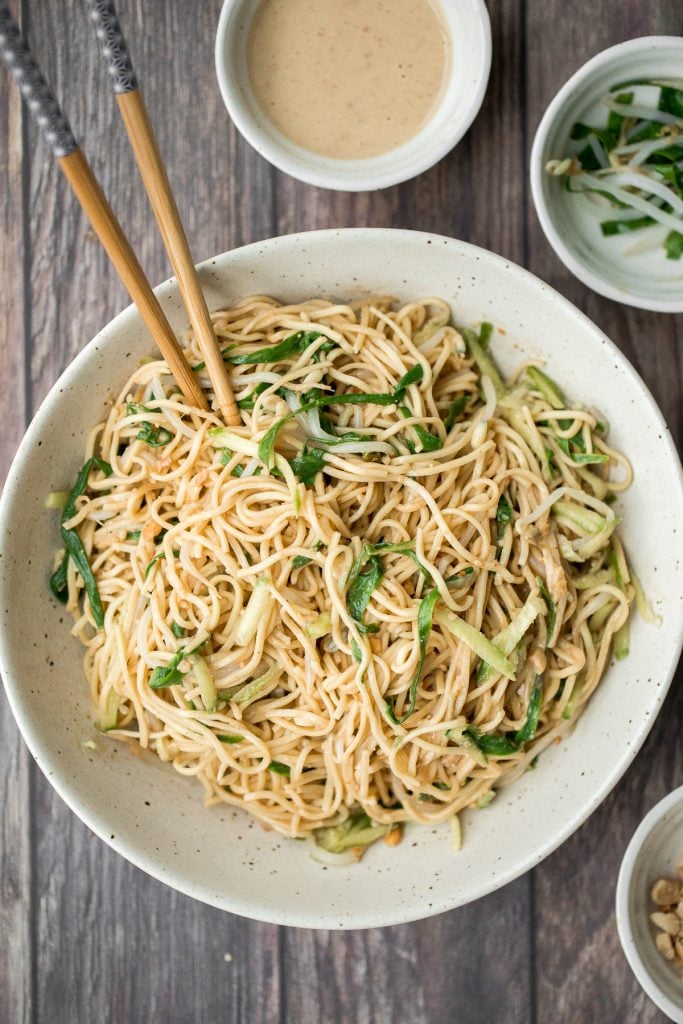
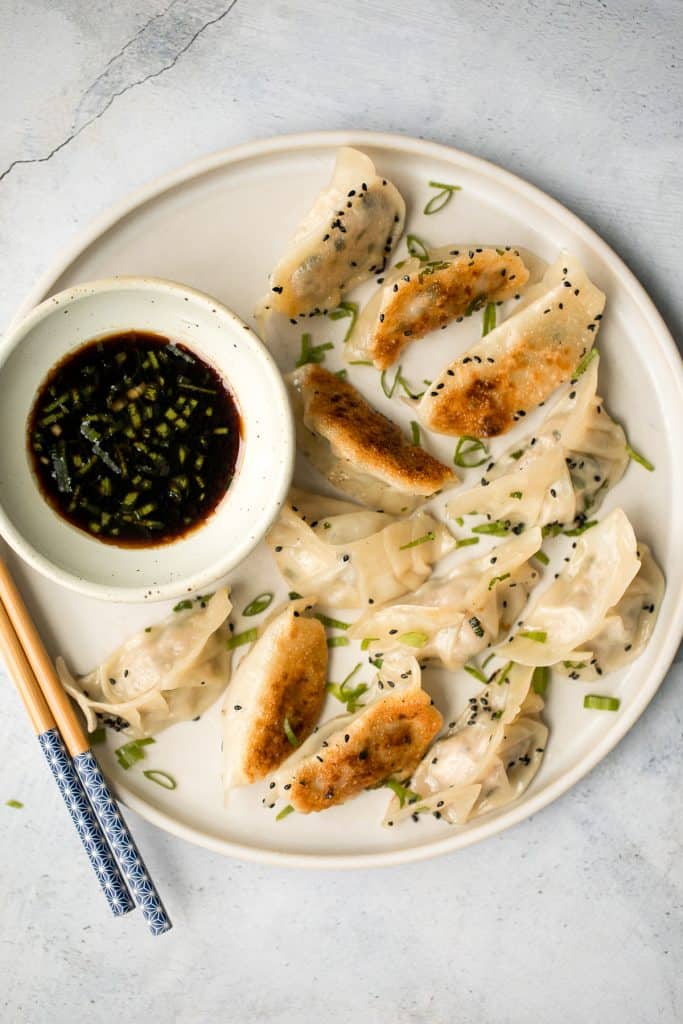
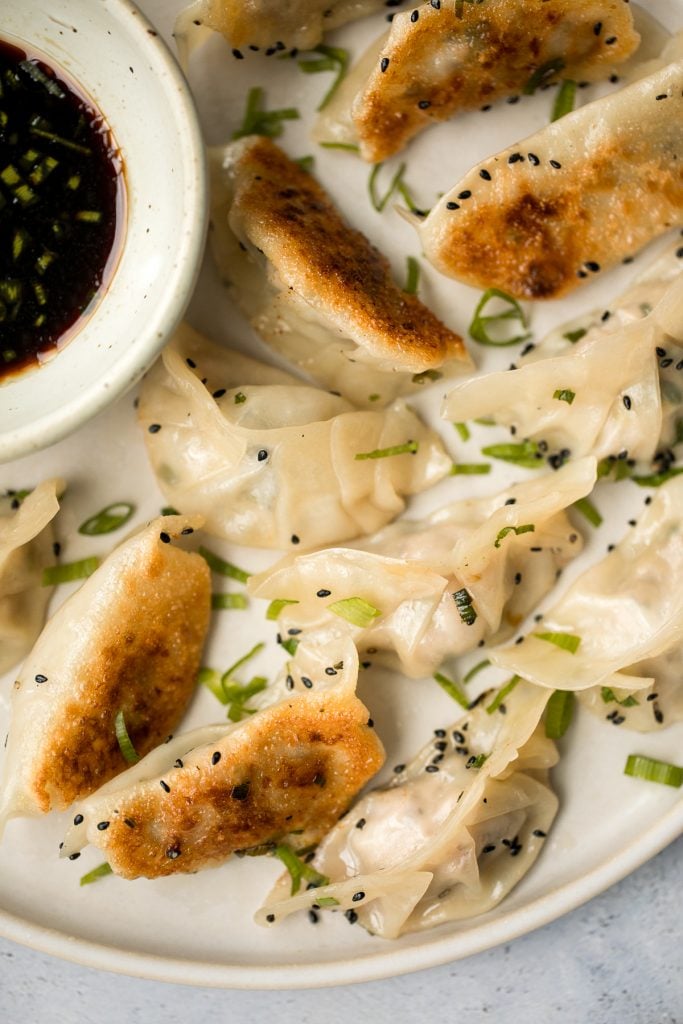
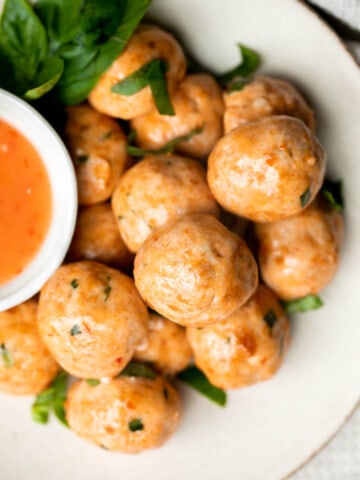
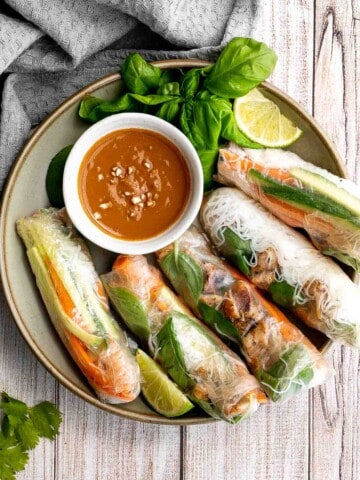
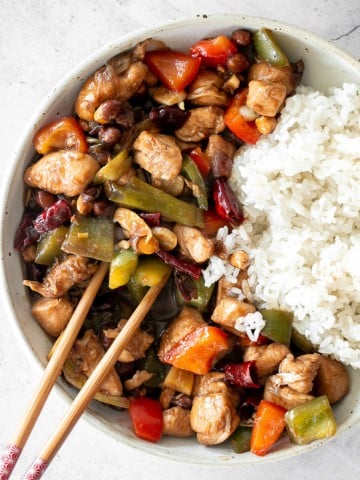
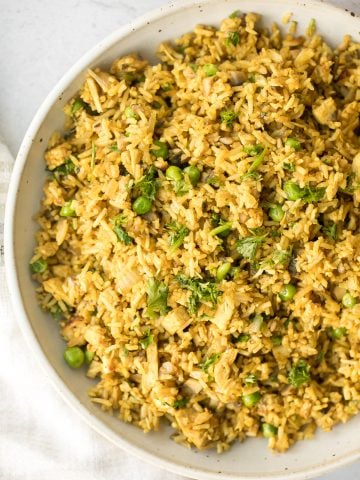
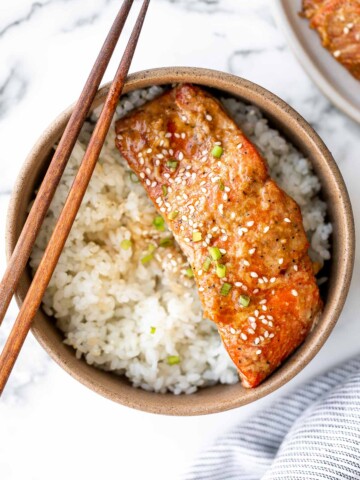
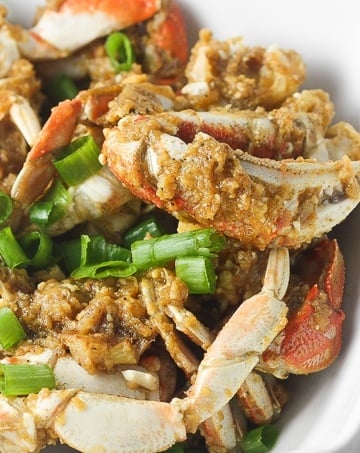
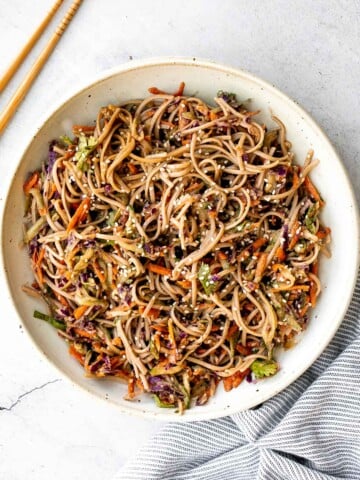
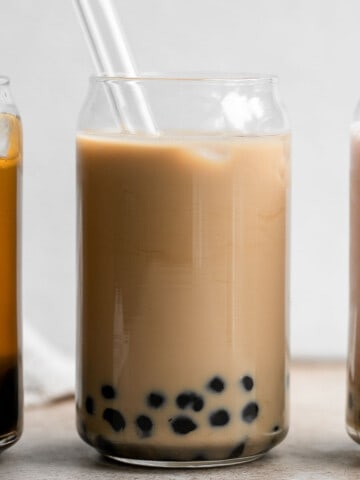
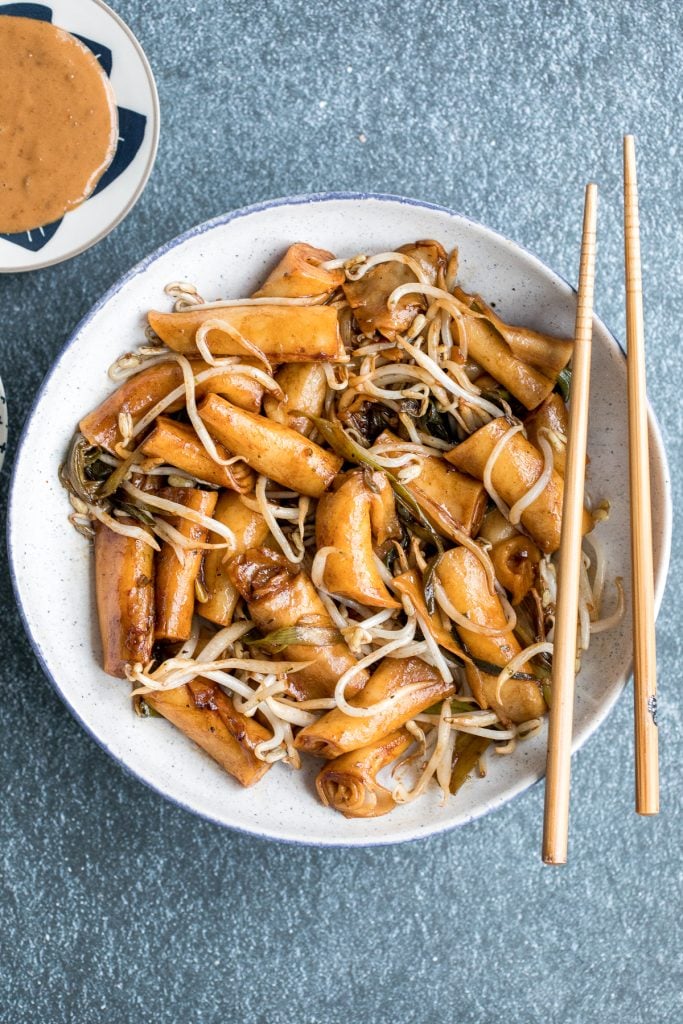
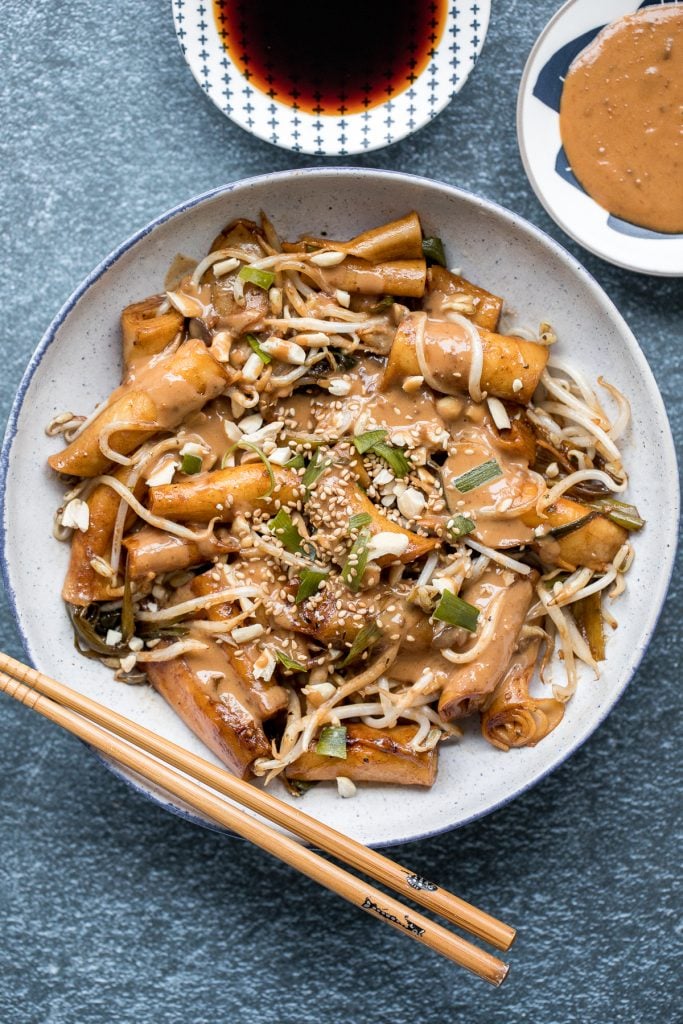
Better than takeout, quick and easy one pan stir-fried rice noodle rolls with peanut butter sauce are packed with rice rolls, bean sprouts, Asian seasonings, and topped with green onions, crushed peanuts and sesame seeds. This super flavourful under 10 minute vegan meal makes weeknight dinner planning a breeze. It seriously takes less time to make than the time spent ordering takeout.
What are Rice Noodle Rolls?
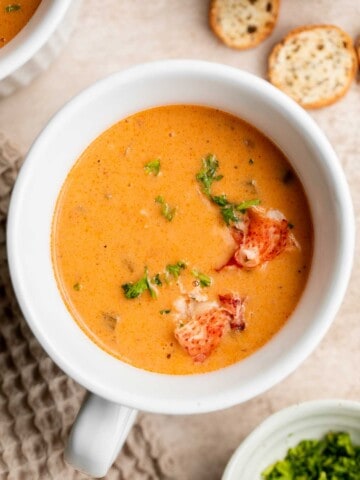
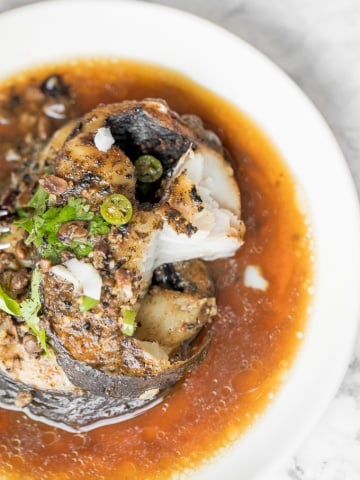
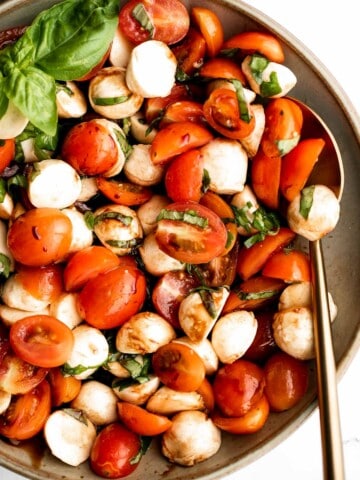
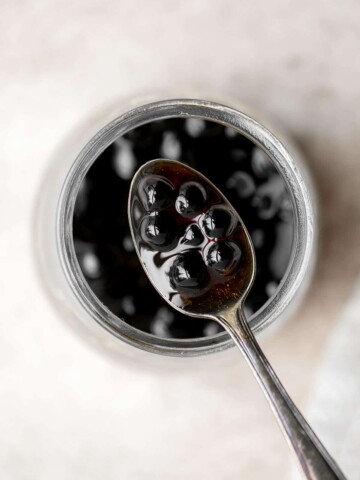
Rice noodle rolls (or cheung fun) are little bite sized, slippery and soft, flat rice noodle sheets that are rolled into a cylinder shape. This Chinese ingredient is normally served steamed as a dim sum snack. They are served unseasoned, and rolled with beef, pork, vegetables, or plain, with a side of soy sauce and peanut butter dipping sauce.
We decided to give these noodle rolls a twist and instead stir-frying them with all the delicious Asian seasonings and then tossing them in peanut butter sauce. The outcome? Ridiculously good.

Ingredients in Stir-Fried Rice Noodle Rolls
- rice rolls - I used a store-bought package of rice noodle rolls, but it's also really easy to make your own. I will be sharing a recipe for it soon (hopefully!).
- vegetable oil - for the stir-fry.
- soy sauce
- sesame oil - optional but adds a really nice flavour.
- white pepper
- sugar
- bean sprouts
- toppings - green onions, roasted peanuts, and white sesame seeds.
- peanut butter sauce - smooth peanut butter, bean paste or hoisin sauce, hot water, and sugar.
You will also need measuring cups and spoons and a skillet (or wok).
How to Make the Best Stir-Fried Rice Noodle Rolls
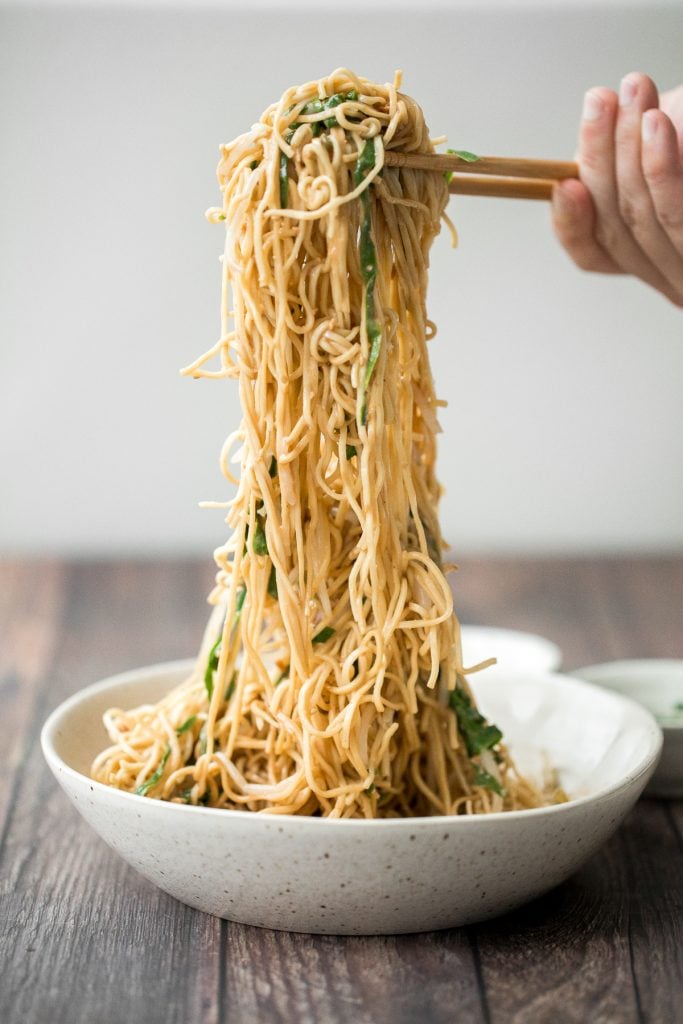
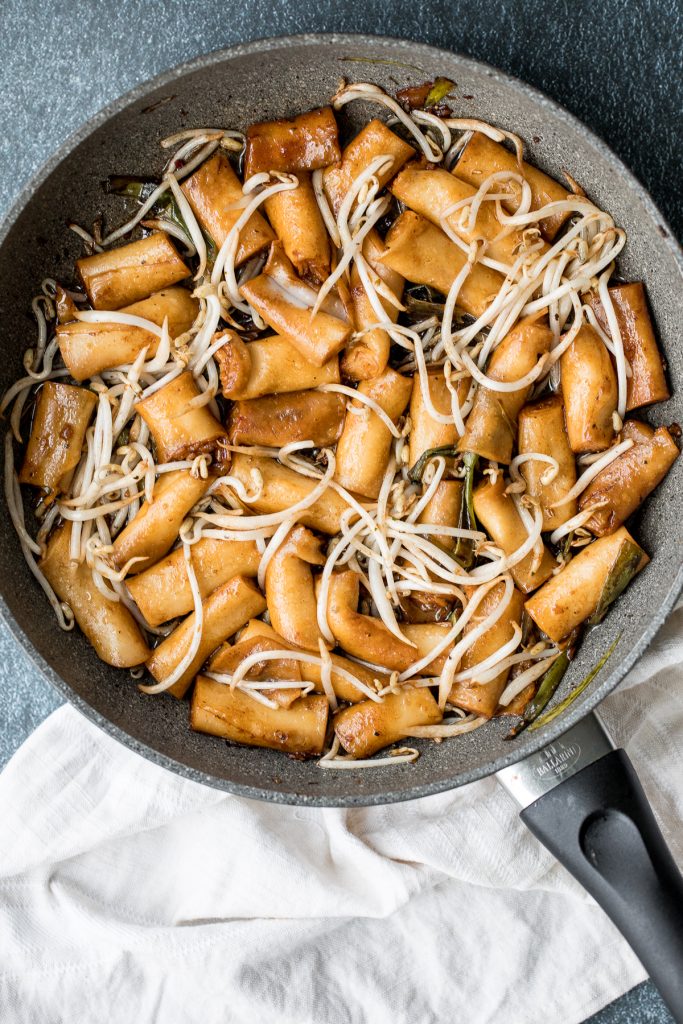
To make this super quick and easy stir fry, heat oil in a cooking pan over medium heat for 2 minutes until the oil starts to sizzle and shimmer. Then, add rice rolls (that you have cut into 2-inch pieces) and stir fry for 2 minutes until the rice rolls soften and browns. Add a spoonful of cold water at a time and stir fry the noodles if they are still a bit dry and hard.
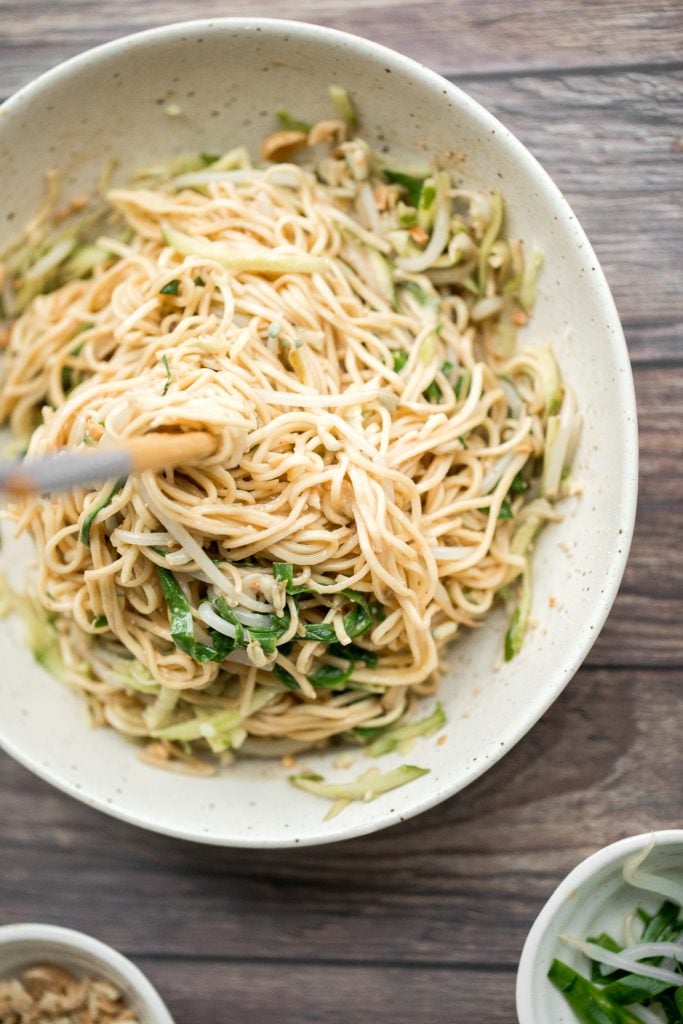
Next, add the seasonings (soy sauce, sesame oil, white pepper and sugar). Stir well for 1 minute with a spatula to combine. Add bean sprouts and chopped green onions at the end. Mix well for another minute and remove from heat.
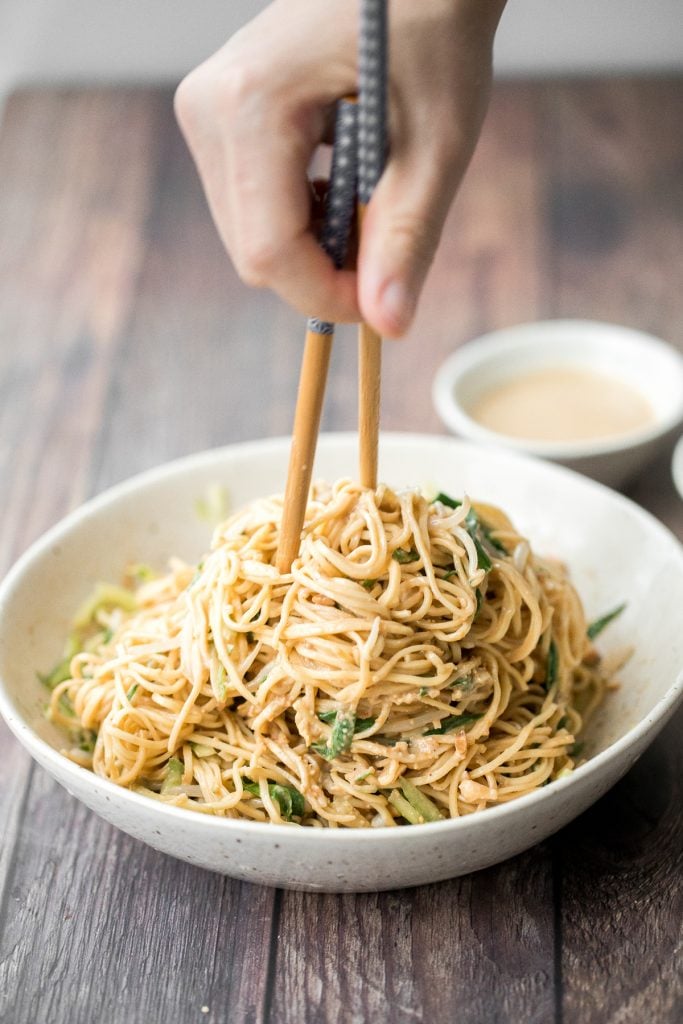
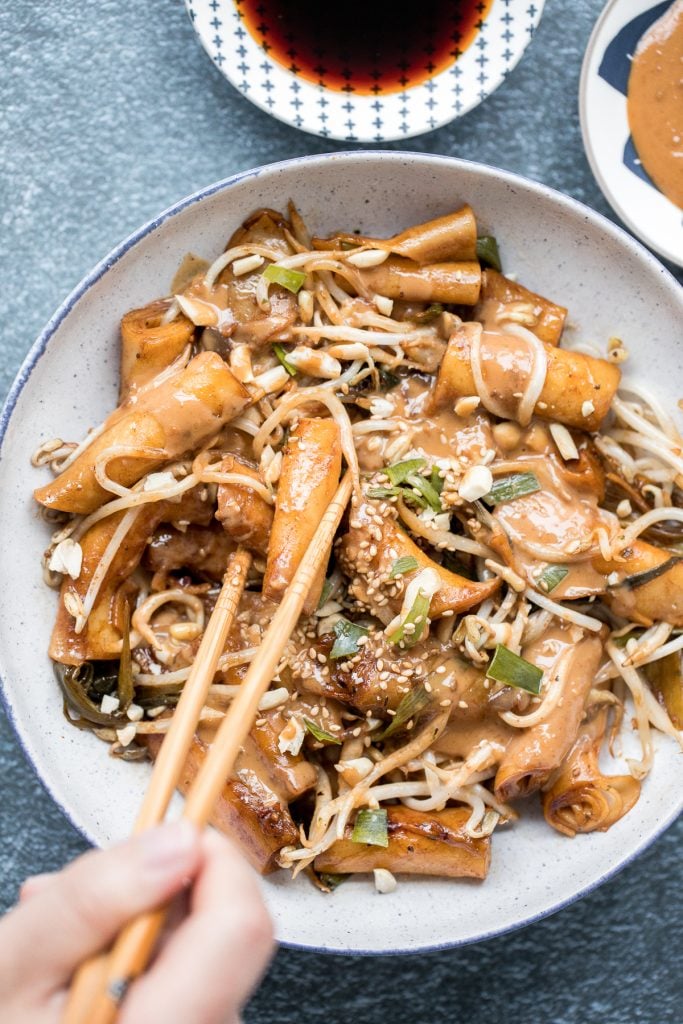
Transfer the rice rolls onto a place and top with half the peanut butter sauce and a sprinkle of chopped peanuts and sesame seeds. Serve the other half of the sauce on the side for extra dipping.
How to Make Peanut Butter Sauce
Mix the peanut butter and hot water together in a bowl until smooth and creamy. Add in the bean paste (or hoisin sauce) and sugar. Stir well with a spoon to dissolve the sugar in the sauce. The peanut butter sauce should have a smooth and creamy consistency.
Tips for Making Rice Noodle Rolls
- Prep the ingredients before you start. Have all your ingredients prepped and ready before you begin. Stir-frying in general is a very fast process and by having your ingredients prepped and within hands reach, it will ensure that everything goes smoothly.
- Can you prepare this stir-fry in advance? You can prepare your ingredients in advance, but stir-fried rice noodle rolls are best served fresh. In particular, you should always prepare noodles fresh because once they start going cold, they will stick together and get stiff.
- How do you store rice noodle rolls? If you have leftovers, store rice noodle rolls in an airtight container for up to 3 days in the refrigerator.

More Stir-Fry Recipes
- Shanghai Style Fried Noodles
- Stir-Fried Rice Cakes with Shrimp
- 10-Minute Vegetarian Fried Rice
- Easy 15-Minute Lo Mein
- 10-Minute Chicken Pad Thai
Tried this recipe?
I'd love to hear what you think! Leave a comment and rating below to share your feedback. Your reviews help others discover this recipe and help me keep creating more free recipes for you. Snap a photo and tag me on social media @aheadofthyme too.
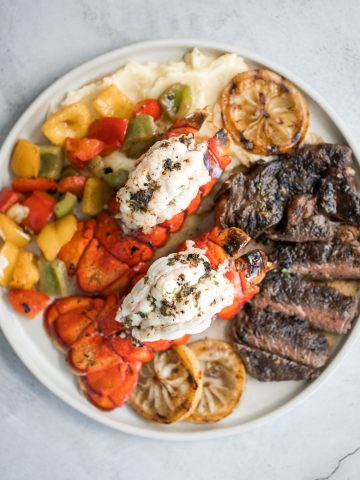
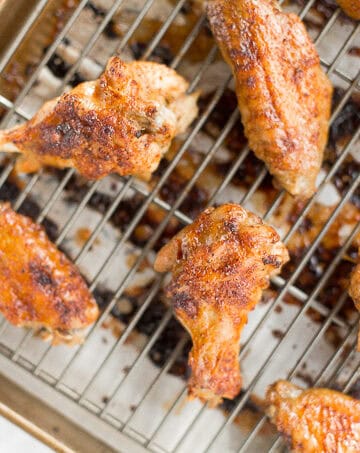
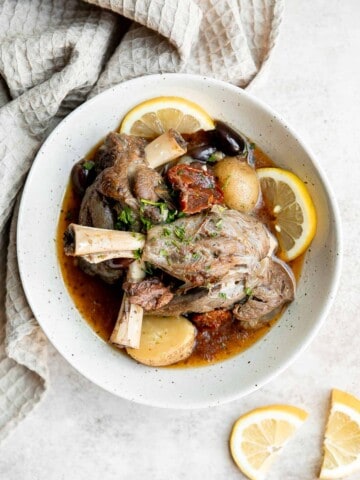
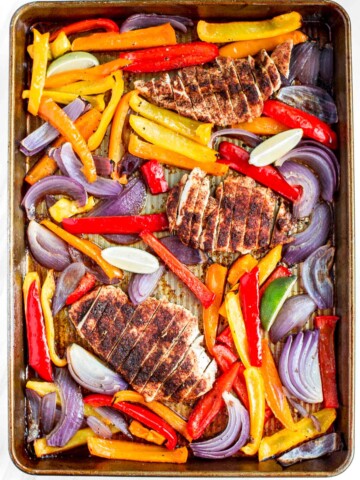
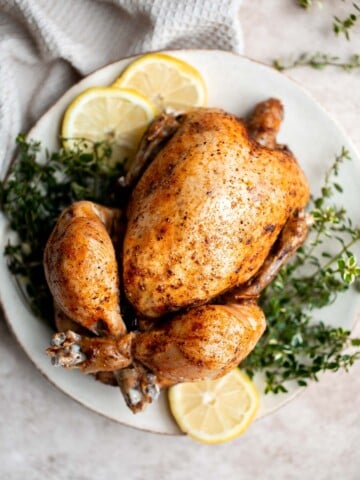
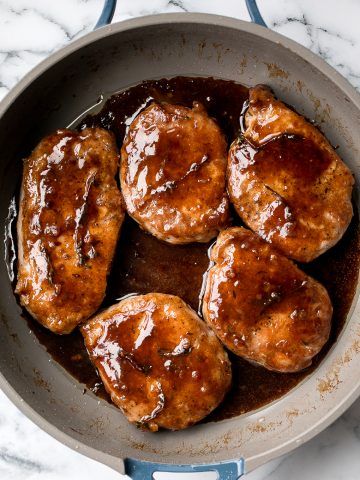
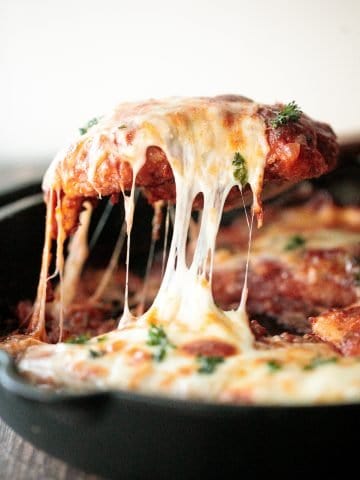
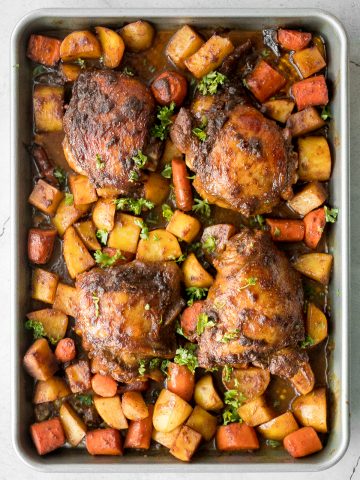
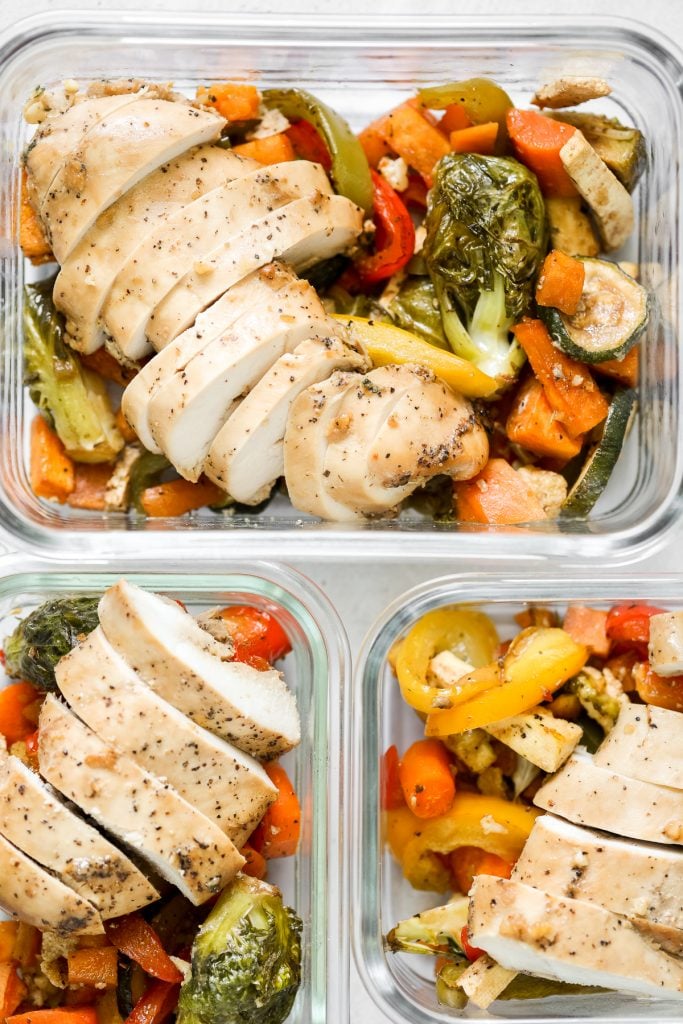
Meal Prep Sheet Pan Balsamic Chicken and Vegetables

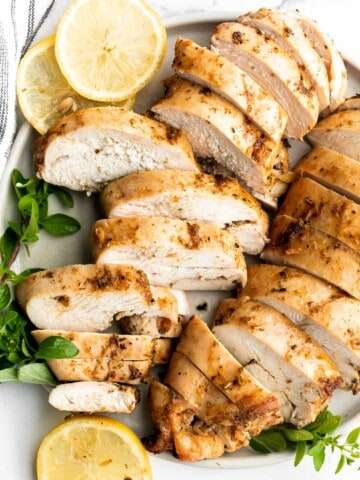
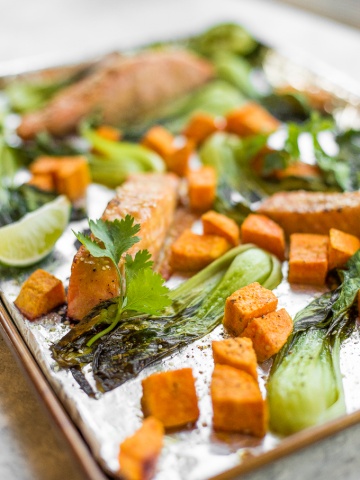
Make your week easier and more delicious with this quick and easy Asian-style meal prep sheet pan balsamic chicken and vegetables. Super flavourful, juicy and tender chicken is marinated in a sesame balsamic marinade inspired by Asian sesame salad dressing. And the vegetables? They are tossed in a balsamic dressing. Combine everything all together on one sheet pan, and say good-bye to stressing over lunch all week. This meal comes together in about 45 minutes including prep (lots of chopping since it's packed with tons of vegetables).
Ingredients in Balsamic Chicken and Vegetables
- chicken breasts - 3 skinless and boneless chicken breasts.
- sesame balsamic marinade - made with soy sauce, sesame oil, balsamic vinegar, minced garlic, brown sugar, salt and pepper.
- tofu - optional
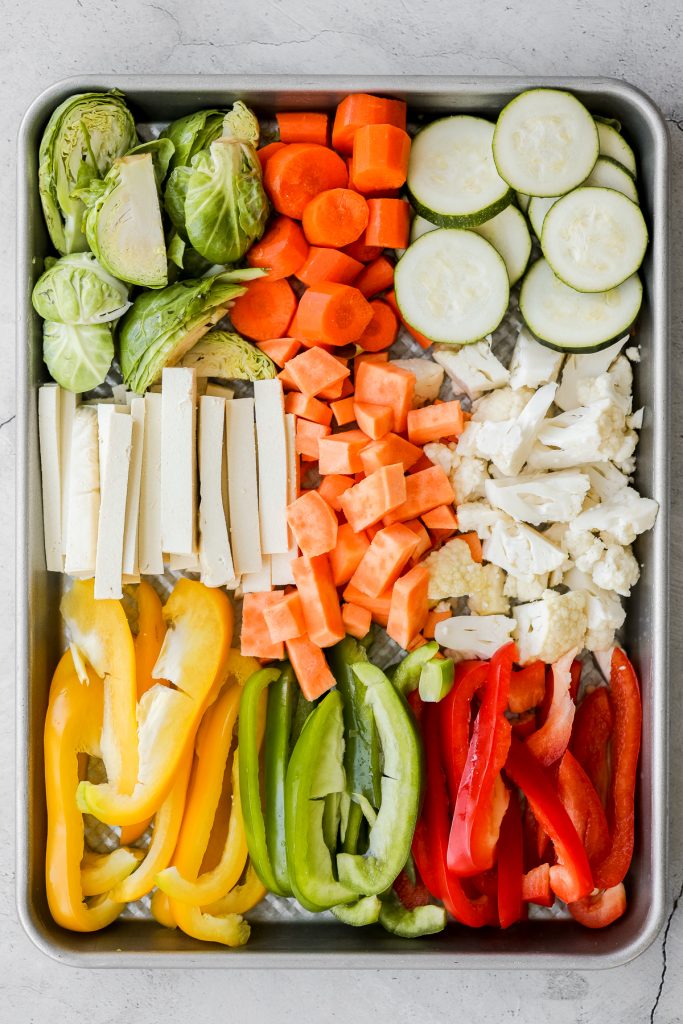
- bell peppers - green, yellow and red.
- sweet potato
- cauliflower
- brussels sprouts
- zucchini
- vegetable seasoning - made with olive oil , balsamic vinegar, Italian seasoning, salt and pepper.
You will also need meal prep containers, mixing bowls, and a large ½ pan sheet pan.
How to Make the Best Meal Prep Sheet Pan Balsamic Chicken and Vegetables
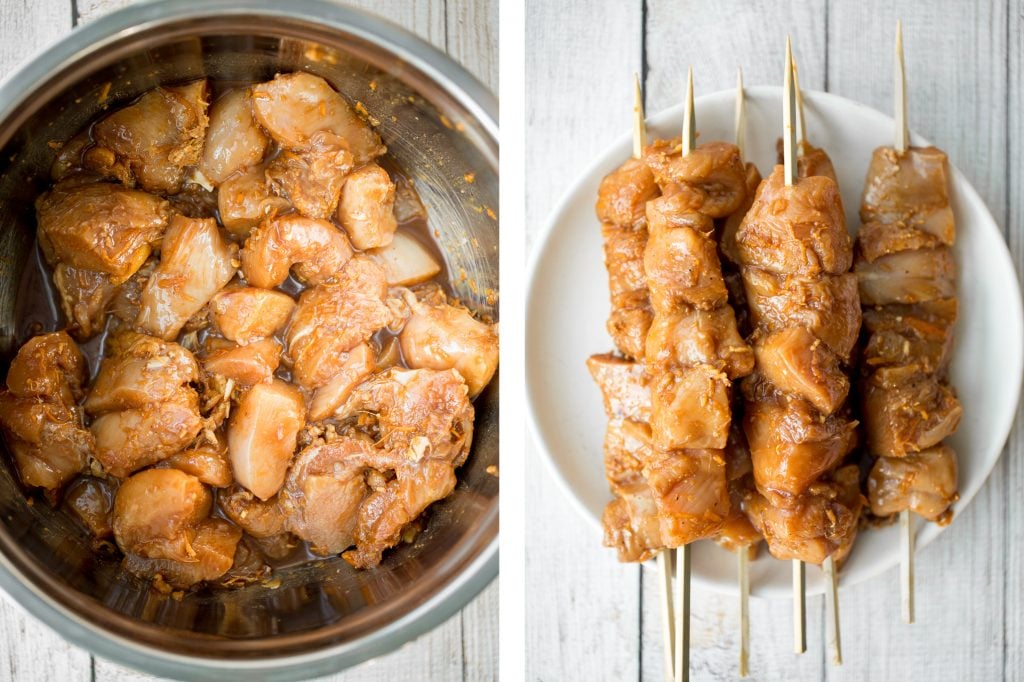
The first step is to marinate the chicken breast in an incredibly simple and delicious Asian-style marinade made with soy sauce, sesame oil, balsamic vinegar, garlic, brown sugar, salt and pepper. Add everything to a large bowl (or ziploc bag) and stir well to combine and fully coat the chicken. Cover with cling wrap (or seal the ziploc bag) and place in the refrigerator to marinate for at least 1 hour up to overnight.
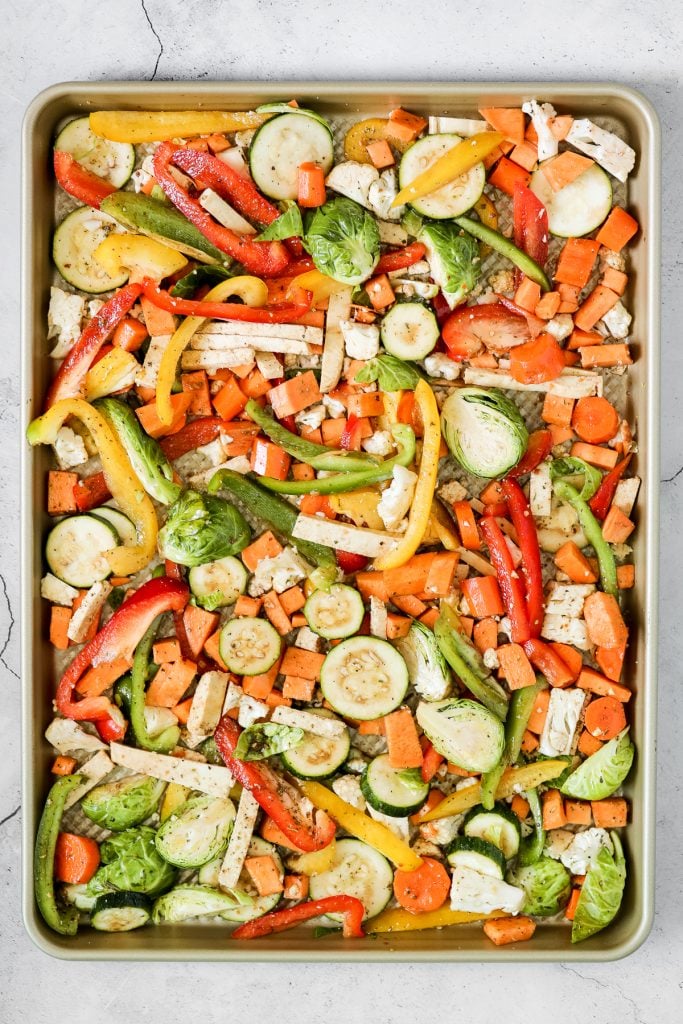
Next, prep and cut all the vegetables and place inside another large mixing bowl. Add in all seasonings (olive oil, balsamic vinegar, Italian seasoning, salt and pepper). Mix well with a spatula to combine and coat evenly well. Transfer the vegetables to a large ½ pan sheet pan and spread them evenly into a single layer. You do not need to line the baking sheet.
How to Roast Sheet Pan Chicken and Veggies
There are two ways that you can make this easy sheet pan meal:
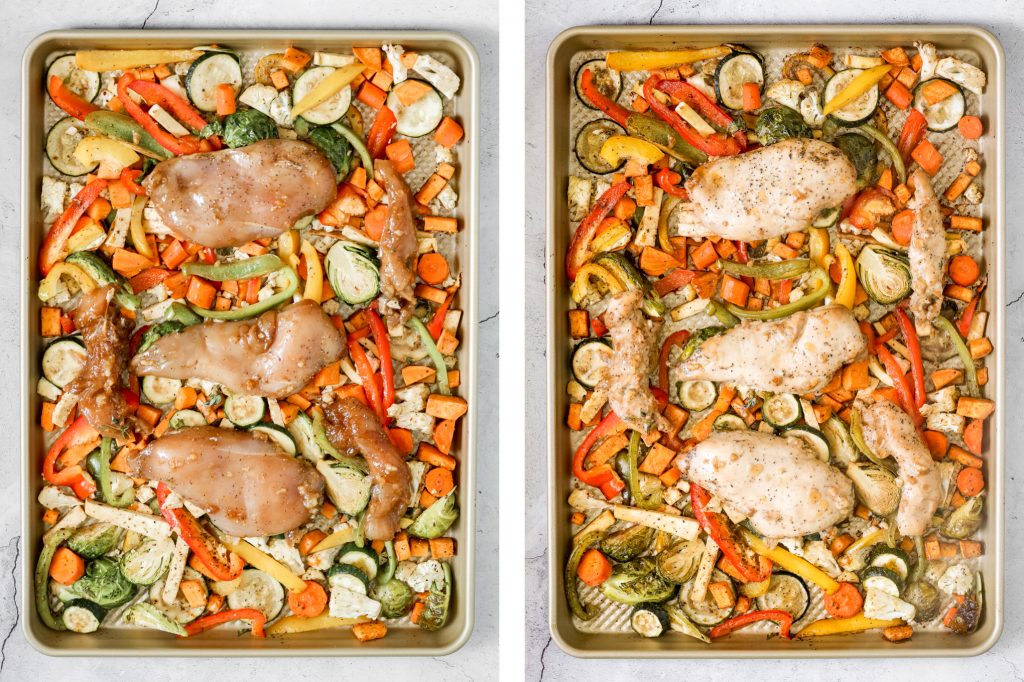
- Option 1: Preheat the oven to 400F. Transfer the baking sheet with all the vegetables in the oven and cook for 10 minutes. Remove from oven and place the marinated chicken breasts on top of the vegetables. Drizzle the extra marinade over the vegetables and chicken. Transfer the baking sheet back in the oven and continue to bake at 400F for another 20 minutes until the internal temperature for the chicken breasts reaches 165F.
- Option 2: Preheat the oven to 350F. Place the marinated chicken breasts on top of the vegetables. Drizzle the extra marinade over the vegetables and chicken. Bake the vegetables and chicken breasts together in the baking sheet for 30 to 35 minutes until the internal temperature for the chicken reaches 165F.
How to Assemble Meal Prep Containers
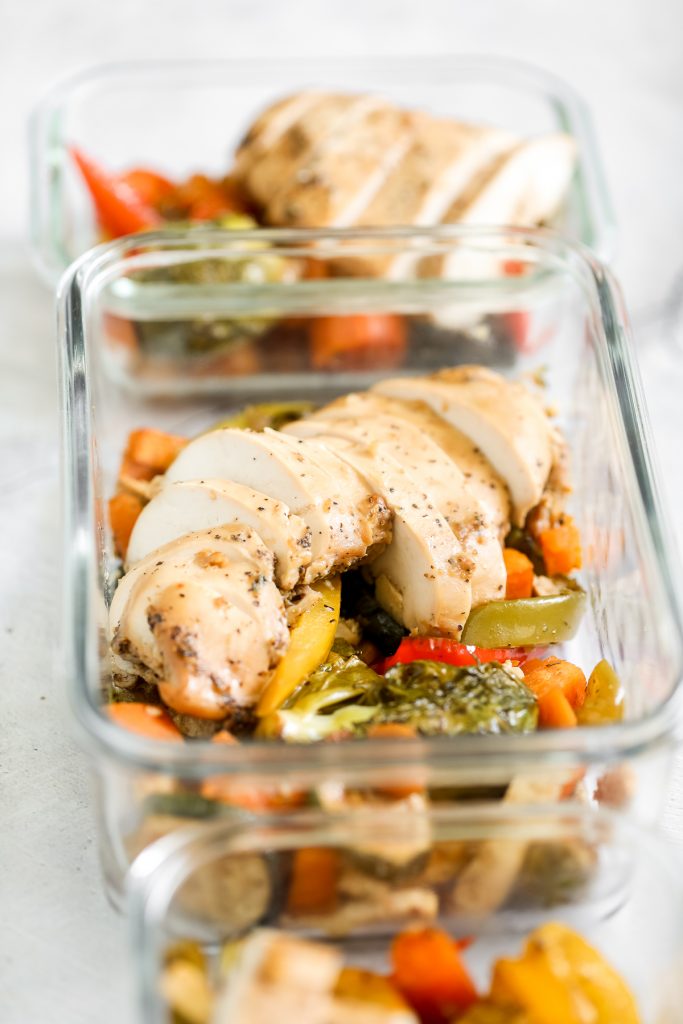
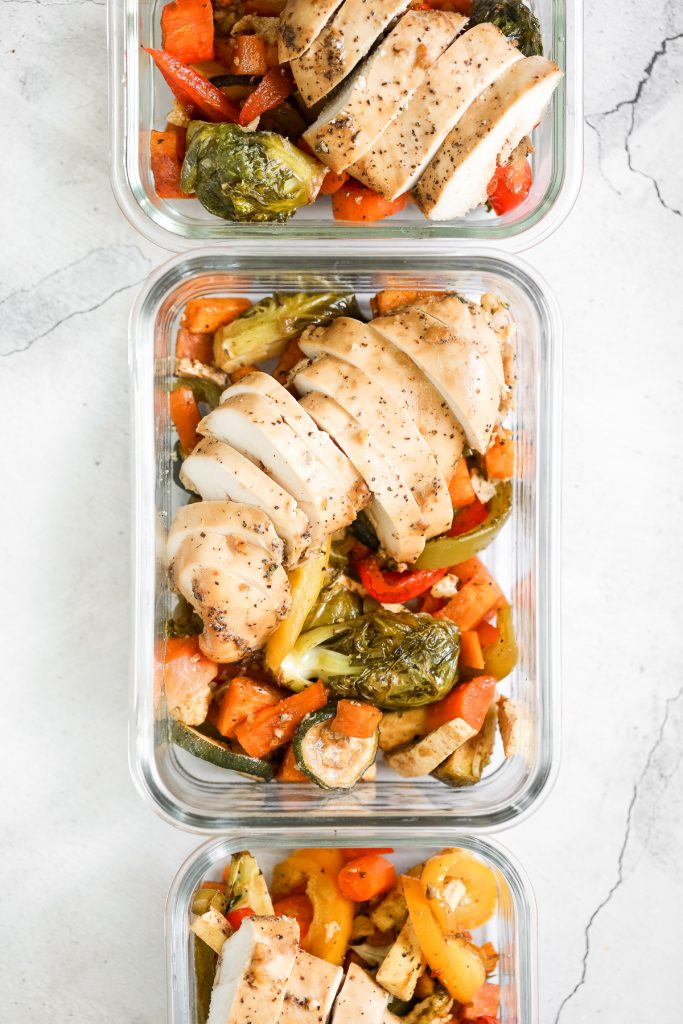
Assembling the meal prep containers is the easiest part. Simply take your meal prep containers and divide the veggies amongst them. For a full balanced meal, you can add in ½ cup to 1 cup of cooked rice on underneath.
Then, slice up the chicken breast and add ½ breast on top of each container. Seal and store in the refrigerator for up to 4 days or in the freezer for up to 2 months.
Meal Prep Tips
- How to customize: This is one of my favourite recipes to meal prep with because the Asian-style sesame balsamic marinade is the bomb. And those veggies? Even better. They are tossed in a balsamic sauce that goes well with any vegetable, which makes it super easy to customize. Literally throw in any vegetables that you have on hand.
- How to store meal prep chicken and vegetables: Divide the chicken and veggies amongst 6 meal prep containers and seal. Store in the refrigerator for up to 4 days or in the freezer for up to 2 months. To defrost, place in the refrigerator until thawed.
More Sheet Pan Recipes
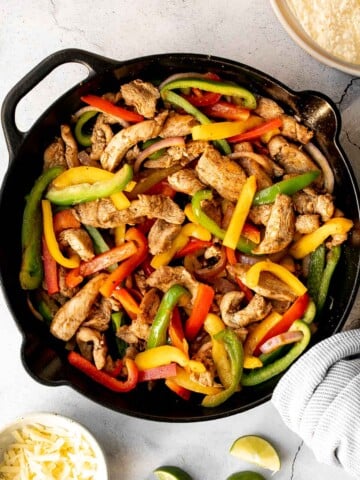
- Sheet Pan Chicken Fajitas
- Tandoori Chicken Sheet Pan Dinner
- Sheet Pan Miso Salmon with Bok Choy
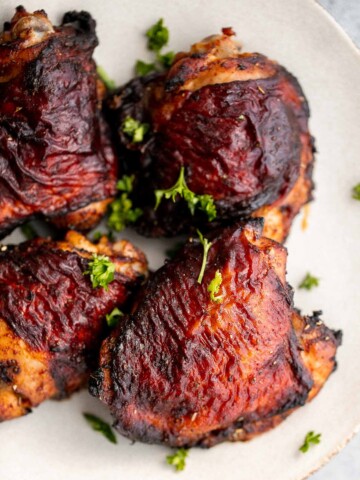
- Sheet Pan Soy-Glazed Chicken Thighs
Tried this recipe?
I'd love to hear what you think! Leave a comment and rating below to share your feedback. Your reviews help others discover this recipe and help me keep creating more free recipes for you. Snap a photo and tag me on social media @aheadofthyme too.
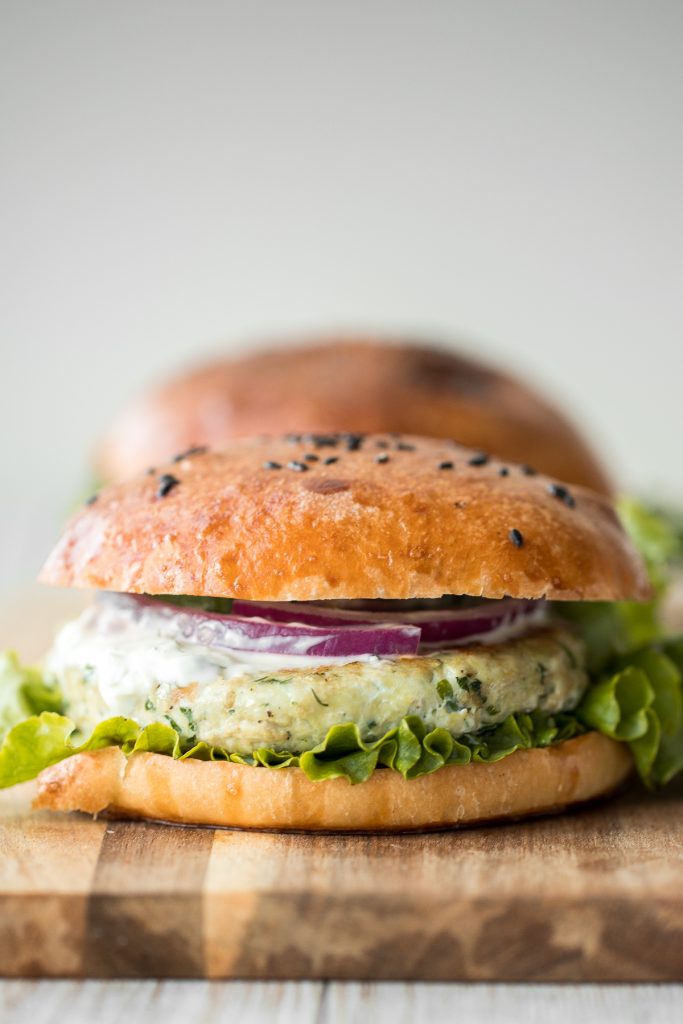
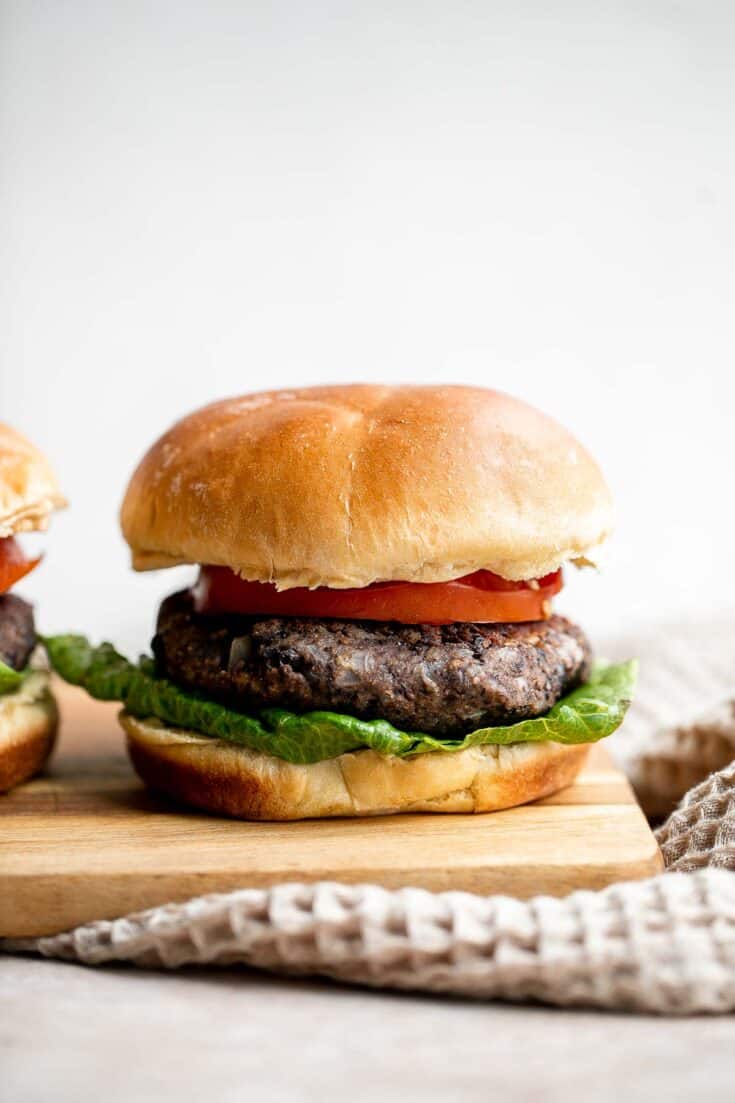
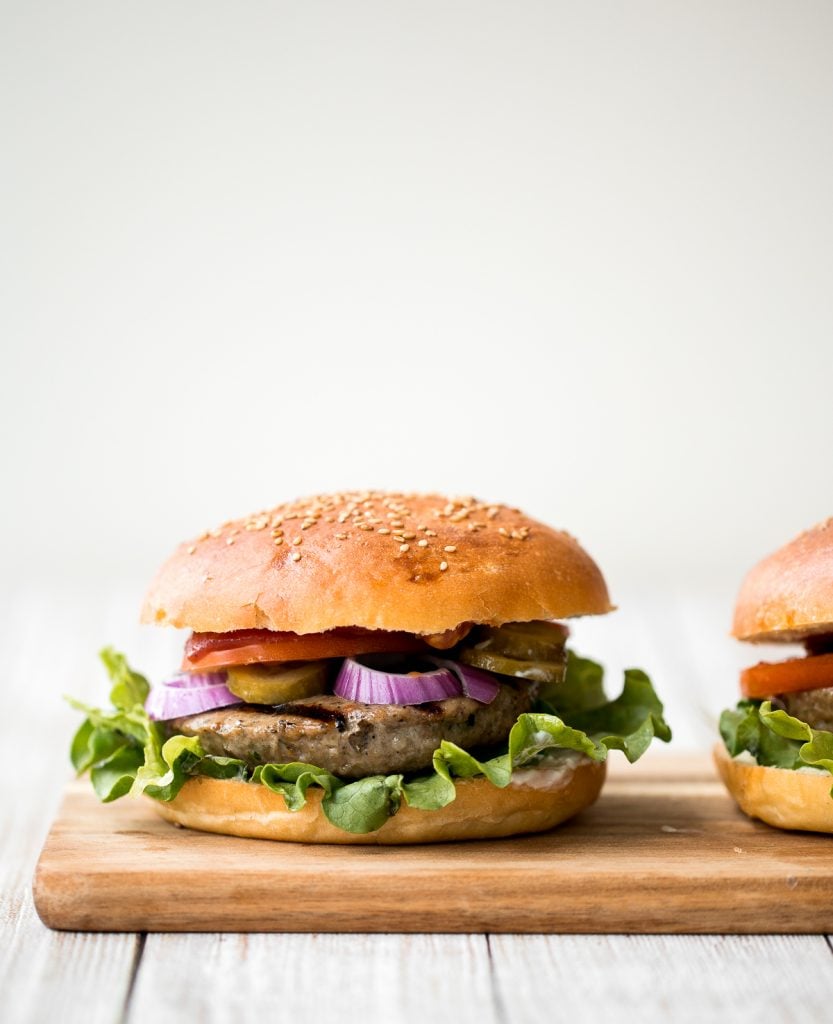
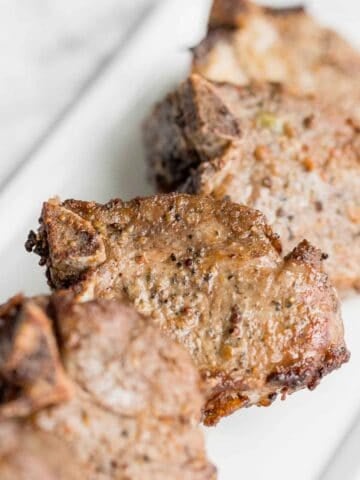
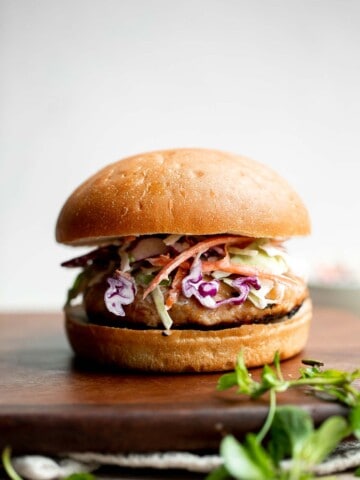
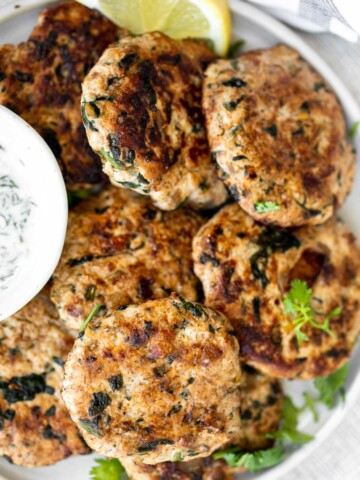
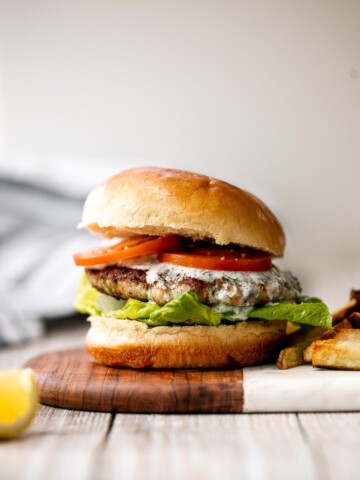
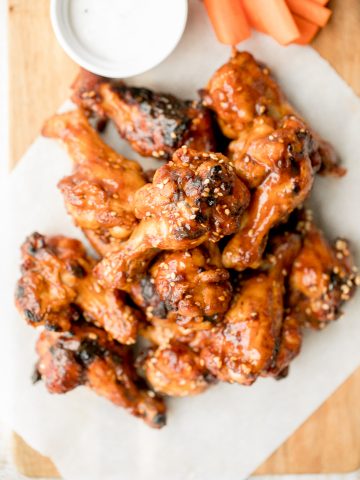
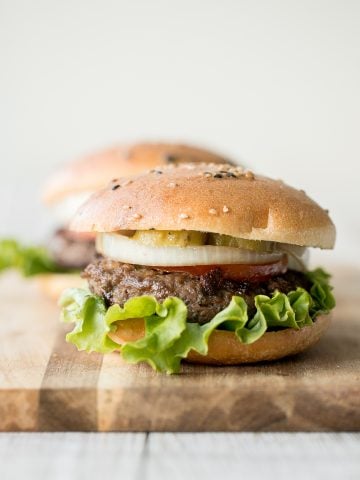
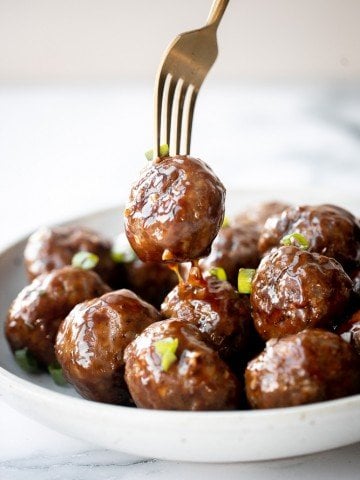
Quarter Pound Burgers

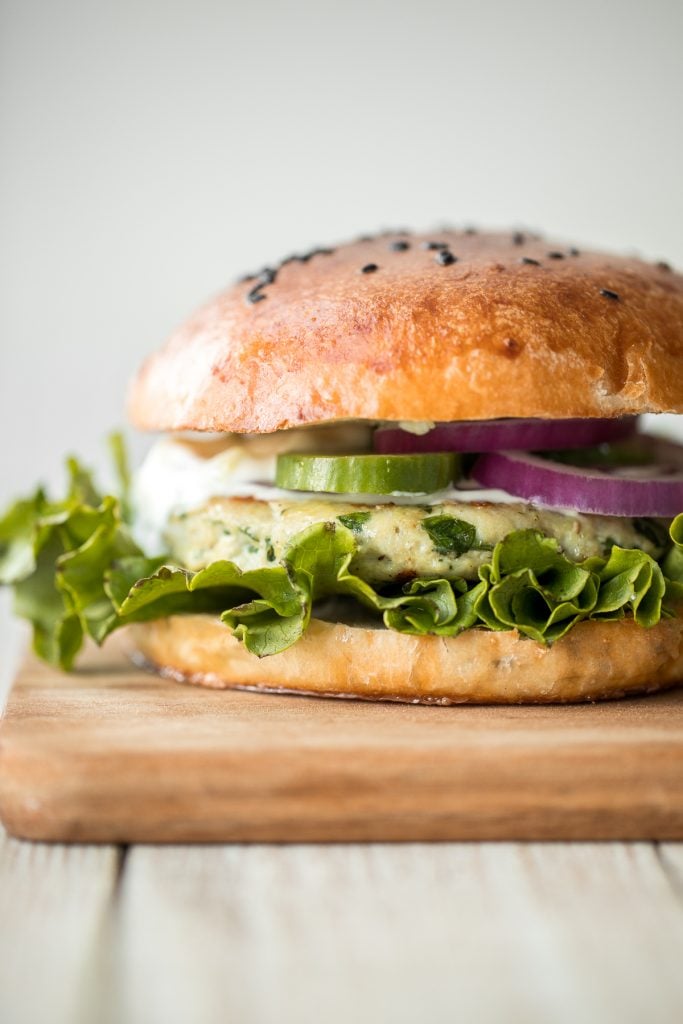
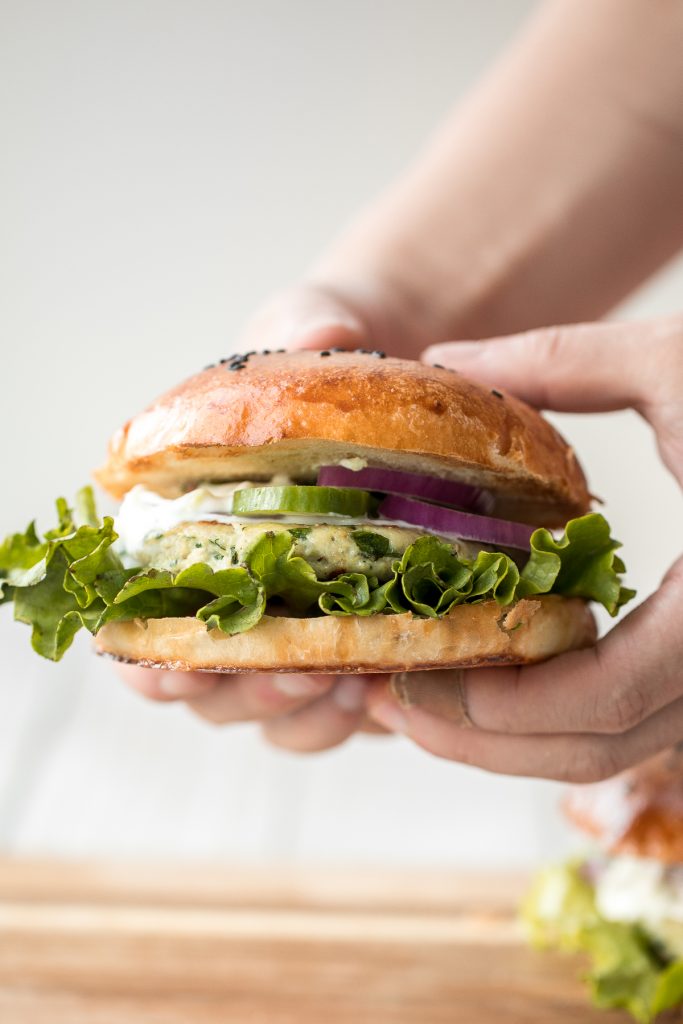
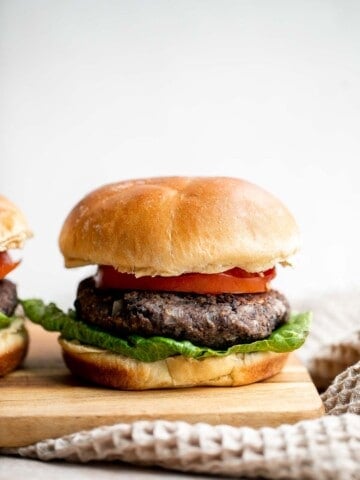
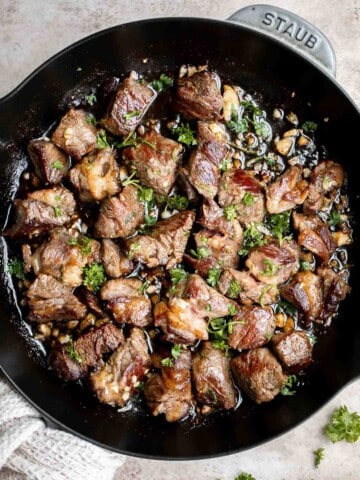
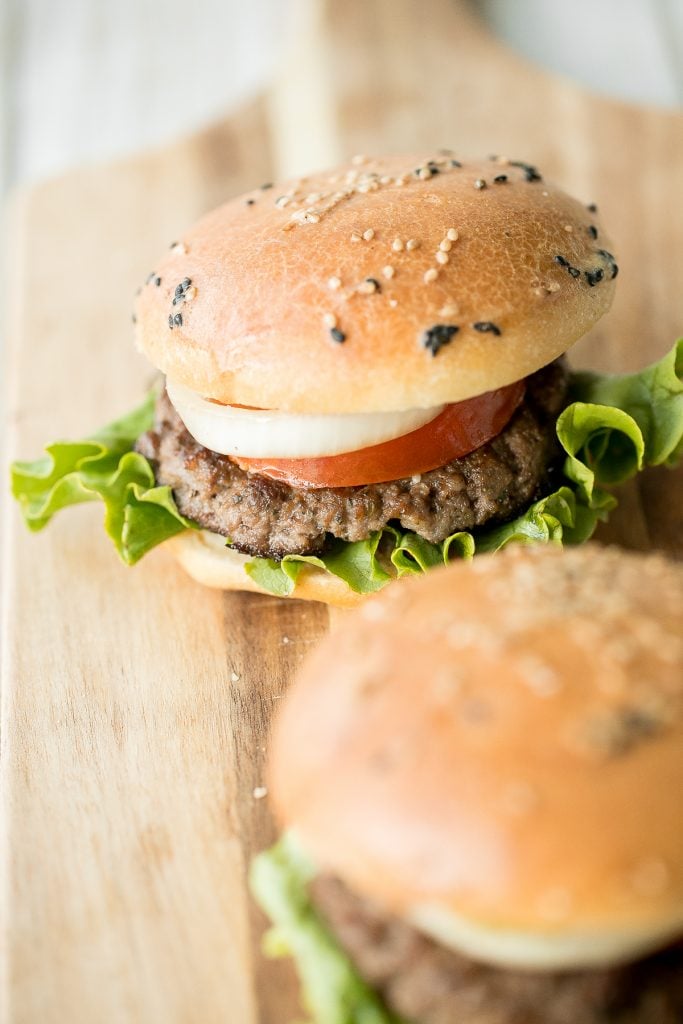
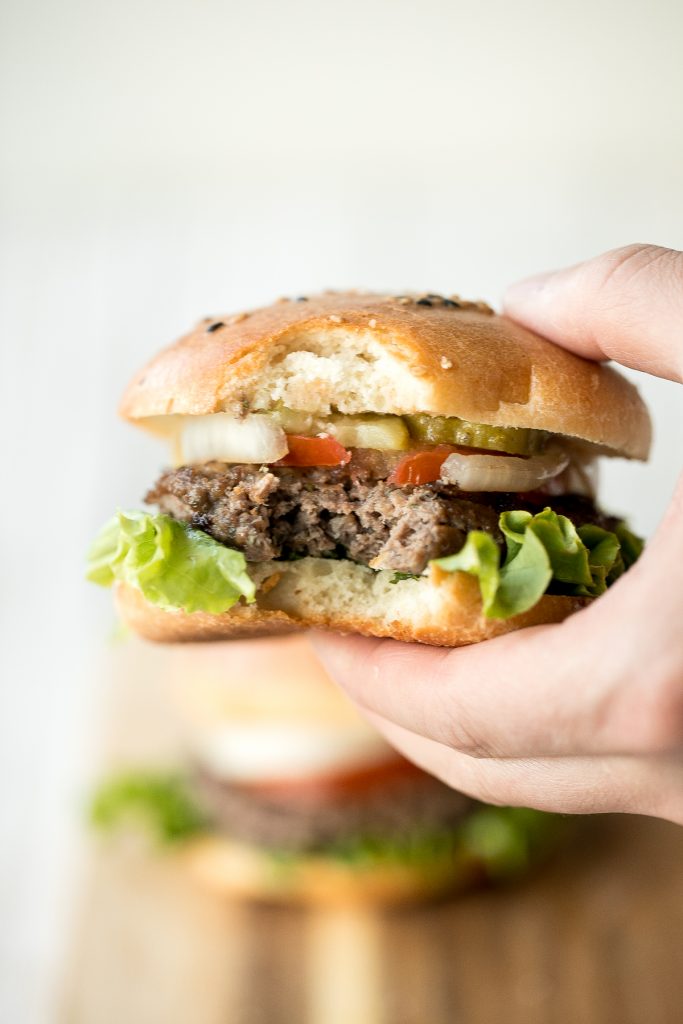
We have been starting to recipe test our upcoming fall dishes so you better believe that we have a fridge full of all the herbs -- rosemary, thyme and sage. If you love these herbs in creamy comfort food, then you will love them in super juicy and flavourful rosemary thyme quarter pound burgers. The depth of flavour that these herbs add to these burgers is on another level. Why not spend just 10 minutes to prep these and make them for dinner tonight. Plus, you can just throw them on a cast-iron skillet or on the grill. So easy!

Ingredients in Rosemary Thyme Burgers
- ground beef - I used lean ground beef.
- Panko breadcrumbs
- cheddar cheese - shredded cheddar.
- pickle juice - or use cold water if you don't have any pickle juice to spare. I often use pickle juice in my burger patties because they make the burger juicier and adds so much flavour.
- Worcestershire sauce
- thyme - finely chopped fresh thyme.
- rosemary - finely chopped fresh rosemary.
- garlic powder
- salt and pepper
- vegetable oil or cooking spray oil - for grilling.
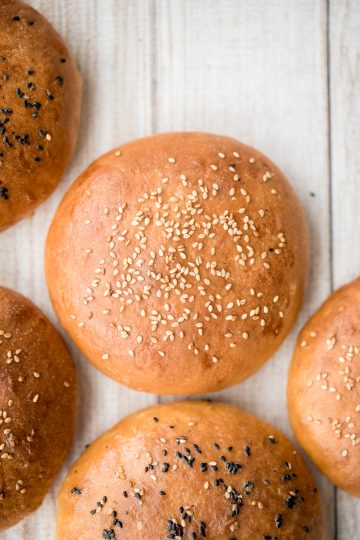
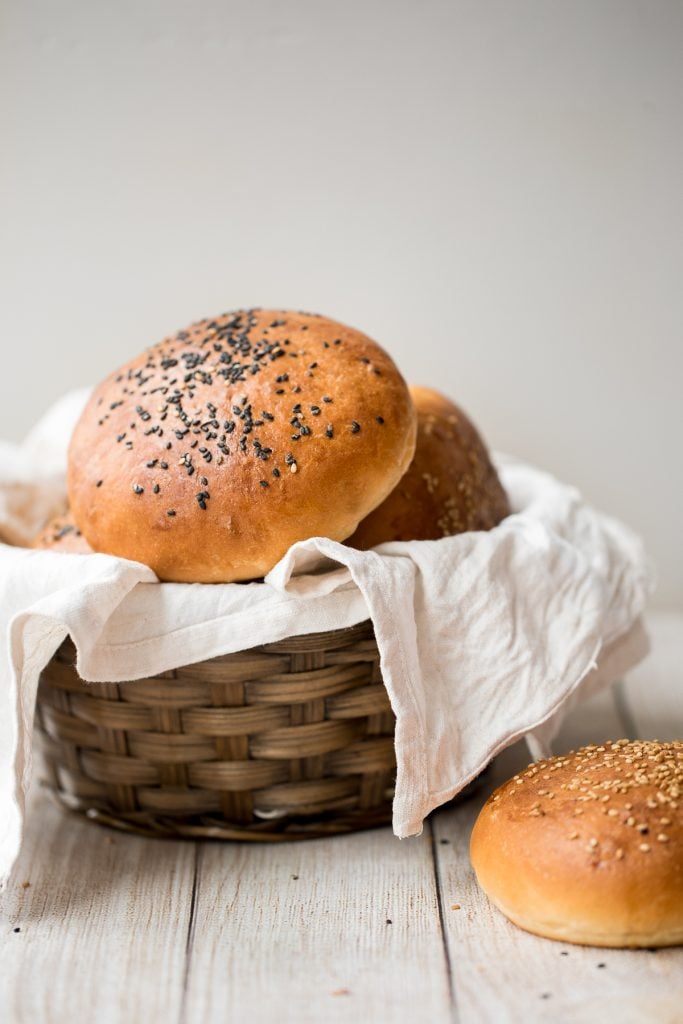
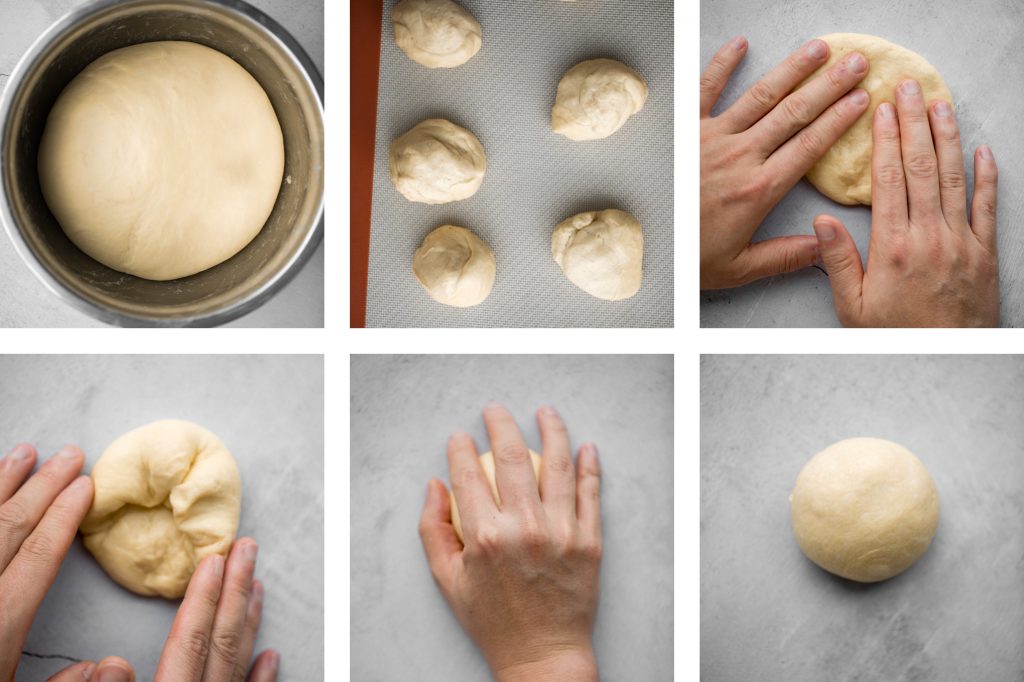
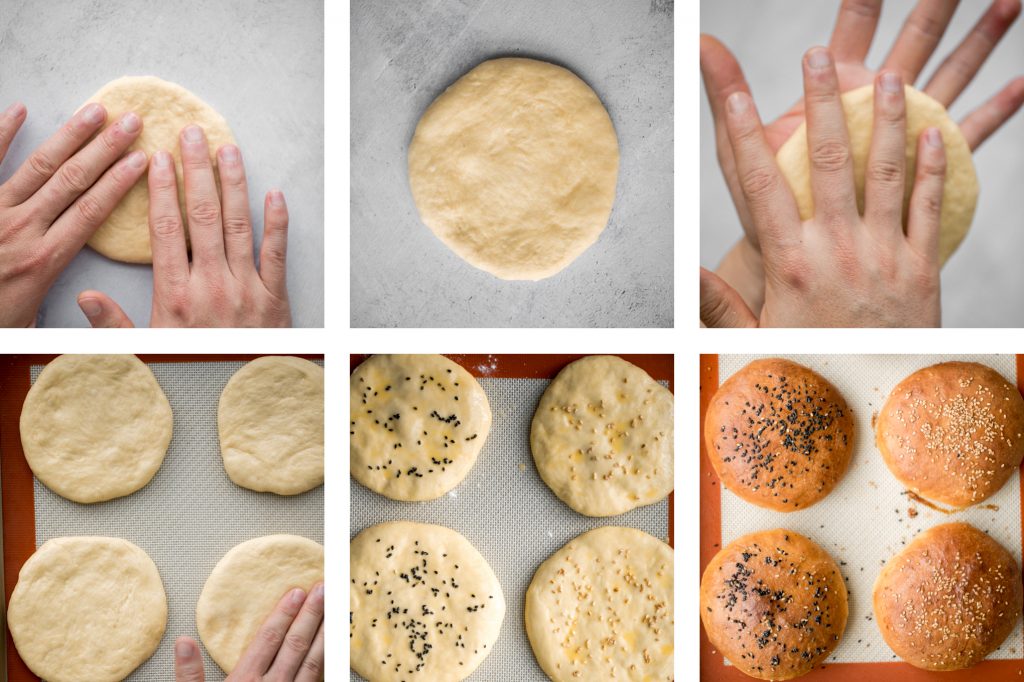
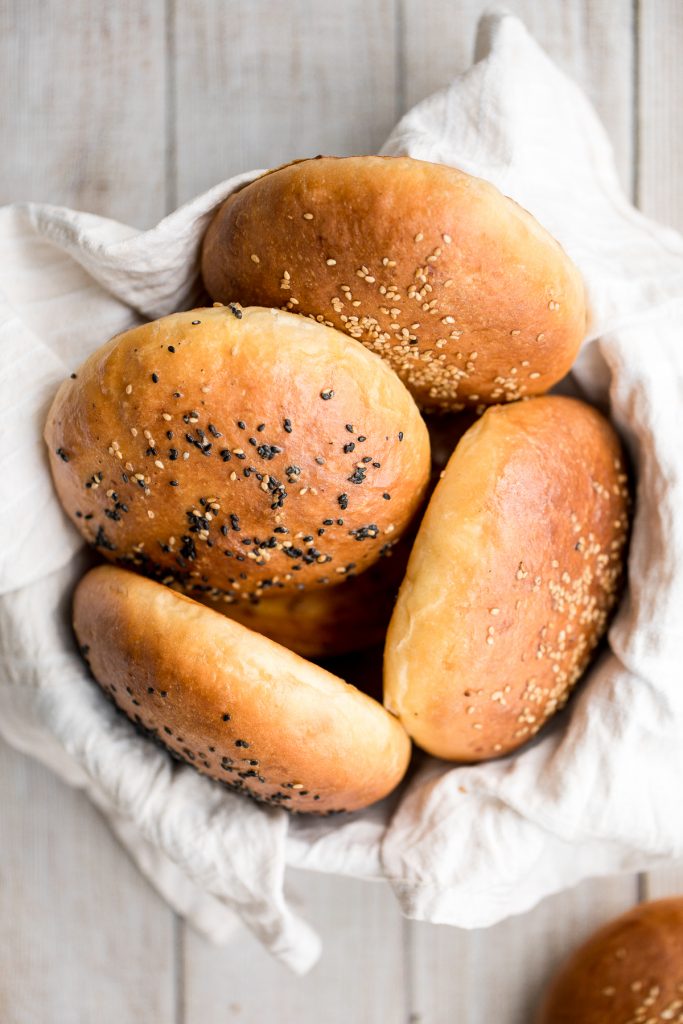
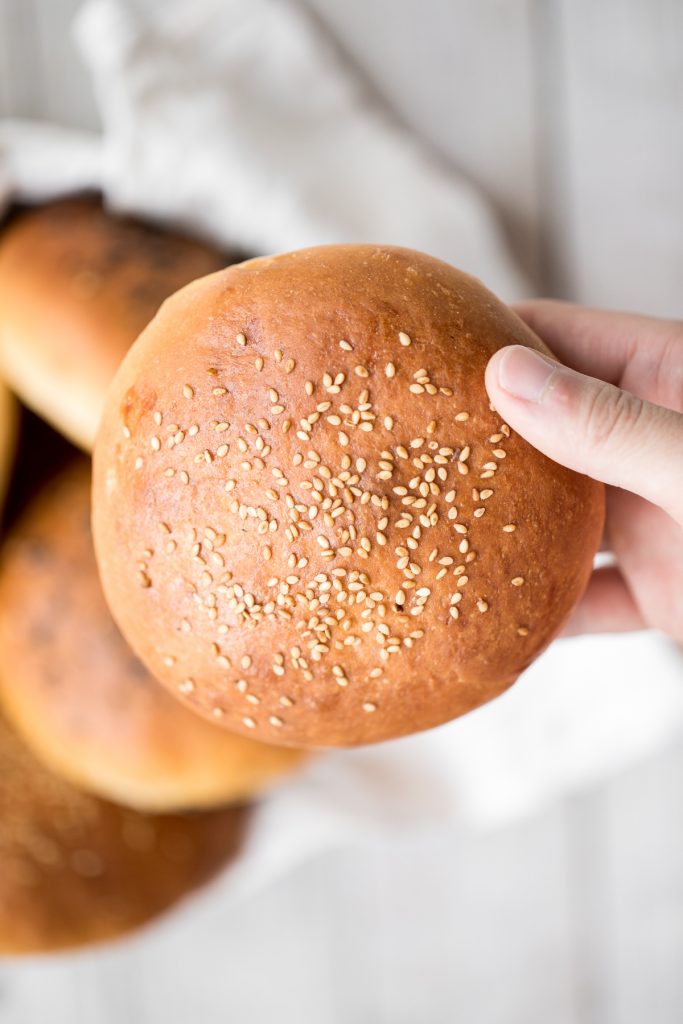
- hamburger buns - I made my own easy homemade hamburger buns in under 3 hours with just 15 minutes of actual prep work. These soft, fluffy and airy buns are my favourite.
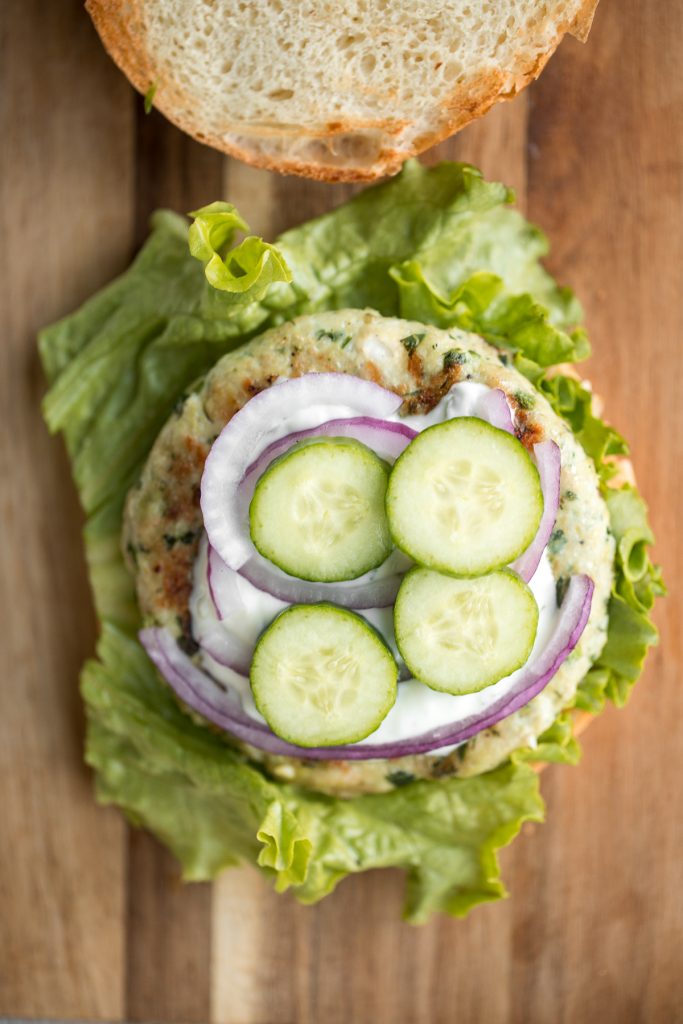
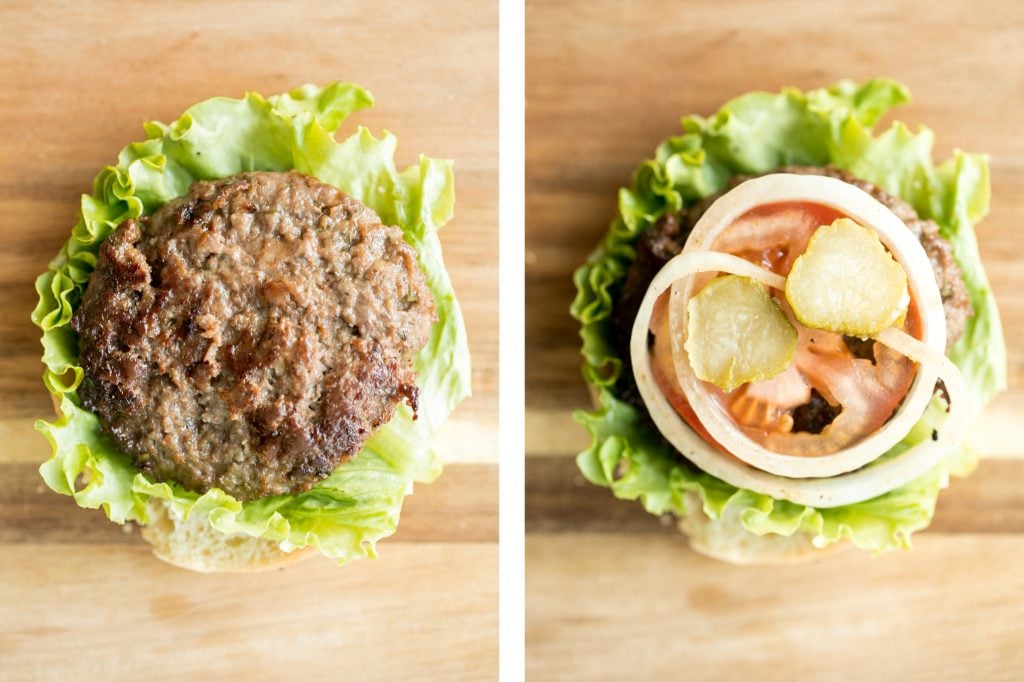
- toppings - top the burger with your favourite toppings. I used the classics -- mayo, lettuce, tomato, onions, pickles, and ketchup. I actually fried my onions alongside the burgers for that extra touch.
- cooking oil - to grease the skillet.
You will also need a mixing bowl, cast-iron skillet and a turner spatula. I also highly recommend a digital meat thermometer if you cook a lot of meat and want to check for doneness. Simply insert halfway inside the meat to get a quick measurement.
How to Make the Best Rosemary Thyme Quarter Pound Burgers
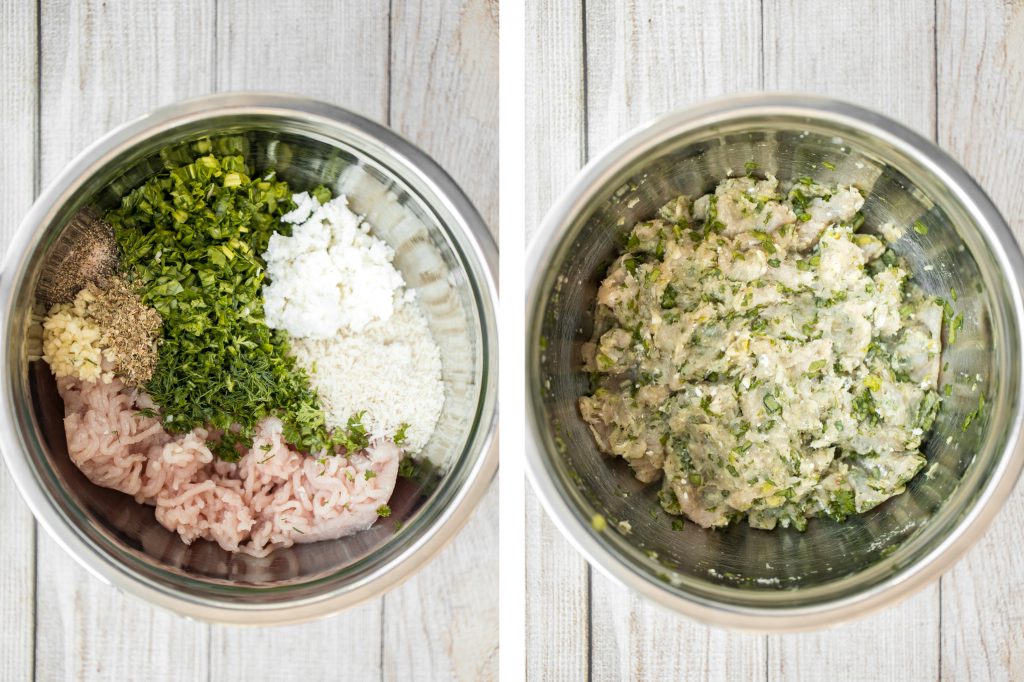
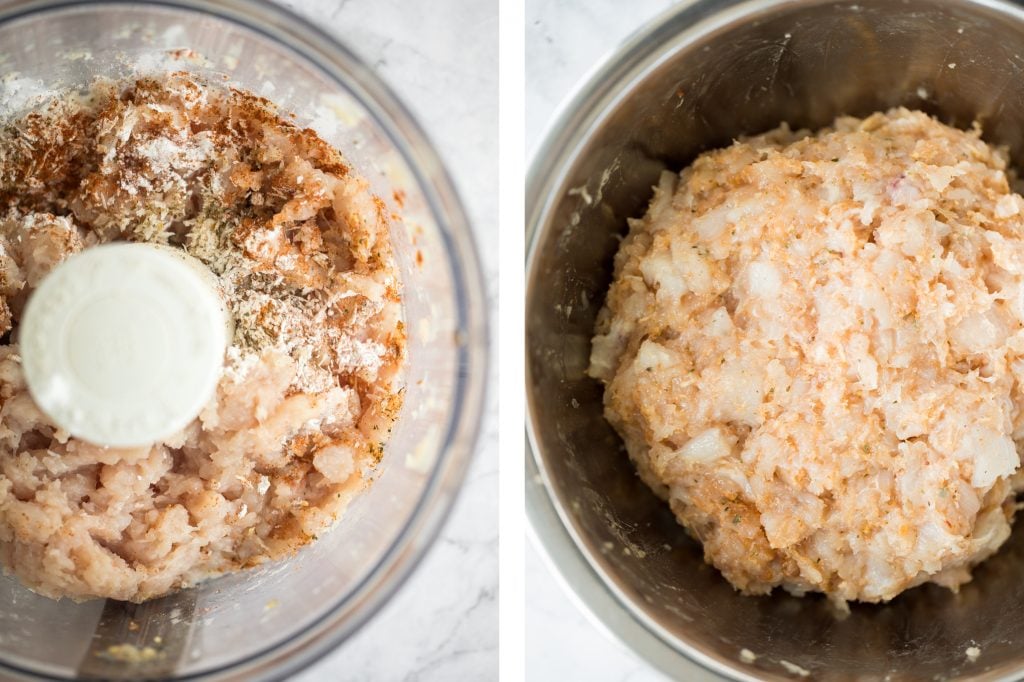
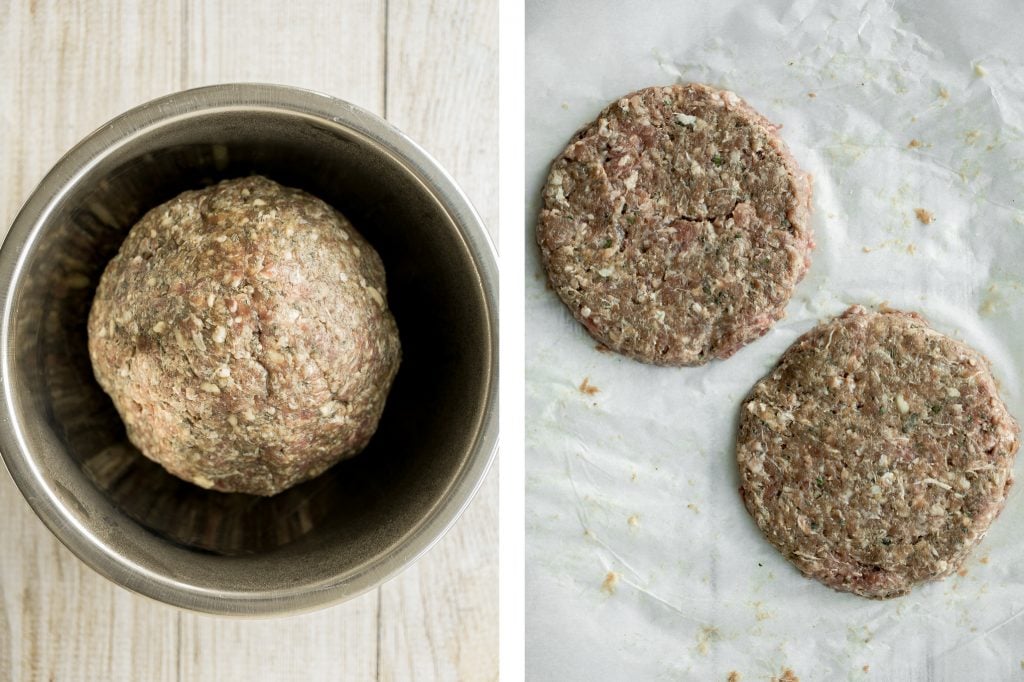
First, prepare the hamburger patties. In a large mixing bowl, add ground beef, breadcrumbs, cheddar cheese, pickle juice (or water), Worcestershire sauce, thyme, rosemary, garlic powder, salt and pepper. Stir well with a spatula to combine everything together (or use your hands to press the ingredients together to evenly combine). Shape the ground beef mixture into a firm ball, and cover the bowl with cling wrap and refrigerate for at least 1 hour or overnight.
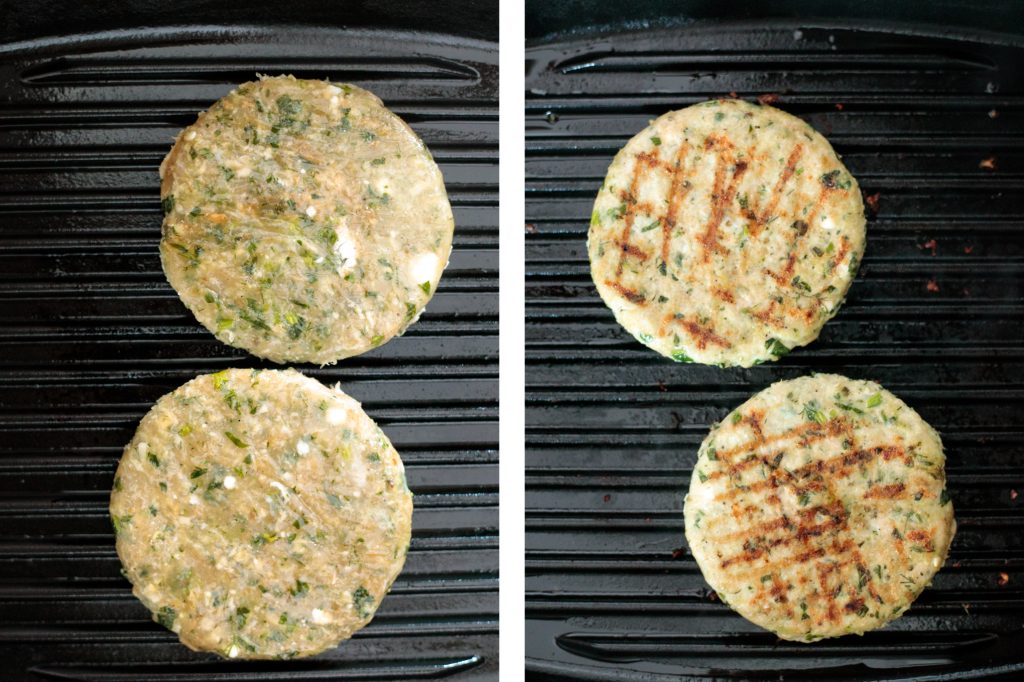
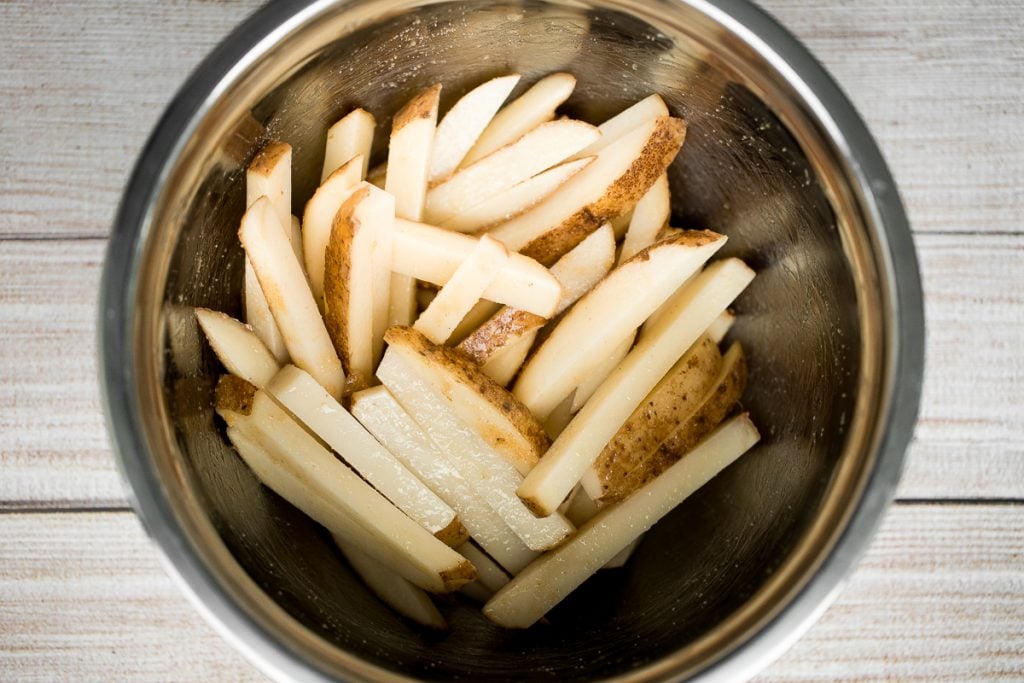
Now it's time to shape the patties. Transfer the ground beef mixture onto a large piece of parchment paper. Flatten the ground beef with your hands into a square that is ½-inch thick (approximately an 8x8-inch square). You can also roll it out with a rolling pin. Use a 4-inch wide circular mold (or the rim of a round bowl) to cut out 4 hamburger patties (¼ pound each). Add the scraps evenly amongst the 4 patties.
How to Cook Hamburgers in a Skillet
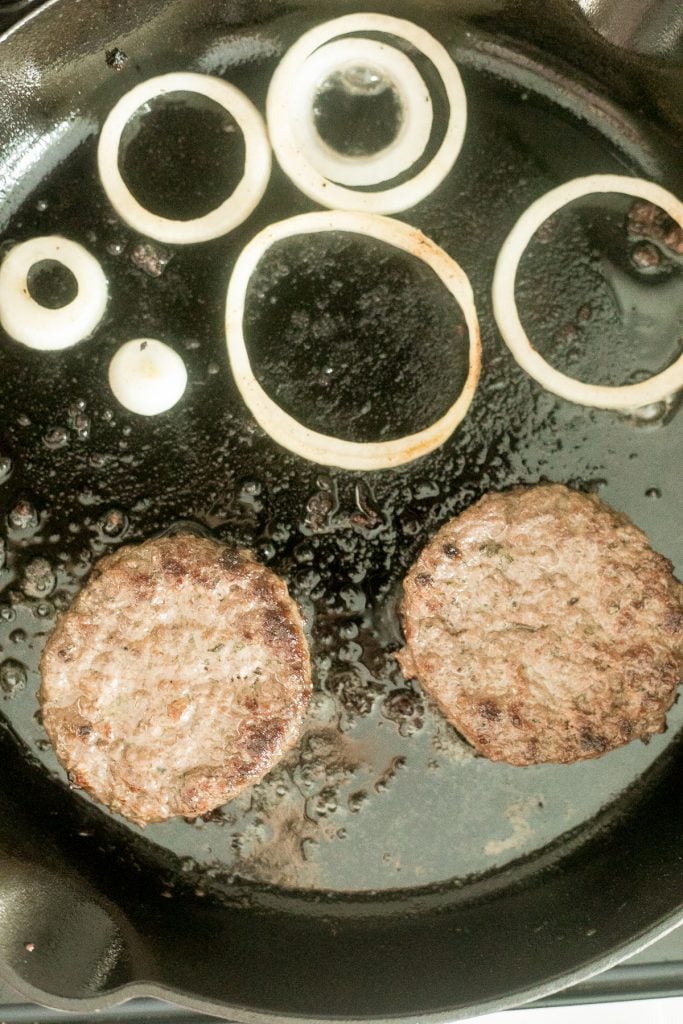
Heat oil in a cast-iron skillet over medium-high heat for 3 minutes until sizzling hot. Place patties on the skillet and cook for 3-5 minutes until nicely seared and starting to brown up the sides. Flip the patties over and cook for another 3-5 minutes, until the internal temperature for the patties reaches 160 F.
You can also cook some onion rings on one side of the skillet to add on top of the burger.
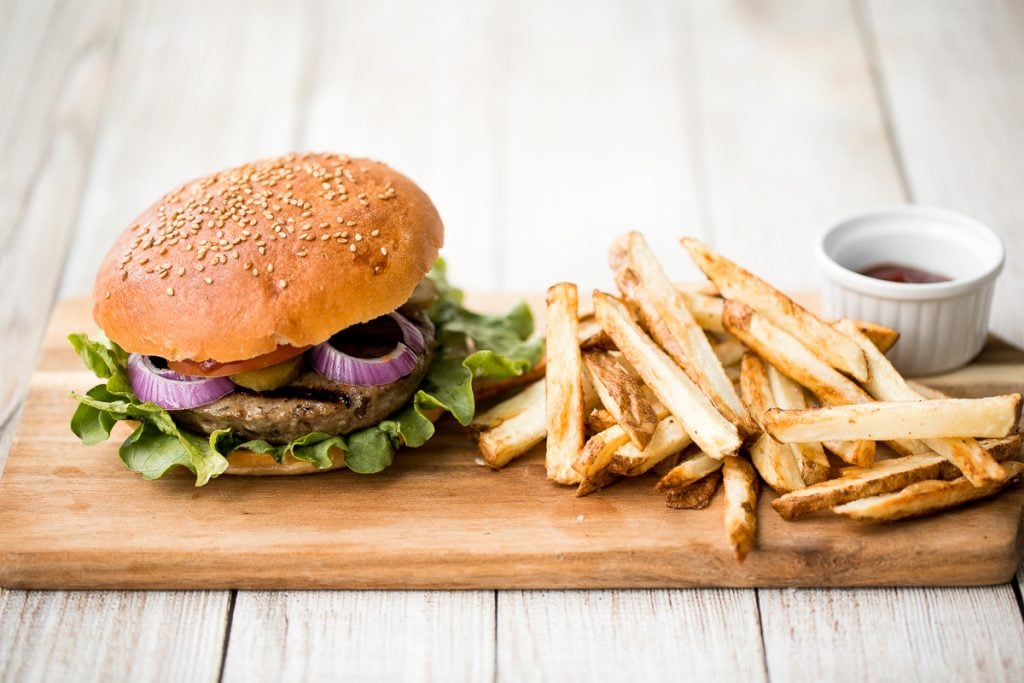
To assemble the burgers, toast the buns, if desired. Then top each burger with your favourite toppings. I spread mayonnaise onto the bottom half, topped with a piece of lettuce and a hamburger patty., then topped with sliced tomato, fried onions and pickles. I added ketchup on top and placed the top half of the bun on top.

Tips for Making Burgers
- How to tell if a beef burger is cooked: The best way to check a burger for doneness is by using a digital meat thermometer. Simply insert halfway inside the meat to get a quick measurement.
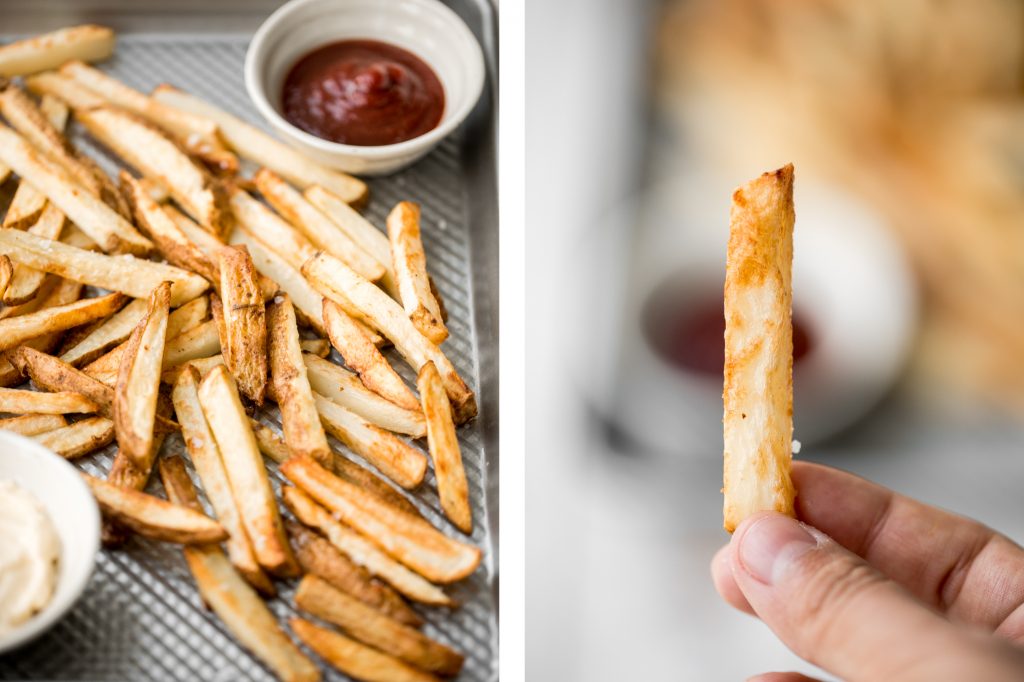
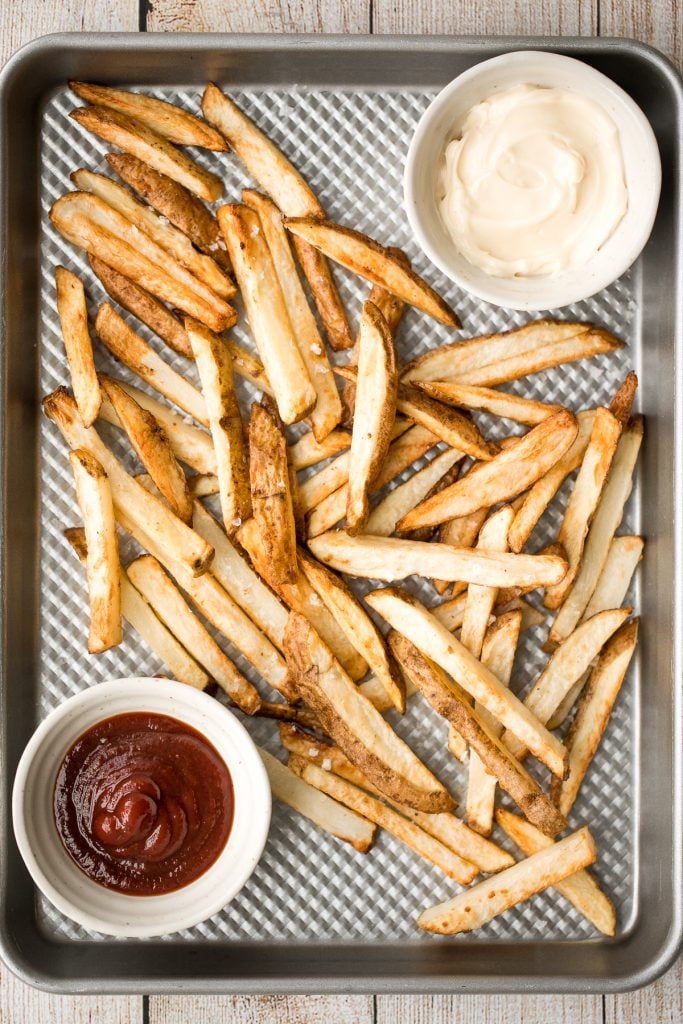
- How to serve hamburgers: Serve these rosemary and thyme burgers with a side of crispy french fries or sweet potato wedges. Add in potato salad or an orzo pasta salad for a complete meal.
- How to freeze hamburger patties: You can freeze the uncooked burger patties for up to 3 months. Place them on a parchment lined baking tray and place in the freezer for an hour. Then, stack them up and layer small squares of parchment paper in between them. Store in a freezer bag and place back in the freezer. To use them, defrost overnight in the refrigerator and follow the recipe.
- Make your own artisan hamburger buns. Make your own easy homemade hamburger buns in under 3 hours with only 15 minutes of actual prep work. These buns are soft, fluffy, and so airy. Totally worth the extra effort.
More Burger Recipes
- Classic Juicy Hamburgers
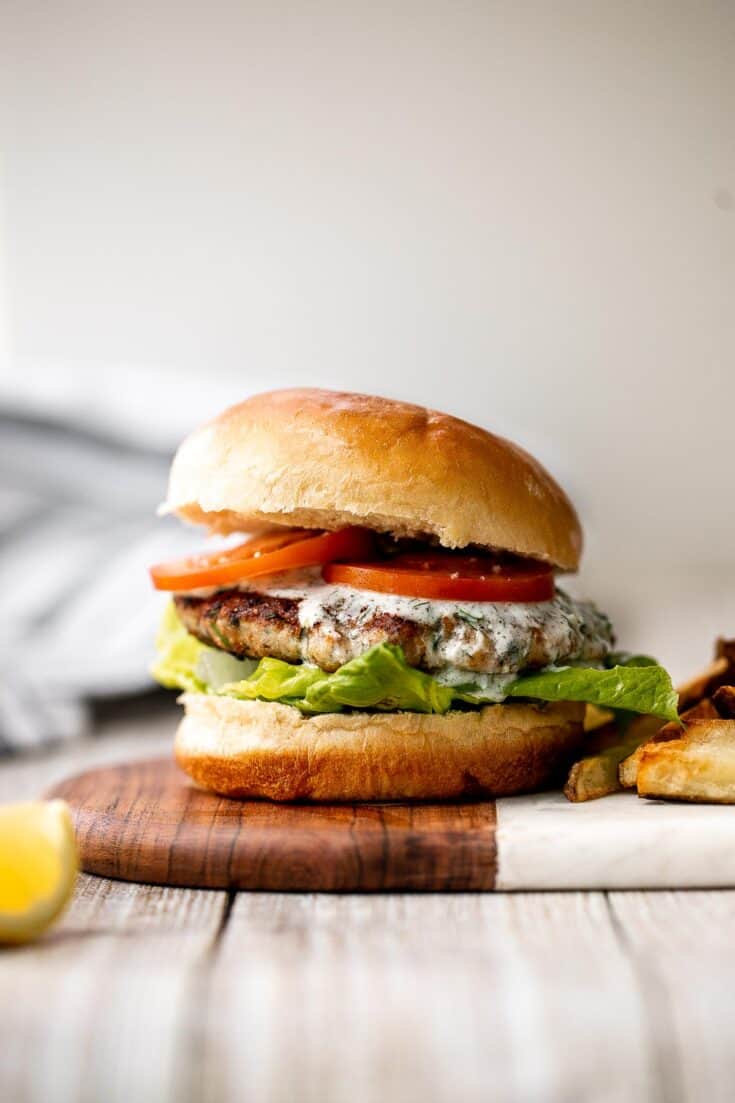
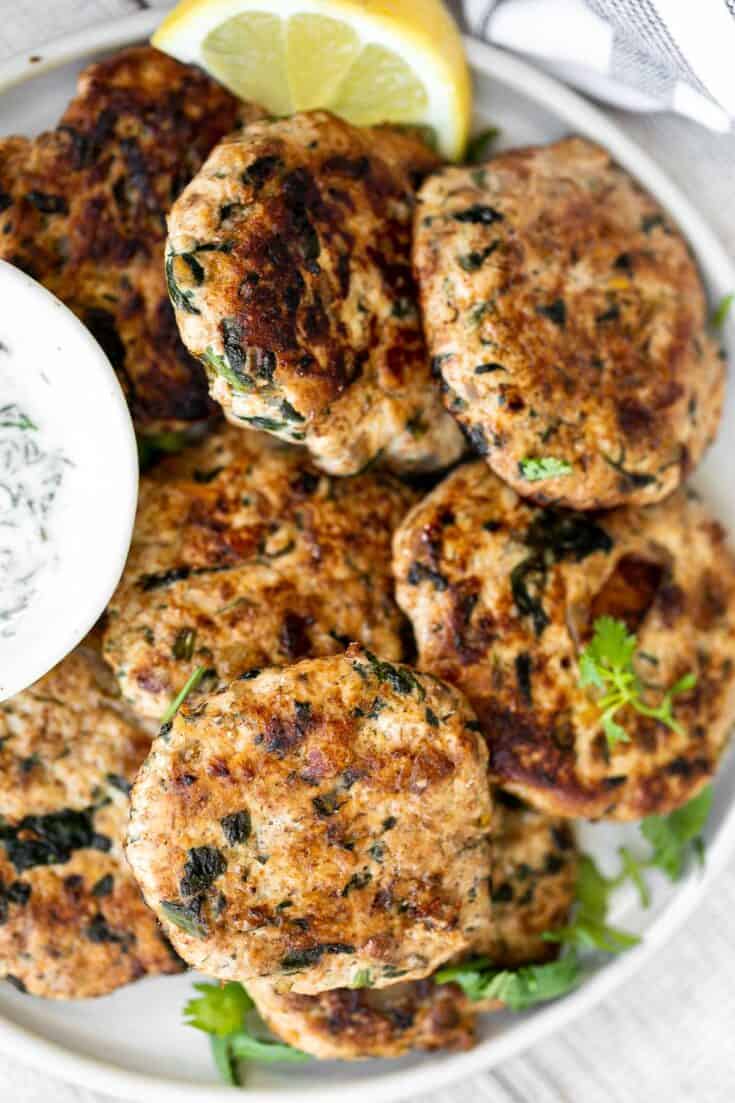
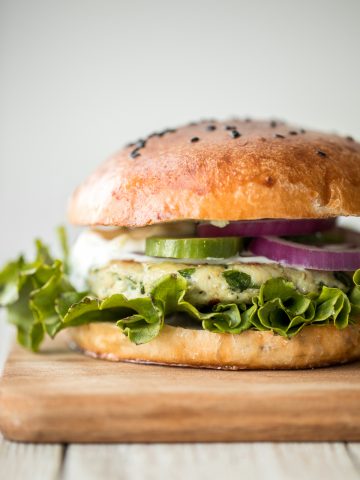
- Spinach and Feta Turkey Burgers
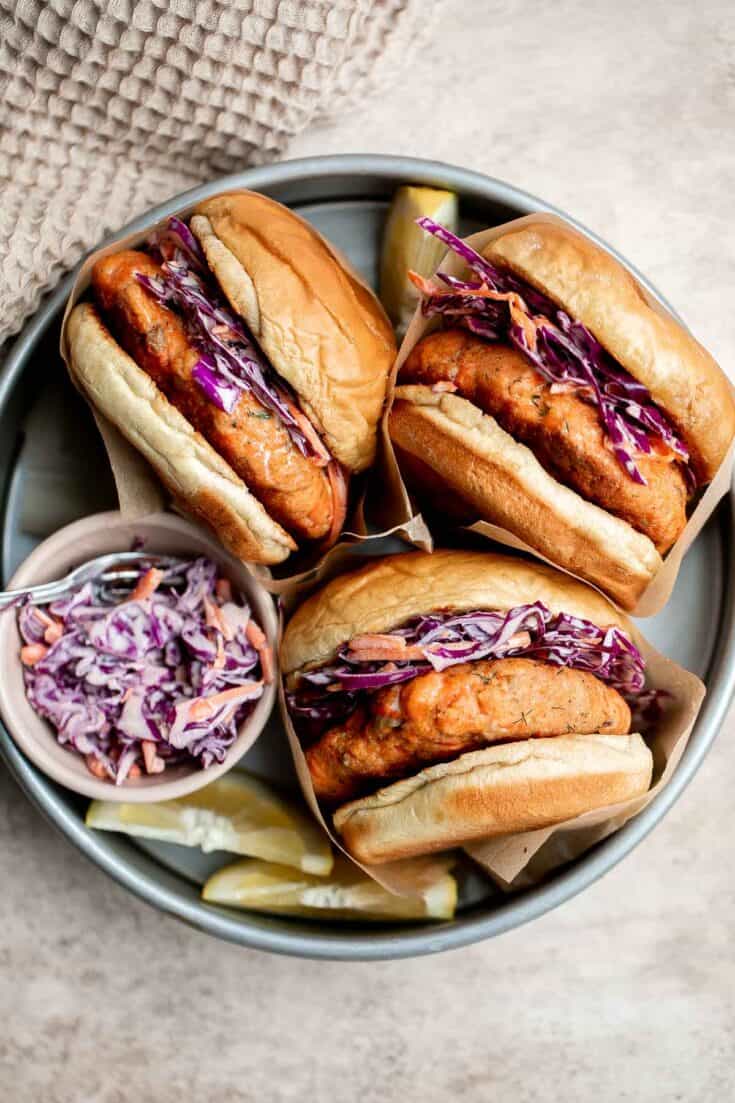
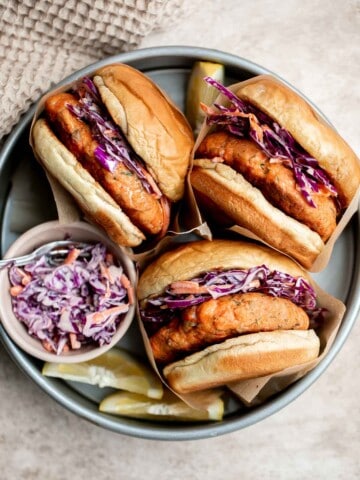
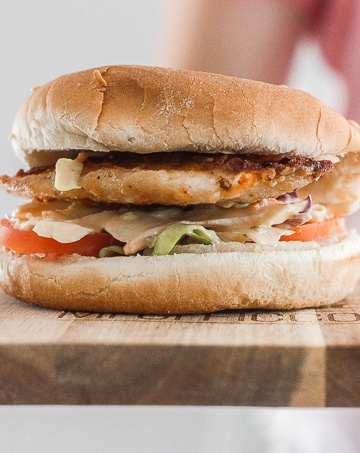
- 15-Minute Fish Burger with Homemade Tarter Sauce
- Veggie Burger with Lima Beans
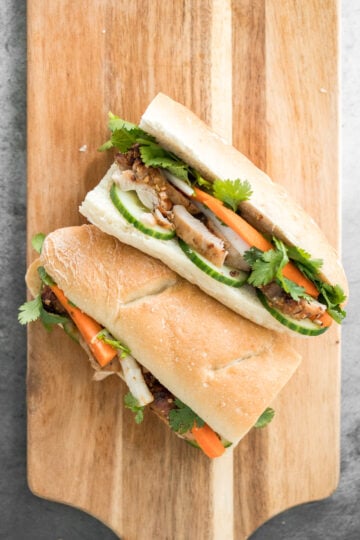
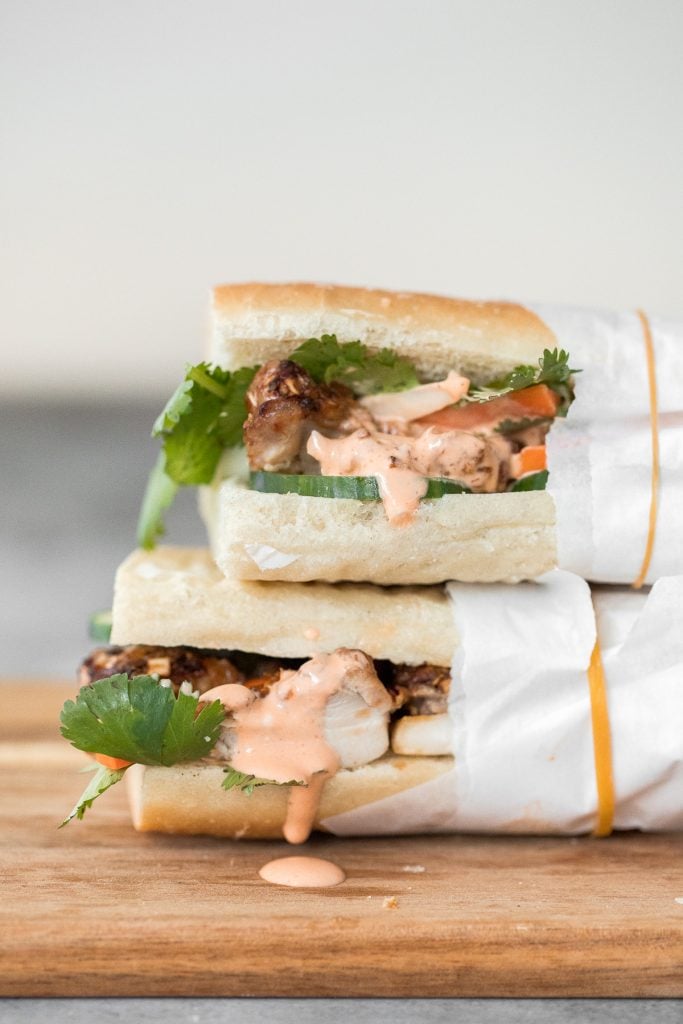
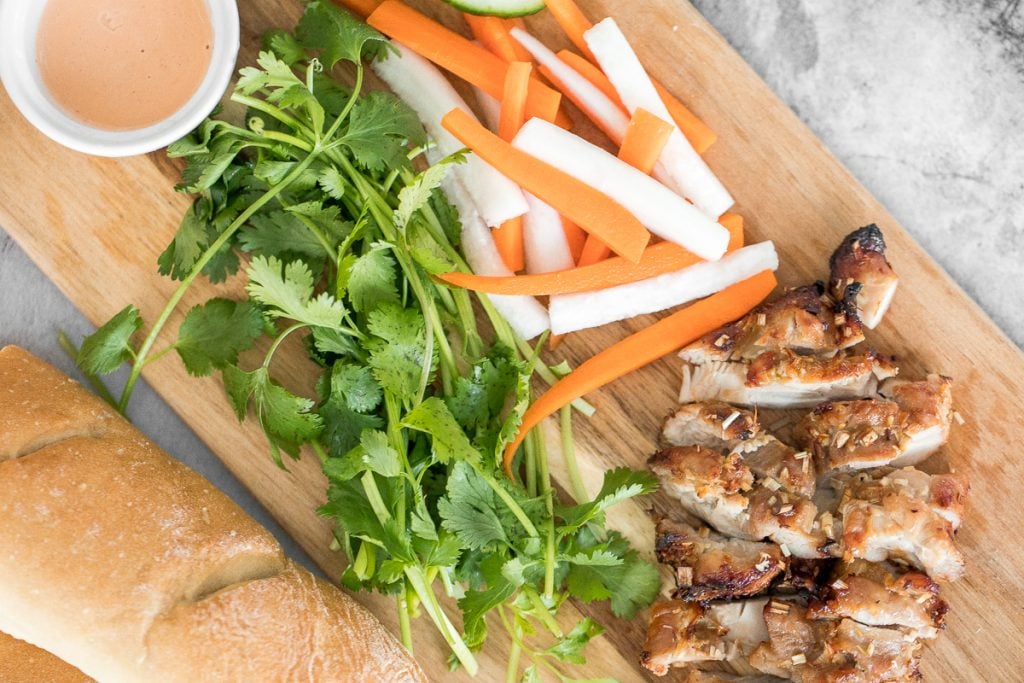
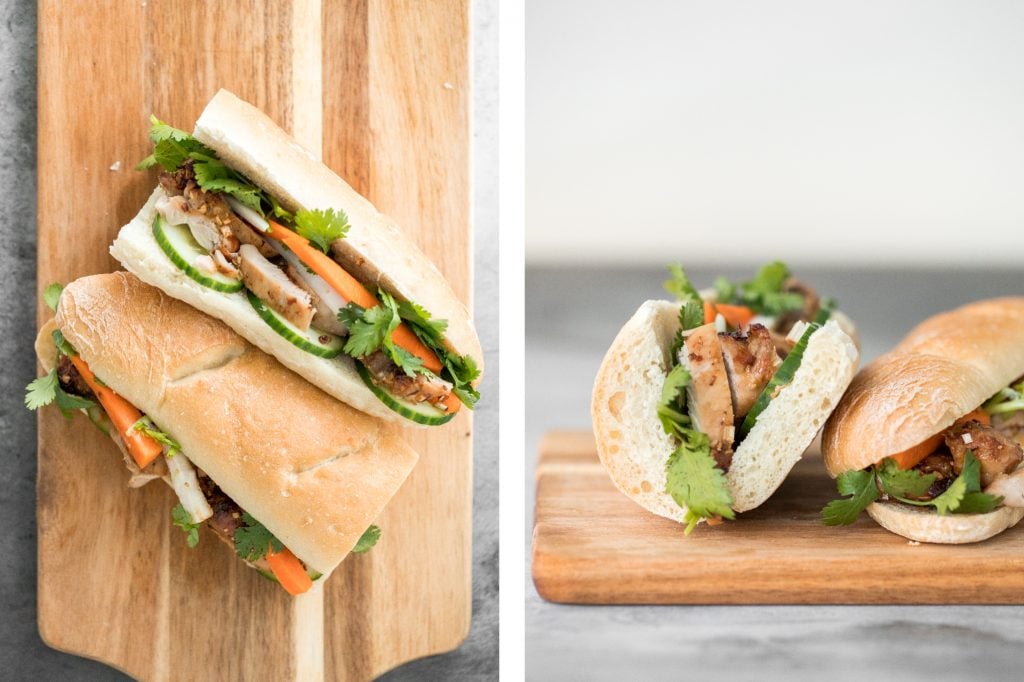
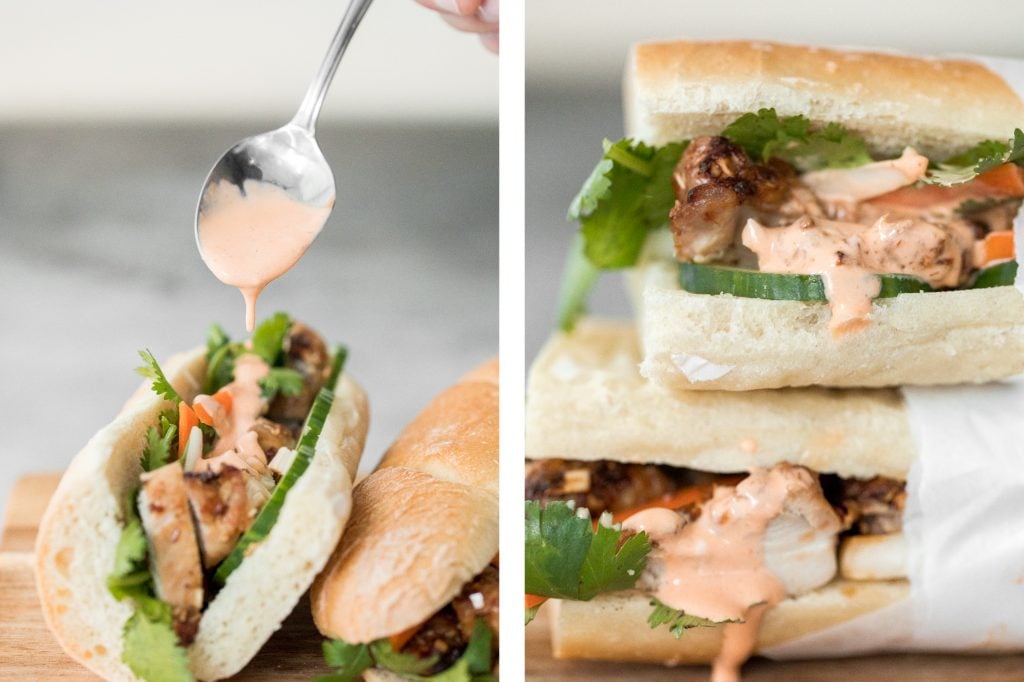
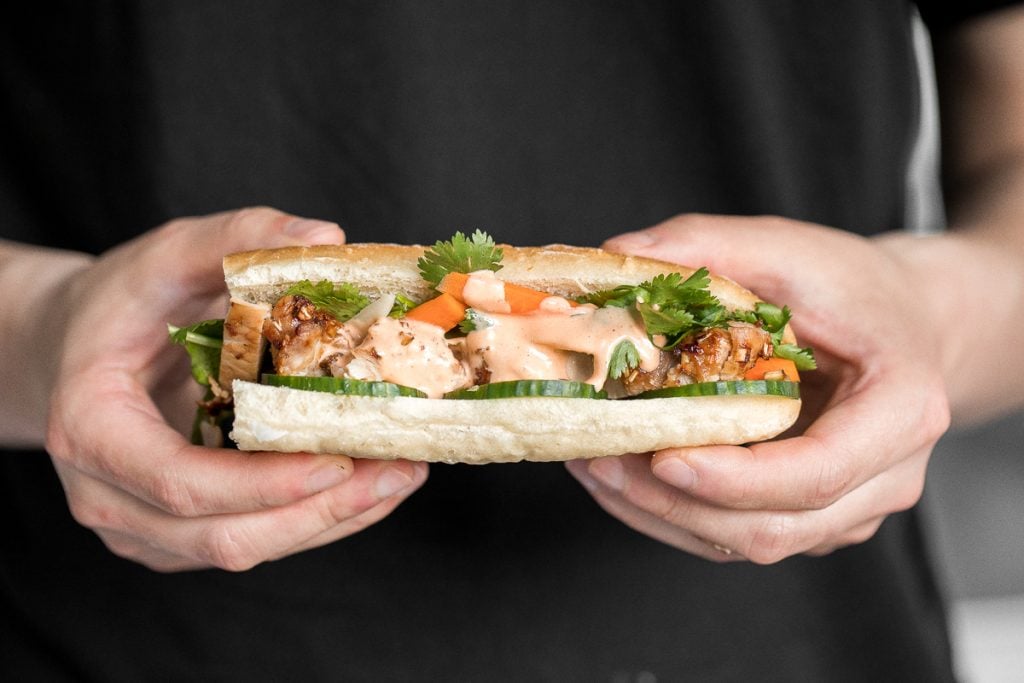
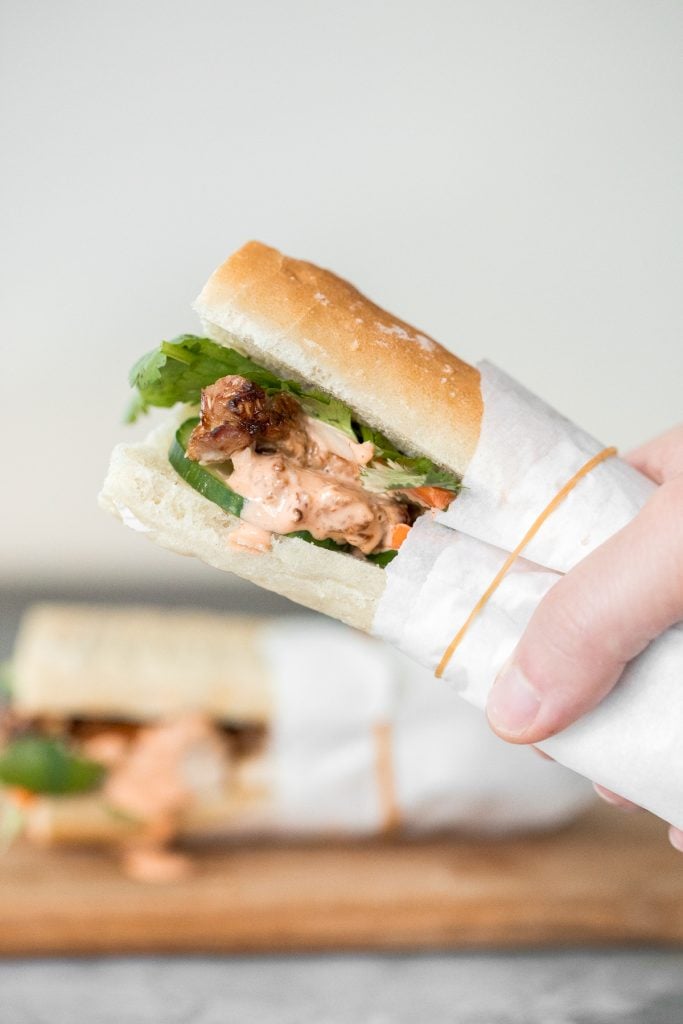
- Lemongrass Chicken Banh Mi Sandwich
- Easy Homemade Hamburger Buns
Tried this recipe?
I'd love to hear what you think! Leave a comment and rating below to share your feedback. Your reviews help others discover this recipe and help me keep creating more free recipes for you. Snap a photo and tag me on social media @aheadofthyme too.
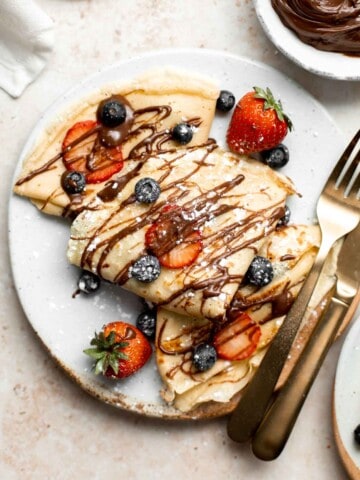
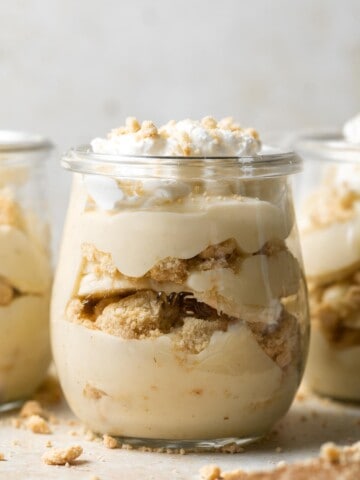
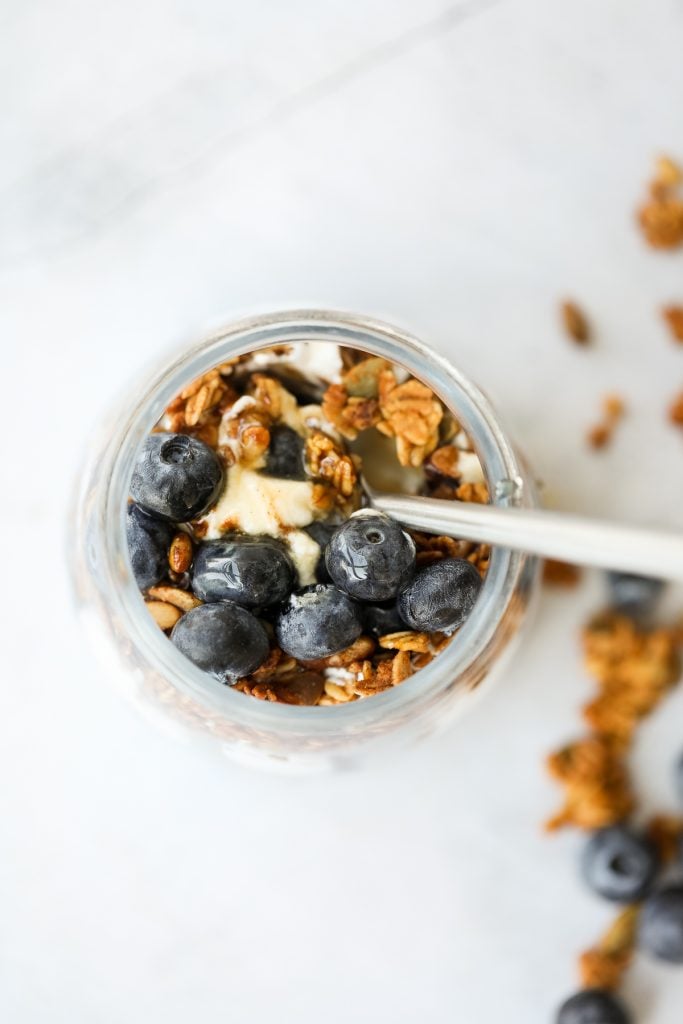
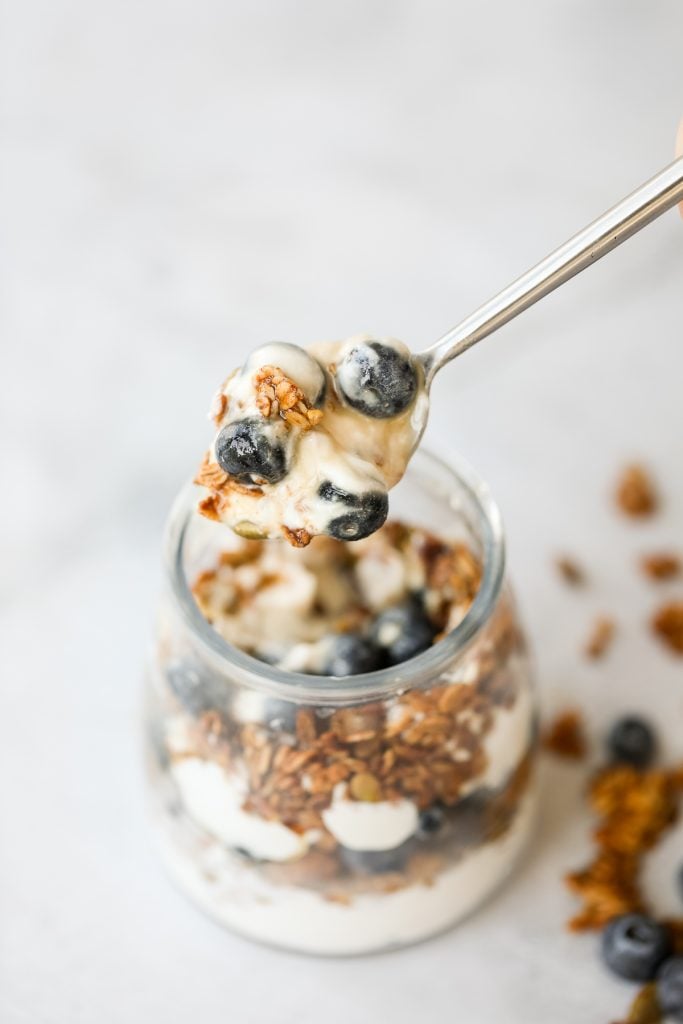
Fruit and Yogurt Parfait with Granola

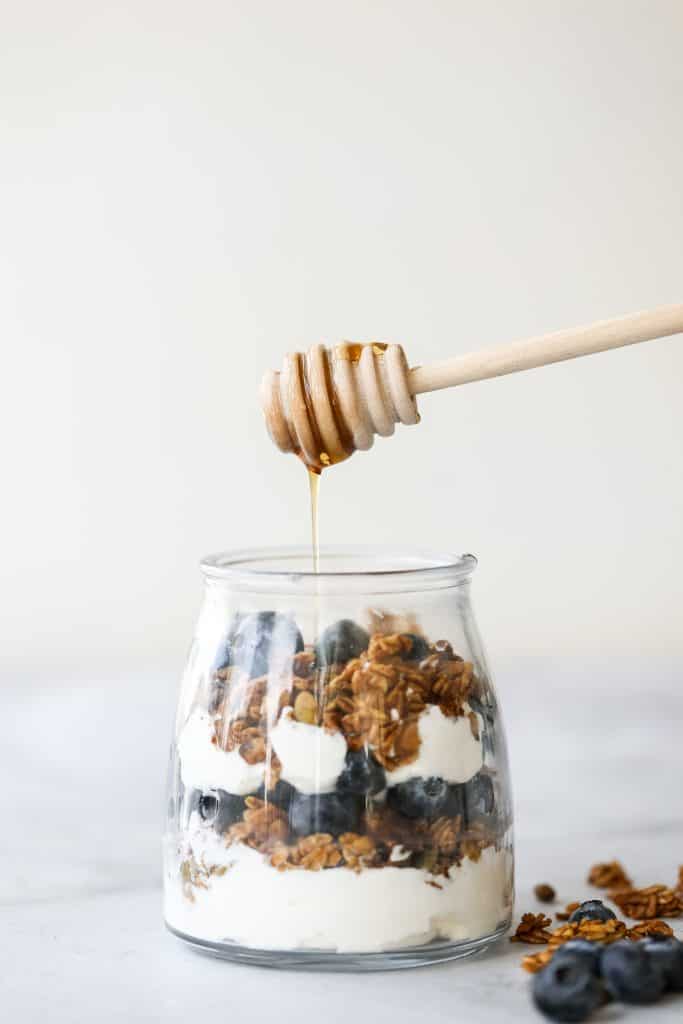
Today's breakfast consisted of creamy Greek yogurt, crunchy homemade granola, and fresh fruit all layered together with an optional drizzle of honey on top in this super simple fruit and yogurt parfait with granola. It is so quick and easy to make in less than 5 minutes. Perfect for a delicious and healthy breakfast, snack or even dessert.
How to Make the Best Fruit and Yogurt Parfait
A fruit and yogurt parfait is a layered dish consisting of layers of:
- Greek yogurt - I used a non-fat Greek yogurt. I also prefer it plain because I find that plain yogurt allows the natural sweet taste of the fruits and granola to truly be recognized. You can also use regular yogurt, but the parfait might not hold its shape as nicely.
- granola - I made my own granola for this. I prefer homemade granola because you know exactly what is in the granola and can eliminate any unnecessary sugars. Try my homemade almond pecan granola or coconut maple walnut granola. Both are amazing in this parfait and so easy to make (just 5 minutes to prep and 30 minutes to bake).
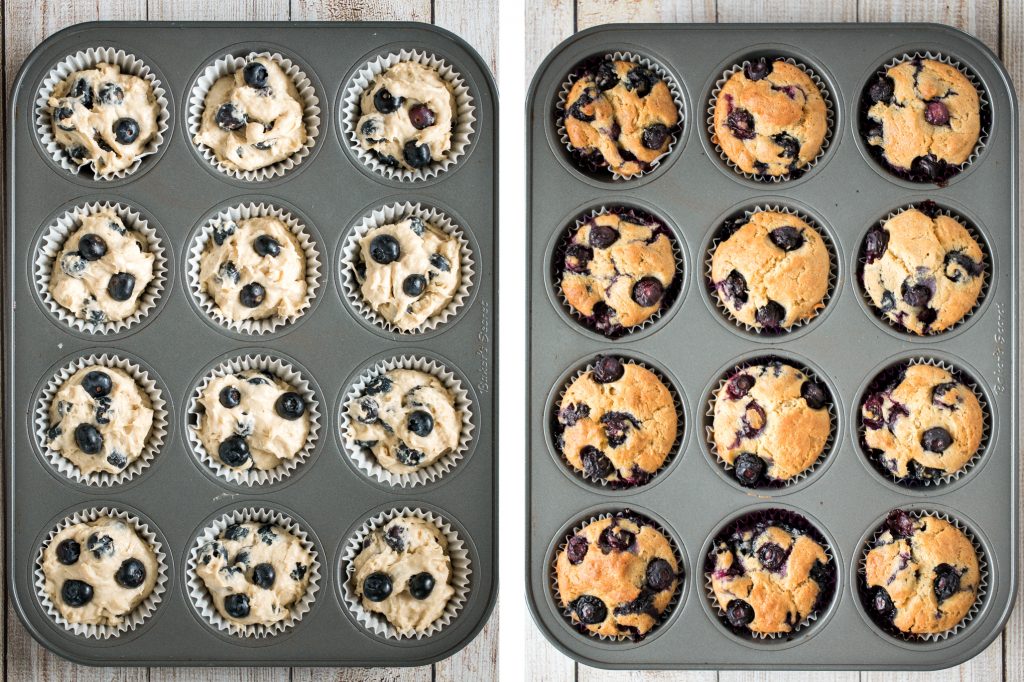
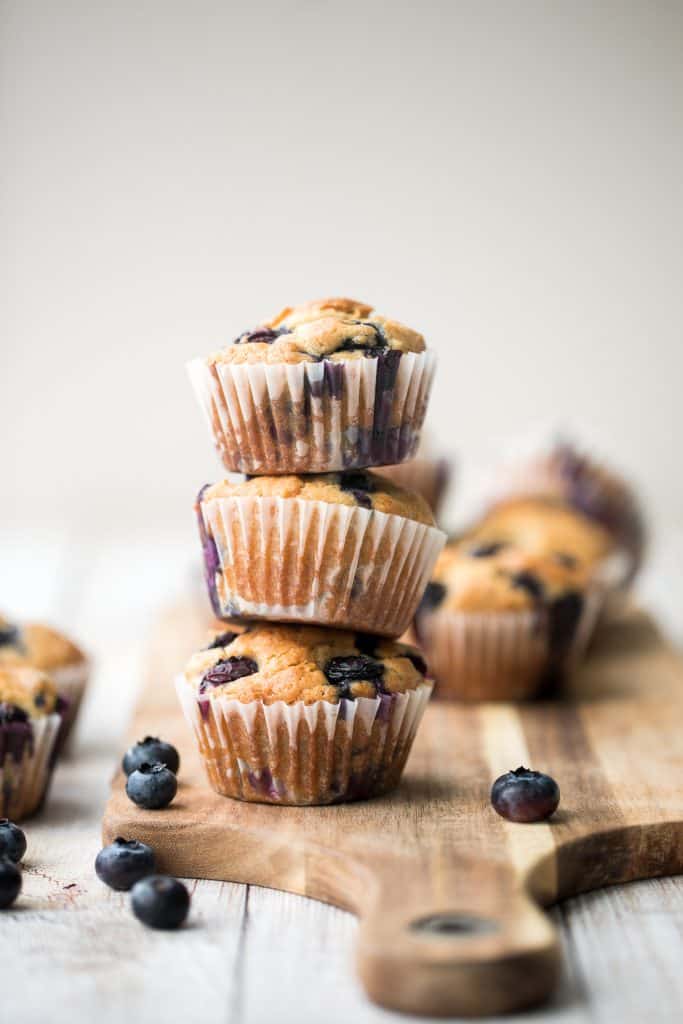
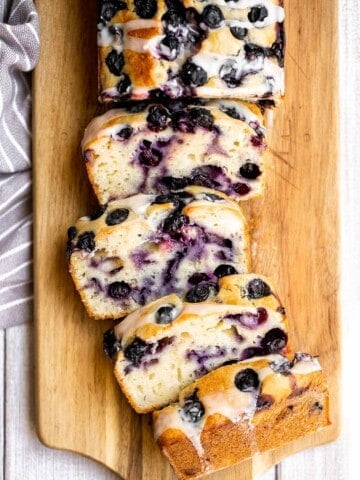
- fruit - I used blueberries but feel free to use any fruit that you have on hand. Just chop up into bite sized pieces.
Are Parfaits Healthy?
When made right, parfaits make an excellent healthy choice for breakfast.
- Yogurt provides calcium and protein in addition other nutrients.
- Fruits add important nutrients, including vitamin c, amounts of which will vary on the type of fruit of fruit that you add.
- Granola is loaded with fiber and can be low in fat and sugar.
But be wary of purchasing parfaits at your local cafe or franchise restaurants. They may appear to be healthy when in reality, you may be putting high amounts of fats and sugars into your body. Parfaits make a healthy breakfast choice only when created with non-fat yogurt and when it is low in sugar. That's why you are sooo much better off making your own parfait.
More Breakfast Recipes
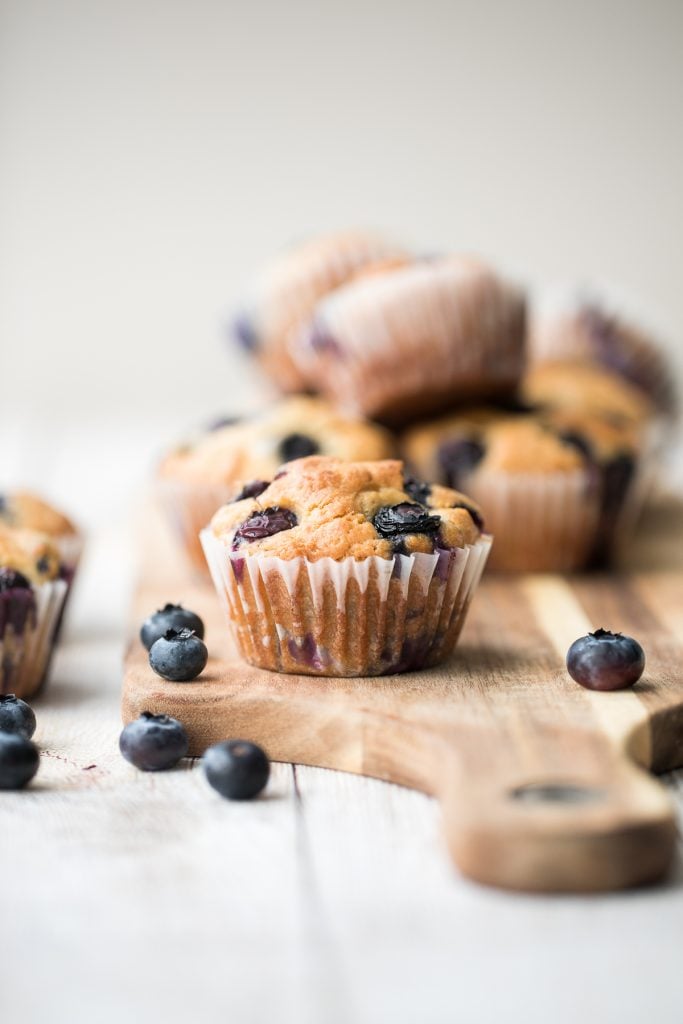
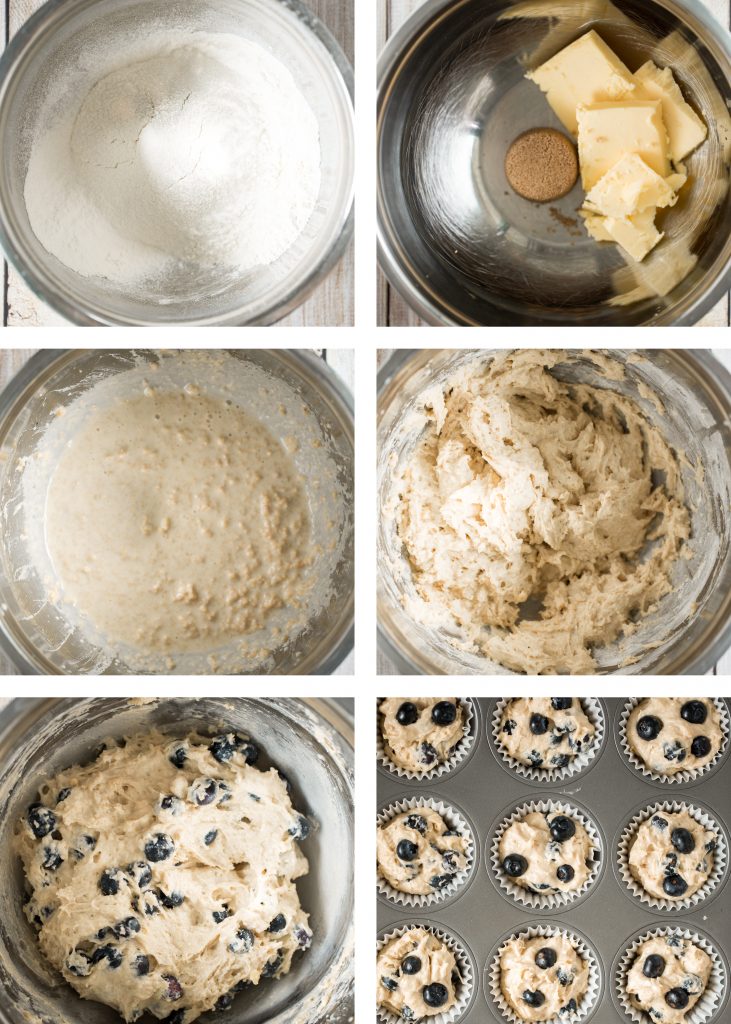
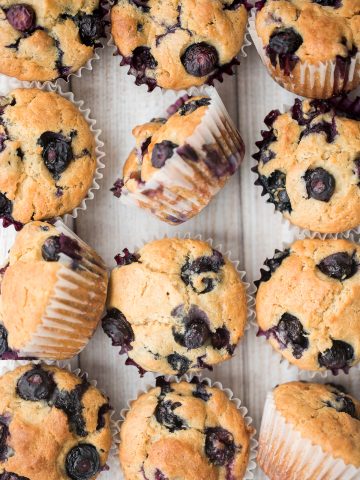
- Blueberry Yogurt Muffins
- Mango Pineapple Tropical Smoothie Bowl
- Triple Berry French Toast
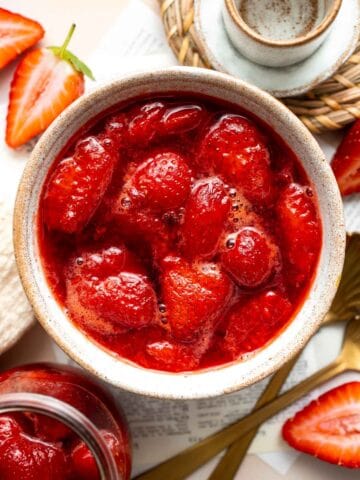
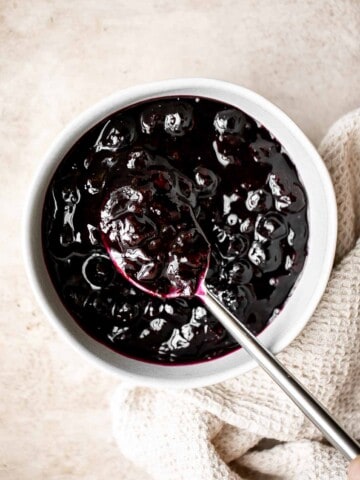
- Small Batch Strawberry Jam
- Banana Toast with Granola and Honey
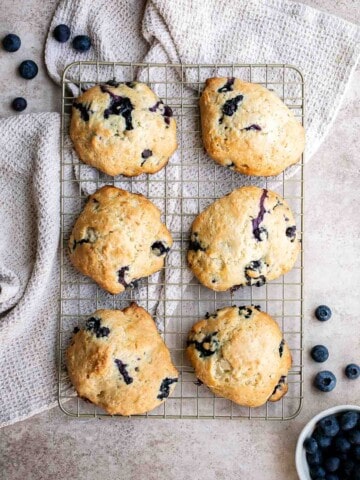
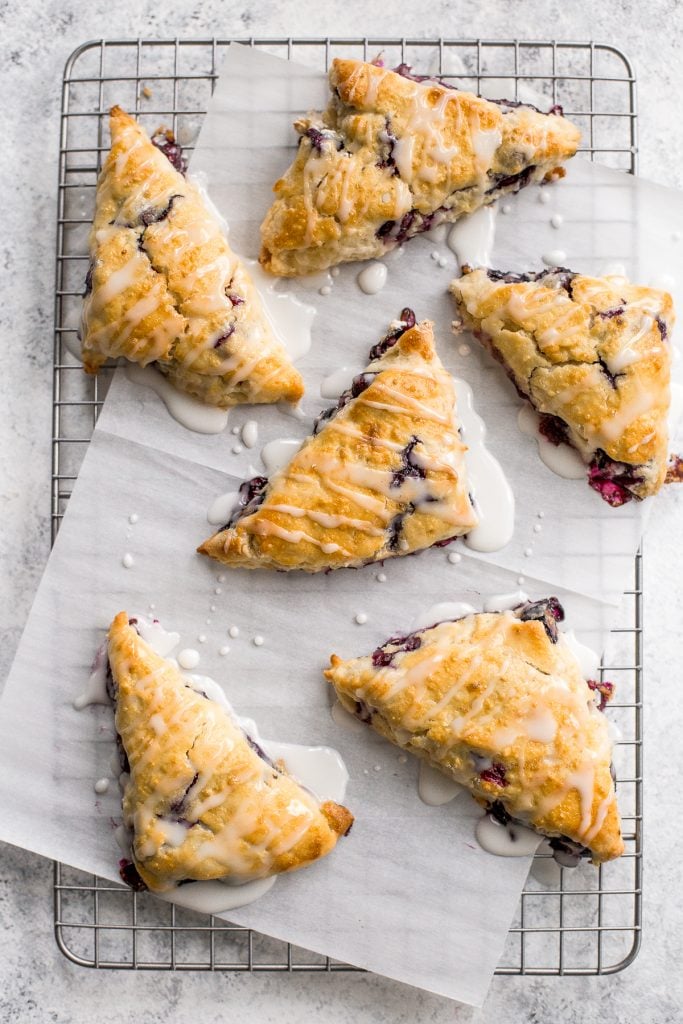
- Glazed Lemon Blueberry Scones
Tried this recipe?
I'd love to hear what you think! Leave a comment and rating below to share your feedback. Your reviews help others discover this recipe and help me keep creating more free recipes for you. Snap a photo and tag me on social media @aheadofthyme too.
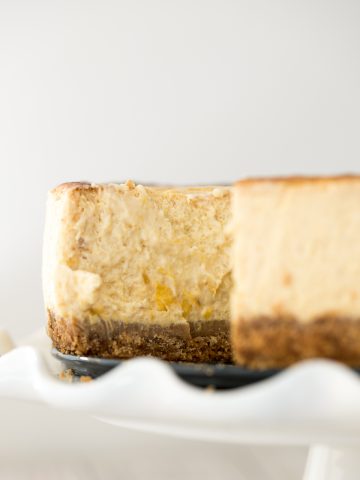
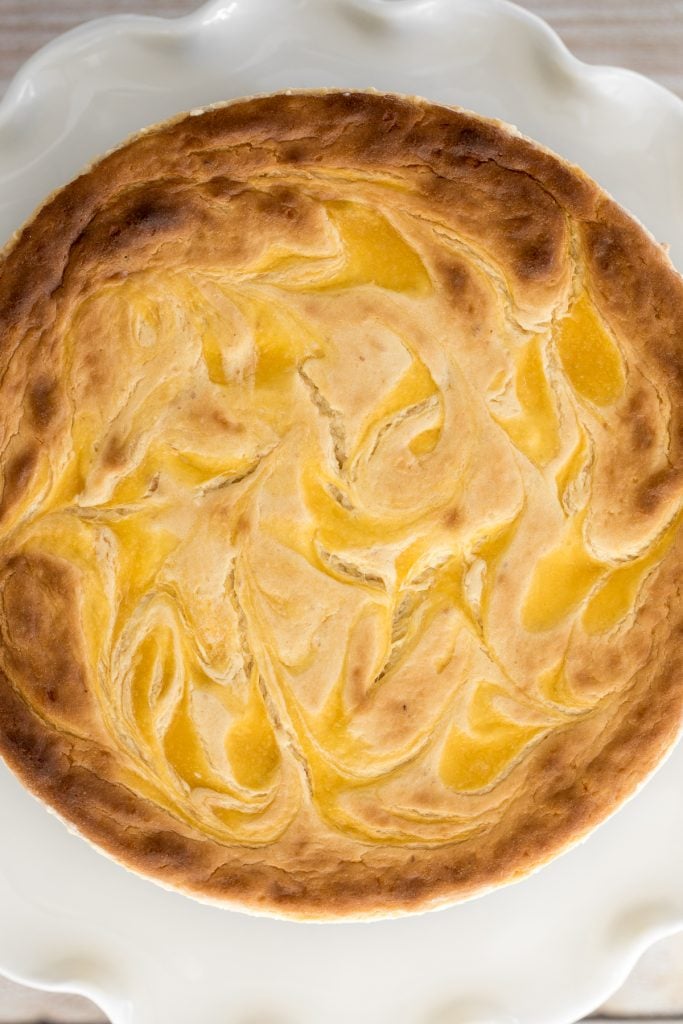
Creamy Mango Cheesecake

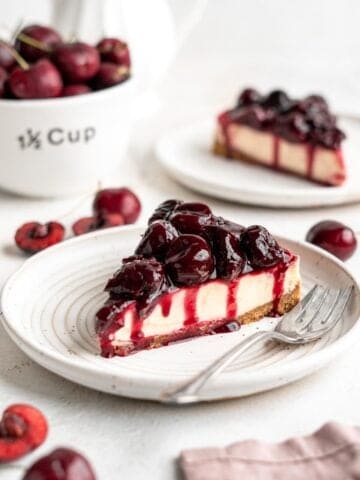
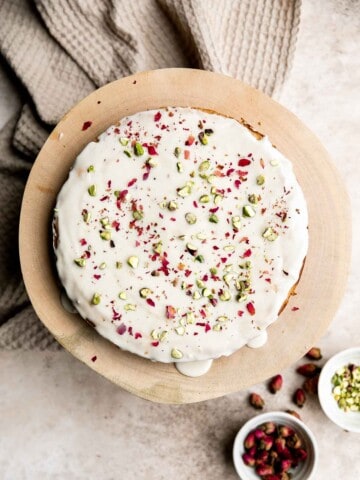
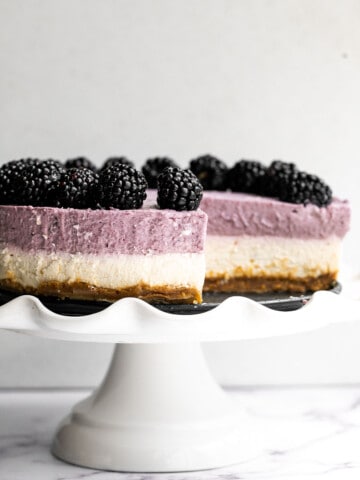
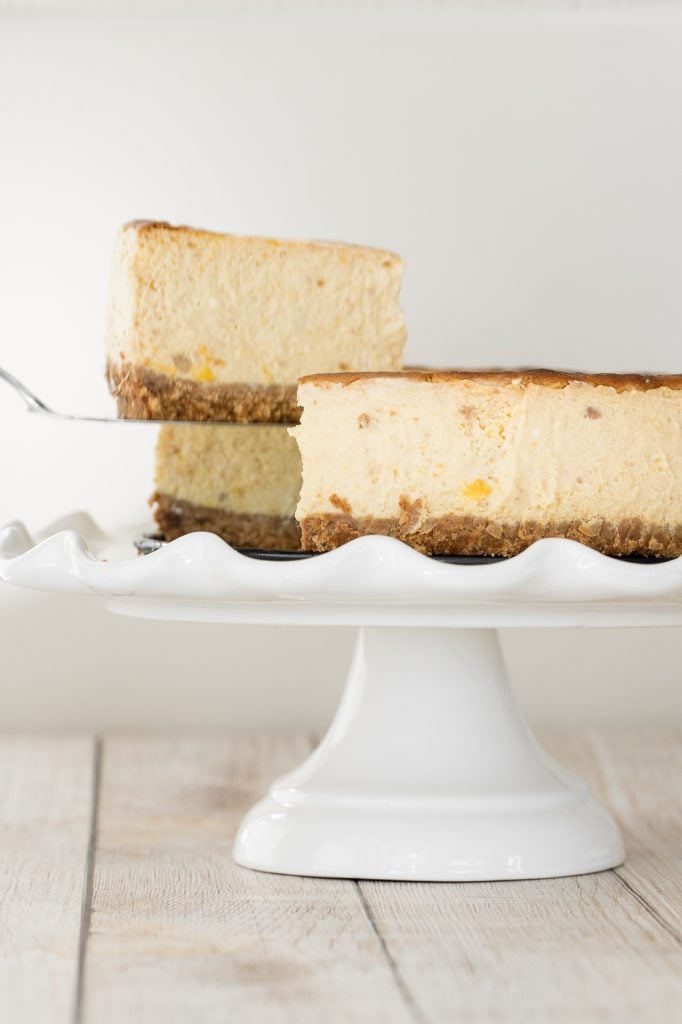
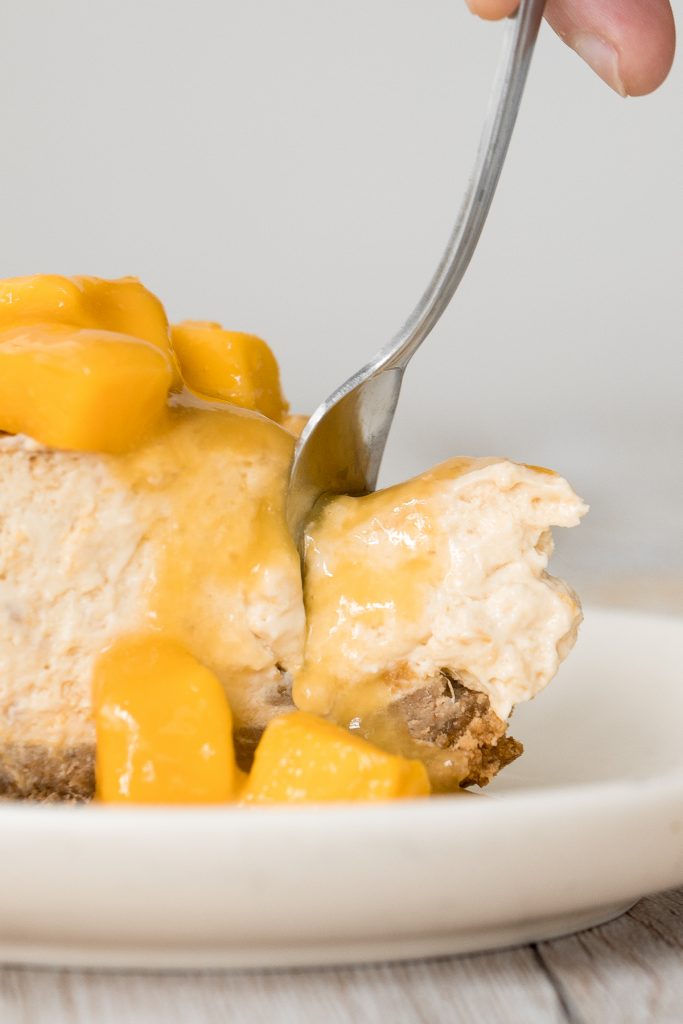
This summery, creamy mango cheesecake has classic graham cracker crust, a light and tropical cheesecake filling packed with pureed mangos, and more mango swirled on the top. It's an ultra creamy and mousse-like cheesecake that is super easy to make in just a few simple steps and with a few ingredients. It's so easy that you don't have to wait for the weekend to bake it.
Ingredients in Mango Cheesecake
- Graham cracker crumbs - for the cheesecake crust.
- granulated sugar - for the crust and for the filling.
- melted butter - for the crust.
- cream cheese - it wouldn't be cheesecake without cream cheese.
- plain Greek yogurt - helps lighten up the filling making it more mousse-like.
- mango pulp - this is essentially pureed mangos. You can make your own by pureeing very ripe mangos in a blender, or you can buy store-bought canned mango pulp.
- vanilla extract
- eggs
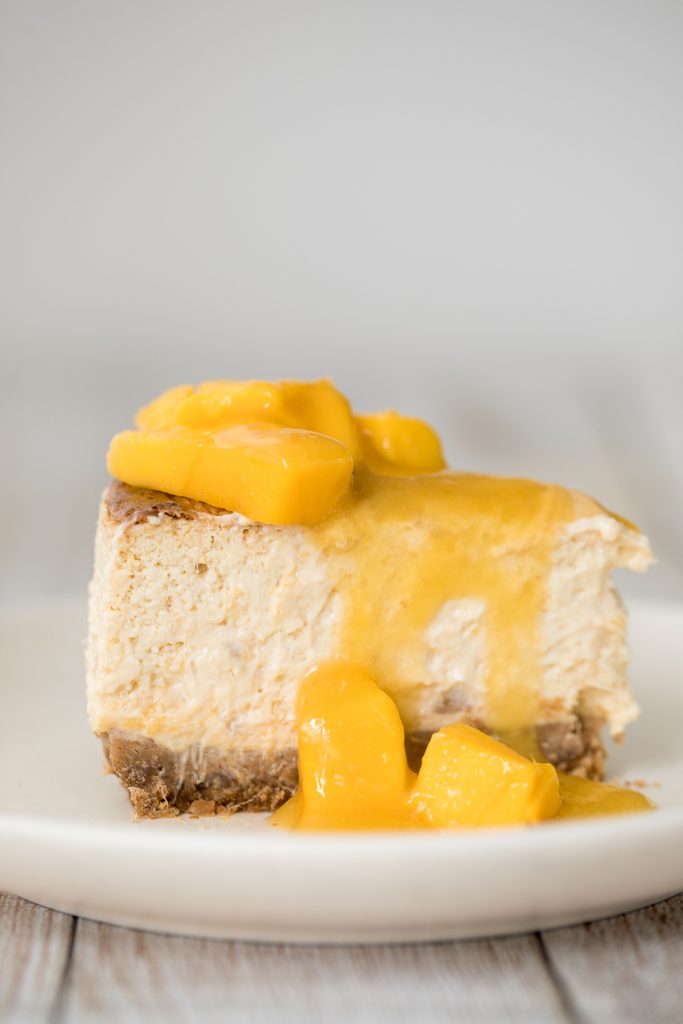
- toppings - serve with mango pulp, whipped cream and cubed mango chunks.
You will also need measuring cups and spoons, mixing bowls, hand mixer, round 8-inch springform pan, aluminum foil, and large deep baking pan (for the water bath).
How to Make the Best Creamy Mango Cheesecake
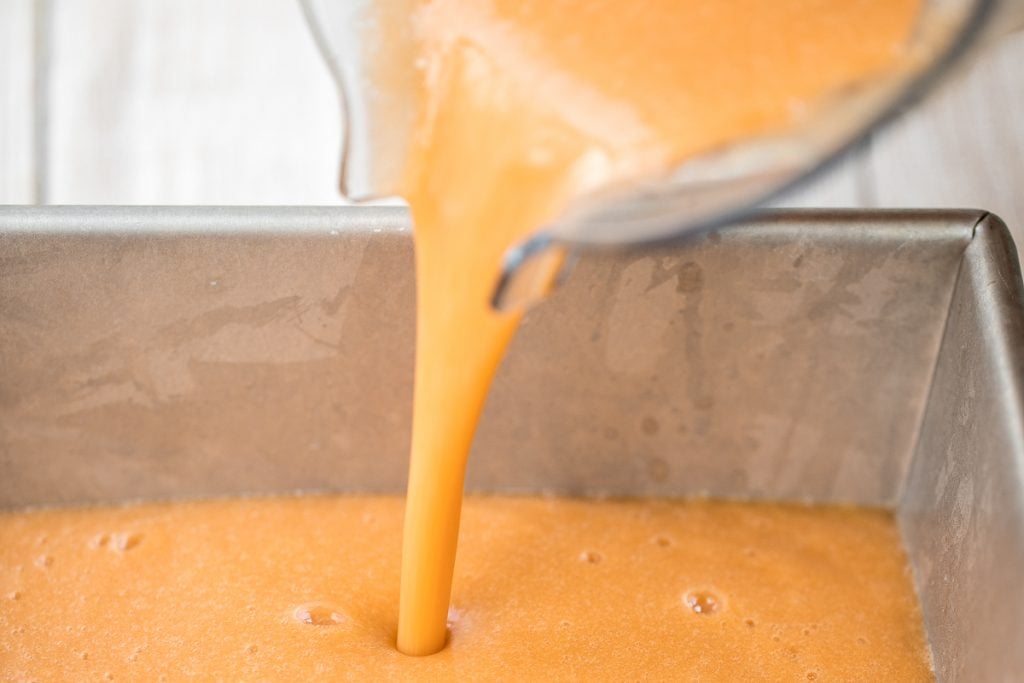
First, make the cheesecake crust. In a large bowl, stir together graham cracker crumbs and sugar. Gradually pour in melted butter, continuing to stir until well mixed. Use your hands to press the mixture firmly into a round 8-inch springform pan.. Bake the crust for 10 minutes in a preheated 350 F oven. Then, allow it to cool for approximately one hour before filling with the cheesecake filling.
Next, make the cheesecake filling. In a large bowl, combine cream cheese, yogurt, 1 cup mango pulp, sugar and vanilla extract. Beat with a hand mixer until well blended. Add one egg at a time and beat just until blended. Repeat until all the eggs are just blended in (Do not overmix to avoid cracking during baking).
Now, let's assemble the cheesecake. Pour the cheesecake filling into the cooled crust and smooth out the surface with a spatula. Add a few dollops of the remaining ¼ cup of mango pulp on top of the filling, randomly in different spots, and gently swirl with a toothpick.

How to Bake Mango Cheesecake
Wrap the outside of the springform pan tightly with aluminum foil (to prevent the filling from leaking) and place the pan in a large deep baking pan. Fill the dish with 1 inch (2 cm) of boiling water.
Move the baking pan to a preheated 350 F oven and bake for 1 hour in the boiling water bath (This helps prevent sudden temperature drop and cracking). After an hour, turn off the heat and let the cheesecake continue to sit in the oven for another hour, without opening the door.
Take the pan out of the oven and run a paring knife gently around the outside of the cheesecake to loosen it from the sides of the pan. Cover the pan with cling wrap and transfer to the refrigerator for 8 hours or overnight to cool and set.
Slice up and serve with your favourite toppings such as a drizzle of mango pulp, some cubed mango chunks and whipped cream.
How to Store Cheesecake
- In the refrigerator: Creamy mango cheesecake can be stored in the refrigerator in an airtight container for up to a week. I usually just store it in the springform pan and seal the top tightly with aluminum foil or cling wrap.
- In the freezer: You can also store mango cheesecake in the freezer for up to three months. Tightly double-wrap the whole cheesecake or slices with aluminum foil or plastic wrap and place it inside an airtight container. When you are ready to serve and eat the cake, just take it out of the freezer and let it thaw overnight in the refrigerator.
More Cheesecake Recipes
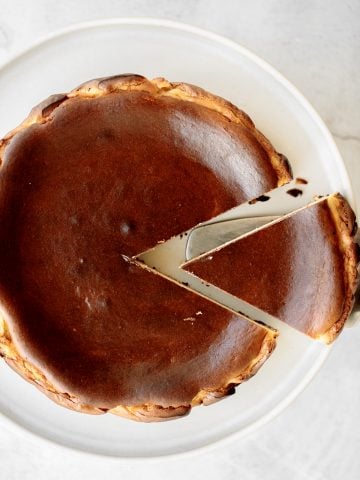
- No Crust Burnt Basque Cheesecake
- Classic New York Cheesecake
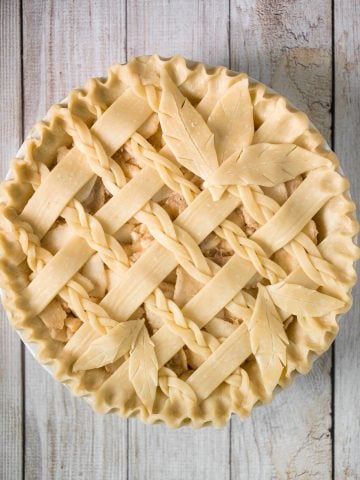
- Healthier Caramel Apple Fall Cheesecake
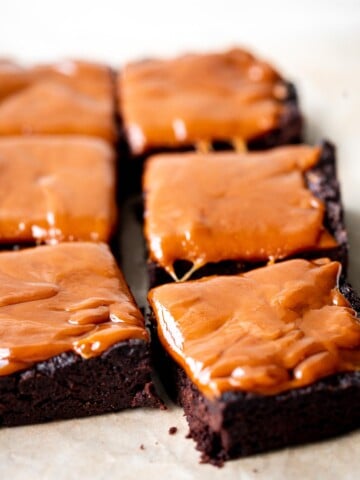
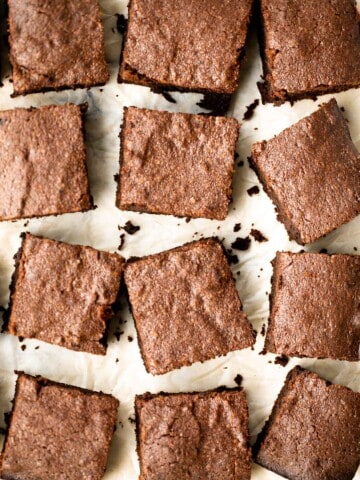
- Caramel Cheesecake Brownies
- Carrot Cake with Cheesecake Topping
Tried this recipe?
I'd love to hear what you think! Leave a comment and rating below to share your feedback. Your reviews help others discover this recipe and help me keep creating more free recipes for you. Snap a photo and tag me on social media @aheadofthyme too.
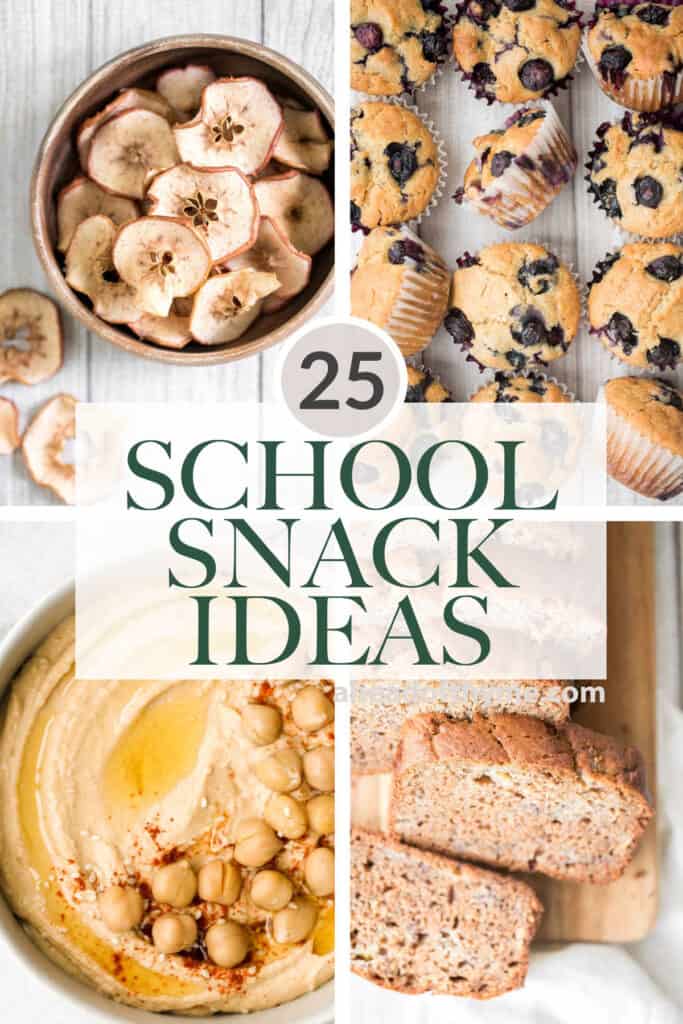
25 School Snacks

One less thing you should stress about when the kiddos go back to school this year is their lunch box. Today I am sharing my top 25 school snack ideas, ranging from granola bars to muffins, energy balls to cracker bites, fruits and dips, baked school snacks and more. Whether you are sending the kids back to school in September or planning to homeschool this year (because let's face it, we have already being doing it for the last few months), there are tons of kid-friendly recipes for everyone, even the pickiest eaters.
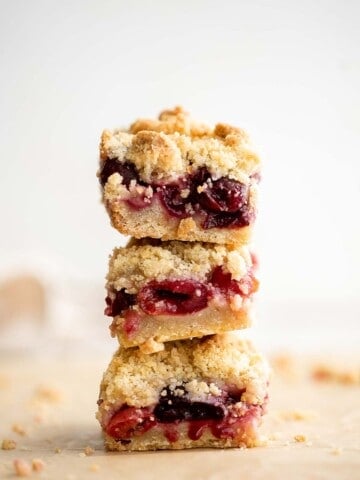
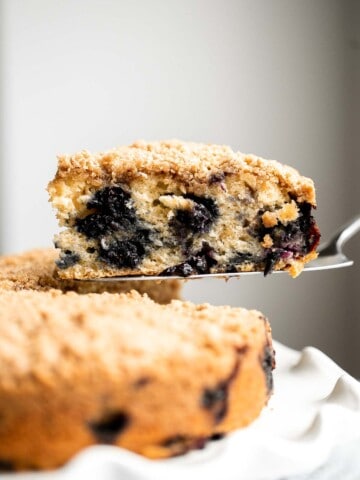
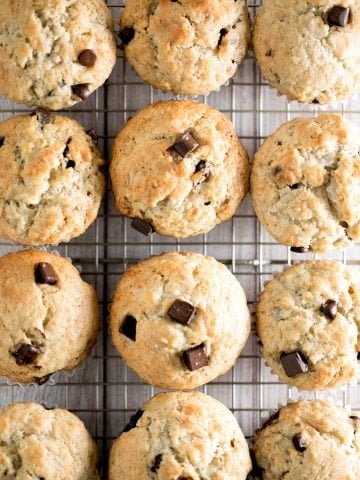
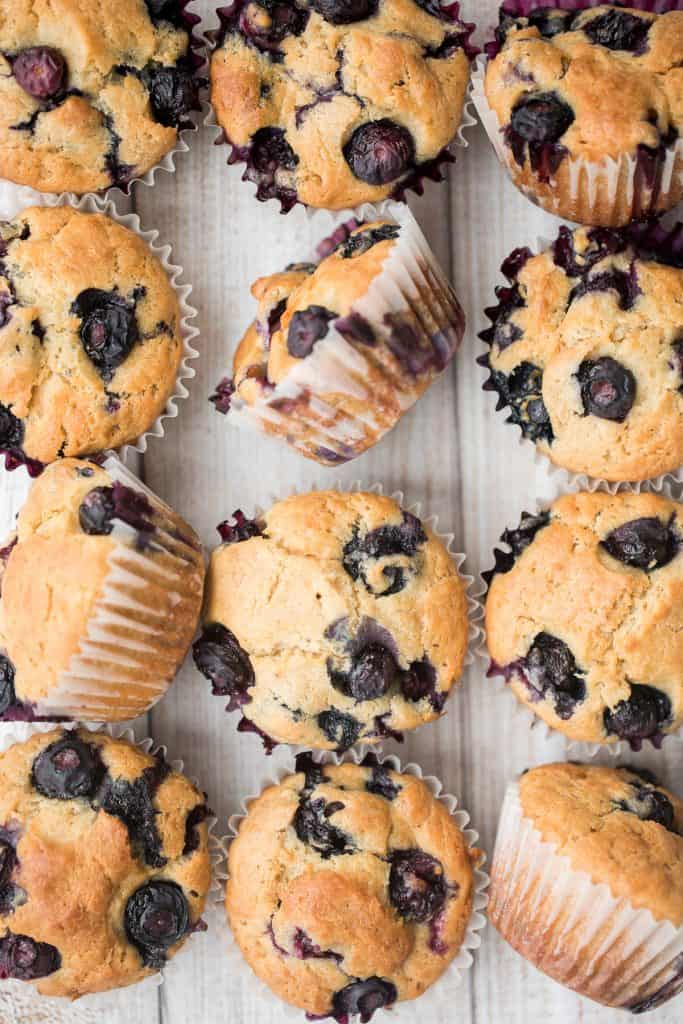
Blueberry yogurt muffins are buttery, moist, soft, and cakey and bursting with blueberries in every single bite. They are super quick and easy to make. Some other muffins to try are spiced carrot muffins or apple oatmeal muffins or banana chocolate chip muffins.
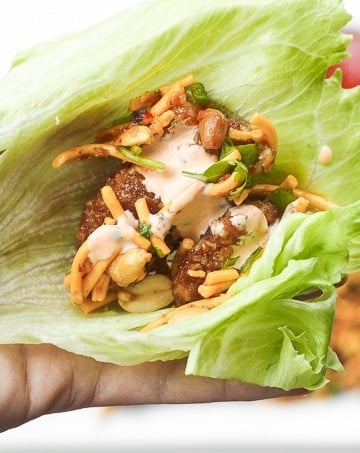
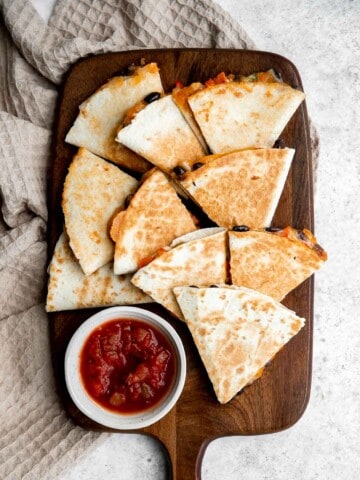
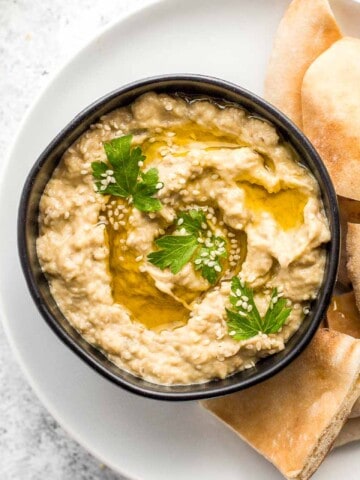
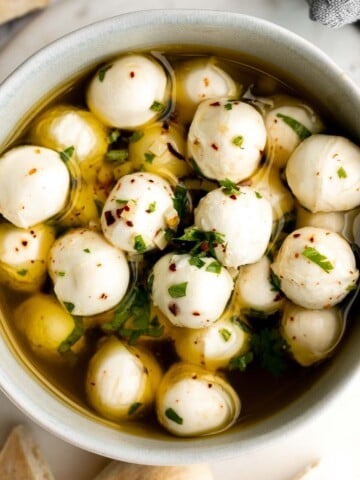
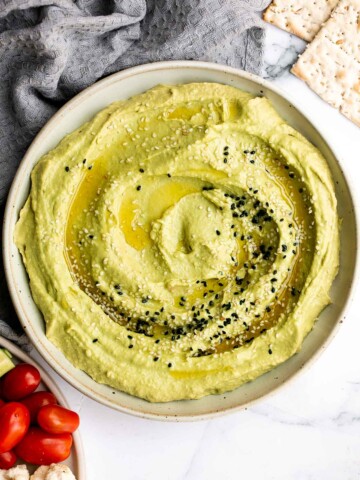
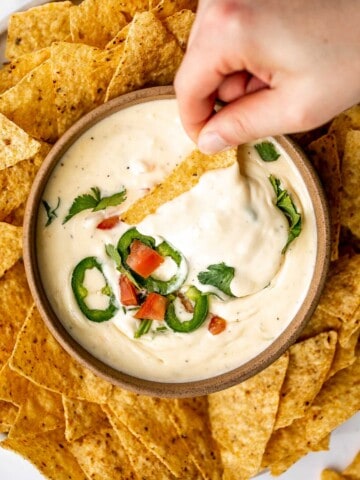
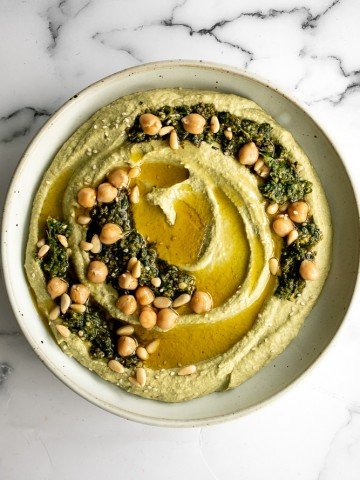
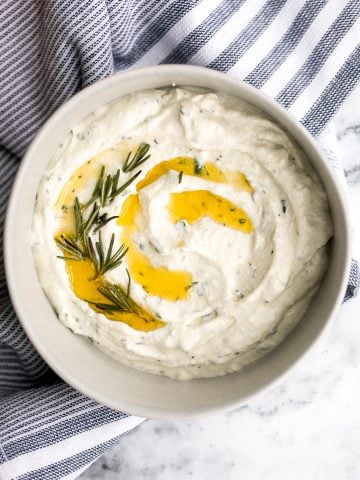
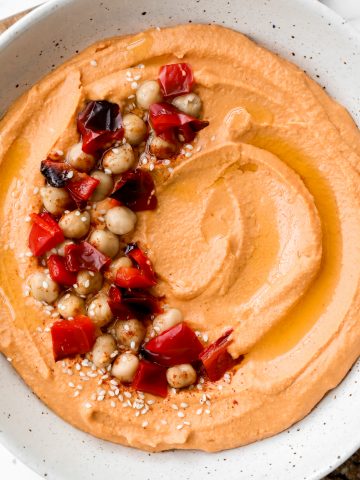
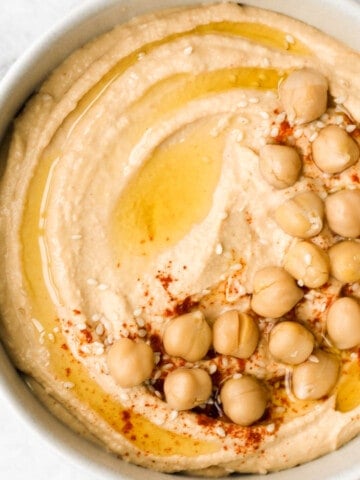
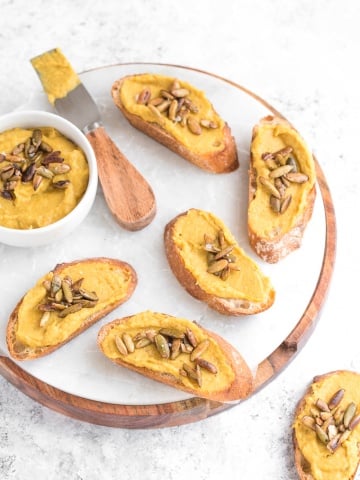
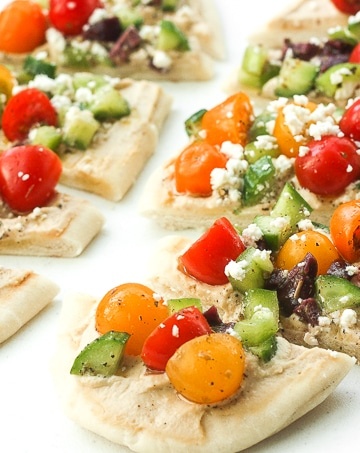
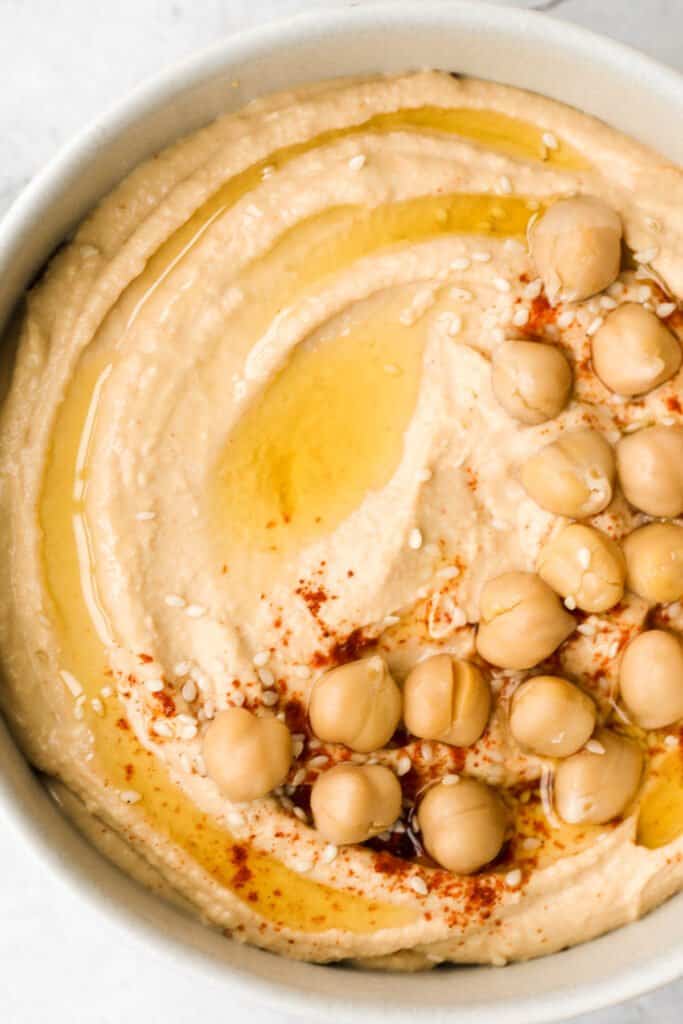
Whip up classic smooth and creamy hummus dip and serve it with veggies or crackers, or use it in a vegan hummus wrap. Hummus takes just 5 minutes to make in the blender by combining chickpeas, tahini, olive oil, lemon juice and garlic. Or add in some avocado and make avocado hummus.
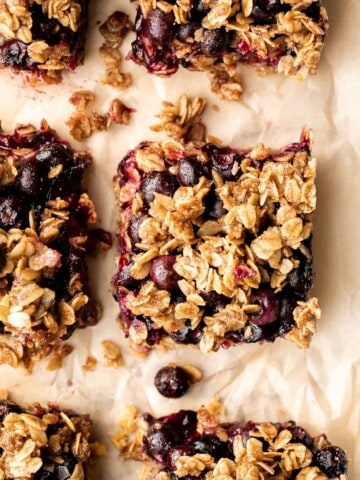
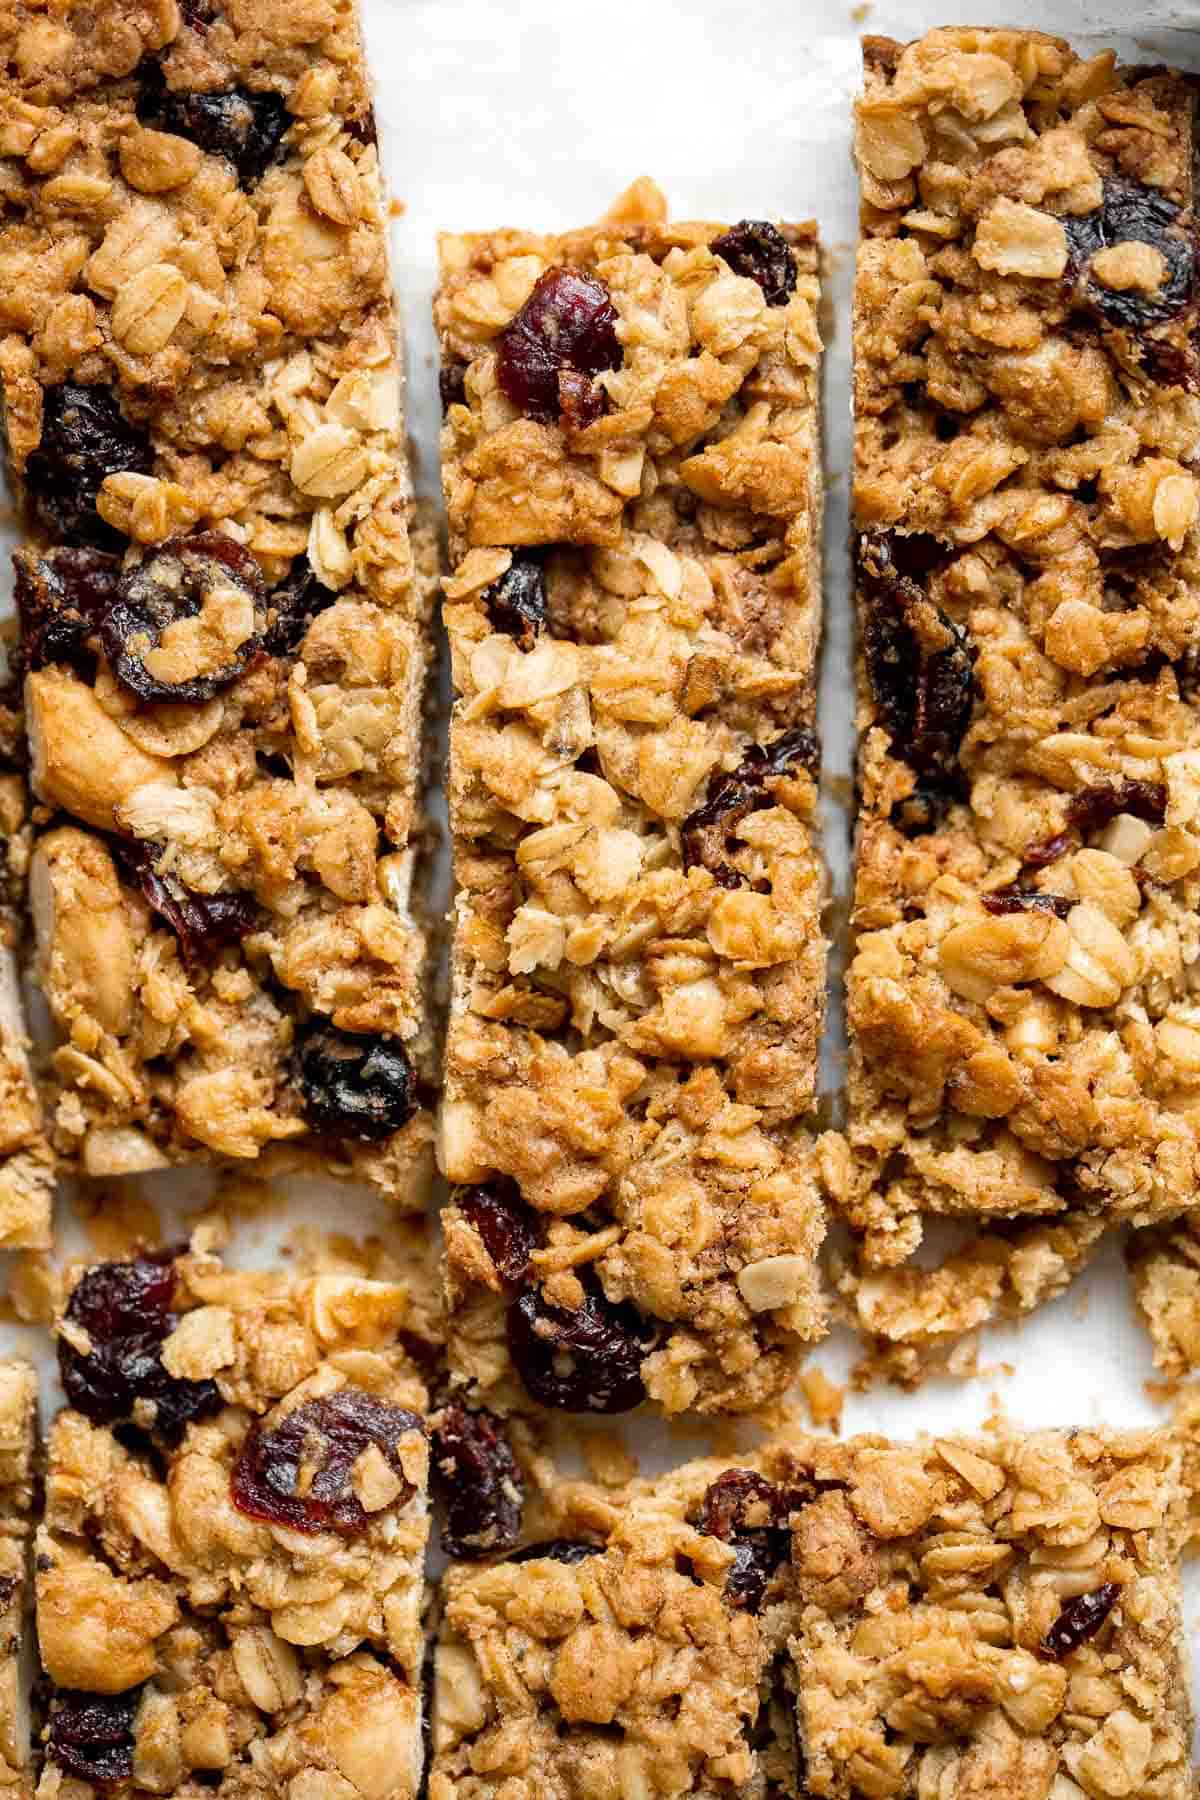
The easiest thing to fill up those lunch-boxes with are chewy almond cranberry chocolate granola bars. They're are chewy and delicious, contain real dried fruit, and made healthier with less processed sugar. For a different flavour, try almond butter granola bars or pecan toffee bars.
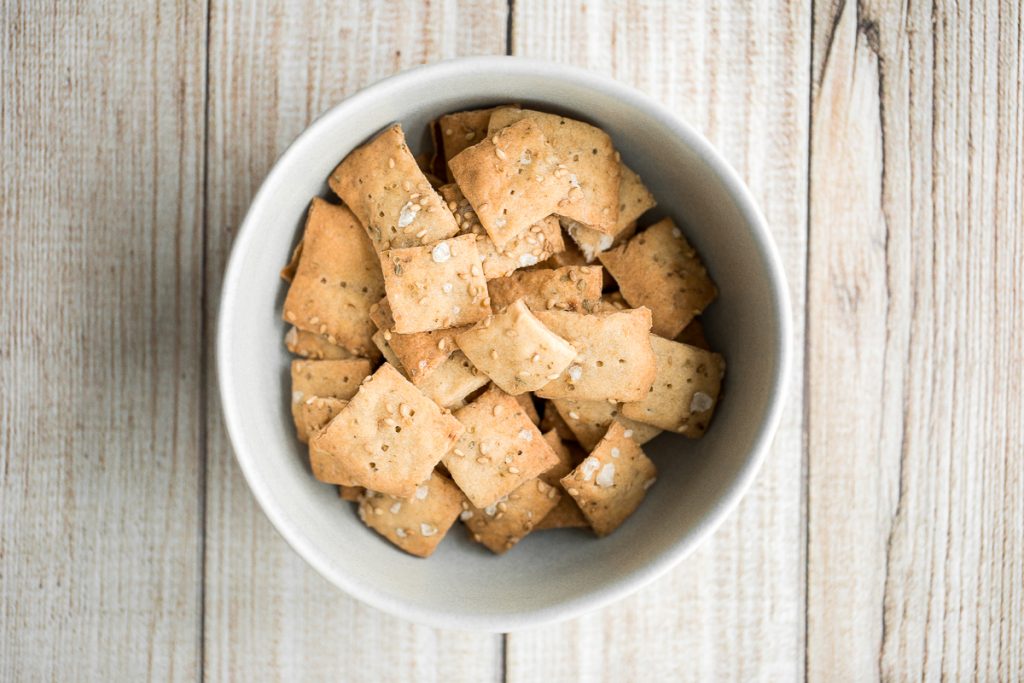
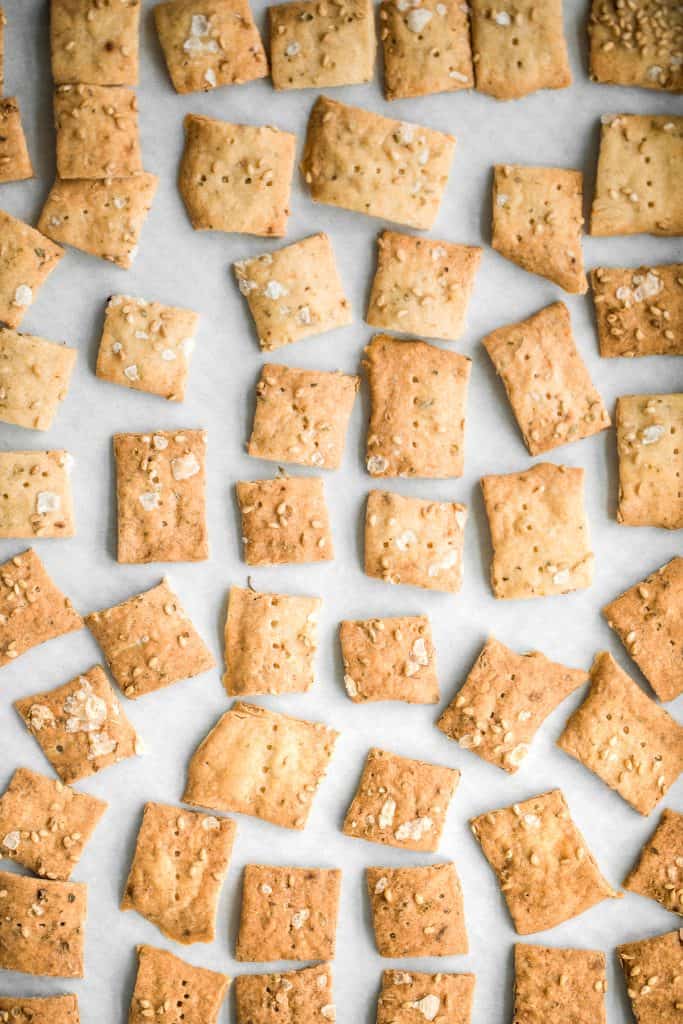
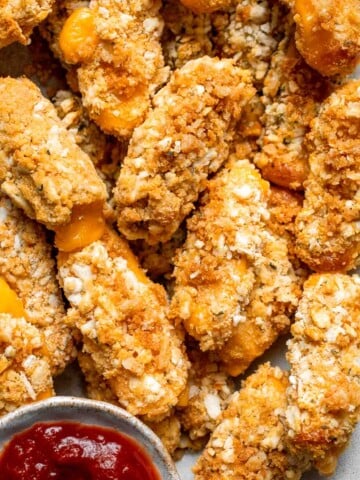
These tender, chewy homemade Pretzel Bites taste professionally made but are a beginner-friendly recipe you can easily make in the comfort of your own home.
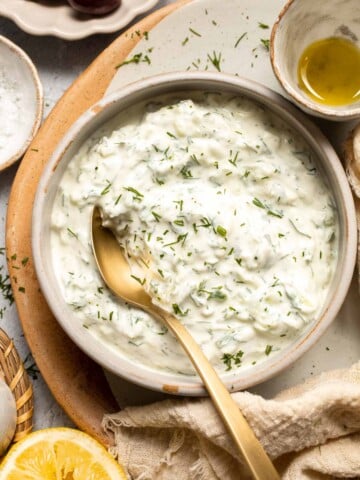
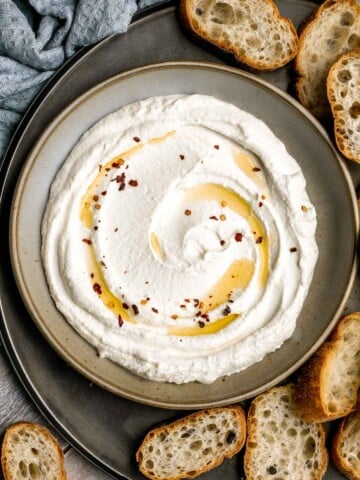
Thick and creamy homemade yogurt is so easy to make at home with just 2 ingredients, a heavy pot, and just a few minutes of actual hands on prep work.

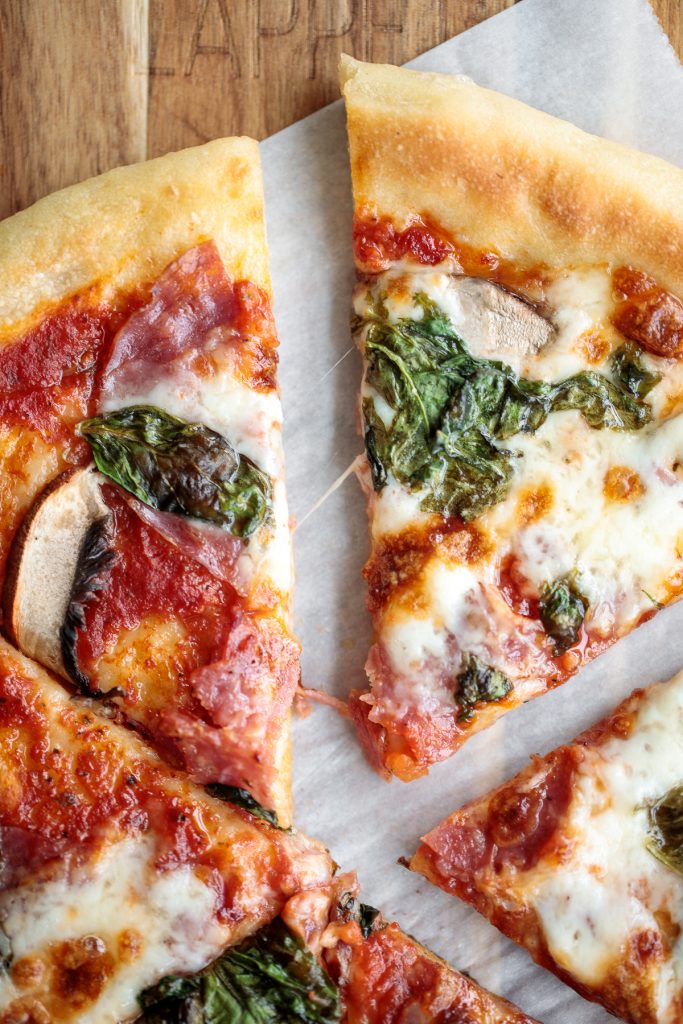
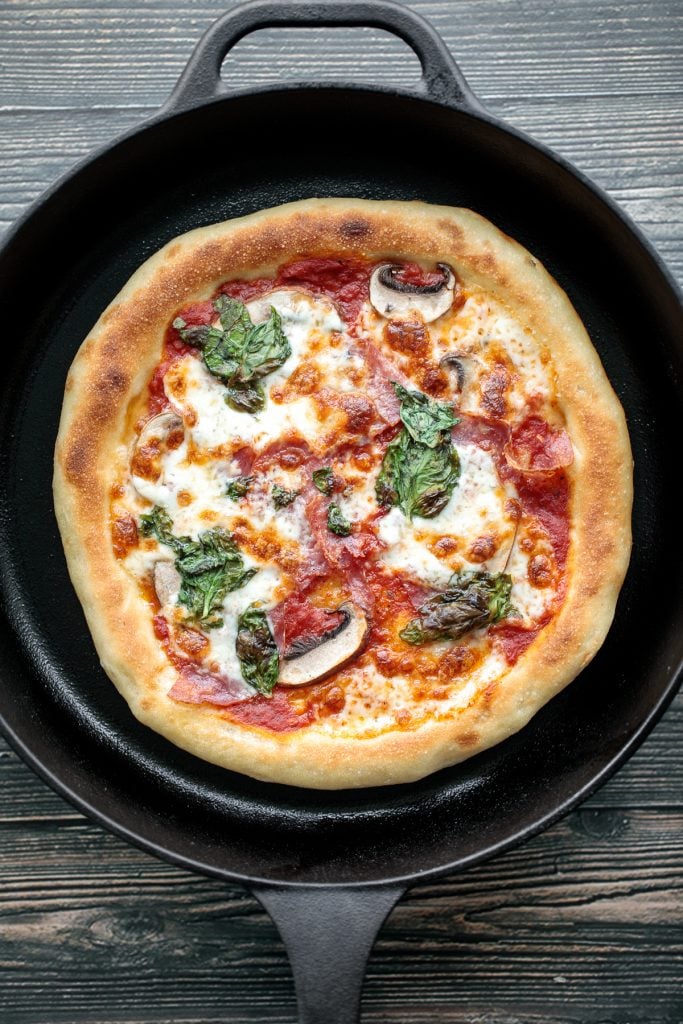
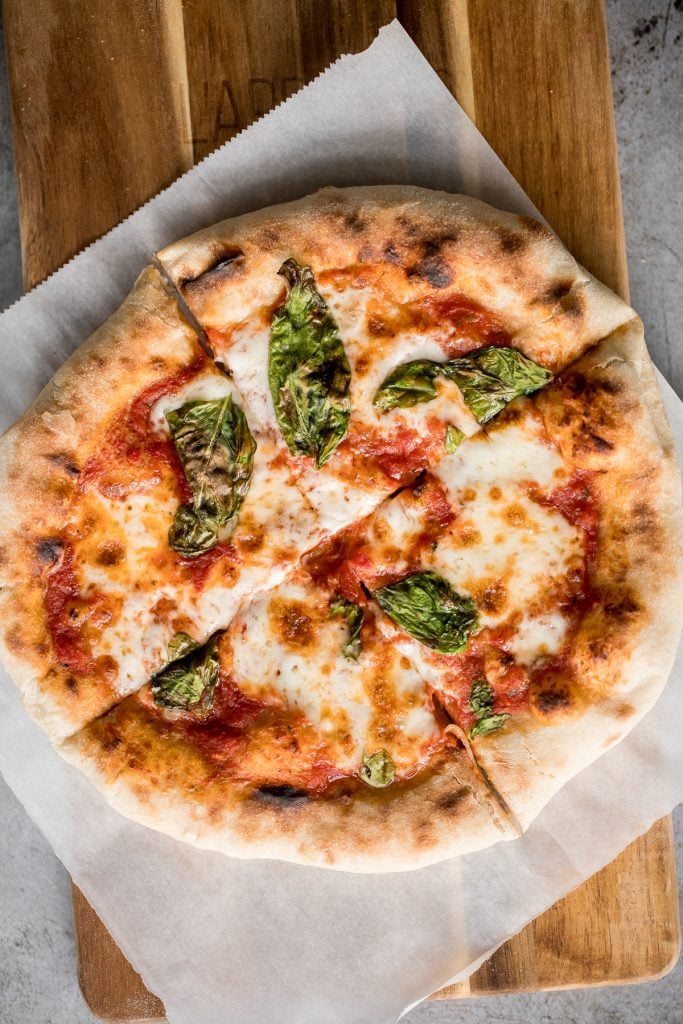
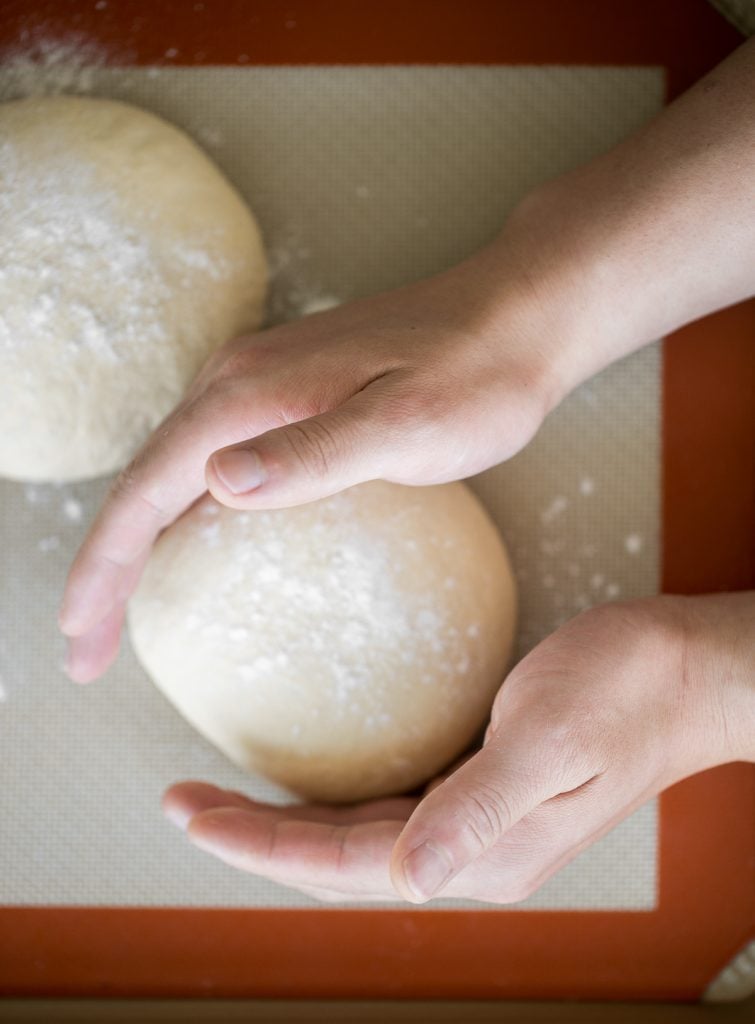
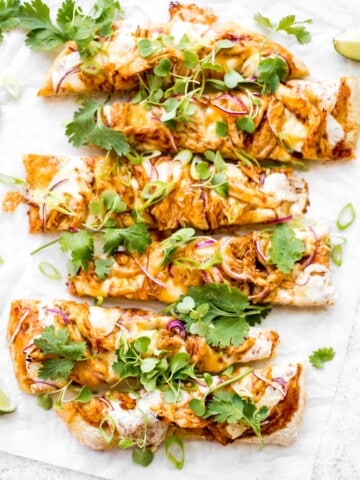
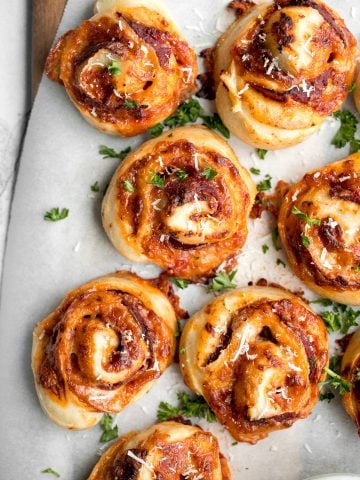
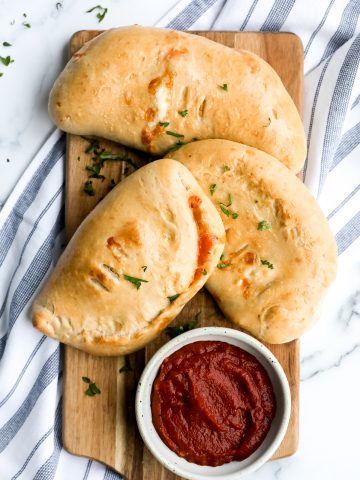
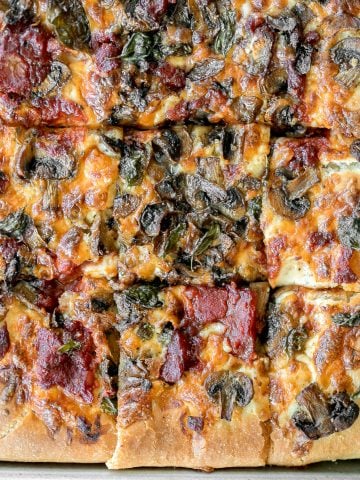
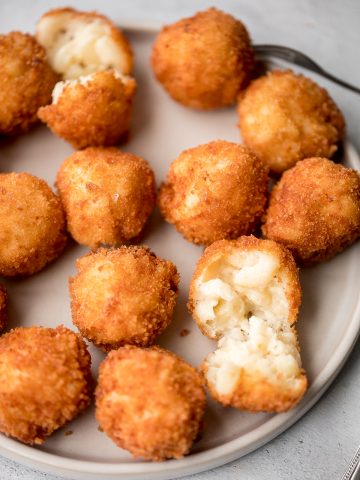
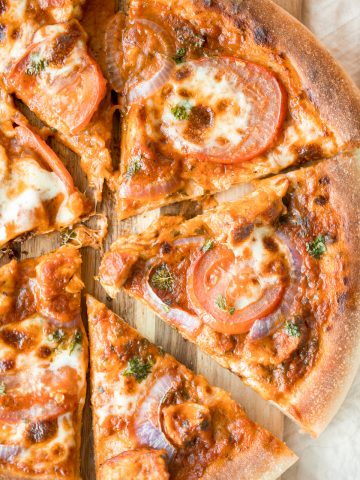
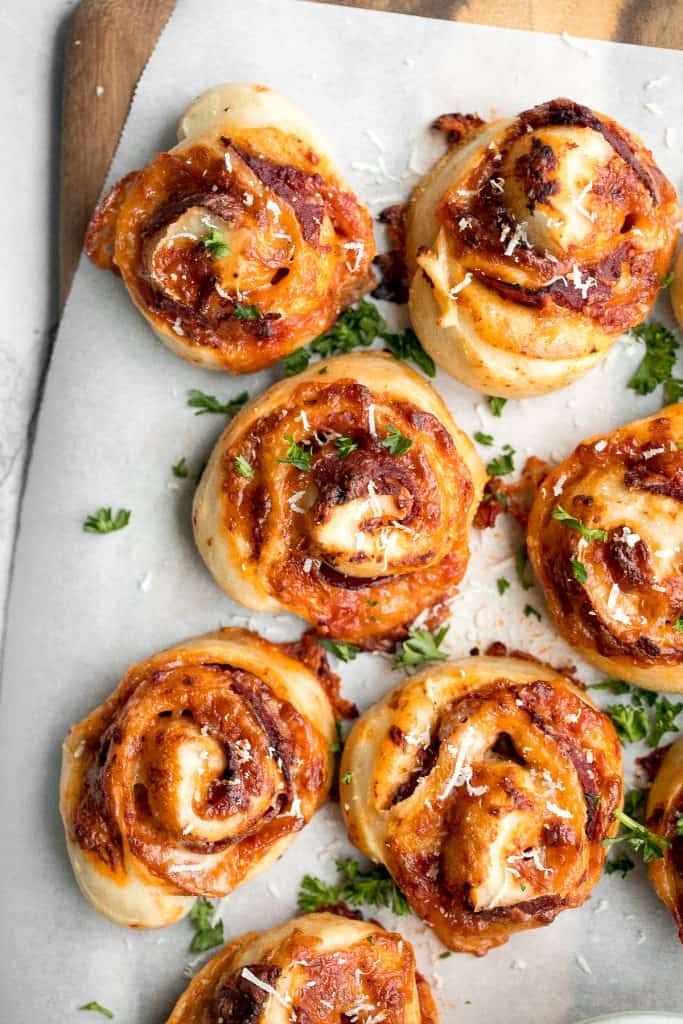
Easy pepperoni pizza rolls are crispy on the bottom, tender and chewy inside, packed with pepperoni and cheese, and baked until bubbly.
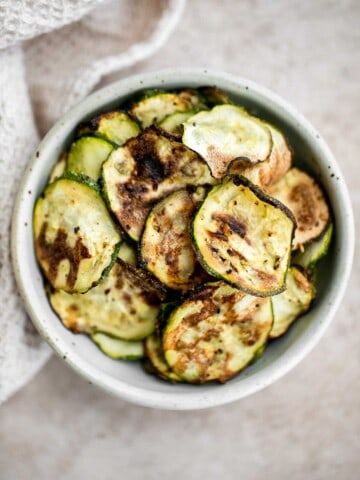
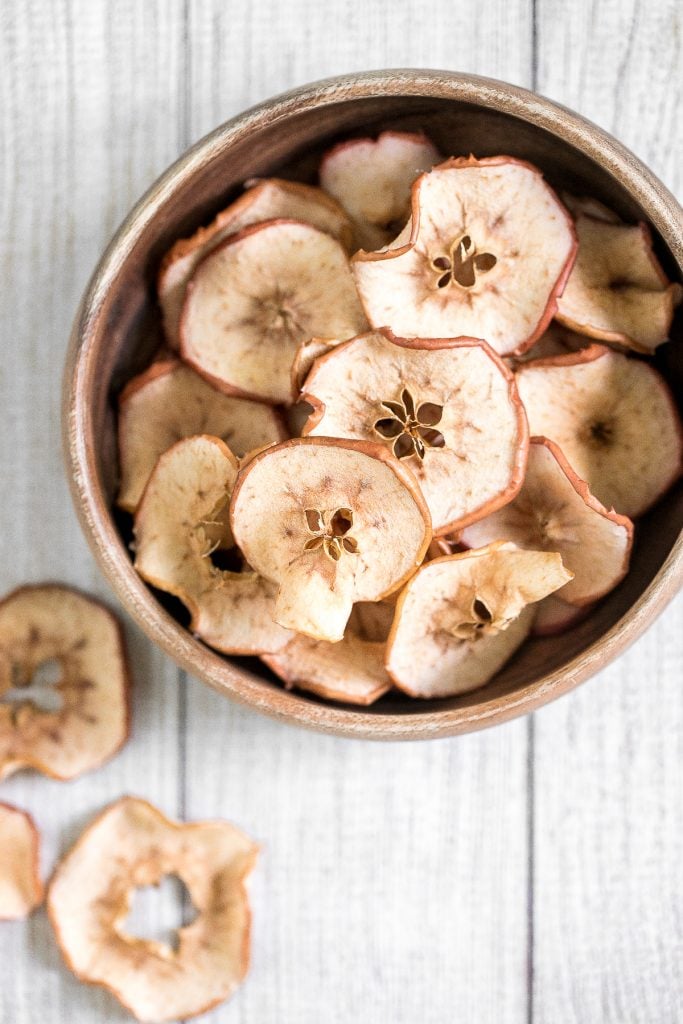
One-ingredient homemade baked apple chips are healthy, light, crispy and crave-worthy. Plus, unlike most store-bought chips, these contain no added sugar.
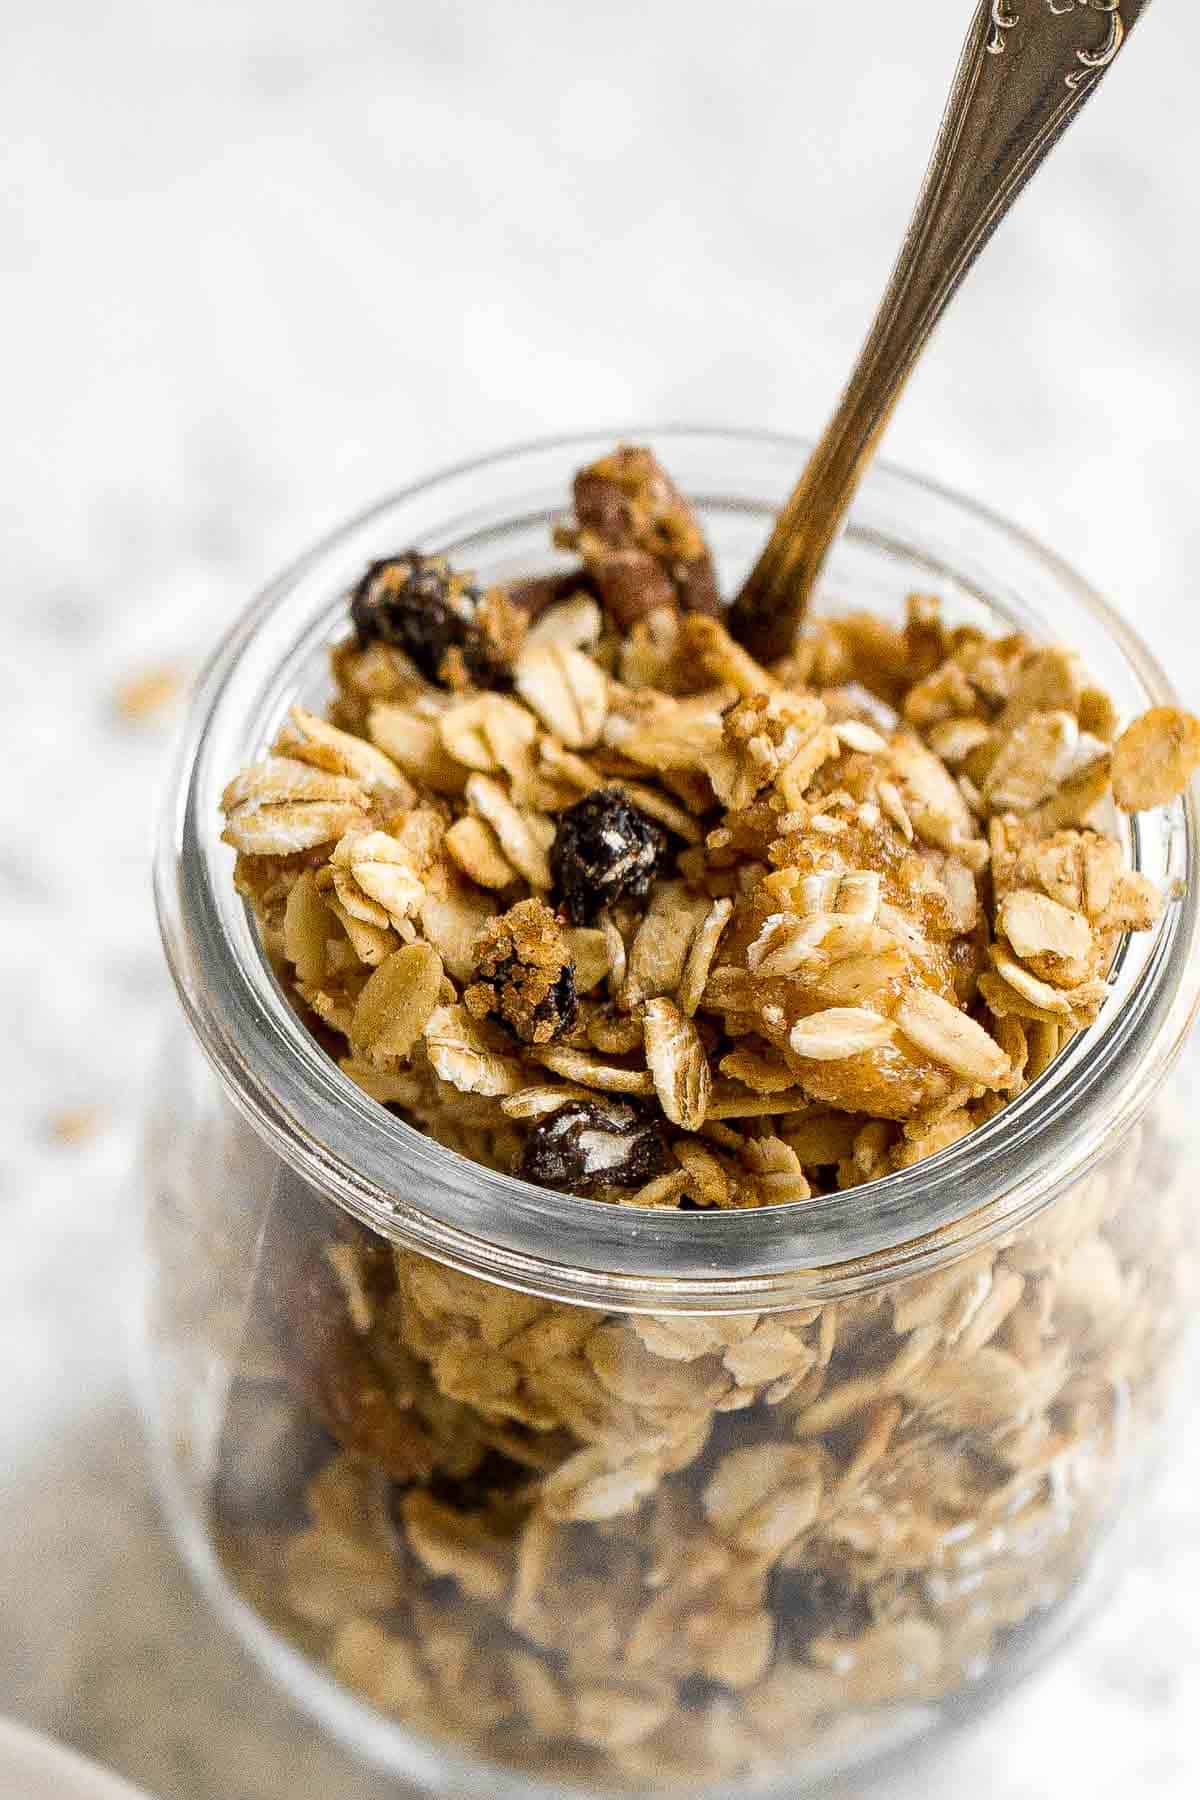
Make your mornings a little easier by prepping this delicious and easy cinnamon apple granola aka apple pie granola ahead of time and I promise you'll never buy store-bought again. Some of my other favourite granolas to make are coconut maple walnut granola and almond pecan granola.
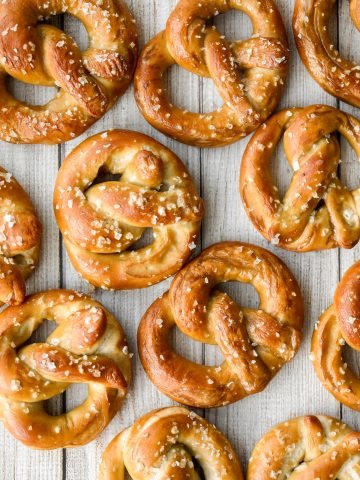
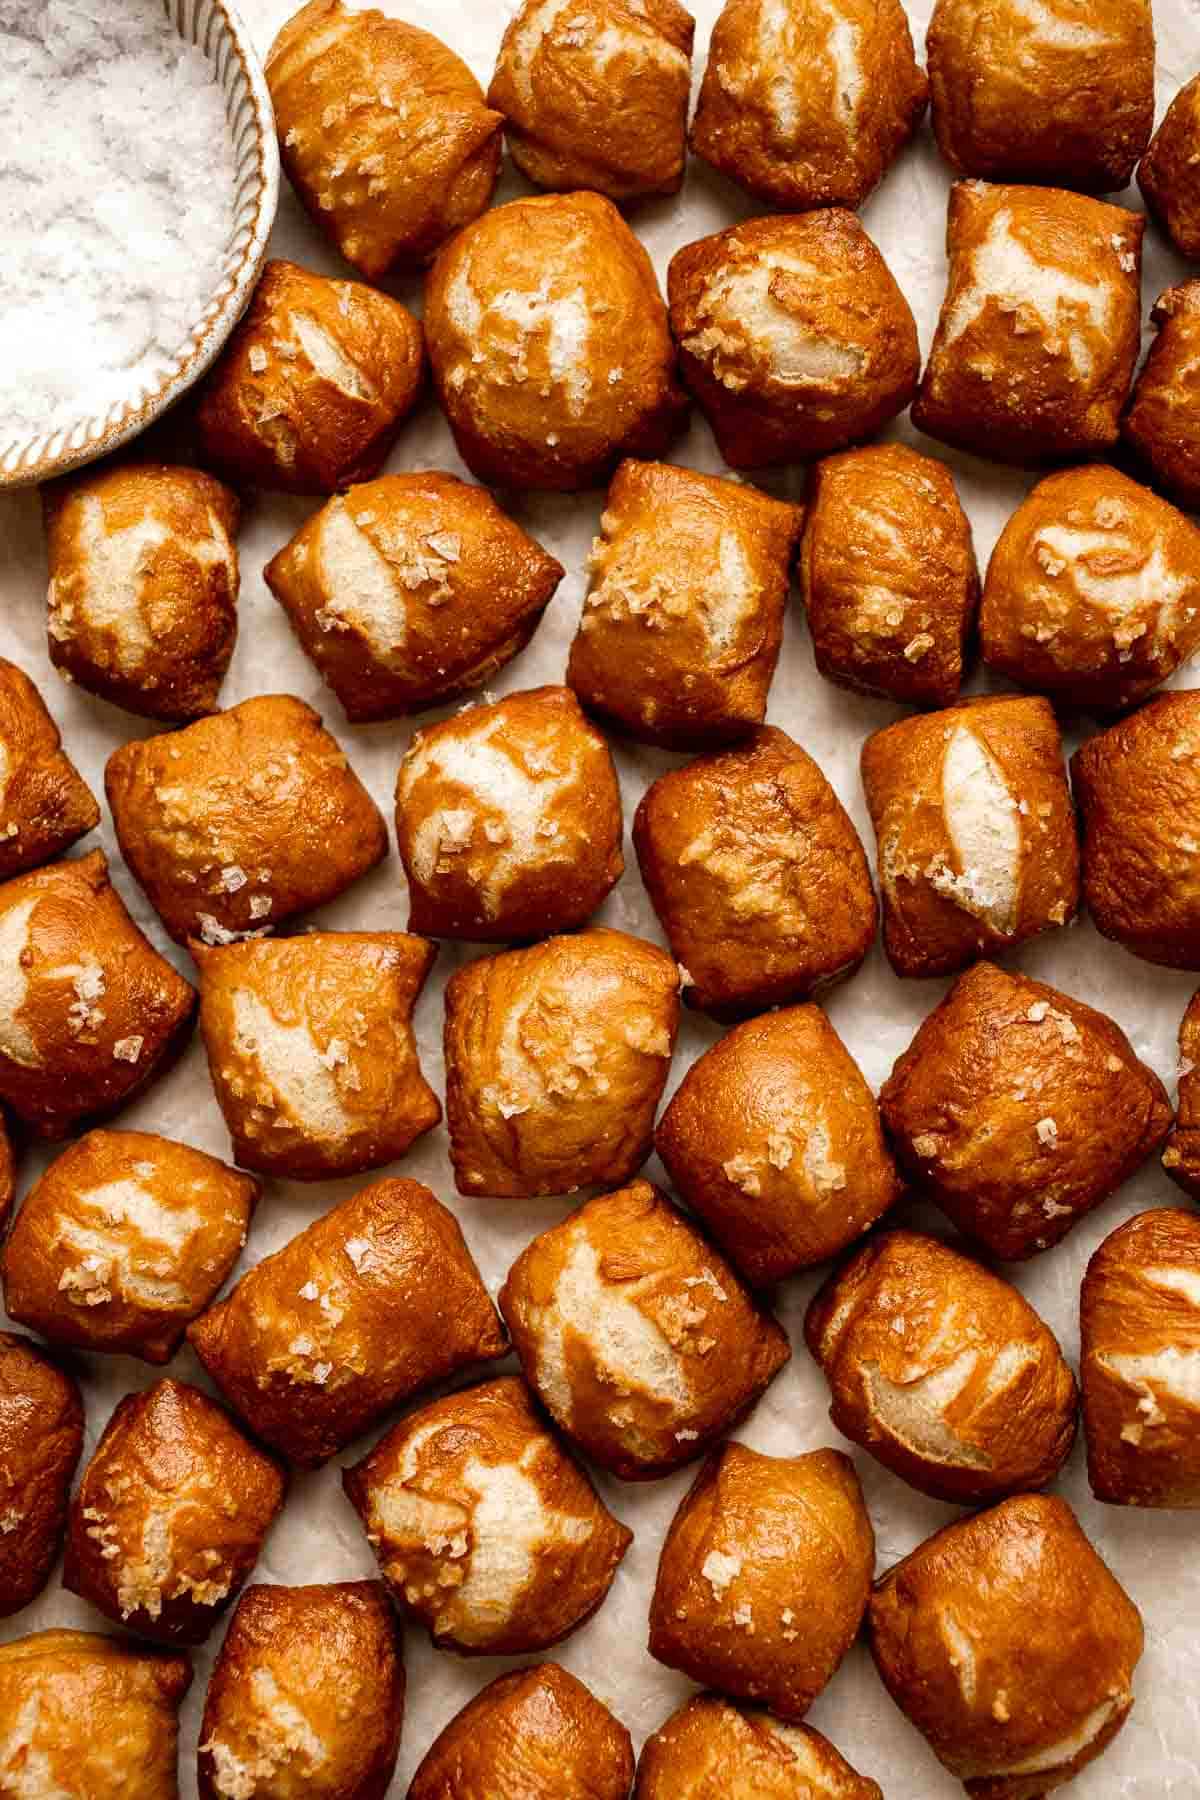
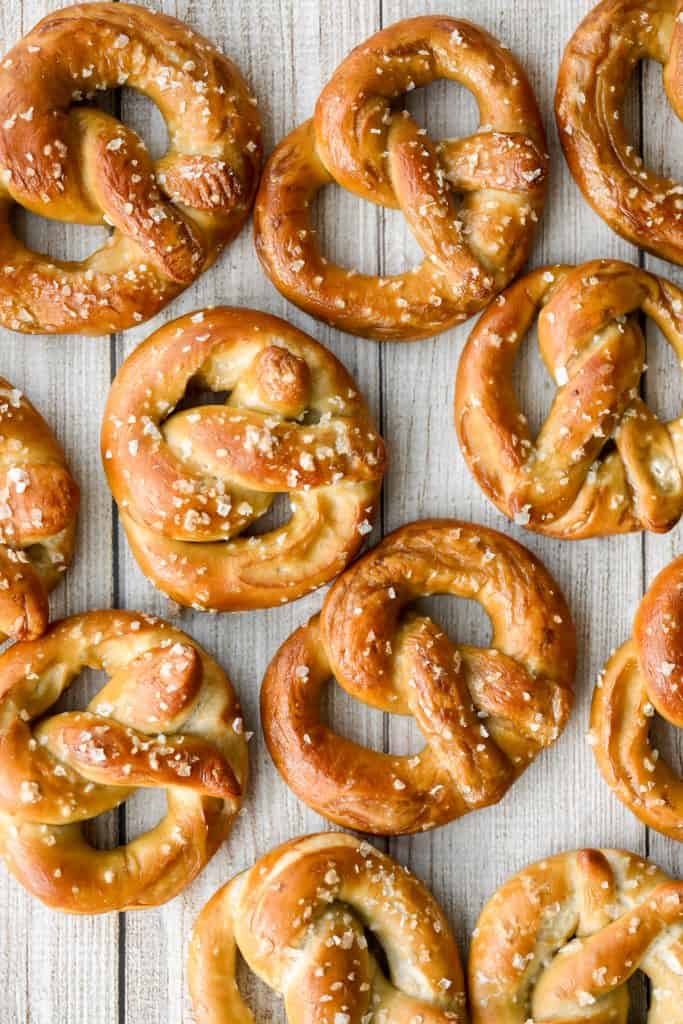
The best quick and easy salted soft pretzels are buttery, salty, and so delicious. They are golden brown and chewy on the outside, yet warm and soft inside.
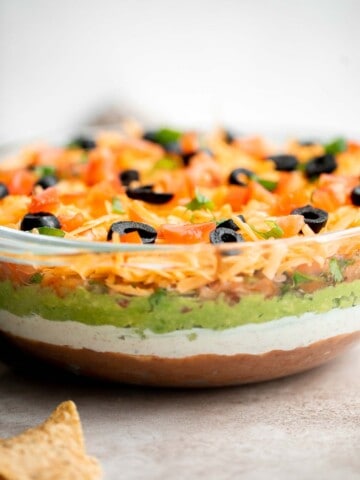
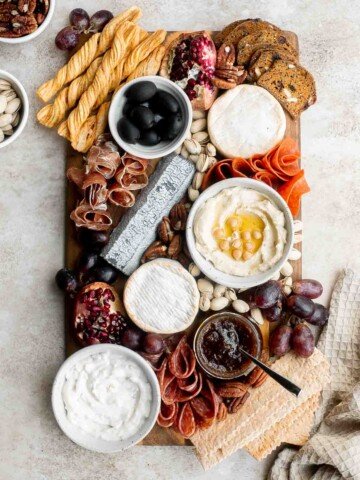
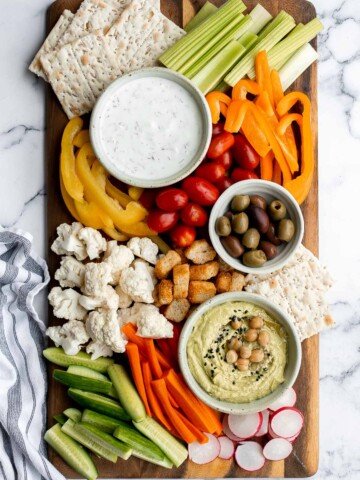
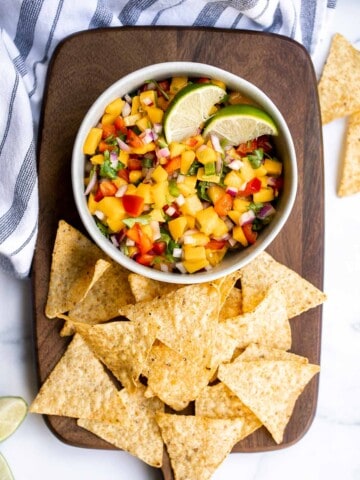
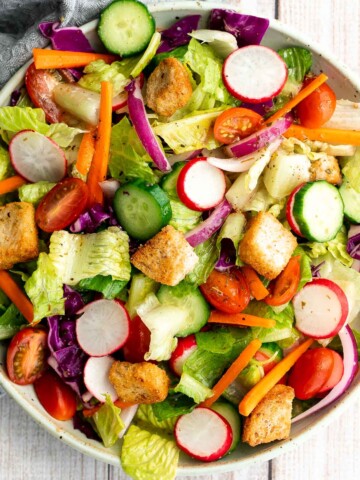
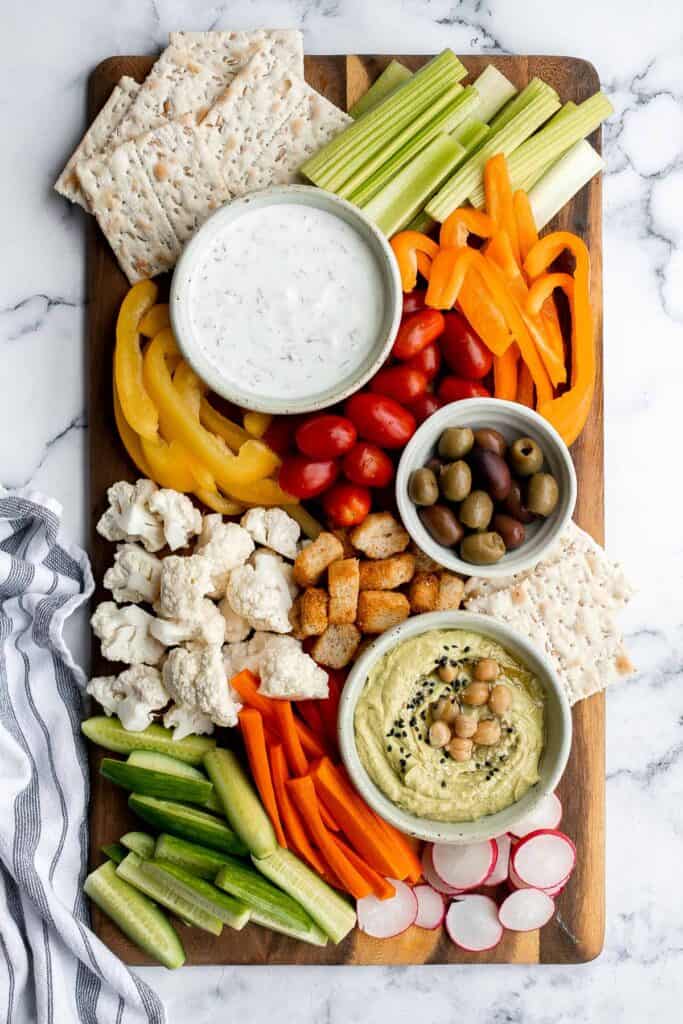
This homemade veggie tray is a quick easy healthy snack or appetizer to make for your next party, with a variety of colorful vegetables and delicious dips.
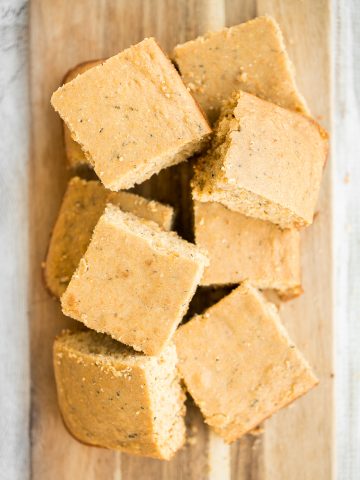
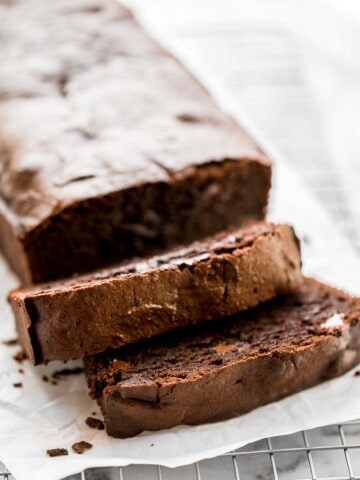
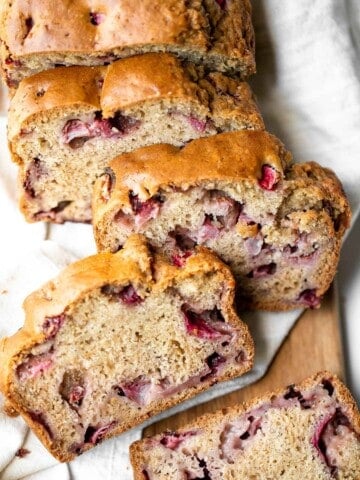
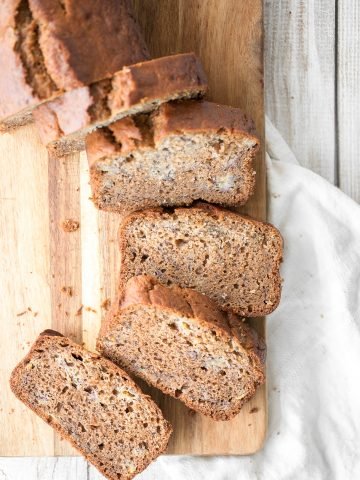
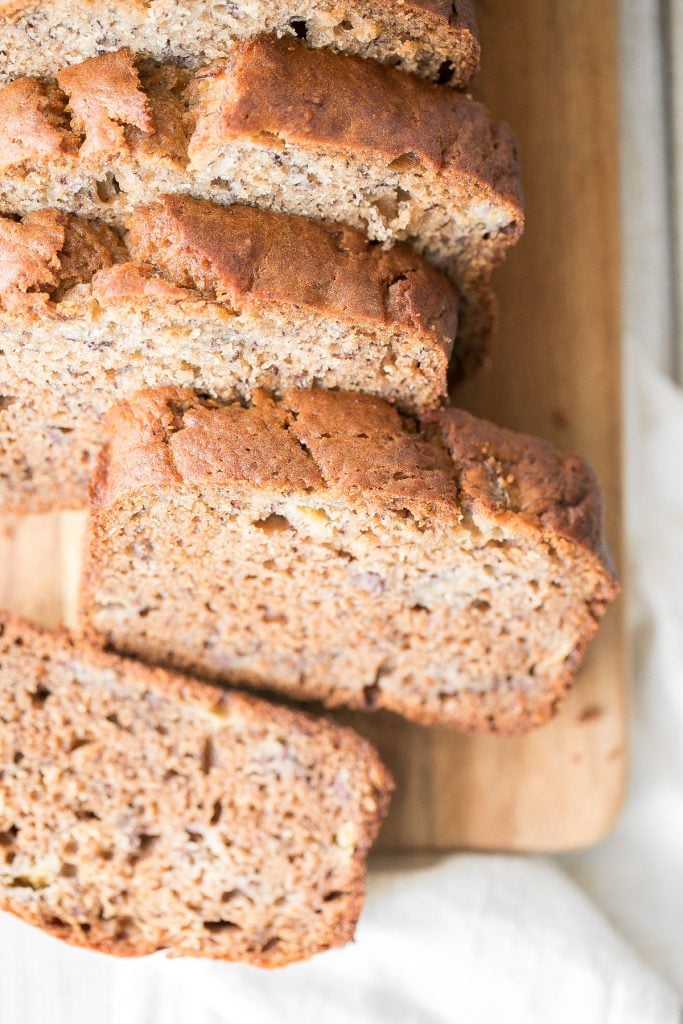
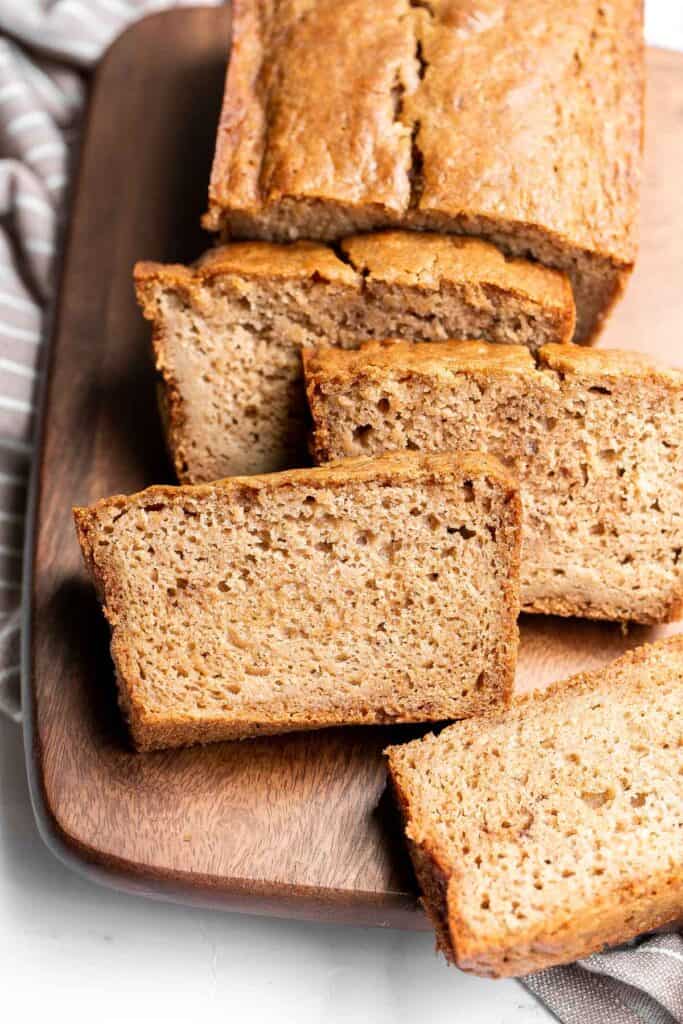
Healthy banana bread is delicious and moist and contains no refined sugar or butter. Quick and easy to make with 10 minutes prep and few pantry staples.
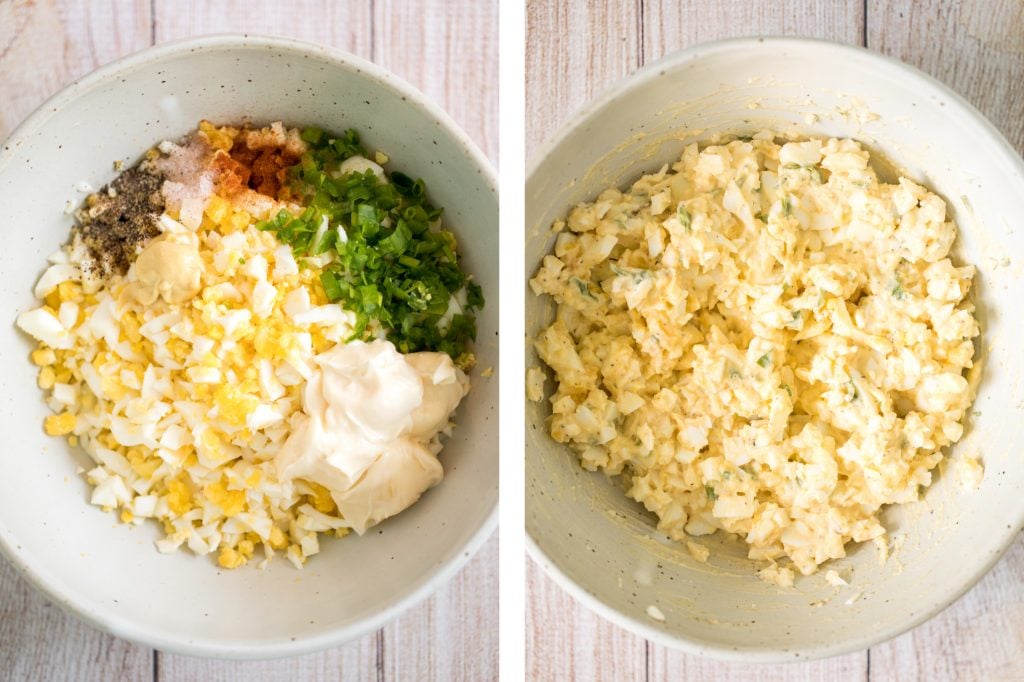
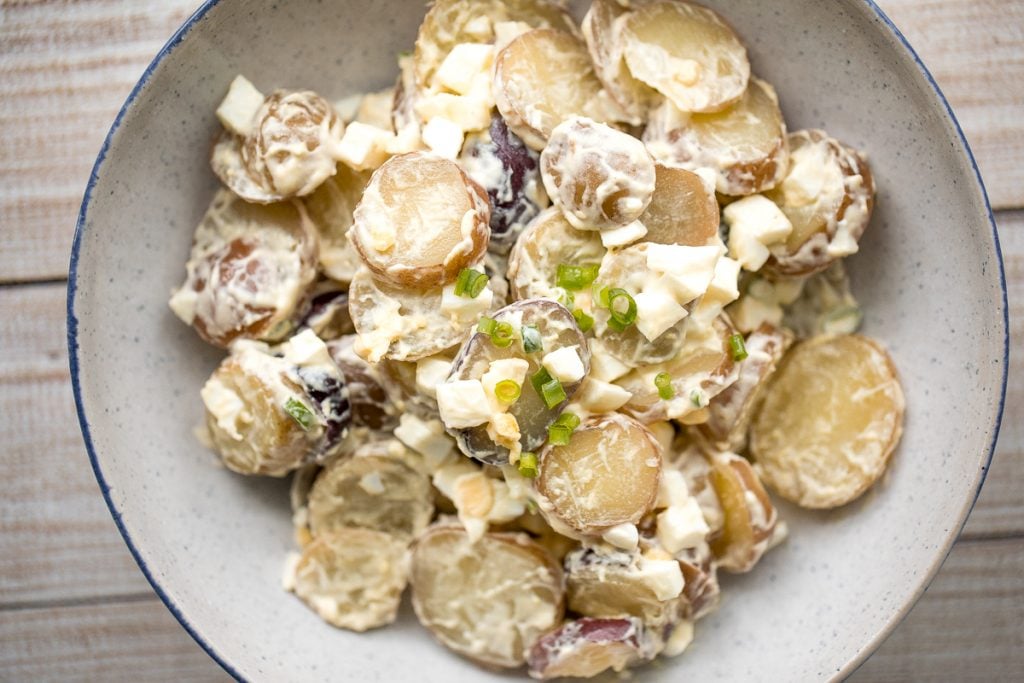
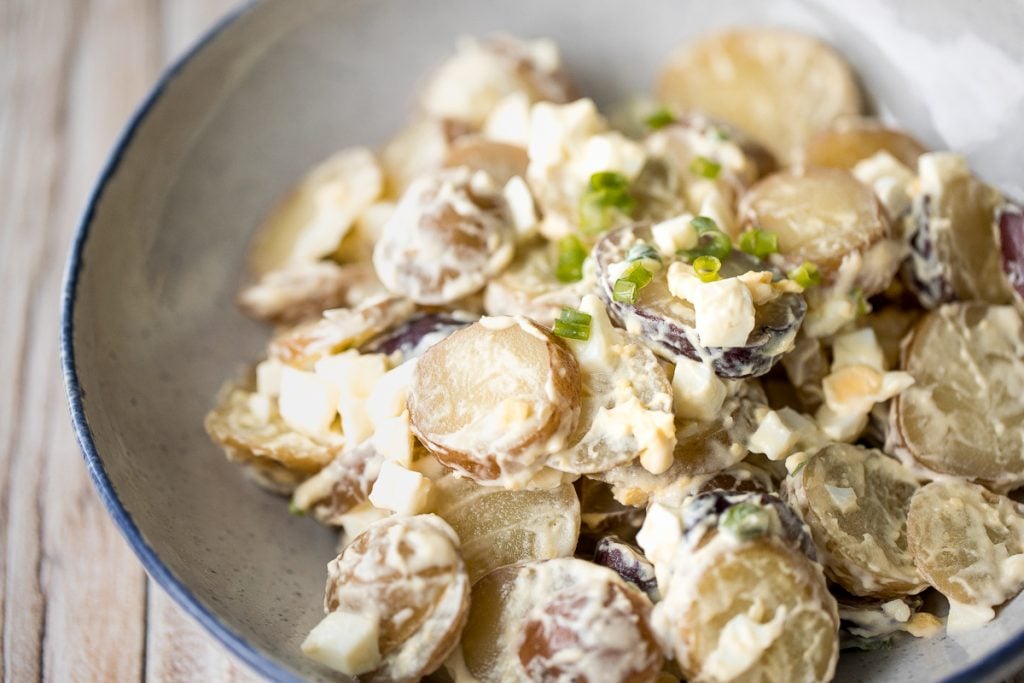
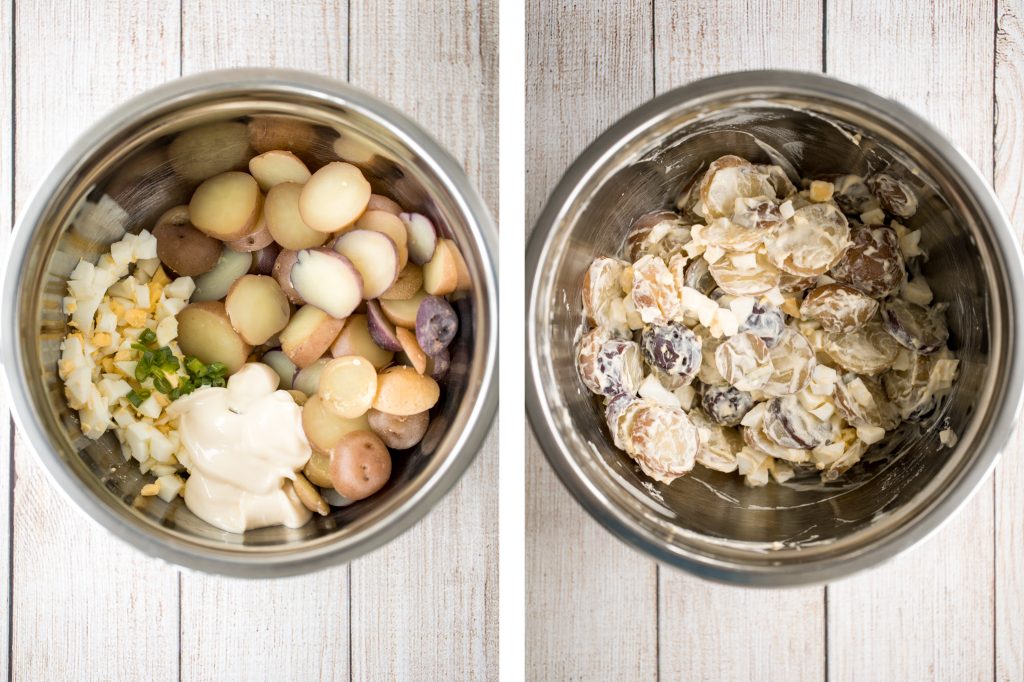
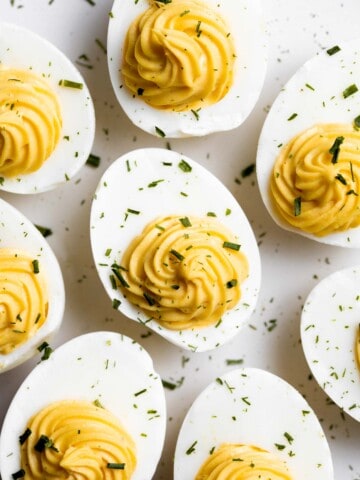
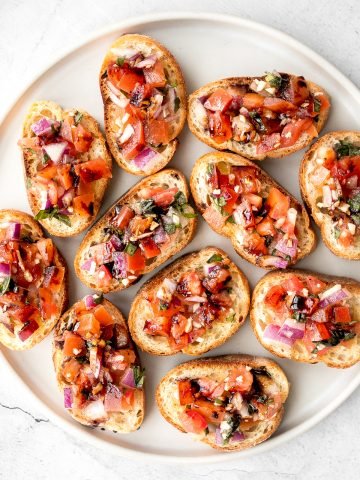
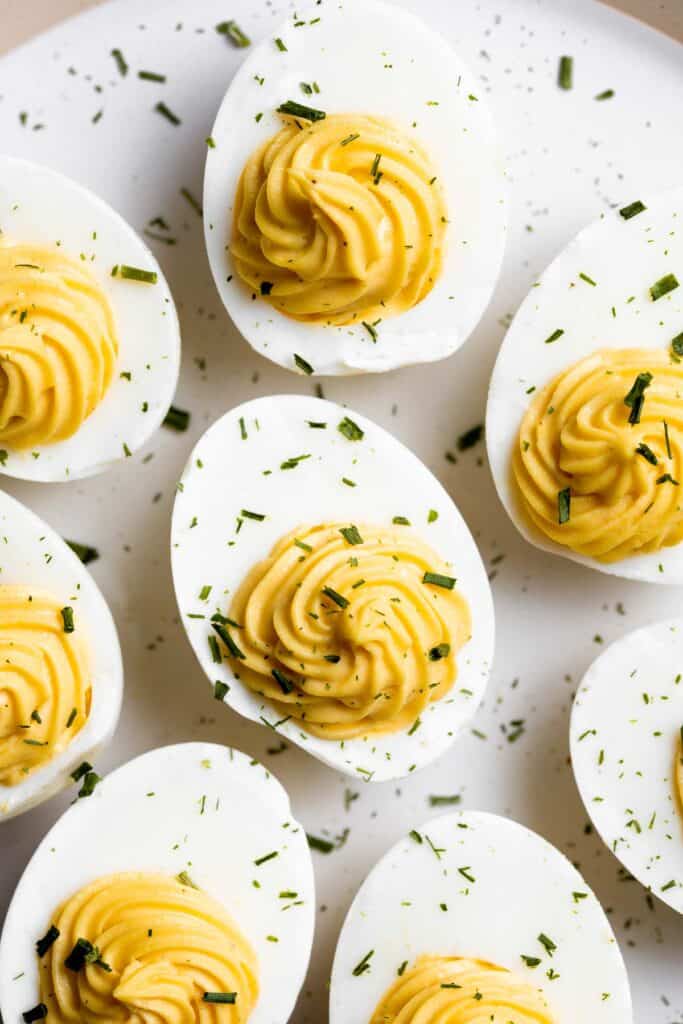
Classic deviled eggs are a simple, easy, and healthy appetizer to make when you need something quick for brunch, picnics, barbecues, potlucks, or Easter.
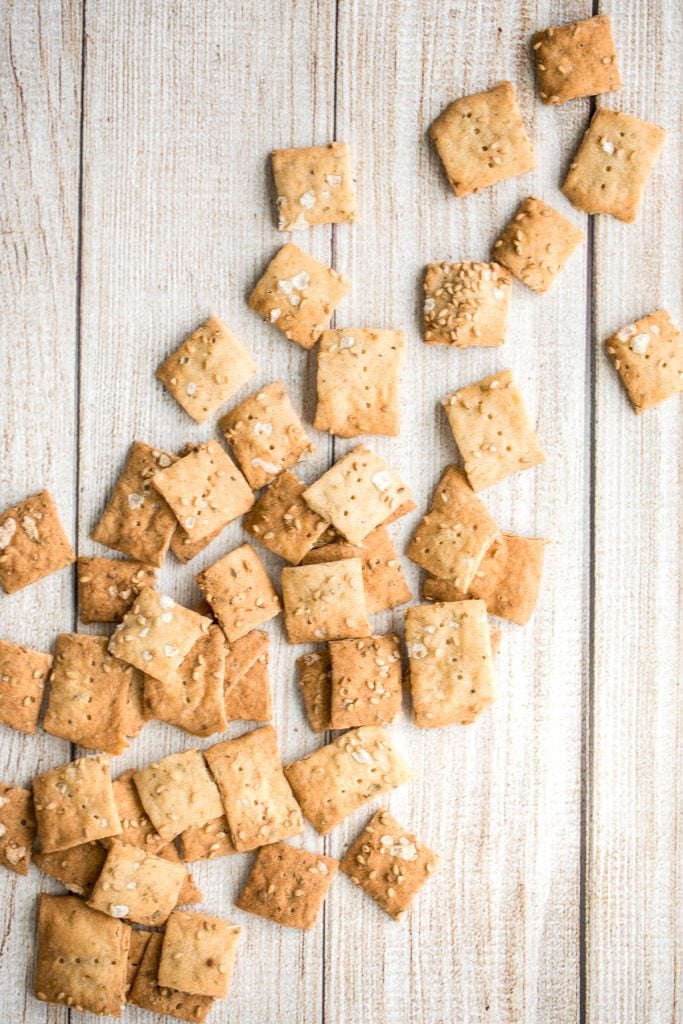
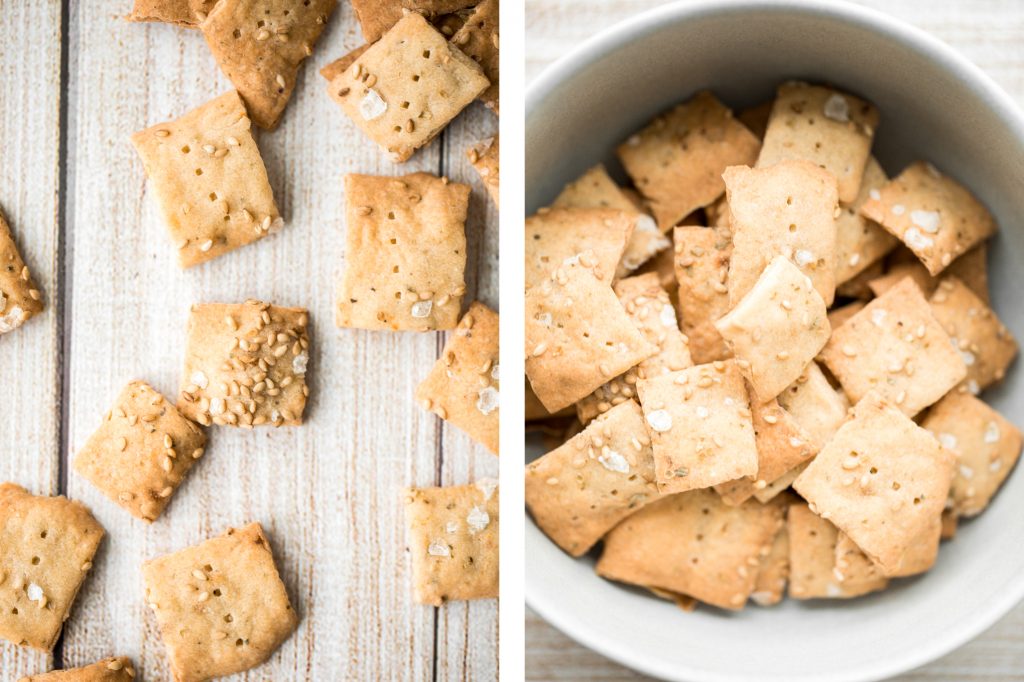
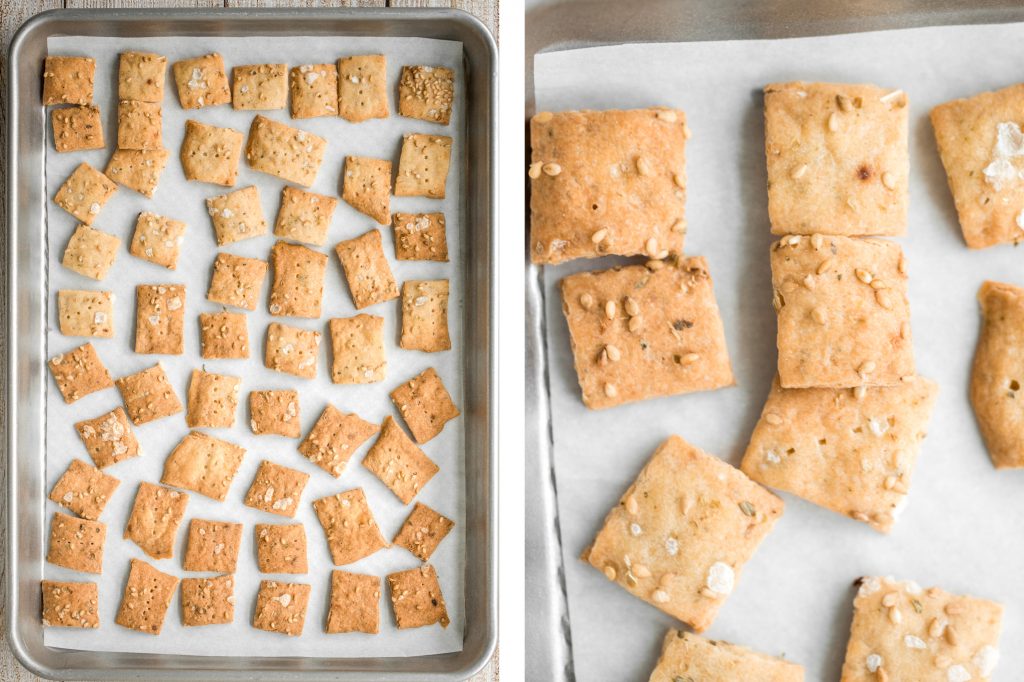
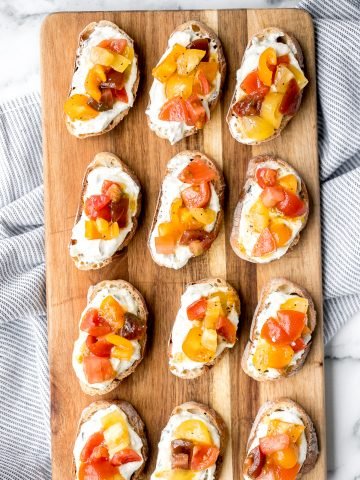
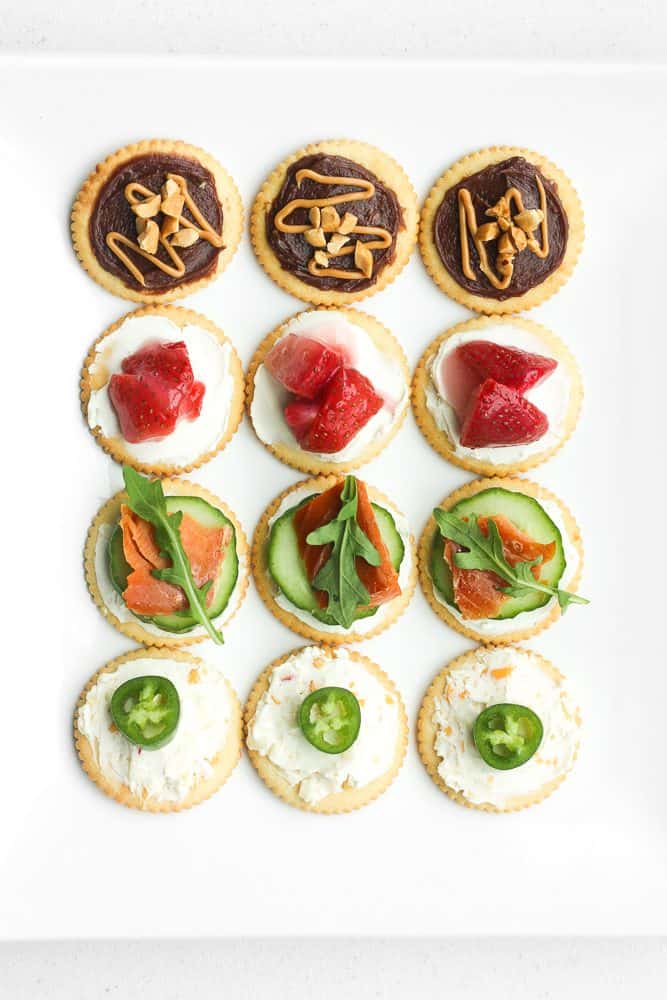
Four Quick and Easy Ritz Crackers
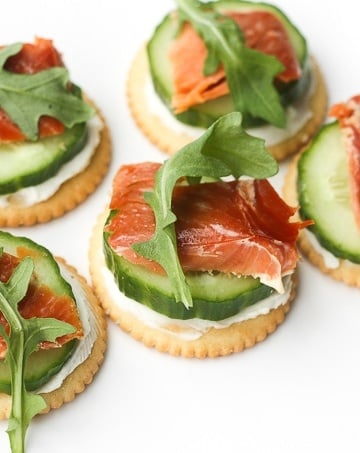
Four super fun, quick and easy RITZ cracker recipes with both sweet and savoury options including my favourite smoked salmon and cheese cracker bites.
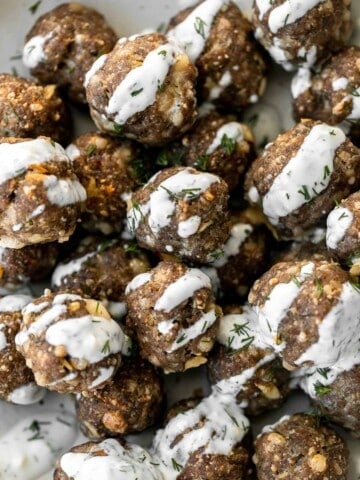
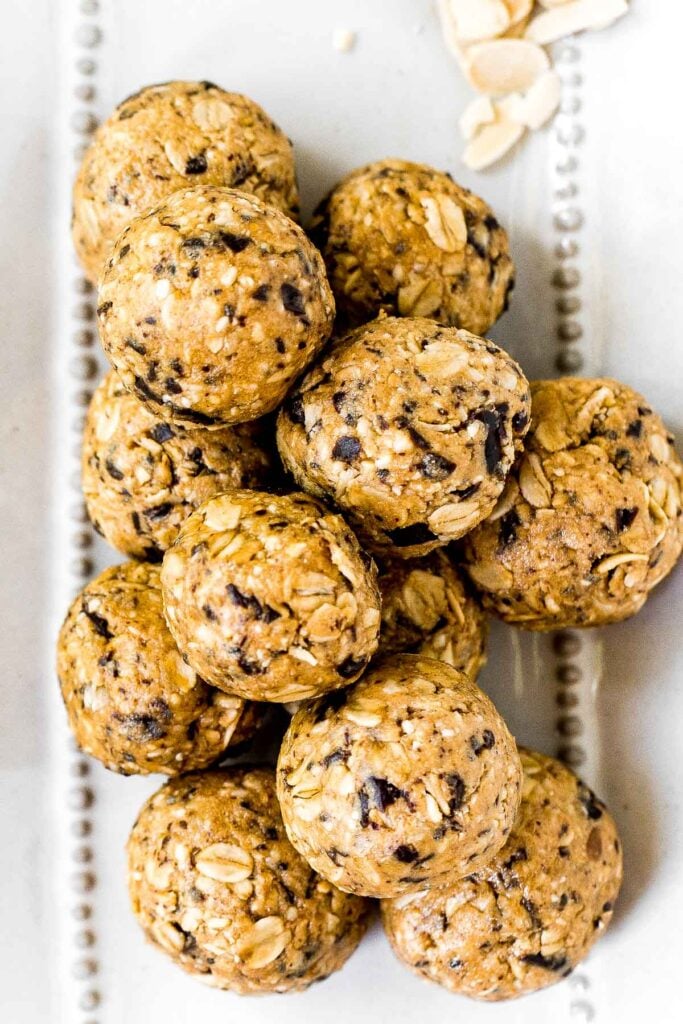
No Bake Protein-Packed Energy Bites
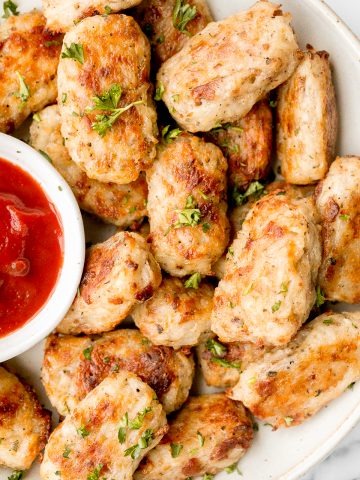
No bake protein-packed breakfast energy bites are chewy, easy to make, delicious, and loaded with healthy nutrients. Perfect for breakfast or as a snack.
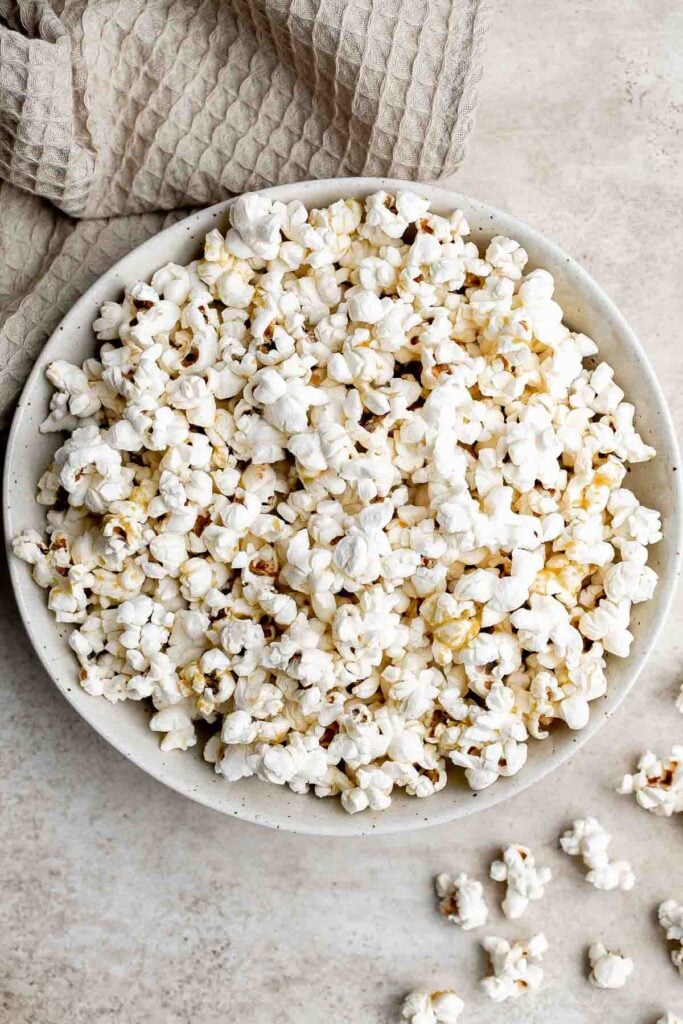
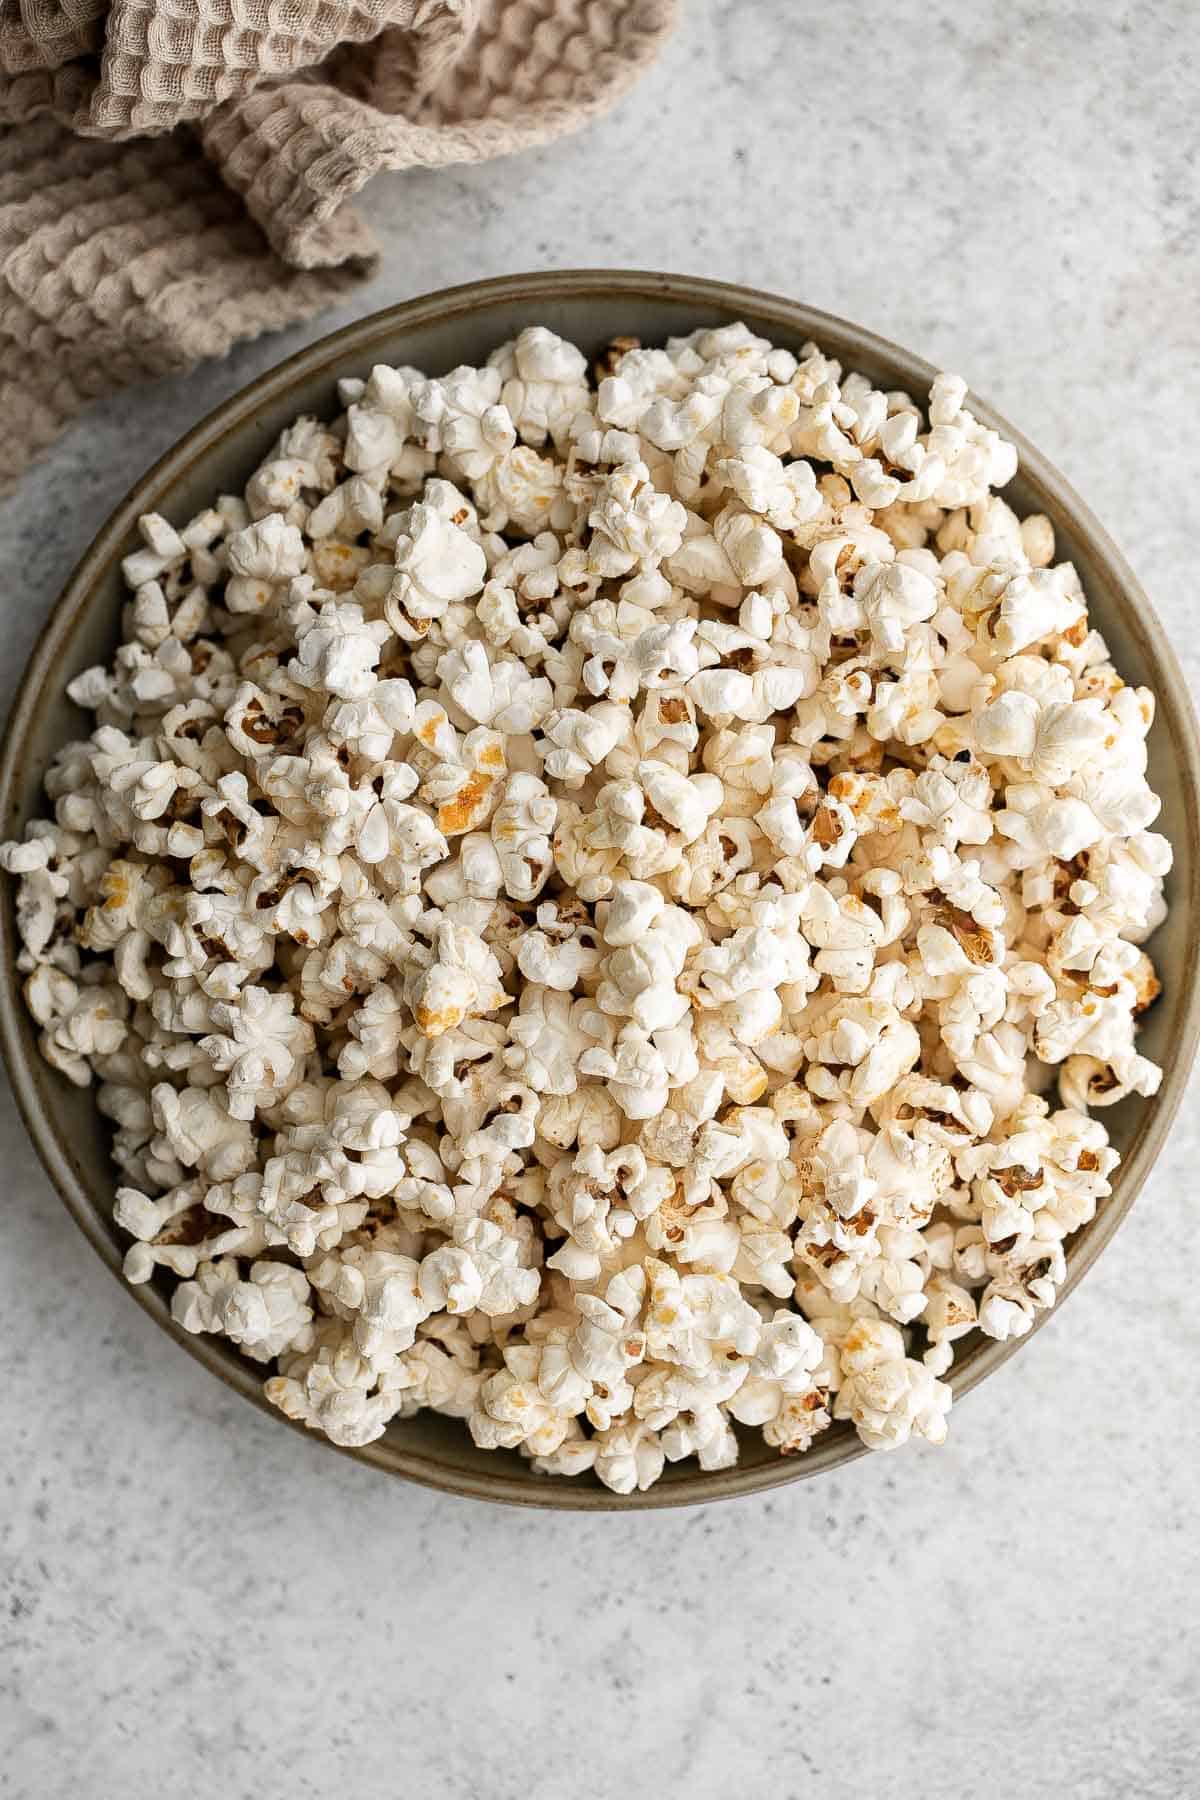
Homemade popcorn from scratch is quick and easy to make, a delicious and healthy snack, and is completely customizable with your favorite seasonings.
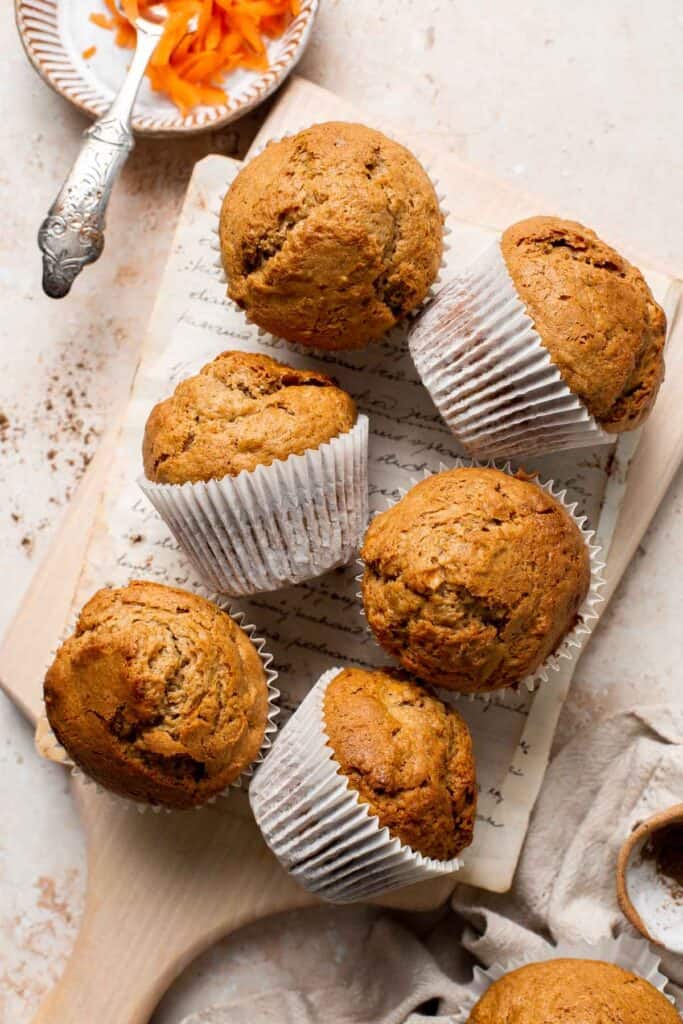
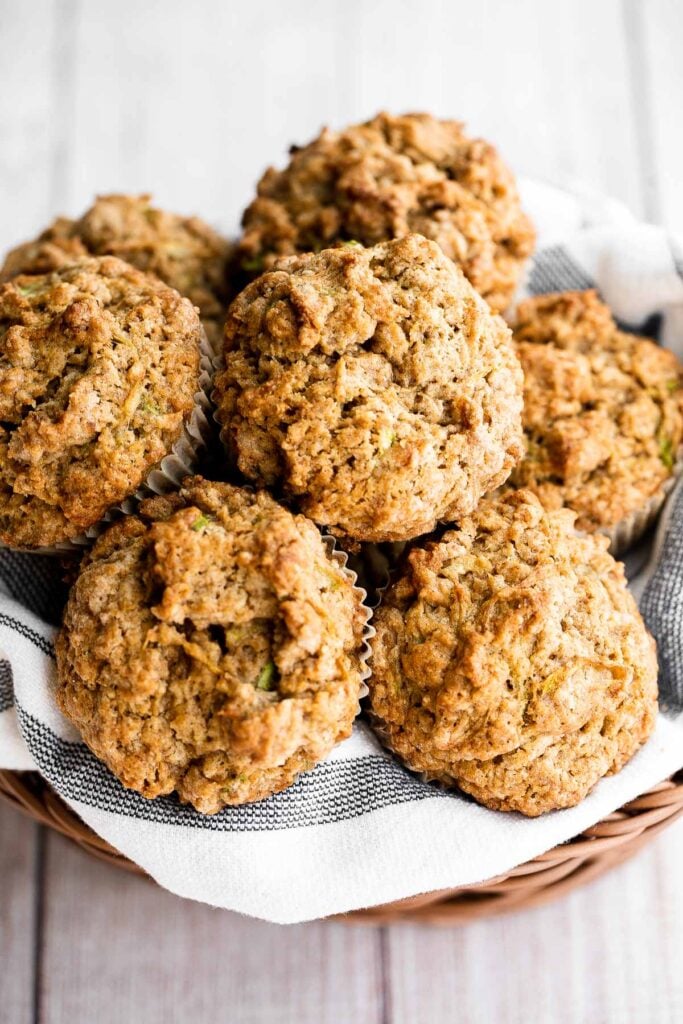
Carrot cake muffins are moist, light, chewy and full of carrots which means breakfast this week is healthy! Carrot muffins are great for meal prep too.
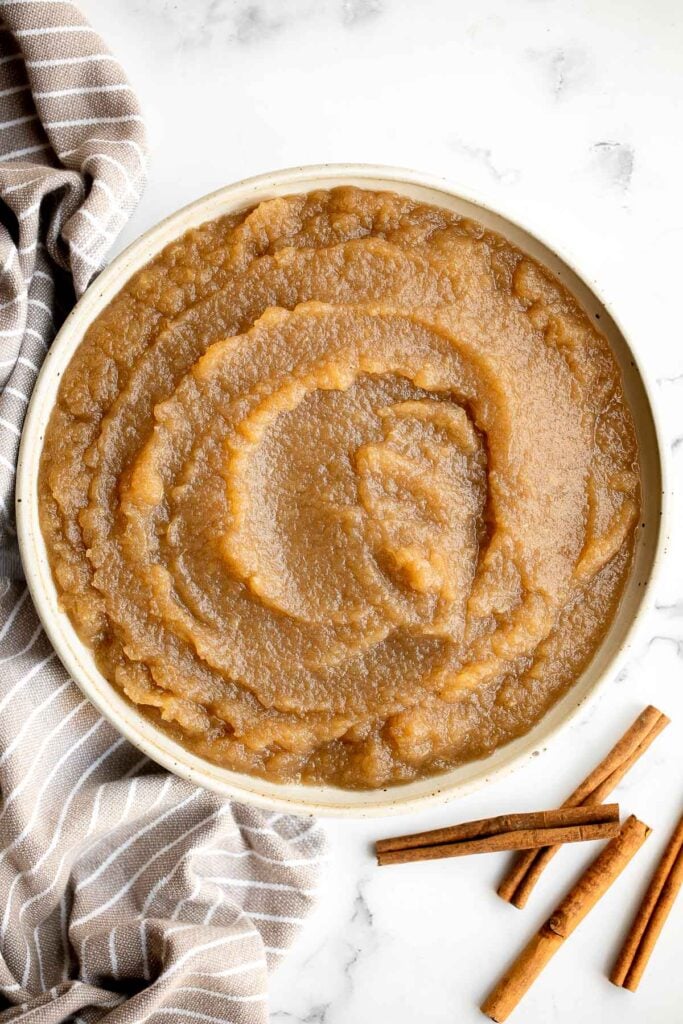
Homemade applesauce is a quick and easy fall treat with just 3 ingredients and very little time and effort. Serve it as a healthy snack or dessert.
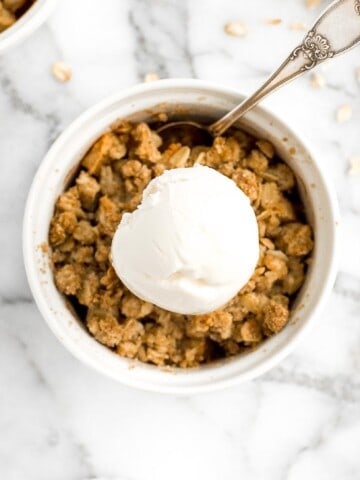
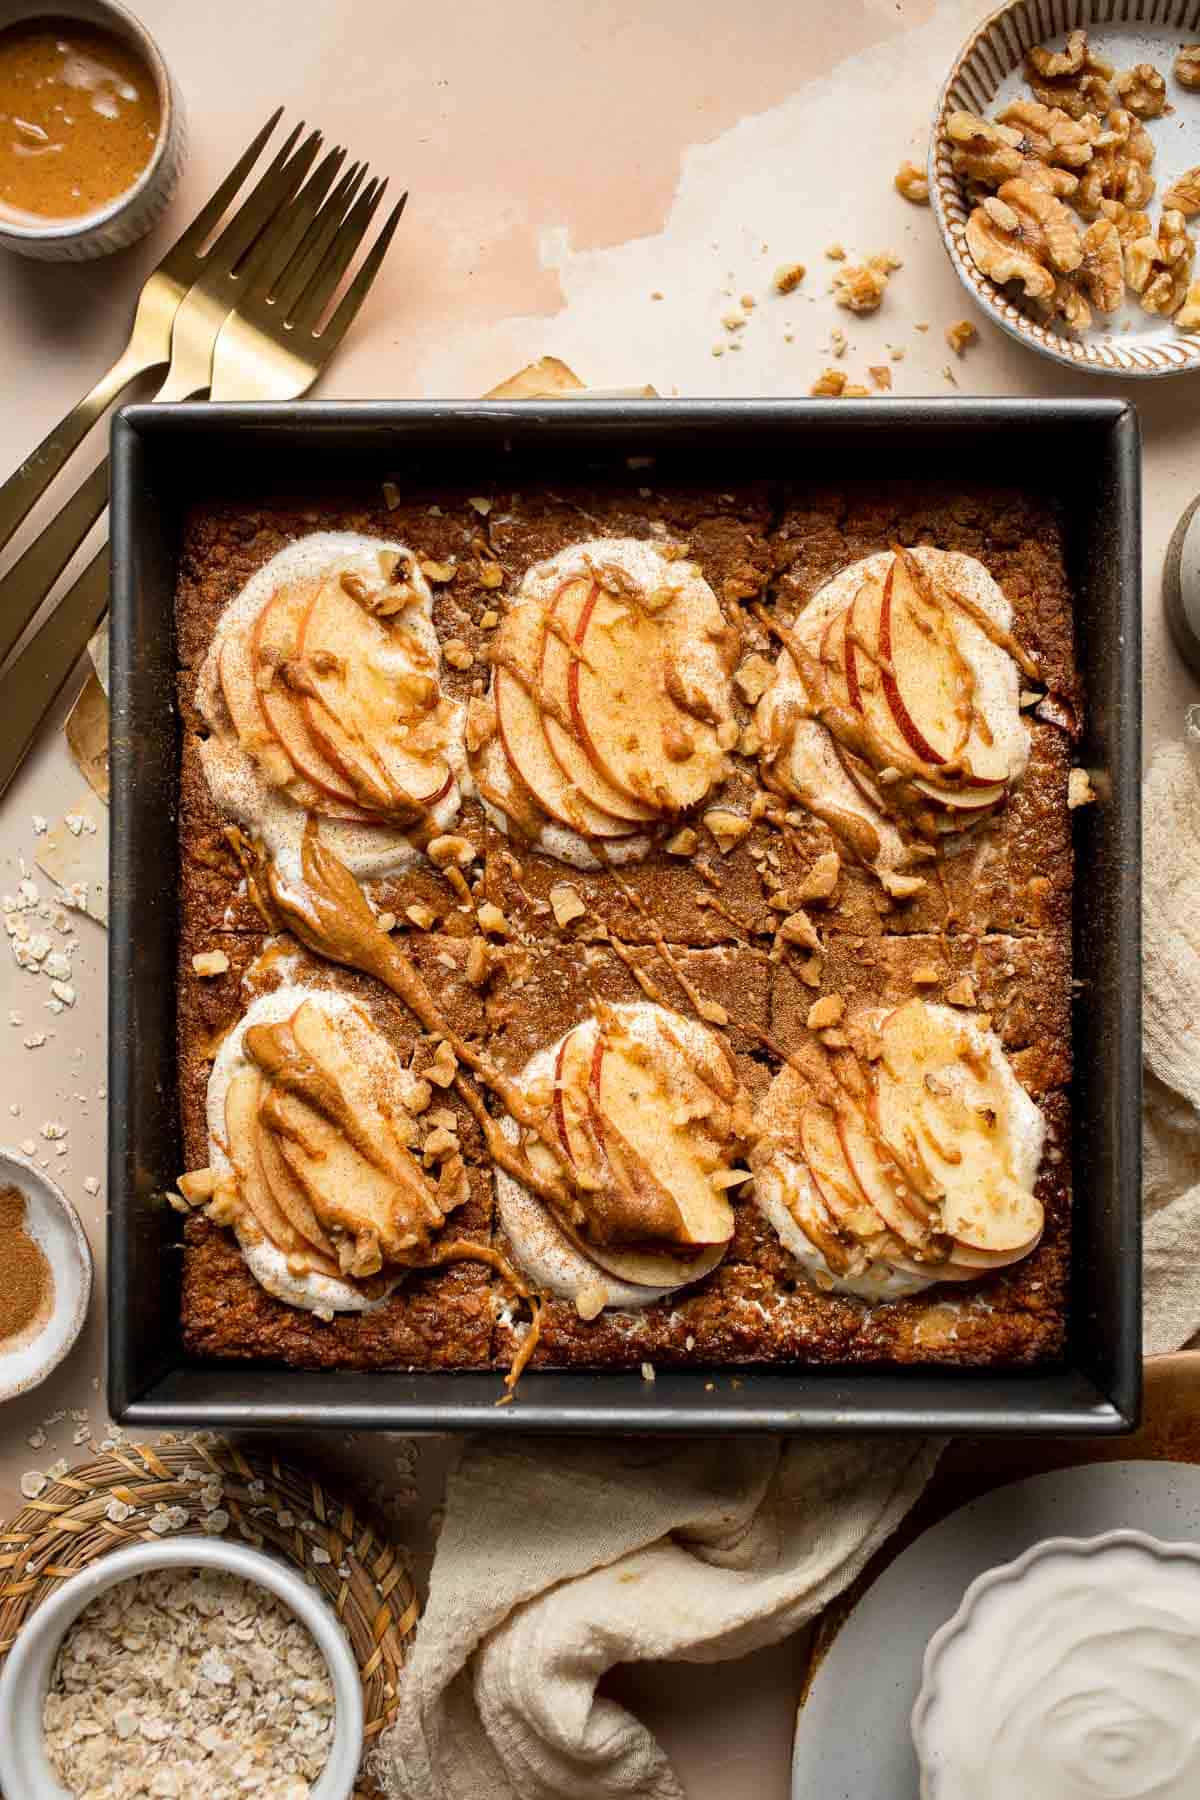
Cinnamon Apple Baked Oatmeal is a delicious, filling make-ahead breakfast or snack for fall - loaded with chewy oats, tender apples, crunchy walnuts, and cinnamon.
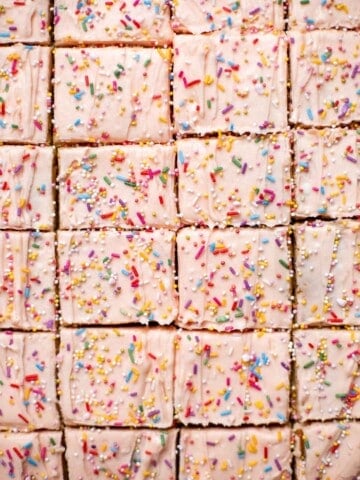
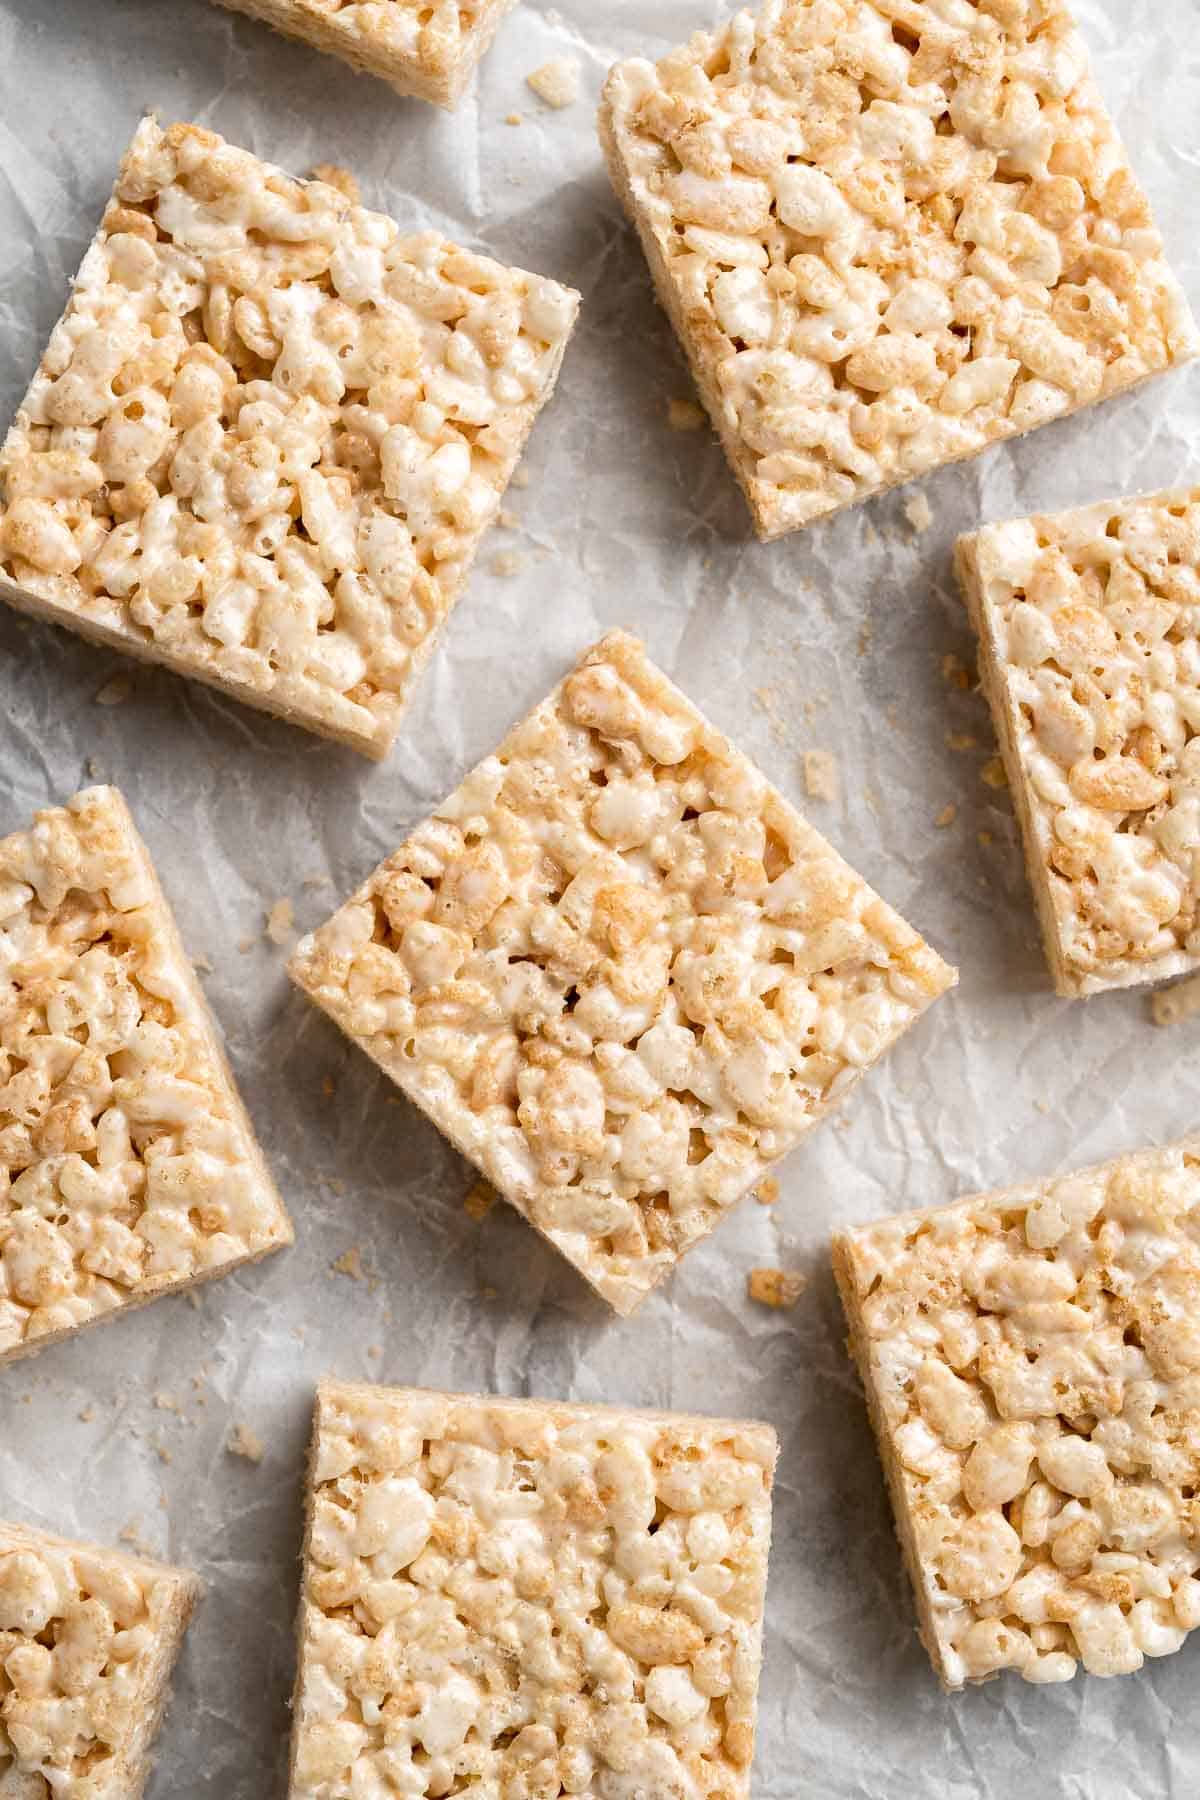
Rice Krispies Treats are a classic dessert loved by all. These chewy, crunchy, sticky-sweet treats are easy to make from scratch using just 3 ingredients!
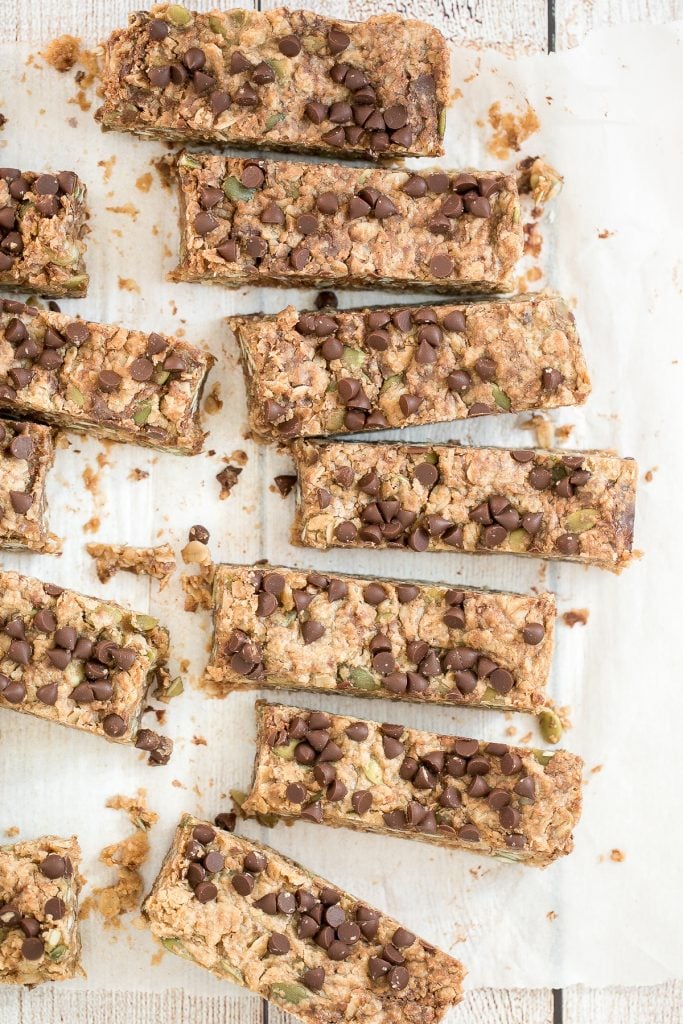
Chewy Peanut Butter Granola Bars
Chewy chocolate chip peanut butter granola bars are healthy, vegan, gluten-free, and refined sugar-free. Prep them in just 10 minutes to snack on for weeks.
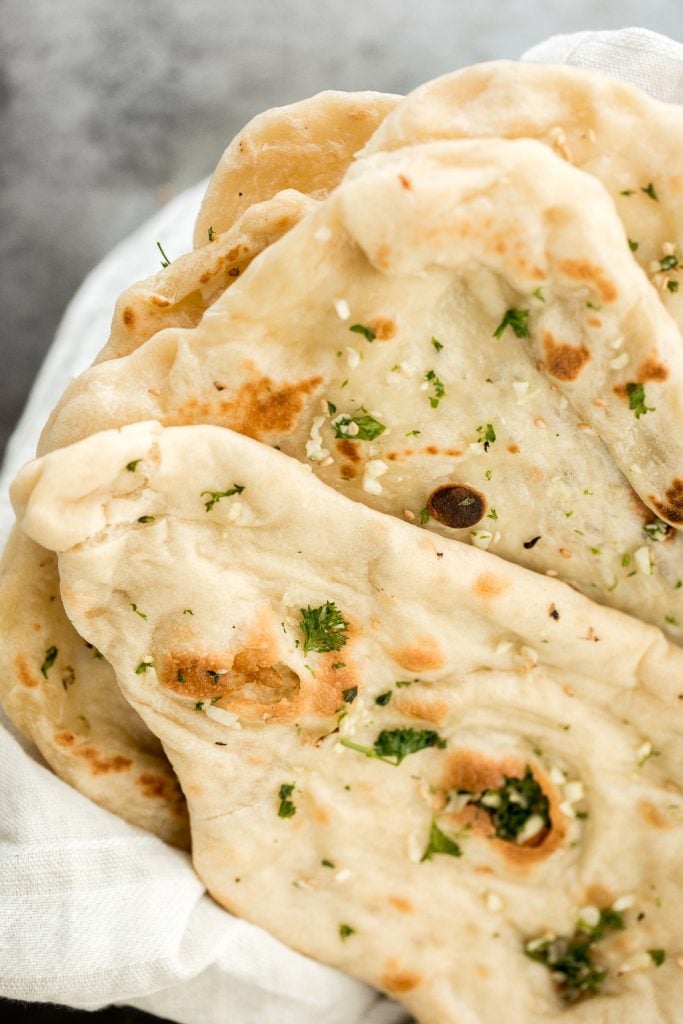
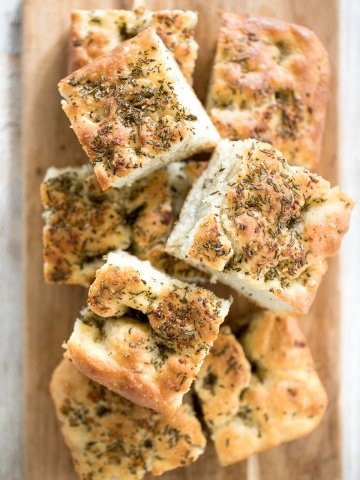
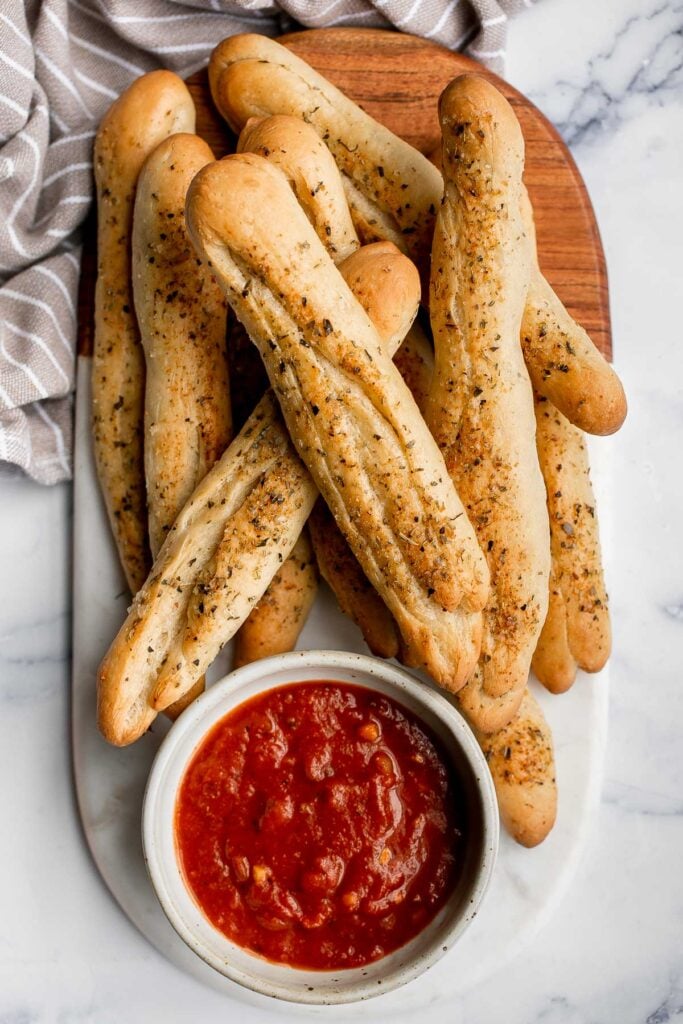
Soft garlic breadsticks are fluffy, airy, buttery, and delicious. They're an easy recipe that is perfect for beginners at baking bread.
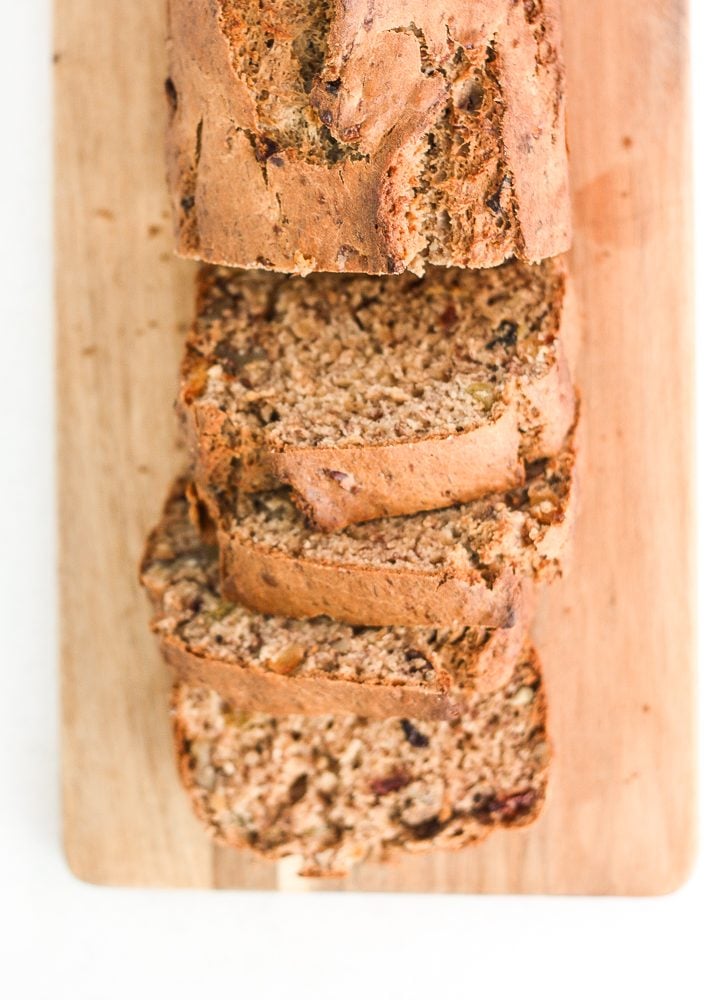
When you combine walnuts, raisins and dried fruit in a nutty banana bread, the result is a tender and moist loaf that is truly irresistible. Some other loaves to try are lemon loaf with lemon glaze and festive yogurt fruitcake.
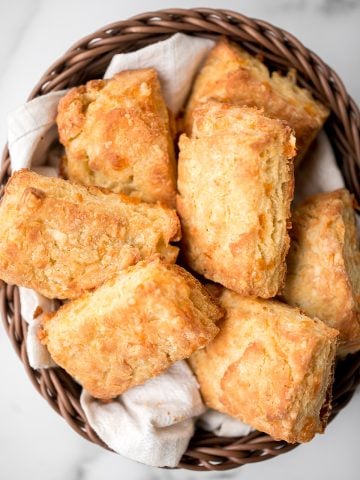
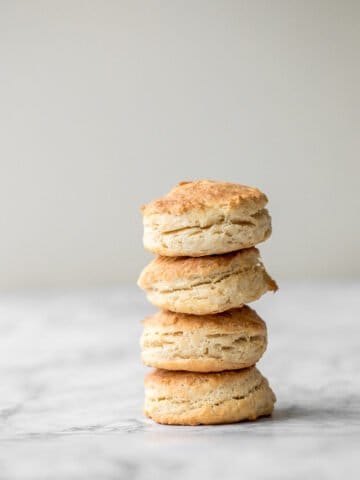
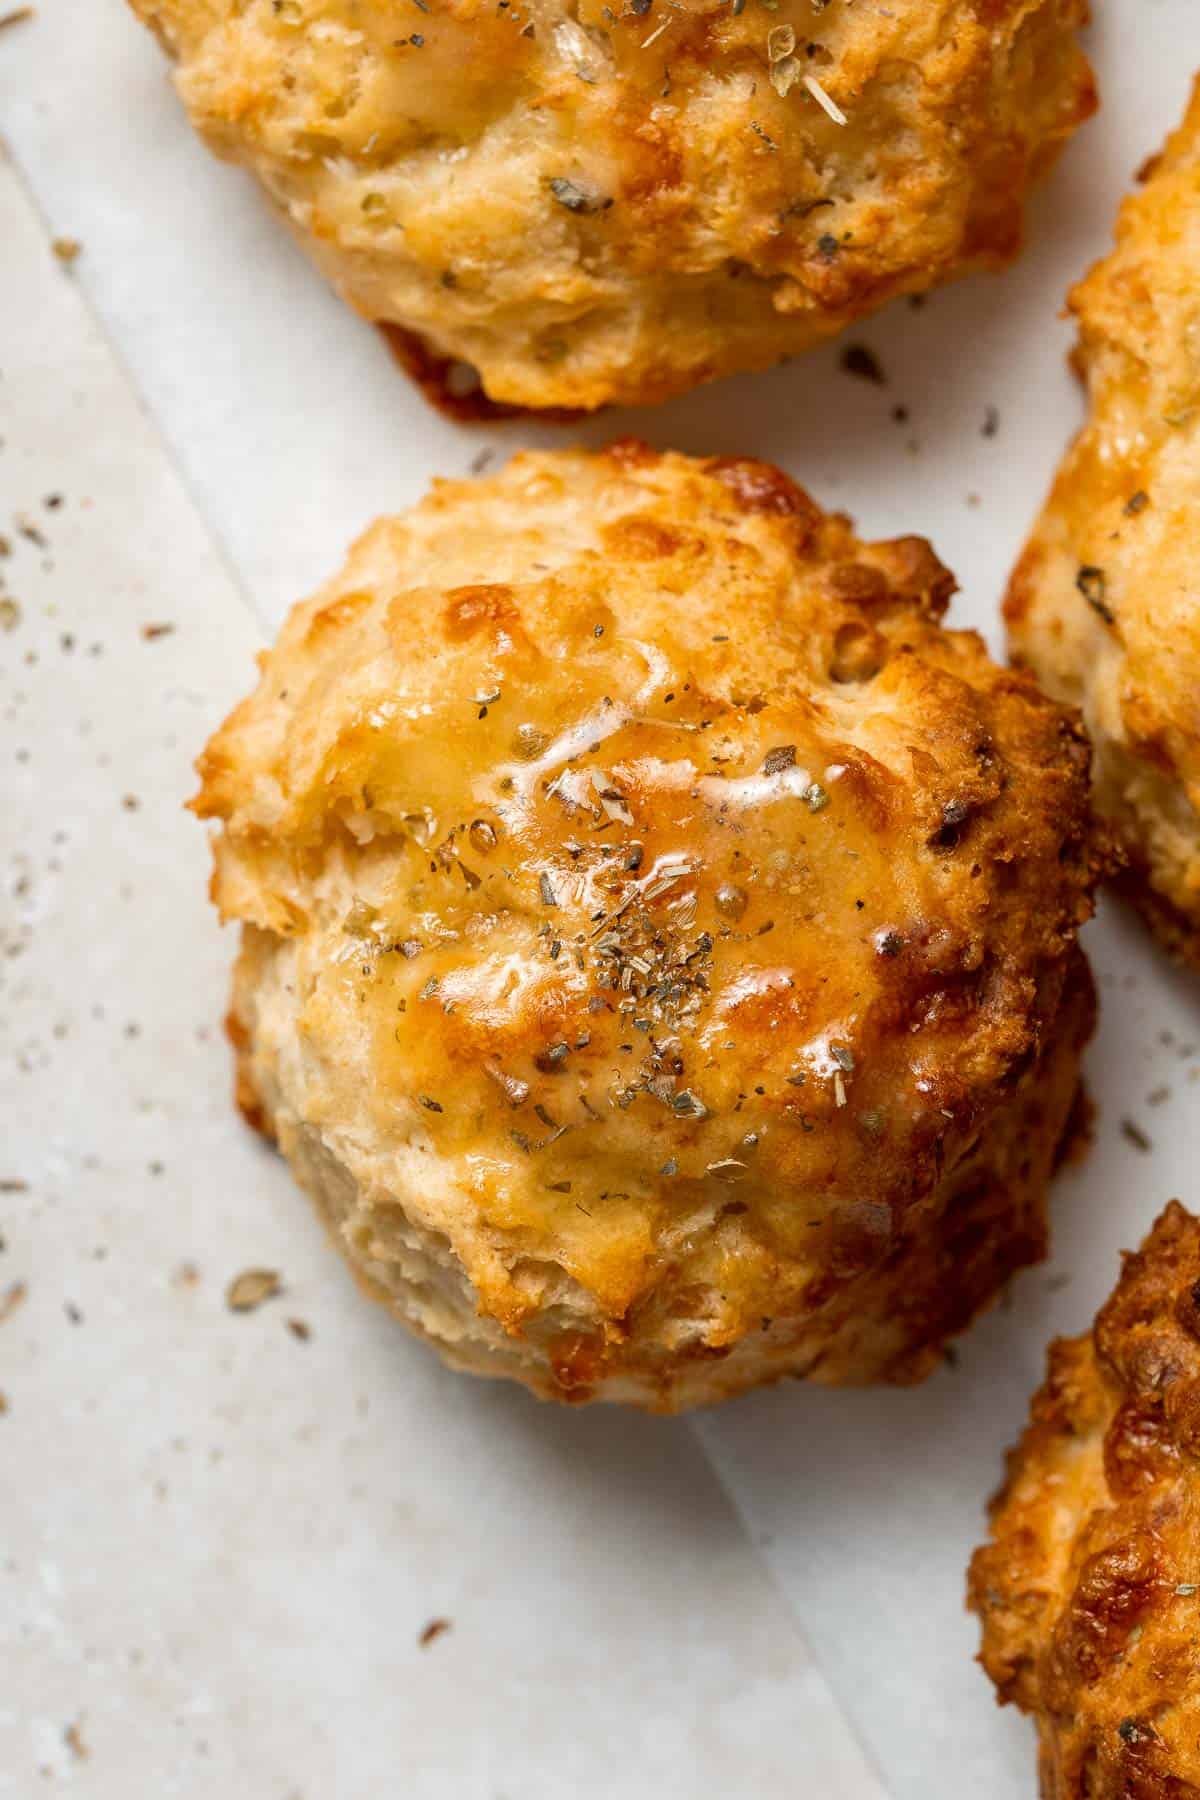
Flaky Garlic Cheddar Biscuits are a simple but delicious and flavorful no yeast bread that is ready for the oven with less than 15 minutes prep.
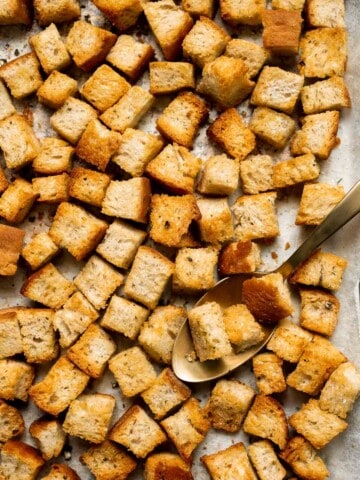
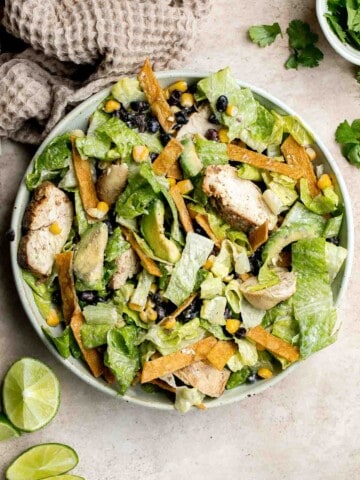
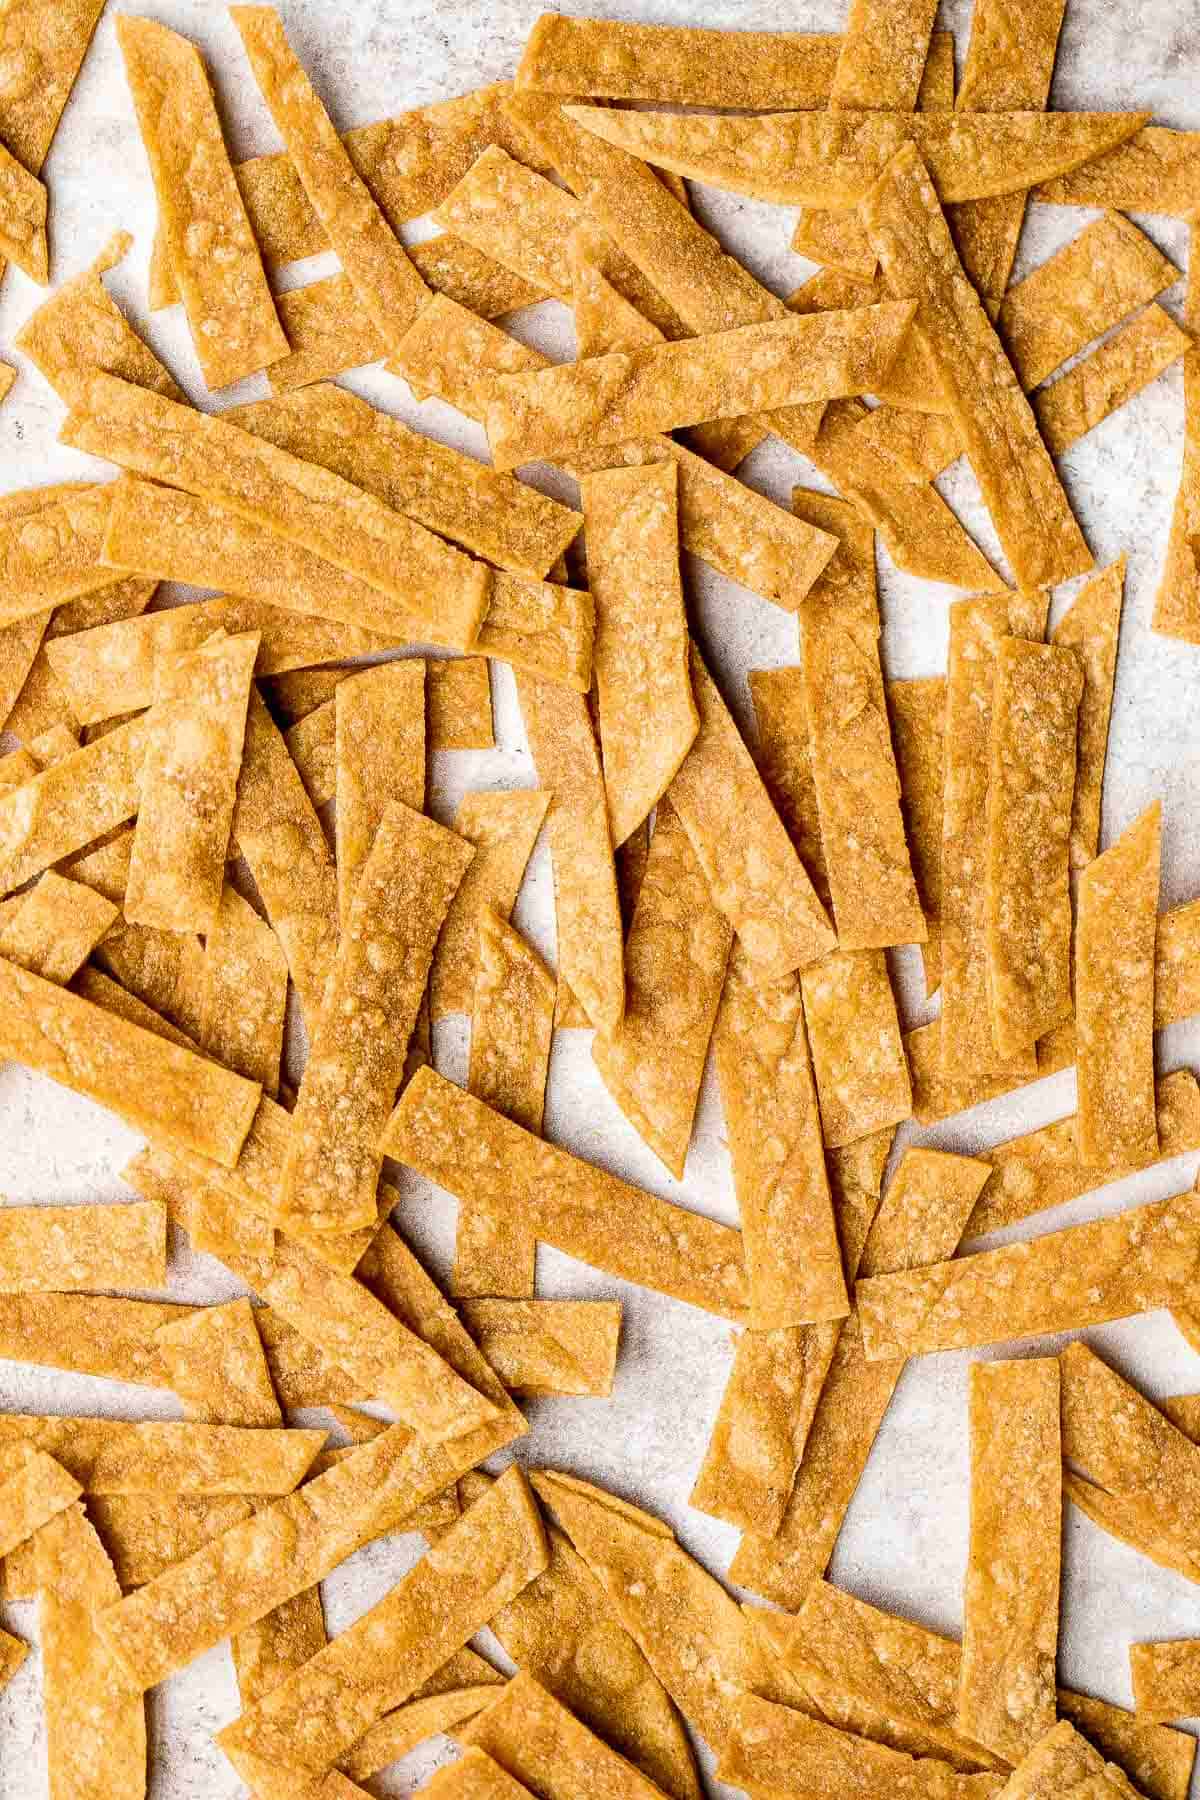
Homemade tortilla strips are crispy, crunchy, delicious, and easy to make using 3 simple ingredients. Serve as a snack or a topping on soups and salad.
Glazed lemon blueberry scones are total breakfast goals. Blueberries and lemon partner together in a light, tender and flakey scone, drizzled with a sweet lemon glaze that is nothing short of impressive.
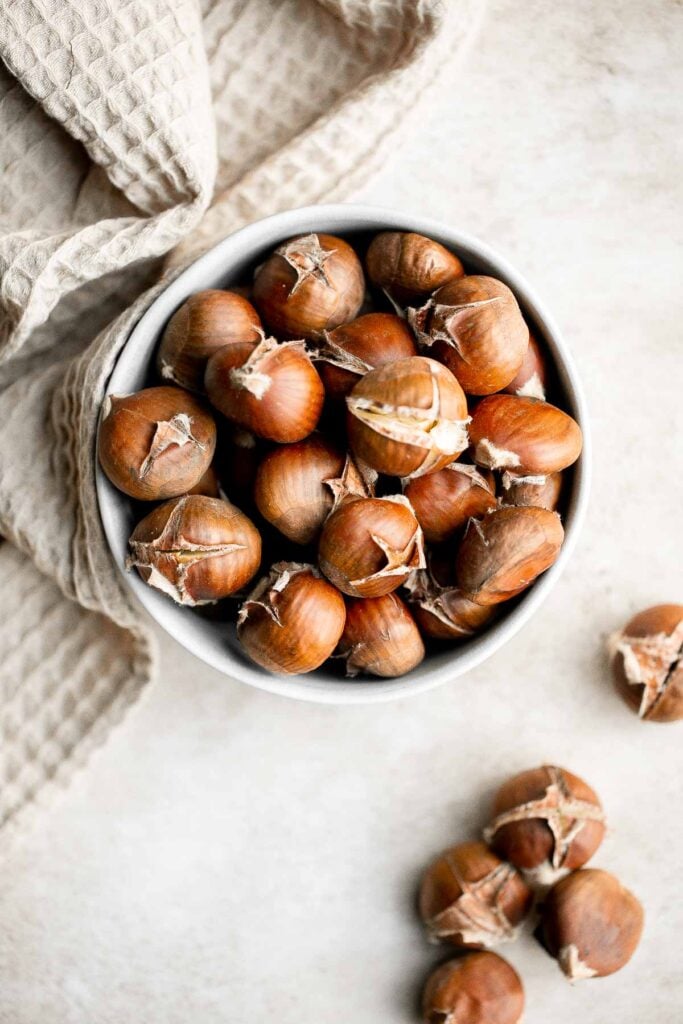
Enjoy street vendor roasted chestnuts at home in three different ways - roast in the oven, cook over the stove, or in the air fryer. Remember to peel them before packing them in the lunch box.
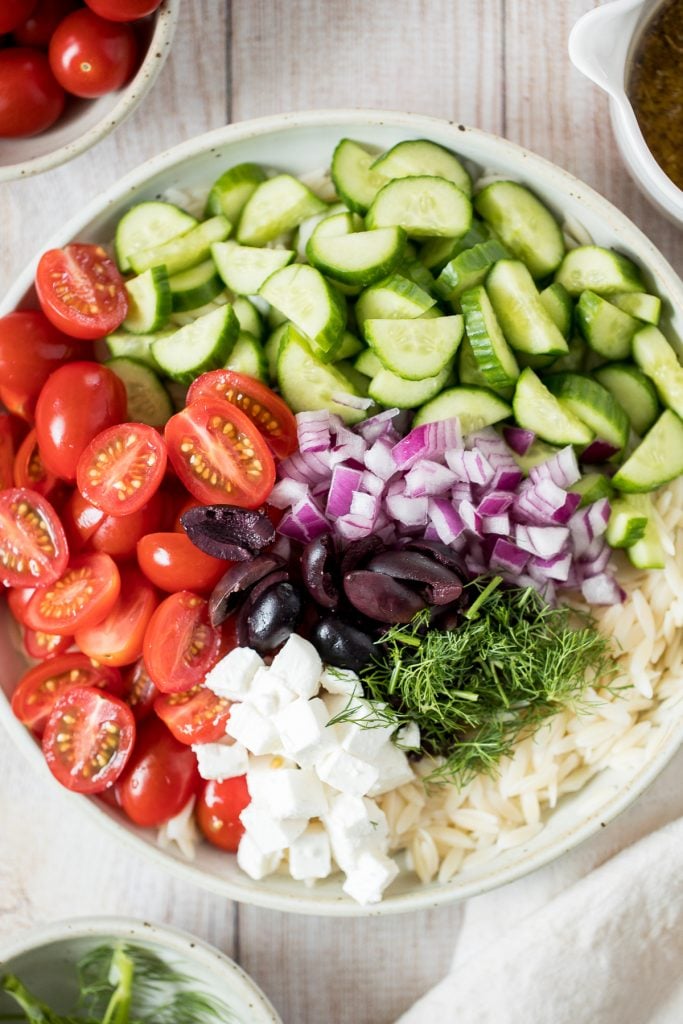
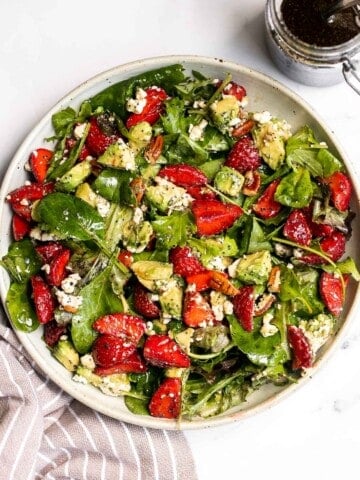
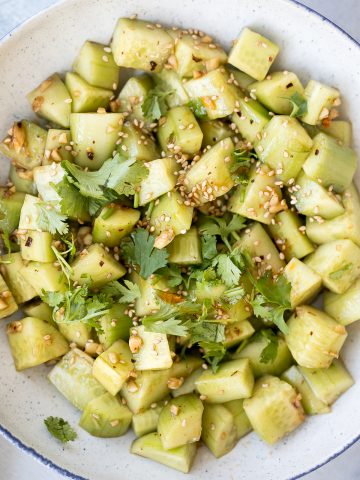
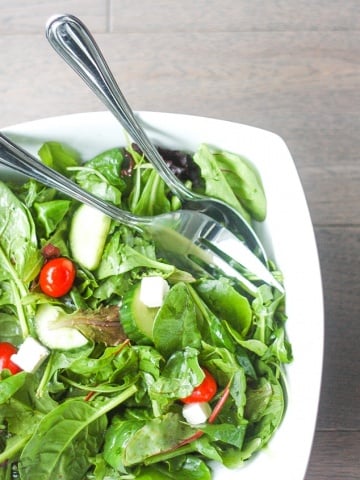
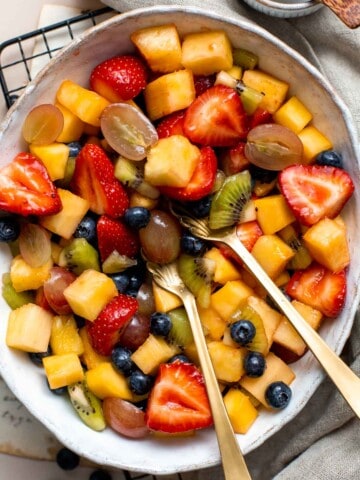
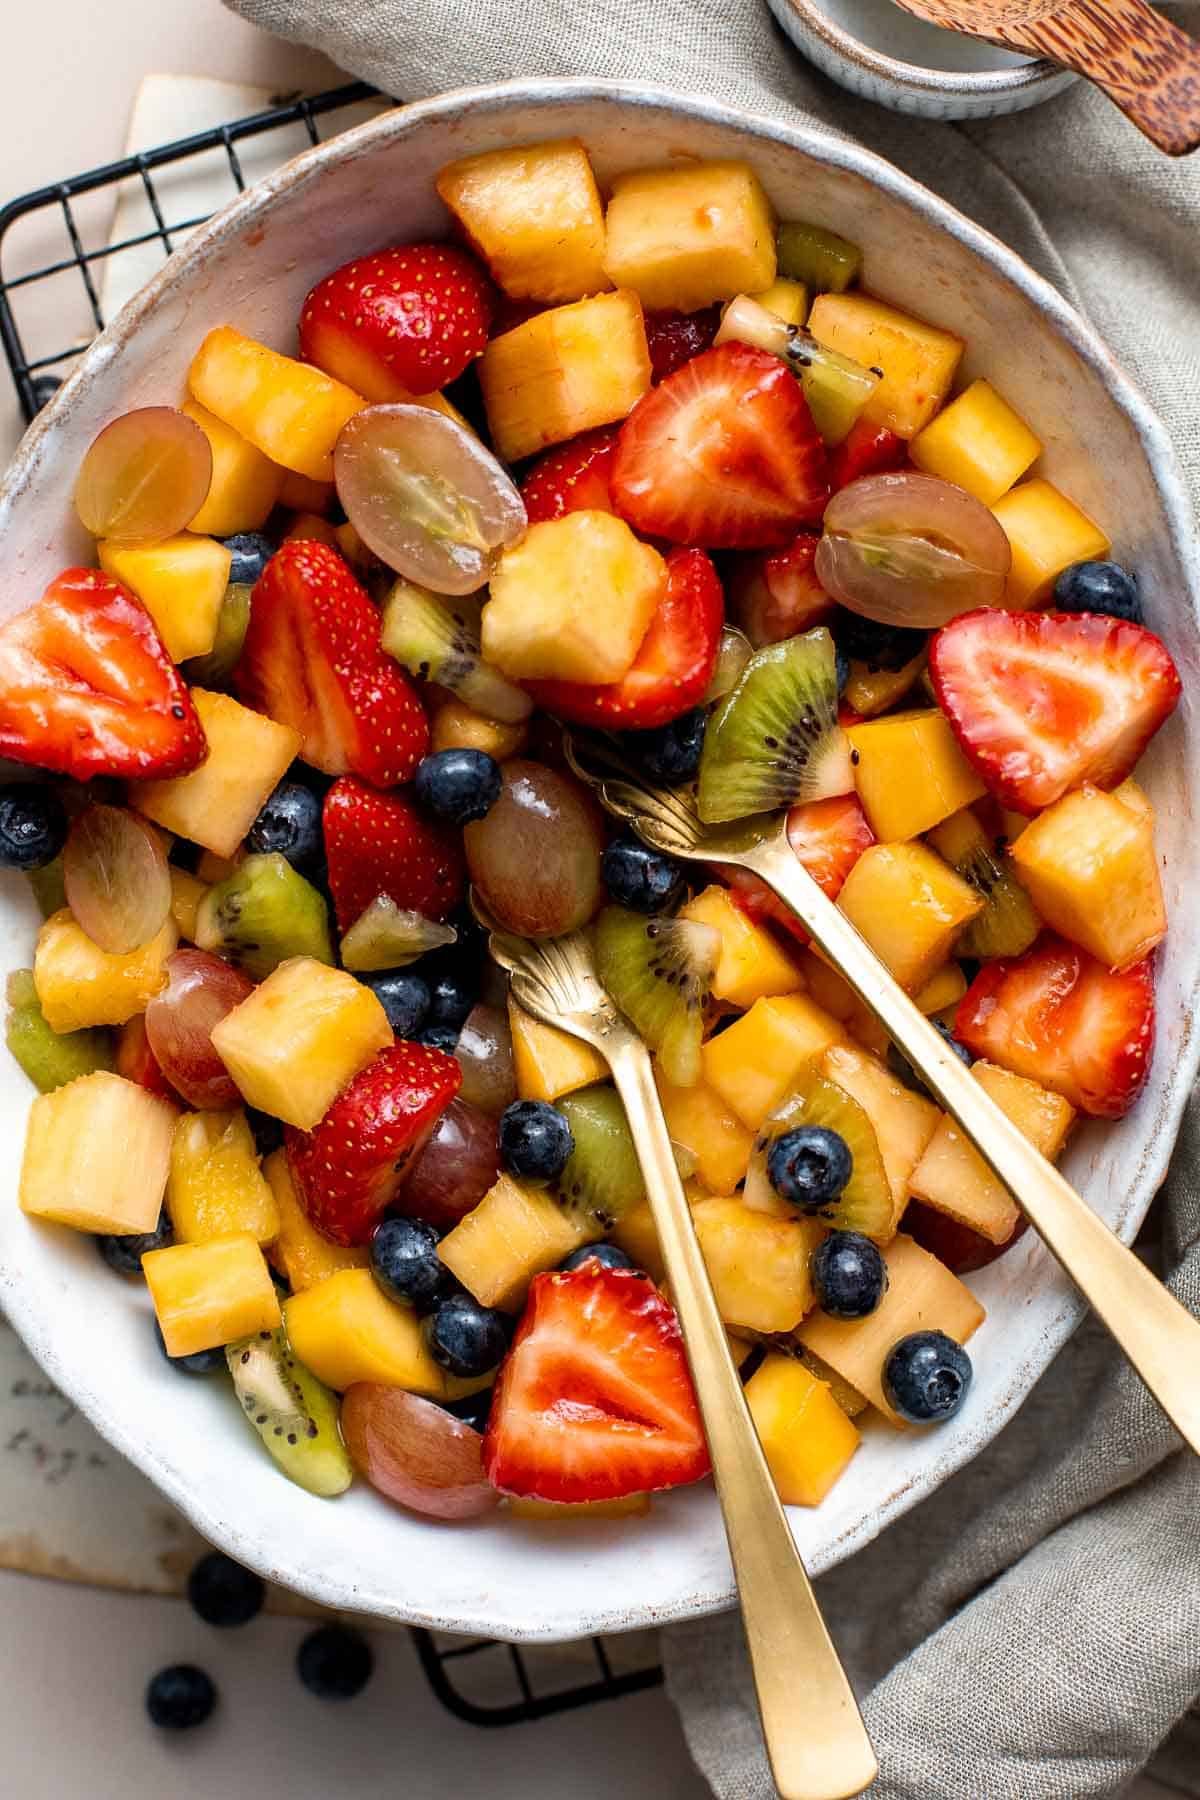
This Summer Fruit Salad is colorful, delicious, and naturally sweet (no processed sugar!). It's easy to make with fresh fruit tossed in a homemade dressing.
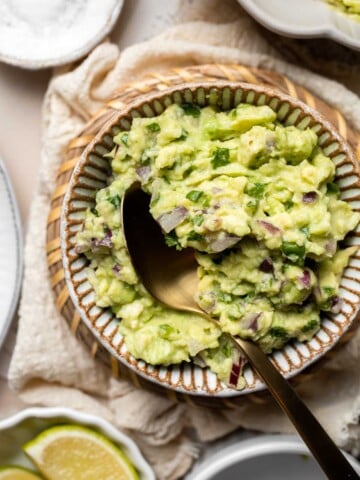
Quick and easy avocado hummus is creamy, smooth, healthy, and delicious. Loaded with chickpeas and avocado, it's the perfect blend of hummus and guacamole.

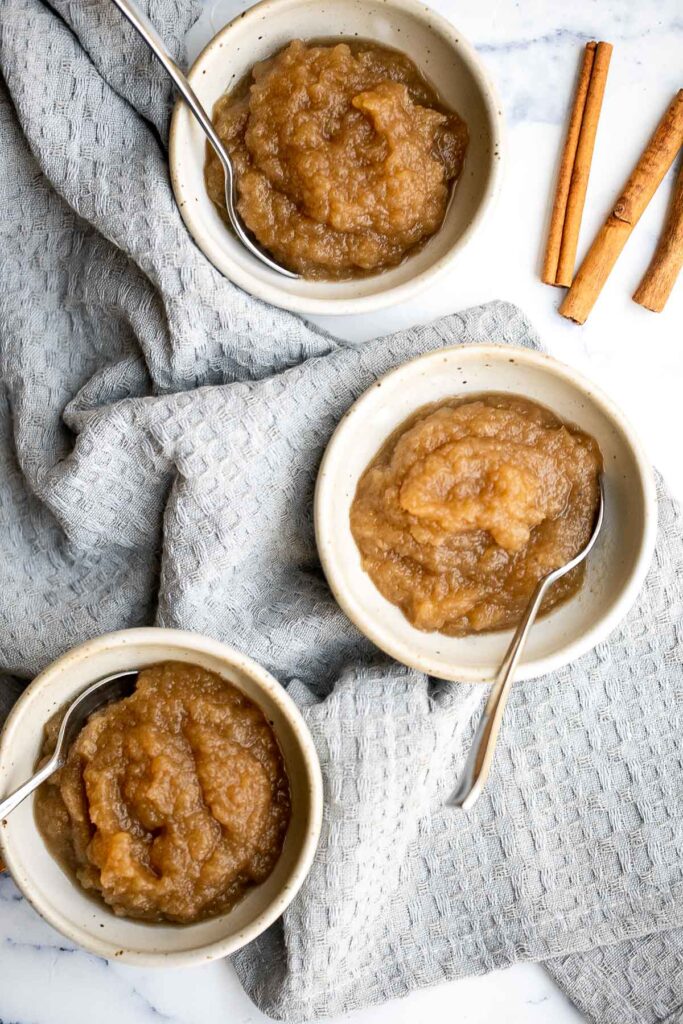
Slow cooker applesauce is delicious, healthy, kid-friendly, packed with warm and cozy fall flavors, and easy to make with just 10 minutes prep. The kiddos love to eat this snack by the spoon.
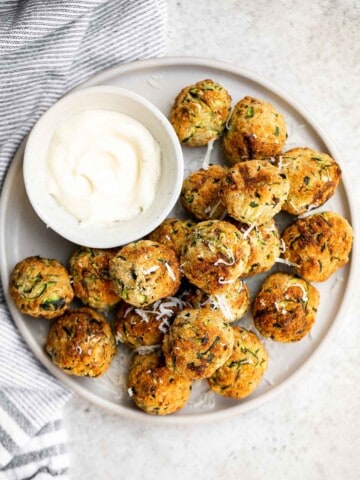
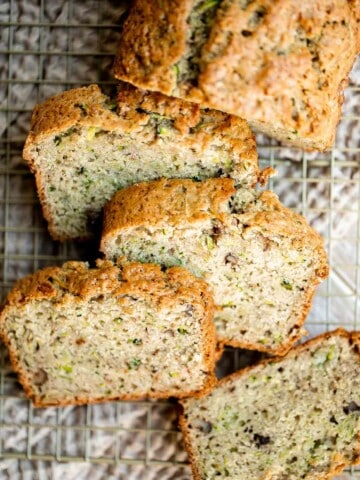
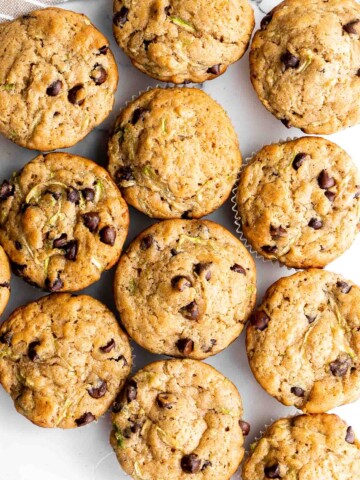
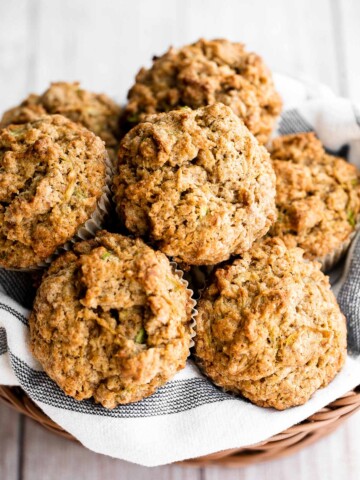
Quick and easy zucchini muffins are loaded with fresh zucchini which makes them fluffy, moist, delicious, and full of nutrients. Freezer-friendly too!
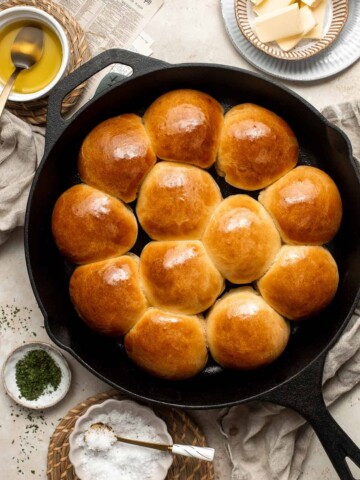
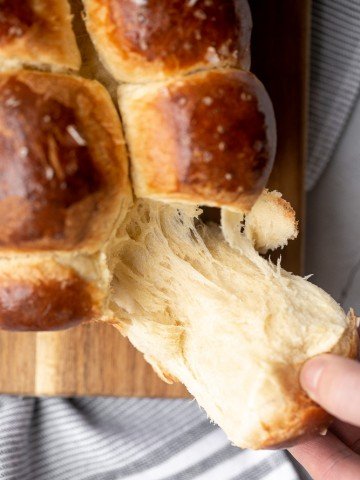
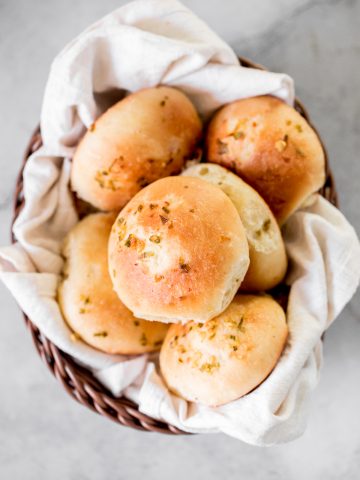
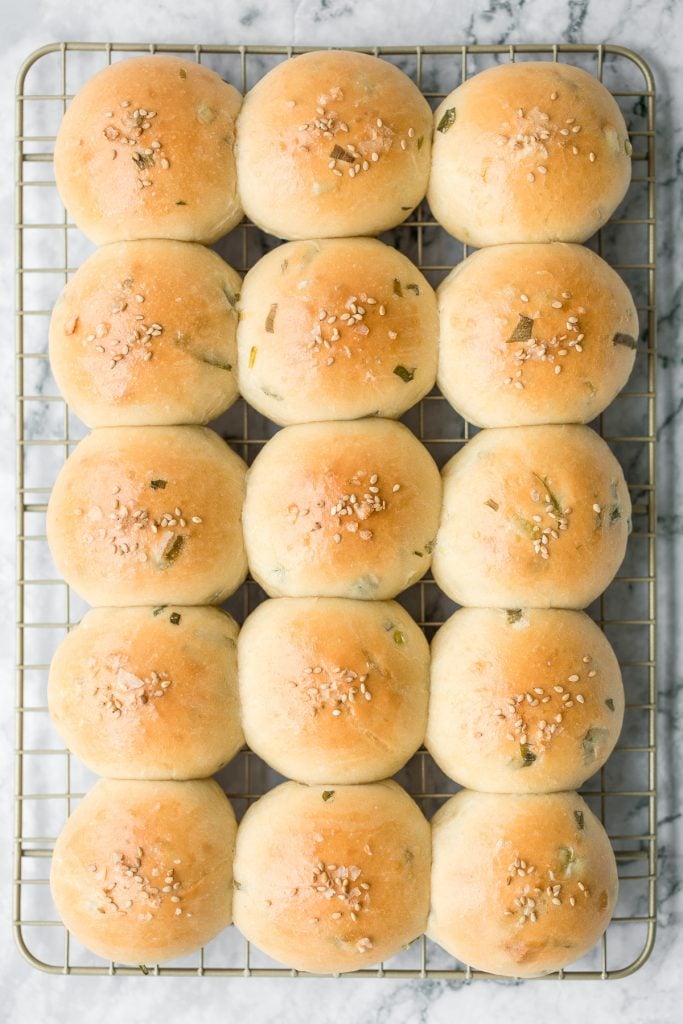
Quick Dinner Bread Rolls with Green Onions
Soft and fluffy, quick dinner bread rolls are loaded with green onions and topped with flaked sea salt and sesame seeds. Ready in just 1.5 hours. You can also make them without green onions for any picky eaters. These rolls are perfect for making little sandwiches or just with butter. You can also try easy skillet dinner rolls or homemade biscuits.
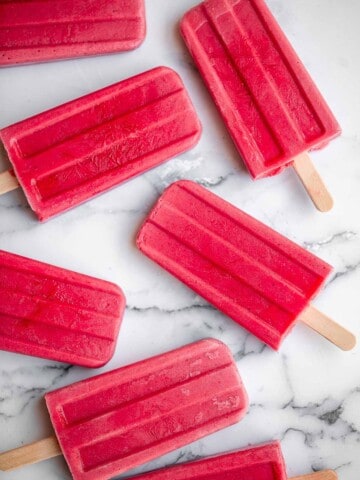
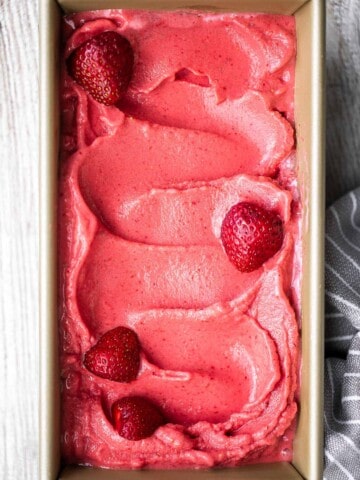
Skinny Strawberries and Cream Popsicles
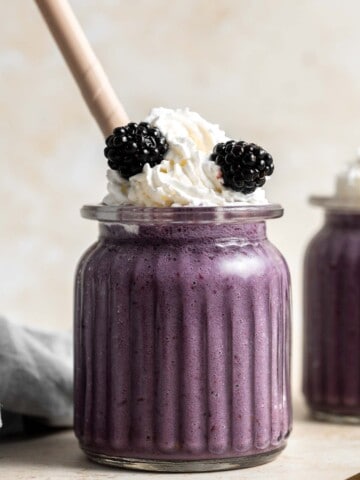
Let's finish off the list with a treat you can feel good about giving to your kids. It is time to say good-bye to the store-bought stuff and make skinny strawberries and cream popsicles at home using fresh fruit and Greek yogurt.

Say goodbye to store-bought popcorn and hello to homemade Kettle Corn - sweet and salty, loved by all, and quick and easy to make with just 4 ingredients.
Homemade applesauce bread is fluffy, moist, and delicious. Loaded with fall flavors that transforms your favorite snack into a loaf cake.
School Lunches to Pair With
You can pair these school snacks with your kids favorite school lunches. Our popular school lunch recipes are:
- 30 School Lunch Ideas
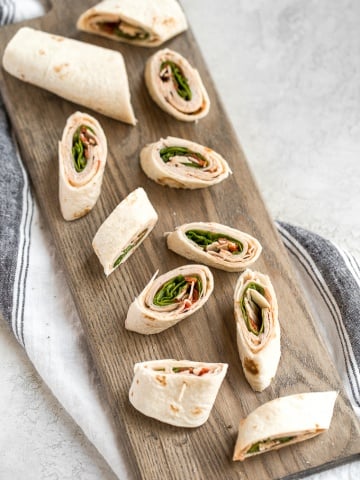
- Turkey Pinwheels
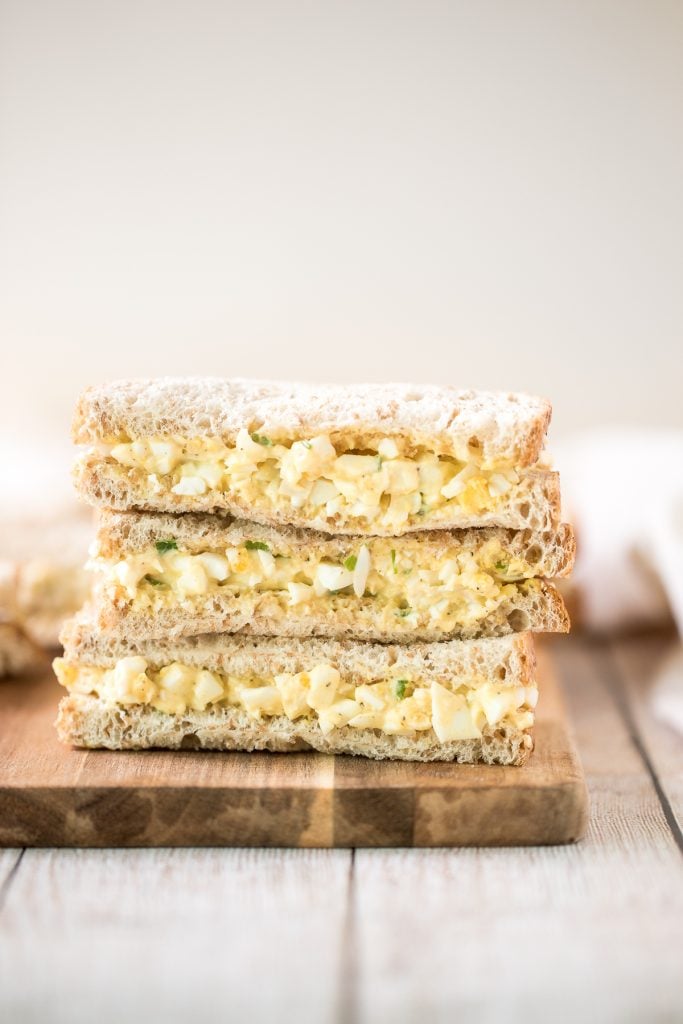
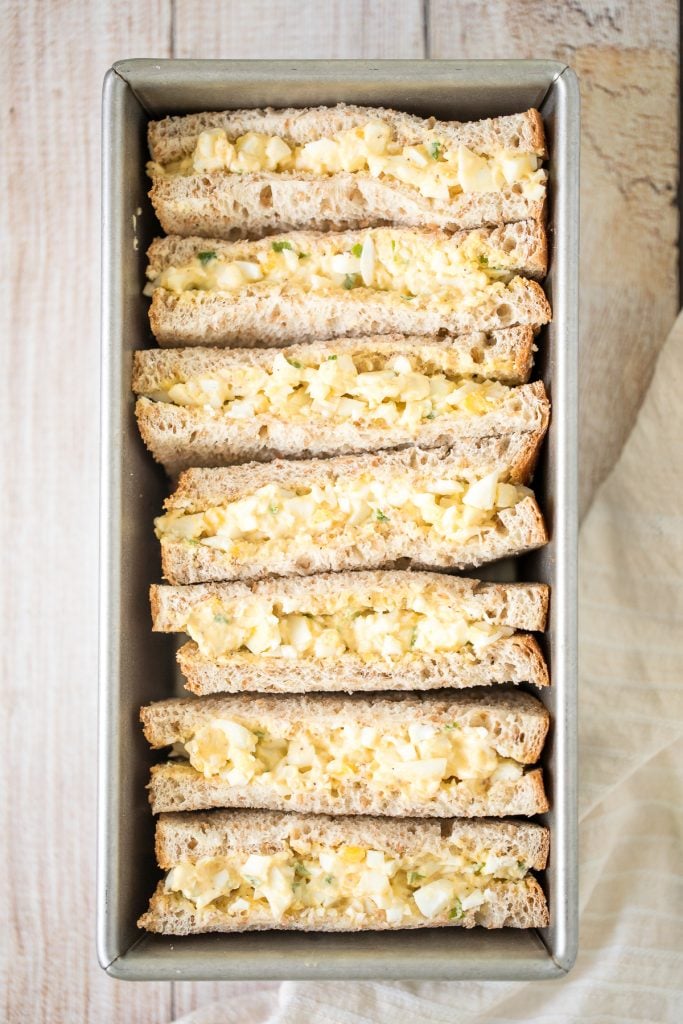
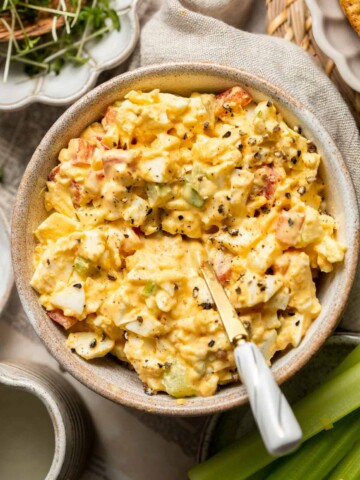
- Egg Salad Sandwich
- Pepperoni Pizza Rolls
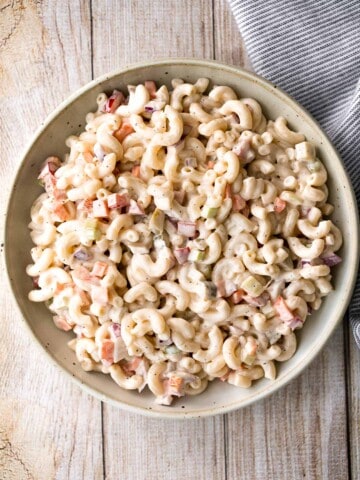
- Mac and Cheese
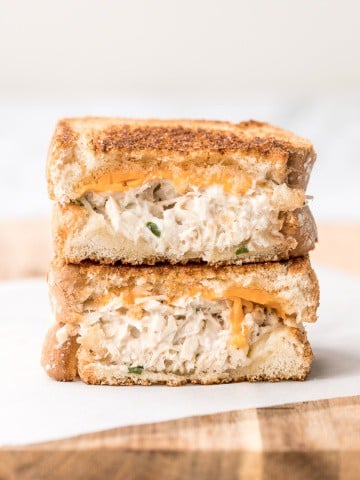
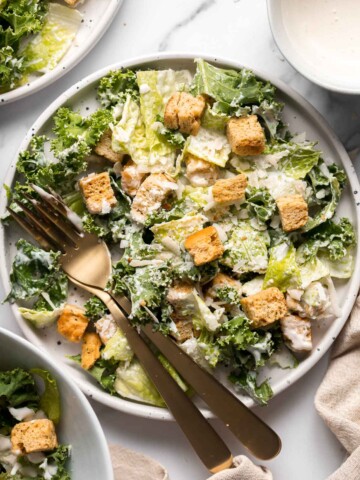
- Chicken Salad
Tips for Preparing Back to School Lunch and Snacks
Here are some tips and tricks to help make things easier when preparing back to school lunch and snacks.
- Prep in advance. Depending on the recipe, try to prep as much as you can the night before to make the mornings go much more smoothly. Whether that is chopping up vegetables or mixing ingredients together, do as much as you can. You can store all your prepared ingredients in airtight containers in the refrigerator.
- Involve your kids in the kitchen. My son is only 17 months old, but I find that even at his age, when I involve him in the cooking process by getting him to "help" me in his learning tower (whether it's transferring chopped vegetables from a plate to a pot, or playing with tupperware), he eats his meal much more readily.
- Pack the lunch and snacks in a cute lunch box and containers. There are so many options that you can choose from with a whole variety of designs. I've linked my favourite bento-style lunch box, insulated lunch bag, kids cutlery, and toddler cutlery.
- Opt for foods that aren't super messy.
Did You Make Any of These Back to School Snack Recipes?
Please leave a comment and rating below, and let me know what you thought of this round up of school snack recipes. Be sure to snap a picture and tag me on Instagram @aheadofthyme or share it on the Pinterest pin so that I can follow along.
HUNGRY FOR MORE? Don't forget to sign up for my email newsletter so that you don't miss any recipes. You can also follow along on Instagram and Pinterest for more recipe updates.
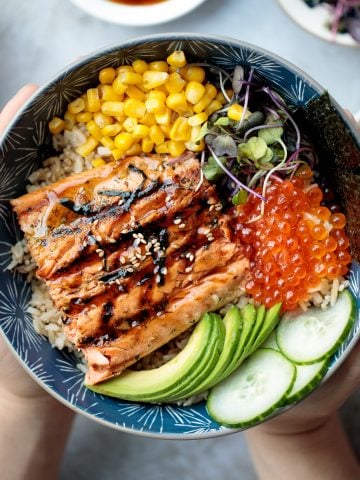
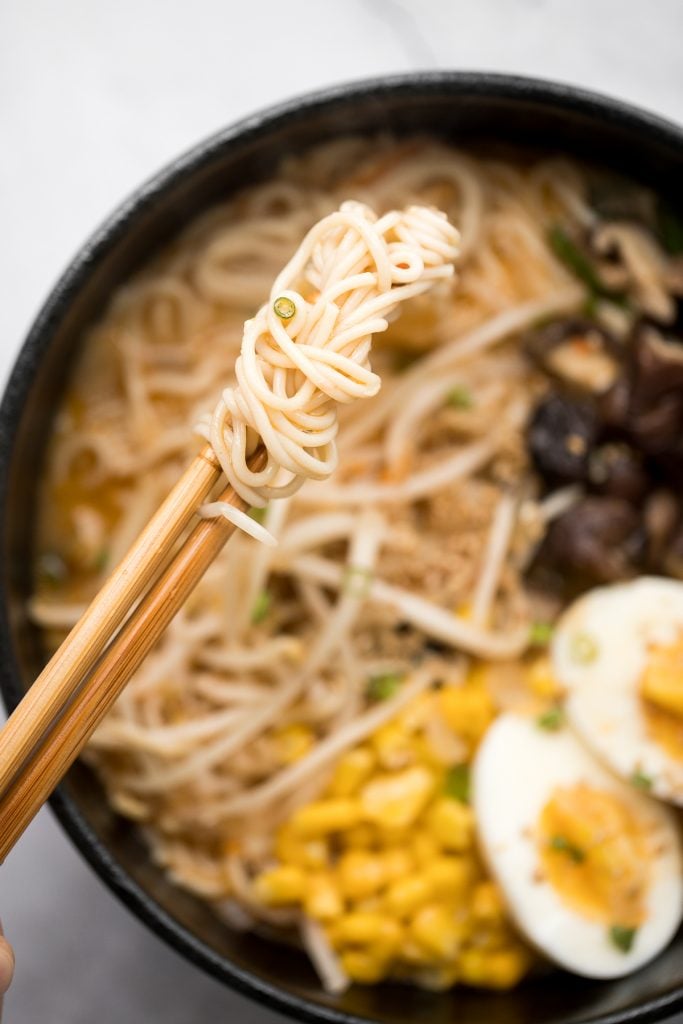
Creamy Vegetarian Peanut Miso Ramen
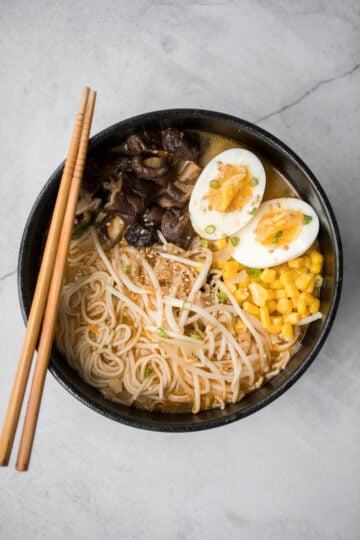
We are slowly transitioning into fall, which means bring on all the comfort foods. To me, comfort food usually means a big bowl of noodle soup. This creamy vegetarian peanut miso ramen has a super creamy and flavourful vegan soup base with tomato and shiitake mushrooms, and is topped with delicate and thin ramen noodles, assorted vegetables, and a perfect soft-boiled ramen egg. This is the kind of ramen that you will take that huge ramen bowl and drink it like a cup, making sure to get every last bit of soup. It's so so delicious.

And aside from the eggs, this is a one pot recipe. Which means that you make everything in one pot. First you prepare the soup base and then cook your ramen noodles directly inside the soup. No extra pot needed, no colander needed.
What is in Peanut Miso Ramen?
- vegetable oil
- onion
- tomato
- shiitake mushrooms
- garlic
- miso paste
- smooth peanut butter
- ramen noodles
- corn
- bean sprouts
- scallions
- eggs - perfectly soft-boiled.
- white sesame seeds - for garnish.
You will also need a large pot, ramen bowls, and chopsticks.
How to Make the Best Creamy Vegetarian Peanut Miso Ramen
In a large pot, heat vegetable oil over medium heat. Add in chopped onion, sliced tomato, shiitake mushrooms and minced garlic. (If you use dried shiitake mushroom, make sure to rehydrate them by pre-soaking them in water for at least 20 minutes before use). Stir and cook for 5 minutes until the tomatoes are soft and mushy. Add in water and bring it to a boil. Stir in miso paste and peanut butter, and dissolve into the soup. Simmer uncovered for 5 minutes.
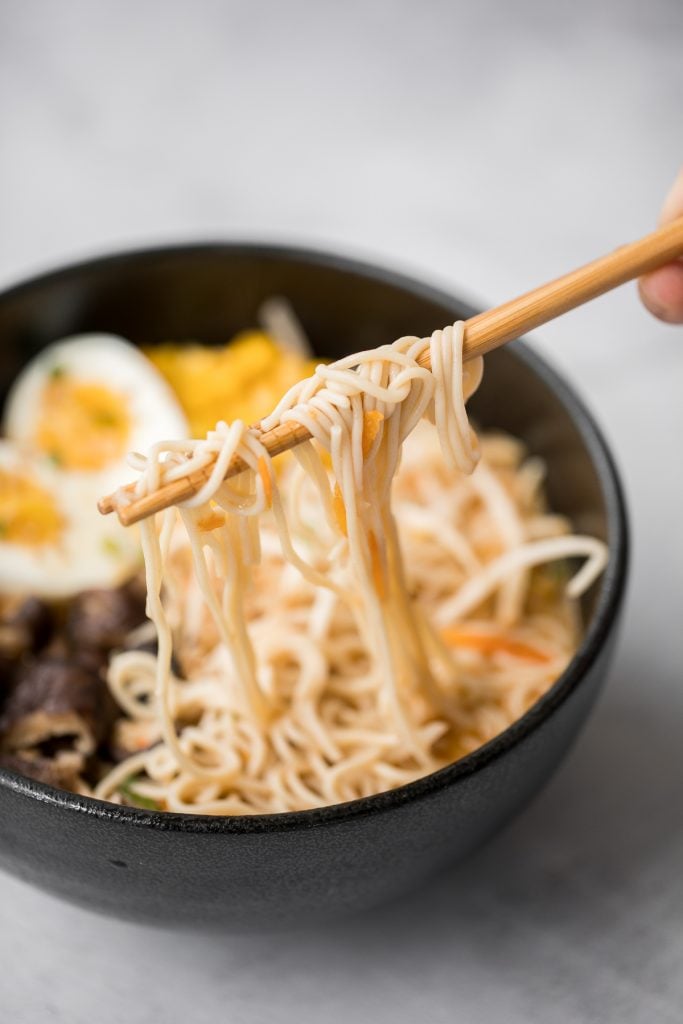
Add the ramen noodles in the soup and cook for 2-3 minutes until soft. Stir the noodles occasionally with chopsticks to prevent them from sticking together.
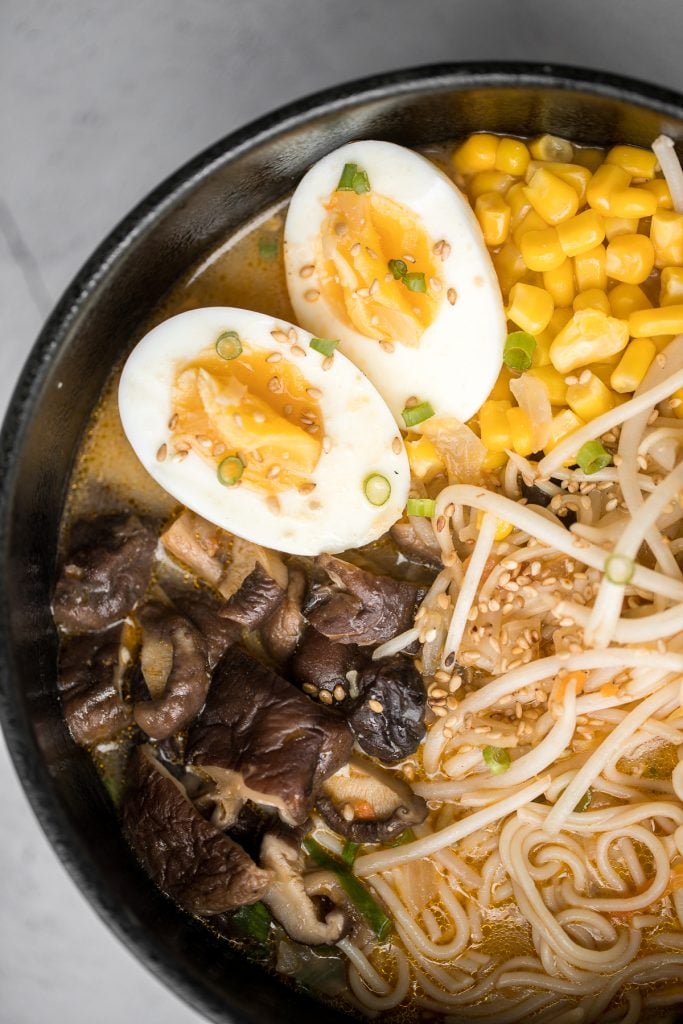
To assemble the ramen soup, divide and pour the ramen soup with noodles evenly into two large bowls. Add in corn, bean sprouts, chopped scallions, and soft-boiled egg on top. Sprinkle sesame seeds on top and serve hot.
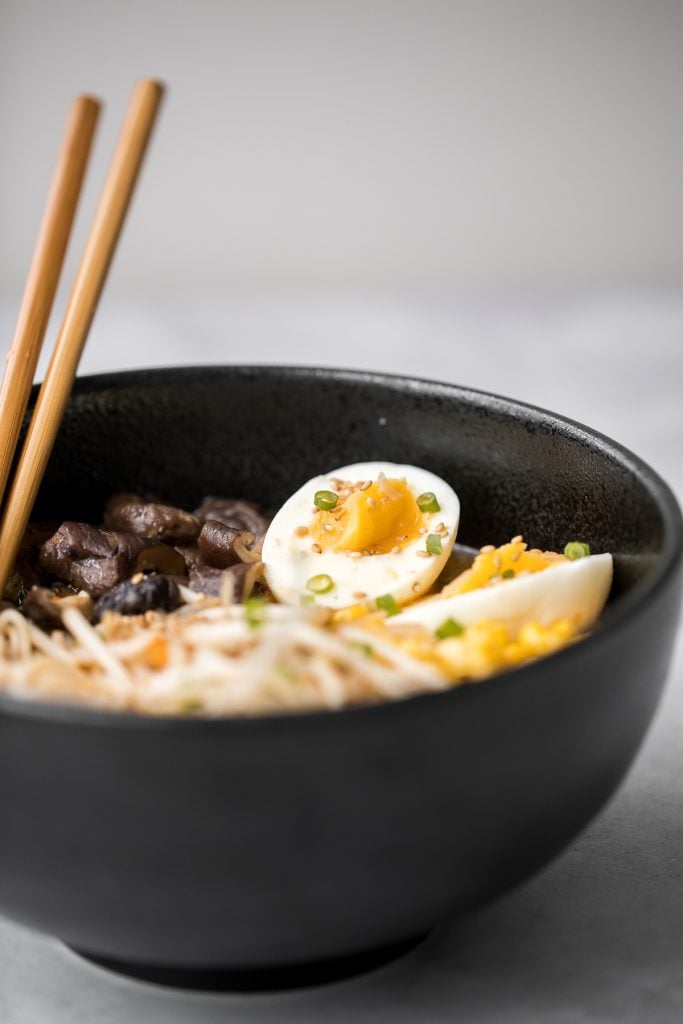
How to Make the Best Soft-boiled Ramen Eggs
- Bring a small pot of water to a boil. Add eggs and cook for 6 minutes. In the first minute, continuously stir the eggs clockwise in the boiling water so that the egg yolk sits right in the centre.
- Once done, remove the eggs and immediately place them in an ice water bath for a few minutes.
- Peel the shells and slice the eggs in half.
Tips for Making Miso Ramen
- How to make a stronger soup base: For a stronger flavoured soup base, add another tablespoon of peanut butter. This will also make the soup extra creamy.
- How to make vegan miso ramen: The ramen soup base is completely vegan, which means that you can make this ramen vegan simply by omitting the eggs.
- How to store miso ramen: You can store the peanut miso ramen soup base separately from the noodles. I would not recommend storing the noodles together with the soup as the ramen noodles will disintegrate and lose its shape when soaked in liquid for too long. You can store the soup base in a sealed container for up to 3 days in the refrigerator.
More Noodle Soups to Try
- Healthy Miso Ramen with Chicken
- Slow Cooker Asian Beef Noodle Soup
- One Pot Thai Red Curry Noodle Soup
- 10-Minute Shanghai-Style Wonton Soup
- Easy 10-Minute Wonton Soup
- Quick and Easy Vegetarian Ramen
Tried this recipe?
I'd love to hear what you think! Leave a comment and rating below to share your feedback. Your reviews help others discover this recipe and help me keep creating more free recipes for you. Snap a photo and tag me on social media @aheadofthyme too.
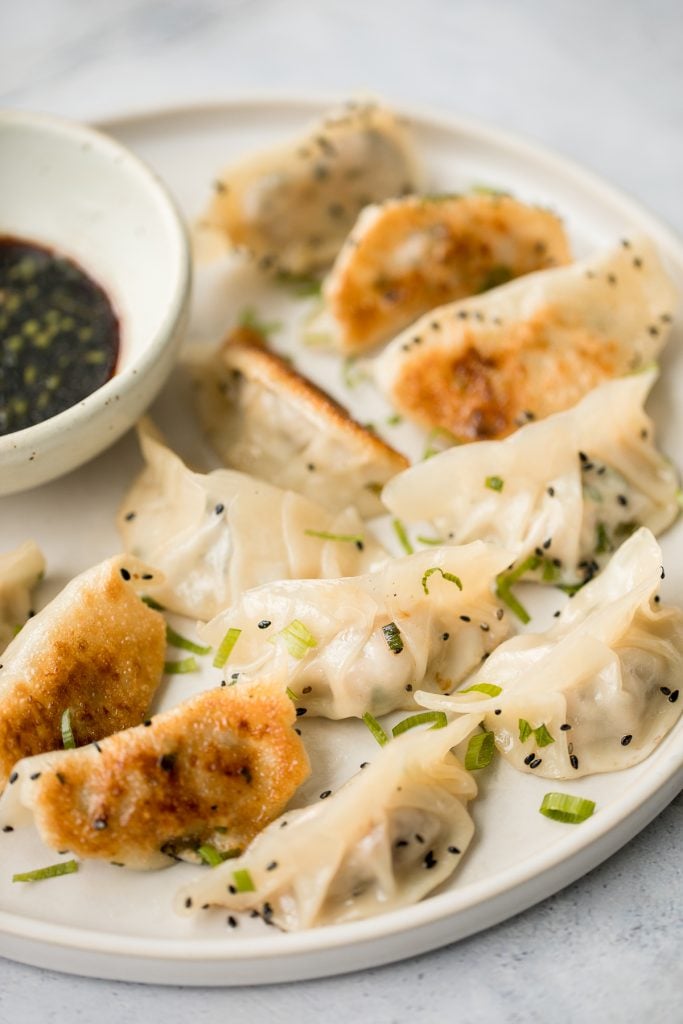
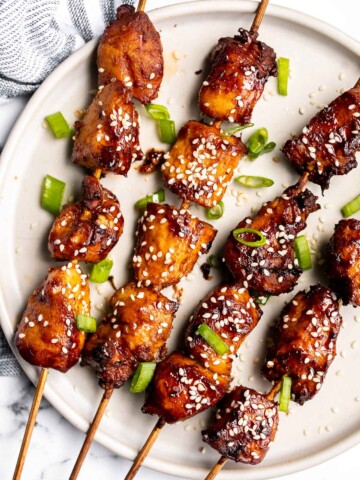
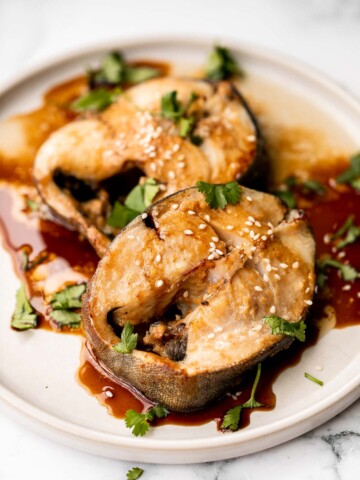
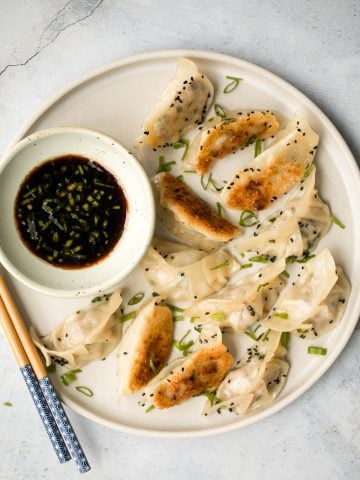
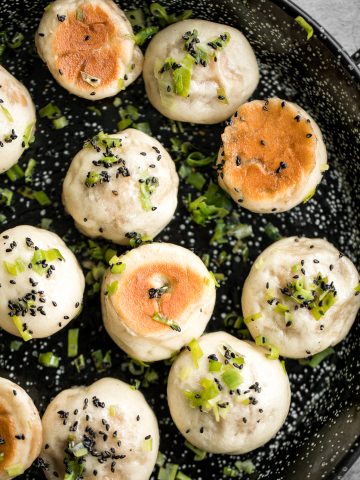
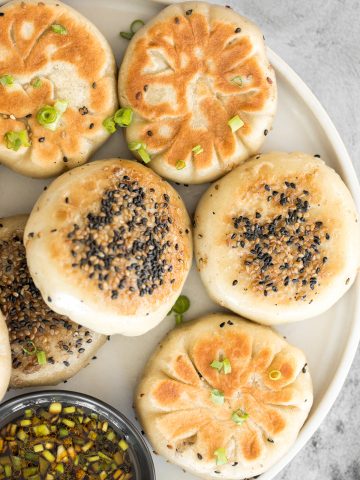
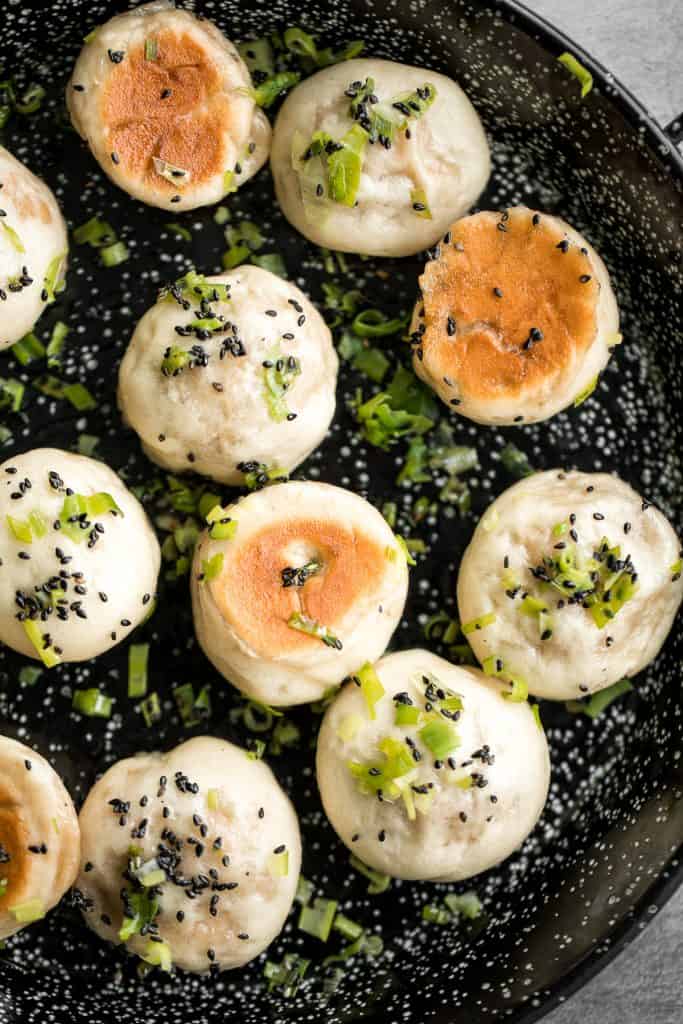
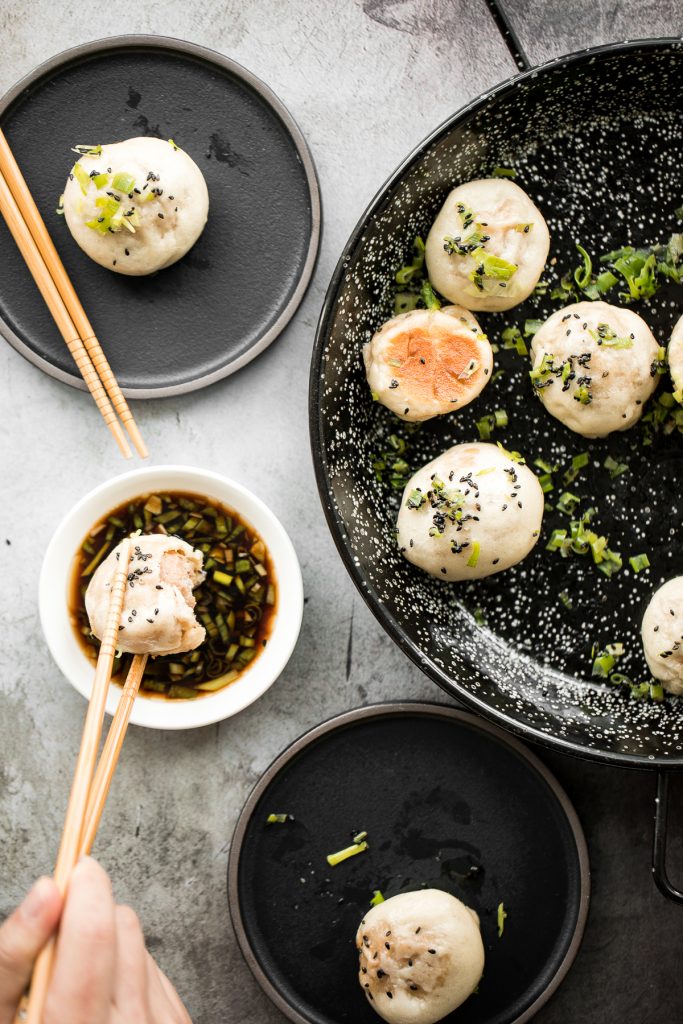
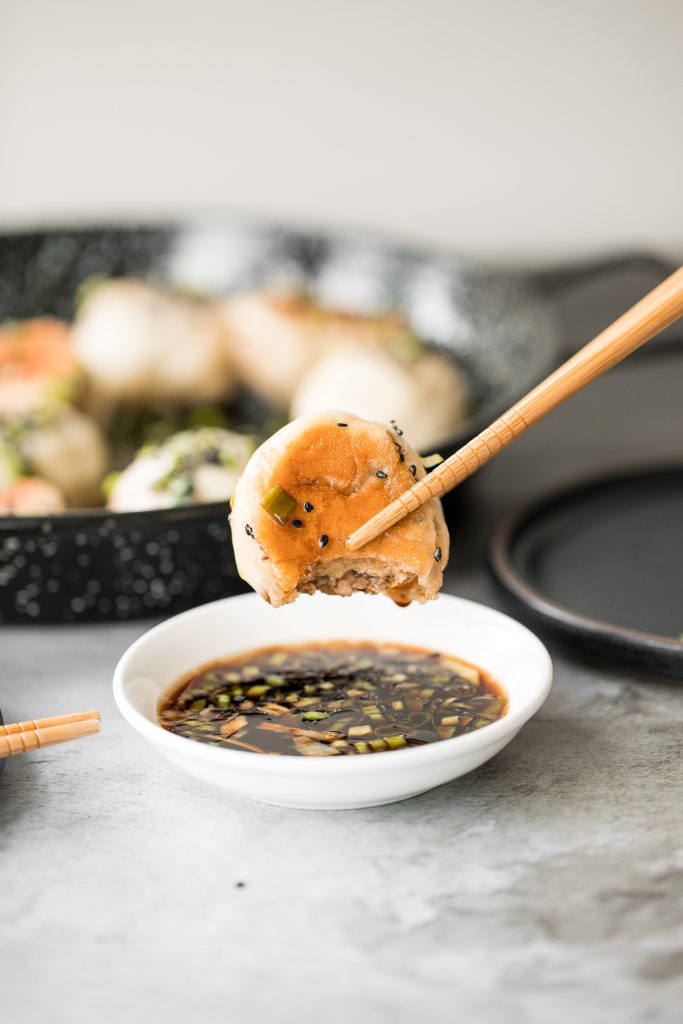
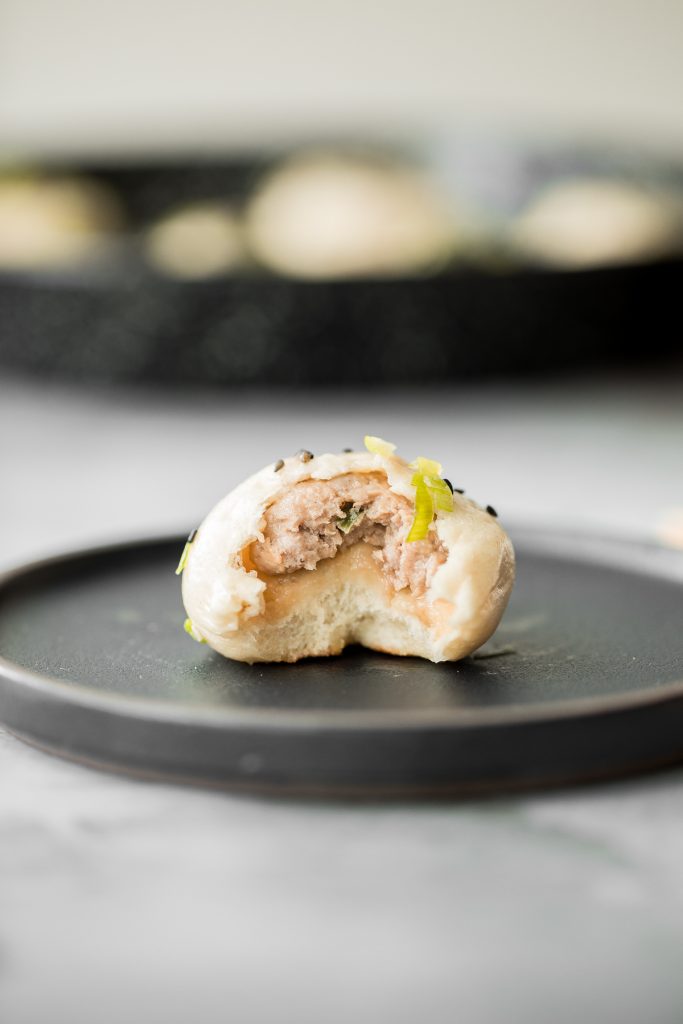
Crispy Bottom Shanghai Pan-Fried Pork Buns

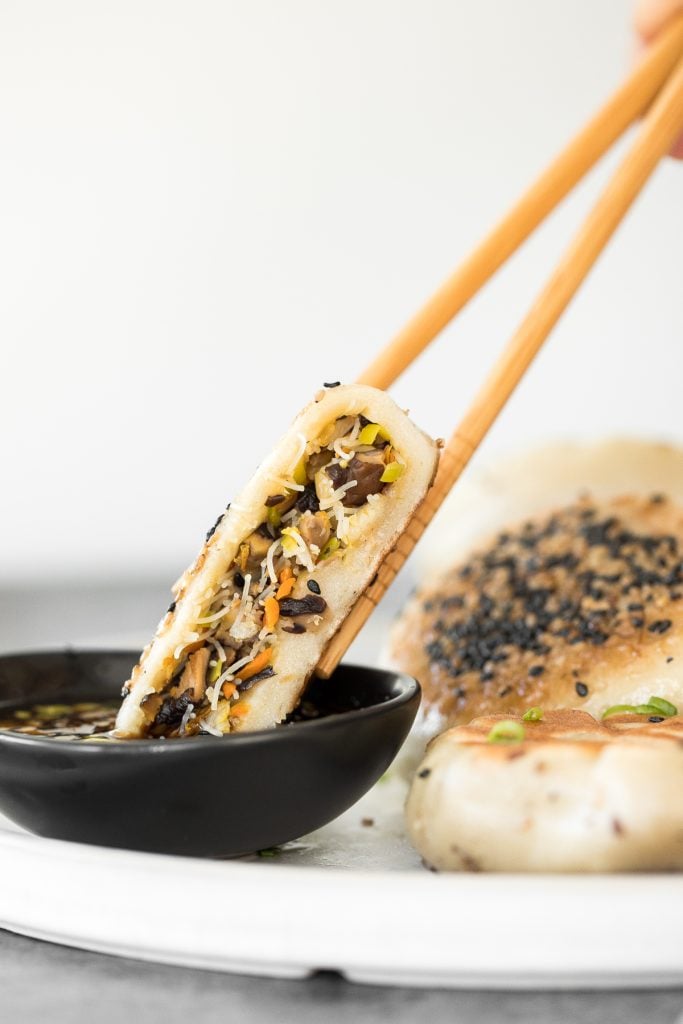
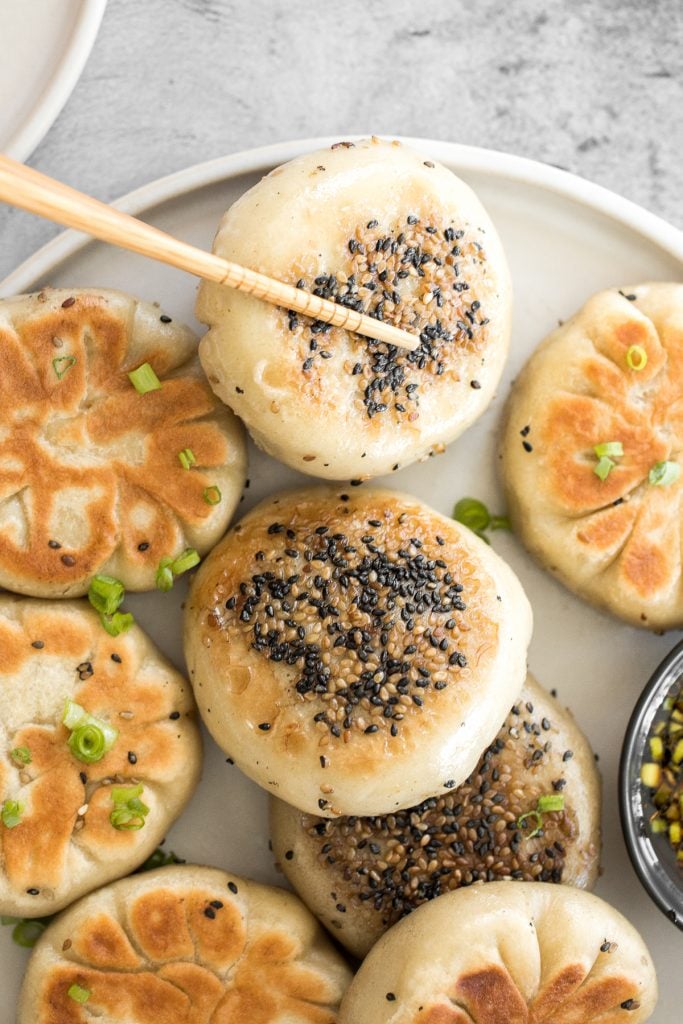
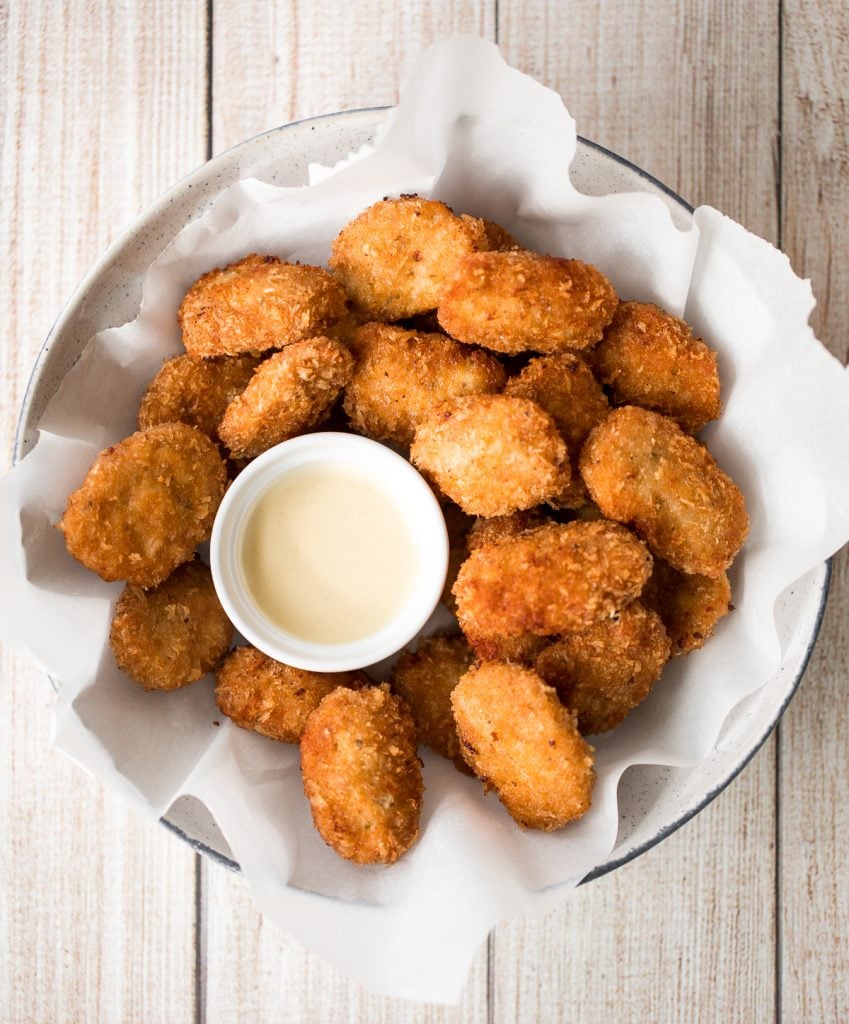
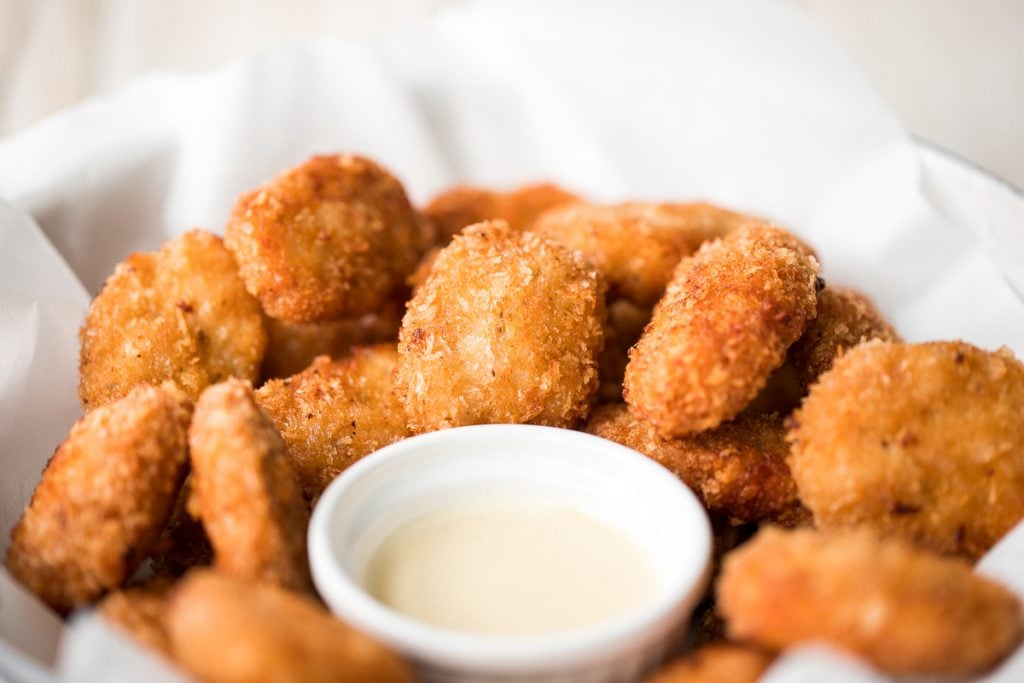
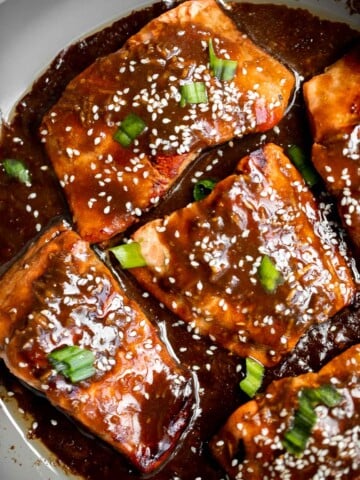
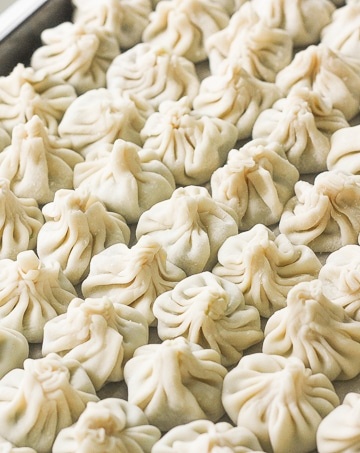
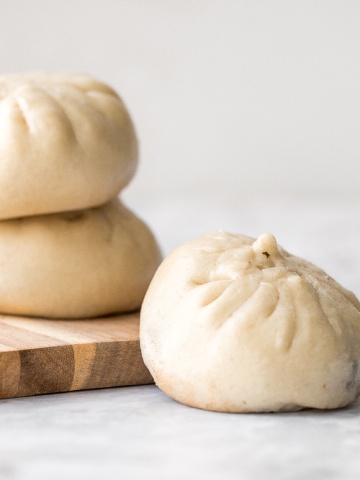
Better than takeout, crispy bottom Shanghai pan-fried pork buns are crispy and golden on the outside, yet fluffy, airy and chewy on the inside with a savoury and juicy pork and spring onion filling inside. Serve this popular Chinese dim sum snack at home with a homemade vinegar dipping sauce or spicy chili oil.
What are Shanghai Pan-Fried Pork Buns?
Crispy bottom Shanghai pan-fried pork buns, also known as shengjian bao or baozi 生煎包 , is a popular Chinese breakfast or snack food (dim sum). It is a specialty of the city of Shanghai. These buns are first fried to give them their iconic golden and crispy bottoms, and then steamed to cook the filling inside, giving them their soft and super fluffy texture inside. They are made with a yeast dough and are typically filled with pork and spring onions inside.
Ingredients in Shanghai Pan-Fried Pork Buns
Here is what you will need to make these Shanghai pork buns:
- bun dough - made with all-purpose flour, instant yeast, sugar, baking powder, and water.
- ground pork
- spring onions
- fresh ginger
- soy sauce
- sesame oil
- Shaoxing cooking wine
- sugar
- white pepper
- black pepper - optional.
- vegetable oil and water - for pan frying the buns.
- garnish toppings - black sesame seeds and spring onions.
- vinegar dipping sauce - made with black vinegar, soy sauce, sesame oil and green onions.
You will also need measuring cups and spoons, mixing bowls, a small rolling pin, and a non-stick skillet with cover.
How to Make the Best Crispy Bottom Shanghai Pan-Fried Pork Buns
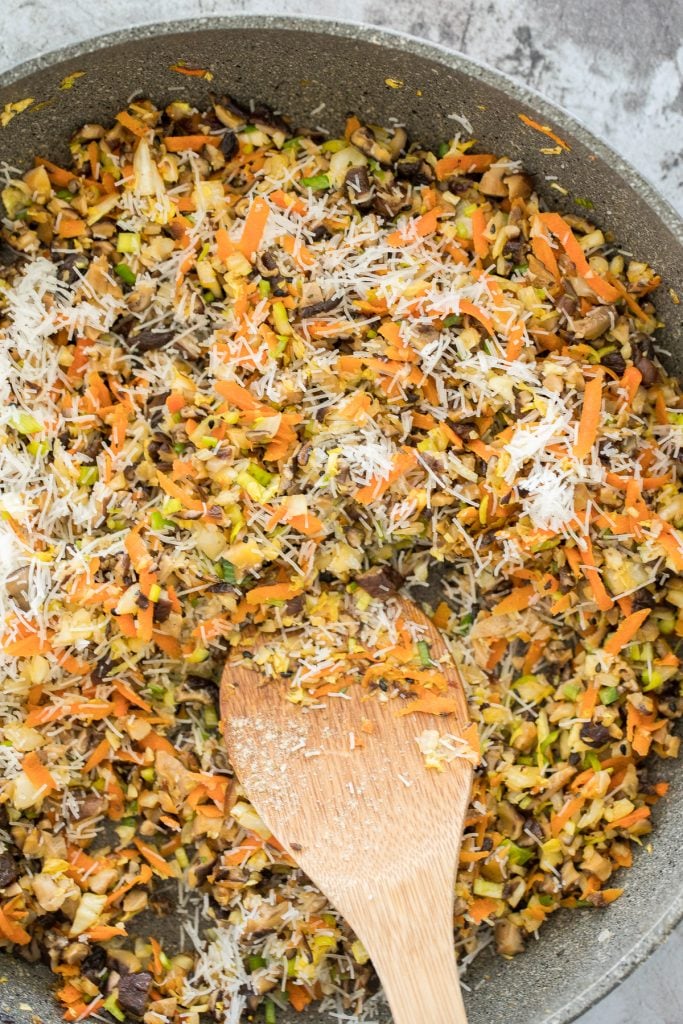
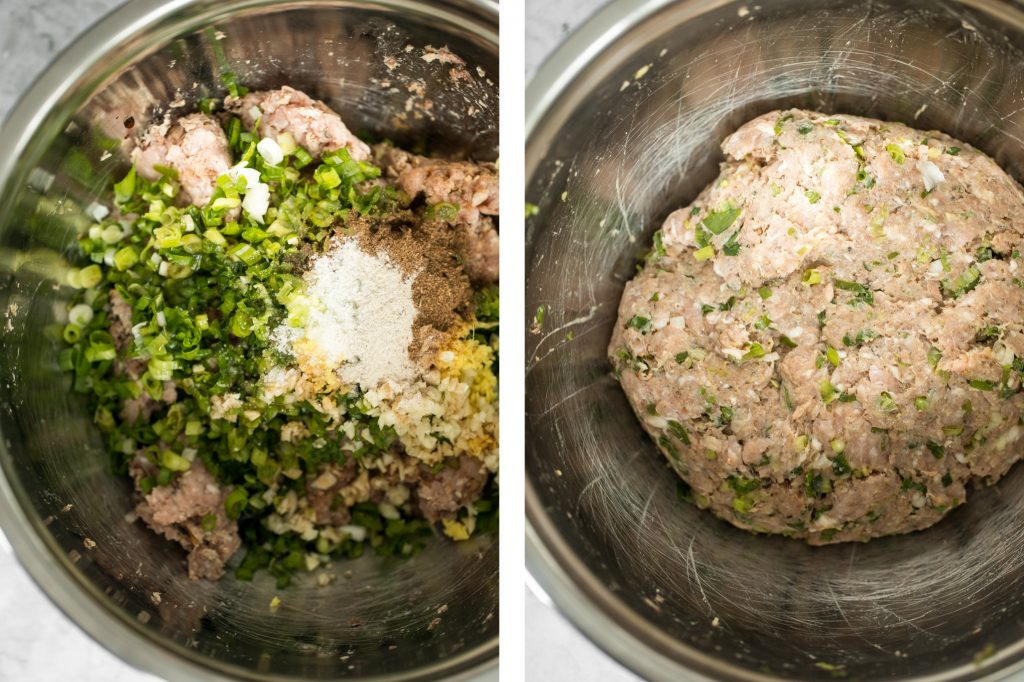
First, prepare the filling by combining all the filling ingredients into a large mixing bowl. Use a spatula to mix well and evenly, blending the ingredients together. Cover the bowl with cling wrap and refrigerate for at least one hour until the dough is ready for assembling.
Then, prepare the bun dough. In a large bowl, whisk together flour, yeast, sugar, baking powder, salt and water. Mix well to combine with a spatula, until the mixture forms into a dough. Make sure to scrape off any remaining dry flour on the sides of the bowl.
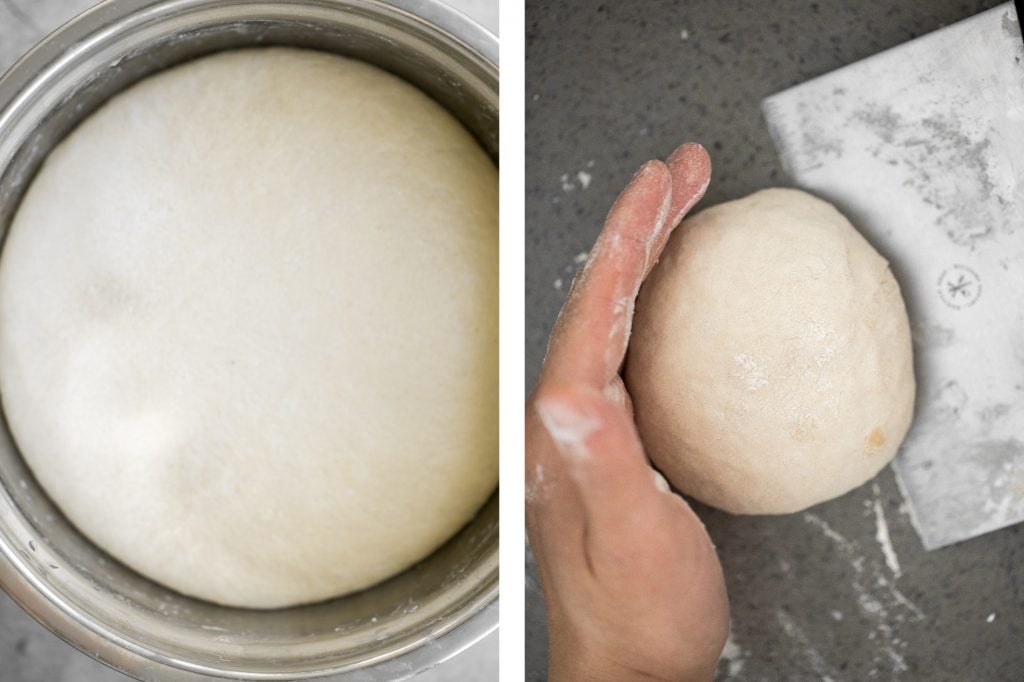
Knead the dough with your hands (or stand mixer) until the dough becomes smooth and soft, about 10 minutes. This is a 60% hydration dough (water to flour ratio) and it should be fairly easy to handle. Form the dough into a ball and place it back into the bowl. Cover the bowl with a chopping board or cling wrap. Let the dough sit at room temperature for one hour, or until it rises and doubles in size. Once risen, knead the dough for a few minutes to get rid of any air bubbles.
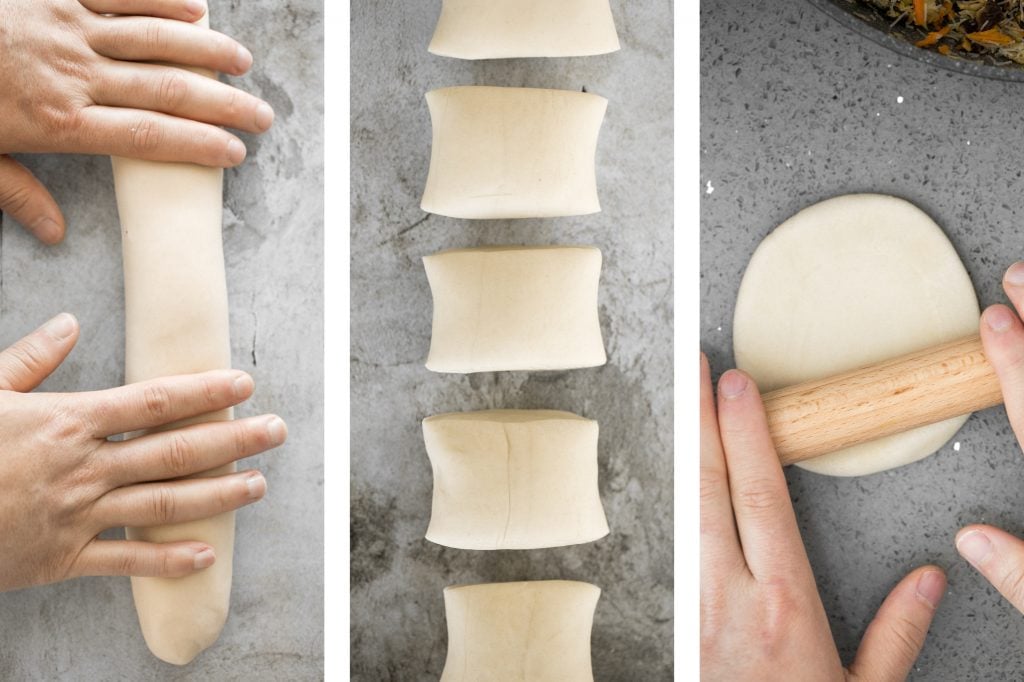
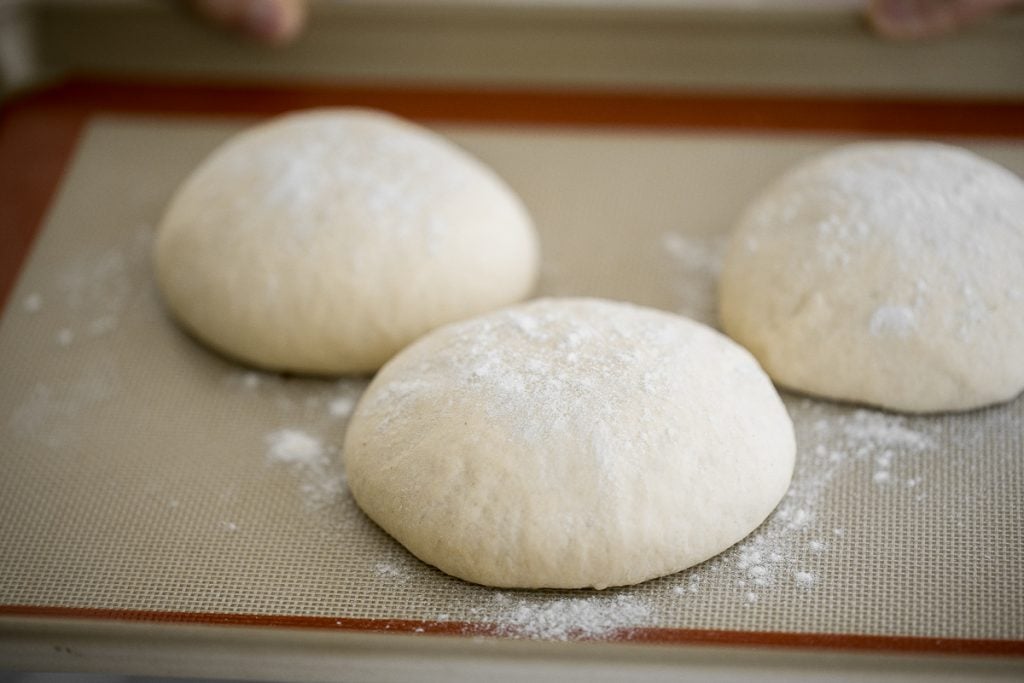
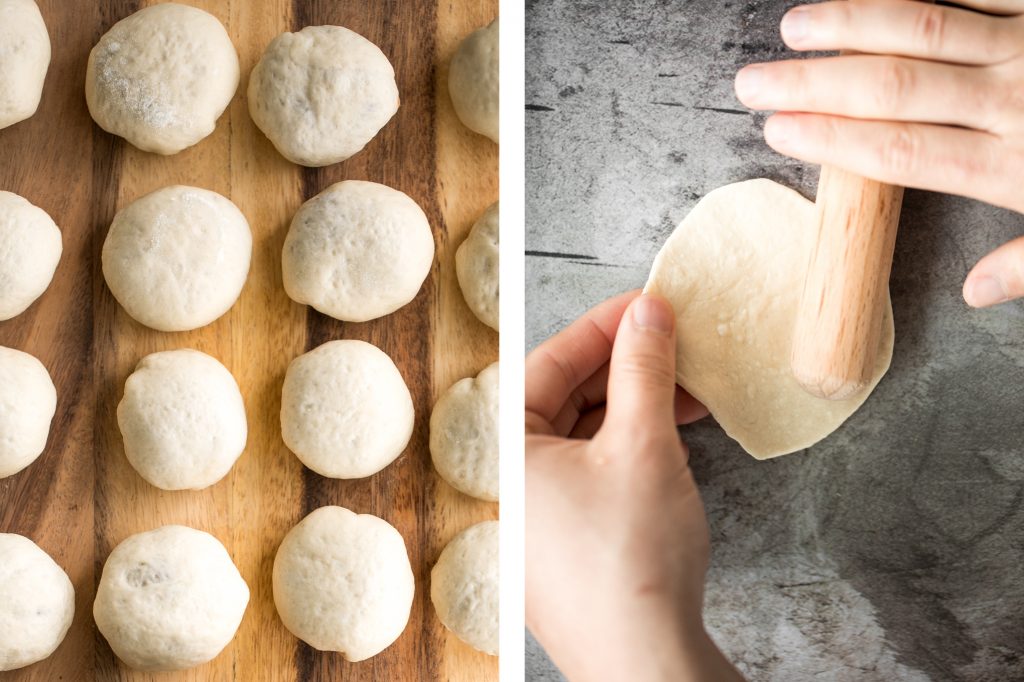
Transfer dough onto a floured surface and roll into a log. Divide the log into 15 even pieces and roll into balls by cupping them into your palm and making circular motions. Flatten and roll each dough ball out into a 3-inch circle with a small rolling pin. Note that the centre should be slightly thicker than the edges.
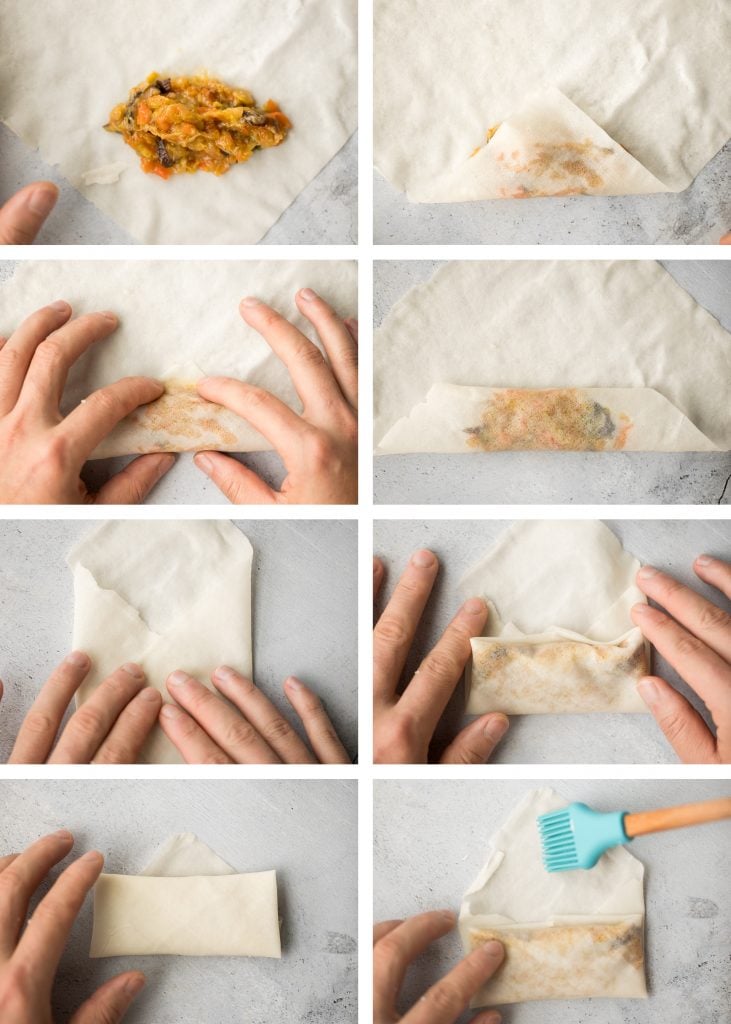
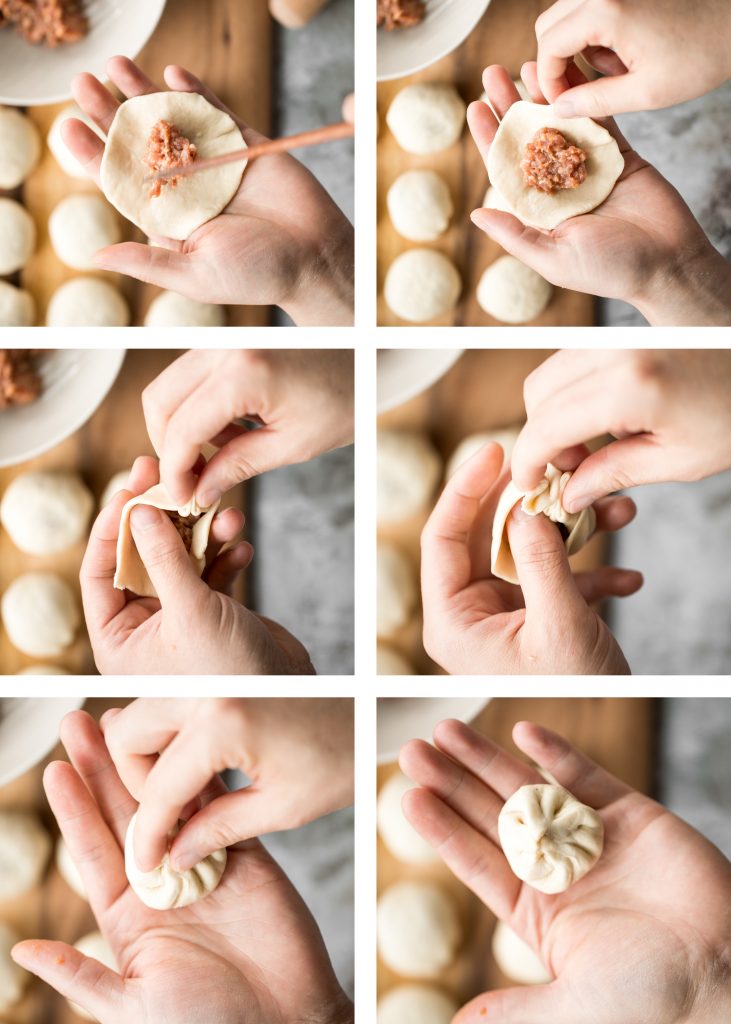
How to Fold Crispy Bottom Buns
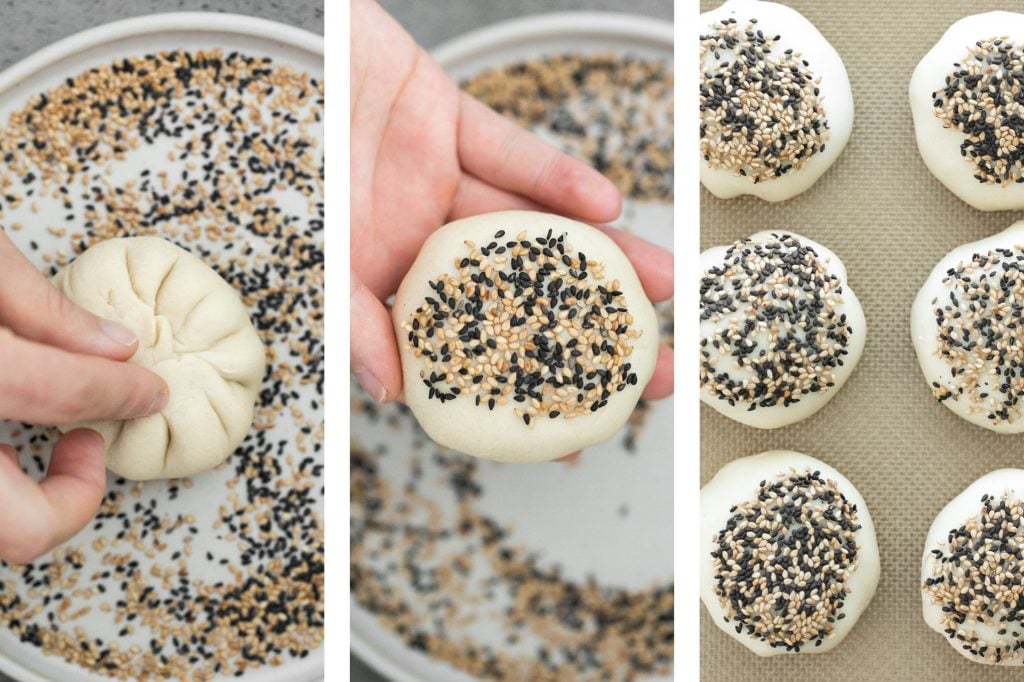
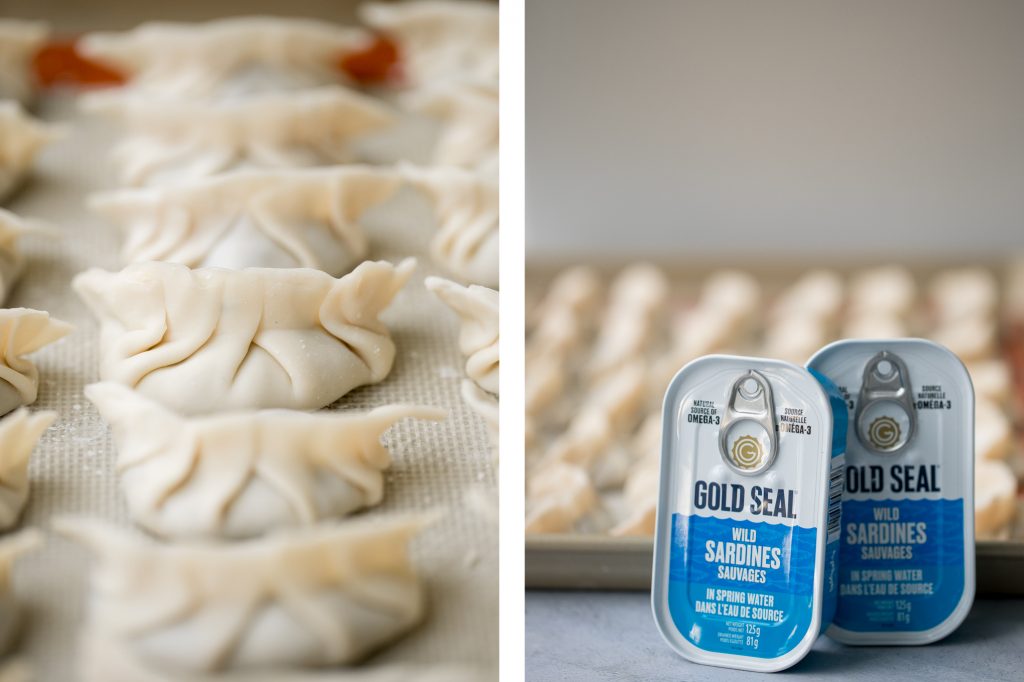
Add a tablespoon filling into the centre of the rolled out dough. Bring the edges of the dough up, enclosing the filling inside. Seal the filling inside by pleating the edges together with your finger.
Turn the buns over with the pleated side down (the top side should be smooth) and place on a parchment-lined tray or plate. Cover with a tea towel and let them rest for another 20 minutes to allow the dough to rise a bit more (not double in size).
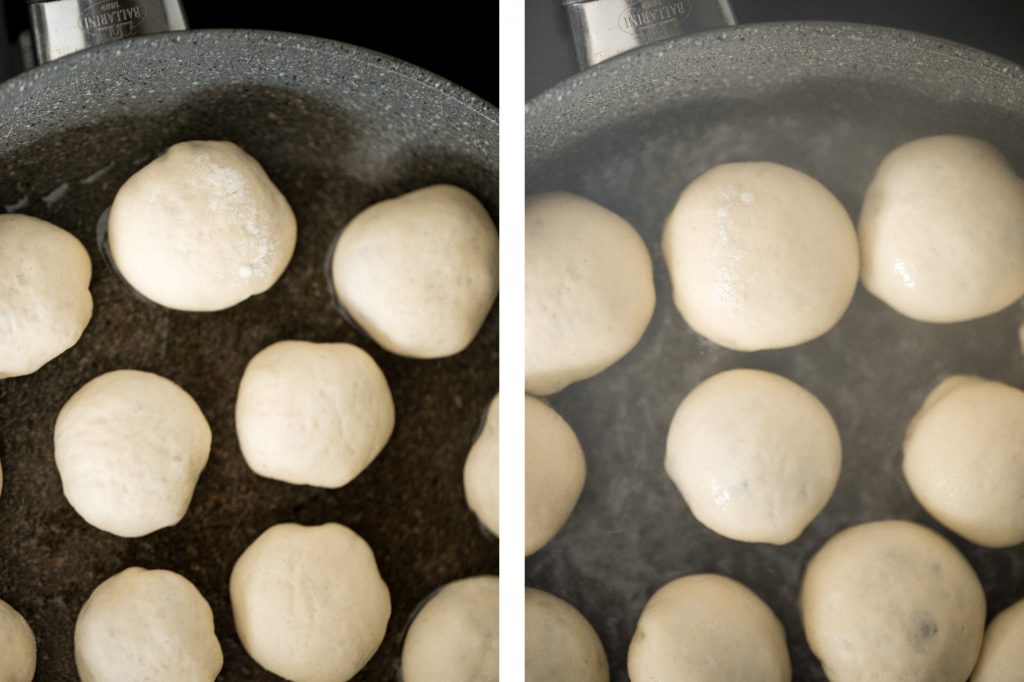
How to Pan Fry Crispy Bottom Buns
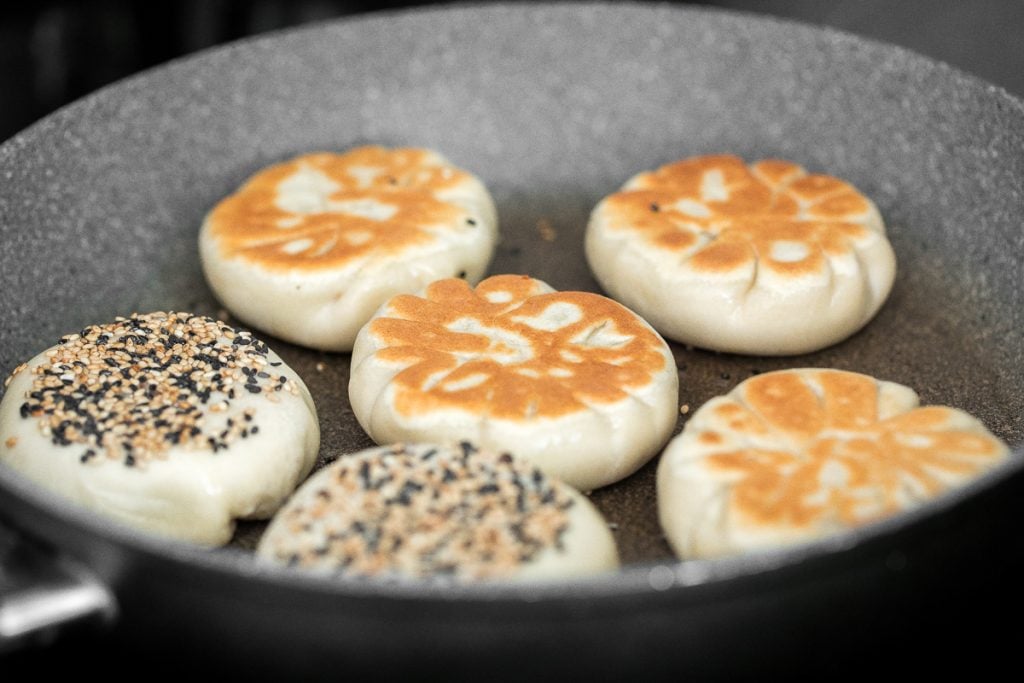
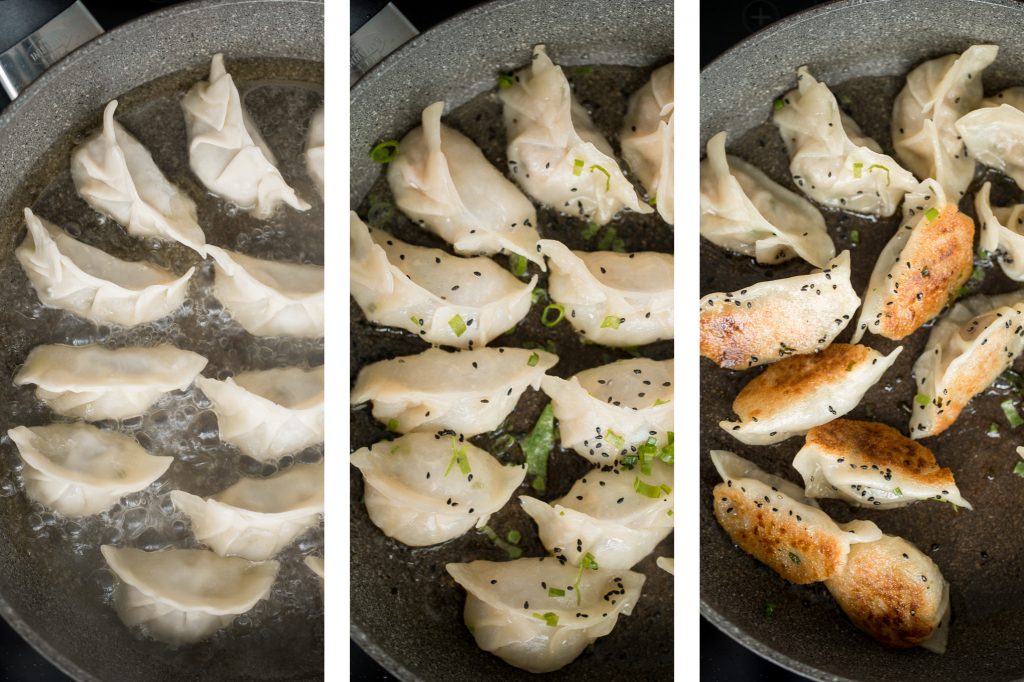
- In a large skillet, heat oil over medium high heat for 2 minutes. Place buns with the pleated side facing down. Make sure to place buns approximately ½ inch apart to prevent them from sticking together. (You may have to cook in 2 batches if your skillet is not large enough). Cook for 2 minutes until the bottom turns golden brown and crispy. Make sure to place buns approximately ½ inch apart to prevent them from sticking together.
- Add a cup of cold water into the pan. The water should start sizzling and bubbling immediately. Make sure the water is about ½-inch deep and covers about half of the buns' height. Cover with the lid and continue to cook for 8-10 minutes until almost all the water is evaporated.
- Remove the lid and lower the heat to medium. Cook for another 2 minutes until all water has been absorbed and the bottom is crispy brown. Sprinkle sesame seeds and green onions on top.

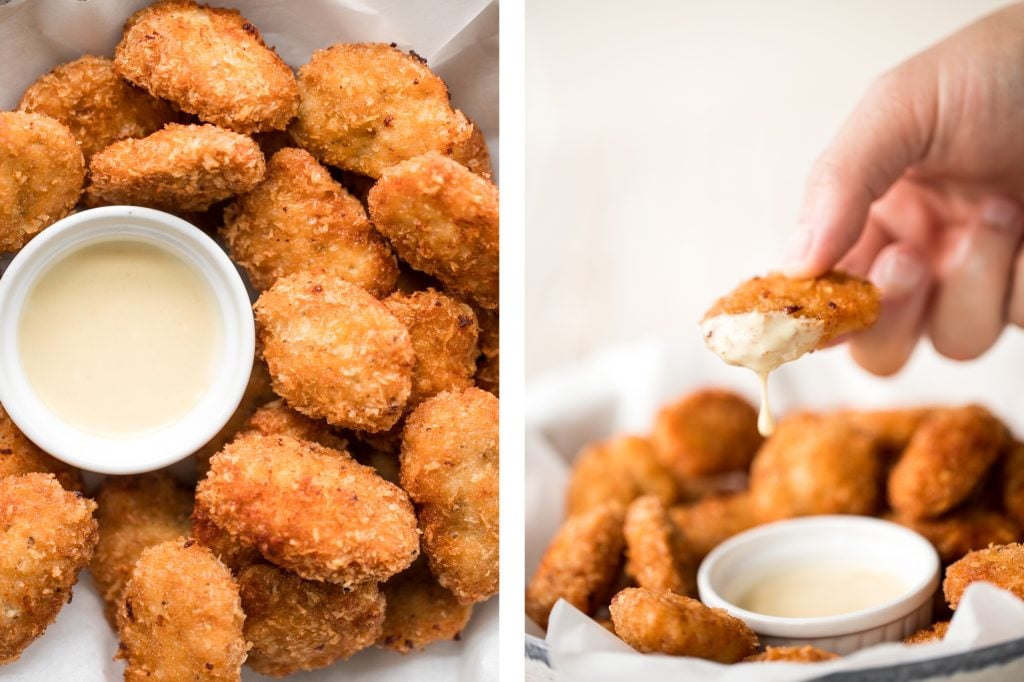
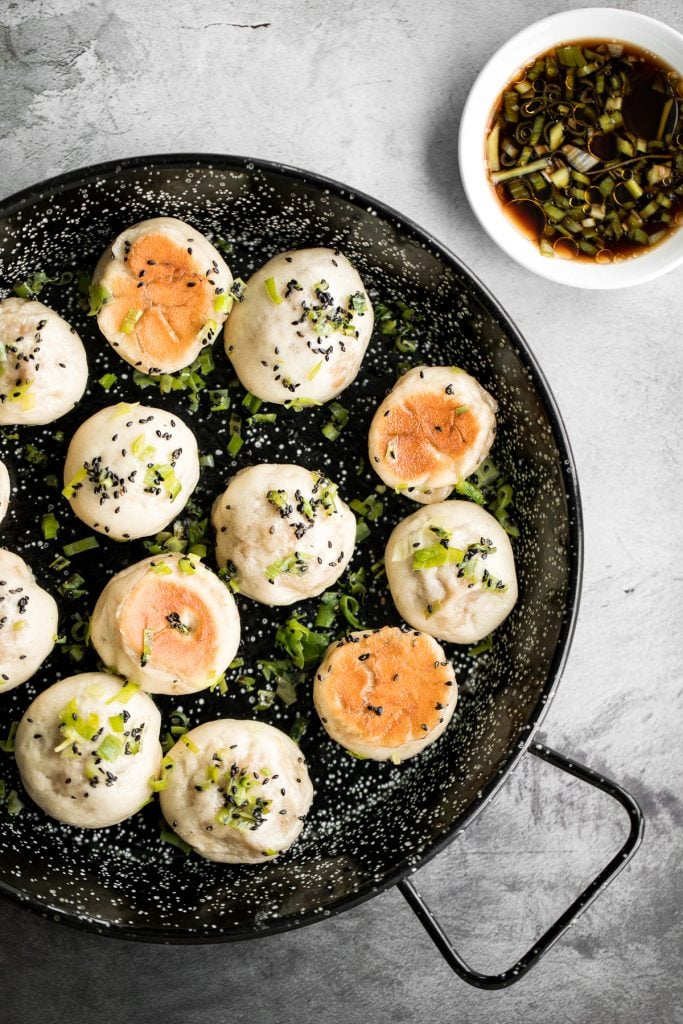
How to Serve Crispy Bottom Pork Buns
Serve these crispy bottom pan-fried Shanghai pork buns hot with a side of vinegar dipping sauce or spicy chili oil. To make the dipping sauce, combine black vinegar, soy sauce, sesame oil, and green onions in a small bowl and stir to combine.
FAQ and Tips on Making Shanghai Pork Buns
- Can you customize the filling? Absolutely. There are endless ways that you can customize the filling. You can use different protein such as ground beef or chicken, and other types of vegetables such as beans sprouts or chives.
- Can I use dry active yeast instead of instant yeast? Yes, you will just need to adjust the first step slightly. Rather than mixing together all the dough ingredients, first combine the active yeast with the water. Let it sit for 5-10 minutes to activate it (it should get bubbly and frothy). Then, combine the rest of the dough ingredients in a large bowl and pour in the yeast mixture to combine. Continue on with the recipe as instructed.
- How long do crispy bottom buns last? You can store them in an airtight container for up to 3 days in the refrigerator. You can reheat in the oven or in the air fryer.
- Can you freeze crispy bottom buns? Yes, these Shanghai buns freeze beautifully. Place uncooked buns in a single later on a parchment-lined baking tray and place in the freezer for one hour. Once they are relatively frozen, transfer to an airtight container or freezer bag. This method prevents them from sticking together initially.
More Dim Sum Recipes
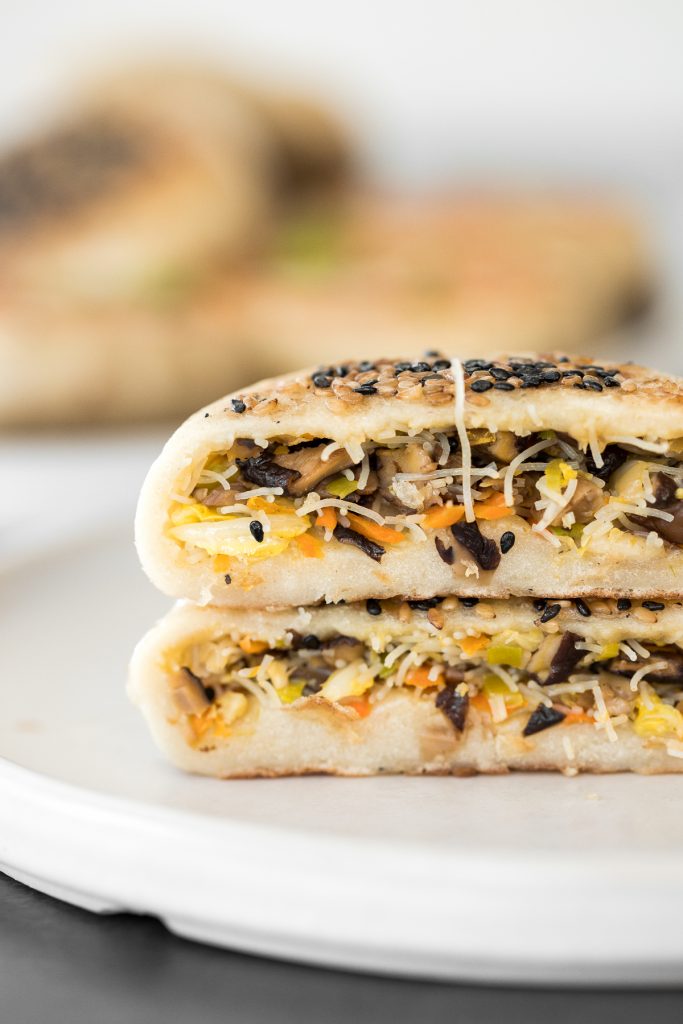
- Crispy Bottom Pan-Fried Vegetable Buns
- Shanghai Style Vegan Steamed Buns
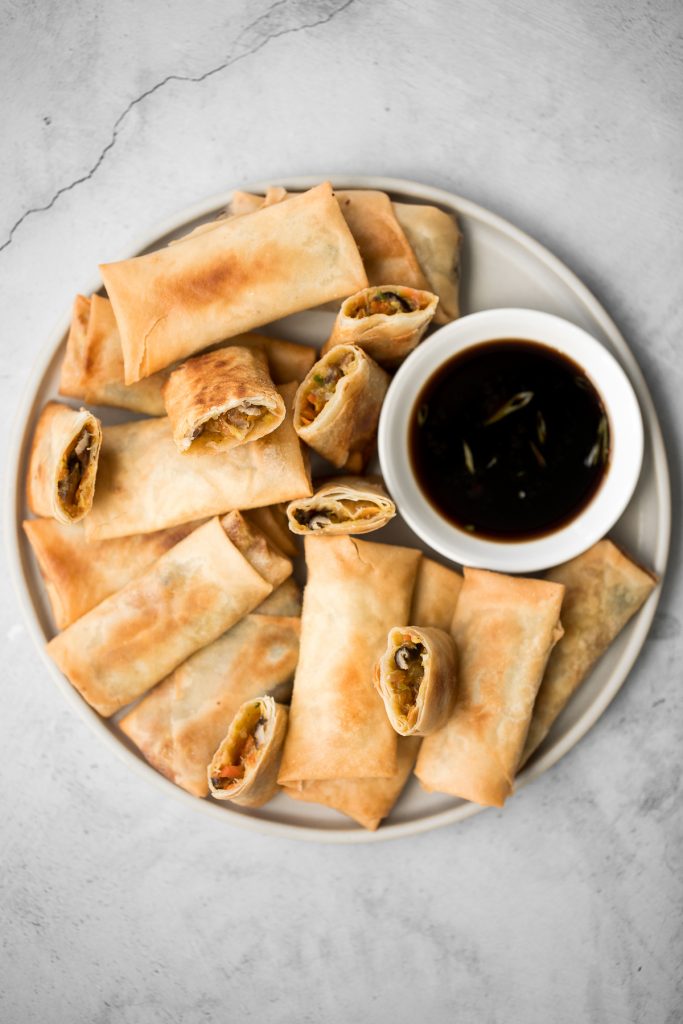
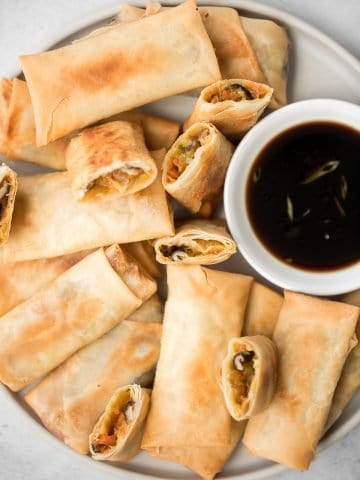
- Crispy Fried Vegetarian Spring Rolls
- Spicy Chili Oil Wontons
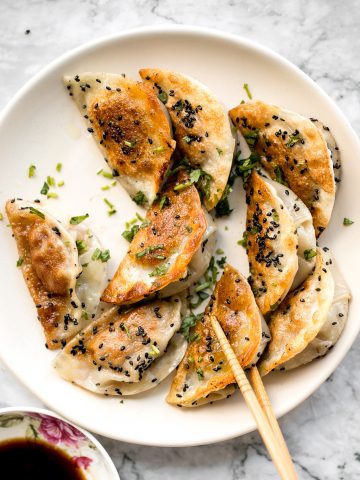
- Egg and Chive Vegetarian Dumplings
- Savoury Chive Pancakes with Sourdough Starter
- Chicken and Cilantro Wontons
Tried this recipe?
I'd love to hear what you think! Leave a comment and rating below to share your feedback. Your reviews help others discover this recipe and help me keep creating more free recipes for you. Snap a photo and tag me on social media @aheadofthyme too.
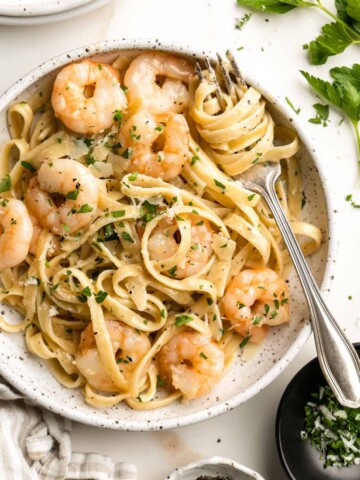
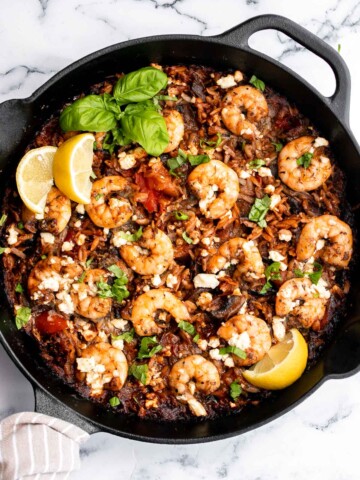
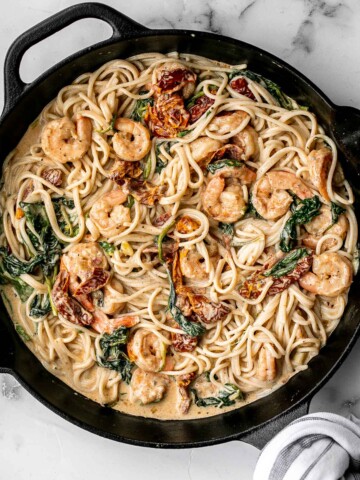
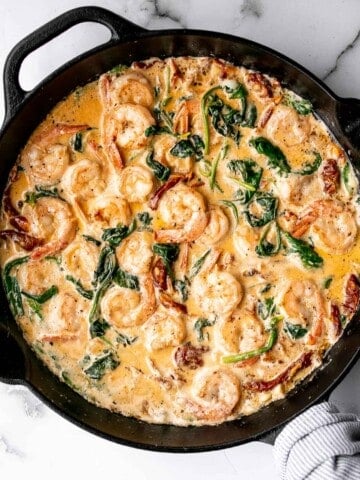
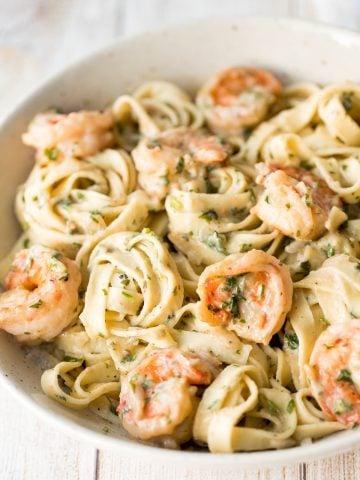
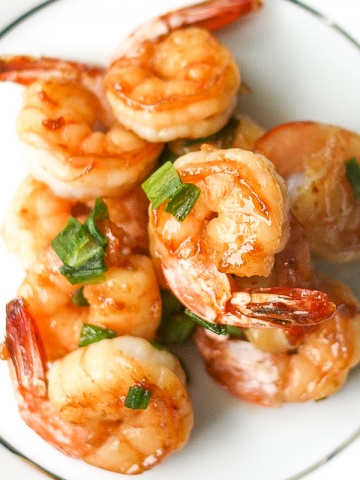
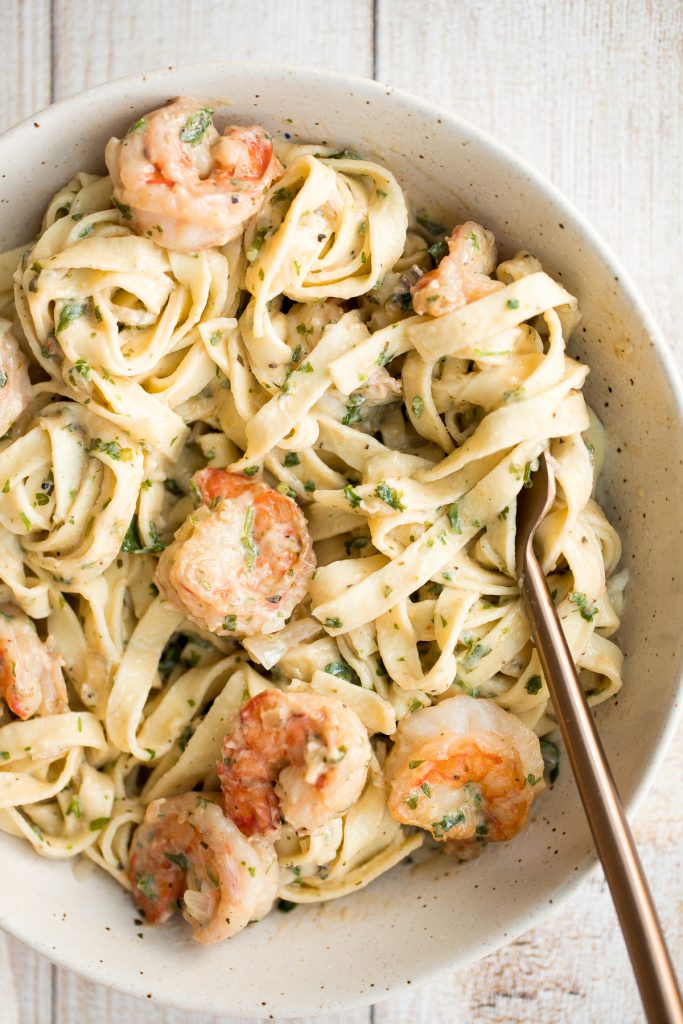
Shrimp Fettuccine Alfredo Pasta Bake
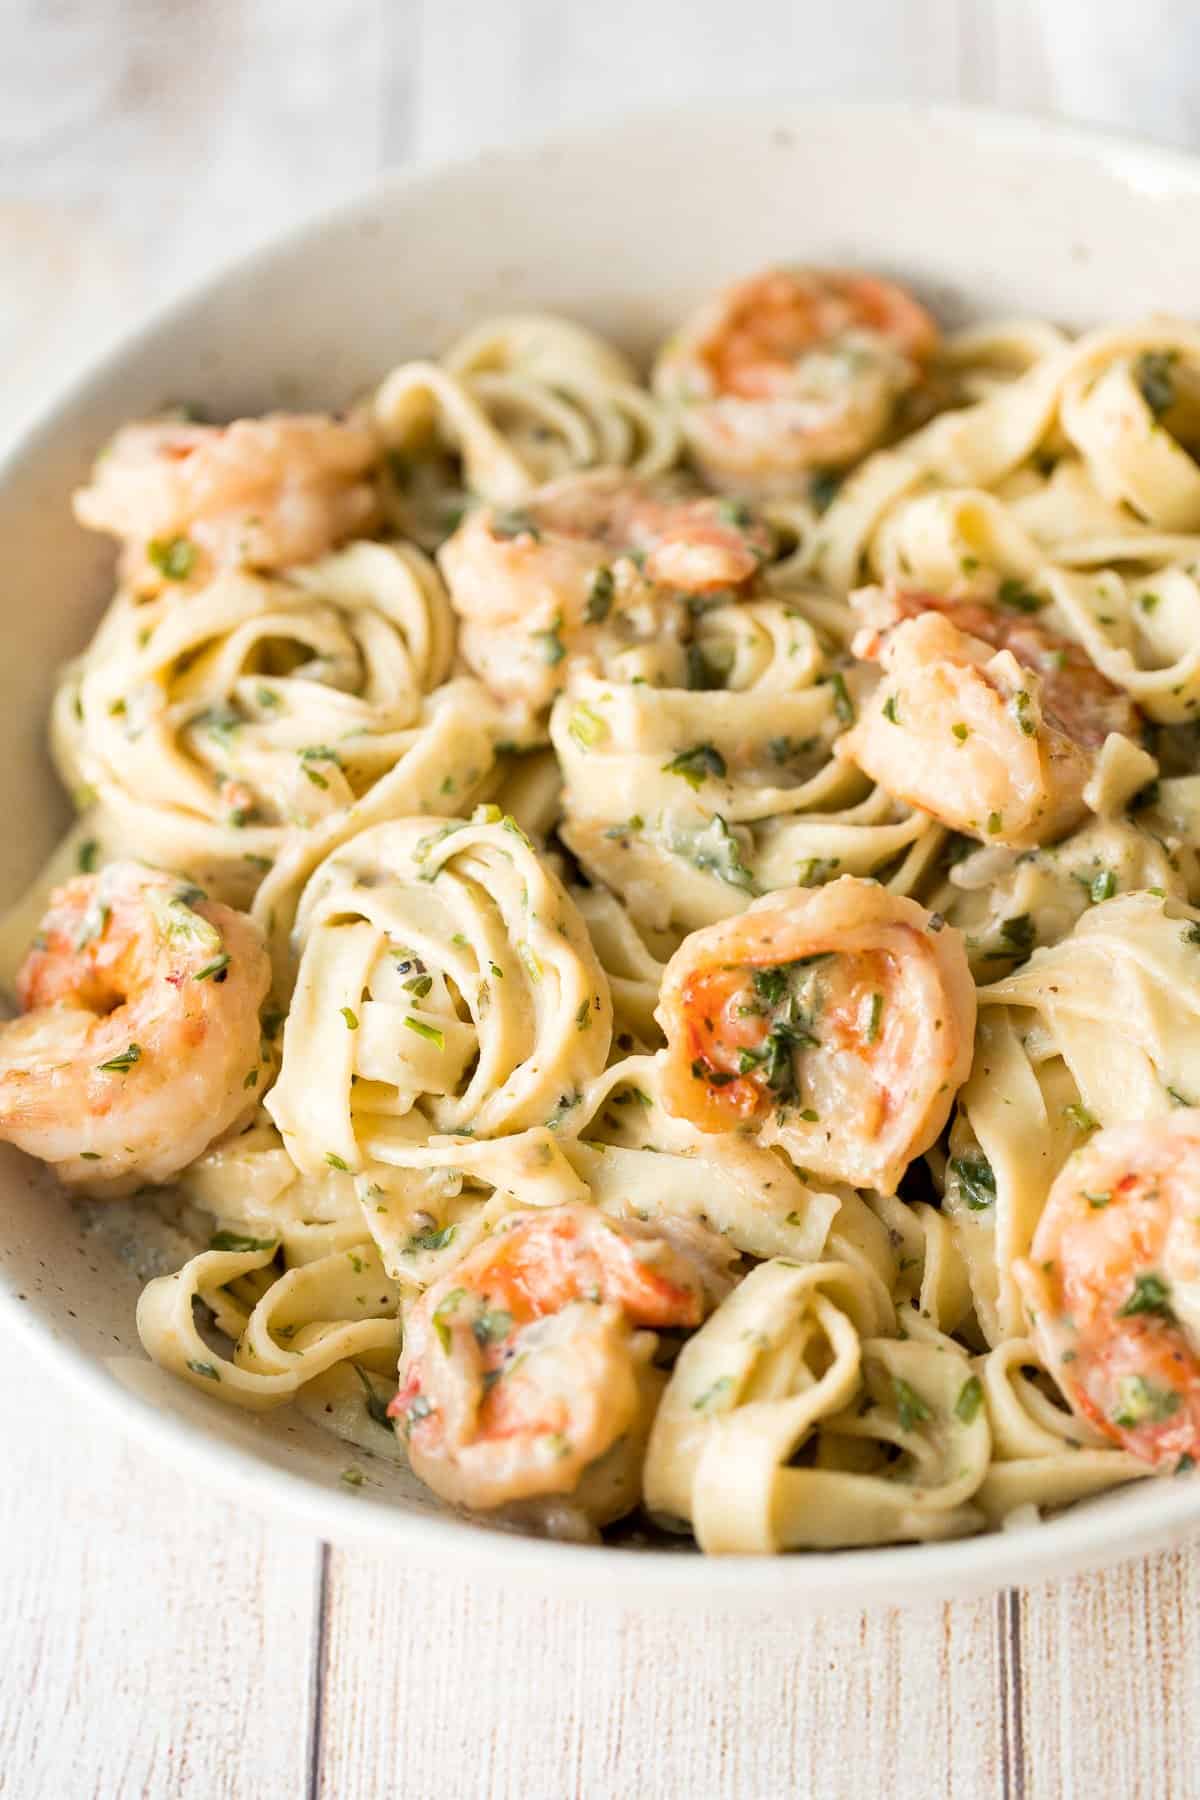
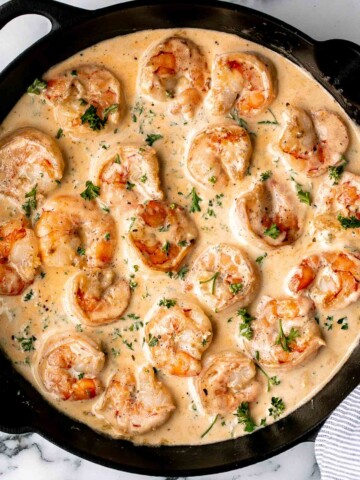
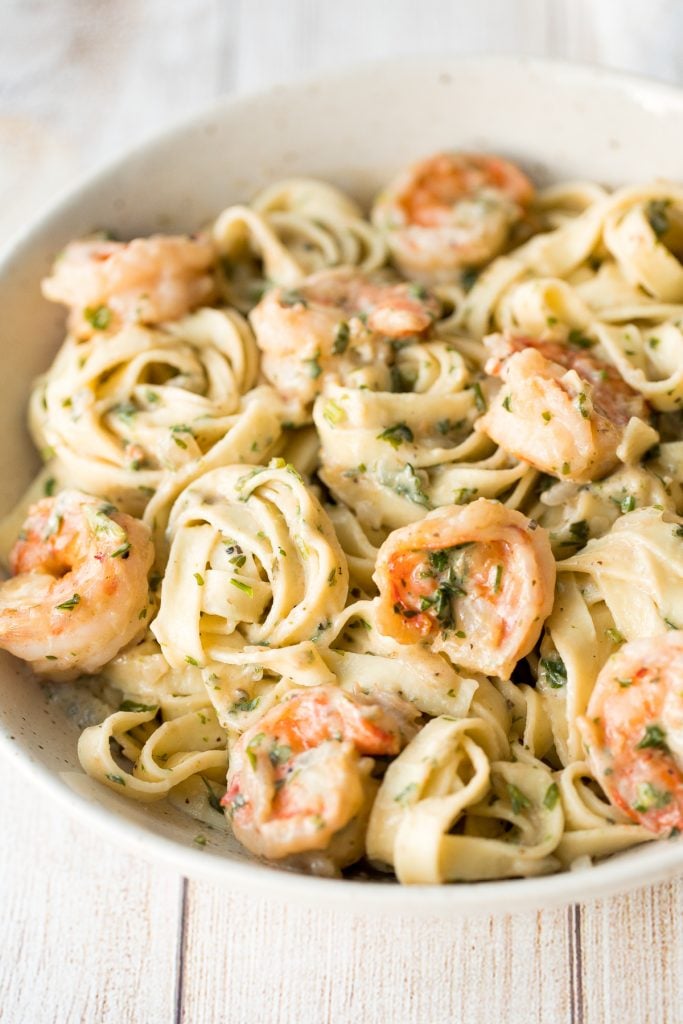
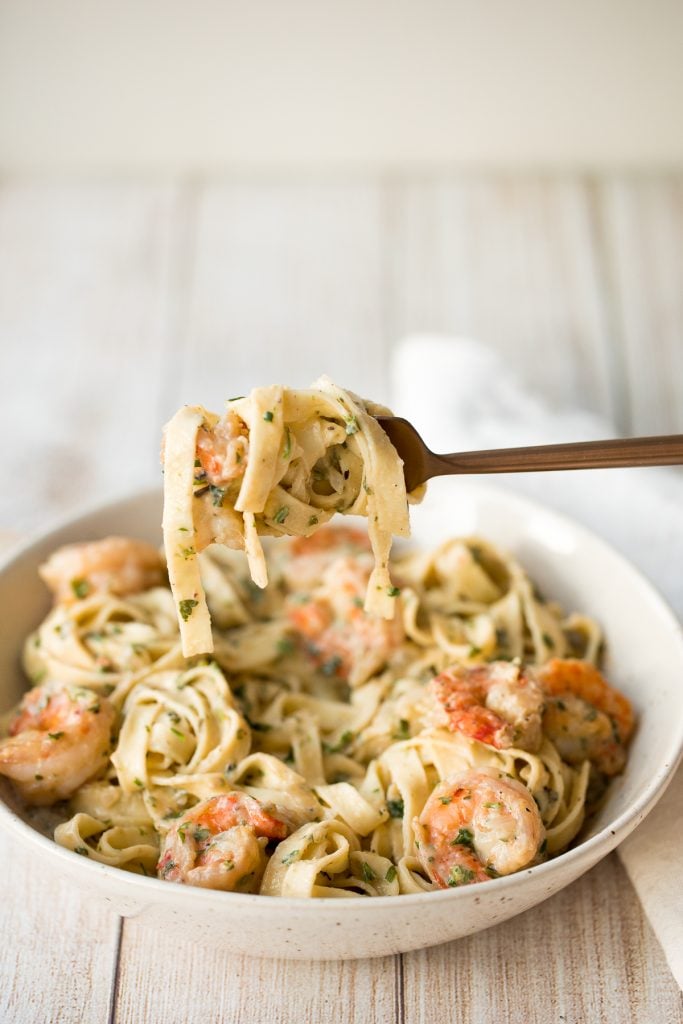
Creamy and dreamy shrimp fettuccine alfredo pasta bake is garlicky, buttery, cheesy, and loaded with jumbo shrimp and fresh parsley smothered in the creamiest alfredo sauce. It's the ultimate comfort food topped with gooey and golden mozzarella cheese baked to perfection. The best part? It's ready in about 20 minutes, including prep. It's such a quick and easy weeknight dinner, not to mention delicious.
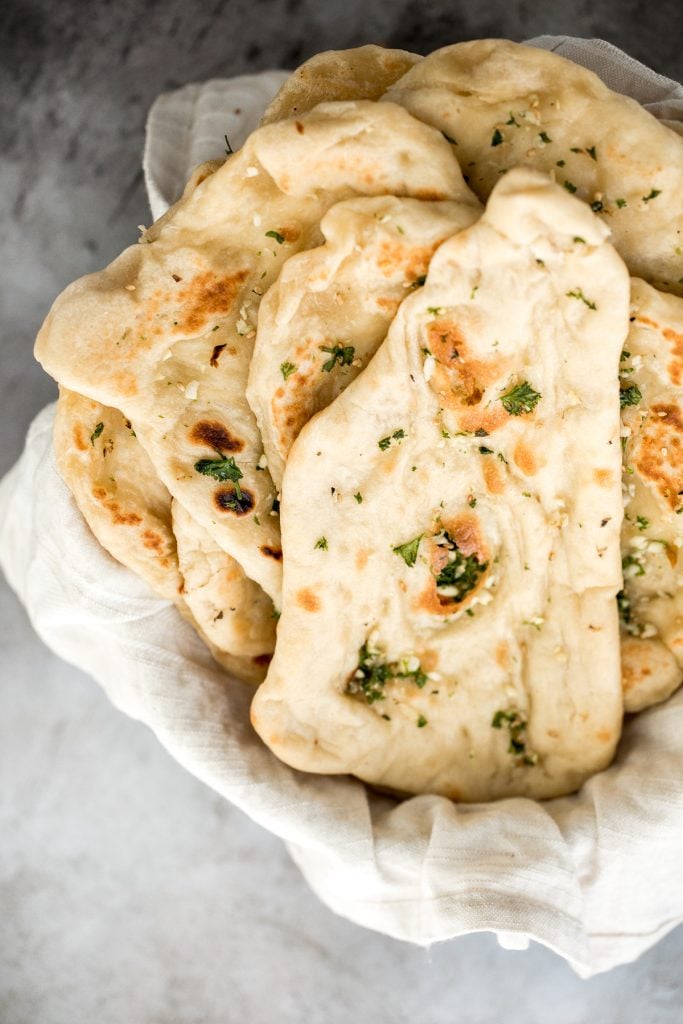
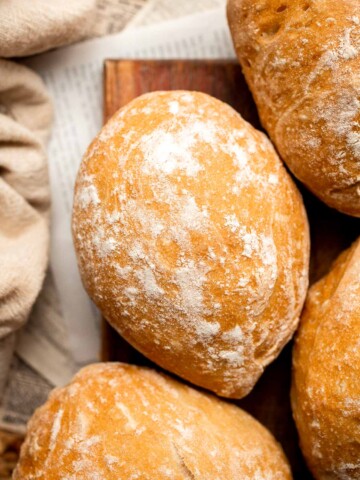
Serve this alfredo pasta bake with pull apart garlic bread to dip and soak up all that delicious sauce. You seriously don't want to miss out on a drop of it. Some other great breads that you can make to soak up the alfredo are small batch ciabatta rolls or green onion dinner rolls.
Ingredients in Shrimp Alfredo
- fettuccine pasta - I used fresh fettuccine which cooked in about 3 minutes. You can also use dry boxed fettuccine but note that it will take closer to 10 minutes to cook to al dente. You can even use any type of pasta shape that you like. A great option is penne as it will scoop up lots of sauce.
- salt - for boiling the pasta.
- olive oil
- onions
- garlic - I used minced garlic because of it's stronger flavour, but you can easily substitute with garlic powder if it is easier for you.
- parsley - lots and lots of parsley.
- shrimp - 1 pound of shrimp. I used jumbo shrimp which was about 20-24 pieces, but any kind of shrimp will work. To prepare, cut through the shell along the back of the prawns and remove the shells and tails. Then, rinse to remove the veins and pat dry with paper towel.
- alfredo sauce - made using melted butter, cream cheese, heavy whipping cream, and Parmesan cheese. You can also use store-bought alfredo sauce instead, especially if you don't have all these ingredients or want to make this even faster.
- ground black pepper
- salt flakes - to taste.
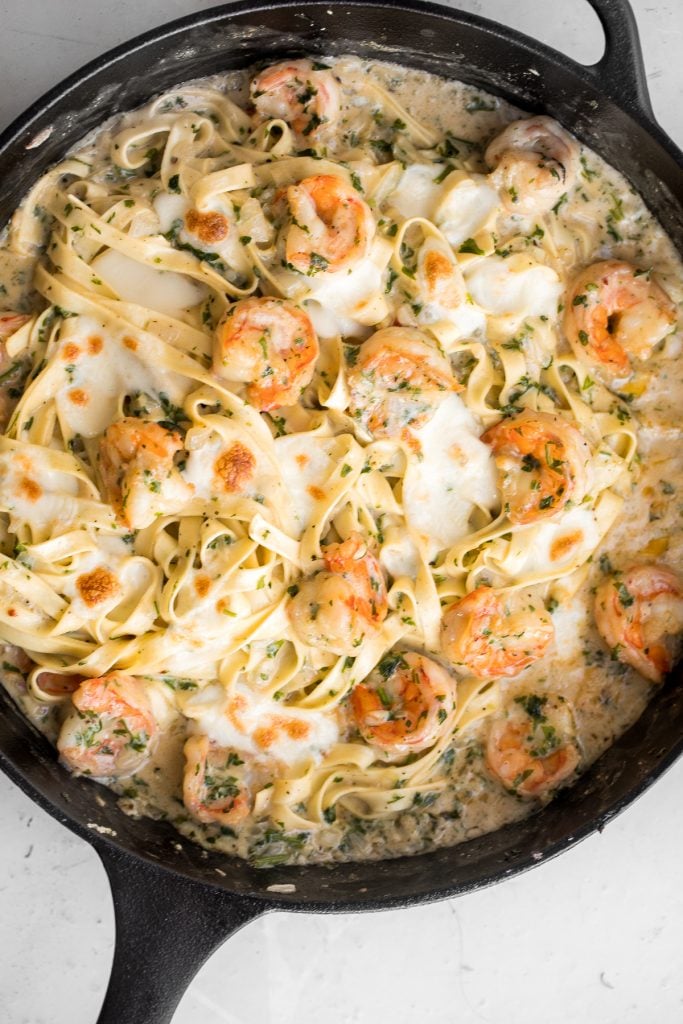
- fresh mozzarella cheese - for the pasta bake. The melted mozzarella cheese really enhances the flavour. You can choose to skip the mozzarella and the pasta bake step and just serve this as delicious shrimp fettuccine alfredo.
You will also need measuring cups and spoons, a colander, and a cast-iron skillet (for the pasta bake).
How to Make the Best Shrimp Fettuccine Alfredo Pasta Bake
First, cook the fettuccine in a large pot of salted boiling water, according to package instructions until al dente (in other words, firm to the bite). Fresh fettuccine takes about 3 minutes to cook thoroughly, whereas dry pasta will take closer to 10 minutes. Drain the fettuccine in a colander and set aside to be added into the skillet directly without rinsing.
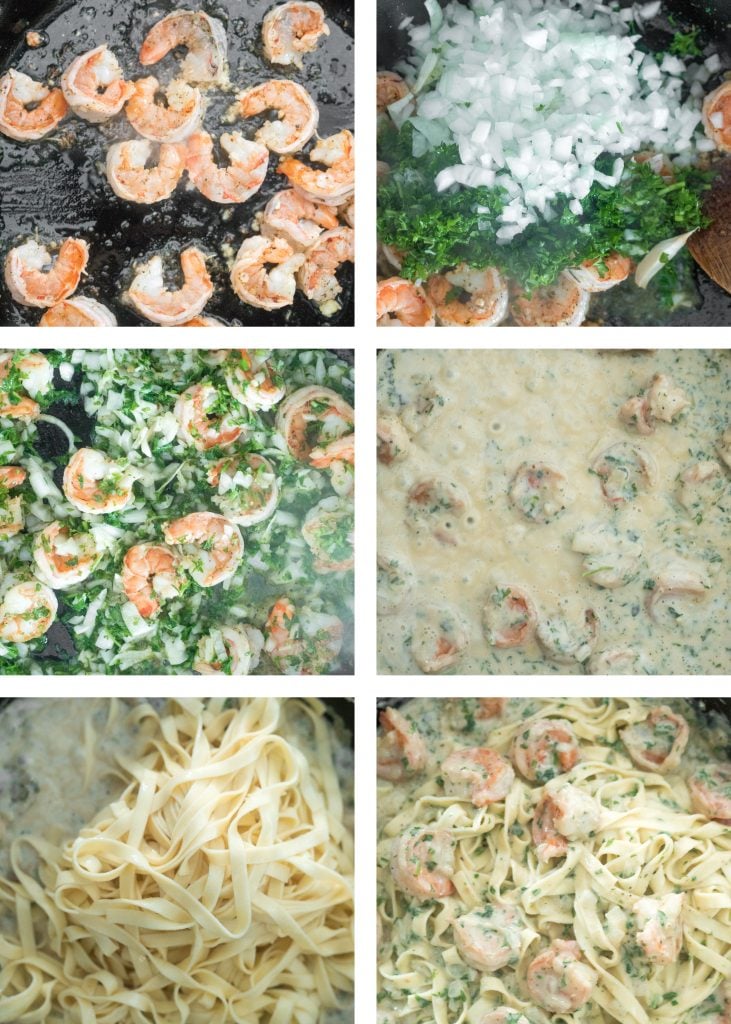
Next, make the creamy shrimp alfredo sauce. Heat olive oil in a large cast-iron skillet over medium high heat. Add shrimp and cook until they turn orange, stirring frequently, about 2-3 minutes. Add garlic, onions, and parsley and stir well. Cook for 2-3 minutes until fragrant and onions are soft and translucent.
Add melted butter, cream cheese and heavy whipping cream. Stir well and cook for about 2 minutes until the mixture forms into a uniform texture. Stir in Parmesan cheese and black pepper. Continue stirring well for another minute to combine all ingredients. You will notice the mixture start to thicken a bit.
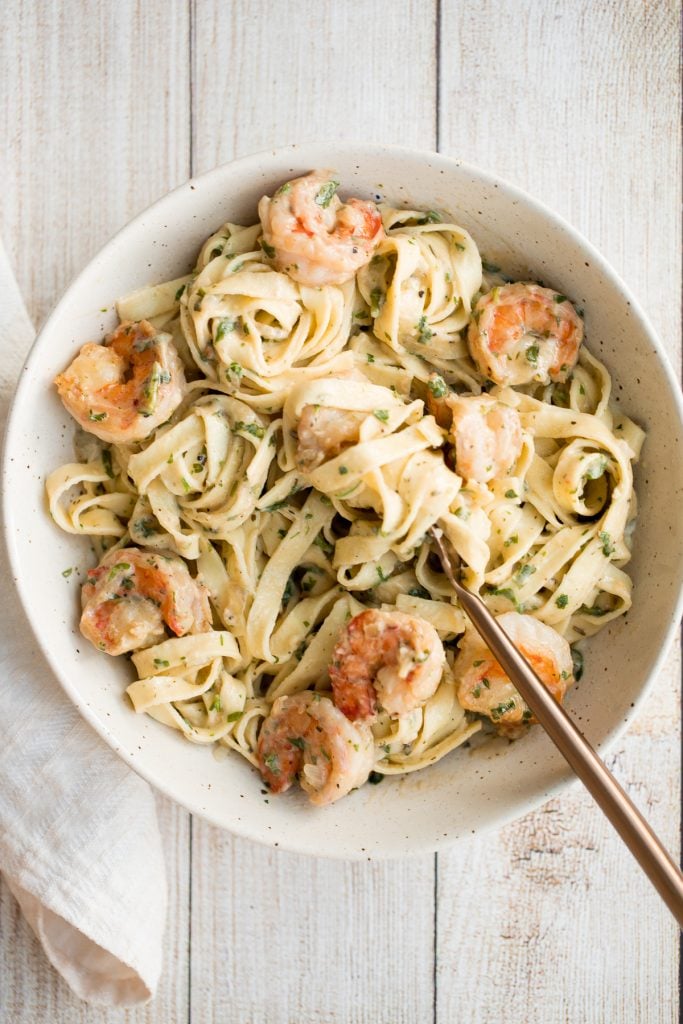
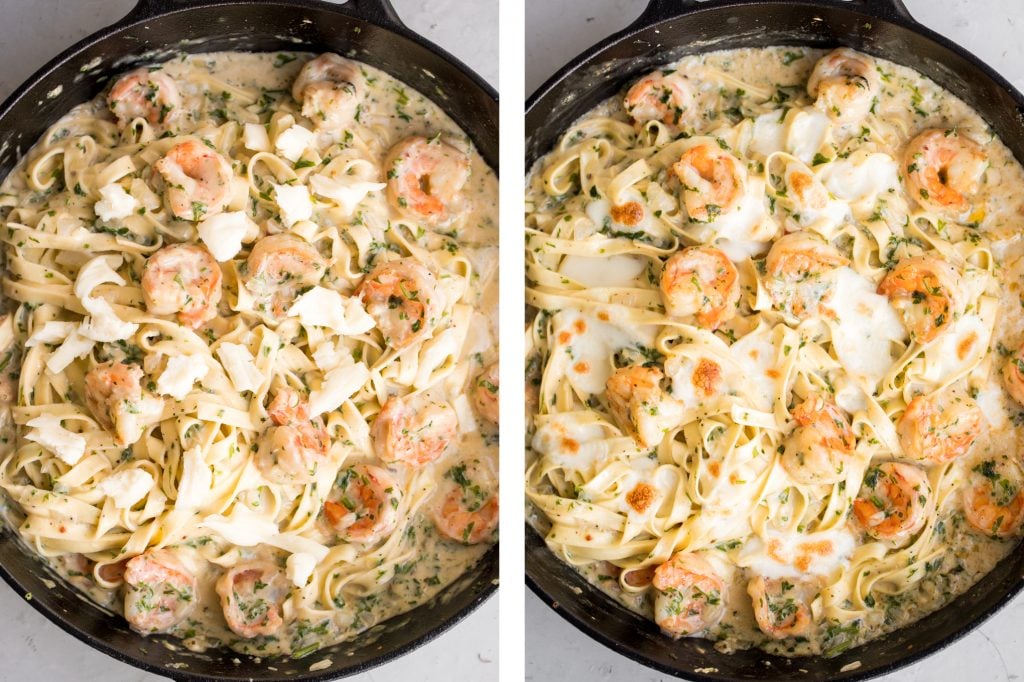
Turn off the heat and add the cooked fettuccine. Toss well to combine. Sprinkle salt flakes on top to taste. You can serve the pasta immediately at this point, or continue on to the pasta bake.
For the pasta bake, add pieces of fresh mozzarella evenly on top of fettuccine. Transfer the skillet to the oven and broil on high for 2-3 minutes, until the cheese melts and browns. Keep a close eye on the pasta because things can happen very quickly in the broiler.
Tips for Making Shrimp Fettucine Alfredo
- Can I make this with chicken? Simply replace the shrimp with small pieces or strips of chicken and adjust the cook time. Depending on the size of the chicken, you should cook until chicken turns white, about 5-6 minutes, before proceeding to add the onions, garlic and parsley.
- How to serve: Serve this alongside some pull apart garlic bread or a crusty bread for dipping, such as small batch ciabatta rolls or small batch no-knead bread.
- How to store: Store shrimp fettuccine alfredo in an airtight container in the refrigerator for up to 3 days. To reheat, simply heat in the microwave or in a skillet. You may need to add a little water to thin out the sauce a bit.
More Pasta Recipes
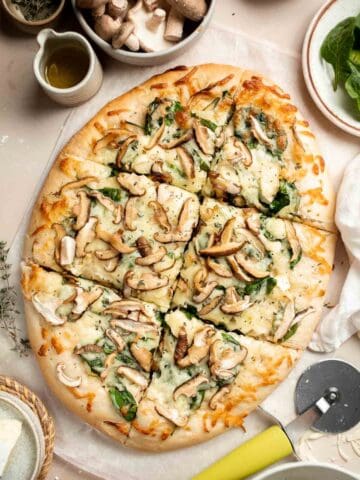
- Spaghetti Alfredo with Spinach and Mushrooms
- Creamy Avocado Basil Peso Spaghetti
- Butternut Squash Carbonara Pasta
- Creamy Spinach and Tomato Vegetarian Lasagna
- Farfalle Pasta with Light Creamy Mushroom Rose Sauce
- Spaghetti and Meatballs
Tried this recipe?
I'd love to hear what you think! Leave a comment and rating below to share your feedback. Your reviews help others discover this recipe and help me keep creating more free recipes for you. Snap a photo and tag me on social media @aheadofthyme too.
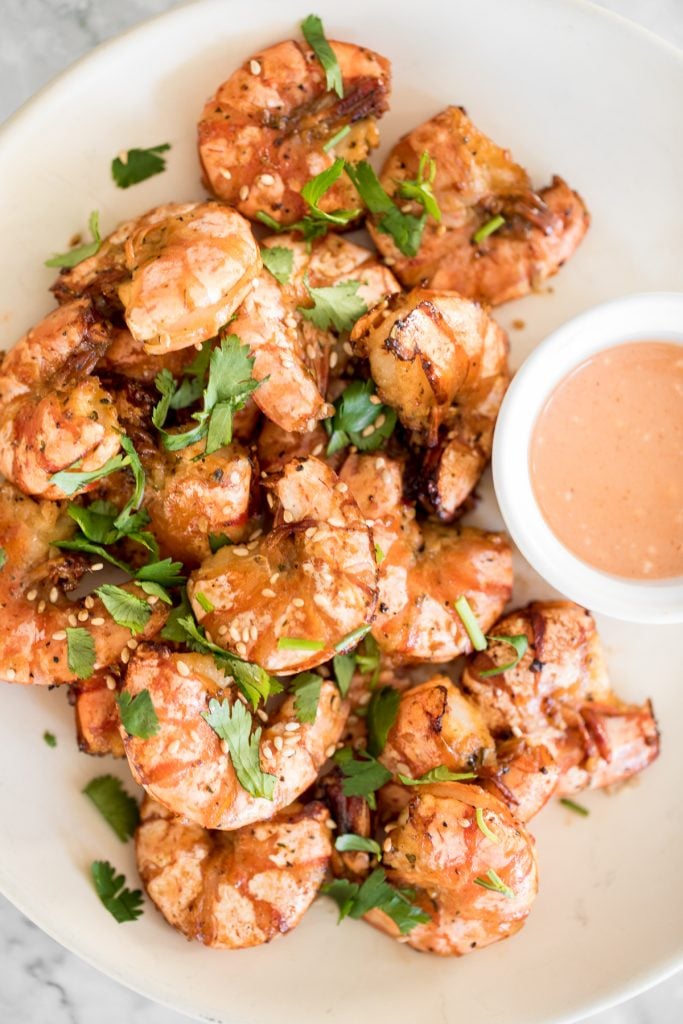
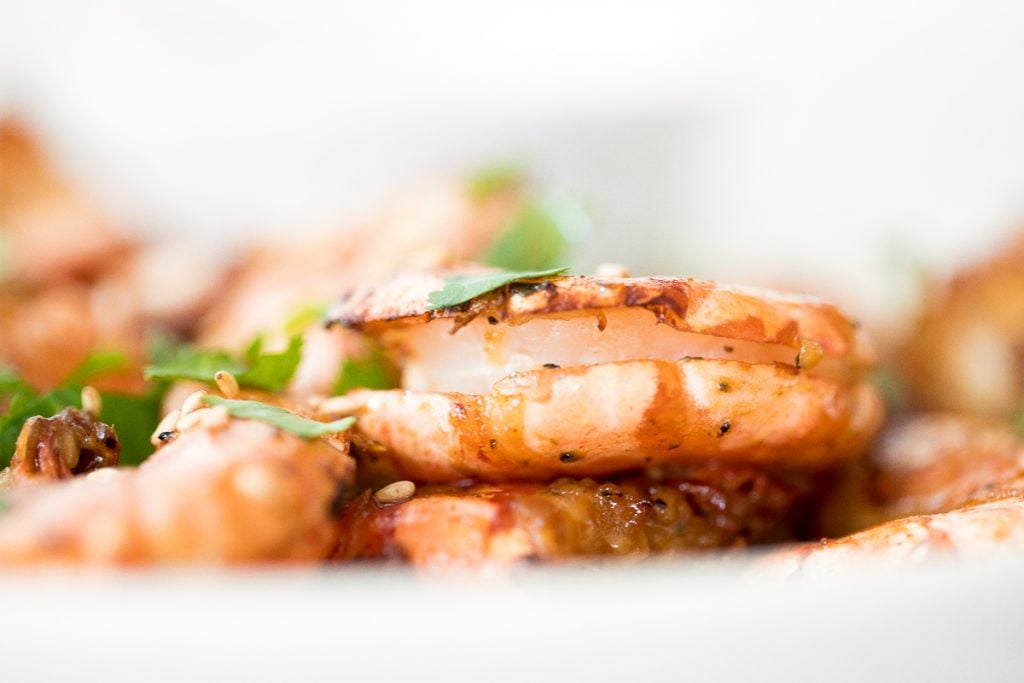
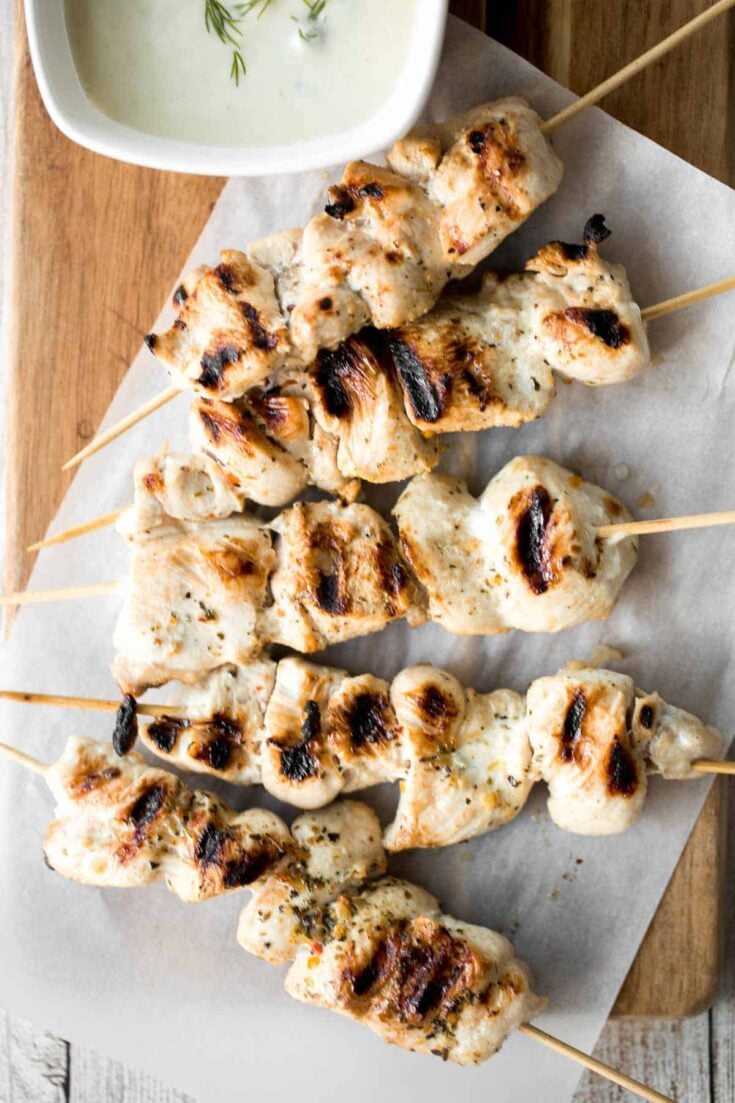
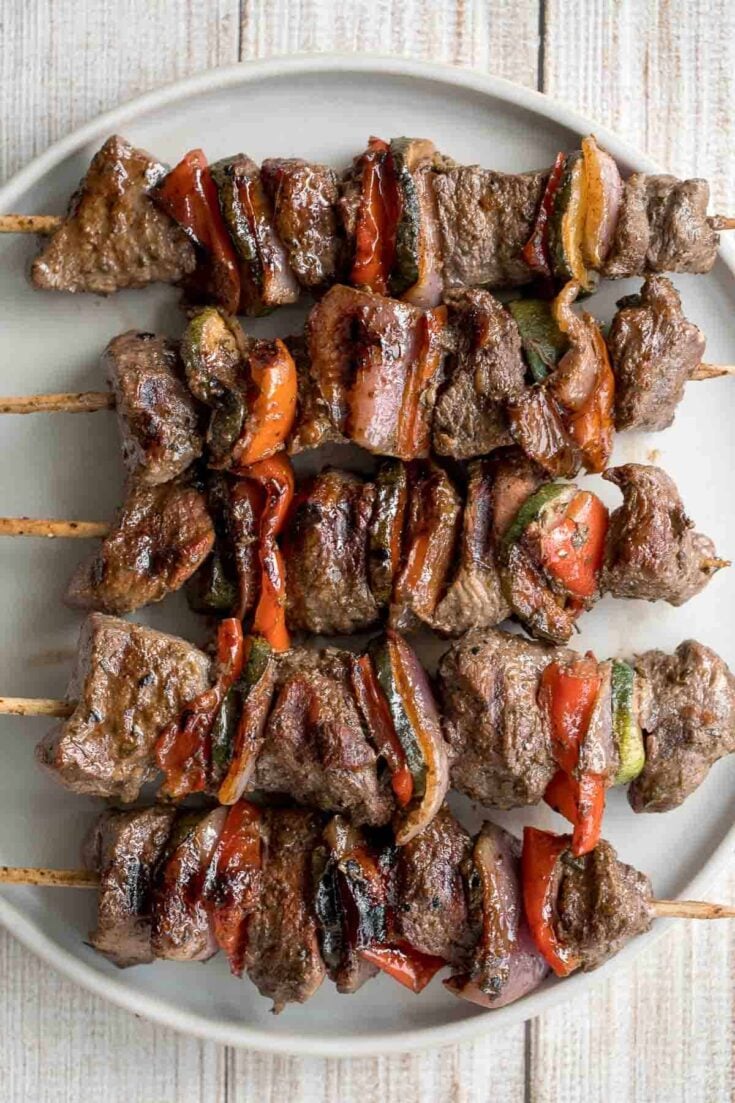
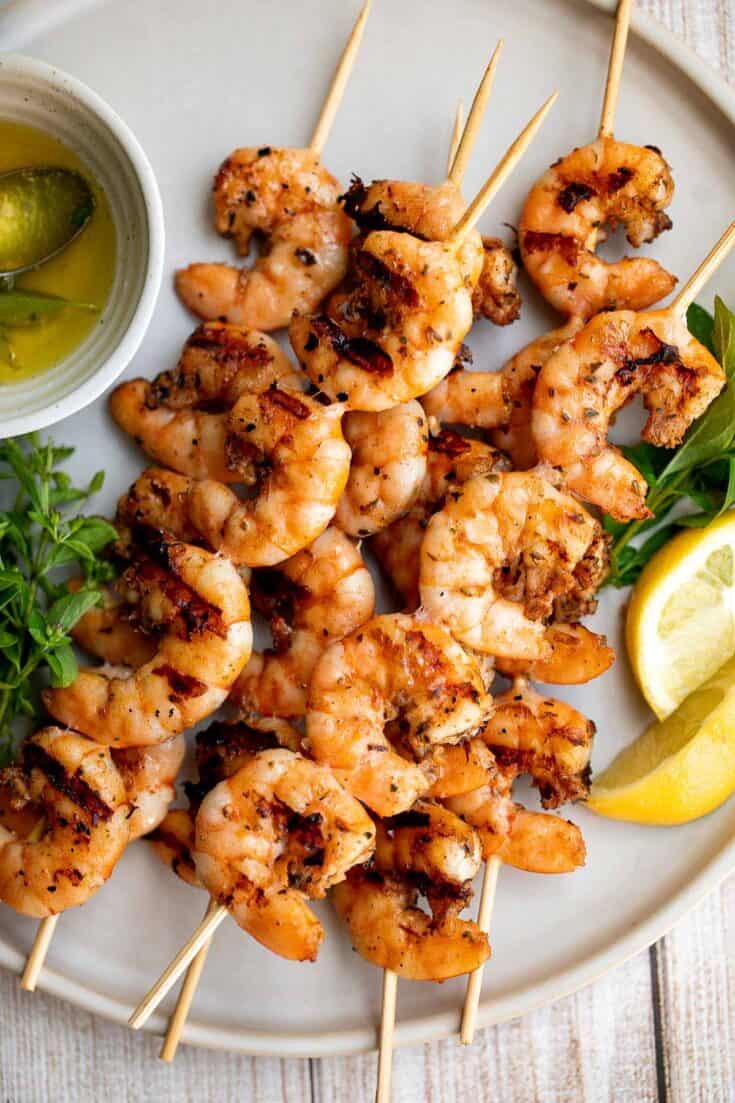
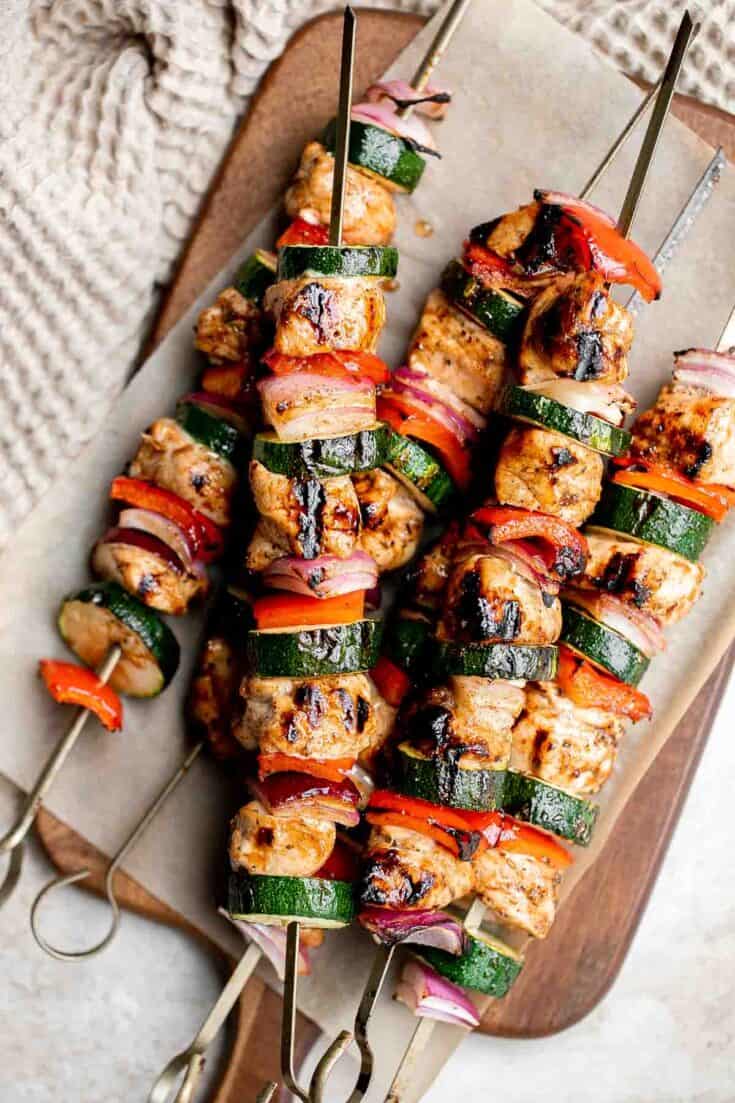
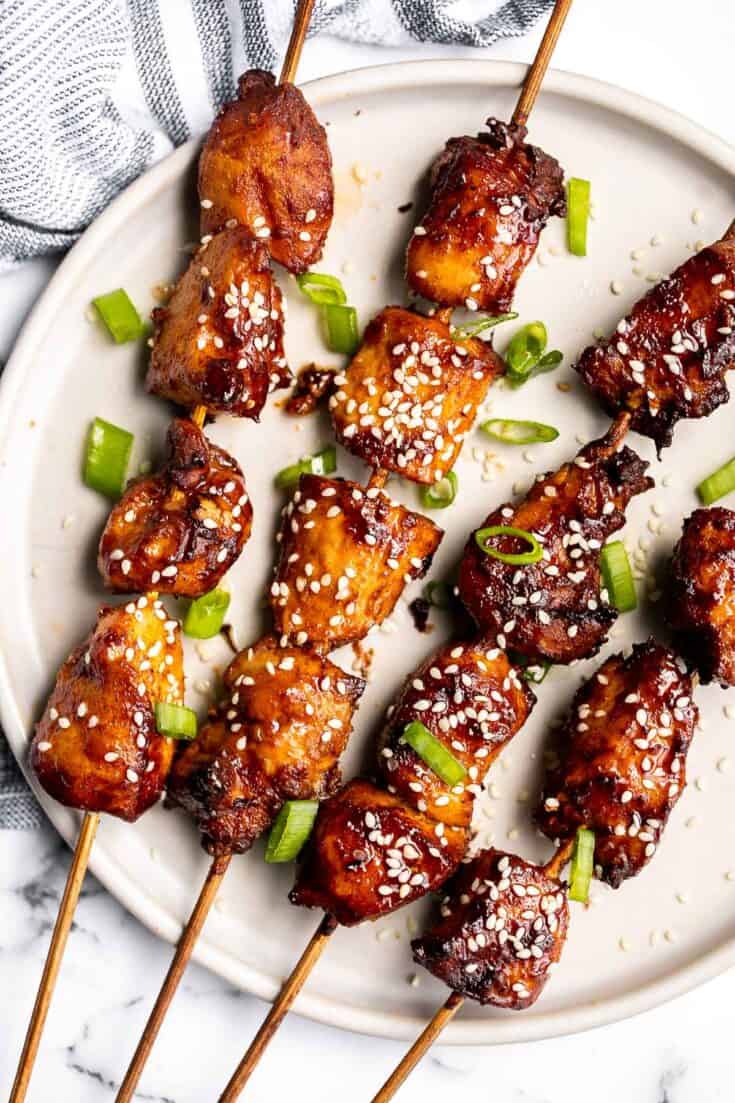
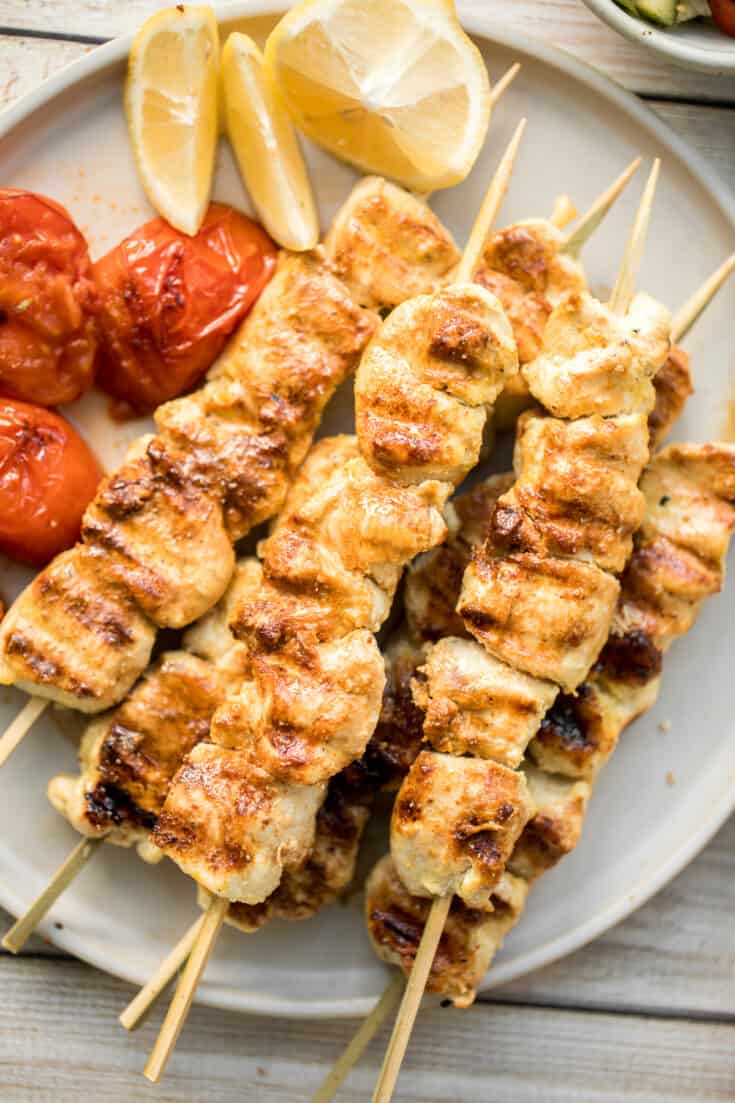
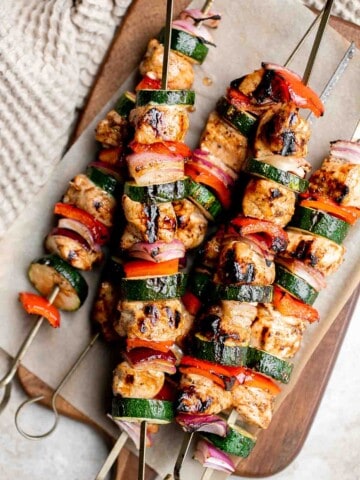
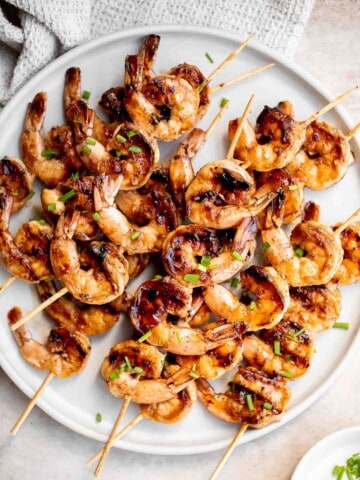
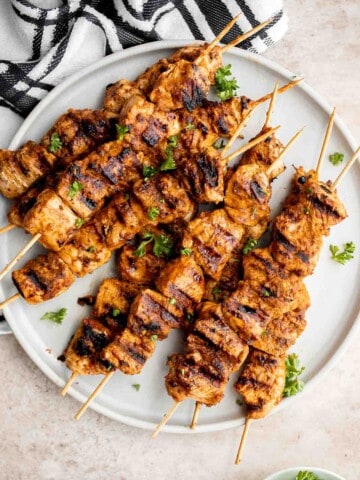
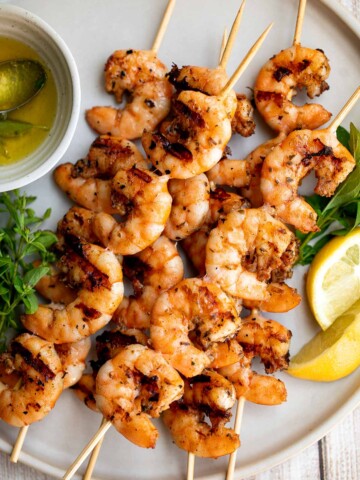
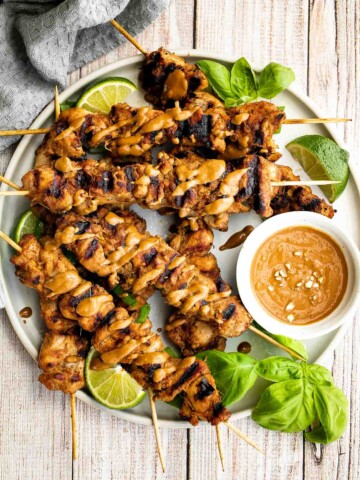
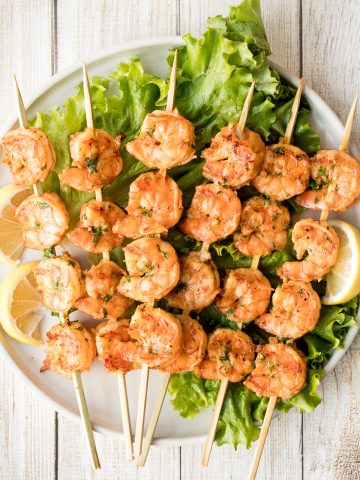
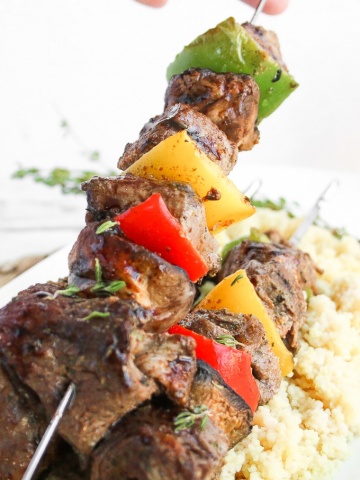
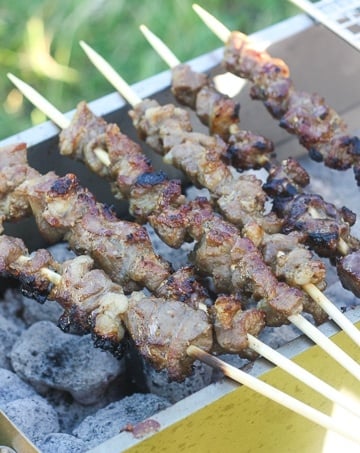
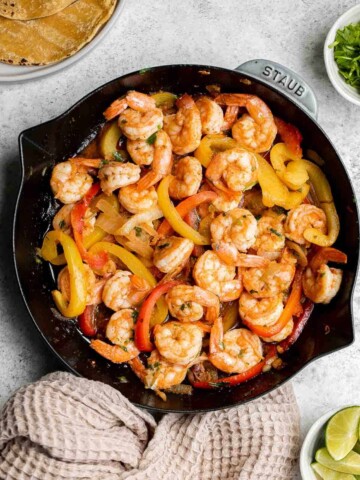
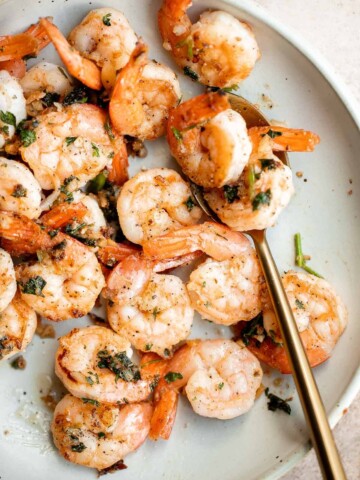
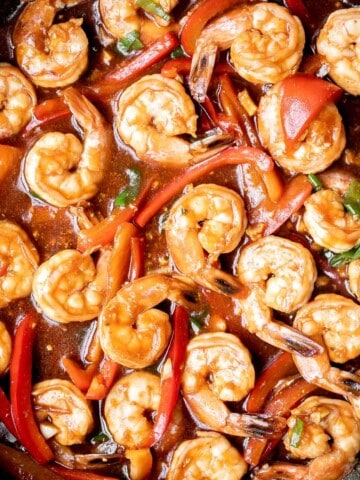
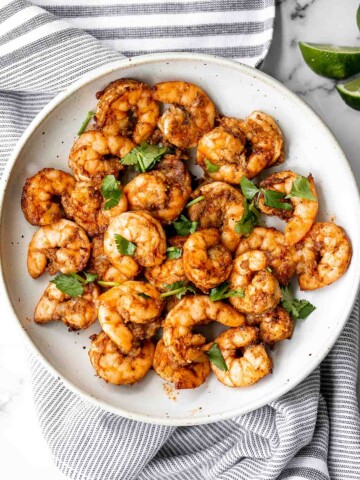
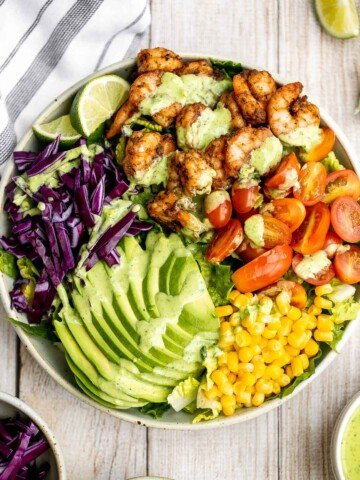
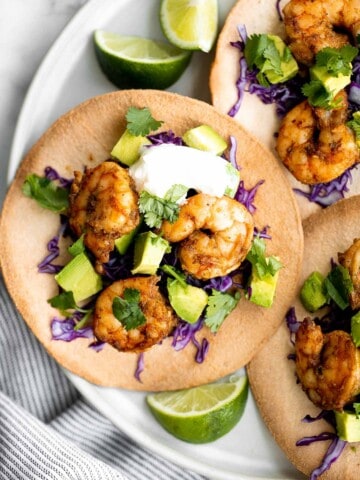
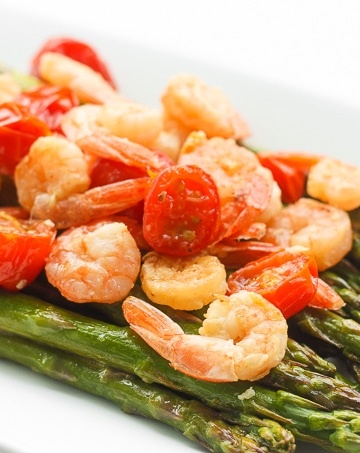
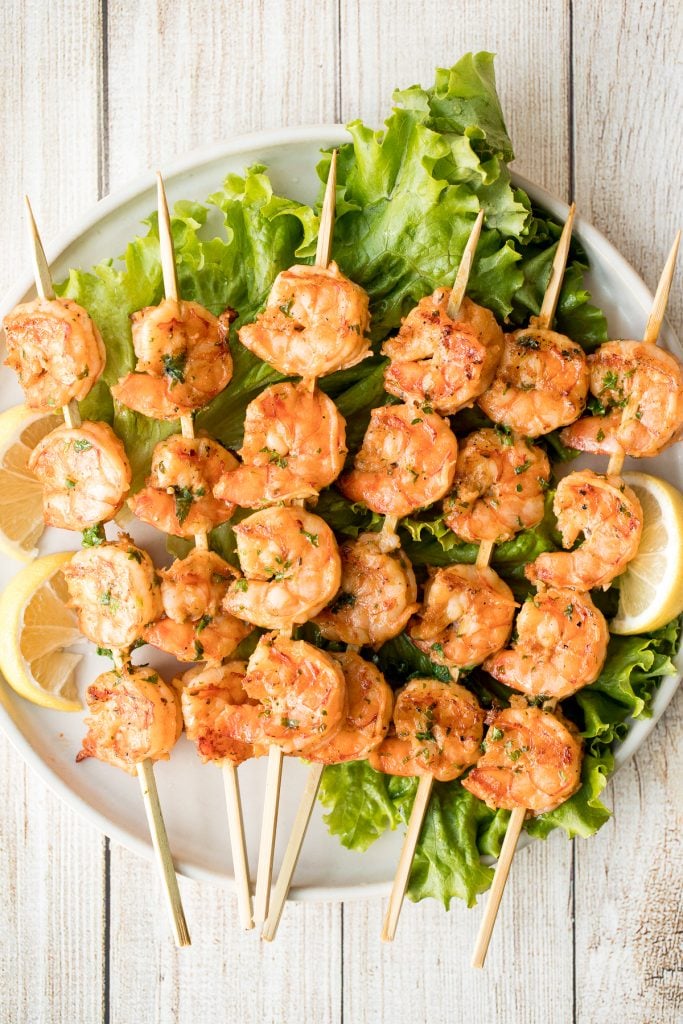
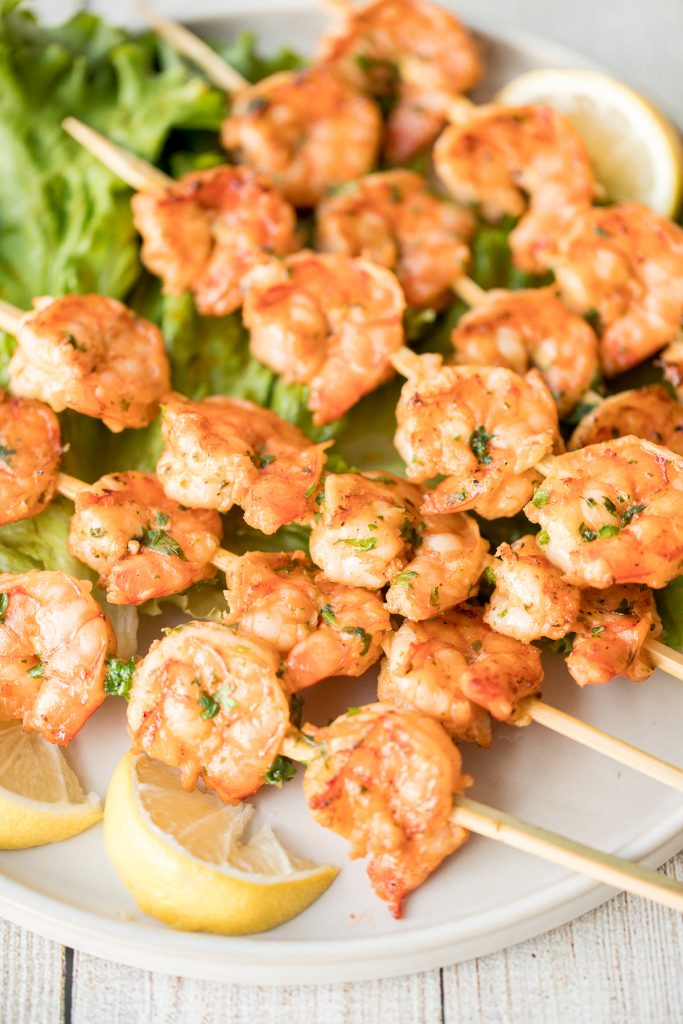
Grilled Cajun Shrimp Skewers

Juicy, tender, and flavourful grilled cajun shrimp skewers are my new favourite summer meal. These prawn skewers are garlicky, lemony, beautifully charred and packed with flavour from the cajun seasoning in the marinade and the olive oil parsley mixture that we brush on top. The best part of all? It takes less than 30 minutes to prepare and make, and this includes the time it takes to marinate.
Ingredients in Cajun Shrimp Marinade
Cajun shrimp skewers are all about the marinade. To make this, you will the following ingredients:
- tiger prawns - or jumbo shrimp. You will need one pound, which is roughly 24 prawns. To prepare them, use scissors to cut through the shell along the back of the prawns, and remove the shells and tails. Rinse to remove the veins and pat dry with paper towel.
- olive oil
- lemon juice
- garlic
- cajun spice - or Old Bay spice.
- Italian seasoning
- paprika
- parsley - fresh parsley to add on top when grilling.
- lemon wedges - for serving.
You will also need skewers, tongs for grilling, and an indoor grill pan (if you are not using an outdoor grill).
How to Make the Best Grilled Cajun Shrimp Skewers
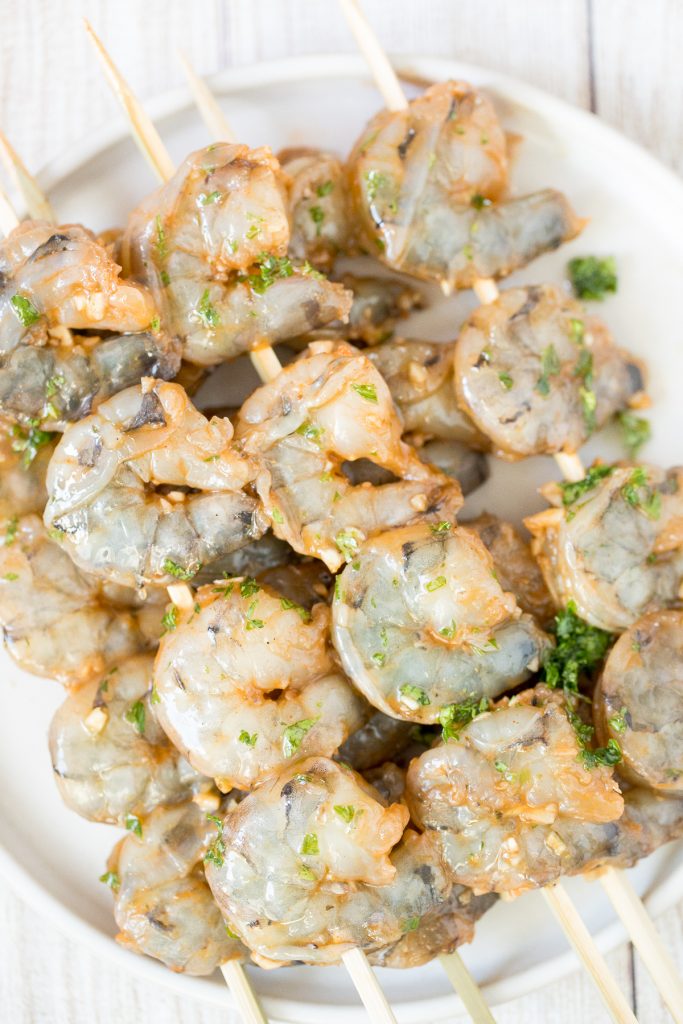
First marinate the prawns. Add the peeled and deveined prawns into a large bowl and add in a tablespoon olive oil, lemon juice, minced garlic, cajun spice, Italian seasoning, and paprika. Toss to combine and fully coat the prawns with the marinade. Cover with cling wrap and refrigerate for at least 15 minutes, up to 30 minutes.
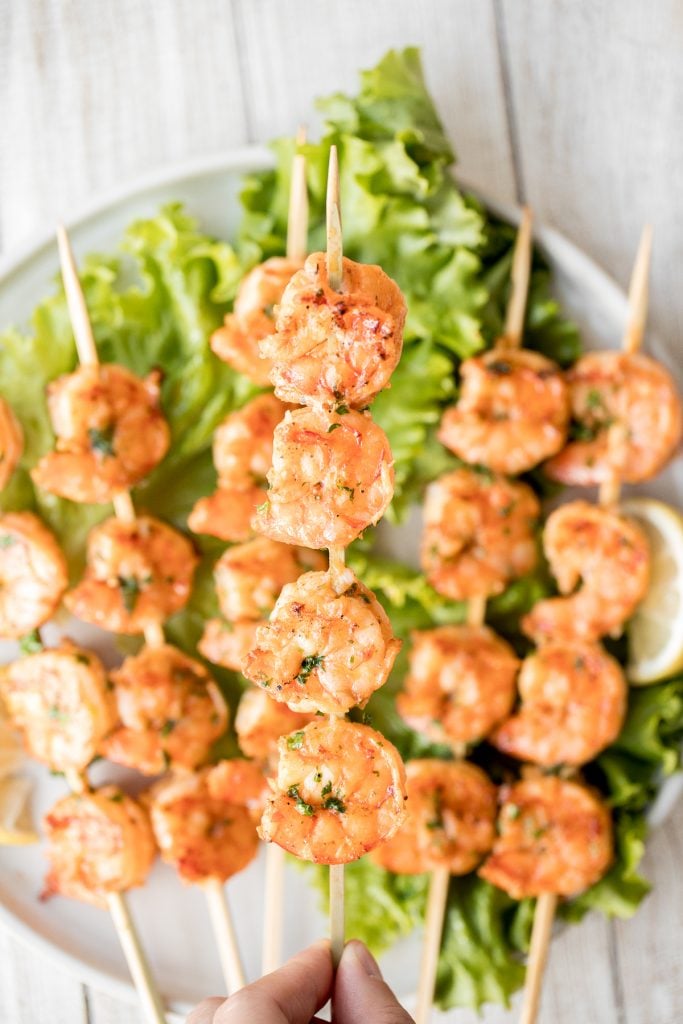
Then, thread the marinated prawns onto skewers. Add 4 prawns on each skewer.
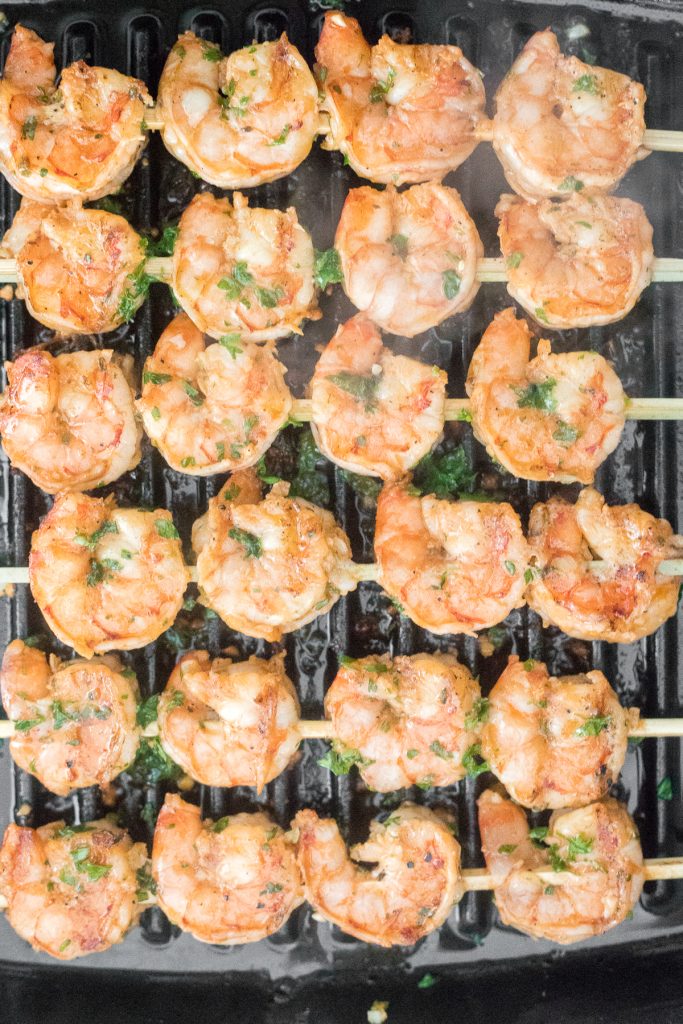
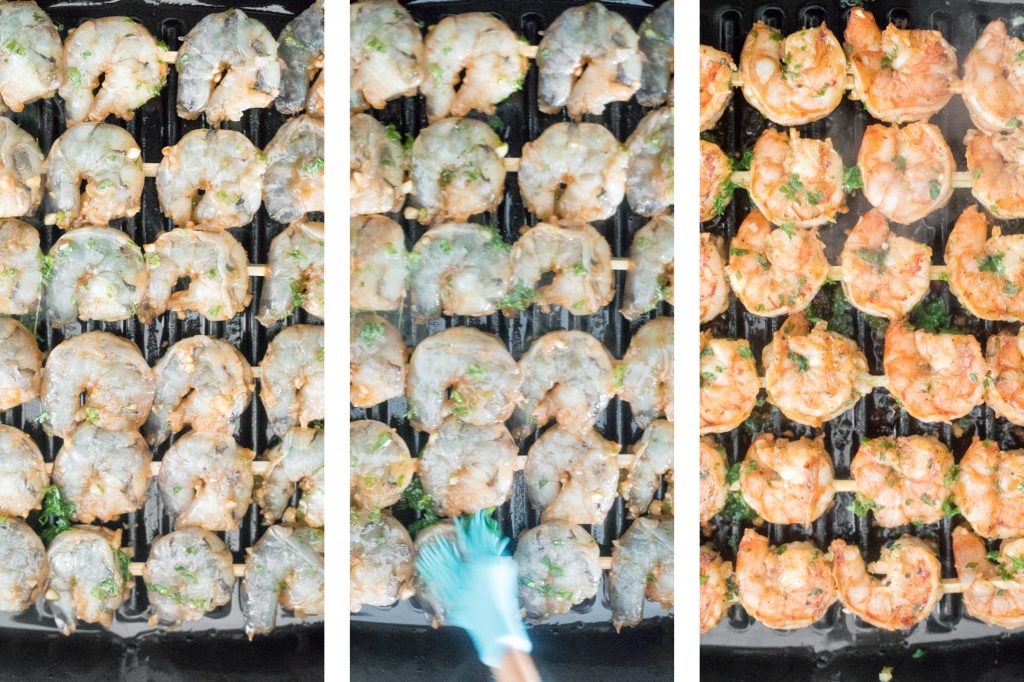
Lightly brush some olive oil over the grill pan. Preheat the grill over medium high heat for 3 minutes until the oil starts sizzling and shimmering. In a small bowl, combine remaining olive oil with finely chopped parsley. Set aside until ready to grill.
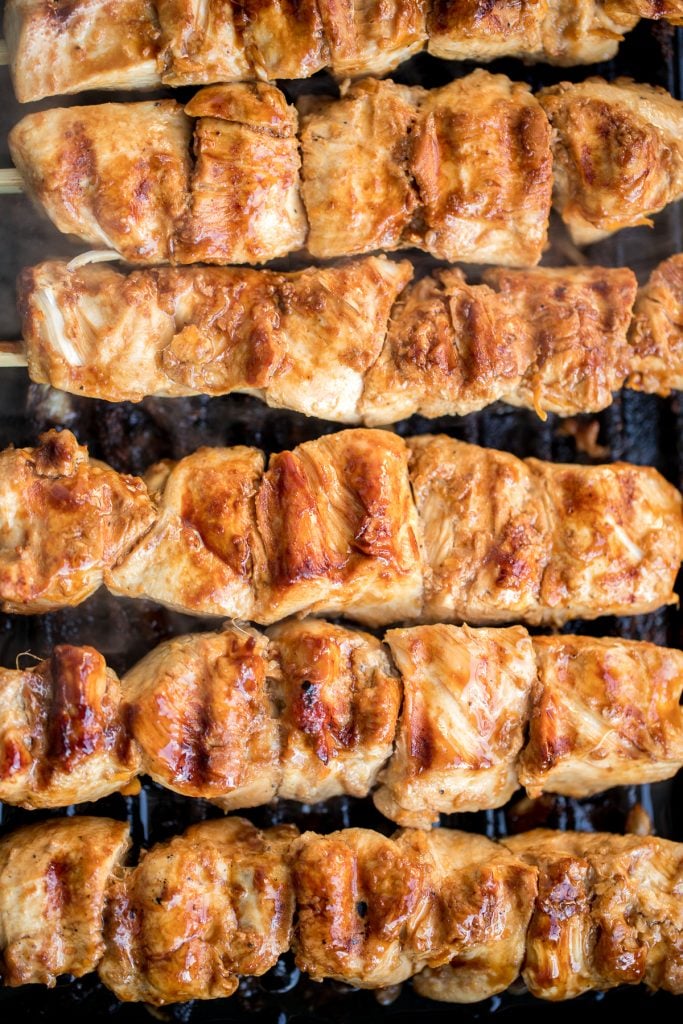
Place the skewers spaced evenly apart on the grill pan and grill for 3-4 minutes on each side or until the prawns turn completely orange. Brush the olive oil parsley mixture over the prawns during grilling.
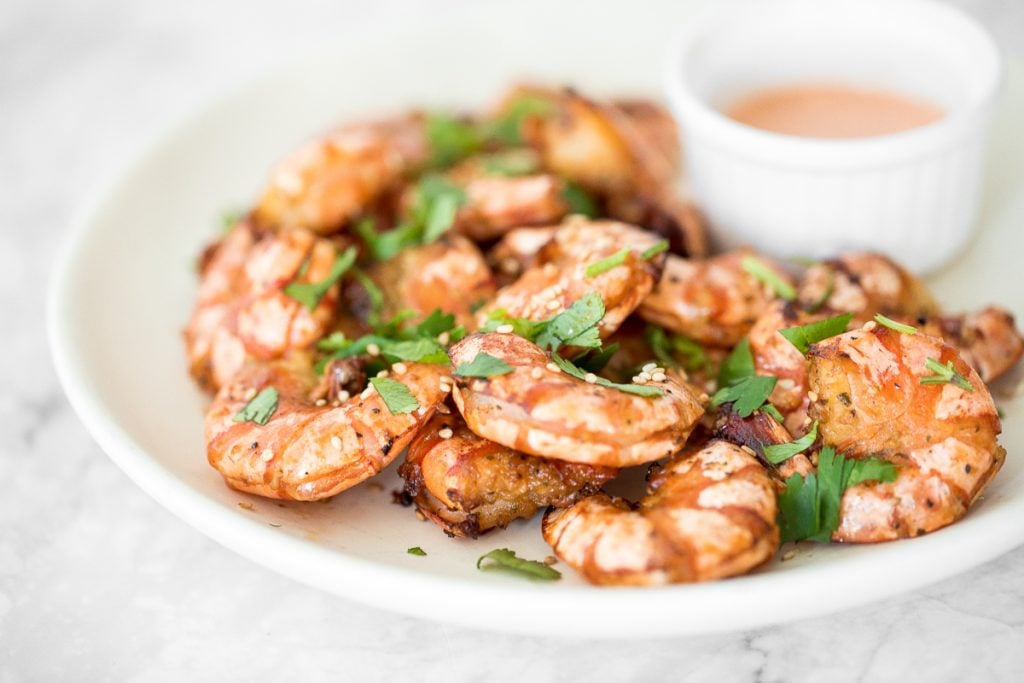
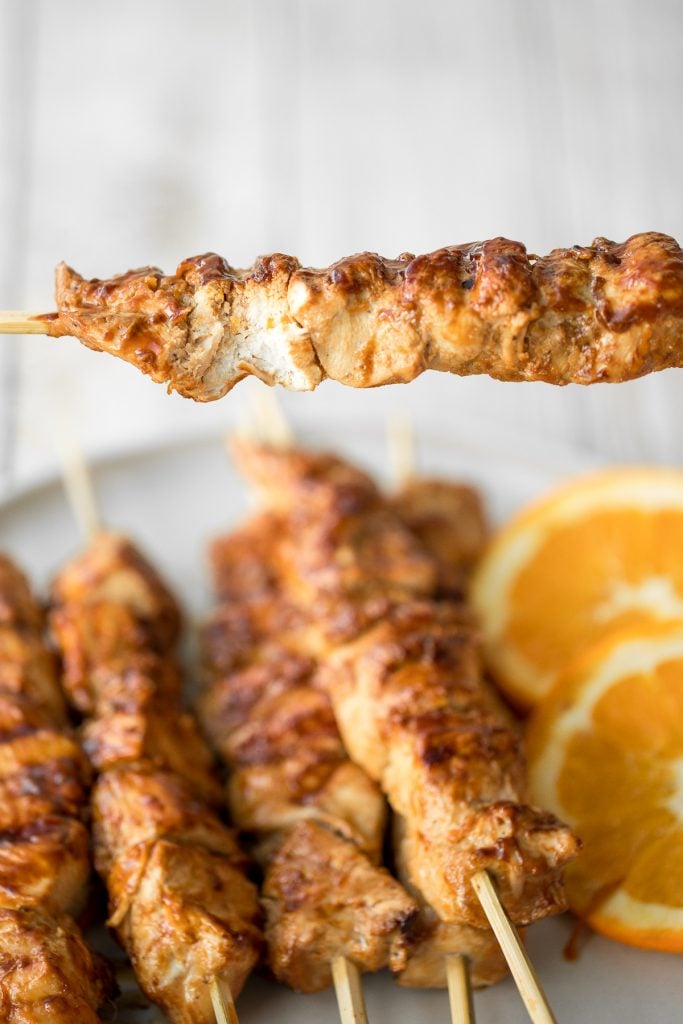
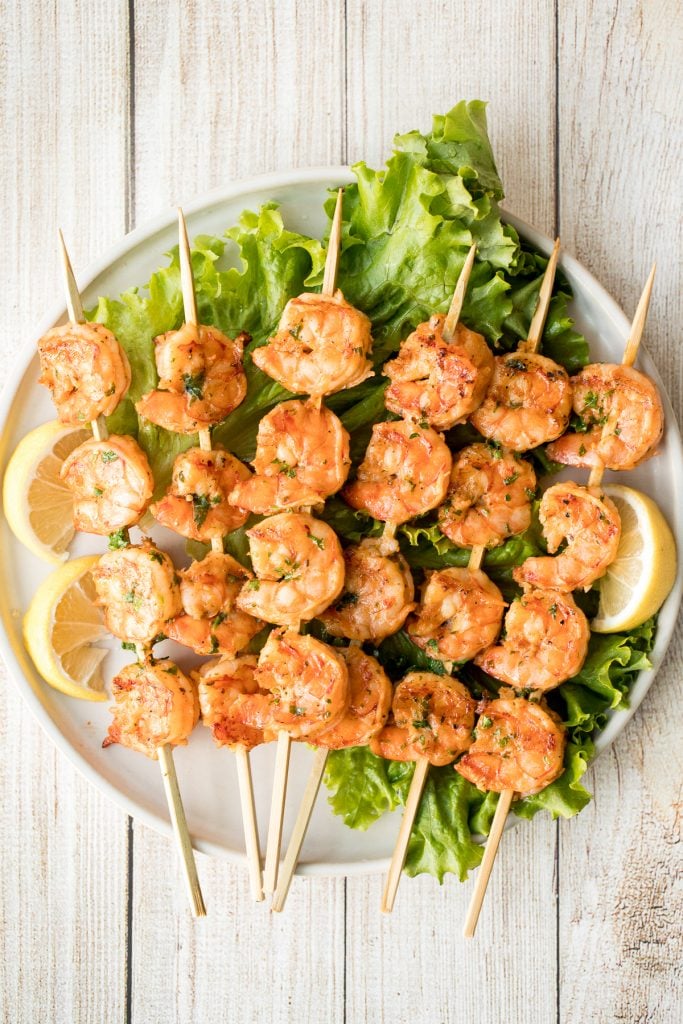
Transfer to a plate and serve warm with some lemon wedges on the side. Sprinkle extra chopped parsley on top.
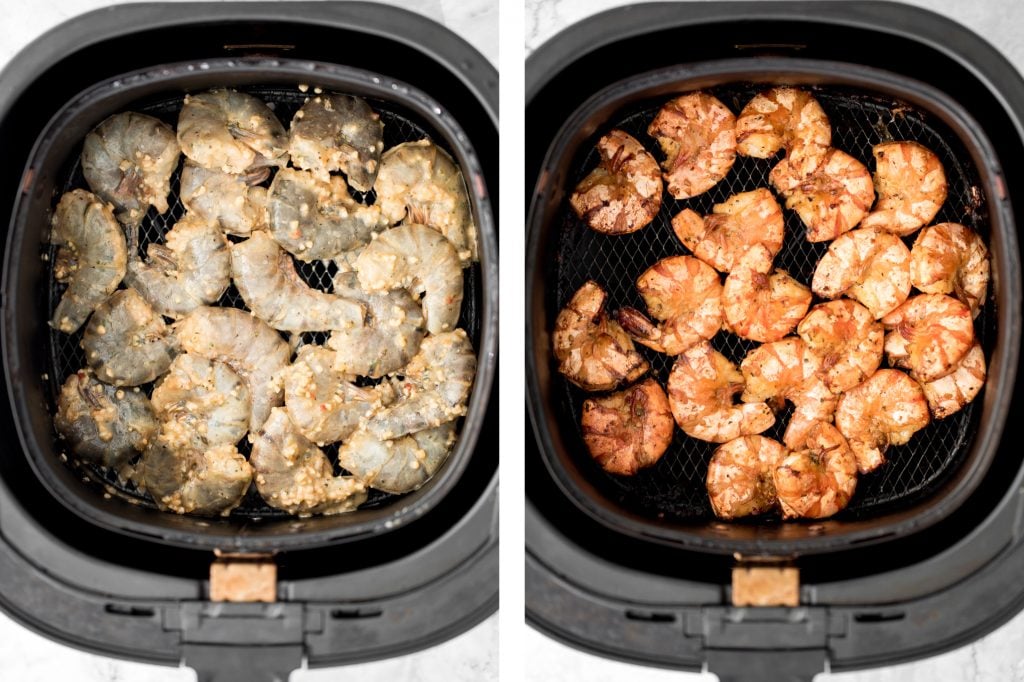
How to Cook Cajun Shrimp in the Air Fryer
To cook cajun shrimp skewers in the air fryer, do not thread them and place about 10 prawns in the air fryer basket at a time. Cook at 350 F for 8 minutes, shaking the basket halfway through.
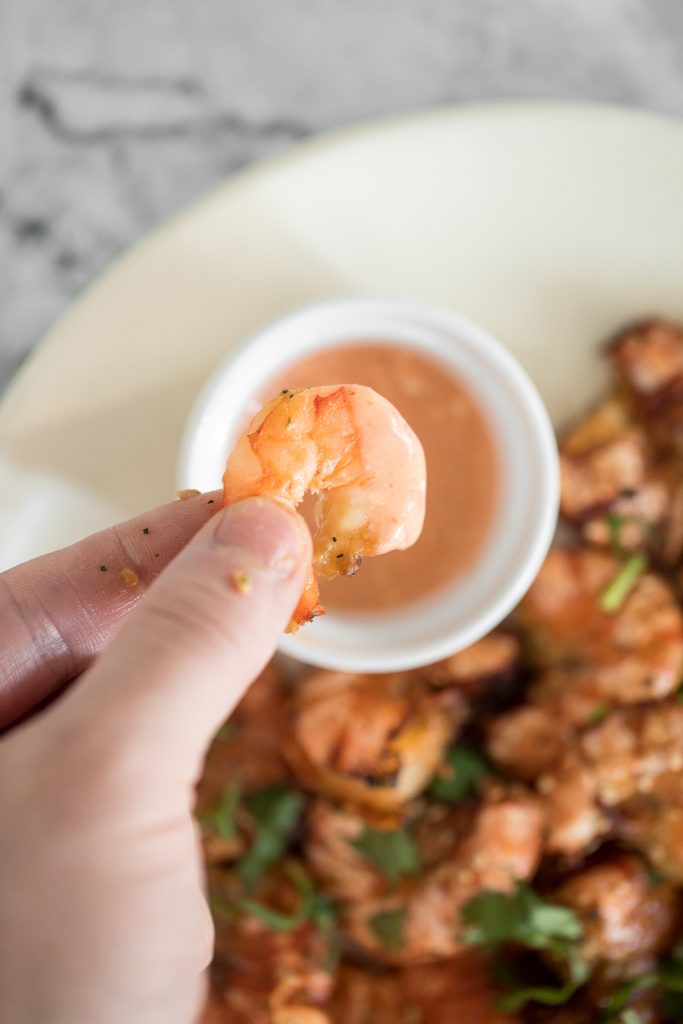
How to Serve Cajun Shrimp Skewers
- Serve cajun shrimp on it's own as a snack or appetizer
- Serve it with a side of coconut rice or plain white rice. It is also really nice served on top of creamy mashed potatoes or cauliflower mash.
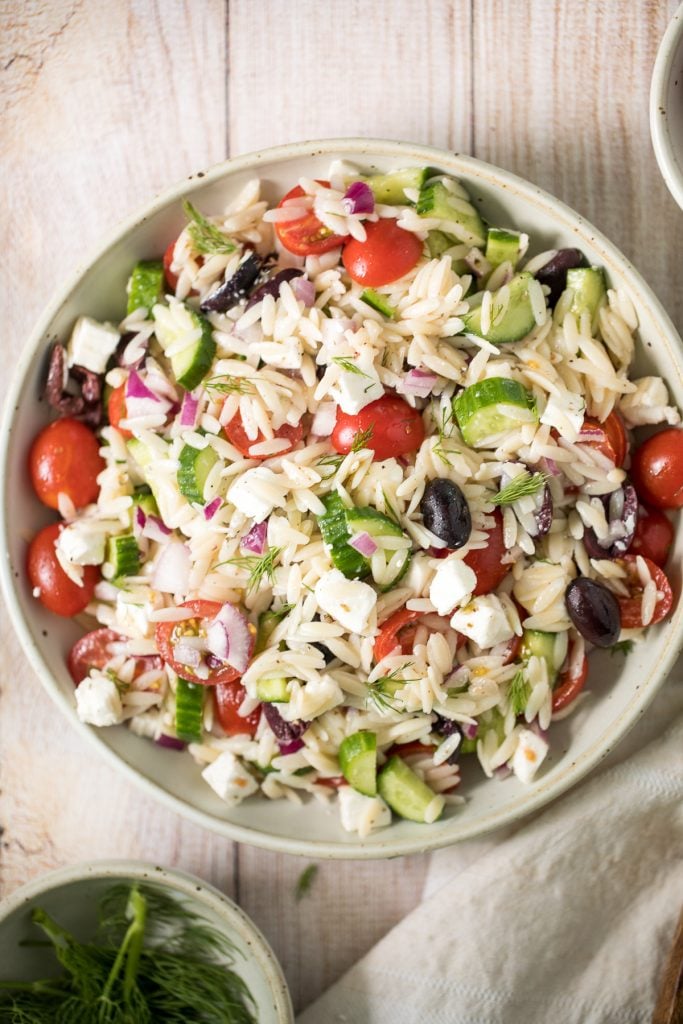
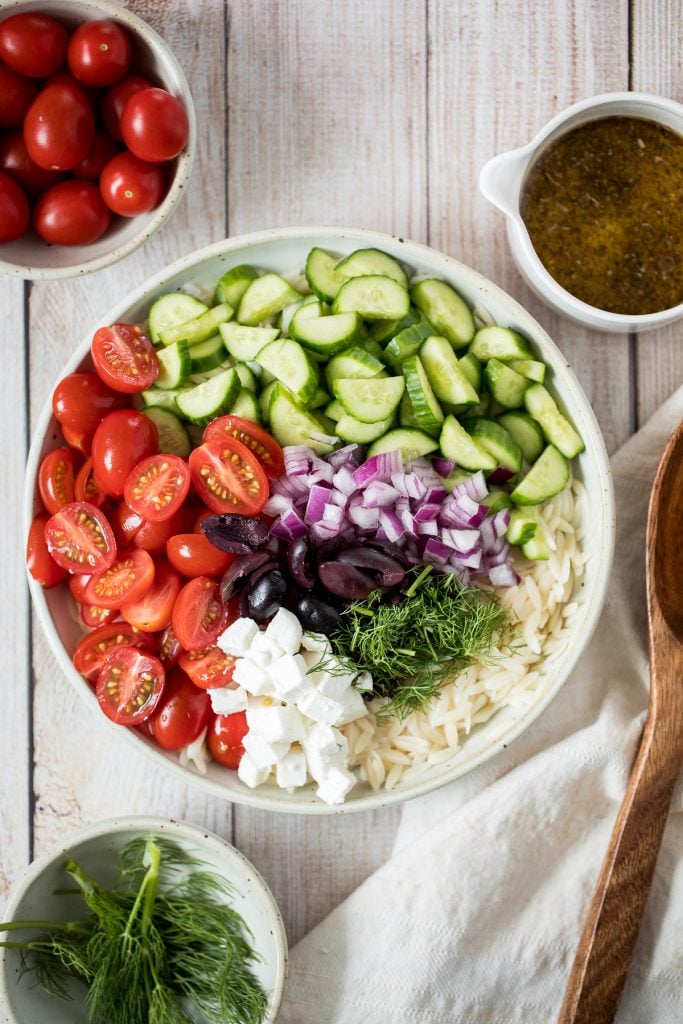
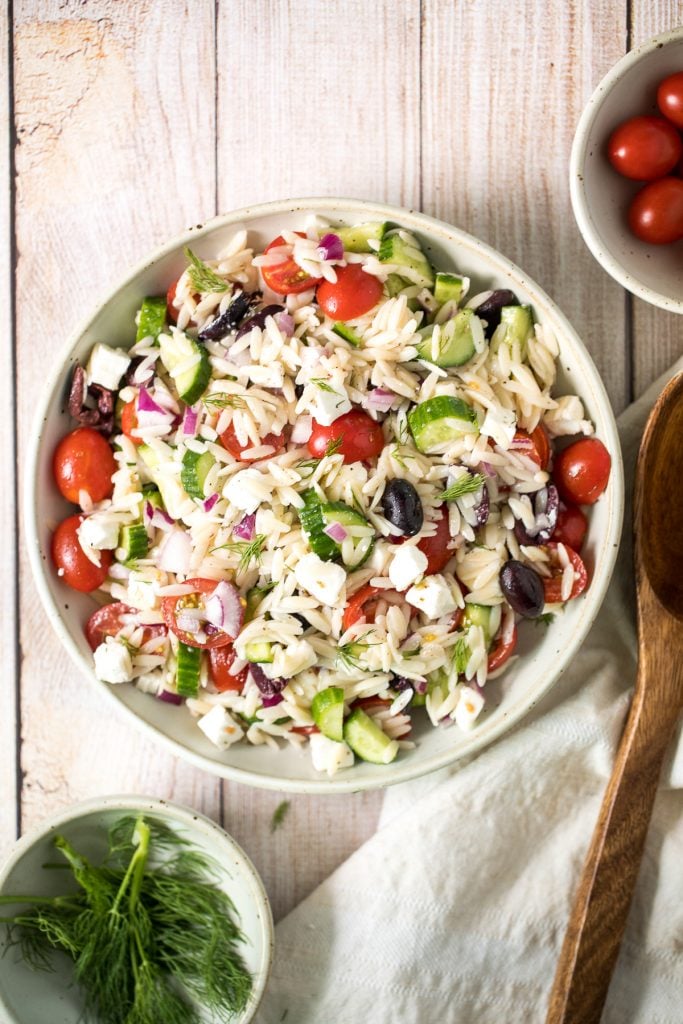
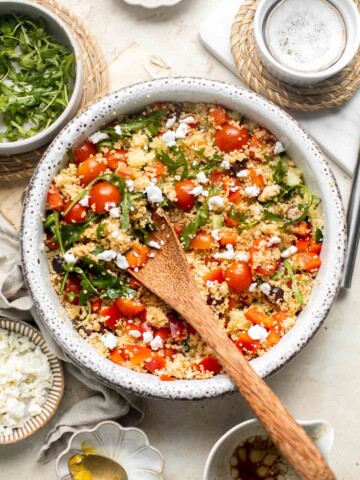
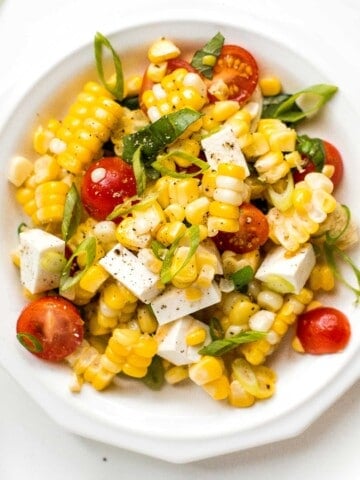
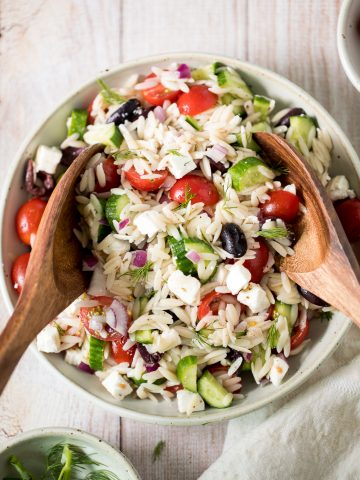
- Serve it in a salad. Try it with a Mediterranean orzo pasta salad or a summer corn salad.
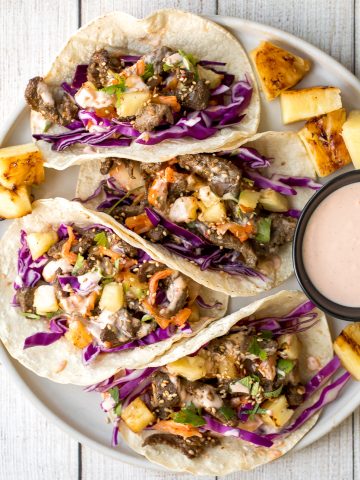
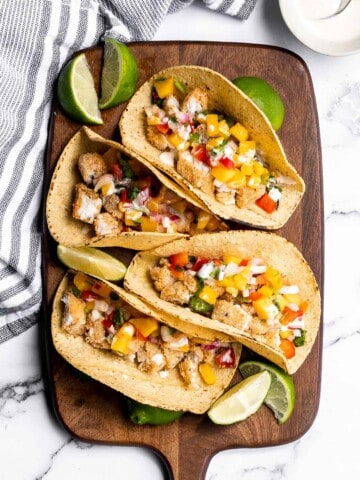
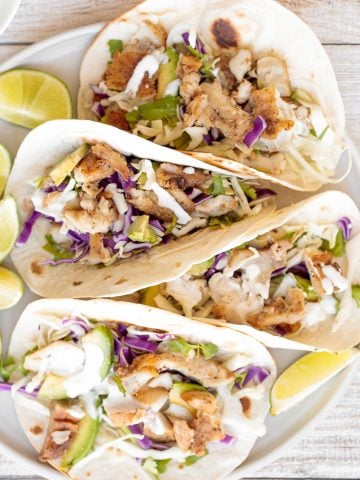
- Serve it in shrimp tacos with lime crema slaw.
Tips for Making Shrimp Skewers
- Marinate the prawns. I recommend marinating the prawns for just 15 minutes and up to a maximum of 30 minutes. This is because of the acidic lemon juice in the marinade, which will actually start to "cook" the prawns. The same idea that makes ceviche work.
- Double up the recipe. This recipe that makes about 6 skewers. You can easily double or triple the recipe to feed a crowd (or if you just want to make sure you have leftovers for lunch the next day). Leftovers are amazing in a salad, and you don't even need to warm it up.
- How to store. Unthread the prawns from the skewers and store in an airtight container for up to 3 days in the refrigerator.
More Shrimp Recipes
- Shrimp Fettuccine Alfredo (coming soon)
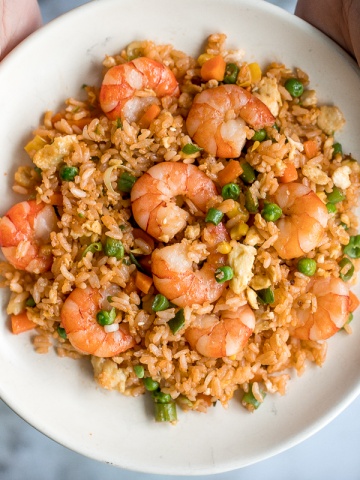
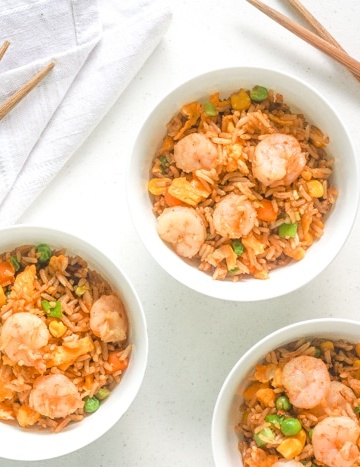
- 10-Minute Seafood Fried Rice
- Stir-fried Rice Cakes with Shrimp
- Shrimp Tacos with Lima Crema Slaw
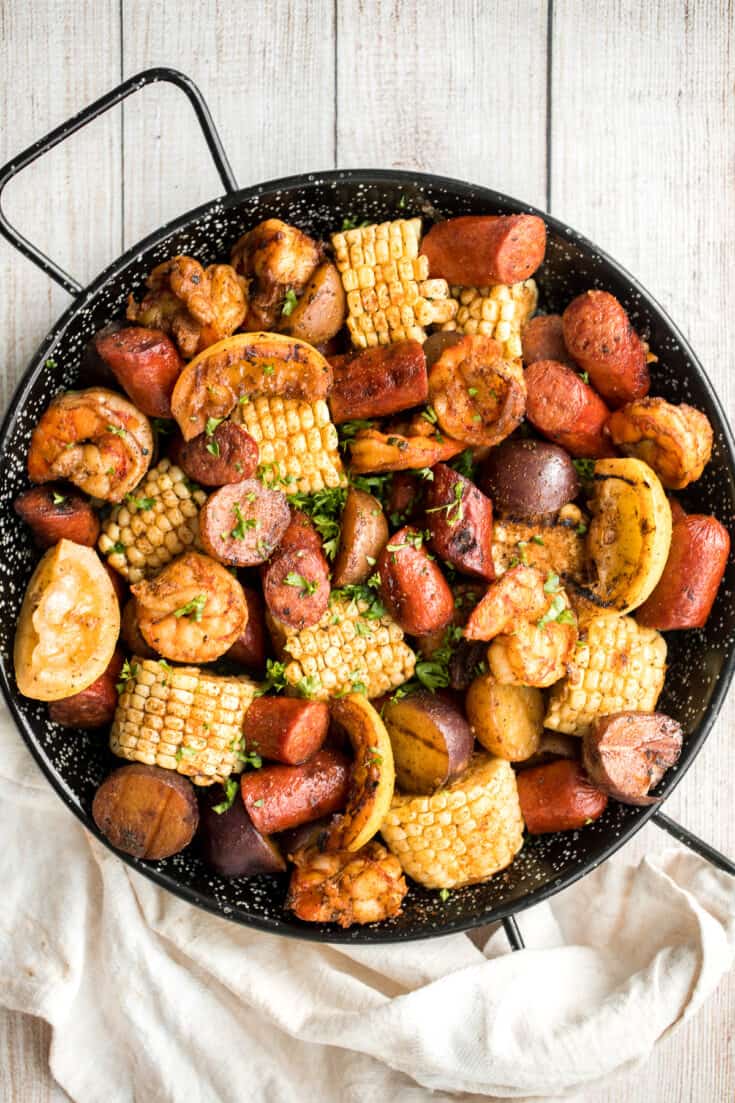
- Easy Grilled Shrimp Boil
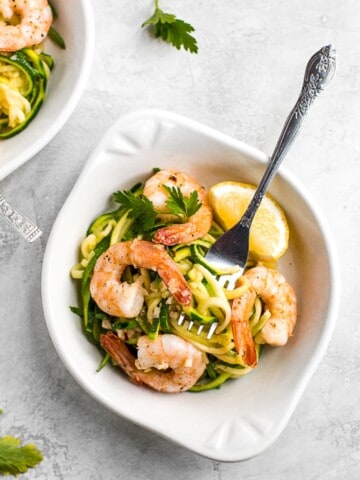
- Shrimp Scampi with Zucchini Noodles
Tried this recipe?
I'd love to hear what you think! Leave a comment and rating below to share your feedback. Your reviews help others discover this recipe and help me keep creating more free recipes for you. Snap a photo and tag me on social media @aheadofthyme too.
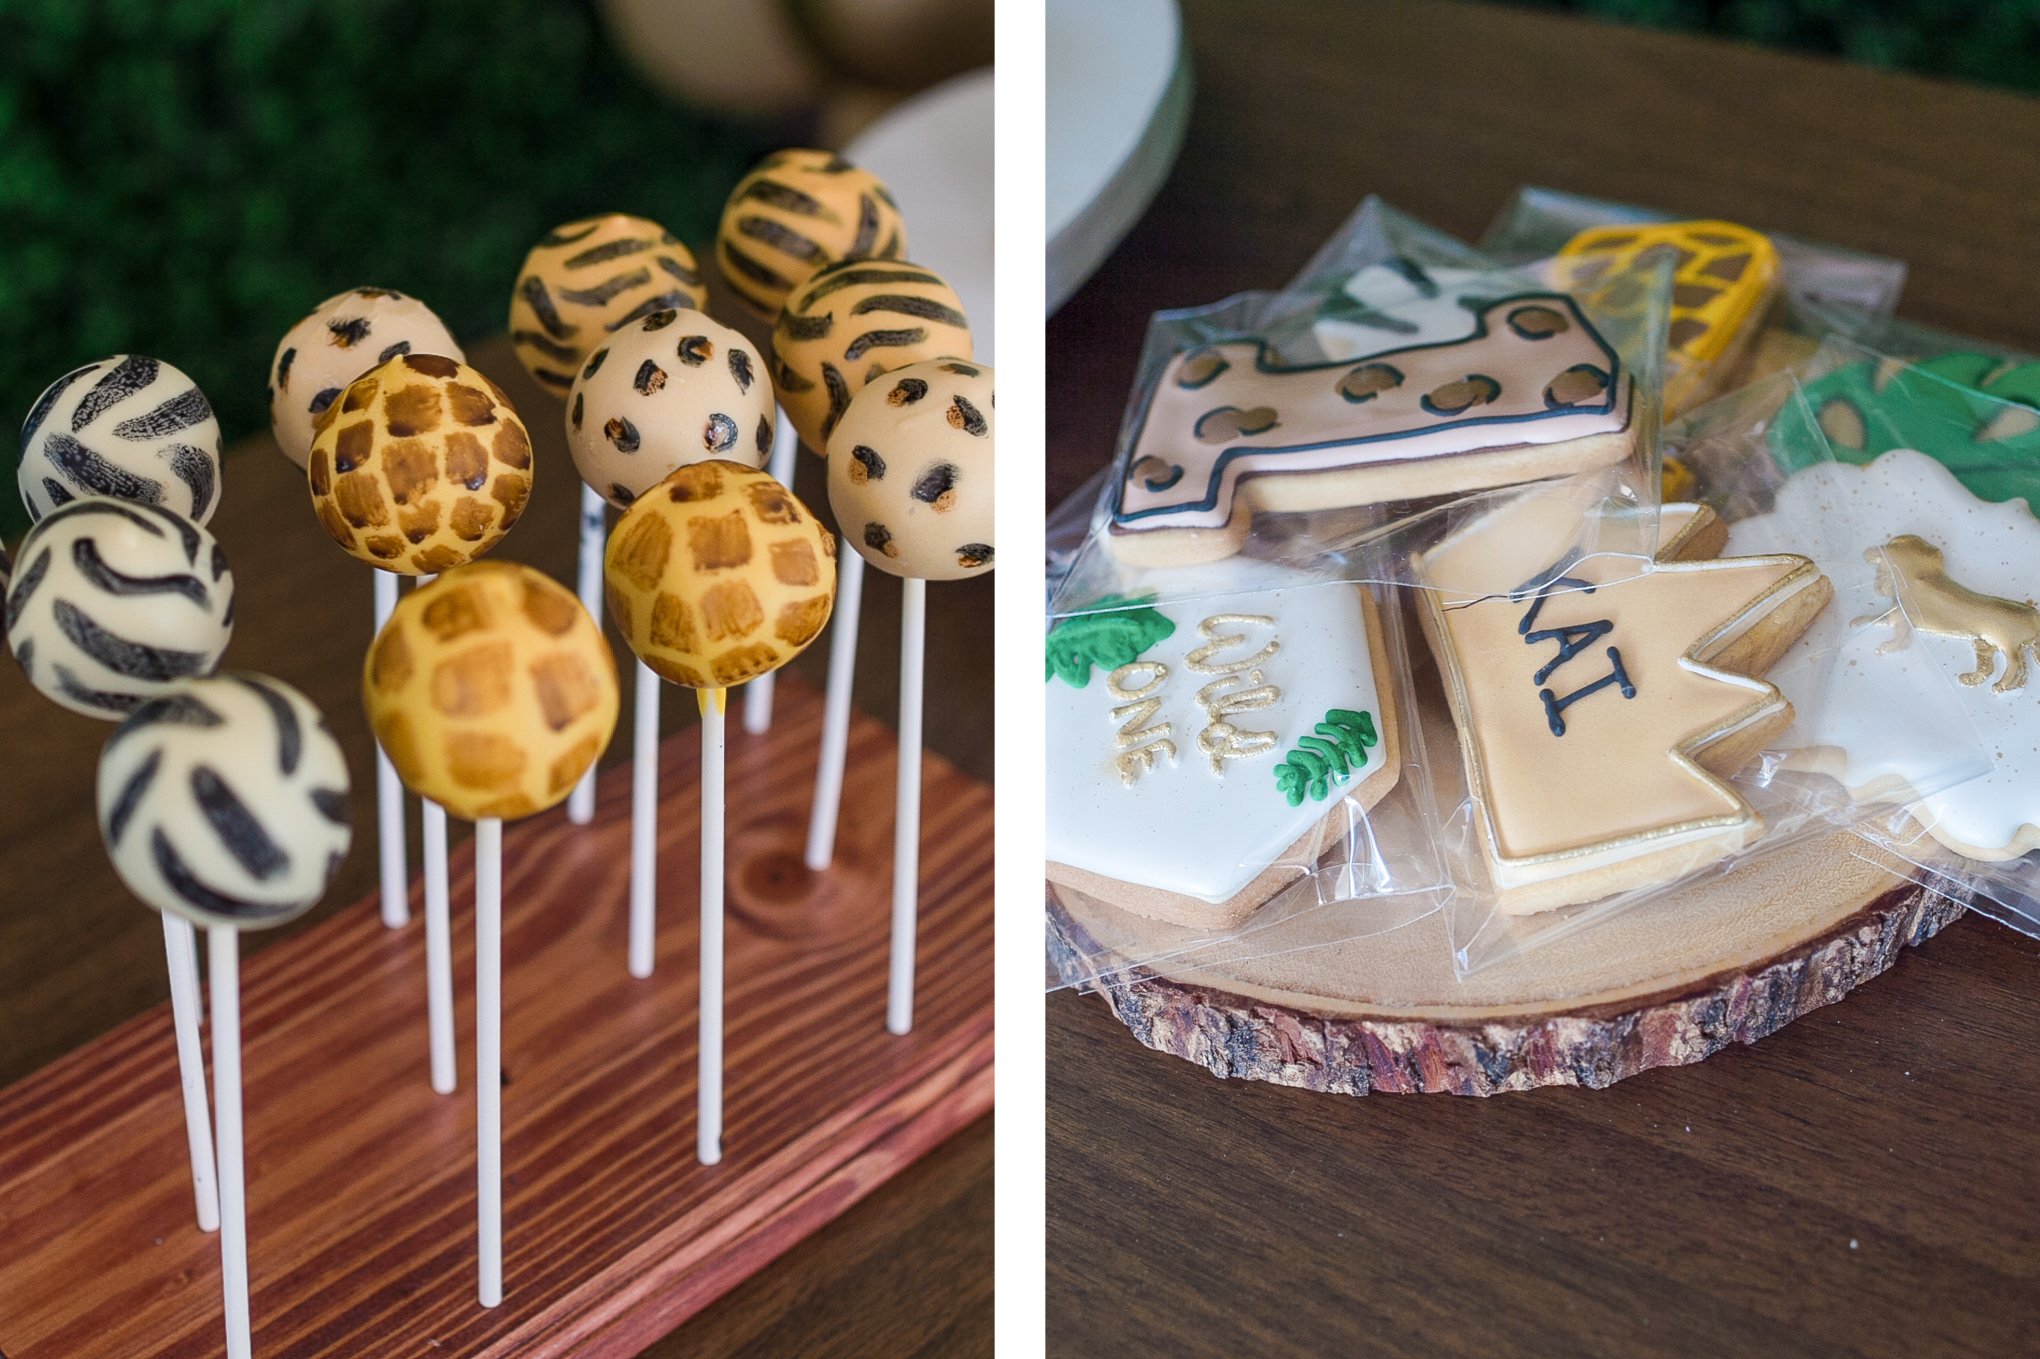
Safari Animal Print Cake Pops

These safari animal print cake pops are homemade with a combination of delicious vanilla cake and vanilla buttercream rolled into a ball and dipped into white chocolate. The bold animal prints make it the perfect item to add to a wild one safari first birthday party dessert table or any jungle-themed party. The best part? They are surprisingly simple to make.
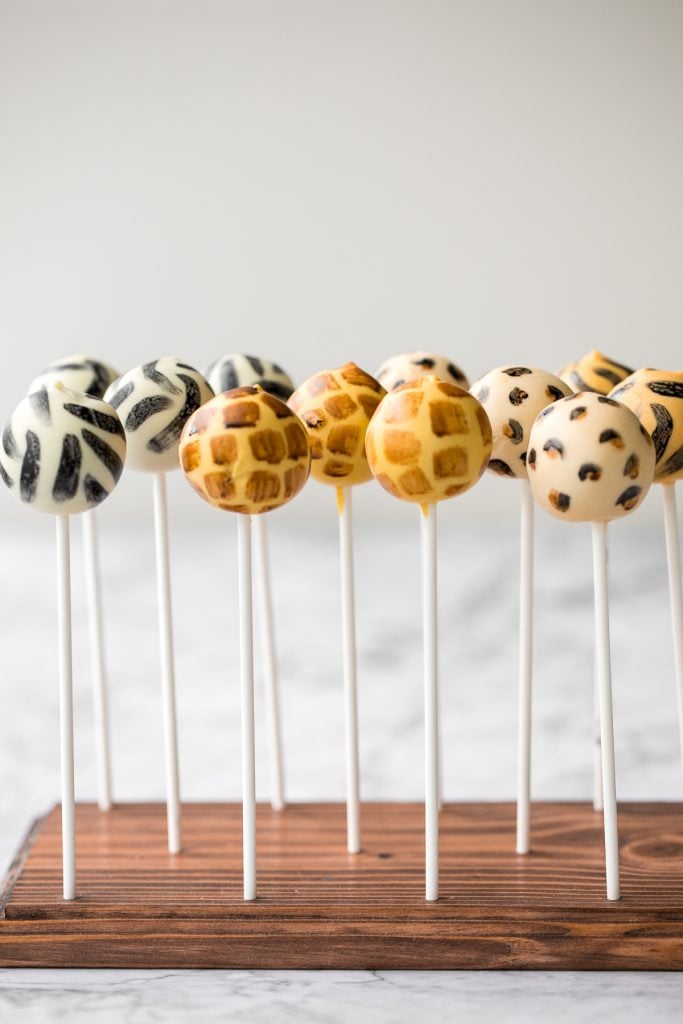
These cake pops are easy to make especially if you are using leftover cake. Plus, there is no need for a fancy cake pop tray. You simply create the cake balls by rolling the cake mixture into balls and freezing. Once set, dip away into melted chocolate and paint on your animal print patterns using homemade edible paint.
Cake pops are just so much more fun to decorate and eat when they have a theme. But, if it's not your thing, you can always opt for simple vanilla cake pops or chocolate cake pops decorated with sprinkles. Same amount of deliciousness. Plus, you can coordinate the colour of the sprinkles to still match the theme that you are going for.
What is in these Vanilla Safari Cake Pops?
- all-purpose flour
- baking powder and baking soda
- salt
- butter
- granulated sugar
- egg
- vanilla extract
- whole milk
- frosting - made with butter, icing sugar, whole milk, and vanilla extract.
- chocolate coating - pure white chocolate and coconut oil.
- gel food coloring
- lemon extract
You will also need: a silicone spatula, round 6-inch cake pan, lollipop sticks, food paint brush, and a cake pop stand (or styrofoam block).
How to Make the Best Homemade Vanilla Cake Pops
First, you need vanilla cake. You can use leftover cake, or bake your own. It's quite simple to bake your own.
- First, combine the dry ingredients (flour, baking powder, baking soda, and salt) in a small bowl.
- Next, cream the butter and sugar together in a medium bowl using an electric mixer, approximately 2-3 minutes. Add egg and vanilla and continue to beat until fully mixed together.
- Slowly add one third of the flour mixture to the wet ingredients, beat until just combined. Then alternate with half of the milk. Continue adding and alternating flour mixture and milk to the batter, and ending with the flour mixture. Use a silicone spatula to scrape down the sides and to stir until just combined.
- Pour batter into a lightly-greased round 6-inch cake pan. Bake for 25-30 minutes in a 375 F preheated oven, until toothpick comes out clean when inserted into the centre of the cake. Allow cake to cool in the cake pan for 30 minutes, then remove from pan and place on wire rack until completely cooled.
Next, make the frosting. In a large bowl, use a hand mixer to beat butter until smooth, approximately 2 minutes. Add sugar, milk, and vanilla, and continue to beat until smooth.
Now we are ready to assemble and shape the cake balls. Crumble the cooled cake and place into the bowl of frosting. Using an electric mixer to beat together until combined and smooth, approximately 2 minutes. The cake mixture should have a play-doh like consistency.
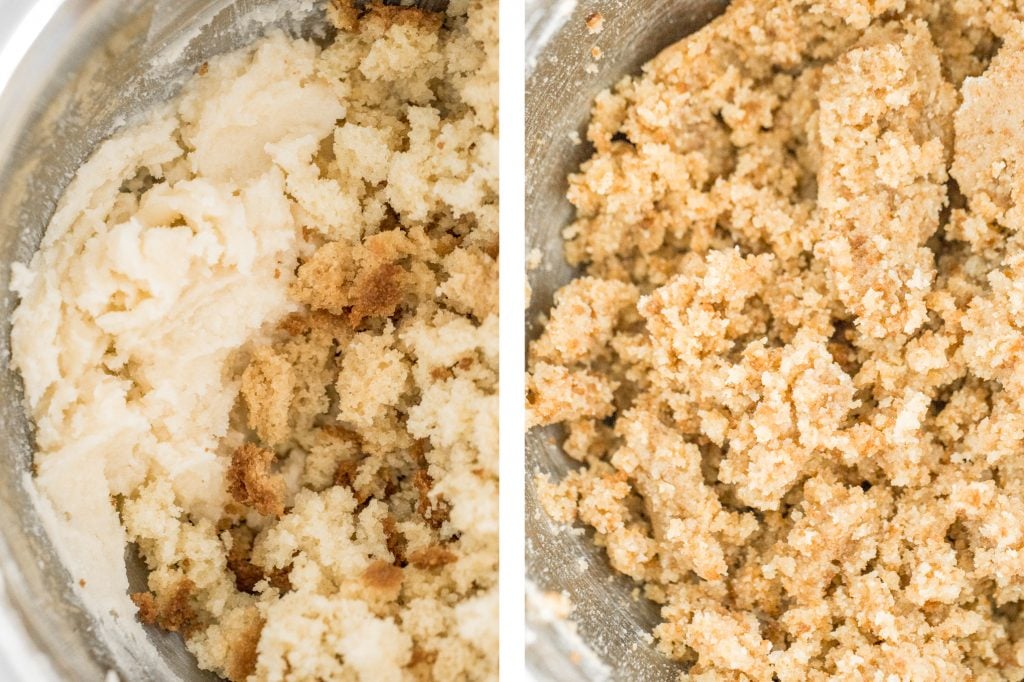
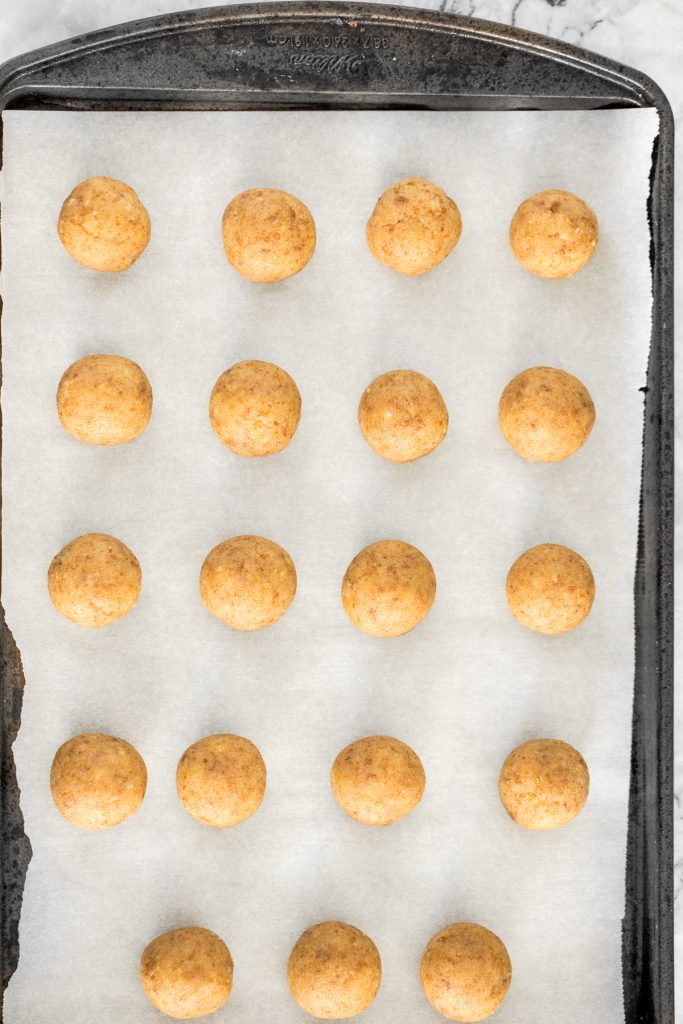
Take a tablespoon of cake mixture and roll it into a ball. Place on a parchment-lined baking tray. Repeat until all the mixture is used up. Place tray into the refrigerator for 1 hour.
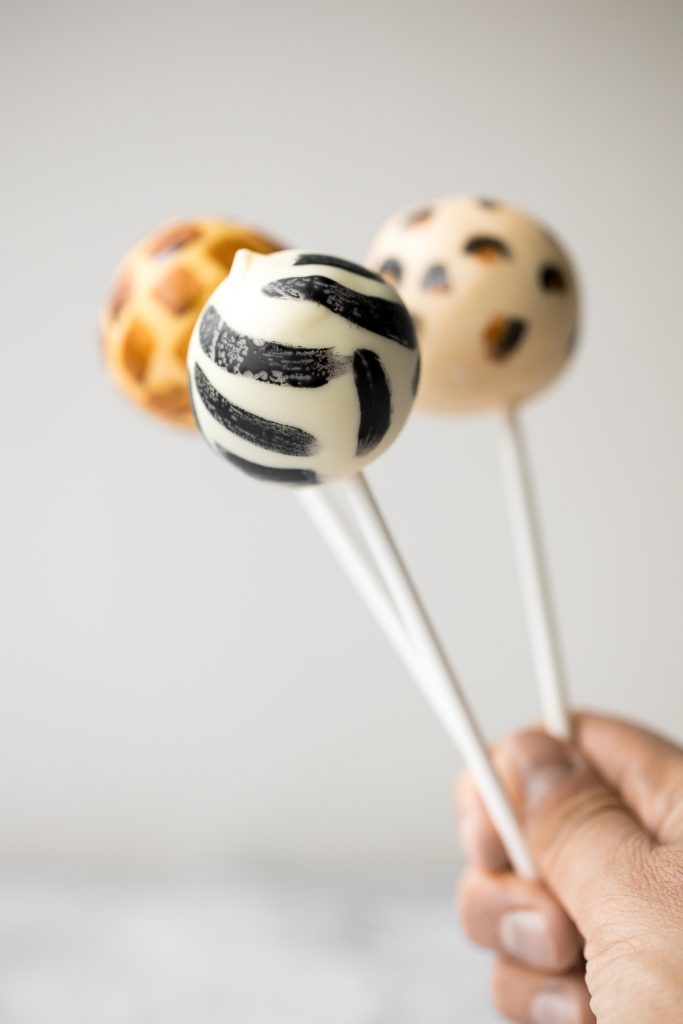
How to Coat Safari Cake Pops
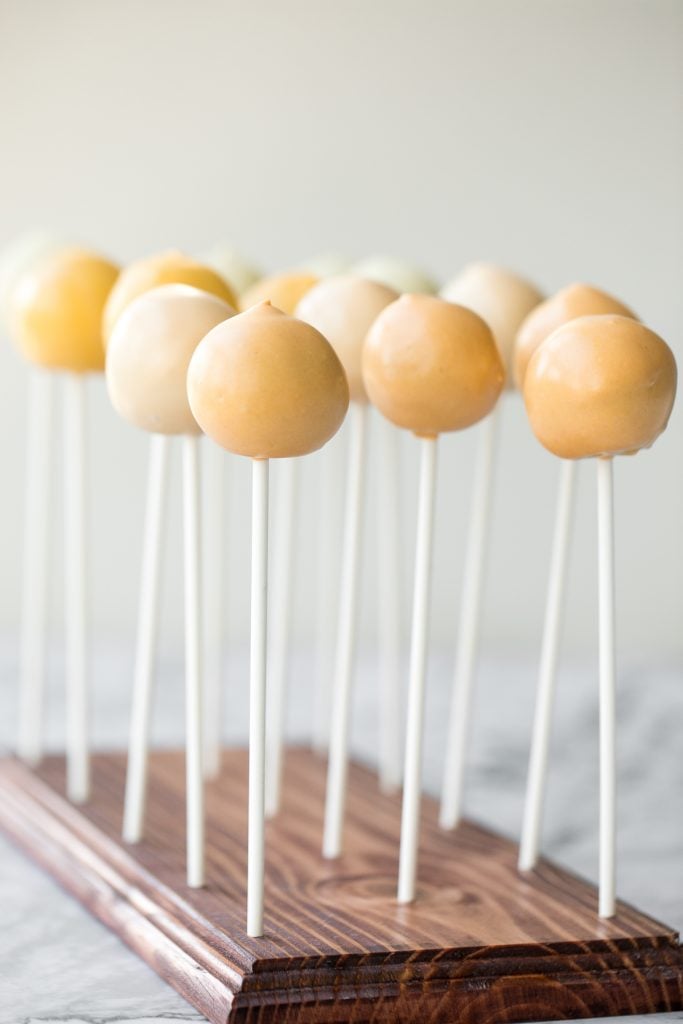
For the animal print, we will be making cake pops with 3 different base colours: white, pale yellow, deep yellow and orange. First, melt the white chocolate with coconut oil in a tall mug or measuring cup.
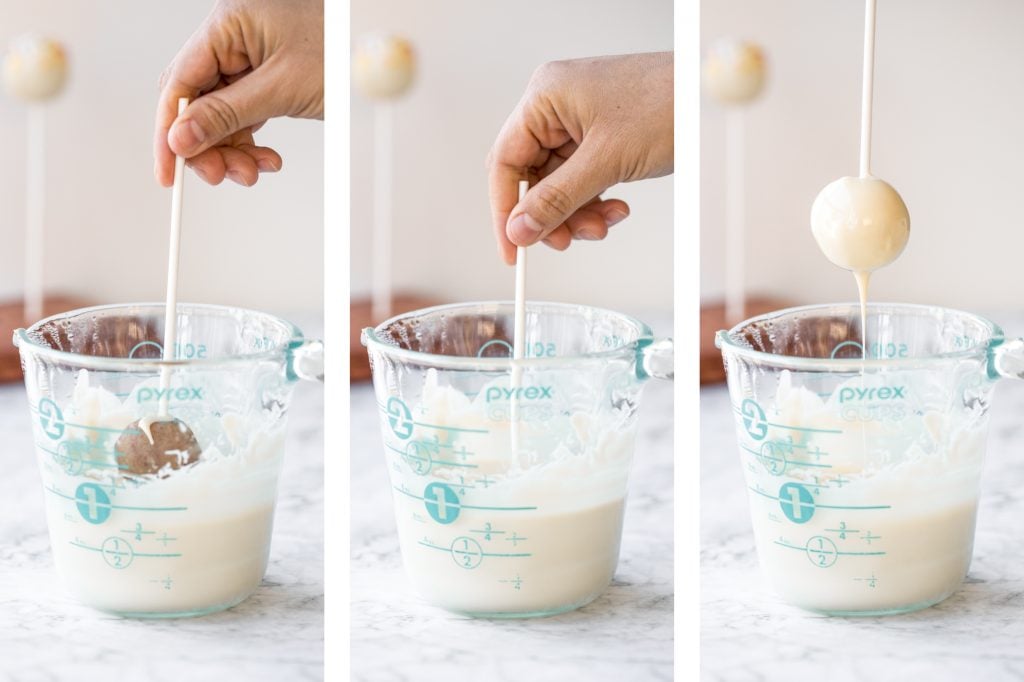
- For the white base: Dip ¼-inch of a cake pop lollipop stick into the chocolate, and then insert it halfway into the cake ball. Completely dip the cake ball into the chocolate and lightly tap off any excess. Place upright into a cake pop stand (or styrofoam block). Repeat with a quarter of all the cake balls.
- For the pale yellow base: Now dye the chocolate a light pale yellow using gel food coloring. Repeat the above step and coat a quarter of all the cake balls with the pale yellow chocolate. Place upright in the cake pop stand.
- For the deep yellow base: Dye the chocolate a deeper pale yellow using more gel food coloring. Coat a quarter of all the cake balls with the deep yellow chocolate. Place upright in the cake pop stand.
- For the orange base: Now dye the chocolate orange by adding some red gel food coloring. Coat the remaining cake balls in orange. Place upright in the cake pop stand.
Carefully place the cake pop stand with the cake pops in the refrigerator and allow coating to set completely, approximately one hour.
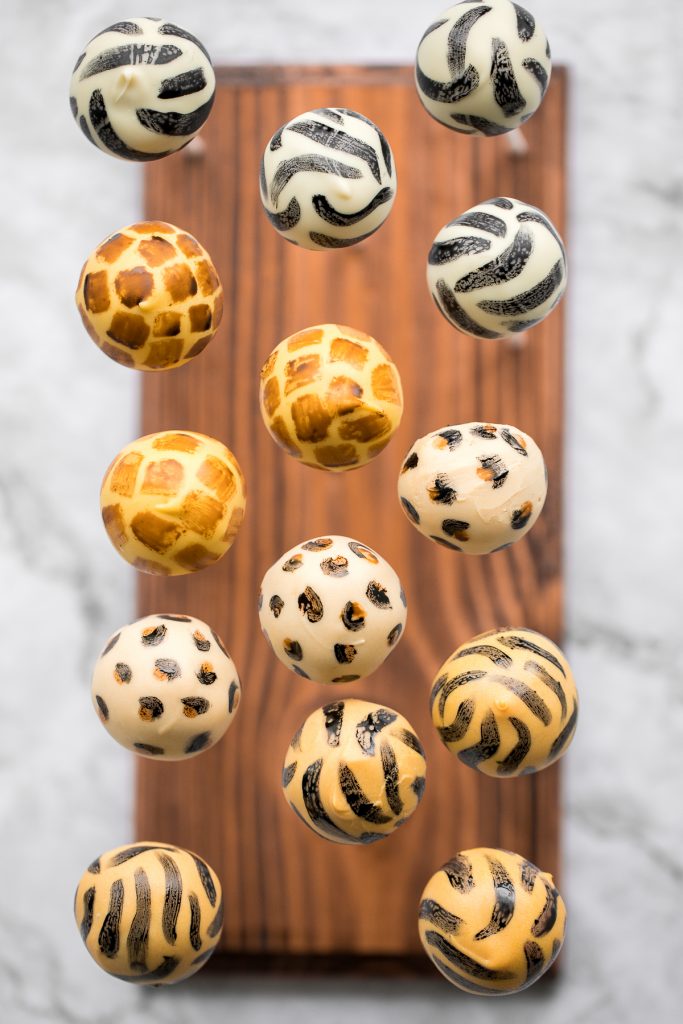
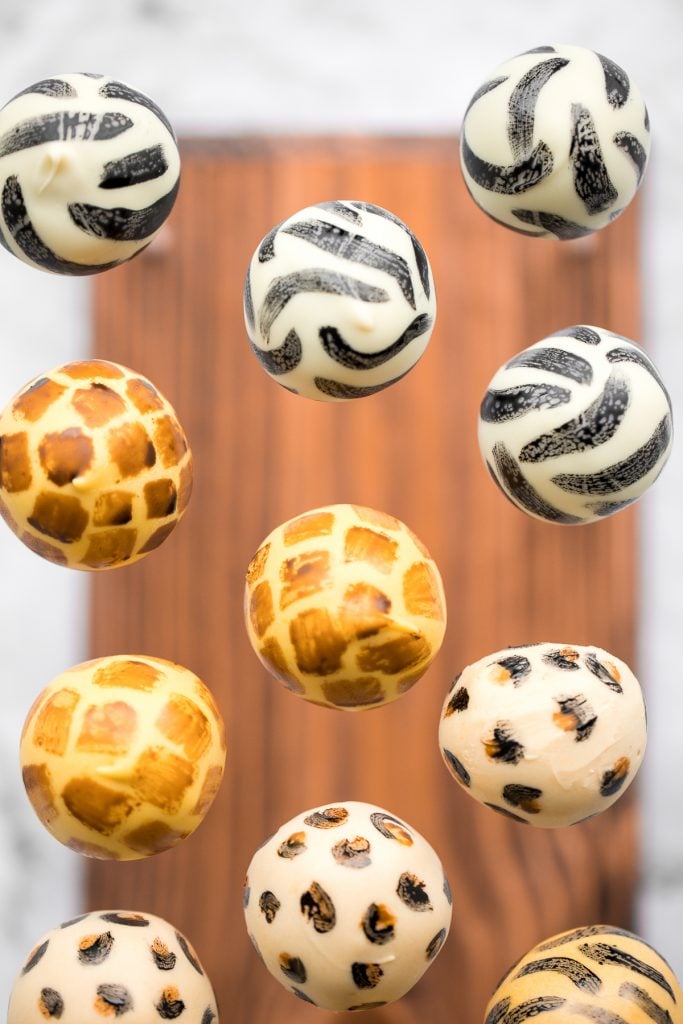
How to Decorate Safari Animal Print Cake Pops
Giraffe Print
- In a small dish, add ¼ teaspoon of lemon extract to one drop of brown gel food coloring.
- Using a food paint brush and ⅔ of the brown paint, paint a giraffe print pattern on the deep yellow cake pops.
Leopard Print
- Use the remaining ⅓ of the brown paint to brush circles/dots onto the pale yellow cake pops. Then, place back into the cake pop stand.
- In a small dish, add ½ teaspoon of lemon extract to two drops of black gel food coloring.
- Use about ¼ of the black paint to brush crescents around the brown dots to complete the look.
Zebra Print
- Use half of the remaining black paint to brush stripes on the white coated cake pops.
Tiger Print
- Use the remaining black paint to brush stripes onto the orange coated cake pops.
Place decorated cake pops upright back into the cake pop stand or a styrofoam block. You can store cake pops at room temperature for up to 2 days, or in the refrigerator or up to 1 week.
Wild One Safari Jungle Birthday Party
These cake pops are the perfect addition to a "Wild One" safari jungle party, or any safari or jungle themed party.


More Bite-sized Desserts
- Vanilla Cake Pops from Scratch
- Chocolate Cake Pops
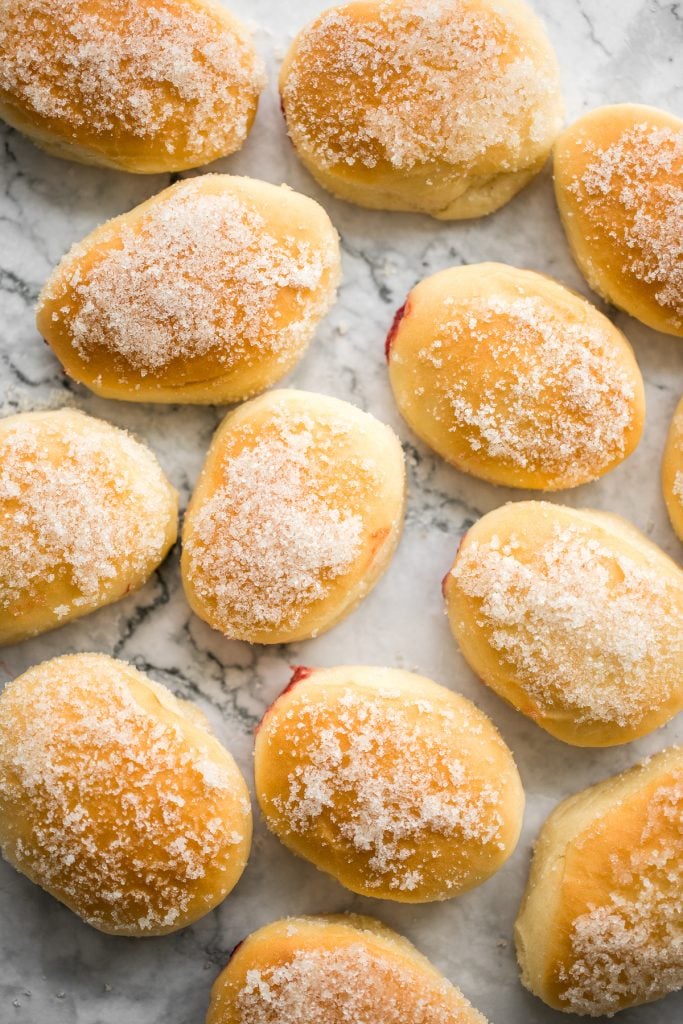
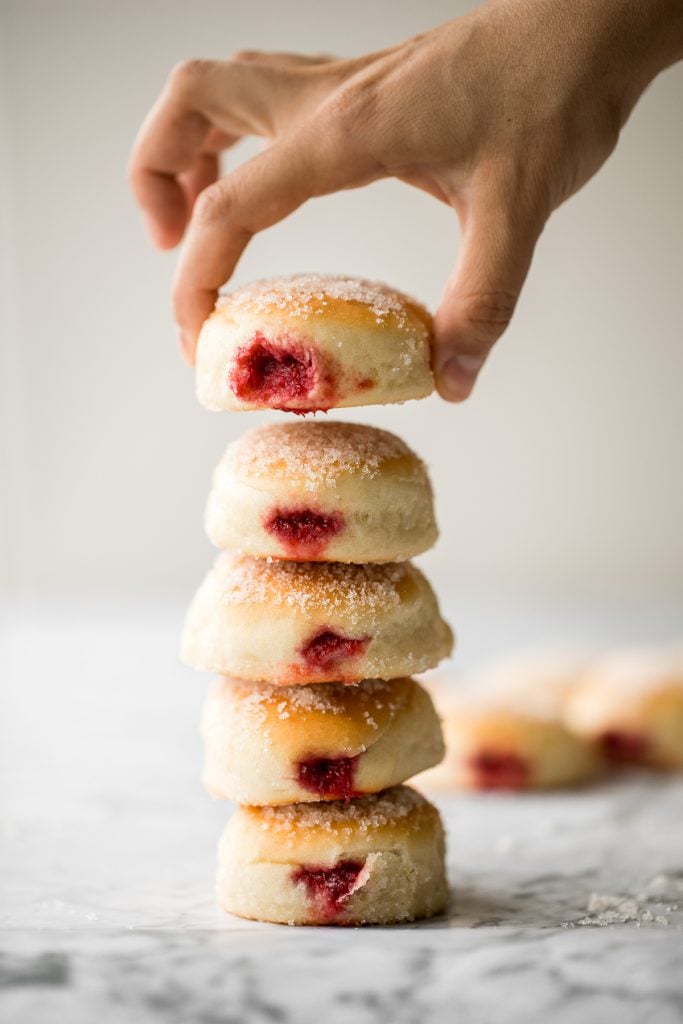
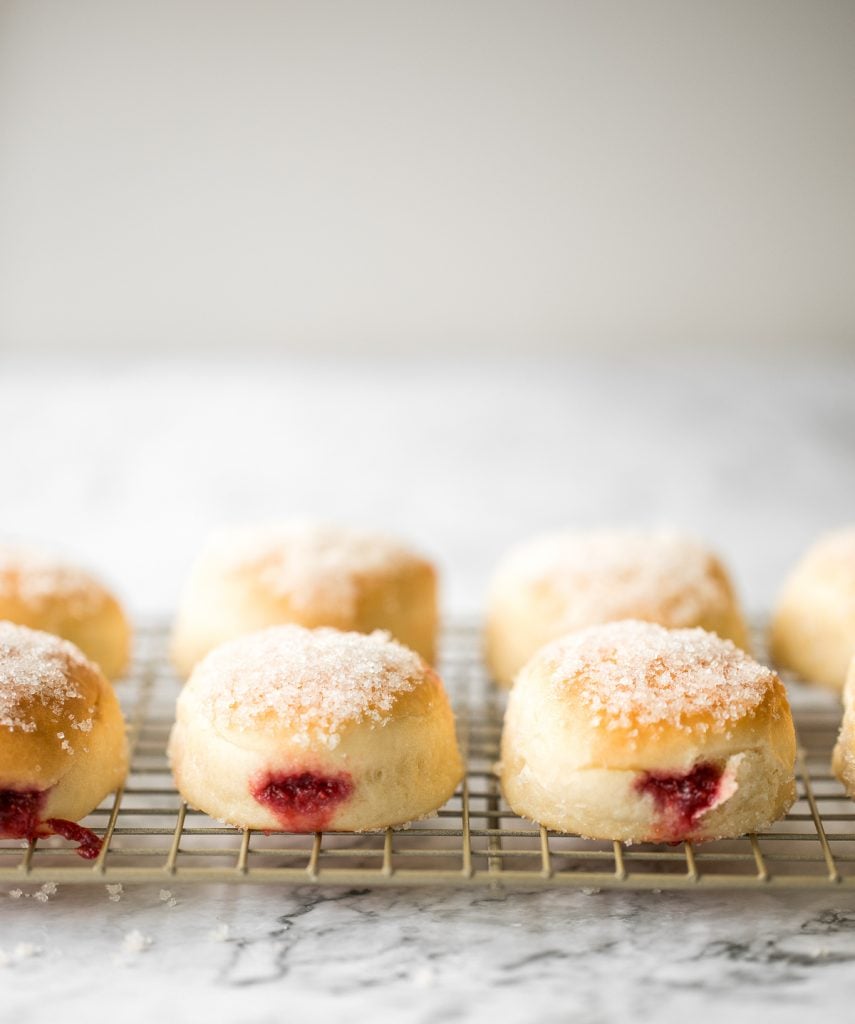
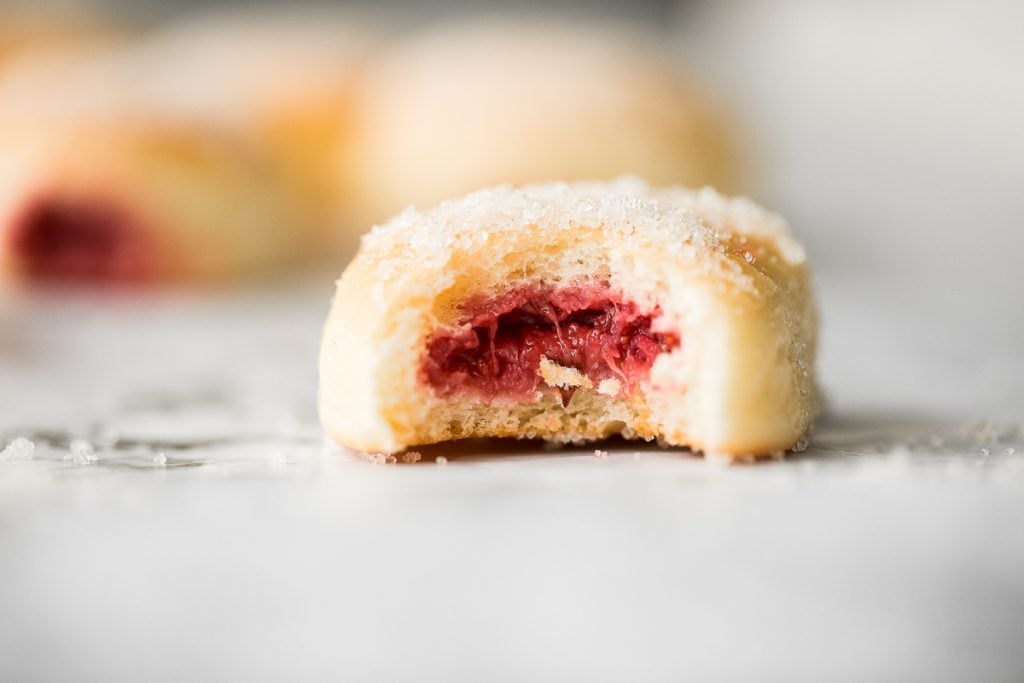
- Baked Jelly Donuts with Strawberry Jam
- Dark Chocolate Raspberry Truffles
- Nutella Mousse Cups
- Caramel Cheesecake Brownies
Tried this recipe?
I'd love to hear what you think! Leave a comment and rating below to share your feedback. Your reviews help others discover this recipe and help me keep creating more free recipes for you. Snap a photo and tag me on social media @aheadofthyme too.