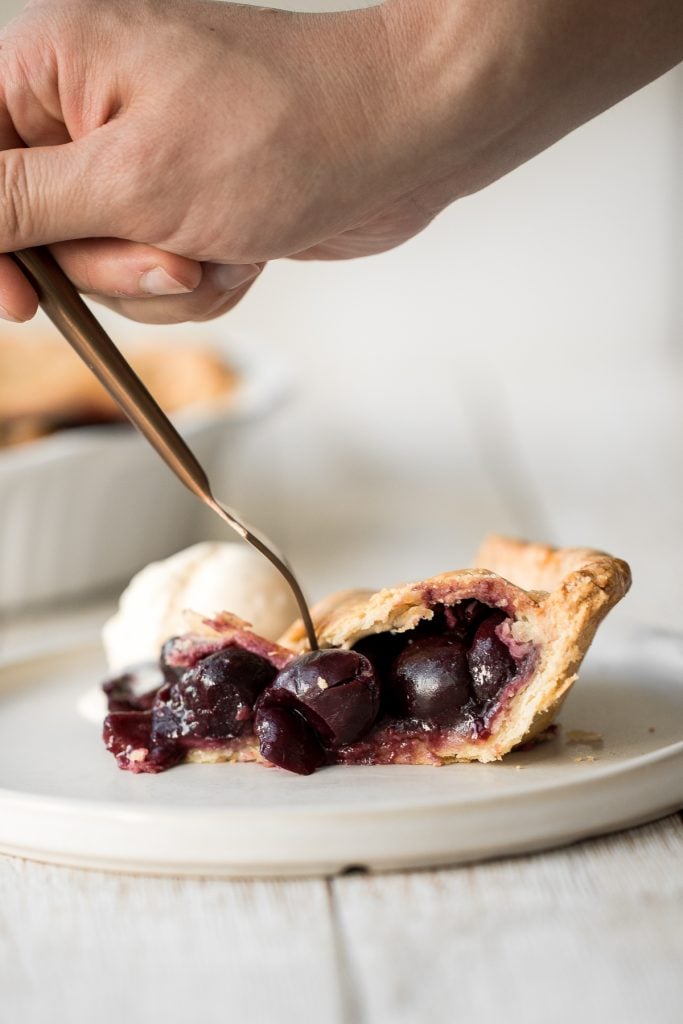
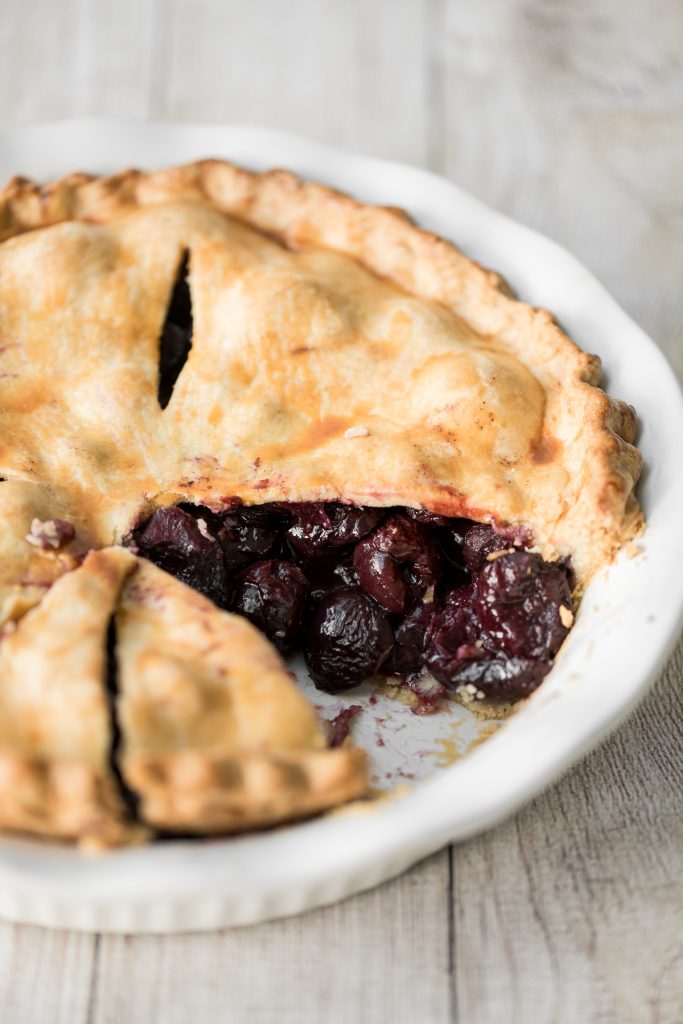
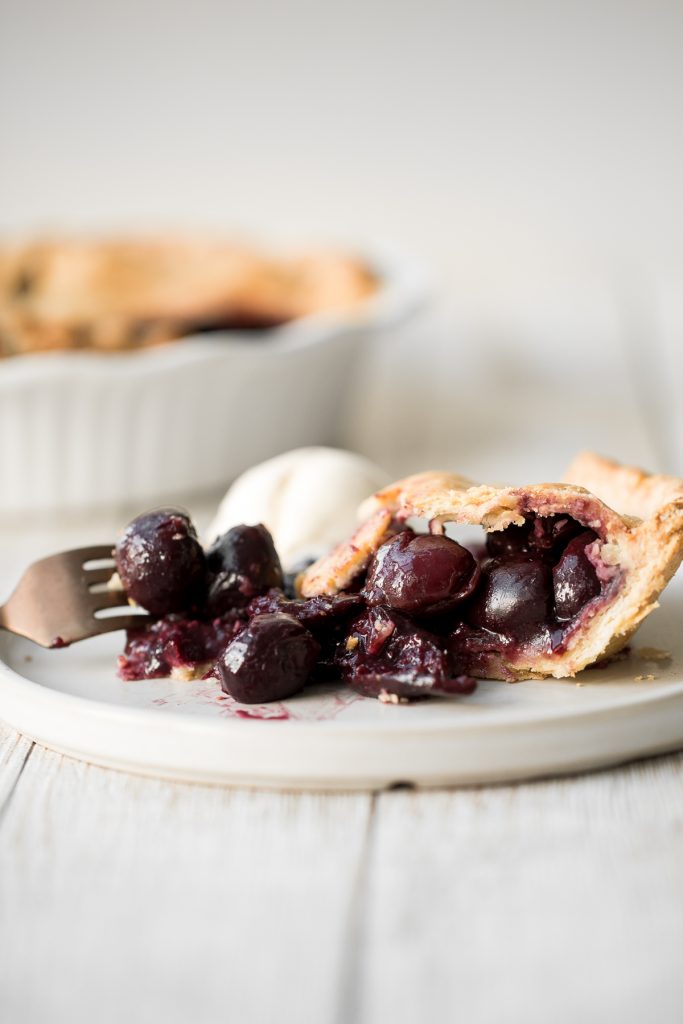
We are nearing the end of cherry season, so what better way to close the season with a classic cherry pie? This summery fruity dessert is made with the most flakey and buttery pie crust on the bottom and top, and filled with a delicious cherry-packed filling. Serve it with a scoop of vanilla ice cream and savour in all the delicious sweet flavours. It's such a satisfying way to end a meal.
What is in Cherry Pie?
- homemade pie dough - we make this using all purpose flour, granulated sugar, salt, cold unsalted butter, and ice cold water.
- cherries - the best way to use 4 and ½ cups of cherries (or 2 lbs.). I prefer to use fresh but you can also use frozen cherries.
- cornstarch - helps to thicken the filling.
- granulated sugar - depending on your taste, you can add more or less sugar to complement the flavour of the cherries.
- cinnamon
- lemon juice - freshly-squeezed gives the best flavour, but you can easily substitute with store-bought lemon juice.
- lemon zest - you can also use orange zest for a hint of orange flavour instead.
- cold butter
- egg - for the egg wash on top.
- vanilla ice cream - for serving.
You will also need mixing bowls, a food processor, plastic cling wrap, and a rolling pin for preparing the pie dough, and a 9-inch pie dish for baking.
How to Make the Best Classic Cherry Pie
Make the Pastry Dough:
In a food processor, add flour, sugar, salt and cubed butter. Pulse mix on and off for about 1 minute, until the flour mixture turns into a small breadcrumb-like consistency. Drizzle ice water into the mixture (ice water is the key here). Close the lid and continue to pulse mix on and off for another 1 minute. If you squeeze the crumbs together and they stick together, that means the crumbs are good to go.
Transfer the dough (crumb-like) into a large ziploc bag and squeeze with your hands to bring all the loose crumbs together until it turns into a nice and smooth dough ball. Divide the dough ball in half and flatten to form 2 equal discs. Wrap the discs separately in plastic wrap and refrigerate for at least 1 hour.
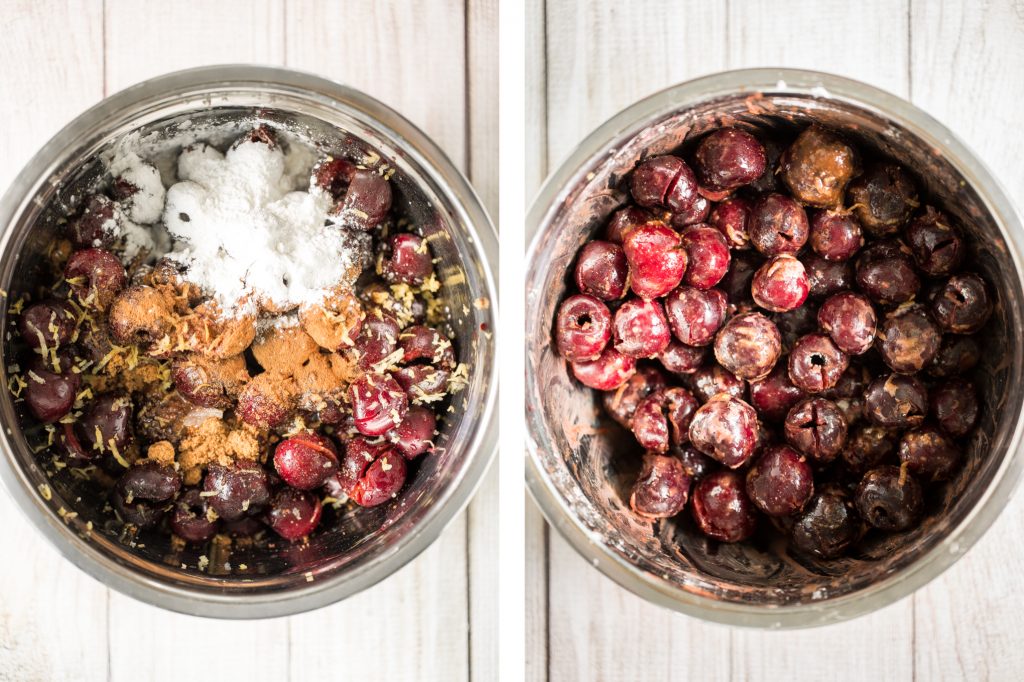
Make the Cherry Pie Filling
In a large mixing bowl, combine pitted and halved cherries, cornstarch, sugar, cinnamon, lemon juice, and lemon zest, and mix together.
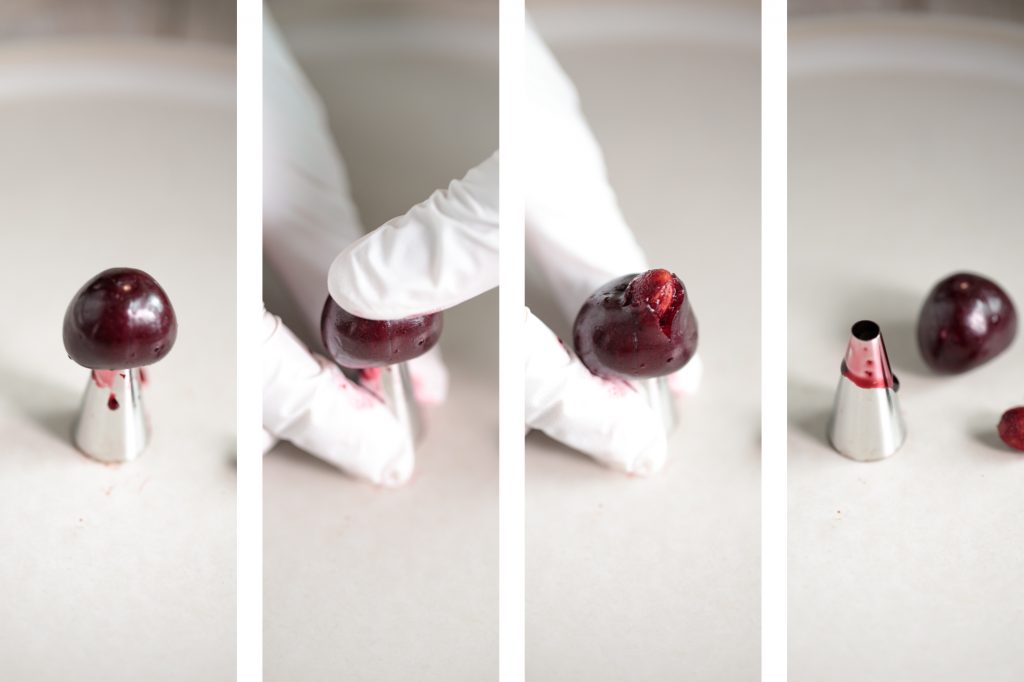
How to Pit Cherries
The easiest way to pit cherries is by placing each cherry on a round piping tip and pushing the cherry down to push out the seed.
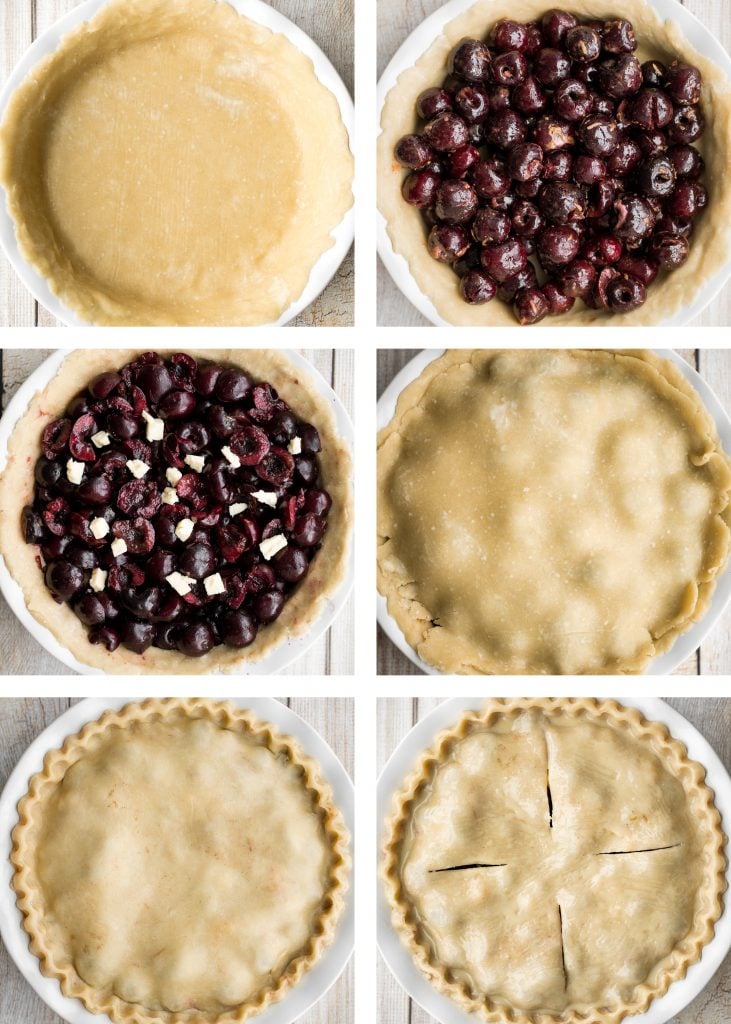
Assemble the Cherry Pie
Unwrap each dough disc and place in between 2 pieces of parchment paper or plastic wrap. Roll each dough disc into 12-inch circle using a rolling pin.
Transfer the first dough disc onto a 9-inch pie pan and gently press down to form into the bottom pie crust. Slowly pour the cherry filling into the dough-lined pie pan (make sure to not transfer any liquid from the bowl) and use a spatula to spread them evenly across. Discard any remaining liquid in the bowl. Add cold cubed butter on top of the cherry filling.
Carefully place the second dough disc on top of the filling (this will form the top pie crust). Make sure it covers the pie pan entirely. Gently press the edges of the top crust and the edges of bottom crust together. Pinch them together with your fingers, along the entire edge of the pie, and crimp to seal.
Use a knife to make 4 slits on top of the top pie crust for ventilation. Gently brush egg wash over the top crust and edges.
Bake the Pie
Preheat the oven to 400 F. Transfer the cherry pie into the oven and bake for 20 minutes until the edges start turning golden brown. Reduce the oven temperature to 350 F and bake for additional 40 minutes until the pie crust is golden brown.
Allow the pie to cool in the pan at room temperature for 1 hour before serving. Then, slice it up and serve with a scoop of vanilla ice cream.

Tips for Making Cherry Pie
- Can I use frozen cherries? Fresh cherries are best when they are in season. You can use frozen cherries without even thawing first. Just throw them into the filling and continue with the recipe. Be sure to not transfer any liquid when transferring the filling into the pie.
- How do I make a jammier cherry filling? You can make a jammier filling by cutting the cherries into smaller pieces (quartered). The smaller the pieces, the easier it will be for them to become jammier.
- How long will homemade cherry pie keep? This pie will last for up to 5 days in the refrigerator. Loosely cover with aluminum foil or plastic cling wrap.
- Can you freeze cherry pie? Yes, you can freeze cherry pie for up to 3 months. To freeze, simply wrap the pie (or each slice) tightly with aluminum foil or plastic cling wrap. Then place inside a freezer bag for storing.
- Can I use this recipe to make other pies? Absolutely. You can use this recipe to make a mixed berry pie with cherries, blackberries, raspberries, and blueberries. Just make sure the total amount of berries is 4 and ½ cups.
More Berry Recipes
- Classic Blueberry Pie with Lattice Top
- Glazed Lemon Blueberry Scones
- Small Batch Strawberry Jam
- Baked Jelly Donuts with Strawberry Jam
- 3-Ingredient Strawberry Sorbet
- Triple Berry French Toast
- 5-Minute Blackberry Milkshake
Tried this recipe?
I'd love to hear what you think! Leave a comment and rating below to share your feedback. Your reviews help others discover this recipe and help me keep creating more free recipes for you. Snap a photo and tag me on social media @aheadofthyme too.
Recipe
Classic Cherry Pie
- Total Time: 2 hours 40 minutes
- Yield: 1 (9-inch) pie 1x
- Diet: Vegetarian
Description
Summery and fruity, classic cherry pie has the most flakey and buttery pie crust on the bottom and top and is filled with a delicious cherry-packed filling.
Ingredients
For the pie dough:
- 3 cups all purpose flour (360 grams)
- 1 tablespoon granulated sugar
- 1 teaspoon salt
- 1 cup unsalted butter, cold and cubed into ½-inch pieces
- 8 tablespoons ice cold water
For the cherry pie filling:
- 4 + ½ cups cherries, pitted and halved (2 lbs.)
- ¼ cup cornstarch (30 grams)
- ¼ cup granulated sugar
- 1 tablespoon ground cinnamon
- 2 tablespoons lemon juice, freshly-squeezed
- 1 teaspoon lemon zest (or orange zest)
- 2 tablespoons cold butter, cut into ½-inch cubes
- 1 egg, beaten (for egg wash)
For serving:
Instructions
Make the Pastry Dough:
- In a food processor, add flour, sugar, salt and cubed butter. Pulse mix on and off for about 1 minute, until the flour mixture turns into a small breadcrumb-like consistency.
- Drizzle ice water into the mixture (ice water is the key here). Close the lid and continue to pulse mix on and off for another 1 minute. If you squeeze the crumbs together and they stick together, that means the crumbs are good to go.
- Transfer the dough (crumb-like) into a large ziploc bag and squeeze with your hands to bring all the loose crumbs together until it turns into a nice and smooth dough ball.
- Divide the dough ball in half and flatten to form 2 equal discs. Wrap the discs separately in plastic wrap and refrigerate for at least 1 hour.
Make the Filling:
- In a large mixing bowl, combine pitted and halved cherries, cornstarch, sugar, cinnamon, lemon juice, and lemon zest, and mix together. Set aside for assembling.
Assemble the Pie:
- Preheat the oven to 400 F.
- Unwrap each dough disc and place in between 2 pieces of parchment paper or plastic wrap. Roll each dough disc into a 12-inch circle using a rolling pin.
- Transfer the first dough disc onto a 9-inch pie pan and gently press down to form into the bottom pie crust.
- Slowly pour the cherry filling mixture into the dough-lined pie pan (make sure to not transfer any liquid from the bowl). Use a spatula to spread the filling evenly across. Discard any remaining liquid in the bowl. Add cold cubed butter on top of the cherry filling.
- Carefully place the second dough disc on top of the filling (this will form the top pie crust). Make sure it covers the pie pan entirely. Gently press the edges of the top crust and the edges of bottom crust together. Pinch them together with your fingers, along the entire edge of the pie, and crimp to seal.
- Use a knife to make 4 slits on top of the top pie crust for ventilation. Gently brush egg wash over the top crust and edges.
- If your oven has not preheated at this point, store the assembled pie in the fridge to prevent the pie crust from disintegrating (the butter in the dough melts quickly at room temperature).
Bake the Pie:
- Transfer the cherry pie pan into the oven and bake in a preheated 400 F oven for 20 minutes, until the edges of the pie start turning golden brown. Reduce the oven temperature to 350F and bake for additional 40 minutes until the pie crust is golden brown. You might see the pie filling ooze out a little.
- Allow the pie to cool in the pan at room temperature for 1 hour before serving.
- Slice and serve with a scoop of vanilla ice cream.
Notes
Equipment used: mixing bowls, a food processor, plastic cling wrap, a rolling pin for preparing the pie dough, and a 9-inch pie dish for baking.
Fresh vs. frozen cherries: Fresh cherries are best when they are in season. You can use frozen cherries without even thawing first. Just throw them into the filling and continue with the recipe. Be sure to not transfer any liquid when transferring the filling into the pie.
How to make a jammier cherry filling: You can make a jammier filling by cutting the cherries into smaller pieces (quartered). The smaller the pieces, the easier it will be for them to become jammier.
How to store cherry pie: This pie will last for up to 5 days in the refrigerator. Loosely cover with aluminum foil or plastic cling wrap. You can also freeze it for up to 3 months. To freeze, simply wrap the pie (or each slice) tightly with aluminum foil or plastic cling wrap. Then place inside a freezer bag for storing.
How to make a mixed berry pie: You can use this recipe to make a mixed berry pie with cherries, blackberries, raspberries, and blueberries. Just make sure the total amount of berries is 4 and ½ cups.
- Prep Time: 40 minutes (+1 hour chill time)
- Cook Time: 60 minutes
- Category: Dessert
- Method: Bake
- Cuisine: American

Comments
No Comments