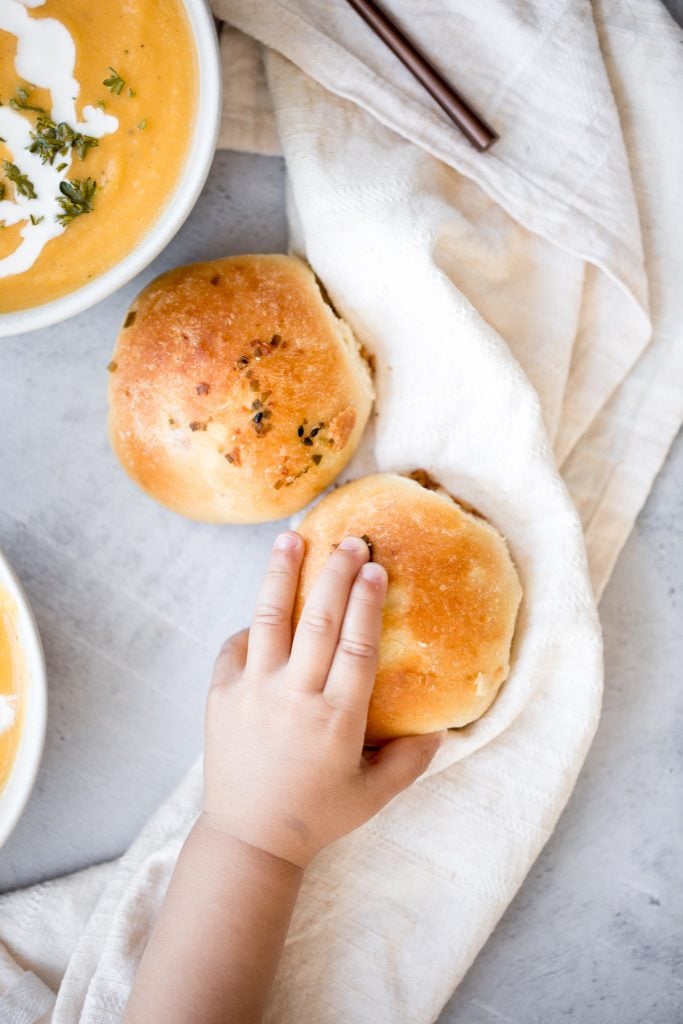
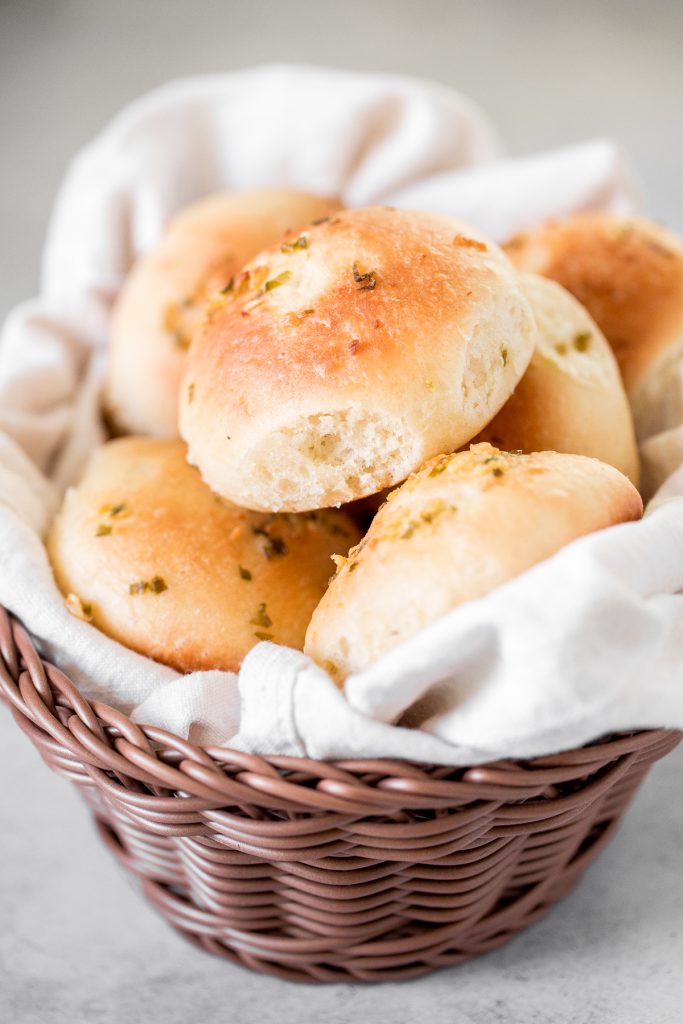
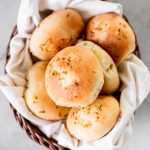
Quick and easy, 90-minute cheesy garlic dinner rolls are soft and fluffy, buttery and garlicky, and full of cheese inside. They are like traditional dinner rolls except so much better. They are the perfect compliment to your dinner table or holiday dinner menu. Enjoy it warm, fresh out of the oven, there is really nothing like it.
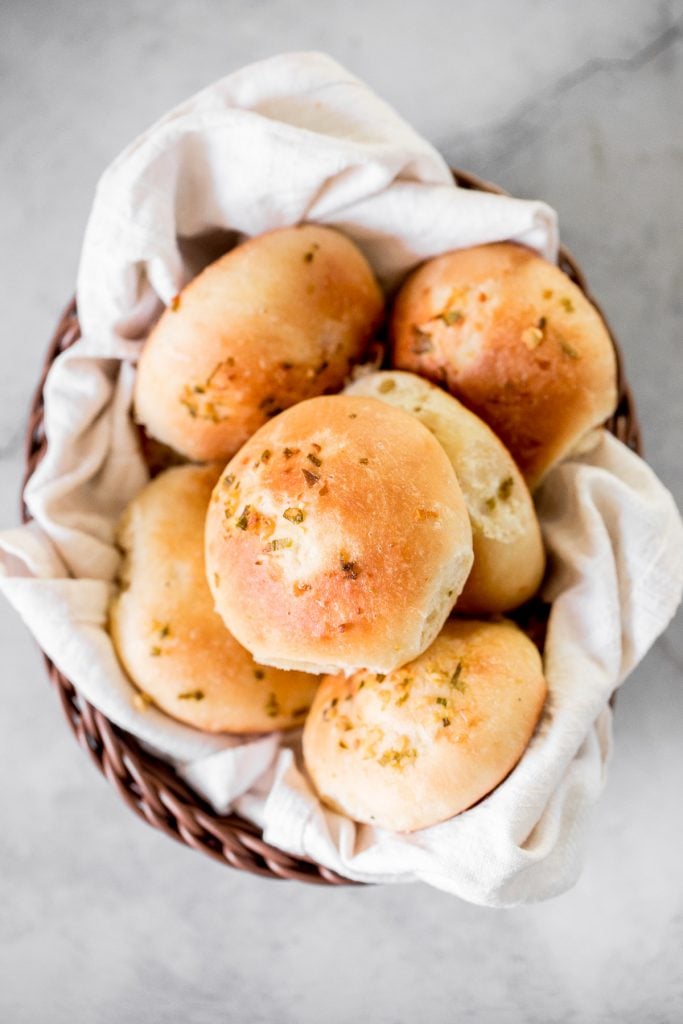
These cheesy garlic dinner rolls are so easy to make, taking just 15 minutes of actual prep work, since the yeast and the oven do most of the work. Just like most of our quick and easy breads such as green onion dinner rolls, pumpkin dinner rolls, skillet dinner rolls, and quick and easy pita bread. So simple, yet so delicious.
Ingredients
- all purpose flour
- active dry yeast
- milk + butter - adds fat content for fluffier and softer rolls.
- sugar - helps the dough rise faster by "feeding" the yeast.
- salt
- egg - leavening agent to promote rising.
- cheese filling - cream cheese and mozzarella cheese.
- garlic topping - garlic, butter, mozzarella cheese, Parmesan cheese, and green onions.
- egg - for egg wash.
- white sesame seeds - optional, to garnish on top.
You will also need mixing bowls, a cast-iron skillet or quarter sheet baking pan. I also highly recommend a kitchen scale to get the most accurate measurements when measuring out your ingredients.
How to Make the Best Cheesy Garlic Dinner Rolls
- Prepare the dough. In a large mixing bowl, combine yeast, milk, butter, sugar, salt and egg, and whisk until well combined and yeast is dissolved. The butter might still be a little lumpy in the mixture at this point. Add flour and stir well to combine until there are no dry flour visible in the bowl. Make sure to scrape down the sides of the bowl with a spatula, as needed.
- Knead the dough. Transfer the dough onto a clean and lightly greased surface. The oil will help keep the dough from sticking to your hands initially. You can also lightly oil your hands. Knead the dough for 5-10 minutes, until the dough is smooth and not sticky at all.
Tips for Kneading Dough
- How to knead dough: Knead the dough by pushing it down and outward using the palms of your hands. Fold the dough in half toward you and press down. Repeat this motion by pushing the dough down and outward, and then folding over towards you. This helps build up gluten strength in dough that is responsible for making the bread fluffy.
- How to test if dough is well-kneaded: A well-kneaded dough is smooth and can hold its shape. You can test the dough by giving it a firm poke with your finger. The indentation should bounce right back. If it doesn't bounce back and stays like a dimple, keep kneading for a few more minutes.
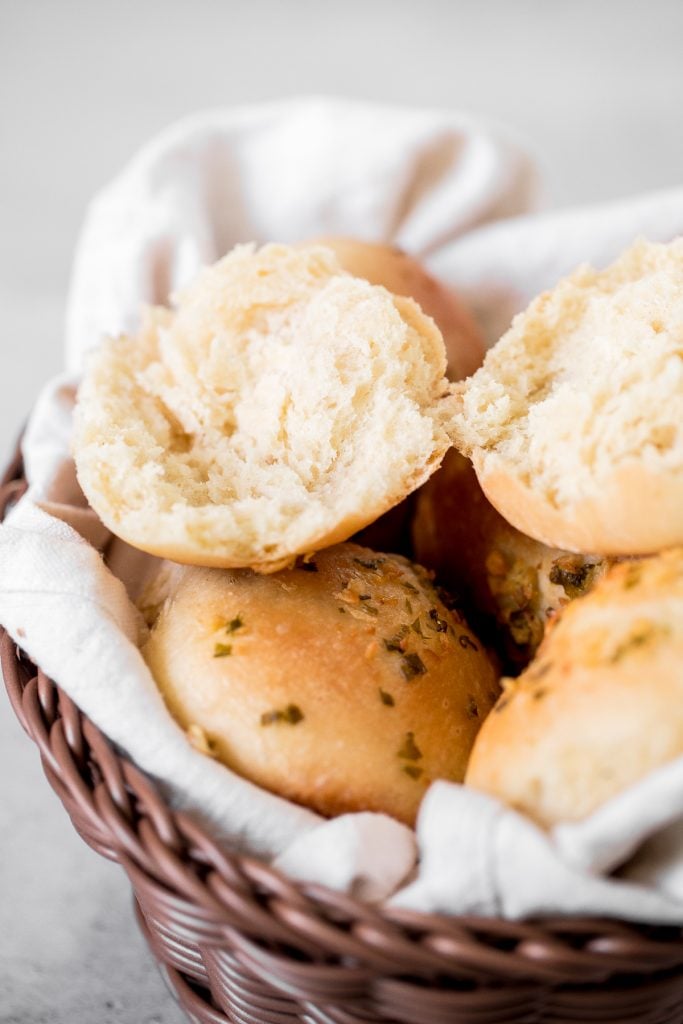
- Shape and stuff the rolls. In a small mixing bowl, combine cream cheese and mozzarella. Roll the dough into a log and use a knife or bench scraper to divide it into 10-12 equal pieces (or 8-10 equal pieces with a larger piece in the middle). Flatten the dough and add 1.5 tablespoons of the cheese mixture into the centre. Press all edges into the centre to seal so that the cheese doesn't escape out during baking. Turn it over and cup the dough in your palm, making circular motions. It should take less than 30 seconds to roll each piece into a smooth ball.
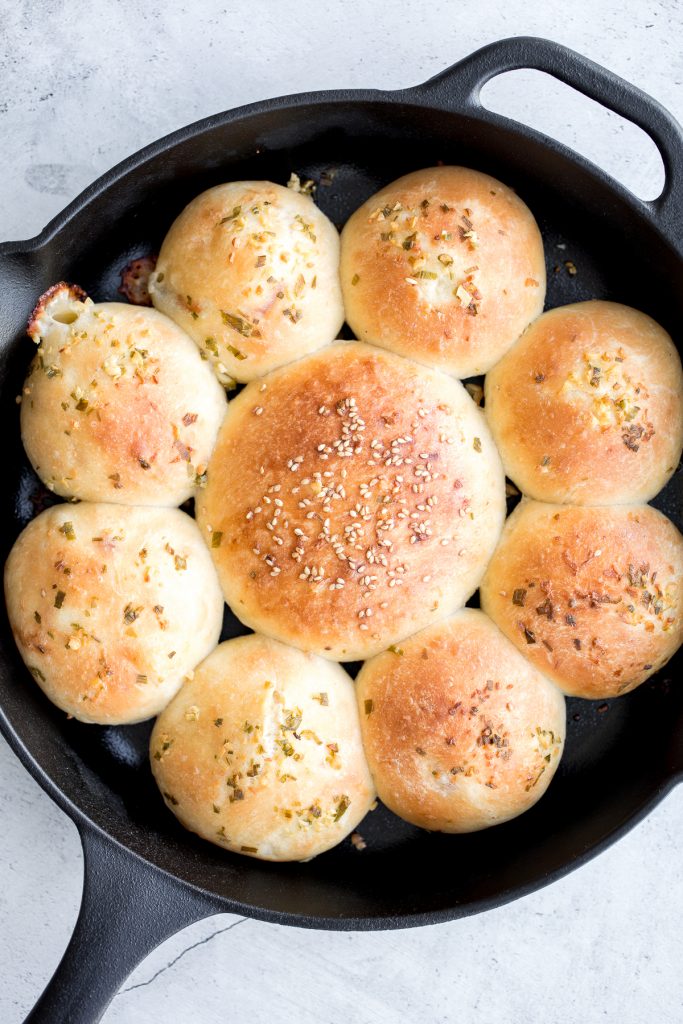
- Proof the dinner rolls: Transfer the cheese-filled dough balls to a large cast-iron skillet or parchment-lined quarter sheet baking pan. Leave ½-inch of space in between each dough ball. Cover the pan with plastic cling wrap to prevent the dough from drying out. Let the rolls rest and rise for 1 hour. The rolls should almost double in size.
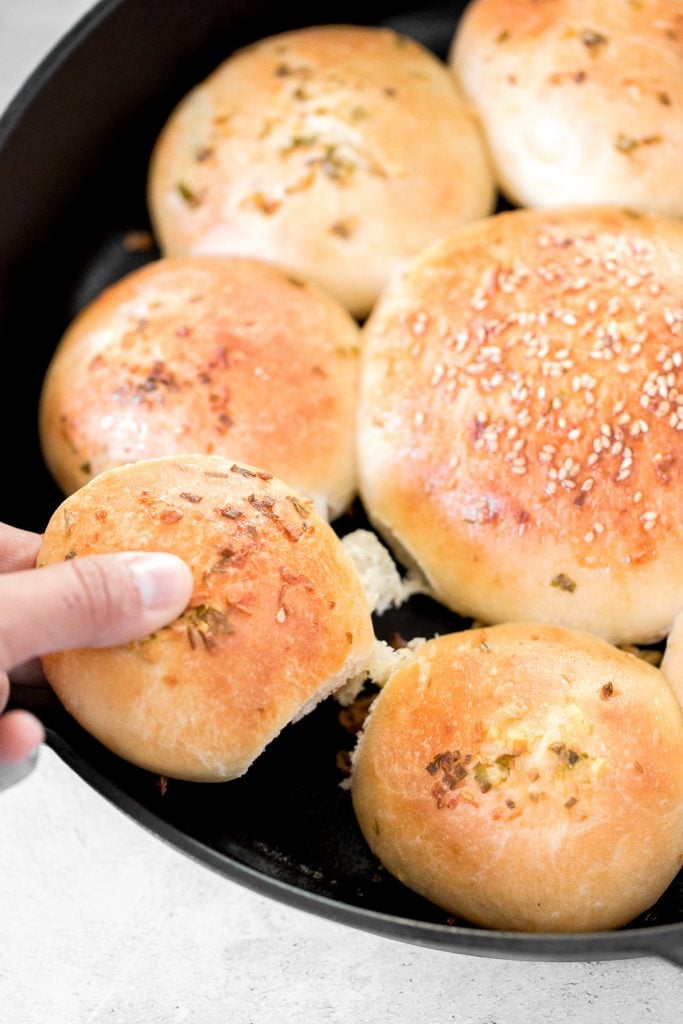
- Add garlic topping: In a small mixing bowl, stir to combine garlic, melted butter, shredded mozzarella, grated parmesan, and chopped green onions. Apply egg wash over each roll and add a spoonful of the garlic cheese mixture on top. Sprinkle some sesame seeds on top (optional, for garnish).
- Bake the dinner rolls: Bake in a 375 F preheated oven for 20 minutes, or until the tops of the rolls are golden brown. Let the rolls cool on a wire cooling rack for 15 minutes before serving.
How to Serve Cheesy Garlic Dinner Rolls
Serve these cheesy garlic dinner rolls on their own as a delicious snack, or serve it alongside a complete meal for dinner (such as skillet chicken with lemon garlic sauce or shrimp fettuccine alfredo pasta bake), or alongside a soup (such as roasted butternut squash soup, creamy cauliflower and garlic soup, and sweet potato soup) or salad (try Mediterranean orzo pasta salad).
Tips on Storing Bread
- How to store: Store cooled dinner rolls covered at room temperature for up to 2 days. You can also store them in an airtight container in the refrigerator for up to 1 week.
- How to freeze: Store cooled dinner rolls in a freezer bag for up to 3 months.
- How to reheat: Reheat in the air fryer at 300F for 5-7 minutes, or in a 300F preheated oven for 10-12 minutes. If frozen, allow the dinner rolls to thaw first to room temperature, then reheat.
More Easy Bread Recipes
- Small Batch Garlic Naan Bread
- Quick and Easy Pita Bread
- Easy Homemade Everything Bagels
- Quick Green Onion Dinner Rolls
- Easy Small Batch Ciabatta Bread
- Homemade No Knead French Baguettes
- Pull Apart Garlic Bread
Tried this recipe?
I'd love to hear what you think! Leave a comment and rating below to share your feedback. Your reviews help others discover this recipe and help me keep creating more free recipes for you. Snap a photo and tag me on social media @aheadofthyme too.
Recipe
Cheesy Garlic Dinner Rolls
- Total Time: 1 hour 35 minutes
- Yield: 10-12 dinner rolls 1x
- Diet: Vegetarian
Description
Quick and easy, 90-minute cheesy garlic dinner rolls are soft and fluffy, buttery and garlicky, and full of cheese inside. The perfect side for dinner.
Ingredients
For the dough:
- 3 grams active dry yeast
- 180 grams milk (¾ cup), at room temperature
- 50 grams butter, softened at room temperature (¼ cup)
- 8 grams sugar (2 teaspoons)
- 6 grams salt (1 teaspoon)
- 1 egg
- 375 grams all purpose flour (3 cups)
For the cheese filling:
- ½ (8 oz.) package cream cheese (½ cup), at room temperature
- ¼ cup mozzarella cheese, shredded
For the garlic topping:
- 2 tablespoons garlic, minced
- 1 tablespoon butter, melted
- 2 tablespoons mozzarella cheese, shredded
- 1 tablespoon Parmesan cheese, finely grated
- 2 tablespoons green onions, finely chopped
- 1 egg, beaten (for egg wash)
- 1 tablespoon white sesame seeds (optional, for garnish)
Instructions
Prepare the Dough:
- In a large mixing bowl, combine yeast, milk, butter, sugar, salt and egg, and whisk until well combined and yeast is dissolved. The butter might still be a little lumpy in the mixture at this point.
- Add flour and stir well to combine until no dry flour is visible in the bowl. Scrape down the sides of the bowl with a spatula, as needed.
Knead the Dough:
- Transfer the dough mixture onto a clean and lightly greased surface. The oil will help keep the dough from sticking to your hands initially. You can even lightly oil your hands too.
- Knead the dough for 5-10 minutes until the dough ball is smooth and not sticky at all. A well kneaded dough is smooth and can hold its shape. To test if the dough is well-kneaded, give the dough ball a firm poke with your finger. The indentation should bounce right back. If it doesn't bounce back and stays like a dimple, keep kneading for a few more minutes.
Shape and Stuff the Dinner Rolls:
- In a small mixing bowl, add cream cheese and mozzarella. Stir with a spatula until well combined.
- Roll the dough into a log and use a knife or bench scraper to divide it into 10-12 equal pieces (or 8-10 equal pieces with a larger piece in the middle).
- Flatten the dough and add 1.5 tablespoons of the cheese mixture into the centre of the dough. Press all edges into the centre to seal so that the cheese doesn't escape out during baking. Turn it over and cup the dough in your palm, making circular motions. It should take less than 30 seconds to roll each piece into a smooth ball.
Proof the Dinner Rolls:
- Arrange the cheese filled dough balls on a large skillet or parchment-lined baking sheet. Leave ½-inch of space in between each dough ball.
- Cover the pan with plastic cling wrap to prevent the dough from drying out. When the dough loses moisture, it tends to form hard skin around its surface, which creates a crust when baking. Let the rolls rest and rise for 1 hour. The rolls should almost double in size. Note that placing the rolls in a warmer area will help them rise faster.
Bake the Dinner Rolls:
- Preheat oven to 375 F.
- In a small mixing bowl, stir to combine garlic, melted butter, shredded mozzarella, grated parmesan, and chopped green onions. Apply egg wash over each roll and add a spoonful of the garlic cheese mixture on top. The egg wash helps the toppings stick to the surface of the rolls. Sprinkle some sesame seeds on top (optional, for garnish).
- Bake in the preheated oven for 20 minutes, or until the tops of the rolls are golden brown.
- Let the rolls cool on a wire cooling rack for 15 minutes before serving.
Notes
Equipment used: kitchen scale, mixing bowls, cast-iron skillet or quarter sheet baking pan.
How to store: Store cooled dinner rolls covered at room temperature for up to 2 days. You can also store them in an airtight container in the refrigerator for up to 1 week.
How to freeze: Store cooled dinner rolls in a freezer bag for up to 3 months.
How to reheat: Reheat in the air fryer at 300F for 5-7 minutes, or in a 300F preheated oven for 10-12 minutes. If frozen, allow the dinner rolls to thaw first to room temperature, then reheat.
- Prep Time: 15 minutes (+1 hour rise time)
- Cook Time: 20 minutes
- Category: Bread
- Method: Bake
- Cuisine: American


Beth says
Oooo, I could eat these big, fluffy rolls for dinner! And only these big, fluffy rolls and be quite happy!!
Sam Hu | Ahead of Thyme says
Hehehe I can't disagree with that!
Jenn says
First off, I LOVE how detailed this post is! I need all the tips I can get and loved the extra info on kneading and prepping the dough. Thanks so much for this tasty recipe!
Sam Hu | Ahead of Thyme says
Thank you so much Jenn! Happy to help!