
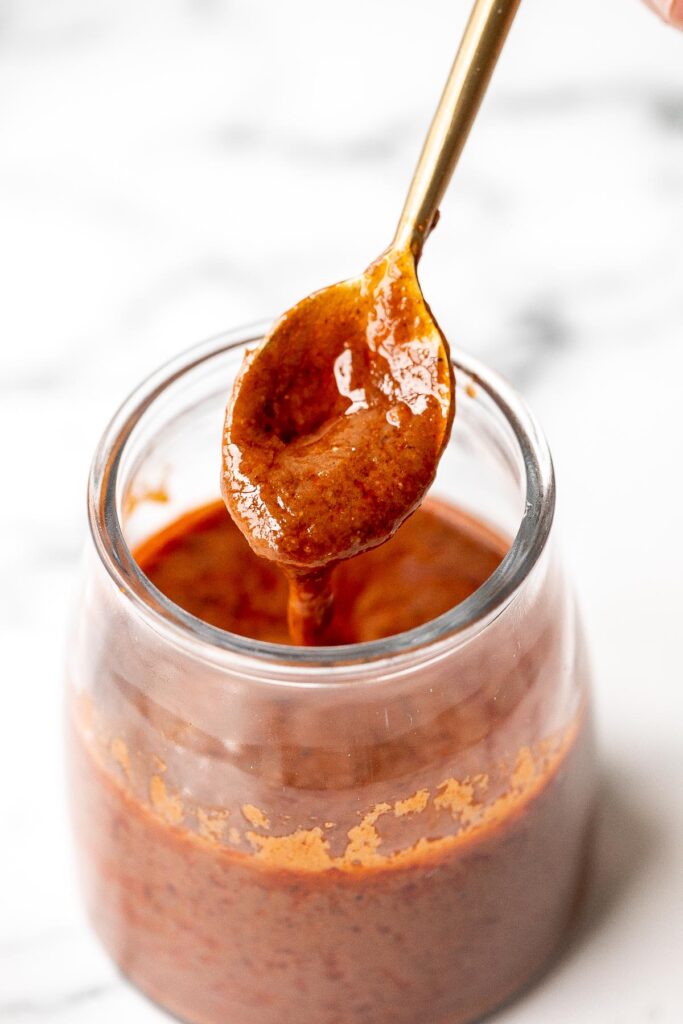
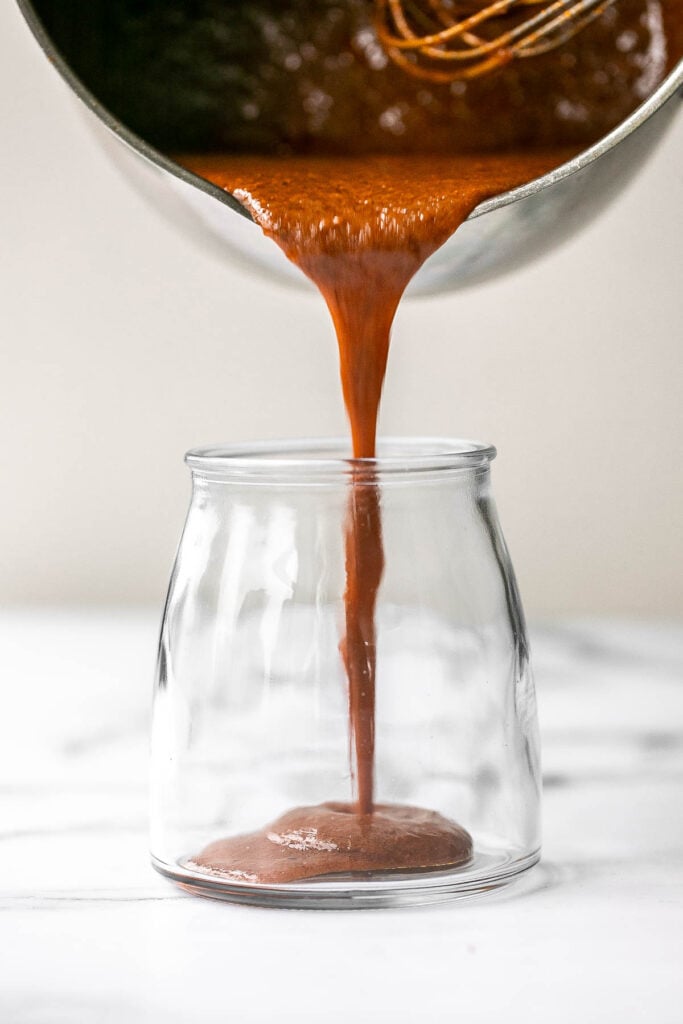
Easy homemade enchilada sauce requires just one pot, an assortment of flavourful spices, and four simple steps to make. The best part? It takes less than 15 minutes to make but tastes like something that took a lot of effort. It's flavoured with a delicious combination of spices including cumin, chili powder, paprika, garlic, and oregano. Homemade enchilada sauce is most popularly served with enchiladas, but you can even use it in soups, stuffed peppers, casseroles, rice, and more.
Why You'll Love Easy Enchilada Sauce
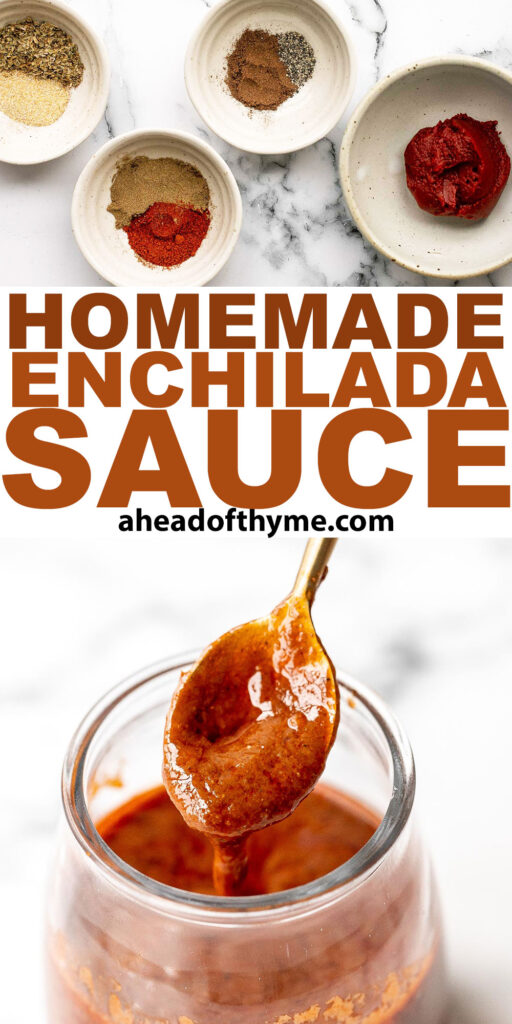
- Timeless Mexican flavours that just work well. Red enchilada sauce is made with a combination of dried Mexican spices including paprika, garlic, chili, cumin, oregano, salt, and pepper which are all standard seasonings every cook should have in their kitchen-and there's a reason why. They're timeless classics. And they taste great together.
- Non-perishable ingredients. The chances are, you have almost everything you need to make this enchilada sauce right now. Dry seasoning, vegetable oil, and tomato paste all have long shelf lives, which means you can stock up on these ingredients and make it whenever you want without worrying the ingredients going bad.
- Ingredients that you recognize. Plus, since you know all the ingredients that are going into the sauce, you know exactly what is in homemade enchilada sauce. So you can rest assured that there are no unnecessary ingredients or fillers in here, unlike some of the store-bought alternatives.
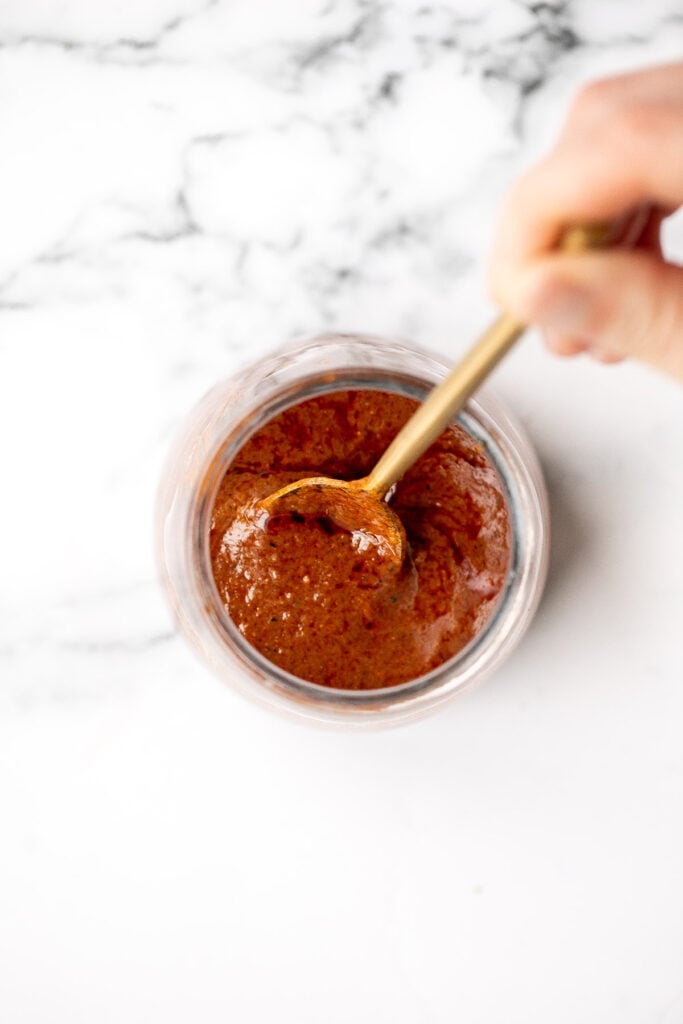
- Enjoy this thick, indulgent sauce. This easy red enchilada sauce is thick thanks to the flour and the time you spend reducing the liquid out. The sauce has the perfect consistency to eat with enchiladas or anything else you want to dip in it.
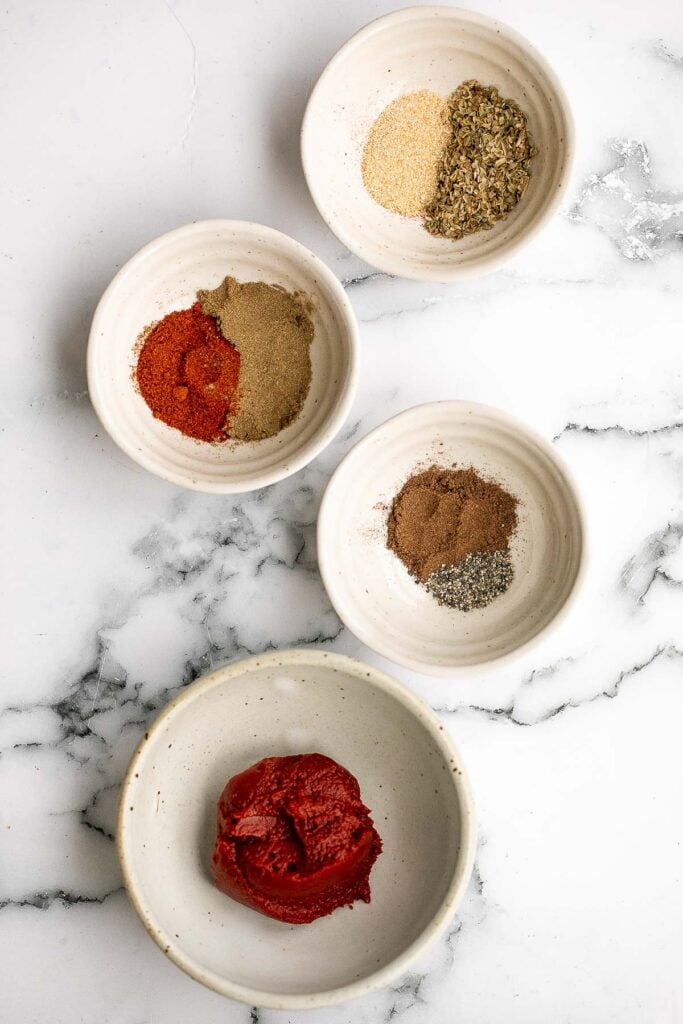
Ingredients
To make easy homemade enchilada sauce, you will need a small saucepan and the following ingredients:
- avocado oil - or any vegetable oil that you have. This is use to sauté the spices to really bring out their flavours.
- all-purpose flour - helps to thicken the enchilada sauce.
- ground cumin
- chili powder
- paprika
- garlic powder
- dried oregano - you can also substitute with Italian seasoning.
- salt and pepper
- tomato paste
- chicken stock - you can make this easy red enchilada sauce vegan by using vegetable stock instead of chicken stock.
How to Make the Best Homemade Enchilada Sauce
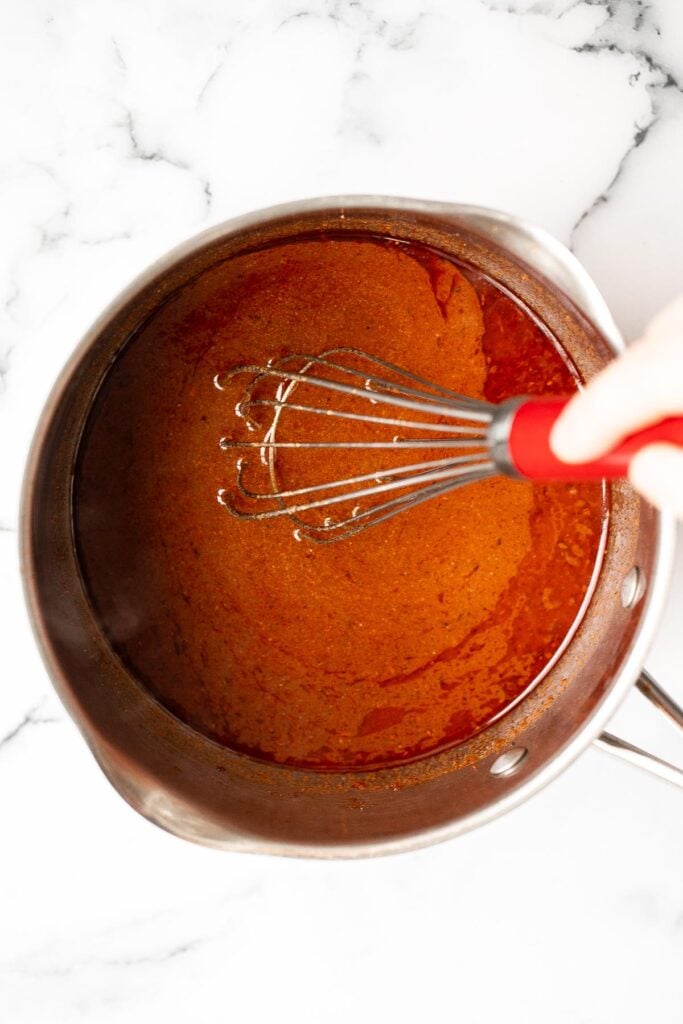
- Make a roux. Heat oil in a small saucepan over medium-high heat for 2 minutes until sizzling hot. Stir in flour and whisk continuously for 1 minute to create a roux. (This is used to thicken the enchilada sauce).
- Add spices. Whisk in cumin, chili powder, paprika, garlic powder, oregano, salt, and pepper. Stir well to mix evenly.
- Add liquids. Add tomato paste and chicken stock and stir well to combine. Bring the sauce to a simmer over medium heat, stirring occasionally. Let it simmer for 8-10 minutes until thickened to a desired consistency.
- Cool. Set aside and let the enchilada cool to room temperature before using.
Tips and Tricks
- Make it yours: Although this easy enchilada sauce is a standard and authentic recipe, don't be afraid to make it your own with substitutions. Add more or less spice depending on your taste. Take out some spices altogether if you don't like them. And add other dried spices like parsley, coriander, cilantro, basil, cayenne pepper, or onion.
- How to store: Store leftover sauce enchilada sauce in an airtight container in the refrigerator for up to to one week. You may have to thin out the sauce with a little water or chicken stock if it has thickened up when storing in the refrigerator.
- How to freeze: Allow enchilada sauce to cool to room temperature, then transfer to an airtight container or freezer bag and freeze for up to 3 months. To use, allow the sauce to thaw overnight in the refrigerator, or for a few hours at room temperature until completely thawed.
- How to reheat: Enchilada sauce is typically served cold or at room temperature. If you would like to reheat it, just heat it up in the microwave in 10-20 second increments until hot. You can also reheat on the stovetop over medium heat, frequently stirring until hot. If the sauce becomes too thick, add some water or stock to thin it out.
More Mexican-Inspired Recipes
- Chicken Enchiladas
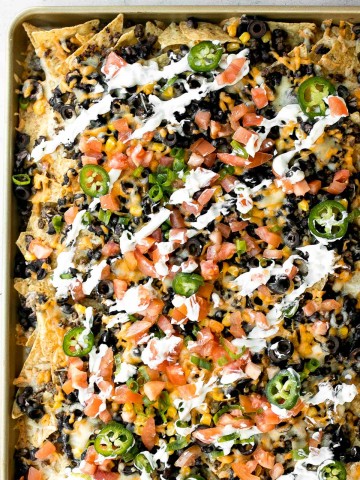
- Sheet Pan Beef Nachos
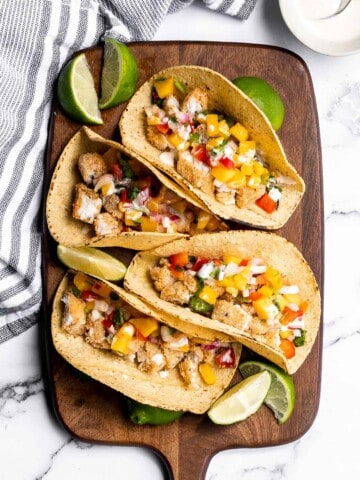
- Fish Tacos with Lime Crema
- Easy Guacamole
- Shrimp Tacos with Lime Crema Slaw
- Creamy Mexican Corn Soup
- Sheet Pan Chicken Fajitas
Tried this recipe?
I'd love to hear what you think! Leave a comment and rating below to share your feedback. Your reviews help others discover this recipe and help me keep creating more free recipes for you. Snap a photo and tag me on social media @aheadofthyme too.
Chicken Enchiladas
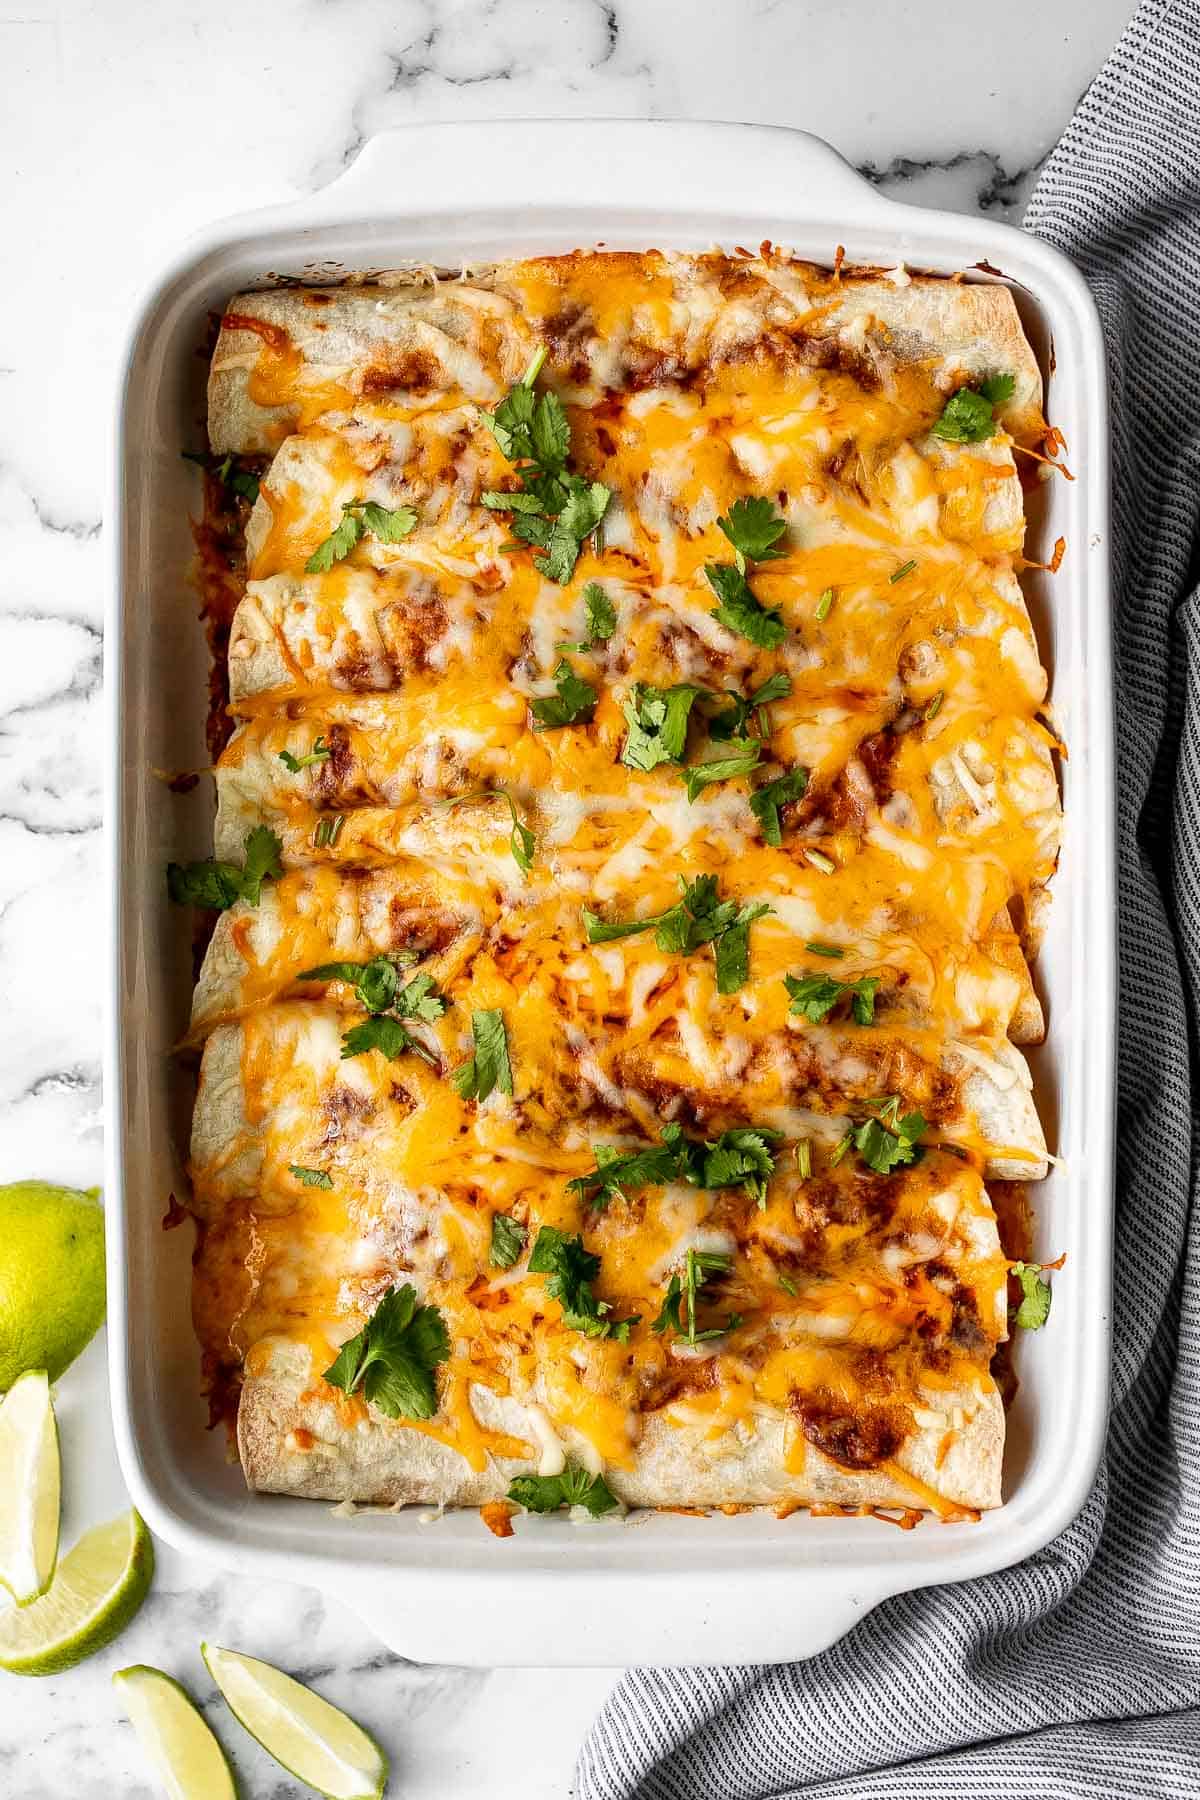
Easy baked chicken enchiladas brings the taste of authentic Mexican food into your kitchen - saucy, spicy, and savoury. Baked to perfection, this restaurant-quality meal can be made easily at home. With a delicious red enchilada sauce, Mexican cheese blend, and a pop of jalapeño peppers, these easy chicken enchiladas are a flavourful dish the whole family with enjoy. They are complete and filling on their own, or you can create an entire Mexican fiesta and serve with lime cilantro rice and beans. Enjoy Mexican enchiladas any time of the day!

Why You'll Love These Baked Chicken Enchiladas
- Baked. These easy chicken enchiladas are baked in the oven at 350F for 15 minutes. The results are crispy, cheesy tops and perfectly blended flavours in a hot meal that tastes amazing fresh out of the oven or reheated the next day. Seriously, leftovers might even taste better.
- Chicken. Chicken is a mood-boosting protein that helps provide a balanced flavour to these baked enchiladas. Boneless, skinless breasts are easy to cook and a healthy, lean source of protein.
- Enchiladas. Easy baked chicken enchiladas are a take on a Mexican favourite that dates back to the Aztecs. It's no wonder why the tradition of rolling food in tortillas is still around. It's delicious! These enchiladas are slightly spicy, too, with a little kick from some jalapeño.
They're baked chicken enchiladas. What more is there to say?

Ingredients
To make these easy baked chicken enchiladas, you will need the following ingredients:
- vegetable oil - I used avocado oil.
- yellow onion
- chicken breasts - you need two chicken breasts (or 1 pound total). You can also substitute with 1. cup shredded chicken, leftover roast chicken, or store-bought rotisserie chicken.
- jalapeño peppers
- salt and pepper
- red enchilada sauce - you can use homemade enchilada sauce or store-bought - whatever makes your life easier!
- flour tortillas - make your own homemade flour tortillas - they are easier than you think!
- cheese - I would recommend a Mexican blend (Tex-Mex) of cheese. You can also use any cheese that shreds and melts easily such as cheddar, mozzarella, or Monterey Jack cheese.
- fresh cilantro - for serving
- sour cream - for serving.
You will also need measuring cups and spoons, a large skillet or shallow saucepan, and a 9x13 baking pan.
How to Make the Best Chicken Enchiladas
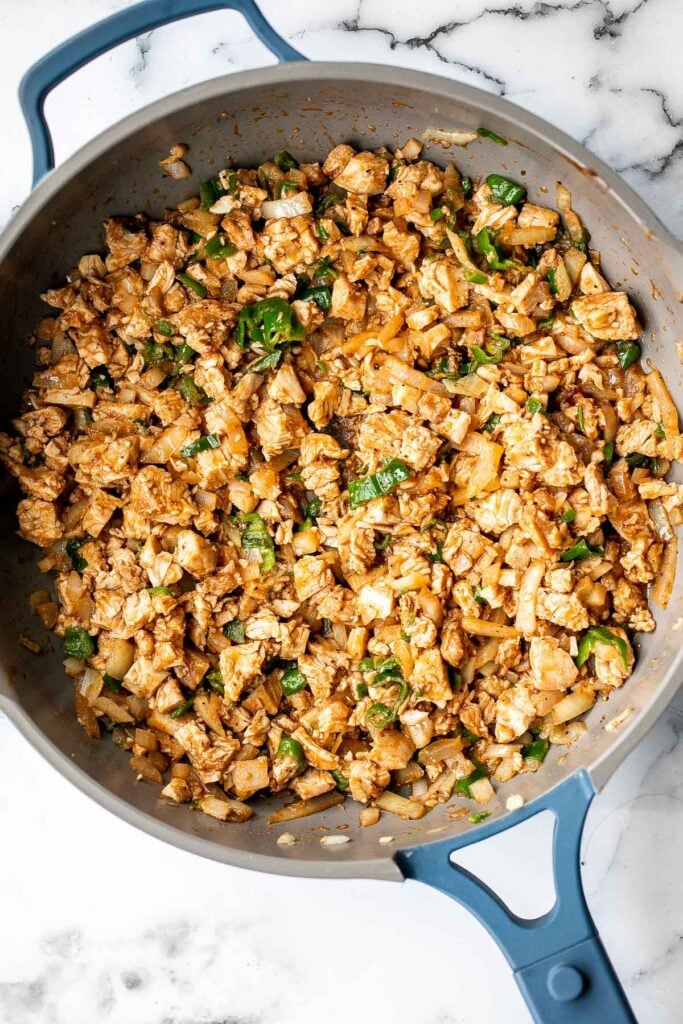
- Make the chicken. Heat oil in a large skillet for 2 minutes over medium high heat until sizzling hot. Add onion and sauté until tender, about 2 minutes. Then, add diced chicken and stir well to cook evenly until fully cooked through, about 6-8 minutes. Add jalapeño, salt, pepper and 2 tablespoons enchilada sauce. Stir well until evenly combined. Set it aside.
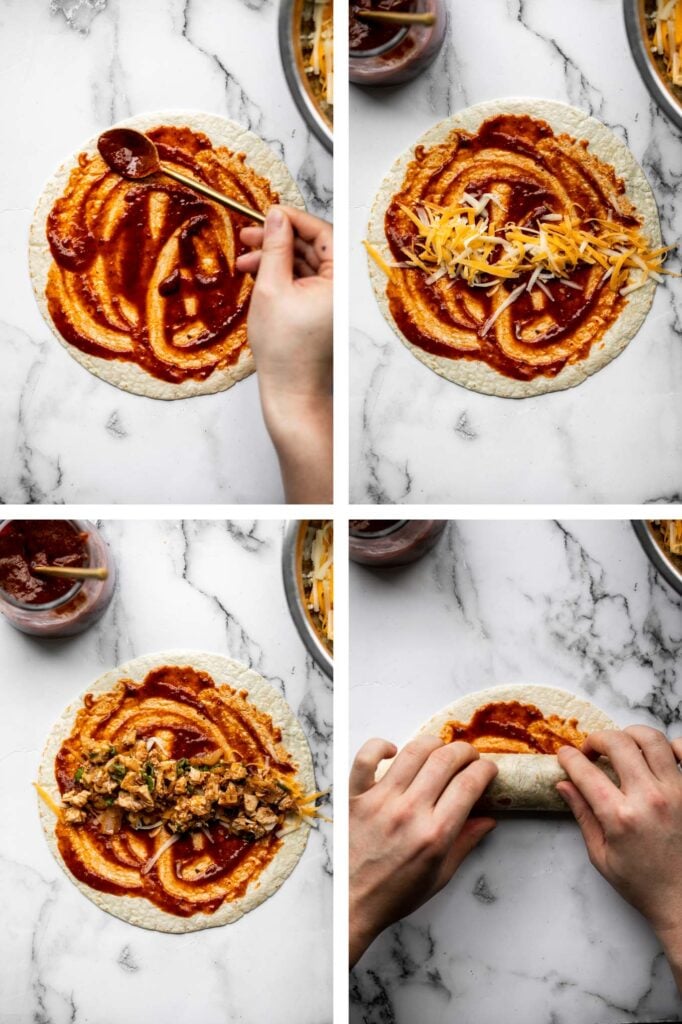
- Roll up the enchiladas.
- Evenly spread 1-2 tablespoons enchilada sauce on each tortilla wrap.
- Sprinkle ¼ cup shredded cheese across the centre and top with 2 tablespoons of the chicken mixture on top.
- Carefully roll up each tortilla wrap with chicken filling.
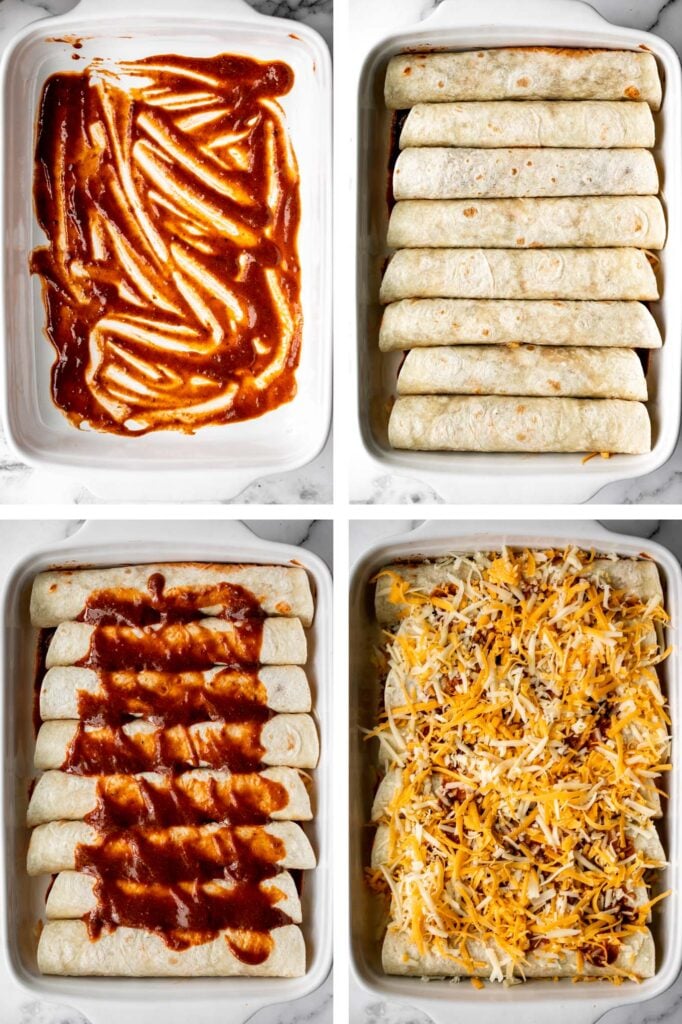
- Assemble.
- Add and evenly spread 2 tablespoons enchilada sauce on the bottom of a 9x13 baking pan.
- Arrange the rolled enchiladas in the baking pan with the seam side down.
- Pour and spread the remaining sauce evenly over top, and sprinkle the remaining cheese on top.
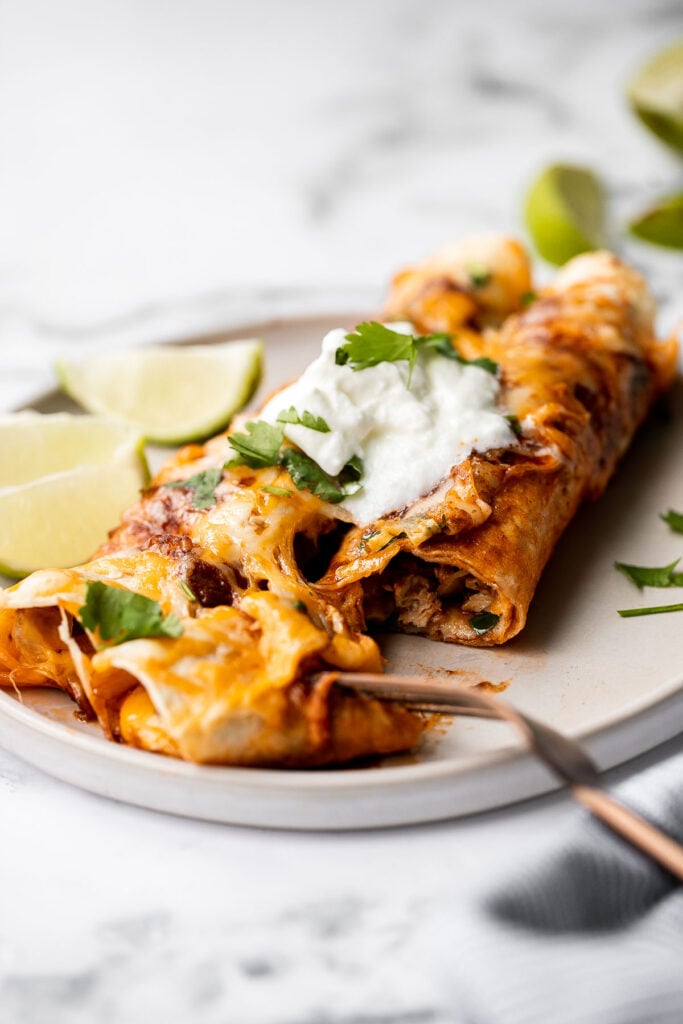
- Bake the enchiladas. Bake in a 350°F preheated oven for 15-20 minutes until the melted cheese turns golden brown. Let rest for 5 minutes.
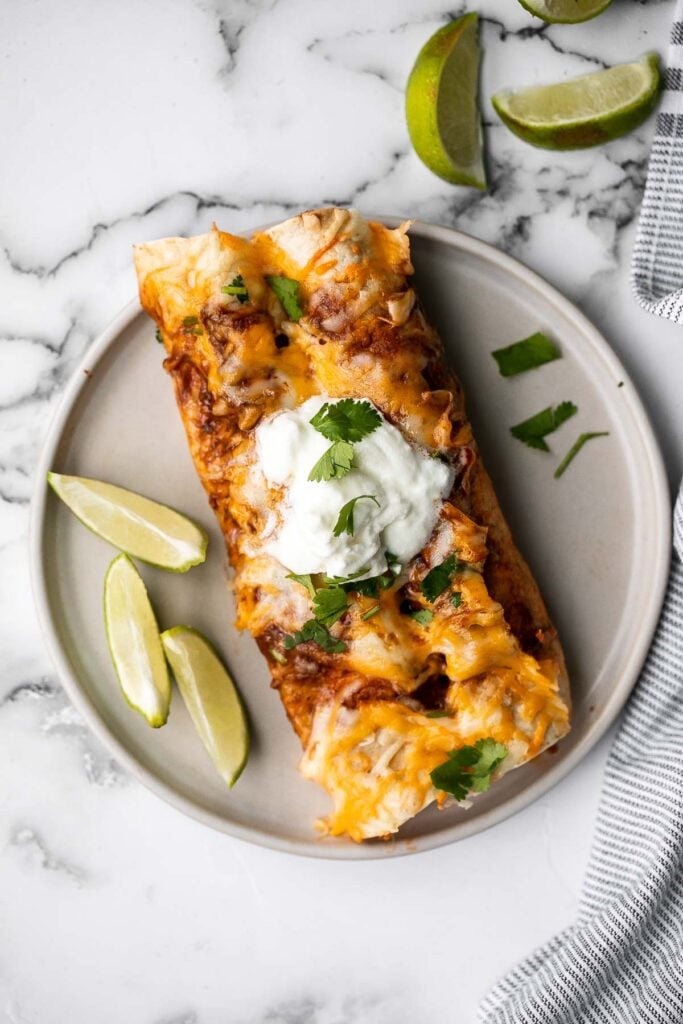
- Serve. Serve warm with cilantro and sour cream, if desired.

Recipe Tips and Tricks
- How to serve: Enchiladas taste great in their own but are even better when served with rice and beans. Whether you prefer Cilantro Lime Rice, Spanish Rice, Steamed White Rice, or brown rice, you can't go wrong. For beans, consider black beans, pinto beans, or Refried Beans.
- How to store: Store baked chicken enchiladas in a shallow airtight container in the refrigerator. Allow the enchiladas to cool to room temperature before placing in the fridge, and eat within 3-4 days.
- How to reheat: Easily reheat enchiladas in the microwave. Cover the top, but allow the air to escape in they are in a container. Reheat in 20-second increments until hot. You can also reheat these easy chicken enchiladas in the oven at 350F for 15 minutes, or in the air fryer for 5-10 minutes or until hot.
More Mexican Recipes
- 30 Best Mexican Recipes
- Fish Tacos with Lime Crema
- Sheet Pan Beef Nachos
- Easy Guacamole
- Sheet Pan Chicken Fajitas
- Shrimp Tacos with Lime Crema Slaw
- Creamy Mexican Corn Soup
Tried this recipe?
I'd love to hear what you think! Leave a comment and rating below to share your feedback. Your reviews help others discover this recipe and help me keep creating more free recipes for you. Snap a photo and tag me on social media @aheadofthyme too.

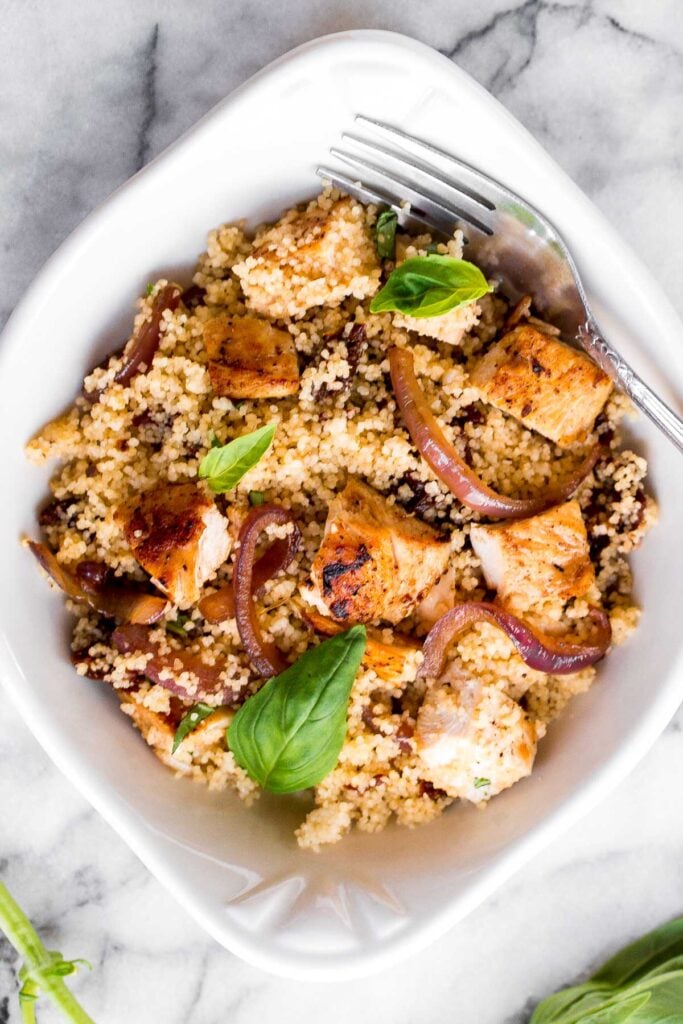
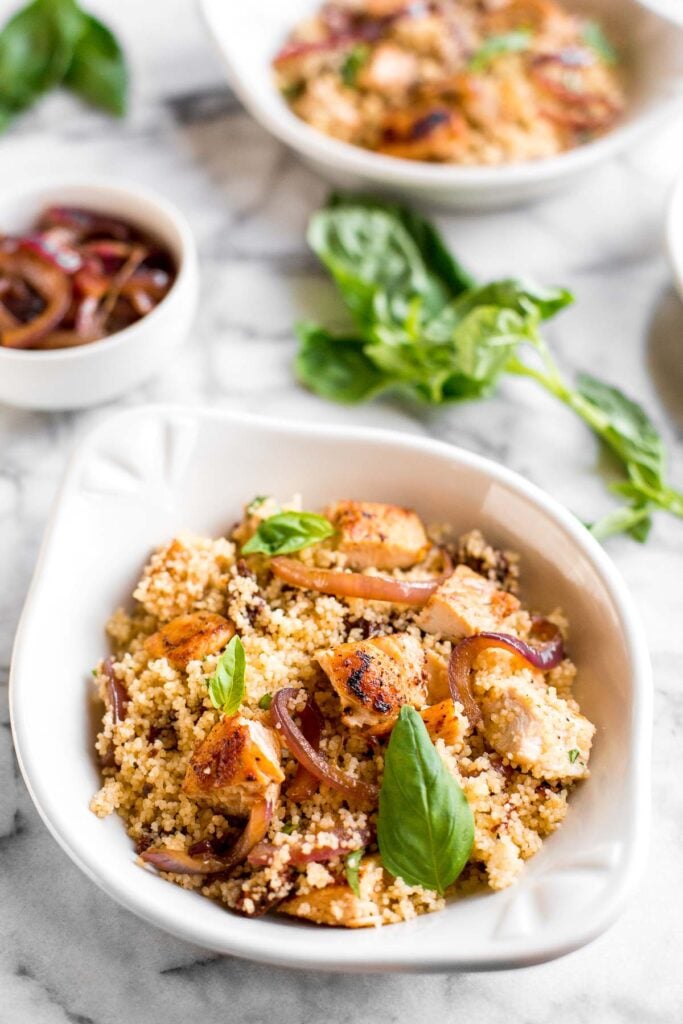
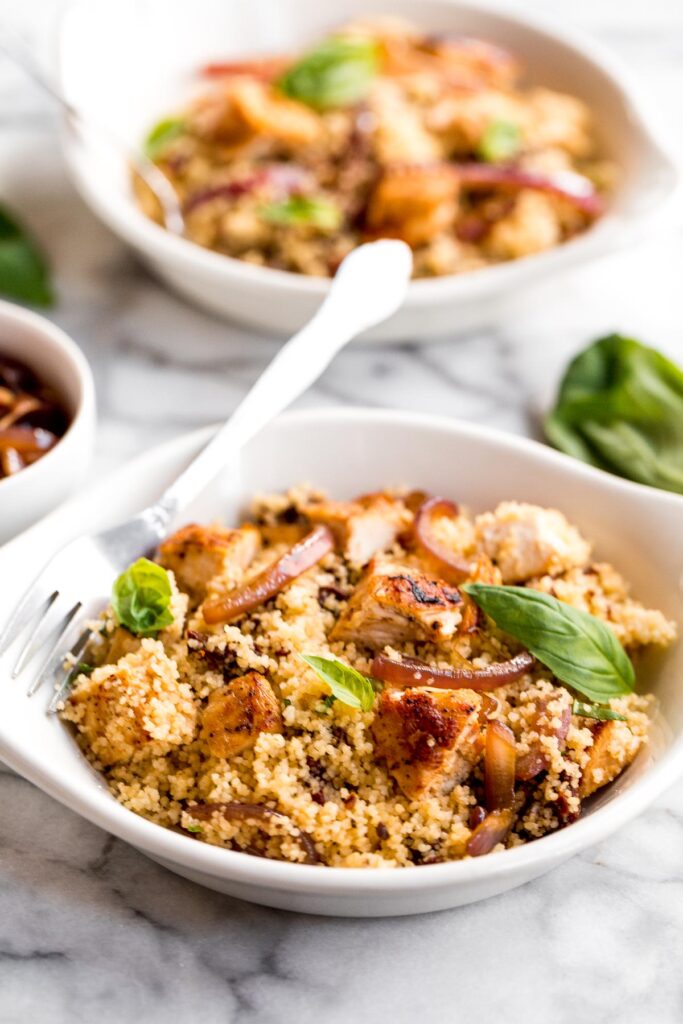
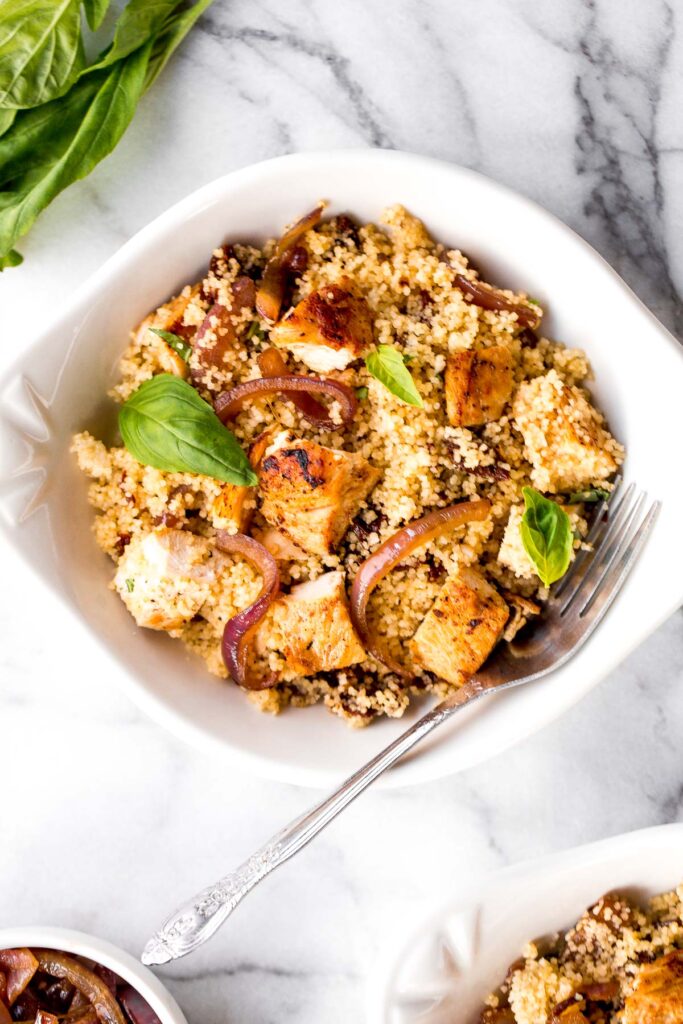
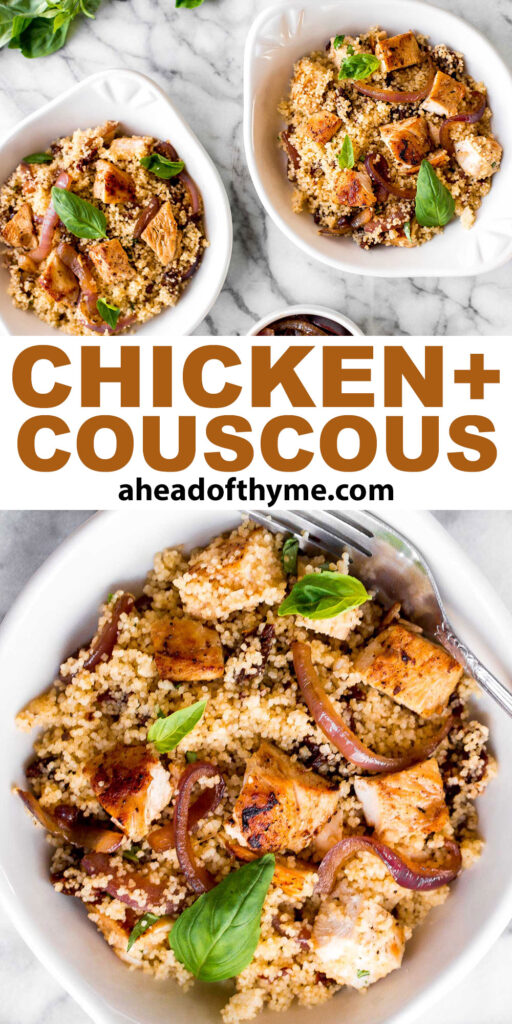
Chicken and Couscous with Sun-Dried Tomatoes
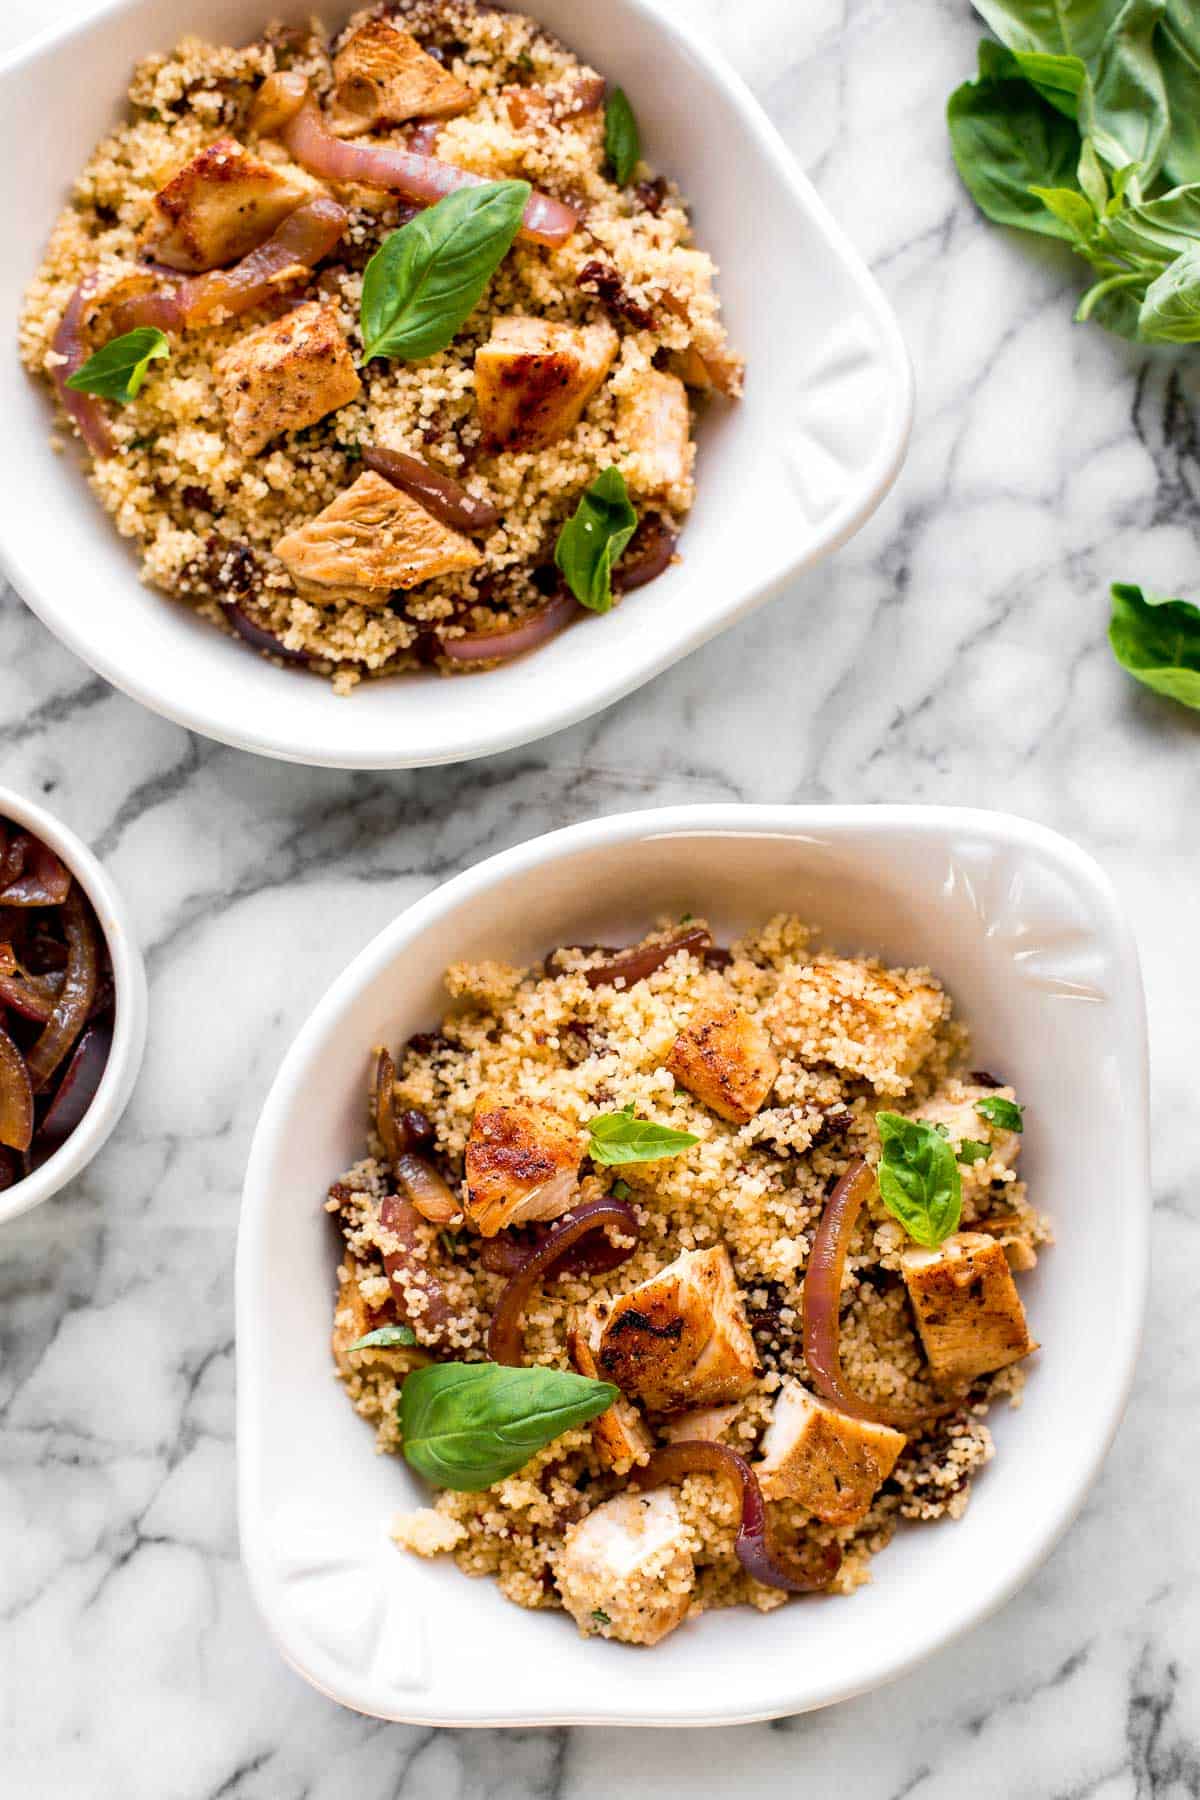
Simple, healthy, and flavourful chicken and couscous with sun-dried tomatoes takes under 30 minutes to prep and cook. Pan-seared and sliced chicken cutlets are tossed into a bowl of light and fluffy couscous, pan-fried red onions and sun-dried tomatoes, and fresh basil. This quick and easy dinner is perfect for busy weeknights. In fact, you can make things even faster by using rotisserie chicken. Either way, once you pick up a fork you won't be able to put it back down. This one is definitely a keeper.

Chicken dinners are always on the menu around here because they are so quick to make, super tasty, and perfect for weeknight meal planning. Especially when we are talking about chicken and couscous which checks off all the boxes and more. There's no reason you can't get this on the table tonight!
Some of my other favourite dinners for busy people are: Healthy Lemon Chicken, Glazed Honey Balsamic Pork Chops, Italian Meatballs, Creamy Lemon Parmesan Chicken, and Kung Pao Chicken.
Ingredients
To make this easy chicken and couscous with sun-dried tomatoes, you will need the following ingredients:
- butter
- couscous - I used whole wheat couscous, but you can use any kind. Couscous is perfect if you are in the mood for something light, yet satisfying. It's not as heavy as pasta, but it's filling just the same.
- chicken cutlets - you will need 2 chicken cutlets (about ½ - ¾ pound total). A chicken cutlet is a chicken breast that has been sliced in half horizontally into 2 thinner pieces. This makes the chicken cook up incredibly quick on the stove. But this meal would be equally delicious with shredded chicken or shredded rotisserie chicken. Use whatever makes your life easier!
- salt and pepper
- olive oil
- red onion
- sun-dried tomatoes - I love cooking with sun-dried tomatoes. They have such an intense flavour so you only need a small amount to pack a big punch. Start with ¼ cup, but if you love the flavour as much as I do, you can drizzle some of the reserved oil that they're packed in onto the cooked couscous in place of regular olive oil. So delicious!
- fresh basil
You will also need a small saucepan and a skillet (or sauté pan).
How to Make the Best Chicken and Couscous with Sun-Dried Tomatoes
- Make the couscous. In a small saucepan, bring water and butter to a boil. Add couscous, stir, then cover and remove from heat. Let sit for 5 minutes, then fluff with a fork. Set aside until needed.
- Cook the chicken. Use a paper towel and pat dry the chicken cutlets completely. Season on both sides with salt and pepper. In a medium skillet or sauté pan, heat olive oil over medium-high heat. When shimmering, add chicken and cook until evenly browned and cooked through, about 4 minutes per side. Remove chicken and place on a plate. When cool, cut into bite-size pieces.
- Sauté aromatics. In the same skillet, add red onion and cook, stirring occasionally, until just beginning to brown, about 8-10 minutes. Add sun-dried tomatoes and cook for 1 minute more. Remove from heat.
- Combine and serve. In a large bowl, combine cooked couscous, chicken, red onion, sun-dried tomatoes, and fresh basil. Stir to combine, then serve garnished with additional basil and a drizzle of olive oil, if desired. Serve hot or at room temperature.
Tips and Tricks
- How to serve. Chicken and couscous is a complete meal on it's own. But you can certainly pair it with a few more dishes if you would like. I often pair this with a fresh salad on the side such as Chopped Asparagus Salad, Mediterranean Chickpea Wedge Salad, Persian Shirazi Salad with Cucumber and Tomato, and Greek Salad.
- Use rotisserie chicken. The chicken cutlets cook up so fast on the stove, but this would be just as delicious with shredded rotisserie chicken. Use whatever makes your life easier.
- How to store. Chicken and couscous with sun-dried tomatoes is best served fresh. You can store any leftovers in an airtight container in the refrigerator for up to 3 days. To reheat, heat on the stove over medium heat for 5-10 minutes until warmed through. You may want to add another drizzle of olive oil if it has dried up too much when stored and reheated.
More Chicken Breast Recipes
- 60 Best Chicken Recipes
- Chicken Marsala
- Parmesan Crusted Chicken
- Chicken Parmesan (Parmigiana)
- Creamy Lemon Chicken Piccata
- Curry Chicken Fried Rice
Tried this recipe?
I'd love to hear what you think! Leave a comment and rating below to share your feedback. Your reviews help others discover this recipe and help me keep creating more free recipes for you. Snap a photo and tag me on social media @aheadofthyme too.
Two Fast Second Birthday Party

Our cute and smart little man officially turned 2 years old! We are still in denial as to how fast this has happened. What they say about the days being long and the years being short is so true. In celebration of his second birthday, we got so lucky that some restrictions were lifted in our province just before his birthday so we were able to host an outdoor party for up to 10 people. We invited his closest little buddies and families and celebrated with a "Two Fast" second birthday party. If you are looking for some party inspiration, then you have come to the right place. I am sharing ideas on every detail for an epic race car theme party including decor, party favors, desserts and recipes.
Two Fast Birthday Party
The craze these days is all about birthday themes that focus around a pun based on the age of the child. Last year, we threw a "Wild One" Safari Birthday, so it was only fitting to follow in tradition and throw something fit for our two year old. We considered a few popular themes like a space theme (Two the Moon), a jungle party (Two Wild), and an ice cream theme (Two Sweet). But based on Kai's interests, we ultimately picked a race car theme (Two Fast, Two Fast Two Furious, or Do Not Grow Up Two Fast) as he is obsessed with all things cars and wheels.
If you have planned a themed party for your child, you know that it takes countless hours of research and planning to put it all together. The party was not as elaborate this year as it was last year (since I wasn't sure we would even be able to throw something for him this year), but nonetheless, it still took a lot of time to put together. Lucky for you, I am sharing every last detail with you so that you don't have to spend too much time planning.

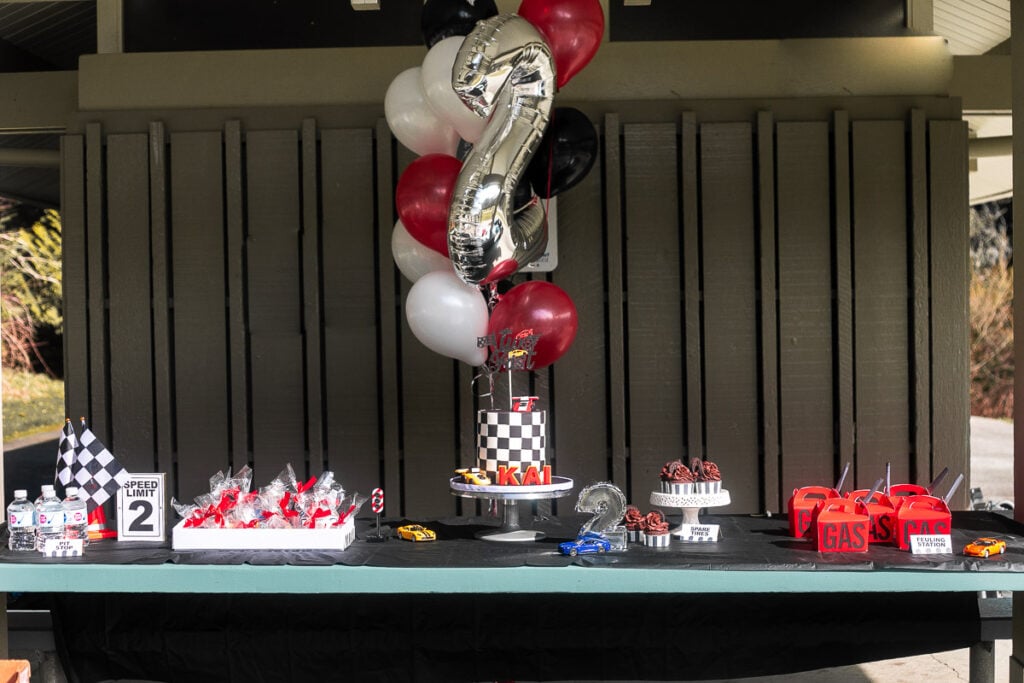
Two Fast Dessert Table with Decor
>> Two Fast Car Theme Decor
Let's talk about the decor, aka the items that basically brings the theme of your party to life. I have linked everything I used for Kai's two fast second birthday party below (in affiliate links).
- Balloons - This year, I went with helium balloons instead of a balloon garland. I picked a race car themed balloon pack with a combination of red balloons, white balloons, and black balloons, with a large silver number 2 balloon in the middle, and secured with a red balloon weight. You can pump your own helium balloons using a helium tank, or get them pumped at your local party store.
- Checkered flags - These checkered flags are a great addition to a race car birthday. A checkered garland would also look amazing.
- Toy cars - I placed a few die cast toy cars on the dessert table to complete the look.
- Traffic signs - I used this traffic light from my son's train set. This set of traffic signs would also look great on the dessert table.
- Speed limit sign - I made a "Speed Limit 2" sign on the computer and printed it out. I cut it out and framed it in a clear picture frame.
- Traffic cone - I placed two of the checkered flags into a small traffic cone.
- Table cloth - A black tablecloth was perfect for this theme.
- Road - A great decor piece are these play tape black roads. You can stick them on the table, on the wall to create a backdrop, or anywhere else.
- Plates - Red plates fit well in the theme. You can also use white plates, black plates or checkered plates. And don't forget checkered napkins and checkered straws.

>> Two Fast Car Theme Desserts
The desserts are also something that needs to be carefully planned. These items are basically extra decorations on your dessert table.
- Cake - we purchased Kai's birthday cake from a local baker. We topped it off with a "Two Fast" cake topper and long thin silver candles. For a more economical option, you can make your own cake. You can adapt the following recipes to make a layered cake: vanilla cake, double chocolate cake, or lemon cake, and decorate with fondant. To decorate your cake in line with the race car theme, try using car fondant cutters. You could also top the cake with small race cars.
- Cupcakes - I made chocolate cupcakes with chocolate buttercream, topped them with an oreo, and called them "spare tires". I placed the cupcakes in striped cupcake cups. You could also top any cupcakes with race car cupcake toppers.
- Sugar cookies - we purchased two fast sugar cookies from a local baker, but for a more economical option you can make your own sugar cookies with royal icing.
- Cake pops - Cake pops are always a fun addition to any birthday party. Try our vanilla cake pops or chocolate cake pops. You will also need cake pop sticks and a cake pop display such as this wooden cake pop stand that we used last year.

Browse through following bite-sized desserts for more inspiration on some of my favourite bite-sized desserts and treats to serve at any birthday party.

M&M Christmas Cookies

Old Fashioned Apple Fritters

The Best Soft and Chewy Peanut Butter Cookies

Nanaimo Bars

Mother's Day Vanilla Cupcakes with Rose Petal Buttercream

No Bake Bird's Nest Cookies

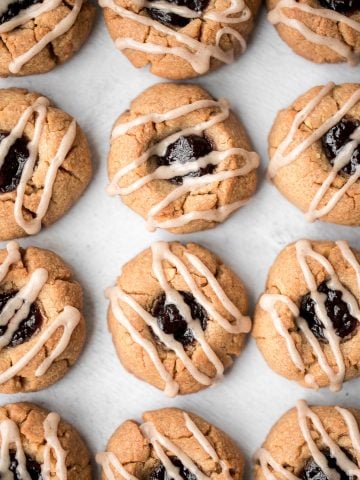
Jam Thumbprint Cookies

Icebox Cake

Fresh Fruit Tart

Vanilla Cake

Strawberry Cupcakes
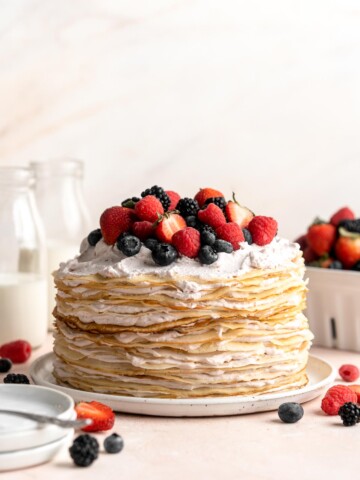
Crepe Cake
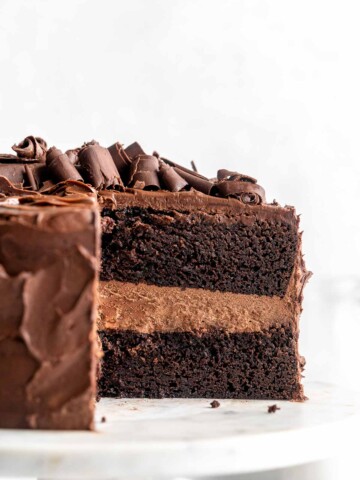
Chocolate Layer Cake
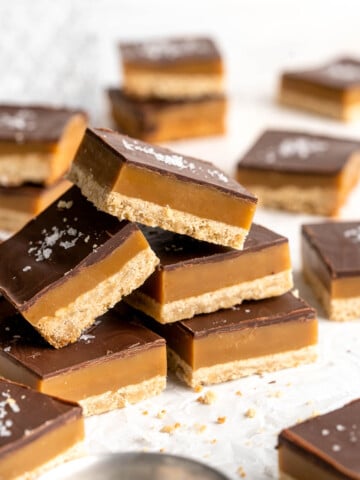
Millionaire's Shortbread
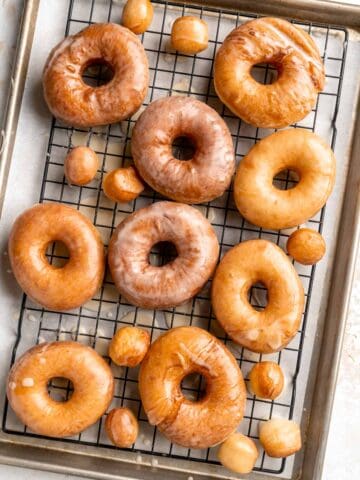
Homemade Glazed Donuts

Peanut Butter Balls

Palmiers

Chocolate Sugar Cookies

Nutella Cookies

Chocolate Covered Oreos

Monster Cookies
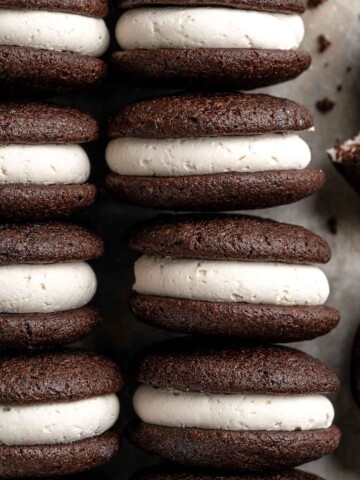
Chocolate Whoopie Pies

S'mores Bars
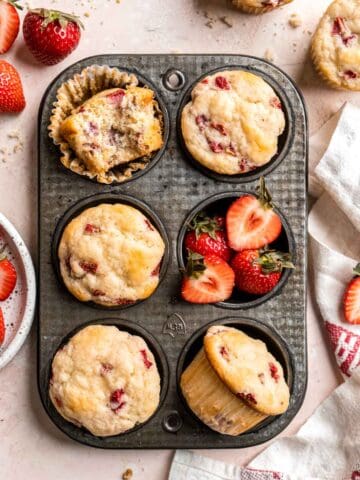
Strawberry Muffins
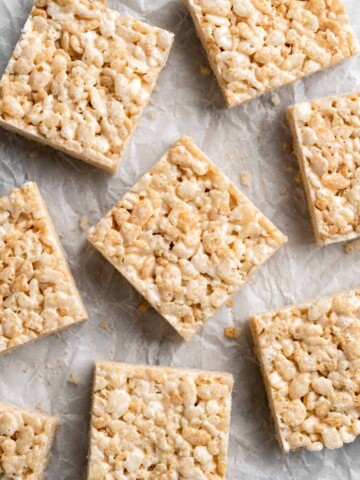
Rice Krispies Treats

Brownie Cookies

Robin's Egg Cupcakes

Italian Easter Cookies

Red Velvet Cupcakes
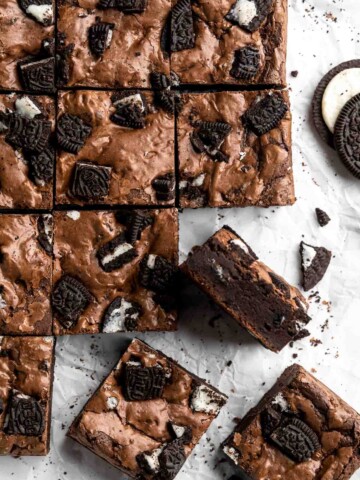
Oreo Brownies
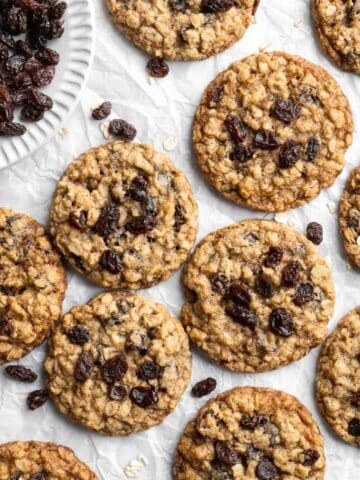
Oatmeal Raisin Cookies
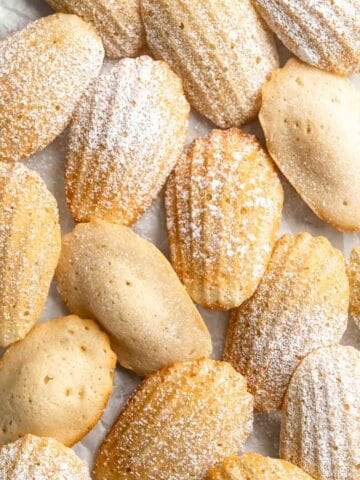
Madeleines

Lofthouse Cookies (Soft Frosted Sugar Cookies)

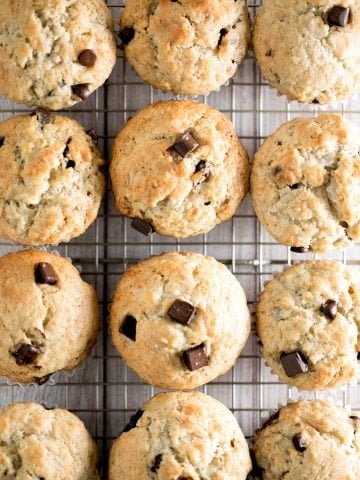
Double Chocolate Chip Cookies

Cranberry Orange Muffins
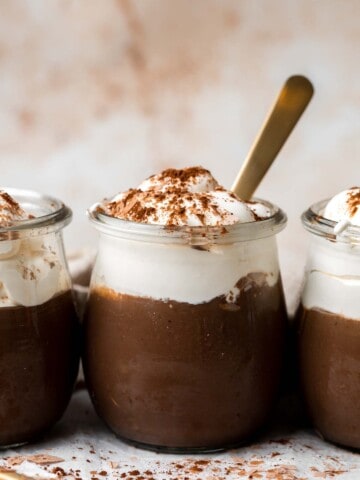
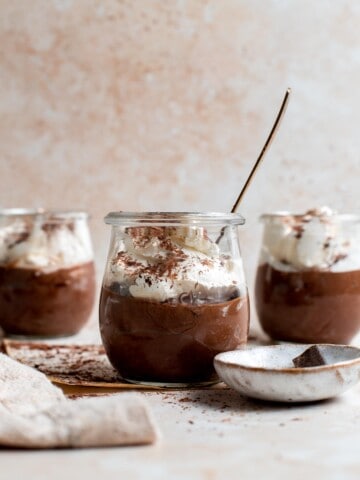
Homemade Chocolate Pudding
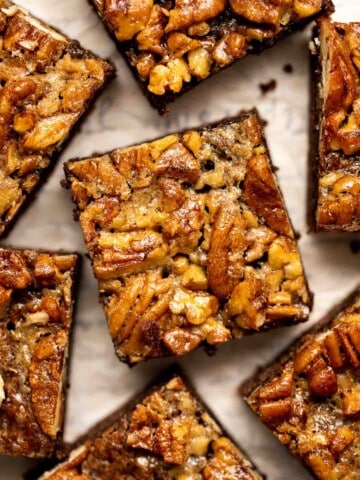
Pecan Pie Brownies

Jello Jigglers
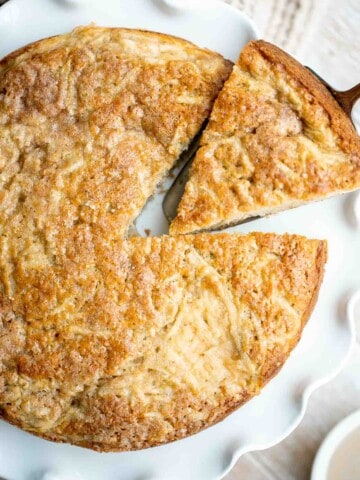
Apple Cake

Blueberry Cake
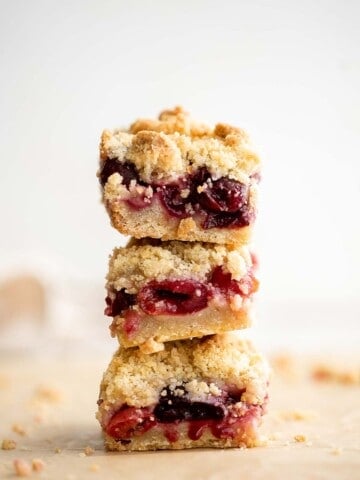
Cherry Crumb Bars

Lemon Curd Cookies

S'mores Cookies
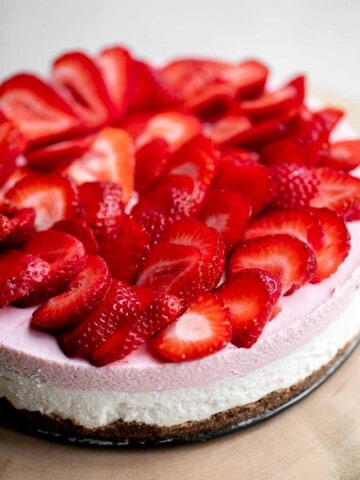
No Bake Strawberry Cheesecake

Sugar Cookie Bars
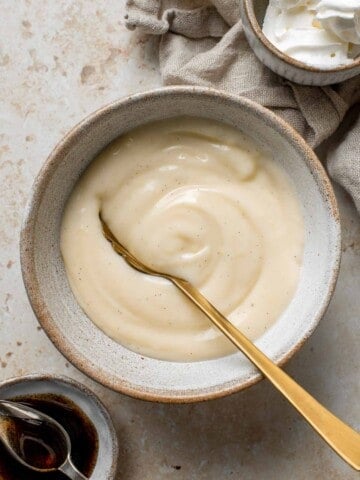
Vanilla Pudding
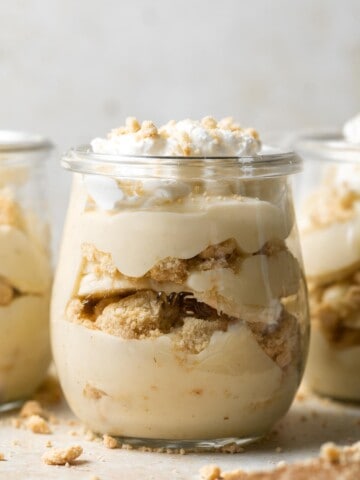
Banana Pudding

Mango Sago
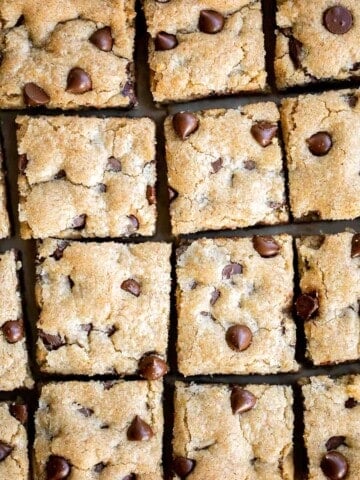
Chocolate Chip Cookie Bars

French Macarons with Vanilla Buttercream Filling
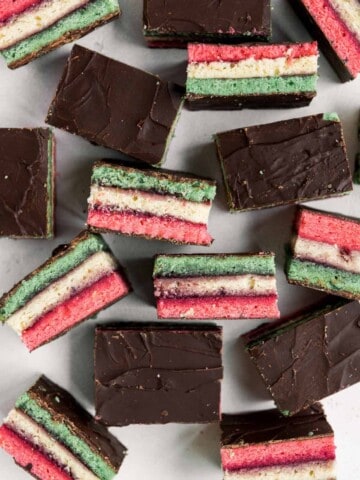
Italian Rainbow Cookies
Nutella Mousse Cups

Easter Bark
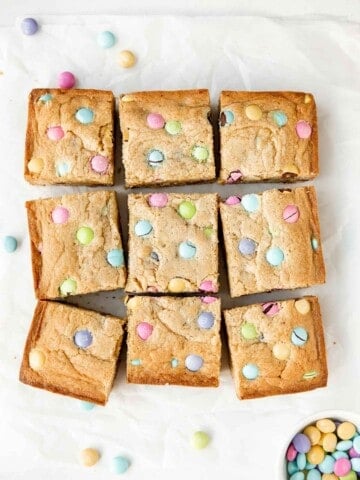
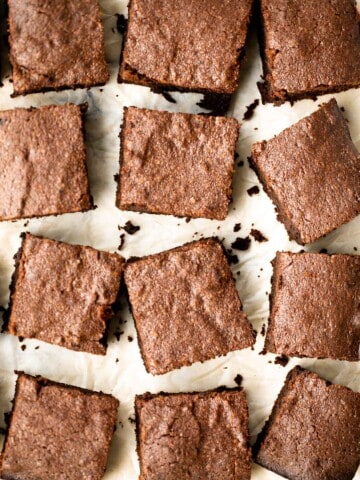
Easter Blondies
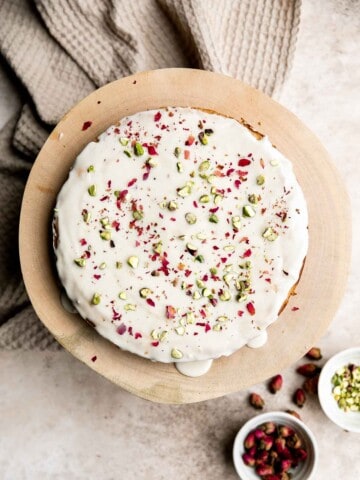
Persian Love Cake
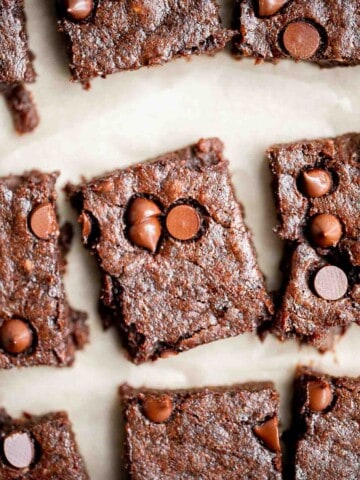
Flourless Banana Brownies
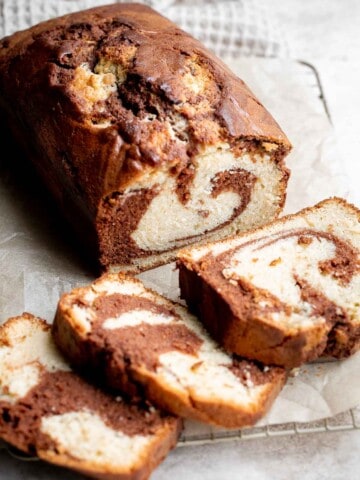
Chocolate and Vanilla Marble Cake

Dark Chocolate Raspberry Truffles
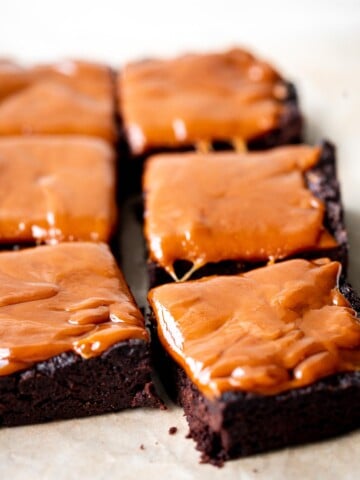
Caramel Brownies
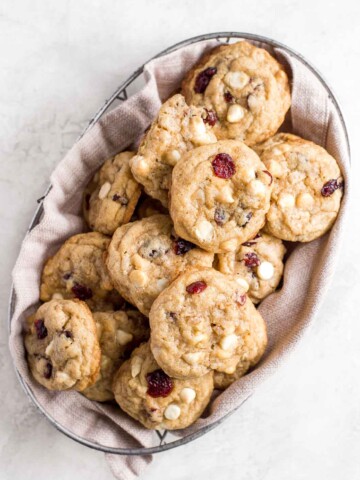
Soft and Chewy White Chocolate Cranberry Cookies
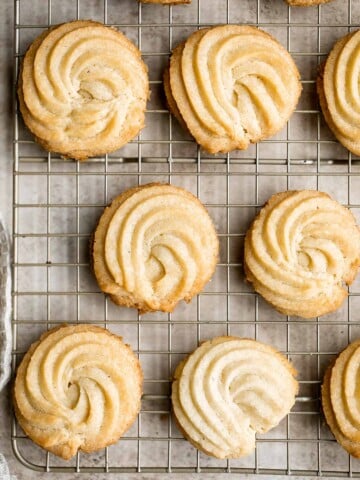
Butter Cookies
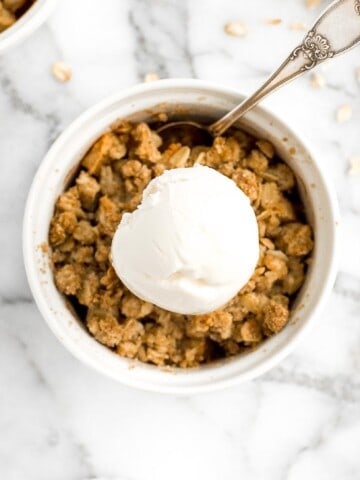
Individual Apple Crisp
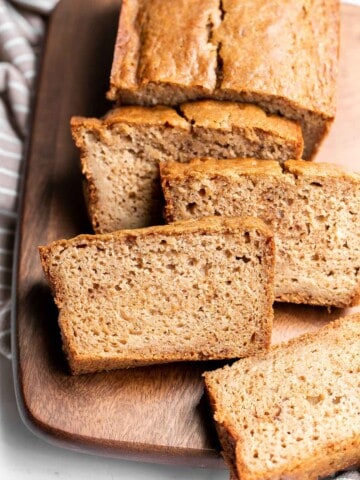
Applesauce Bread

Mango Frozen Yogurt
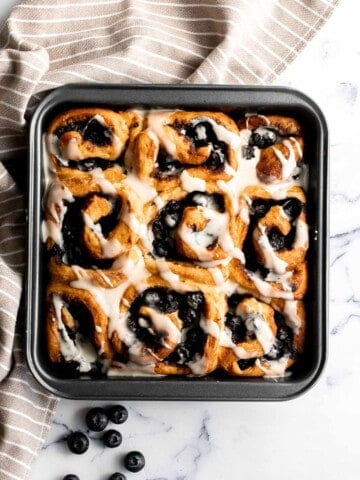
Blueberry Cinnamon Rolls

Glazed Lemon Blueberry Scones

Moist Vanilla Cupcakes
Fudgy Brownies

Lemon Sweet Rolls

Easter Egg Sugar Cookies

Raspberry and White Chocolate Shortbread Cookies
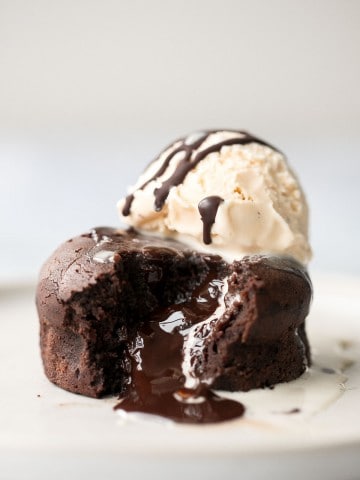
Molten Chocolate Lava Cakes

Chocolate Covered Strawberries
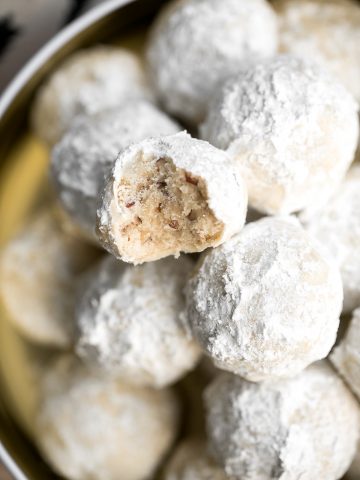
Pecan Snowball Cookies
Peanut Butter Thumbprint Cookies
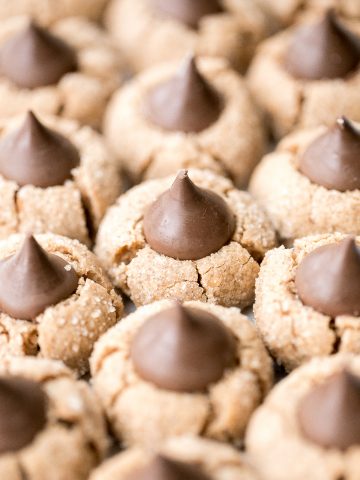
Peanut Butter Blossoms
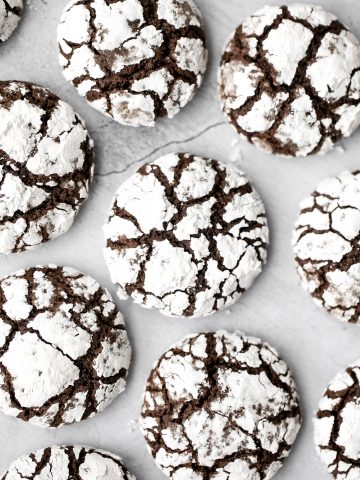
Chocolate Crinkle Cookies
Banana Chocolate Chip Muffins
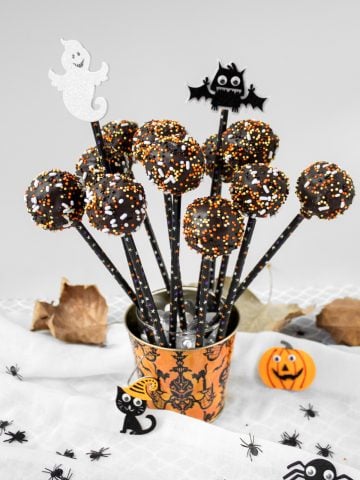
Spooky Halloween Chocolate Cake Pops
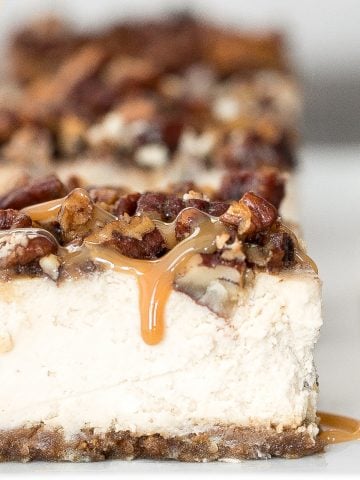
Caramel Pecan Pie Cheesecake Bars
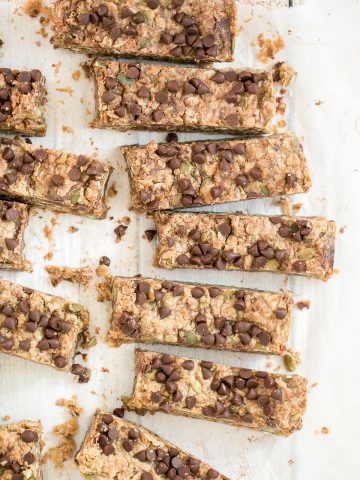
Chewy Peanut Butter Granola Bars

Chocolate Chunk Peanut Butter Cookies
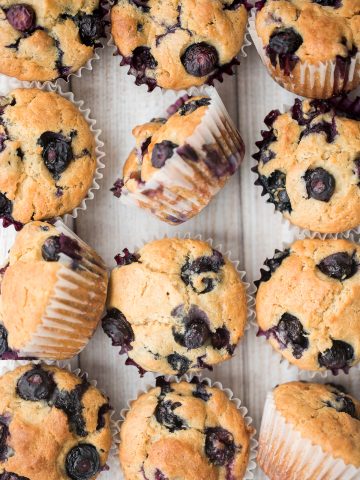
Blueberry Yogurt Muffins

Baked Jelly Donuts with Strawberry Jam

Easy Small Batch Almond Biscotti

Chocolate Chip Banana Bread Cookies
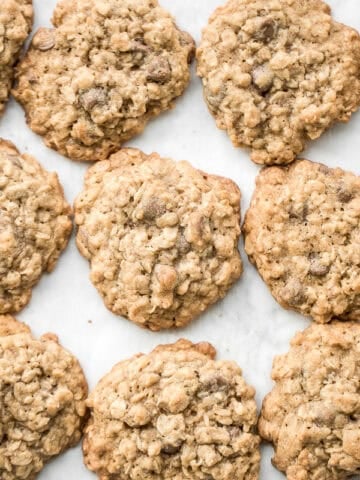
The Best Chewy Chocolate Chip Oatmeal Cookies

Vanilla Cake Pops from Scratch

Easy Homemade Apple Hand Pies
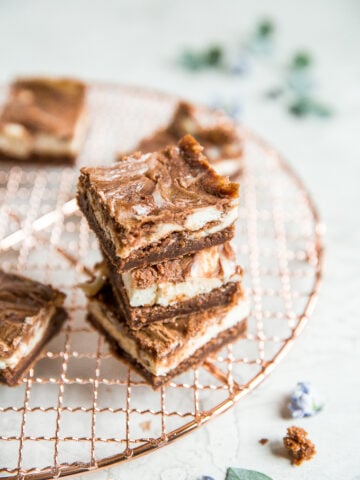
Caramel Cheesecake Brownies

Chocolate-Dipped Shortbread Heart Cookies

Four Quick and Easy RITZ Cracker Recipes
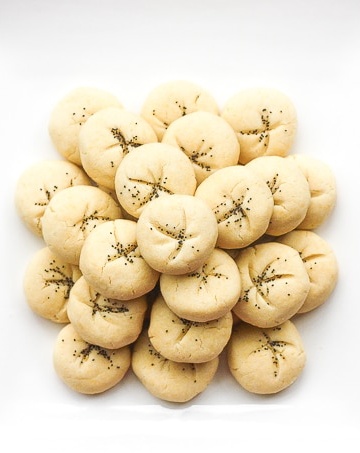
Persian Rice Cookies with Poppy Seeds (Nan-e Berenji)
Food and Snacks for a Car Themed Birthday Party
When it comes to birthday parties, it's all about the finger foods and dips (the less messy the better right?). Swipe through my favourite hand-held party food recipes below. Don't forget some squeeze pouches or crackers for any little ones.
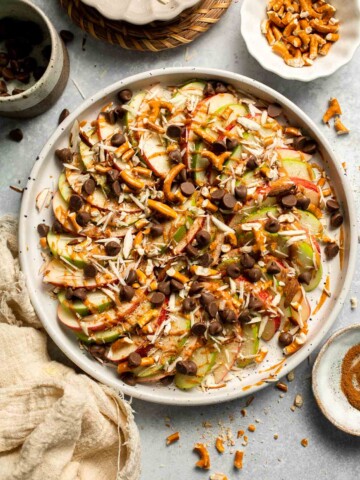
Apple Nachos (Easy and Healthy Snack)

Baked Cheddar Cheese Sticks

Mexican Ground Beef Tacos

Vietnamese Salad Rolls with Shrimp and Peanut Dipping Sauce
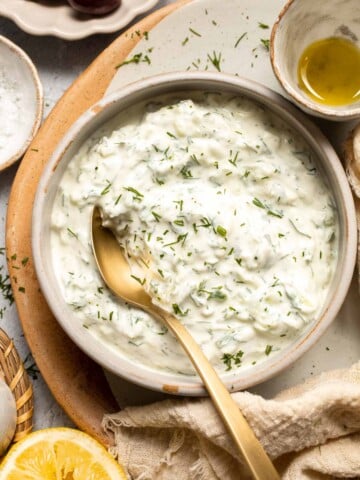
Easy Tzatziki Sauce (Yogurt Cucumber Dip)

French Bread Pizza

Baked Mozzarella Sticks

Ham and Cheese Pinwheels

Shrimp Tacos with Lime Crema Slaw

Cheeseburger Sliders

Pico de Gallo
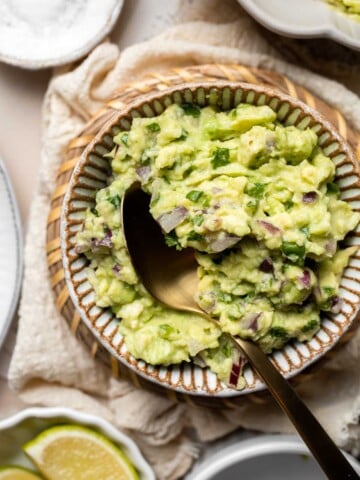
Guacamole
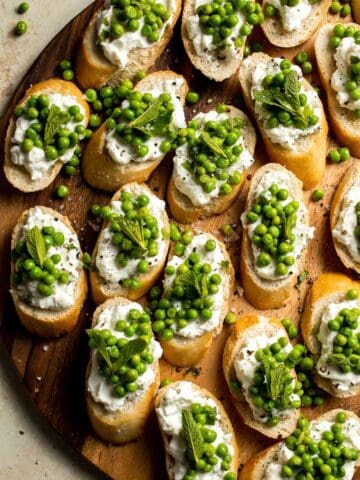
Ricotta Crostini with Peas and Mint

Sweet Potato Tater Tots
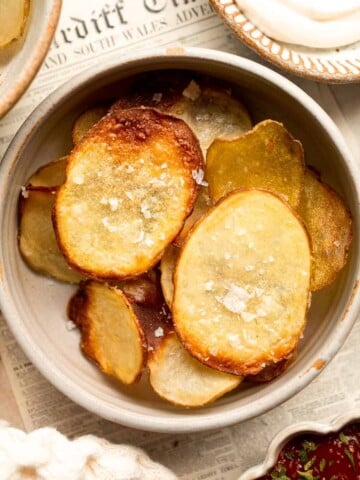
Homemade Baked Potato Chips

Cheese Board

Air Fryer Pizza Rolls

Pizza Fries
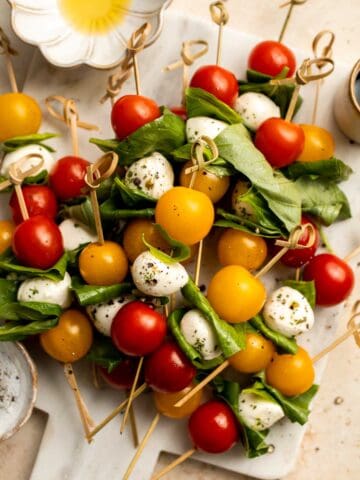
Caprese Skewers
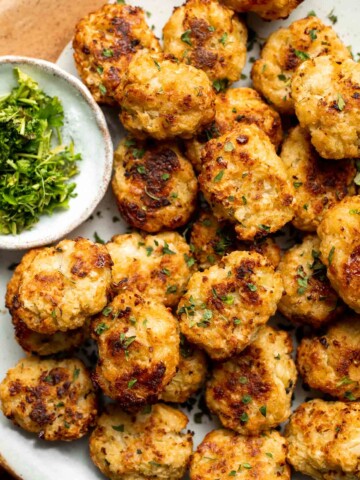
Cauliflower Tots

Homemade Taquitos
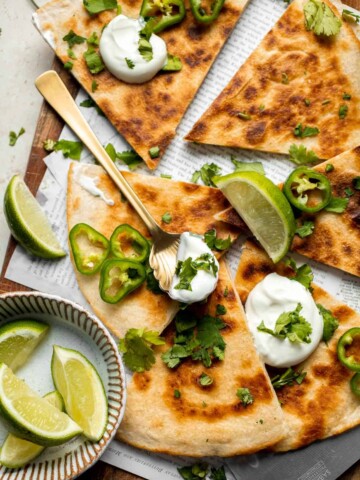
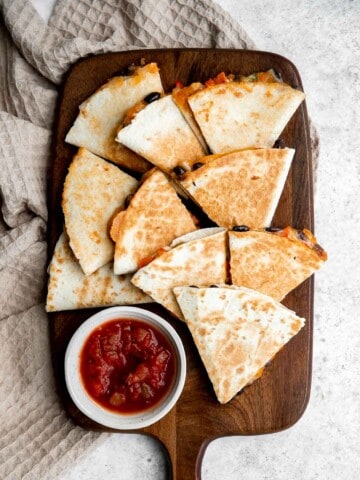
Cheese Quesadilla
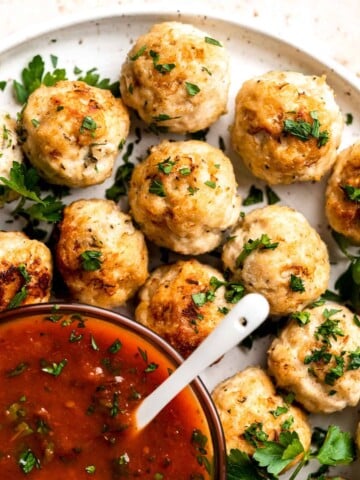
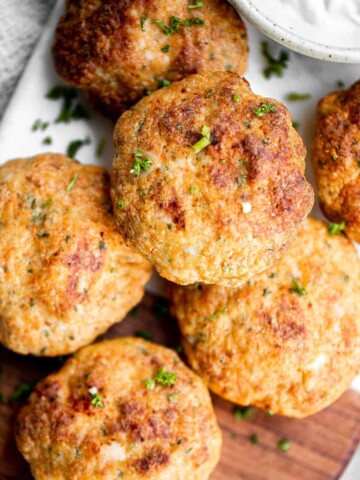
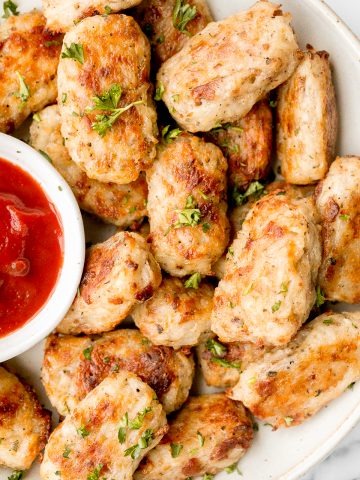
Chicken Meatballs

Baked Chicken Quesadillas
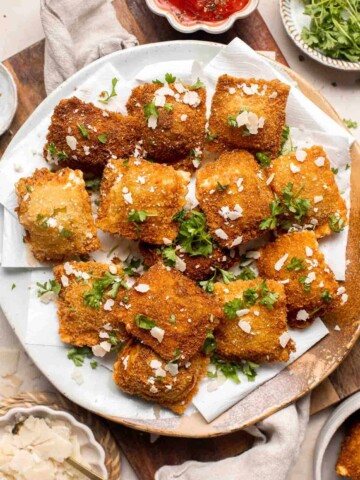
Toasted Ravioli
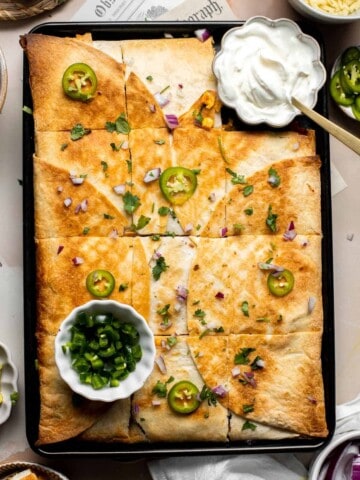
Sheet Pan Quesadillas

Cheesy Garlic Bread
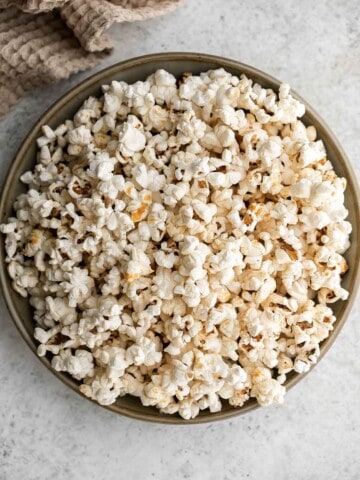
Homemade Kettle Corn
Turkey and Cheese Sliders
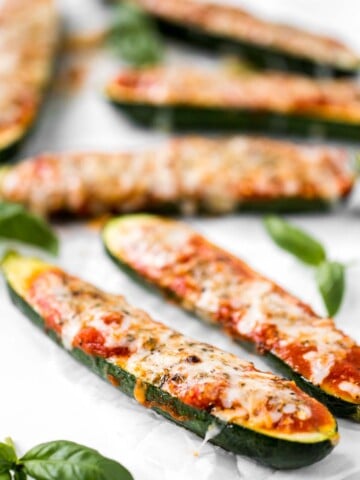
Cheesy Baked Zucchini with Marinara
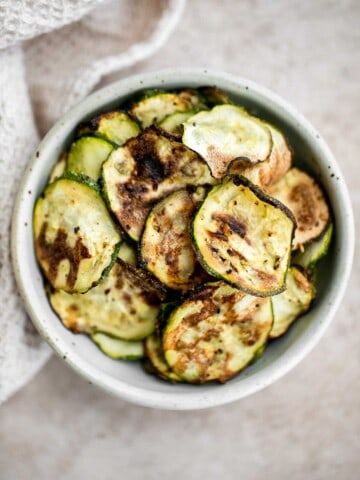
Air Fryer Zucchini Chips
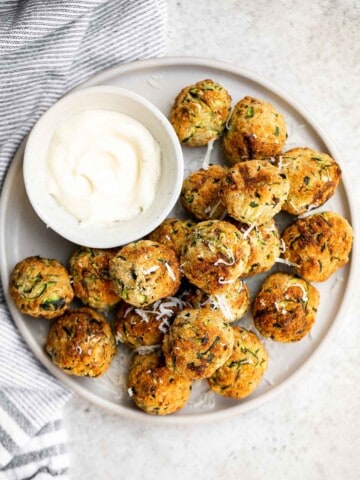
Zucchini Bites
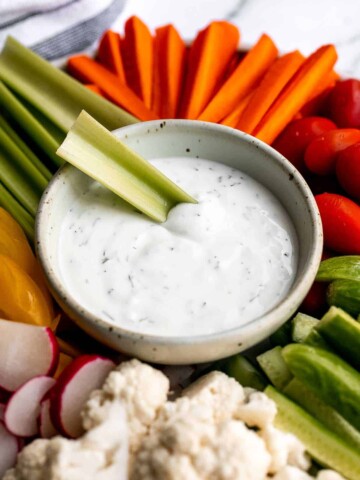
Homemade Ranch Dip
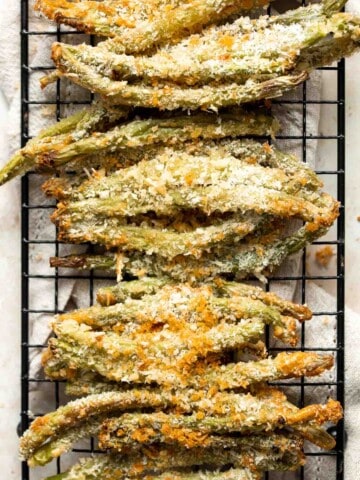
Green Bean Fries

Lobster Rolls

Tortilla Strips
Shrimp Cakes
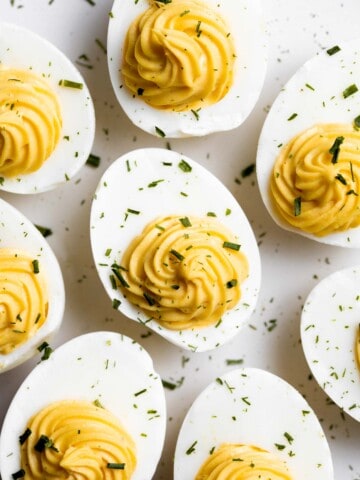
Deviled Eggs

Air Fryer Chicken Tenders

Air Fryer Cauliflower Bites
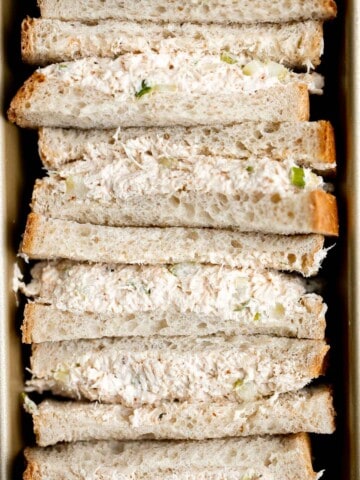
Chicken Salad
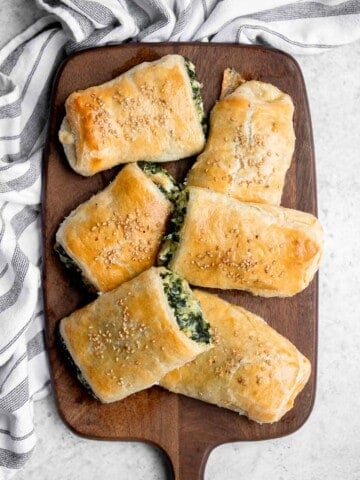
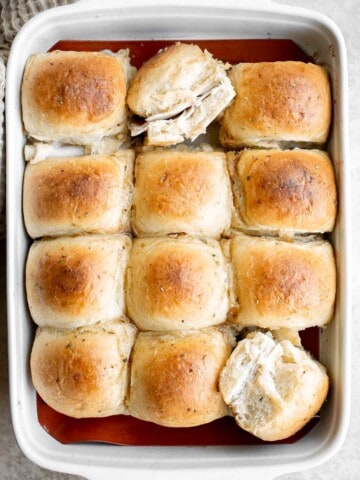
Spinach Cheese Rolls
Chicken Nachos
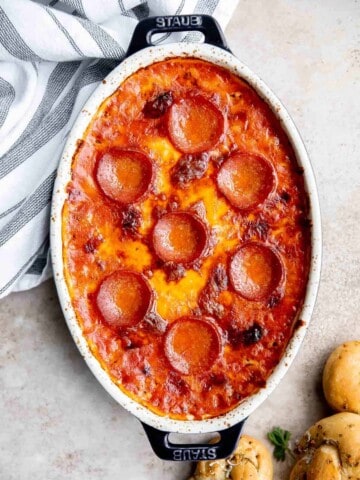
Pizza Dip
Vegetarian Quesadillas

Pizza Crescent Rolls
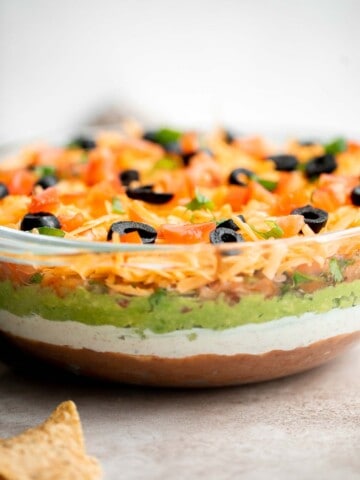
7 Layer Dip
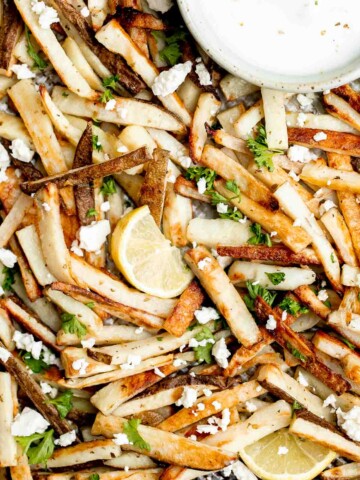
Greek Fries

Chili Nachos
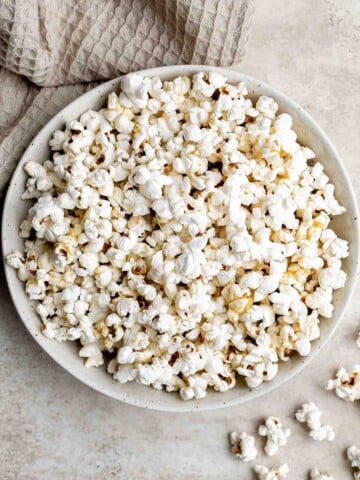
Homemade Popcorn

Bacon Wrapped Chicken Bites
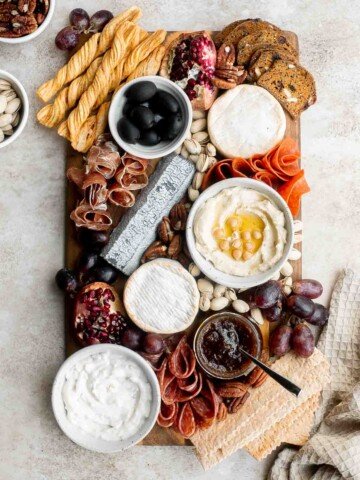
How to Make a Charcuterie Board
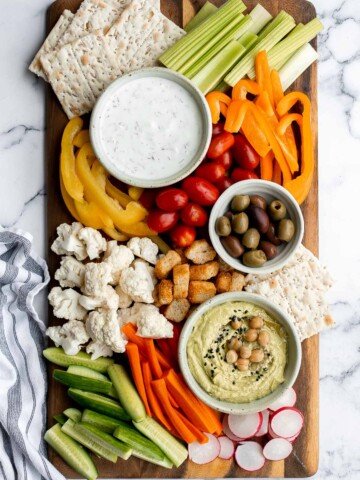
Veggie Tray

Tex Mex Egg Muffins
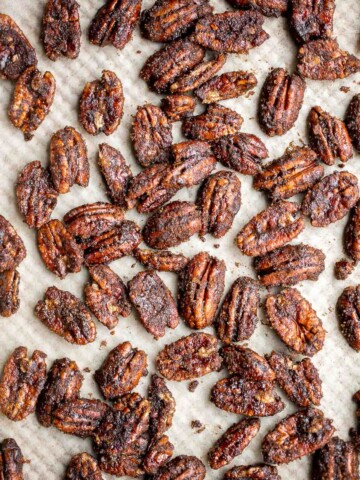
Candied Pecans
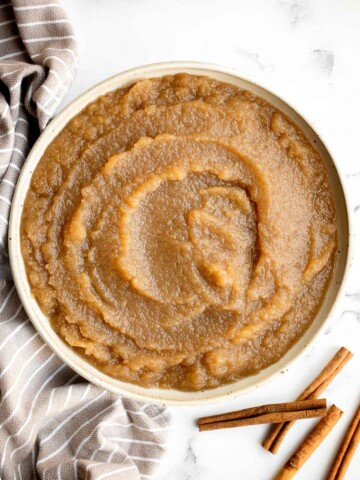
Homemade Applesauce
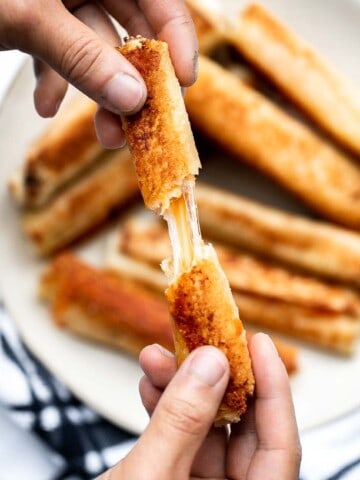
Grilled Cheese Roll Ups

Caramelized Onion Dip
Fish Stick Tacos
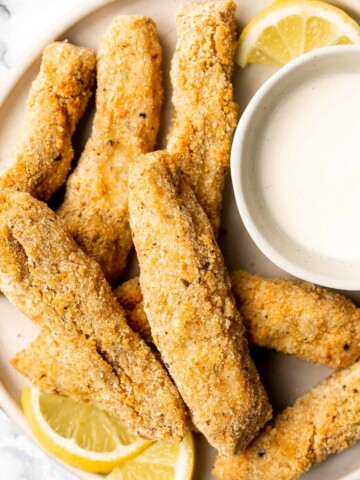
Homemade Fish Sticks

BBQ Chicken Pizza
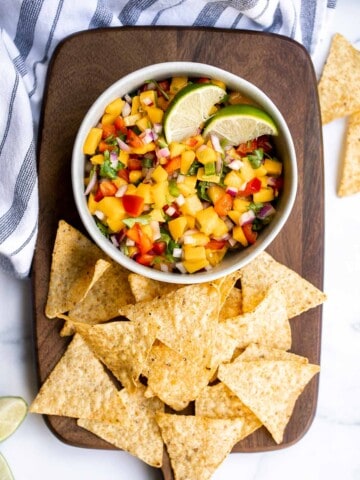
Mango Salsa
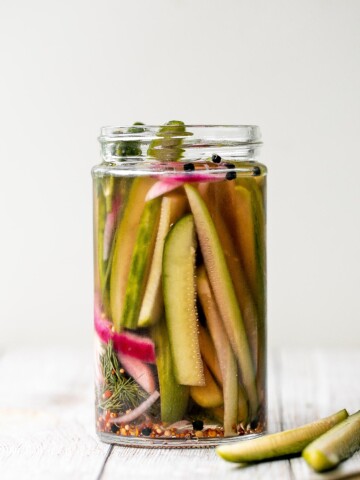
Homemade Pickles

Fig Crostini with Goat Cheese and Pistachios
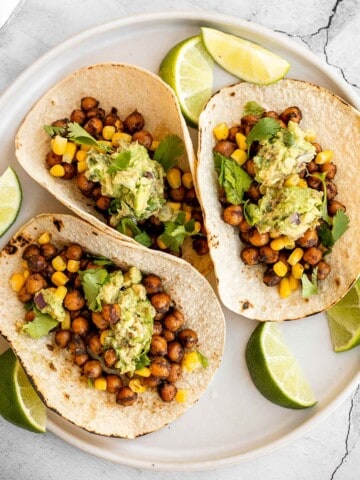
Vegan Chickpea Tacos
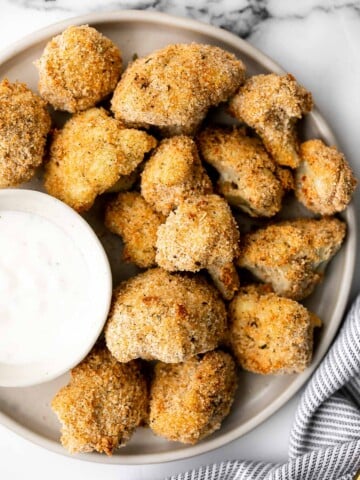
Baked Cauliflower Nuggets
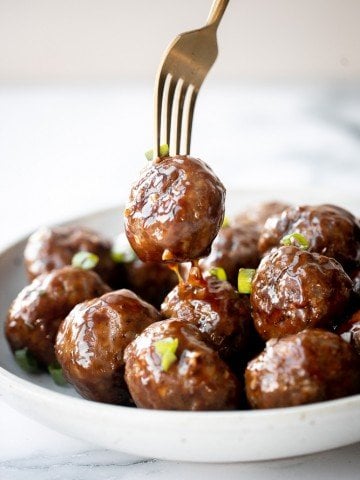
Sticky Honey Garlic Meatballs
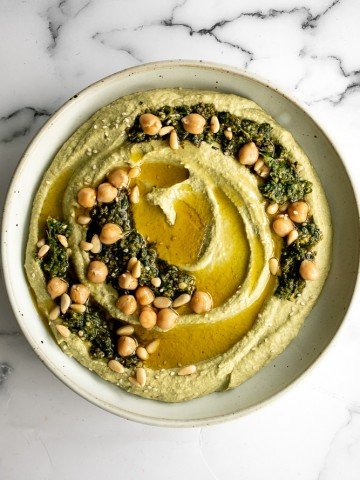
Pesto Hummus

Sweet Chili Chicken Bites
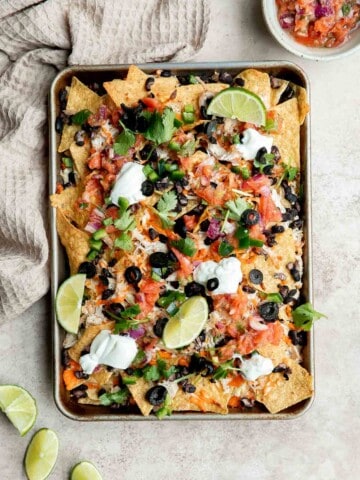
Sheet Pan Nachos

Pepperoni Pizza Rolls
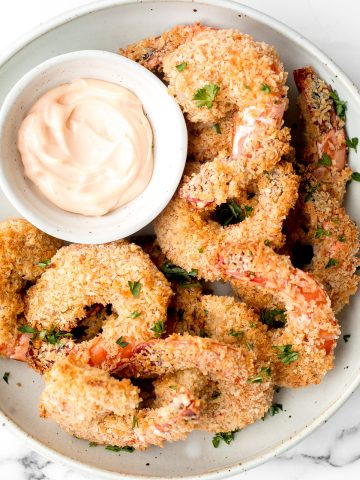
Baked Coconut Shrimp
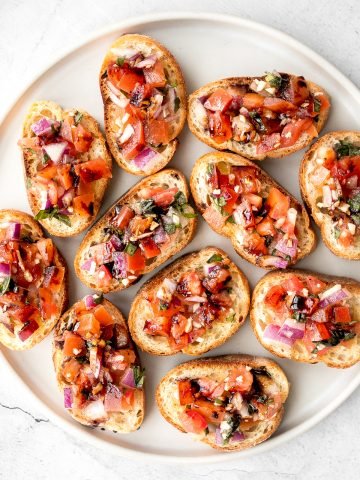
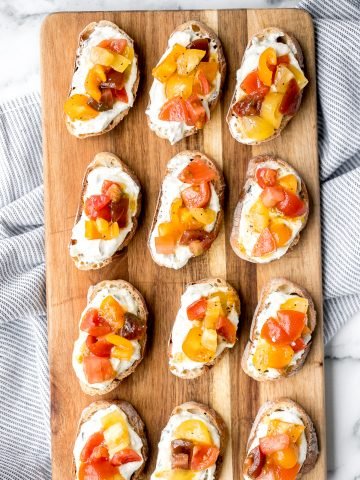
Tomato Bruschetta with Balsamic Glaze
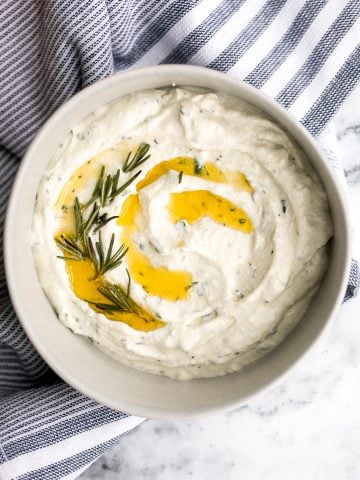
Whipped Ricotta Dip
Whipped Ricotta Crostini
Homemade Tater Tots with Bacon
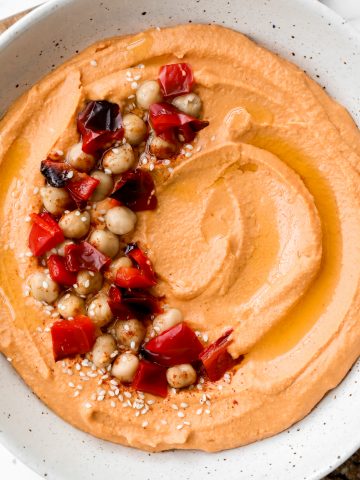
Roasted Red Pepper Hummus
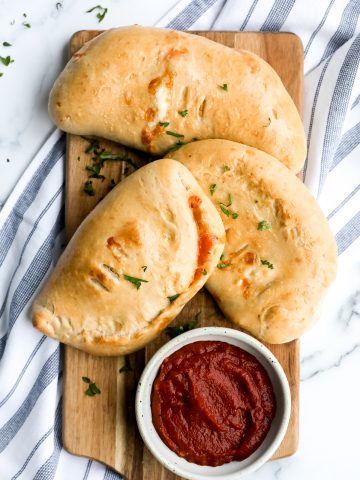
Homemade Calzones
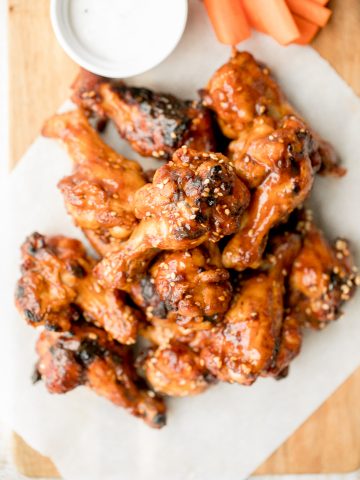
Baked BBQ Chicken Wings

Baked Spinach Dip
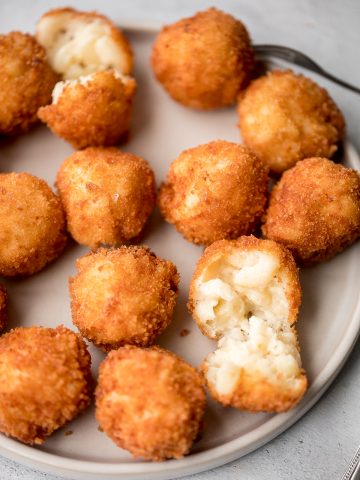
Fried Mac and Cheese Balls
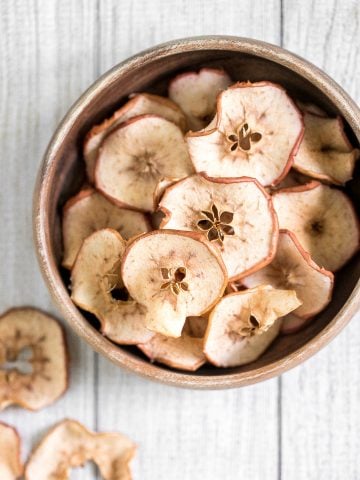
Baked Apple Chips
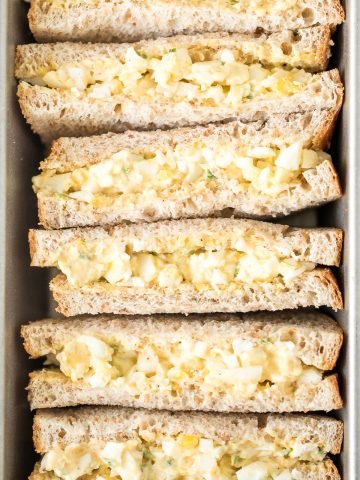
The Best Egg Salad Sandwich
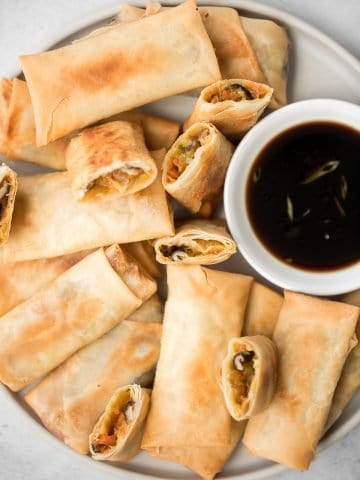
Vegetarian Spring Rolls
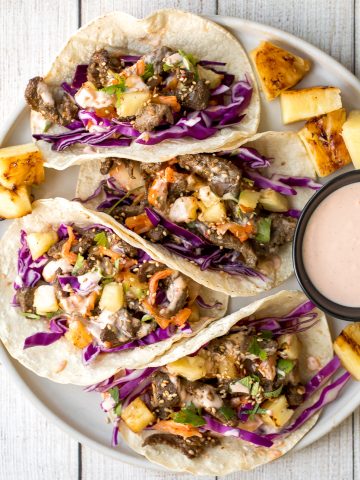
Korean Beef Steak Tacos
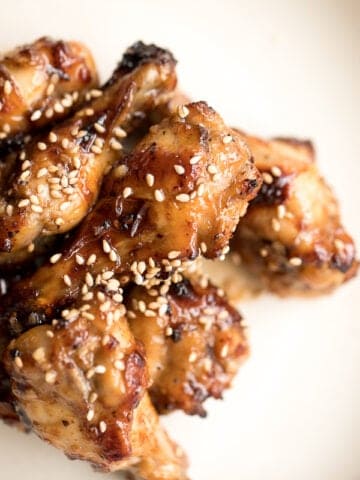
Honey Garlic Chicken Wings
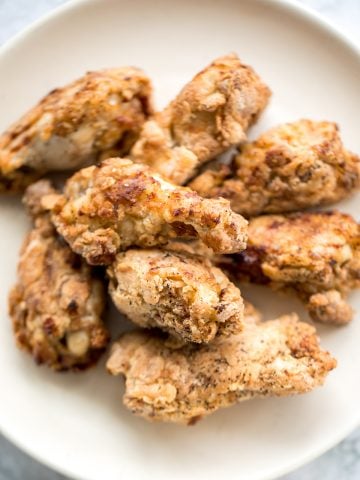
The Best Breaded Fried Chicken Wings (Air Fryer)
Classic Hummus
Curried White Bean Crostini with Toasted Pepitas
Back to School Turkey Pinwheels

Baked Mashed Potato Spring Rolls (JOEY Copycat)

Crispy Baked Asian Chicken Wings

Baked Turkey Meatballs
Szechuan Chicken Lettuce Wraps with Spicy Mayo (Cactus Club Copycat)

Smoked Salmon and Cream Cheese Cracker Bites
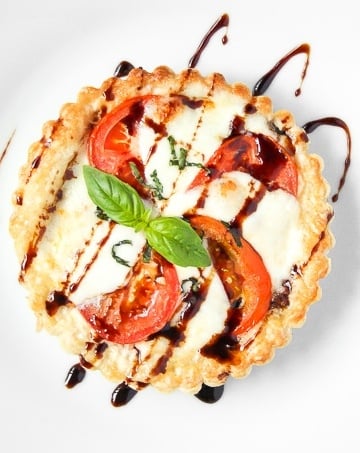
Tomato and Mozzarella Tart
Four Quick and Easy RITZ Cracker Recipes
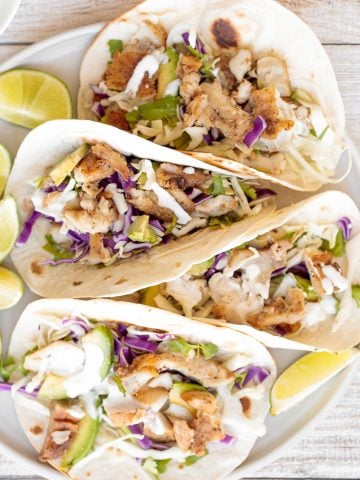
Fish Tacos with Lime Crema
Some of the most popular recipes that are always a hit with kids are:
- Pepperoni Pizza Rolls - Easy pepperoni pizza rolls are crispy on the bottom, tender and chewy inside, packed with pepperoni and cheese, and baked until bubbly. A total crowd pleaser!
- Homemade Tater Tots - Homemade tater tots with bacon are golden and crispy on the outside, yet soft and tender inside. They're packed with flavour and a total family favourite.
- Fried Mac and Cheese Balls - Fried mac and cheese balls are crispy on the outside, creamy and cheesy on the inside, and have the perfect crunch. Best way to use leftover mac and cheese.
- Baked Mozzarella Sticks - Crunchy, cheesy, and paired with an awesome dipping sauce, these baked mozzarella sticks are just as amazing as what you would find in a restaurant!
- Homemade Calzones - Homemade calzones are delicious little pizza pockets filled with cheese and toppings and baked until golden. This Italian favourite is easy to make at home.
- Egg Salad Sandwich - The best egg salad sandwich is a quick and easy picnic classic loaded with perfect hard-boiled eggs, mayonnaise, a touch of dijon mustard and green onions.
In line with the race car theme party, label little tent cards with creative phrases to describe the food such as:
- spare tires
- pit stop
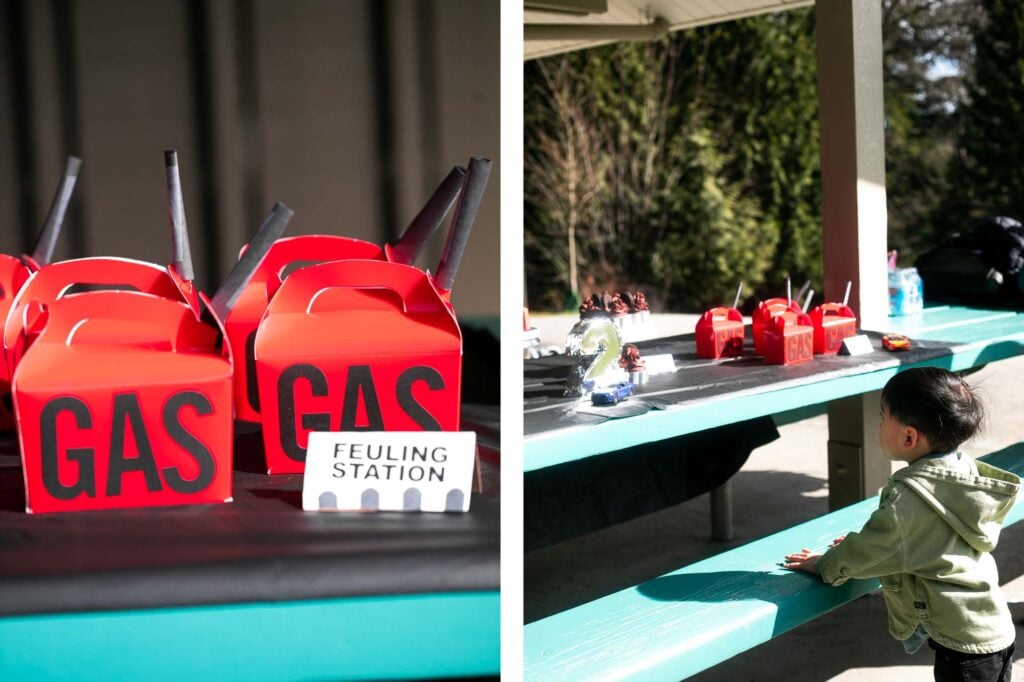
- fueling station
- service your engine
- dip sticks
- transmission fluid
- nuts and bolts

Birthday Party Drinks
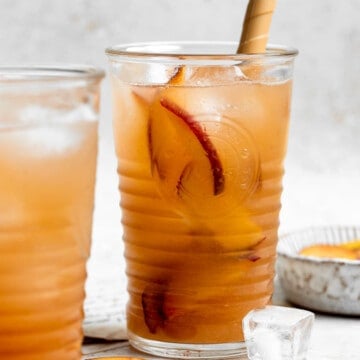
You can't have a birthday party without some juice. Serve some refreshing lemonade or iced tea, or even some bubble tea.


Car Party Favors
For the party favors, I created little portable fuel tanks for each child using a red favor box with a black nozzle rolled out of black construction paper and tape onto the side. I then used black alphabet stickers to stick on the words "Gas" on top of each box.
I filled each box with 2 ballons, car themed stickers, a small car, and a pack of play-doh. To complete the look, you can add a car thank you sticker on the other side of the favor box. For the display, I create a tent card with the phrase "fueling station".


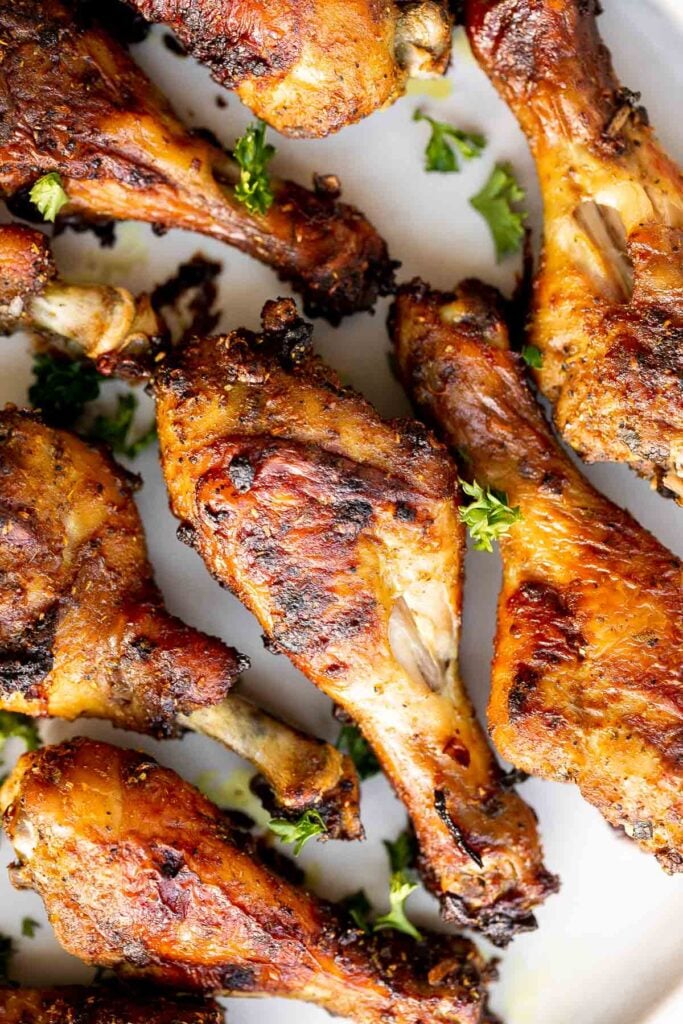
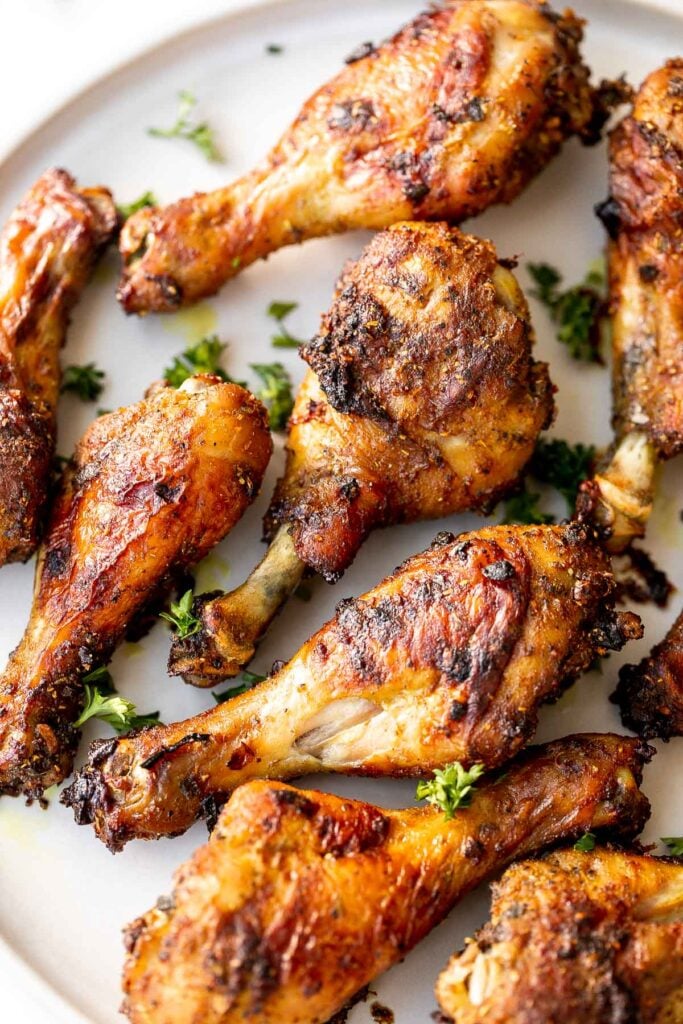
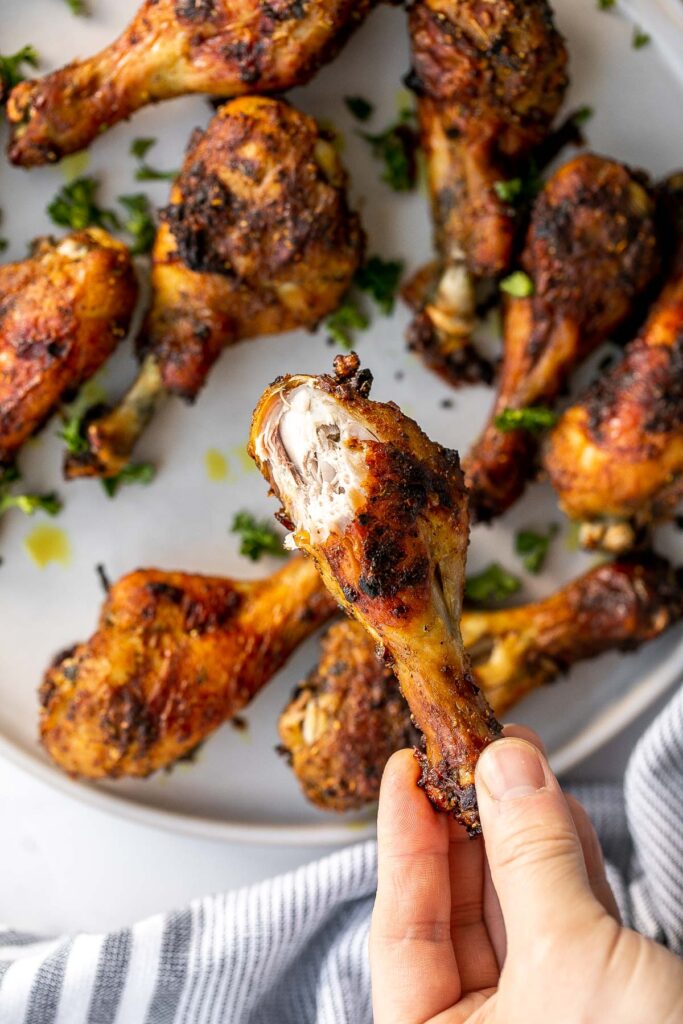
Baked Curried Chicken Drumsticks
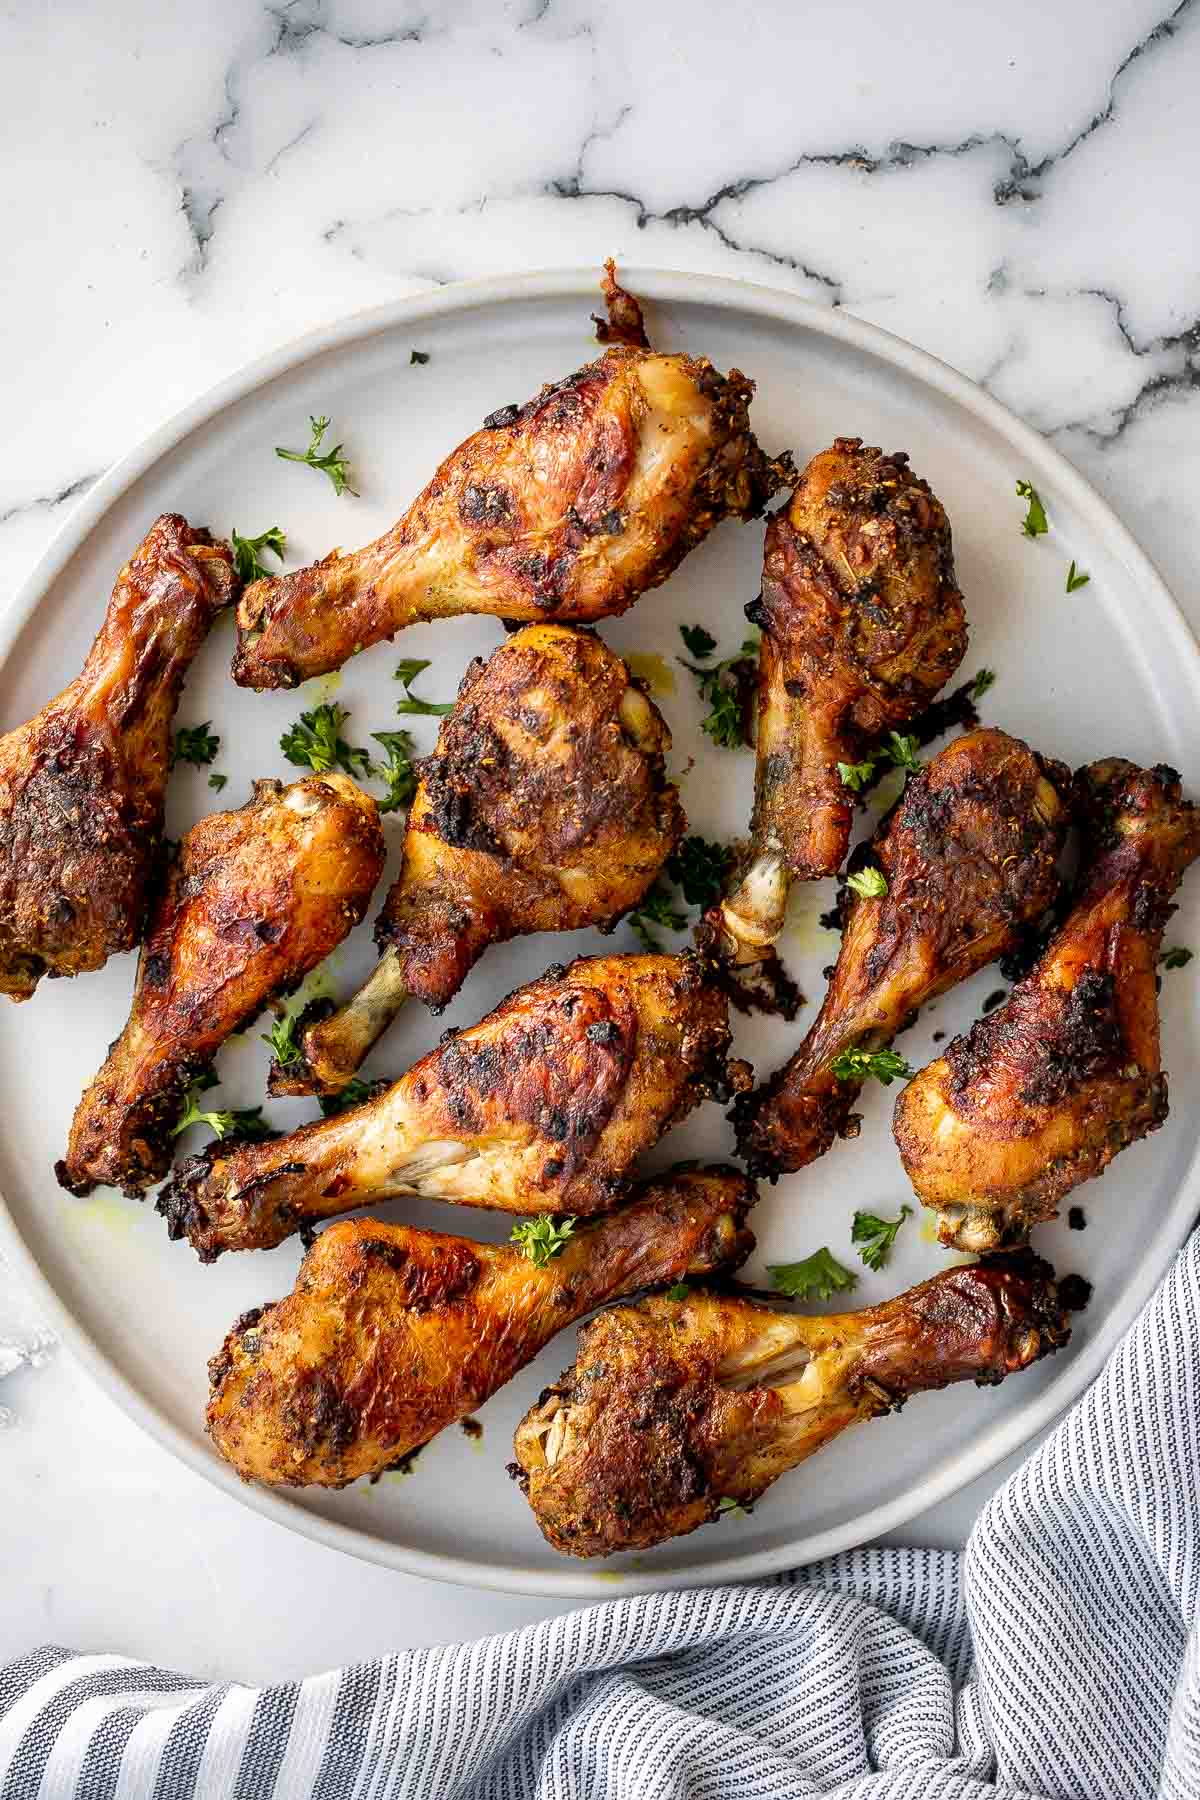
Baked curried chicken drumsticks are an easy to make dinner with quick prep and minimal dishes. These drumsticks are tender, delicious, and packed with so much flavour from its delicious marinade made of yellow curry powder, Worcestershire sauce, balsamic vinegar, garlic, and paprika. It's seriously the most flavourful way of adding protein into your diet. Plus, marinate the chicken in advance to make dinner even faster on a busy weeknight -- all you have to do is pop them in the oven about 45 minutes before dinner. Plus, the longer you marinate them, the more flavour they will absorb.

Why You'll Love Baked Curried Chicken Drumsticks
- Yellow curry is delicious and nutritious. Baked curried chicken drumsticks are full of flavour thanks to yellow curry powder. This special blend of coriander, ginger, turmeric, cumin, and fenugreek provides great taste and boasts health benefits.
- The secret ingredients. Balsamic vinegar and Worcestershire sauce shine in the marinade for these baked curried chicken drumsticks. These two ingredients help break down the proteins and fats, which means more tender meat. Plus, they add a dash of sweetness with no added sugars.
- Great on their own or with sides. These baked curried chicken drumsticks make a great meal by themselves, and they pair well with any sides you can think of such as Coconut Rice, Crispy Leaf Potatoes, Roasted Garlic Green Beans, Mashed Potatoes, or Roasted Cauliflower.
Ingredients
To make baked curried chicken drumsticks, you will need a large half sheet baking pan and the following ingredients:
- chicken drumsticks - You need about 3 lbs. or 10 drumsticks. I keep the skin on because crispy skin is everything. You can remove the skin if you prefer, but the texture may be slightly drier.
- olive oil
- garlic
- salt and pepper
- paprika
- yellow curry powder
- Worcestershire sauce
- balsamic vinegar
- fresh parsley - optional, for garnish when serving.
How to Make the Best Baked Curried Chicken Drumsticks
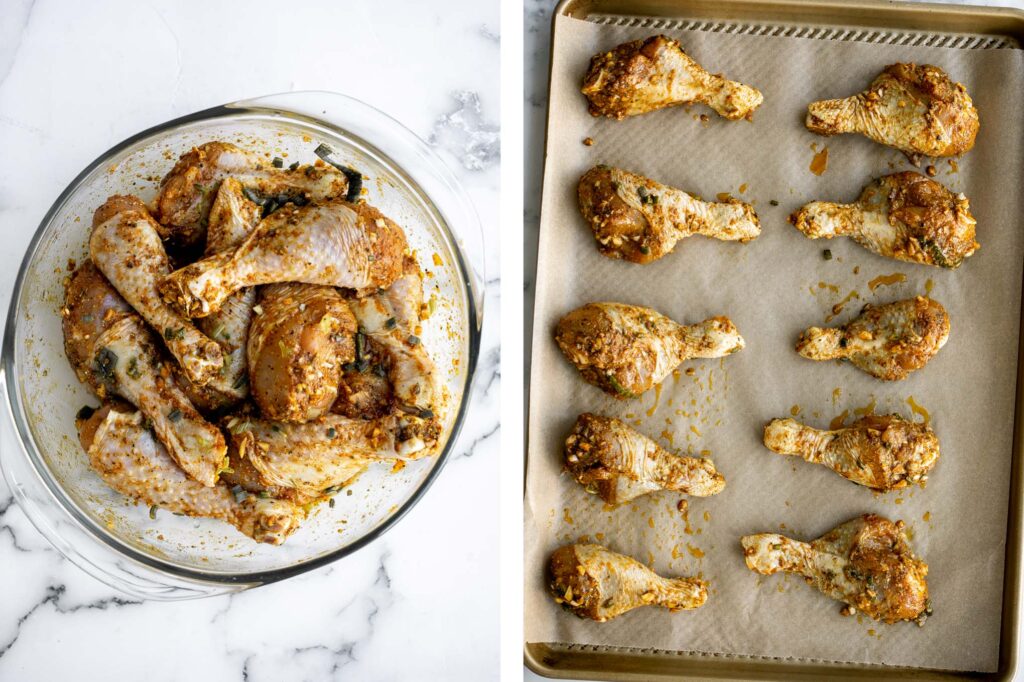
- Marinate the chicken. In a small mixing bowl, combine oil, garlic, salt, pepper, paprika, curry powder, Worcestershire sauce and balsamic vinegar and mix well with a spoon until smooth. Using a paper towel, pat dry the chicken drumsticks. Place them into a ziploc bag, along with the marinade, and toss to combine with the chicken. Press the air out of the bag and seal tightly. Press the marinade around the chicken thighs to fully coat. Place the ziploc bag in the refrigerator and marinate for at least 1 hour, up to overnight.
- Bake the chicken. Arrange the marinated chicken drumsticks on a large half sheet baking pan and bake in a 400 F preheated oven for 40-45 minutes, turning over once halfway through baking, until the skin is crispy and the internal temperature for the chicken reaches 165 F as read on a meat thermometer.
- Serve. Let the drumsticks cool for 5 minutes, then garnish with parsley and serve.
Storing and Freezing Instructions
- How to store: Allow the chicken drumsticks to cool to room temperature, then transfer to a shallow airtight container and store in the refrigerator for up to 4 days.
- How to reheat: Reheat these baked curried chicken drumsticks uncovered in a 325 F preheated oven for about 20 minutes until warmed through. You can brush or spray them with oil for extra crispy skin. You can also reheat them in the microwave (in increments of 20 seconds until heated all the way through), but they retain their taste and texture better when reheated in the oven.
- How to freeze: Allow the cooked chicken drumsticks to cool to room temperature, then transfer them to an airtight container or freezer bag. Eliminate as much air as possible to avoid freezer burn. Store in the freezer for up to 3 months.
More Chicken Recipes
- 60 Best Chicken Recipes
- Sheet Pan Curry Chicken and Vegetables
- Chicken Marsala
- Creamy Lemon Chicken Piccata
- Easy Chicken Parmesan (Parmigiana)
- White Chicken and Spinach Lasagna
- Kung Pao Chicken
- Parmesan Crusted Chicken
Tried this recipe?
I'd love to hear what you think! Leave a comment and rating below to share your feedback. Your reviews help others discover this recipe and help me keep creating more free recipes for you. Snap a photo and tag me on social media @aheadofthyme too.

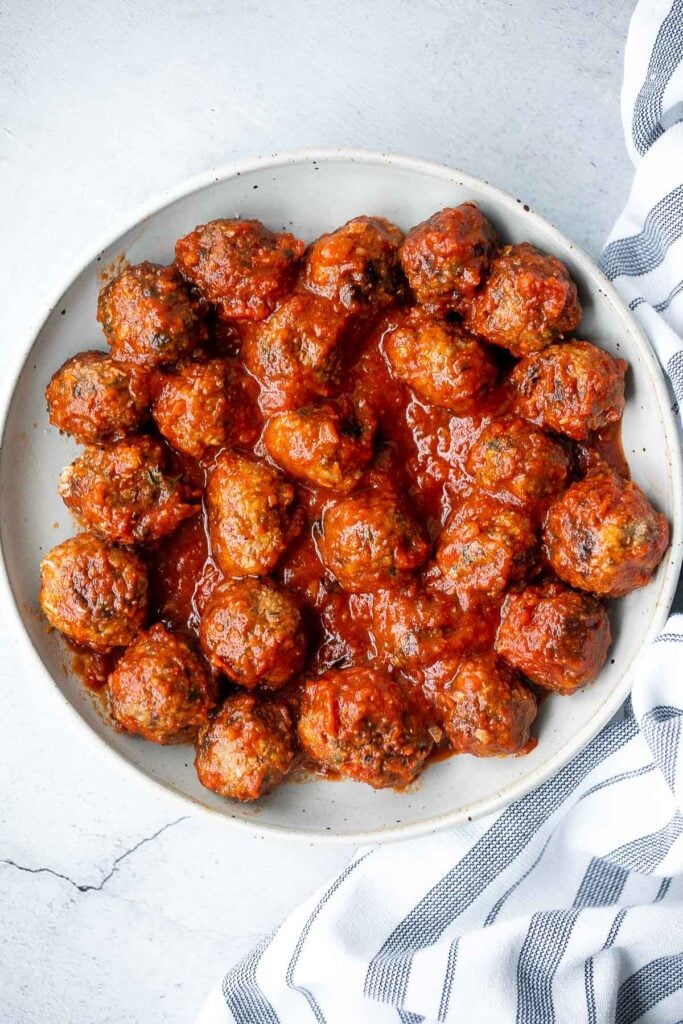
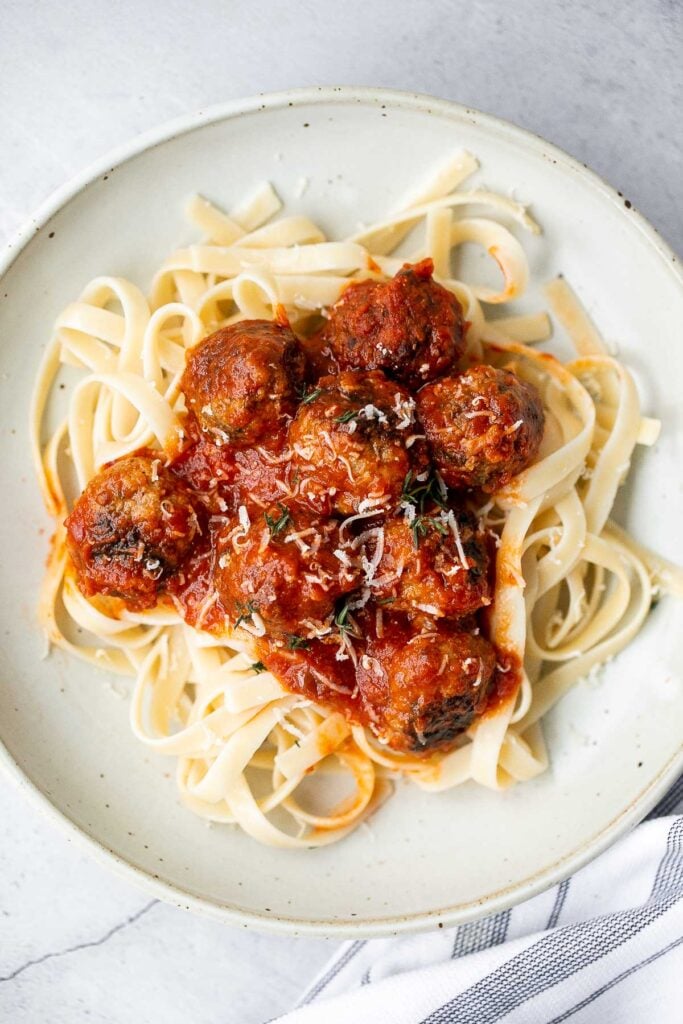
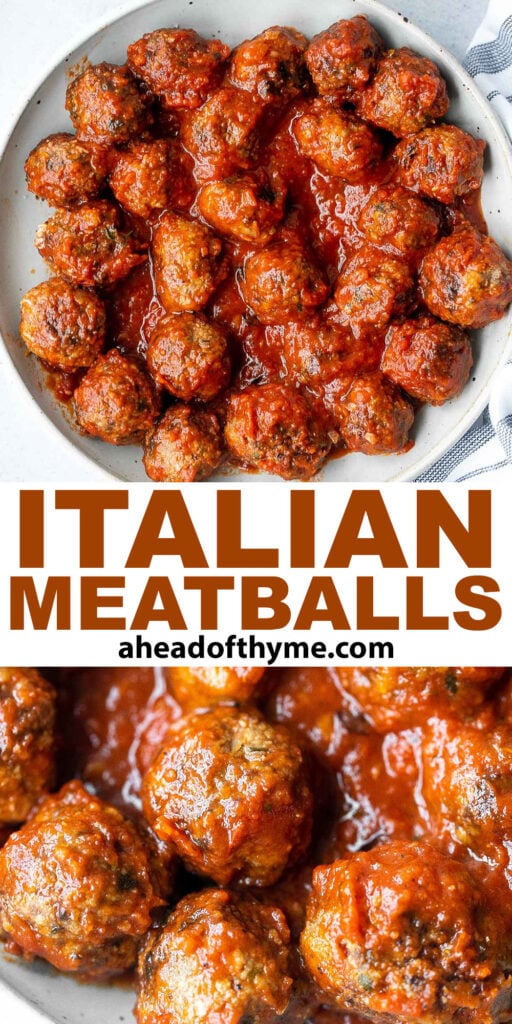
Italian Meatballs

Quick and easy homemade Italian meatballs are juicy, flavourful, and delicious. They are seasoned with herbs, garlic, and Parmesan cheese, pan-seared in olive oil, and simmered in a rich and savoury tomato sauce. The best part? You can make these Italian meatballs in just 30-minutes, making them the perfect weeknight dinner. Serve them on their own, over pasta, or in a meatball sandwich. Plus, you can make a bigger batch and freeze any extras for an even quicker meal on a lazy day.
Why You'll Love Italian Meatballs
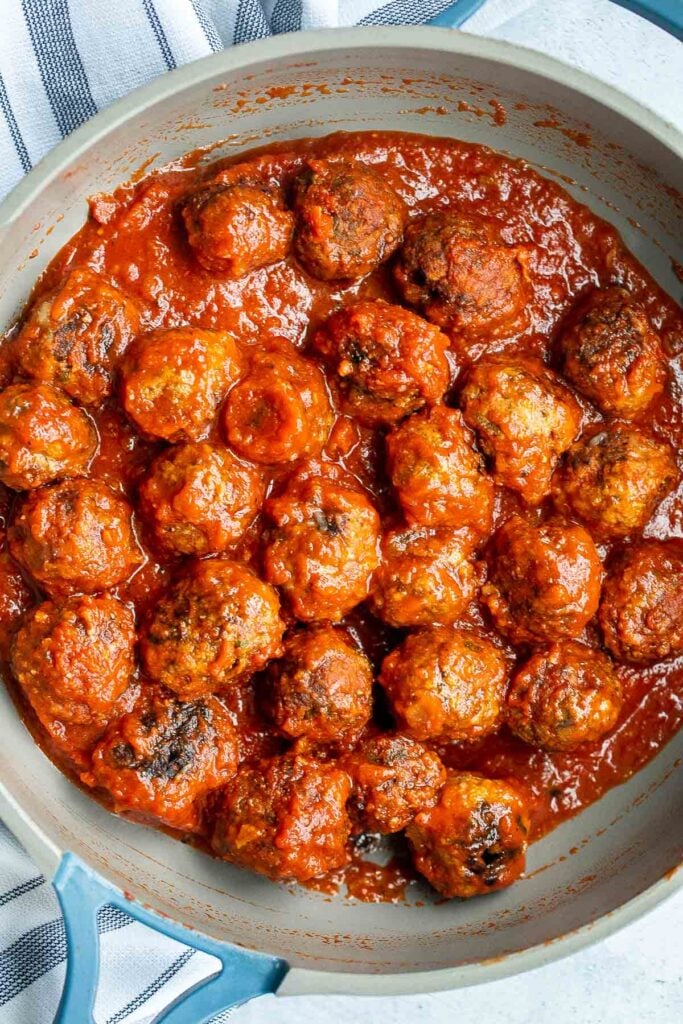
- The beef flavours the sauce. For this recipe, you'll sear the Italian meatballs before transferring them out of the pan. Then, using the juices left behind, you'll create the flavourful and rich tomato sauce with garlic, onion, bay leaves, and crushed tomatoes. The result is an amazing and flavourful tomato sauce to smother your meatballs in.
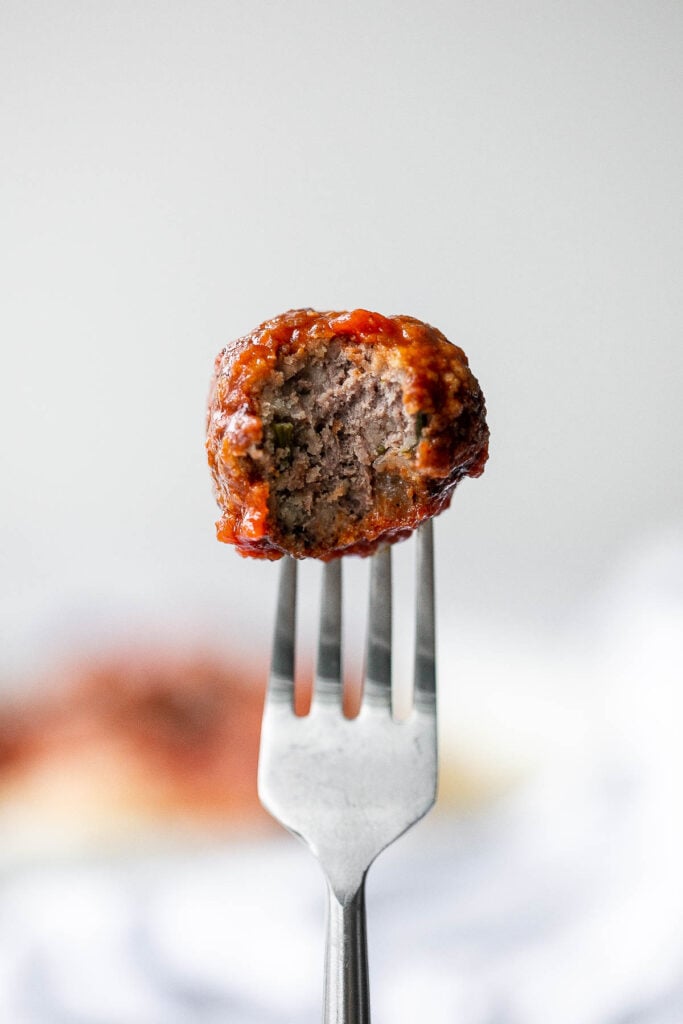
- And the sauce flavours the beef. Once you've created the sauce, the meatballs return to the pan to simmer, allowing the naturally occurring msg in the tomatoes to bring out the umami flavour in the beef. The result is beefy, saucy goodness all around.
- Meatballs are more versatile than you think. When you make them, serve them with your favourite pasta. The next day, reheat some leftover Italian meatballs in tomato sauce to have on their own or in a meatball sandwich. After that, mix them into a meat sauce. The options are endless!

Ingredients
To make these easy Italian meatballs in tomato sauce, you will need the following ingredients:
- ground beef
- breadcrumbs
- milk
- egg
- garlic
- fresh parsley
- Parmesan cheese
- Italian seasoning
- salt and pepper
- olive oil - for cooking.
There are plenty of ways to customize these family-favourite meatballs to change things up every once in a while. You can experiment with different flavours, but always be sure to include binding ingredients such as eggs, breadcrumbs, cheese, or milk.
For the tomato sauce, you will need:
- onion
- garlic
- crushed tomatoes and tomato paste
- bay leaves
- salt and pepper
You will also need a large mixing bowl and a large skillet or shallow saucepan.
How to Make the Best Italian Meatballs in Tomato Sauce
- Prepare the meatballs. In a large mixing bowl, combine beef with breadcrumbs, milk, egg, garlic, parsley, Parmesan, Italian seasoning, salt and pepper. Mix well and form the mixture into a uniform consistency. Take 2 spoonfuls of the beef mixture at a time and roll them into meatballs. Set aside.
- Cook the meatballs. Heat olive oil in a cast-iron skillet or shallow saucepan over medium-high heat for 2 minutes until the hot oil sizzles. Slowly add the meatballs and gently stir to cook until browned on all sides, about 6 to 8 minutes. Make sure to stir gently to prevent meatballs from disintegrating. Transfer the meatballs to a plate and set aside (Note that the meatballs are not fully cooked at this point).
- Make the tomato sauce. In the same skillet, add onion and garlic and sauté until fragrant, about 1 minute. Stir in crushed tomatoes, tomato paste and bay leaves, and season with salt and pepper.
- Add meatballs and simmer. Return the meatballs to the skillet and bring the sauce mixture to a simmer over medium heat, stirring occasionally. Cover the lid and let it simmer for 8-10 minutes until the meatballs are fully cooked.
- Serve. Sprinkle with extra Parmesan if desired and serve immediately over pasta, rice, or mashed potatoes.
Storing and Freezing Instructions
- How to store: If you have any leftover Italian meatballs in tomato sauce, store them in an airtight container for up to 3-4 days in the refrigerator. Be sure to allow the meatballs to cool to room temperate before storing them in the refrigerator.
- How to freeze: Meatballs freeze beautifully (both cooked and uncooked).
- To freeze uncooked meatballs: Place the shaped meatballs on a large half sheet baking pan lined with parchment paper. Transfer the pan to the freezer and freeze until hard, about 1 hour. Then, transfer the meatballs into a freezer bag or freezer-safe airtight container and store in the freezer for up to 3 months. To cook, allow the meatballs to thaw overnight in the refrigerator first, then cook as per recipe instructions on the stove.
- To freeze cooked Italian meatballs: Once they have cooled, store the meatballs and sauce in an airtight container or freezer bag (leaving room for expansion) for up to 3 months.
- How to Reheat: Reheat in a shallow saucepan on the stove over medium-low heat until warmed through. You may need to add a little water if the sauce thickened up too much in the refrigerator. Alternatively, you can reheat the meatballs in a microwave-safe bowl in the microwave in 20-second increments. Be sure to cover the bowl to avoid tomato sauce splatter.
More Meatball Recipes
- Swedish Meatballs
- Sticky Honey Garlic Meatballs
- Lion's Head Chinese Meatballs
- Spaghetti and Meatballs
- Baked Turkey Meatballs
- Vegetarian Meatballs
Tried this recipe?
I'd love to hear what you think! Leave a comment and rating below to share your feedback. Your reviews help others discover this recipe and help me keep creating more free recipes for you. Snap a photo and tag me on social media @aheadofthyme too.
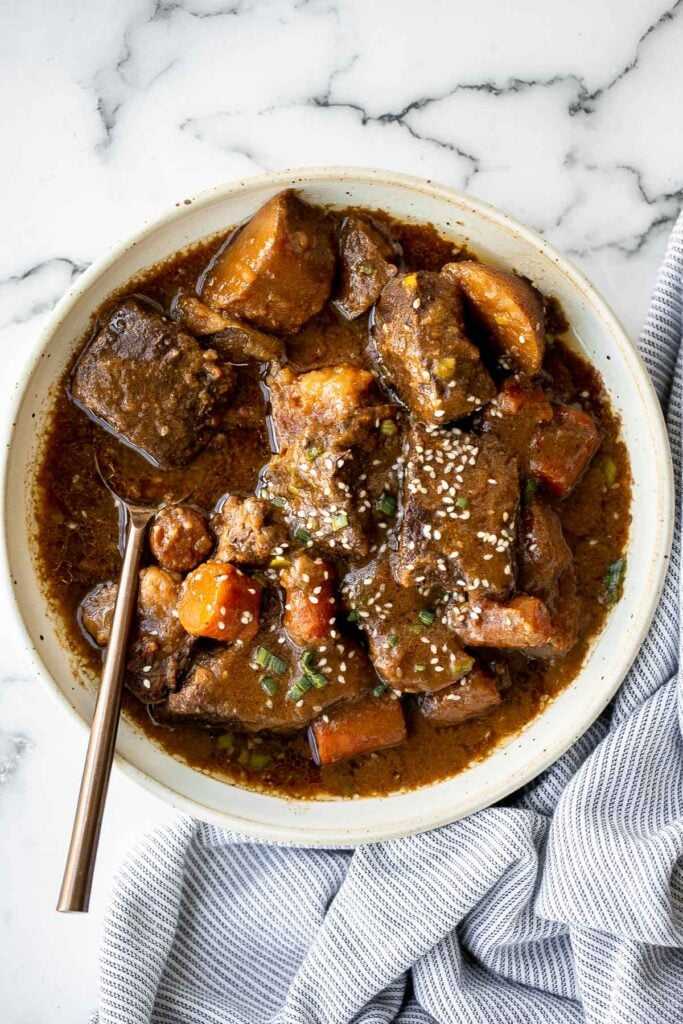
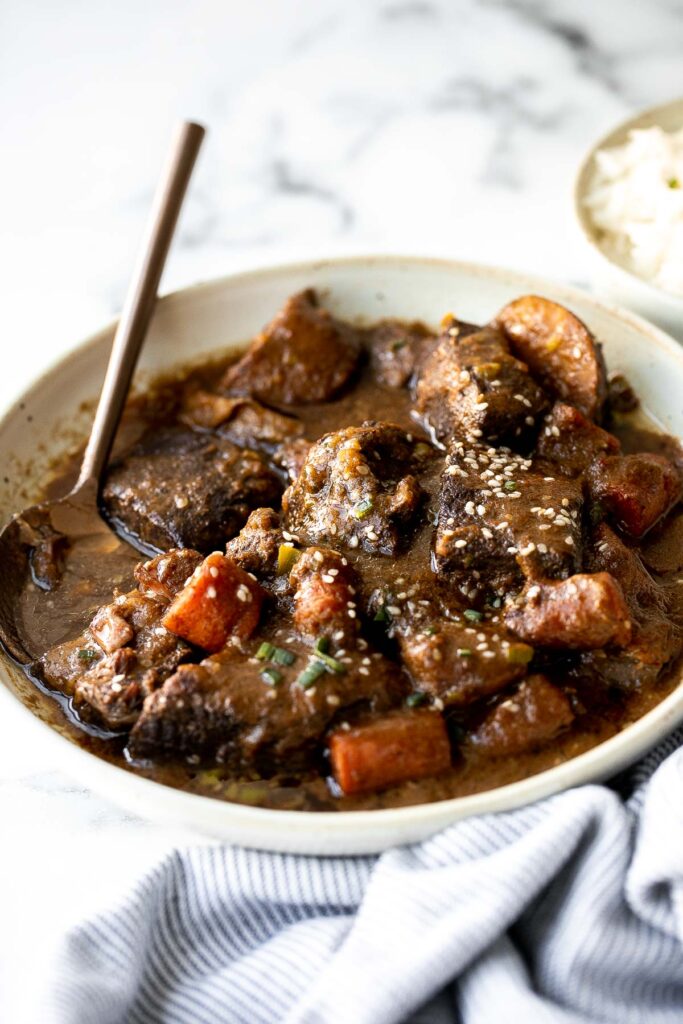
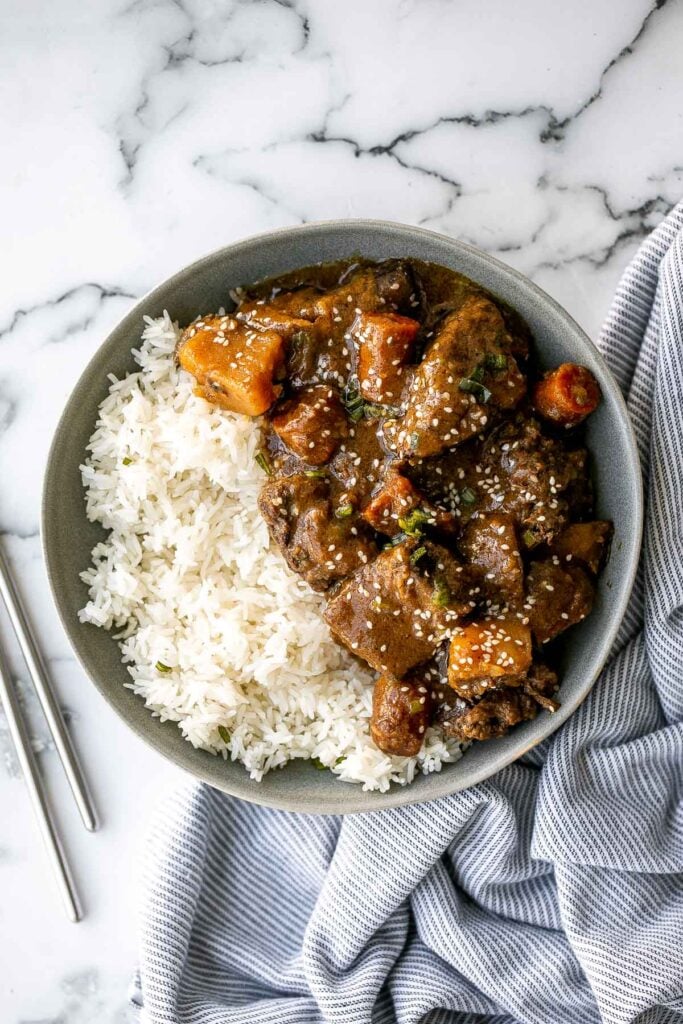
Slow Cooker Korean Short Ribs

Slow cooker Korean short ribs deliver complex Asian flavours with little effort. Simply add all your ingredients into the crockpot, leave it to cook all day, and impress the whole family for dinner. Layers of soft and tender bone-in short ribs, carrots, and potatoes swim in a delicious sauce made of soy sauce, honey, garlic, ginger, and sesame. Settle for sweetness or turn up the heat by adding crushed red pepper-either way, these slow cooker Korean short ribs will turn out amazing.
Why You'll Love Slow Cooker Korean Short Ribs
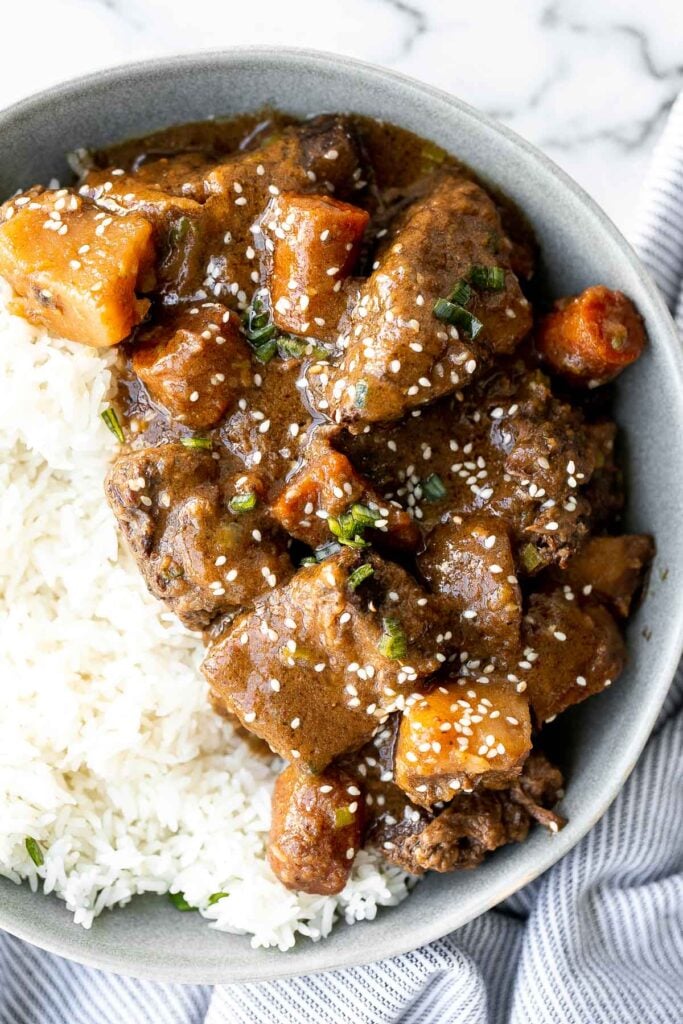
- Incredible flavour in every bite. Bathed in a Korean-inspired marinade for over 4 hours, the potatoes, carrots, and ribs absorb all the delicious flavours of garlic, ginger, soy sauce, sesame, and honey. Paired with white rice, these slow cooker Korean short ribs give you the perfect bite every time.
- Forget about it. Crockpots are the unsung heroes of the kitchen. Prepare this recipe when you have time, then forget about it. Cook for 4-10 hours-whatever fits into your schedule-and reap the benefits of a timely process without investing your energy. The easiest dinner ever.
- Be careful, you might get addicted. Korean barbecue features some of the best flavours out there. Adjust to your desired level of spiciness and rejoice in these slow cooker Korean short ribs with potatoes and carrots. Total comfort food.
Ingredients
To make these easy slow cooker Korean short ribs, you will need a crockpot and the following ingredients:
- beef short ribs - you need 4-6 pounds of bone-in beef short ribs, about 10 two-inch pieces.
- potatoes
- carrots
- soy sauce
- beef broth - use storebought beef broth or homemade beef bone broth.
- honey - honey adds sweetness can is often replaced with fruit, such as 1 cup of cubed pear instead.
- onion
- garlic
- sesame seeds
- ginger
- sesame oil
- crushed red pepper - optional, for a spicy kick. For a more authentic Korean spice, check your local grocery's international foods aisle for gochujang-Korean chili paste. Add as much as you like and enjoy.
- for serving - steamed rice, sesame seeds, and green onions.
How to Make the Best Slow Cooker Korean Short Ribs
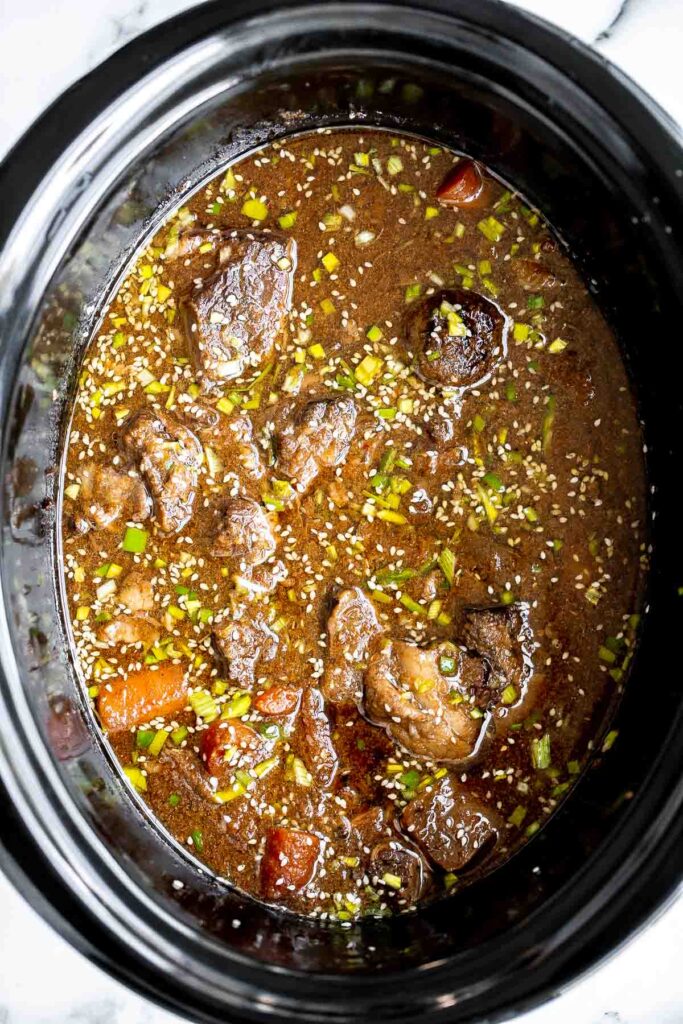
- Add ribs and vegetables. Add short ribs, potatoes and carrots into a 6-qt slow cooker (crockpot).
- Make the sauce. In a food blender, add remaining ingredients and puree for 1 minute until smooth. Transfer the the sauce into the crockpot. The sauce should almost cover the short ribs. If not, add a little more beef stock or water.
- Cook. Close the lid and set to cook for 8-10 hours on LOW or 4-6 hours on HIGH. When time is up, the slow cooker will automatically switch to the WARM setting.
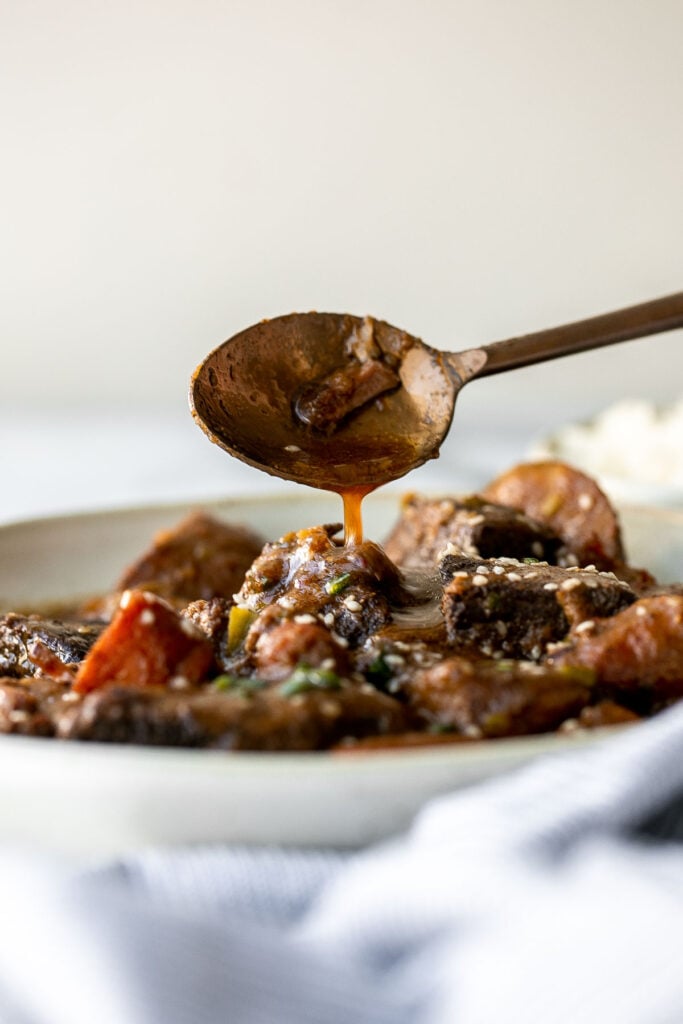
- Thicken the sauce. Transfer 1 cup of the cooked sauce to a shallow saucepan and add 1 tablespoon flour. Whisk until smooth. Bring the sauce to a simmer over medium heat for 2-3 minutes, stirring continuously, until thickened to a desired consistency. Transfer the thickened sauce back in the slow cooker and stir well to mix. This is to thicken up the sauce.
- Serve. Serve the short ribs over steamed rice and garnish with sesame seeds and green onions on top.
Storing and Freezing Instructions
- How to store: Store any leftover crockpot Korean short ribs in an airtight container in the refrigerator for up to 4 days.
- How to reheat: Reheat slow cooker Korean short ribs covered in the microwave in increments of 20-30 seconds until hot. Alternately, reheat in a saucepan on the stove over medium-low heat until warmed through, about 5-10 minutes.
- How to freeze: Allow the short ribs to cool to room temperature before freezing. Transfer to a freezer bag or airtight container, and leave some room for expansion. Freeze for up to 3 months. To serve, allow it to thaw in the refrigerator overnight or at room temperature for a few hours.
More Slow Cooker Recipes
- Slow Cooker Beef Chili
- Slow Cooker Bone Broth
- Crockpot Leg of Lamb with Vegetables
- Slow Cooker Whole Chicken
- Slow Cooker Turkey Breast
- Crockpot Asian Beef Noodle Soup
Tried this recipe?
I'd love to hear what you think! Leave a comment and rating below to share your feedback. Your reviews help others discover this recipe and help me keep creating more free recipes for you. Snap a photo and tag me on social media @aheadofthyme too.

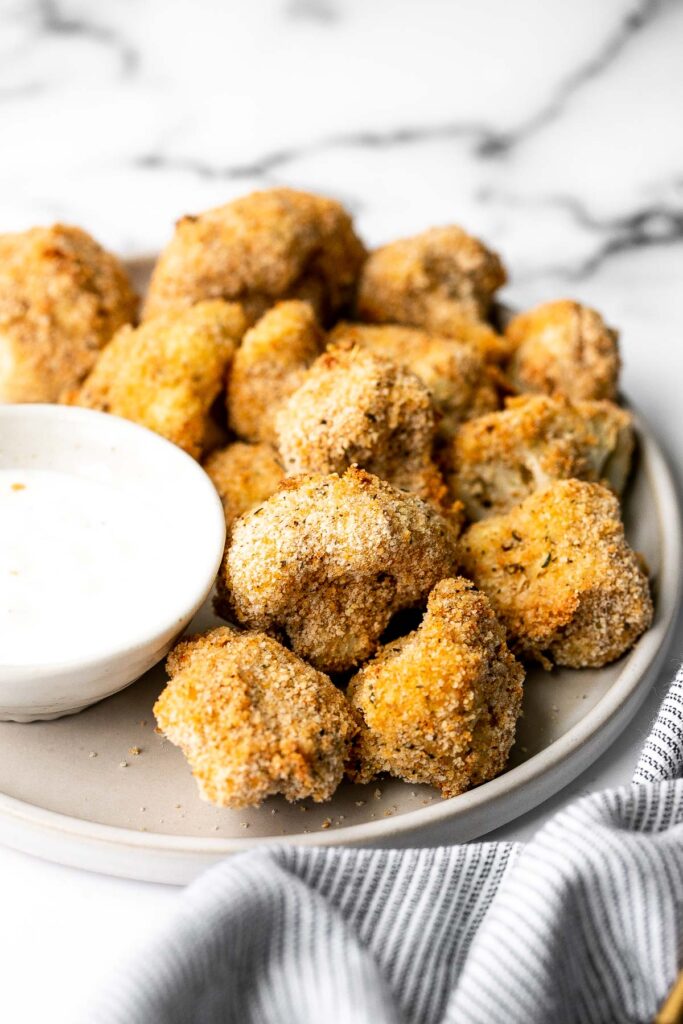
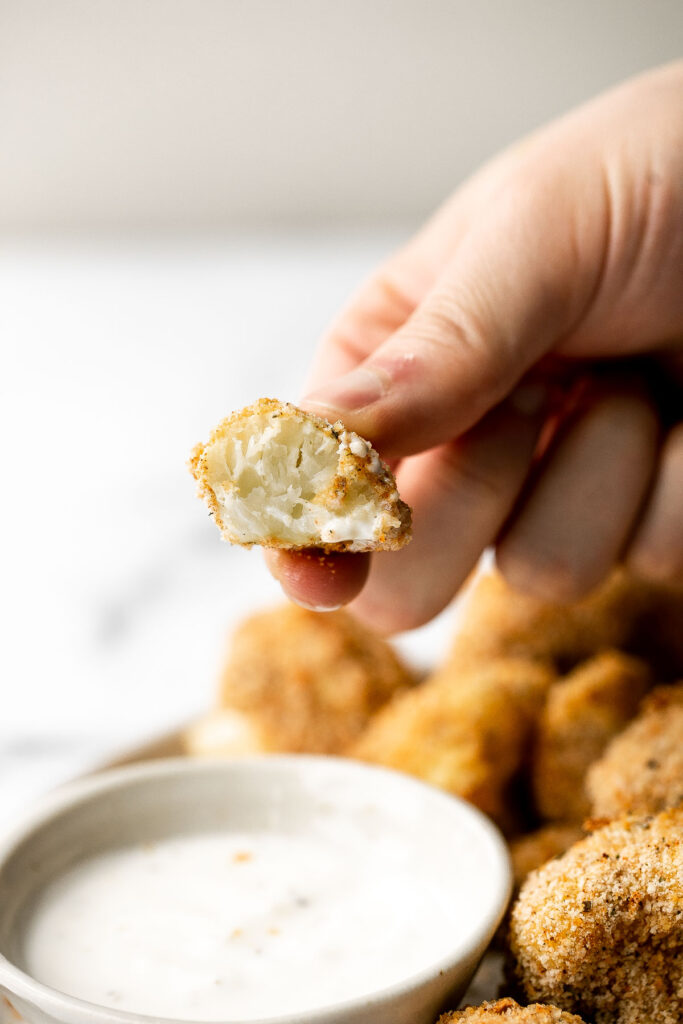
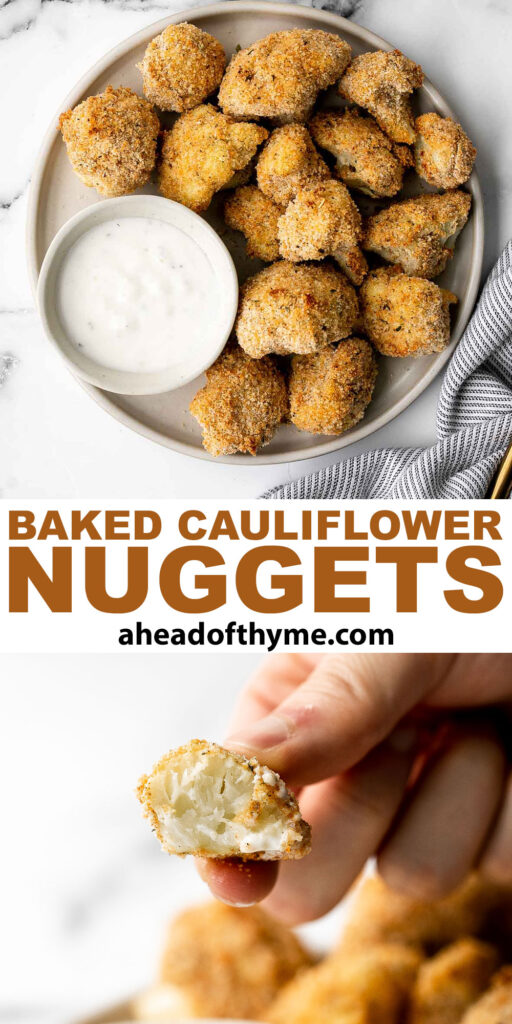
Baked Cauliflower Nuggets
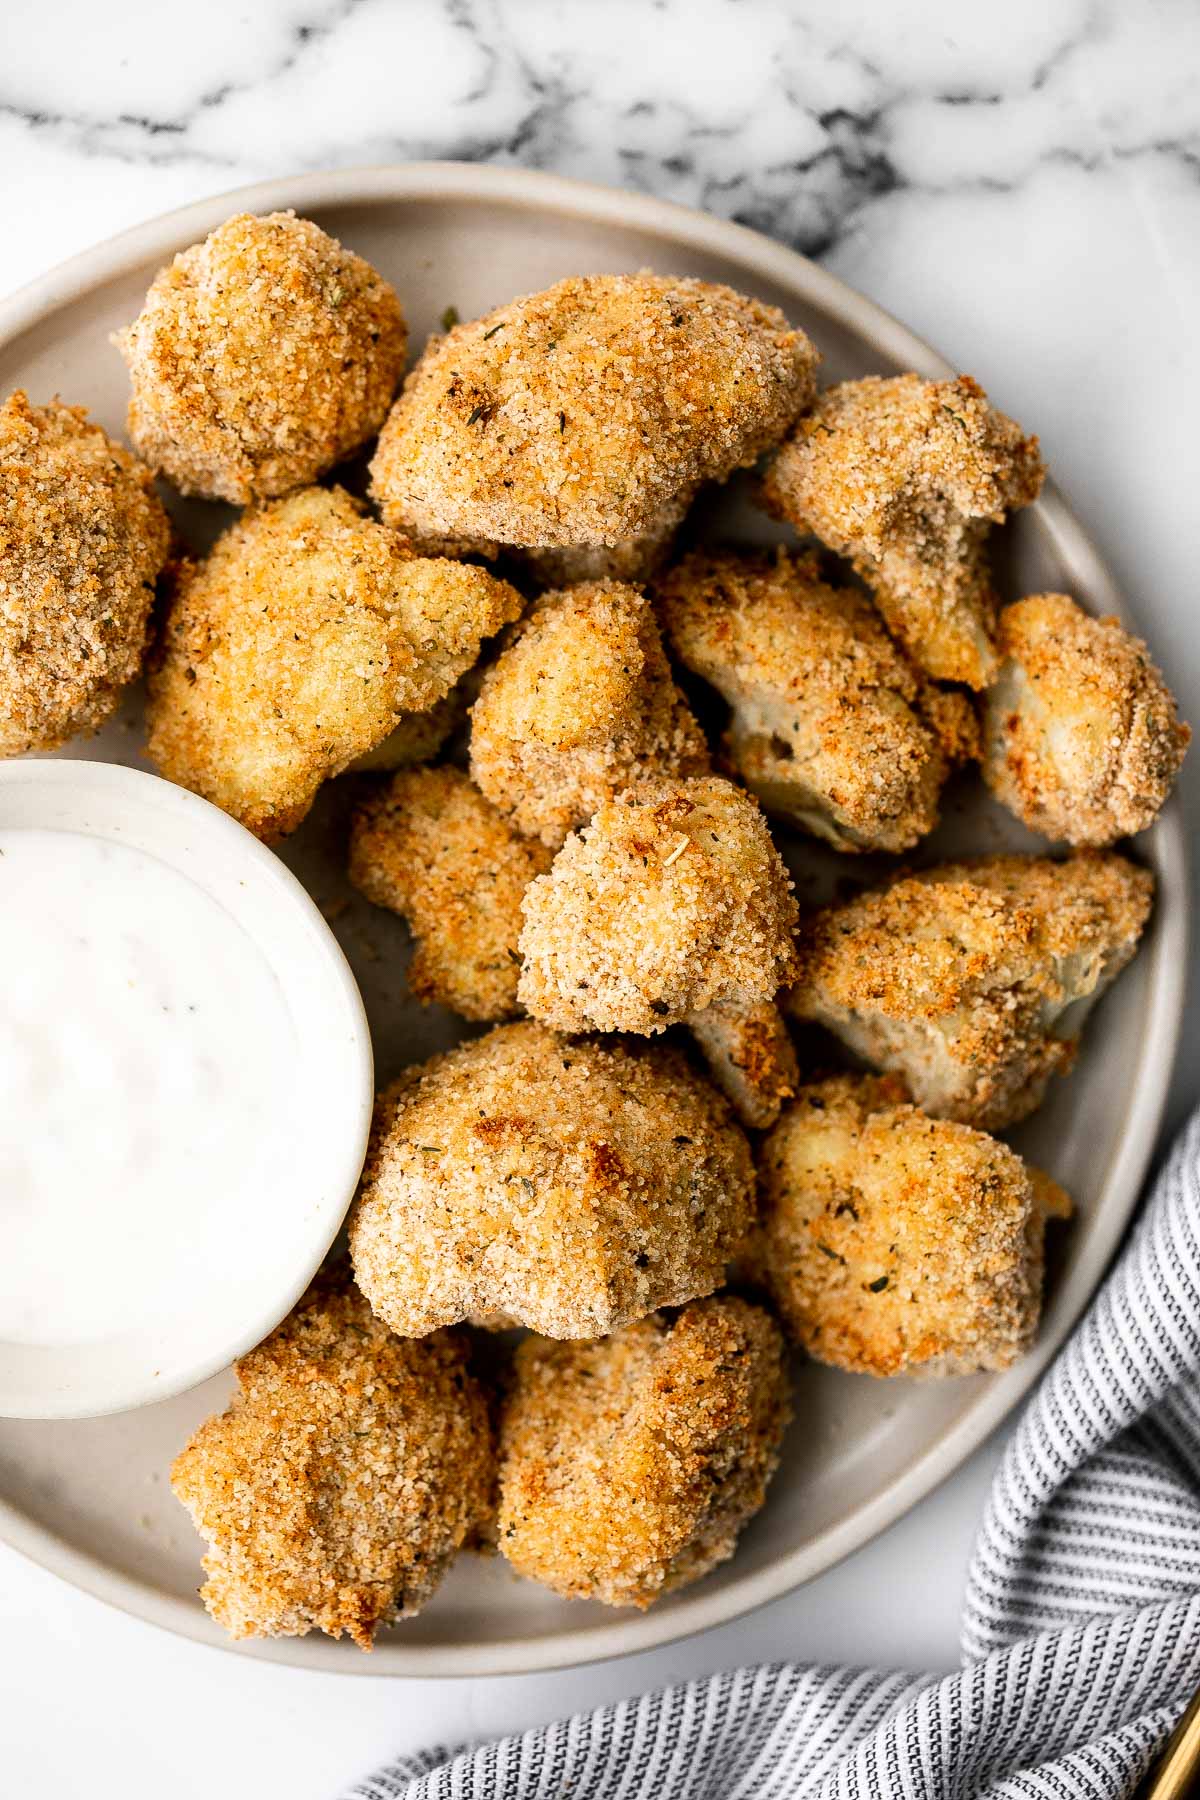
Healthy baked cauliflower nuggets are crispy and toasty on the outside, and soft and tender inside. With a crispy and well-seasoned panko breadcrumb and Parmesan breading, these healthy cauliflower bites taste even better than they look. They're a delicious vegetarian alternative to traditional chicken nuggets, and you won't even miss the meat! Plus, they are baked in the oven for just 15 minutes, making them even healthier than a fried option. Serve cauliflower nuggets as an appetizer, snack or lunch dipped in your favourite sauce, or serve it for dinner as a delicious side dish.
Why You'll Love Healthy Baked Cauliflower Nuggets
- Parmesan panko breading! Turn roasted cauliflower into healthy baked cauliflower nuggets by coating them with a Parmesan-panko breading. The breading adds incredible flavour and helps the exterior of the cauliflower become super crispy.
- Tastes and feels fried-but isn't. By spraying these healthy baked cauliflower bites with cooking oil, you replicate an air fryer in your oven. The results are perfectly cooked breaded cauliflower bites that taste fried but are so much healthier!
- A delicious way to add cauliflower to your diet. Cauliflower is high in fiber, nutrients, and antioxidants. Because of this, some people consider cauliflower a superfood. Either way, it's a veggie you want in your diet-and making healthy baked cauliflower nuggets is the perfect way to do just that.

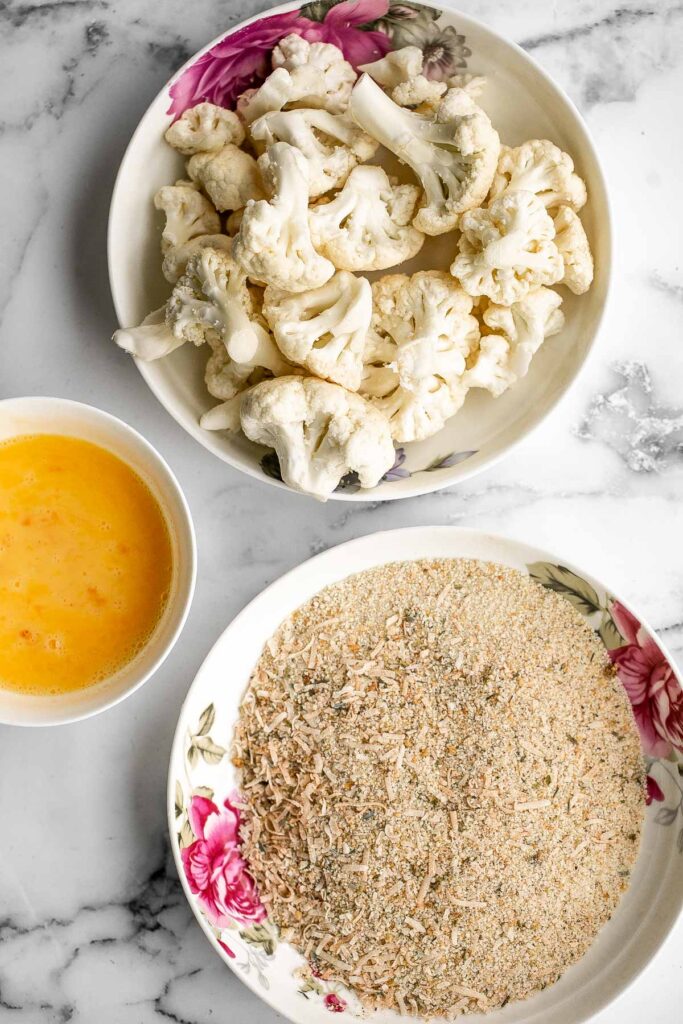
Ingredients
To make these healthy baked cauliflower nuggets, you will need the following ingredients:
- cauliflower florets - you need 3 cups of small cauliflower florets which is what you will get from roughly one small head of cauliflower.
- Panko breadcrumbs - or you can make these cauliflower bites gluten-free by using gluten-free breadcrumbs or crush up a gluten-free cereal like Rice Chex or Corn Chex.
- Parmesan cheese
- Italian seasoning
- garlic powder
- paprika
- salt and pepper
- eggs
- cooking oil spray
You will also need measuring cups and spoons, mixing bowls, and a large half sheet baking pan.
How to Make the Best Baked Cauliflower Nuggets
- Combine breadcrumb mixture. In a large mixing bowl, whisk together breadcrumbs, Parmesan cheese, Italian seasoning, garlic powder, paprika, salt, and pepper, until evenly combined.
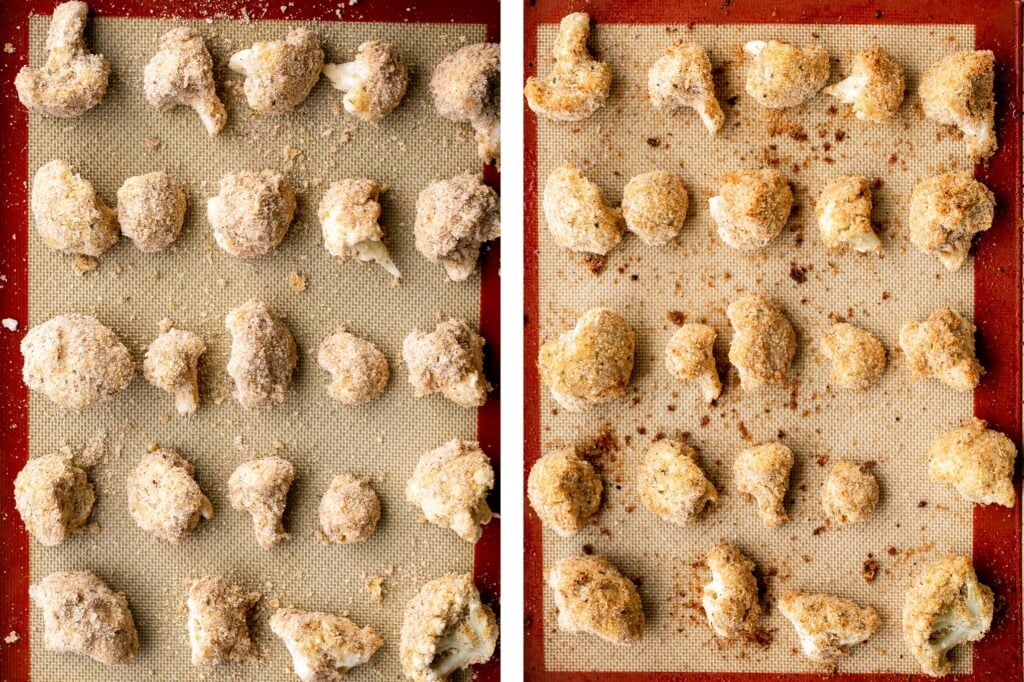
- Coat the cauliflower. Place beaten eggs into a small bowl. Dip the cauliflower florets in the eggs and then coat it with the breadcrumb mixture. You can gently press the crumbs into the cauliflower florets to adhere as much as possible to them. Transfer the breaded cauliflower to a large half sheet baking pan lined with parchment paper. Spray them evenly with cooking oil spray.
- Bake. Bake in a 400 F preheated oven for 15-20 minutes until golden brown and crispy. Serve immediately with a side of your favourite dipping sauce such as ranch or BBQ sauce.
Tips and Tricks
- How to store: Healthy baked cauliflower nuggets will keep in the refrigerator for up to 4-5 days in an airtight container.
- How to reheat: Reheat cauliflower bites in a 300F preheated oven or air fryer for 5-10 minutes until warmed through. You can also reheat them in the microwave but their texture will be different as they won't be as crispy.
- How to make vegan cauliflower nuggets: You can make these dairy-free by omitting the Parmesan cheese. If you don't want to lose out on the cheesy flavour, you can substitute it with vegan Parmesan or nutritional yeast. To make them completely vegan, you can also substitute the egg with a vegan egg binder substitute.
- How to make gluten-free breaded cauliflower bites: You can make these cauliflower bites gluten-free by using gluten-free breadcrumbs or crush up a gluten-free cereal like Rice Chex or Corn Chex.
More Bite-Sized Appetizers
- Baked Coconut Shrimp
- Homemade Chicken Nuggets
- Sweet Chili Chicken Bites
- Vegetarian Spring Rolls
- Homemade Tater Tots with Bacon
- Fried Mac and Cheese Balls
- Vegetarian Meatballs
Tried this recipe?
I'd love to hear what you think! Leave a comment and rating below to share your feedback. Your reviews help others discover this recipe and help me keep creating more free recipes for you. Snap a photo and tag me on social media @aheadofthyme too.
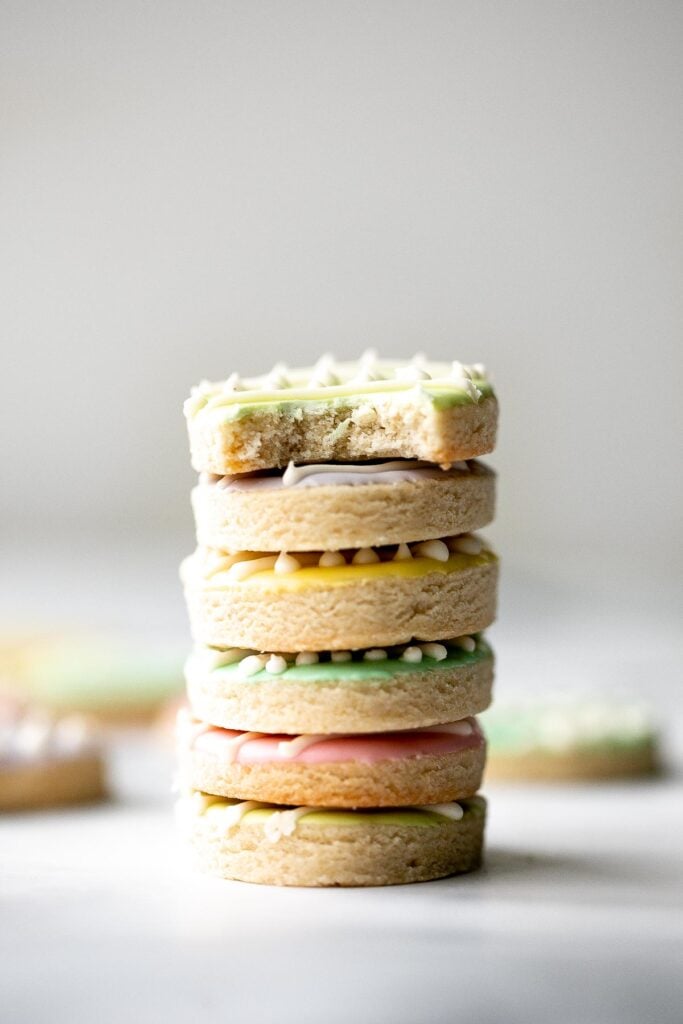
Easter Egg Sugar Cookies

Sugar cookies are basically my go-to cookie for any holiday. And one of my favourite holidays for making and decorating sugar cookies is Easter. The gorgeous pale tones, the intricate designs, the colourful variety. Easter egg sugar cookies are the definition of edible art.

Easter egg sugar cookies are golden brown and crisp on the outside, soft and tender on the inside, and decorated with cute patterns using a meringue-based royal icing. And who says art has to be complicated? You certainly don't have to be Picasso to create a masterpiece. A few swirls here, a few polka dots there, and a few stripes is all you need to create adorable, simple Easter egg sugar cookies.
For more cute Easter treats, browse through my most popular Easter dessert recipes.

Ingredients in Easter Egg Sugar Cookies
You will need the following ingredients to make these cute Easter egg sugar cookies:
- unsalted butter - If you only have salted butter on hand, you can use it, but leave out the extra salt in the recipe.
- granulated sugar
- egg
- vanilla extract
- baking powder
- salt
- all-purpose flour
- royal icing - Easy to make with confectioners' sugar, meringue powder, water, vanilla extract.
- gel food colouring - for decorating the cookies with different colours.
Kitchen Tools and Equipment
You will also need the following kitchen tools and equipment:
- measuring cups and spoons
- mixing bowls
- hand mixer or stand mixer
- rolling pin
- egg-shaped cookie cutter
- half sheet baking pan and silicone baking mat (or parchment paper)
- wire cooling rack
- piping bags
- couplers - for securing the tips to the piping bag.
- no. 5 round tip for the base colour and no. 1 round tip or no. 2 round tip for piping the patterns.
How to Make the Best Easter Egg Sugar Cookies
- Make the dough: In a large mixing bowl, cream butter and sugar together using a hand mixer (or stand mixer) on medium speed until light and fluffy, about 2 minutes. Add egg and vanilla and beat until combined. Turn the mixer to low speed and add baking powder and salt. Gradually add flour and mix until combined. Form the dough into a ball and wrap it tightly in plastic cling wrap. Freeze for 30 minutes or refrigerate until firm (at least 1 hour, up to overnight).
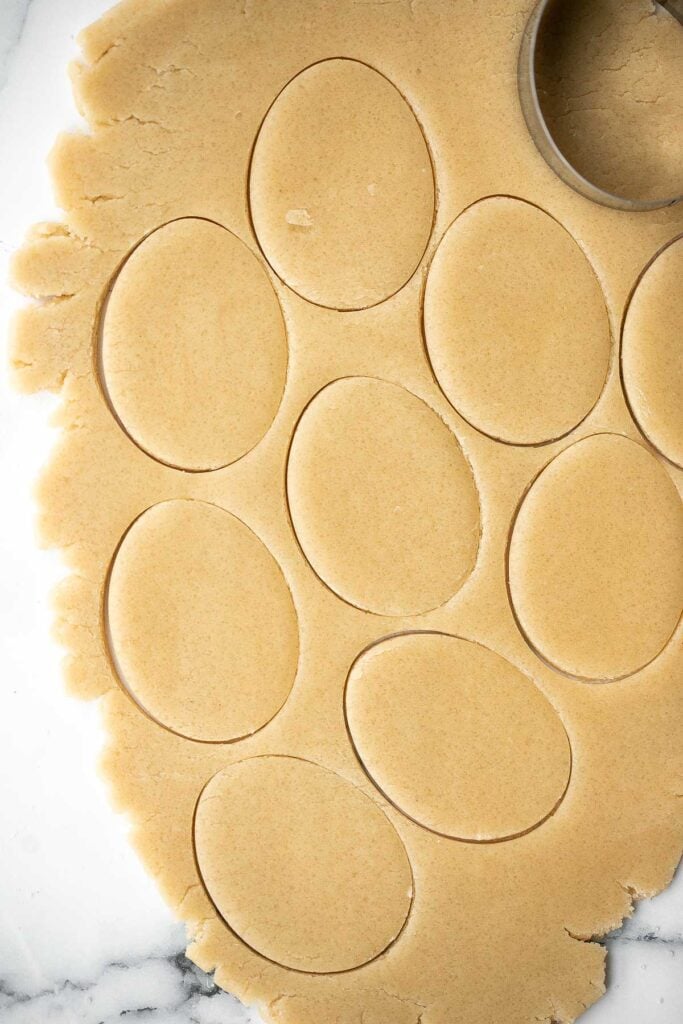
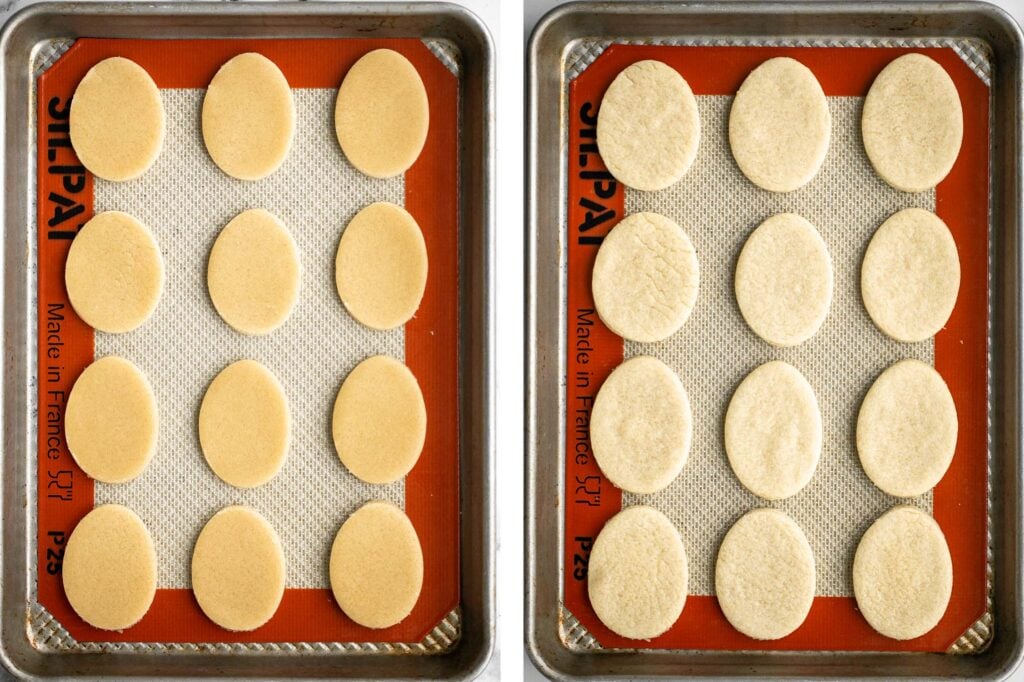
- Cut out the cookies: Remove the dough from refrigerator and let it sit at room temperature for 5-10 minutes. On a lightly floured surface, use a rolling pin to roll the dough out until it is ¼-inch thick. Use an egg-shaped cookie cutter to cut out egg cookie shapes. I used a 2-inch one. Transfer the cookies onto a half sheet baking pan lined with parchment paper or a silicone baking mat, placing them an inch apart. Re-roll any scraps and repeat to cut out more cookies.
- Bake: Bake the cookies at 350 F preheated oven for 8-10 minutes, until the edges start to turn golden brown. Let the cookies cool for a couple minutes on the baking sheet, then transfer them to a wire cooling rack to cool completely.
How to Make Easy Royal Icing for Easter Egg Sugar Cookies
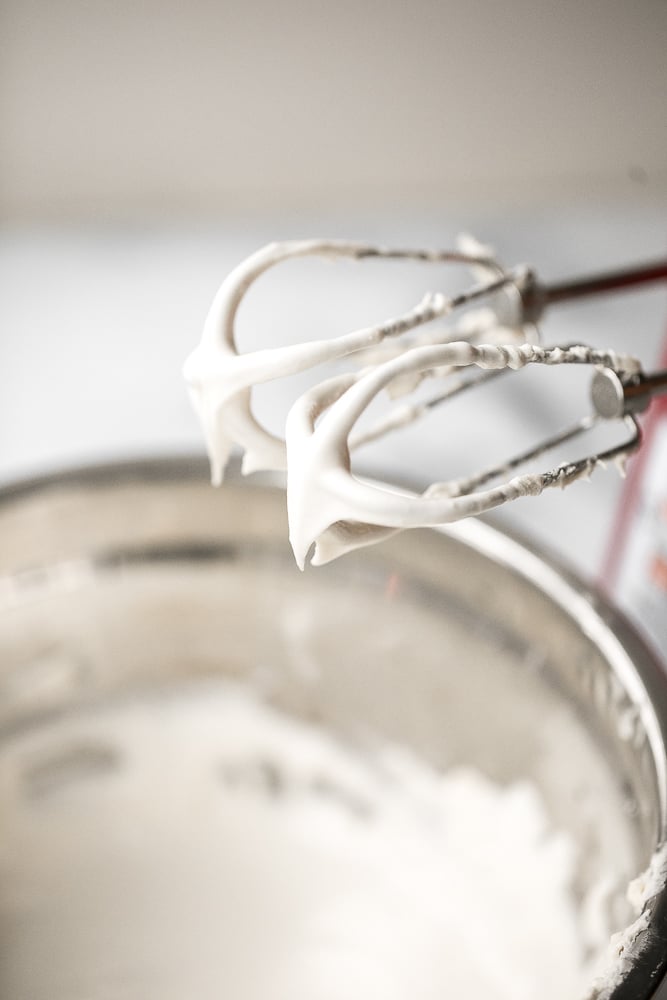
Once you've baked the Easter egg sugar cookies and they have cooled completely, you can start making the royal icing. Traditionally, royal icing is made with raw egg whites, but you can actually use meringue powder in place of the egg whites (as we did) and still get icing that hardens beautifully with the same taste, texture and consistency as royal icing.
To make royal icing:
- Combine ingredients: In a medium mixing bowl, combine confectioners' sugar with meringue powder. Add water and vanilla extract and beat with a hand mixer on medium-high speed, until smooth. If you find that the icing is too thick, add a little water (a teaspoon at a time). If you find the icing too thin, add a little more sugar.
- Add colour: To colour the icing, add gel food colouring. You can also use liquid food colouring, but this will have a slight effect on the consistency of the icing. You may need to add a little more sugar to get the consistency right.
How to Decorate Sugar Cookies with Royal Icing
- Use a no. 5 round tip to outline the base colour on the sugar cookie, leaving about ⅛-inch from the edge, and fill in the inside. To get the icing completely to the edges, use the back of a spoon to spread the icing to the edge.
- Allow the base to dry enough so that when you add icing on top, it won't smudge or blend into it. It doesn't have to be fully set, but set enough, about 20-30 minutes.
- Use a thin no. 1 round tip to decorate the Easter egg cookies in cute patterns such as lines, squiggles and dots.

Tips
- Plan ahead. You will need to plan ahead and give yourself enough time when making these cookies. The entire process spans over the course of a several hours, up to a day:
- The cookies need to completely cool before icing for at least a few hours. Otherwise the icing will get too runny from the warm cookies and won't set properly.
- If adding multiple layers of icing, you need to allow the bottom layer to dry first, at least 30 minutes.
- The icing needs a few hours, up to a day, to completely set and harden, otherwise it can easily get smudged when storing, handling, or transporting, which is the last thing you want when you are storing them or getting ready to package them up as gifts.
- How to store: Once the icing is completely set, store Easter egg sugar cookies in a single layer or stacked up in an airtight container at room temperature for up to 3 days, or in the refrigerator for up to one week.
- How to freeze: These sugar cookies also freeze really well. Place them in an airtight container, layered in between pieces of parchment paper and store in the freezer for up to 3 months.

More Cookie Recipes
- 30 Best Easter Dessert Recipes
- Mini Egg Easter Cookies
- No Bake Butterscotch and Peanut Butter Bird's Nest Cookies
- Carrot Cake Shortbread Cookies
- Soft and Chewy Peanut Butter Cookies
- Chewy Chocolate Chip Oatmeal Cookies
- Raspberry and White Chocolate Shortbread Cookies
- Slice and Bake Pecan Shortbread Cookies
- Chocolate Crinkle Cookies
Tried this recipe?
I'd love to hear what you think! Leave a comment and rating below to share your feedback. Your reviews help others discover this recipe and help me keep creating more free recipes for you. Snap a photo and tag me on social media @aheadofthyme too.
This post was originally published in 2017. It has been completely updated with new photographs and clearer instructions.

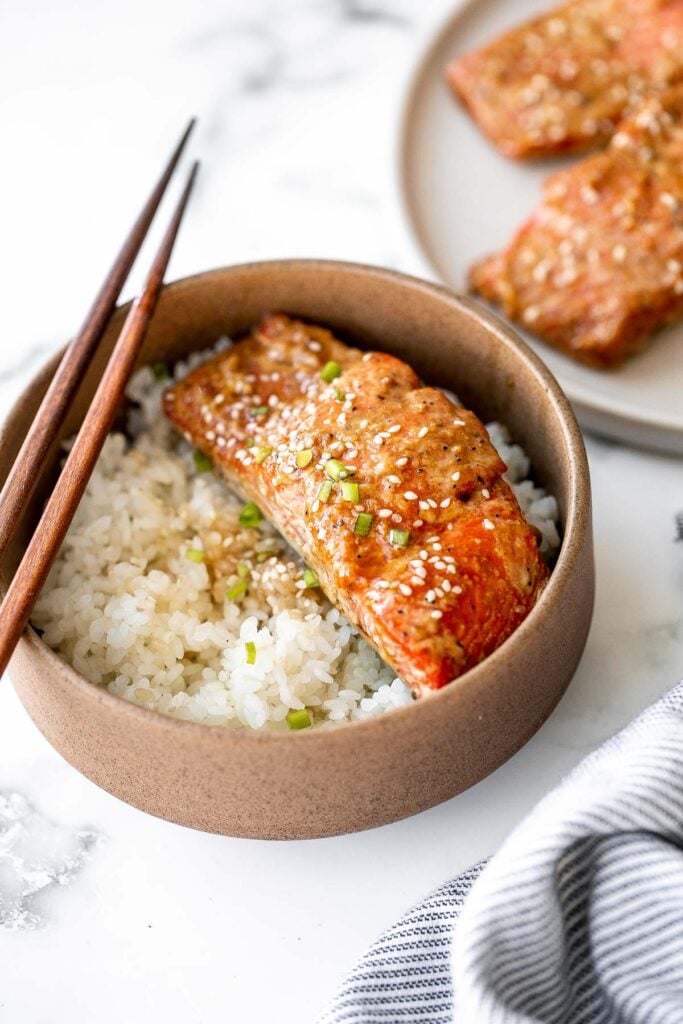
Miso Salmon
Baked miso salmon is the perfect meal to make when you're short on time or energy but still want a delicious and healthy dinner. This Japanese-inspired dish with miso, honey, and soy sauce pack a sweet and savoury punch in a tasty marinade that you can prepare last-minute. Marinate it for at least 30 minutes to absorb as much flavour as possible or simply let it sit while the oven preheats if you are short on time. It's the easiest weeknight dinner ever.

Why You'll Love This Miso Salmon
- It's simple but delicious. Made with only five key ingredients-salmon, miso, honey, soy sauce, and olive oil-this baked miso salmon is easy to make and quick to prepare. But that doesn't mean it lacks any flavour!
- Salmon contains omega-3 fatty acids. Salmon is one of the best fish you can eat. Packed full of vitamins and minerals, salmon contains the essential healthy fats (omega-3 fatty acids) your body needs to process and absorb nutrients. Not only does baked miso salmon taste great-you can feel good about eating it!
- Miso contains healthy probiotics. As a fermented, cultured product, miso contains natural probiotics that assist with digestion and overall health. It can even relieve digestive pain from issues like IBS. Ditch the yogurt and have some miso!
What is Miso?
Miso is a traditional Japanese paste with a peanut butter-like consistency which consists of a fermented blend of soybeans, grains (usually rice or barley), salt, and cultures, and it dates way back to the eighth century. There are thousands of different kinds of miso with different ingredients, fermentation times, and flavours.
Miso is tangy and salty, with an umami taste that makes it a great addition to soups (such as Vegetarian Peanut Miso Ramen or Miso Chicken with Ramen), stews, dressings, gravies, sauces, and batters. It is most commonly recognized as the staple ingredient in popular miso soup in Japanese cuisine.
Ingredients
To make this easy miso salmon, you will need the following ingredients:
- salmon fillets - about 1 pound, cut into 2-inch wide fillets
- miso paste
- honey
- soy sauce
- olive oil
- ground black pepper
- glaze - made with honey, soy sauce and sesame oil.
- for serving - steamed rice, sesame seeds, and green onions.
You will also need measuring spoons, mixing bowl, and quarter sheet baking pan.
How to Make the Best Baked Miso Salmon
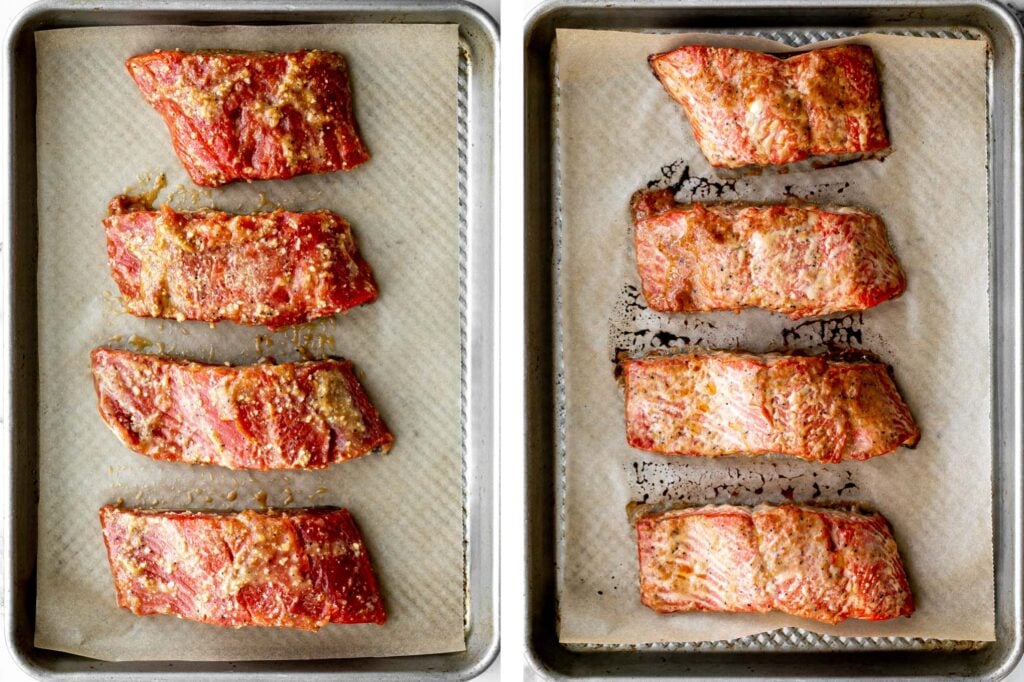
- Marinate the salmon. In a small mixing bowl, combine miso paste, honey, soy sauce, olive oil and pepper and mix well with a spoon until smooth. In a large ziploc bag, add salmon and the miso mixture. Press the air out of the bag and seal tightly. Gently press the marinade around the salmon fillets to coat. Place the bag in the refrigerator and marinate for at least 30 minutes, up to overnight.
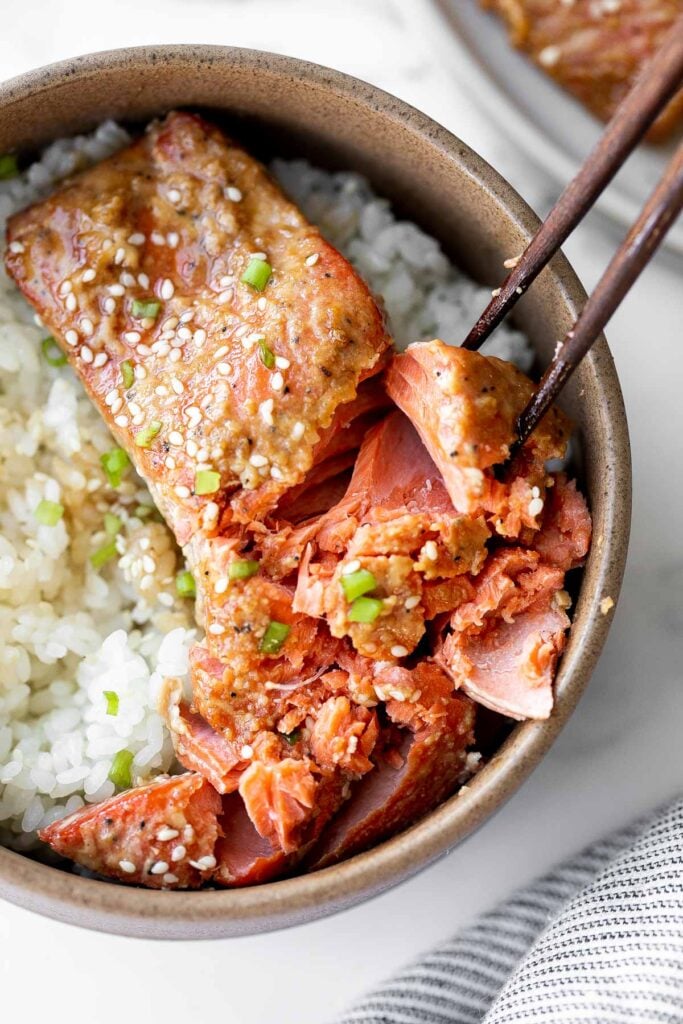
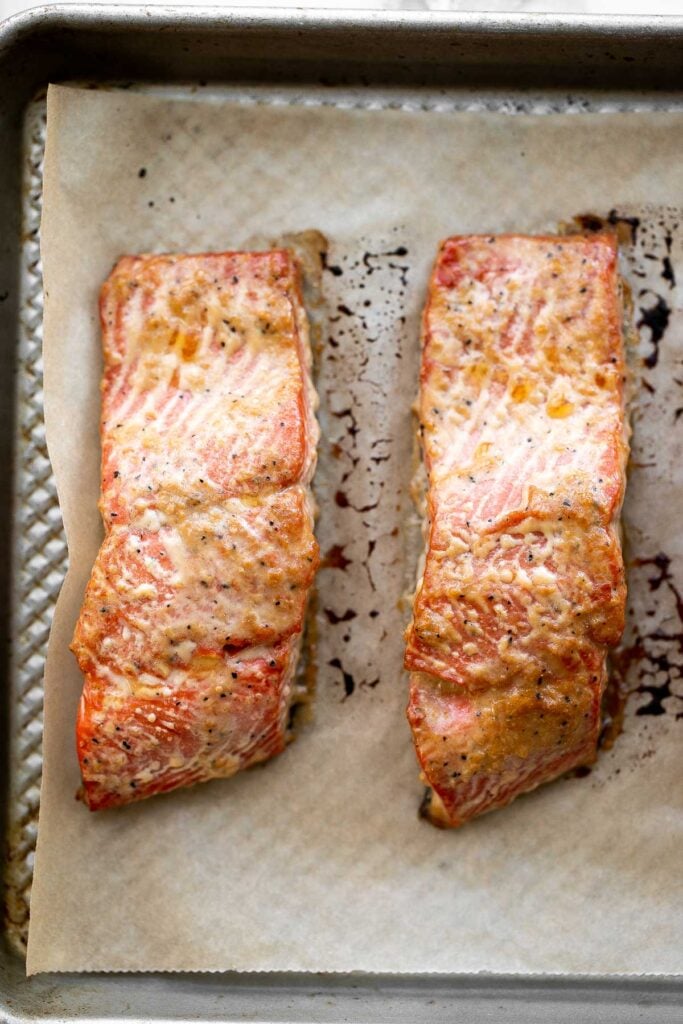
- Bake. Remove the marinated salmon fillets out of the bag and place them evenly spaced apart onto a parchment-lined quarter sheet baking sheet. Bake in a 375 F preheated oven for 13-15 minutes, then remove from oven and let the salmon rest on the baking sheet at room temperature for 5 minutes. When salmon is cooked, the flesh will turn opaque and will flake easily when inserting a fork.
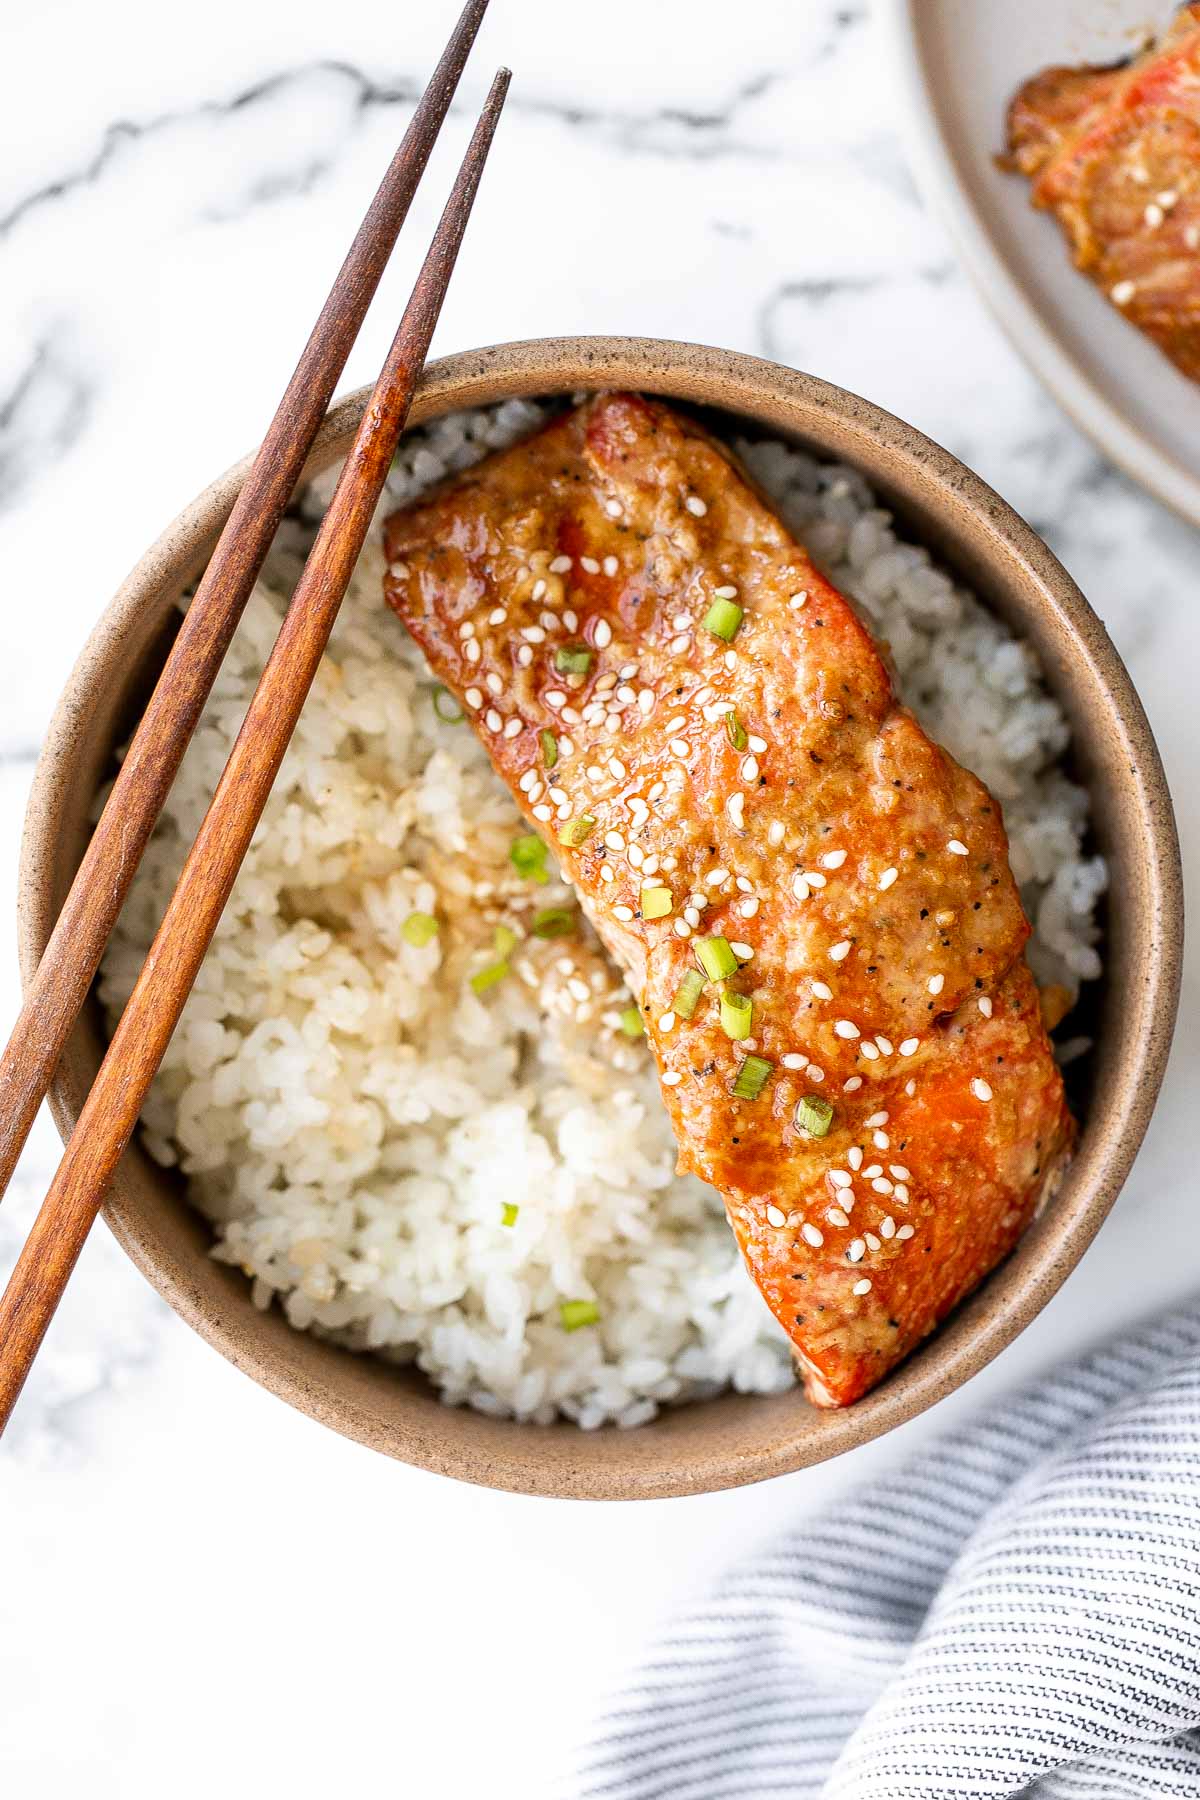
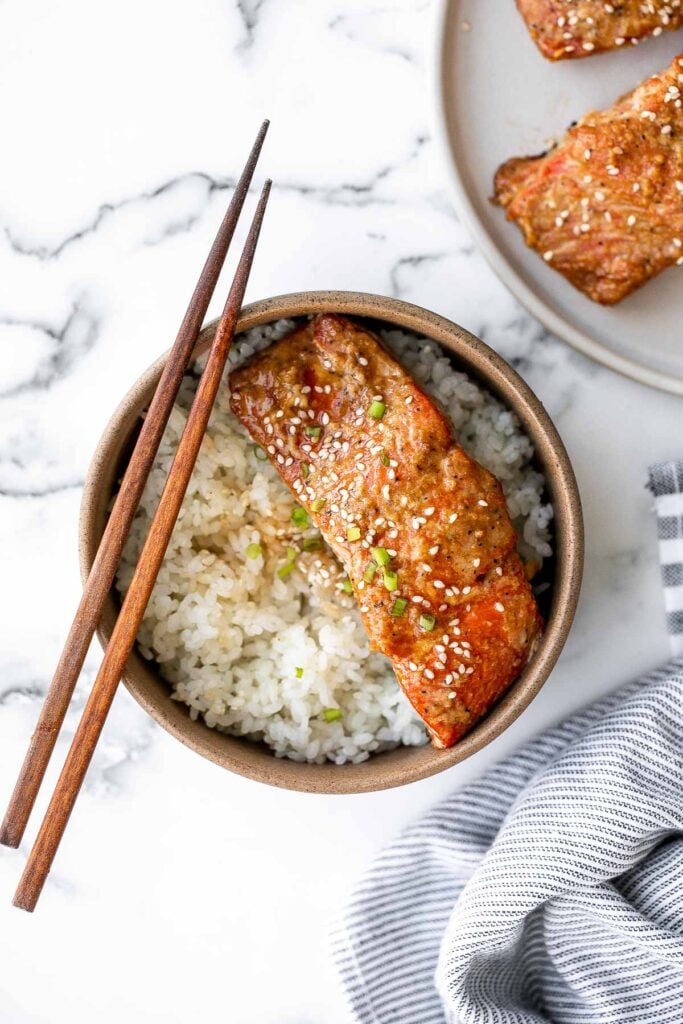
- Add glaze and serve. In a small bowl, mix together soy sauce, honey and sesame oil and brush the glaze over salmon. Serve with steamed rice and garnish with sesame seeds and green onions.
How to Serve Miso Salmon
Serve miso salmon over a bowl of steamed rice and sprinkle some sesame seeds and chopped green onions on top. You can also serve it over noodles, brown rice, quinoa or a side of vegetables. You can also assemble miso salmon into an Asian rice bowl with avocado, greens, cucumber, roe, and seaweed.
Tips and Tricks
- Marinate time. I recommend marinating the salmon for at least 30 minutes to absorb the most flavour. But if you are short on time, you can simply let it sit while the oven preheats and still get a very flavourful fish.
- Air fryer instructions. Place the salmon in a single layer into your air fryer basket (you make have to do this in batches). Air fry at 400F for about 10 minutes.
- How to store. Baked miso salmon will keep in the refrigerator for up to 3-4 days. Store it in a shallow airtight container or wrap it tightly in foil.
- How to reheat. Reheat in a skillet over medium-low heat until warmed through, about 5 minutes, or in the microwave for about 1 minute. You can also reheat in a preheated oven or air fryer at 300F for about 5-10 minutes until warmed through.
- How to freeze. Although you can freeze cooked salmon, it is not recommended as freezing will cause the cooked salmon to be rubbery and tough. Instead, portion and freeze fresh salmon. Then, thaw and prepare a portion of salmon that you can eat within a few days.
More Seafood Recipes
- Honey Garlic Glazed Salmon
- Baked Maple Salmon
- Teriyaki Salmon Rice Bowl
- Pistachio-Crusted Salmon
- Creamy Garlic Shrimp
- Sablefish with Black Bean Sauce
- Almond-Crusted Halibut
Tried this recipe?
I'd love to hear what you think! Leave a comment and rating below to share your feedback. Your reviews help others discover this recipe and help me keep creating more free recipes for you. Snap a photo and tag me on social media @aheadofthyme too.

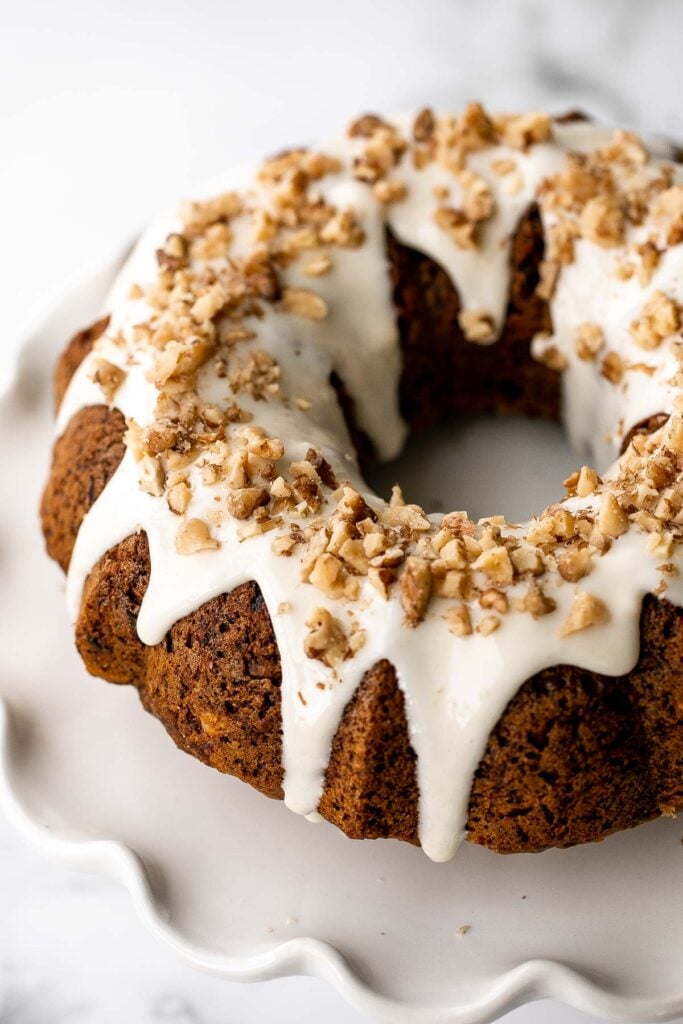
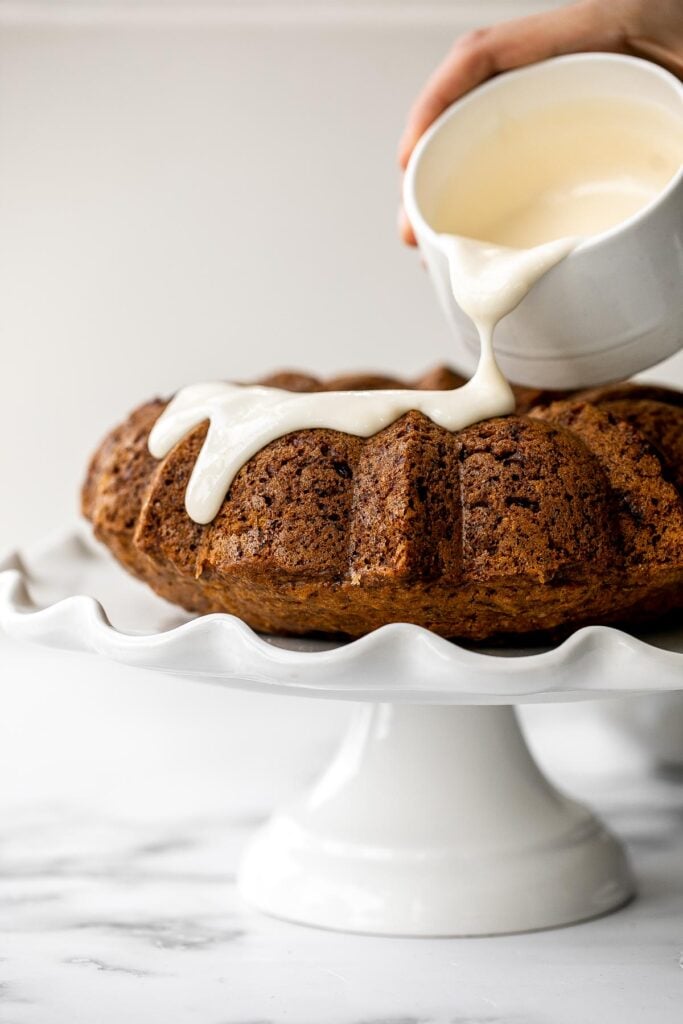
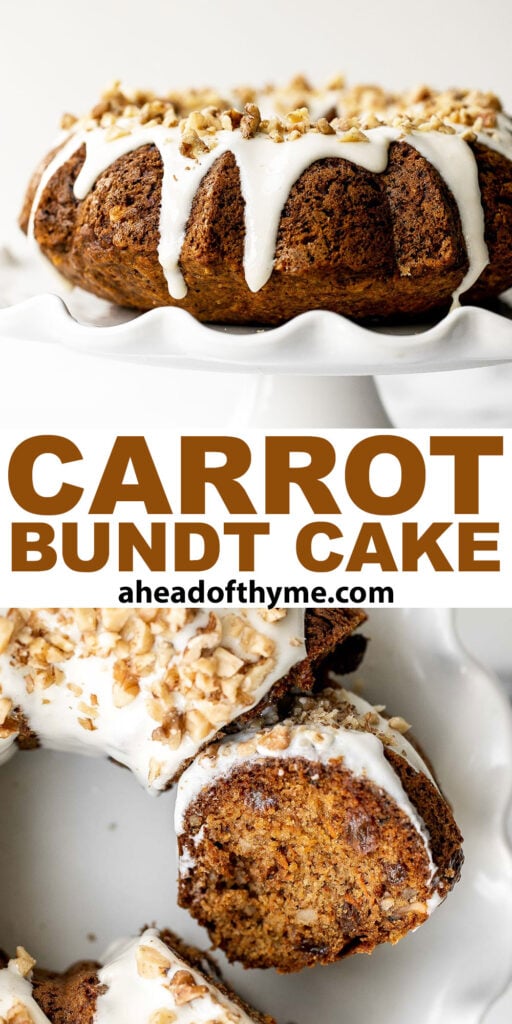
Carrot Bundt Cake with Cream Cheese Glaze

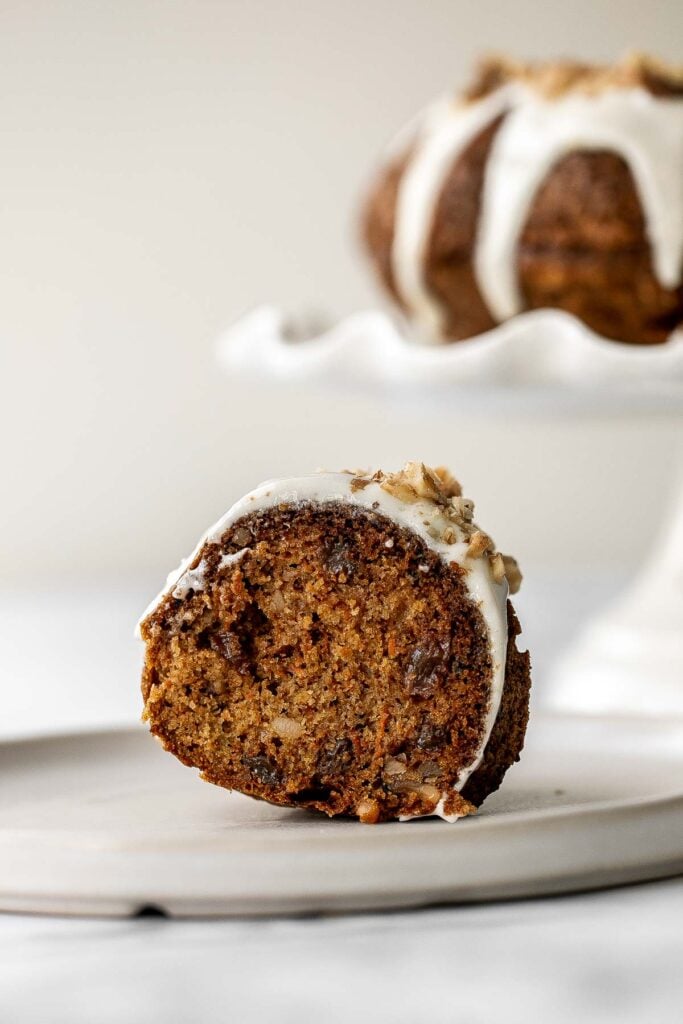
Carrot bundt cake with cream cheese glaze is a showstopping festive cake that is light, fluffy, and moist. It is packed with grated carrots, cinnamon, vanilla, raisins, and walnuts for that warm holiday flavour and the best texture. The easy-to-make batter comes together in just 10 minutes, is baked in a round bundt cake pan, and comes out perfect every time. This carrot cake is topped with a homemade cream cheese glaze with walnuts on top. It's sweet, creamy, and savoury, and seriously looks just as amazing at it tastes. The perfect cake to make this spring for Easter.
Why You'll Love this Carrot Bundt Cake
- Rich, flavourful taste. Cinnamon and vanilla are superstars together, but when you add shredded carrots, brown sugar, raisins, and walnuts, the flavour of this carrot bundt cake is out of this world. Vegetables have never tasted so good.
- You can't go wrong with the classics. Although the bundt pan is German, the French, English, and Swiss all claim the original carrot cake recipe as their own-it's that good.
- It's literally good for your eyes! While eating this cake every day might add more sugar to your diet than you want, this carrot cake is loaded with two cups of fresh carrots with a chock full of vitamin A, which aids in eye health!
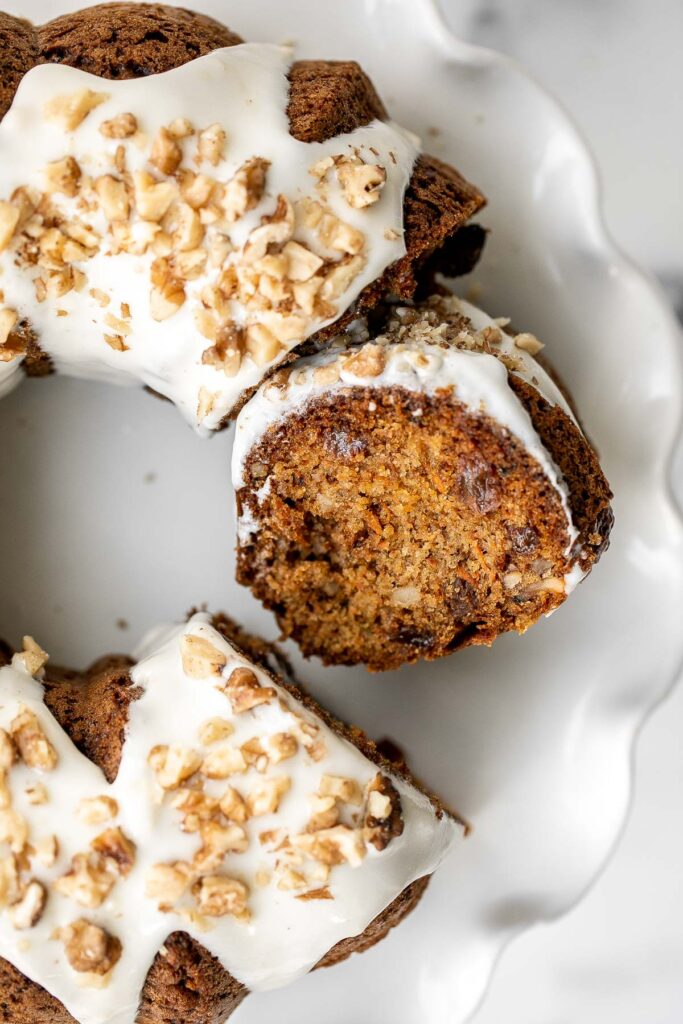
- Moist, cakey texture. Freshly grated carrots bring more than vitamin A to the table. They add moisture, volume, and natural sugars to this carrot bundt cake. Healthy fats from the olive oil also lock in moisture, resulting in a perfect cakey texture.
If you loved this carrot bundt cake with cream cheese glaze, then you will love Carrot Cake with Cheesecake Topping, Spiced Carrot Muffins, and Carrot Cake Biscotti.
Ingredients
To make this easy carrot bundt cake with cream cheese glaze, you will need the following ingredients:
- all-purpose white flour
- baking soda and baking powder
- salt
- ground cinnamon
- carrots
- raisins
- walnuts
- eggs
- olive oil
- light brown sugar
- vanilla extract
- cream cheese glaze - made with cream cheese, butter, confectioners' sugar, milk, and crushed walnuts to sprinkle on top.
You will also need measuring cups and spoons, mixing bowls, hand mixer (or stand mixer), 10-cup bundt pan, and wire cooling rack.
How to Make the Best Carrot Bundt Cake with Cream Cheese Frosting
- Combine dry ingredients. In a large mixing bowl, whisk together flour, baking soda, baking powder, salt, cinnamon, raisins and walnuts. Whisk together until evenly distributed and combined.
- Combine wet ingredients. In another mixing bowl, whisk together eggs, olive oil, sugar, vanilla and carrots until smooth.
- Add wet ingredients to dry ingredients. Pour the wet mixture into dry flour mixture and fold together using a spatula until just combined and no dry ingredients are visible.
- Bake. Coat a 10-cup bundt pan with nonstick cooking spray and pour the batter inside. Bake in a 350 F preheated oven for 60-65 minutes, or until a toothpick inserted into the center of the cake comes out clean.

- Cool. Let the carrot cake cool for 10-15 minutes in the bundt pan on a wire cooling rack, then turn it upside down onto the wire cooling rack to remove. Allow the cake to cool completely before frosting.

How to Make Cream Cheese Glaze
In a medium mixing bowl, use a hand mixer to beat together cream cheese and butter until smooth and creamy. Add sugar and milk (½ tablespoon at a time) and beat until smooth and desired consistency is reached. The icing should be thin enough to pour but thick enough to coat the back of a spoon. If the icing is too thin, add in a little more sugar. If it is too thick, add in a little more milk.
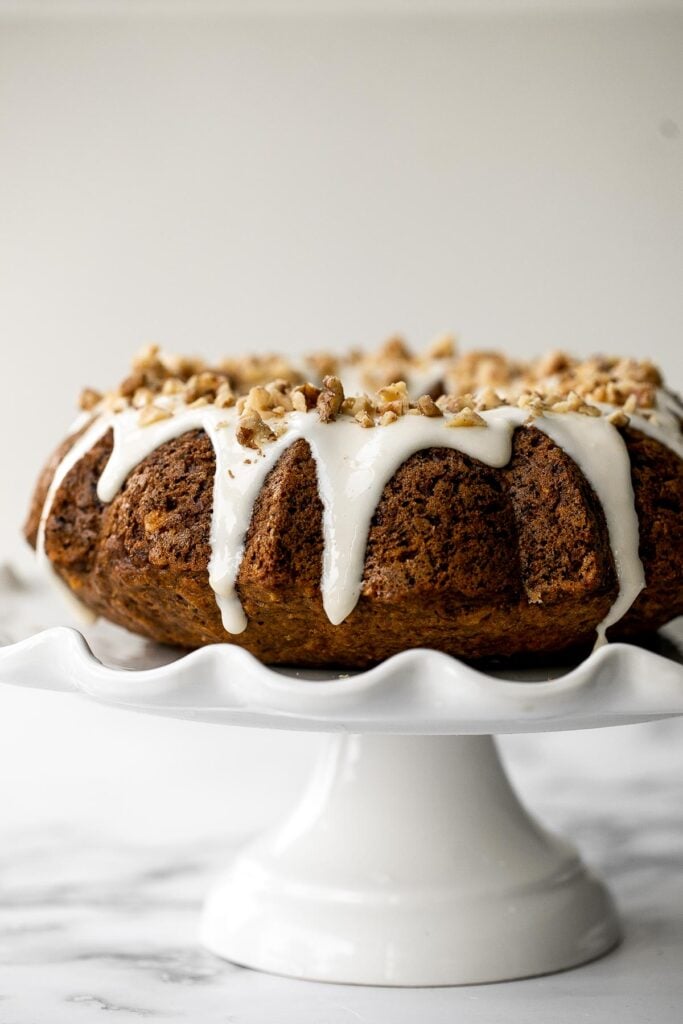
Use a spoon to slowly drizzle the cream cheese glaze over the cooled bundt cake and sprinkle chopped walnuts on top.
Tips and Tricks
- How to store: Store this freshly baked carrot bundt cake in an airtight container at room temperature for up to 4 days (if cream cheese glaze has not been added), or in the refrigerator for up to 1 week (if cream cheese glaze has been added).
- How to freeze: This carrot bundt cake freezes beautifully. To freeze, cut the baked and cooled carrot bundt cake into the portions you will want to thaw. Then, wrap each piece tightly in several layers of plastic wrap. Store in a freezer bag or airtight container and freeze for up to 3 months. If possible, I would recommend freezing the cake before adding the glaze as it can smudge when storing. To eat, allow it to thaw overnight in the refrigerator or at room temperature.
- How to reheat: If desired, you can also warm up this carrot cake in the microwave, oven, or air fryer at 300F for 5-10 minutes until warmed through.
- How to make it dairy-free and vegan: This carrot bundt cake is already dairy-free without the frosting, and you can make it vegan by substituting the eggs with 1 cup of a vegan egg (like Just Egg) OR 1 cup of unsweetened applesauce.
More Dessert Recipes
- 30 Best Easter Dessert Recipes
- Carrot Cake Shortbread
- Carrot Cake Biscotti
- Hot Cross Buns
- Persian Rice Cookies with Poppy Seeds
- Carrot Cake with Cheesecake Topping
- Spiced Carrot Muffins
- Persian Chickpea Cookies with Pistachio
Tried this recipe?
I'd love to hear what you think! Leave a comment and rating below to share your feedback. Your reviews help others discover this recipe and help me keep creating more free recipes for you. Snap a photo and tag me on social media @aheadofthyme too.
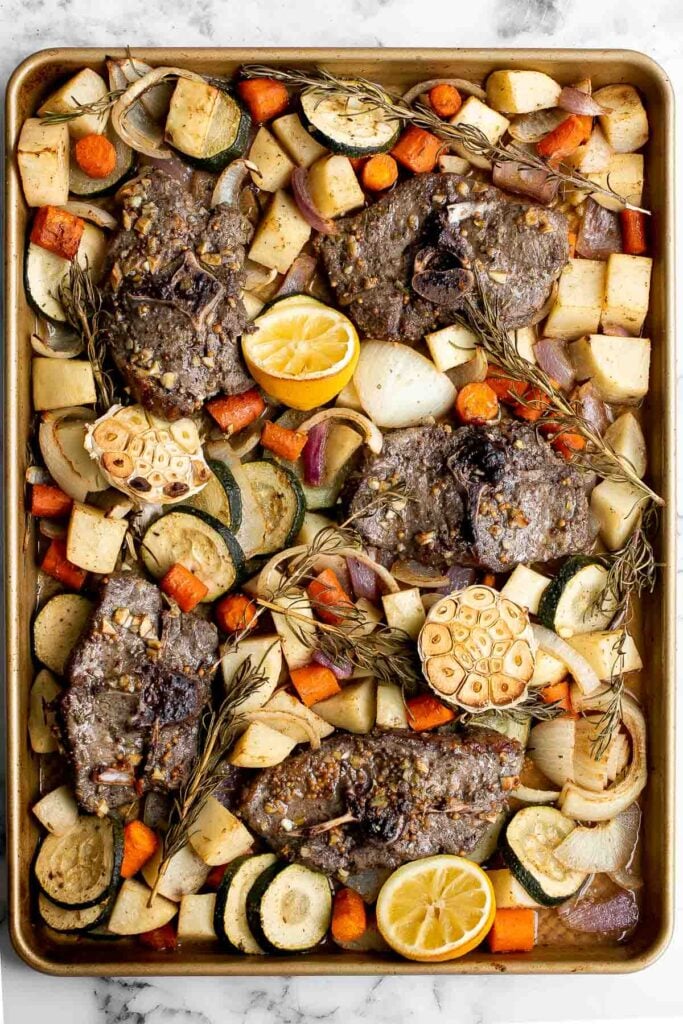
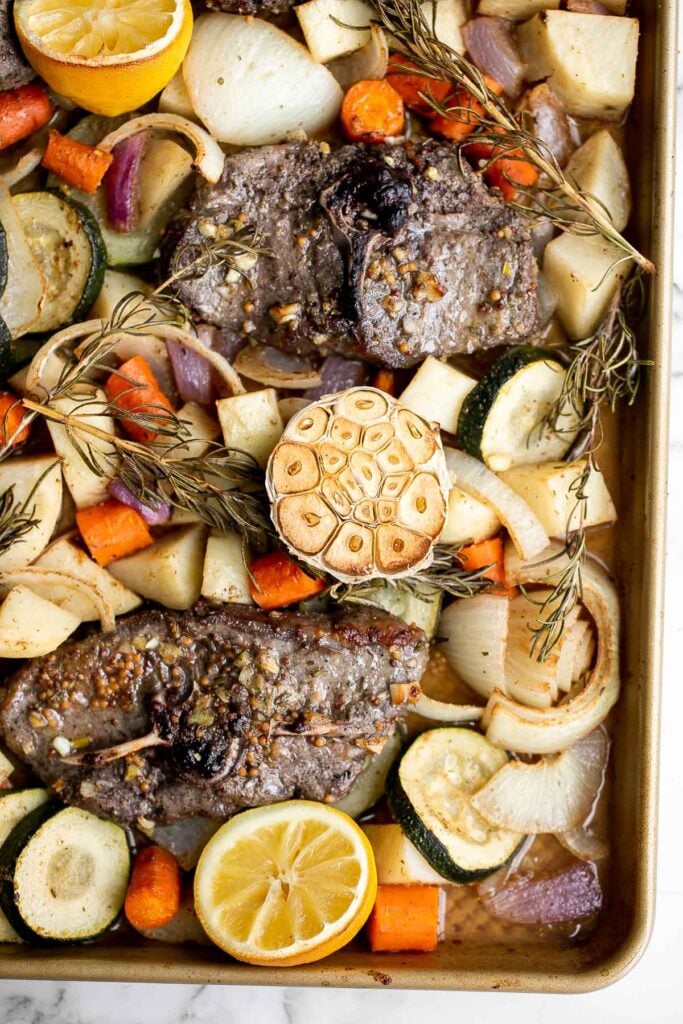
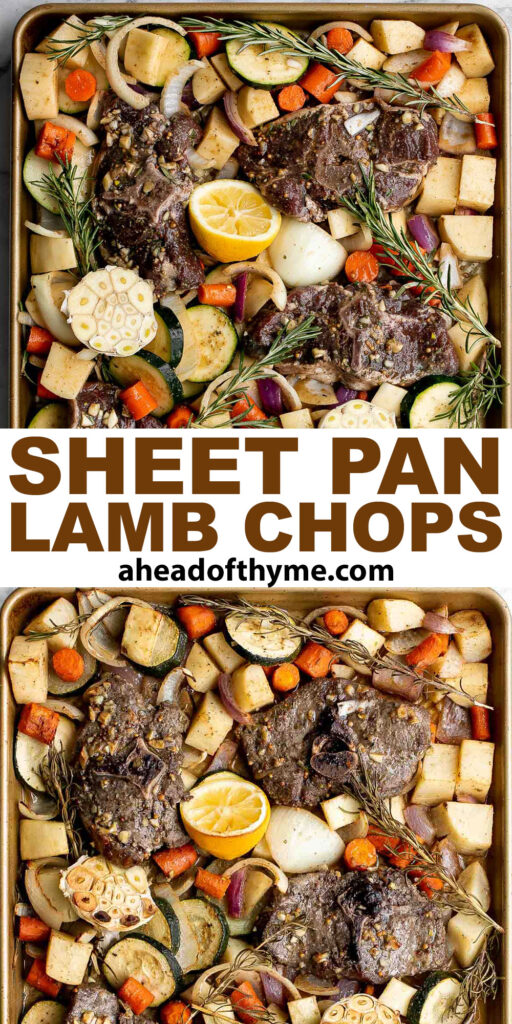
Sheet Pan Lamb Chops

Sheet pan lamb chops with vegetables are as delicious as they look, easy to make, and even easier to clean up. This one-pan meal leaves behind few dishes and gives you lots of flavours. Lemon, garlic, and rosemary are the most prominent flavours in this sheet pan dinner which pairs tender lamb chops perfectly with roasted potatoes, carrots, and zucchini. This meal is easy enough for busy weeknights but fancy enough for a holiday dinner.
Why You'll Love Sheet Pan Lamb Chops
- Lamb chops do more than taste great. Lamb chops are a source of high-quality protein, and they contain iron, zinc, and B12. Marinated in garlic, rosemary, lemon juice, and Dijon mustard, these lamb chops taste amazing and will make you feel great.
- Flavour combinations to die for. In addition to the marinated lamb chops, the flavours of garlic, lemon, and rosemary shine through in the sheet pan vegetables. Natural juices from the lamb chops help season the vegetables, while the roasted potatoes, carrots, zucchini, and onions add even more flavour.
- Feel full of great food. Healthy eating doesn't have to mean giving up comfort food. These sheet pan lamb chops with vegetables make a feel-good filling meal that you won't feel guilty about.
Ingredients
To make these easy sheet pan lamb chops, you will need mixing bowls and a half sheet baking pan. You will also need the following ingredients:
- lamb loin chops - 5 lamb chops, approximately 1.5 lbs. in total.
- vegetables - I used potatoes, onion, carrots, and zucchini. Not a fan of all these vegetables? Make adjustments as you please! Sheet pan lamb chops with vegetables is a versatile recipe. Try adding or substituting cauliflower, broccoli, brussels sprouts, sweet potatoes, bell peppers, eggplant, acorn squash, or any of your other favourite veggies.
- olive oil
- garlic
- Italian seasoning
- Dijon mustard
- salt and pepper
- fresh rosemary
- lemon juice - I recommend freshly squeezed lemon juice for the most potent flavour. Store-bought lemon juice can work too, just make sure it is 100% lemon juice and contains no sweeteners.
How to Make the Best Sheet Pan Lamb Chops with Vegetables
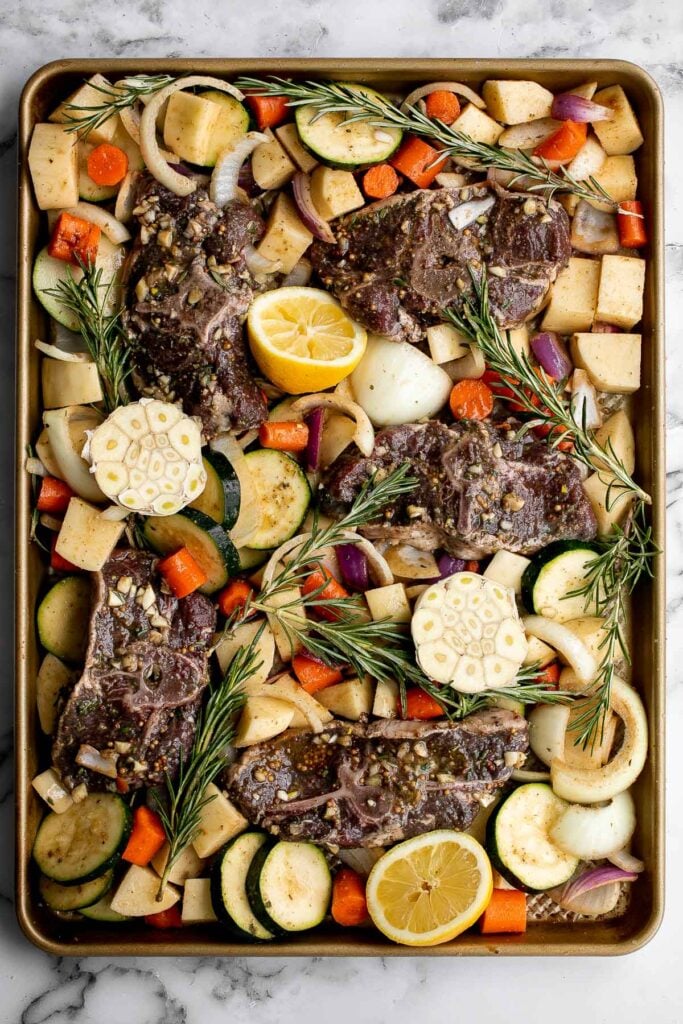
- Marinate the lamb chops. Using a paper towel, pat dry the lamb chops completely and transfer into a large mixing bowl or ziploc bag. Season all sides generously with olive oil, salt and pepper. Add garlic, rosemary, lemon juice and dijon mustard and toss well to coat evenly. Set aside at room temperature for at least 20 minutes. This helps the lamb chops infuse all the flavours and cook evenly when the lamb is brought to room temperature.
- Prepare the vegetables. In a large mixing bowl, add potatoes, onion, carrots, zucchini and garlic, olive oil, lemon juice, Italian seasoning, salt and pepper. Toss to combine until well coated. Arrange the vegetable mixture in a single layer on a large half sheet baking pan.
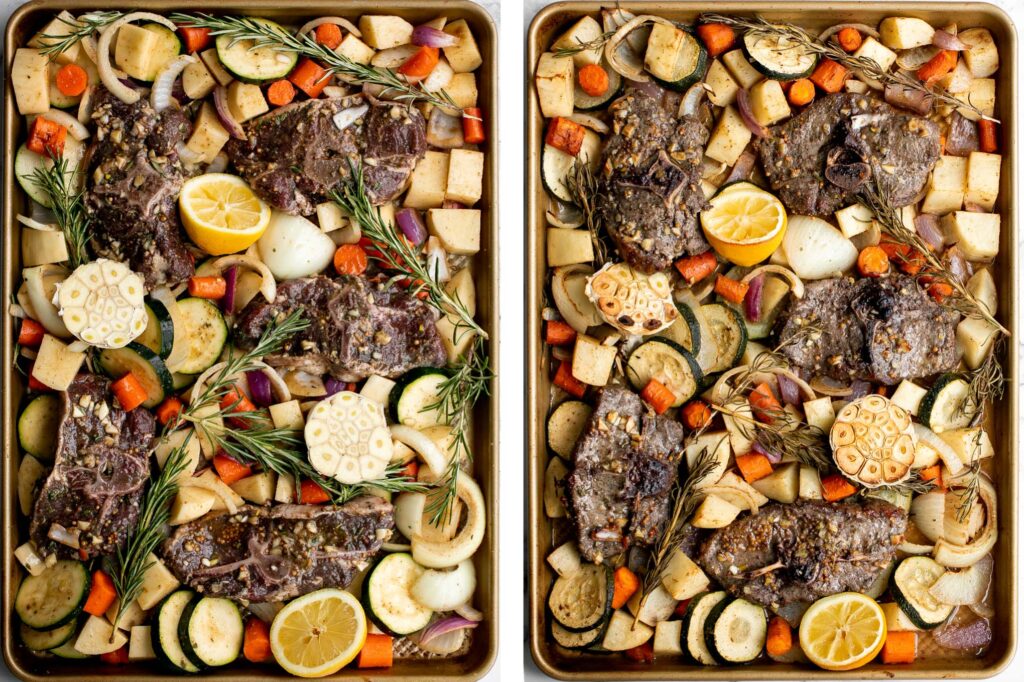
- Roast the vegetables. Bake the vegetable mixture in a preheated 375 F oven for 20 minutes. Remove the pan out of the oven and gently shake to ensure even cooking.
- Add lamb and continue to roast. Arrange marinated lamb chops, head or garlic and rosemary sprigs on top. Return the pan to the oven and bake for another 25 minutes until the vegetables are tender and golden brown, and the internal temperature for the lamb chops should be about 130F as read on a meat thermometer.
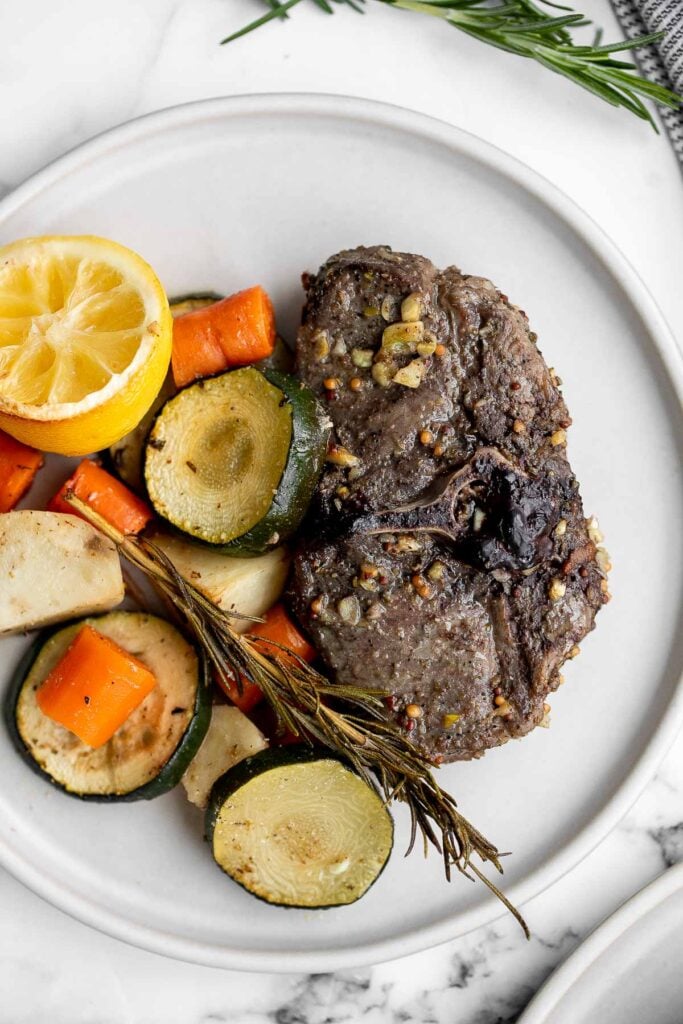
- Serve. Remove the pan out of the oven and let the lamb chops rest at room temperature for 5 minutes. Serve lamb chops with roasted vegetables.
Tips and Tricks
- How to customize: - Sheet pan lamb chops with vegetables is a completely versatile recipe. You can use the suggested vegetables in the recipe, or add in and substitute with any of your favourite veggies (which is also a great way to get rid of any vegetables sitting in the refrigerator). Try cauliflower, broccoli, brussels sprouts, sweet potatoes, bell peppers, eggplant, or acorn squash. But before you throw your veggies in the oven, check to see if your veggies need more or less time to cook. Softer veggies like broccoli can be thrown in with the lamb chops, while harder ones like sweet potatoes need more time in the oven.
- How to store: Store lamb chops and vegetables in an airtight container for up to 3-4 days in the refrigerator.
- How to freeze: Once cooled, you can store the lamb chops in an airtight container or freezer bag and store in the freezer for up to 6 months. To avoid freezer burn, wrap the lamb chops tightly in plastic wrap or aluminium foil before placing them in the container or freezer bag.
More Sheet Pan Recipes
- One Pan Garlic Roasted Chicken and Potatoes
- Sheet Pan Curry Chicken and Vegetables
- Sheet Pan Chicken Fajitas
- Tandoori Chicken Sheet Pan Dinner
- Sheet Pan Nachos
- Sheet Pan Balsamic Chicken and Vegetables
- Roasted Balsamic Chicken with Cranberries
- Sheet Pan Soy Glazed Chicken Thighs
Tried this recipe?
I'd love to hear what you think! Leave a comment and rating below to share your feedback. Your reviews help others discover this recipe and help me keep creating more free recipes for you. Snap a photo and tag me on social media @aheadofthyme too.
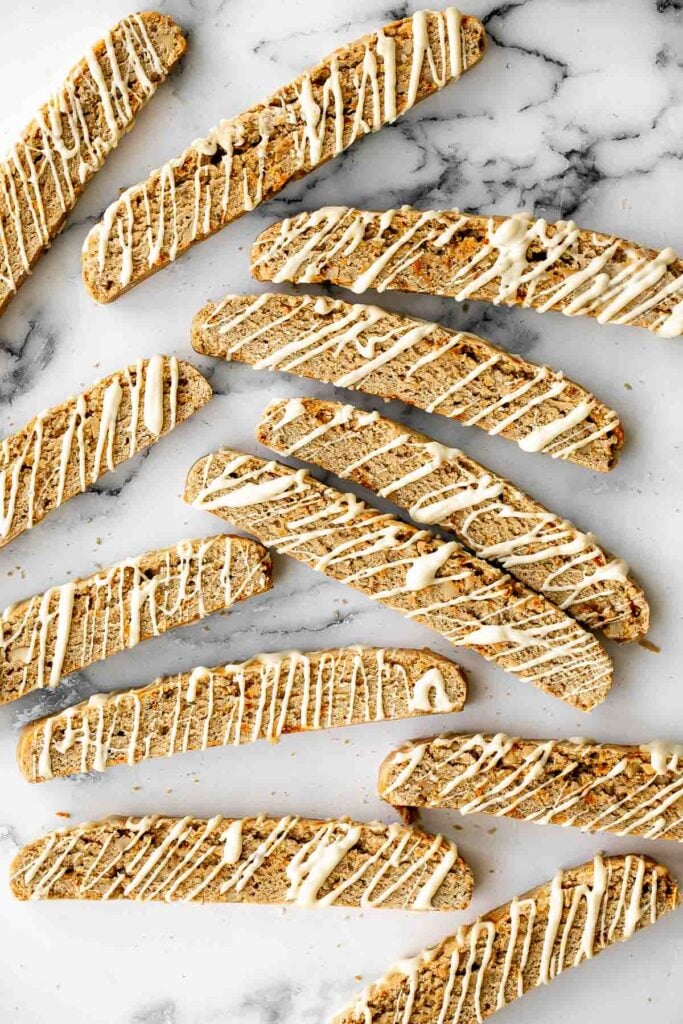
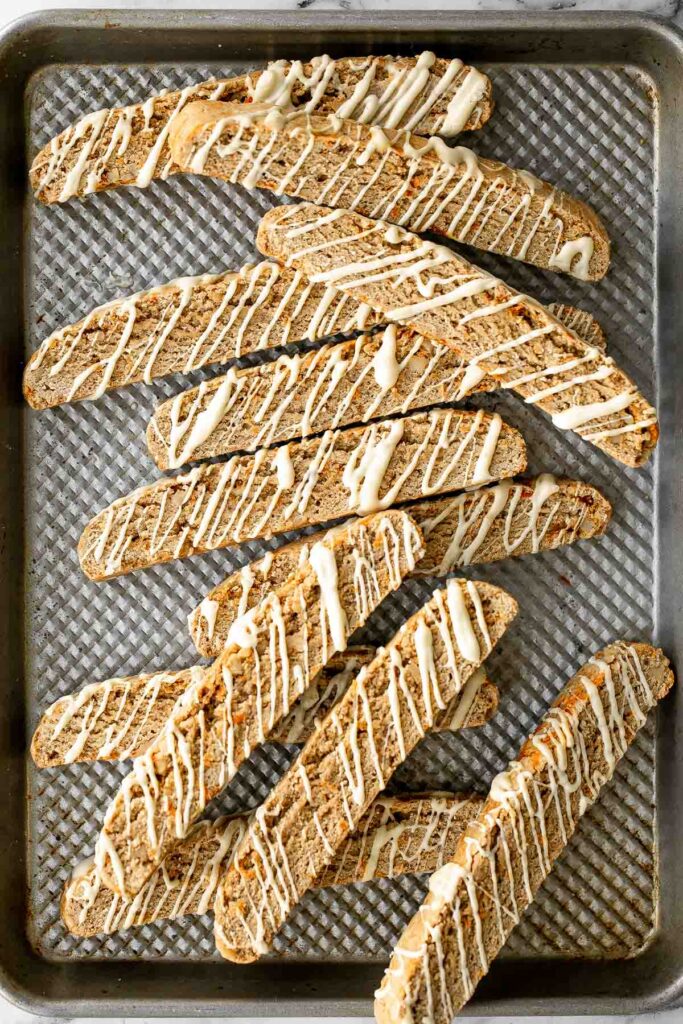
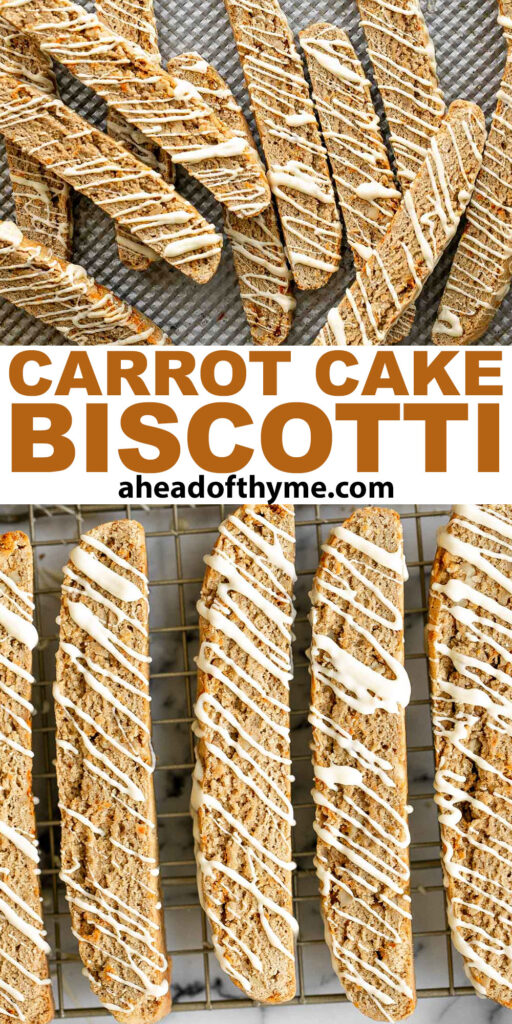
Carrot Cake Biscotti

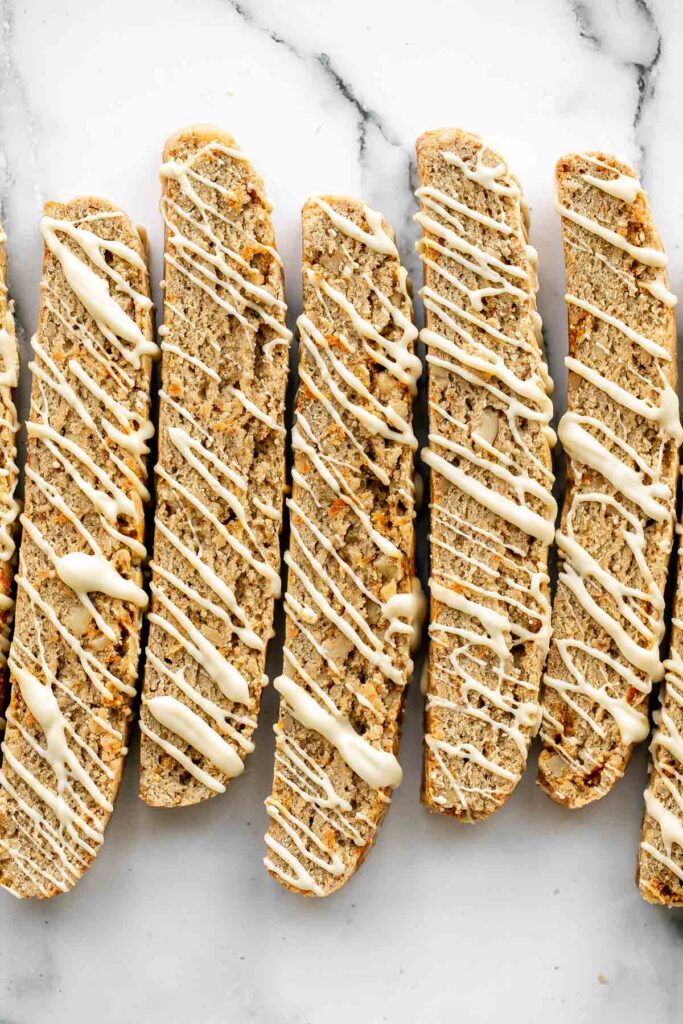
Carrot cake biscotti is crunchy, crumbly, and satisfies all your carrot cake cravings. Carrots and walnuts add that extra bit of seasonal flavour in these Italian cookies, making them a total crowd favourite whenever I bake them during the spring, or any time of year really. You can enjoy them as is, or with a drizzle of white chocolate on top for that extra bit of sweetness and flavour. So make up a pot of hot coffee or hot chocolate, because carrot cake biscotti are the ultimate cookie made for dunking.
Plus, these biscotti cookies are so easy to make in almost one bowl with a few simple ingredients and minimal prep. Just like Almond Biscotti and Cranberry Pistachio Biscotti, these cookies are twice baked (biscotti literally translates to twice-cooked), there are a few extra steps in making these than with traditional drop cookies, but the steps are so worth it. The cookie dough is formed into a log, baked and slightly cooled, then sliced and baked again on both sides to get the perfect crisp cookie. The best part? Biscotti lasts for up to 2 weeks at room temperature or months in the freezer.
Ingredients in Carrot Cake Biscotti
To make these delicious carrot cake biscotti, you will need the following ingredients (full quantities in recipe card below):
- eggs
- brown sugar
- olive oil
- vanilla extract
- all-purpose flour
- baking powder
- cinnamon
- salt
- carrots
- walnuts - You can substitute the walnuts with any other type of nuts. Try pecans, almonds, or hazelnuts.
- white chocolate - optional, for drizzling on top.
You will also need measuring cups and spoons, mixing bowls, hand mixer (or stand mixer), quarter sheet baking pan, and a wire cooling rack.
How to Make the Best Carrot Cake Biscotti
- Combine the wet ingredients. In a medium mixing bowl, add eggs and brown sugar. Beat together using a hand mixer (or stand mixer) on medium speed until light and fluffy, about 1-2 minutes. Add in olive oil and vanilla and beat together for another minute.
- Add wet ingredients to dry ingredients. In a large bowl, sift together flour, baking powder, cinnamon, and salt. Gradually stir in the wet ingredients, until just combined. Fold in the grated carrots and walnuts and bring the dough together with your hands. The dough should be able to hold together but will still be slightly sticky.
- Shape the dough. Transfer the dough onto a lightly floured surface and shape it into a rectangular log. Lightly flour a rolling pin and roll the dough into a rectangle measuring 10x6 inches, and ½-inch thick.
- Bake. Transfer to a quarter sheet baking pan lined with parchment paper or a silicone baking mat. Bake in a 350F preheated oven for 25 minutes, until golden brown.
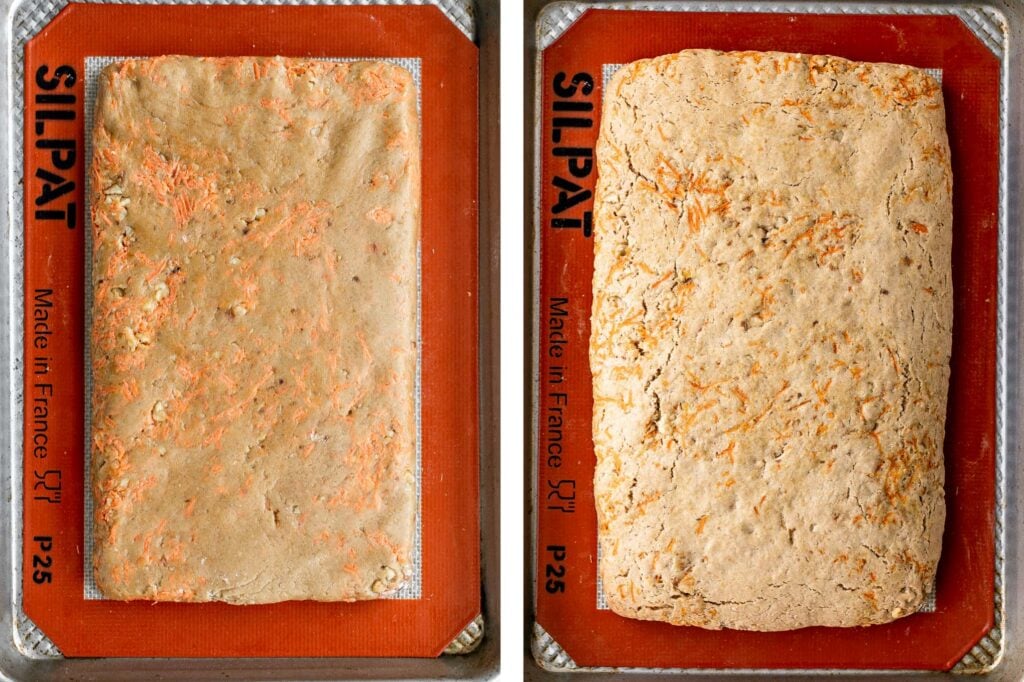
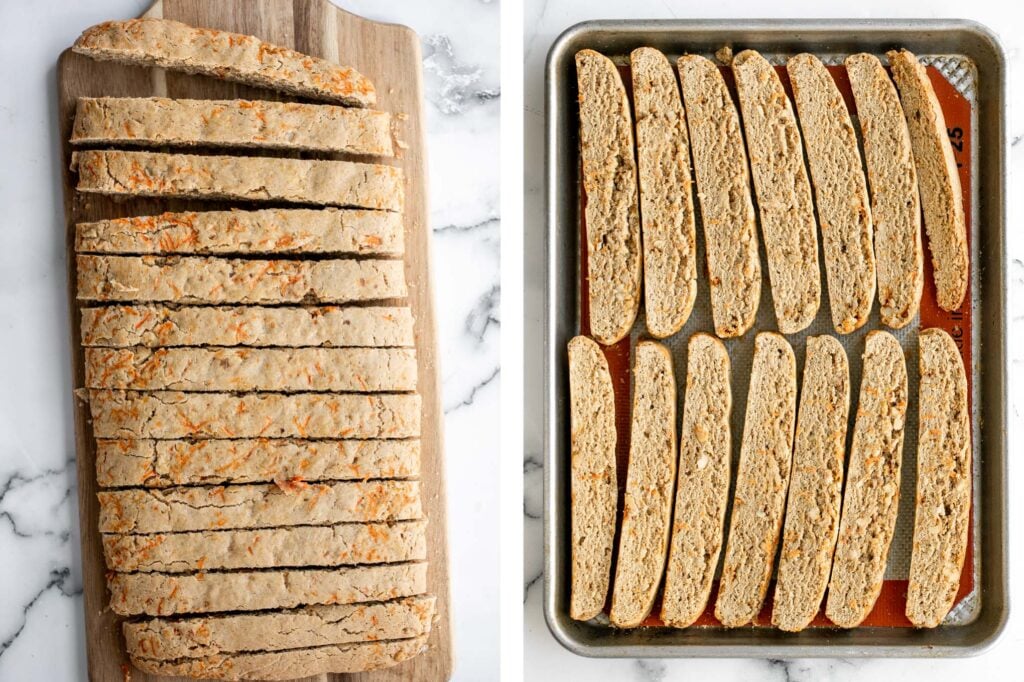
- Slice: Remove from oven and allow it to cool down in the pan until cool enough to handle, about 10 minutes. Transfer log to a cutting board and use a knife to cut into ¾-inch slices, crosswise. You should get about 14-16 slices, depending on how thick you rolled out the log.
- Second bake: Reduce the oven temperature to 300F. Place the carrot cake biscotti back on the lined baking tray (standing up on its cut side) and bake for 12 minutes. Then remove from oven and flip the biscotti over to the other side. Bake for another 10-12 minutes until crisp and golden.
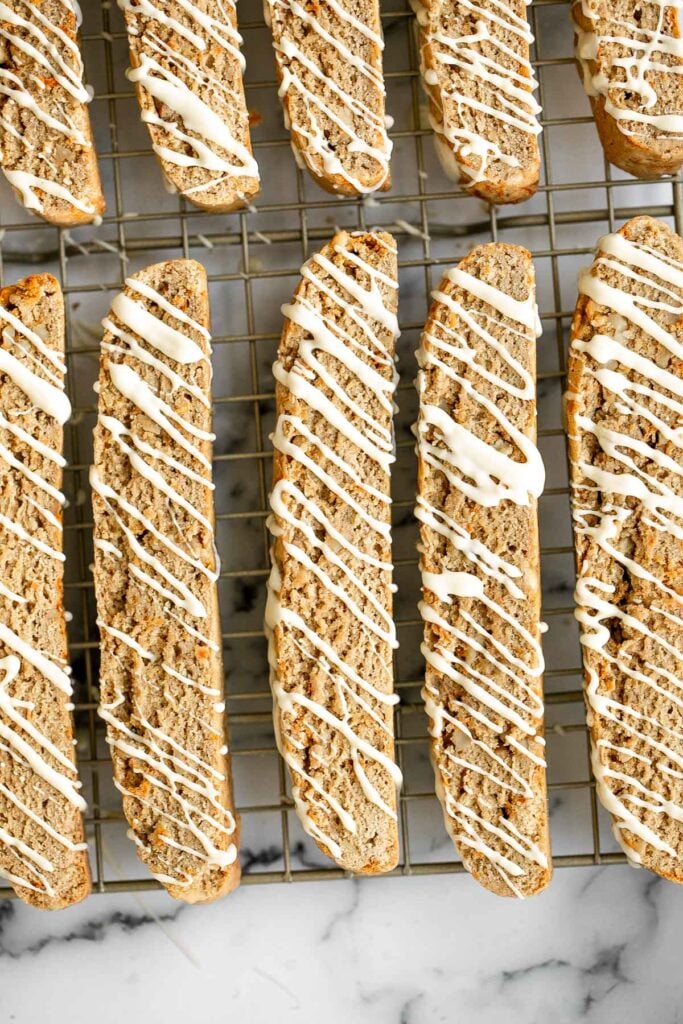
- Cool and serve: Allow biscotti to cool in the baking sheet for 5 minutes, then transfer to a wire cooling rack to cool down completely before serving or drizzling with chocolate on top.
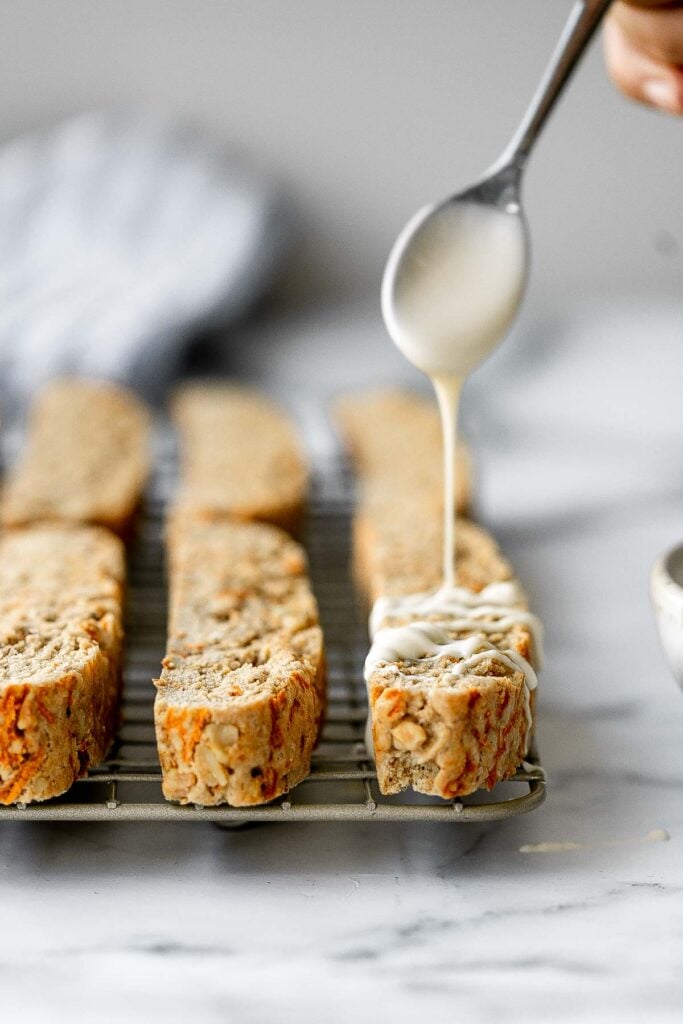
How to Make the White Chocolate Drizzle
These carrot cake biscotti are amazing as is, but you can dress them up a little with a drizzle of white chocolate or cream cheese frosting. I opted for chocolate for easier storage (since with a cream cheese drizzle, the cookies would have to be stored in the refrigerator within 2 hours).
You can melt the white chocolate in one of two ways:
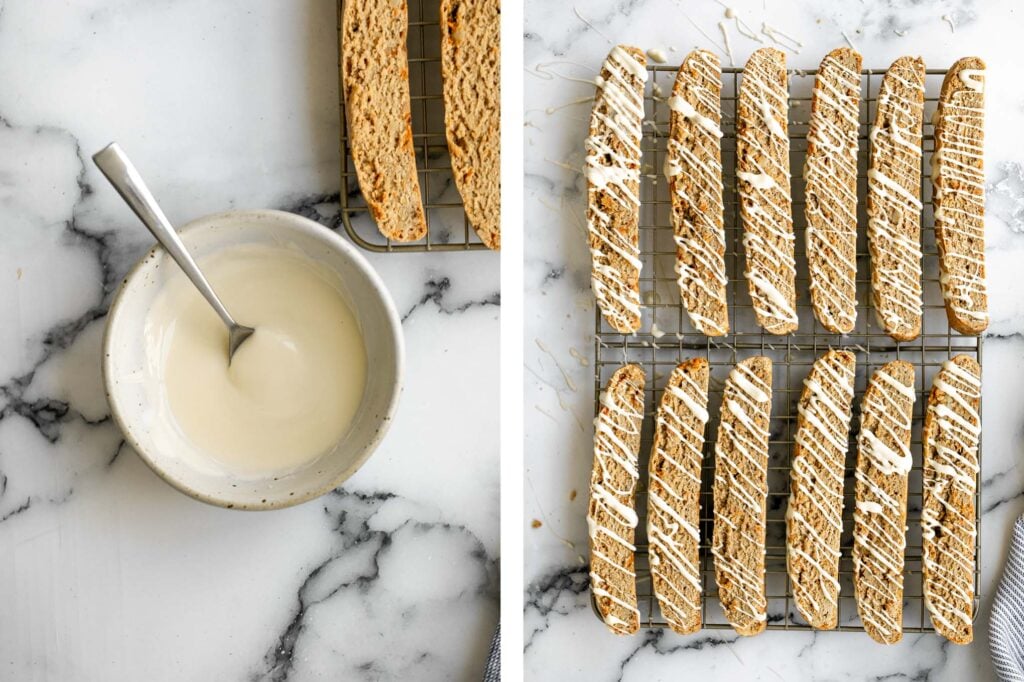
- On the stove: Bring 2 inches of water to a low simmer in a saucepan over medium-low heat. Then, turn the heat to low and place a medium heatproof bowl on the mouth of the pot. Make sure that there is a gap of a few inches in between the bottom of the bowl and the water (You can also place a bowl on a steamer attachment on top of your pot). Add the white chocolate and stir constantly as it melts. Stir until the chocolate is completely smooth and melted. This should take a few minutes.
- In the microwave: The second way to melt chocolate (and an easier way) is in the microwave. Place a small heatproof bowl of white chocolate into the microwave and microwave in 30 second intervals. Remove the bowl at each interval and stir well. Repeat until the chocolate has completely melted. Stir until completely smooth.
Once the cookies have cooled, use a small spoon and drizzle the melted chocolate over the cooled biscotti. Allow the chocolate to harden and set before stacking and storing.
Tips and Tricks
- How to adjust the texture: These biscotti are crunchy and slightly hard but still soft enough for an easy bite. You can bake these to the texture that you like. For extra crunchy and dry biscotti, bake them longer, for softer ones, then bake them for less time.
- How to store: Store biscotti in an airtight container at room temperature for up to 2 weeks.
- How to freeze: Transfer the cooled biscotti into an airtight container or a freezer bag and squeeze out as much air as you can. Freeze the cookies for up to 3 months. When ready to eat, let it thaw at room temperature first.
More Spring Desserts
- 30 Best Easter Dessert Recipes
- Carrot Cake Shortbread
- Carrot Bundt Cake with Cream Cheese Frosting
- Hot Cross Buns
- Persian Rice Cookies with Poppy Seeds
- Carrot Cake with Cheesecake Topping
- Spiced Carrot Muffins
Tried this recipe?
I'd love to hear what you think! Leave a comment and rating below to share your feedback. Your reviews help others discover this recipe and help me keep creating more free recipes for you. Snap a photo and tag me on social media @aheadofthyme too.
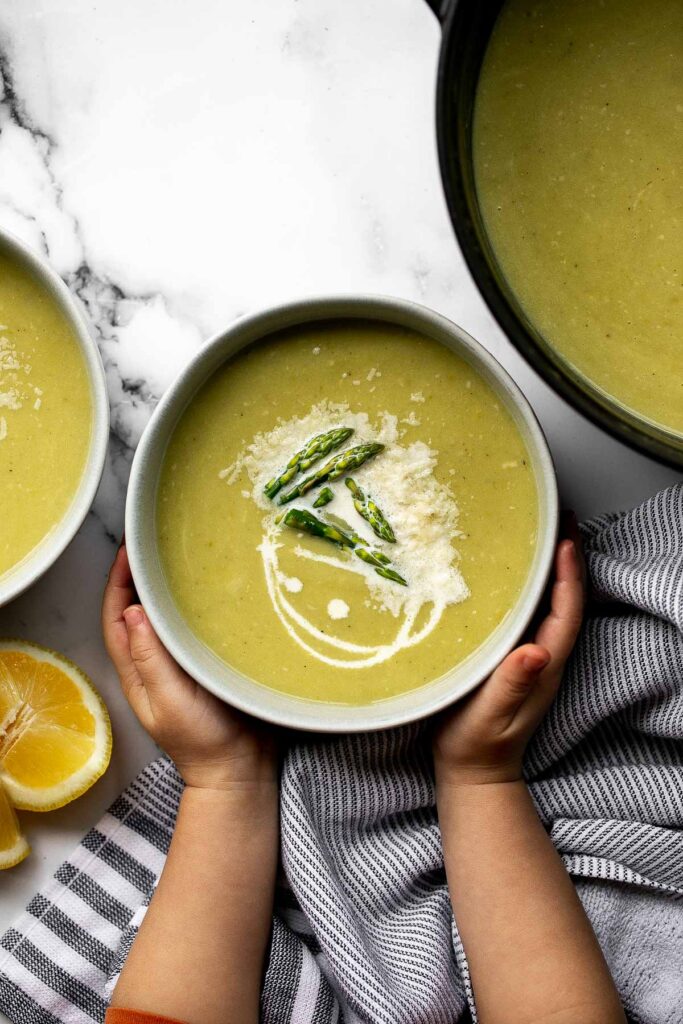
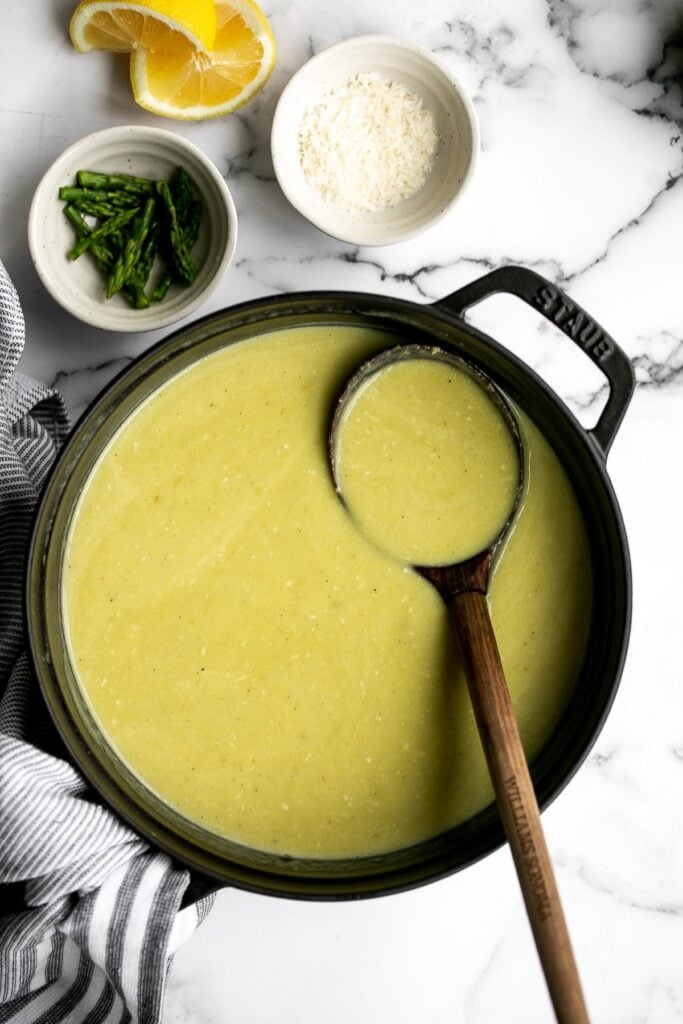
Lemon Asparagus Soup with Parmesan
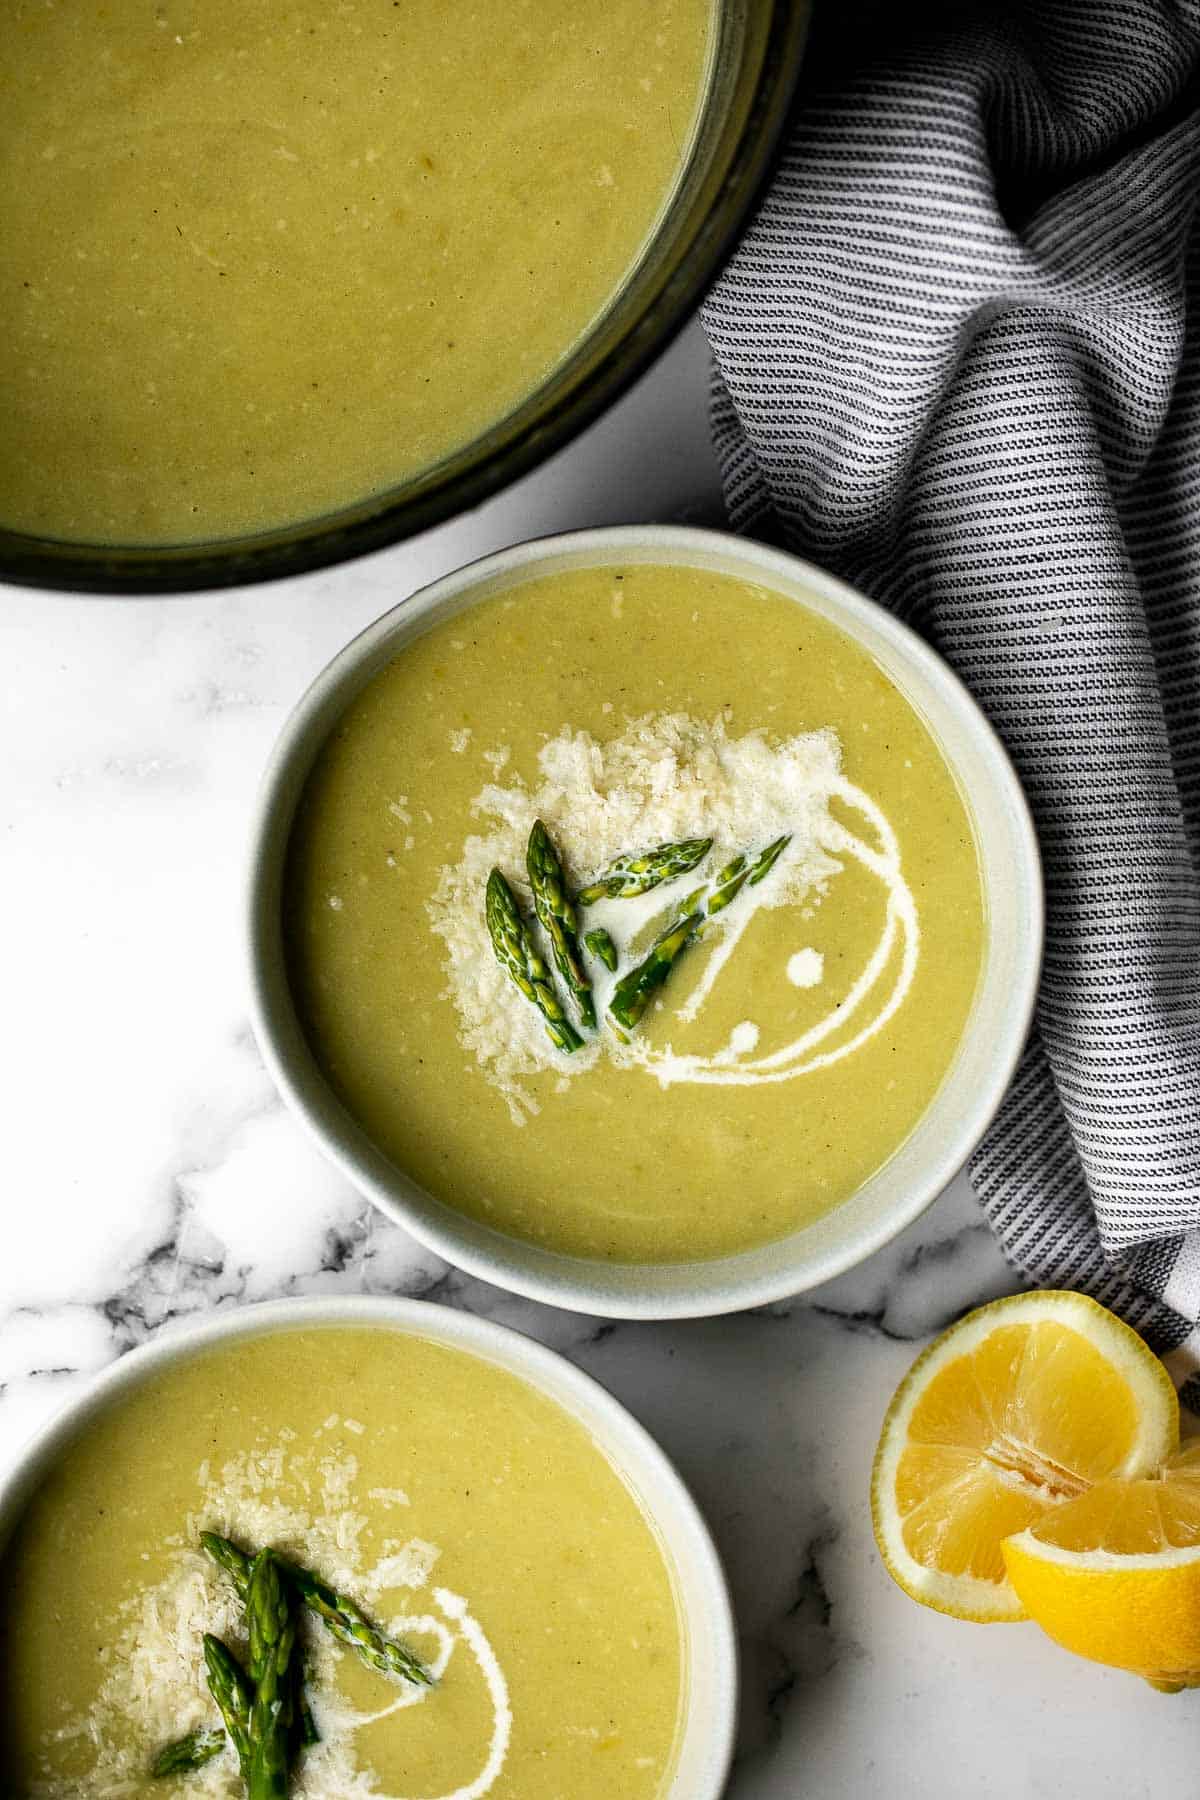
Lemon asparagus soup with Parmesan is a smooth and creamy soup topped with blanched asparagus tips. It's a delicious spring soup packed with nutritious spring vegetables, seasonal flavours, and notes of lemony citrus. Onion, celery, garlic, potato, and asparagus come together to create a robust broth that is creamy without any cream. Plus, Parmesan cheese and butter add depth to this asparagus soup, making it a delicious dish whether it is served warm or cold.

Why You'll Love this Lemon Asparagus Soup with Parmesan
- Lemon asparagus soup feels light but is packed with nutrients. This spring soup will leave you feeling satisfied without weighing you down. Full of fibre and essential vitamins like A, B6, C, and K, this spring soup nourishes your body and tastes great doing it!
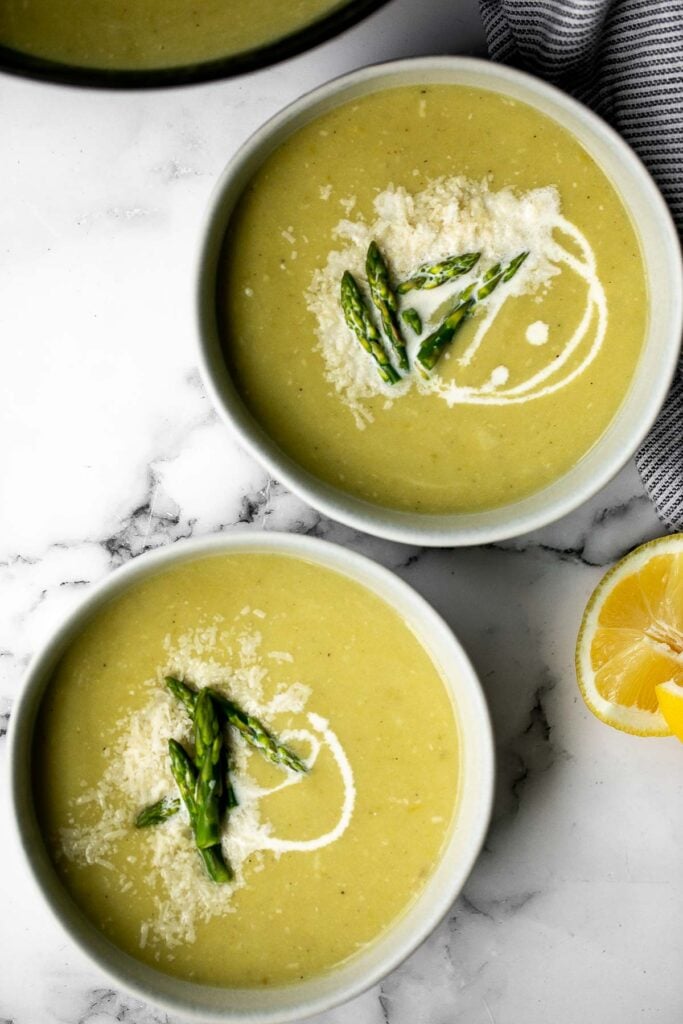
- The silky-smooth texture is to die for. The smooth and creamy texture of this spring soup is highlighted by the garnish: blanched asparagus tips and grated Parmesan cheese. Every texture of lemon asparagus soup is delightful.
- It can be served hot or cold. Eating a winter soup cold seems sad-but having a spring soup cold is joyful. Just as delicious cold, your lemon asparagus soup leftovers will still wow the crowd.
Ingredients
To make this easy lemon asparagus soup with Parmesan, you will need a large stockpot (I used my 4 qt. dutch oven), and the following simple ingredients:
- asparagus
- butter
- onion
- celery
- garlic
- russet potato - adds creaminess to the soup without adding any cream. You can also use Yukon gold potatoes for creaminess.
- chicken stock - you can also use vegetable stock if keeping this soup completely vegetarian.
- lemon juice - freshly squeezed lemon juice adds the best flavour into this soup. You could substitute with store-bought 100% natural lemon juice.
- Parmesan cheese - you can substitute with other types of cheese for a more robust cheesy flavour (such as cheddar).
- salt and pepper - add salt and pepper to taste. I typically don't need to add any salt as I find the chicken stock and Parmesan cheese adds plenty of salty flavour.
How to Make the Best Lemon Asparagus Soup with Parmesan
- Sauté aromatics. In a large pot, melt butter over medium-high heat. Sauté the onions, celery, and garlic, until the onions are soft and translucent. Add in the potatoes and asparagus (reserving a few of the tips to use later for garnish). Mix well until combined.
- Simmer. Add the chicken stock and bring the soup to a simmer. Turn the heat down to low and simmer (covered) for 20 minutes, or until the vegetables have become soft and tender.
- Blanch the asparagus tips. Meanwhile, bring a small pot of salted water to a boil and add the reserved asparagus tips. Cook for 2 minutes, then remove with a slotted spoon and place in a bowl of ice water. Let cool, then drain.
- Puree. Puree the soup directly in the pot using an immersion blender, or puree in batches in a blender and pour it back into the pot. Add the lemon juice and Parmesan, and stir until the cheese has melted. Add salt and pepper to taste.
- Serve. Transfer the soup into serving bowls and top with blanched asparagus tips and extra Parmesan cheese on top.
Tips and Tricks
- How to customize: Lemon asparagus soup with parmesan is a versatile spring soup that can be customized with your favourite herbs and vegetables to adjust the flavour to your liking. For example, you can add fresh basil, mint, parsley, or chives to make the soup more herby. You can add cooked rice after pureeing the soup to make it heartier.
- How to garnish: I typically garnish the soup with the blanched asaparagus tips and extra Parmesan. I also like to sometimes garnish with a drizzle of cream, pine nuts, croutons, or red pepper flakes.
- How to store: Store lemon asparagus soup covered in the pot or in an airtight container in the refrigerator for up to 3-4 days.
- How to freeze: You can freeze this spring soup in an airtight container or freezer bag for up to 3 months. When ready to serve, defrost overnight in the refrigerator or at room temperature on the kitchen counter for a few hours.
- How to reheat: Reheat this soup on the stovetop over medium-low heat until warmed through. You can add extra lemon juice or Parmesan, if desired. You may also have to add a splash of water to thin out the soup if it has thickened up too much when stored.
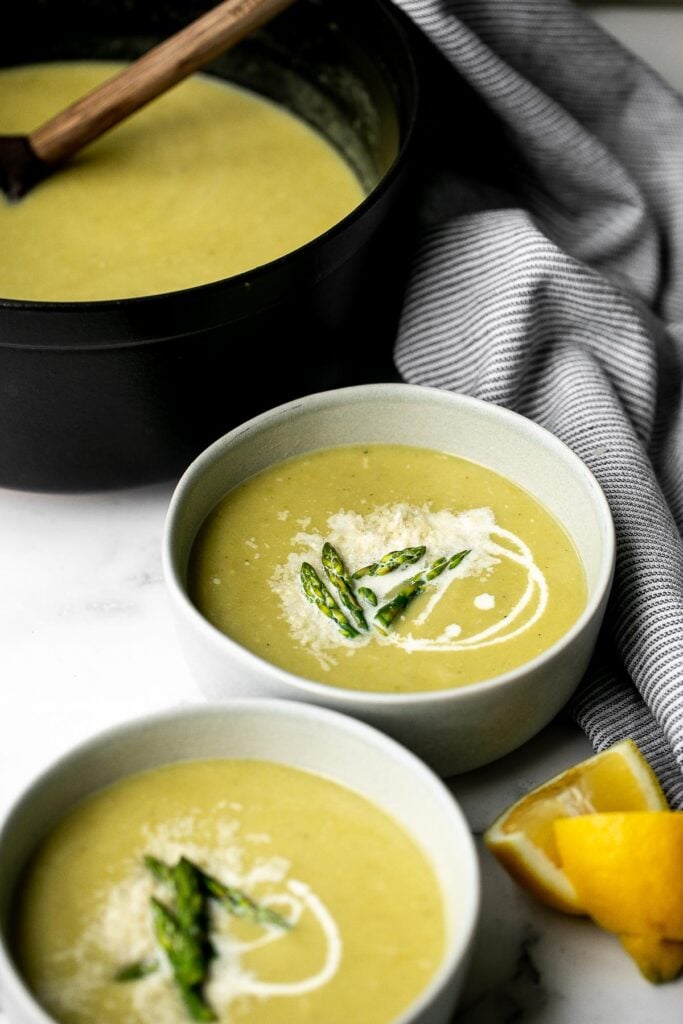
More Asparagus Recipes
- Creamless Cream of Asparagus Soup
- Chopped Asparagus Salad
- Spring Pesto Pasta with Asparagus
- Asparagus Tart
- Air Fryer Asparagus
- Prosciutto-Wrapped Asparagus and Cantaloupe Bundles
- Sautéed Asparagus
- Roasted Asparagus with Poached Eggs
Tried this recipe?
I'd love to hear what you think! Leave a comment and rating below to share your feedback. Your reviews help others discover this recipe and help me keep creating more free recipes for you. Snap a photo and tag me on social media @aheadofthyme too.
30 Best Easter Appetizers

Like most holidays, we need some savoury appetizers to snack on before we dig into our big Easter feast. Whether you are looking for the classics this spring such as deviled eggs, or something new but heavy on the spring produce, then you have come to the right place. Browse through the 30 most popular and best Easter appetizers including everything from tarts and crostini, dips and spreads, baked bites, and more.

Easter Appetizers
Asparagus tart with Gruyère cheese, a balsamic glaze, and flaky puff pastry, is a flavourful and delicious addition to brunch or an Easter appetizer this spring season.
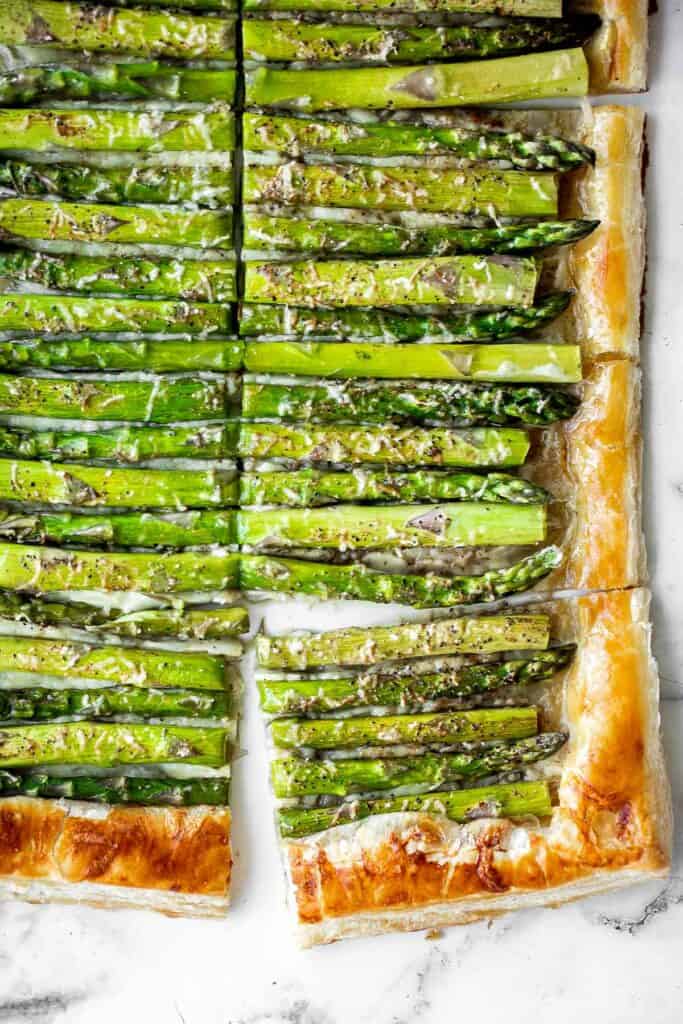
Classic deviled eggs are a simple and easy to whip up, go-to appetizer for lunch or dinner, or just as a snack. It's a classic Easter recipe you can't miss.
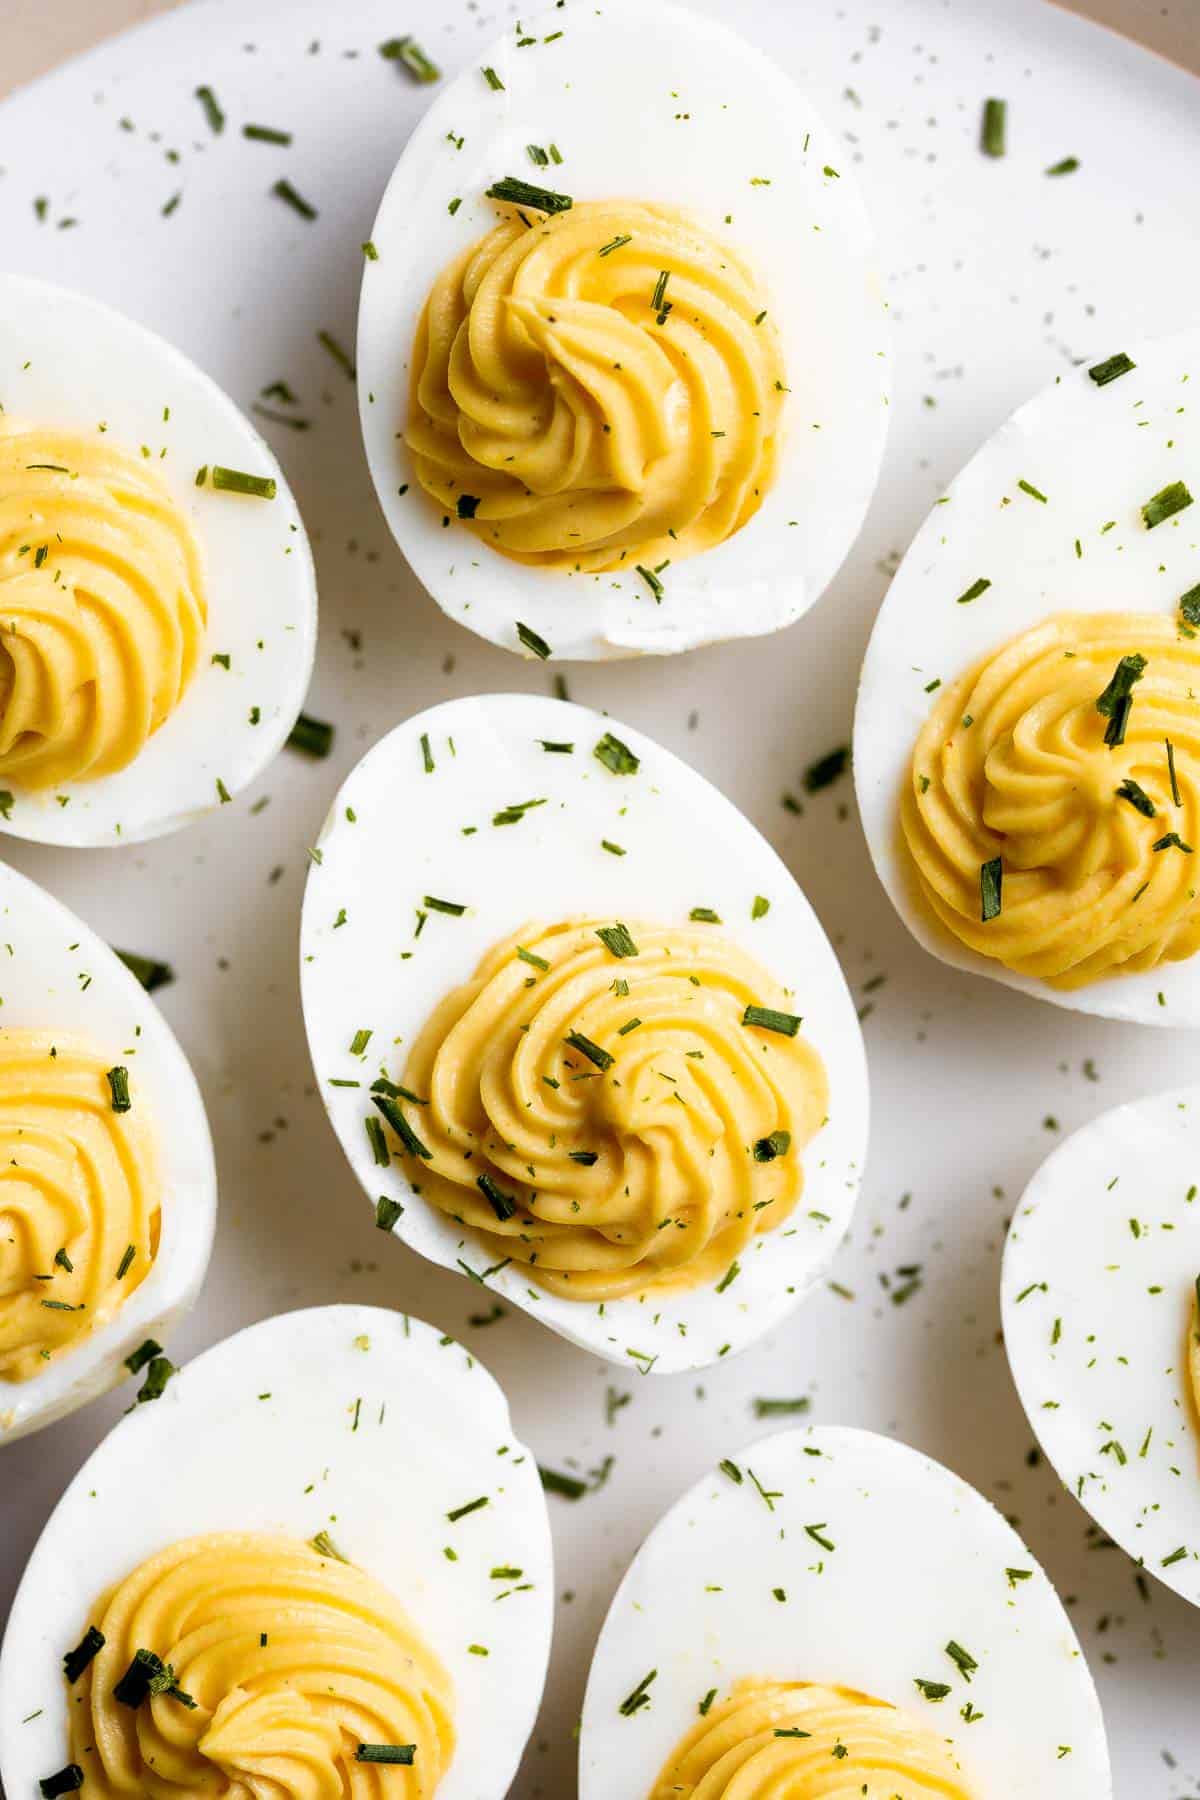
Easy Tomato Bruschetta with Balsamic Glaze
Tomato bruschetta with balsamic glaze is an easy Italian appetizer topped with tomatoes, onions, garlic, basil and olive oil. Delicious, fresh and simple. It's one of my favourite Easter appetizers of all time.
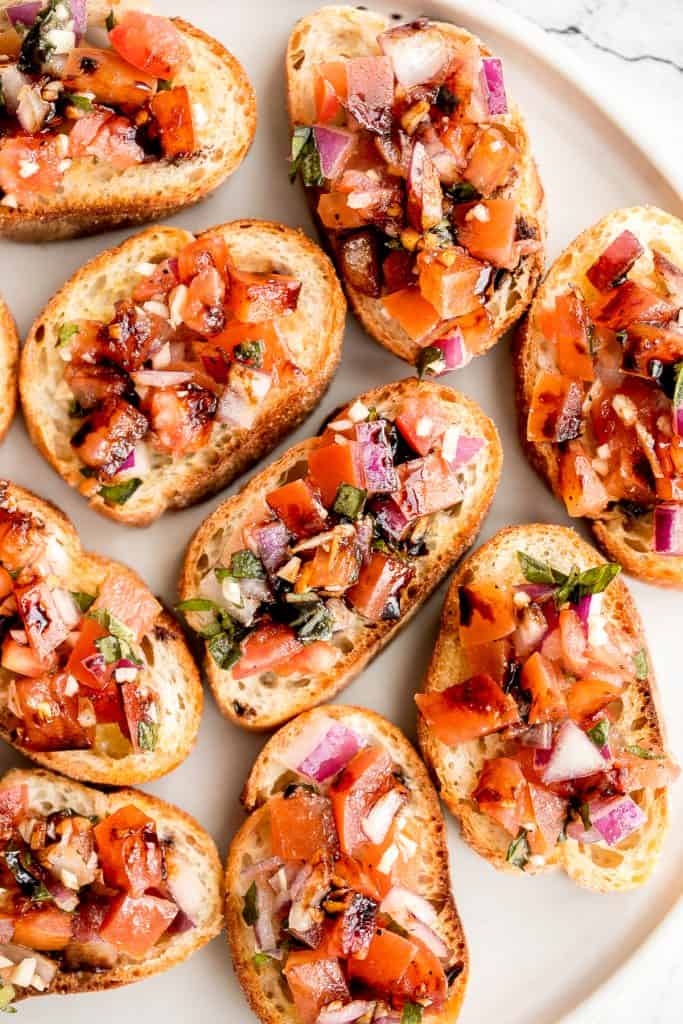
This easy charcuterie board is the perfect appetizer to impress with minimal effort- made with cheese, cured meats, crackers, dips, olives, fruit, and nuts.
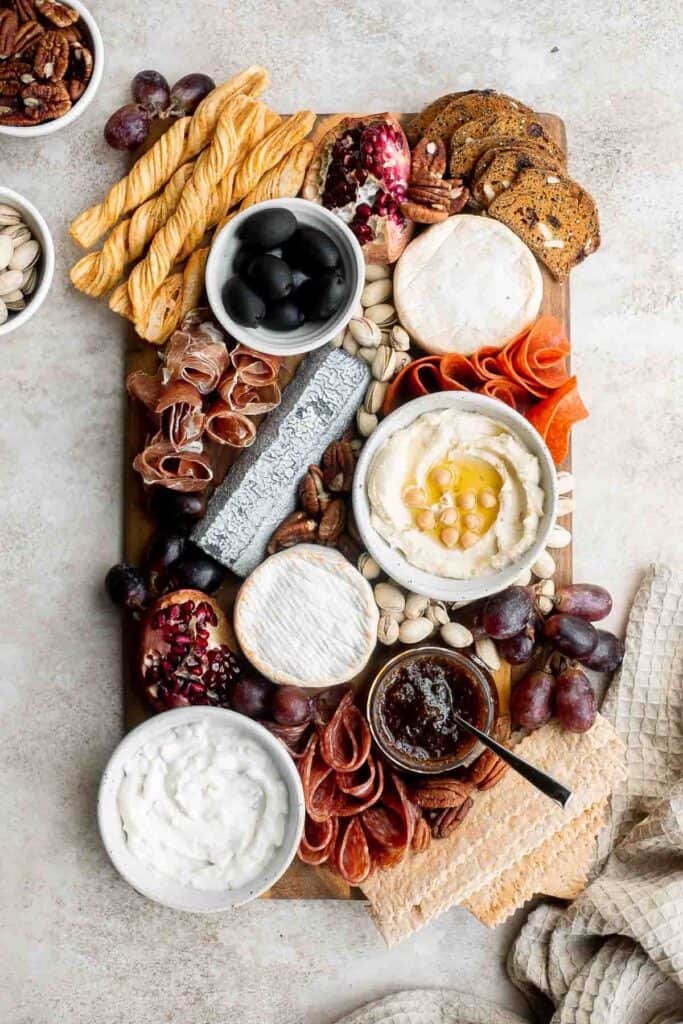
Prosciutto Wrapped Asparagus and Melon
Prosciutto wrapped asparagus and melon are salty, sweet, and juicy. They are easy to make with a handful of simple ingredients, then cooked on the grill.
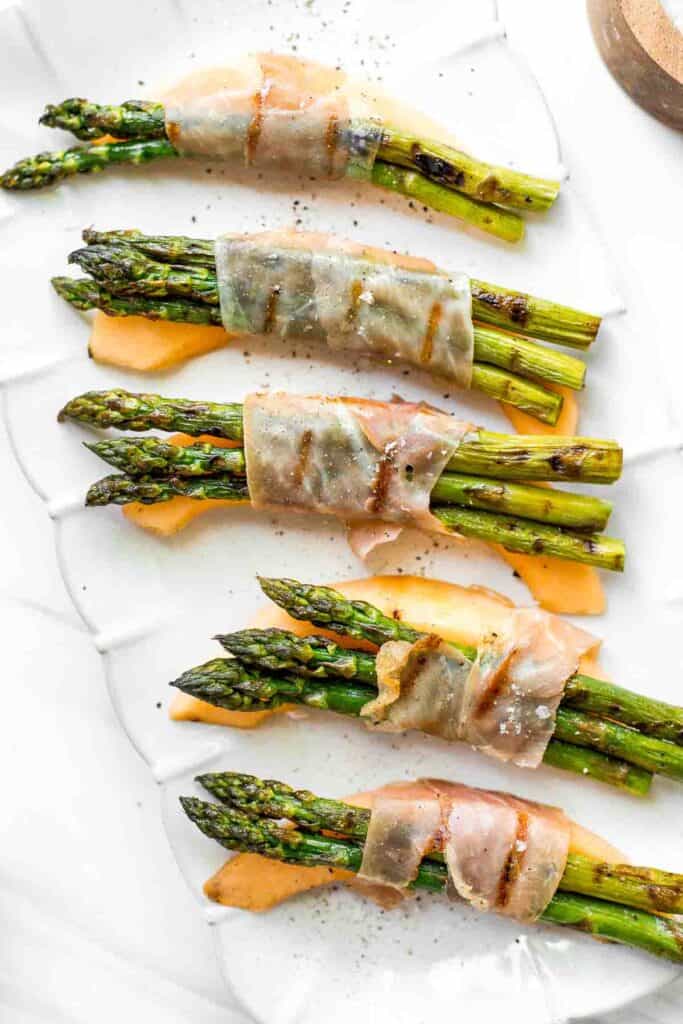
Smooth and creamy pesto hummus is a healthy, delicious and flavourful dip that is easy to make in just 5 minutes. It's vegan and gluten-free.
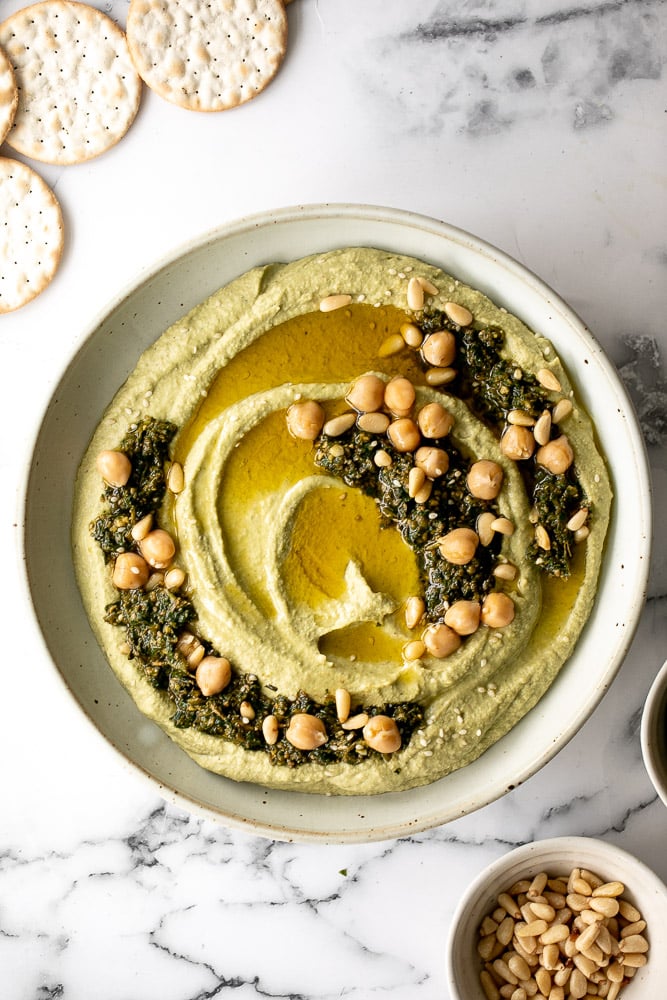
Hot cross buns is a timeless classic Easter bread made with raisins, cinnamon, and a honey glaze. They are perfect for breakfast, dessert, or snack alongside your Easter meal.

Fried mac and cheese balls are crispy on the outside, creamy and cheesy on the inside, and have the perfect crunch. Best way to use leftover mac and cheese.
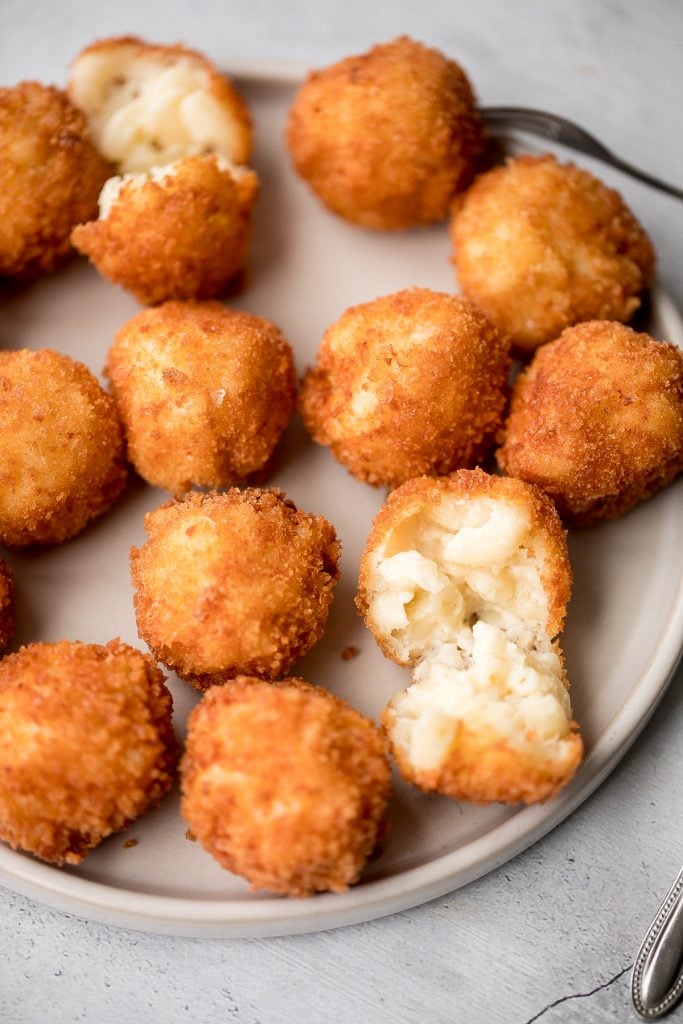
This homemade veggie tray is a quick easy healthy snack or appetizer to make for your next party, with a variety of colorful vegetables and delicious dips.
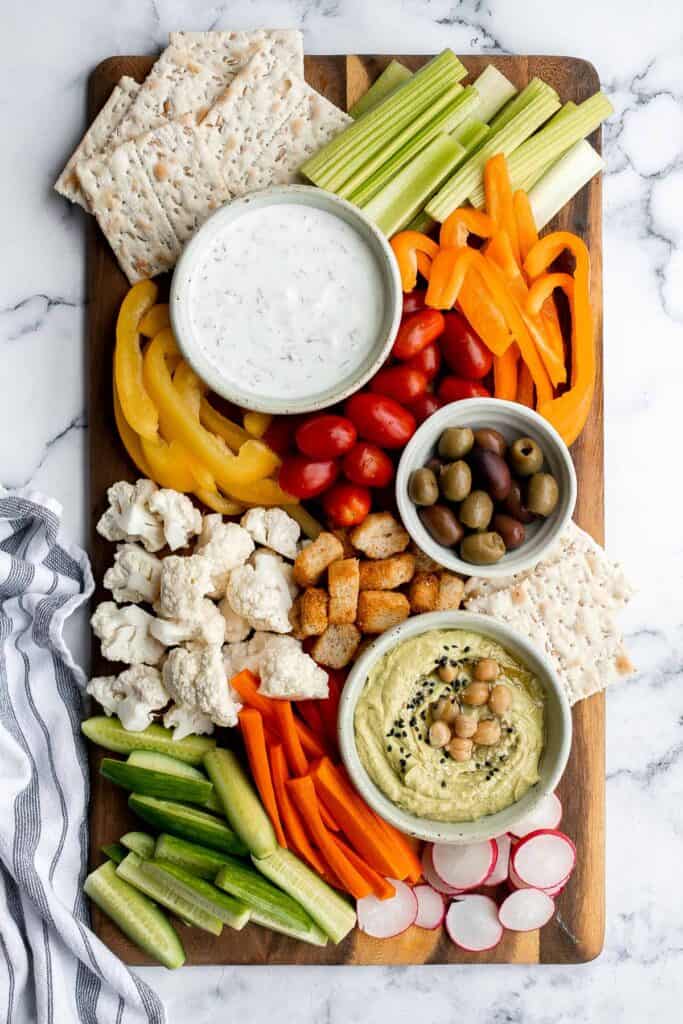
Crostini with Ricotta, Peas and Mint
Get ready for spring with this impressive and delicious spring appetizer -- crostini with creamy ricotta, fresh English peas and fragrant mint.
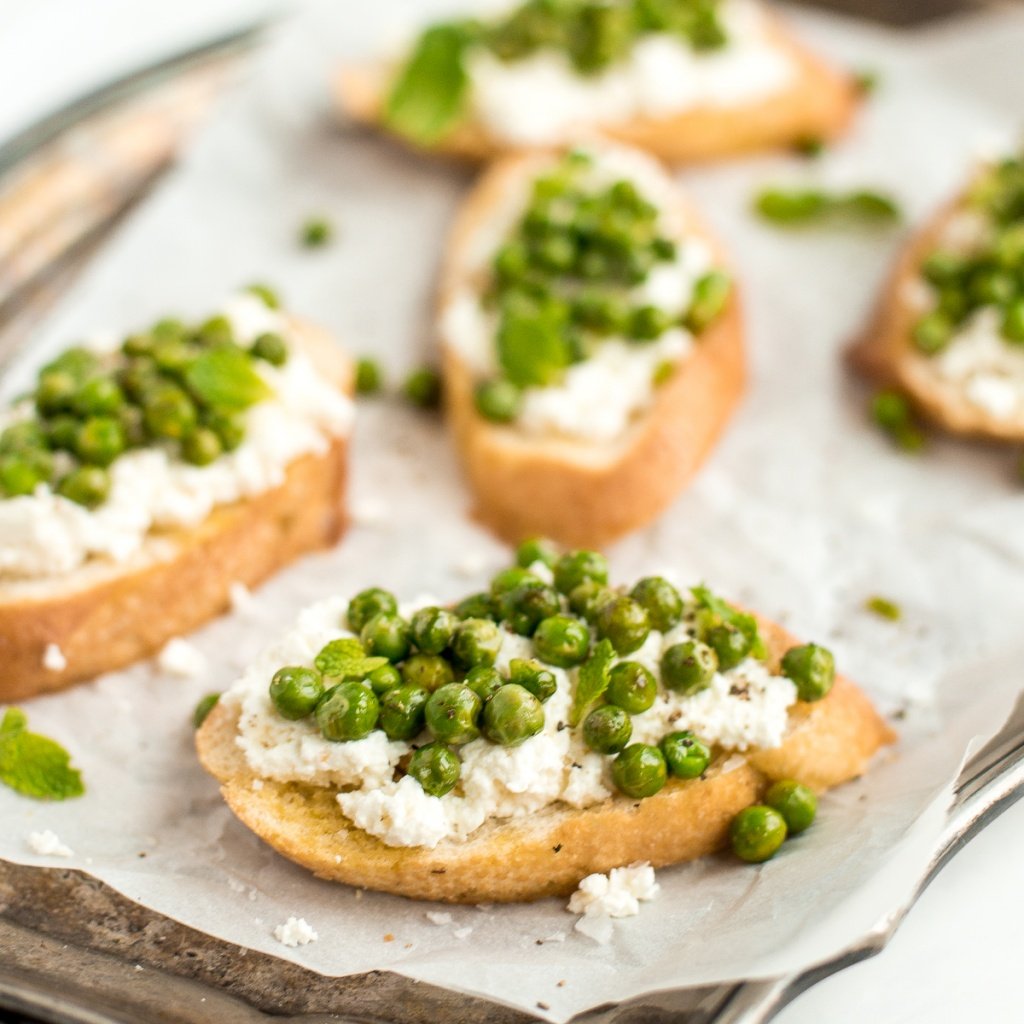
Whipped feta is light, airy, and fluffy. It's an easy yet impressive recipe that takes only 5 minutes to make in a blender with 3 simple ingredients.
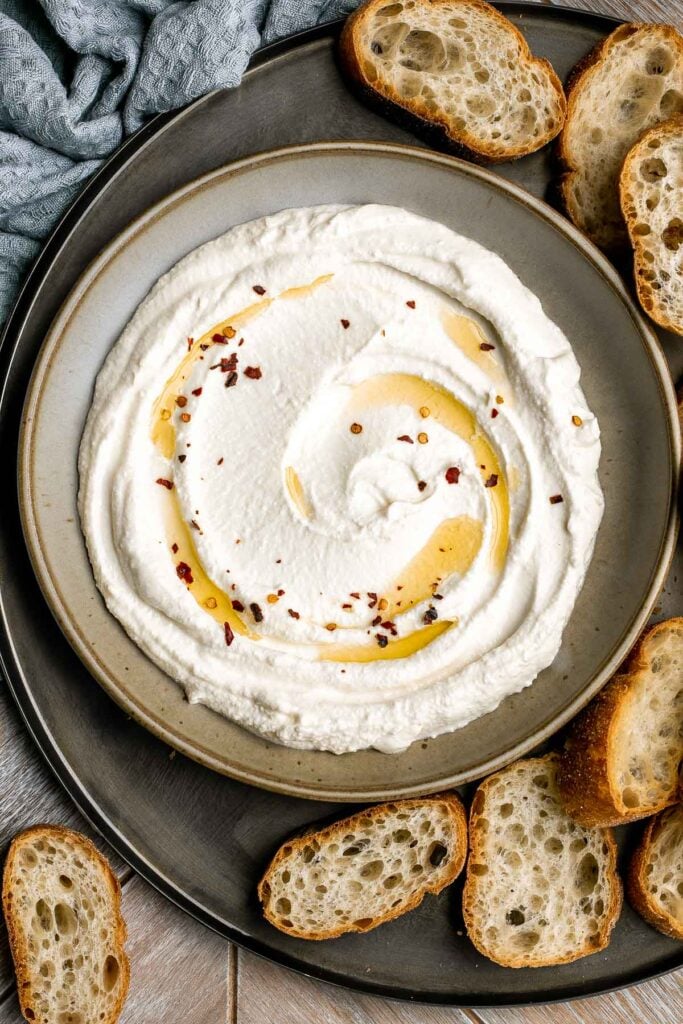
Vegetarian stuffed mushrooms are a delicious, flavorful, healthy, and nutritious appetizer. Plus, quick and easy to make in under 30 minutes including prep!
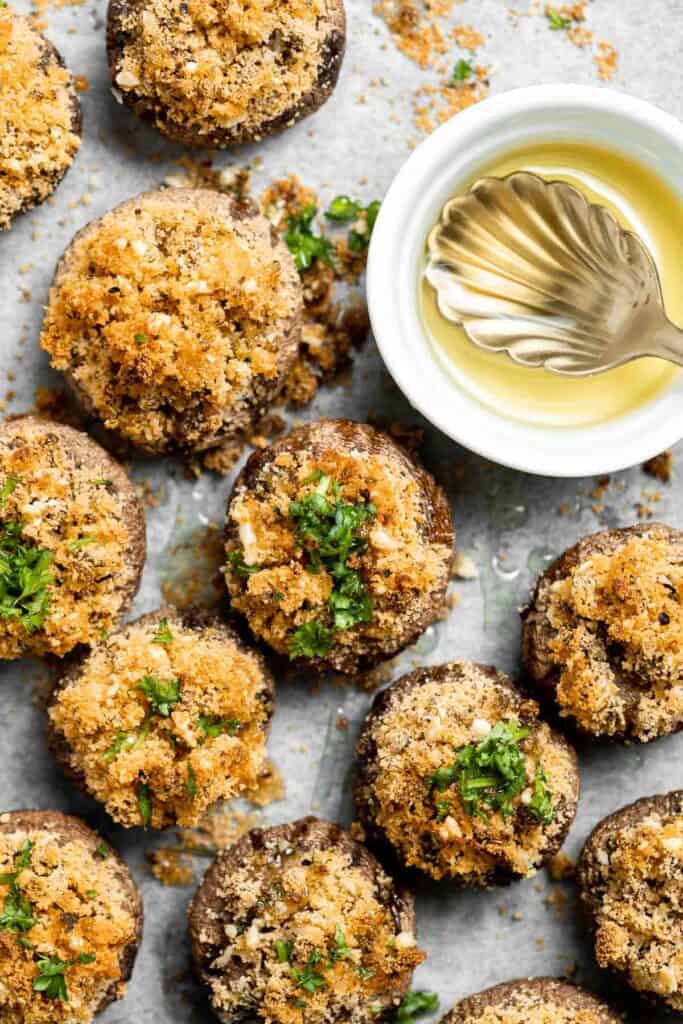
Deviled Egg Salad is the perfect spring side dish! It has the signature tang and smokiness of deviled eggs with the pillowy texture of egg salad.

Spinach and Feta Quiche with Cauliflower Crust
Spinach and feta quiche is healthy and gluten-free with a keto cauliflower crust and savoury vegetarian filling. Serve for breakfast, lunch or dinner.
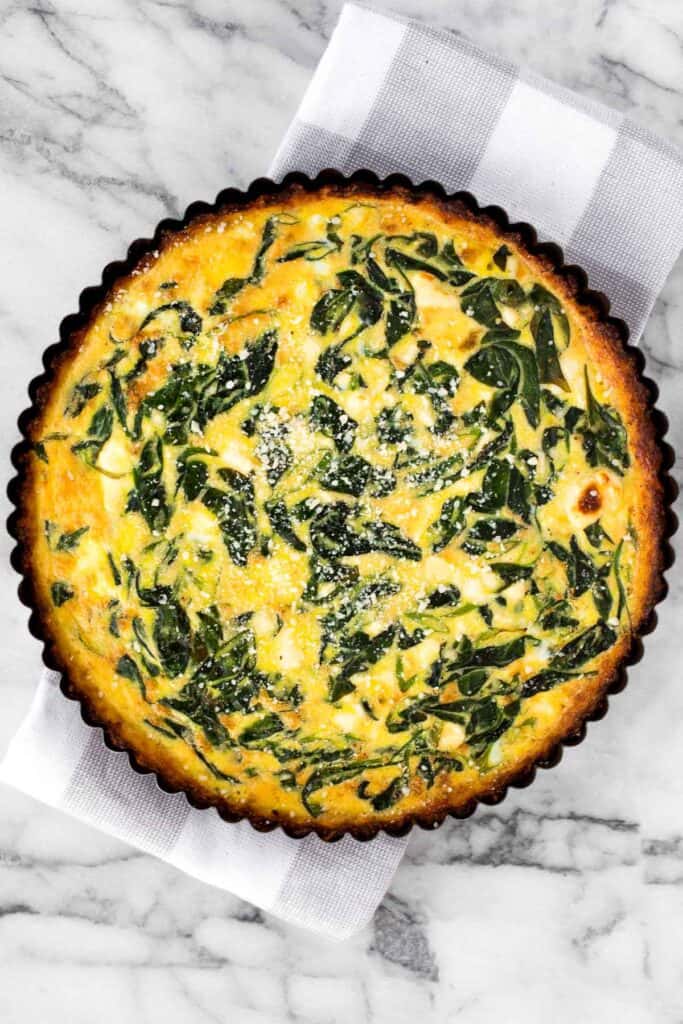
Bacon wrapped chicken bites are one of the best appys ever - well seasoned tender juicy chicken is wrapped in bacon and oven-baked to crisp perfection.

Light and airy, whipped ricotta dip is so easy to make in just 5 minutes with a few fresh ingredients including fresh herbs, olive oil, garlic, and honey.
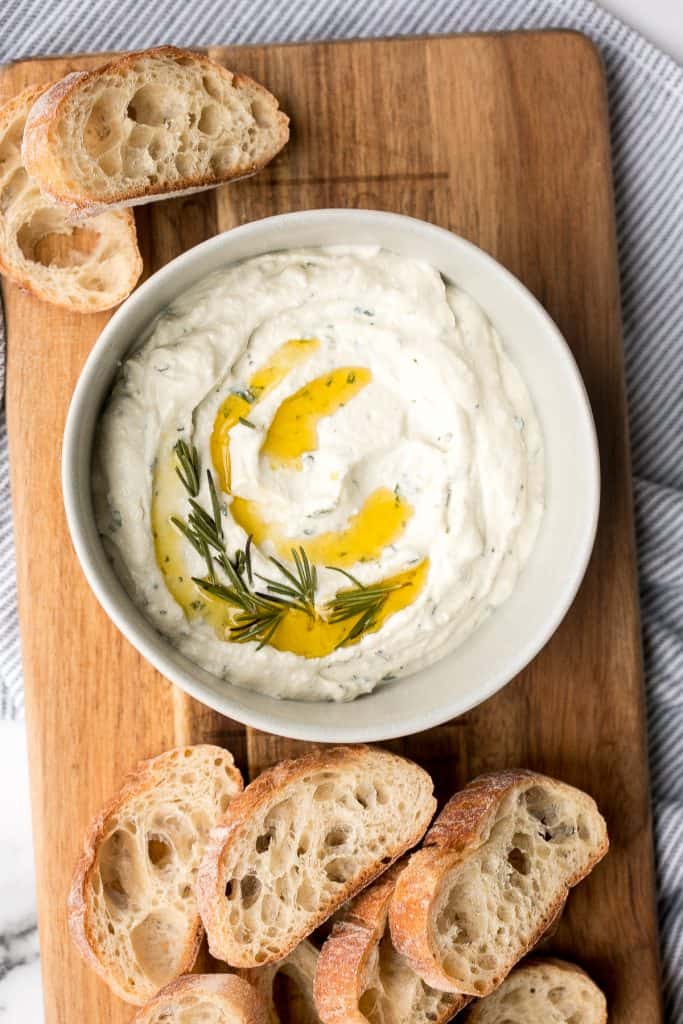
Crispy baked coconut shrimp is a delicious appetizer that is easy to make in 30 minutes. They are more flavourful, tastier and healthier than takeout.
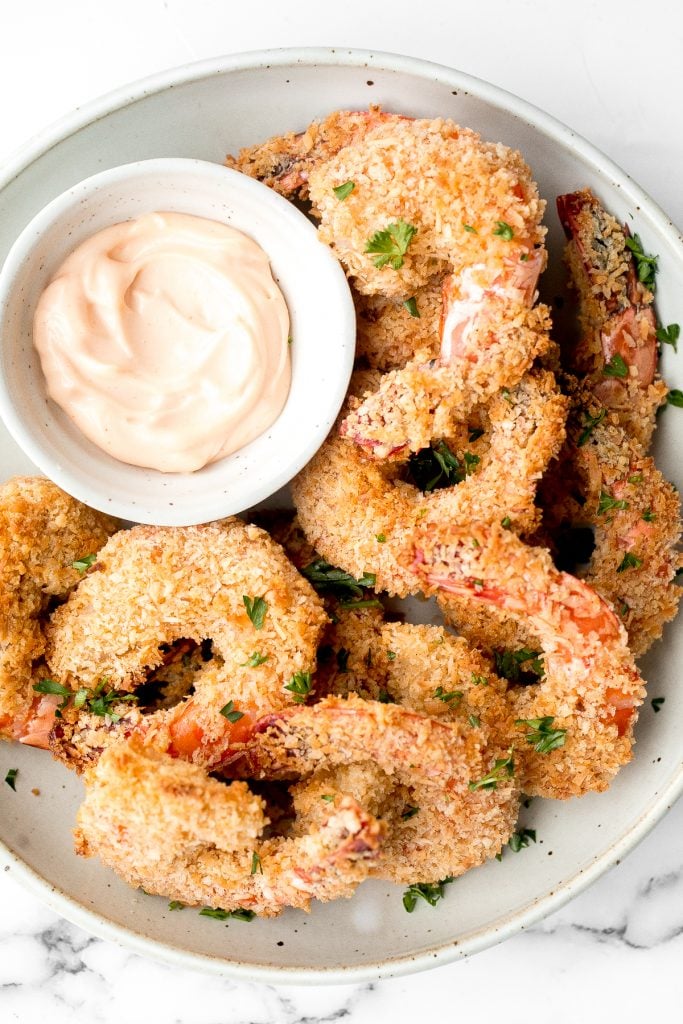
Flaky cornmeal cheddar biscuits are simple, buttery, cheesy, and so delicious. These savoury biscuits with perfect golden tops are quick and easy to make.
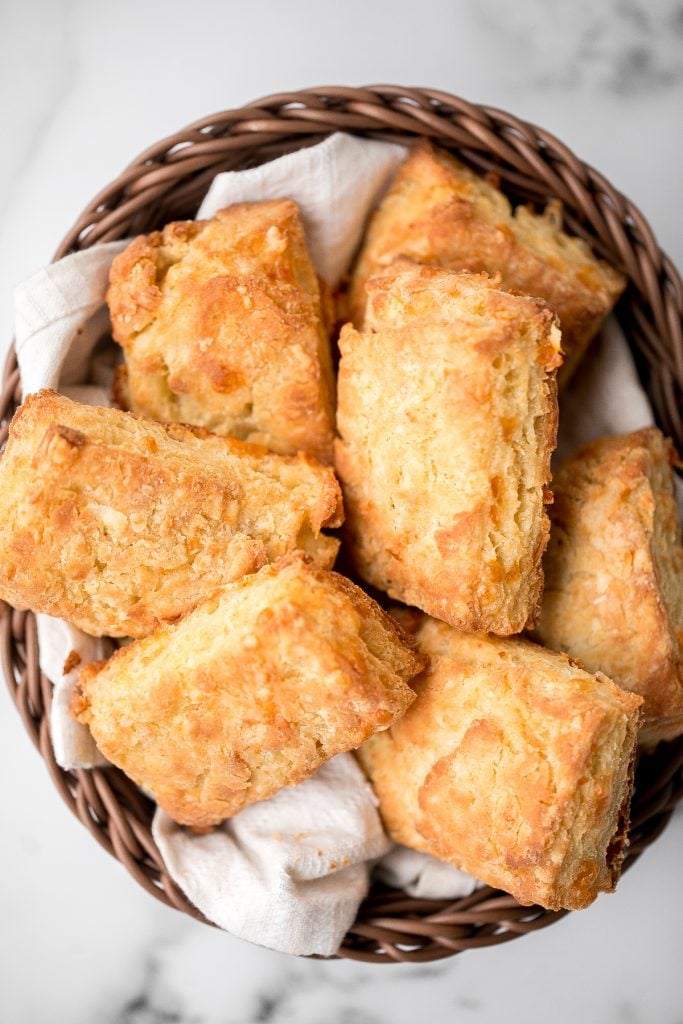
Beet Hummus is a smooth and creamy vegan dip that is made with healthy ingredients including real beets. It's flavorful, delicious, vibrant and colorful.
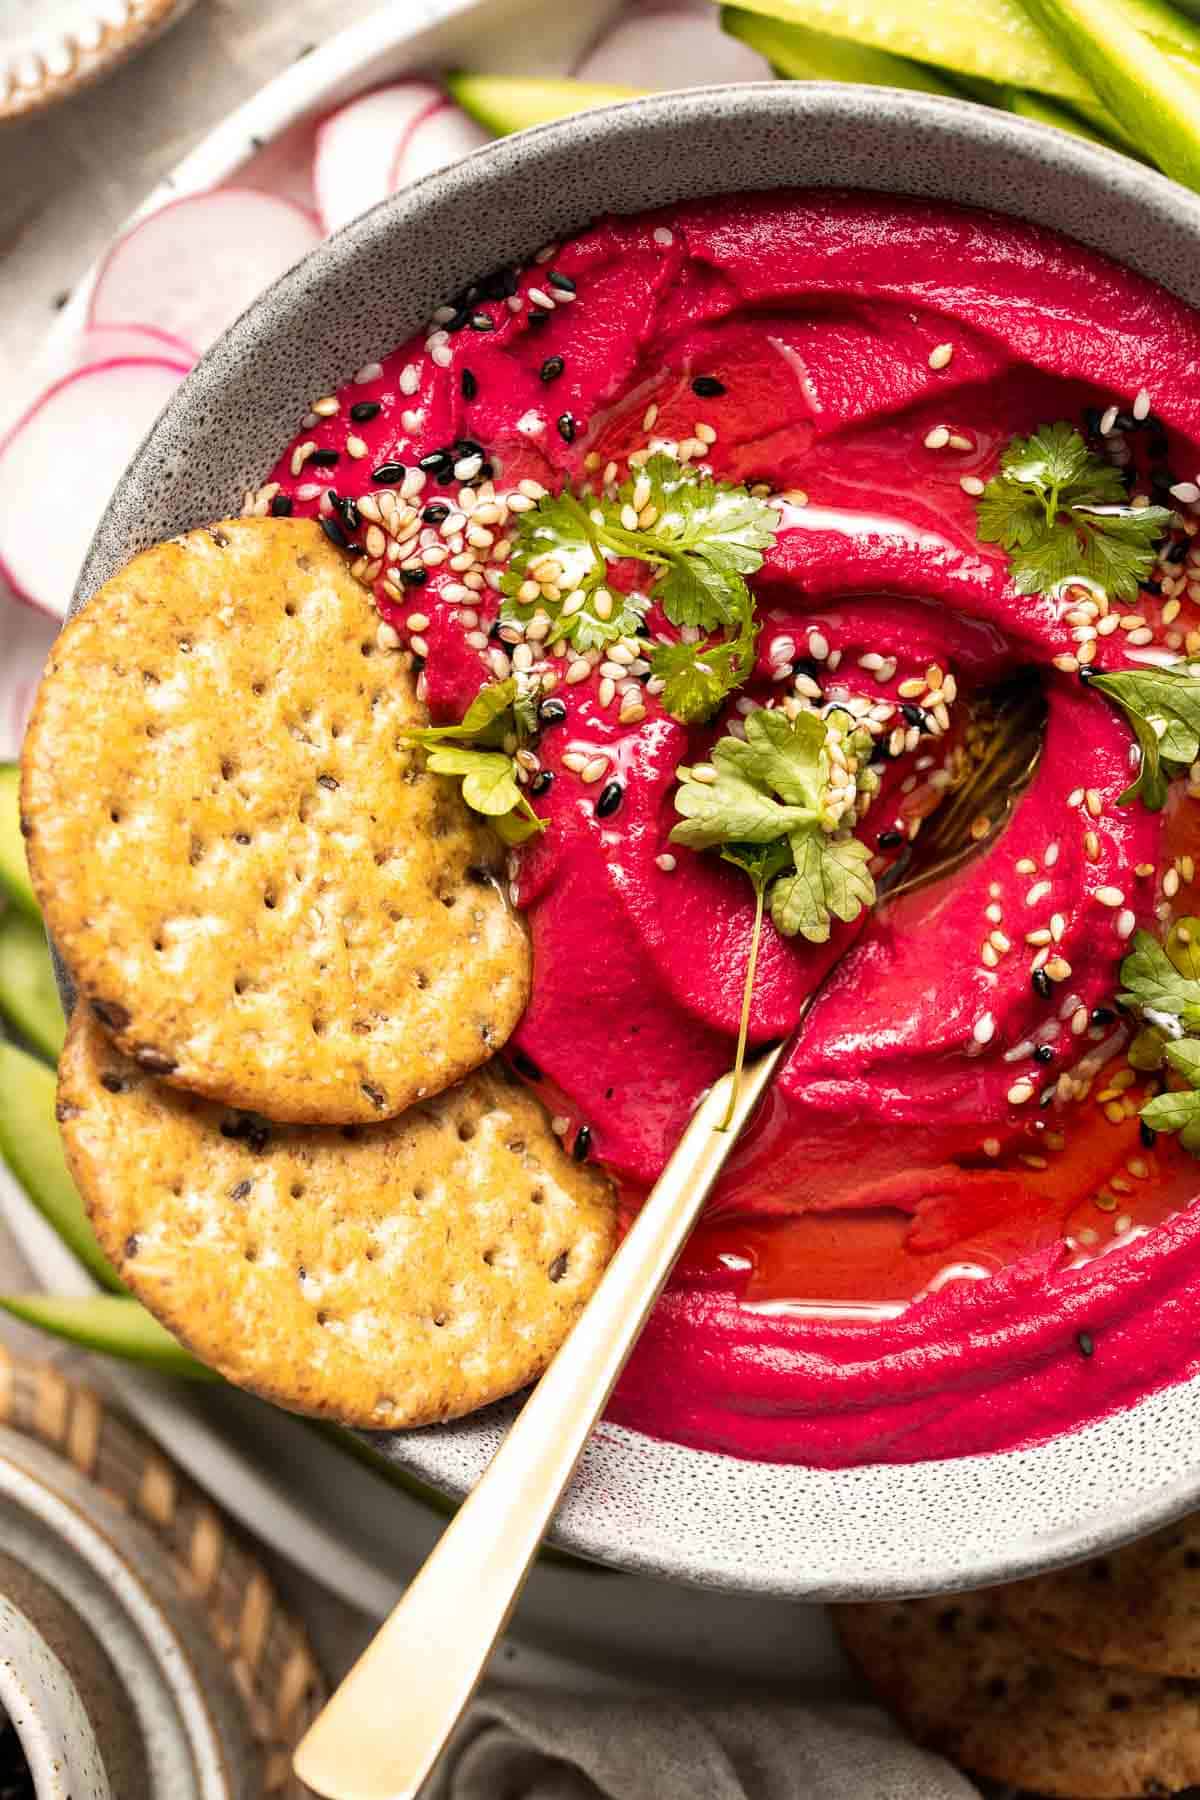
Whipped ricotta crostini is a fancy easy appetizer to make in just minutes or prepare in advance and assemble before serving. A total crowd pleaser.

Sticky crispy baked sweet chili chicken bites is better than takeout and so easy to make healthier at home. An easy dinner or appy.

Potato Galette with Arugula and Creme Fraîche
Potato galette with arugula and crème fraîche is a rich, light, and delicious savoury tart to serve for breakfast, lunch, or dinner. A total crowd-pleaser.
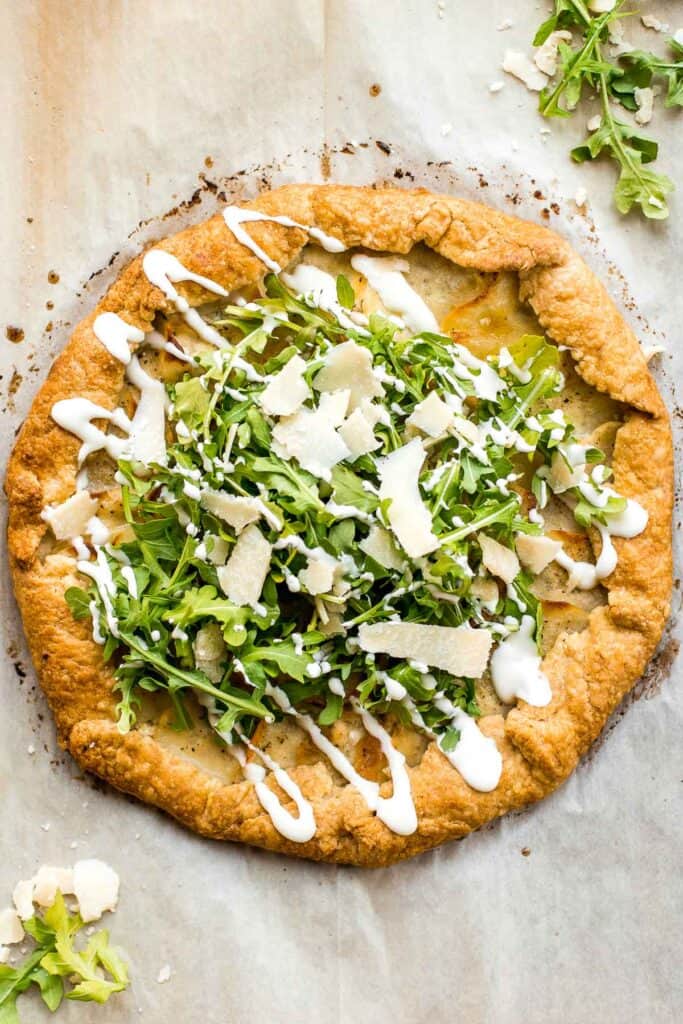
Flaky, fluffy, buttery, and soft, these easy homemade biscuits come together with only a handful of ingredients you already have at home!
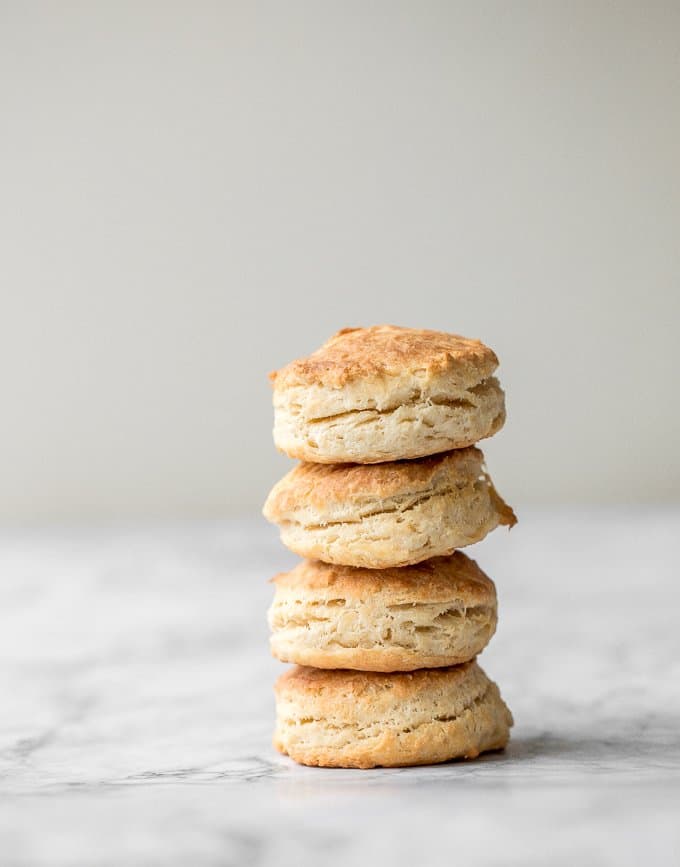
Whipped feta crostini with a herby olive topping is quick and easy snack or appetizer that is ready in less than 20 minutes - or 10 minutes if you're fast.
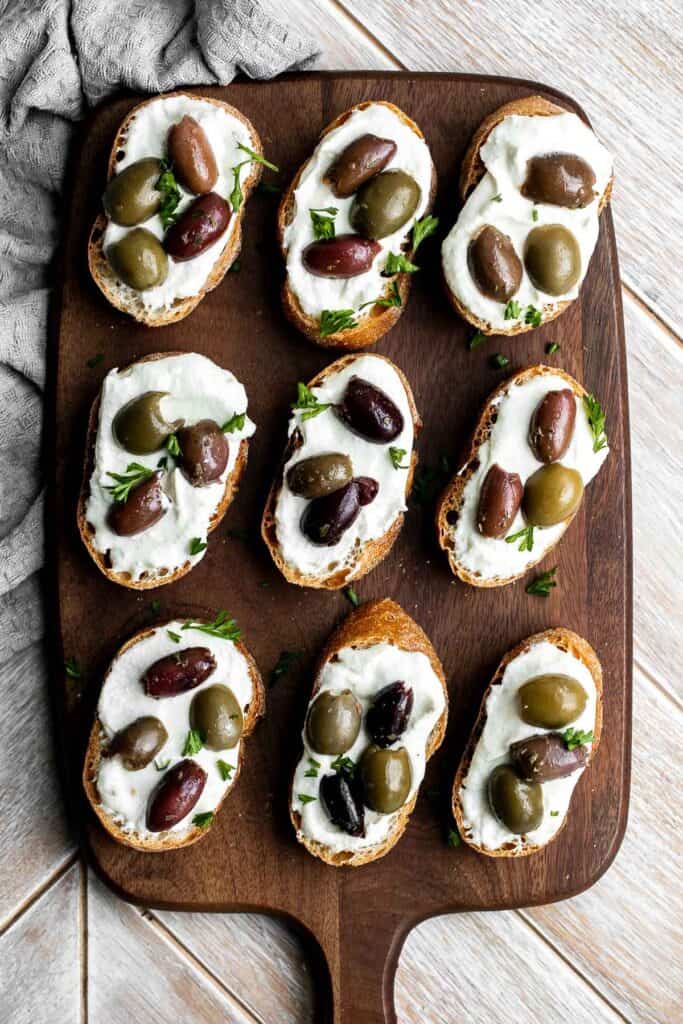
Warm, rich, creamy baked spinach dip is a delicious and easy appetizer that is baked until warm and melty. Easy to make ahead and a total crowd pleaser.
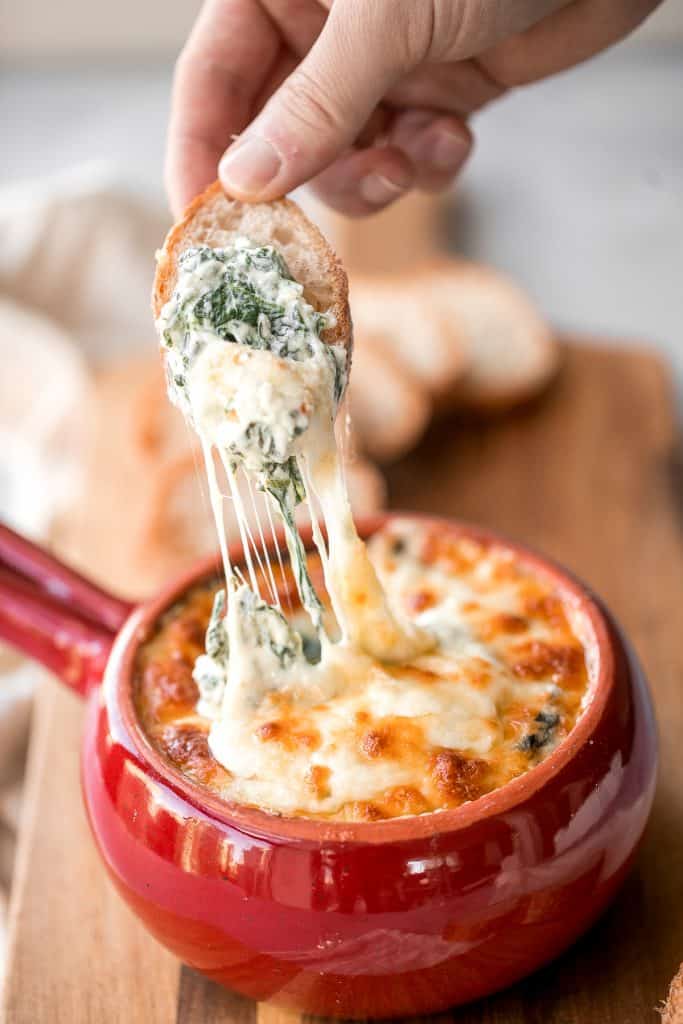
Bacon Wrapped Jalapeño Poppers
Bacon wrapped jalapeño poppers are crispy on the outside, creamy and cheesy inside, spicy, and wrapped in bacon. Easy to make in the air fryer or oven.

Mushroom and Spinach Flatbread
Mushroom and spinach flatbread is heaven on a place. It is ready in under 30 minutes, making it a life-saver appetizer or weeknight dinner!

Curried White Bean Crostini with Toasted Pepitas
Curried white bean crostini with toasted pepitas is the perfect, sophisticated holiday appetizer that is ready to serve in under 15 minutes.
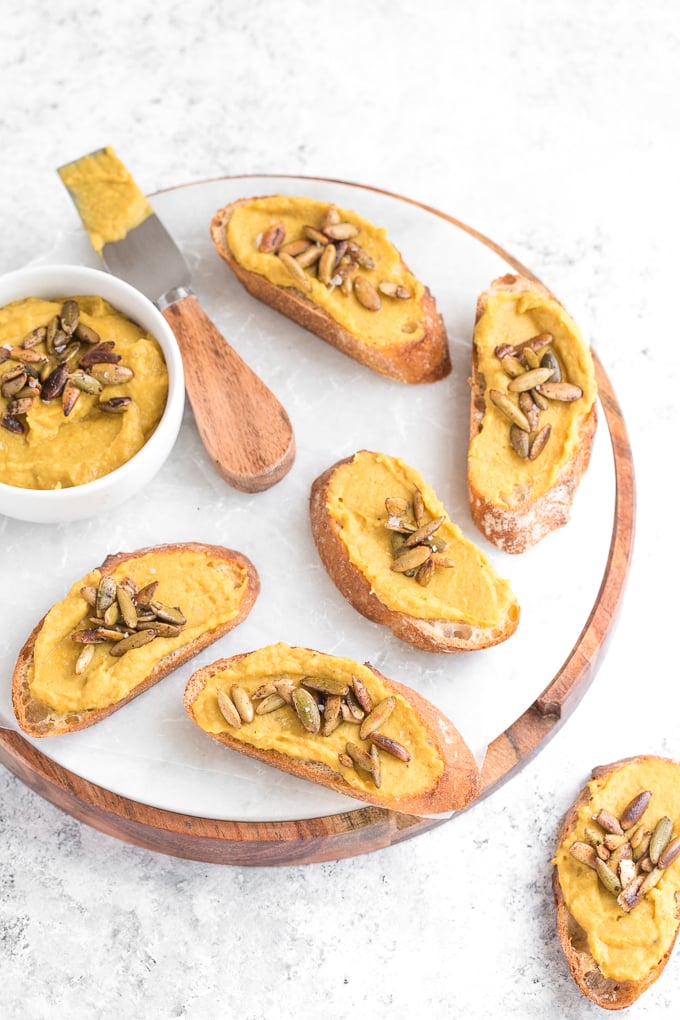
Caramelized onion dip is creamy, flavorful, and melt-in-your-mouth delicious. This easy appetizer is perfect for entertaining, on game day, or for a snack.
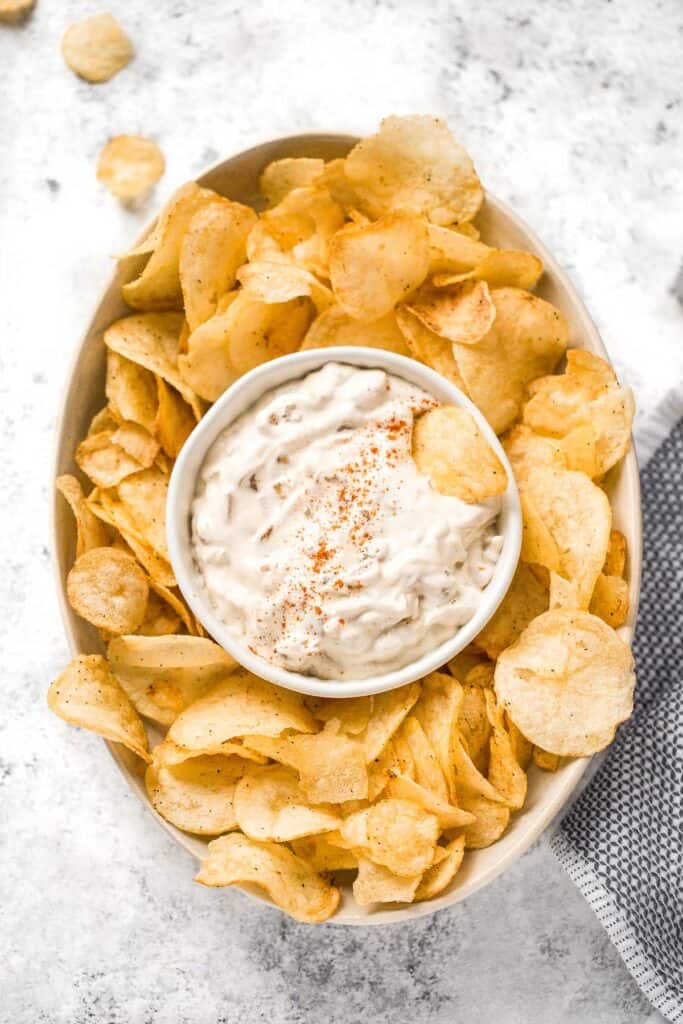
Fried Goat Cheese Balls are flavorful, delicious, and easy to make. With creamy, melty cheese oozing out of a crunchy, golden crust in every bite.

The best quick and easy salted soft pretzels are buttery, salty, and so delicious. They are golden brown and chewy on the outside, yet warm and soft inside.
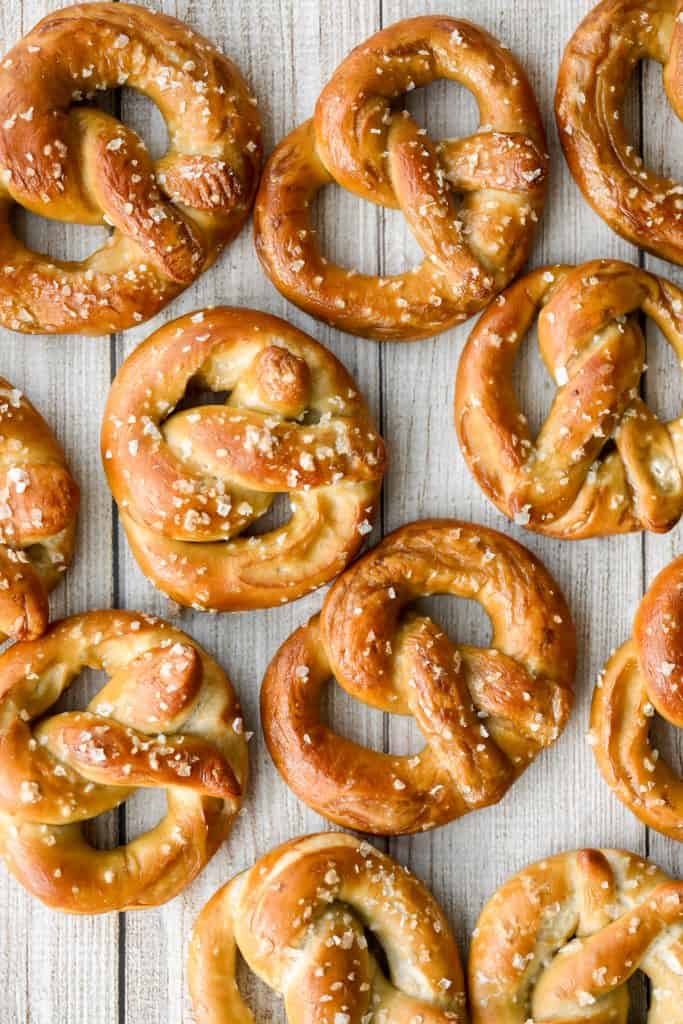
Smooth creamy roasted red pepper hummus is a delicious, flavourful, vegan + gluten-free dip. This healthy appetizer is easy to make with a few ingredients.
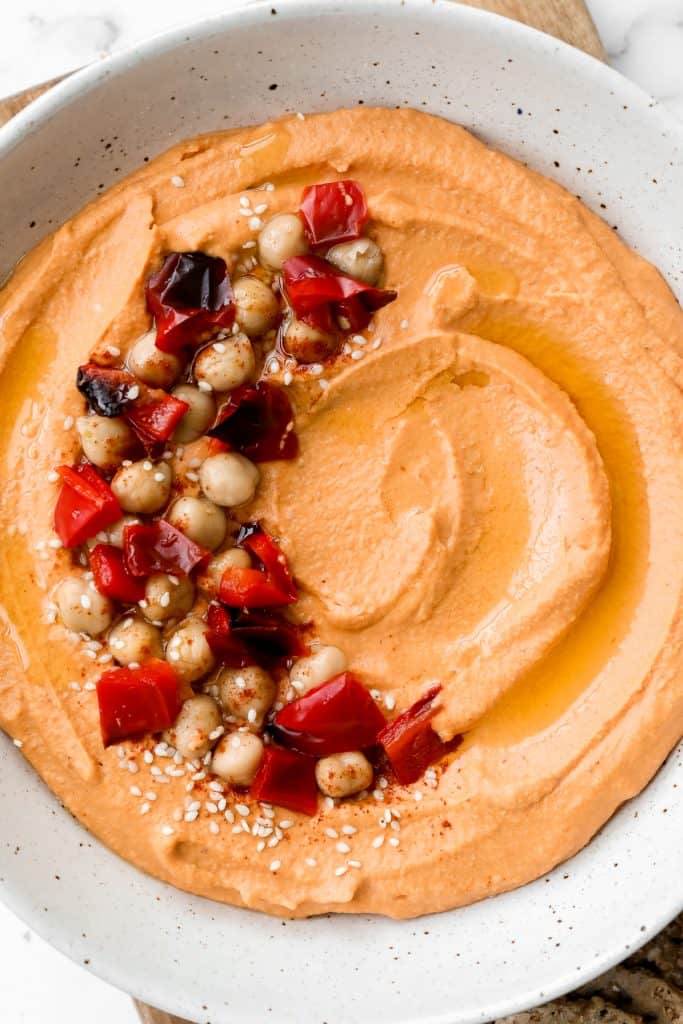
This bright and colourful Greek salad hummus flatbread is perfect as an appetizer or a healthy lunch or snack.
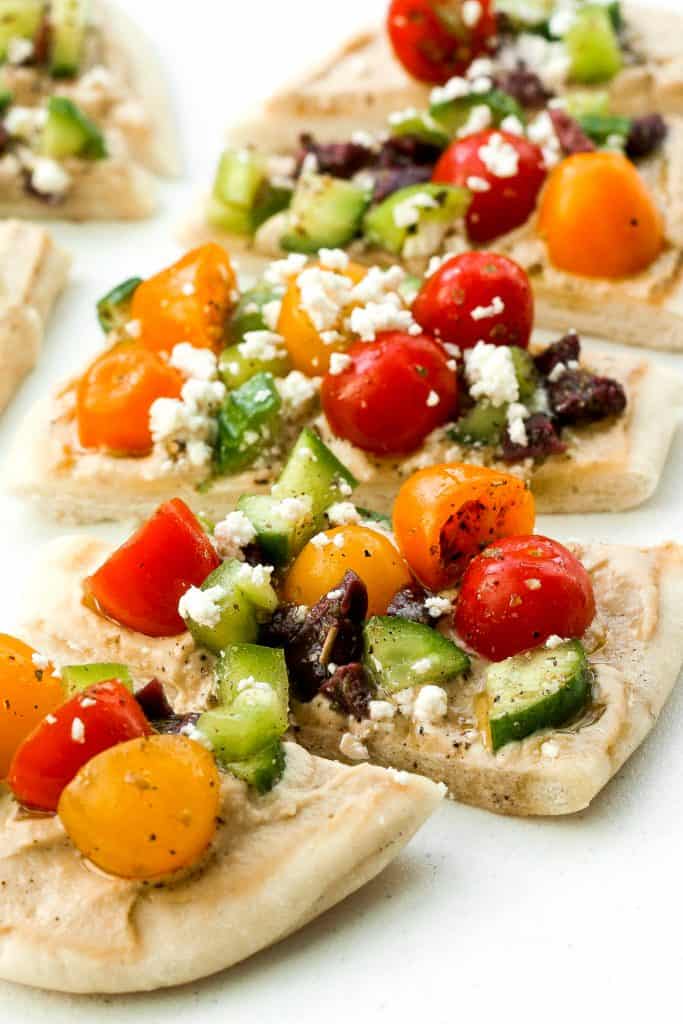
Crunchy, cheesy, and paired with an awesome dipping sauce, these baked mozzarella sticks are just as amazing as what you would find in a restaurant.

Flaky Garlic Cheddar Biscuits are a simple but delicious and flavorful no yeast bread that is ready for the oven with less than 15 minutes prep.
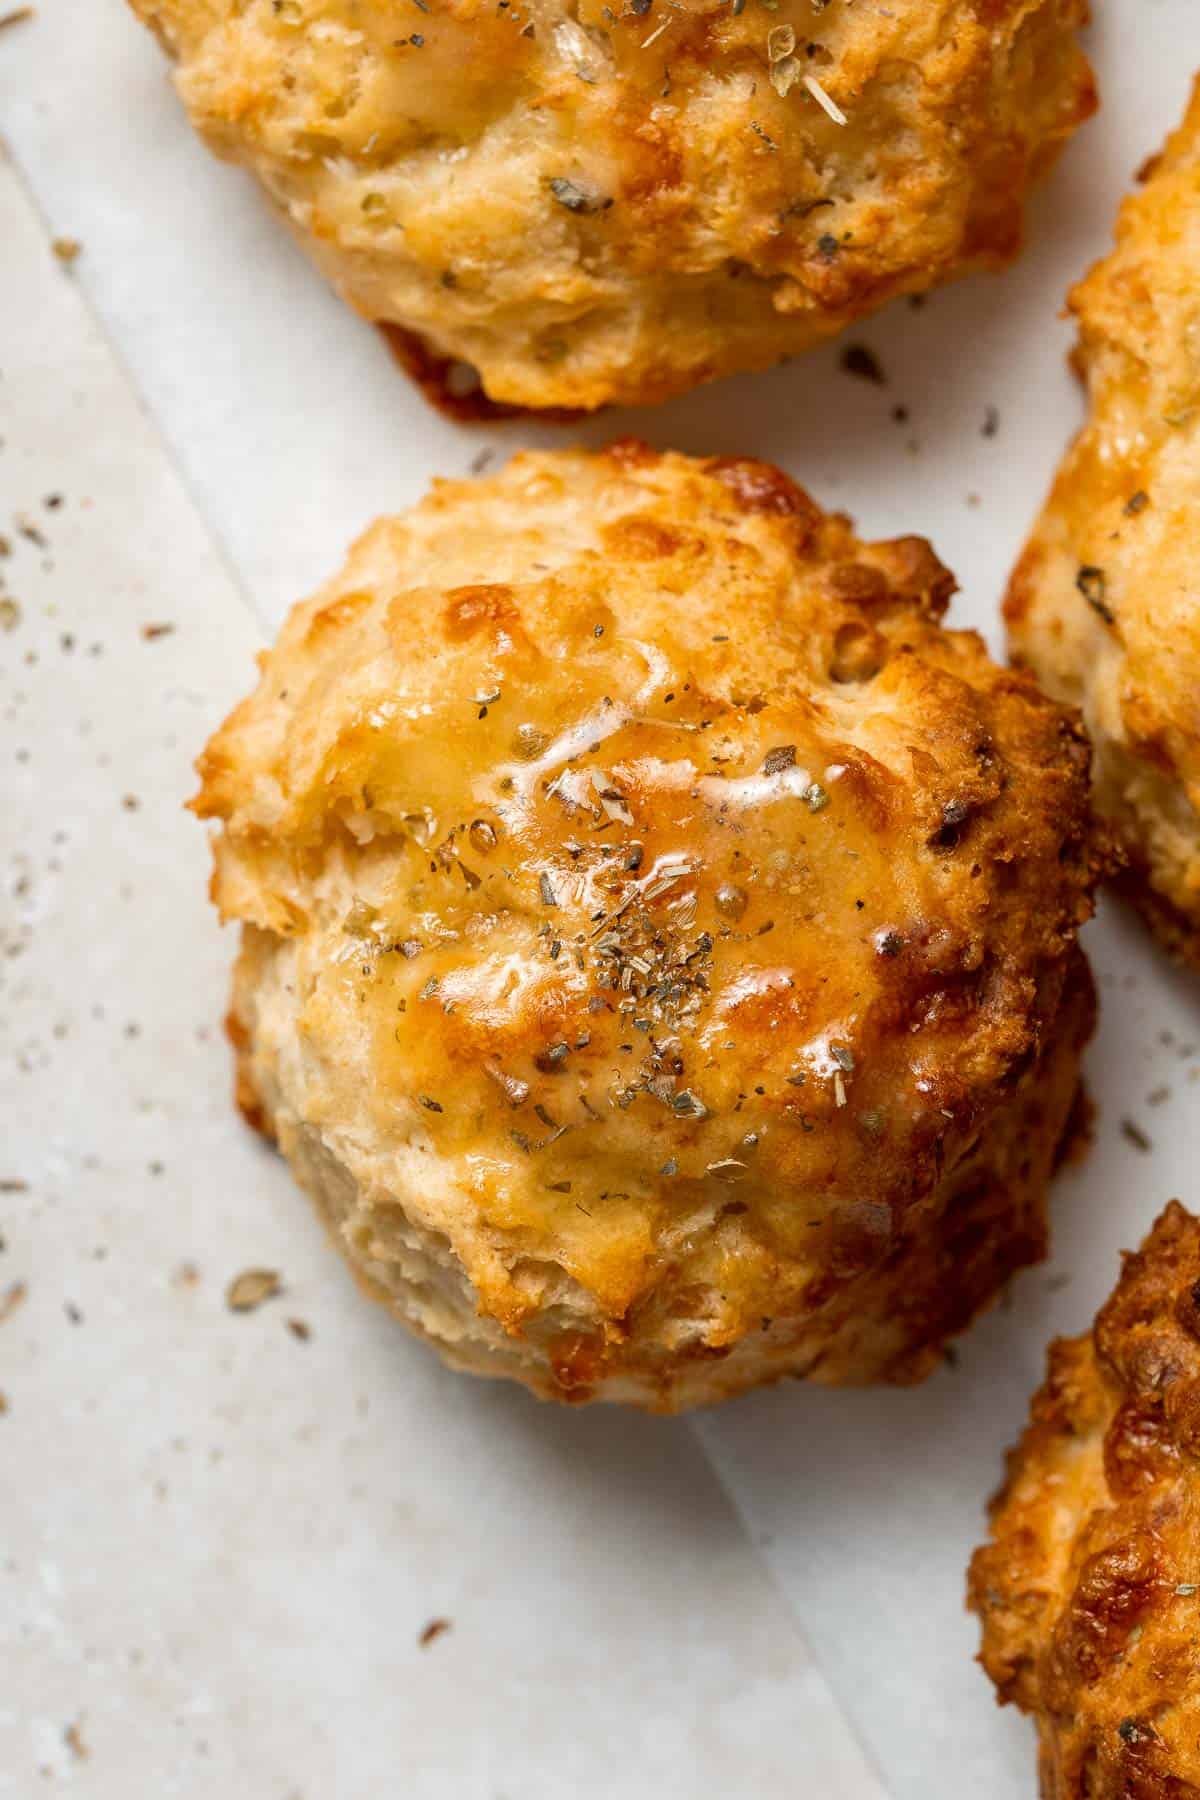
Looking for the perfect appetizer or light lunch? Try a tomato and mozzarella tart topped with basil and a drizzle of pomegranate molasses.
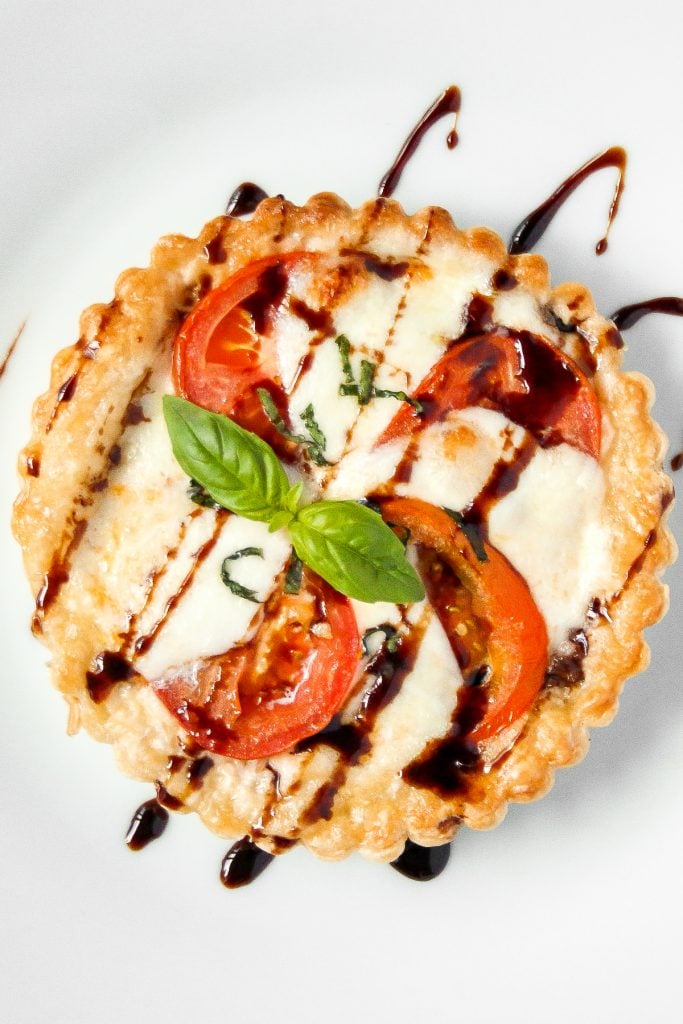
When it comes to menu planning, baked turkey meatballs reign supreme. Say hello to your meal ready in under 20 minutes from prep to table. For a vegetarian option, try quinoa, cauliflower and chickpea vegetarian meatballs.
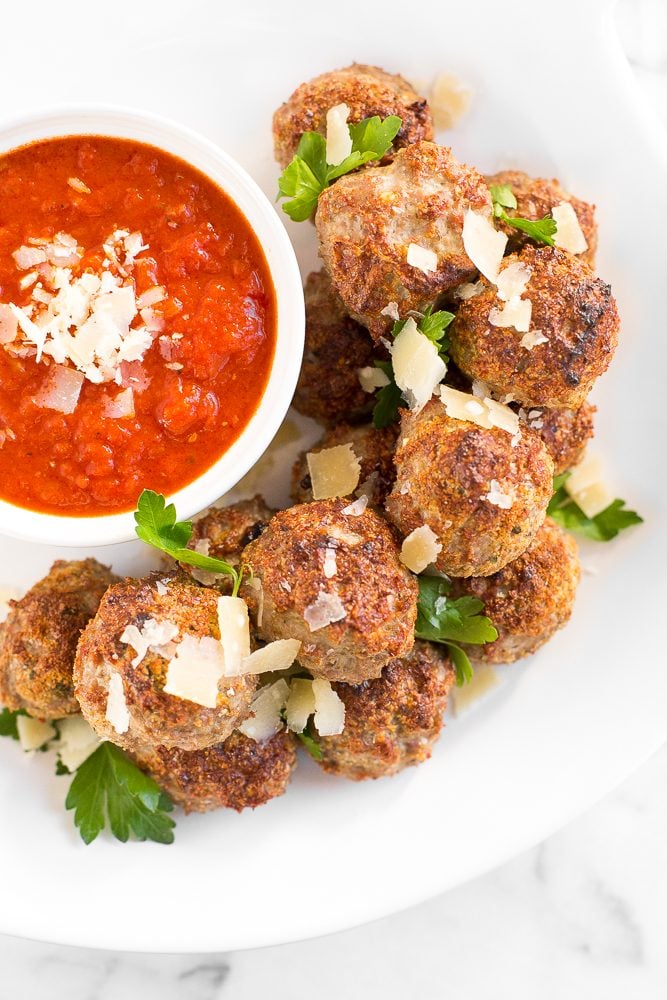
Smoked Salmon and Cream Cheese Cracker Bites
Smoked salmon and cream cheese cracker bites are topped with cucumber and argula to make the perfect bite-size snacks.
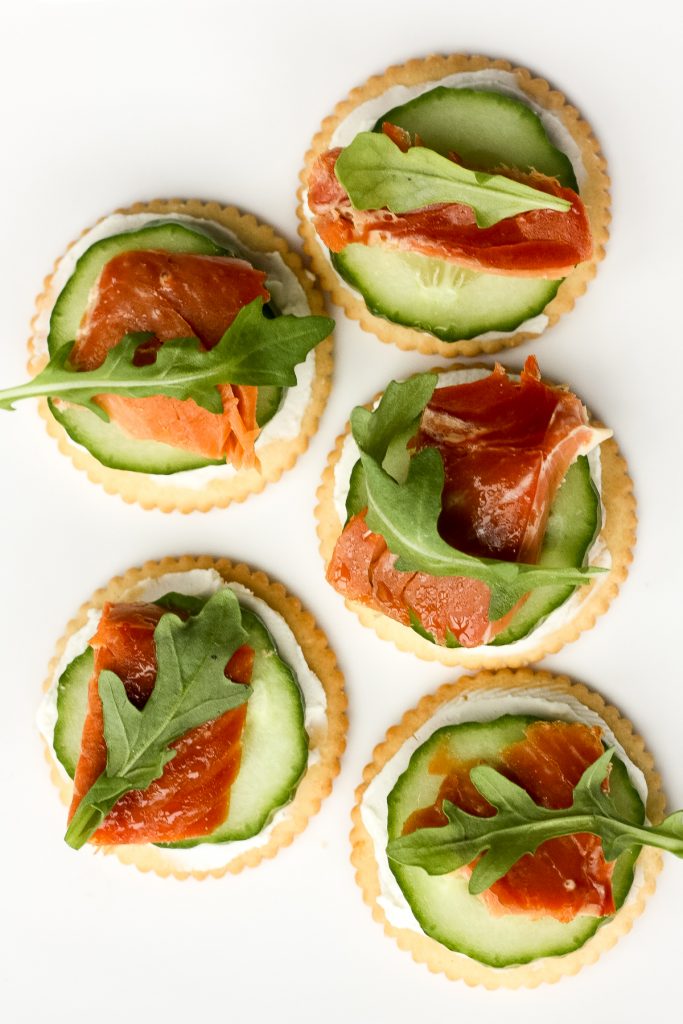
Baba ganoush is a creamy, roasted eggplant dip mixed with garlic and tahini for an explosion of flavour! It is perfect served with pita chips or veggies.
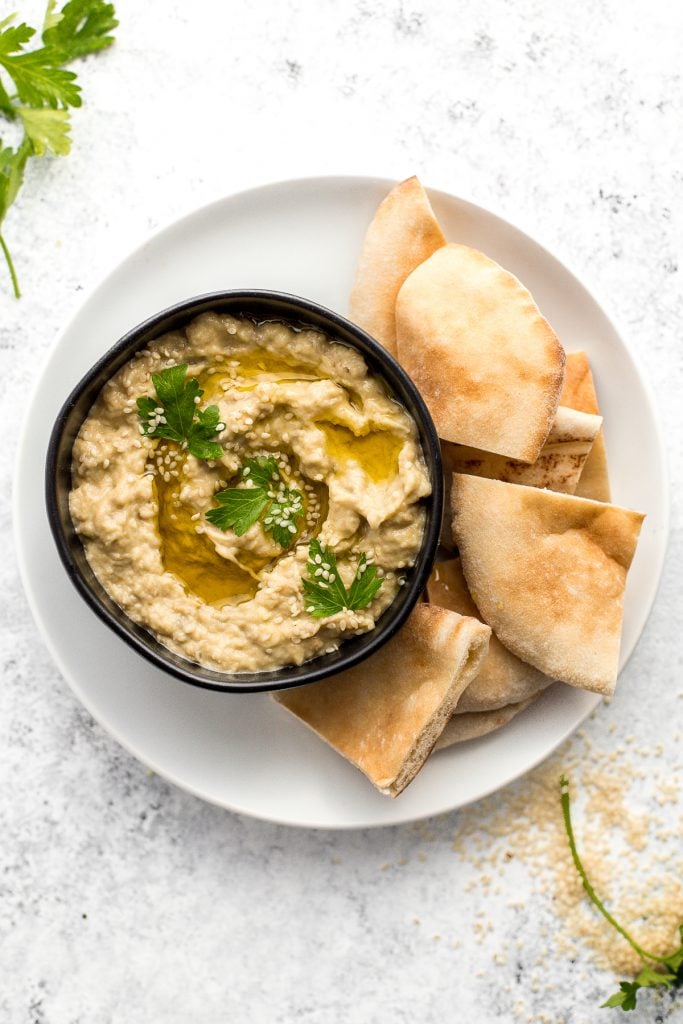
More Easter Recipes
Once you have selected the Easter appetizers that you want to serve, let's tackle the other items on the menu:
Easter Dinner Tips
- Plan your menu ahead of time. You can prepare some of these Easter appetizers in advance. Some can stored in an airtight container for a few days at room temperature or in the refrigerator, and some can even be frozen, according to recipe directions.
- Prep your ingredients as much as possible. Once you have decided on the dishes to serve, prepare as much as you can in advance, whether that is chopping ingredients or prepping the dish and storing in the refrigerator until ready for the oven. Any little bit that you can prepare in advance will make things much less stressful on the day.
- Set the table the night before. Take out the fancy dinnerware, flatware, glasses, placemats, and napkins and set the table the night before. It's one less thing to worry about on Easter.
Did You Make Any of These Easter Appetizers?
Please leave a comment and rating below, and let me know what you thought of this round up of Easter appetizer recipes. Be sure to snap a picture and tag me on Instagram @aheadofthyme or share it on the Pinterest pin so that I can follow along.
HUNGRY FOR MORE? Don't forget to sign up for my email newsletter so that you don't miss any recipes. You can also follow along on Instagram and Pinterest for more recipe updates.
Easter Egg Brownies

Rich, fudgy, and decadent, Easter egg brownies are the dessert that will give you some serious FOMO if you don't bake them this spring season. These gooey and chewy mini egg brownies are topped with a simple and easy-to-make caramel sauce, and topped with mini chocolate eggs. It's an easy one bowl brownie recipe comes together quickly, you will seriously never go back to the boxed mix ever again. Plus, they are super festive and will look so good on your Easter dessert table.
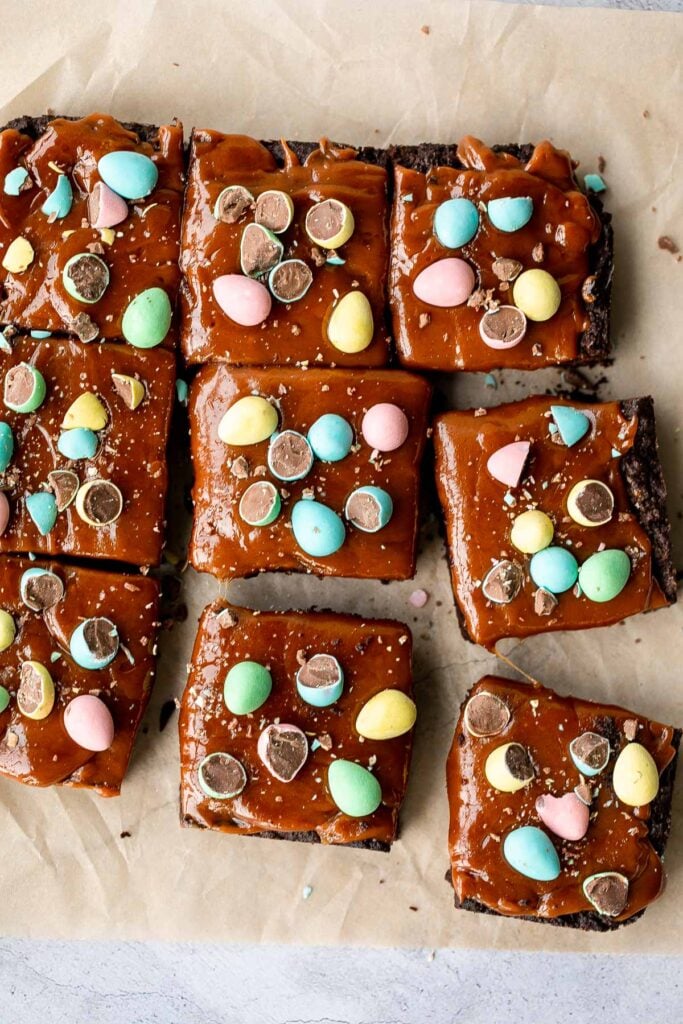
I think we can all agree that chocolate and caramel are kind of made for each other. Just like in Cheesecake Caramel Brownies and Caramel Apples, it's a no brainer that these Easter Egg Caramel Brownies are going to be so good and seriously super crave-worthy. One bite of this stuff and you will know what I am talking about.
For more Easter treats, browse through my most popular Easter dessert recipes.
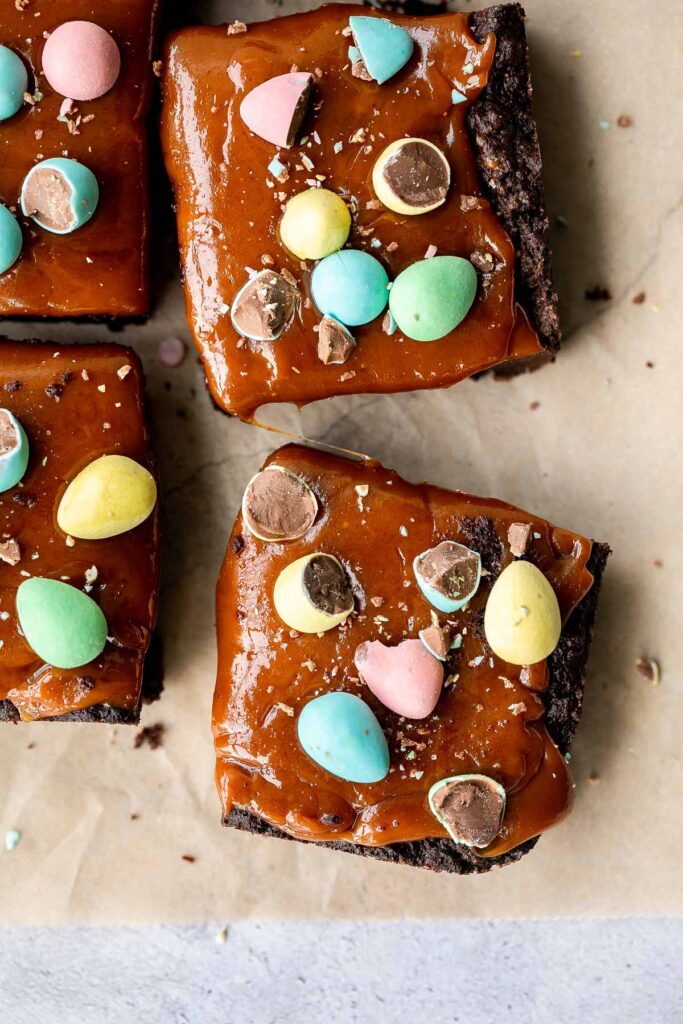
Ingredients
To make these delicious and rich Easter egg caramel brownies, you will need the following ingredients:
- semi-sweet chocolate + cocoa powder - these are brownies after all.
- butter
- sugar - both granulated sugar and brown sugar.
- eggs
- vanilla extract
- all-purpose flour
- salt
- caramel topping - homemade with sugar, butter, and heavy cream. You can top with salted caramel sauce if you prefer.
- mini chocolate eggs - the chocolate eggs bring a great crunch to the brownies and add a charming festive colour to each treat.
You will also need measuring cups and spoons, 9-inch square baking pan, large saucepan, and wire cooling rack.
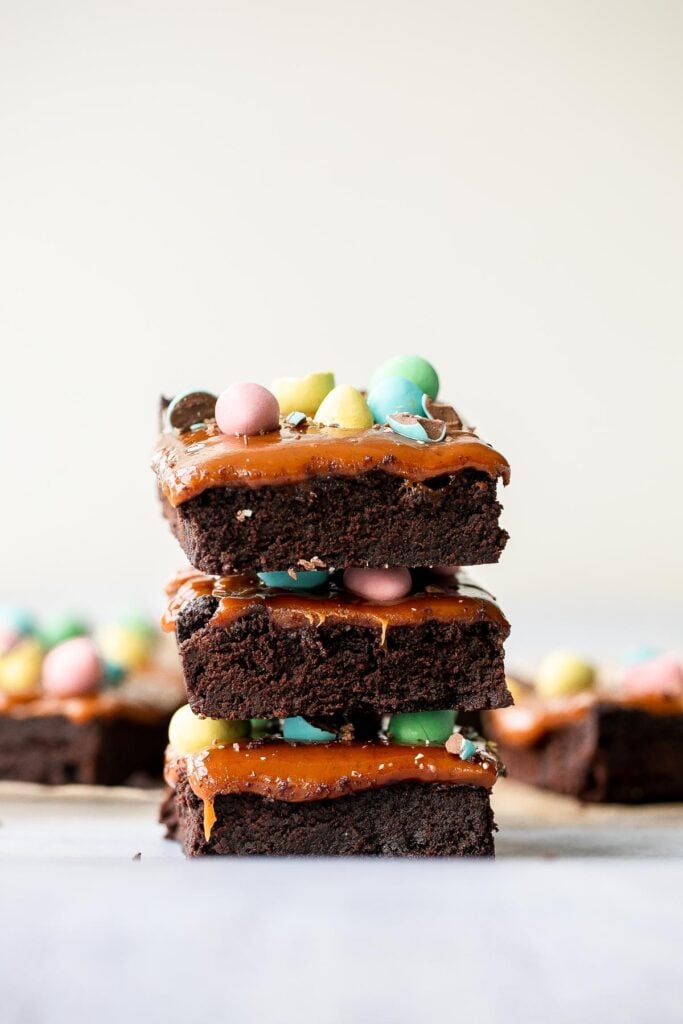
How to Make the Best Easter Egg Caramel Brownies
- Prep. Preheat the oven to 350°F. Grease a 9-inch square baking pan and line it with parchment paper so that it hangs over two sides to make it easy to life the brownies out of the pan when baked.
- Melt chocolate and butter. Melt the chocolate with butter in a medium heatproof bowl over a pan of simmering water. Make sure the bottom of the bowl does not touch the water, or you will burn the chocolate. Whisk until melted and smooth. Remove from heat.
- Make the brownie batter. Add sugars into the chocolate mixture and whisk until completely combined. Then, whisk in eggs and vanilla, until just combined. Add in flour, cocoa powder, and salt and fold together using a large spatula until just combined. Transfer the thick batter into the prepared baking pan.
- Bake. Bake for 25-30 minutes, until a toothpick inserted comes out clean with moist a few moist crumbs attached. If it comes out clean, it's overbaked.
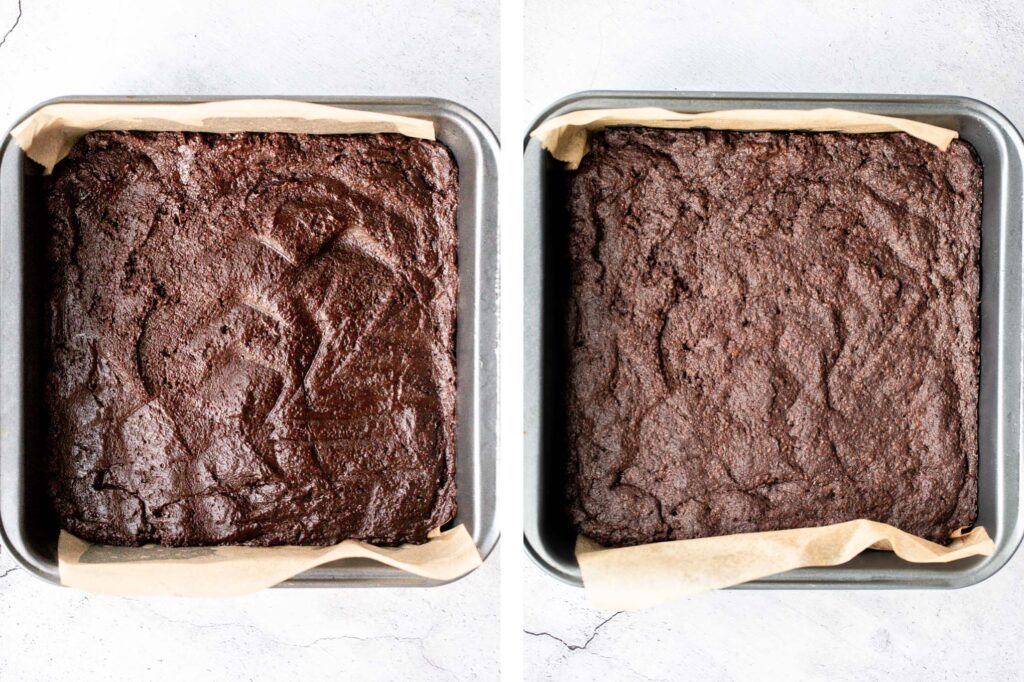
How to Make Homemade Caramel Sauce
While the brownies are baking, you can make the caramel sauce:
- Melt sugar. Heat sugar in a large shallow saucepan over medium-high heat. Whisk continuously as the sugar as it begins to melt. It will form clumps but will eventually melt completely. This can take 10-15 minutes. Continue to stir continuously until the sugar reaches a deep amber colour. Keep a close eye because the sugar will burn if you overcook.
- Add butter. Add the butter (note that the butter will immediately begin bubbling and may splatter, so be careful). Whisk until the butter is completely melted, then cook for 1 minute without stirring.
- Add cream. Slowly pour in the heavy cream and whisk until combined in the mixture. Again, be careful as the mixture will bubble and may splatter.
- Cool. Remove from heat and allow the sauce to cool in the saucepan for 10 minutes. The caramel will thicken as it cools.
How to Assemble Easter Egg Caramel Brownies
Once the brownies are done, remove the baking pan from the oven and place it on a wire cooling rack. Allow the brownies to cool for 10 minutes in the pan, then remove from the pan and place on the wire cooling rack.
Pour the slightly cooled caramel sauce on top of the brownies. Spread it evenly with a metal spatula. Top with mini chocolate eggs (half of the eggs should be crushed, while the other half are whole pieces). Allow the caramel to set, then cut into squares. You can place it in the refrigerator to help it firm up faster.
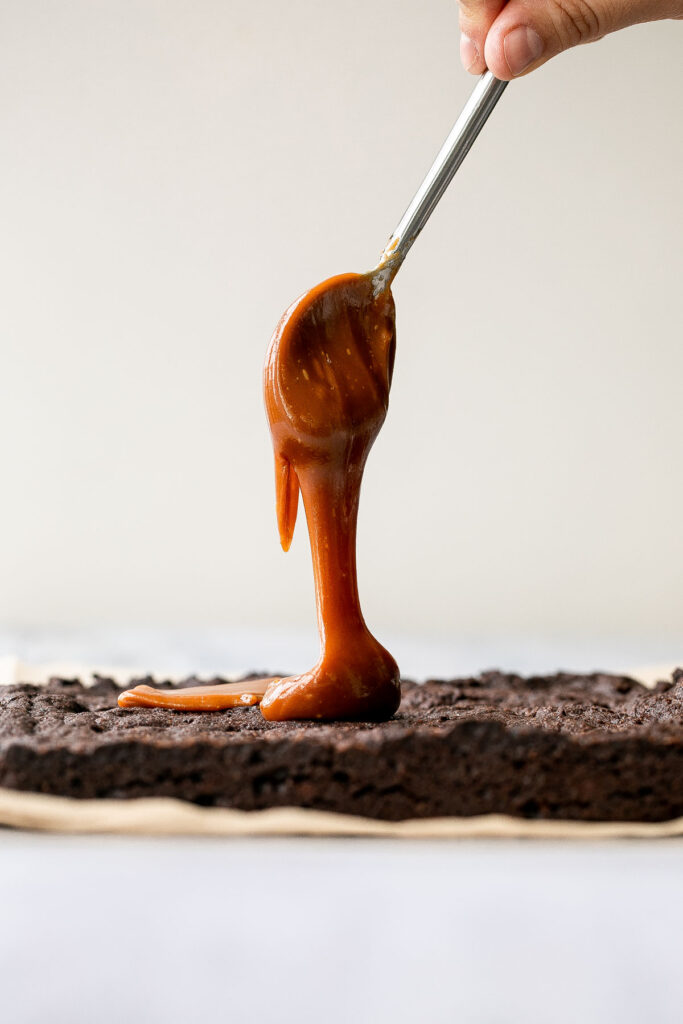
Storing and Freezing Instructions
- How to store: Store in an airtight container at room temperature for up to 3 days, or in the refrigerator for up to one week. I would not suggest stacking them up as the caramel may cause them to stick together when stacked.
- How to freeze: Brownies freeze really well. Store in single layers divided in between pieces of parchment paper in an airtight container or freezer bag. Freeze for up to 3 months. To eat, allow the brownies to thaw in the refrigerator overnight or on the kitchen counter for a few hours.
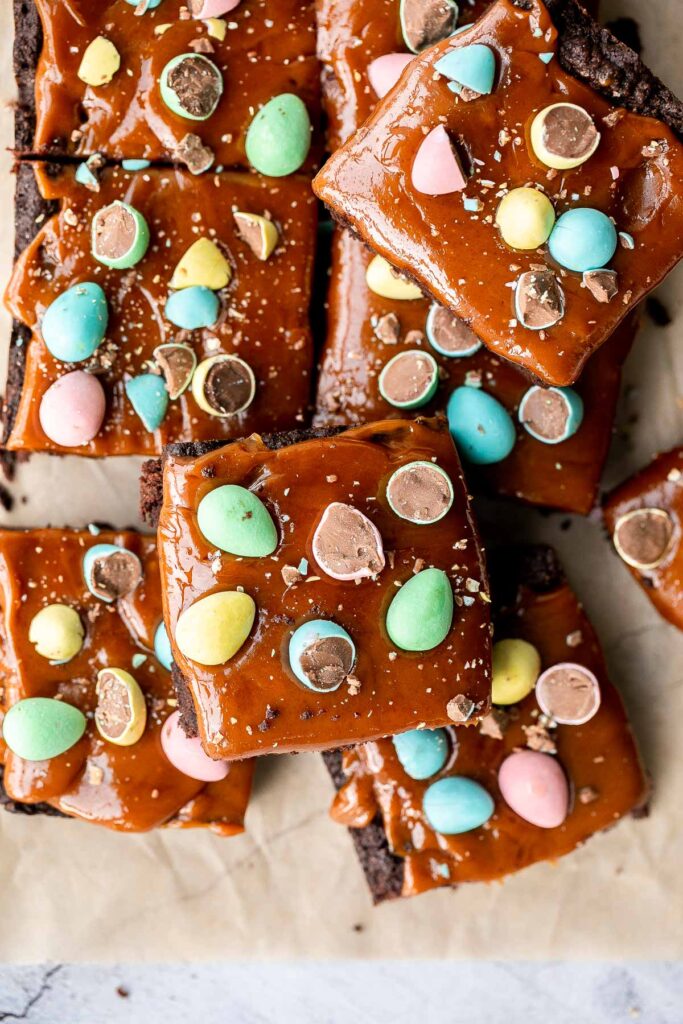
More Easter Recipes
- Easter Egg Sugar Cookies
- Mini Egg Easter Cookies
- Carrot Cake with Cheesecake Topping
- Carrot Cake Shortbread Cookies
- Bird's Nest Cookies
- Caramel Cheesecake Brownies
Tried this recipe?
I'd love to hear what you think! Leave a comment and rating below to share your feedback. Your reviews help others discover this recipe and help me keep creating more free recipes for you. Snap a photo and tag me on social media @aheadofthyme too.

Arugula and Roasted Carrot Salad
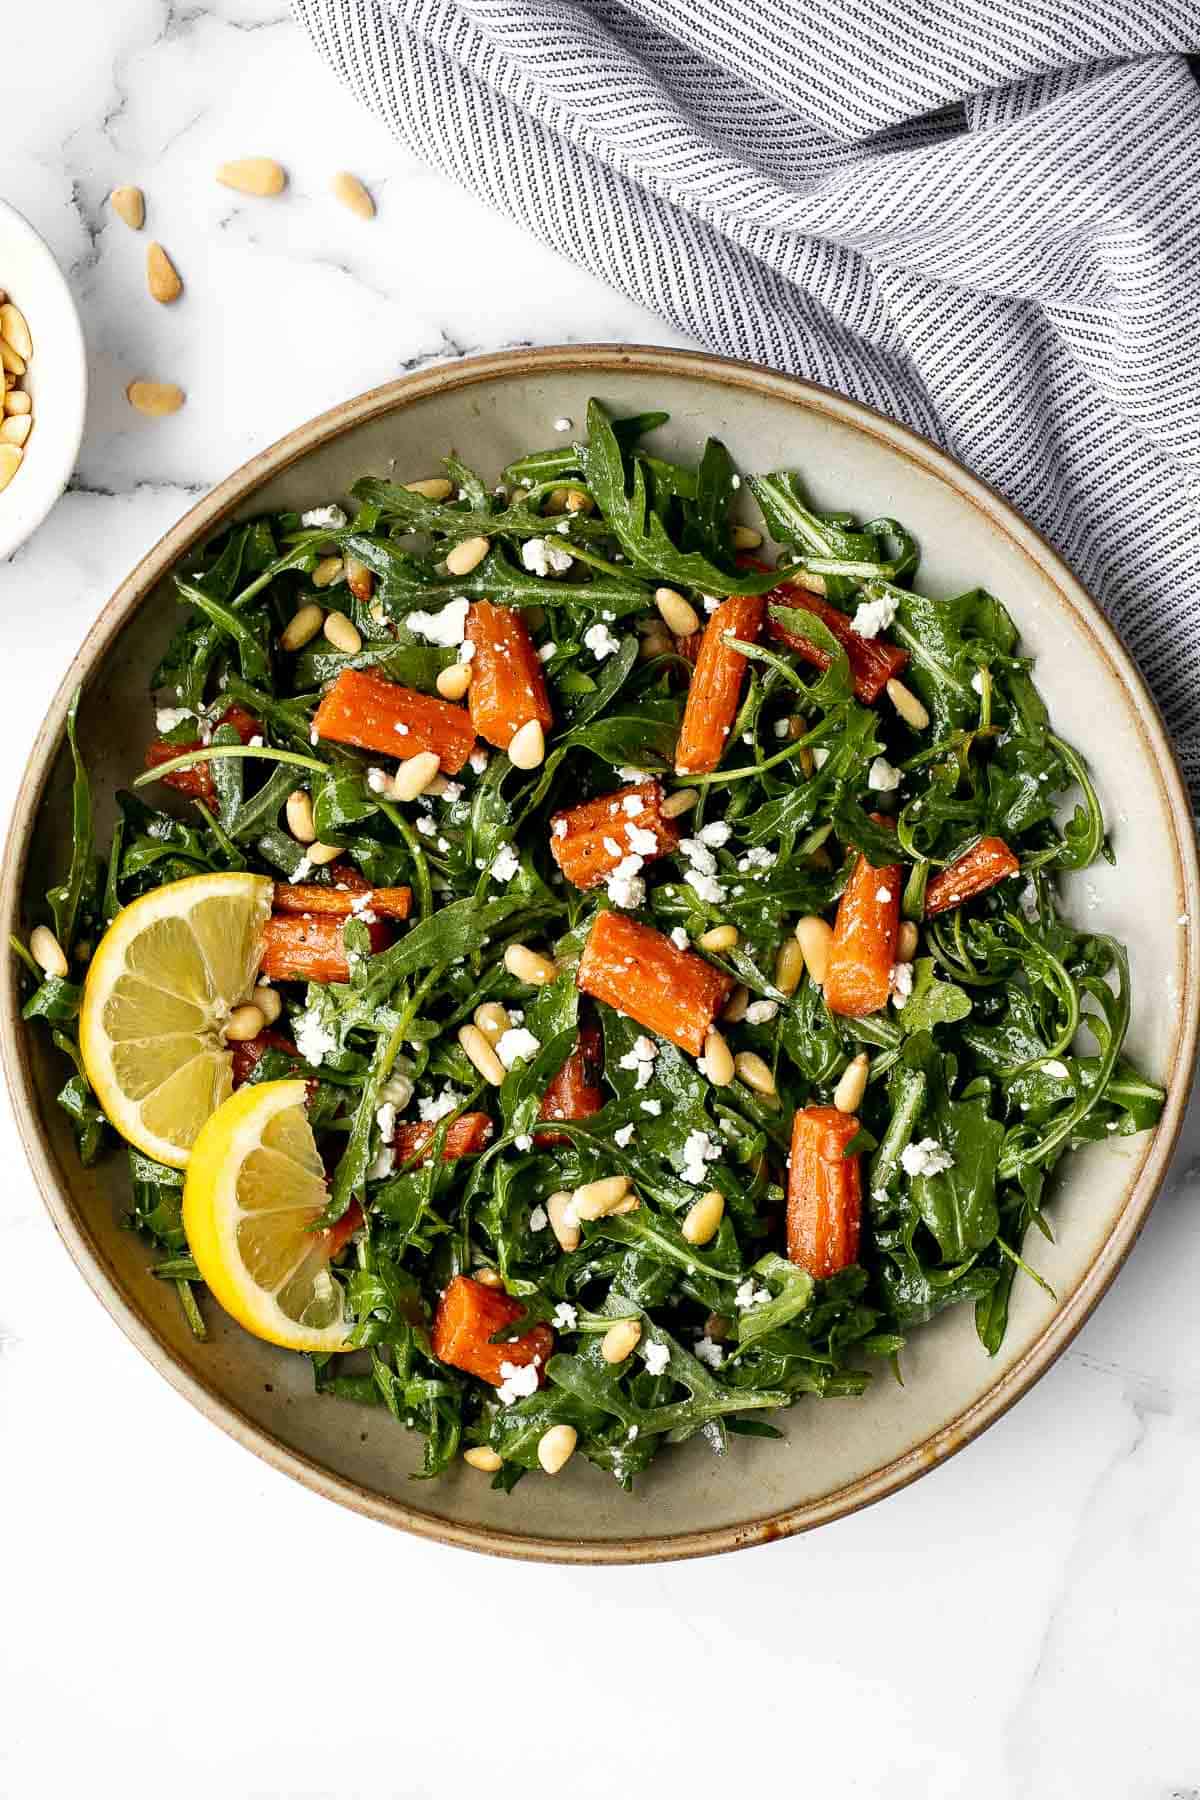
Arugula and roasted carrot salad is one of my favourite spring salads. It's a delicious and stunning salad that is packed with an amazing combination of sweet and sour flavours that balance each other out including spicy arugula, sweet roasted carrots, creamy feta cheese, sour lemon juice, and pine nuts. It's a light meal option that is sure to impress. Plus, it's a great way to use up any leftover roasted carrots that you might have on hand. Serve this quick and easy salad for lunch or dinner this season.
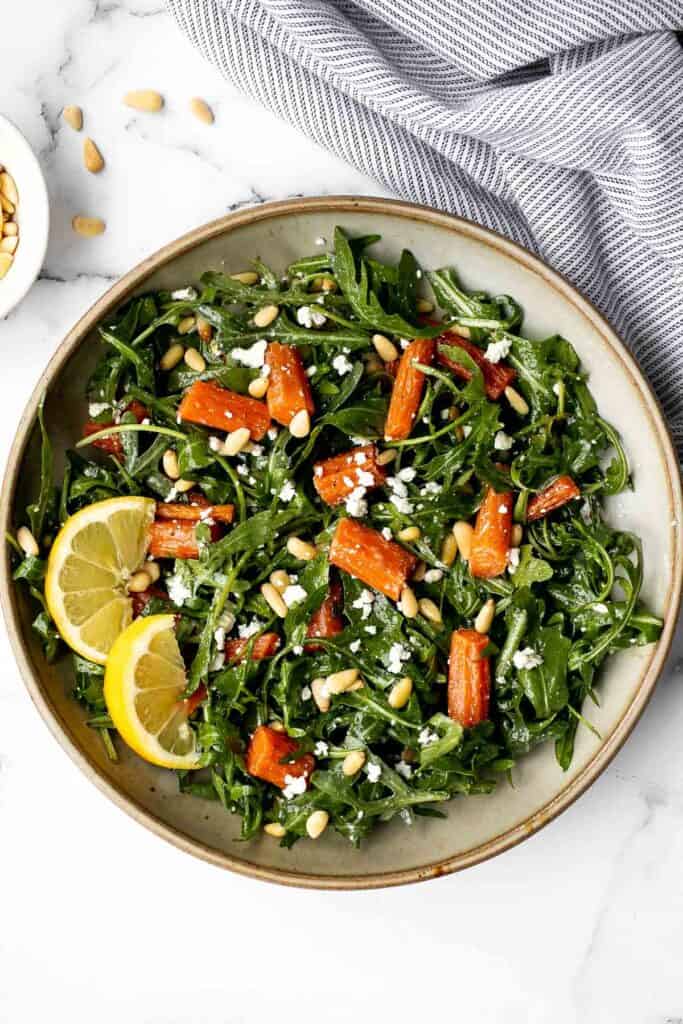
You know it's spring when all the carrot recipes start to come out. And what's not to love? I can have carrot-heavy dishes ranging all season long. Some of my favourites are Roasted Carrot and Ginger Soup, Roasted Spring Vegetables, Carrot Cake Shortbread Cookies, and Spiced Carrot Muffins.
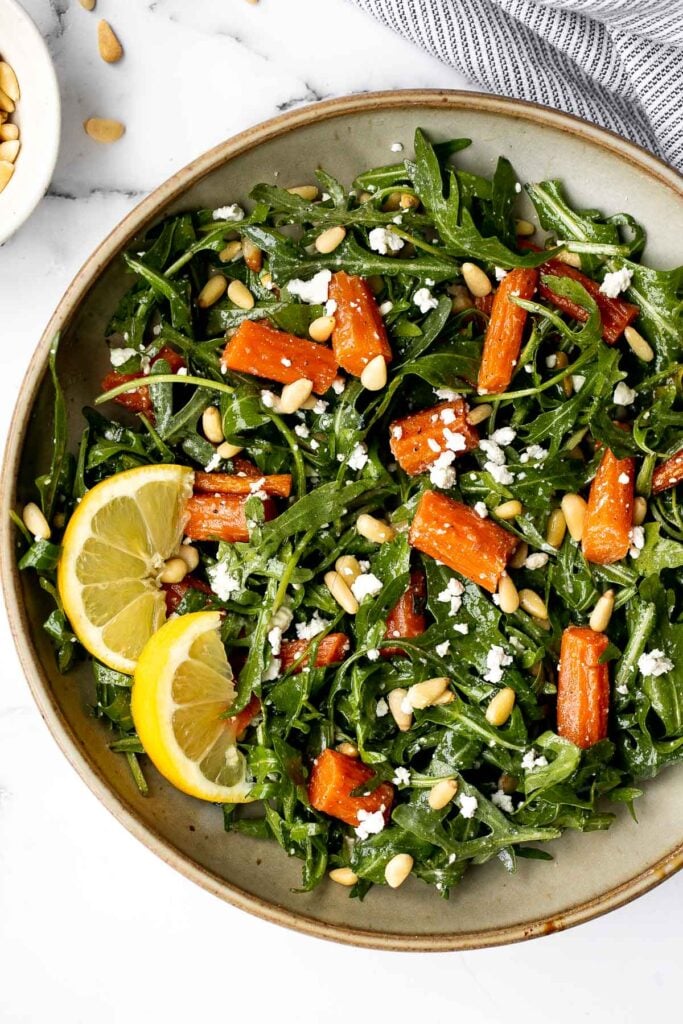
Ingredients in Roasted Carrot Salad
To make this easy arugula and roasted carrot salad, you will need the following ingredients:
- roasted carrots - This a great recipe to use up any leftover roasted carrots that you have such as Garlic and Herb-Roasted Carrots, Honey Roasted Carrots or Maple Roasted Carrots. You can also prepare the carrots fresh by drizzling baby carrots with some olive oil and seasoning with salt and pepper on a large sheet pan. Bake in a 400F preheated oven for 25-30 minutes until fork tender.
- arugula - I love the combination of sweet carrots with spicy arugula, they really balance each other out. You can also substitute the arugula with any mixed greens that you would like.
- feta cheese - I have also made this salad with goat cheese, either option works great and is a personal preference.
- pine nuts - Feel free to substitute with any other nuts that you have. Toasted sunflower seeds or sliced almonds are great options.
- salad dressing - this salad is tossed in a simple dressing made with olive oil, lemon juice, salt, and pepper.
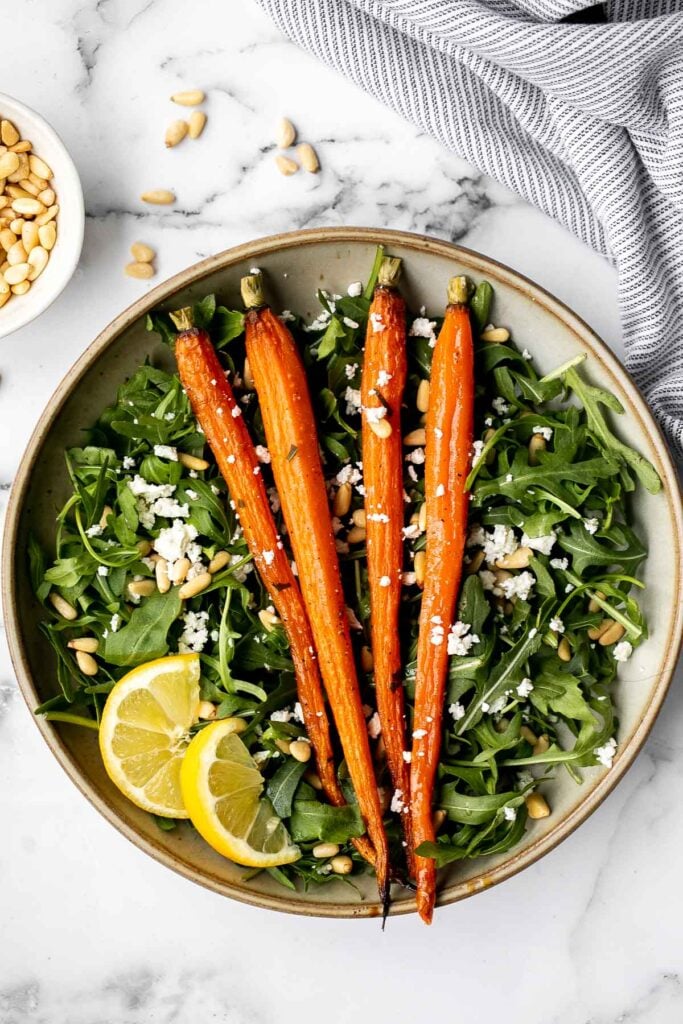
How to Make the Best Arugula and Roasted Carrot Salad
This salad is super easy to make. All you do is combine your ingredients into a serving plate or mixing bowl. Stir together the dressing ingredients and pour onto the salad. Then toss to combine and serve.
You can either place your carrots whole onto the tossed salad, or chop them up and toss together.
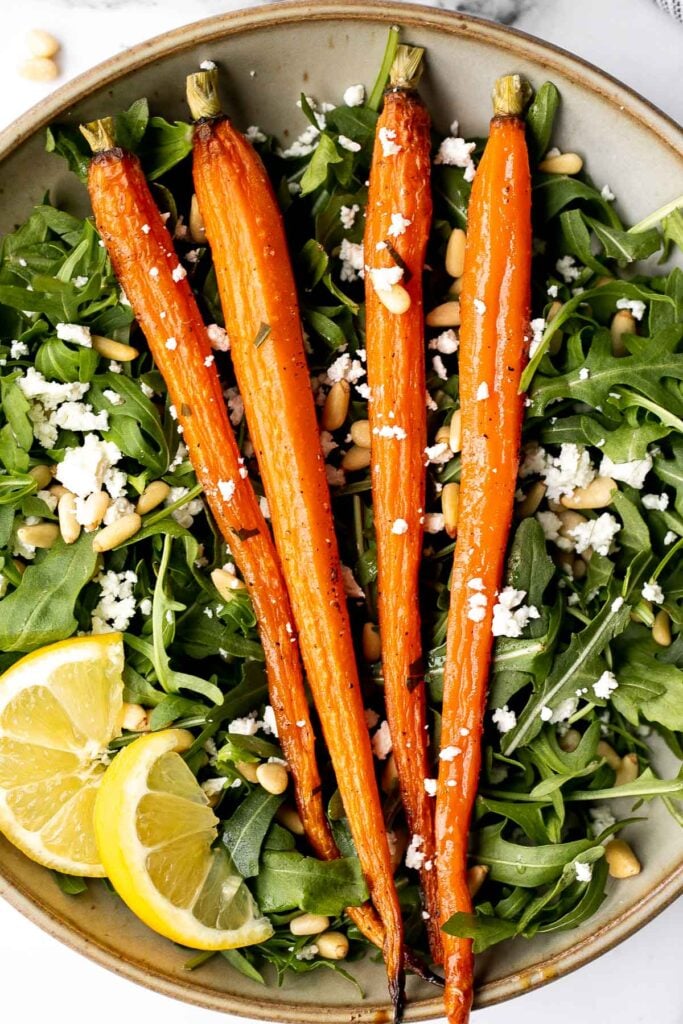
Tips and Tricks
- How to serve. Serve this salad pretty much any time of day. It works brilliantly as a starter for a relaxed dinner party or a light lunch with friends. I also like to serve some toasted baguettes or other crusty bread alongside this hearty salad.
- Make ahead instructions. If not using leftover roasted carrots, you can roast the carrots 1-2 days ahead of time. Allow the carrots to cool to room temperature and then store in an airtight container in the refrigerator for up to 2 days. Assemble the salad when ready to serve.
- Use grilled carrots. Another great way to cook the carrots, especially if you are experiencing warmer weather is to grill them. Drizzle the carrots with olive oil and season with salt and pepper. Then grill on both sides for 5-6 minutes until golden.
- How to customize. If making the roasted carrots fresh, rather than using leftovers, then you can go completely versatile with the seasoning on them. Go wild and experiment with flavours like garlic, chilli, cumin, thyme or dried sumac and roast until they're fragrant and caramelized.
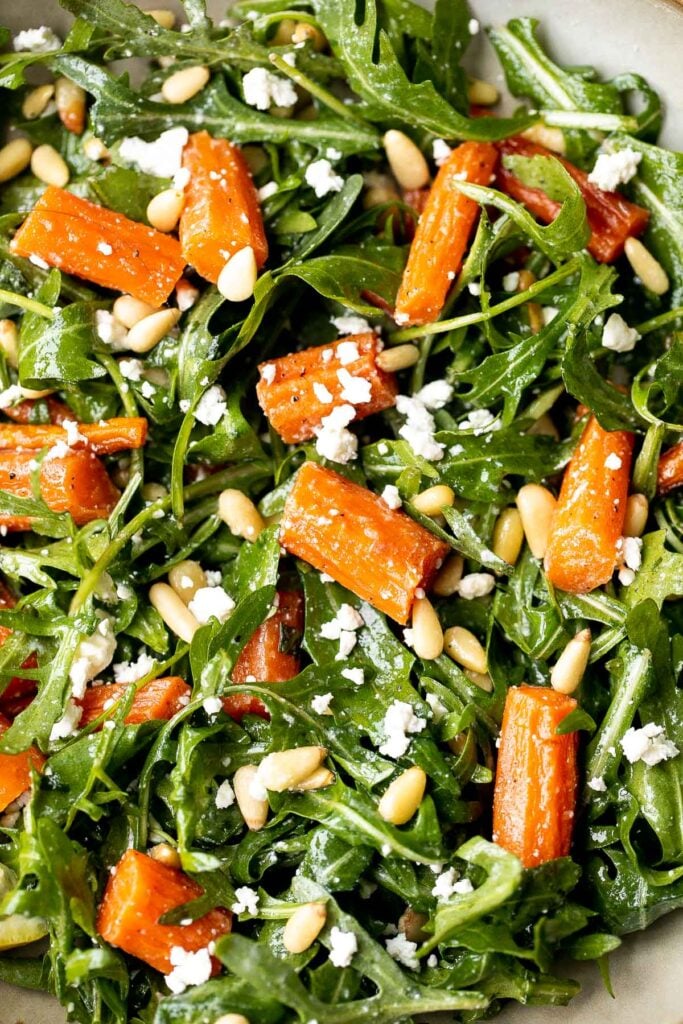
More Salad Recipes
- Chopped Asparagus Salad
- Mediterranean Chickpea Wedge Salad
- Spring Pesto Pasta Salad with Asparagus
- The Best Greek Salad
- Mediterranean Orzo Pasta Salad
- Persian Shirazi Salad with Cucumber and Tomatoes
- Chinese Garlic Cucumber Salad
Tried this recipe?
I'd love to hear what you think! Leave a comment and rating below to share your feedback. Your reviews help others discover this recipe and help me keep creating more free recipes for you. Snap a photo and tag me on social media @aheadofthyme too.
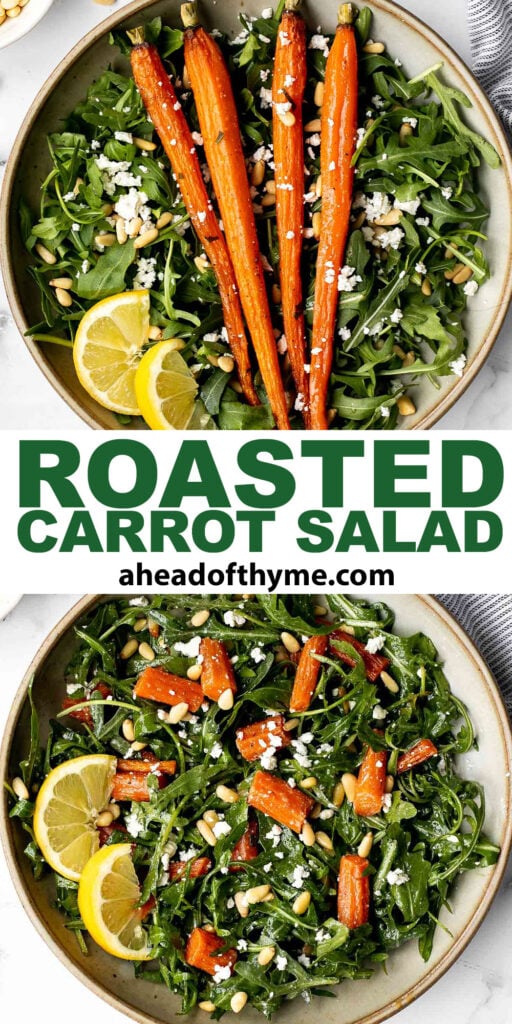
Bunny Ears Easter Cupcakes

Bunny ears Easter cupcakes are made of moist vanilla cake with homemade buttercream frosting, topped with sugar sprinkle coated marshmallows. These decadent handheld treats are the sweetest and most flavourful dessert you'll have this Easter. Satisfy those sweet tooths with a fluffy vanilla cake that locks in moisture and crumbles delicately. The melt-in-your-mouth taste will have you coming back for more each year. These bunny ears Easter cupcakes are creative, tasty, and fun!

Why You'll Love These Bunny Ears Easter Cupcakes
- The festive design is pretty sweet. Cute bunny ears top these vanilla cupcakes with festive fun. Customize your coloured sprinkles and unleash your creativity. You can even use food colouring to dye the icing for some Easter pastels!
- Decorating for the whole family. Decorating these bunny ears Easter cupcakes is so easy, your kids can do their part before eating them! Dessert can be just as fun to make as it is to eat.
- Who doesn't love moist, fluffy, sweet vanilla cupcakes? The texture and flavour of these bunny ears Easter cupcakes create a decadent treat that everyone will love this holiday.
- Homemade buttercream frosting. What more is there to say? It's fresh. It's sweet. It's to die for. Celebrate Easter the right way with homemade buttercream frosting atop your bunny ears Easter cupcakes.

Ingredients
To make these adorable and delicious bunny ears Easter cupcakes, you will need the following ingredients:
- all-purpose flour
- baking powder
- cornstarch
- salt
- butter
- granulated sugar
- eggs
- vanilla extract
- plain yogurt - this is a secret ingredient that keeps these cupcakes moist for days.
- whole milk
- buttercream frosting - made with butter, confectioners' sugar, vanilla extract, and milk.
- marshmallows
- sugar sprinkles - I used gold sprinkles because I love the luxurious look of these cupcakes. Feel free to use pink sprinkles for a more classic look.
You will also need measuring cups and spoons, mixing bowls, stand mixer or hand mixer, 12-tin muffin pan, piping bags, and no. 2D decorating tip.

How to Make the Best Bunny Ears Easter Cupcakes
- Make the cupcake batter. In a medium mixing bowl, whisk together flour, cornstarch, baking powder and salt. Set aside. In a large mixing bowl, use a hand mixer or stand mixer with the paddle attachment to cream together the butter and sugar until light and fluffy, about 2-3 minutes. Add eggs, one at a time, and beat until incorporated. Add vanilla and yogurt, beating until combined. Add one-third of the dry ingredients and beat until just combined. Then, add half of the milk, and beat until just combined. Repeat, until you end with the dry ingredients. Scrape down the bowl as needed and beat until just combined and smooth. Do not overmix. The batter will be thick.
- Bake the cupcakes. Use a medium cookie scoop to scoop up the batter and into a 12-tin muffin pan lined with cupcake liners, filling the liners ⅔ full with batter. Bake in a 350 F preheated oven for 18-20 minutes, until a toothpick inserted into the center of the cupcake comes out clean.
- Cool. Allow the cupcakes to cool in the muffin pan for 5 minutes, then transfer into a wire cooling rack to cool completely before icing.
How to Decorate Bunny Cupcakes
- Make the buttercream. In a large mixing bowl, beat the butter using a hand mixer or stand mixer on medium speed until creamy. Add vanilla and beat until light and fluffy. Add in confectioners' sugar one cup at a time and continue to beat until incorporated. Add milk ad beat until light and fluffy. Cover the bowl with a damp cloth until you are ready to use the icing to prevent it from drying out.
- Pipe on the buttercream. Use a couplers to secure a no. 2D decorating tip onto a piping bag. Fill the bag with icing and pipe the icing onto each cupcake starting at the edges and move in an overlapping circular motion until you reach the center and gently lift up.
- Prepare the bunny ears. Prepare a small shallow plate of sugar sprinkles. Then, use a pair of kitchen scissors to cut each of the marshmallows diagonally and dip the sticky cut edges into the sugar sprinkles, pressing down gently to coat. Place the marshmallow halves standing up in the frosting to form into bunny ears.
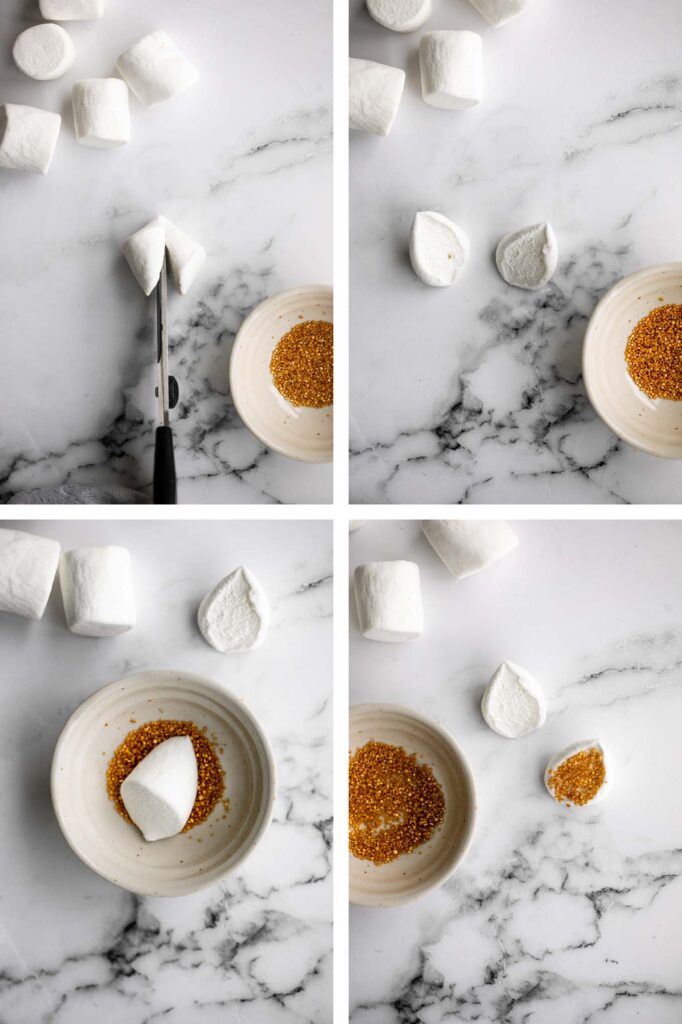
Tips and Tricks
- Use room temperature butter. Using the right temperature butter is about having the right consistency. Your butter should still be cool to the touch and should hold its shape well. If you poke it, your finger should leave an indent-not slide into it. Leave your butter out for about an hour to achieve this.
- Use room temperature dairy products. Don't skip this step! Allow your yogurt, milk, and eggs to warm up a bit to room temperature before making your batter. You end up with a fuller batter and fluffier, lighter cupcakes.
- How to store. Allow cupcakes to cool completely, then store iced bunny ears Easter cupcakes in an airtight container at room temperature for up to 3 days, or in the refrigerator for up to 5 days.
- How to freeze. You can freeze these cupcakes either before or after icing.
- Before frosting: You can freeze unfrosted vanilla cupcakes by wrapping them tightly with plastic cling wrap, and then placing them in an airtight container and freezing for up to 3 months.
- After frosting: Place frosted cupcakes on a baking tray and freeze until hard, about 1 hour. Then wrap them tightly in plastic cling wrap, and then place in an airtight container and freeze for up to 3 months.
- To serve: Allow them to completely thaw overnight in the refrigerator, or for a few hours at room temperature, before icing or serving.
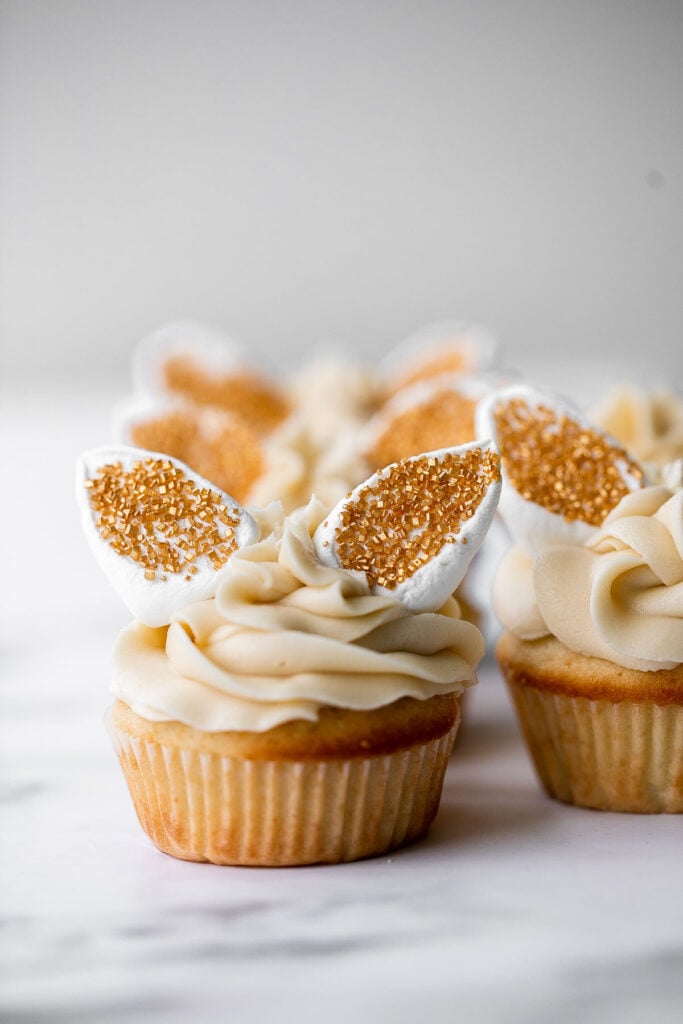
More Easter Dessert Recipes
- Easter Egg Sugar Cookies
- Mini Egg Easter Cookies
- Carrot Cake Shortbread Cookies
- Easter Egg Caramel Brownies
- Carrot Cake with Cheesecake Topping
- Bird's Nest Cookies
- Spiced Carrot Muffins
Tried this recipe?
I'd love to hear what you think! Leave a comment and rating below to share your feedback. Your reviews help others discover this recipe and help me keep creating more free recipes for you. Snap a photo and tag me on social media @aheadofthyme too.

30 Best Easter Desserts

Baking desserts is kind of a must for all holidays, but Easter is by far my favourite holiday to do some baking for. Easter desserts are just so pretty with all the gorgeous pastel colour tones, and cute designs. We have rounded up our 30 best and most popular Easter dessert recipes from egg-shaped sugar cookies, mini chocolate egg treats, everything carrot cake, and more. So if you are wondering what to bake this Easter, then you have come to the right place.

Best Easter Desserts
Cute, delicious, and easy-to-make Easter egg sugar cookies with royal icing are the perfect treat to make this Easter. Crisp outside and soft inside. One of my favourite Easter dessert recipes.
Mini egg Easter cookies are the perfect chocolate chip cookie -- crispy on the outside, and soft and chewy on the inside. Make in under 20 minutes.

Easter Bark is the perfect chocolate treat - sweet, rich, and pretty, loaded with chocolate mini eggs and sprinkles. It's a quick and easy no bake recipe.

Robin's Egg Cupcakes are an Easter treat you need to try! Fluffy vanilla cupcakes are topped with blue buttercream, mini eggs, and speckled with chocolate.

Carrot Bundt Cake with Cream Cheese Glaze
Showstopping carrot bundt cake with cream cheese glaze is light, fluffy, and moist. It's loaded with sugar, spice, and everything nice -- including grated carrots.
Italian Easter Cookies are cake-like cookies that are light and fluffy with lemon flavor throughout and topped with an easy homemade glaze and sprinkles.

Butterscotch and Peanut Butter Bird's Nest Cookies
Spring is in the air and Easter is right around the corner. This calls for a batch of adorable no bake butterscotch and peanut butter bird's nest cookies. One of the cutest Easter dessert recipes.
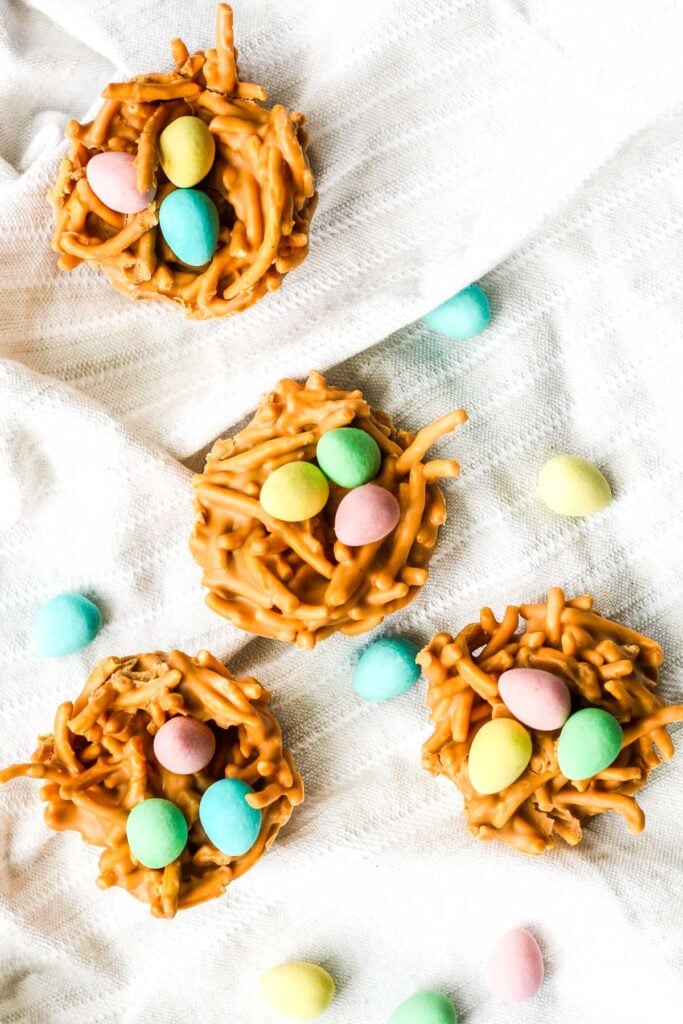
Hot cross buns is a timeless classic Easter bread made with raisins, cinnamon, and a honey glaze. They are perfect for breakfast, a snack or dessert.
Mini Egg Easter Cheesecake is a rich and decadent triple chocolate cheesecake with an Oreo crust, chocolate cheesecake filling, and topped with mini eggs.
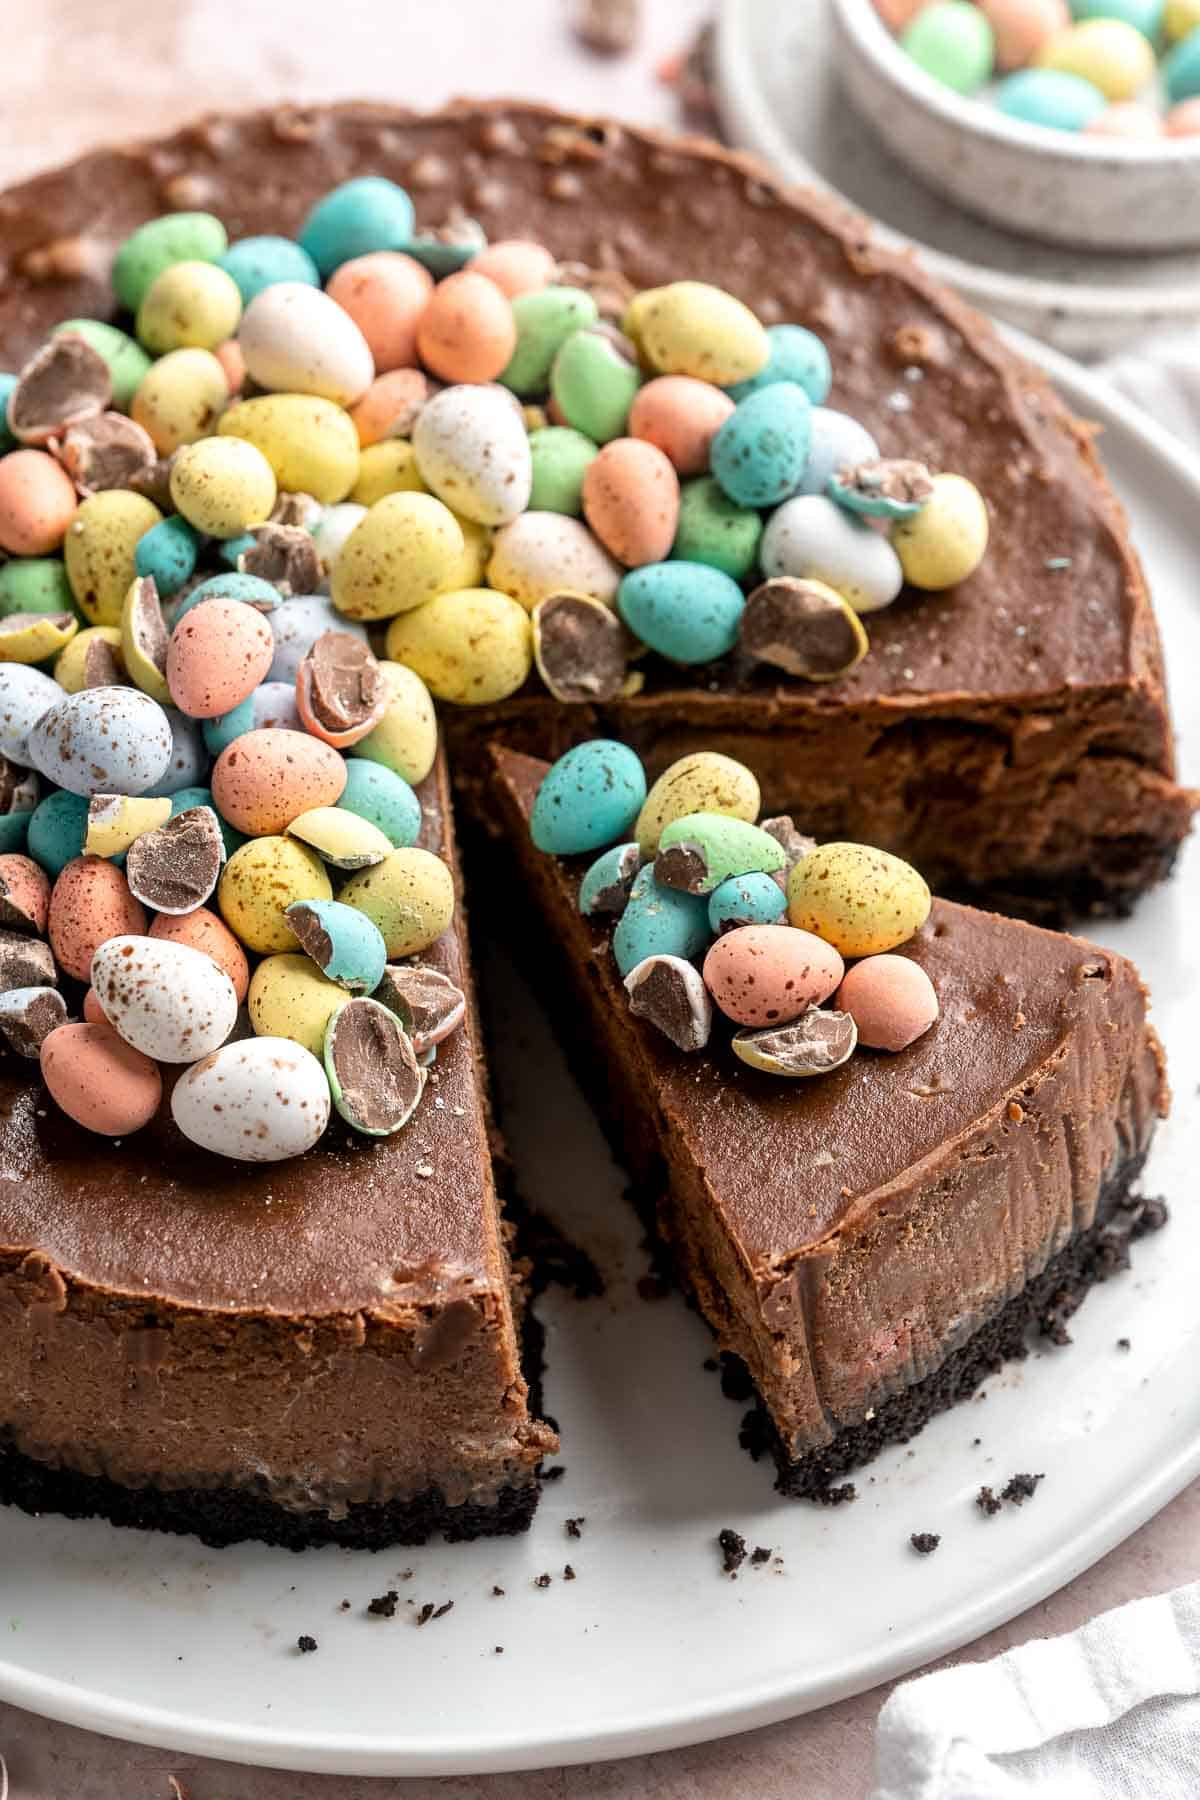
Simnel Cake is a traditional Easter fruitcake that is light and citrusy with two layers of marzipan which adds a delicious nutty flavor.
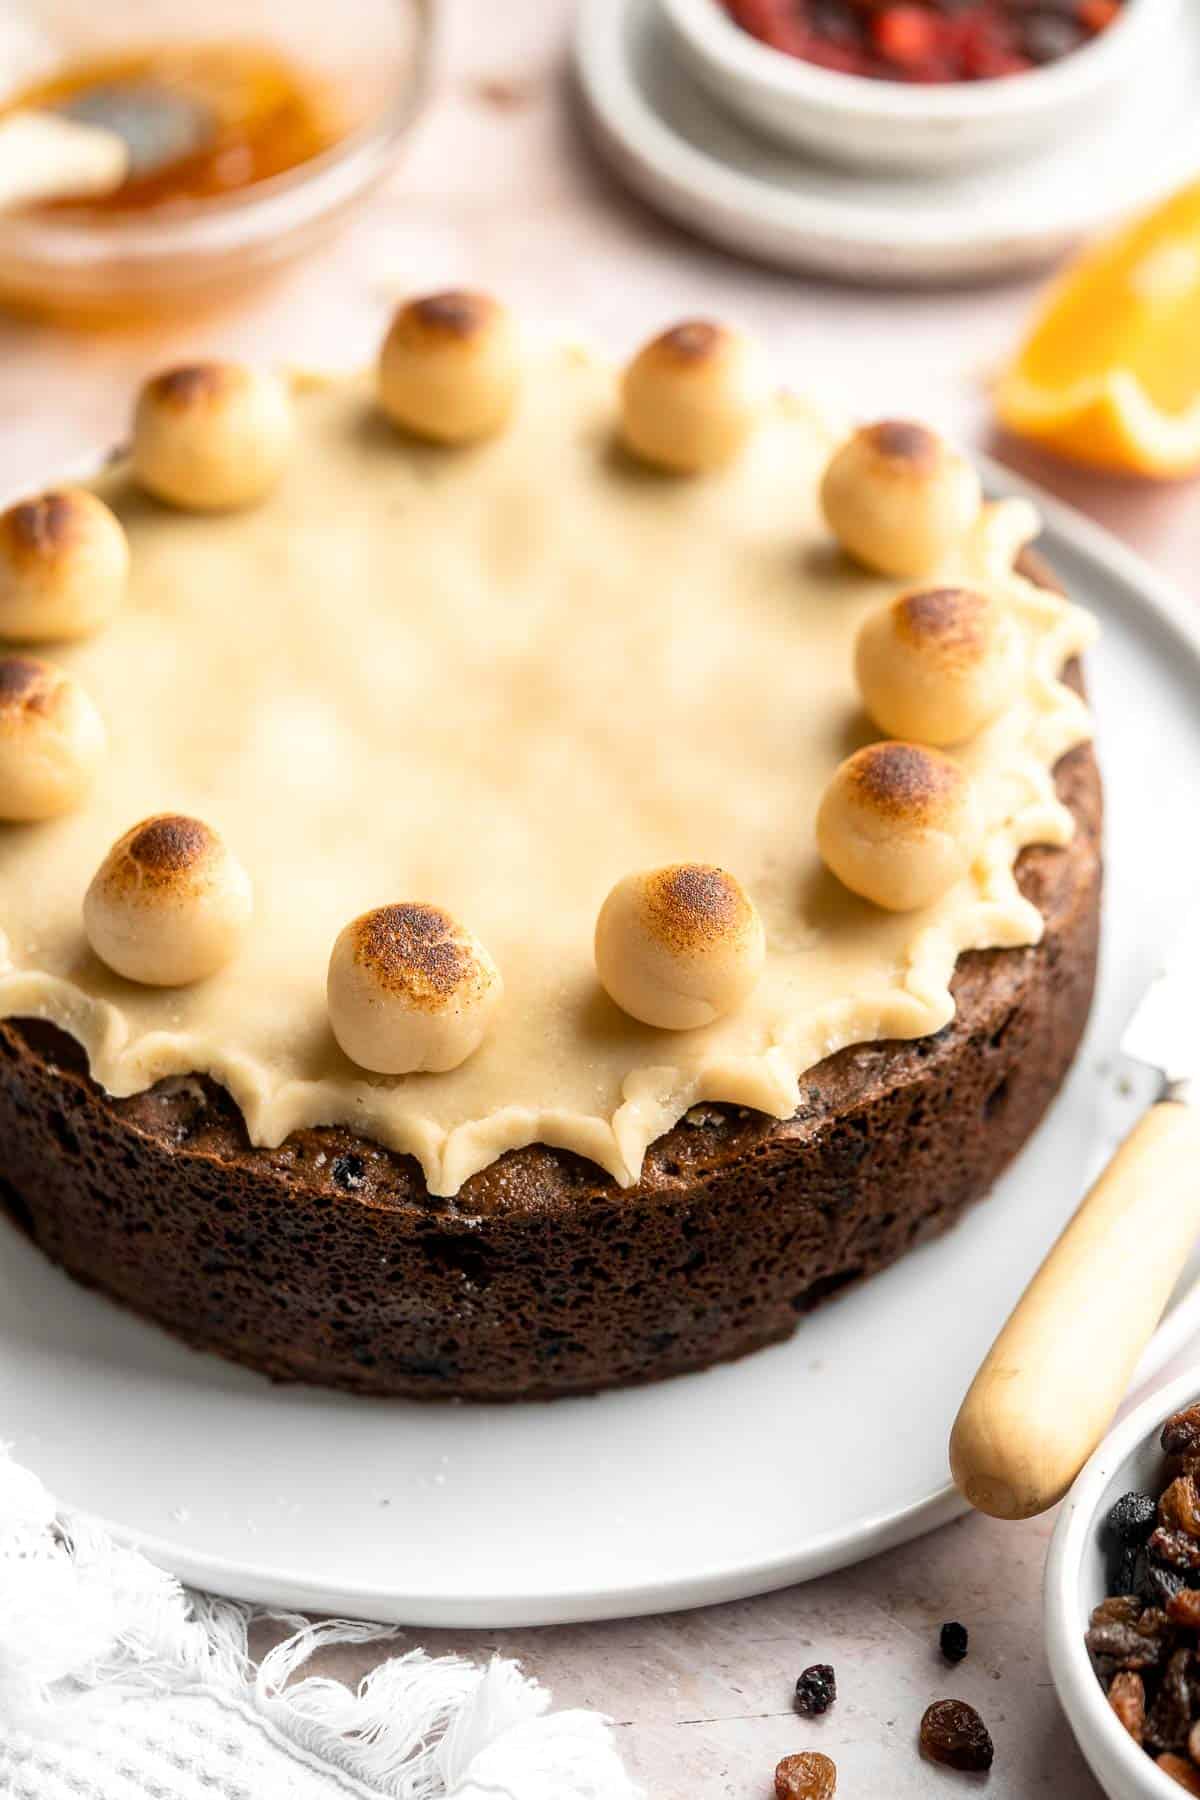
Carrot Cake with Cheesecake Topping
Super moist and perfectly spiced carrot cake with a creamy cheesecake topping is flavourful, comforting, and the perfect homemade spring dessert.
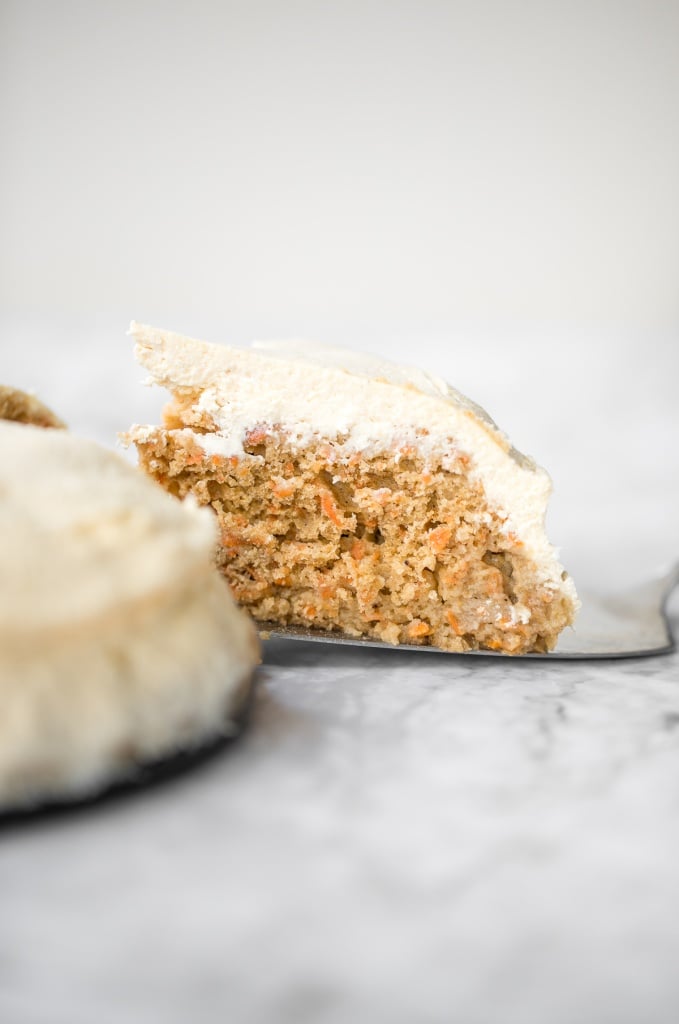
Chocolate-covered peanut butter eggs with a hard chocolate shell on the outside and a soft peanut butter interior inside are rich, sweet, and delicious.

Get festive with these cute bunny ears Easter cupcakes. Buttercream frosting and marshmallows make these vanilla cupcakes extra sweet and delicious.
Easter blondies are rich, sweet, and moist, loaded with festive M&M's which makes them fun to make and eat. Plus, it's a quick and easy one bowl recipe.
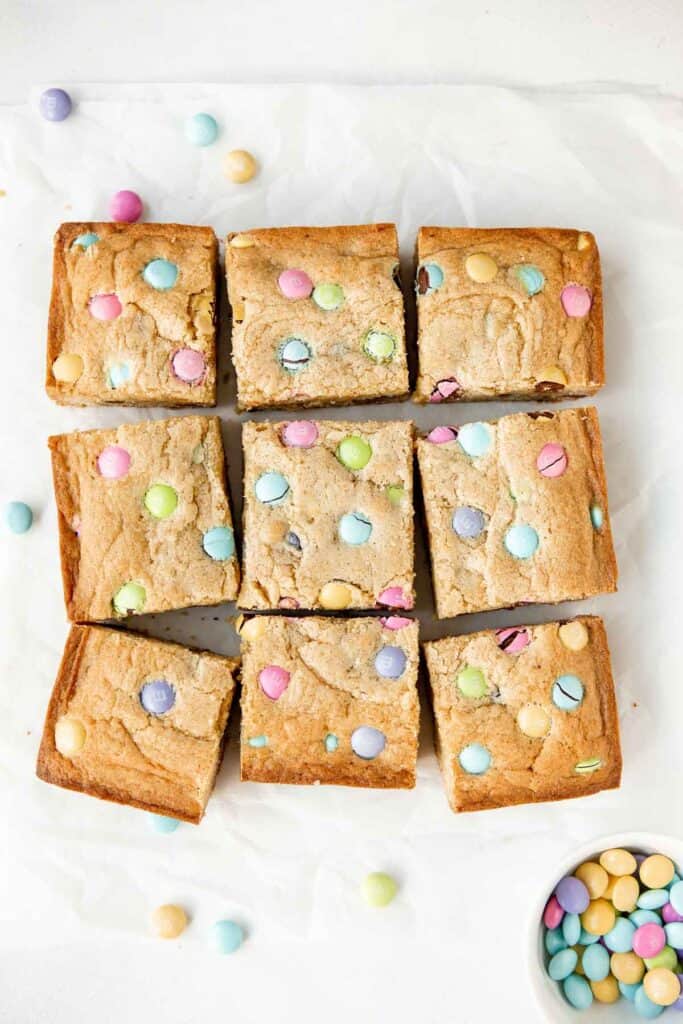
Carrot Cake Shortbread Cookies
Carrot cake shortbread cookies are sweet and buttery, packed with carrots and walnuts, and spiced like your favourite carrot cake. A total treat.
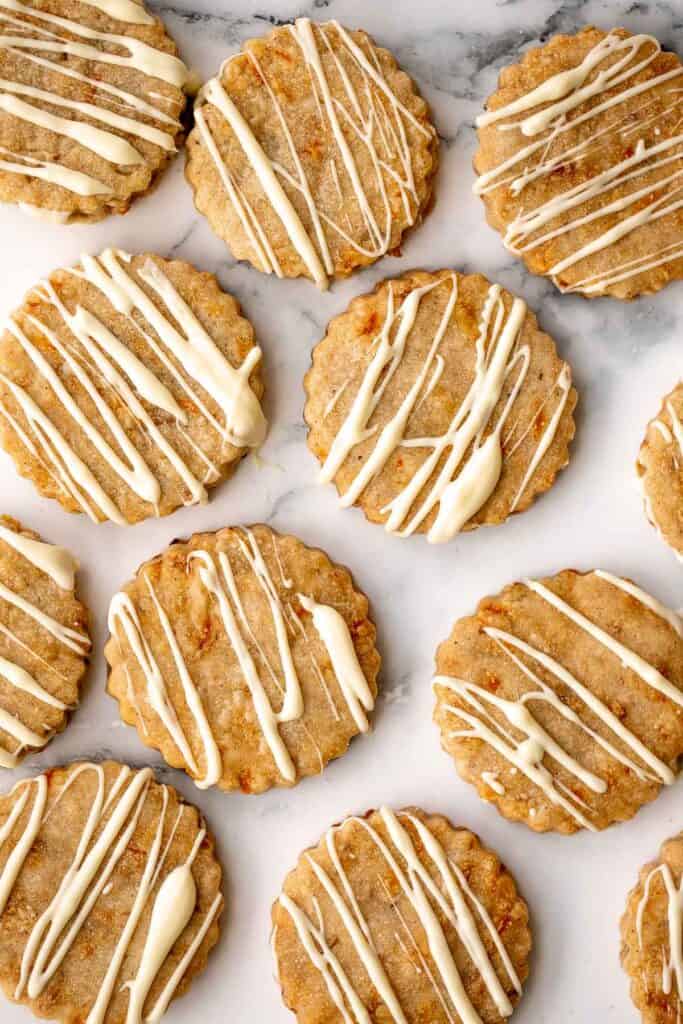
Mini Egg Easter Fudge is a rich, sweet, and colorful white chocolate fudge that is easy to make from scratch with just 3 simple ingredients.
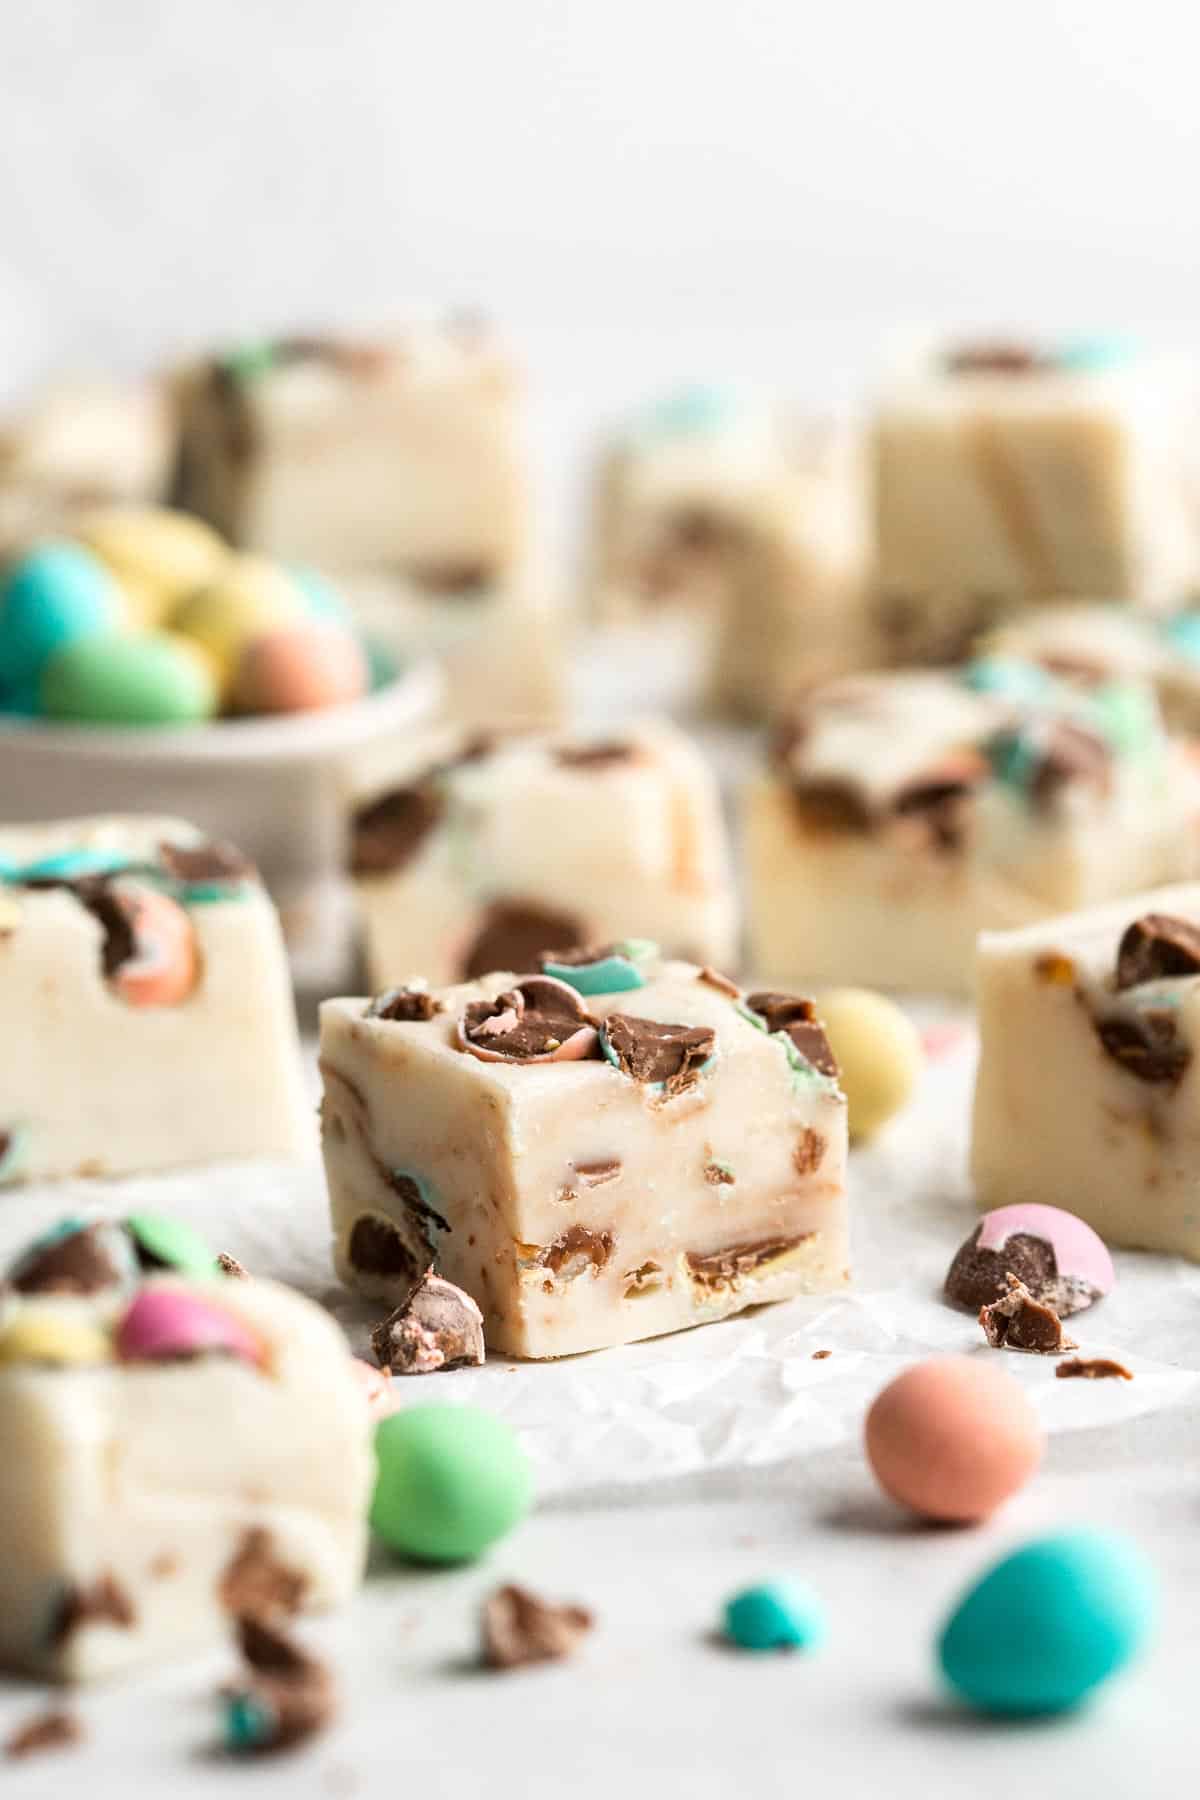
Carrot Cake Cookies are soft, chewy, cake-like cookies with a delicious homemade cream cheese glaze. They taste just like carrot cake but in cookie form.
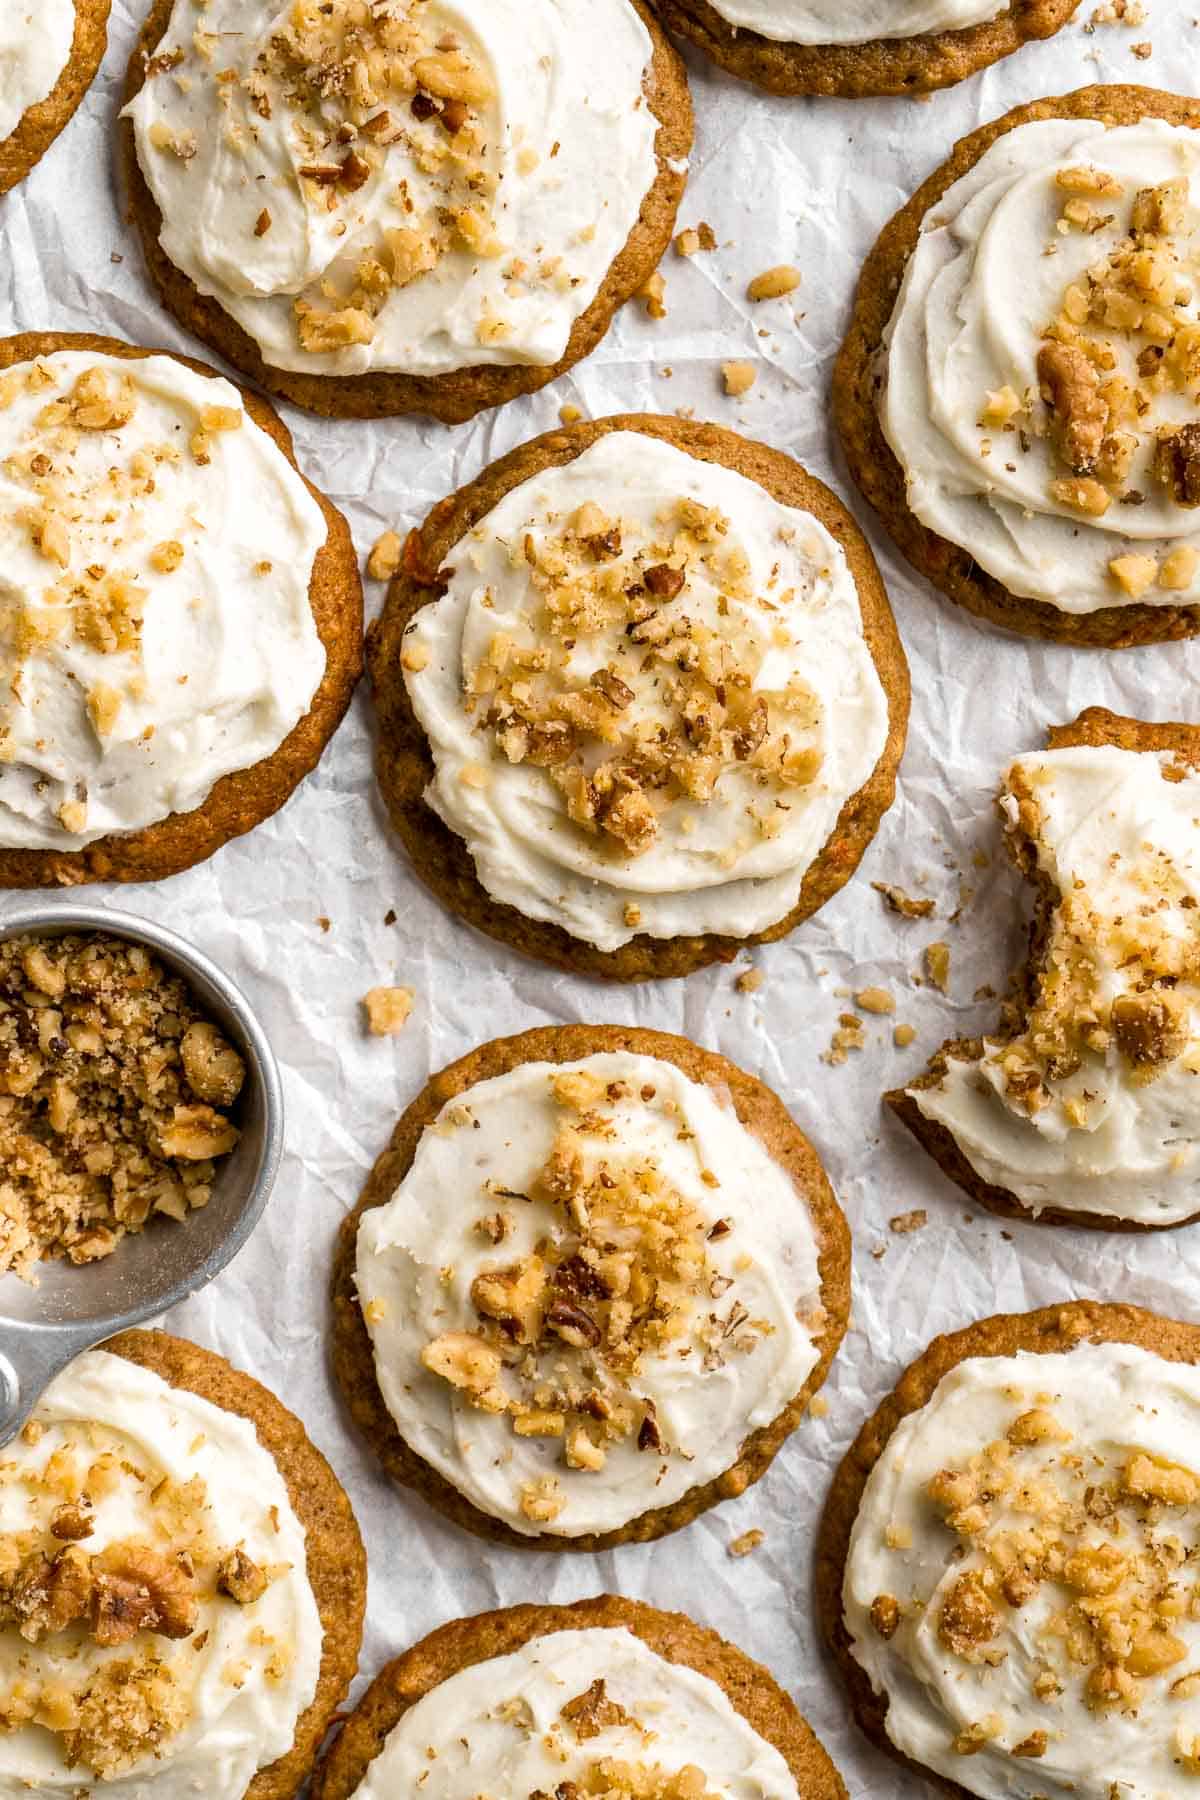
Rich, fudgy, and decadent, Easter egg caramel brownies are topped with an easy-to-make caramel sauce and topped with mini chocolate eggs. Such a decadent on this list of Easter dessert recipes.
Carrot cake muffins are moist, light, chewy and full of carrots which means breakfast this week is healthy! Carrot muffins are great for meal prep too.
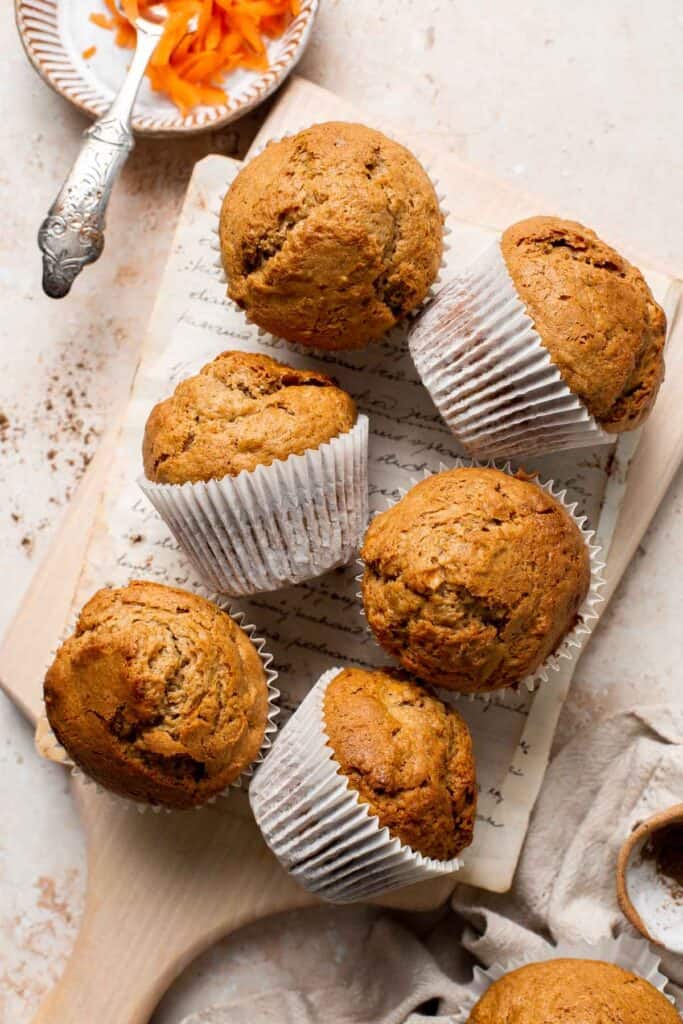
Mini egg cookie bars are a quick easy one bowl Easter dessert - soft and chewy with perfect crisp edges and a gooey center and loaded with mini eggs.
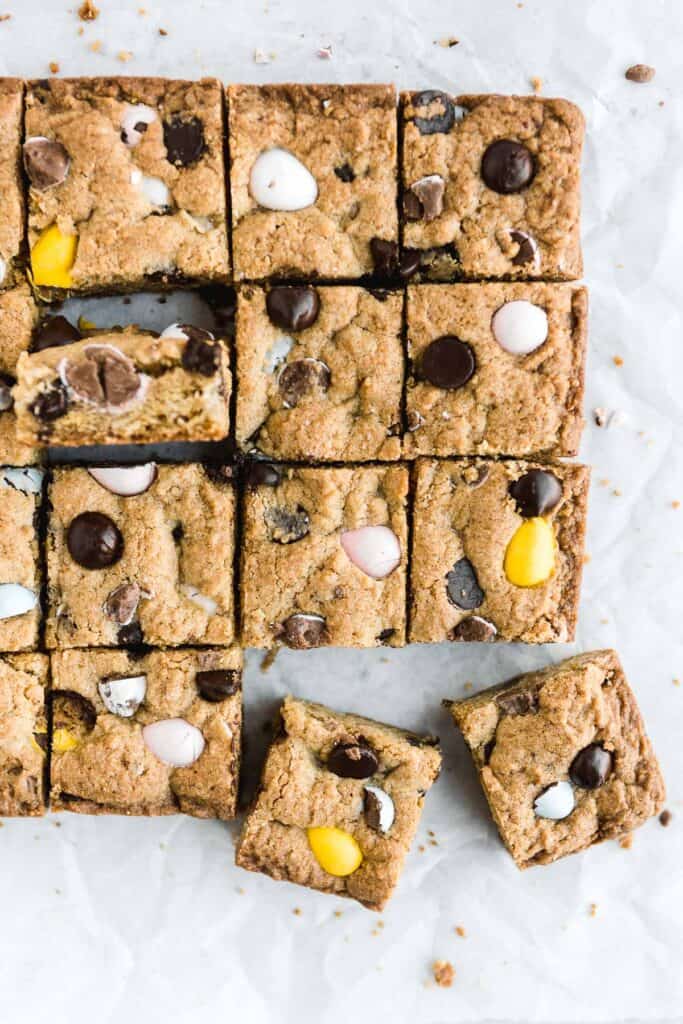
Carrot cake biscotti is crunchy, crumbly, and satisfies all your carrot cake cravings. Enjoy these Italian cookies as is or with white chocolate.
The cutest bite-sized treat to serve at any event are vanilla cake pops from scratch -- luckily, they are actually simple and easy to make. Add pastel coloured food colouring to the chocolate coating, or use colourful sprinkles to make them festive for Easter.
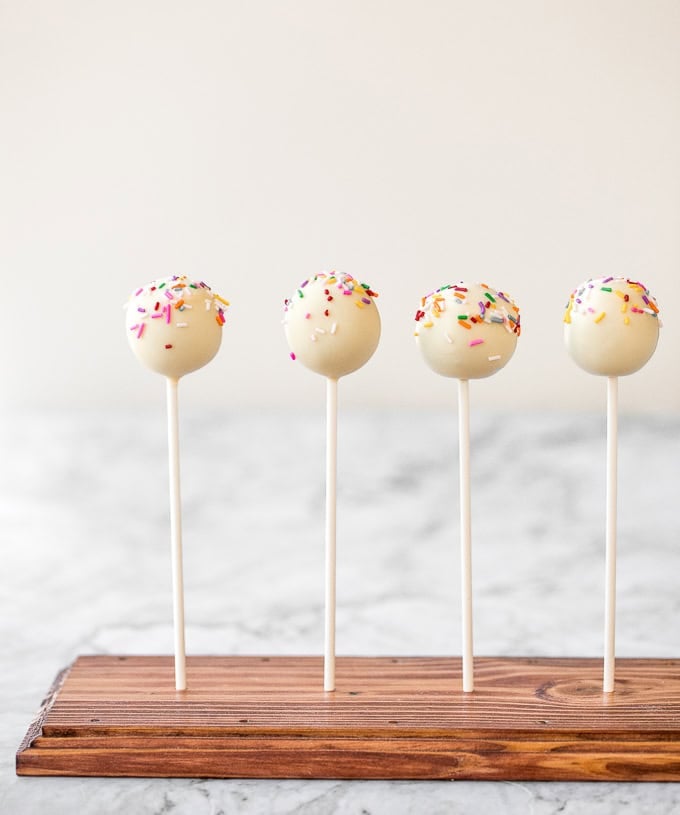
Vanilla Cupcakes with Rose Petal Buttercream
Light, airy and fluffy vanilla cupcakes with rose petal buttercream icing is the cutest treat for Easter. They are super quick and easy to make.

Baked Jelly Donuts with Strawberry Jam
These melt-in-your-mouth, homemade baked jelly donuts, coated in sugar and filled with sweet strawberry jam, are so soft, fluffy, spongy and airy.
French Macarons with Vanilla Buttercream Filling
Easy French macarons with vanilla buttercream filling are sweet, light, airy, and delicate cookies that melt in your mouth. Beginners can make them too!

Butter cookies are a classic cookie with a crisp, slightly crunchy texture that melts in your mouth on the first bite - and every bite after!

Inspired by Starbucks lemon loaf, this moist, homemade lemon loaf with lemon glaze has the perfect balance between sweet and tangy, and so so flavourful.
Classic Madeleines are soft spongy mini cakes with a signature shell shape and dusting of sugar on top. Making French butter cakes is easier than you think!
Italian rainbow cookies are delicious, colorful, fluffy, and gorgeous, made with three cake layers sandwiched in between jam and covered in chocolate.
Festive red and green M&M cookies are super soft and chewy with the crispiest edges. Quick and easy to make in under 20 minutes with no chill time. Switch up the M&M's with pastel-coloured ones for Easter.
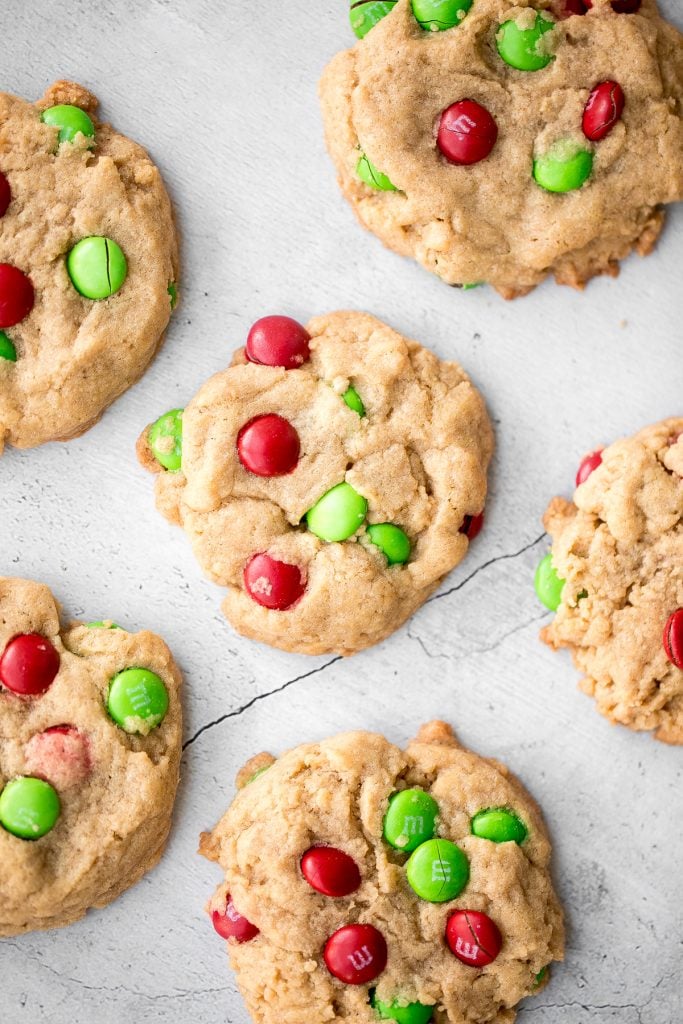
Persian Love Cake is a rich, moist, and nutty almond cake loaded with floral and citrus flavors, topped with a lemon glaze, pistachios, and rose petals.
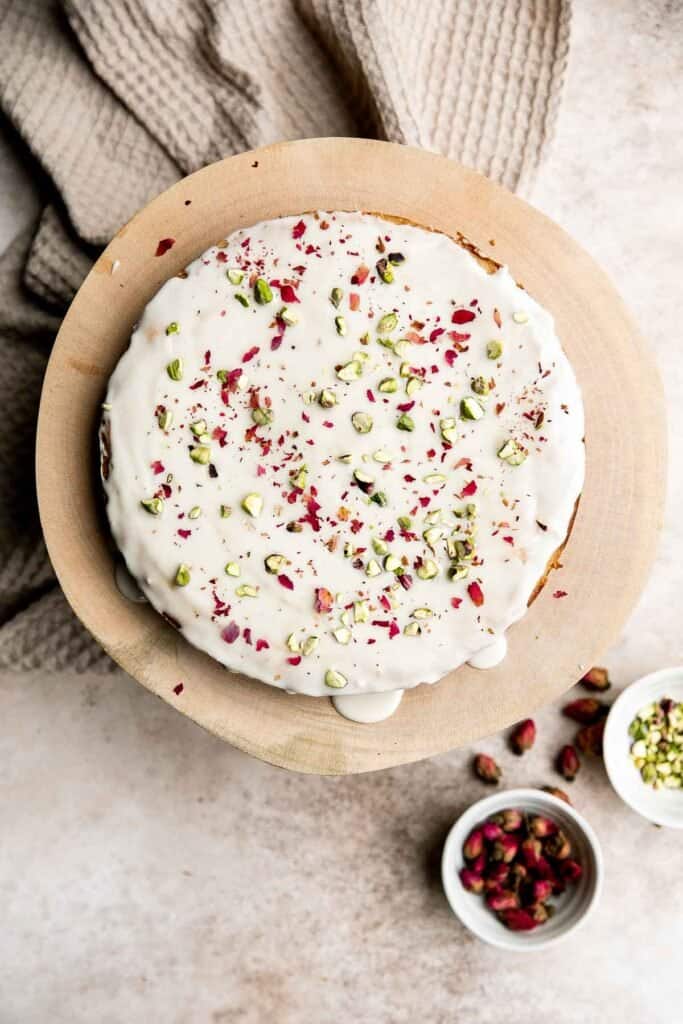
Healthy banana bread is delicious and moist and contains no refined sugar or butter. Quick and easy to make with 10 minutes prep and few pantry staples.
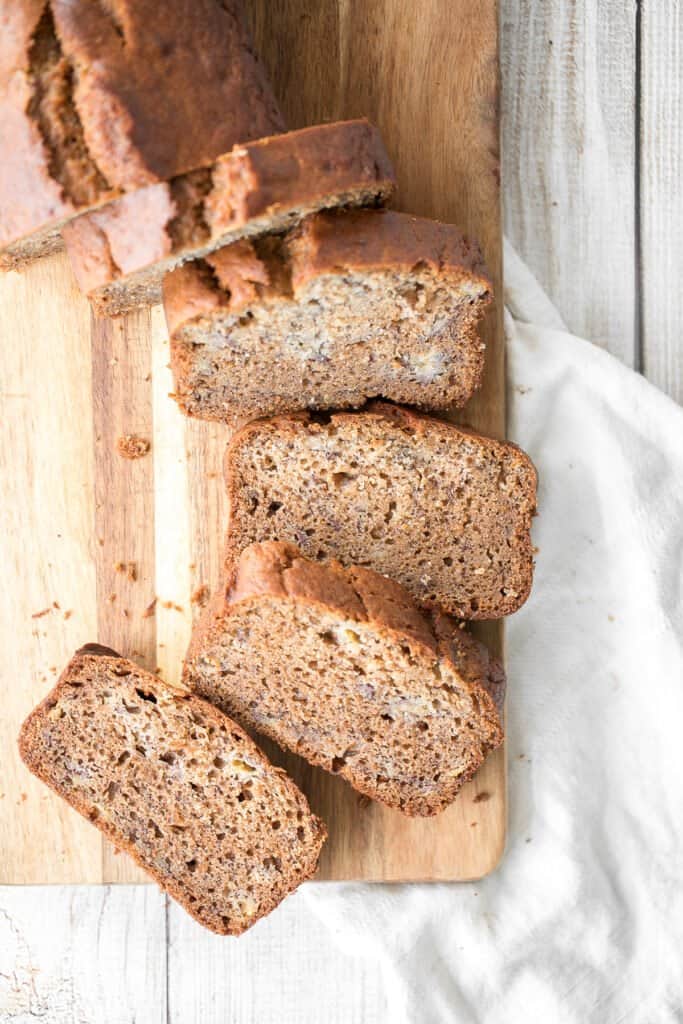
Easy Small Batch Almond Biscotti
Small batch almond biscotti are crunchy, crumbly and packed with almonds, perfect for dunking into tea, coffee, or hot chocolate, and they are super easy to make.

Pistachio Macarons are delicate, chewy, melt-in-your-mouth cookies filled with pistachio white chocolate ganache filling and chopped pistachios on top.

This fudgy double chocolate loaf cake is delicious, moist, and rich. It's easy to make with a quick one-bowl batter that's ready for the oven in 10 minutes.
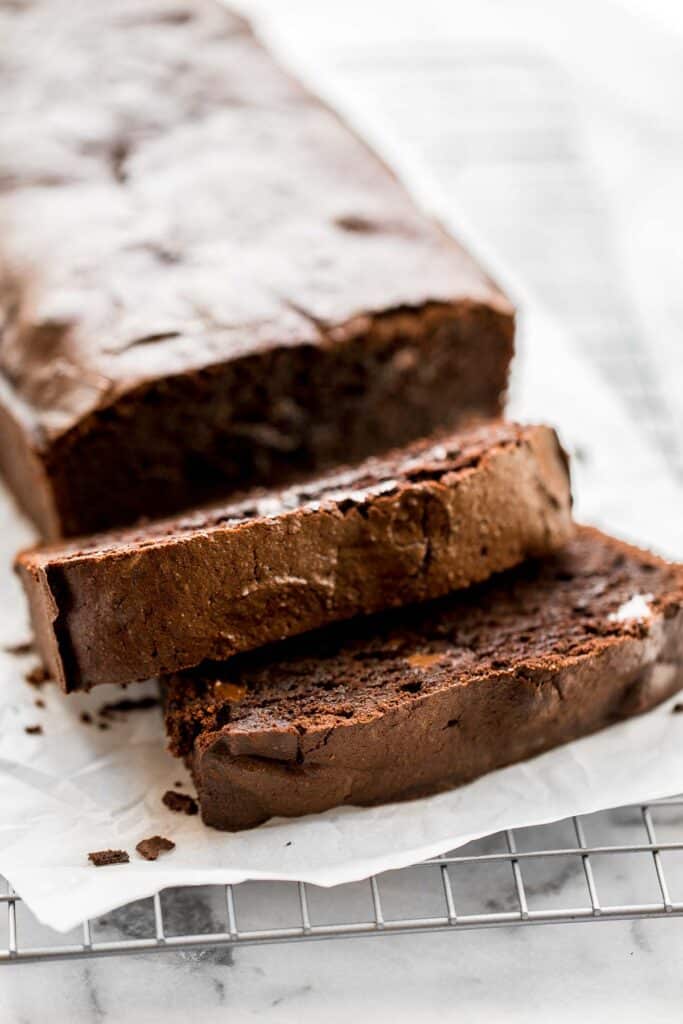
Classic New York Cheesecake is stunning, delicious, rich, and creamy. Plus, it's surprisingly easy to make from scratch - even for beginners!
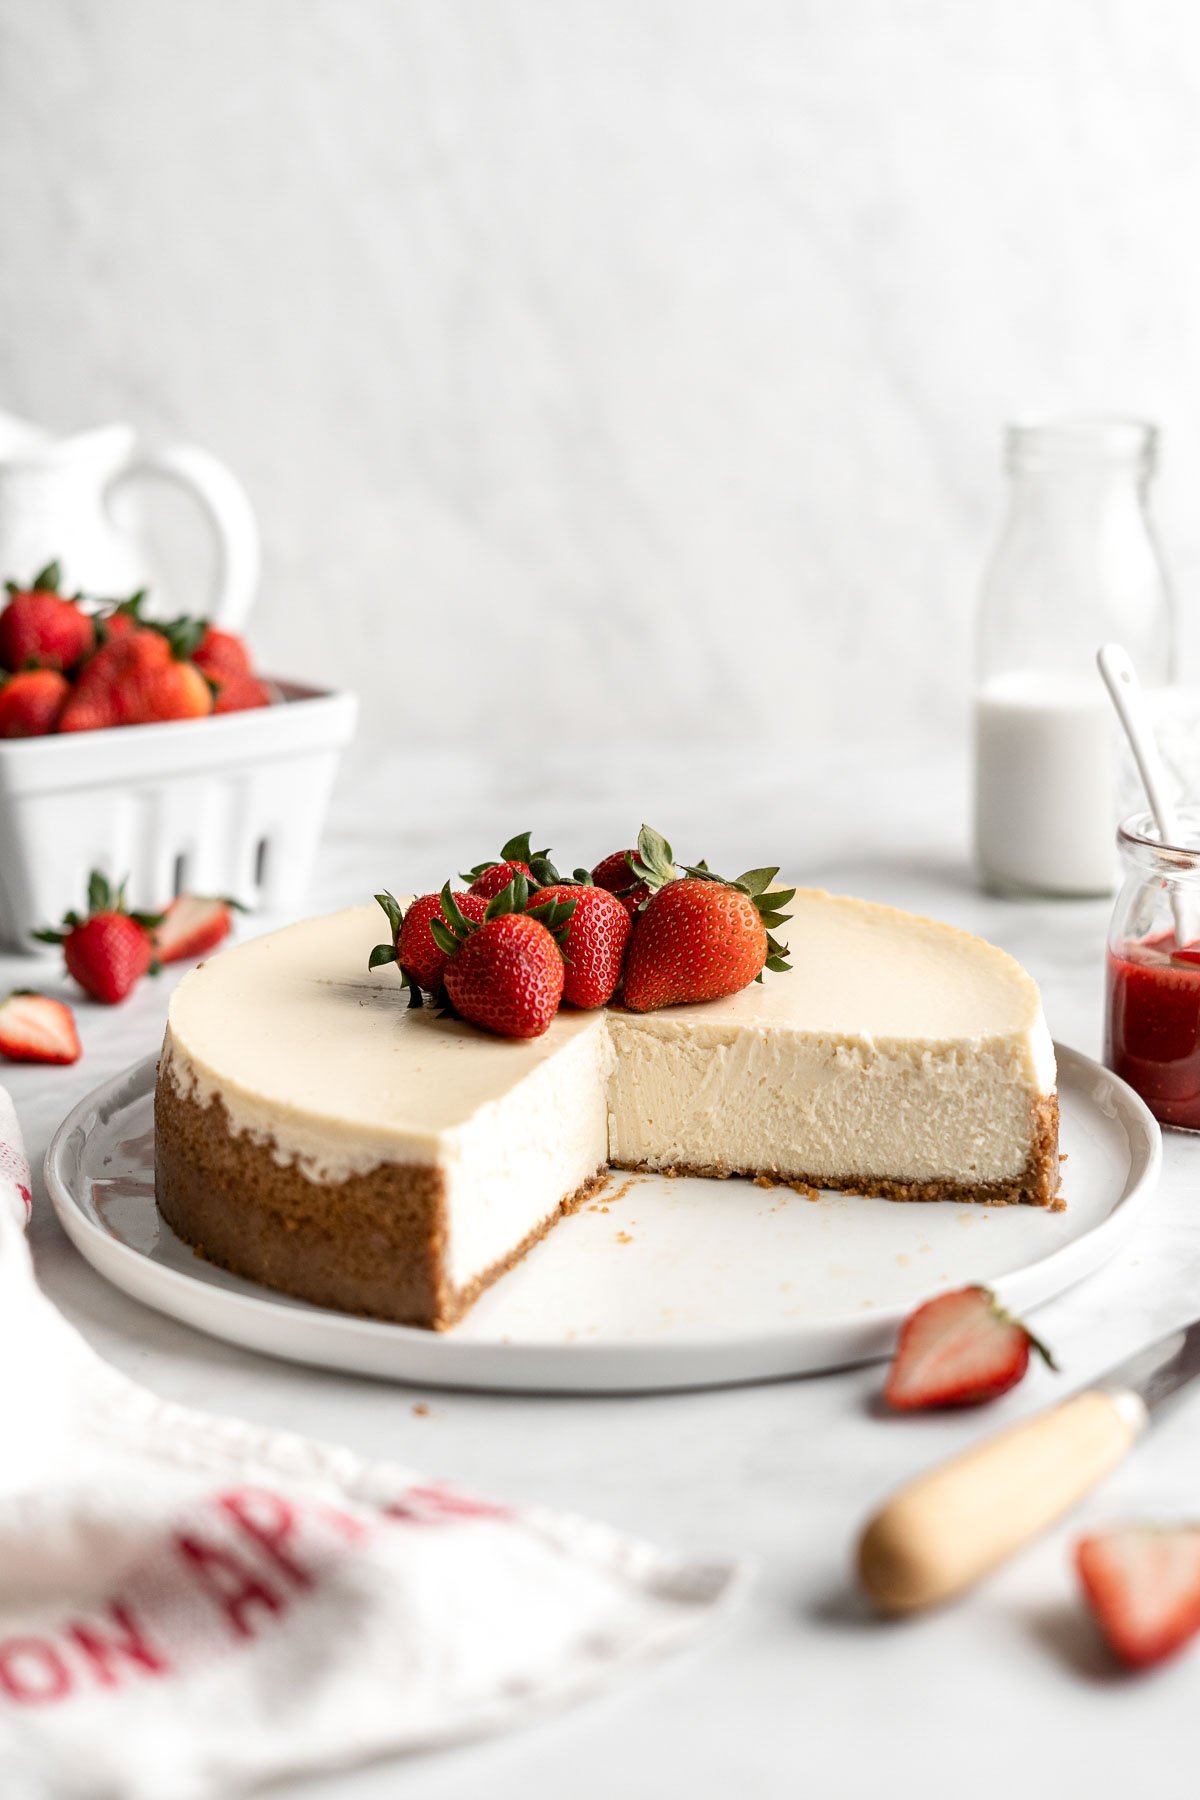
Caramel cheesecake brownies are totally indulgent and worth the effort, so toss that prepared brownie mix away and bake this with a few easy ingredients.
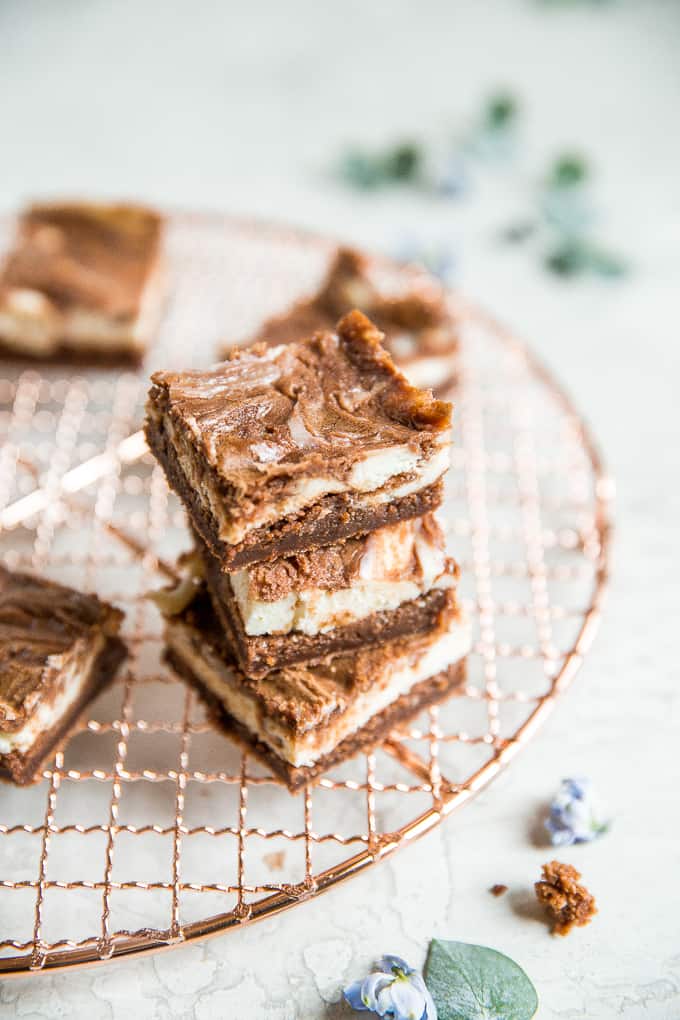
No one will be able to resist this perfectly sweet and moist, glazed brown sugar bundt cake. Made with Greek yogurt for major decadence and richness.
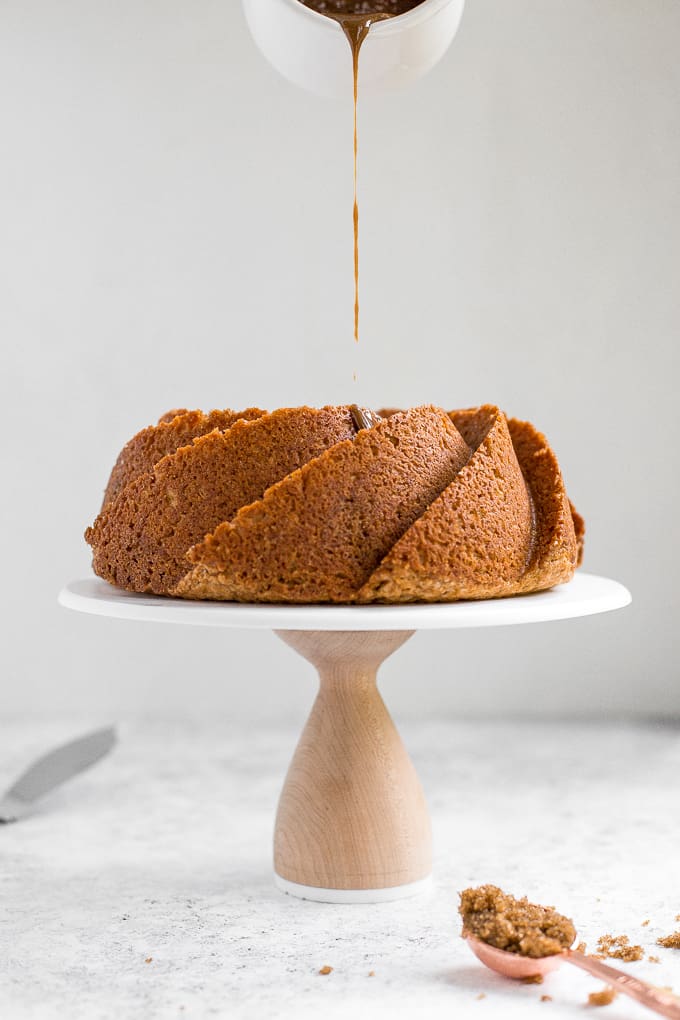
Funfetti shortbread cookie bites are little bites of buttery melt-in-your-mouth shortbread packed with festive sprinkles for a fun holiday treat. Use Easter colored sprinkles!
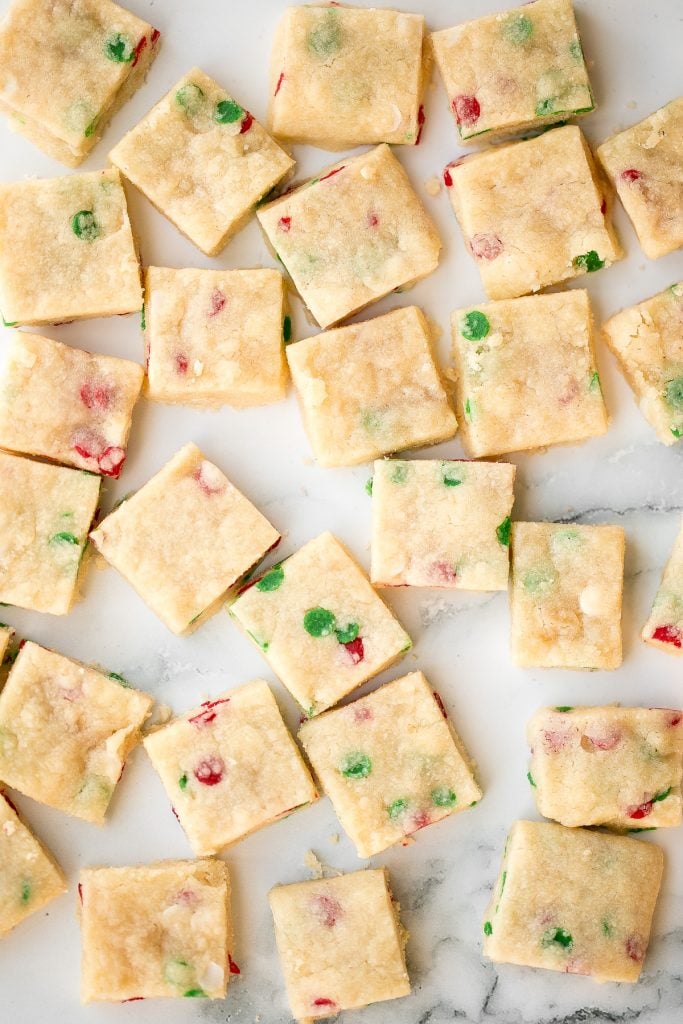
Chocolate Chunk Peanut Butter Cookies
These perfectly soft, chewy and a little crumby chocolate chunk peanut butter cookies literally melts in your mouth. Make them in under 20 minutes.
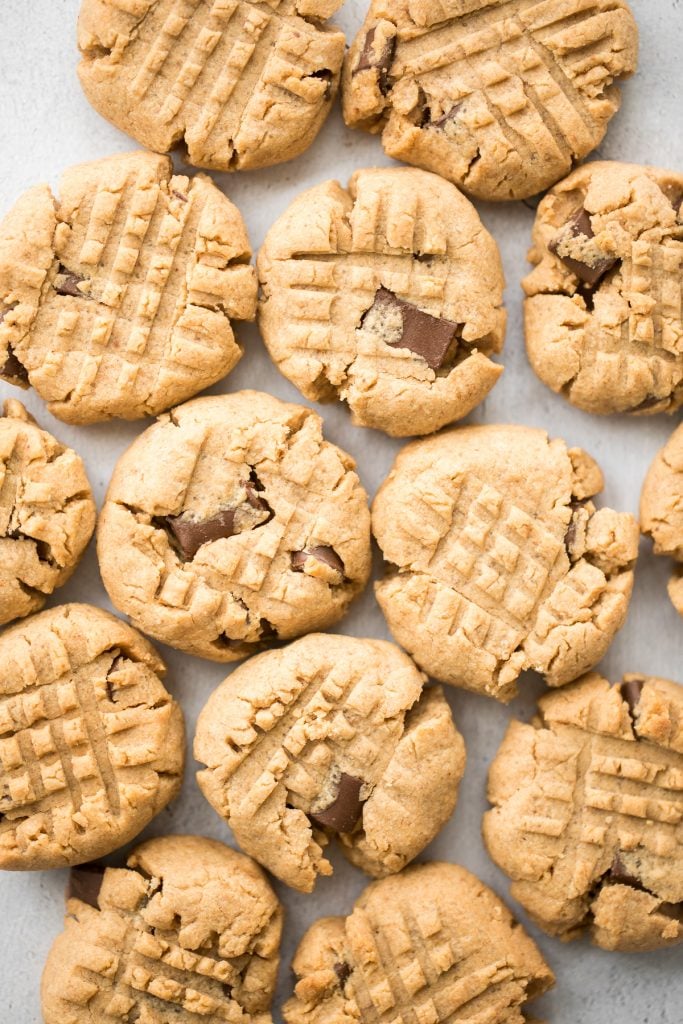
Easy no crust burnt Basque cheesecake is the easiest one bowl recipe. It is perfectly caramelized on the top and edges and creamy yet firm on the inside.
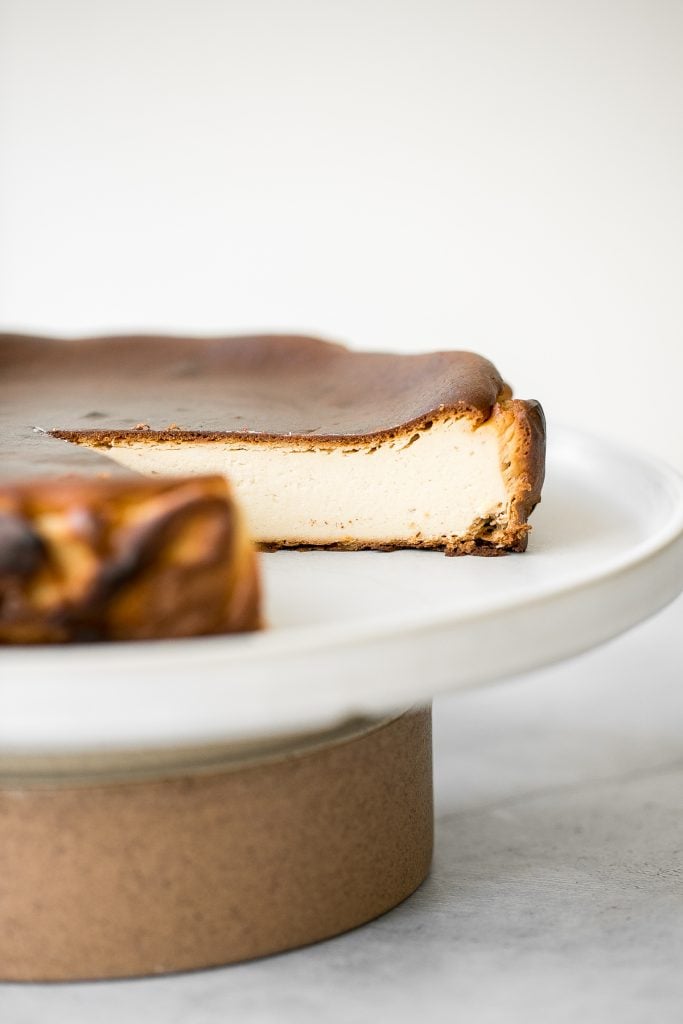
M&M cookie bars are soft and chewy, have crisp edges with a gooey center, and are loaded with M&M's and chocolate chips. The easiest way to bake cookies!
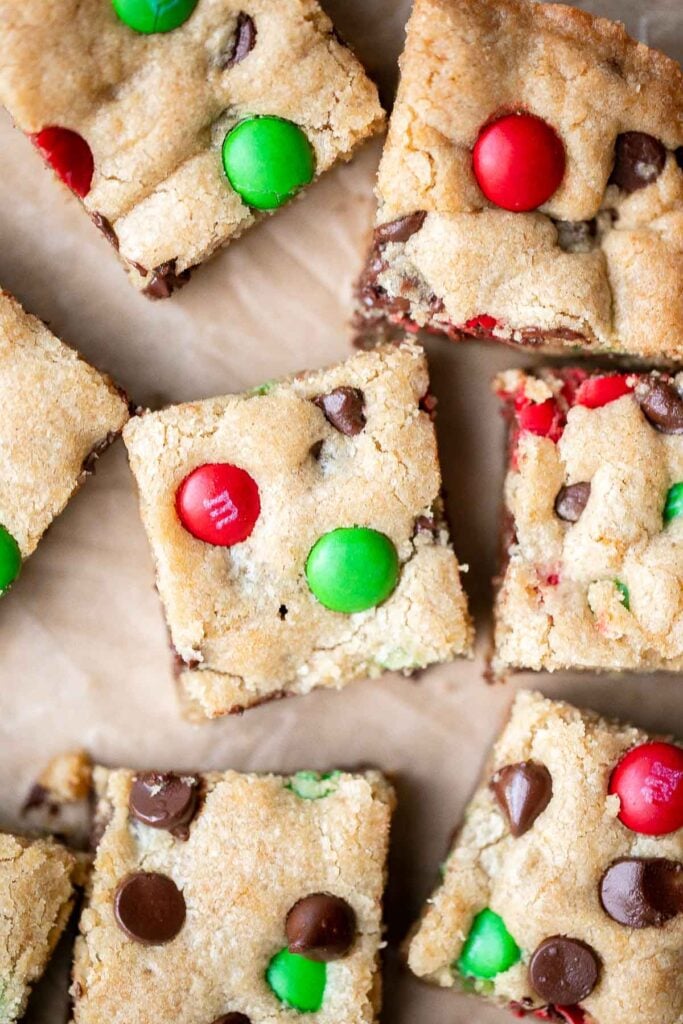
Chocolate and Vanilla Marble Cake
Chocolate and vanilla marble cake is delicious, moist, fluffy with the perfect golden brown crust. With two classic cake flavors, this loaf cake has it all.
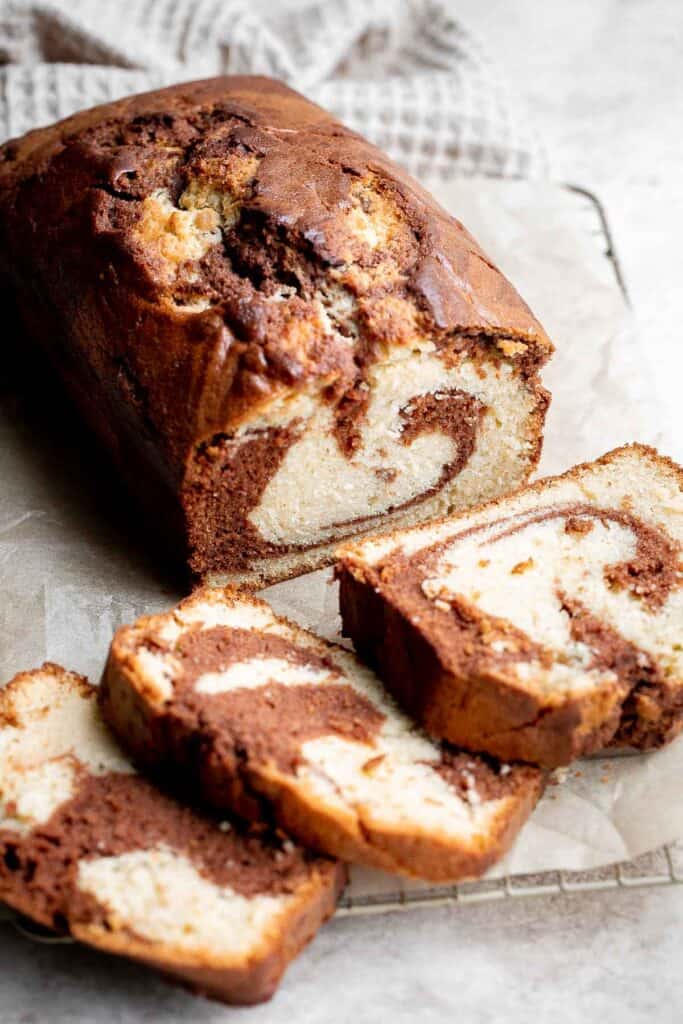
Soft and Chewy Peanut Butter Cookies
The best classic soft and chewy peanut butter cookies are puffy and thick, stay soft for days, and melt in your mouth. Make them in under 20 minutes.
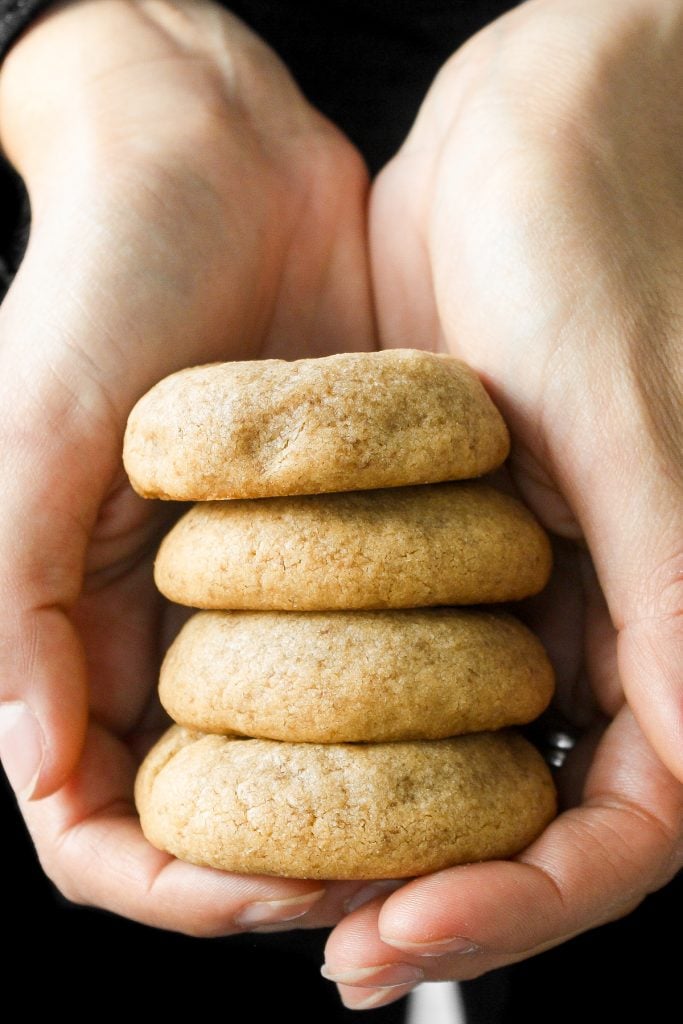
Easy to make and decorate, bite-sized chocolate cake pops are packed with chocolate and sprinkles are the perfect treat. Use red, pink and white sprinkles to make it festive for Valentine's Day.

The Best Chewy Chocolate Chip Oatmeal Cookies
Grab a tall glass of milk and start dipping the best homemade, soft-centered, chewy chocolate chip oatmeal cookies you will ever try.

Chocolate Chip Banana Bread Cookies
Brown butter oatmeal chocolate chip banana bread cookie bites are thick, fluffy, pillowy, cake-like little bites of banana bread heaven.
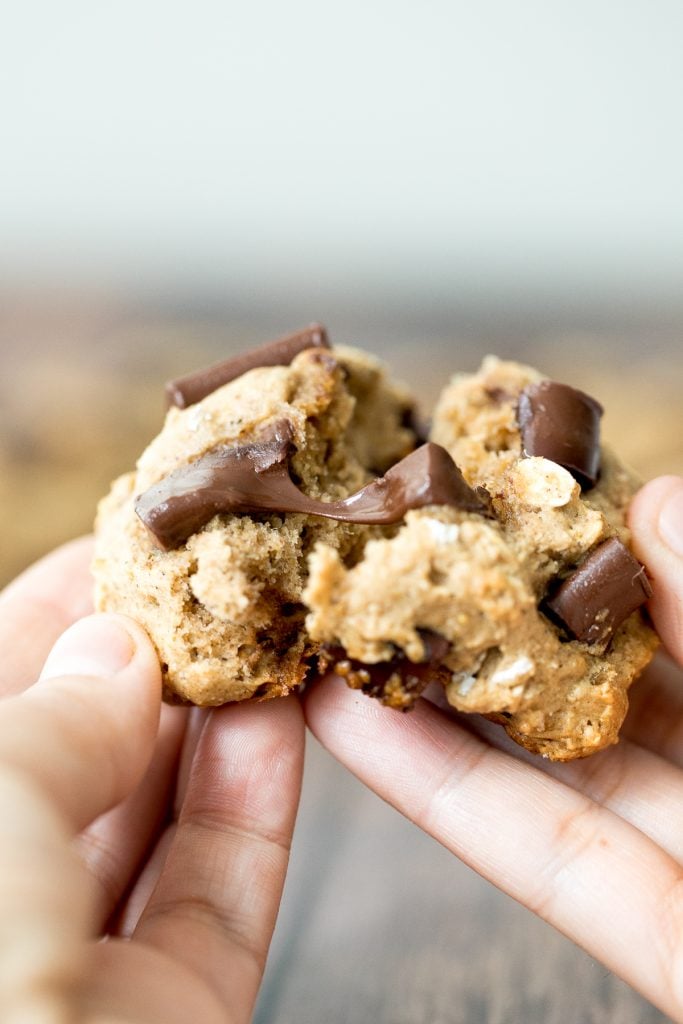
How to Make Ahead and Store
You can make or prepare most of these Easter dessert recipes ahead of time. You can store the cookies at room temperature for a few days and cakes for about 1-2 days (depending on the recipe). You can also store them in the refrigerator for up to one week or in the freezer for up to 3 months. Confirm storing instructions by checking each recipe.
To reheat any of these Easter desserts and serve them warm as if they just came out of the oven, you can warm them up in a 300F preheated oven or in the air fryer for about 5-15 minutes. I would check on it every 5 minutes until warmed through. If heating from frozen, let it thaw first and then reheat.
Did You Make Any of These Easter Dessert Recipes?
Please leave a comment and rating below, and let me know what you thought of this round up of Easter dessert recipes. Be sure to snap a picture and tag me on Instagram @aheadofthyme or share it on the Pinterest pin so that I can follow along.
HUNGRY FOR MORE? Don't forget to sign up for my email newsletter so that you don't miss any recipes. You can also follow along on Instagram and Pinterest for more recipe updates.
Honey Roasted Carrots

Tender caramelized honey roasted carrots are simple and inexpensive-but you wouldn't know it based on how they taste! With baby carrots, olive oil, honey, and a hint of salt and pepper, this honey roasted carrots recipe comes together quickly and easily. Since fresh carrots don't spoil fast, you likely have everything you need on hand for these honey roasted carrots at any given time, making this a great recipe for spontaneous chefs. Plus, it pairs well with almost any main course meal. With these flavours, everyone will want seconds.
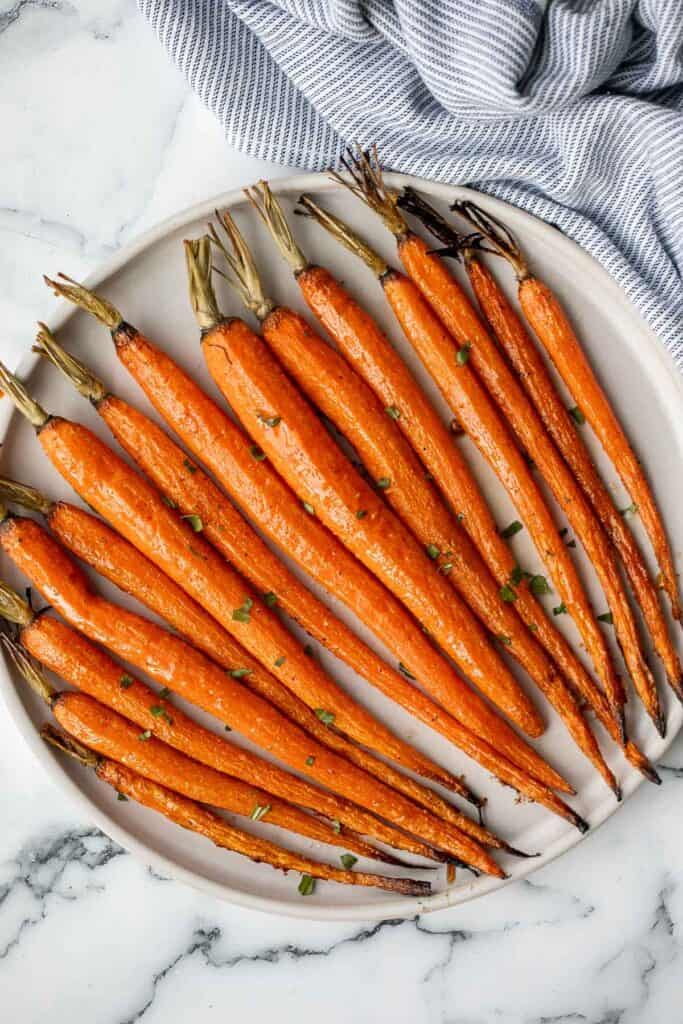
Why You'll Love these Honey Roasted Carrots
- Whole baby carrots are beautiful and tasty. This recipe comes out looking professional and poised. And the best part is that anyone can elevate their cooking skills in just minutes with this dish.
- Simple ingredients and simple steps. With only three ingredients (plus salt and pepper), honey roasted carrots will be one of the easiest things you've ever made but still so flavourful and delicious.
- Honey roasted carrots pair with anything. Are you having salmon, chicken, beef, pork, shrimp, or something else for dinner? Honey roasted carrots are your go-to side dish since they taste great with all of these foods and more!
- Carrots have great health benefits. Chock full of beta carotene, fiber, vitamin K, potassium, and antioxidants, carrots promote healthy cholesterol levels and eye health.
If you love these honey roasted carrots, then you will also love Garlic and Herb Roasted Carrots and Maple Roasted Carrots.

Ingredients
To make easy honey roasted carrots, you will a large half sheet baking pan and a few simple ingredients:
- baby carrots - you need 1 pound of baby carrots, or approximately 2 bunches. Baby carrots are slightly smaller than medium carrots and they still have their stems attached.
- olive oil
- honey
- salt and pepper
- fresh parsley - optional, for garnishing on top.
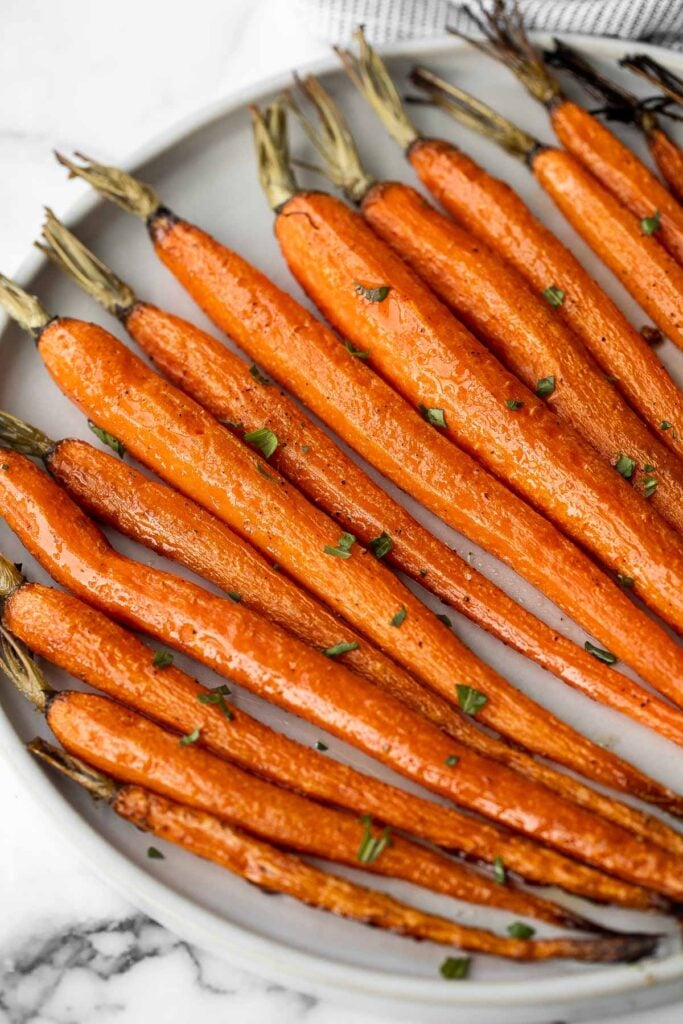
How to Make the Best Honey Roasted Carrots
These honey roasted carrots are seriously the easiest side dish to make. You literally toss everything in the sheet pan and bake.
First, place the carrots onto a parchment-lined half sheet baking pan. Then, make the honey glaze by combining olive oil, honey, salt and pepper in a small bowl and stir until smooth. Pour the glaze over the carrots and toss to combine. Arrange carrots in a single later and place sheet pan into the oven. Bake in a 400F preheated oven for 25-35 minutes until tender. Note that depending on how thick your carrots are, the roasting time may vary. Thicker carrots will need more time. To serve, garnish with fresh parsley on top (optional).
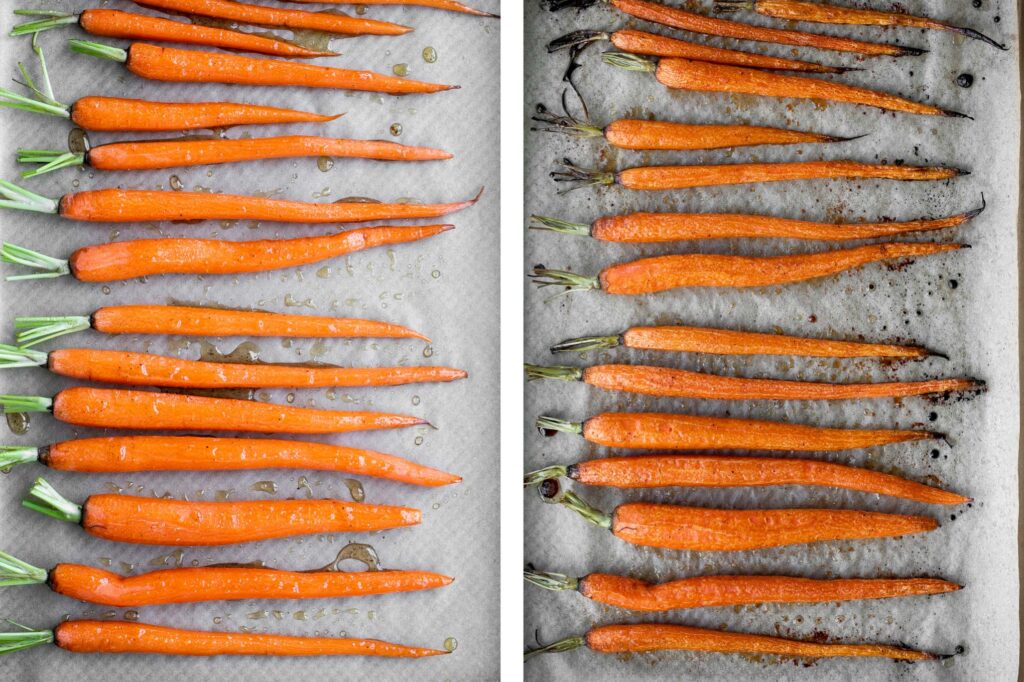
Recipe Tips and Tricks
- How to choose baby carrots: When choosing the perfect baby carrots, avoid the pre-peeled baby carrots for this recipe (which are actually whole carrots that are shaped into small pieces). Instead, choose small, fresh carrots that are smooth, bright orange, and firm. Carrots that bend, feel limp, or have discoloured tips are no good.
- How to store fresh carrots: When stored properly, whole raw carrots will stay fresh for up to four weeks. Yes, you read that right. Four weeks. To prolong their shelf-life, you can store them in an airtight container filled with cold water, and replace the water every few days.
- How to store roasted carrots: Honey roasted carrots keep in the refrigerator in an airtight container for up to 4 days. Freezing is not recommended.
More Carrot Recipes
- 40 Best Carrot Recipes
- Garlic and Herb Roasted Carrots
- Maple Roasted Carrots
- Arugula and Roasted Carrot Salad
- Roasted Carrot and Ginger Soup
- One Pot Rice Pilaf with Carrots
- Carrot Cake Shortbread Cookies
Tried this recipe?
I'd love to hear what you think! Leave a comment and rating below to share your feedback. Your reviews help others discover this recipe and help me keep creating more free recipes for you. Snap a photo and tag me on social media @aheadofthyme too.
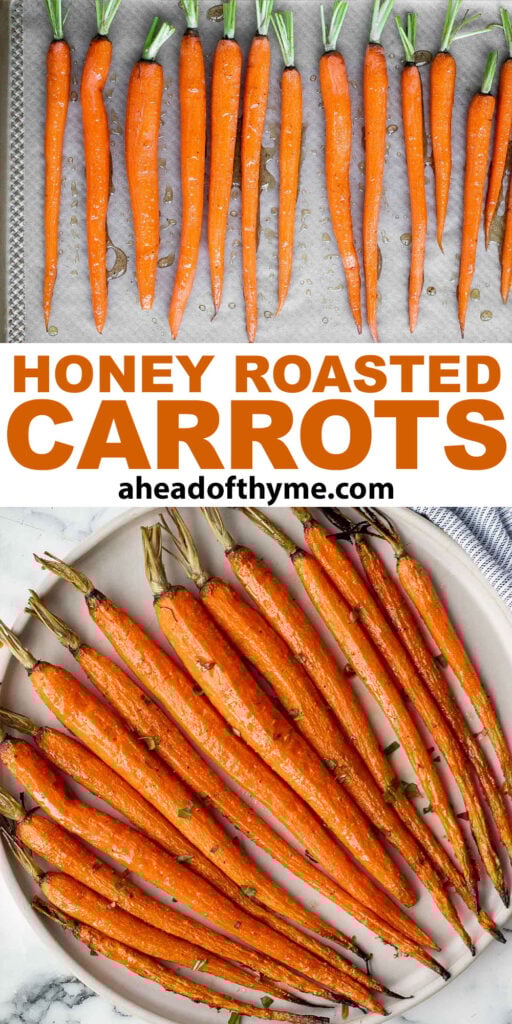
Skillet Shepherd's Pie

Skillet shepherd's pie is a baked meat pie made with a layer of sautéed ground beef and vegetables, fluffy and creamy garlic cheddar mashed potatoes, and baked in the oven to perfection. When you bite into skillet shepherd's pie, you'll taste the wonderful blend of spices, vegetables, and beef in the bottom layer, with a natural gravy oozing throughout. With all the food groups in one dish, this one-pan skillet shepherd's pie is a completed wholesome meal the whole family will love.
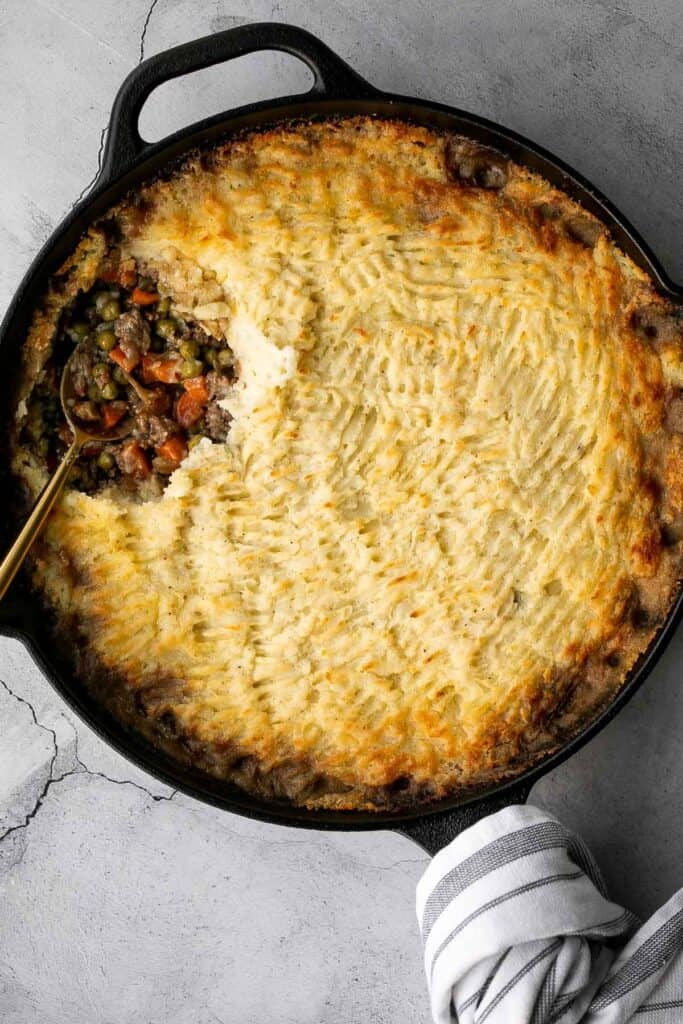
Why You'll Love This Shepherd's Pie
- Skillet shepherd's pie is bursting with flavour. From the seasoned beef, tasty veggies, and delicious gravy, the bottom layer of this skillet shepherd's pie is enough to make your mouth water. Add the mashed potatoes on top, and the savoury flavors are enough to make your heart melt!
- You can't go wrong with filling comfort food. No one will be left hungry or disappointed with this skillet shepherd's pie. Hearty beef and potatoes will satisfy the whole family.
- It's the perfect make-ahead meal. Skillet shepherd's pie is easy to make ahead and serve fresh when you need it. Assemble the pie. Then, store the skillet shepherd's pie in your fridge for up to 3 days. When you need it, bake as directed. Simple and delicious!
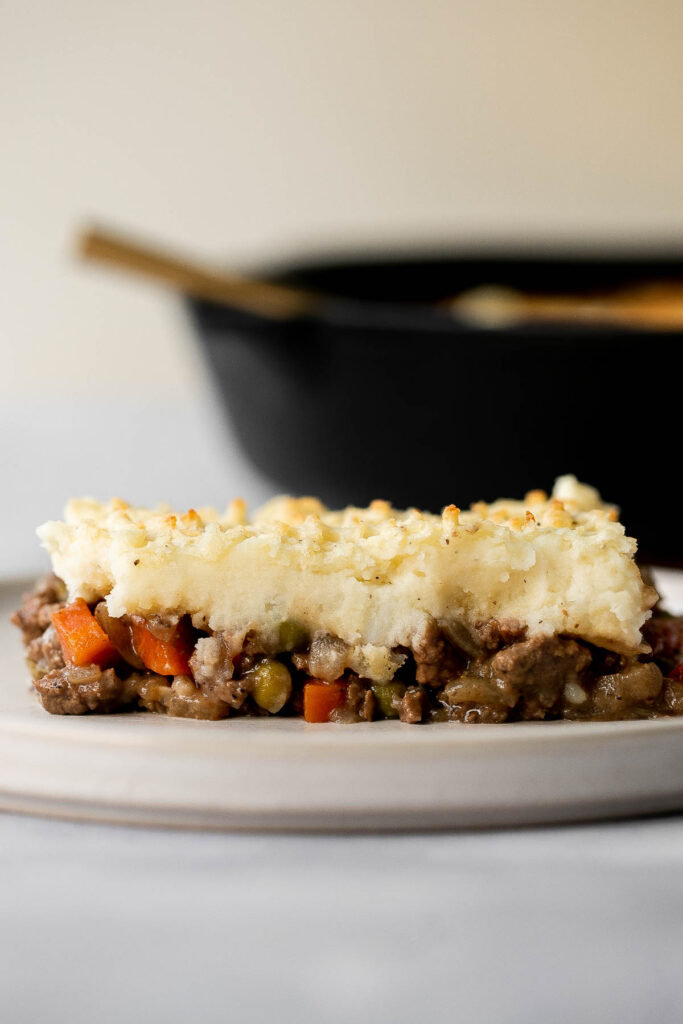
What is Shepherd's Pie?
Shepherd's pie is a traditional British comfort food cooked in a cast-iron skillet. It consists of two different (but equally delicious) layers. The bottom layer of a shepherd's pie has cooked ground beef, veggies, and spices. It's topped off with fluffy and creamy mashed potatoes. Then, the whole thing is baked in the oven until the top turns brown and crispy. Skillet shepherd's pie is the perfect heavy, savoury, comfort food to warm you up on cold nights.
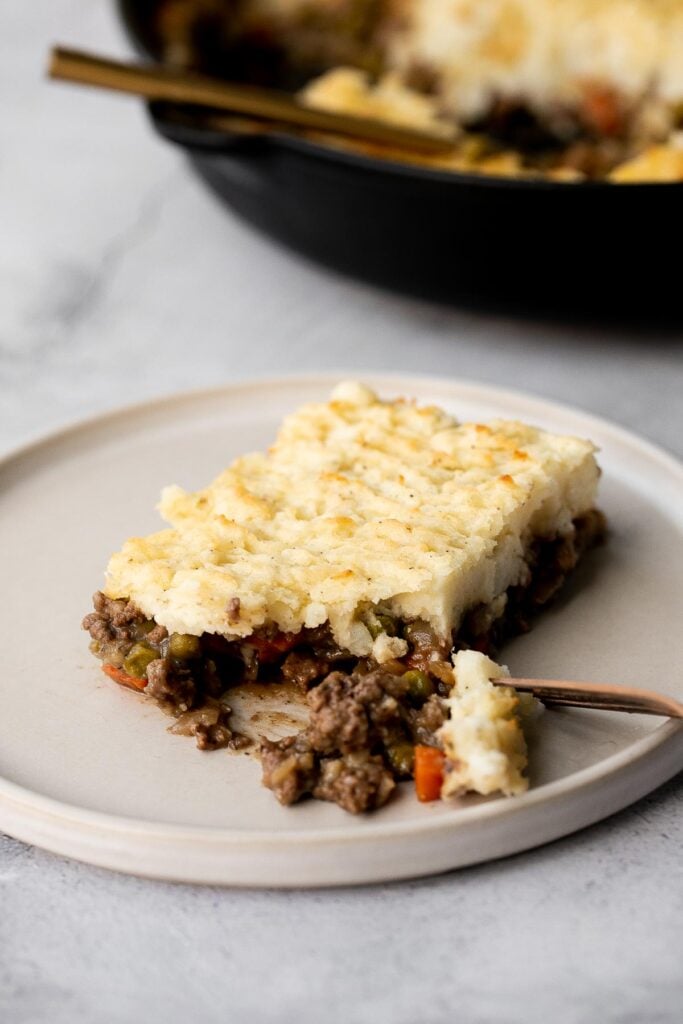
Ingredients
To make this delicious and easy skillet shepherd's pie, you will need the following ingredients:
- mashed potatoes - the potato topping is made with russet potatoes, unsalted butter, milk, cheddar cheese, garlic powder, salt and pepper.
- olive oil
- ground beef - or you can substitute the ground beef with ground lamb.
- vegetables - yellow onion, medium carrots, and frozen peas.
- garlic
- seasoning - Worcestershire sauce (or easily substitute with tomato paste), Italian seasoning, paprika, salt and pepper.
- all-purpose flour - helps thicken up the beef mixture.
- beef broth or water
You will also need a large cooking pot and a 12-inch cast-iron skillet (or ovenproof skillet).
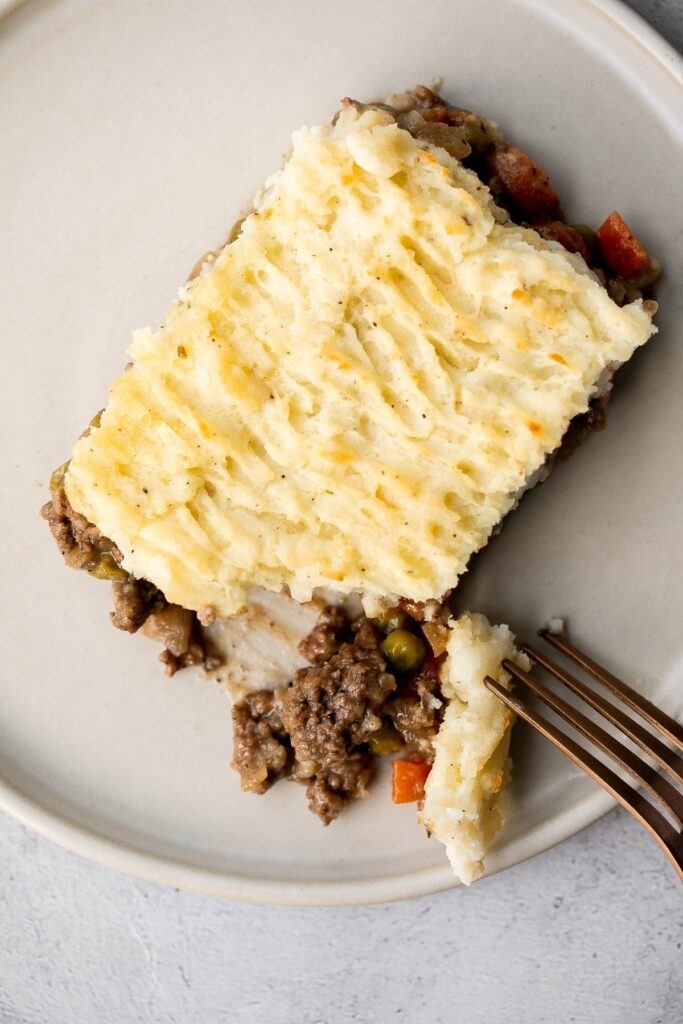
How to Make the Best Skillet Shepherd's Pie
First, prepare the mashed potato topping:
- Make the mashed potato topping. Add the potatoes into a large pot of salted water. Bring it to a boil over medium-high heat and cook until fork tender, about 10-15 minutes. If you can easily insert a fork into the potatoes, then they are ready.
- Drain the water and mash the potatoes using a potato masher or a fork. Add butter, milk, cheddar cheese, garlic powder, salt, and pepper. Stir well until evenly mixed and set aside.
Then, make the beef mixture:
- While potatoes are boiling, heat olive oil in a cast-iron skillet (or other ovenproof skillet) for 2 minutes over medium-high heat until the hot oil sizzles. Add onion and carrots, and sauté until fragrant and tender, about 2-3 minutes.
- Add ground beef and stir well to cook evenly until browned, about 5-7 minutes. Use a spatula to break up the beef into small pieces to help with even browning and cooking.
- Stir in garlic, Worcestershire sauce, Italian seasoning, paprika, salt, and pepper and stir together until well combined. Add flour and stir well until fully combined with the beef mixture. No dry flour should be visible. Add peas and beef broth. Stir occasionally and bring the mixture to a simmer, about 2 minutes.
- Reduce the heat to medium and let it simmer for another 2 minutes until thickened to a desired consistency, stirring occasionally.

Lastly, assemble and bake the pie:
- Preheat oven to 400F.
- Use a spatula to spread the beef mixture into an even layer on the same skillet. Carefully add spoonfuls of the mashed potatoes on top, and spread it evenly on top using a fork.
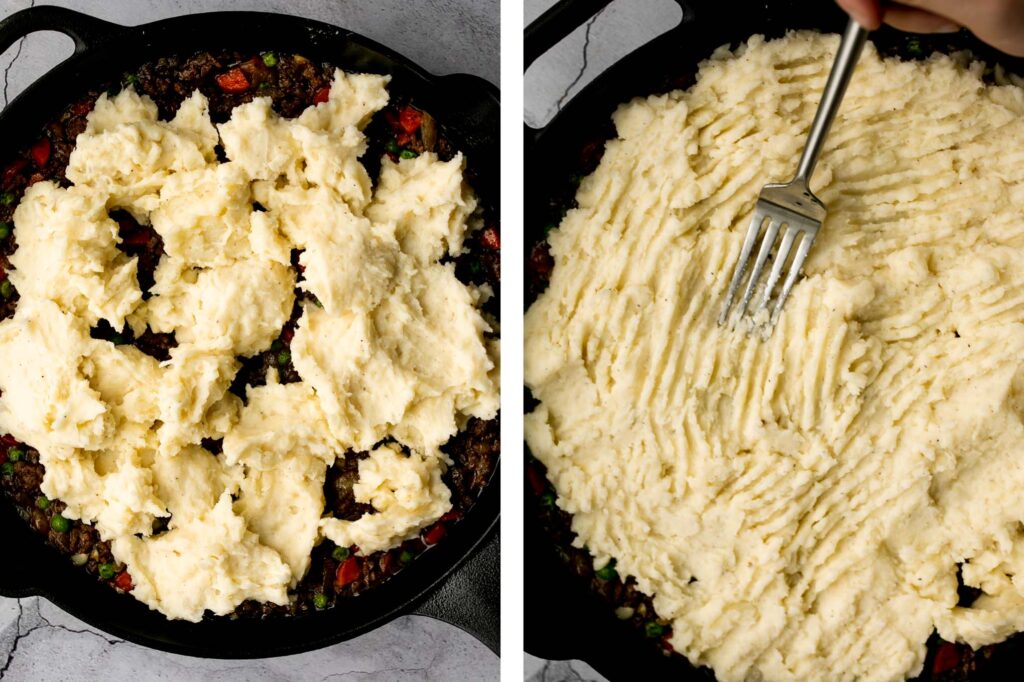
- Bake in a 400F preheated oven for 25-30 minutes until the top turns golden brown. Let cool for 15 minutes before serving.
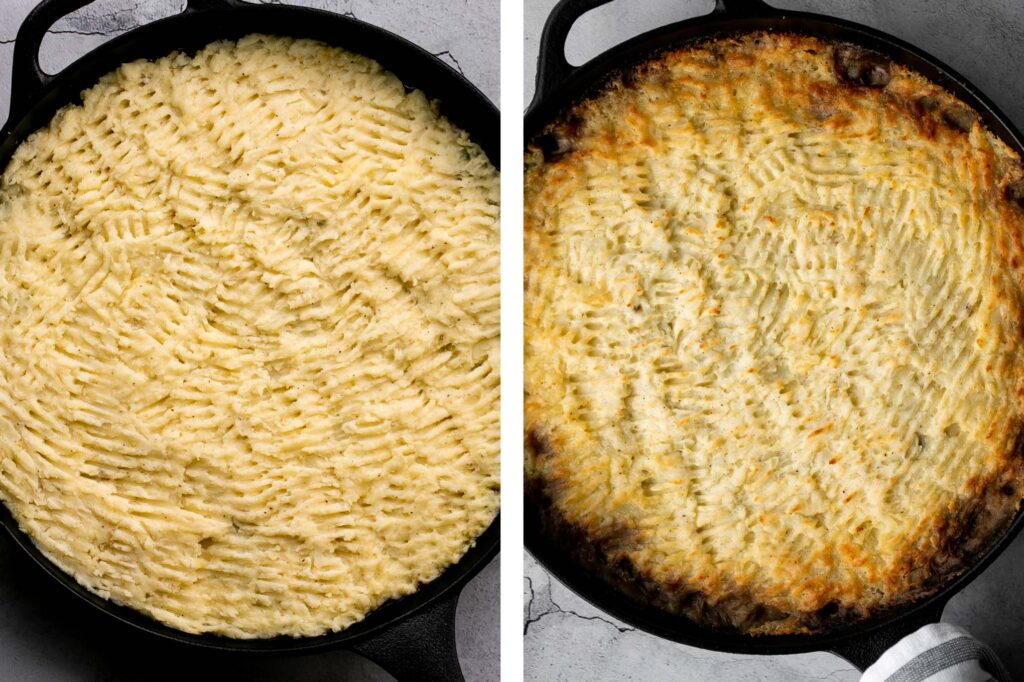
Tips and Tricks
- No cast-iron skillet? No problem. You can cook the beef in a shallow saucepan on the stovetop. Then, transfer the mixture to a casserole dish, and top with the potato mixture.
- Make ahead instructions. Assemble the skillet shepherd's pie according to recipe instructions. Then, store it (covered) in the refrigerator for up to 3 days before baking as directed. So easy.
- How to store. Store leftover shepherd's pie in an airtight container in the refrigerator for up to 4 days.
- How to freeze before baking. Assemble the pie and freeze before baking, tightly covered, for up to 2 months. To make, allow the shepherd's pie to thaw overnight in the refrigerator, then bake as directed.
- How to freeze after baking. Allow any leftover shepherd's pie to cool to room temperature, then wrap it tightly or store in an airtight container in the freezer for up to 4 months. Allow it to thaw overnight in the refrigerator, then reheat in a 300F oven for 20-30 minutes until warmed though.
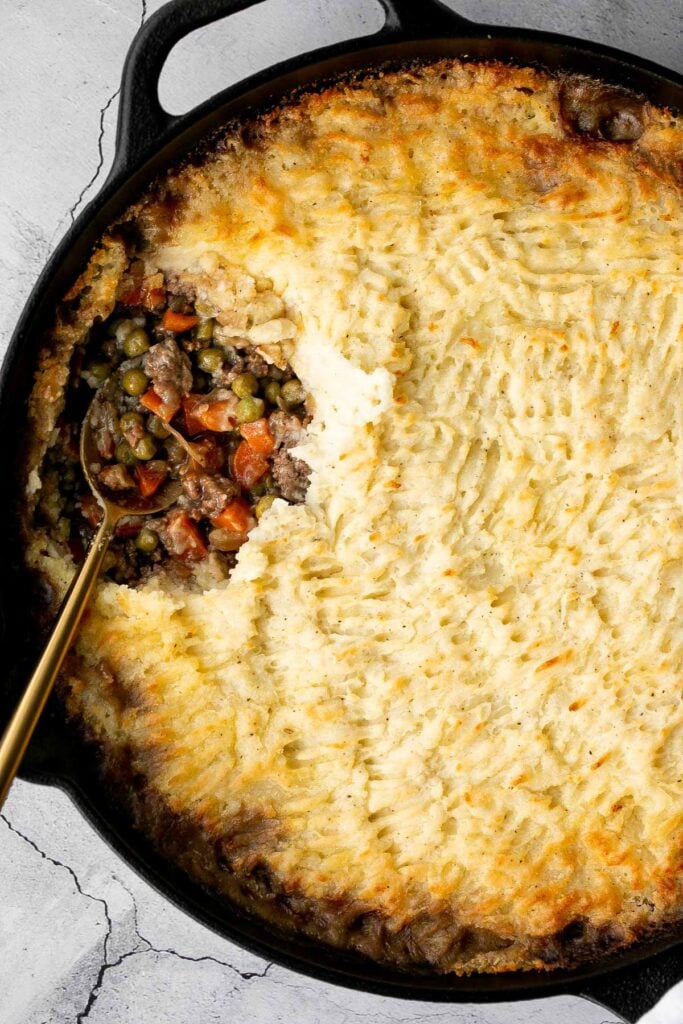
More Ground Beef Recipes
- Ground Beef Meat Pie
- Classic Meatloaf
- Swedish Meatballs
- Slow Cooker Beef Chili
- Sticky Honey Garlic Meatballs
- Easy Meat Lasagna
- Beef Cabbage Barley Soup
Tried this recipe?
I'd love to hear what you think! Leave a comment and rating below to share your feedback. Your reviews help others discover this recipe and help me keep creating more free recipes for you. Snap a photo and tag me on social media @aheadofthyme too.
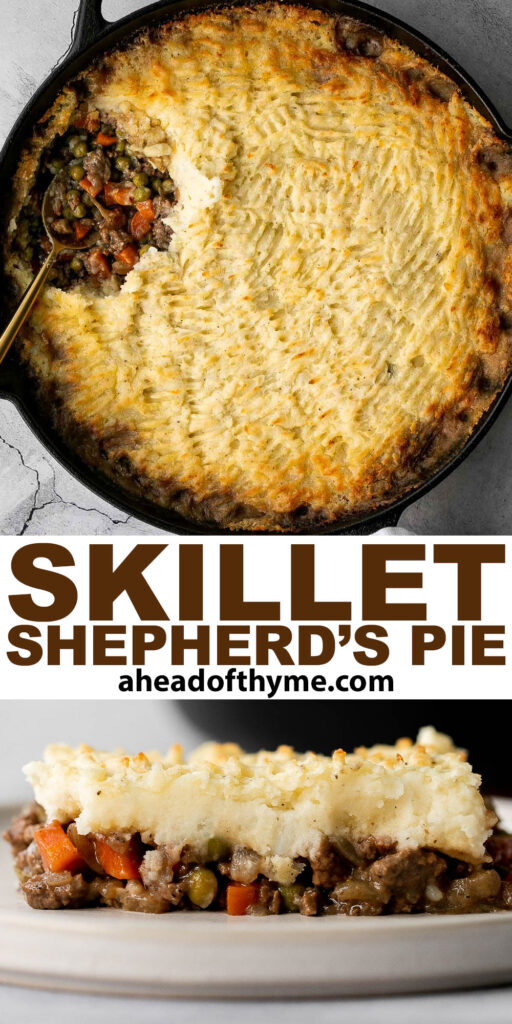
Hot Cross Buns

These hot cross buns are sweet and spiced, fruity, and filling. This truly timeless Easter recipe gives you bread whose looks compete with its flavour! But don't be fooled. Hot cross buns taste just as good the rest of the year as they do on Good Friday. With a white cross down the center, a honey butter glaze, and fluffy and flavourful dough, these hot cross buns won't disappoint. The best part? You only need to spend about 20 minutes of hands-on prep work to make these.
Why You'll Love Hot Cross Buns
- Hot cross buns are the Easter tradition. Dating back as far as the 12th century-yes, the 12th century-hot cross buns are a timeless classic recipe. Trust almost 1,000 years of R&D. These buns are the best.
- Everyone loves sweet, fluffy buns. Hot cross buns are light and airy. When you knead properly, the flavourful dough picks up plenty of air during proofing. The result is melt-in-your-mouth buns with sweet raisins sprinkled throughout. Oh, and don't forget the honey butter glaze!
- Breadmaking at its finest. Making bread is fun, rewarding, and it can save you lots of money. From the art of kneading to the patience of proofing, breadmaking is a skill you'll be happy you learned-and hot cross buns are one of the best to know.
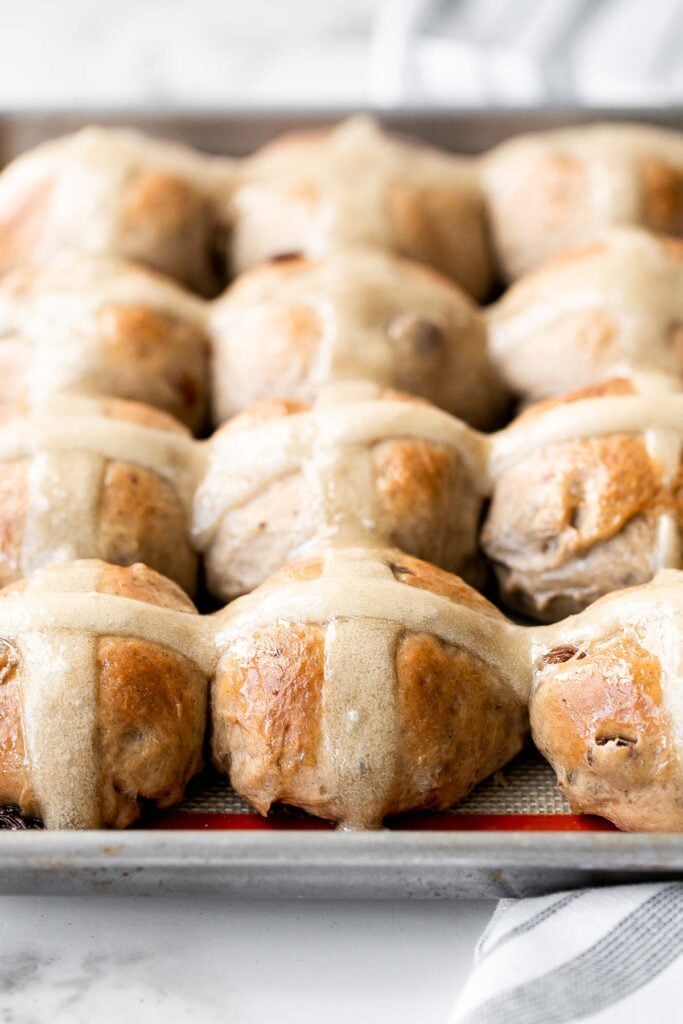
Ingredients
To make easy hot cross buns this Easter, you will need the following ingredients:
- all-purpose flour
- yeast - you can use either active dry yeast or instant yeast.
- granulated sugar - helps to "feed" the yeast, making it rise faster, and also adds a little sweetness to the bread.
- salt - adds flavour.
- milk - whole milk and buttermilk will result in the richest hot cross buns. You can use non-dairy or low-fat milk, but your buns will lose out on the flavour and richness that the milk fat adds.
- egg
- butter
- vanilla extract
- ground cinnamon
- raisins - while raisins make great traditional hot cross buns, you can substitute other dried fruits like raspberries, apricots, or citrus. You can also add a mixture of fruit. Be sure to keep the total amount of fruit you add to less than ¾ cups or 100 grams and cut up large chunks into raisin-sized pieces.
- for the cross - you will need all-purpose flour and water.
- for the honey glaze - you will need honey and melted butter.
You will also need mixing bowls, a kitchen scale (or measuring cups and spoons), a quarter sheet baking pan, and piping bag or ziploc bag to pipe on the cross.
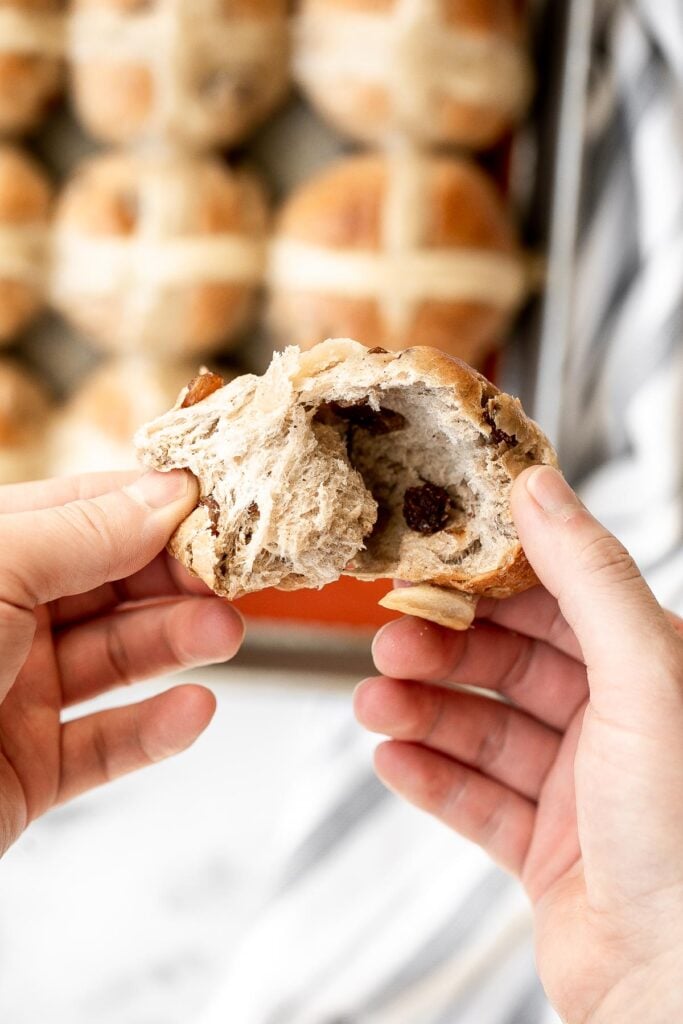
How to Make the Best Hot Cross Buns
Prepare the Dough
- Prepare the dough. In a large mixing bowl, add milk, yeast, sugar, salt, egg, butter, vanilla extract and cinnamon. Whisk well to combine and let sit for 5 minutes. This allows the yeast to become active. Add in flour and stir well to combine until no dry flour is visible in the bowl. Make sure to scrape down the sides of the bowl with a spatula. The butter might still be a bit crumbly at this point.
- Knead the dough. Transfer the dough mixture onto a clean surface and knead the dough for 5-10 minutes until the dough ball is smooth and not sticky at all. Because of the high fat content (butter and milk) in the dough, it should take less than 5 minutes of kneading by hand to achieve a non-sticky and smooth dough ball.
Tips for Kneading Dough
- How to knead dough: Knead the dough by pushing it down and outward using the palms of your hands. Fold the dough in half toward you and press down. Repeat this motion by pushing the dough down and outward, and then folding over towards you. This helps build up gluten strength in dough that is responsible for making the bread fluffy.
- How to test if dough is well-kneaded: A well-kneaded dough is smooth and can hold its shape. You can test the dough by giving it a firm poke with your finger. The indentation should bounce right back. If it doesn't bounce back and stays like a dimple, keep kneading for a few more minutes.
- Proof the dough (first rise). Transfer the dough back into the mixing bowl and lightly grease the dough ball with oil or cooking oil spray. Cover the bowl with plastic cling wrap and let it rise for 1 hour or until doubled in size. I leave it in the oven (not turned on) with the light on to speed up the rise time.
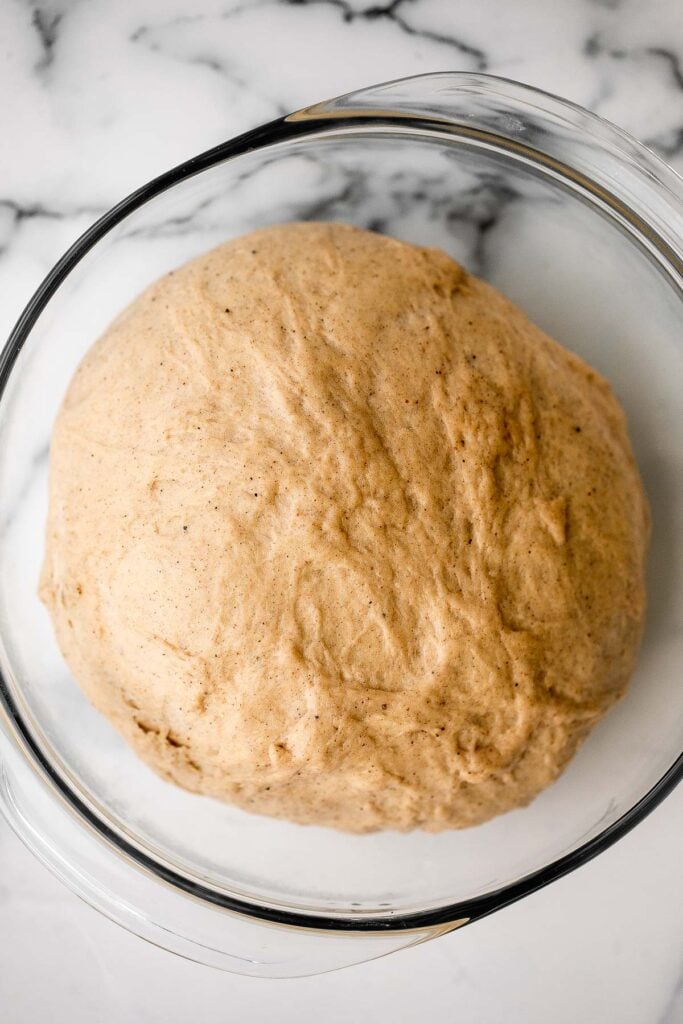
- Add raisins. When the dough doubles in size, punch it down to release the air. Add raisins and knead for a few minutes to combine.
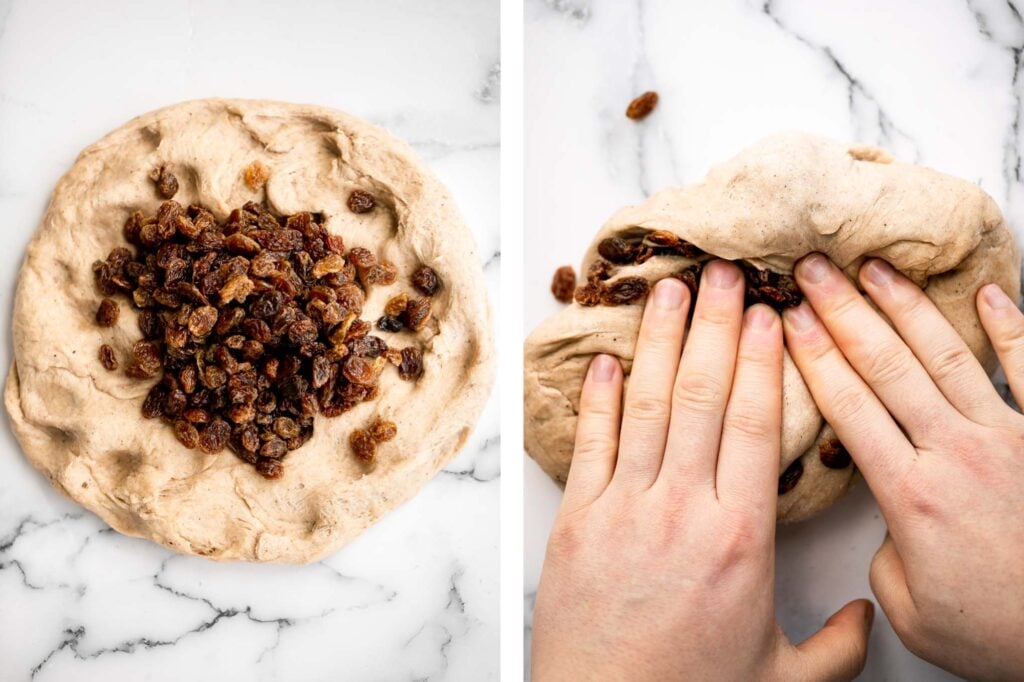
- Shape the dough. Roll the dough ball into a rectangle and divide it into 12 equal pieces with a knife or bench scraper. Use your hands to roll each piece into a ball and transfer onto a quarter sheet baking pan lined with a silicone baking mat or parchment paper, leaving ½-inch of space between each dough ball.
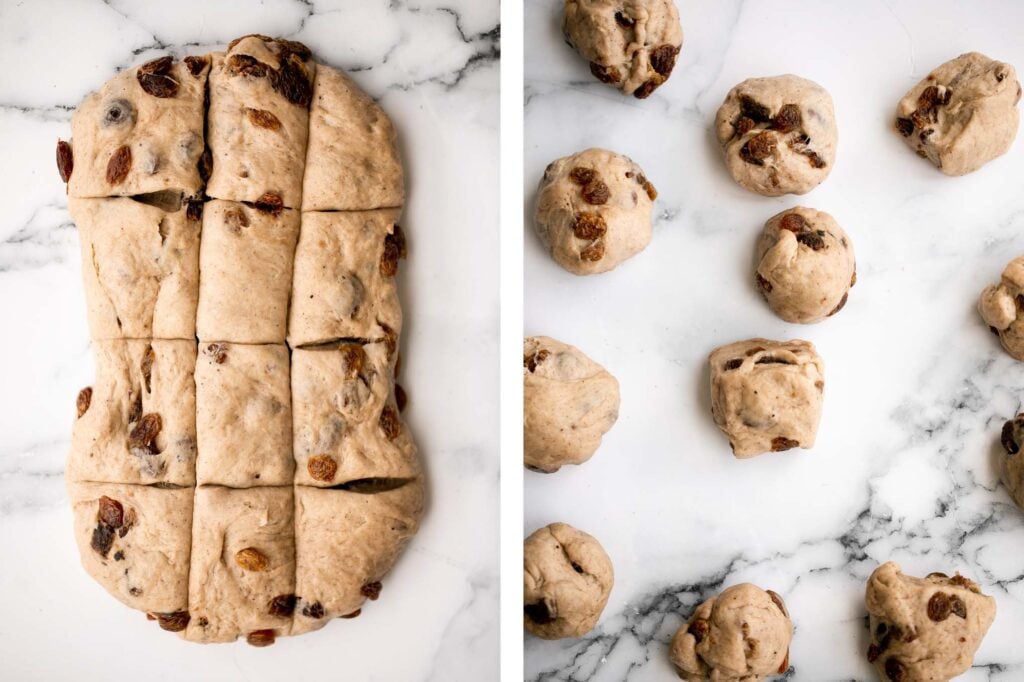
- Proof the buns (second rise). Cover the pan with plastic cling wrap to prevent the dough from drying. When the dough loses moisture, it tends to form hard skin around its surface, which creates a hard crust when baking. Let the rolls rest and rise for 45 minutes. The rolls should almost double in size.
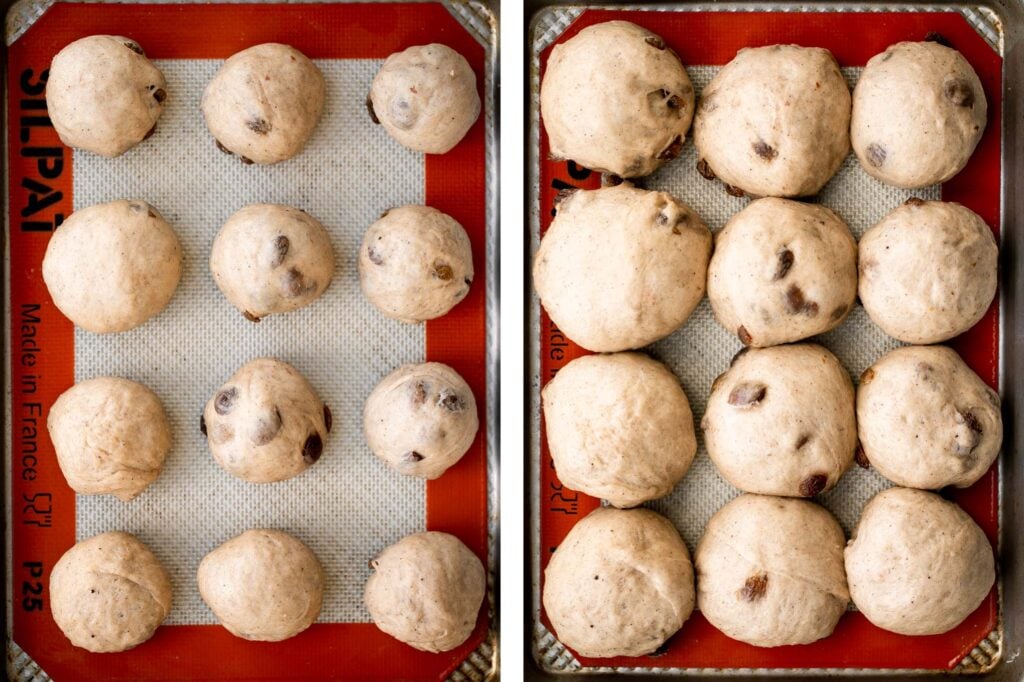
How to Make the Cross on Hot Cross Buns
In a small mixing bowl, add flour and water and stir well into a thick paste. Transfer the paste into a piping bag and attached a no. 5 round tip, or snip off the corner. Pipe crosses over the buns by piping a line down the center of the buns and repeating in the other direction to create crosses.
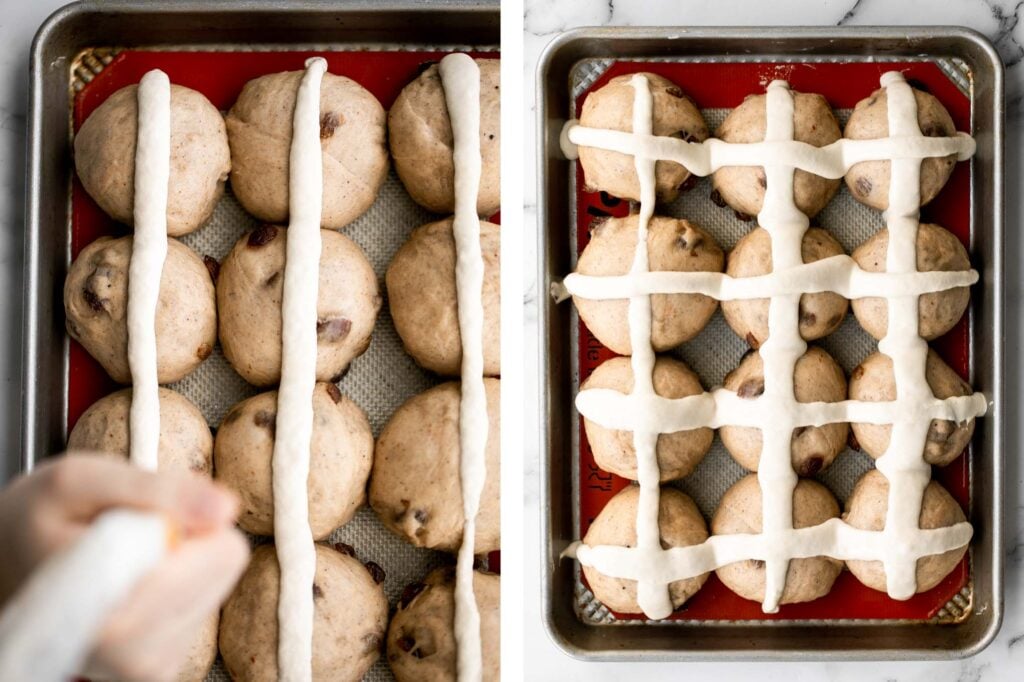
Then, bake the buns in a preheated 375 F oven for 20-25 minutes until golden brown.
Lastly, make the glaze by mixing together honey and melted butter in a bowl until smooth and combined. Brush the glaze evenly over the buns immediately once out of the oven. Let the buns cool on a wire cooling rack for 15 minutes before serving.
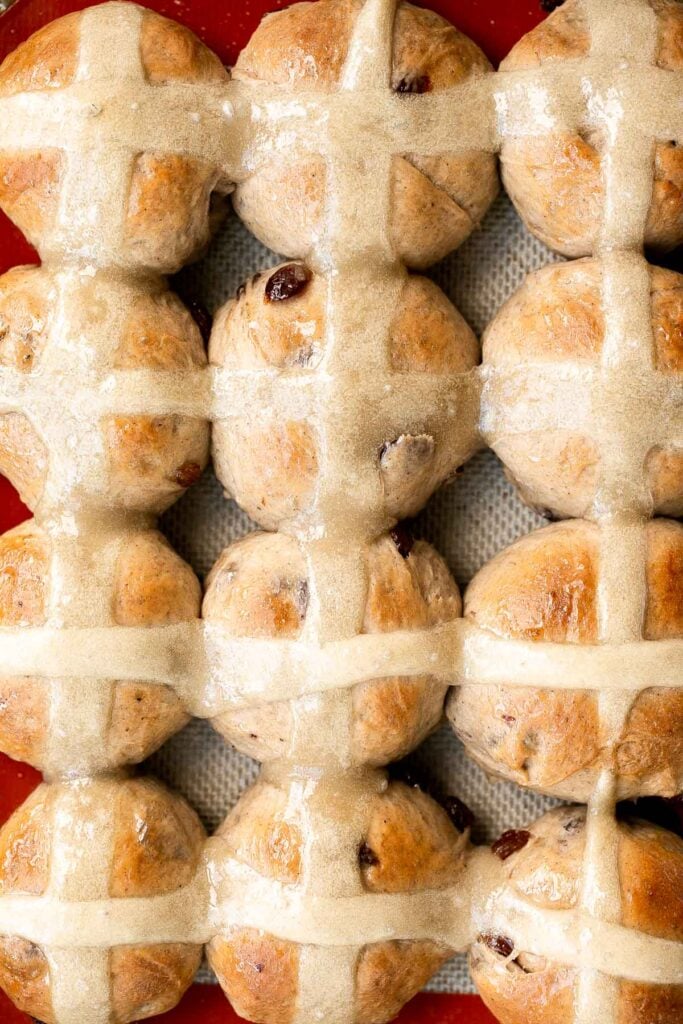
Storing and Freezing Instructions
- How to store: Hot cross buns can be stored in a bread box or an airtight container at room temperature for up to 5 days. You can also refrigerate them for up to a week, but they will become more dry.
- How to freeze: Let the baked buns cool to room temperature before freezing in an airtight container or freezer bag. To thaw, place in the refrigerator overnight or allow the buns to rest at room temperature for several hours.
- How to reheat: You can reheat hot cross buns for a few minutes in a toaster oven or air fryer at 300F.
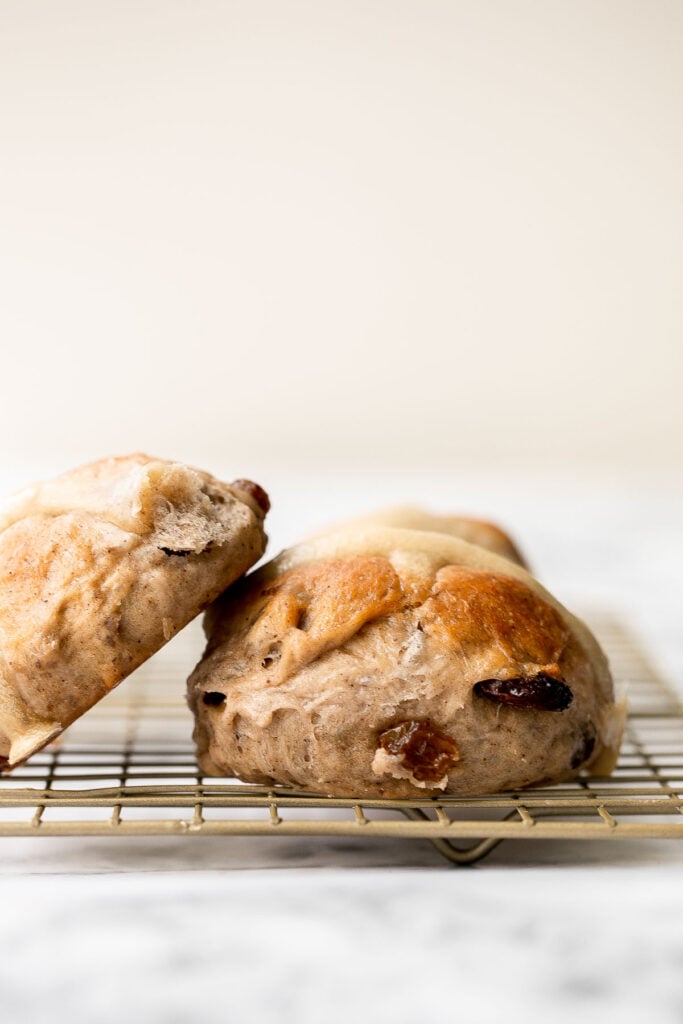
More Bread Recipes
- Cinnamon Raisin Challah Bread
- Green Onion Dinner Rolls
- Broiche Bread
- Homemade Pita Bread
- Easy Challah Bread
- Easy Homemade Everything Bagels
- Small Batch No-Knead Bread
- Easy Small Batch Ciabatta Rolls
Tried this recipe?
I'd love to hear what you think! Leave a comment and rating below to share your feedback. Your reviews help others discover this recipe and help me keep creating more free recipes for you. Snap a photo and tag me on social media @aheadofthyme too.

Asparagus Tart
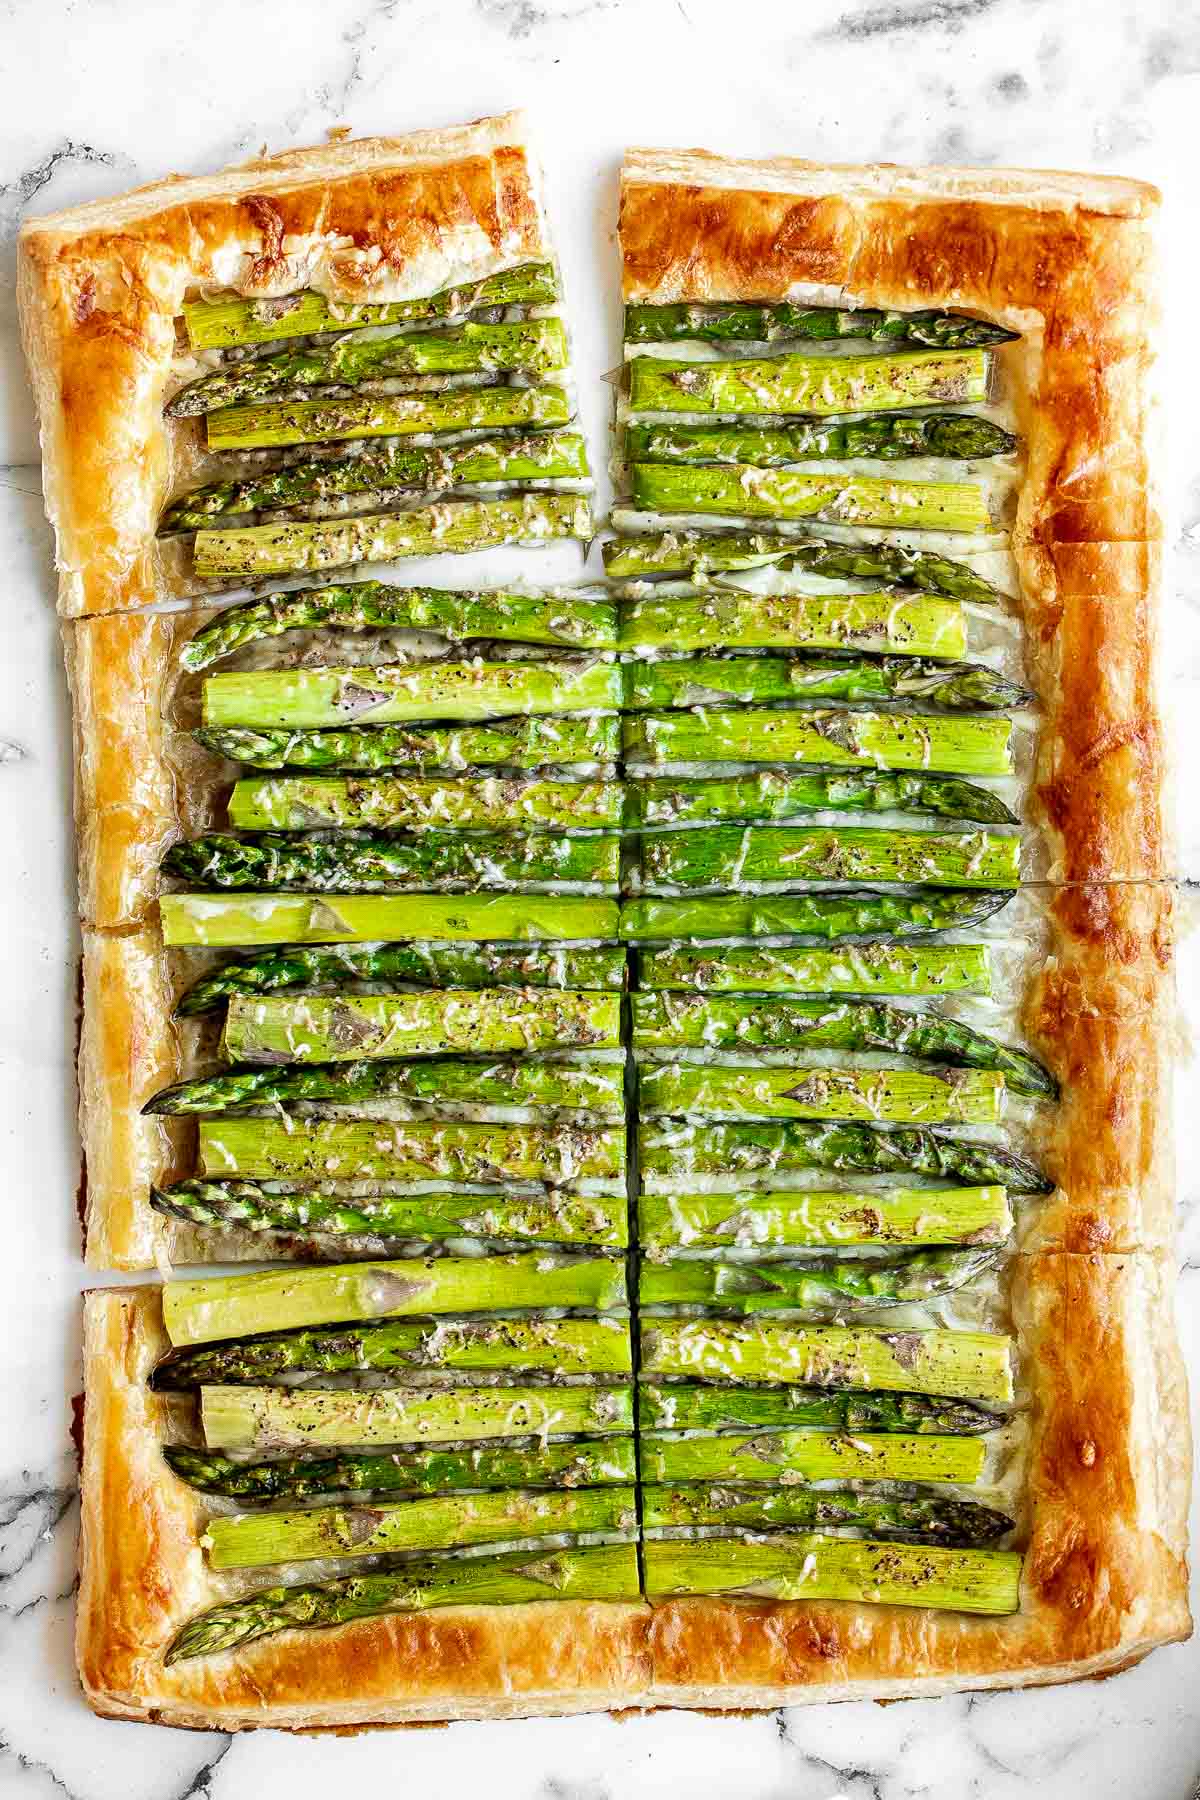
Get ready to impress with this easy asparagus tart recipe. You'll be amazed how such a surprisingly simple recipe creates a tart with a complex depth of flavour that can be served with breakfast, lunch, or dinner. With a flaky puff pastry base, a layer of creamy melted cheese, fresh asparagus stalks, and a balsamic glaze, this asparagus tart is light, savoury, and delicious.
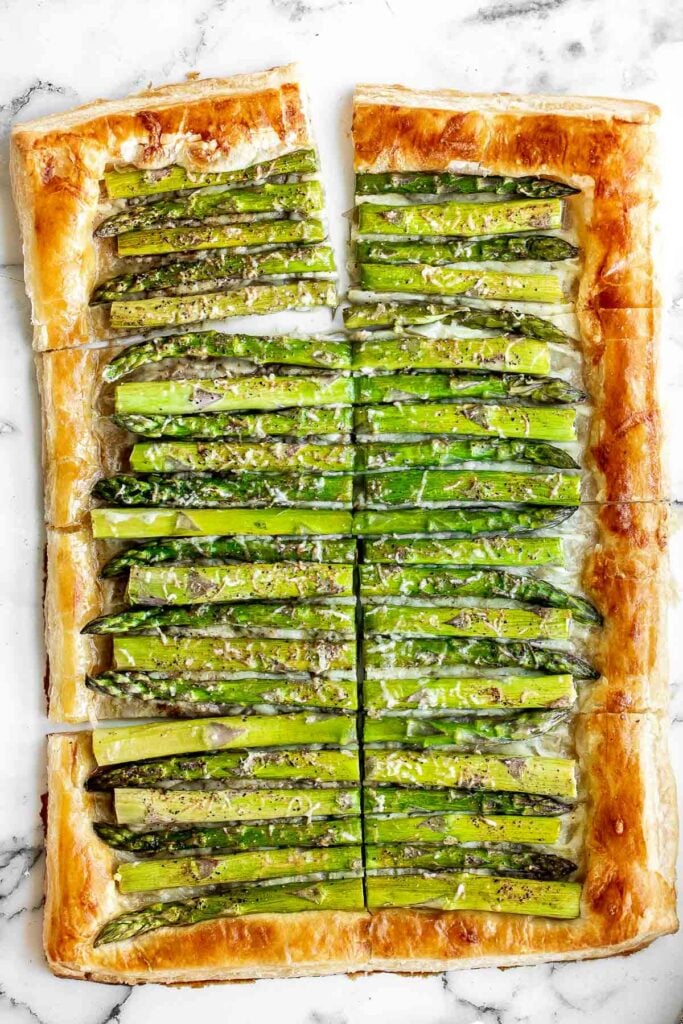
Why You'll Love this Asparagus Tart
- Asparagus and Gruyère are a match made in heaven! If you're craving a pizza night but tired of the same old things, this asparagus tart is exactly what you need. Fresh asparagus and melted Gruyère cheese pair together so well, you'll be amazed (and so will everyone else at the table).
- Skip the hassle and use frozen puff pastry. If you want to make your own pastry dough from scratch, you certainly can. But this recipe uses frozen puff pastry dough for a reason. It's easier to make and clean up. Plus, you don't have to worry whether you've done it right!
- Asparagus tart is a versatile meal. Do you need a side dish for dinner, finger food for a party, or a main course for brunch? Asparagus tart is perfect at any time of the day and accompanies almost anything well. And, it's vegetarian!
Ingredients
To make this easy and delicious asparagus tart, you will a large half sheet baking pan and the following ingredients:
- frozen puff pastry - I used storebought puff pastry to make it super easy to prepare this tart. You can also use homemade puff pastry.
- asparagus - I used thick asparagus, but I would recommend thinner asparagus for this tart. The thicker the asparagus, the heavier the tart will be and can cause the tart to have less structure on the bottom due to the weight.
- Gruyère cheese - When it comes to cheesy asparagus, it's hard to go wrong. Gruyère is the best for this recipe, but you can use any hard cheese like fontina, cheddar, Jarlsberg, Emmentaler, Edam, etc. However, using freshly shredded cheese instead of the pre-shredded store-bought kind will result in a better tart.
- Parmesan cheese - We top the tart with some Parmesan cheese for extra flavour because two cheeses are better than one right? You can also substitute this with asiago cheese.
- olive oil
- balsamic vinegar
- salt and pepper
- egg wash - made with egg and milk. This helps create a golden crust o the border of the puff pastry.
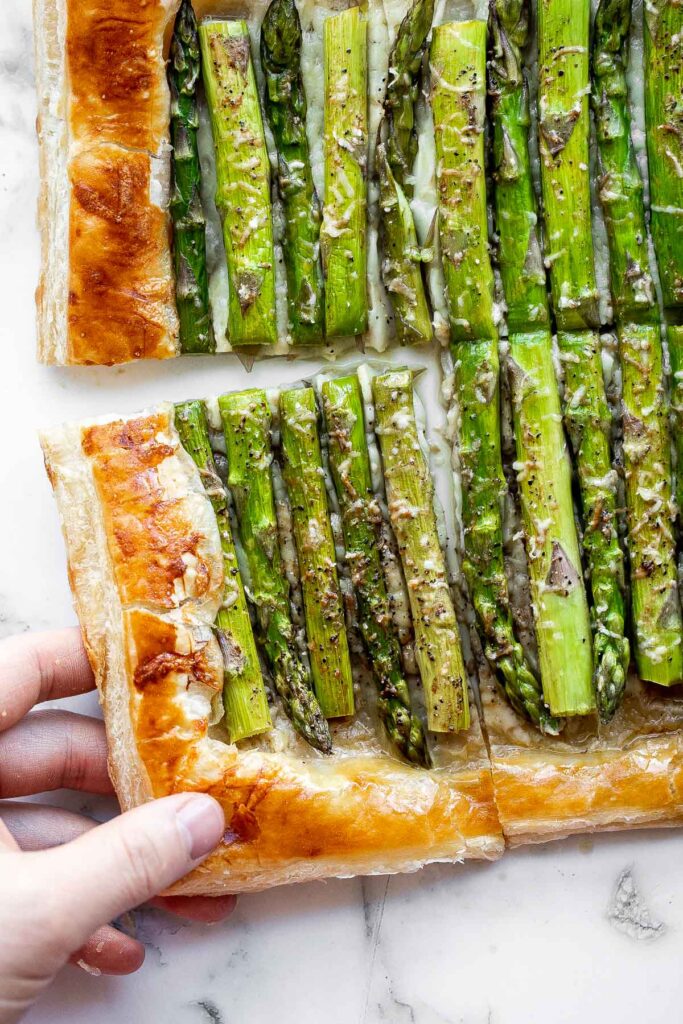
How to Make the Best Asparagus Tart
- Prepare the puff pastry. On a clean and lightly floured surface, prepare and roll out the puff pastry into a 10x15-inch rectangle. Transfer to a large half sheet baking pan lined with parchment paper.
- Use a knife to gently score a 1-inch border around the pastry dough. Make sure to score the pastry with shallow cuts and do not cut through the pastry.
- Use a fork to lightly poke holes all over the pastry dough (inside the scored border). Do not poke through the dough. This allows the steam to escape during baking so that the pastry doesn't puff up in the oven.
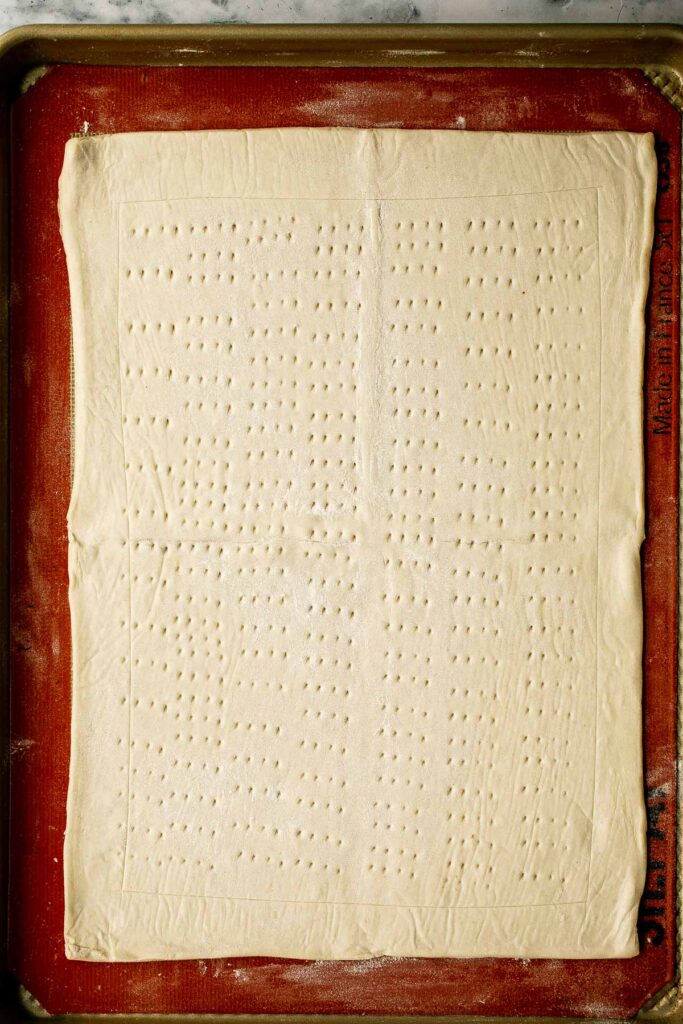
- Add toppings. Sprinkle Gruyère cheese evenly over the pastry inside the border and top with asparagus in a single layer alternating ends and tips.
- Add seasoning. In a small bowl, add olive oil, balsamic vinegar, salt, and pepper, and stir well to combine. Brush the mixture evenly over the asparagus and top with Parmesan cheese.
- Brush on egg wash. In another small bowl, whisk together egg and milk. Brush the egg wash over the border on all sides.
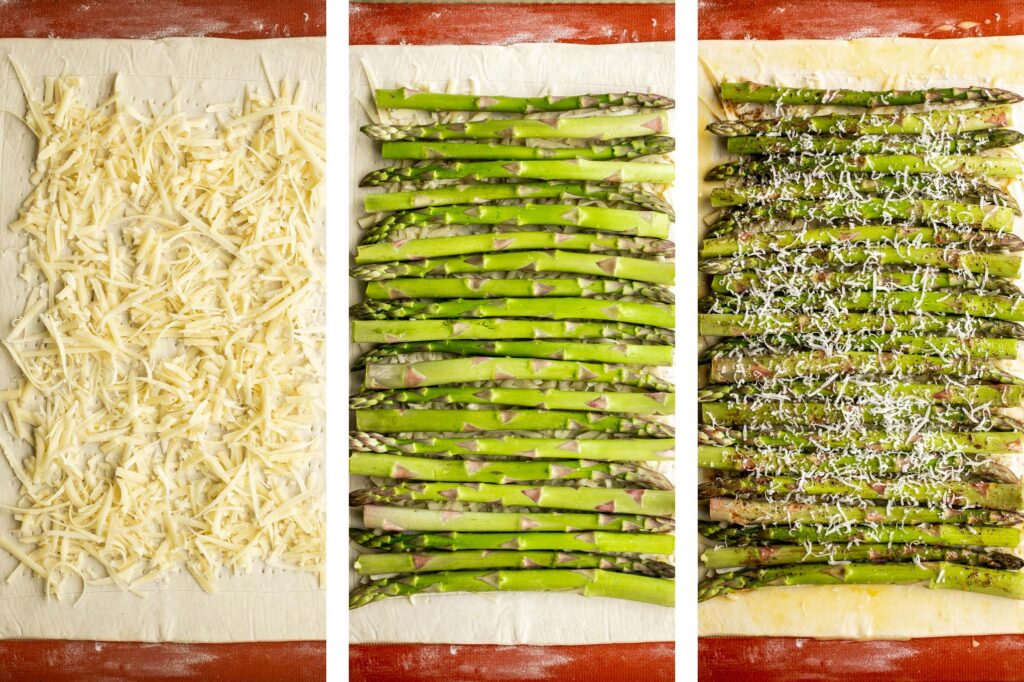
- Bake. Bake in a preheated 450F oven for 15 to 20 minutes until the crust is golden brown and puffy. Let the tart cool for 2-3 minutes before slicing and serving.
Tips and Tricks
- How to trim asparagus. To trim the asparagus, you can use a knife, kitchen scissors, or your hands. To trim without any tools, just hold the ends and bend until the bottom snaps off. If your asparagus is fresh, you should end up with a clean snap.
- How to garnish. You can completely elevate this baked asparagus tart by simply adding a garnish to go with the balsamic and Parmesan. Try sundried tomatoes, fresh basil, or roasted garlic.
- How to store. Asparagus tart is best eaten fresh. It can be stored at room temperature the day it is made but should be refrigerated if you will keep it for longer than a few hours. Store it in the refrigerator for up to 4 days.
- How to reheat. Reheat asparagus tart in a 300 F preheated oven for 10 minutes, or in the air fryer for 5-10 minutes until warmed through.

More Asparagus Recipes
- Chopped Asparagus Salad
- Spring Pesto Pasta with Asparagus
- Air Fryer Asparagus
- Creamless Cream of Asparagus Soup
- Prosciutto-Wrapped Asparagus and Cantaloupe Bundles
- Sautéed Asparagus
- Roasted Asparagus with Poached Eggs
Tried this recipe?
I'd love to hear what you think! Leave a comment and rating below to share your feedback. Your reviews help others discover this recipe and help me keep creating more free recipes for you. Snap a photo and tag me on social media @aheadofthyme too.
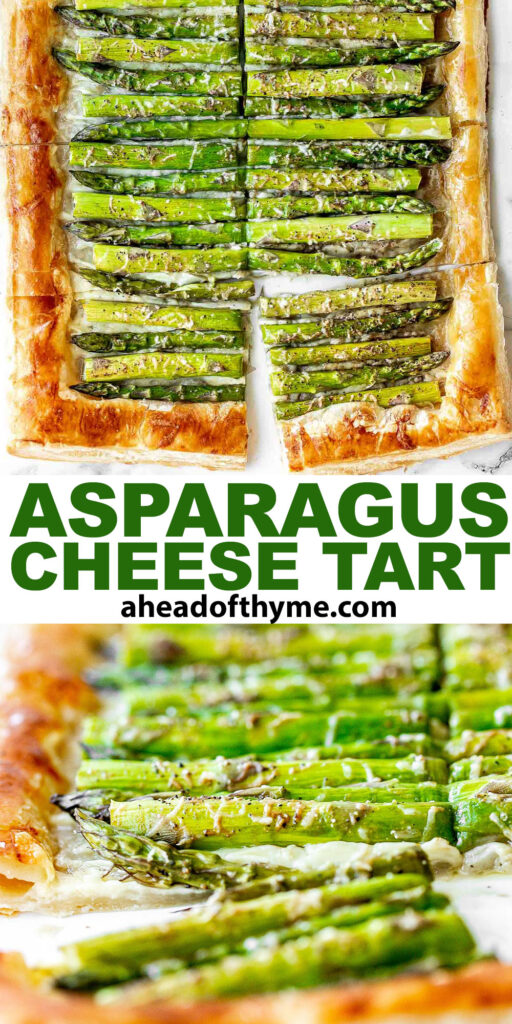
Mini Egg Easter Cookies

Mini egg Easter cookies are crispy on the outside, and soft and chewy on the inside. Just how the perfect chocolate chip cookie should be. These festive holiday cookies are also the easiest cookies to make with under 10 minutes of prep, no chill time, and just 10 minutes to bake.
Mini egg Easter cookies also make the best gifts for family and friends, especially this year since we likely won't be spending time together in person this year. Or an even better idea would be to make a few other cookie options like Easter Egg Sugar Cookies, Bird's Nest Cookies, and Carrot Cake Shortbread Cookies and package them all up as gifts in cute Easter-themed holiday cookie boxes. Who wouldn't love to receive a package like that?
For more Easter treats, browse through my most popular Easter dessert recipes.

Ingredients in Mini Egg Easter Cookies
To make these easy mini egg Easter cookies, you will need the following pantry staples:
- butter
- sugar - light brown sugar and granulated sugar.
- large egg
- vanilla extract
- all-purpose flour
- baking soda
- salt
- mini chocolate eggs - I used Cadbury mini eggs because I like them best, but any brand of chocolate eggs will work.
- chocolate chips - I used semi-sweet chocolate chips.
You will also need measuring cups and spoons, mixing bowl, large half sheet baking pan, silicone baking mat, and wire cooling rack.

How to Make the Best Mini Egg Easter Cookies
- Make the dough. In a large mixing bowl, use a hand mixer or stand mixer cream together butter and sugars on medium speed until light and fluffy, about 2 minutes. Add egg and vanilla, and beat on low until incorporated. Add flour, baking soda, salt, halved mini eggs, and chocolate chips, and stir with a large spatula until just combined.
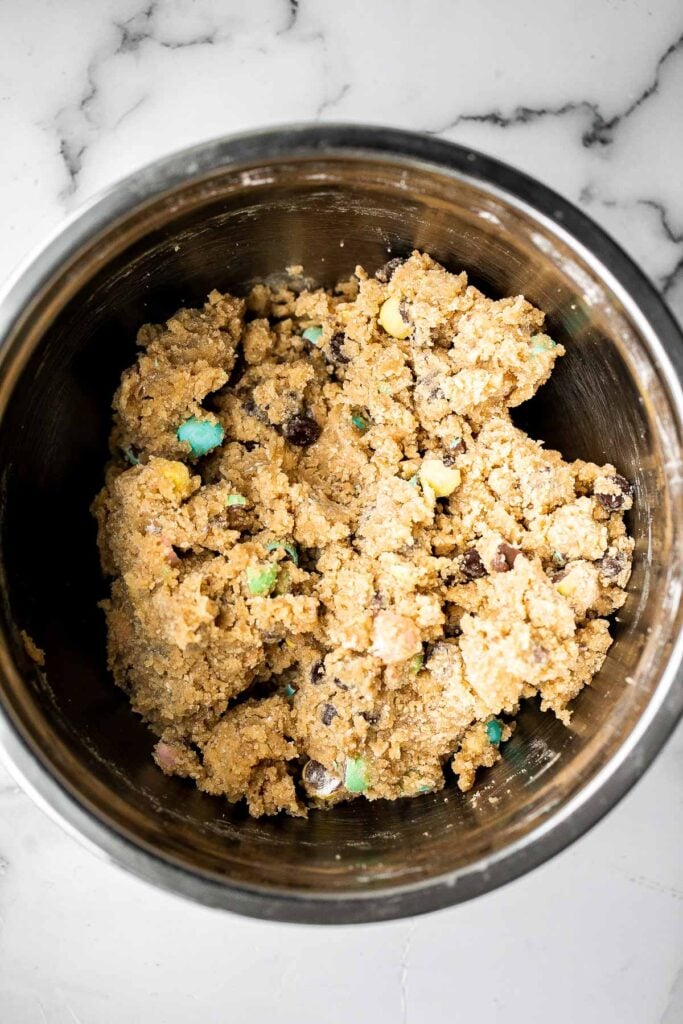
- Shape the cookie balls. Scoop out 1.5 tablespoons of cookie dough and roll it into a ball. Place the cookie balls spaced 2 inches apart on a large half sheet baking tray lined with a silicone baking mat or parchment paper. Press in extra whole mini eggs into the top of the cookies.
- Bake. Bake in a 350 F preheated oven for 8-10 minutes, until edges just start to brown. DO NOT OVERBAKE. The cookies may not look done in the middle, but they will continue to cook as they are cooling. Remove from oven and allow the cookies to cool in the baking sheet for 5 minutes, then carefully transfer to a wire cooling rack to cool completely.
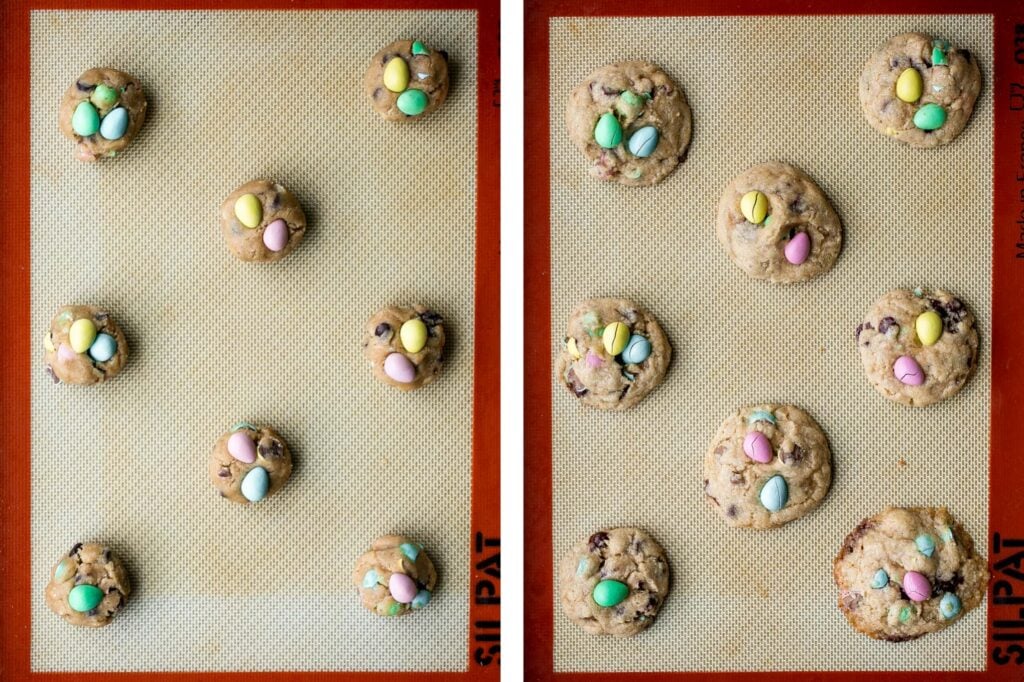

Storing and Freezing Instructions
- How to store: Store mini egg Easter cookies in an airtight container at room temperature for up to 3 days, or in the refrigerator for up to one week.
- How to freeze baked cookies: These mini egg cookies freeze very well. Let them cool completely first, then store in an airtight container or freezer bag for up to 3 months.
- How to freeze cookie dough: To freeze the cookie dough before baking, scoop out and roll the dough into cookie balls and place on a lined baking sheet. Transfer the baking sheet to the freezer and freeze for 1 hour until hard. Then, transfer the cookie dough balls into a freezer bag and store for up to 3 months. To bake, thaw the cookie dough balls in the refrigerator overnight or at room temperature until thawed. Then, bake according to recipe instructions.

More Cookie Recipes
- Easter Egg Sugar Cookies
- Bird's Nest Cookies
- Chocolate Chunk Peanut Butter Cookies
- M&M Cookies
- Chewy Chocolate Chip Oatmeal Cookies
- Raspberry and White Chocolate Shortbread Cookies
- Soft and Chewy Peanut Butter Cookies
- Slice and Bake Pecan Shortbread Cookies
Tried this recipe?
I'd love to hear what you think! Leave a comment and rating below to share your feedback. Your reviews help others discover this recipe and help me keep creating more free recipes for you. Snap a photo and tag me on social media @aheadofthyme too.

50 Best Easter Side Dishes
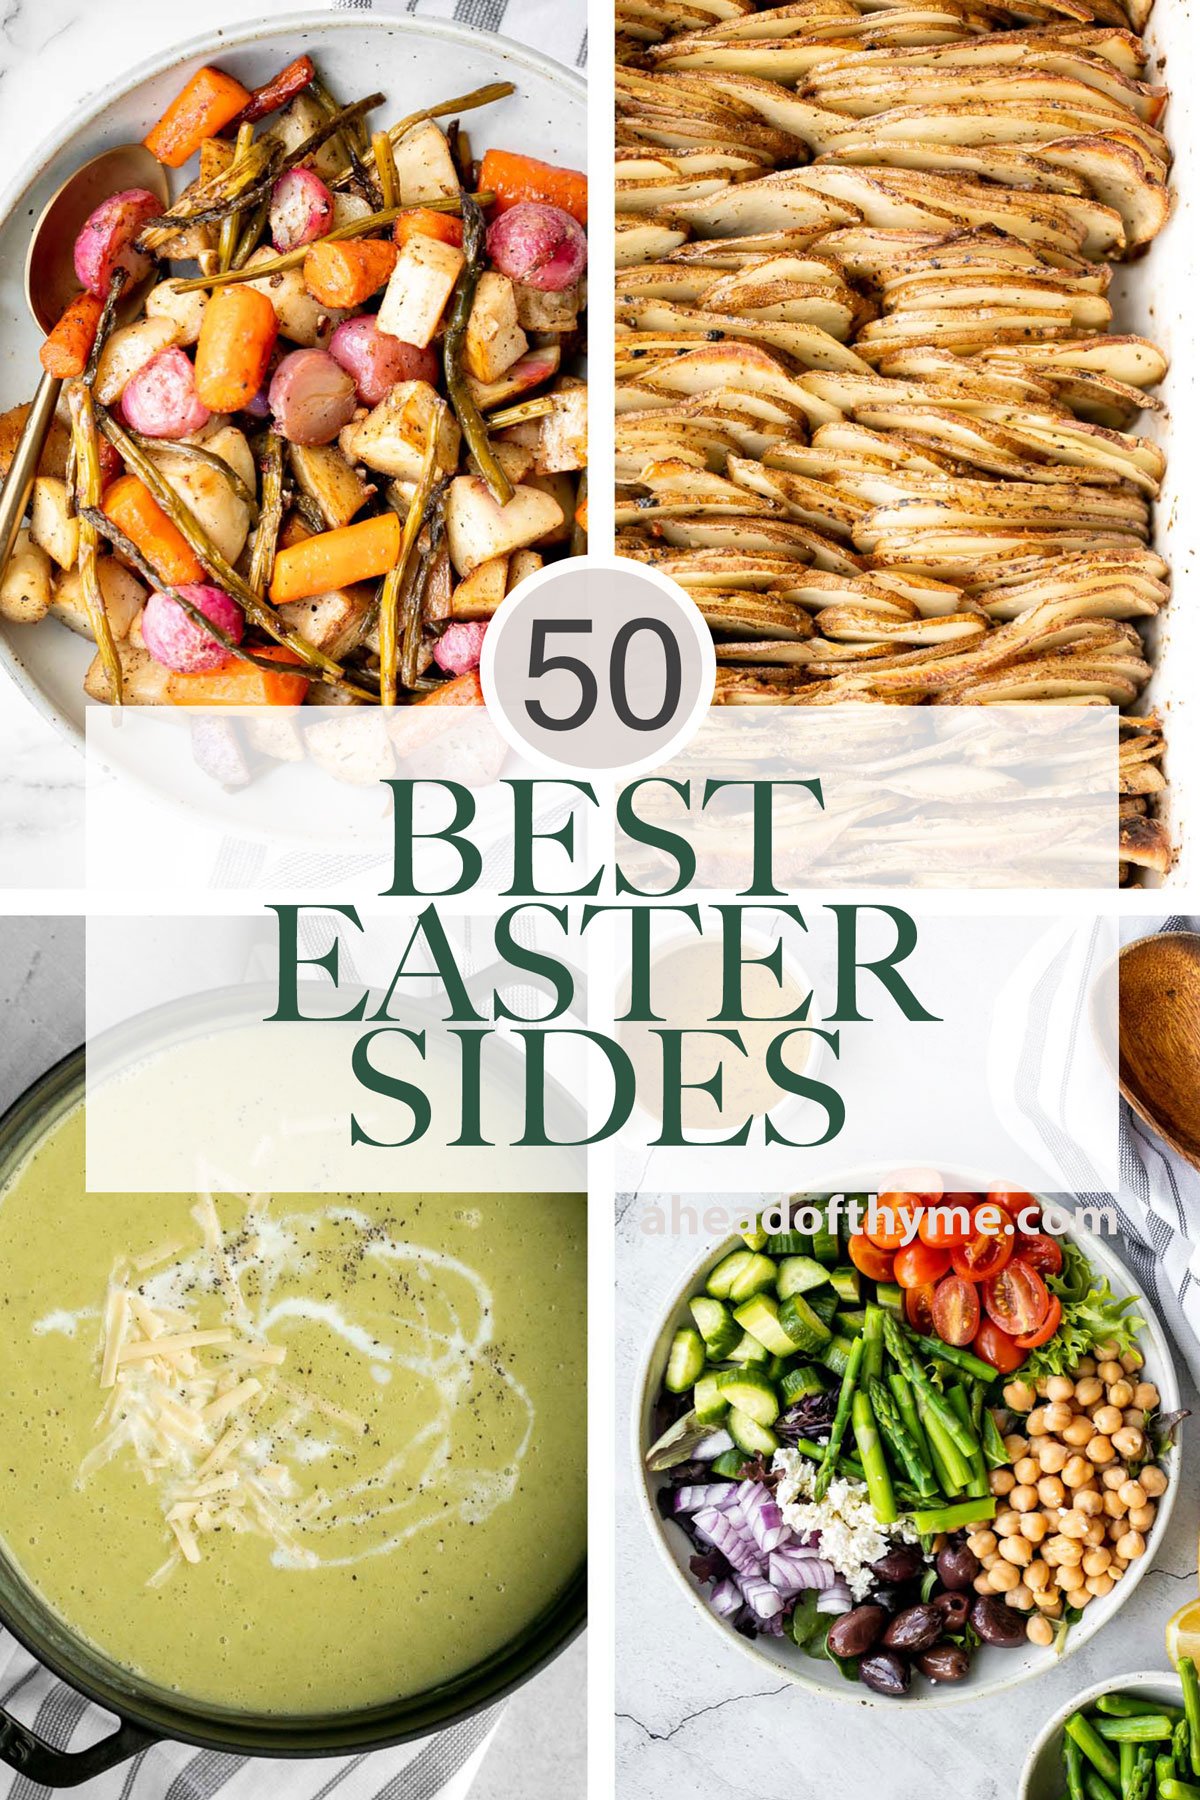
Like most holidays, Easter is kind of all about the side dishes. Whether you are looking for traditional Easter recipes this year, or trying something new, you have come to the right place. Browse through the 50 most popular and best Easter side dishes including everything from classic vegetable sides, to fresh seasonal salads, to light spring soups, and more.
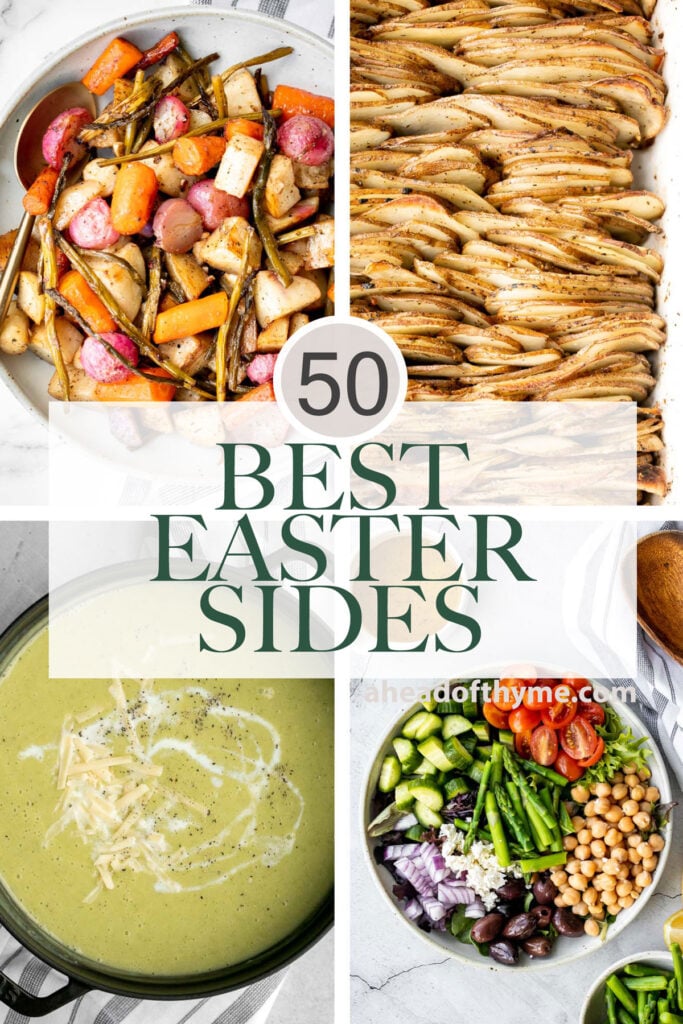
Looking for an entree to pair these sides with? Try some of my favourite Easter main dishes like Holiday Glazed Baked Ham, Pineapple Glazed Ham Slices, Herb-Crusted Rack of Lamb, Glazed Honey Balsamic Pork Chops, Honey Glazed Roast Pork, Skillet Shepherd's Pie, or Dutch Oven Whole Roast Chicken.
Easter Side Dishes
Roasted spring vegetables are an easy sheet pan side dish packed with all our favourite veggies of the season. Plus, it's so easy to prep and make.
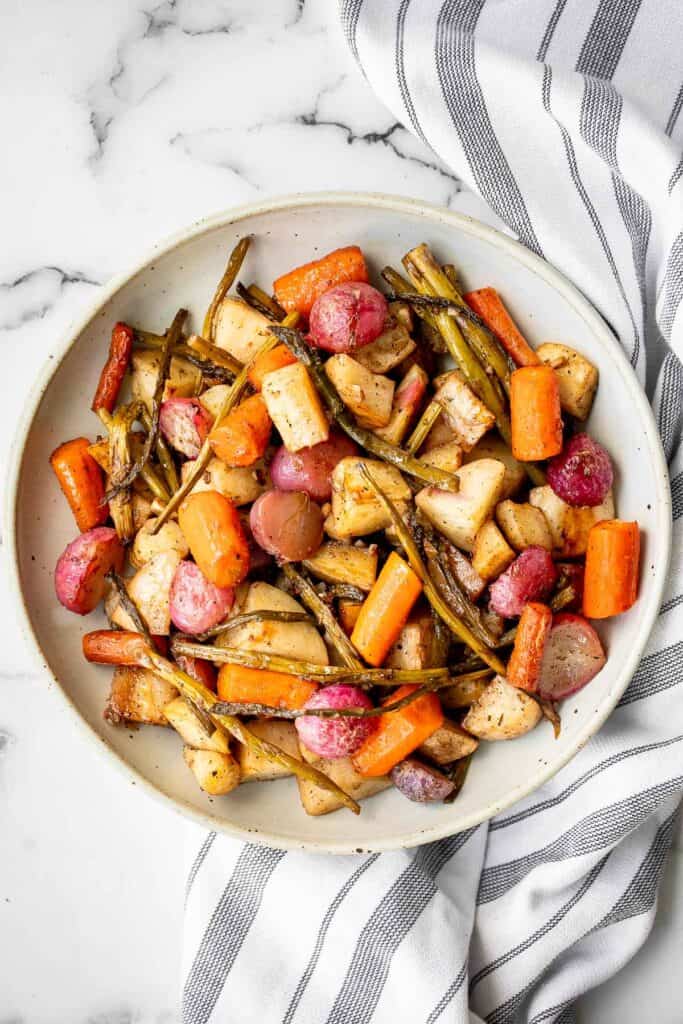
Rich and creamy potatoes au gratin is the ultimate comfort food made with sliced potatoes, cheese, and milk. It's the perfect side dish for the holidays.
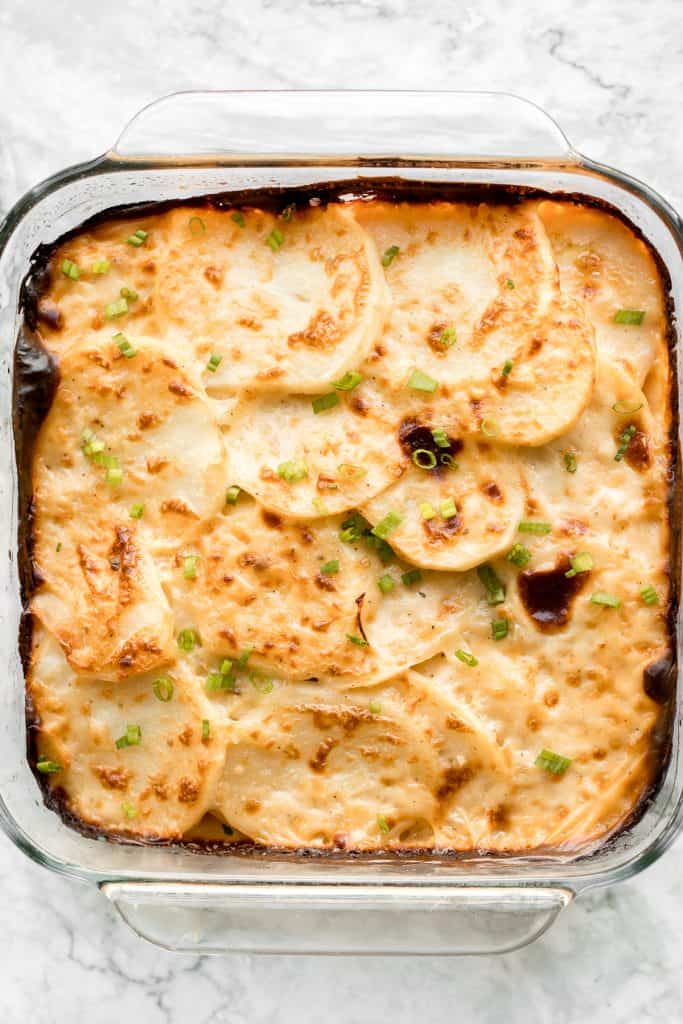
Crisp on the outside and tender inside, air fryer asparagus cooks in just 6 minutes! It is tossed in very little olive oil with garlic and seasonings.

Chopped asparagus salad with lemon vinaigrette is the easiest and best spring salad ever - colourful, vibrant, flavourful, light, and crunchy.
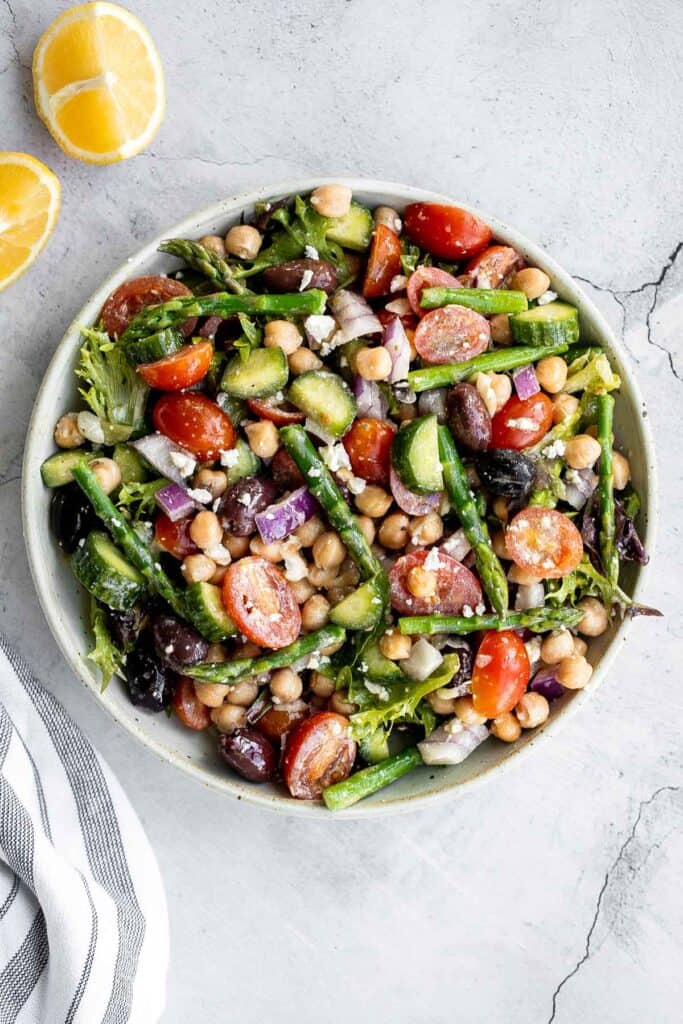
Roasted Carrots are a healthy, delicious, and easy to make side dish with a slightly crispy interior and sweet and tender inside. Serve with any entree!
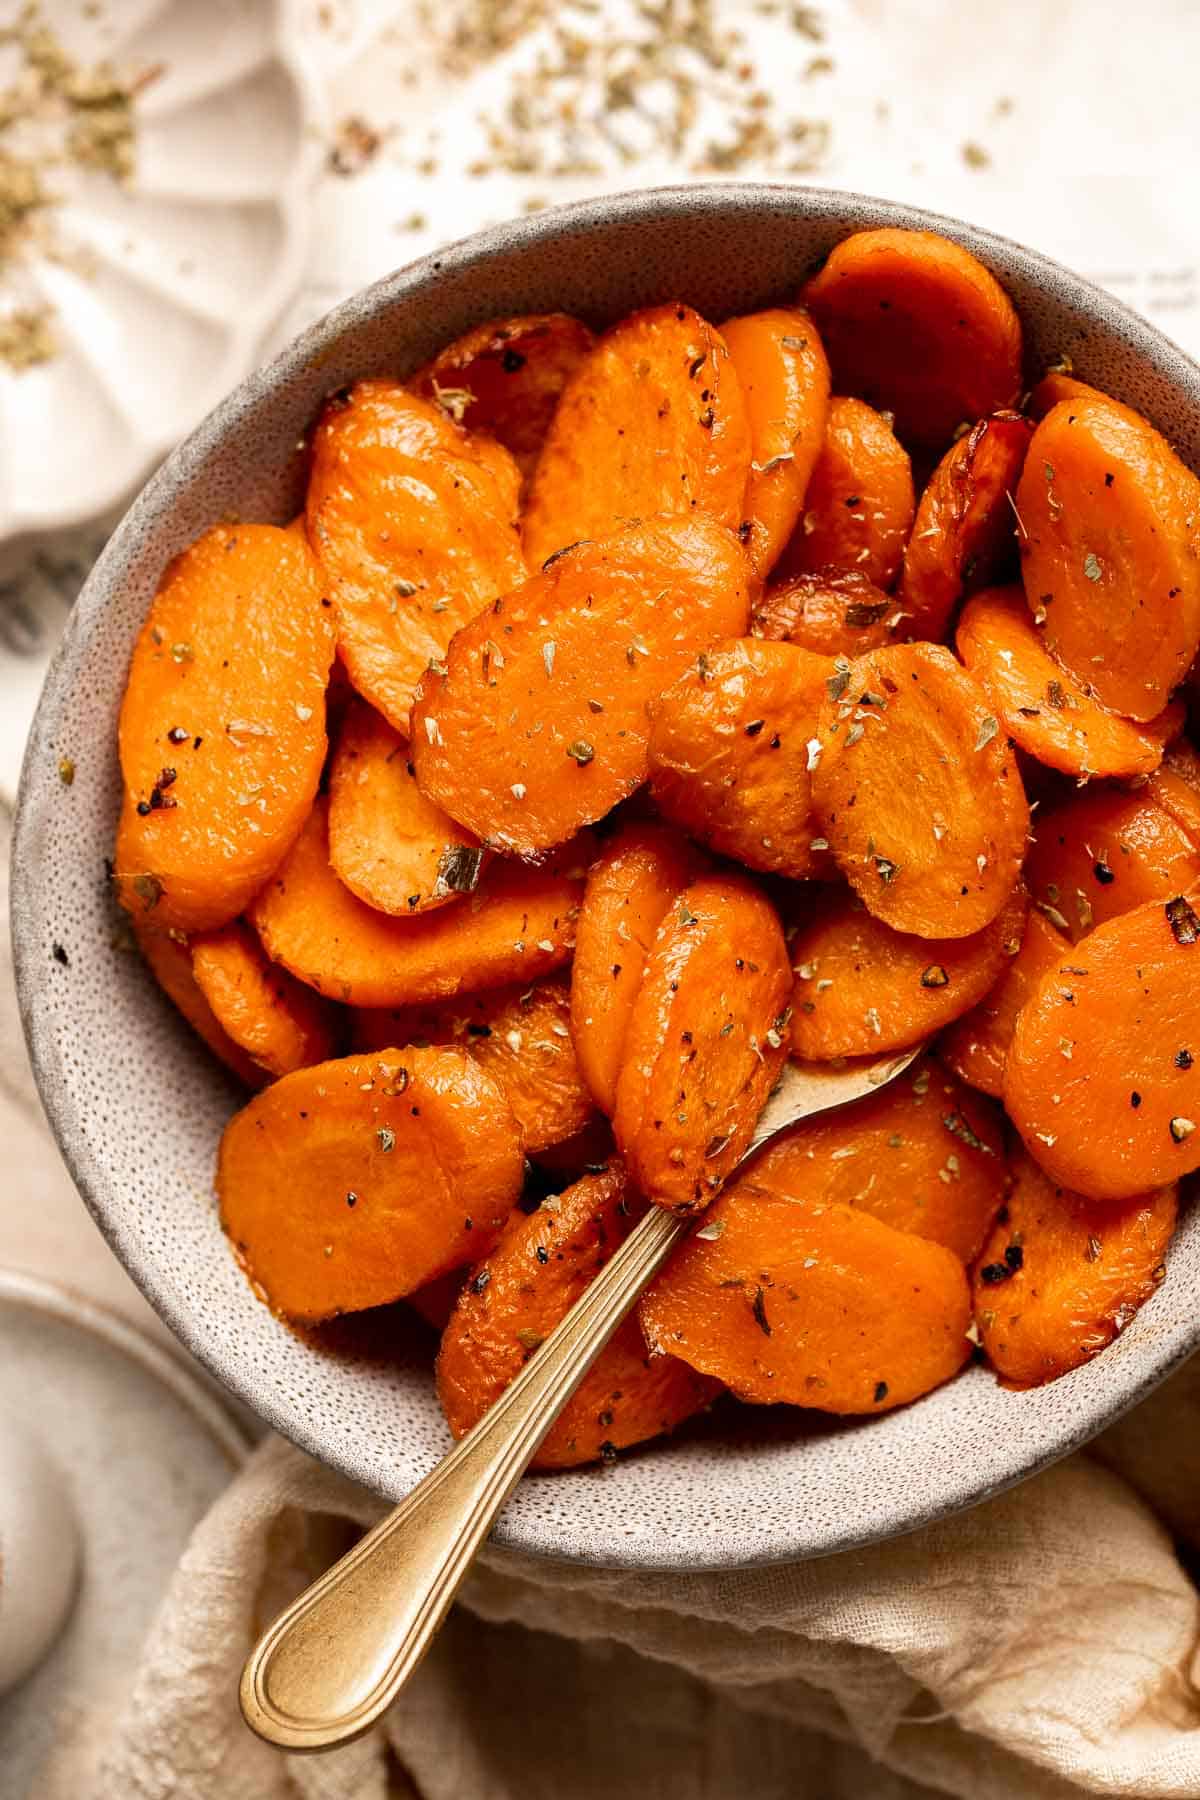
Roasted Garlic Parmesan Baby Potatoes
Quick and easy roasted garlic Parmesan baby potatoes are crispy on the edges and tender inside. They are delicious, flavourful and bakes in just 30 minutes.
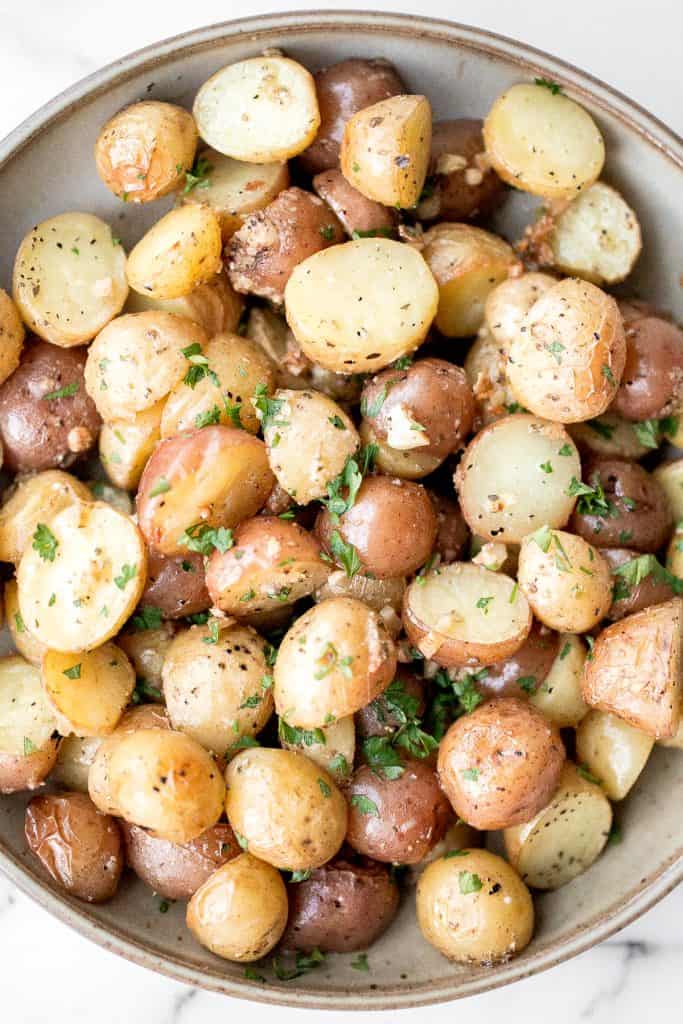
Asparagus tart with Gruyère cheese, a balsamic glaze, and flaky puff pastry, is a flavourful and delicious addition to brunch this spring season.
Roasted Beets are a healthy and nutritious side dish that is easy to make and bursting with flavor. Made with just 4 ingredients and few simple steps!
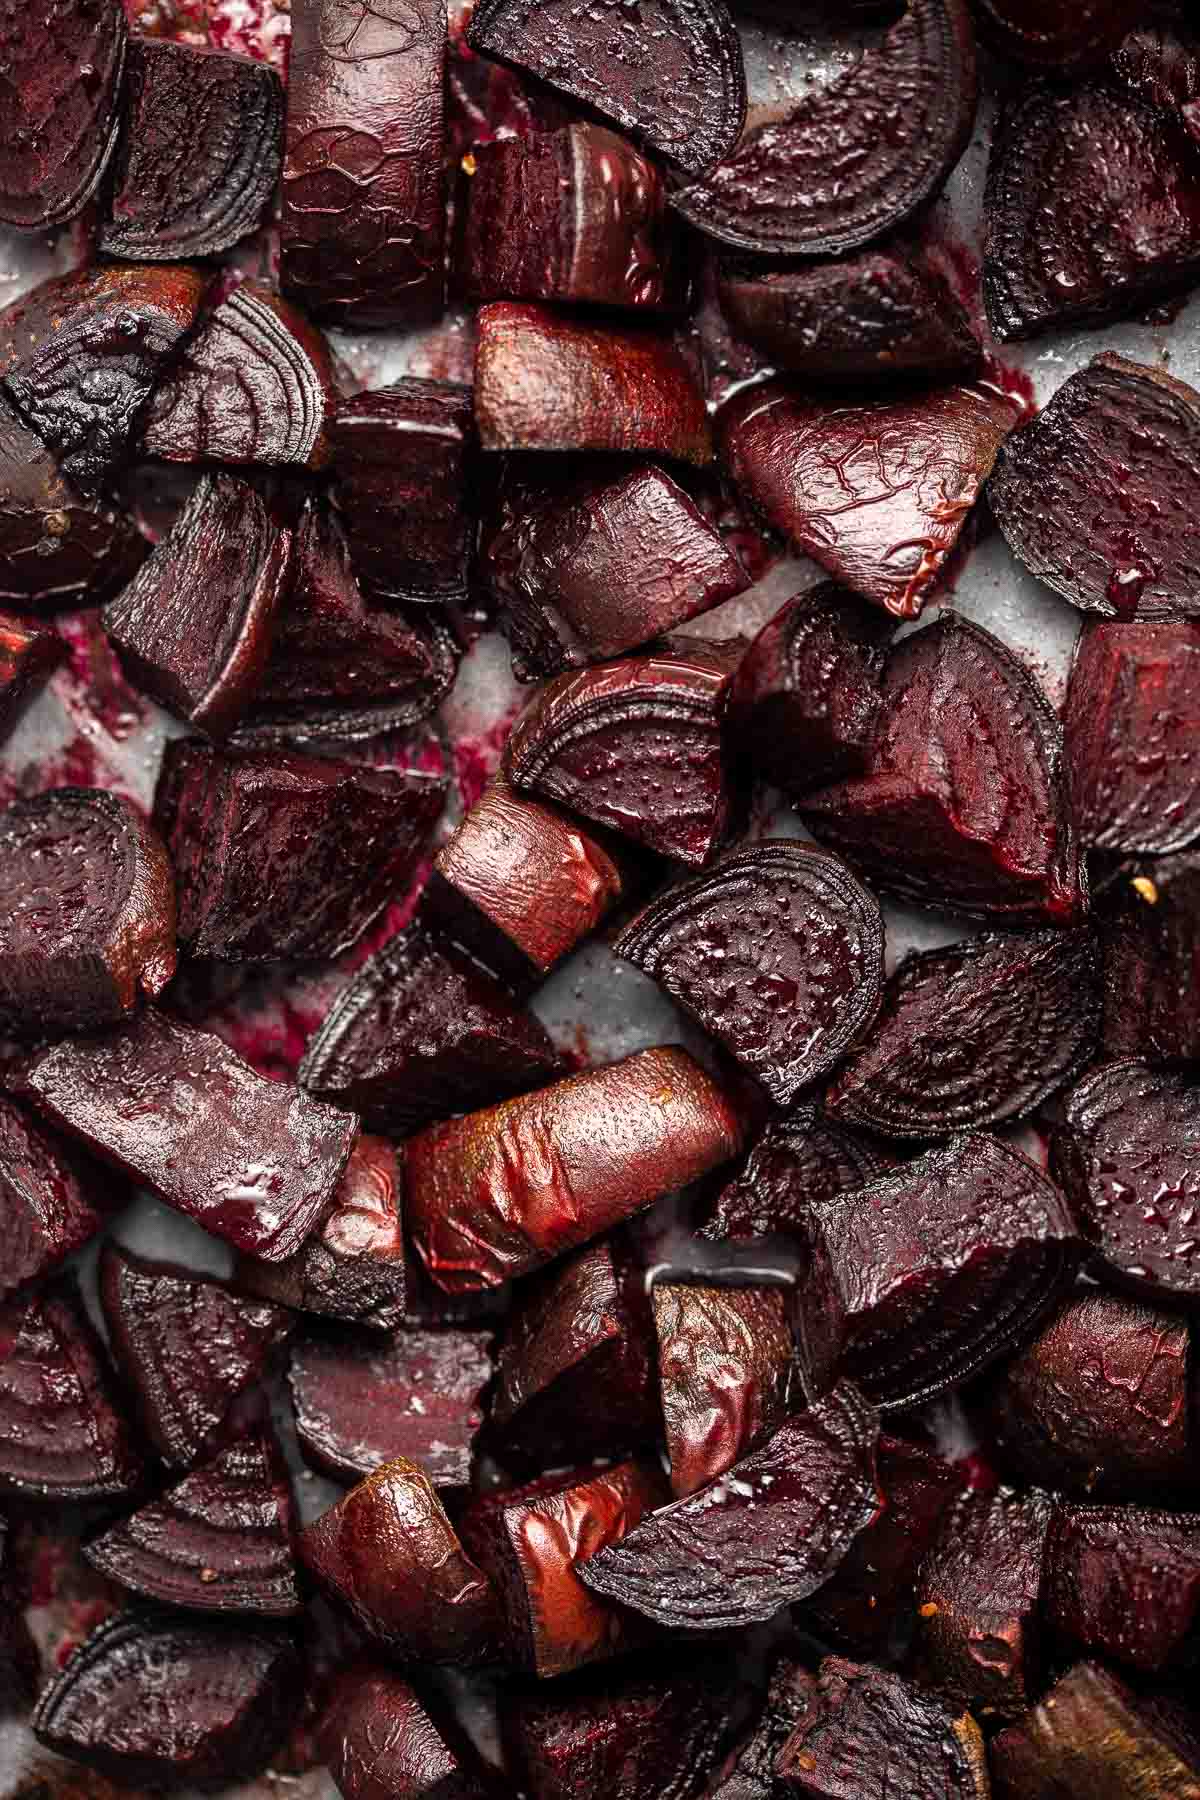
Green Beans Almondine is buttery, garlicky, and nutty. This classic French side dish is quick and easy to make, and loaded with flavor and texture.
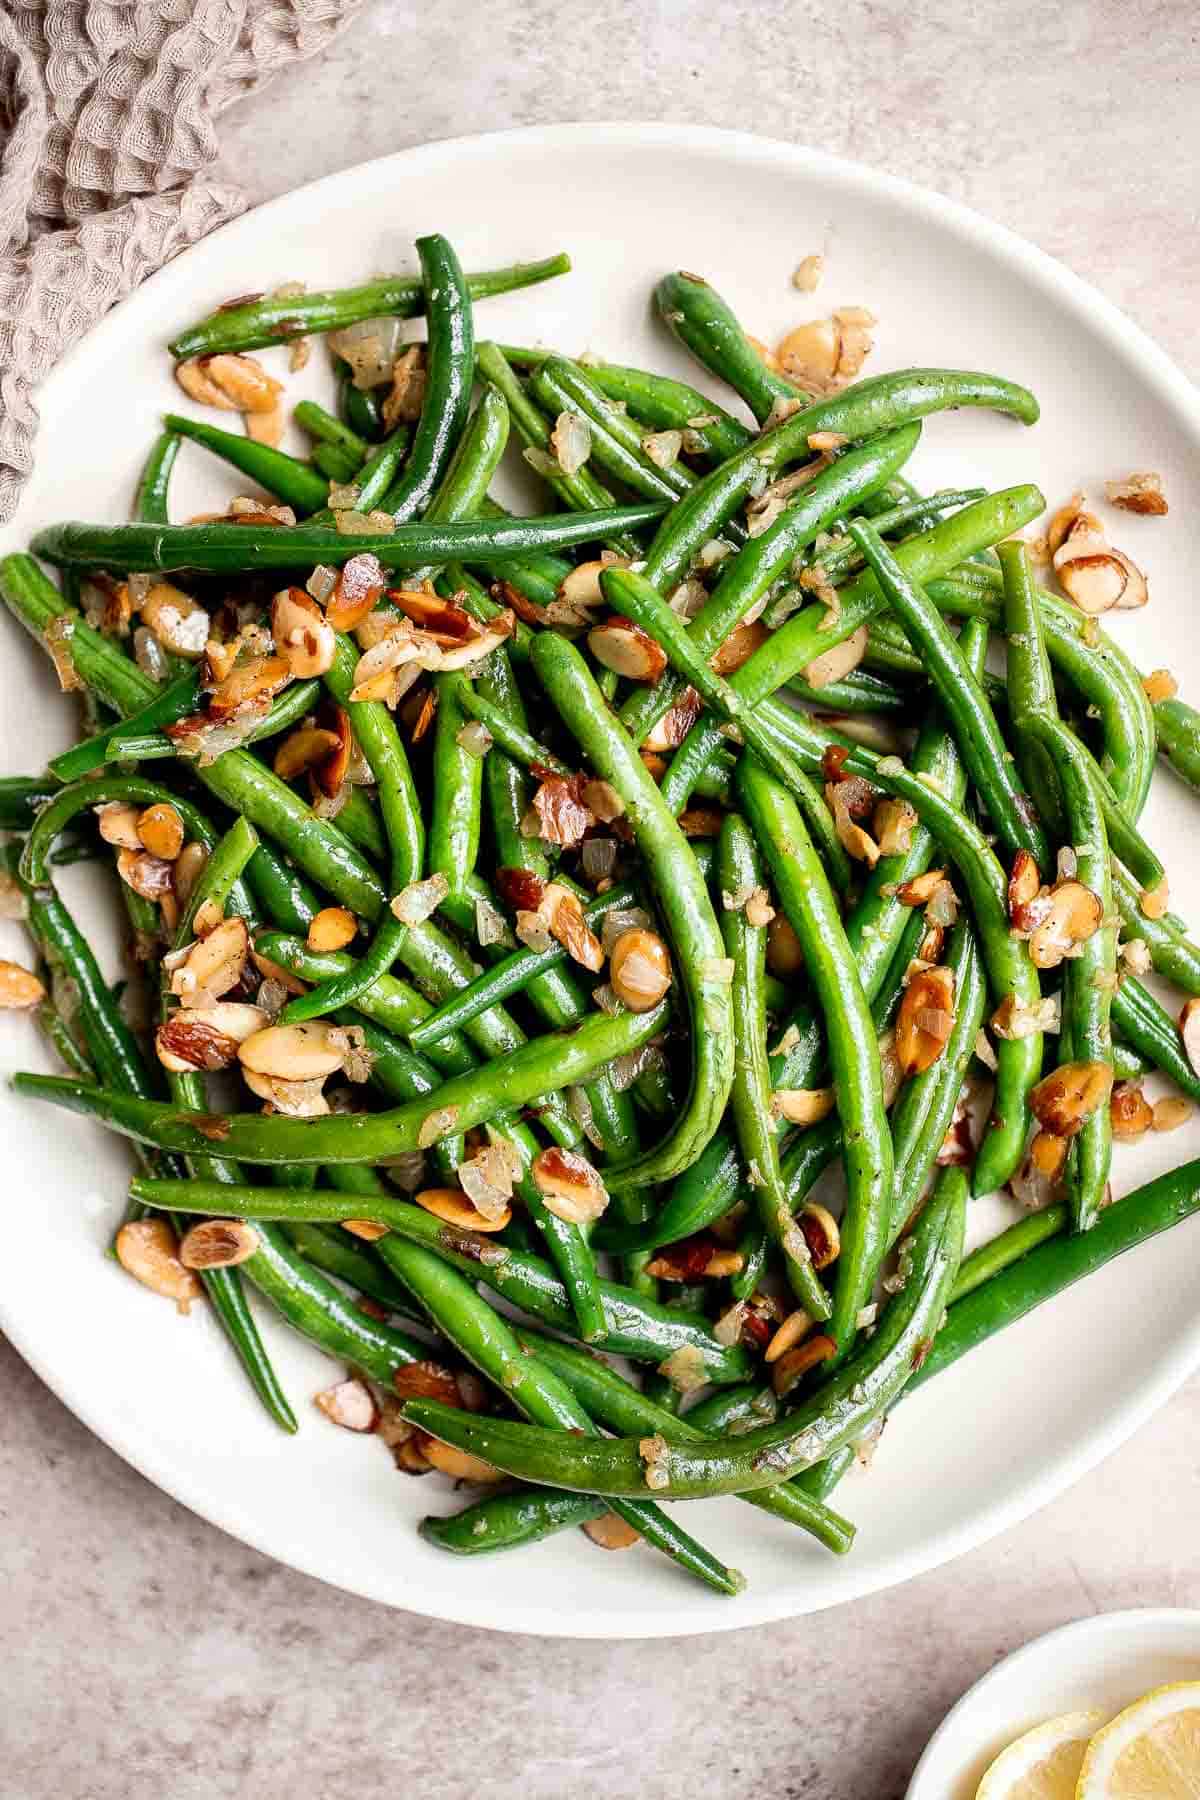
Hot cross buns is a timeless classic Easter bread made with raisins, cinnamon, and a honey glaze. They are perfect for breakfast, a snack or dessert.
Pesto asparagus is a quick easy side dish that takes regular sautéed asparagus to the next level in just 15 minutes. It's healthy, vegan, and gluten-free.
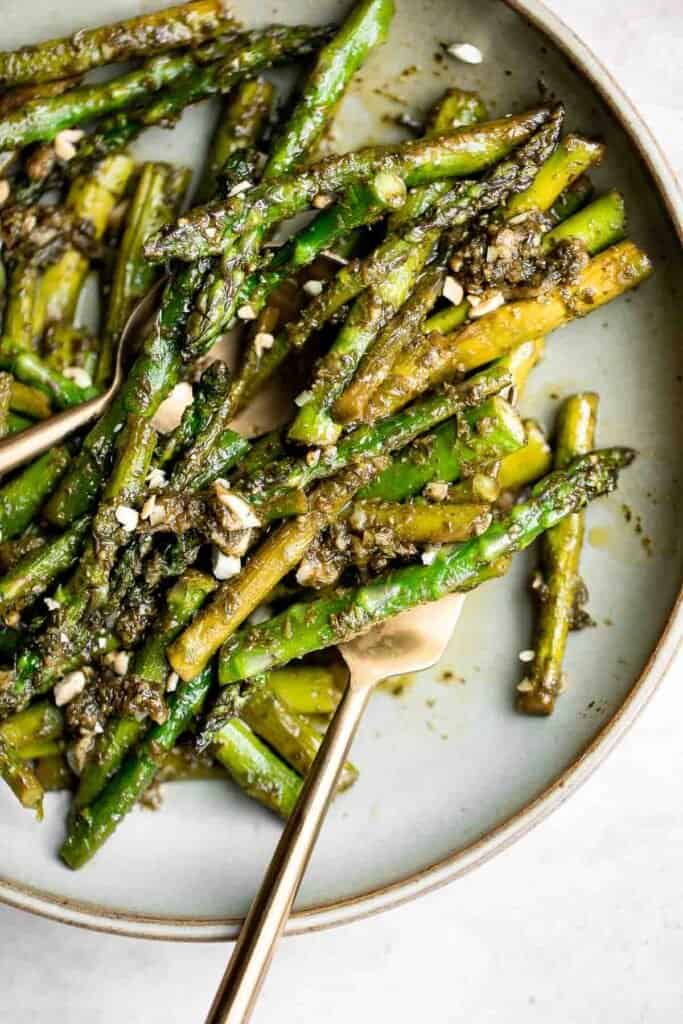
Arugula and Roasted Carrot Salad
Arugula and roasted carrot salad is one of the best spring salads, packed with a delicious combination of sweet and sour flavours, plus easy to make.
Buttery sautéed garlic mushrooms are silky smooth with an incredible caramelization and earthy rich flavour. A simple side dish in under 15 minutes.
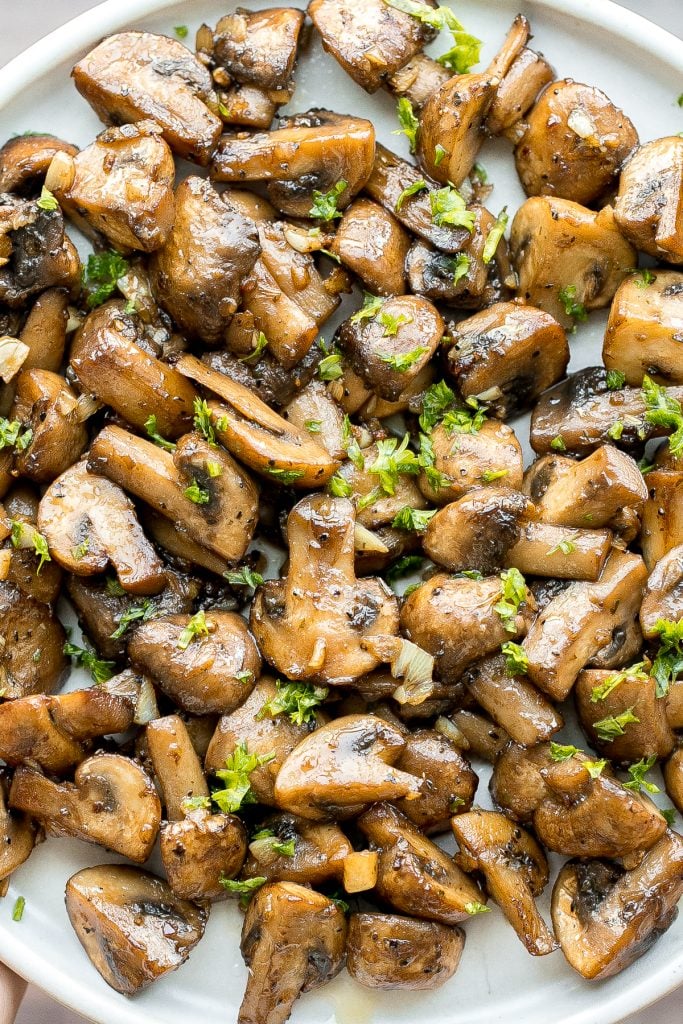
Lemon parmesan asparagus is a delicious way to serve a classic spring vegetable. This side dish is quick and easy to make in less than 20 minutes.

These crispy smashed potatoes are the perfect side dish. They're easy to make, crispy on the outside, tender and fluffy on the inside, and so flavorful.
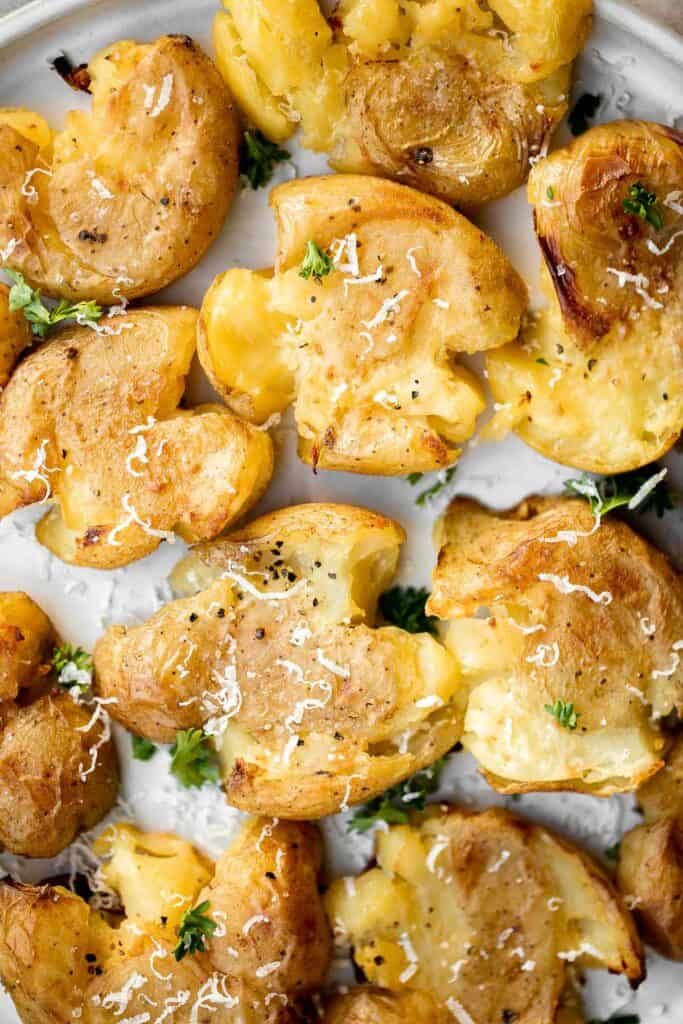
Mashed Cauliflower is a fluffy and buttery side dish and a low carb, keto-friendly alternative to mashed potatoes. Plus, it's easier and quicker too!
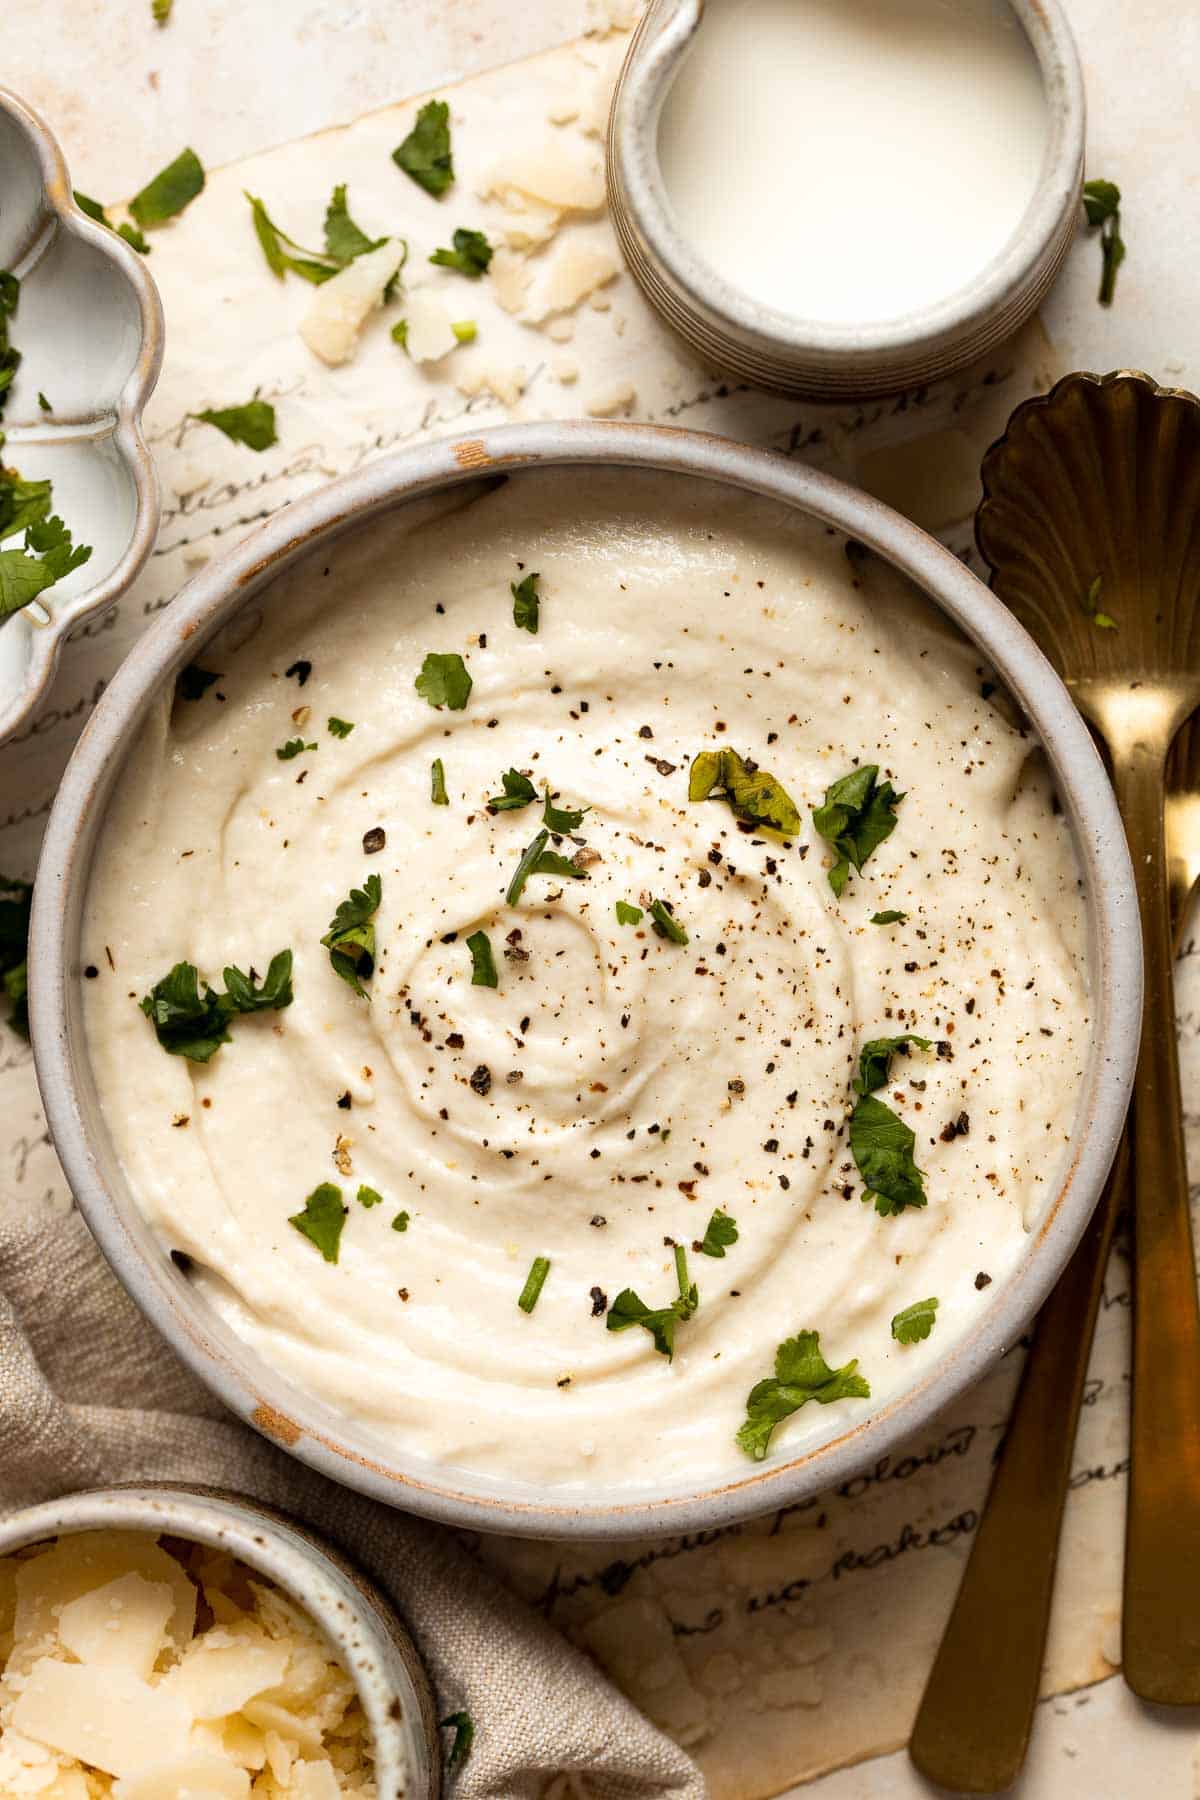
Pesto green beans is a simple side dish that is quick and easy to make in under 10 minutes, tossed in buttery toasted walnuts and pesto. So delicious.
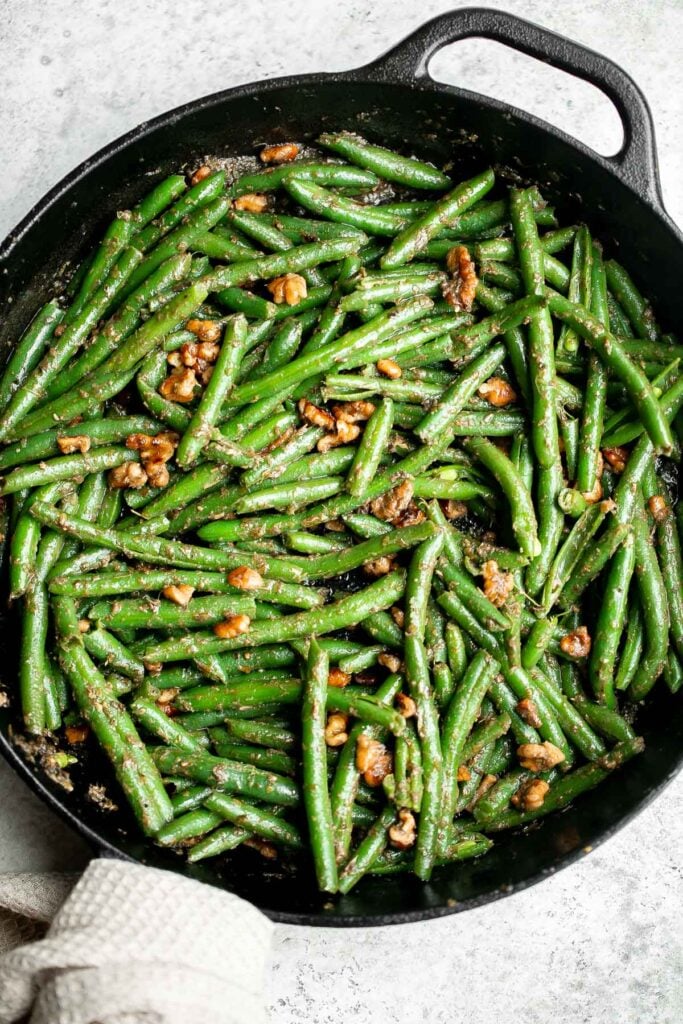
Air fryer vegetables are healthy, flavorful, and delicious. This vegan side dish is quick and easy to make in the air fryer in under 15 minutes.
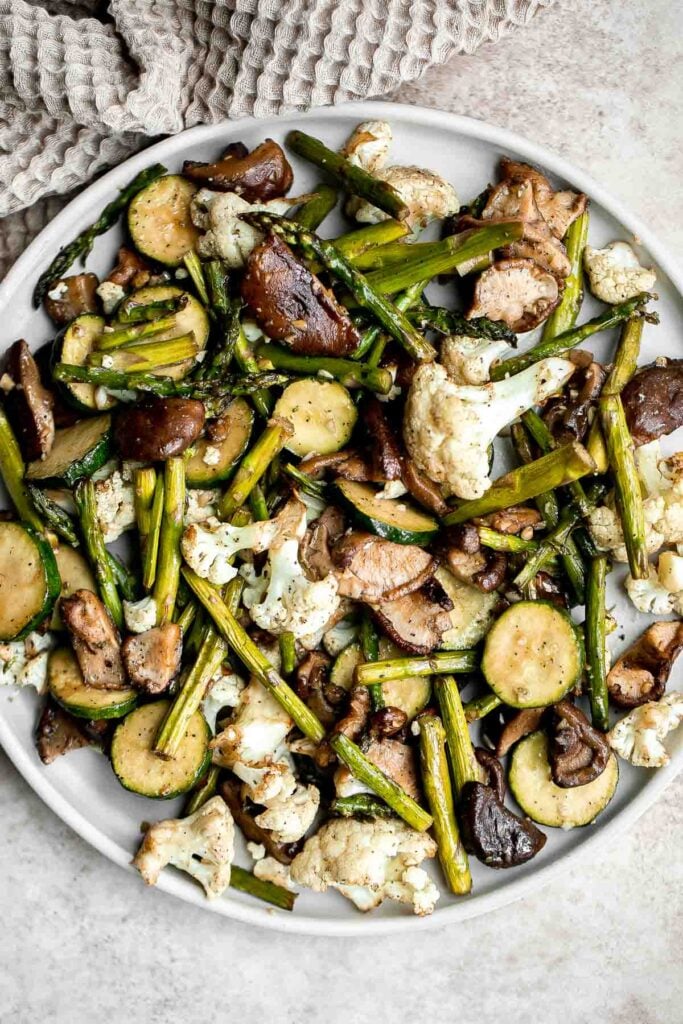
Cheesy roasted asparagus is a quick and easy side dish made with a handful of simple ingredients in 20 minutes. They're garlicky, cheesy, and flavorful.
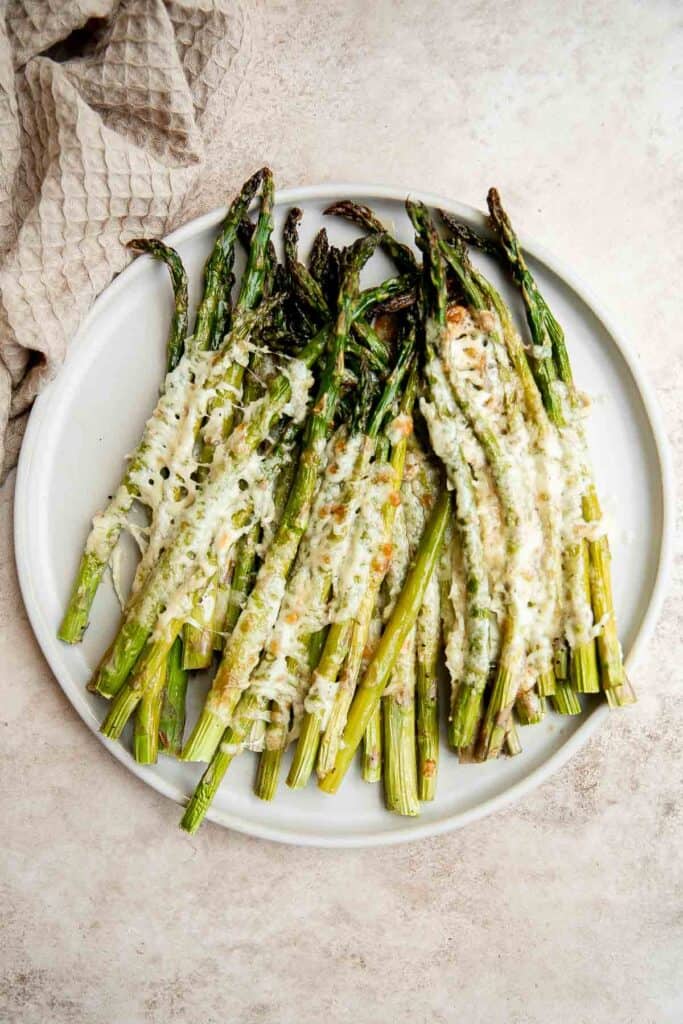
Crispy leaf potatoes are a delicious potato side dish made with layers of buttery, sliced potatoes that crisp up when baked. The perfect side dish.
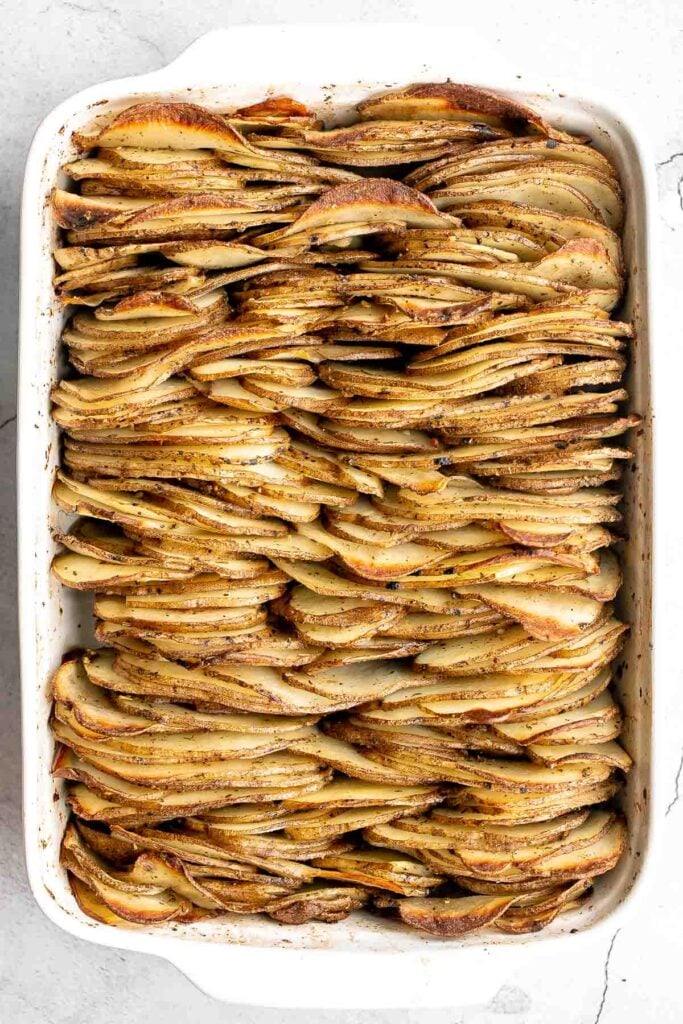
Creamless Cream of Asparagus Soup
Creamless cream of asparagus soup is healthy, delicious, smooth, creamy, quick and easy to make. A perfect spring soup for a last minute lunch or dinner.
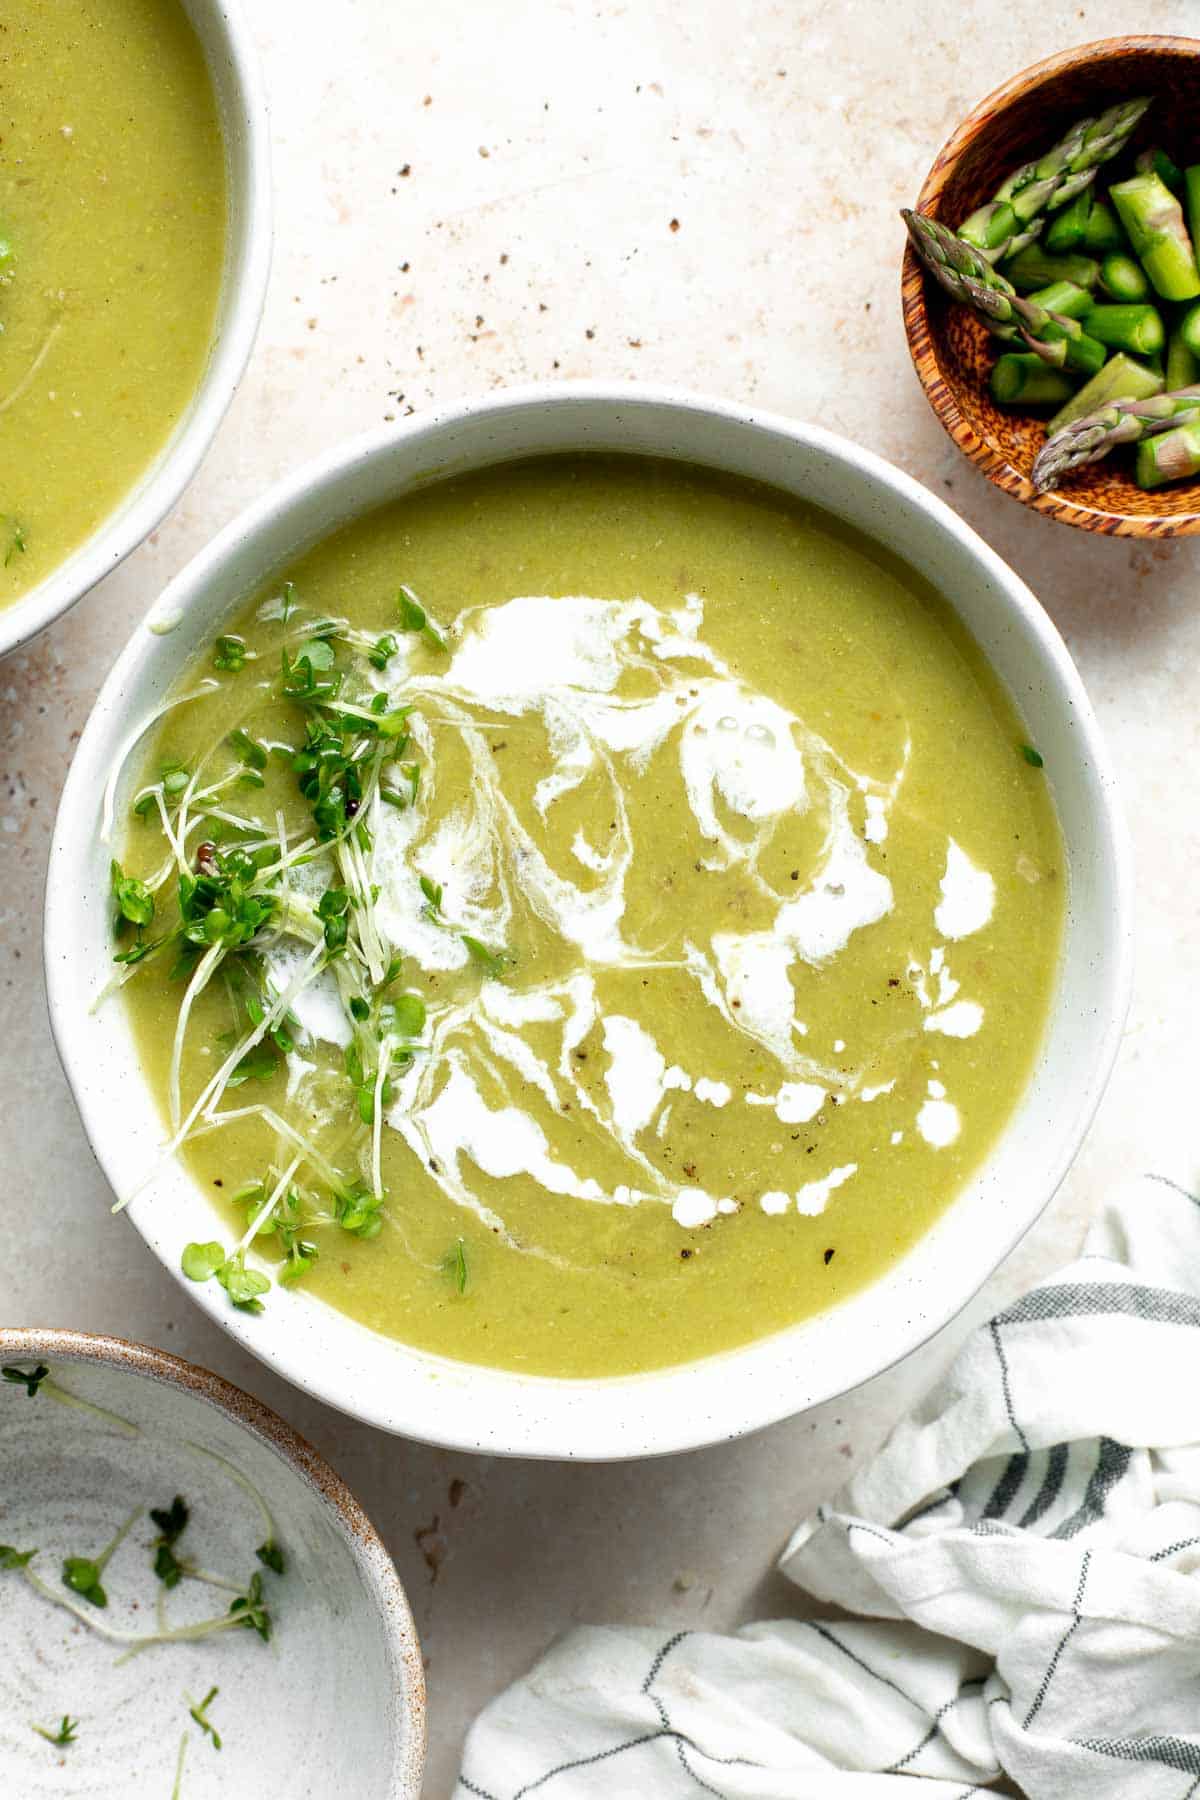
Garlic and Herb Roasted Carrots
Sweet and flavourful easy garlic and herb roasted carrots is the perfect side dish to your holiday dinner or your everyday weeknight dinner.
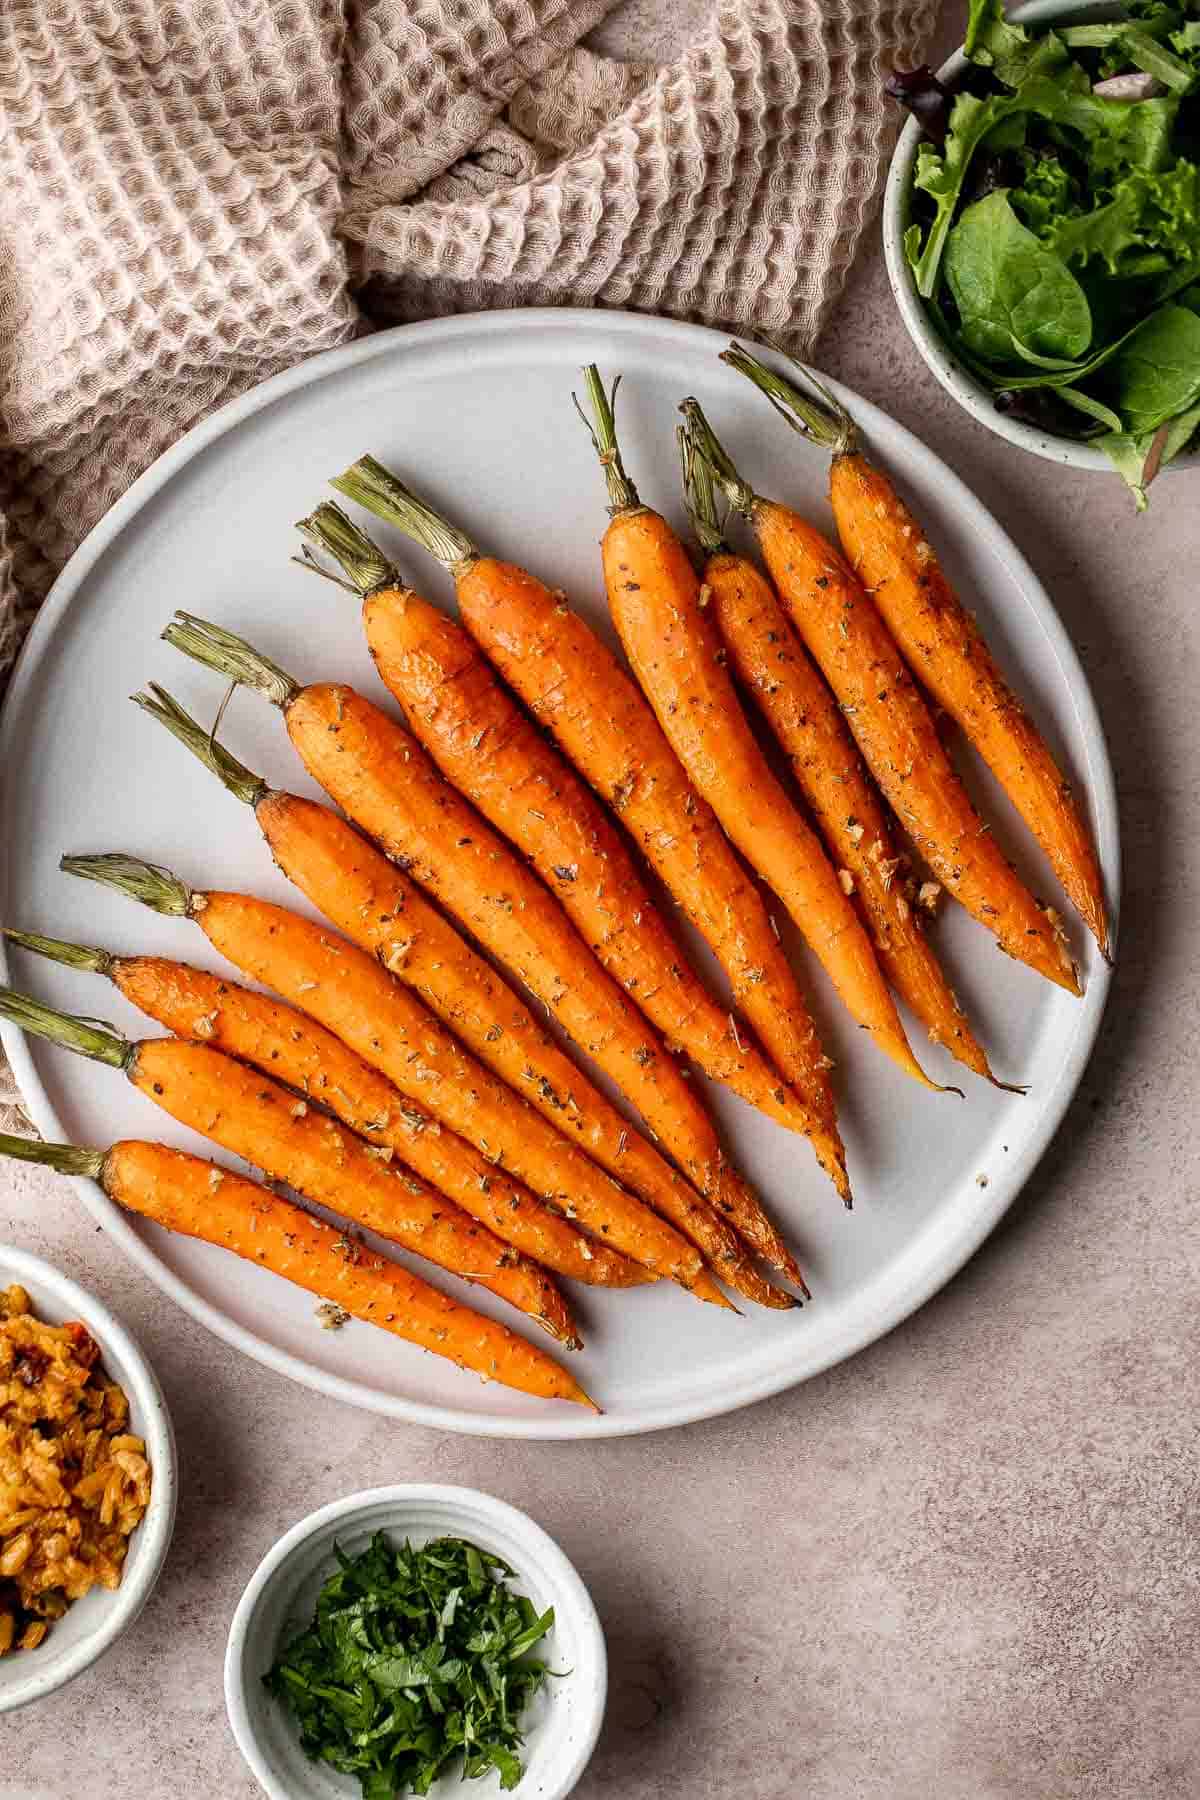
Roasted Asparagus and Mushrooms
Roasted garlic asparagus and mushrooms is a simple vegan sheet pan side dish that's easy to make, flavorful and delicious. Serve with your favorite protein.
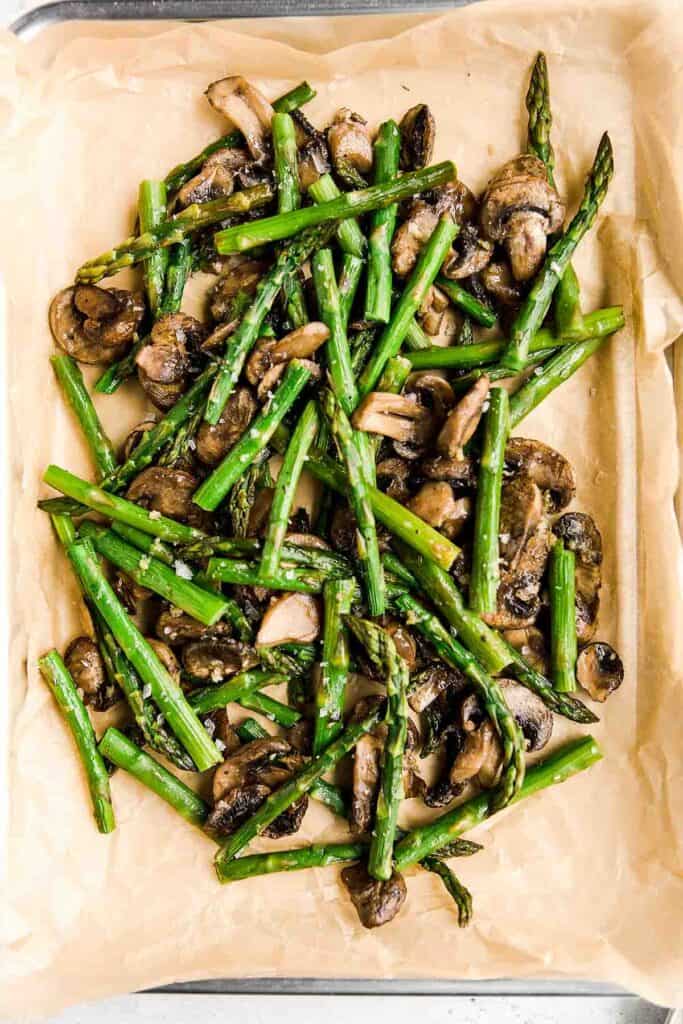
Creamed spinach is a rich, creamy, and delicious side dish to make this fall. Easy to make ahead and reheats well - perfect for a holiday dinner.
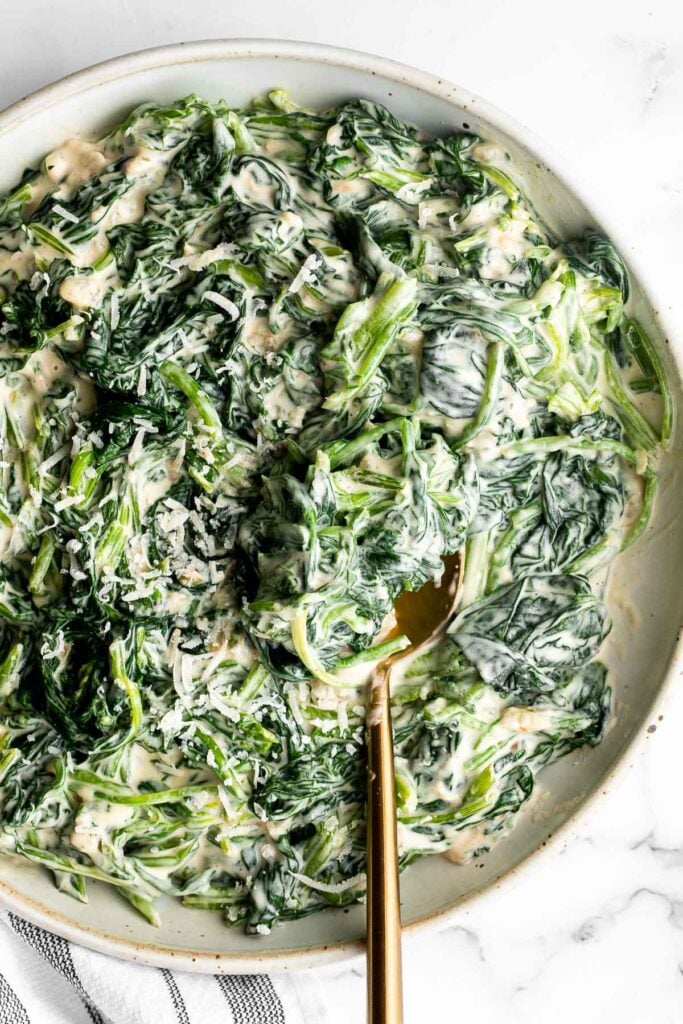
Spring Pesto Pasta Salad with Asparagus
Spring pesto pasta with asparagus and chives is light and made with simple ingredients in under 20 minutes. Serve it hot for dinner or cold as pasta salad.
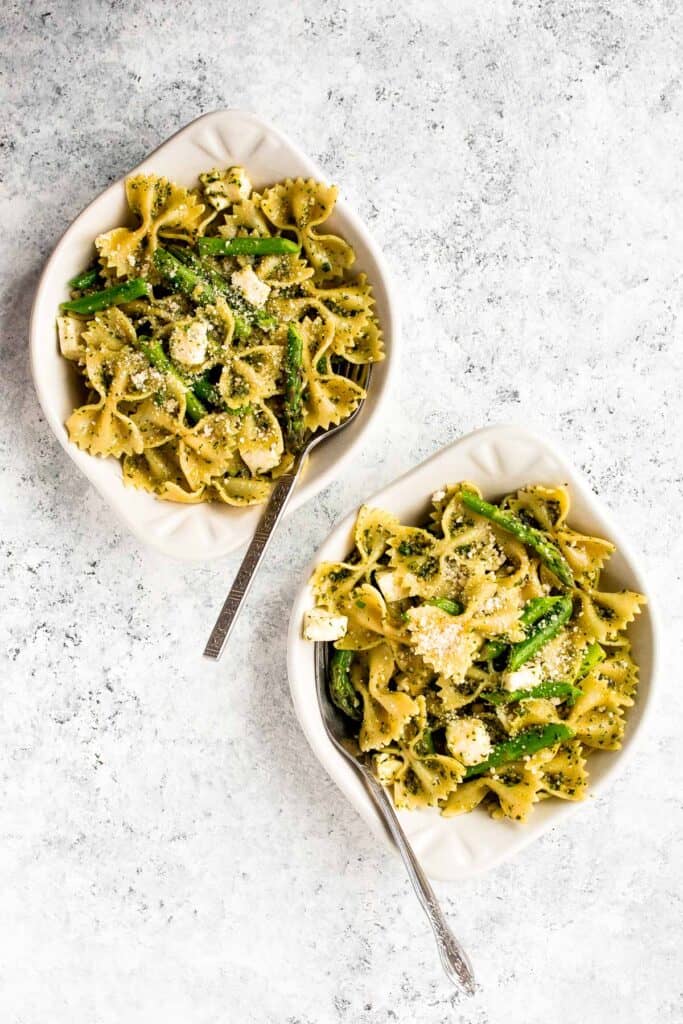
Quick and easy roasted cauliflower is a delicious, flavourful side dish that you throw on a sheet pan and into the oven. Plus, it's vegan and gluten-free.
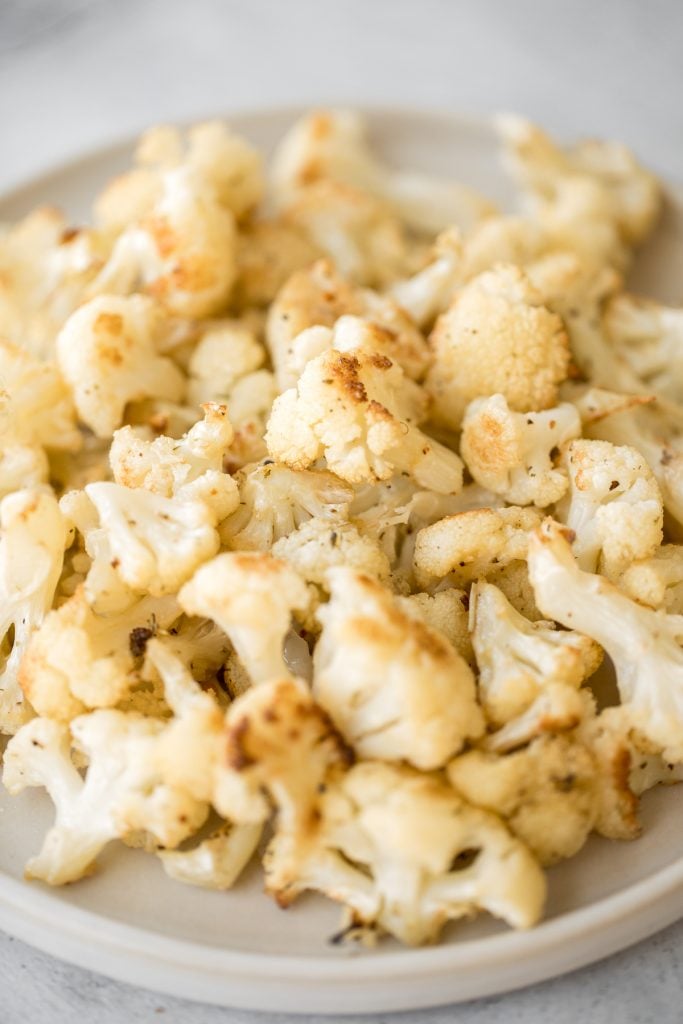
Mascarpone mashed potatoes are creamy, smooth, and comforting. Classic mashed potatoes are given a twist resulting in a super silky and rich mash.

Quick and easy, 90-minute cheesy garlic dinner rolls are soft and fluffy, buttery and garlicky, and full of cheese inside. The perfect side for dinner.
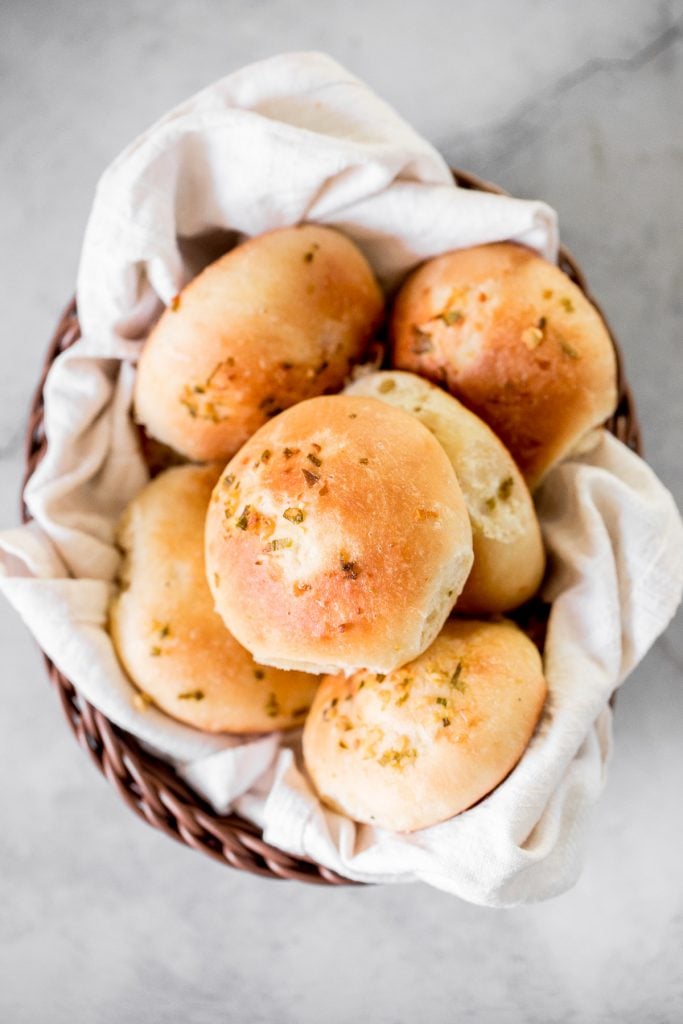
Lemon Asparagus Soup with Parmesan
Lemon asparagus soup with parmesan is the perfect spring soup -- smooth, light, fresh, and flavourful. It's customizable and can be served hot or cold.
Mediterranean Chickpea Wedge Salad
Mediterranean chickpea wedge salad combines chickpeas, crunchy vegetable toppings, and hummus dressing for a delicious deconstructed falafel flavour.
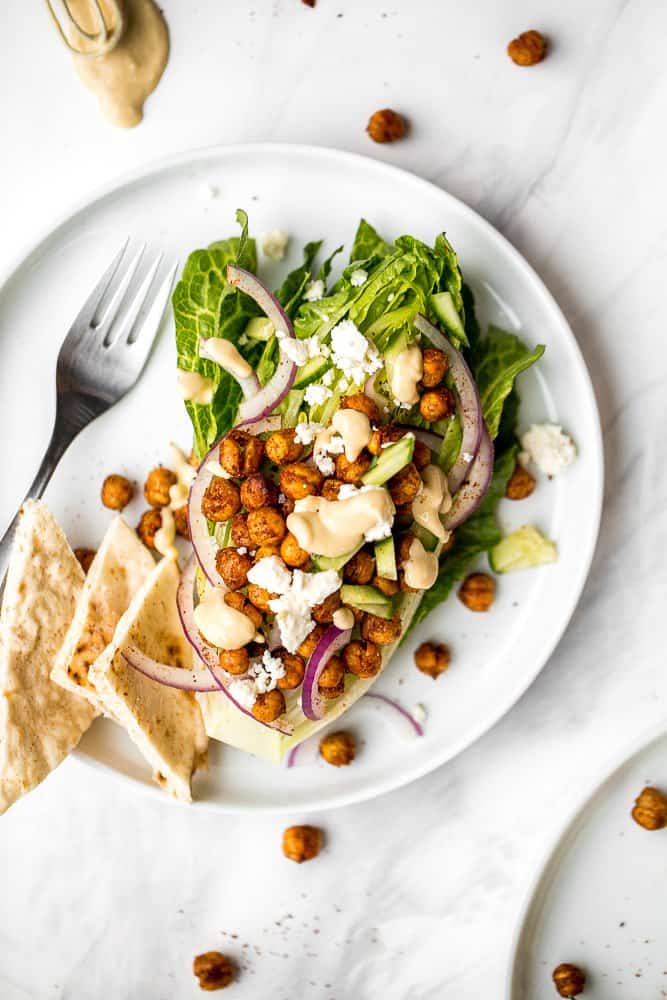
Roasted Garlic Green Beans (Air Fryer or Oven)
Quick easy roasted garlic green beans are tangy, sour, savoury, and sweet, with a tender and crunchy texture. Make them in the oven or air fryer in minutes.

Delicious, garlicky, cheesy and creamy brussels sprouts bake is the ultimate comfort food side dish. So flavourful and the best way to eat brussels sprouts.
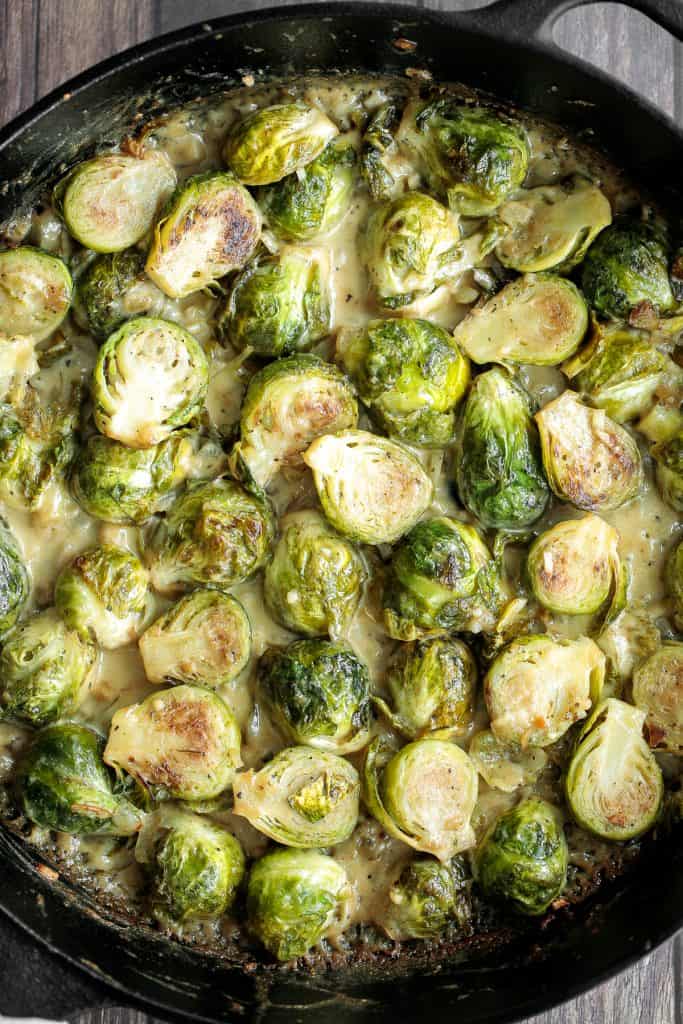
Easy Ham and Potatoes Au Gratin
Easy creamy ham and potatoes au gratin is a great way to use leftover ham with tender sliced potatoes and a cheesy béchamel sauce. The best comfort food.
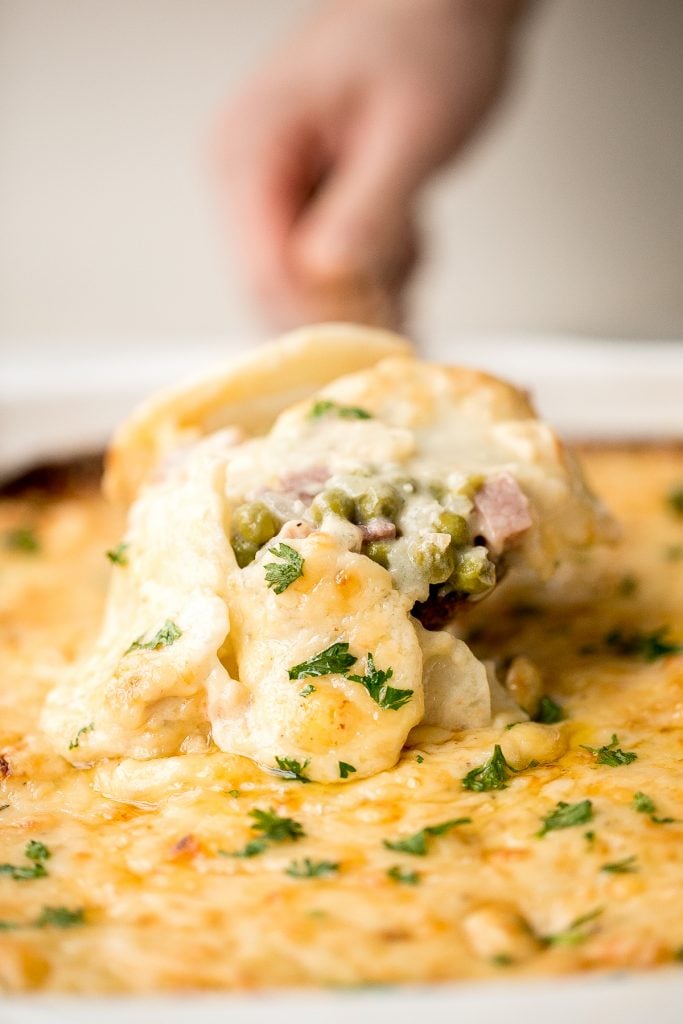
Oven Roasted Vegetables are a delicious flavorful side dish that goes well with almost any dinner main. Customize it with whatever veggies you have on hand.
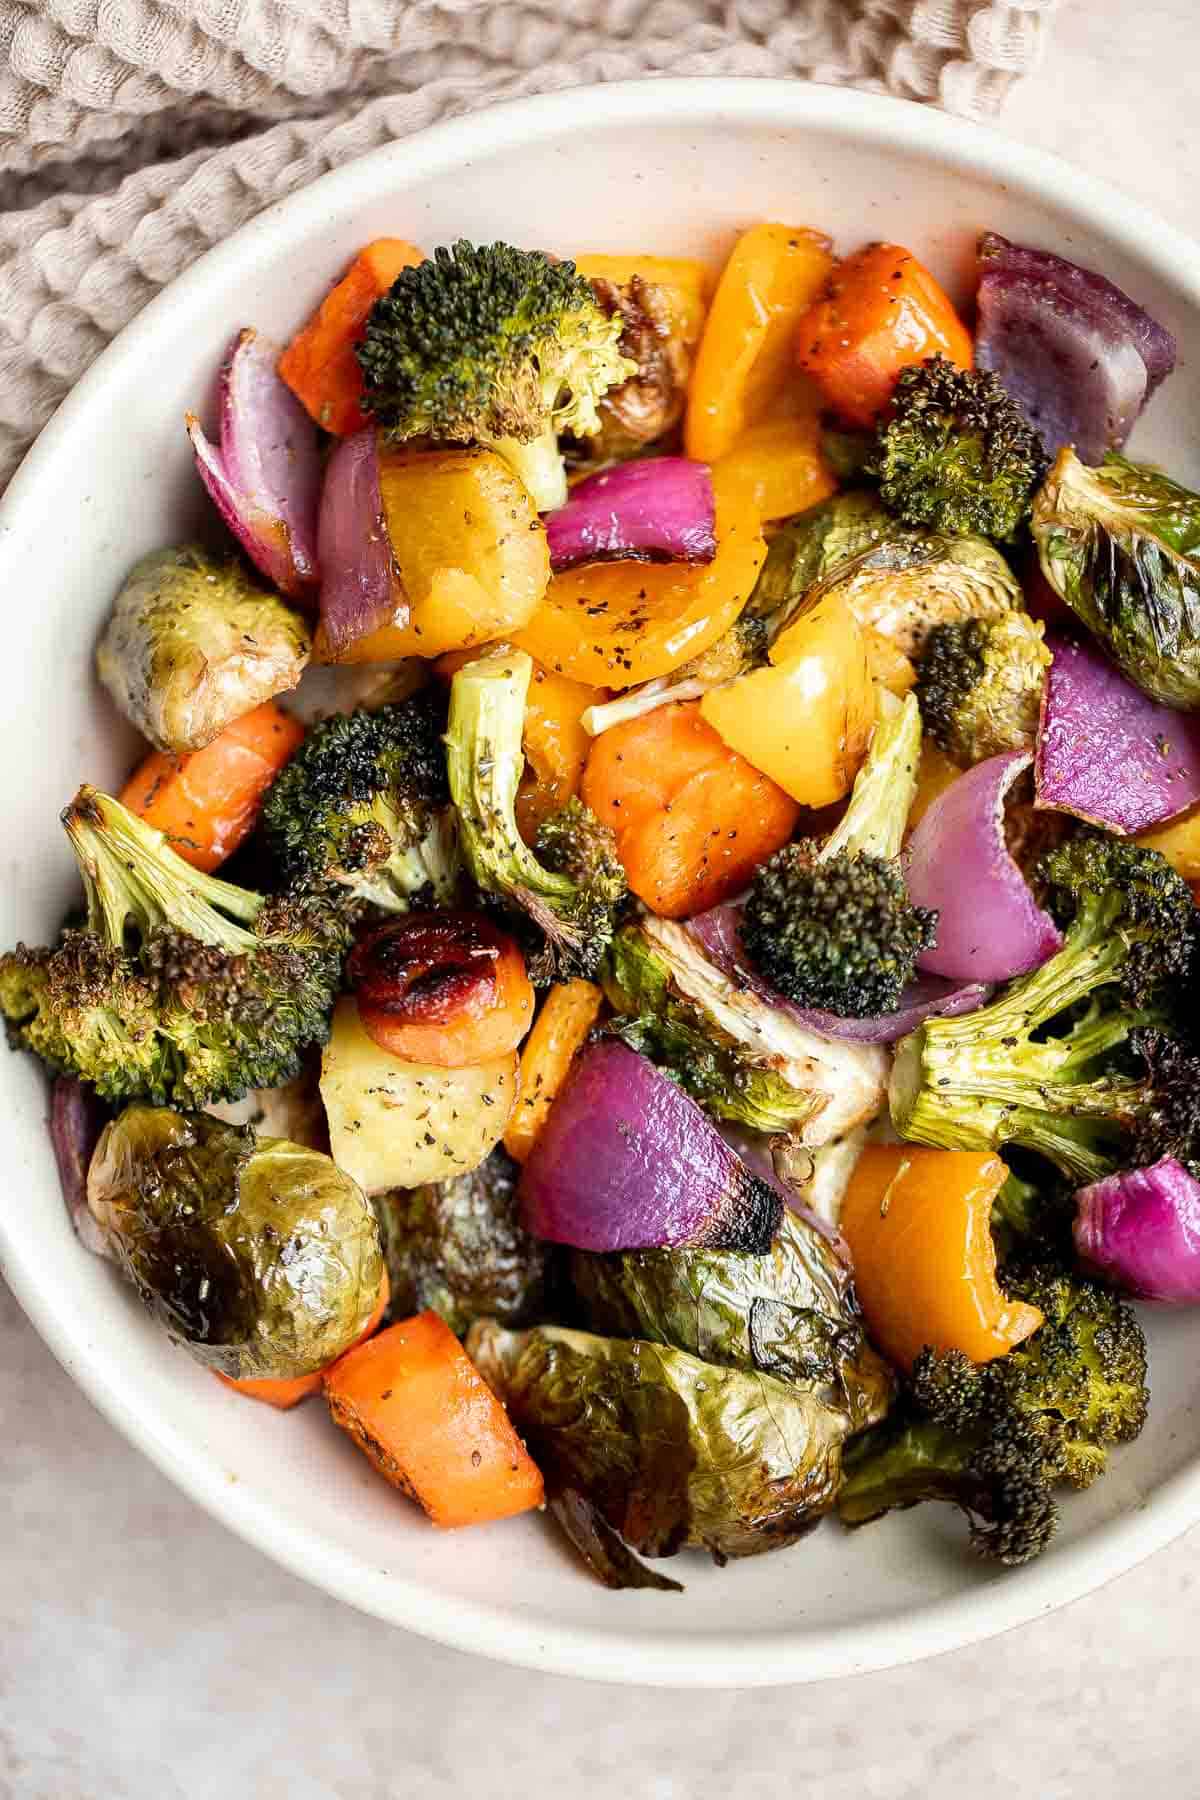
Duchess Potatoes (Pommes Duchesse) are rich, creamy whipped bites of potatoes with crispy edges and a soft fluffy mashed potato centre. A fancy side dish!

Spinach and Feta Quiche with Cauliflower Crust
Spinach and feta quiche is healthy and gluten-free with a keto cauliflower crust and savoury vegetarian filling. Serve for breakfast, lunch or dinner.
Quick and easy spring vegetable stir fry is made with delicious seasonal vegetables, packed with savoury and salty flavour, and takes 10 minutes to cook.
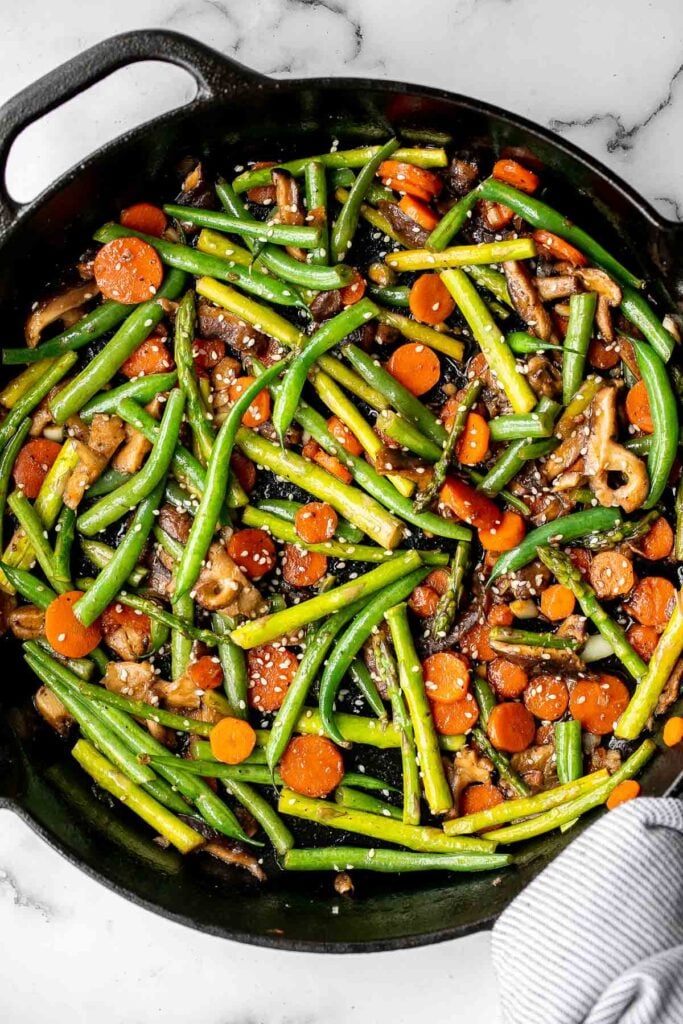
Roasted Carrot and Ginger Soup
Roasted carrot and ginger soup is rich, velvety, creamy, flavorful, and delicious. This healthy vegetarian soup is quick and easy to make in 30 minutes.
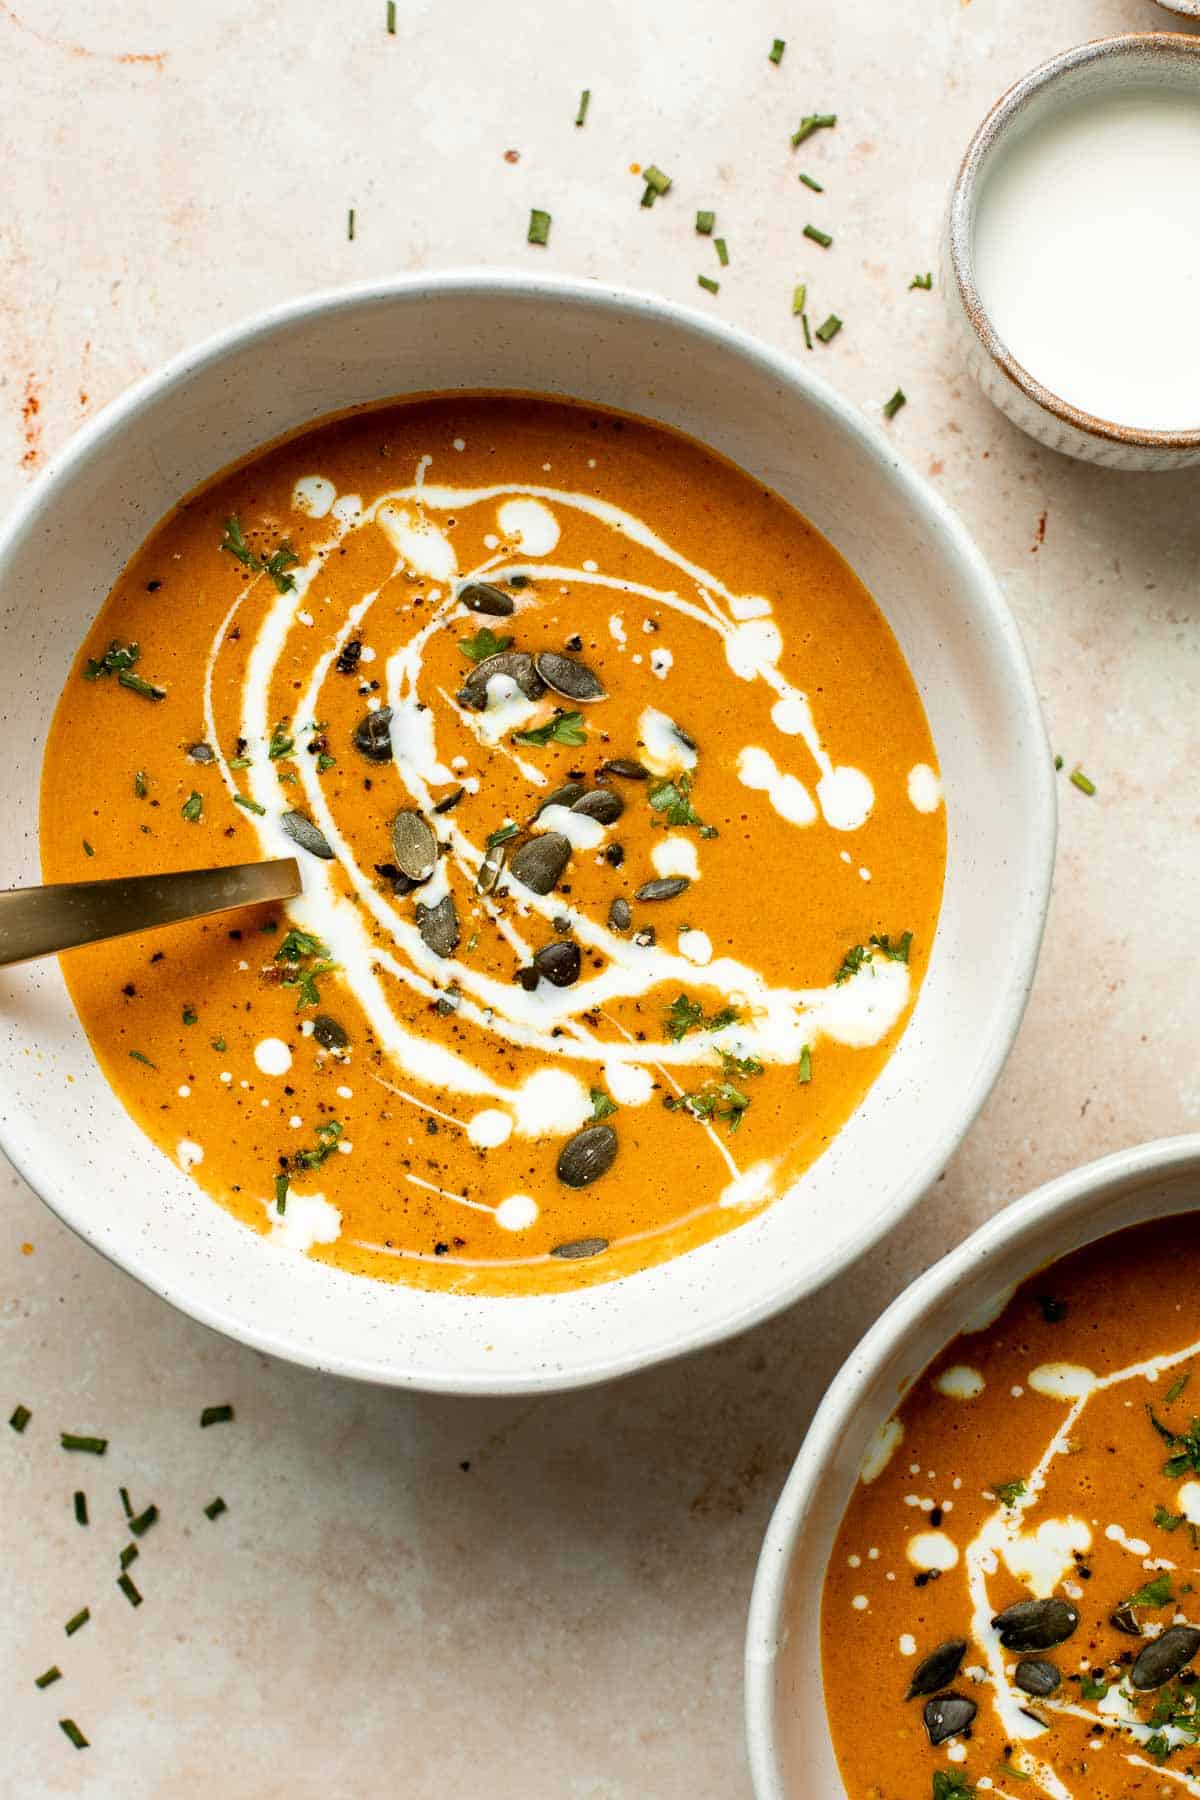
Deviled Egg Salad is the perfect spring side dish! It has the signature tang and smokiness of deviled eggs with the pillowy texture of egg salad.
Creamy Garlic Mashed Cauliflower
Craving a big serving of mashed potatoes but with a quarter of the calories? Now you can with creamy garlic mashed cauliflower. Ready in just 20 minutes.
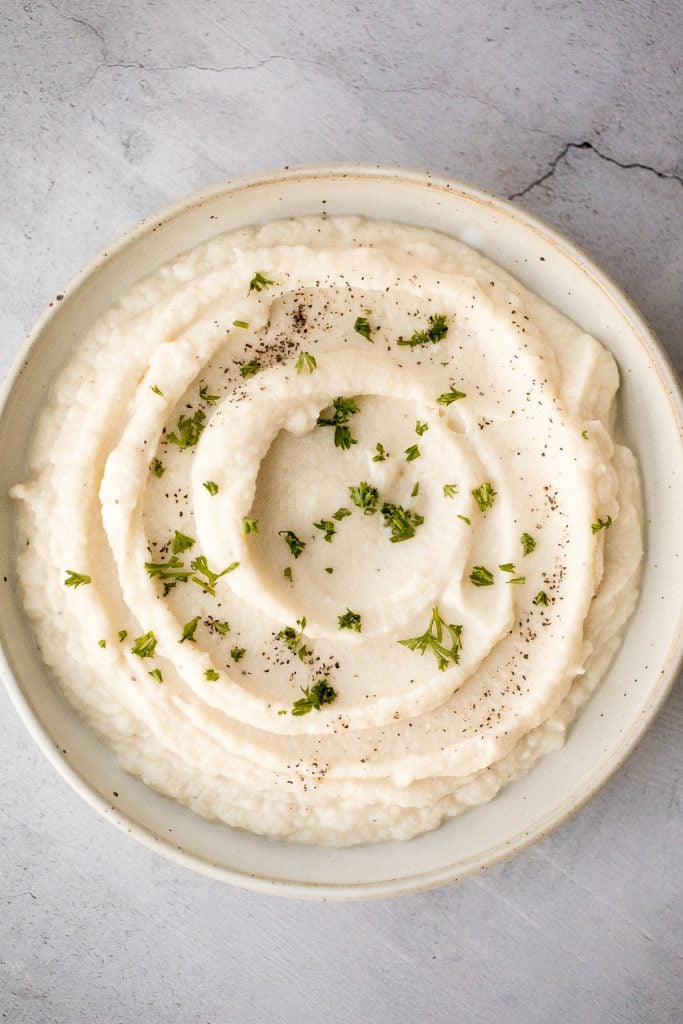
Spinach gratin is a rich and creamy side dish with a layer of crispy melty cheese on top. This fancy side is easy to make ahead and freezer-friendly.
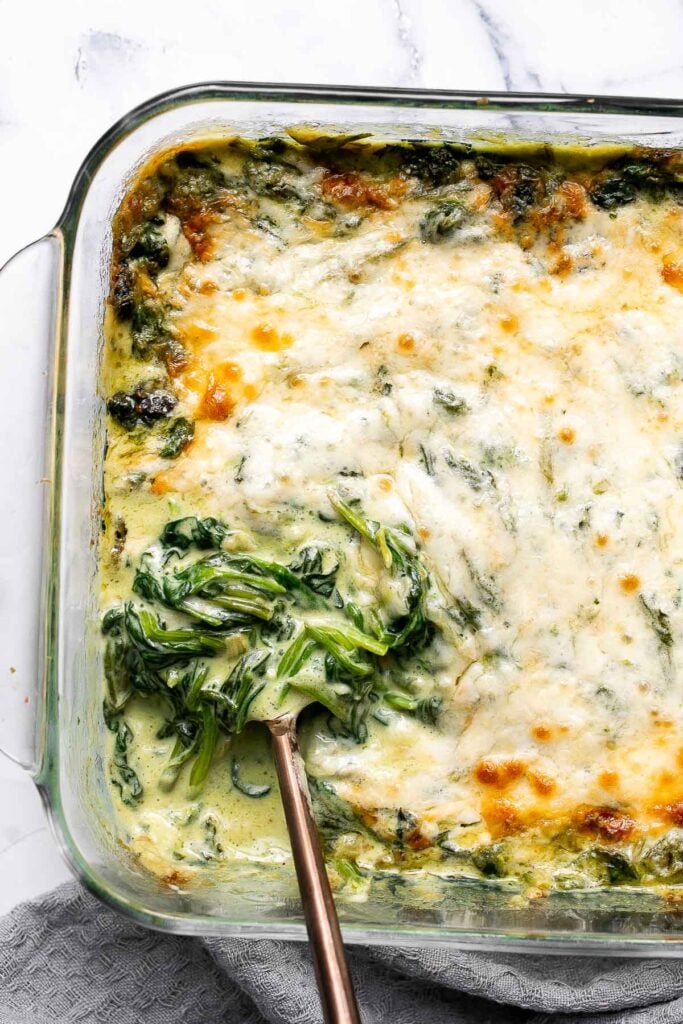
Hasselback Potatoes with Garlic Herb Butter
Hasselback Potatoes are infused with garlic butter and feature signature cuts that make these potatoes crispy on the outside and tender on the inside.
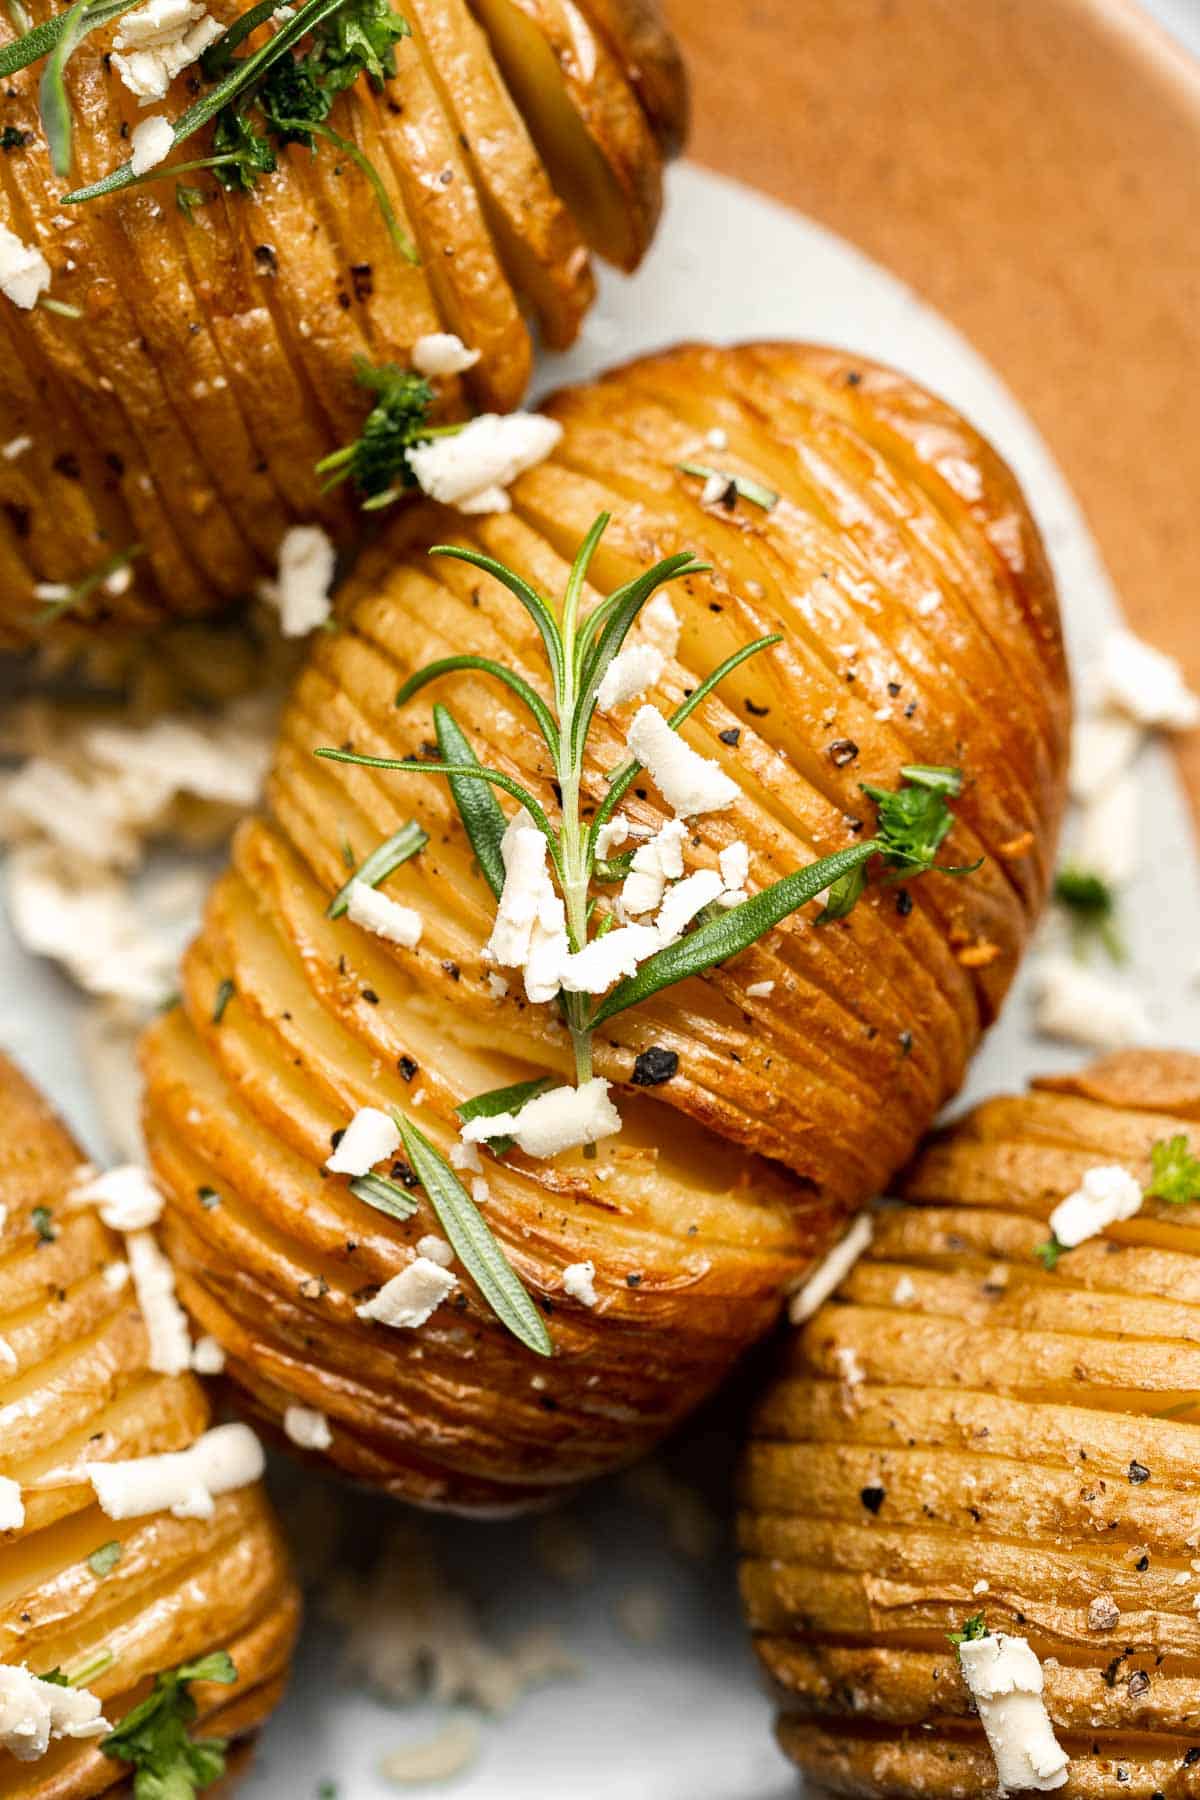
Quick and easy Sautéed Asparagus is a simple, savory side dish that goes well with almost any main dish. It's healthy, flavourful, and seasoned simply.
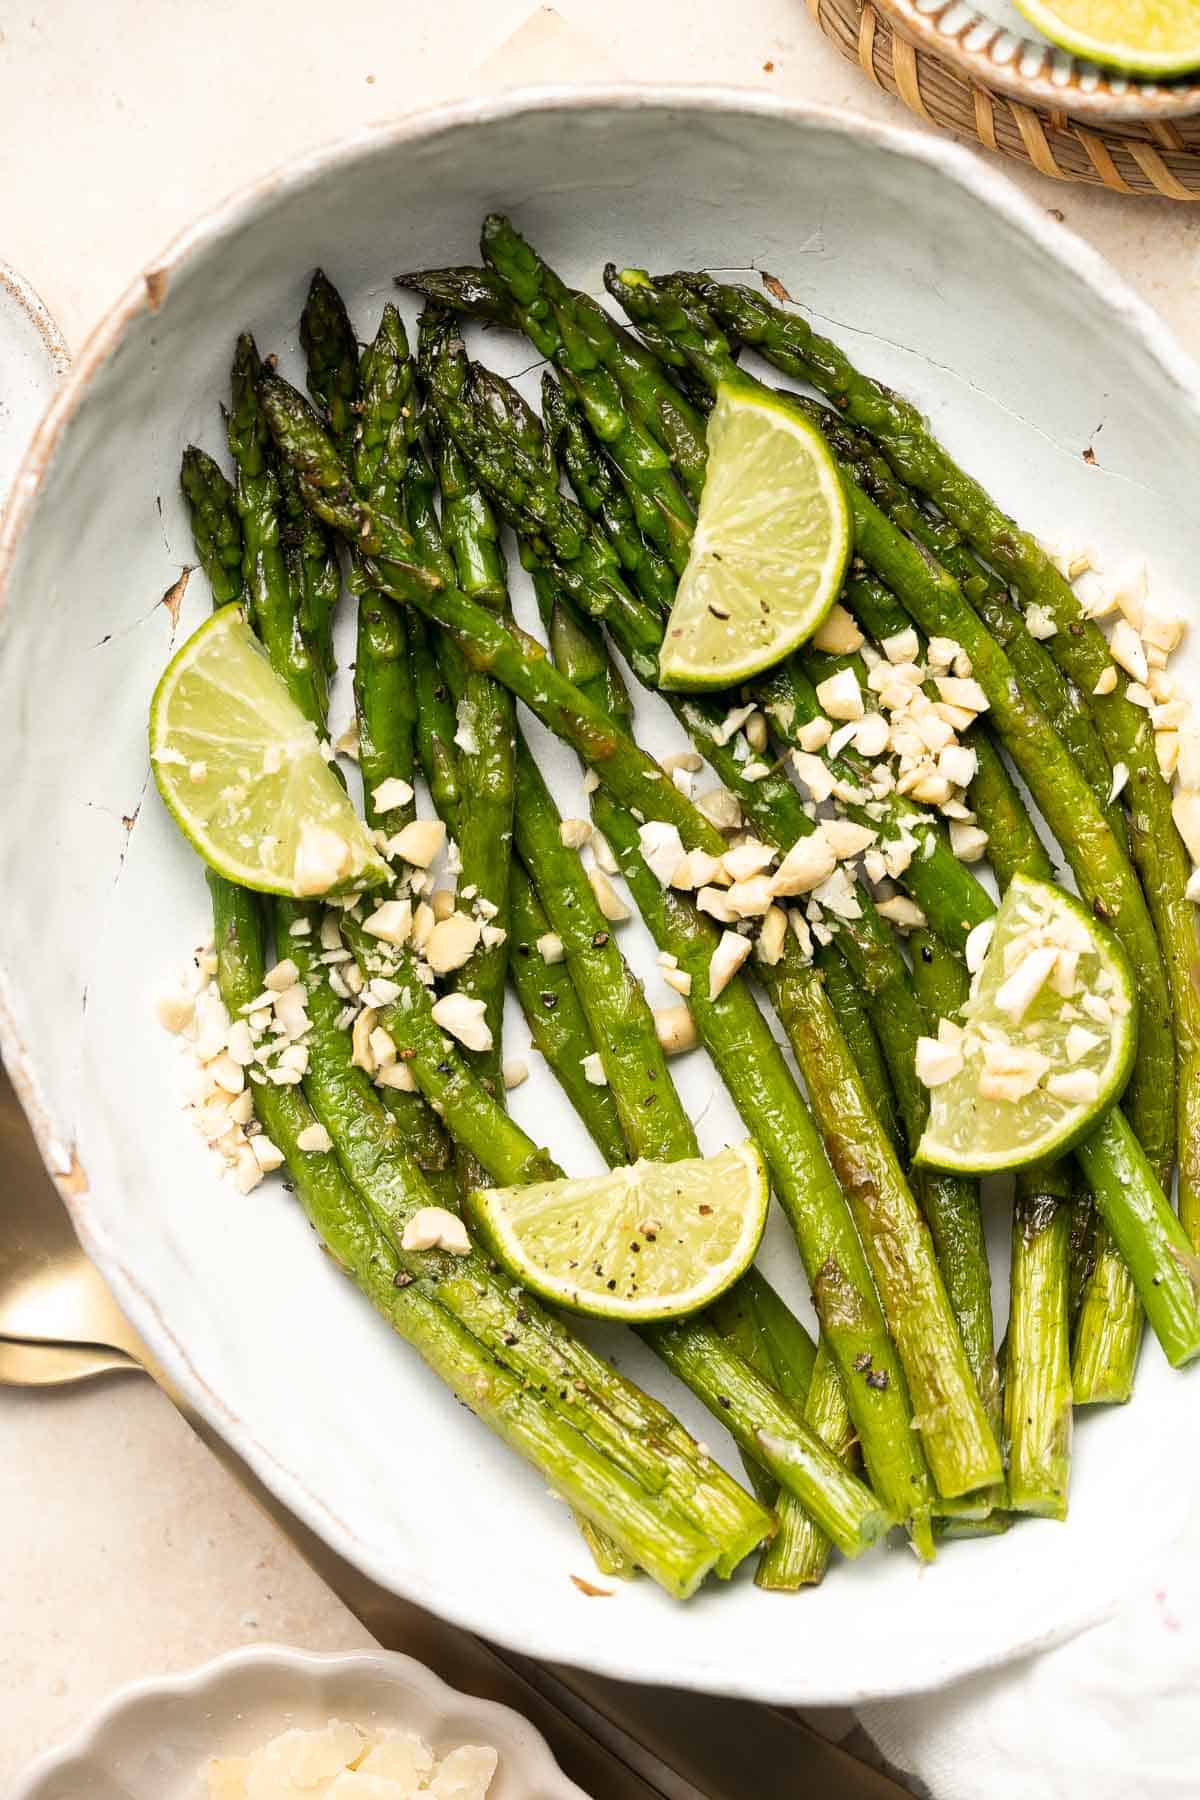
Mediterranean Orzo Pasta Salad
Quick and easy Mediterranean orzo pasta salad packed with fresh vegetables and herbs is tossed in a Greek lemon vinaigrette. Healthy, light and delicious.
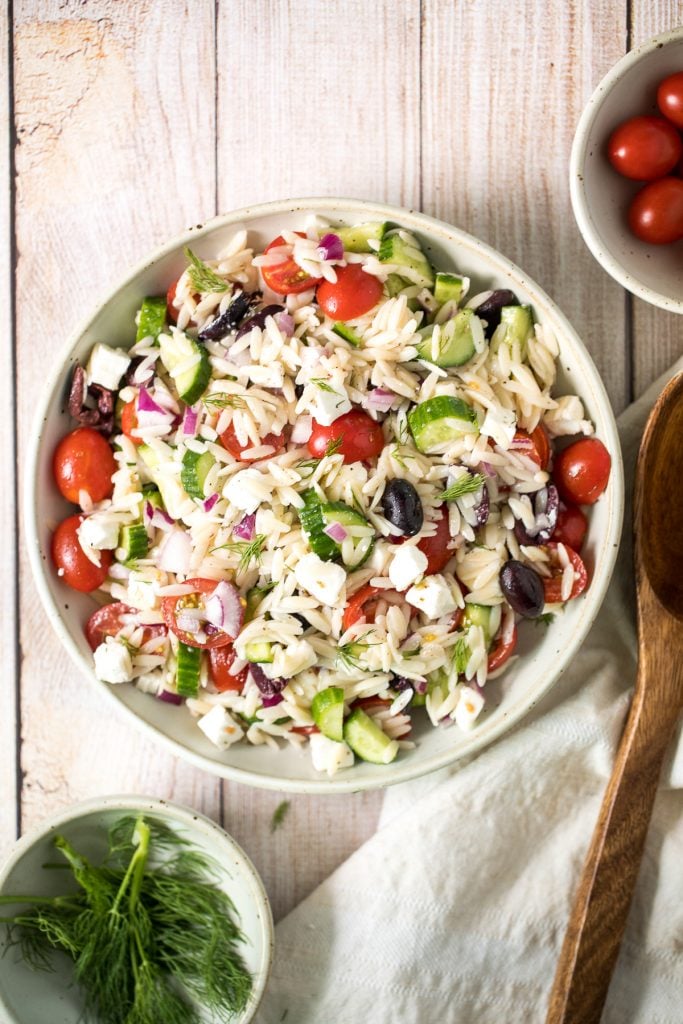
Green Beans with Bacon is a delicious, flavorful side dish that comes together quickly in 20 minutes (including prep!) with a handful of simple ingredients.
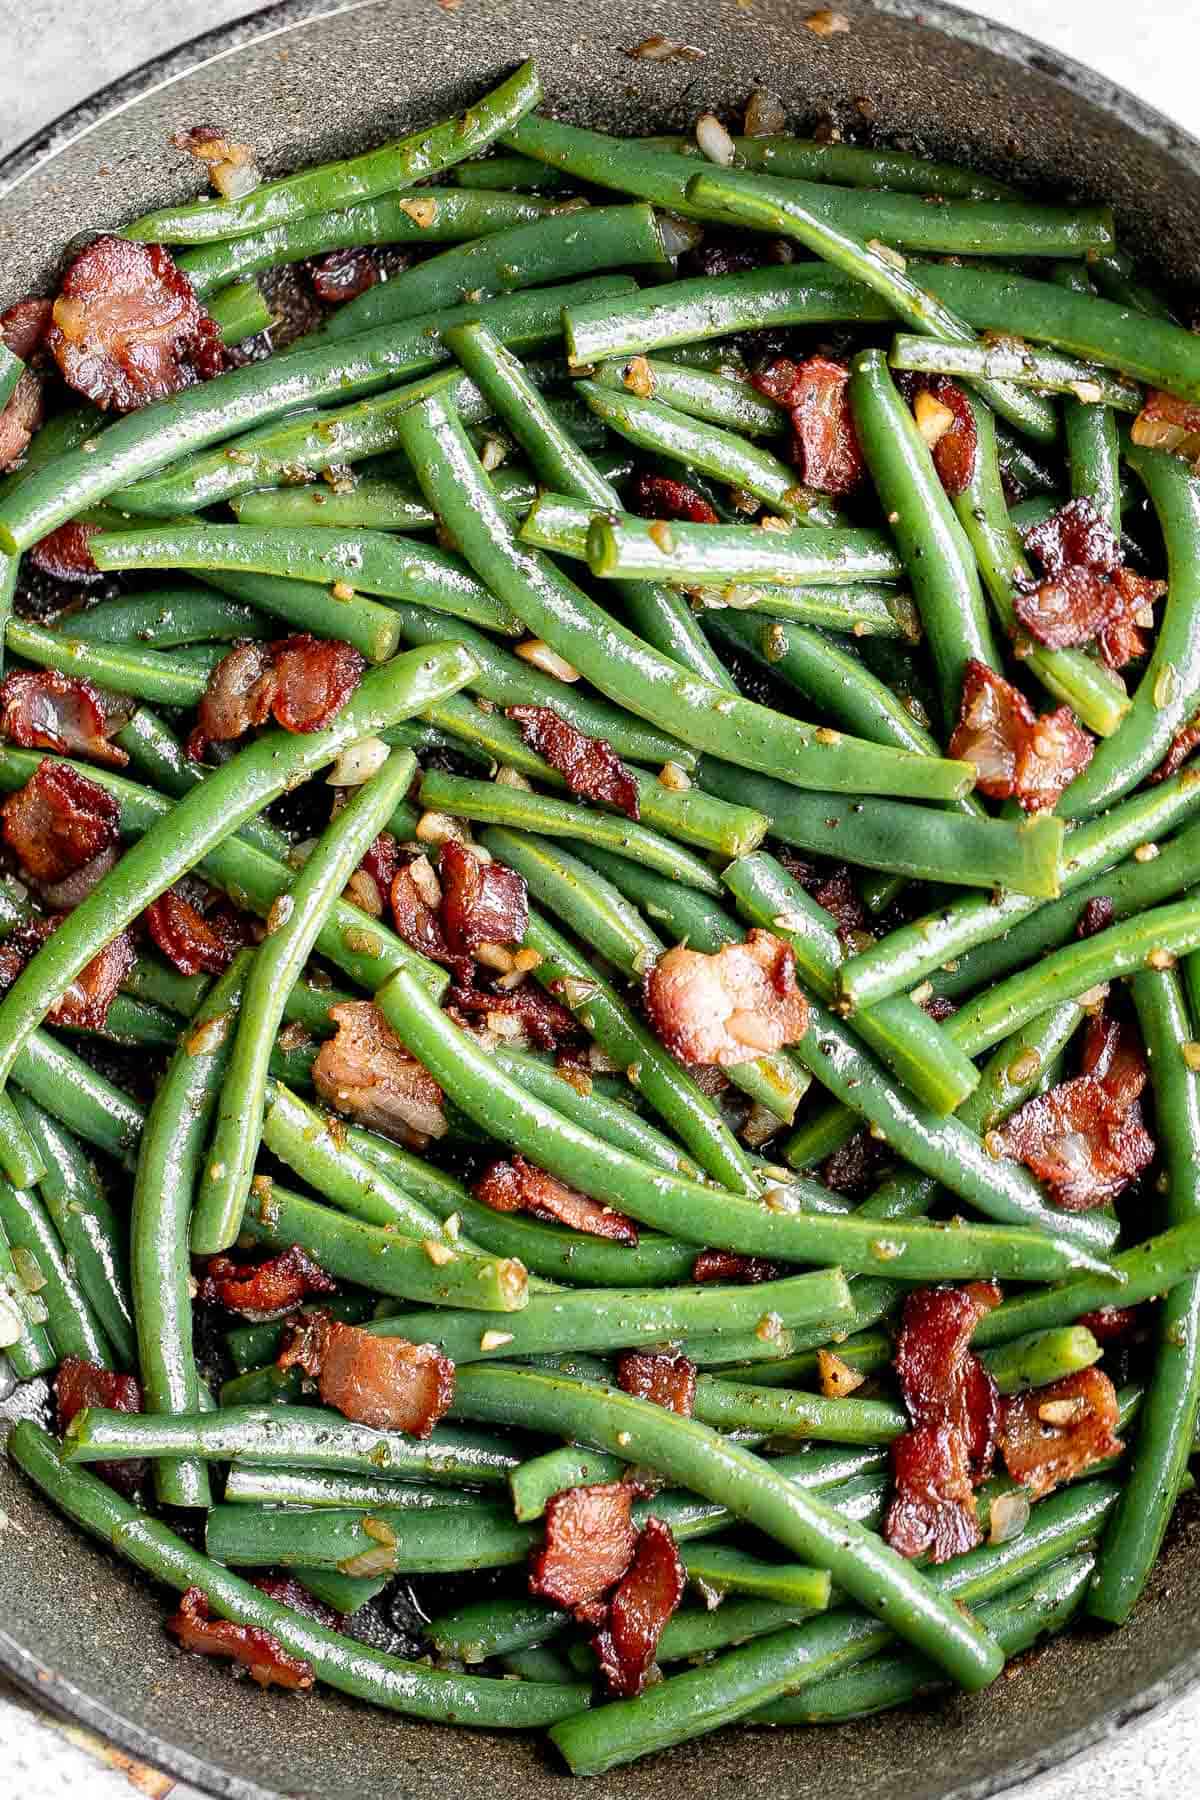
Air Fryer Spring Vegetable "Stir Fry"
Simple air fryer spring vegetable "stir-fry" with tofu is the ultimate easy dinner ready in less than 10 minutes. It's healthy, vegan and gluten-free.
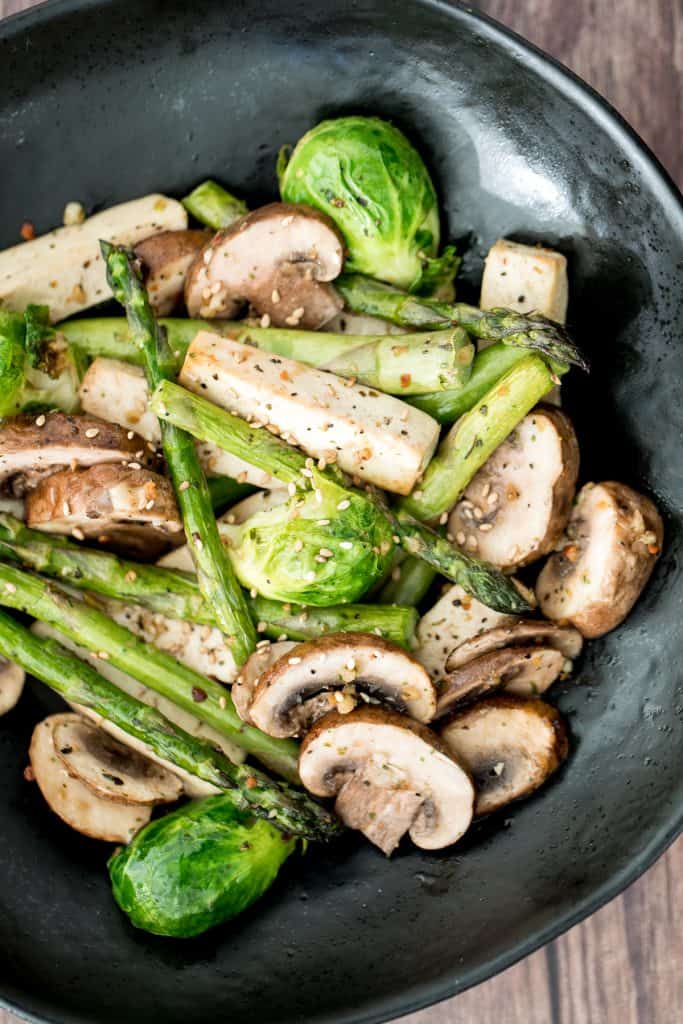
Flaky, fluffy, buttery, and soft, these easy homemade biscuits come together with only a handful of ingredients you already have at home. Perfect to serve with your holiday meal.
Potato Galette with Arugula and Crème Fraîche
Potato galette with arugula and crème fraîche is a rich, light, and delicious savoury tart to serve for breakfast, lunch, or dinner. A total crowd-pleaser.
Buttery sautéed garlic green beans is a simple side dish that is quick, easy and delicious. Make these vibrant, crispy and tender green beans in 10 minutes.
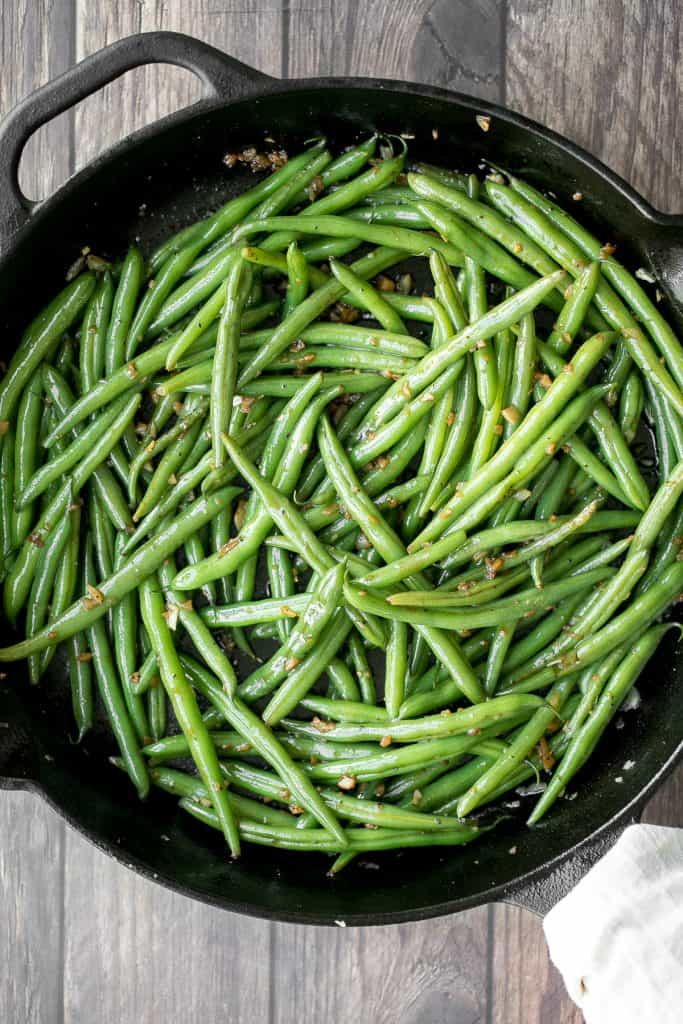
Garlic Mashed Potatoes with Sour Cream
Velvety and smooth, garlic mashed potatoes with sour cream are the best, flavourful make-ahead side dish ever. Garlicky, buttery, creamy, and pure comfort.
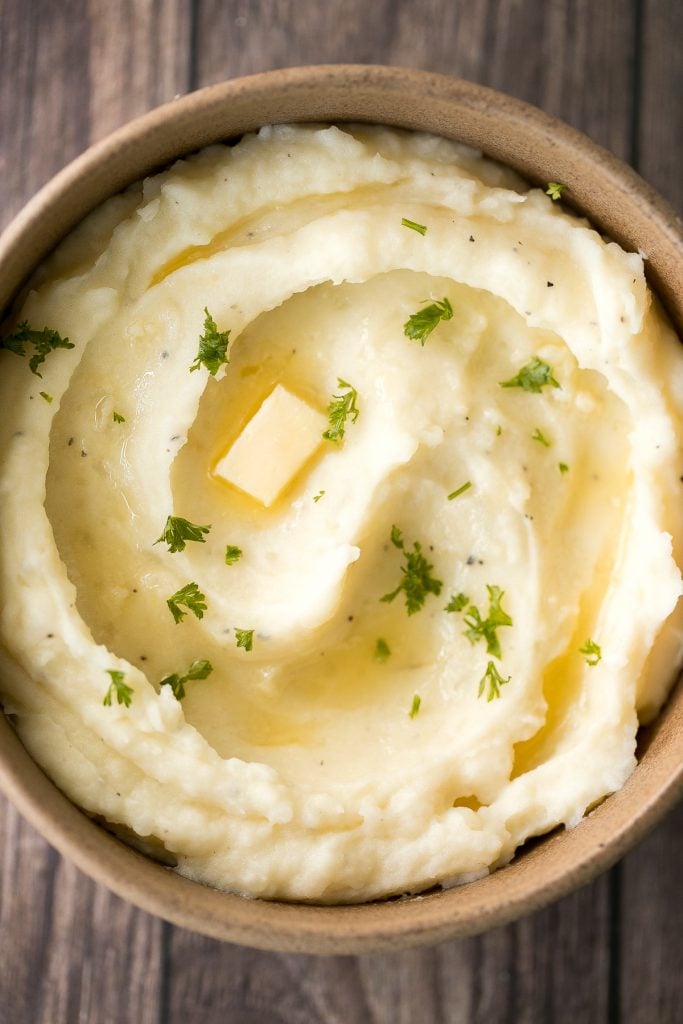
Roasted Asparagus with Poached Eggs
Roasted asparagus with poached eggs is a match made in food heaven. Serve this topped with fresh herbs and lots of black pepper for a classy, elevated dish that will leave you feeling light, but completely satisfied, or simply to celebrate the arrival of spring.
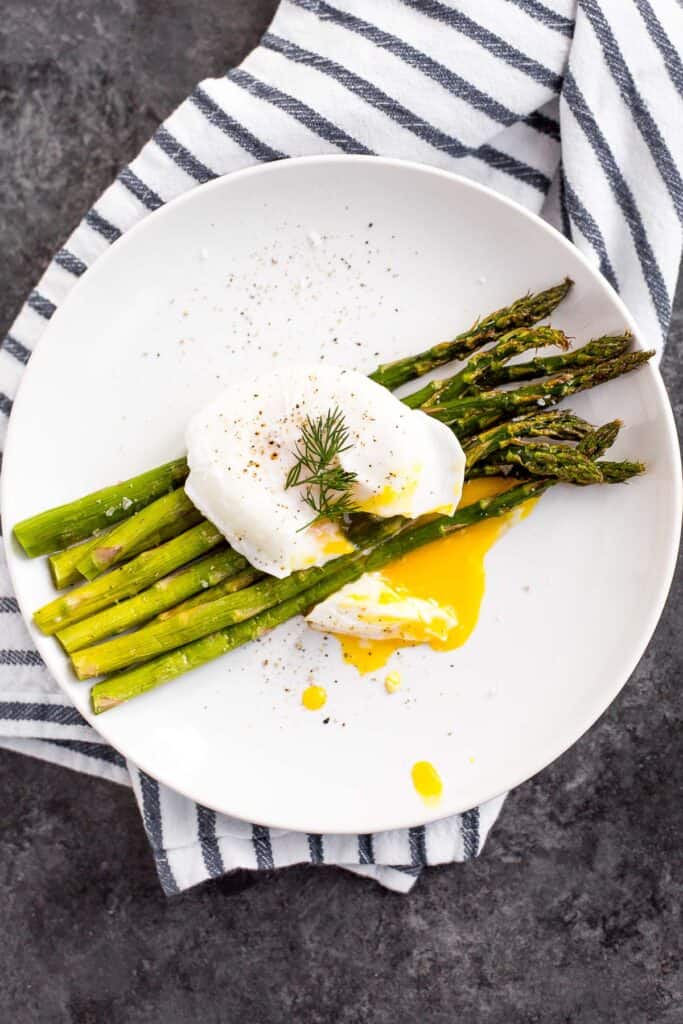
Maple Roasted Carrots with Yogurt Sauce
These maple roasted carrots with yogurt sauce are not only stunning, but they get all caramelized and crispy around the sides from the maple syrup… pure perfection!
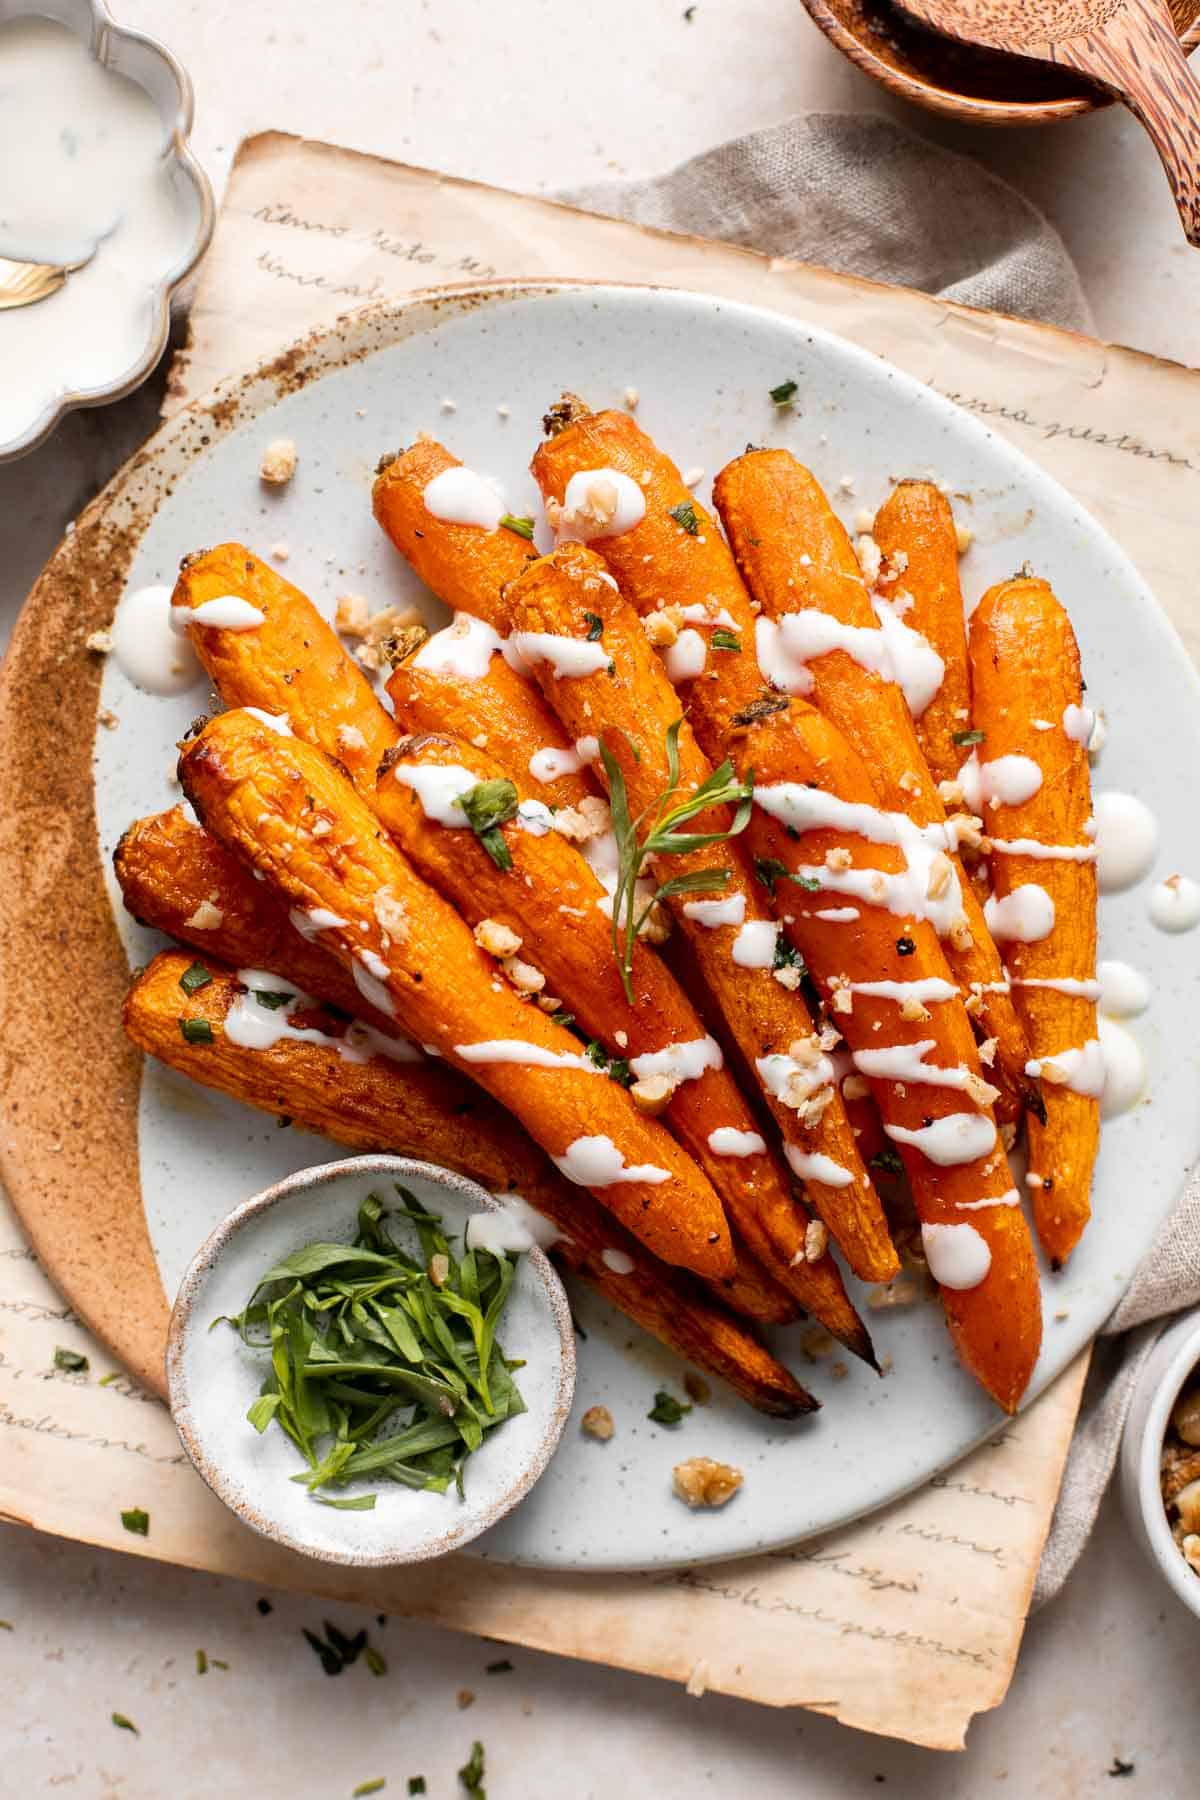
Lemon Parmesan Green Beans are the perfect side to any entree dinner meal - buttery, lemony, and cheesy. This quick side dish is easy to make in 20 minutes.

Greek Lemon Roasted Baby Potatoes
Quick and easy Greek lemon roasted baby potatoes are crispy on the outside and tender inside, packed with a Greek flavour blend of lemon, garlic and herbs.
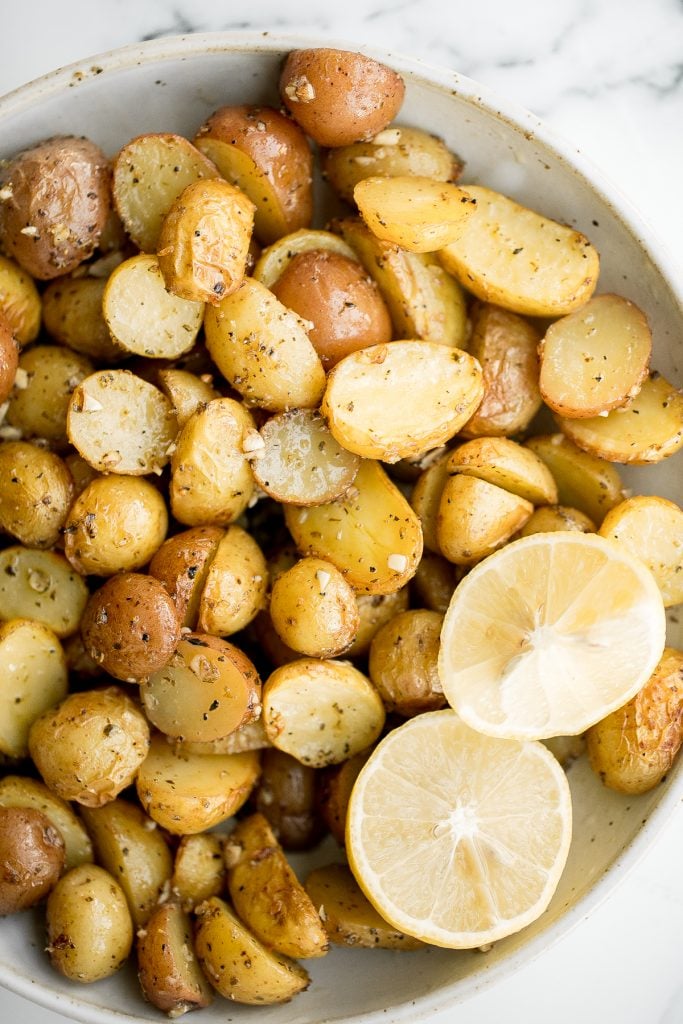
Take a bite into this refreshing, gluten-free quinoa spinach salad bursting with colourful tomatoes, cucumbers and raisins dressed with a lemon vinaigrette.
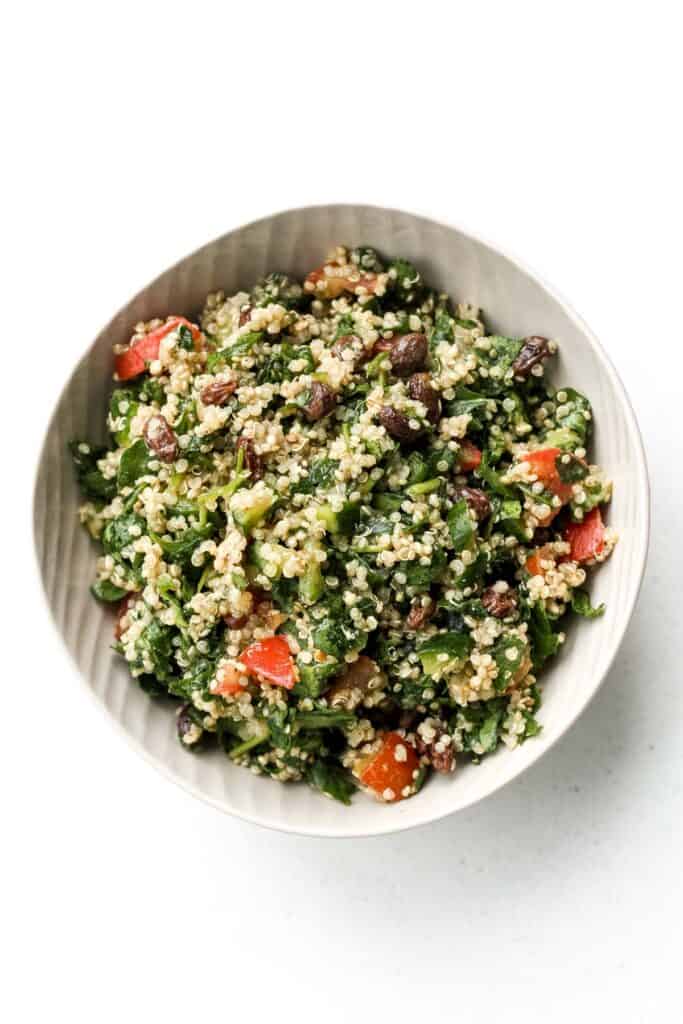
Delicious and flavourful, light cream of broccoli soup is a silky smooth, creamy, and thick soup made healthier with no cream. Make it in under 25 minutes.
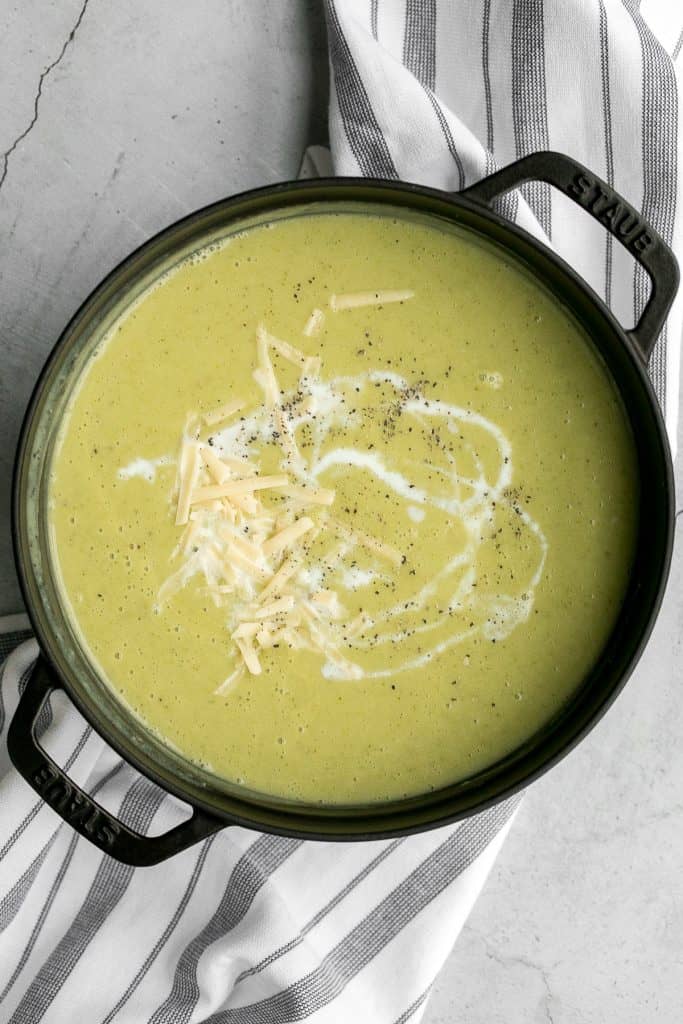
Vegan Stuffed Peppers are stuffed with pan-fried mushrooms, tender rice, and veggies, making them flavorful and filling. Easy to make in under an hour!
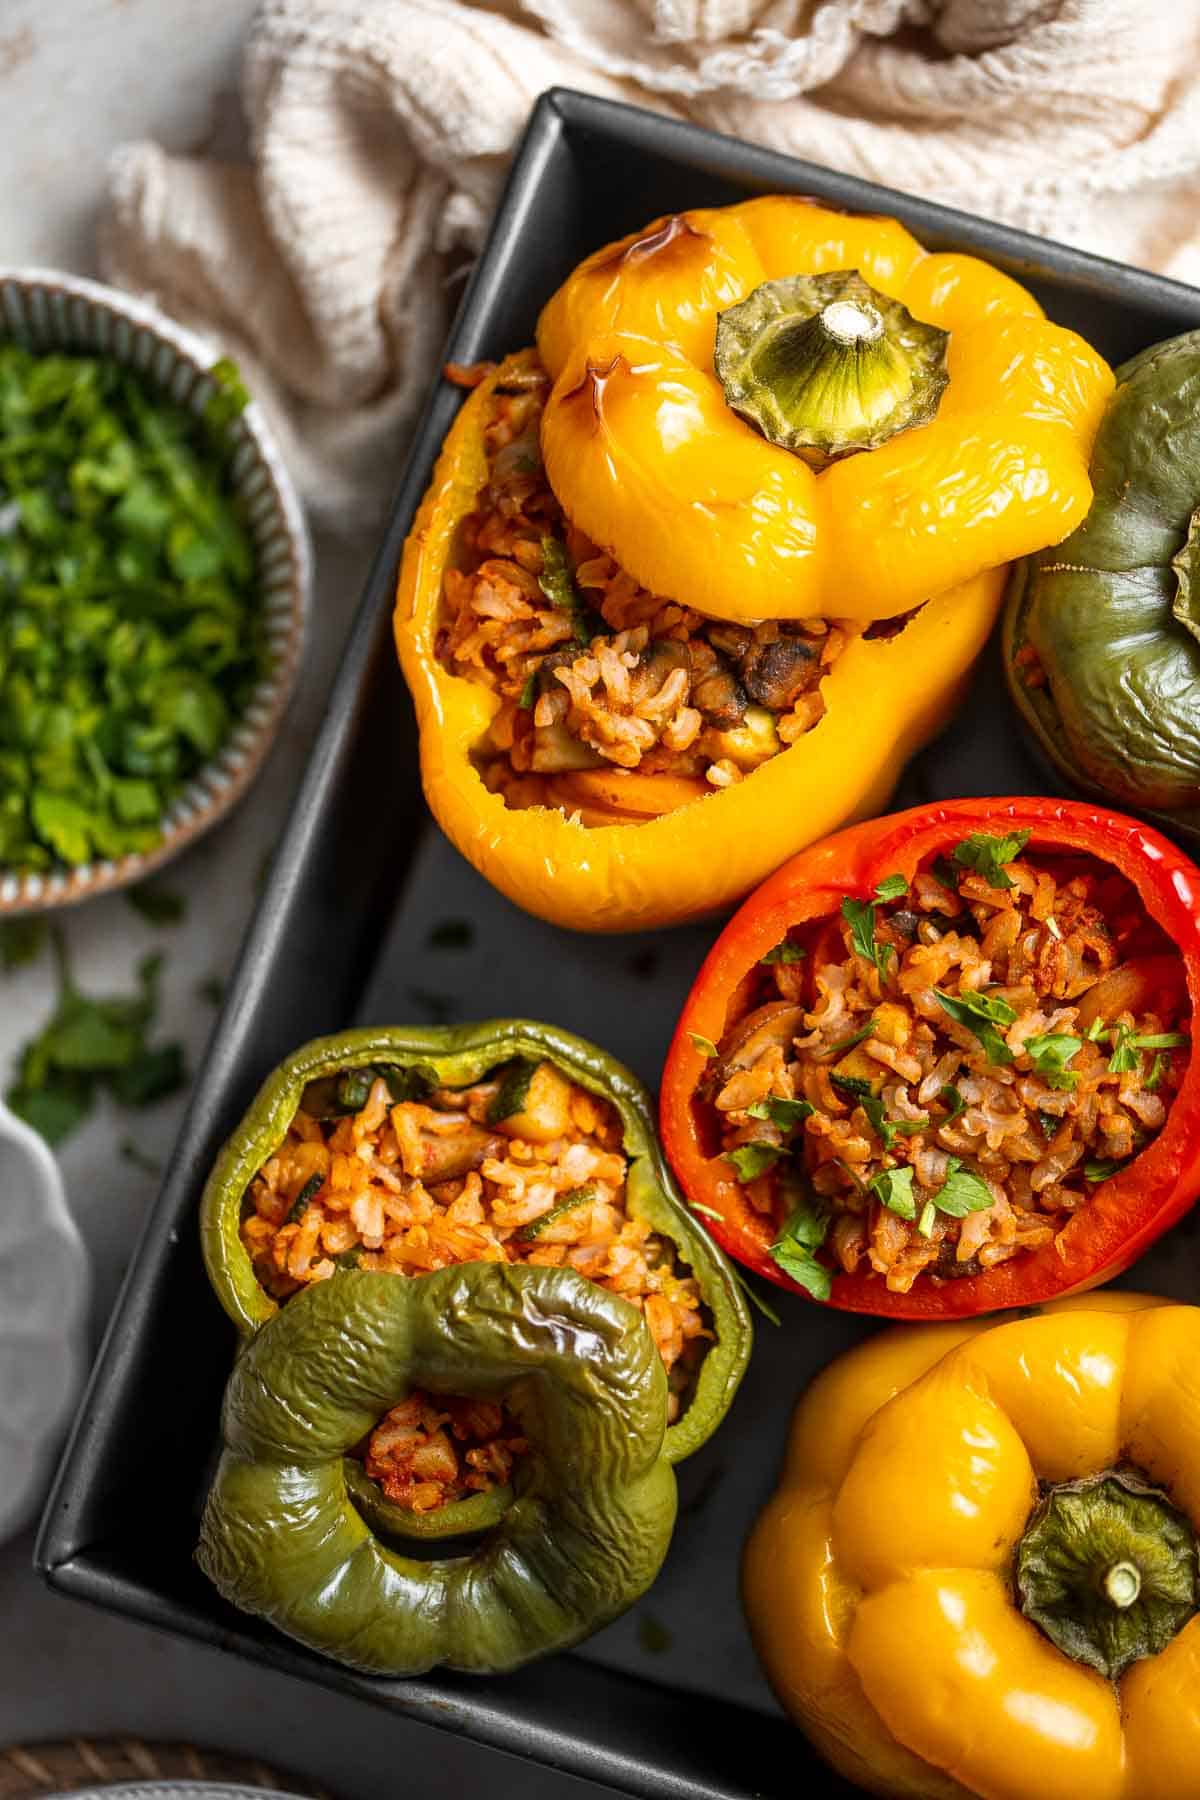
Flaky Cornmeal Cheddar Biscuits
Flaky cornmeal cheddar biscuits are simple, buttery, cheesy, and so delicious. These savoury biscuits with perfect golden tops are quick and easy to make.
Scalloped potatoes are a creamy, cheesy, indulgent side dish that will make cheese lovers swoon. Every bite is savory, rich, comforting, and delicious.
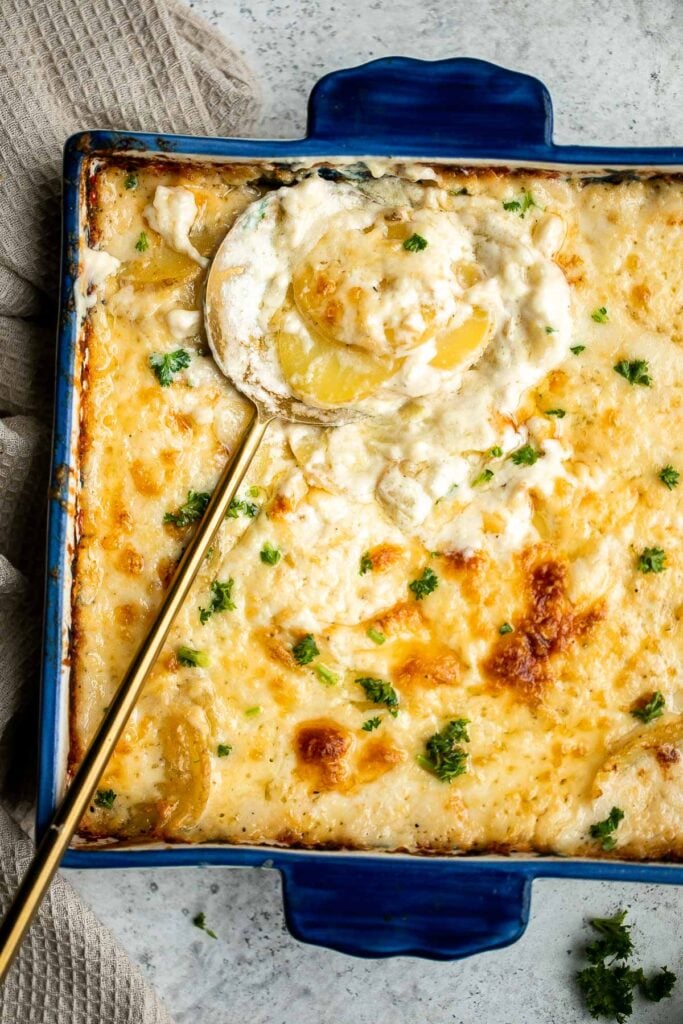
Crispy and tender, easy air fryer baby potatoes are a healthier take on a classic side dish without compromising taste or texture. Cooks in just 20 minutes.
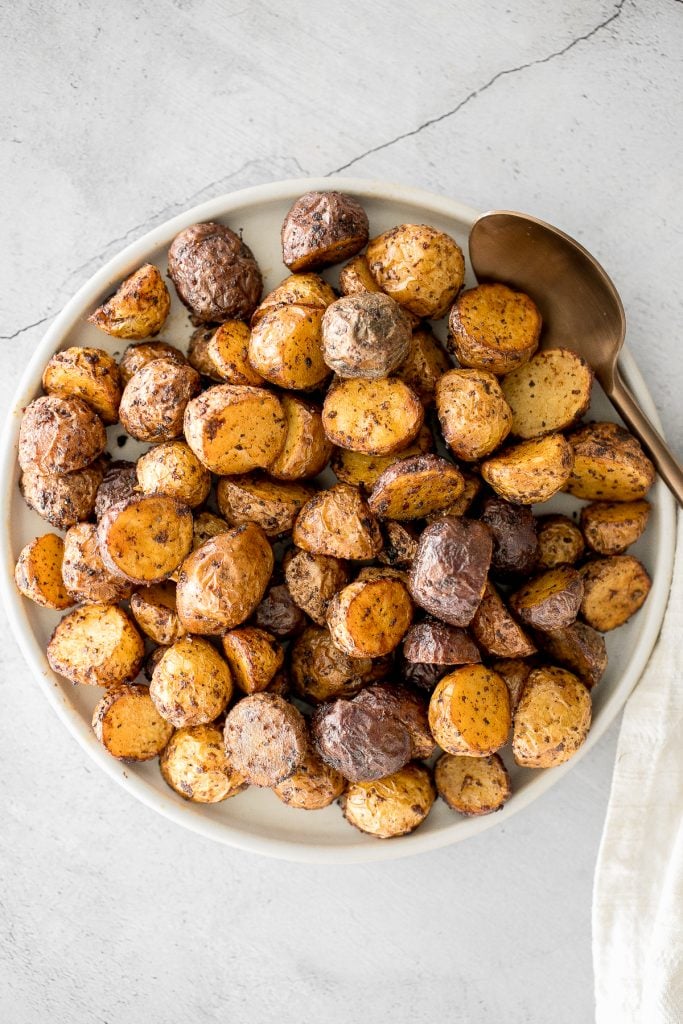
The Best and Creamiest Mashed Potatoes
Creamy, buttery, and delicious, this is the best and creamiest mashed potatoes recipe you will ever find. It's velvety, smooth, and melts in your mouth.
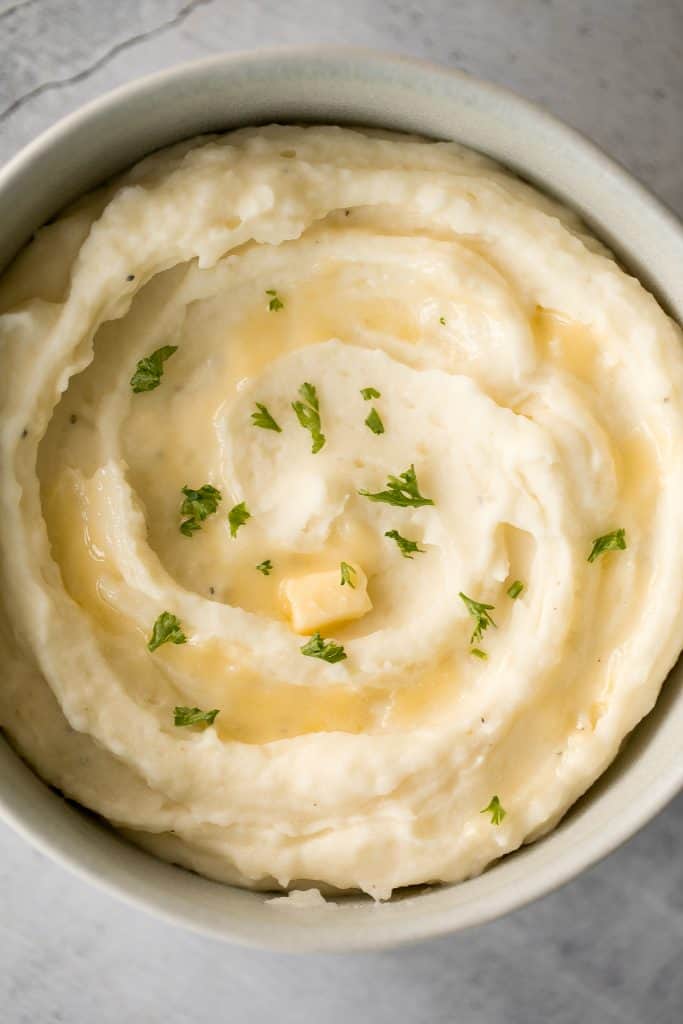
Easy Rosemary Garlic Focaccia Bread
No knead, easy rosemary garlic focaccia bread is thick with a perfect golden and crispy texture on the outside, but soft, fluffy and tender inside.
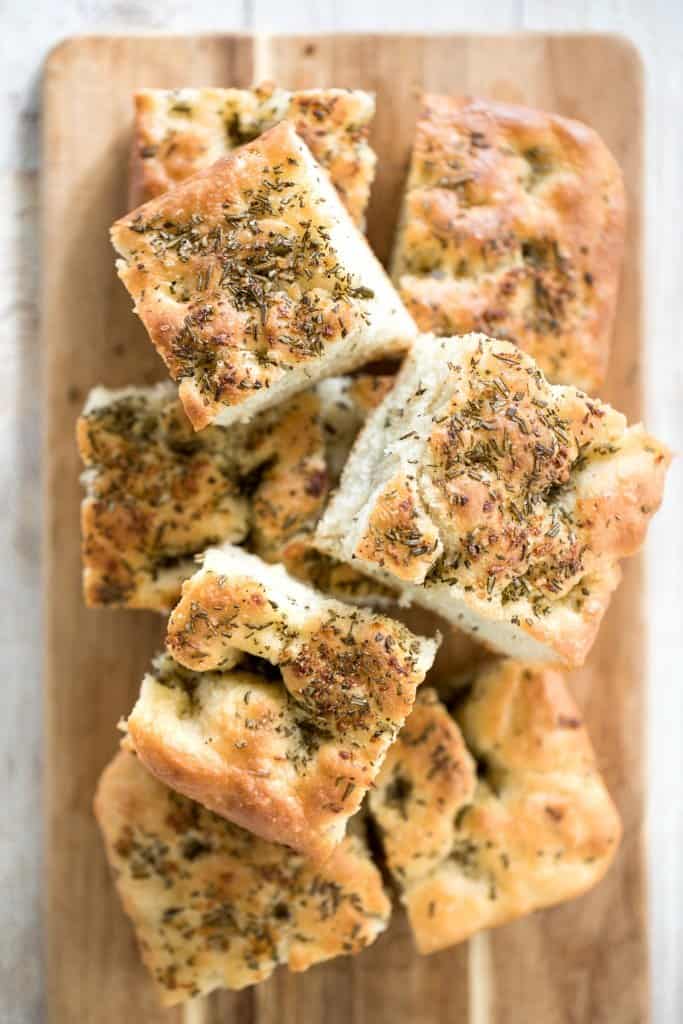
Tender and caramelized, easy roasted brussels sprouts tossed in balsamic vinegar and honey is a classic household favourite to serve on your holiday table.
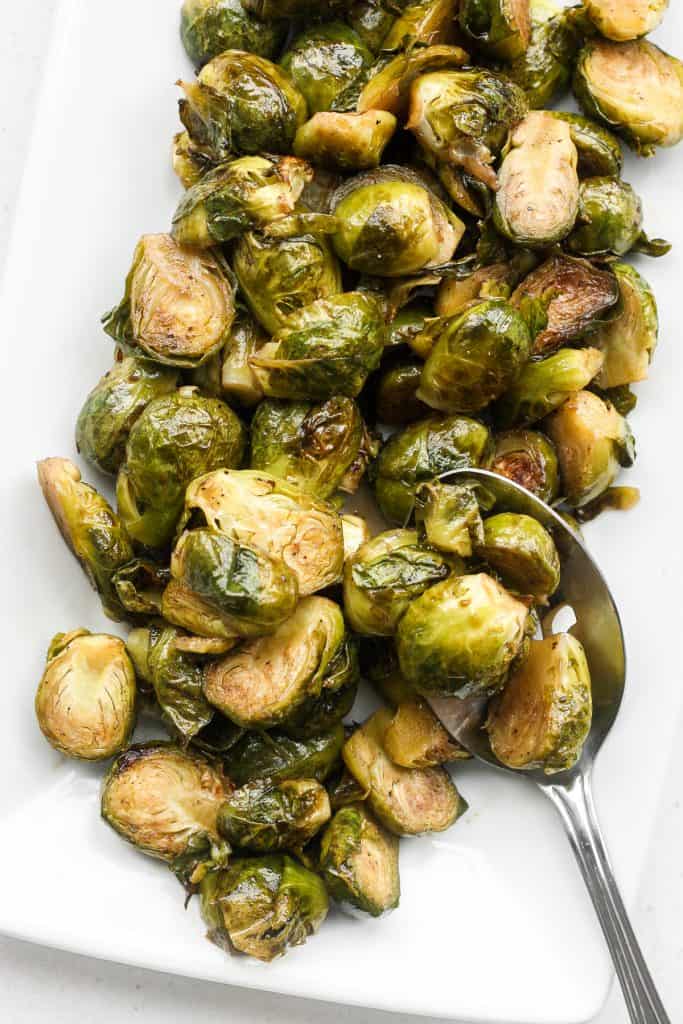
With only a few ingredients, it is incredible how much flavour are packed in these 10-minute nutty green beans. Earthy green beans balance perfectly with crunchy pecans.
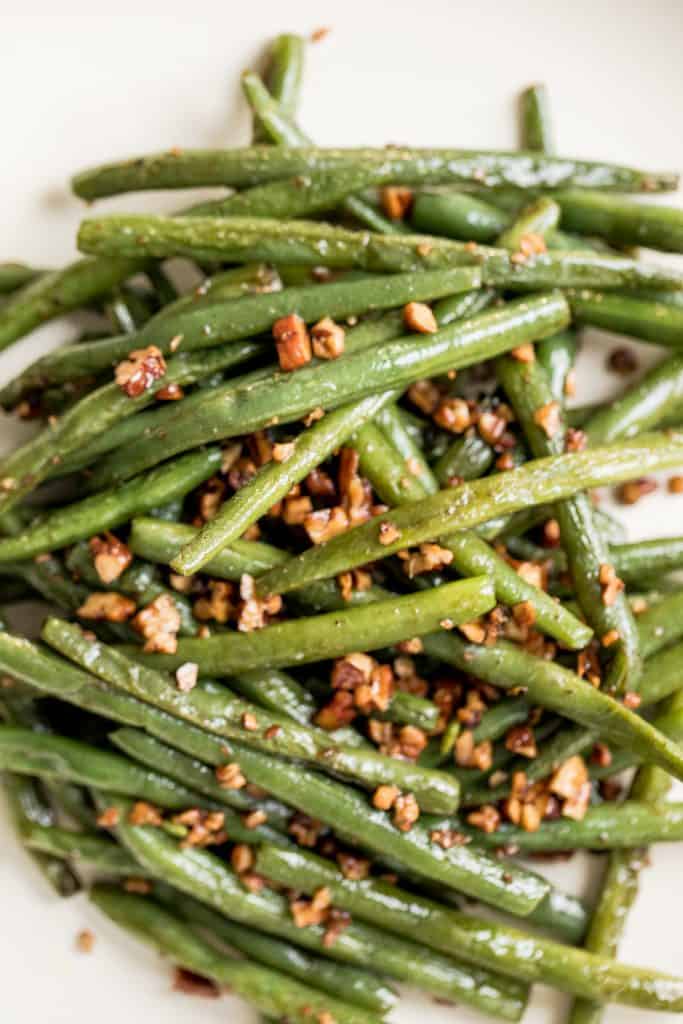
Flaky Garlic Cheddar Biscuits are a simple but delicious and flavorful no yeast bread that is ready for the oven with less than 15 minutes prep.
Baked Sweet Potato Wedges are crispy, delicious, flavorful. Serve as an appetizer or side dish. They are salty, savory, and sweet, with a hint of spice.
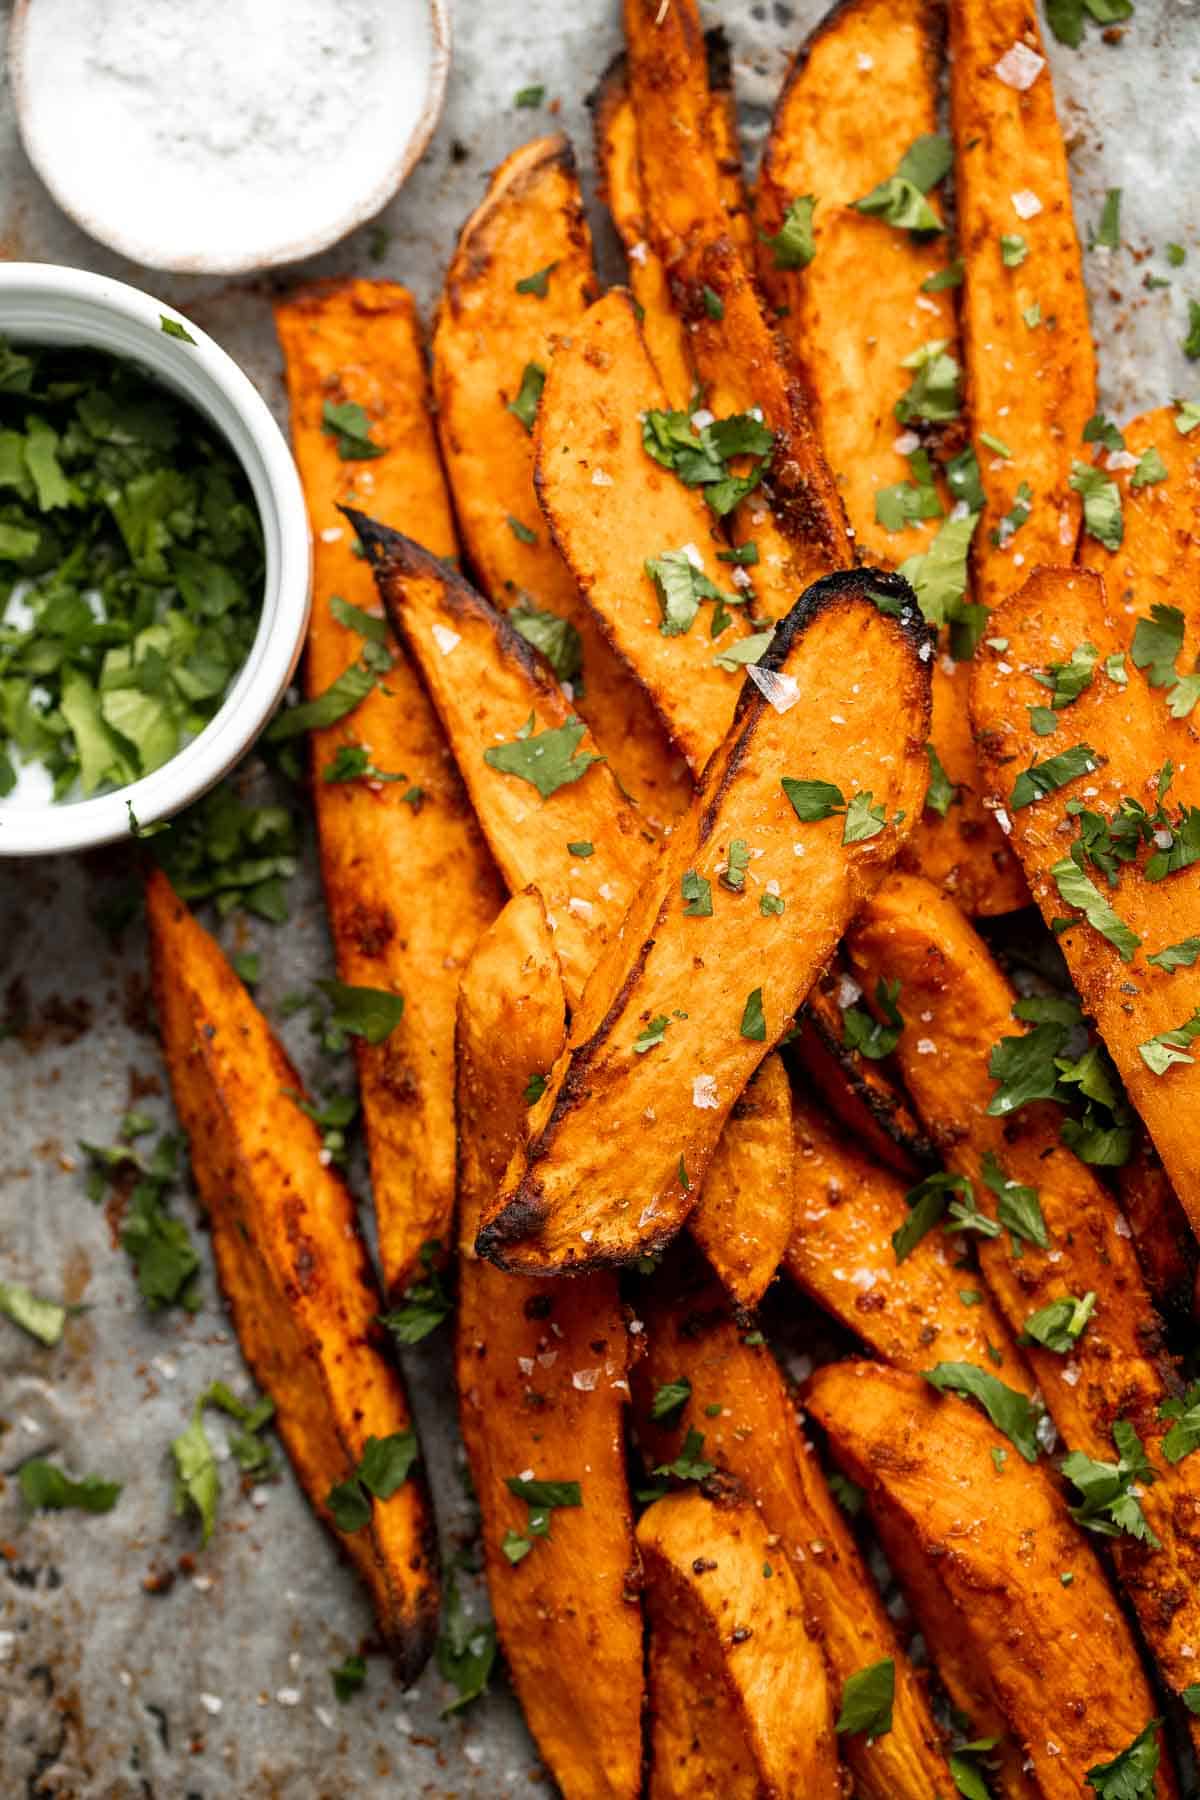
Oven-roasted corn on the cob with homemade garlic butter is buttery, juicy, crunchy, and perfectly charred on the outside - without a grill.
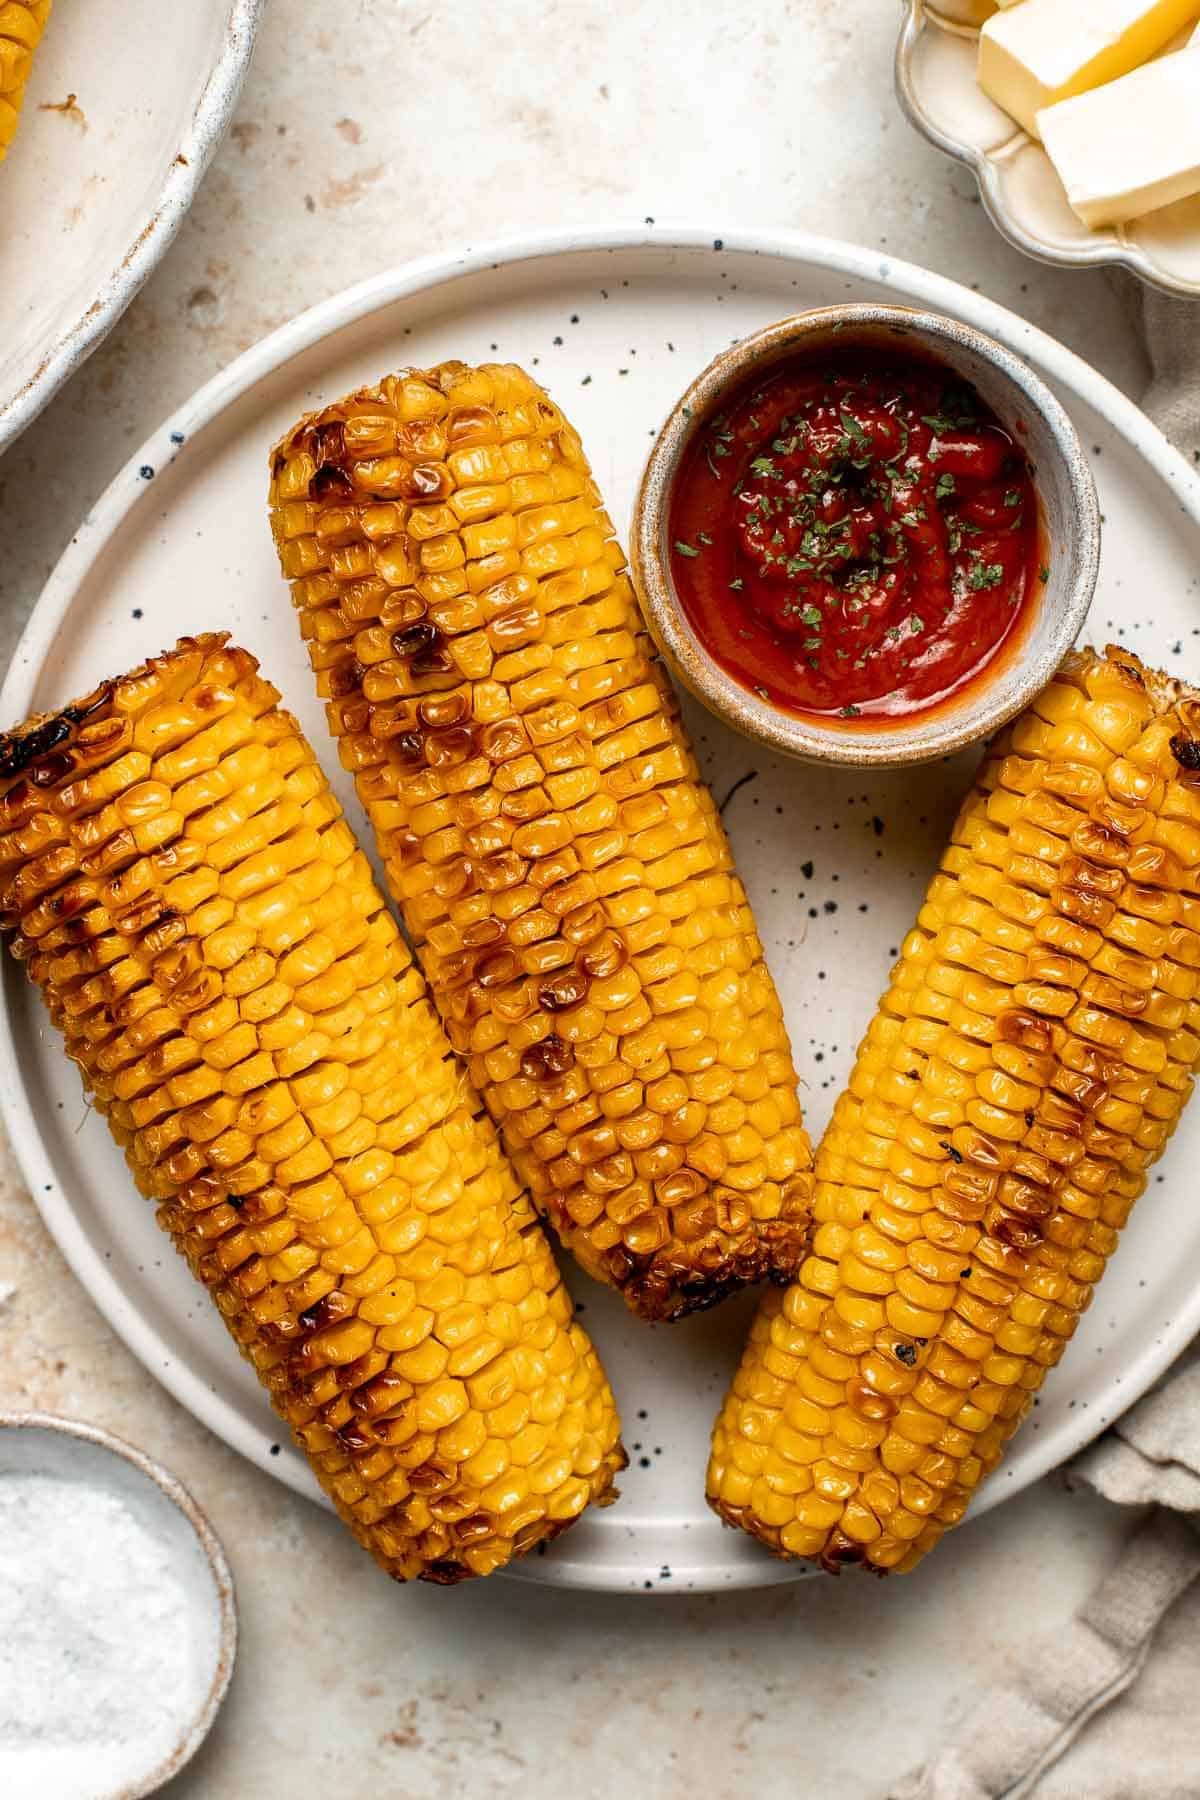
12-Minute Crispy Roasted Air Fryer Brussels Sprouts
Tender and crispy roasted air fryer brussels sprouts cooks in less than 12 minutes with very little oil. It is a holiday table game changer.
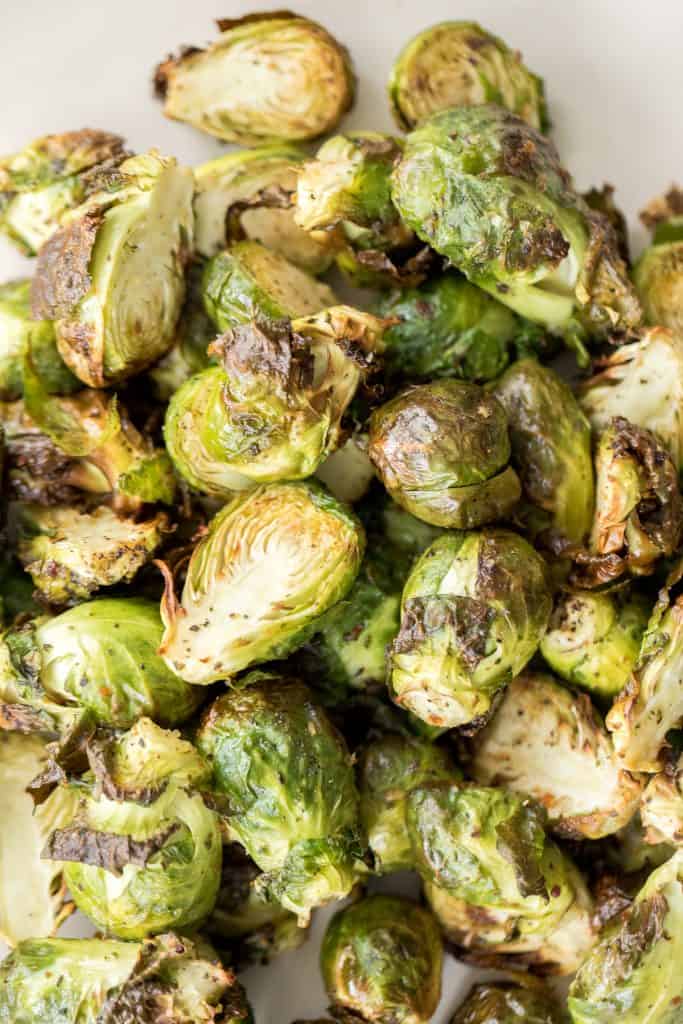
Easy cornbread muffins just made cooking a whole lot easier and tastier! These moist and fluffy muffins are made with cornmeal, cooked corn kernels, and sweetened with honey for a burst of flavor in every bite.

How to Make Ahead
You can make many of these Easter side dish recipes ahead of time and store in the refrigerator for a few days and some can even be stored in the freezer for up to 3 months. Alternatively, you can prepare the ingredients and store them in the refrigerator until ready to assemble and cook. Check the individual recipes for full make ahead and storing instructions.
To reheat, place any leftovers in the air fryer or the oven at 300F for 10-15 minutes until warmed through. If heating from frozen, let it thaw first and then reheat.
More Easter Recipes
Once you have figured out the sides that you will be serving on your Easter menu, start planning the main dish and all the Easter desserts. Some of my go to holiday mains for Easter are:
- Holiday Glazed Baked Ham
- Pineapple Glazed Ham Slices
- Dutch Oven Whole Roast Chicken
- Herb-Crusted Rack of Lamb
- Pistachio-Crusted Salmon
- Honey Glazed Roast Pork with Vegetables
- Baked Maple Salmon
- Garlic Rosemary Rack of Lamb
- Glazed Honey Balsamic Pork Chops
- Honey Garlic Glazed Salmon
- Slow Cooker Leg of Lamb
Did You Make Any of These Easter Side Dishes?
Please leave a comment and rating below, and let me know what you thought of this round up of Easter side dish recipes. Be sure to snap a picture and tag me on Instagram @aheadofthyme or share it on the Pinterest pin so that I can follow along.
HUNGRY FOR MORE? Don't forget to sign up for my email newsletter so that you don't miss any recipes. You can also follow along on Instagram and Pinterest for more recipe updates.
Chopped Asparagus Salad

Chopped asparagus salad is the best spring salad ever. It is colourful, vibrant, flavourful, light, and crunchy -- all the best characteristics of the perfect salad. This salad is easy to throw together with a few vegetables, a delicious Greek lemon dressing, and less than 10 minutes to prep. Serve it as a main course for lunch with some added protein, or on the side of a fresh spring entree. It's seriously so simple but SO good.
Spring is probably my favourite season of all. So when I start to see asparagus pile up at my local grocery store, I get super excited and so many bunches that my family gets sick of asparagus by the time I get to the last bunch. This chopped asparagus salad is one of the easiest way to enjoy some asparagus this season.
Some of my other favourite ways to cook with asparagus are in Creamless Cream of Asparagus Soup, Spring Pesto Pasta with Asparagus, Air Fryer Asparagus, and Prosciutto-Wrapped Asparagus and Cantaloupe Bundles.
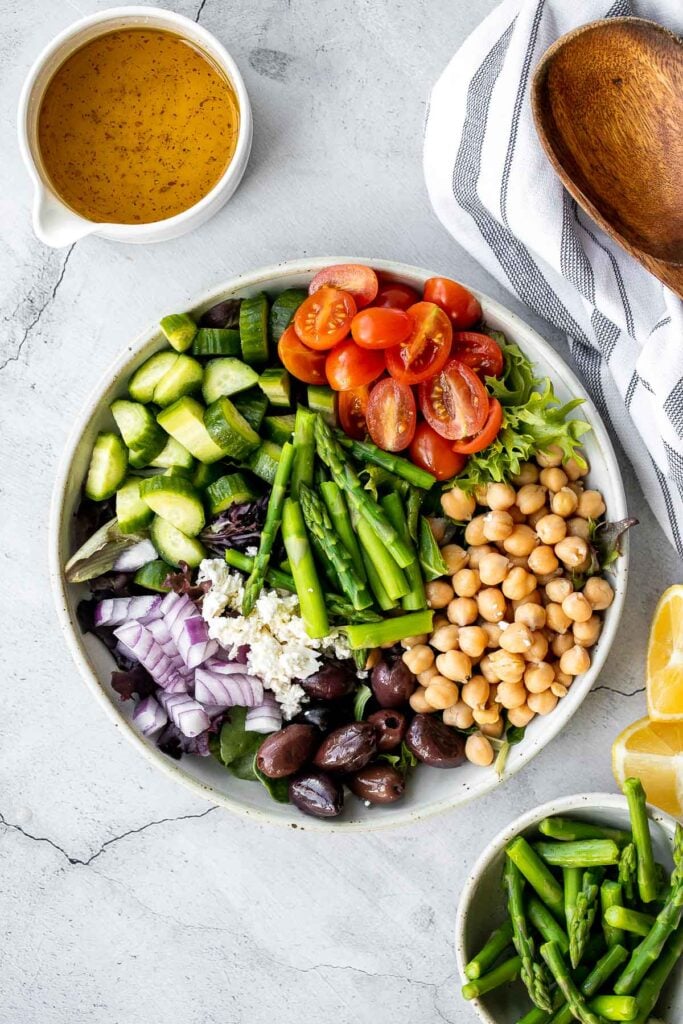
Asparagus Salad Ingredients
To make this easy chopped asparagus salad, you will need the following ingredients:
- asparagus - You need about half bunch of asparagus, trimmed and cut into 2-inch pieces.
- mixed greens - You can use any greens that you like -- romaine, spinach, arugula, or a simple bag of mixed greens.
- chickpeas - I used a 15 oz. can of chickpeas. You will need to rinse and drain them before adding them to the salad.
- grape tomatoes - You can also use cherry tomatoes sliced in half. If you only have regular tomatoes on hand, cut them into 1-inch pieces.
- Persian cucumbers - These are my favourite cucumbers to use in this salad. You can also use a different type of cucumber, just cut them into 1-inch pieces.
- red onion
- kalamata olives
- feta cheese
- lemon dressing - The dressing is essentially the same dressing as in a Greek salad. It is made with olive oil, lemon juice, dried oregano (can use Italian seasoning instead), salt, and pepper.
You will also need a medium pot and mixing bowl.
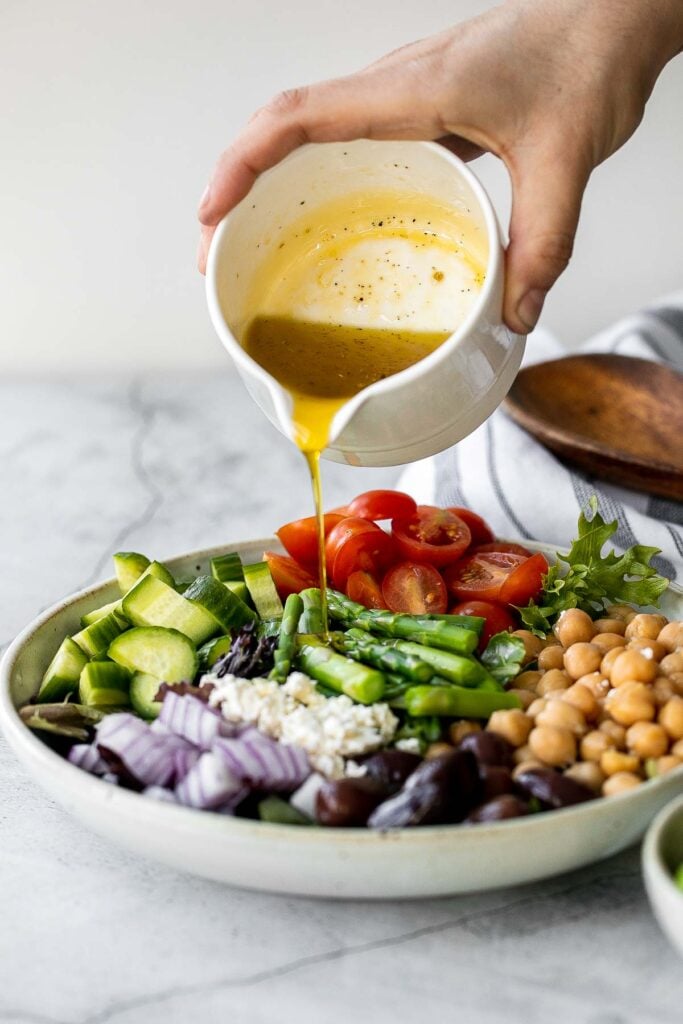
How to Make the Best Chopped Asparagus Salad
- Cook the asparagus. Bring a medium pot of salted water to a boil and add asparagus. Cook for 2 minutes, then remove with a slotted spoon and place in a bowl of ice water. Let cool, then drain.
- Assemble salad. In a large bowl, combine mixed greens, asparagus chickpeas, tomatoes, cucumbers, red onion, cucumber, olives and feta cheese.
- Add dressing. In a small bowl, make the dressing by whisking together olive oil, lemon juice, oregano, salt and pepper. Pour dressing over the salad and toss to combine. Add more salt and black pepper to taste.
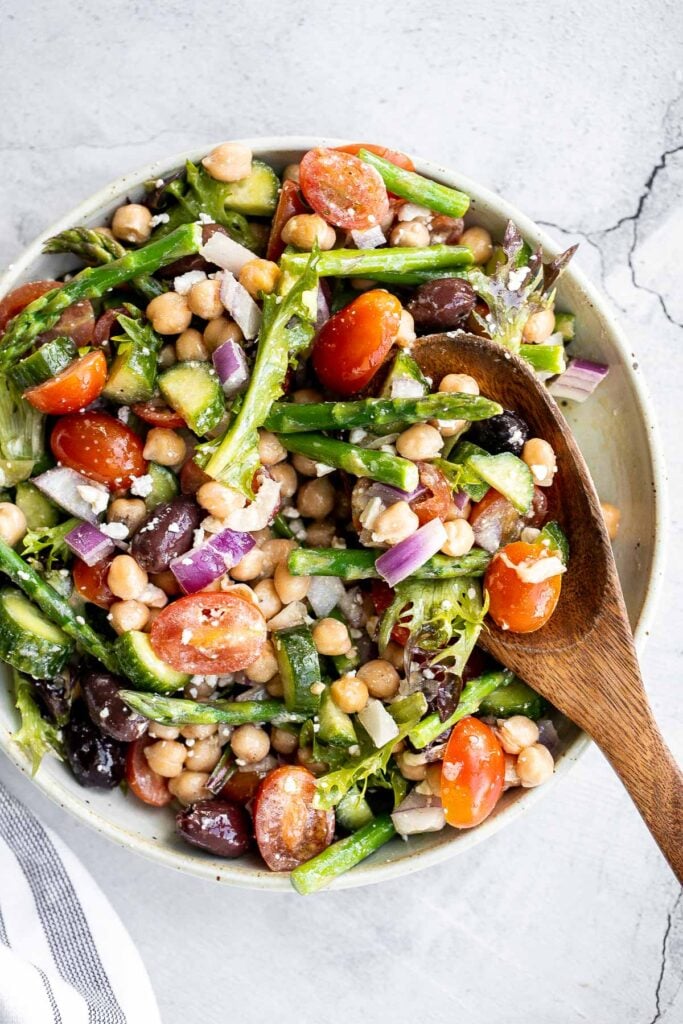
Tips and Tricks
- Blanch cook the asparagus. Make sure to blanch cook the asparagus for 2 minutes only, then immediately immerse them in ice water to stop the cooking process. This will ensure that the asparagus retains its crunch instead of getting too soft and limp.
- Add protein. You can make a complete meal out of this salad by adding in some protein. Some great options to add are shredded chicken, grilled shrimp, salmon, hard-boiled eggs, or tuna.
- How to serve. Chopped asparagus salad is the perfect side to a spring entree, or as a side dish on an Easter holiday menu.
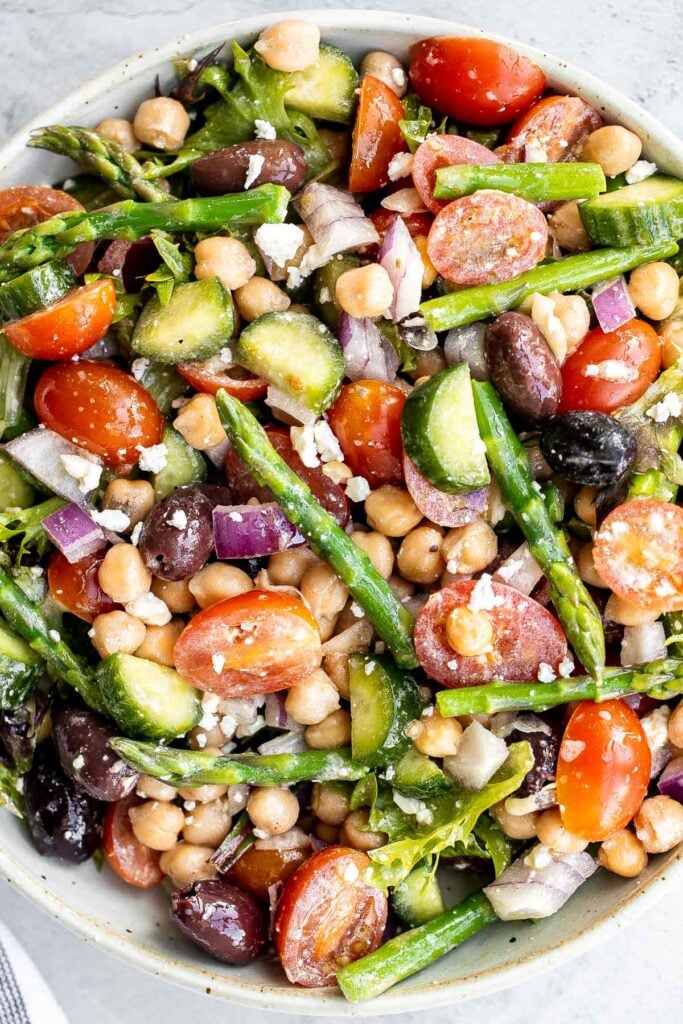
More Salad Recipes
- Mediterranean Chickpea Wedge Salad
- The Best Greek Salad
- Spring Pesto Pasta Salad with Asparagus
- Mediterranean Orzo Pasta Salad
- Persian Shirazi Salad with Cucumber and Tomatoes
- Chinese Garlic Cucumber Salad
- Mandarin Orange Salad
Tried this recipe?
I'd love to hear what you think! Leave a comment and rating below to share your feedback. Your reviews help others discover this recipe and help me keep creating more free recipes for you. Snap a photo and tag me on social media @aheadofthyme too.
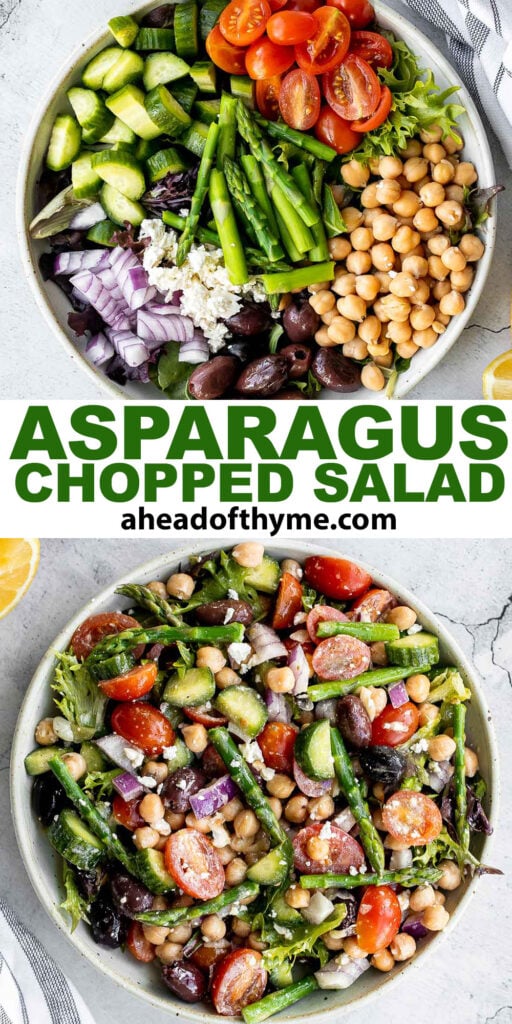
Pineapple Glazed Ham Slices

Pineapple glazed ham slices are a delicious and easy-to-make main course meal using only six simple ingredients and in under 45 minutes. Take a precooked ham to the next level with pineapples, cherries, Dijon mustard, and brown sugar. With the natural sweetness from fruits and a pineapple-brown sugar glaze, this recipe satisfies both sweet tooths and hungry bellies alike. But don't be fooled: this holiday favourite is perfect all year round.
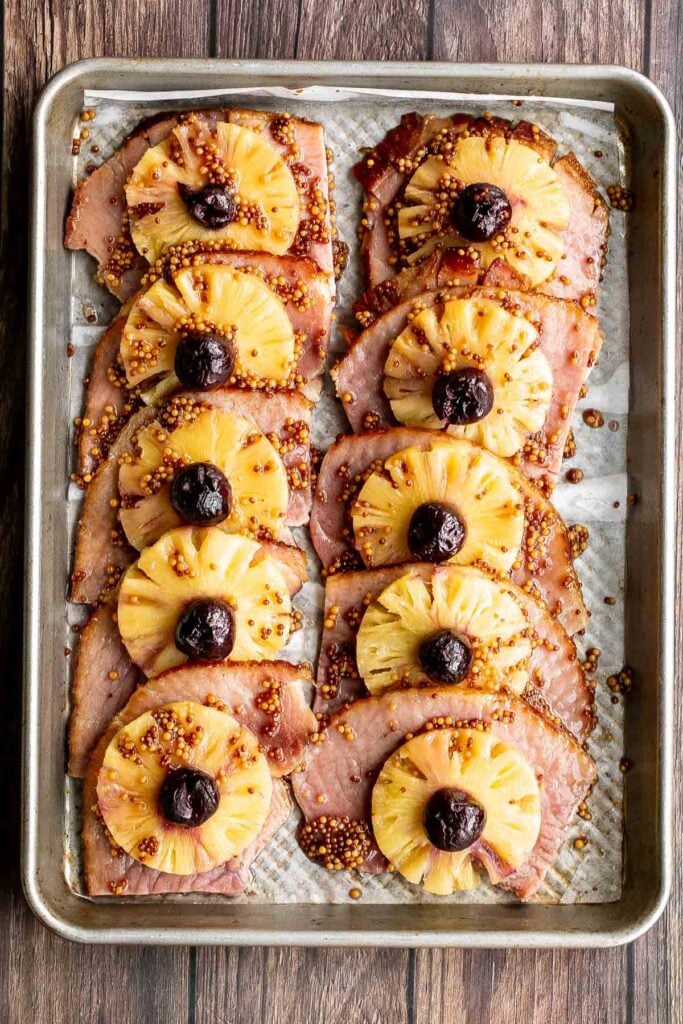
Why You'll Love These Pineapple Glazed Ham Slices
- You only need six basic ingredients! It's really five if you consider how your canned pineapple slices come with juice in the can. On top of that, you can skip the cherries and make it four. Looking for an easy recipe that you don't need to go out all for (but still tastes complex)? You've found it.
- Perfect for a small Easter dinner. This year, holiday celebrations will be smaller-and fewer guests means less food. Instead of cooking up a whole ham, serve these pineapple glazed ham slices at an intimate family gathering.
- It's sweet and salty heaven. Pairing sweet and salty flavors makes for the best combinations and these pineapple glazed ham slices are no exception. The natural saltiness of the precooked ham with the sweet glaze and fruit is crave-worthy.
- Kids and adults will love it. Do you have picky eaters at home? Not anymore! These moist pineapple glazed ham slices appeal to kids who love sweets and adult meat-lovers. And if you have fans of Hawaiian pizza at home, this dinner will blow them away.
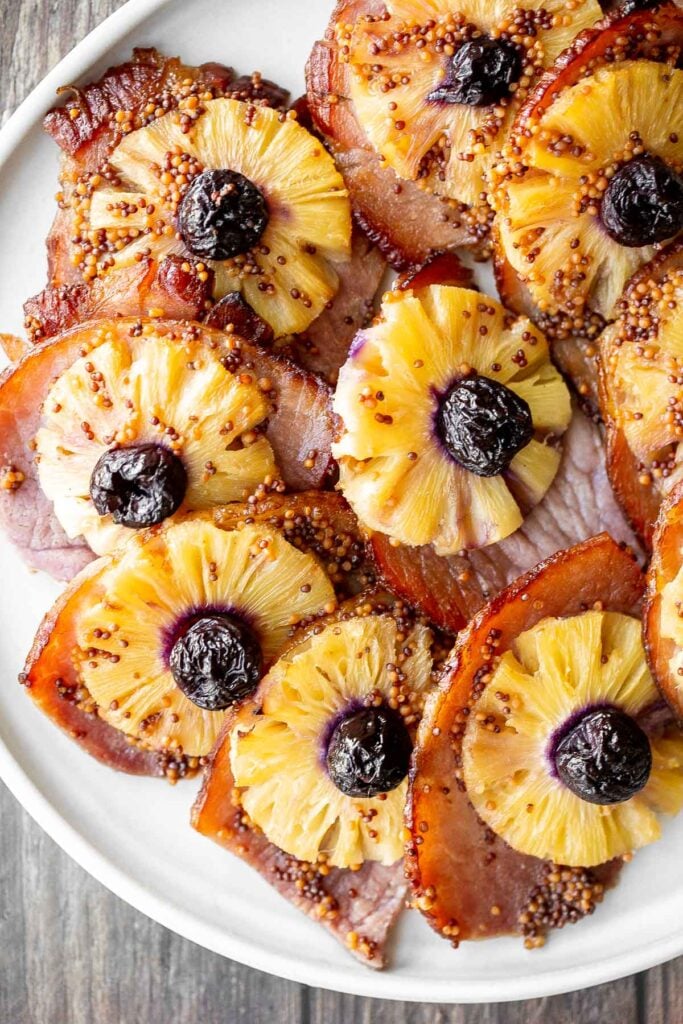
Ingredients
To make these delicious pineapple glazed ham slices, you will need a quarter sheet baking pan and the following ingredients:
- boneless cooked ham - Slice up your ham into ten ¼-thick inch slices.
- pineapple slices + pineapple juice - I used canned pineapple slices and reserved the juice directly in the can to use for the glaze.
- red tart cherries - This is optional but adds a nice flavour to the ham, plus it adds so much to the presentation, which is key if serving this for a holiday main.
- brown sugar - The brown sugar is what really caramelizes the glaze and gives it that beautiful golden brown colour.
- Dijon mustard - If you don't like Dijon (or just don't have any) you can substitute yellow mustard or honey mustard. You'll may want to add a little less pineapple juice to the glaze, however, to keep it thick. How much you add will depend on the thickness of your mustard.
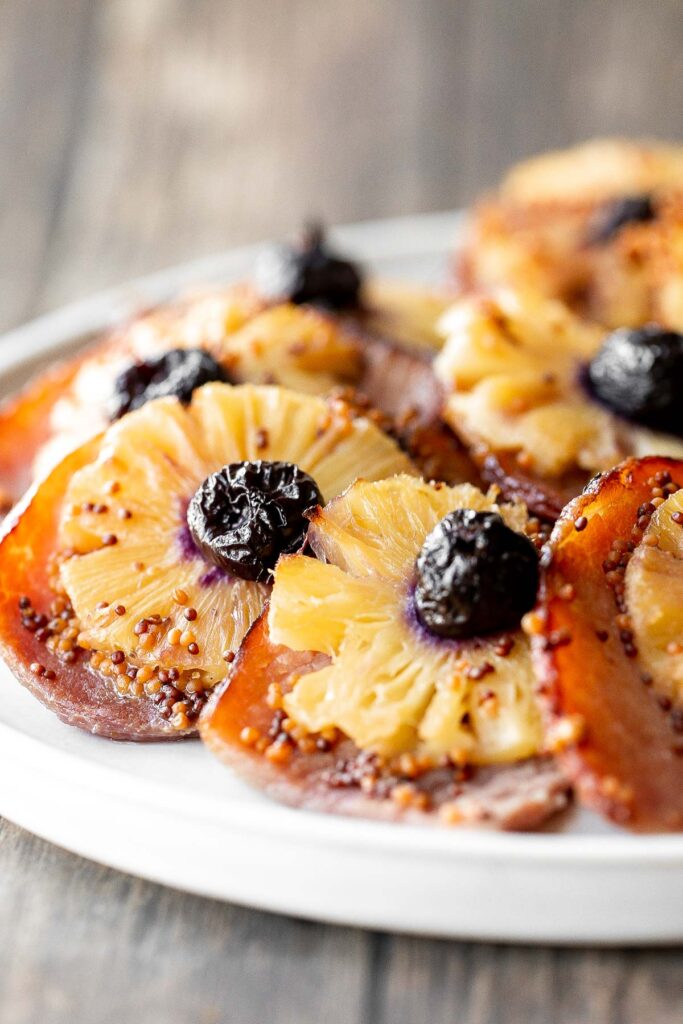
How to Make the Best Pineapple Glazed Ham Slices
- Arrange the ham and pineapple. In a quarter sheet baking pan, arrange ham in 2 rows, slightly overlapping. Top with pineapple slices with cherries in the middle. Reserve 1 tablespoon of pineapple juice from the can for the glaze.
- Bake. Bake the ham in a 400F preheated oven for 15 minutes.
- Make the glaze. In a small bowl, combine reserved pineapple juice, brown sugar and mustard, and stir well to combine.
- Add glaze and bake again. Remove baked ham from the oven and evenly brush it with the glaze. Return the ham to the oven and bake for another 20 minutes until the glaze caramelizes and turns golden brown.
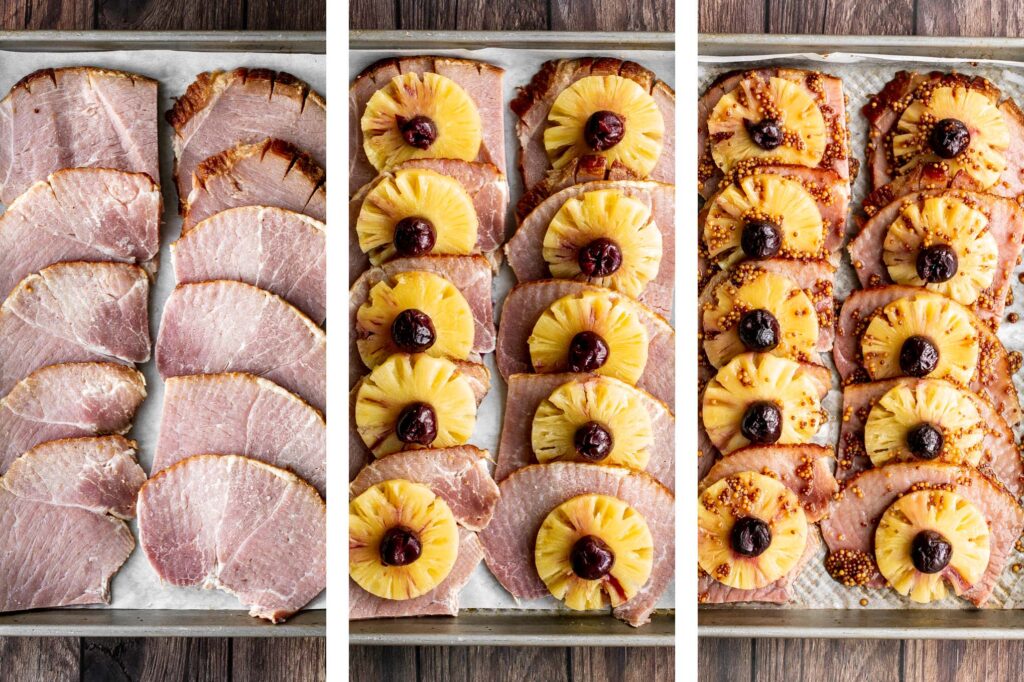
How to Serve Pineapple Glazed Ham Slices
Serve these pineapple glazed ham slices as a main on your holiday dinner table for Easter or Christmas, or on any night of the week when you are feeling a little fancy. Some of my favourite sides to pair with ham are:
- Creamy Mashed Potatoes
- Roasted Spring Vegetables
- Cheesy Garlic Dinner Rolls
- Crispy Leaf Potatoes
- Sautéed Garlic Mushrooms
- Sautéed Asparagus
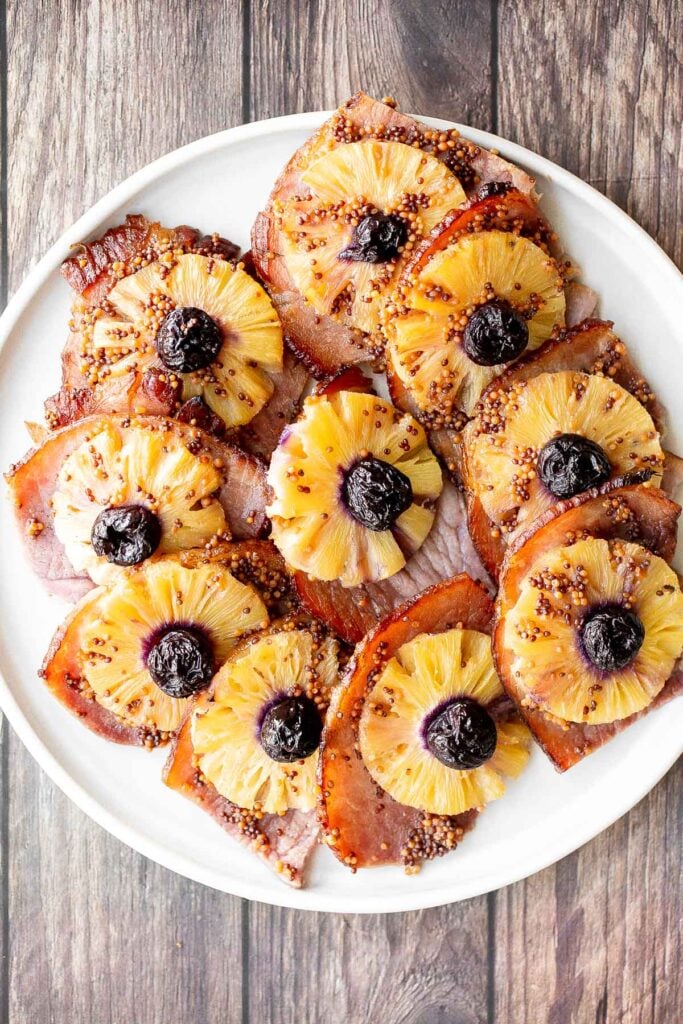
Freezing and Storing Instructions
- How to store: Pineapple glazed ham slices taste best fresh but will keep in the fridge for up to 5 days. Allow it to cool down to room temperature first, then place into an airtight container and store in the refrigerator.
- How to freeze: Allow the ham to cool to room temperature, then wrap the ham slices tightly in plastic wrap or aluminum foil. Place the wrapped slices inside a freezer bag. and freeze for up to 3 months. To serve, allow it to thaw overnight in the refrigerator before reheating.
- How to reheat: Reheat in a 300F preheated oven for 5-10 minutes until warmed through, or in the microwave in 20-second increments until warm. Time in the microwave will vary depending on how many slices you are reheating.
More Ham Recipes
- Holiday Glazed Baked Ham
- Creamy Ham and Potato Soup
- Ham and Potatoes au Gratin
- Chinese-Style Borscht Soup with Ham
Tried this recipe?
I'd love to hear what you think! Leave a comment and rating below to share your feedback. Your reviews help others discover this recipe and help me keep creating more free recipes for you. Snap a photo and tag me on social media @aheadofthyme too.
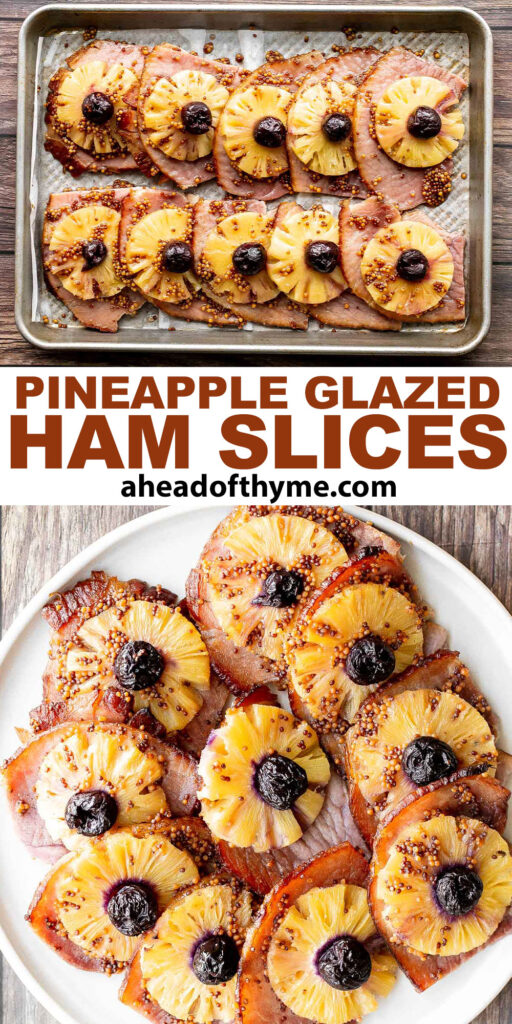
Spring Pesto Pasta with Asparagus
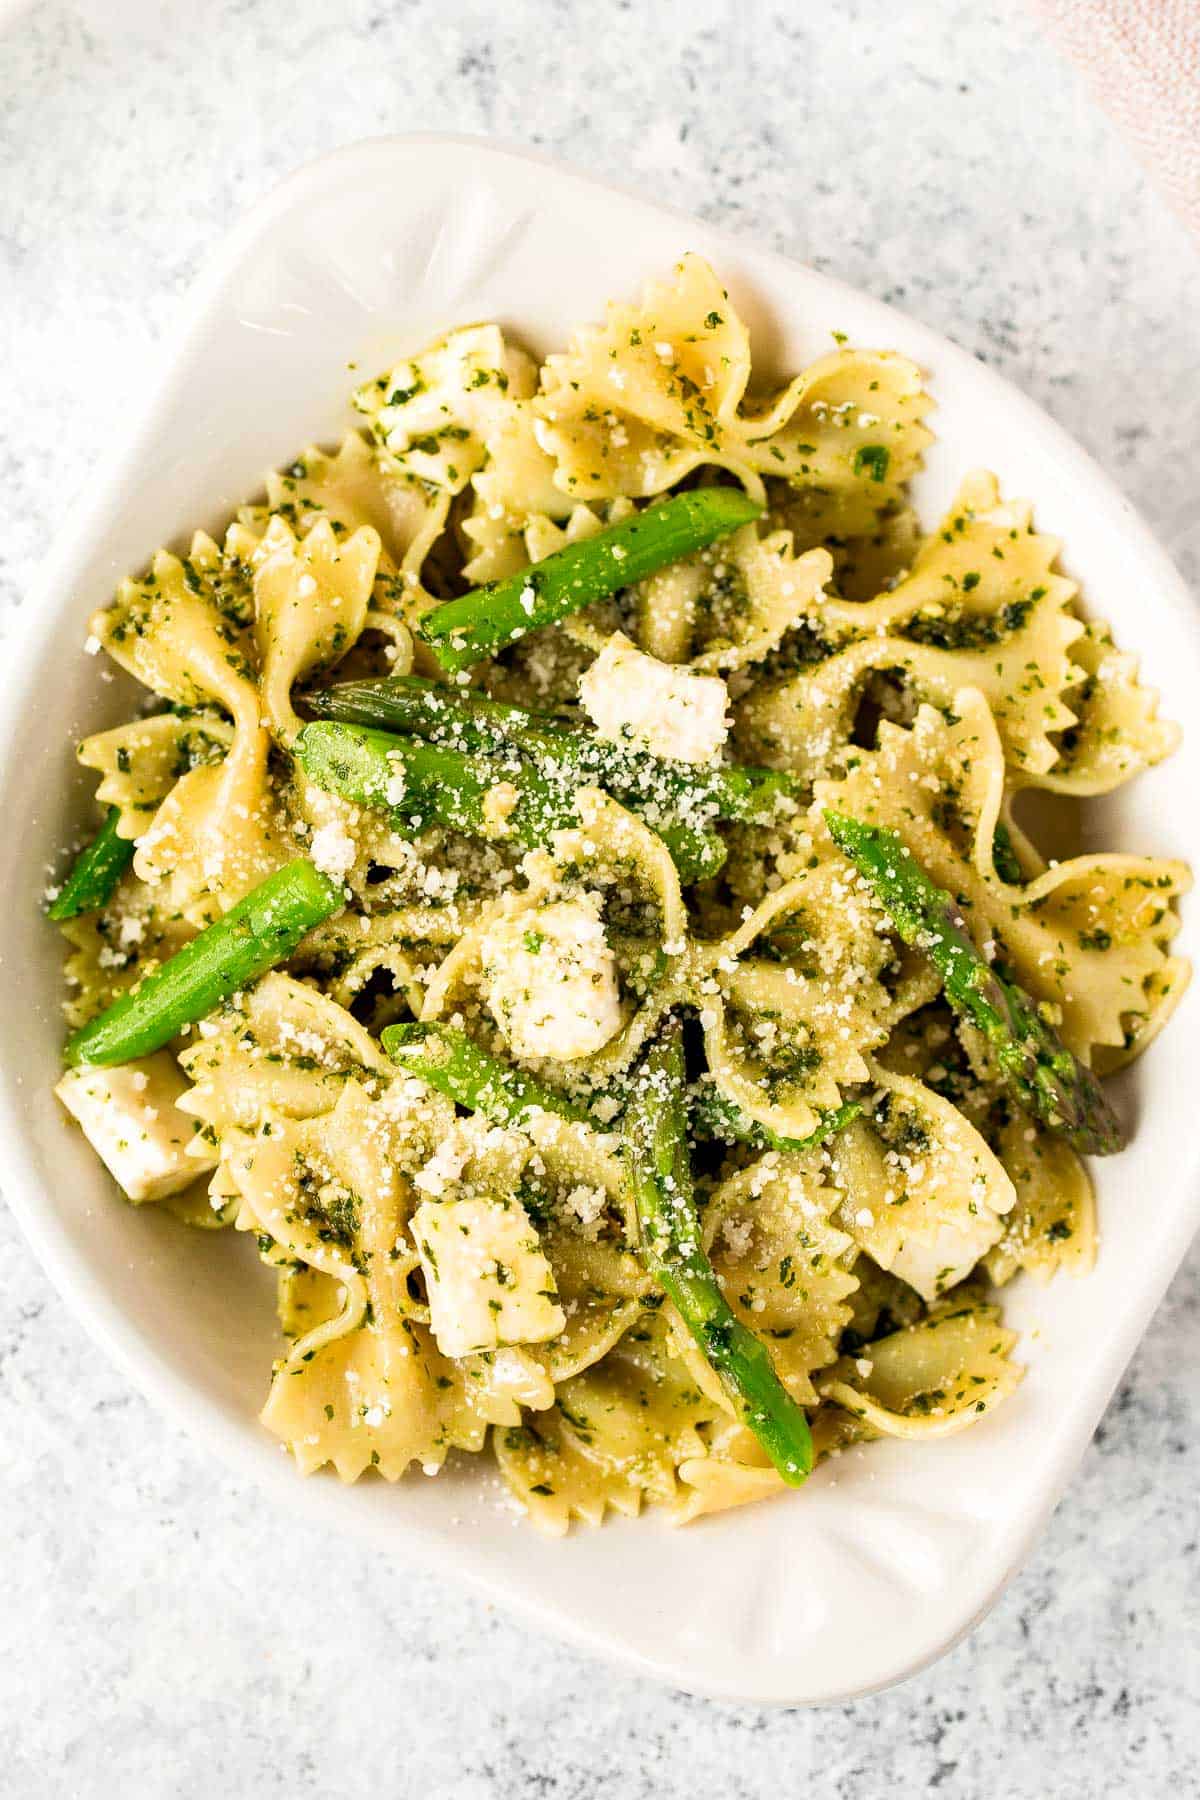
Spring pesto pasta with asparagus and chives is a simple and light spring pasta dish that is made with just a handful of ingredients in under 20 minutes (including prep!). Toss freshly cooked farfalle pasta with basil pesto, asparagus, chives, and cheese for the ultimate spring pasta recipe packed with incredible flavour. Honestly, this just tastes like spring exploded in my mouth. Serve it hot for an easy weeknight dinner, or serve it cold as a pasta salad for lunch.
With only a few short weeks until the official start of spring, I'm already seeing asparagus begin to pile up in my local markets. Which means this is the time of year when I overload on asparagus and make my favourite spring dishes. One bite of this spring pesto pasta with asparagus, and you too will be transported to warmer days.
And there's something about pairing pesto with pasta that makes an otherwise heavy dish feel light. Just like Pesto Penne Pasta or Avocado Basil Pesto Spaghetti, Spring Pesto Pasta with Asparagus is seriously the easiest and lightest pasta dinner that you can make.
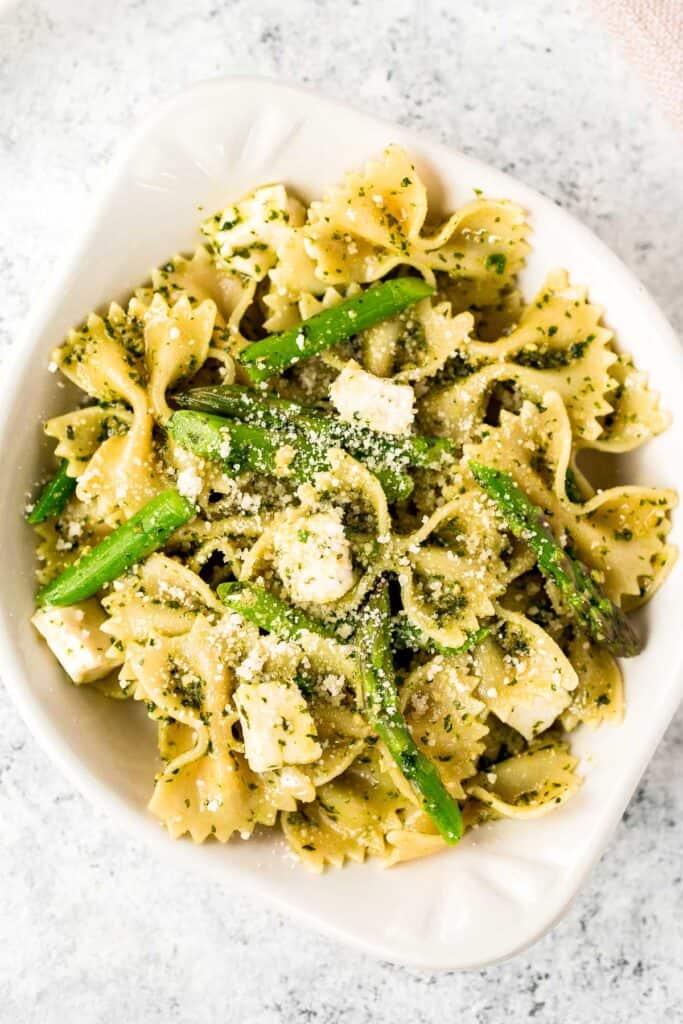
Ingredients
To make easy spring pesto pasta with asparagus, you need the following simple ingredients:
- pasta - You can use any type of pasta that you would like. I used farfalle pasta (also known as bow-tie pasta or butterfly pasta).
- asparagus - If you don't like asparagus, no worries! Just sub in fresh english peas or sautéed ramps if you can find them.
- basil pesto - I love making my own basil pesto at home in just 5 minutes, but if you have a brand you know and love, use that. Plus, it will cut the prep time down too. You could also make a pesto with highly coveted garlic scapes, which are only in season during the early spring.
- chives
- lemon zest
- mozzarella cheese - I added a little mozzarella cheese to help bind the dish together. If you throw it in while the pasta is still warm, it melts beautifully.
- Parmesan cheese
You will also need a large cooking pot and a large mixing bowl.
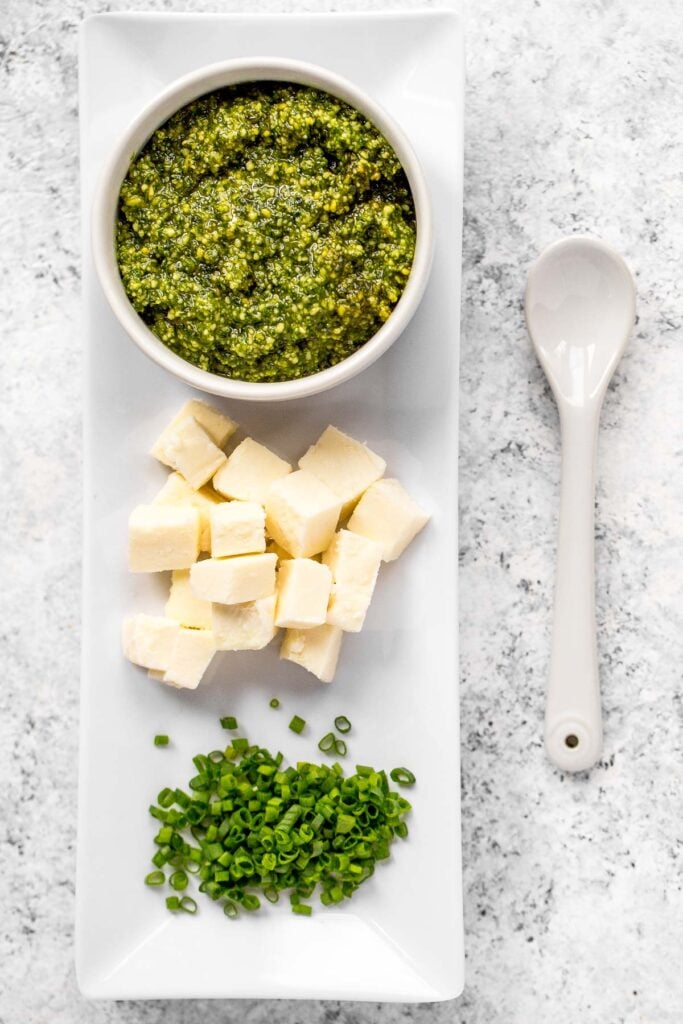
How to Make the Best Spring Pesto Pasta with Asparagus
- Cook the asparagus. Bring a large pot of salted water to a boil and add asparagus. Cook for 3 minutes, then remove with a slotted spoon and place in a bowl of ice water. Let cool, then drain.
- Boil the pasta. Bring the same pot of water back up to a boil. Add pasta and cook for 11 minutes, or until al dente. Then drain, reserving about ¼ cup of cooking water.
- Combine ingredients. In a large mixing bowl, combine pasta, asparagus, and basil pesto. Toss until pasta is evenly coated with pesto. If the sauce is too thick, begin pouring in some reserved pasta water (about 2 tablespoons at a time) until the sauce reaches desired consistency. Add chives, lemon zest, and mozzarella, and stir until just combined.
- Serve. Divide pasta into bowls, top with Parmesan cheese, and serve hot.
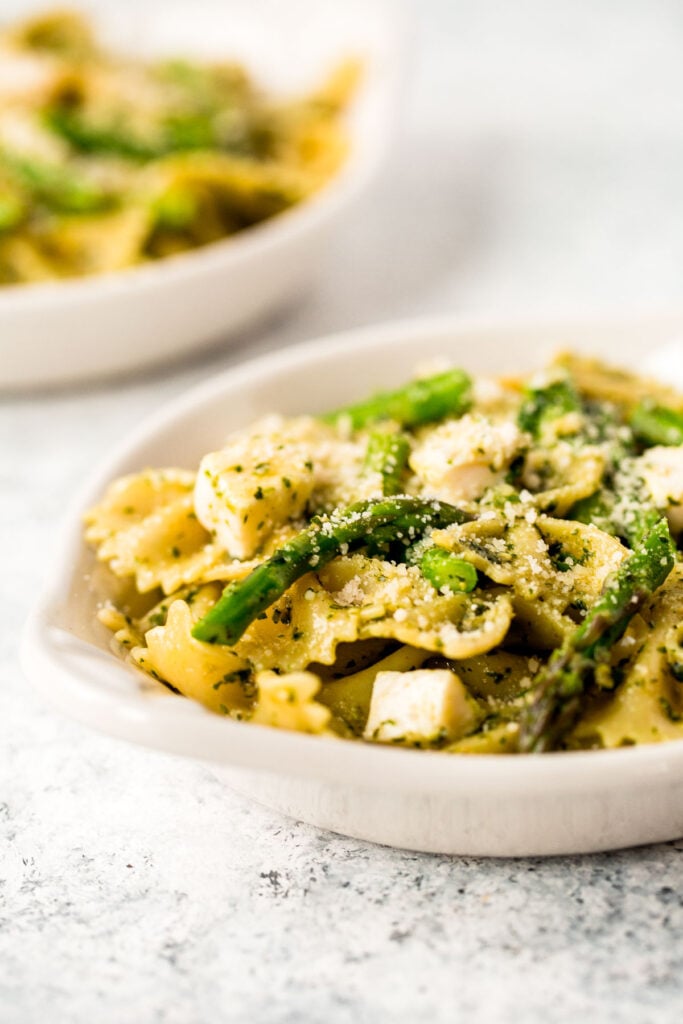
How to Serve Asparagus Pesto Pasta
Perhaps the best part of this asparagus pesto pasta is that it's just as good served warm in the winter or spring as it is served cold or at room temperature as a pasta salad in the summer. Either way, this may definitely become your new favourite vegetarian pasta.
Serve this asparagus pasta with a side of crusty bread such as Pull Apart Garlic Bread or Rosemary Garlic Focaccia Bread. You can also serve it alongside a bowl of soup such as Creamless Asparagus Soup, Tomato Potato Soup, Creamy Cauliflower and Garlic Soup, or Light Cream of Broccoli Soup.

Tips for Making Spring Pesto Pasta
- Toss in a mixing bowl. When mixing the pasta and pesto together, do not just mix in the pot. Use a mixing bowl instead as the heat from the pot will cause the basil in the pesto to turn black.
- How to customize. You can customize this spring pesto pasta by adding in protein such as cooked chicken or shrimp.
- How to store. Spring pesto pasta is best served fresh or cold as a delicious pasta salad. Store any leftovers an airtight container for up to 3 days in the refrigerator. Serve leftovers cold as a pasta salad, rather than reheating as heating will cause the basil to turn black.
More Pasta Recipes
- Farfalle Pasta with Creamy Mushroom Sauce
- Pasta Bake with Sausage
- Spaghetti Carbonara
- Stovetop Mac and Cheese with White Cheddar
- Mussels Pasta in Tomato Sauce
- Shrimp Fettuccine Alfredo Pasta Bake
- Creamy White Chicken and Spinach Lasagna
Tried this recipe?
I'd love to hear what you think! Leave a comment and rating below to share your feedback. Your reviews help others discover this recipe and help me keep creating more free recipes for you. Snap a photo and tag me on social media @aheadofthyme too.
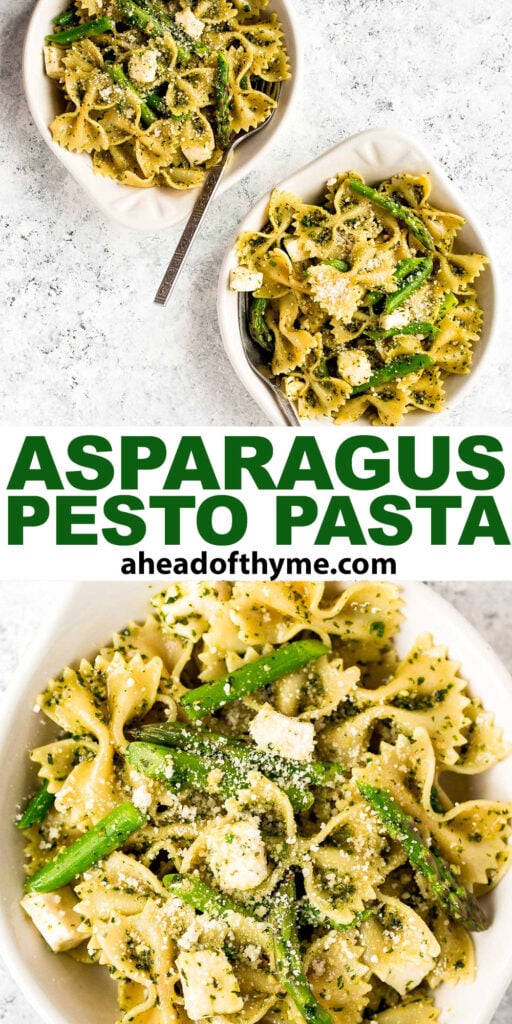
Roasted Spring Vegetables

Roasted spring vegetables are the side dish of the spring season. This easy sheet pan recipe is packed with all our favourite veggies of the season: carrots, asparagus, potatoes, radishes, and parsnips. It's an easy dish to prep and make. You literally chop up your vegetables, toss them together with seasoning, and bake. Plus, you can completely customize the recipe with any vegetables that you have on hand. It's a stress-free side to serve for dinner or alongside a holiday meal.
Why You Will Love these Roasted Spring Vegetables
- Simple ingredients with lots of flavour. This sheet pan side dish is made with a handful of vegetables and some simple seasoning that packs on some serious flavour.
- It's completely customizable. I used potatoes, carrots, asparagus, radishes, and parsnips. Don't have these vegetables on hand? Or want to add in something else like spring onions or snap pea? Go for it. This is completely customizable. Just make sure that your vegetables are all cut into similar pieces for even cooking.
- Sheet pan = minimal clean up. This is a sheet pan recipe so everything is baked in one pan. One pan = less dishes = less time to spend on clean up.

How to Make the Best Roasted Spring Vegetables
To make these easy roasted spring vegetables, you will need a half sheet baking pan and the following ingredients:
- spring vegetables - I used russet potatoes, carrots, asparagus, radishes, and parsnips. You can also add snap peas or spring onions, or any other vegetables that you have on hand.
- fresh garlic
- olive oil
- seasoning - Italian seasoning, soy sauce, balsamic vinegar, salt, and pepper.
Then, you will need to follow two basic steps:
- Combine ingredients. In a large mixing bowl (or directly in the sheet pan), add potatoes, carrots, asparagus, radishes, parsnips and garlic. Drizzle with olive oil and season with salt, pepper, Italian seasoning, soy sauce and vinegar. Toss to combine until well coated.
- Bake. Arrange the vegetable mixture in a single layer on a large half sheet baking pan. Bake at for 30 to 35 minutes until tender and golden brown. Gently shake the sheet pan halfway through baking to ensure even cooking.
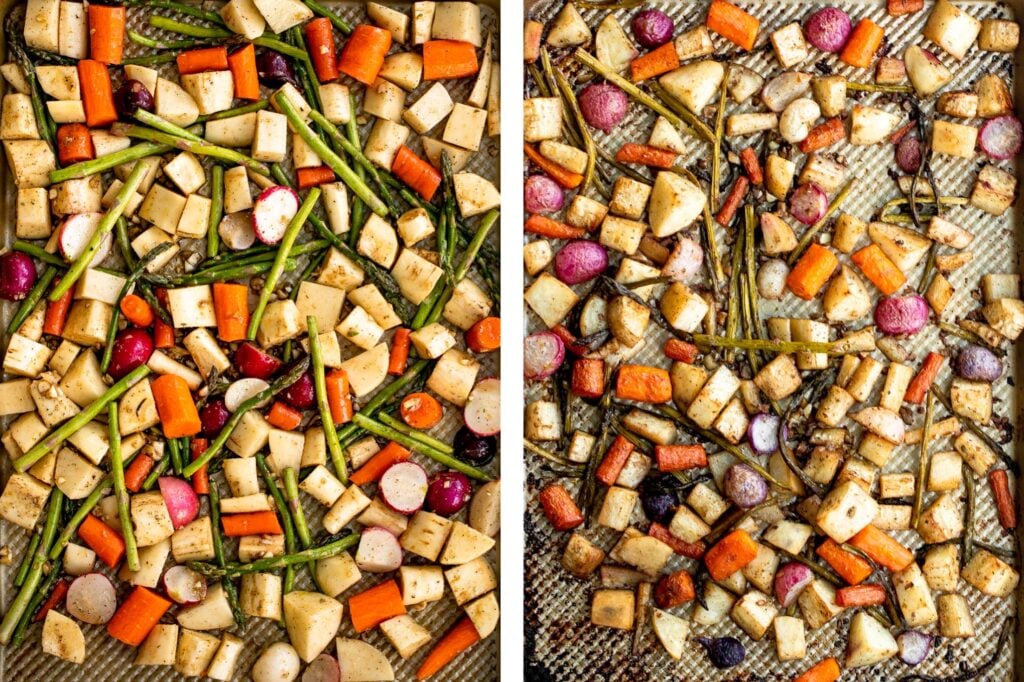
How to store: Store roasted spring vegetables in an airtight container for up to 4 days in the refrigerator. Reheat for a few minutes on the stove over medium heat, or in the oven at 300F for 5-10 minutes until warmed through.
How to Serve Roasted Spring Vegetables
Serve these roasted spring vegetables as a side dish with all your favourite spring meals, particularly for Easter dinner. Some of my favourites to pair this with are Whole Roast Chicken (or Roasted Spatchcock Chicken), Honey Garlic Glazed Salmon, Herb-Crusted Rack of Lamb, and Ribeye Steak.
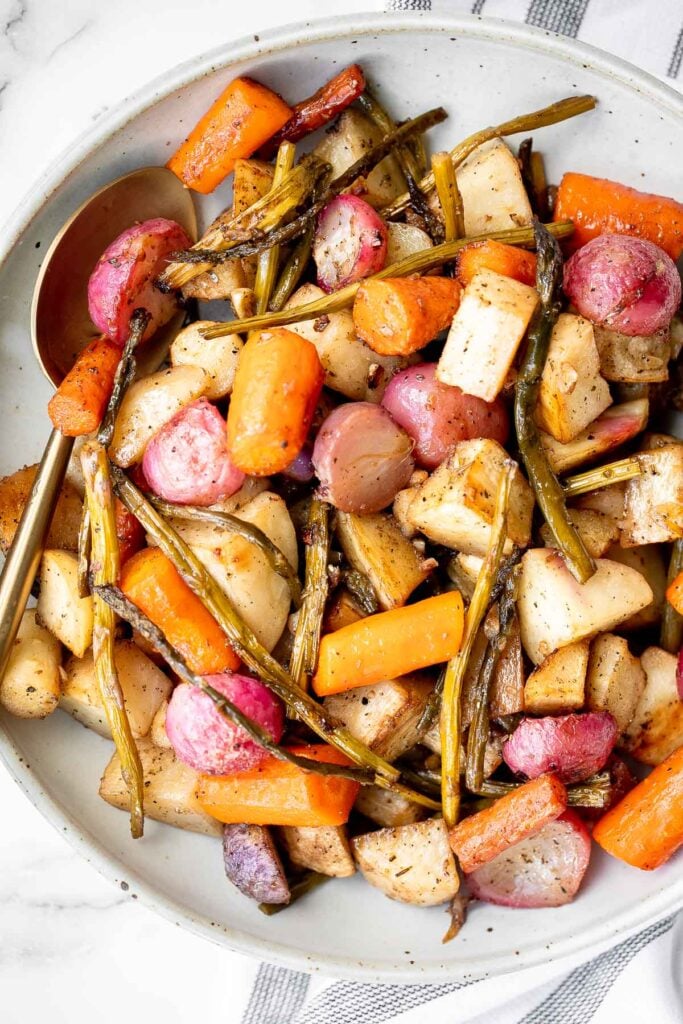
More Roasted Vegetable Side Dishes
- Roasted Garlic Parmesan Baby Potatoes
- Easy Roasted Cauliflower
- Easy Garlic Herb-Roasted Carrots
- Roasted Garlic Green Beans
- Greek Lemon Roasted Baby Potatoes
- Easy Roasted Brussels Sprouts
- Herb-Roasted Sweet Potatoes
Tried this recipe?
I'd love to hear what you think! Leave a comment and rating below to share your feedback. Your reviews help others discover this recipe and help me keep creating more free recipes for you. Snap a photo and tag me on social media @aheadofthyme too.
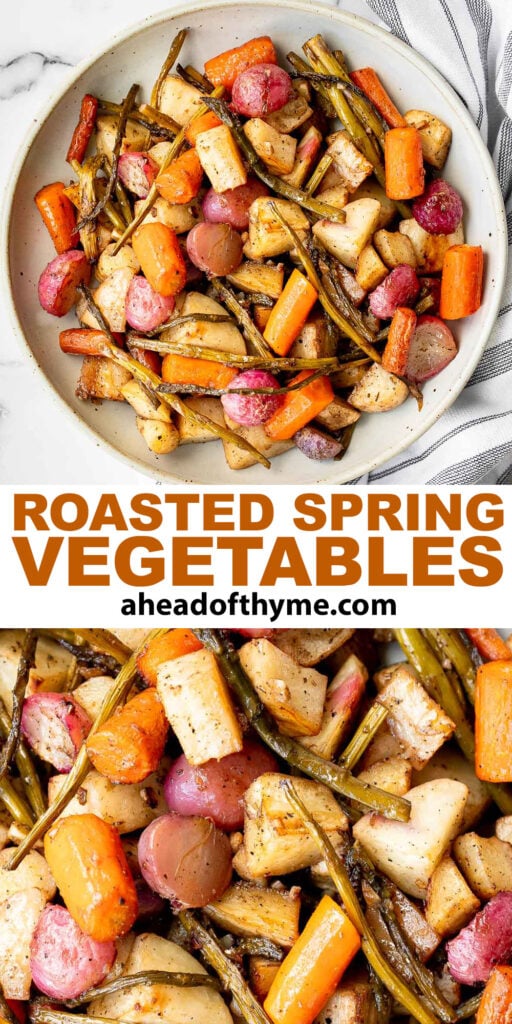
Carrot Cake Shortbread Cookies
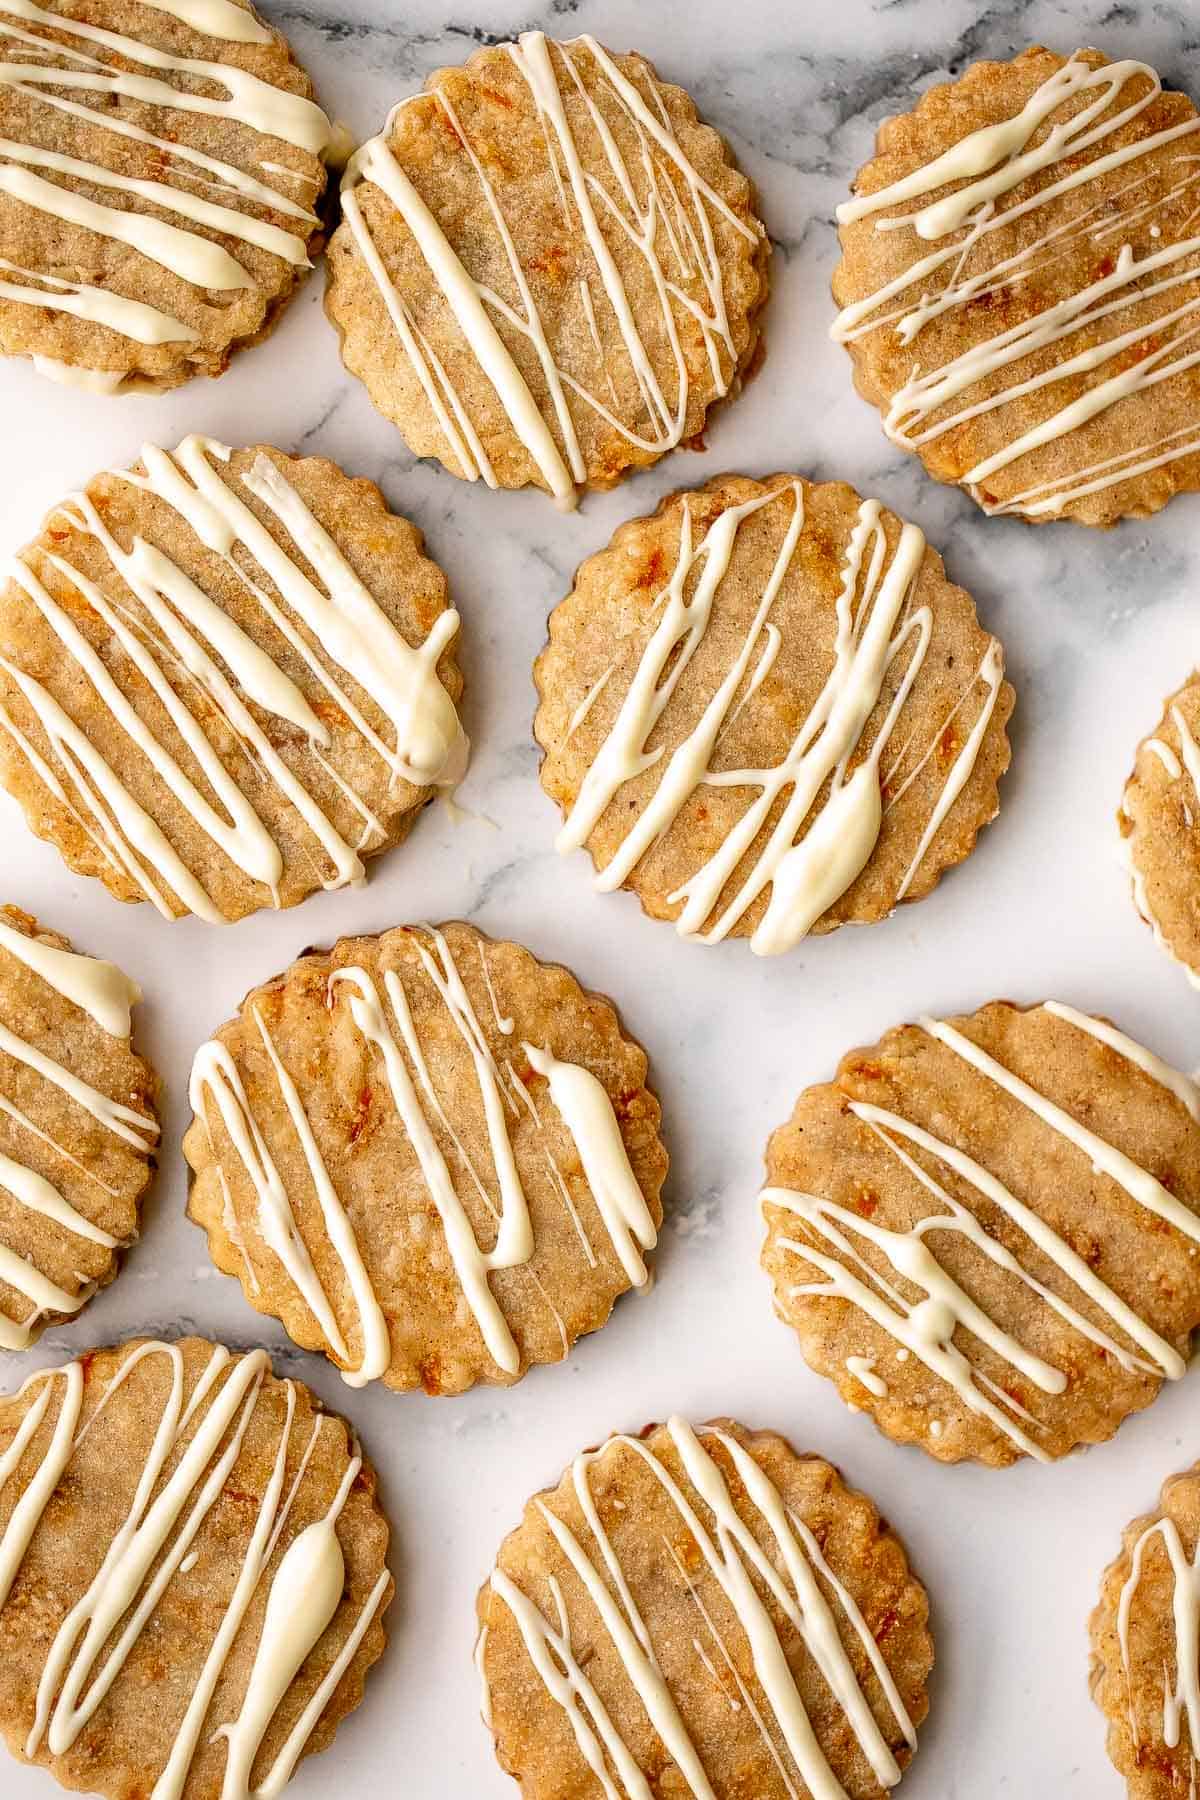
Carrot cake shortbread cookies are sweet and melt-in-your-mouth buttery, packed with carrots and walnuts, and spiced like your favourite carrot cake. Enjoy them as is, or with a drizzle of melted white chocolate for total indulgence. These cookies are easy to make in one bowl with a few simple ingredients and they are freezer-friendly (both baked and unbaked). You can enjoy these all year round, especially in the spring during Easter (aka. carrot cake season).
You will always find me baking up a storm during any holiday, because it's the perfect excuse to make some sweet treats to enjoy. Carrot cake shortbread cookies are the perfect option that is festive, delicious, and simple. It's perfect if you are looking for something tht is not decorated like an Easter egg or super colourful. Some other popular carrot-heavy Easter desserts to make this spring are: Carrot Cake with Cheesecake Topping, Spiced Carrot Muffins, and Carrot Cake Biscotti.
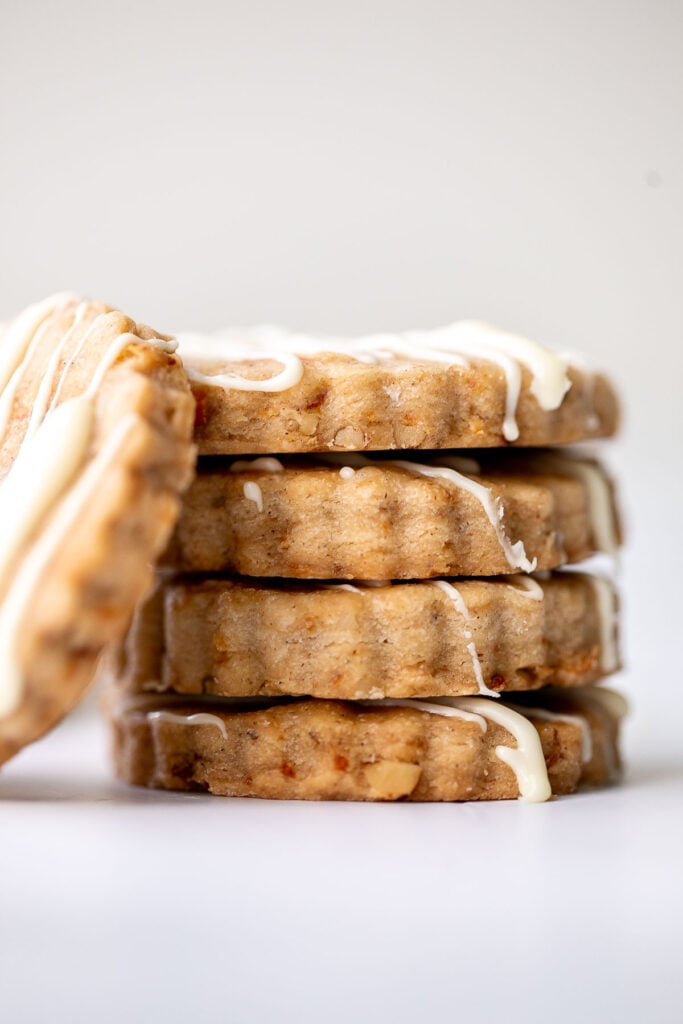
Ingredients and Equipment
To make these easy carrot cake shortbread cookies, you will need the following ingredients:
- butter
- confectioners' sugar
- vanilla extract
- all-purpose flour
- ground cinnamon
- walnuts
- carrots
- white chocolate - optional, to drizzle on top.
You will also need measuring cups and spoons, mixing bowl, plastic cling wrap, large half sheet baking pan, and wire cooling rack.
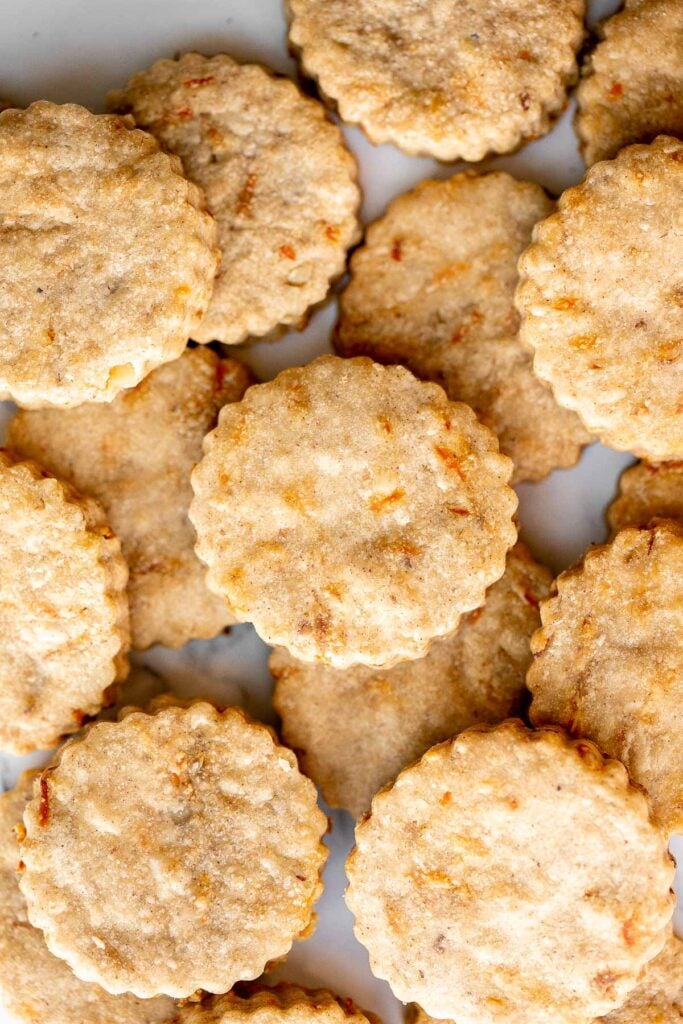
How to Make the Best Carrot Cake Shortbread Cookies
- Make the cookie dough. Cream the butter and sugar together using a stand mixer or hand mixer on medium speed until light and fluffy, about 2 minutes. Add vanilla and beat on medium until incorporated. Gradually add the flour and cinnamon and beat on low speed until combined. Add walnuts and carrots and beat until incorporated. Turn the mixer to high speed and beat for 2 minutes until dough becomes more breadcrumb like and less dry.
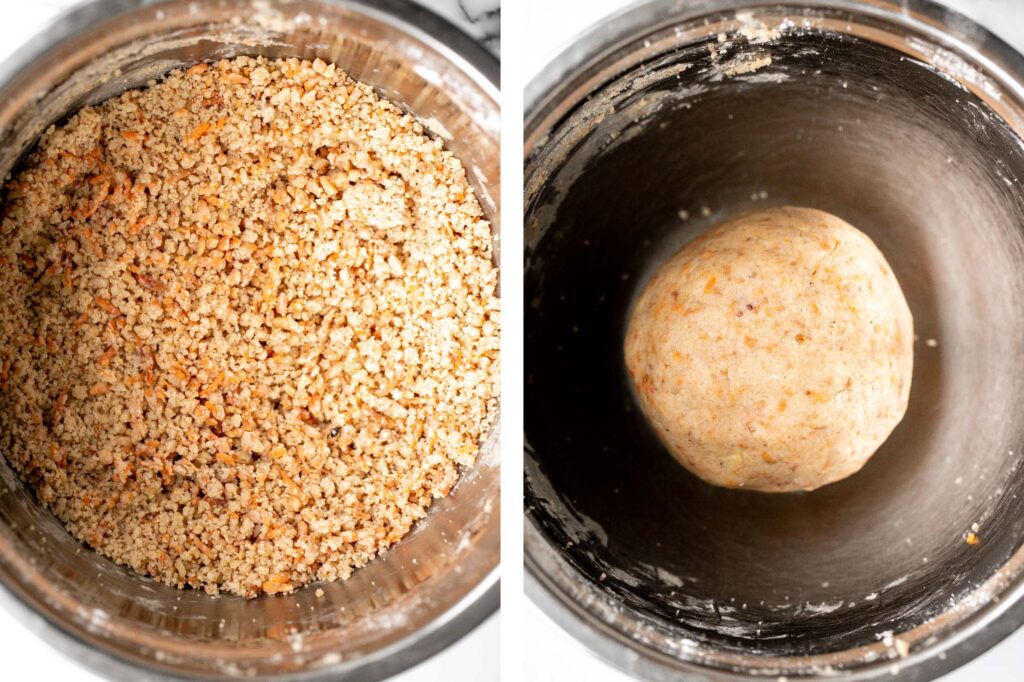
- Chill the dough. Using your hands, form the dough into a ball, then flatten into a disc. Wrap the disc tightly with plastic cling wrap and refrigerate for 2 hours, up to overnight. If you are using a dough that has been chilled overnight, you will need to let the dough sit at room temperature for 10-20 minutes to soften slightly and become more workable when ready to use.
- Cut out the cookies. Lightly dust a clean surface with flour, and place the dough on top. Use a rolling pin to roll out the dough until it is ¼-inch thick. Use a 2-inch fluted cookie cutter to cut out the cookies. Re-roll the scraps and repeat.
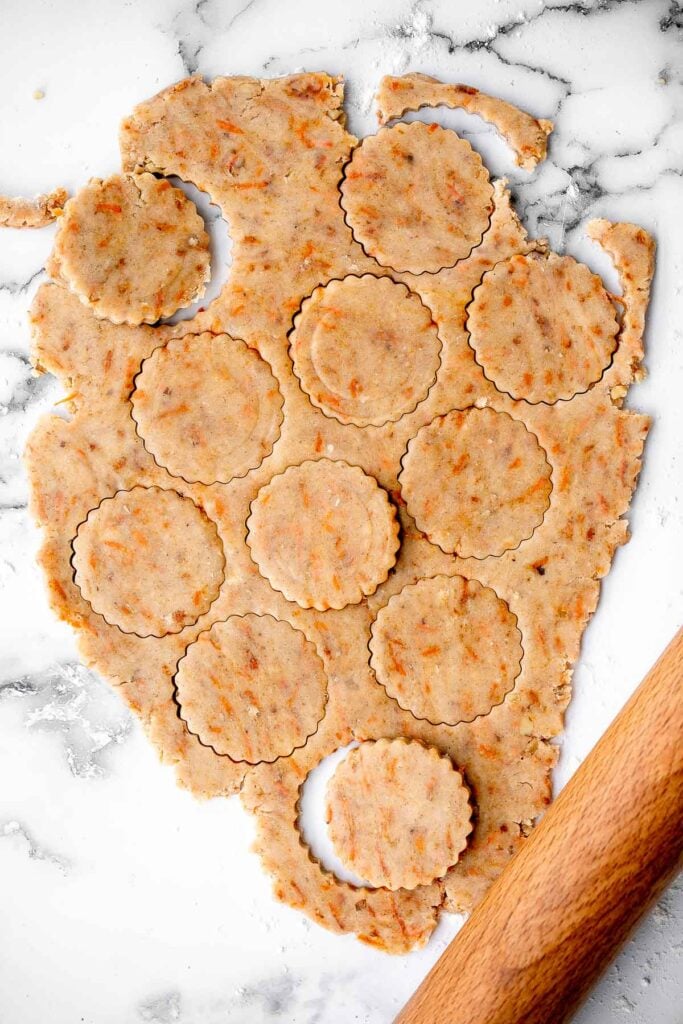
- Second chill. Place the cookies half-inch apart on two half sheet baking pans lined with parchment paper or a silicone baking mat, and chill in the refrigerator for another 10 minutes, while the oven is preheating.
- Bake. Bake the cookies in a 350 F preheated oven for 12-14 minutes, or until edges turn light brown (or 10-12 minutes for a softer cookie). These shortbread cookies take a little longer to bake than traditional cookies because of the extra moisture added from the carrots. Allow the cookies to cool on the baking sheet for 5 minutes, then transfer onto a wire cooling rack to cool completely to room temperature.
Enjoy the cookies as is, or drizzle white chocolate over them.

How to Make the White Chocolate Drizzle
I opted for a simple white chocolate drizzle over these instead of a cream cheese frosting, mainly for easier storage and handling. Plus, white chocolate just makes everything taste better. You can certainly use a cream cheese icing, but you will then no longer be able to store the cookies at room temperature for more than 2 hours, and will need to store the cookies in the refrigerator.
To make the white chocolate drizzle, you simple melt the white chocolate and drizzle it over top of the cooled cookies. Allow the chocolate to set before stacking and storing.
How to Melt White Chocolate
- On the stove: Bring 2 inches of water to a low simmer in a saucepan over medium-low heat. Then, turn the heat to low and place a medium heatproof bowl on the mouth of the pot. Make sure that there is a gap of a few inches in between the bottom of the bowl and the water (You can also place a bowl on a steamer attachment on top of your pot). Add the white chocolate and stir constantly as it melts. Stir until the chocolate is completely smooth and melted. This should take a few minutes.
- In the microwave: The second way to melt chocolate (and an easier way) is in the microwave. Place a small heatproof bowl of white chocolate into the microwave and microwave in 30 second intervals. Remove the bowl at each interval and stir well. Repeat until the chocolate has completely melted. Stir until completely smooth.
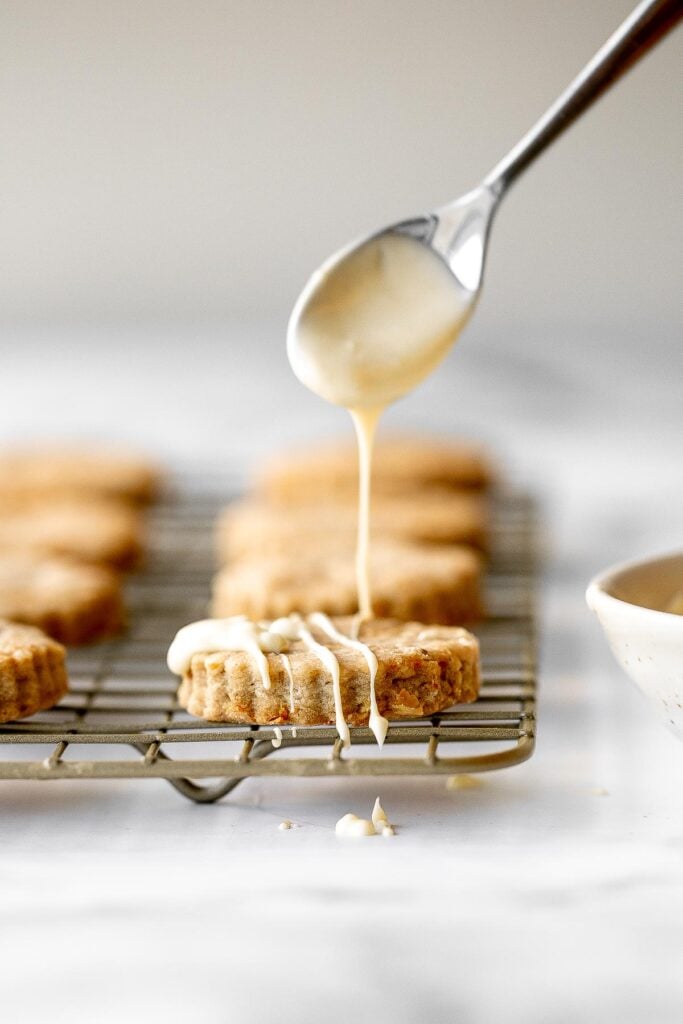
Tips for Making Shortbread Cookies
- Can I substitute the walnuts? You can substitute the walnuts with any other type of nuts. Try pecans, almonds, or hazelnuts.
- How long do these carrot cake cookies last? Once cooled, store the cookies in an airtight container at room temperature for up to 4 days, or in the refrigerator for up to one week.
- Can I freeze shortbread? Yes. Once cooled, arrange the cookies in a single layers in an airtight container, layered in between pieces of parchment paper. Store in the freezer for up to 3 months.
- How do I store shortbread cookie dough? Store shortbread cookie dough once shaped into a disc and wrapped tightly with cling wrap for up to 3 days in the refrigerator before baking. When ready to use, you will need to let the dough sit at room temperature for up to 20 minutes to allow it to soften slightly and become more workable.
- Can I freeze shortbread cookie dough? Absolutely! Once the dough has been shaped into a disc and wrapped tightly with cling wrap, transfer to an airtight container or freezer bag and store for up to 3 months. To use, allow the dough to thaw in the refrigerator overnight or on the kitchen counter for one hour before rolling and cutting out the cookies.
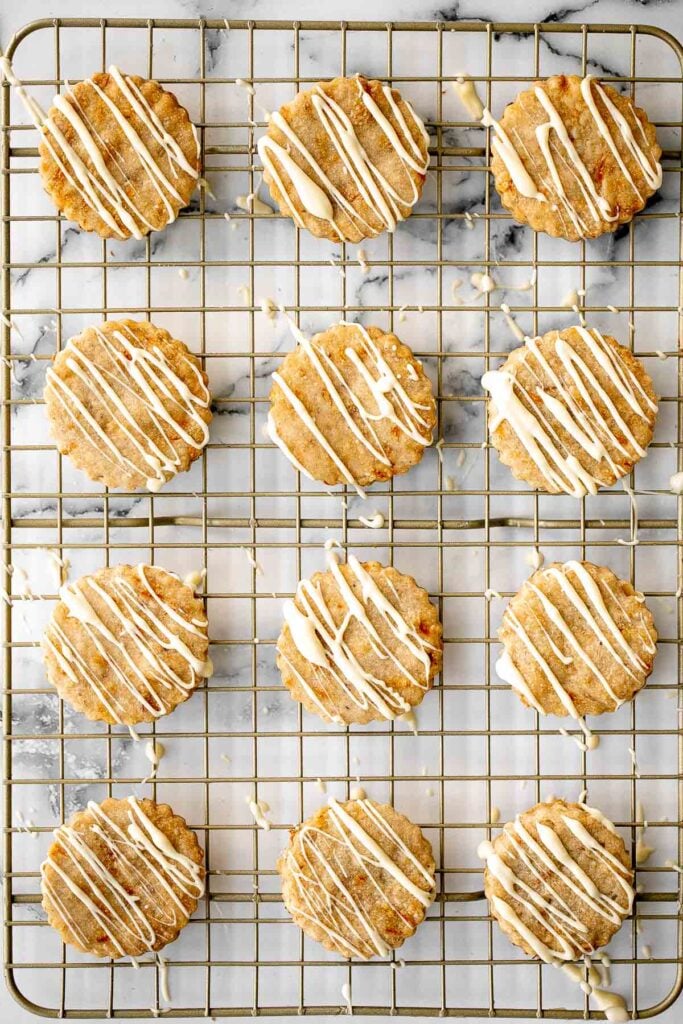
More Shortbread Cookies
- Slice and Bake Pecan Shortbread Cookies
- Cranberry Orange Shortbread Cookies
- Pecan Snowball Cookies
- Linzer Cookies
- Chocolate-Dipped Shortbread Heart Cookies
- Christmas Shortbread Cookie Bites
- Jam-Filled Thumbprint Cookies with Almond Glaze
Tried this recipe?
I'd love to hear what you think! Leave a comment and rating below to share your feedback. Your reviews help others discover this recipe and help me keep creating more free recipes for you. Snap a photo and tag me on social media @aheadofthyme too.
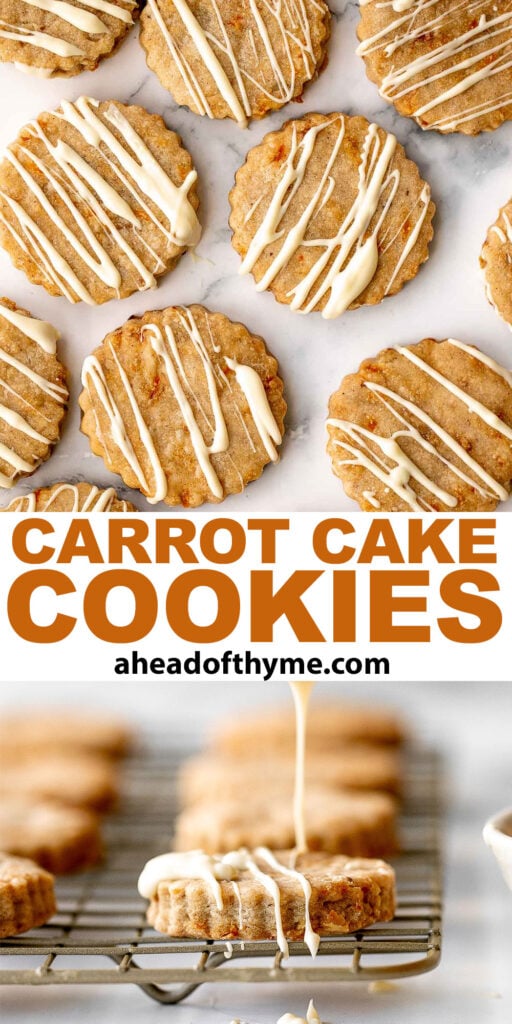
Classic Meatloaf

With a sweet yet simple glaze, classic meatloaf is a flavourful and filling comfort food. This simple dinner will leave you feeling satisfied from start to finish. Milk, eggs, and breadcrumbs add a moistness that will leave every member of the family coming back for more. With barely any prep work, classic meatloaf is the perfect weeknight meal-and everyone will agree.
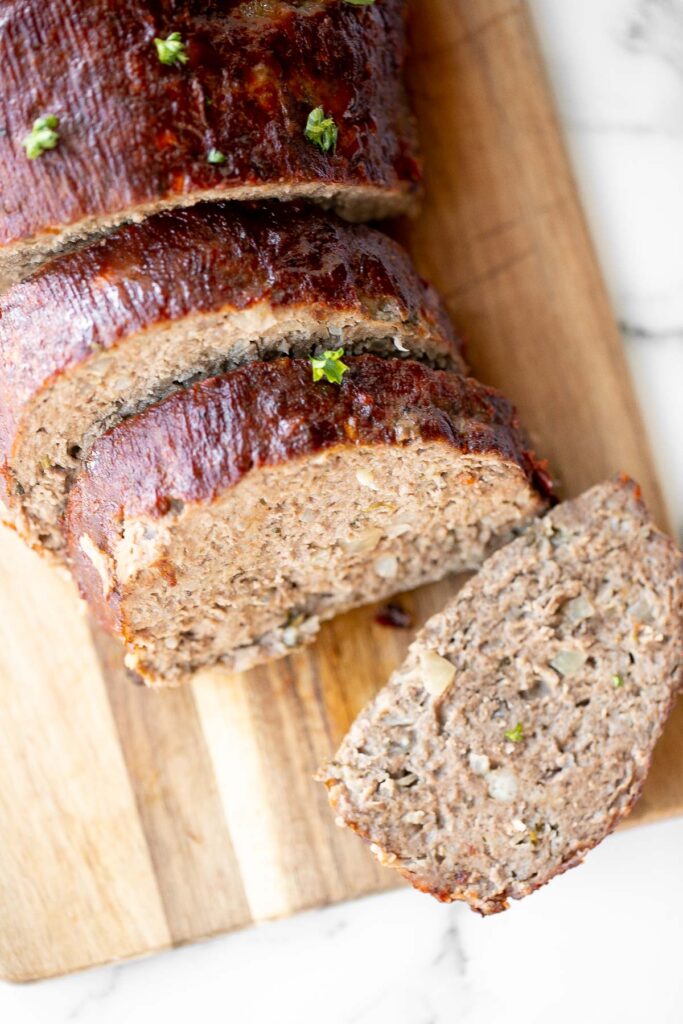
Why You'll Love This Classic Meatloaf Recipe
- Say goodbye to dry meatloaf. This classic meatloaf recipe is more than just tasty. With the perfect texture and consistency, your loaf will come out moist and delicious every time. When you use this recipe, you won't need glaze or gravy to come to the rescue.
- Simple ingredients with complex flavour. Made with basic ingredients and spices that you can find in almost any home, this classic meatloaf recipe is easy to prepare for. Pick up an onion and some ground beef, and you should be good to go!
- It's customizable. Not a fan of whole onions? Want to add a dash of sweet or a pinch of spicy? No problem! You can adjust the flavor to make your own special classic meatloaf without sacrificing texture-just be sure to use enough binder!

Ingredients
To make this delicious classic meatloaf, you will need the following ingredients:
- ground beef - I would recommend using lean ground beef in this recipe. Fattier meats produce more oil and can result in a greasy loaf. 90% lean ground beef will give you the best results. You can also substitute the beef with an equal amount of ground turkey. Just be sure to cook it to an internal temperature of 165 degrees F, as read on a meat thermometer.
- breadcrumbs
- milk
- eggs
- onion
- garlic
- seasonings - fresh parsley, Italian seasoning, Worcestershire sauce, ketchup, salt, and pepper.
- glaze - made with ketchup and BBQ sauce.
- fresh parsley - optional, for serving.
You will also need measuring cups and spoons, large mixing bowl, 1 lb. loaf pan, and quarter sheet baking pan (or 9x13-inch casserole pan).

How to Make the Best Classic Meatloaf
- Combine ingredients. In a large mixing bowl, combine beef, bread crumbs, milk, eggs, Italian seasoning, onion, garlic, parsley, Worcestershire sauce, ketchup, salt and pepper. Mix well until the mixture forms into a uniform consistency.
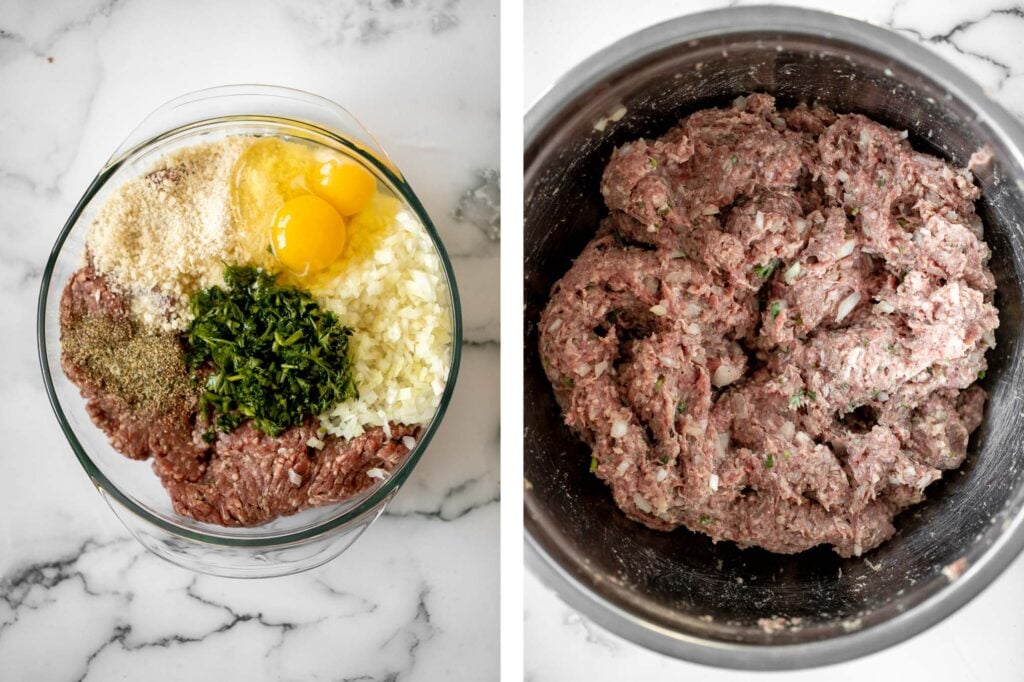
- Shape the meatloaf. Transfer the beef mixture into a lightly oiled 9x5-inch loaf pan (1 lb. loaf pan), and invert it upside down onto a quarter sheet baking pan or 9x13-inch casserole pan to transfer the meatloaf over.
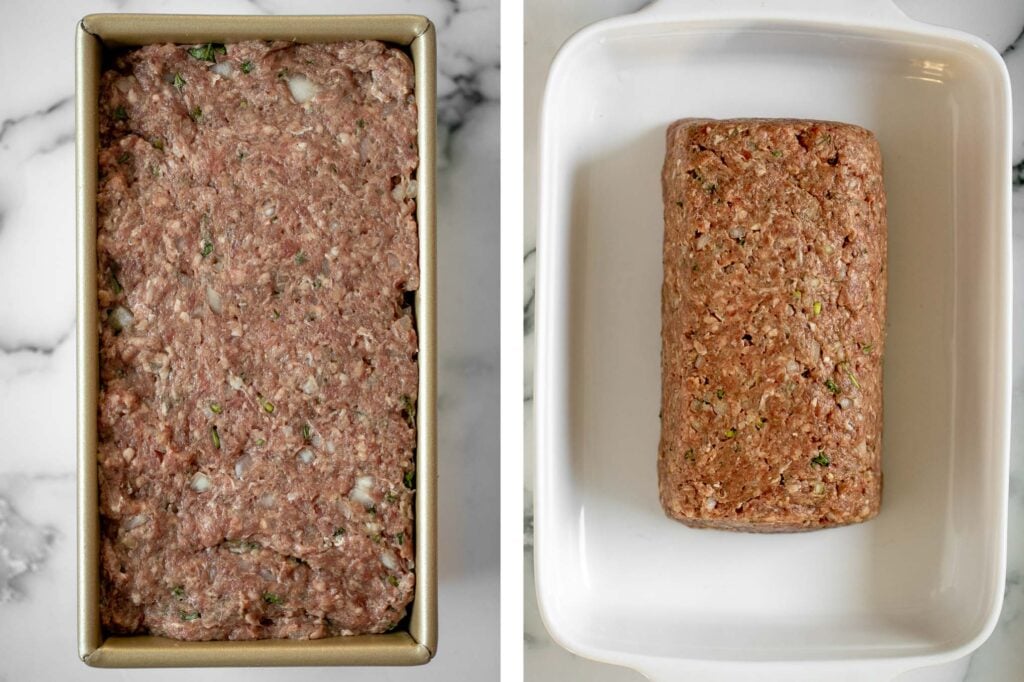
- Bake. Bake in a 350 F preheated oven for 1 hour until the internal temperature reaches 160F, as read on a meat thermometer.
- Add glaze and bake longer. In a small bowl, whisk to combine ketchup and BBQ sauce. Spread the sauce evenly over the meatloaf. Then, return the meatloaf back into oven and bake for additional 10 to 15 minutes to create a beautiful caramelized glaze.
- Serve. Garnish with parsley and serve immediately with a side of mashed potatoes or roasted vegetables. Drizzle any extra pan juices on top for extra flavour.
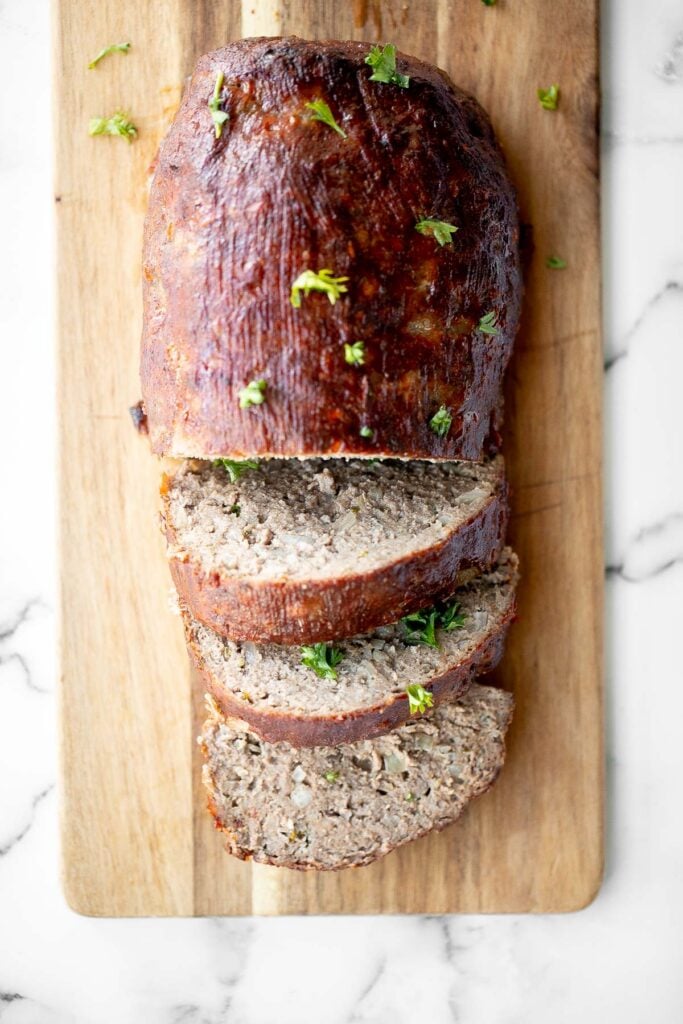
Tips for Making the Best Meatloaf
- Can I make gluten-free meatloaf? Yes, making a gluten-free meatloaf is easy! Instead of breadcrumbs, use crushed up Rice Chex or Corn Chex.
- Can I make dairy-free meatloaf? Yes, you can easily substitute the milk for your favourite unsweetened and unflauvored non-dairy milk.
- How to store: Store leftover meatloaf in an airtight container in the refrigerator for up to 3-4 days.
- How to freeze: If you want to freeze your meatloaf, you should freeze it before cooking instead of after. Pack it into your pan, cover it tightly with plastic wrap, and freeze for up to 3 months. Thaw in the refrigerator before cooking.
- How to make meatballs: Love this recipe? You can turn the beef mixture into meatballs instead of a meatloaf! Just roll the beef mixture into 1.5-inch thick meatballs, and then cook. You can cook the meatballs in one of 2 ways:
- In the oven: Preheat the oven to 400 F. Place meatballs on a lined half sheet baking pan and cook for 15 minutes until fully cooked, once internal temperature reaches 160F).
- On the stovetop: In a large skillet, heat some butter or oil over medium-high heat until sizzling, about 2 minutes. Add meatballs and cook until browned on all sides and fully cooked, about 7-8 minutes. Make sure to stir gently to prevent the meatballs from disintegrating.
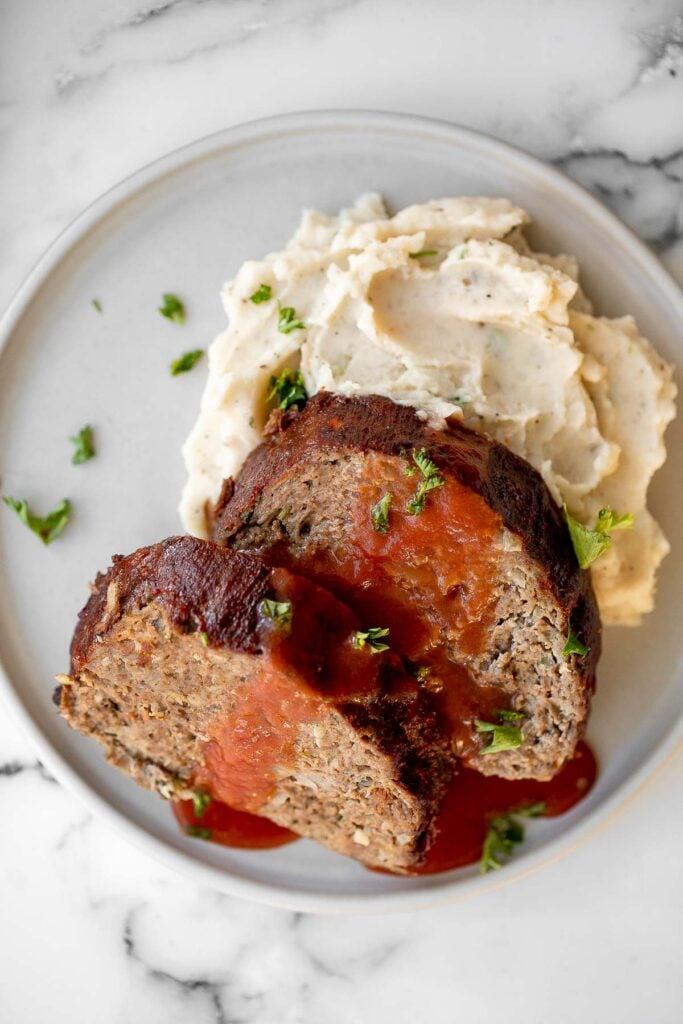
More Ground Beef Recipes
- Ground Beef Meat Pie
- Swedish Meatballs
- Spaghetti Bolognese
- Slow Cooker Beef Chili
- Sticky Honey Garlic Meatballs
- Easy Meat Lasagna
- Beef Cabbage Barley Soup
Tried this recipe?
I'd love to hear what you think! Leave a comment and rating below to share your feedback. Your reviews help others discover this recipe and help me keep creating more free recipes for you. Snap a photo and tag me on social media @aheadofthyme too.
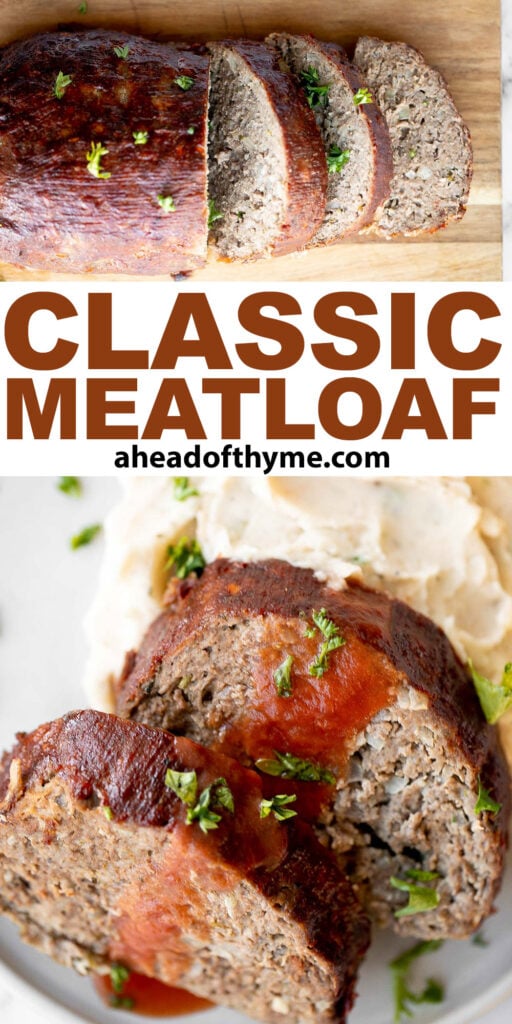
Crispy Leaf Potatoes

Crispy leaf potatoes are a delicious potato side dish made with layers of well seasoned, buttery, sliced potatoes. The tops of these paper-thin potato slices crisp up like potato chops when baked in the oven. They are the perfect side to serve for a holiday meal or on any night of the week when you need an extra comforting and delicious side dish. Plus, they are easy to make with just a few basic steps and a few simple ingredients.
Just like Hasselback Potatoes, these potato slices are smothered in all the best things: butter, garlic and herbs. The slices just soak up all the flavour and crisp up to perfection. Some other easy roasted potato side dishes that pack on the flavour include Roasted Garlic Parmesan Baby Potatoes and Greek Lemon Roasted Baby Potatoes.
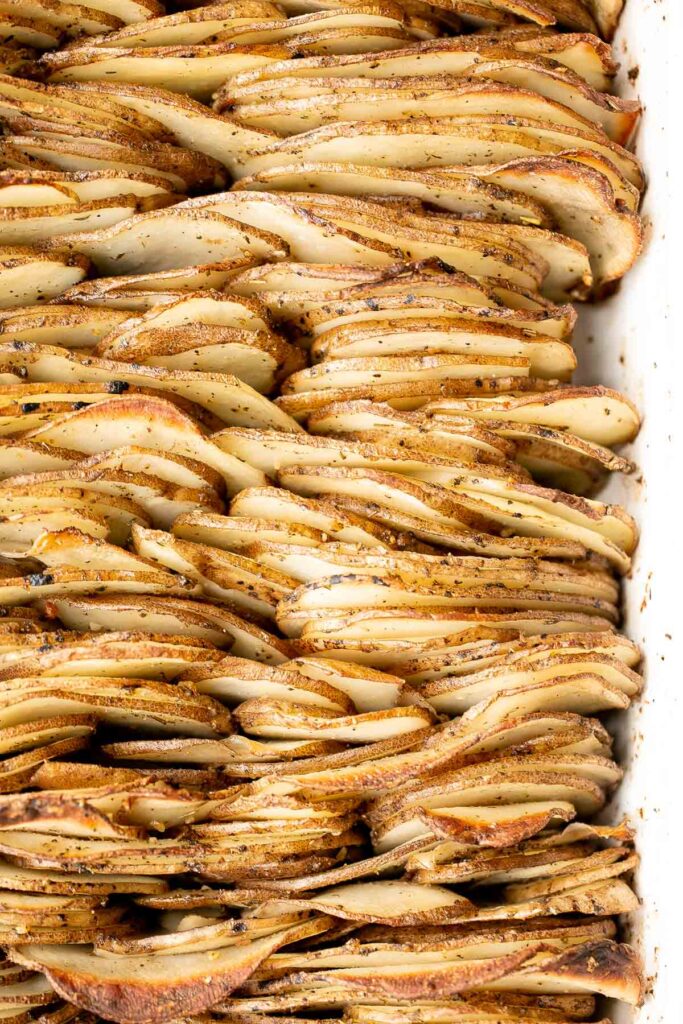
Ingredients
To make baked crispy leaf potatoes, you will need the following ingredients:
- russet potatoes - you can also use Yukon gold potatoes, which is also very delicious in this recipe. I choose to keep the skin on my potatoes to cut down the prep time (and I love the skins), but this is completely optional. To prepare the potatoes, you will also need to slice them up into very thin slices. The easiest way to do this is to use a mandoline slicer and cut resistant gloves.
- olive oil
- unsalted butter
- Italian seasoning - you can substitute this with 1.5 tablespoons of fresh herbs. Some fresh herbs that you can use are thyme, rosemary, and oregano.
- garlic powder - you can substitute this with 1-2 minced cloves of garlic.
- salt and pepper
- for serving - you can serve this as is or with chopped parsely and grated Parmesan (completely optional).
You will also need a 9x13-inch casserole pan. I also recommend a mandoline slicer and cut resistant gloves to help easily slice the potatoes.
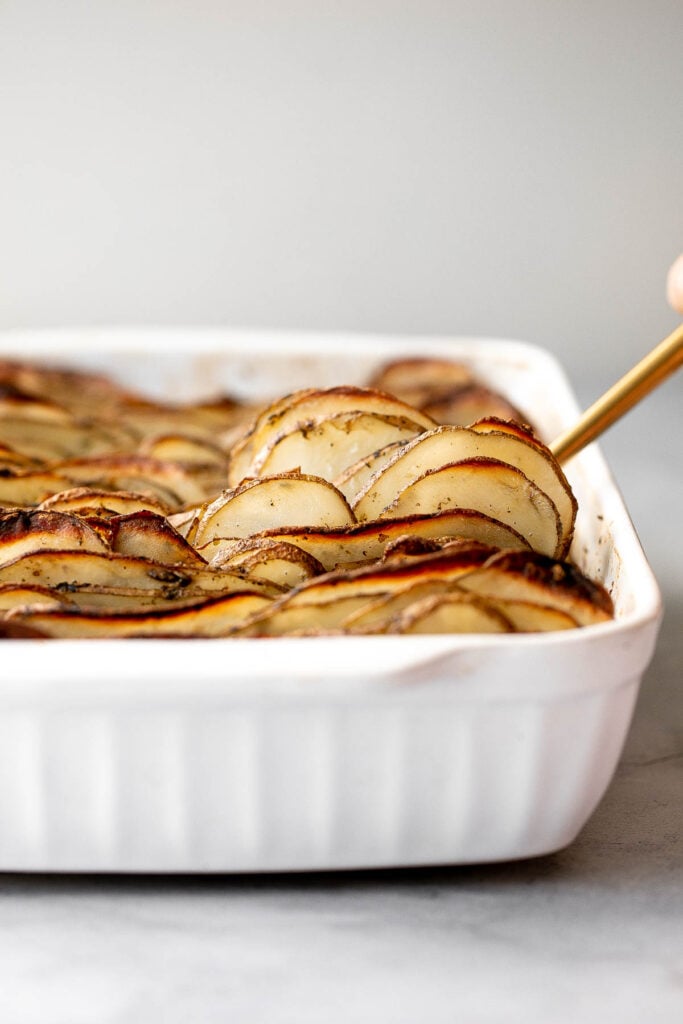
How to Make the Best Crispy Leaf Potatoes
- Slice the potatoes. Using a mandoline slicer, thinly slice the potatoes (peeled or unpeeled) and pat them dry with a paper towel.
- Season the potatoes. Transfer the spiced potatoes into a large mixing bowl and add in 1 tablespoon olive oil, melted butter, Italian seasoning, garlic powder, salt and pepper. Toss to coat evenly.
- Assemble. Arrange the potatoes upright in a 9x13-inch casserole pan and brush the top with the remaining 1 tablespoon olive oil. This helps the top get even more crispy.
- Bake. Bake in a 400 F preheated oven for 1 hour and 20 minutes until golden brown. Check occasionally to make sure the top doesn't brown too much.
- Serve. Top with parsley and Parmesan cheese (optional) and serve immediately.
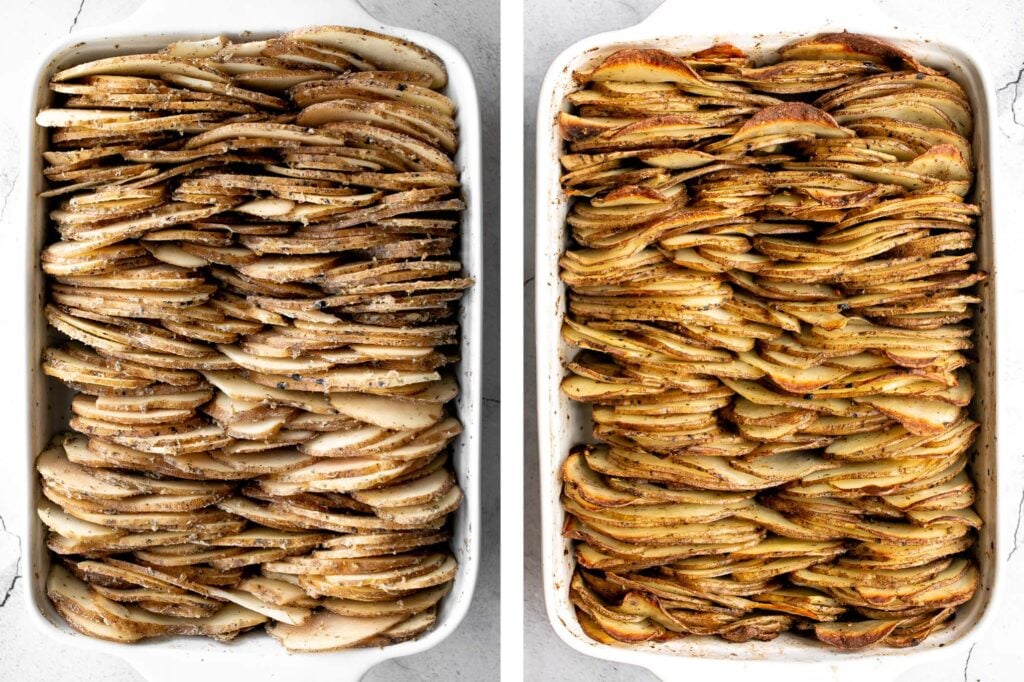
How to Serve Crispy Leaf Potatoes
You can serve crispy leaf potatoes alongside any main course meal. Some of my favourites include: Whole Roast Chicken, Ribeye Steak, Dijon Lamb Chops, Honey Garlic Salmon, and Mussels in Tomato Sauce.
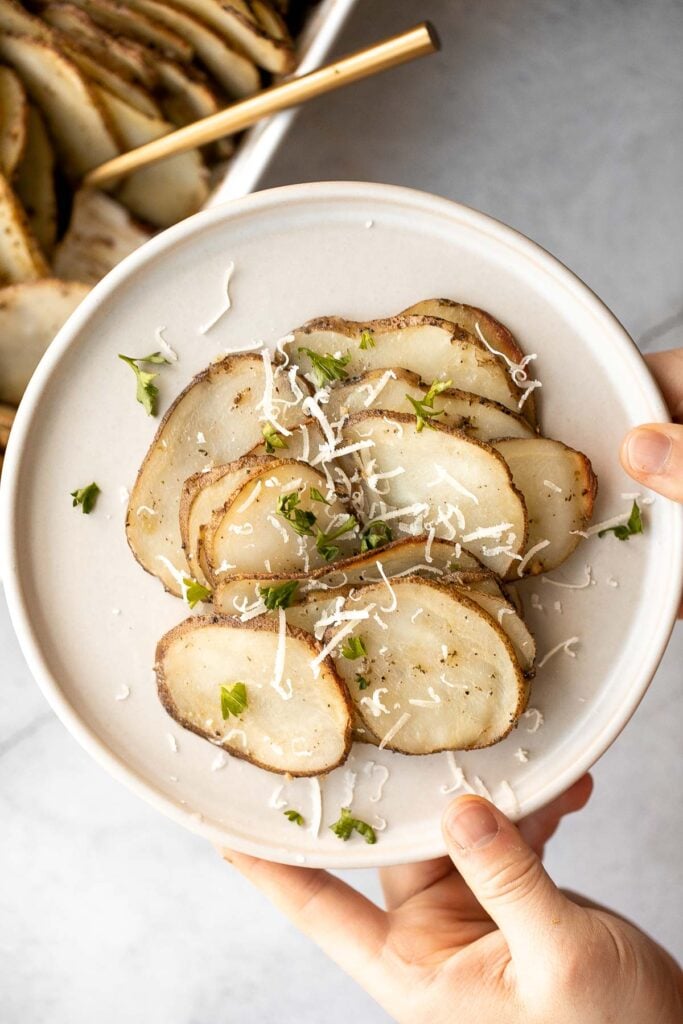
Frequently Asked Questions and Tips
- Can I use duck fat? Absolutely. Crispy leaf potatoes are commonly cooked in duck fat instead of butter. You can easily substitute this for another option with a greater depth of flavour.
- Can I make this ahead of time? I would not recommend making this ahead of time because the potatoes will start to go brown from oxidization. If you do want to slice the potatoes in advance, you can store them in a bowl filled with water to prevent them from oxidizing. Then, drain and pat dry the potatoes completely before seasoning and assembling.
- How long do crispy leaf potatoes last? You can store leftover crispy leaf potatoes in an airtight container in the refrigerator for up to 4 days. To reheat, heat in a 300 F preheated oven for 10 minutes or air fryer for about 5 minutes, until warmed through. You can also heat in the microwave, but the texture will not be as crispy.
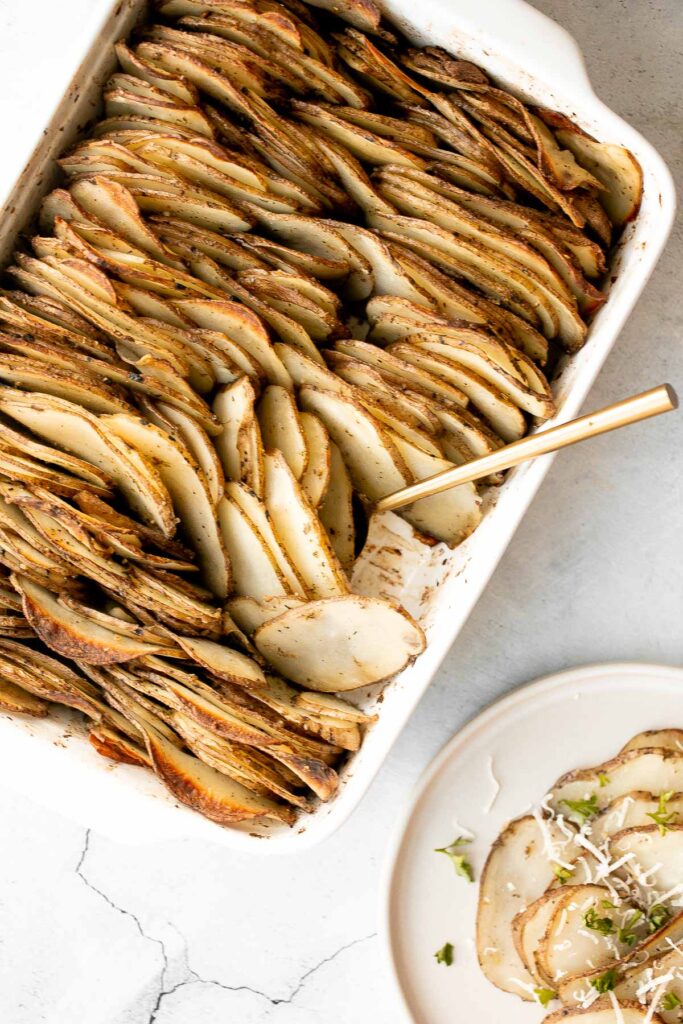
More Potato Recipes
- Creamy Potatoes au Gratin
- Hasselback Potatoes with Garlic Herb Butter
- Ham and Potatoes au Gratin
- Garlic Mashed Potatoes with Sour Cream
- Homemade Tater Tots with Bacon
- The Best and Creamiest Mashed Potatoes
- Crispy Air Fryer French Fries
Tried this recipe?
I'd love to hear what you think! Leave a comment and rating below to share your feedback. Your reviews help others discover this recipe and help me keep creating more free recipes for you. Snap a photo and tag me on social media @aheadofthyme too.
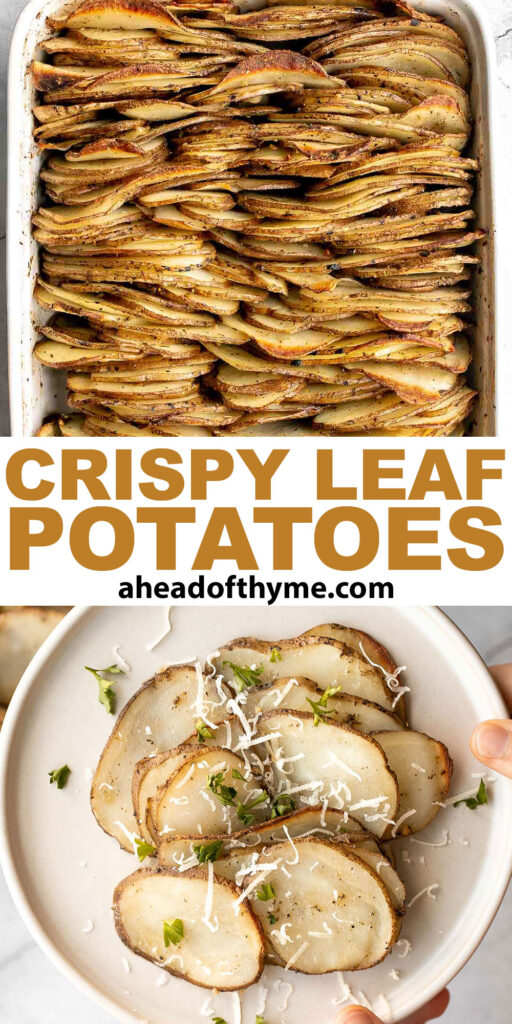
Honey Garlic Glazed Salmon

Sticky and sweet, this easy honey garlic glazed salmon is one of the best salmon recipes to add to your weeknight dinner rotation. It comes together with just a handful of simple ingredients, in one pan, and in under 25 minutes. It's delicious, flaky, garlicky, and is packed with so much flavour. This honey glazed salmon is a keeper.

Why You'll Love this Honey Garlic Glazed Salmon
- Quick and easy. We love easy weeknight dinners around here, and seafood tends to be at the top of the list since it cooks fast and it is highly nutritious. This easy salmon filet recipe is ready to serve in just 25 minutes (including prep!). If you love this honey garlic glazed salmon, then you will love our Baked Maple Salmon, Teriyaki Salmon, and Creamy Garlic Shrimp.
- A healthy and nutritious meal. Salmon is high in protein and nutrients, loaded with omega-3's and vitamins. It's a good source of healthy unsaturated fats that can benefit your cholesterol levels - so you can feel good about feeding your family real food.
- Loaded with flavor. With just a handful of simple ingredients, the flavor of this honey glazed salmon dish is incredible. It's sweet and savory and absolutely delicious.
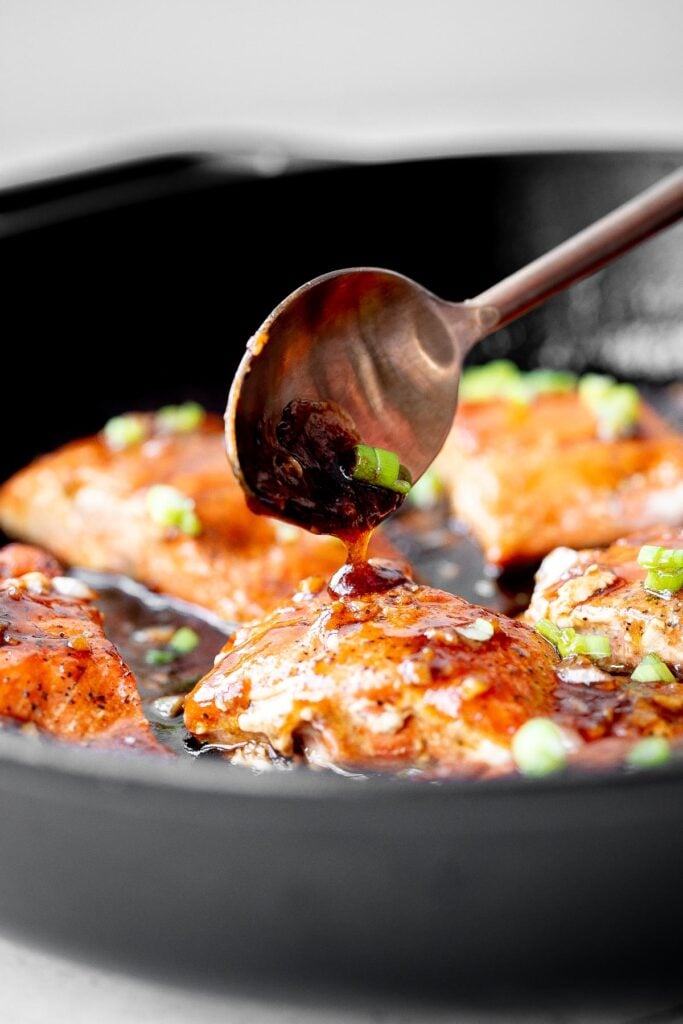
Ingredients
To make this delicious honey garlic glazed salmon, you will need the following ingredients (full measurements in recipe card below):
- salmon fillets - I prefer to keep the skin on, as it helps with easy cooking (provides a layer of protection between the skillet and the salmon), making it easy to flip and remove from the pan. You can choose to eat the skin or remove it after cooking.
- salt and pepper - to season the salmon.
- olive oil - for searing the salmon
- honey garlic glaze - made with honey, garlic, soy sauce, water, cornstarch, and lemon juice (or substitute with lime juice).
- green onions - for garnish on top.
You will also need a 12-inch skillet (I used a cast-iron skillet).
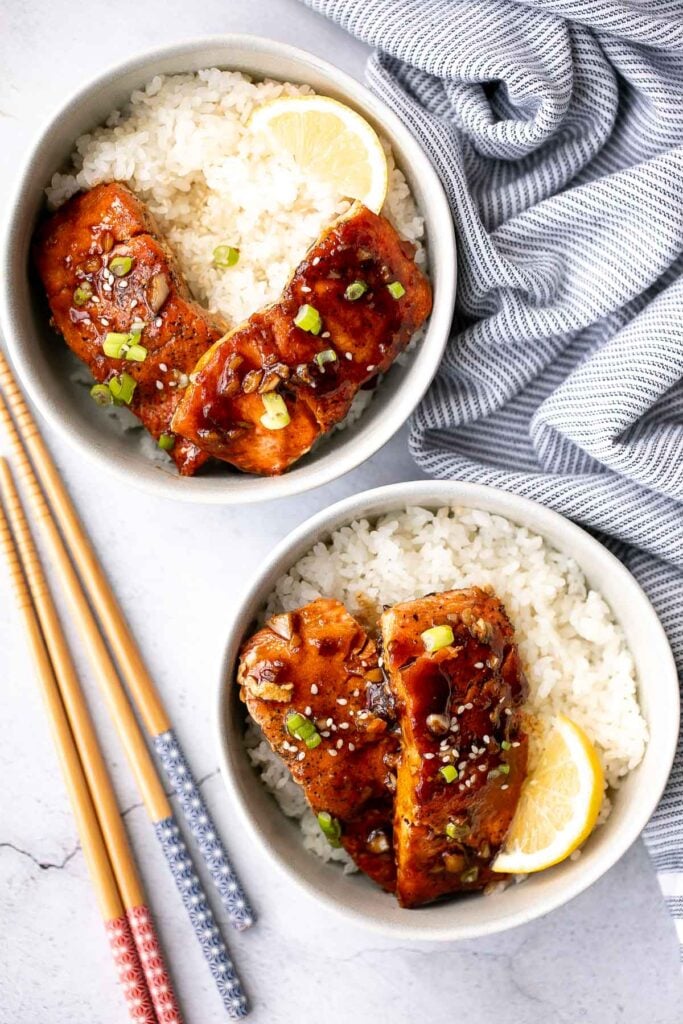
How to Make the Best Honey Garlic Glazed Salmon
- Prepare and sear the salmon. Pat dry salmon fillets and season with salt and pepper. Set aside at room temperature for 10 to 15 minutes. In a large skillet, heat oil for 2 minutes over medium-high heat until the hot oil sizzles. Sear the salmon fillets for 5-6 minutes on each side (skin side facing up first), until golden brown and fully cooked. When salmon is cooked, the flesh will turn opaque, and it will flake easily when inserting a fork. Transfer the cooked salmon onto a plate.
- Make the honey garlic glaze. In a small bowl, whisk together soy sauce, honey, water, cornstarch and lemon juice. Whisk well to combine until the cornstarch dissolves. Set aside. In the same skillet, add garlic and sauté until fragrant over medium heat, about 1 minute. Pour in sauce mixture and cook for 3-4 minutes. Stir continously until thickened to a desired consistency.
- Assemble and serve. Return the cooked salmon to the skillet and toss well to coat evenly. Garnish with green onions and serve warm with a bowl of steamed rice.
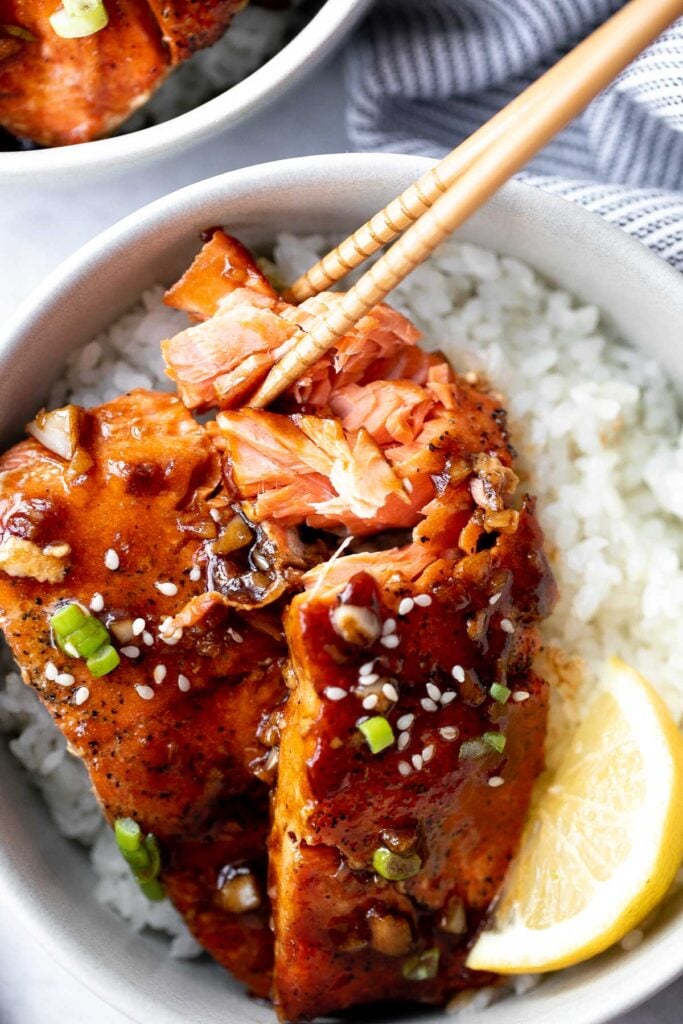
How to Serve Honey Garlic Glazed Salmon
Serve honey garlic glazed salmon with a over steamed rice or cauliflower rice and a side of veggies to add some fiber. Some of my favourites to serve with this are:
- Creamy Mashed Potatoes or Creamy Garlic Mashed Cauliflower (for an option lower in carbohydrates)
- Sautéed Garlic Mushrooms
- Garlic Green Geans
- Roasted Asparagus or Air Fryer Asparagus
- Roasted Garlic Parmesan Baby Potatoes
- Air Fryer Vegetables
You can also assemble this salmon into an Asian rice bowl with avocado, greens, cucumber, roe, and seaweed.
For more delicious sides to serve with salmon, check out our 25 Side Dishes for Salmon.
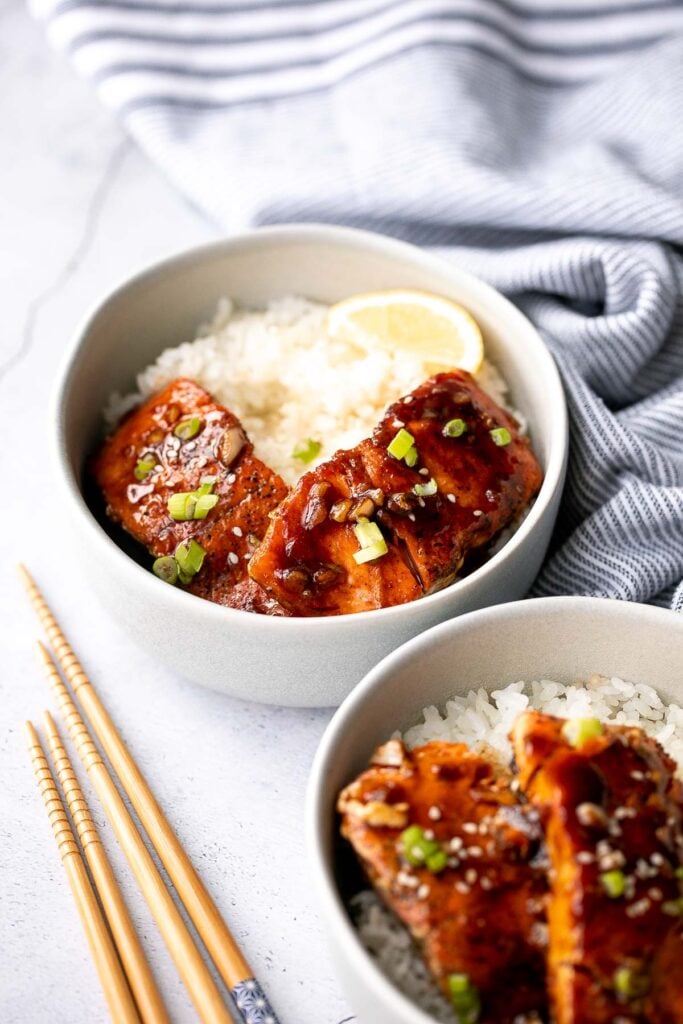
How to Store
Leftover salmon will keep in the refrigerator for up to 3-4 days when stored in an airtight storage container. Allow the fish to cool to room temperature before placing in the refrigerator.
Reheat salmon in a skillet over medium-low heat until warmed through, about 5 minutes, or in the microwave for about 1 minute. You can also reheat in a preheated oven or air fryer at 300F for about 5-10 minutes until warmed through.
You can also eat leftovers cold over a salad or in a sandwich. Serve it whole in a sandwich or combine the flakes with mayo and seasonings for a salmon salad sandwich.
Frequently Asked Questions and Tips
- Can I cook this in the oven? Absolutely. Place the salmon skin-side down onto a quarter sheet baking pan lined with aluminum foil or parchment paper and bake in a preheated 400F oven for about 12-15 minutes, until cooked through and flaky. (Roast for 5 minutes per half-inch of the thickest part of your salmon fillets).
- Can I cook this salmon in the air fryer? Yes. Place the salmon filets in a single layer into your air fryer basket (you make have to do this in batches). Air fry at 400F for about 10 minutes.
- How long does cooked salmon last? Store cooked salmon in an airtight container in the refrigerator for up to 3 days. Reheat in a skillet over medium-low heat until warmed through, about 5 minutes, or in the microwave for about 1 minute.
- Can I freeze cooked salmon? No, freezing cooked salmon will cause it to become rubbery and tough. I would not recommend it.
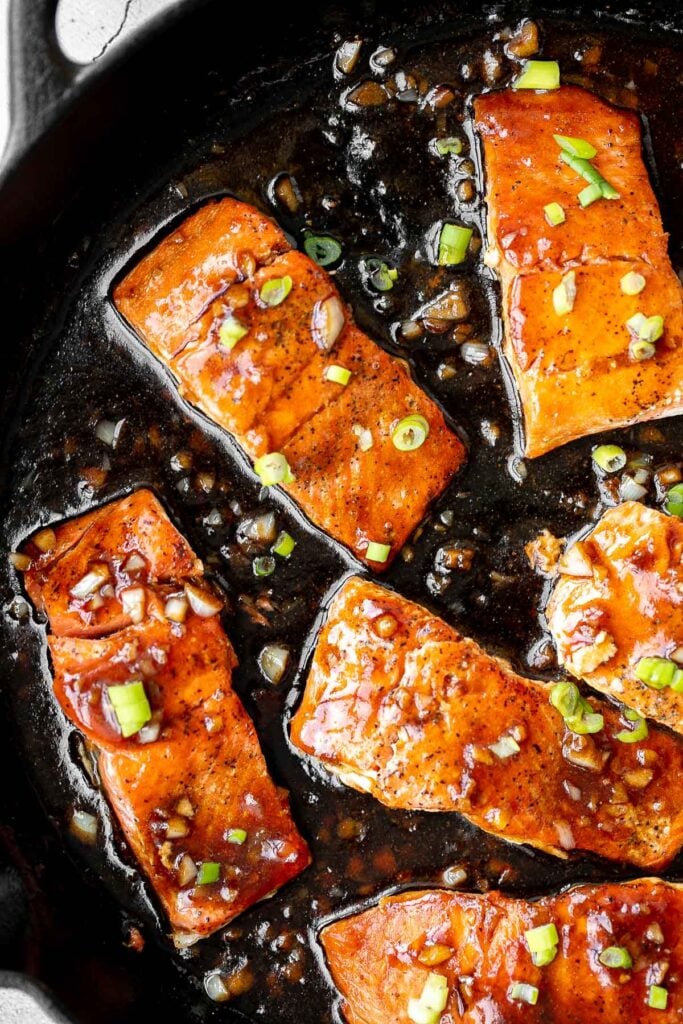
More Salmon Recipes
- 15 Best Salmon Recipes
- Teriyaki Salmon
- Coconut Curry Salmon
- Miso Salmon
- Garlic Butter Salmon
- Creamy Garlic Salmon
Tried this recipe?
I'd love to hear what you think! Leave a comment and rating below to share your feedback. Your reviews help others discover this recipe and help me keep creating more free recipes for you. Snap a photo and tag me on social media @aheadofthyme too.
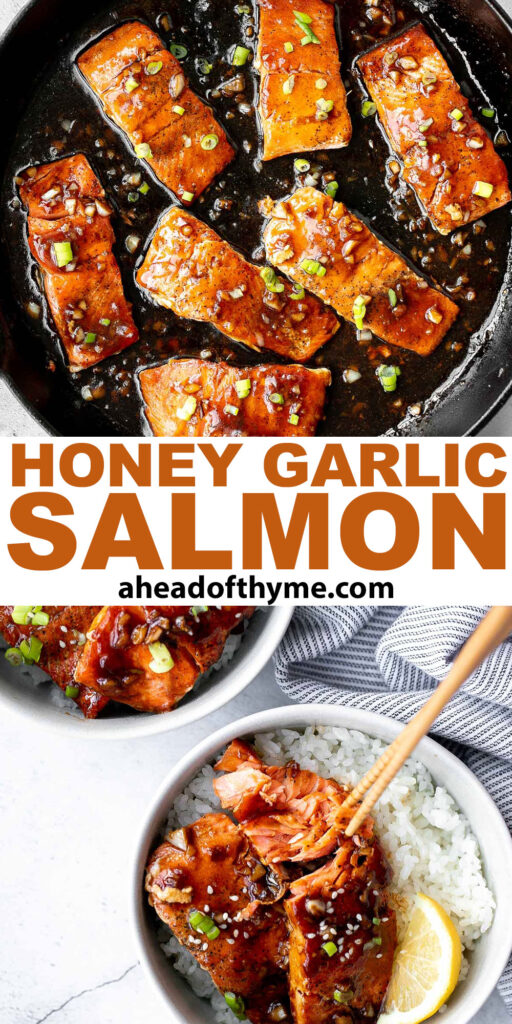
60 Best Chicken Recipes

We have rounded up 60 of the best and most popular chicken recipes that we have shared over the years including everything from skillet chicken recipes, baked sheet pan chicken dinners, whole chickens, better than takeout chicken recipes (and faster too!), chicken soups, chicken casseroles, chicken skewers, chicken appetizers, and more! So if you are looking for something to make with that package of chicken that you just picked up on your way home, then you have come to the right place. We are covering so many different flavour profiles here, plus lots of quick and easy options for busy weeknights.
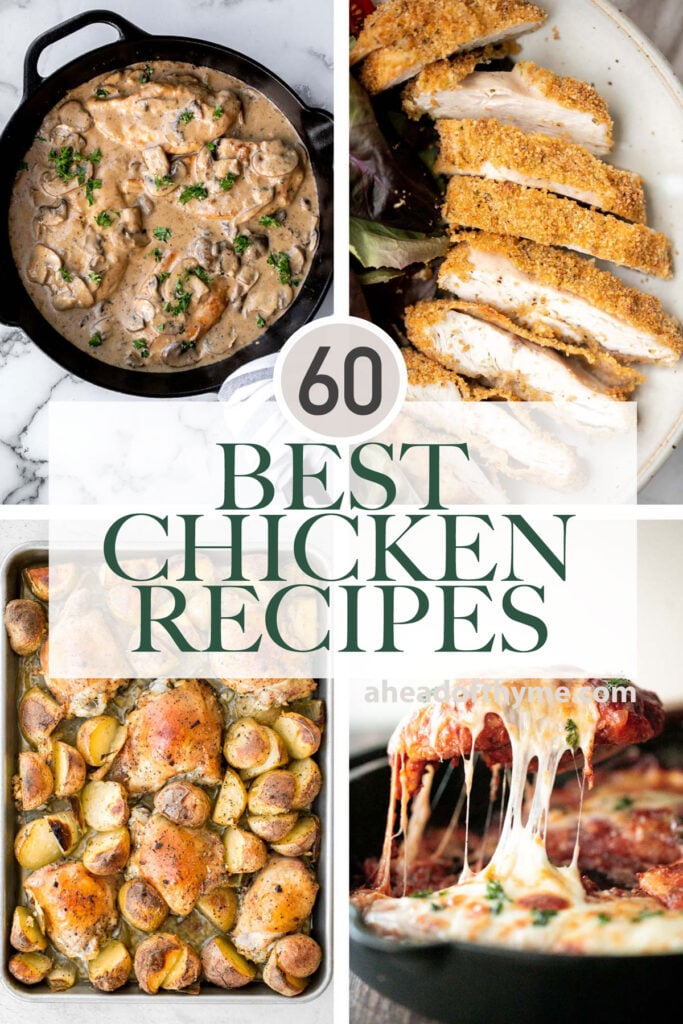
Seriously, let's dive in.
Stovetop Chicken Recipes
Creamy Tuscan chicken with sun-dried tomatoes and spinach is a quick and easy 30 minute Italian chicken dinner that is delicious, flavorful, and comforting.
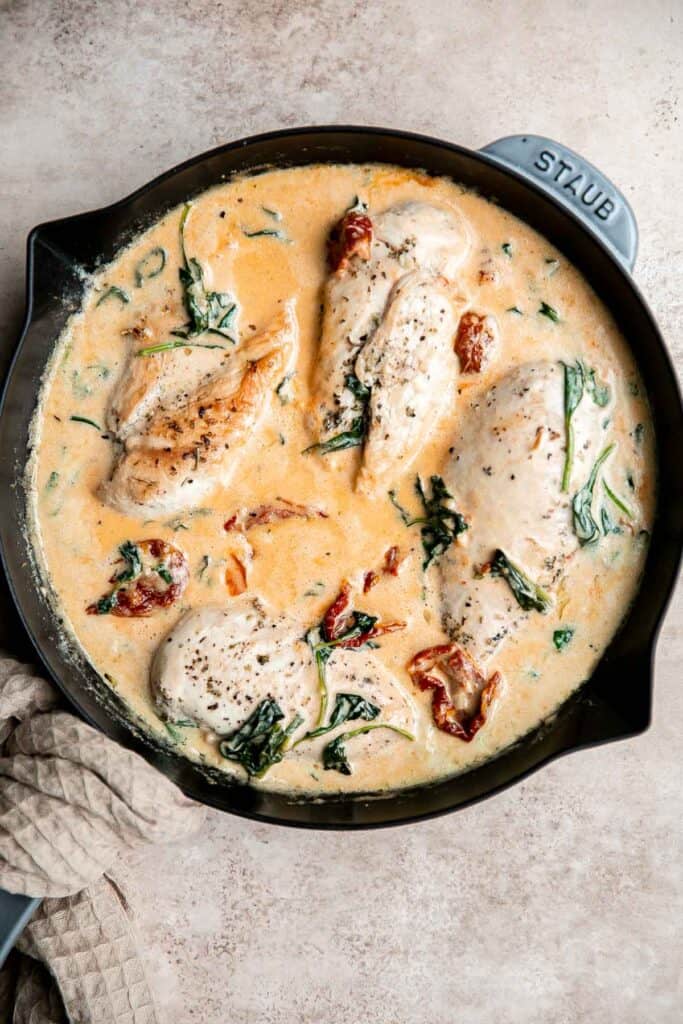
Chicken marsala in creamy mushroom sauce is a quick and easy 30-minute chicken dinner that is pure comfort food goals. A total crowd favourite.
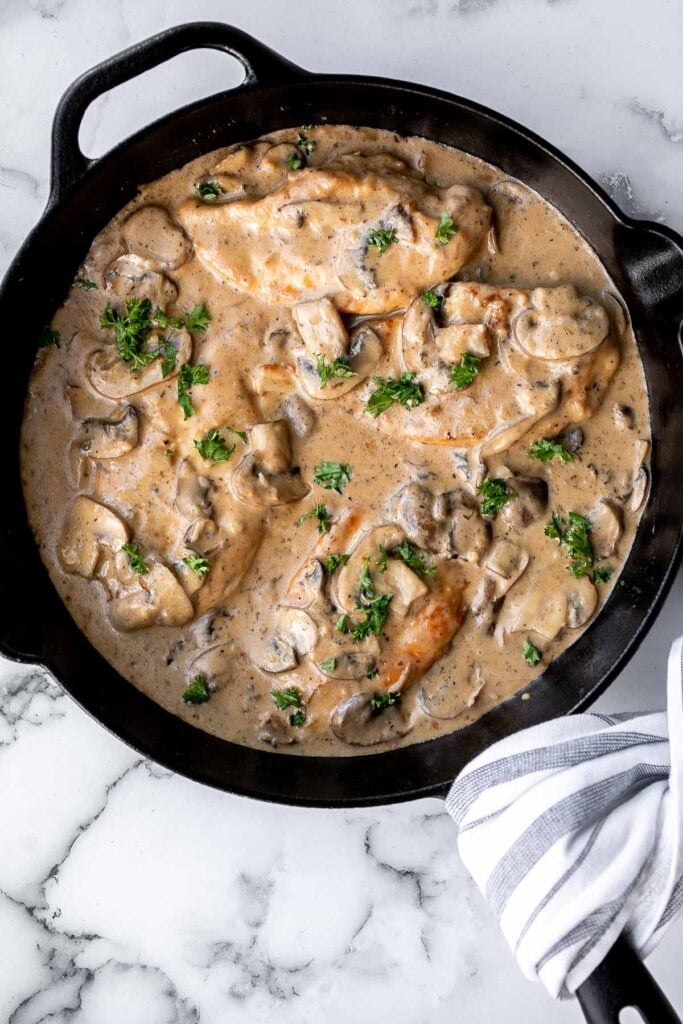
Quick and easy, creamy lemon chicken piccata is a simple and delicious 30-minute meal made with tender chicken breast in a light lemon sauce with capers.
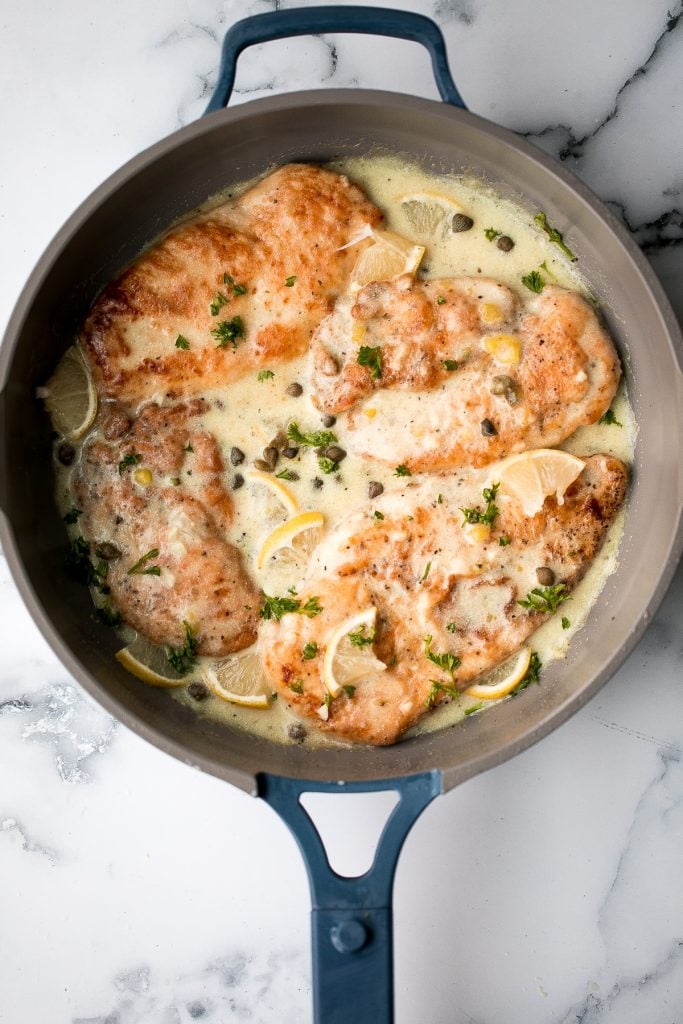
Creamy Pesto Chicken is a quick and easy 30 minute meal that needs to be on your family weeknight dinner rotation. It's rich, creamy, and delicious.
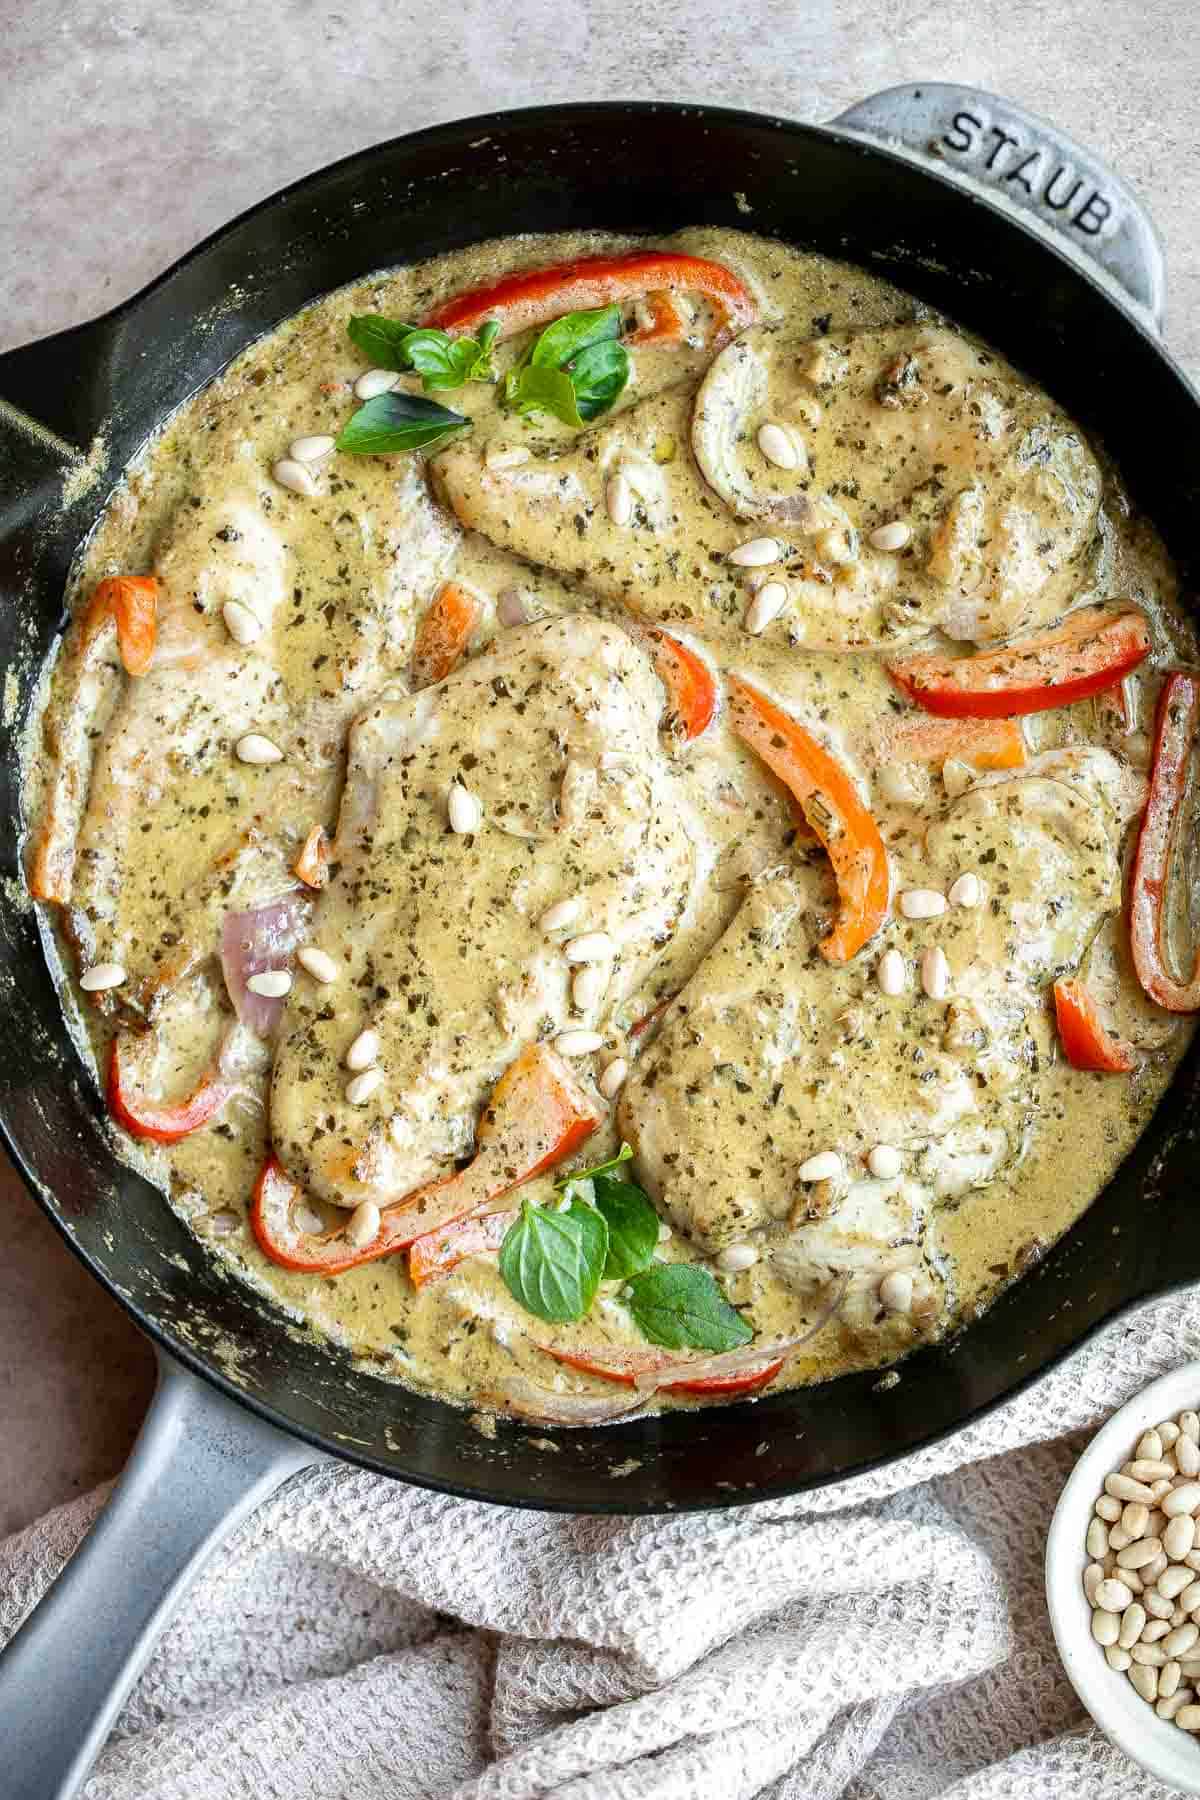
Chicken Madeira with sautéed mushrooms and tender crisp asparagus is topped with melty mozzarella cheese. Cheaper and better than the Cheesecake Factory!
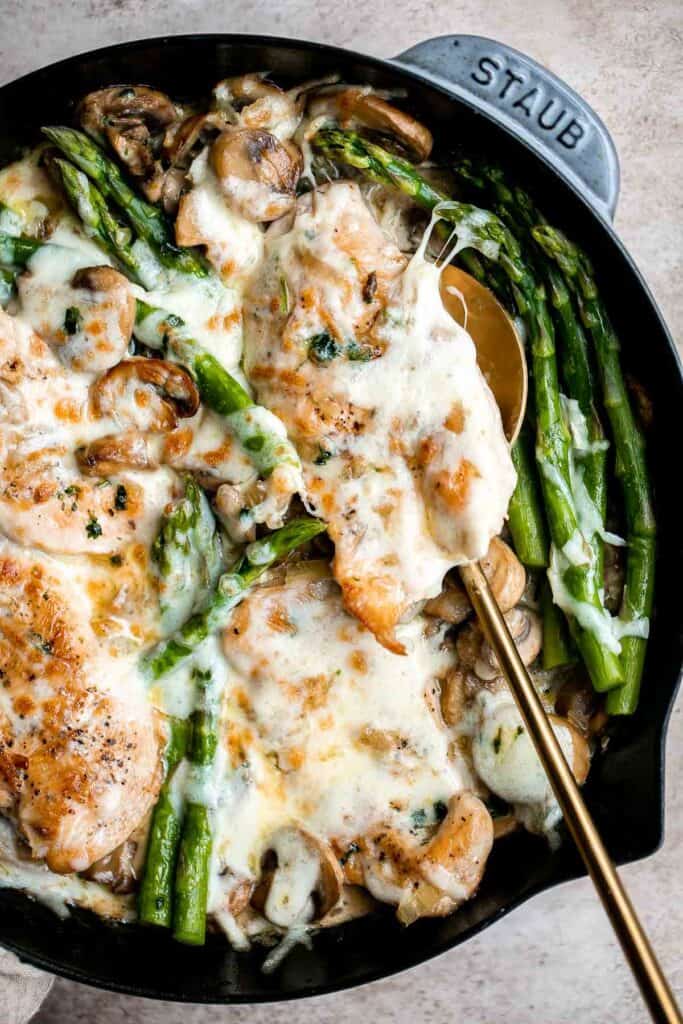
One Pot Spanish Chicken and Rice
Packed with flavour, real ingredients and vibrant colours, one pot Spanish chicken and rice is the perfect no fuss, no clean up weeknight meal.
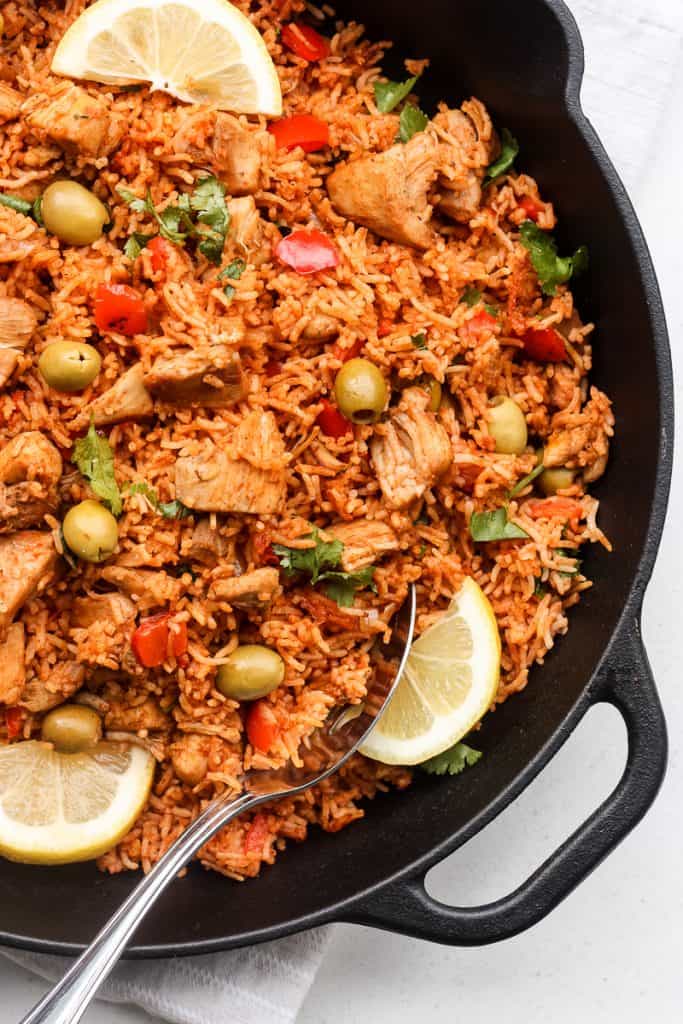
Creamy lemon parmesan chicken is a simple, quick and easy 30-minute meal that is packed with flavour. The most comforting and easiest weeknight dinner.
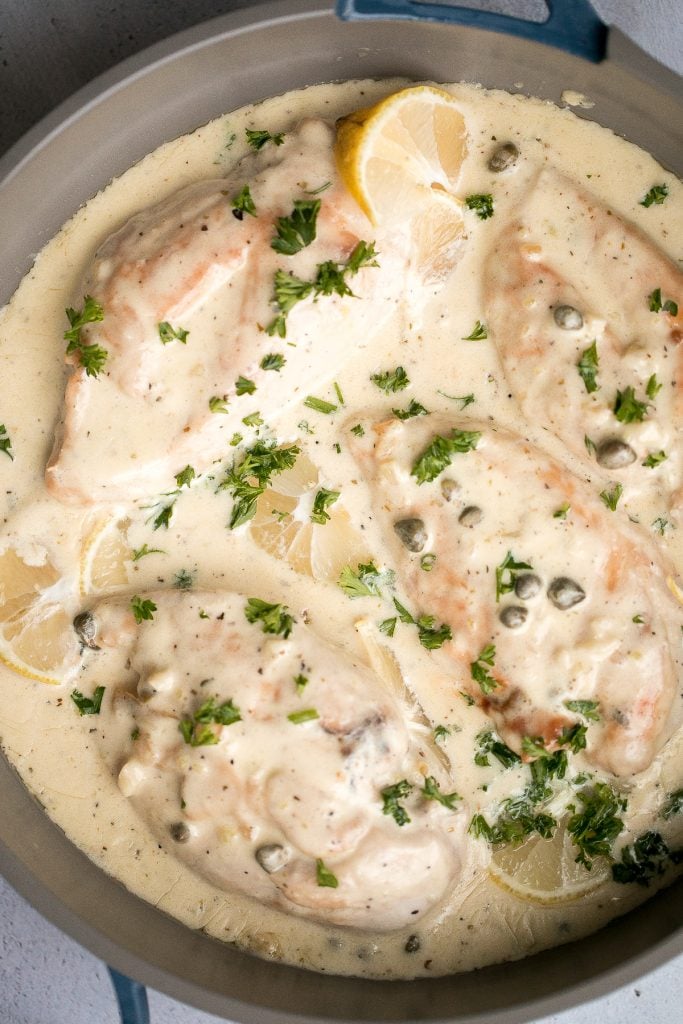
Creamy Chicken Roulade with Spinach and Mushrooms
Give your chicken breasts an upgrade by stuffing them to make fancy, juicy chicken roulade with spinach and mushrooms topped with a creamy alfredo sauce. Serve it over spaghetti alfredo with spinach and mushrooms.
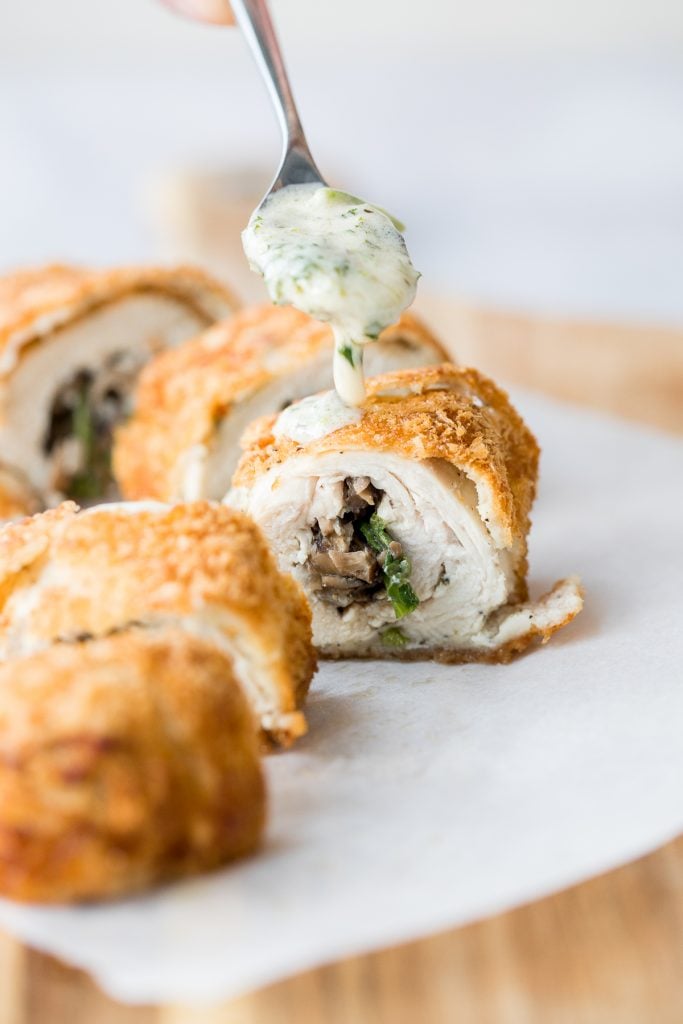
One Pot Coconut Curry Chicken and Rice
Creamy, delicious and flavourful, Thai-inspired one pot coconut curry chicken and rice is a 30-minute weeknight meal made with red curry and coconut milk.

Chicken penne pasta is a quick and easy dinner that is delicious, rich, creamy, and flavorful. It's a family favorite that's ready in under 30 minutes.
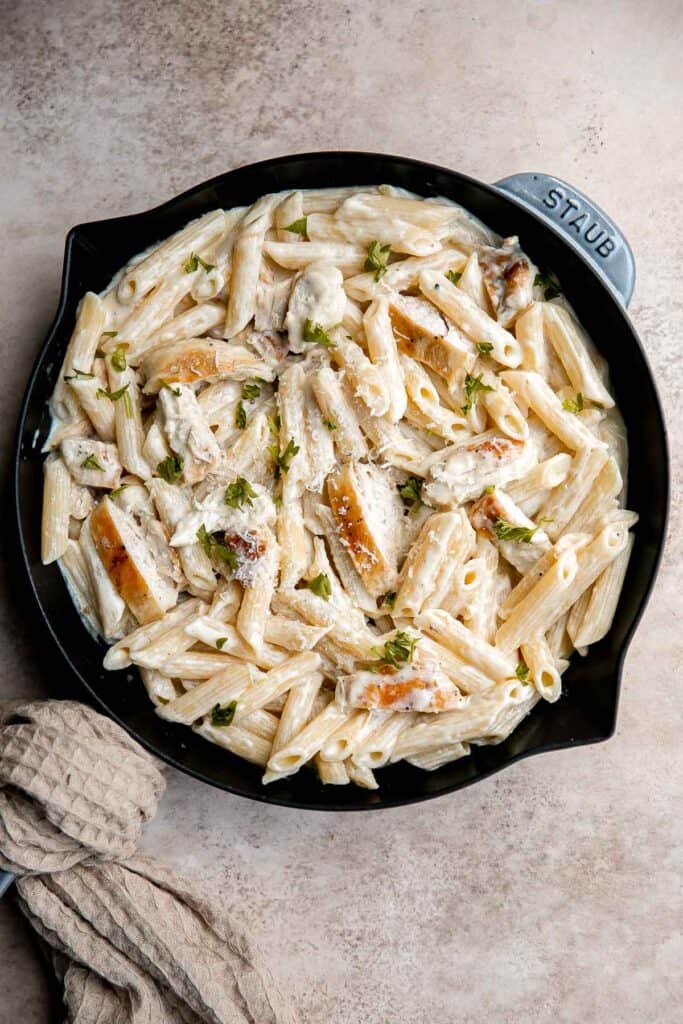
Chicken and Couscous with Sun-dried Tomatoes
Simple, healthy and flavourful chicken and couscous with sun-dried tomatoes is ready in under 30 minutes. The easiest weeknight dinner to make tonight!
Shredded chicken is quick and easy to make (in three ways) and shred. It's a staple ingredient to add to other recipes such as soup, salads, and sandwiches.
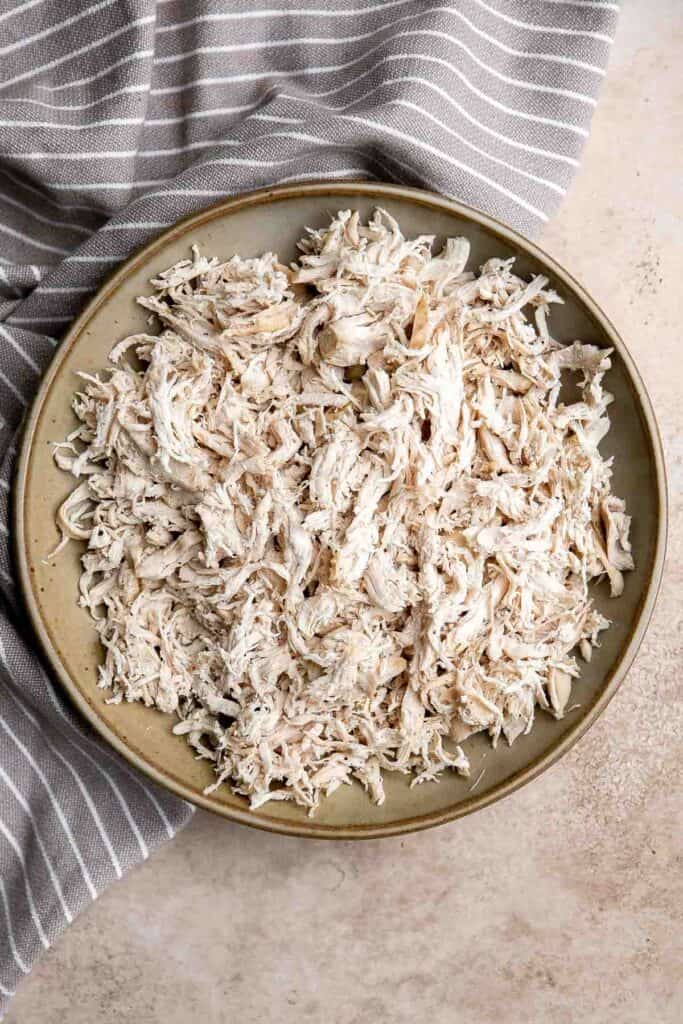
Skillet / Sheet Pan Chicken Recipes
One Pan Garlic Roasted Chicken and Baby Potatoes
One pan garlic roasted chicken and baby potatoes is an easy to make, delicious, and wholesome meal for the entire family. Prep this sheet pan in 10 minutes.
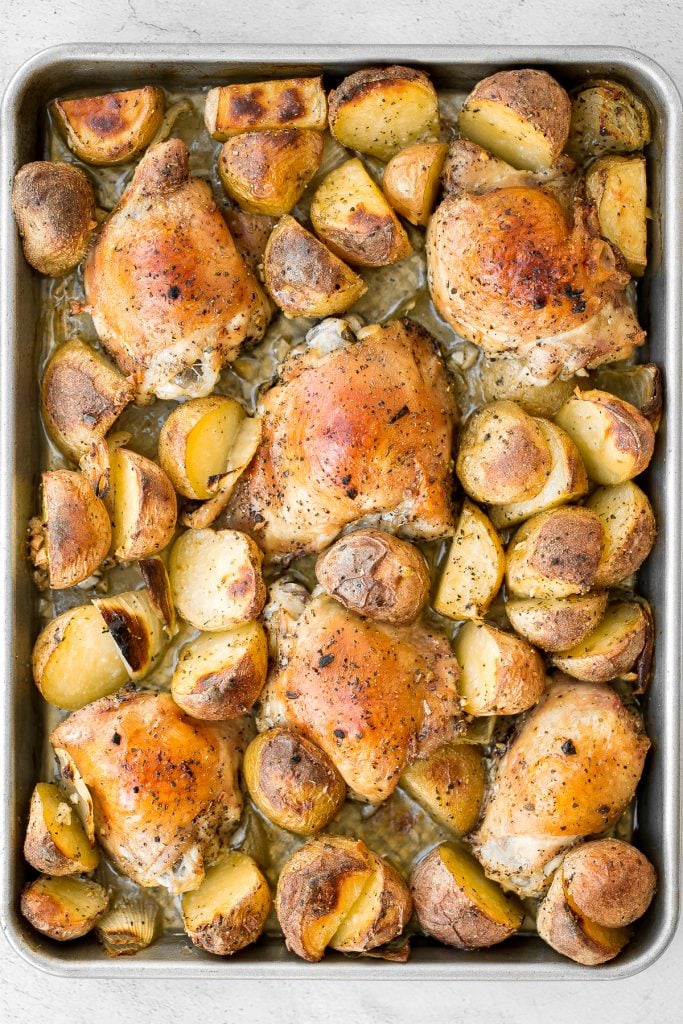
Baked queso chicken with tomatoes is an easy, cheesy, delicious chicken dinner that takes just 30 minutes to cook. The best weeknight dinner.
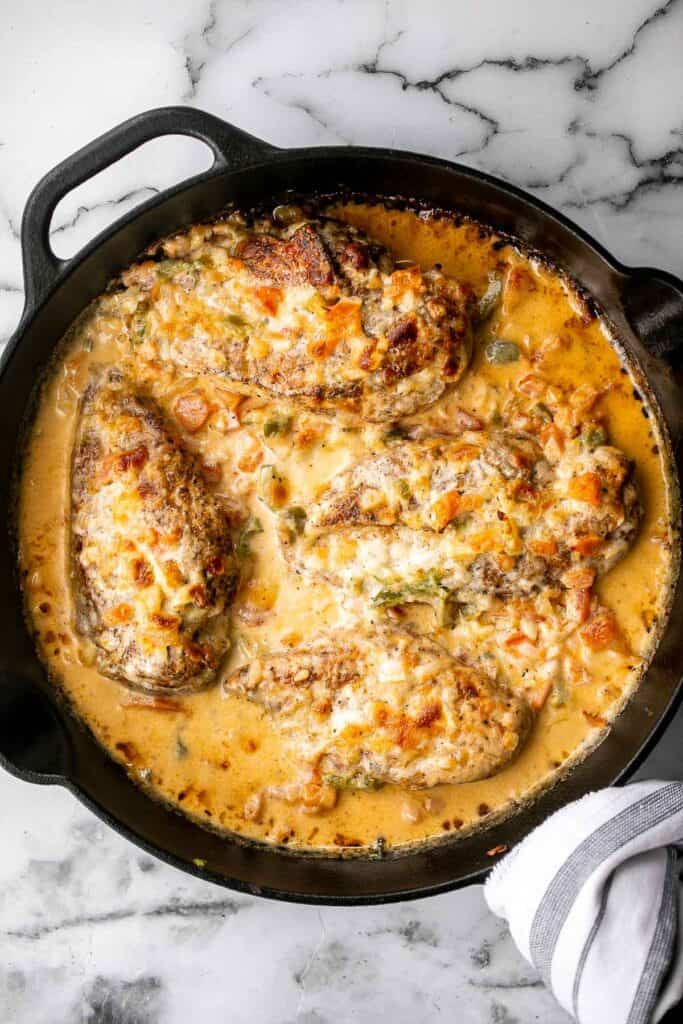
Easy Chicken Parmesan (Parmigiana)
Easy chicken parmesan (parmigiana) with crispy breaded chicken, tomato sauce, and melted mozzarella and parmesan cheese. The best comfort chicken dinner.
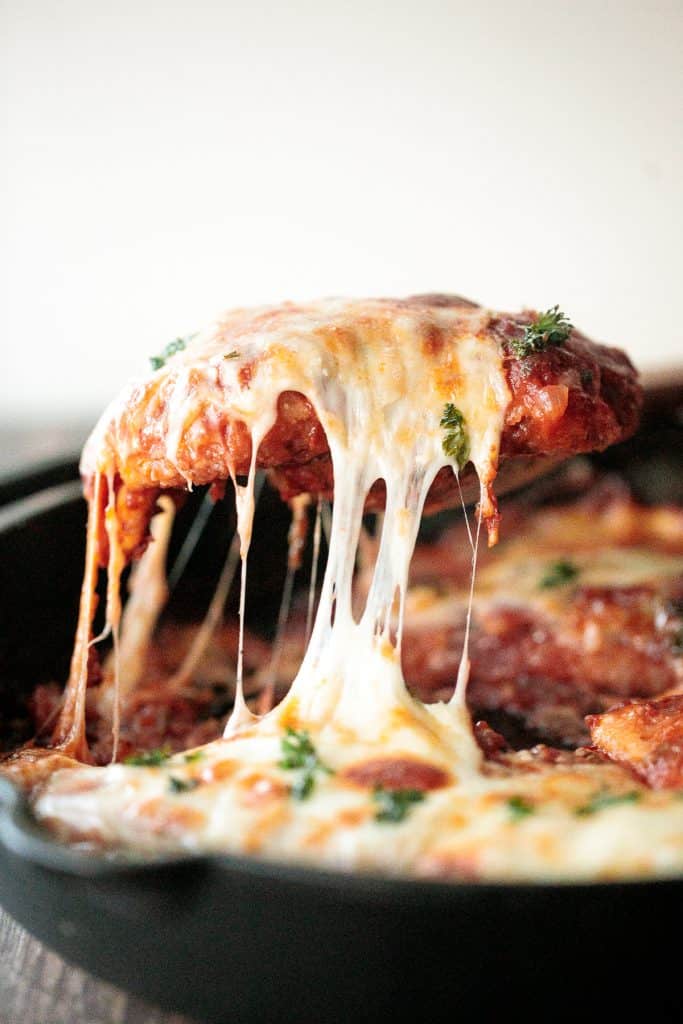
Skillet Chicken Thighs and Potatoes
Tender, juicy, and crispy one pan skillet chicken thighs and potatoes and carrots is an easy weeknight dinner on your dinner table in less than 45 minutes. Serve with a warm brussels sprouts salad on the side.
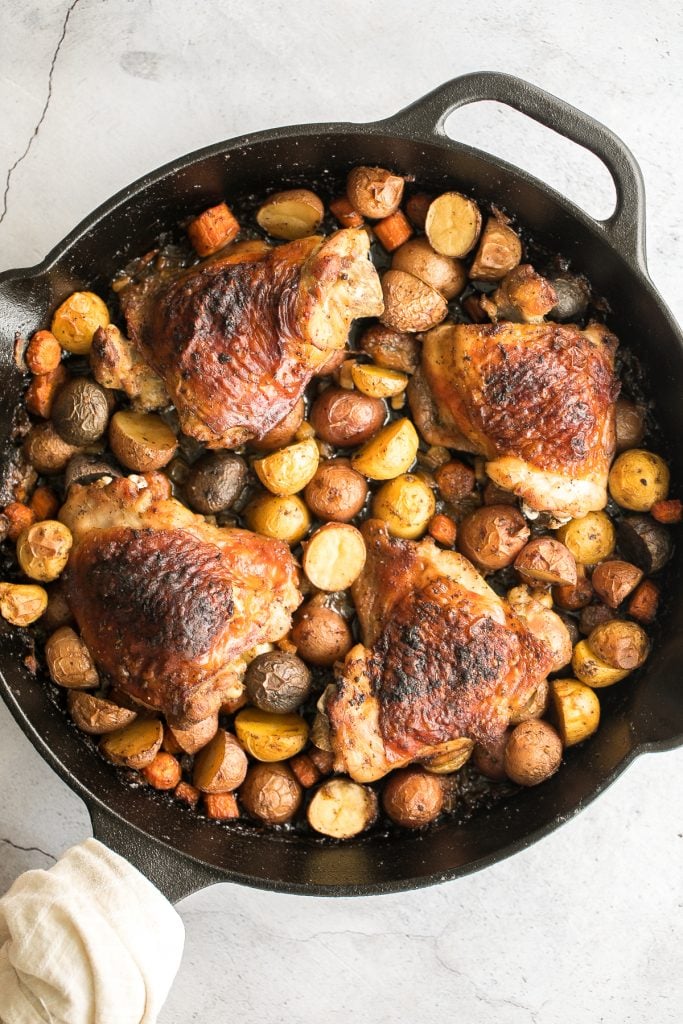
This Oven Baked Chicken Breast is juicy, tender, and delicious. It's quick and easy to make with a simple seasoning blend that packs on the flavor.
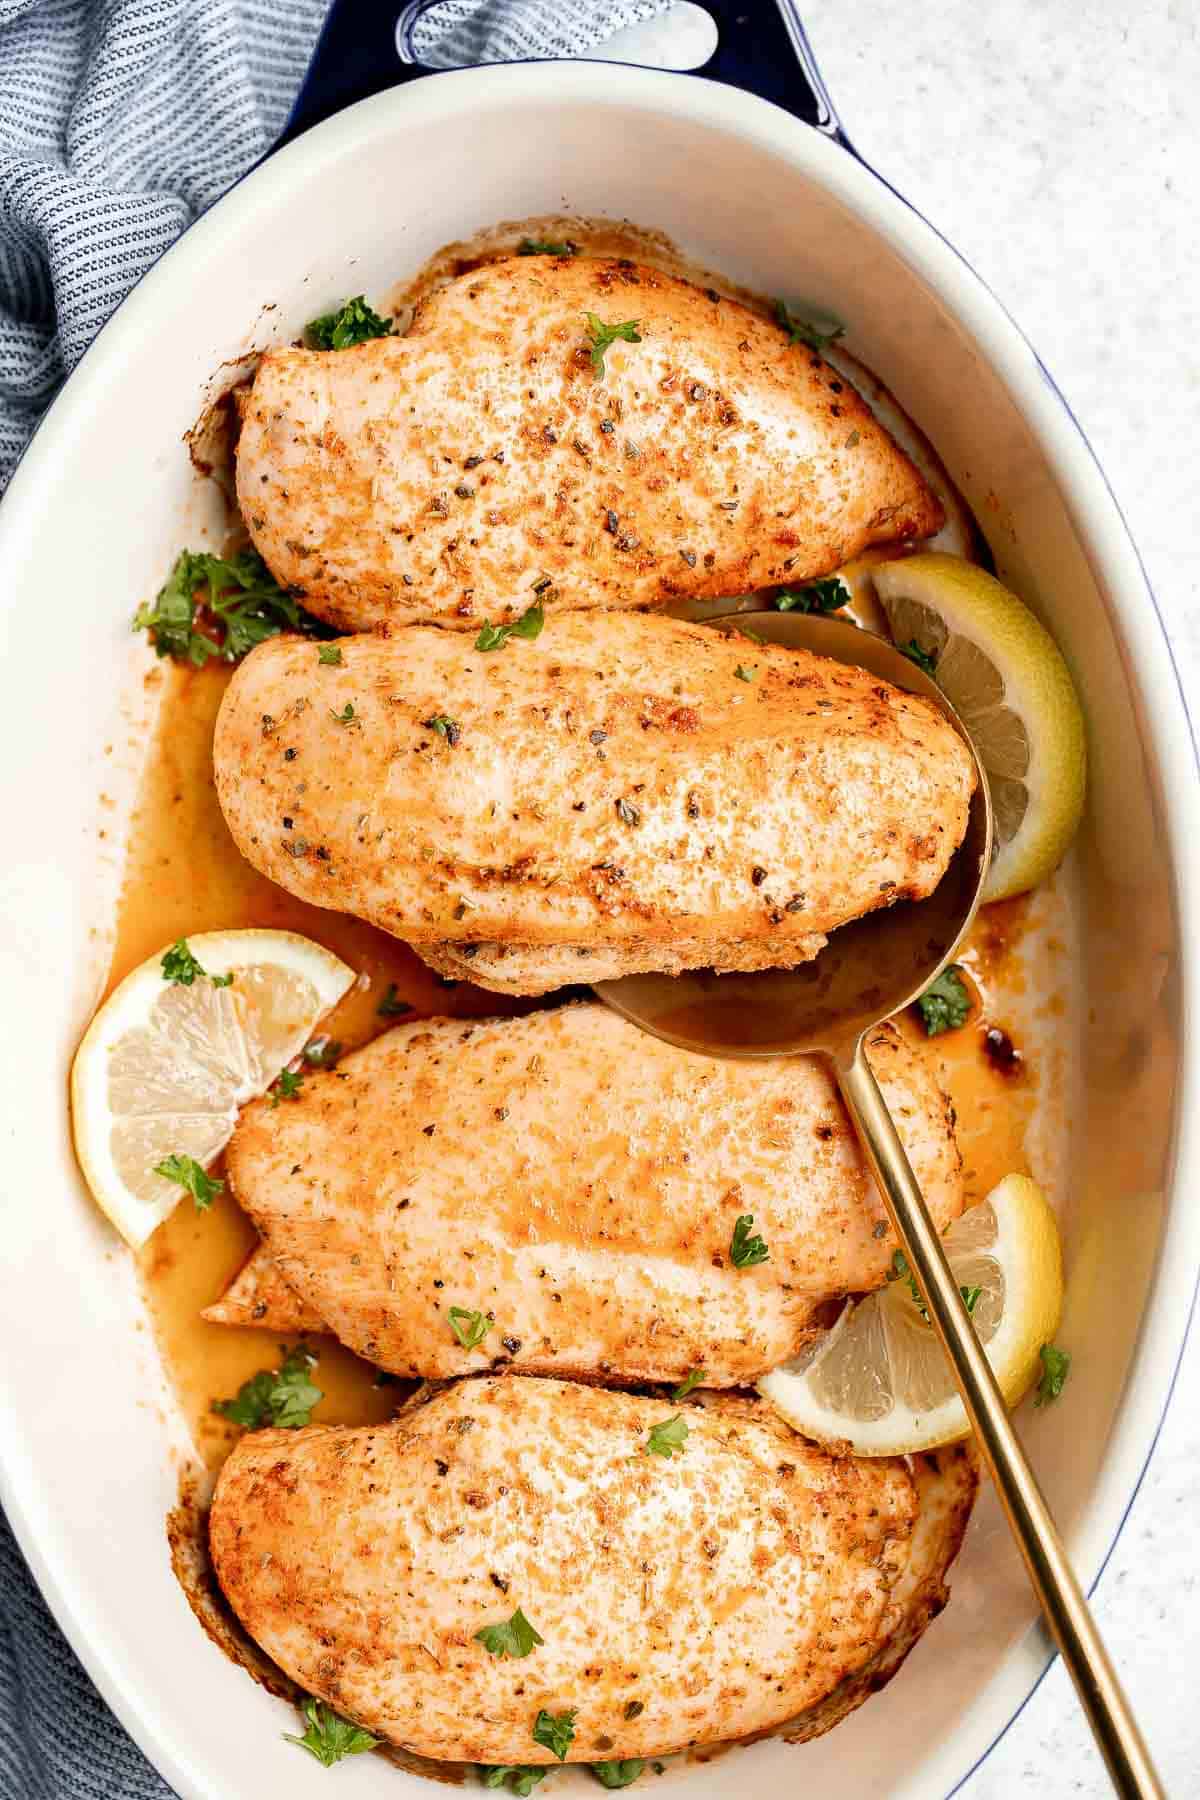
Apple Cider Chicken with Butternut Squash
One of my favourite chicken recipes is quick, easy, one pan apple cider chicken with butternut squash, apples, and thyme, cooked in an apple cider sauce. Serve this fall meal in just 40 minutes. Don't forget some crusty bread to soak up all that juice.
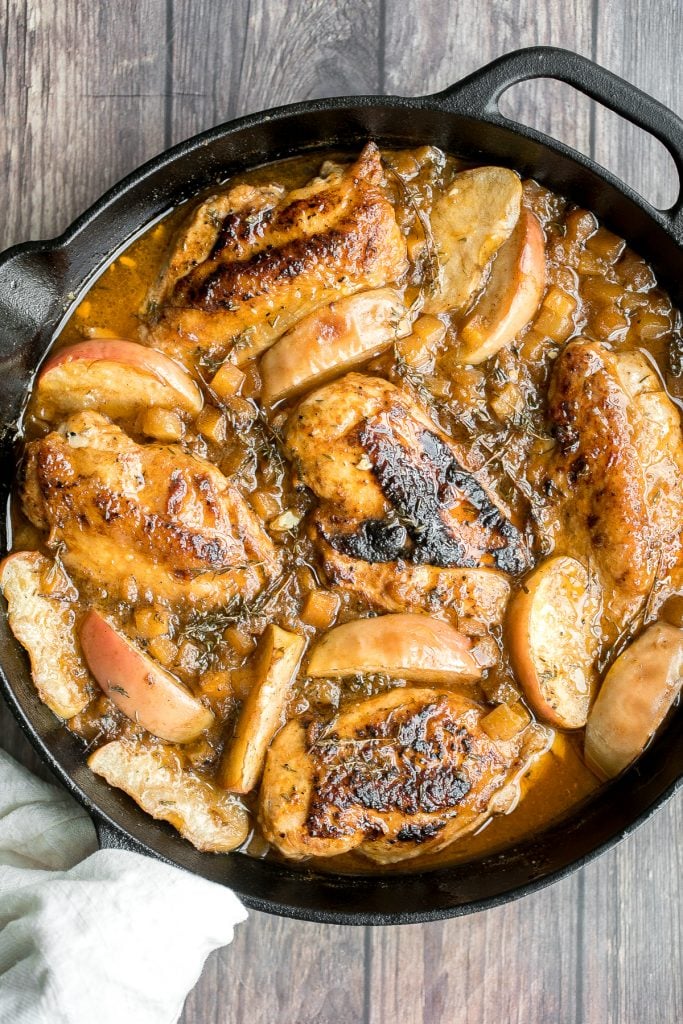
Sheet Pan Curry Chicken and Vegetables
Sheet pan curry chicken and vegetables with tender chicken thighs marinated in a delicious flavourful curry marinade is a complete one pan dinner. Serve with easy coconut rice or plain Basmati rice on the side.

Baked caprese chicken is tender, juicy, and delicious, topped with burst tomatoes, mozzarella cheese, fresh basil, and a drizzle of balsamic glaze.
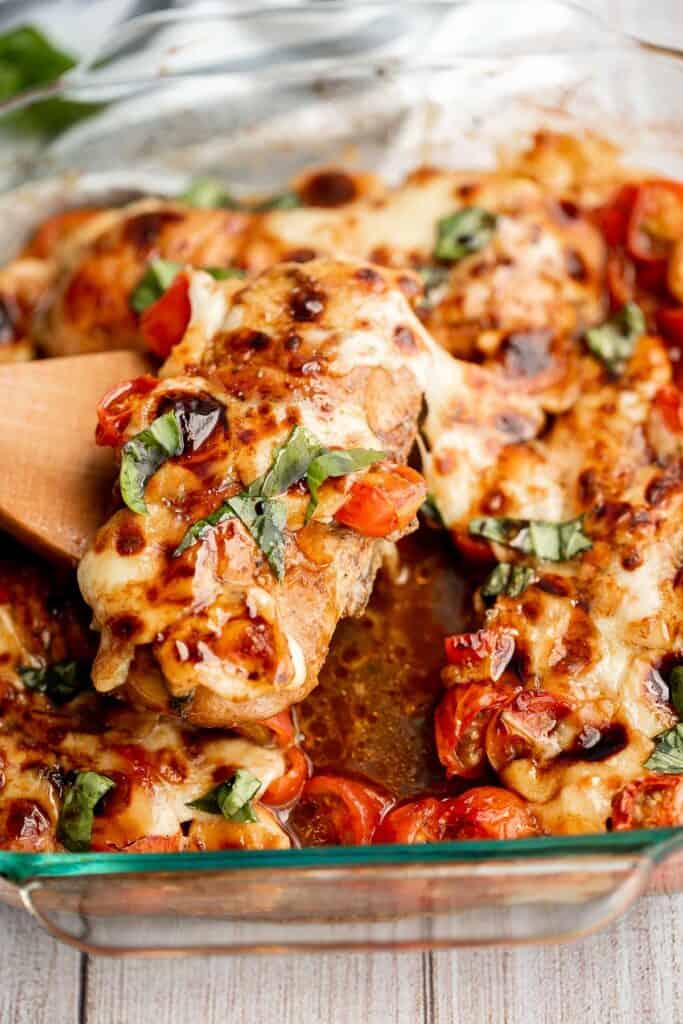
Apple Dijon Braised Chicken Thighs
Tender and juicy apple dijon braised chicken thighs with potatoes is juicy, tender and so succulent that it falls off the bone, yet so crispy outside. Serve with some bread to soak up all that juice. Try homemade ciabatta rolls or green onion dinner rolls.
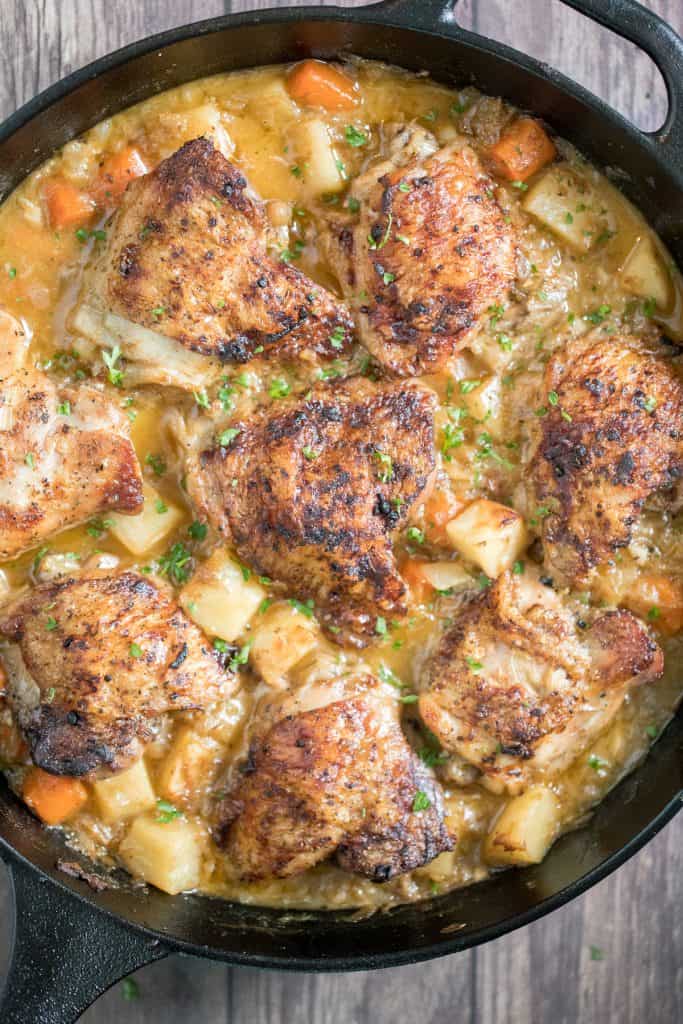
Skillet Chicken with Lemon Garlic Sauce
Delicious creamy skillet chicken with lemon garlic sauce is a one-skillet meal that is ready in 30 minutes. It's garlicky, saucy, creamy, and so flavourful. Bread is a must to dip into this delicious sauce. Try pull apart garlic bread or easy no yeast biscuits.
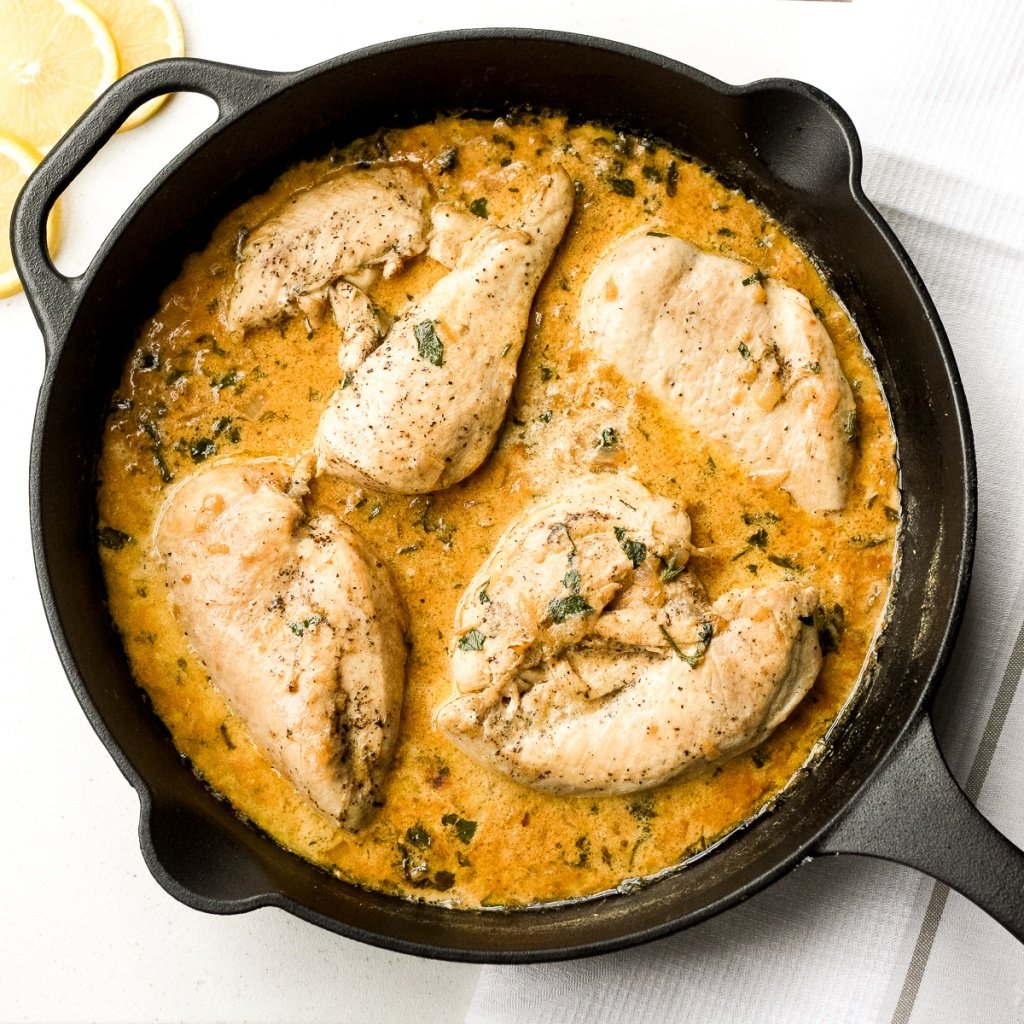
Baked parmesan crusted chicken is breaded in a herby parmesan breadcrumb mixture and baked until crispy perfection. So flavourful and delicious.
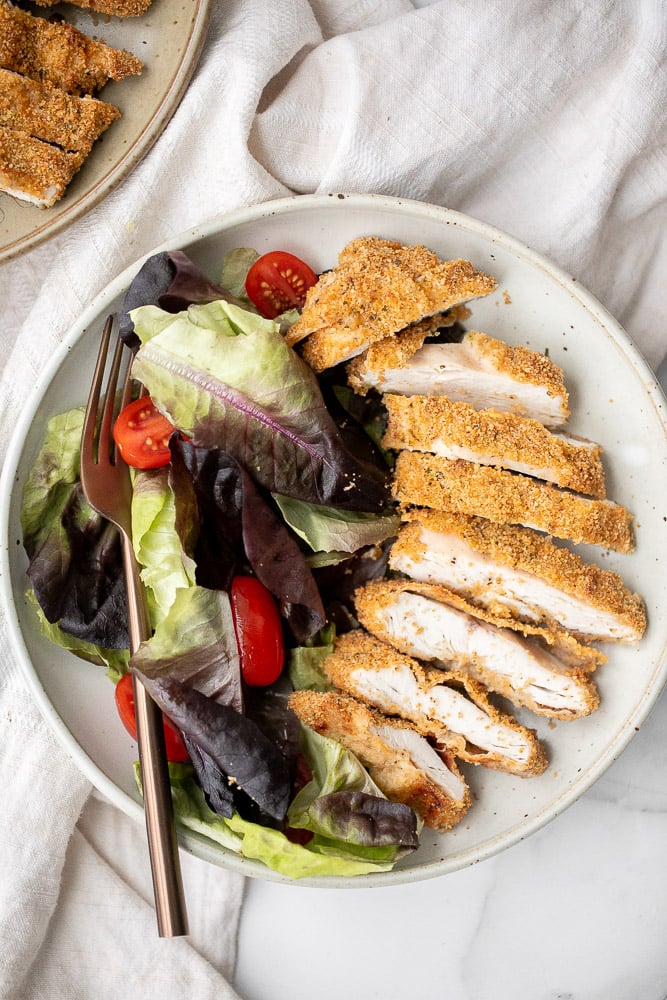
Meal Prep Sheet Pan Balsamic Chicken and Vegetables
Quick and easy, throw everything into one pan, Asian-style meal prep sheet pan sesame balsamic chicken and vegetables is flavourful, juicy and tender. Serve with some steamed rice.
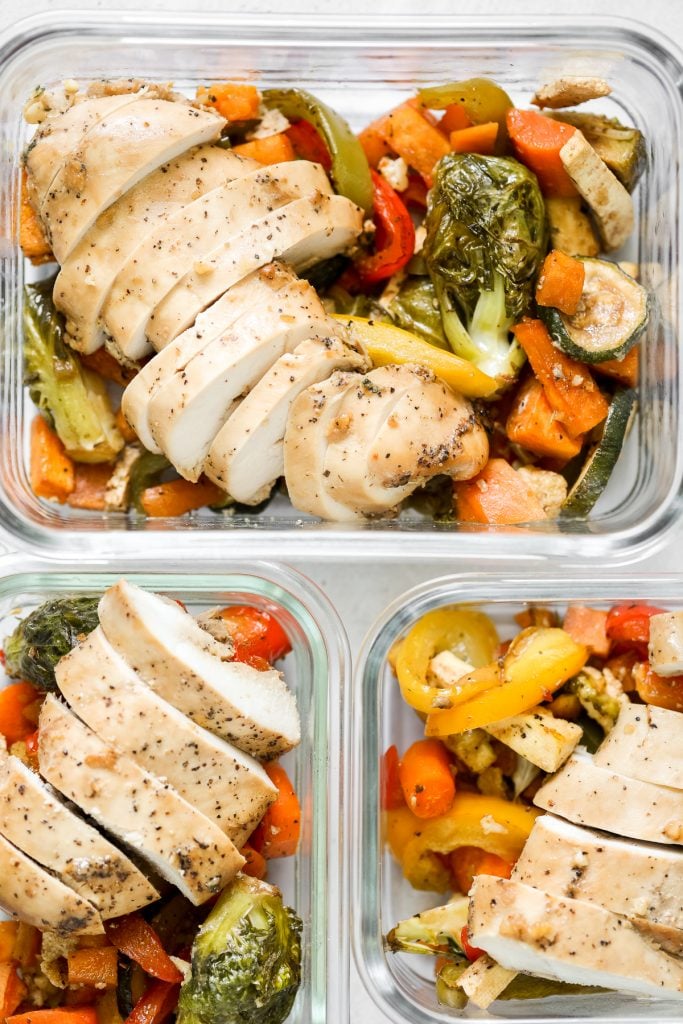
Sizzling and hot sheet pan chicken fajitas are on the table in less than 30 minutes. The best part is that you just throw everything into one sheet pan. Make it a total fiesta with some pico de gallo and fish tacos.

Roasted Balsamic Chicken with Cranberries
If you're scrambling to figure out dinner with less than 30 minutes on hand, this sweet and tangy roasted balsamic chicken with cranberries will save the day. Serve with some creamy mashed potatoes or garlic mashed cauliflower.
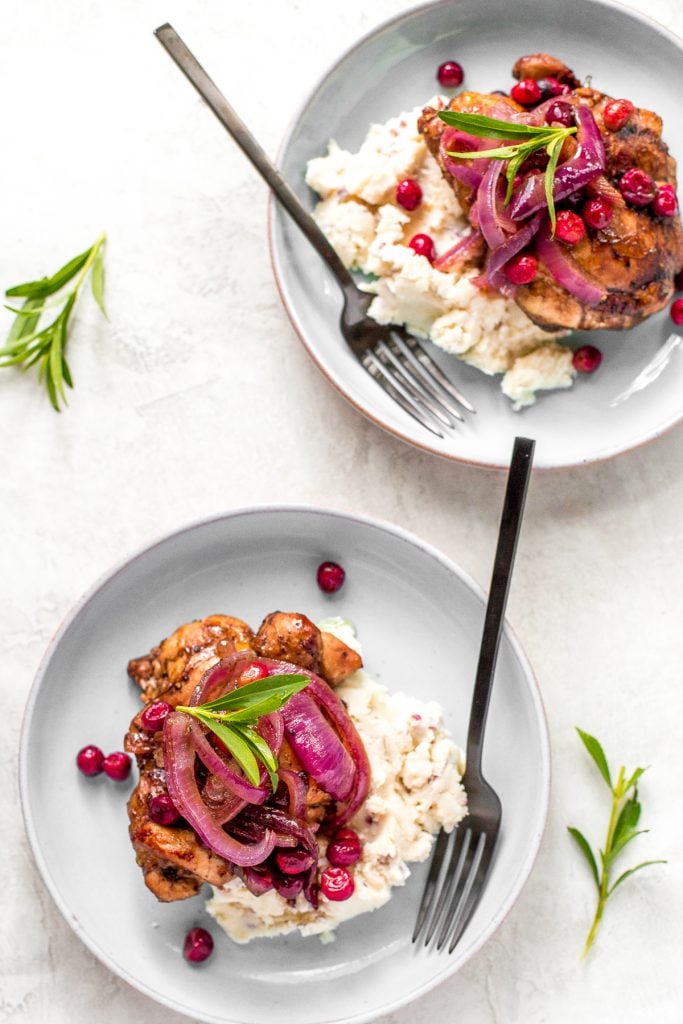
Tandoori Chicken Sheet Pan Dinner
In under 30 minutes, create intensely flavourful tandoori chicken sheet pan dinner loaded with vegetables, any night of the week. Good-bye takeout. Serve over easy coconut rice or plain Basmati rice.
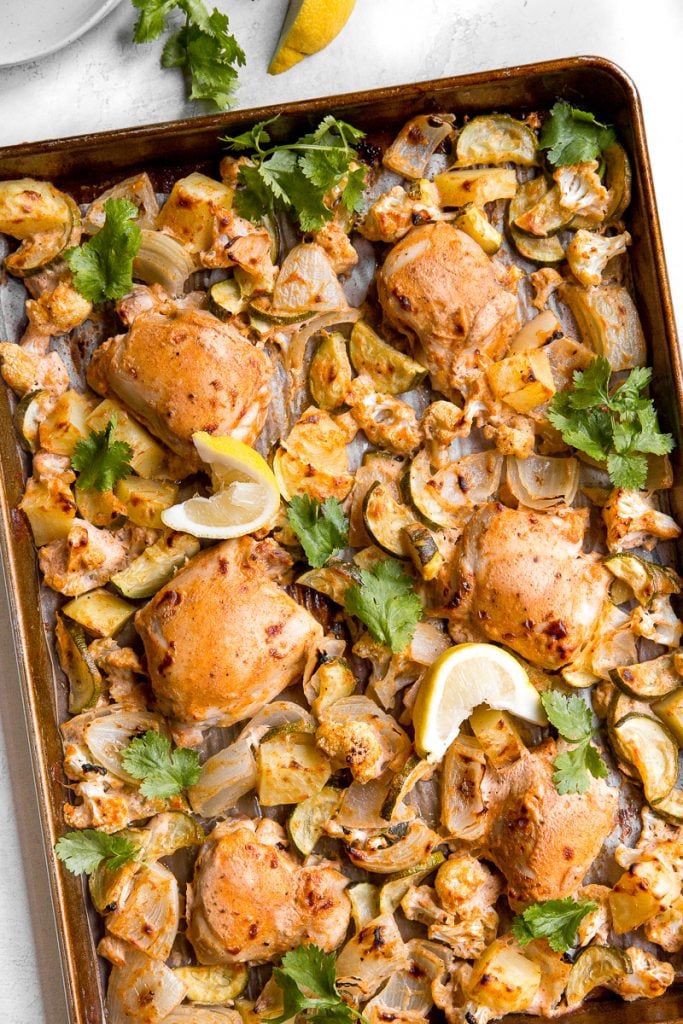
Sheet Pan Soy-Glazed Chicken Thighs
Sheet pan soy-glazed chicken thighs is the perfect weeknight meal -- 30 minutes in the marinade and 20 minutes in the oven. Easier and healthier than take-out. Serve with steamed rice and a vegetable stir fry.

Air fryer chicken breast is crispy on the outside, juicy and tender inside, and packed with flavor in every bite. Quick and easy dinner on busy weeknights.
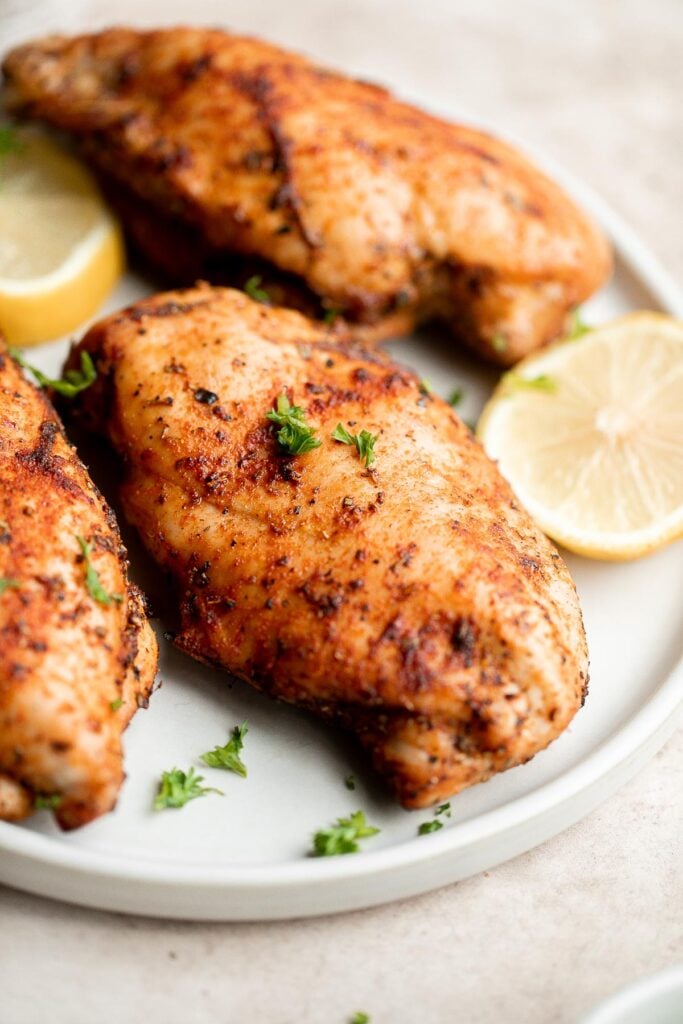
Whole Chicken Recipes
Dutch Oven Whole Roast Chicken
Easy Dutch oven whole roast chicken with the crispiest golden skin is juicy, tender and succulent and packed with flavour. Just takes 15 minutes to prep. Serve with creamy potatoes au gratin on the side.
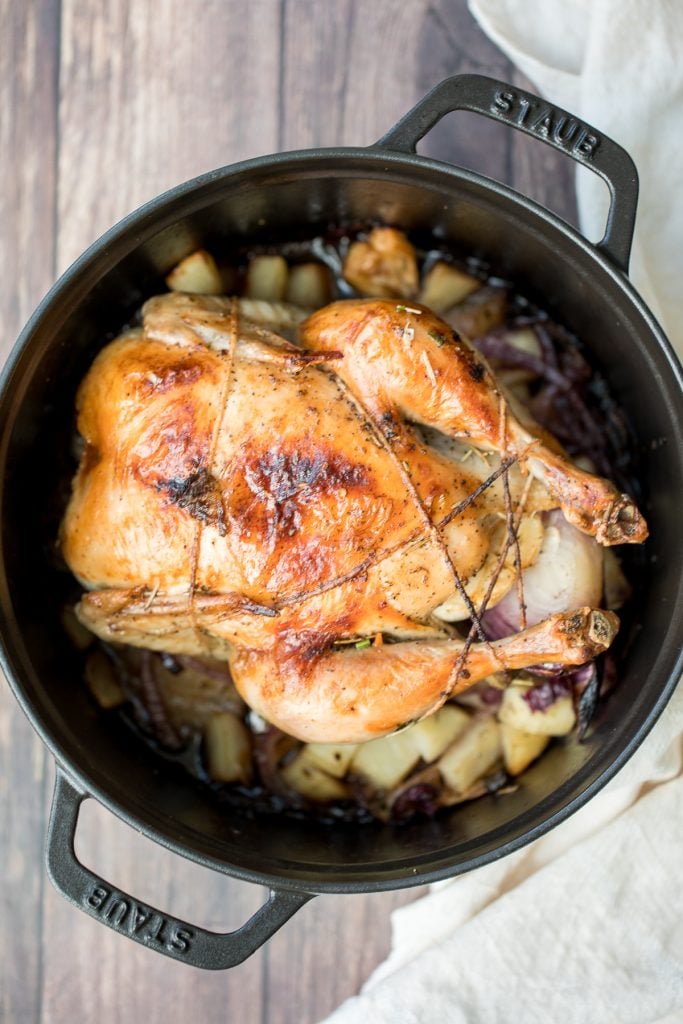
Roasted Spatchcock Chicken (Butterflied Chicken)
Quick and easy roasted spatchcock chicken (butterflied chicken) seasoned with garlic and thyme is juicy, tender, delicious and flavourful with minimal prep. Serve with some creamy mashed potatoes and garlic green beans.
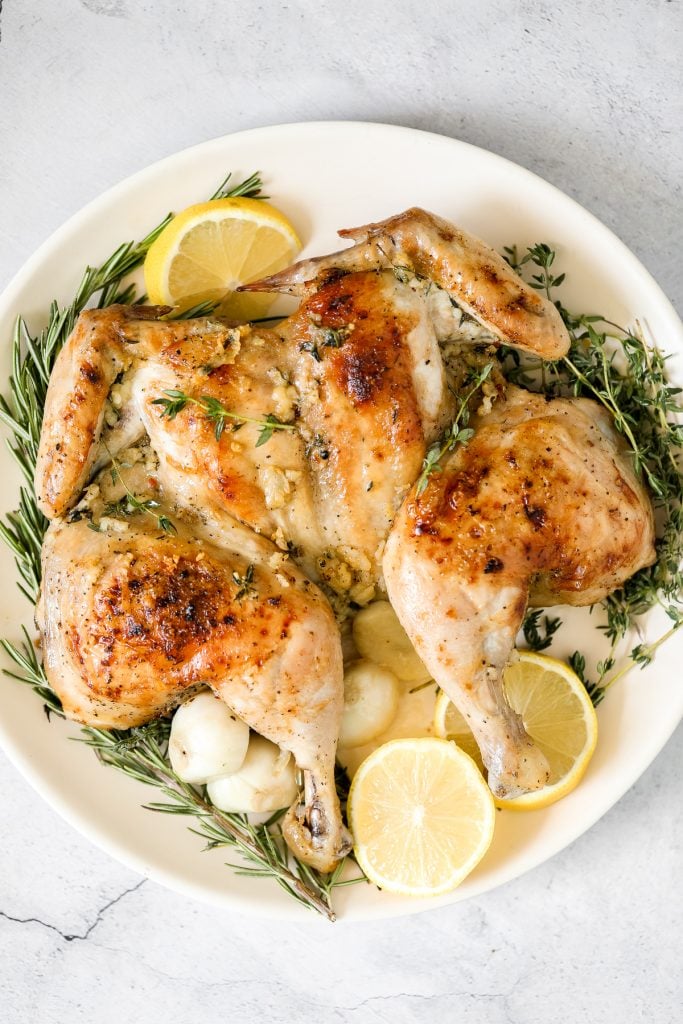
Instant pot whole chicken with gravy is tender, juicy, and flavorful. It's the fastest way to cook a whole rotisserie chicken for dinner in just 40 minutes.
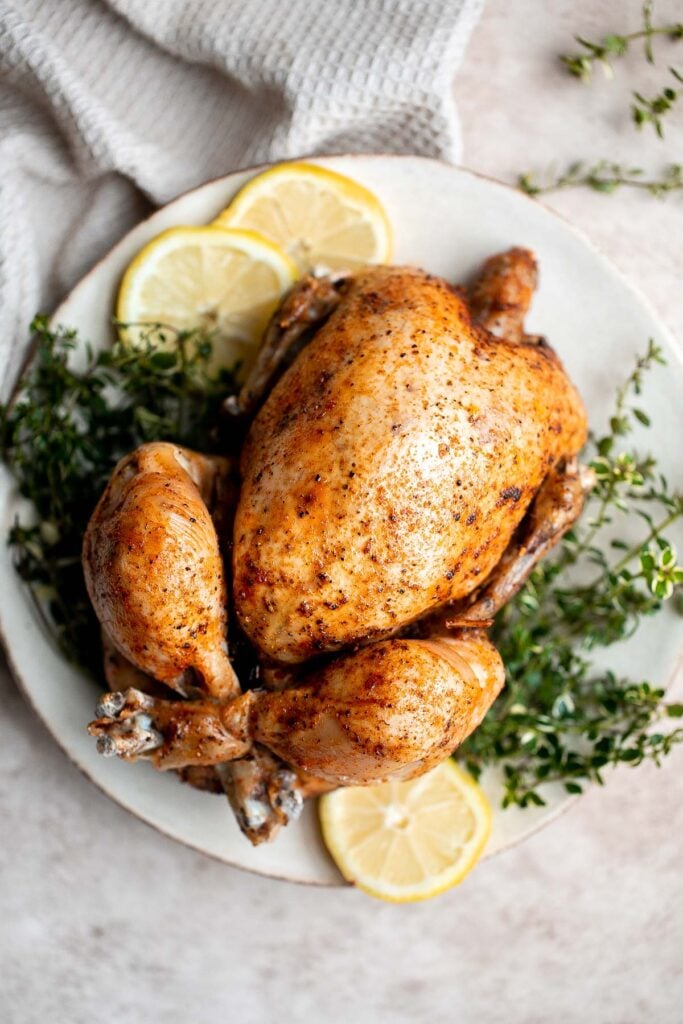
Greek Lemon Garlic Whole Roast Chicken
Easy Greek lemon garlic whole roast chicken is tender, juicy and succulent with the crispiest skin. Prep this flavourful one pan meal in just 15 minutes.
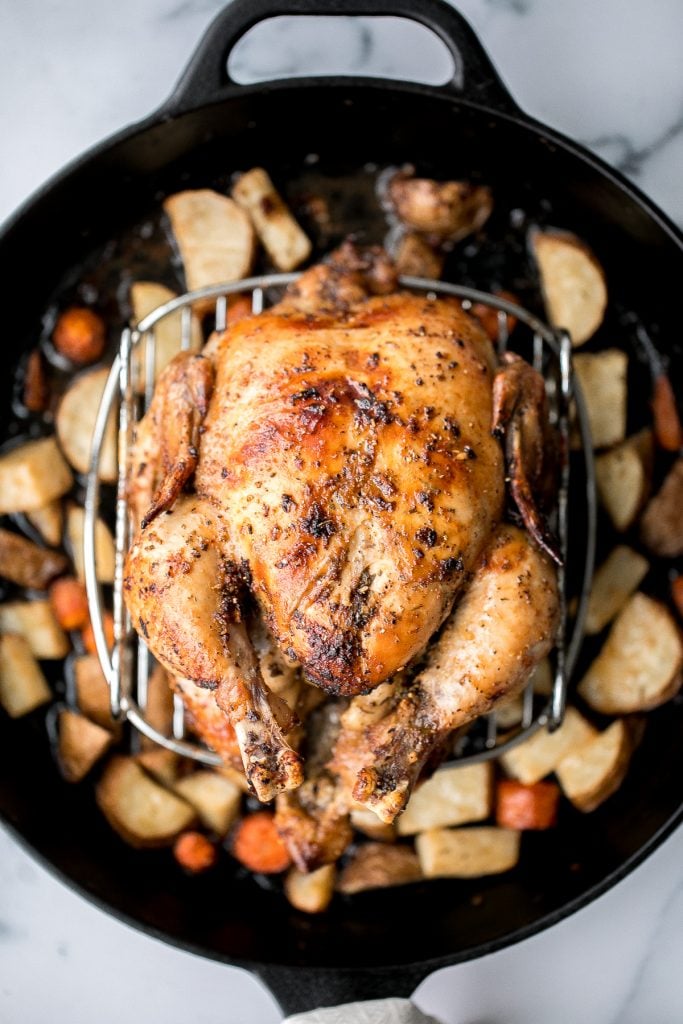
Pesto whole chicken baked over a bed of vegetables is the juiciest and most flavorful chicken you'll ever taste. Quick and easy to prep and pop in the oven.
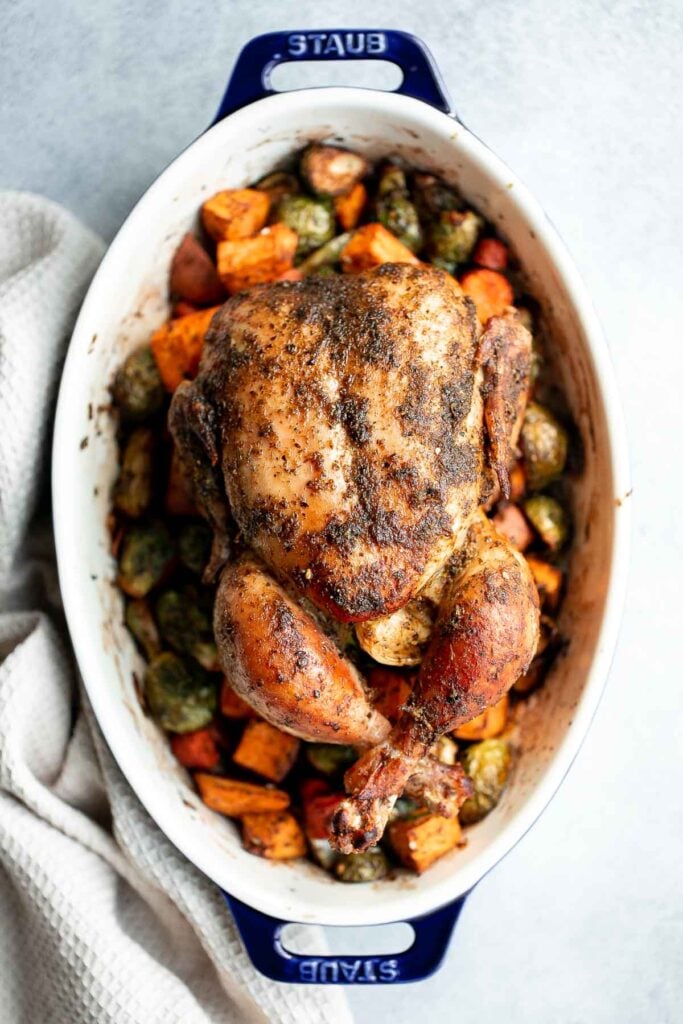
Slow cooker whole chicken is soft and tender and literally falls off the bone. It is the easiest way to cook a rotisserie chicken with a few minutes prep. Shred it and use it in lemon chicken orzo soup, 30-minute BBQ chicken pizza, or baked pasta with chicken.
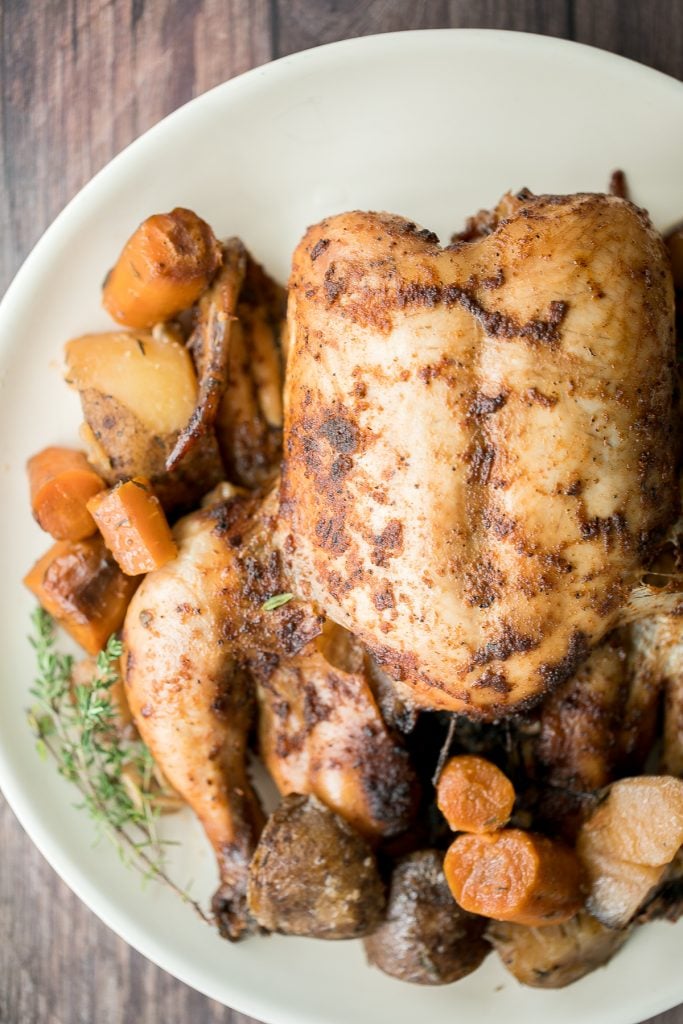
Better than Takeout Chicken Recipes
Chinese Takeout Orange Chicken is a quick, easy, delicious meal ready in 30 minutes. It's healthier than takeout - can be pan-fried, air fried, or baked.

Kung Pao chicken is a Chinese chicken dish that is stir-fried with crisp vegetables and tossed in a delicious Asian sauce packed with flavour.
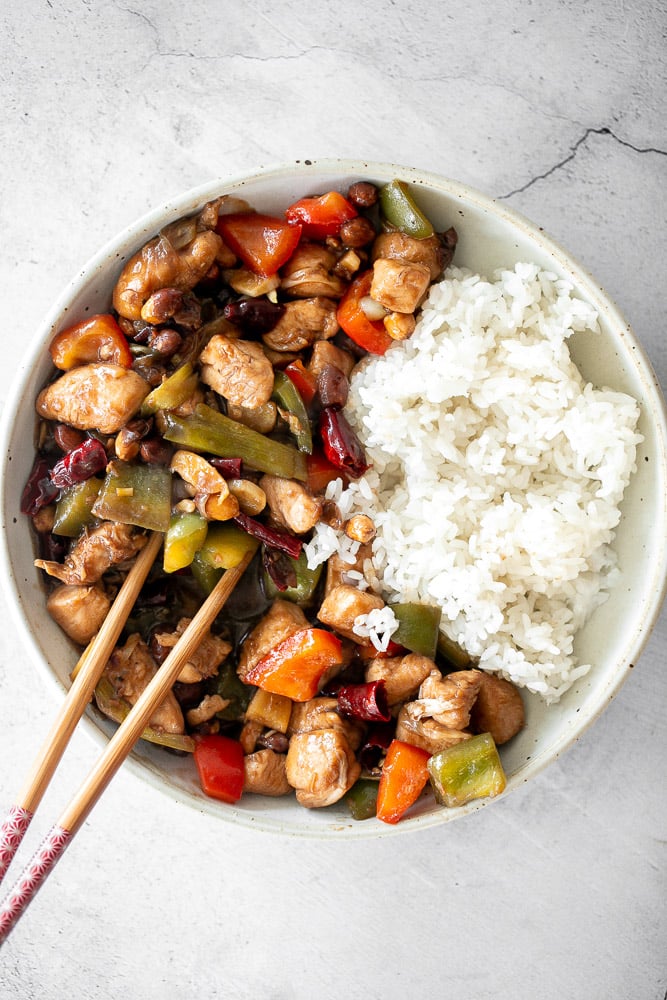
Baked General Tso's Chicken is a saucy, savoury, sweet, spicy Chinese-American takeout favourite made healthier with baked chicken, not fried.
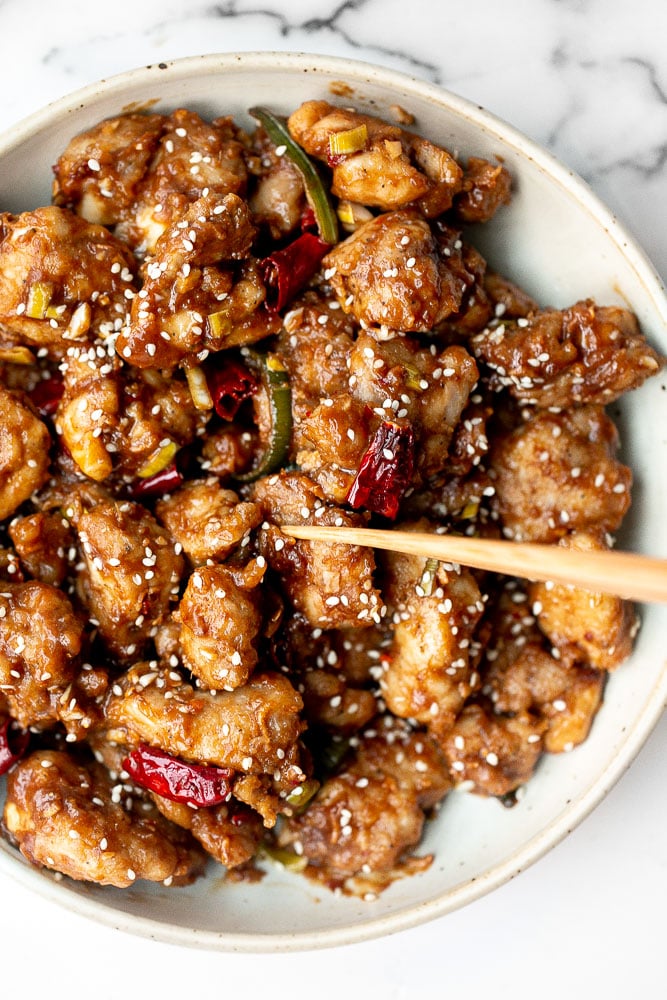
Better than takeout, healthy lemon chicken is a delicious, sticky chicken stir fry coated in a flavourful, sweet and tangy sauce. The best weeknight dinner.
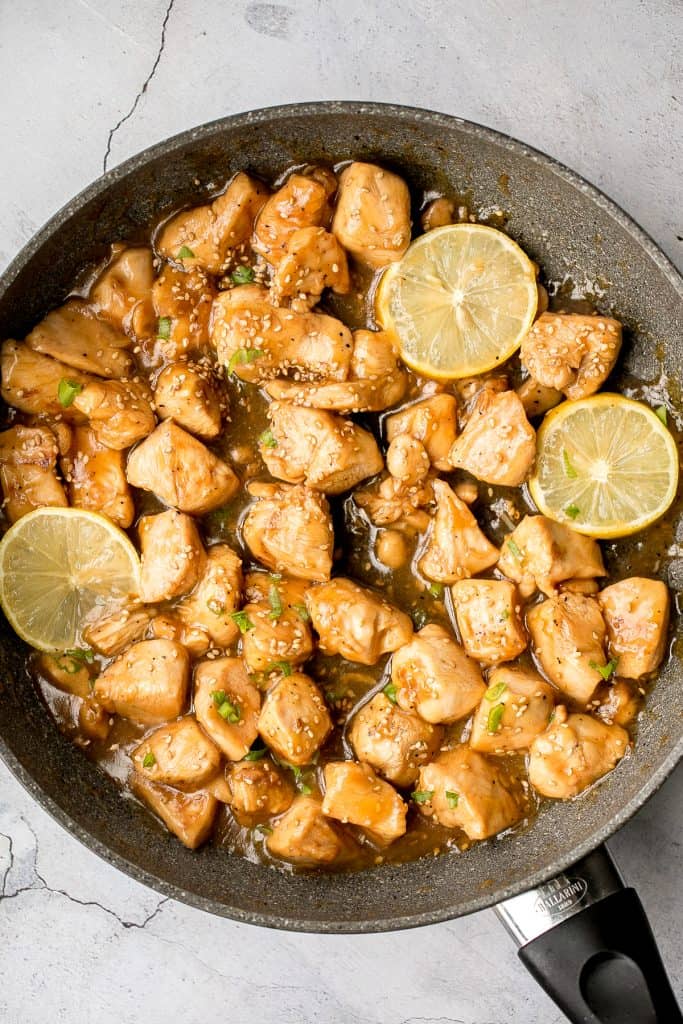
Teriyaki chicken is a quick easy chicken stir fry that is delicious, flavorful, healthy, and better and faster than takeout. Perfect for busy weeknights.
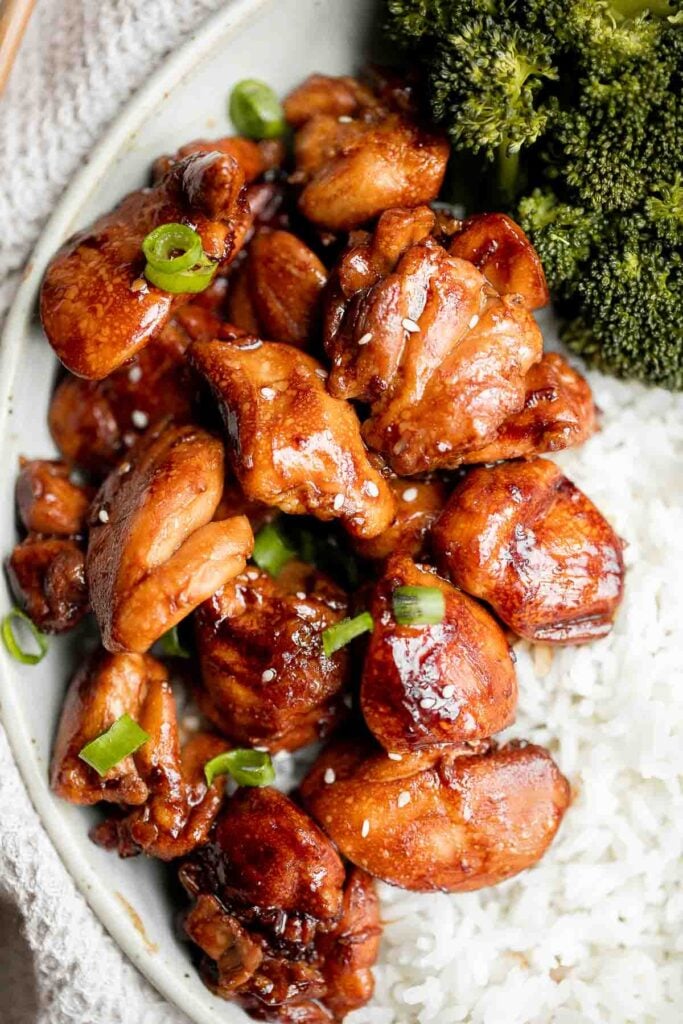
No more takeout when you can make flavourful, restaurant-style, authentic chicken Pad Thai at home in just 10 minutes. It's sweet, savoury, sour and nutty.
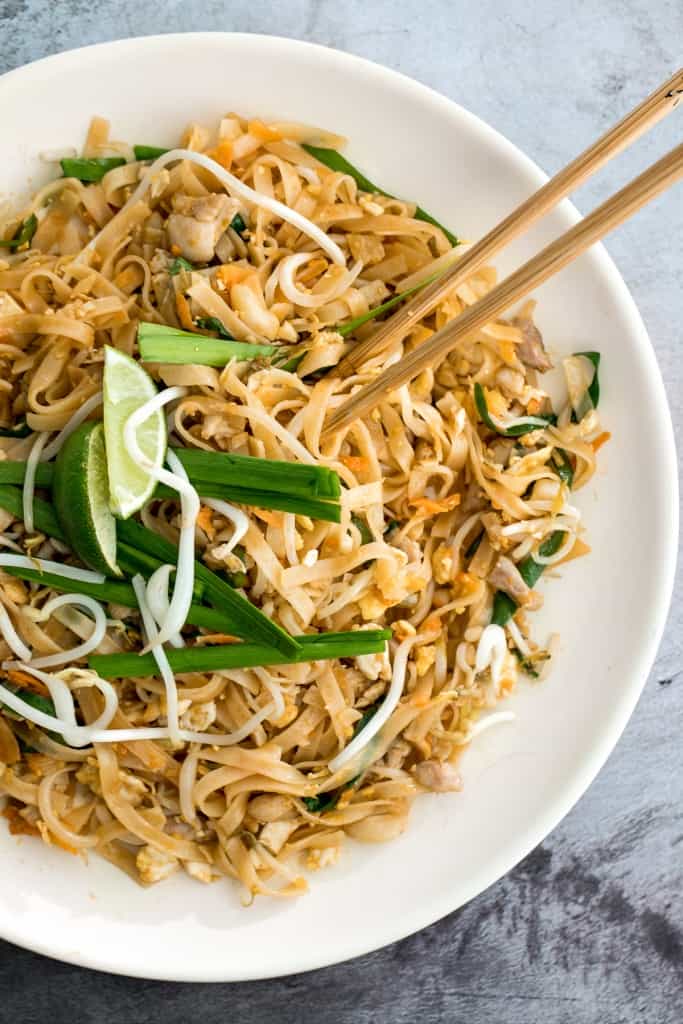
Better than takeout, baked sesame chicken with vegetables is delicious, flavourful, sticky and saucy. This healthier Chinese dish is quick and easy to make.
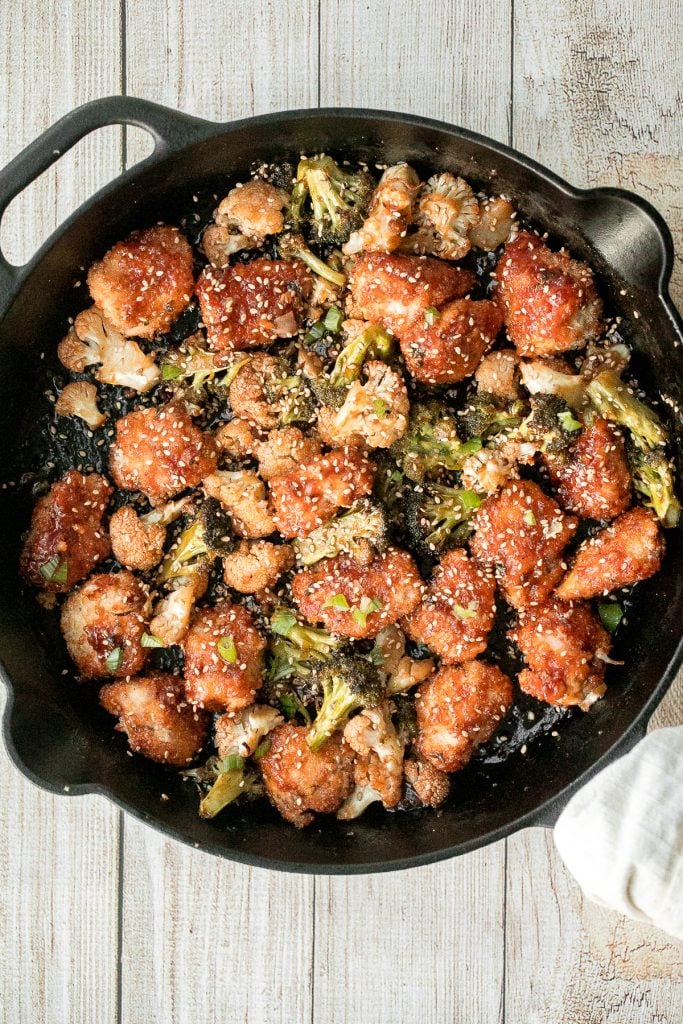
Cashew chicken is a quick and easy chicken stir fry ready in under 30 minutes. It's flavorful, delicious, and so much better and faster than takeout.
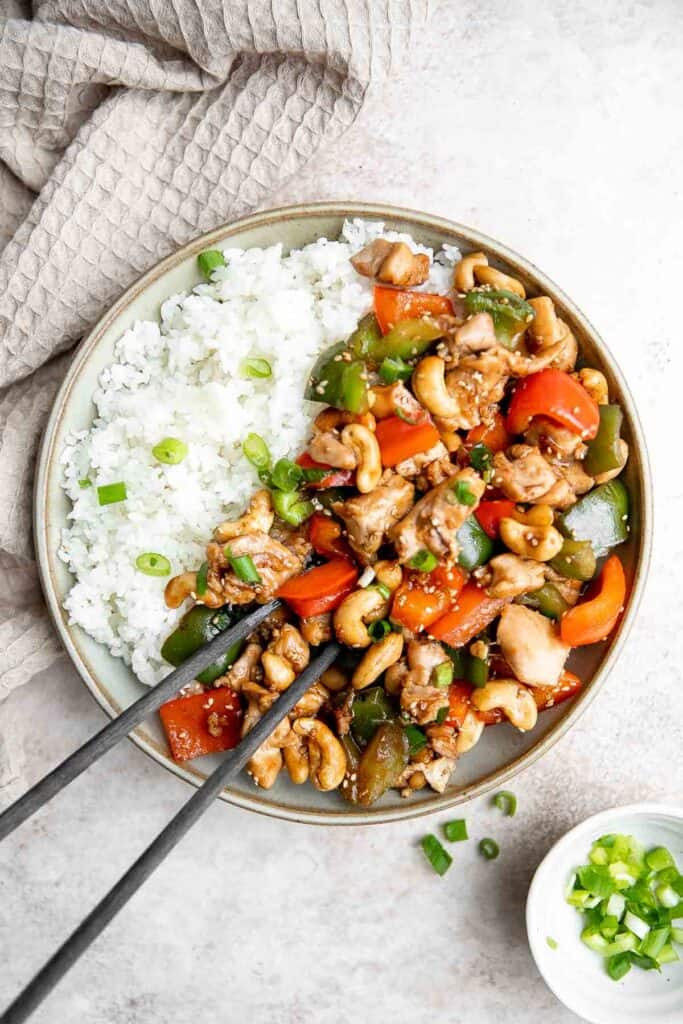
Better than take-out, flavourful and authentic Shanghai fried noodles with chicken, mushrooms, and bok choy is made in just 10 minutes - the easiest dinner!

Aromatic Asian pan-fried lemongrass chicken is healthy, gluten-free, and takes less than 25 minutes to prep and cook. Now that's what I call the perfect weeknight meal. Use any leftovers in a lemongrass chicken banh mi sandwich.
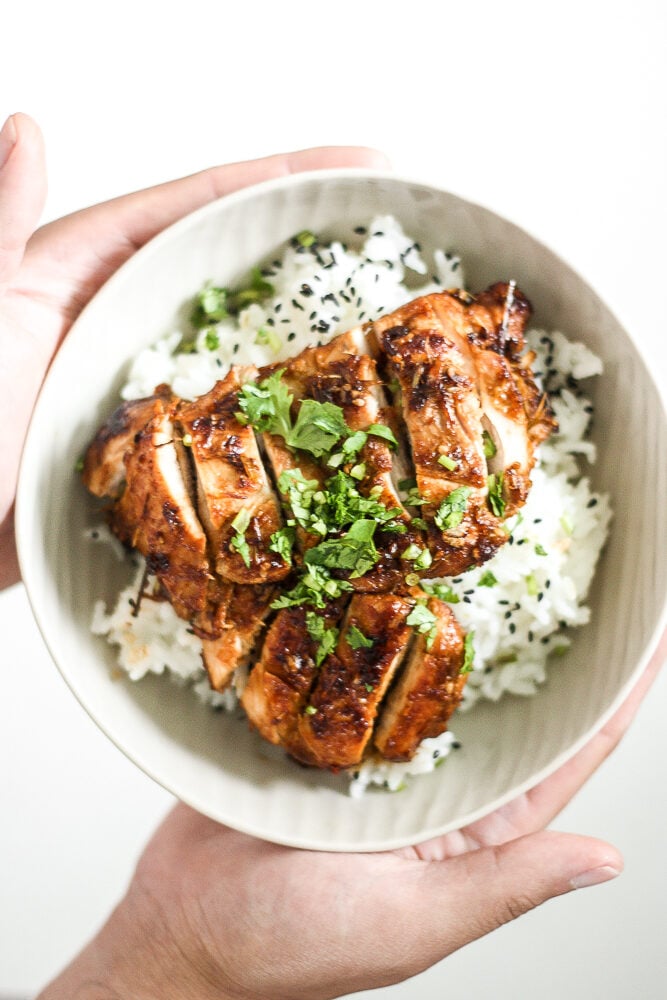
Better than takeout, make easy Indian butter chicken in just 30 minutes, with a creamy tomato-based sauce, charred chicken, and incredible spice + flavour. Serve with homemade garlic naan bread.
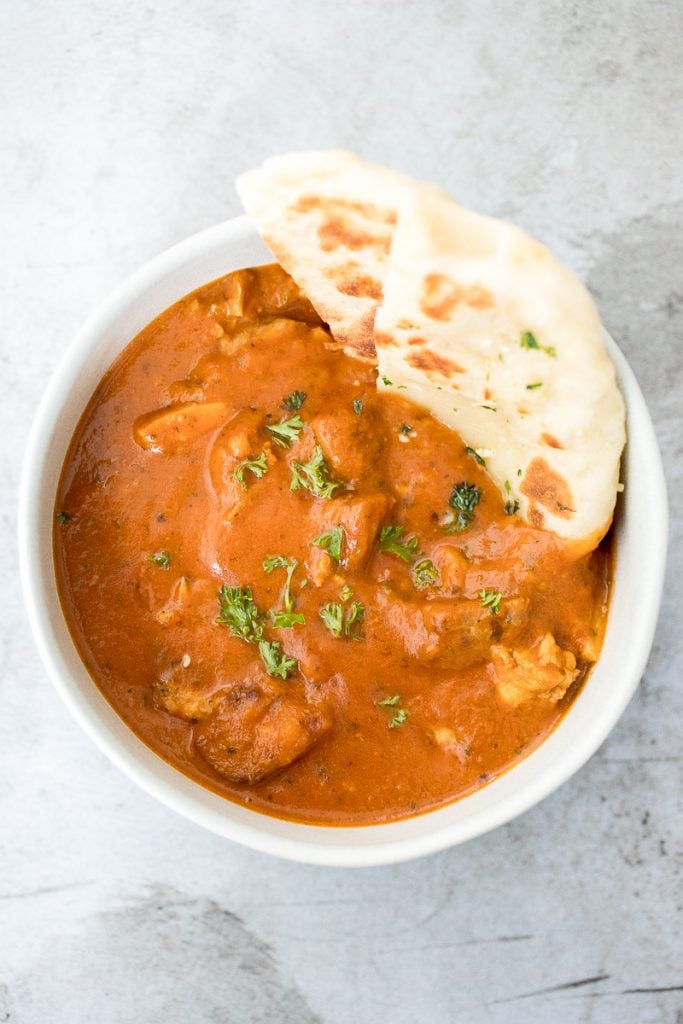
Flavourful curry chicken fried rice with chicken, mushrooms, peas, rice, and curry flavours is so easy to make in less than 10 minutes on busy weeknights. Serve with a fresh Chinese garlic cucumber salad on the side.
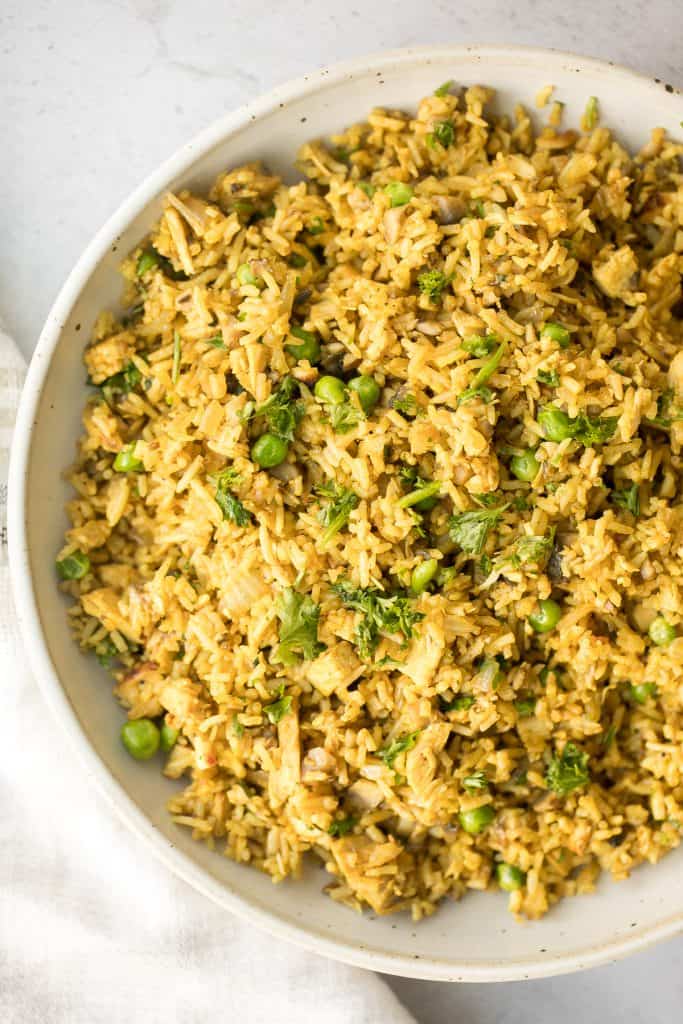
Char Siu (Chinese BBQ) Chicken
Sweet sticky and savoury Char Siu (Chinese BBQ) chicken is a delicious dinner packed with classic Asian flavours with incredible flavour.
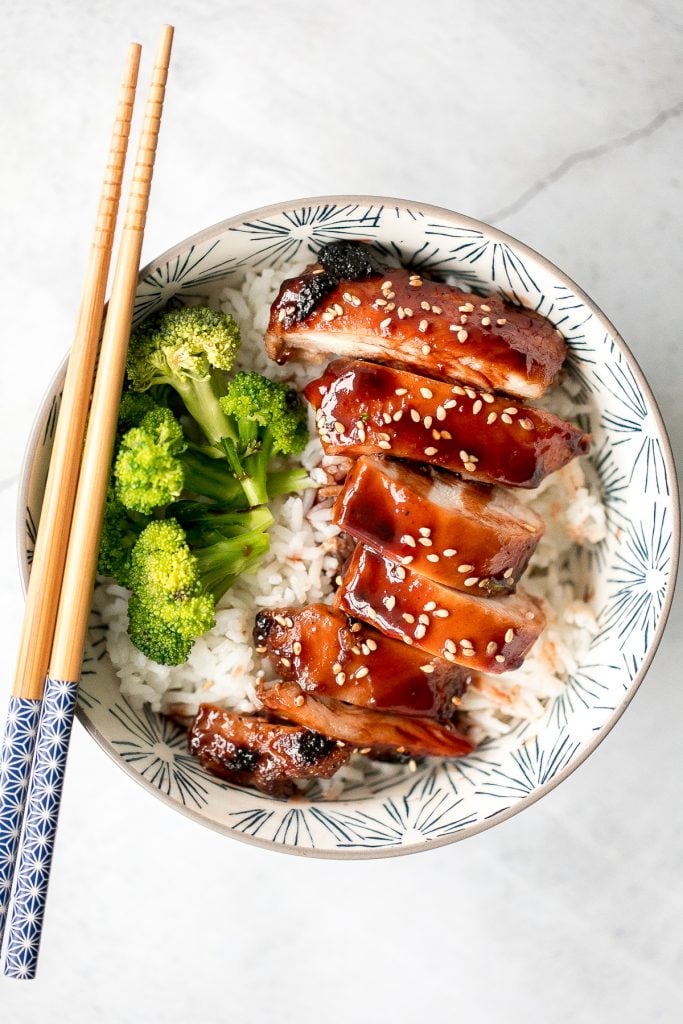
Learn how to make homemade chicken and cilantro wontons with this easy to follow recipe and instructions on how to fold wontons. For another variation, try chicken and shrimp dumplings.
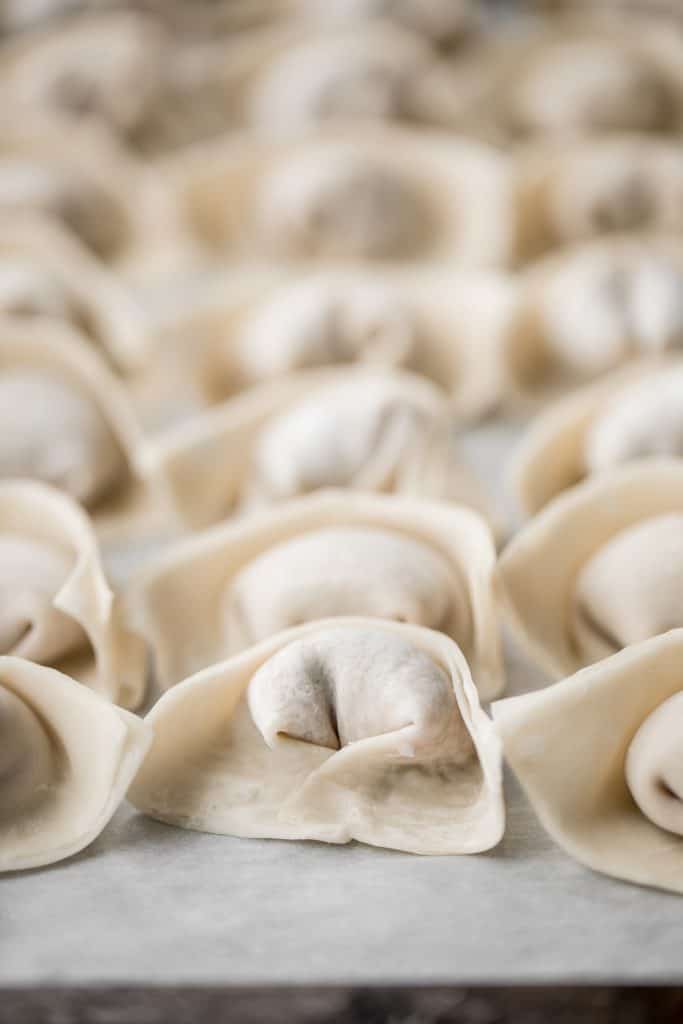
Chicken Soup Recipes
Smooth, hearty and light, one pot lemon chicken orzo soup is pure comfort in a bowl. This family favourite is like chicken noodle soup with a major upgrade.
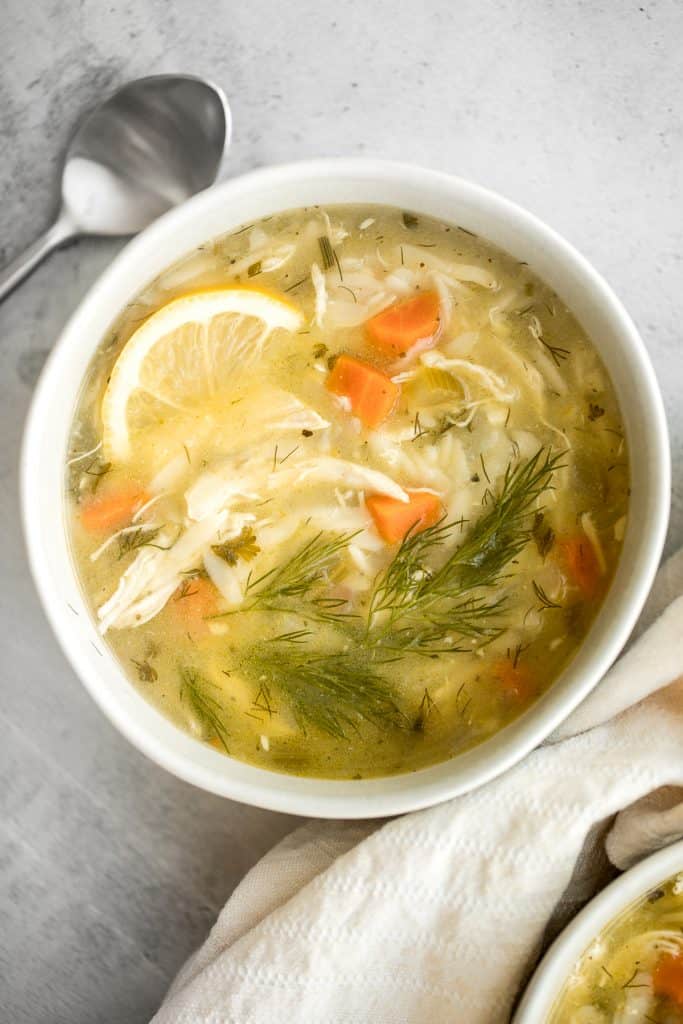
Hearty chicken tortilla soup is a delicious, wholesome and filling soup that you can make in about 30 minutes, packed with classic Mexican flavours.
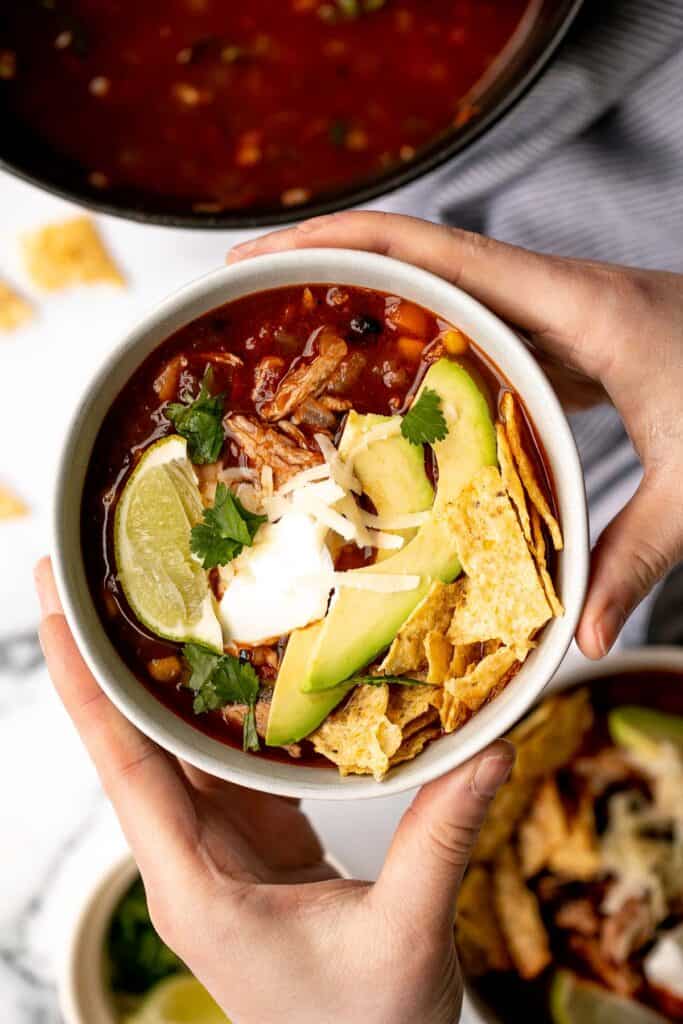
White chicken chili is an easy and delicious one pot meal made with shredded chicken, hearty veggies, and a creamy broth that's loaded with flavor.

Chicken and rice soup is delicious, warm, cozy, and comforting feel-good meal that can warm you up on a chilly day. Easy to make in one pot.
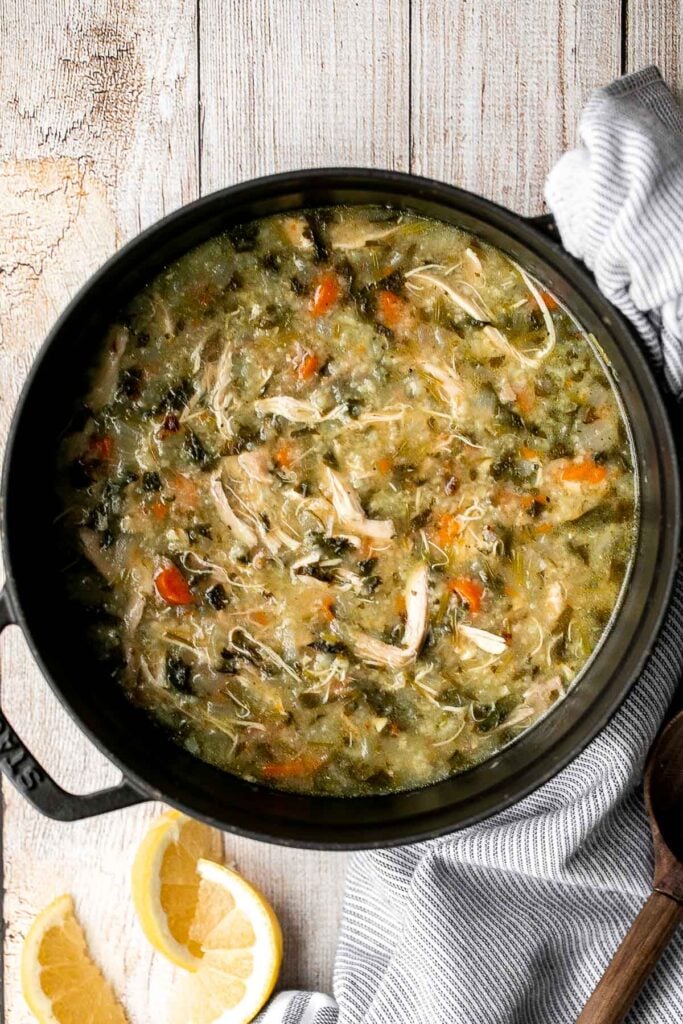
Healthy Miso Ramen with Chicken
It doesn't get any more cozier than a healthy miso ramen soup with chicken from the comfort of your own home. The vegan miso broth is what this ramen is all about. Seriously, weeknight dinners have never been tastier!

Wholesome hearty one pot leftover turkey wild rice soup can be adapted easily for chicken instead of turkey. It's the most comforting way to use any leftover chicken or a store-bought rotisserie chicken.

Warm and cozy, creamy turkey orzo soup is wholesome, hearty, filling, and flavourful. Make this delicious one pot meal using a rotisserie chicken instead in just 30 minutes.
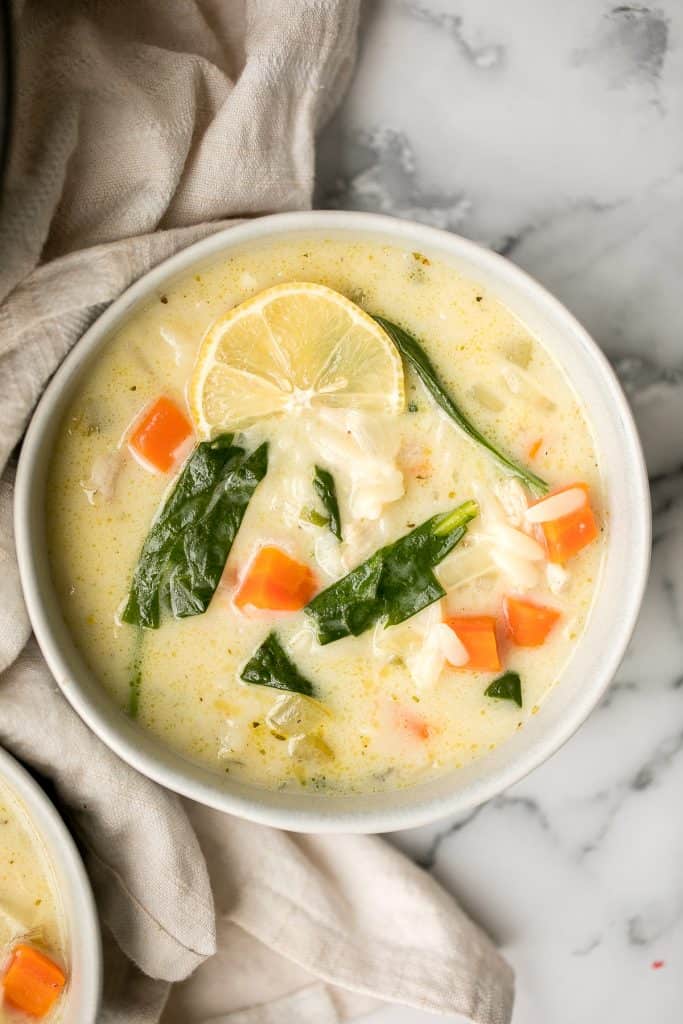
Chicken Casseroles
Creamy White Chicken and Spinach Lasagna
Creamy white chicken and spinach lasagna with tender shredded chicken is the most comforting creamiest cheesiest white lasagna. Easy to make ahead & freeze.
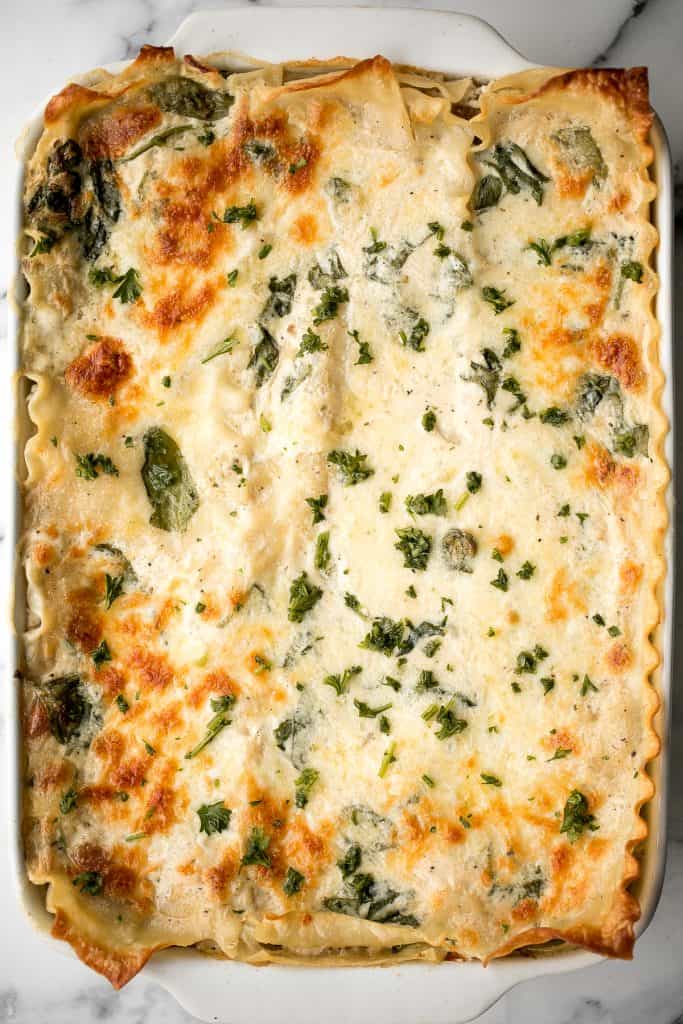
Creamy tetrazzini with spinach is a simple, easy and delicious pasta recipe that is comforting, creamy and cheesy. The recipe used turkey, but you can easily substitute it with leftover chicken or a storebought rotisserie chicken instead.
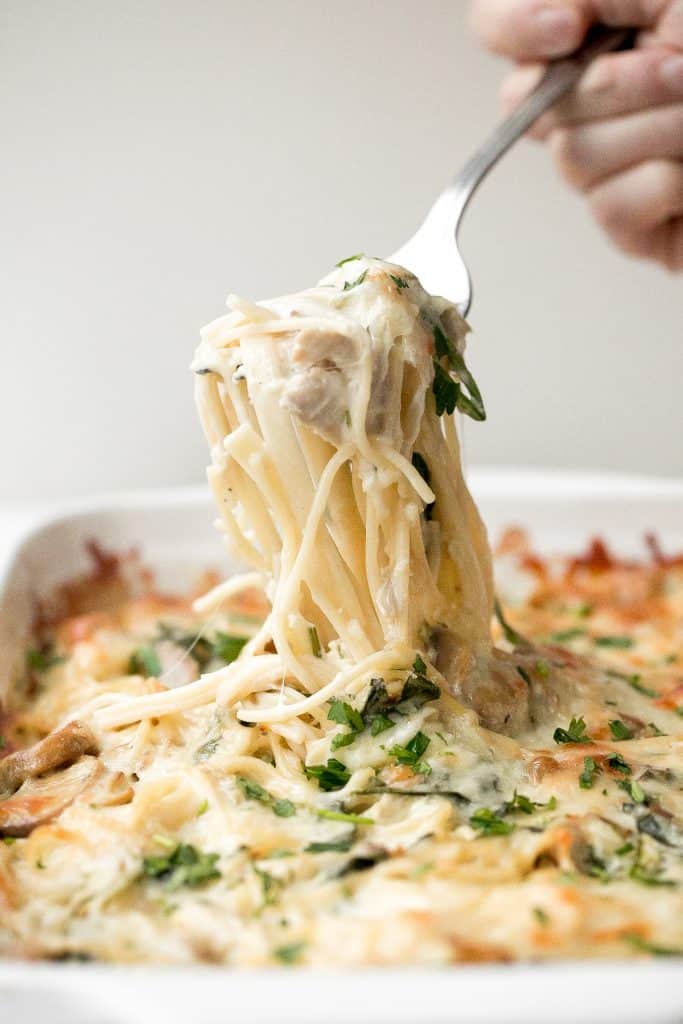
Creamy Chicken Broccoli and Quinoa Casserole
Nothing says comfort food better than a creamy chicken, broccoli and quinoa casserole made with fresh and healthy ingredients.
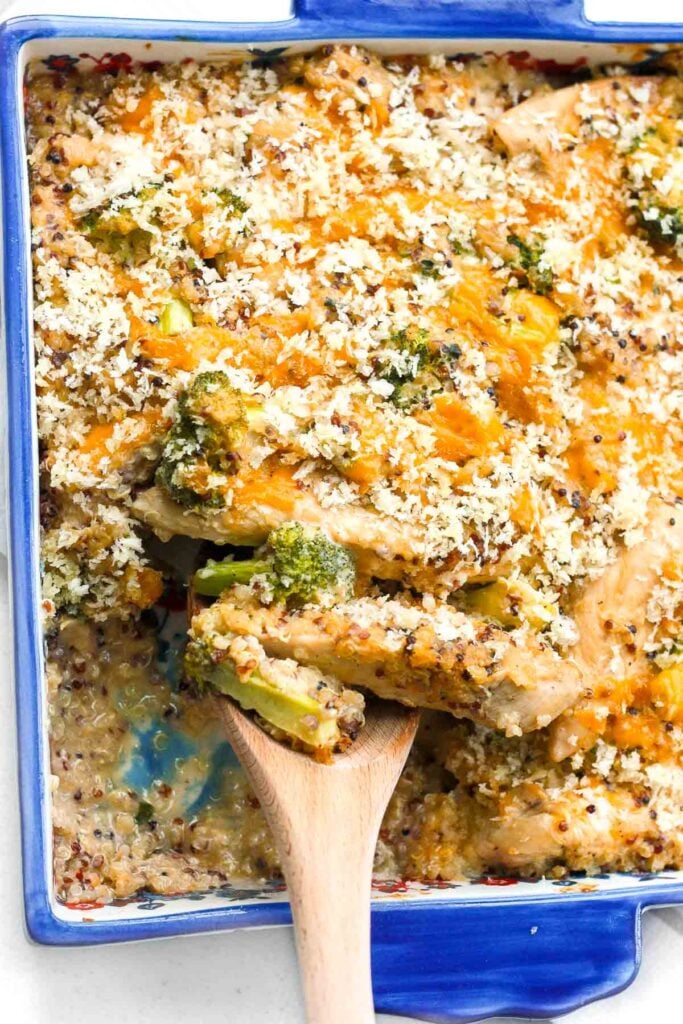
Chicken Skewer Recipes
Easy Greek Chicken Souvlaki Skewers
Easy Greek chicken souvlaki skewers marinated in garlic, fresh herbs, lemon and bay leaves for that classic Mediterranean flavour. Grill in under 15 minutes. Serve alongside some easy homemade tzatziki sauce and a Mediterranean orzo pasta salad. Or turn them into Greek chicken gyros wrapped in pita bread.
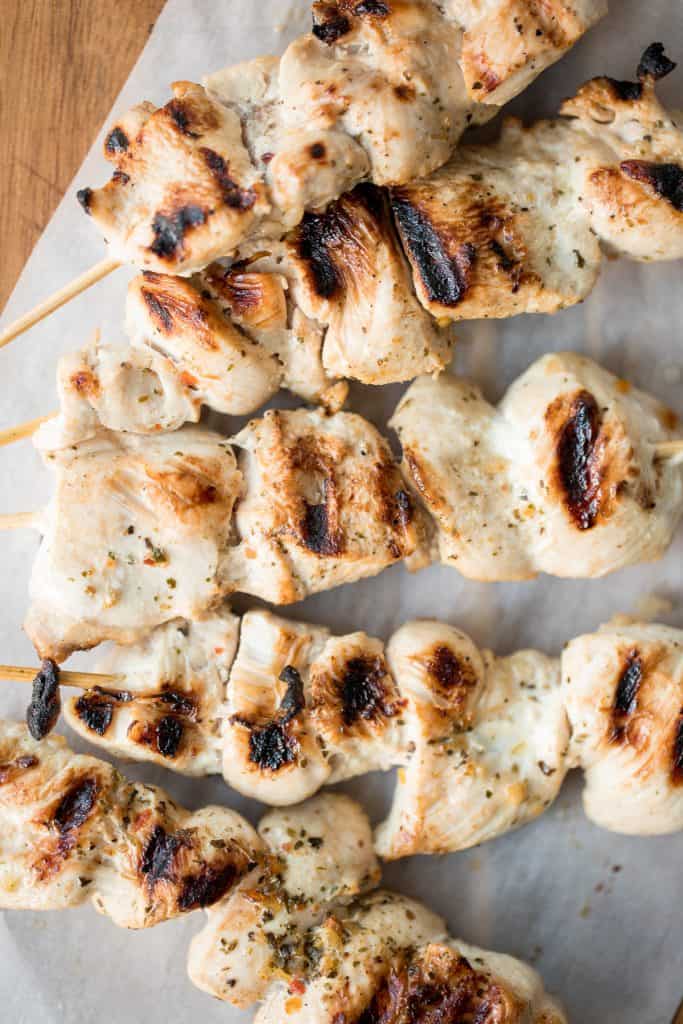
Teriyaki Chicken Skewers with Pineapple
Juicy and tender teriyaki chicken skewers with pineapple, bell peppers and red onions are sticky, sweet, savoury, and tangy. So flavourful and delicious. Serve over some steamed rice or easy coconut rice.
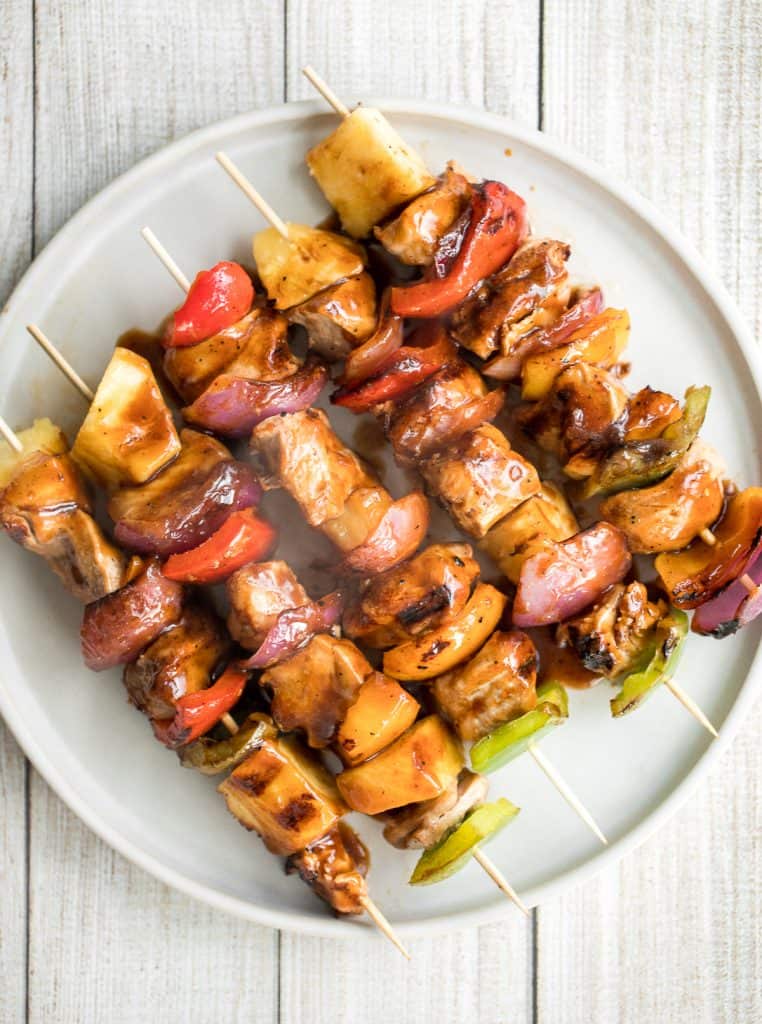
Chicken Satay Skewers with Peanut Sauce
Better than takeout, easy to make tender chicken satay skewers with coconut marinade and homemade peanut dipping sauce is savoury, sweet, tangy, and nutty. Serve it over some delicious easy coconut rice.
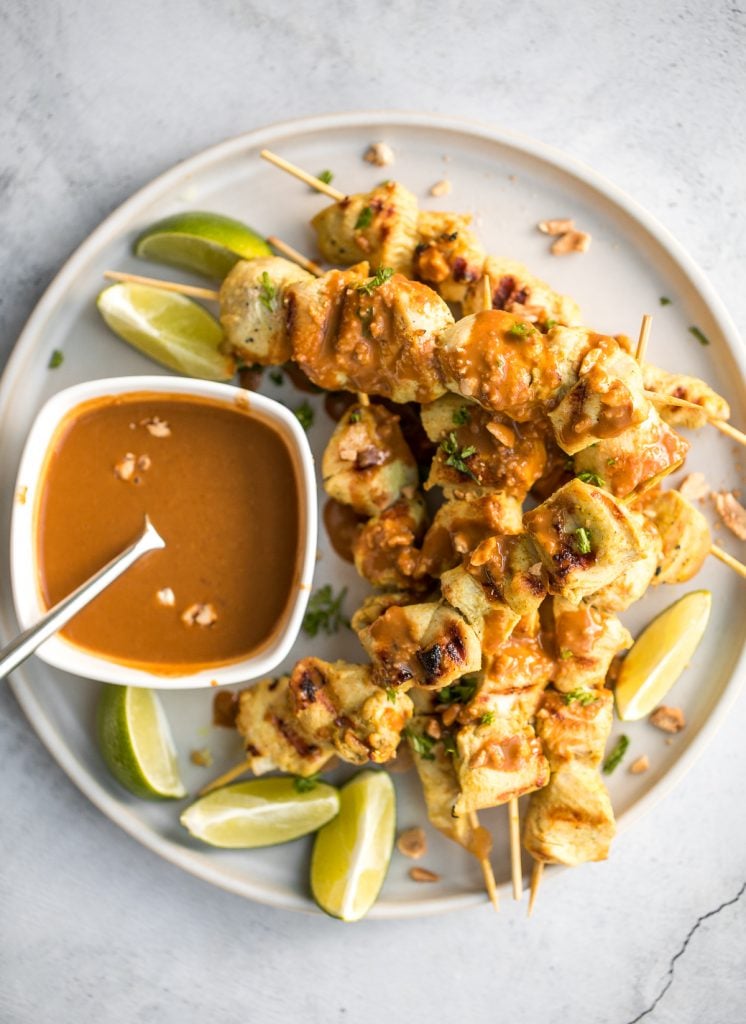
Grilled Orange Chicken Skewers
Flame-kissed, sticky and saucy, grilled orange chicken skewers with a rich, citrus-based marinade are delicious, juicy and so tender. Best summer weeknight dinner ever. Serve with a side of 10-minute vegetarian fried rice.

Persian Saffron Chicken Kebabs (Joojeh Kabob)
Quick and easy, classic Persian saffron chicken kebabs (joojeh kabob) is marinated in a simple saffron and lemon marinade for that classic Iranian flavour. Make it a full on Persian dinner with Basmati rice with saffron and Persian Shirazi salad with cucumber and tomato.
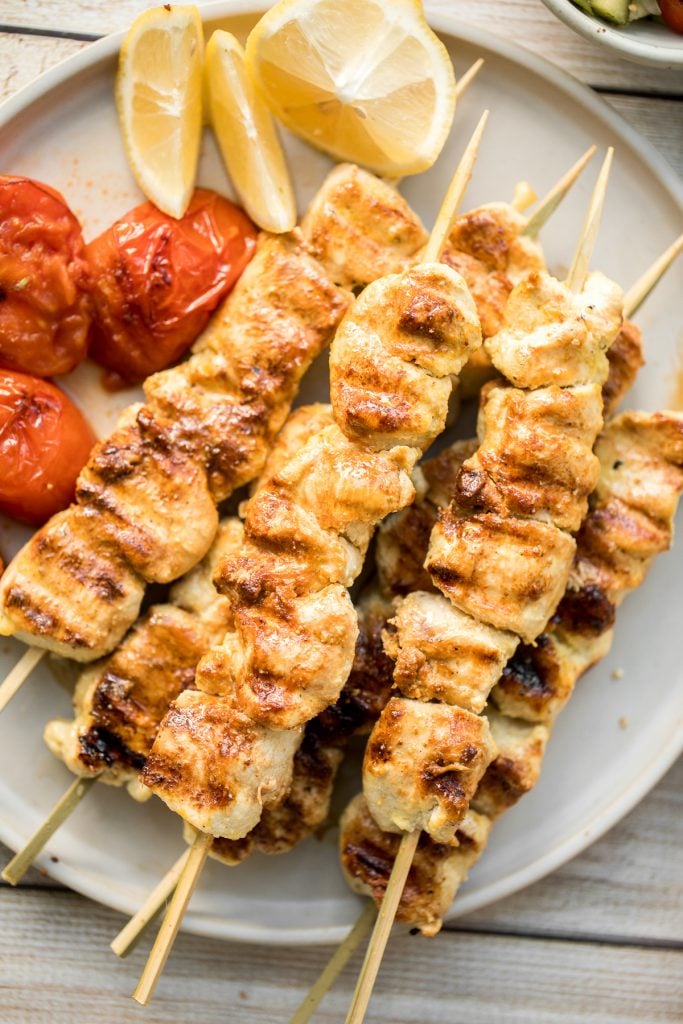
Chicken Appetizer Recipes
Easy homemade chicken nuggets with chicken breast are golden and crisp on the outside and juicy and tender inside. They're freezer-friendly so make extra.
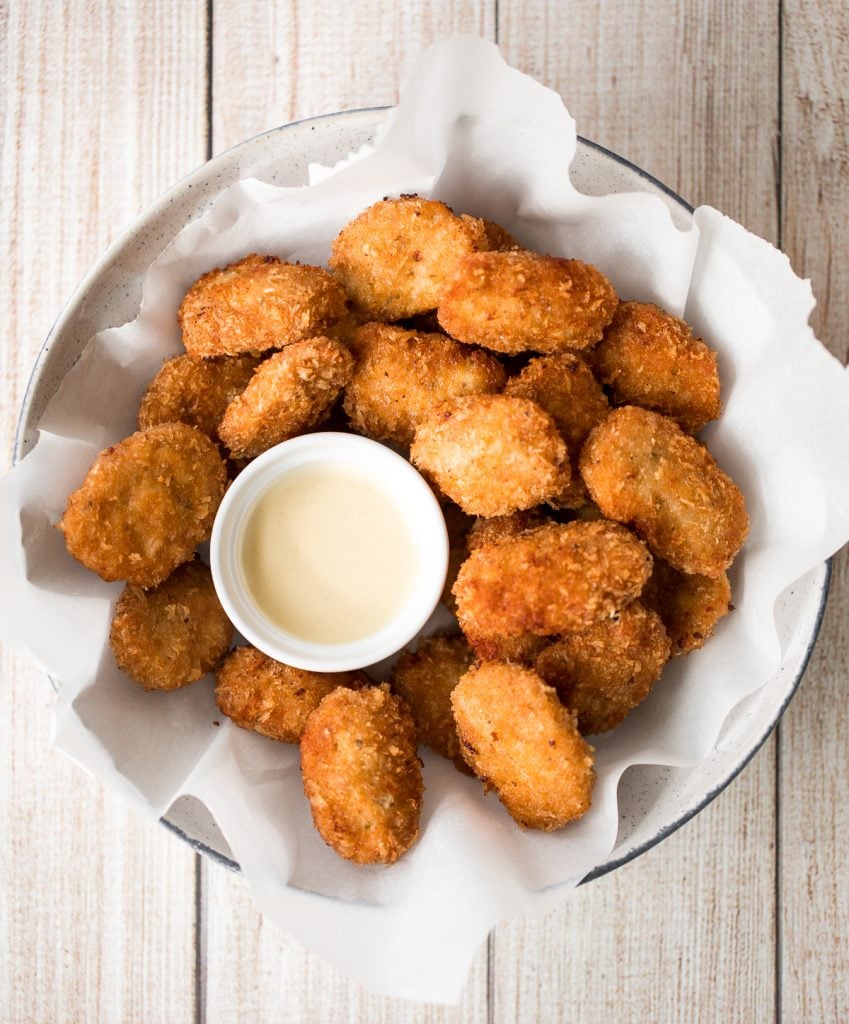
Baked Chicken Quesadillas are cheesy, crispy, flavorful, and delicious. This family-friendly recipe is quick and easy to make in just 30 minutes!

Easy Greek Chicken Gyros with Tzatziki
This refreshing and light, easy Greek chicken gyros is packed with tender souvlaki chicken, Greek salad, and homemade tzatziki sauce, all wrapped in a pita.
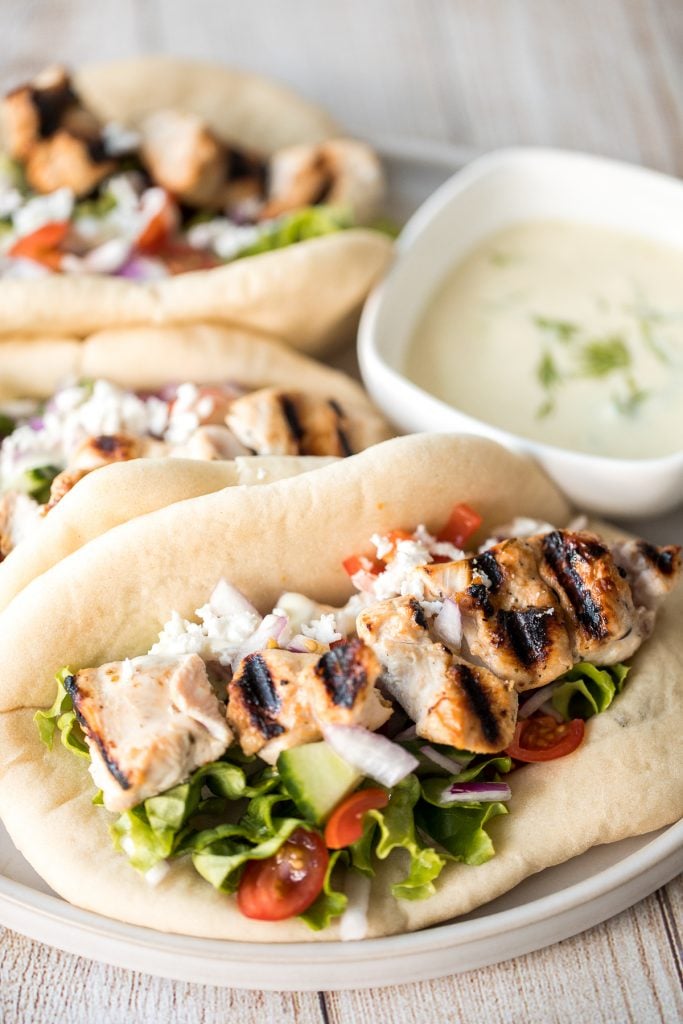
Sticky crispy baked sweet chili chicken bites is better than takeout and so easy to make healthier at home. An easy dinner or game day appy.
ForgForget delivery and make sweet, tangy, and smoky BBQ chicken pizza from the comfort of your own home in under 30 minutes. The easiest weeknight dinner.

The Best Breaded Fried Chicken Wings (Air Fryer)
The BEST breaded fried chicken wings -- extra crispy and crunchy outside, tender and juicy inside. You can't even tell they're air fried, not deep-fried!
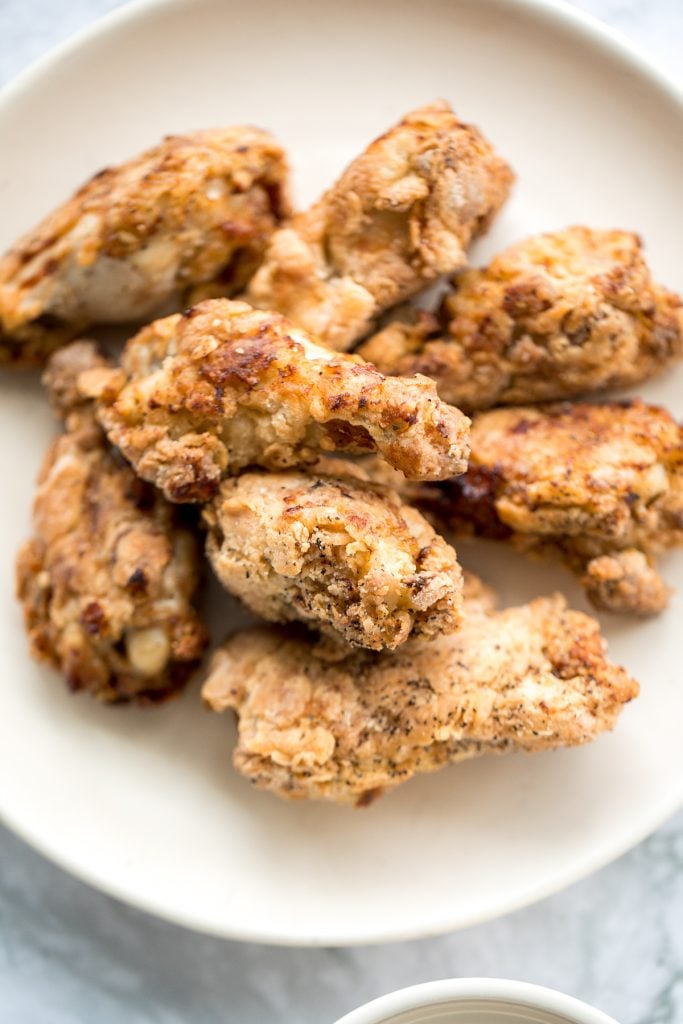
These sweet and sticky honey garlic chicken wings are baked or air fried until crispy and tossed in a honey garlic sauce. So crave-worthy and so easy to make.
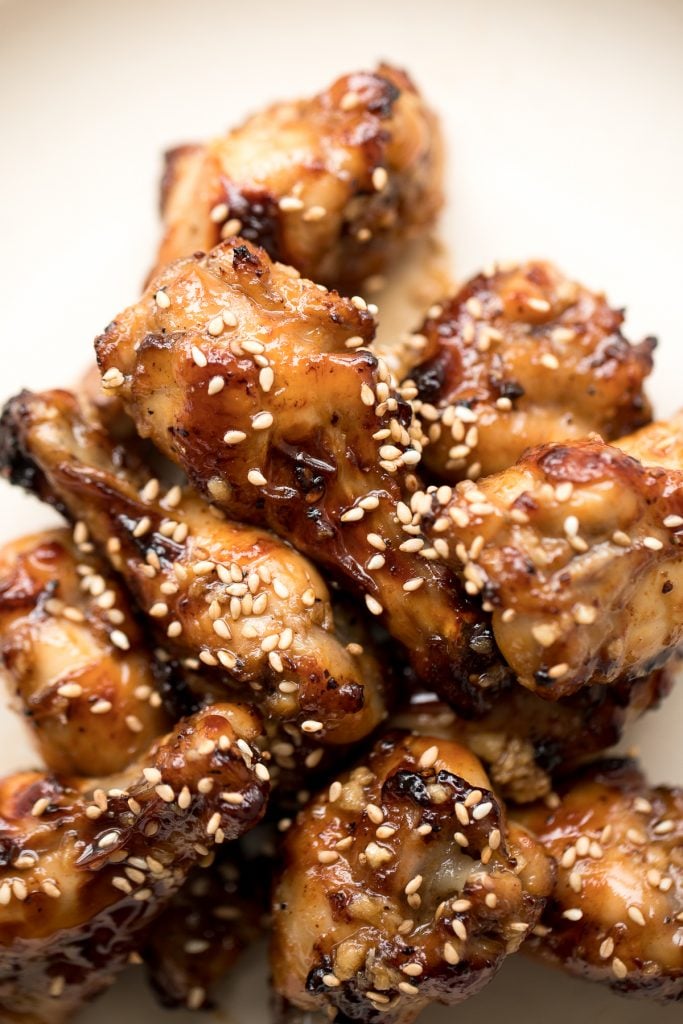
Szechuan Chicken Lettuce Wraps with Spicy Mayo
Spice it up and make copycat Szechuan chicken lettuce wraps with spicy mayo from the comfort of your own home with this easy to follow recipe. Plus, it is healthier than the original.
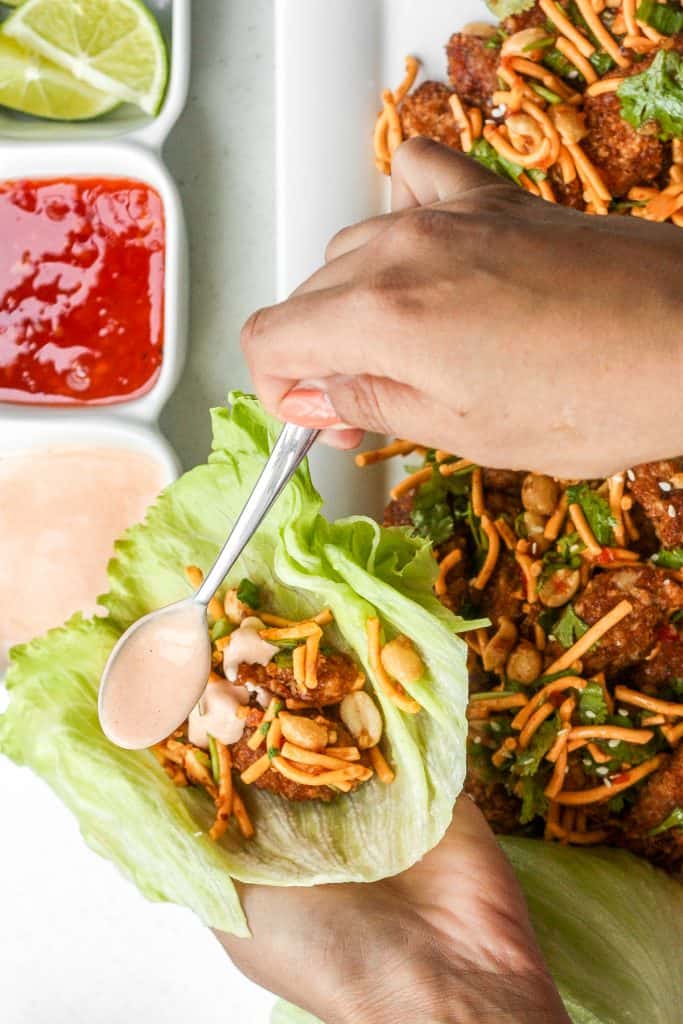
Quick, easy, delicious and saucy leftover butter chicken pizza with an ultra crispy pizza crust is made entirely in a cast-iron skillet in just 10 minutes.

Sweet and sticky, baked BBQ chicken wings are perfectly crispy, so delicious, and smothered in barbecue sauce. They are the perfect game day appetizer.
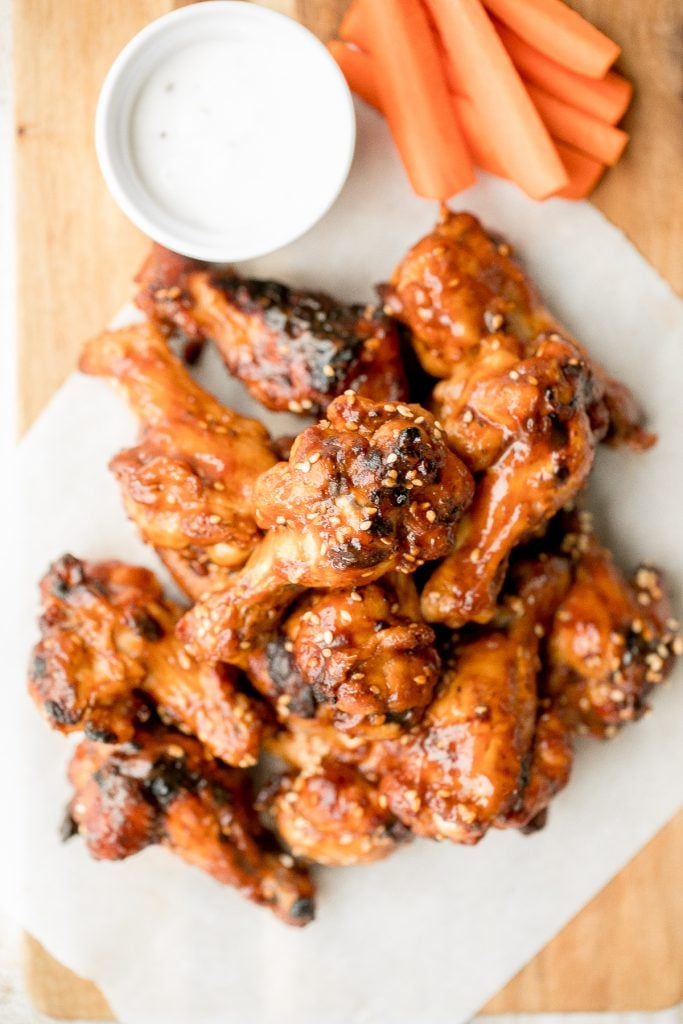
Lemongrass Chicken Banh Mi Sandwich
This easy-to-make, light and crunchy Vietnamese lemongrass chicken banh mi sandwich is packed with tender chicken, pickled vegetables and fresh herbs.
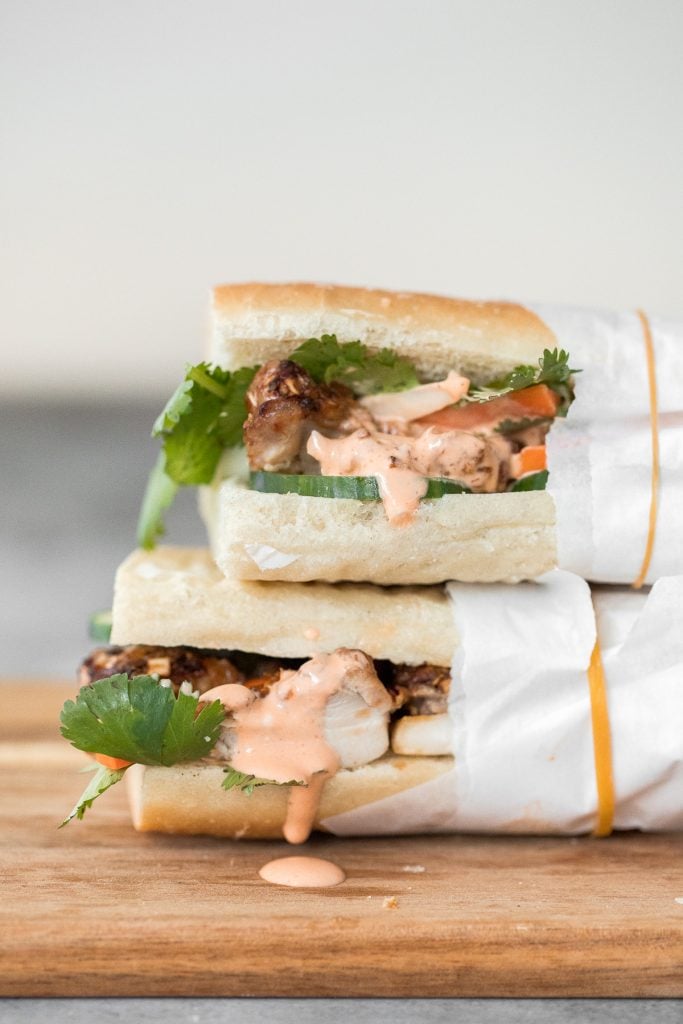
Juicy long strips of chicken shaped perfectly for dipping and coated with a flawless crispy and crunchy exterior, baked crispy chicken strips are a pleaser.

BBQ Chicken Stuffed Baked Potatoes
Try this gorgeous combination of BBQ chicken, scallions, cilantro and gruyere for an explosion of flavour in loaded BBQ chicken stuffed baked potatoes.

Is it even game day without game day buffalo hot wings? This classic appetizer is a total crowd pleaser and one of my most popular Super Bowl recipes.

How to Store Chicken
Store leftover chicken from any of these quick chicken recipes in an airtight container and place in the refrigerator for up to 3 days. Most of these recipes are also freezer-friendly and can also be stored in the freezer for up to 3 months.
To reheat, simply reheat in the air fryer at 300F for 5-10 minutes, or in the oven at 300F for 10 minutes. You can also reheat on the stove over medium heat until fully warmed through. If heating from frozen, let it thaw first in the refrigerator and then reheat.
How to Serve Chicken
You can never have too many sides when serving a delicious chicken dinner. Some of my favourite side dishes to serve are:
- Sautéed Garlic Mushrooms
- Roasted Cauliflower
- Creamy Mashed Potatoes
- Roasted Garlic Green Beans
- Creamy Garlic Mashed Cauliflower
- Roasted Garlic Parmesan Baby Potatoes
- Air Fryer Asparagus
- Garlic and Herb Roasted Carrots
Did You Make Any of These Chicken Recipes?
Please leave a comment and rating below, and let me know what you thought of this round up of the best chicken recipes. Be sure to snap a picture and tag me on Instagram @aheadofthyme or share it on the Pinterest pin so that I can follow along.
HUNGRY FOR MORE? Don't forget to sign up for my email newsletter so that you don't miss any recipes. You can also follow along on Instagram and Pinterest for more recipe updates.
Slow Cooker Beef Chili
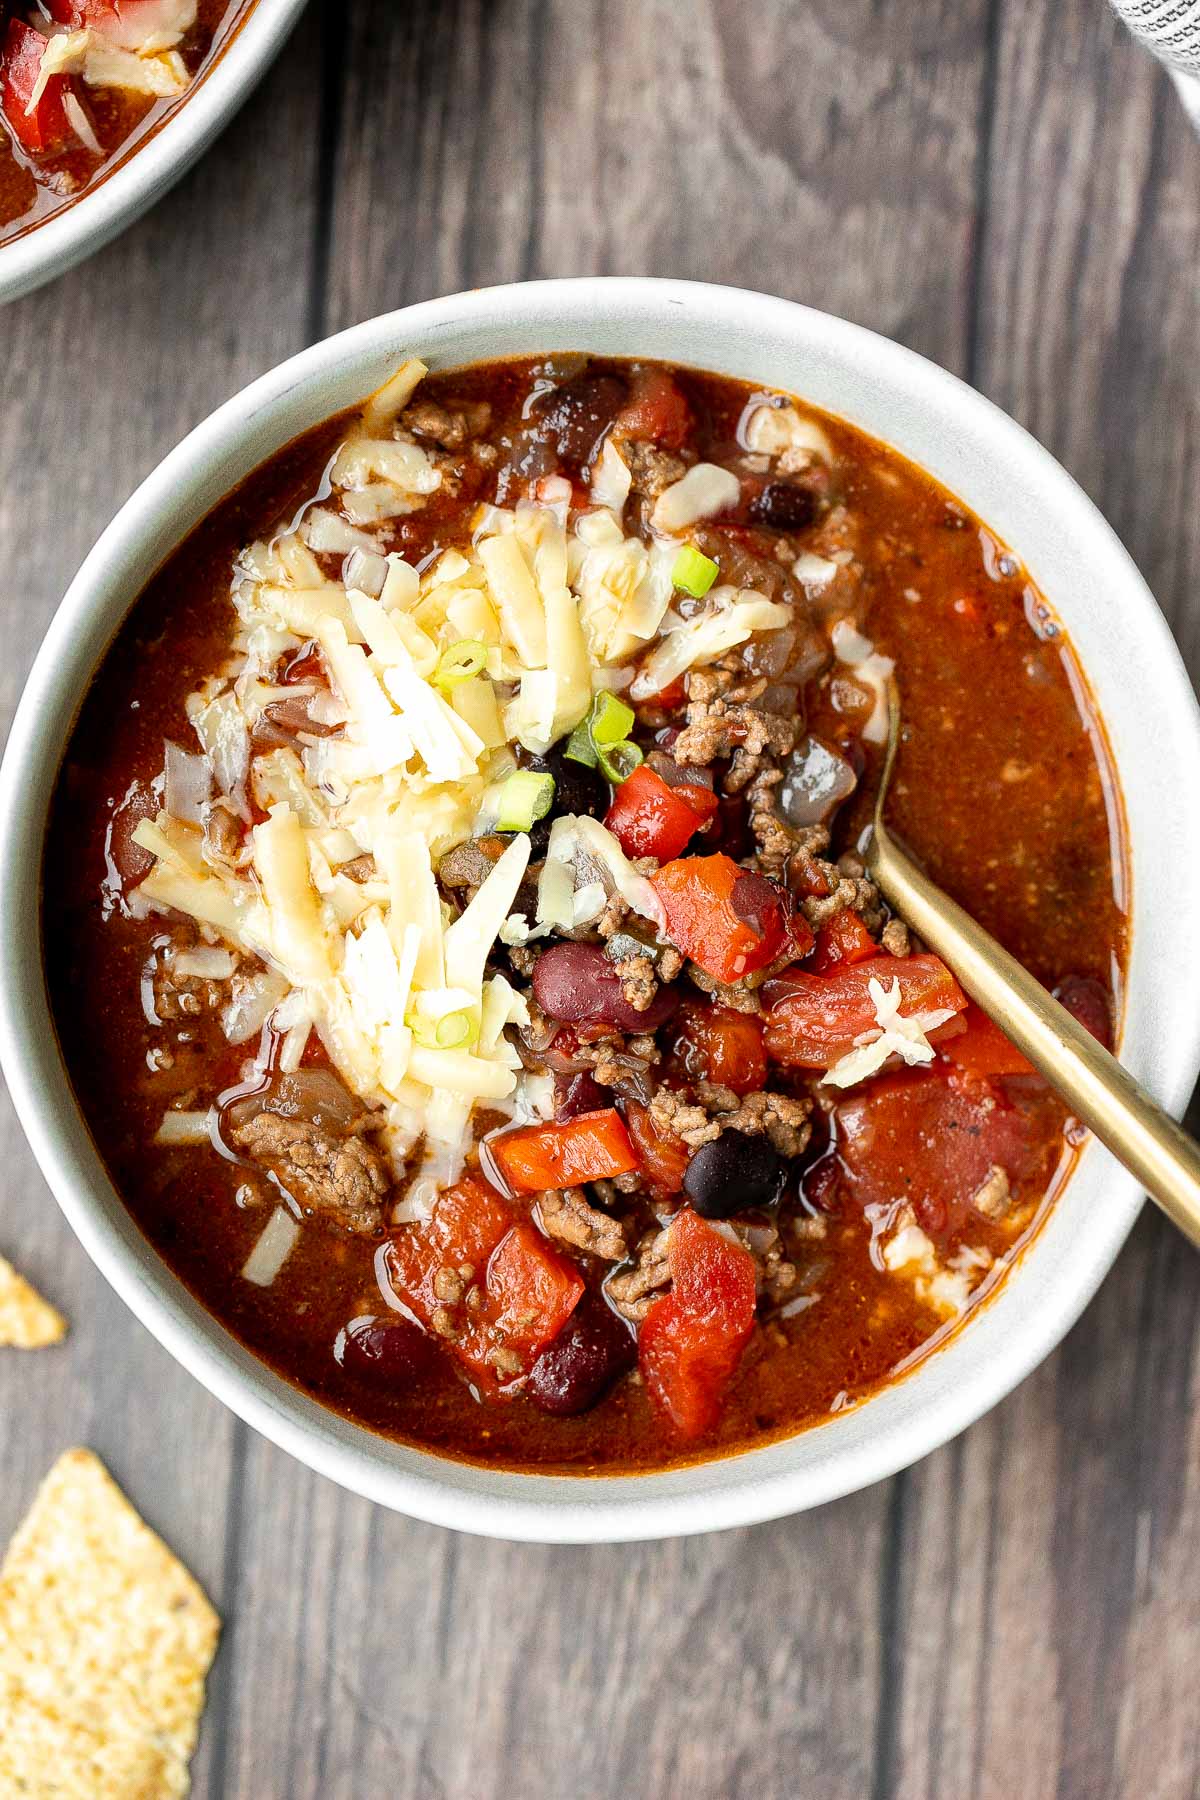
Hearty slow cooker beef chili is an easy, low-maintenance dinner that really hits the spot in the fall and winter months. This crockpot chili is made with ground beef, beans, tomatoes, and delicious seasonings that packs on the flavour. Top it with your favourite toppings and enjoy this bowl of comfort food that is a true family favourite.

Cooking dinner in the slow cooker is the way to to go. It makes life super easy because you can literally prep your ingredients and throw them in there, set the crockpot on, and have it cook dinner for you over the course of a few hours. Plus, slow cooking over a longer period of time results in the most rich and flavourful chili as it allows the flavours to really blend into each other. Plus, the beef becomes tender and juicy in the process. Win win.
But if you don't have the time to let the crockpot do its thing, a one pot chili is also really convenient (not to mention delicious!) since making it in one pot means less dishes to clean.

Ingredients in Slow Cooker Chili
To make this delicious slow cooker beef chili, you will need to gather the following ingredients:
- olive oil
- ground beef
- onion
- garlic
- jalapeño pepper
- red bell pepper
- seasoning - paprika, ground cumin, salt, and cayenne red pepper (optional for a spicy kick).
- beans - I used red kidney beans and black beans. You can substitute with whatever beans that you have such as
- fire-roasted diced tomatoes
- water
And, don't forget the toppings! Any combination of the following toppings will be pretty amazing on this slow cooker chili: sour cream, cheddar cheese, tortilla chips (or tortilla strips), green onions, avocado, cilantro and hot sauce.
You will also need a large skillet and a slow cooker (crockpot) to make this beef chili.

How to Make Slow Cooker Beef Chili
- Cook the ground beef. Heat oil in a skillet for 2 minutes over medium high heat until the hot oil sizzles. Add ground beef and stir well to cook evenly until browned, about 5-7 minutes. Break up the beef into small pieces to help with even cooking and browning.
- Sauté aromatics. Add onion, garlic, jalapeño, and red bell pepper. Sauté until fragrant and tender, about 2-3 minutes. Stir in seasoning including paprika, cumin, salt, and cayenne pepper, until well combined.
- Transfer to the slow cooker. Transfer beef mixture into a 6-quart slow cooker (crockpot) and stir in kidney beans, black beans, diced tomatoes, and water. Cover the lid and set to cook for 4 hours on the high temperature setting (or for 6-8 hours on low). When the time is up, the slow cooker should automatically switch to the "warm" setting.
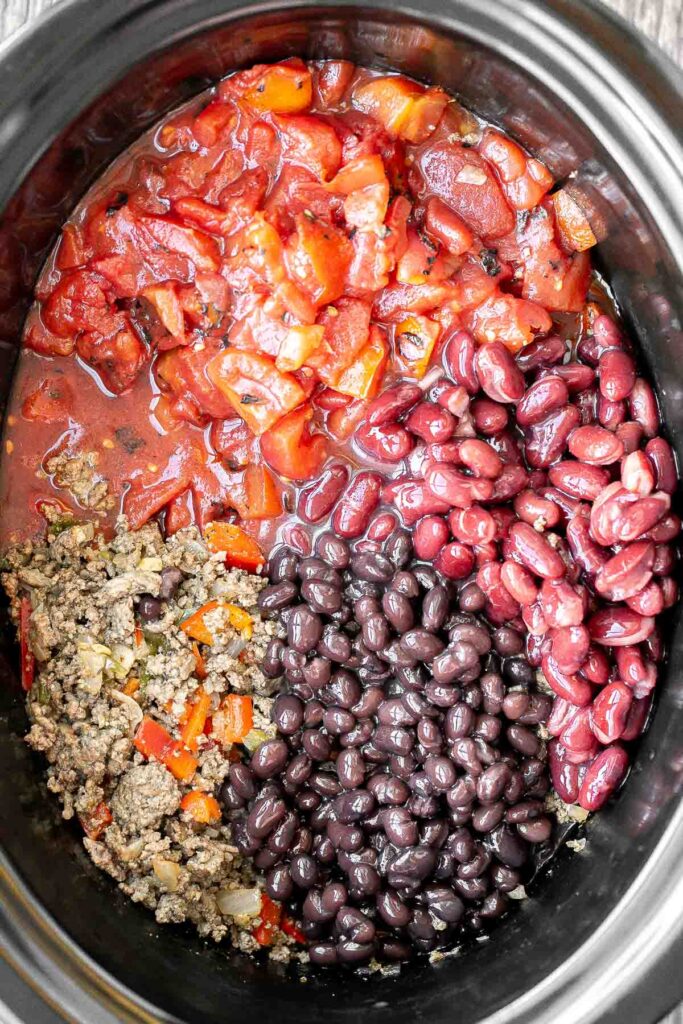
- Serve. Serve with your favourite toppings such as a spoonful of sour cream, cheddar cheese, and corn chips (like tortilla strips). Some other toppings you can add are green onions, avocado, cilantro, and hot sauce.
Stovetop Instructions: To make this beef chili on the stovetop, follow the instructions as is, but instead of transferring to the slow cooker, transfer the beef mixture into a large stockpot. Then, add in the diced tomatoes and water and simmer the chili on low heat for 3 hours. Stir in the beans and simmer for another 10 minutes before serving.
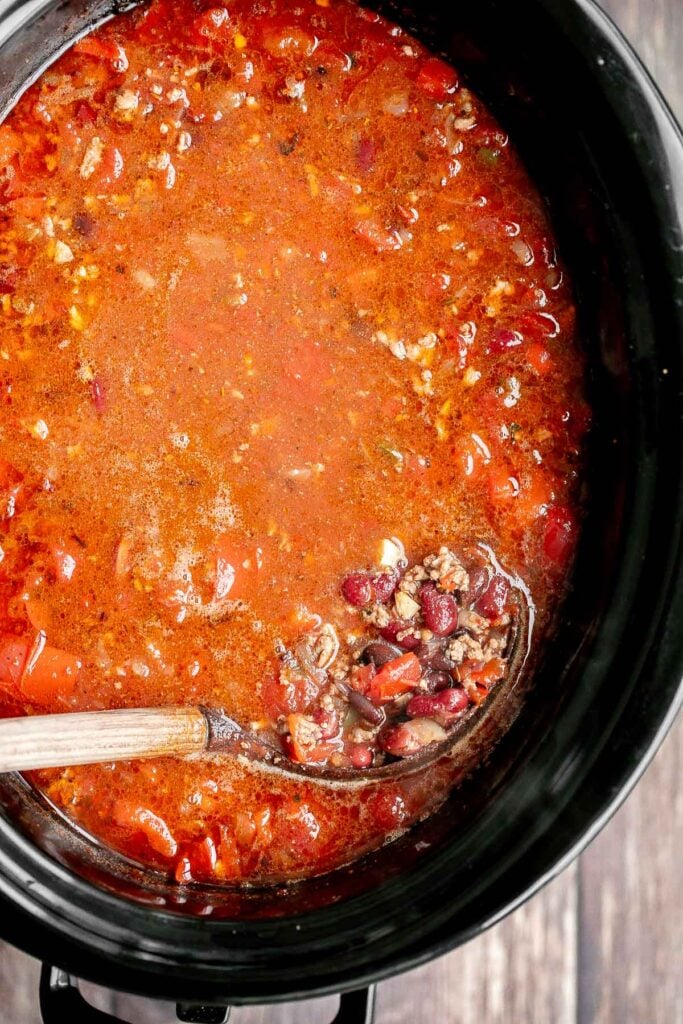
Tips
- How to serve: Serve slow cooker beef chili loaded with toppings (my favourite are tortilla chips and cheddar cheese) with a side of biscuits or cornbread. You can also serve it over a bowl of rice or on top of baked potatoes.
- How to store: Store chili in an airtight container for up to 4 days in the refrigerator.
- How to freeze: Chili is one dish that freezes exceptionally well. Once cooled, transfer to an airtight container or freeze in batches in smaller airtight containers or freezer bags. Store in the freezer for up to 3 months. When ready to eat, allow the chili to thaw overnight in the refrigerator or on the kitchen counter for a few hours.
- How to reheat: To reheat, heat on the stove over medium-low heat until warmed through, about 10 minutes.
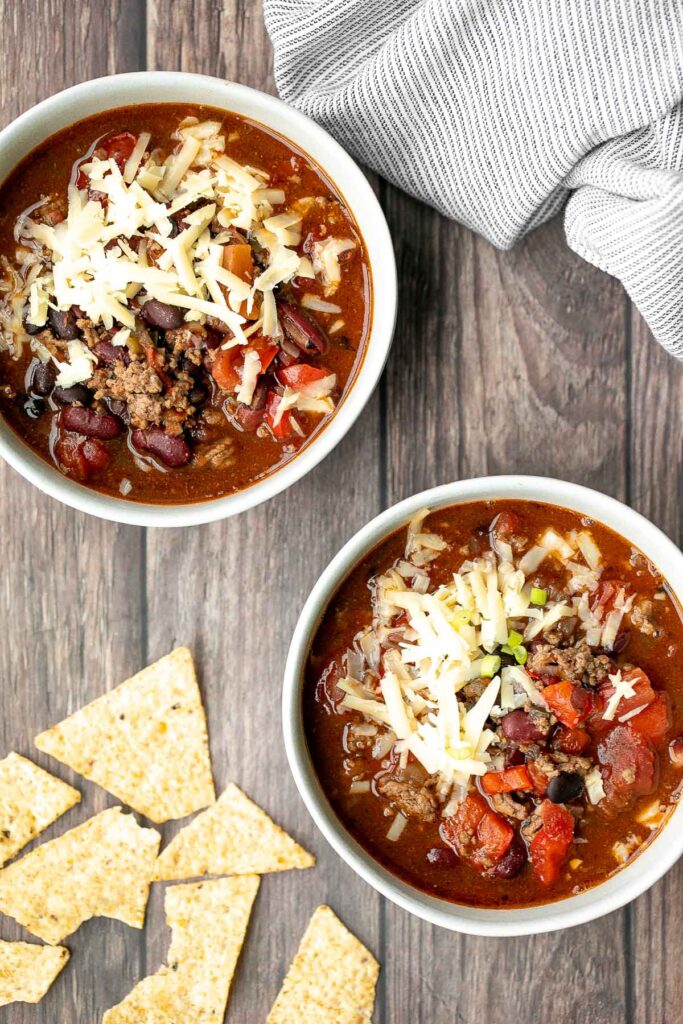
More Ground Beef Recipes
- Beef Cabbage Barley Soup
- Ground Beef Meat Pie
- Swedish Meatballs
- Spaghetti Bolognese
- Sticky Honey Garlic Meatballs
- Easy Meat Lasagna
- Beef Potstickers (Dumplings)
Tried this recipe?
I'd love to hear what you think! Leave a comment and rating below to share your feedback. Your reviews help others discover this recipe and help me keep creating more free recipes for you. Snap a photo and tag me on social media @aheadofthyme too.

Mussels Pasta in Tomato Sauce
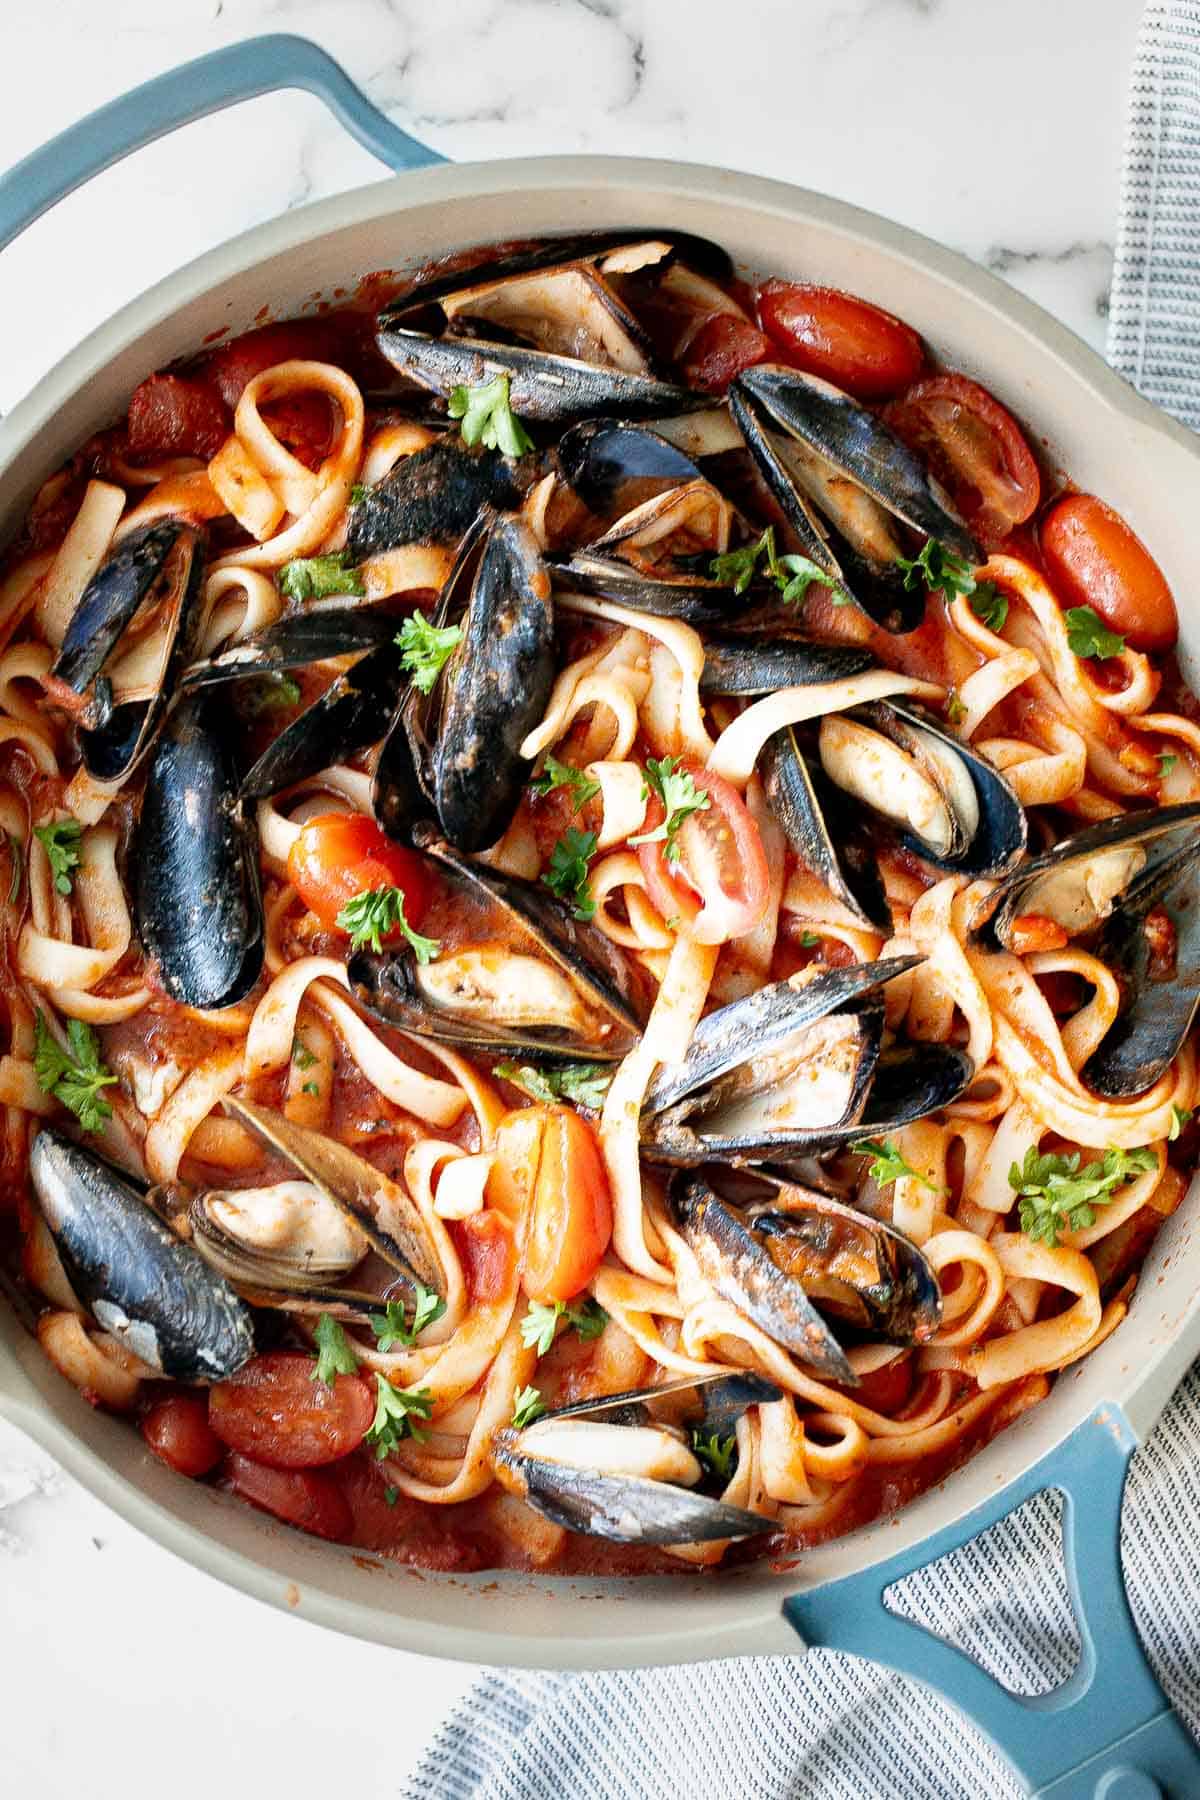
Mussels pasta in tomato sauce is a simple, light and fresh, seafood pasta dinner that you can make at home in about 30 minutes. Fresh mussels are cooked with delicious flavours and tossed in spaghetti noodles smothered in a tomato sauce. This is a quick and easy, restaurant-quality meal that you can serve on busy weeknights or on any day of the week when you are feeling fancy. Complete the meal with a side of crusty bread for major dipping.

We love cooking with mussels because they are so easy to prepare and cook fast. But throw in some pasta, and you have yourself a pretty balanced wholesome meal in literally no time. If you are like us and love these mussels, then you will also love Thai Red Curry Mussels and Steamed Mussels in Tomato Sauce.

Ingredients
To make this delicious mussels pasta in tomato sauce, you will need the following ingredients:
- pasta - I recommend a long, stringy pasta like spaghetti, fettuccine or linguine.
- live mussels - scrub and debeard the mussels prior to cooking. For full tips on how to do this, scroll down to the tips section below.
- olive oil
- onion
- garlic
- cooking wine - You can use white or red cooking wine.
- tomato sauce
- salt and pepper
- cherry tomatoes
- Parmesan cheese
- fresh parsley - optional, for garnish on top.
You will also need a cooking pot and shallow saucepan or skillet.
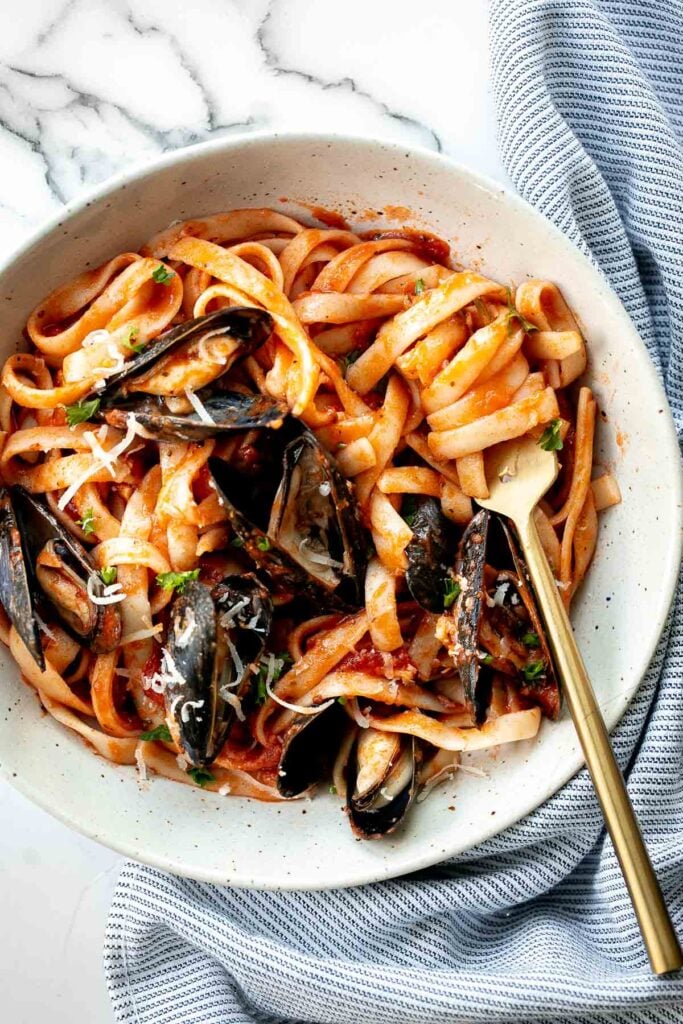
How to Make the Best Mussels Pasta in Tomato Sauce
- Make the pasta. Bring a large pot of salted water to a boil over medium-high heat. Add spaghetti noodles and cook until al dente (fully cooked but still firm), about 8-10 minutes or according to package directions. Drain well and set aside.
- Cook the mussels. In the meantime, heat oil in a shallow saucepan or large skillet over medium-high heat for 2 minutes until the hot oil is sizzling hot and shimmering. Add onion and garlic and sauté until fragrant and soft, 2-3 minutes. Add mussels and wine. Cover the lid and steam for 6-8 minutes until all shells are wide open. If you don't have a lid to cover, stir occasionally to help the mussels cook evenly.
- Assemble. Reduce the heat to medium, and add in tomato sauce and cooked pasta. Toss well to combine and bring the sauce to a simmer, about 3-5 minutes. Stir in cherry tomatoes and season with salt and pepper.
- Serve. Sprinkle parmesan and parsley on top and serve immediately.
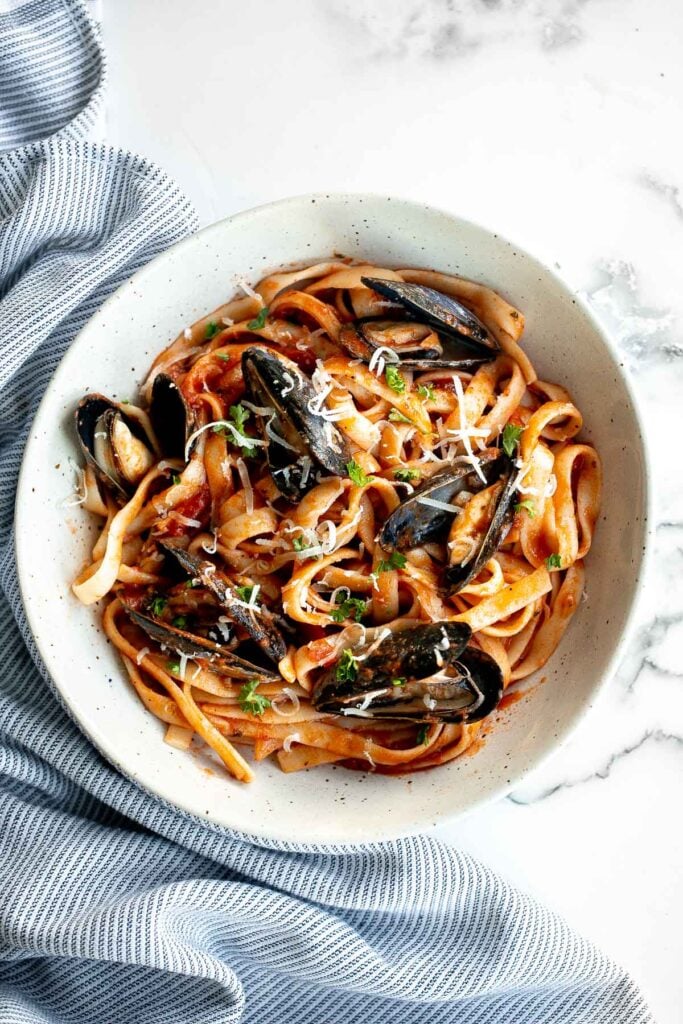
Frequently Asked Questions and Tips
- How do you clean prepare fresh live mussels? - To prepare mussels, you will need to clean and debeard them. To clean, scrub the mussels with a scrubbing brush to remove any particles and debris. Next, remove the beard. This is a small stringy mass that sticks out of the side of each mussel. Hold the mussel in one hand, and gently pull the beard off using your other hand, pulling towards the bottom of the mussel where the clasp is. Once you've removed all of them, give the mussels one last rise under cold water.
- How do I store mussels pasta? You can store mussels pasta for up to 2 days in an airtight container in the refrigerator. To reheat, heat in a skillet over low heat until warmed through. You may have to add a splash of water if the sauce has thickened up too much in the refrigerator.
- Can I customize this pasta? You can customize mussels pasta into a complete seafood pasta by tossing in some cooked shrimp, scallops, or clams.
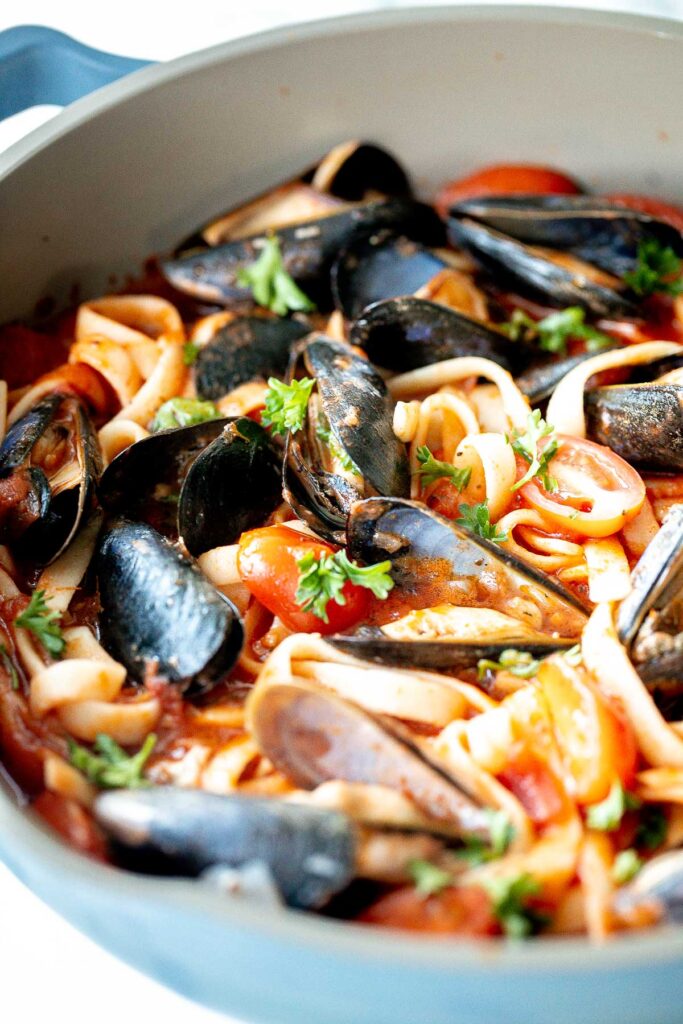
More Pasta Recipes
- Shrimp Fettuccine Alfredo Pasta Bake
- Pesto Penne Pasta
- Spaghetti and Meatballs
- Cacio e Pepe
- Pasta Bake with Sausage
- Spaghetti Carbonara
- Farfalle Pasta with Mushroom Rose Sauce
Tried this recipe?
I'd love to hear what you think! Leave a comment and rating below to share your feedback. Your reviews help others discover this recipe and help me keep creating more free recipes for you. Snap a photo and tag me on social media @aheadofthyme too.
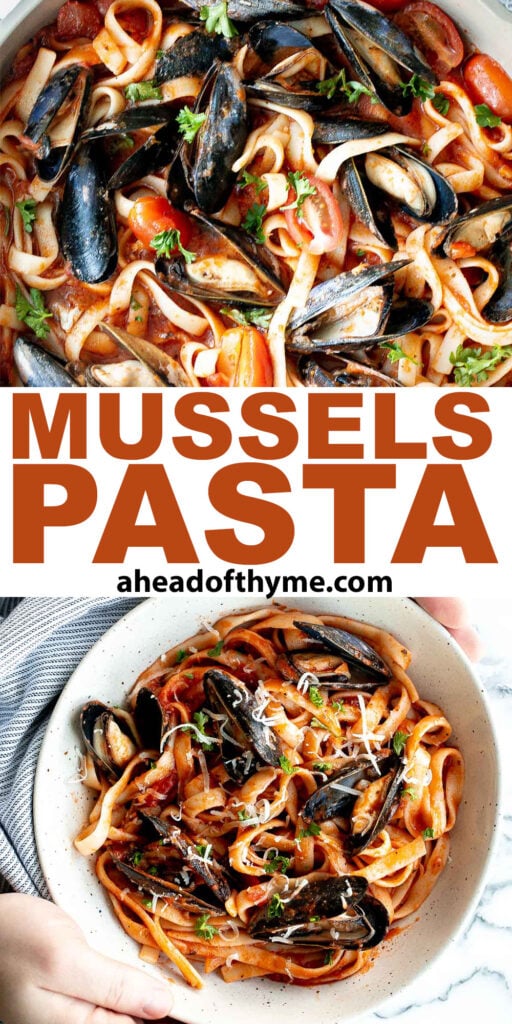
Chicken Tortilla Soup

Hearty chicken tortilla soup is a delicious, wholesome and filling soup that you can make in about 30 minutes. It's a tomato-based soup packed with chicken, vegetables, beans, and classic Mexican-inspired flavours. It's loaded with all the best toppings including tortilla chips, cilantro, sour cream, and avocado. This one pot meal is a quick and easy option to throw together on a busy weeknight and one that is loved by all. A true family favourite.
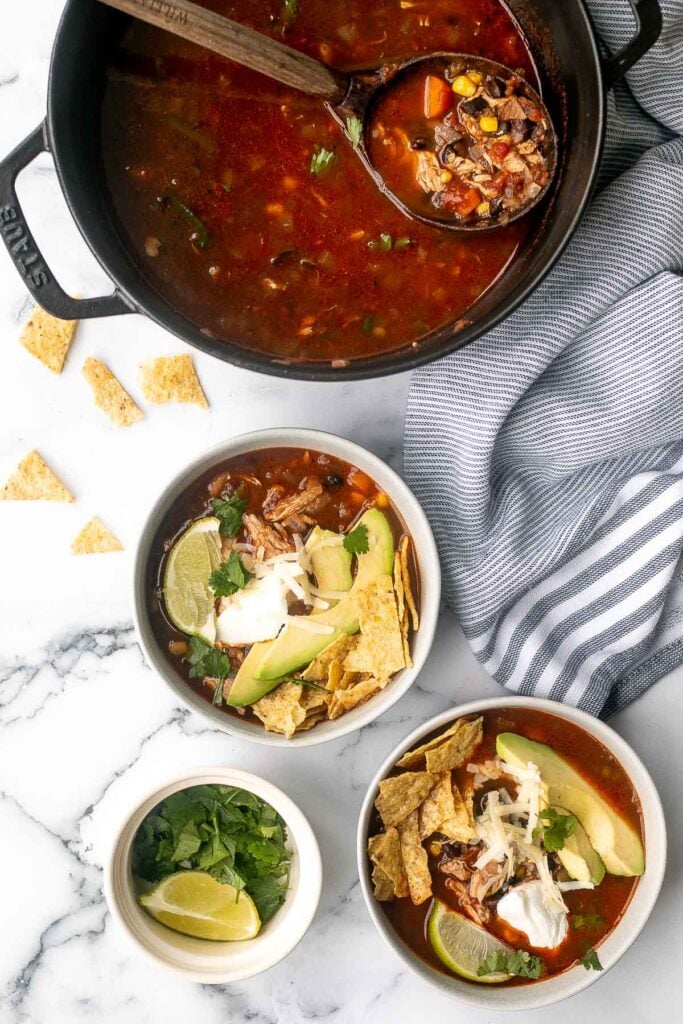
And the leftovers? They might even taste better the next day. You might as well make a double or triple batch just so that you can have leftovers all week (or freeze it for a rainy day!). You can serve this as a meal on it's own for lunch or dinner with a side of crusty bread for dipping or serve it as part of a complete Mexican-style fiesta. Some other items to include on your menu are: Fish Tacos with Lime Crema, Sheet Pan Nachos, Baked Chicken Quesadillas, and Sheet Pan Chicken Fajitas.
Ingredients in Chicken Tortilla Soup
To make this delicious and hearty chicken tortilla soup, you will need the folling ingredients:
- olive oil
- chicken breasts - you will need 2 boneless and skinless chicken breasts, cut into 1-inch strips. You can also make this soup using ¾ to 1 cup leftover roast chicken or store-bought rotisserie chicken. Shred the chicken using a fork and add it in along with the onions, garlic, jalapeño and carrot (skipping step 2 where you cook the chicken).
- onion
- garlic
- jalapeño pepper
- carrots
- crushed tomatoes
- chicken broth
- black beans
- corn
- seasonings - salt, paprika, ground cumin, and crushed red pepper (optional, for extra spiciness).
For the toppings, you need tortilla strips or tortilla chips, and all or a portion of the following toppings: fresh cilantro, lime, sour cream, avocado, and cheddar cheese (I used sharp white cheddar).
You will also need a medium stockpot (or 4 qt. Dutch oven).
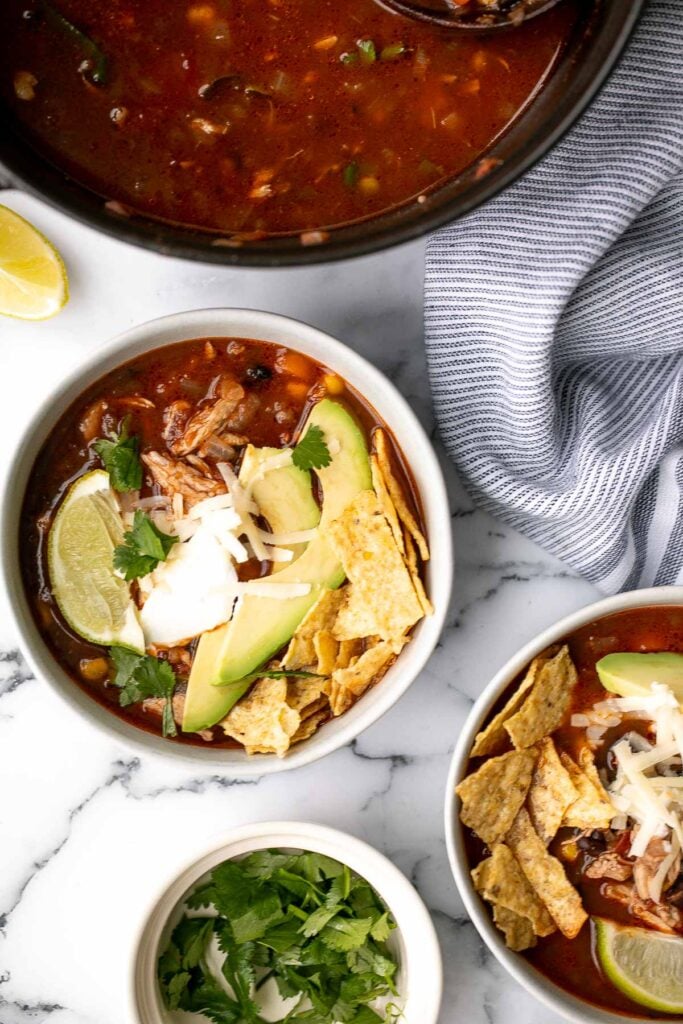
How to Make the Best Chicken Tortilla Soup
- Cook the chicken. In a medium stockpot (or 4 qt. Dutch oven), heat oil over medium-high heat for 2 minutes until the hot oil is sizzling hot. Add chicken and sauté until cooked through, about 5-7 minutes. Break the chicken into smaller pieces using a wooden spatula.
- Add remaining ingredients. Add onions, garlic, jalapeño and carrot. Stir well to combine and cook for 2 minutes until fragrant. Stir in salt, paprika, cumin, and crushed red pepper (if using). Add canned tomatoes, chicken broth, black beans and corn. Stir occasionally and bring the soup to a boil, about 5 minutes.
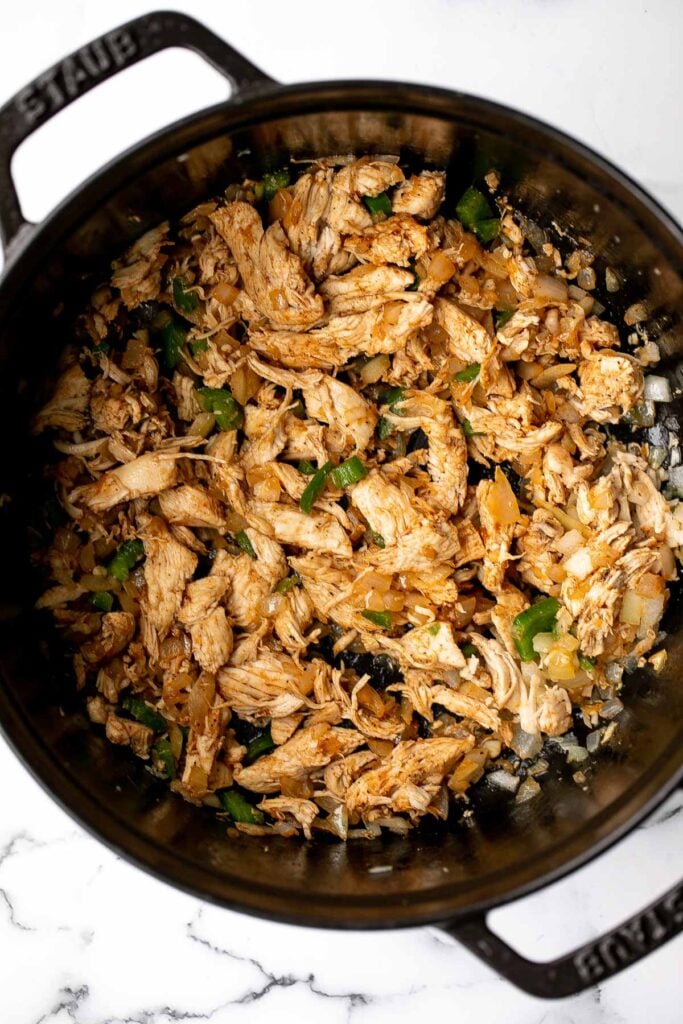
- Simmer. Reduce heat to medium and simmer uncovered for 10 minutes, stirring occasionally.
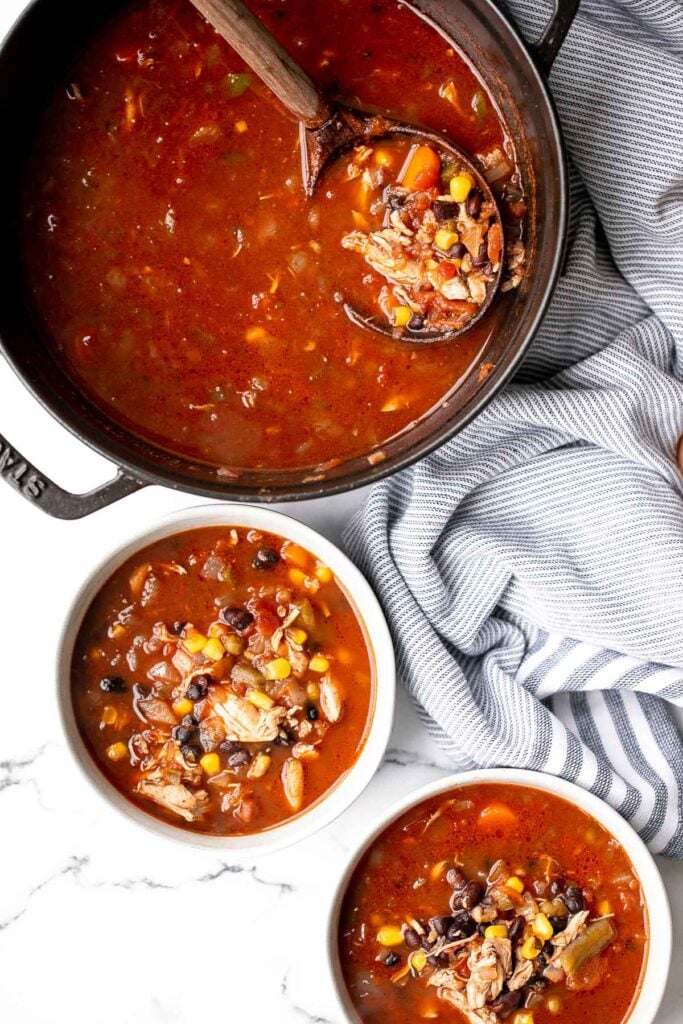
- Serve. Serve immediately in a soup bowl and top with tortilla chips, cilantro, lime, sour cream, avocado, and cheddar cheese, or any combination of these toppings that you like.
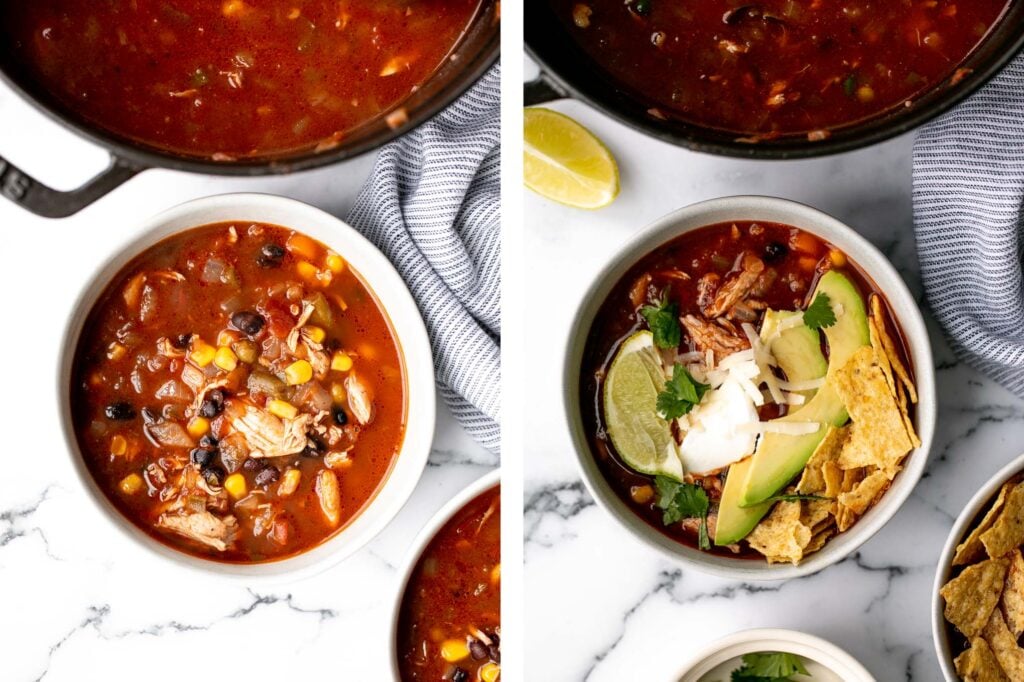
Storing and Freezing Instructions
- How to store: Store chicken tortilla soup still in the pot (covered with the lid) or transfer to an airtight container and store in the refrigerator for up to 4 days.
- How to freeze: Once cooled, transfer any leftover chicken tortilla soup to an airtight container or portion them out into freezer bags and freeze for up to 3 months. When ready to serve, allow the soup to thaw overnight in the refrigerator or for a few hours at room temperature on the kitchen counter.
- How to reheat: Reheat on the stove over medium-low heat for about 5 minutes until warmed through. Serve it loaded up with your favourite toppings.
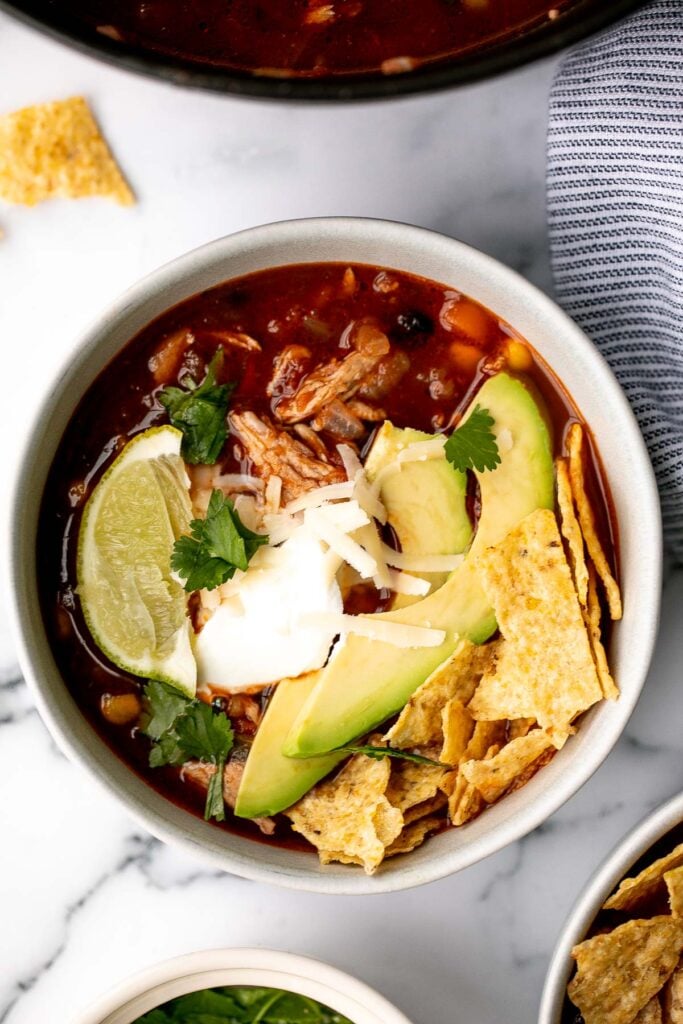
More Hearty Soup Recipes
- Lemon Chicken Orzo Soup
- Beef Cabbage Barley Soup
- Healthy Miso Ramen with Chicken
- Creamy Turkey Orzo Soup
- Vegetarian Mushroom Barley Soup
- Coconut Curry Lentil Soup
- Creamy Mexican Corn Soup
Tried this recipe?
I'd love to hear what you think! Leave a comment and rating below to share your feedback. Your reviews help others discover this recipe and help me keep creating more free recipes for you. Snap a photo and tag me on social media @aheadofthyme too.

Spinach and Feta Quiche with Cauliflower Crust
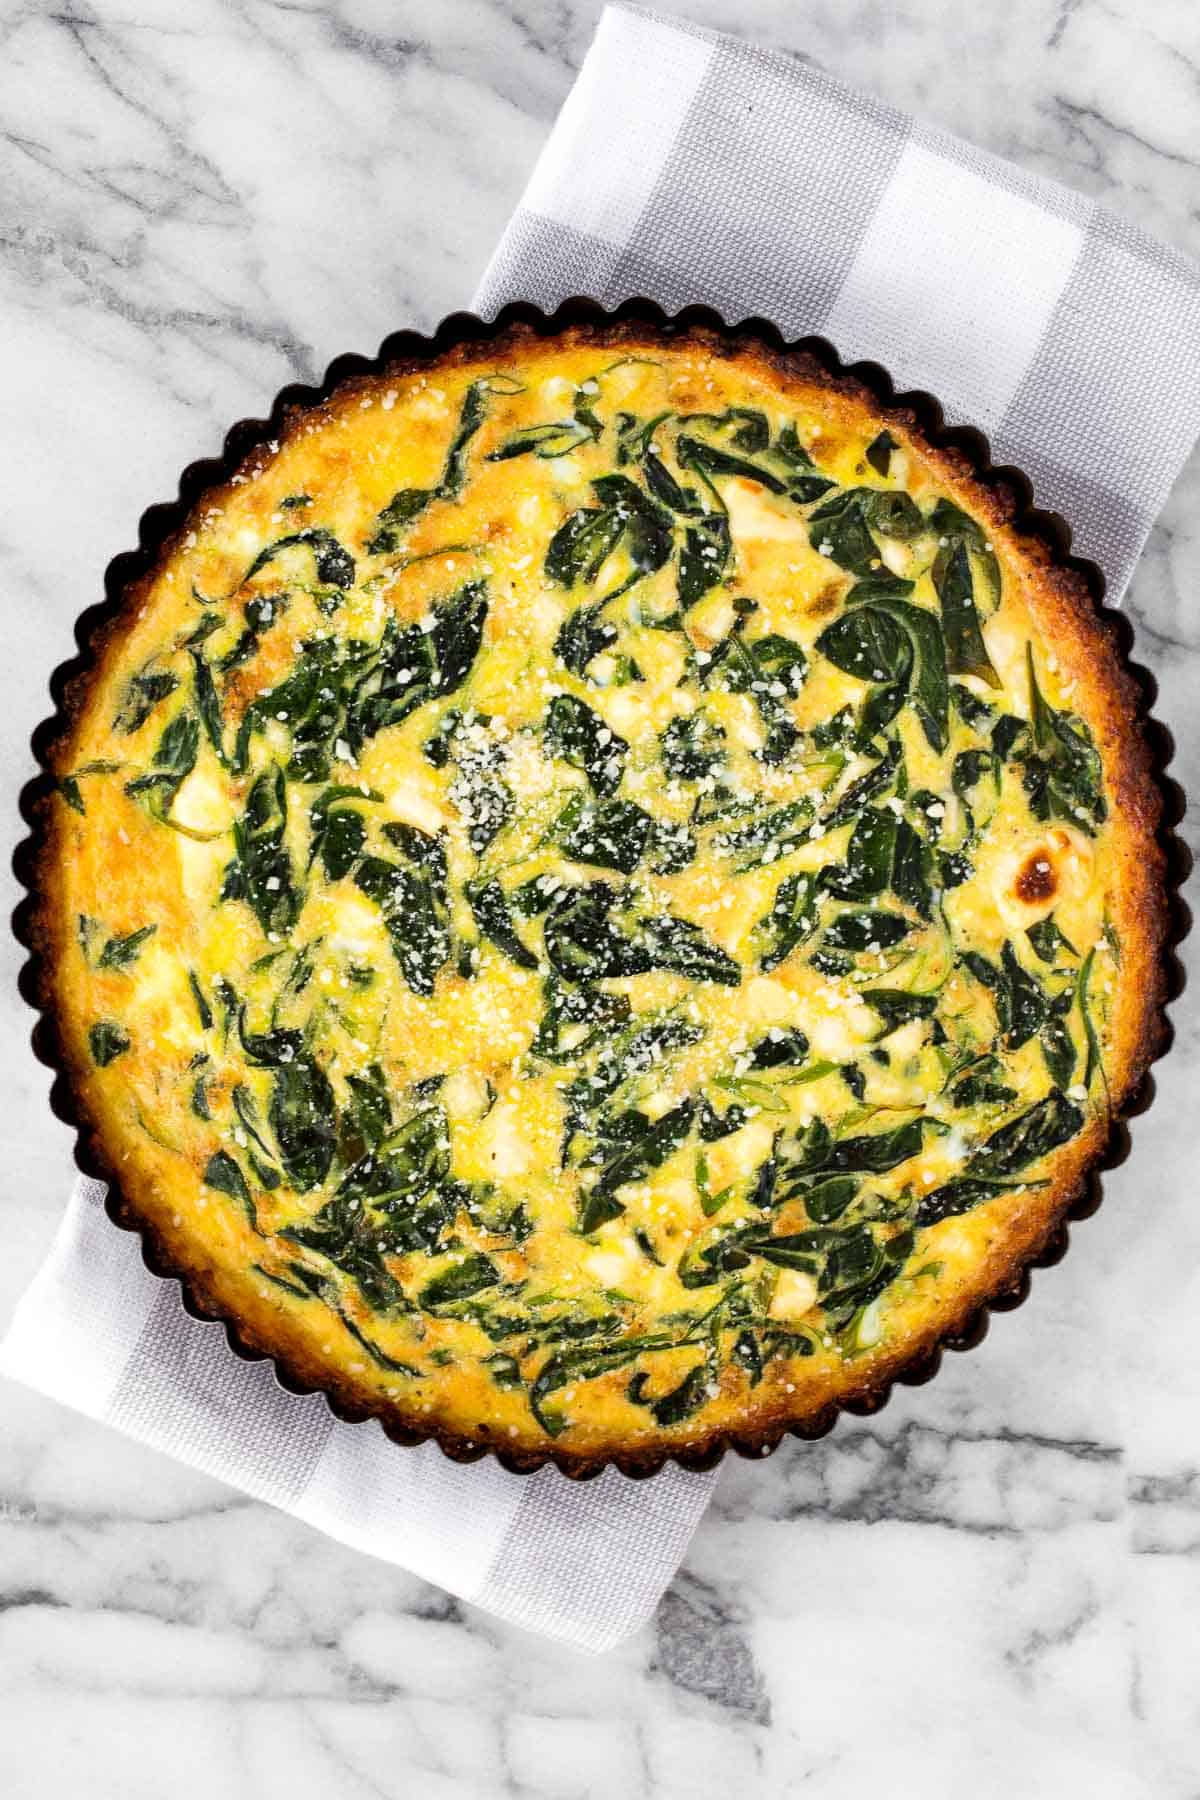
Spinach and feta quiche with cauliflower crust is the perfect healthy and guilt-free recipe to make this new year, especially if you are planning to eat lighter and healthier. This quiche is made with an easy keto and gluten-free cauliflower crust, filled with a delicious savoury spinach and feta cheese filling, and baked to perfection. It's a recipe that sounds super fancy and complicated, but if you own a food processor and have a bit of arm strength, you can have this on your table in no time! Serve it for either breakfast, lunch, or dinner.
Spinach and feta is a classic combination of ingredients, and for good reason (just like in our Spinach and Feta Turkey Burgers or Mediterranean Scrambled Eggs). In this quiche with cauliflower crust, these ingredients perfectly accompany the cauliflower crust without overpowering it. I have a good feeling that if you try this recipe and sub out a traditional flour-based crust for this one made from cauliflower, you may never look back again.
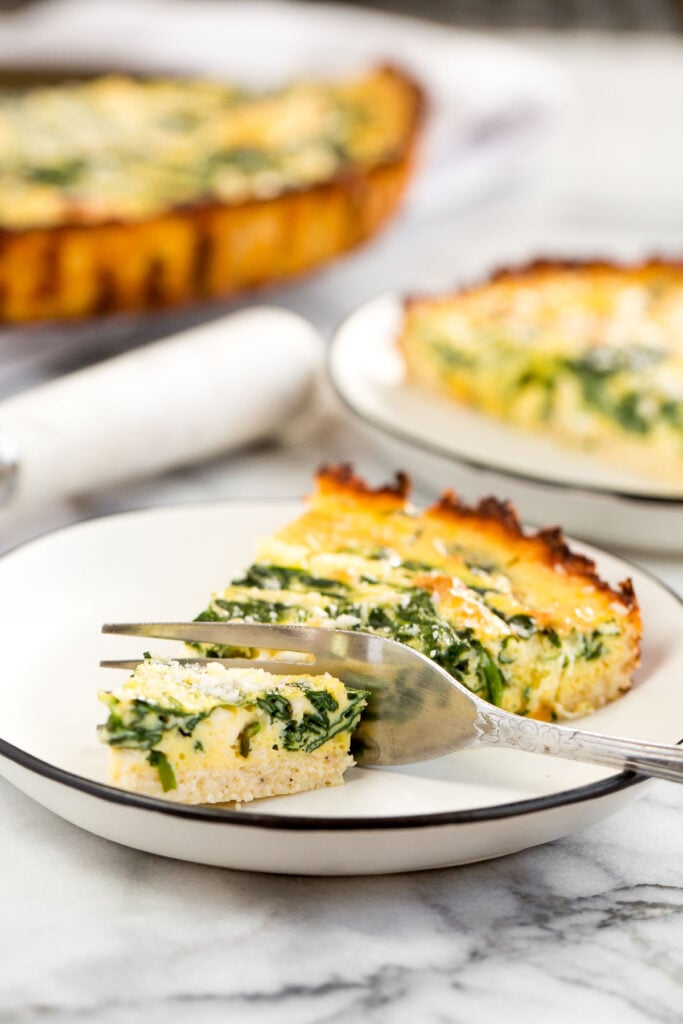
Ingredients in Spinach and Feta Quiche with Cauliflower Crust
To make this delicious spinach and feta quiche with cauliflower crust, you will need the following ingredients:
- cauliflower - You will need cauliflower florets from a small head of cauliflower and then process them in the food processor into a crumble (If using riced cauliflower, you will need about 2 cups, and you can skip the food processor step). Then, cook the crumbled cauliflower, rinse out the water content, and you will be left with dried cauliflower that you can season anyway that you want.
- Parmesan cheese - we add Parmesan to our cauliflower crust because we love the salty combination. But you can leave the cheese out entirely and still keep this gluten-free by substituting with cornmeal or potato flour instead.
- garlic powder
- eggs - we use one egg in the crust to help bind it together, and more eggs for the quiche filling.
- milk - you can substitute this with heavy cream or half and half.
- olive oil
- baby spinach
- scallions
- feta cheese
- salt and pepper
You will also need a food processor, measuring cups and spoons, mixing bowls, a 9-inch round tart pan (or 9-inch pie dish), and nonstick cooking spray.
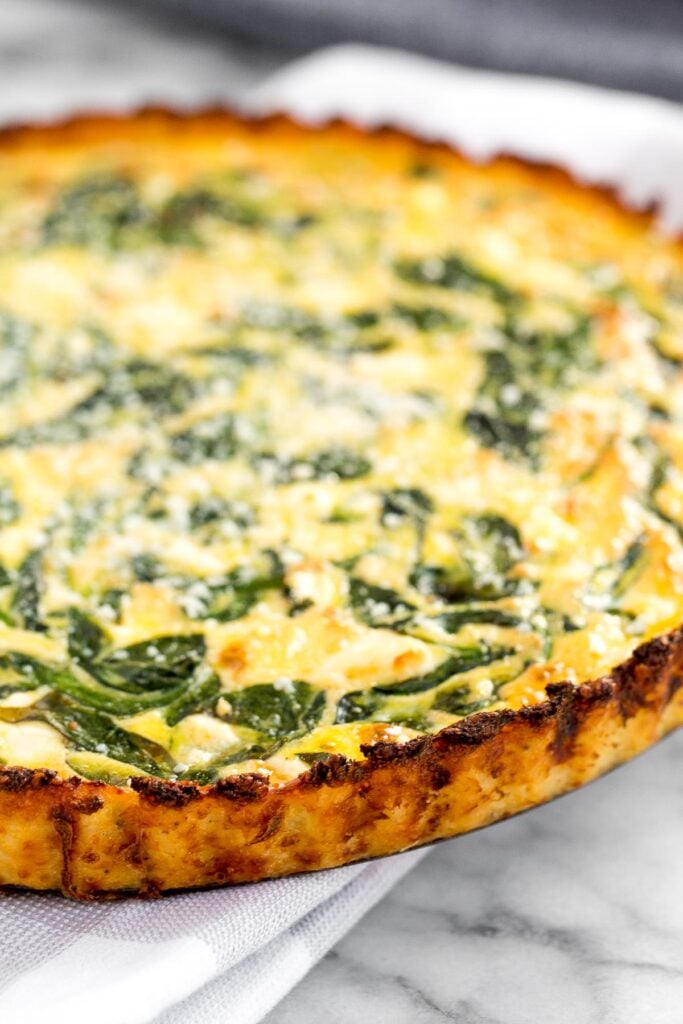
How to Make the Best Spinach and Feta Quiche with Cauliflower Crust
- Prepare the cauliflower. Place cauliflower florets in the bowl of a food processor with the blade attached. Pulse until completely crumbled. Pour into a microwave safe, medium-sized bowl and microwave on high for 5 minutes. Let cool slightly. Place cauliflower in a small kitchen towel or cheese cloth and ring out all the excess liquid.
- Make the cauliflower crust. Transfer cauliflower to a clean mixing bowl and add Parmesan, salt, and garlic powder. Stir until combined. Add slightly beaten egg to bowl and mix thoroughly. Spray a 9-inch round tart pan or 9-inch pie dish with nonstick spray. Pour in cauliflower mixture. Use your hands to mold the cauliflower to the pan, making sure to press firmly on the bottom and up the sides to form an even layer. Bake in a 450F preheated oven for 10 minutes. Then, remove from oven and lower oven temperature to 400 F. By baking the crust first, we give it a chance to firm up before adding the filling.
- Make the filling. In a large mixing bowl, combine eggs, milk (or heavy cream), salt and pepper and whisk thoroughly. Set aside. Heat olive oil in a small skillet over medium-high heat. Add spinach and cook until just wilted, stirring often, about 2-3 minutes. Remove spinach from heat and add it to the egg mixture, along with the scallions and feta. Mix to combine.
- Assemble and bake the quiche. Pour the filling into the cauliflower crust, and bake for 15-20 minutes. Let cool and serve topped with additional feta or grated Parmesan cheese.
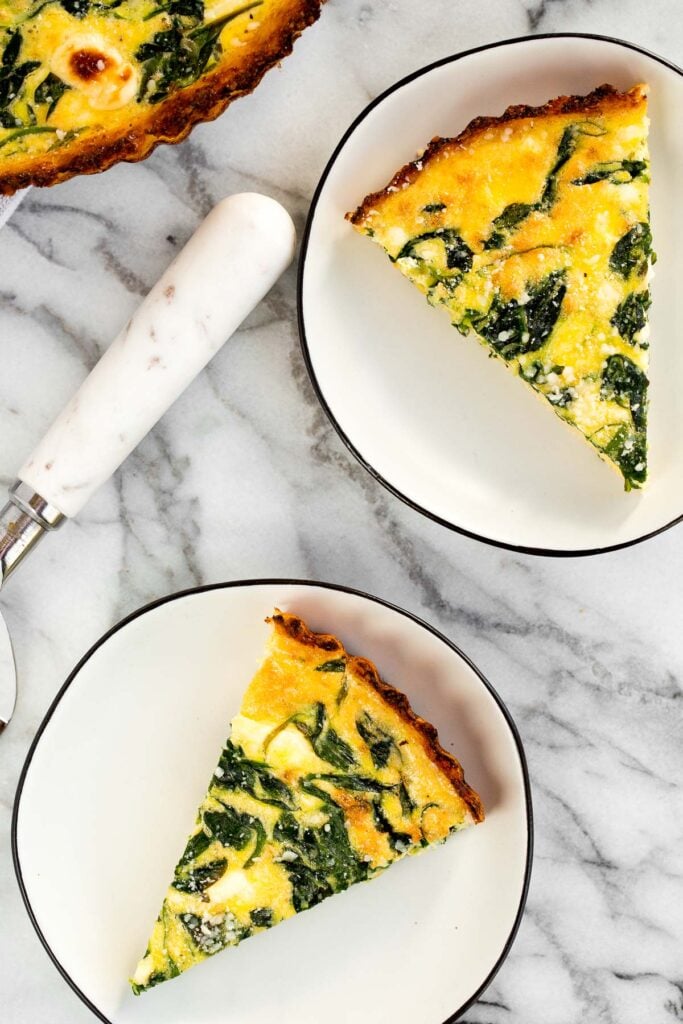
Make Ahead and Storing Instructions
- How to customize. You can customize this spinach and feta quiche with cauliflower crust and fill it with any vegetables that you like. I often like to add in mushrooms or onions.
- How to store. Once cooled, store the quiche in an airtight container or wrap the tart pan tightly with plastic wrap and store in the refrigerator for up to 3 days. To reheat, heat in a 300F preheated oven for about 20 minutes or in the air fryer for about 10 minutes, until warmed through.
- How to freeze. Once cooled, store the quiche in an airtight container or wrap the tart pan tightly with plastic cling wrap or aluminum foil and store in the freezer for up to 3 months. To reheat, allow the quiche to thaw overnight in the refrigerator. Then reheat in a 300F preheated oven for about 20-30 minutes or in the air fryer for about 10-15 minutes, until warmed through.
- Make ahead instructions. Pre-bake the crust as per instructions, and add in the filling. Cover and store in the refrigerator for up to one day before baking. To bake, place the quiche on the kitchen counter while the oven is preheating, to allow it to come to room temperature. Then, bake according to recipe instructions.
- How to freeze before baking. Place assembled quiche pan on a baking sheet and freeze until hard, about 1-2 hours. Then, remove from the baking sheet and cover the quiche with a few layers of aluminum foil and freeze for up to one month. To bake, allow the quiche to thaw in the refrigerator overnight. Then, take it out of the refrigerator and set it on the kitchen counter for 20 minutes while the oven is preheating to allow it to come to room temperature, and bake according to recipe instructions.
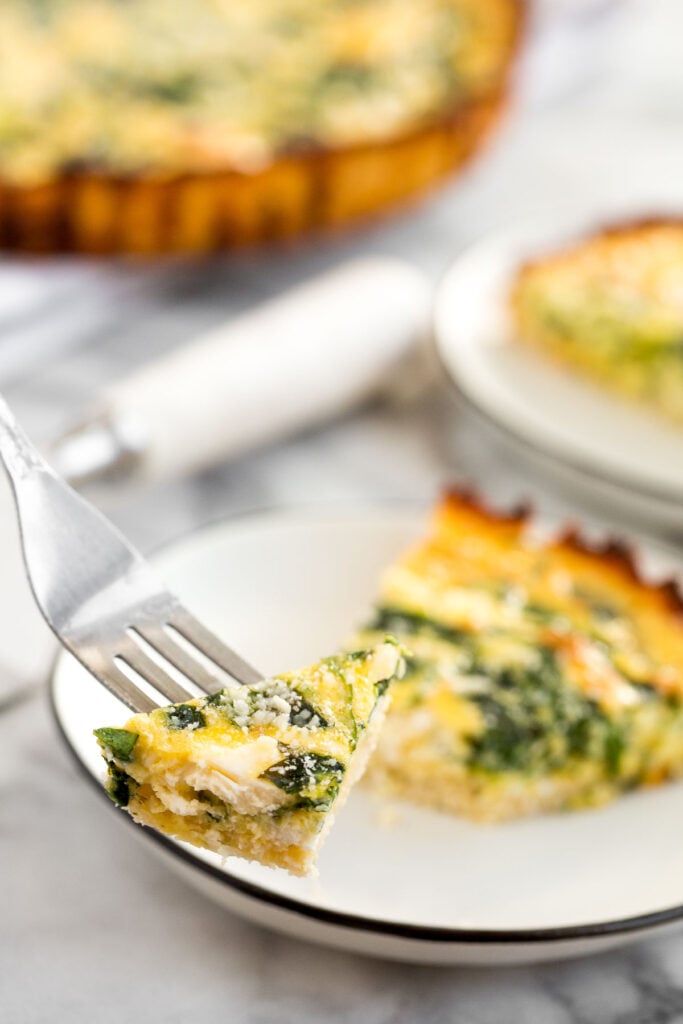
More Cauliflower Recipes
- Easy Roasted Cauliflower
- Creamy Garlic Mashed Cauliflower
- Roasted Butternut Squash and Cauliflower Soup
- Creamy Cauliflower and Garlic Soup
- Quinoa Cauliflower and Chickpea Vegetarian Meatballs
Tried this recipe?
I'd love to hear what you think! Leave a comment and rating below to share your feedback. Your reviews help others discover this recipe and help me keep creating more free recipes for you. Snap a photo and tag me on social media @aheadofthyme too.
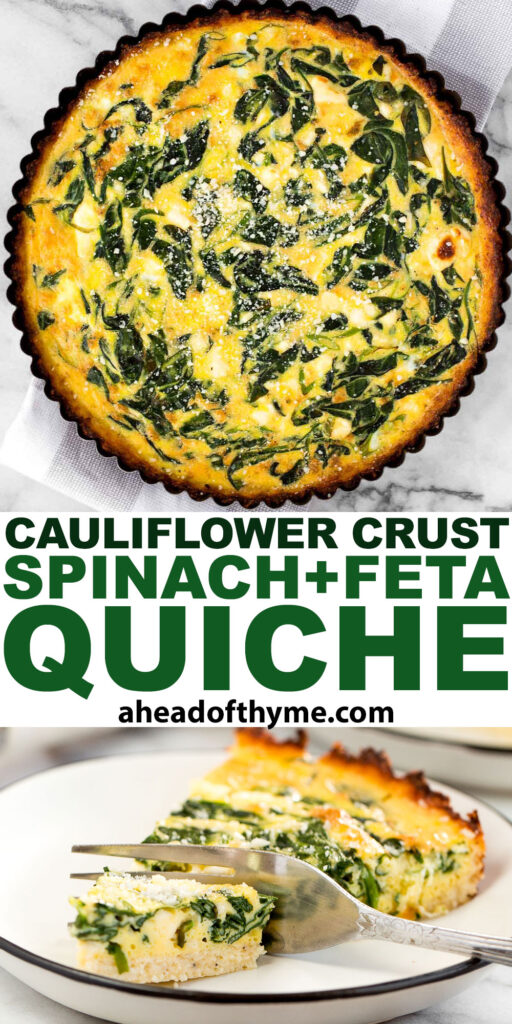
25 Best Noodle Recipes

We have rounded up 25 of the best and most popular noodle recipes including stir-fried noodles, tossed noodles, cold noodle salads, and noodle soups, with lots of vegan and vegetarian options too. So if you are craving a late night ramen fix or takeout on a busy weeknight, then you have come to the right place. Plus, the best part is that almost all of these recipes take less than 20 minutes to make. So easy!

Stir-Fried Noodles
Chicken Chow Mein is a classic Chinese noodle dish that is quick and easy to make at home in 20 minutes - faster, healthier, and better than takeout.
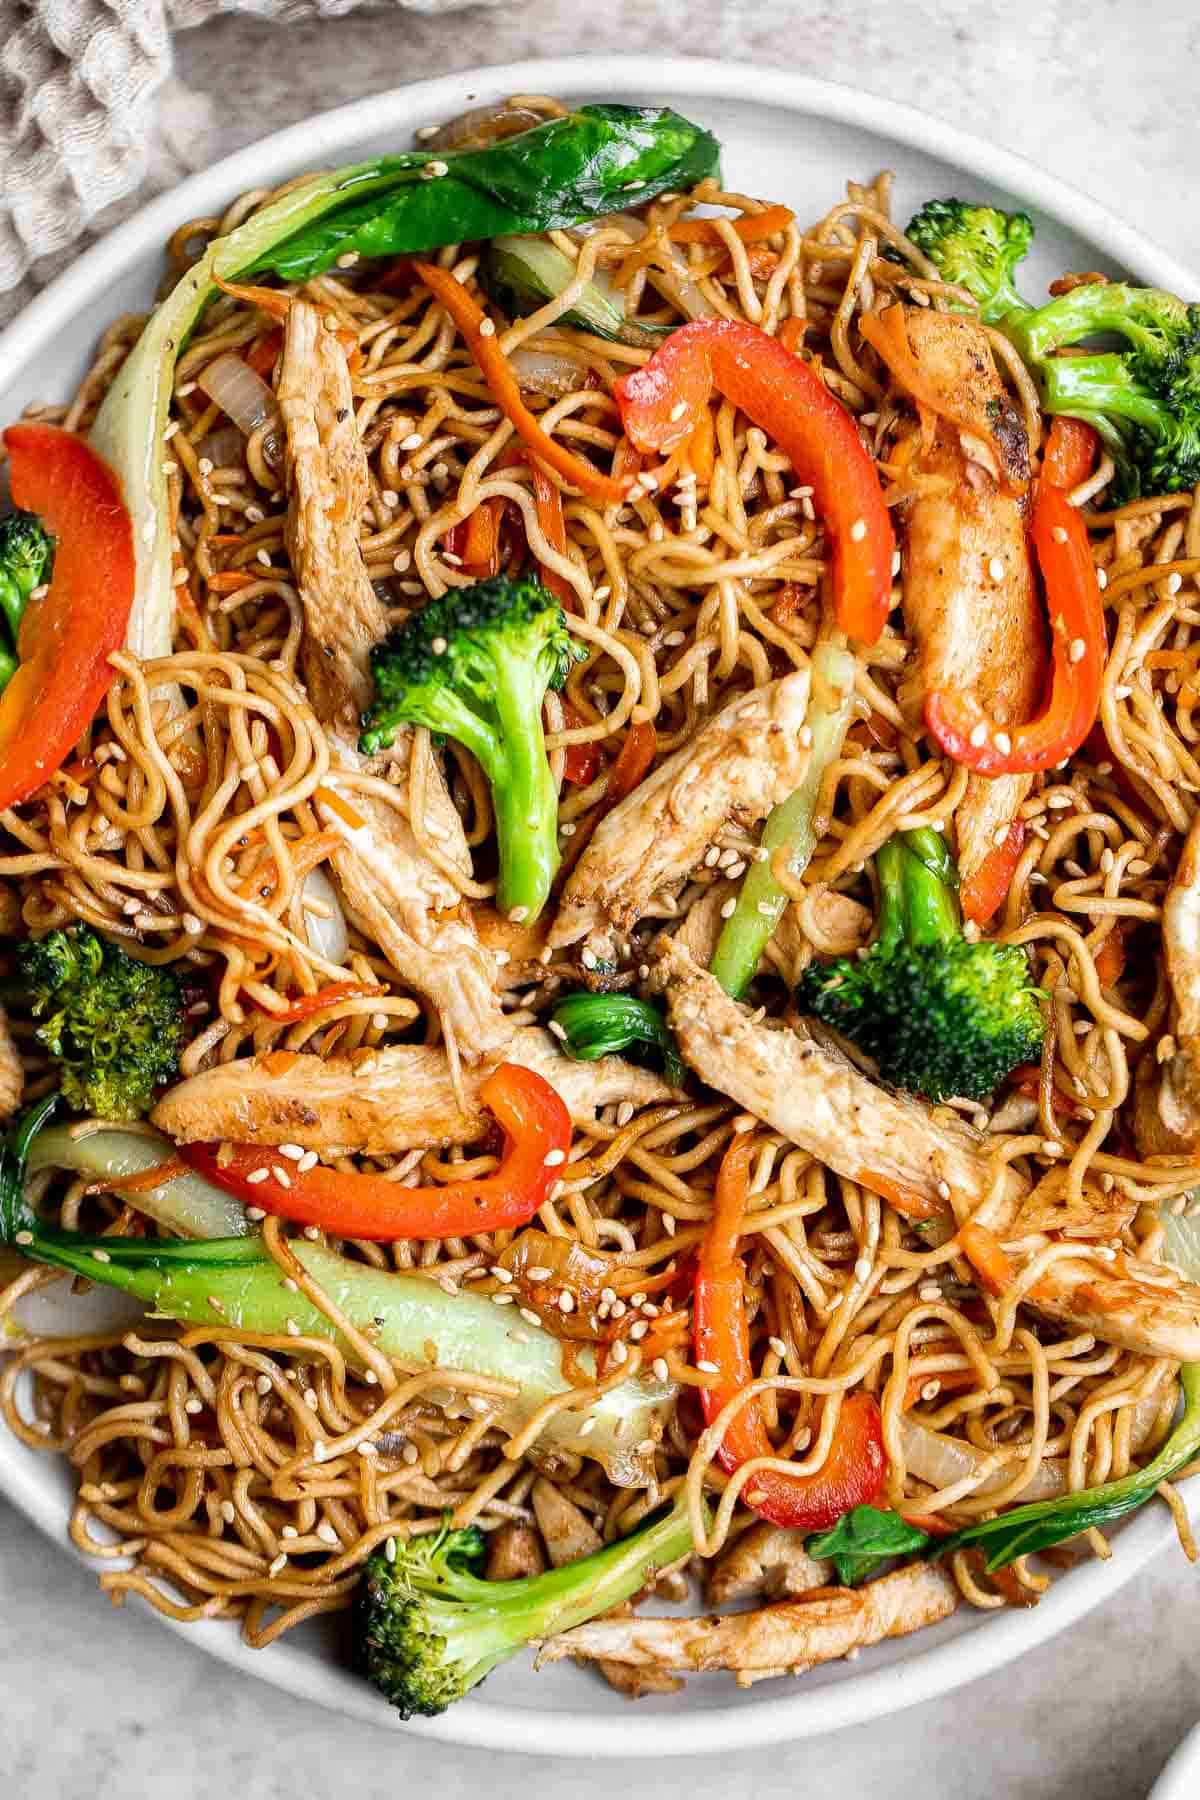
Better than take-out, flavourful and authentic Shanghai fried noodles with chicken, mushrooms, and bok choy is made in just 10 minutes - the easiest dinner!
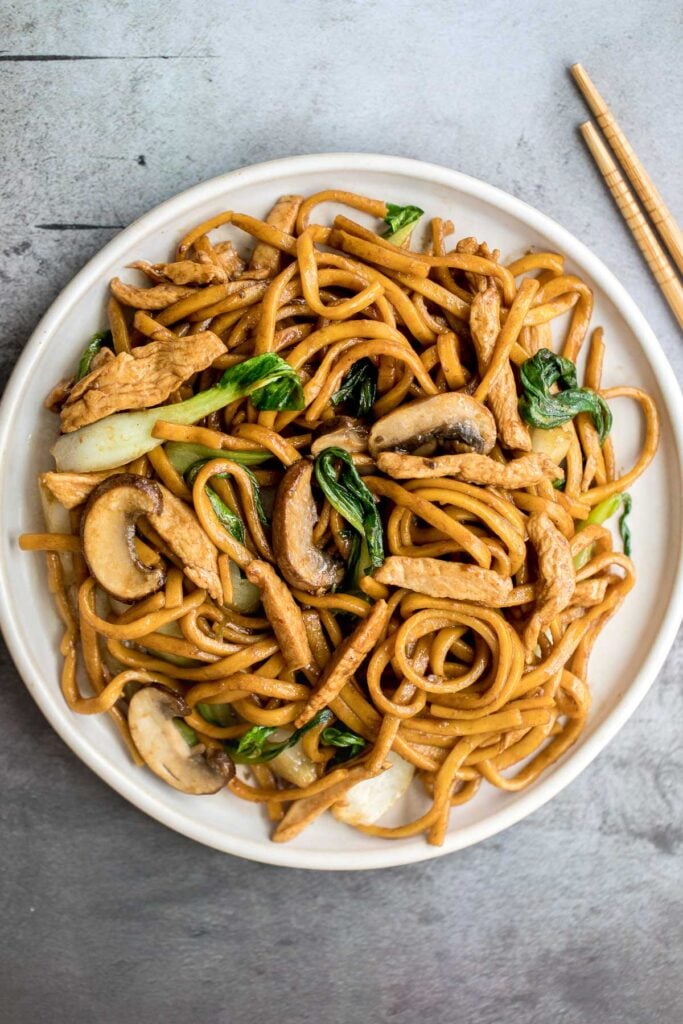
Say goodbye to takeout and make easy Lo Mein Noodles at home, packed with fresh veggies and healthy ingredients, in less than 15 minutes!
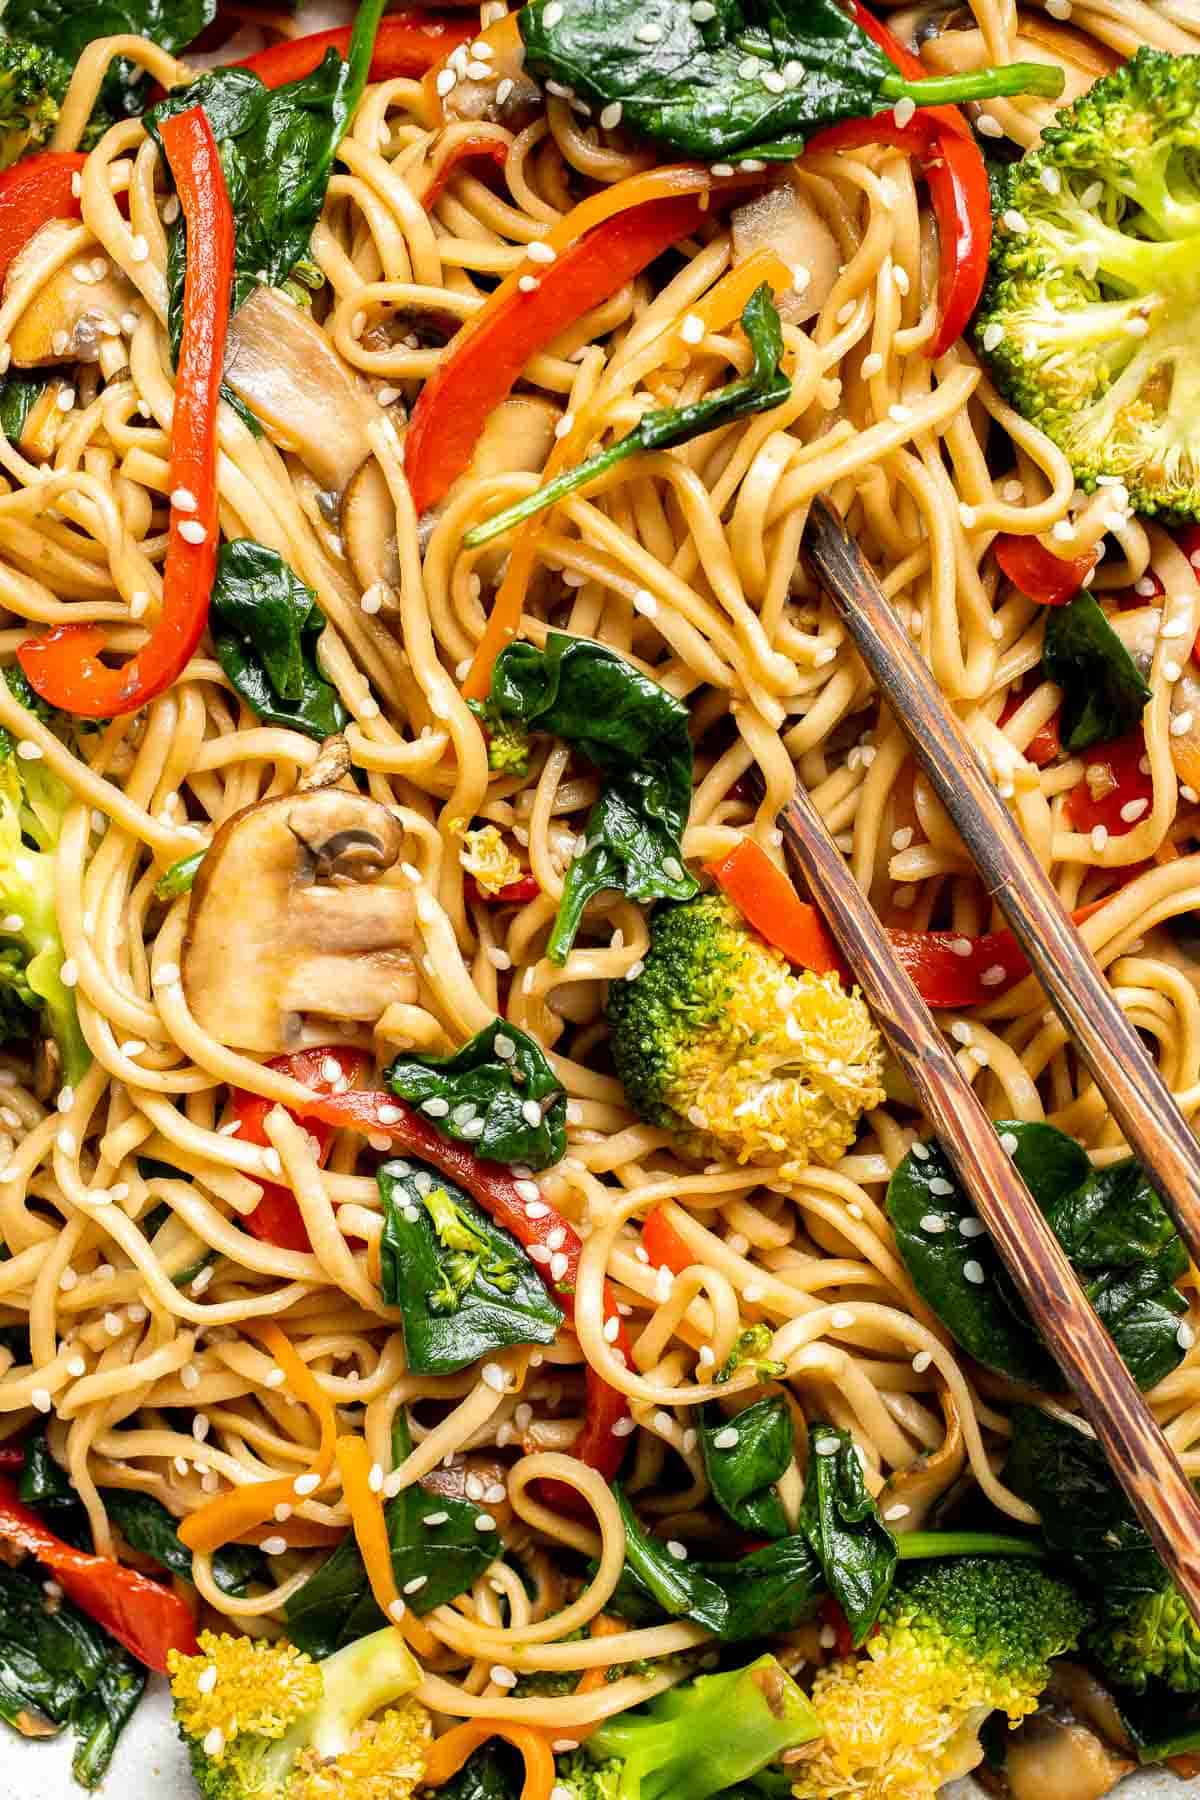
No more takeout when you can make flavourful, restaurant-style, authentic chicken Pad Thai at home in just 10 minutes. It's sweet, savoury, sour and nutty.
This beef noodle stir fry is the 20-minute dinner that you have been looking for - quick and easy, delicious and flavorful, and so much better than takeout.
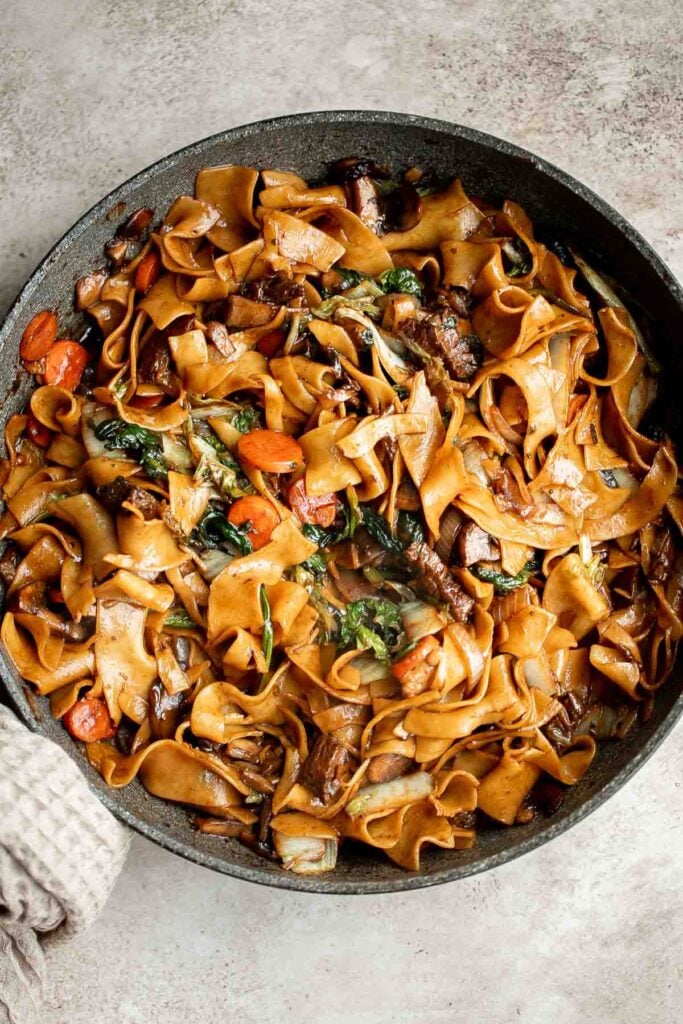
Tiktok ramen is savory, sweet and loaded with umami flavor. It's a quick and easy viral ramen hack with instant noodles, eggs, butter, garlic and soy sauce.
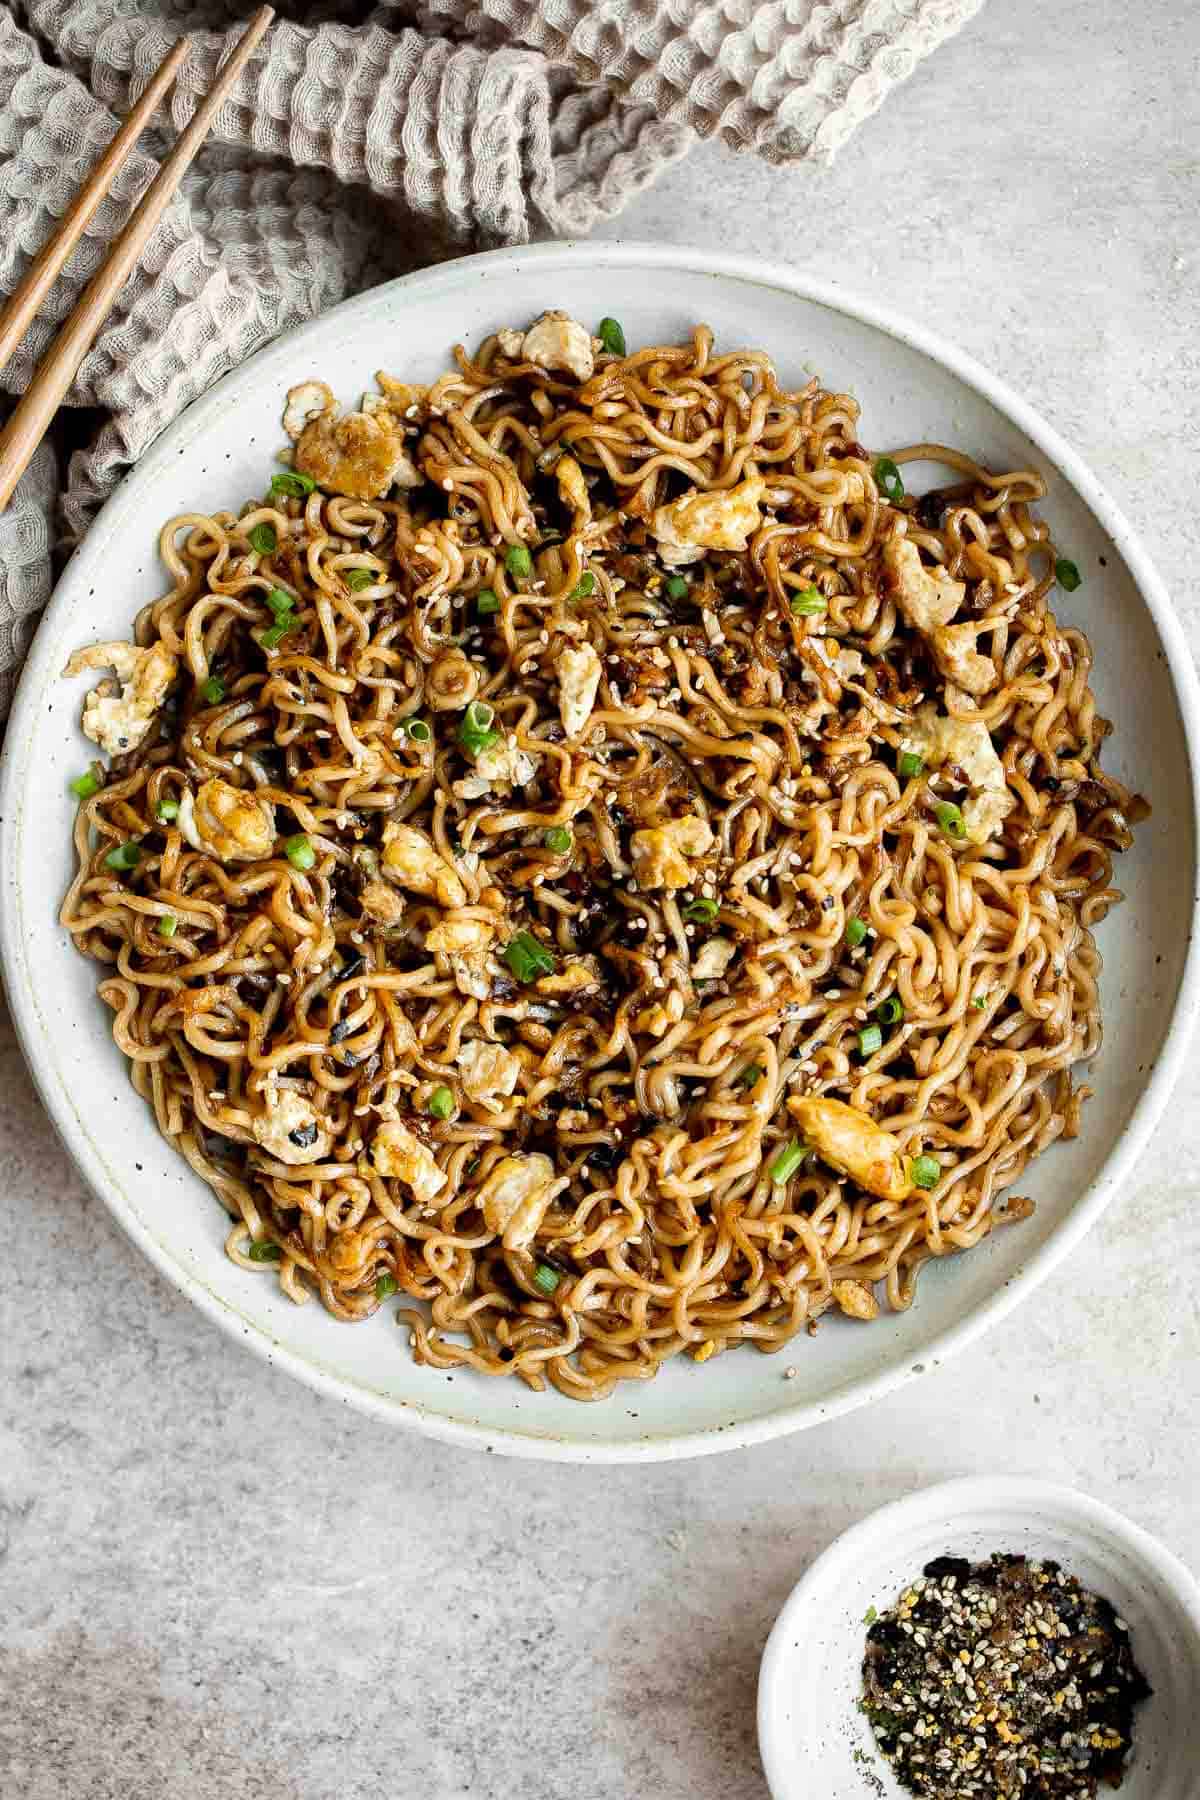
Better than takeout, flavourful stir-fried spicy cumin lamb noodles is packed with marinated lamb, noodles, and crisp bean sprouts. Make it in 15 minutes.
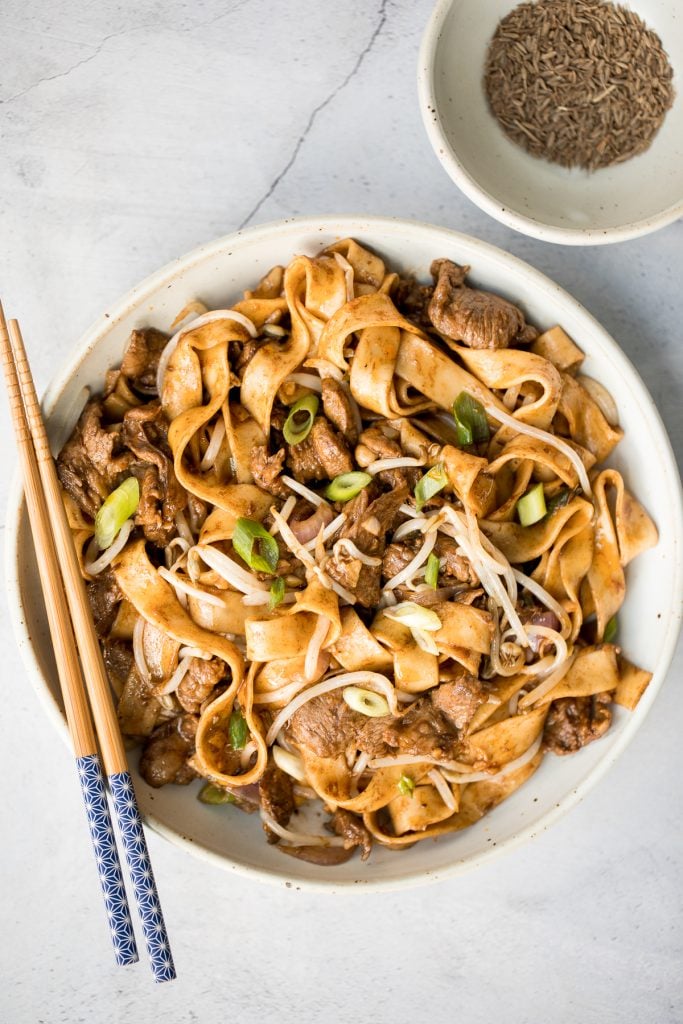
Better than takeout, quick easy stir-fried vegetarian chow mein is packed with vegetables and coated in a delicious savoury sauce. Make it in 15 minutes.
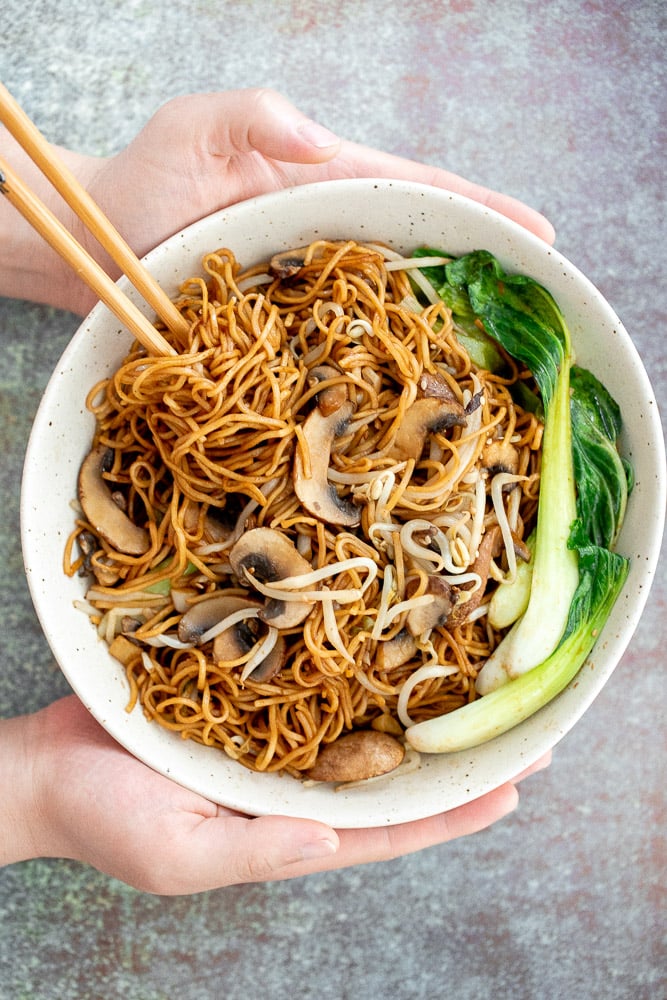
Stir-fried Rice Noodle Rolls with Peanut Butter Sauce
Better than takeout, quick and easy one pan stir-fried rice noodle rolls with peanut butter sauce is the best weeknight stir fry, ready in under 10 minutes.
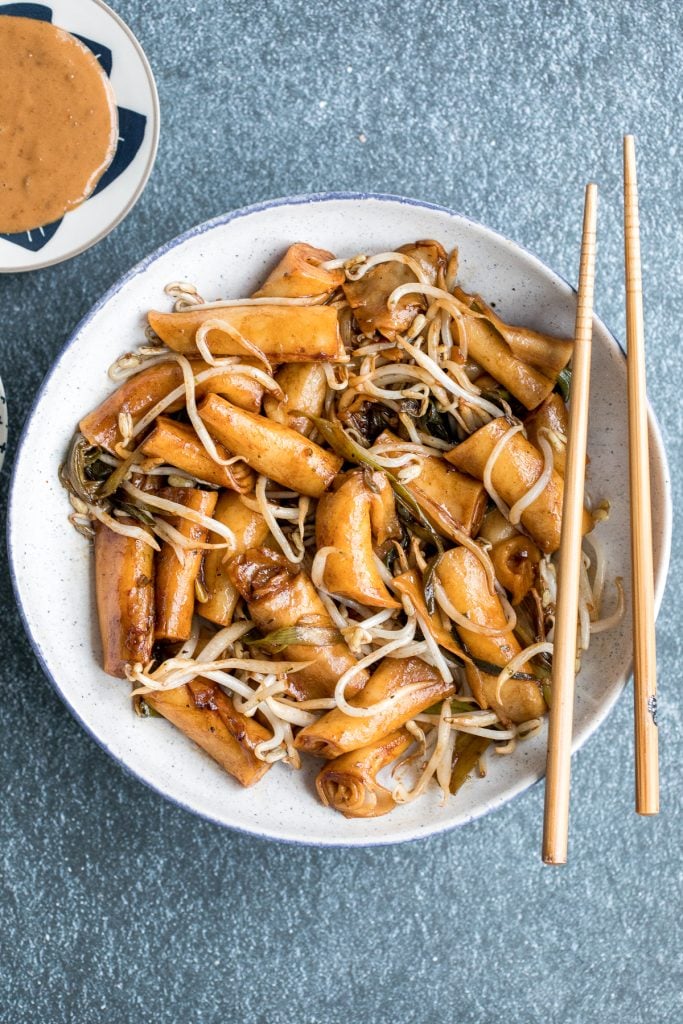
Pork Noodles is a quick and easy stir fry ready in just 20 minutes (including prep!). It's filling, delicious, flavorful, and better than takeout.
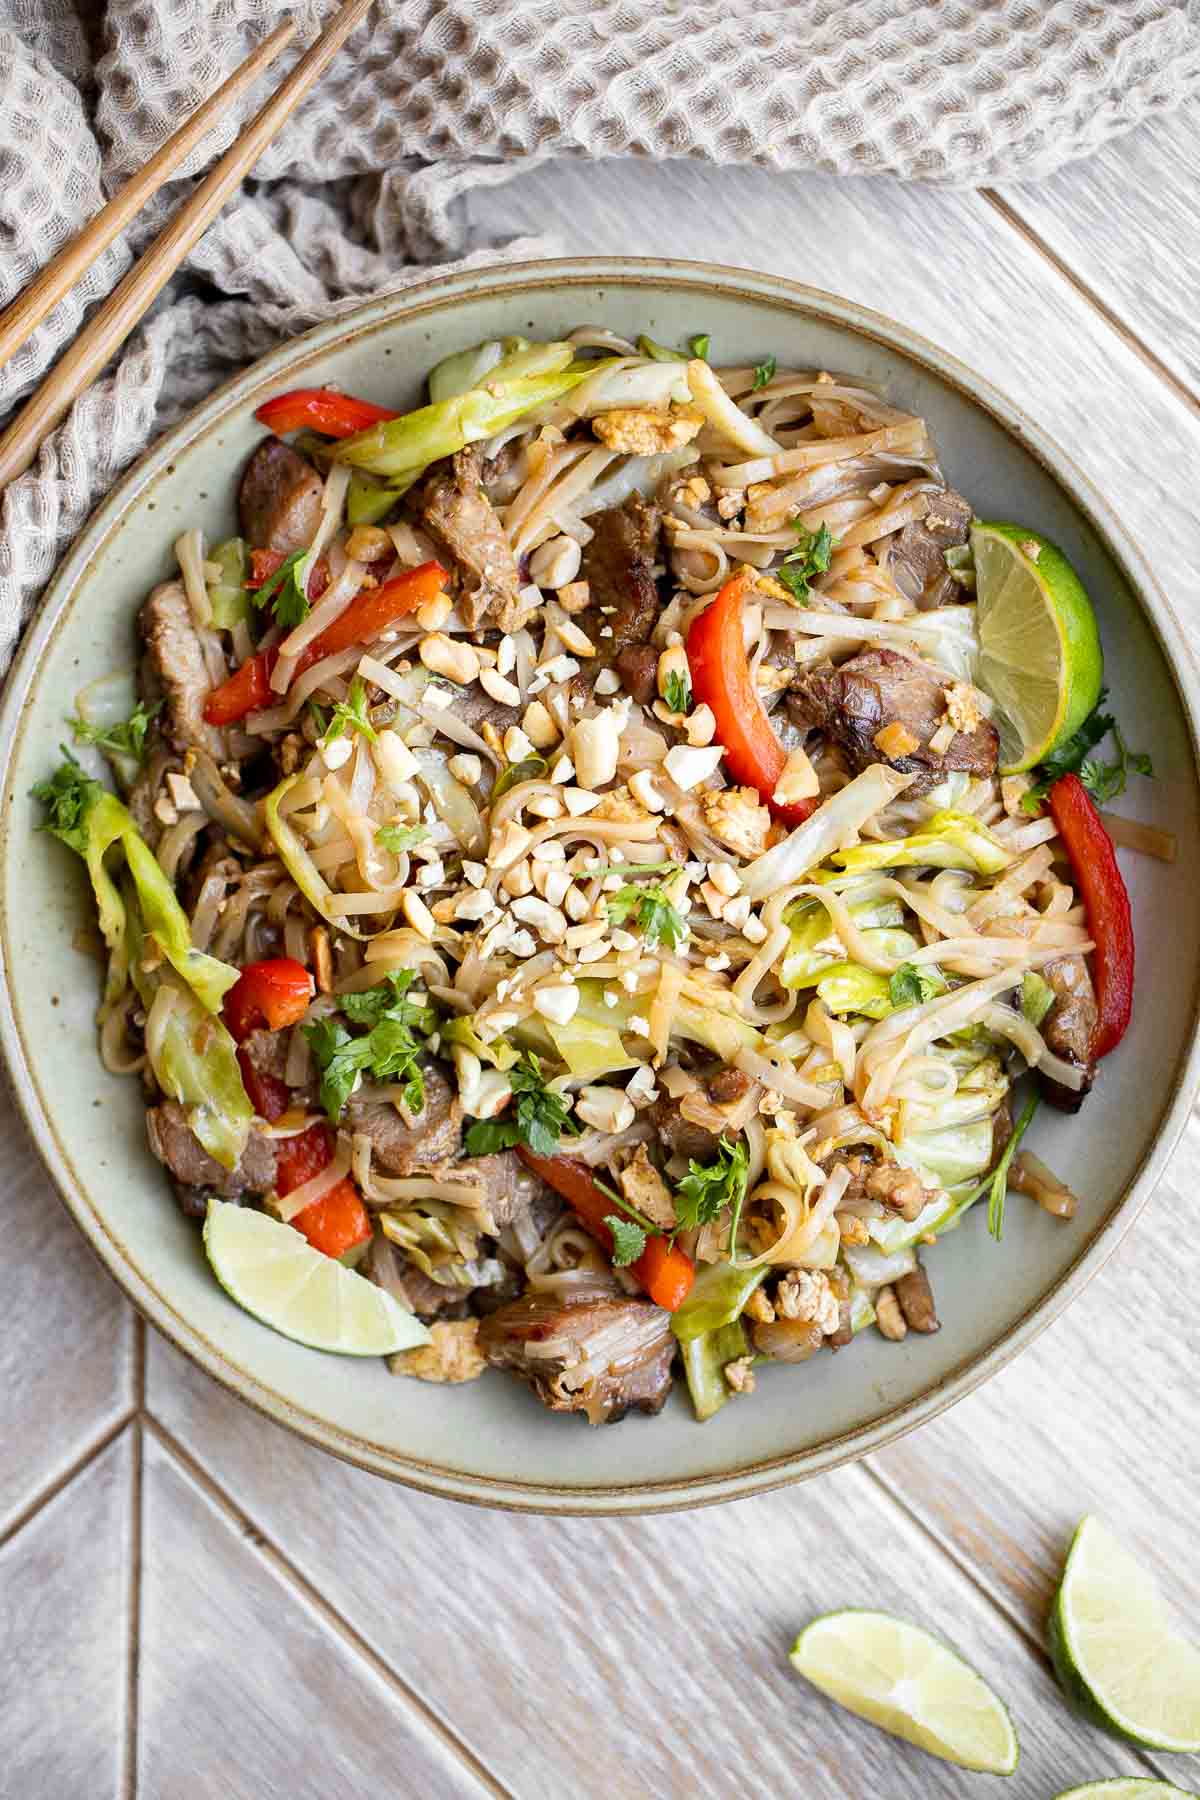
Stir-Fried Rice Cakes with Shrimp
Better than takeout, stir-fried rice cakes with shrimp, bok choy, and bean sprouts in a delicious peanut butter sauce is a quick 10-minute one pan meal.
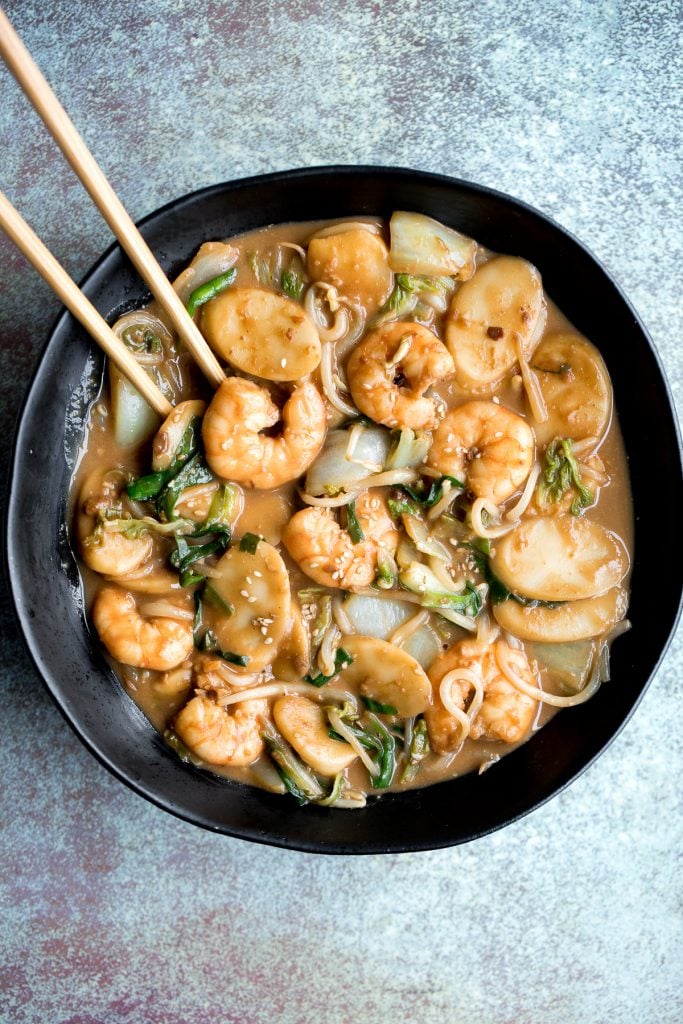
Tossed Noodles
Toss thin wheat noodles in a spicy chili oil sauce and top with seasoned ground beef to make numbing, spicy Sichuan Dan Dan noodles in under 15 minutes.
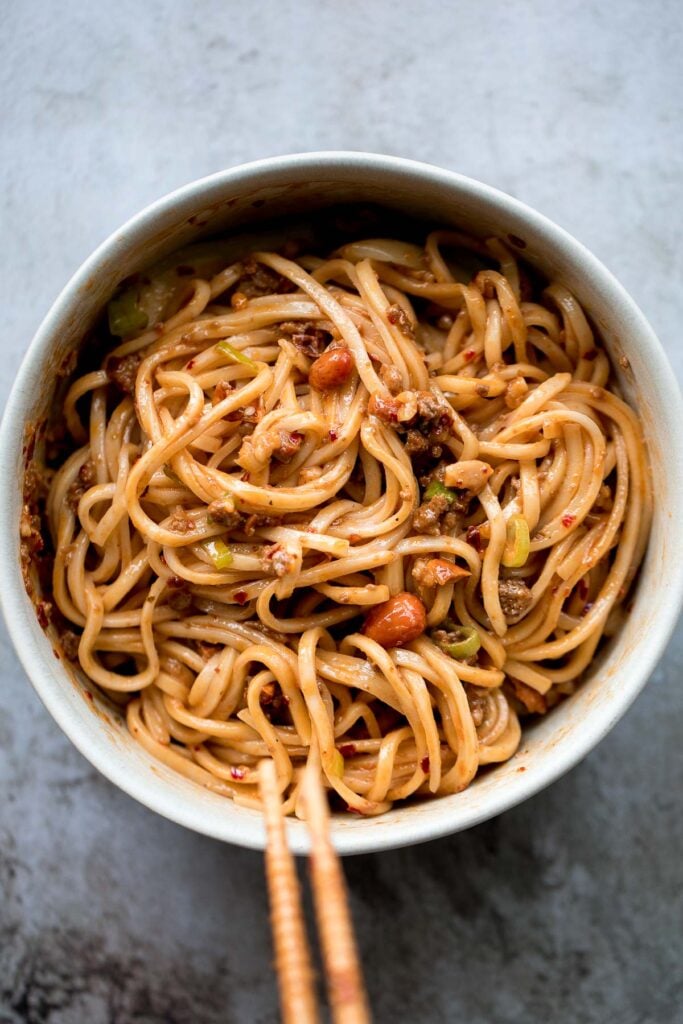
Hand-pulled noodles (la mian 拉面) are springy, chewy and delicious traditional homemade noodles that are rolled and stretched into long strips.
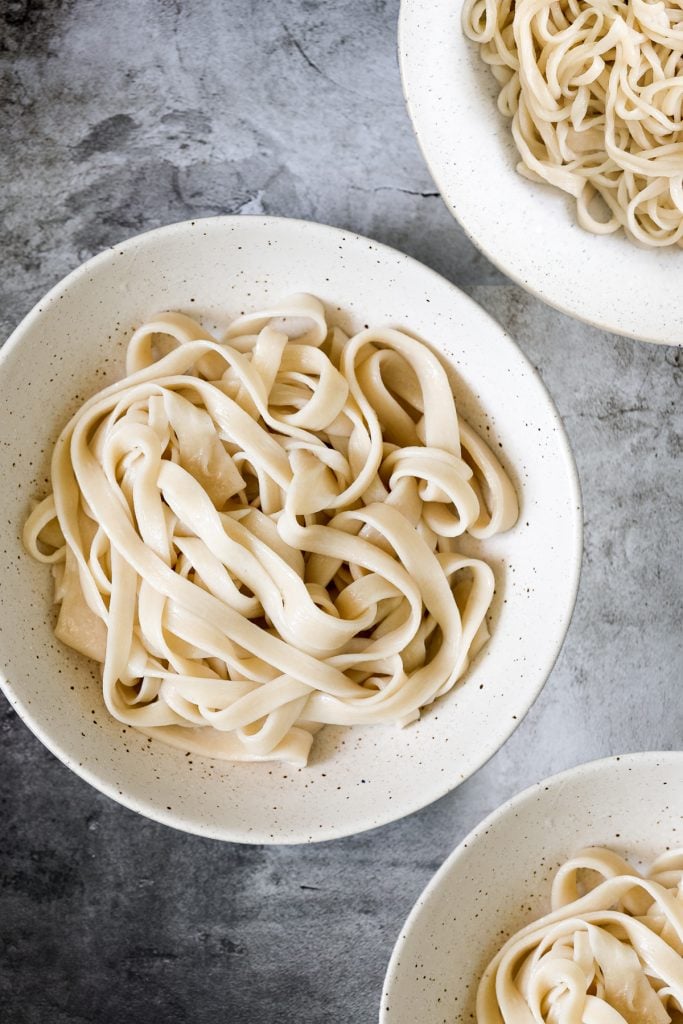
Cold Noodles with Peanut Butter Sauce
Easy vegan Shanghai style cold noodles tossed in peanut butter sauce with fresh vegetables and Asian seasonings, are flavourful and ready in 10 minutes.
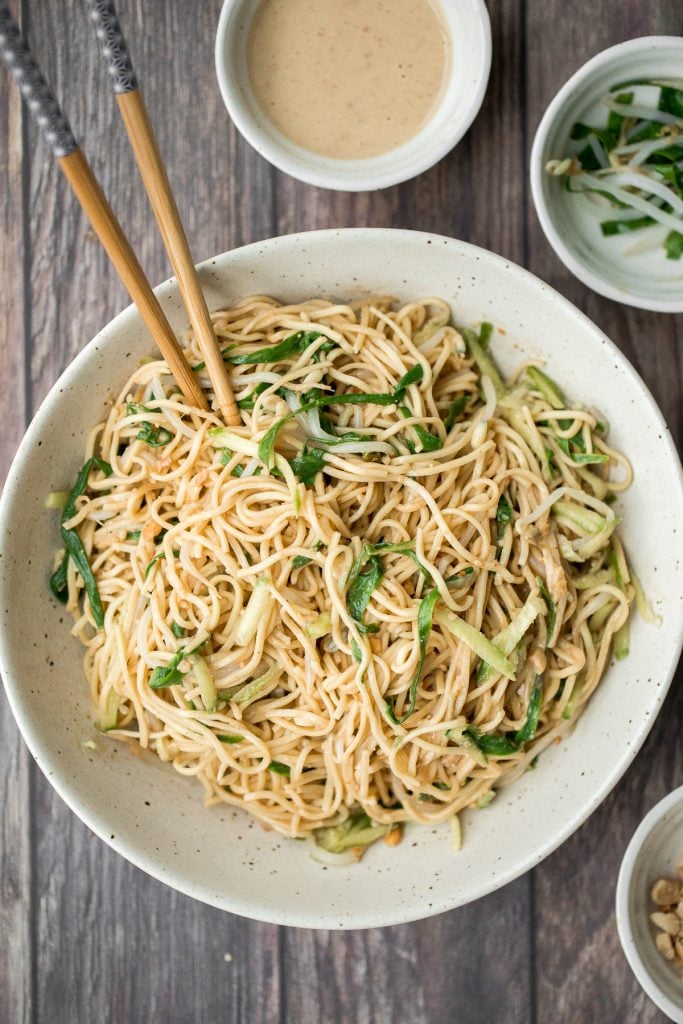
Shanghai scallion oil noodles (葱油拌面) is a flavourful, simple noodle dish that is easy to make homemade with 6 ingredients in under 10 minutes.
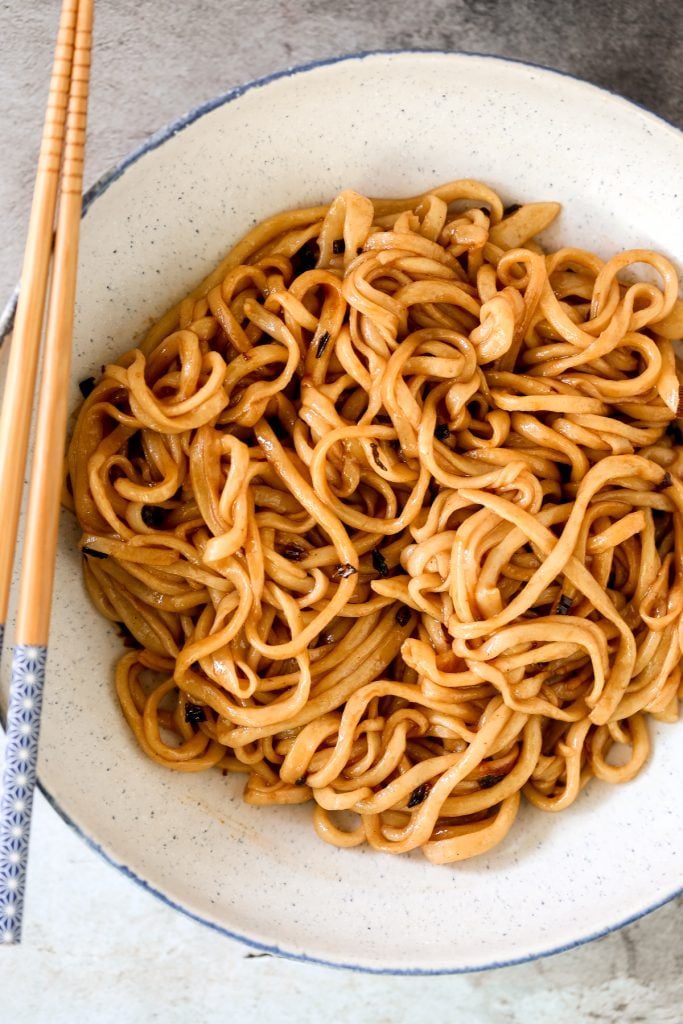
There's nothing better on a hot day than a cold and refreshing vegan soba noodle salad, tossed with fresh vegetables and a delicious saucy dressing.
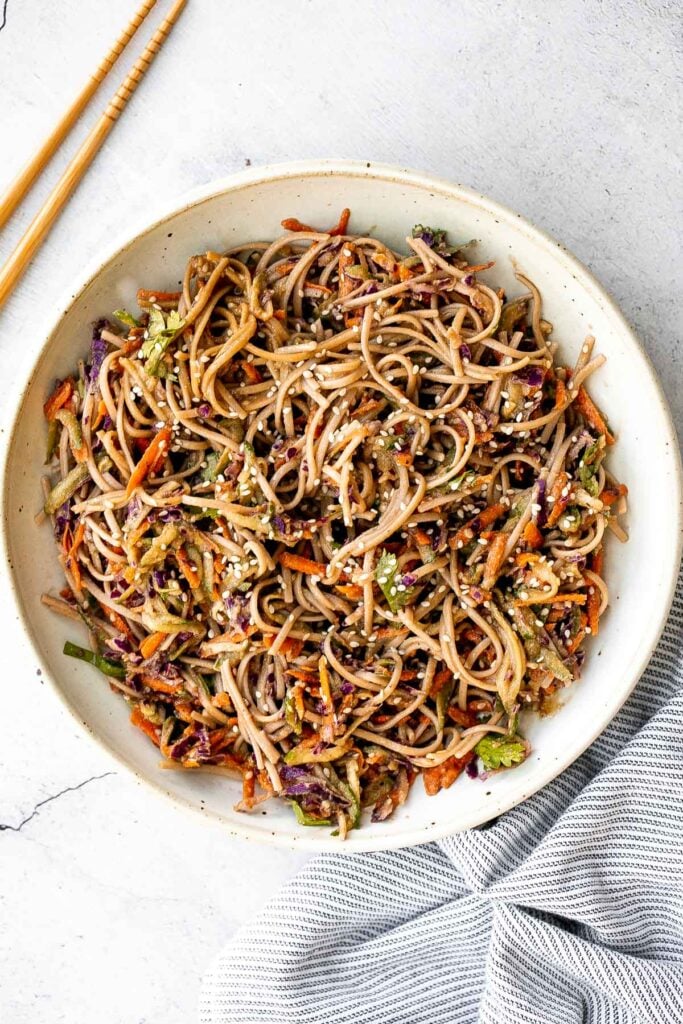
Quick and easy biang biang spicy noodles is a simple, flavourful and vegan noodle dish made with a few ingredients and in under 10 minutes.
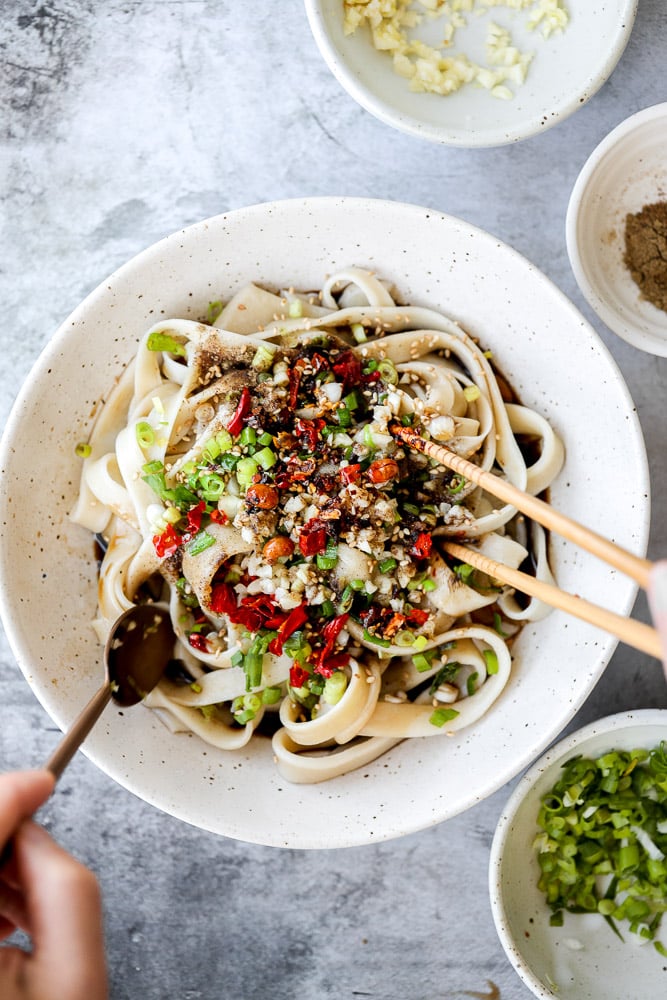
Peanut noodles are creamy, nutty, and delicious. This quick and easy, vegan homemade takeout recipe is loaded with flavor and is ready in 15 minutes.
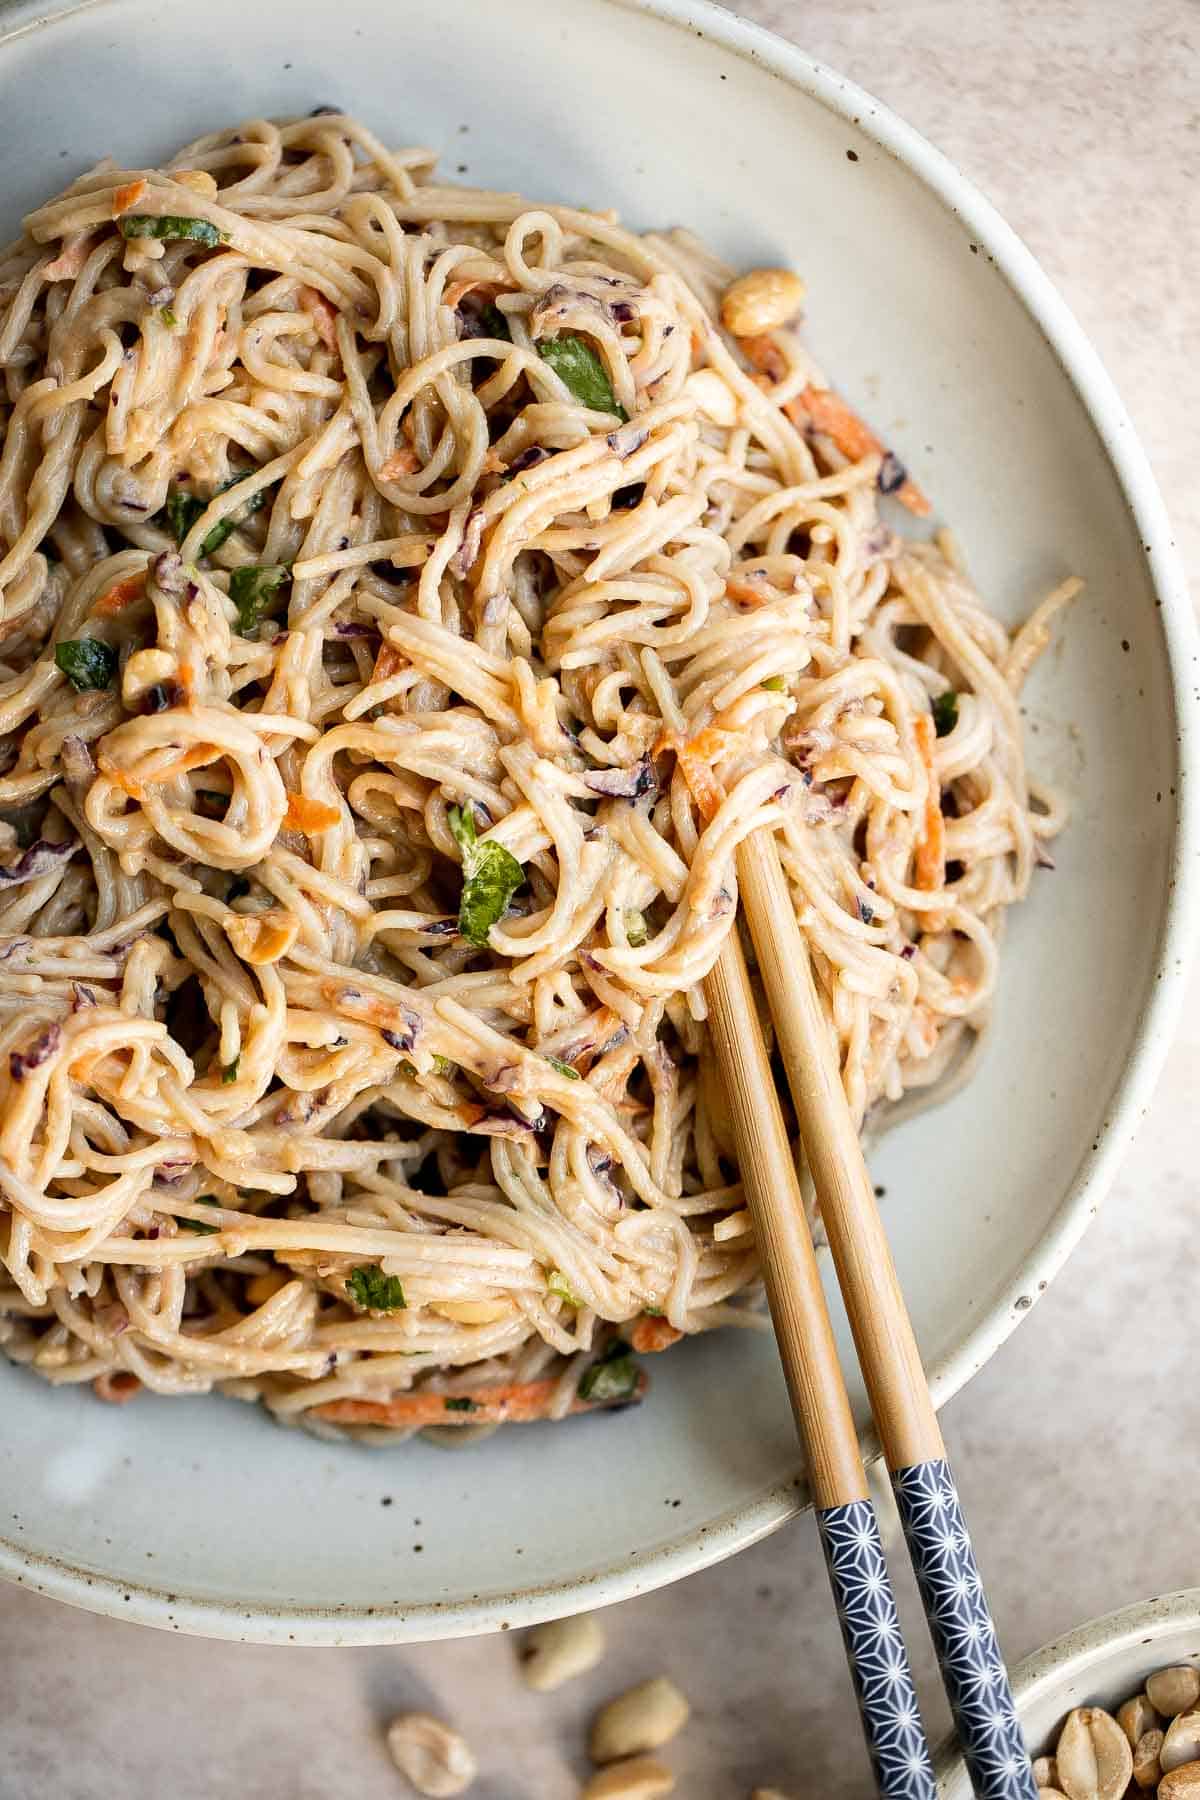
Flavorful, crispy, and crunchy, this Asian Cold Noodle Salad is made with noodles, vegetables, peanuts, and cilantro tossed in a homemade peanut dressing.

Noodle Soup Recipes
Creamy vegan ramen is delicious, flavorful, and healthy comfort food, packed with nutrients that will give you an immunity boost. Ready in just 30 minutes!

This Coconut Curry Ramen is creamy, rich, comforting, and delicious, with a perfect blend of mouthwatering textures and flavors and ready in 25 minutes.
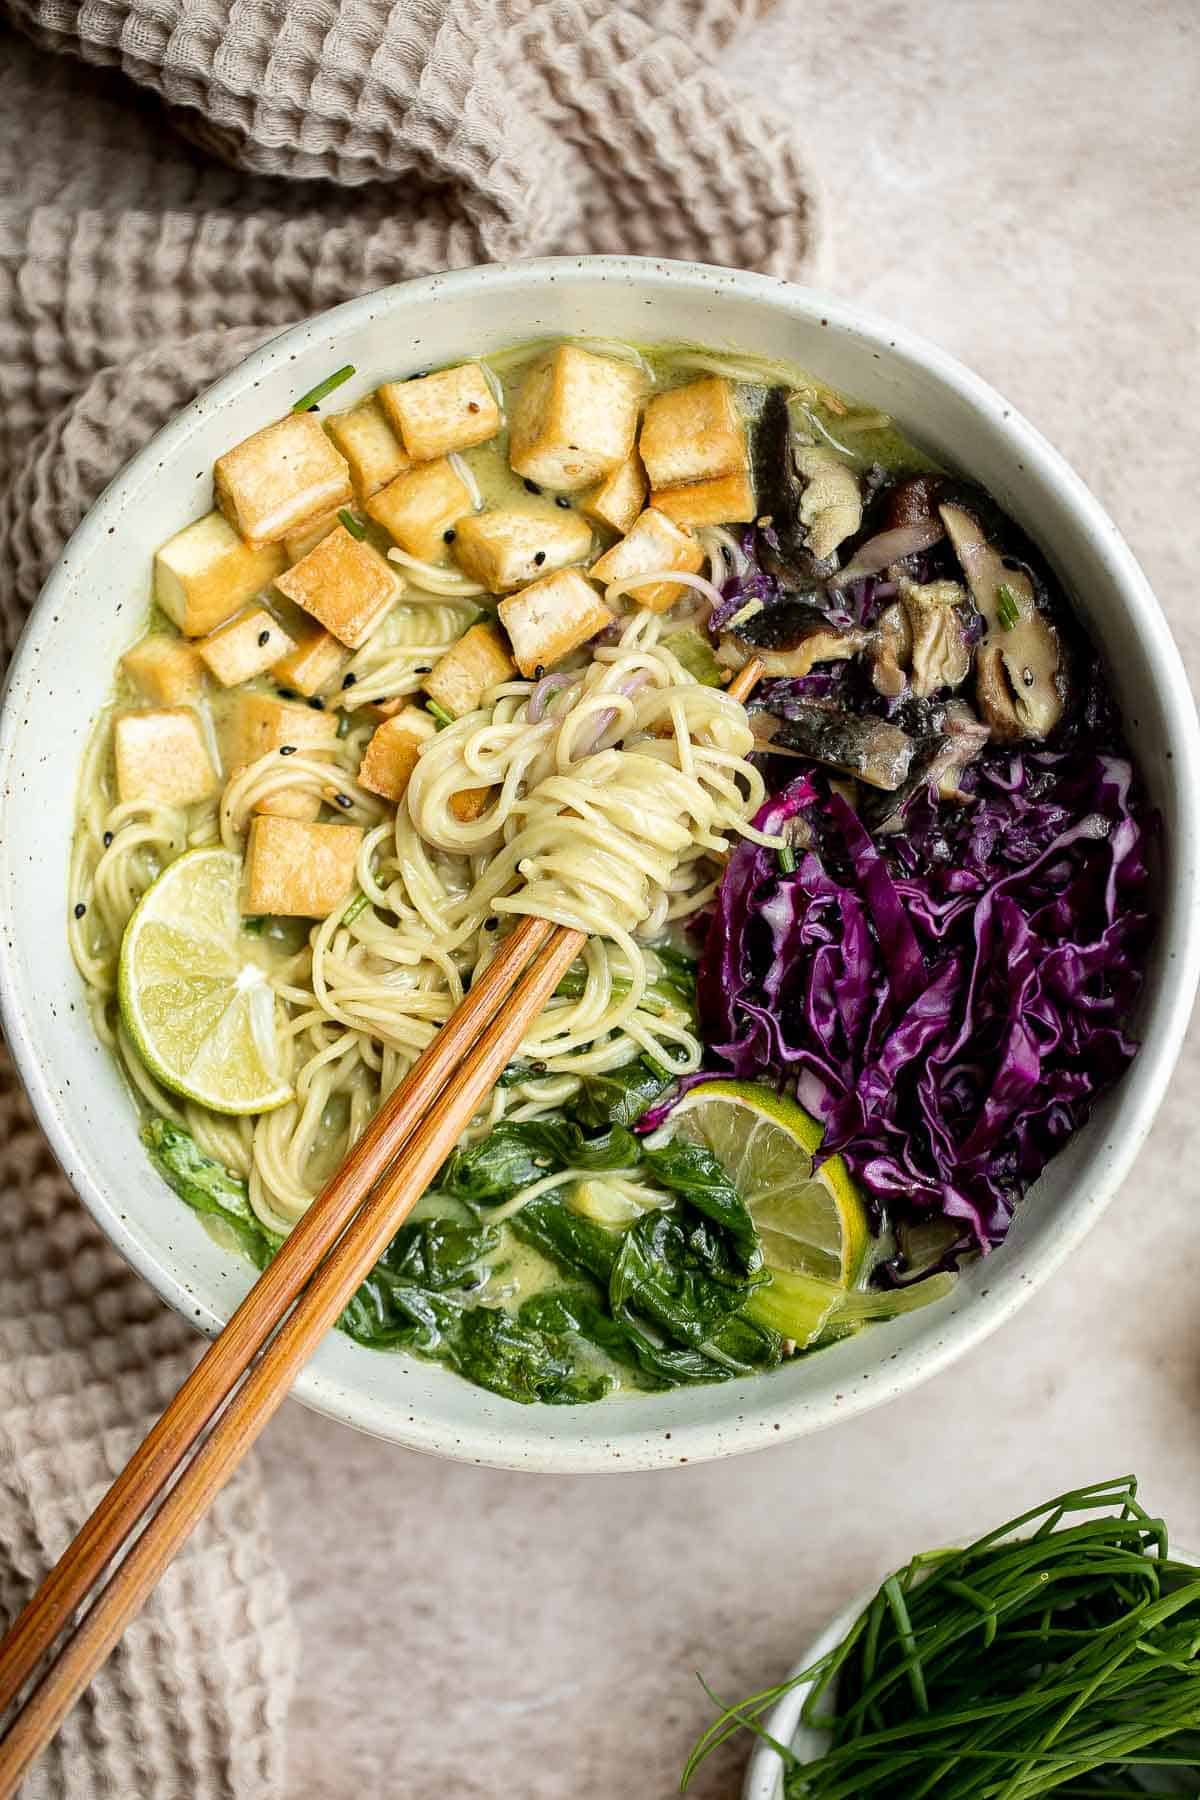
Healthy Miso Ramen with Chicken
It doesn't get any more cozier than a healthy miso ramen soup with chicken from the comfort of your own home. The vegan miso broth is what this ramen is all about. Seriously, weeknight dinners have never been tastier!
Quick and Easy Vegetarian Ramen
Put down that cup of instant noodles and make fresh, quick and easy Vegetarian Ramen in minutes with fresh vegetables, noodles and authentic umami flavours.
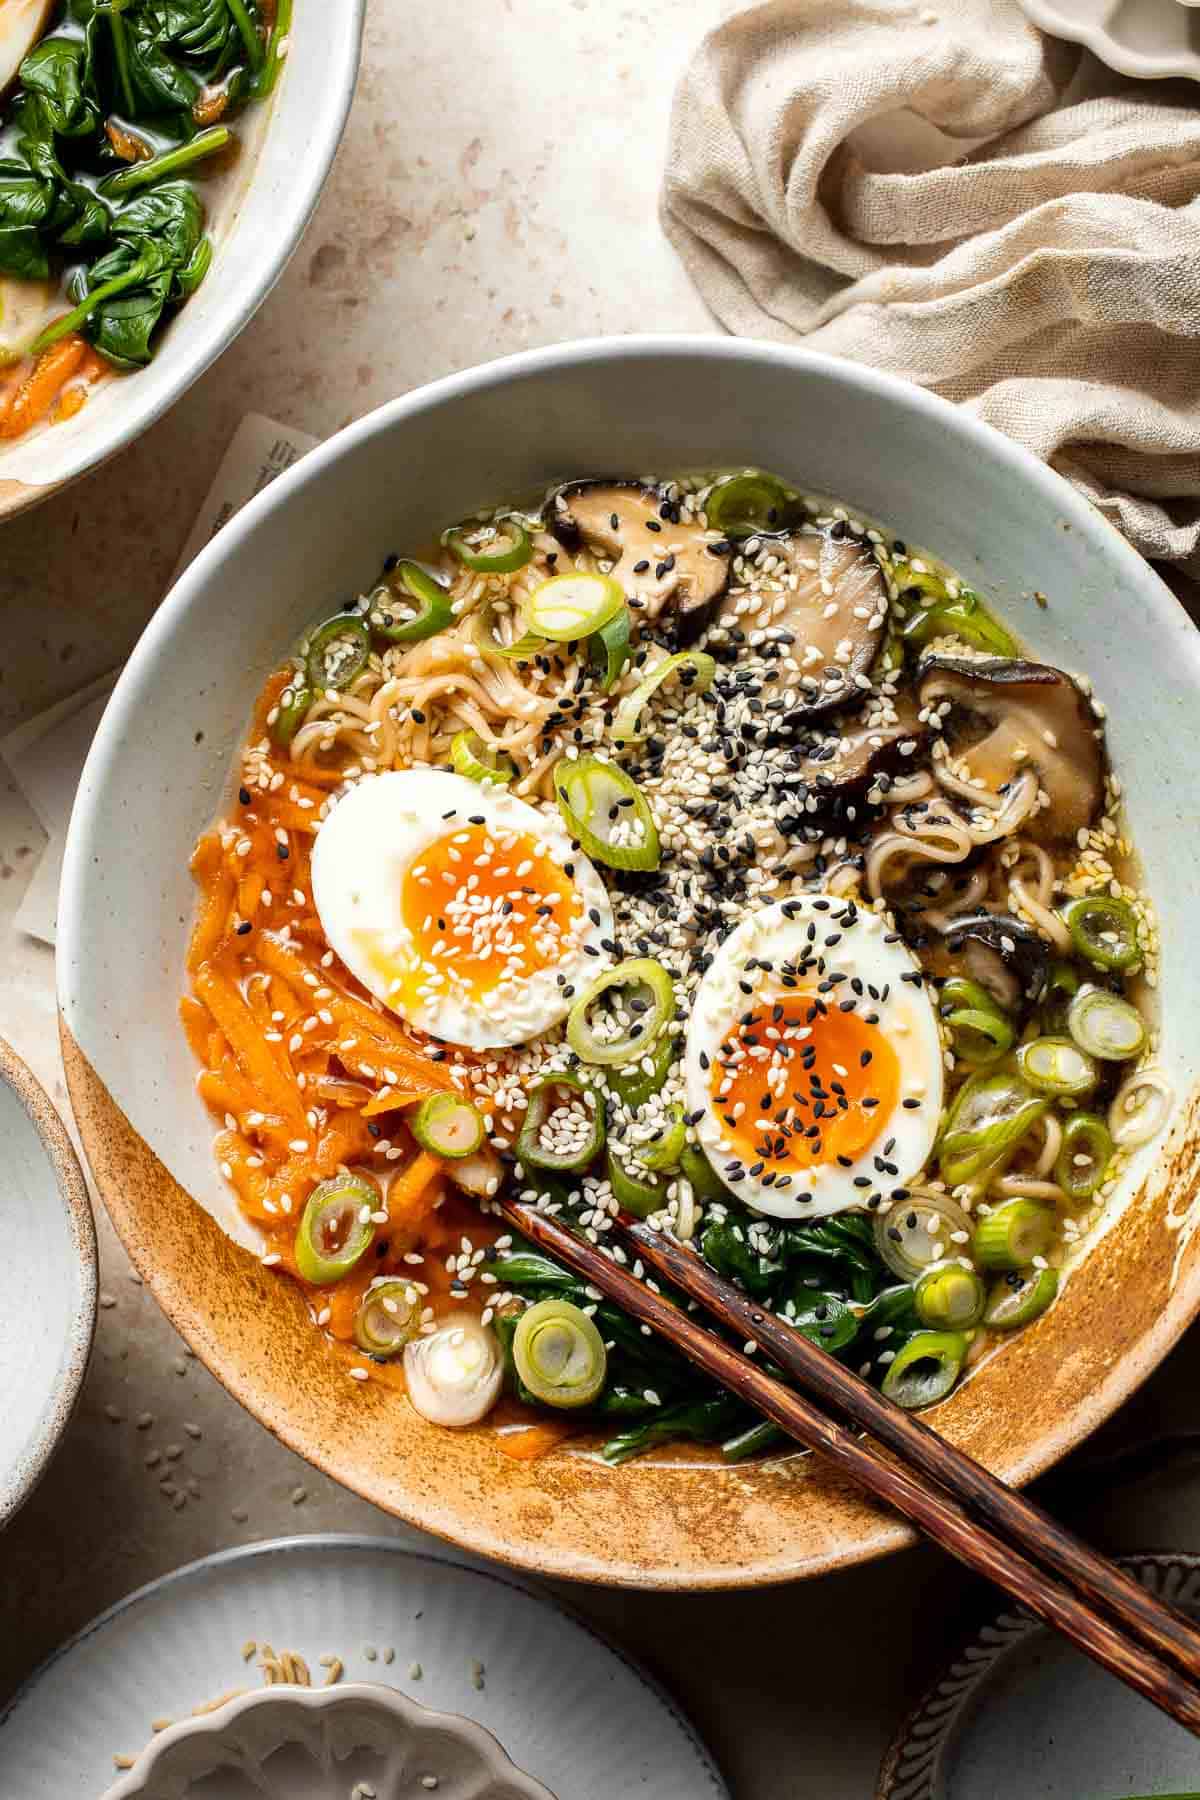
This gluten-free, one pot Thai red curry noodle soup is so flavourful and packed with shrimp, vermicelli rice noodles, fresh herbs, lime juice, and fish sauce.
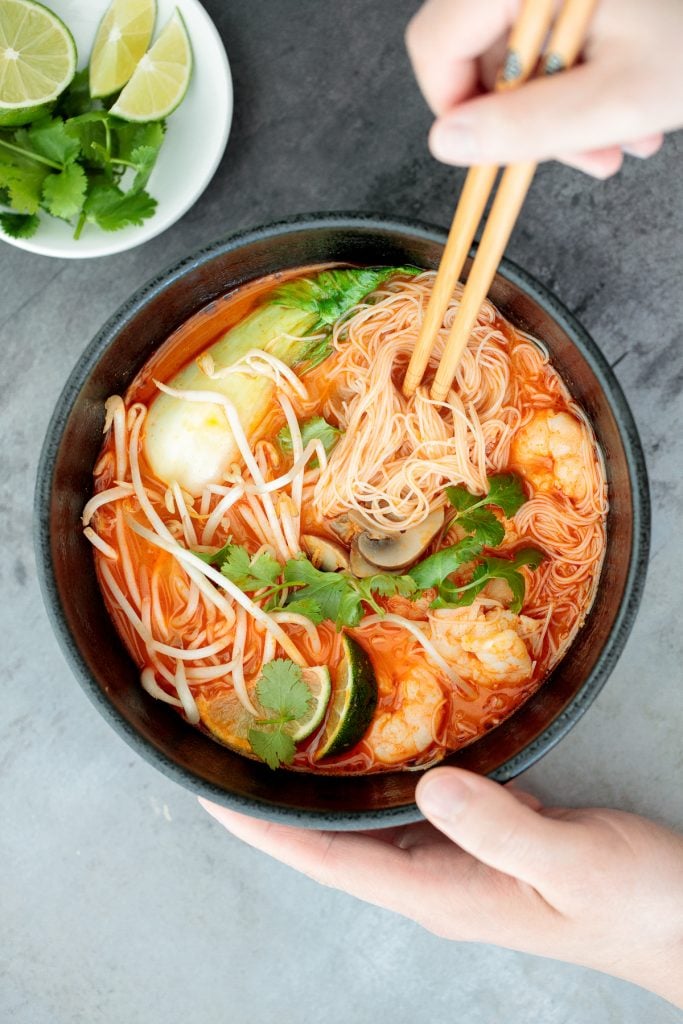
Vegetarian peanut miso ramen with a creamy vegan soup base, is topped with noodles, vegetables, and a perfect soft-boiled egg. Make it in just 20 minutes.
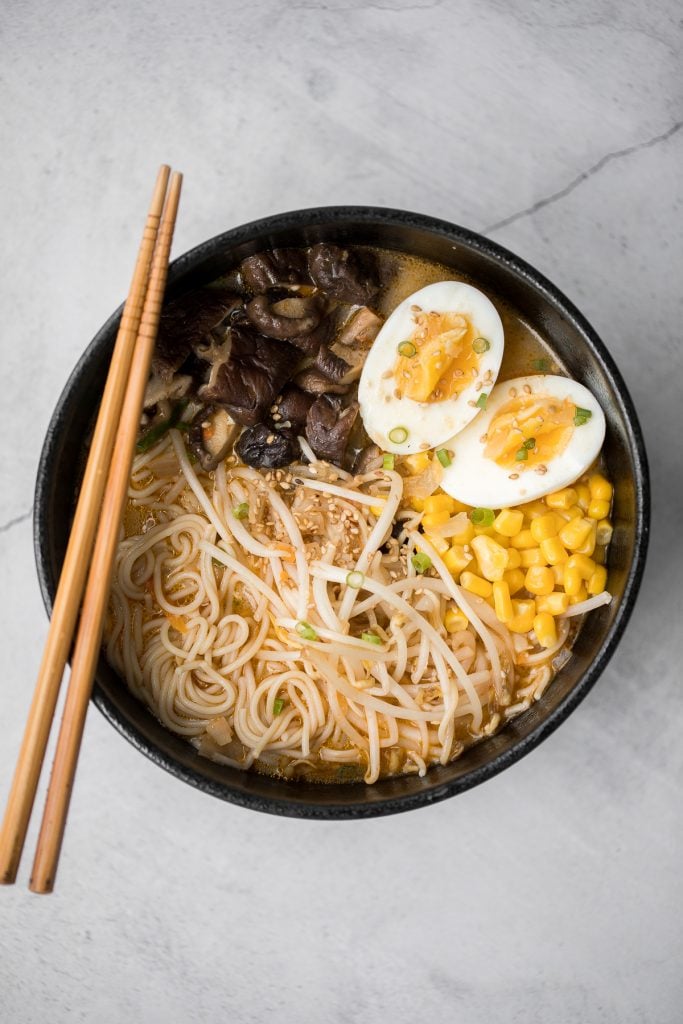
Slow Cooker Asian Beef Noodle Soup
An easy weeknight dinner option, this hearty and oily slow cooker Asian beef noodle soup is packed with beef chunks, vegetables, noodles, and Asian spices and flavours.
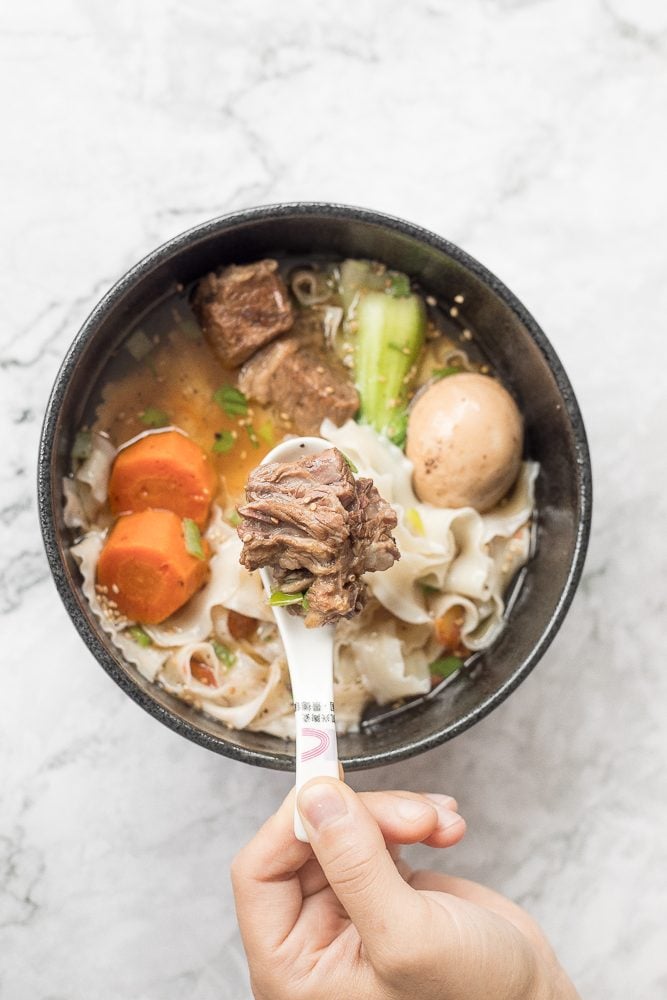
Easy 10-minute Wonton Soup is filling, delicious, and flavorful. With just a handful of simple ingredients, this homemade soup is ready in only 10 minutes!
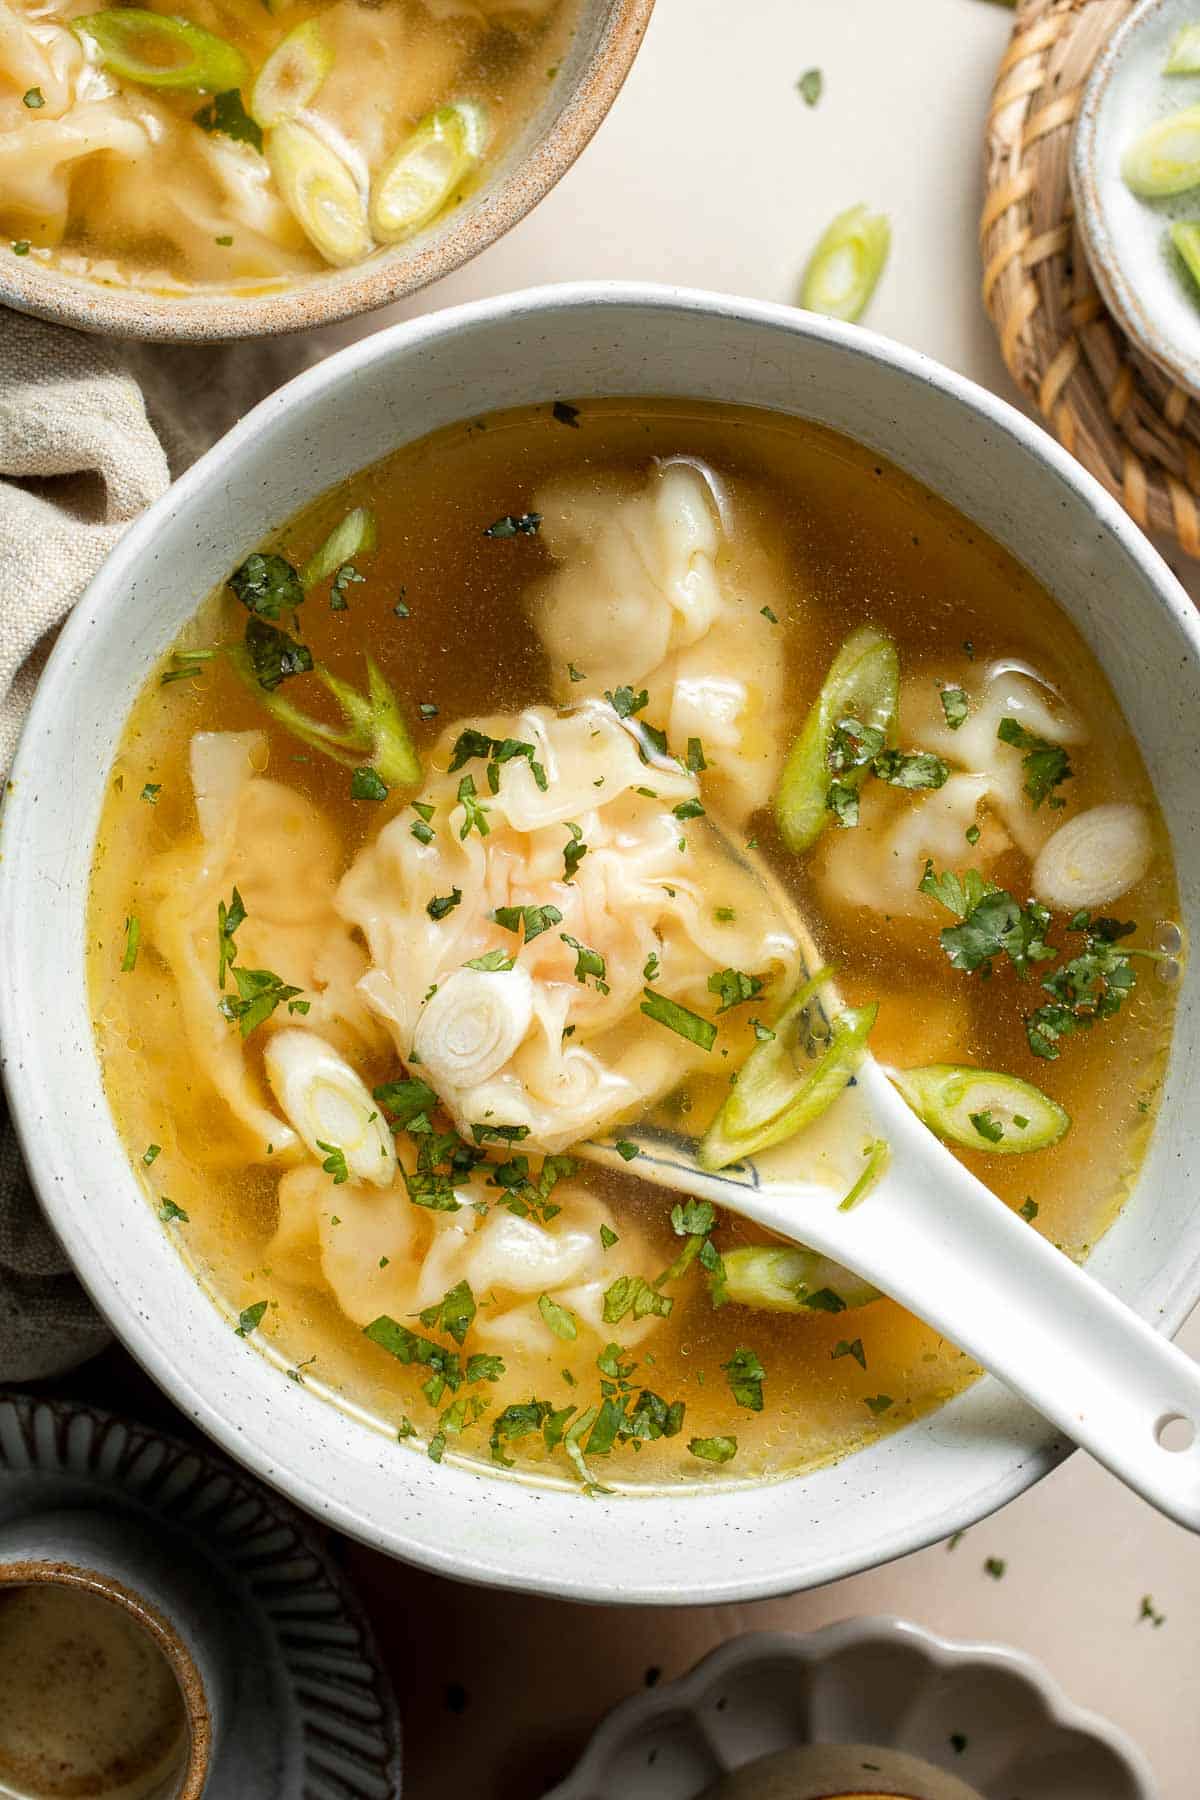
This easy, better than takeout, 10-minute Shanghai style wonton soup is the perfect soup to make for one person and is packed with classic Asian flavours.
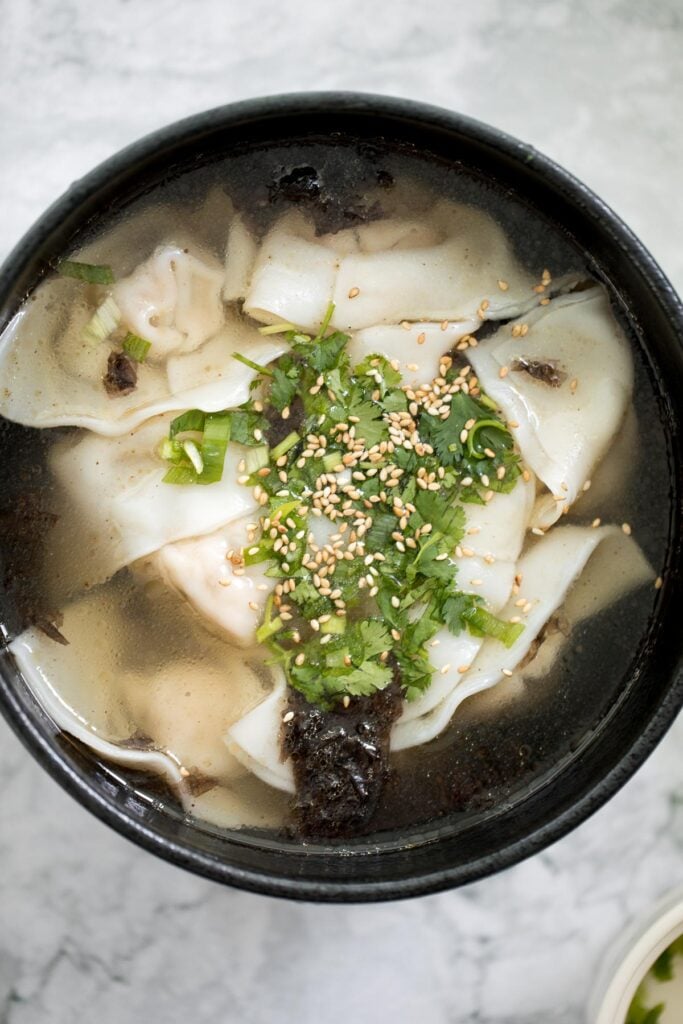
Tips for Making the Best Noodles
- Prep the ingredients before you start. Noodles are typically very quick and easy to make. Having all your ingredients prepped, ready, and within hands reach before you begin will make the entire cooking process go smoothly. This is especially important for stir-fried noodles as you have to add different ingredients in quickly, one after the other, while continuously stir-frying.
- How to customize. Almost all these noodle recipes are completely customizable. You can add in or substitute any vegetables that you have on hand. You can add in or substitute the protein with chicken, beef, tofu, or ground meat. Noodles are a great way for clearing out your refrigerator of any vegetables or protein that you need to get rid of. Make sure that everything is cut into bite-sized pieces for fast and even cooking.
- How to store. Noodles are best served fresh. Depending on the type of noodle, they might start to stick together and get a little stiff once they go cold. If you happen to have leftovers, you can store them in an airtight container in the refrigerator for up to 3 days. To reheat, steam the noodles, heat on a skillet with a splash of water, or heat in the microwave.
More Better than Takeout Recipes
- Healthy Lemon Chicken
- 10-Minute Vegetarian Fried Rice
- Beef Potstickers (Dumplings)
- Tigers Prawns in Garlic Ginger Soy Sauce
- Baked Sesame Chicken
- Lion's Head Chinese Meatballs
- Kung Pao Chicken
- Air Fryer Black Cod with Black Bean Sauce
- 10-Minute Seafood Fried Rice
- General Tso's Chicken
Did You Make Any of These Popular Noodle Recipes?
Please leave a comment and rating below, and let me know what you thought of this round up of the best noodle recipes. Be sure to snap a picture and tag me on Instagram @aheadofthyme or share it on the Pinterest pin so that I can follow along.
HUNGRY FOR MORE? Don't forget to sign up for my email newsletter so that you don't miss any recipes. You can also follow along on Instagram and Pinterest for more recipe updates.
Vegetarian Chow Mein
Better than takeout, quick and easy stir-fried vegetarian chow mein is packed with vegetables and coated in a delicious savoury sauce. This flavourful and delicious vegan recipe is completely customizable and takes just 15 minutes to make. Weeknight dinner has never been easier!
A good takeaway fakeaway is what I am all about. Who doesn't want delicious takeout after a busy day at work or school, especially one that tastes so much better than what you would get from a restaurant. Plus, way faster! Seriously, you can make this Hong Kong style vegetarian chow mein in the same amount of time that it will take for you look at a takeout menu and place an order. Some of my other favourite takeaway fakeaway recipes are: 10-Minute Vegetarian Fried Rice, 10-Minute Chicken Pad Thai, and Vegetarian Spring Rolls.
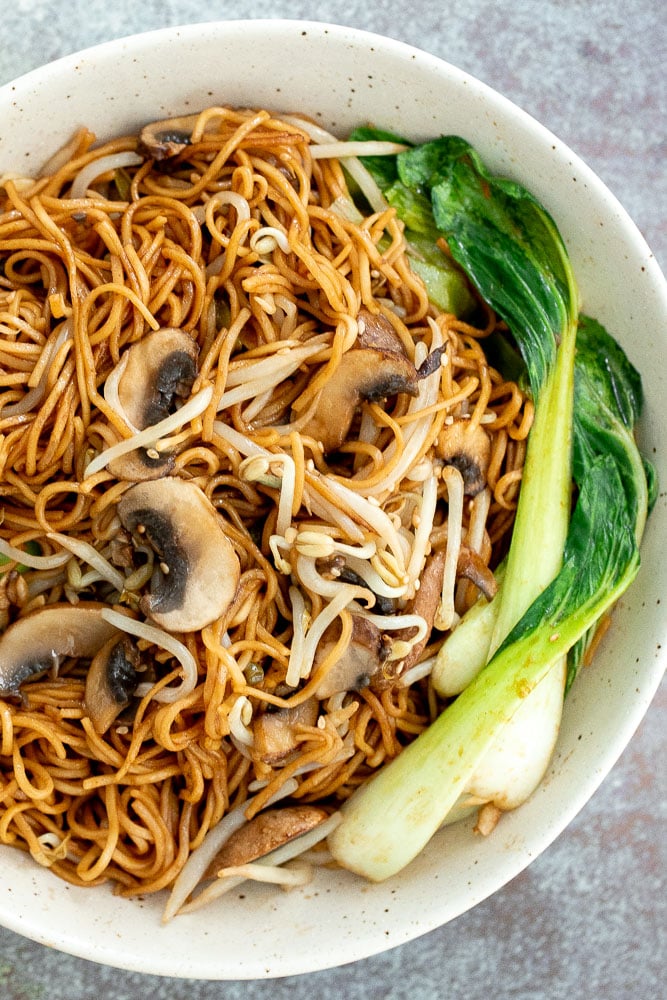
Ingredients in Vegetarian Chow Mein
To make vegetarian chow mein, you will need the following ingredients:
- vegetable oil - for stir-frying.
- mushrooms - you can add in any vegetables that you like. Some other vegetables I add often are carrots, red peppers, and broccoli.
- garlic
- chow mein noodles
- soy sauce
- sugar
- white pepper
- water (if needed)
- bok choy
- bean sprouts
- sesame oil
- white sesame seeds - to garnish on top.
You will also need measuring spoons and a large skillet or wok.
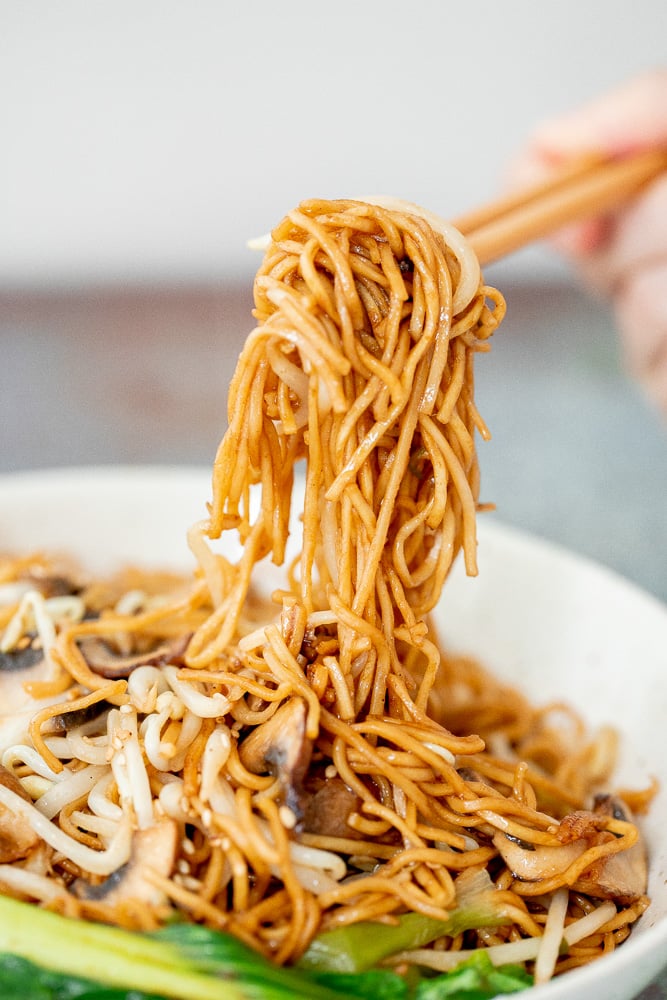
How to Make Hong Kong Style Vegetarian Chow Mein
- Sauté vegetables. Heat oil in a large skillet or wok for 2 minutes over medium-high heat until the oil is sizzling hot. Add mushrooms and sauté until tender and golden brown, about 3-4 minutes. Then, add garlic and sauté for another minute.
- Add noodles and seasoning. Add chow mein noodles, soy sauce, sugar and white pepper (add to taste if you don't like too much pepper). Stir fry for 3 minutes until the noodles soften. Stir in 1 or 2 tablespoons water if the noodle mixture becomes too dry.
- Add bok choy. Add bok choy, bean sprouts and sesame oil and reduce the heat to medium. Stir fry continuously until bok choy becomes medium soft, about 1-2 minutes. Do not overcook as you want the bok choy and bean sprouts to still be firm and not soggy.
- Serve. Garnish with sesame seeds and serve hot.
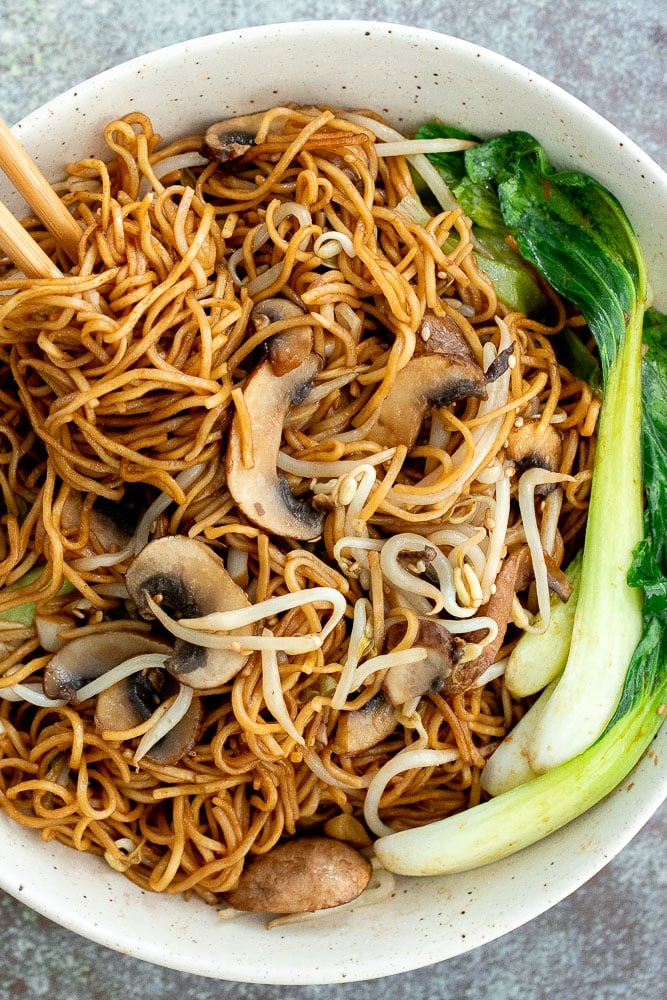
Tips
- Prep the ingredients before you start. Have all your ingredients prepped and ready before you begin. Stir-frying in general is a very fast process and by having your ingredients prepped and within hands reach, it will ensure that everything goes smoothly.
- How to customize. You can add or substitute in any vegetables that you have. This recipe is great way for clearing out your refrigerator of any vegetables. Some of my favourites to add are carrots, red peppers, and broccoli.
- How to store. This vegetarian chow mein is best served fresh. Once the noodles start going cold, they might start sticking together and get a little stiff. If you happen to have leftovers, you can store in an airtight container in the refrigerator for up to 3 days. To reheat, steam the noodles, heat on a skillet with a splash of water, or heat in the microwave.
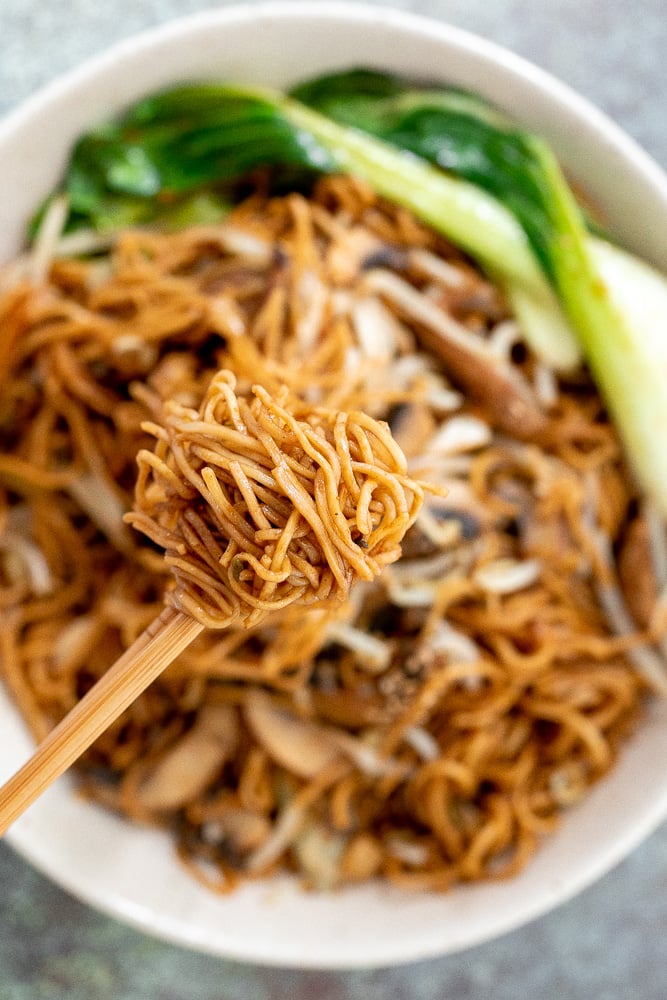
More Noodle Recipes
- Scallion Oil Noodles
- Shanghai Style Fried Noodles
- Chicken Pad Thai
- Vegetarian Peanut Miso Ramen
- Biang Biang Spicy Noodles
- Spicy Cumin Lamb Noodles
- Thai Red Curry Noodle Soup
- Spicy Dan Dan Noodles
Tried this recipe?
I'd love to hear what you think! Leave a comment and rating below to share your feedback. Your reviews help others discover this recipe and help me keep creating more free recipes for you. Snap a photo and tag me on social media @aheadofthyme too.

Mediterranean Chickpea Wedge Salad
Mediterranean chickpea wedge salad with hummus dressing is the king of all salads. It's a beautifully presented salad served as a wedge salad on a halved heart of romaine, topped with roasted chickpeas, crunchy vegetables, and a delicious creamy hummus dressing which gives this dish that familiar, deconstructed falafel flavour that is going to blow your mind. Seriously, this is reason enough to keep extra cans of chickpeas on hand! You've got to try this one. It's SO good.
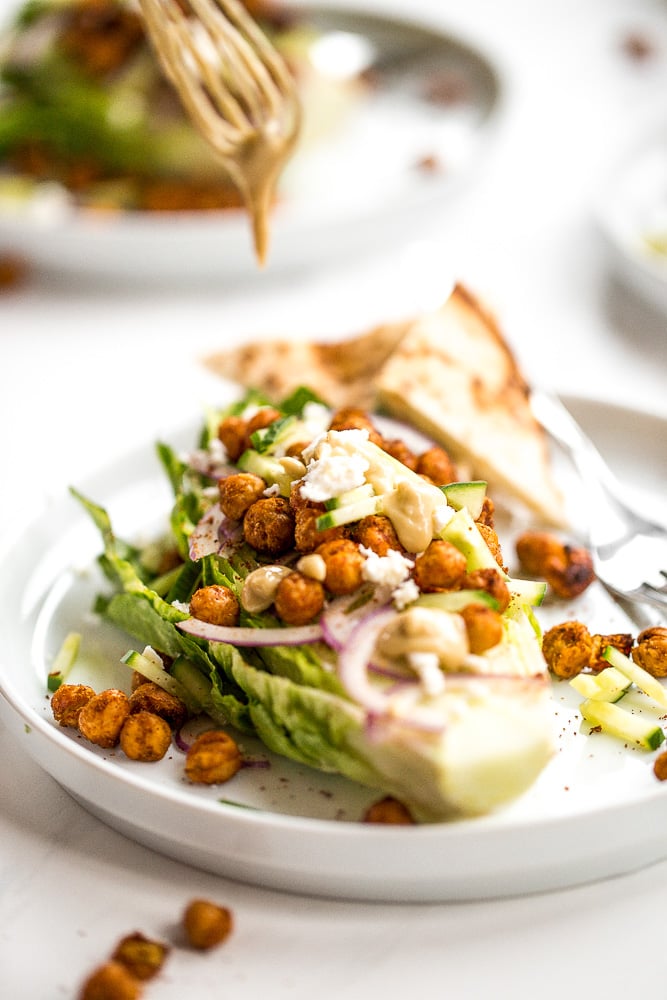
This chickpea wedge salad is the perfect meal on it's own with a side of pita bread. You can also serve it as part of a full-course meal with Chicken Souvlaki, Lamb Souvlaki, or Souvlaki Beef Shish Kebabs, a pot of One Pot Rice Pilaf, and Greek Lemon Roasted Baby Potatoes.
Ingredients
To make this delicious Mediterranean chickpea wedge salad with hummus dressing, you will need the following ingredients:
- chickpeas - you will need one 15 oz. can of chickpeas, drained and rinsed. Chickpeas are an unassuming and inexpensive ingredient, but that doesn't mean they can't transform into something truly stellar. Toss them with olive oil and your favourite blend of spices, bake until golden brown and crunchy, and you will not believe how much flavour they add to this or any dish. In fact, you could double the recipe for the chickpeas and keep them on hand as a healthy snack all week! For this recipe, toss the chickpeas in the following ingredients:
- olive oil
- cumin
- paprika
- coriander
- cinnamon
- salt and pepper
- romaine lettuce hearts - you could easily also adapt this entire salad using pre-bagged lettuce (stick with romaine or switch to fresh spinach, spring greens, or even mesclun!).
- cucumber
- red onion
- roasted red peppers - you can use storebought roasted red peppers or roast your own. I provide full instructions for roasting red pepper in this Roasted Red Pepper Hummus recipe.
- feta cheese
- hummus dressing - made with hummus, tahini, lemon juice, salt, and olive oil.
You will also need measuring spoons, half sheet baking pan, and mixing bowls.
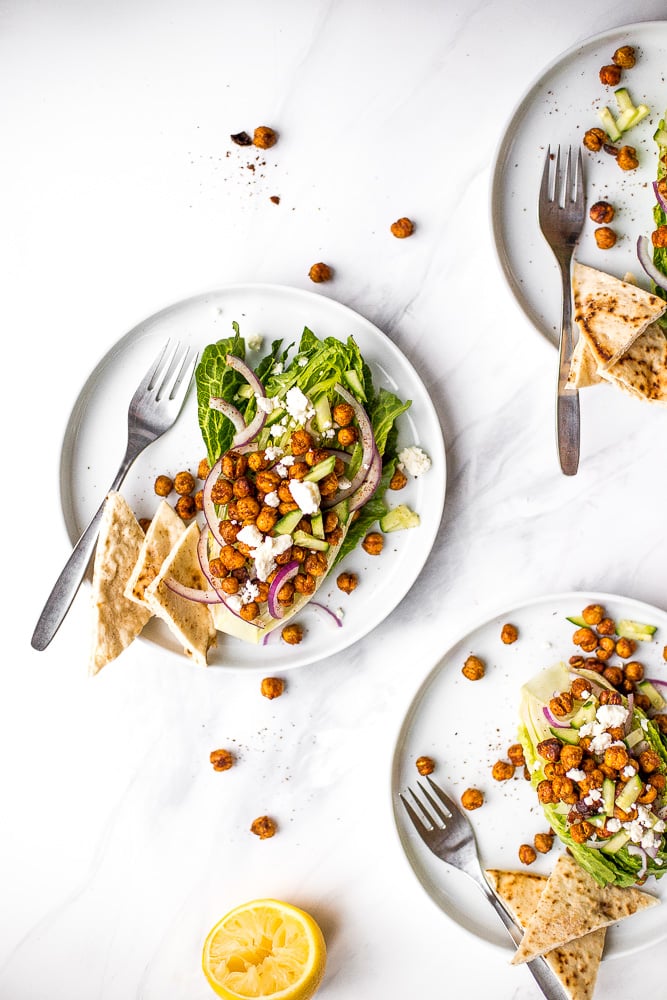
How to Make the Best Mediterranean Chickpea Wedge Salad with Hummus Dressing
- Roast the chickpeas. Place drained and rinsed chickpeas on a paper towel or kitchen towel to dry completely. In a medium bowl, combine chickpeas, olive oil, cumin, paprika, coriander, cinnamon, salt and pepper. Stir to combine, then place on a large half sheet baking pan lined with parchment paper, making sure the chickpeas are in a single layer. Bake in a 400F preheated oven for 25 minutes, shaking the pan halfway through to ensure they crisp up evenly on all sides. Set aside to cool.
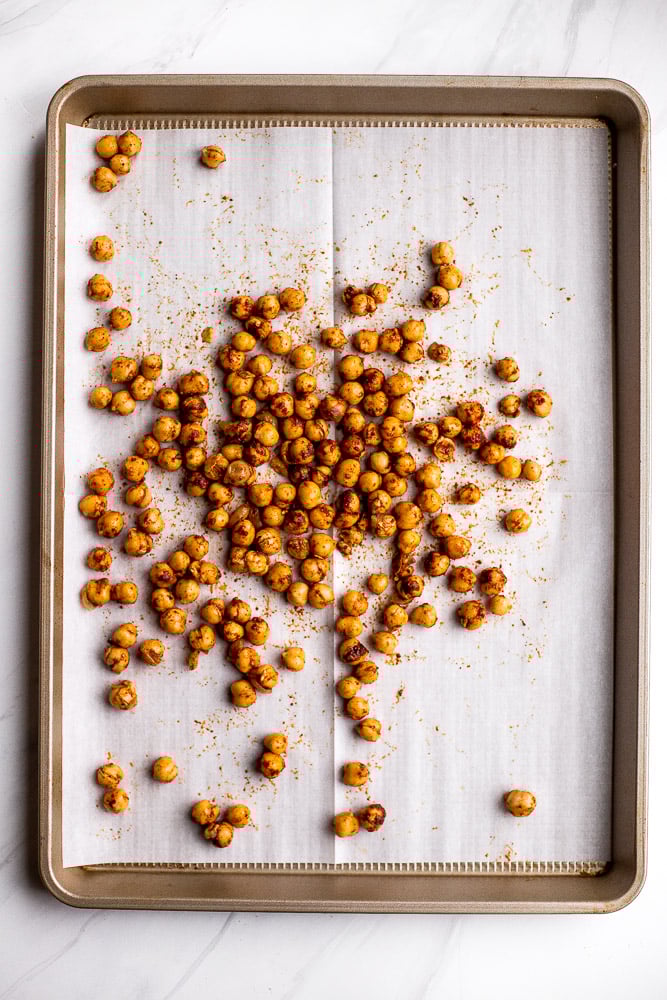
- Make the hummus dressing. In a small bowl, whisk together hummus, tahini, lemon juice, and salt. While whisking, slowly drizzle in the olive oil and mix until thoroughly combined. Taste and adjust seasoning as needed. Set aside.
- Assemble the salad. Slice romaine lettuce hearts in half or in quarters (depending on the size) to create large, individual portions. Place them on one large tray or on individual plates. Top each lettuce heart with equal amounts of cucumber, red onion, and roasted red peppers. Top with heaping spoonfuls of roasted chickpeas. Then, drizzle the hummus dressing on top and garnish with crumbled feta cheese.
- Serve. Serve immediately or at room temperature with some pita bread on the side.
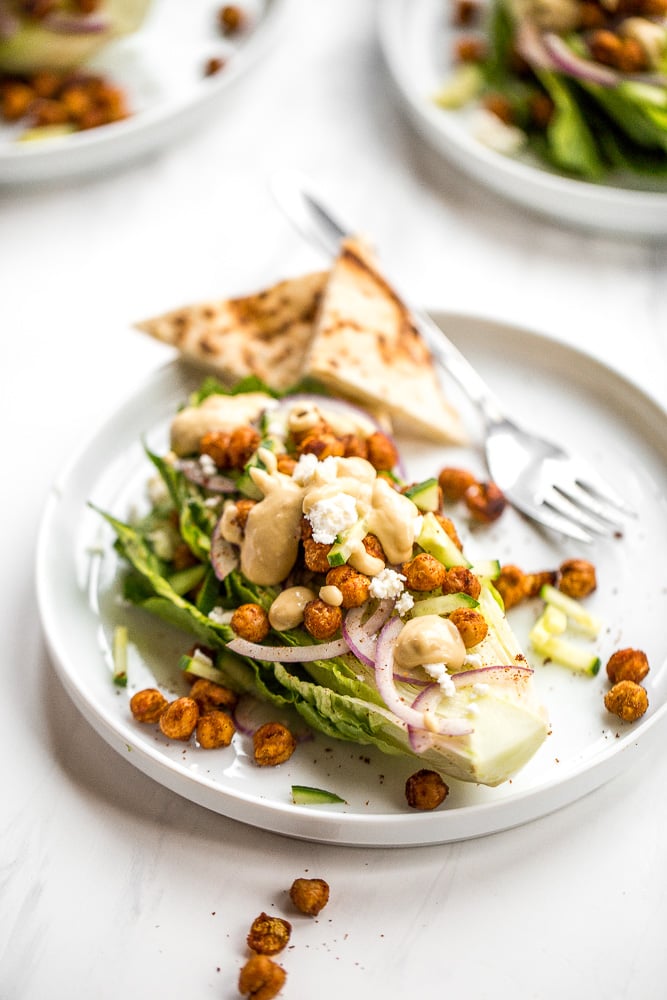
More Salad Recipes
- Mediterranean Orzo Pasta Salad
- The Best Greek Salad
- Persian Shirazi Salad with Cucumber and Tomatoes
- Chinese Garlic Cucumber Salad
- Mandarin Orange Salad
- Winter Kale Salad with Apple Cider Vinaigrette
- Fall Harvest Salad with Roasted Butternut Squash
- Apple Walnut Salad with Balsamic Vinaigrette
Tried this recipe?
I'd love to hear what you think! Leave a comment and rating below to share your feedback. Your reviews help others discover this recipe and help me keep creating more free recipes for you. Snap a photo and tag me on social media @aheadofthyme too.

Parmesan Crusted Chicken
Baked parmesan crusted chicken is a delicious meal that is easy to make in just under 40 minutes. Flattened pieces of chicken breast are breaded in a delicious and herby parmesan breadcrumb mixture and baked until crispy perfection. This chicken is flavourful, delicious and healthy because it's baked and not fried. Serve it alongside a salad or pasta, or slice up and serve on its own as a grown-up version of chicken strips.
Parmesan crusted chicken is kind of like the base of Chicken Parmesan (without the tomato sauce and mozzarella). Which of course, is also very delicious. Chicken dinners are always a go to around here because they are tasty and fast, so you can easily make them on a busy weeknight. Some of my other quick weeknight favourites include: Creamy Lemon Chicken Piccata, Healthy Lemon Chicken, Creamy Lemon Parmesan Chicken, and Kung Pao Chicken.
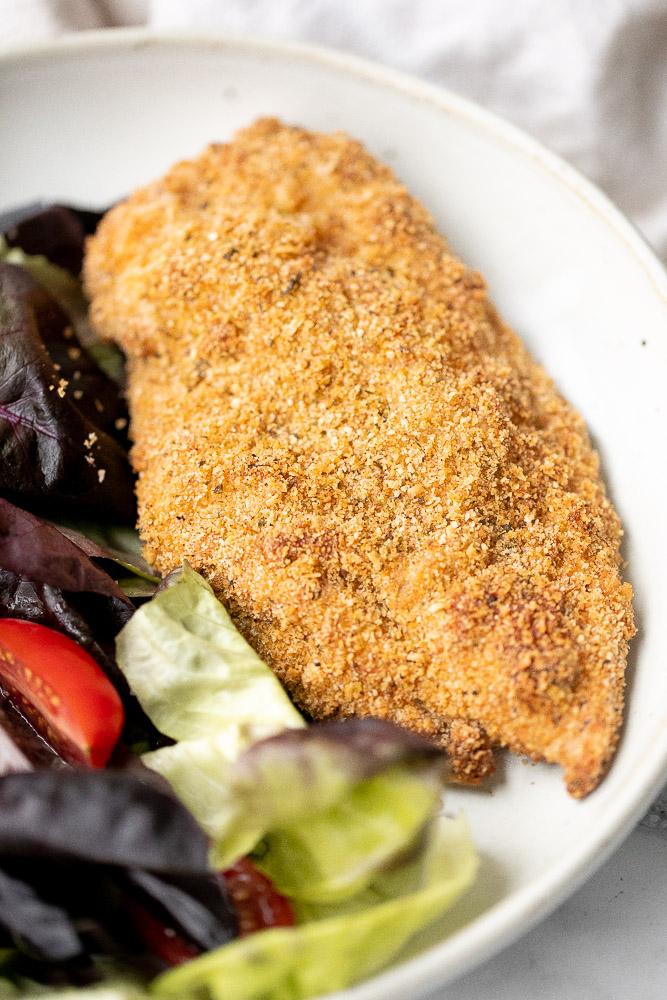
Ingredients
To make delicious parmesan crusted chicken, you will need the following ingredients:
- chicken breasts - you want to use boneless and skinless breasts.
- salt and pepper
- Italian seasoning
- breadcrumbs - you can use regular breadcrumbs or Panko.
- Parmesan
- garlic powder
- fresh parsley - you can also substitute with your favourite fresh herbs such as oregano, basil or thyme. If planning to use rosemary, just use a little bit and add in other herbs because the flavour will be overpowering.
- olive oil
- all-purpose flour - helps the eggs stick to the chicken, and creates a nice crust.
- egg - helps the parmesan-breadcrumb coating stick to the chicken.
You will also need measuring cups and spoons, mixing bowl, rolling pin, and half sheet baking pan.
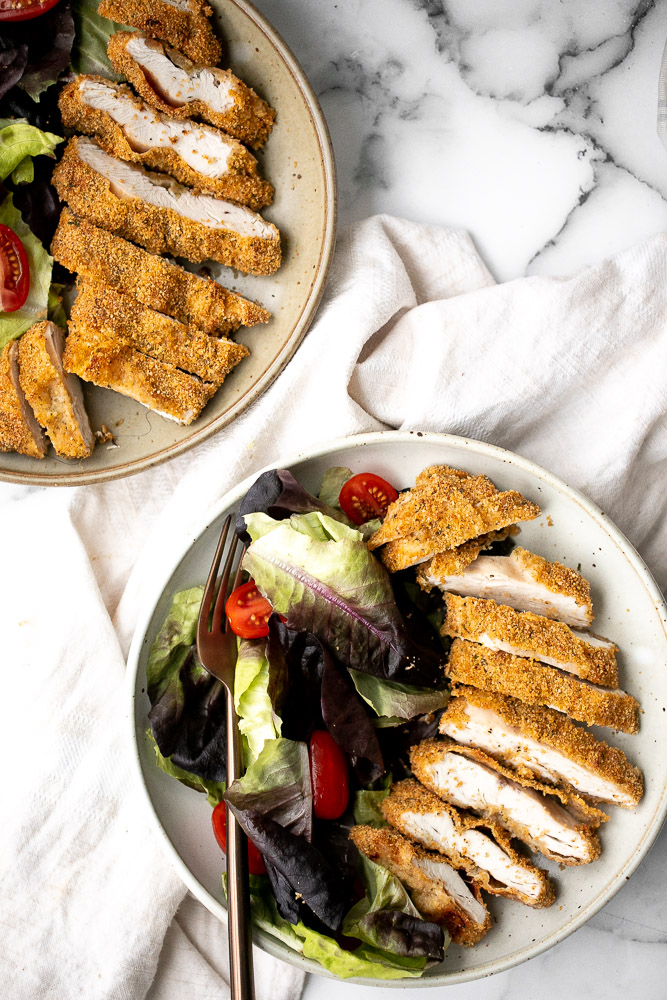
How to Make the Best Parmesan Crusted Chicken
- Prep the chicken. Using a paper towel, pat dry each chicken breast completely and place, one at a time, between 2 sheets of cling wrap or in a ziploc freezer bag. Carefully flatten the chicken breasts with a rolling pin until they are approximately ½-inch thick. Don't pound the breasts too hard as it could tear the breast apart. Ideally, you want flattened chicken breasts with uniform thickness. Season both sides of each chicken breast with salt, pepper and Italian seasoning. Set aside on a plate.
- Prepare the coating. In a mixing bowl, whisk together breadcrumbs, Parmesan, garlic powder, parsley and olive oil until smooth. You can also combine these ingredients into a food processor, and pulse mix until just combined. Transfer the breadcrumb mixture into a shallow plate.
- Dredge the chicken. Prepare another shallow plate with flour and a shallow plate with the beaten egg. Dip each piece of chicken into the flour to evenly coat on all sides. Then, dip into the egg to evenly coat and then coat it in the breadcrumb mixture. The flour will stick to the chicken, the egg sticks to the flour, and the breadcrumbs stick to the egg. Shake off any excess breadcrumbs.
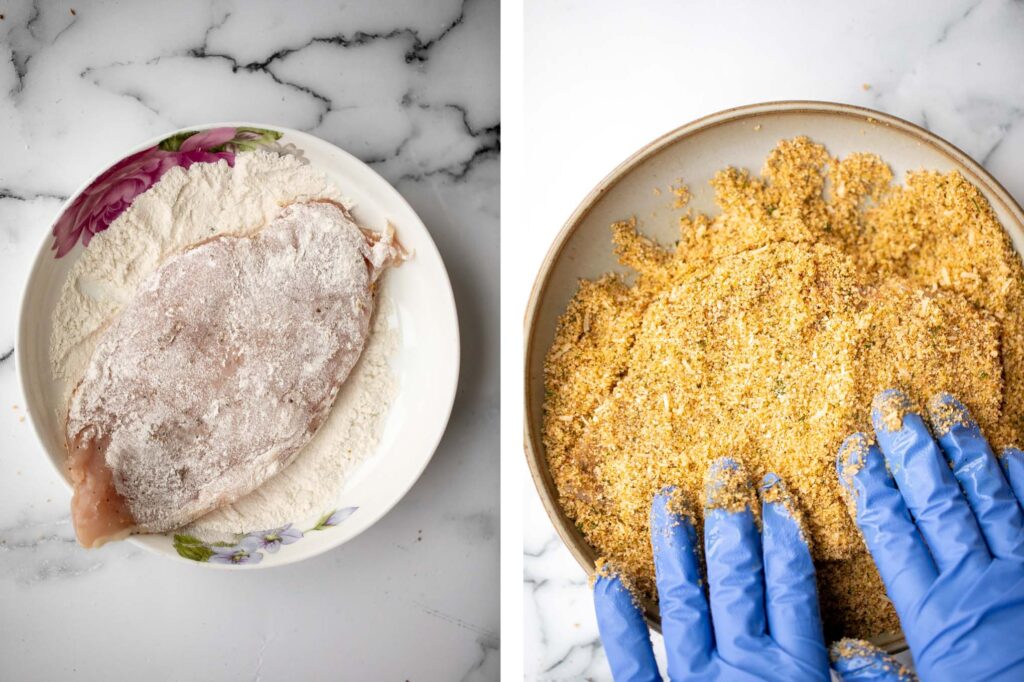
- Bake. Transfer the breaded chicken on a large half sheet baking pan lined with parchment paper. Bake on a 400F preheated oven for 30 minutes until the crust is golden brown and the internal temperature for the chicken reaches 165F as read on a meat thermometer. You can also flip the chicken once halfway through baking if you want both sides to be crispy.
- Serve. Slice into strips and serve immediately over salad or pasta.
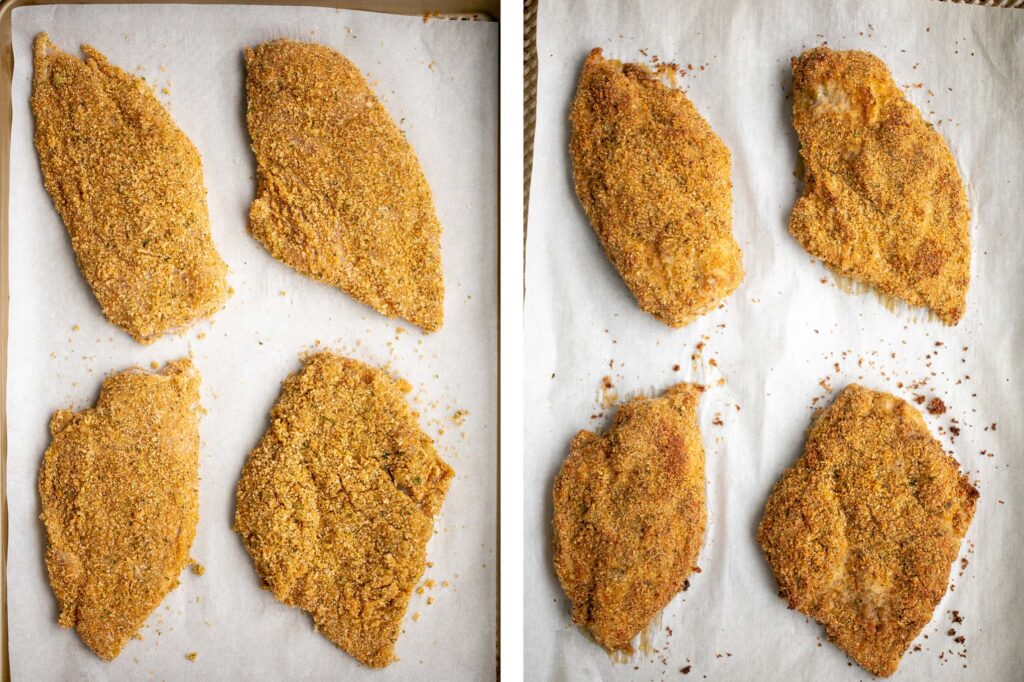
How to Serve Parmesan Crusted Chicken
Serve this delicious baked parmesan crusted chicken over a plate of salad, such as Mixed Greens Salad, Greek Salad, or Mediterranean Chickpea Wedge Salad with some veggies on the side. Try Sautéed Garlic Mushrooms, Roasted Garlic Green Beans, or Roasted Garlic Parmesan Baby Potatoes.
I would also recommend serving this chicken over a plate of pasta. Some of my favourites to pair this with include: Pesto Penne Pasta, Spaghetti Alfredo with Spinach and Mushrooms, or Cacio e Pepe.
Storing Instructions
- How to store. Parmesan crusted chicken is best served fresh. You can store any leftovers in an airtight container for up to 4 days in the refrigerator
- How to reheat. Reheat in a 300F preheated oven or air fryer for 5-10 minutes until warmed through.
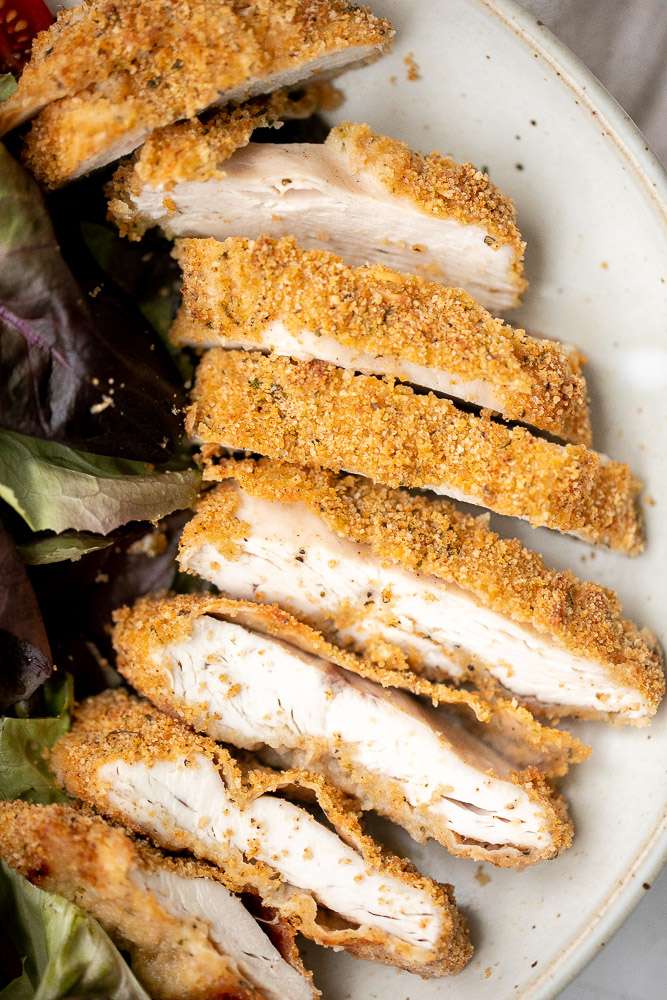
More Chicken Recipes
- Easy Chicken Parmesan (Parmigiana)
- Baked Sesame Chicken
- One Pan Garlic Roasted Chicken with Baby Potatoes
- Creamy White Chicken and Spinach Lasagna
- Creamy Skillet Chicken with Lemon Garlic Sauce
- Skillet Chicken Thighs and Potatoes
- One Pot Spanish Chicken and Rice
Tried this recipe?
I'd love to hear what you think! Leave a comment and rating below to share your feedback. Your reviews help others discover this recipe and help me keep creating more free recipes for you. Snap a photo and tag me on social media @aheadofthyme too.
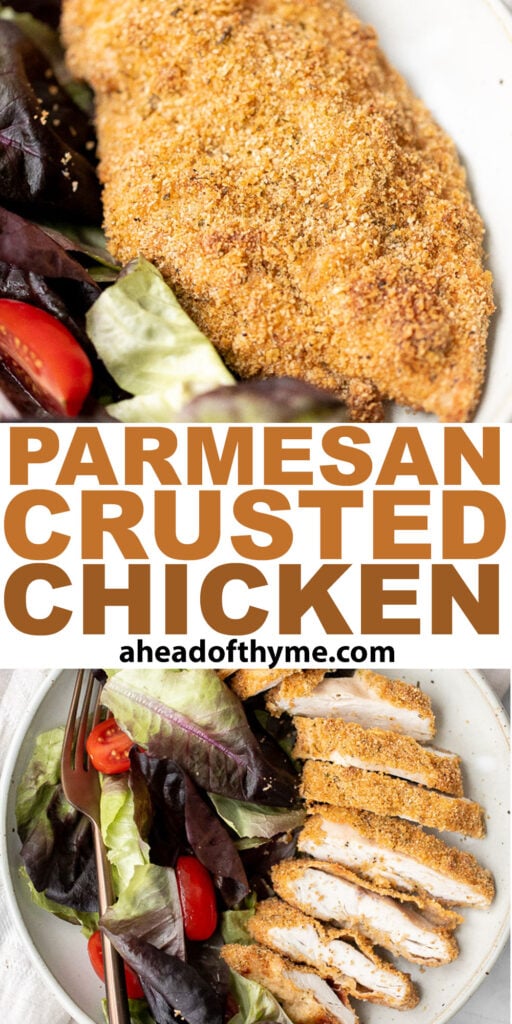
- « Previous Page
- 1
- …
- 29
- 30
- 31
- 32
- 33
- …
- 40
- Next Page »