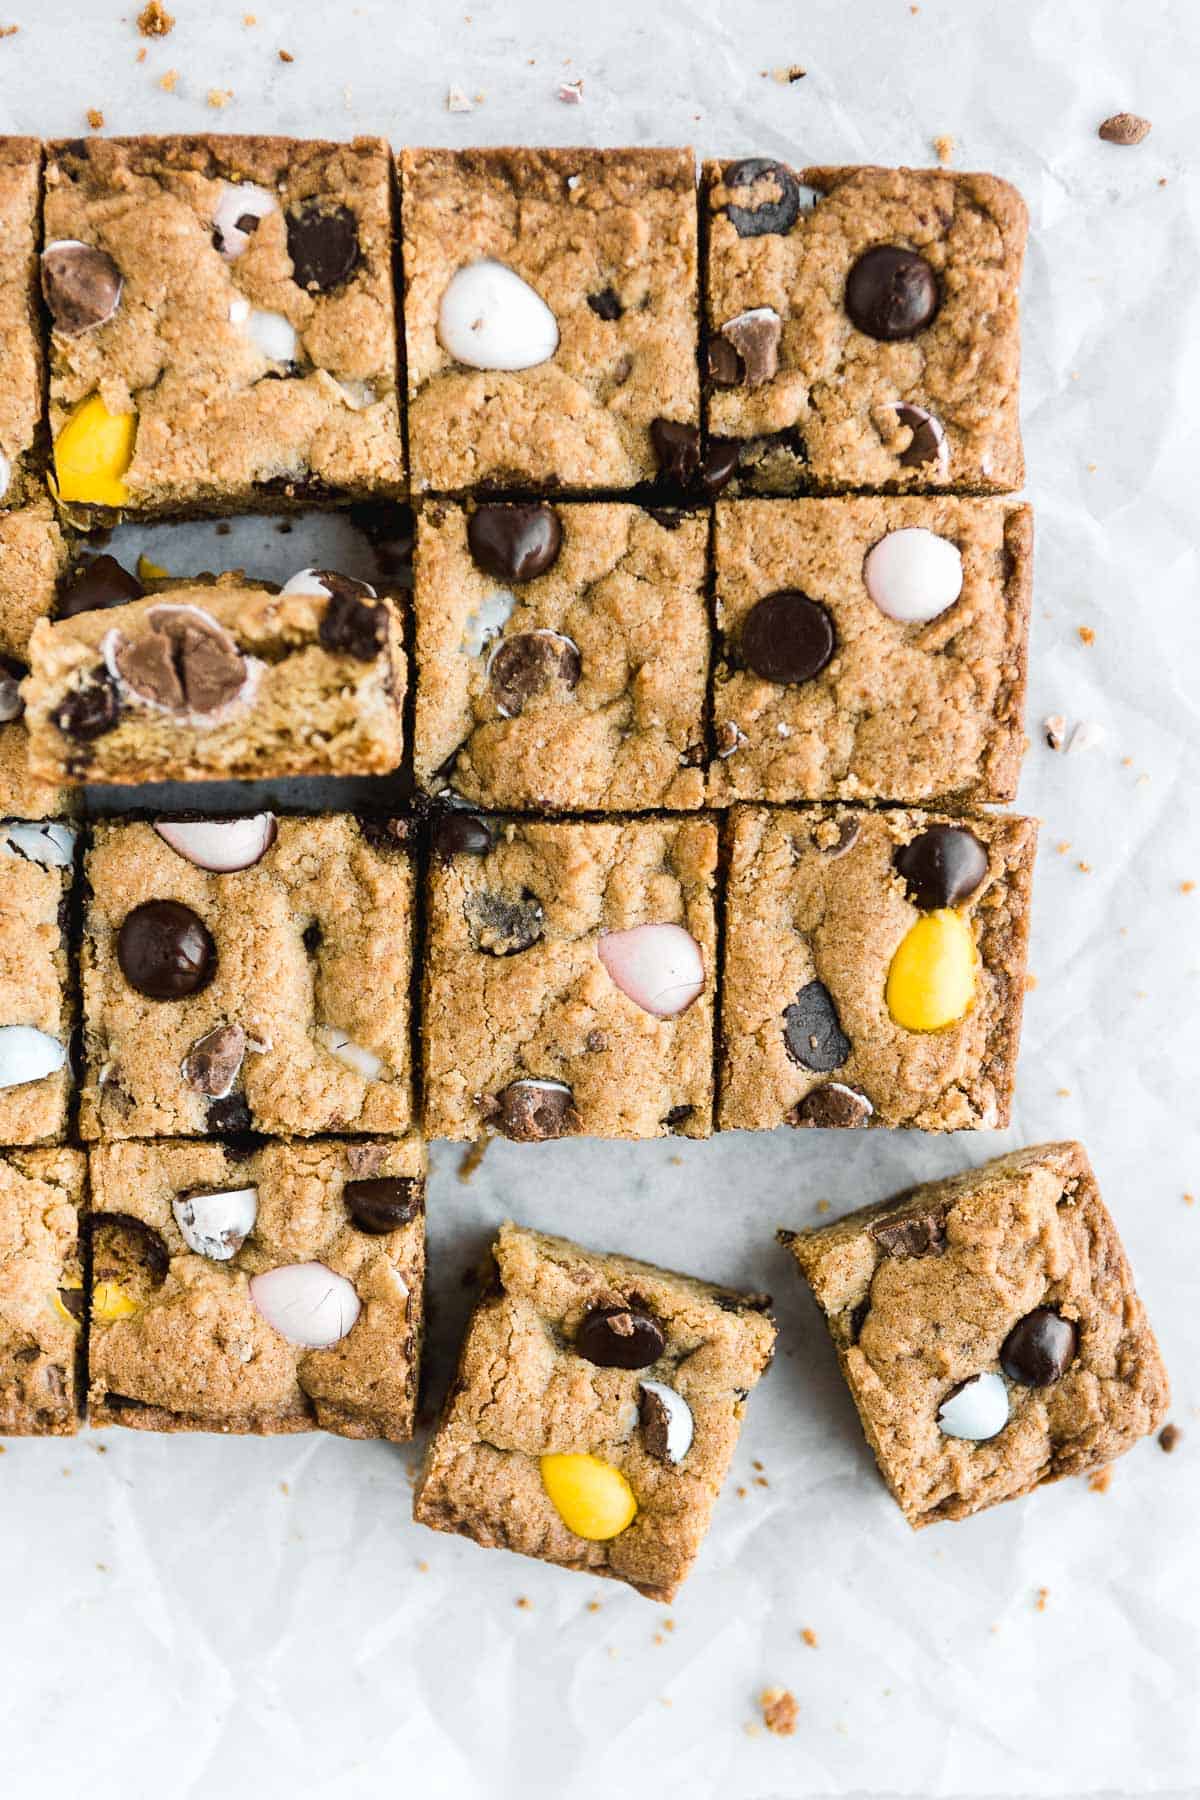
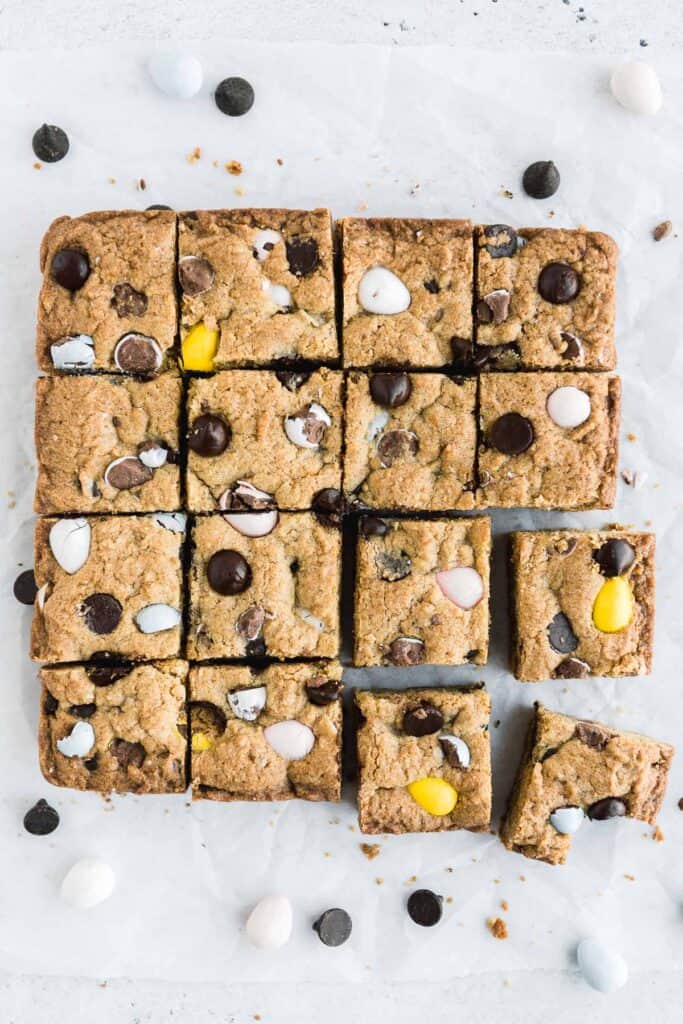
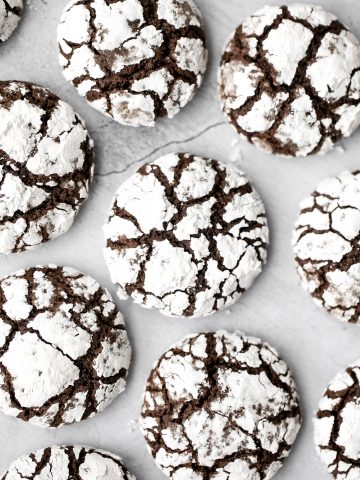
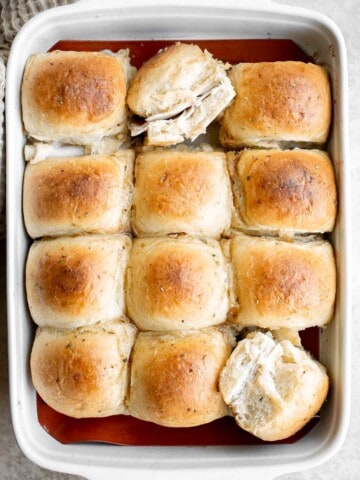
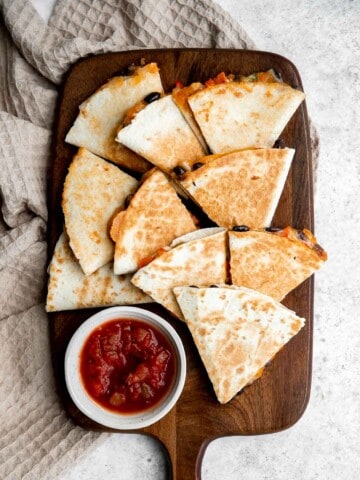
Mini egg cookie bars are a quick and easy Easter dessert that everyone will love. They are soft and chewy with perfect crisp edges and a gooey center and loaded with mini eggs and chocolate chips. This one bowl recipe comes together in just 10 minutes with a handful of classic baking ingredients before it's ready to bake. They are the best way to enjoy mini egg Easter cookies without the hassle of scooping out cookie dough. Easter cookie bars are perfect when you are having a last minute sugar craving.

Why You'll Love Mini Egg Cookie Bars
- They are a quick one bowl recipe. To make mini egg cookie bars, all you need is 10 minutes of prep, one bowl, and a few basic baking ingredients. Then pop them into the oven for 30 minutes before they're ready to eat. They are perfect to satisfy a late night sugar craving.
- Cookie bars are easier to make than cookies. Baking cookies for a crowd is fun - but it takes a little more work to scoop out each cookie or roll and cut them out. With mini egg cookie bars, there is no need to shape into cookies, bring out extra cookie trays, or bake in batches. Simply bake these cookie bars in an 8-inch square baking pan, then and slice to serve.
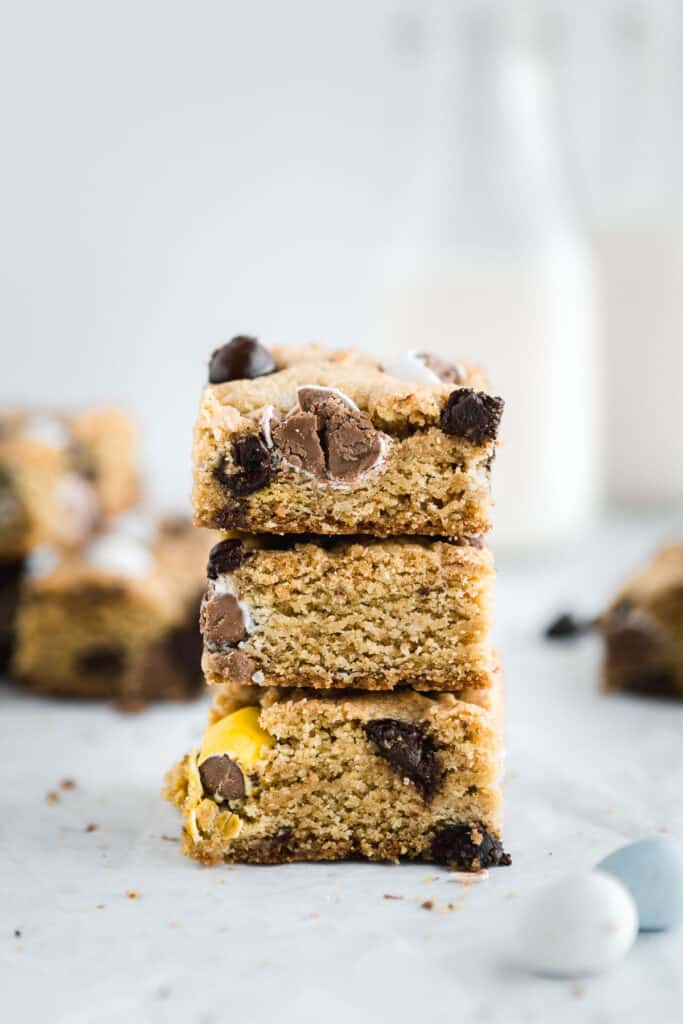
- They taste like chocolate chip cookies. These cookie bars have everything you would want in a chocolate chip cookie - soft and chewy centers with the perfect crispy edges. But, these bars are thicker than your average cookie making the centers extra gooey and delicious. Plus, they are packed with mini eggs.
- Chocolate mini eggs and chocolate chips. These Easter cookie bars not only contain chocolate eggs but they also have chocolate chips, because you can never have enough chocolate!

Ingredients and Substitutions
To make these easy Mini Egg Cookie Bars, you will need the following ingredients (full quantities in the recipe card below):
- butter - make sure to use softened butter, otherwise it won't cream properly with the sugar and the cookie bars won't have that classic chocolate chip cookie texture.
- sugar - both light brown sugar and granulated sugar are required in these cookie bars.
- egg
- all-purpose flour
- baking soda
- salt
- chocolate chips
- mini eggs - we use both whole mini eggs and crushed mini eggs to make these cookie bars look their best.
You will also need measuring cups and spoons, mixing bowl, hand mixer or stand mixer, and an 8-inch square baking pan.
How to Make the Best Mini Egg Cookie Bars
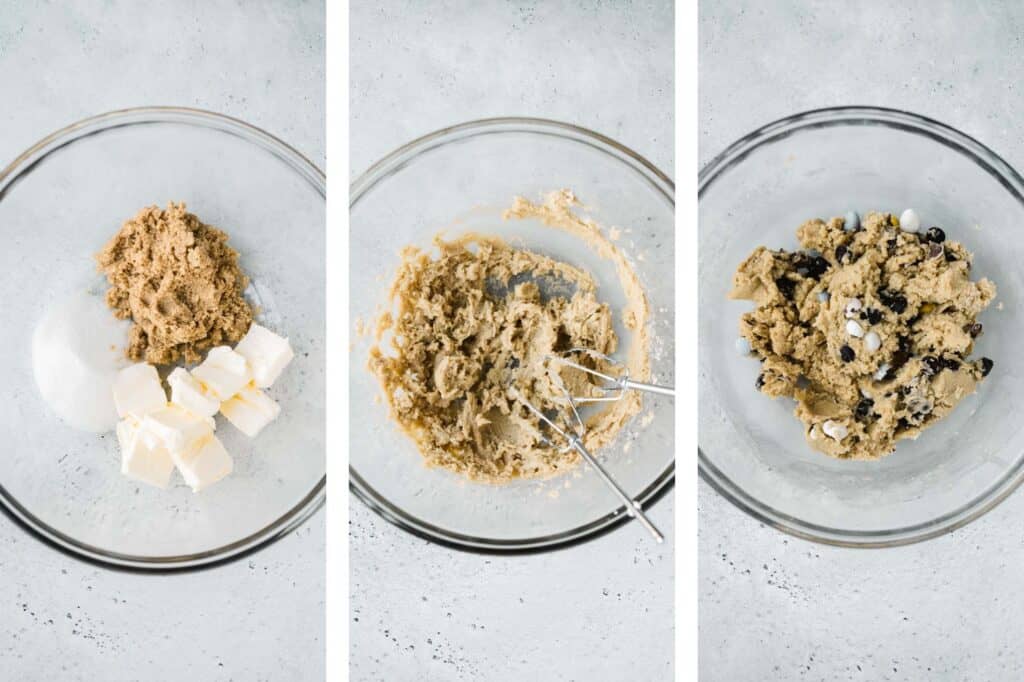
- Make the cookie dough. In a large mixing bowl, use a hand mixer or stand mixer cream together butter and sugars on medium speed until light and fluffy, about 2 minutes. Add egg and vanilla, and beat on low until incorporated. Add flour, baking soda, and salt and beat until just combined. Reserve 1 tablespoon each of the chocolate chips and crushed mini eggs and 2 tablespoons of the whole mini eggs (for the top). Fold in the rest.
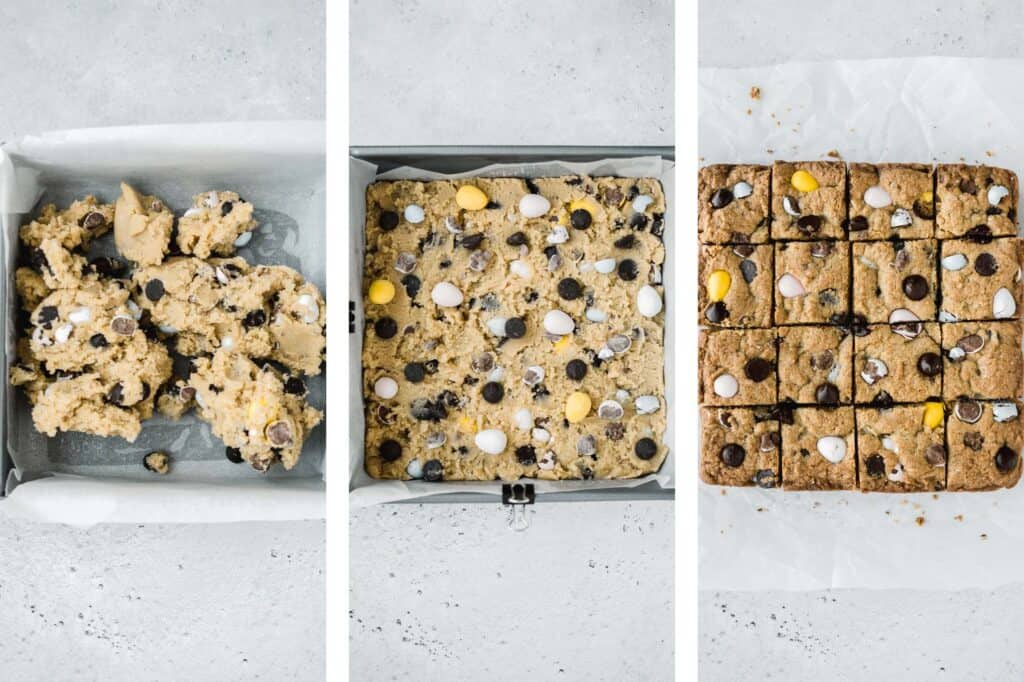
- Transfer to baking pan. Spray an 8-inch square baking pan with cooking spray oil and line it with a piece of parchment paper, allowing the overhang to come off the 2 sides. Spread the cookie dough onto the lined pan. Press in the remaining chocolate chips and mini eggs on top.
- Bake. Bake in a 375F preheated oven for 30-35 minutes until golden brown, and a toothpick inserted into the center comes out clean. The cookie dough may not look completely done in the middle, but they will continue to cook as they are cooling.
- Serve. Allow the cookies to cool completely in the pan. Then, use the parchment paper overhang to pull them out. Slice into 16 pieces and serve.
How to Serve
Enjoy these soft and chewy mini egg cookie bars warm right out of the oven with a couple scoops of vanilla ice cream, and dig right in with a spoon. Or allow them to cool down a bit and slice up and enjoy over the next few days or weeks to come (depending on how you store them). Plus, you can quickly reheat them in the microwave and enjoy warm with ice cream any time you want.

Storing and Freezing Instructions
- How to store: Store mini egg cookie bars in an airtight container or wrap them individually in plastic wrap. Eat within 4 days if stored at room temperature, and within 7 days if stored in the fridge.
- How to freeze: You can also freeze mini egg cookie bars for up to 3 months. Let them cool completely first, then slice and store in an airtight container or freezer bag. To thaw, leave them in the fridge overnight.
- Make ahead instructions: You can make the mini egg cookie dough up to 2-3 days in advance. Cover the bowl with plastic cling wrap when storing. When ready to bake, allow the dough to come to room temperature (about 20 minutes) before spreading onto the prepared baking pan.
- How to freeze cookie dough: You can also freeze the cookie dough by rolling it into a ball and wrapping tightly in plastic cling wrap and placing inside a freezer bag. Freeze for up to 3 months. When ready to bake, allow the cookie dough to thaw overnight in the refrigerator, and allow it to come to room temperature before baking, according to recipe instructions.
Recipe FAQ and Tips
How can I make thinner cookie bars?
Spread the cookie batter into a lined quarter sheet baking pan or 9x13-inch pan to make thinner mini egg cookie bars. You will need to shorten the cook time though, so keep an eye on the cookies at the 15-20 minute mark.
Can I add nuts or other substitutions?
Absolutely! If you are feeling creative, you can add in nuts, make simple chocolate chip cookie bars by omitting the mini eggs, substitute the chocolate chip for white chocolate chips, and switch the mini eggs for M&M's.
Can I make a bigger batch?
Yes, you can simply double the recipe and spread the cookie dough into a 9x13-inch baking pan, and instead of baking for 30-35 minutes, bake for 35-45 minutes.
More Easter Dessert Recipes
- 30 Best Easter Dessert Recipes
- Mini Egg Easter Cookies
- Easter Blondies
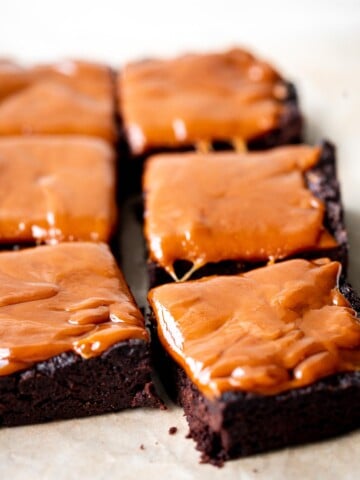
- Easter Egg Caramel Brownies
- Bunny Ears Easter Cupcakes
- Easter Egg Sugar Cookies
Tried this recipe?
I'd love to hear what you think! Leave a comment and rating below to share your feedback. Your reviews help others discover this recipe and help me keep creating more free recipes for you. Snap a photo and tag me on social media @aheadofthyme too.

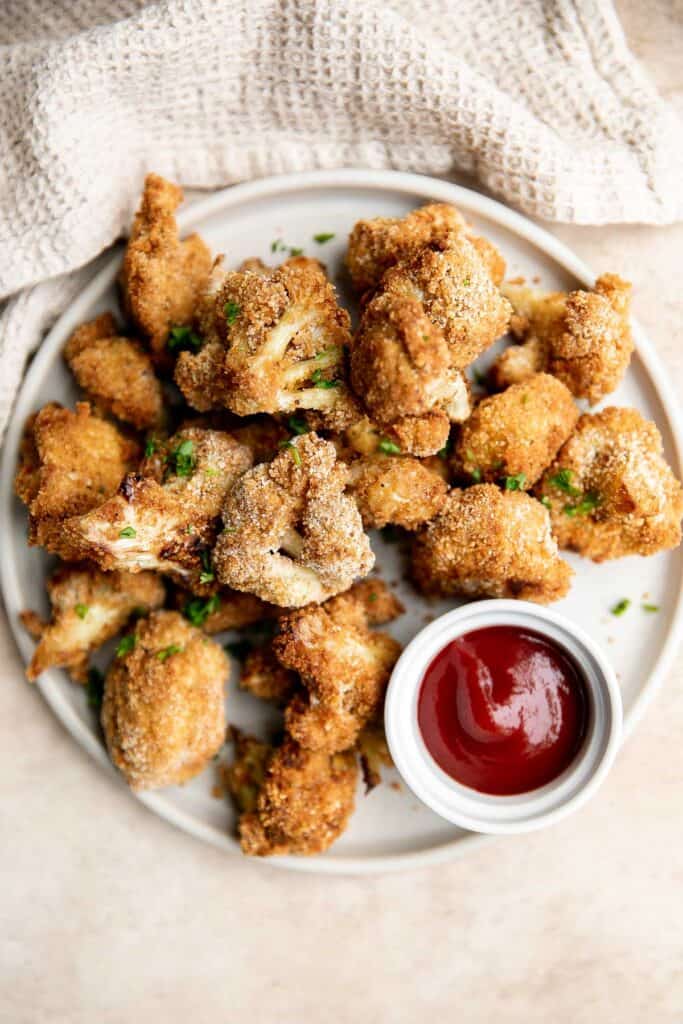
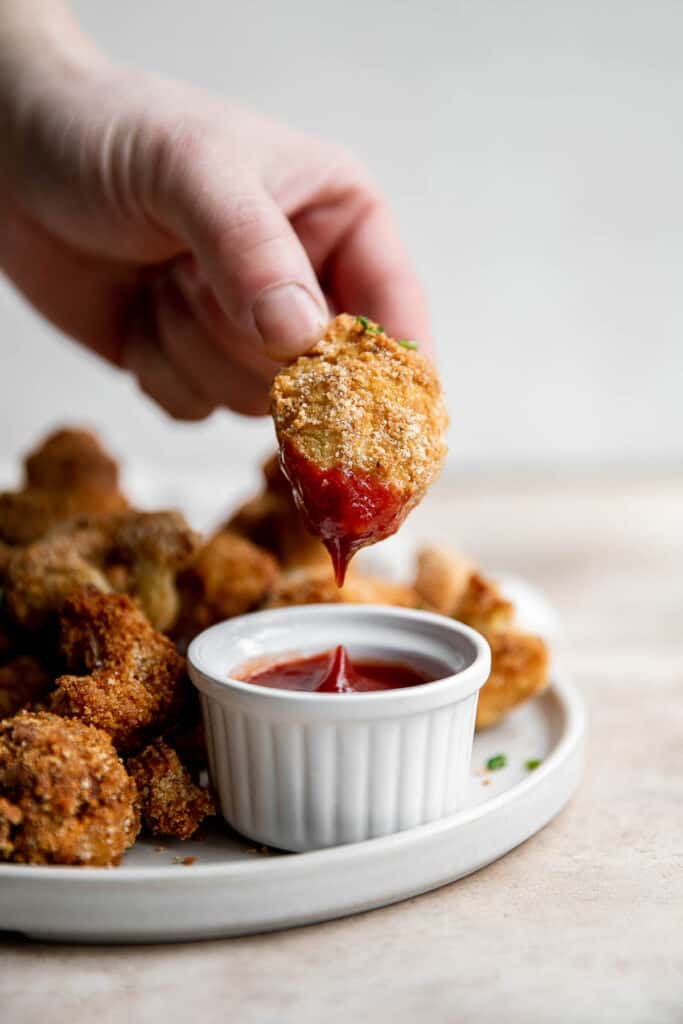
Air Fryer Cauliflower Bites

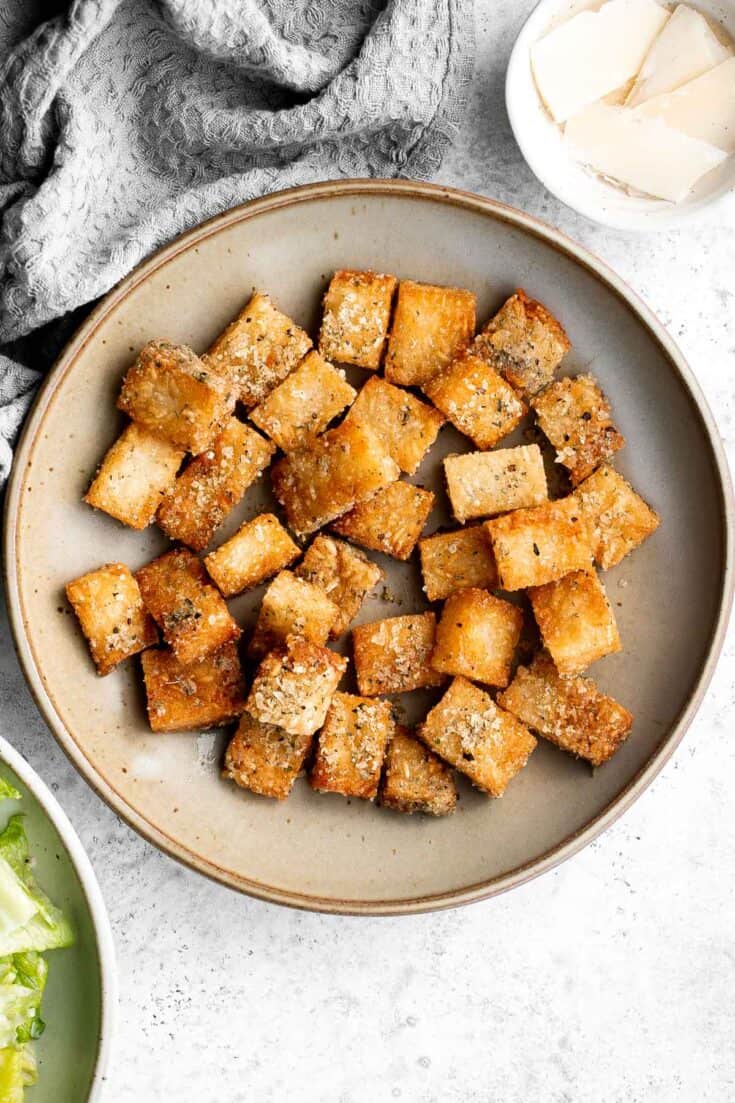
Air fryer cauliflower bites have a crispy breaded coating on the outside, yet tender and light inside. They are bite-sized, flavorful, easy to make, and healthy! It's true. One dish can have everything you need, and these air fryer cauliflower nuggets prove it. Instead of choosing to eat French fries, chips, or another greasy side, make air fryer breaded cauliflower for a healthy alternative that doesn't sacrifice taste. They literally check every box when it comes to a healthy snack or side.
Why You'll Love Air Fryer Cauliflower Bites
- The balanced seasoning. Now, I love a good bite of cauliflower - even when it's only been baked with olive oil, salt, and pepper. But these air fryer cauliflower bites are even better, thanks to a seasoning blend that adds garlic, paprika, and cumin to the mix!
- The crispy breading. These air fryer cauliflower nuggets are coated in a thin layer of egg and panko breadcrumbs before being baked in the air fryer. Although this step isn't mandatory, you shouldn't skip it if you want to enjoy the crisp, air-fried texture the breading gives these cauliflower bites.
- The fact that this snack is actually healthy. When it comes to "healthy" alternatives to fried foods, most of the options don't stand up to the task (I'm looking at you, carrot sticks). But this air fryer breaded cauliflower has it all - they are good enough to compete with French fries, and they're way healthier.

Ingredients and Substitutions
To make these delicious Air Fryer Cauliflower Bites, you will need the following ingredients (full quantities in the recipe card below):
- cauliflower florets
- vegetable oil - feel free to use your favorite vegetable oil such as avocado oil, grapeseed oil, or olive oil.
- garlic powder
- paprika
- ground cumin
- salt and pepper
- eggs - for coating on the cauliflower to allow the breadcrumbs to stick on.
- Panko breadcrumbs - I like the extra crispy texture of Panko breadcrumbs, but you can feel free to substitute with regular breadcrumbs
- cooking oil spray
You will also need measuring cups and spoons, mixing bowl, and an air fryer.
How to Make the Best Air Fryer Cauliflower Bites
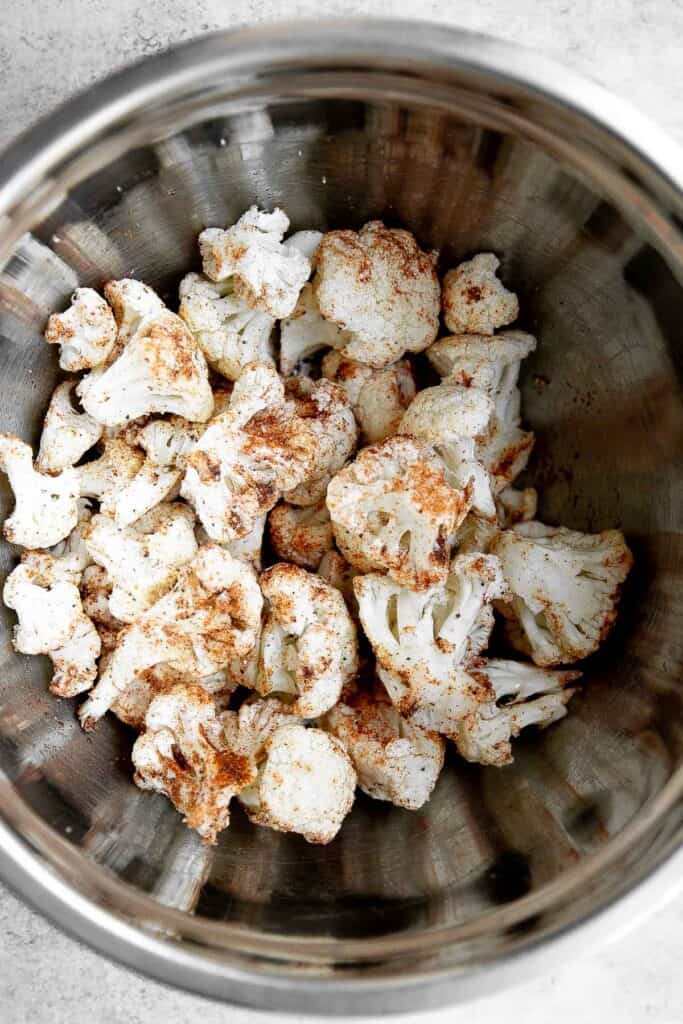
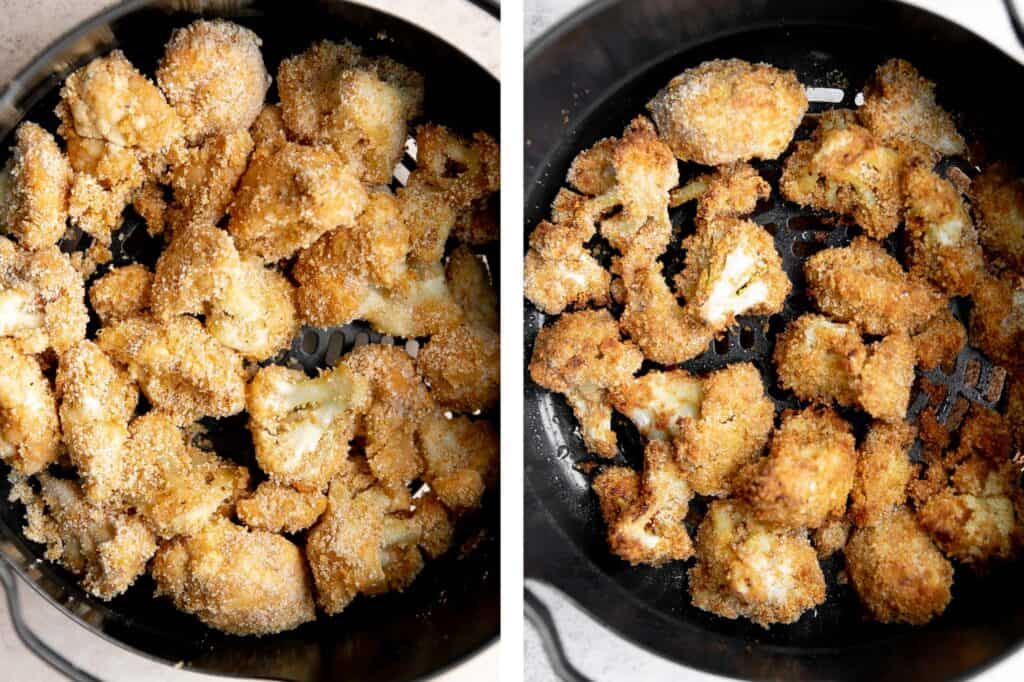
- Season the cauliflower. In a large mixing bowl or Ziploc bag, add cauliflower, oil, garlic powder, paprika, cumin, salt, and pepper. Mix well until evenly coated.
- Coat the cauliflower. Use a fork or whisk to beat the eggs in a small bowl. Place the panko breadcrumbs in another small bowl. Dip the cauliflower florets in the egg and then coat it with the breadcrumb mixture. You can gently press crumbs into the cauliflower to adhere as much as possible.
- Air fry. Transfer the breaded cauliflower to the air fryer basket and evenly spray with cooking oil spray. Cook at 375F for 15 minutes until tender and the crust turns golden brown.
- Serve. Serve with ketchup or your favorite dipping sauce, if desired.
Recipe Tips and Tricks
- How to store: Before storing these air fryer cauliflower bites, make sure they cool completely. Warm bites will create condensation in the fridge, and that condensation will make your cauliflower bites soggy. Once cooled, store air fryer cauliflower nuggets in the fridge inside an airtight container for up to 3-5 days.
- How to reheat: To reheat cold air fryer cauliflower bites, use your air fryer! Heat them for 2-4 minutes at 375F until warm and crispy.
- How to serve: Air fryer cauliflower bites make a perfect snack on their own (and if you eat enough, you can just call it lunch!). I recommend serving with your favorite sauces, including: ketchup, barbecue, siracha aioli, or buffalo sauce.

More Cauliflower Recipes
- Baked Cauliflower Nuggets
- Roasted Cauliflower
- Creamy Garlic Mashed Cauliflower
- Spinach and Feta Quiche with Cauliflower Crust
- Creamy Cauliflower and Garlic Soup
- Veggie Tray
Tried this recipe?
I'd love to hear what you think! Leave a comment and rating below to share your feedback. Your reviews help others discover this recipe and help me keep creating more free recipes for you. Snap a photo and tag me on social media @aheadofthyme too.

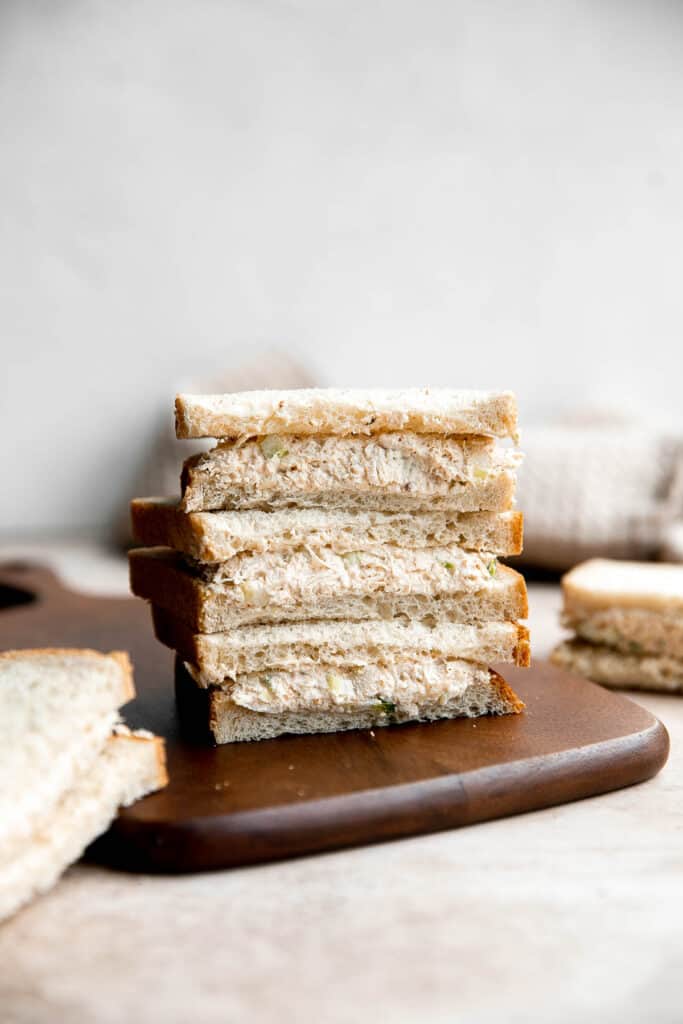
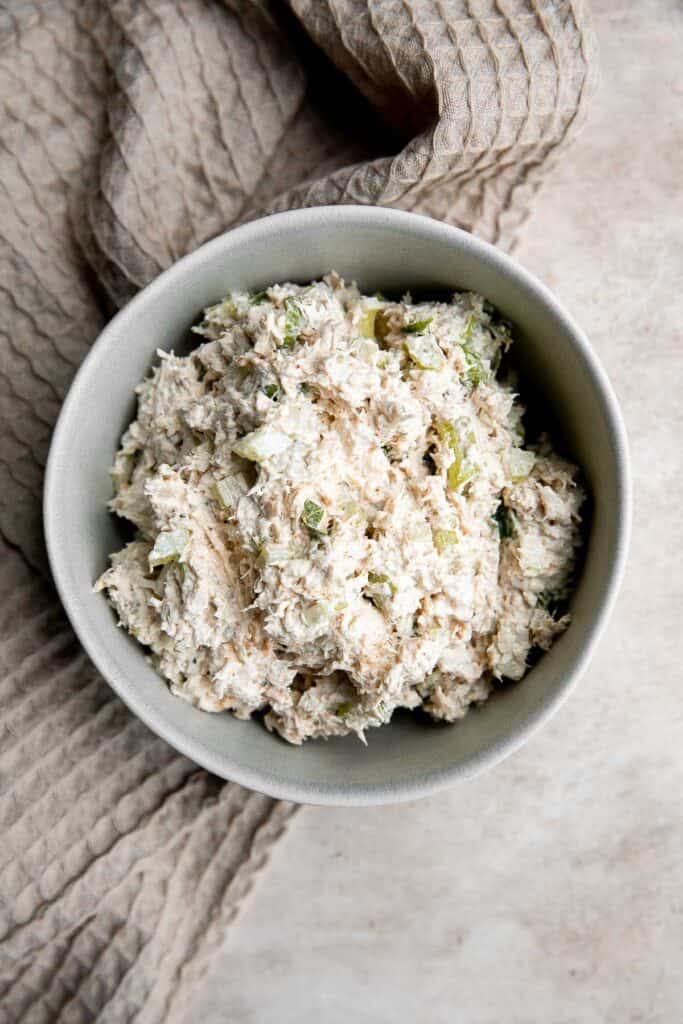
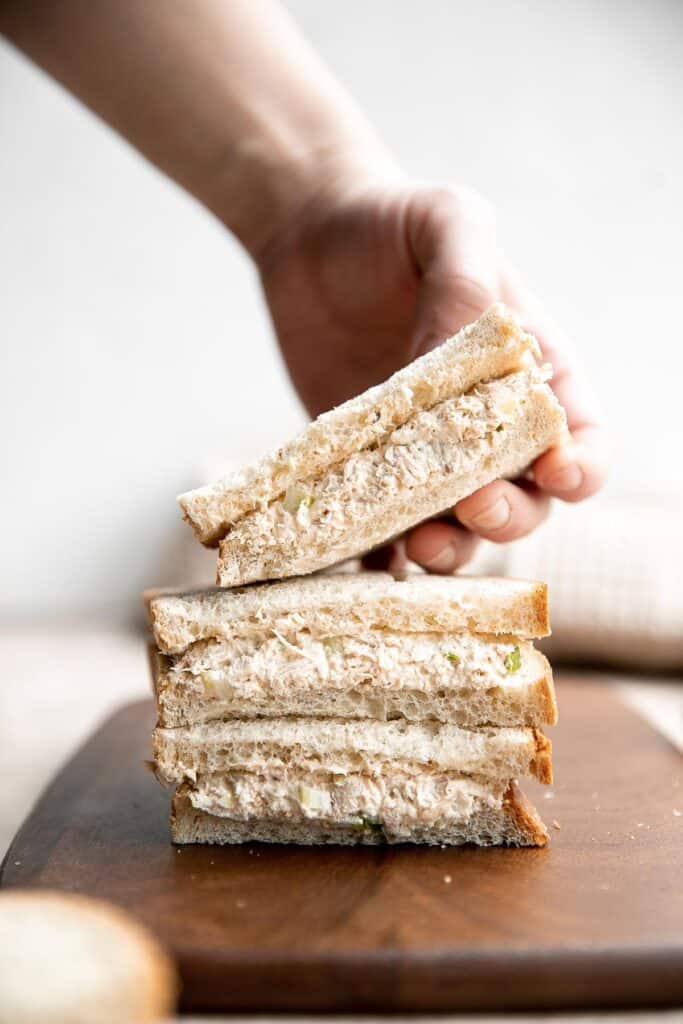
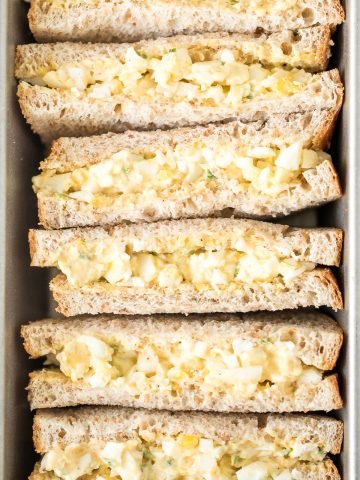
Chicken Salad
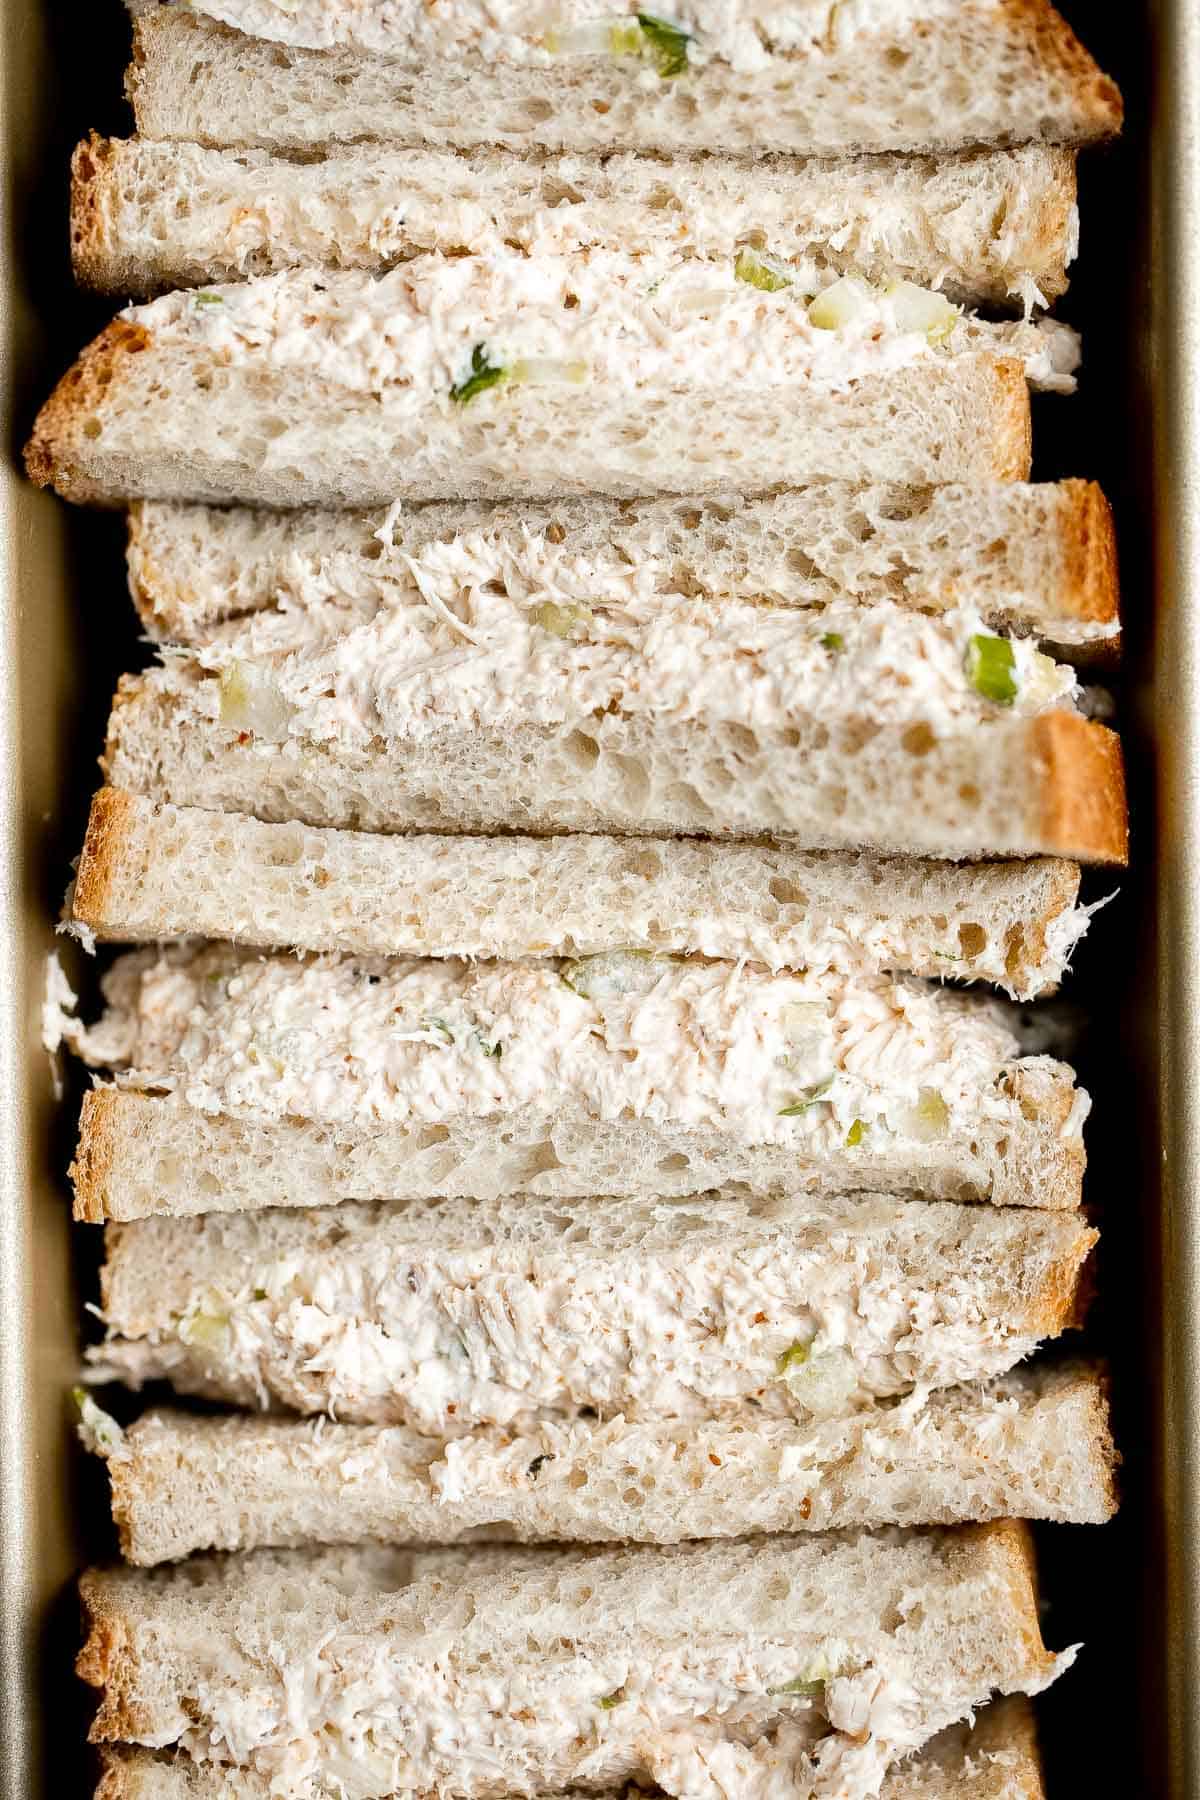
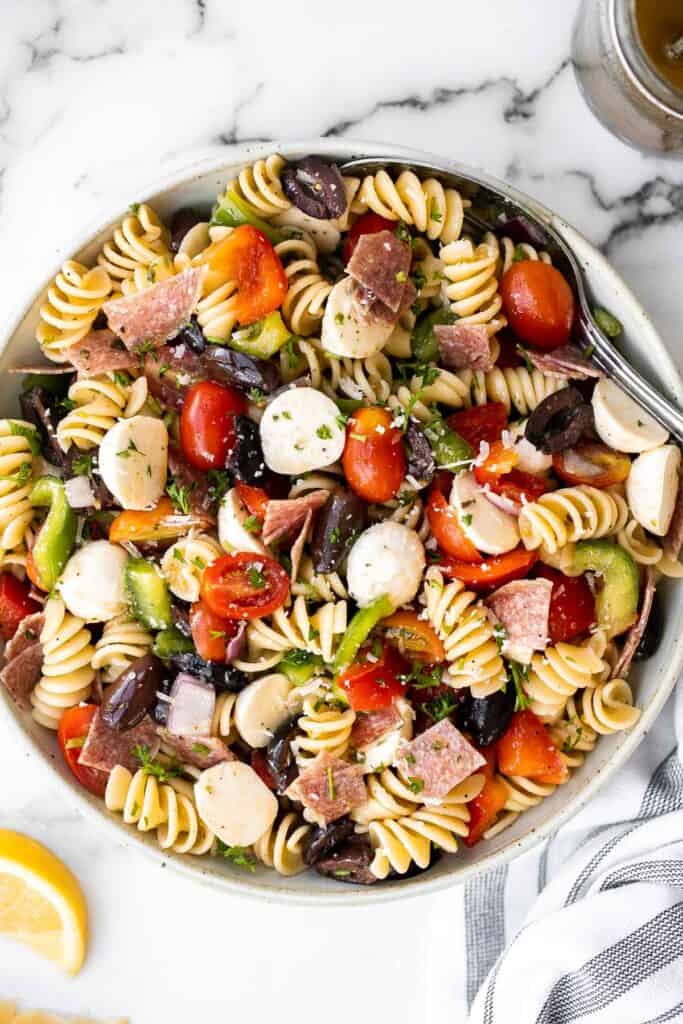
Classic chicken salad is a creamy and delicious salad that is so easy to throw together in minutes. It's packed with shredded chicken and a sprinkle of celery and green onions all tossed in a creamy sauce that holds it all together. It's the perfect side salad to bring to a summer BBQ or office potluck, or make it ahead for a healthy lunch the next day spread in between sandwich bread or a wrap.

Why You'll Love Chicken Salad Sandwich
- It's quick and easy. This chicken salad sandwich consists of two steps (or three if you consider eating a step!). Simply mix all of your ingredients together. Then, put it between two slices of your favorite bread such as sourdough sandwich bread or pita bread.
- It's versatile. Don't want a sandwich? You can enjoy this chicken salad over a salad, as a side (I love eating it with barbecue!), or a filling in a quesadilla.
- It's classic. If you're looking for a classic or traditional chicken salad, this is it. You'll love this simple chicken salad sandwich recipe which only needs chicken, celery, mayo, mustard, green onions, and seasoning.
- It's well-balanced. This chicken salad recipe delivers the perfect ratio of sauce to chicken - and just enough celery and green onions for a kick that isn't overwhelming. But, you can, of course, always adjust everything to your personal taste.
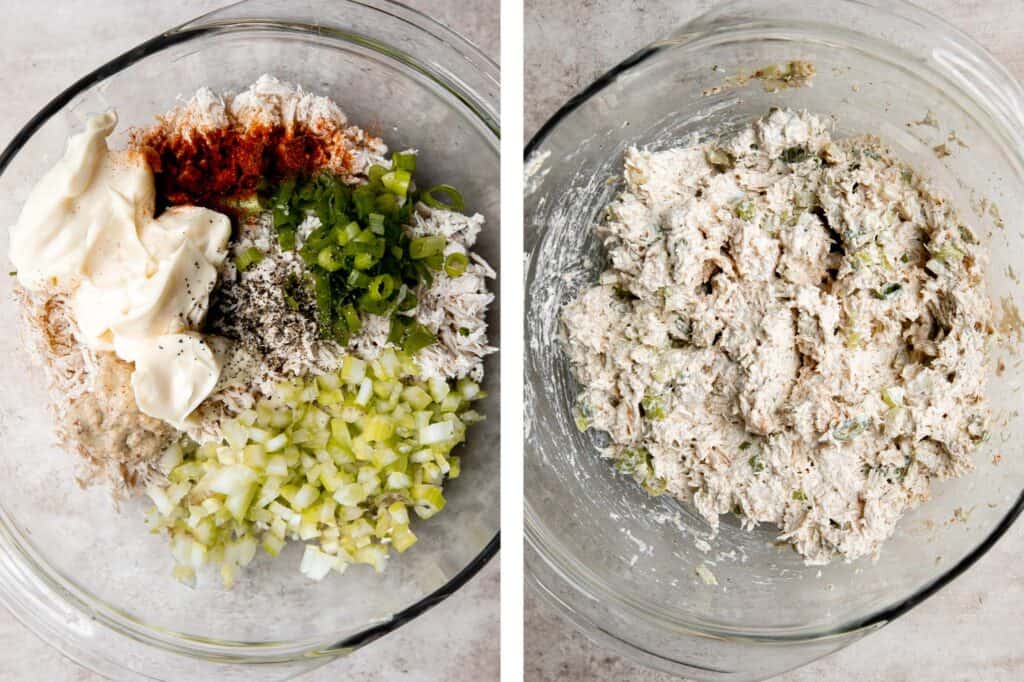
Ingredients and Substitutions
To make this delicious and easy Chicken Salad, you will need the following ingredients (full quantities in the recipe card below):
- shredded chicken - this is a great way to use leftover rotisserie chicken or make a fresh batch of shredded chicken easily.
- celery
- green onions
- mayonnaise
- Dijon mustard
- lemon juice
- paprika
- salt and pepper
- sandwich bread slices - optional, of serving as a sandwich spread.
A classic chicken salad sandwich is good and always hits the spot, but you can totally customize this to your liking and add some extra spice. Consider making this recipe your own by adding:
- chili powder for a spicy kick
- slices grapes, apples, or pears for a hint of sweetness
- diced carrots for extra crunch
- tomatoes and cucumbers
- pickles or olives for an acidic flavor profile
How to Make the Best Chicken Salad
Chicken salad is so easy to make in just minutes. You simply combine all the ingredients in a large mixing bowl and until well combined.
Shredded Chicken
The main ingredient in chicken salad is shredded chicken. It's a great recipe to use up any leftover rotisserie chicken in, but if you don't have any it is also really easy to make a batch of shredded chicken. Plus, you can make it in one of three ways - in the oven, stovetop, or instant pot pressure cooker.
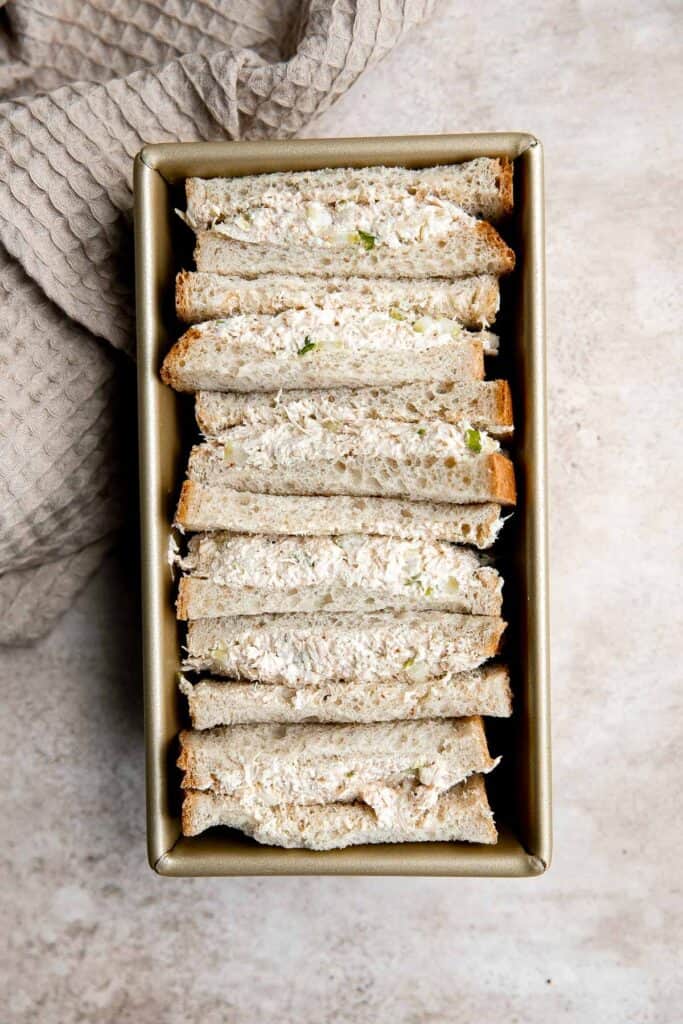
How to Serve Chicken Salad
Serve chicken salad on it's own as a salad served over iceberg lettuce, as a spread in sandwiches, pita bread, or wraps, as a filling in a grilled cheese sandwich or quesadilla.
However you choose to serve it. Some great side dishes that go along with it include:
- Veggie Tray
- Baked Apple Chips
- Grilled Corn on the Cob
- Homemade Yogurt
- Charcuterie Board
- Garden Salad
- Fruit Salad
How to Store
Leftover chicken salad will last in an airtight container in the fridge for up to 3-4 days. You should avoid storing chicken salad on bread since it will make the bread a little soggy. If you want to take it with you, consider putting a big piece of dry lettuce on both sides of the bread to protect it from the moisture inside the salad.
More Sandwich Recipes
- Egg Salad Sandwich
Tuna Melt Grilled Cheese Sandwich - Pita Grilled Cheese
- Buffalo Turkey Wraps
- Roasted Broccoli Grilled Cheese
- Vegan Hummus Wrap
Tried this recipe?
I'd love to hear what you think! Leave a comment and rating below to share your feedback. Your reviews help others discover this recipe and help me keep creating more free recipes for you. Snap a photo and tag me on social media @aheadofthyme too.
Three Rex Dinosaur Birthday Party

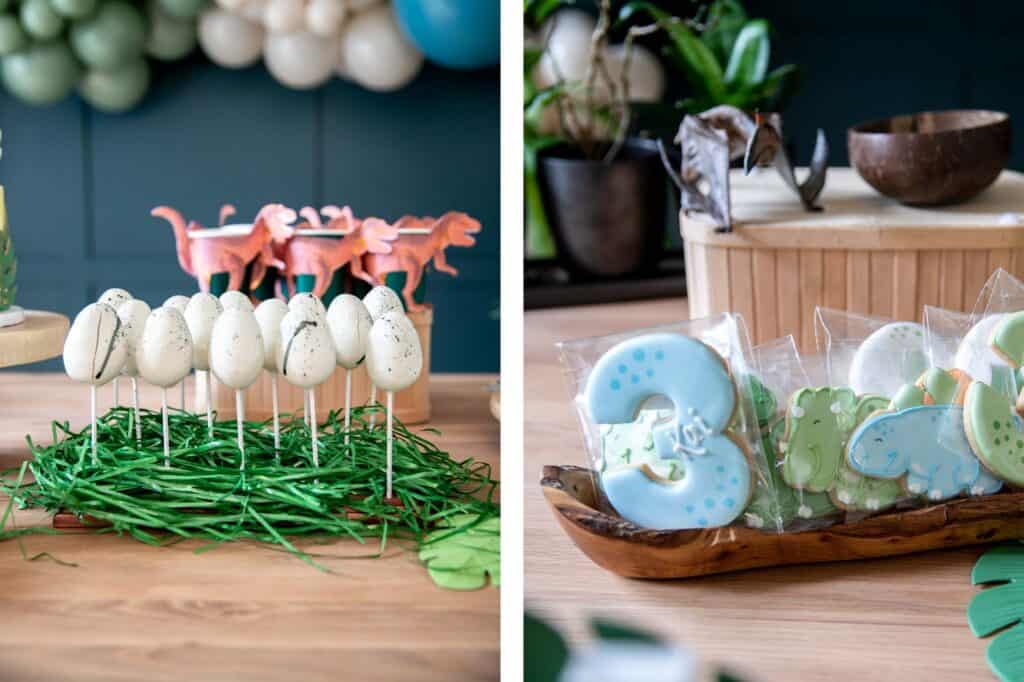
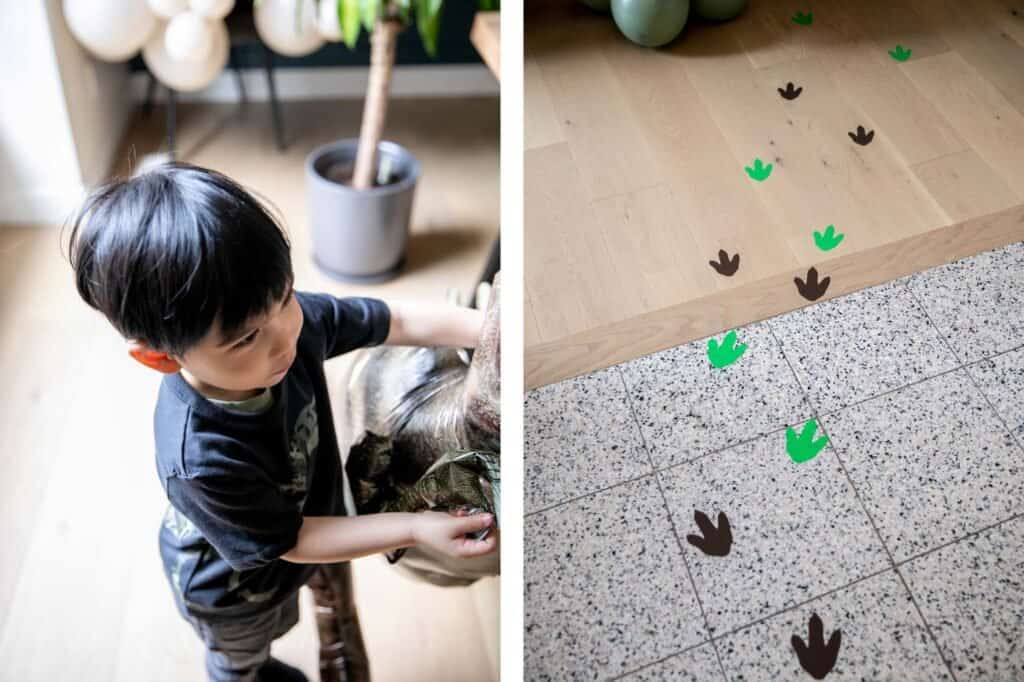
Our little man is officially 3 years old. To celebrate his third birthday, we hosted a three rex dinosaur birthday party with his friends and their families. If you are looking for some party inspiration for your dinosaur loving child, then you have come to the right place. I am taking the stress away and sharing ideas on every detail for an epic dino theme party including decor, craft table, party favors, desserts, and recipes, all in one place!

Three Rex Birthday Party
We are all about birthday themes that focus around a pun based on the age of the child. Last year, we threw a "Two Fast" Car Birthday, and the year before that we threw a "Wild One" Safari Birthday, so of course we had to do the same thing this year that would be perfect for our three year old. We considered a few popular themes like a construction theme (Dirty Thirdy), a jungle or bohemian party (Wild Young and Free), a space theme (3,2,1 Blast off), and a Mexican theme (Three-esta). But based on Kai's interests, we ultimately picked a dinosaur theme as he is obsessed with all things dinosaurs.
If you have planned a themed party for your child, you know that it takes countless hours of research and planning to put it all together. So, I am here to help save you time if you are thinking of throwing the perfect dino themed party for your little boy or girl with every last detail so that you don't have to spend too much time planning.

Dinosaur Birthday Party Dessert Table with Decor
Three Rex Dinosaur Party Decor
Let's talk about the decor or the items that will bring the theme of your party to life. I have linked everything I used for Kai's three rex third birthday party below (in affiliate links).
- Balloons - This year, we went with a luxe style balloon garland for the dessert table, and helium balloons in the party/craft room.
- Balloon garland - We hired help this year with the garland, but you can totally do it yourself using garland tape, balloons, and double-sided balloon tape (to tape on the smaller balloons). I picked a neutral look using a combination of olive green balloons, pearl white balloons, blue slate balloons, and peacock blue balloons. Our garland was made mostly of 11-inch latex balloons, with smaller 5-inch balloons, and a few large 18-inch balloons. Our garland was hung using command hooks and fishing wire to safely secure it to the wall without damaging it.
- Dinosaur balloons - I placed 4d foil balloons around the dessert table including a stegosaurus balloon, triceratops balloon, and t-rex balloon.
- Three Rex balloon - I also added this gold foil cursive three rex balloon on the wall behind the dessert table.
- Helium balloons - I inflated a large gold foil number 3 balloon, olive green balloons, and white balloons inflated with helium and secured with green balloon weights. You can pump helium balloons using a helium tank or get them filled at your local party store.
- Loose balloons. We also had a bunch of loose balloons floating around on the ground and hung to the front door outside.
- Dinosaur figurines - I decorated the dessert table with an assortment of high-quality large dinosaur figurines including: t-rex, triceratops, brachiosaurus, brontosaurus, velociraptor, ankylosaurus, and pterodactyl. For a cheaper option, you can get a bundle of large dinosaur figurines at a fraction of the price.
- Small dinosaur figurines - I decorated the food table with these small plastic dinosaur figurines.
- Dinosaur eggs - I found hatched open porcelain eggs at my dollar store that was part of an Easter decorating kit. I stuffed a couple of them with small dinosaur figurines.
- Foam leaves - we decorated the table with foam leaves that I picked up at the dollar store. You could also use these artificial palm leaves. These are also great to add to the balloon garland to give it a more lush jungle effect.
- Wooden letters - I displayed my son's name using 5-inch white wooden letters. I taped some of the foam leaves on the back to make it fit with the dino theme.
- Dinosaur footprints - I stuck these dinosaur footprints on the floor from our front door and leading straight to the dessert table.
- Plush dinos - we also displayed a few plush dinosaurs around the house. They are the perfect touch to bring the whole look together. We went with medium-sized ones from Ikea.


Three Rex Dinosaur Party Desserts
The desserts are also something that needs to be carefully planned. These items are basically extra decorations on your dessert table.
- Cake - We purchased Kai's birthday cake from a local baker and placed it on a wooden cake stand. We topped it off with long thin gold candles. For a more economical option, you can make your own cake. You can adapt the following recipes to make a layered cake: vanilla cake, double chocolate cake, or lemon cake, and decorate with fondant. To decorate your cake in line with the dinosaur theme, try using dinosaur fondant molds. You could also top the cake with small dinosaur figurines.
- Cupcakes - We served vanilla cupcakes topped with buttercream icing and fondant eggs. You could also top them with dinosaur cupcake toppers. I placed the cupcakes on a wooden 2-tier cupcake stand.
- Sugar cookies - We purchased dinosaur sugar cookies from a local baker, but for a more economical option you can make your own sugar cookies with royal icing. I displayed them in a long wooden tray so that I could place them upright.
- Cake pops - I typically make my own cake pops, but this year I decided to purchase dinosaur egg cake pops from a local baker. Cake pops are always a fun addition to any birthday party. Try our vanilla cake pops or chocolate cake pops. You will also need cake pop sticks and a cake pop display such as this wooden cake pop stand that I used. I added some green Easter grass on top to complete the look.
- Popcorn - We served our homemade popcorn in these cute T-rex cups.
- Mousse cups - These nutella mousse cups are also great to include in the dessert table. Serve them in mini cups.
Kid's Birthday Party Desserts
Browse through following bite-sized desserts for more inspiration on some of my favourite bite-sized desserts and treats to serve at any birthday party.

M&M Christmas Cookies

Old Fashioned Apple Fritters

The Best Soft and Chewy Peanut Butter Cookies

Nanaimo Bars

Mother's Day Vanilla Cupcakes with Rose Petal Buttercream

No Bake Bird's Nest Cookies

Jam Thumbprint Cookies

Icebox Cake

Fresh Fruit Tart

Vanilla Cake

Strawberry Cupcakes
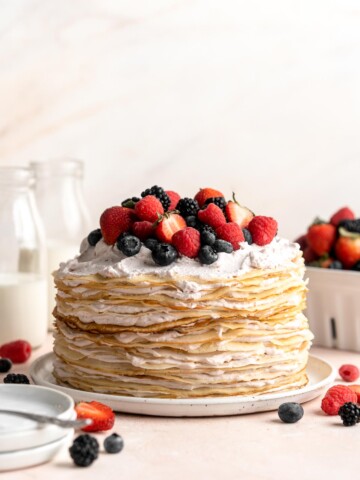
Crepe Cake
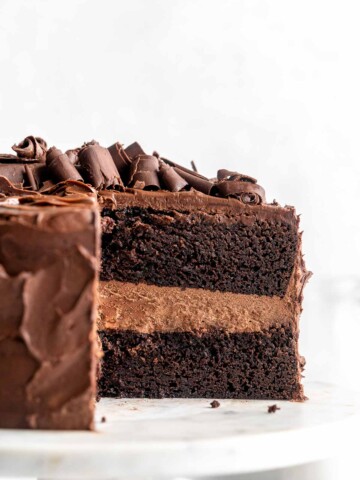
Chocolate Layer Cake

Millionaire's Shortbread

Homemade Glazed Donuts

Peanut Butter Balls

Palmiers

Chocolate Sugar Cookies

Nutella Cookies

Chocolate Covered Oreos

Monster Cookies

Chocolate Whoopie Pies

S'mores Bars

Strawberry Muffins
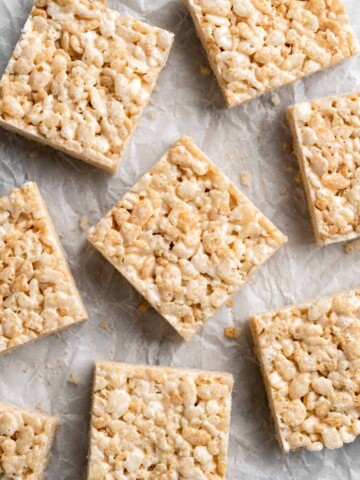
Rice Krispies Treats

Brownie Cookies

Robin's Egg Cupcakes

Italian Easter Cookies

Red Velvet Cupcakes

Oreo Brownies

Oatmeal Raisin Cookies

Madeleines

Lofthouse Cookies (Soft Frosted Sugar Cookies)

Double Chocolate Chip Cookies

Cranberry Orange Muffins

Homemade Chocolate Pudding
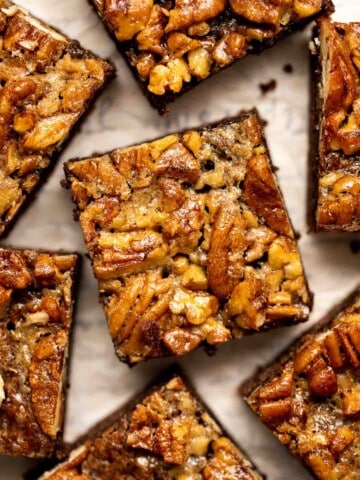
Pecan Pie Brownies

Jello Jigglers
Apple Cake

Blueberry Cake
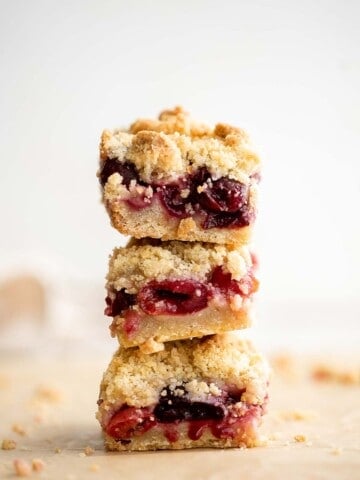
Cherry Crumb Bars

Lemon Curd Cookies

S'mores Cookies

No Bake Strawberry Cheesecake

Sugar Cookie Bars
Vanilla Pudding
Banana Pudding

Mango Sago

Chocolate Chip Cookie Bars

French Macarons with Vanilla Buttercream Filling

Italian Rainbow Cookies
Nutella Mousse Cups

Easter Bark

Easter Blondies
Persian Love Cake

Flourless Banana Brownies
Chocolate and Vanilla Marble Cake

Dark Chocolate Raspberry Truffles
Caramel Brownies
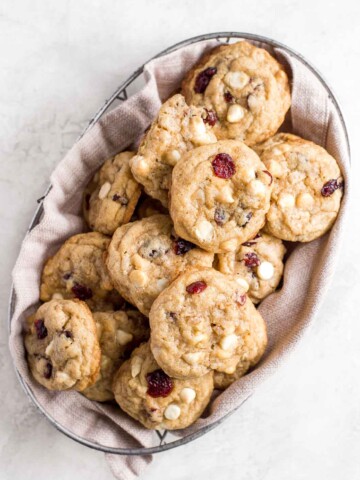
Soft and Chewy White Chocolate Cranberry Cookies

Butter Cookies
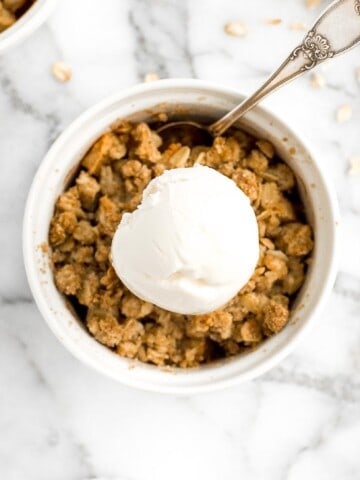
Individual Apple Crisp
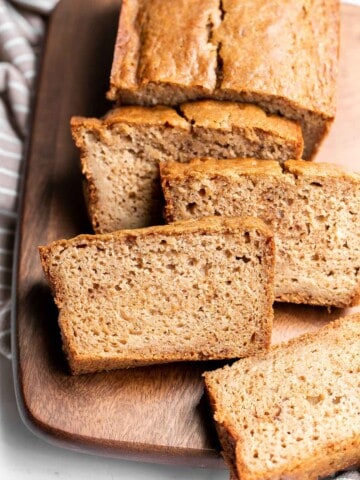
Applesauce Bread

Mango Frozen Yogurt
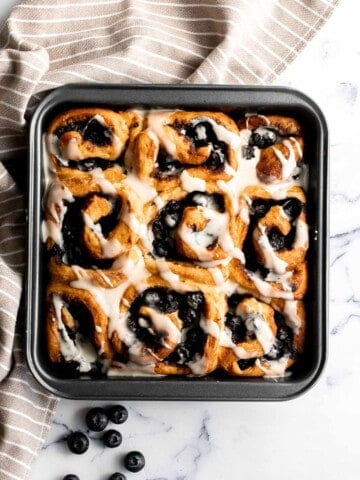
Blueberry Cinnamon Rolls

Glazed Lemon Blueberry Scones

Moist Vanilla Cupcakes
Fudgy Brownies

Lemon Sweet Rolls

Easter Egg Sugar Cookies

Raspberry and White Chocolate Shortbread Cookies
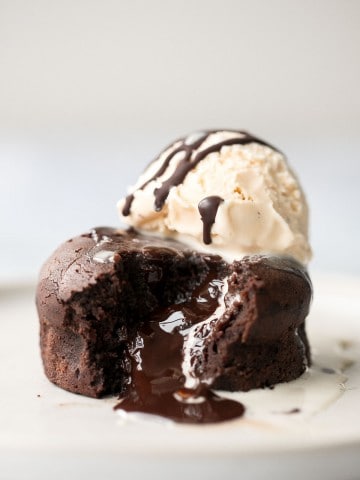
Molten Chocolate Lava Cakes

Chocolate Covered Strawberries
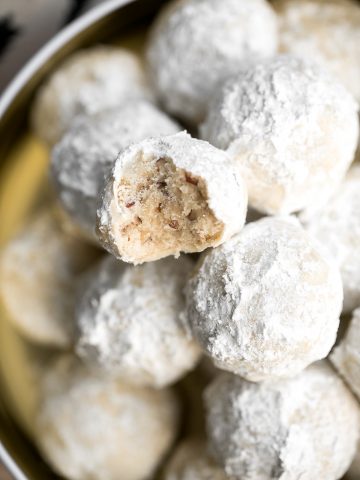
Pecan Snowball Cookies

Peanut Butter Thumbprint Cookies

Peanut Butter Blossoms
Chocolate Crinkle Cookies

Banana Chocolate Chip Muffins

Spooky Halloween Chocolate Cake Pops
Caramel Pecan Pie Cheesecake Bars
Chewy Peanut Butter Granola Bars

Chocolate Chunk Peanut Butter Cookies
Blueberry Yogurt Muffins

Baked Jelly Donuts with Strawberry Jam

Easy Small Batch Almond Biscotti

Chocolate Chip Banana Bread Cookies

The Best Chewy Chocolate Chip Oatmeal Cookies

Vanilla Cake Pops from Scratch

Easy Homemade Apple Hand Pies

Caramel Cheesecake Brownies

Chocolate-Dipped Shortbread Heart Cookies

Four Quick and Easy RITZ Cracker Recipes
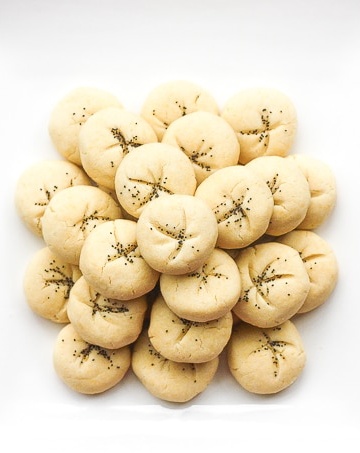
Persian Rice Cookies with Poppy Seeds (Nan-e Berenji)
Birthday Party Craft Table
One of my favorite things about this party is the craft table set up that we made. It was a great way to keep the kids entertained for quite some time. We rented 2 large kid's tables and put them together along with white chiavari chairs. Here are all the supplies that we used to make this epic birthday party craft table:
- Easel and canvas - These wooden tabletop easels and canvas were the perfect size for the kid's craft table. You can also find easels and canvases together in a bundled package set.
- Organizer caddy - I set up 2 organizer caddies to organize the art supplies in different areas.
- Markers - I used two packs of my favorite markers.
- Paint - We opted out of a paint set up to make clean up easier. If you want to include paint, be sure to include paint brushes and small paint palettes.
- Scissors - I like these safety scissors for toddlers or these blunt scissors.
- Glue - School glue and glue sticks for all crafting needs.
- Craft supplies - Include a variety of pompoms, googly eyes, popsicle sticks, pipe cleaners, foam alphabet stickers, feathers, multicolor paper, foam cubes, and buttons.
- Foam dinosaurs - I cut foam paper into dinosaur shapes by tracing around dinosaur cookie cutters and then cutting them out.
- Sticker puzzles - I placed out dinosaur sticker puzzles for each child.

Food and Snacks for a Dinosaur Themed Birthday Party
When it comes to birthday parties, it's all about the finger foods and dips (the less messy the better right?). We provided large Dinosaur plates served with dark green napkins. You can mix and match and use dinosaur napkins or get a party bundle set. And don't forget green straws.
Swipe through my favourite hand-held party food recipes below. Don't forget some squeeze pouches or crackers for any little ones.
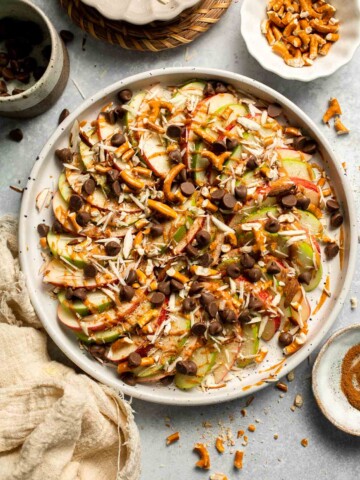
Apple Nachos (Easy and Healthy Snack)

Baked Cheddar Cheese Sticks

Mexican Ground Beef Tacos

Vietnamese Salad Rolls with Shrimp and Peanut Dipping Sauce
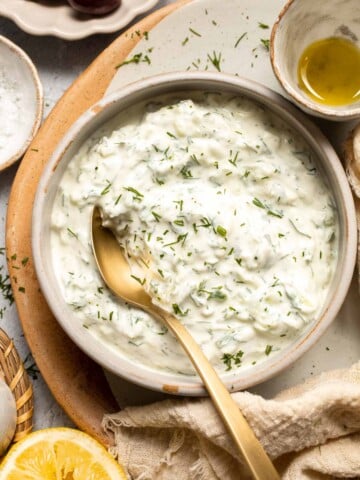
Easy Tzatziki Sauce (Yogurt Cucumber Dip)

French Bread Pizza

Baked Mozzarella Sticks

Ham and Cheese Pinwheels

Shrimp Tacos with Lime Crema Slaw

Cheeseburger Sliders

Pico de Gallo
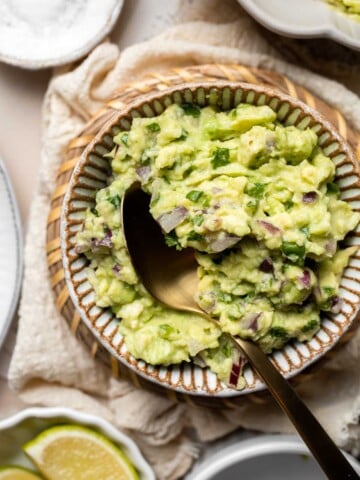
Guacamole

Ricotta Crostini with Peas and Mint

Sweet Potato Tater Tots
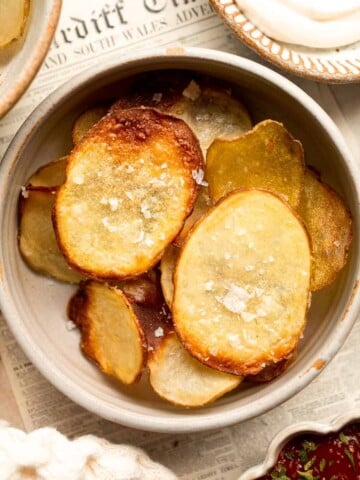
Homemade Baked Potato Chips

Cheese Board

Air Fryer Pizza Rolls

Pizza Fries
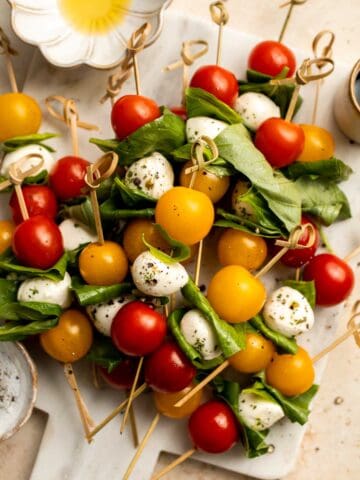
Caprese Skewers

Cauliflower Tots

Homemade Taquitos
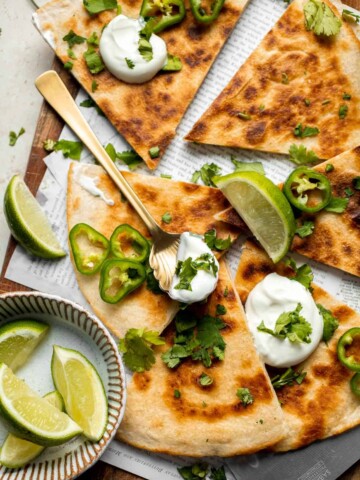
Cheese Quesadilla

Chicken Meatballs

Baked Chicken Quesadillas

Toasted Ravioli
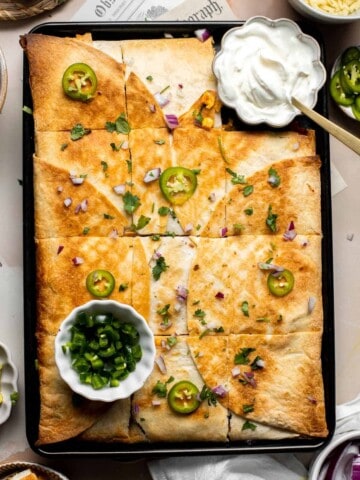
Sheet Pan Quesadillas

Cheesy Garlic Bread

Homemade Kettle Corn
Turkey and Cheese Sliders

Cheesy Baked Zucchini with Marinara
Air Fryer Zucchini Chips
Zucchini Bites
Homemade Ranch Dip

Green Bean Fries

Lobster Rolls

Tortilla Strips

Shrimp Cakes
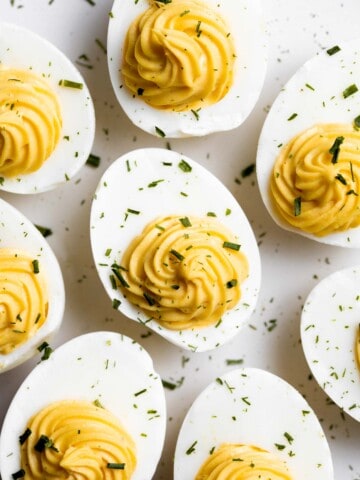
Deviled Eggs

Air Fryer Chicken Tenders

Air Fryer Cauliflower Bites
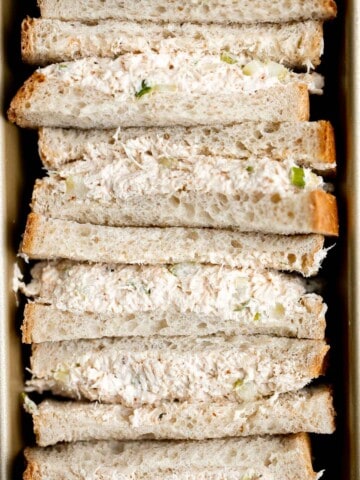
Chicken Salad

Spinach Cheese Rolls
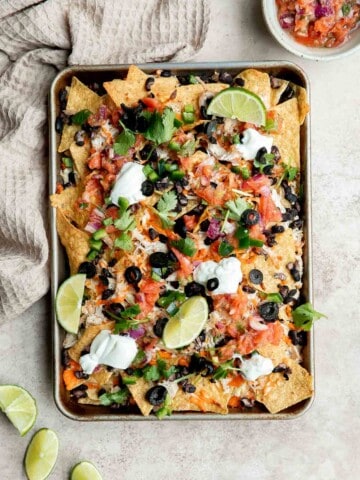
Chicken Nachos
Pizza Dip
Vegetarian Quesadillas

Pizza Crescent Rolls

7 Layer Dip
Greek Fries

Chili Nachos
Homemade Popcorn

Bacon Wrapped Chicken Bites
How to Make a Charcuterie Board
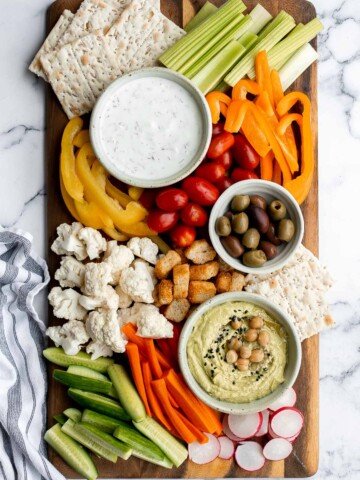
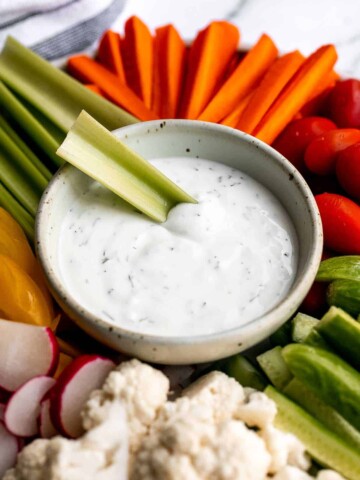
Veggie Tray

Tex Mex Egg Muffins

Candied Pecans
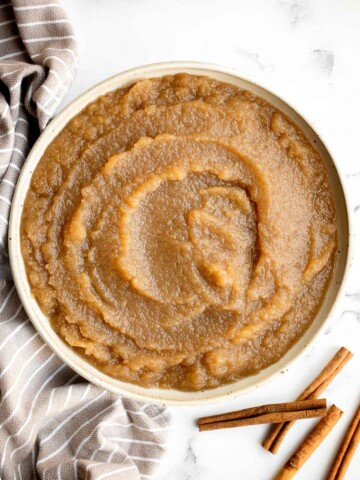
Homemade Applesauce

Grilled Cheese Roll Ups

Caramelized Onion Dip
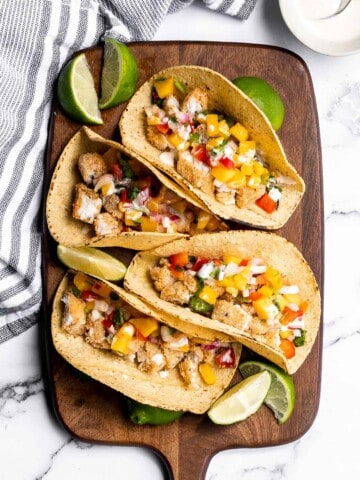
Fish Stick Tacos

Homemade Fish Sticks

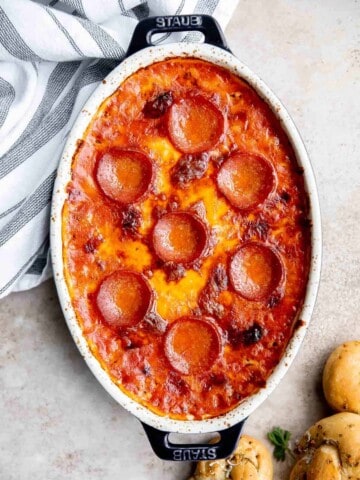
BBQ Chicken Pizza
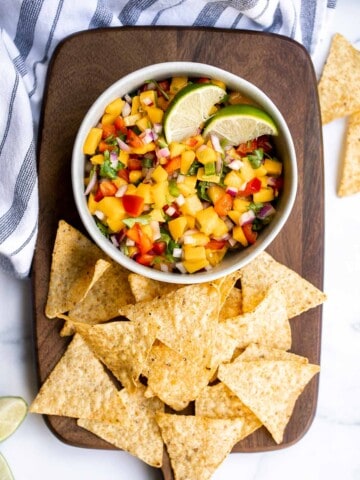
Mango Salsa
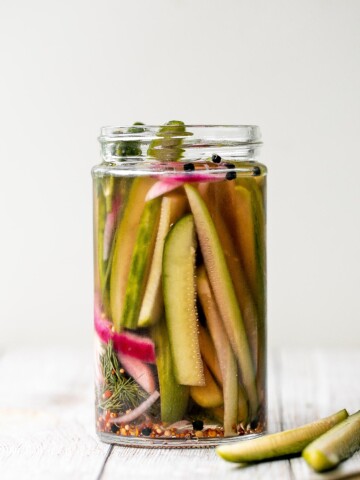
Homemade Pickles

Fig Crostini with Goat Cheese and Pistachios

Vegan Chickpea Tacos

Baked Cauliflower Nuggets
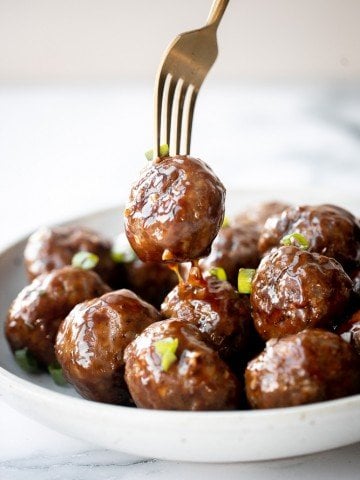
Sticky Honey Garlic Meatballs
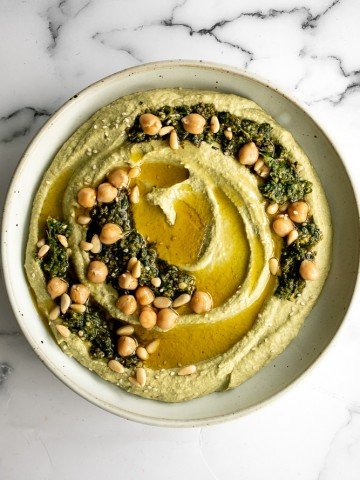
Pesto Hummus

Sweet Chili Chicken Bites
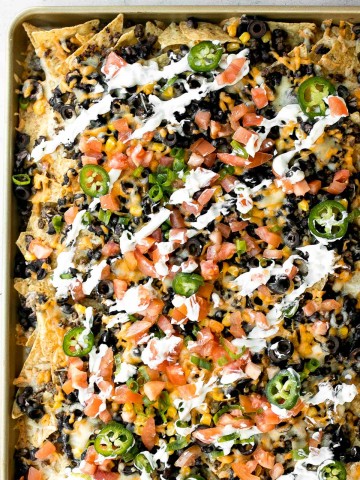
Sheet Pan Nachos

Pepperoni Pizza Rolls

Baked Coconut Shrimp
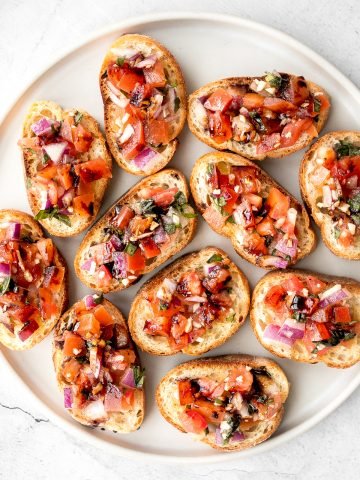
Tomato Bruschetta with Balsamic Glaze
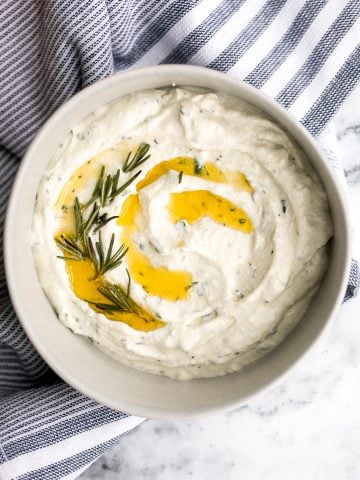
Whipped Ricotta Dip

Whipped Ricotta Crostini

Homemade Tater Tots with Bacon
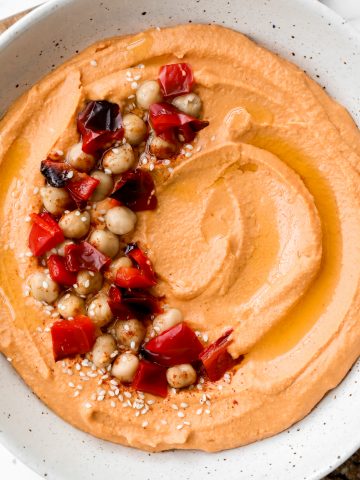
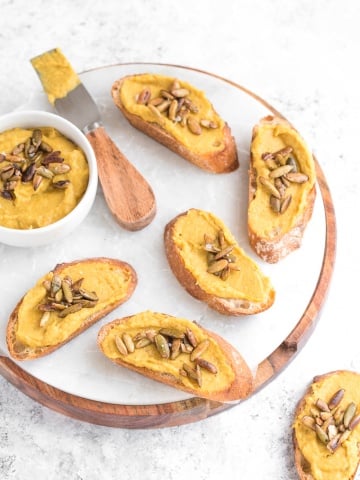
Roasted Red Pepper Hummus

Homemade Calzones

Baked BBQ Chicken Wings

Baked Spinach Dip
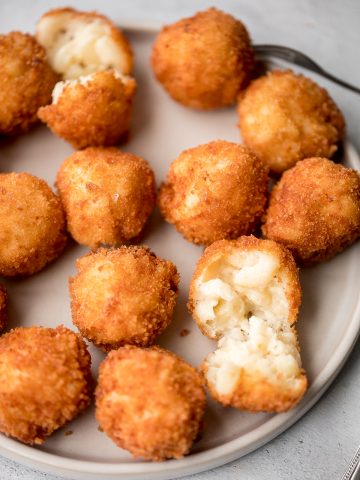
Fried Mac and Cheese Balls
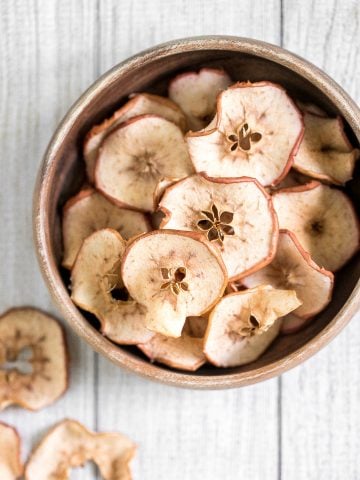
Baked Apple Chips
The Best Egg Salad Sandwich

Vegetarian Spring Rolls
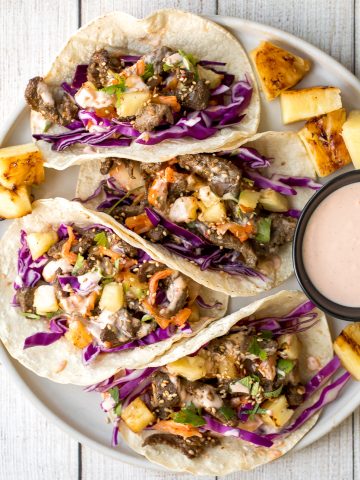
Korean Beef Steak Tacos
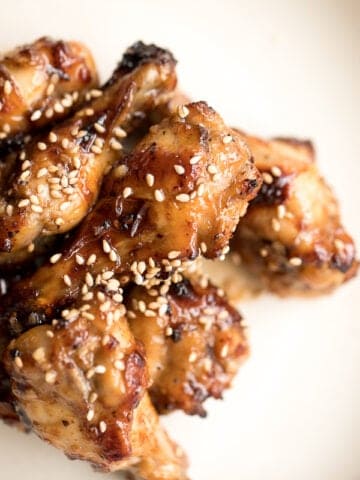
Honey Garlic Chicken Wings

The Best Breaded Fried Chicken Wings (Air Fryer)
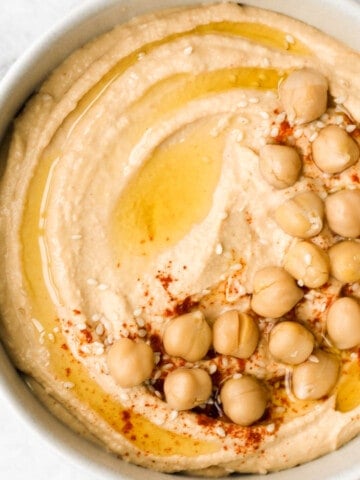
Classic Hummus
Curried White Bean Crostini with Toasted Pepitas
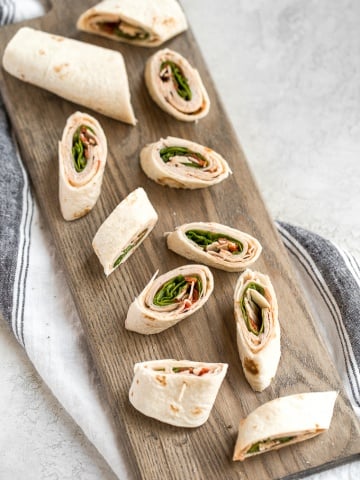
Back to School Turkey Pinwheels

Baked Mashed Potato Spring Rolls (JOEY Copycat)

Crispy Baked Asian Chicken Wings

Baked Turkey Meatballs

Szechuan Chicken Lettuce Wraps with Spicy Mayo (Cactus Club Copycat)

Smoked Salmon and Cream Cheese Cracker Bites

Tomato and Mozzarella Tart
Four Quick and Easy RITZ Cracker Recipes

Fish Tacos with Lime Crema
Some of the most popular recipes that are always a hit with kids are:
- Pepperoni Pizza Rolls. Easy pepperoni pizza rolls are crispy on the bottom, tender and chewy inside, packed with pepperoni and cheese, and baked until bubbly. A total crowd pleaser!
- Homemade Tater Tots. Homemade tater tots with bacon are golden and crispy on the outside, yet soft and tender inside. They're packed with flavour and a total family favourite.
- Baked Mozzarella Sticks. Crunchy, cheesy, and paired with an awesome dipping sauce, these baked mozzarella sticks are just as amazing as what you would find in a restaurant!
- Pigs in a Blanket. Pigs in a blanket from scratch are a delicious and easy appetizer or snack to make for your next party or gathering - juicy, cheesy, flaky, and buttery.
- Veggie Tray. This homemade veggie tray is a quick, easy, and healthy snack or appetizer to make for your next party, with a variety of colorful vegetables and delicious dips.
- Chicken Strips. Juicy long strips of chicken shaped perfectly for dipping and coated with a flawless crispy and crunchy exterior, baked crispy chicken strips are a kid's favorite meal.
- Egg Salad Sandwich. The best egg salad sandwich is a quick and easy picnic classic loaded with perfect hard-boiled eggs, mayonnaise, a touch of dijon mustard and green onions.
In line with the dinosaur theme party, label little tent cards with creative phrases to describe the food such as:
- dig in
- dinosaur bones
- t-rex claws
- dino eggs
- dino track cookies
- ice age water
- lava cake
- t-rex nachos
- jurassic garden
- herbivores

Birthday Party Drinks
You can't have a birthday party without some juice. Serve some refreshing lemonade or iced tea, or even some bubble tea.


Dinosaur Birthday Party Favors
I set up the party favors on a separate table with a cute "adopt a dinosaur" sign. I made the sign on Microsoft Word and placed it into a wooden picture frame. We placed an assortment of medium sized dinosaur figurines that each child could take home, along with a favor box filled with dinosaur themed goodies.
I purchased these cute dinosaur treat boxes (I also loved these dinosaur treat bags). To complete the look, you can add a thank you tag tied onto the handle with burlap string, or add a dino thank you sticker on one side of the favor box.
I filled each box with:
- dinosaur stickers
- dinsaur stamp
- dino mini coloring book
- crayons
- dinosaur slap bracelet
- dinosaur pull back car
- playdoh "dino" egg
- individually wrapped chocolates
You could also get a dinosaur favor bundle with everything that you need.

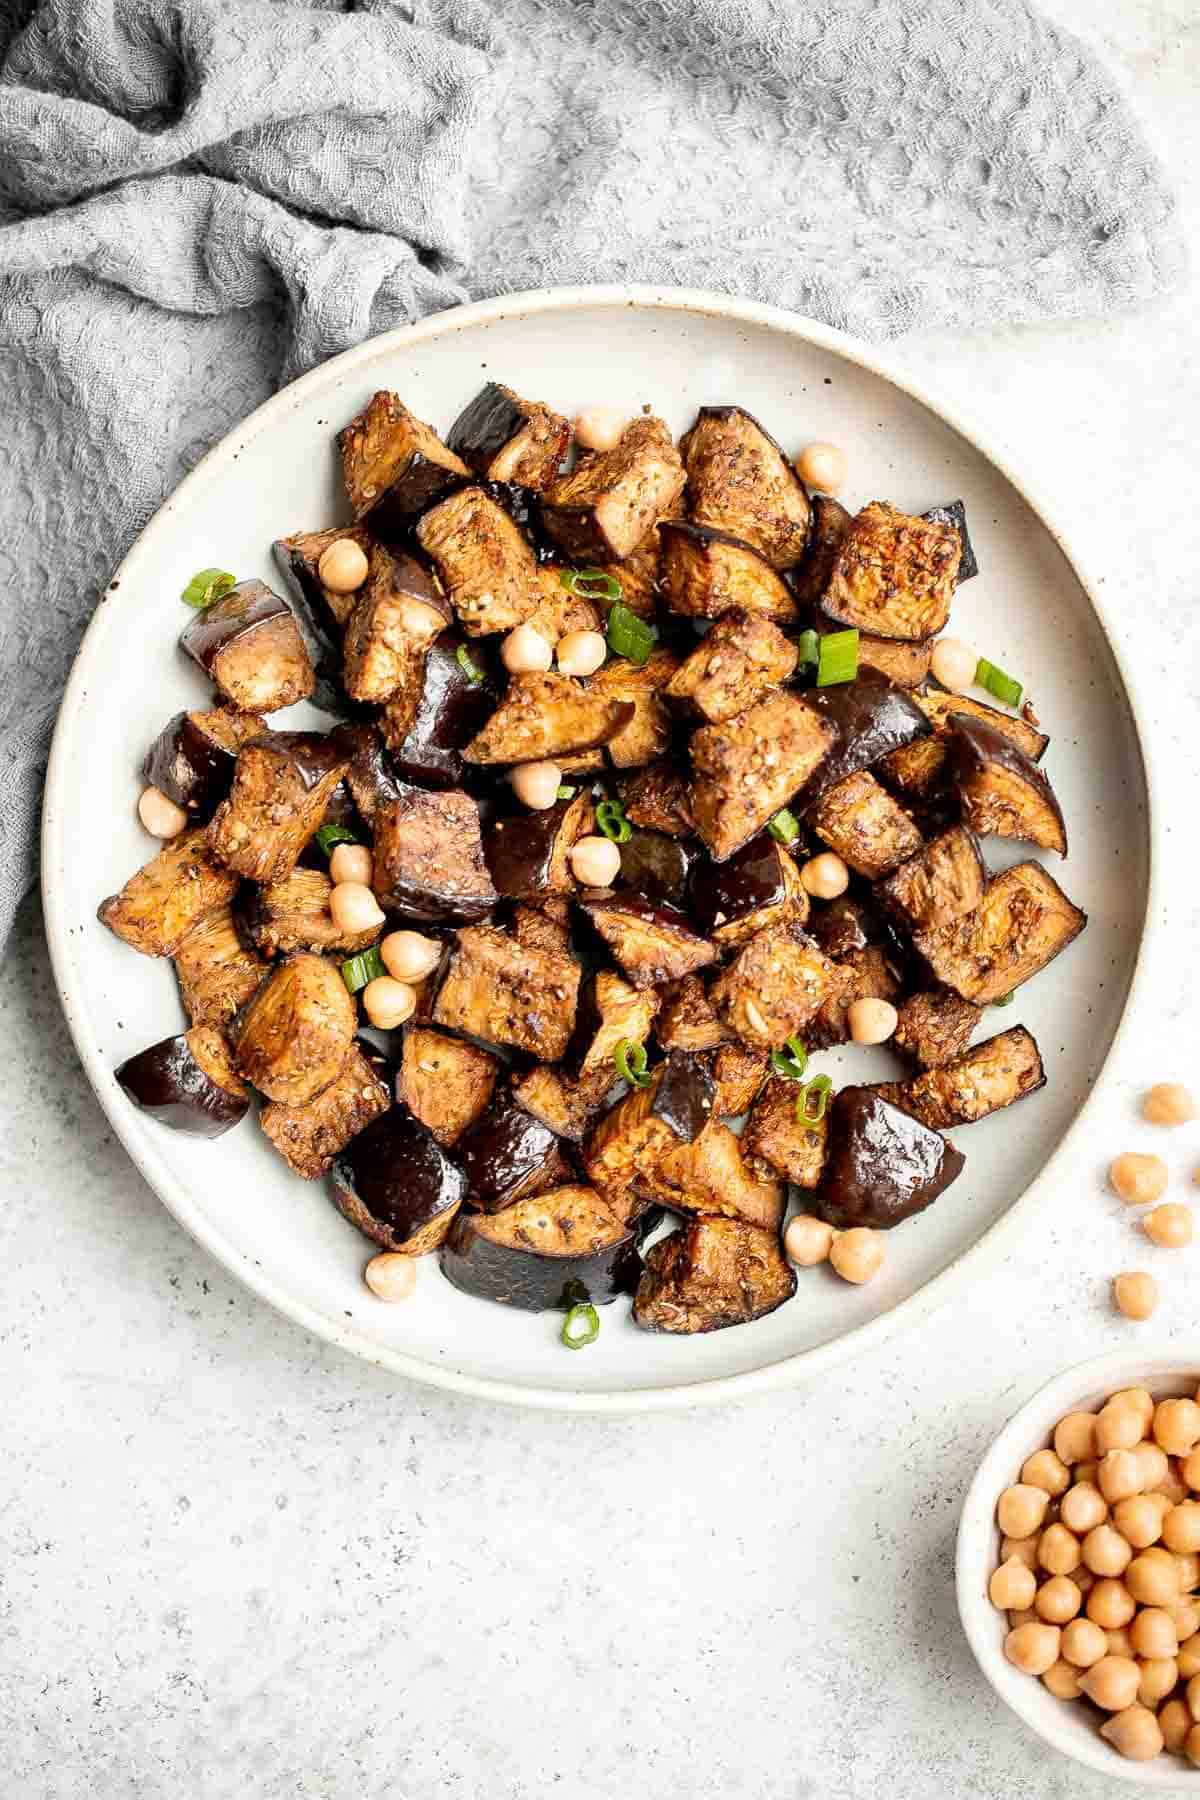
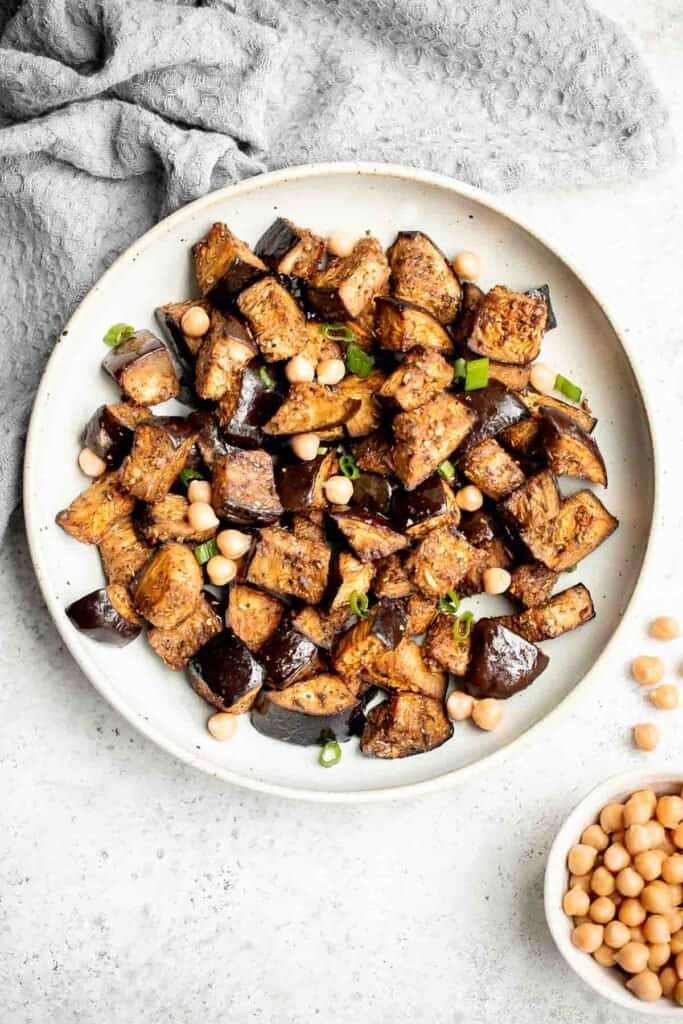
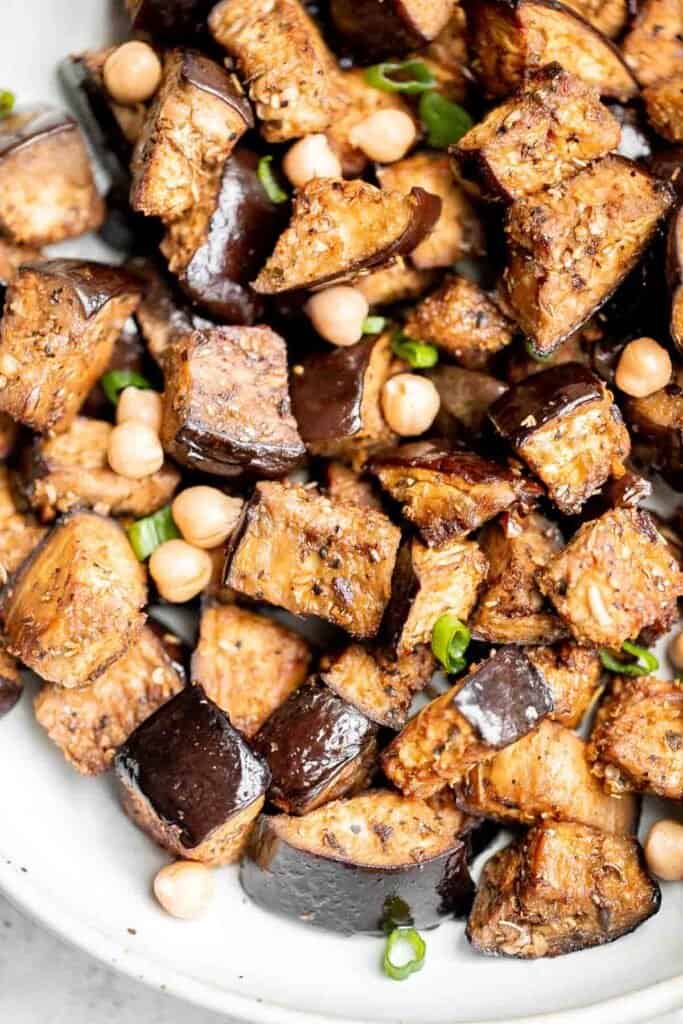
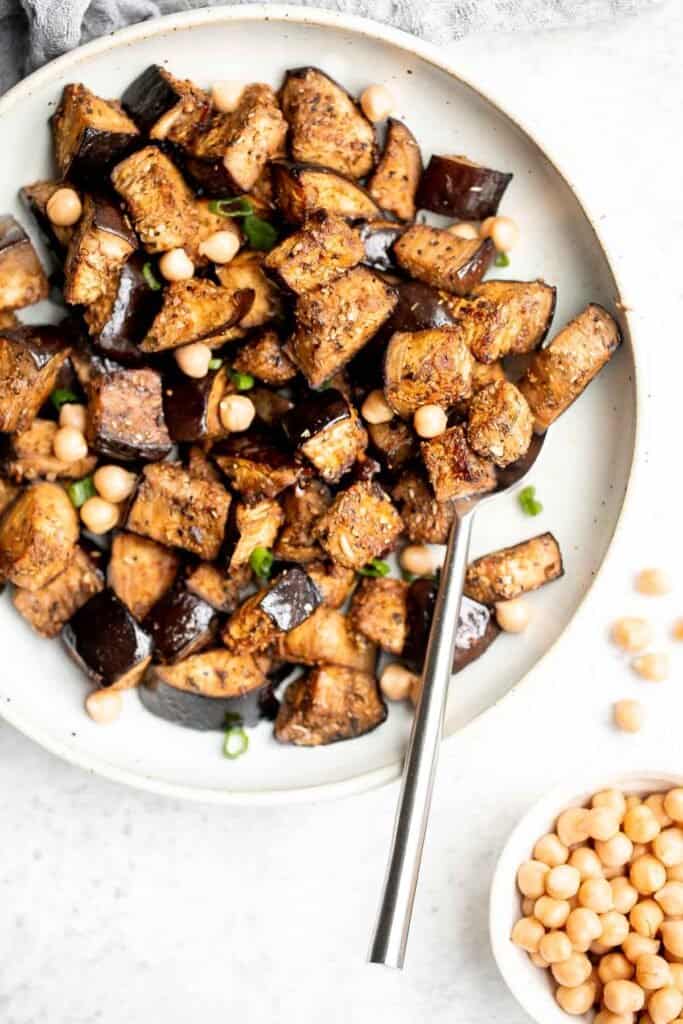
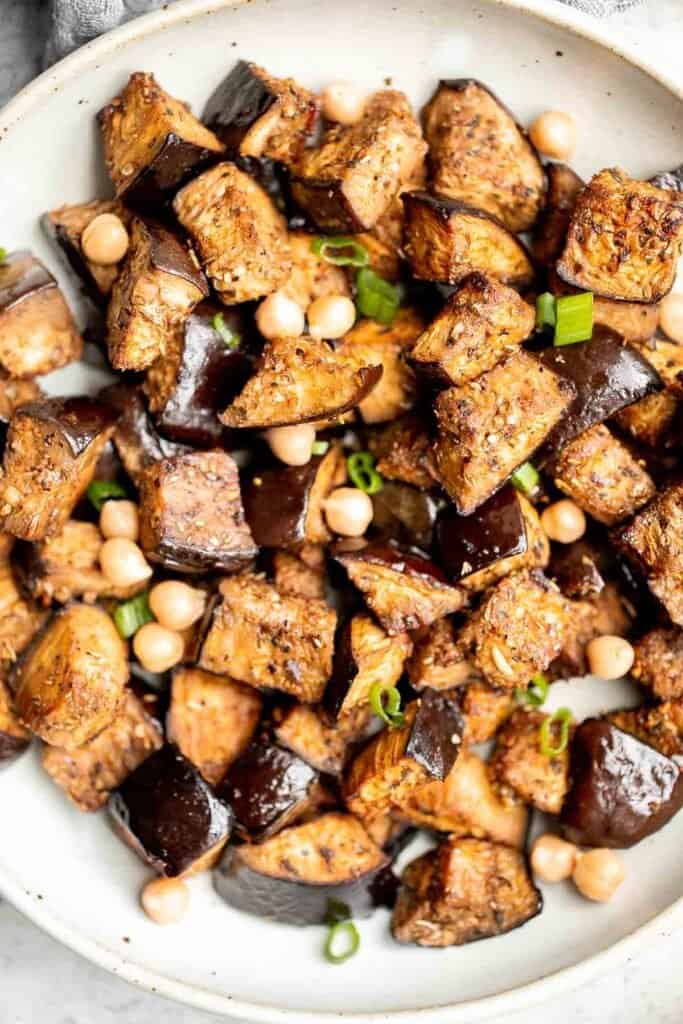
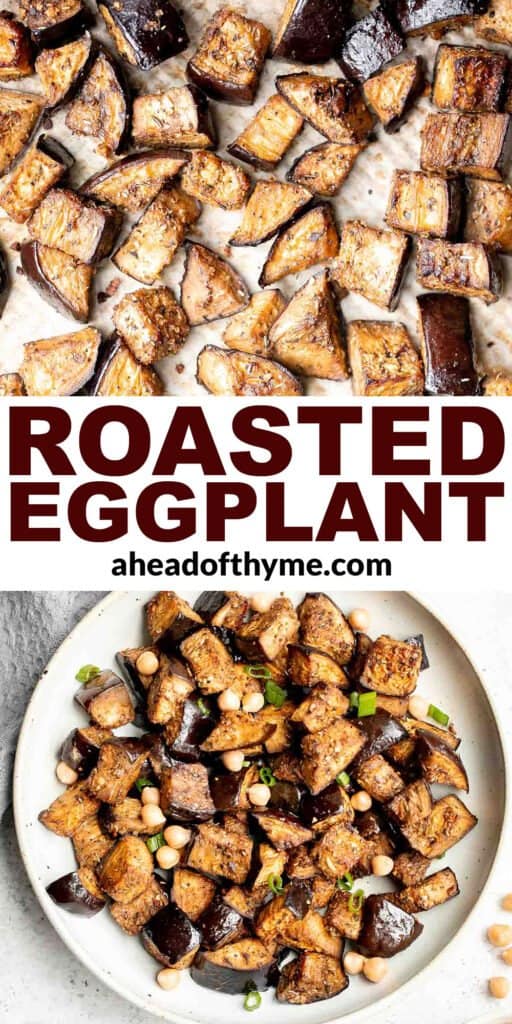
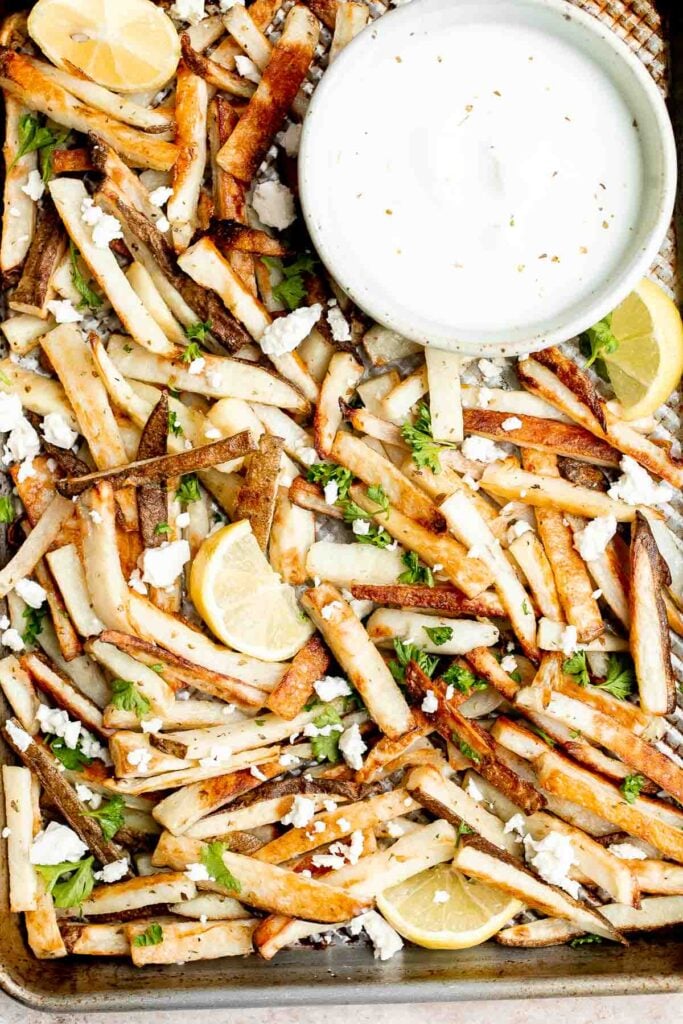
Roasted Eggplant
Whether you're cooking this roasted eggplant in your oven or air fryer, you'll fall in love with how fast, easy, and delicious this simple recipe is. Ready in just half an hour with a handful of ingredients and minimal prep work, this roasted eggplant recipe is healthy and nutritious. It's a perfect side dish for busy weeknights when you forget about prepping dinner. Serve it with protein like chicken, over rice, or with a side of pita bread.
Why You'll Love Roasted Eggplant
- It's so easy to make. Chop it. Season it. Roast it in the oven - and don't forget to flip it halfway through. That's really all there is to it. This is by far the easiest eggplant recipe out there.
- Plus, it's quick. Forgot about dinner? Hungry already? Don't worry. This roasted eggplant recipe is here to the rescue. It takes about 30 minutes from the moment you decide to make it to the moment the delicious, crispy, roasted eggplant reaches your plate.
- Loaded with flavor. No one likes boring and bland vegetables. This roasted eggplant is special because it's seasoned with Italian spices, paprika, and a dash of balsamic vinegar. Plus, you can add extra toppings like green onions and chickpeas for a different flavor.
- Eggplants are healthy. Vegetables like eggplants provide essential nutrients like vitamins, minerals, and fiber. Add this delicious, easy, and simple recipe to your diet, and you might be able to cut back on the vitamins and supplements.
Ingredient Notes
To make this delicious Roasted Eggplant, you will need the following simple ingredients (full quantities in recipe card below):
- eggplants - when selecting perfectly ripe eggplants, look for ones that are slightly firm but not very hard. You can check by pushing on it with your finger. It should feel the same as when touching a ripe tomato. If it's too soft that it breaks the skin, then it is too ripe. It's too hard if it doesn't budge when pressed.
- olive oil
- balsamic vinegar
- seasoning - you will need a few simple seasoning including salt, pepper, Italian seasoning, and paprika.
- toppings - you can top it with green onions and chickpeas (optional).
You will also need measuring spoons, large mixing bowl, and half sheet baking pan.
How to Make the Best Roasted Eggplant
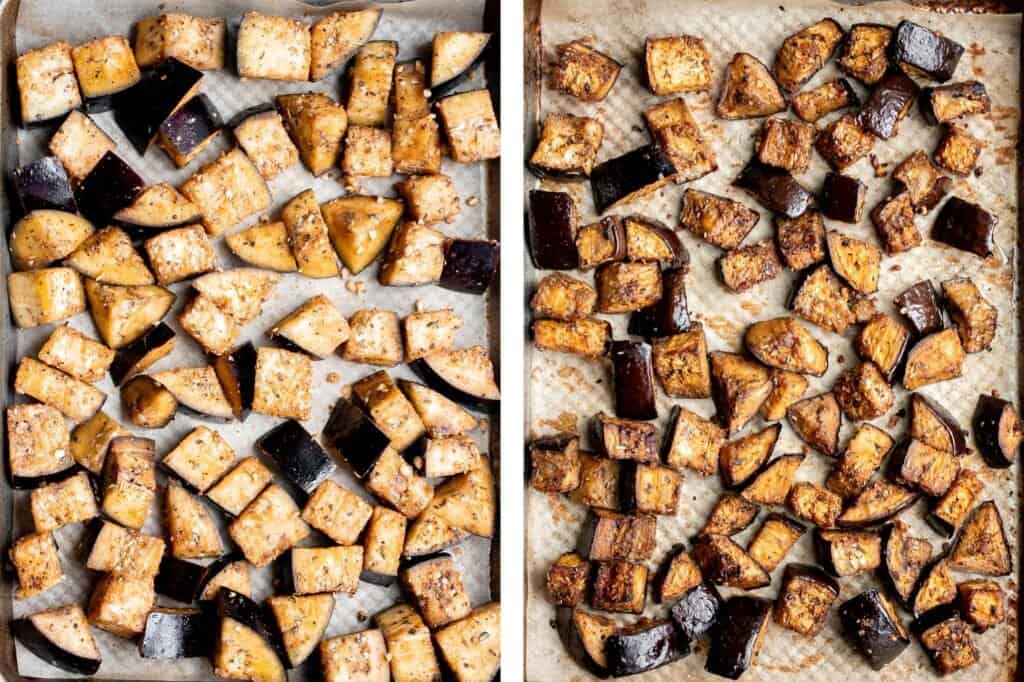
- Season eggplant. In a large mixing bowl, add eggplants and drizzle with olive oil and balsamic vinegar. Add all seasoning (salt, pepper, Italian seasoning, and paprika). Toss well to coat and set aside for 15 minutes until the oven is preheated.
- Bake. Arrange the eggplants in a single layer on a parchment lined half sheet baking pan. Bake in a 425F preheated oven for 25-30 minutes until nicely browned, flipping the eggplants halfway through to achieve even cooking.
- Serve. Serve immediately and drizzle with more balsamic vinegar on top, if desired.
How to Cook Roasted Eggplant in the Air Fryer
Add eggplants in the air fryer basket and cook at 375F for 20-25 minutes until tender and nicely caramelized. Shake the basket halfway to cook them evenly.
Recipe Tips and Tricks
- How to store: Eggplant and other roasted vegetables are notorious for becoming soggy after cooking and storing. Never store hot vegetables. Instead, allow the eggplant to cool on the roasting pan before transferring to an airtight container (once completely cool). Keep in the fridge and eat within 4-5 days.
- How to reheat: Leftover roasted eggplant tastes best when reheated in the oven or the air fryer. Heat in a 425F oven for 10-15 minutes until warm, or heat in a 375F air fryer for 5-10 minutes.
More Vegetable Side Dishes
- 40 Vegetable Side Dishes
- Honey Balsamic Brussels Sprouts
- Lemon Parmesan Asparagus
- Roasted Cauliflower
- Pesto Green Beans
- Honey Roasted Carrots
Tried this recipe?
I'd love to hear what you think! Leave a comment and rating below to share your feedback. Your reviews help others discover this recipe and help me keep creating more free recipes for you. Snap a photo and tag me on social media @aheadofthyme too.
30 Best Rice Recipes

Rice is the most popular pantry staple used across the world, and it's really no surprise. It's delicious, comforting, and versatile - it soaks up different flavors so well, making it the perfect base of any meal. Whether you add some seasonings to change it up a little, or throw in protein and veggies to completely transform it, the options are endless. So if you are wondering what to cook with rice that goes beyond plain rice, or simply "how to cook rice", then you are in the right place. We are sharing over 30 of the most popular and best rice recipes including simple plain rice recipes, stir fried rice, chicken and rice, creamy rice, rice stuffed into vegetables, soup with rice, and more!
Best Rice Recipes
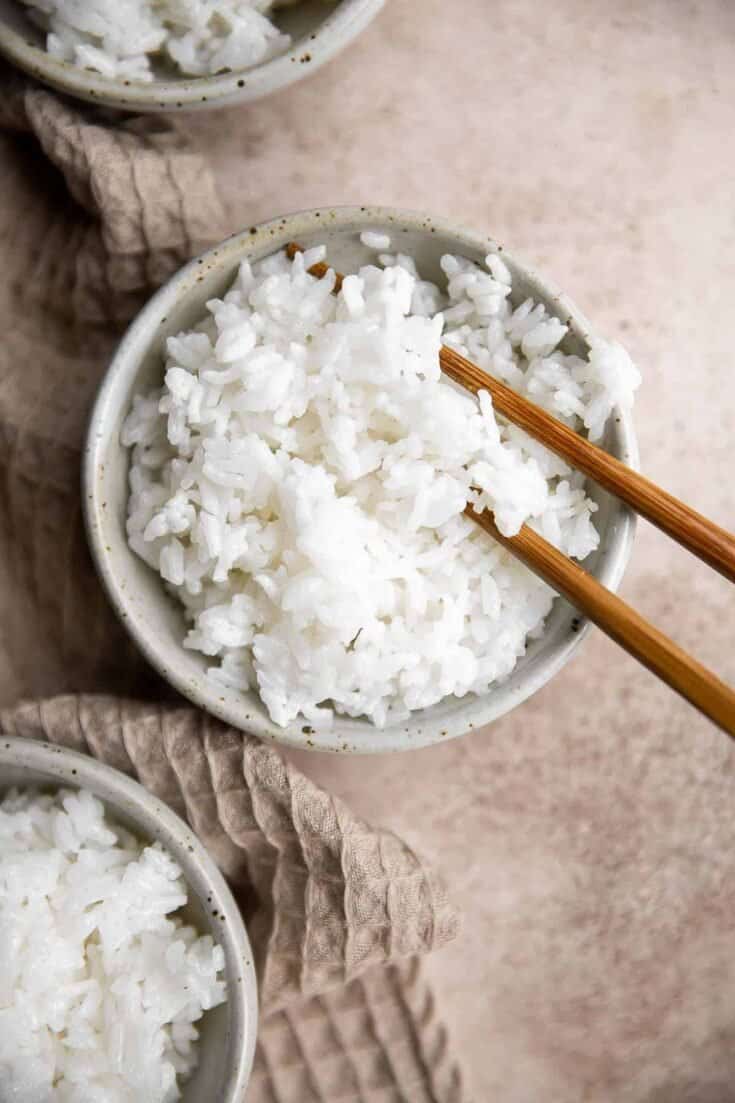
Steamed Rice
Learn how to make steamed rice that's perfectly cooked, fluffy and delicious in 30 minutes. Cook white rice on the stove, rice cooker, or instant pot.
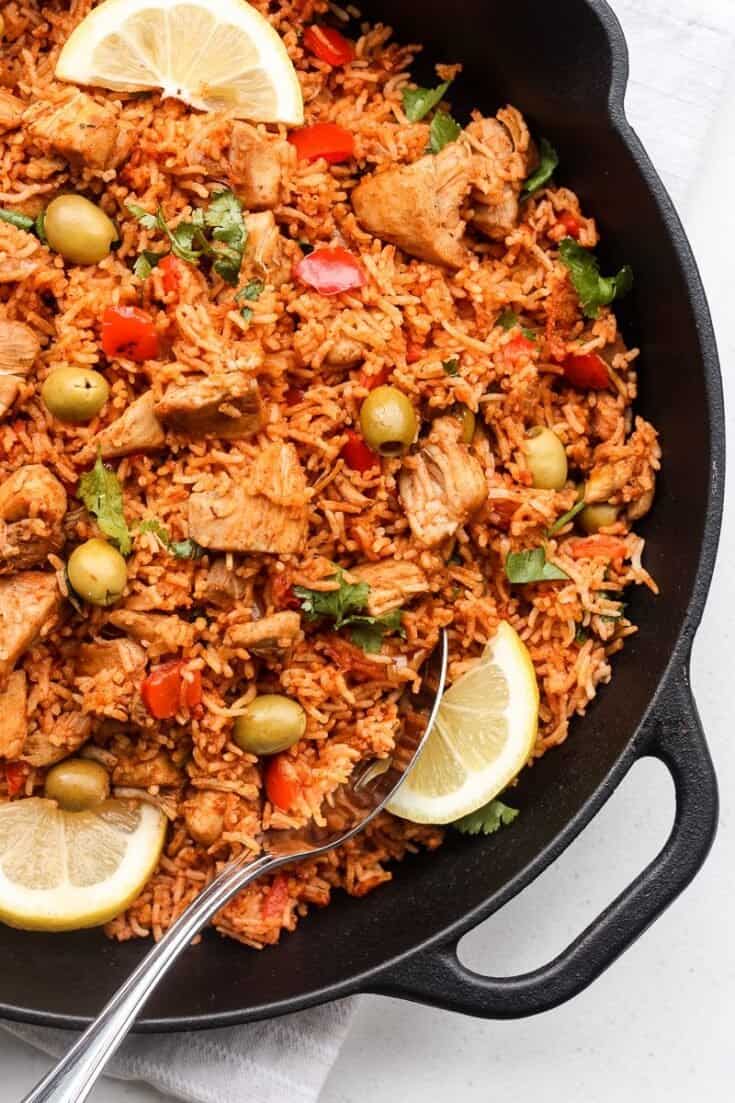
One Pot Spanish Chicken and Rice
Packed with flavour, real ingredients and vibrant colours, one pot Spanish chicken and rice is the perfect no fuss, no clean up weeknight meal.
Easy Coconut Rice
Easy coconut rice is light, fluffy, delicious, and flavorful. It's a quick and easy side dish that compliments all Thai, South Asian, and tropical dishes.
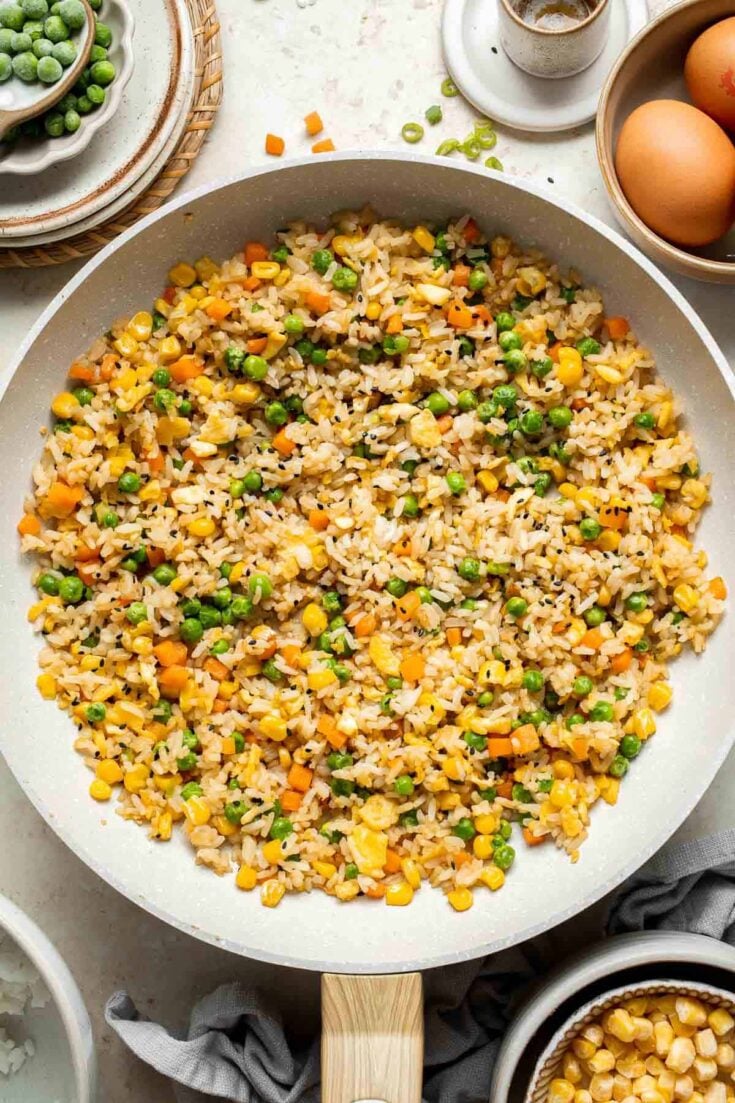
Vegetarian Fried Rice
Make flavourful, Chinese restaurant-style vegetarian fried rice at home in 10 minutes, with fully customizable ingredients, and say good-bye to take-out!
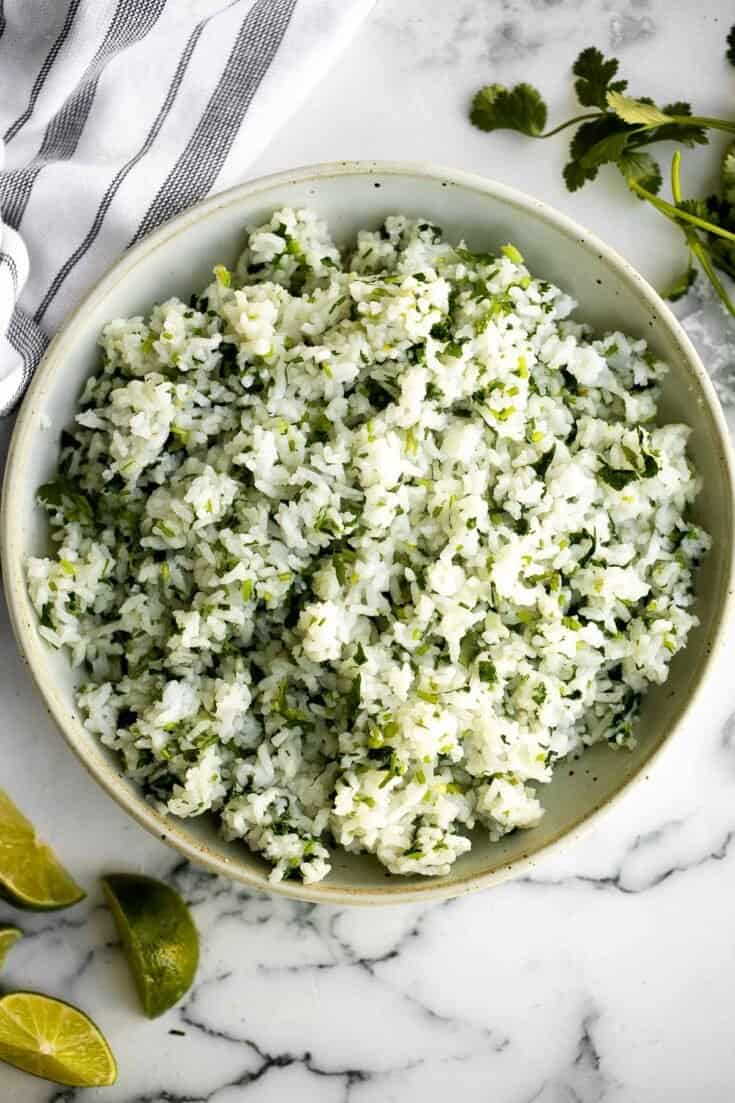
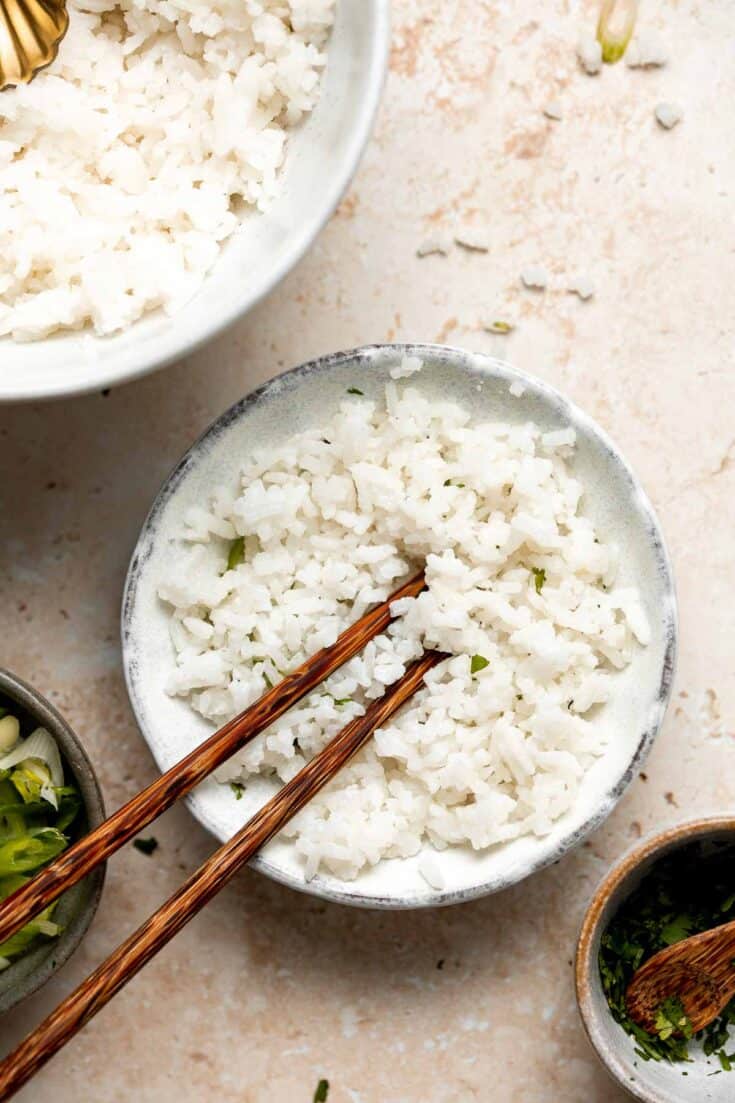
Cilantro Lime Rice
Cilantro lime rice is a fresh, bright and vibrant side dish that will add extra flavour to any meal you serve it with. It's a quick, easy, one pot recipe.

Basmati Rice with Saffron
Basmati rice with saffron is an essential side in Middle Eastern diets. Make it in 15 minutes with this easy-to-follow recipe.
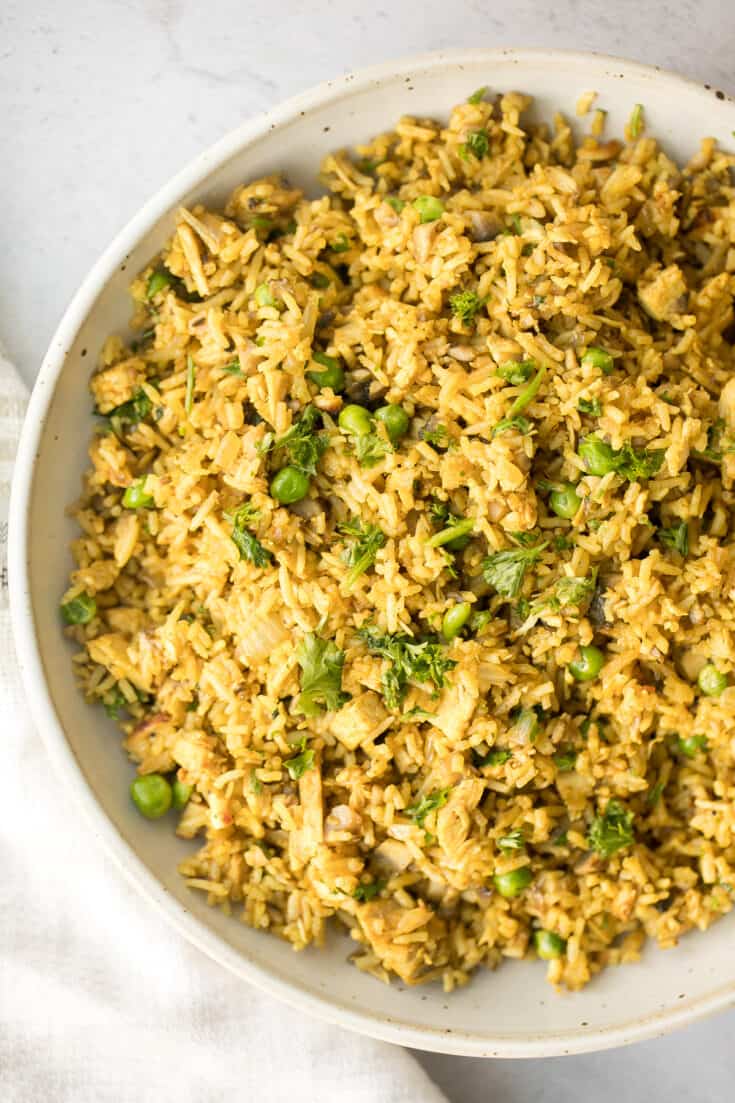
Curry Chicken Fried Rice
Flavourful curry chicken fried rice with chicken, mushrooms, peas, rice, and curry flavours is so easy to make in less than 10 minutes on busy weeknights. Serve with a fresh Chinese garlic cucumber salad on the side.

Broccoli Rice
Broccoli Rice is the perfect side dish: creamy, cheesy, healthy, and filling. Plus, it’s quick and easy and all made in one pot in just over 30 minutes.
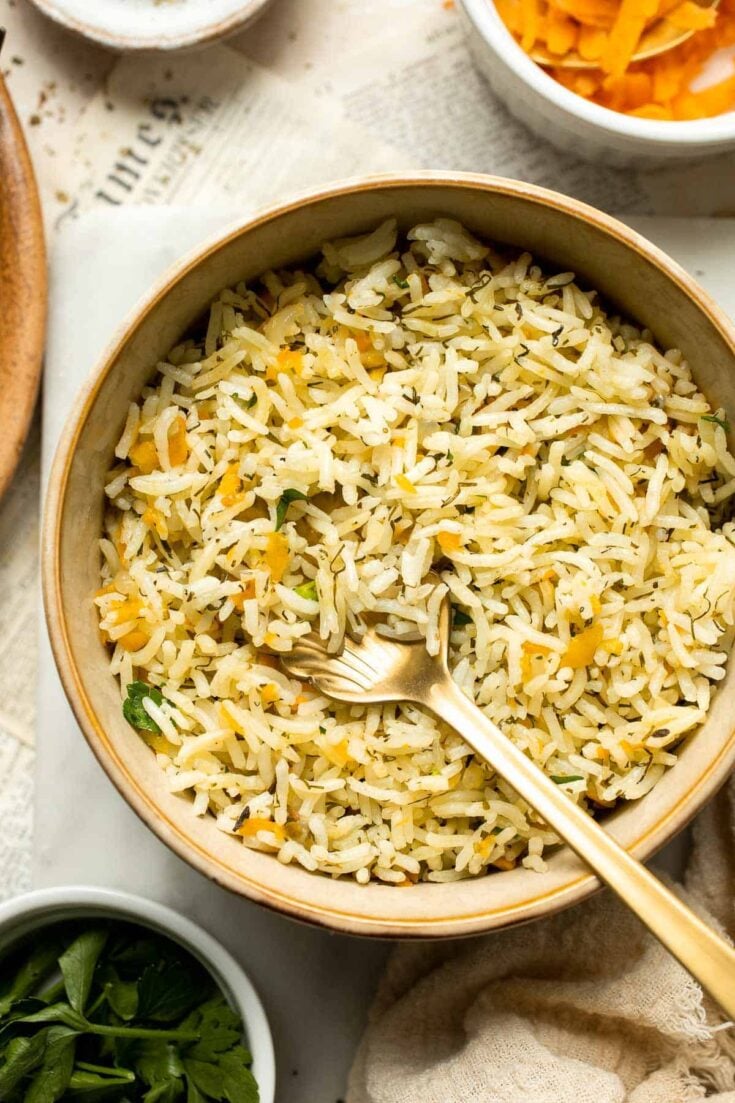
One Pot Rice Pilaf with Carrots
One pot Rice Pilaf with Carrots is quick, easy, and loaded with flavor. Cook this vegetable rice on the stove, rice cooker, or instant pot.
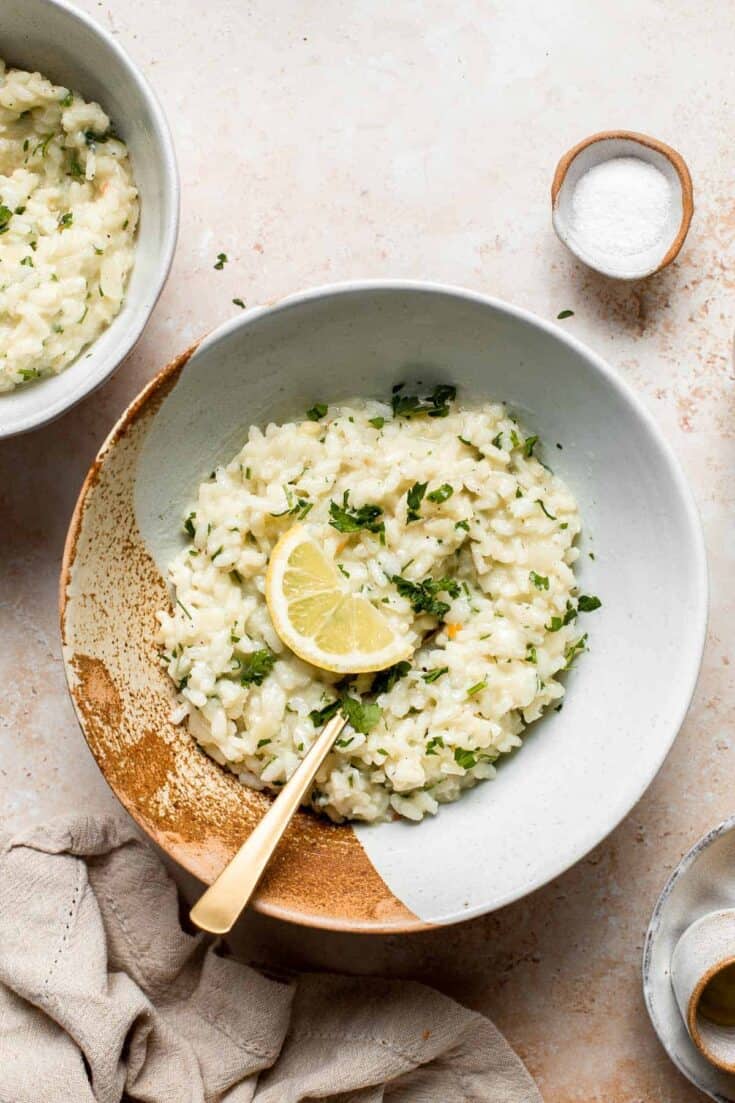
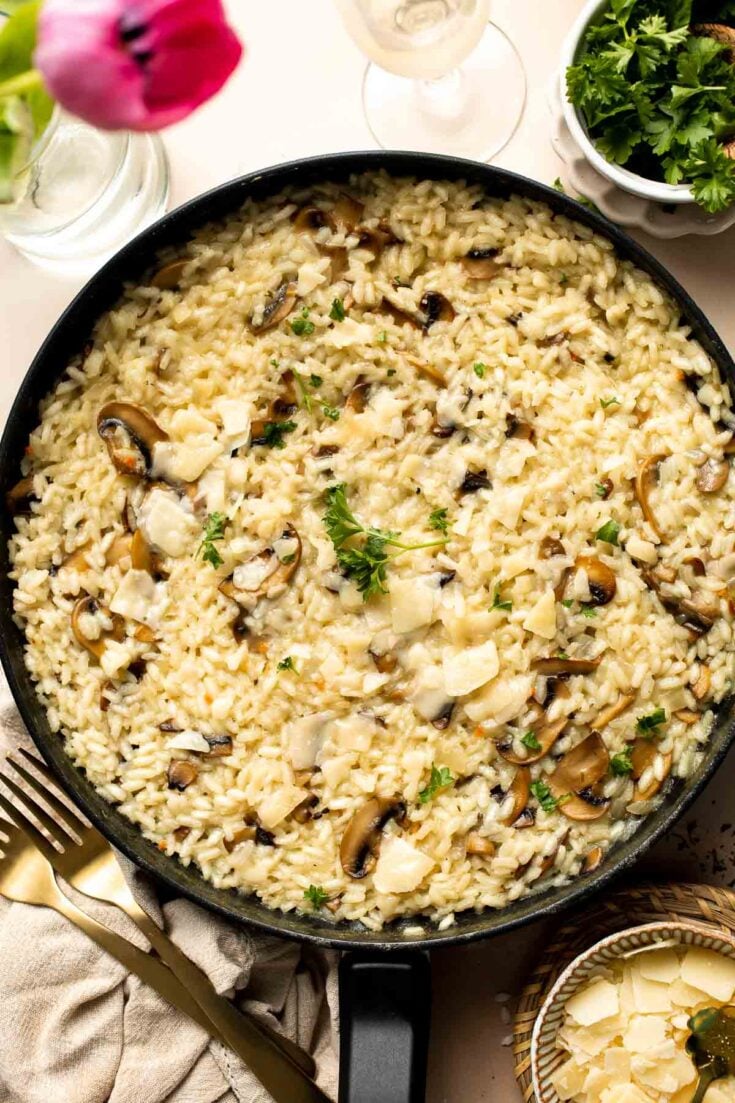
Creamy Parmesan (No Wine) Risotto
Creamy Parmesan (No Wine) Risotto is a rich, creamy, and comforting classic Italian dish that may be intimidating but is actually quick and easy to make.

Greek Rice
This simple Greek Rice is lemony, full of herbs, and warm, delicious flavors — and it couldn't be much easier to make. Our go-to fluffy herb rice dish!
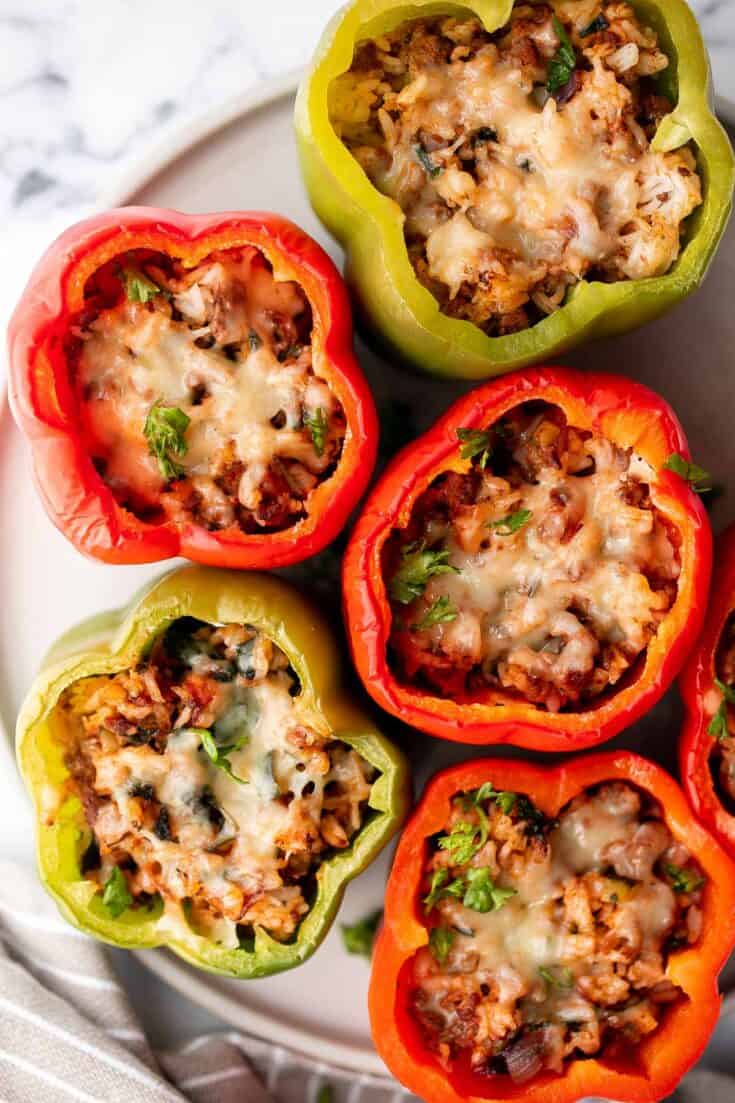
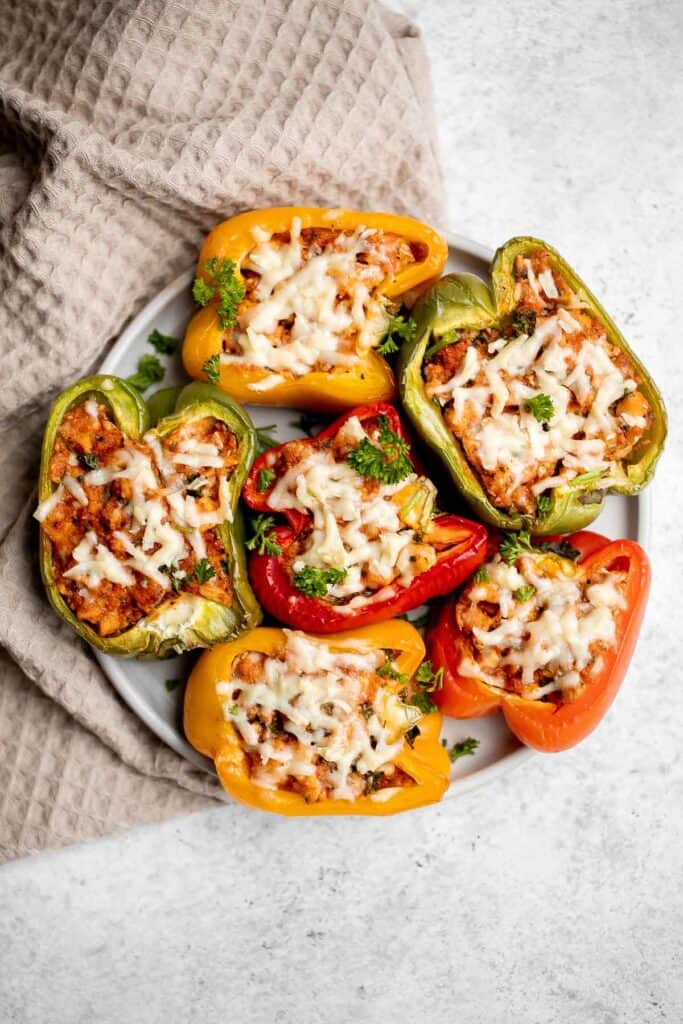
Ground Beef Stuffed Peppers
Ground beef stuffed peppers are delicious, healthy, and filling. Stuffed with beef rice and veggies, they're easy to make ahead and freezer-friendly.
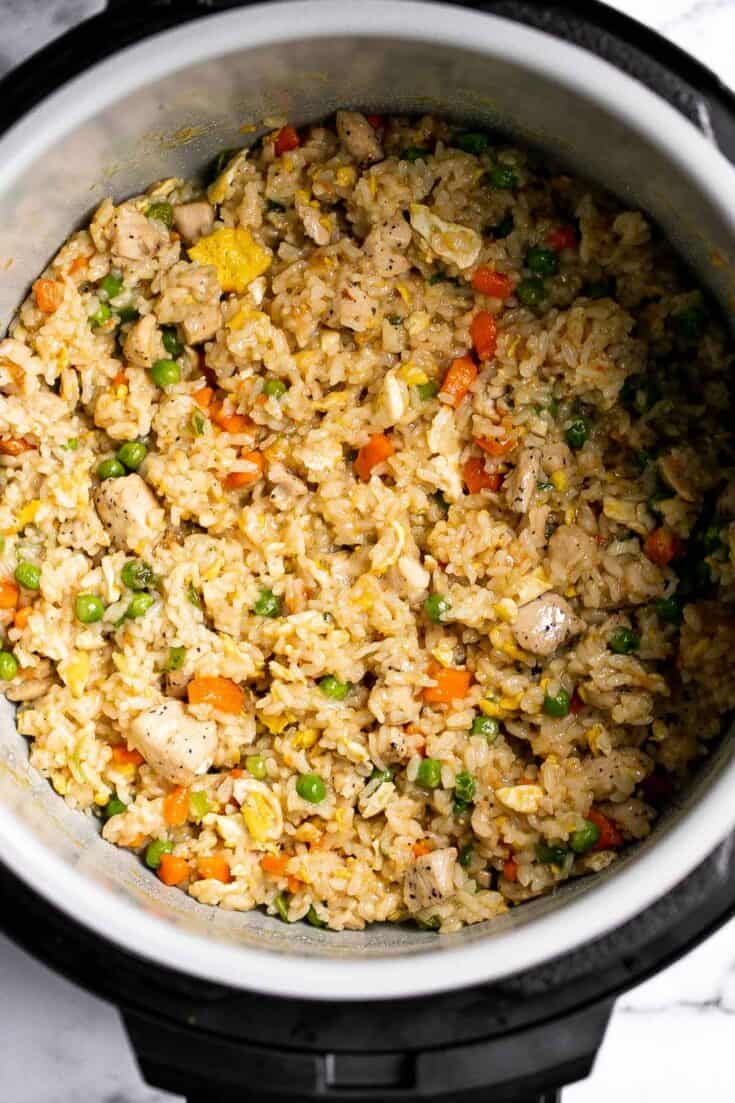
Instant Pot Chicken Fried Rice
Instant pot chicken fried rice is easy to throw together, packed with flavor, and delicious. It's perfect for a weeknight family dinner or meal prep.
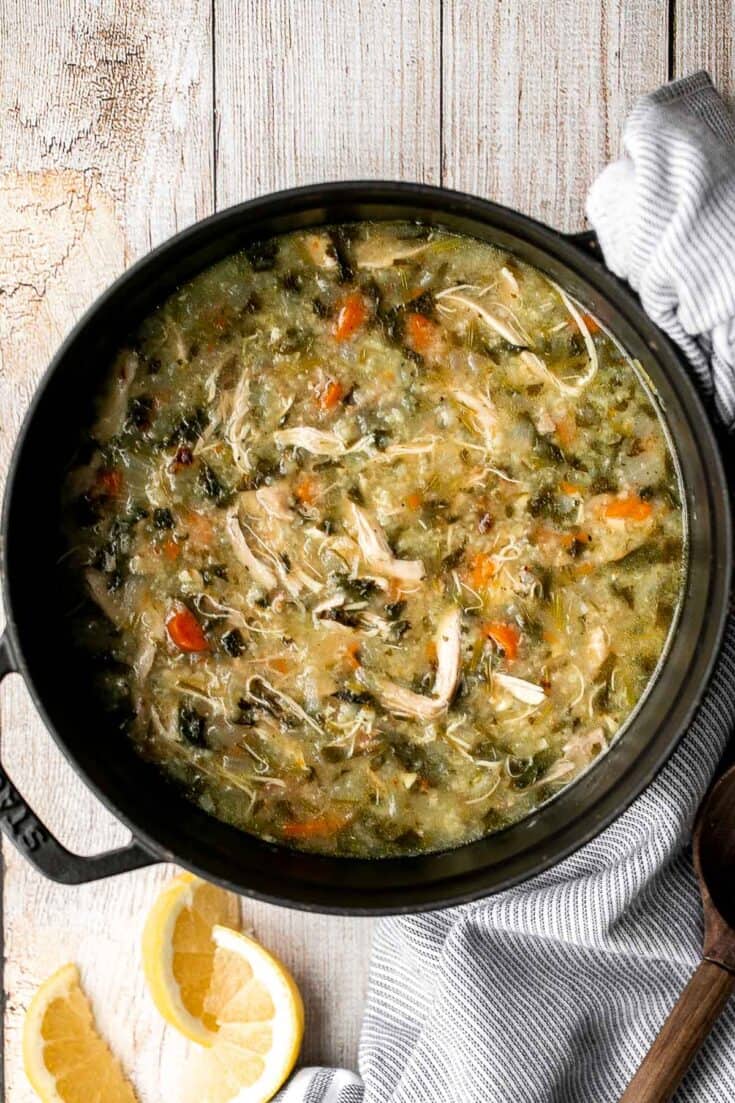
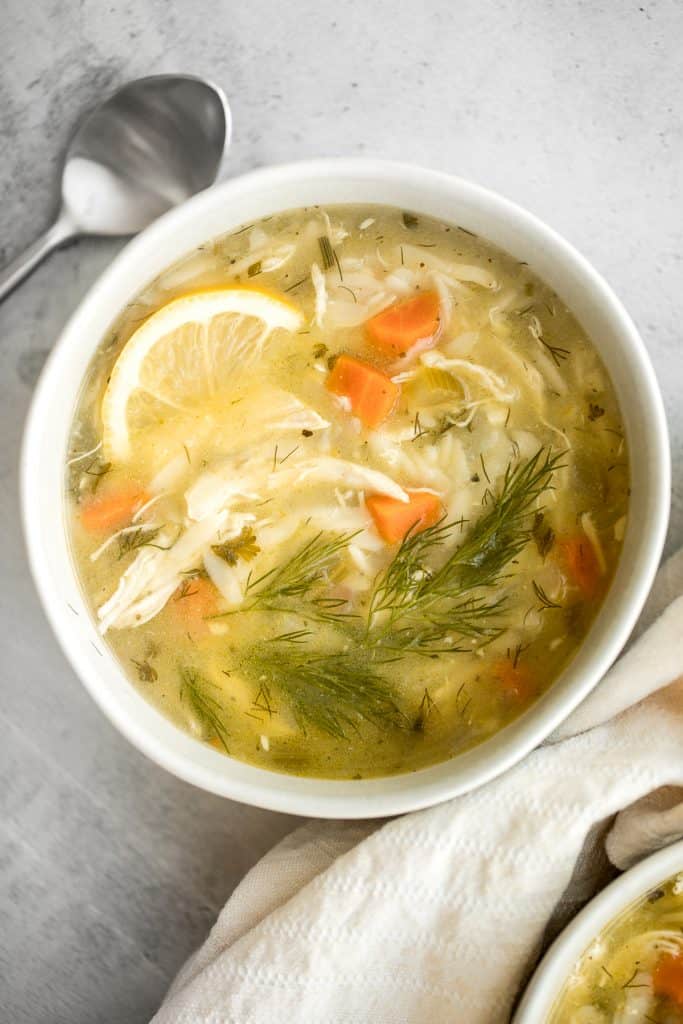
Chicken and Rice Soup
Chicken and rice soup is delicious, warm, cozy, and comforting feel-good meal that can warm you up on a chilly day. Easy to make in one pot.
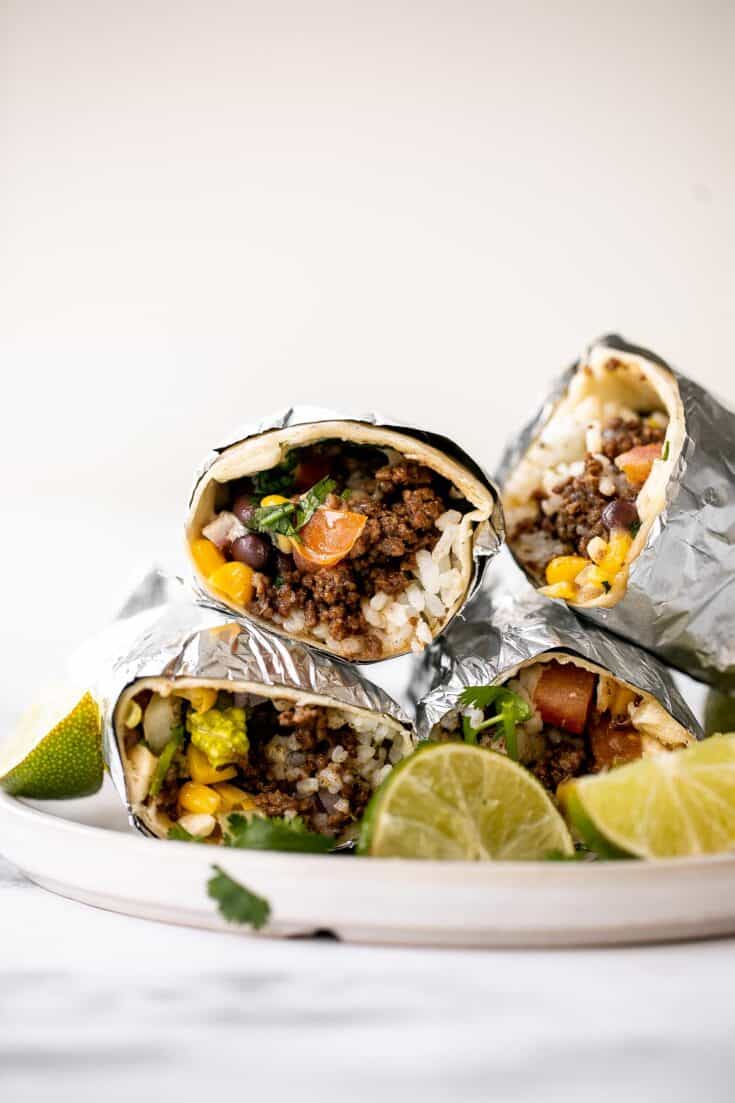
Beef and Bean Burritos
Hearty and filling beef and bean burritos are easy to make ahead, freezer-friendly, and take just 30 minutes for restaurant-quality Mexican food at home.
Mushroom Risotto
Mushroom Risotto is a rich creamy one pot rice dish made with simple ingredients that deliver bold flavors. Making homemade risotto from scratch is easy!
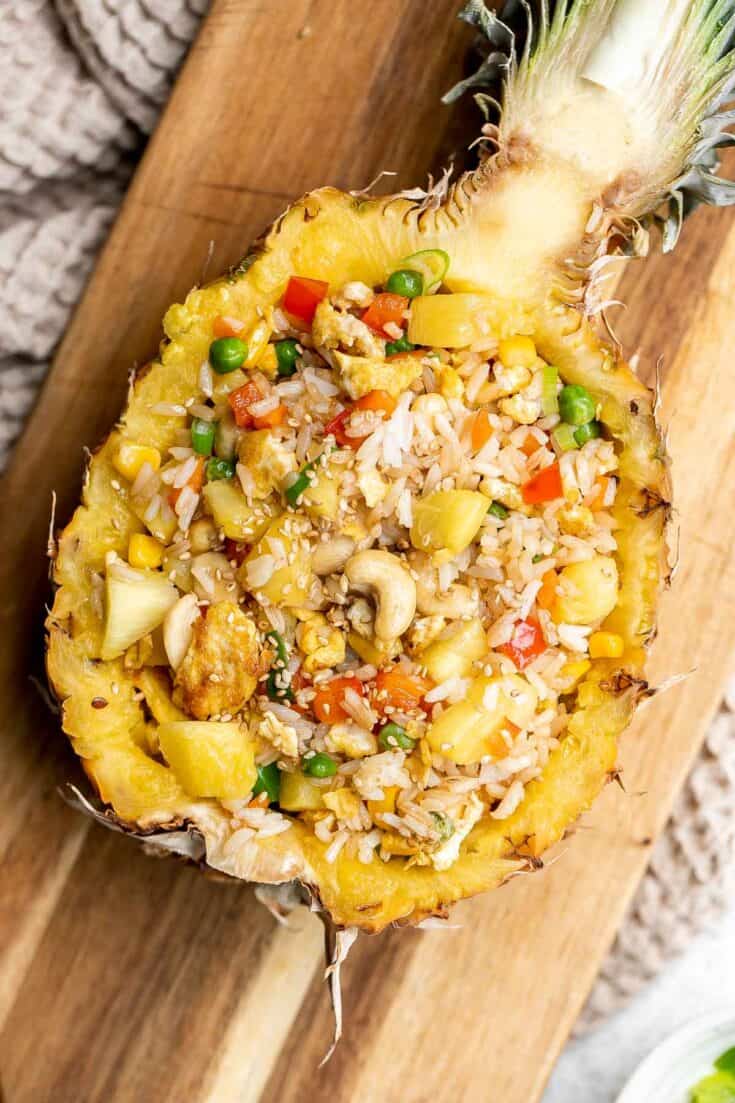
Pineapple Fried Rice
Pineapple fried rice is a quick and easy meal that is ready in just 20 minutes. It's a savory, sweet, delicious, and flavorful weeknight family dinner.
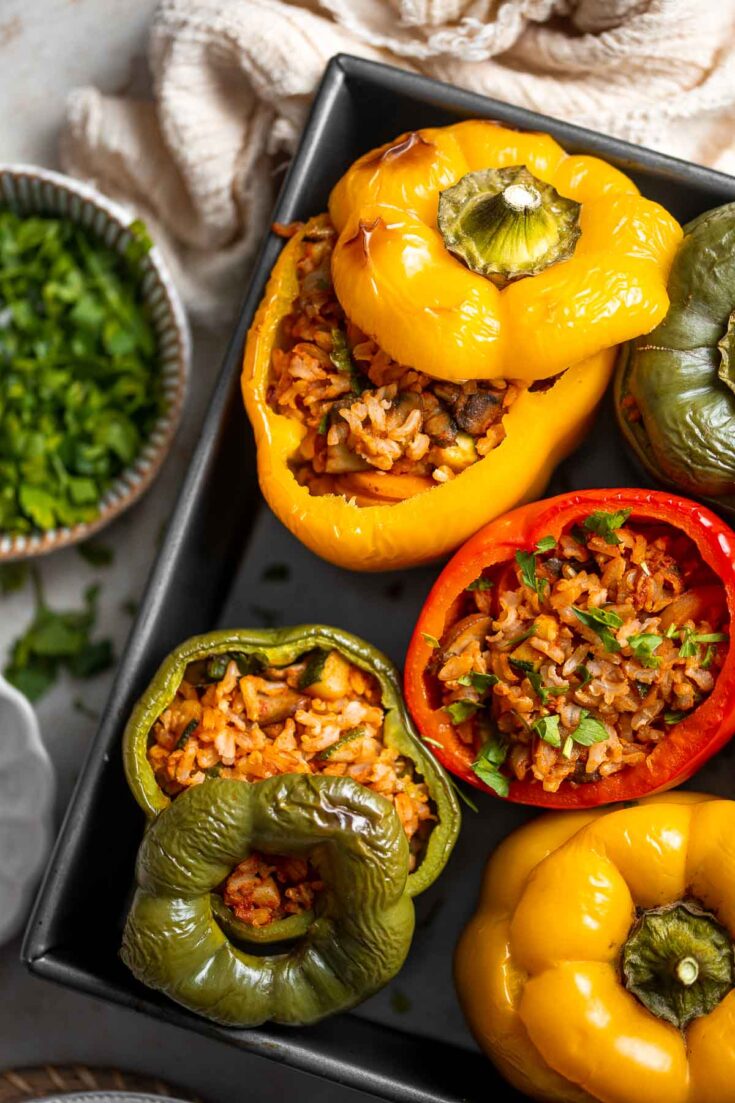
Easy Vegan Stuffed Bell Peppers
Vegan Stuffed Peppers are stuffed with pan-fried mushrooms, tender rice, and veggies, making them flavorful and filling. Easy to make in under an hour!

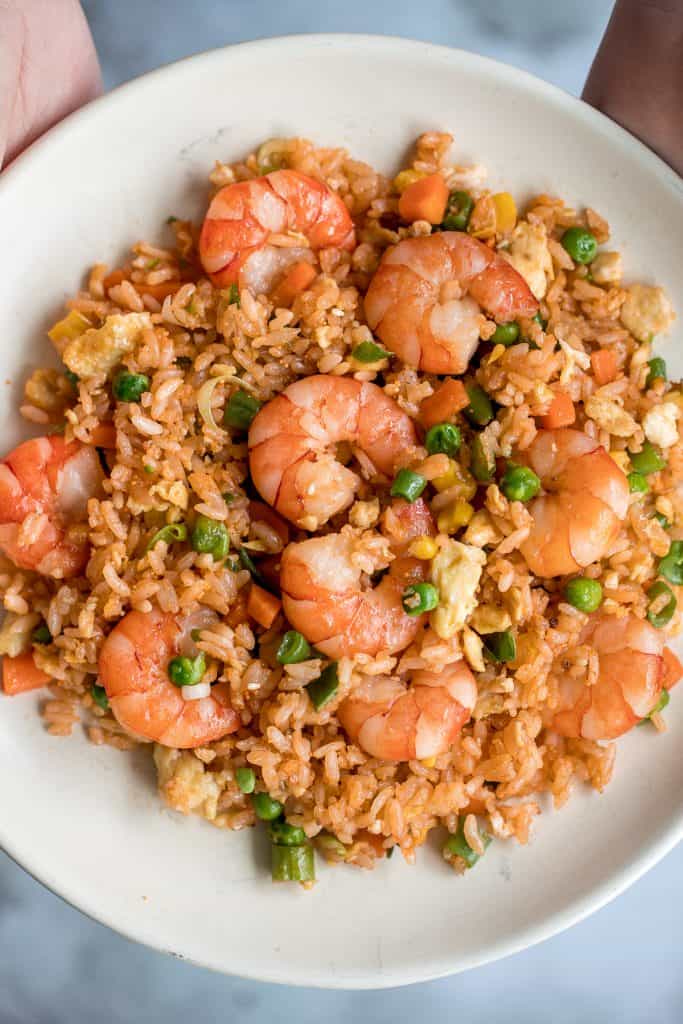
Seafood Fried Rice
Quick and easy, one-pan, 10-minute seafood fried rice with tiger prawns is so much healthier, tastier and better than takeout. It's the easiest weeknight meal.
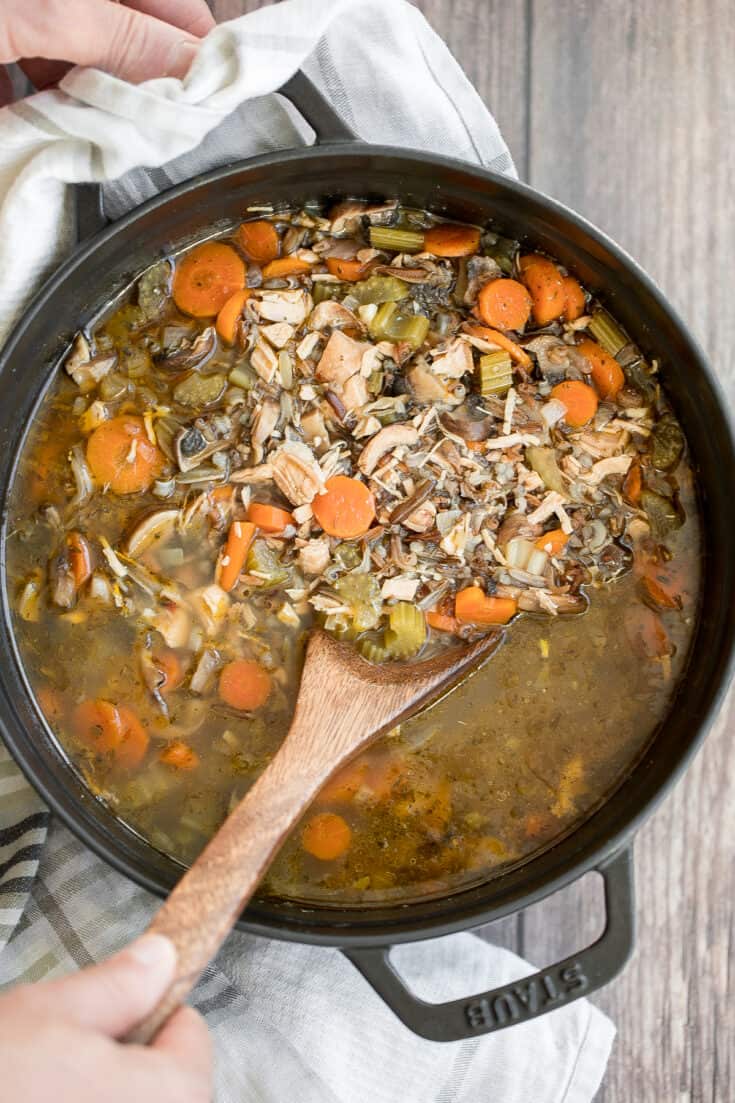
Leftover Turkey Wild Rice Soup
Wholesome hearty one pot leftover turkey wild rice soup can be adapted easily for chicken instead of turkey. It's the most comforting way to use any leftover chicken or a store-bought rotisserie chicken.

Stuffed Butternut Squash with Wild Rice
Healthy, hearty and wholesome butternut squash with wild rice and mushrooms is an easy cozy vegetarian dinner or side dish for fall. It pairs so nicely with a juicy roasted turkey breast and nutty green beans.
Mediterranean Brown Rice Salad
Mediterranean Brown Rice Salad loaded with veggies and tossed in a Greek dressing is filling, healthy, nutritious, gluten-free, and easy to make.
Rice Croutons
Gluten-free rice croutons are a delicious, crunchy, and chewy homemade snack with the same texture as the best part of rice — the crispy bottom of the pot!
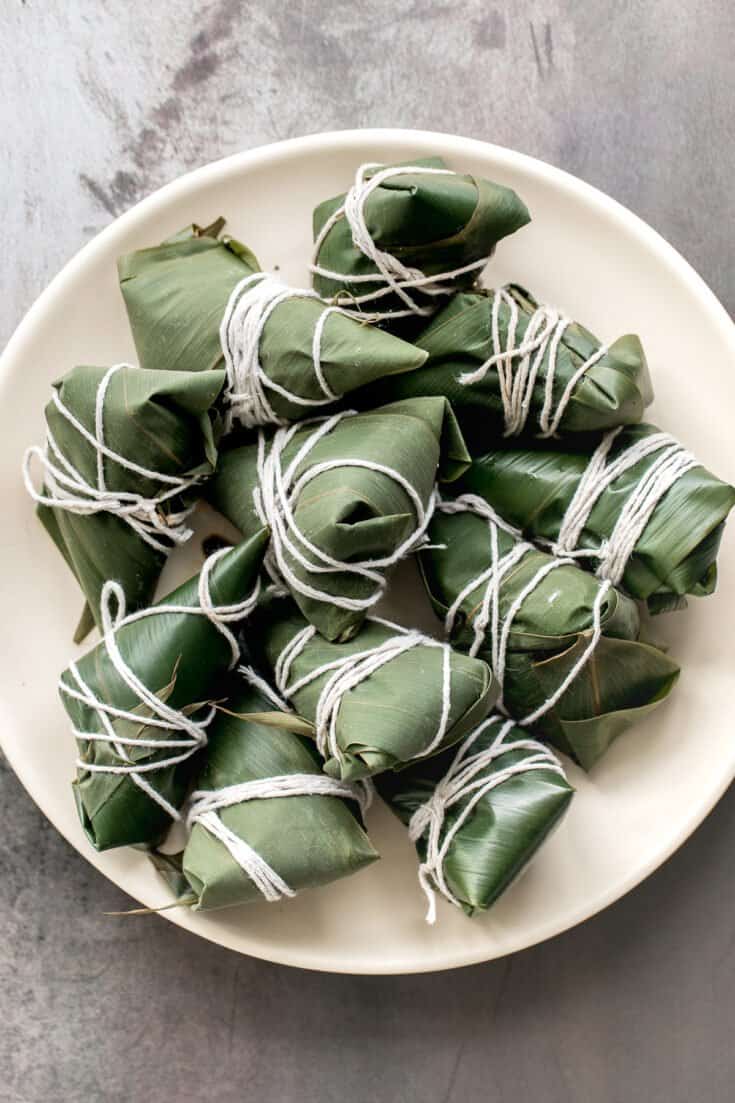
Zongzi Sticky Rice Dumplings (粽子)
Zongzi Chinese tamales (粽子) or sticky rice dumplings are stuffed with sticky rice, pork belly, and shiitake mushrooms, wrapped inside reed or bamboo leaves.

Leftover Turkey Fried Rice
Leftover turkey fried rice with turkey, fluffy rice, scrambled eggs, vegetables, and classic Asian seasonings is a one skillet meal made in just 10 minutes. Easily substitute the turkey in this recipe with leftover chicken.

One Pot Coconut Curry Chicken and Rice
Creamy, delicious and flavourful, Thai-inspired one pot coconut curry chicken and rice is a 30-minute weeknight meal made with red curry and coconut milk.
How to Serve Rice
There are so many ways to serve a side of cooked rice. I typically pair it with a protein and a side of vegetables or salad (unless it's a complete meal like our Spanish Rice). Here are some of my favorite recipe collections for pairing with rice:
- 60 Best Chicken Recipes
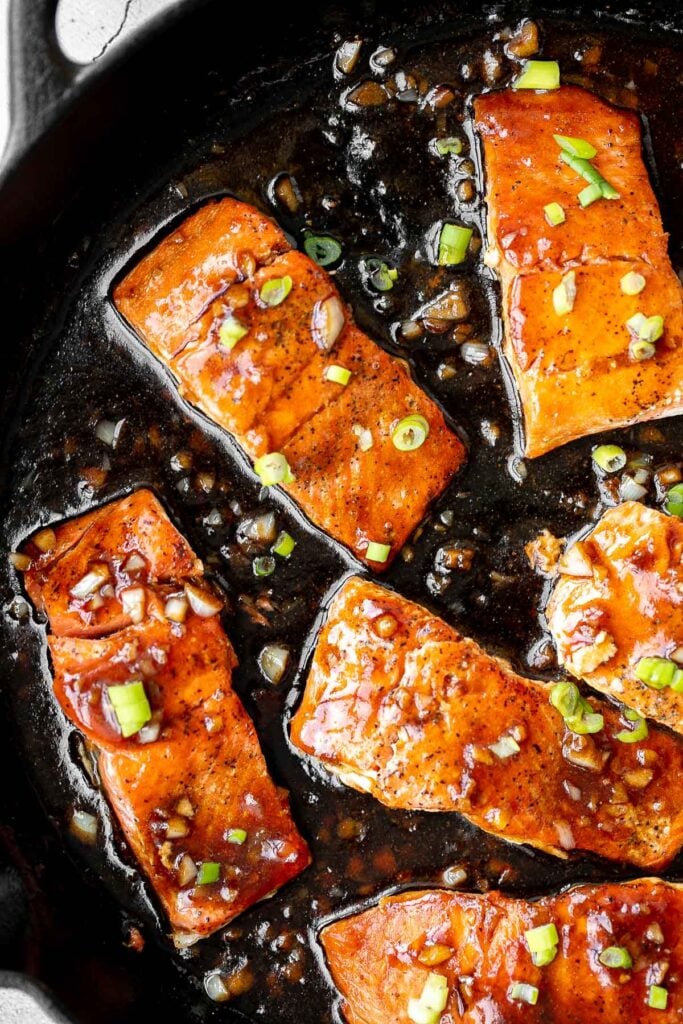
- 15 Best Salmon Recipes
- 30 Best Shrimp Recipes
- 25 Side Dishes for Chicken
- 40 Best Salad Recipes
How to Store Rice
Store leftover rice in an airtight container in the refrigerator for up to 3-4. days.
Reheat rice by steaming it in a steamer, or putting it in a microwave-safe container and covering it with a damp paper towel. Ensure there are no gaps for air to escape. Heat in the microwave in 30-second increments or until you notice steam rising from the paper towel. This method steams the rice, so it is soft and light instead of hard and dry. You could also reheat over the stove but you may need to add some water to soften it up a bit.
Did You Make any of These Rice Recipes?
Please leave a comment and rating below, and let me know what you thought of this round up of vegetarian rice recipes. Be sure to snap a picture and tag me on Instagram @aheadofthyme or share it on the Pinterest pin so that I can follow along.
HUNGRY FOR MORE? Don't forget to sign up for my email newsletter so that you don't miss any recipes. You can also follow along on Instagram and Pinterest for more recipe updates.
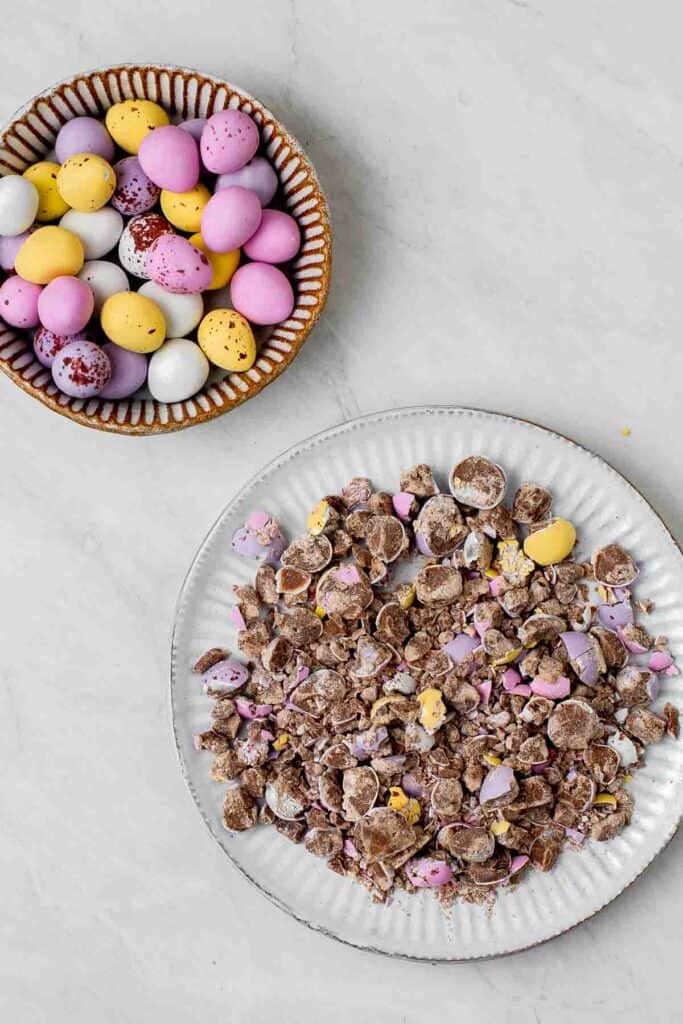
Easter Bark

Easter Bark is the perfect chocolate treat to make this spring. It's sweet, rich, and oh so pretty. This quick and easy recipe comes together with minimal prep time and a handful of ingredients. Plus, it's a no bake recipe that is great to make with the kids. Customize the toppings to include your favorite Easter candies and sprinkles. Plus, they store well, so you can snack on these for weeks to come (if they don't disappear before then!).

Why You'll Love Easter Bark
- It takes just 15 minutes to make. Although it takes about 45 minutes to chill the Easter bark after you assemble it, this recipe only requires 15 minutes of your time. It's a quick and easy no-bake dessert that used just a handful of simple (and sweet!) ingredients.
- They are a fun Easter treat. This gorgeous chocolate bark is loved by kids and adults alike. They are sweet, delicious, and pretty. Plus, you can serve them up on any occasion by just substituting the mini eggs with other festive candies and using sprinkles that match your theme.
- It's the perfect activity for the kids. Easter bark is even a great idea to make with the kids. It's such a fun activity and easy to supervise since there is no baking required. You might want to measure out some extra mini eggs because they will be snacked on...
- They store well = perfect for gifting. Easter chocolate bark can last for weeks either at room temperature or in the fridge, and even longer in the freezer. They make a great last minute Easter gift that you can package up in clear plastic bags tied with string and gift to friends and family.

Ingredients and Substitutions
To make this delicious Easter Bark, you will need the following ingredients (full quantities in the recipe card below):
- chocolate - you will need both semi-sweet chocolate and white chocolate. You can use coarsely chop the chocolate before melting, or use chocolate chips.
- food coloring - to get pastel colors, you only need a drop or two of food coloring. If you add too much, it will get too dark. Feel free to use liquid food coloring or gel food coloring.
- chocolate mini eggs - you can easily find mini eggs at your local grocery store in the spring season. I like using Cadbury mini eggs. Feel free to substitute with other Easter candies such as Easter M&Ms, robin eggs, or mini bunny chocolates.
- sprinkles - I recommend using pastel-colored sprinkles to keep with the Easter theme.
You will also need half sheet baking pan, cooking pot or microwave, and mixing bowls.
How to Make the Best Easter Bark
- Prep. Line a large half sheet baking pan with parchment paper or a silicone baking mat. Set aside. Crush half of the chocolate mini eggs. Set aside.
- Melt chocolate. Melt the semi-sweet chocolate either on the stove or in the microwave:
- On the stove: Bring 2 inches of water to a low simmer in a saucepan over medium-low heat. Then turn the heat to low and place a large heatproof bowl of chocolate chips on the mouth of the pot. Make sure that there is a gap of a few inches in between the bottom of the bowl and the water (You can also place a bowl on a steamer attachment on top of your pot). Stir the chocolate constantly as it melts. Stir until the chocolate is completely smooth and melted. This should take a few minutes.
- In the microwave: The second way to melt chocolate (and an easier way) is in the microwave. Place the chocolate into a microwave safe bowl and microwave in 30-second intervals. Remove the bowl at each interval and stir well. Repeat until the chocolate has completely melted. Stir until completely smooth
- Melt white chocolate. Melt the white chocolate by repeating the above process.
- Dye the white chocolate. Divide the white chocolate into 2-3 separate small mixing bowls. Add pastel-colored food coloring to each bowl and mix until combined. Try light pink, light yellow, light green, light blue, or light purple. To get pastel colors, you can use regular primary colors but add very little. Just a drop or two should suffice per color.
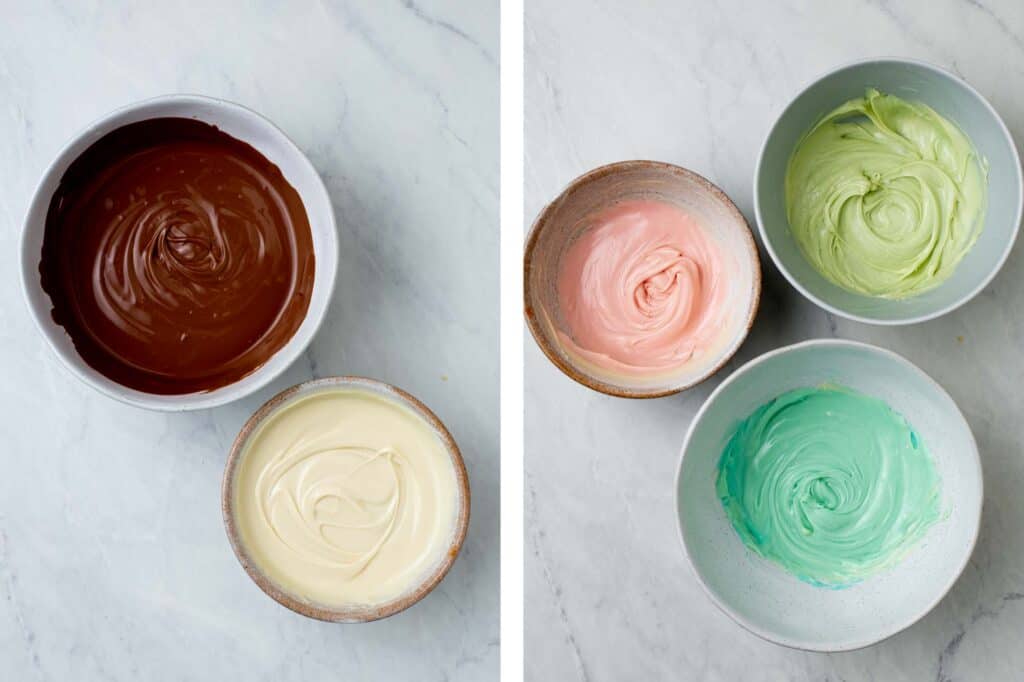
- Spread out chocolate. Spread the melted semi-sweet chocolate in a thin layer onto the prepared baking sheet, forming an approximate 9x12-inch rectangle, about ⅓-inch thick. Dollop the melted and colored white chocolate on top in alternating patterns. Use a toothpick to swirl the semi-sweet and white chocolates together.
- Add toppings. Immediately arrange the chocolate eggs (½ of them will be whole while ½ are crushed) onto the swirled chocolate, pressing them lightly into the chocolate, if necessary. Sprinkle the remaining gaps in the surface with sprinkles.
- Set. Transfer the pan to the refrigerator to allow the chocolate to set, about 45 minutes. Transfer the parchment paper to a cutting board and cut the bark into pieces. Serve immediately or store in an airtight container in the refrigerator.

Recipe Tips and Tricks
- Tip for handling melted chocolate: When pouring the chocolate onto the prepared pan, you can get every last drop by using a rubber spatula to wipe the sides of the bowls clean.
- Make this with the kids: To make this activity easier for young kids, portion the various topping options into small bowls that they can easily dump (or stick their hands into!) instead of putting out an entire container of mini eggs and sprinkles.
- How to store: Store chocolate bark in an airtight container at room temperature for up to 3 weeks. Keep it in a cool and dry place where it will not melt. If you live somewhere warm, you can store it in the fridge for up to a month.
- How to freeze: You can freeze Easter bark in an airtight container or freezer bag for up to 2 months. To eat, allow it to thaw overnight in the refrigerator, or on the kitchen counter for an hour or 2 until thawed.

More Easter Desserts
- 30 Best Easter Dessert Recipes
- Easter Blondies
- Mini Egg Easter Cookies
- Easter Egg Sugar Cookies
- Bunny Ears Easter Cupcakes
- Easter Egg Caramel Brownies
Tried this recipe?
I'd love to hear what you think! Leave a comment and rating below to share your feedback. Your reviews help others discover this recipe and help me keep creating more free recipes for you. Snap a photo and tag me on social media @aheadofthyme too.

60+ Spring Dinner Ideas

When it comes to the best spring dinners, it's all about fresh and light dishes that keep you feel without feeling heavy and loaded with vibrant seasonal ingredients. If you are looking for delicious spring recipes to cook for dinner, then you are in the right place. We are sharing over 60 of the best spring dinner ideas including quick and easy seafood for spring, spring chicken dinners, vegetarian dinners for spring, spring soups, spring salads, and more.

Best Spring Dinners
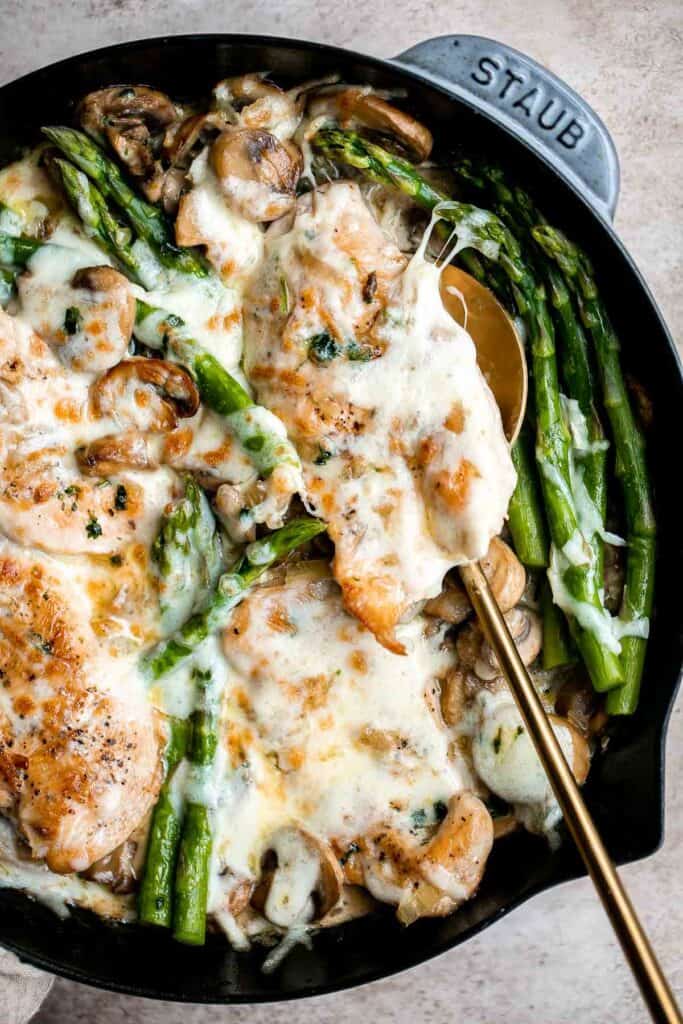
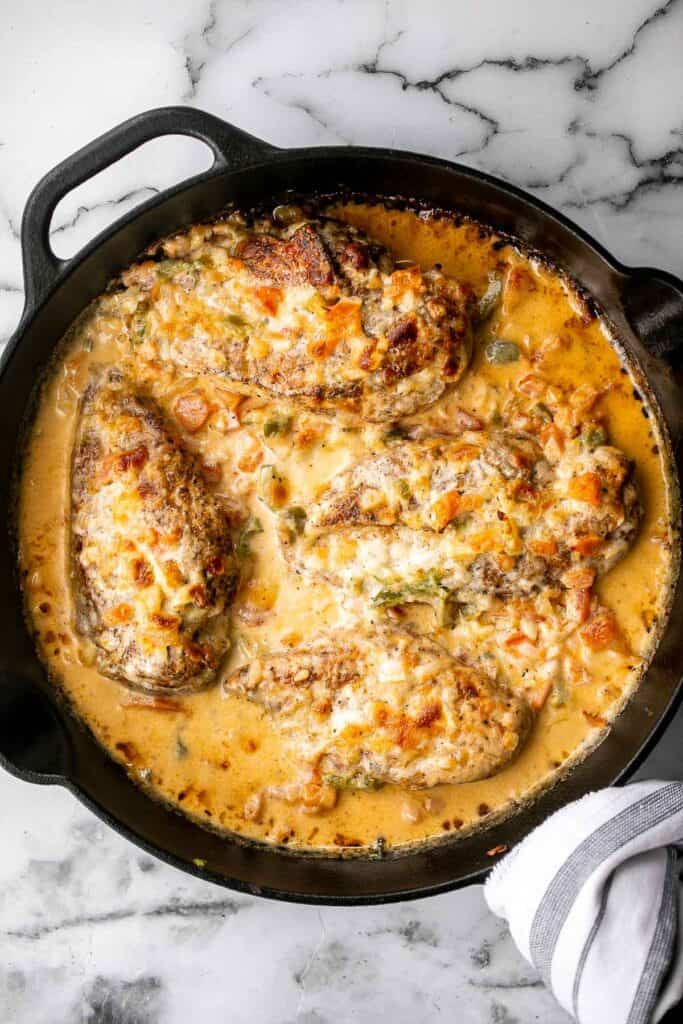
Chicken Madeira with sautéed mushrooms and tender crisp asparagus is topped with melty mozzarella cheese. Cheaper and better than the Cheesecake Factory!
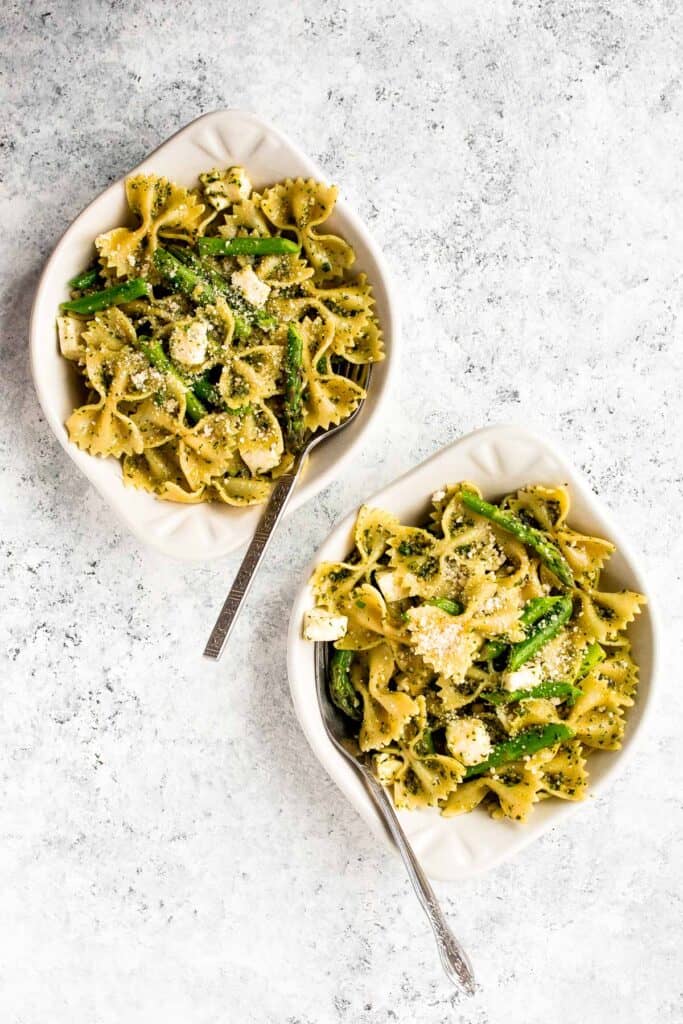
Spring Pesto Pasta with Asparagus
Spring pesto pasta with asparagus and chives is light and made with simple ingredients in under 20 minutes. Serve it hot for dinner or cold as pasta salad. One of my favorite spring dinner ideas.
Lemon Asparagus Soup with Parmesan
Lemon asparagus soup with parmesan is the perfect spring soup -- smooth, light, fresh, and flavourful. It's customizable and can be served hot or cold. The perfect spring recipe.

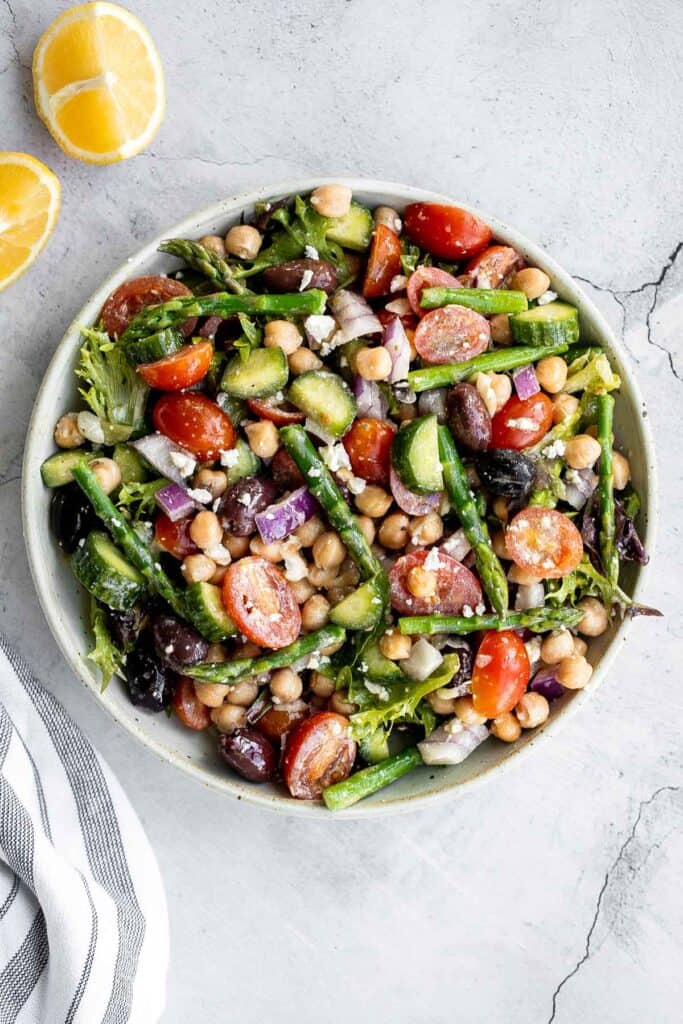
Chopped asparagus salad with lemon vinaigrette is the easiest and best spring salad ever - colourful, vibrant, flavourful, light, and crunchy.
Sweet chili turkey meatballs are delicious, tender and juicy, loaded with classic Thai flavors, and quick and easy to make. Savory, sweet, and tangy.

Chicken Parmesan Stuffed Peppers
Chicken parmesan stuffed peppers are delicious, flavorful, healthy, and filling, and combines two all-time favorites. Great for meal prep and freezes well.
Ukrainian borscht soup is a vegan beet soup made with red beets and vegetables. It's nutritious, flavorful, delicious, easy to make, and freezer-friendly.

Ground beef tacos are delicious, authentic, and so easy to make. They're savory, spicy, creamy, and fresh. The perfect recipe for a Mexican fiesta or spring dinner.

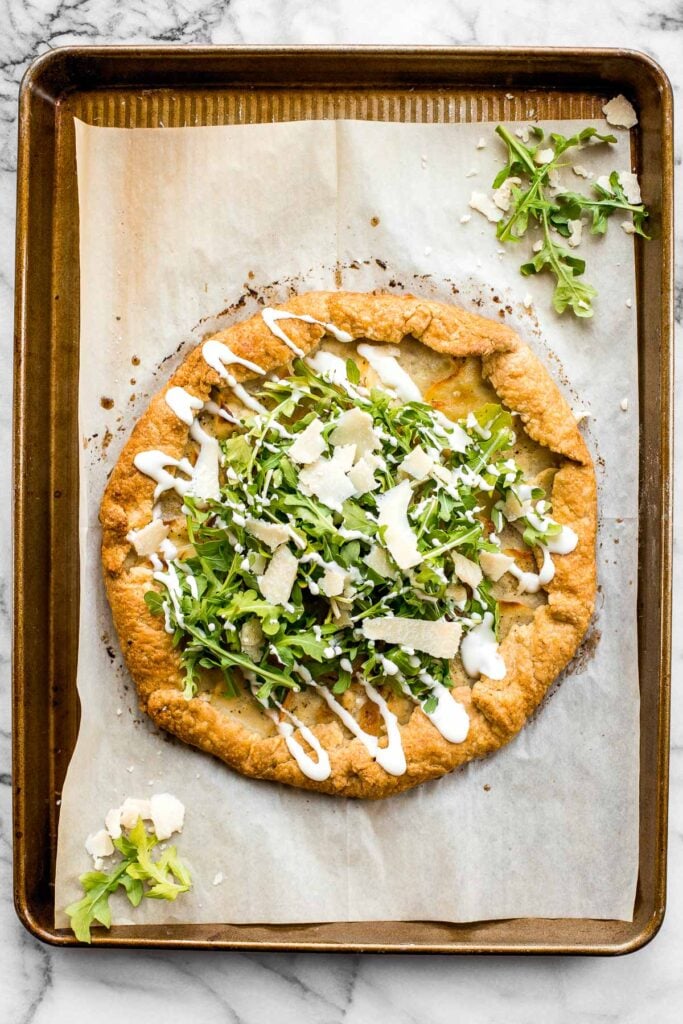
Potato Galette with Arugula and Crème Fraîche
Potato galette with arugula and crème fraîche is a rich, light, and delicious savoury tart to serve for breakfast, lunch, or dinner. A total crowd-pleaser.
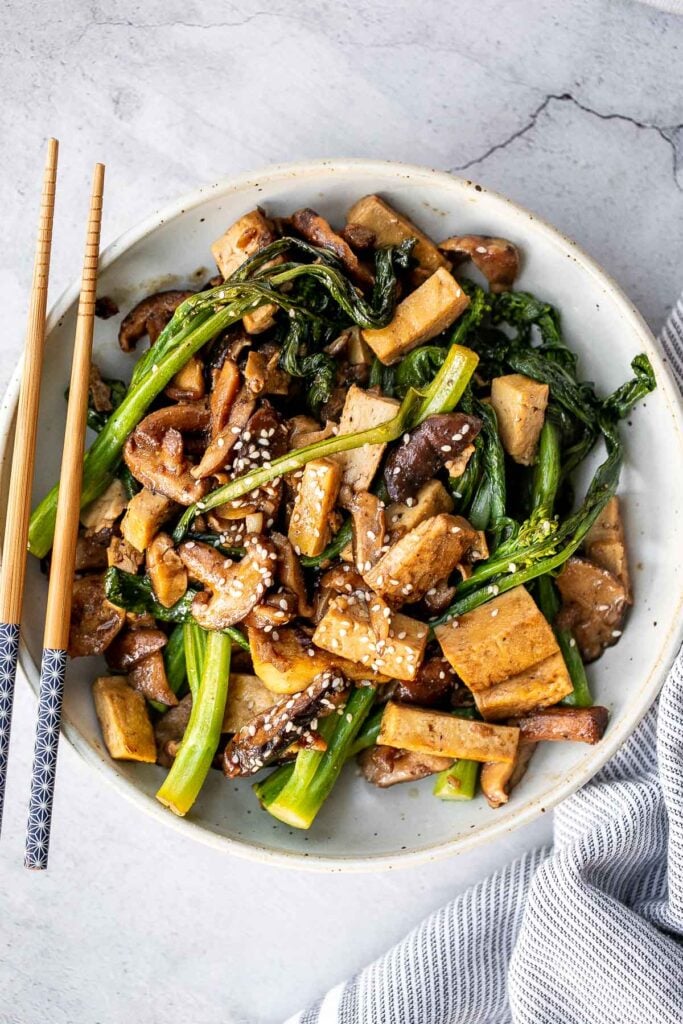
Quick, easy, and simple, vegan tofu and mushroom stir fry is a delicious meal that is ready in under 15 minutes. Serve it over a bowl of steamed rice.
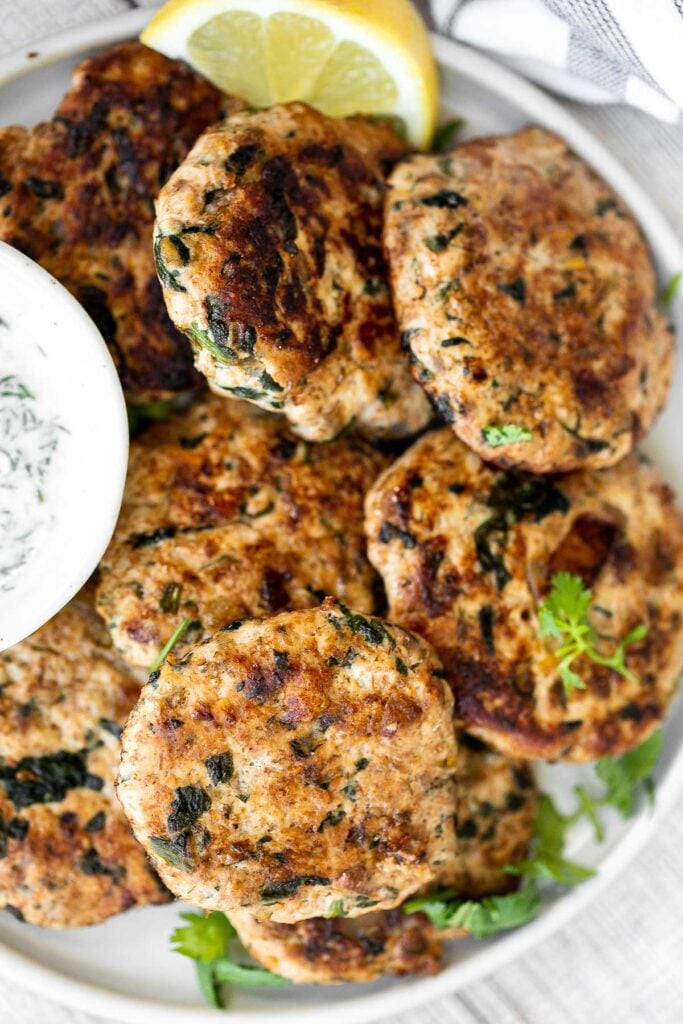
Delicious, moist and juicy Mediterranean chicken patties have everything you want in one bite: protein, veggies, herbs, and they're quick and easy to make. One of my favorite spring dinner ideas.
Shrimp taco salad with cilantro lime dressing is flavourful, delicious, and easy to make. It has all the fixings and of shrimp tacos, but without the mess.

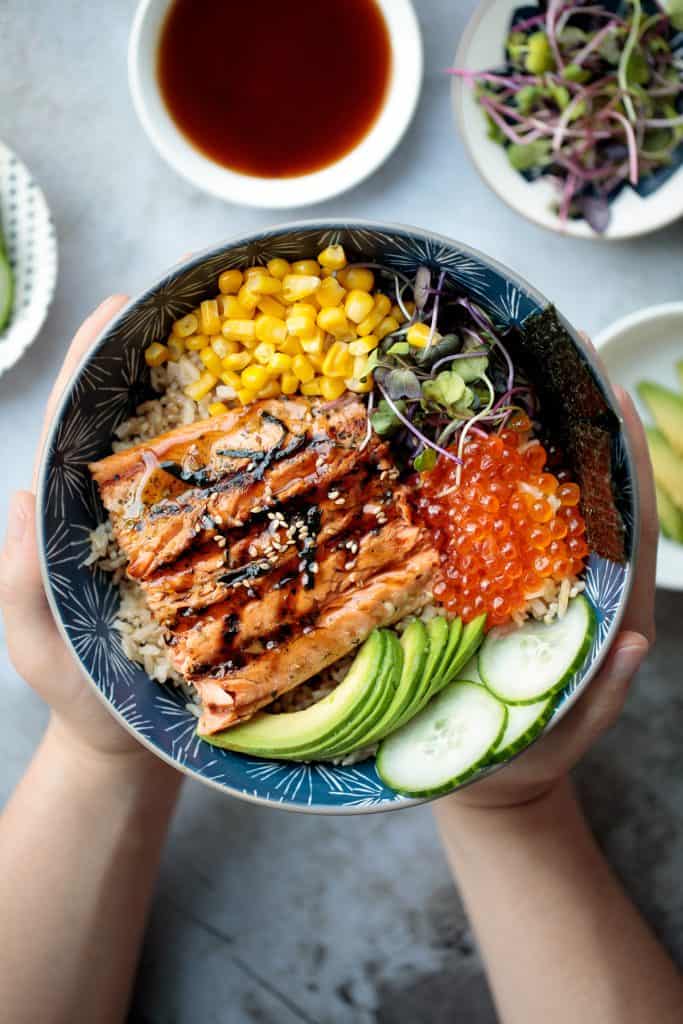
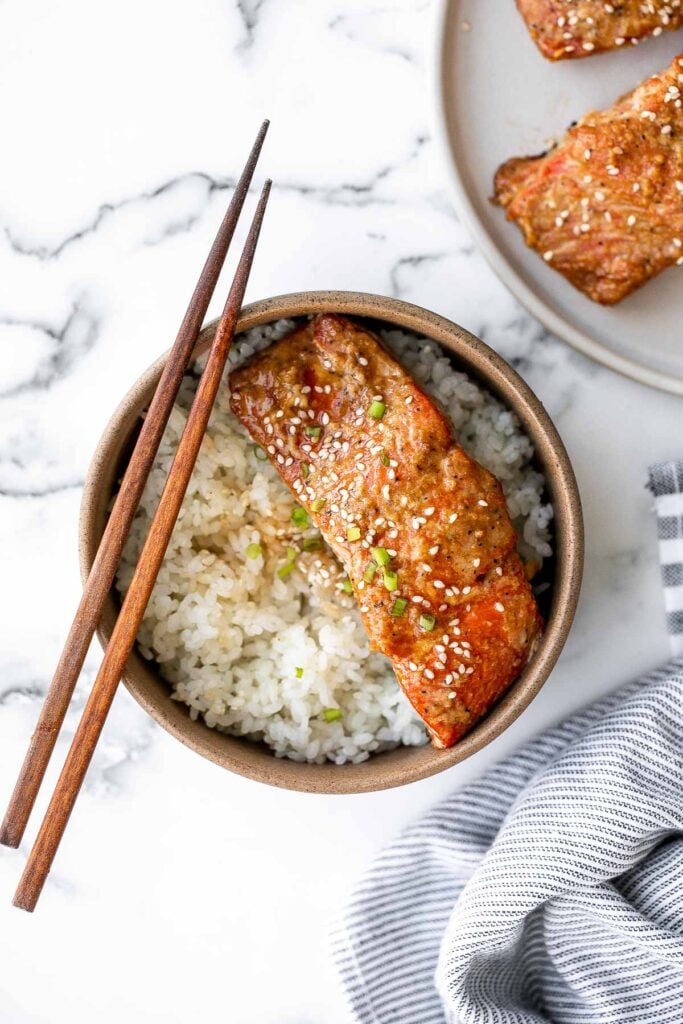
Easy to make, light and fresh teriyaki grilled salmon rice bowl is topped with vegetables, seaweed and salmon roe, with homemade teriyaki sauce on top.
This beef noodle stir fry is the 20-minute dinner that you have been looking for - quick and easy, delicious and flavorful, and so much better than takeout.
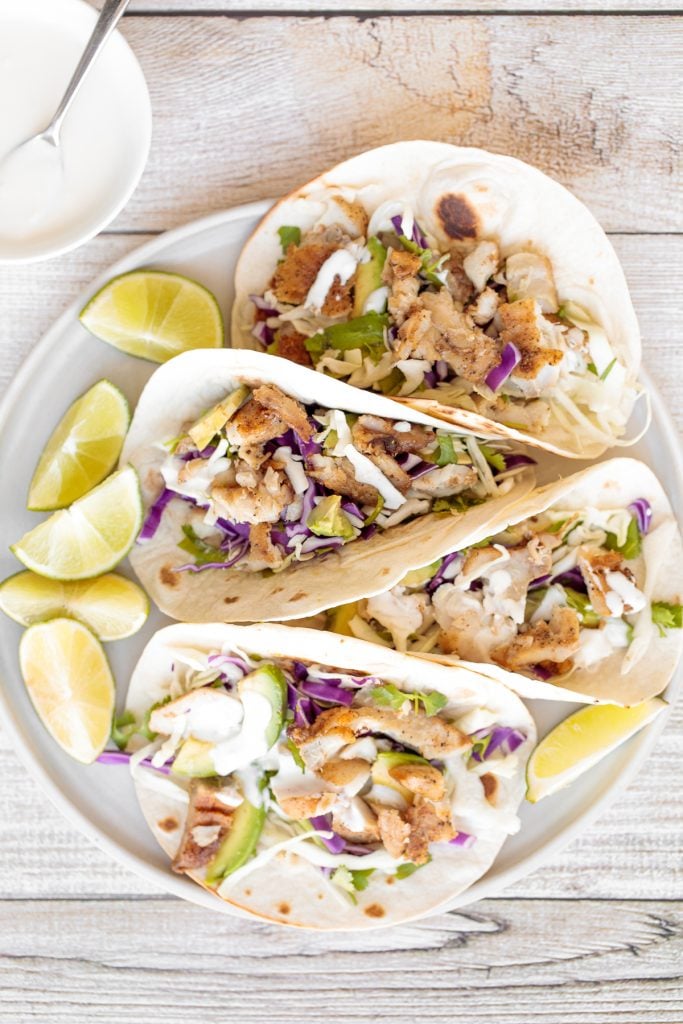
Flavourful, easy fish tacos with lime crema is made with seasoned white fish, cabbage slaw, and lime sauce. It takes less than 25 minutes to prep and serve.
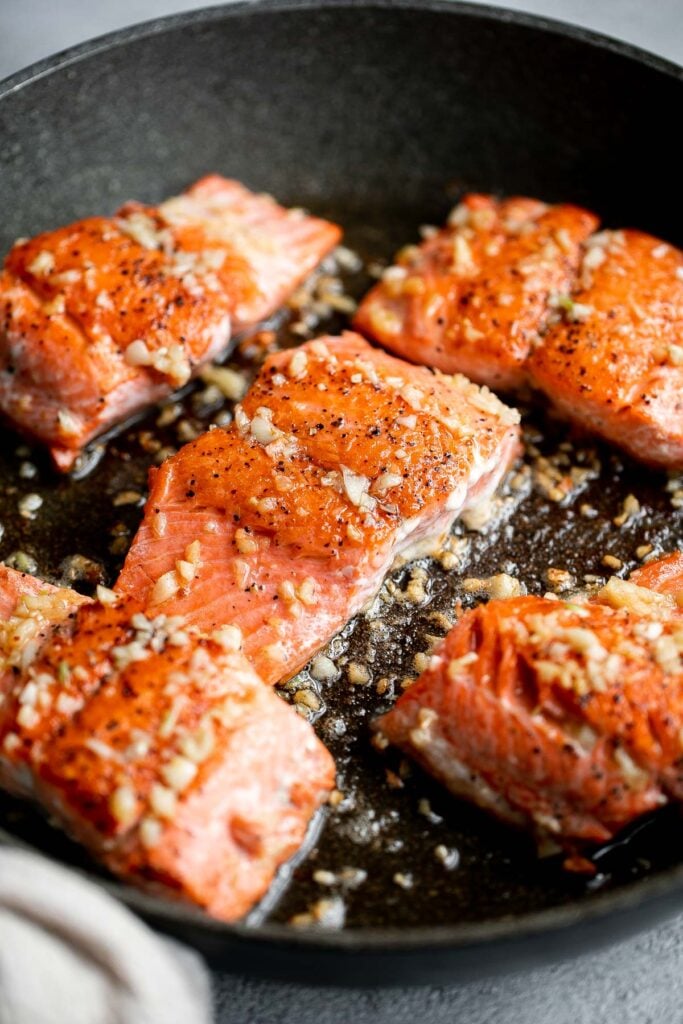
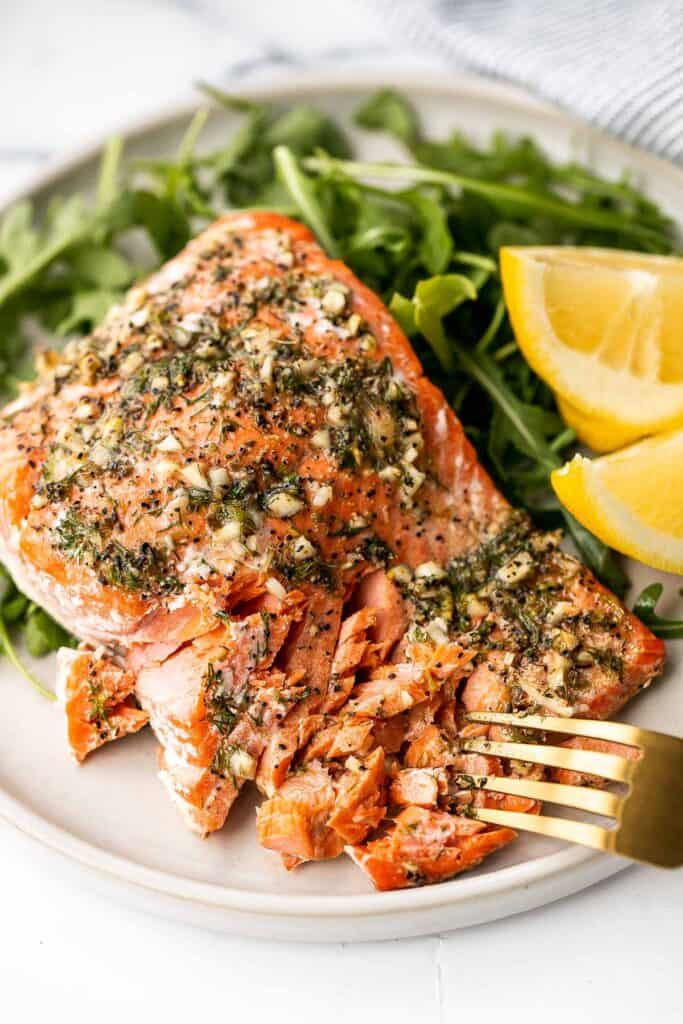
Tender, flaky, flavorful garlic butter salmon is well-seasoned, seared to perfection, and basted until juicy. Quick and easy to make in 20 minutes.
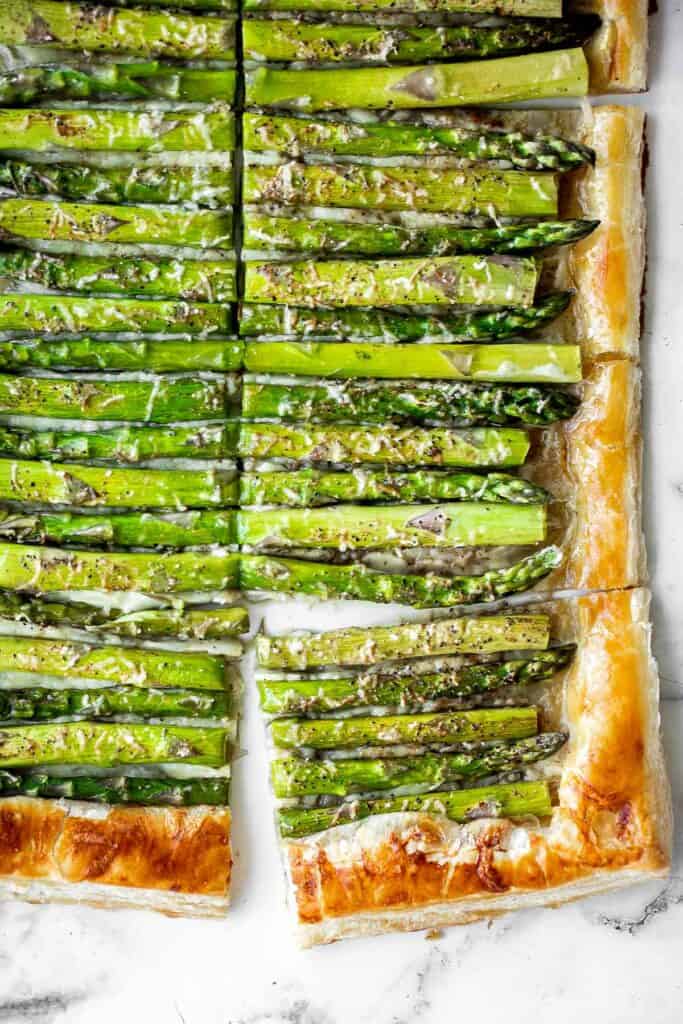
Asparagus tart with Gruyère cheese, a balsamic glaze, and flaky puff pastry, is a flavourful and delicious addition to brunch, as an Easter appetizer, or for a light dinner this spring. You need to try this spring dinner idea.
Seafood Spring Recipes
Greek salmon is delicious, flaky, and tender. This healthy oven-baked salmon is packed with Mediterranean flavors and is ready in just 20 minutes.
Quick and easy, one-pan, 10-minute seafood fried rice with tiger prawns is so much healthier, tastier and better than takeout. It's the easiest weeknight meal.
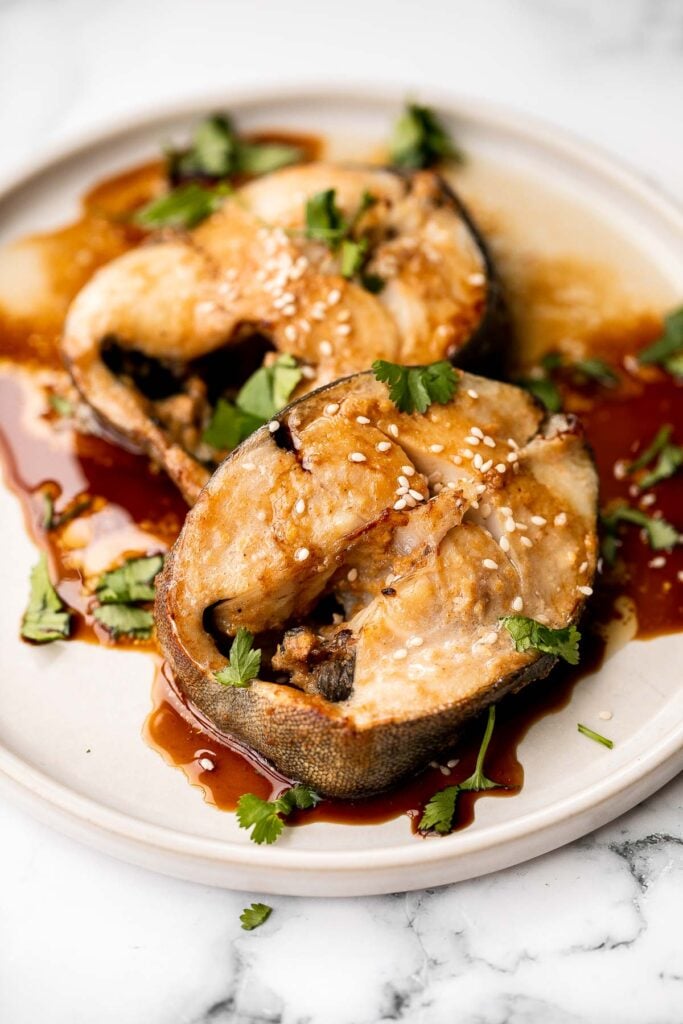
Flaky, oily, and tender, miso black cod (or sablefish) packed with delicious Asian flavours is an indulgent meal that's as healthy as it is delicious. One of my favorite spring dinner ideas.
Sticky and sweet, easy honey garlic glazed salmon is one of the best salmon recipes to add to your weeknight dinner rotation. Ready in under 25 minutes.
Shrimp avocado tostadas are a delicious, crunchy, quick and easy Mexican dish you can make in just 15 minutes, loaded with the best combination of toppings.

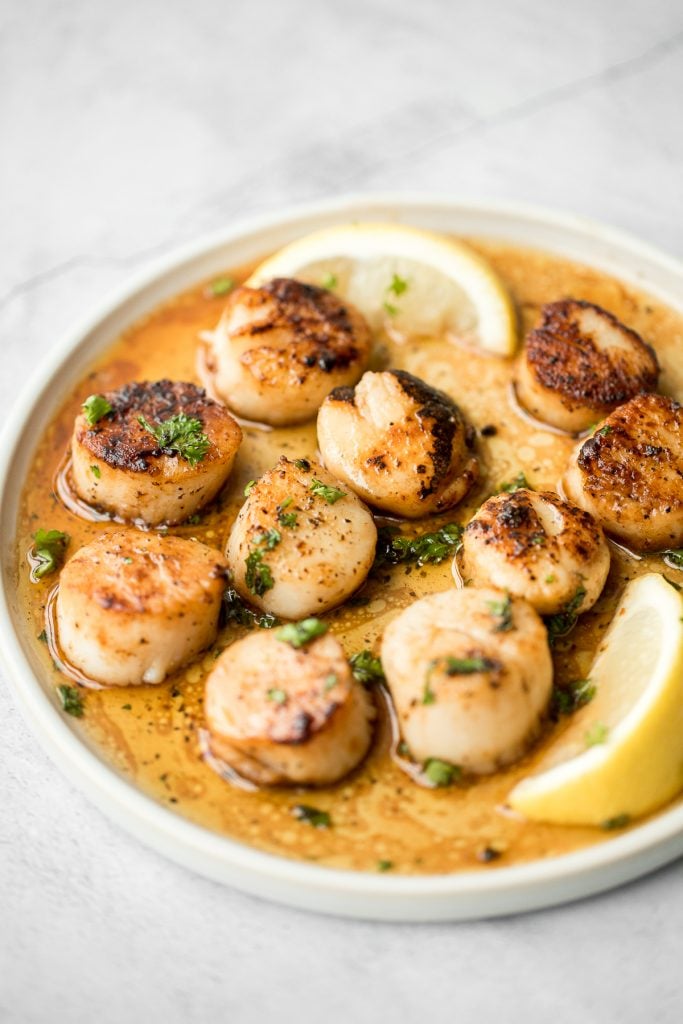
Garlicky, buttery, and perfectly seared scallops take less than 10 minutes to prep and cook. It's the easiest fancy, restaurant-grade meal to make at home.
Baked miso salmon brings traditional Japanese flavours to the forefront, with a healthy and delicious meal that's easy to make on busy weeknights.
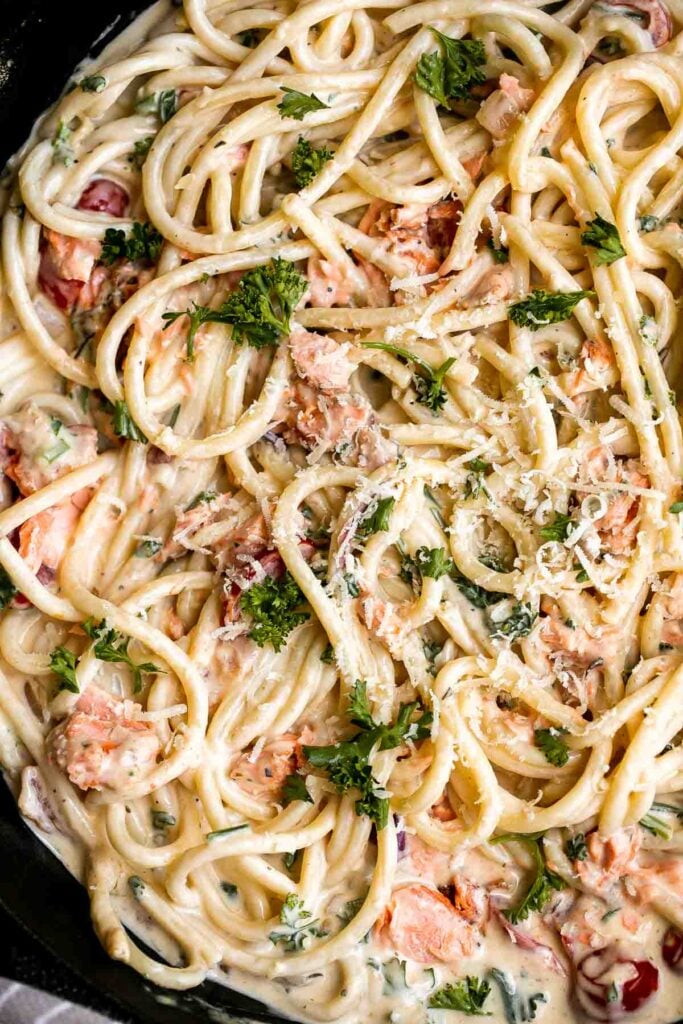
This simple creamy salmon pasta is quick and easy to make, delicious and flavorful, and loaded with salmon. A weeknight dinner in under 30 minutes.
Chicken Dinners for Spring
Juicy, tender, and moist, baked chicken breast with the best classic Greek souvlaki marinade is the most flavorful and delicious chicken dinner in under 30 minutes. Serve it on its own with greek lemon roasted baby potatoes or use in a Greek chicken salad.
Sizzling and hot sheet pan chicken fajitas are on the table in less than 30 minutes. The best part is that you just throw the chicken, peppers, and everything into one sheet pan. Serve with pico de gallo and guacamole.

Baked queso chicken with tomatoes is an easy, cheesy, delicious chicken dinner that takes just 30 minutes to cook with skinless chicken breasts. The best weeknight dinner.
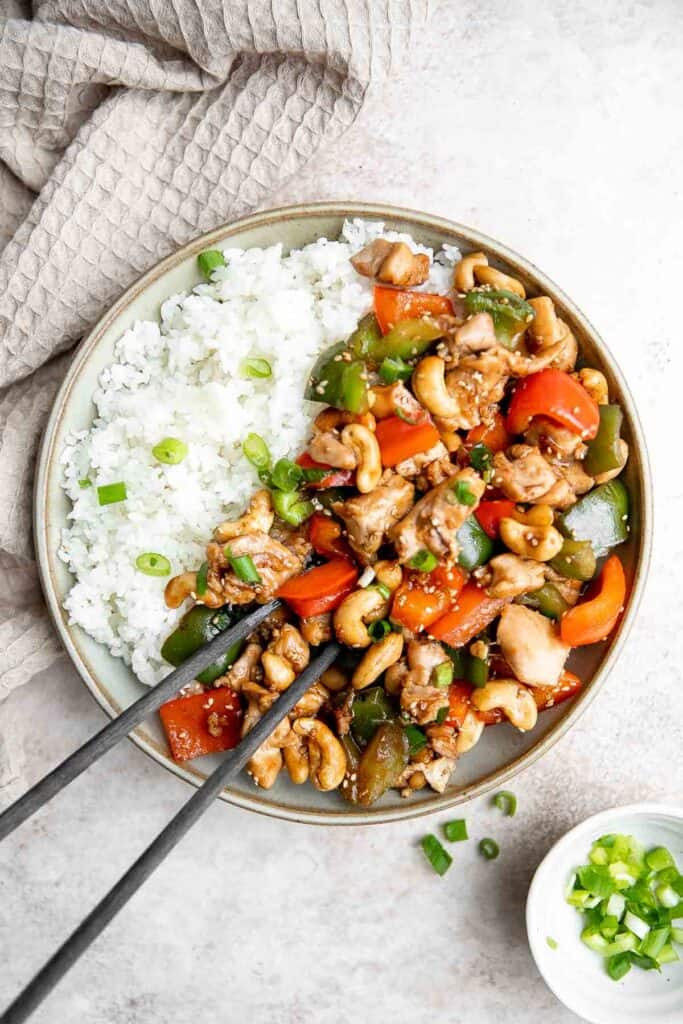
Cashew chicken is a quick and easy chicken stir fry ready in under 30 minutes. It's flavorful, delicious, and so much better and faster than takeout. One of my favorite spring dinner ideas.
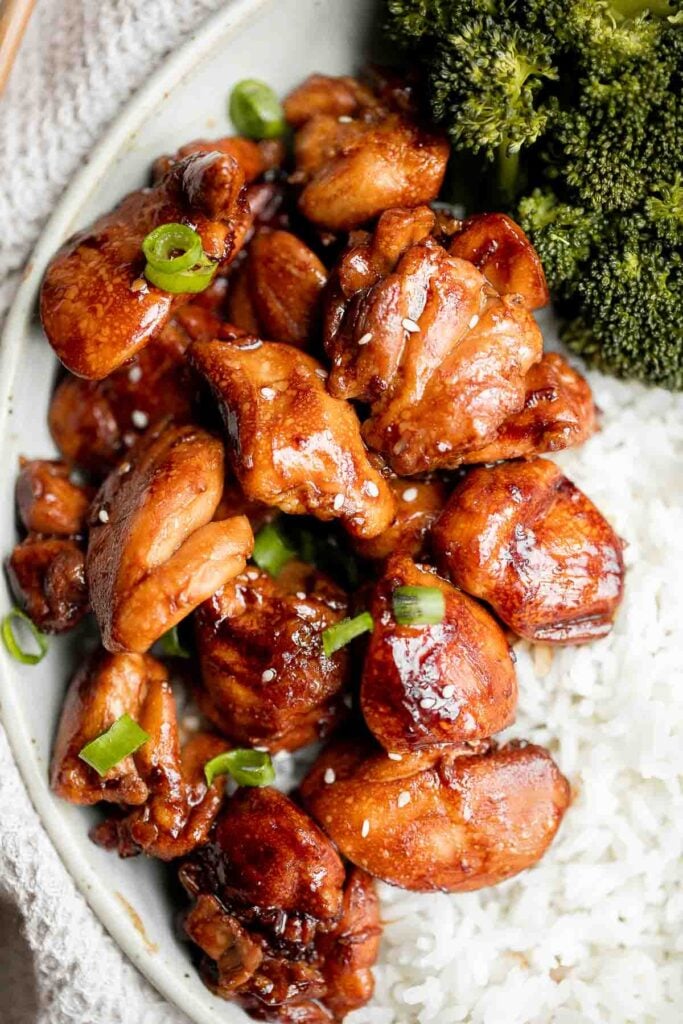
Teriyaki chicken is a quick easy chicken stir fry that is delicious, flavorful, healthy, and better and faster than takeout. Perfect for busy weeknights.
Creamy Tuscan chicken with sun-dried tomatoes and spinach is a quick and easy 30 minute Italian chicken dinner that is delicious, flavorful, and comforting.

Air fryer chicken breast is crispy on the outside, juicy and tender inside, and packed with flavor in every bite. Quick and easy dinner on busy weeknights.
Vietnamese Summer Rolls with Chicken
Vietnamese summer rolls with chicken are fresh, light, and healthy. This Asian summer snack takes less than 20 minutes to make and easier than you think. A light spring recipe.

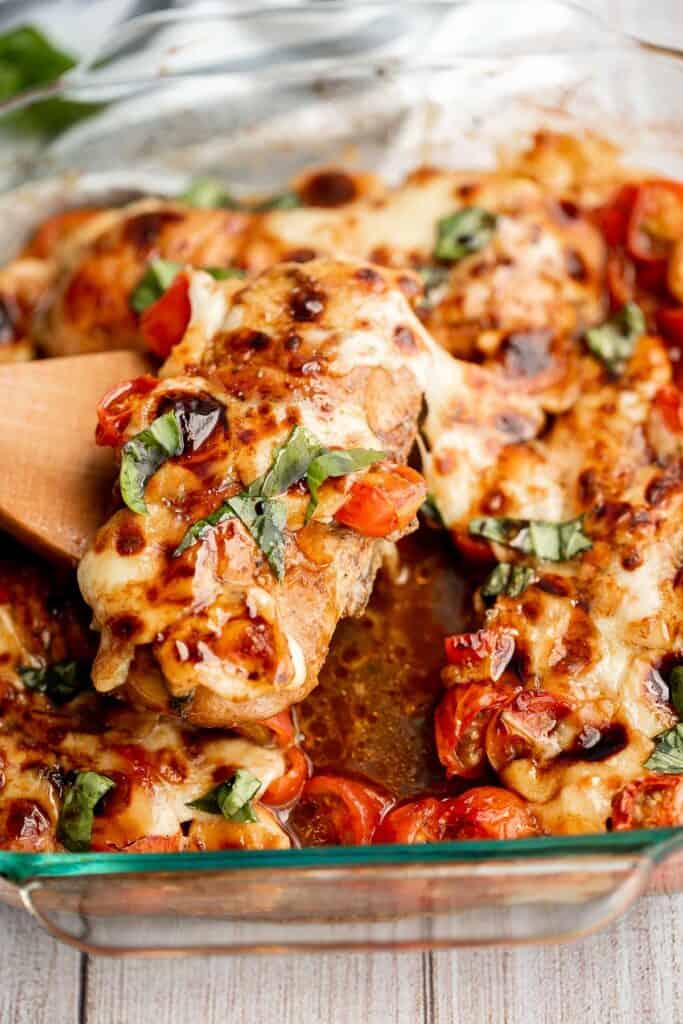
Baked caprese chicken is tender, juicy, and delicious, topped with burst tomatoes, mozzarella cheese, fresh basil, and a drizzle of balsamic glaze.
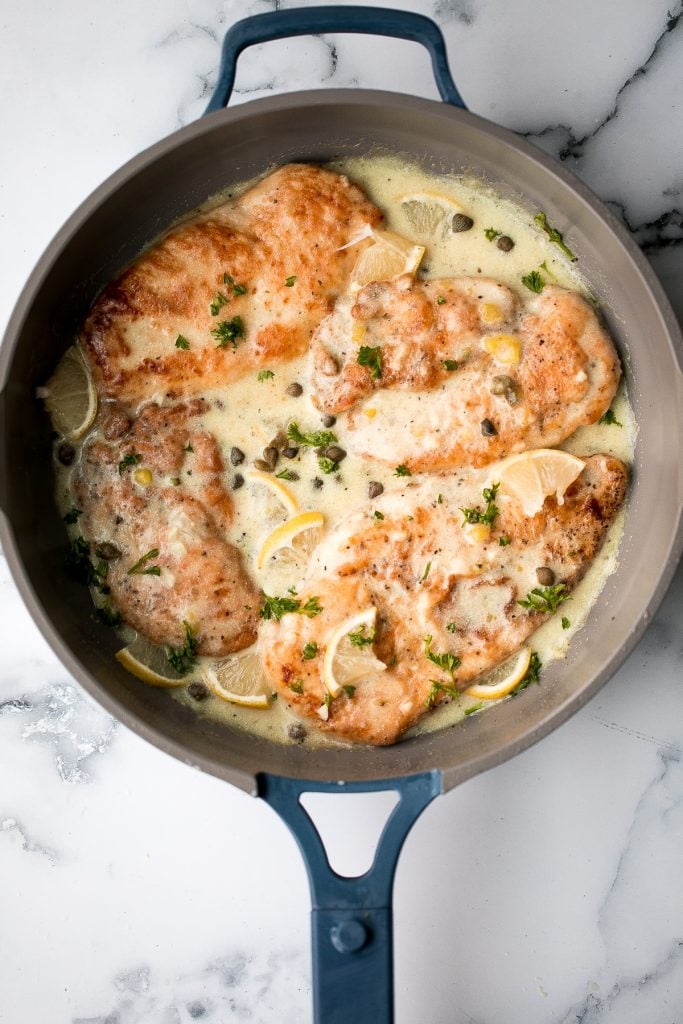
Quick and easy, creamy lemon chicken piccata is a simple and delicious 30-minute meal made with tender chicken breast in a light lemon sauce with capers. One of my favorite easy chicken dinners.
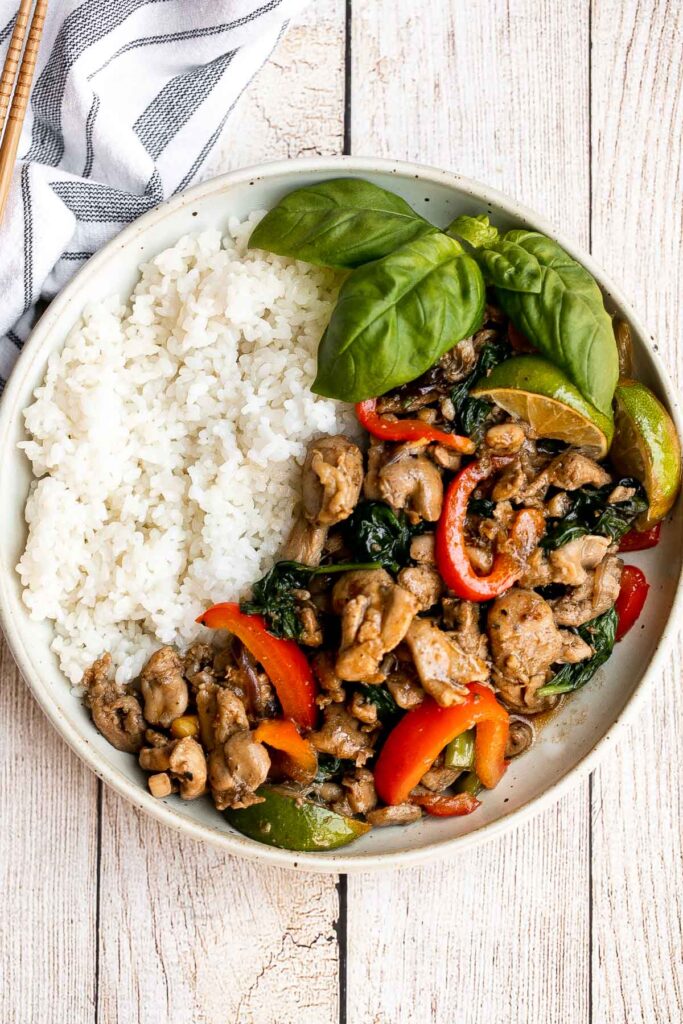
Better than takeout, Thai basil chicken with a delicious homemade sauce is a quick and easy, light and fresh chicken stir fry that is ready in 25 minutes. The perfect spring recipe.
Chicken penne pasta is a quick and easy dinner that is delicious, rich, creamy, and flavorful. It's a family favorite that's ready in under 30 minutes.

Vegetarian Spring Dinners
Homemade Greek fries bring a Mediterranean twist on a classic side dish, crispy fries are topped with crumbled feta cheese, fresh parsley, and lime juice.
Quick and easy pesto penne pasta is a simple and light Italian pasta dish made with just five ingredients in under 15 minutes. The easiest spring recipe. If you like this recipe, try Mascarpone Pesto Pasta.

Homemade falafel are delicious, golden brown and crispy on the outside, fluffy tender and soft inside. Plus, they're vegan, loaded with plant-based protein. One of my favorite vegetarian meals.

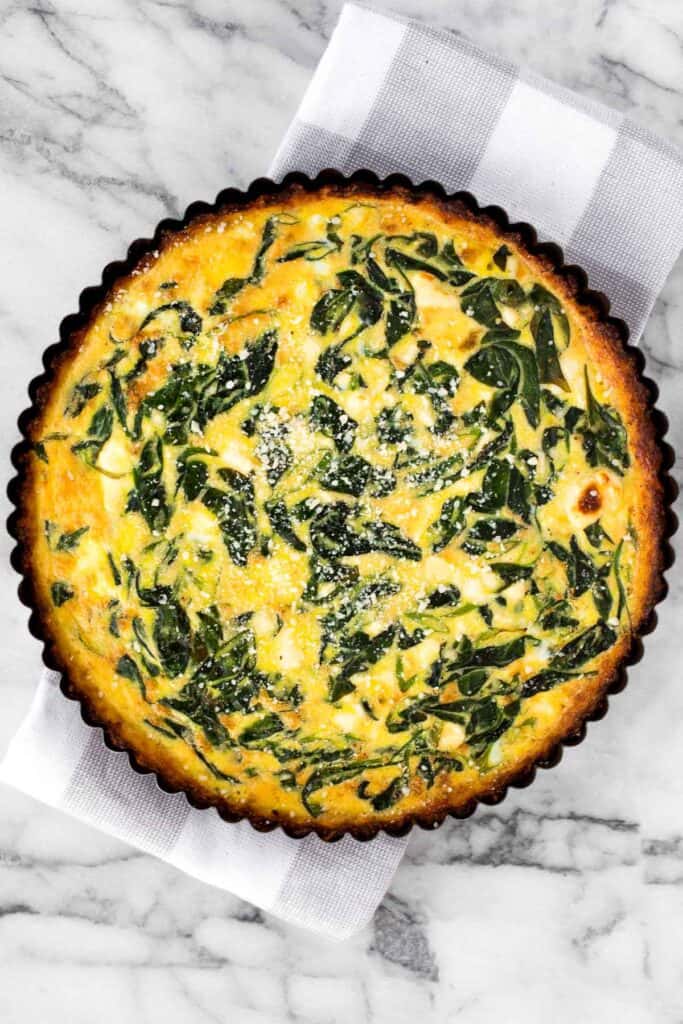
Spinach and Feta Quiche with Cauliflower Crust
Spinach and feta quiche is healthy and gluten-free with a keto cauliflower crust and savoury vegetarian filling. Serve for breakfast, lunch or dinner.
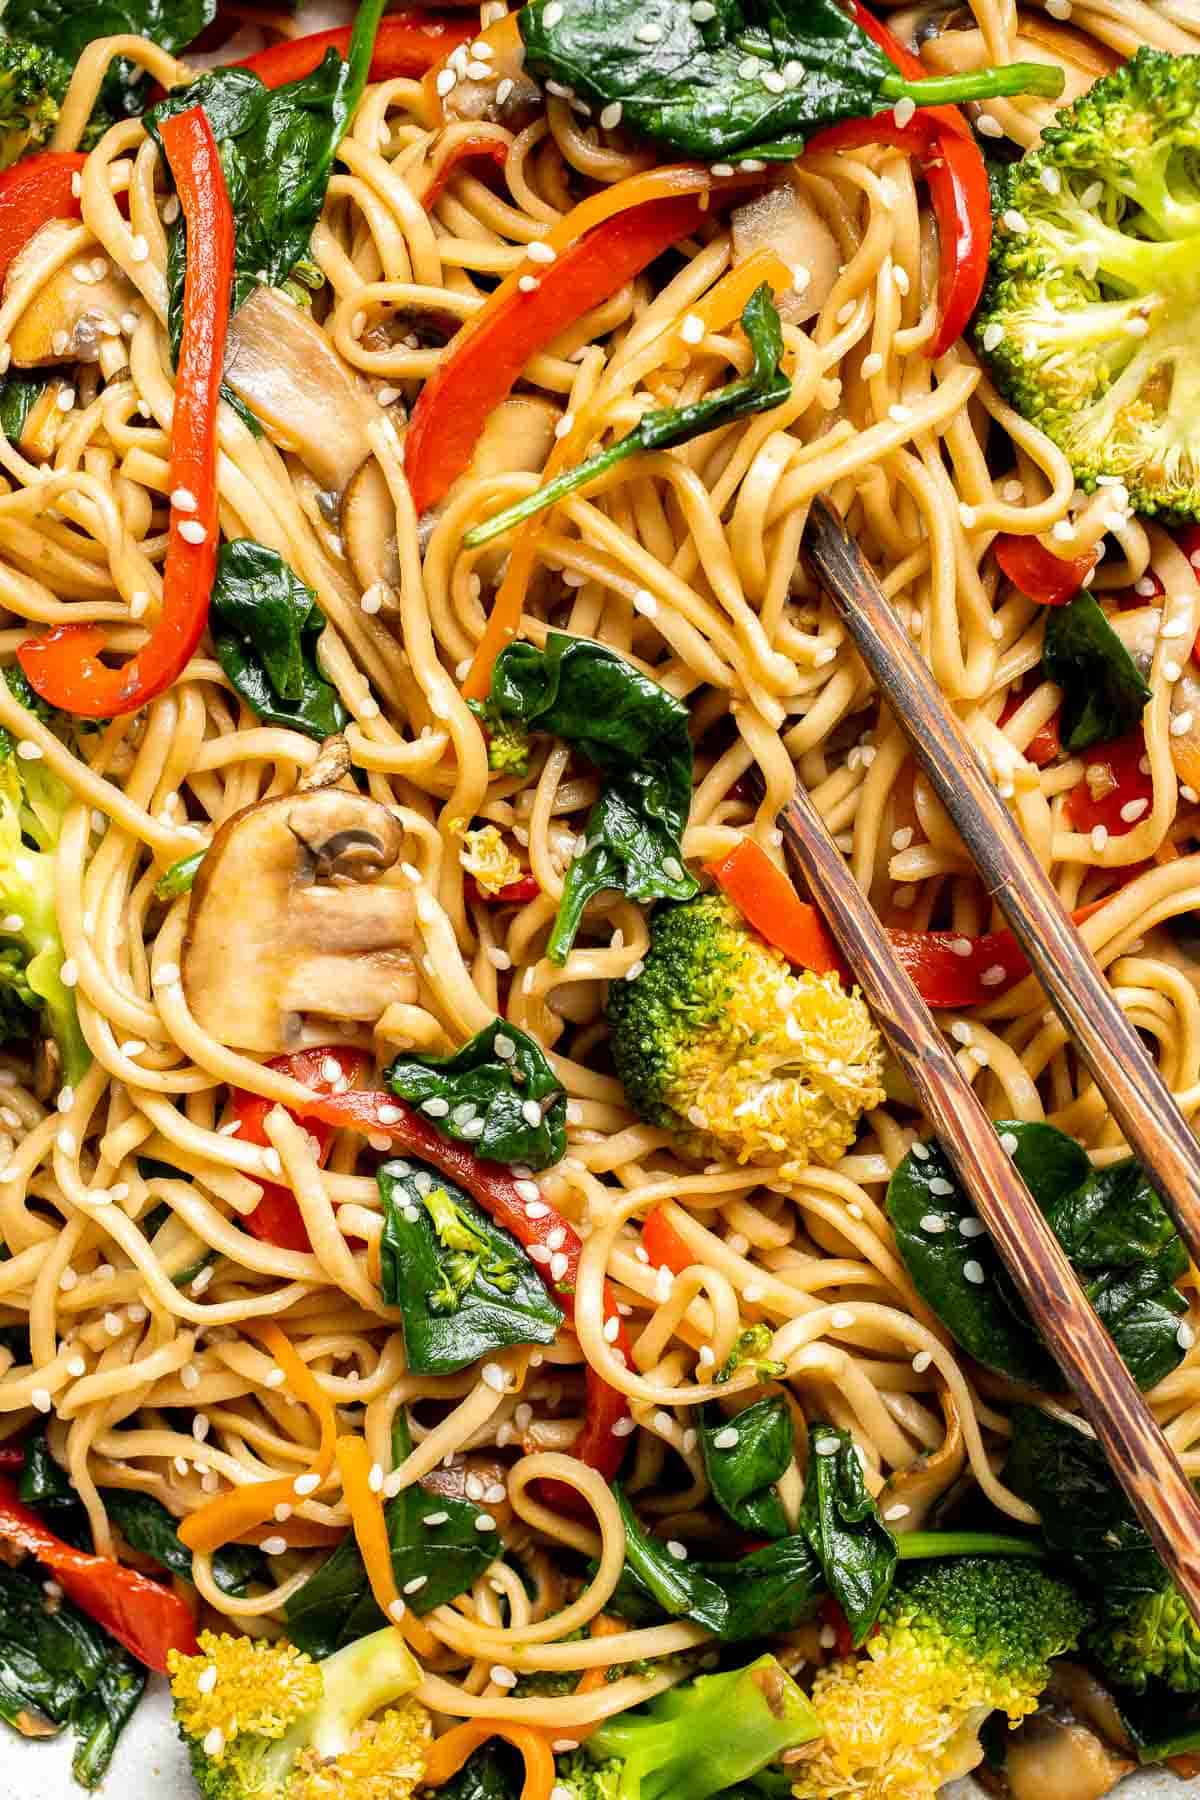
Say goodbye to takeout and make easy Lo Mein Noodles at home, packed with fresh veggies and healthy ingredients, in less than 15 minutes! We love this spring recipe.
Baked Zucchini Boats with Marinara and Cheese
Baked zucchini with marinara and melted cheese is so quick and easy to make. It's vegetarian, gluten free, and packed with flavour. It's basically pizza but on a zucchini.

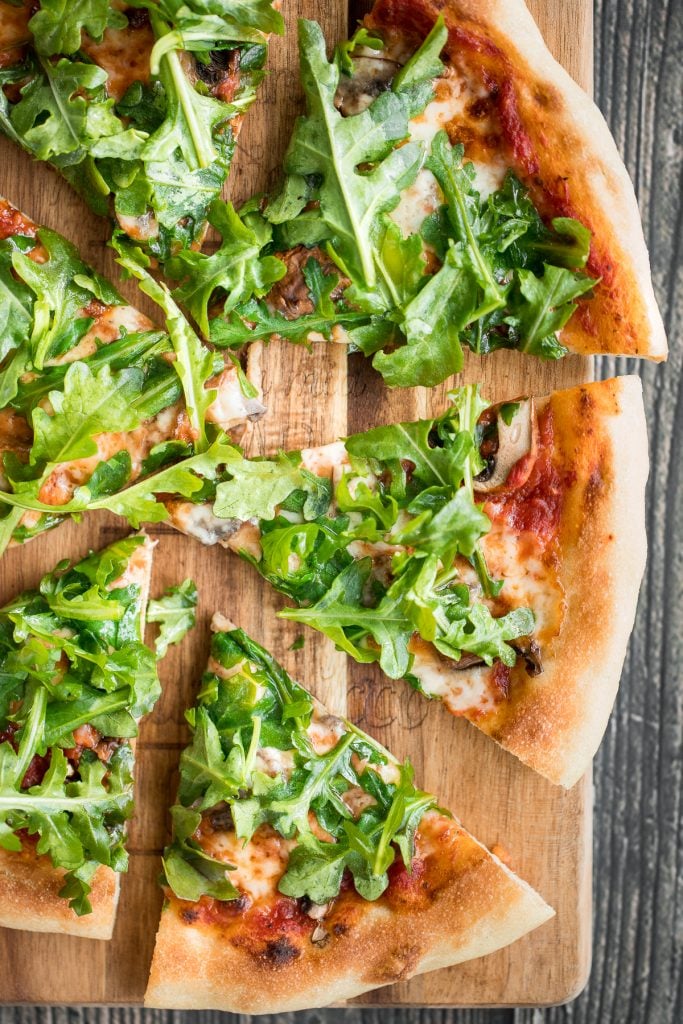
Mushroom and Arugula Skillet Pizza
Easy and delicious homemade mushroom and arugula skillet pizza with a perfectly crispy pizza crust is topped with mushrooms, arugula, and mozzarella cheese.
Baked Mediterranean pasta is simple, flavorful, and vibrant, loaded with fresh tomatoes, artichoke hearts, and olives, and topped with mozzarella cheese.
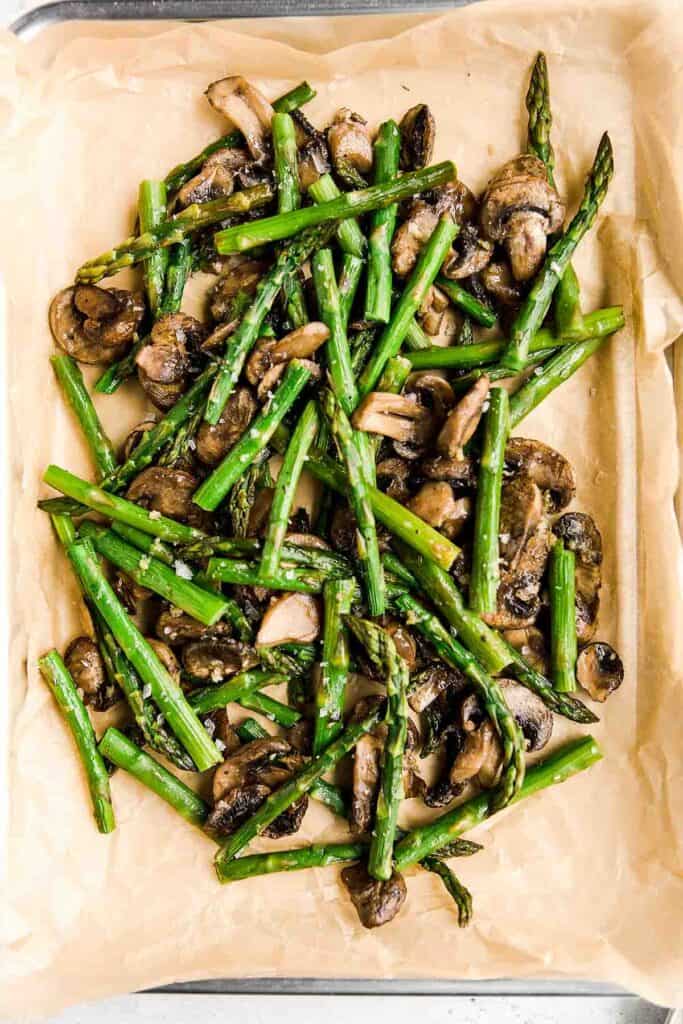
Roasted Asparagus and Mushrooms
Roasted garlic asparagus and mushrooms is a simple vegan sheet pan side dish that's easy to make, flavorful and delicious. Serve with your favorite protein.
Spring Soup Recipes
Smooth, hearty and light, one pot lemon chicken orzo soup is pure comfort in a bowl. This family favourite is like chicken noodle soup with a major upgrade. Serve it with some crispy sourdough discard crackers with sesame seeds.
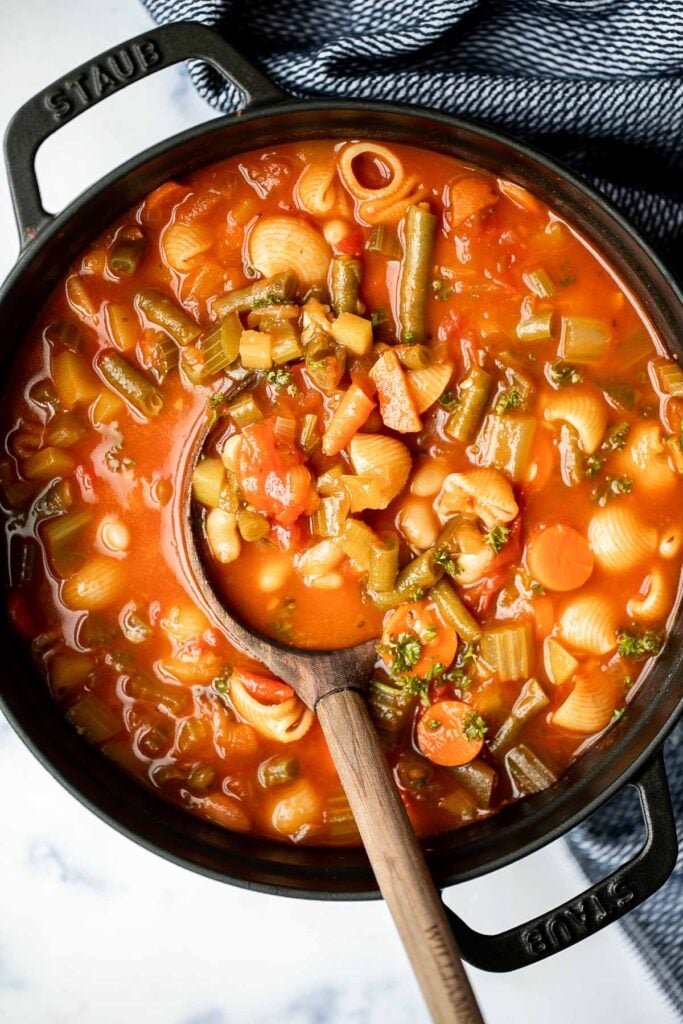
Minestrone soup is a hearty, healthy, nourishing, and delicious classic Italian soup, packed with vegetables and pasta simmered in a rich tomato broth.
Creamy vegan ramen is delicious, flavorful, and healthy comfort food, packed with nutrients that will give you an immunity boost. Ready in just 30 minutes!

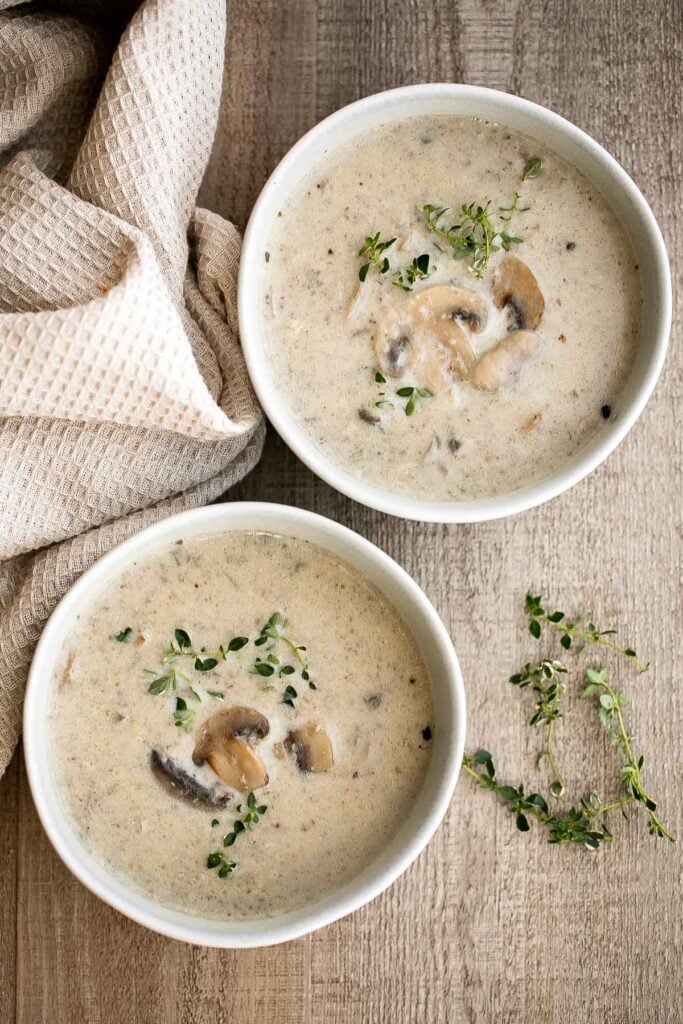
Cream of mushroom soup is thick, creamy, and comforting. This delicious one pot soup is easy to make in 45 minutes, freezer-friendly, and reheats well.
This vegetarian, hearty and filling, creamy Mexican corn soup is dense, bright, and full of flavour! It has all the warm and cozy vibes written all over it. Serve it with some butternut squash quesadillas.

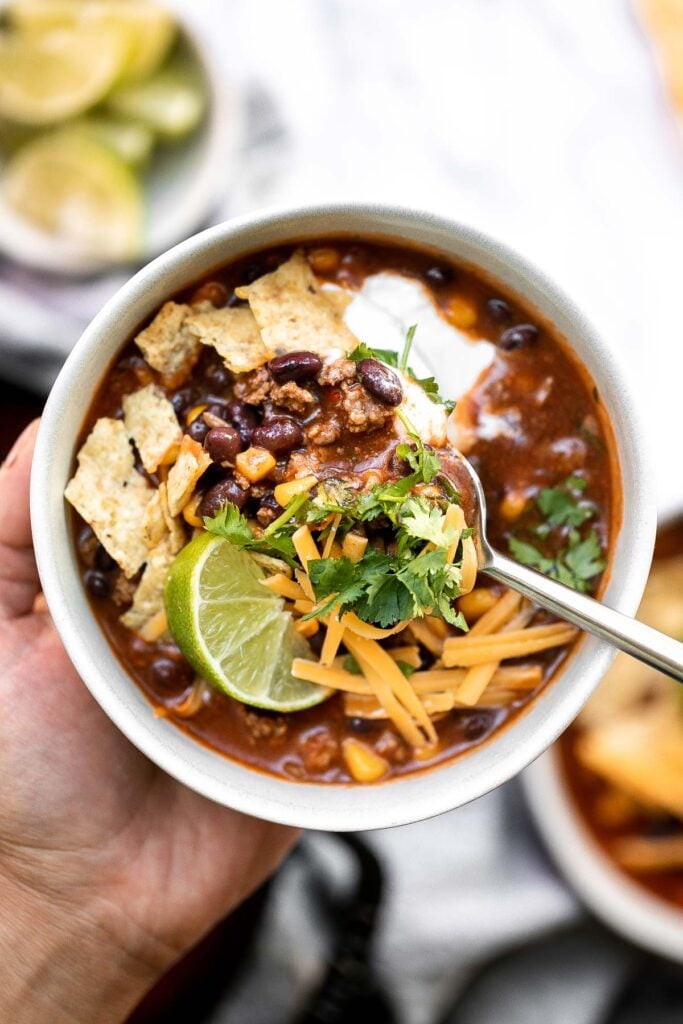
Beef taco soup is a delicious take on tacos, transforming it into a hearty, wholesome, filling soup topped with all the taco fixings. Ready in 30 minutes.
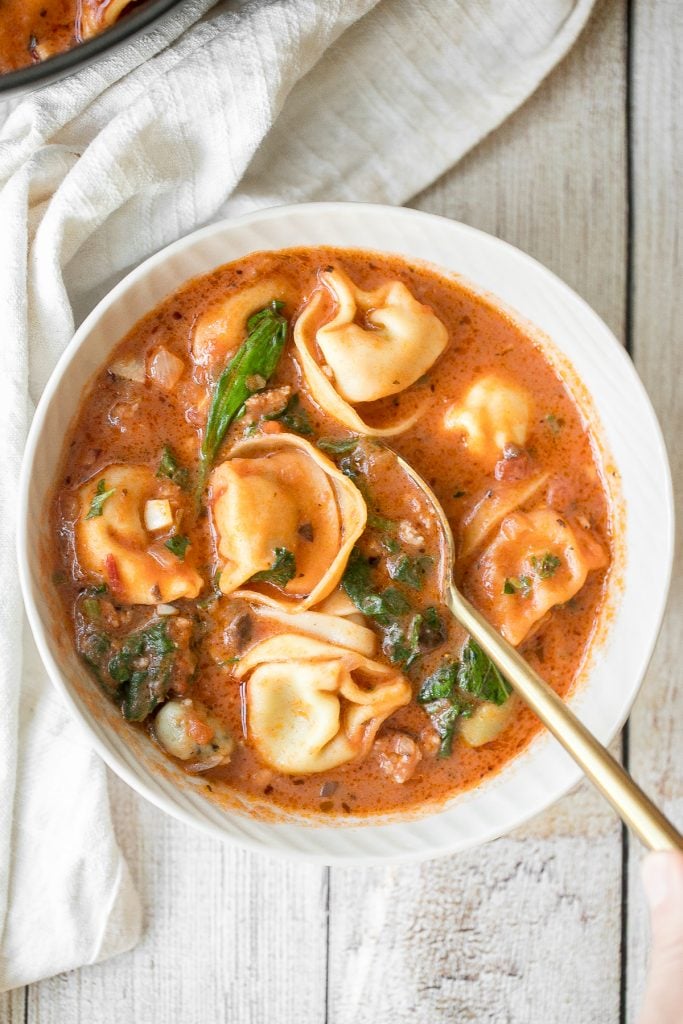
Creamy Tortellini Soup with Sausage
Hearty and creamy tortellini soup with sausage, spinach and kale is total comfort food in a bowl. Make this flavourful one pot meal in under 30 minutes.
Creamless Cream of Asparagus Soup
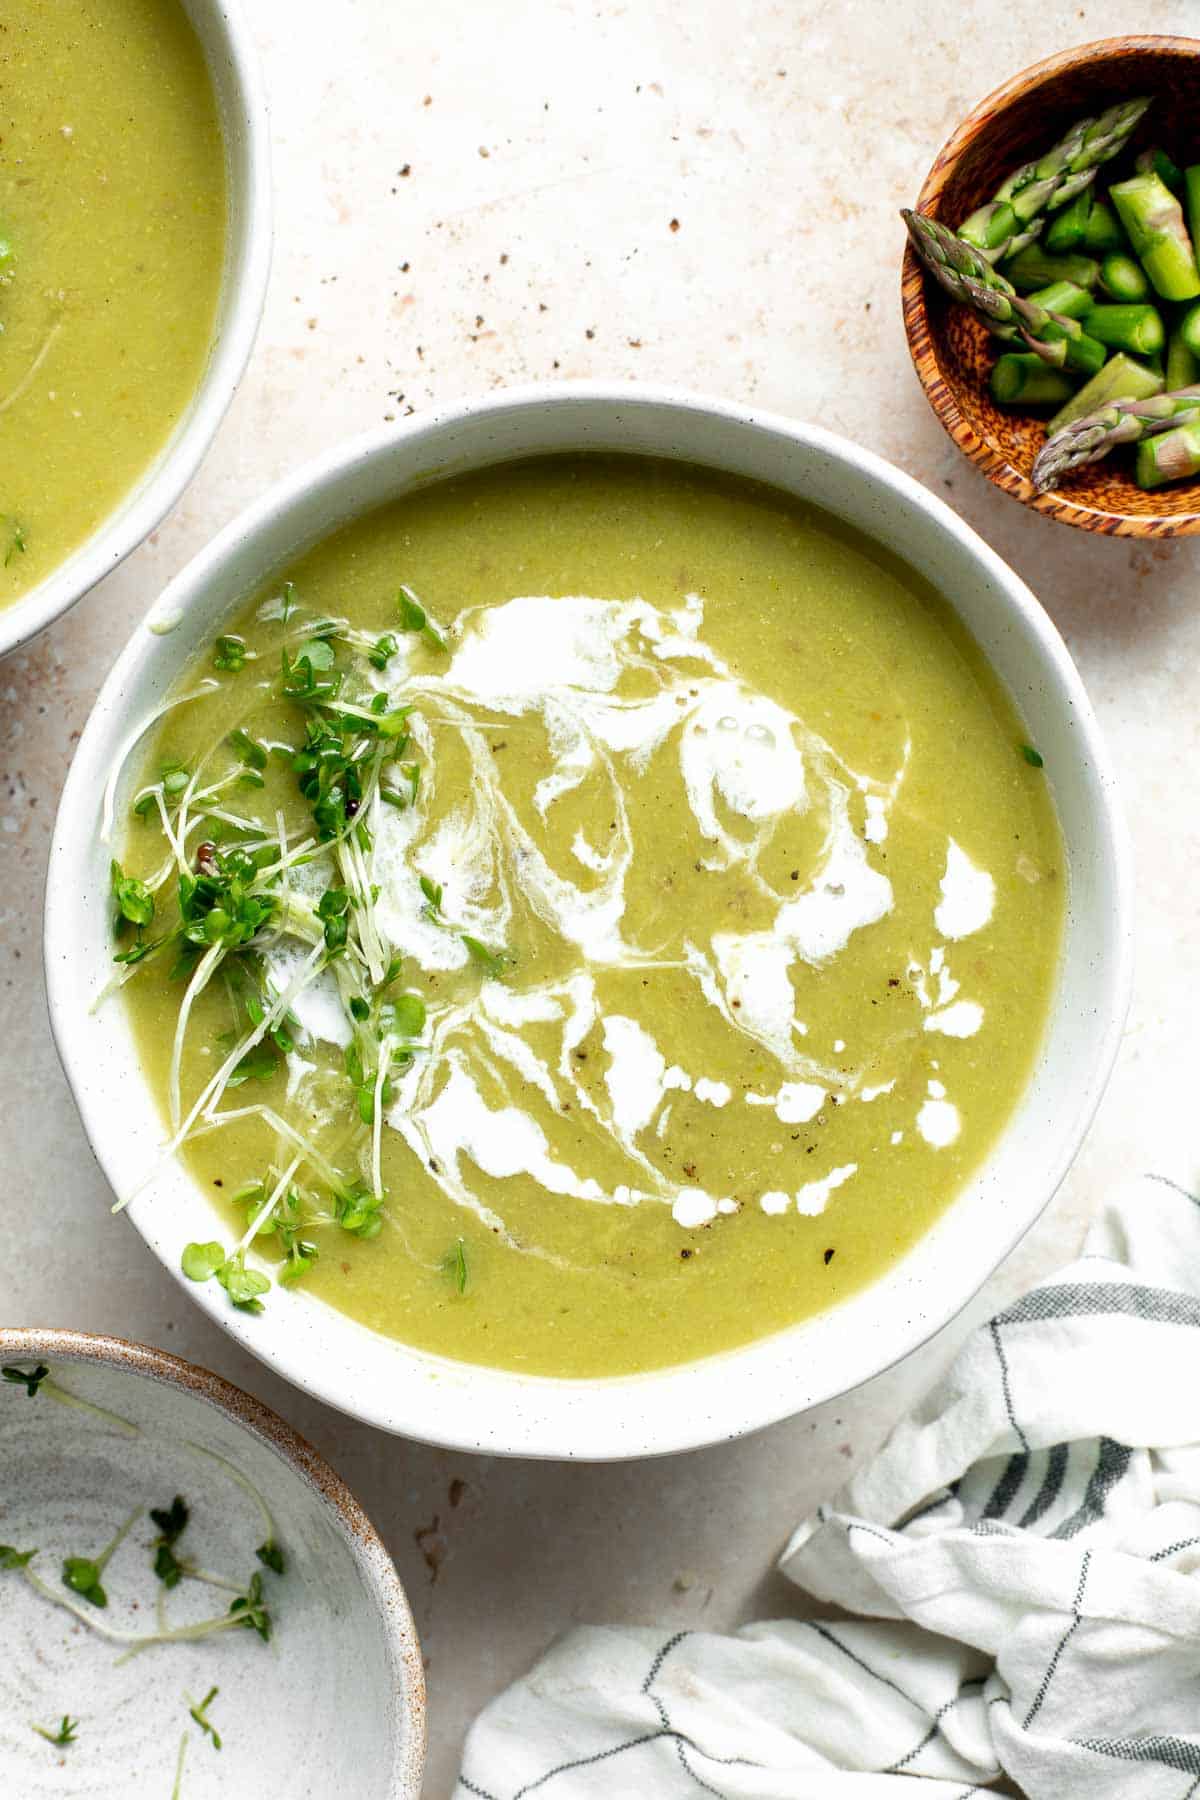
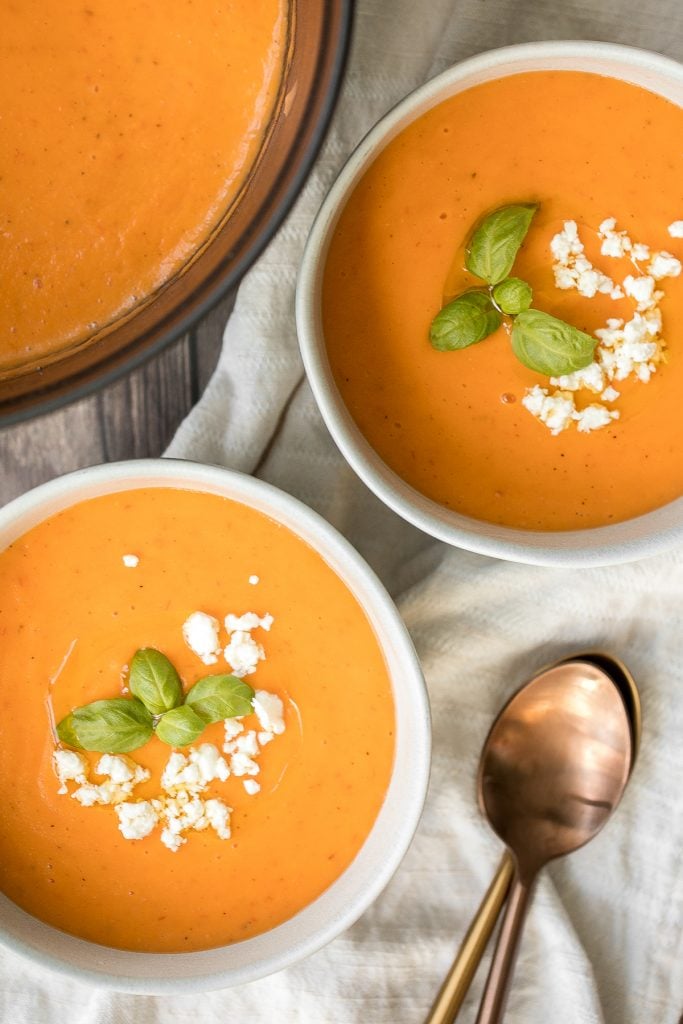
Creamless cream of asparagus soup is healthy, delicious, smooth, creamy, quick and easy to make. A perfect spring soup for a last minute lunch or dinner.
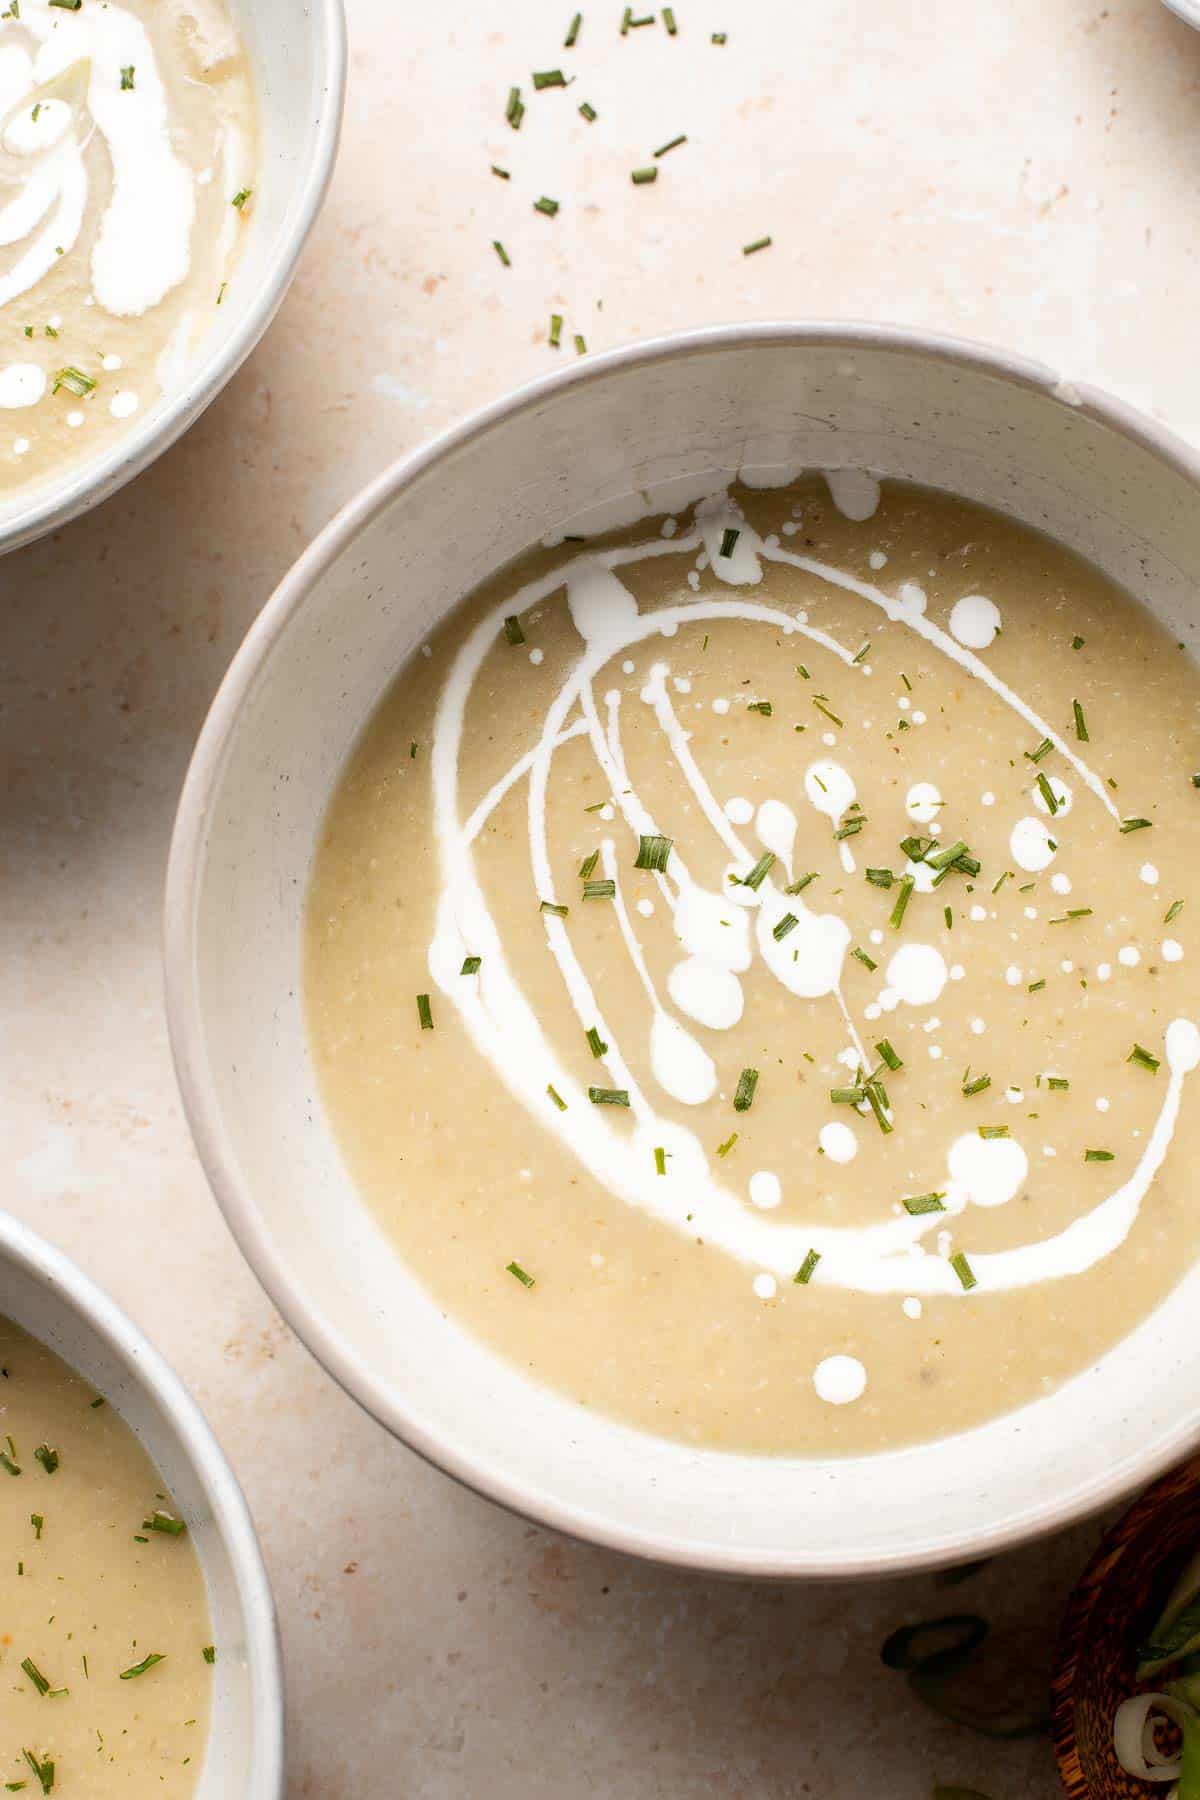
Make this silky smooth and creamy tomato potato soup in under 25 minutes. This gluten-free vegan soup is healthy and filling and the easiest weeknight meal.
Creamy artichoke soup is rich, healthy, delicious, easy to make, and freezer-friendly. This vegetarian soup is loaded with artichokes, leeks, and potatoes.
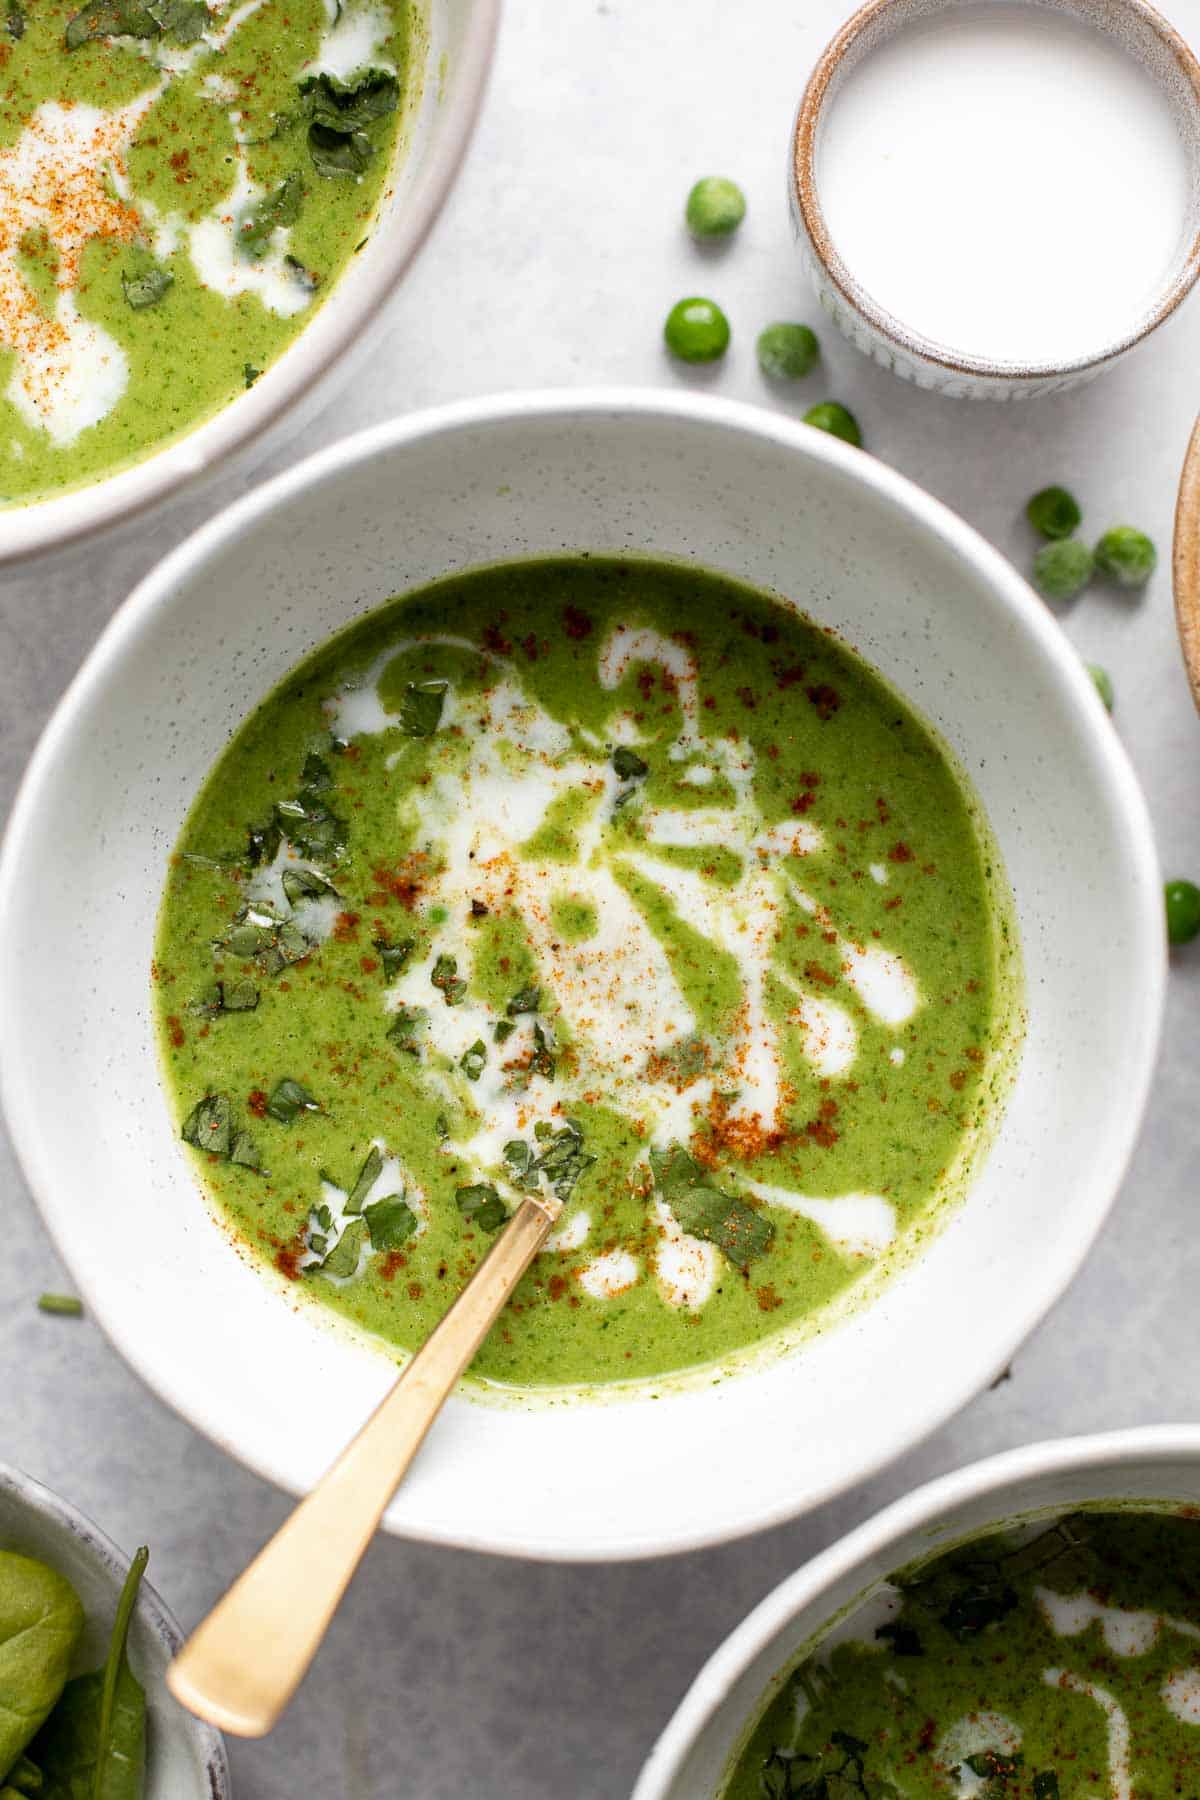
Spinach and Pea Soup is creamy, velvety, healthy and delicious. It's a curried soup with a vegan coconut milk base loaded with fresh spinach and green peas.
Spring Salads
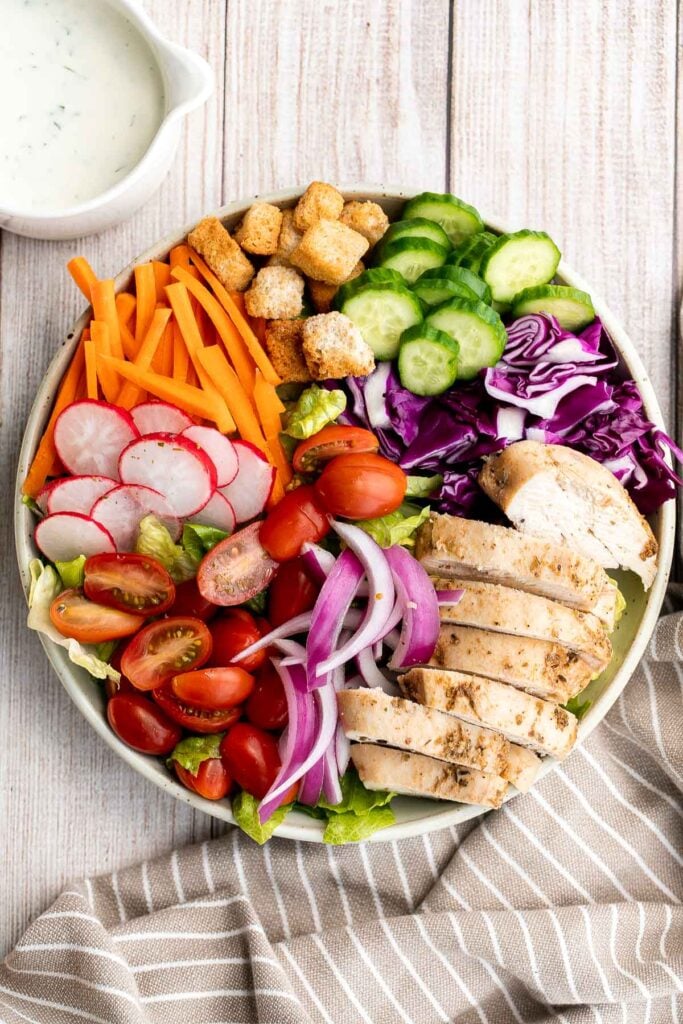
Chicken Garden Salad with Ranch Dressing
Chicken garden salad with ranch dressing is fresh, healthy, hearty, and colorful. It's a filling and wholesome lunch or dinner that is versatile too.
Italian pasta salad is delicious, wholesome, and easy to make. Make it up to three days ahead for your summer picnics and cookouts. You can't get more classic than Italian Salad on Memorial Day!
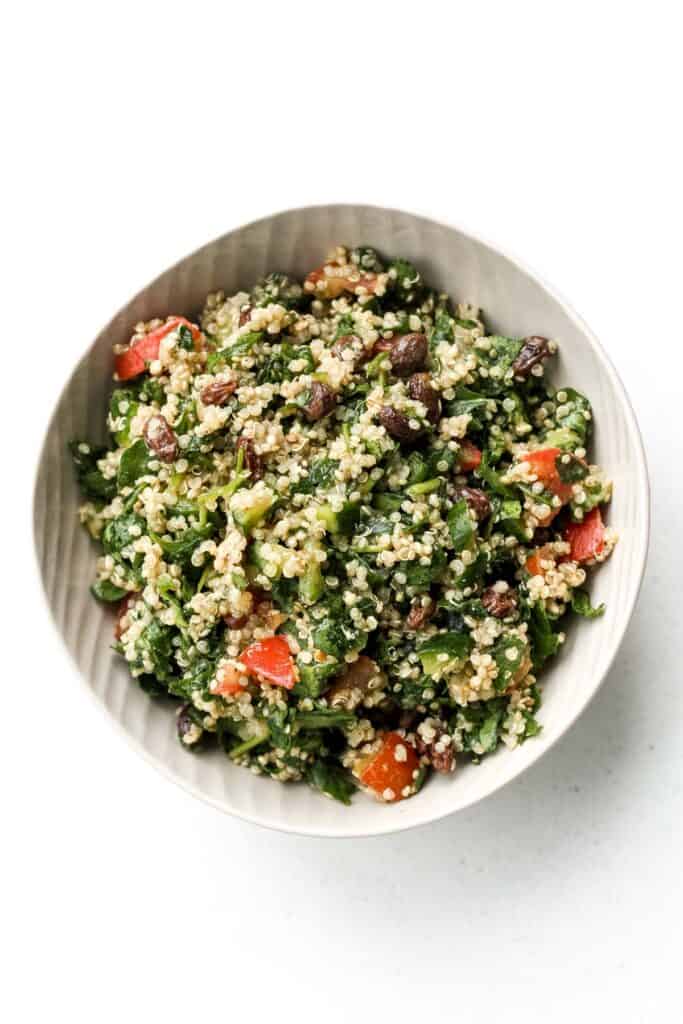
Take a bite into this refreshing, gluten-free quinoa and spinach salad bursting with colourful tomatoes, cucumbers and raisins.
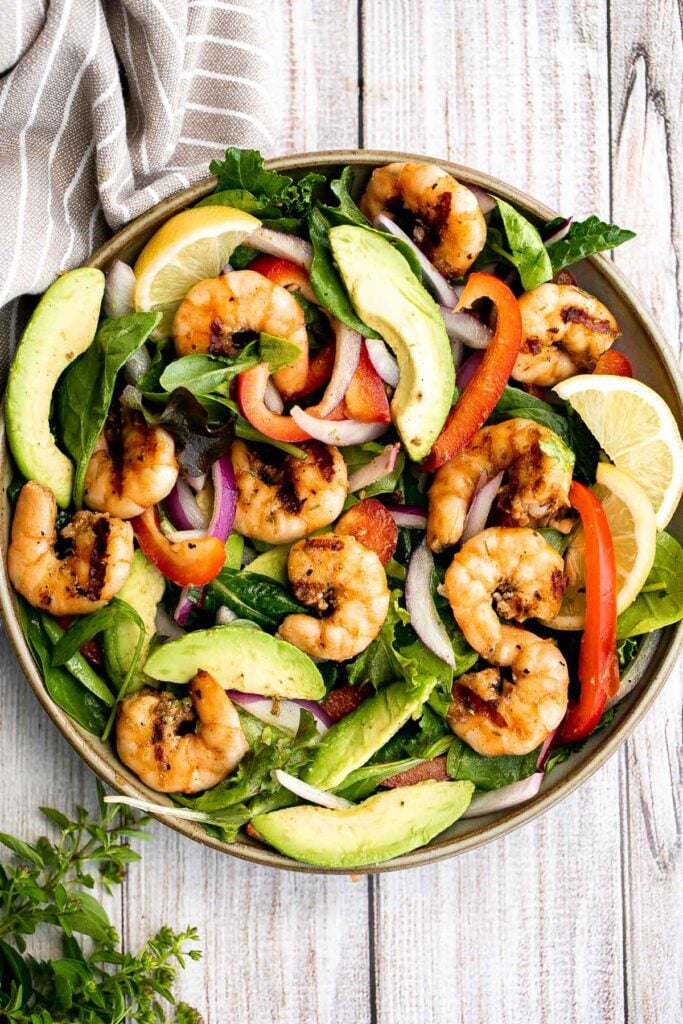
Grilled shrimp salad is a quick and easy, healthy summer meal that is loaded with fresh, flavorful ingredients, all tossed in an easy homemade dressing.
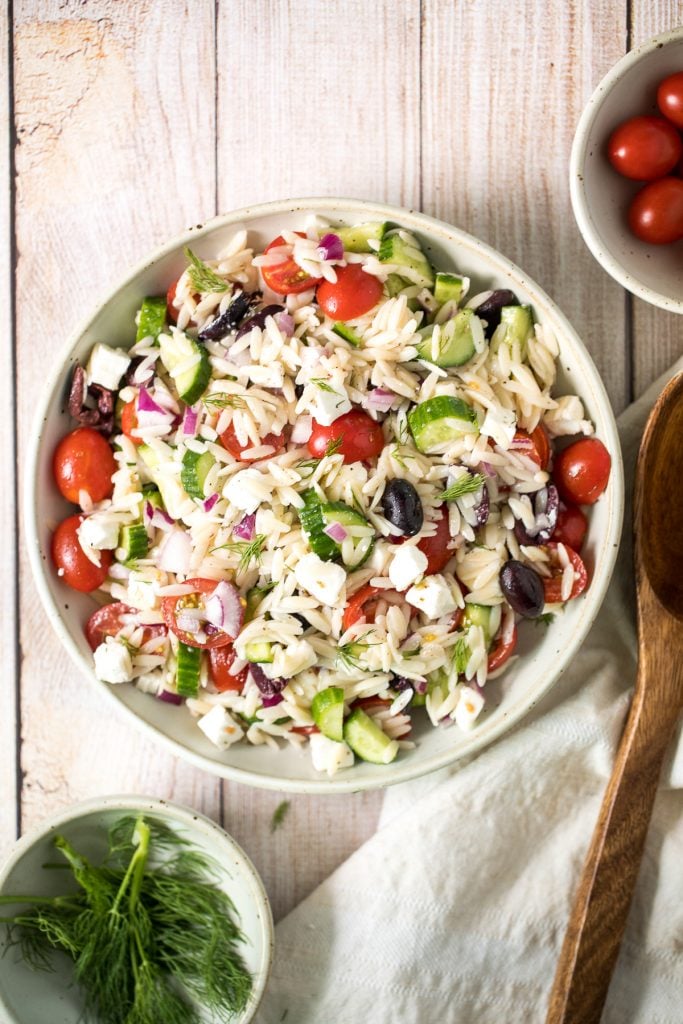
Mediterranean Orzo Pasta Salad
Quick and easy Mediterranean orzo pasta salad packed with fresh vegetables and herbs is tossed in a Greek lemon vinaigrette. Healthy, light and delicious.
Beef taco salad is a simple, filling, and delicious meal loaded with your favorite taco fillings, and a creamy lime dressing. Make it in 20 minutes.
There's nothing better on a hot day than a cold and refreshing vegan soba noodle salad, tossed with fresh vegetables and a delicious saucy dressing.
Mexican street corn salad adds a twist to a classic street food, loaded with freshly grilled corn, a creamy cheesy dressing, and authentic flavor.
Storing and Reheating Spring Dinners
- Make ahead instructions. You can make some of these spring dinners ahead of time and store in the refrigerator for a few days or even in the freezer for up to 3 months. You can also prep the ingredients in advance and store in the refrigerator until ready to use.
- How to store: Store any leftovers in airtight containers in the refrigerator or possible even in the freezer. Check the individual recipe for complete storing instructions and to see if the recipe is freezer-friendly.
- How to reheat: Most of the leftovers can be reheated on the stovetop over medium to low heat for about 5-10 minutes until warmed through, in the air fryer or the oven at 300F for 10-15 minutes until warmed through, or in the microwave in 20-second increments until warmed through. If heating from frozen, let it thaw first and then reheat.
More Spring Dinner Ideas
- 60 Best Chicken Recipes
- 15 Best Salmon Recipes
- 40 Best Pasta Recipes
- 30 Best Shrimp Recipes
- 25 Best Ground Beef Recipes
- 20 Best Dip Recipes
Did You Make Any of These Easy Spring Dinner Recipes?
Please leave a comment and rating below, and let me know what you thought of this round up of these easy spring dinner ideas. Be sure to snap a picture and tag me on Instagram @aheadofthyme or share it on the Pinterest pin so that I can follow along.
HUNGRY FOR MORE? Don't forget to sign up for my email newsletter so that you don't miss any recipes. You can also follow along on Instagram and Pinterest for more recipe updates.
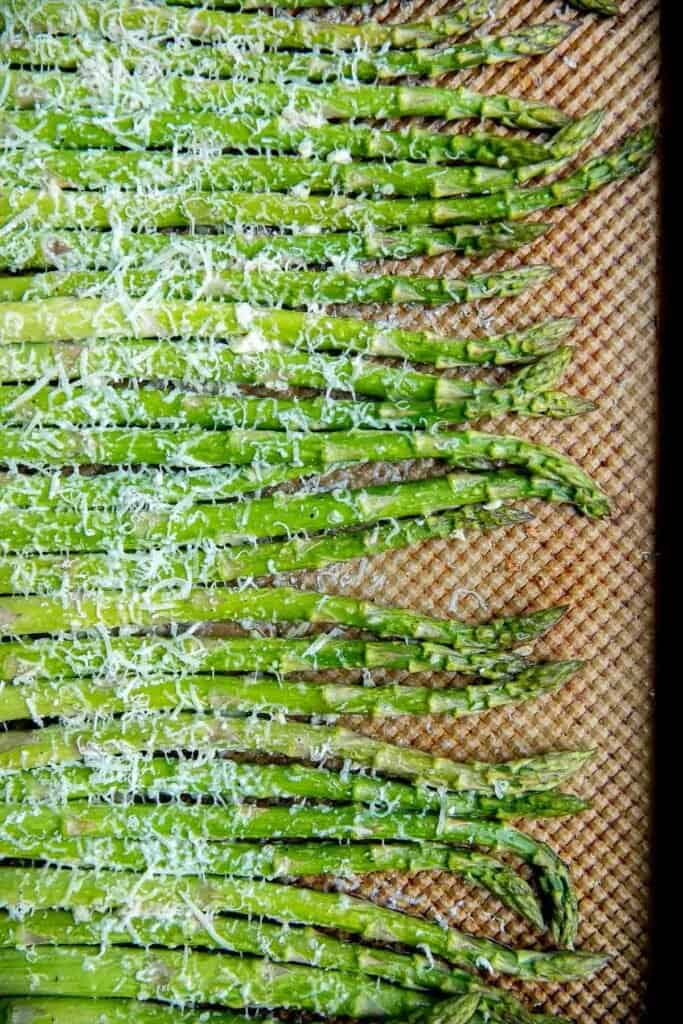
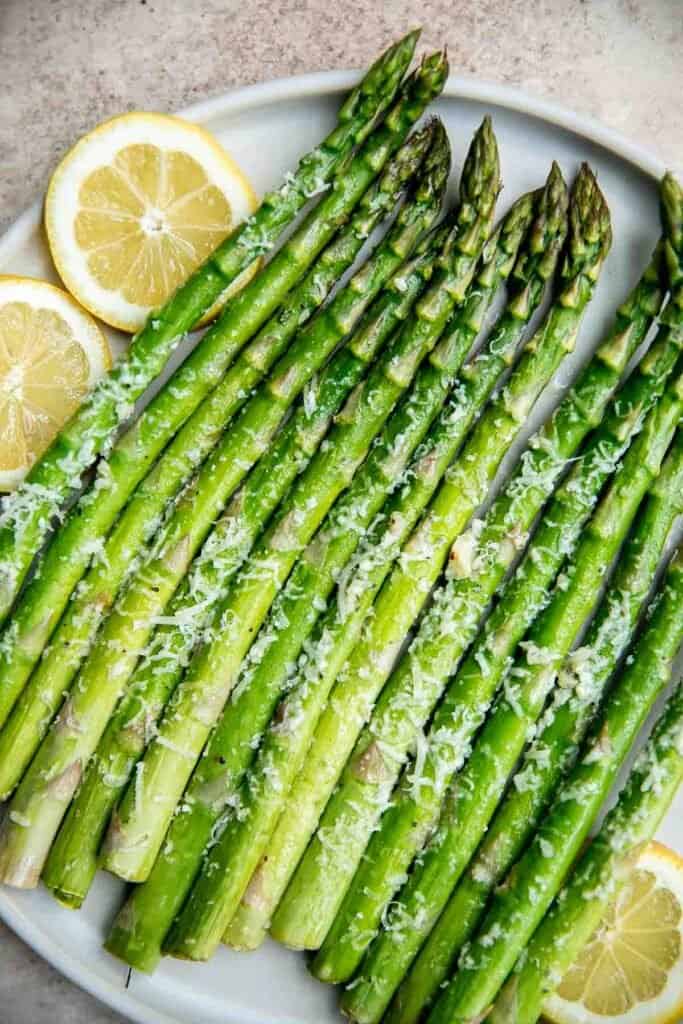
Lemon Parmesan Asparagus
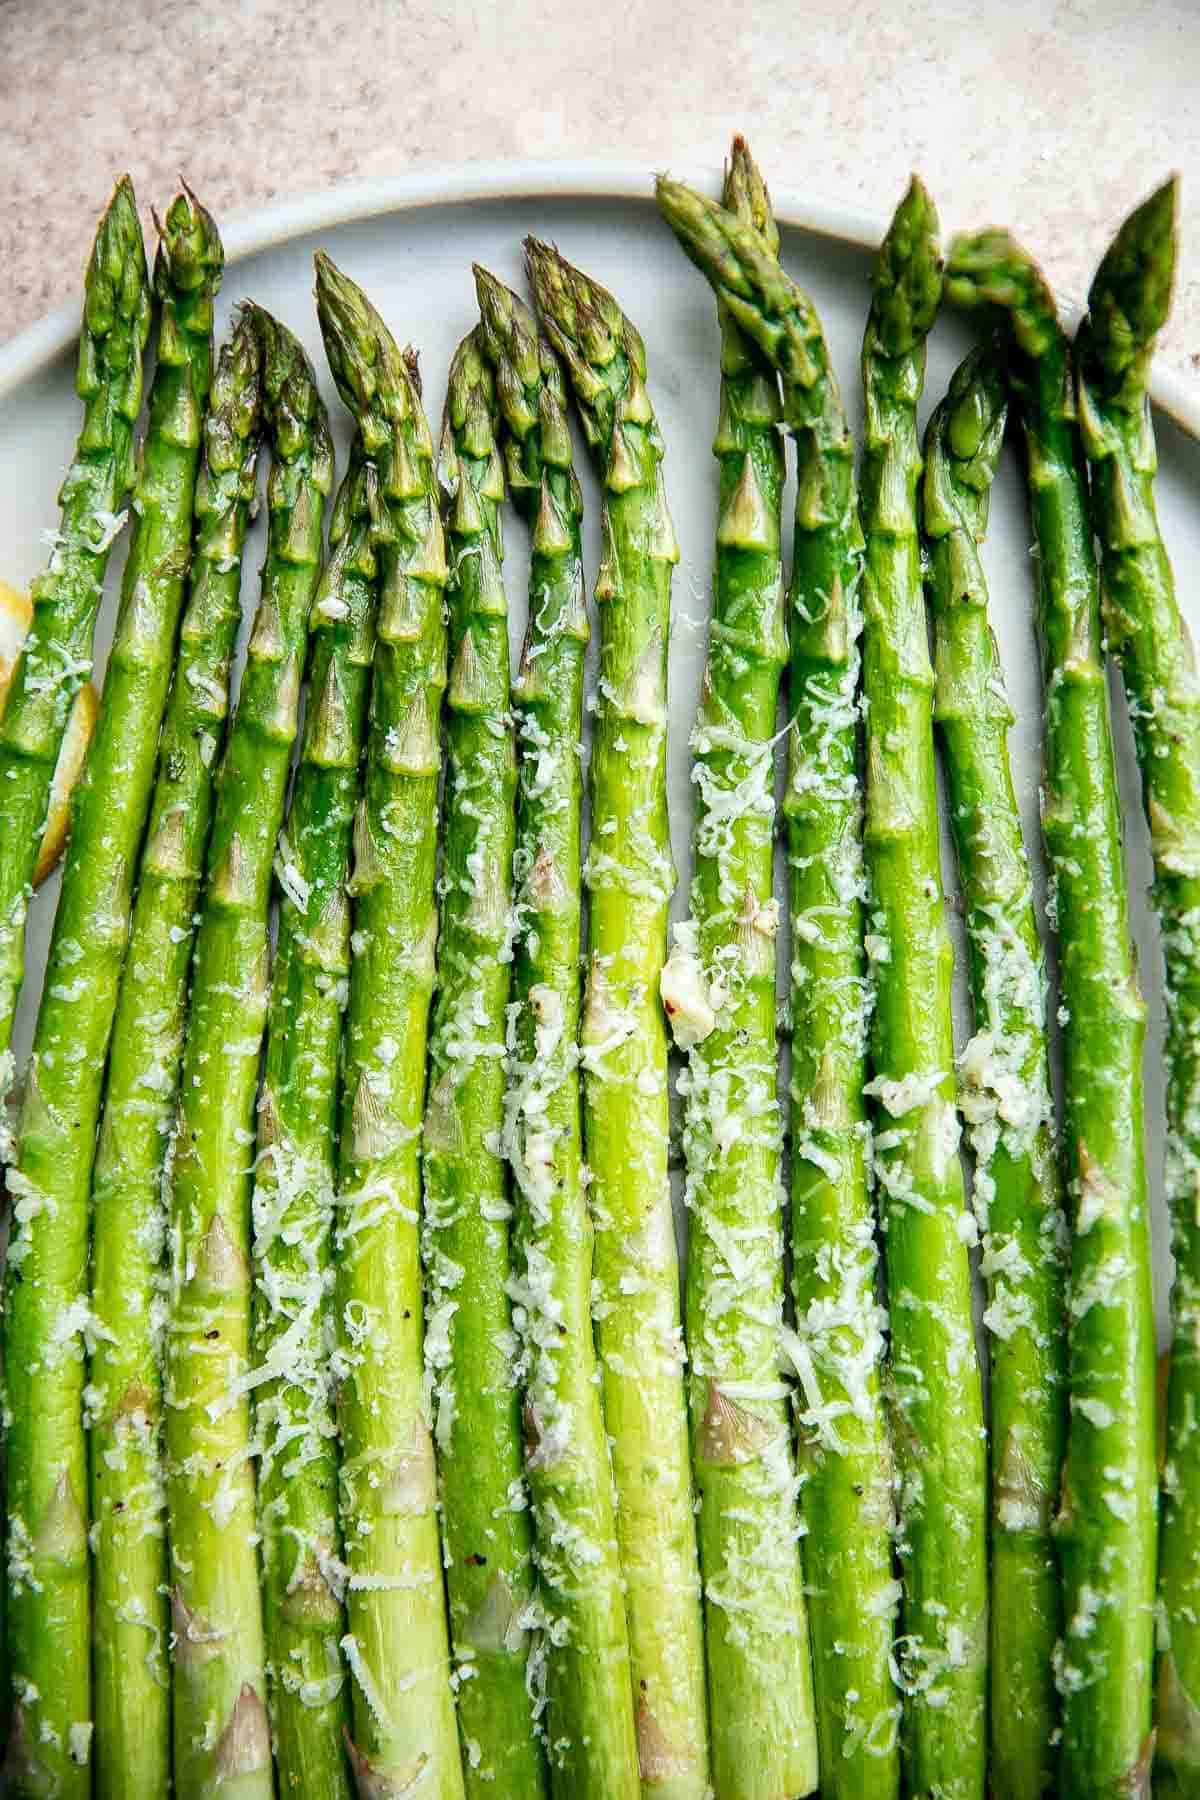
Lemon parmesan asparagus is a delicious way to serve a classic spring vegetable. Seasoned asparagus is roasted in the oven until tender crisp and topped with freshly squeezed lemon juice and grated Parmesan for the most incredible flavor. This side dish is incredibly quick and easy to make in less than 20 minutes! Serve it alongside your favorite protein such as chicken or salmon and a starchy side dish like pasta or rice for a complete and wholesome weeknight dinner.

Why You'll Love Lemon Parmesan Asparagus
- It's quick and easy. Set aside about 20 minutes to prep and cook this lemon parmesan asparagus. It's a simple recipe that requires minimal prep and just a handful of ingredients. You'll love how quickly this side dish comes together - especially on busy weeknights.
- A healthy side dish. The best part of this lemon parmesan asparagus is certainly the asparagus. Asparagus is a low-calorie vegetable that's packed with nutrients like fiber, folate, and vitamins A, C & K. In fact, one serving of this side dish (with Parmesan cheese) is just 29 calories. Insane!
- Loaded with flavor. Parmesan and lemon kind of go amazing together in so many dishes, especially vegetable side dishes. There is something about the nutty cheese and sour lemon that just go together and helps bring out the flavor of the vegetables that it is added to. Add it to crunchy tender crisp asparagus with garlic, and you've got yourself some major flavorful veggies.

Ingredient Notes
To make this quick and easy Lemon Parmesan Asparagus, you will need the following ingredients (full quantities in the recipe card below):
- asparagus - I went for medium asparagus. If you are using thinner asparagus, you will have to adjust the cook time slightly so that they don't overcook and burn.
- salt and pepper
- olive oil
- garlic
- lemon juice - lemon is a great ingredient in the kitchen because it can add acidity, sourness, sweetness, and citrus notes to any dish. It's the perfect companion to asparagus and parmesan.
- Parmesan cheese - you can substitute freshly grated parmesan cheese in this recipe for the pre-grated packaged parmesan cheese, but I urge you not to. Fresh parmesan is one of the main ingredients in this dish and it adds incredible flavor and texture that you won't want to miss out on.
You will also need measuring cups and spoons and a large half sheet baking pan.
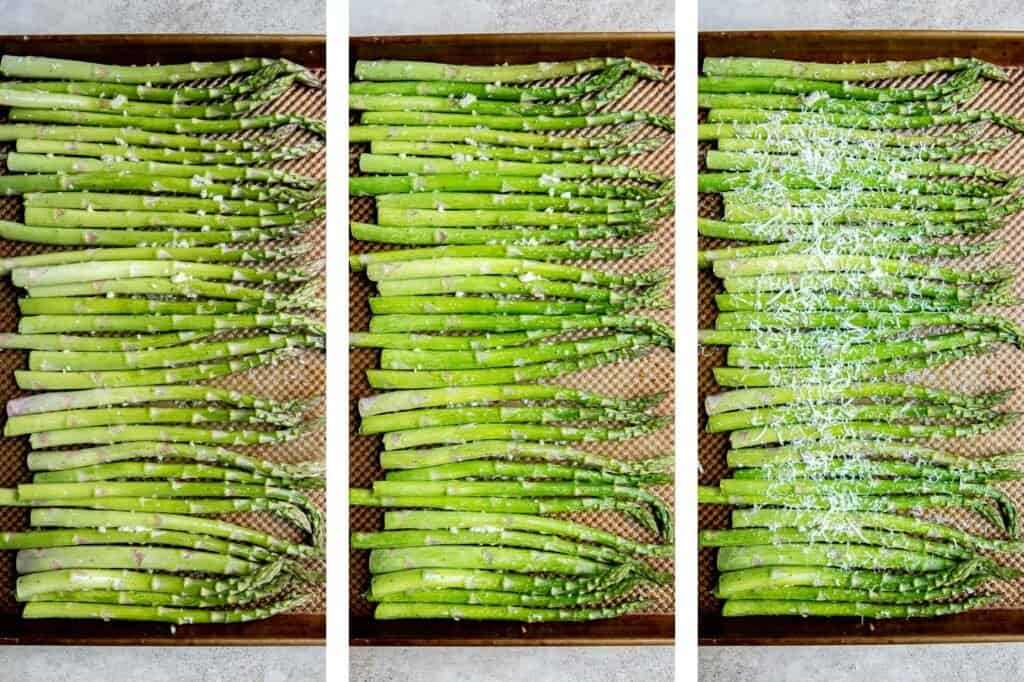
How to Make the Best Lemon Parmesan Asparagus
- Season asparagus. Place asparagus on a large half sheet baking pan and season with salt and pepper. Sprinkle minced garlic on top and drizzle with olive oil. Toss well to coat evenly.
- Bake. Arrange the asparagus in a single layer on the baking sheet and bake in a 400F preheated oven for 12-15 minutes until tender yet crisp. Note that if you are using thinner asparagus, you will have to adjust the cook time by about 5 minutes.
- Serve. Drizzle with lemon juice and sprinkle parmesan cheese on top. Serve immediately.
How to Serve Roasted Asparagus
Serve this lemon parmesan asparagus alongside a protein and simple plain side like potatoes or rice for a complete meal. Some of my favorites to serve with this are:
- Air Fryer Chicken Breast
- Garlic Butter Salmon
- Greek Lemon Roasted Potatoes
- Ribeye Steak
- Mascarpone Mashed Potates
- Greek Souvlaki Baked Chicken Breast
Storing Instructions
- How to store: Allow leftover lemon parmesan asparagus to cool to room temperature before storing it in the fridge inside an airtight container. Eat within 3-5 days.
- How to reheat: Reheat roasted asparagus the same way you baked it - in a preheated 400F oven. It only needs about 4-5 minutes to heat completely. Serve immediately. The Parmesan will melt when reheating, so feel free to add extra freshly grated Parmesan on top.
More Recipe
- How to Cook Asparagus (20 Recipes)
- Roasted Asparagus and Mushrooms
- Asparagus Tart
- Cheesy Roasted Asparagus
- Roasted Asparagus with Poached Eggs
- Air Fryer Asparagus
Tried this recipe?
I'd love to hear what you think! Leave a comment and rating below to share your feedback. Your reviews help others discover this recipe and help me keep creating more free recipes for you. Snap a photo and tag me on social media @aheadofthyme too.

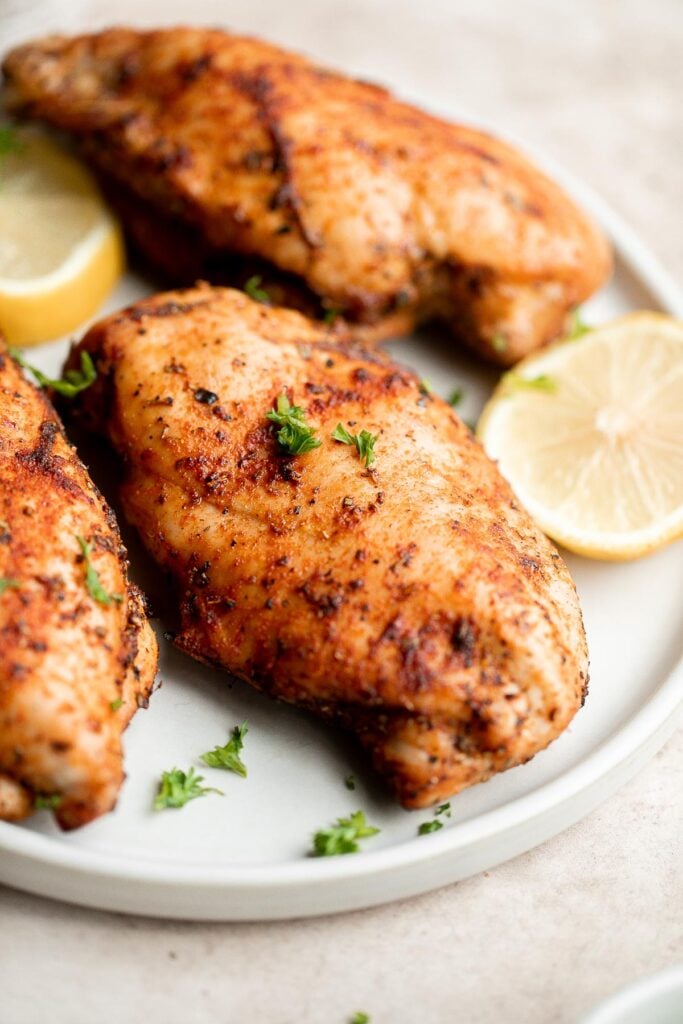
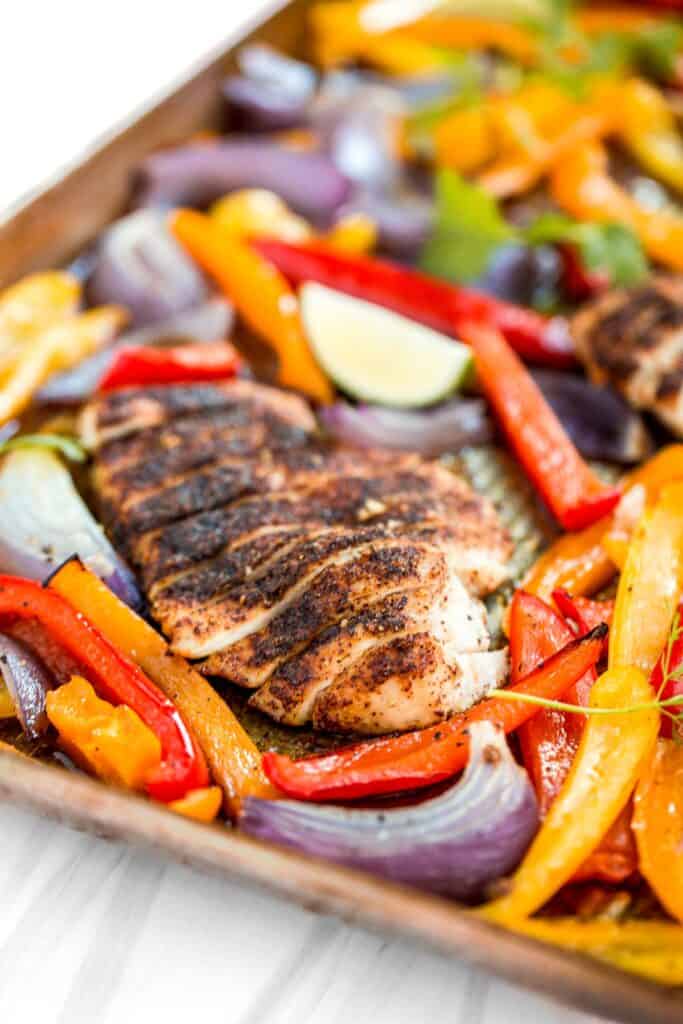
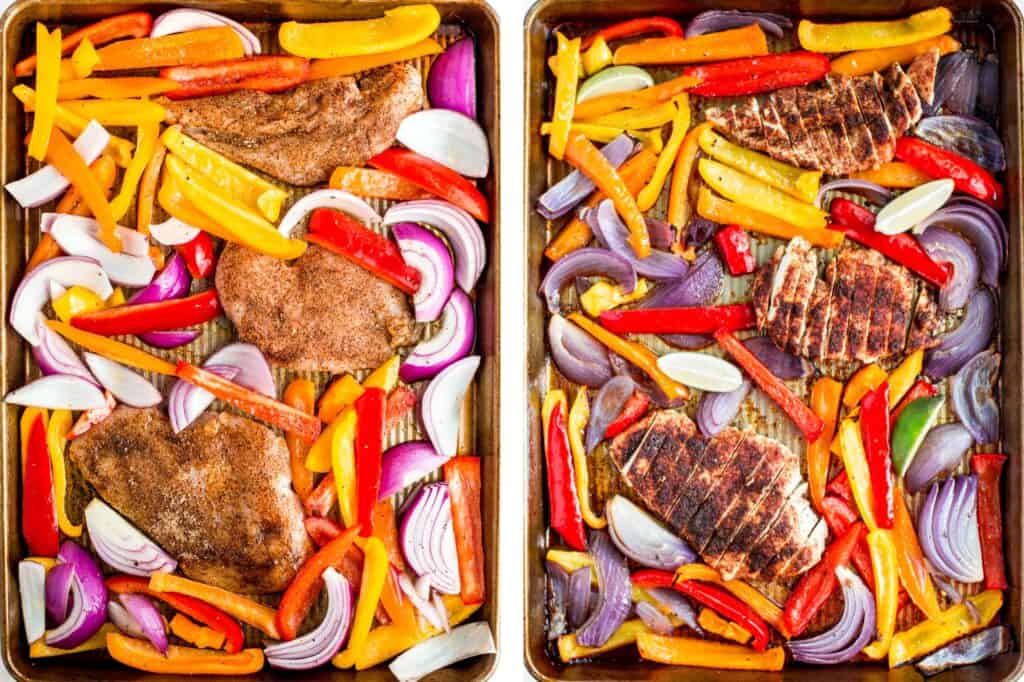
Sheet Pan Chicken Fajitas

Sheet pan chicken fajitas are quick and easy to make, loaded with flavor, and totally delicious. If I told you that sizzling hot chicken fajitas could be on the table in less than 30 minutes, would you believe me? And that instead of dirtying up multiple skillets sautéing vegetables and chicken you could simply throw everything on a single sheet pan and pop into the oven. Because these sheet pan fajitas are all that and more. With just 10 minutes prep and 15 minutes in the oven, you could be celebrating Taco Tuesday any night of the week! Plus, chicken fajitas store and reheat well so they are perfect for meal prep lunches throughout the week.
Why You'll Love Sheet Pan Chicken Fajitas
- Quick and easy under 30 minute dinner. This is the perfect weeknight meal because it takes less than 30 minutes to cook. You literally throw together the chicken and vegetables together with the fajita seasoning in one sheet pan for easy cooking and minimal cleanup. Then, pop into the oven and sit back while you wait for your chicken fajita dinner to be ready.
- Homemade fajita seasoning. The fajita seasoning mix takes literally 2 minutes to put together, and another minute to rub all over the chicken. All you need is an easy combination of cumin, chili powder, paprika, garlic powder, onion powder, salt and pepper. But if you want to make things more convenient, feel free to substitute with store-bought seasoning.
- They are loaded with flavor. These sheet pan fajitas are bursting with flavor from the quick spice rub fajita seasoning (pro tip: make extra!). But you can add more flavors with extra toppings. The sky is really the limit when you get creative with toppings. To keep dinner super simple, serve with tortillas, shredded cheese, homemade guacamole and your favorite salsa.
- Great for meal prep. These chicken fajitas are one of my favorite meals to make ahead of time and divided into meal prep containers with some Cilantro Lime Rice or tortillas for lunches throughout the week.
Ingredient Notes
To make these delicious and easy sheet pan chicken fajitas, you will need the following ingredients (full quantities in recipe card below):
- chicken cutlets (about 3-4 cutlets)
- olive oil
- fajita seasoning - make your own in just seconds with cumin, chili powder, paprika, garlic powder, onion powder, salt, and pepper. You can also substitute with 1 tablespoon and 2 teaspoons store-bought fajita seasoning mix.
- vegetables - I used a variety of different colored bell peppers (feel free to use any color combination that you want), along with red onions. You can also add in other veggies that will roast in 15 minutes. Try it with green beans, zucchini, or sliced mushrooms.
- red onion
- limes - for serving.
- cilantro - for serving.
You will also need measuring spoons and a quarter sheet baking pan.
How to Make the Best Sheet Pan Chicken Fajitas
- Make fajita seasoning. In a small mixing bowl, make the fajita seasoning by combining cumin, chili powder, paprika, garlic powder, onion powder, salt, and black pepper, then stir to combine. Set aside.
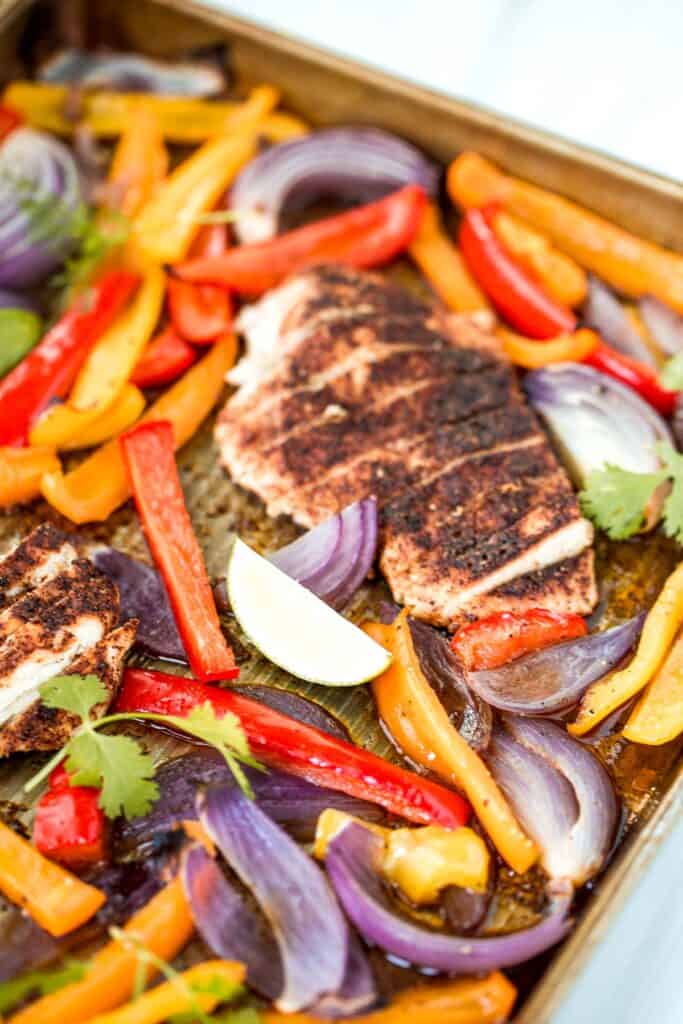
- Assemble sheet pan. Place chicken on a rimmed quarter sheet baking pan and drizzle with 2 tablespoons olive oil. Sprinkle fajita seasoning on both sides of the chicken, reserving about 1 tablespoon of the seasoning. Cut the 3 bell peppers and the onion into ½-inch thick slices. Evenly distribute them on the baking sheet and drizzle remaining 2 tablespoons olive oil and reserved seasoning on top.
- Cook. Cook in a 400F preheated oven until chicken reaches an internal temperature of 165 F (as read on a meat thermometer) and the vegetables are slightly charred, about 15-17 minutes.
- Serve. Serve fajitas with lime wedges and fresh cilantro.
How to Serve Chicken Fajitas
Serve sheet pan chicken fajitas as is for a low carb meal. Or serve them with:
- Cilantro Lime Rice
- Tortillas topped with shredded cheese, salsa, sour cream, and guacamole
- Mexican Street Corn Salad
- Mango Salsa
- Grilled Corn on the Cob

Recipe Tips and Tricks
- Make ahead instructions: You can season the chicken and cut the veggies ahead of time. Toss everything together and store in an airtight container or ziploc back for up to 2 days (as long as the chicken doesn't expire beforehand). Once ready to cook, spread out the contents of the container onto a quarter sheet baking pan and bake according to the recipe instructions.
- How to store: Store leftover chicken fajitas (without any sides or toppings) in an airtight container in the fridge for up to 3 days.
- How to reheat: Reheat on the stove over medium-low heat until warmed through. You can also reheat in a 350F preheated oven for about 10 minutes or in the microwave in 30 second increments until warm.
More Sheet Pan Recipes
- One Pan Garlic Roasted Chicken and Baby Potatoes
- Sheet Pan Lamb Chops
- Sheet Pan Nachos
- Meal Prep Sheet Pan Balsamic Chicken and Vegetables
- Sheet Pan Curry Chicken and Vegetables
- Sheet Pan Miso Salmon with Bok Choy
Tried this recipe?
I'd love to hear what you think! Leave a comment and rating below to share your feedback. Your reviews help others discover this recipe and help me keep creating more free recipes for you. Snap a photo and tag me on social media @aheadofthyme too.

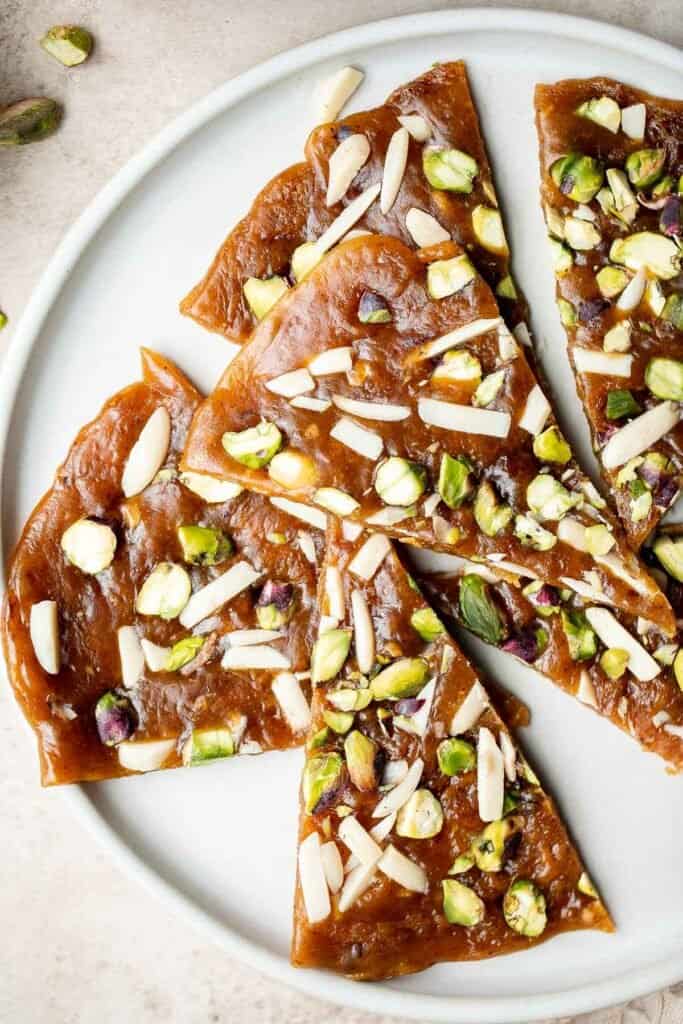
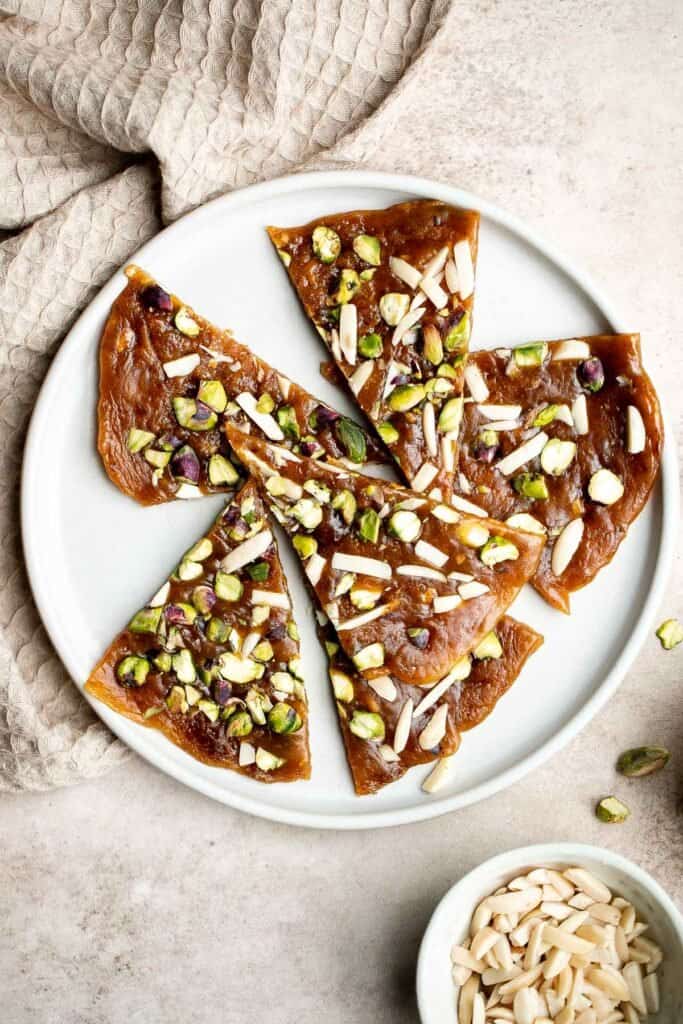
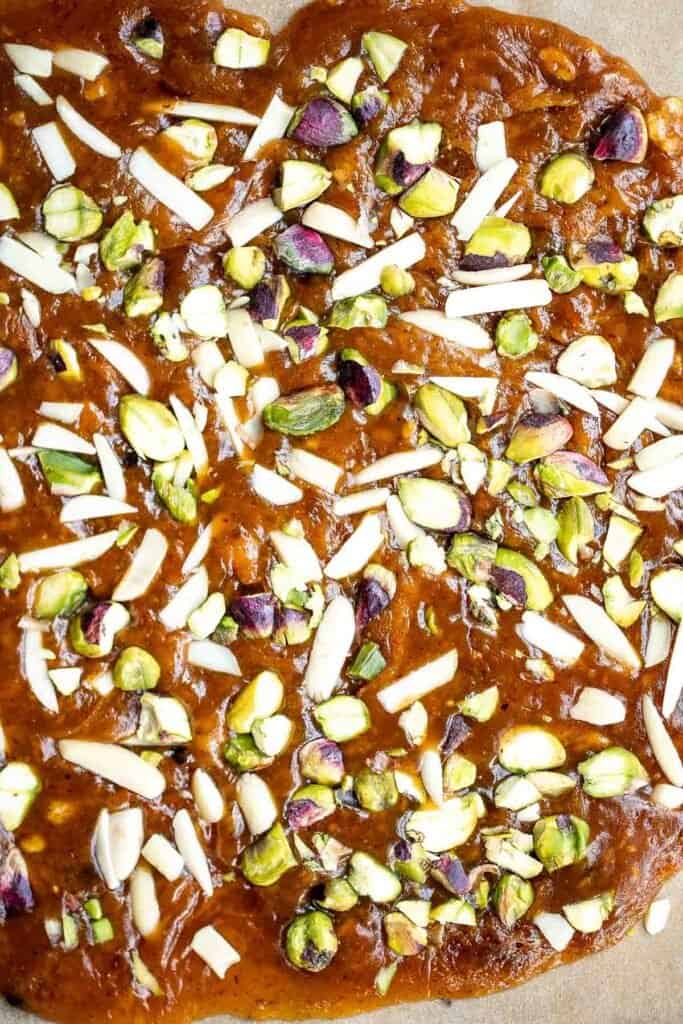
Sohan (Persian Pistachio Brittle)

Sohan (Persian Pistacho Brittle) is a traditional Persian candy that is full of classic flavors -sweet, floral, and nutty. This toffee-like Iranian treat has the best crunchy texture and is loaded with pistachios and almonds with hints of saffron and cardamom for the perfect spice. Plus, it's easier to make at home than you think. This brittle stores really well so you can make a big batch to last weeks (if you don't eat them all up first!), or gift to family and friends during Persian New Years. I like it best with a hot cup of tea.
Why You'll Love Sohan (Persian Pistachio Brittle)
- Enjoy a taste of Iran in your kitchen. Whether you're looking for comforting treats that remind you of your family or you want to try something new, this traditional Persian pistachio brittle (sohan) is what you need. This treat originated in Qom, Iran - but it can be made in the comfort of your own home.
- Homemade candy is easier to make than you think. Seriously. Sohan takes 15 minutes to cook and another 20 minutes to cool down before you are ready to break it up and eat. You do need to actively be stirring the mixture, but that's really the only hard part of this recipe.
- It has the best flavors and textures. Loaded with classic Persian flavors like rosewater, saffron, cardamom, and pistachios, this sweet and nutty brittle offers incredible depth of flavor in every bite. Plus, it's crunchy and breaks easily yet melts in your mouth for a one-of-a-kind experience.
- It lasts for weeks = the perfect gift. The best tip for making Persian brittle is to gift it. It stores well for weeks at room temperature. It is a truly unforgettable candy that everyone loves.
Ingredients and Substitutions
To make this delicious Sohan or Persian Pistachio Brittle, you will need the following ingredients (full quantities in the recipe card below):
- all-purpose flour
- granulated sugar
- water
- rose water
- butter
- light corn syrup - feel free to replace with glucose syrup as well. You can also use a dark corn syrup but note that the color will be darker.
- ground saffron - I recommend grinding saffron threads yourself in a mortar and pestle.
- ground cardamom
- slivered almonds - you could leave this out if you prefer.
- pistachios - pistachios are traditional in sohan, so I don't recommend substituting them.
You will also need measuring cups and spoons, parchment paper, medium cooking pot, candy thermometer, and rolling pin.

How to Make the Best Sohan Persian Pistachio Brittle
- Prep. Place a large piece of parchment paper on a cutting board or on a half sheet baking pan. Set aside.
- Make the caramel. In a medium cooking pot, add flour and sugar and heat over medium heat and cook for 2-3 minutes, stirring frequently. Add water and rose water, and clip a candy thermometer onto the side of your pot. Turn the heat to high and bring the mixture to a boil, stirring continuously. Once boiling, add in butter and corn syrup. Stir continuously until the butter has melted. Stir in saffron and cardamom. Continue to stir continuously until the temperature reaches 255 F on the candy thermometer, about 4-6 minutes (note that the temperature might be stuck at around 220F, but it will start to go up). The mixture will bubble and start to caramelize into a rich golden brown color at this stage. Turn off the heat and let the mixture reach 260F.
- Shape and top with nuts. Give the mixture a final stir and pour onto the prepared parchment paper into a circular shape. Sprinkle slivered almonds and crushed pistachios on top. Place another large piece of parchment paper on top and use a rolling pin to roll the top to allow the nuts to press into the sohan.
- Chill. Remove the top parchment paper and allow the sohan to cool down at room temperature until hard, about 20-30 minutes. Break into bite-size pieces and serve.
Recipe Tips and Tricks
- Prep all the ingredients first: The secret to have a smooth cooking experience is to prep and measure out all your ingredients first. Making sohan is a quick process and things happen first. Plus, you need to continuously stir the mixture the whole time, so having the ingredients hand and within arms reach is crucial.
- How to store: Keep sohan in an airtight bag or container at room temperature away from any moisture, including humidity. A cool, dry place is best for storing Persian pistachio brittle, so it remains crunchy. It will stay good for several weeks but is best fresh. Do not store sohan in the fridge as it will make it soft and sticky.

More Persian Dessert Recipes
- Persian Love Cake
- Persian Rice Cookies (Nan e Berenji)
- Ghotab Pastry (Walnut Filled Crescents)
- Persian Chickpea Cookies (Nan e Nokhodchi)
Tried this recipe?
I'd love to hear what you think! Leave a comment and rating below to share your feedback. Your reviews help others discover this recipe and help me keep creating more free recipes for you. Snap a photo and tag me on social media @aheadofthyme too.

50 Best Spring Desserts

From pretty pastel spring colors to sweet fruity desserts to bold flavors of carrots and pecans, spring dessert recipes has it all. So if you are wondering what to make for dessert this spring season, you have come to the right place. We are sharing over 50 of the best spring desserts including all the carrot cake desserts, fun Easter treats, delicious cakes and cookies, and so much more!

Best Spring Desserts
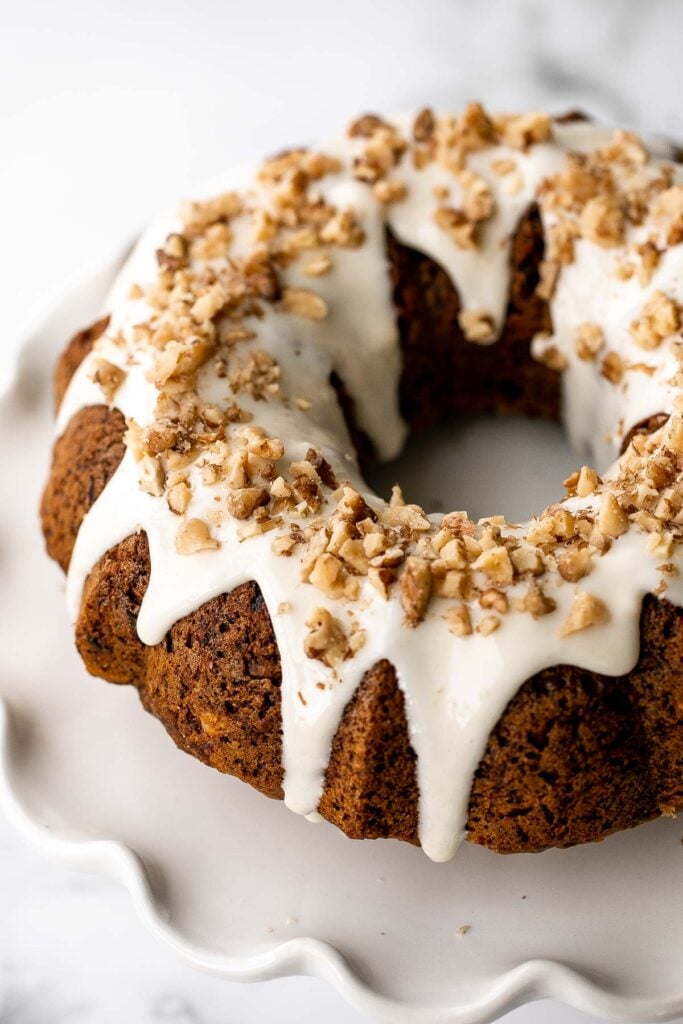
Carrot Bundt Cake with Cream Cheese Glaze
Showstopping carrot bundt cake with cream cheese glaze is light, fluffy, and moist. It's loaded with sugar, spice, and everything nice -- including grated carrots.
Carrot Cake Cookies are soft, chewy, cake-like cookies with a delicious homemade cream cheese glaze. They taste just like carrot cake but in cookie form.

Hot cross buns is a timeless classic Easter bread made with raisins, cinnamon, and a honey glaze. They are perfect for breakfast, a snack or dessert.
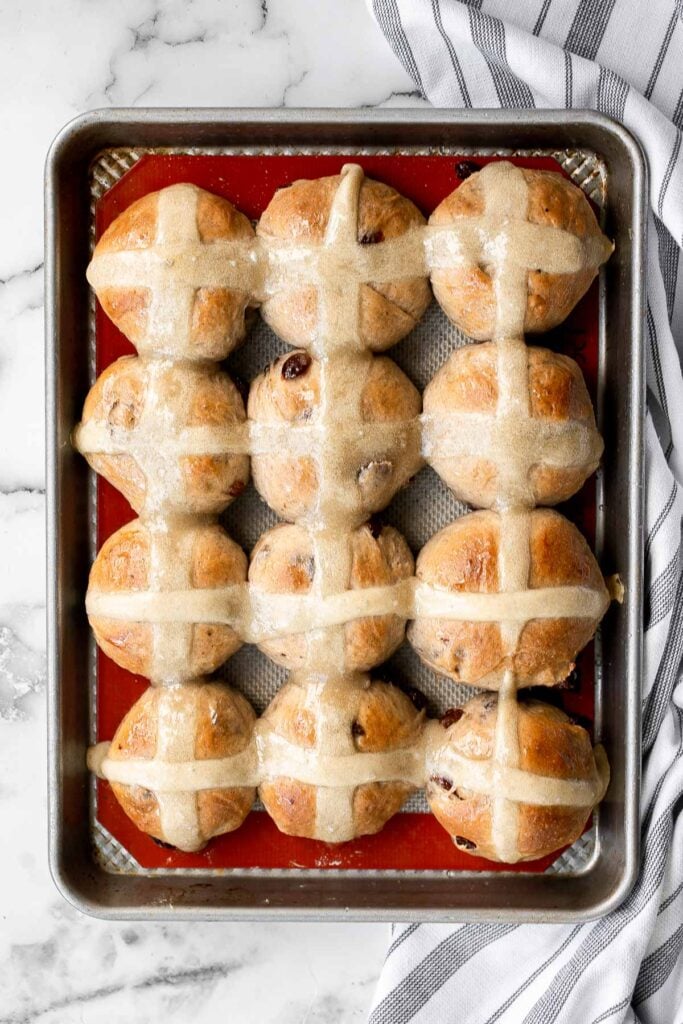
Pistachio Macarons are delicate, chewy, melt-in-your-mouth cookies filled with pistachio white chocolate ganache filling and chopped pistachios on top.

Persian Love Cake is a rich, moist, and nutty almond cake loaded with floral and citrus flavors, topped with a lemon glaze, pistachios, and rose petals.
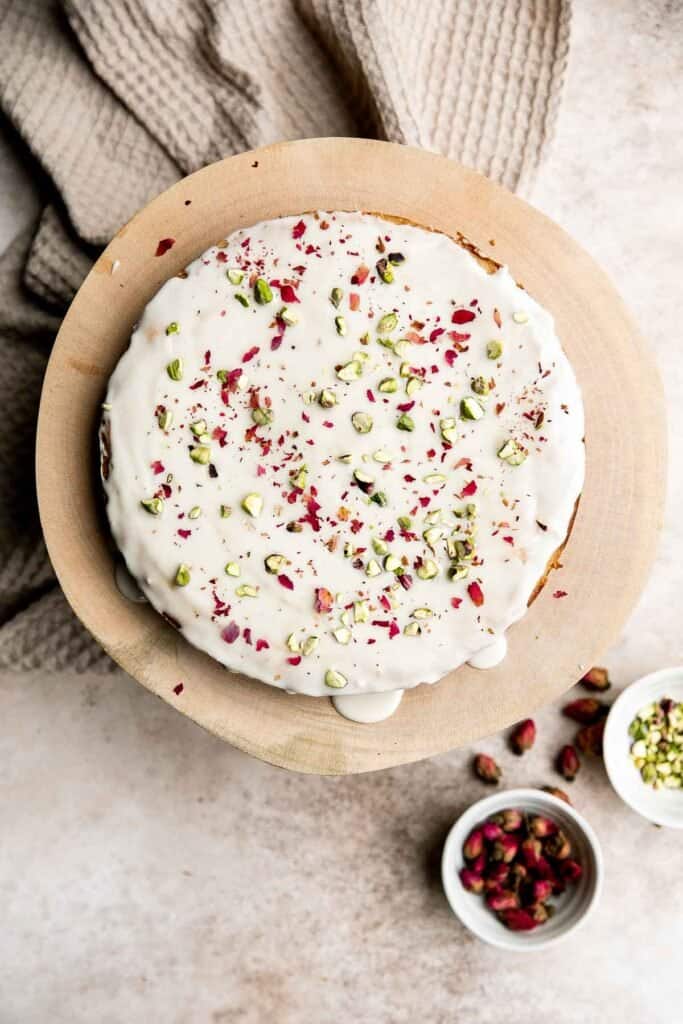
Carrot Cake Shortbread Cookies
Carrot cake shortbread cookies are sweet and buttery, packed with carrots and walnuts, and spiced like your favourite carrot cake. A total treat.

Italian Easter Cookies are cake-like cookies that are light and fluffy with lemon flavor throughout and topped with an easy homemade glaze and sprinkles.

M&M cookie bars are soft and chewy, have crisp edges with a gooey center, and are loaded with M&M's and chocolate chips. The easiest way to bake cookies!

Moist vanilla cupcakes with buttercream frosting are soft, fluffy, simple, sweet, and delicious. Secret ingredient yogurt keeps them moist for days!

Easy lemon blueberry bread with lemon glaze is soft, moist, and delicious. This quick bread with fresh blueberries and lemon is the perfect summer dessert.
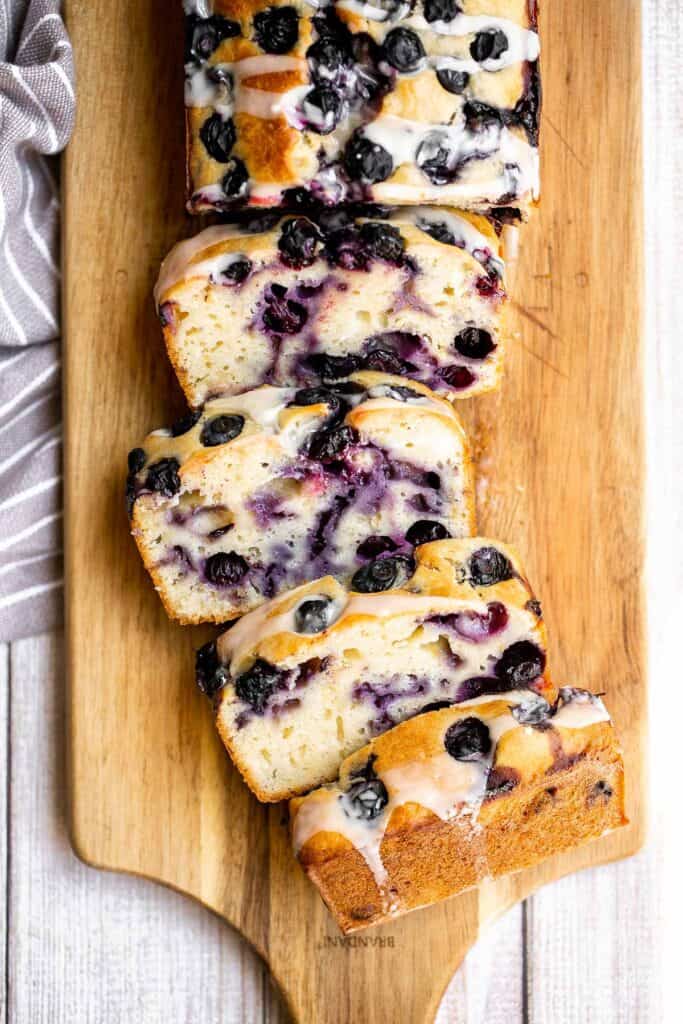
Carrot cake biscotti is crunchy, crumbly, and satisfies all your carrot cake cravings. Enjoy these Italian cookies as is or with white chocolate.
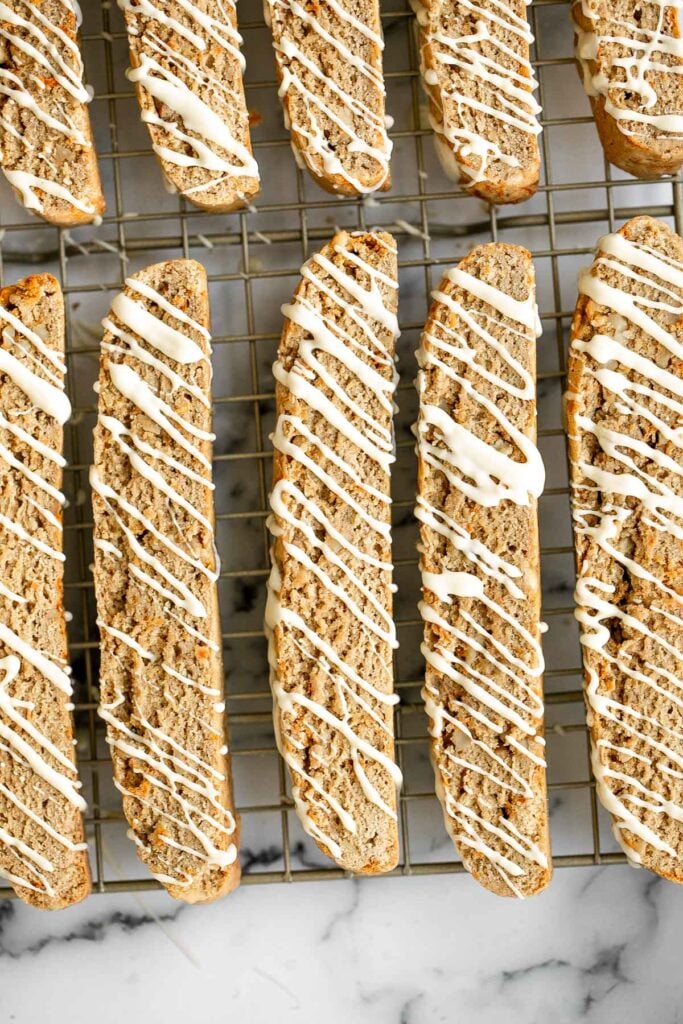
Chocolate and Vanilla Marble Cake
Chocolate and vanilla marble cake is delicious, moist, fluffy with the perfect golden brown crust. With two classic cake flavors, this loaf cake has it all.
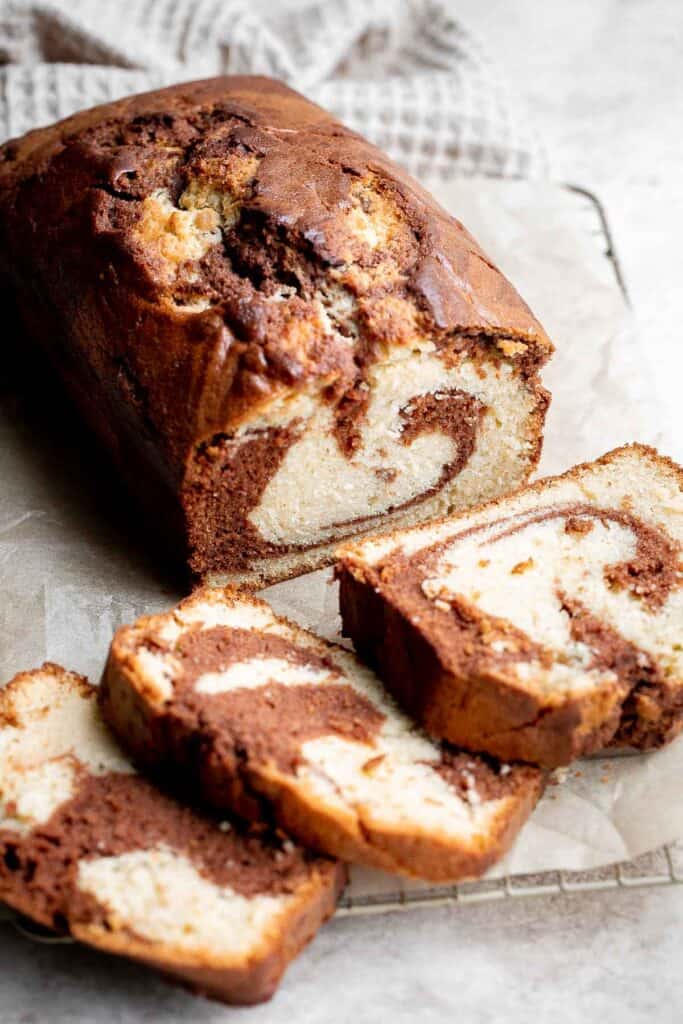
Soft and fluffy lemon sweet rolls are filled with a lemon vanilla sugar and topped with homemade lemon cream cheese icing. They're sweet, citrusy, and tart.

Homemade chocolate chip cookies are soft and chewy, have perfectly crisp edges, and are loaded with chocolate chips. This classic cookie is quick and easy and one of the best easy baking recipes.

Carrot cake muffins are moist, light, chewy and full of carrots which means breakfast this week is healthy! Carrot muffins are great for meal prep too.
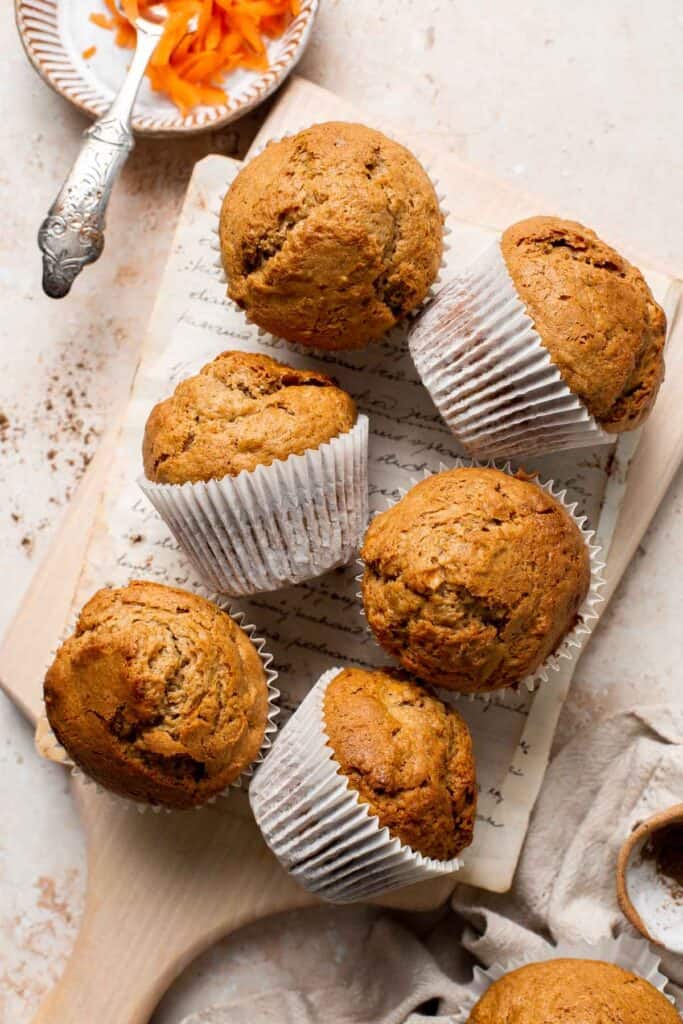
Mini Egg Easter Fudge is a rich, sweet, and colorful white chocolate fudge that is easy to make from scratch with just 3 simple ingredients.
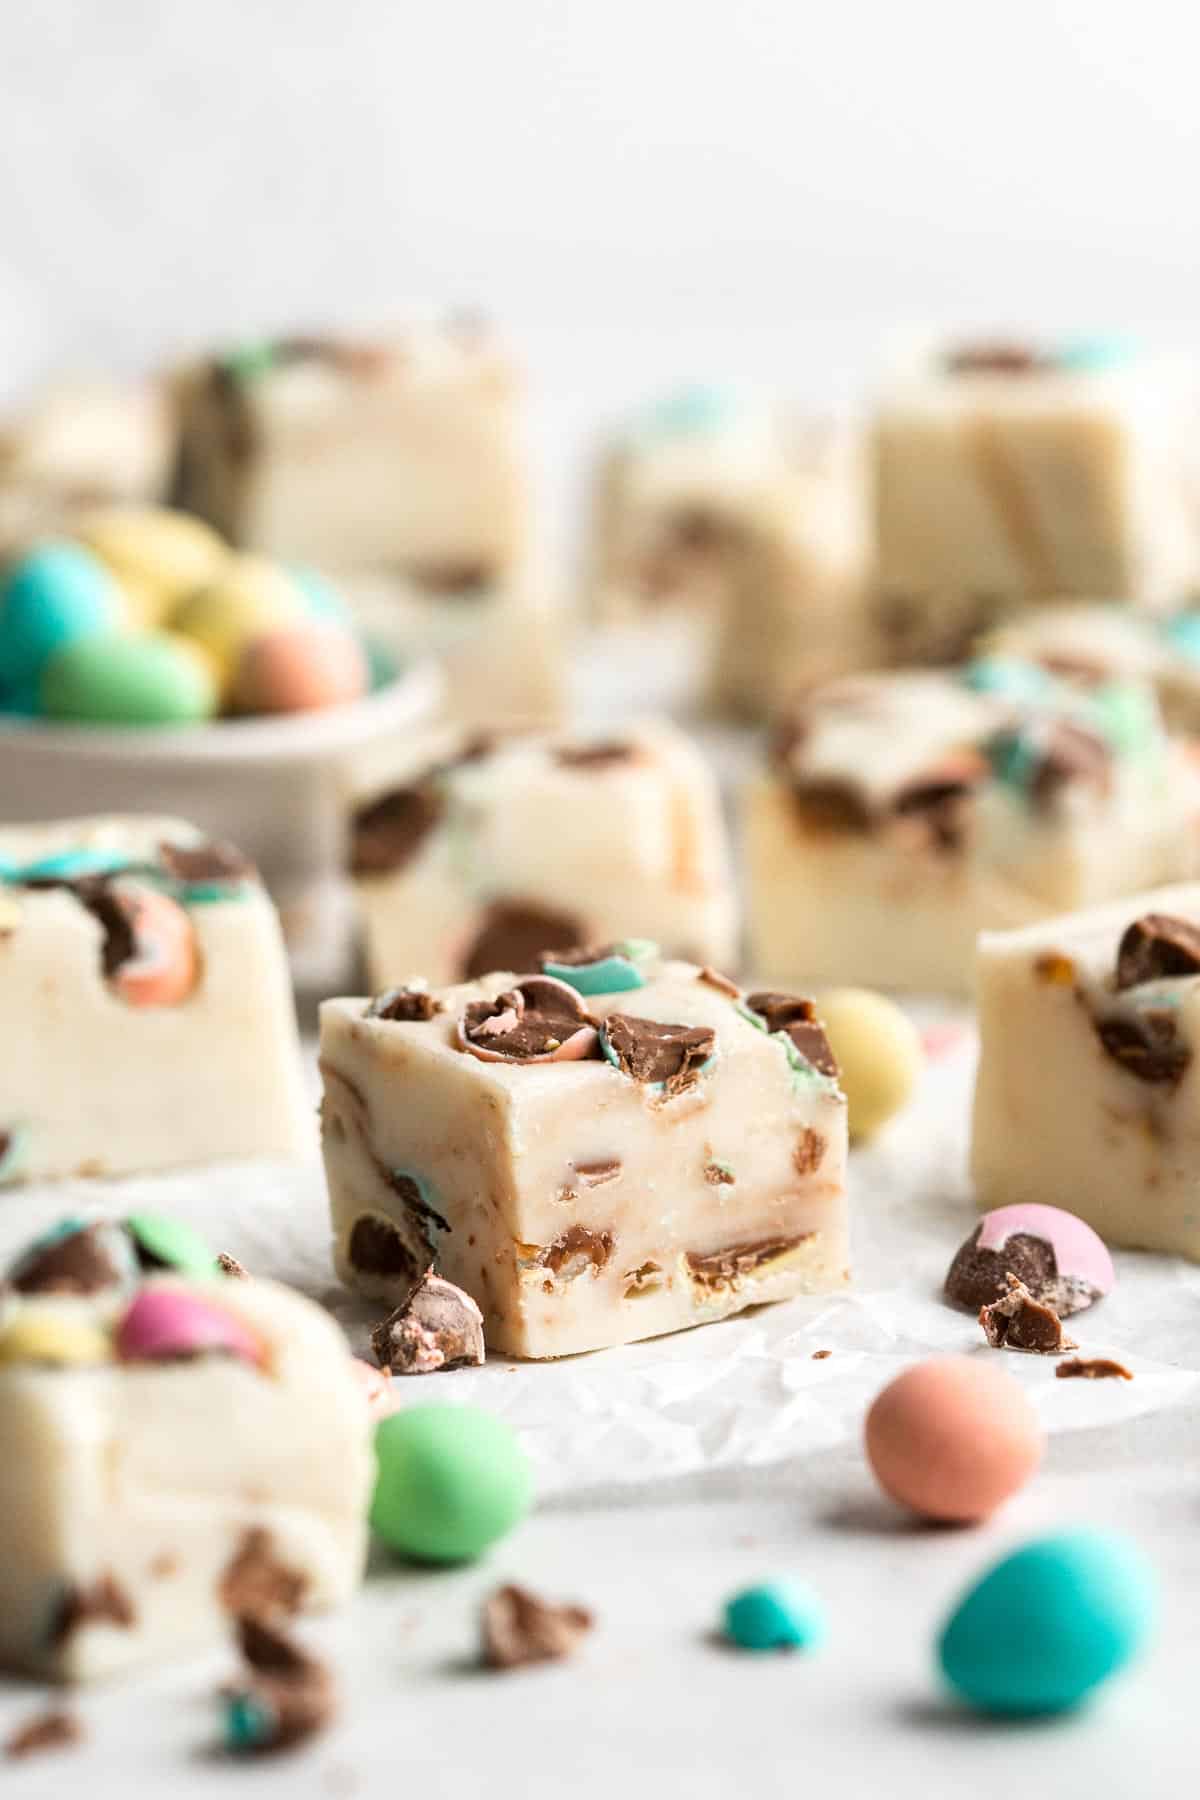
No one will be able to resist this perfectly sweet and moist, glazed brown sugar bundt cake. Made with Greek yogurt for major decadence and richness.
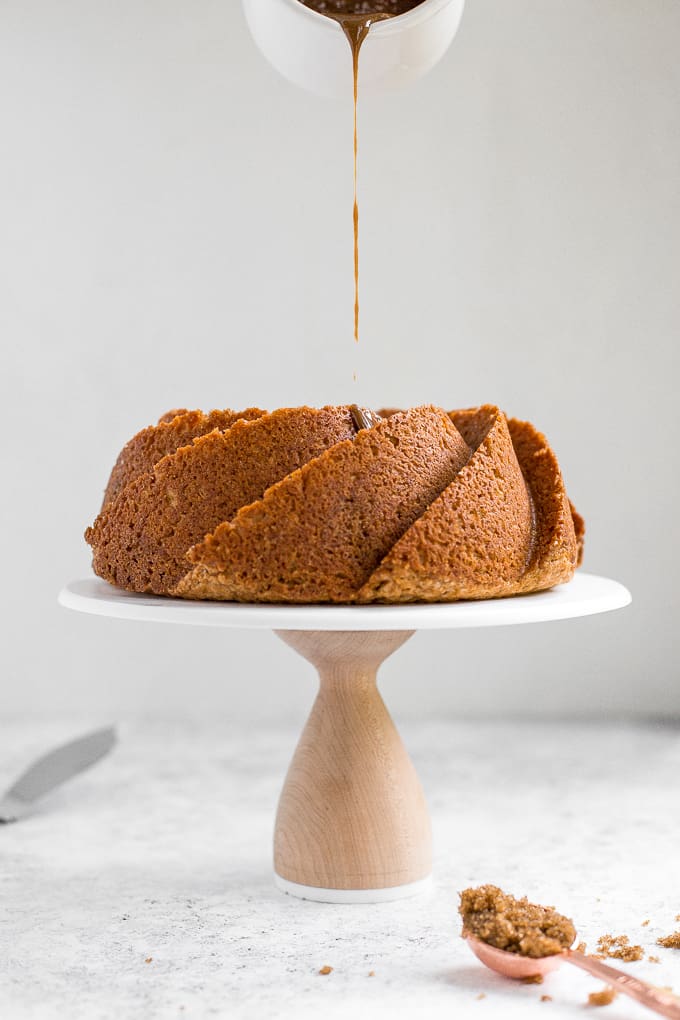
Easier than pie, this strawberry galette with a buttery flaky crust and a sweet and tart strawberry filling is a beautiful treat to serve this berry season.
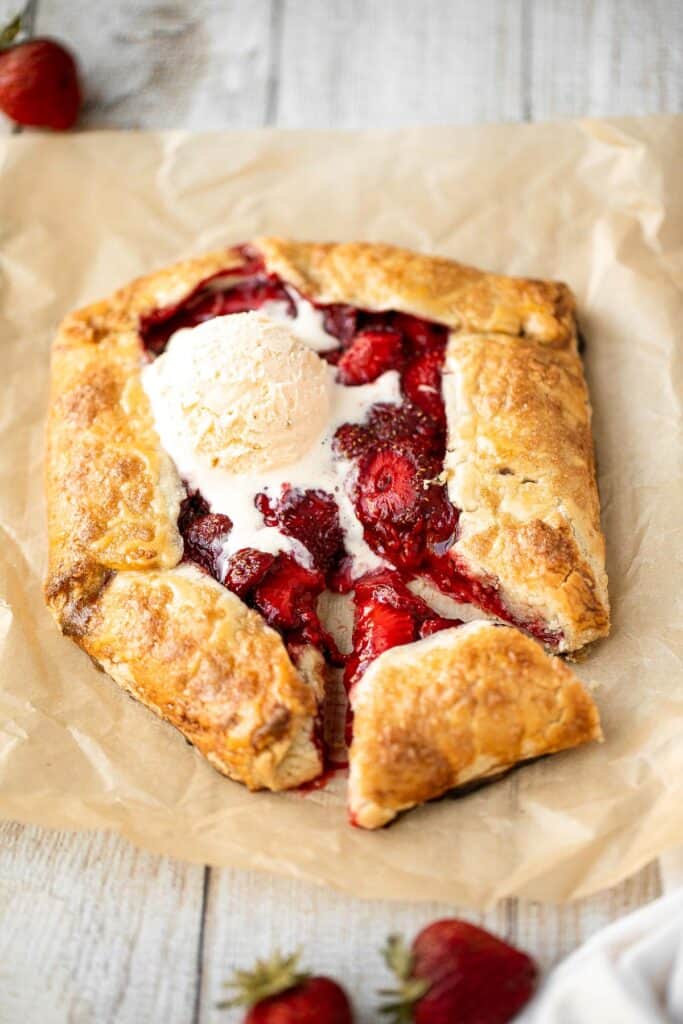
Fudgy brownies are rich, sweet, moist, and decadent. Plus, they're easy to make in one bowl (meaning less cleanup!) and ready in about 30 minutes.
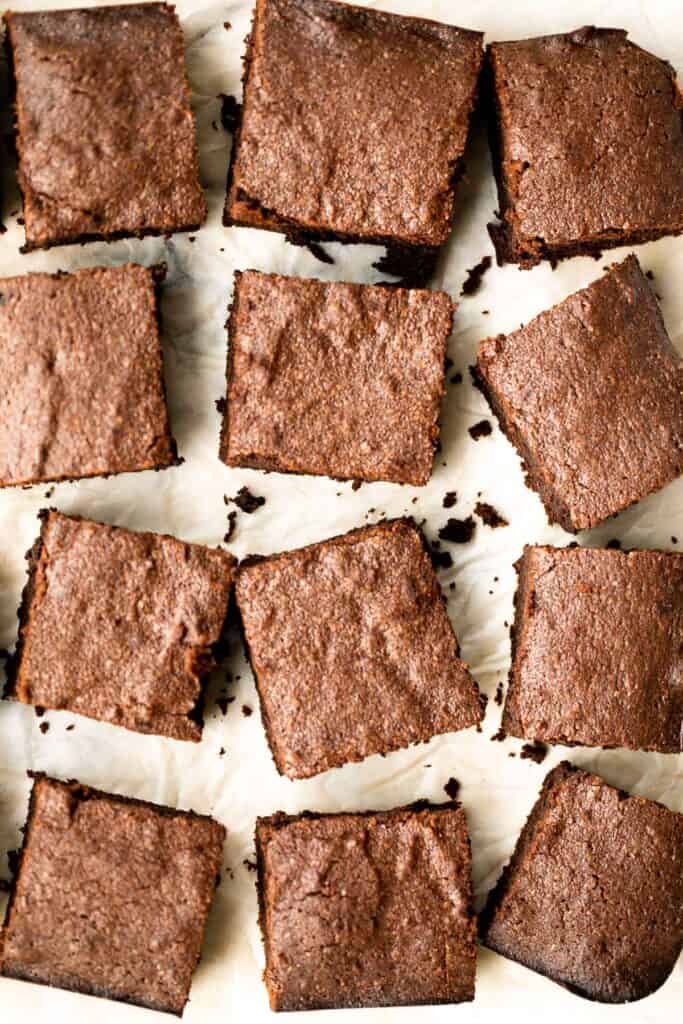
Butter cookies are a classic cookie with a crisp, slightly crunchy texture that melts in your mouth on the first bite - and every bite after!

Baked Jelly Donuts with Strawberry Jam
These melt-in-your-mouth, homemade baked jelly donuts, coated in sugar and filled with sweet strawberry jam, are so soft, fluffy, spongy and airy.

Carrot Cake with Cheesecake Topping
Super moist and perfectly spiced carrot cake with a creamy cheesecake topping is flavourful, comforting, and the perfect homemade spring dessert.
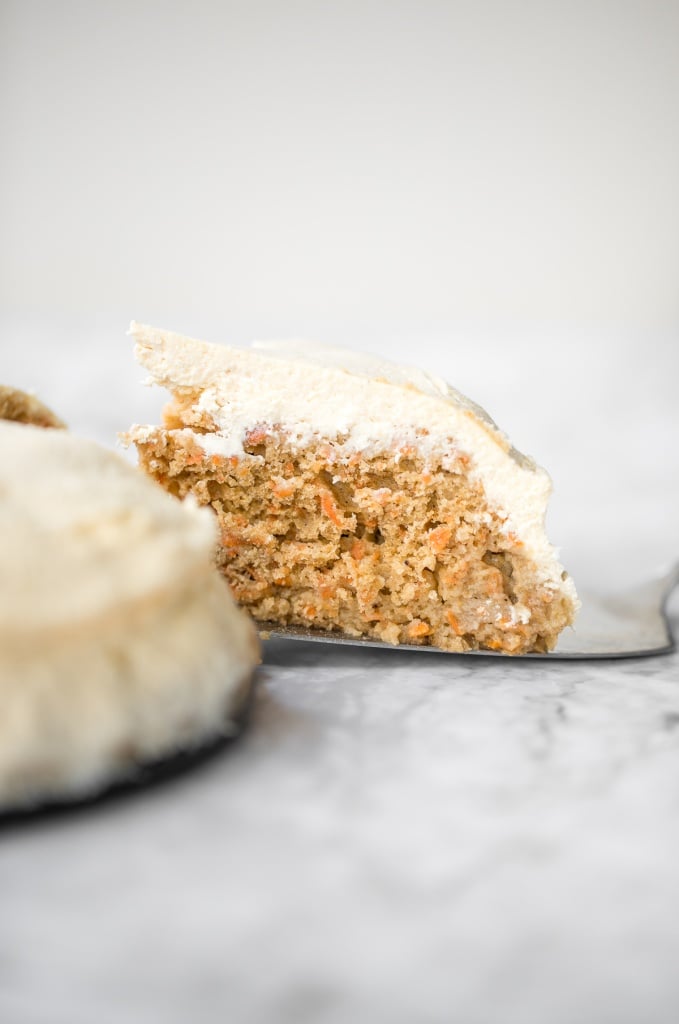
Raspberry and White Chocolate Shortbread Cookies
Cute raspberry and white chocolate heart-shaped shortbread cookies literally melt in your mouth. They are the perfect Mother's Day treat.

The cutest bite-sized treat to serve at any event are vanilla cake pops from scratch -- luckily, they are actually simple and easy to make. Add pastel coloured food colouring to the chocolate coating, or use colourful sprinkles to make them festive for spring.

Italian rainbow cookies are delicious, colorful, fluffy, and gorgeous, made with three cake layers sandwiched in between jam and covered in chocolate.

Blueberry buckle cake is soft and moist, loaded with fresh blueberries, and has a crunchy, sweet and buttery streusel topping. It's the best coffee cake.
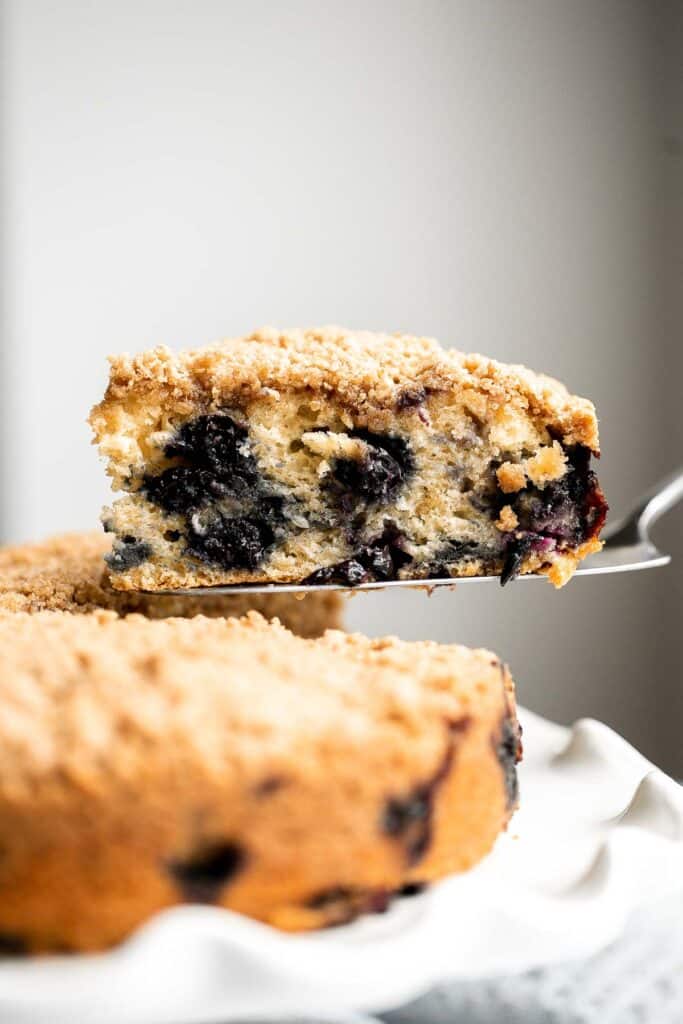
Classic New York Cheesecake is stunning, delicious, rich, and creamy. Plus, it's surprisingly easy to make from scratch - even for beginners!
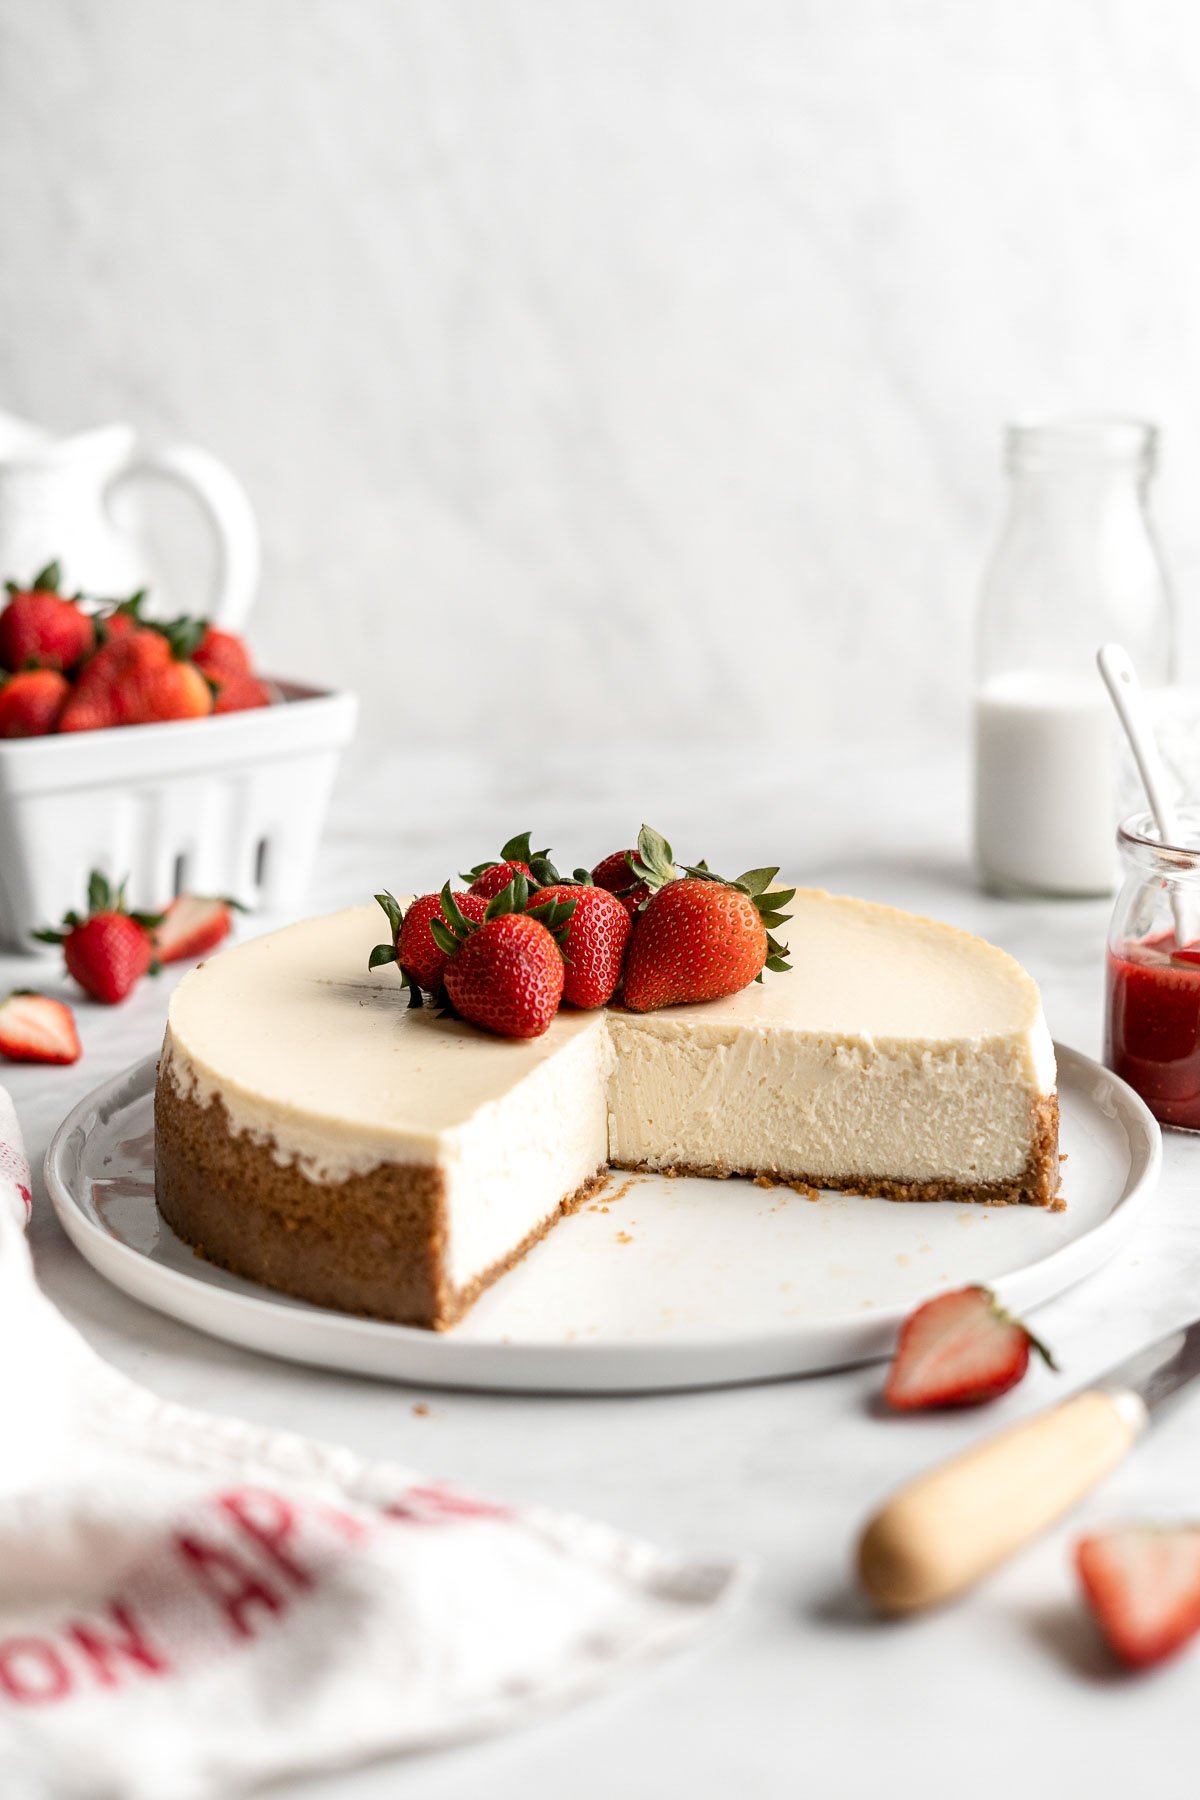
French Macarons with Vanilla Buttercream Filling
Easy French macarons with vanilla buttercream filling are sweet, light, airy, and delicate cookies that melt in your mouth. Beginners can make them too!

Cut out shortbread cookies are soft, buttery, and melt in your mouth. Made with a simple 5-ingredient cookie dough and decorated with optional royal icing.
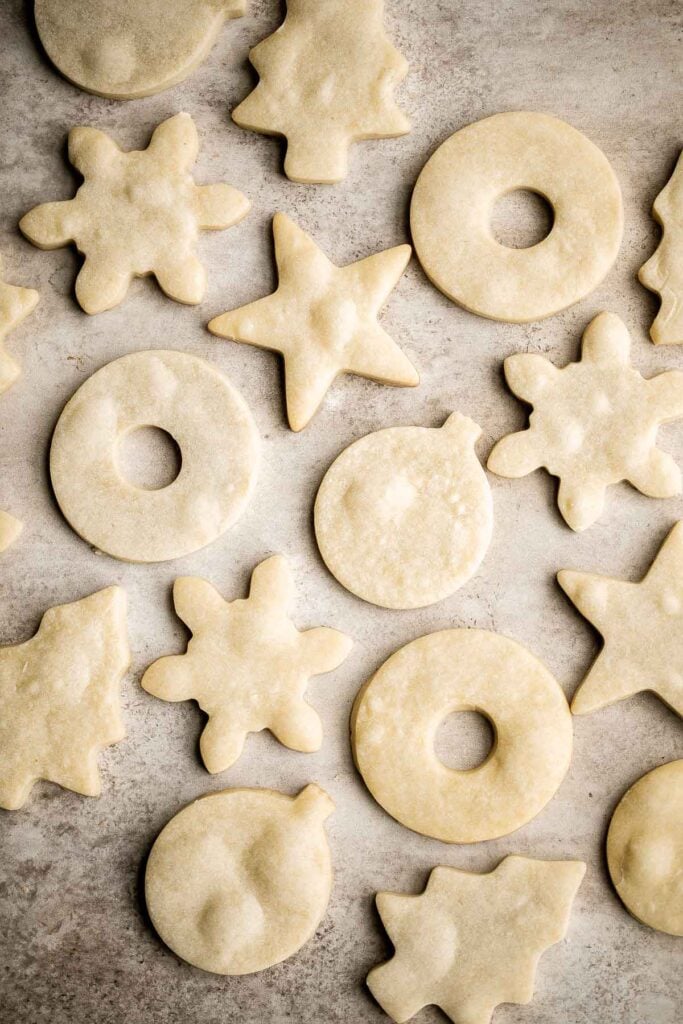
Moist chocolate cupcakes topped with chocolate buttercream frosting and sprinkles, are a chocolate triple threat. They're rich, decadent, sweet, and easy to make.

Light, tender and flakey, glazed lemon blueberry scones are crunchy and golden on the outside, soft and moist in the middle, with a drizzle of lemon glaze.

Slice and Bake Pecan Shortbread Cookies
Easy slice and bake pecan shortbread cookies are sweet, nutty and buttery shortbread cookies packed with finely chopped pecans that melt in your mouth. It's an easy baking recipe with no cookie cutters or cookie scoop required.
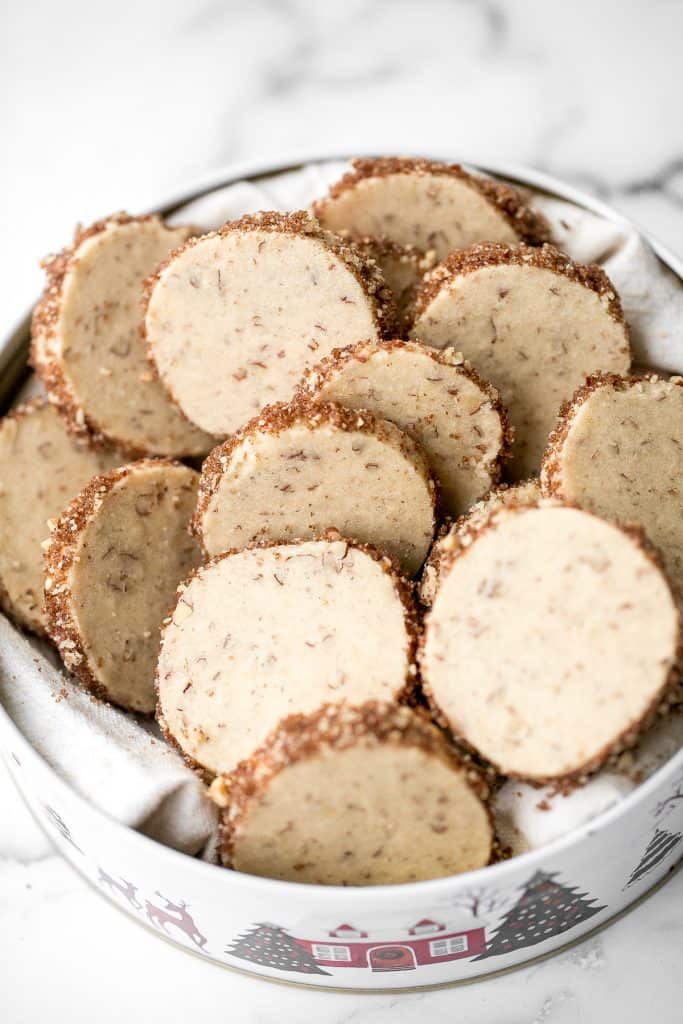
Vanilla Cupcakes with Rose Petal Buttercream
Light, airy and fluffy vanilla cupcakes with rose petal buttercream icing is the cutest treat for Easter. They are super quick and easy to make.

Inspired by Starbucks lemon loaf, this moist, homemade lemon loaf with lemon glaze has the perfect balance between sweet and tangy, and so so flavourful.
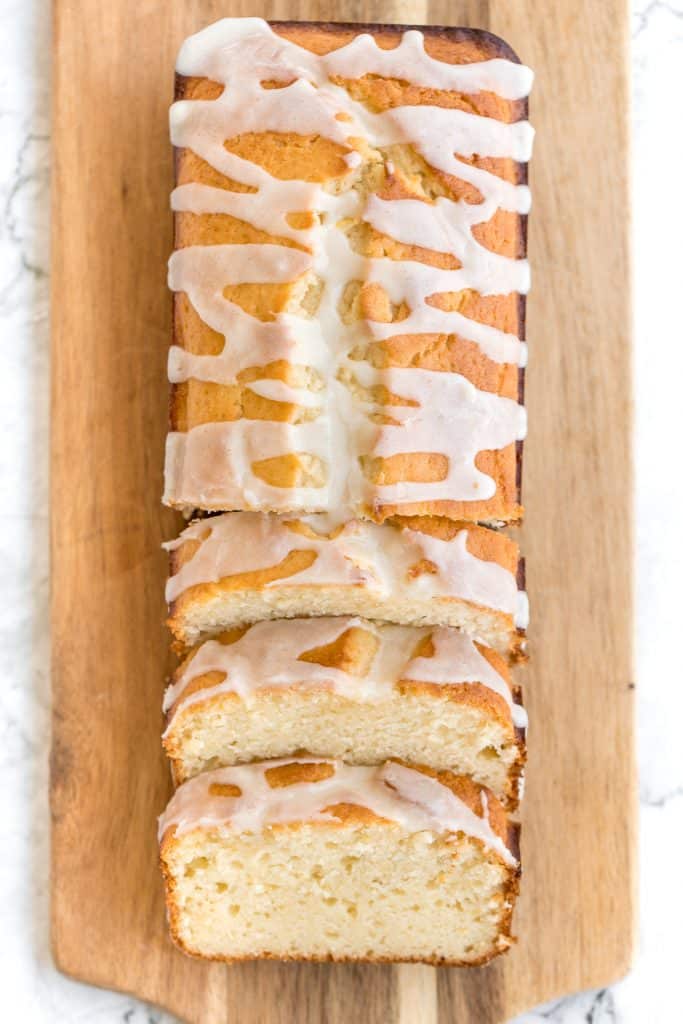
Homemade salted caramel sauce is sweet, salty, and buttery. It's so simple and easy to make at home in just 10 minutes with 4 basic ingredients.

Chocolate Chunk Peanut Butter Cookies
These perfectly soft, chewy and a little crumby chocolate chunk peanut butter cookies literally melts in your mouth. Make them in under 20 minutes.

Easy Small Batch Almond Biscotti
Small batch almond biscotti are crunchy, crumbly and packed with almonds, perfect for dunking into tea, coffee, or hot chocolate, and they are super easy to make.

Easy No Crust Burnt Basque Cheesecake
Easy no crust burnt Basque cheesecake is the easiest one bowl recipe. It is perfectly caramelized on the top and edges and creamy yet firm on the inside.
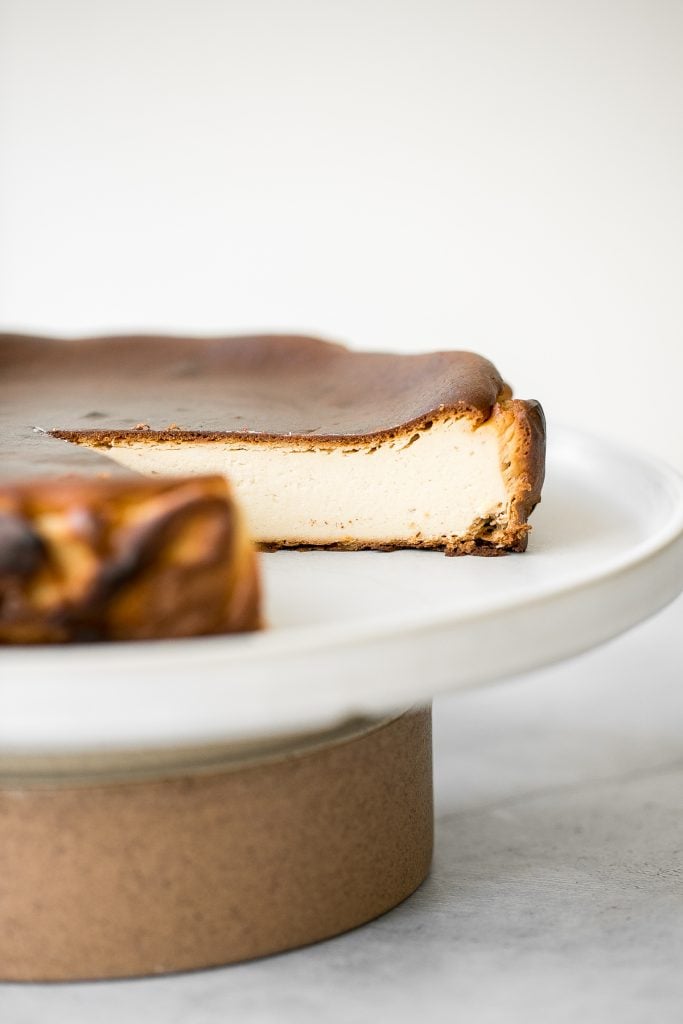
Cake mix cookies are the easiest cookies to bake with just three simple ingredients in 20 minutes! Mix and match different cake mix flavors and add-ins.

Persian Rice Cookies with Poppy Seeds (Nan-e Berenji) are irresistible, melt-in-your-mouth cookies made of rice flour, fragrant rose water and poppy seeds.
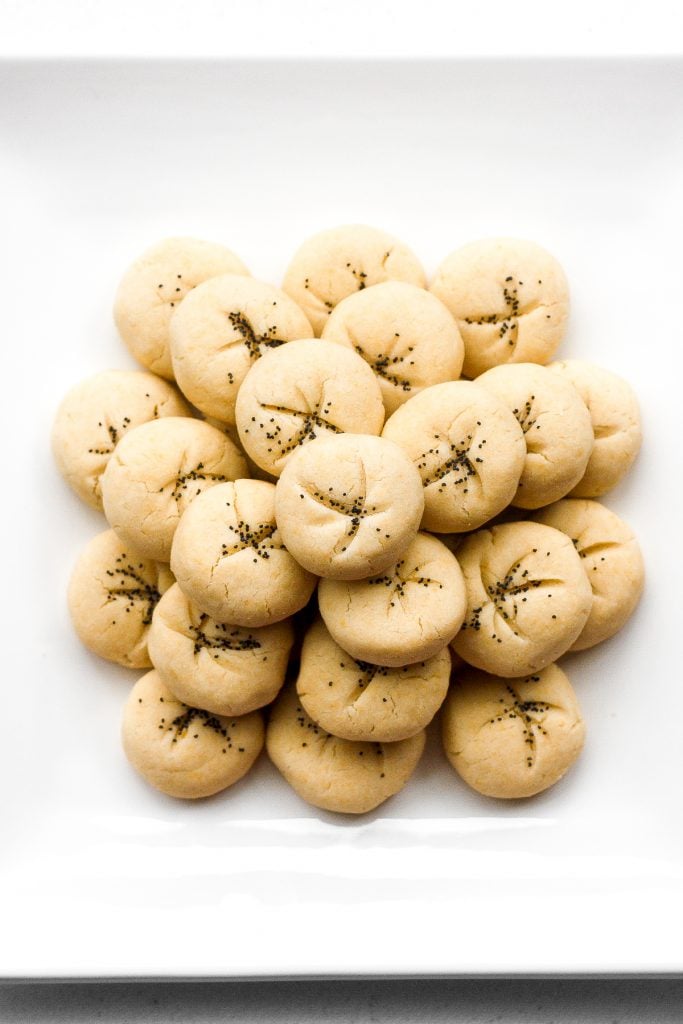
Easter Desserts
Cute, delicious, and easy-to-make Easter egg sugar cookies with royal icing are the perfect treat to make this Easter. Crisp outside and soft inside. One of my favourite Easter dessert recipes.

Mini egg Easter cookies are the perfect chocolate chip cookie -- crispy on the outside, and soft and chewy on the inside. Make in under 20 minutes.

Get festive with these cute bunny ears Easter cupcakes. Buttercream frosting and marshmallows make these vanilla cupcakes extra sweet and delicious.

Chocolate-covered peanut butter eggs with a hard chocolate shell on the outside and a soft peanut butter interior inside are rich, sweet, and delicious.

Rich, fudgy, and decadent, Easter egg caramel brownies are topped with an easy-to-make caramel sauce and topped with mini chocolate eggs. Such a decadent on this list of Easter dessert recipes.

Easter Bark is the perfect chocolate treat - sweet, rich, and pretty, loaded with chocolate mini eggs and sprinkles. It's a quick and easy no bake recipe.
Butterscotch and Peanut Butter Bird's Nest Cookies
Spring is in the air and Easter is right around the corner. This calls for a batch of adorable no bake butterscotch and peanut butter bird's nest cookies. One of the cutest Easter dessert recipes.

Mini egg cookie bars are a quick easy one bowl Easter dessert - soft and chewy with perfect crisp edges and a gooey center and loaded with mini eggs.
Easter blondies are rich, sweet, and moist, loaded with festive M&M's which makes them fun to make and eat. Plus, it's a quick and easy one bowl recipe.
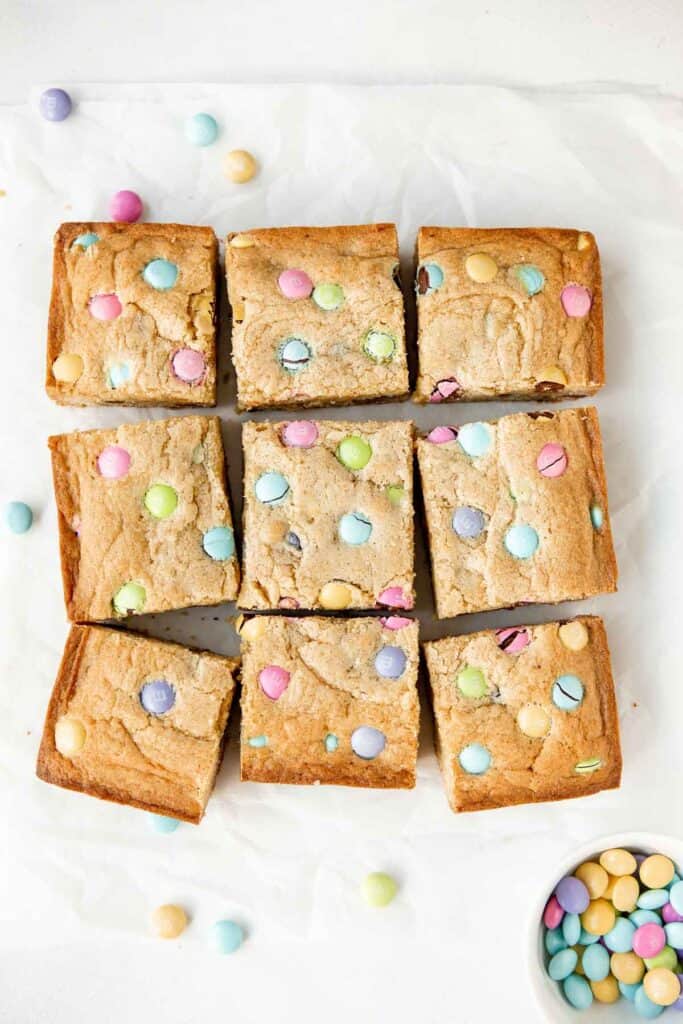
How to Make Ahead and Store
You can make or prepare some of these spring dessert recipes ahead of time. Store the desserts and baked goods at room temperature for 1-2 days. You can also store them in the refrigerator for up to one week or in the freezer for up to 3 months. Confirm storing instructions by checking each recipe.
To reheat any of these recipes and serve them warm, reheat in a 300F preheated oven or air fryer for 5-15 minutes until fully warmed through, depending on the recipe. If heating from frozen, let it thaw first and then reheat.
How to Make Ahead and Store Spring Desserts
You can make or prepare most of these spring desserts ahead of time.
- Store the pies and baked goods at room temperature for 1-2 days.
- You can also store them in the refrigerator for up to one week or in the freezer for up to 3 months.
To reheat any of these desserts and serve them warm as if they just came out of the oven, you can reheat in a 300F preheated oven or air fryer for 5-15 minutes until fully warmed through. If heating from frozen, let it thaw first overnight in the refrigerator, or a for a few hours at room temperature, and then reheat.
Did You Make Any of These Spring Dessert Recipes?
Please leave a comment and rating below, and let me know what you thought of this round up of the best spring dessert recipes. Be sure to snap a picture and tag me on Instagram @aheadofthyme or share it on the Pinterest pin so that I can follow along.
HUNGRY FOR MORE? Don't forget to sign up for my email newsletter so that you don't miss any recipes. You can also follow along on Instagram and Pinterest for more recipe updates.
Borscht (Beet Soup)
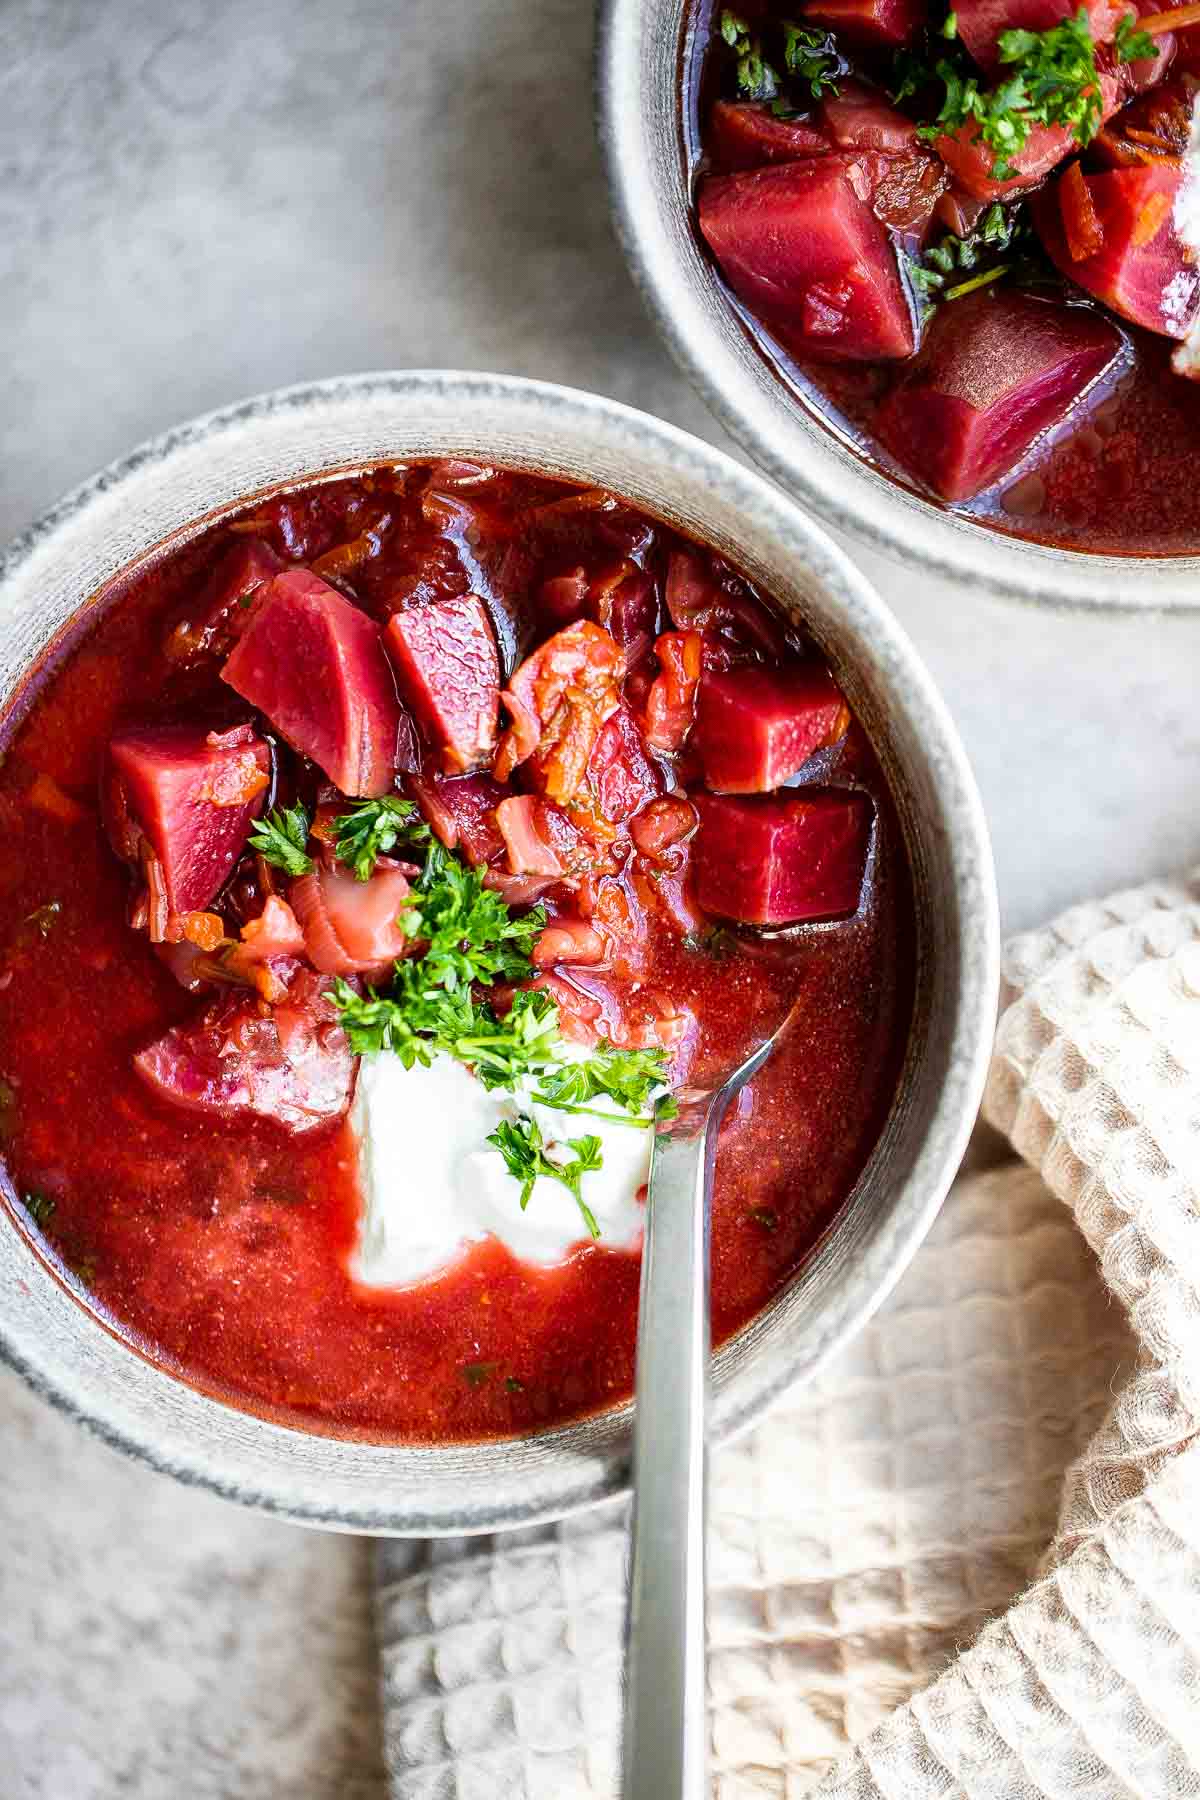
This Ukrainian borscht soup is a traditional beet soup that is enjoyed by locals all over Eastern Europe (and many in rest of the world too!). Made with red beets and plenty of vegetables, this vegan soup is nutritious, flavorful, and delicious. It's so easy to make in one pot on the stove with minimal prep work involved - and even easier in an Instant Pot. Plus, beet soup is easy to make ahead and freezes really well so you can meal prep lunches and dinners for days or months to come.
Why You'll Love Borscht Soup (Beet Soup)
- Vegan and gluten-free. This classic borscht soup is completely vegan and gluten-free. It's loaded with vegetables like beets, cabbage, carrots, and onion and made with a vegetable broth and simple seasonings. I like serving it with a dollop of sour cream, but you can leave it out to keep it vegan.
- It's full of flavor. Don't think that vegan means bland. Beets are highly flavorful, and along with the other vegetables you find in this beet soup, you will taste tons of flavor (and color!) in every spoonful.
- It has a rich beautiful color. The red beets in this soup lend a gorgeous earthy purple red color to the entire soup, which makes it a stunning item to serve. Just be careful if you are wearing white!
- It's nutritious. The veggies found in this beet soup are nutrient-dense, and they contain plenty of antioxidants and vitamins. Plus, it keeps you full and satisfied until your next meal.
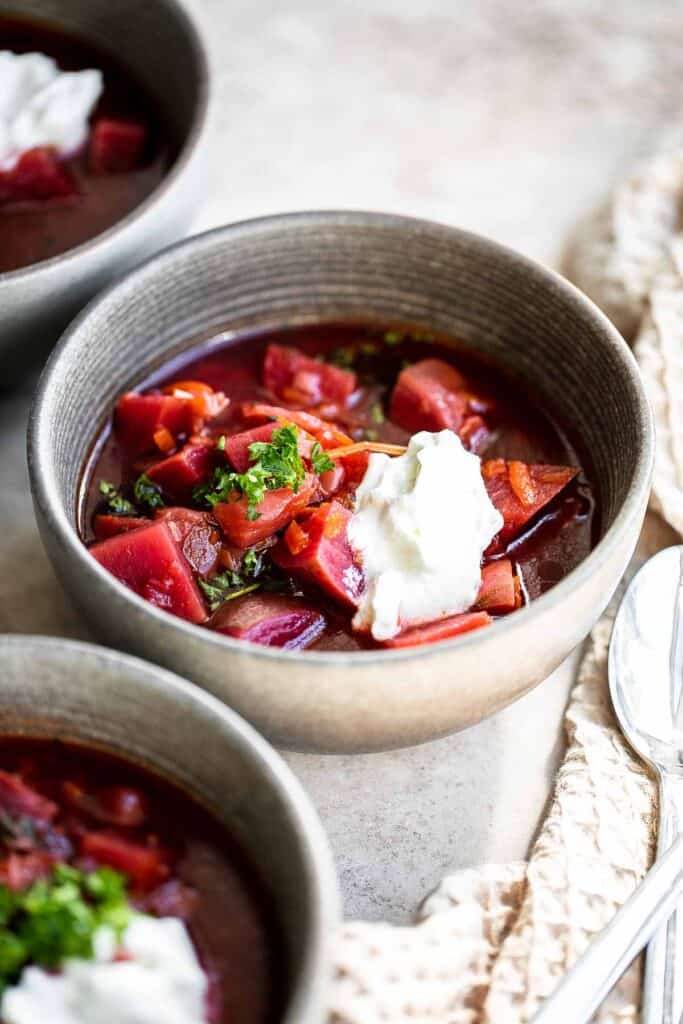
Ingredients and Substitutions
To make this delicious Ukrainian Borscht Soup, you will need the following ingredients (full quantities in the recipe card below):
- beets - classic borscht soup is traditionally made with red beets which gives it its iconic red color. You can feel free to substitute with golden beets for a similar flavor without the color.
- purple cabbage - feel free to substitute with regular cabbage.
- carrots
- onion
- tomatoes
- broth - you can use vegetable broth or substitute with beef broth.
- parsley
- salt and pepper
- sour cream - add a dollop of sour cream on top (optional) when serving.
You will also need measuring cups and spoons and a large stockpot (or instant pot).
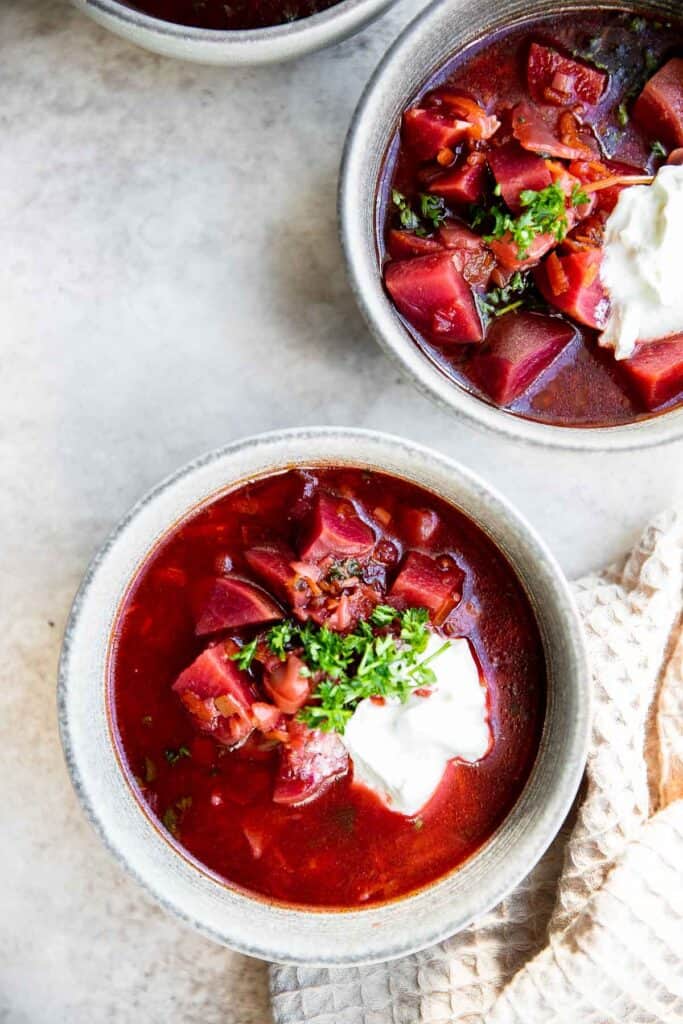
How to Make the Best Ukrainian Borscht Soup
Making borscht soup is so easy. In a large stockpot, add beets, purple cabbage, carrots, onion, diced tomatoes, and broth. Mix well and bring it to a boil over medium-high heat, about 5-6 minutes. Cover the lid and simmer over low heat until the beets are tender, about 30- 35 minutes.
Stir in parsley and season with salt and pepper to taste. Serve warm with a dollop of sour cream on top and a sprinkle of chopped parsley, if desired.
How to Make Borscht Soup in the Instant Pot
- Add beets, purple cabbage, carrots, onion, diced tomatoes, and broth into the instant pot and mix well to combine.
- Seal the lid and turn the steam release knob to SEAL position. Pressure cook for 15-20 minutes until tender. Once the time is up, quick release the remaining pressure by turning the steam release valve to the venting position.
- Stir in parsley and season with salt and pepper to taste. Serve warm.
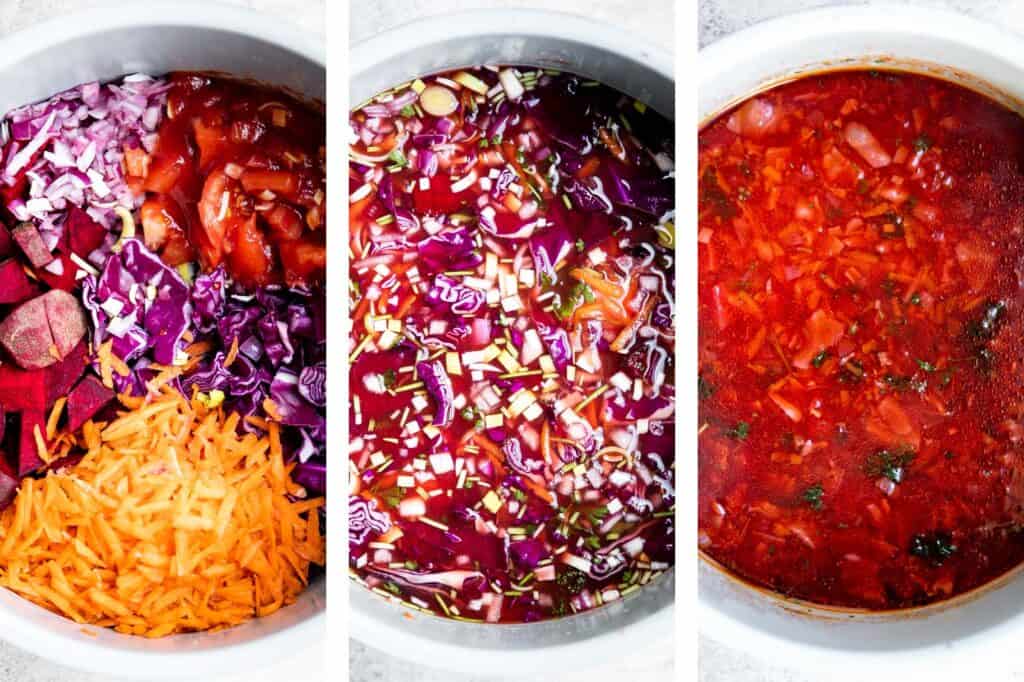
Recipe Tips and Tricks
- How to store: Keep leftover Ukrainian borscht soup in an airtight container in the fridge for up to 2 days. If possible, it's best to keep this colorful soup in glass containers instead of reusable plastic ones to prevent the container from getting stained red.
- How to freeze: You can freeze borscht soup for up to 3 months. When freezing, be sure to leave a bit of extra space in the container(s) for the beet soup to expand.
- How to reheat: If reheating from frozen, it's best to thaw borsch overnight in the fridge before reheating. Otherwise, reheat on the stove over low heat in a covered pan until warm.
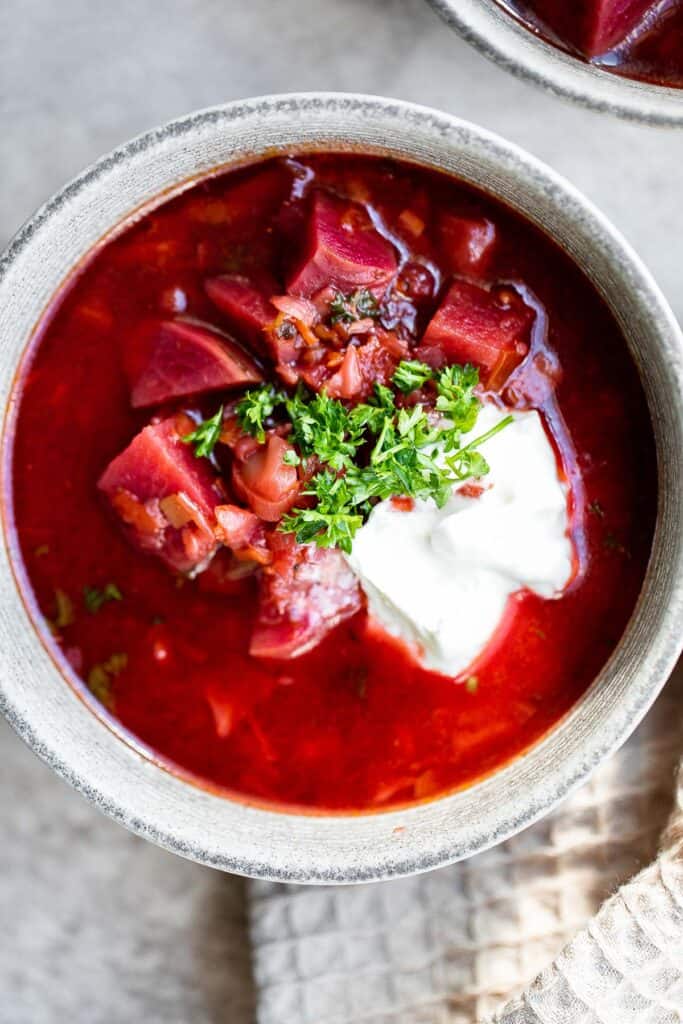
More Soup
- 60 Best Soup Recipes
- Minestrone Soup
- Beef Wild Rice Soup
- Tomato Basil Soup
- Chicken Noodle Soup
- Broccoli Cheese Soup
Tried this recipe?
I'd love to hear what you think! Leave a comment and rating below to share your feedback. Your reviews help others discover this recipe and help me keep creating more free recipes for you. Snap a photo and tag me on social media @aheadofthyme too.

Prosciutto Wrapped Asparagus and Melon
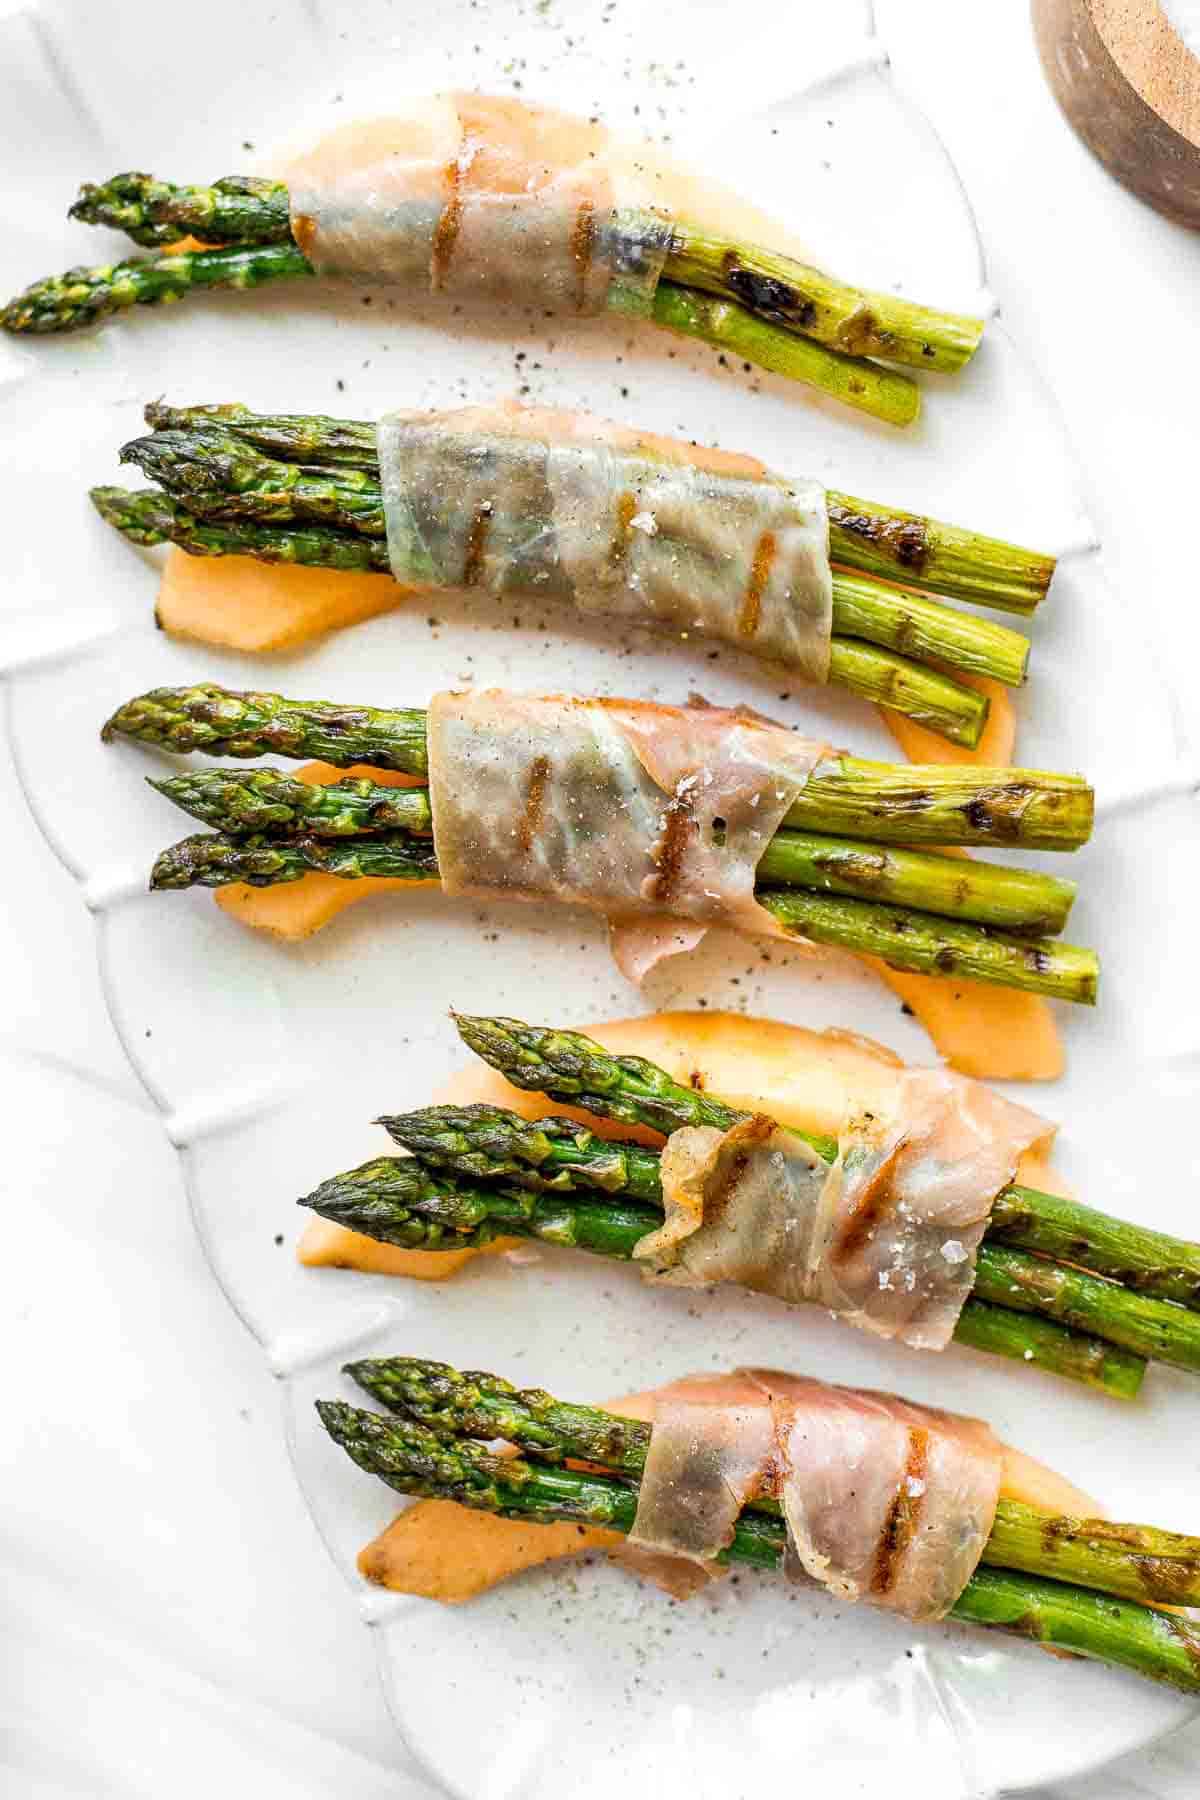
Prosciutto wrapped asparagus and melon are salty, sweet, and juicy - the trifecta you never knew that you needed. They are easy to make with just a handful of simple ingredients. It's the perfect recipe to fire up the grill for in the summer season or throw on a grill pan over the stove in the spring. These asparagus and cantaloupe bundles are a total crowd-pleaser and worth the extra prep of assembling. You will be serving these up to your guests (or yourself) all season long.

Why You'll Love Prosciutto Wrapped Asparagus and Melon
- It's easy to make with a handful of simple ingredients. A ripe cantaloupe, one bundle of asparagus, and a small package of prosciutto is all you need to make this crowd-pleasing appetizer. It takes a bit of time to prep them as you have to assemble each bundle, but it's totally worth the extra time.
- You can grill the bundles or leave them as is. We typically grill the bundles after assembling them, but it's totally acceptable to leave the prosciutto uncooked. Heating them on the grill for a couple minutes per side enhances its already smokey flavor. These little bundles are so crave-worthy and perfect for your next cookout.
- They are the perfect spring or summer appetizer. Serve these prosciutto wrapped asparagus and cantaloupe bundles in the spring or summer season when the produce is fresh. They are great served as an Easter Appetizer, or along with your favorite Summer Grill Recipes at your next summer cookout.
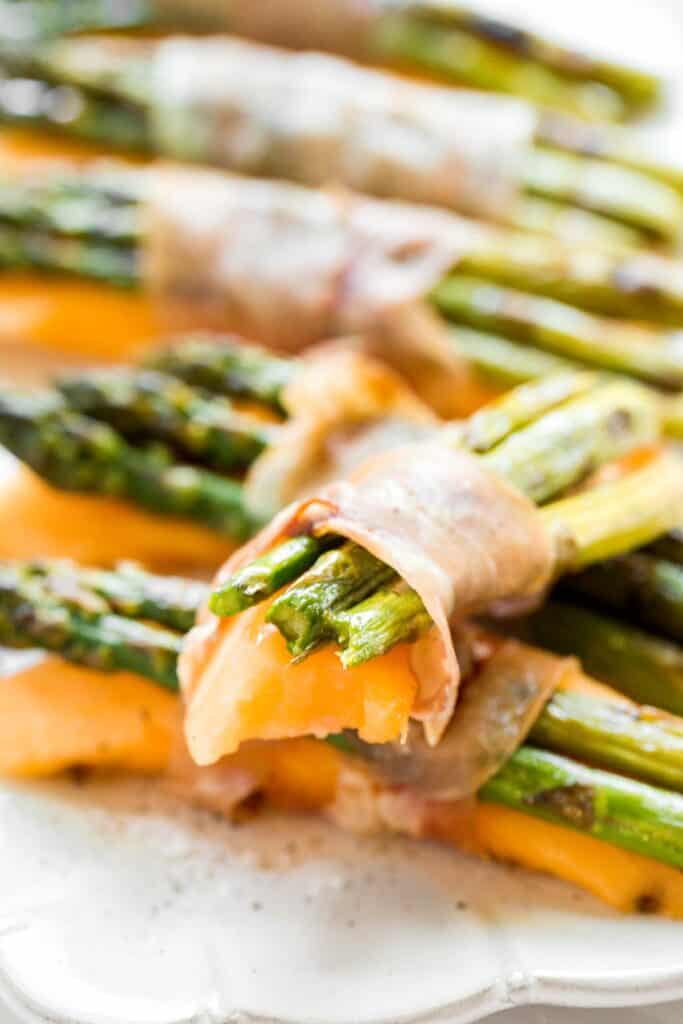
Ingredient Notes
To make this easy prosciutto wrapped asparagus and melon, you will need the following ingredients (full quantities in the recipe card below):
- asparagus
- olive oil
- salt and pepper
- melon - I used cantaloupe but any melon will work (except watermelon). Try it with honeydew melon.
- prosciutto
You will also need measuring spoons, nonstick cooking spray, and a grill.
How to Make the Best Prosciutto Wrapped Asparagus and Melon
- Season and grill asparagus. Trim the bottom 1 to 1.5-inches off the ends of the asparagus. Drizzle the asparagus with olive oil and season with salt and pepper. Heat a grill over medium-high heat until it reaches about 400 degrees (or heat a grill pan on the stove). Grill the asparagus until tender, about 2-3 minutes per side. Remove and set aside.
- Assemble bundles. Peel the cantaloupe and scoop out seeds, then slice into wedges. You can get about 18-20 wedges per cantaloupe. Slice each piece of prosciutto in half lengthwise, then take one single piece and wrap it around 1 cantaloupe wedge and 2-3 pieces of asparagus. Repeat until all the bundles are prepped.
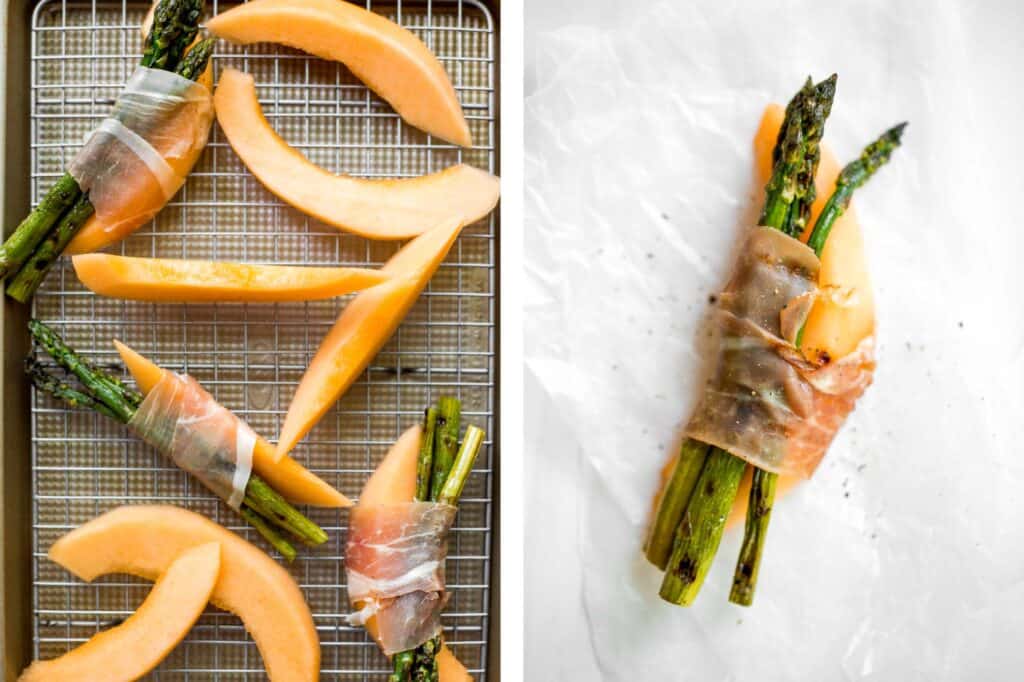
- Grill bundles. Spray the grill with nonstick cooking spray, then grill the asparagus bundles for about 2 minutes per side. Remove and season with a little more black pepper. Serve immediately.

Recipe Tips and Tricks
- Varying cook times: If your asparagus is large and thick, they'll may need an extra minute on the grill. If they are thin, flip them over after just a minute or 2.
- How to store: After the grilled asparagus and cantaloupe bundles have cooled to room temperature, store them in an airtight container in the fridge for 4-5 days.
- How to reheat: Prosciutto wrapped asparagus and melon are best served fresh. If you have leftovers, you can eat them cold or reheat on the grill or in a 400F oven or air fryer for 5-10 minutes until the prosciutto is crisp.
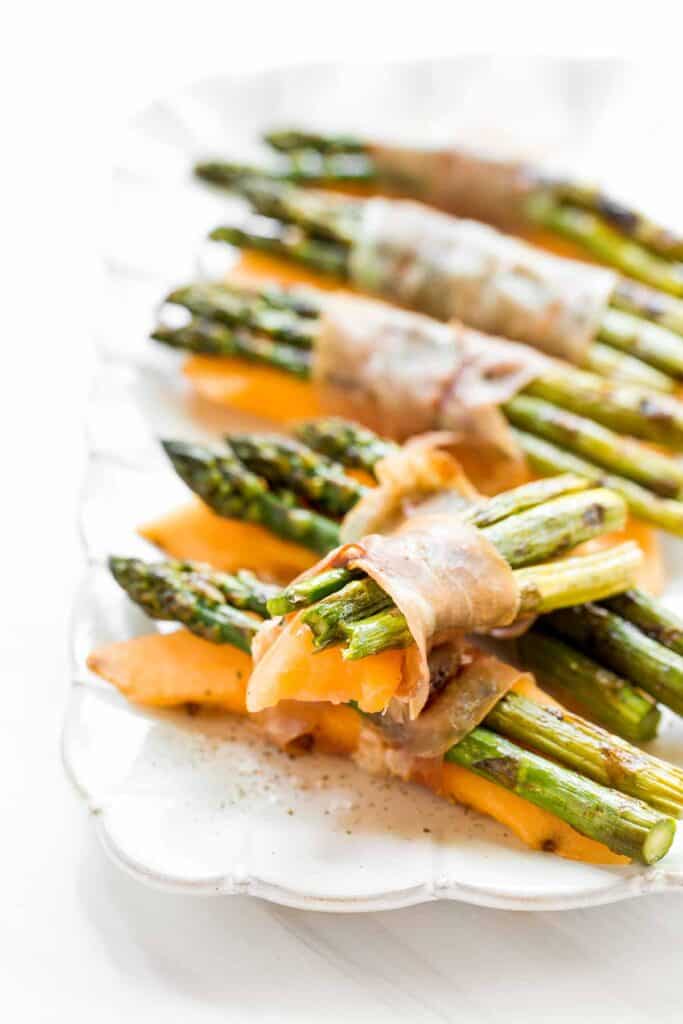
More Asparagus Recipes
- Cheesy Roasted Asparagus
- Asparagus Tart
- Lemon Asparagus Soup with Parmesan
- Chopped Asparagus Salad
- Spring Pesto Pasta with Asparagus
- Roasted Asparagus with Poached Eggs
Tried this recipe?
I'd love to hear what you think! Leave a comment and rating below to share your feedback. Your reviews help others discover this recipe and help me keep creating more free recipes for you. Snap a photo and tag me on social media @aheadofthyme too.

How to Cook Asparagus
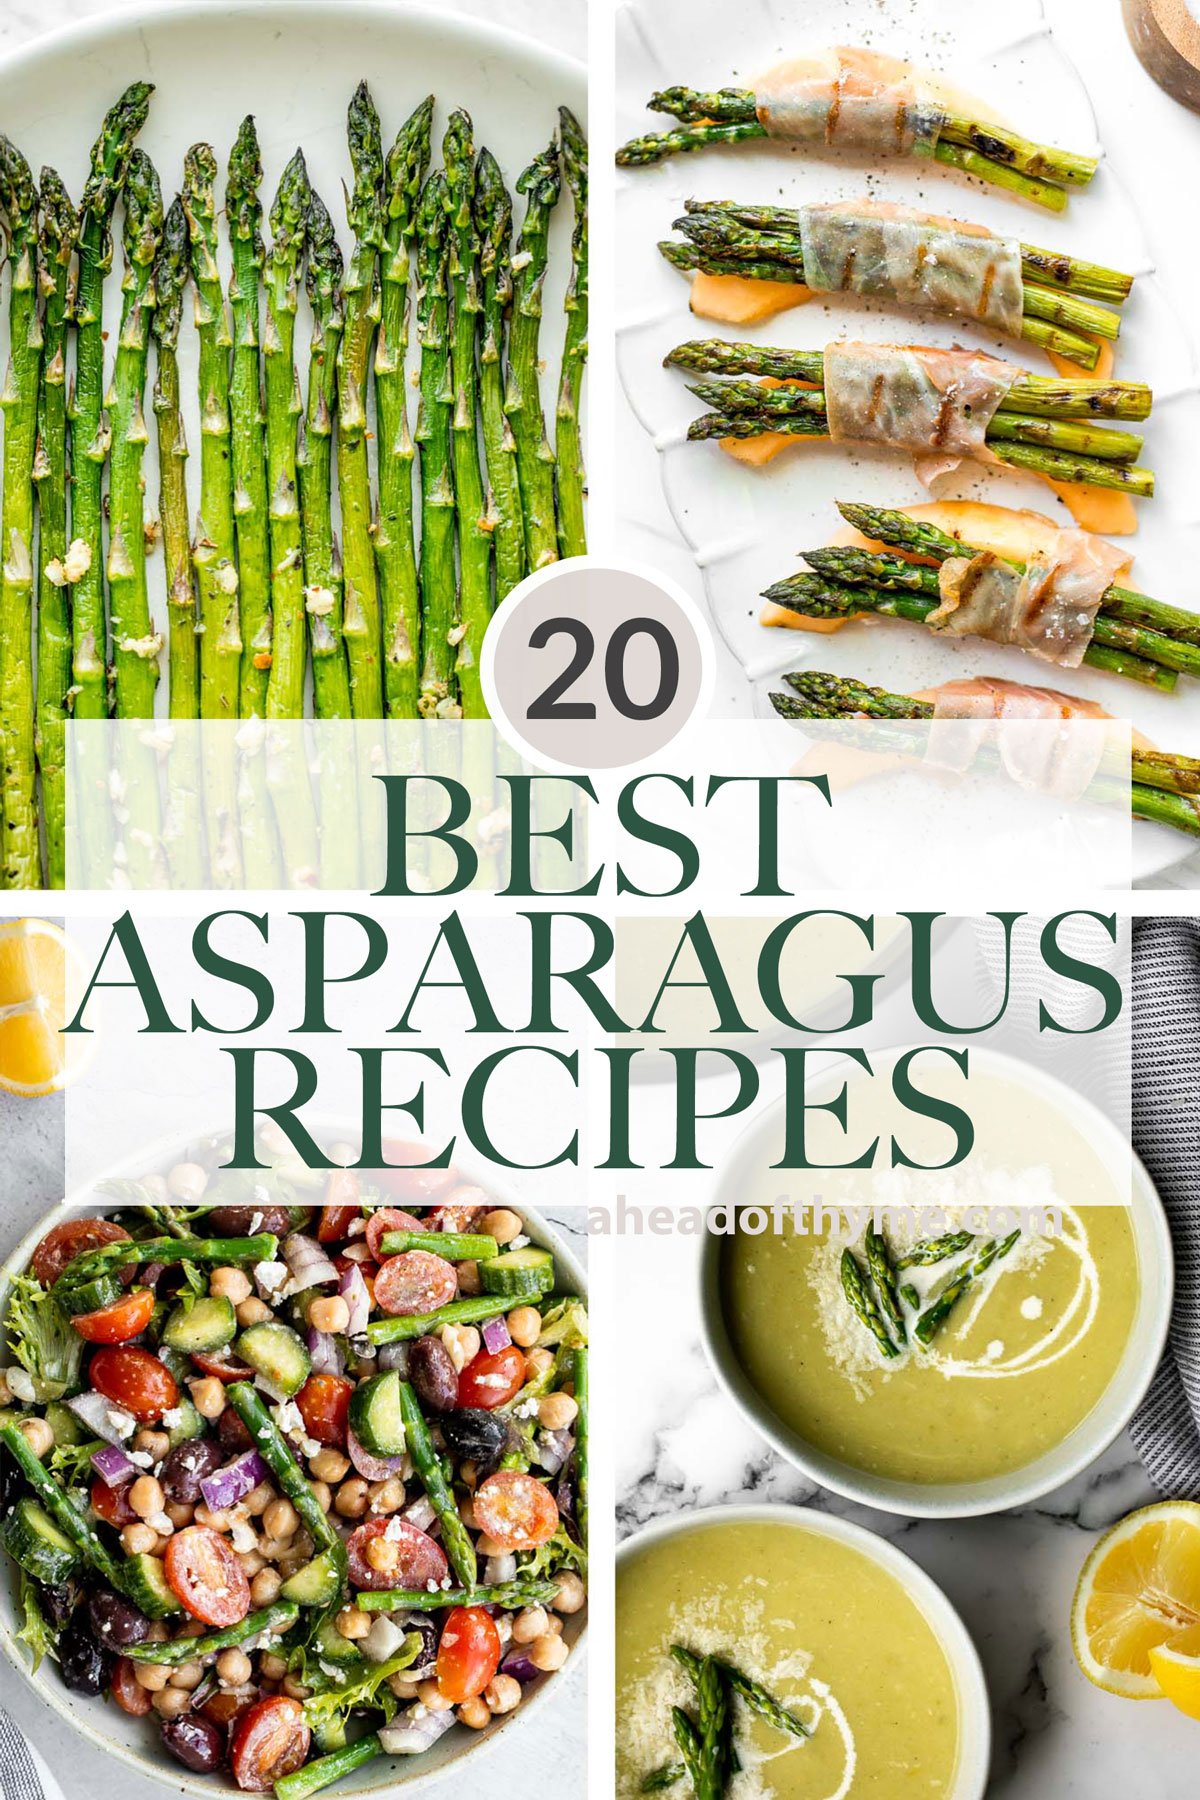
The spring season is all about the fresh seasonal produce that we start to see in our local grocery stores and farmer's market. My favorite spring vegetable is asparagus. I love using it in cooking because it's so versatile - easy to prepare (like 5 minutes easy) and is delicious on it's own as a side dish or as an ingredient in soups, salads, and more. So if you are wondering "how to cook asparagus", then you are in the right place. We are sharing over 20 of our favorite and best asparagus recipes including roasted asparagus, air fryer asparagus, sautéed asparagus, asparagus soup and salad, asparagus appetizers, and dinner recipes with asparagus.

Best Asparagus Recipes
Crisp on the outside and tender inside, air fryer asparagus cooks in just 6 minutes! It is tossed in very little olive oil with garlic and seasonings.

Lemon Asparagus Soup with Parmesan
Lemon asparagus soup with parmesan is the perfect spring soup -- smooth, light, fresh, and flavourful. It's customizable and can be served hot or cold.
Cheesy roasted asparagus is a quick and easy side dish made with a handful of simple ingredients in 20 minutes. They're garlicky, cheesy, and flavorful.

Chicken Madeira with sautéed mushrooms and tender crisp asparagus is topped with melty mozzarella cheese. Cheaper and better than the Cheesecake Factory!
Roasted Asparagus and Mushrooms
Roasted garlic asparagus and mushrooms is a simple vegan sheet pan side dish that's easy to make, flavorful and delicious. Serve with your favorite protein.
Chopped asparagus salad with lemon vinaigrette is the easiest and best spring salad ever - colourful, vibrant, flavourful, light, and crunchy.
Keep dinner healthy, yet full of flavour with a side of quick and easy sautéed asparagus: the perfect companion to your main dish.

Spring Pesto Pasta Salad with Asparagus
Spring pesto pasta with asparagus and chives is light and made with simple ingredients in under 20 minutes. Serve it hot for dinner or cold as pasta salad.
Asparagus tart with Gruyère cheese, a balsamic glaze, and flaky puff pastry, is a flavourful and delicious addition to brunch this spring season.
Lemon parmesan asparagus is a delicious way to serve a classic spring vegetable. This side dish is quick and easy to make in less than 20 minutes.
Air Fryer Spring Vegetable "Stir Fry"
Simple air fryer spring vegetable "stir-fry" with tofu is the ultimate easy dinner ready in less than 10 minutes. It's healthy, vegan and gluten-free.
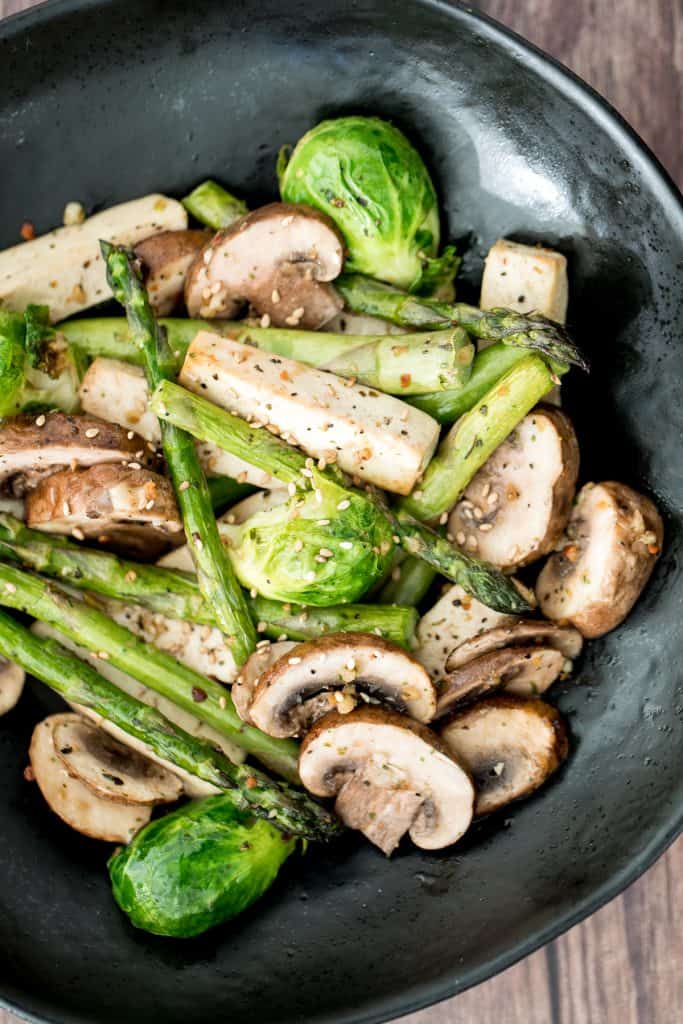
Prosciutto Wrapped Asparagus and Melon
Prosciutto wrapped asparagus and melon are salty, sweet, and juicy. They are easy to make with a handful of simple ingredients, then cooked on the grill.
Roasted Asparagus with Poached Eggs
Roasted asparagus with poached eggs is a match made in food heaven. Serve this topped with fresh herbs and lots of black pepper for a classy, elevated dish that will leave you feeling light, but completely satisfied, or simply to celebrate the arrival of spring.
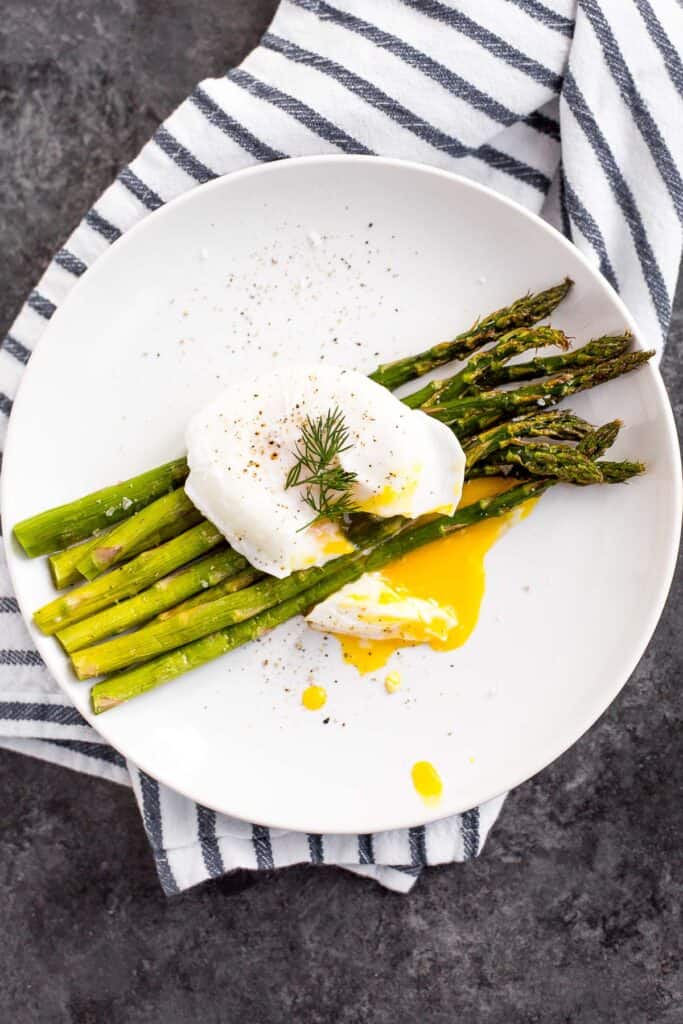
Roasted spring vegetables are an easy sheet pan side dish packed with all our favourite veggies of the season. Plus, it's so easy to prep and make.
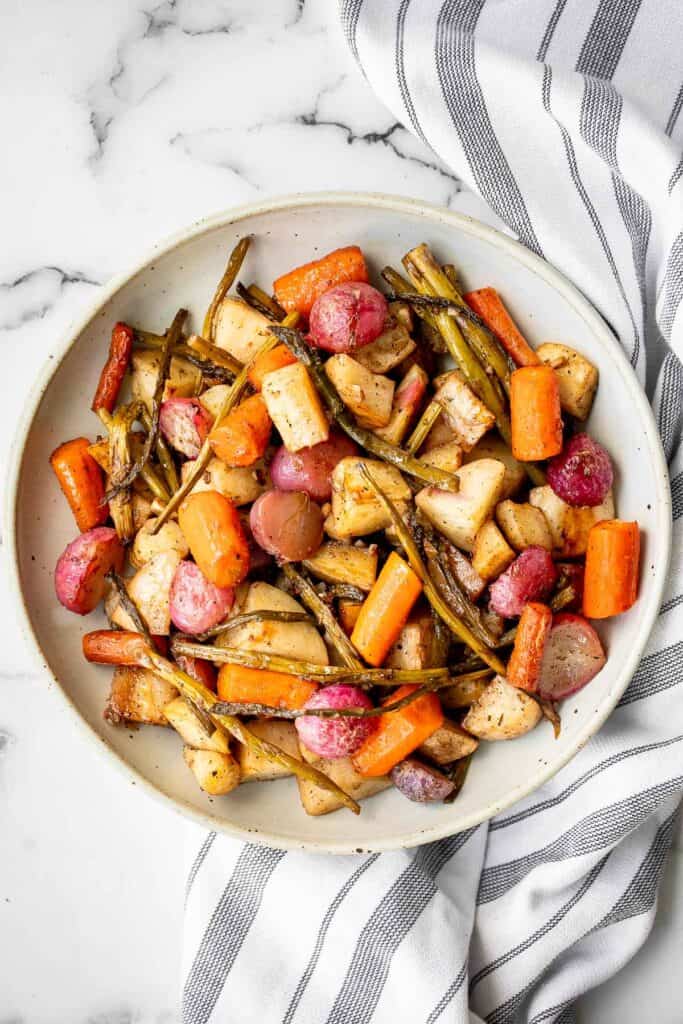
Spring vegetable frittata is a delicious breakfast or served at any time of the day. It's a one-pan meal that starts on the stove and moves to the oven. A perfect Easter breakfast and brunch idea!
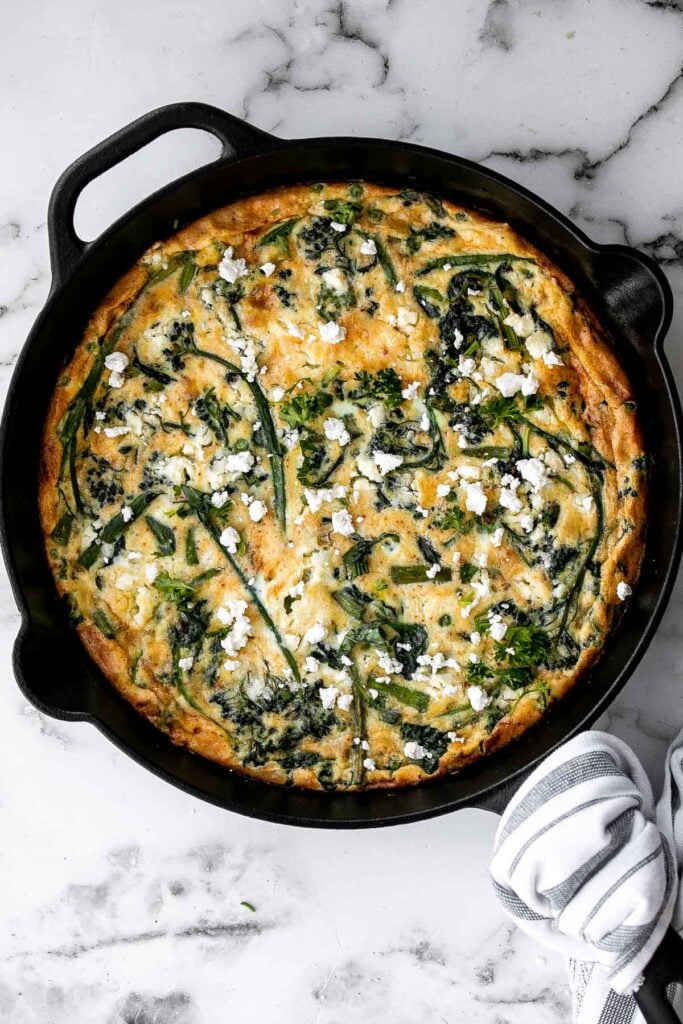
Creamless Cream of Asparagus Soup
Creamless cream of asparagus soup is healthy, delicious, smooth, creamy, quick and easy to make. A perfect spring soup for a last minute lunch or dinner.
Quick and easy spring vegetable stir fry is made with delicious seasonal vegetables, packed with savoury and salty flavour, and takes 10 minutes to cook.
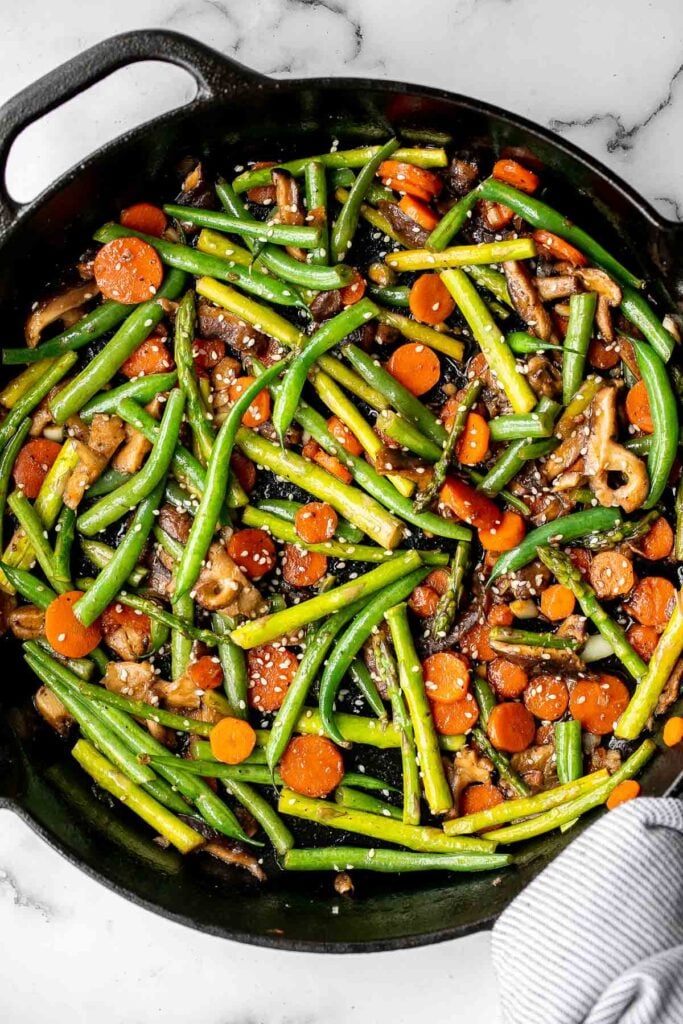
More Vegetable Recipes
- 40 Vegetable Side Dishes
- 40 Best Carrot Recipes
- 30 Best Potato Recipes
- 10 Best Stuffed Peppers Recipes
- 25 BBQ Side Dishes
Did You Make Any of These Asparagus Recipes?
Please leave a comment and rating below, and let me know what you thought of this round up of the best asparagus recipes. Be sure to snap a picture and tag me on Instagram @aheadofthyme or share it on the Pinterest pin so that I can follow along.
HUNGRY FOR MORE? Don't forget to sign up for my email newsletter so that you don't miss any recipes. You can also follow along on Instagram and Pinterest for more recipe updates.
Easter Blondies

Easter blondies are the perfect treat to make this spring. They are rich, sweet, and moist. They are basically blonde brownies made without cocoa and use plenty of vanilla instead. Plus, they are loaded with festive pastel-colored M&M's which makes them so much more fun to make and eat. The best part? It's an easy one bowl recipe that you can make with basic baking ingredients you likely already have on hand, so you can satisfy that last-minute sugar craving - like right now.
Why You'll Love Easter Blondies
- They are an easy one bowl recipe. Serioiusly, you only need a mixing bowl and 10 minutes to make the batter. Pop into the oven and you can be enjoying the Easter blondies in just 25 minutes later. It's the perfect recipe to make at the last minute when you are craving a sugar fix.
- They're fun to make with the kids. Easter blondies are so much fun to make thanks to the addition of Easter M&Ms. I'm not saying you have to eat some of the M&Ms while baking, but I am definitely saying that you should. Plus, it's an easy activity that you can do with the kids.
- Serve them warm or cold. My favorite way to serve blond brownies are warm out of the oven with a scoop of vanilla ice cream. There is seriously nothing better. Oh, and don't be afraid to go the extra mile and add some melted chocolate or salted caramel sauce. But the good news is that you can enjoy these cool at room temperature or from the fridge too (although reheating does take it to another level!).
- They're the perfect Easter dessert. Kids and adults will rave about these Easter blondies. They bring balanced sweetness, a moist texture, and adorable M&M's. What's not to love? Plus, you can serve them up on any occasion by just substituting the M&M's with any color to match your theme. Try red and green for Christmas, pink and red for Valentine's Day, or brown, orange, and yellow for Halloween.

Ingredient Notes
To make these festive Easter Blondies, you will need the following ingredients (full quantities in the recipe card below):
- butter
- sugar - you will need both light brown sugar and granulated sugar.
- eggs
- vanilla extract
- all-purpose flour
- baking powder
- salt
- Easter M&M's - You should be able to easily find Easter-colored M&Ms at your local grocery store, around the spring season, or order them online.
You will also need measuring cups and spoons, mixing bowl, an 8-inch square baking pan, and wire cooling rack.
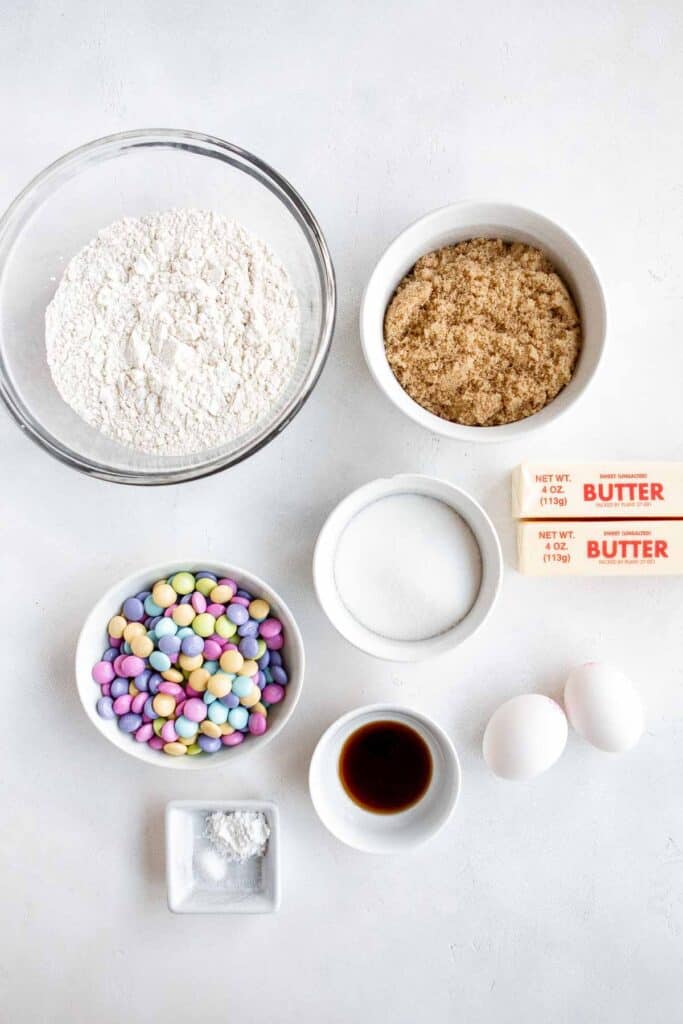
How to Make the Best Easter Blondies
- Make the blondie batter. Melt the butter in a small saucepan or in a microwavable bowl. Allow the butter to cool slightly for about 3-5 minutes. Transfer the cooled butter to a large mixing bowl and add sugar, eggs, and vanilla, and whisk together until well combined, smooth and glossy. Add in flour, baking powder, and salt and mix using with a large spatula until the batter it thick and few streaks of flour remain. Gently fold in ¾ cup of the Easter M&M's. Do not overmix.
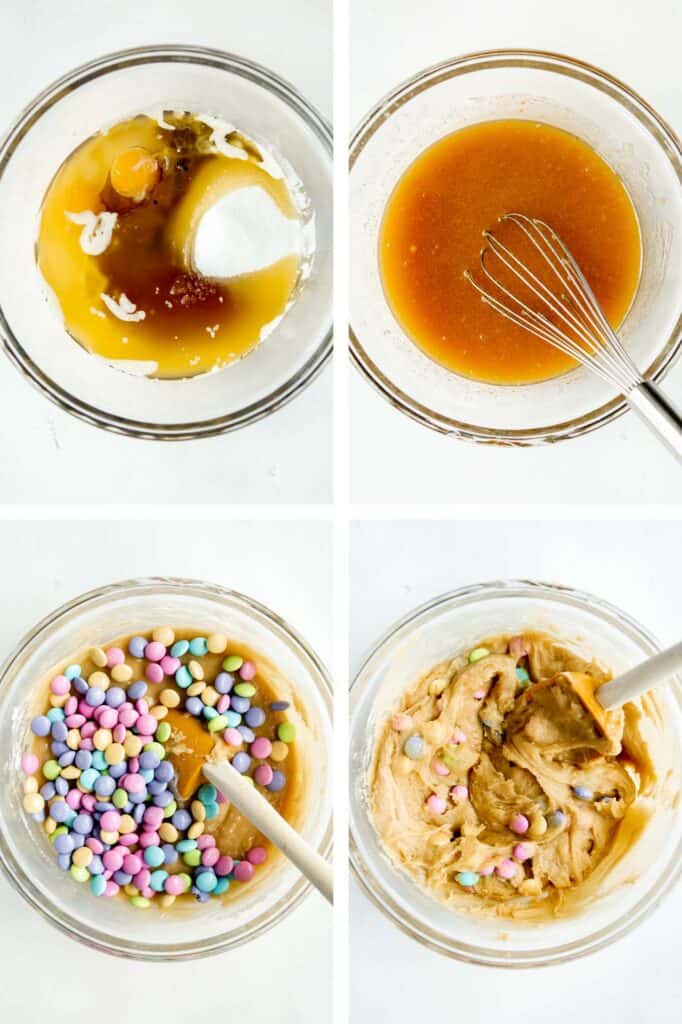
- Prep for baking. Spray an 8-inch square baking pan with cooking spray and line with parchment paper, allowing the sides to hang over the edge for easy removal. Transfer the batter to the prepared baking pan and use a spatula press the mixture into the corners and level the top. Gently press the remaining M&M's on top.
- Bake. Bake in a preheated 350F oven for 30-40 minutes, depending on how chewy you want the center. Bake for 30 minutes for a chewy blondie, bake for 40 minutes for a more cakey texture. If you notice the top browning too quickly towards the end, you can cover the top loosely with aluminum foil.
- Serve. Remove the pan from the oven and place it on a wire cooling rack. Once cooled completely, lift it out of the pan and cut into squares or grab a spoon and enjoy it hot out of the pan with a scoop of vanilla ice cream.
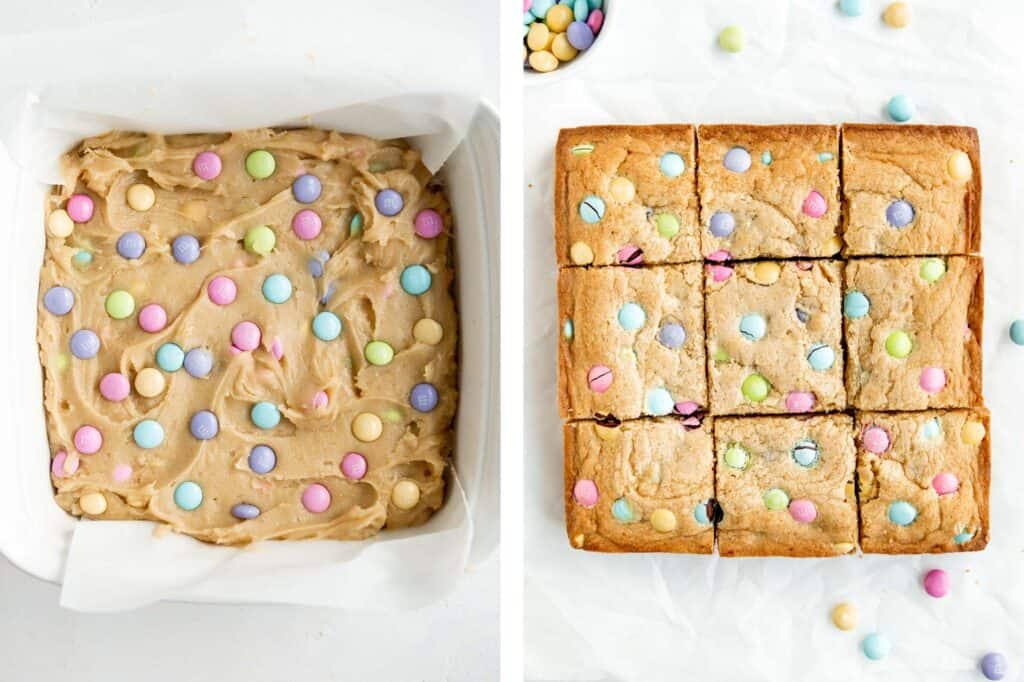
Recipe Tips and Tricks
- Double the recipe: Baking for a crowd? Double this recipe and use a 9x13-inch baking pan instead of an 8-inch square baking pan, and bake for 40-50 minutes instead.
- How to store: Store Easter blondies in an airtight container for up to 3 days at room temperature, or up to 7 days in the fridge.
- How to freeze: Freeze blondies in an airtight container of freezer bag for up to 3 months. Allow the Easter blondies to thaw overnight in the refrigerator before serving.
- How to reheat: You can reheat blondies in a 350F preheated oven for 10 minutes until warm or in the air fryer for 5-10 minutes. You can also reheat in the microwave.
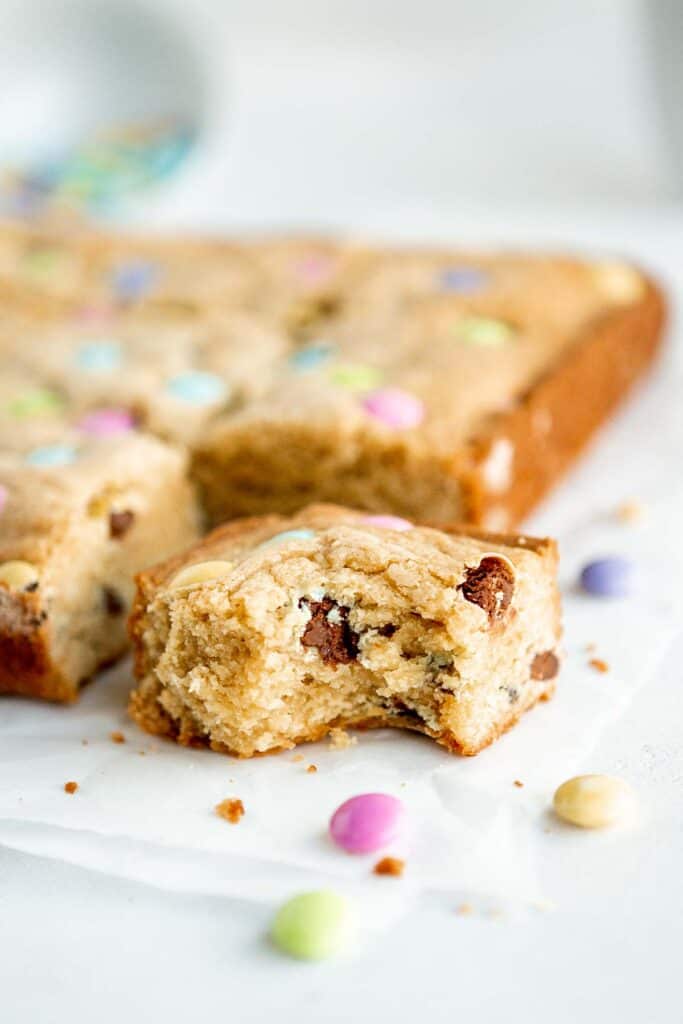
More Easter Dessert Recipes
- 30 Best Easter Dessert Recipes
- Mini Egg Easter Cookies
- Easter Egg Sugar Cookies
- Easter Egg Caramel Brownies
- Spiced Carrot Muffins
- Bird's Nest Cookies
Tried this recipe?
I'd love to hear what you think! Leave a comment and rating below to share your feedback. Your reviews help others discover this recipe and help me keep creating more free recipes for you. Snap a photo and tag me on social media @aheadofthyme too.

Teriyaki Meatballs

Teriyaki meatballs are our latest go to weeknight dinner - they are quick and easy, saucy with so much flavor, and the kids love them too. If you are getting tired of traditional meatball recipes, you need to try these. Made with an assortment of Asian seasonings like soy sauce, mirin, and ginger, cooked in the air fryer or oven, and tossed in a delicious homemade teriyaki sauce, these Asian meatballs are one of our favorite 30-minute meals (and great for meal prep too!). Serve them over steamed rice and stir-fried vegetables.
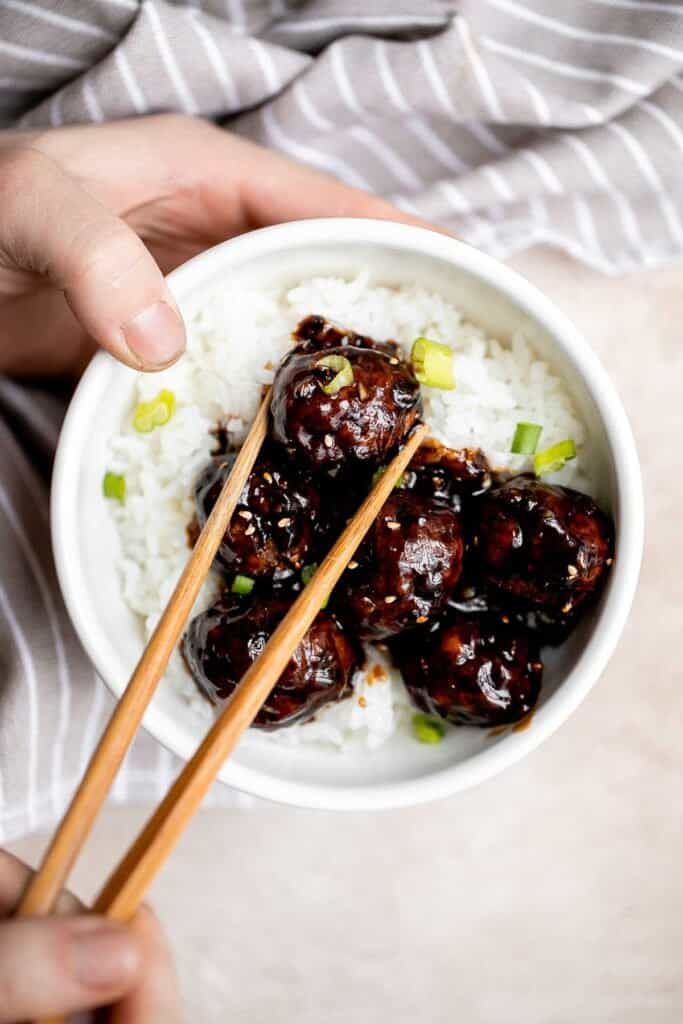
Why You'll Love Teriyaki Meatballs
- A different take on meatballs. We are kind of obsessed with meatballs over here because they are quick and easy to make, and totally customizable by using different ingredients and sauces. Classic meatballs are our go-to dinner but sometimes we want to switch things up. These teriyaki meatballs are the perfect answer.
- They are loaded with so much flavor. One of the best things of giving meatballs an Asian twist is that it adds so much flavor. Not only do the meatballs themselve have added flavor from soy sauce, Shaoxing wine, and ginger, but the teriyaki sauce adds even more depth of flavor to every bite - sweet, savory, salty, and unami.
- The delicious homemade teriyaki sauce. Although these meatballs can hold their own without sauce (and you could totally serve them this way!), this teriyaki sauce takes things up a few notches. To make our homemade teriyaki sauce, you'll need soy sauce, brown sugar, ginger, garlic, sesame oil, mirin, chicken broth, and cornstarch. Plus, it's ready in just 5 minutes!
- Great for meal prep. One of the things I love about meatballs is that they are great for meal prep. You can make a big batch and store in meal prep containers with steamed rice for lunches the next few days. They are freezer-friendly too and can be frozen before or after cooking.
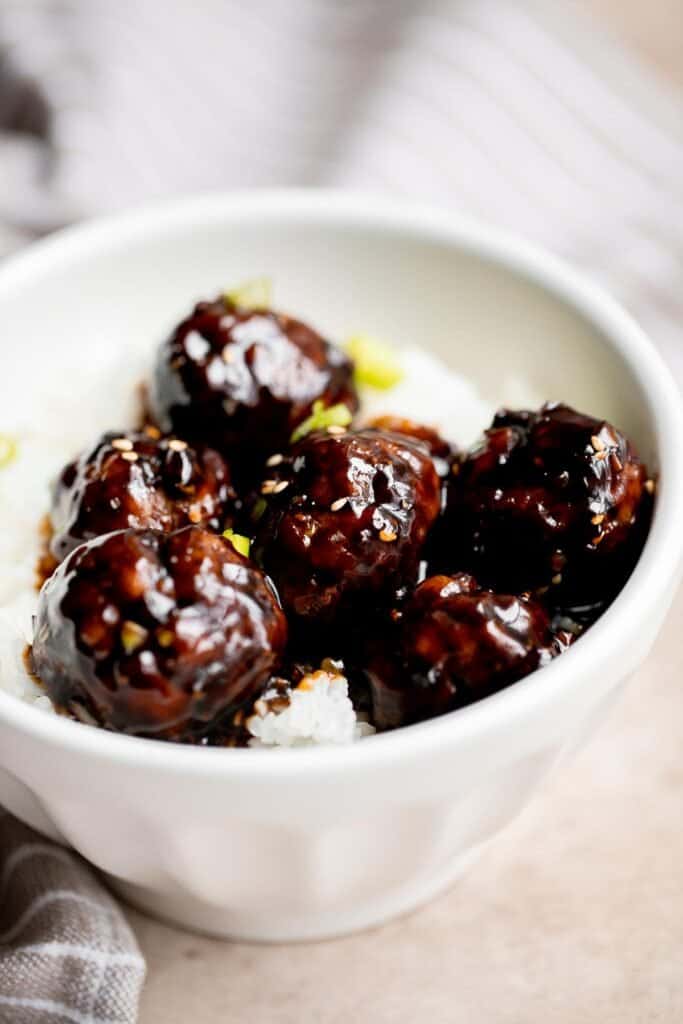
Ingredient Notes
To make delicious Teriyaki Meatballs, you will need the following ingredients (full quantities in the recipe card below):
- ground beef - you can easily substitute with other ground meats. Try it with ground pork, turkey, or chicken.
- breadcrumbs
- Shaoxing wine - or substitute with mirin.
- soy sauce
- ginger
- garlic powder
- green onions
- egg
- salt and pepper
- cooking oil spray - I recommend cooking oil spray over the meatballs when air fryer or baking so that they don't stick.
- teriyaki sauce - I use a batch of my homemade teriyaki sauce for the best results. Store-bought teriyaki sauce works well too.
These teriyaki meatballs are sweet and savory, but you can add a spicy kick by introducing some your favorite spicy seasonings, including sriracha, gochujang, red pepper flakes, or cayenne.
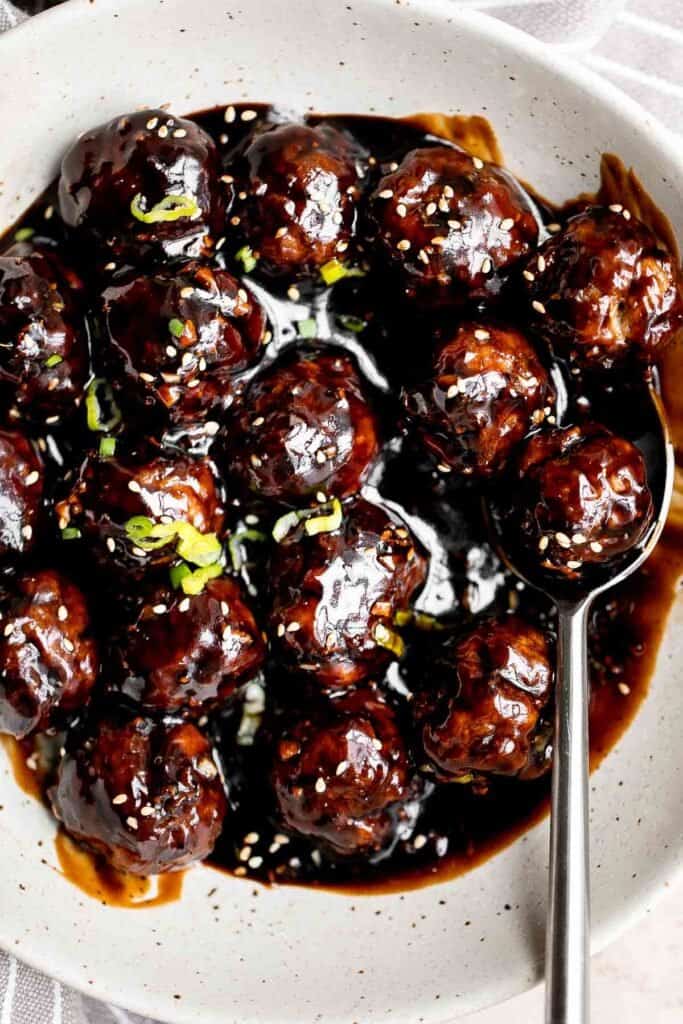
How to Make the Best Teriyaki Meatballs
- Prepare the meatballs. In a large mixing bowl, combine ground beef with breadcrumbs, Shaoxing wine, soy sauce, ginger, garlic powder, green onions, egg, salt, and pepper. Mix well until evenly combined. Set aside to marinate for at least 20 minutes.
- Shape. Take 2 spoonfuls of the beef mixture at a time and roll into meatballs.
- Cook. Cook the meatballs in the air fryer or in the oven:
- Cook in the air fryer: Place the meatballs in a single layer into the air fryer basket and lightly coat with some cooking oil spray to keep them from sticking. Air fry the meatballs at 350F for 13-15 minutes until browned nicely and fully cooked through, shaking the basket halfway during cooking to brown evenly. The internal temperature for the beef should reach 165F as read on a meat thermometer.
- Cook in the oven: Preheat oven to 400F. Transfer meatballs onto a parchment-lined half sheet baking pan and lightly coat with some cooking oil spray to keep them from sticking. Bake for 15 minutes until fully cooked through.
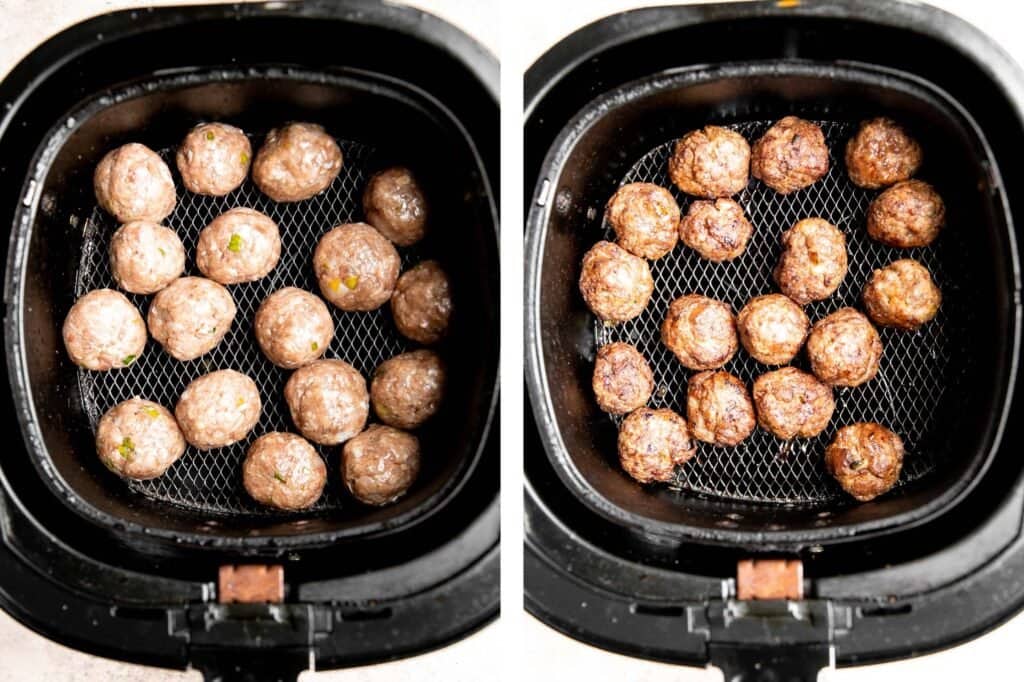
- Make teriyaki sauce. While cooking the meatballs, prepare the teriyaki sauce (if cooking from scratch). I made a batch of my homemade teriyaki sauce for this. If using storebought, heat it over medium heat for 1-2 minutes until warmed through.
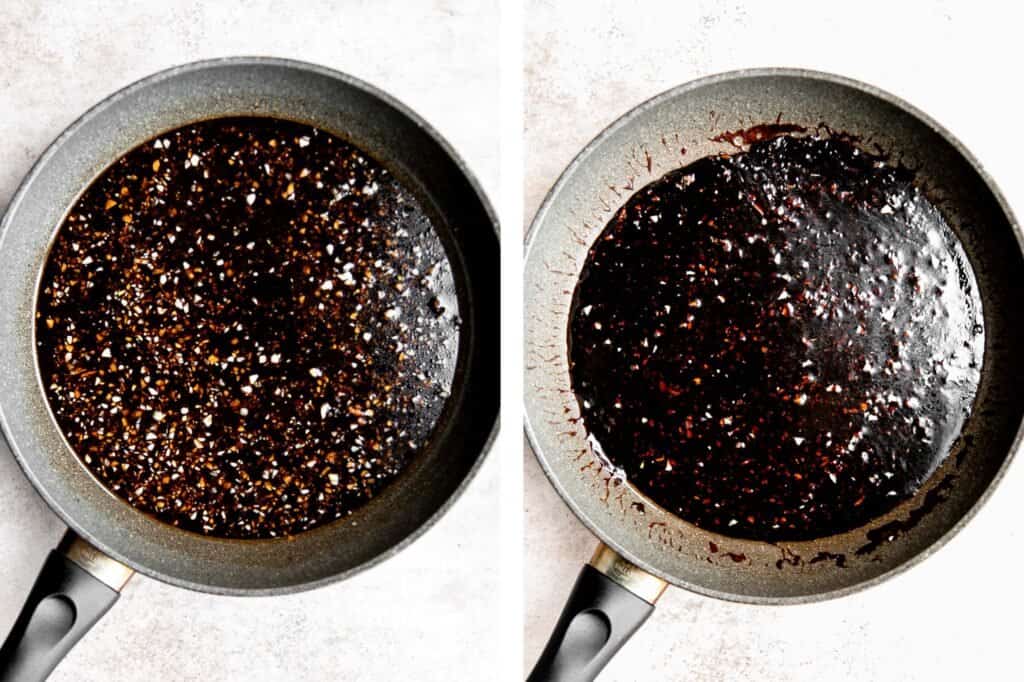
- Toss in meatballs. Add cooked meatballs to the pan and toss well to coat.
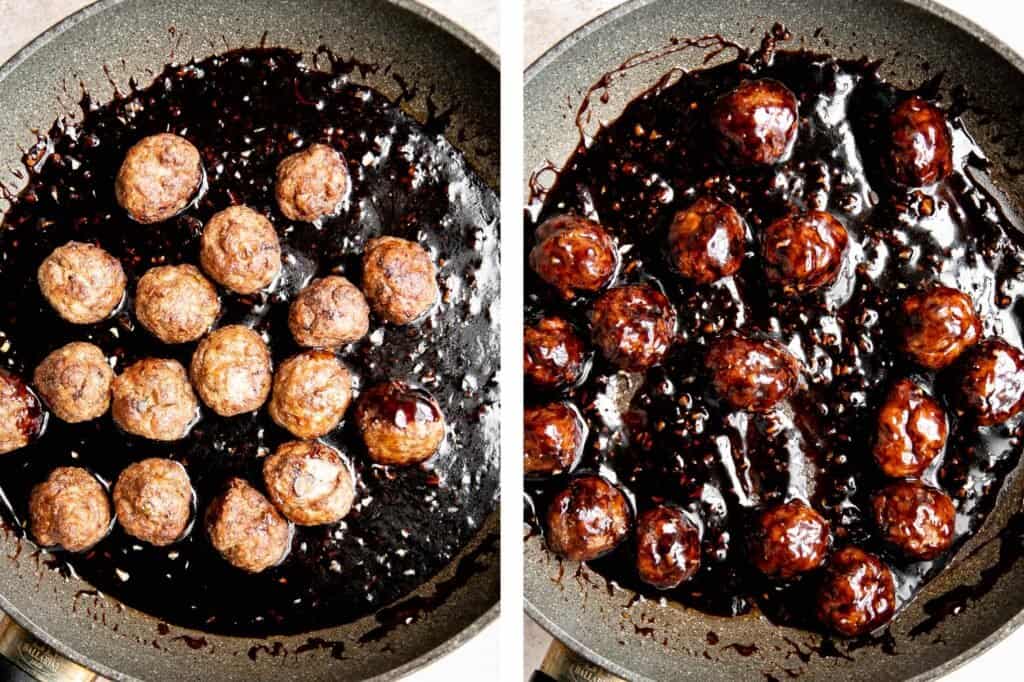
How to Serve Teriyaki Meatballs
Serve Teriyaki Meatballs over a bowl of steamed rice. Some other side dishes that you can serve alongside this are:
- Gomae Spinach Salad
- Scallion Oil Noodles
- Air Fryer Vegetable Stir Fry
- Vegetarian Fried Rice
- Vegan Soba Noodle Salad
- Air Fryer Broccoli
- Asian Chopped Salad

Storing Instructions
- How to store: Cooked meatballs will keep for up to four days in an airtight container in the fridge or 3 months in the freezer.
- How to freeze: Teriyaki meatballs freeze well either before or after cooking. Frozen meatballs are reheated best when un-sauced, but you still freeze saucy teriyaki meatballs.
- To freeze uncooked meatballs: Place the shaped meatballs on a large half sheet baking pan lined with parchment paper. Transfer the pan to the freezer and freeze until hard, about 1 hour. Then, transfer the meatballs into a freezer bag or freezer-safe airtight container and store in the freezer for up to 3 months. To cook, allow the meatballs to thaw overnight in the refrigerator first, then cook as per recipe instructions on the stove.
- To freeze cooked meatballs: Once cooled, freeze the meatballs separately first on a parchment lined baking sheet (about 1-2 hours) before transferring to an airtight container or freezer bag for up to 3 months in the freezer.
- How to reheat: If frozen, allow the meatballs to thaw overnight in the refrigerator first. Reheat teriyaki meatballs in a covered microwave-safe dish in the microwave on medium heat for 2-3 minutes until warmed through. Or, reheat in a covered pan over medium-low heat on the stovetop for 5-10 minutes, stirring occasionally until warmed through.
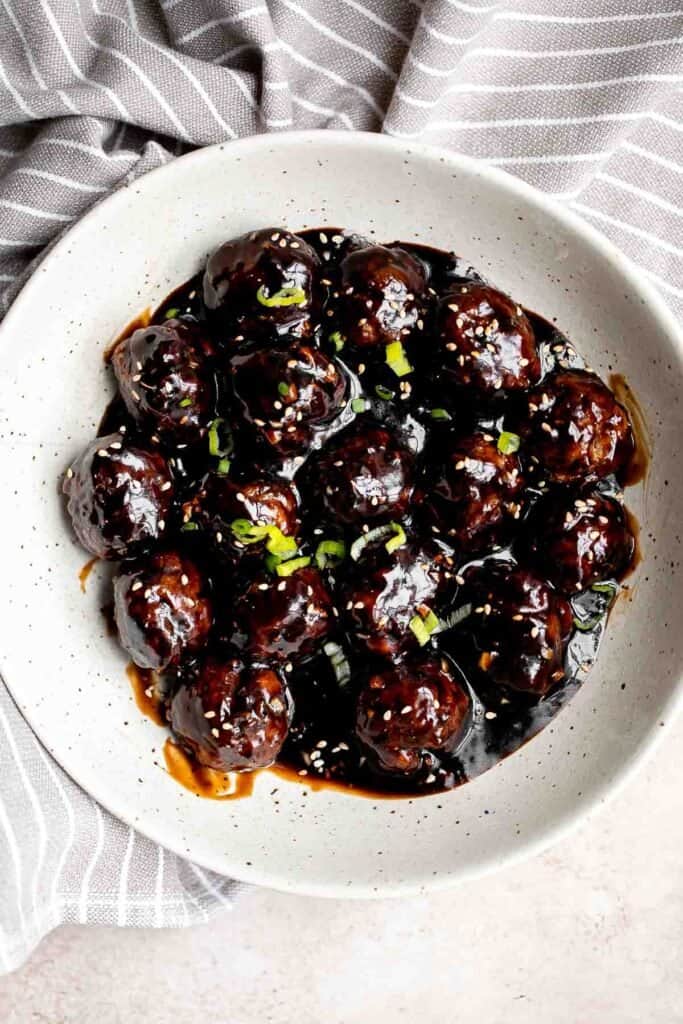
More Teriyaki Recipes
- Homemade Teriyaki Sauce
- Teriyaki Chicken
- Teriyaki Salmon
- Teriyaki Chicken Skewers with Pineapple
- Teriyaki Grilled Salmon Rice Bowl
Tried this recipe?
I'd love to hear what you think! Leave a comment and rating below to share your feedback. Your reviews help others discover this recipe and help me keep creating more free recipes for you. Snap a photo and tag me on social media @aheadofthyme too.

Spinach Artichoke Pasta

If you're a fan of spinach artichoke dip, then you need to try this spinach artichoke pasta. A rich creamy sauce loaded with spinach and artichokes is tossed with tender spaghetti noodles. This quick and easy comfort food is ready in under 30 minutes with a handful of ingredients. It's perfect for busy weeknights, but fancy enough for date night. Plus, you can make it even faster using leftover spinach artichoke dip!
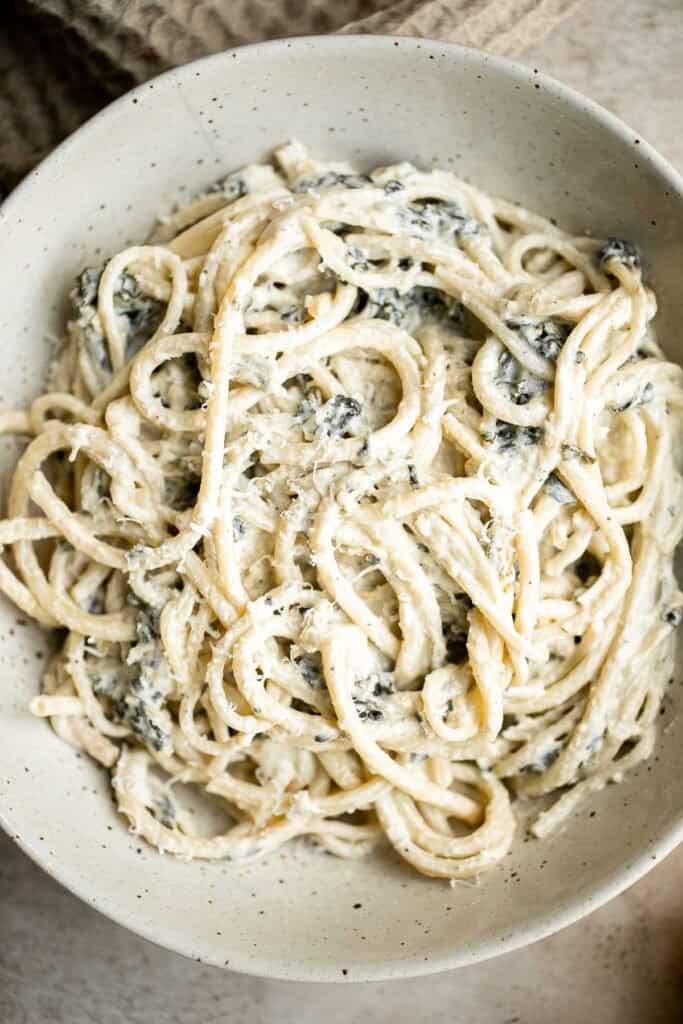
Why You'll Love Spinach Artichoke Pasta
- It's spinach artichoke dip in pasta form. You'll love how creamy and delicious this spinach artichoke pasta is. It's tastes just like Spinach Artichoke Dip, except instead of dipping crackers into it, you can enjoy the pasta that's mixed right in! In fact, you can even use leftover dip in this recipe!
- Spinach and artichokes are packed with nutrients. Although I wouldn't label this a particularly "healthy" meal because it's creamy and cheesy, you can still enjoy the nutritious benefits of eating spinach and artichokes. These veggies support heart and bone health.
- Quick and easy 30 minute meal. This spinach artichoke pasta is ready to eat in just under half an hour (and even faster if using leftover spinach artichoke dip), which makes it one of the fastest dinners you'll enjoy this week. It's perfect for busy weeknights. Plus it's easy to make with a handful of ingredients - you will find yourself eating it over and over again.
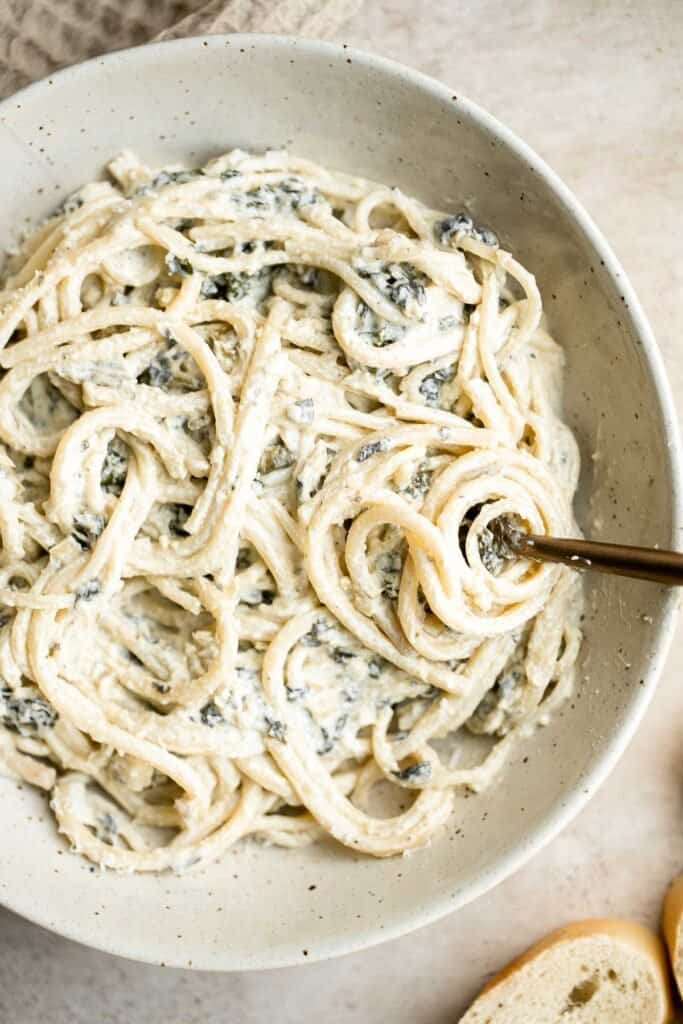
Ingredients and Substitutions
To make this delicious Spinach Artichoke Pasta, you will need the following ingredients (full quantities in the recipe card below):
- pasta - I used spaghetti noodles, but feel free to use any shape pasta that you'd like. You will also need to reserve some pasta water for the sauce (or use chicken or vegetable broth).
- butter
- garlic
- cream cheese + sour cream - this is what makes the sauce ultra creamy and silky.
- Parmesan cheese - feel free to substitute with asiago cheese or white cheddar cheese.
- salt and pepper
- artichoke hearts
- baby spinach - or substitute with ½ cup (150 grams) of frozen chopped spinach. Make sure to thaw and drain it well (squeeze out any excess water).
You will also need measuring cups and spoons, a medium cooking pot, and a large skillet.
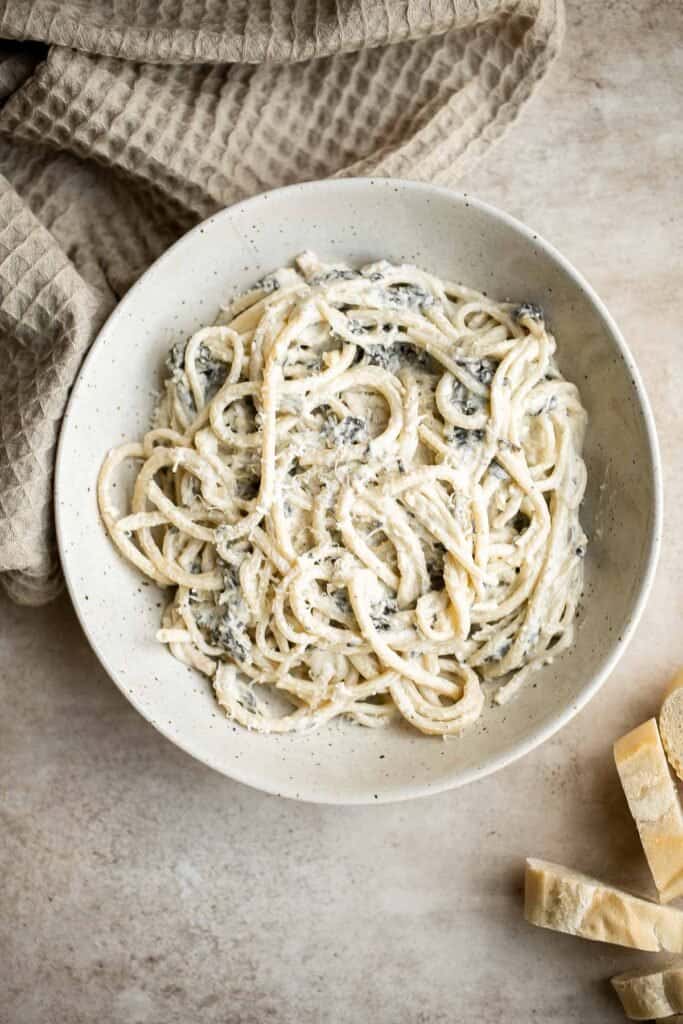
How to Make the Best Spinach Artichoke Pasta
- Boil pasta. Bring a large pot of salted water to a boil over medium-high heat. Add spaghetti noodles and cook until al dente according to package directions, about 10 minutes. Reserve ½ cup hot pasta water in a bowl. Drain the noodles well and set aside.
- Make sauce. Heat butter in a large skillet over medium-high heat until bubbly, about 1 minute. Add garlic and sauté until fragrant, about 1 minute. Add cream cheese, sour cream, reserved pasta water (or stock) and Parmesan cheese, and mix until smooth. Season with salt and pepper. The sauce might be a bit lumpy at the beginning. Bring the sauce to a simmer over medium heat. Let it simmer and stir occasionally until thickened to a desired consistency, about 4-6 minutes. Turn off the heat and stir in the spinach and artichoke. Mix well until the spinach is wilted and evenly combined.
- Toss in pasta. Add cooked spaghetti and toss well to coat. Serve immediately.
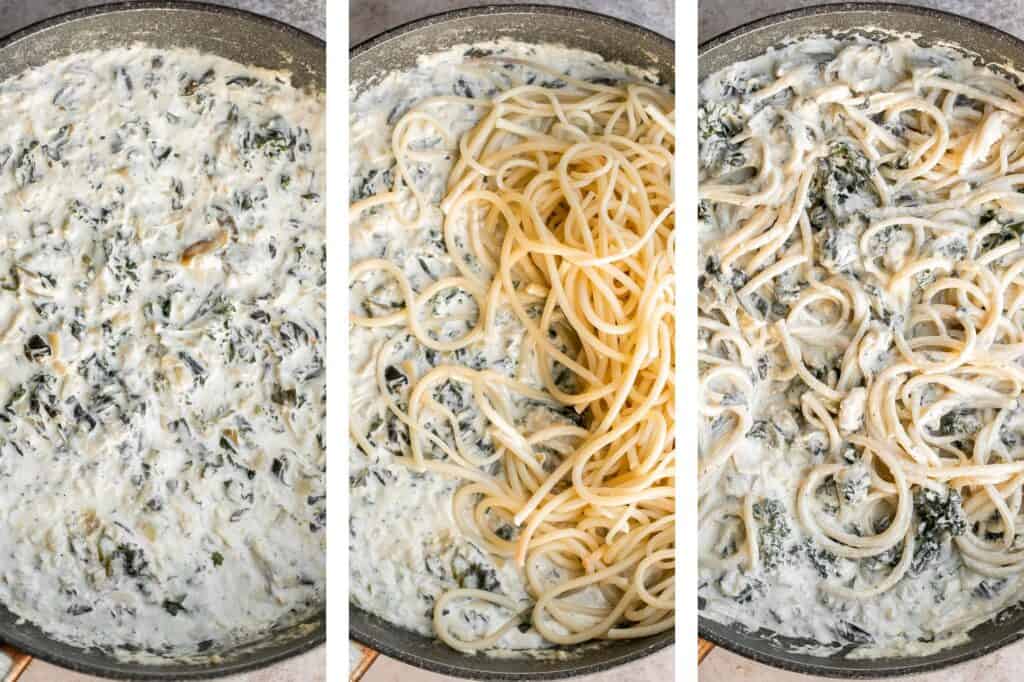
Recipe Tips and Tricks
- Keep items on hand: This spinach artichoke pasta is one of my favorite backup recipes since I usually have most of the ingredients in my home. If you keep your home stocked with frozen spinach, canned artichoke hearts, and dairy products, you won't need to make any last-minute runs to the store for this recipe.
- How to make with leftover dip: You can easily make this pasta using leftover Spinach Artichoke Dip. Simply warm the dip over medium heat along with ½ cup pasta water or chicken broth. Add salt and pepper to taste, if needed and then toss in the pasta and serve.
- Spice it up: Feel free to add a dash of cayenne, chili, or paprika to your spinach artichoke pasta for a spicy kick.
- How to store: Allow the pasta to cool to room temperature, then store any leftover spinach artichoke pasta in an airtight container in the fridge for up to 4-5 days.
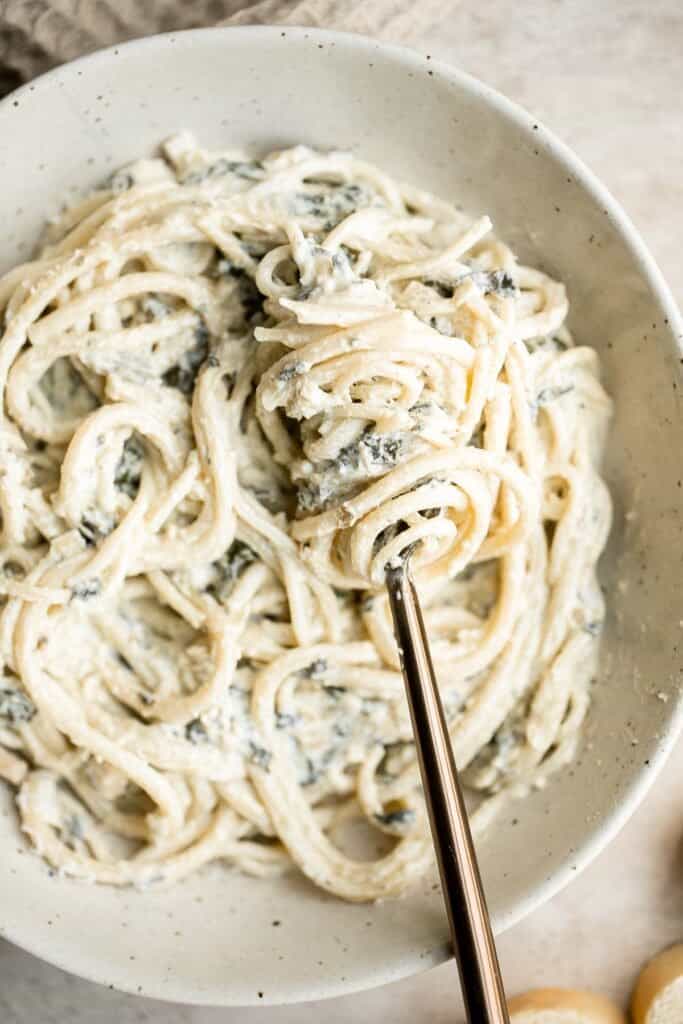
More Pasta Recipes
- 40 Best Pasta Recipes
- Chicken Penne Pasta
- Creamy Salmon Pasta
- Ground Turkey Pasta Bake
- Homemade Hamburger Helper
- Spaghetti Bolognese
Tried this recipe?
I'd love to hear what you think! Leave a comment and rating below to share your feedback. Your reviews help others discover this recipe and help me keep creating more free recipes for you. Snap a photo and tag me on social media @aheadofthyme too.
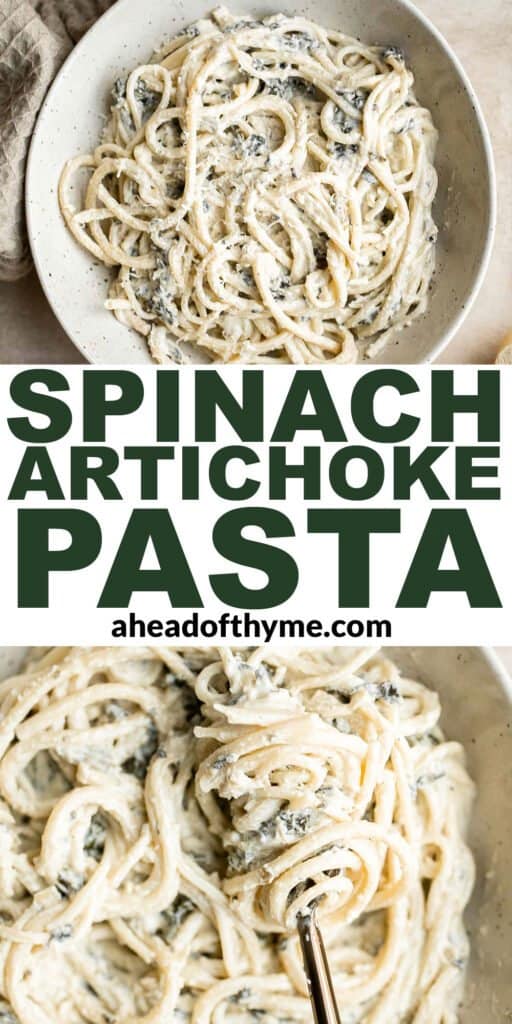
Roasted Asparagus and Mushrooms
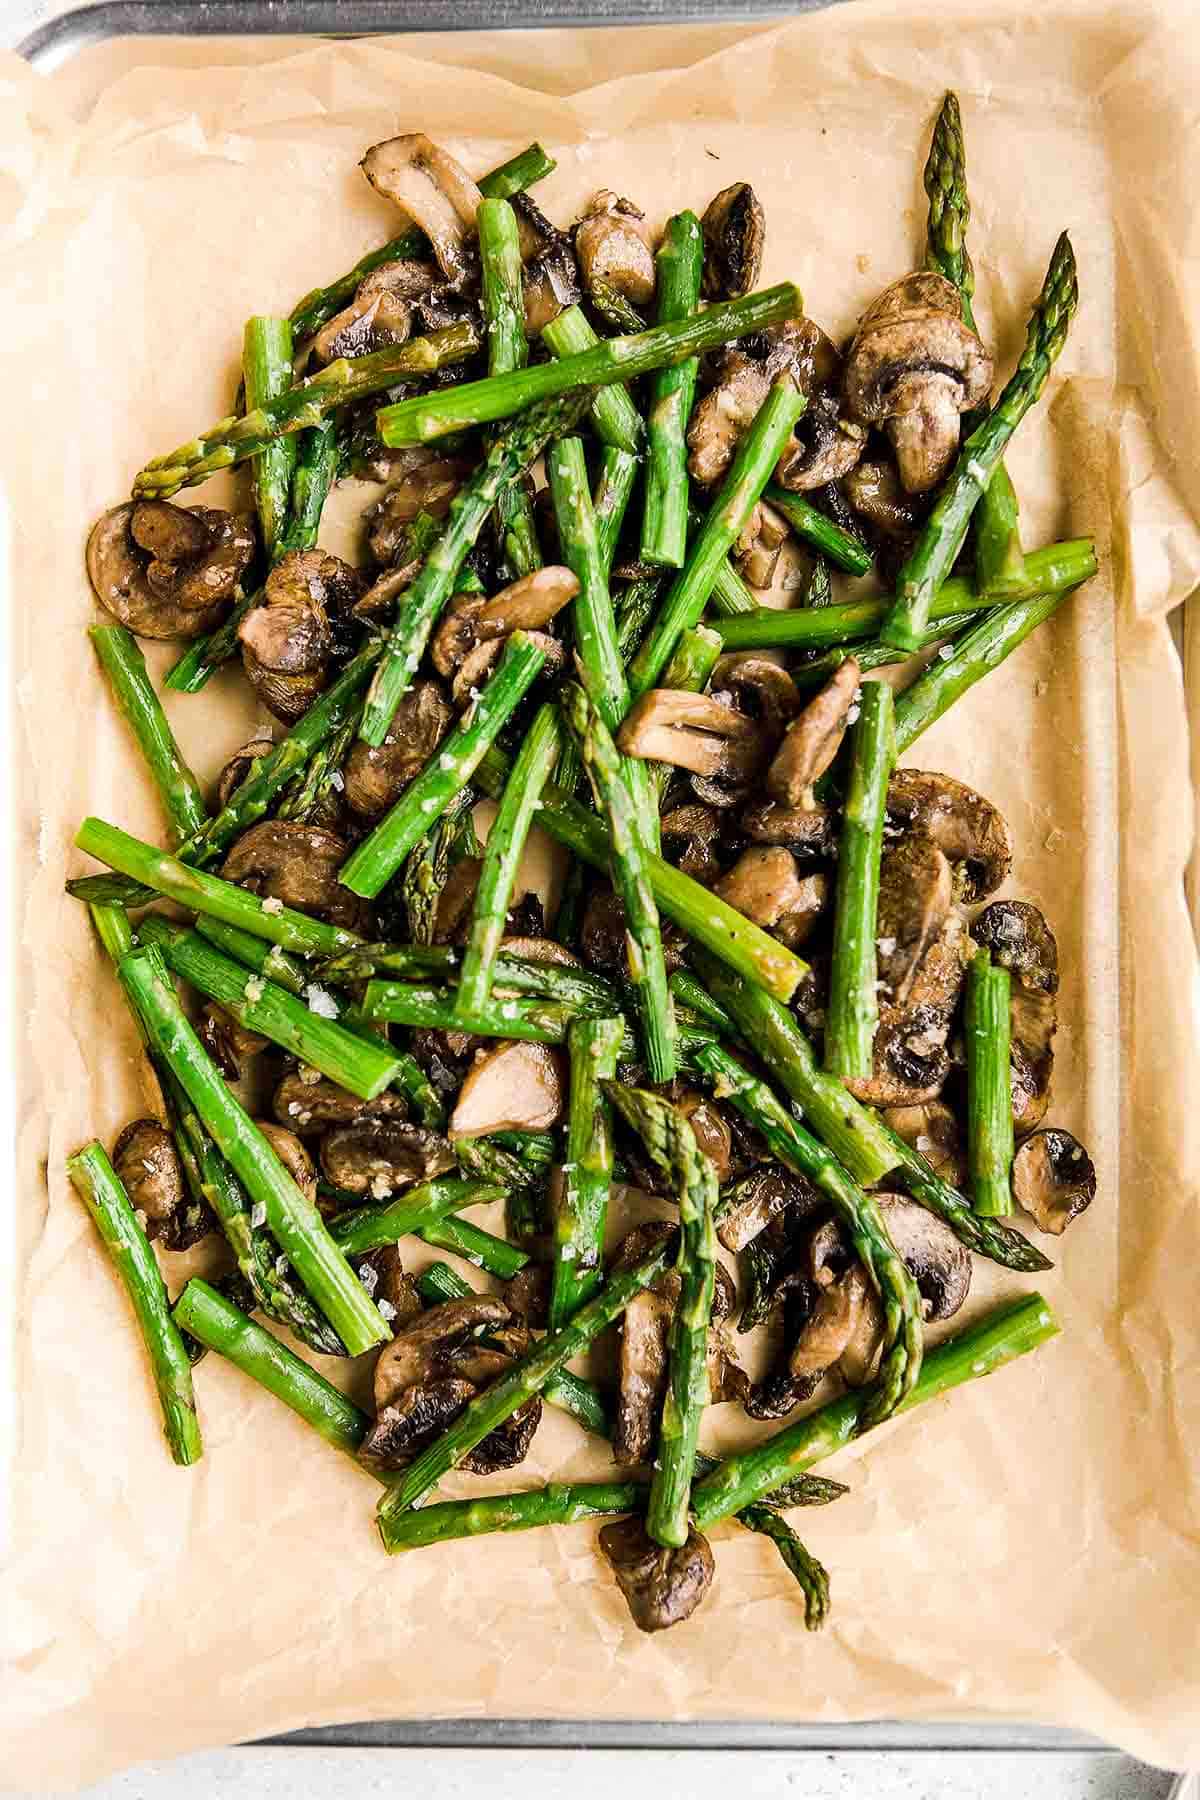
Roasted garlic asparagus and mushrooms is easy, simple, flavorful, and delicious. Crisp asparagus is roasted with earthy mushrooms and loaded with garlic for the best flavor. These easy sheet pan vegetables come together in just minutes before they're ready to pop into the oven. Serve this healthy vegan side dish alongside your favorite protein for a complete meal.
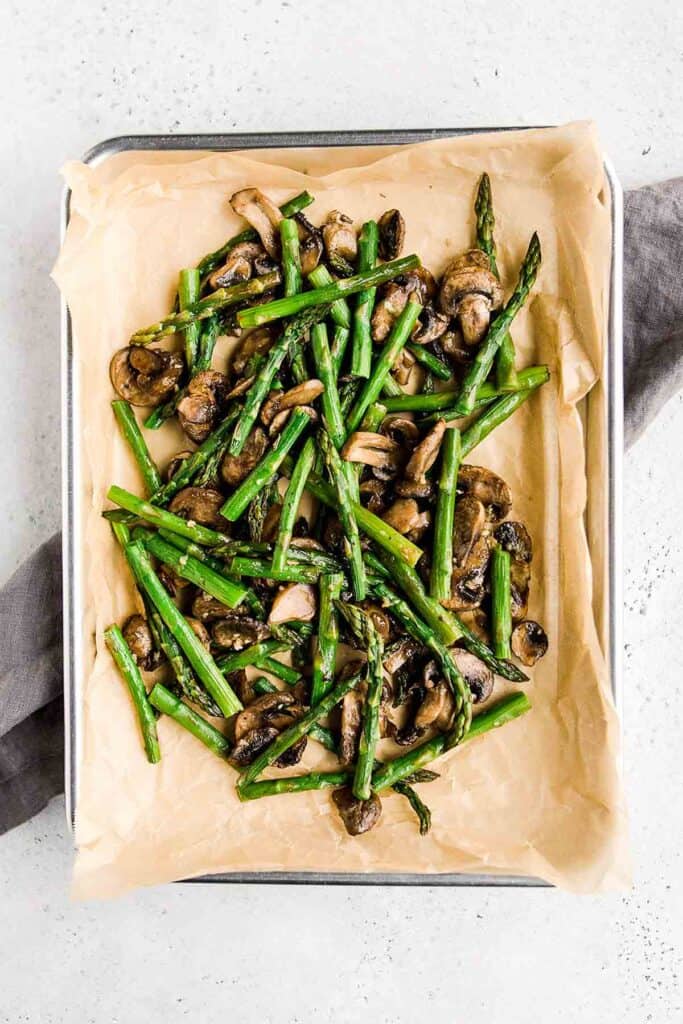
Why You'll Love Roasted Garlic Asparagus and Mushrooms
- Asparagus and mushrooms are the perfect pair. Asparagus and mushrooms are each vegetables that are individually packed with flavour. But when you combine the two and add garlic in the mix, the flavour is on another level. The freshness of the asparagus complements the earthy mushrooms so well.
- It's easy to make with just 6 ingredients. Is it hard to make something so delicious? Nope, not at all. I'm a big advocate on quick and easy recipes and this one is definitely on point. Simply combine asparagus, mushrooms, and garlic, toss in olive oil, season with salt and pepper and pop into the oven. In the meantime, you can prepare chicken breast or salmon to go along with it.
- A healthy side dish. If you are looking to incorporate more healthy meals to your weekly meal plan, this is it. It's vegan, gluten-free, and keto too.
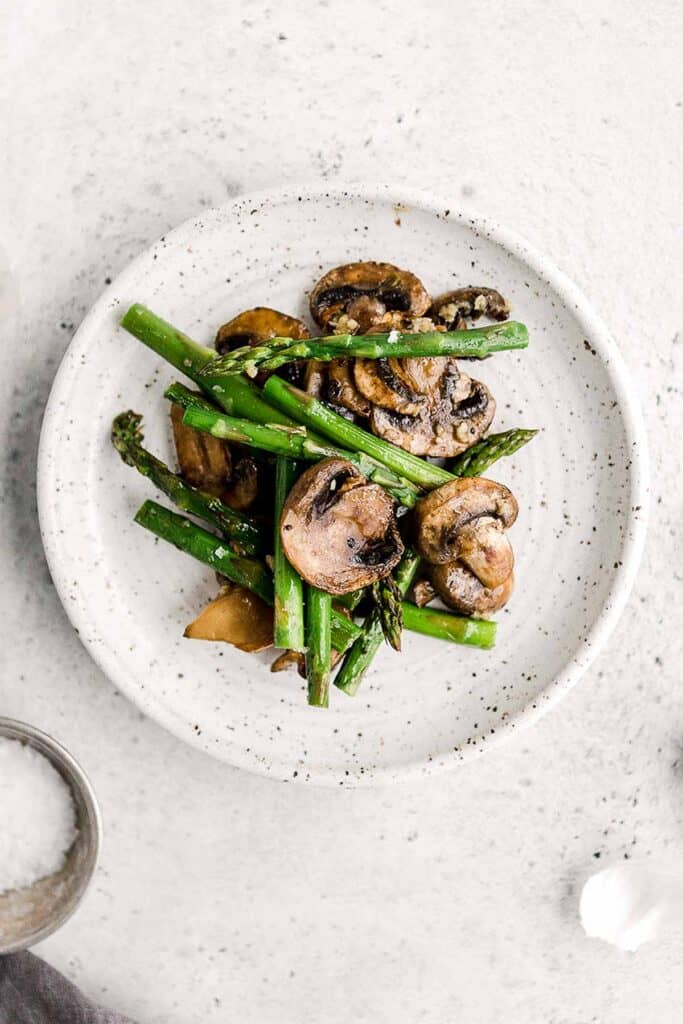
Ingredient Notes
To make this simple and delicious Roasted Asparagus and Mushrooms, you will need the following ingredients (full quantities in recipe card below):
- asparagus
- mushrooms - feel free to use white or brown mushrooms. You can slice them or cut into quarters.
- olive oil
- garlic - I recommend fresh garlic for the most potent flavor. You could substitute with ½ teaspoon of garlic powder if that's what you have on hand.
- salt and pepper
You will also need measuring spoons and a half sheet baking pan.
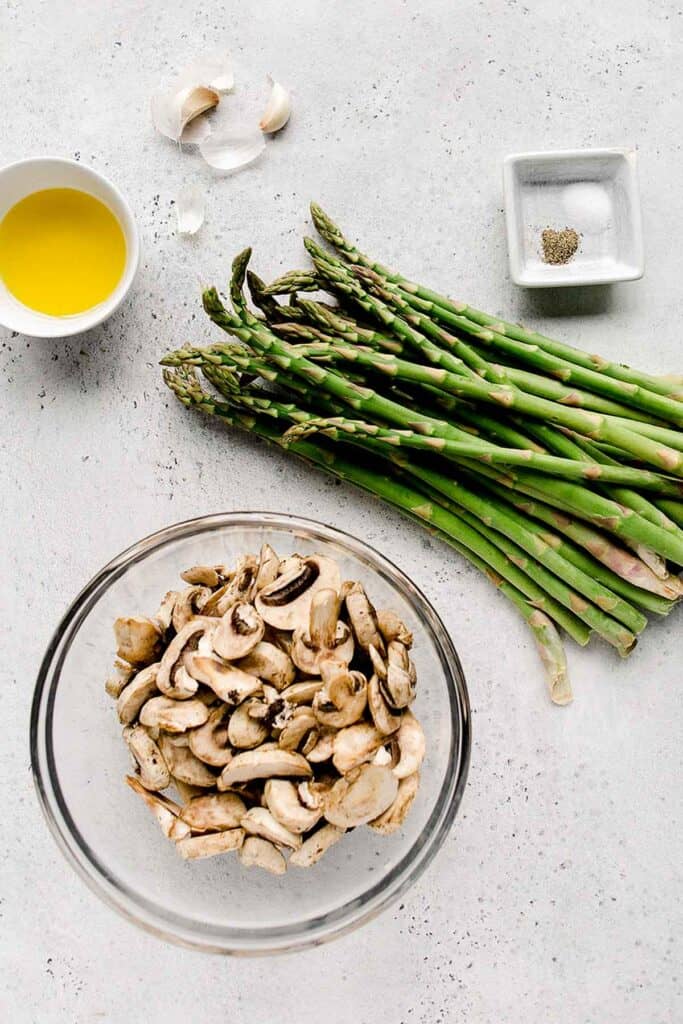
How to Make the Best Roasted Asparagus and Mushrooms
- Prepare vegetables. Wash and prepare the vegetables. Cut off the woody ends of the asparagus and cut into 2 inch pieces. Transfer to a large half sheet baking pan. Slice mushrooms and add to pan.
- Add seasoning. Drizzle olive oil on top and add garlic, salt, and pepper. Toss to coat.
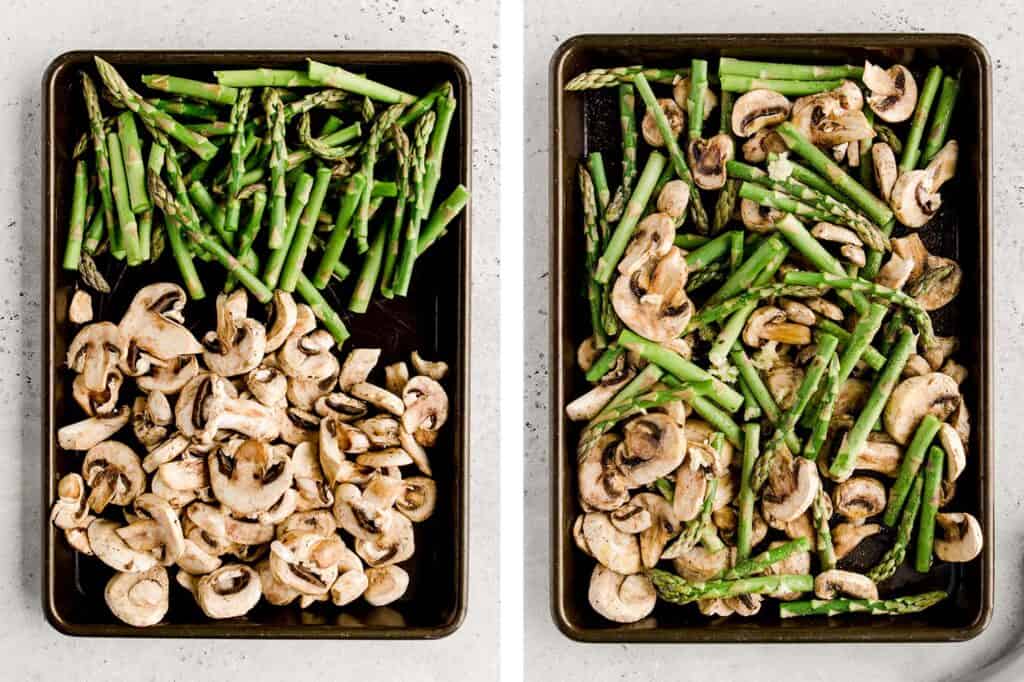
- Roast. Roast in a 400F preheated oven for 15-20 minutes until asparagus and mushrooms are just tender and nicely browned.
Storing Instructions
Store roasted asparagus and mushrooms in an airtight container for up to 4 days in the refrigerator. Reheat for a few minutes on the stove over medium heat, in the oven at 300F for 10 minutes until warmed through, or in the air fryer at 300F for 5 minutes.
How to Serve Roasted Asparagus and Mushrooms
Serve these vegetables as a side dish with all your favourite spring dinners. Some of my favourites to pair this with are:
- Whole Roast Chicken
- Garlic Butter Salmon
- Ribeye Steak
- Roasted Pork Tenderloin
- Air Fryer Chicken Breast
- Creamy Parmesan (No Wine) Risotto
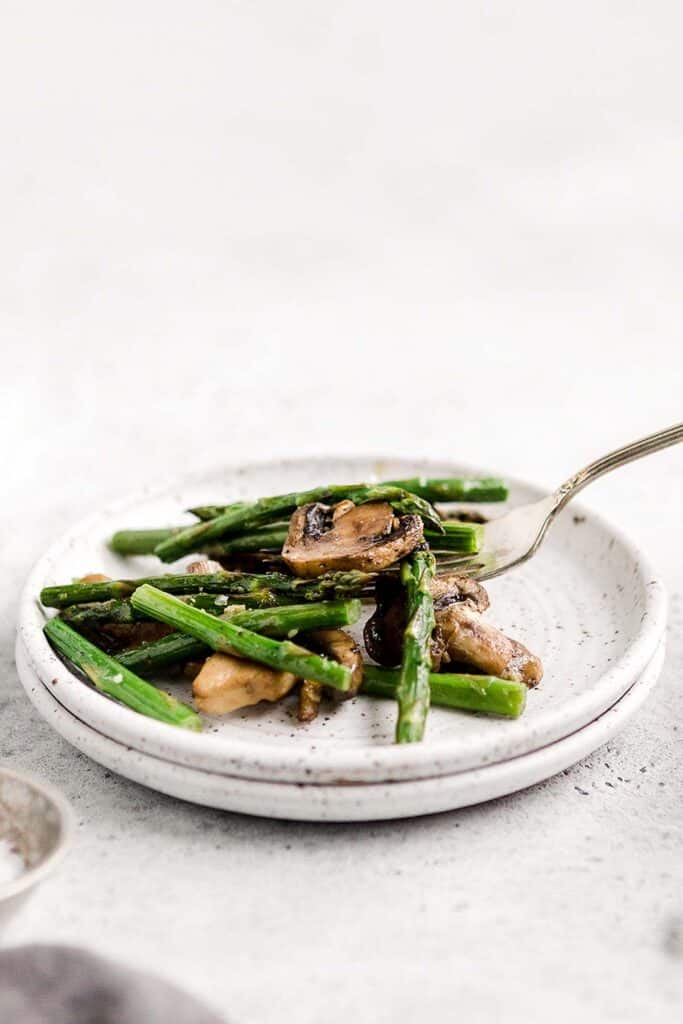
More Asparagus Recipes
- Cheesy Roasted Asparagus
- Asparagus Tart
- Lemon Asparagus Soup with Parmesan
- Chopped Asparagus Salad
- Spring Pesto Pasta with Asparagus
- Sautéed Asparagus
Tried this recipe?
I'd love to hear what you think! Leave a comment and rating below to share your feedback. Your reviews help others discover this recipe and help me keep creating more free recipes for you. Snap a photo and tag me on social media @aheadofthyme too.
This post was originally published in December 2015. It has been completely updates with new photos and content.
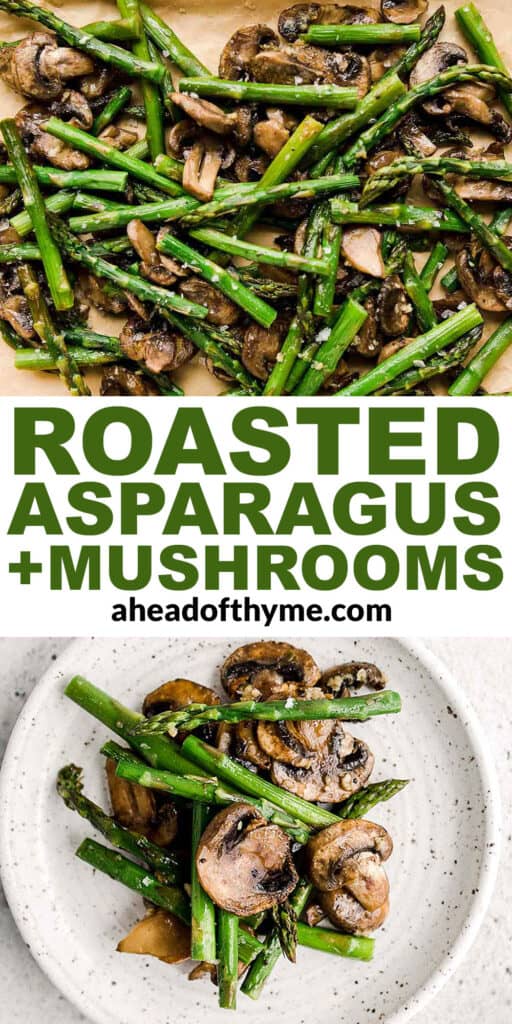
Korean Ground Turkey
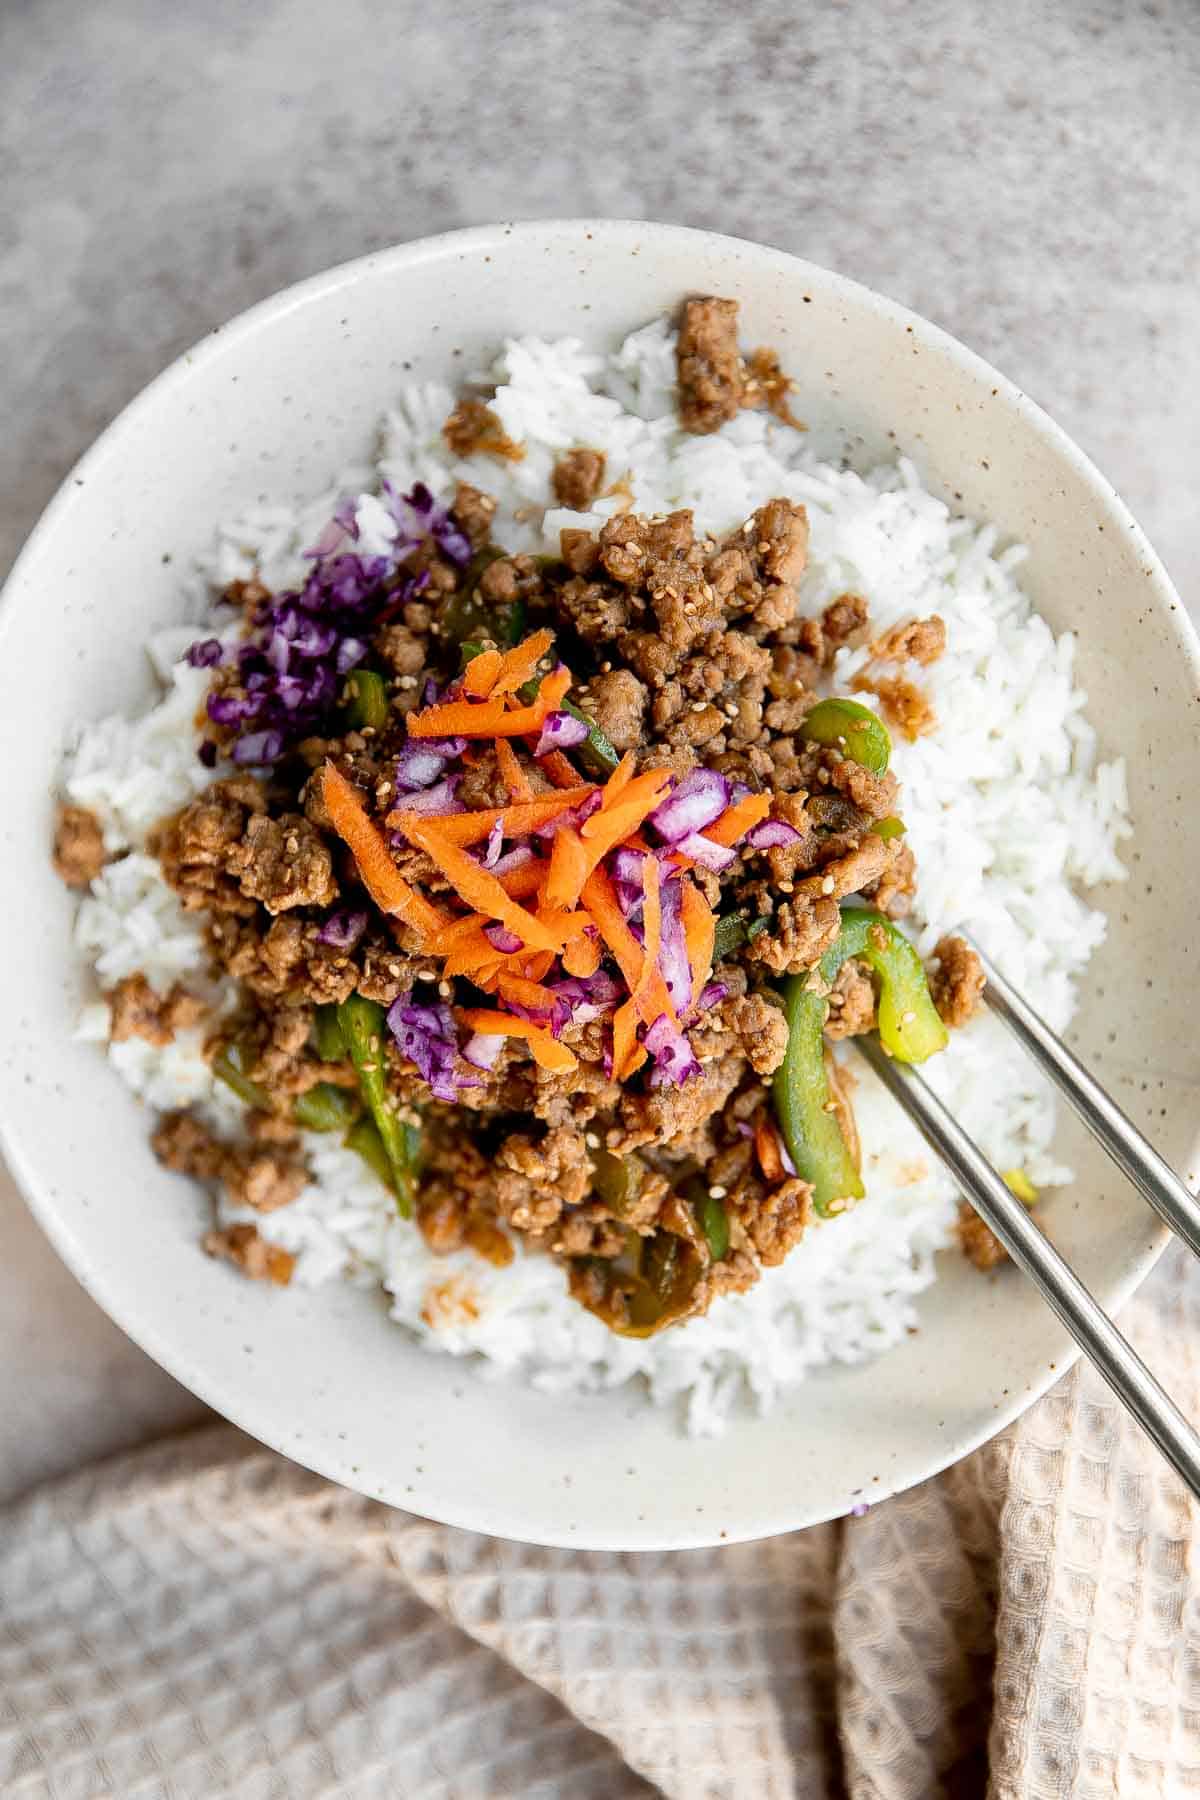
Korean ground turkey is flavorful, saucy, and delicious. It's quick and easy to make in just 20 short minutes (which is just enough time for your steamed rice to cook)! This Korean turkey is perfect when you're craving a flavorful and filling meal but don't have much time to make one. It's savory, sweet, and spicy, and just all around good. Plus, it's great for meal prep and freezes really well - so make a big batch and save the rest for another day.
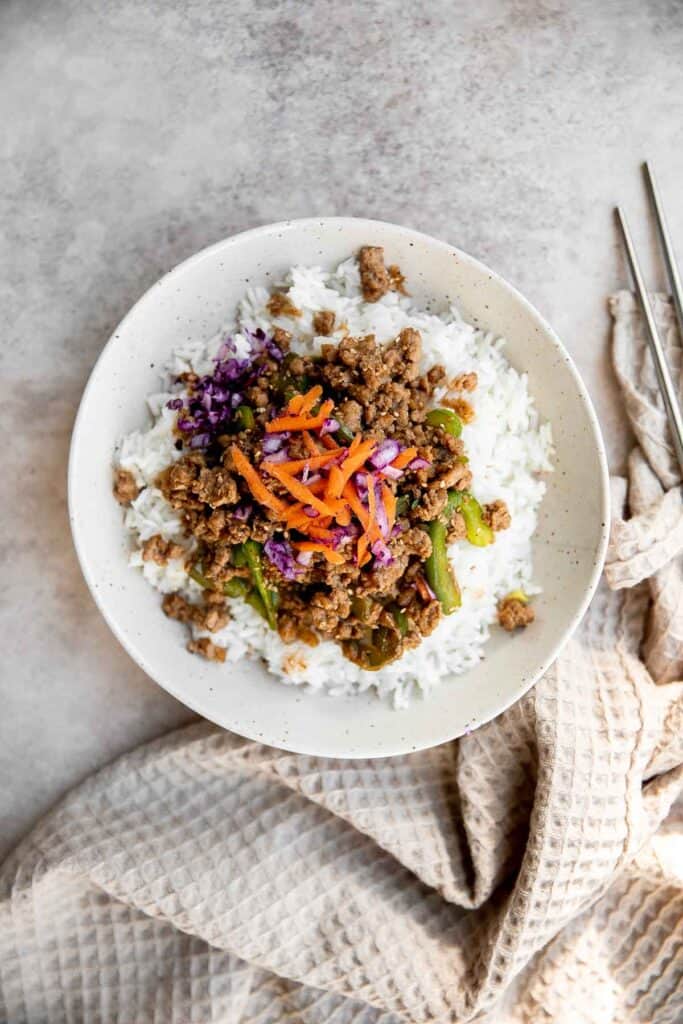
Why You'll Love Korean Ground Turkey
- It's a quick under 30 minute meal. Be prepared. This recipe comes together fast. That's why I love to make Korean ground turkey on busy days when hunger sneaks up on me. In just 20 minutes, you can enjoy this hot and flavorful meal with a bowl of steamed rice.
- Korean ground turkey is easy to make. This recipe only needs one pan to make. Sauté your aromatics, brown your meat, and add your sauce. Then, just prepare your plate. You'll love the immense flavor you get from such little effort in the kitchen.
- It's tender, flavorful, and filling. This Korean ground turkey recipe truly has it all. Not only is it quick and easy - it's so delicious. The meat is tender and packed with sweet, savory, and spicy flavors. It's the total package.
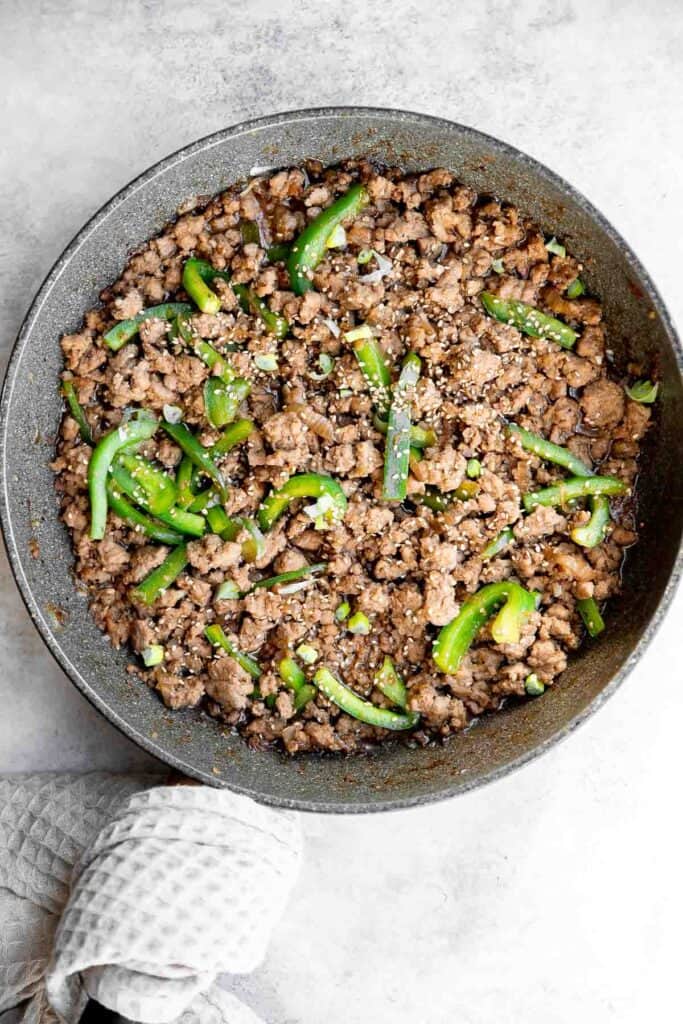
Ingredients and Substitutions
To make this easy Korean Ground Turkey, you will need the following ingredients (full quantities in the recipe card below):
- vegetable oil
- yellow onion
- garlic + ginger
- ground turkey - this recipe is versatile and you can substitute the ground turkey with other ground meats. Try it with ground chicken, beef, or pork.
- salt and pepper
- red chili powder - optional, to make it spicy.
- for the sauce - soy sauce, brown sugar, sesame oil, black vinegar (or mirin), water (or chicken broth), and cornstarch (to thicken it up).
- toasted white sesame seeds - for garnish.
To serve in a rice bowl, you will also need steamed rice, grated carrots and purple cabbage, and/or kimchi.
You will also need measuring cups and spoons and a large skillet.

How to Make the Best Korean Ground Turkey Rice Bowls
- Sauté aromatics. Heat oil in a large skillet over medium-high heat until the hot oil sizzles, about 1 minute. Add onion, garlic and ginger. Sauté until fragrant, about 2-3 minutes.
- Cook turkey. Add ground turkey and cook for 6-8 minutes until it's no longer pink. Stir well and break up the turkey into small pieces with a spatula. Cover the lid and simmer for another 2-3 minutes (which will keep the turkey from getting dry).
- Add sauce. In a small mixing bowl, whisk together all the sauce ingredients (soy sauce, brown sugar, sesame oil, black vinegar, water or chicken broth, and cornstarch) until smooth. Add the sauce to the turkey and cook for 2-3 minutes until thickened to a desired consistency, stirring constantly.
- Serve. Garnish with sesame seeds and serve warm with a bowl of steamed rice, topped with shredded carrots, cabbage, and/or kimchi, if desired.
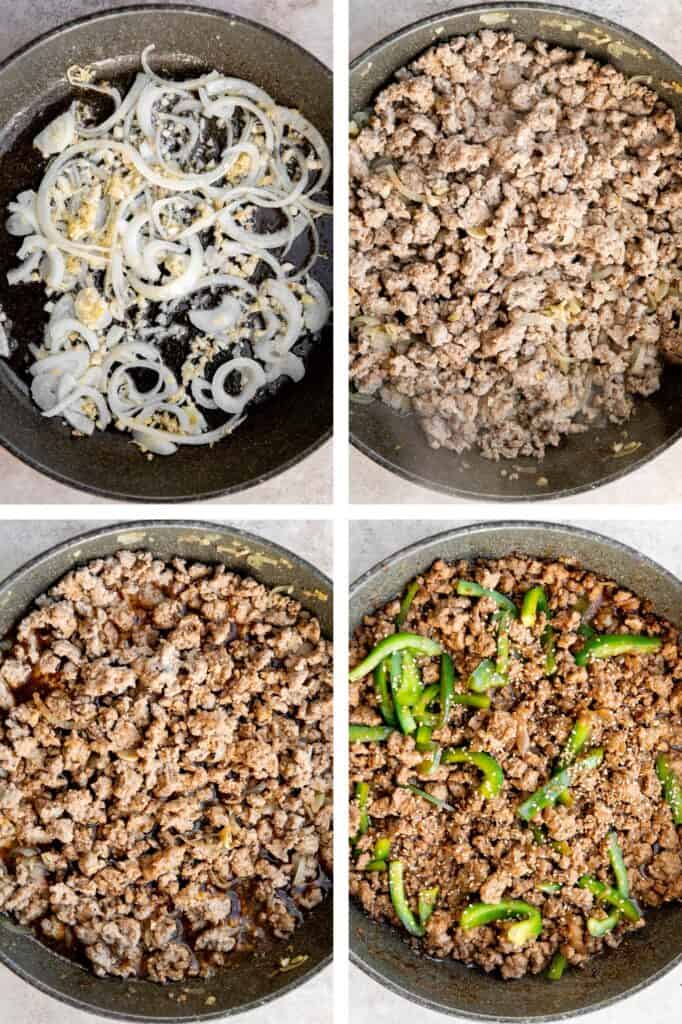
How to Serve
This Korean ground turkey is perfect served over steamed white rice. You can add a few things to make it a more complete meal, such as:
- green onions to garnish
- shredded carrots and cabbage
- an over-easy or boiled egg
- cooked vegetables (broccoli, peppers, onions, carrots, etc.)
You could even serve them in tacos for a fusion twist like in these Korean Beef Tacos.
Recipe Tips and Tricks
- How to store: Keep leftover Korean ground turkey in an airtight container in the fridge for up to 3-4 days.
- How to freeze: Korean ground turkey also freezes really well. Store in an airtight container or freezer bag for up to 3 months. I recommend portioning them out into meal prep containers for easy storing and reheating. Allow the ground meat to thaw overnight in the refrigerator before reheating.
- How to reheat: Reheat Korean ground turkey on the stove on a heat resistant dish in a steamer basket over boiling water. You can also reheat in a pan over medium-low heat, stirring constantly. Add water if it starts to look dry.
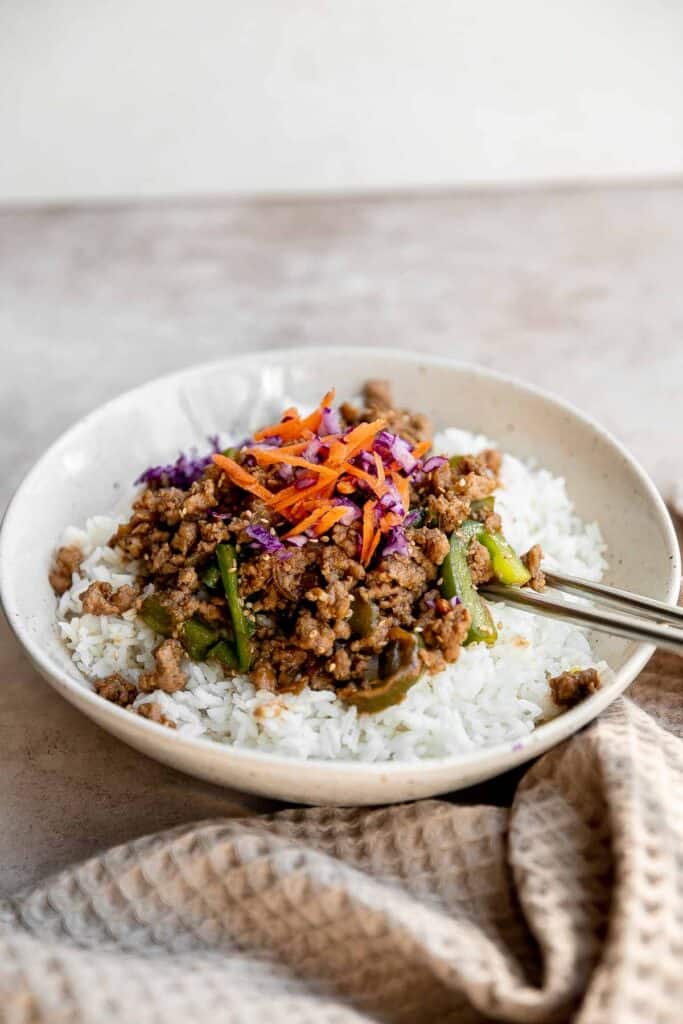
More Ground Turkey Recipes
- Turkey Chili
- Mediterranean Turkey Burgers
- Ground Turkey Pasta Bake
- Thai Turkey Meatballs in Coconut Curry
- Sweet Chili Turkey Meatballs
- Spinach and Feta Turkey Burgers
Tried this recipe?
I'd love to hear what you think! Leave a comment and rating below to share your feedback. Your reviews help others discover this recipe and help me keep creating more free recipes for you. Snap a photo and tag me on social media @aheadofthyme too.

Chicken Madeira
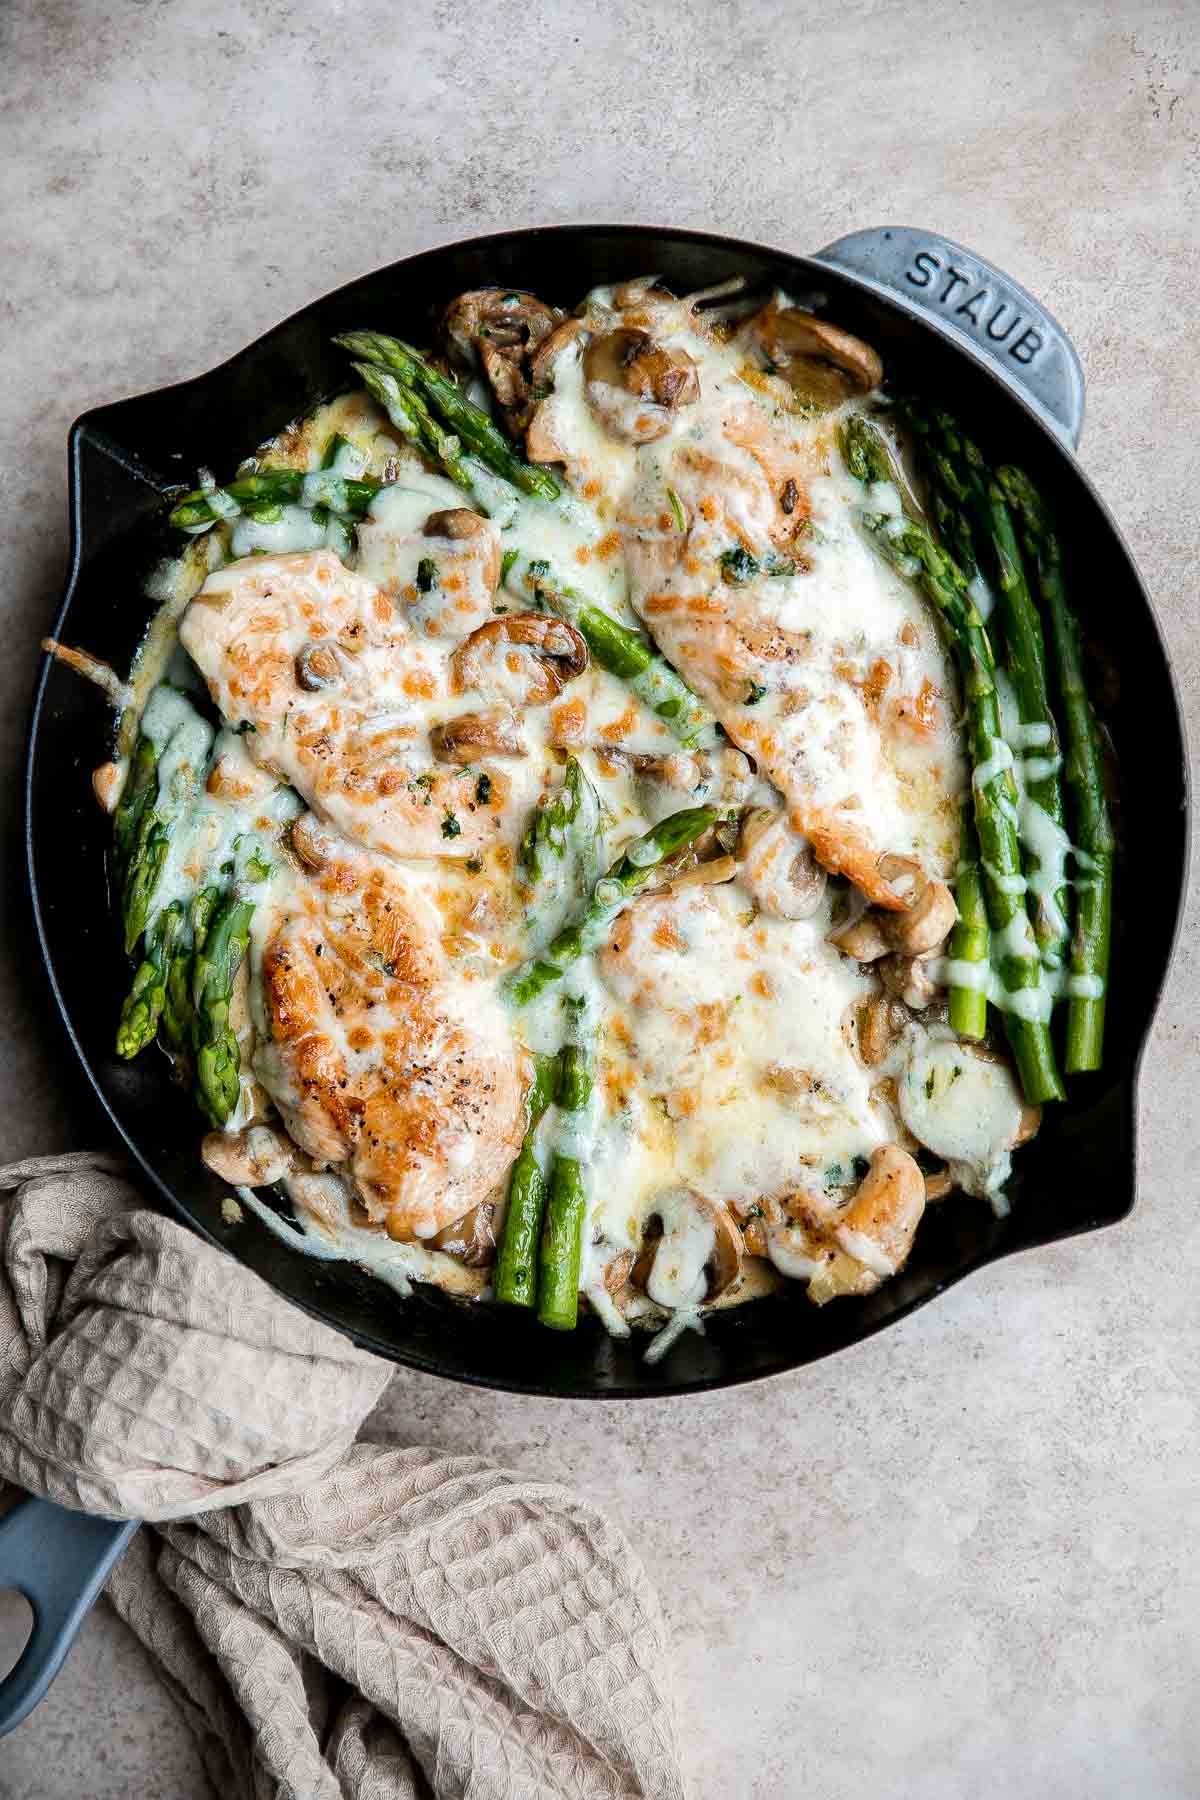
Chicken Madeira is creamy, cheesy, and delicious. Tender and juicy chicken is seared and tossed in a madeira wine sauce with mushrooms and tender crisp asparagus, topped with melty mozzarella cheese and baked until golden and bubbly. This family favorite is one of the most popular dishes at the Cheesecake Factory and can be easily made so much better at home. Serve it over pasta, mashed potatoes, or rice for a filling meal that you won't be able to get enough of.
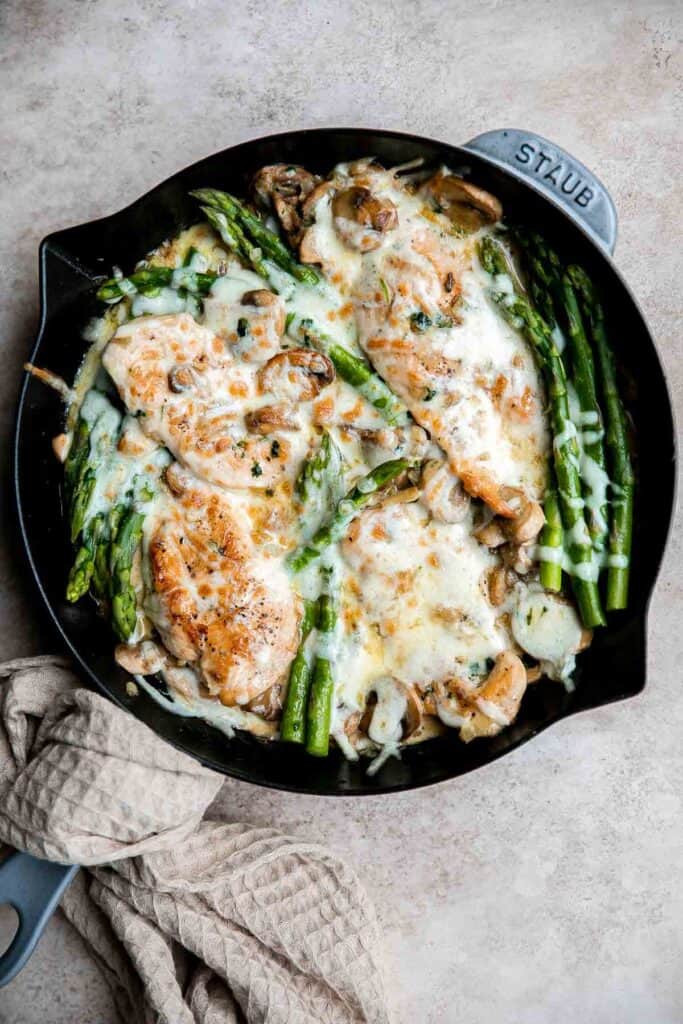
Why You'll Love Chicken Madeira
- It's a Cheesecake Factory Chicken Madeira copycat - but better. Seriously! This Chicken Madeira recipe delivers fresh chicken breasts in a perfectly cooked Madeira sauce with sautéed mushroom and blanched asparagus, topped with melted mozzarella cheese. This Chicken Madeira will have you thinking you're eating at a fine-dining restaurant.
- The earthy sauce pairs so well with chicken and asparagus. Imagine the slightly bitter crunch of bright green asparagus combined with a bite of juicy, tender chicken. Now, add in an earthy sauce complete with sautéed garlic mushrooms (and made with that sweet and nutty Madeira wine, of course). It's similar to Chicken Marsala but with asparagus and cheese.
- It's quick and easy. There may be a few different steps involved here (blanching the asparagus, sautéing the mushrooms, searing the chicken, and assembling it all together before popping in the broiler to melt the cheese), but it's easy to follow. You can have this fancy meal on your table in just 40 minutes. It's great for busy weeknights but definitely a strong date night dinner contender as well.
Ingredients and Substitutions
To make this delicious Chicken Madeira, you will need the following ingredients (full quantities in recipe card below):
- asparagus
- butter
- white mushrooms - feel free to substitute with brown mushrooms or shiitake mushrooms.
- salt and pepper
- yellow onion
- garlic
- parsley
- chicken
- Madeira wine - for a classic Chicken Madeira taste, don't substitute the wine. It adds a warm, sweet, and nutty flavor. If you must substitute, you can substitute with sherry wine or balsamic vinegar. Note that the taste will not be the same, but it will still be delicious.
- chicken broth
- heavy cream - or substitute with half and half
- cheese - I recommend using mozzarella cheese or any cheese that melts well. You can try provolone or white cheddar.
You will also need measuring cups and spoons and a skillet such as a 12-inch cast-iron skillet.

How to Make the Best Chicken Madeira
- Cook asparagus. In a large pot of boiling water, add asparagus and blanch until slightly but still bright green, about 2-3 minutes. Rinse the asparagus under cold running water to stop the cooking process and drain in a colander. Set aside.
- Cook mushrooms. Melt 2 tablespoons butter in a large skillet over medium-high heat until it starts to bubble, about 1 minute. Add mushrooms and sauté until the moisture evaporates from them, about 5 minutes. Season with salt and pepper and continue cooking for another 2-3 minutes until the mushrooms turns golden brown. Stir in onion, garlic, and parsley and cook until tender, about 2 minutes. Transfer the mushroom mixture to a plate and set aside.
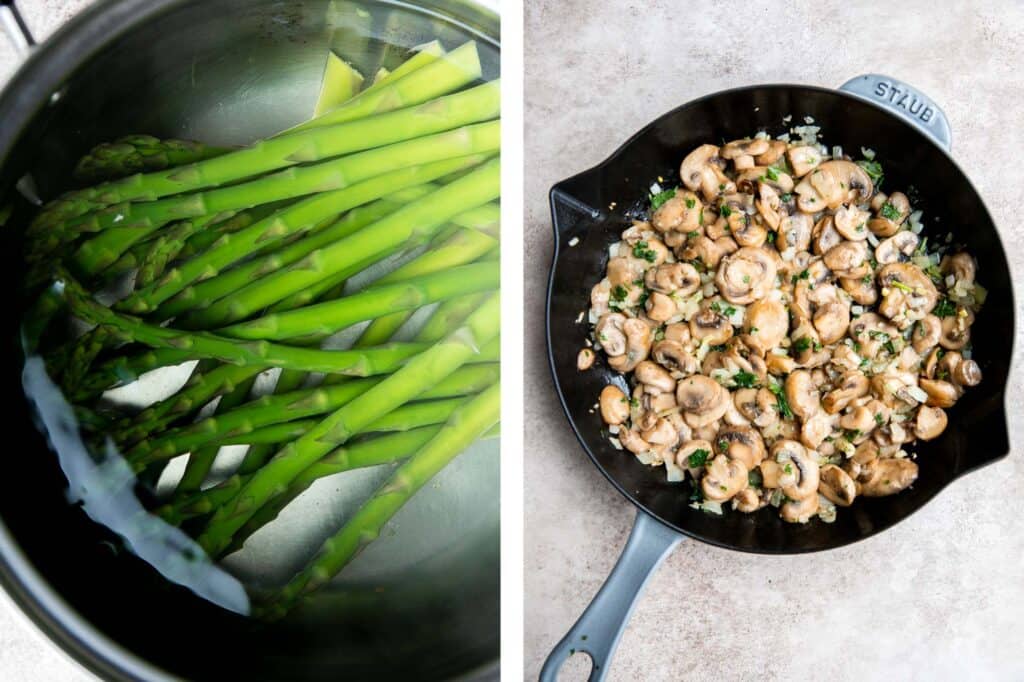
- Sear chicken. Slice each chicken breast in half lengthwise (horizontally) and season with salt and pepper to taste (about ¼ teaspoon of each). Use a paper towel to wipe the same skillet clean. Melt the remaining butter over medium heat until it starts to bubble, about 1 minute. Sear the chicken until golden brown and fully cooked through, about 5 minutes per side. The internal temperature for the chicken should reach 165F on a meat thermometer. Remove the chicken from the heat and transfer to the same plate with mushrooms.
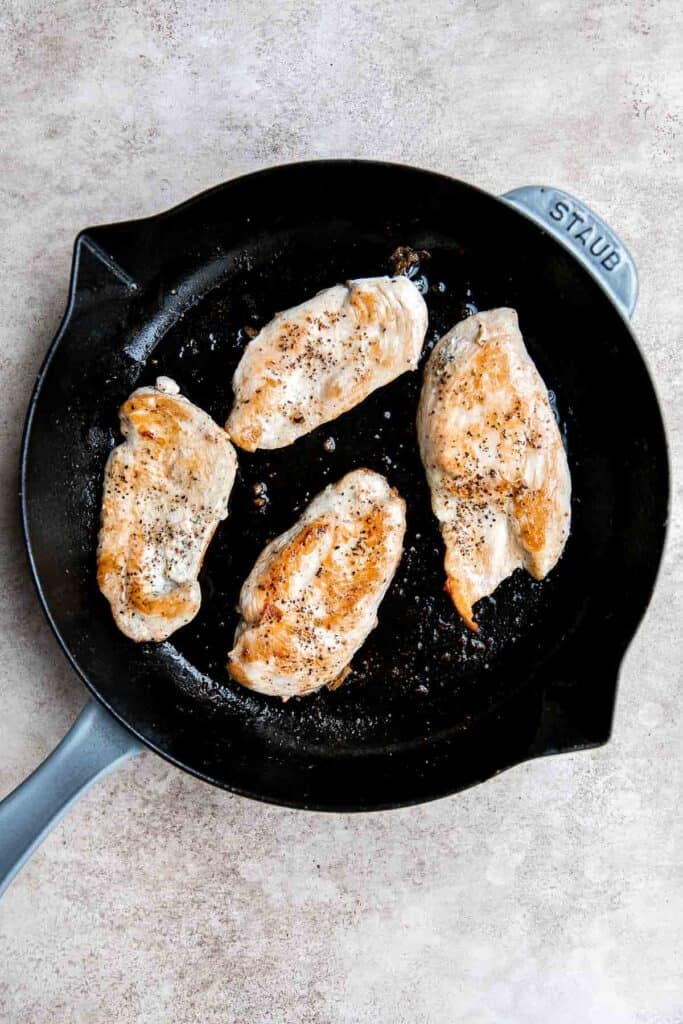
- Make the sauce. In the same skillet, add wine and stir well to deglaze the bottom of the pan. Stir in chicken broth and heavy cream. Mix well and bring the sauce to a simmer. Continue to simmer until thickened to a desired consistency, about 2-3 minutes. Turn off the heat.
- Assemble the chicken madeira. Return the chicken to the pan and toss to coat in the sauce. Arrange the mushrooms and asparagus around the chicken. Top with shredded mozzarella cheese.
- Broil. Transfer the pan into the oven and broil on HI for 3-4 minutes (or bake in a preheated 450F oven for 5-7 minutes) until the melted cheese turns golden brown.
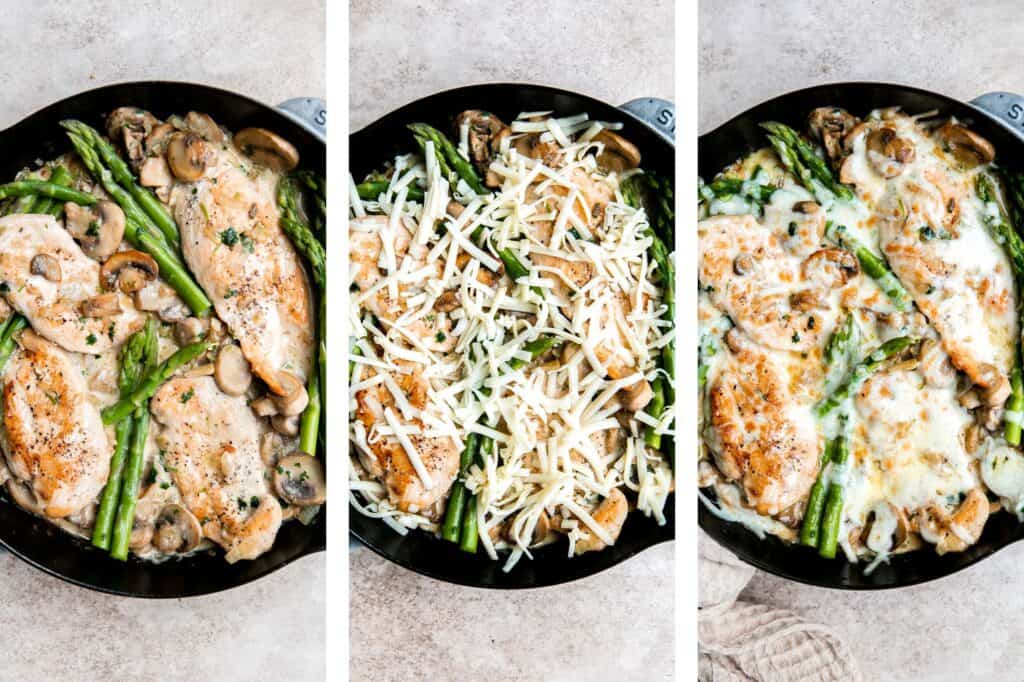
How to Serve Chicken Madeira
Serve chicken madeira on it's own or with a side of pasta or rice. Some of my favorite sides to serve with this are:
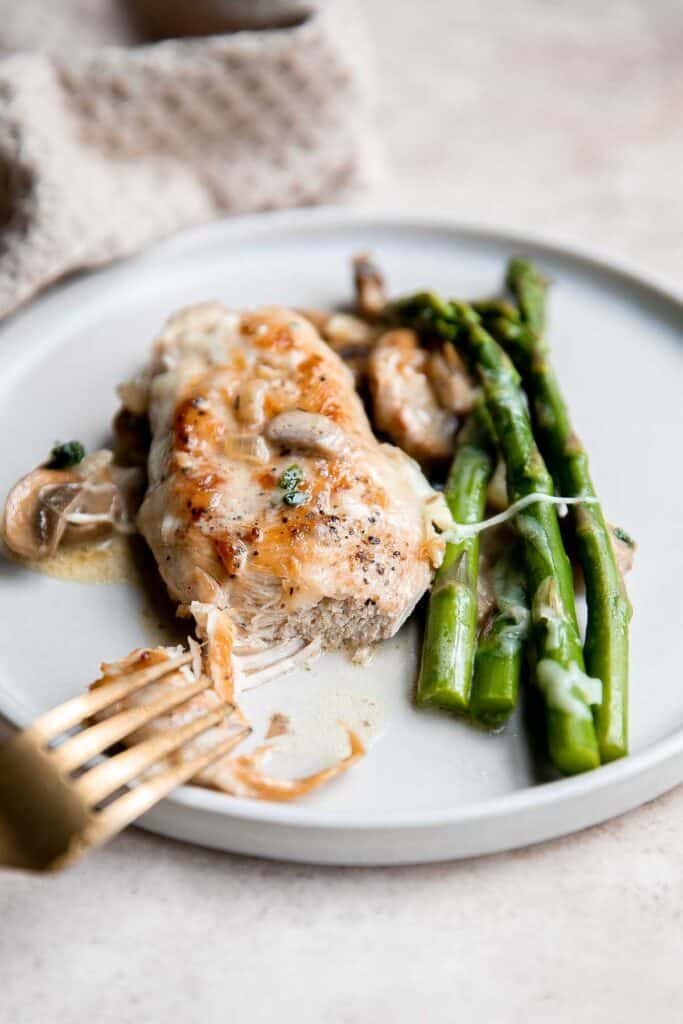
Storing and Reheating Instructions
- How to store: Keep leftover chicken madeira in the fridge for 3-4 days. Be sure to allow it to cool first before placing it in an airtight container.
- How to reheat: You can reheat chicken madeira in the oven or over the stove. To reheat in the oven, I recommend adding a little water to the baking dish and then covering it loosely in aluminum foil. Reheat in a 375F preheated oven for about 10-15 minutes until warmed through and cheese has melted. To reheat on the stove, place the chicken in a covered pan over medium heat for 10-15 minutes. Add 1-3 tablespoons of water to the pan to help steam the chicken.
- Tip for reheating faster: No matter how you reheat this chicken madeira, you can speed it up by slicing the chicken before reheating and spreading it out. More surface area will allow the chicken to heat through faster.
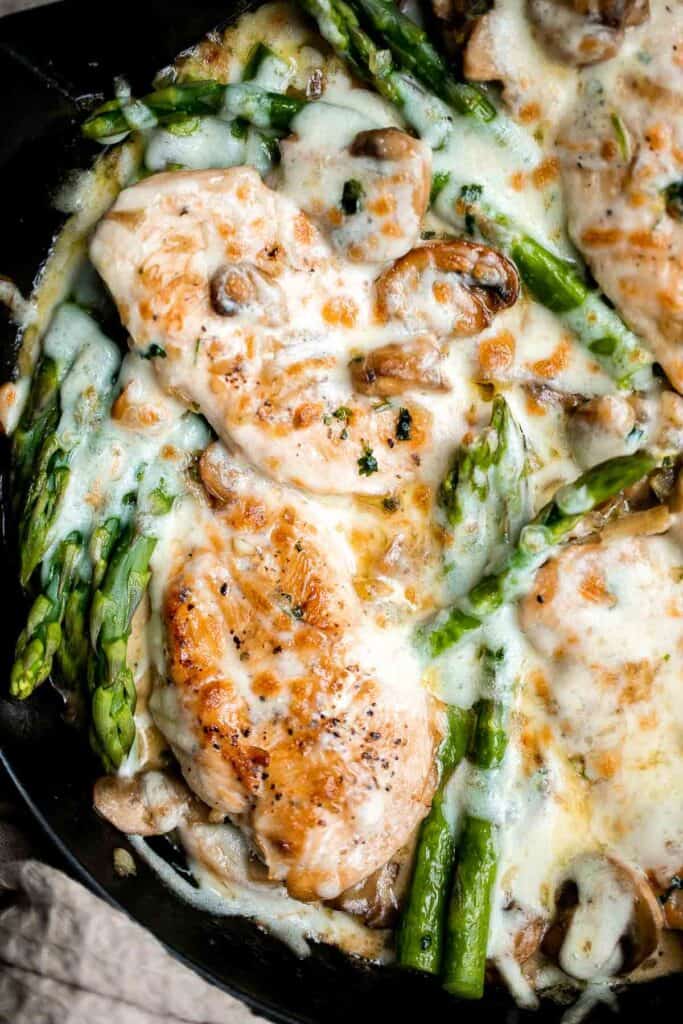
More Chicken Recipes
- 60 Best Chicken Recipes
- Chicken Marsala
- Creamy Lemon Chicken Piccata
- Chicken Penne Pasta
- White Chicken and Spinach Lasagna
- Baked Queso Chicken
Tried this recipe?
I'd love to hear what you think! Leave a comment and rating below to share your feedback. Your reviews help others discover this recipe and help me keep creating more free recipes for you. Snap a photo and tag me on social media @aheadofthyme too.

Spring Produce Guide
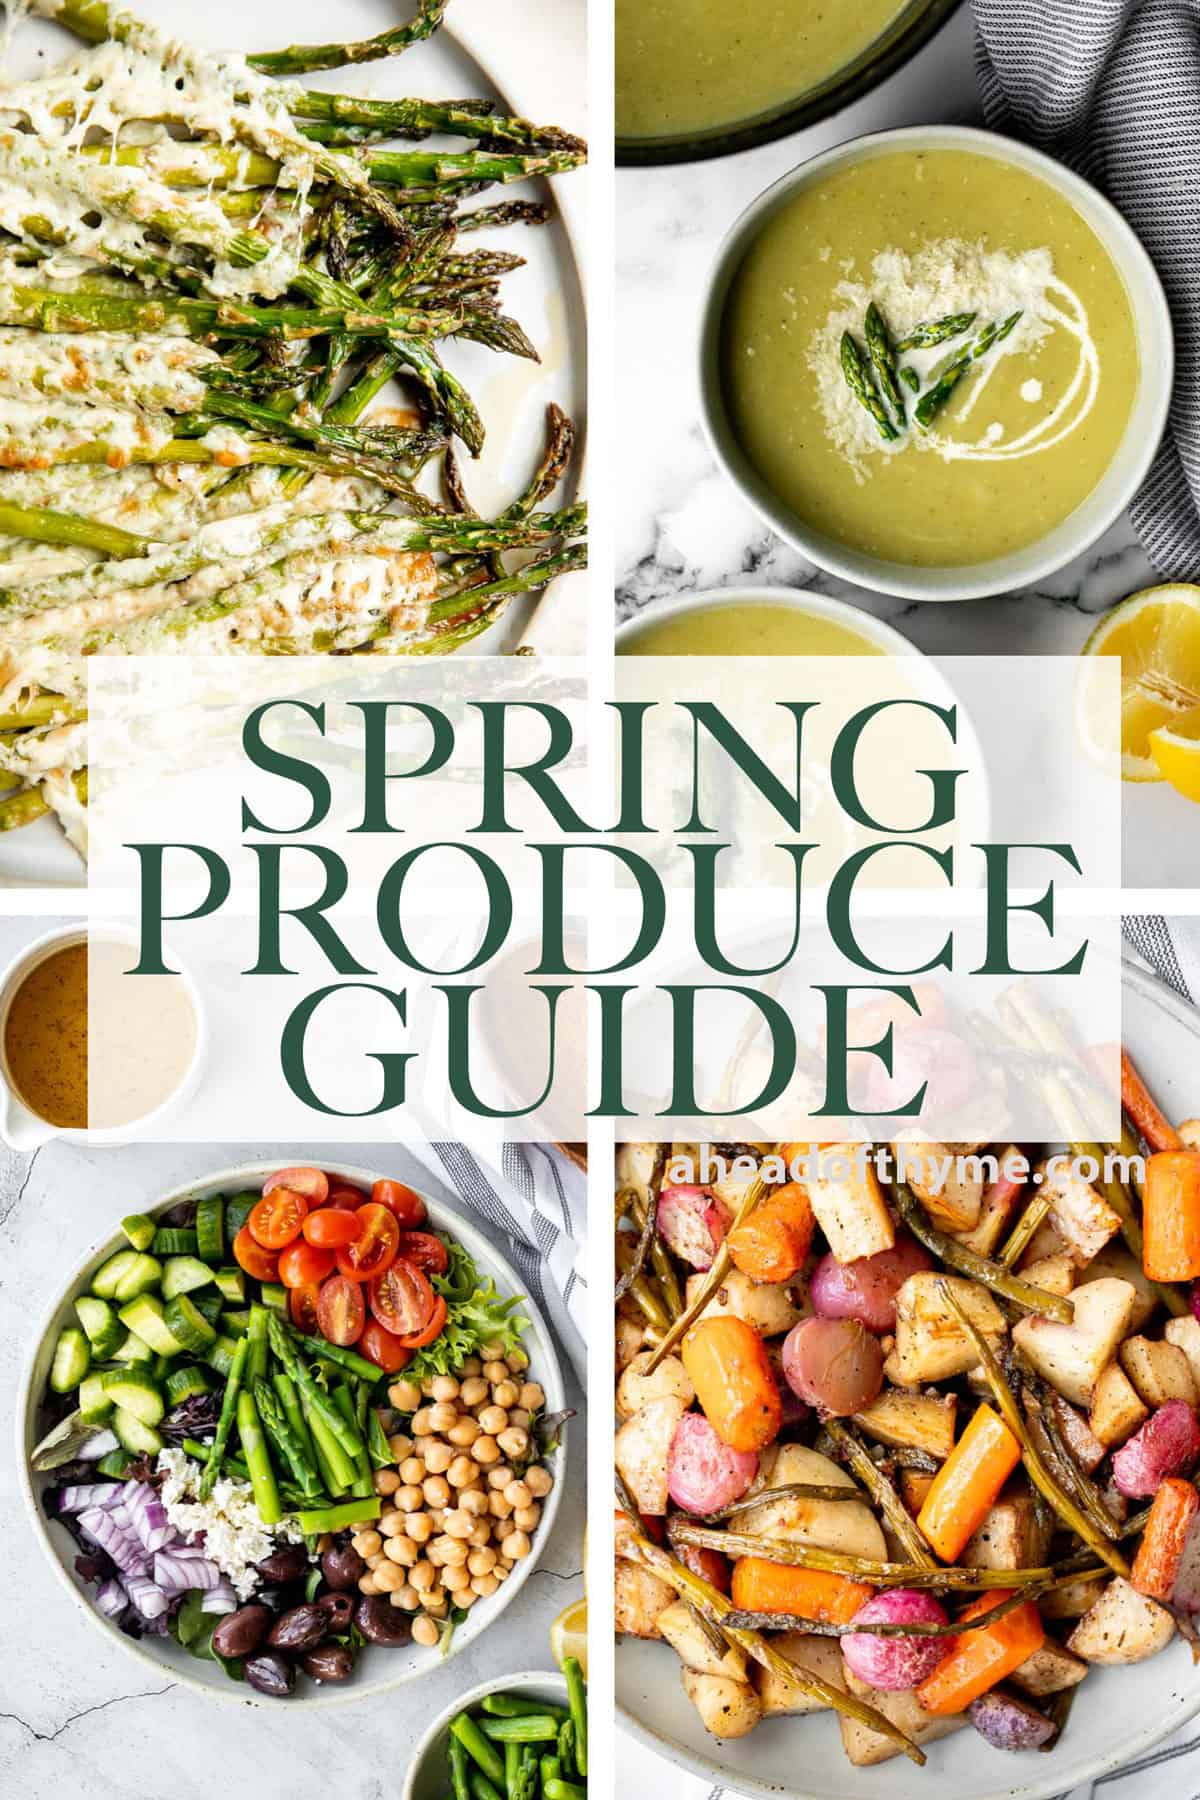
Wondering what fruits and vegetables are in season in the spring at your local grocery store or farmer's market? We are sharing our complete Spring Produce Guide including a list of seasonal fruits and vegetables, tips when shopping for spring produce, and how to use spring veggies and fruit including all our favorite seasonal spring recipes.
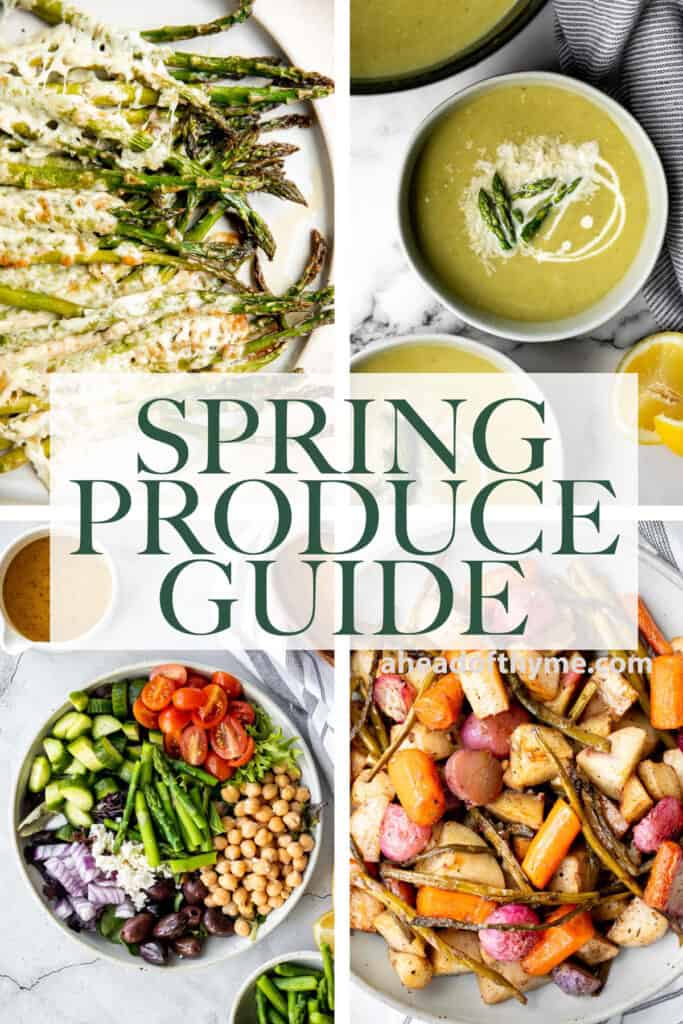
What is Seasonal Eating?
In the simplest words, seasonal eating refers to the idea of consuming only fruits and vegetables produced in the current season. Which means no stored or canned produce from the previous season or any veggies produces artificially in the wrong season.
This also means that depending on where you live in the world, your seasonal produce may be different across countries. So, if it's spring right now where you live, the local seasonal produce will be different from those available to others living in the opposite part of the globe.
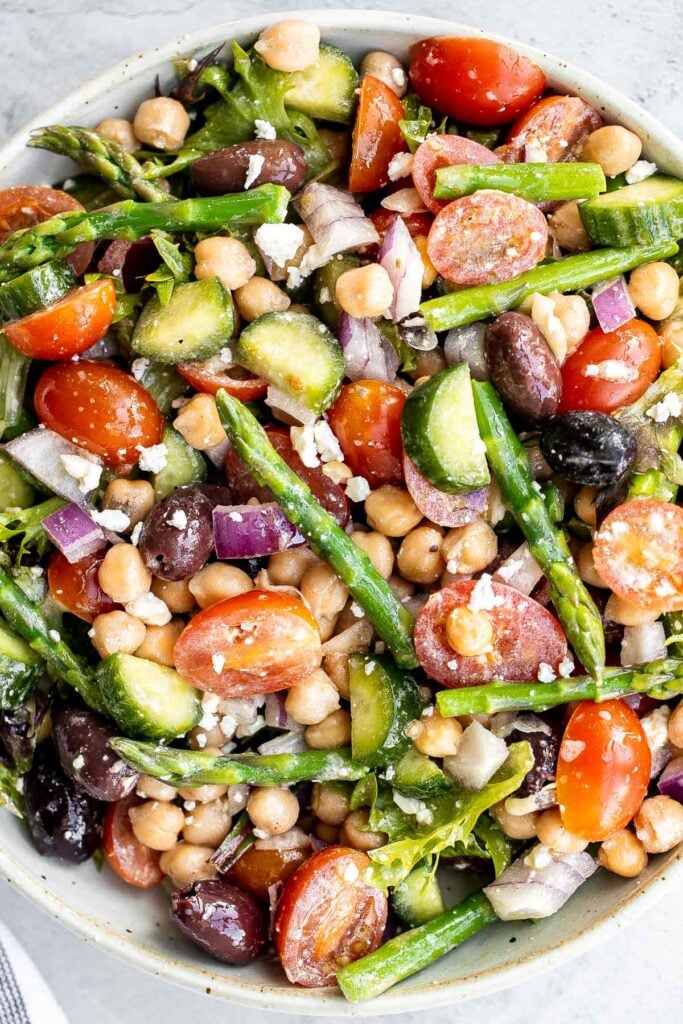
Why Eat Seasonally?
Eating with the seasons have a number of benefits. Just to mention a few:
- It has health benefits. Seasonal produce that is consumed fresh in the season contains more nutrients. Unlike fruits and vegetables that are available year round which typically are given ripening agents to help them grow all year.
- Promotes your microbiome. The nutrient dense seasonal fruits help to support the good bacteria in your digestive system which has health benefits throughout your body.
- They taste better. Have you ever noticed that the canned food items you eat off-season don't offer much of the flavor? Peas that you devour in summer and Spinach that you store to consume in winters are not as mouthwatering as they are in their season of origin. That's because seasonal produce simply tastes better. Produce that is artificially produced year round favors higher shelf life over flavor.
It's only now with technological advancements that it is possible for any produce to be available all year round. You can typically find any fruit or vegetable at a large grocery chain any time of the year. Just decades ago, it was not a possibility. You would consume only what the farmers produced during the season and nothing else.
Spring Produce Guide
So let's get right to it. What is in season in the spring?
Asparagus
Asparagus is probably the most popular spring vegetable and it's my favorite. I get so excited when the spring season rolls around because I start stocking up my fridge with a fresh batch almost weekly. Although you are likely to find asparagus year round at big grocery stores, even during the peak winter season, it's the freshest in the spring.
There are so many different ways you can eat asparagus. Roast it, grill it, blanch cook it, boil it in soup, or shave it and sprinkle on salad. Some of our favorite asparagus recipes are:
- Cheesy Roasted Asparagus
- Sautéed Asparagus
- Lemon Asparagus Soup with Parmesan
- Asparagus Tart
- Chopped Asparagus Salad
- Lemon Parmesan Asparagus
- Roasted Asparagus with Poached Eggs
- Spring Pesto Pasta with Asparagus
- Pesto Asparagus
| |
Radishes
Love pink and reds? Stock on some radish as soon as the spring season arrives. Just like asparagus, you can consume it in numerous ways. You can eat it raw on a veggie platter with a dip like whipped feta or hummus, you can roast it, or even add them to cold press juices to help promote skin health.
Try radishes in a Veggie Tray or Roasted Spring Vegetables.
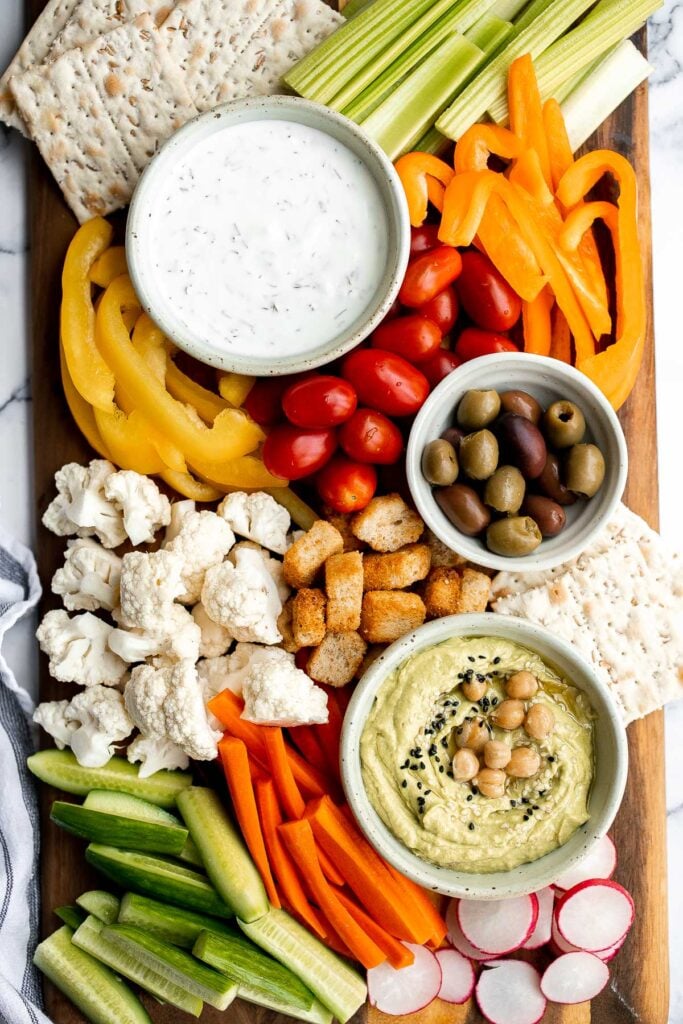 | |
Rhubarb
Rhubarb is another vegetable that you typically only see pop up at the grocery stores in the spring. It's rich in flavor and typically used in baked goods including sweet breads, pies, and cakes, or cooked down into a jam and enjoyed for breakfast or slathered on a savory meat dish.
Carrots
Spring carrots are just the best. They are flavorful, delicious, and seriously so good. Every year, I like to take a trip down to the farmer's market or even try and grow some myself in our vegetable garden.
Plus, carrots are so versatile. You can seriously throw them into any recipe. Add them in a salad to add color and flavor, add them to soups and stews, roast them as a side dish, or even throw them into desserts (carrot cake anyone?). Whether boiled, roasted, or raw, carrots taste the best in the prime spring season. Even if you try to store them for later use in months to come, it won't taste or feel the same.
Some of our favorite carrot recipes are:
- Honey Roasted Carrots
- Arugula and Roasted Carrot Salad
- Carrot and Ginger Soup
- Carrot Bundt Cake with Cream Cheese Frosting
- One Pot Rice Pilaf with Carrots
- Spiced Carrot Muffins
 | 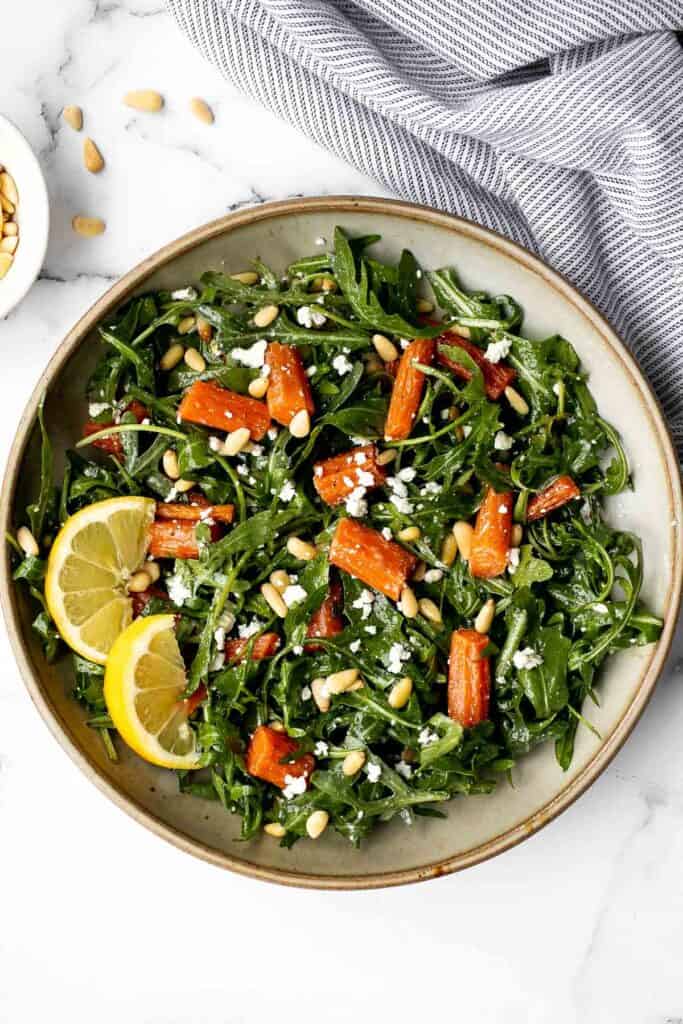 |
Beets
If you are a fan of the vibrant rich colors of spring produce, then you will be a fan of beets. Many people consider it a winter vegetable, but it is in the peak spring season when you can taste its flavor the best. In the spring they taste a little sweet and slightly less earthy than they do in the winter.
Whether you opt for red beets or golden beets, you can make a salad out of them, pickle them, boil them, roast them, or use them to make soup.
Some of our favorite beet recipes are:
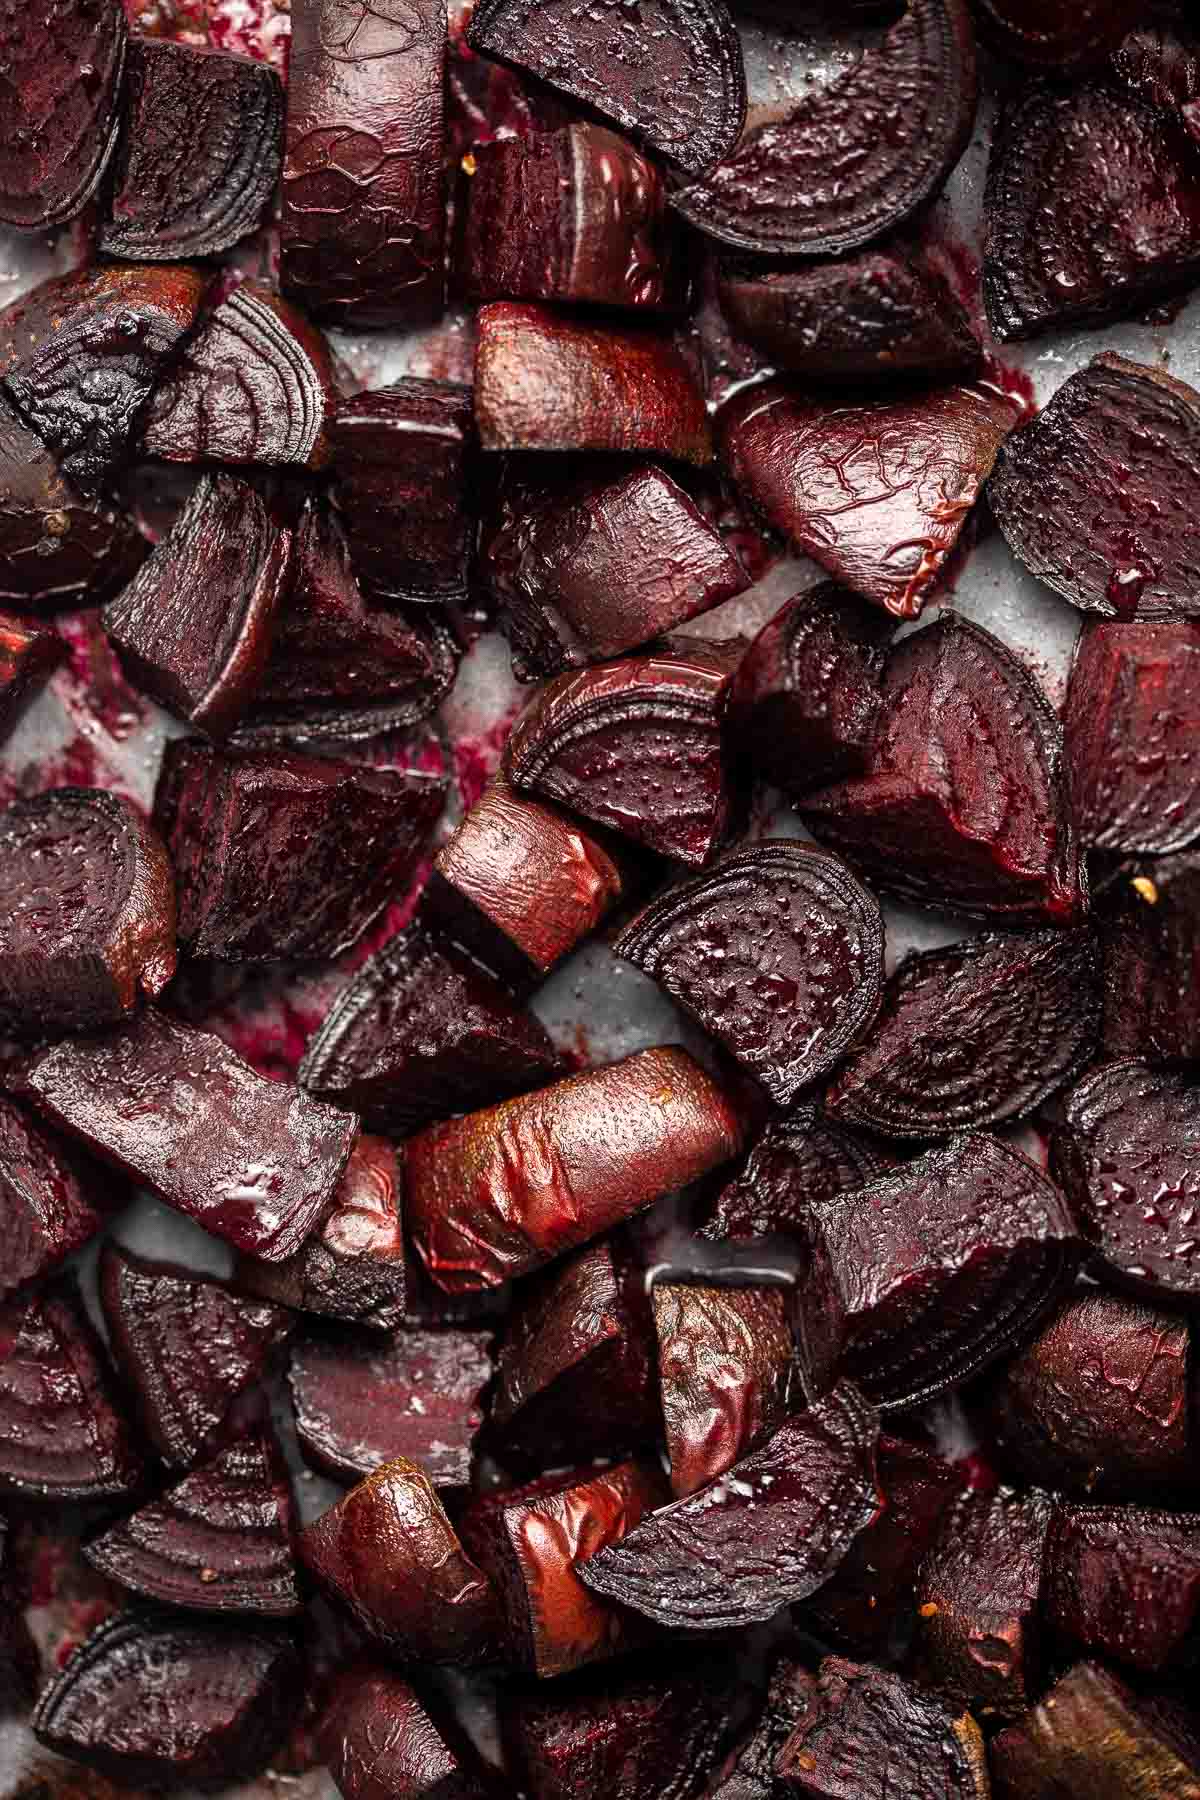
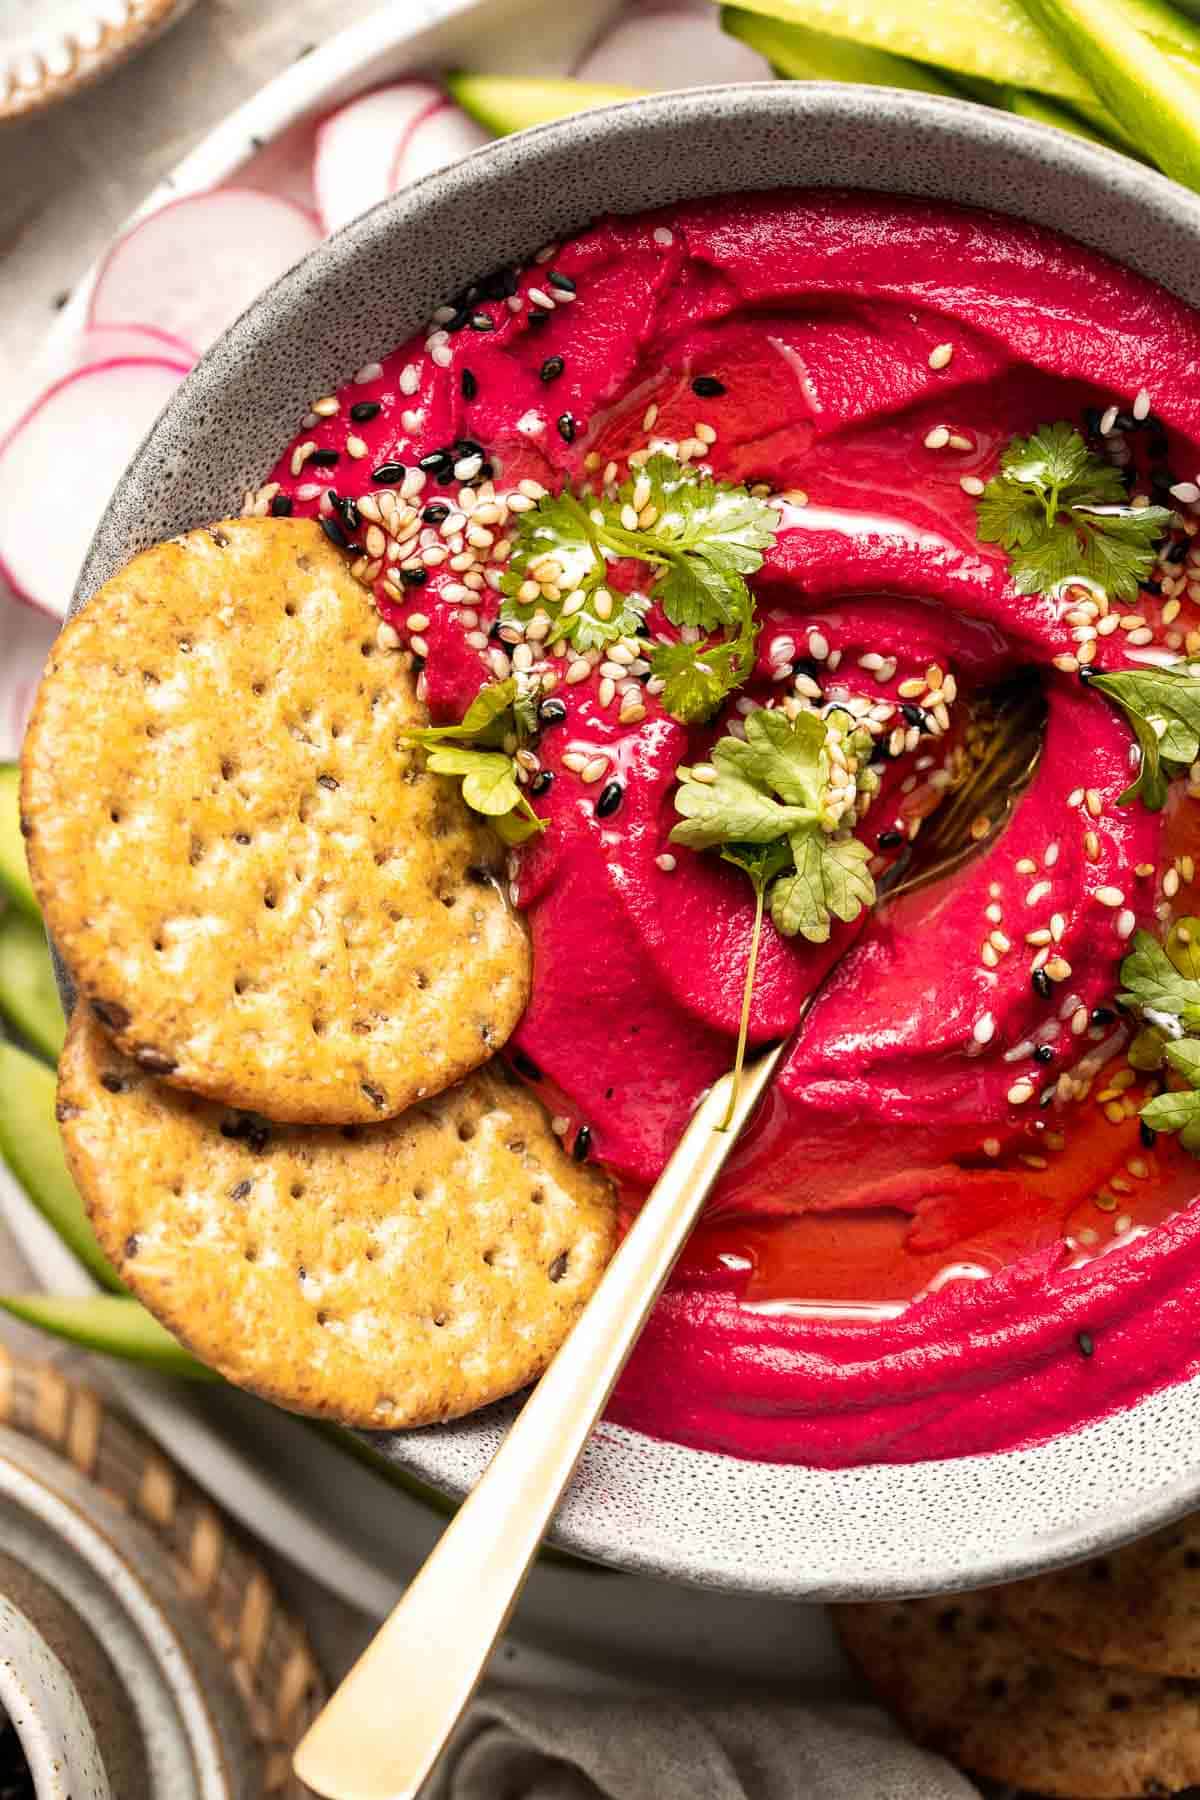
More Spring Produce
Some other fruits and vegetables that grow in the spring season are:
- Artichokes
- Leeks
- Peas
- Spinach
- Apricots
- Plums
- Avocados
Tips for Shopping for Spring Produce
- Smell the produce. One of the oldest tricks in the book is to literally smell the fruit or vegetable you are considering buying. Fruit should have a sweet smell to it which will indicate ripeness.
- Check the skin. Examine the fruit or vegetable. You want produce that is firm to the touch but not too firm that it doesn't move when you press your finger gently in it. Check and avoid produce that has any marks and bruises, dents, wrinkles, or soft areas.
How to Use Spring Produce
Looking for more ideas on how to use spring produce in your kitchen. Here are a few ways that you can get the most out of these seasonal veggies.
- Make healthy salads. Have you been planning to shift to a healthy diet for a long but never get the motivation to do so? The arrival of the spring season may entice you to take the plunge by making vibrant and colorful salads. Mixing these greens and pinks in a bowl will make you feel like an artist and add great nutritional value to your daily meal.
- Make smoothies. The spring produce is mostly sweet, so you can combine them with almost any assortment of fruit, put it in your blender, and make a smoothie. You can also add some yogurt to add extra flavor and thickness.
- Roast them. Consuming grilled and roasted spring produce is a great idea and can compliment almost any main course meal. Whether you are making pasta for dinner, chicken, ground beef, or salmon, a side of healthy roasted spring vegetables can't be beat. Roasted carrots or beets on the side make your overall meal more nutritious, delicious, and filling. Plus, the pretty colors make for a great food photos to post on social media.
Our Favorite Spring Recipes
- 60+ Spring Dinner Ideas
- 50 Best Spring Desserts
- 40 Best Carrot Recipes
- 30 Best Easter/Spring Appetizers
- 50 Best Easter/Spring Side Dishes
What did you think about this Spring Produce Guide? I would greatly appreciate a comment below, letting me know what you thought of these kitchen tips. You can also tag me on Instagram @aheadofthyme or share on the Pinterest so that I can follow along.
Don't forget to sign up for my email newsletter so that you don't miss any recipes. You can also follow along on Instagram, Pinterest, and Facebook for more recipe updates.
Garlic Knots

Garlic knots are fluffy on the inside, crispy on the outside, and topped with savory garlic herbed butter that will have you begging for more! Enjoy these garlic buns on their own, pair them with an Italian meal, or dip them in marinara sauce. No matter how you serve them, these garlic knots are a total crowd pleaser. You may want to double the recipe because it's that good.
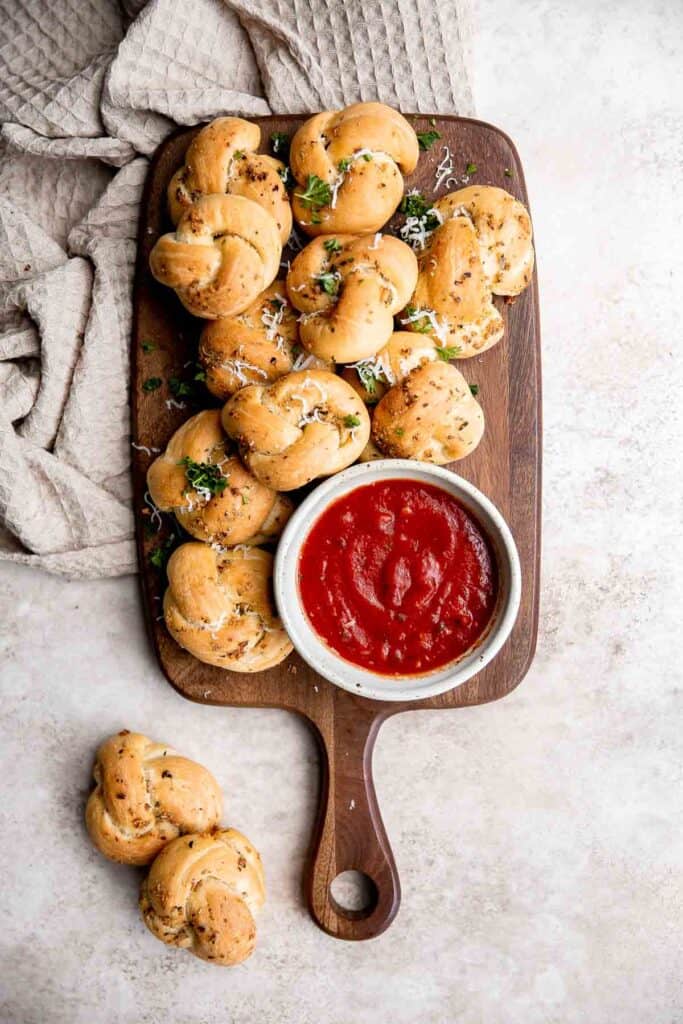
Why You'll Love Garlic Knots
- The fluffy interior and crispy exterior. When you bite into one of these garlic knots, your first impression will be the crisp, golden-brown crust. Then, you'll notice just how light and fluffy the inside of these garlic knots is. And then, you'll struggle to figure out which is your favorite.
- The herbed garlic butter. These buns are delicious plain, but adding garlic butter makes them even better. Melted butter, freshly minced garlic, Italian seasoning, and salt are mixed together to give garlic rolls their incredible classic flavor.
- A great way to practice your bread baking skills. Making great bread can be intimidating if you are new to baking. These garlic knots use basic and fundamental bread-making techniques so you can perfect your practice - and it's pretty hard to go wrong.
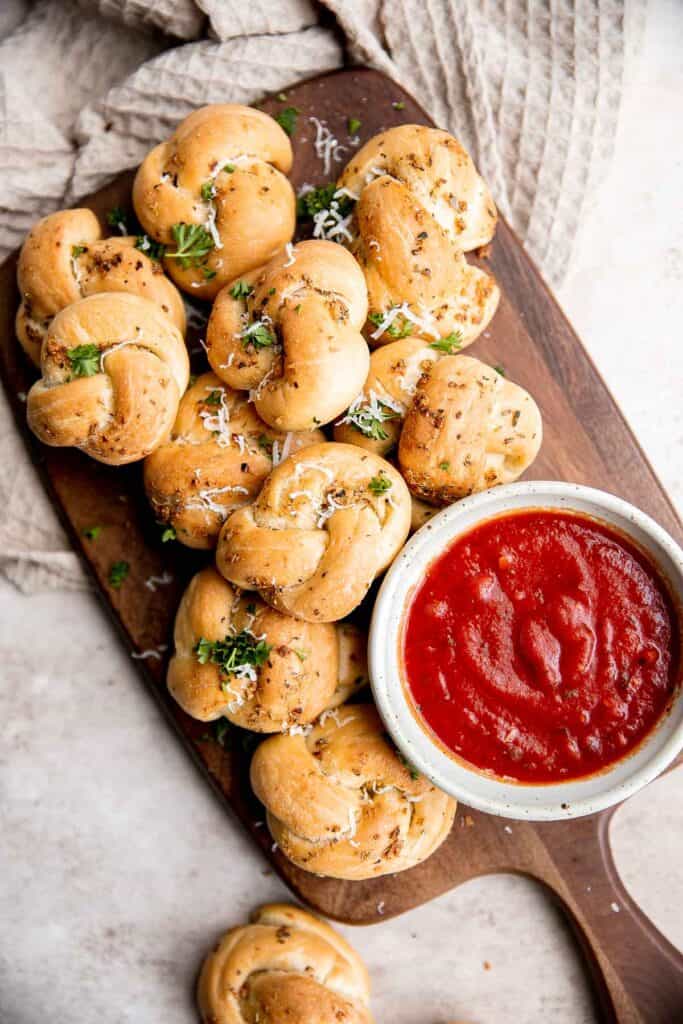
Ingredient Notes
To make these delicious homemade Garlic Knots, you will need the following ingredients (full quantities in the recipe card below):
- lukewarm water
- active dry yeast - you can also use instant yeast.
- all-purpose flour
- salt
- olive oil
- butter - we use butter in the garlicky buttery topping, but for a healthier version, you can use high-quality olive oil instead.
- garlic
- Italian seasoning - or substitute with dried oregano.
You will also need measuring cups and spoons (or kitchen scale), mixing bowls, bench scraper or knife, and a half sheet baking pan.
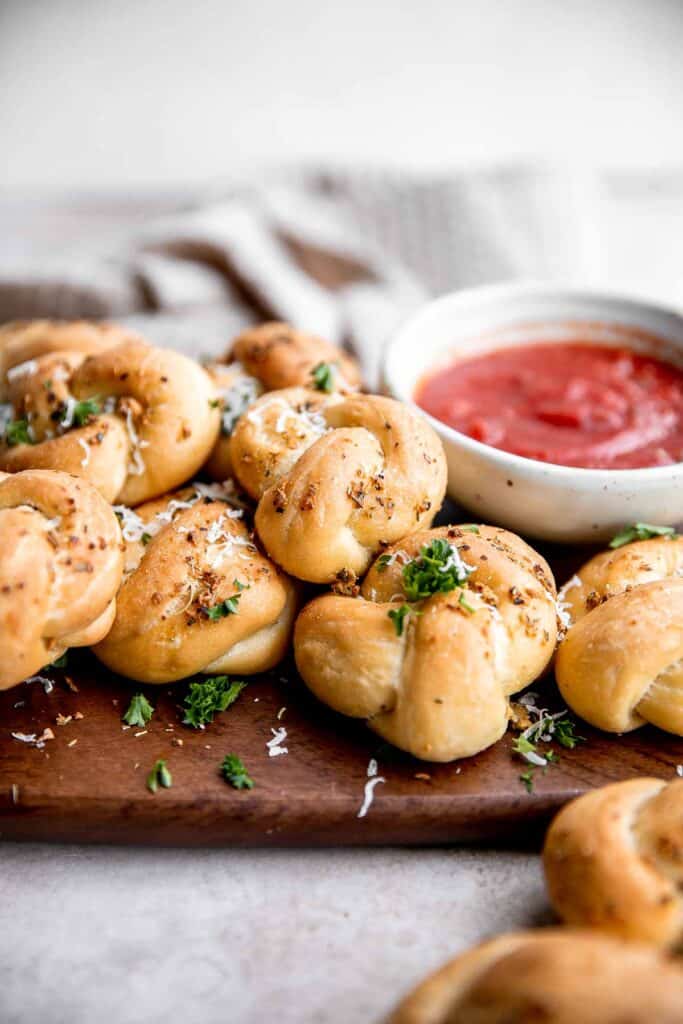
How to Make the Best Garlic Knots
- Make the dough. In a medium mixing bowl, whisk together water and yeast until smooth. Let it sit for 5 minutes until slightly foamy. In a large mixing bowl, mix flour, salt, and oil. Pour in the wet yeast mixture and combine until it forms a shaggy dough, scraping down the sides of the bowl (there should be no dry flour particles visible).
- Knead the dough. Knead the dough on a clean lightly floured surface for 5 minutes until it changes from a sticky shaggy dough into a smooth and soft dough ball. Cover the bowl with plastic cling wrap and let the dough rise at room temperature (preferably in a warmer area) for 1 hour until doubled.
Tips for Kneading Dough
- How to knead dough: Knead the dough by pushing it down and outward using the palms of your hands. Fold the dough in half toward you and press down. Repeat this motion by pushing the dough down and outward, and then folding over towards you. This helps build up gluten strength in dough that is responsible for making the bread fluffy.
- How to test if dough is well-kneaded: A well-kneaded dough is smooth and can hold its shape. You can test the dough by giving it a firm poke with your finger. The indentation should bounce right back. If it doesn't bounce back and stays like a dimple, keep kneading for a few more minutes.
How to Shape Garlic Knots
- Flatten the dough and shape into a 16-inch long log. Cut the dough into 14 evenly spaced strips (about 1-inch wide) with a pizza cutter, bench scraper, or knife.
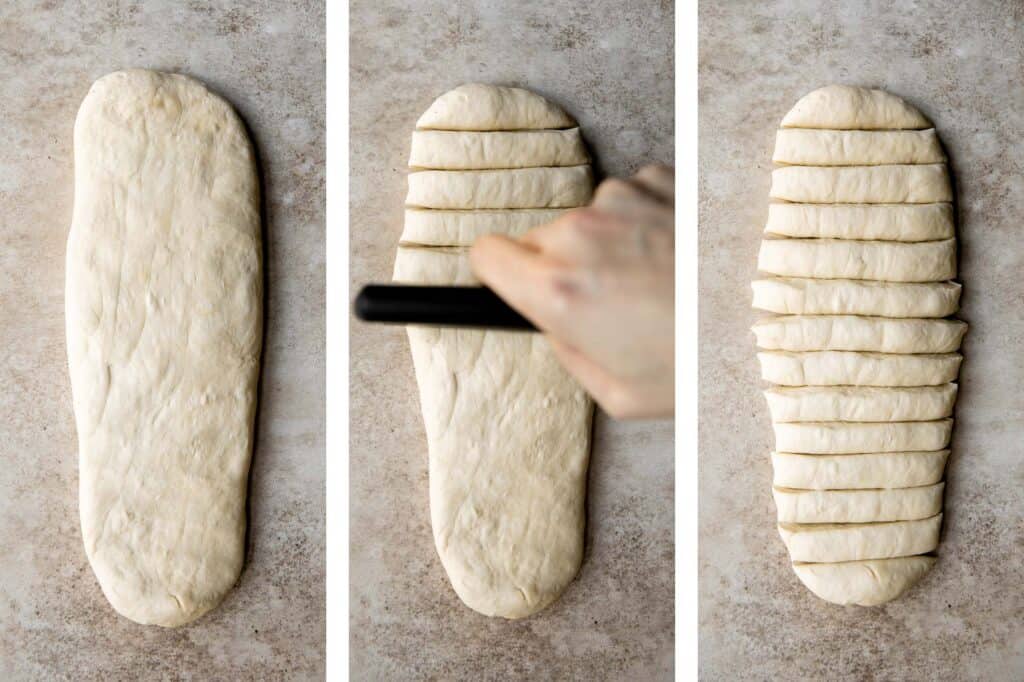
- Roll each dough strip into an approximate 8-inch long rope, tie into knots, then tuck the two ends of the knots underneath.
- Place the knots spaced evenly on a lined half sheet baking pan and cover loosely with plastic cling wrap. Let the knots rise at room temperature for 30 minutes until almost doubled.

How to Bake Garlic Knots
In a small mixing bowl, whisk together melted butter, garlic, Italian seasoning, and salt until evenly combined. Use a pastry brush or silicone brush to brush the knots evenly with the garlic butter mixture.
Bake in a 400F preheated oven for 20 minutes until the tops turns golden brown. You can brush some extra garlic butter on top. Let the garlic knots cool for 10 minutes and serve.
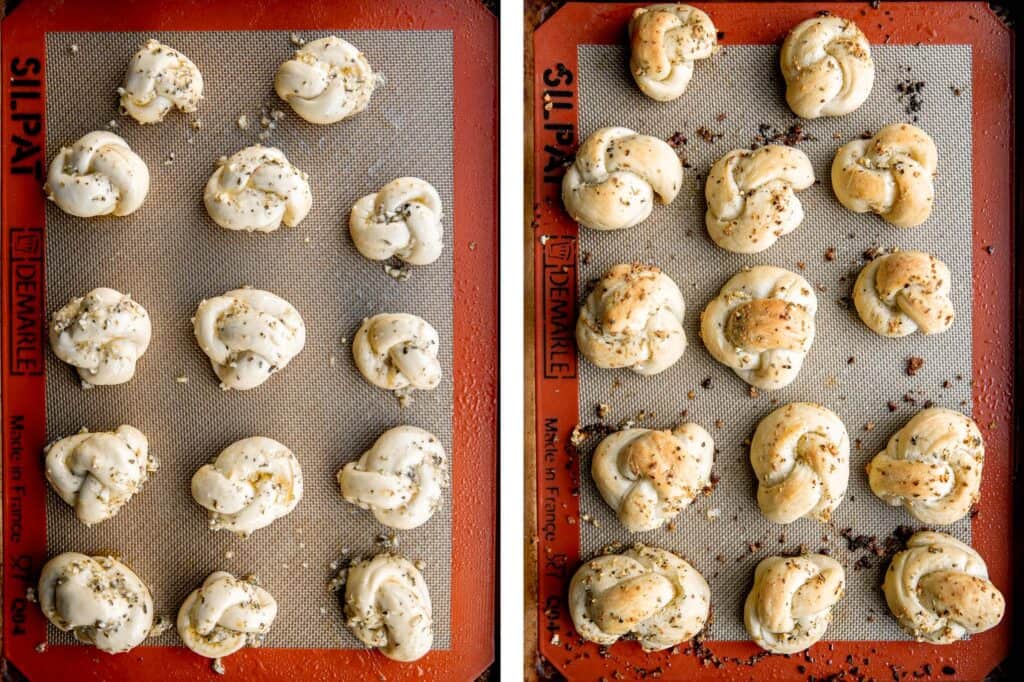
How to Serve
My favorite way to enjoy garlic knots is with a side of Marinara Sauce, hot or cold. You can also serve these garlic knots with a side of cheese sauce like Pizza Dip or Baked Spinach Dip or dust them in Parmesan and enjoy on their own.
Garlic knots are also great served on the side of your favorite meals like soup or pasta. I suggest a saucy pasta so you can dip the knots into and scoop up any extra sauce. Try it with Pasta Bake with Sausage, Spaghetti Bolognese, or Chicken Penne Pasta.
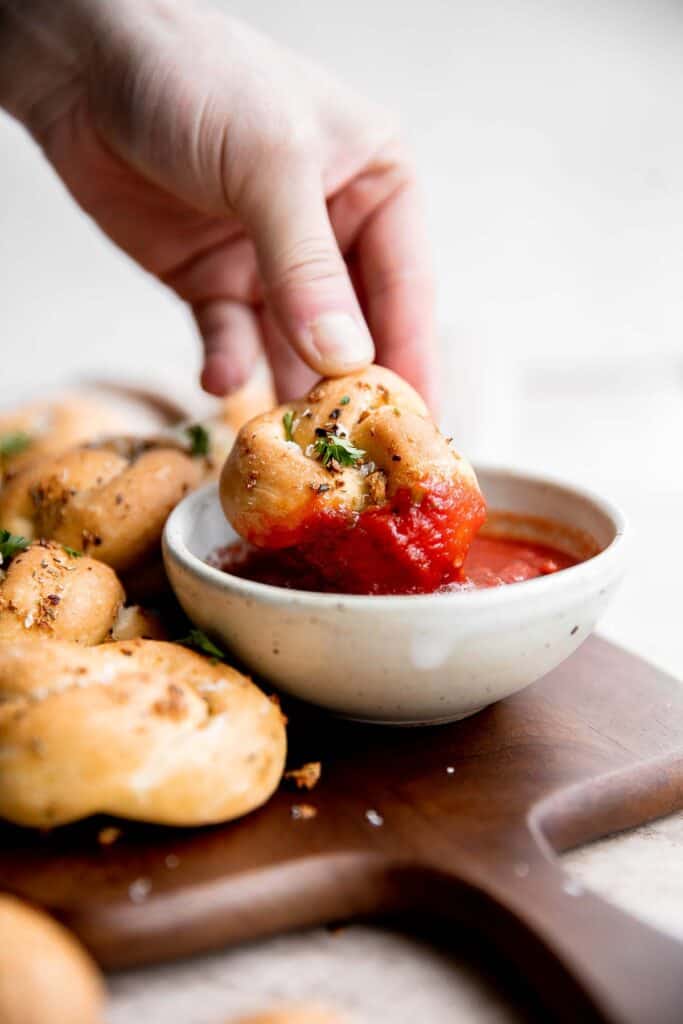
Storing Instructions
- How to store: Garlic knots are best eaten fresh. But you can store them at room temperature in a bread basket or airtight container for 1-2 days. You can store them longer in the fridge 2-4 days but they will harden. I suggest reheating them to get them soft to eat.
- How to reheat: Reheat garlic knots in a conventional oven, toaster oven, or air fryer for 3-5 minutes at 350F.
More Garlic Bread Recipes
- 50 Best Bread Recipes
- Garlic Breadsticks
- Pull Apart Garlic Bread
- Cheesy Garlic Dinner Rolls
- Rosemary Garlic Focaccia Bread
- Garlic Naan Bread
Tried this recipe?
I'd love to hear what you think! Leave a comment and rating below to share your feedback. Your reviews help others discover this recipe and help me keep creating more free recipes for you. Snap a photo and tag me on social media @aheadofthyme too.

Instant Pot Oxtail Stew
Instant Pot Oxtail Stew is filling, nourishing, and satisfying. This Asian oxtail stew is easy to make in the instant pot and is loaded with flavor from an assortment of Asian spices and seasoning. It's juicy, tender, and literally falls off the bone. It tastes delicious on the day that you make it but leftovers might even be better! Plus, it's freezer-friendly so you can make a big batch and meal prep for another day. Serve this pressure cooker oxtail stew over steamed rice, noodles, or potatoes.

Why You'll Love Instant Pot Oxtail Stew
- It's like your favorite pot roast recipe - but Asian-style. This Instant Pot oxtail stew is made with fresh beef oxtails along with classic pot roast ingredients like onion, carrot, and tomato. But it gains added flavor with an Asian-twist from ginger, garlic, wine, soy sauce, and more.
- Oxtail is one of the best cuts of beef. Oxtails are one of the most unique cuts of meat, and many people are intimidated by them. Don't turn away from using oxtails in soups and stews, because the distinct cut of bone and muscle delivers a serious and robust flavor that you can't get from other cuts of beef. Plus, it's loaded with nutrients.
- The Instant Pot does all the hard work. The best part of this Instant Pot Asian oxtail stew is that your Instant Pot takes on most of the work. You just sear the meat and sauté the vegetables and then let the pressure cooker do it's thing. This stew is ready to eat in just under one hour, thanks to your pressure cooker.
Ingredient Notes
To make this easy Instant Pot Oxtail Stew, you will need the following ingredients (full quantities in the recipe card below):
- beef oxtails - the best beef oxtails are large and fat with plenty of meat on them. The fatty parts should be a clean creamy white color, and the meat will be a deep dark red.
- vegetable oil
- onion
- ginger + garlic
- seasoning and spices - star anise, bay leaves, crushed red pepper (optional), Shaoxing wine (or substitute with red wine), soy sauce (or substitute with oyster sauce), tomato paste, salt, and pepper.
- vegetables - carrots, white radish (optional), and tomato.
- water
- green onions - optional, for garnish.
You will also need measuring cups and spoons and an instant pot pressure cooker.
How to Make the Best Instant Pot Oxtail Stew
- Sear oxtails. Use a paper towel to pat the beef oxtails completely dry. Set aside on a plate. Turn on the Sauté function to high on the Instant Pot. Heat oil until the hot oil sizzles, about 1-2 minutes. Sear the oxtails until golden brown, about 5 minutes on each side. The oxtails don't need to be fully cooked at this point.
- Add seasoning. Add onions, ginger, garlic, star anise, bay leaves, and crushed red pepper (if using to spice up the stew). Mix well and cook until fragrant, about 2 minutes. Stir in wine, soy sauce, and tomato paste. Mix well until smooth.
- Add vegetables. Add carrots, radish (if using), tomato, and water. The liquid should just cover the oxtails. If not, add a little bit more water.
- Pressure cook. Switch the instant pot to pressure cooking mode on manual High and seal the lid (the steam release knob must be turned to the sealed position). Let the oxtails pressure cook until tender (the meat falls off the bone), about 1 hour. The longer you cook, the more tender the oxtails are. Once the time is up, you can let the instant pot slowly release the pressure, about 20 minutes or quick release the remaining pressure by turning the steam release valve to the venting position.
- Serve. Season with salt and pepper to taste and garnish with green onions. Serve immediately with a bowl of steamed rice or noodle soup if desired.
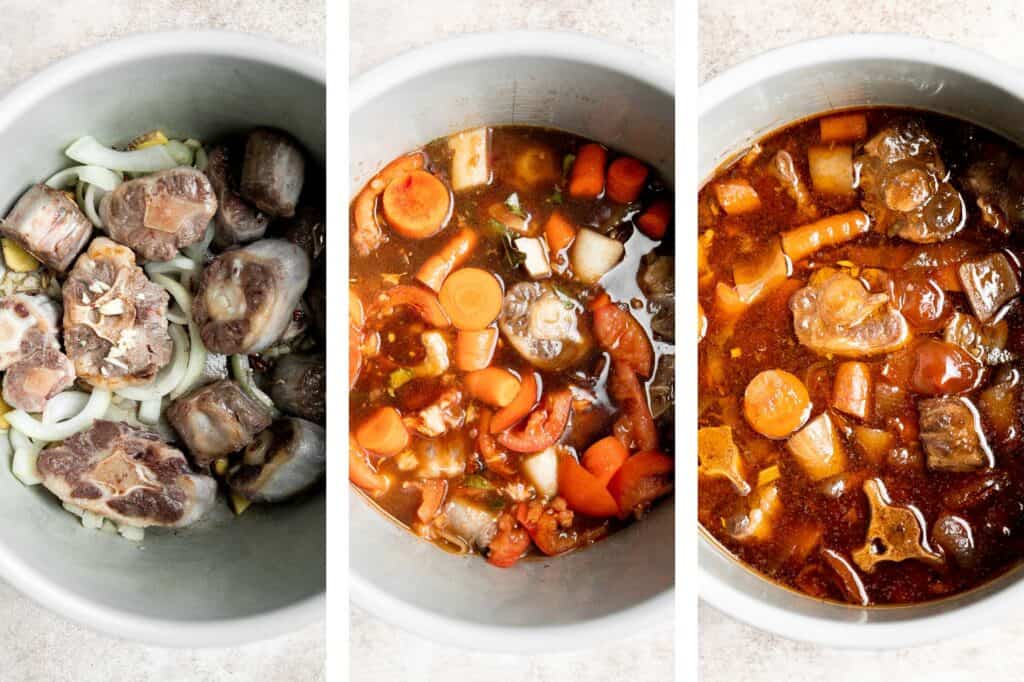
How to Cook Asian Oxtail Stew on the Stove or Slow Cooker
If you don't have an instant pot or pressure cooker, you can prepare the oxtail stew over the stove or in the slow cooker:
- Stovetop instructions: Follow the recipe as written but over the stove in a 4 quart Dutch oven or large cooking pot. Instead of pressure cooking, simmer (covered) over low heat for 2 hours.
- Slow cooker instructions: To cook in the crockpot, follow the recipe as written but in a 4 quart Dutch oven or large cooking pot. Then, instead of pressure cooking, transfer the ingredients to a slow cooker and cook on low for 4-5 hours (up to overnight).
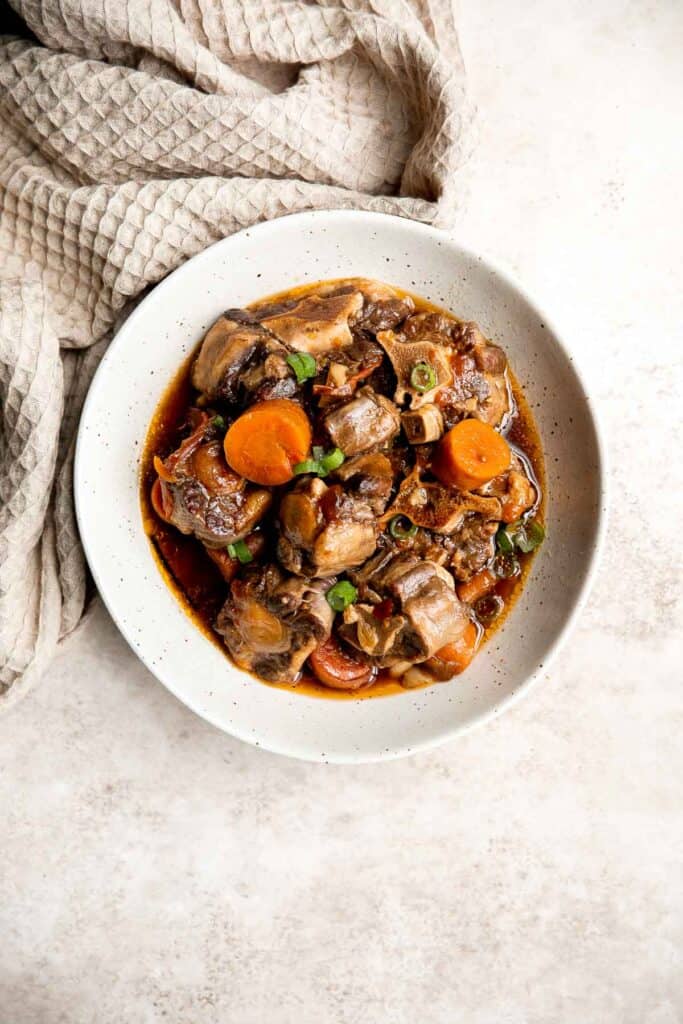
Storing Instructions
- How to store: Keep leftover Instant Pot Asian oxtail stew in an airtight container for 3-4 days in the fridge or up to six months in the freezer. If frozen, allow it to thaw overnight in the fridge before reheating.
- How to reheat: Reheat oxtail stew in a covered pan on the stovetop over medium heat, stirring occasionally until warmed through.
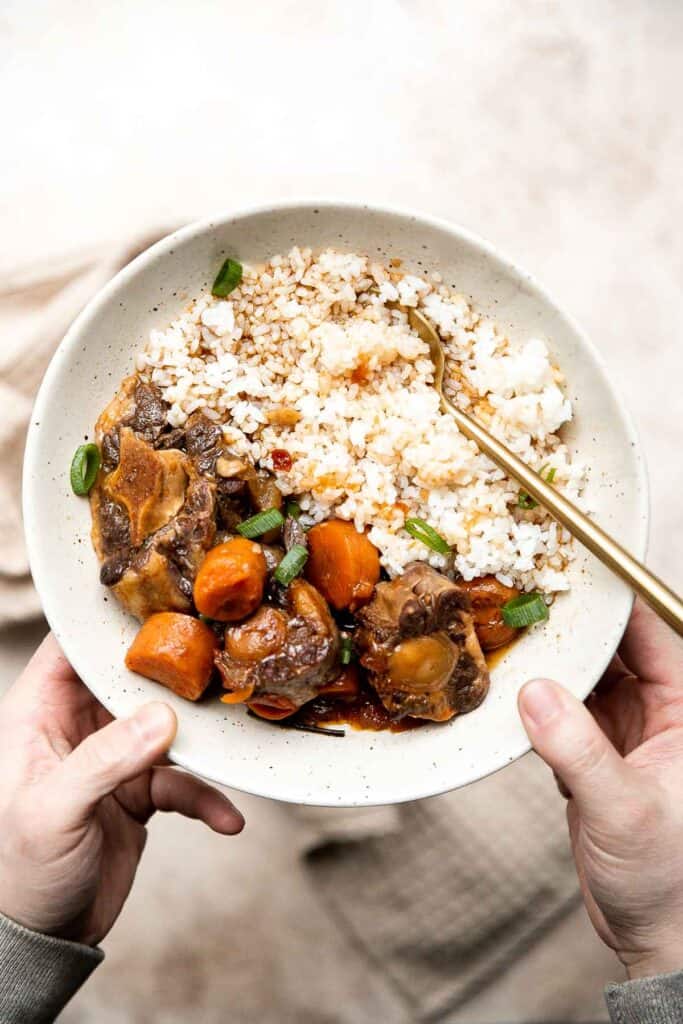
More Instant Pot Recipes
- 30 Best Instant Pot Recipes
- Instant Pot Beef Curry
- Instant Pot Osso Buco
- Turkey Chili
- Instant Pot Butternut Squash Soup
- Instant Pot Whole Chicken
Tried this recipe?
I'd love to hear what you think! Leave a comment and rating below to share your feedback. Your reviews help others discover this recipe and help me keep creating more free recipes for you. Snap a photo and tag me on social media @aheadofthyme too.

Creamy Parmesan (No Wine) Risotto

Creamy Parmesan (No Wine Risotto) is a rich, creamy, and comforting classic Italian dish that may be intimidating to make but is actually really quick and easy. Short grain arborio rice is cooked in stock until tender and loaded with nutty Parmesan cheese for the best flavor. Plus, this risotto is made without wine but you won't even miss it! Serve this delicious restaurant-quality side dish on a fancy Date Night, or any night of the week because it's that quick. You can also top it with some protein like seafood (hello seared scallops!) or vegetables to make it a complete meal.

Why You'll Love Creamy Parmesan (No Wine) Risotto
- This risotto is made without wine. Whether you live an alcohol-free diet or just don't have any on hand when you are craving a last-minute fix of risotto, this is the recipe for you. With just a few simple substitutions, you can easily mimic the taste, texture, and flavor as a classic risotto without it.
- It's quick and easy. Risotto is one of those meals that is fancy enough for a special occasion like on Date Night, but is actually super quick and easy to make any night of the week. It takes just over 30 minutes to prepare this meal with just a handful of simple ingredients, but it will look like it took way more time and effort to your guests.
- Risotto that is loaded with flavor. This creamy parmesan risotto is creamy, cheesy, garlicky, and so delicious. It's total comfort food goals that hits the spot every time. Once you try it homemade, you might never order it again from the restaurant! It's that good.
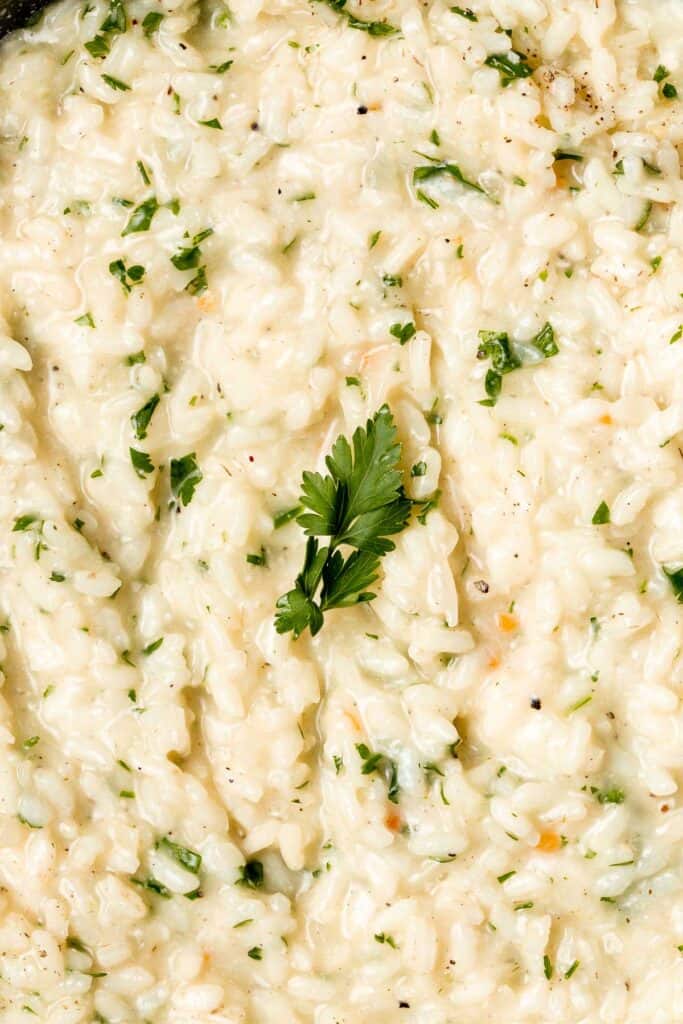
Ingredients and Substitutions
To make this delicious creamy Parmesan (No Wine) Risotto, you will need the following ingredients (full quantities in the recipe card below):
- butter
- onion
- garlic
- arborio rice - arborio rice is a type of short-grain rice that is used to prepare classic risotto.
- chicken stock - or substitute with vegetable stock to keep the recipe vegetarian.
- lemon juice - or substitute with lime juice.
- water
- salt and pepper
- Parmesan cheese
- fresh parsley
You will also need measuring cups and spoons and a large skillet.
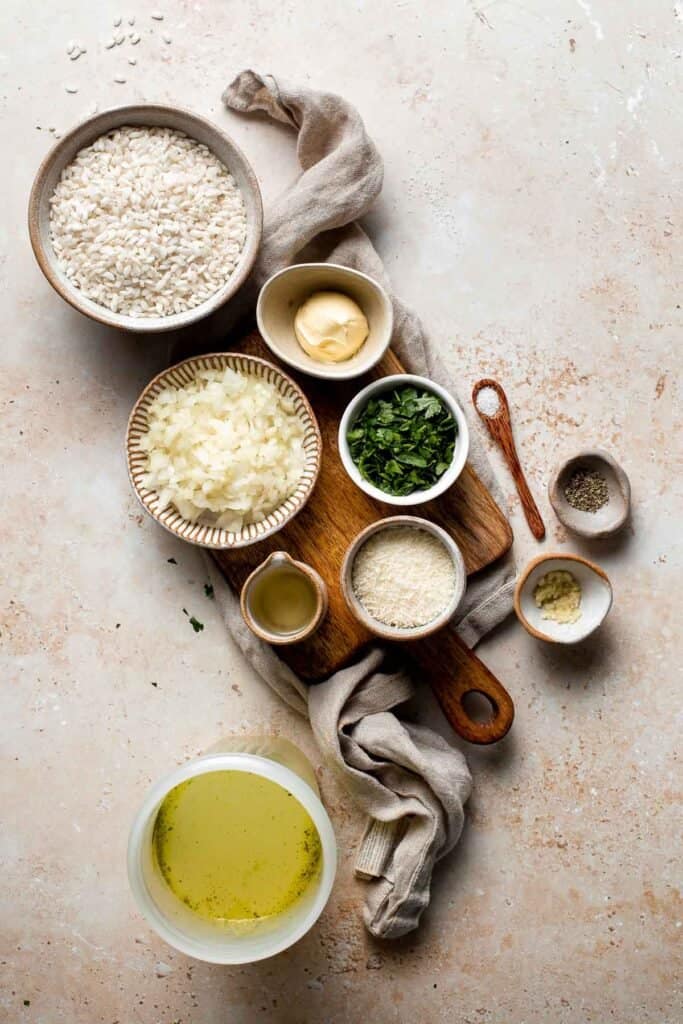
How to Make the Best Creamy Parmesan (No Wine) Risotto
- Sauté aromatics. In a large skillet, melt butter over medium-high heat. Sauté the onion and garlic until soft and translucent, about 4 minutes.
- Add rice. Add rice and mix well until it is fully coated with the butter. The rice will look shiny once coated.
- Add stock. Pour in ½ cup of the chicken stock with the lemon juice and stir to combine. Once the rice has absorbed all the liquid, bring down the heat to medium low. Add one cup of chicken stock and continuously stir until the liquid is absorbed, about 5 minutes. Repeat, one cup at a time, with the remaining stock. This will take about 20-25 minutes until done.
- Add water. Stir in ½ cup water. Once the risotto reaches your desired consistency, remove the pan off of the heat.

- Serve. Add in Parmesan cheese and parsley and stir to combine. Add salt and pepper to taste. Garnish with extra chopped parsley on top, if desired, and serve warm.
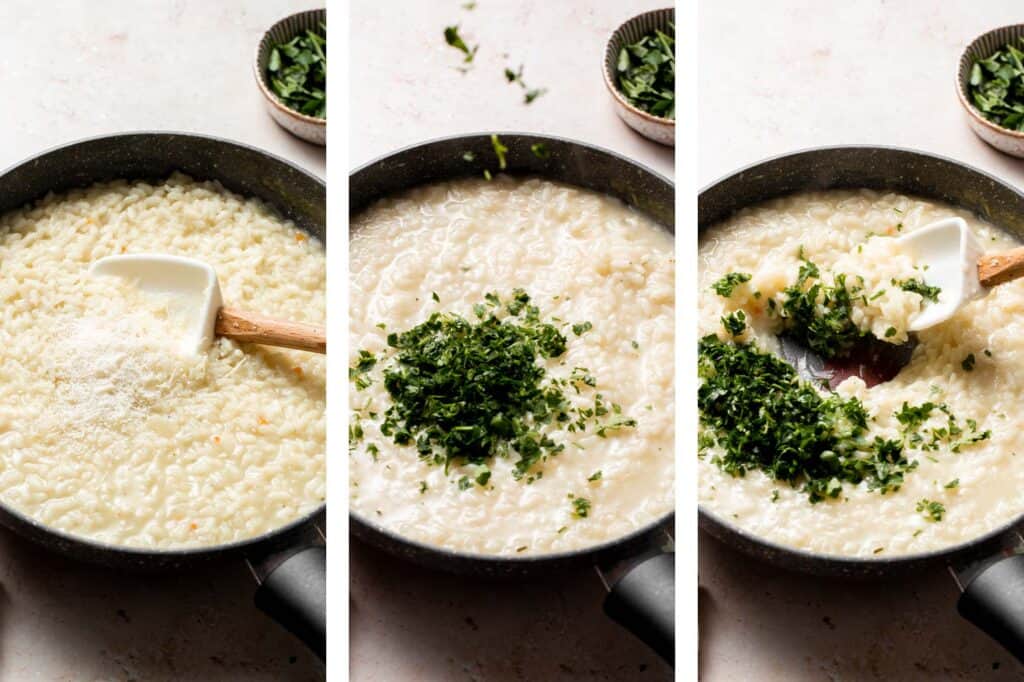
How to Serve Parmesan Risotto
Serve this delicious Parmesan Risotto as is or add some protein. Some of my favorites to serve with this are:
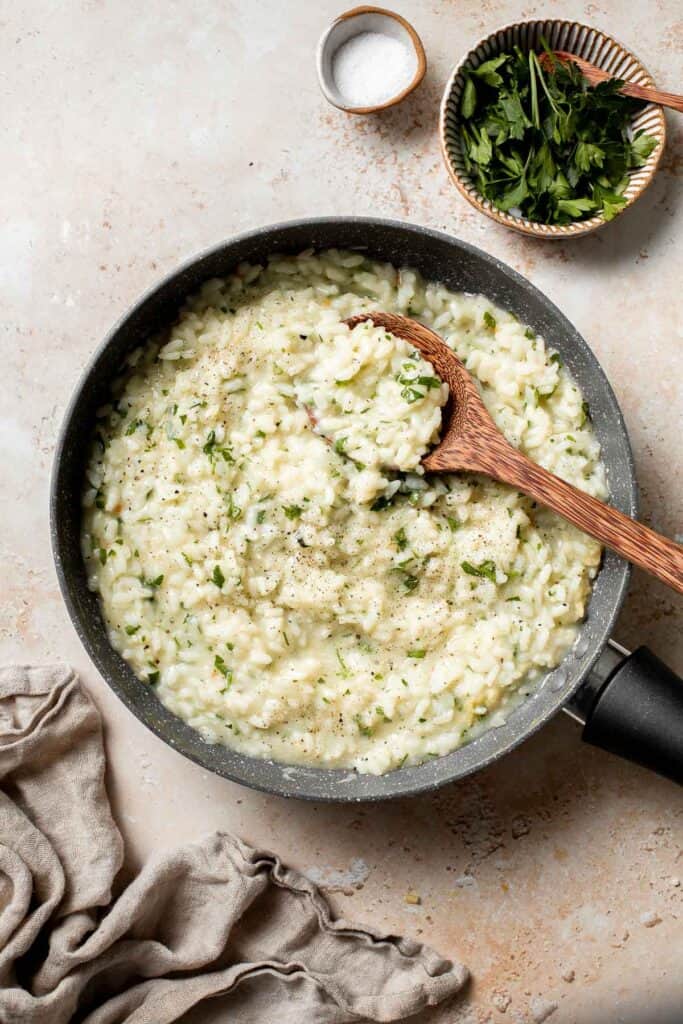
Storing Instructions
- How to store: Once cooled, store leftover risotto in an airtight container for up to 5 days in the fridge.
- How to reheat: Reheat leftover risotto over the stove until warmed through. It will likely have thickened up in the fridge. Just add a splash of water to thin it out a bit.
- Freezing risotto: Risotto is best served fresh. I do not recommend freezing it.
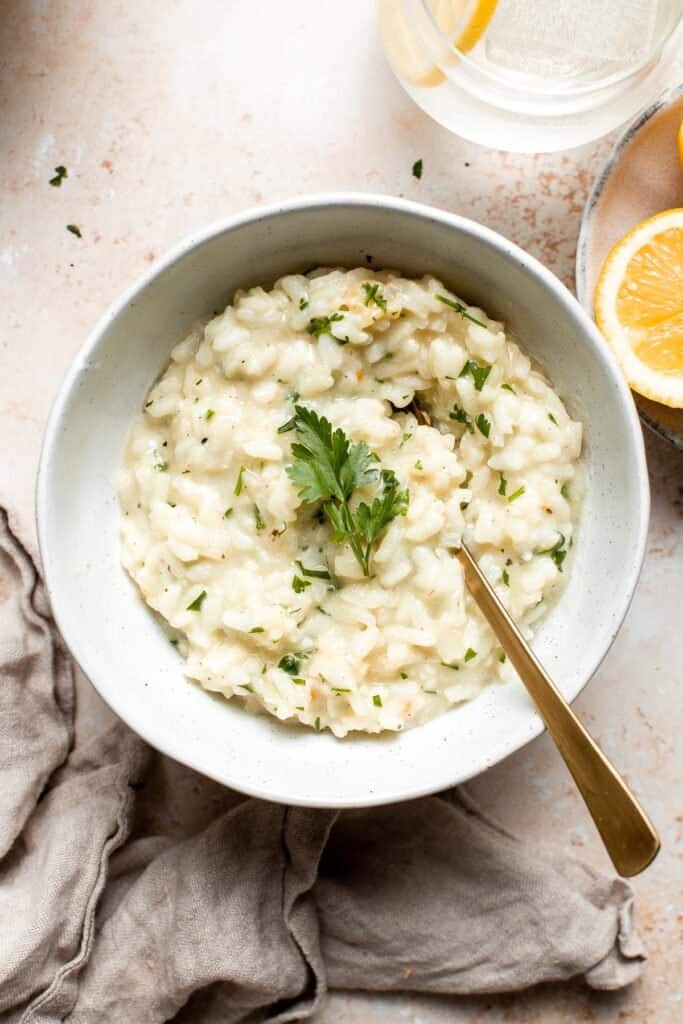
More Italian Recipes
- 50 Best Italian Recipes
- Stuffed Shells
- White Chicken and Spinach Lasagna
- Minestrone Soup
- Chicken Penne Pasta
- Fettuccine Alfredo
Tried this recipe?
I'd love to hear what you think! Leave a comment and rating below to share your feedback. Your reviews help others discover this recipe and help me keep creating more free recipes for you. Snap a photo and tag me on social media @aheadofthyme too.
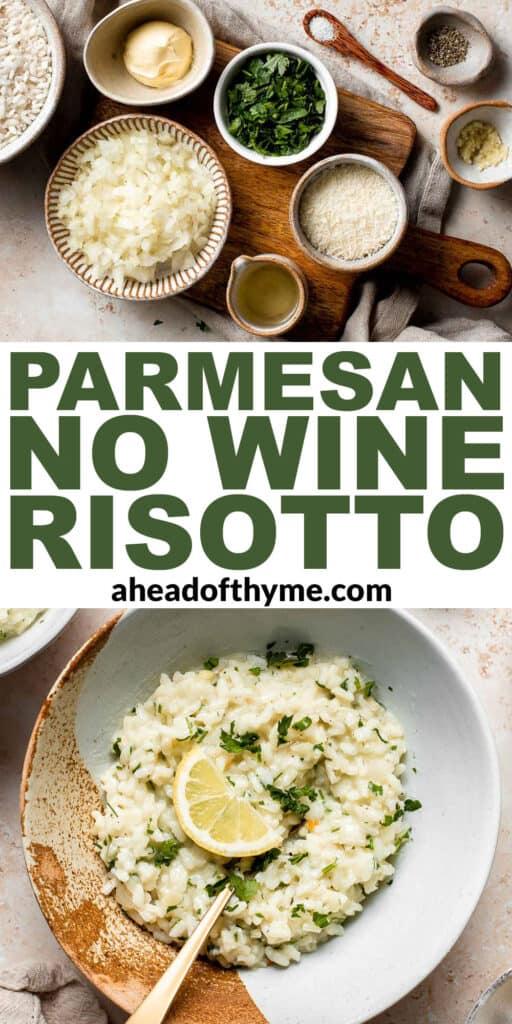
Sweet and Sour Meatballs
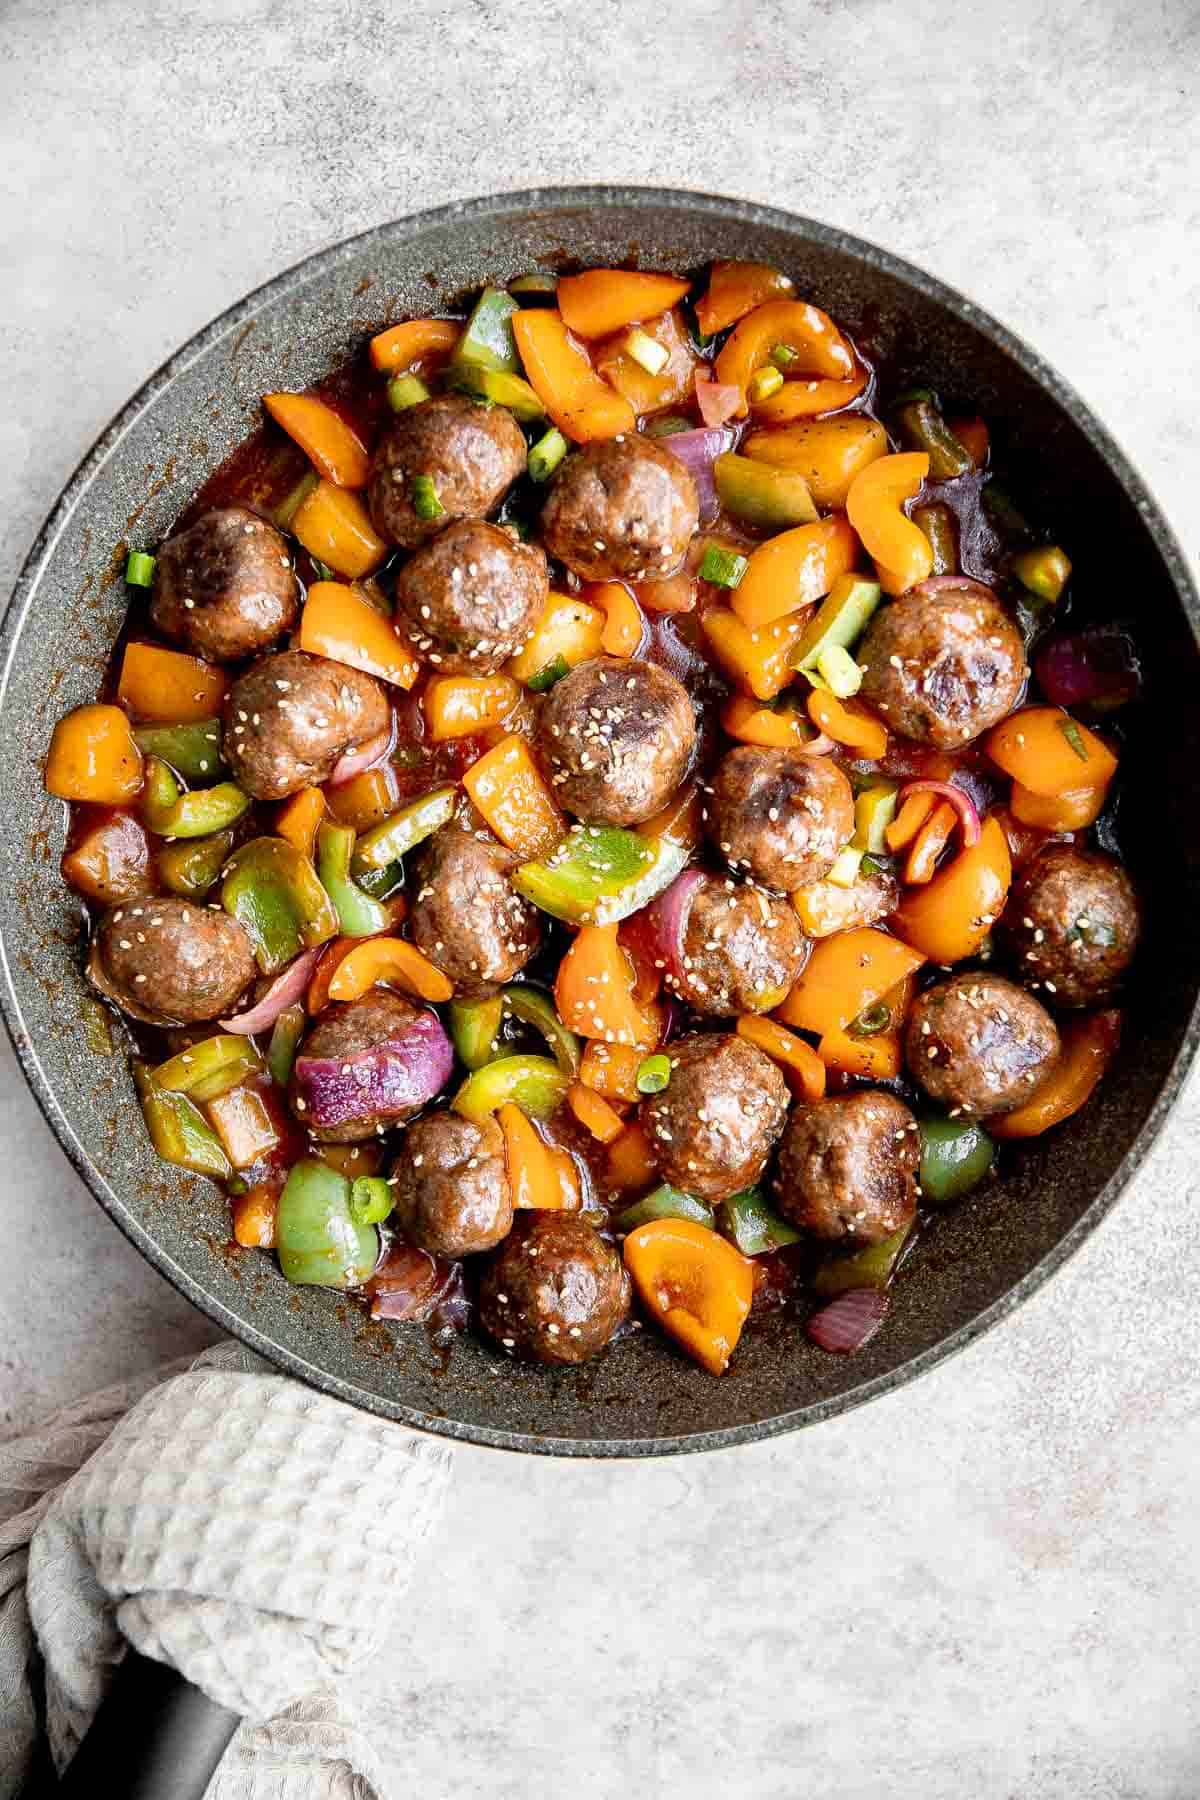
Sweet and sour meatballs are quick, easy, delicious, and flavorful. This twist on a classic Chinese stir fry dish is loaded with meatballs and tossed in a vibrant and colourful vegetable and pineapple stir fry smothered with homemade sweet and sour sauce. Plus, you can completely customize these Asian meatballs and use ground beef, pork, turkey, chicken, or a combination instead, or even use frozen meatballs for convenience. Serve it over steamed rice for a complete meal.

Why You'll Love Sweet and Sour Meatballs
- The best sweet and sour flavor. You've probably heard of sweet and sour chicken or sweet and sour pork. But this sweet and sour meatball recipe is something else. It brings the same flavors in a new way that's hard to resist.
- Great for meal prep. This is one of my favorite weekend meal preps to help me have a great week of healthy eating. Portion them out into meal prep containers along with steamed rice to last for 3-4 days, which means I can cover 4-5 weekday meals with just one recipe. Served with rice and extra veggies (if desired), these sweet and sour Chinese meatballs make a complete meal.
- You only need 30 minutes to make them. These sweet and sour meatballs are one of my favorite 30-minute dinners. Like most meatball recipes (and stir fries), these are quick and easy - but you can't tell when you're eating them!
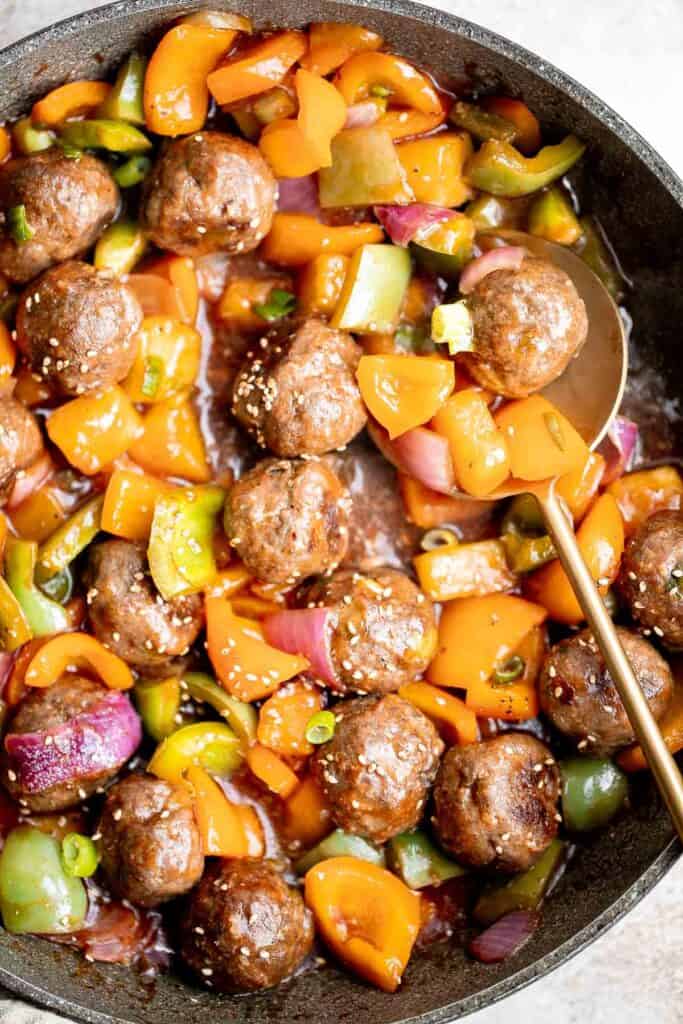
Ingredients and Substitutions
To make this quick and delicious Sweet and Sour Meatballs , you will need the following ingredients (full quantities in the recipe card below):
- ground beef - you can substitute other ground meats in this recipe. I like this recipe best with beef or pork because these fattier meats lend a better texture to the sweet and sour meatballs. However, you can easily substitute turkey or chicken as well.
- for the meatballs - breadcrumbs, egg, soy sauce, Worcestershire sauce, garlic powder, green onions, salt, and pepper. You could even use frozen meatballs instead and cook according to package instructions.
- oil - I recommend cooking oil spray over the meatballs if baking them so that they don't stick. You also need vegetable oil for the stir fry. I used avocado oil, but any vegetable oil works.
- bell peppers - use a green bell pepper and an orange bell pepper for a beautiful contrast. You can use a yellow or red one instead as well, or a combination.
- onion
- pineapple - feel free to use canned or fresh.
- sweet and sour sauce - I used my easy homemade sweet and sour sauce that takes just minutes to make with 5 simple ingredients. You can also use store-bought sauce instead to make things easier.
- green onions
- white sesame seeds - for garnish on top.
You will also need measuring cups and spoons, mixing bowl, and a skillet. If baking the meatballs in the oven you will also need a half sheet baking pan. If cooking them in the air fryer then you will need that instead.
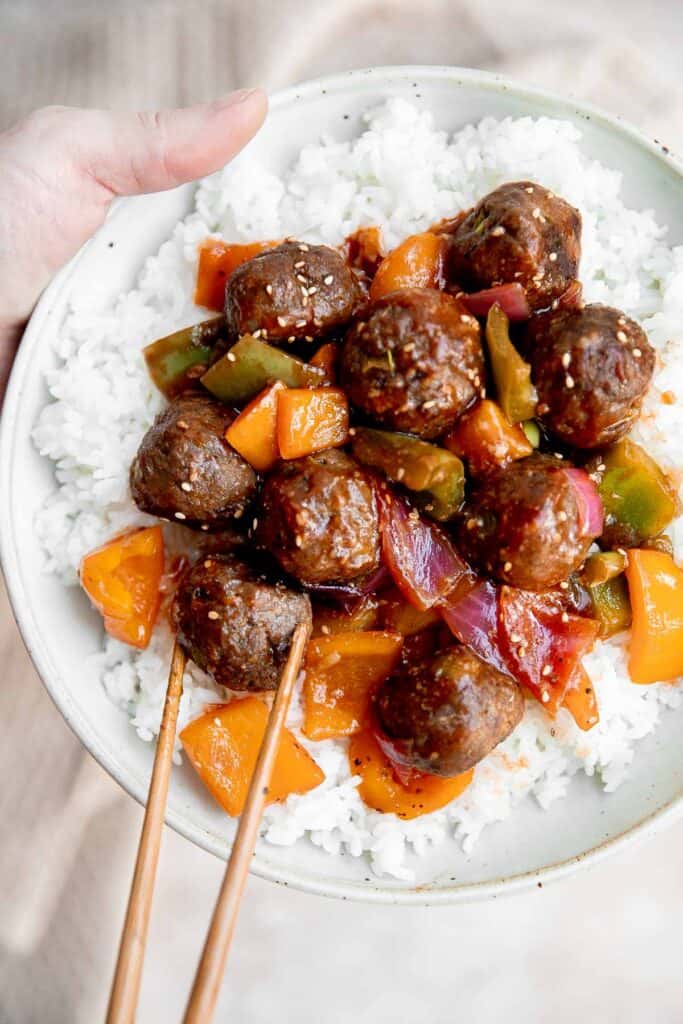
How to Make the Best Sweet and Sour Meatballs
- Marinate the meatballs. In a large mixing bowl, combine ground beef with breadcrumbs, egg, soy sauce, Worcestershire sauce, garlic powder, green onions, salt, and pepper. Mix well until evenly combined. Cover and set aside to marinate for at least 20 minutes.
- Shape the meatballs. Take 2 spoonfuls of the beef mixture at a time and roll into meatballs. Transfer meatballs onto a parchment-lined half sheet baking pan and lightly coat with some cooking oil spray to keep them from sticking.
- Cook the meatballs. Bake in a 400F preheated oven for 15 minutes until fully cooked through and the internal temperature reaches 165F as read on a meat thermometer. (You can also deep fry the meatballs in oil for 5-7 minutes or cook in the air fryer at 350F for 12-14 minutes). Set aside on a plate after cooked.
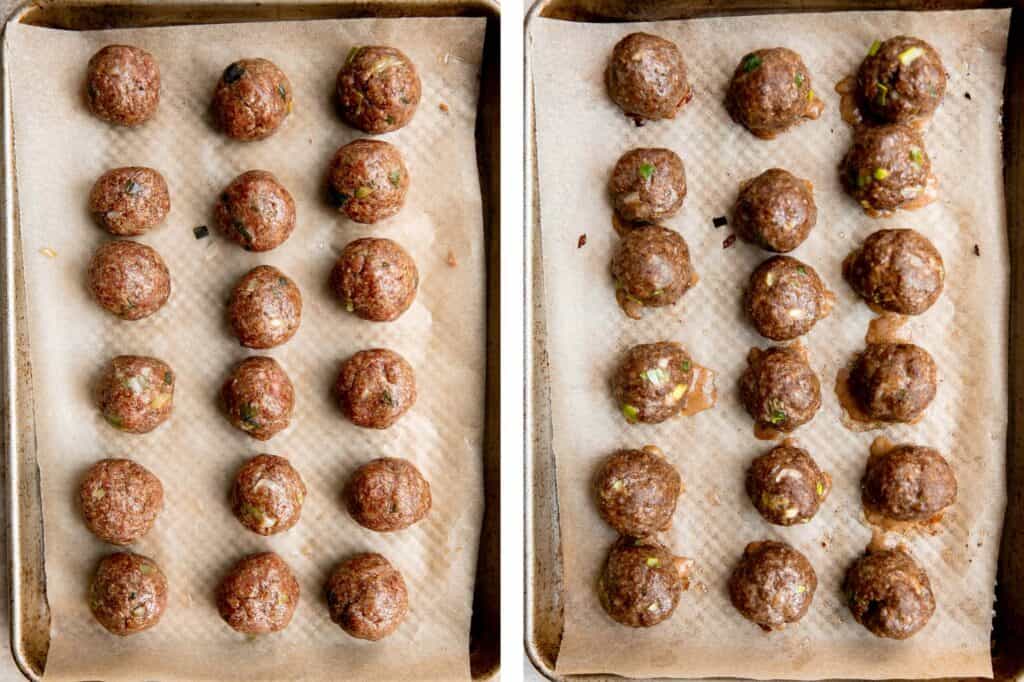
- Stir fry the vegetables. While the meatballs are baking, heat oil in a large skillet over medium-high heat until the hot oil sizzles, about 1 minute. Add bell peppers, onions and pineapple and sauté until tender, about 3-4 minutes.
- Add in meatballs and sauce. Add cooked meatballs and sweet and sour sauce. Toss well and cook until the sauce simmers, about 2-3 minutes.
- Serve. Garnish with green onions and sesame seeds on top. Serve warm with a bowl of steamed rice.
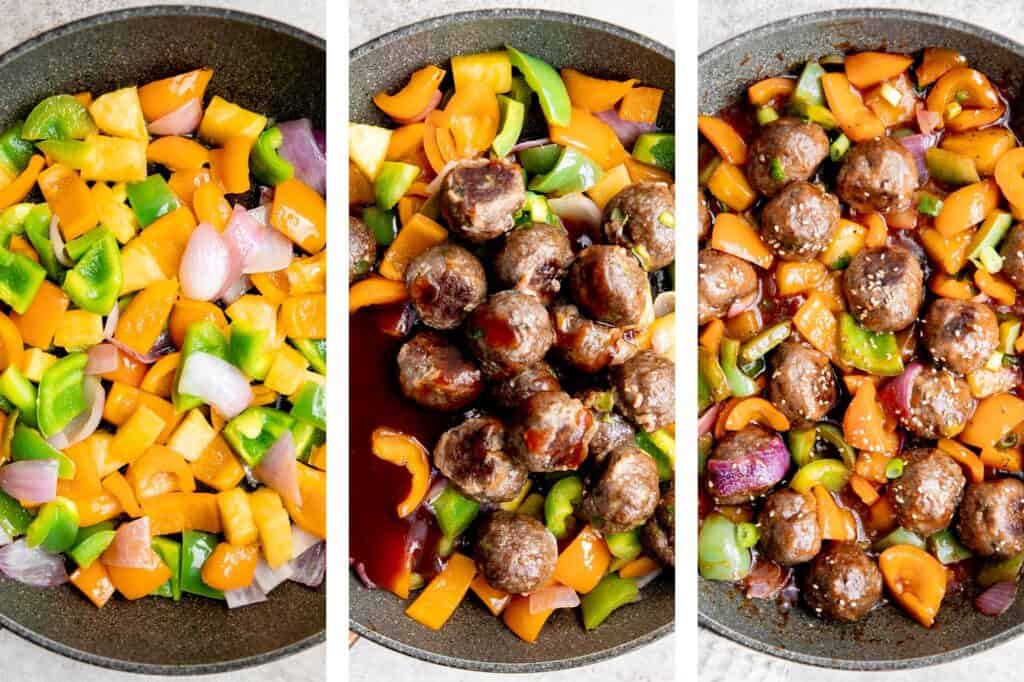
How to Serve Sweet and Sour Meatballs
Serve sweet and sour meatballs over a bowl of steamed rice and some Asian side dishes. Some of my favorites are:
- Vegetarian Fried Rice
- Spring Vegetable Stir Fry
- Chinese Garlic Cucumber Salad
- Vegetarian Chow Mein
- Asian Chopped Salad
- Steamed Scallion Buns
- Scallion Oil Noodles
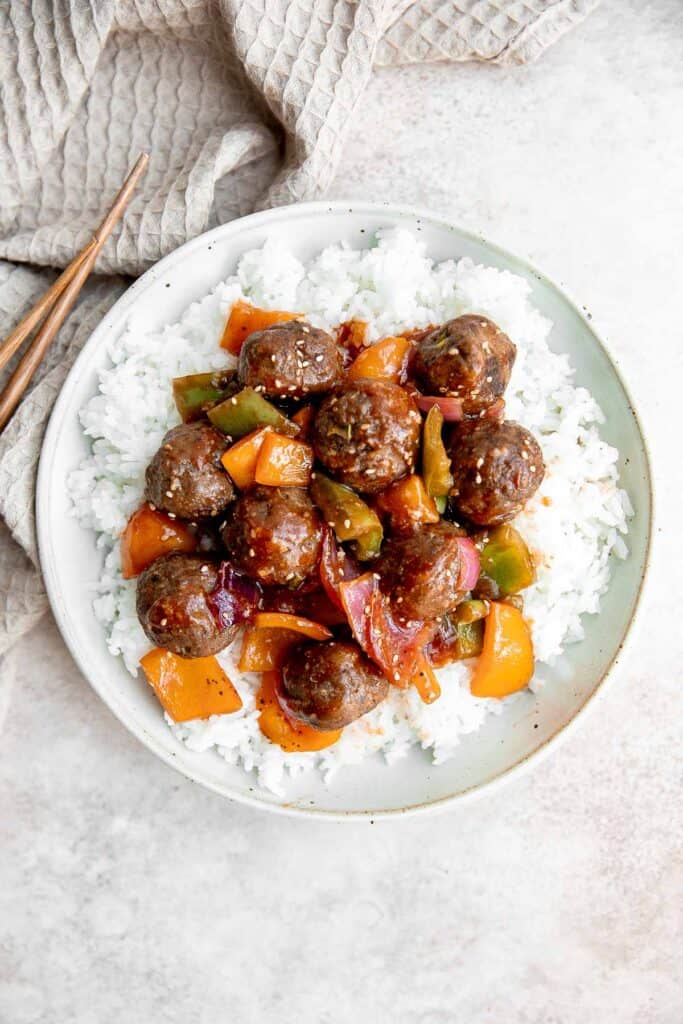
Make Ahead and Storing Instructions
- How to store: Allow the sweet and sour meatballs to cool to room temperature before storing. Then transfer to an airtight container and store in the refrigerator for 3-4 days.
- Meal prep instructions: Sweet and sour meatballs are great to meal prep ahead of time for lunches throughout the week. Store them into meal prep containers with some steamed rice for lunch the next 3-4 days.
- How to reheat: Reheat cooked meatballs on the stovetop in a covered pan over medium heat, in the steamer, or in the microwave until warmed through.
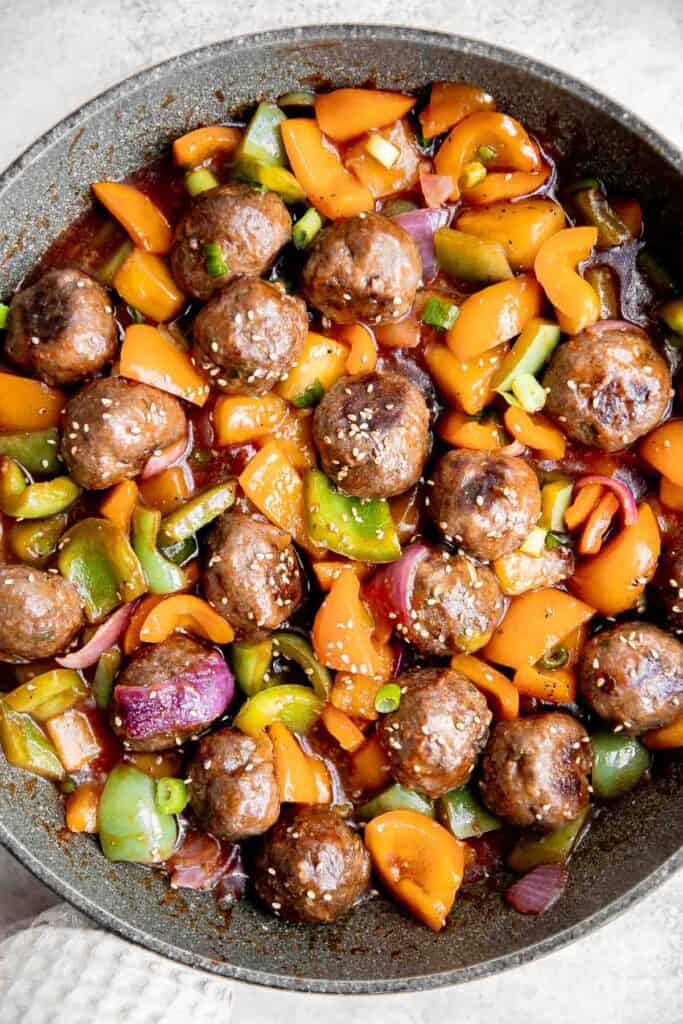
More Meatball Recipes
- 15 Best Meatball Recipes
- Sticky Honey Garlic Meatballs
- Thai Turkey Meatballs in Coconut Curry
- Swedish Meatballs
- Italian Meatballs
- Greek Meatballs
Tried this recipe?
I'd love to hear what you think! Leave a comment and rating below to share your feedback. Your reviews help others discover this recipe and help me keep creating more free recipes for you. Snap a photo and tag me on social media @aheadofthyme too.

Bacon Wrapped Jalapeño Poppers (Air Fryer)

Bacon wrapped jalapeño poppers are crispy on the outside, creamy and cheesy inside, loaded with spicy flavor throughout, and best of all -wrapped in bacon. These delicious appetizers are quick and easy to make with minimal prep and can be cooked in the air fryer or oven. Ready in under 30 minutes, air fryer jalapeno poppers are perfect for an evening of entertaining, a date night appetizer, or a game day snack for one or more. Plus, they can be made ahead and are freezer-friendly too!
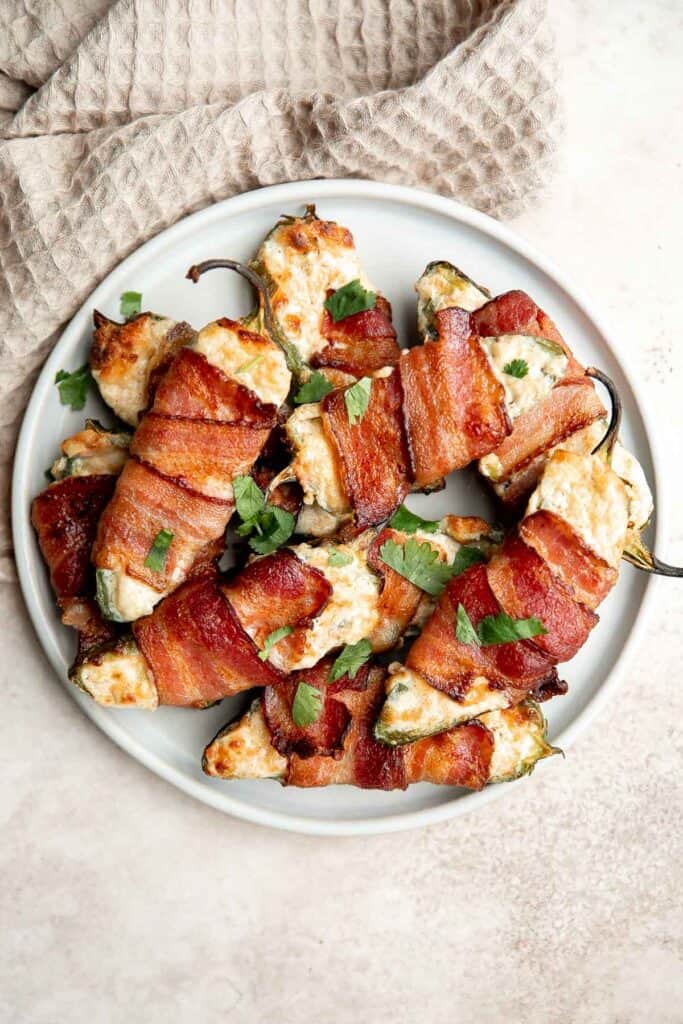
Why You'll Love Air Fryer Bacon Wrapped Jalapeño Poppers
- They are quick and easy. When you are looking for a quick and easy recipe for game day that satisfies all the cravings, this is it. It looks like it was hard to make, but the prep is minimal and it comes in under 15 minutes in the air fryer (or bake in the oven).
- The flavorful creamy and cheesy filling. The filling for these air fryer bacon wrapped jalapeño poppers is made of cream cheese, cheddar cheese, green onions, and seasonings which creates the perfect balance between creaminess and savory flavor.
- It gets the perfect crispiness from the air fryer. While you can make these just as delicious and crispy in the oven, using an air fryer helps them crisp up that much quickly. Seriously, when you bite into one of these air fryer bacon wrapped jalapeno poppers, you'll experience all the textures in your mouth - crispy bacon, a tender jalapeno, and melt-in-your-mouth cheese filling.
- Bacon makes everything better. Jalapeño Poppers are an amazing appetizer on their own, but wrapping them in bacon takes them to the next level. Everything is better with bacon, and these air fryer jalapeño poppers are no exception.

Ingredient Notes
To make these delicious bacon wrapped jalapeño poppers, you will need the following ingredients (full quantities in the recipe card below):
- jalapeño peppers - made with five fresh jalapeños, cut in half lengthwise, so you can make ten poppers total. Using these fresh, spicy peppers is essential for this recipe.
- cream cheese
- salt
- garlic powder
- paprika
- cheese - use shredded cheddar cheese (white cheddar or yellow), Monterey Jack cheese, or substitute with Tex Mex Mexican cheese blend.
- green onions - feel free to substitute with chives.
- bacon strips
You will also need measuring cups and spoons, mixing bowl, and an air fryer (or half sheet baking pan if cooking in the oven).
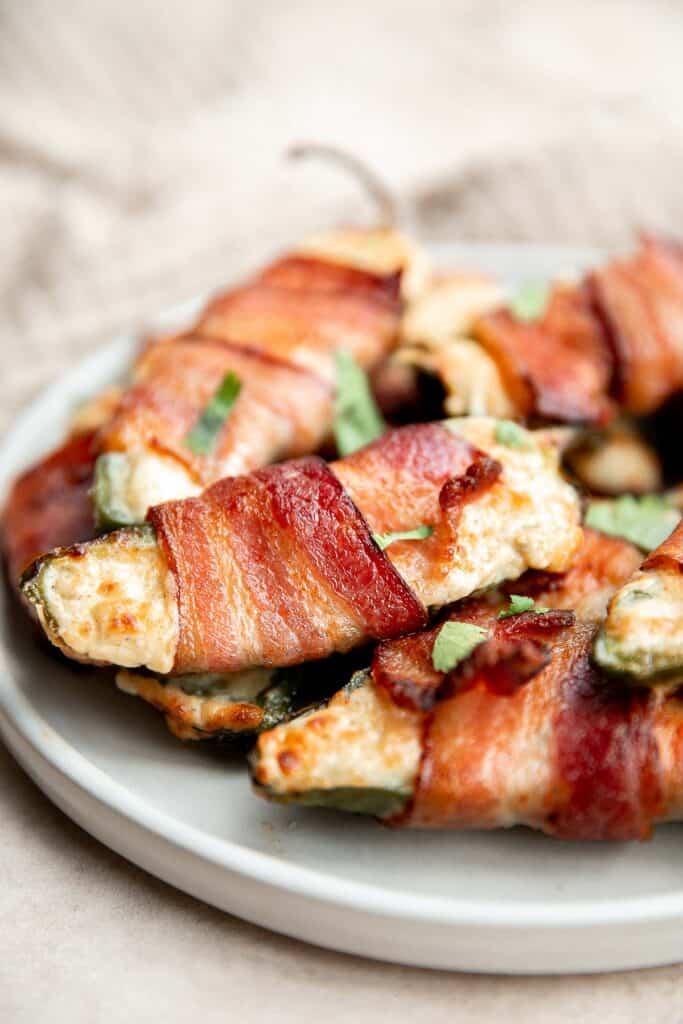
How to Make the Best Bacon Wrapped Jalapeño Poppers in the Air Fryer
- Prep jalapeños. Prepare the jalapeños by slicing them in half lengthwise and remove all the seeds and membranes. I recommend wearing gloves during the preparation and do not touch your eyes or nose until you take the gloves off.
- Make filling. In a small mixing bowl, combine cream cheese, salt, garlic powder, paprika, shredded cheese, and green onions. Mix well until smooth and set aside.
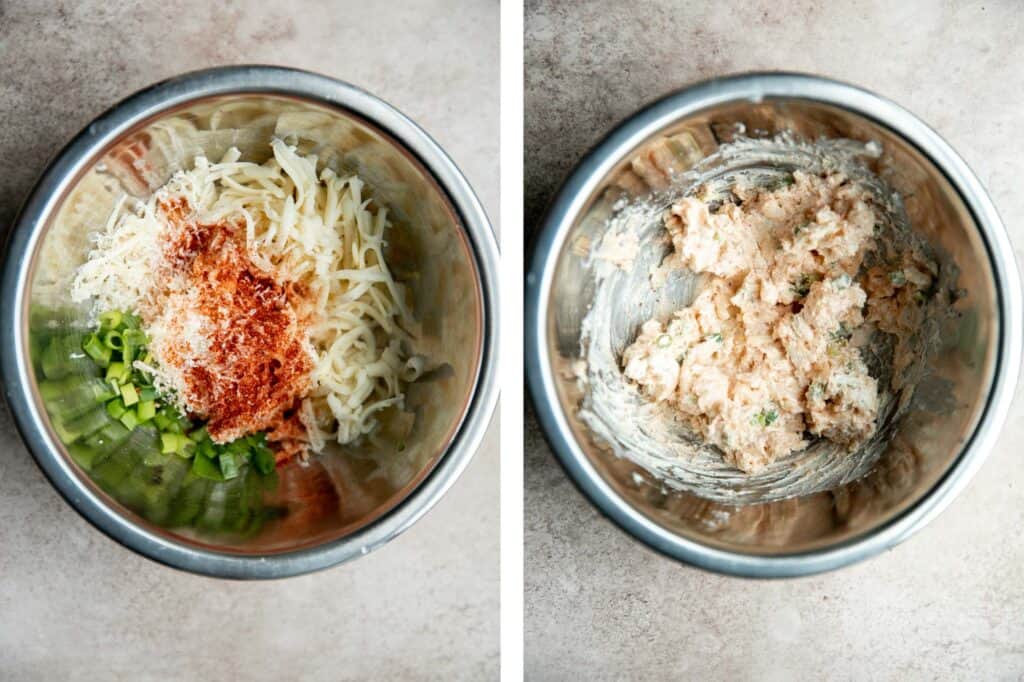
- Assemble. Fill each halved jalapeño with 2 tablespoons of the cheese mixture. Wrap each with a slice of bacon.
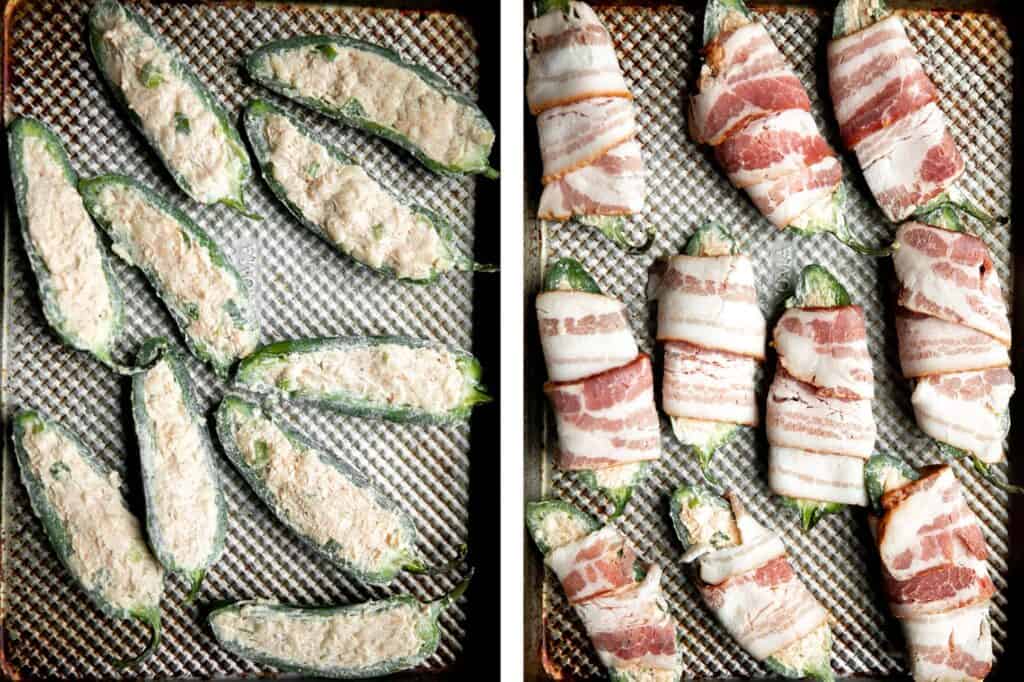
- Air fry. Place the wrapped jalapeño poppers evenly in an air fryer basket. You may have to do this in 2 batches or 2 layers, depending on the size of your air fryer. Air fry at 375 F for 12-14 minutes until the cheese turns golden brown and bacon becomes crispy. Let cool for 5 minutes, then serve.
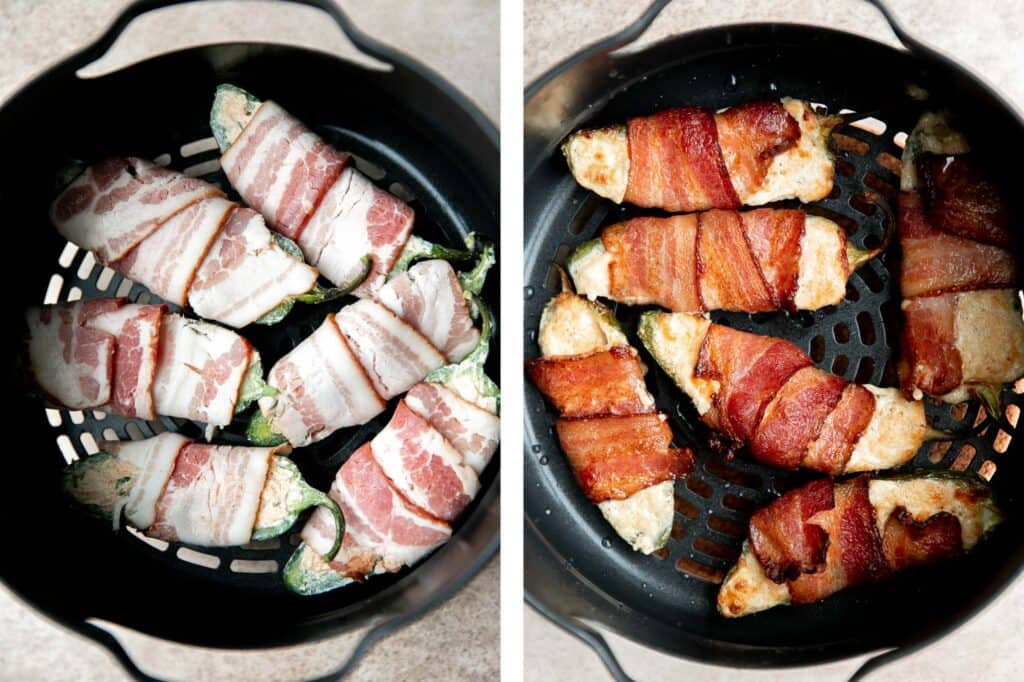
How to Cook Jalapeño Poppers in the Oven
Once stuffed and wrapped with bacon, place the jalapeño poppers evenly on a large half sheet baking pan and bake in a 400F preheated oven for 15-20 minutes until golden brown. Optionally, you can broil for another 3-5 minutes to make the bacon extra crispy (but keep a close eye on the poppers to make sure they don't burn). Let cool for 5-10 minutes and serve.

Recipe Tips and Tricks
- Use gloves: I recommend using gloves to prepare these jalapeño poppers. The last thing you want is to have some jalapeño residue on your fingers and then touch your face.
- Make ahead instructions: You can prep these jalapeno poppers up to one day ahead of time, store covered in the refrigerator, and pop them into the air fryer and serve fresh at your party or dinner.
- How to store: Allow air fryer bacon wrapped jalapeño poppers to cool completely before storing in an airtight container for up to 5 days.
- How to reheat: These jalapeño poppers taste best when reheated in the air fryer for 10 minutes at 350F. You can also reheat them in a 350F preheated oven for 10-15 minutes until warm and crispy.
- How to freeze jalapeño poppers: You can freeze these poppers for up to 3-4 months. To freeze, place them on a baking tray and ensure that none of the poppers are touching each other. Once flash frozen (about 1-2 hours), transfer them to an airtight container or freezer bag. When ready to reheat, heat directly from frozen, adding a few minutes to the reheat time.
More Air Fryer Recipes
- 25 Easy Air Fryer Recipes
- Air Fryer Short Ribs
- Miso Garlic Chicken Wings
- Air Fryer Mexican Shrimp
- Crispy Air Fryer French Fries
- Air Fryer Chicken Breast
Tried this recipe?
I'd love to hear what you think! Leave a comment and rating below to share your feedback. Your reviews help others discover this recipe and help me keep creating more free recipes for you. Snap a photo and tag me on social media @aheadofthyme too.

Turkey Chili

Turkey chili is hearty, filling, and delicious. It's the perfect warm and cozy meal to serve on cold nights, but that doesn't mean you can't enjoy it during sunny days. This flavorful ground turkey chili recipe is quick and easy to make in one pot, and can even be made in the instant pot in half the time. Loaded with classic ingredients and a savory blend of seasoning, and topped with your favorite chili toppings, it has incredible depth of flavor in every bite. Make a big batch because it's easy to make ahead and freezer-friendly too.

Why You'll Love Turkey Chili
- It's flavorful and delicious. To make this delicious turkey chili, we start by sautéing fresh garlic, onion, bell pepper, and celery. Tenderizing these aromatics is a step you don't want to miss as it forms the basis of this chili. It's also seasoned with classic chili spices like chili powder, cumin, paprika, and oregano to add delicious flavor in every bite. You can even add in a splash of soy sauce for a savory, salty kick, but can leave it out to keep it more traditional.
- Quick and easy one pot recipe. This recipe is so easy to make. You spend just a few minutes sautéing and then you let the chili simmer until it's done. Plus, it's made in one single pot. Who doesn't love cooking everything in one pot? It means that you have way less dishes to clean at the end. That's a huge bonus!
- Turkey is delicious in chili. Although you'll find beef in traditional chili recipes like Slow Cooker Beef Chili and One Pot Chili, turkey is a healthy meat that you can use in a chili recipe. We also love using chicken in White Chicken Chili, or just beans in Vegetarian Chili.
- You can even make in the instant pot. Check the recipe tips to make this chili even faster (in literallly half the time!) in the instant pot pressure cooker. Weeknight dinners have never been quicker.
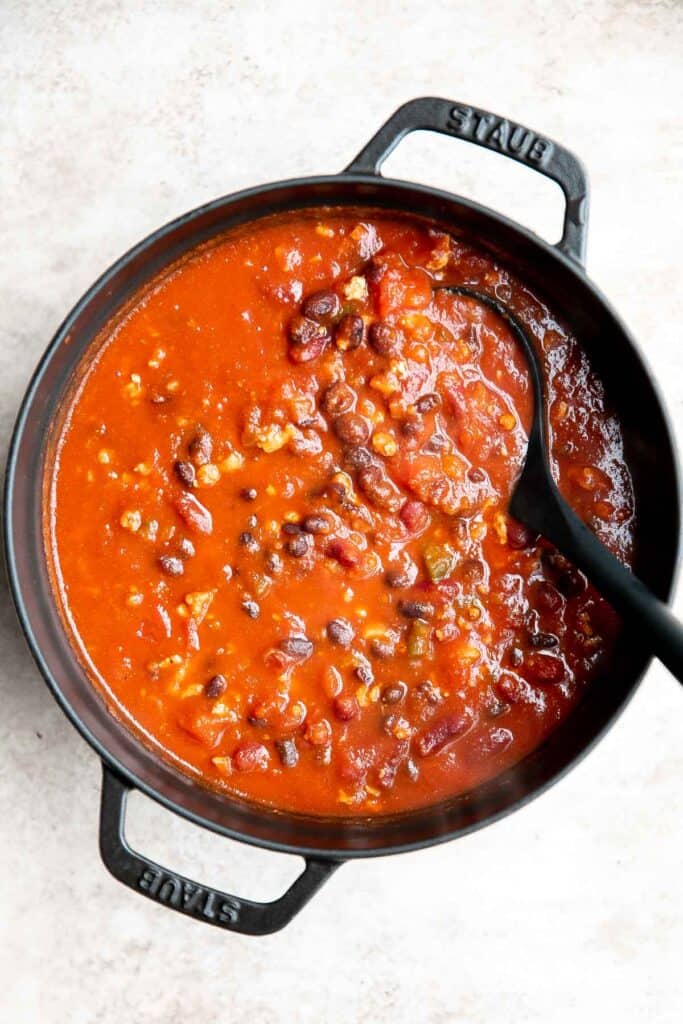
Ingredients and Substitutions
To make this easy Turkey Chili, you will need the following ingredients (full quantities in the recipe card below):
- vegetable oil
- red onion
- garlic
- green bell pepper - you can substitute the bell pepper for jalapeño pepper for an extra kick.
- celery
- ground turkey
- seasoning - salt, ground cumin, chili powder, smoked paprika, dried oregano, and soy sauce (optional).
- fire-roasted diced tomatoes
- vegetable broth - or substitute with water.
- beans - I used canned red kidney beans and black beans. You can also substitute each of the beans with 1.5 cups cooked beans or use ½ cup dry beans (note that you will need to soak them overnight and may need to add 5-10 minutes to the cook time until the beans are fully cooked).
Turkey Chili Toppings
To spice things up, feel free to add your favorite chili toppings on your turkey chili! My favorites are:
- sour cream
- shredded cheddar cheese
- avocado
- cilantro
- lime juice
- tortilla strips or tortilla chips
- jalapeños
You will also need measuring cups and spoons and a Dutch oven or large cooking pot.

How to Make the Best Ground Turkey Chili
- Sauté vegetables. Heat oil in a 4 quart Dutch oven or large pot over medium-high heat until the hot oil sizzles, about 1 minute. Add onion, garlic, bell pepper, and celery. Sauté until tender, about 2-3 minutes.
- Cook turkey. Add ground turkey and cook for 5-7 minutes until it turns white, stirring well. Make sure to break up ground turkey into small pieces with a spatula while cooking.
- Add seasoning. Stir in salt, cumin, chili powder, paprika, and oregano until well combined. Add diced tomatoes, broth, soy sauce (if using), kidney beans, and black beans. Stir well and bring it to a boil, about 5 minutes.
- Simmer. Cover the lid and simmer over low heat for 30-35 minutes until thickened to a desired consistency, stirring occasionally.
- Serve. Serve with your favorite chili toppings such as sour cream, cheese, avocado, cilantro, tortilla strips, and lime wedges, if desired.
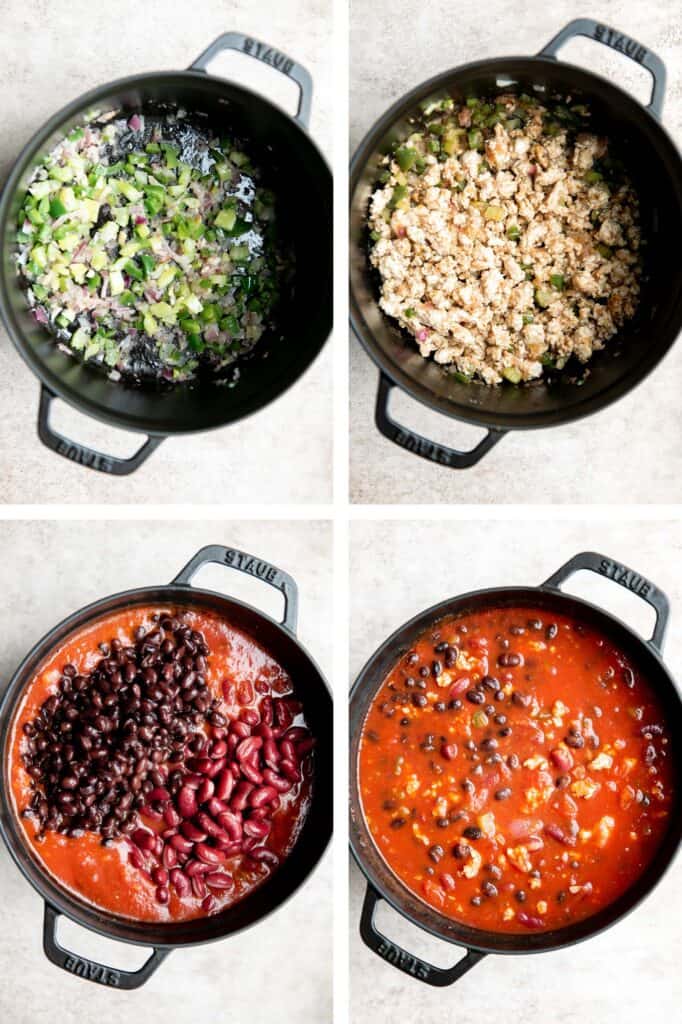
How to Cook Turkey Chili in the Instant Pot
Turn on the Sauté function on high on the Instant Pot. Add oil and heat until the hot oil sizzles, about 1 minute. Add onion, garlic, bell pepper, and celery. Sauté until tender, about 2-3 minutes.
Add turkey and cook for 5-7 minutes until it turns white, stirring well. Make sure to break up ground turkey into small pieces with a spatula. Stir in all seasonings including salt, cumin, chili powder, paprika, and oregano.
Add diced tomatoes, broth, soy sauce (if using), kidney beans, and black beans. Seal the lid and turn the steam release knob to Seal position. Pressure cook for 12-15 minutes. Once the time is up, quick release the remaining pressure by turning the steam release valve to the venting position. Serve immediately.
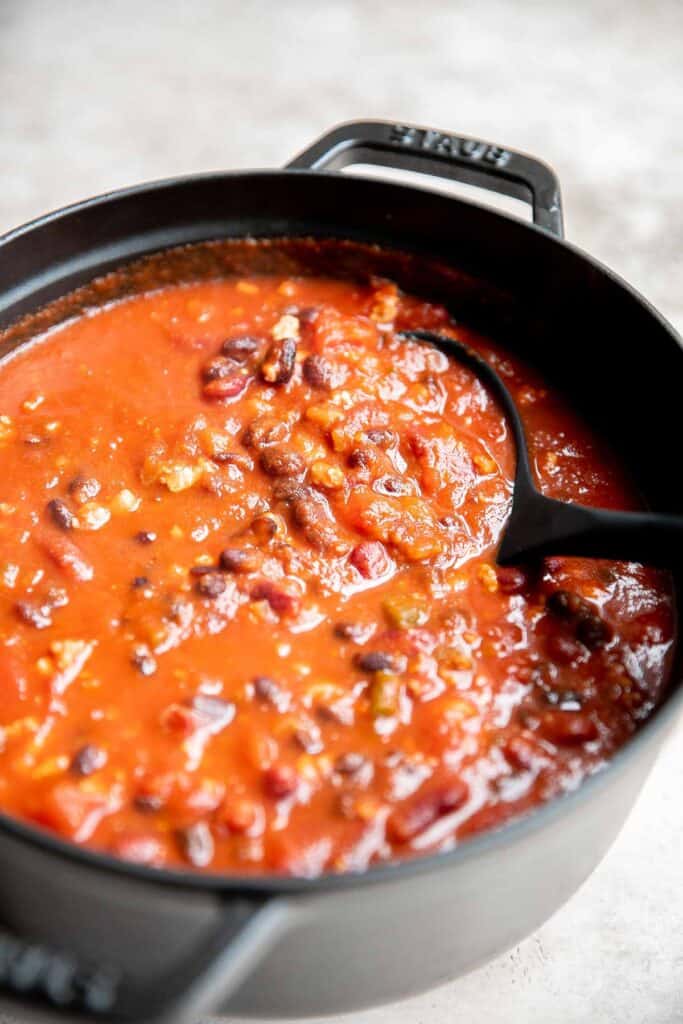
Storing Instructions
- How to store chili: Keep leftover turkey chili in an airtight container in the fridge for up to 3-4 days. Allow it to cool to room temperature first before storing.
- How to freeze chili: You can also freeze cooked turkey chili for up to 2-3 months. Store in an airtight container or freezer bag. I would also recommend portioning them out into smaller portions to easily thaw the exact amount that you want. When ready to eat, allow it to thaw overnight in the refrigerator first.
- How to reheat chili: You can reheat turkey chili in a pan over the stove on medium heat or in the microwave on medium heat, until warmed through.
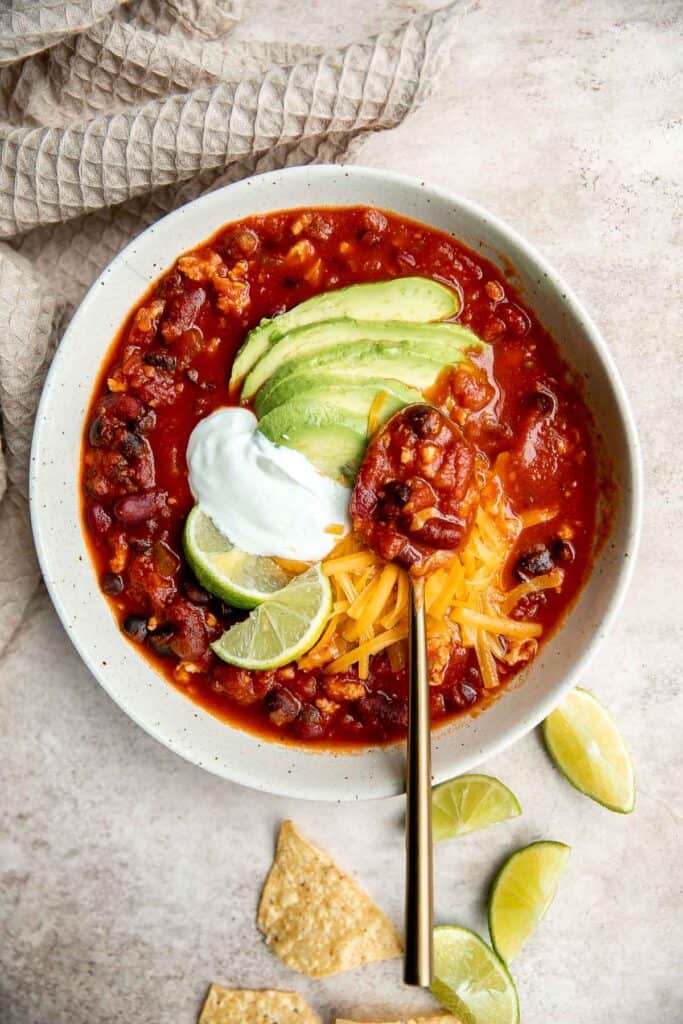
More Ground Turkey Recipes
- Mediterranean Turkey Burgers
- Thai Turkey Meatballs in Coconut Curry
- Ground Turkey Pasta Bake
- Korean Ground Turkey
- Sweet Chili Turkey Meatballs
- Baked Turkey Meatballs
Tried this recipe?
I'd love to hear what you think! Leave a comment and rating below to share your feedback. Your reviews help others discover this recipe and help me keep creating more free recipes for you. Snap a photo and tag me on social media @aheadofthyme too.

Steamed Rice
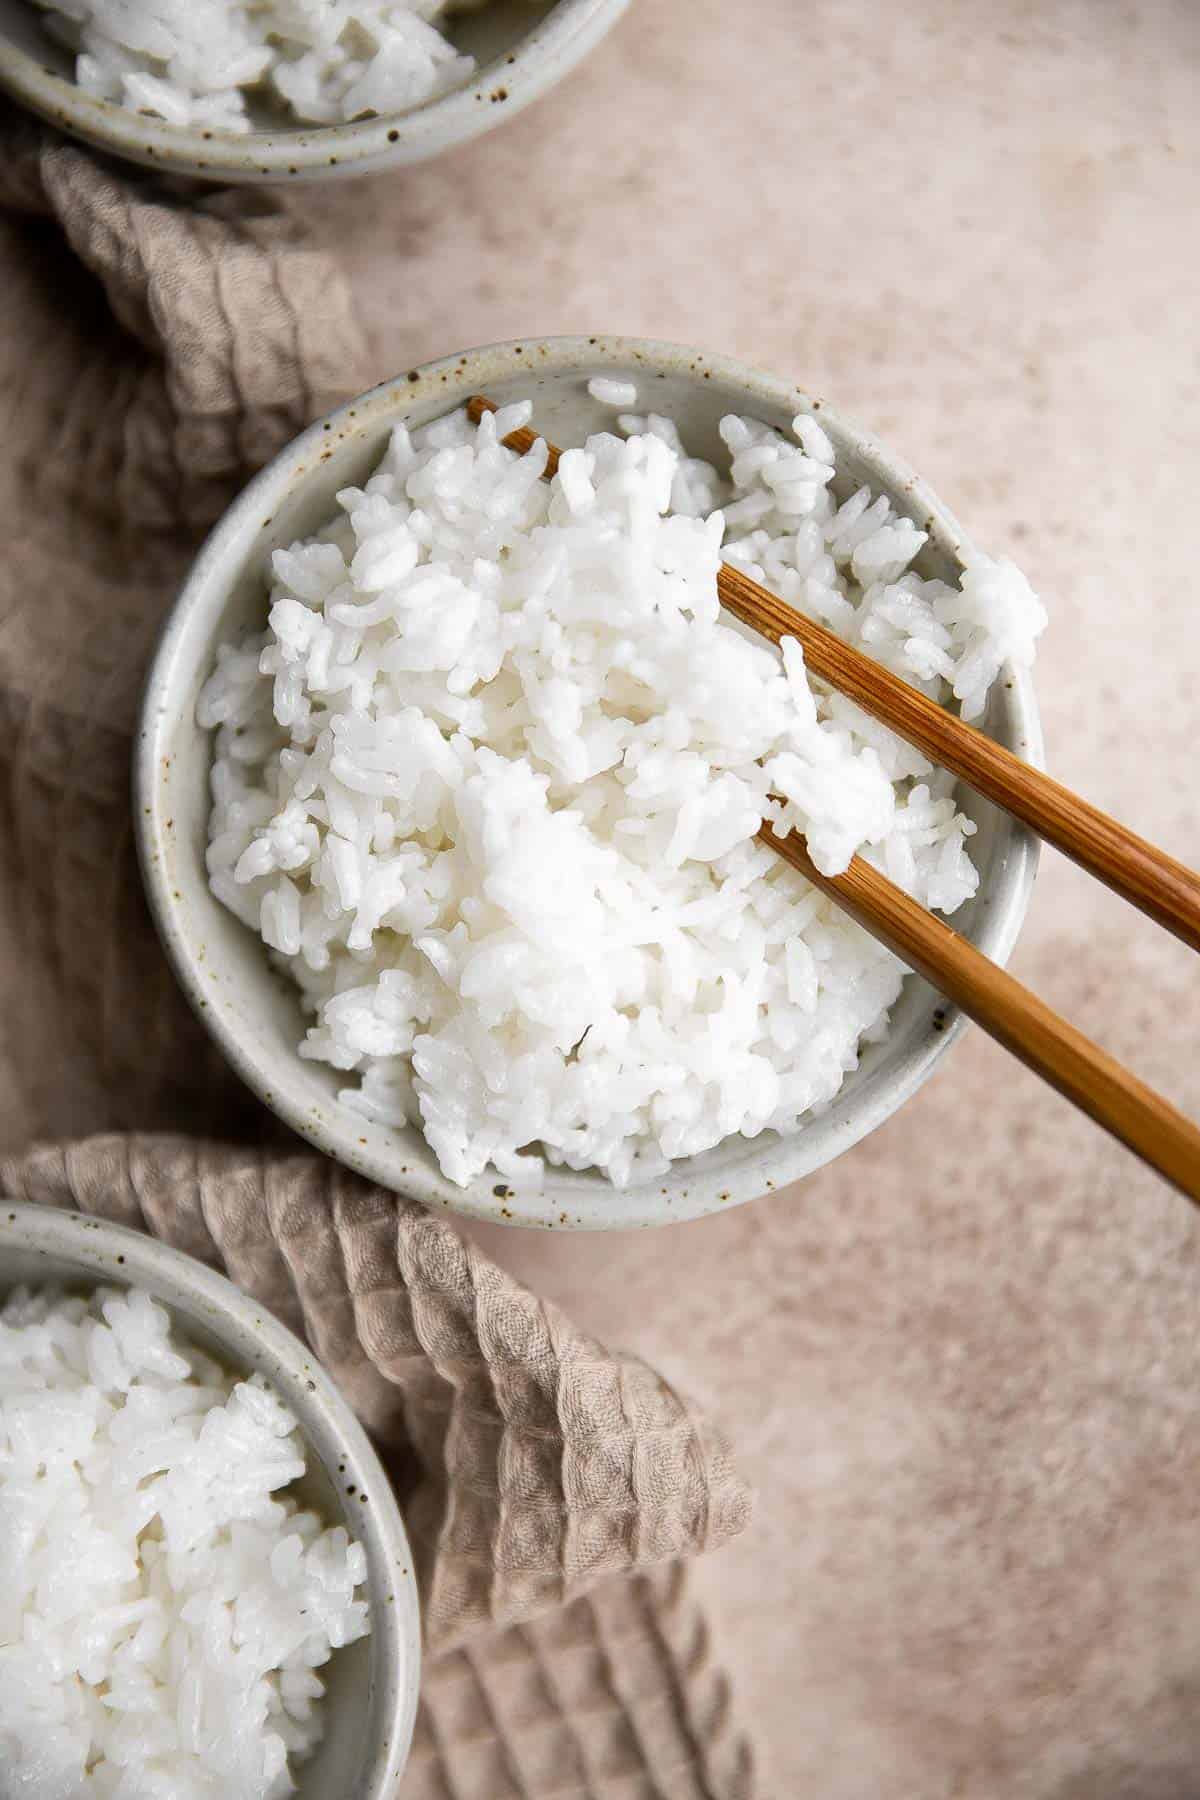
Learn how to make steamed rice that is perfectly cooked, fluffy, and delicious in just 30 minutes. Whether you want to make long grained rice or medium grained rice, it's easy to cook rice on the stove, in a rice cooker, or in your instant pot pressure cooker. So say goodbye to undercooked, burnt, or mushy overcooked rice because you will end up with tender and fluffy rice every single time. Serve this white rice on the side of your favorite family dinners, and make leftovers to include in meal prep throughout the week.
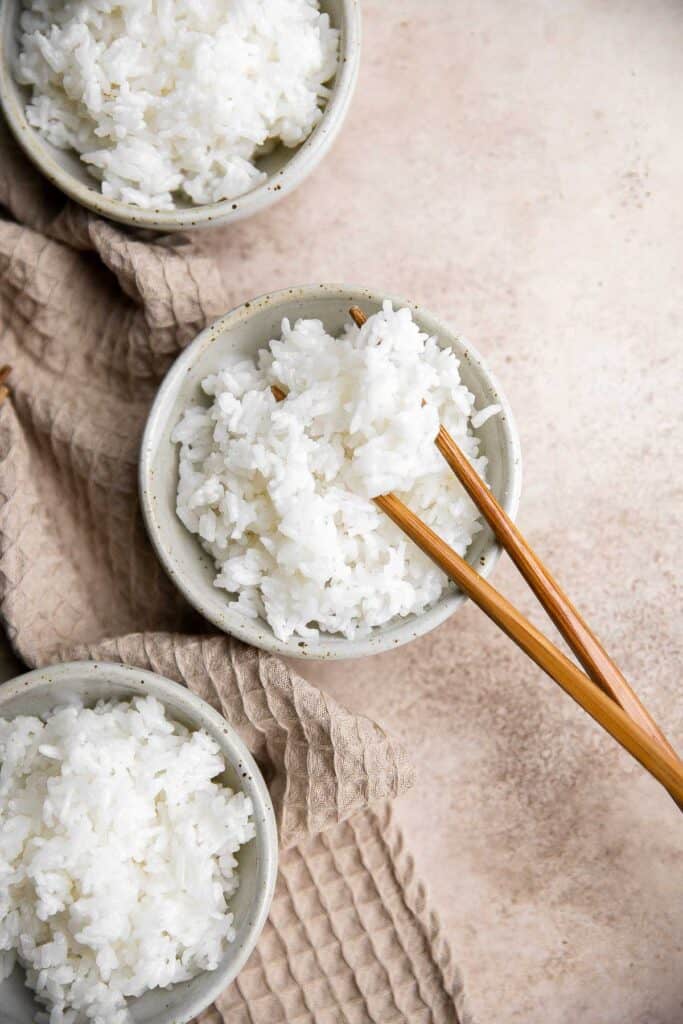
Why You'll Love Steamed Rice
- Steamed rice is an classic recipe to know. In my opinion, any cook should know how to make steamed rice. White rice is the perfect side for so many dishes - especially ones that are saucy so you can pour it over the rice. Try Instant Pot Beef Curry, Creamy Tuscan Chicken, or Cashew Chicken.
- It's easy to make steamed rice. If you've struggled to make rice before, now is the time to learn how to make the best steamed rice. I'm sharing 3 ways to make steamed rice over the stove, in the rice cooker, or in the pressure cooker (instant pot). It turns out fluffy and delicious every time (no undercooked, burnt, or mushy rice over here!)
- It helps you maintain a balanced diet. Healthy grains are an important part of a healthy diet, and white rice is a better carbohydrate than pasta or bread. It's lower in calories and takes more time to digest compared to wheat products, which means more energy over a longer time period and no carb crash.
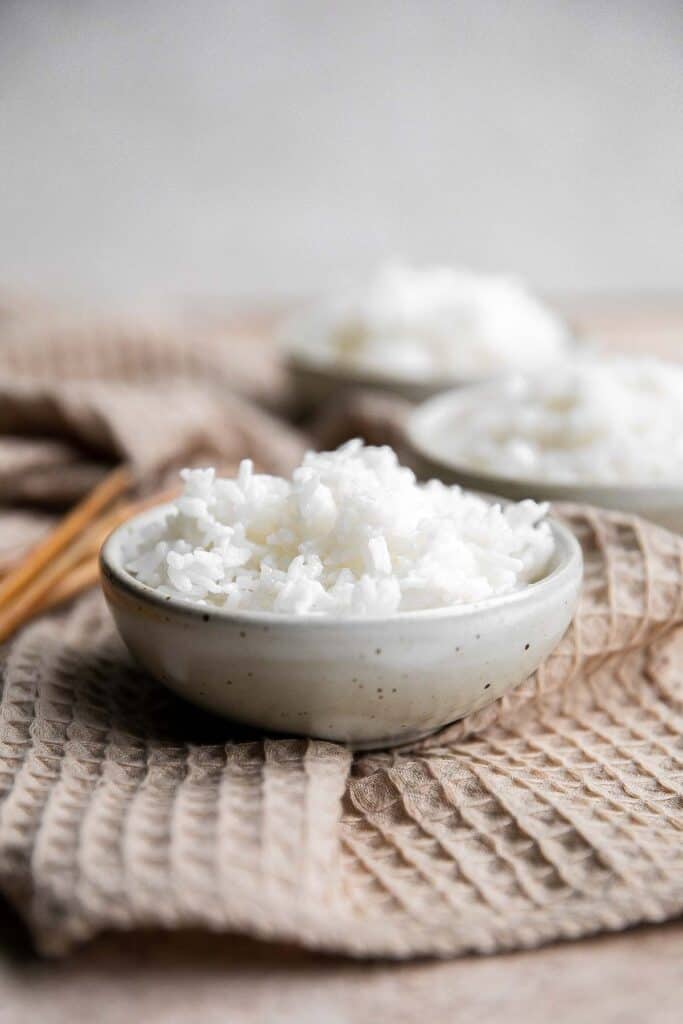
Ingredients and Substitutions
To make easy Steamed Rice, you will need the following ingredients (full quantities in recipe card below):
- white rice - you can pick any kind of white rice. For instance, you can use long-grain such as Jasmine and Basmati or medium-grain such as Calrose.
- water
- salt - salt is optional, and it depends on the rice that you are making. For instance, many cultures tend to add a little salt to rice. But others, such as Asian steamed rice, does not have any salt.
You will also need measuring cups and a cooking pot, rice cooker, or instant pot (pressure cooker).

Do You Have to Wash Rice?
Whether you should or shouldn't wash your rice is a highly controversial topic - although it shouldn't be. Whether or not you wash your rice is a personal preference. However, washing rice does have benefits such as removing impurities, reducing starchiness and stickiness, and improving flavor.
I like to rinse rice in several changes of cold water first until the water runs clear. Then, I drain the rice in a large fine-mesh sieve or colander.
How to Make the Best Steamed Rice
There are three ways that you can make rice - over the stove, in a rice cooker, or in a pressure cooker (like an instant pot).
How to Cook Rice in a Cooking Pot
- In a medium cooking pot, add rice, water and salt. Bring it to boil over medium heat, about 5 minutes.
- Close the lid and reduce heat to low. Let the rice simmer for 15 minutes until tender and the water is absorbed.
- Remove from heat and let the cooked rice rest for another 5 minutes. Fluff with a fork and serve warm.
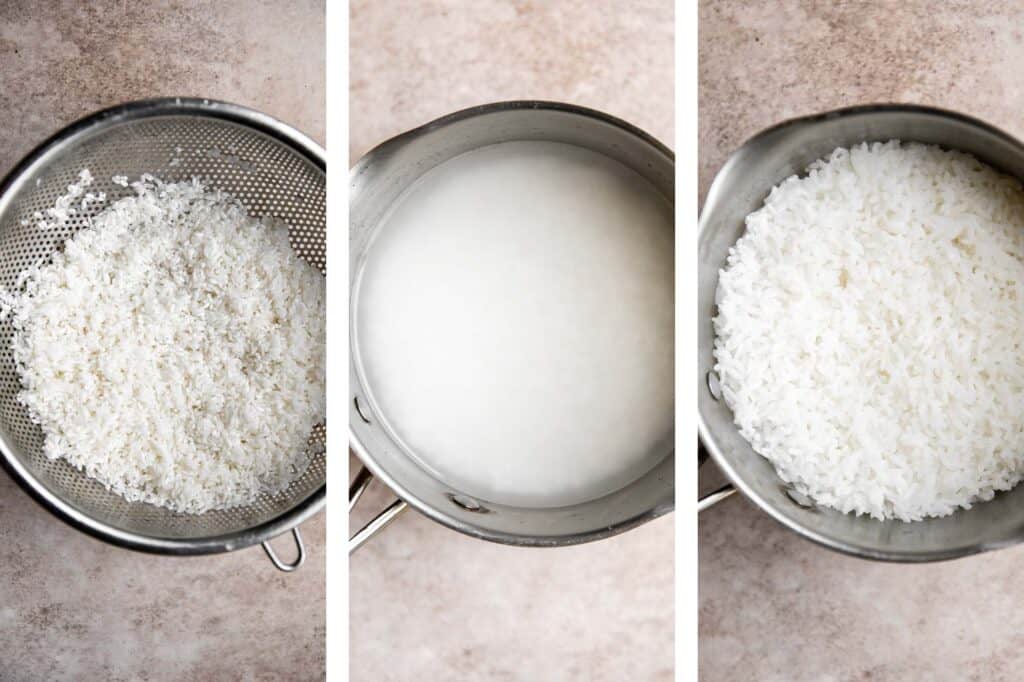
How to Cook Rice in a Rice Cooker
- Add rice and cold water in 1:1.5 ratio in the rice cooker (for 2 cups of rice, you need 3 cups of water).
- Turn on the power and start cooking in the rice cooker. It typically takes about 15-20 minutes.
- The rice cooker will automatically switch to 'keep warm' setting. Let the cooked rice rest for another 5 minutes and fluff with a fork.
How to Cook Rice in an Instant Pot
- Add rice and cold water in 1:1 ratio in the Instant Pot Pressure Cooker (for 2 cups of rice, you need 2 cups of water).
- Switch the instant pot to pressure cooking mode on manual High and seal the lid (the steam release knob must be turned to the sealed position). Cook for 3 minutes. Once the time is up, let the instant pot slowly release the pressure for 10 minutes and then quickly release the remaining pressure by turning the steam release valve to the venting position.
- Fluff with a fork and serve warm.
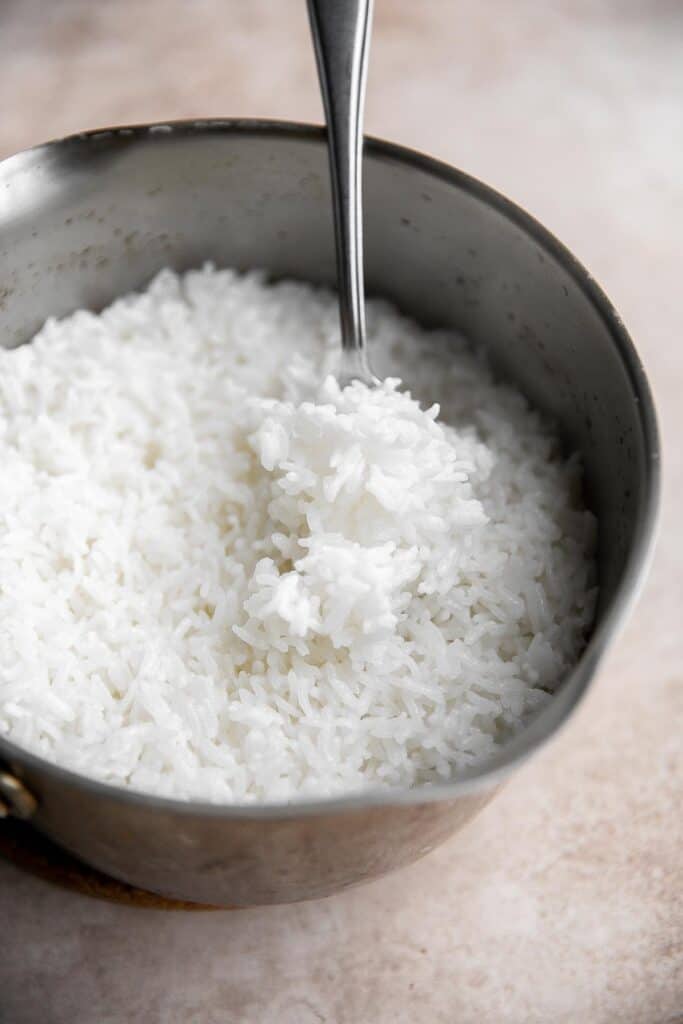
Storing Instructions
- Don't leave the rice on warm for too long. If you used an Instant Pot or rice cooker, do not leave your rice on the "warm" setting for too long since it can overcook the rice, making it too dry or too soft.
- How to store: Allow the rice to cool, then place in an airtight container and store in the refrigerator for up to 4-5 days.
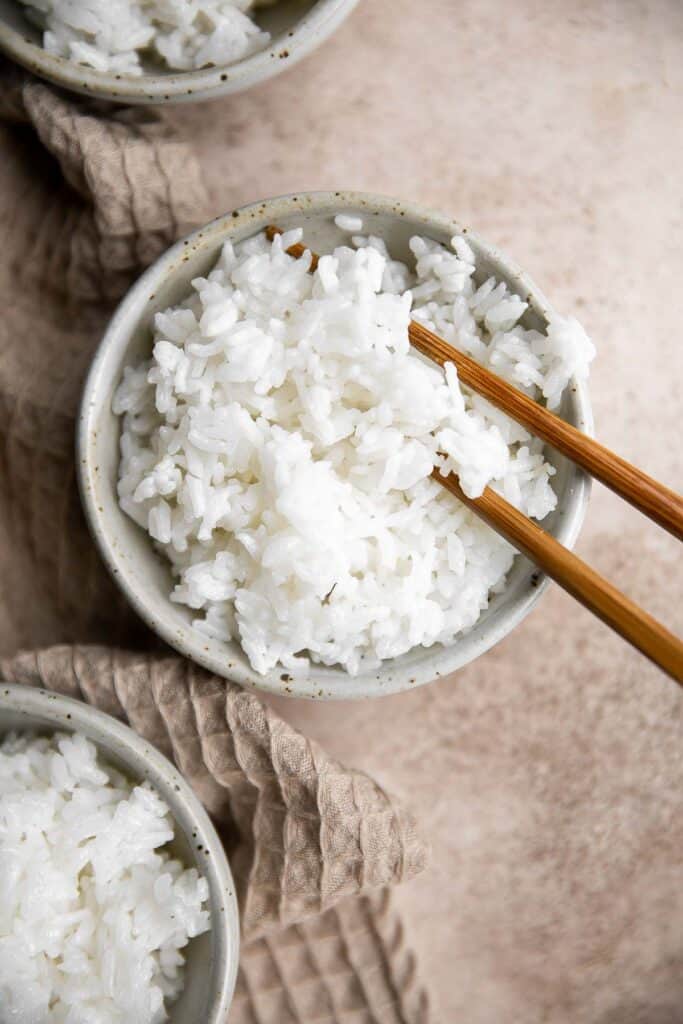
More Rice Recipes
- 30 Best Rice Recipes
- Cilantro Lime Rice
- Vegetarian Fried Rice
- Basmati Rice with Saffron
- Rice Pilaf with Carrots
- Curry Chicken Fried Rice
Tried this recipe?
I'd love to hear what you think! Leave a comment and rating below to share your feedback. Your reviews help others discover this recipe and help me keep creating more free recipes for you. Snap a photo and tag me on social media @aheadofthyme too.

30 Shredded Chicken Recipes

Dinner is so quick and easy when it involves shredded chicken. Whether you have a batch ready to use in your favorite recipes or need to spend just 20 minutes making a fresh batch, it might just become your go-to on busy weeknights. So if you are wondering "what to cook with shredded chicken", then you are in the right place. We are sharing over 30 of our most popular and best shredded chicken recipes including shredded chicken itself (in three different ways), chicken soups, sandwiches, casseroles, pizza, pasta, salads, and more.
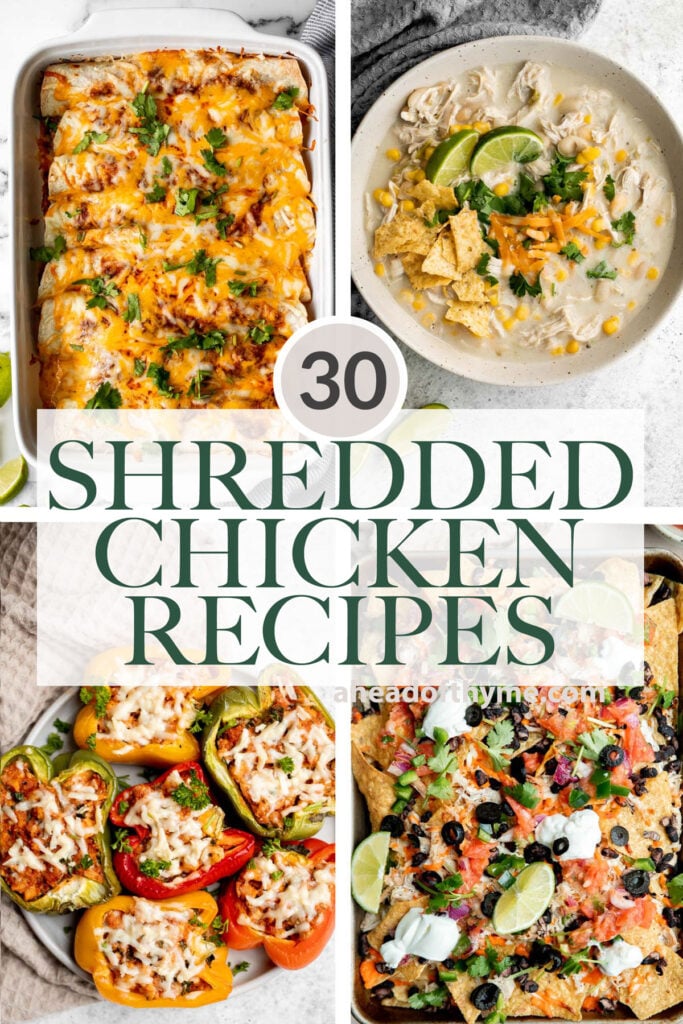
Best Shredded Chicken Recipes
First, you need shredded chicken. Shredded chicken is quick and easy to make in three ways, including over the stove, in the oven, or in the instant pot pressure cooker. Plus, you can make a big batch because it's freezer-friendly. It's a staple ingredient to add to other recipes such as soup, salads, and sandwiches.
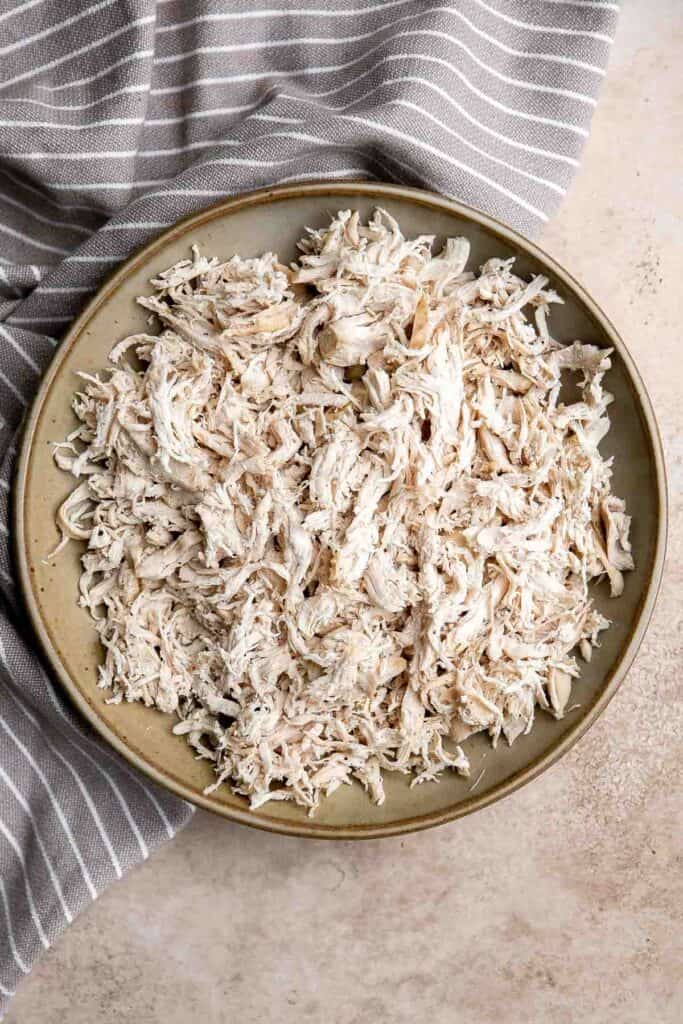
Creamy White Chicken and Spinach Lasagna
Creamy white chicken and spinach lasagna with tender shredded chicken is the most comforting creamiest cheesiest white lasagna. Easy to make ahead & freeze.
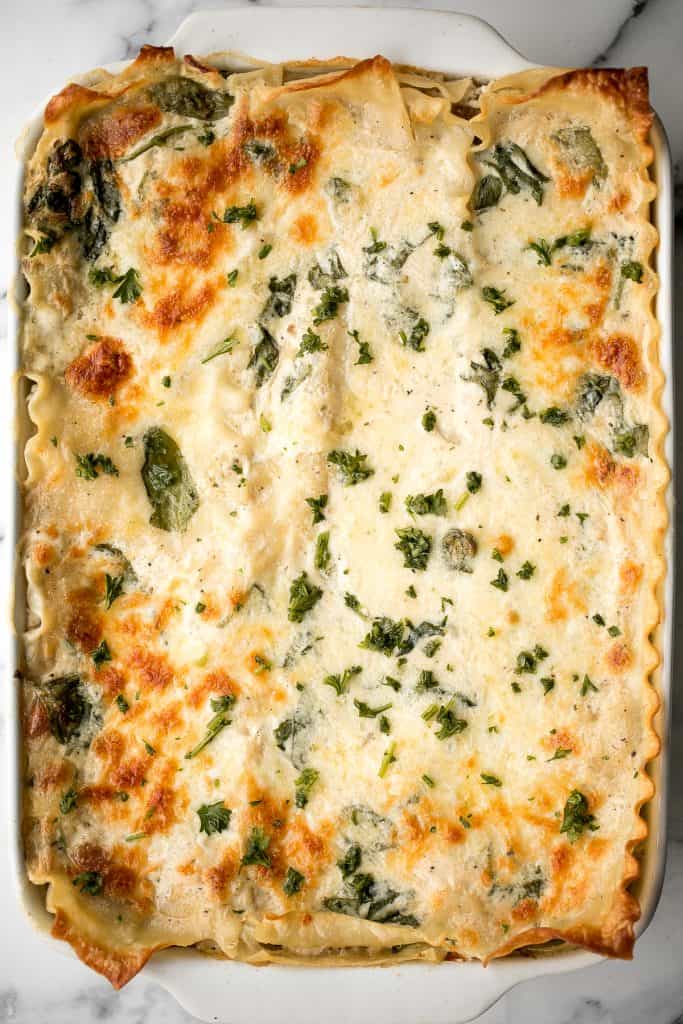
Homemade chicken noodle soup is classic, comforting, simple, quick, and easy to make at home. Plus, you can use cooked shredded chicken to save time.
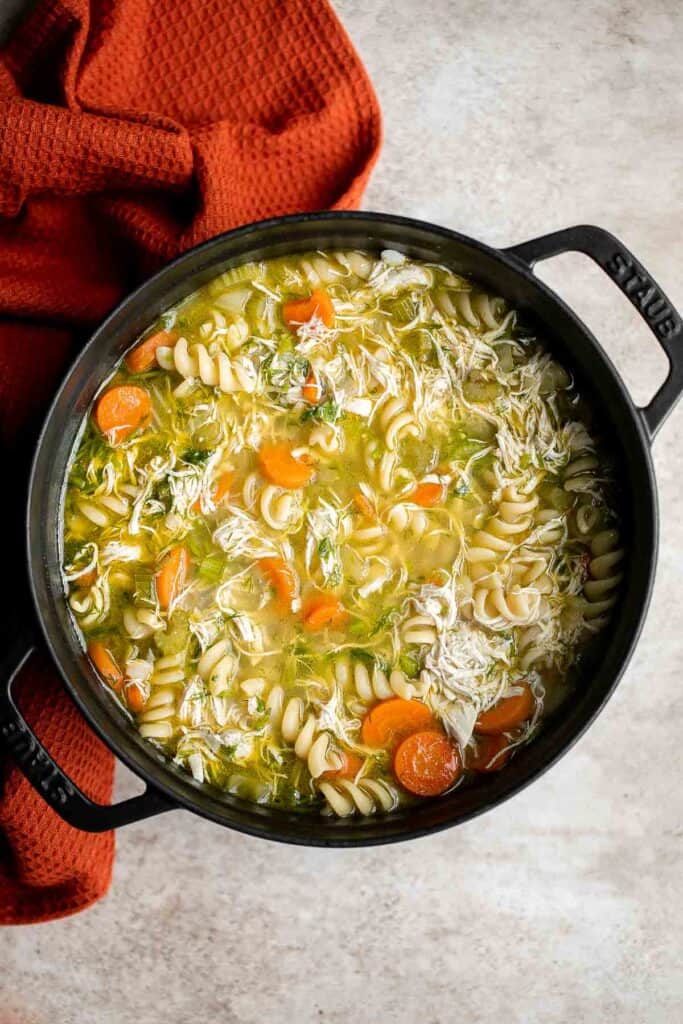
Homemade chicken pot pie is loaded with a delicious, creamy, savory filling contained by a crispy, buttery, and flaky pie crust. It stores and freezes well.

Easy baked chicken enchiladas brings the taste of authentic Mexican food into your kitchen -- saucy, spicy, and savoury. Perfect for a Mexican fiesta on Cinco de Mayo.

White chicken chili is an easy and delicious one pot meal made with shredded chicken, hearty veggies, and a creamy broth that's loaded with flavor.

Classic chicken salad is a creamy delicious salad that is easy to throw together. It's the perfect side salad for a summer BBQ, potluck, or healthy lunch.
ForgForget delivery and make sweet, tangy, and smoky BBQ chicken pizza from the comfort of your own home in under 30 minutes. The easiest weeknight dinner with shredded chicken.

Chicken penne pasta is a quick and easy dinner that is delicious, rich, creamy, and flavorful. It's a family favorite that's ready in under 30 minutes. Easily use shredded chicken instead.
Chicken Potato Soup is cozy, hearty, and delicious - loaded with chicken, potatoes, veggies, and greens simmered in a creamy broth. Ready in 40 minutes.

Greek chicken salad is fresh, healthy, and delicious, packed with classic Mediterranean flavors. Perfect as a light lunch or dinner, or for meal prep. Substitute the chicken breast for cooked shredded chicken.

Flavourful curry chicken fried rice with chicken, mushrooms, peas, rice, and curry flavours is so easy to make in less than 10 minutes on busy weeknights. Serve with a fresh Chinese garlic cucumber salad on the side.
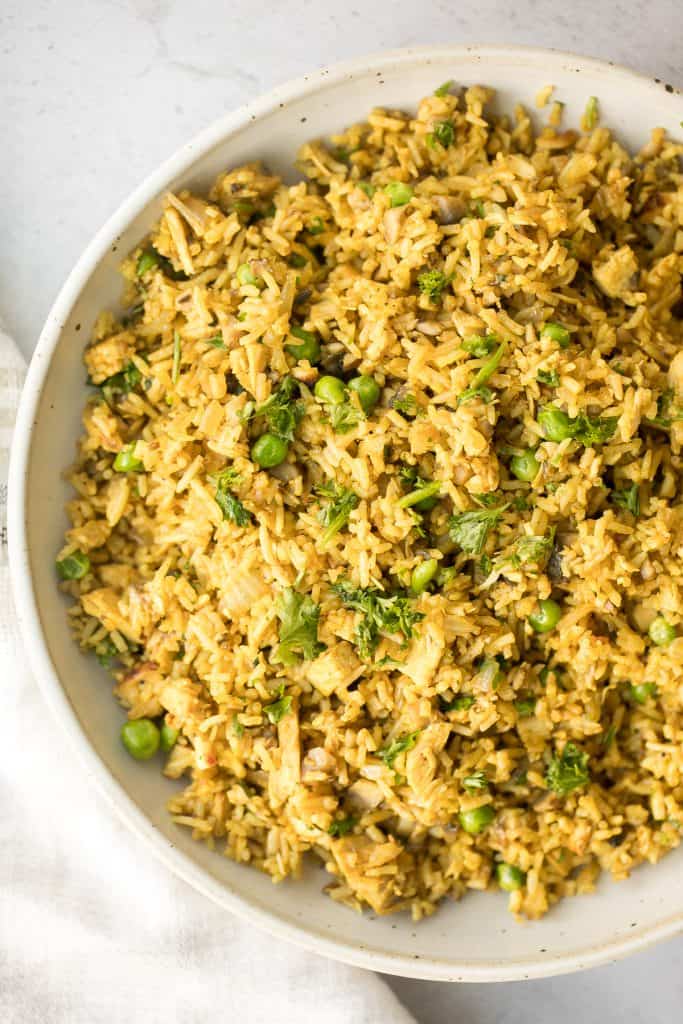
Chicken Parmesan Stuffed Peppers
Chicken parmesan stuffed peppers are delicious, flavorful, healthy, and filling, and combines two all-time favorites. Great for meal prep and freezes well.
Baked Chicken Quesadillas are cheesy, crispy, flavorful, and delicious. This family-friendly recipe is quick and easy to make in just 30 minutes! Easily make it with leftover shredded chicken.

Creamy tetrazzini with spinach is a simple, easy and delicious pasta recipe that is comforting, creamy and cheesy. The recipe used turkey, but you can easily substitute it with cooked shredded chicken instead.
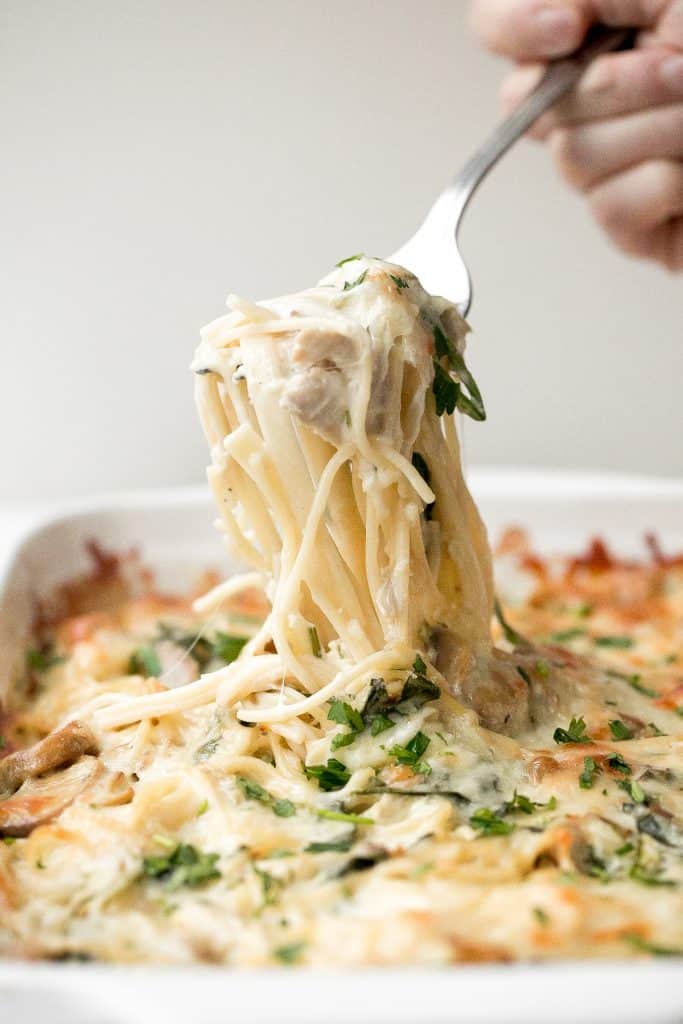
Smooth, hearty and light, one pot lemon chicken orzo soup is pure comfort in a bowl. This family favourite is like chicken noodle soup with an upgrade. Shredded chicken instructions in recipe tips.
Chicken nachos are an easy to make when you're craving something filling, crunchy, cheesy, and satisfying. Perfect game day appetizer or late-night snack. One of my favorite shredded chicken recipes.
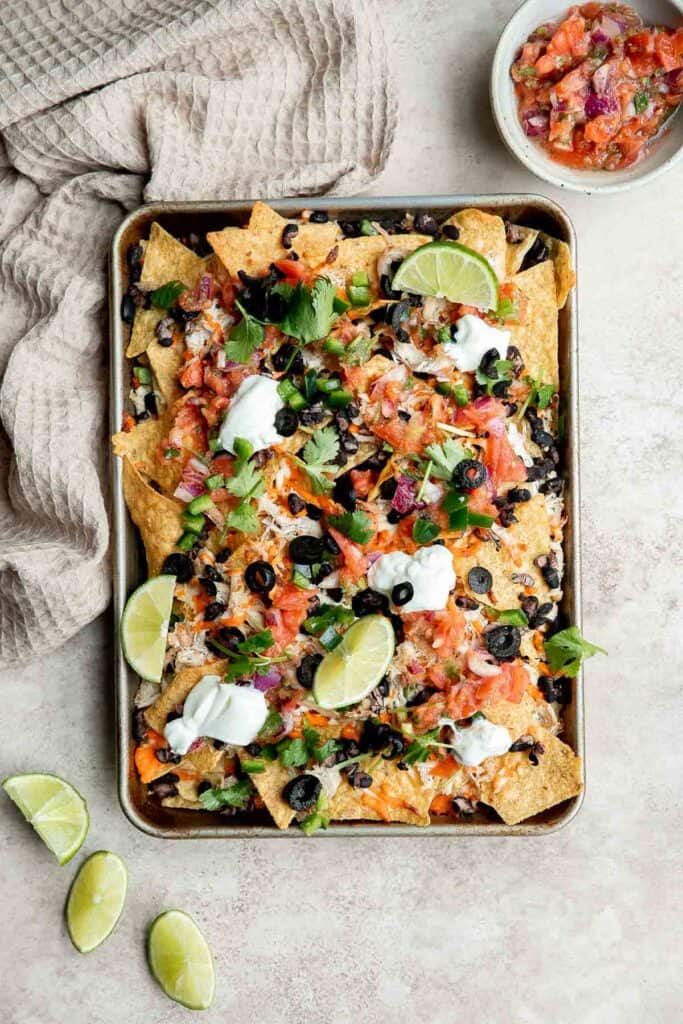
Vietnamese summer rolls with chicken are fresh, light, and healthy. This Asian summer snack takes less than 20 minutes to make and easier than you think.

Coconut turkey curry is creamy, rich, and flavorful. This delicious curry is the perfect recipe to make when you have turkey leftovers, ready in 30 minutes! Easily substitute the turkey with shredded chicken.

Hearty chicken tortilla soup is a delicious, wholesome and filling soup that you can make in about 30 minutes, packed with classic Mexican flavours.
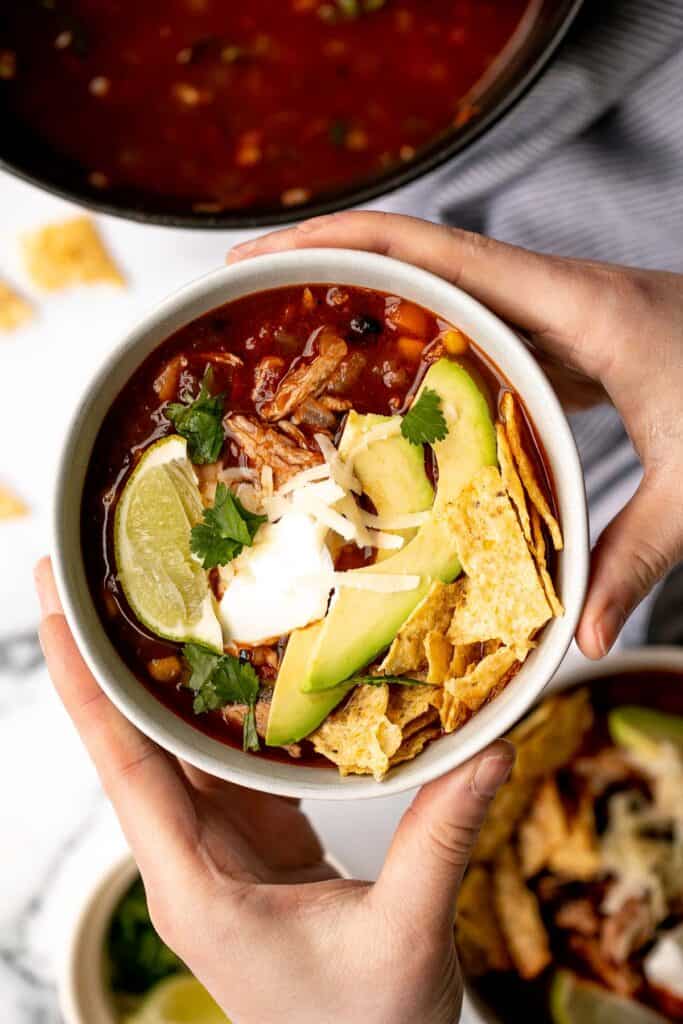
No more takeout when you can make flavourful, restaurant-style, authentic chicken Pad Thai at home in just 10 minutes. It's sweet, savoury, sour and nutty. Shredded chicken instructions in recipe tips.
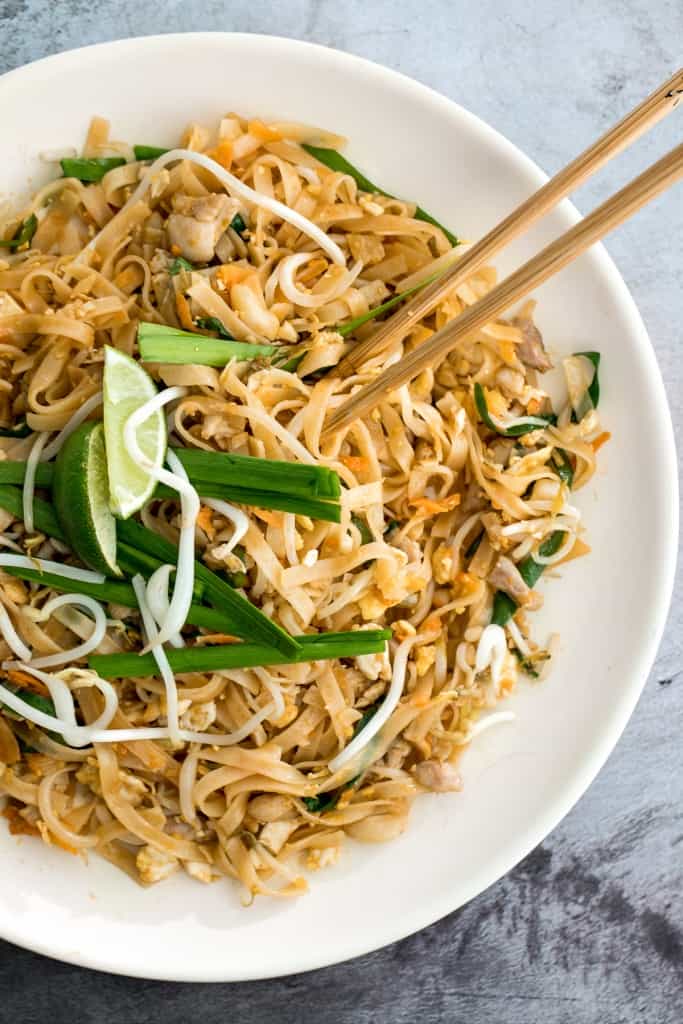
Quick easy buffalo turkey wraps with homemade buffalo sauce are flavorful, spicy, and delicious. Substitute with cooked shredded chicken for a delicious lunch that will keep you full until dinner.

Creamy turkey gnocchi soup is the ultimate comfort food - creamy, rich, and delicious, made with good carbs, clean protein, and veggies in 25 minutes. Make it with shredded chicken instead!
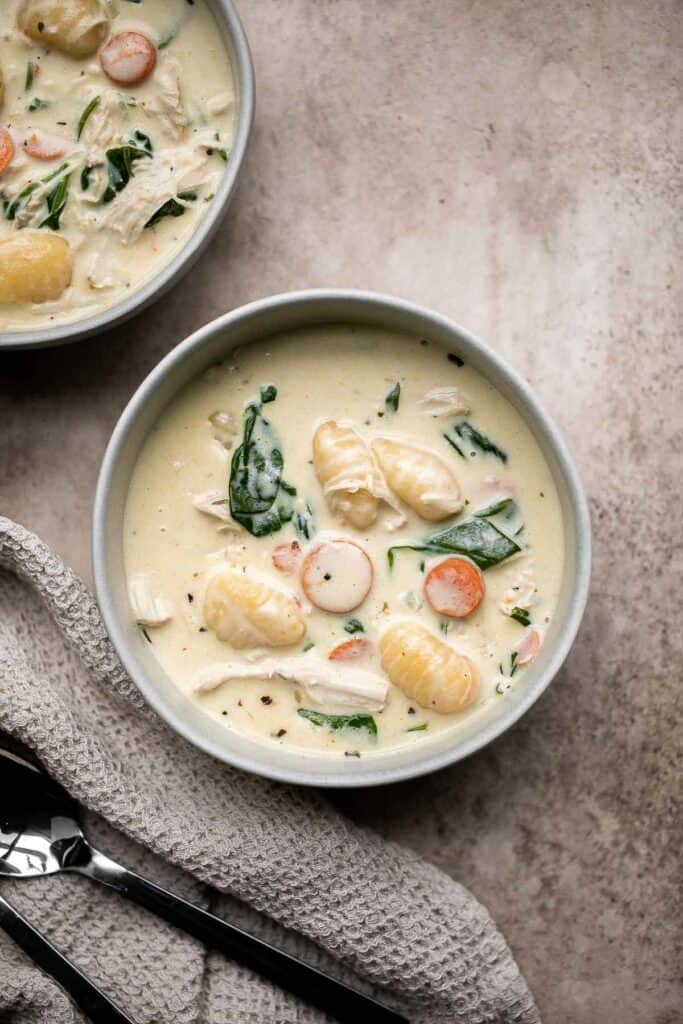
Chicken Garden Salad with Ranch Dressing
Chicken garden salad with ranch dressing is fresh, healthy, hearty, and colorful. It's a filling and wholesome lunch or dinner that is versatile too.
Butternut Squash Quesadillas with Chicken and Kale
Quick and easy butternut squash quesadillas with chicken and kale is the best fall weeknight meal. It's flavourful, so cheesy, and has the perfect crunch.
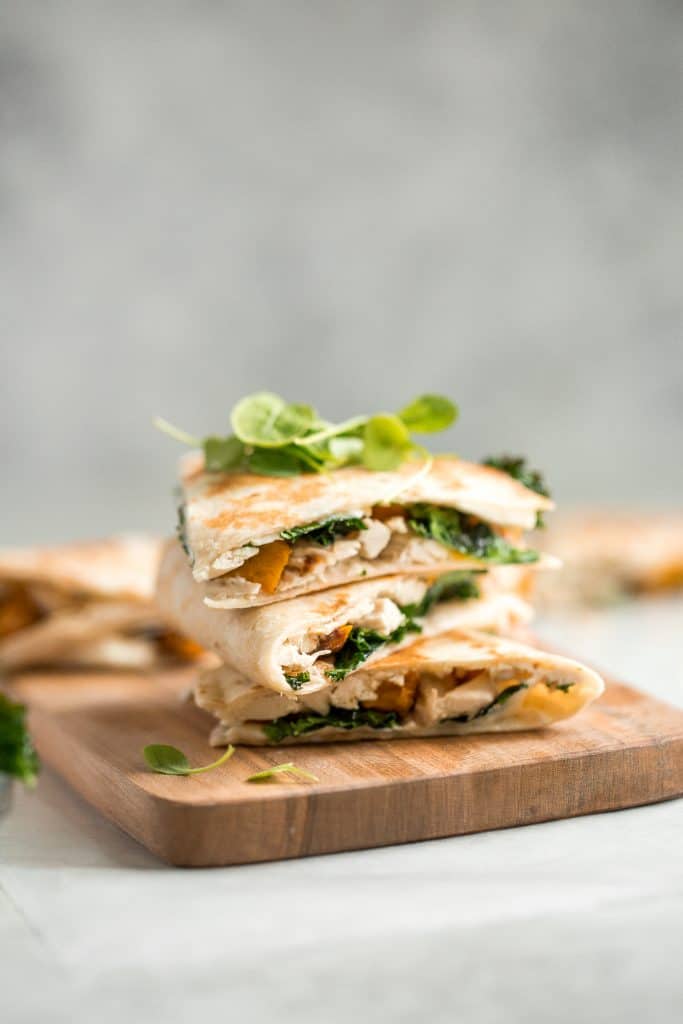
Chicken and rice soup is delicious, warm, cozy, and comforting feel-good meal that can warm you up on a chilly day. Easy to make in one pot.

Salsa Verde Green Chicken Enchiladas
Salsa verde green chicken enchiladas are delicious and flavorful, quick and easy to make, and saucy and spicy. Authentic Mexican food ready in 40 minutes.
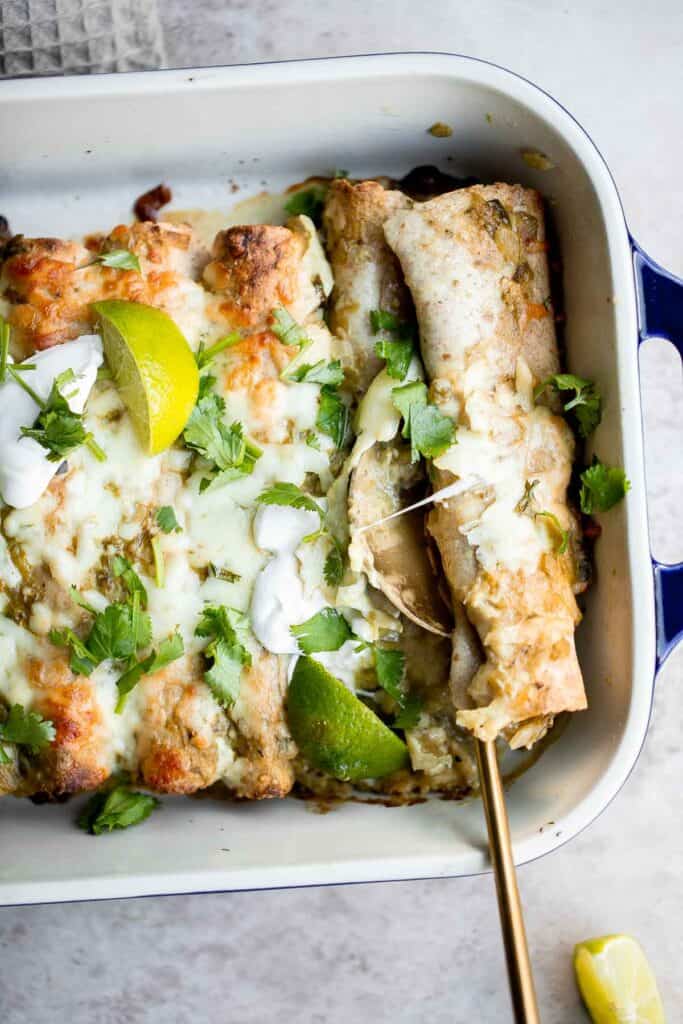
BBQ Chicken Stuffed Baked Potatoes
Try this gorgeous combination of BBQ chicken, scallions, cilantro and gruyere for an explosion of flavour in loaded BBQ chicken stuffed baked potatoes.

Warm and cozy, creamy turkey orzo soup is wholesome, hearty, filling, and flavourful. Make this delicious one pot meal using shredded chicken instead in just 30 minutes.
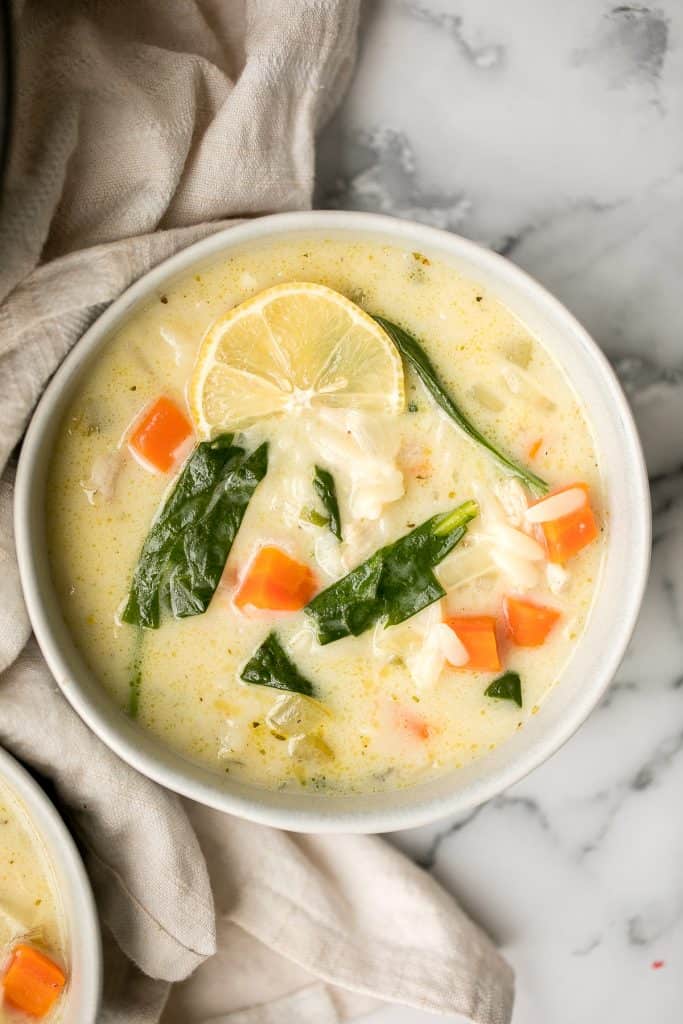
Leftover Turkey Stuffed Bell Peppers
Leftover turkey stuffed peppers are a nutritious, wholesome and healthy dinner that you can throw together easily and quickly. Easily substitute this crowd-pleaser with shredded chicken.
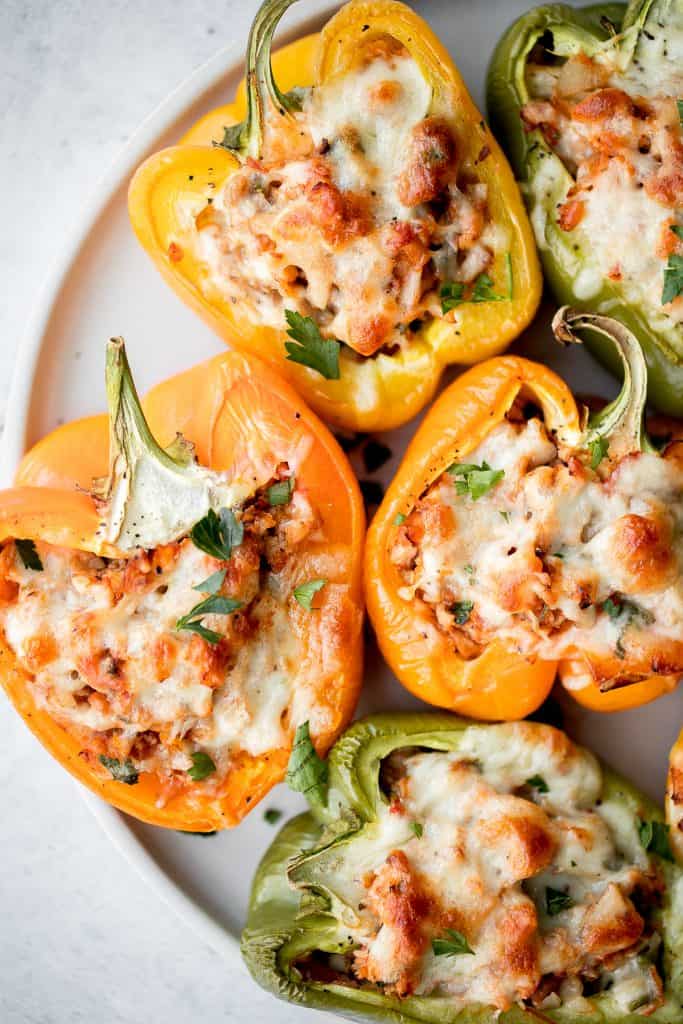
Chicken and Couscous with Sun-dried Tomatoes
Simple, healthy and flavourful chicken and couscous with sun-dried tomatoes is ready in under 30 minutes. The easiest weeknight dinner to make tonight! Easily use shredded chicken instead.
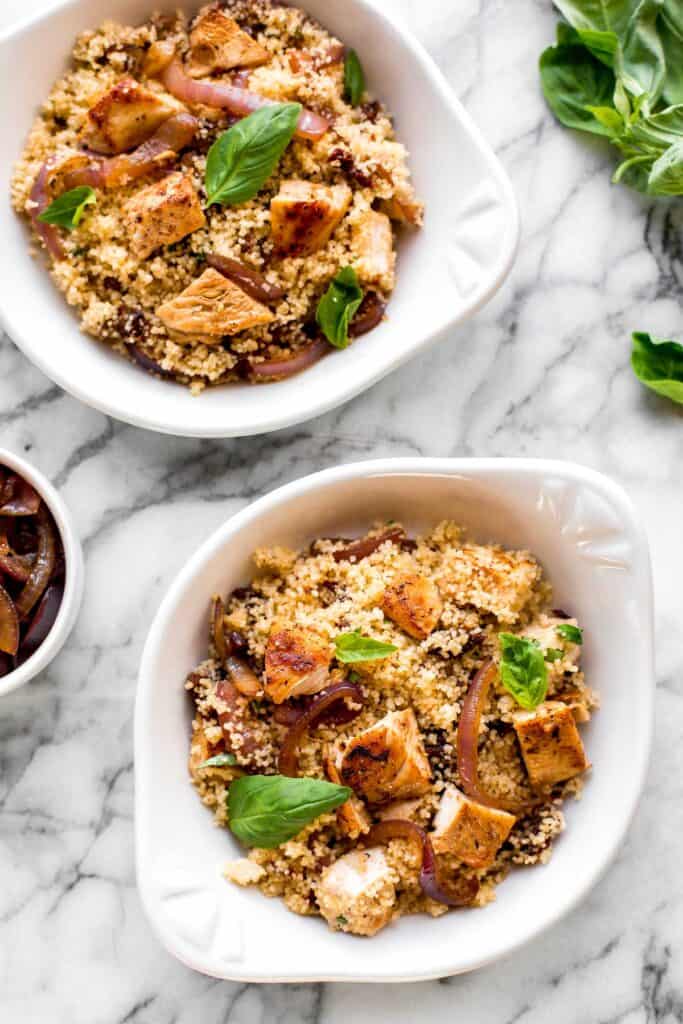
Wholesome hearty one pot leftover turkey wild rice soup can be adapted easily for chicken instead of turkey. It's the most comforting way to use shredded chicken.

Leftover turkey fried rice with turkey, fluffy rice, scrambled eggs, vegetables, and classic Asian seasonings is a one skillet meal made in just 10 minutes. Easily substitute the turkey in this recipe with leftover shredded chicken.

Leftover turkey potato chowder is a creamy, savory, and delicious soup that is loaded with holiday leftovers. Quick and easy, ready in under 30 minutes. Easily substitute the turkey for shredded chicken.

Baked Pasta with Rotisserie Chicken
Need a pasta dish with layers of flavour in under 30 minutes? Look no further! Baked pasta with rotisserie chicken (or shredded chicken), earthy and warm shiitake mushrooms, and nutty asiago cheese is the perfect weeknight (or fancy date night) meal!
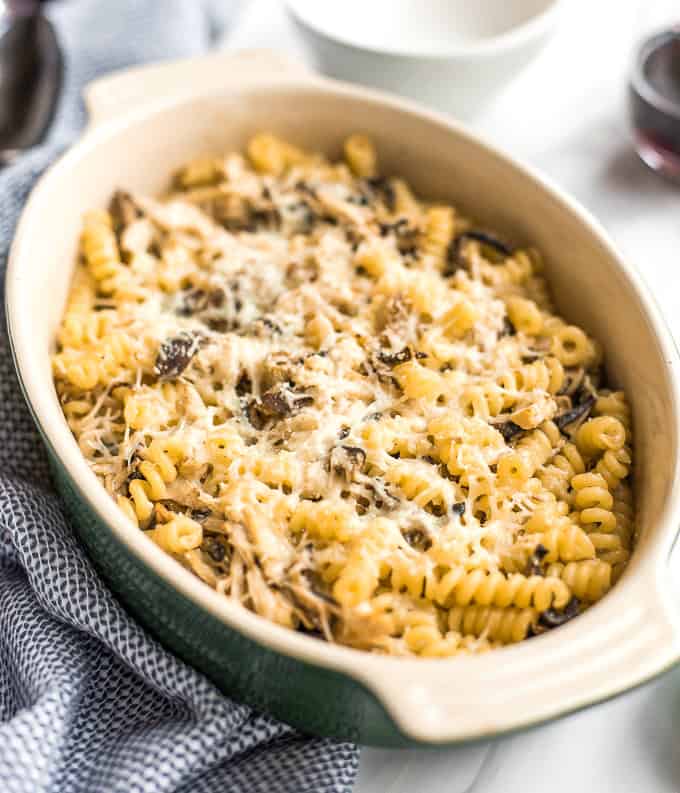
How to Use Shredded Chicken
Some other go to ways to use shredded chicken are:
- Salads. Top it on salads to add extra protein and flavor.
- Sandwiches. Stuff it into sandwiches and wraps for an healthy lunch the next day.
- Pizza. Top it onto pizza, like Butter Chicken Pizza.
- Pasta. Add it to pasta. I love adding it to Fettuccine Alfredo or Pesto Penne Pasta.
Did You Make Any of These Leftover Rotisserie Chicken Recipes?
Please leave a comment and rating below, and let me know what you thought of this round up of these easy leftover rotisserie chicken recipes. Be sure to snap a picture and tag me on Instagram @aheadofthyme or share it on the Pinterest pin so that I can follow along.
HUNGRY FOR MORE? Don't forget to sign up for my email newsletter so that you don't miss any recipes. You can also follow along on Instagram and Pinterest for more recipe updates.
40 Best Easter Mains and Entrees
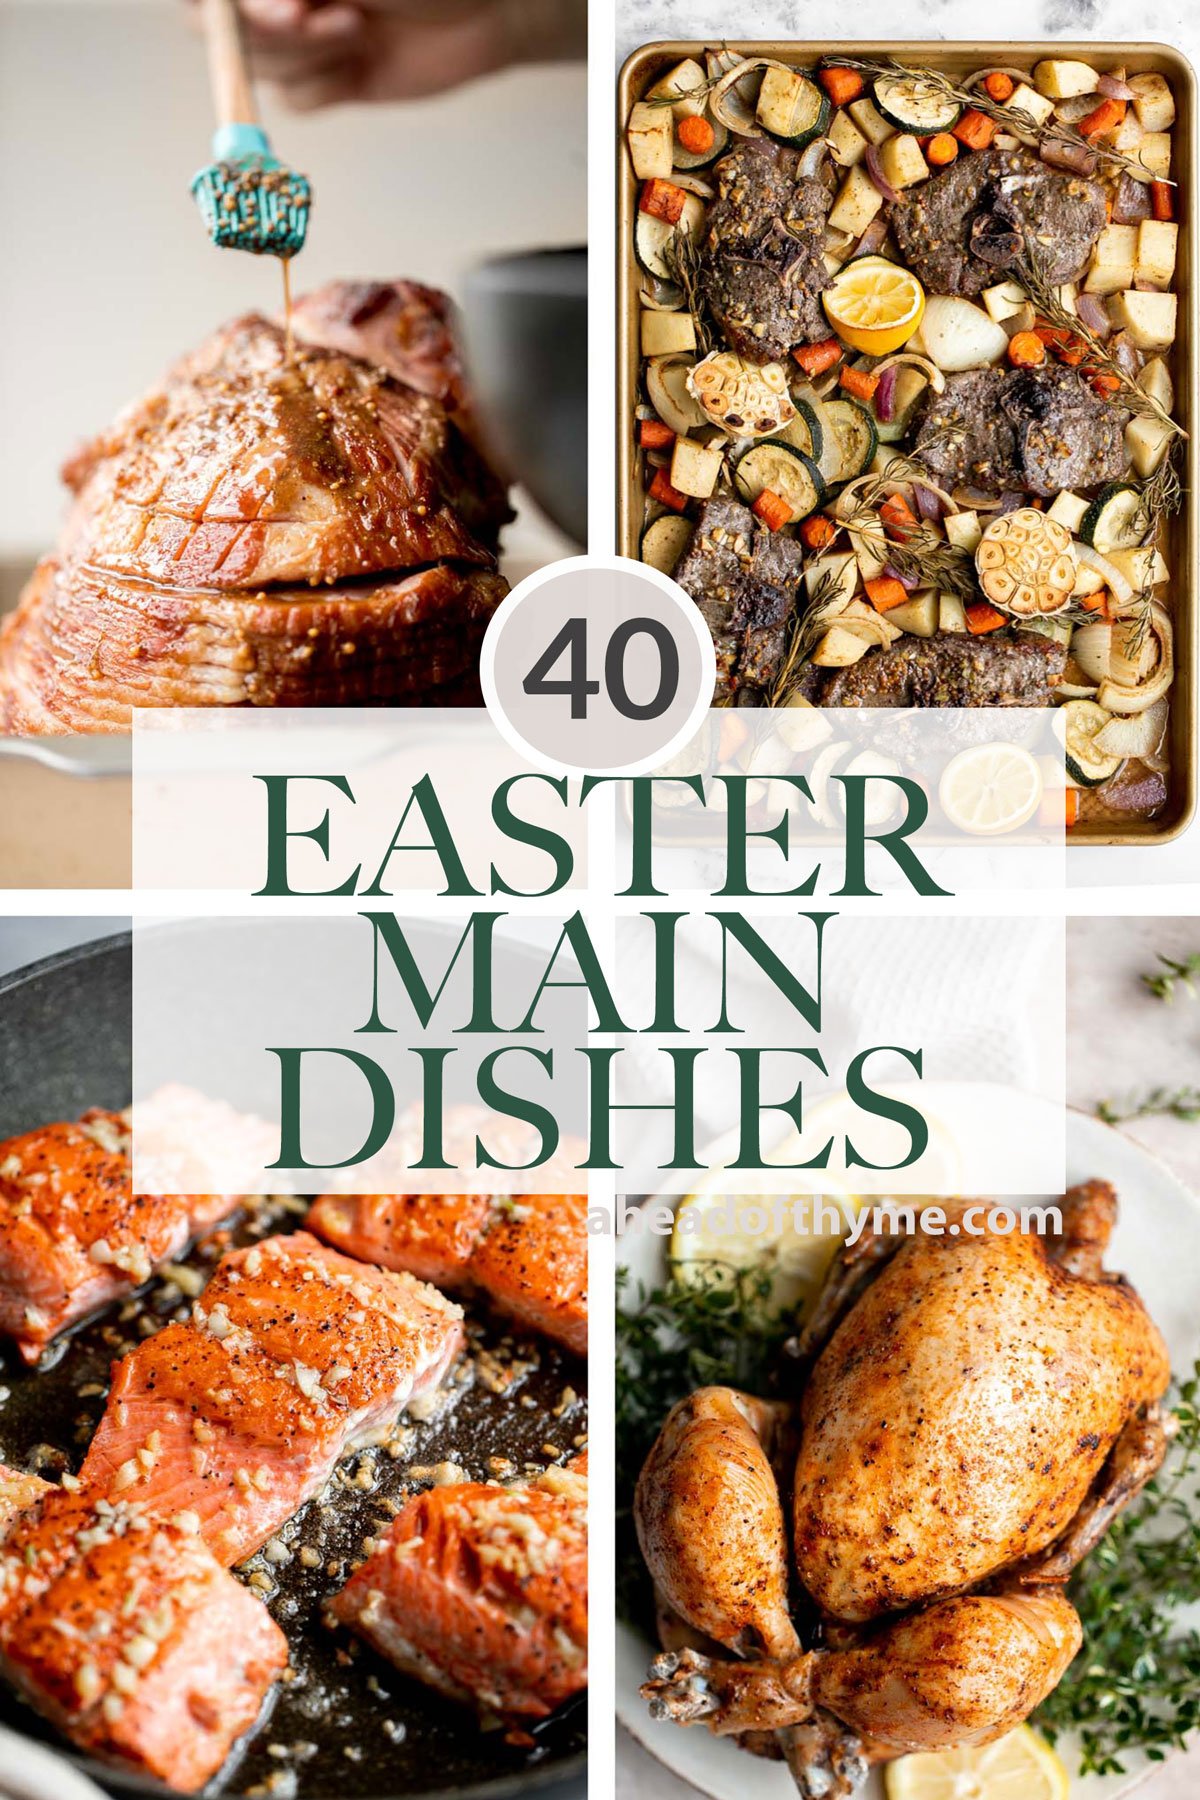
When it comes to an epic Easter dinner spread, it's all about the main course. Whether you are going for a traditional baked holiday ham to feed a crowd, or looking for delicious Easter recipes for a smaller intimate gathering, we have got you covered. We are sharing over 40 of our most popular and best Easter mains dishes that go beyond ham but of course including ham, turkey, chicken, lamb, beef, pork, and more Easter mains and entrees.

Best Easter Main Dishes
Easy holiday glazed baked ham is juicy, succulent and flavourful, coated in a brown sugar honey glaze with and baked until caramelized and golden brown.
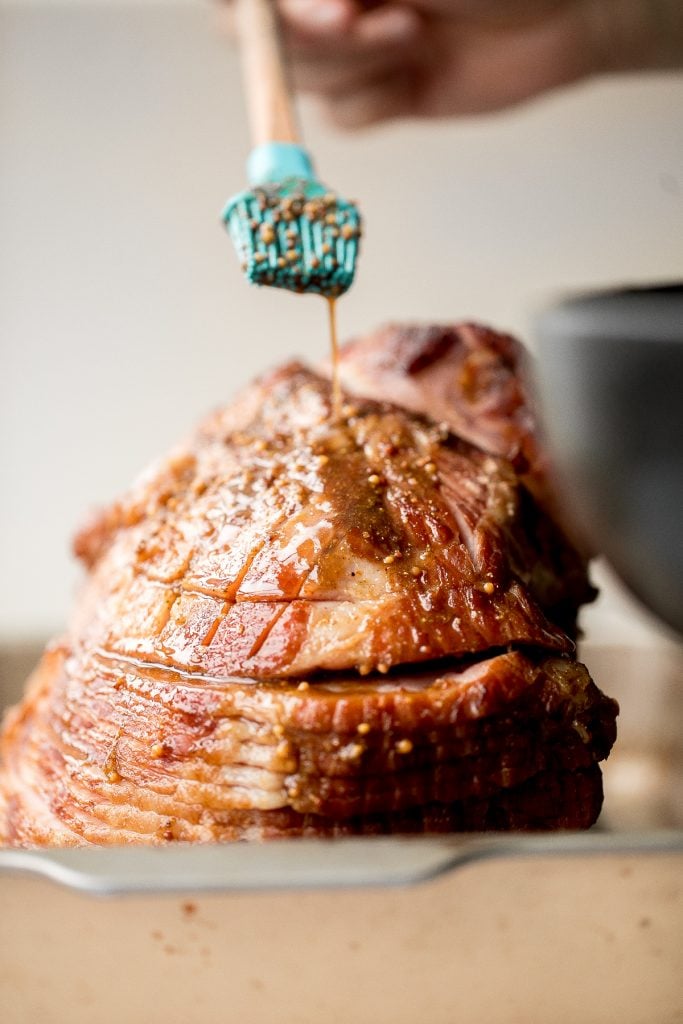
Best and Juiciest Roast Turkey
The best and juiciest roast turkey cooks faster that traditional methods and requires no brining. It's so tender and juicy every time. And use the giblets and drippings to make delicious homemade turkey gravy.
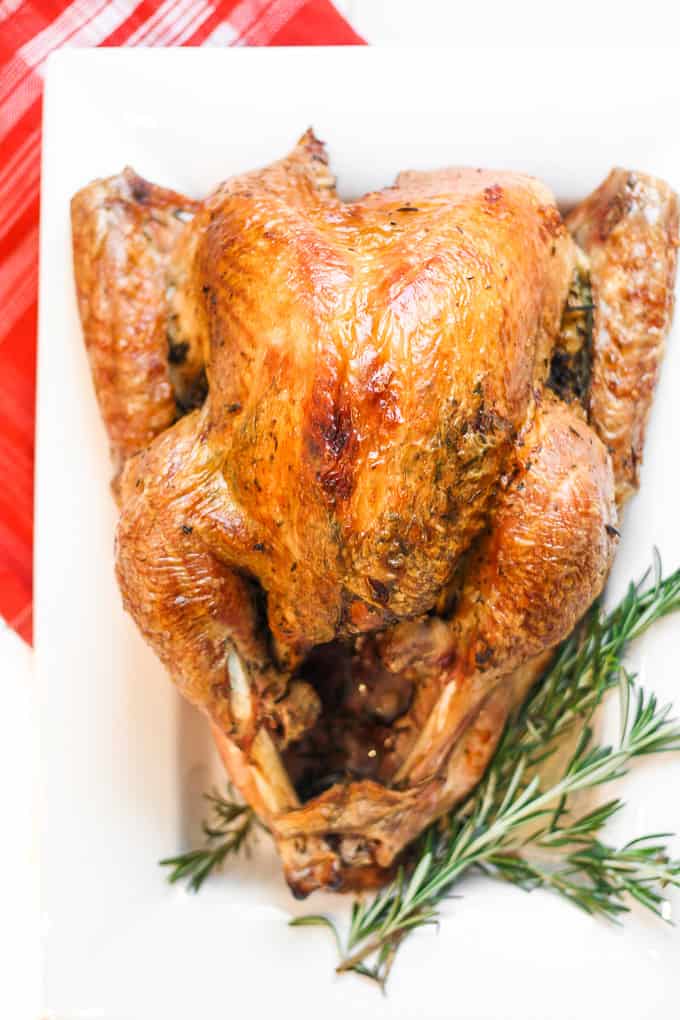
Sheet pan lamb chops with vegetables are healthy and delicious, easy to make, and easier to clean up. Perfect for busy weeknights or a holiday dinner.
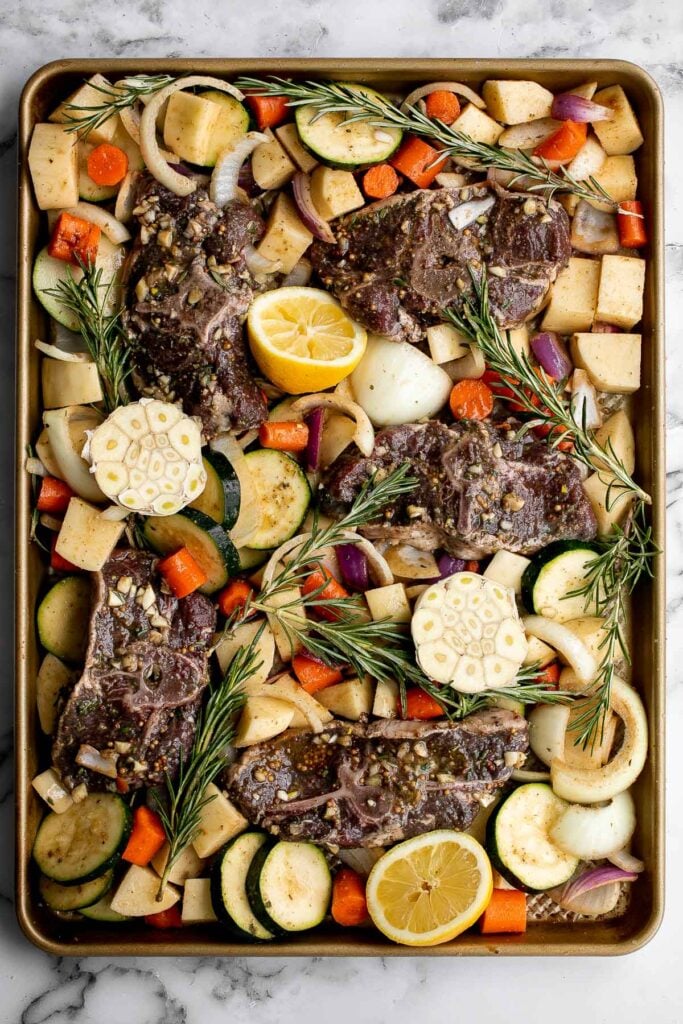
Dutch Oven Whole Roast Chicken
Easy Dutch oven whole roast chicken with the crispiest golden skin is juicy, tender and succulent and packed with flavour. Just takes 15 minutes to prep. Serve with creamy potatoes au gratin on the side.
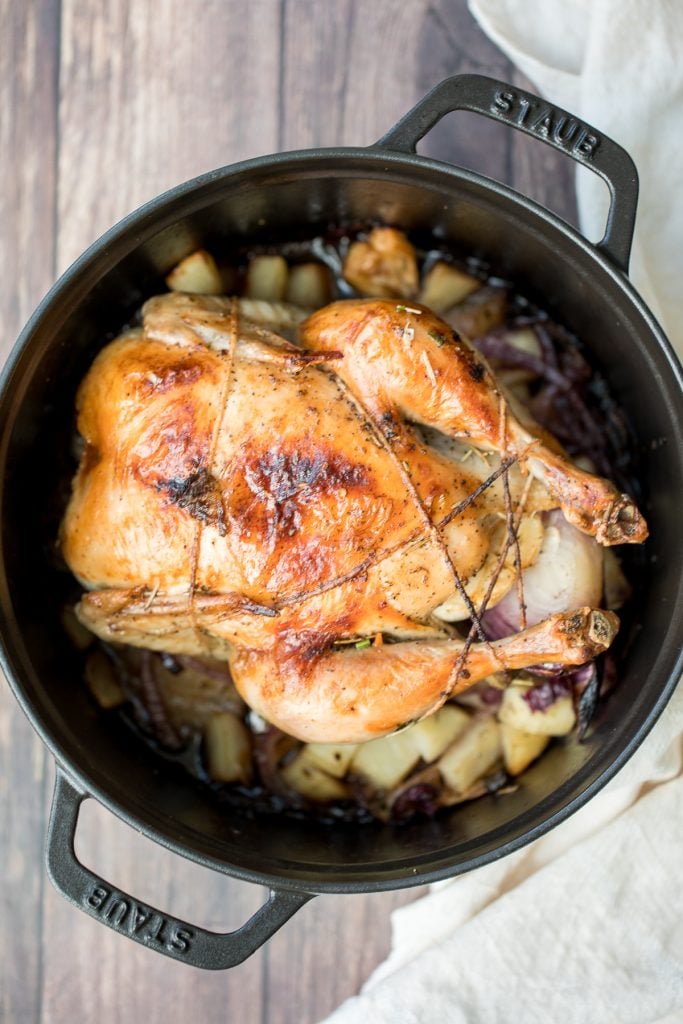
Homemade roast beef is roasted on high heat and slow cooked on low heat for the best texture - browned crust on the outside and tender, moist, juicy inside.
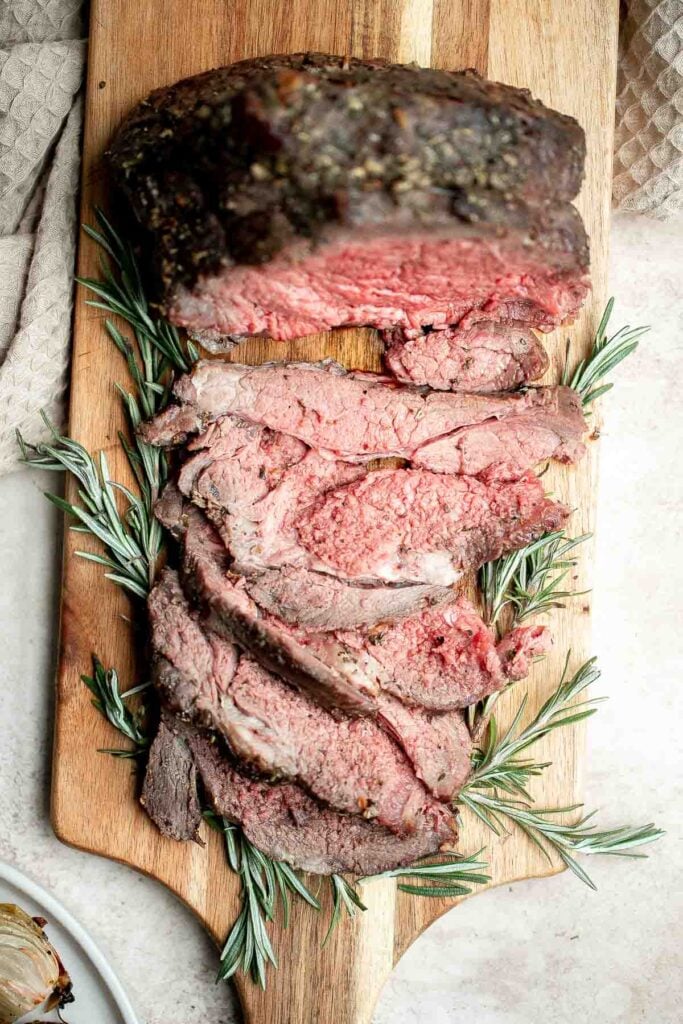
Greek salmon is delicious, flaky, and tender. This healthy oven-baked salmon is packed with Mediterranean flavors and is ready in just 20 minutes.
Quick easy roasted pork tenderloin with sauce is juicy, tender, and flavorful. Ready in 30 minutes, it's perfect for busy weeknights or a holiday dinner.
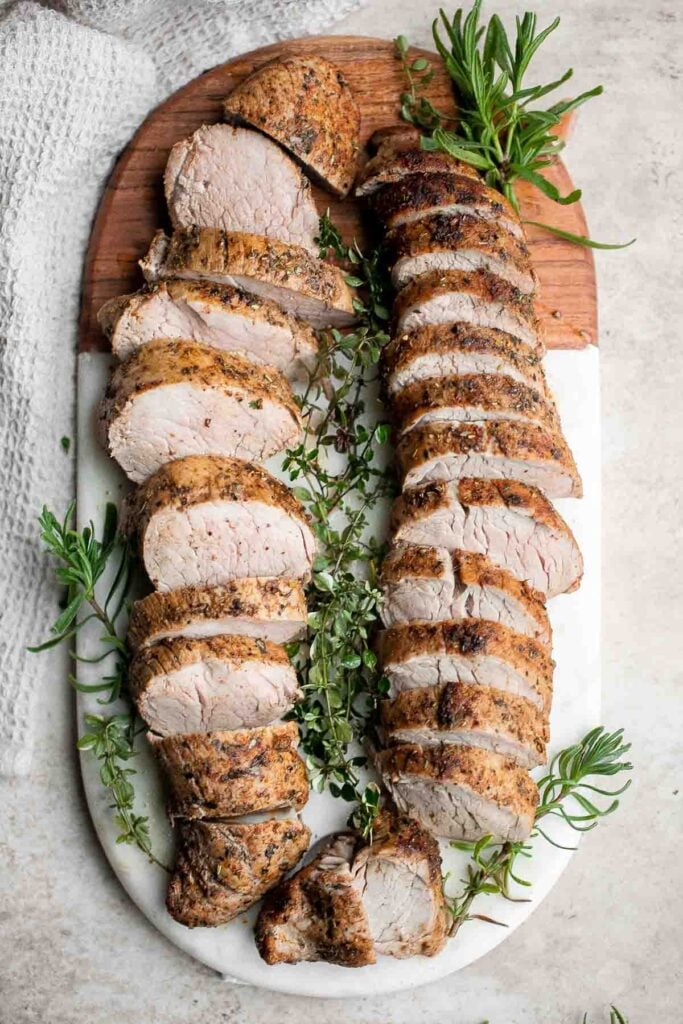
Easy Juicy Roasted Turkey Breast
Easy juicy roasted turkey breast is the perfect holiday dinner, minus the headache…tender meat, crispy skin, and a layer of roasted onions. Serve it with easy 2-ingredient gravy made with the drippings.
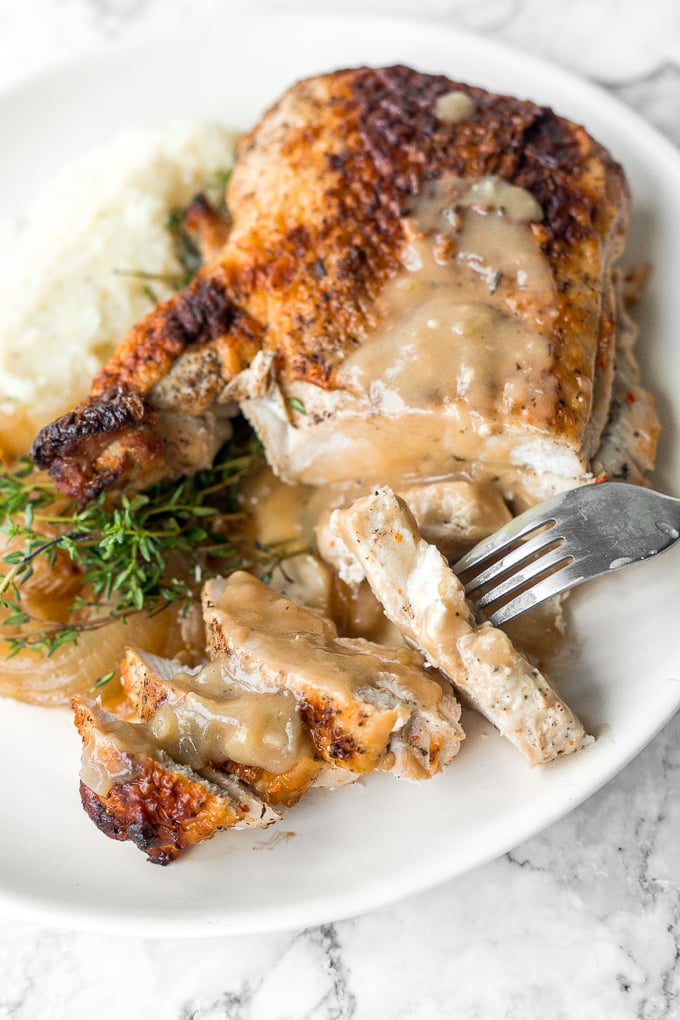
Chicken Madeira with sautéed mushrooms and tender crisp asparagus is topped with melty mozzarella cheese. Cheaper and better than the Cheesecake Factory!
Roasted Spatchcock Chicken (Butterflied Chicken)
Quick and easy roasted spatchcock chicken (butterflied chicken) seasoned with garlic and thyme is juicy, tender, delicious and flavourful with minimal prep. Serve with some creamy mashed potatoes and garlic green beans.
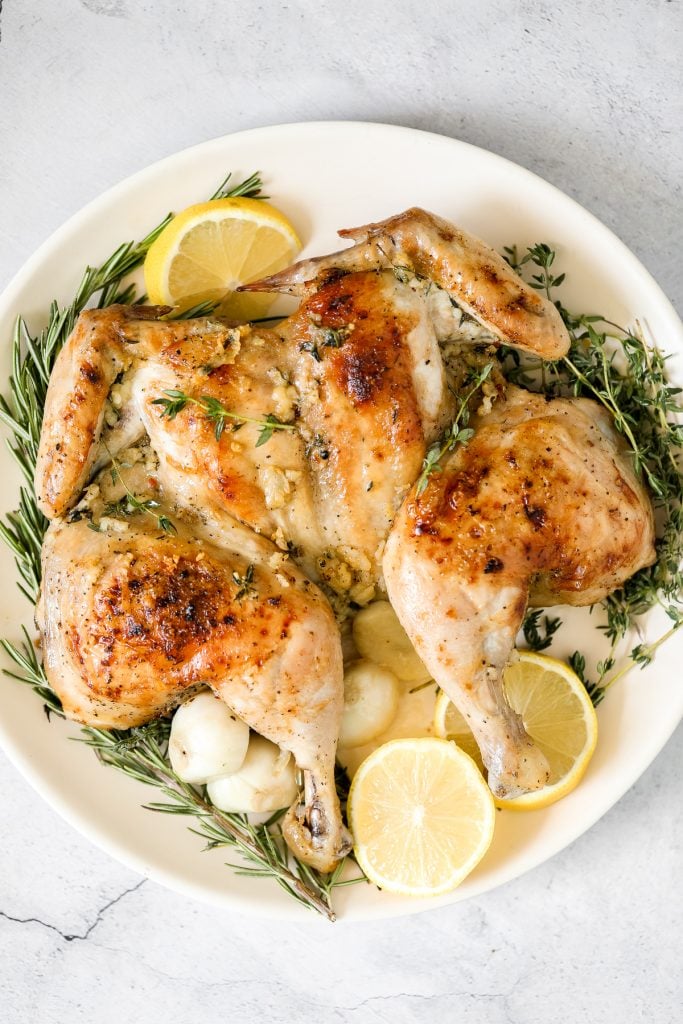
This Prime Rib Roast is a tender and juicy cut of beef marbled with fat. It is incredibly flavorful, delicious, and good - flavored with simple ingredients.
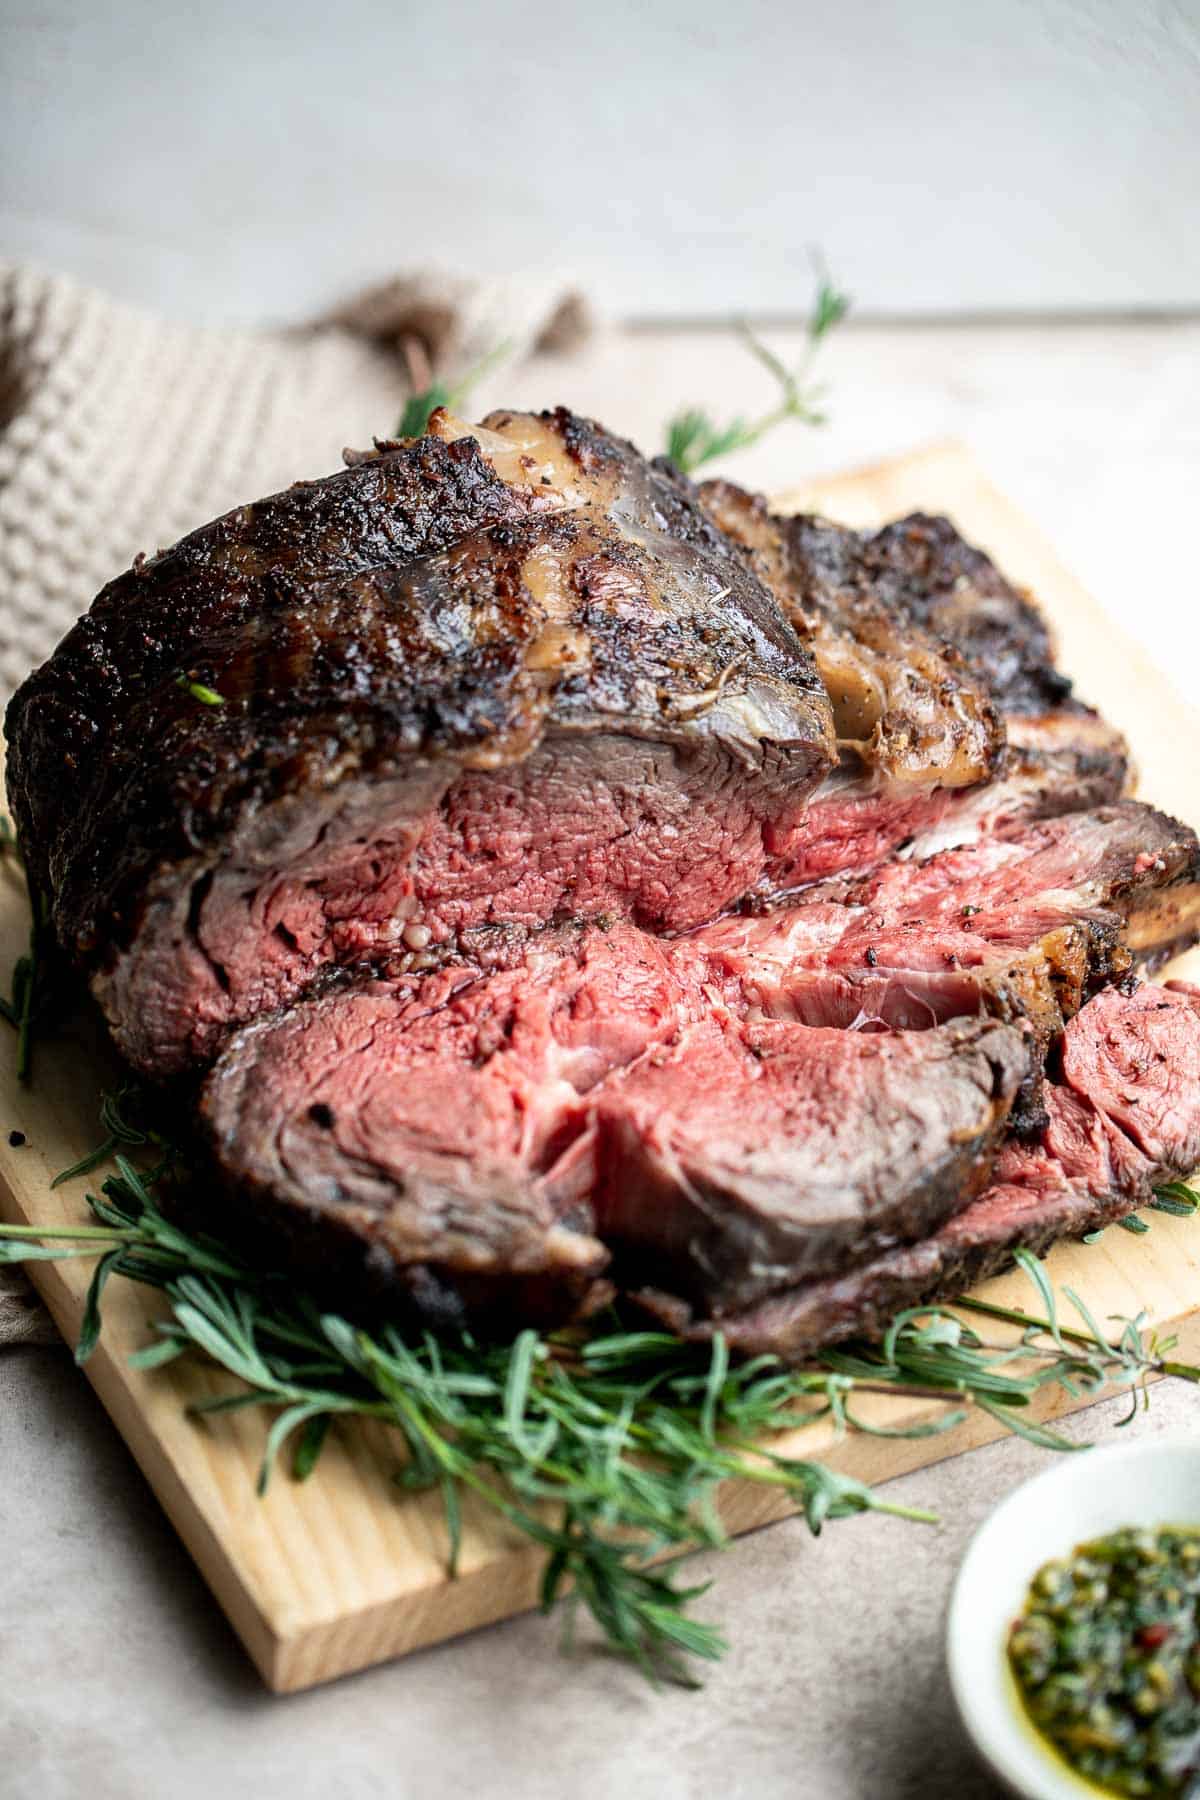
Honey Glazed Roast Pork with Vegetables
Easy one pan honey glazed roast pork is moist, tender, and juicy, coated with an irresistible honey glaze and packed with potatoes, green beans and apples.
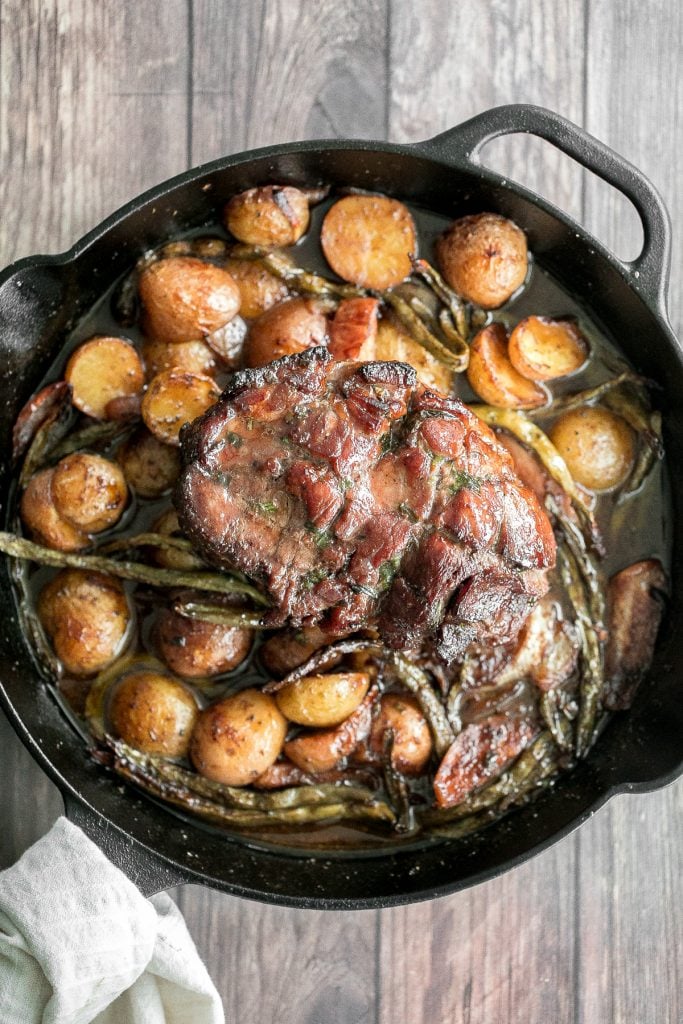
Instant pot whole turkey is a tender, juicy, and delicious holiday main. Ready in under 2 hours, it's the fastest and easiest way to cook a whole turkey!

Soft, tender and juicy slow cooker turkey breast with the crispiest skin and fresh fall herbs is the easiest way to cook a turkey this holiday season. Serve it with make ahead cranberry sauce.
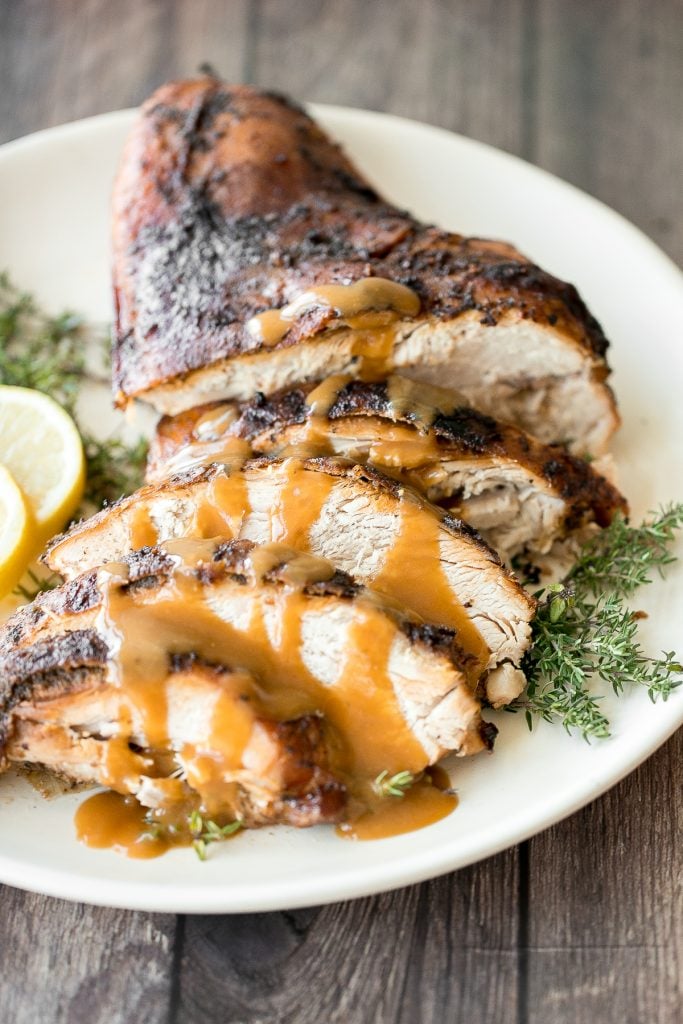
Sweet and savoury pineapple glazed ham slices are perfect for a holiday dinner. With a caramelized glaze, this ham is dressed to impress.
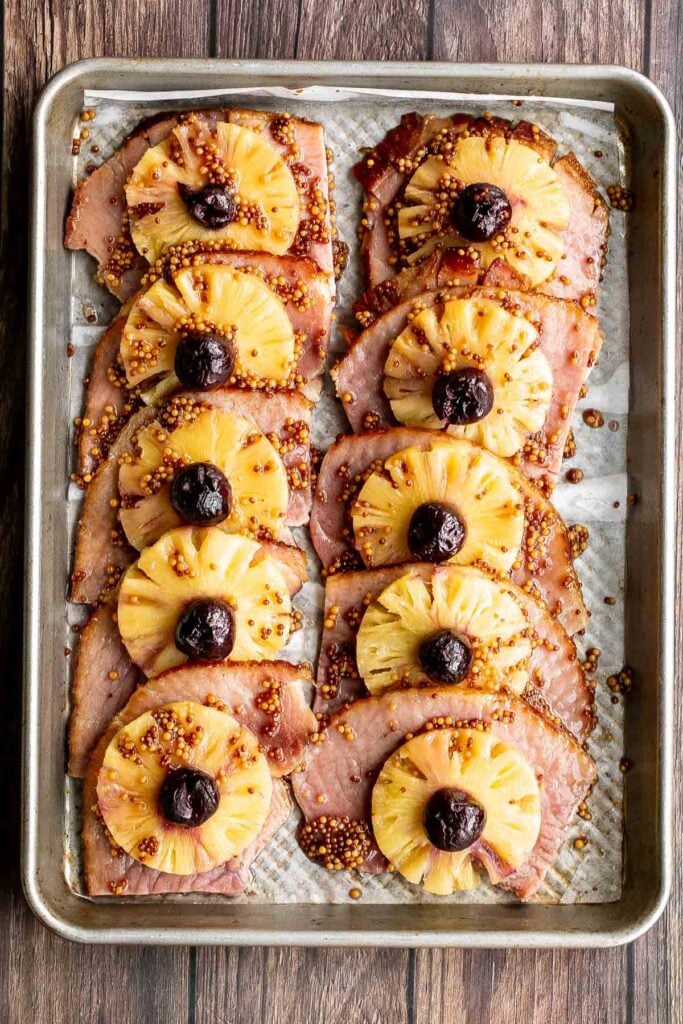
Garlic shrimp skewers are delicious and full of fresh flavor. These quick and easy kabobs can be grilled, baked or air fried for an easy summer dinner.
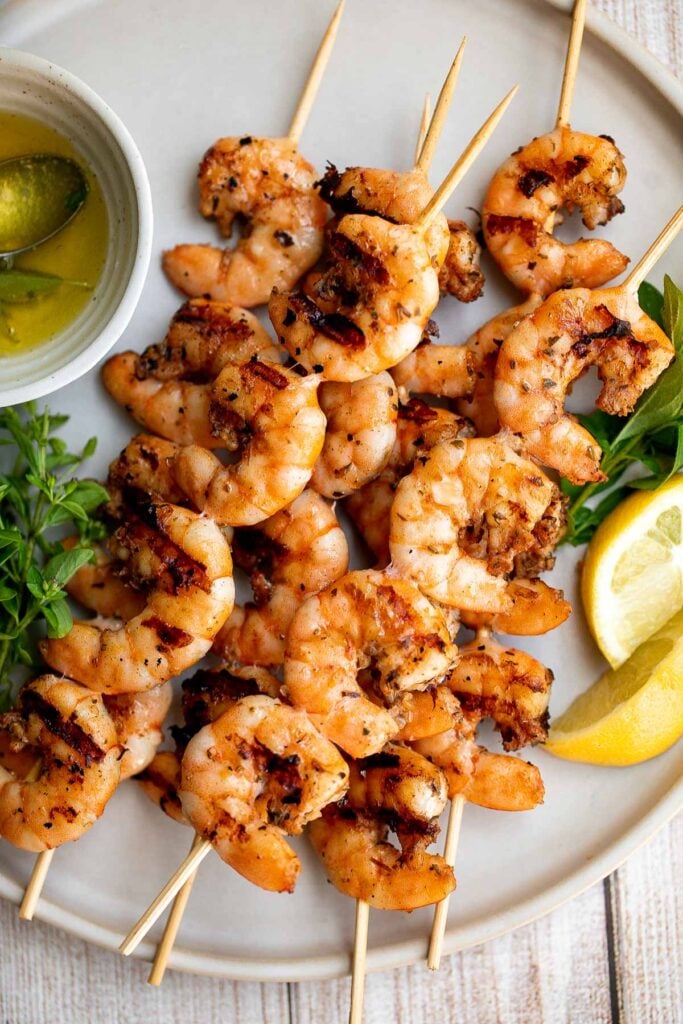
Glazed Honey Balsamic Pork Chops
Quick and easy, glazed honey balsamic pork chops are tender and juicy, seared in thyme and coated with a honey balsamic sauce. Make it in under 30 minutes.
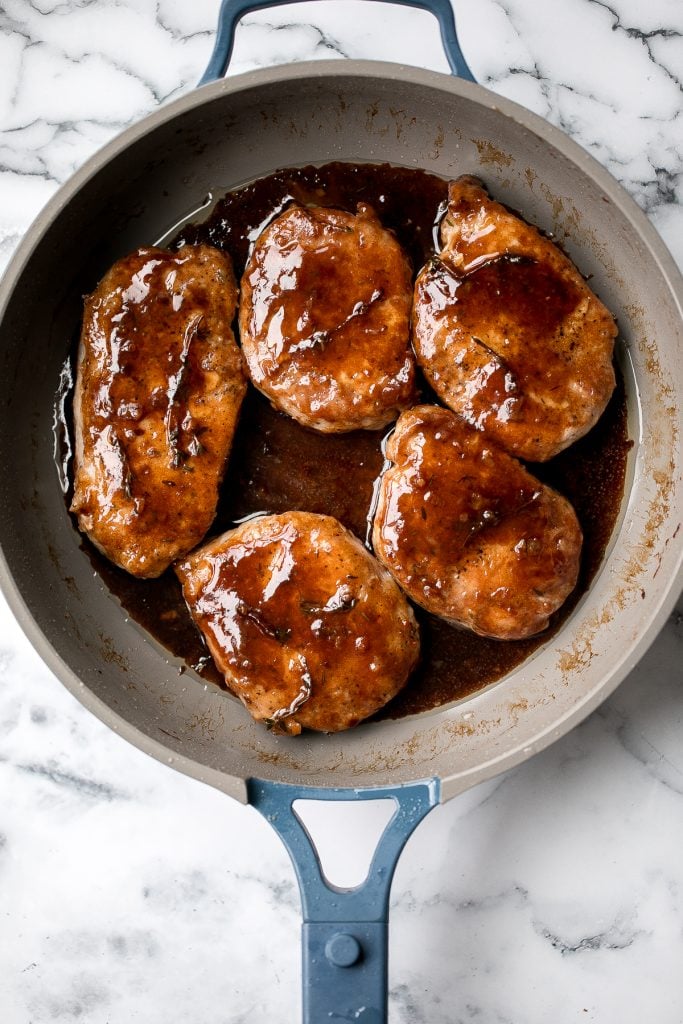
Creamy garlic salmon is a quick easy one-pan meal ready in under 30 minutes, with seared flaky tender salmon tossed in a delicious creamy garlic sauce.

This delicious garlic and herb-crusted rack of lamb is tender, juicy, and flavourful. It is surprisingly quick and easy to make at home in about 30 minutes.
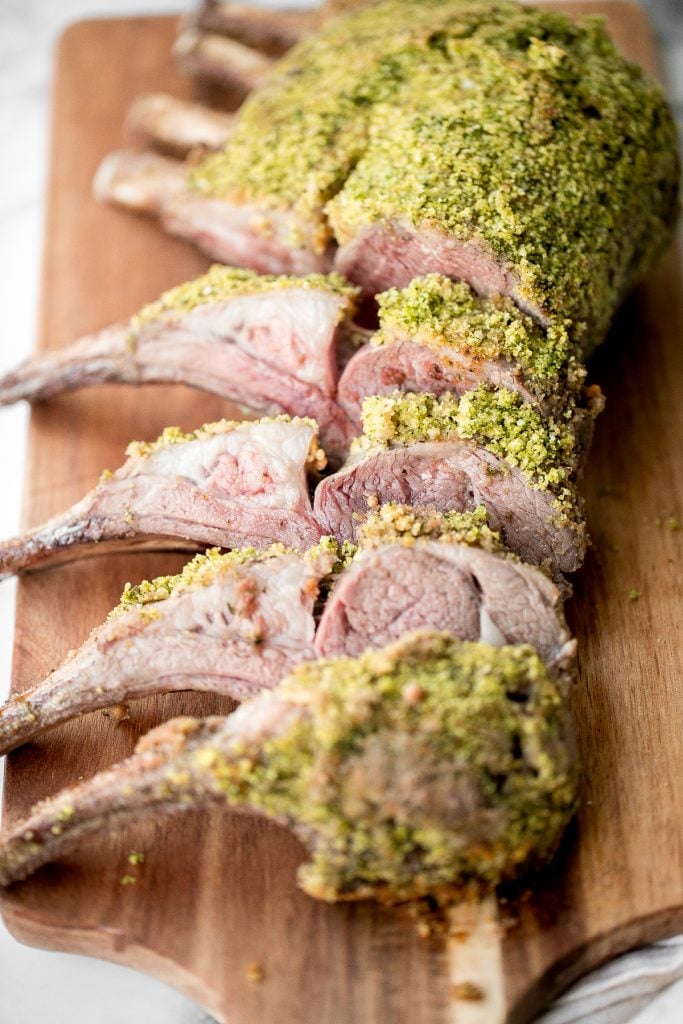
Instant pot whole chicken with gravy is tender, juicy, and flavorful. It's the fastest way to cook a whole rotisserie chicken for dinner in just 40 minutes.
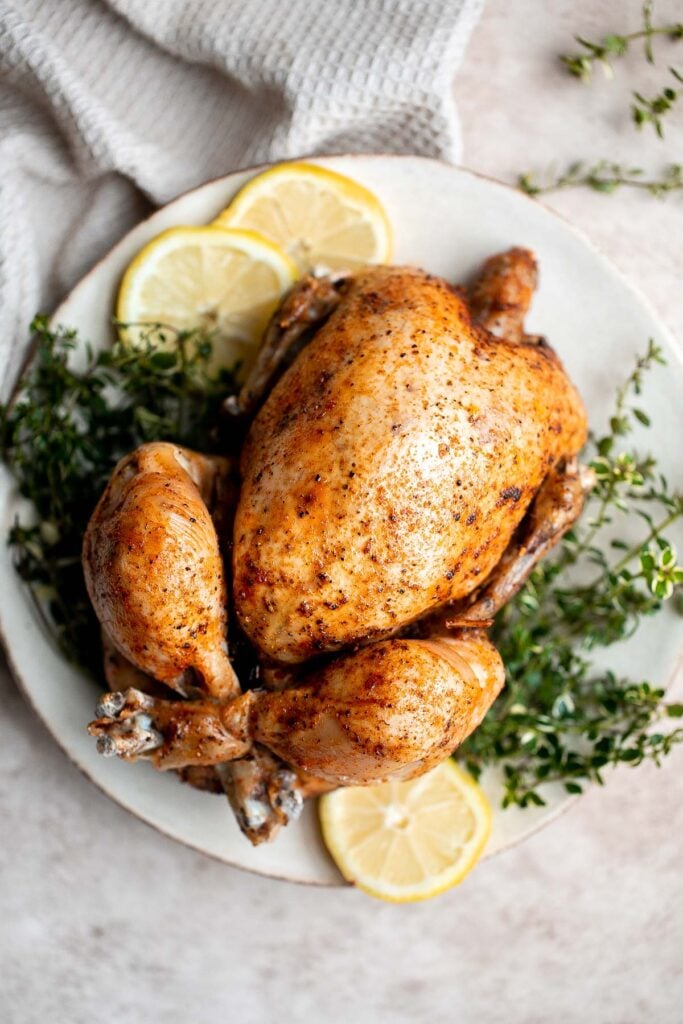
This hearty classic meatloaf with a caramelized glaze will nourish your body and soul. Feed the whole family with a simple yet flavourful classic.

There's nothing better than a classic Pot Roast for Easter Dinner. It's hearty, wholesome, and filling comfort food that can feed the whole family.
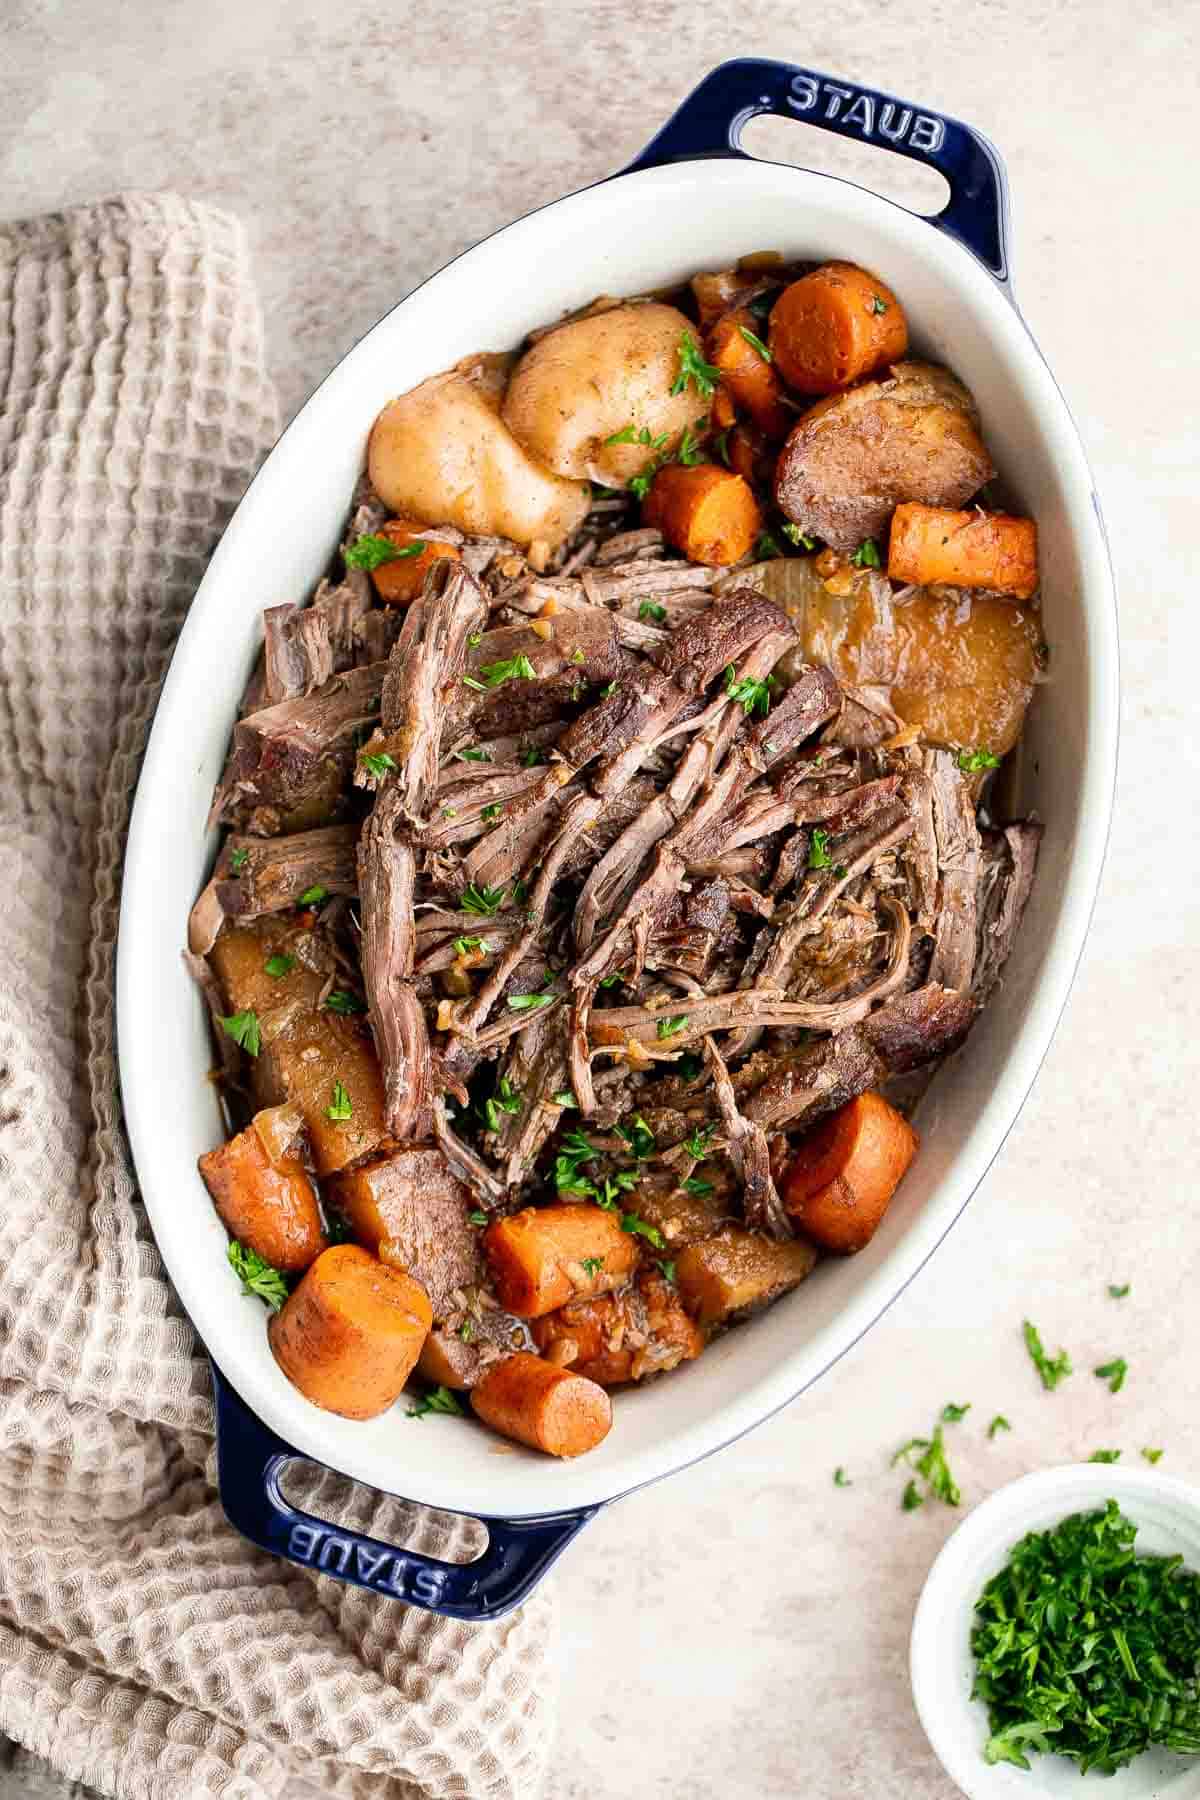
Creamy Tuscan shrimp packed with sun-dried tomatoes, spinach, and garlic, is creamy, rich, and delicious. Make it in just 15 minutes, including prep!
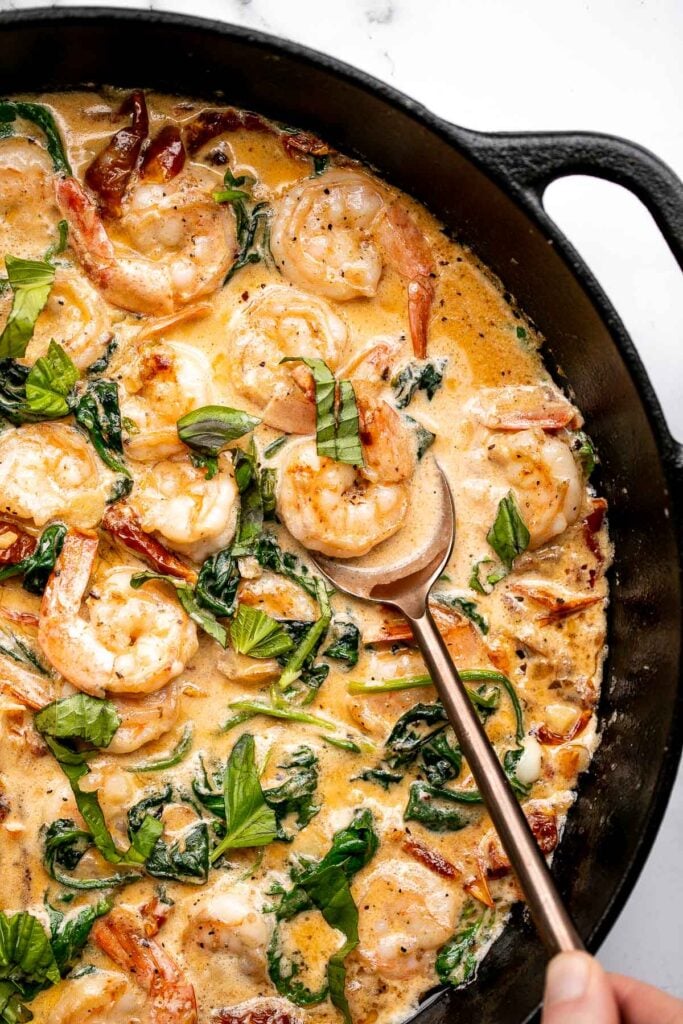
Air Fryer Lamb Chops with Dijon Garlic Marinade
Juicy, tender, and delicious 18-minute air fryer lamb chops is marinated in a dijon sauce and will change the way you cook lamb forever.
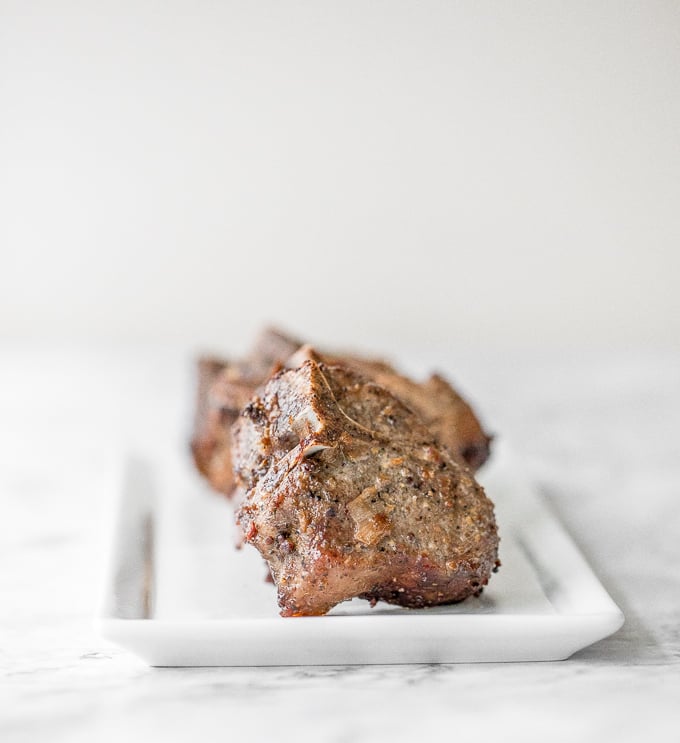
Instant pot turkey breast is the most tender and juicy turkey you'll ever try. It's so easy to make in the pressure cooker and requires little prep.
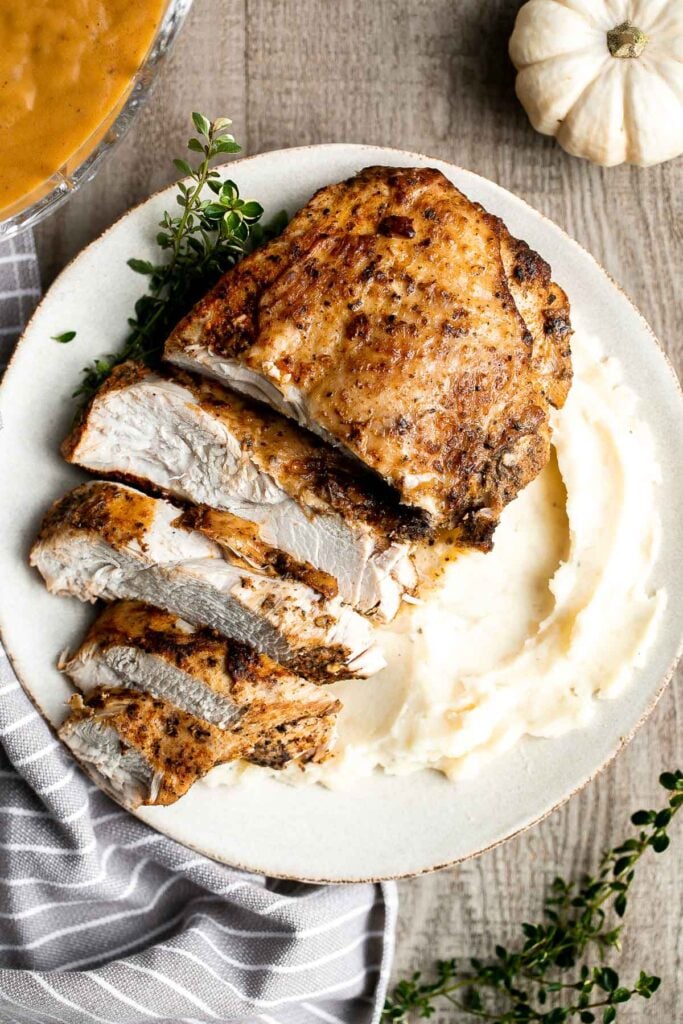
Tender, flaky, flavorful garlic butter salmon is well-seasoned, seared to perfection, and basted until juicy. Quick and easy to make in 20 minutes.
Easy Roast Lamb with Vegetables
Easy roast lamb with vegetables is tender, juicy, and succulent and packed incredible flavour. This fancy holiday dinner is easy to prep in just 15 minutes.
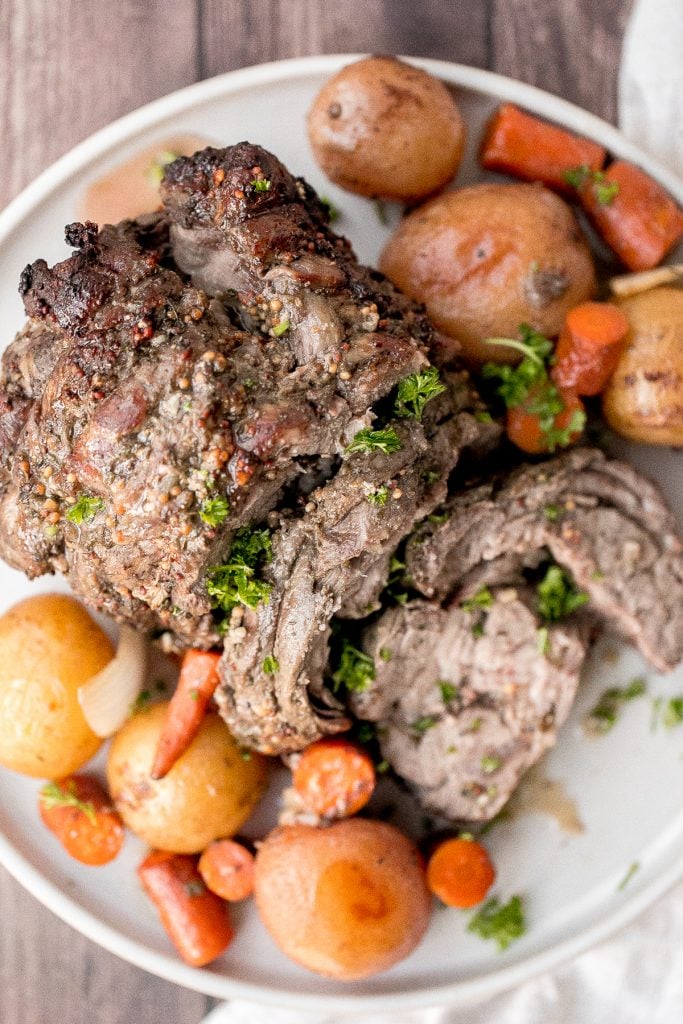
Quick and easy, creamy lemon chicken piccata is a simple and delicious 30-minute meal made with tender chicken breast in a light lemon sauce with capers. One of my favorite easy chicken dinners.
Greek Lemon Garlic Whole Roast Chicken
Easy Greek lemon garlic whole roast chicken is tender, juicy and succulent with the crispiest skin. Prep this flavourful one pan meal in just 15 minutes.
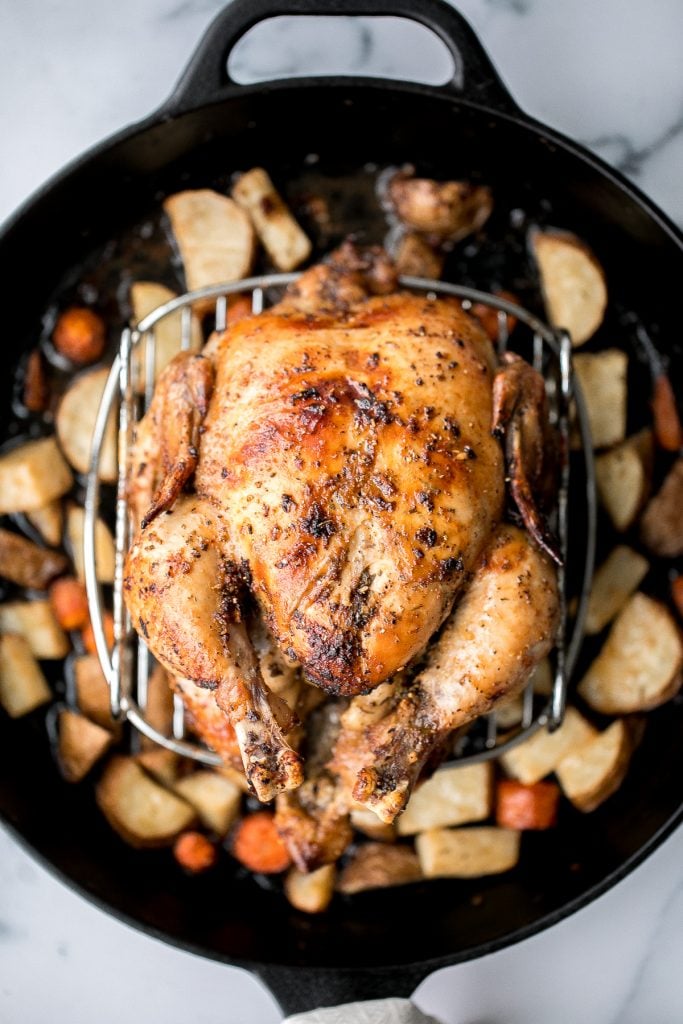
Instant pot turkey roast with homemade gravy is easy to prepare in minutes, the fastest way to cook turkey, and delivers flavorful, juicy, tender turkey.
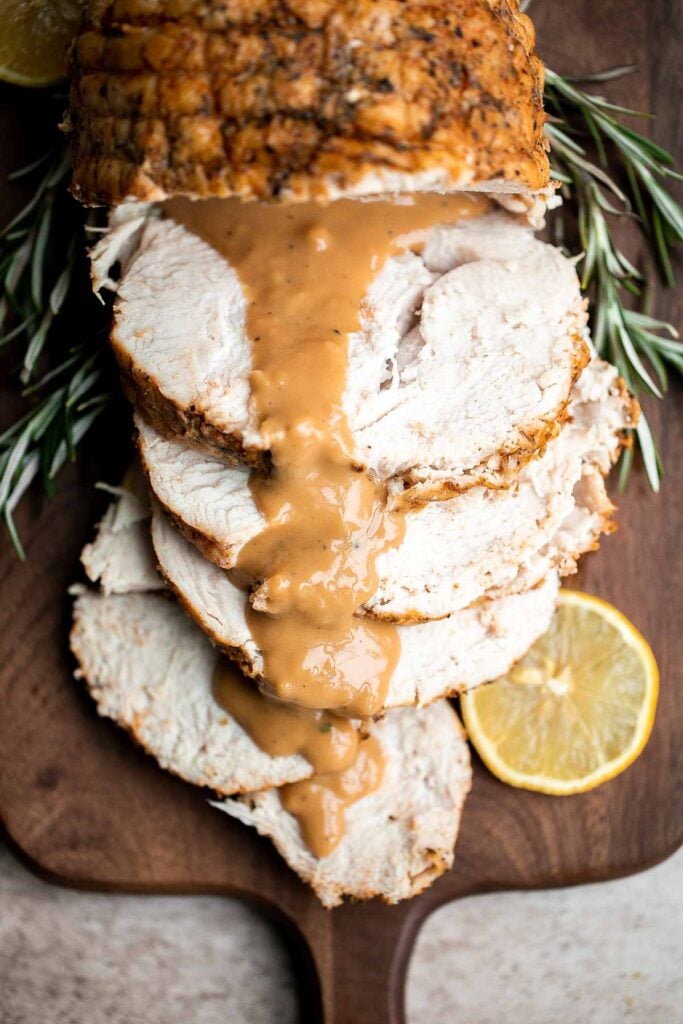
Greek Lamb Shanks - recipe coming soon!
One Pan Garlic Roasted Chicken and Baby Potatoes
One pan garlic roasted chicken and baby potatoes is an easy to make, delicious, and wholesome meal for the entire family. Prep this sheet pan in 10 minutes.
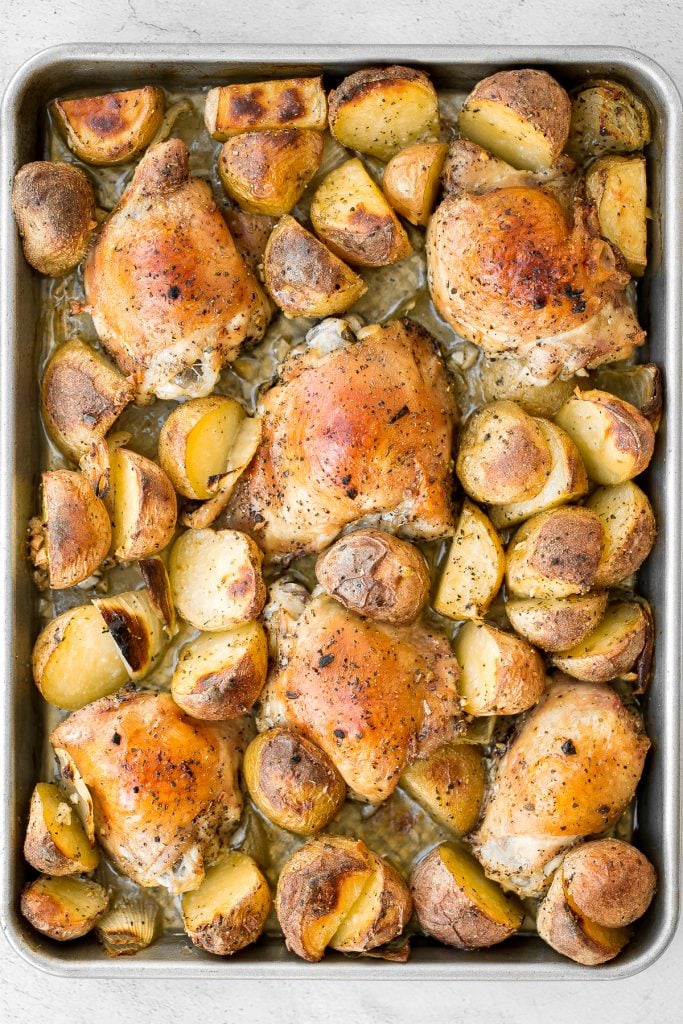
Spring Pesto Pasta with Asparagus
Spring pesto pasta with asparagus and chives is light and made with simple ingredients in under 20 minutes. Serve it hot for dinner or cold as pasta salad. One of my favorite spring dinner ideas.
Garlicky, buttery, and perfectly seared scallops take less than 10 minutes to prep and cook. It's the easiest fancy, restaurant-grade meal to make at home.
Slow Cooker Leg of Lamb with Vegetables
Easy Mediterranean slow cooker leg of lamb with vegetables is succulent, tender, juicy, and flavourful, seasoned with fresh herbs. Prep the crockpot in just 15 minutes.
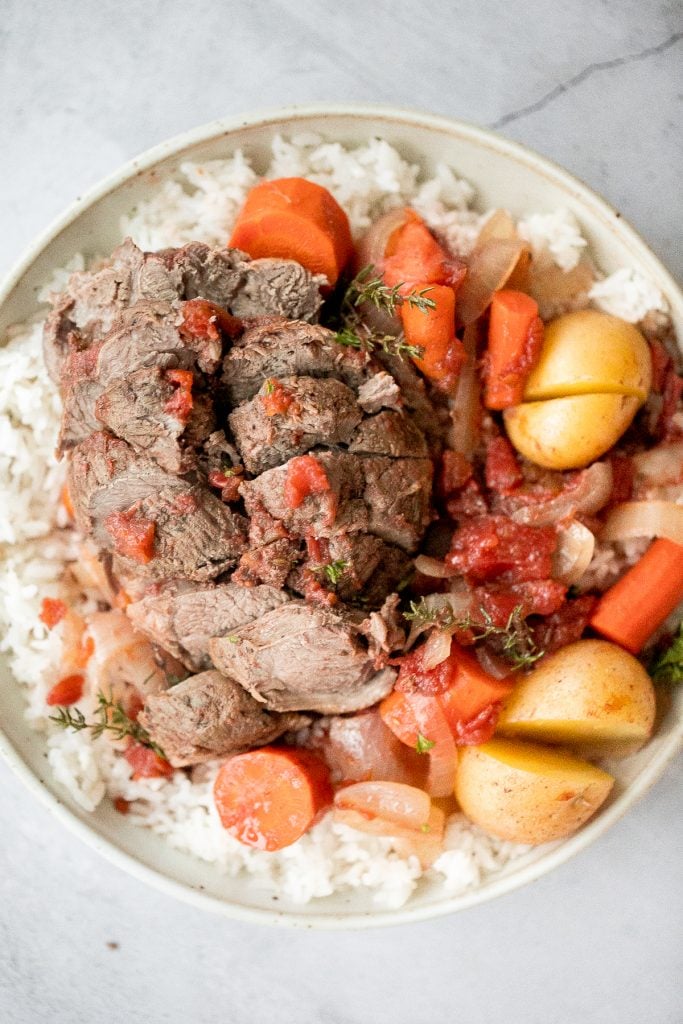
Pistachio-crusted salmon is a gourmet dinner without the gourmet skills! Prepare this with a handful of ingredients in less than 20 minutes!
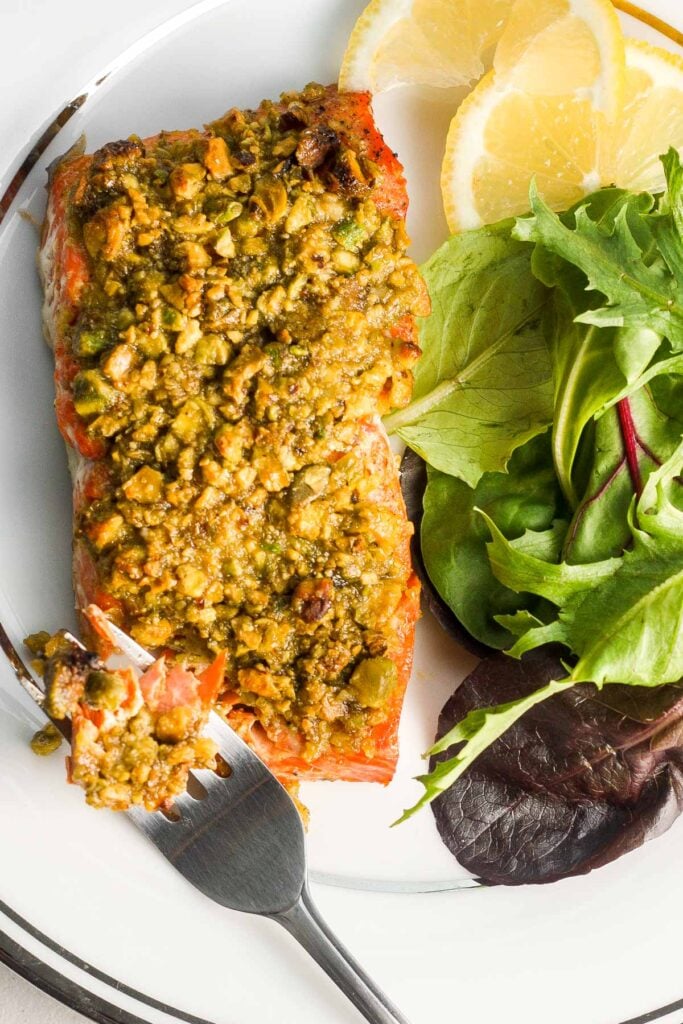
Tips for a Stress-Free Easter Dinner
- Plan your menu ahead of time. You can prepare some of these Easter recipes in advance. Some can be frozen and reheated from frozen, others can be made and stored in an airtight container for a few days at room temperature or in the refrigerator. Check individual recipe for full make ahead instructions.
- Prep your ingredients as much as possible. Once you have decided the main dish that you will be serving at Easter (and all the other dishes), prepare as much as you can in advance. Whether that is chopping vegetables, marinating meat, or throwing together a salad. You can store all the prepared ingredients in airtight containers in the refrigerator.
- Set the table the night before. Take out the fancy Easter holiday dinnerware, flatware, glasses, placemats, and napkins and set the table the night before. It's one less thing to worry about on Easter.
More Easter Recipes
Once you have figured out the main dish that you will be serving for Easter dinner, start planning the appetizers, sides, and dessert. Find everything you need in my most popular Easter recipes:
- 30 Best Easter Appetizers
- 50 Best Easter Side Dishes
- 30 Best Easter Desserts
- 50 Easter Breakfast and Brunch Recipes
Did You Make Any of These Easter Main Dishes?
Please leave a comment and rating below, and let me know what you thought of these Easter main dishes. Be sure to snap a picture and tag me on Instagram @aheadofthyme or share it on the Pinterest pin so that I can follow along.
HUNGRY FOR MORE? Don't forget to sign up for my email newsletter so that you don't miss any recipes. You can also follow along on Instagram and Pinterest for more recipe updates.
Persian Love Cake

Persian Love Cake is exactly as romantic as it sounds. It's rich, moist, and nutty, with distinct floral tones from rose water and a hint of citrus from lemon zest. The moist almond cake batter comes together quickly in one bowl and is delicious served on its own. But make it even better with a simple lemon glaze drizzled on top with crushed pistachios and rose petals sprinkled throughout. This Persian Love Cake is truly a showstopper.
Why You'll Love Persian Love Cake
- It's perfect for any occasion. This Persian Love Cake is the dessert version of a love potion. It's perfect for Valentine's Day, anniversary celebrations, and Mother's Day, and the rose petals on top are only a part of the reason why. But you can serve it anytime you are feeling fancy.
- It has the best texture. Persian Love Cake is rich, moist and fluffy. This cake is super moist and gets this texture from the ground almonds, yogurt, and rose water too. It cuts into clean slices for the perfect romantic photo op, and it tastes just as good as it looks.
- The complex and unique flavors. Persian Love Cake is truly unique. It's sweet, nutty, and citrusy - gaining its flavor profile from almond, cardamom, lemon, and rose water. Although I usually like to encourage creativity in these recipes, you'll want to follow this Persian Love Cake recipe to a tee for the best results, but you can creative with the toppings on the glaze.
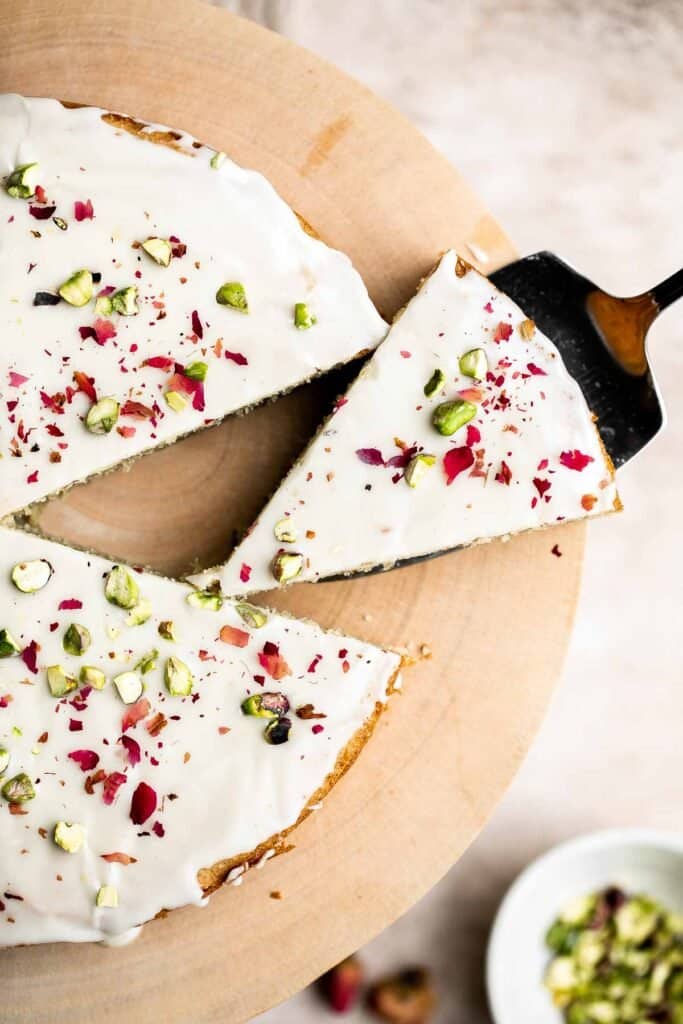
Ingredients and Substitutions
To make this delicious Persian Love Cake, you will need the following ingredients (full quantities in the recipe card below):
- butter
- granulated sugar
- eggs
- plain yogurt - or substitute with sour cream.
- rose water
- lemon zest
- all-purpose flour
- almond meal - almond meal is essentially ground almonds with the skin on. You can make your own in a heavy duty blender or even substitute for almond flour (which is ground almonds without the skin). The texture of almond meal is slightly coarser than almond flour.
- ground cardamom
- salt
- for the glaze - confectioners' sugar, lemon juice, water, pistachios (or substitute with your favorite nuts like almonds or walnuts), and dried rose petals.
You will also need measuring cups and spoons, mixing bowl, hand mixer or stand mixer, 9-inch cake pan or springform pan, and wire cooling rack.

How to Make the Best Persian Love Cake
- Make the batter. In a large mixing bowl, use a hand mixer (or stand mixer) to beat the butter and sugar together until light and fluffy, about 2 minutes. Add eggs, one at a time, and beat until each is incorporated. Add yogurt, rose water, and lemon zest and beat until incorporated. Turn the mixer to low speed and add the flour, almond meal, cardamom, and salt. Beat until just combined.
- Bake. Spray an 8-inch cake pan with cooking spray or line it with parchment paper. Transfer the batter into the lined cake pan and spread it smooth with a spatula. Bake for 50 to 60 minutes, or until the top of the cake is golden brown and a toothpick inserted into the center comes out clean.
- Cool. Allow the cake to chill in the pan for 15 minutes, then carefully transfer it to a wire cooling wrap to cool completely before icing.
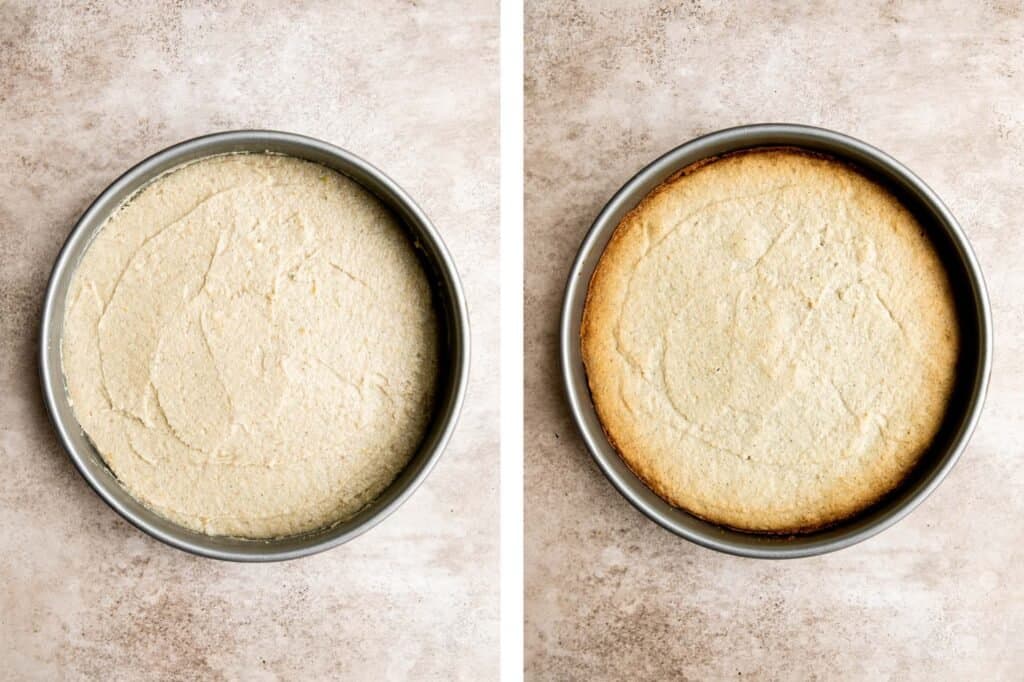
How to Glaze a Persian Love Cake
- In a medium mixing bowl, combine confectioners' sugar, lemon juice, and water. The icing should be thin enough to pour but thick enough to coat the back of a spoon. If the icing is too thin, add in a little more sugar. If it is too thick, add in a little more milk.
- Use a spoon to slowly drizzle the glaze over the cooled love cake and sprinkle chopped pistachios and dried rose petals on top.
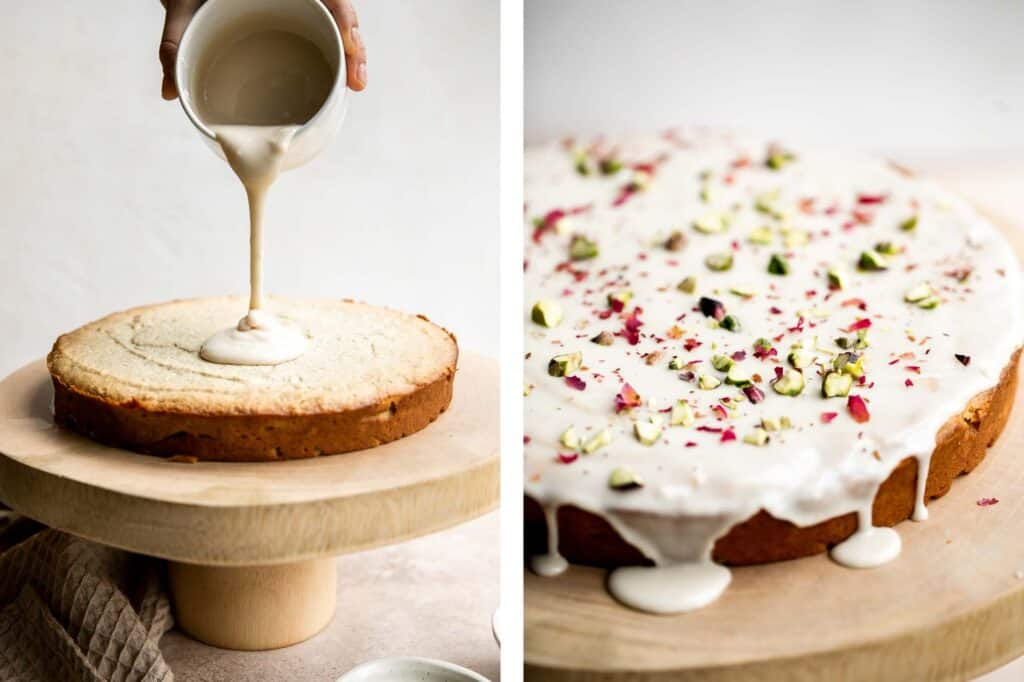
Recipe Tips and Tricks
- Don't make substitutions: For the best results, follow this recipe to a tee. If you're wondering if it's okay to substitute certain ingredients, I would err on the side of caution and say no. For instance, you don't want to add in too much rose water so that it doesn't overpower the cake. And don't omit anything.
- Glazing tips: Never glaze a hot cake. In fact, don't even glaze a slightly warm cake. Wait until your Persian Love Cake has cooled completely. Glazing while warm will cause the icing to melt down the sides too much or into the cake like a syrup and not set properly.
- How to store: You can store Persian Love Cake in an airtight container at room temperature for up to 3-5 days.
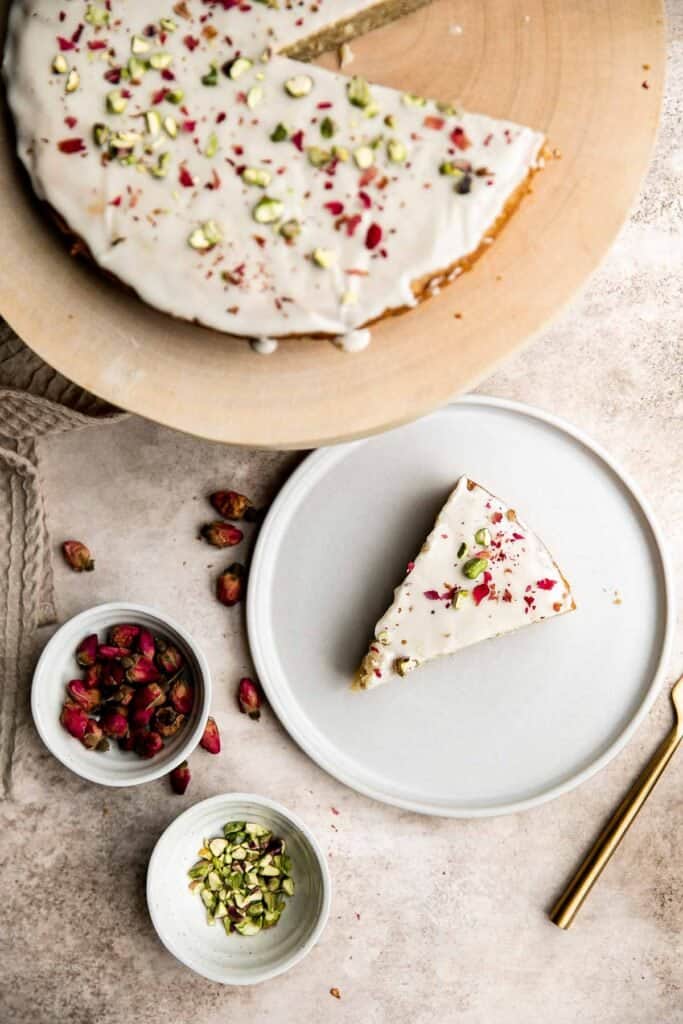
More Cake Recipes
- 50 Best Cake Recipes
- Chocolate and Vanilla Marble Cake
- Carrot Bundt Cake with Cream Cheese Glaze
- Molton Chocolate Lava Cakes
- Moist Vanilla Cupcakes
- Blueberry Buckle Cake
Tried this recipe?
I'd love to hear what you think! Leave a comment and rating below to share your feedback. Your reviews help others discover this recipe and help me keep creating more free recipes for you. Snap a photo and tag me on social media @aheadofthyme too.

Sweet and Sour Sauce
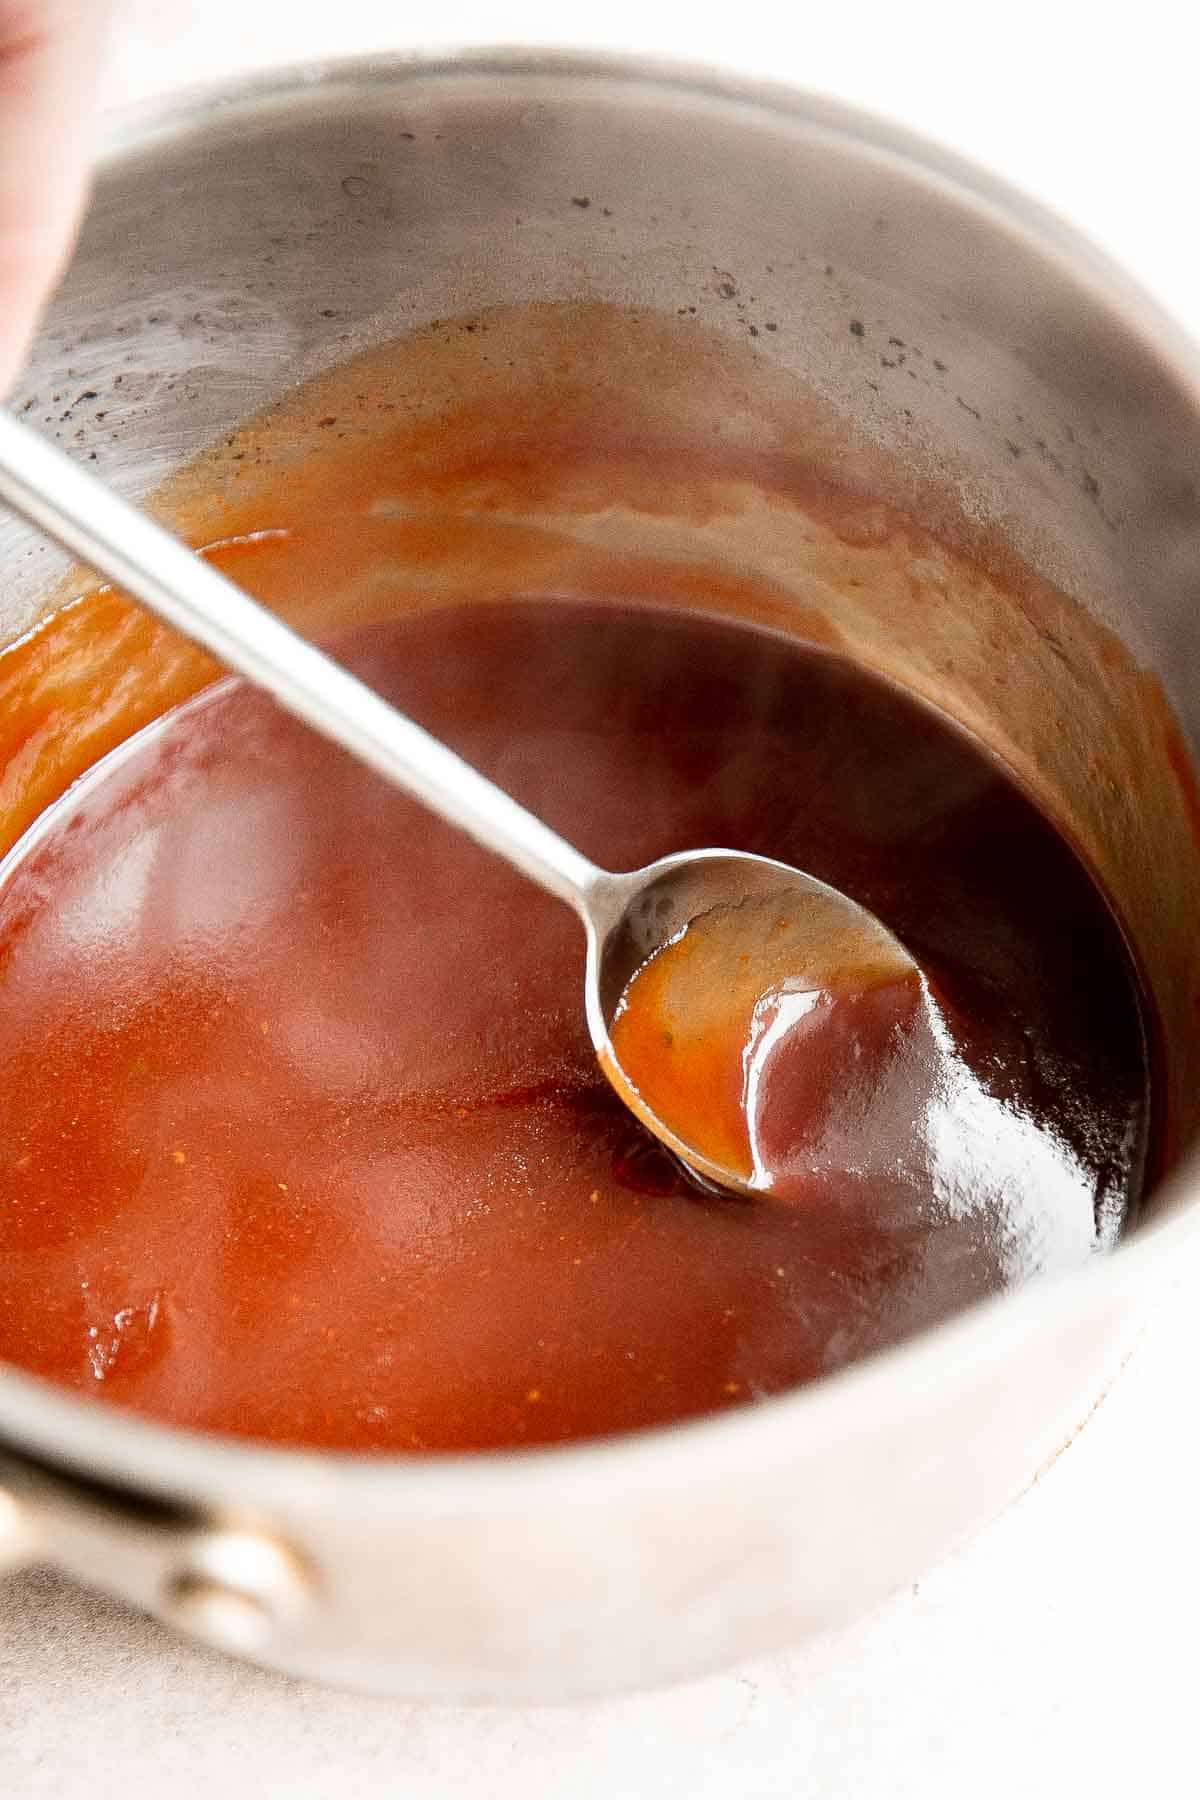
Sweet and sour sauce adds instant flavor to any dish that you add it to. Made in 10 minutes with just 5 ingredients, this homemade Chinese sauce is so easy to make at home and so much better than takeout packets. Serve it as a vegan dip with your favorite appetizers or drizzle it over rice, stir fries, or protein to instantly elevate your meal.

Why You'll Love Sweet and Sour Sauce
- It takes minutes to make and lasts for 2 weeks. This sweet and sour sauce is quick and easy to make with just a handful of ingredients (with easy substitutions provided). Plus, you can use it in your cooking for the next 2 weeks! Set aside a little bit of time today, and you'll be thankful for days to come.
- Sweet and sour sauce adds flavor to any dinner. I love drizzling this sweet and sour sauce over steamed rice or over sautéed or stir-fried vegetables. It can also upgrade basic proteins to sweet and sour chicken or sweet and sour pork!
- You can probably make it right now with pantry staples. If you cook often and have a stock of Asian ingredients (particularly soy sauce), then I bet that you have everything you need to make this sweet and sour sauce already. The key ingredients include ketchup, soy sauce, sugar, vinegar, and cornstarch.
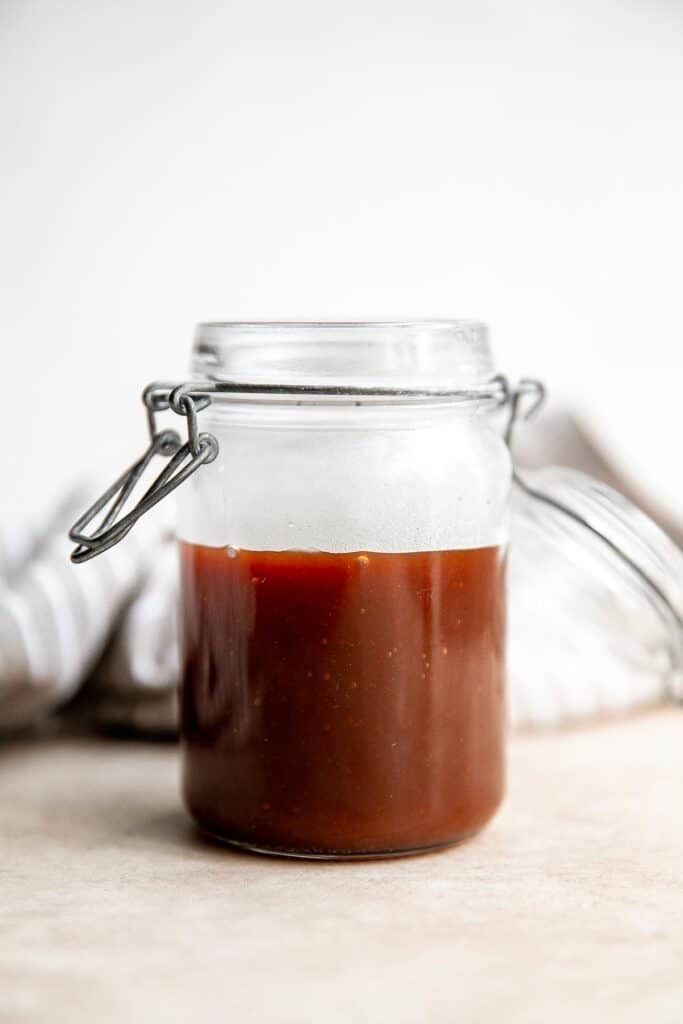
Ingredients and Substitutions
To make this easy homemade sweet and sour sauce, you will need the following ingredients (full quantities in the recipe card below):
- ketchup
- soy sauce - or substitute with oyster sauce.
- water - or substitute with chicken broth for a little more flavor.
- brown sugar - or substitute with honey for a refined sugar free option.
- white vinegar - or substitute with apple cider vinegar.
- cornstarch - to help thicken up the sauce.
You will also need measuring cups and spoons, mixing bowl, and a saucepan.
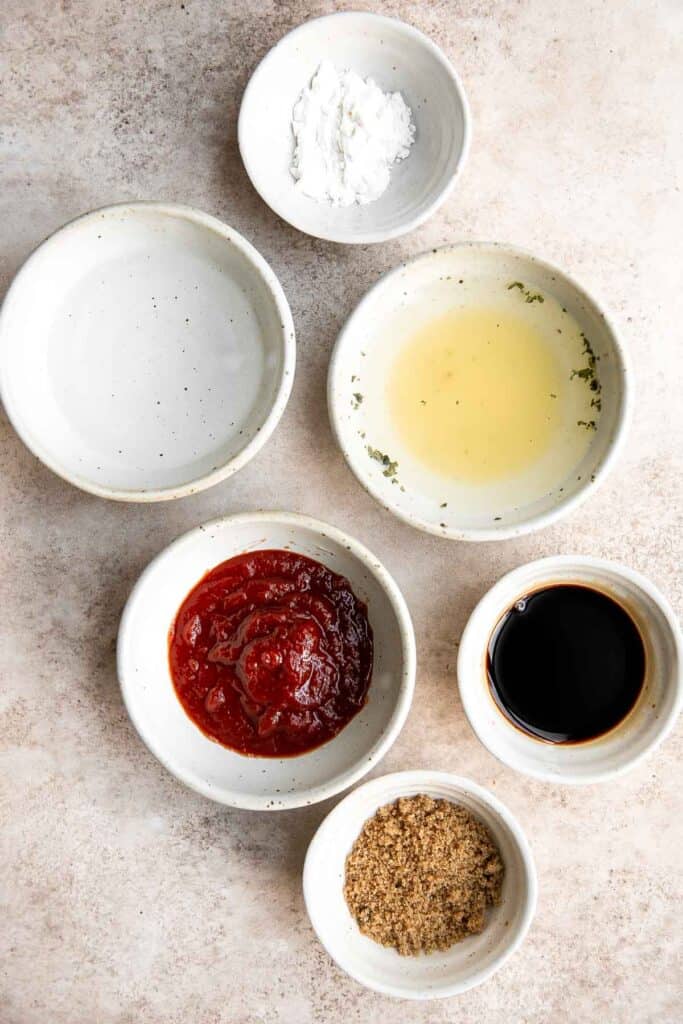
How to Make the Best Sweet and Sour Sauce
- Combine ingredients. In a small mixing bowl, whisk together all the sauce ingredients including ketchup, soy sauce, water (or chicken broth), sugar, vinegar, and cornstarch until smooth.
- Cook the sauce. Transfer the sauce mixture into a saucepan and bring it to a simmer over low heat. Stir constantly and simmer until thickened to a desired consistency, about 5-7 minutes.
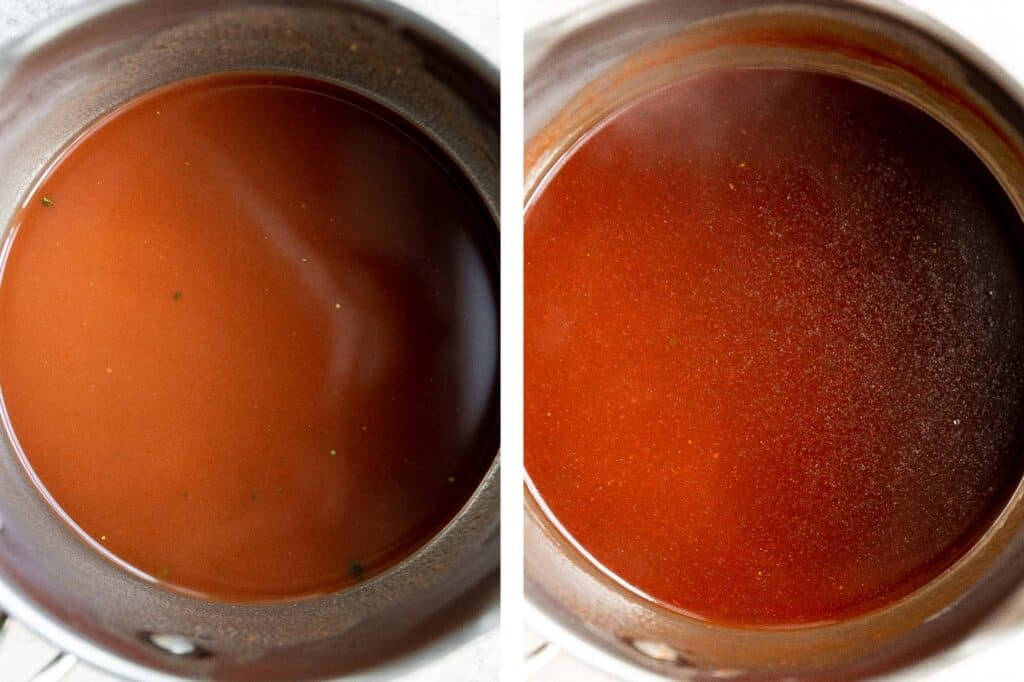
- Serve and store. Use the sauce in your favorite Asian dishes such as Sweet and Sour Pork, or use as a dipping sauce. If not using right away, let the sauce cool completely and store in an airtight container for up to 2 weeks in the refrigerator.
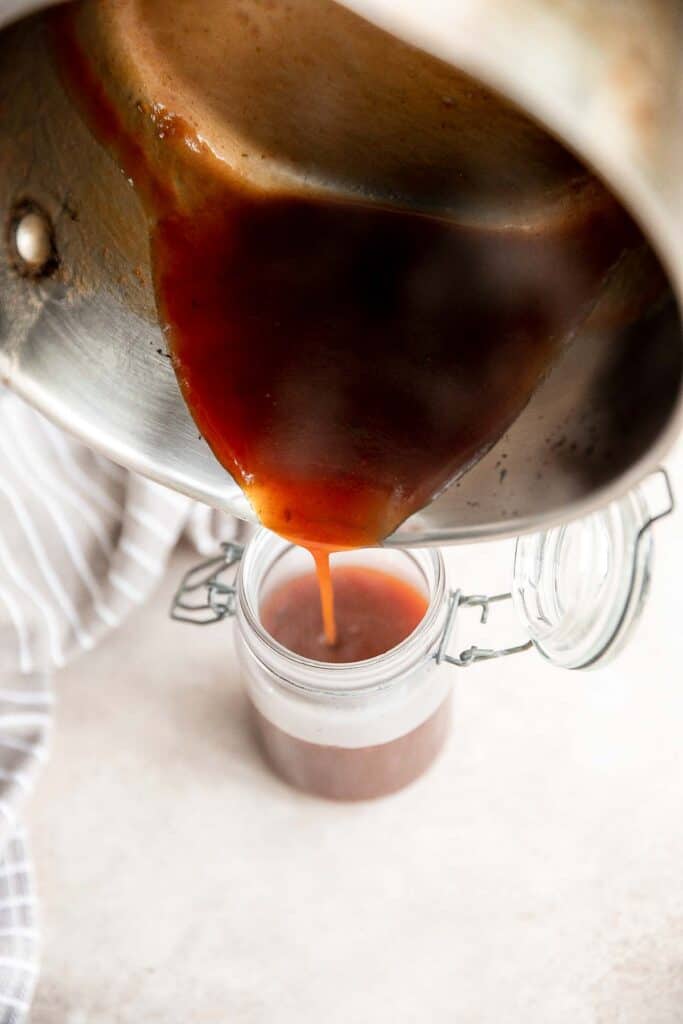
How to Use Sweet and Sour Sauce
Sweet and sour sauce it so versatile. Here are my favorite ways that you can use it:
- Dipping sauce. Use it as a dip for Asian appetizers such as Spring Rolls, Dumplings, Egg Rolls, Wontons, or for any appetizer such as French Fries, Chicken Nuggets, Fish Sticks, and Chicken Strips.
- Stir fry sauce. Use it as a sauce in your favorite Chinese stir fries such as Sweet and Sour Pork (or chicken), Sweet and Sour Meatballs, Vegetable Stir Fry, and Tofu Stir Fry.
- Glaze for meat. Drizzle it over grilled meats to add flavor. Try it with Skewers, Short Ribs, Chicken, Salmon, and more.

Recipe Tips and Tricks
- Making substitutions: If you've never made sweet and sour sauce before, stick to the recipe. But, if you know what you like, then feel free to make adjustments. If you like it sourer, add more vinegar. If you prefer it saltier, use more soy sauce. Is it too sweet? Add less sugar. You get the idea.
- How to thicken: If the sauce is not thickened enough to your liking, just continue to simmer to activate the cornstarch. The longer you simmer the sauce, the more it will thicken as it reduces.
- Use it as a marinade: To use this sauce as a marinade, just leave out the cornstarch and slather it on your meats before cooking.
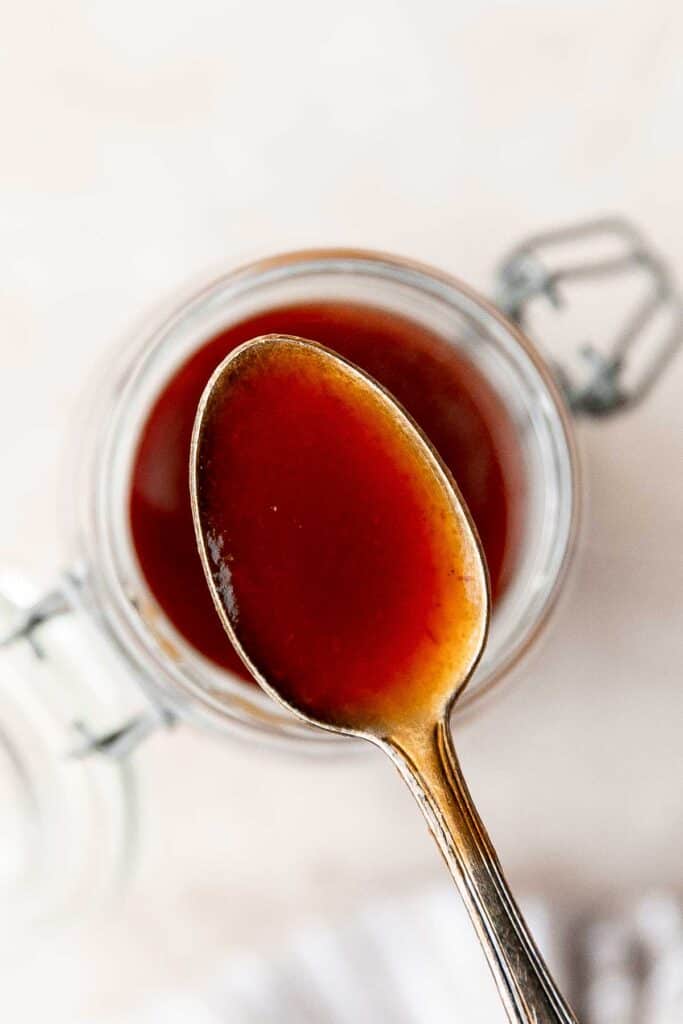
More Sauce Recipes
Tried this recipe?
I'd love to hear what you think! Leave a comment and rating below to share your feedback. Your reviews help others discover this recipe and help me keep creating more free recipes for you. Snap a photo and tag me on social media @aheadofthyme too.

25 Side Dishes for Ham

Are you preparing ham tonight for dinner and need the perfect side dishes to go along with it? Whether you are roasting a whole ham to serve a crowd during the holidays or are cooking ham slices for a more intimate dinner any night of the week, and you are wondering "what to serve with ham", you are in the right place. We are sharing over 25 of the best side dishes for ham including everything from healthy vegetable sides like roasted vegetables, soup, and salad, to hearty sides like mac and cheese and bread.

Best Ham Side Dishes
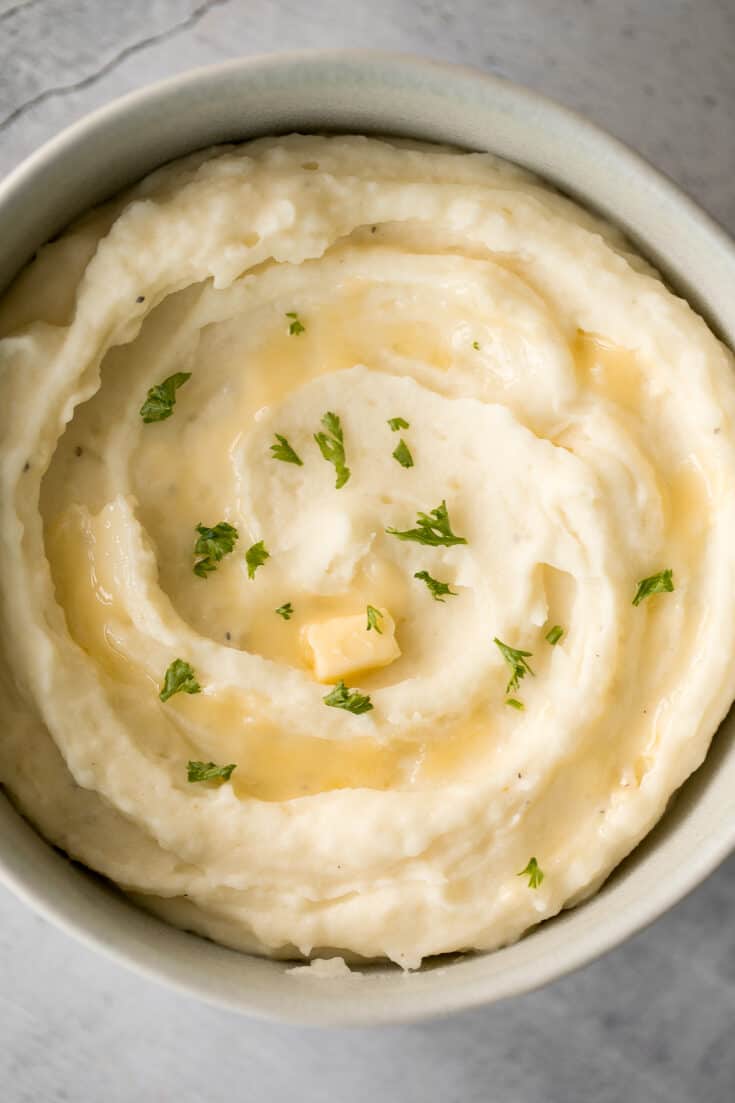
The Best and Creamiest Mashed Potatoes
Creamy, buttery, and delicious, this is the best and creamiest mashed potatoes recipe you will ever find. It's velvety, smooth, and melts in your mouth.

Cheesy Roasted Asparagus
Cheesy roasted asparagus is a quick and easy side dish made with a handful of simple ingredients in 20 minutes. They’re garlicky, cheesy, and flavorful.
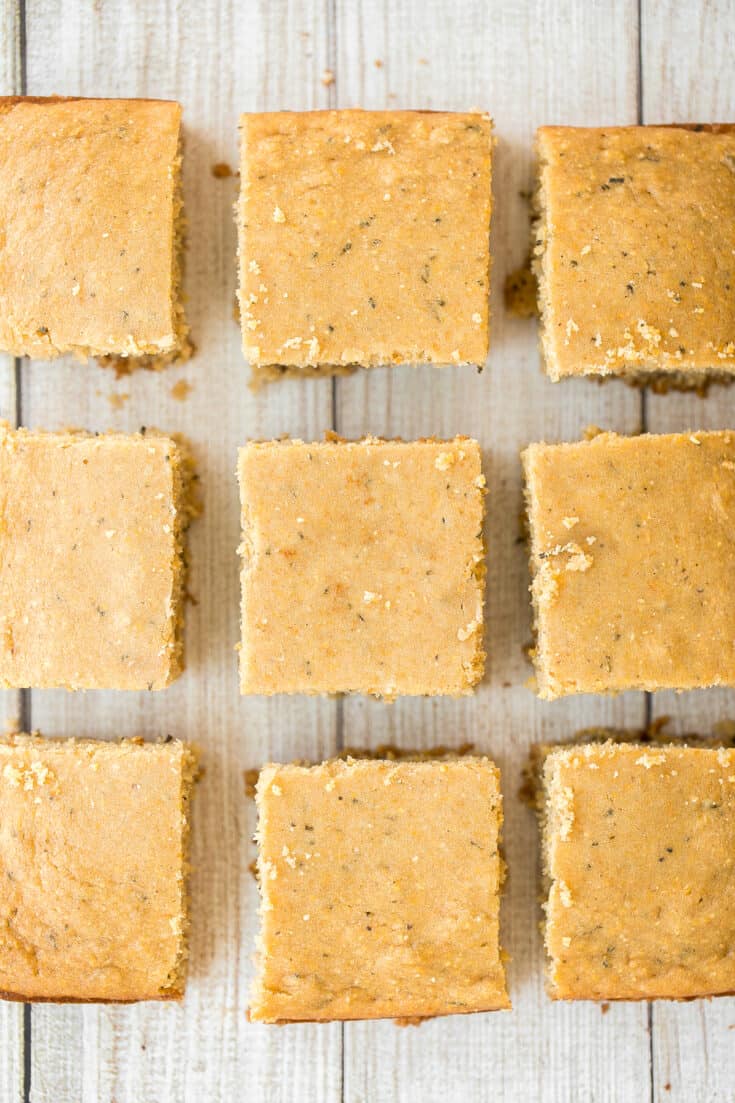
Rosemary Cornbread
Sweet and savoury, buttery rosemary cornbread is soft and moist with golden crispy edges, flavourful and delicious, and so easy to make this holiday season.
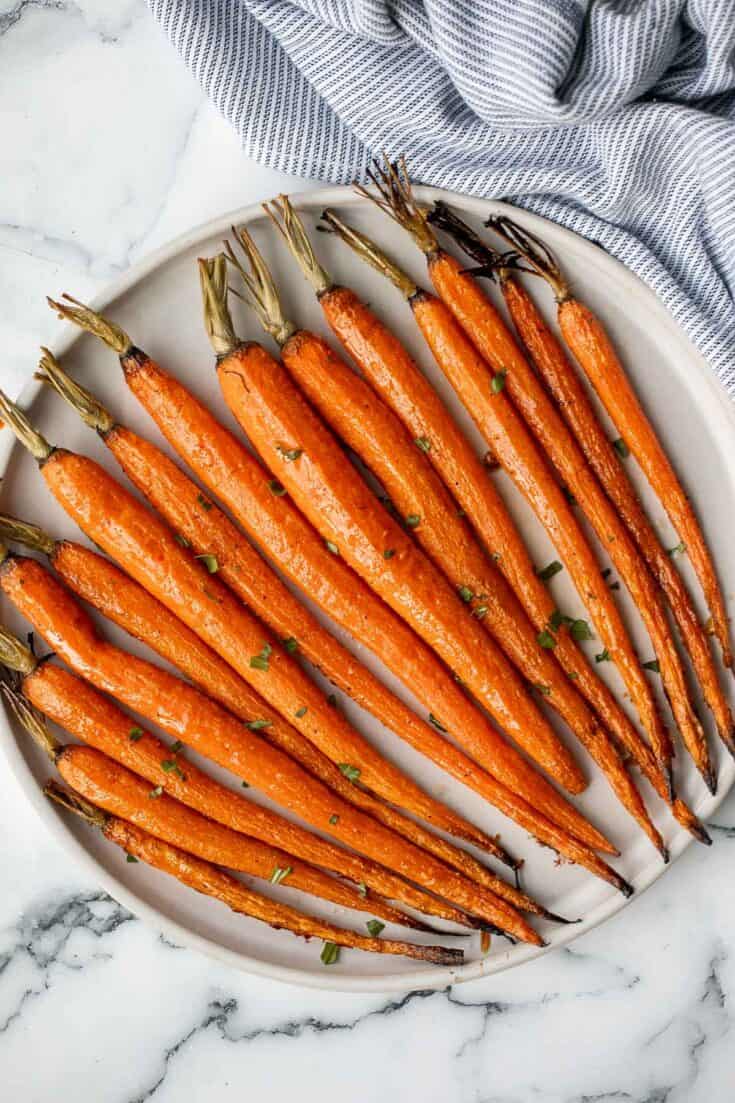
Honey Roasted Carrots
Honey roasted carrots are a sweet, savoury, and salty side dish that pairs well with almost any entree. With these flavours, everyone will want seconds.
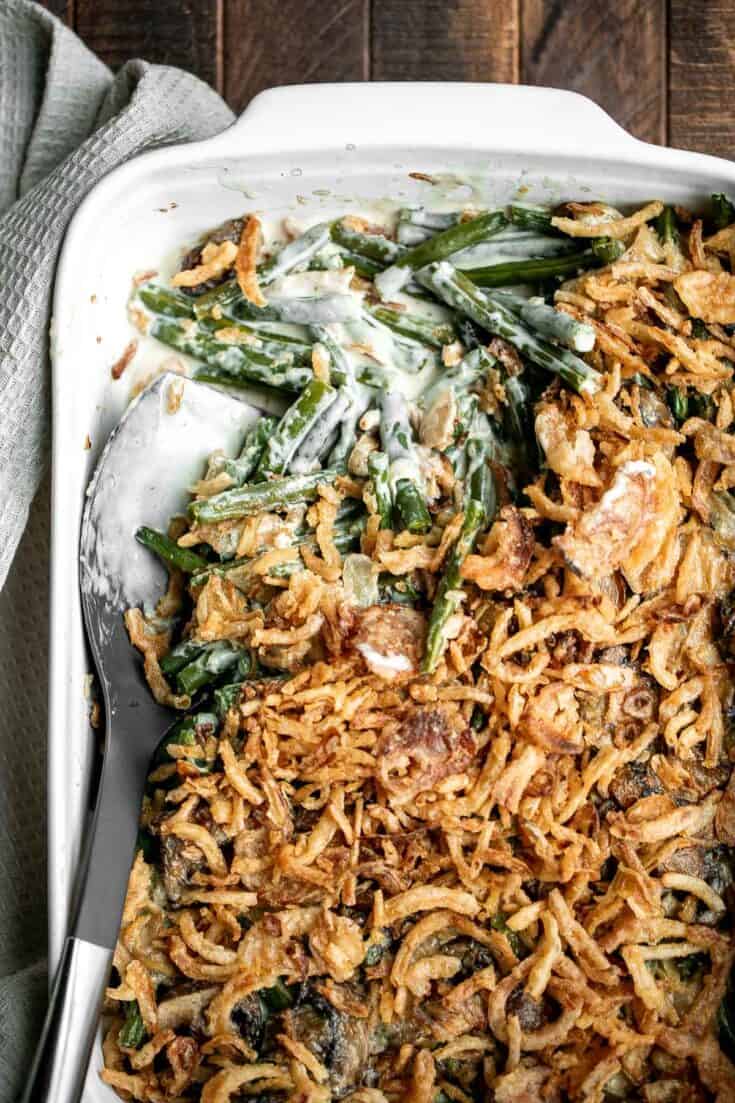
Green Bean Casserole
Green bean casserole is a classic holiday side dish packed with fresh green beans in a delicious creamy mushroom sauce, and topped with crispy fried onions.
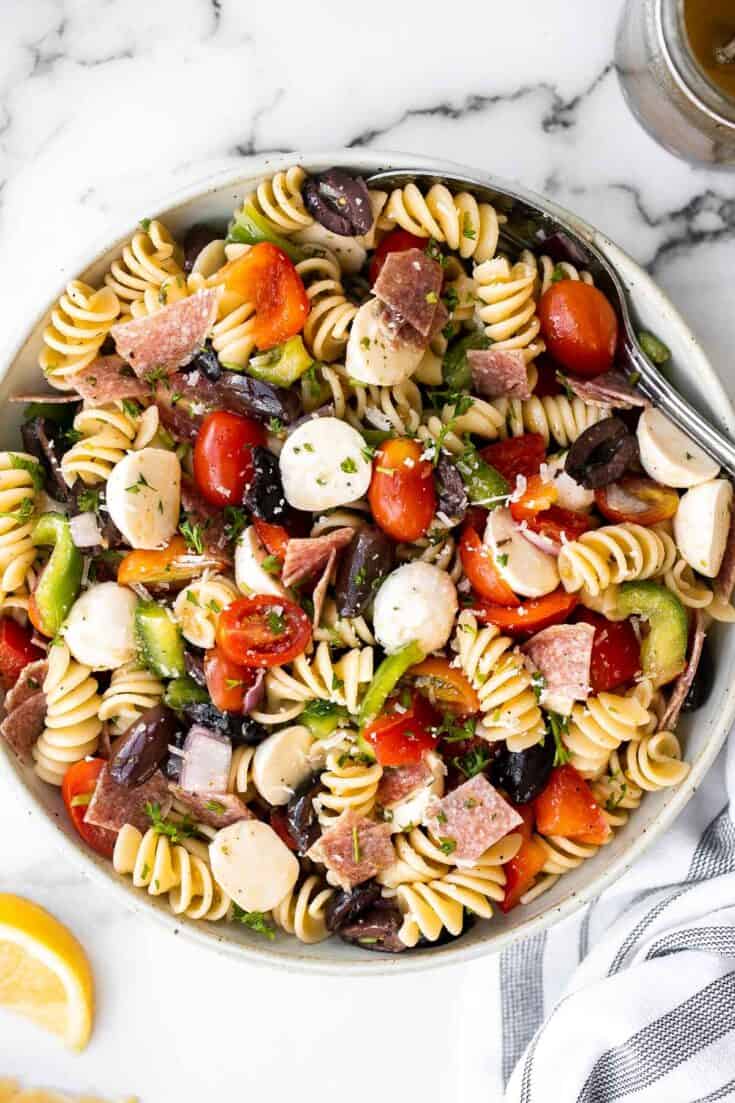
Italian Pasta Salad
Italian pasta salad is delicious, wholesome, and easy to make. Make it up to three days ahead for your summer picnics and cookouts.
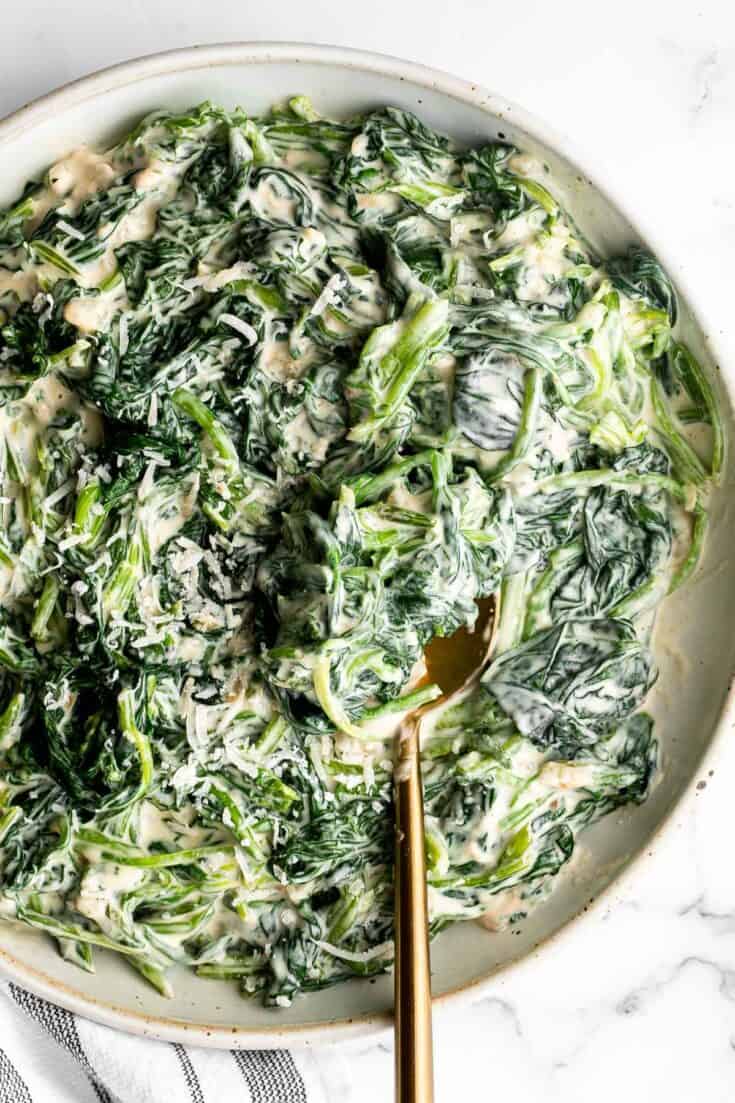
Creamed Spinach
Creamed spinach is a rich, creamy, and delicious side dish to make this fall. Easy to make ahead and reheats well — perfect side for a holiday dinner.
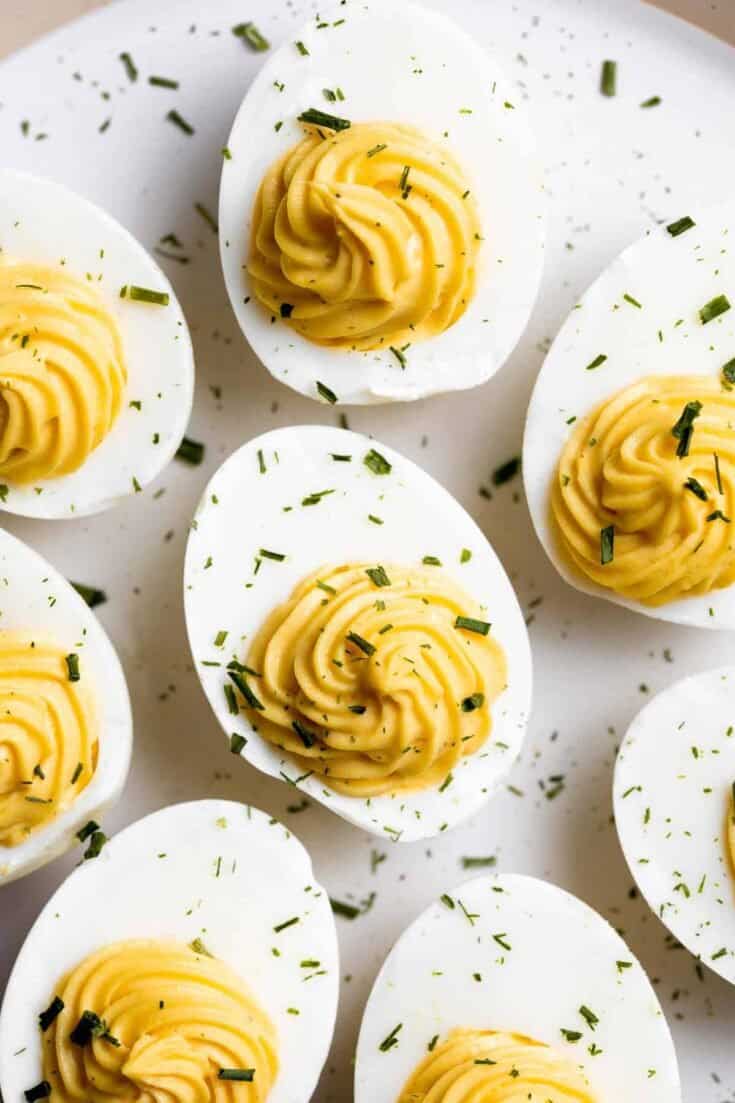
Deviled Eggs
Classic deviled eggs are a simple, easy, and healthy appetizer to make when you need something quick for brunch, picnics, barbecues, potlucks, or Easter.
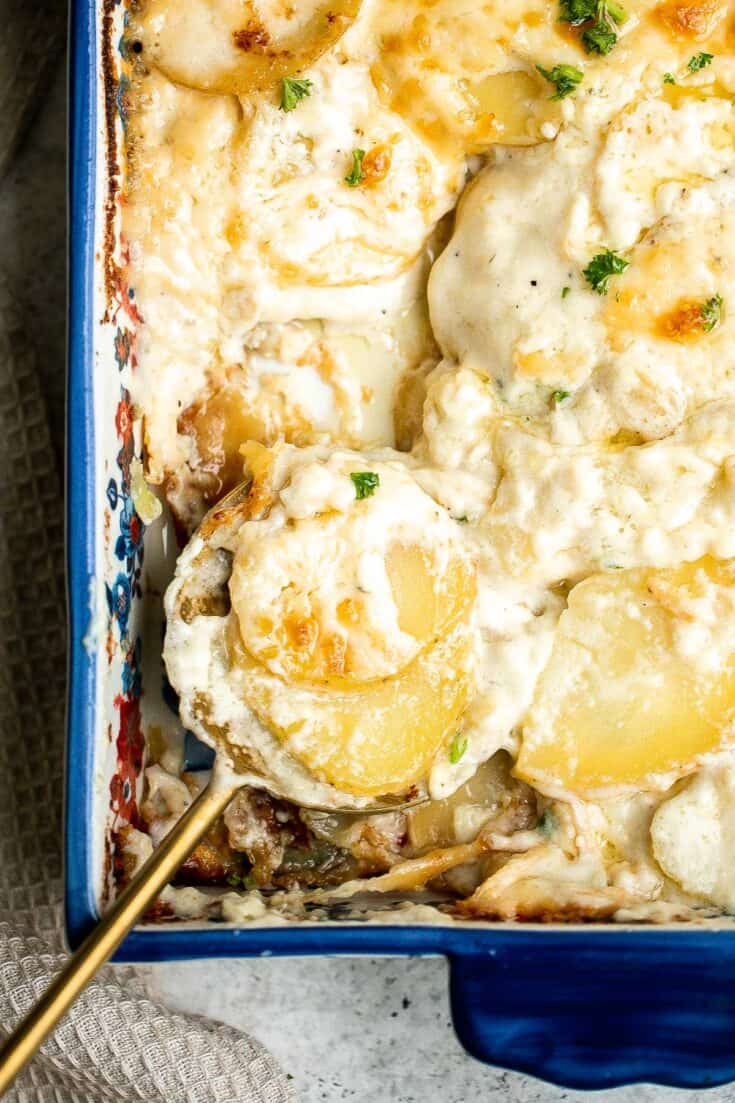
Scalloped Potatoes
Scalloped potatoes are a creamy, cheesy, indulgent side dish that will make cheese lovers swoon. Every bite is savory, rich, comforting, and delicious.
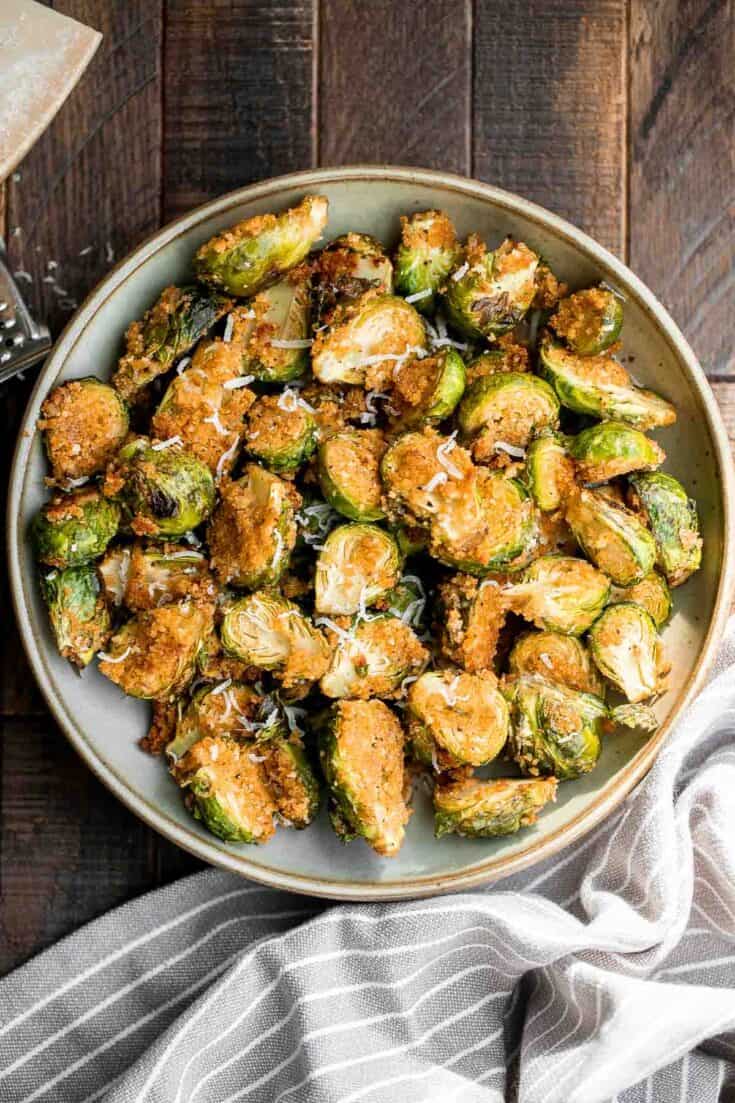
Parmesan Crusted Brussels Sprouts
Parmesan crusted Brussels sprouts are a quick, easy, delicious side dish that's perfectly crispy outside and soft and tender inside. Ready in 30 minutes.
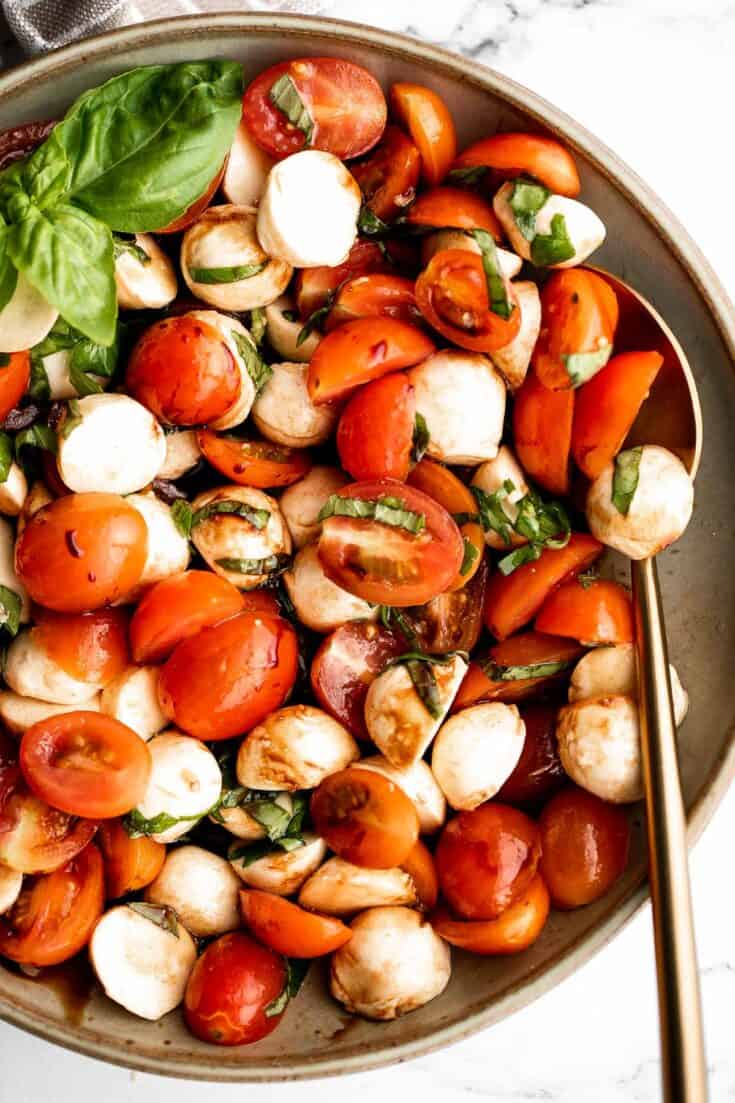
Tomato and Mozzarella Caprese Salad
Quick and easy tomato and mozzarella caprese salad is a fresh, light, and delicious summer salad, made with just a few simple ingredients in 10 minutes.
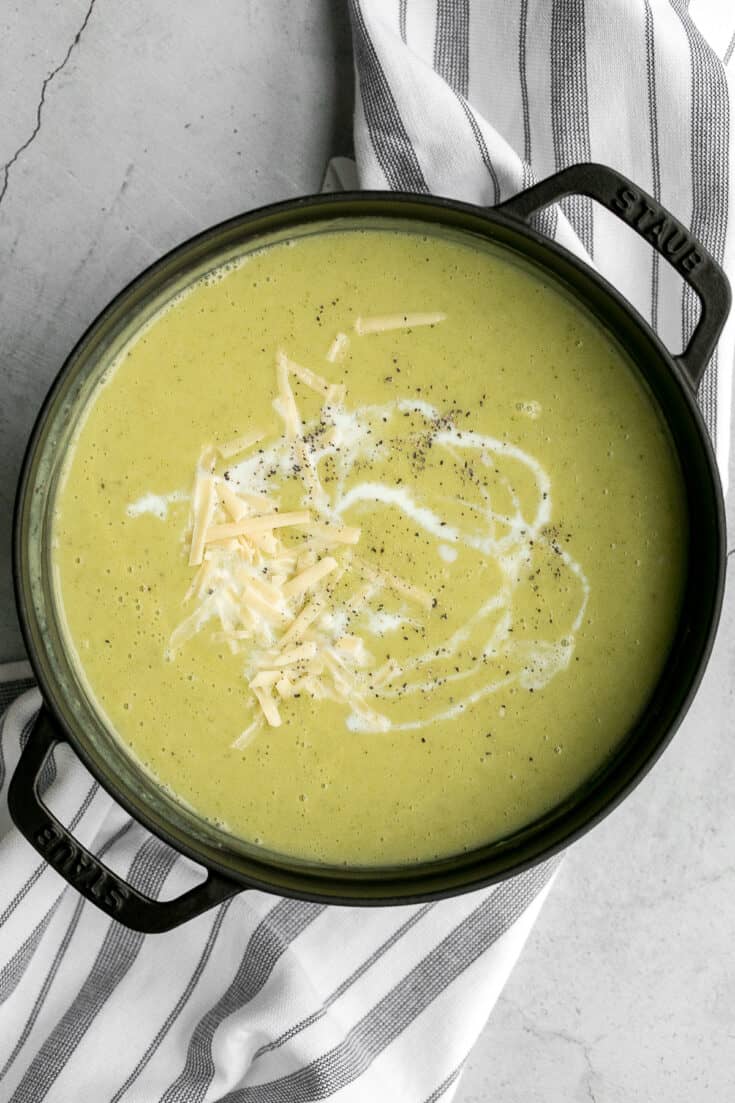
Light Cream of Broccoli Soup
Delicious and flavourful, light cream of broccoli soup is a silky smooth, creamy, and thick soup made healthier with no cream. Make it in under 25 minutes.
Easy Vegan Stuffed Bell Peppers
Easy vegan stuffed bell peppers are filled with brown rice, mushrooms, veggies, and seasonings, then baked for 40 minutes. It's a perfect side to a fancy holiday dinner.
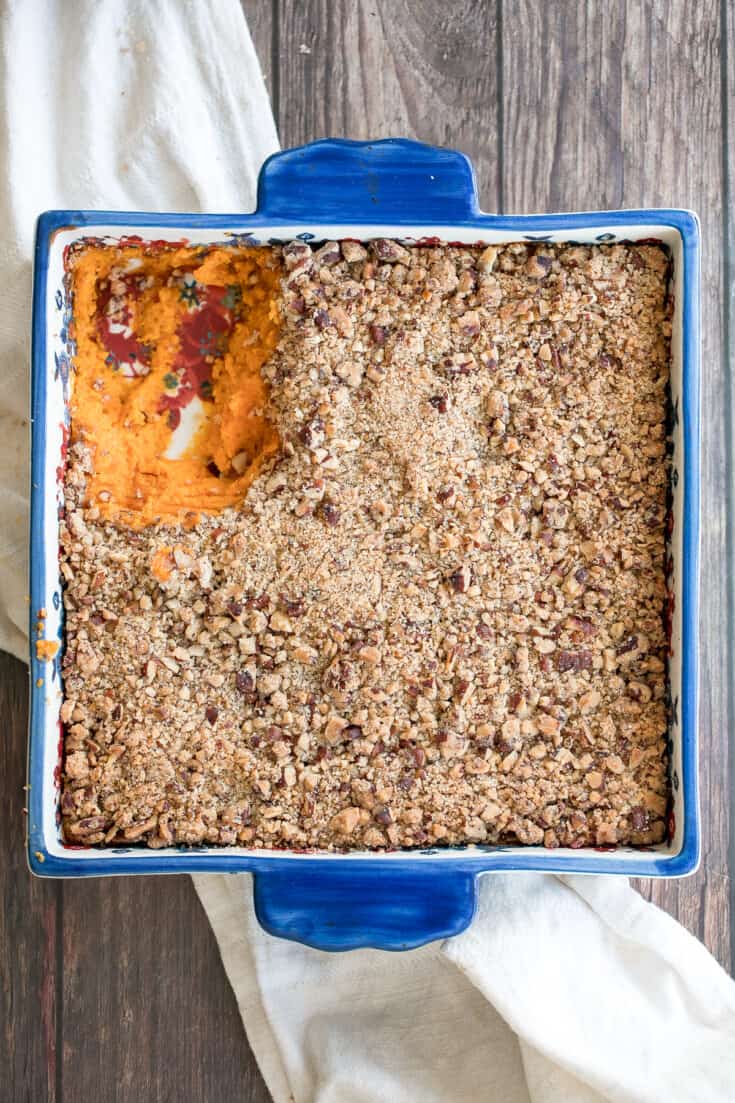
Sweet Potato Casserole with Pecans
Sweet potato casserole with pecans packed with tender sweet potatoes and a buttery crunchy pecan topping is the best fall side dish.
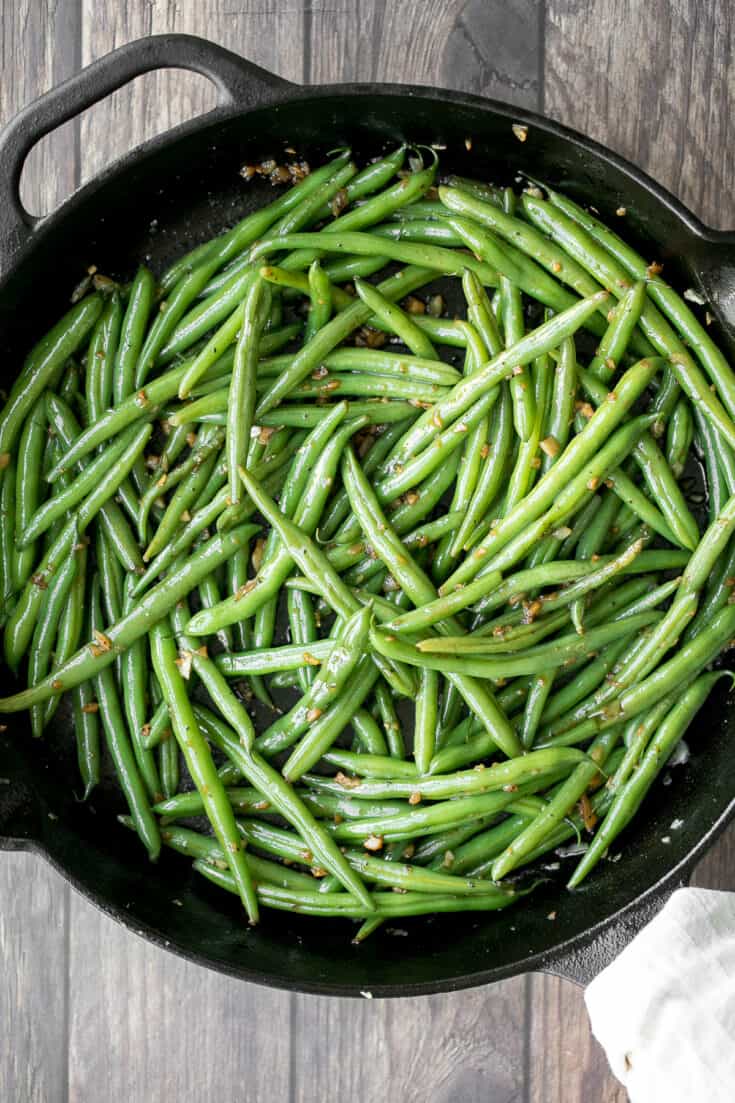
Sautéed Garlic Green Beans
Buttery sautéed garlic green beans is a simple side dish that is quick, easy and delicious. Make these vibrant, crispy and tender green beans in 10 minutes.
Cheesy Garlic Dinner Rolls
Quick and easy, 90-minute cheesy garlic dinner rolls are soft and fluffy, buttery and garlicky, and full of cheese inside. The perfect side for a ham dinner.
Brie Mac and Cheese
Brie mac and cheese takes traditional macaroni and cheese to the next level. It's creamy, comforting, delicious, and easy to make in about 30 minutes.
Classic Coleslaw
Fresh, crisp, classic coleslaw salad is a must-have recipe for a summer barbecue or picnic, or as an easy make-ahead lunch. Make it in less than 10 minutes.

Mashed Potato Soup
Mashed potato soup is one of the best ways to use up leftover mashed potatoes. It’s creamy, cheesy, delicious, and ready in under 30 minutes.
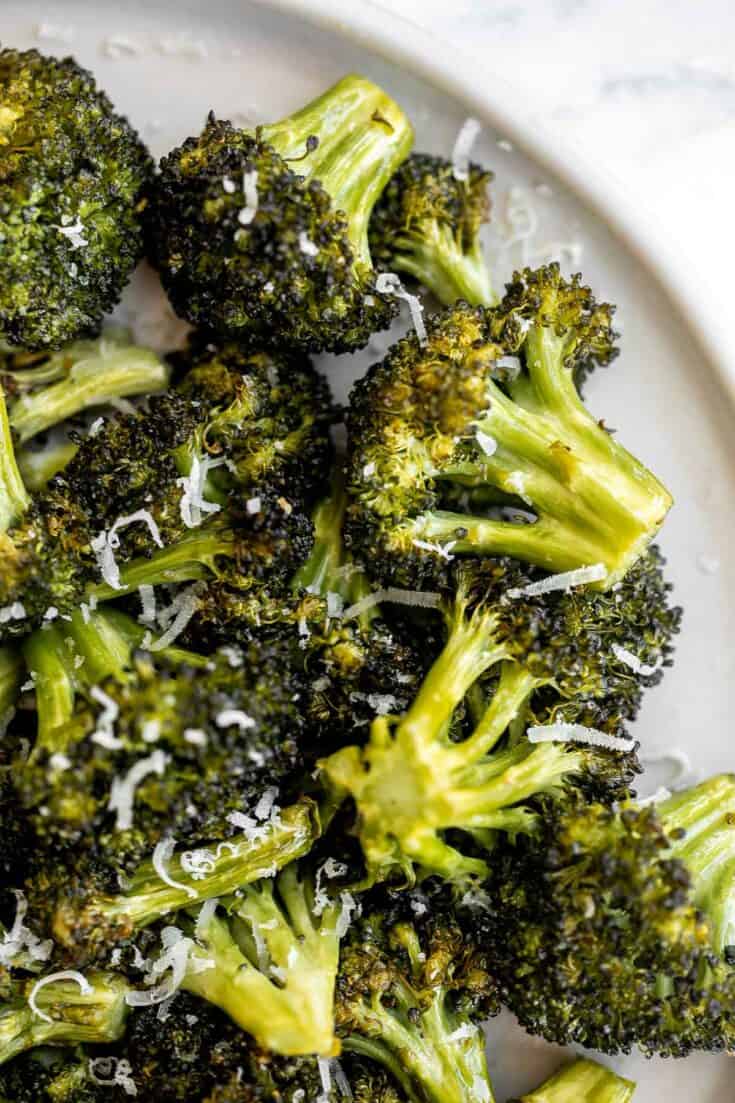
Air Fryer Broccoli
Quick and easy air fryer broccoli is a healthy side dish that takes just six minutes to cook in the air fryer. It's crispy, delicious, and flavorful.
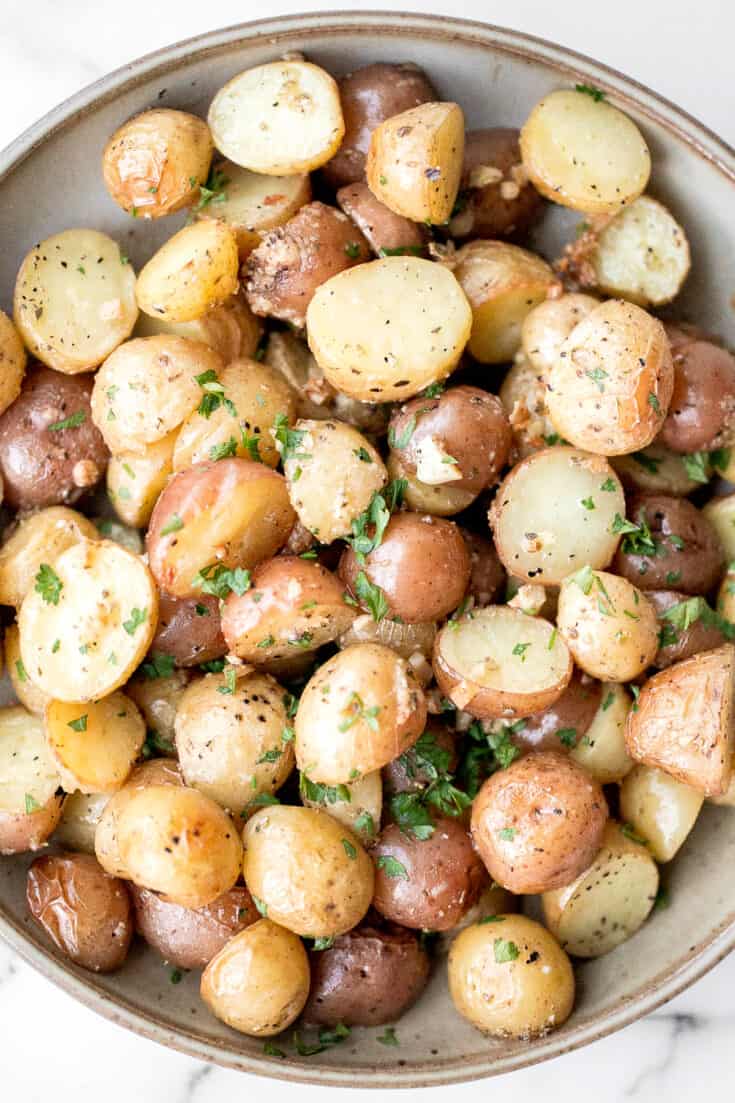
Roasted Garlic Parmesan Baby Potatoes
Quick and easy roasted garlic Parmesan baby potatoes are crispy on the edges and tender inside. They are delicious, flavourful and bakes in just 30 minutes.
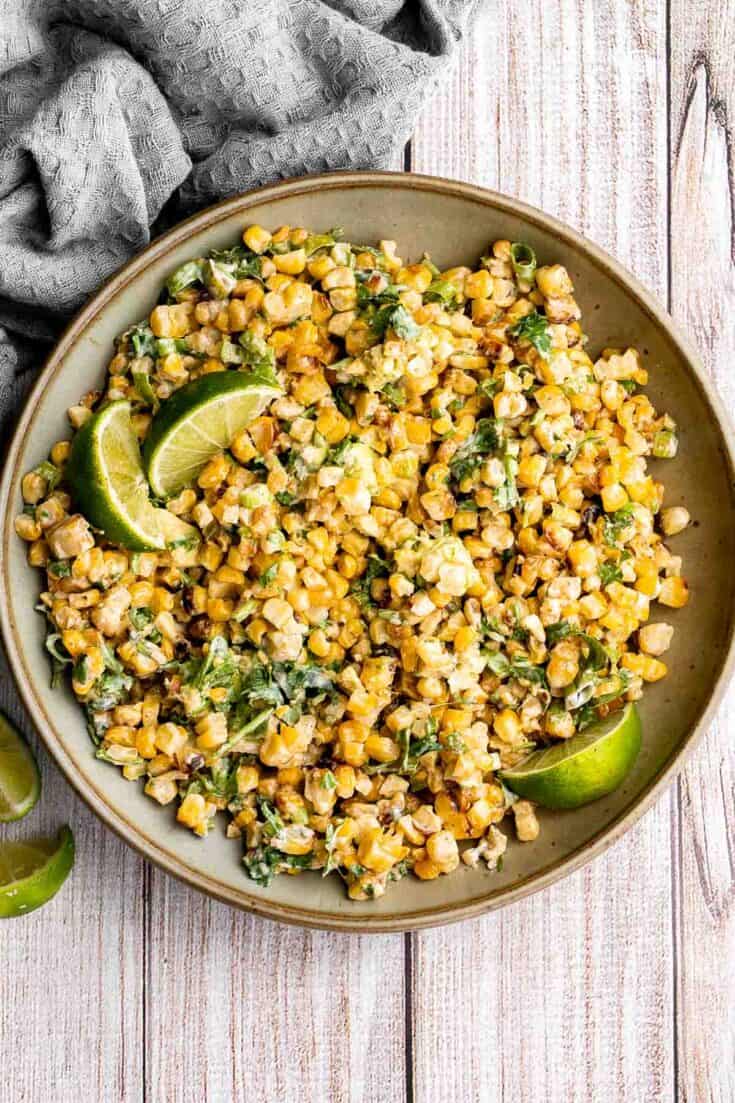
Mexican Street Corn Salad
Mexican street corn salad adds a twist to a classic street food, loaded with freshly grilled corn, a creamy cheesy dressing, and authentic flavor.
Baked Sweet Potato Wedges with Homemade Honey Mustard
Pair baked sweet potato wedges with warm spices and a homemade honey mustard dipping sauce and serve as an appetizer or side on game day or on any occasion!

Roasted Spring Vegetables
Roasted spring vegetables are an easy sheet pan side dish packed with all our favourite veggies of the season. Plus, it's so easy to prep and make.
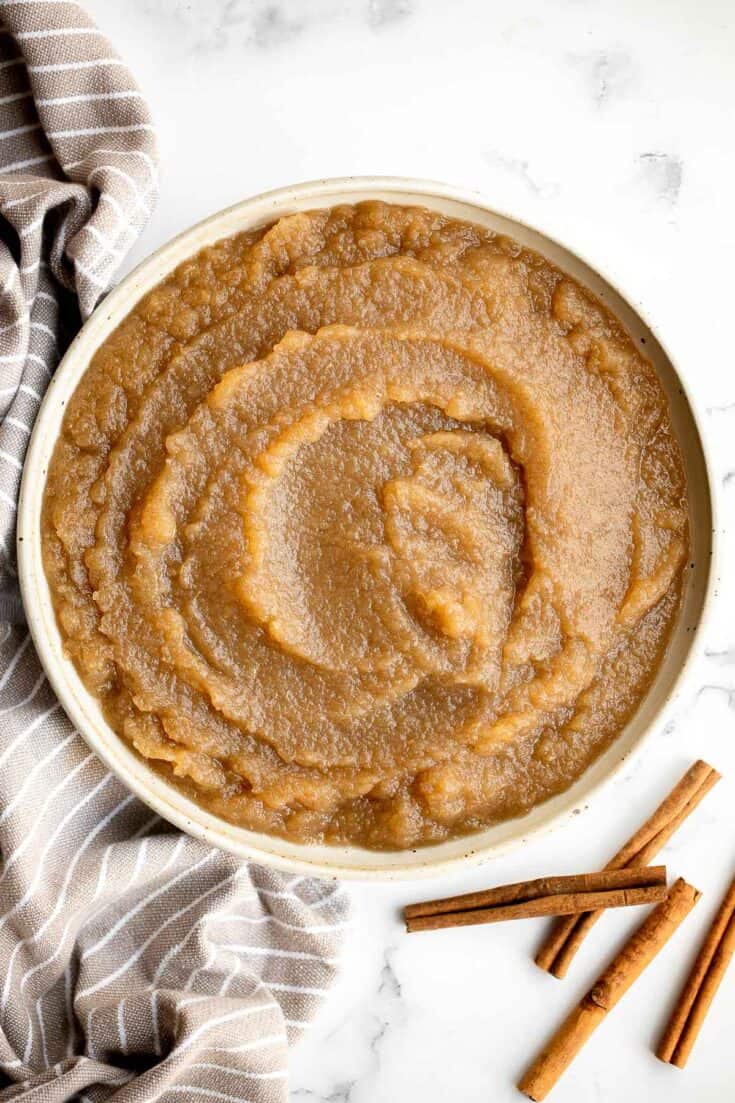
Homemade Applesauce
Homemade applesauce is a quick and easy fall treat with just 3 ingredients and very little time and effort. Serve it over ham to add some sweetness.
Easy Homemade Potato Salad
Easy homemade potato salad is loaded with baby potatoes, eggs, and green onions and tossed in a mayo sauce and is a go-to for summer barbecues and picnics.
How to Make Ahead and Store
You can make many of these ham side dish recipes ahead of time and store in the refrigerator for a few days or even in the freezer for up to 3 months. Otherwise, you can prepare the ingredients and store in the refrigerator until ready to assemble and/or cook. Check the individual recipes for full make ahead and storing instructions.
To reheat, place any leftovers in the air fryer or the oven at 300F for 10-15 minutes until warmed through, or on the stovetop over medium-low heat (depending on the recipe). If heating from frozen, let it thaw first and then reheat.
More Side Dish Recipes
- 25 Side Dishes for Chicken
- 25 Side Dishes for Salmon
- 25 Side Dishes for Steak
- 25 BBQ Side Dishes
- 40 Vegetable Side Dishes
- 30 Potato Side Dishes
Did You Make Any of These Side Dishes for Ham?
Please leave a comment and rating below, and let me know what you thought of this round up of side dish recipes to serve with ham. Be sure to snap a picture and tag me on Instagram @aheadofthyme or share it on the Pinterest pin so that I can follow along.
HUNGRY FOR MORE? Don't forget to sign up for my email newsletter so that you don't miss any recipes. You can also follow along on Instagram and Pinterest for more recipe updates.
Cheesy Roasted Asparagus
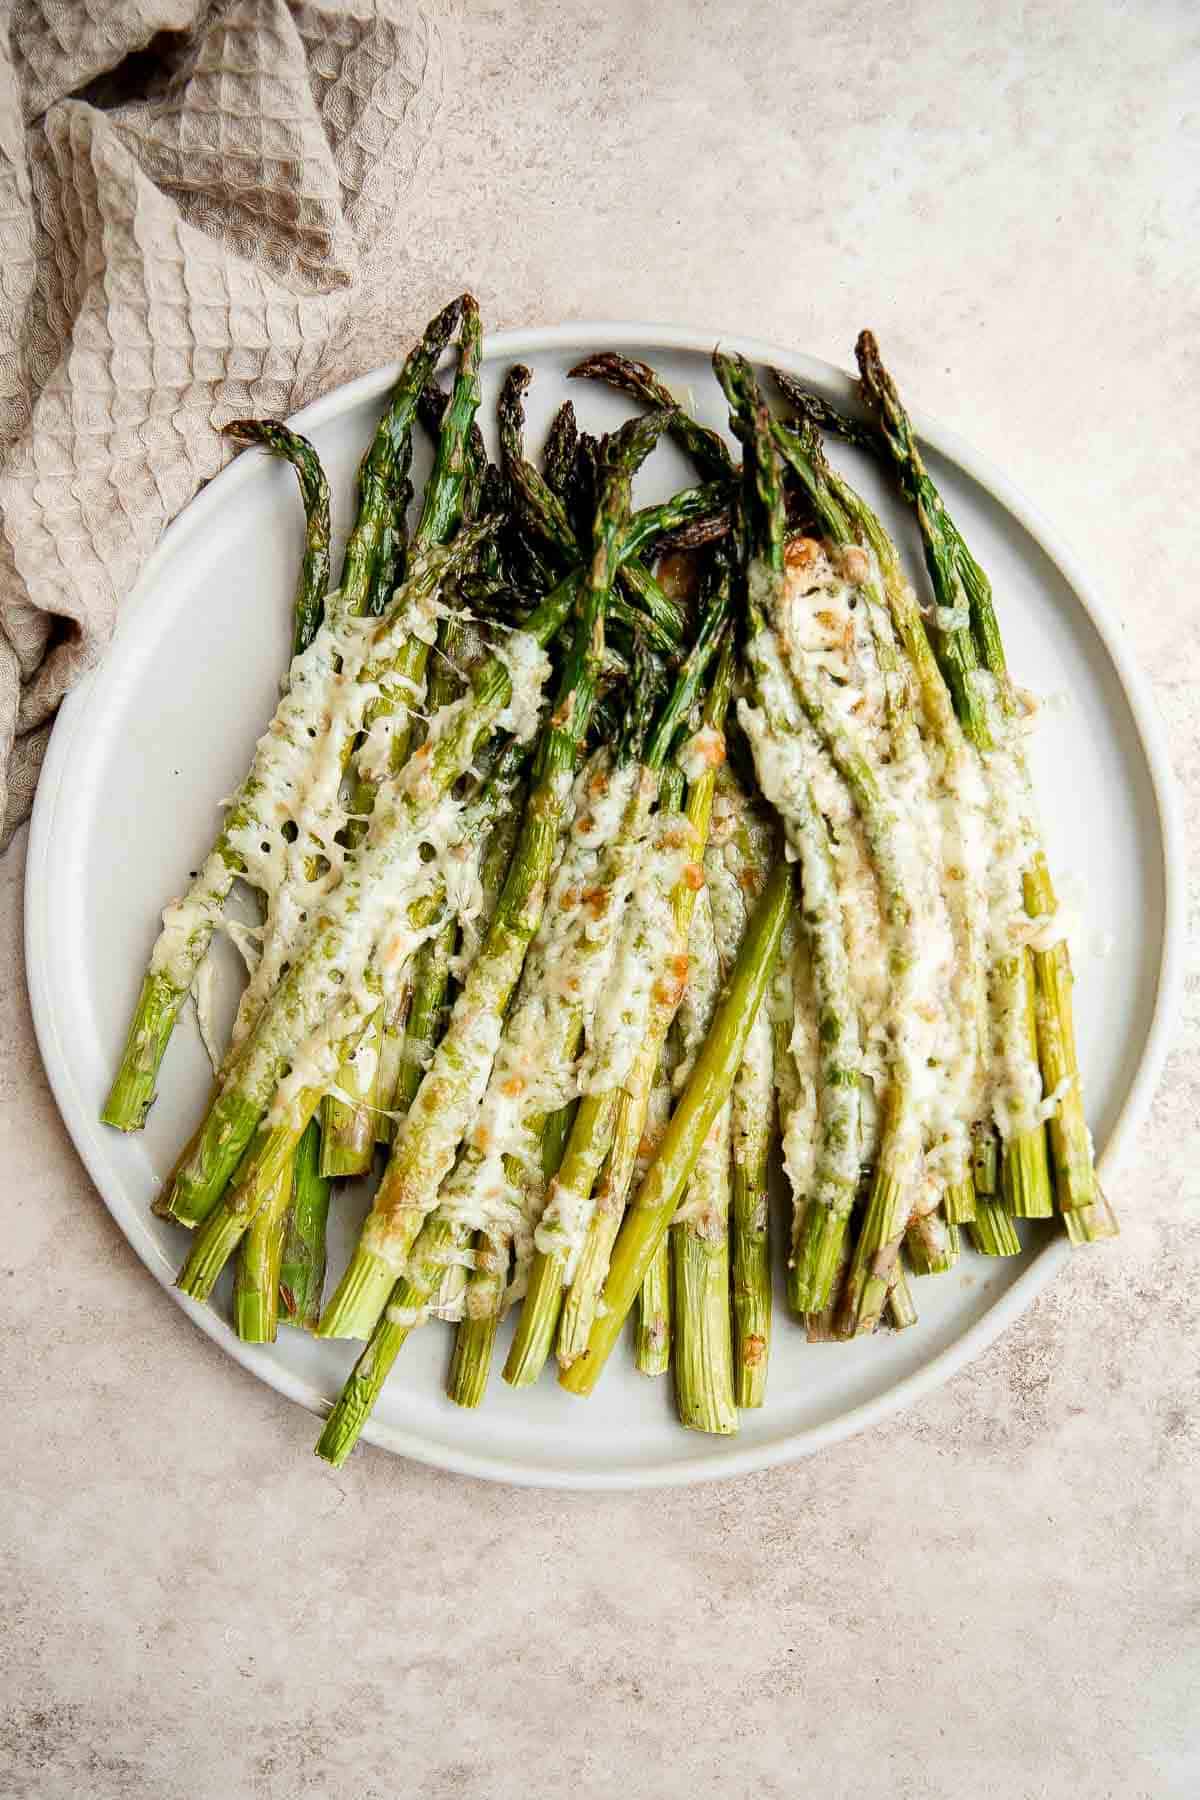
Cheesy roasted asparagus takes roasted vegetables to the next level. With a handful of simple ingredients, these veggies are quick and easy to make in just 20 minutes (including prep!). They are garlicky, cheesy, delicious, and flavorful, loaded with garlic and topped with melty bubbly cheese. This easy side dish is compliments almost and meal and is a great way to convince the kids to eat their vegetables!
Why You'll Love Cheesy Roasted Asparagus
- It's so easy to make. This cheesy roasted asparagus doesn't take much more effort than regular roasted asparagus. You'll bake the asparagus in the oven as usual for 10 minutes. Take it out. Top with shredded cheese. Then, pop it back in the oven to broil for 5 minutes longer.
- A few simple ingredients pack on the flavor. Despite being with just a handful of ingredients, these cheesy spring side dish is loaded with flavor. It's garlicky, savory, cheesy, and delicious. And if you love asparagus and cheese, you have to try this.
- The crispy, melty, cheesy top. The way the cheese creates melted strings as you pull the asparagus might just be the best part. The golden-brown crisp mozzarella topping helps too. Roasted vegetables have never been better!
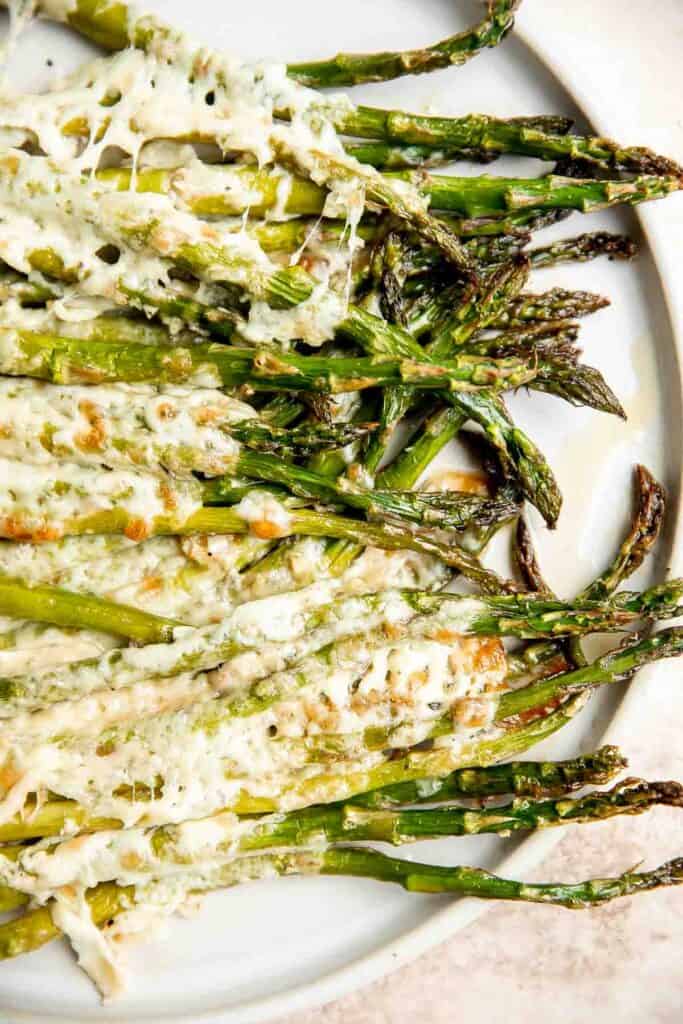
Ingredients and Substitutions
To make this easy cheesy roasted asparagus, you will need the following ingredients (full quantities in the recipe card below):
- asparagus
- salt and pepper
- garlic
- olive oil
- cheese - we use mozzarella cheese and Parmesan cheese. Feel free to substitute with your favorite kind of cheese. I recommend cheese that melts easily such as cheddar cheese, Monterrey Jack, brie, or havarti.
You will also need measuring cups and spoons and a large half sheet baking pan.
How to Make the Best Cheesy Roasted Asparagus
- Season asparagus. Place asparagus on a large half sheet baking pan and season with salt and pepper. Sprinkle minced garlic on top and drizzle with olive oil. Use a spatula to toss well to coat evenly.
- Bake. Arrange the asparagus in a single layer on the baking sheet and bake in a 400F preheated oven for 15 minutes until tender.
- Add cheese. Remove the sheet pan from the oven and sprinkle mozzarella and Parmesan cheese evenly over the asparagus. Return the pan to the oven and continue baking for another 3-4 minutes until the melted cheese turns golden brown. Serve immediately.
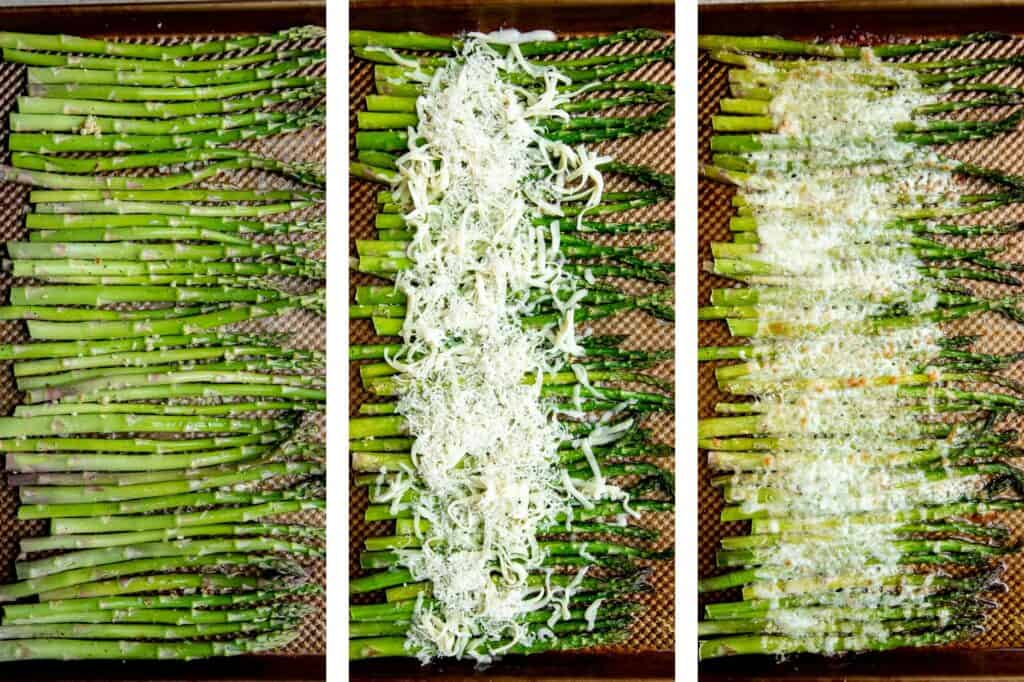
How to Serve
Serve cheesy roasted asparagus as a side dish along your favorite main dishes for a complete spring dinner. Some of my favorites are:
- Dutch Oven Whole Roast Chicken
- Garlic Butter Salmon
- Ribeye Steak
- Air Fryer Chicken Breast
- Garlic Shrimp Skewers
Recipe Tips and Tricks
- Varying cook times: If your asparagus is large and thick, they'll need 15 minutes to bake. If they're thin, take them out at 10 minutes. Keep in mind that the extra 5 minutes of broiling will not just melt the cheese-it will cook the asparagus. So, be careful not to overcook the veggies.
- How to store: After it cools to room temperature, store cheesy roasted asparagus in an airtight container in the fridge for 4-5 days.
- How to reheat: Reheat cheesy roasted asparagus in a 425F oven for about 10 minutes until warm and cheese has melted again.
More Asparagus Recipes
- Asparagus Tart
- Lemon Asparagus Soup with Parmesan
- Chopped Asparagus Salad
- Roasted Asparagus with Poached Eggs
- Spring Pesto Pasta with Asparagus
- Sautéed Asparagus
Tried this recipe?
I'd love to hear what you think! Leave a comment and rating below to share your feedback. Your reviews help others discover this recipe and help me keep creating more free recipes for you. Snap a photo and tag me on social media @aheadofthyme too.

Banana Chocolate Chip Oatmeal Muffins

Banana chocolate chip oatmeal muffins are delicious, moist, and filling. They are a quick and easy breakfast or snack that you can meal prep at the beginning of the week and enjoy for days, weeks, or even months to come (if you freeze them!). They are the best way to use up any overripe bananas that you have in your kitchen, and are made with some other common pantry staple ingredients that you likely already have at home. The best part? You need just 30 minutes to prep and bake them before you can bite into one.

Why You'll Love Banana Chocolate Chip Oatmeal Muffins
- It's a great way to use those bananas you forgot about. We've all been there. You buy a bunch of bananas, enjoy them for a while, and then completely forget you have them. They ripen on the counter until they're brown or black. Well, don't throw those bananas away! Overripe bananas are the best for these banana chocolate chip oatmeal muffins.
- Quick, easy, and filling breakfast or snack. Banana muffins are one of the easiest breakfast meal preps you can make. In just 30 minutes, you'll have a dozen fresh muffins that will last all week. Serve them for breakfast on the go, include them are a snack in your kids' school lunch boxes, or enjoy them for a treat throughout the day.
- They have the perfect combination of ingredients to make them flavorful and moist. Ripe bananas add sweetness and ensures that your muffins don't dry out, while oats bring a unique flavor and healthy whole grains to the mix. Mini chocolate chips also add sweet and decadent flavor to every bite.
Ingredients and Substitutions
To make easy banana chocolate chip oatmeal muffins, you will need the following ingredients (full quantities in recipe card below):
- all-purpose flour
- oats - you need old-fashioned rolled oats, and not quick oats. You could use quick oats for the same taste but it won't have the same texture.
- sugar
- baking powder + soda
- chocolate chips - there is just something about mini chocolate chips with banana muffins that just makes sense. You can use regular sized chocolate chips if you prefer or chocolate chunks.
- bananas - make sure the bananas are ripe, otherwise they won't give you the same sweet results.
- egg
- vegetable oil
- milk
You will also need measuring cups and spoons, mixing bowls, cookie scoop (or large spoon), 12-cup muffin pan, cupcake lines, and wire cooling rack.

How to Make the Best Banana Chocolate Chip Oatmeal Muffins
- Make the batter. In a large mixing bowl, whisk together flour, oats, sugar, baking powder, baking soda, and chocolate chips. Set aside. In a medium mixing bowl, add banana and mash with a fork. Then add egg, oil, and milk. Whisk together until combined. Make a well in the center of the dry ingredients and pour the wet ingredients inside. Use a large spoon to mix the batter until just combined, and there are no dry flour particles visible.
- Scoop out batter. Line a 12-cup muffin pan with cupcake liners or spray with cooking spray oil. Use a medium cookie scoop to scoop out the batter and fill in the lined muffin pan, filling each cup about ¾ full.
- Bake. Bake in a 400F preheated oven for 20-25 minutes until golden brown, and a toothpick inserted into the center of the muffin comes out clean. Allow muffins to cool in the pan for 5 minutes before transferring onto a wire cooling rack to cool completely.
Storing Instructions
- How to store muffins: Keep banana oatmeal muffins in an airtight container for up to 2-4 days at room temperature. You can extend their shelf life by storing in the fridge for up to 7-10 days.
- How to freeze muffins: Wrap each banana muffin individually in plastic cling wrap. Use two layers and ensure the wrap is tight. Store in the freezer for up to 3-4 months. Thaw overnight in the fridge before eating.

More Banana Recipes
- Nutty Banana Bread
- Flourless Banana Brownies
- Banana Chocolate Chip Muffins
- Majoon Banana and Nut Smoothie
- Chocolate Chip Banana Bread Cookies
- Healthy Banana Bread
- Strawberry Banana Smoothie
Tried this recipe?
I'd love to hear what you think! Leave a comment and rating below to share your feedback. Your reviews help others discover this recipe and help me keep creating more free recipes for you. Snap a photo and tag me on social media @aheadofthyme too.

Pita Grilled Cheese
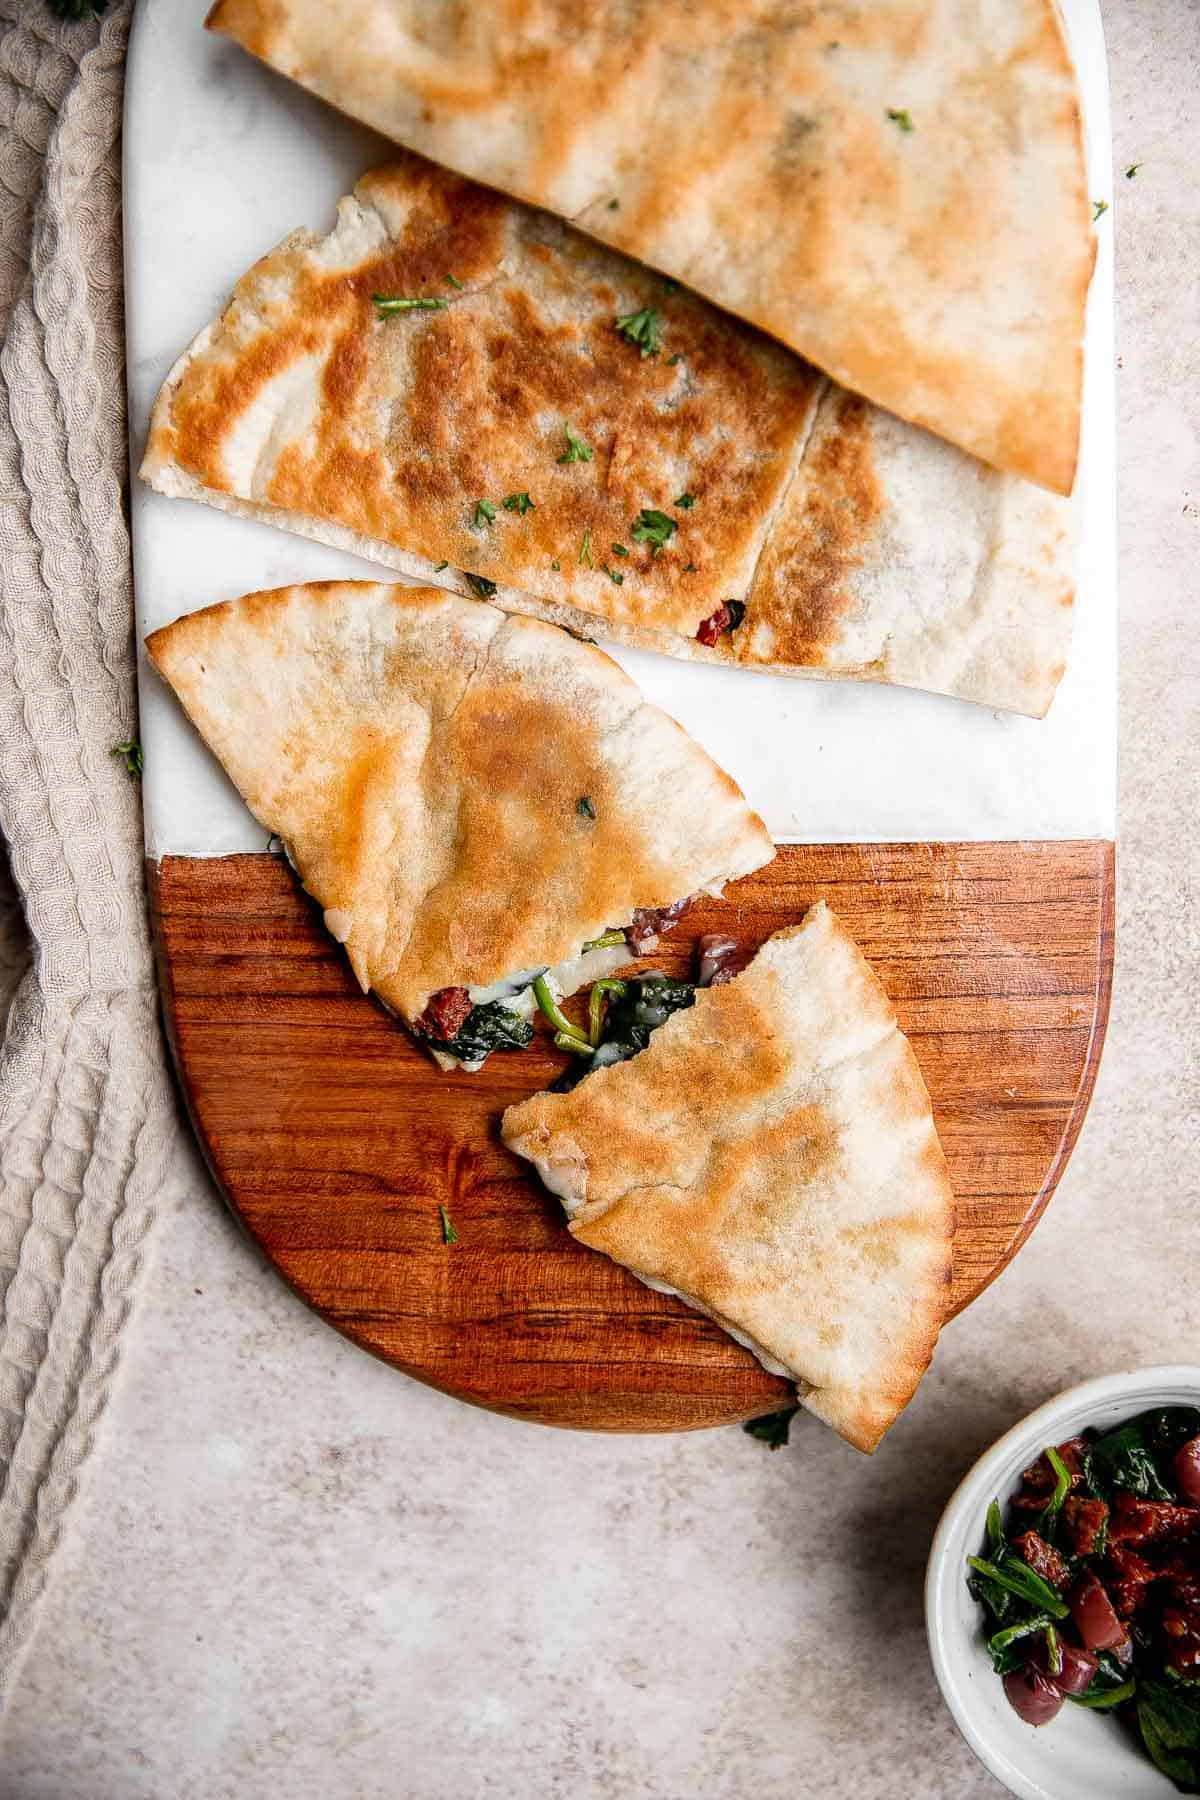
Pita grilled cheese is loaded with fresh Mediterranean flavors with a spinach, olive, and sun-dried tomato filling stuffed inside pita bread with melty cheddar cheese. It's crispy on the outside, but tender and bubbly inside. It's seriously so good, you'll wonder why you haven't tried it before. You'll love the blend of fresh flavors that explodes in your mouth when you take a bite of this twist on classic grilled cheese. Plus, you only need a quick 15 minutes to make these for lunch, or prep them ahead and store for later.

Why You'll Love Pita Grilled Cheese
- It's the best twist on classic grilled cheese. Pita bread, meet grilled cheese. This blend of your favorite Mediterranean bread and a classic easy comfort food could possibly be the best thing that will happen to you this year. It's seriously that good.
- Loaded with Mediterranean flavors. Stuffed with a delicious sautéed spinach filling mixed with Greek kalamata olives and tangy sun-dried tomatoes, this pita grilled cheese is packed with fresh and vibrant Mediterranean flavors. Plus, you can add in some sprinkled feta for an even more authentic taste.
- The fastest recipe ever. The only thing faster than this pita grilled cheese might be buttered toast - or a can of beans. Ok maybe that was a slight exaggeration, but this recipe is quick! You only need 15 minutes to make 3 (or 6 stuffed halves) delicious spinach grilled cheese. Even less time if you decide to make just one and store the rest for later. It's the perfect lunch on busy days. And the kids love it too!

Ingredients and Substitutions
To make this easy Pita Grilled Cheese, you will need the following ingredients (full quantities in the recipe card below):
- whole pitas - you can use white or whole wheat pitas, or try making your own homemade pita bread.
- cheese - I used a sharp white cheddar, but feel free to substitute with any kind of cheese that melts well. Try mozzarella, Monterrey Jack, havarti, provolone, or any combination. You can even sprinkle in some feta in addition to the melty cheese to add extra flavor.
- baby spinach - you can also use frozen spinach. Use about ⅓ of a 10 ounce pack of frozen spinach and make sure to thaw and drain it well first.
- kalamata olives
- sun-dried tomatoes
- seasonings - olive oil, garlic powder, salt, and pepper.
You will also need measuring cups and spoons and a skillet.

How to Make the Best Pita Grilled Cheese
- Make filling. Heat oil in a large skillet over medium-high heat until the hot oil sizzles, about 1 minute. Add spinach and sauté until completely wilted, about 2-3 minutes. Season with salt, pepper, and garlic powder. Stir in olives and sun-dried tomatoes. Mix well and set aside.
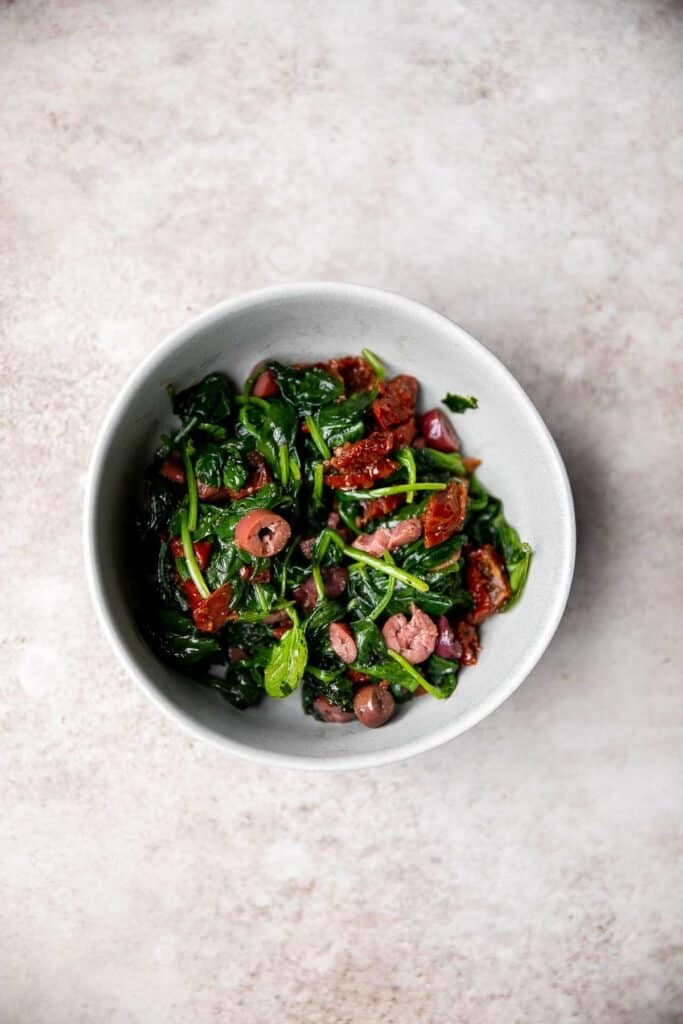
- Stuff the pitas. Open each sliced pita pocket and arrange 1 slice of cheddar cheese inside (You can tear the slice in half and overlap them to make it easier to fit in). Top with 3 tablespoons of the spinach filling, then layer with another slice of cheese on top.
- Grill the pitas. Heat a clean skillet over medium-low heat for 1 minute and use a silicone brush to brush with a little bit of oil. Place two stuffed pita halves on the hot pan at a time and cook until crispy and the cheese melts, about 2 minutes per side. Flip the, over once and press down using the back of a flipper spatula. Repeat with the remaining pita pockets and serve warm.
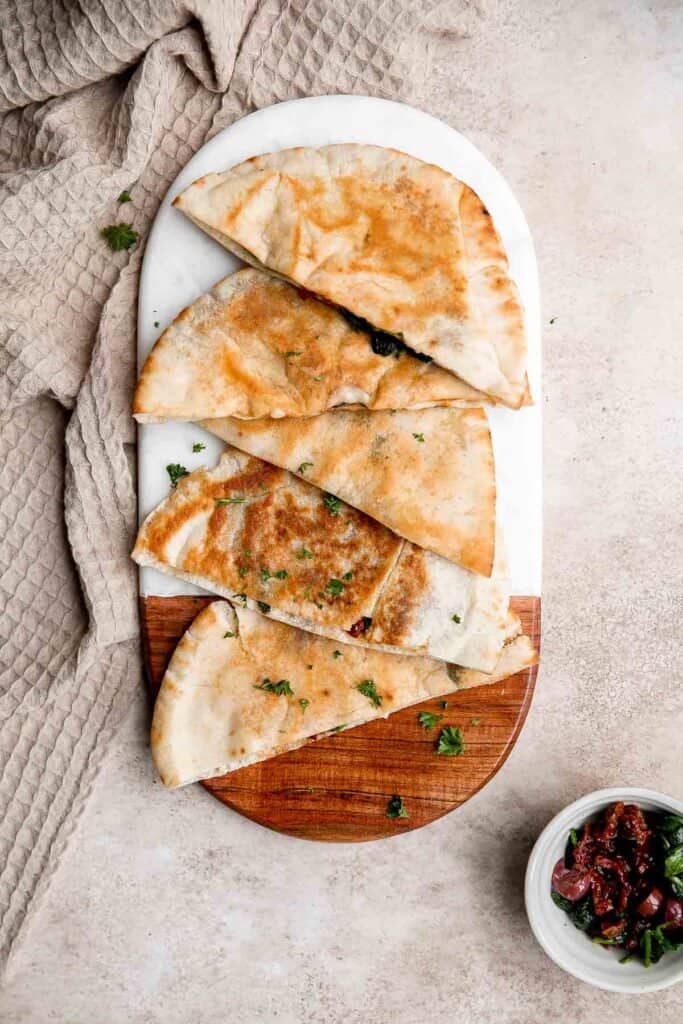
How to Serve Pita Grilled Cheese
You can serve pita grilled cheese on it's own or with a side of Tzatziki Sauce or Whipped Feta. I also love serving it with soup and salad. Some of my favorite side dishes to pair this with are:
- Tomato Basil Soup
- Greek Salad
- Lemon Chicken Orzo Soup
- Mediterranean Orzo Pasta Salad
- Creamy Turkey Gnocchi Soup
- Minestrone Soup
- Chickpea Greek Salad
Make Ahead and Storing Instructions
- Make ahead instructions: Meal prep is a great time-saver, and when you build your pita grilled cheese ahead of time, you can enjoy a fresh meal in just a few short minutes. You can make the filling and stuff the pitas ahead of time (or stuff them after), then store the stuffed pitas in the refrigerator until ready to cook. If storing for more than 2 hours, place the pita in an airtight container before storing.
- How to store: Pita grilled cheese is best eaten fresh, but you can store it in the fridge for up to 3-4 days in an airtight container.
- How to reheat: The best way to reheat your Mediterranean pita grilled cheese after it's been cooked on the pan is in the oven. Place the pita grilled cheese on a baking tray and heat it for 10-15 minutes in a 375F oven (or in the air fryer at 375 F for 5-8 minutes). You can also reheat on the stove over medium-low heat until cheese is melted.
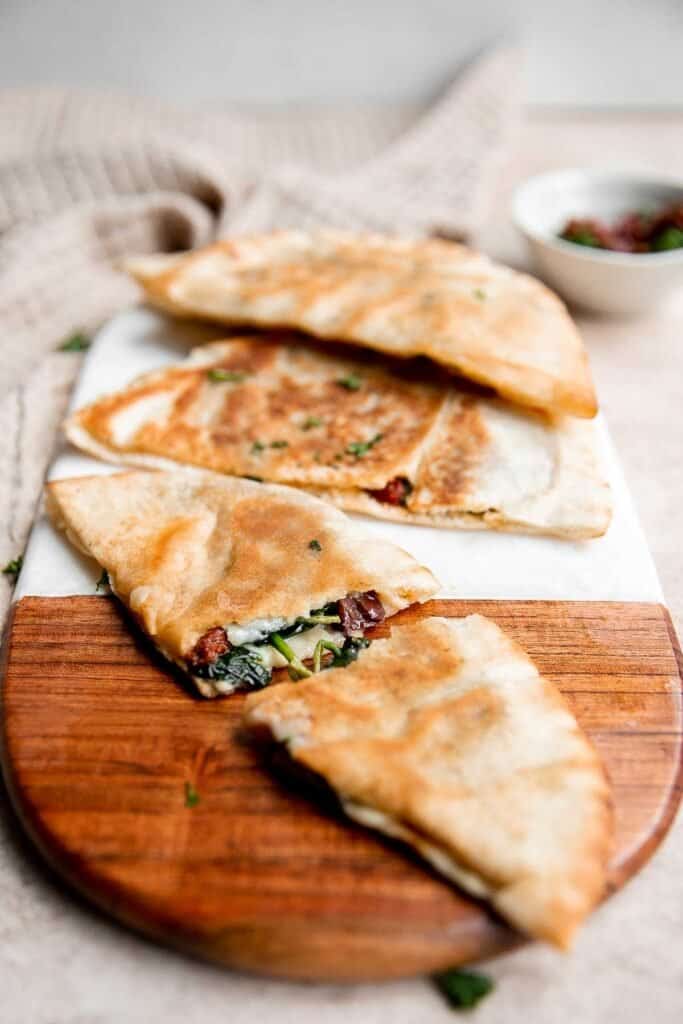
More Sandwich Recipes
- Tuna Melt Grilled Cheese Sandwich
- Greek Chicken Gyros
- Buffalo Turkey Wraps
- Roasted Broccoli Grilled Cheese
- Grilled Cheese Roll Ups
- Lemongrass Banh Mi Sandwich
Tried this recipe?
I'd love to hear what you think! Leave a comment and rating below to share your feedback. Your reviews help others discover this recipe and help me keep creating more free recipes for you. Snap a photo and tag me on social media @aheadofthyme too.

Homemade Teriyaki Sauce

Homemade teriyaki sauce is a quick, easy, and delicious way to upgrade any meal. Made with pantry staples in just 5 minutes, you can literally make this vegan sauce at the last minute to add sweet and salty umami flavor to any meal. Serve it as a dipping sauce or drizzle it over chicken, fish, beef, tofu, and veggies.
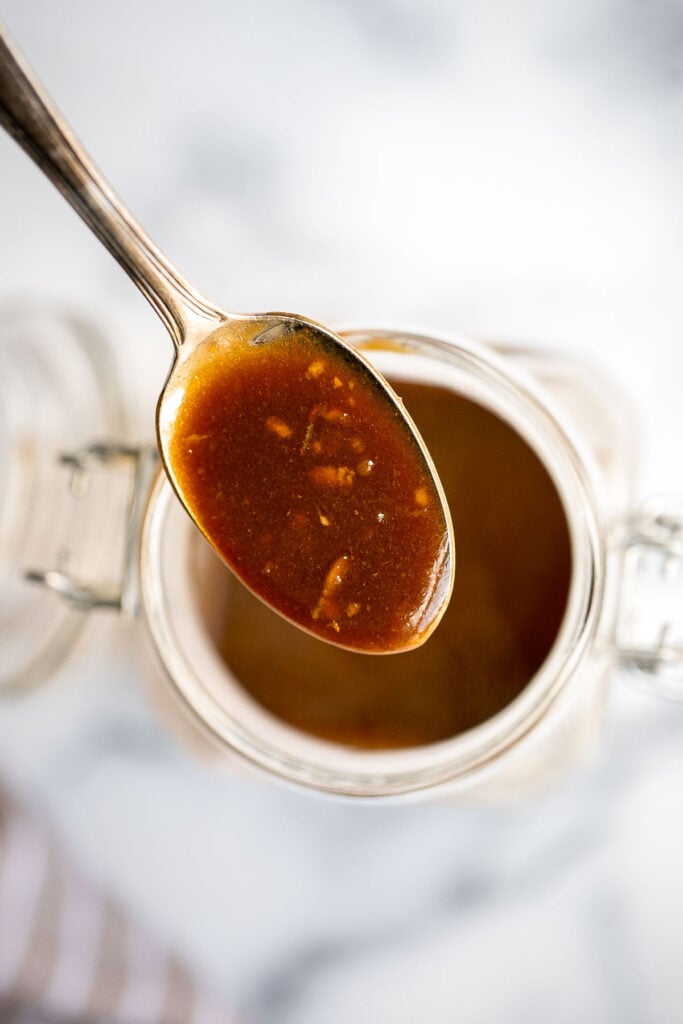
Why You'll Love Homemade Teriyaki Sauce
- Made with pantry staples. Since most of the ingredients in this homemade teriyaki sauce live in your pantry, this is a great last-minute addition to any meal. The only fresh ingredients you'll need are garlic and ginger, which are also staples that last in your cupboards or kitchen counter for weeks.
- It's quick and easy. This is the fastest sauce ever, and one that you can throw together at the last minute. When I say last minute, I mean it. In the last five minutes of cooking and meal, you can whip up homemade teriyaki sauce for a tasty dipping sauce or dressing.
- Bold teriyaki flavor. Teriyaki is a great flavor because it has everything you want: umami, spice, sweetness, saltiness. With soy sauce, sugar, honey, garlic, ginger, and more, this homemade teriyaki sauce will delight your tastebuds.
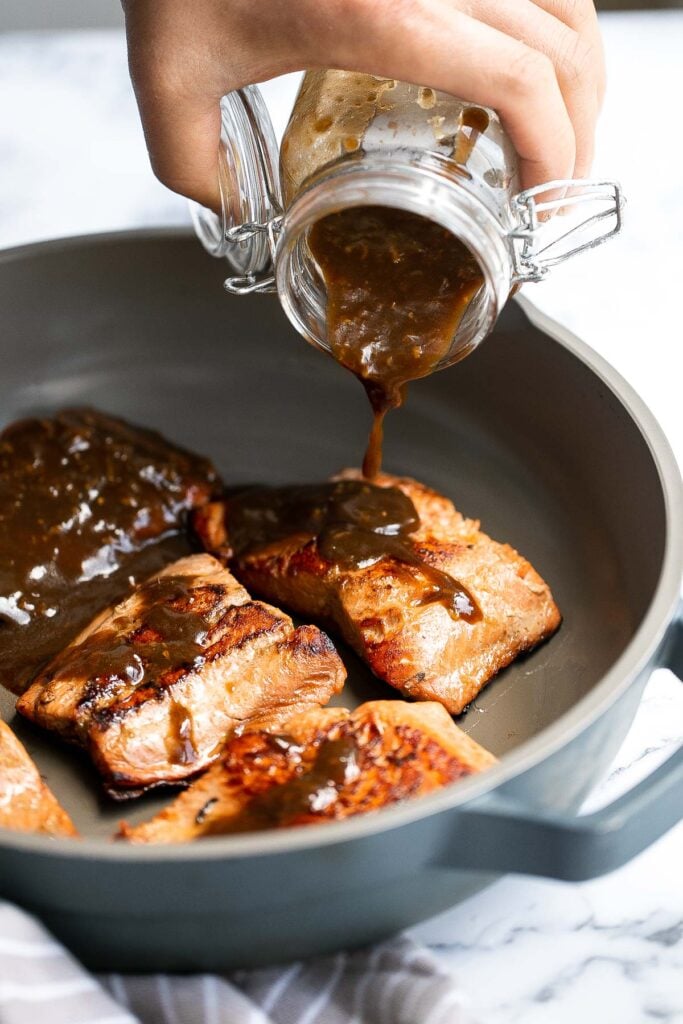
Ingredients and Substitutions
To make this easy homemade teriyaki sauce, you will need the following ingredients (full quantities in the recipe card below):
- soy sauce
- brown sugar - you can also substitute this with honey.
- ginger
- garlic
- sesame oil
- black vinegar
- water
- cornstarch - this ingredient is a must and thickens up the teriyaki sauce to the right consistency (similar consistency to maple syrup). I would not recommend flour or baking soda as substitutes.
I love adding a dash of spice to everything. If you want to turn up the heat, consider adding: red pepper flakes, cayenne pepper, sriracha hot sauce, or gochujang.
You will also need measuring cups and spoons, mixing bowl, and shallow saucepan or skillet.

How to Make the Best Homemade Teriyaki Sauce
- Combine ingredients. In a medium mixing bowl, whisk together all ingredients until smooth, and the sugar and cornstarch are fully dissolved.
- Cook. Add the sauce to a shallow saucepan or skillet and cook over medium heat for 3-4 minutes until simmering and thickened to a desired consistency, stirring constantly.
- Cool. Serve warm or cooled over meat, seafood, stir fried vegetables, rice, noodles, grilled skewers, and more.
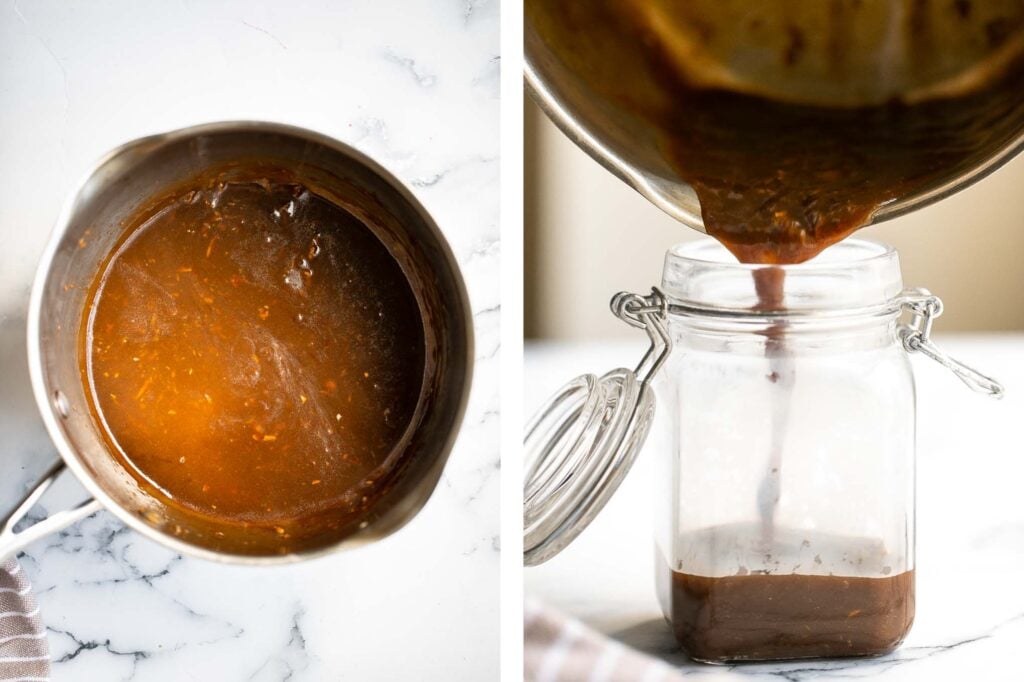
Recipe Tips and Tricks
- How to serve: The best way to eat this homemade teriyaki sauce is to drizzle over meat, seafood, and veggies, serve as a dipping sauce, or as a garnish. You can serve it warm, at room temperature, or cold. Be mindful if reheating it with meats or veggies (like a marinade) since the sugars can burn easily. You may want to add a splash of water when reheating to keep it from drying out.
- How to store: Once cooled to room temperature, store homemade teriyaki sauce in a mason jar or airtight container in the refrigerator for up to 3-4 days.
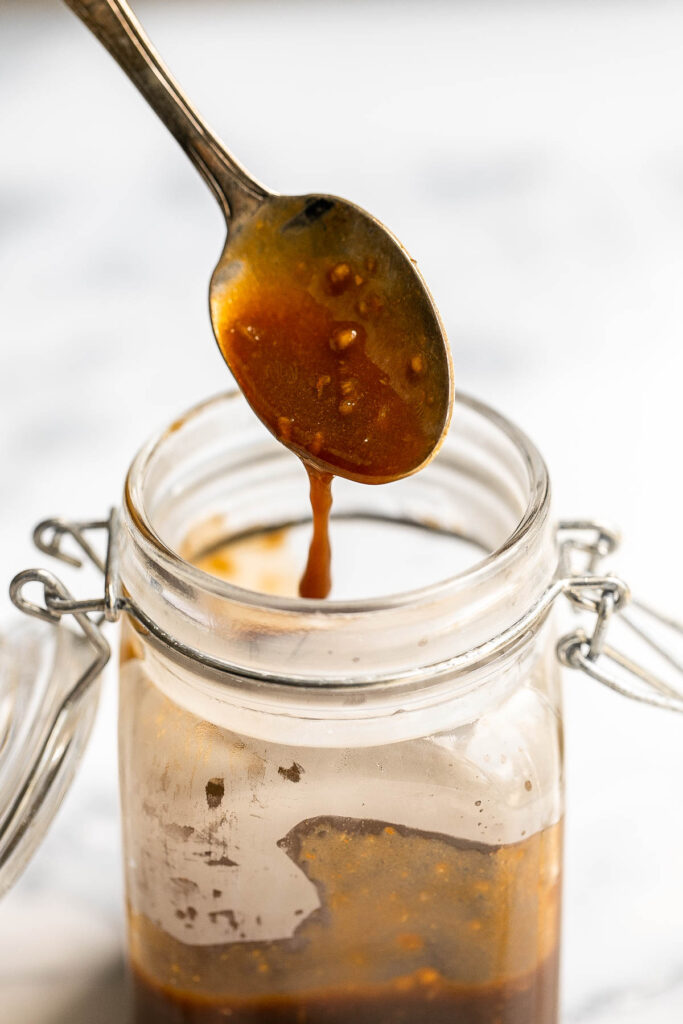
More Sauce Recipes
- Sweet Chili Sauce
- Tahini Sauce
- Homemade Enchilada Sauce
- Buffalo Sauce
- Homemade Applesauce
- Salted Caramel Sauce
Tried this recipe?
I'd love to hear what you think! Leave a comment and rating below to share your feedback. Your reviews help others discover this recipe and help me keep creating more free recipes for you. Snap a photo and tag me on social media @aheadofthyme too.
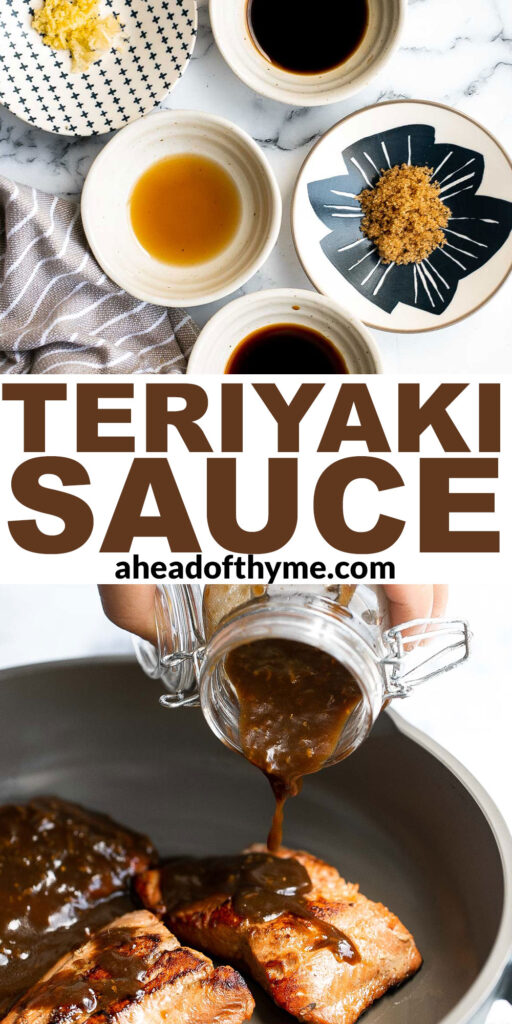
Chicken Penne Pasta

Chicken penne pasta is a quick and easy dinner that is delicious, creamy, and flavorful. Perfectly seared chicken is sliced and tossed into a creamy white sauce that with penne pasta in under 30 minutes. This creamy chicken pasta is a simple and classic Italian dinner idea and family favorite, and leftovers are great for lunch the next day.
Why You'll Love Chicken Penne Pasta
- It's quick and easy. The best thing about pasta dinners are that they are quick and easy, making them a perfect option for busy weeknights. For some other weeknight pastas try Pasta Bake with Sausage, Creamy Salmon Pasta, and Mascarpone Pesto Pasta.
- It has the perfect balance of flavors. From fresh garlic and cheese that bring bold flavors to the starchy pasta and flavorful chicken to the heavy cream and chicken broth that form the base of the sauce, this chicken penne pasta is delicious and loaded with flavor.
- Chicken penne pasta is filling and satisfying. This pasta dish is loaded with carbs and protein to help you refuel after a long day - whether you used your brain, your body, or both to get through it. Make dinner the satisfying experience you deserve by preparing this chicken penne pasta.
- It's perfect for tomorrow's lunch. When I make creamy chicken pasta, I always remember to make extra for tomorrow. It reheats well the next day and is just as satisfying as it was the first time.
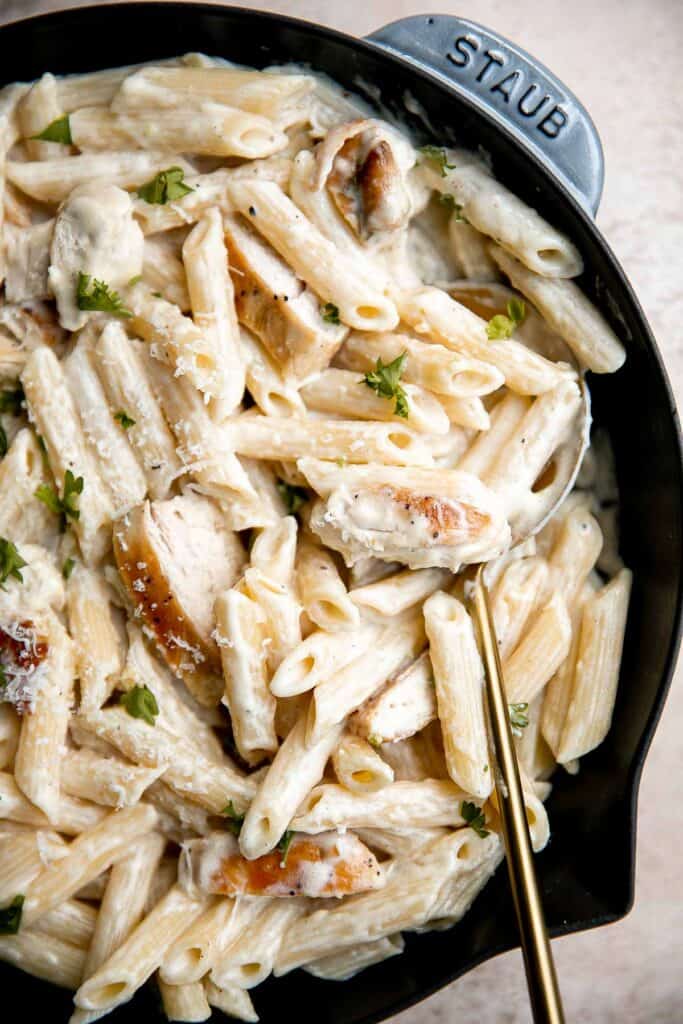
Ingredients and Substitutions
To make this delicious Chicken Penne Pasta, you will need the following ingredients (full quantities in recipe card below):
- chicken breast - you can substitute with boneless chicken thighs if you prefer, or use cooked shredded chicken instead (just skip the chicken steps in the beginning and toss in the shredded chicken at the end).
- salt and pepper
- vegetable oil
- penne pasta - feel free to substitute with your favorite shaped pasta. Try shells, bow ties, rotini, or macaroni.
- butter
- garlic
- all-purpose flour
- heavy cream
- chicken broth - or use reserved hot pasta water
- Parmesan cheese
- fresh parsley - optional, for garnish.
You can also add your favorite vegetables to this chicken penne pasta for added nutrition. After everything is cooked, you can toss in:
- air fryer broccoli
- roasted asparagus
- steamed spinach
- boiled peas
- sautéed green beans
You will also need measuring cups and spoons, cooking pot, and a skillet (I used a cast-iron skillet).
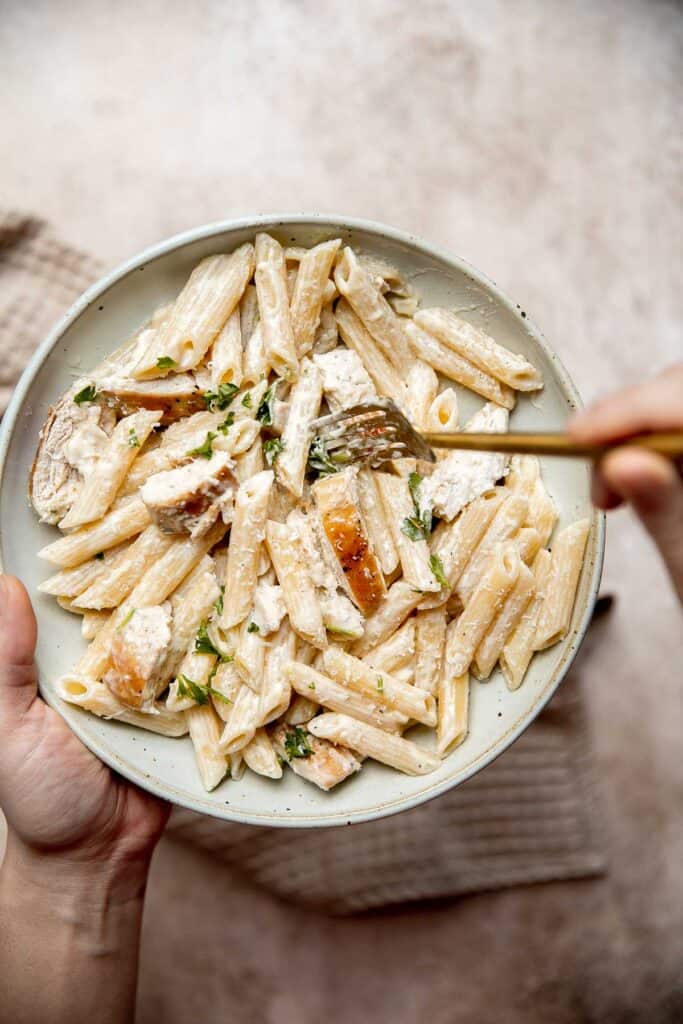
How to Make the Best Chicken Penne Pasta
- Boil pasta. Bring a large pot of salted water to a boil over medium-high heat. Add penne pasta and cook until al dente according to package directions, about 8-10 minutes. Reserve ½ cup of the hot pasta water in a bowl (if using instead of chicken stock). Drain the pasta and set aside.
- Sear chicken. Use a paper towel to pat the chicken breasts completely dry. Season with salt and pepper. In a large skillet, heat oil over medium-high heat until the hot oil sizzles, about 1-2 minutes. Add chicken and sear until golden brown, 6-8 minutes per side.
- Slice chicken. Slice the chicken into ½-inch strips, transfer onto a plate, and cover with aluminium foil to stay moist.
- Make the creamy sauce. In the same skillet, add butter and garlic and sauté until fragrant, about 1 minute. Add flour and cook until thickened into a paste, about 1 minute. Add heavy cream, chicken broth (or reserved hot pasta water), and Parmesan cheese. Bring the sauce to a simmer over medium heat and simmer for 2-3 minutes until thickened to a desired consistency, stirring occasionally. Season with salt and pepper to taste.
- Toss in chicken. Add the chicken and pasta to the skillet and toss well to coat. Garnish with parsley and serve immediately.
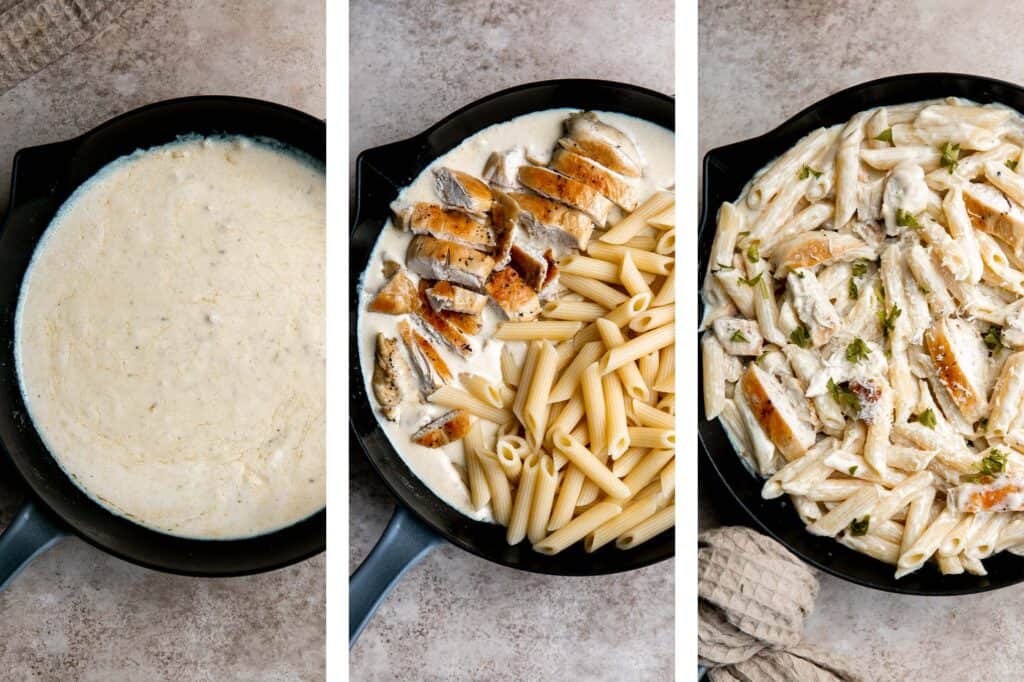
How to Serve Chicken Penne Pasta
Serve chicken penne pasta with some bread for soaking up any extra sauce and some light side dishes to balance it out.
- Garlic Breadsticks
- Garden Salad
- Air Fryer Brussels Sprouts
- Greek Salad
- Cheesy Garlic Dinner Rolls
- Tomato Cucumber Avocado Salad
Storing Instructions
- How to store: Allow leftover chicken penne pasta to cool in the pan or in a container with the lid off. Once the pasta reaches room temperature, place it in an airtight container in the fridge for 3-4 days. If you don't allow it to cool before covering, the pasta can become mushy.
- How to reheat: Reheat in a pan on the stove over medium-low heat until warmed through. If the sauce has thickened too much in the fridge, add a splash of water. You can also reheat in the microwave in 30 second increments until warmed through.
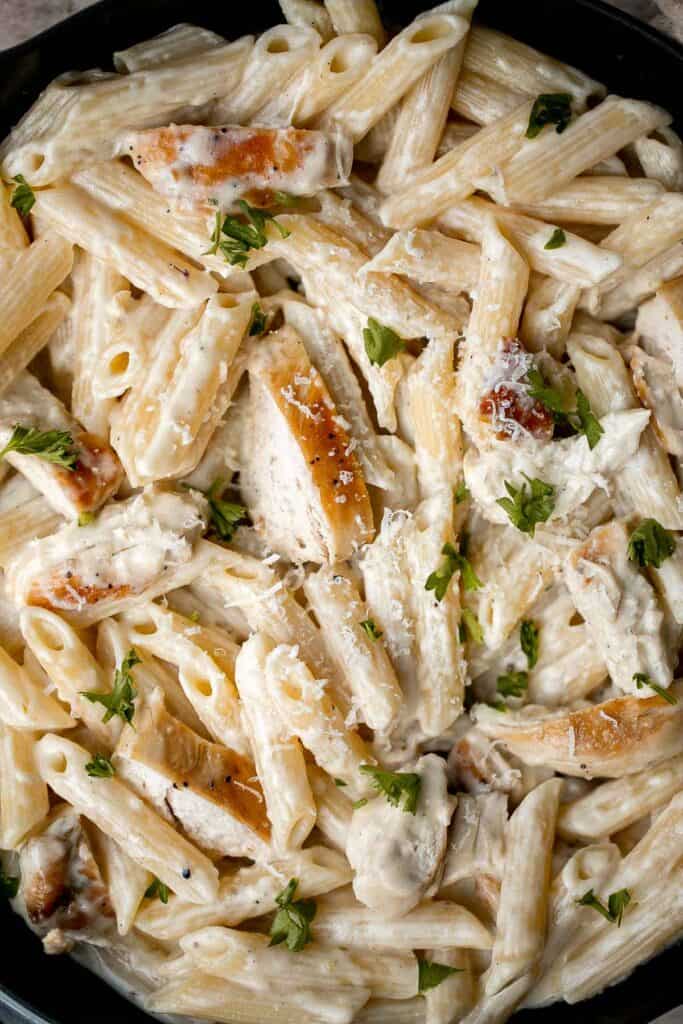
More Pasta Recipes
- 40 Best Pasta Recipes
- Creamy Salmon Pasta
- Pesto Penne Pasta
- White Chicken and Spinach Lasagna
- Creamy Shrimp Pasta with Sun-dried Tomatoes
- Fettuccine Alfredo
Tried this recipe?
I'd love to hear what you think! Leave a comment and rating below to share your feedback. Your reviews help others discover this recipe and help me keep creating more free recipes for you. Snap a photo and tag me on social media @aheadofthyme too.

Stuffed Shells

Ricotta stuffed shells are an easy, hearty, and classic Italian comfort food that can feed the whole family. Tender jumbo pasta shells are stuffed with a delicious cheese mixture made with three types of cheese and placed on a layer of marinara sauce before popping into the oven to bake until golden brown, bubbly perfection. Plus, stuffed shells are so easy to make ahead and store for another day. The perfect lazy day dinner!
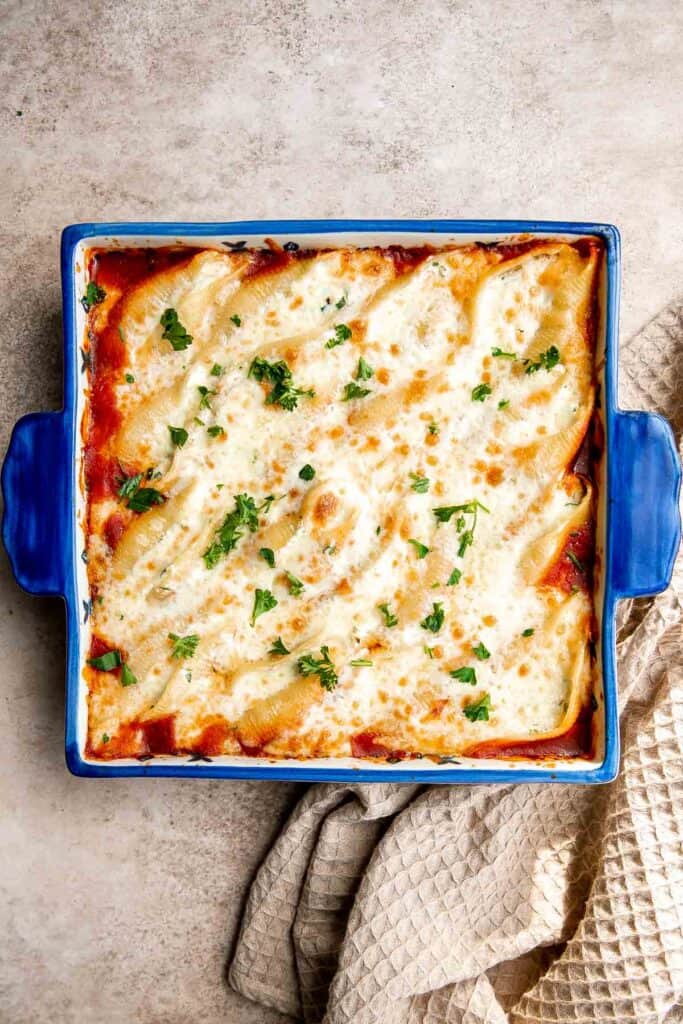
Why You'll Love Ricotta Stuffed Shells
- They're quick and easy. Ricotta stuffed shells are easy to make with just a handful of ingredients. Plus, the prep time is quick, taking about 15 minutes. Then, pop them into the oven for 30 minutes and enjoy a comforting dinner that took just 45 minutes from prep to table.
- The perfect family meal. When it comes to the best family dinners, it's all about comfort foods and casseroles that can feed a crowd. Stuffed shells check all the boxes. Some other favorites that both adults and kids will love are Lasagna Roll Ups and Pasta Bake with Sausage.
- Easy to make ahead for meal prep. These ricotta stuffed shells are a great dinner to meal prep for weeks to come. You can make them up to a day ahead and store in the fridge until ready to bake (perfect to prep in the morning and pop into the oven at dinner time). You can also freeze them for up to 3 months and enjoy on another day.
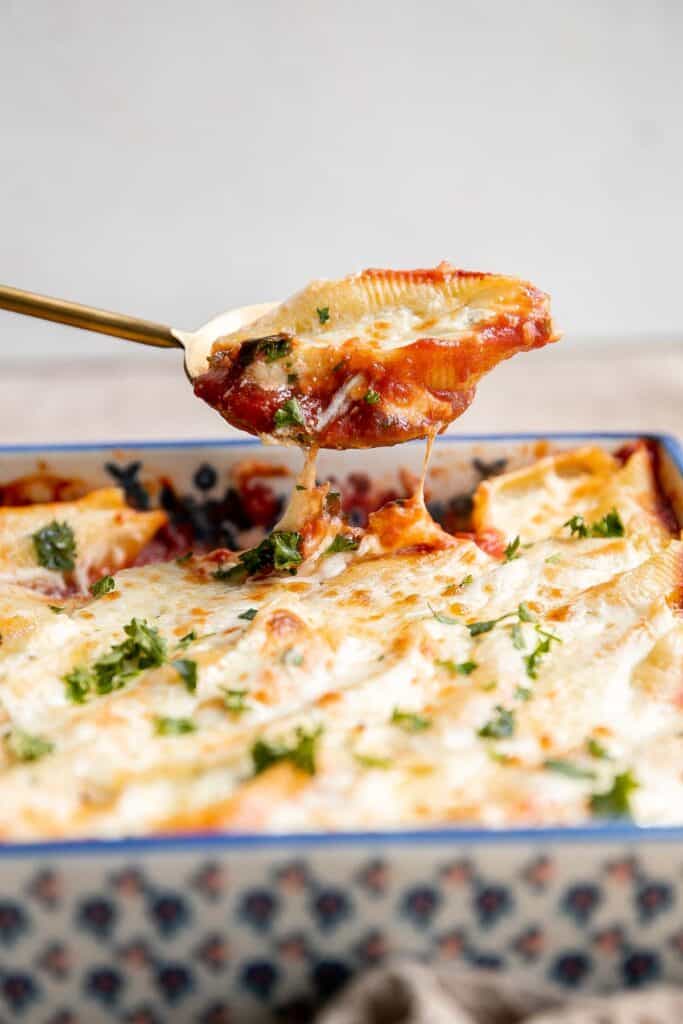
Ingredients and Substitutions
To make delicious Stuffed Shells, you will need the following ingredients (full quantities in recipe card below):
- jumbo pasta shells
- marinara sauce - feel free to use homemade marinara sauce or store-bought. You can also substitute with pasta sauce.
- cheese - you will need 3 types of cheese - ricotta, mozzarella, and parmesan.
- egg
- parsley
- salt and pepper
You can customize these stuffed shells by adding other ingredients into the ricotta cheese mixture. Some popular items are spinach, mushrooms, zucchini. Or bell peppers. Make sure to cook them first before adding to the filling mixture.
You will also need measuring cups and spoons, medium cooking pot, mixing bowl, cookie scoop, and an 8-inch square casserole pan.
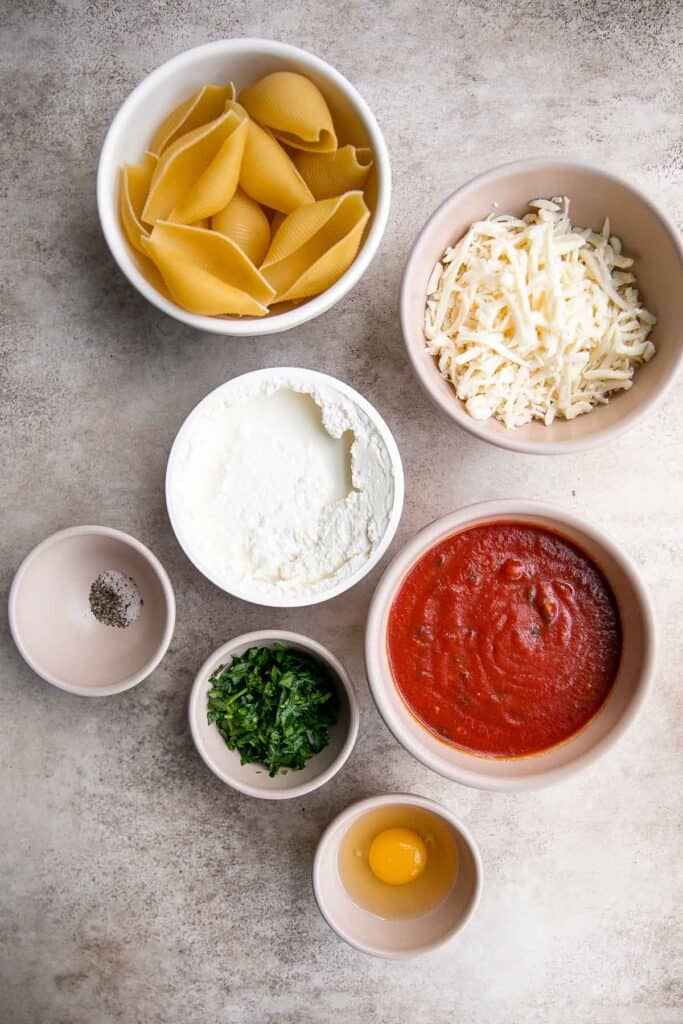
How to Make the Best Stuffed Shells
- Cook the shells. Bring a large pot of salted water to a boil over medium-high heat. Add pasta jumbo shells and cook until al dente (fully cooked but still firm) according to package directions, about 8-10 minutes. Stir occasionally to prevent the pasta from sticking to the pot. Drain and rinse the jumbo shells under cold water to cool off completely and set aside in the pot.
- Make cheese mixture. In a medium mixing bowl, combine all three kinds of cheese, egg, parsley, salt, and pepper. Mix well until smooth.
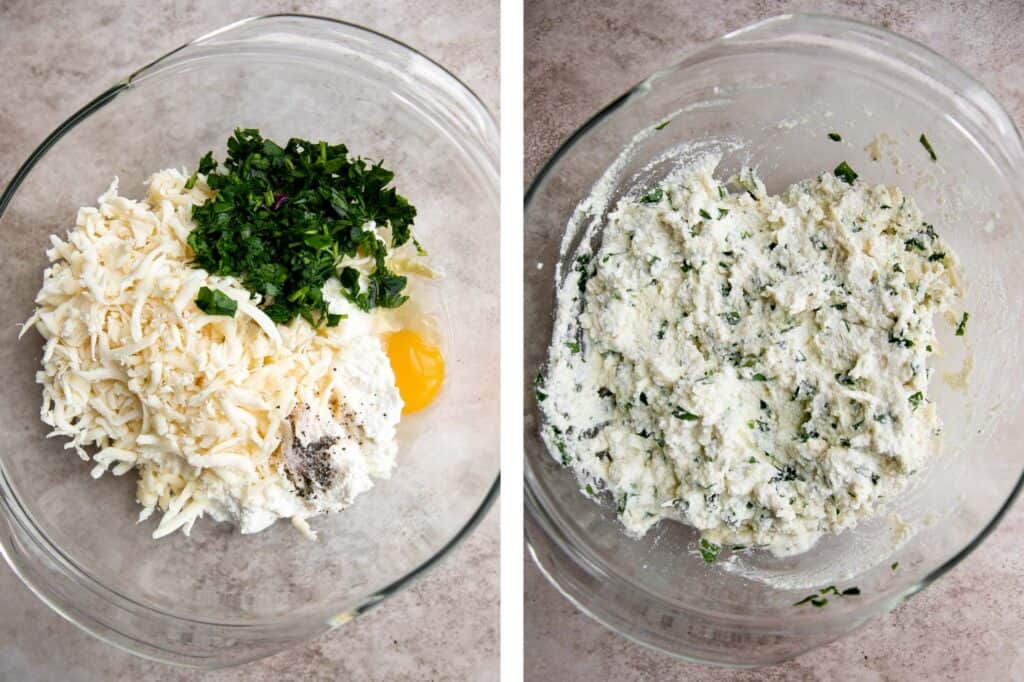
- Stuff the shells and assemble. Use a cookie scoop to stuff each cooked pasta shell with approximately ⅓ cup of the cheese mixture. In an 8-inch square casserole pan, add and spread marinara sauce evenly. Place the stuffed shells on top and sprinkle with a layer of mozzarella cheese.
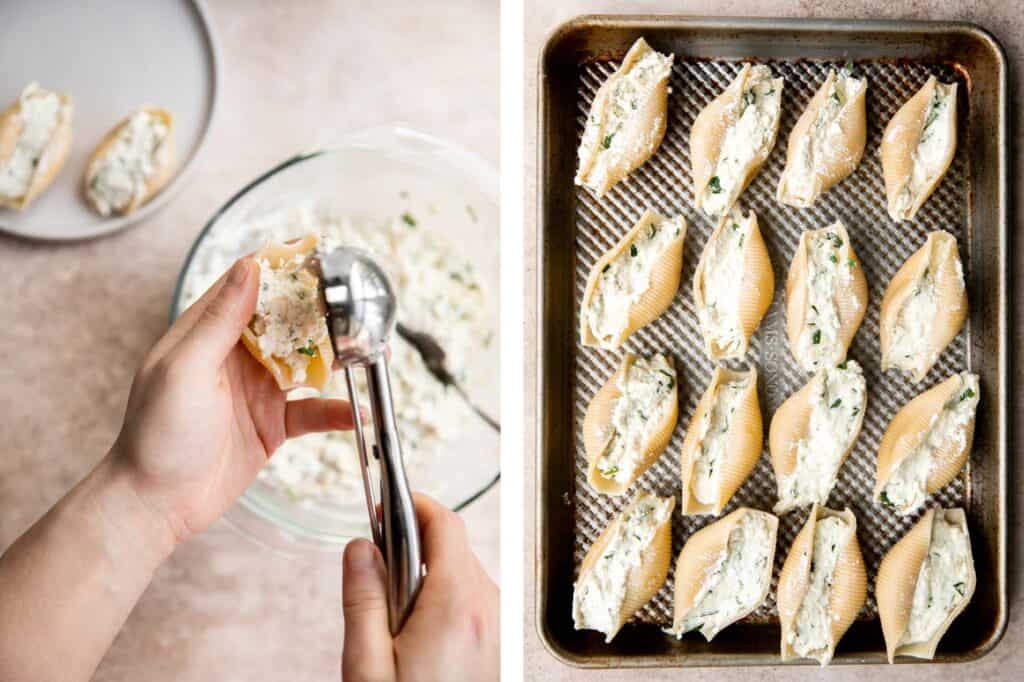
- Bake. Cover with aluminum foil and bake in a 375F preheated oven for 30 minutes. Remove the foil and broil until the cheese turns golden brown, about 2-3 minutes. Garnish with parsley and serve warm.
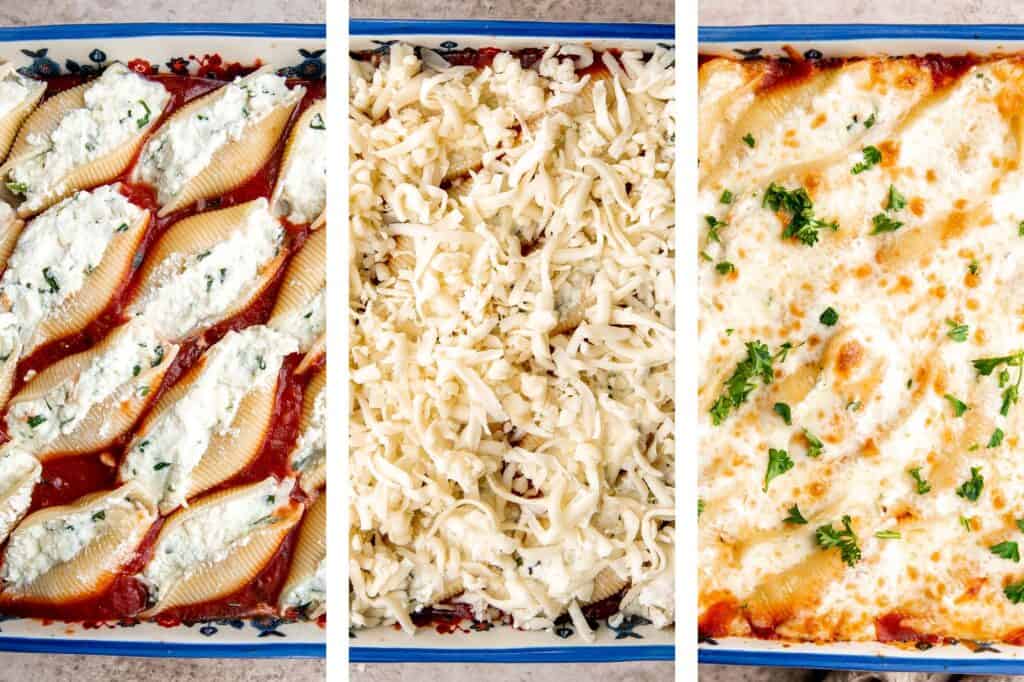
Storing Instructions
- How to freeze uncooked stuffed shells: Assemble the shells (until just before baking), then cover tightly with aluminum foil and freeze for up to 3 months. You can bake the shells directly from frozen and add an extra 30 minutes to the cook time.
- How to store: Store ricotta stuffed shells in an airtight container in the fridge for up to 4-5 days. Allow the stuffed shells to cool completely before storing them to avoid condensation.
- How to freeze cooked stuffed shells: You can also freeze cooked stuffed shells. Store them all together in an airtight container or portion them out into individual-sized meal prep containers and freeze for up to 3 months.
- How to reheat: You can reheat cooked stuffed shells in a 350 F preheated oven for 10-15 minutes until warmed through. You can also reheat in the microwave on low to medium heat for several minutes.
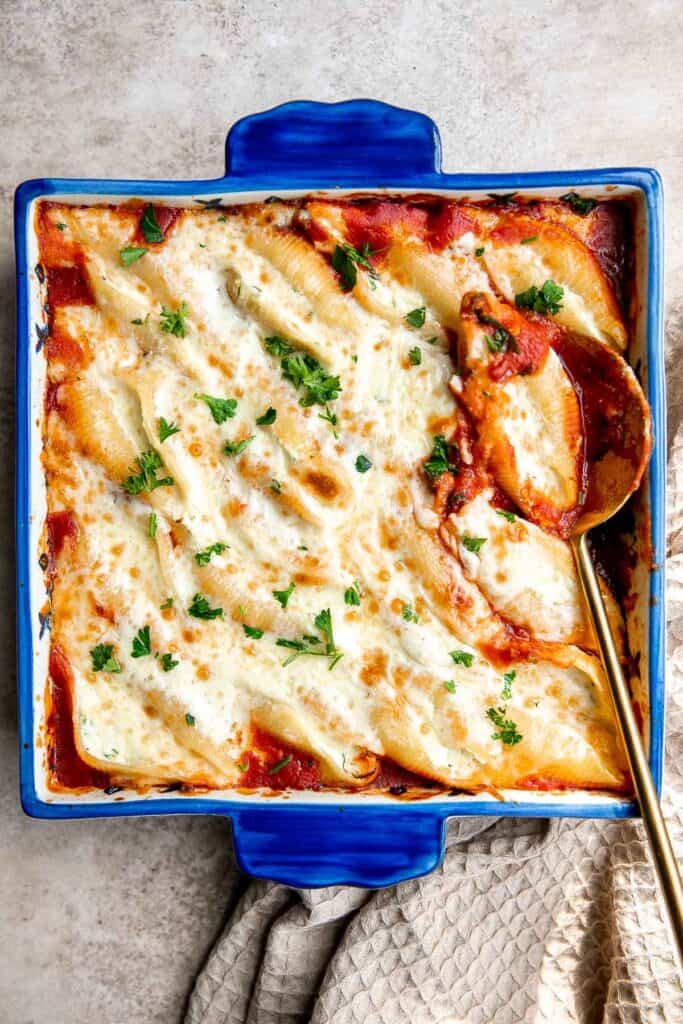
More Baked Pasta Recipes
- 40 Best Pasta Recipes
- Meat Lasagna
- Cheesy Tortellini and Sausage Bake
- Pasta Bake with Sausage
- White Chicken and Spinach Lasagna
- Shrimp Fettuccine Alfredo Pasta Bake
Tried this recipe?
I'd love to hear what you think! Leave a comment and rating below to share your feedback. Your reviews help others discover this recipe and help me keep creating more free recipes for you. Snap a photo and tag me on social media @aheadofthyme too.

Spinach Cheese Rolls

Spinach cheese rolls are an easy appetizer that is creamy, cheesy, comforting, and delicious. Made with spinach, fresh garlic, and three types of cheese, wrapped in a puff pastry and baked until golden and bubbly, these delicious snacks are loaded the flavor, creamy inside, and crispy outside. Serve these hand-held appys warm fresh out of the oven at your next party, in a school lunch, or or cold for lunch the next day.

Why You'll Love Spinach Cheese Rolls
- They're easier than they look. These spinach cheese rolls may look difficult to make, but it's really not that hard. You simply spend about 15 minutes of prep time - combining most of the ingredients to make the filling, adding it to the puff pastry dough, then rolling and cutting before popping into the oven to bake.
- The perfect blend of ingredients. From Baked Spinach Dip to Spinach Gratin and more, spinach and cheese are a match made in heaven. These two ingredients are just meant to go together and compliment each other so well, and these layered spinach cheese rolls wrapped in puff pastry are no exception.
- Creamy inside, crisp outside. When you bite into a spinach cheese roll, you'll see several beautiful layers of cheesy spinach nestled between perfectly baked puff pastry
- A bite-sized appetizer. We love bite-sized appetizers that are so easy to serve. Every one just grabs an individually portioned snack without having to share. It's perfect to serve for lunch, as a snack, or an appetizer on a Game Day spread.

Ingredient Notes
To make these baked Spinach Cheese Rolls, you will need the following ingredients (full quantities in the recipe card below):
- puff pastry - use a 10x15-inch frozen sheet of puff pastry (thawed), or use homemade puff pastry dough.
- spinach - I used frozen chopped spinach to make it easy. You will need to thaw and drain it really well. You can also cook 1 pound of fresh spinach until wilted, then squeeze out any excess water.
- garlic
- cheese - we use 3 types of cheese: feta cheese (or substitute with goat cheese), Parmesan cheese, and mozzarella cheese (or substitute with cheddar cheese).
- eggs - for the filling and for the egg wash on top.
- salt and pepper
- sesame seeds - optional, for garnish.
You can also get creative with the filling and add in different ingredients. Try using:
- fresh mozzarella and tomatoes
- artichokes and asparagus
- pepperoni and tomato sauce
- cheddar cheese and jalapeño peppers

How to Make the Best Spinach Cheese Rolls
- Preheat oven to 350F.
- In a large mixing bowl, mix spinach, garlic, cheese, 1 egg, salt, and pepper until well combined. (Make sure to drain the thawed spinach well beforehand). Set aside.
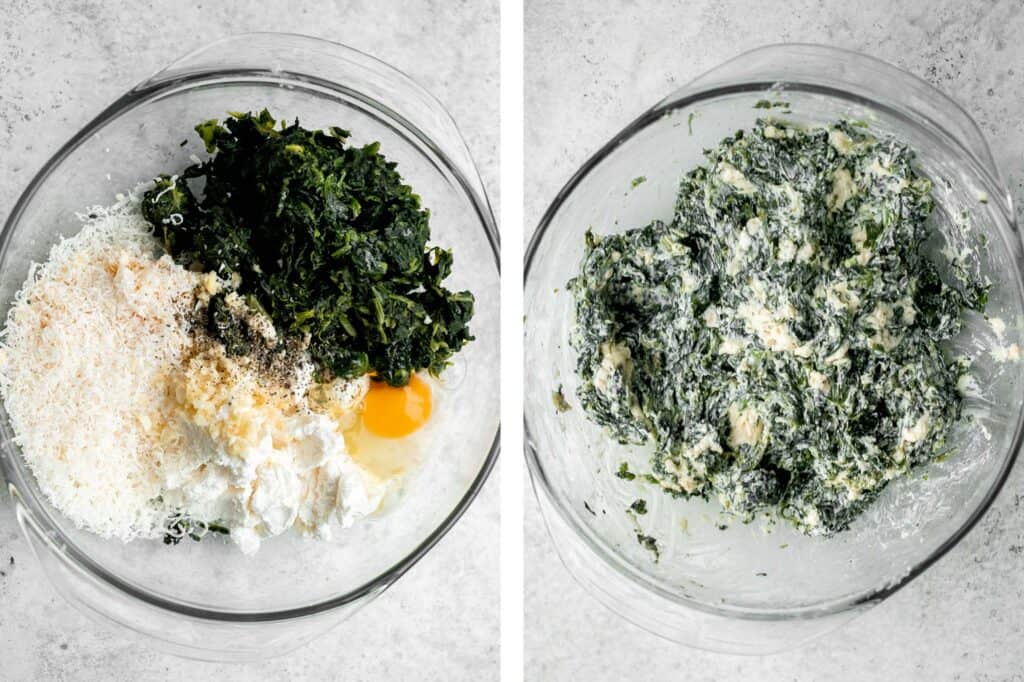
- Crack the remaining egg into a small bowl and beat with a fork. Set aside.
- Place the puff pastry on a clean and lightly floured surface, and divide in half crosswise. If you are making the puff pastry dough from scratch, roll out it out into a 10x15-inch rectangle, and then cut in half.
- Divide the spinach filling between 2 pastries and use a silicone brush to brush the edges with the egg wash.
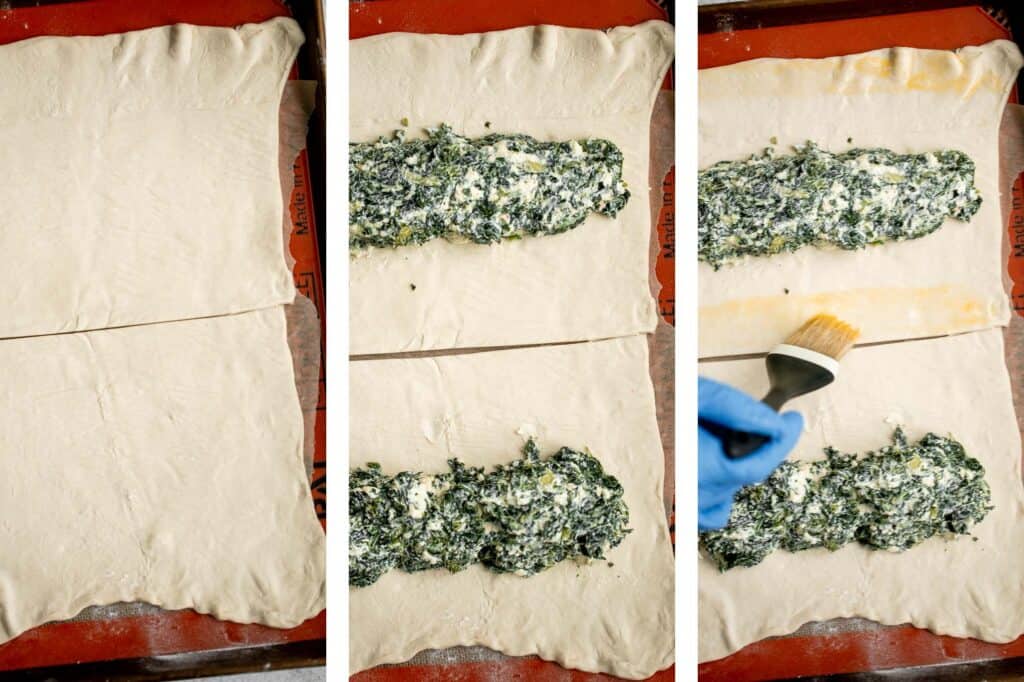
- Gently roll the dough over the filling and pinch to seal the edges.
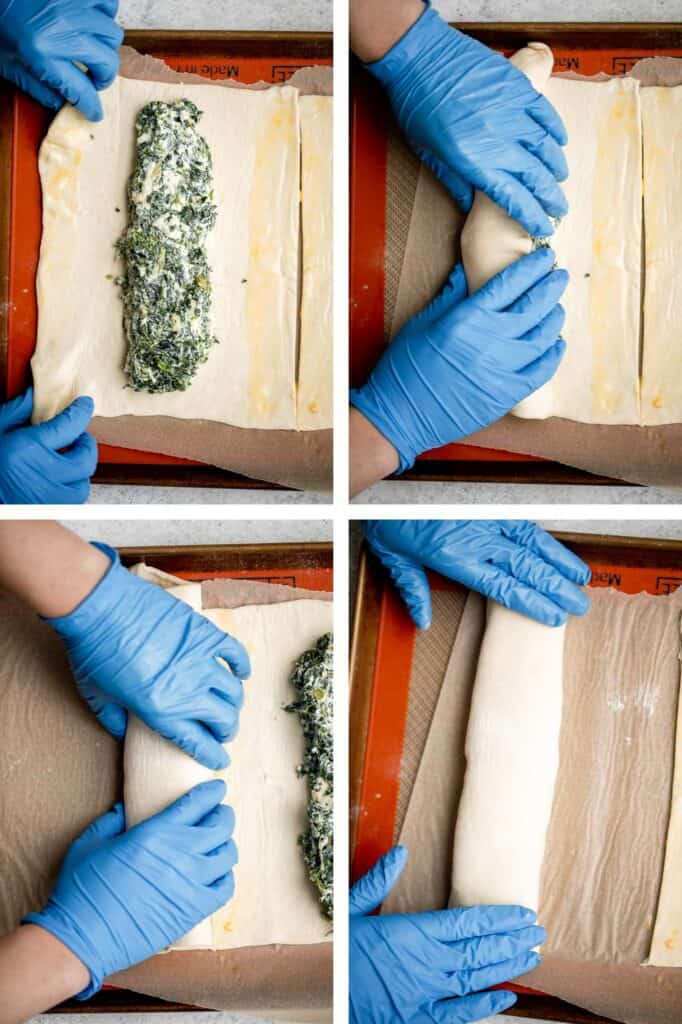
- Cut each roll into 3 equal pieces and arrange the rolls seam side down on a large half sheet baking pan lined with parchment paper or a silicone baking mat. (You can divide the rolls into any size you prefer by cutting it into thinner slices if you prefer).
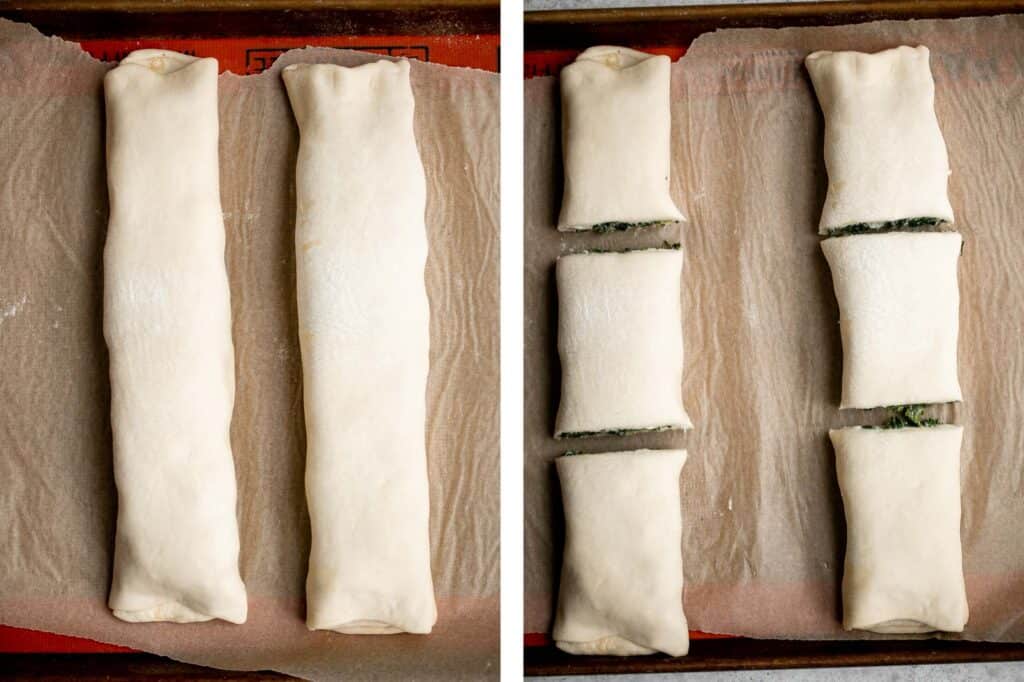
- Apply egg wash evenly on top of each roll and sprinkle with sesame seeds.
- Bake for 25-30 minutes until golden brown and serve immediately.
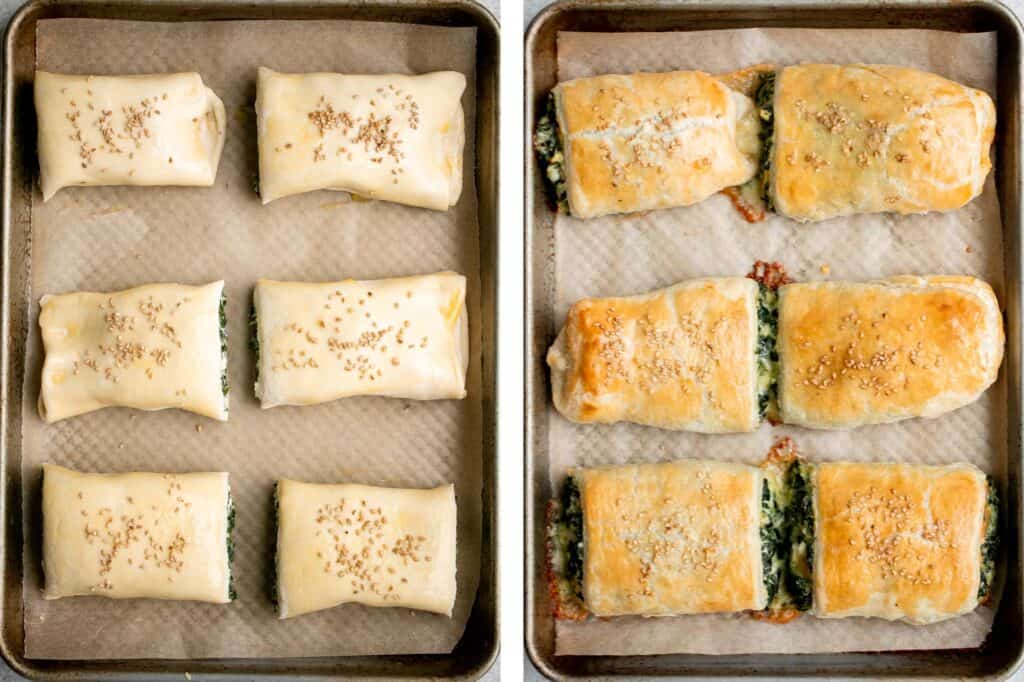
Recipe Tips and Tricks
- Less is more: Be mindful when filling your spinach cheese rolls. You want to leave enough room on the sides to seal each roll, so the filling doesn't spill out when you bake them.
- How to store: Store leftover spinach cheese rolls in the fridge in an airtight container for 4-5 days or in the freezer for up to 3 months. Allow them to cool completely before storing.
- How to reheat: Reheat cold or thawed spinach cheese rolls in a 350F oven for 10 minutes. If reheating from frozen, reheat for 15 minutes until warmed through.
- How to freeze uncooked spinach rolls: You can also freeze spinach rolls before baking. Store them in an airtight container or freezer bag for up to 3 months. You can cook the raw rolls directly from frozen at 350F for 30-35 minutes.

More Appetizers
- Pizza Crescent Rolls
- Pepperoni Pizza Rolls
- Homemade Calzones
- Pigs in a Blanket
- Grilled Cheese Roll Ups
- Shrimp Egg Rolls
Tried this recipe?
I'd love to hear what you think! Leave a comment and rating below to share your feedback. Your reviews help others discover this recipe and help me keep creating more free recipes for you. Snap a photo and tag me on social media @aheadofthyme too.

How to Make Shredded Chicken

Shredded chicken is quick and easy to make and even easier to shred. It's a staple ingredient to add into so many other delicious recipes from soups to salads to sandwiches and more. Ready in under 30 minutes, with 4 simple ingredients, you'll wonder why you never tried making it at home before. It's also great for meal prep and is freezer-friendly. You need this staple in your backpocket.
Why You'll Love Shredded Chicken
- Quick and easy meal prep. This shredded chicken recipe uses just four ingredients and can be made using one of 3 cooking methods - in a pan over the stove, in the pressure cooker, or baked in the oven. Whichever you choose, it should be ready in under 30 minutes.
- Three easy ways to shred chicken. I may have been today years old when I discovered that you don't have to use 2 forks to shred chicken. Use a hand mixer or stand mixer to shred a whole chicken breast in a matter of seconds. This kitchen hack is a serious time saver!
- Freeze it for later. Shredded chicken will last in your freezer for about 3-4 months. You can separate it into portions in small zip-lock bags for easy use.
- There are a million ways to use shredded chicken. There are endless possibilities for your shredded chicken. Use it in soups, chilis, or casseroles. Put on sandwiches, pizzas, and salads. Or make tacos, nachos, and quesadillas.
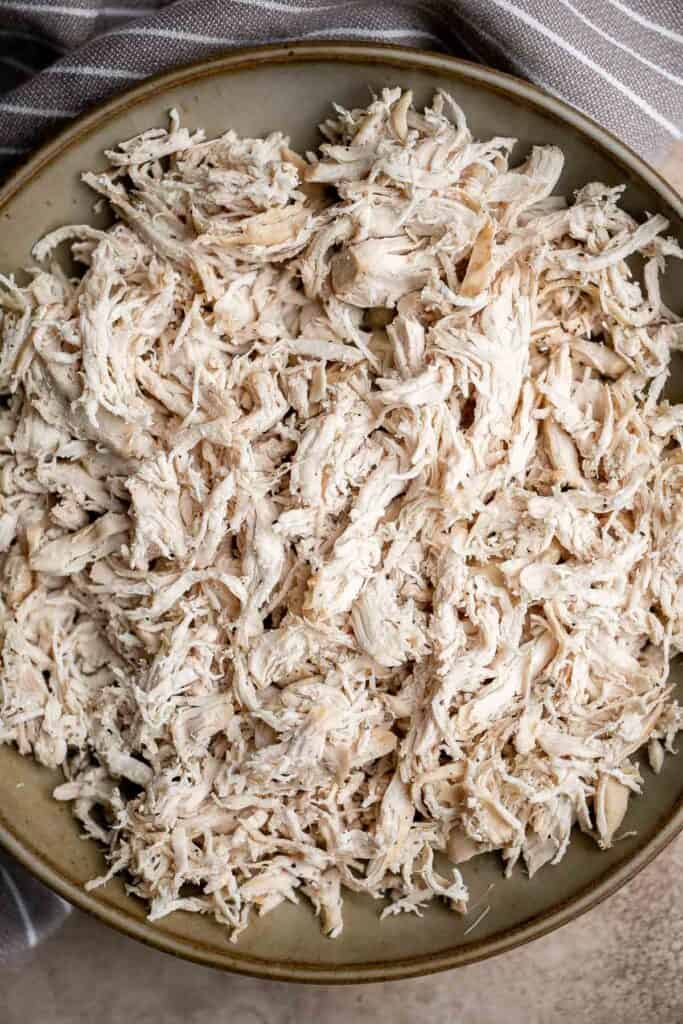
Ingredients and Substitutions
To make easy Shredded Chicken, you will need the following ingredients (full quantities in recipe card below):
- chicken breasts
- salt and pepper
- vegetable oil
- chicken broth
You will also need measuring spoons and depending on the cooking method you use - a skillet, instant pot pressure cooker, or baking sheet.
How to Make the Best Shredded Chicken (Three Ways)
You can cook the chicken in one of three ways, either on the stove, in the instant pot, or in the oven.
Stovetop shredded chicken
- Use a paper towel to pat the chicken breasts completely dry. Season with salt and pepper.
- Heat oil in a large skillet or 4 quart Dutch oven over medium-high heat until the hot oil sizzles, about 1 minute. Add chicken and sear until golden brown, about 5 minutes per side.
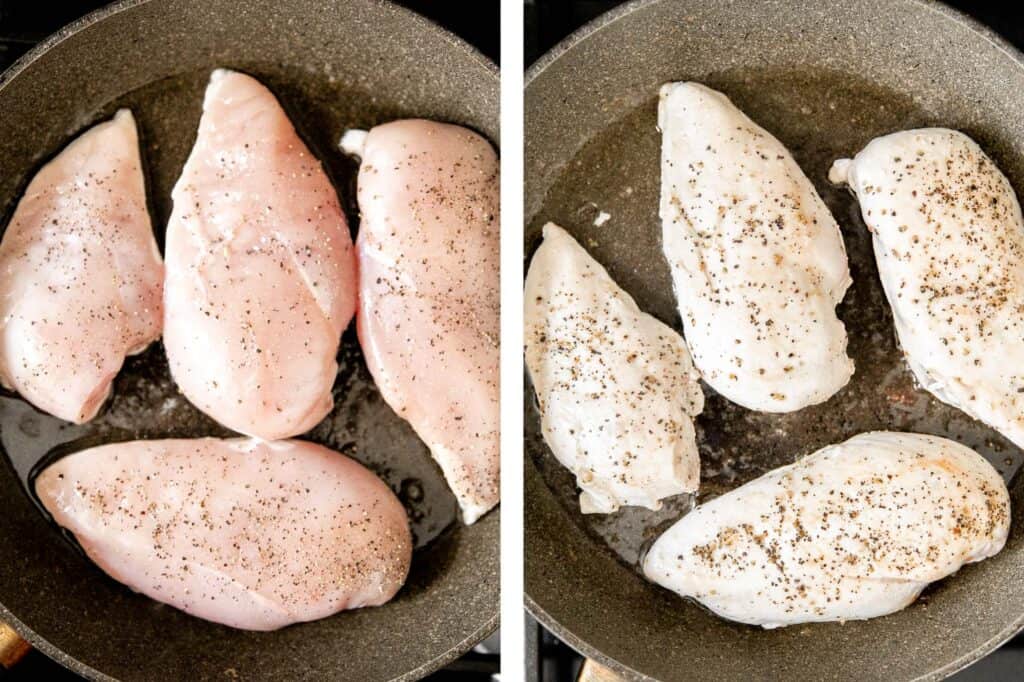
- Pour in chicken broth and cover the lid. Bring to a boil until the chicken is fully cooked through, about 10-12 minutes. The internal temperature of the chicken should be 165F. You can check for doneness by inserting a meat thermometer into the thickest part of the chicken to get a quick reading.
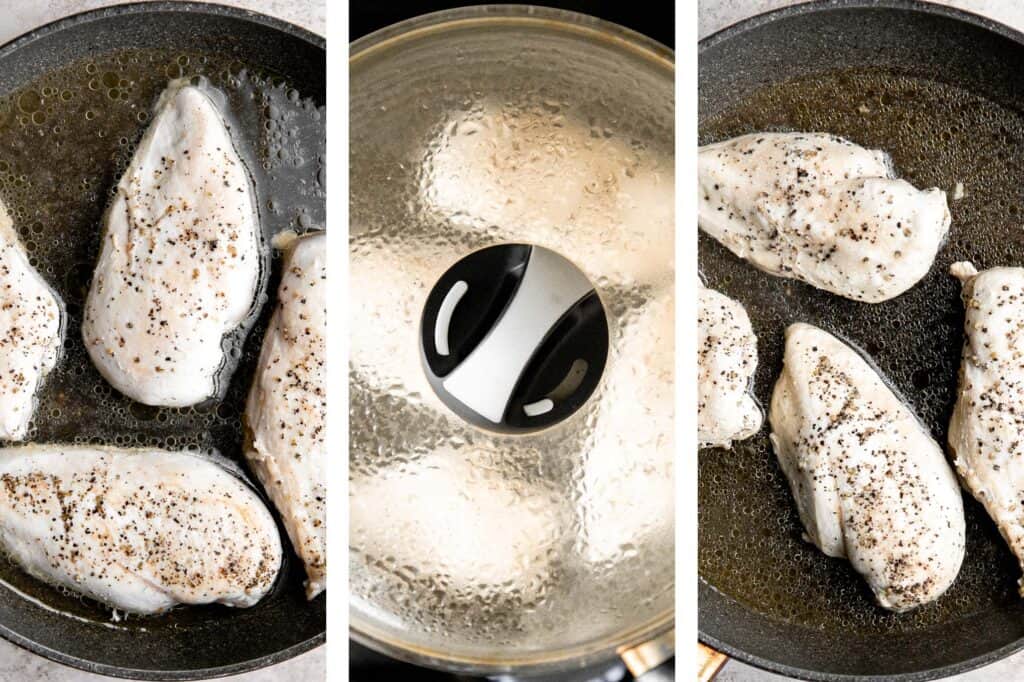
Shredded chicken in the instant pot
- Place chicken breasts and 1 cup chicken broth (or water) in the inner pot of the instant pot and season with salt and pepper. Feel free to customize and add any other seasonings that you like.
- Switch the instant pot to pressure cooking mode on manual High and seal the lid (the steam release knob must be turned to the sealed position). Set the timer for 10-12 minutes.
- Once the time is up, let the instant pot slowly release the pressure, about 15 minutes or quick release the remaining pressure by turning the steam release valve to the venting position.
Shredded chicken in the oven
- Place the chicken breasts on a large plate and season with oil, salt, and pepper on both sides. You can also combine chicken with all seasoning in a large zip-loc bag. Press the air out of the bag and seal tightly. Press the seasoning around the chicken to coat.
- Place the chicken in a baking sheet and pour in 1 cup chicken broth (or water). Cover the pan with aluminium foil. Bake in a preheated 350F oven for 30-35 minutes until the internal temperature for the chicken reaches 165F.
How to Shred Chicken
You can shred chicken in one of three ways. You can remove the chicken and shred into small pieces with 2 forks, or shred the chicken within a few seconds using an electric hand mixer or stand mixer.
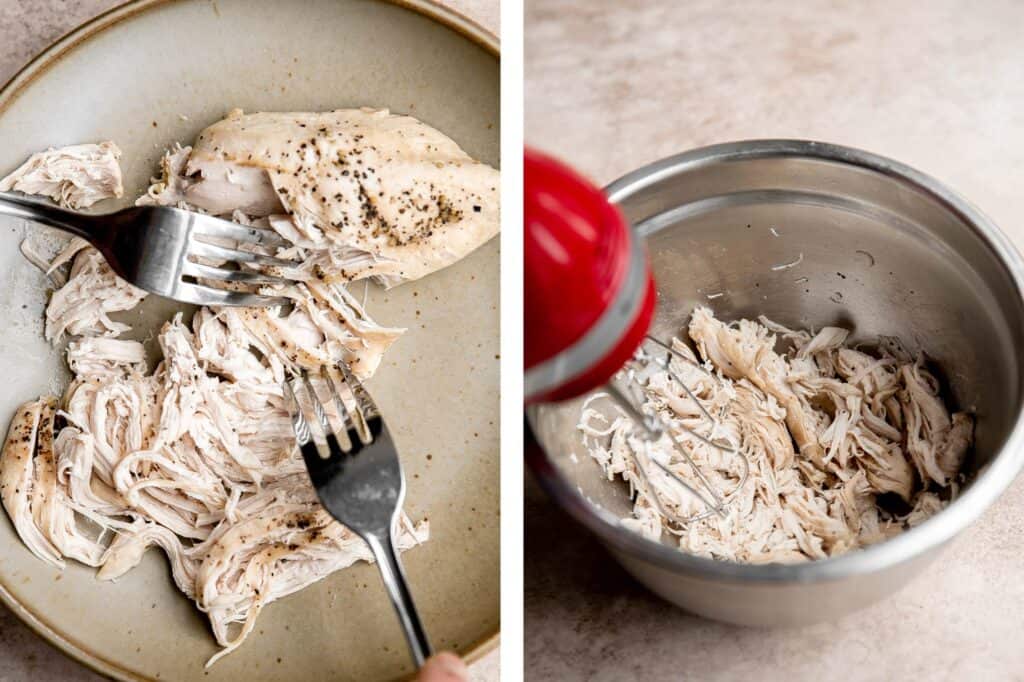
Recipe Tips and Tricks
- How to store shredded chicken: Leftover shredded chicken will stay good for 4-5 days in an airtight container in the fridge.
- How to freeze: If you know you won't eat all the chicken within 4 or 5 days, freeze it the day you make it. This ensures the chicken tastes just as good when you thaw it as the day you made it. Shredded chicken can be frozen for up to 3-4 months in an airtight container or freezer bag. When ready to use, let it thaw overnight in the refrigerator.
.
How to Use Shredded Chicken
Use shredded chicken in any recipe that calls for leftover rotisserie chicken, such as tacos, salads, pizza, soup, sandwiches, and wraps. Some of my favorites are:
- Chicken Pot Pie
- BBQ Chicken Pizza
- White Chicken Chili
- Chicken Parmesan Stuffed Peppers
- Creamy Turkey Gnocchi Soup (but use chicken)
- Vietnamese Summer Rolls

More Chicken Recipes
- 60 Best Chicken Recipes
- Air Fryer Chicken Breast
- Instant Pot Whole Chicken
- Slow Cooker Whole Chicken
- Pesto Whole Chicken
- Air Fryer Chicken Thighs
Tried this recipe?
I'd love to hear what you think! Leave a comment and rating below to share your feedback. Your reviews help others discover this recipe and help me keep creating more free recipes for you. Snap a photo and tag me on social media @aheadofthyme too.
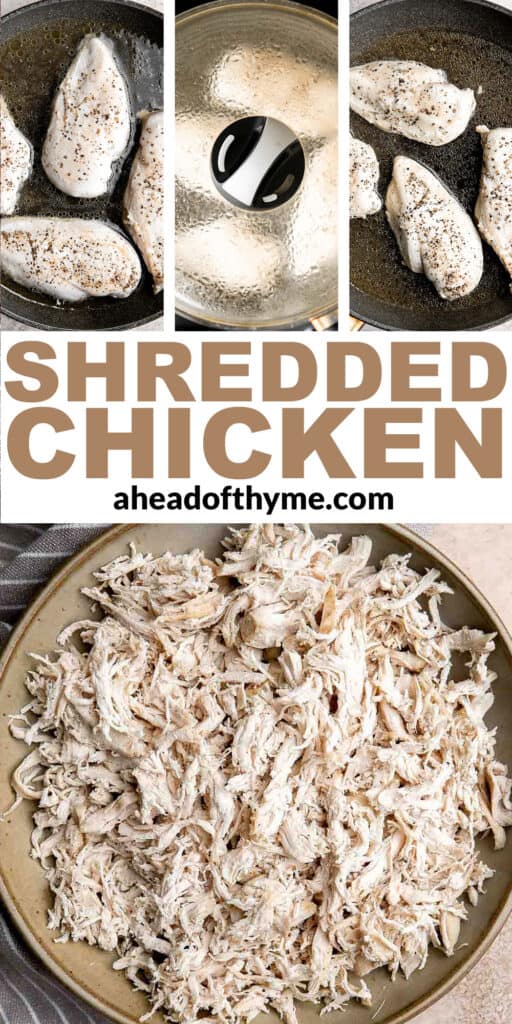
- « Previous Page
- 1
- …
- 20
- 21
- 22
- 23
- 24
- …
- 40
- Next Page »