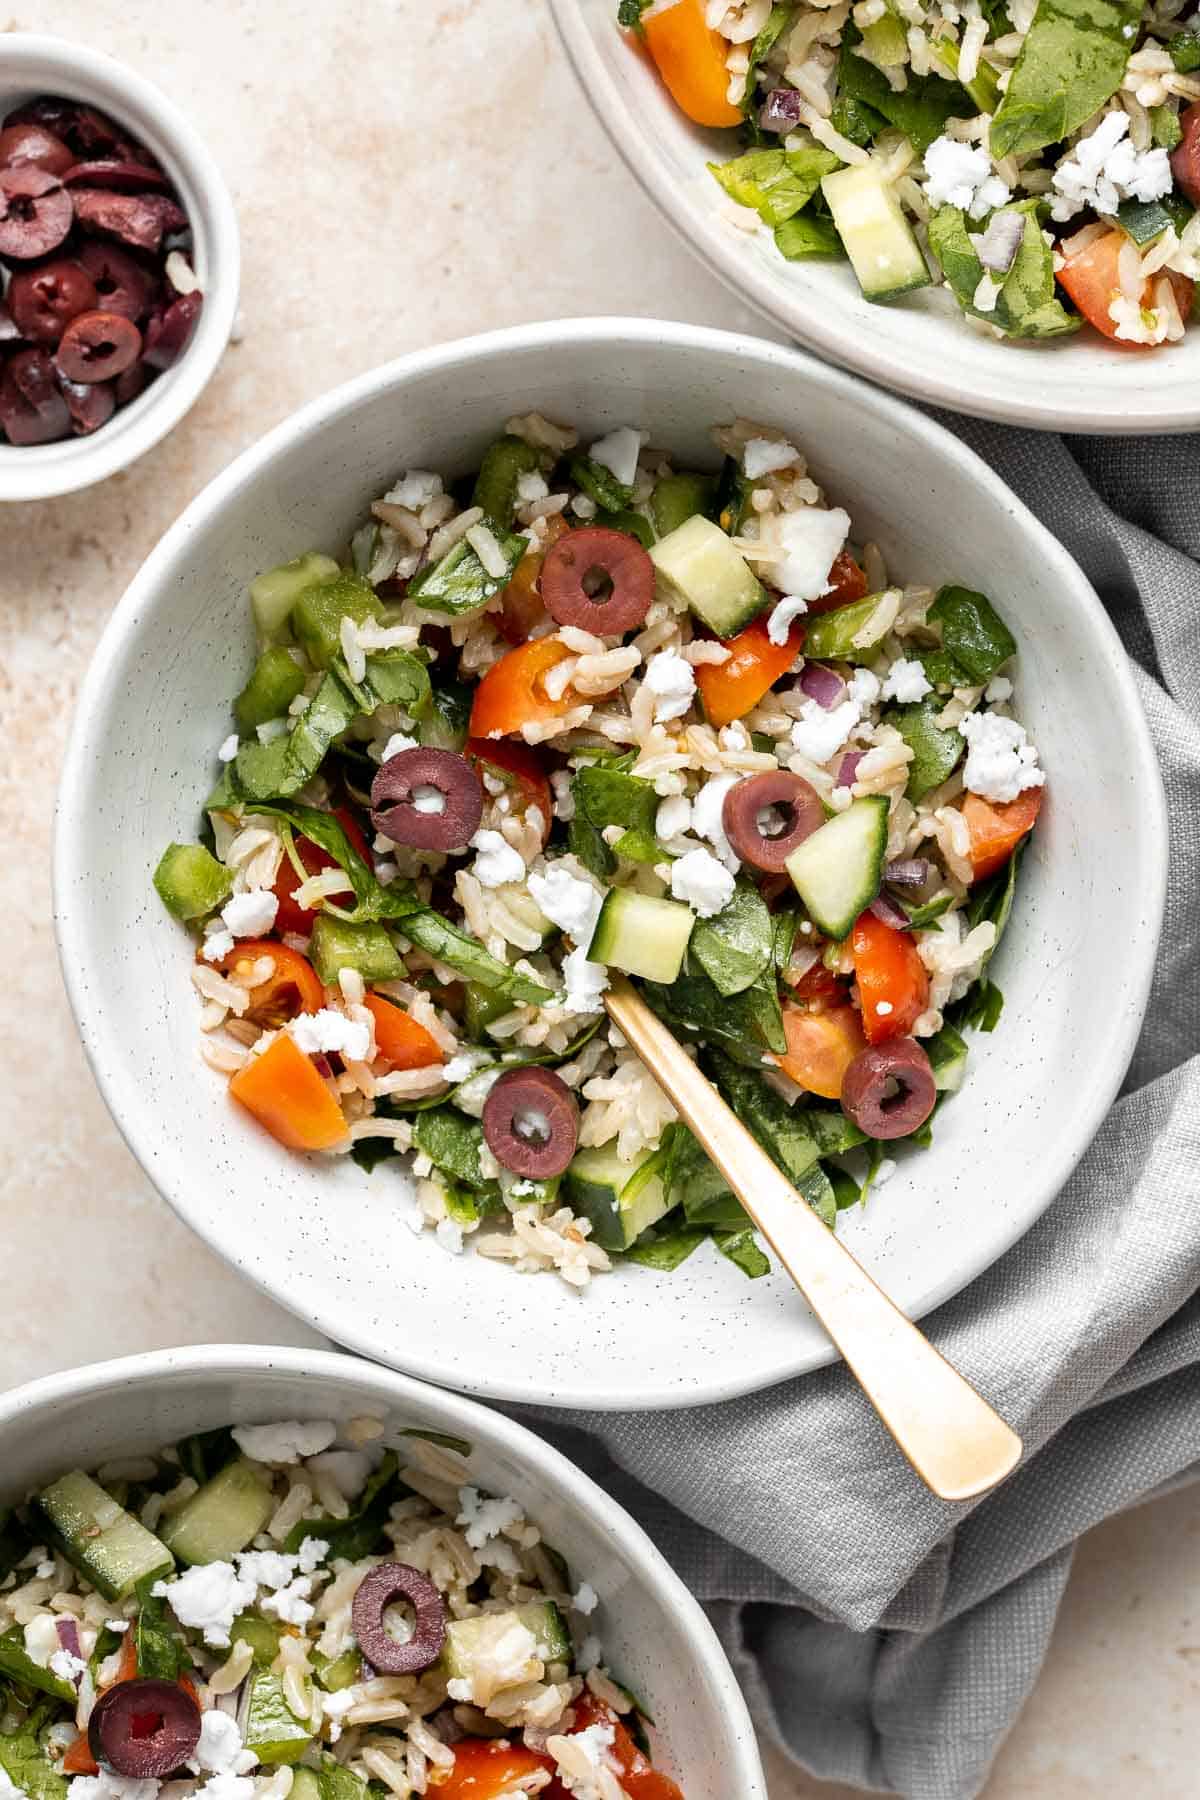
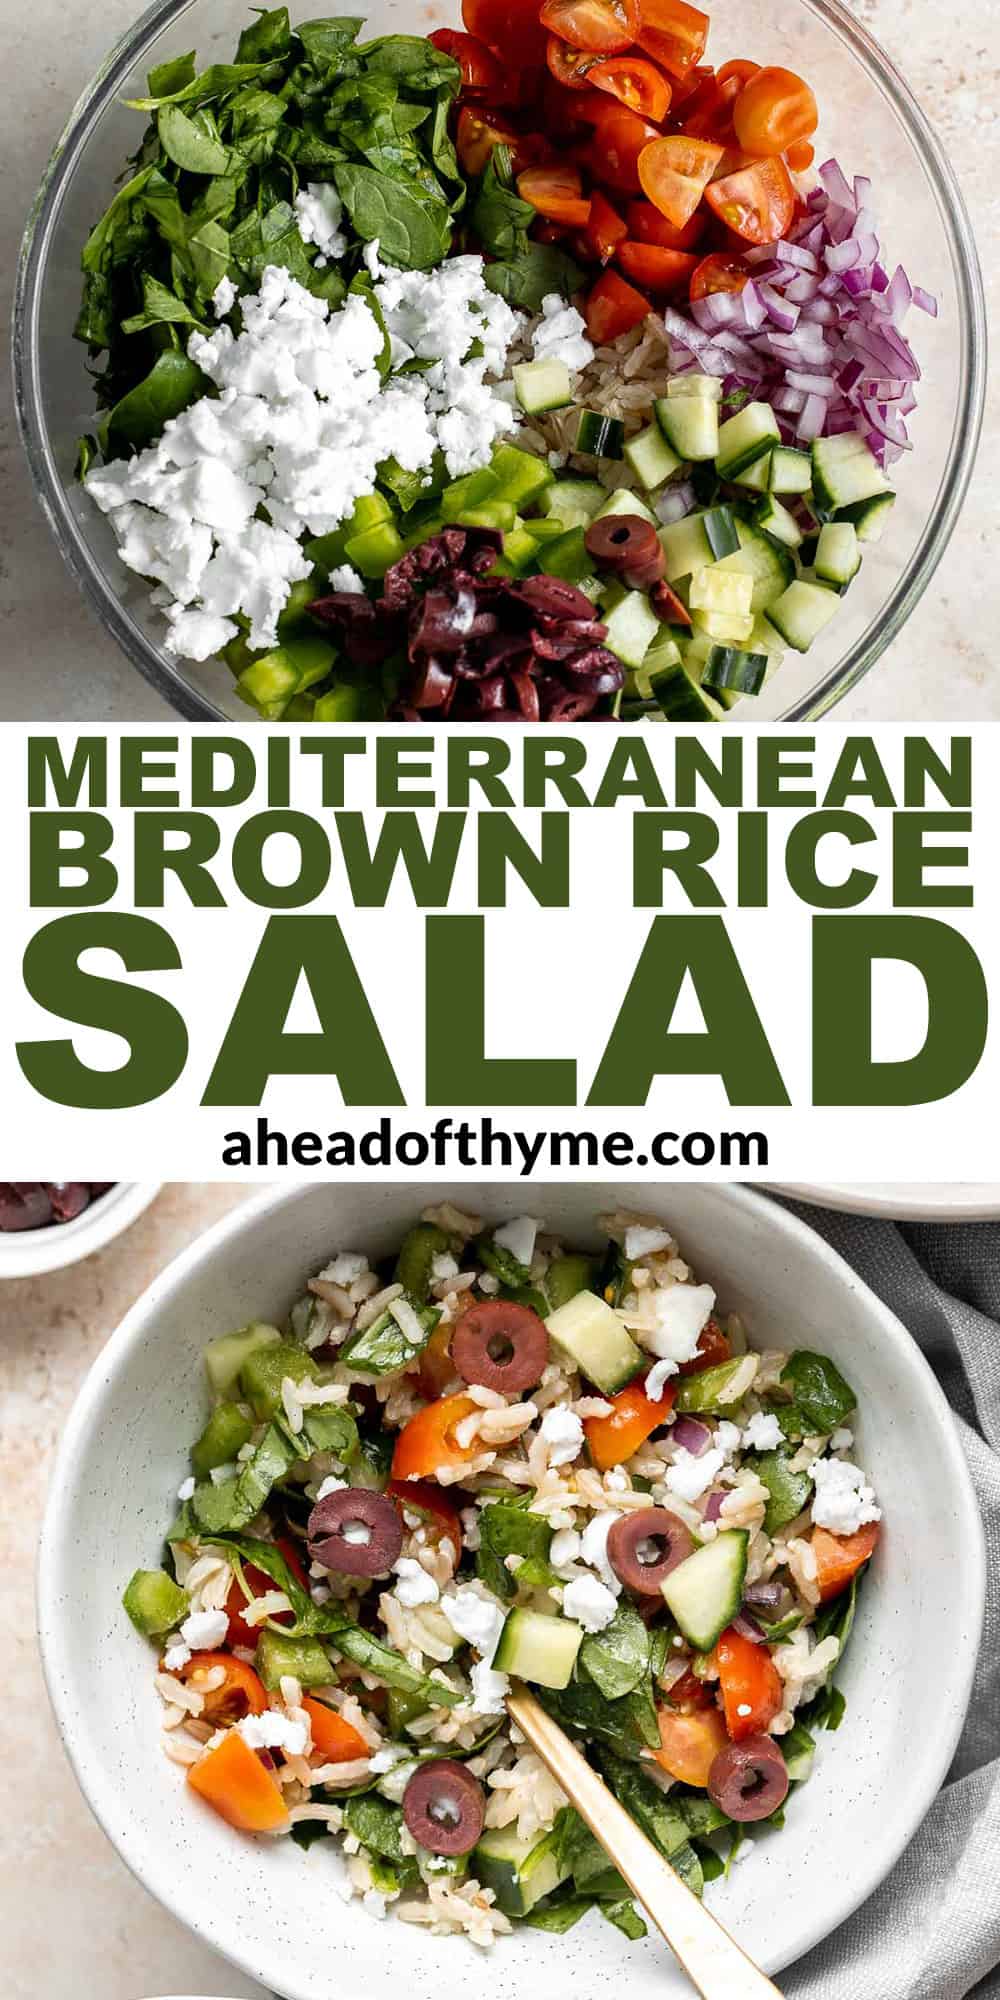
This Mediterranean Brown Rice Salad is a filling, healthy, and gluten-free salad that is easy to make. Loaded with veggies, rice, and Greek flavors, this fibre- packed salad is nutritious and delicious.
The best part? It takes just minutes to toss together one the rice is cooked. It also stores well so it's great for meal prep lunches over the next few days, or to bring to a summer potluck or BBQ.
Why You'll Love Mediterranean Brown Rice Salad
- The best Mediterranean flavors. This Mediterranean brown rice salad combines the flavours of a classic Greek salad with spinach and rice.
- It's healthy and nutritious. This gluten-free salad is loaded with nutrients thanks to the veggies and rice. Adding brown rice to this salad adds tons of nutritional value as rice is a source of B-vitamins, phosphorus and zinc. Plus, brown rice also contains magnesium, selenium, manganese and fibre.
- Loaded with fibre. One cup of brown rice has almost 4 grams of fibre while 3.5 cups of raw spinach has only 2.2 grams. Well this salad has both, so we are seriously doubling up on some major fibre!
- Quick and easy to make. It takes some time for the rice to cook, but once it's ready, you just toss all the ingredients together and enjoy.
Ingredient Notes
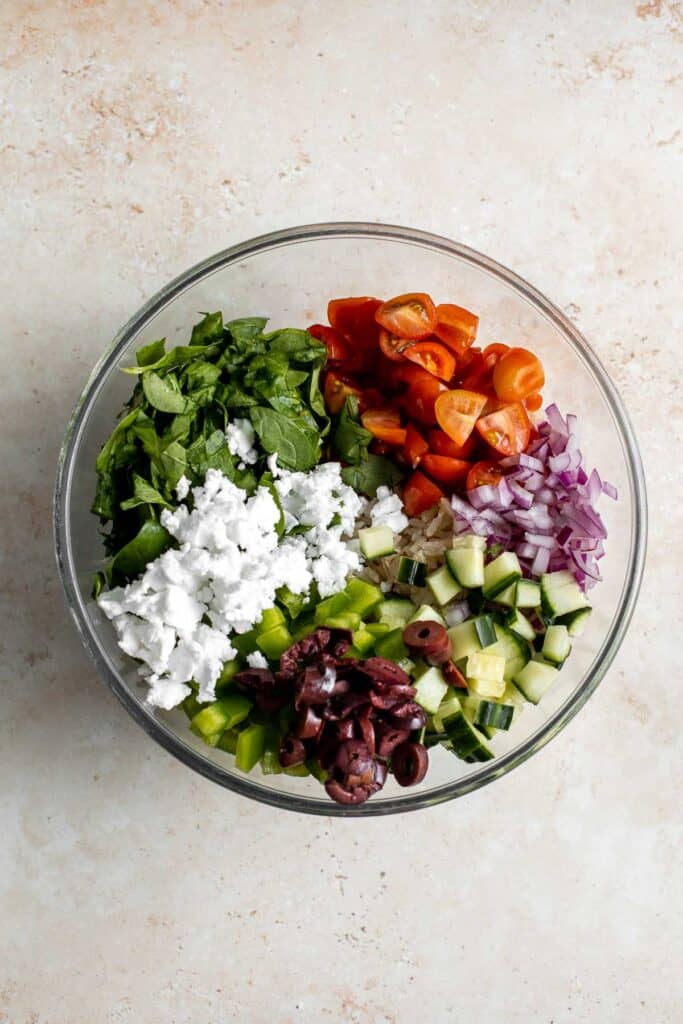
To make this quick and easy Mediterranean Brown Rice Salad, you will need the following ingredients (full measurements in recipe card below):
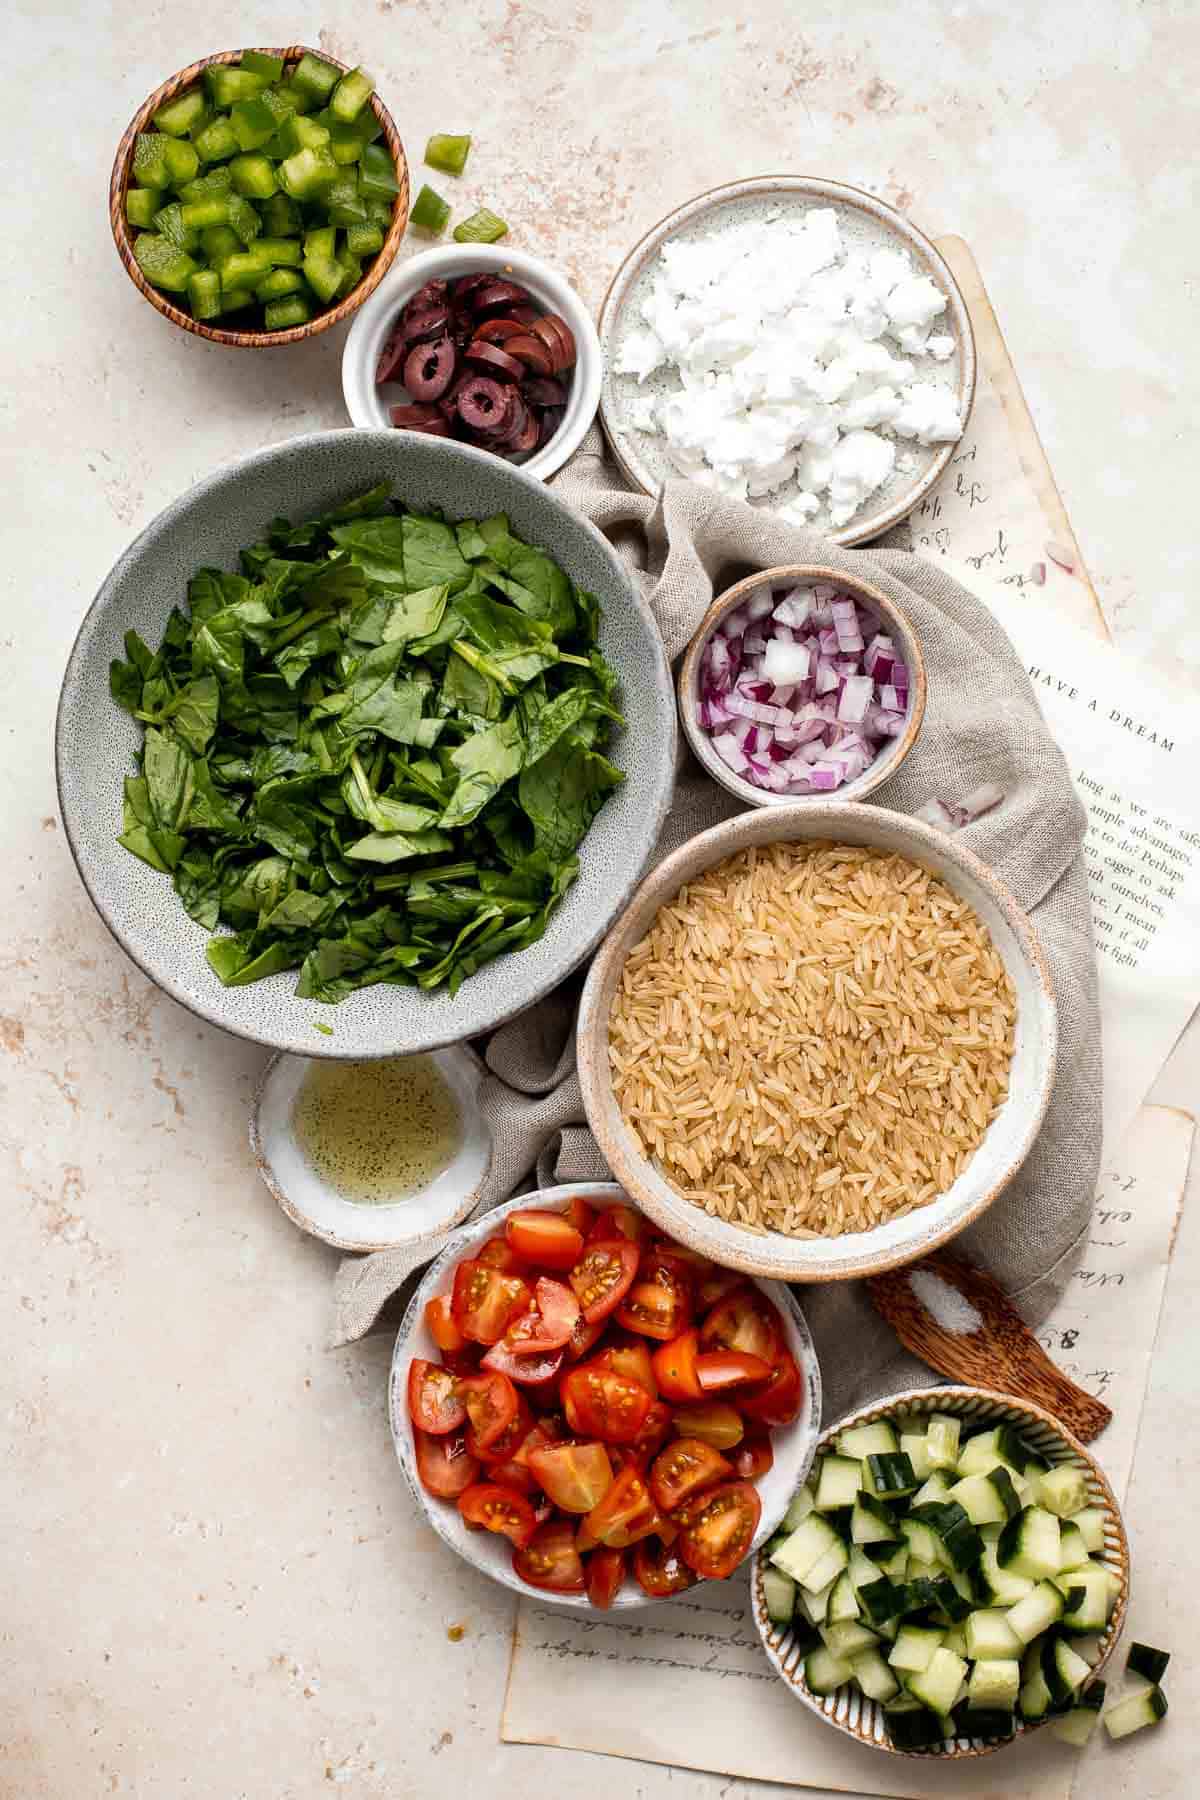
- brown rice - I used long-grain brown rice cooked in water, olive oil, and salt. Feel free to use either long-grain or short-grain. You can also use white rice but you'll have to adjust the cooking time slightly. See out Steamed Rice recipe for instructions.
- spinach - feel free to substitute with any leafy greens that you like such as romaine lettuce, kale, arugula, or a spring mix salad blend.
- grape tomatoes - or substitute with cherry tomatoes or diced roma tomatoes.
- Persian cucumbers
- green bell pepper
- red onions
- kalamata olives
- feta cheese
- dressing - made with olive oil, lemon juice, garlic, oregano, salt, and pepper. You can also substitute it with ¼ cup Greek Salad Dressing.
You will also need measuring cups and spoons, a medium saucepan, and mixing bowls.
How to Make Mediterranean Brown Rice Salad
- Cook the brown rice. Add rice, water, oil, and salt to a medium saucepan and bring to a boil over high heat. Turn the heat down to low, cover, and simmer for 40 minutes (or according to package instructions). Remove from heat and allow rice to absorb the steam for another 10 minutes (still covered). Uncover and fluff with a fork.
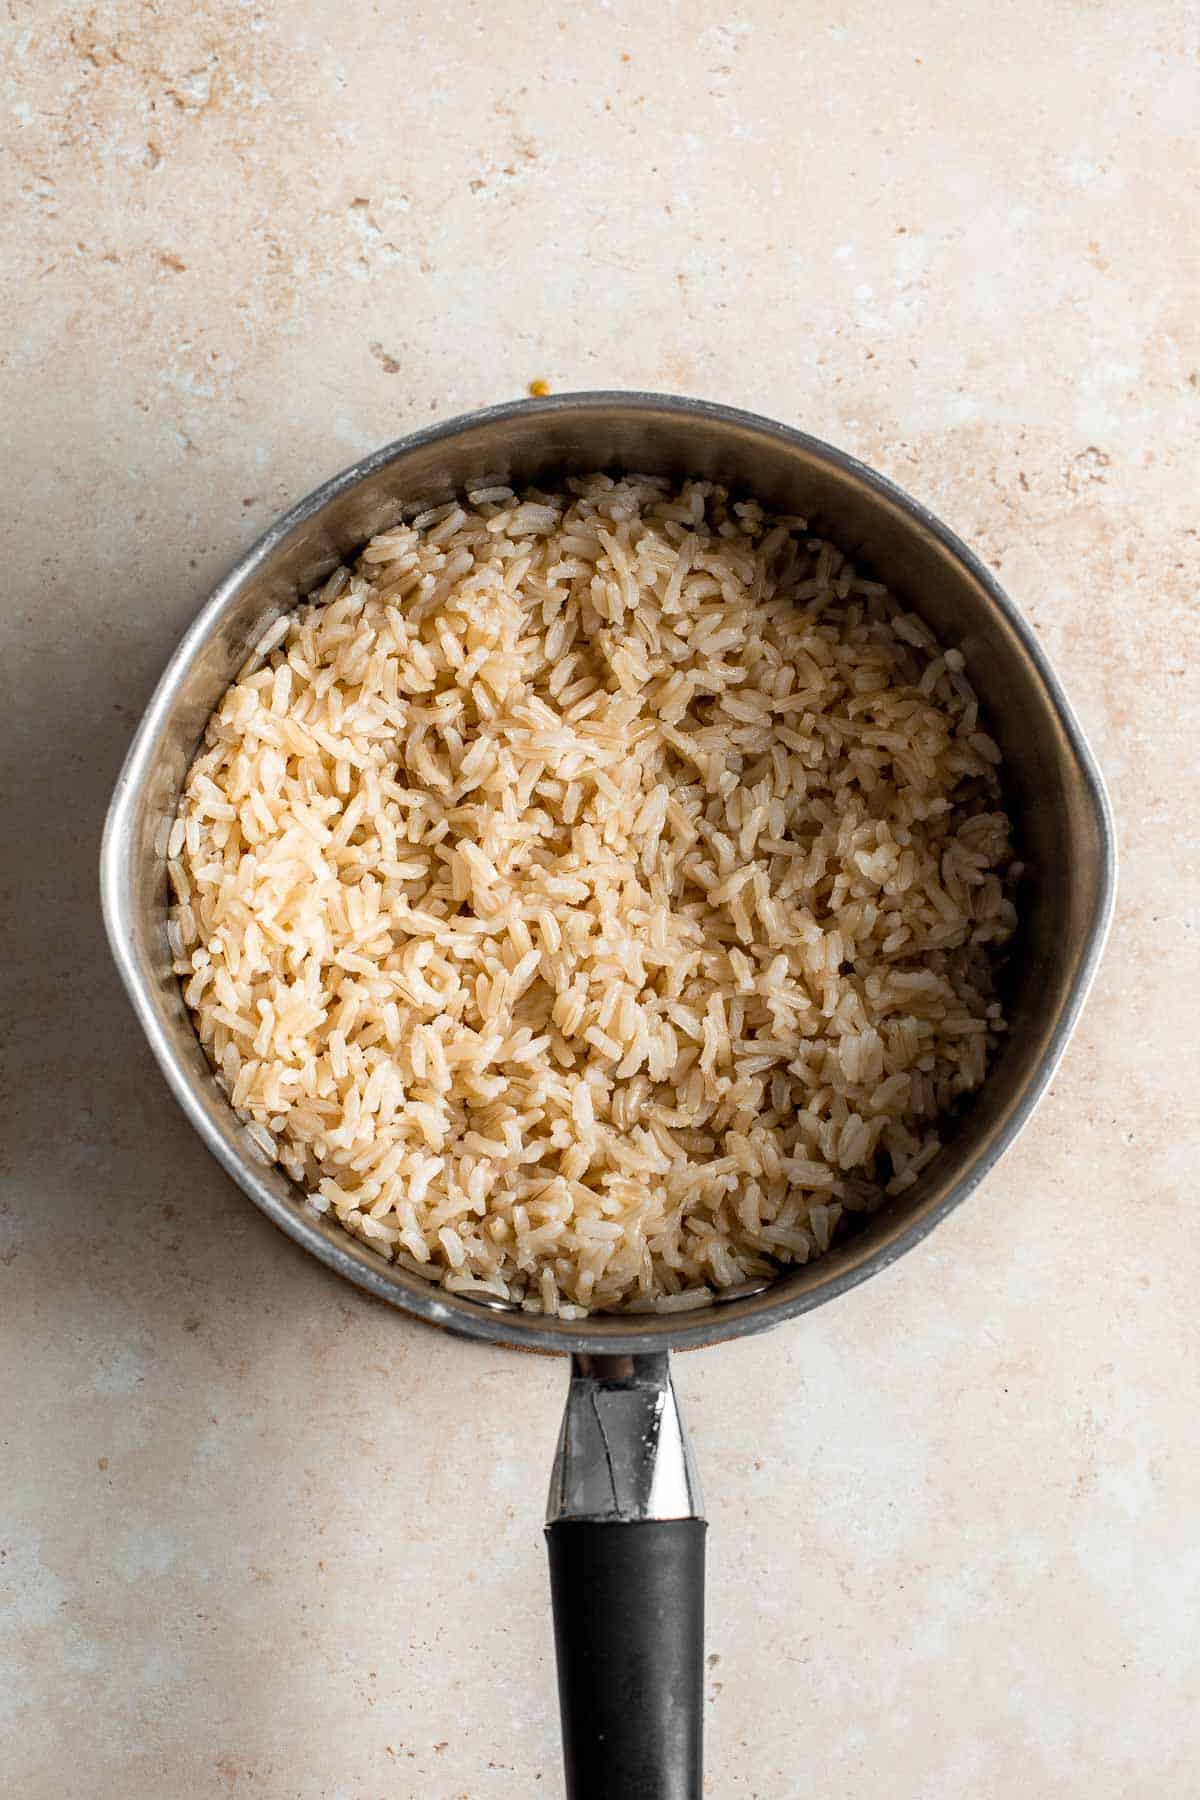
- Cool the rice. Allow the rice to cool down to room temperature or place it to the refrigerator for 10-15 minutes to cool down quickly.
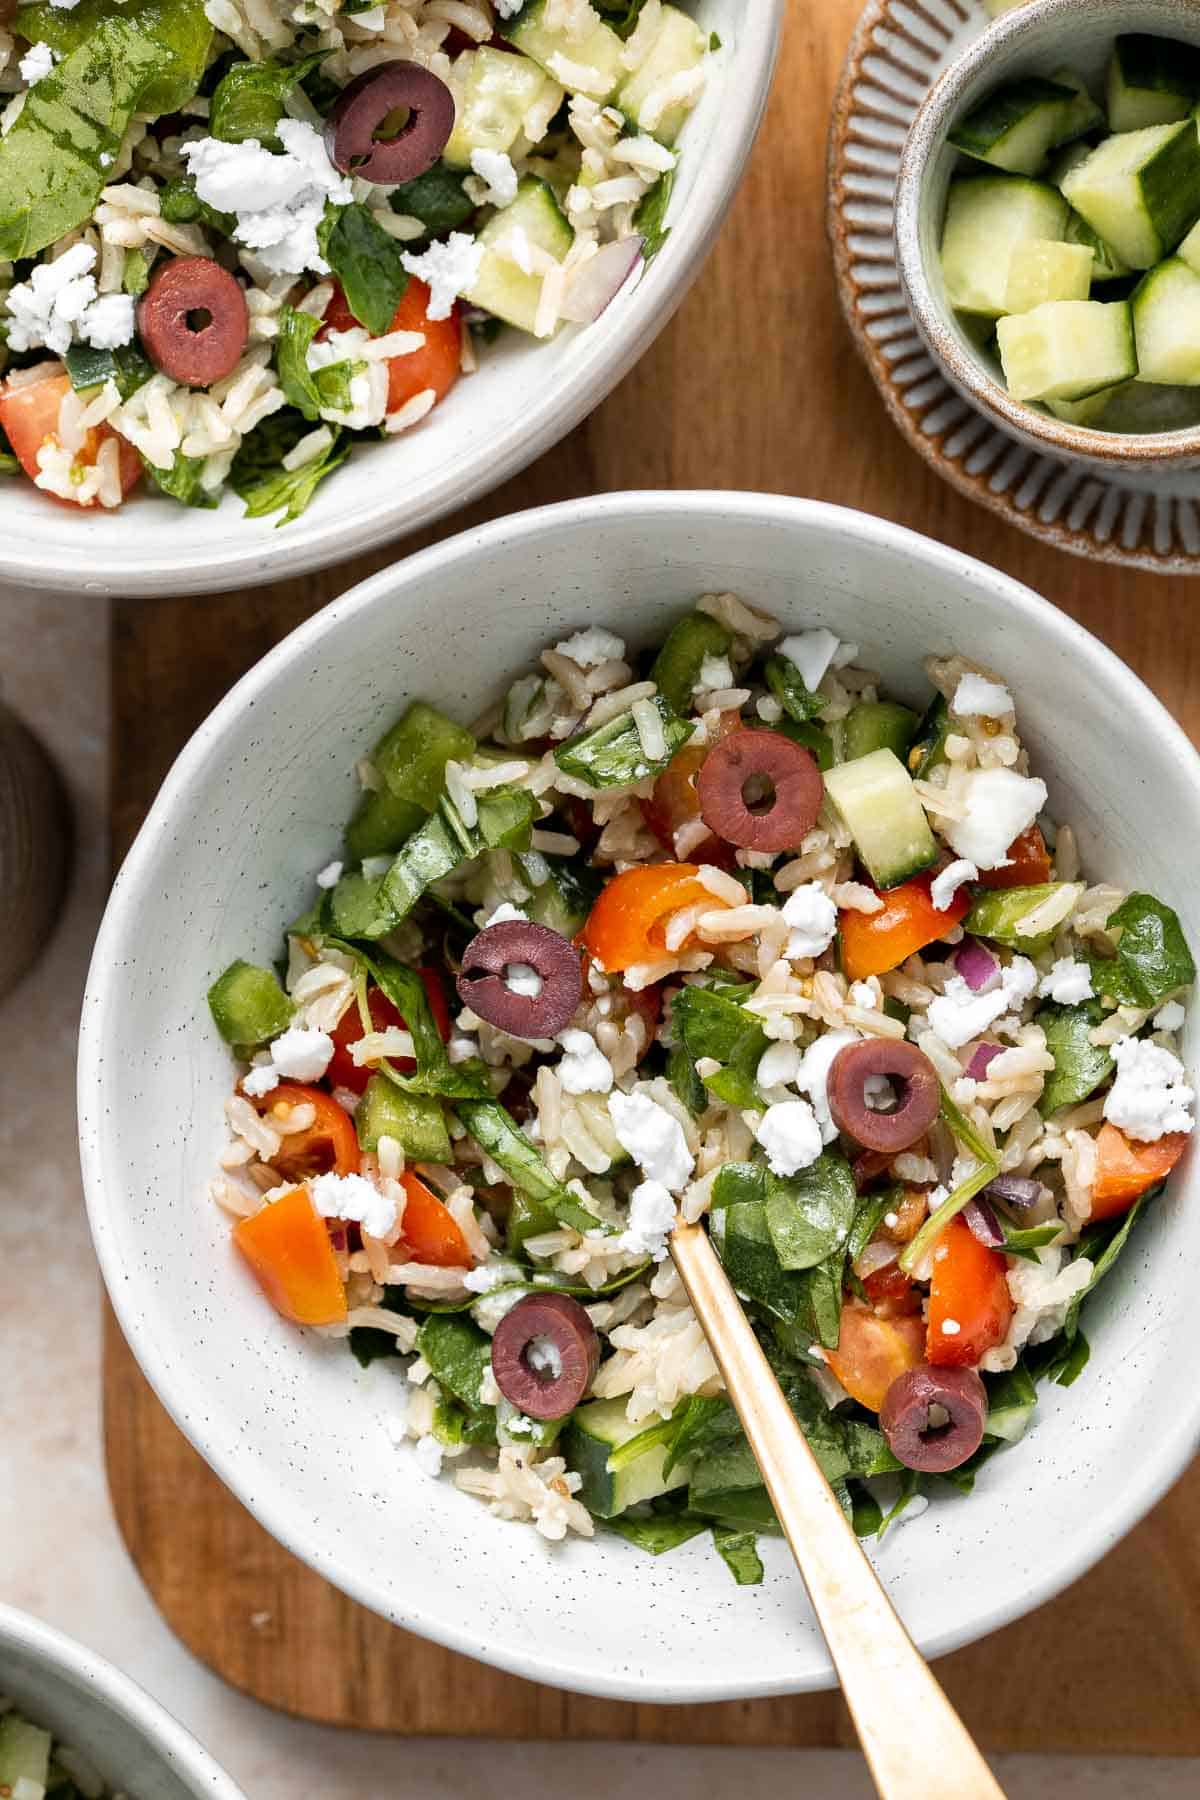
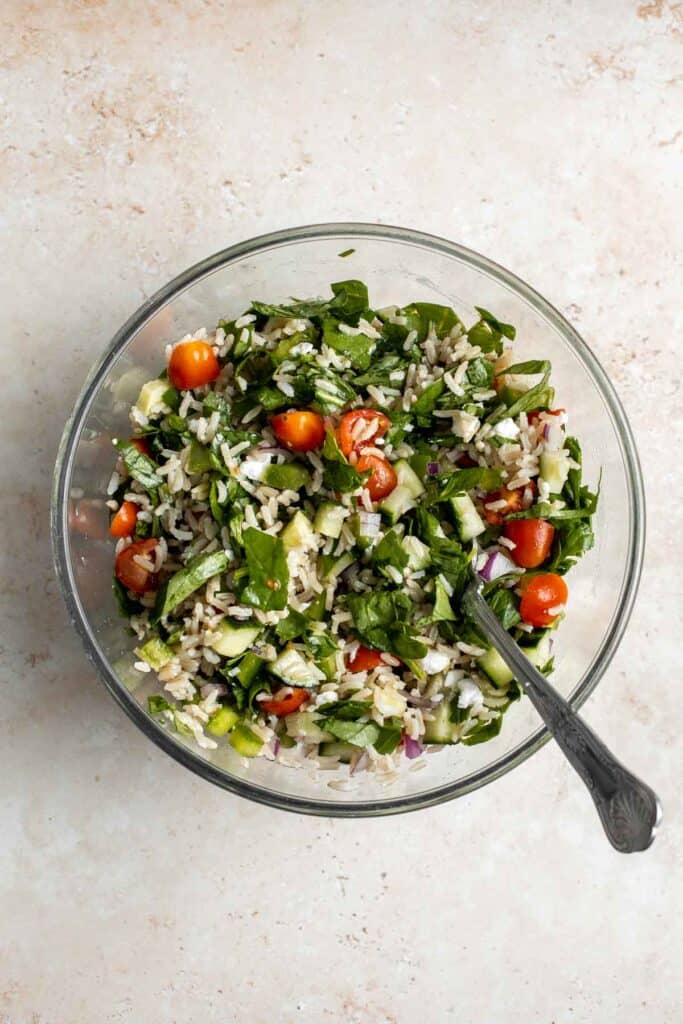
- Combine salad ingredients. In a large mixing bowl, combine the cooled rice, spinach, tomatoes, cucumber, bell pepper, red onions, olives, and feta cheese.
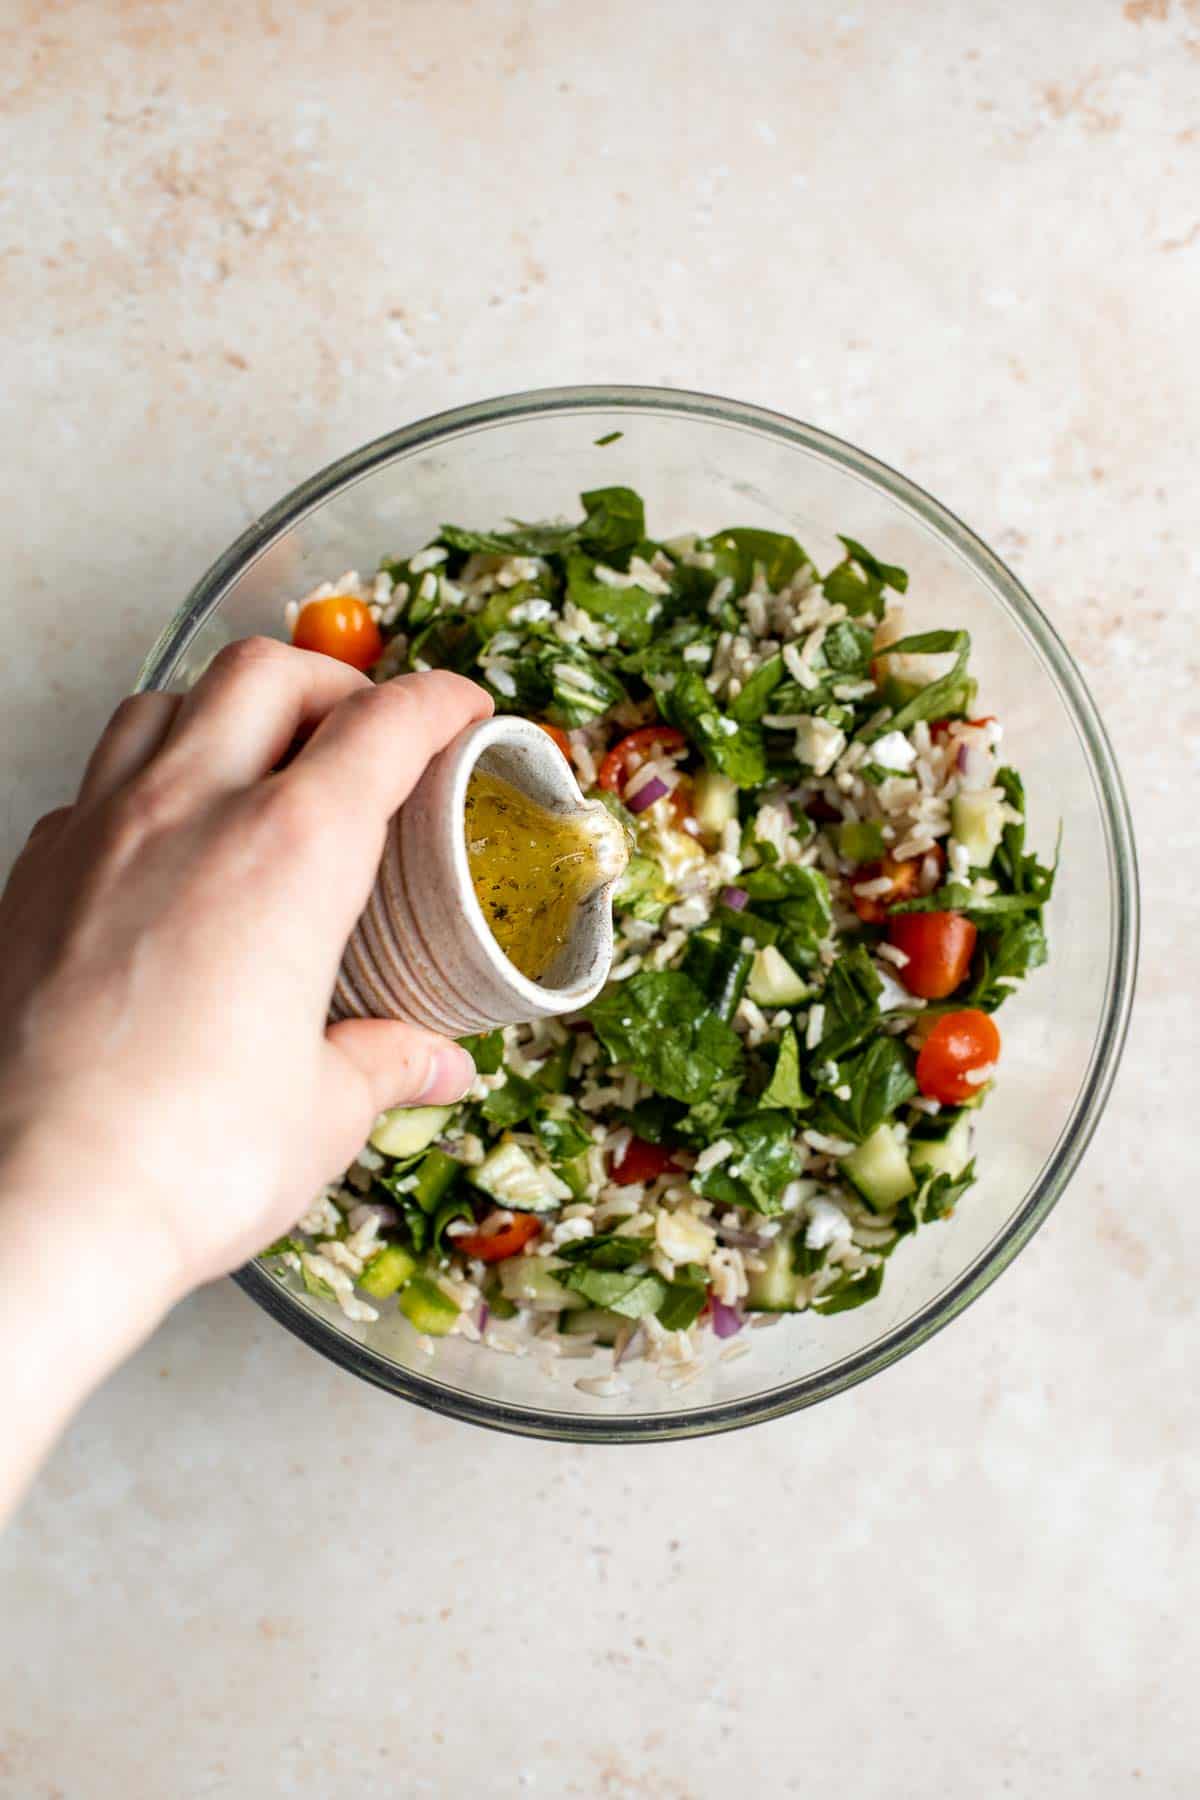
- Make dressing. In a small mixing bowl, make the dressing by combining and stirring together olive oil, lemon juice, garlic, oregano, salt, and pepper.
- Toss and serve. Pour the dressing over the salad and toss to combine. Serve immediately at room temperature. You can also refrigerate and serve cold. If the rice is too hard (which can happen in the fridge), allow it to warm to room temperature before eating.
How to Serve
This Mediterranean brown rice salad can be served on its own as a complete meal, as it's loaded with veggies and rice which makes it filling. If you are thinking of serving it as a side salad, pair this brown rice salad with:
- Greek Salmon or Garlic Butter Shrimp.
- Oven Baked Chicken Breast or Balsamic Chicken Kabobs.
- Garlic Butter Steak Bites, Sheet Pan Lamb Chops, or Greek Lamb Shanks.
- Roasted Spring Vegetables or Greek Lemon Roasted Baby Potatoes.
- Hummus, Olive Tapenade, and Pita Bread.

Storing Instructions
- How to store brown rice salad: Store Mediterranean brown rice salad in an airtight container in the refrigerator for up to 3-4 days but it's best to eat immediately or within a day as the dressing will start to break down the rice and it will can start to get a little soggy the longer it's stored. Give it a quick stir to redistribute the dressing and ingredients before serving.
- How to store extra rice: I like to double up on the rice, use half in this Mediterranean brown rice salad and store the rest in the refrigerator to use in meals during the week to feed my hungry family. You can store the cooked rice in an airtight container for up to one week in the refrigerator. OR store it even longer in the freezer. Yes, rice freezes beautifully! Say hello to homemade, always ready, "minute rice."
- How to use leftover rice: I just love how versatile rice is. Think salads, soups, puddings and stir fries!
More Salad Recipes
- 40 Best Salad Recipes
- Mediterranean Orzo Pasta Salad
- Buckwheat Salad
- Chickpea Greek Salad
- Tomato Cucumber Avocado Salad
- Italian Pasta Salad
Tried this recipe?
I'd love to hear what you think! Leave a comment and rating below to share your feedback. Your reviews help others discover this recipe and help me keep creating more free recipes for you. Snap a photo and tag me on social media @aheadofthyme too.
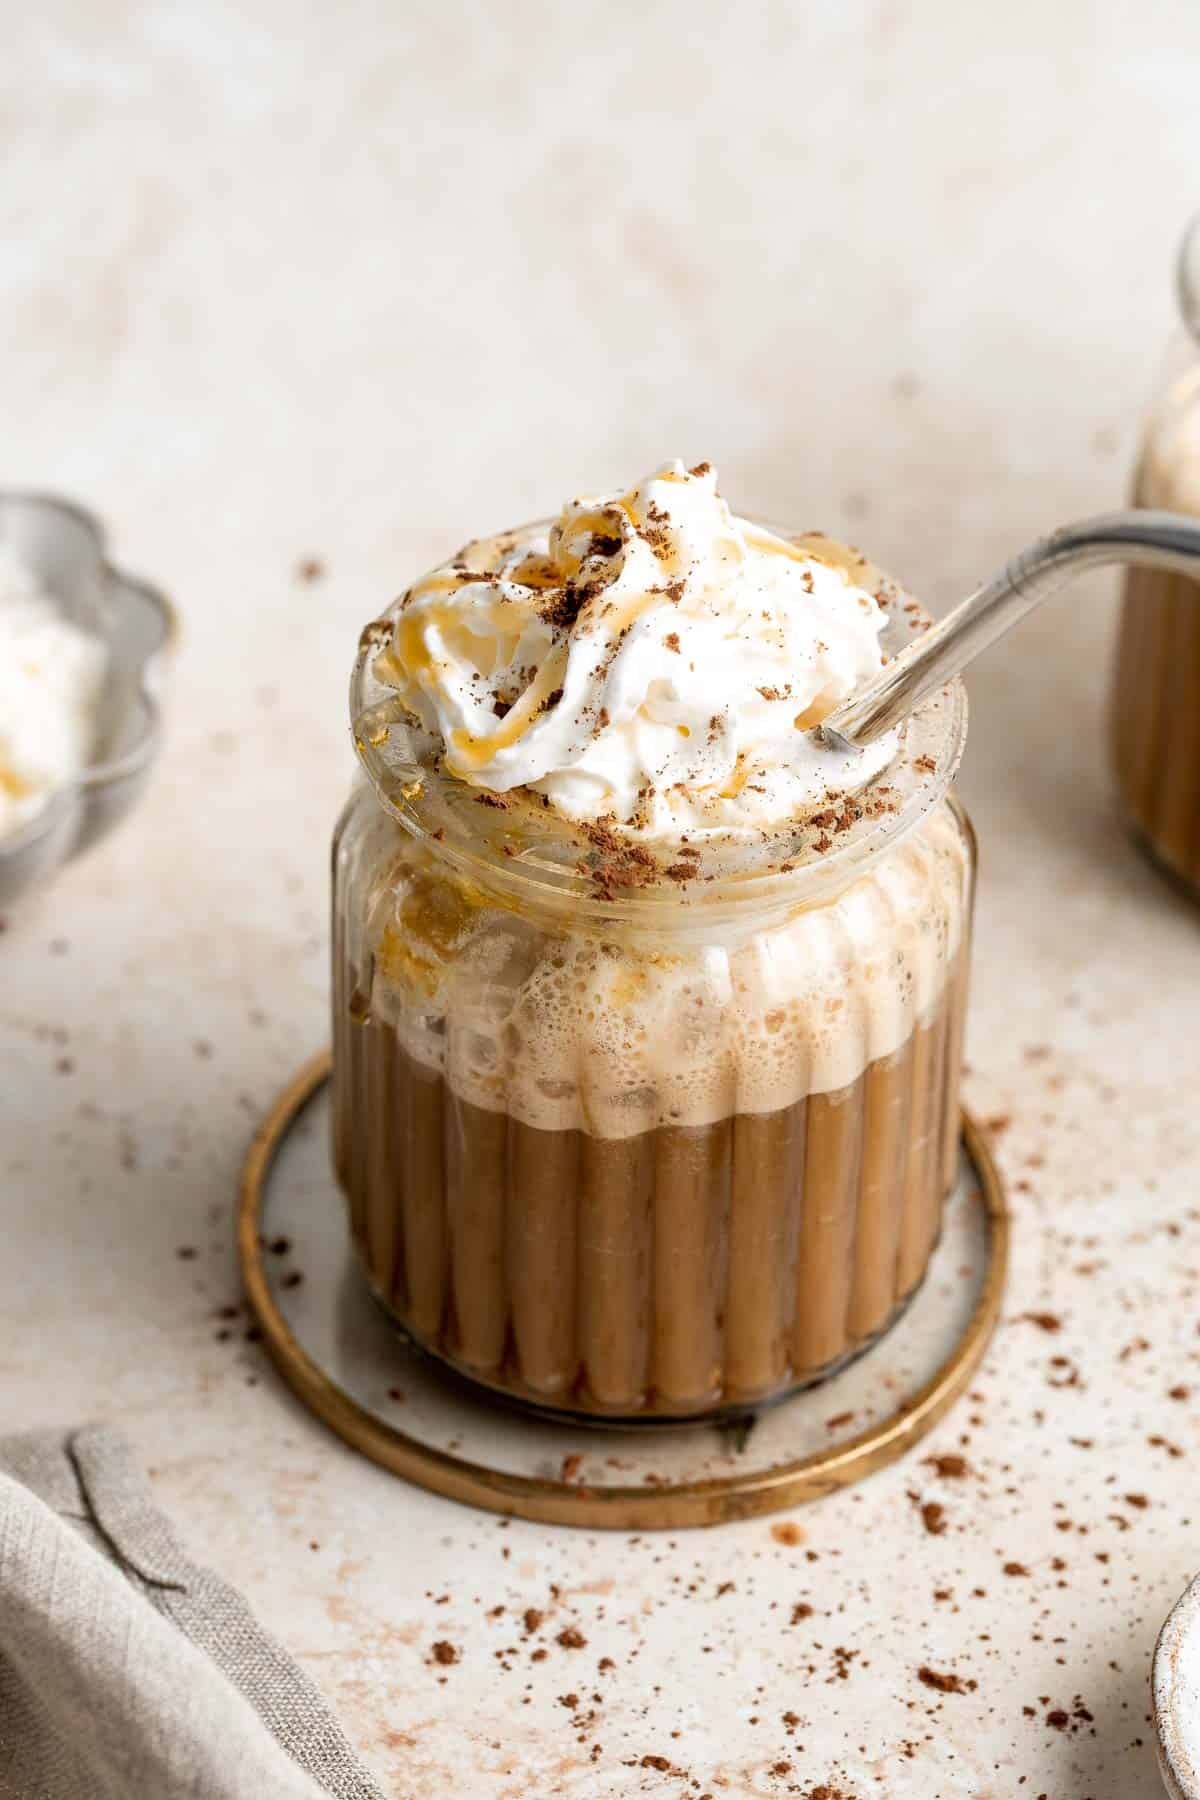
Frappuccino
This Starbucks copycat Frappuccino recipe is icy, frothy, sweet, and milky. It's faster and cheaper than the store-bought version and tastes just as good! Skip the line and enjoy this popular iced coffee drink in a matter of minutes when you make Frappuccinos at home.
Plus, you won't believe how quick and easy Frappuccinos are to make homemade and you likely already have all the ingredients in your fridge and pantry. It's the only drink you need all summer long!
Why You'll Love this Coffee Frappuccino
- It's ready in 2 minutes. Why wait in line to place an order when you can make this Frappuccino at home in no time. Your refreshing drink will be ready to enjoy just two short minutes after you start making it (as long as you have coffee ready to use).
- It's icy, frothy, sweet, and milky. This Frappuccino recipe delivers the perfect texture every time, just like what you can pick up at starbucks except it's faster and way cheaper. With this recipe, you can become your own Starbucks barista and make drinks that are just as good!
- Customize this Frappuccino recipe with different flavors. Whether you prefer strong drinks vs. light ones, dairy vs. dairy-free, or sweet vs. unsweetened, you can completely customize the ingredient measurements to suit your taste buds. Plus, use this recipe as a base and in extra ingredients to create different Starbucks-inspired Frappuccinos. See our instructions on customizing below!

Ingredient Notes
To make this Starbucks copycat Frappuccino, you will need the following ingredients (full measurements in recipe card below):
- espresso or strong coffee
- ice
- milk - feel free to use any milk that you like - whether that's dairy milk or half and half or non-dairy milk like soy milk, oat milk, or almond milk.
- granulated sugar - or substitute with another sweetener like honey or maple syrup.
- toppings - top up these Frappes with your favorite toppings such as whipped cream, chocolate syrup, or caramel sauce.
You will also need measuring cups and spoons and a blender.

How to Make the Best Frappuccino
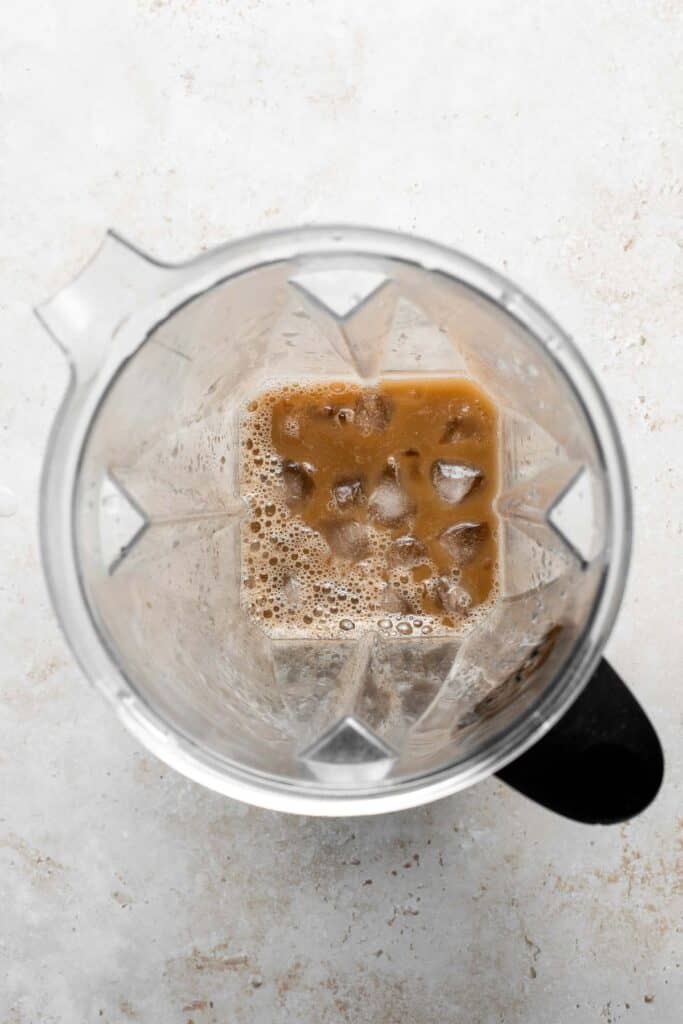
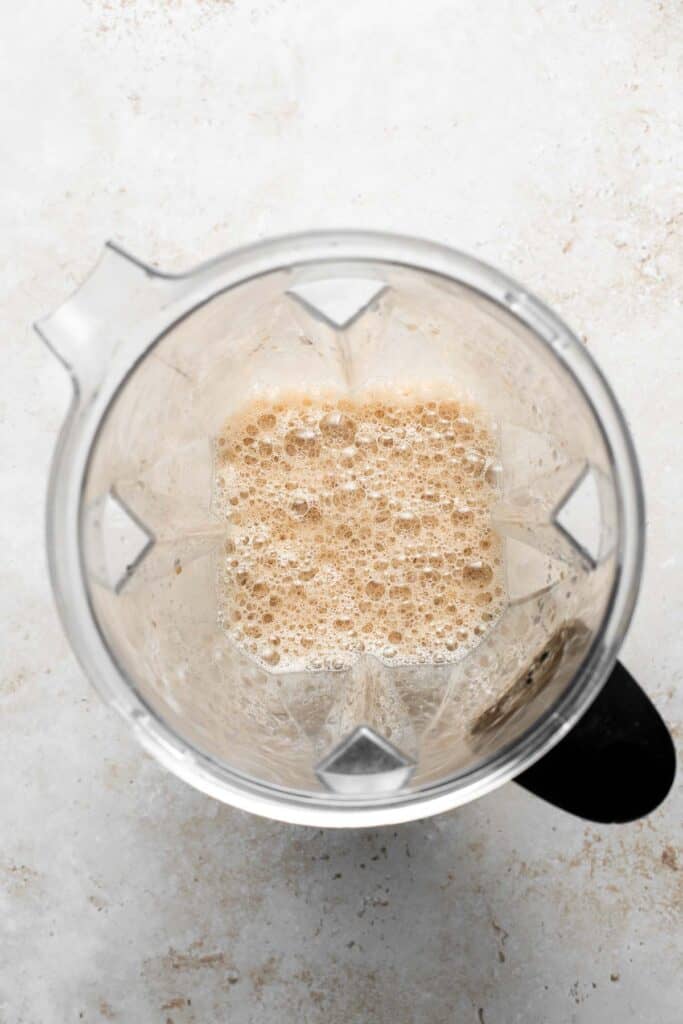
It's so easy to make coffee Frappuccinos at home in just minutes. First, add espresso (or strong coffee), crushed ice, milk, and sugar to your blender and puree until well-blended.
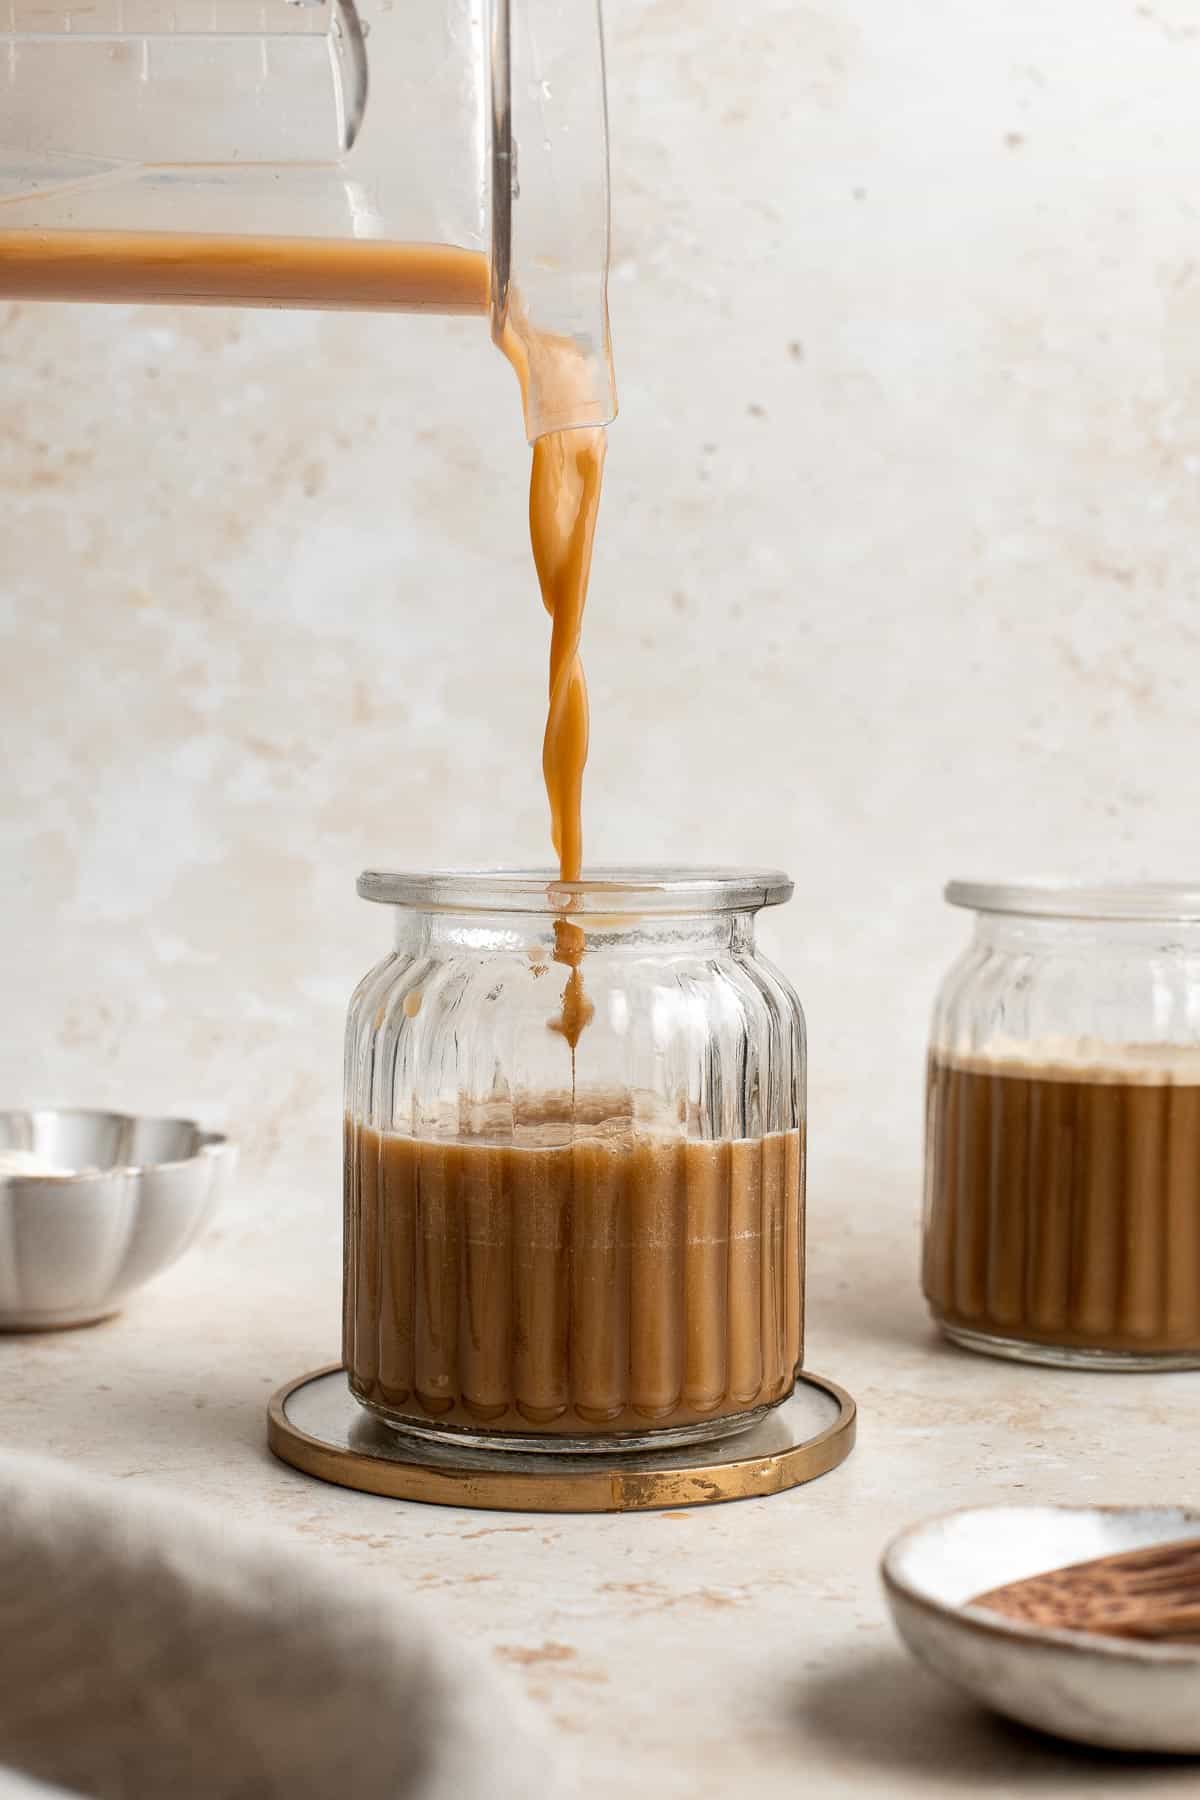
Then, pour and divide into two glasses. Top with whipped cream and chocolate or caramel sauce (if desired) and serve immediately.
Customize with Different Frappuccino Flavors
You can use this Frappe recipe and customize it to create different flavors or copycat Starbucks drinks.
- Mocha Frappuccino: Add 3 tablespoons of chocolate sauce or cocoa powder to your blender along with the rest of ingredients before you blend everything together. Top the drink with whipped cream and a drizzle of chocolate sauce.
- Caramel Frappuccino: Add 2-3 tablespoons of caramel sauce to your blender along with the rest of ingredients before you blend everything together. Top the drink with whipped cream and a drizzle of caramel sauce.
- Java Chip Frappuccino: Add ⅓ cup of chocolate chips to your blender along with the rest of ingredients before you blend everything together. Top the drink with whipped cream and a drizzle of chocolate sauce.
- Mocha Cookie Crumble Frappuccino: Add 3 tablespoons of chocolate sauce or cocoa powder, ⅓ cup chocolate chips, and 8 crushed Oreo cookies to your blender along with the rest of ingredients before you blend everything together. Top the drink with whipped cream, a drizzle of chocolate sauce, and crushed Oreo cookies on top.
Storing Instructions
- Make ahead instructions: If you want to prep your Frappuccino to make easily in the morning, combine the coffee, milk, and sugar the day before and store in an airtight container in the fridge. Then, blend with ice when it's time to go.
- How to store: Homemade Frappuccinos are best enjoyed freshly made, but you can store leftovers to enjoy later. If you have a strong blender, like a Vitamix or Blendtec, you can freeze the Frappuccino and re-blend it later. If you have a regular blender, put your leftover Frappuccino in the fridge and blend it with more ice later. You may also want to add more cream or flavor in this case as the first batch of ice will have melted and diluted the drink.

More Drink Recipes
- Bubble Tea
- Matcha Milk Tea
- Peach Iced Tea
- Blackberry Milkshake
- Strawberry Lemonade
- Majoon (Banana and Nut) Smoothie
Tried this recipe?
I'd love to hear what you think! Leave a comment and rating below to share your feedback. Your reviews help others discover this recipe and help me keep creating more free recipes for you. Snap a photo and tag me on social media @aheadofthyme too.

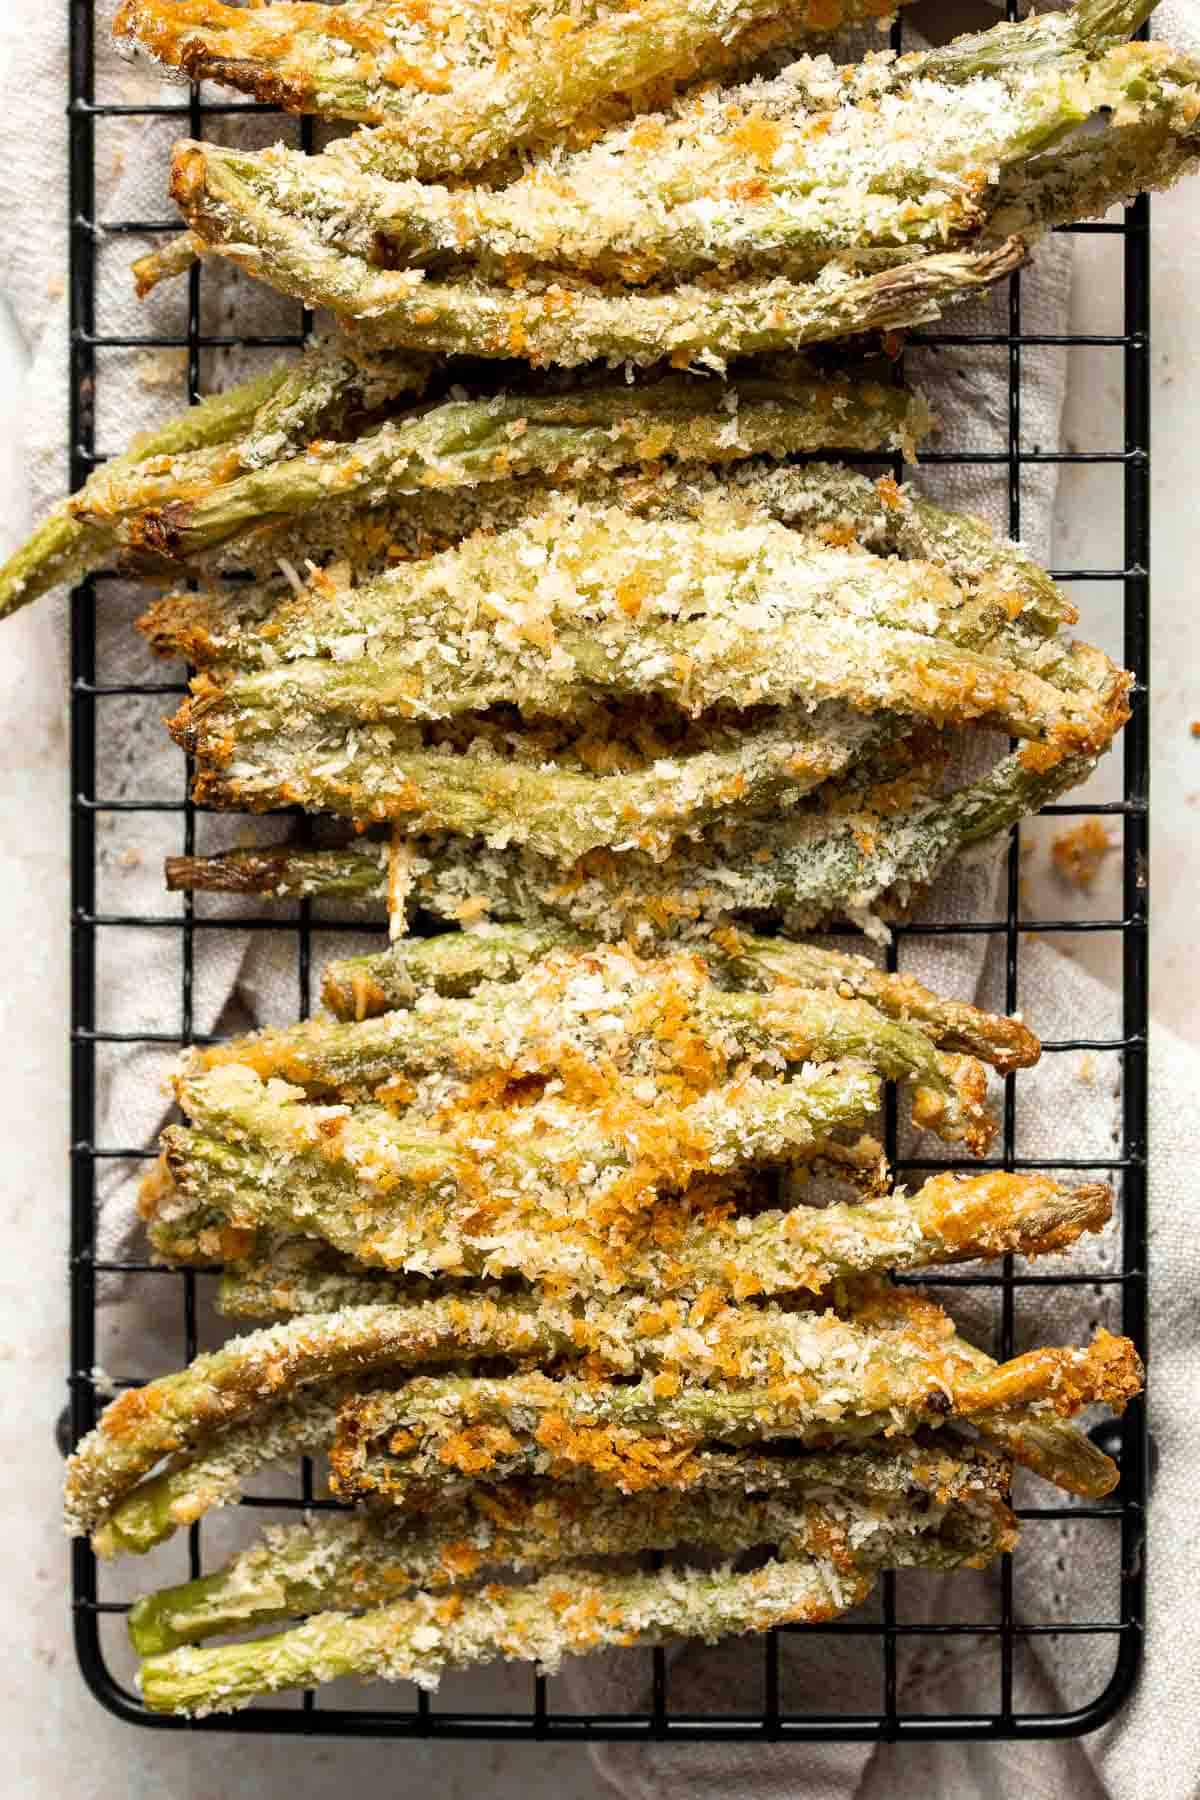
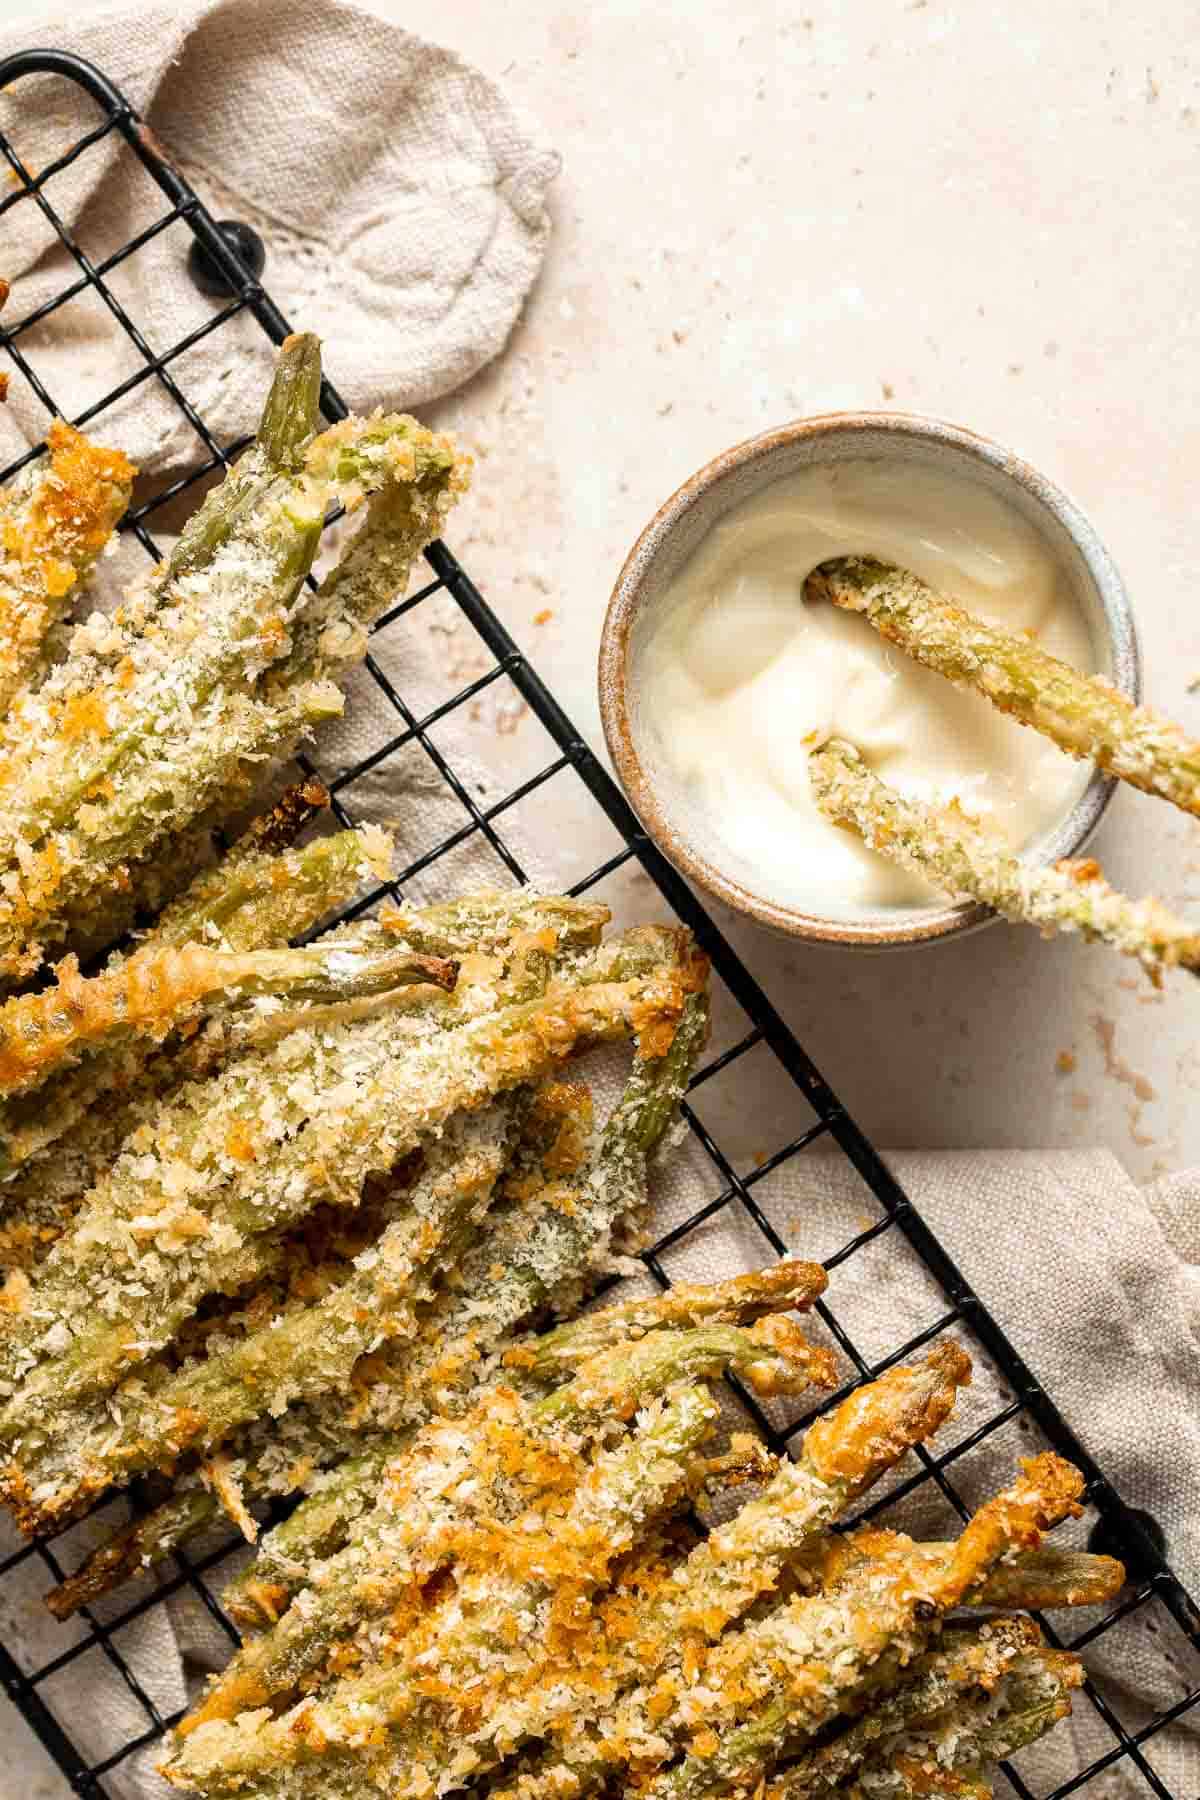
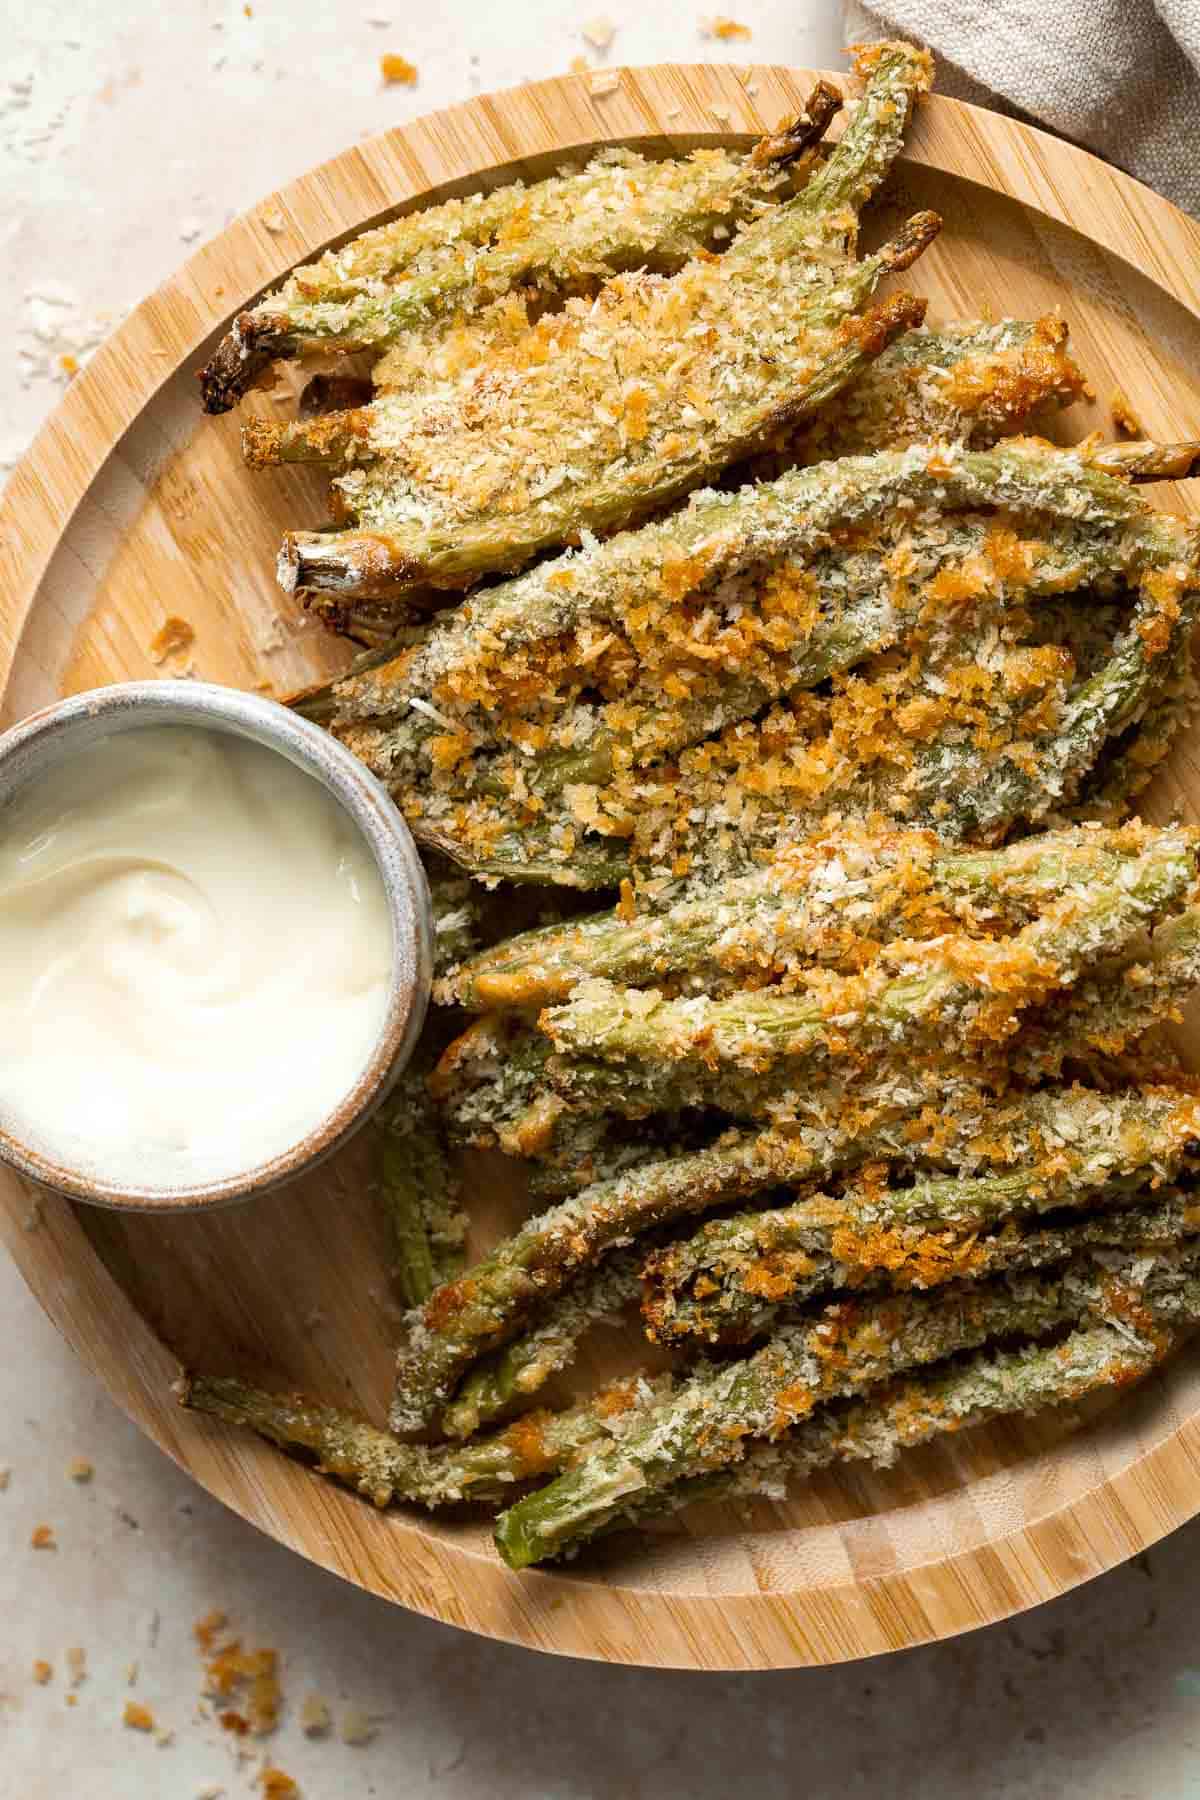
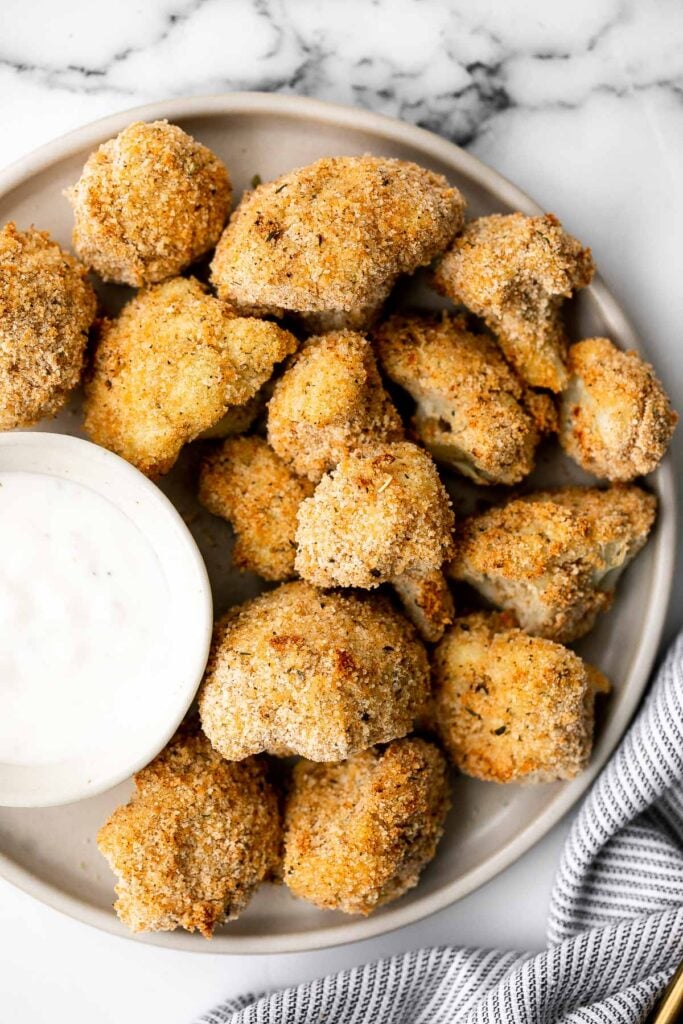
Green Bean Fries
Green Bean Fries are flavorful, crispy, and nutritious. These baked veggies are quick and easy to make in less than 30 minutes. Plus, they are so delicious that even your kids will start asking for vegetables after they try these veggie fries.
Serve baked green bean fries as a healthy appetizer on game day, as a snack in your kid's School Lunch Box, or as a side dish to complement dinner on busy weeknights.
Why You'll Love these Green Bean Fries
- The crispy panko breading. These green bean fries are coated in a thin layer of flour and egg which helps the seasoned parmesan panko breading stick on top. The panko coating adds flavorful, cheesy, crispy goodness that makes these green bean fries so tasty. Plus, it can be customized with other slices for a different flavor.
- Ready in just 25 minutes. Fast food at home is always the best kind, especially when it's healthy food. These green bean fries are a quick recipe that's ready in just 25 minutes (including prep!).
- They're baked instead of fried. Green bean fries are healthy and delicious, due to the fact that its a veggie and it's baked instead of deep fried which ensures they are still crisp but don't come out greasy.
- The best way to enjoy green beans. After you try these green bean fries, you won't want to eat plain old green beans again. They are perfect served as a snack with a dipping sauce or as a healthy side dish with dinner.
Ingredient Notes
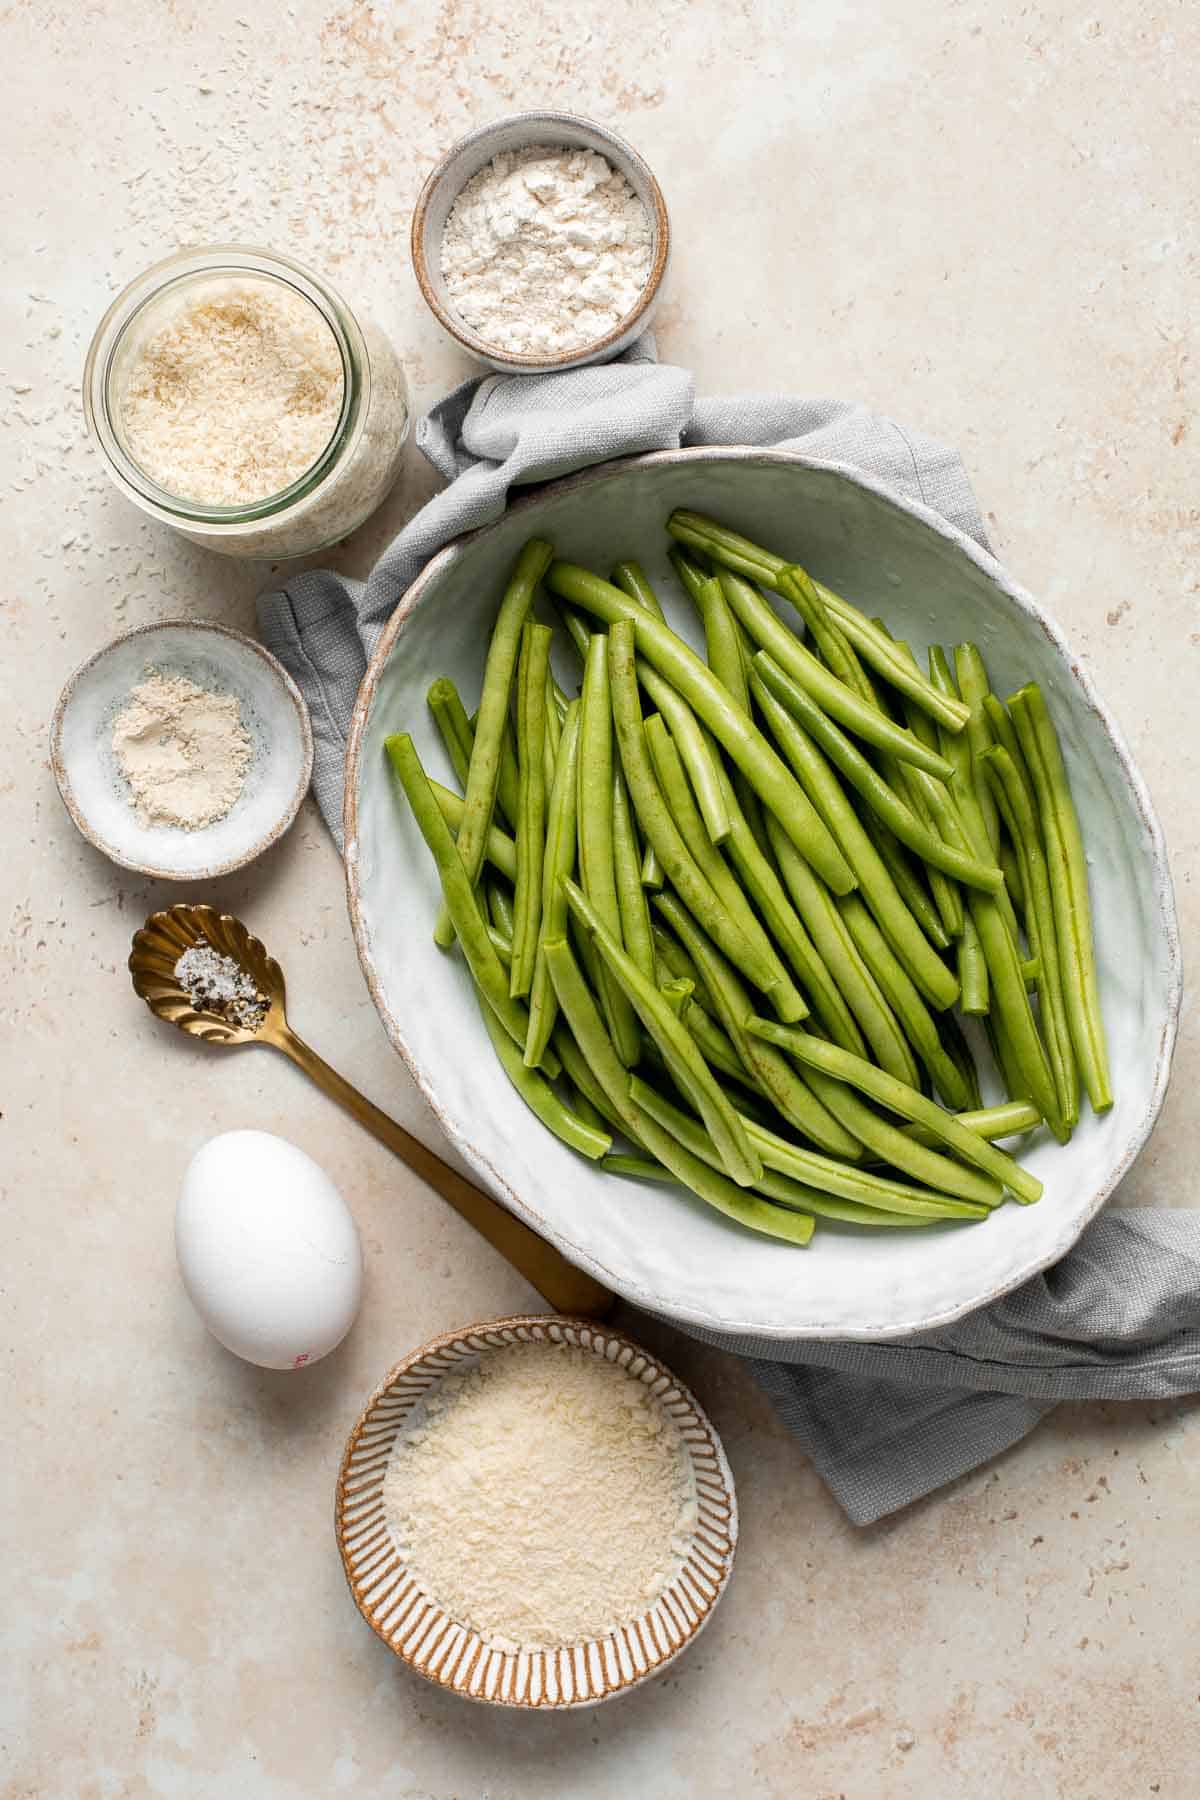
To make quick and easy Green Bean Fries, you will need the following ingredients (full measurements in recipe card below):
- green beans (about 40 beans), washed and trimmed
- all-purpose flour
- egg
- panko breadcrumbs - this gives the fries an extra crispy texture. You can also substitute with regular breadcrumbs.
- Parmesan cheese - or substitute with asiago cheese.
- garlic powder
- salt and pepper
- cooking spray
You will also need measuring cups and spoons, shallow bowls, and a half sheet baking pan.
How to Make the Best Green Bean Fries
- Prep coating. Place the flour and beaten eggs in separate mixing bowls. In a shallow dish, combine panko, parmesan, garlic powder, salt, and pepper.
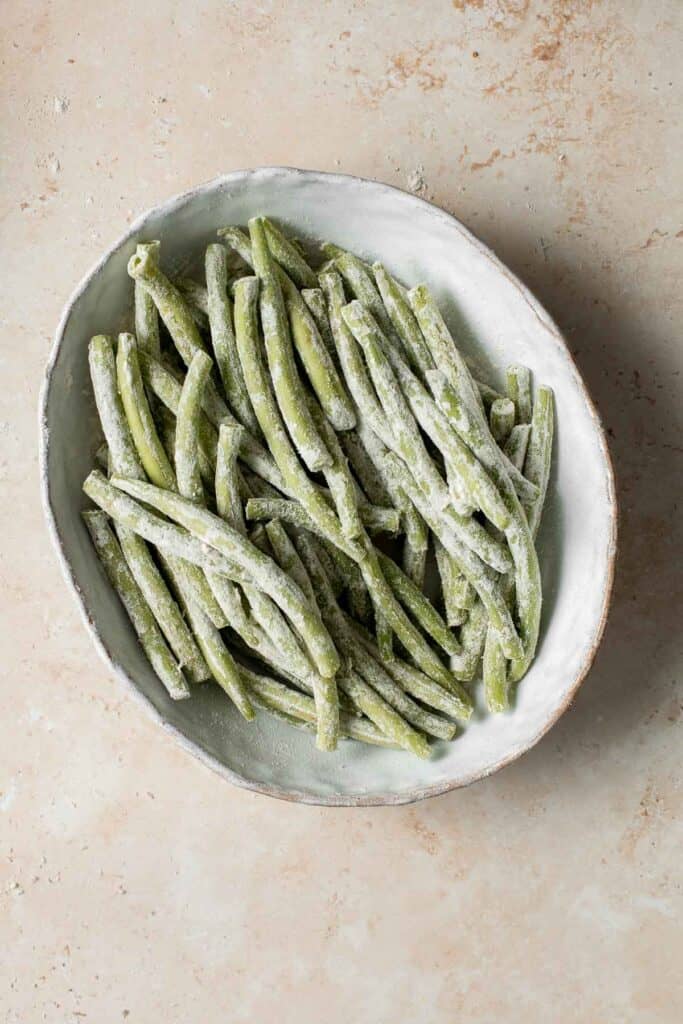
- Coat in flour. Toss the green beans in the flour to lightly coat them. Shake off any excess flour.
- Dip in eggs. Dip the coated green beans into the egg, allowing the excess to drip off.
- Coat with panko mixture. Toss into the panko mixture, pressing firmly so that the crumbs stick on.

- Bake. Lightly spray a large half sheet baking pan with nonstick cooking spray. Transfer the breaded green beans to the prepared baking pan in a single layer. Spray them with cooking spray. Bake in a preheated 425F oven for 10-12 minutes or until golden-brown and crispy.
Green Bean Fries Variations
When coating the green beans with panko and seasoning, you can customize it with whatever spices that you like. Consider trying:
- paprika, cayenne, chili, and garlic
- garlic, onion, and lemon pepper
- Italian seasoning
How to Serve
Green bean fries are delicious served on its own as a snack or appy with some mayo or garlic aioli for dipping. You can also serve them as a side dish with dinner entrees such as:
- Ribeye Steak
- Black Bean Burgers
- Greek Salmon
- Garlic Butter Shrimp
- Stuffed Chicken Breasts
- Miso Black Cod (Sablefish)
Recipe Tips and Tricks
- How to store: Make sure the green bean fries cool completely before placing them in an airtight container lined with paper towels. If the lid fogs up, then your green beans fries are not cooled enough. They will keep for up to four days when stored in the fridge.
- How to reheat: The best way to reheat green bean fries is in an oven, toaster oven, or air fryer. Preheat the oven to 400F and ensure that the beans have plenty of space around them. Heat for 5 minutes or until warmed through.
More Green Bean Recipes
- 15 Best Green Bean Recipes
- Pesto Green Beans
- Green Bean Casserole
- Sautéed Garlic Green Beans
- Air Fryer Green Beans
- Nutty Green Beans
Tried this recipe?
I'd love to hear what you think! Leave a comment and rating below to share your feedback. Your reviews help others discover this recipe and help me keep creating more free recipes for you. Snap a photo and tag me on social media @aheadofthyme too.

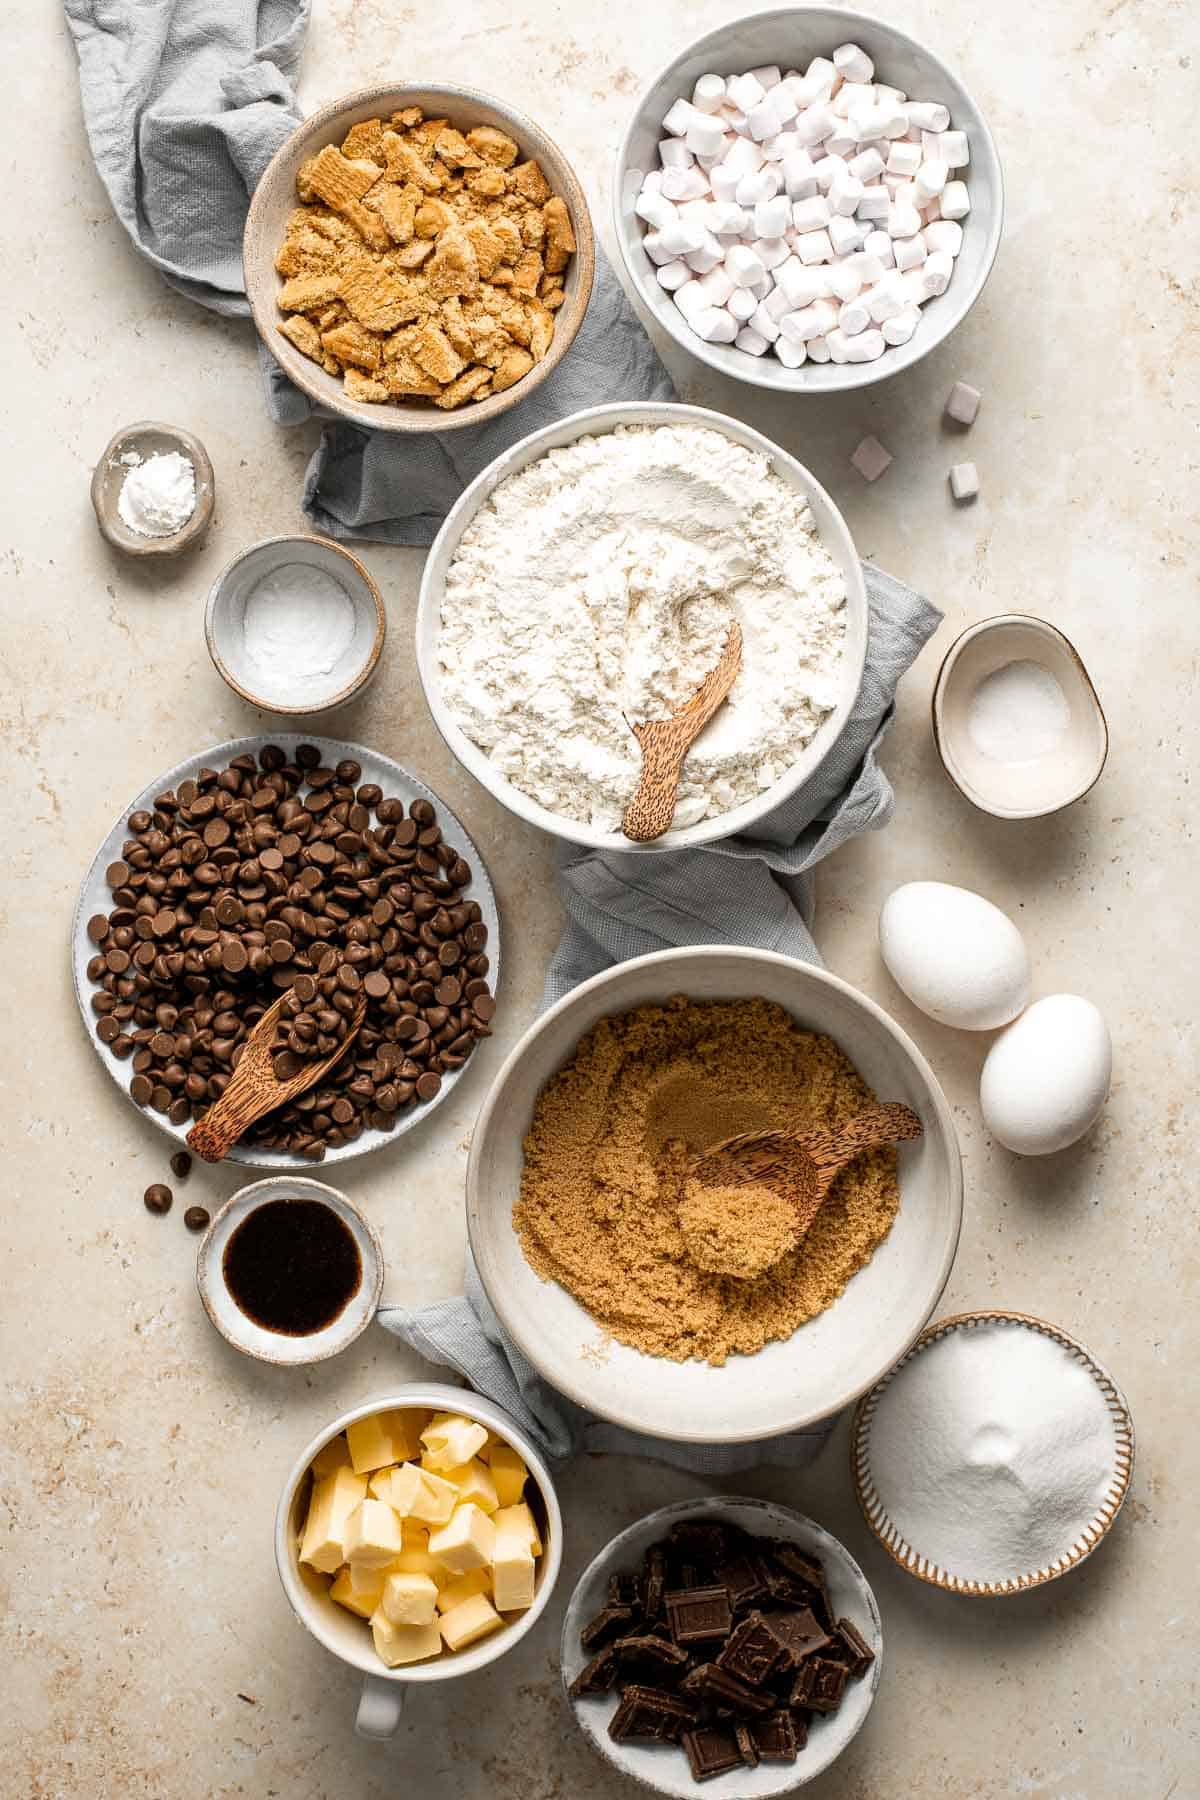
S'mores Cookies
S'mores Cookies are chewy, gooey, and nostalgic. This take on a classic American dessert is loaded with marshmallows, chocolate, and Graham crackers and there's no campfire required!
Plus, this summer cookie recipe is quick and easy to make in under 20 minutes using one bowl, pantry staples , and no chilling required! The easiest smores cookies ever.

Why You'll Love S'mores Cookies
- S'mores in cookie form. If you've never had a s'more, it's about time you did. They're all about 3 classic ingredients and these smores cookies feature them all - decadent melted chocolate, soft and sugary roasted marshmallows, and sweet thin graham crackers. And it's brought to you in cookie form!
- They're quick and easy to make. Have you ever been struck by a sudden craving that you needed to satisfy quickly? Well, these s'mores cookies will do the job. This easy one bowl cookie recipe is ready in less than 20 minutes, and you only need to wait 10-12 excruciating minutes while your cookies bake.
- Everyone loves them. You'll love how fun and easy it is to make s'mores cookies. It's also a great recipe to make as a fun family activity for kids. But they are so much more fun to eat! They especially hit the spot in the summer months during camping season but you can enjoy them all year round.

Ingredient Notes
To make this easy S'mores Cookies, you will need the following ingredients (full measurements in recipe card below):
- butter - the key is to use softened butter, otherwise it won't cream properly with the sugars and the texture of the cookies will be off. Using softened butter ensures cookies that be round, fluffy, and perfectly textured.
- sugar - for the best smores cookies, we use both brown sugar and granulated sugar.
- eggs
- vanilla extract
- all-purpose flour
- cornstarch
- baking soda
- salt
- chocolate chips - feel free to use chocolate chunks or crush up a chocolate bar into small pieces.
- mini marshmallows
- Hershey's chocolate bars
- graham crackers
Baking Equipment
You will also need:
- measuring cups and spoons
- mixing bowls
- hand mixer or stand mixer
- medium cookie scoop
- half sheet baking pan
- wire cooling rack
How to Make the Best S'mores Cookies
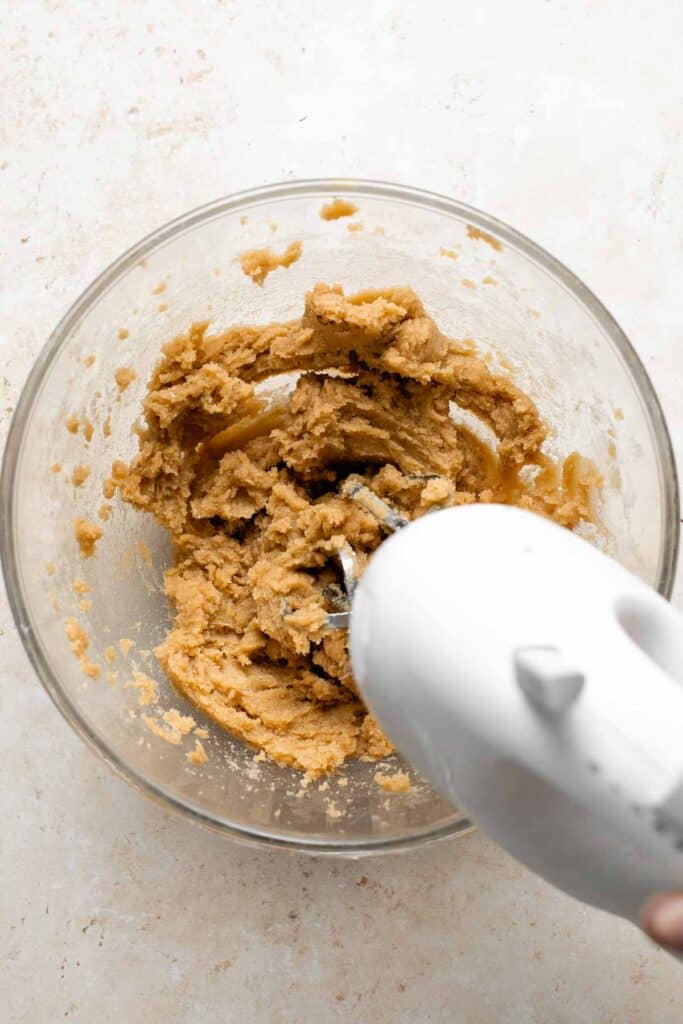
- Cream butter and sugars. In a large mixing bowl, use a hand mixer or stand mixer cream together butter and sugars on medium speed until light and fluffy, about 2 minutes.
- Add wet ingredients. Then, add egg and vanilla, and beat on low until incorporated.
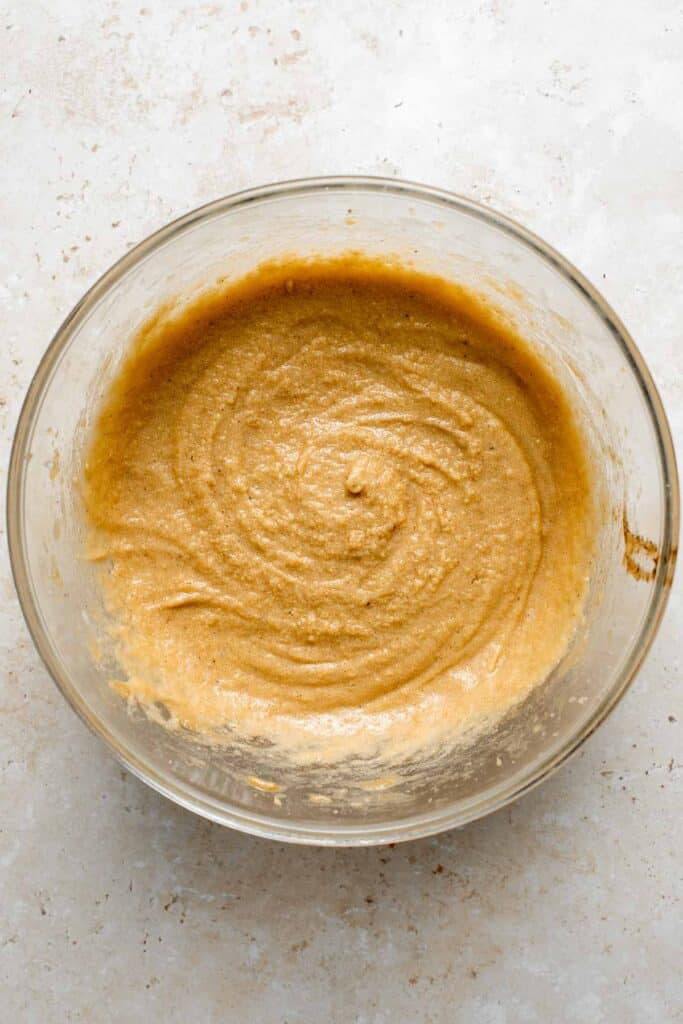
- Add dry ingredients. Next, add flour, cornstarch, baking soda, and salt and beat until just combined.
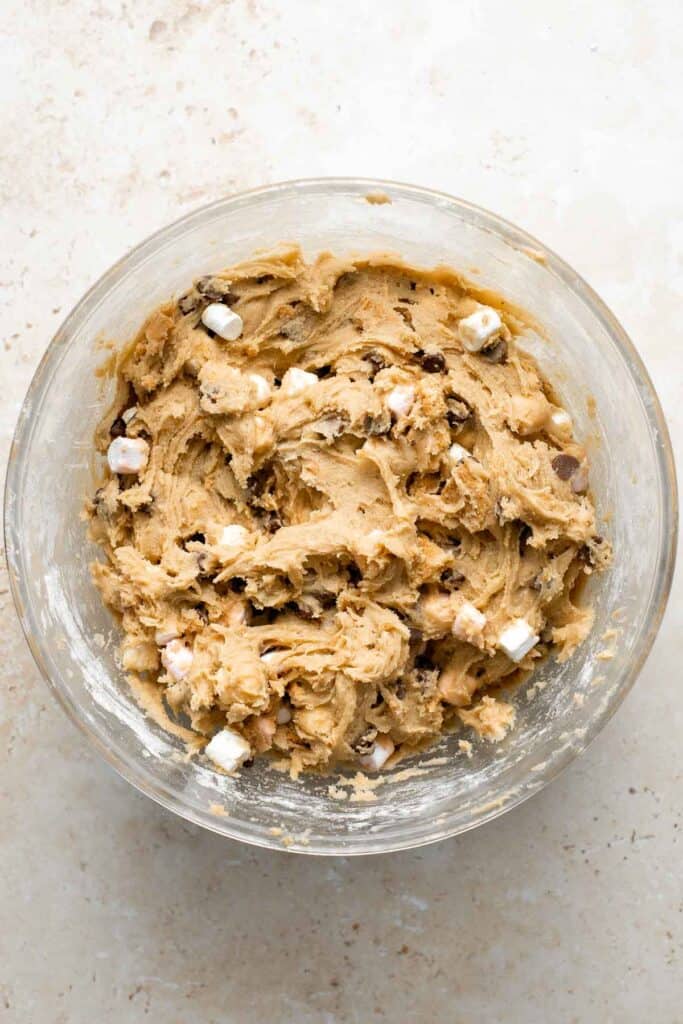
- Add classic smores ingredients. Add 1 cup of the graham cracker pieces, 1 cup marshmallows, and chocolate chips. Fold in until evenly incorporated in the dough.

- Shape cookies. Line a large half sheet baking tray with a silicone baking mat or parchment paper. Use a medium cookie scoop to scoop out 2 tablespoons of cookie dough. Use your hands to roll it into a ball (this will ensure cookies with smooth edges). Place the cookie balls onto the lined baking sheet, spaced at least 2 inches apart (you can fit about 6-8 on a large cookie sheet).

- Bake. Bake in a preheated 350F oven for 10-12 minutes, until edges just start to brown. DO NOT OVERBAKE. The cookies may not look done in the middle, but they will continue to cook as they are cooling.
- Press in remaining toppings. Immediately press in the remaining marshmallows, graham crackers, and Hershey bar pieces into the top of each cookie. Let it sit to start cooling.
- Broil (optional). Optionally, pop into the broiler for about 1 minute to toast the marshmallows on top but keep a close eye on the cookies as they can burn fast.
- Cool. Allow the cookies to cool in the baking sheet for 5 minutes, then carefully transfer to a wire cooling rack to cool completely.

How to Serve
You can serve these smores cookies warm out of the oven or at room-temperature cookie. I personally love s'mores cookies warm and gooey so that the chocolate and marshmallows start to soften and melt.
Enjoy s'mores cookies with a tall glass of your favorite milk or a scoop of Vanilla Ice Cream!
Storing Instructions
- How to store: Store leftover cookies at room temperature in an airtight container for up to one week. You can extend their life by storing them in the fridge, but your cookies'taste and texture will suffer.
- How to freeze: To freeze baked smores cookies, let them cool completely first, then store in an airtight container or freezer bag for up to 3 months. Allow cookies to thaw in the refrigerator overnight or on the kitchen counter until thawed.
- How to reheat: Reheat on a microwave-safe plate for 5-15 seconds until warm or in the air fryer.

More Cookie Recipes
- 50 Best Cookie Recipes
- Chocolate Chip Cookies
- Chewy Chocolate Chip Oatmeal Cookies
- Italian Rainbow Cookies
- M&M Cookie Bars
- White Chocolate Cranberry Cookies
Tried this recipe?
I'd love to hear what you think! Leave a comment and rating below to share your feedback. Your reviews help others discover this recipe and help me keep creating more free recipes for you. Snap a photo and tag me on social media @aheadofthyme too.

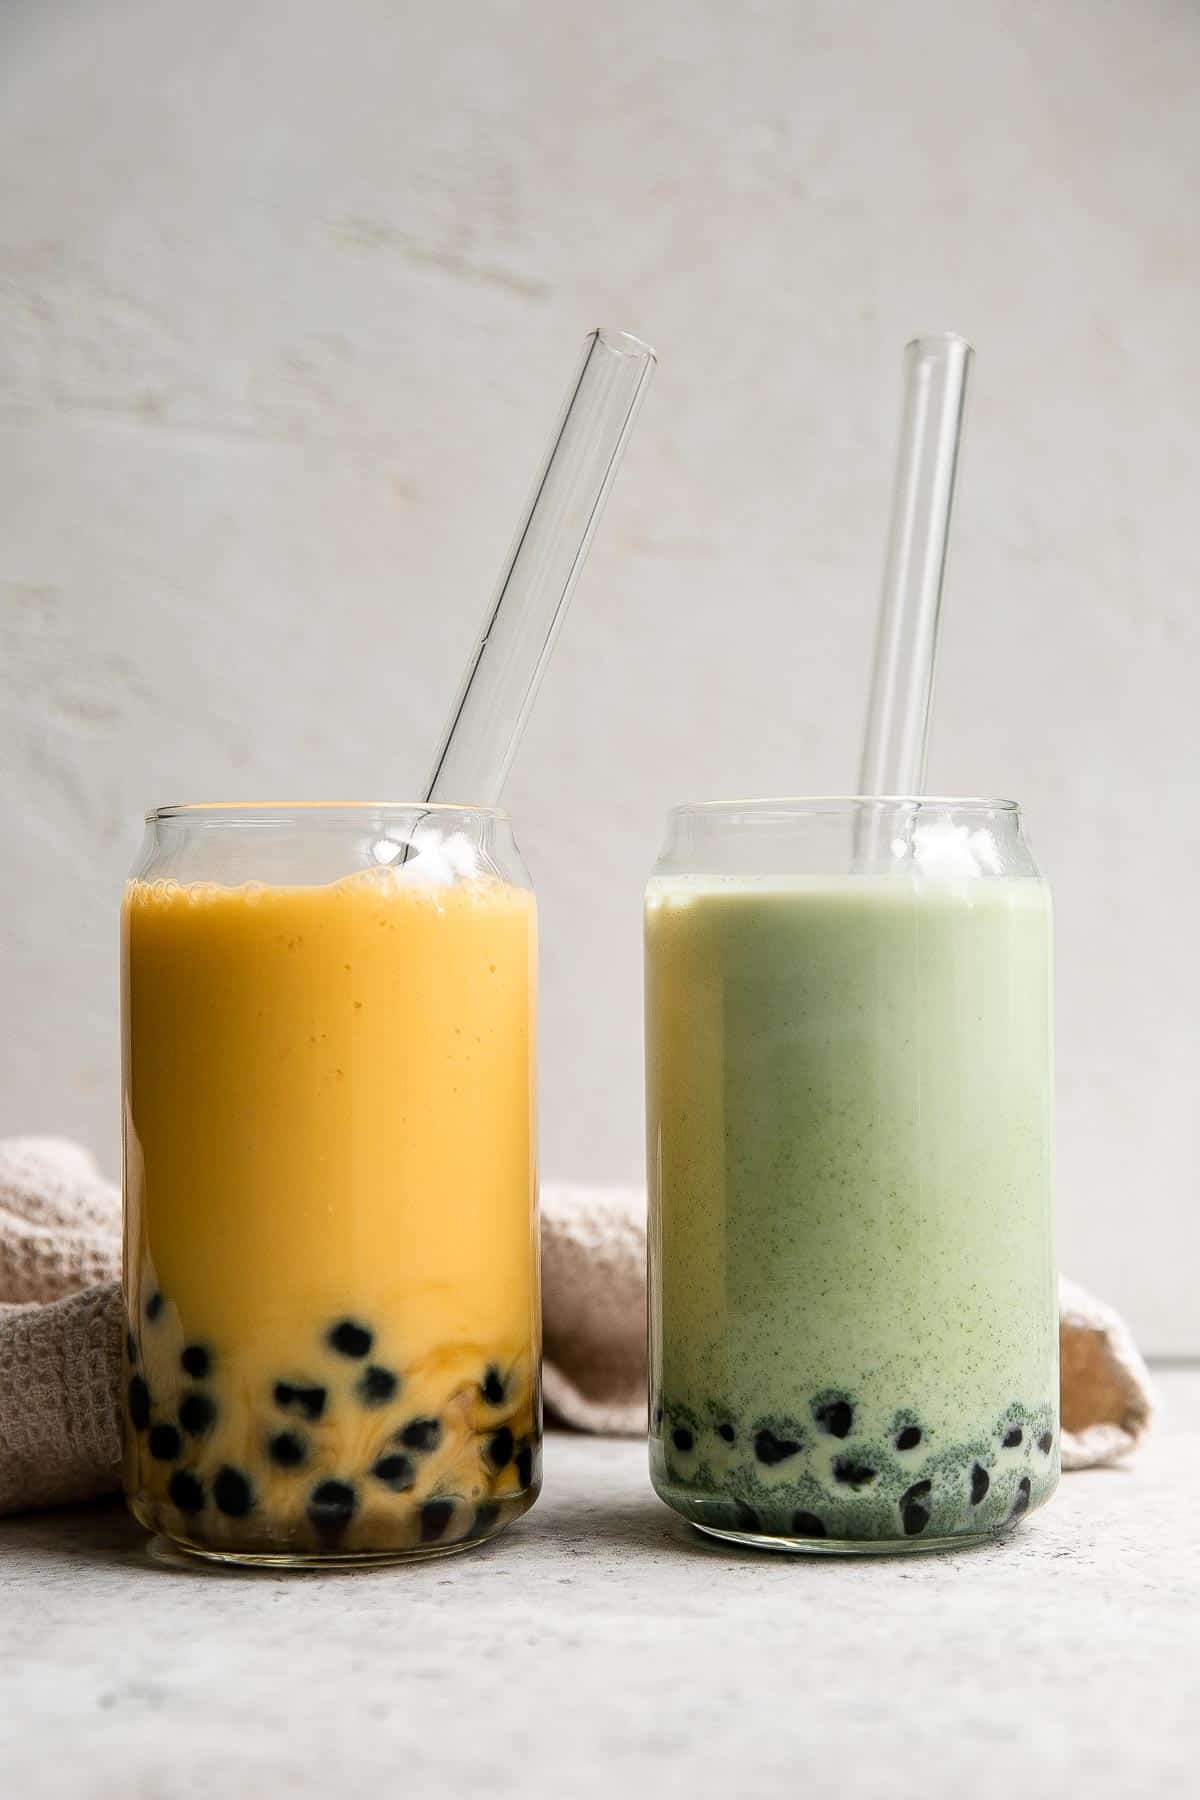
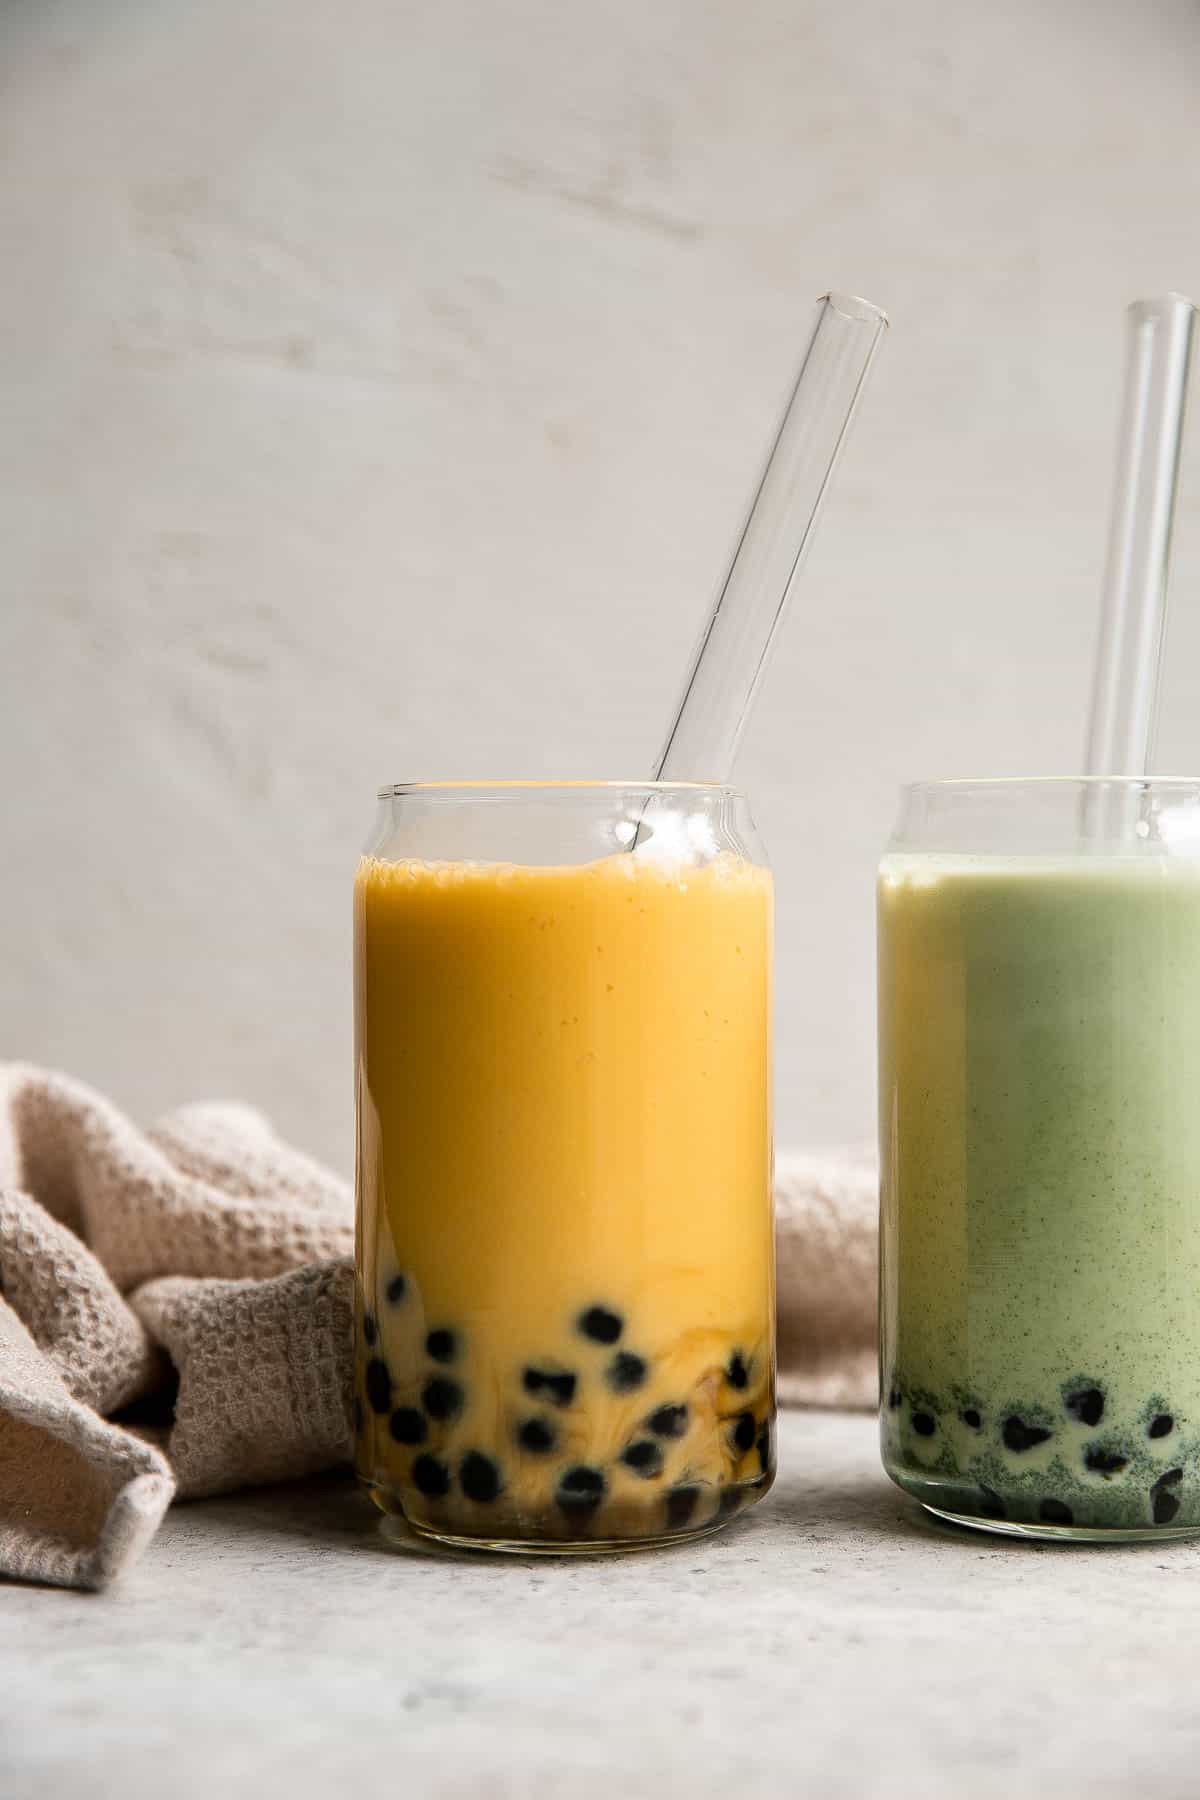
Mango Bubble Tea
Mango Bubble Tea with boba tapioca pearls is the perfect creamy and refreshing summer drink. You won't believe how easy it is to make at home (and just as good if not better!) and so much cheaper too!
Plus, you can customize mango boba tea with extra sweetness if you like, change up the fruit, or even make it vegan using non-dairy milk.

Why You'll Love Mango Bubble Tea
- Bubble tea is easy to make at home. We love making bubble tea at home because it's easy! Plus, it's cheaper than store-bought milk tea from the bubble tea shop (and tastes the same if not better!). For other flavors try our Strawberry Milk Tea or Matcha Milk Tea.
- It's a healthy smoothie drink. There are a few reasons that this mango bubble tea is healthy. First, it's loaded with vitamins and nutrients from mango. Second, the mango milk has no added sugar. You can also make vegan bubble tea by using non-dairy milk like almond milk or oat milk to suit your dietary preference.
- Serve it as mango milk smoothie, bubble tea, or mango milk tea. If you don't have boba on hand, you can totally make this recipe without them as a mango milk smoothie. You can also add in your favorite green tea or black tea for a mango milk tea with boba instead.
Ingredient Notes
To make this refreshing Mango Bubble Tea, you will need the following ingredients (full measurements in recipe card below):
- mango - use ripe yellow mangos such as Ataulfo mangos).
- milk - feel free to use any kind of milk for this recipe, whether that is dairy milk or non-dairy alternatives such as almond milk, soy milk, or oat milk.
- ice cubes - this is optional, if needed.
- tapioca boba pearls - made using dry tapioca pearls cooked in water with brown sugar. You can refer to our tapioca boba pearls recipe for extra tips.
- sweetener (optional) - The brown sugar tapioca pearls already add sweetness, but if you need more or if you find your mangos are not ripe enough, feel free to add in some honey or maple syrup.
- tea (optional) - to make a mango milk tea, substitute ¾ cup of milk with your choice of tea. Make the tea by adding a green tea bag or black tea bag to ¾ cup of boiling water. Allow it to steep for 5 minutes then cool in the fridge.
You will also need measuring cups and spoons and a teapot or small mixing bowl. You will also need tall glasses and wide straws for serving. These can also be purchased online or at Asian specialty stores.

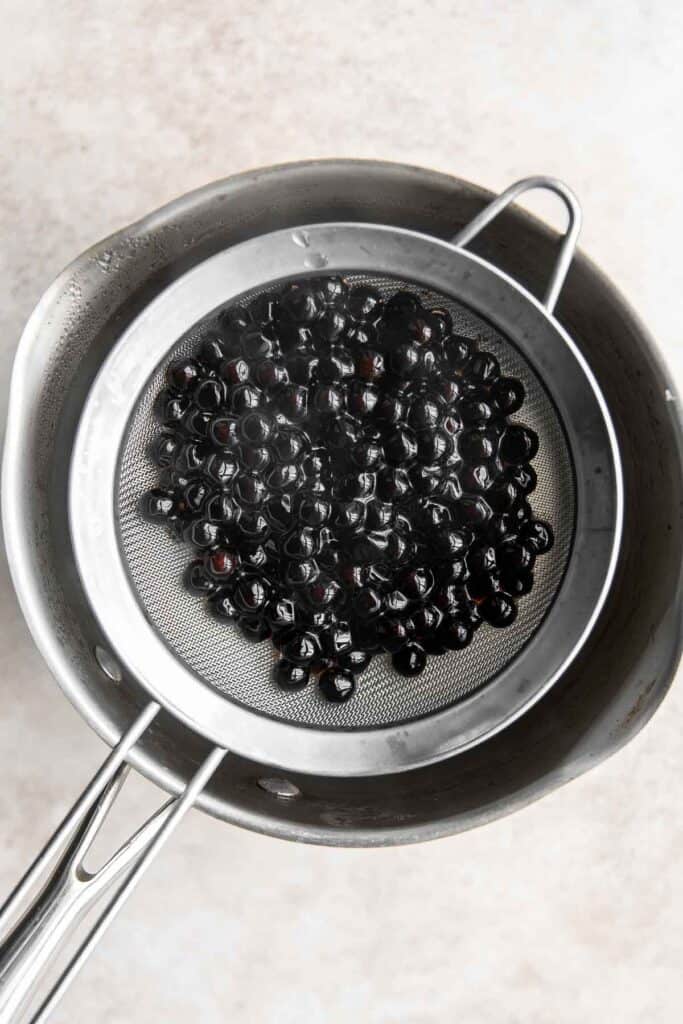
How to Cook Boba (Tapioca Pearls)
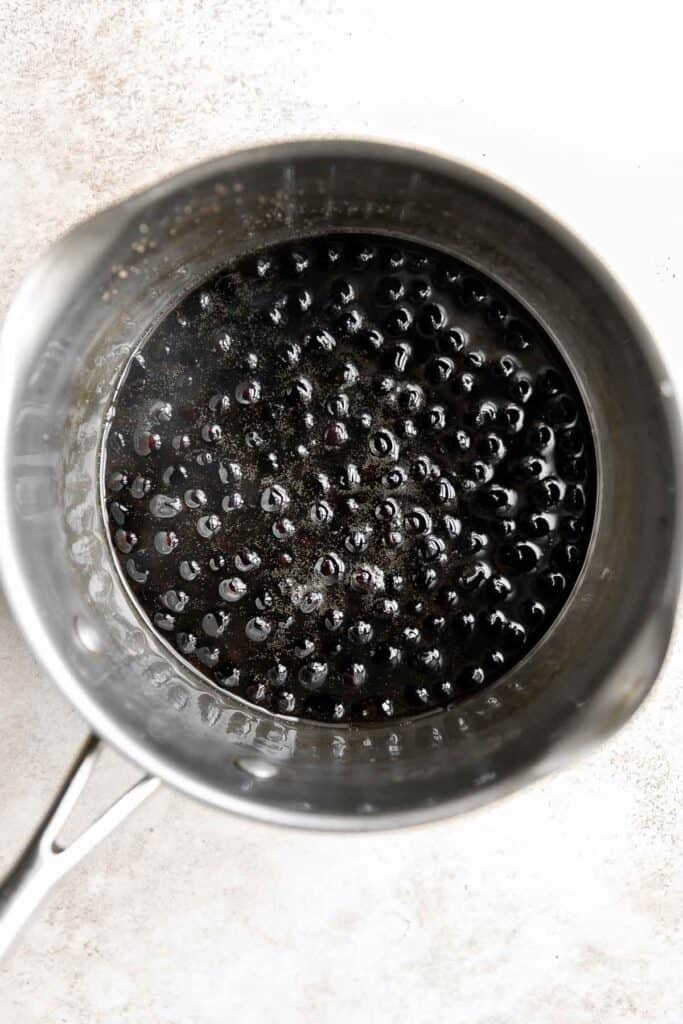
Boba is really easy to make at home. All you do is cook the tapioca pearls in boiling water for 20-25 minutes, stirring occasionally to prevent them from sticking to the bottom of the pan. Then, turn the heat off and let the pearls sit in the hot water for another 20-25 minutes. Drain the pearls through a fine mesh sieve and return to the saucepan.
Then, make the brown sugar syrup by adding it to the saucepan with a little water. Stir well and heat over medium heat until the sugar dissolves and the syrup starts to thicken a bit, about 2-3 minutes. When the pearls are fully cooked through, they should be soft and chewy.
Check out the complete Tapioca Pearls (Boba) recipe with tips.
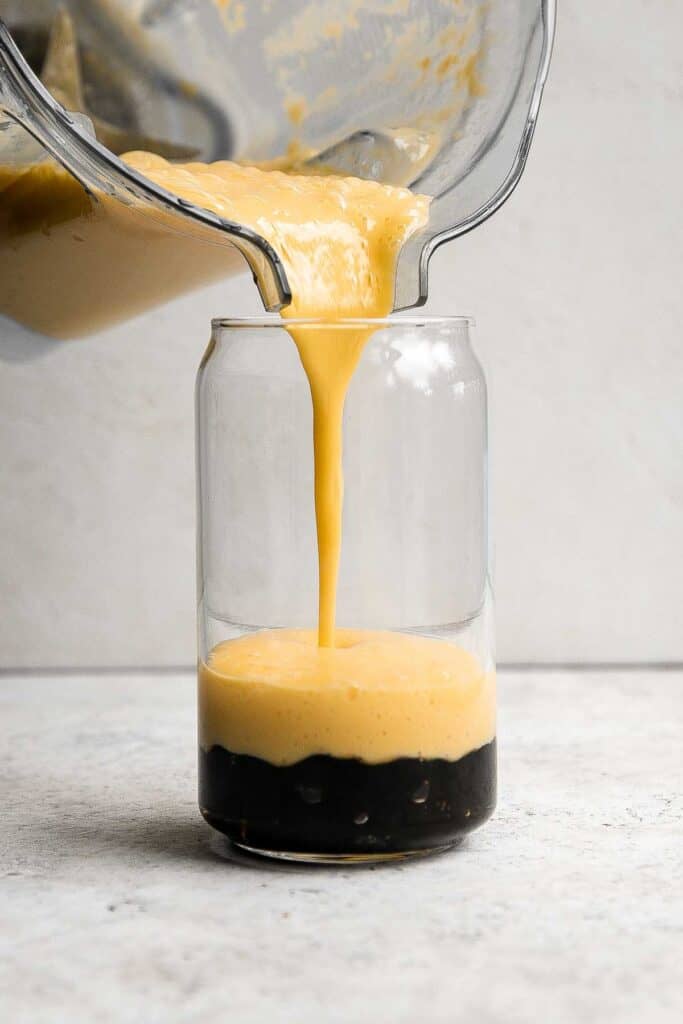
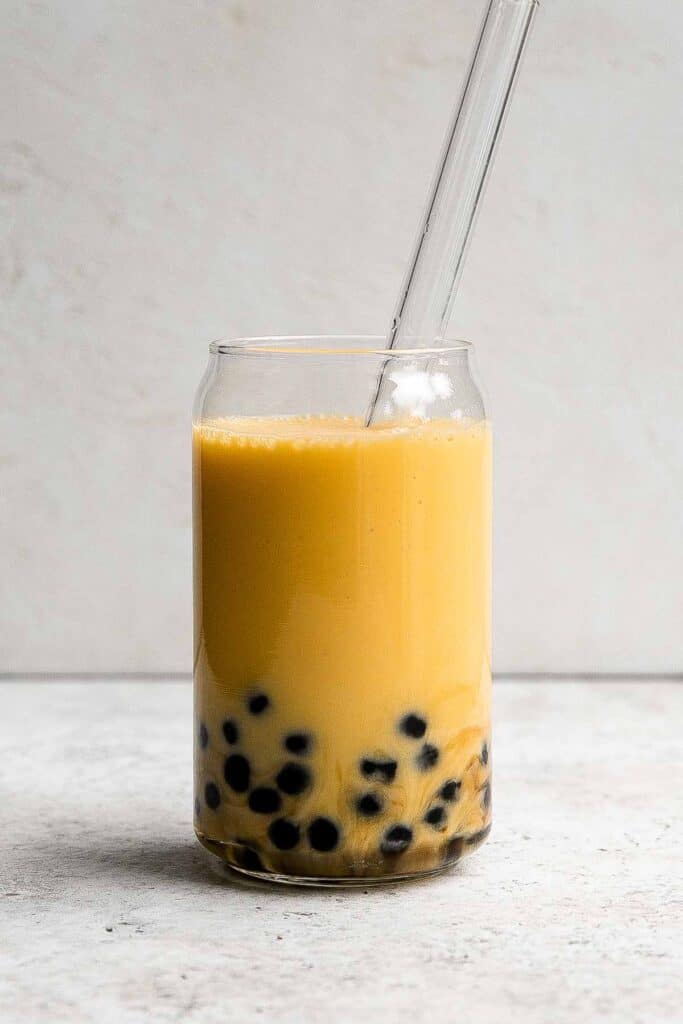
How to Make the Best Mango Bubble Tea
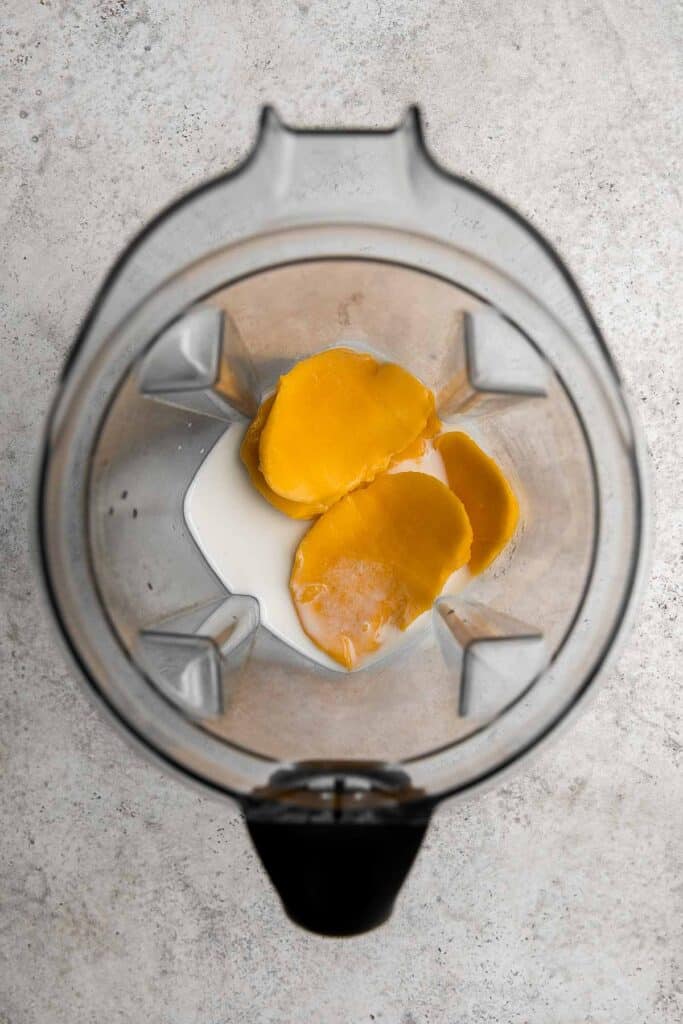
- Prepare the mangos. Slice each mango in half away from the pit and use a large spoon to scoop out the flesh.
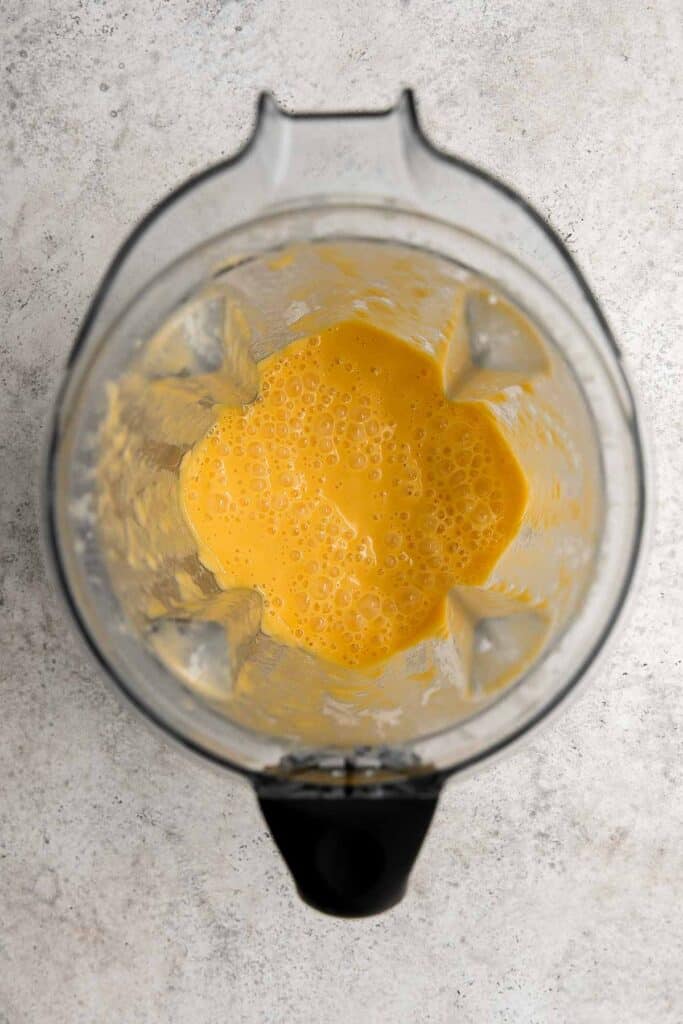
- Make the mango milk. Add mango and milk to a blender and blend on medium speed until smooth, about 1-2 minutes.
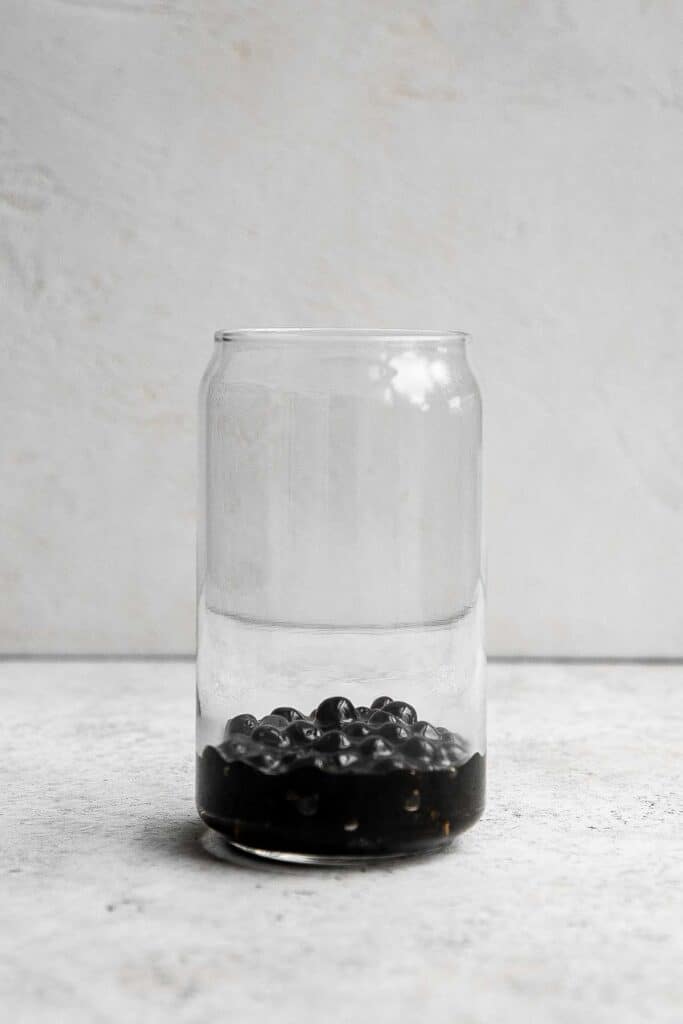
- Assemble. Divide the cooked boba pearls into 2 tall glasses. Pour in the mango smoothie and top with ice cubes, if desired. You can add in extra sweeteners such as honey or maple syrup if needed. Serve with wide straws.
Storing Instructions
- How to store mango bubble tea: Mango bubble tea is best enjoyed fresh, but it will last in the fridge for about 4 hours if it's already mixed with the tapioca pearls. You can enjoy it after a day but the boba pearls will lose its texture and get hard. In this case, you can remove the boba with a slotted spoon and enjoy the rest of the drink. Otherwise, it can last for 1-2 days in the fridge if not mixed with the pearls.
- How to store cooked tapioca pearls: If you have extra boba pearls, store them in an airtight container at room temperature, and cover and fully coat them in the brown sugar syrup to prevent them from sticking together. You need to consume them within 4 hours or they will start to get mushy. You can also store them in the fridge for a couple of hours, but if you store them too long in there, they will start to harden.
More Mango Recipes
- Healthy Mango Yogurt Smoothie
- Mango Frozen Yogurt
- Mango Sago
- Thai Mango Salad
- Creamy Mango Cheesecake
- Mango Pineapple Tropical Smoothie Bowl
Tried this recipe?
I'd love to hear what you think! Leave a comment and rating below to share your feedback. Your reviews help others discover this recipe and help me keep creating more free recipes for you. Snap a photo and tag me on social media @aheadofthyme too.

Tandoori Chicken Skewers
Tandoori Chicken Skewers are a quick, easy, and delicious chicken dish to serve the next time you fire up the grill. Juicy tender chicken bites are marinated in an authentic yogurt marinade that is packed with a homemade Indian tandoori seasoning blend loaded with flavor.
The best part? You only need to marinate it for an hour to soak up all that flavor and tenderize the meat. Serve tandoori chicken kebabs on busy summer weeknights with a homemade yogurt sauce or make a complete meal with rice, veggies, and/or salad.

Why You'll Love Tandoori Chicken Skewers
- The homemade tandoori spice blend. To make Indian tandoori chicken, you need the perfect spice blend - and it's a good thing we have it for you right here in this recipe. To achieve the authentic and eye-opening flavor you're looking for, you'll need garlic, ginger, paprika, curry powder (or garam masala), cumin, turmeric, salt, and pepper. You can also add some cayenne pepper powder for extra heat.
- The yogurt-based marinade = tender juicy meat. We often turn to vinegar or lemon juice to tenderize meats in marinades, but yogurt makes an excellent tenderizer - it's even better than acidic marinades! Yogurt gently and effectively tenderizes the meat so that you can nearly pull it apart. That's the secret of how this grilled tandoori chicken is so juicy and tender!
- Cook them on the grill, in the oven, or in the air fryer. If you want to enjoy these Indian chicken skewers, you'll need to fire up your grill. The charring and smoke add even more flavor to these already flavorful bites of chicken. You can also bake them in the oven or air fryer so you can enjoy boneless tandoori chicken all year long.

Ingredient Notes
To make these flavorful Tandoori Chicken Skewers, you will need the following ingredients (full measurements in recipe card below):
- chicken - we used boneless skinless chicken breasts, but you can also use boneless chicken thighs if you prefer.
- garlic
- ginger
- tandoori seasoning - made simple with paprika, curry powder (or garam masala), ground cumin, turmeric, salt, and pepper. You can also make it spicy with cayenne powder or red pepper powder.
- plain yogurt - we love making our own easy Homemade Yogurt.
- tomato paste - add flavor and color.
- vegetable oil
- yogurt sauce - this sauce is perfect for dipping or drizzling. You'll need plain yogurt, olive oil, lemon juice, garlic, dill, salt, and pepper. Alternatively, serve these skewers with Tzatziki Sauce.
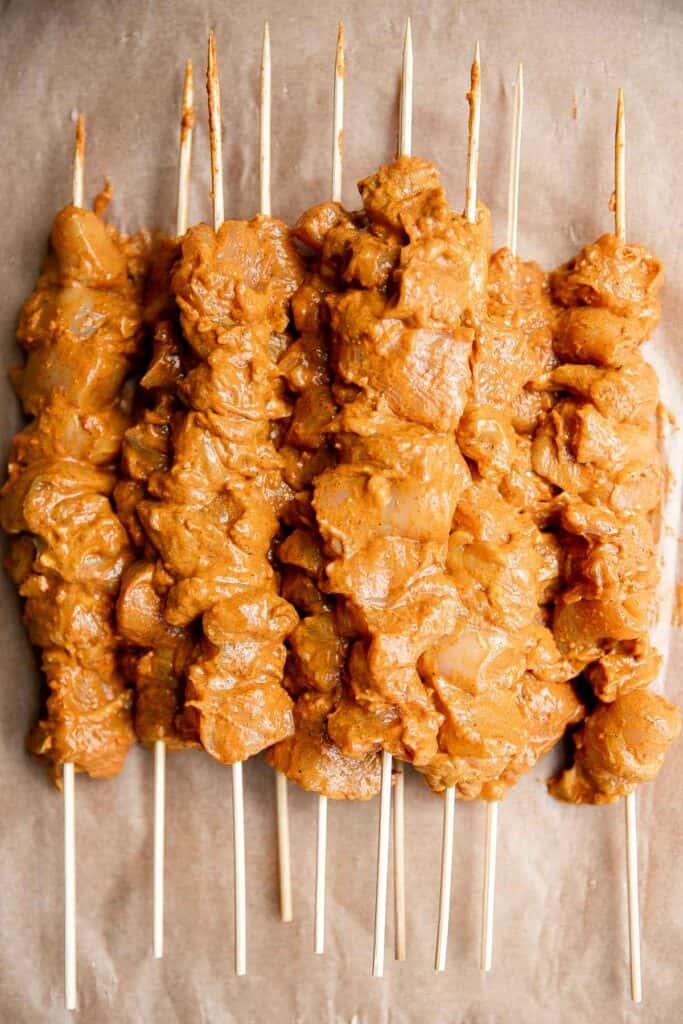
You will also need measuring cups and spoons, mixing bowl or ziploc bag for marinating, and skewers (we used bamboo skewers).

How to Make the Best Tandoori Chicken Skewers
- Prep the chicken. Cut the chicken breasts into 1-inch thick pieces and set aside in a large mixing bowl or Ziploc bag.
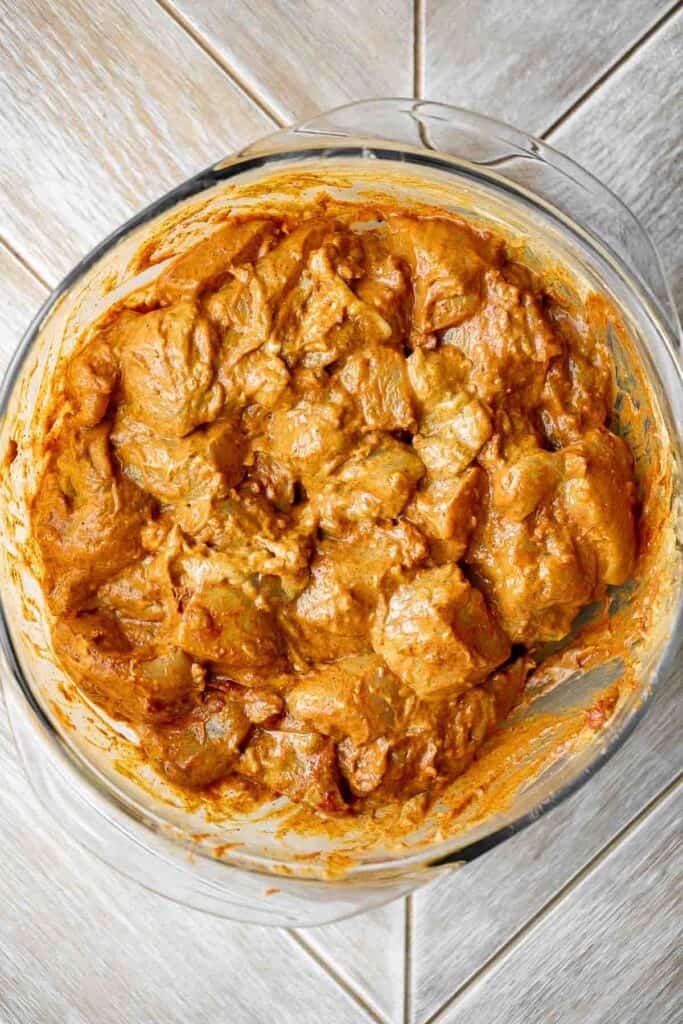
- Marinate the chicken. Add garlic, ginger, paprika, curry powder, cumin, salt, and pepper. Rub the seasoning all over the chicken to coat it evenly. Stir in yogurt, tomato paste and oil. Toss well until evenly coated. Cover the bowl with plastic cling wrap and refrigerate for at least 1 hour (or overnight for the best results).
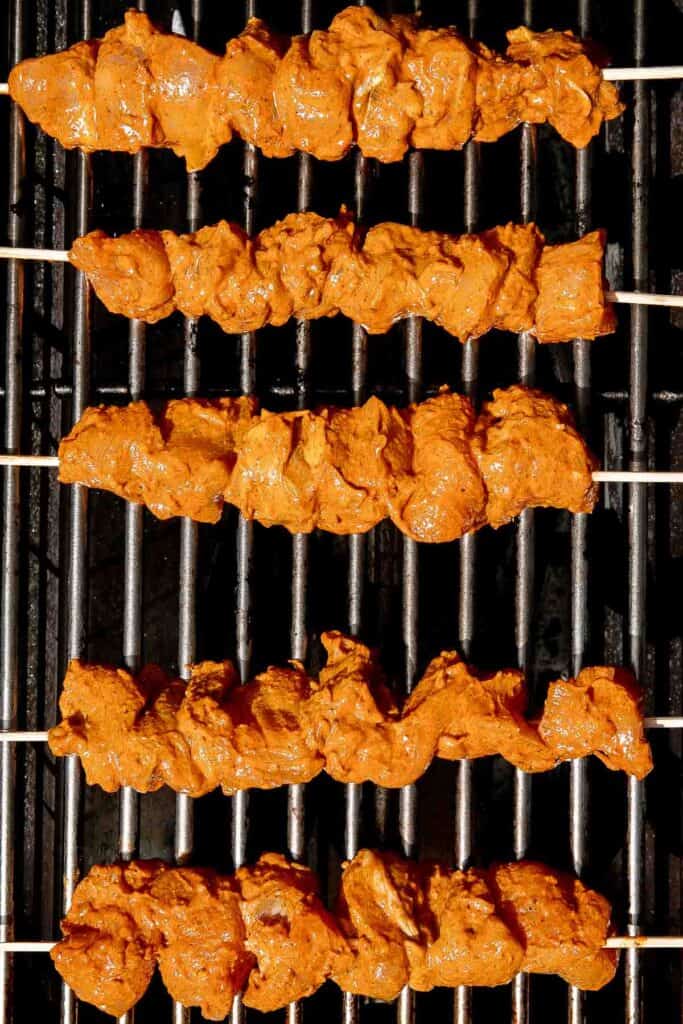
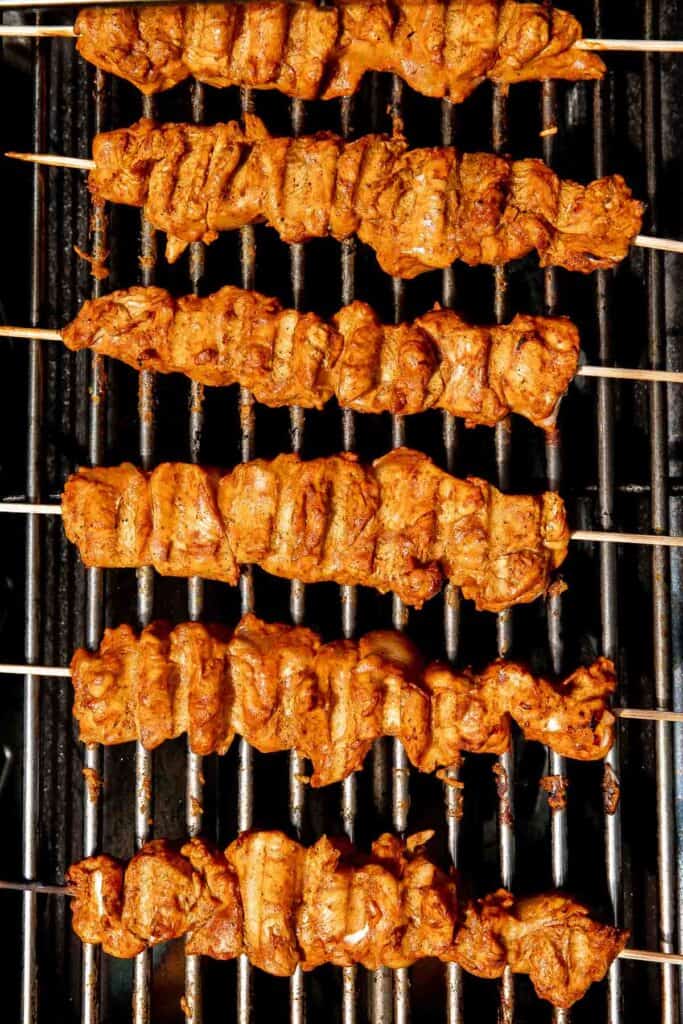
- Skewer the chicken. Preheat grill over medium high to 450F, about 6-8 minutes. Thread 6-8 marinated cubed chicken breasts onto each skewer. I used bamboo skewers.
- Grill the chicken. Place the skewers evenly apart on the grill and grill for 5-7 minutes on each side until the edges are nicely charred. The internal temperature for the chicken should reach 165 F as read on a meat thermometer. Do not overlap the skewers at any time to ensure even cooking.
- Make yogurt sauce. Whisk together yogurt, oil, lemon juice, garlic, dill, salt, and pepper in a small mixing bowl until smooth. Refrigerate the sauce until ready to use.
Serve. Serve skewers warm with a drizzle of yogurt sauce on top or on the side for dipping.
How to Bake Chicken Skewers in the Oven or Air Fryer
- You can also bake the chicken skewers in a preheated oven at 450F for 16- 18 minutes or cook in the air fryer at 450F for 13-15 minutes until the chicken is fully cooked through.
What to Serve with Tandoori Chicken
These tandoori chicken skewers taste so good on their own dipped in the homemade yogurt sauce. You can also make a complete meal by pairing them with some side dishes such as:
- Steamed Rice or Rice Pilaf with Carrots.
- Garlic Naan Bread or Pita Bread.
- Cucumber, tomato, and onion salad such as a Persian Shirazi Salad.
- Roasted vegetables such as Honey Roasted Carrots, Air Fryer Vegetables, or Roasted Cauliflower.
- Grilled vegetables such as mushrooms, potatoes, zucchini, or Grilled Corn on the Cob.
You can also make a Tandoori Rice Bowl with steamed rice, salad, and a dollop or drizzle of the yogurt sauce.
Storing and Reheating
- How to store: Keep leftover tandoori chicken skewers in a shallow airtight container for up to 3-4 days in the fridge. They can be stored on or off the skewers.
- How to reheat: The best way to reheat cold chicken skewers is to wrap them in aluminum foil with a splash of water and bake for 10-20 minutes in a 350F preheated oven. The foil should lay somewhat loosely around the chicken to allow for air circulation, but it should be pinched shut. You can also unthread the chicken and reheat in the air fryer at 350F for 5-10 minutes until warm.

More Chicken Skewer Recipes
- Easy Summer Grilling Recipes
- Balsamic Chicken Kabobs
- Chicken Satay Skewers with Peanut Sauce
- Persian Saffron Chicken Skewers (Joojeh Kabob)
- Lemongrass Chicken Skewers
- Greek Chicken Souvlaki Skewers
Tried this recipe?
I'd love to hear what you think! Leave a comment and rating below to share your feedback. Your reviews help others discover this recipe and help me keep creating more free recipes for you. Snap a photo and tag me on social media @aheadofthyme too.

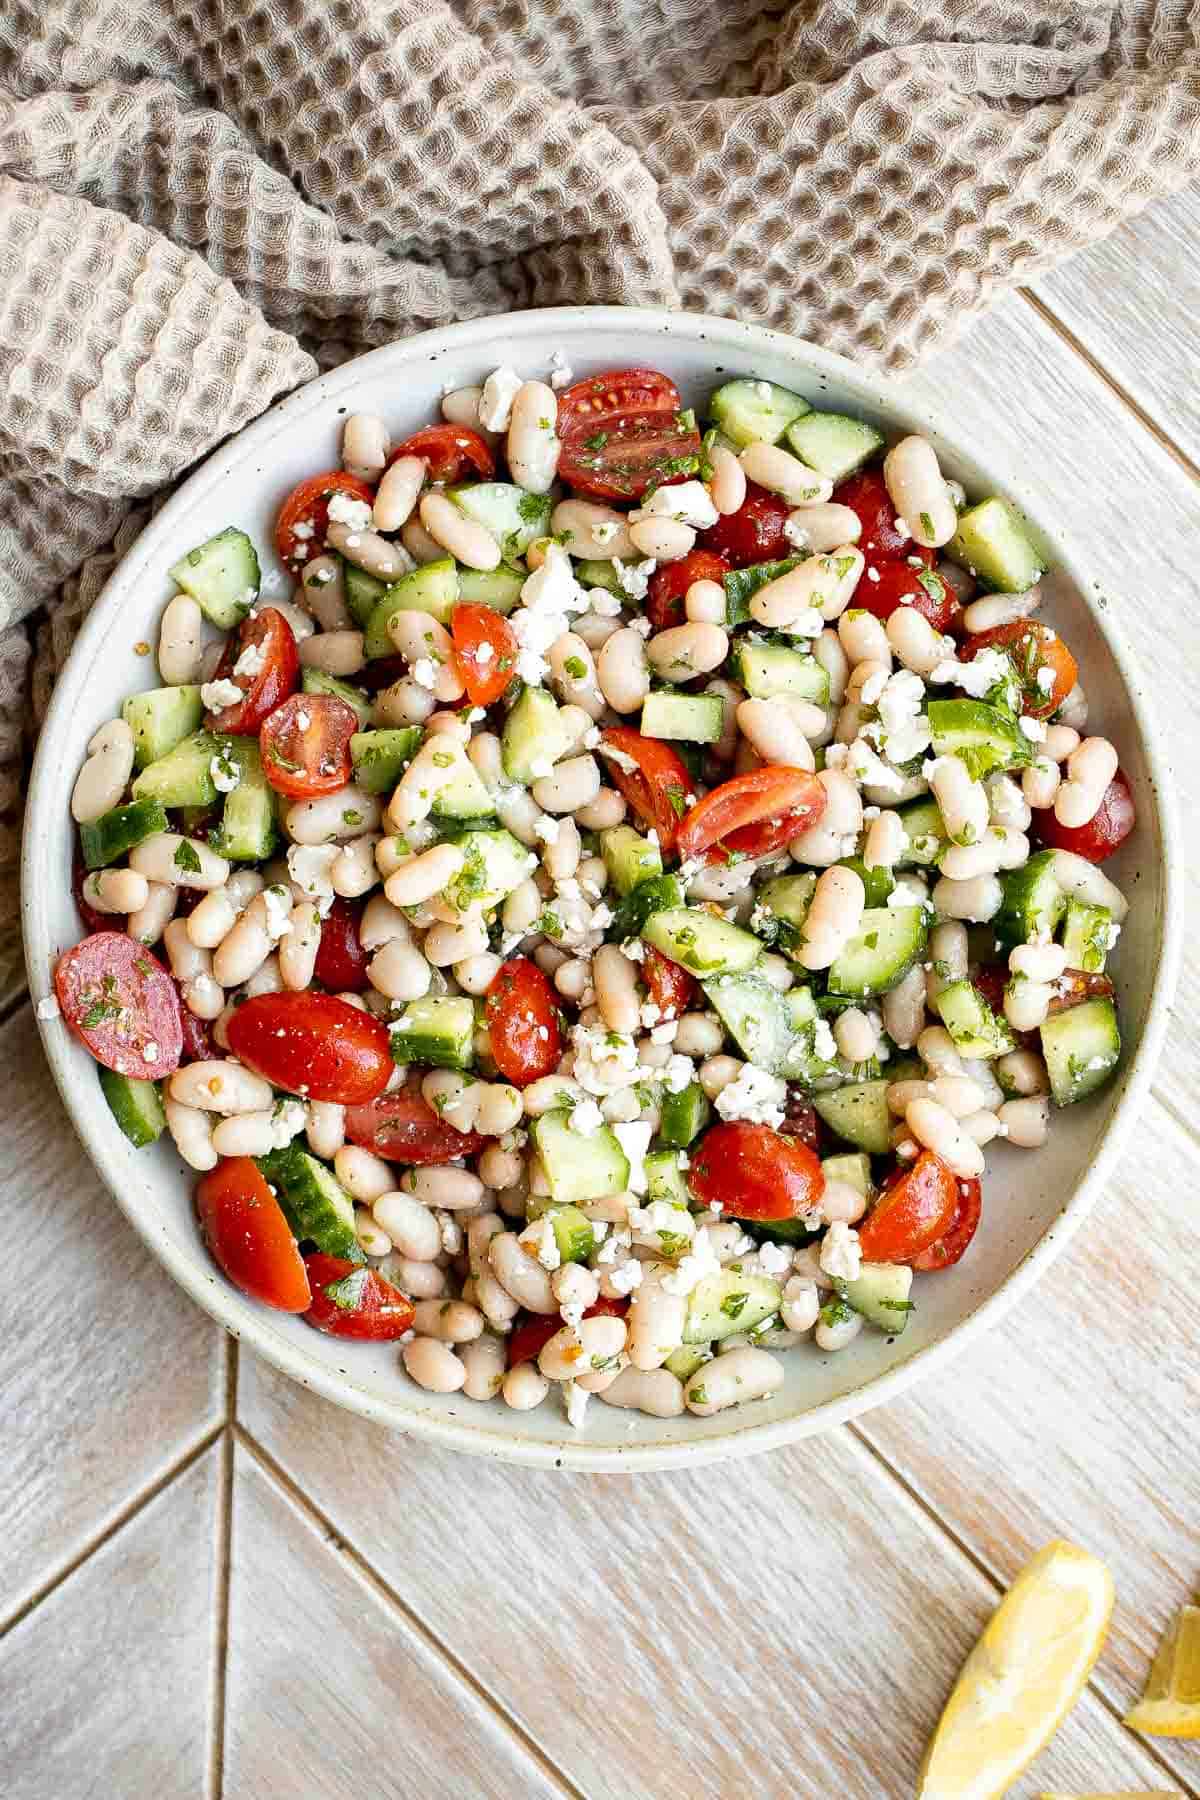
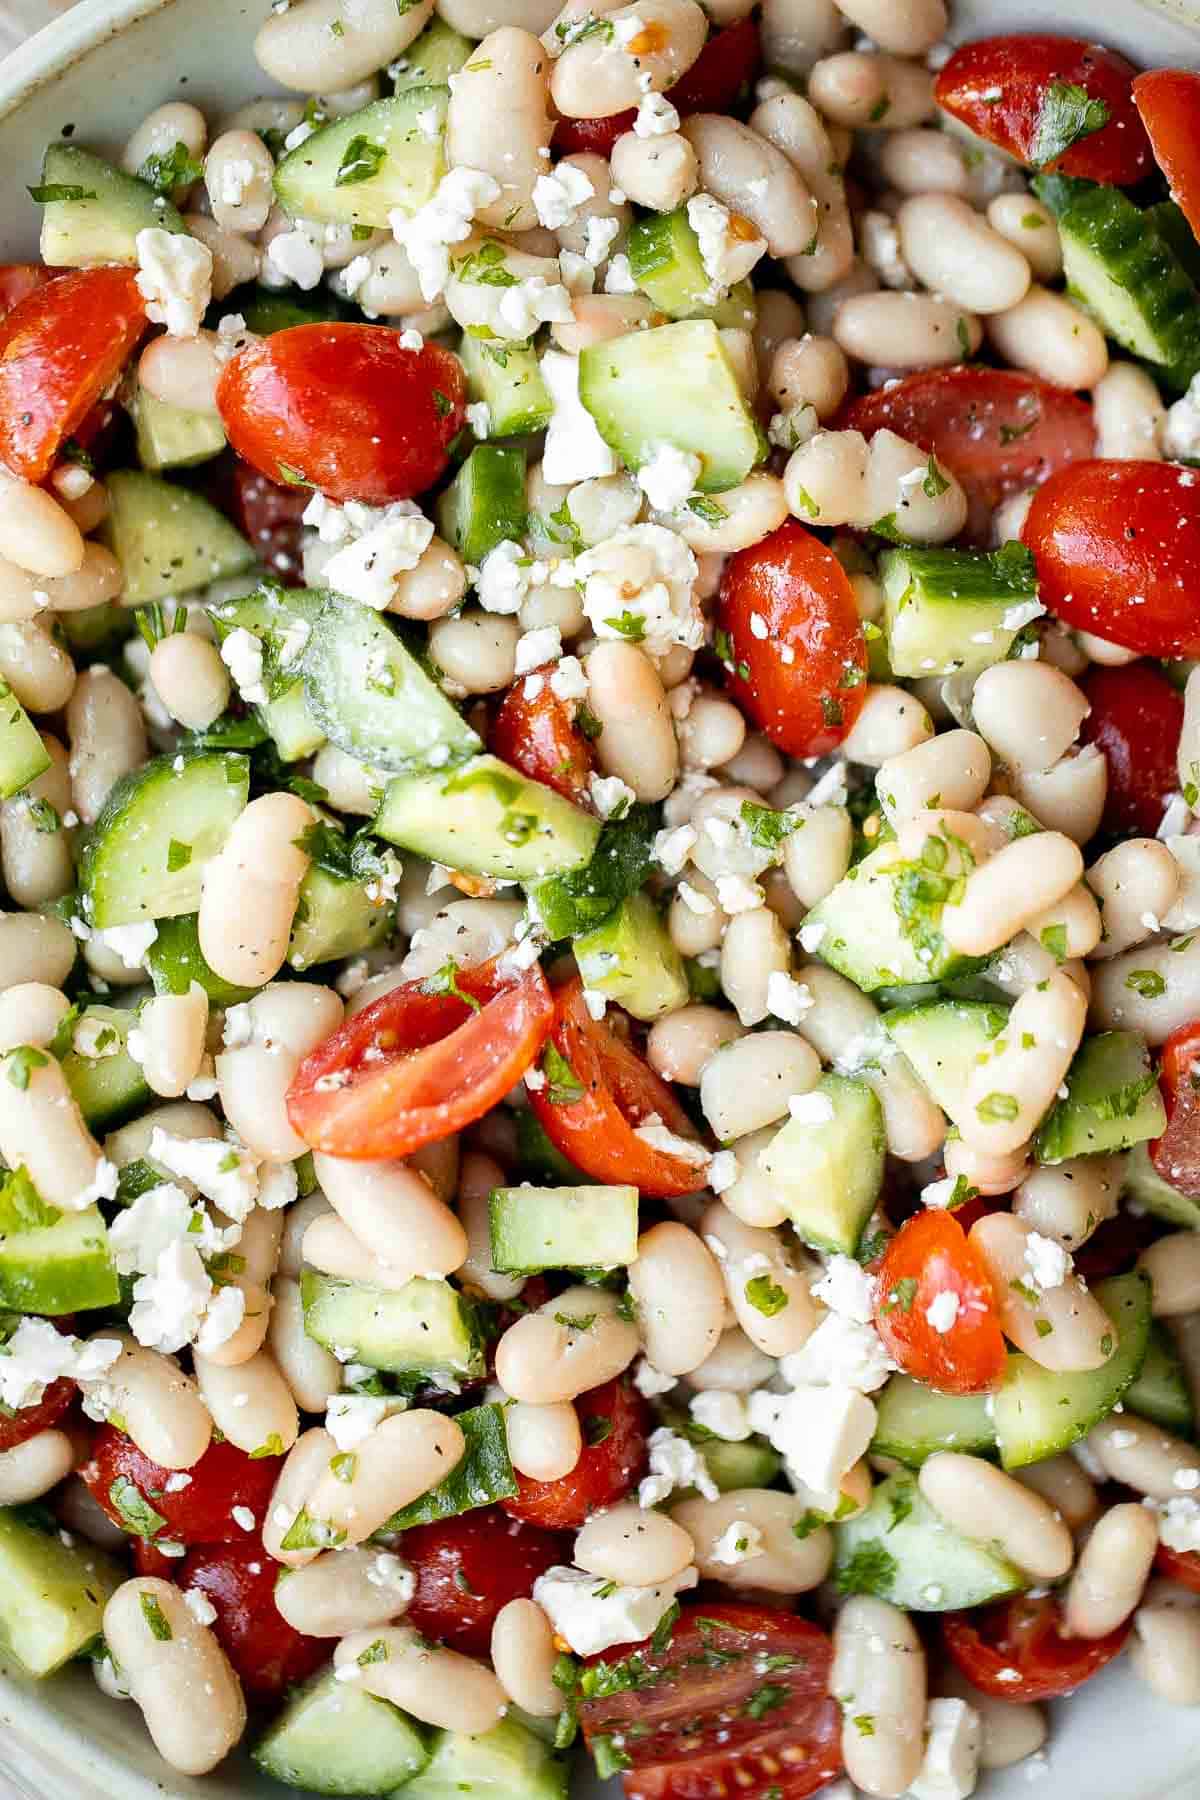
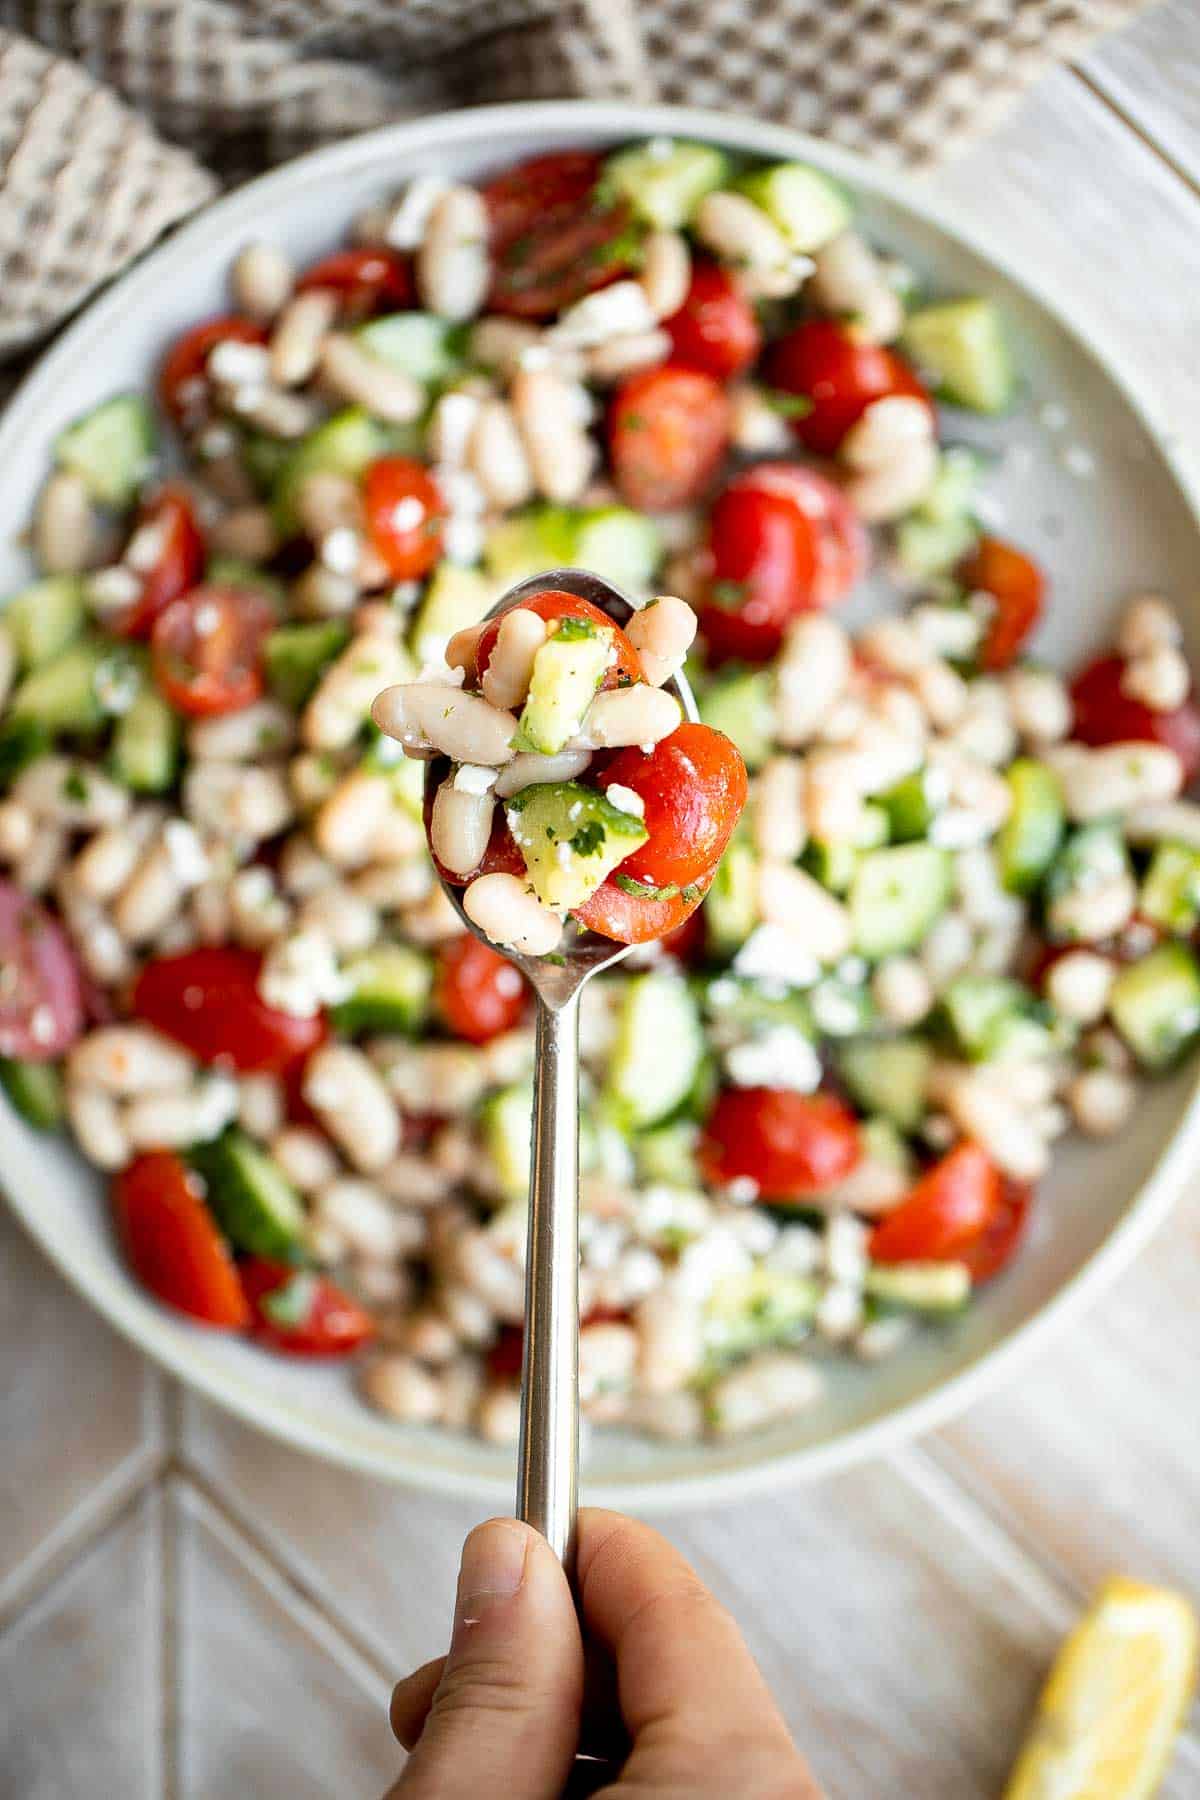
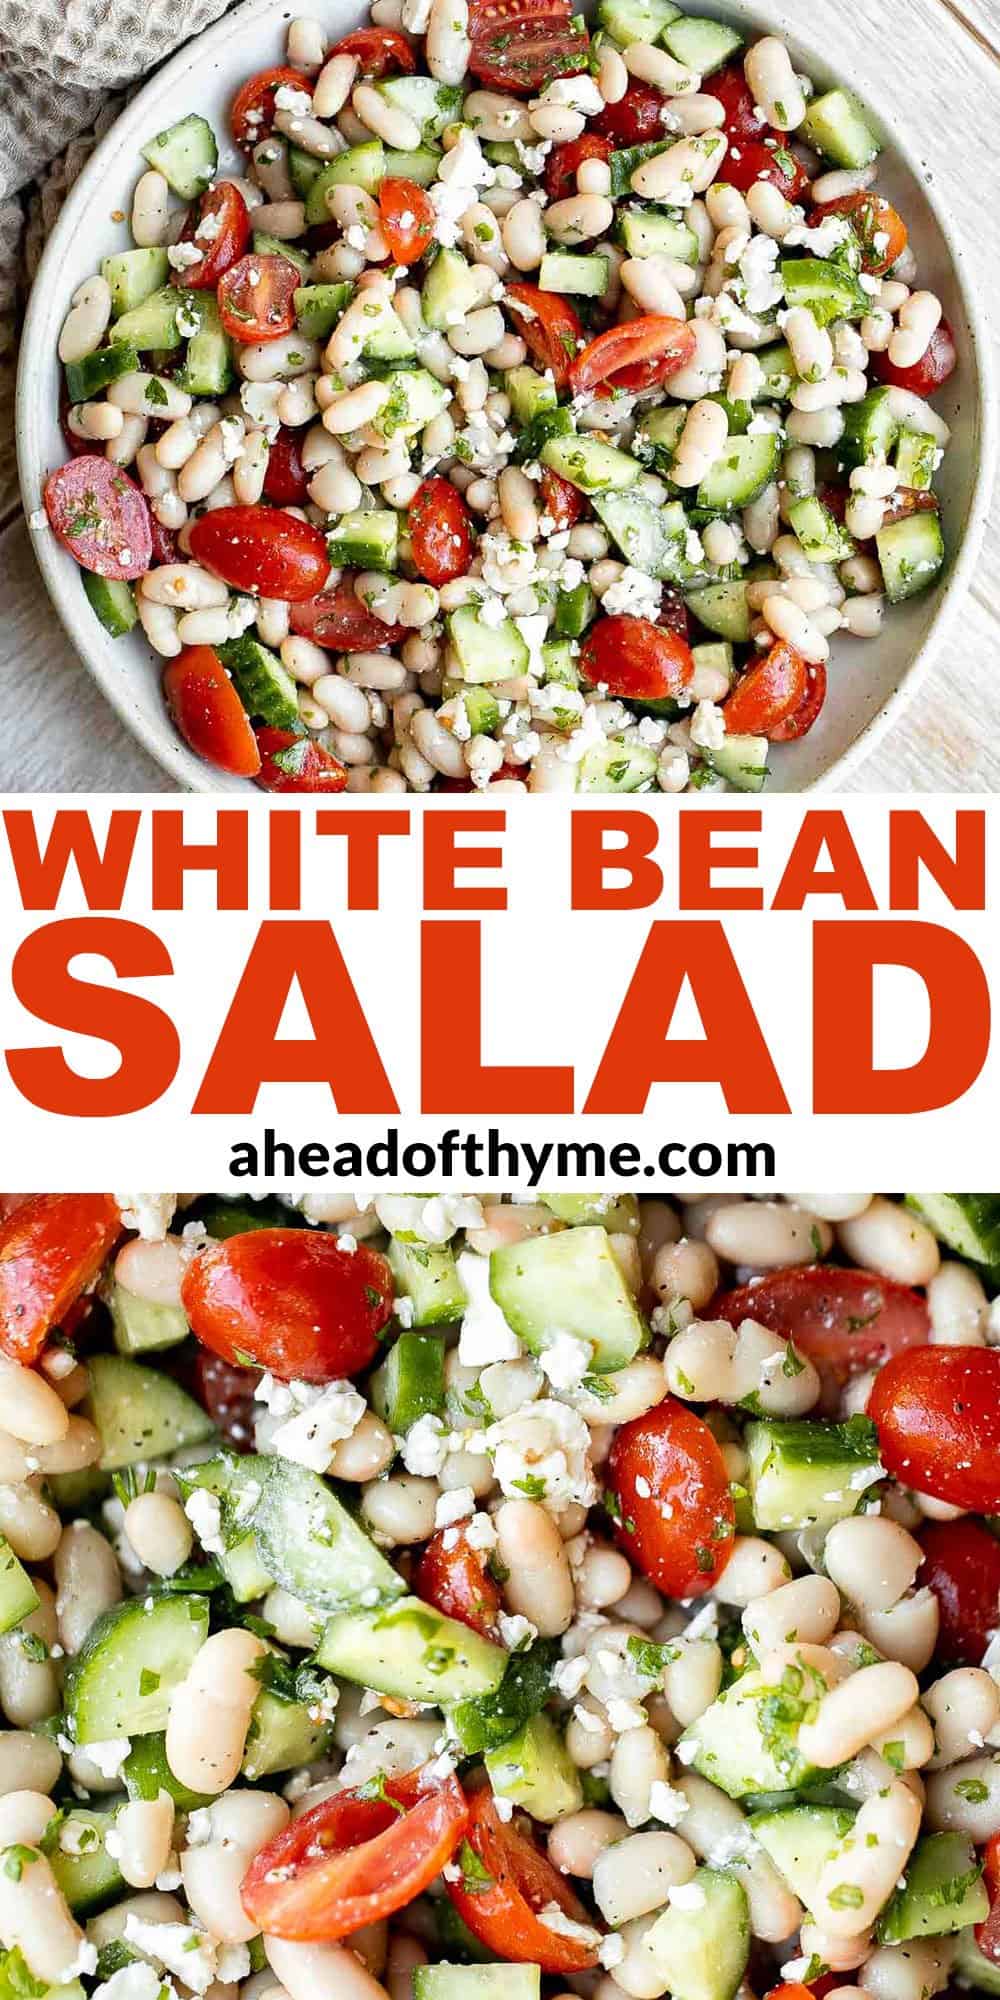
White Bean Salad
This Mediterranean White Bean Salad is a quick and easy recipe that's packed with healthy, flavorful ingredients. Loaded with cannellini beans, veggies, feta, and fresh herbs, all tossed in a homemade Greek dressing, this protein-packed salad is filling and nourishing.
The best part? It takes just minutes to toss together. Plus, this cannellini bean salad stores well and tastes better served cold the next day! It's perfect for meal prep lunches all week or for a summer potluck.
Why You'll Love This Mediterranean White Bean Salad
- It's quick and easy. This Mediterranean white bean salad will be ready to eat in just 10 minutes (or less if you're fast with chopping veggies)! It's the perfect meal for when you're low energy or short on time. Plus, the beans and veggies have plenty of healthy energy to keep you going - and is filling too!
- The perfect meal prep. This cannellini bean salad is so quick and easy, and can be eaten at room temperature but it's meant to be eaten cold. Plus, it stores well in the fridge which makes it an ideal recipe for your weekly meal prep. Bring it for lunch, take it to a picnic or potluck, or serve it as a low-effort side dish at dinner.
- It's fully customizable. This Mediterranean white bean salad can be used as a perfect base salad from which you can add or remove ingredients as you see fit. If you love olives, capers, bell peppers, or onions, then add them in! Have leftover kale that you need to eat? Throw it in your white bean salad! Craving balsamic? Add it to your bean salad. No cannellini beans? Use chickpeas! This Mediterranean white bean salad is incredibly versatile.
Ingredient Notes
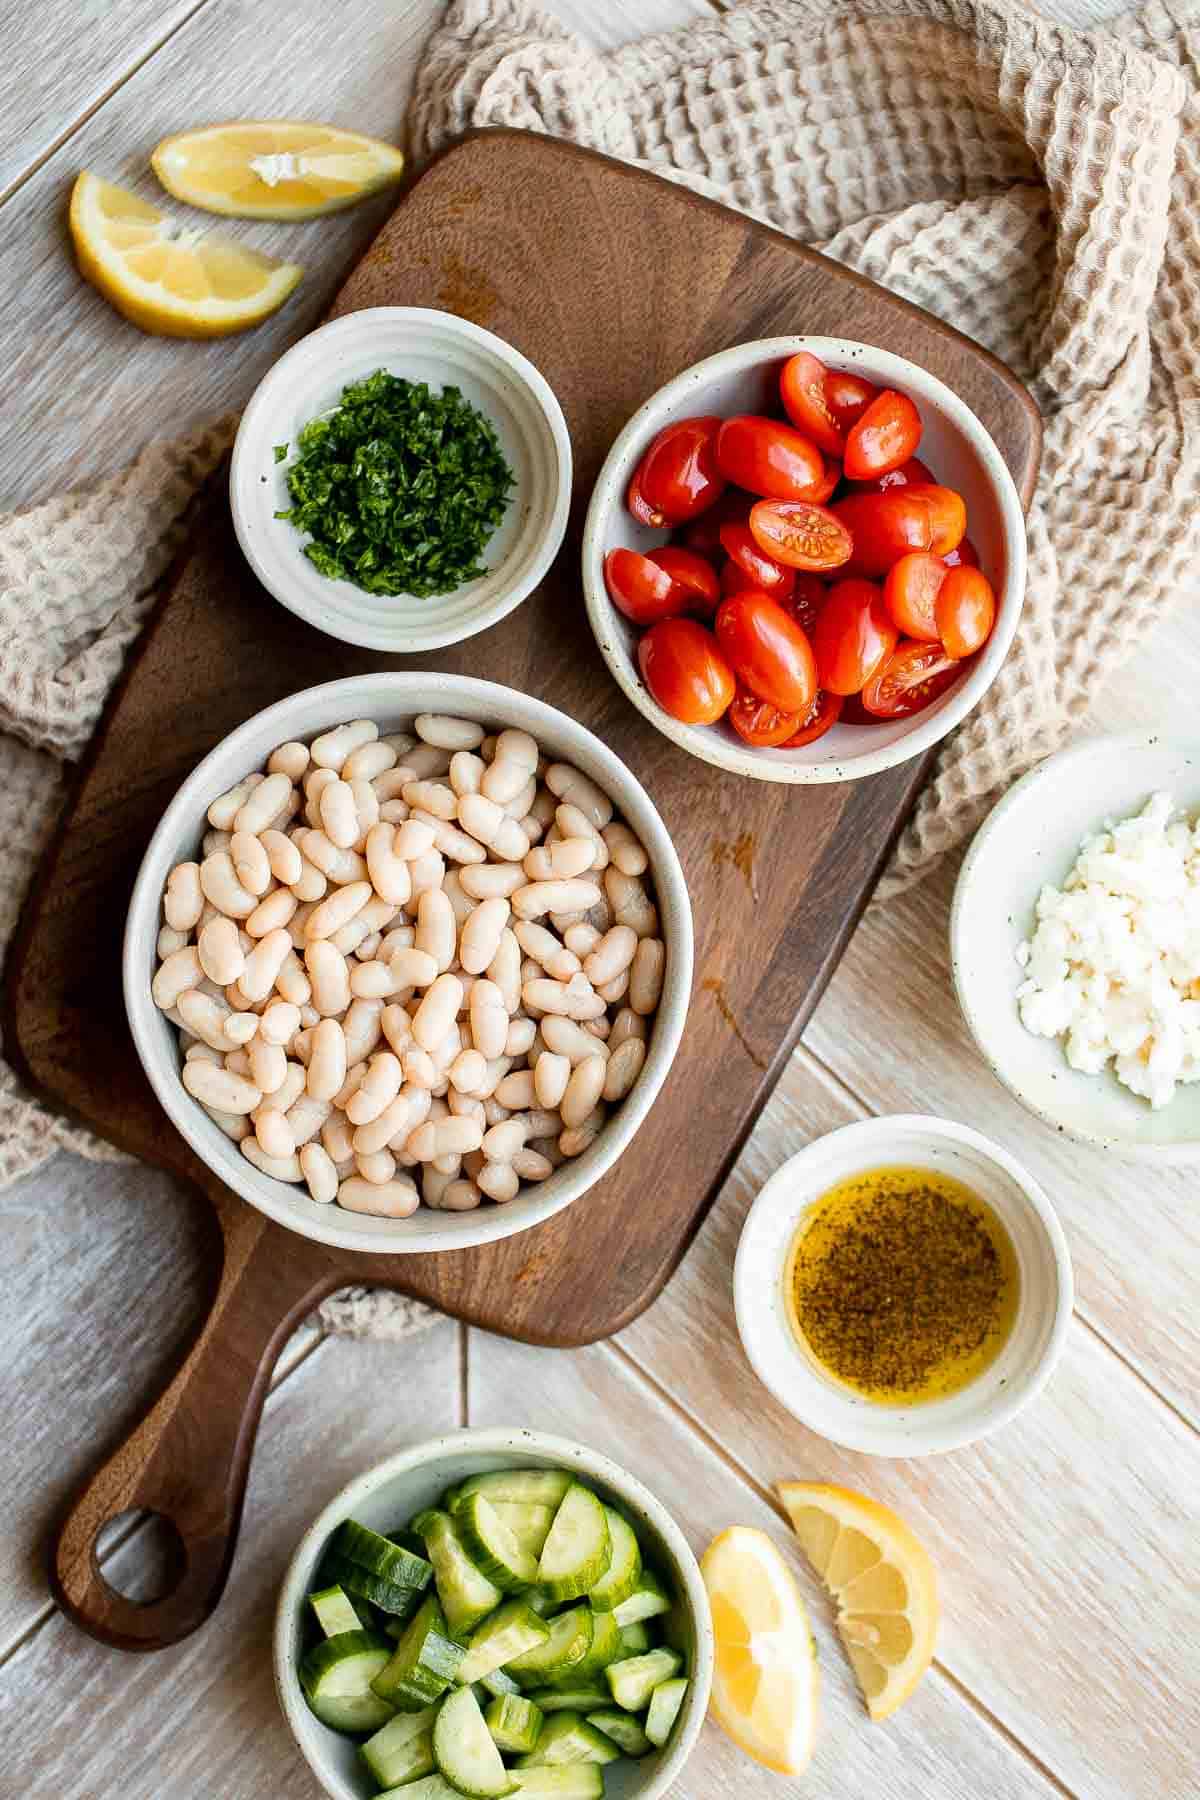
To make this quick and easy Cannellini White Bean Salad, you will need the following ingredients (full measurements in recipe card below):
- white beans - also known cannellini beans or butter beans. We used canned beans but you can also cook dried beans from scratch. You will need about ¾ cup dried beans. Also keep in mind that you will need to soak the beans overnight.
- tomatoes - I prefer small tomatoes such as grape tomatoes or cherry tomatoes in this recipe. Of course there is nothing stopping you from using larger tomatoes. Just chop them up into ½ to 1-inch pieces.
- mini cucumbers - I prefer Persian cucumbers for this salad. You can use a larger English cucumber but you may want to cut each slice into 6 pieces to keep them small.
- feta cheese - or substitute with goat cheese if you prefer.
- fresh parsley - feel free to substitute with your fresh dill or another of your favorite herbs.
- salad dressing - the dressing is a simple Greek style salad dressing made with olive oil, lemon juice, salt, and pepper. You can add in a little minced garlic for an extra oomph.
How to Customize
You can customize this salad with other ingredients that you have on hand. To keep it as a Mediterranean style salad, add in kalamata olives, bell peppers, and/or red onions.
How to Make the Best Cannellini White Bean Salad
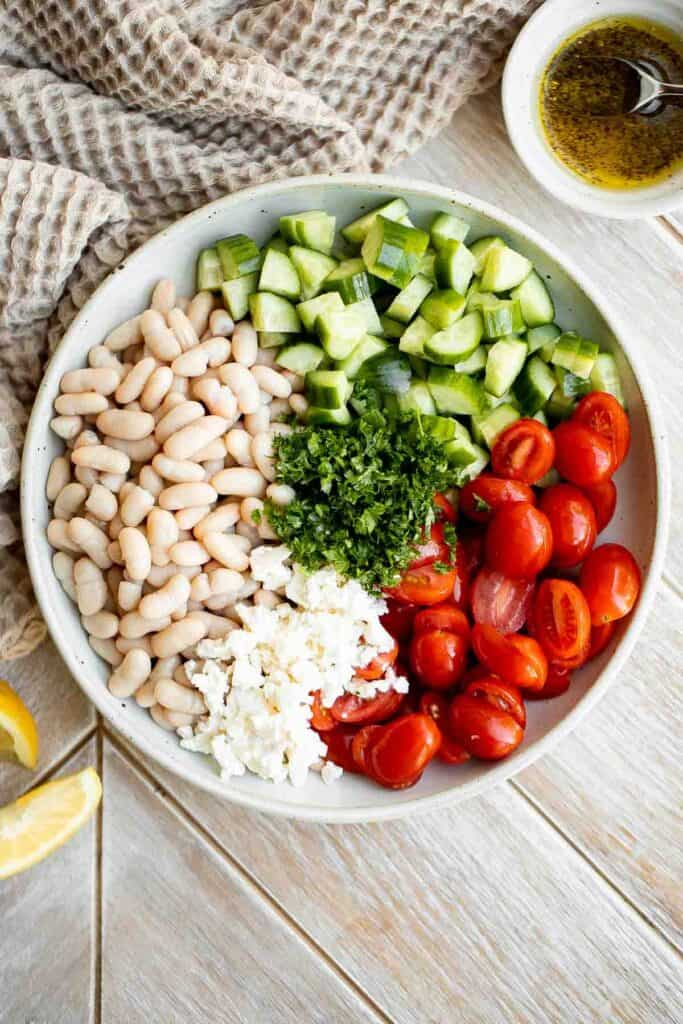
- Combine salad ingredients. In a large serving bowl or mixing bowl, combine beans, tomatoes, cucumbers, feta, and parsley.
- Make the dressing. In a small mixing bowl, make the dressing by stirring together olive oil, lemon juice, salt, and pepper.
- Toss. Pour the dressing over the salad and toss to combine. Serve immediately or refrigerate and serve cold.
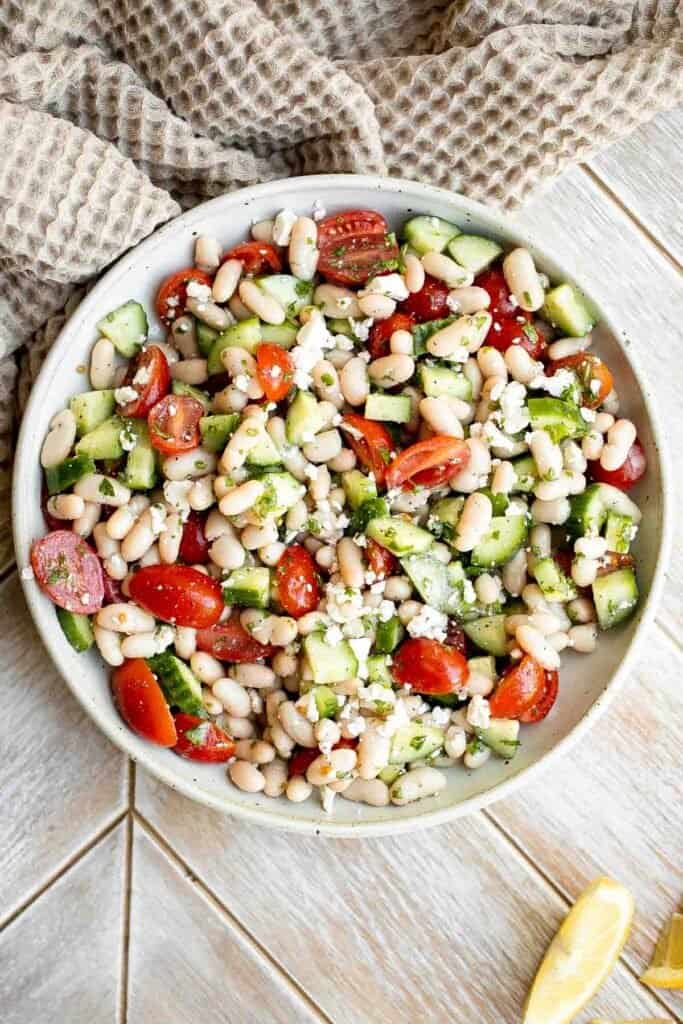
How to Serve
This Mediterranean white bean salad can be served on its own as a complete meal, thanks to the beans, which provide protein, carbs, and essential nutrients. However, this Mediterranean bean salad pairs well with:
- hummus, olives, and pita bread
- grilled or roasted beef, lamb, or pork
- baked chicken or salmon
- steamed or roasted vegetables
Recipe Tips and Tricks
- Always rinse canned foods: Although beans are an extremely healthy protein to work into your diet, canned beans are high in sodium, which can lead to high blood pressure and dehydration. This is why it's important that you rinse and drain canned beans before making your salad - to make it even healthier!
- How to store bean salad: Store cannellini bean salad in an airtight container in the refrigerator for 3-4 days. The longer it is refrigerated, the more the flavors will blend into each other - it's actually more flavorful the next day! Give it a quick stir to redistribute the dressing and ingredients before serving.
More Salad Recipes with Beans
- 40 Best Salad Recipes
- Chickpea Greek Salad
- Buckwheat Salad
- Warm Lentil Salad
- Mediterranean Wedge Salad with Roasted Chickpeas
- Southwest Salad
Tried this recipe?
I'd love to hear what you think! Leave a comment and rating below to share your feedback. Your reviews help others discover this recipe and help me keep creating more free recipes for you. Snap a photo and tag me on social media @aheadofthyme too.
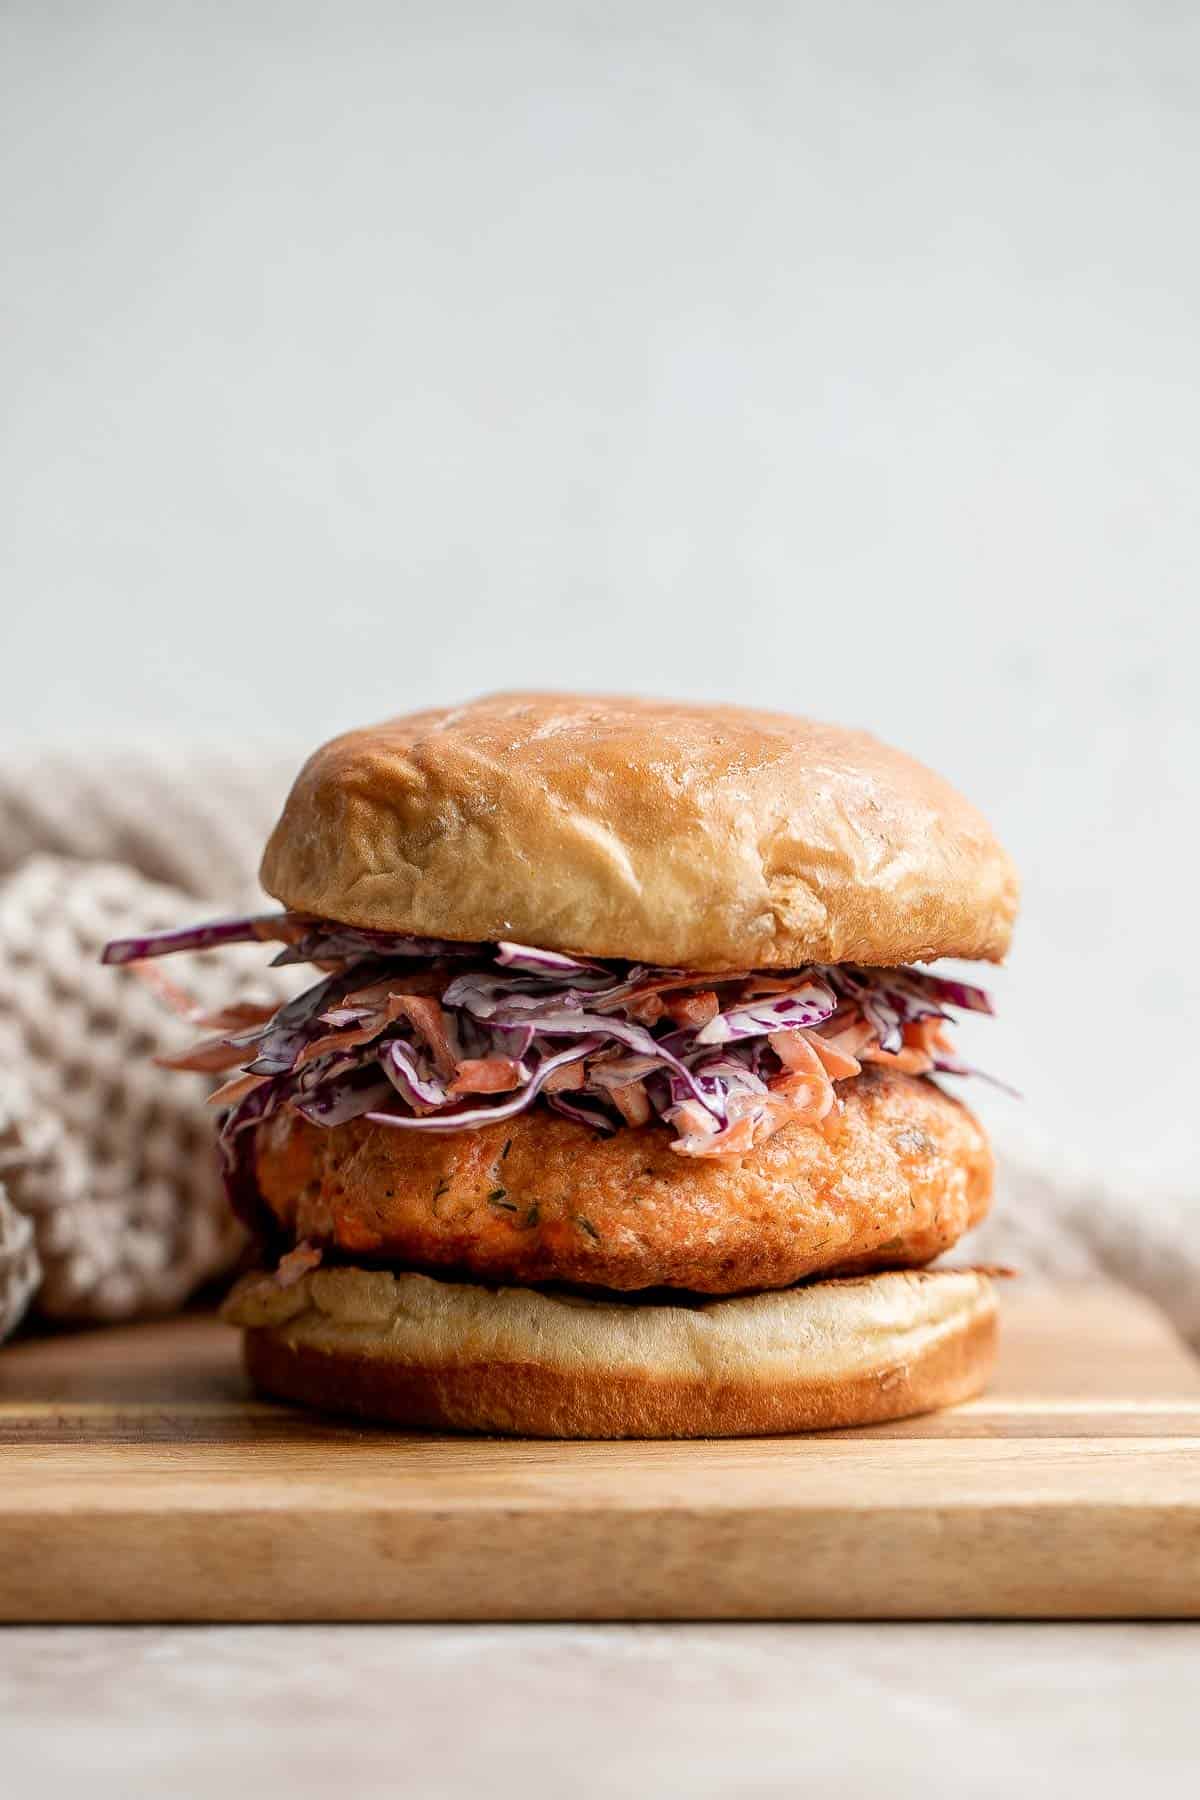
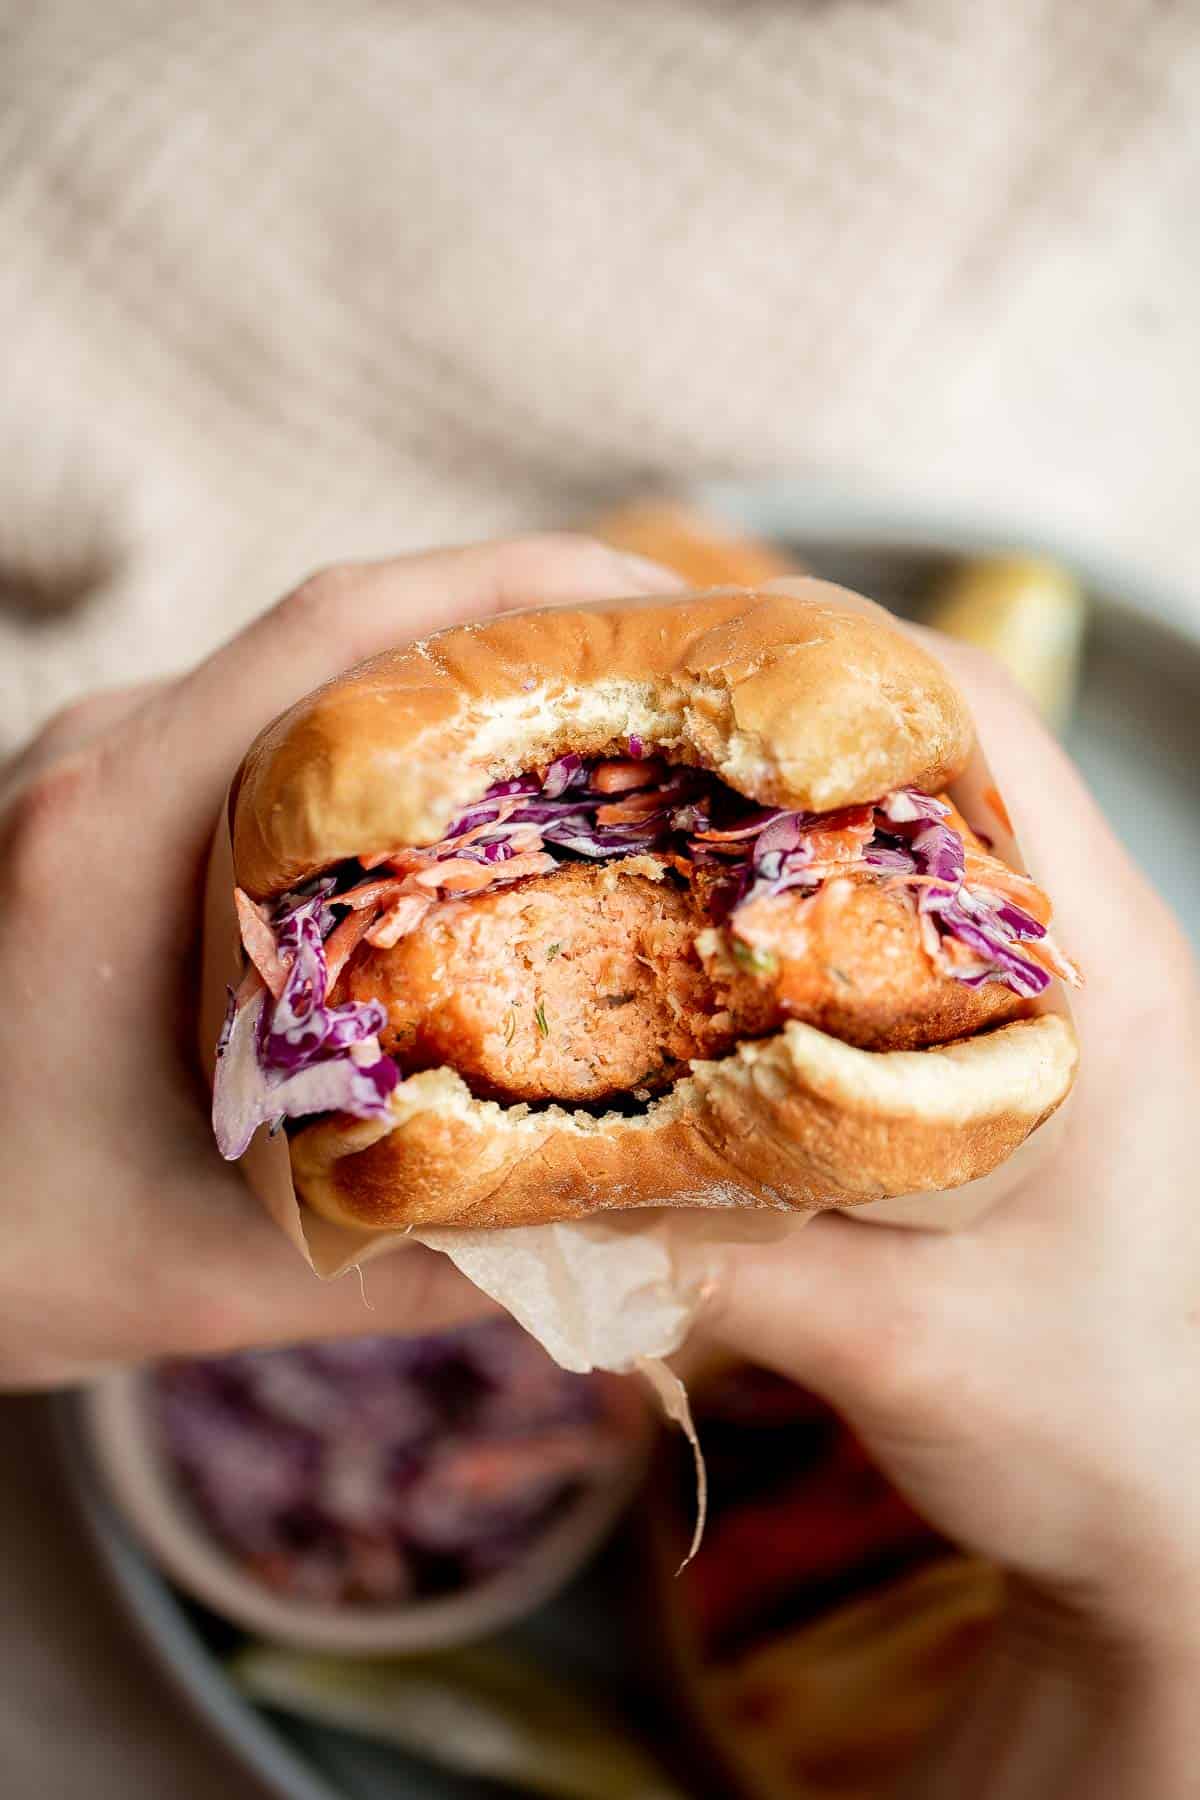
Salmon Burgers
These Salmon Burgers are unlike any burger you've ever had. Made with real fresh salmon, these burgers are crispy on the outside and flaky inside. They're juicy, thick, and healthy. Top them with creamy coleslaw the best combination of flavor and texture.
Plus, you can make these homemade salmon patties on the stove, in the air fryer, or in the oven. Serve this protein-packed meal for lunch or dinner in a burger bun, lettuce wrap, or over salad.

Why You'll Love Salmon Burgers
- The juicy, tender salmon patty. Of course, you could slap a seared Garlic Butter Salmon filet on a burger and call it a salmon burger - but it just wouldn't be the same. This salmon patty is made with carefully chopped fresh salmon, breadcrumbs, dill, and a special blend of aromatics to create a flavorful, tender, and juicy salmon burger patty that is thick.
- It's a healthy and tasty alternative to classic burgers. You can't go wrong with traditional Classic Beef Burgers, but sometimes you crave a burger that is a little different. These salmon burgers give you an option that's delicious and healthy without sacrificing protein or flavor.
- Topped with a simple and easy coleslaw. Although these salmon burgers are seasoned well, you need to serve them with the something saucy - and the coleslaw with creamy dressing does not disappoint. But of course you could choose your favorite burger toppings and add some tarter sauce.
- Serve them with or without a bun. You can serve the salmon patties with a bread bun or serve them bunless in a lettuce wrap or over Coleslaw or any other salad you like.
Ingredient Notes
To make this delicious homemade Salmon Burgers, you will need the following ingredients (full measurements in recipe card below):
Salmon Patty Ingredients
- salmon fillets - these salmon burgers are made with real salmon fillets (no canned salmon here), so you will need to remove the skin and any bones.
- breadcrumbs - helps to make the cooked salmon patties lighter and more tender.
- egg - a binding ingredient to help shape the patties and hold them together.
- mayonnaise
- Dijon mustard
- lemon juice
- dill - I recommend using fresh dill and not dried. Dill compliments the natural flavor of salmon so well. Feel free to substitute with you favorite herb if you like.
- smoked paprika
- salt and pepper
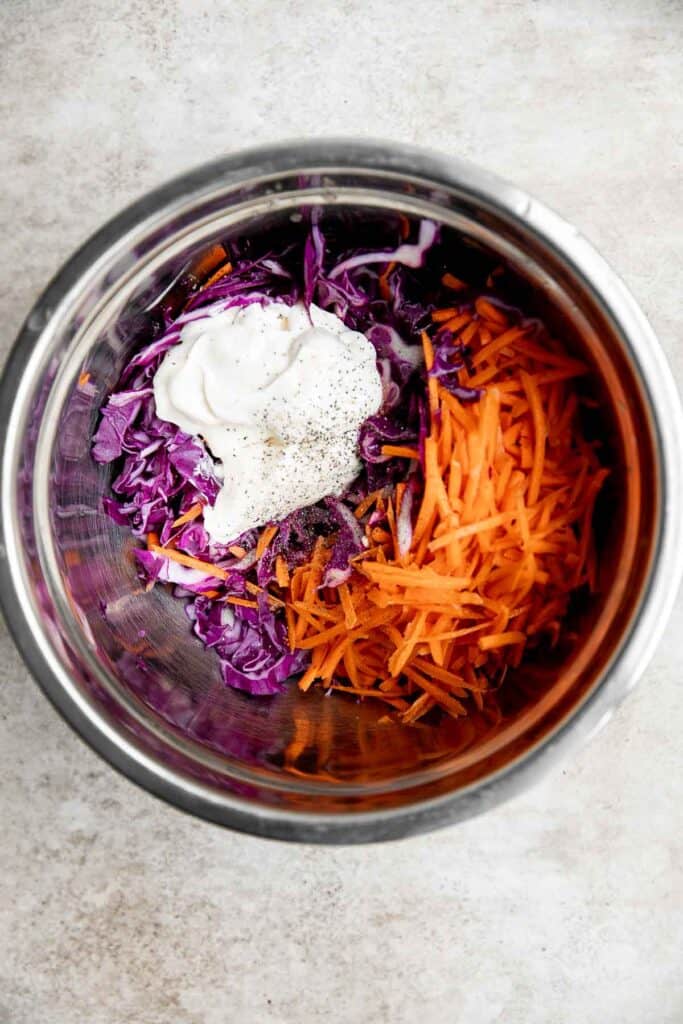
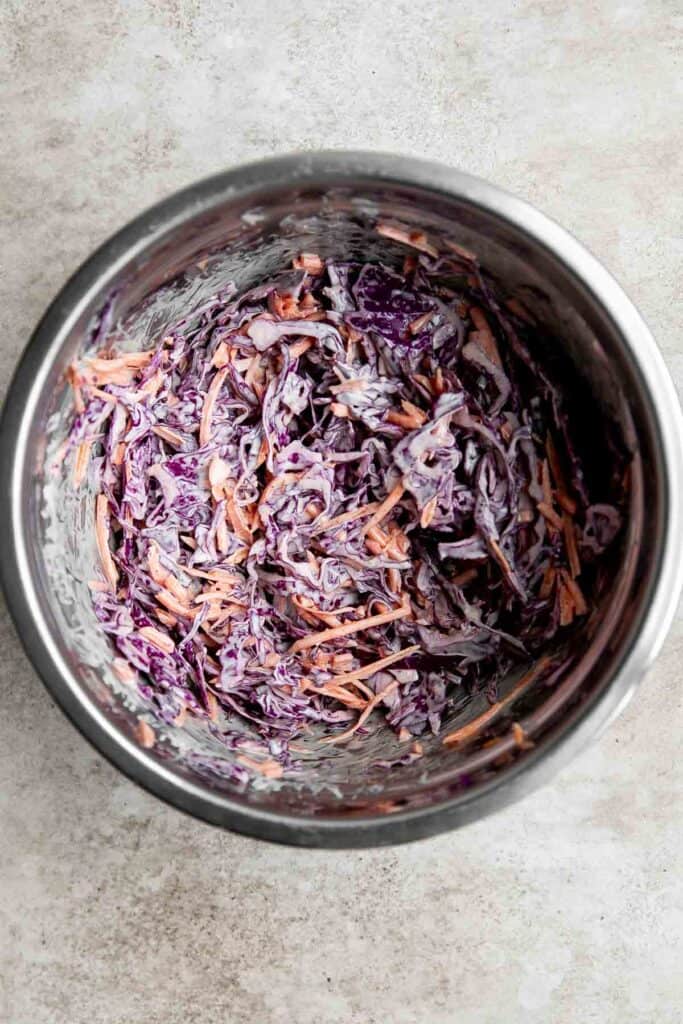
Coleslaw Ingredients
- purple cabbage - or substitute with a green cabbage or a combination of the two.
- carrot - you will need to shred or julienne the carrots. A box grater makes it really easy to do this.
- mayonnaise
- lemon juice
- salt and pepper
You will also need vegetable oil (if pan frying the patties) and hamburger buns for assembling the burgers. If you like baking bread at home or want to give it a try, you need to try our easy to make Homemade Hamburger Buns.
How to Make the Best Patties for Salmon Burgers
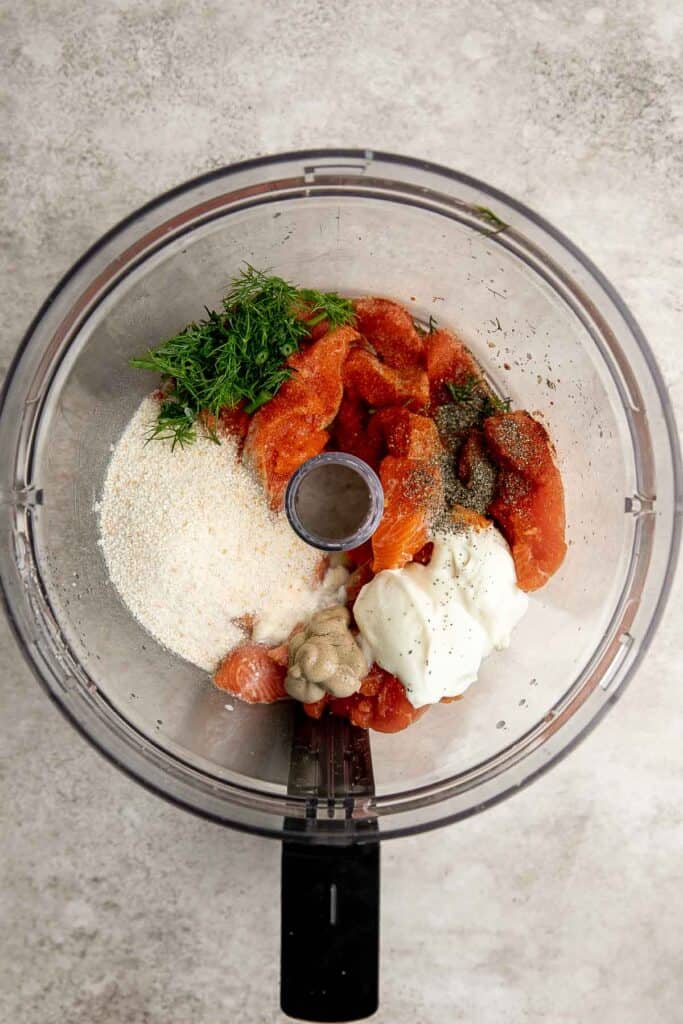
- Combine the patty ingredients. Cut the salmon fillets into 1-inch strips and transfer into a food processor. Add breadcrumbs, egg, mayonnaise, mustard, lemon juice, dill, paprika, salt, and pepper.
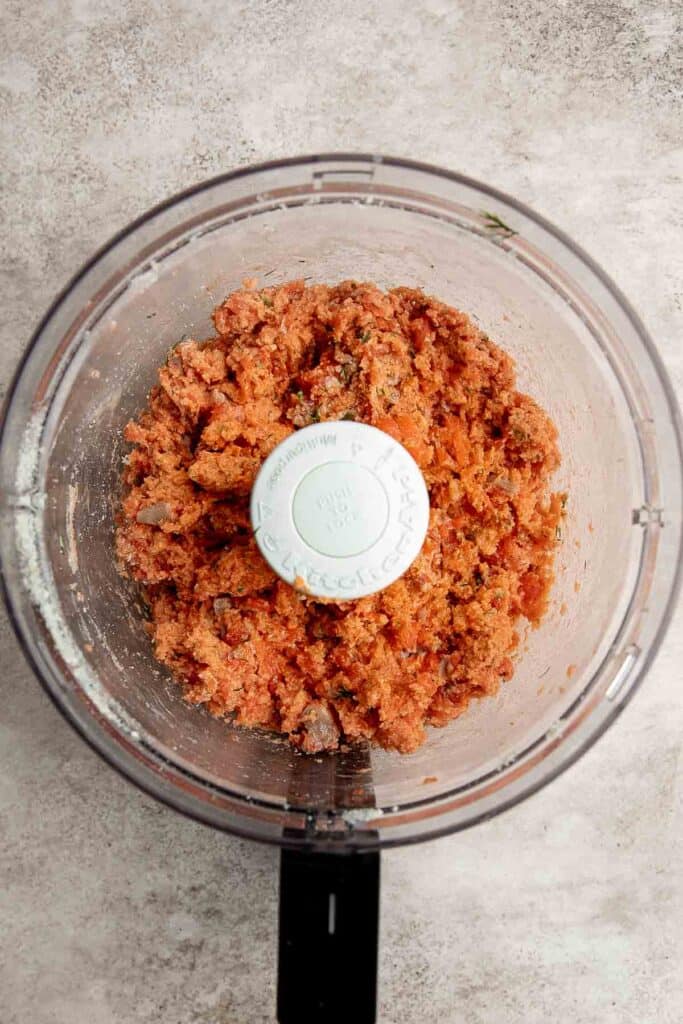
- Process. Pulse mix on and off for 1 minute until coarsely chopped. You can also chop the salmon fillets by hand into ⅛-inch diced pieces and use a spatula to mix all the ingredients together in a large mixing bowl until evenly combined.
- Shape into patties. Take about ½ cup salmon mixture at a time and use your hands to firmly shape into 4-5 large patties. You can wear disposable gloves for easy clean up.
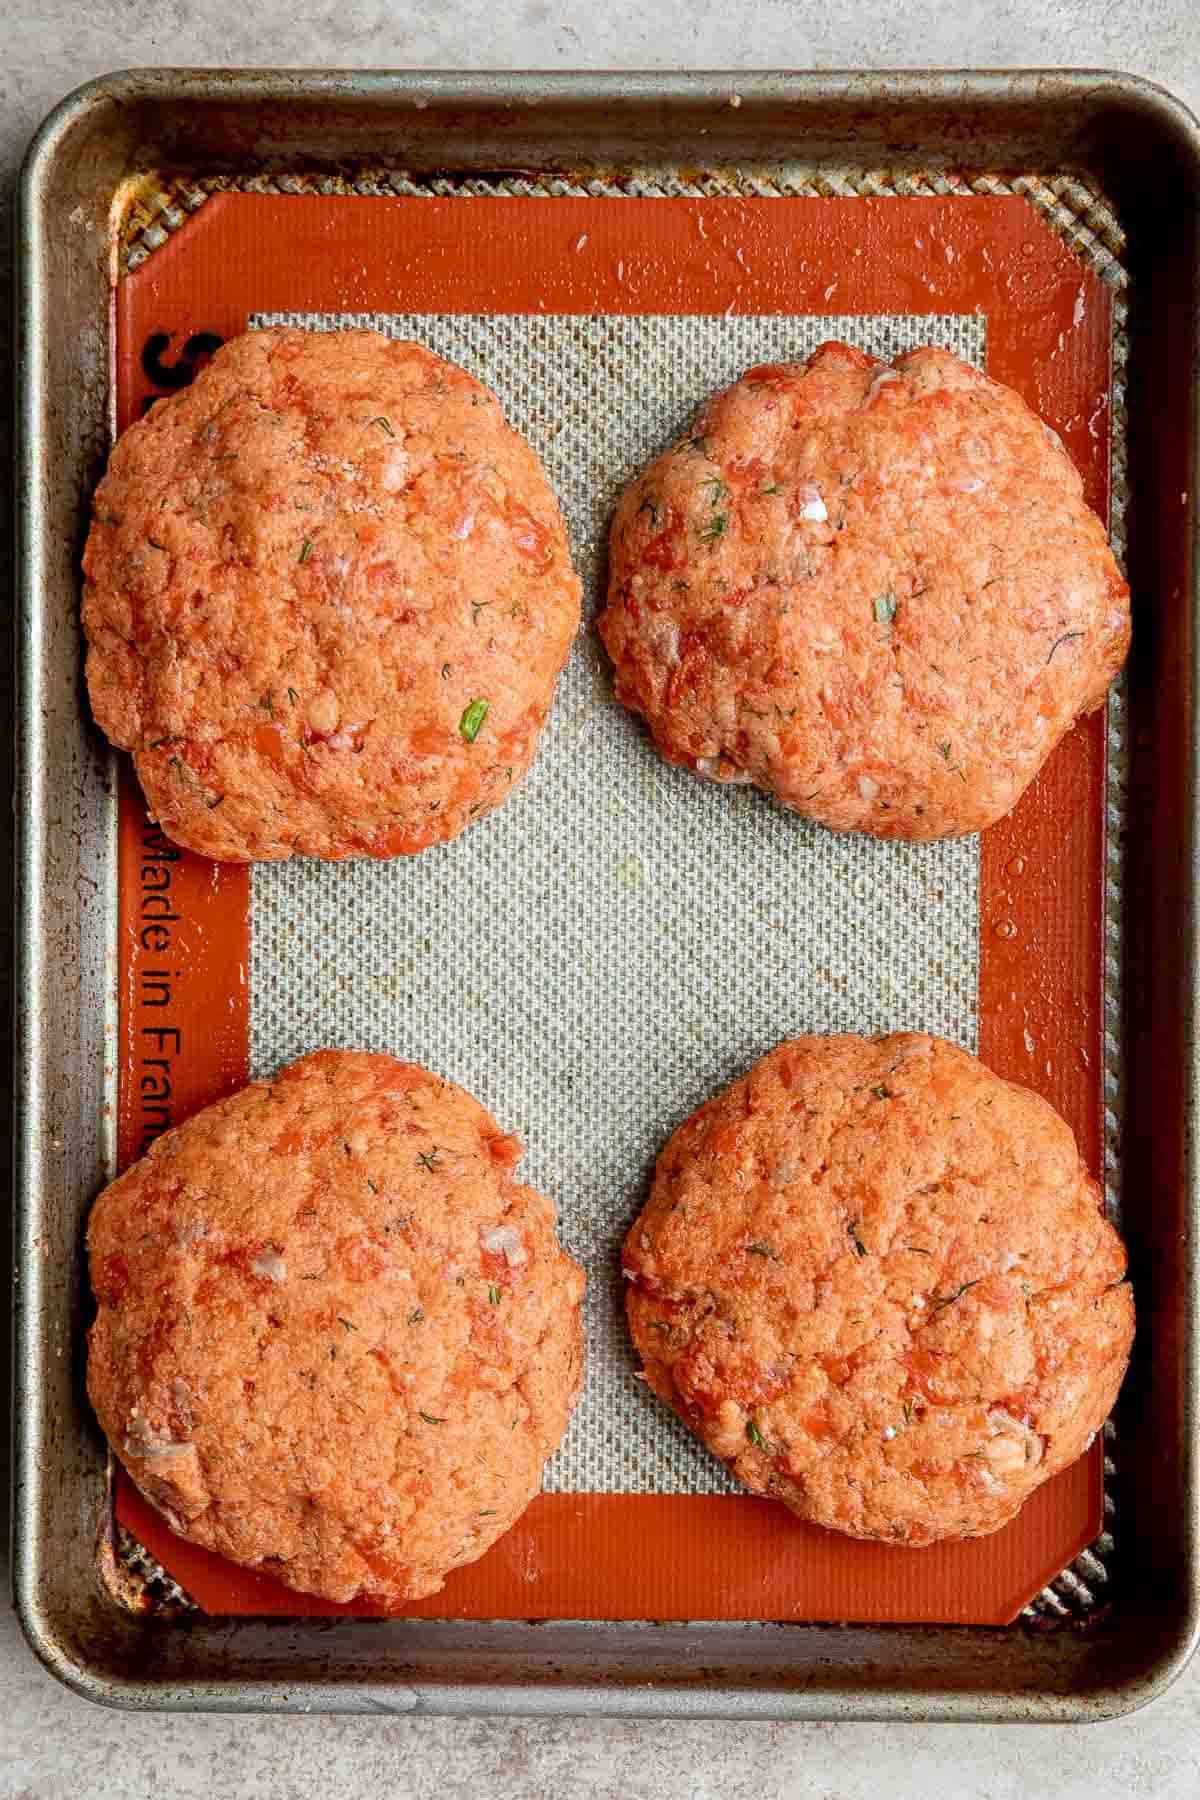
- Chill. Refrigerate or freeze for 10-15 minutes to allow the salmon patties to firm up a bit more.
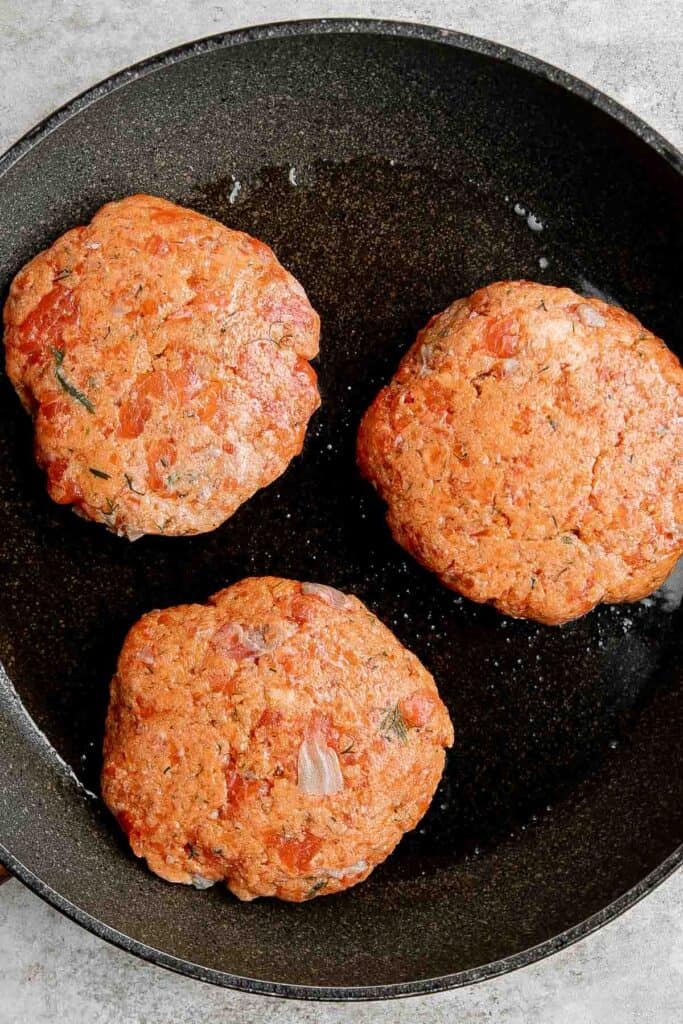
- Cook the patties. You can pan fry, air fry, or bake the patties.
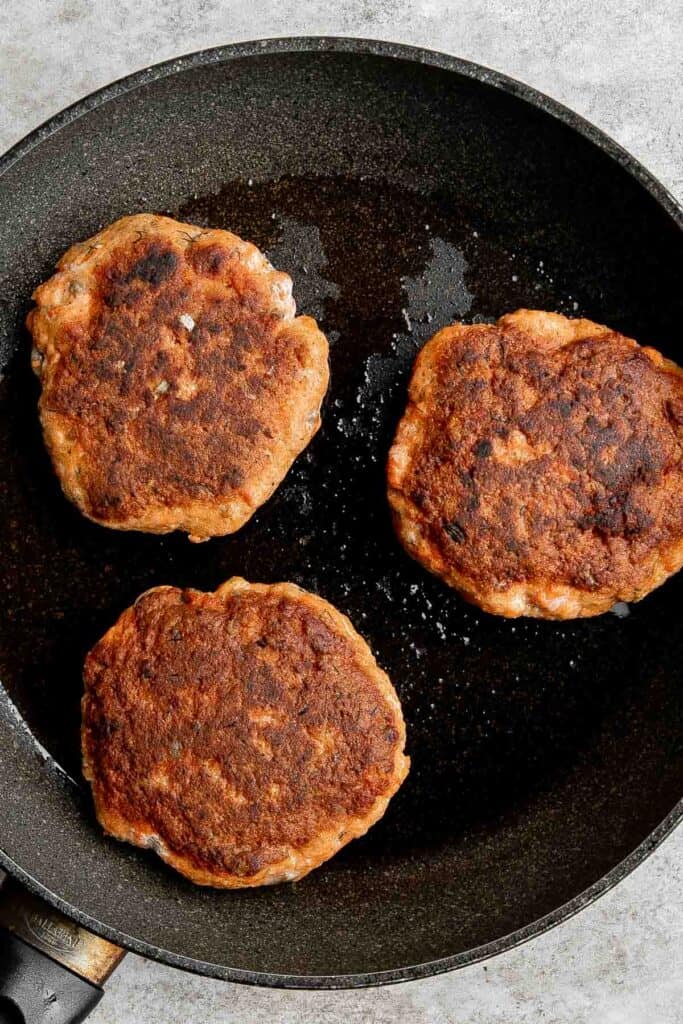
- To pan fry: Heat oil in the skillet over medium heat until sizzling hot, about 2 minutes. Place patties on the skillet and cook until nicely browned and firm, about 5 minutes per side.
- To air fry: Add salmon patties in batches in the air fryer basket and cook at 375F for 12-15 minutes until nicely browned. Flip once halfway through cooking.
- To bake: Add salmon patties to a large parchment-lined half sheet baking pan and bake in a 375F preheat oven for 15 minutes until nicely browned, flipping once.
How to Assemble Salmon Burgers
First, make the slaw. In a medium mixing bowl, combine cabbage, carrot, mayonnaise, lemon juice, salt, and pepper. Stir well until evenly combined.
Next, slice the hamburger buns and toast them on the grill or in the frying pan, if desired.
Finally, assemble the burgers. Place the salmon patties on the bottom half of the bun and top with coleslaw. Place top bun on top and serve immediately.
Salmon Burger Toppings
You can also add any additional fixings that you like to your salmon burgers, such as:
- tarter sauce
- fresh or fried onions
- pickles
- thinly sliced, fresh or roasted bell peppers
- sliced avocado or guacamole
- pesto sauce
- sliced cheese, such as provolone or mozzarella
How to Serve
Salmon burgers are delicious and filling on their own. If you want to make a complete meal, serve your salmon burgers with classic burger sides such as:
- Greek Fries
- Caesar Salad
- Grilled Corn on the Cob
- Baked Sweet Potato Wedges
- Lemon Parmesan Asparagus
- Air Fryer French Fries
Recipe Tips and Tricks
- How to store: Store salmon patties, slaw, and buns separately until it's time to eat. Cooked salmon burgers will keep in the fridge for 3-4 days inside an airtight container. Coleslaw will last the same amount of time in an airtight container but get soggier the longer it's stored.
- How to reheat: To reheat salmon burgers, place the patty gently on an oiled non-stick pan over medium heat. Add a splash of water and cover the pan, allowing the burger to steam for 5-10 minutes until warm. Flip, if needed.
- How to freeze uncooked salmon patties: You can freeze the uncooked salmon patties for up to 1 month for best results. To freeze, place on a lined sheet pan and freeze for 1-2 hours until hard. Then, stack them up with a piece of parchment paper in between each patty and store in an airtight container or freezer bag.

More Salmon Recipes
- 15 Best Salmon Recipes
- Coconut Curry Salmon
- Garlic Butter Salmon
- Teriyaki Salmon
- Greek Salmon
- Miso Salmon
Tried this recipe?
I'd love to hear what you think! Leave a comment and rating below to share your feedback. Your reviews help others discover this recipe and help me keep creating more free recipes for you. Snap a photo and tag me on social media @aheadofthyme too.

50 Best Finger Foods
Wondering what finger foods to serve a crowd at your next party? Well, you're in the right place! We are sharing over 50 of our best finger foods including bite-sized appetizers that you can assemble in minutes, baked appys, easy platters, air fryer finger foods, shareable snacks like nachos and fries, and more party foods - so you don't have to search any further for finger food ideas.
Plus, there are lots of vegetarian, gluten-free, and kid-friendly options too. So you will find something for everyone. Whether you're preparing appetizers for a family gathering, birthday party, or summer party, we are here to help make things easier for you!

Best Finger Foods
Pigs in a blanket from scratch are a delicious and easy appetizer or snack to make for your next party or gathering - juicy, cheesy, flaky, and buttery.

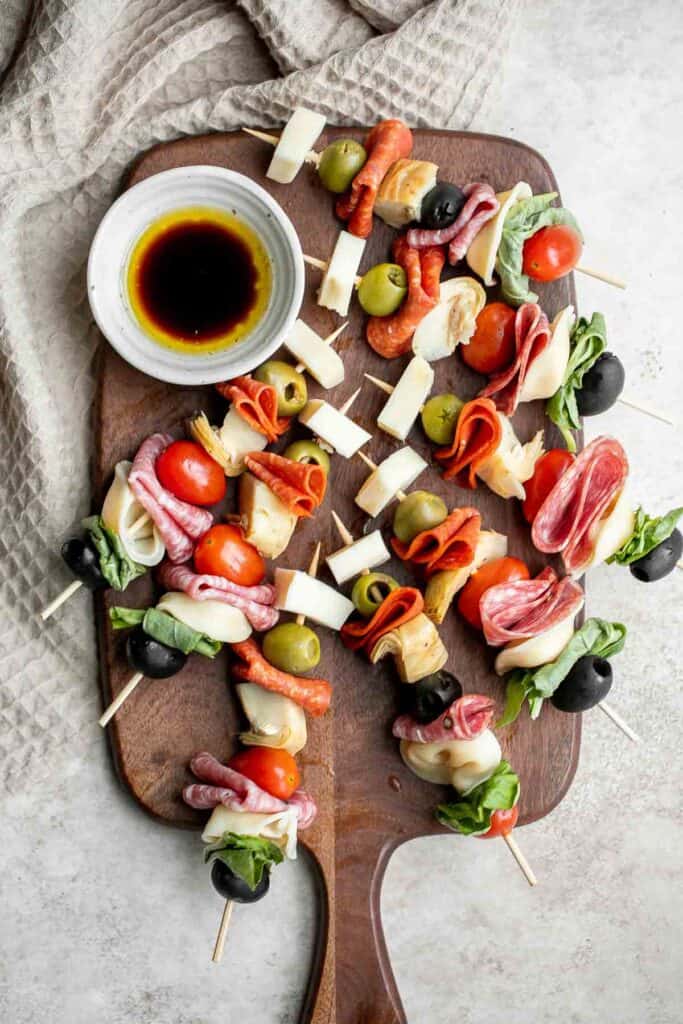
Antipasto skewers with tortellini are a quick, easy, and delicious appetizer with the best parts of a traditional antipasto platter but easier to eat.
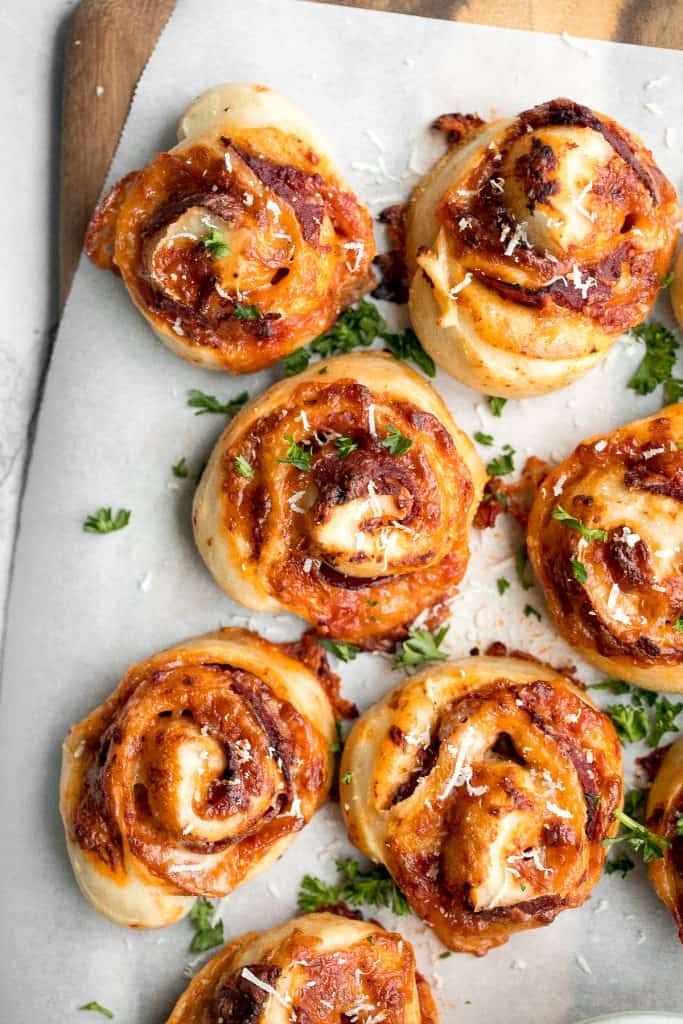
Easy pepperoni pizza rolls are crispy on the bottom, tender and chewy inside, packed with pepperoni and cheese, and baked until bubbly. One of my favorite finger foods!
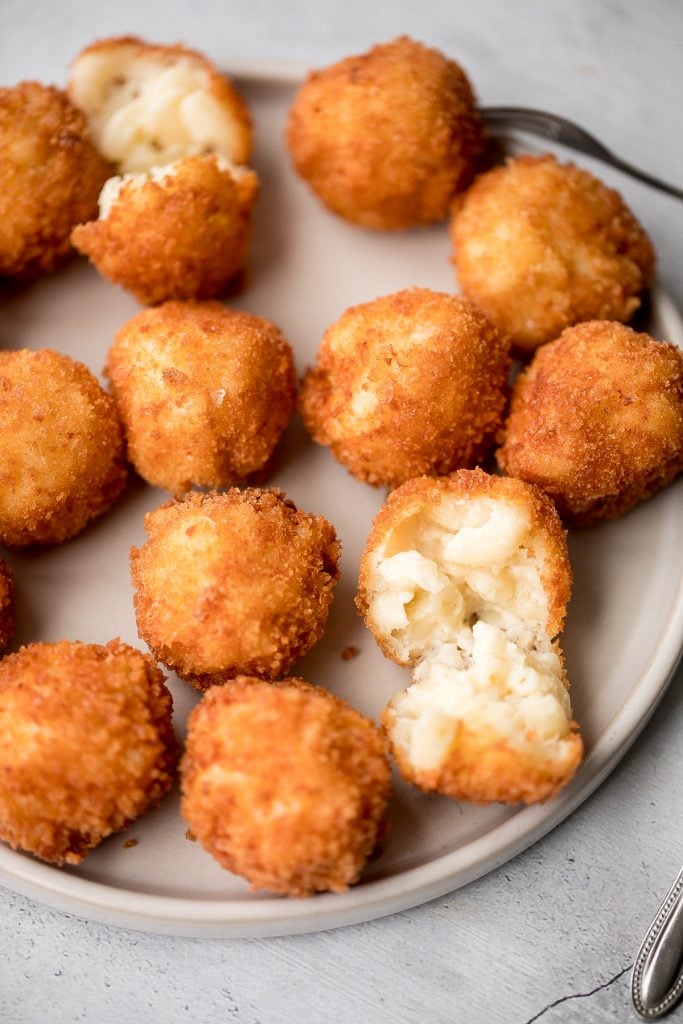
Fried mac and cheese balls are crispy on the outside, creamy and cheesy on the inside, and have the perfect crunch. Best way to use leftover mac and cheese. One of our most popular party foods!
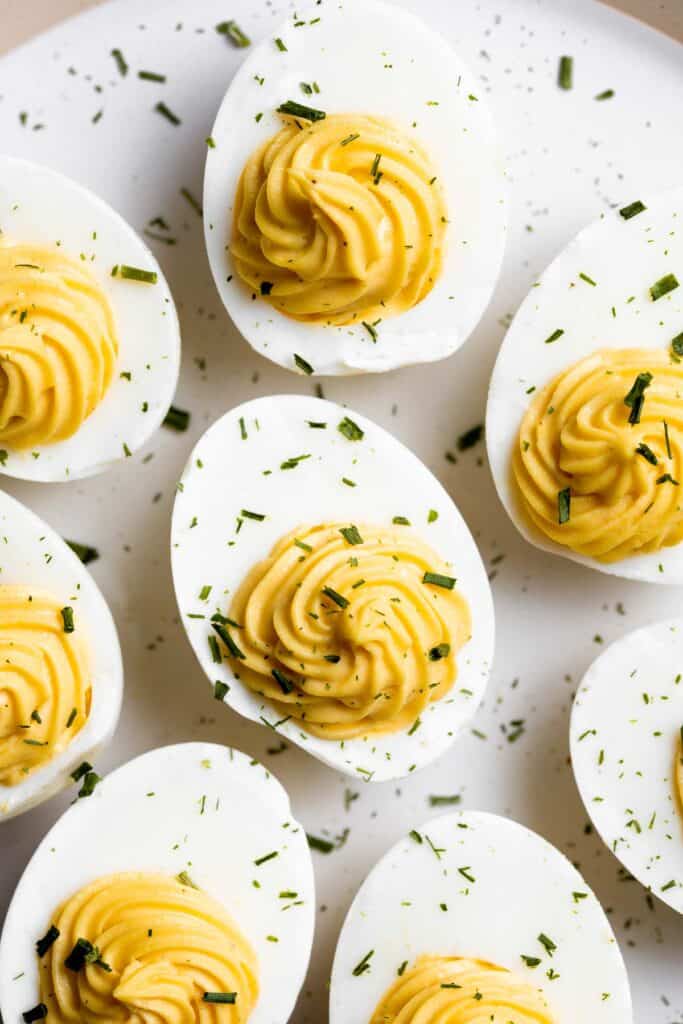
Classic deviled eggs are a simple, easy, and healthy appetizer to make when you need something quick for brunch, picnics, barbecues, potlucks, or Easter.
Jalapeño poppers are the perfect appetizer - spicy, crispy, cheesy, and creamy, toasted to golden brown perfection. Plus easy to make ahead and freeze well.

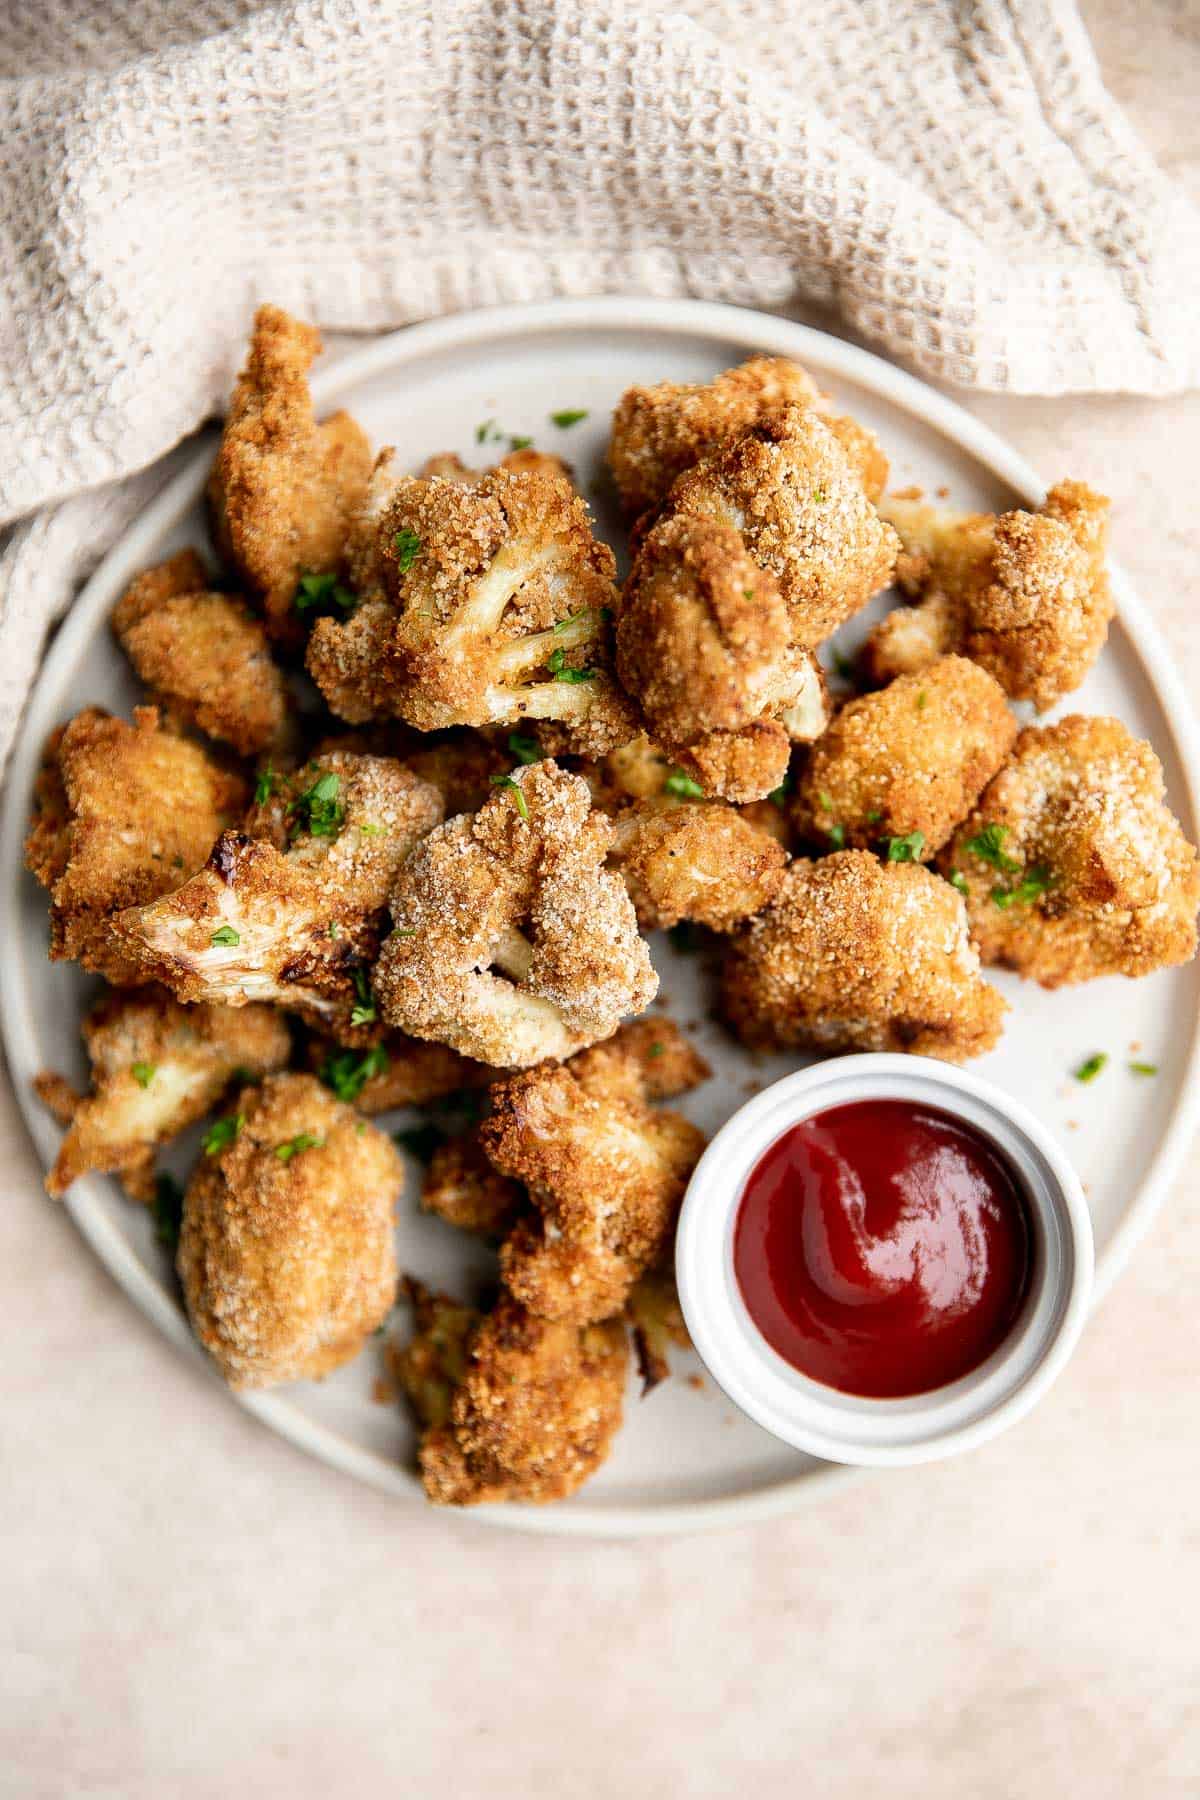
Air fryer cauliflower bites have a crispy breaded coating outside, yet tender and light inside. They are a bite-sized, flavorful, easy to make, and healthy finger food.
Easy Tomato Bruschetta with Balsamic Glaze
Tomato bruschetta with balsamic glaze is an easy Italian appetizer topped with tomatoes, onions, garlic, basil and olive oil. Delicious, fresh and simple.

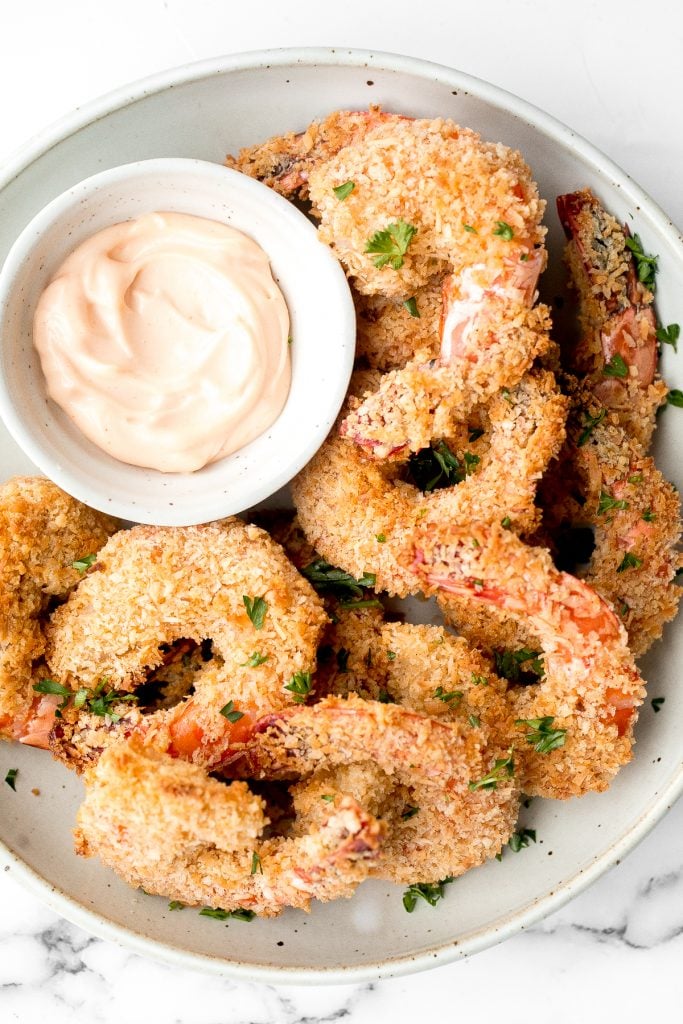
Crispy baked coconut shrimp is a delicious appetizer that is easy to make in 30 minutes. They are more flavourful, tastier and healthier than takeout. One of my favorite finger foods!
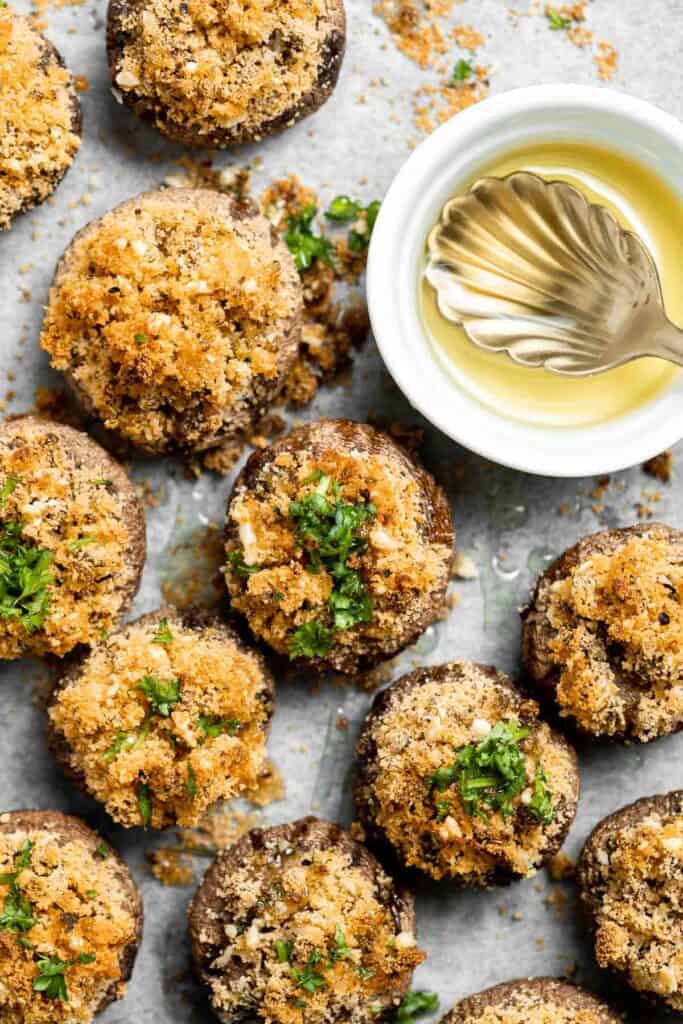
Vegetarian stuffed mushrooms are a delicious, flavorful, healthy, and nutritious appetizer. Plus, quick and easy to make in under 30 minutes. mminutesminutes including prep!
Homemade Taquitos are crispy, delicious and flavorful. These rolled tacos are filled with seasoned ground beef and melty cheese - and can be fried or baked!

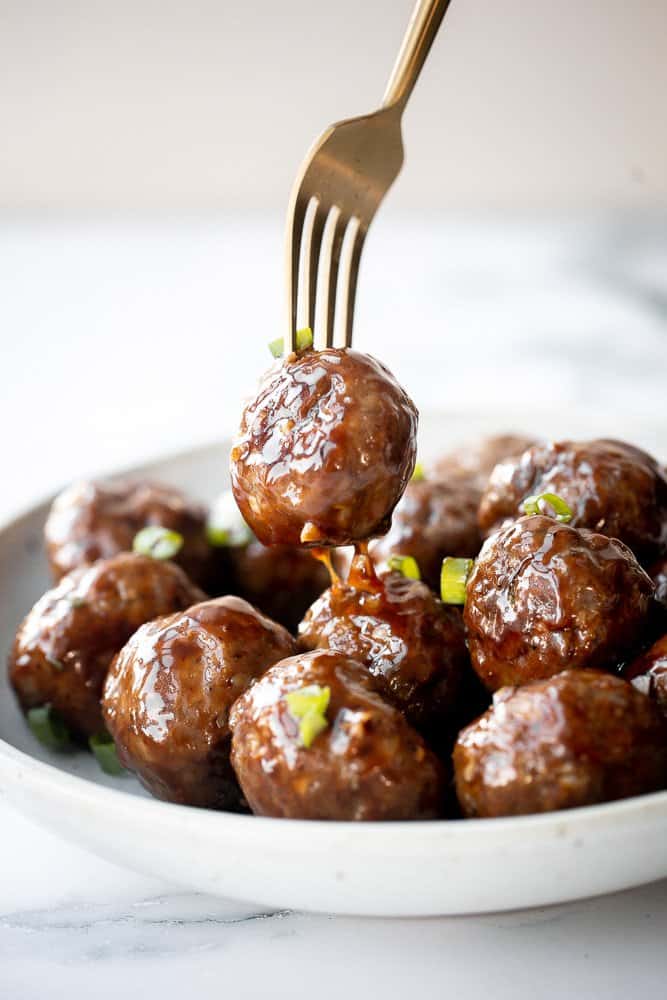
Sticky honey garlic meatballs are a delicious and flavourful 30-minute meal to add to your weekly dinner rotation. A total crowd pleaser.
Homemade Chinese beef potstickers (dumplings) are crispy on the outside and tender and juicy inside packed with a delicious beef filling.

Bacon Wrapped Brussels Sprouts
Bacon wrapped brussels sprouts are the sweet, savory, and salty appetizer that you need at your next holiday gathering this fall. Simple and easy to make.

Sticky crispy baked sweet chili chicken bites is better than takeout and so easy to make healthier at home. An easy dinner or game day appy.

Caprese Skewers are a quick and fresh appetizer made with bite-sized mozzarella, juicy tomatoes, and basil leaves with a drizzle of balsamic glaze.

These tender, chewy homemade Pretzel Bites taste professionally made but are a beginner-friendly recipe you can easily make in the comfort of your own home.

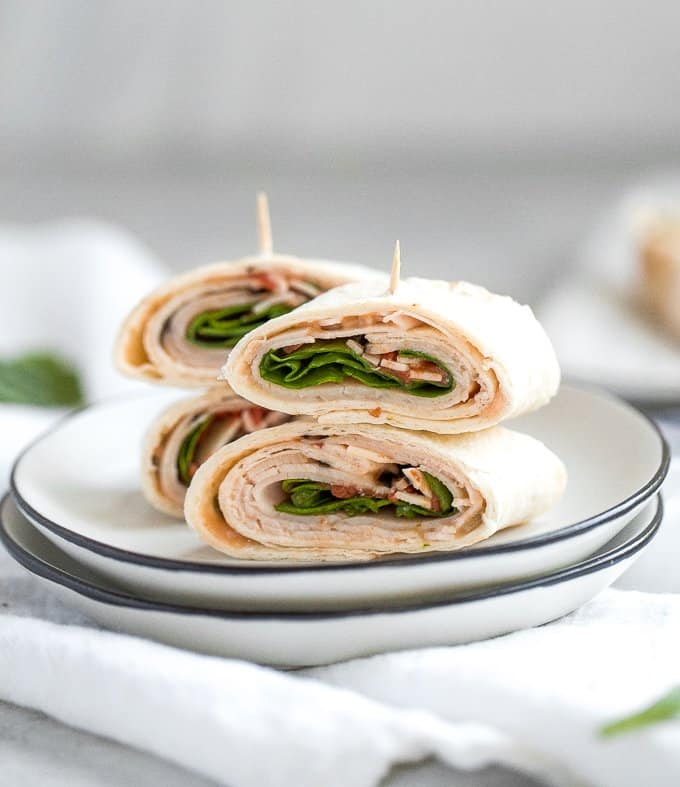
Turkey pinwheels are bite-sized finger food perfection and a healthy New Year's Eve appetizer. They are fully customizable and you can wrap them up in a tortilla or pita bread.
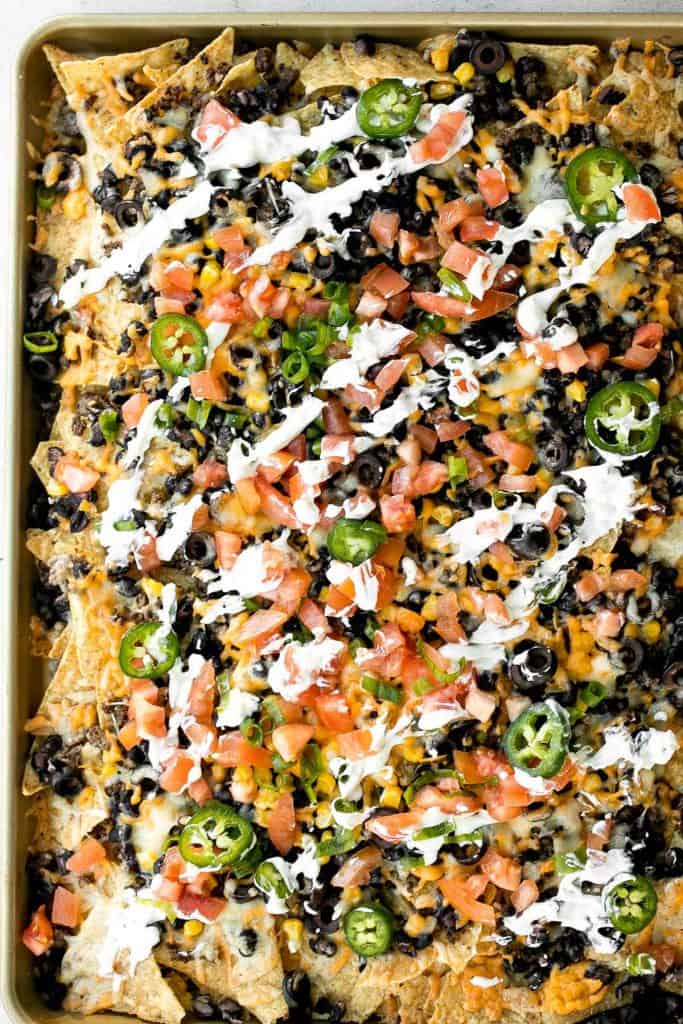
Oven-baked loaded sheet pan nachos are a crowd pleaser for an easy weeknight dinner or a crave-worthy appetizer to serve on game day.
Toasted Ravioli is a classic Italian appetizer that is crispy and golden on the outside, and tender and gooey on the inside. Ready in less than 30 minutes!

These Cauliflower Tots are everything you want in a tater tot - but better! They are crunchy on the outside, tender inside, higher in fiber, and cheesy.

Better than takeout, shrimp egg rolls are a delicious, flavourful and easy appetizer to make. They can be deep fried, baked or air fried.

Garlic Butter Steak Bites are tender, juicy, and flavorful. This quick and easy appetizer or weeknight dinner takes just 15 minutes to make in one skillet. Serve with toothpicks for an easy finger food idea.
Cheesy Garlic Bread is toasty and crispy on the outside, tender and soft inside with a garlic butter and melty cheese on top. Make in under 20 minutes!

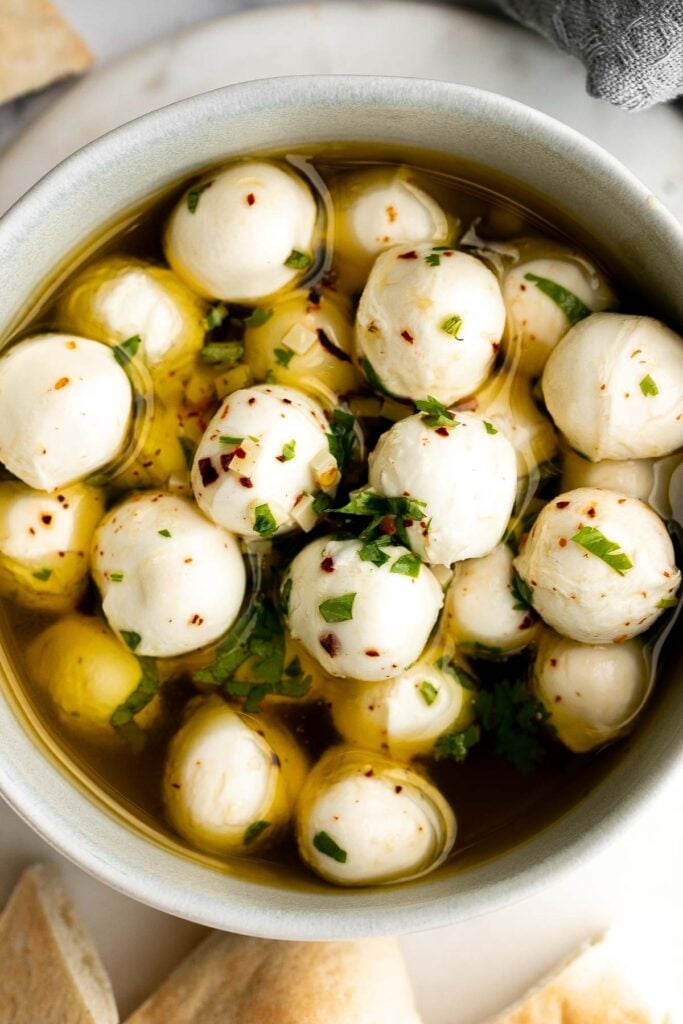
Marinated mozzarella balls is a delicious and simple yet stunning appetizer, made with fresh bocconcini soaked in olive oil, garlic, and fresh herbs.
Cranberry Brie Bites are quick and easy to make with flaky puff pastry, gooey melty brie, and sweet cranberry sauce. The perfect holiday appetizer.

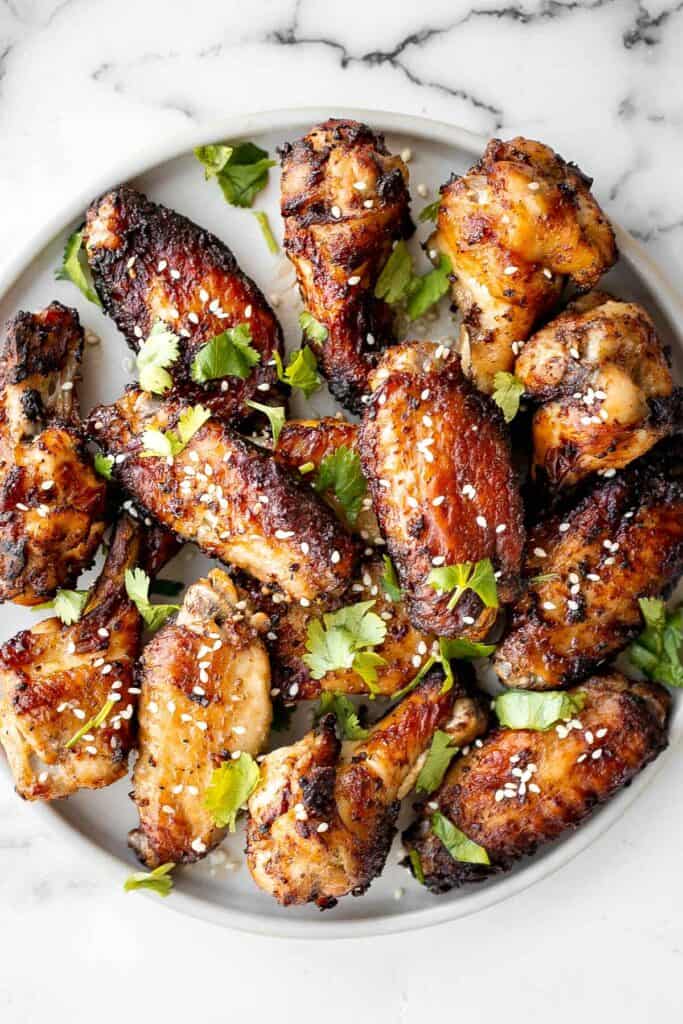
Baked miso garlic chicken wings are crispy, delicious, and easy to make. They're marinated in a savoury Asian marinade, and cooked in the oven or air fryer.
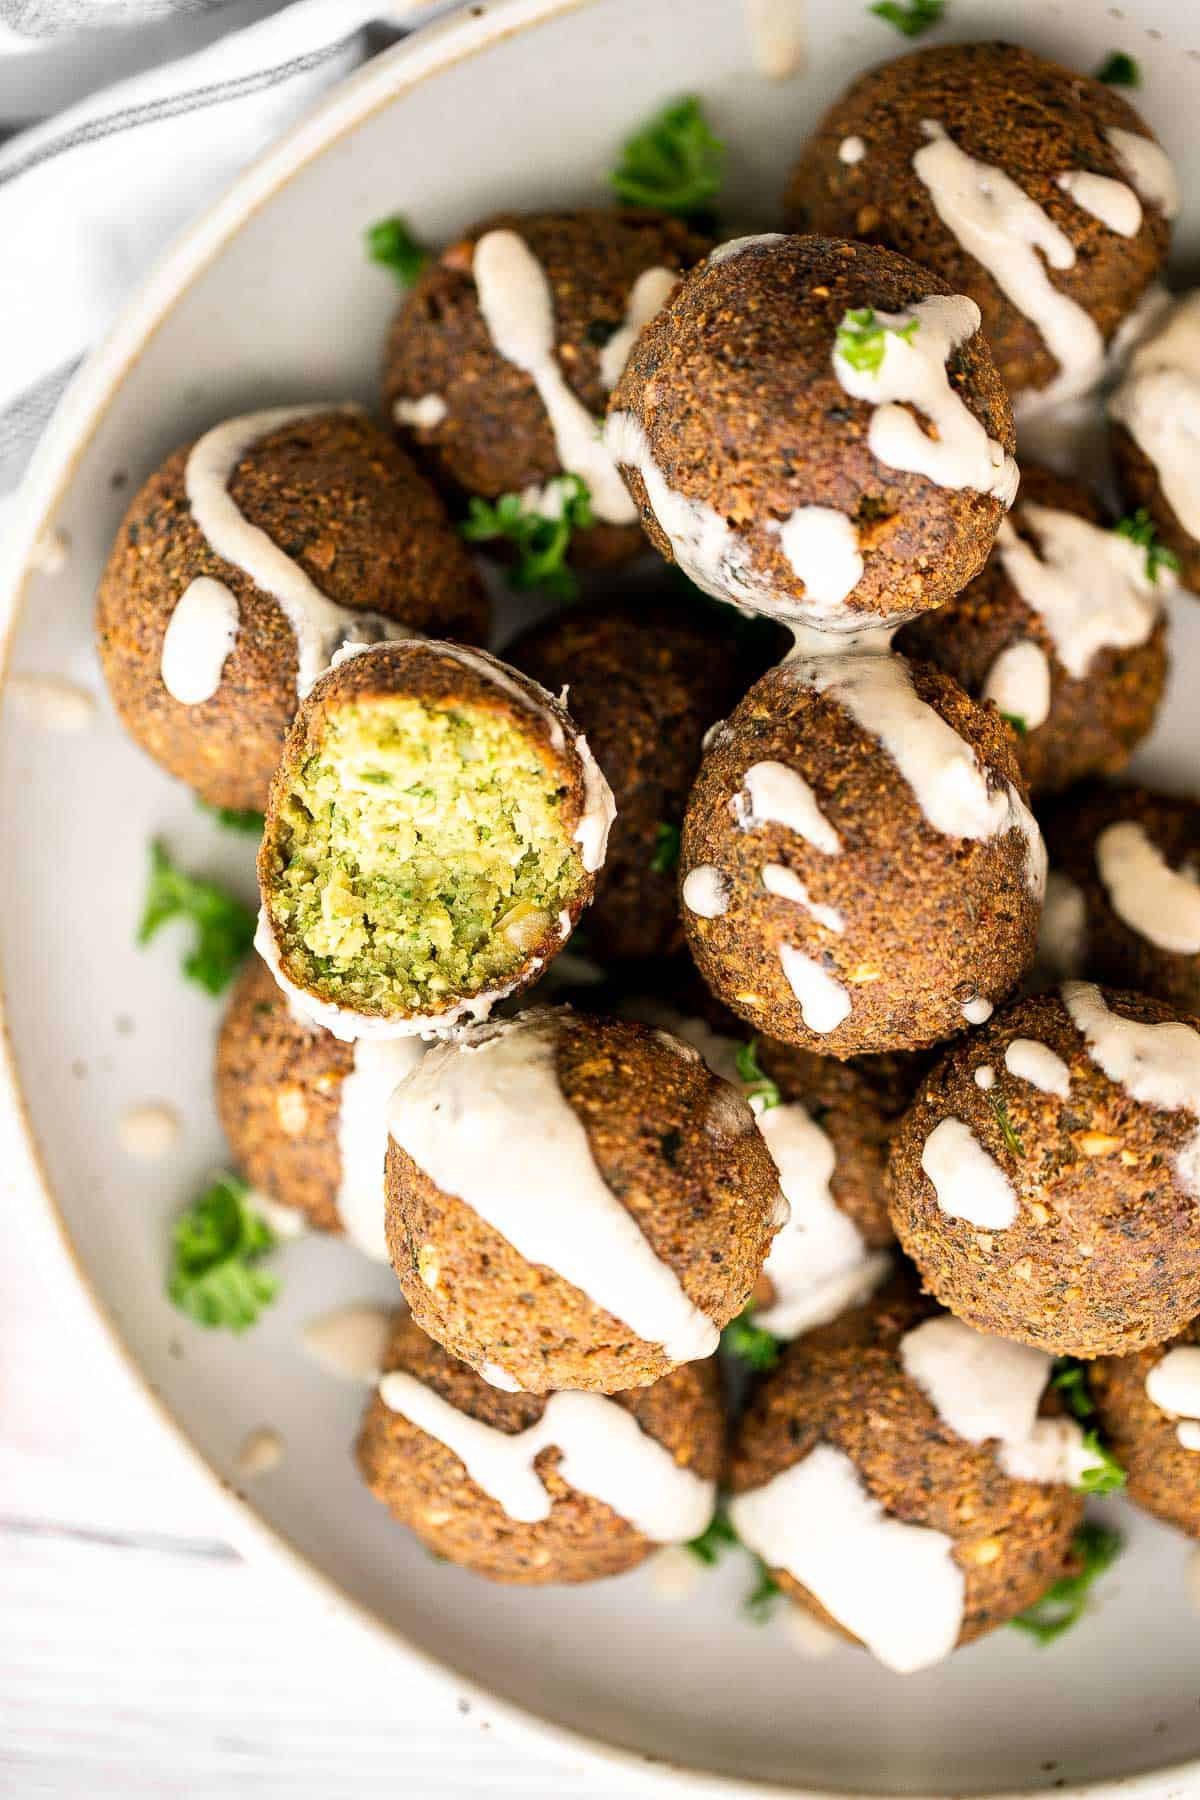
Homemade falafel are delicious, golden brown and crispy on the outside, fluffy tender and soft inside. Plus, they're vegan, loaded with plant-based protein. One of my favorite vegan finger foods!
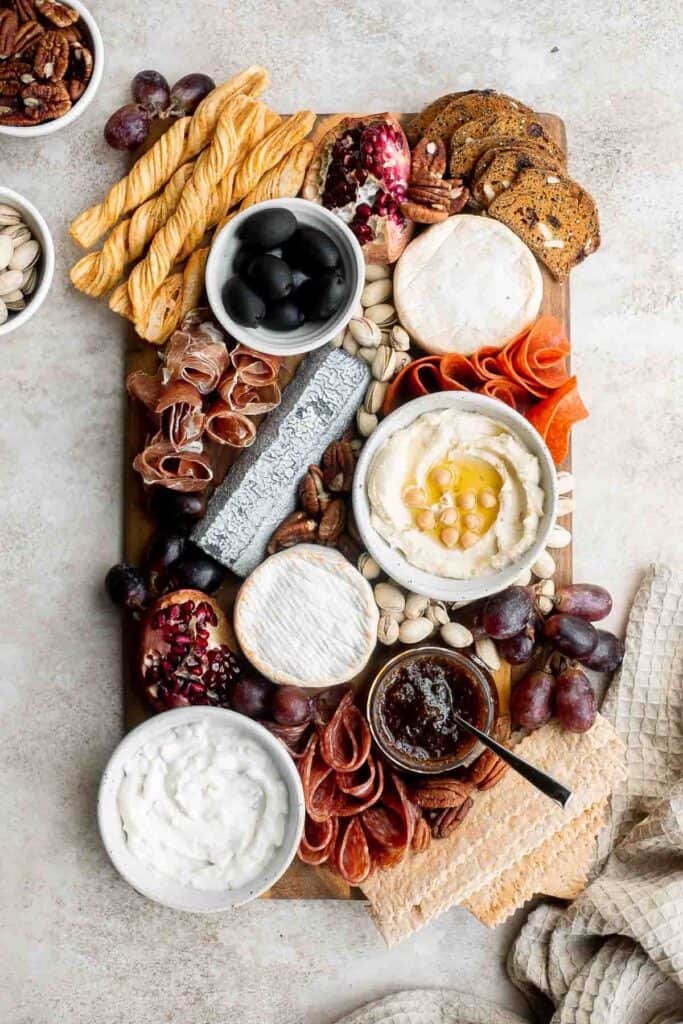
This easy charcuterie board is the perfect appetizer to impress with minimal effort- made with cheese, cured meats, crackers, dips, olives, fruit, and nuts.
Air fryer chicken tenders are juicy and moist inside while crispy and golden brown outside. A healthy, delicious, and quick kid-friendly recipe.

Mashed potato balls are a delicious appetizer that is crisp on the outside and soft, tender, and cheesy inside. Best way to use leftover mashed potatoes!

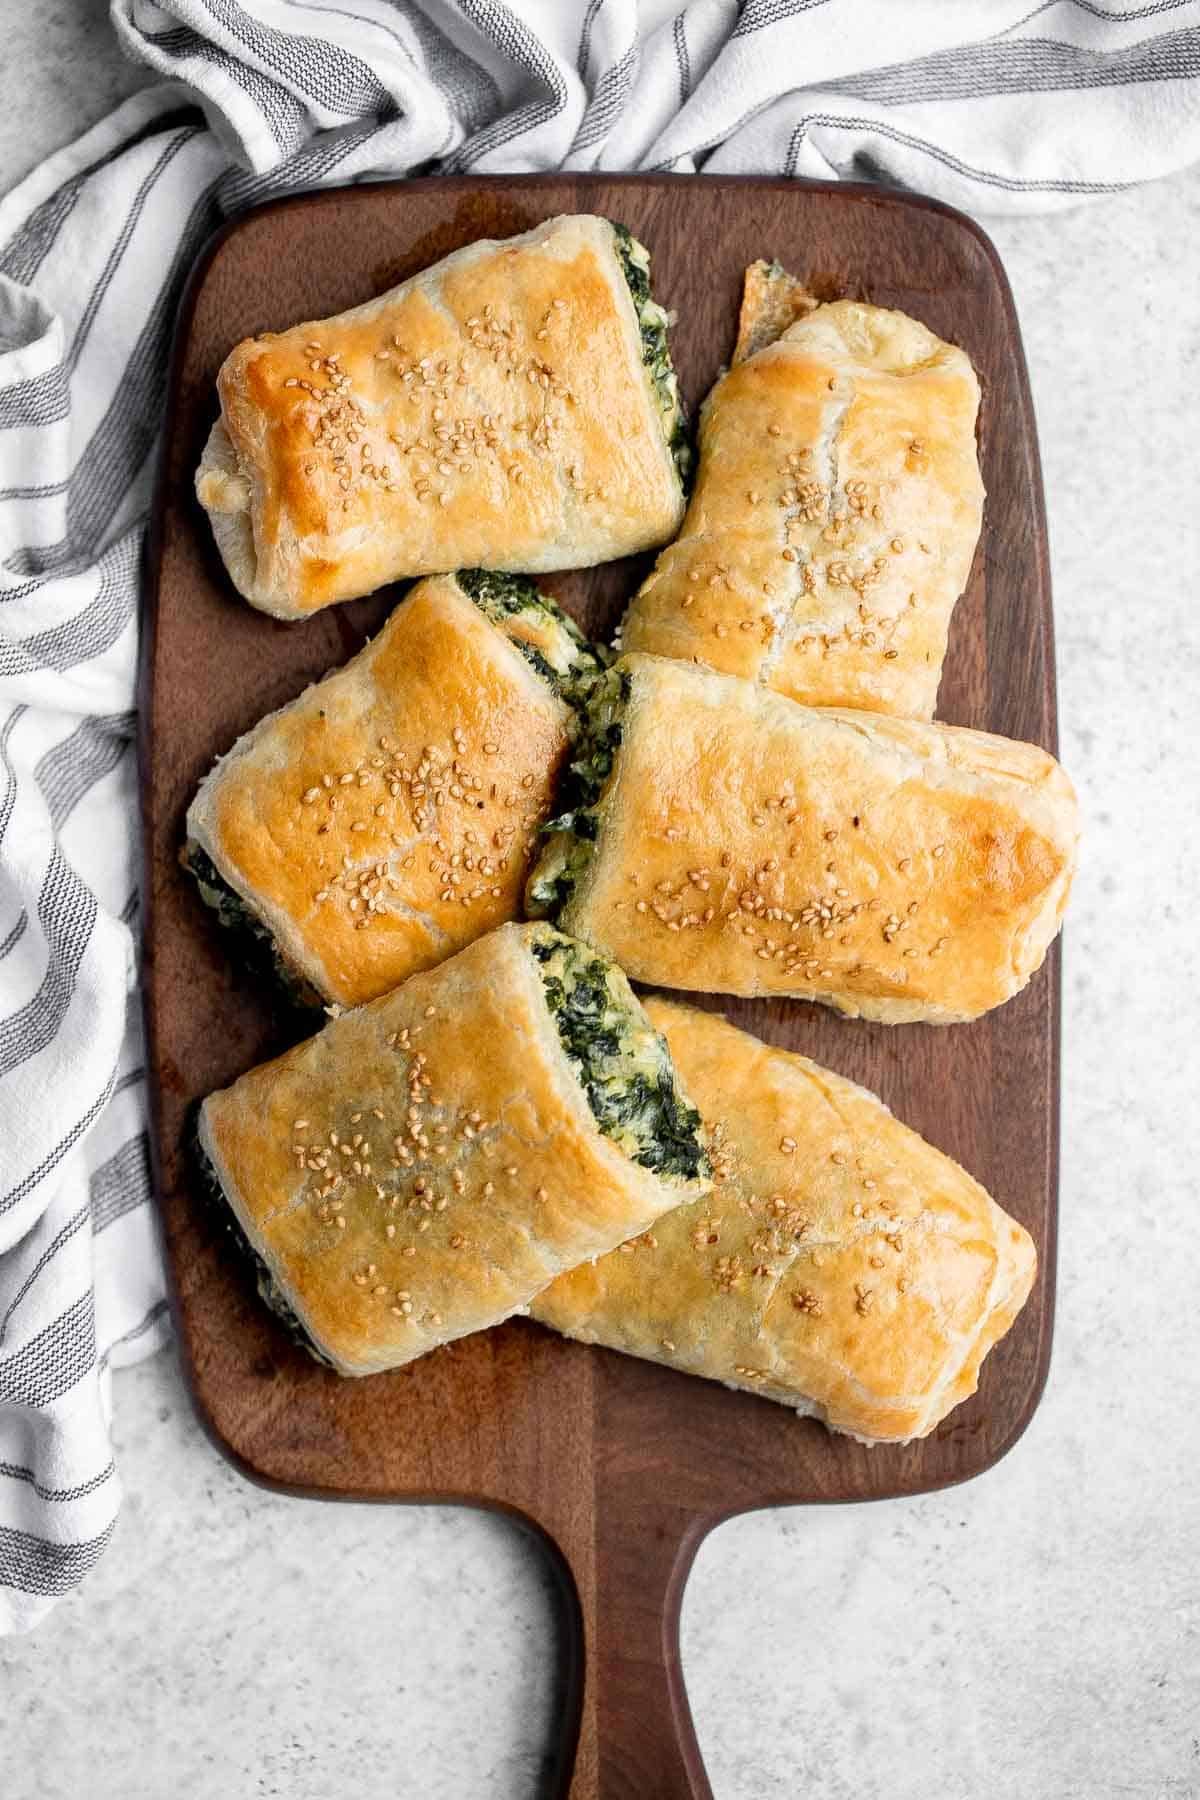
Spinach cheese rolls are an easy appetizer that's creamy, cheesy, comforting, and delicious. Serve as an appy at parties, for a school lunch, or snack.
Bacon Wrapped Jalapeño Poppers
Bacon wrapped jalapeño poppers are crispy on the outside, creamy and cheesy inside, spicy, and wrapped in bacon. Easy to make in the air fryer or oven.

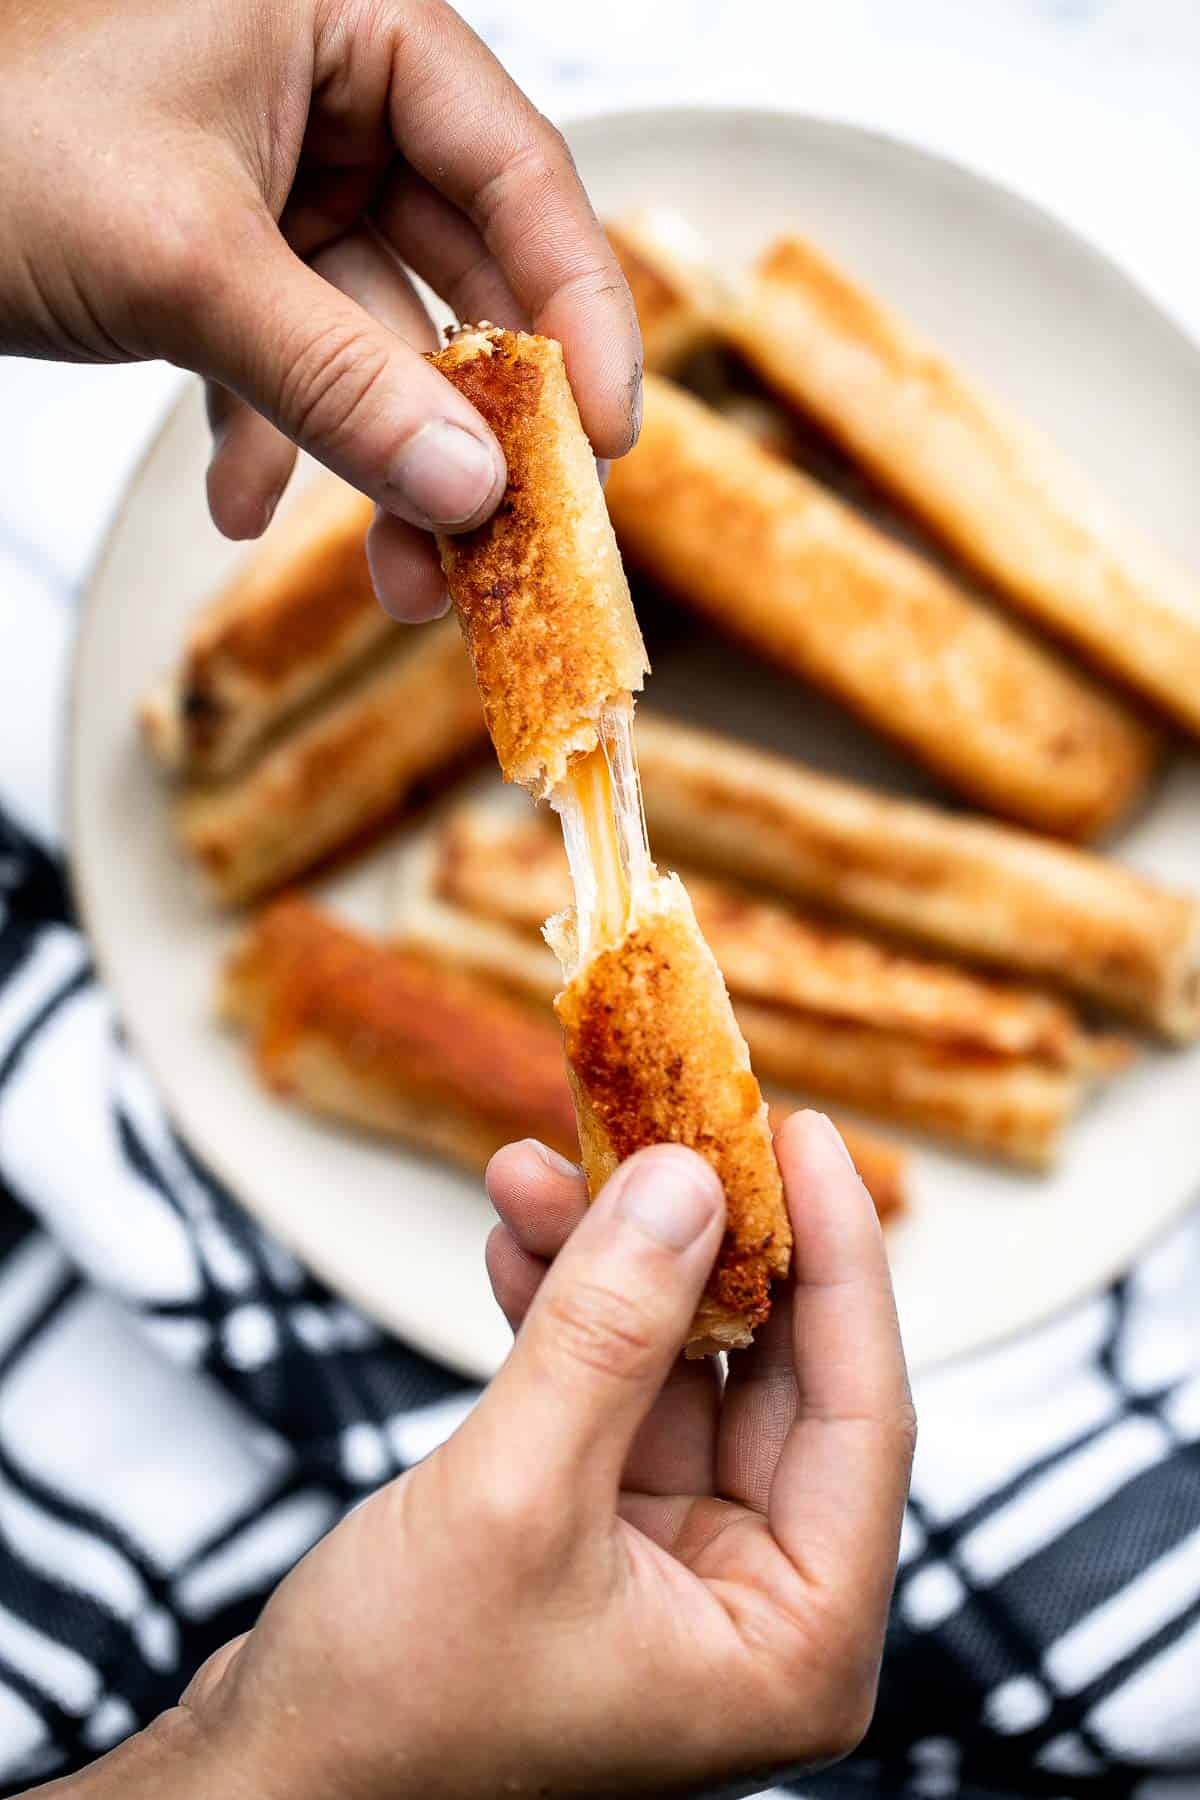
Grilled cheese roll ups are a fun twist on a classic grilled cheese that gives you a hot handheld lunch to enjoy. They're kid-friendly and easy to make.
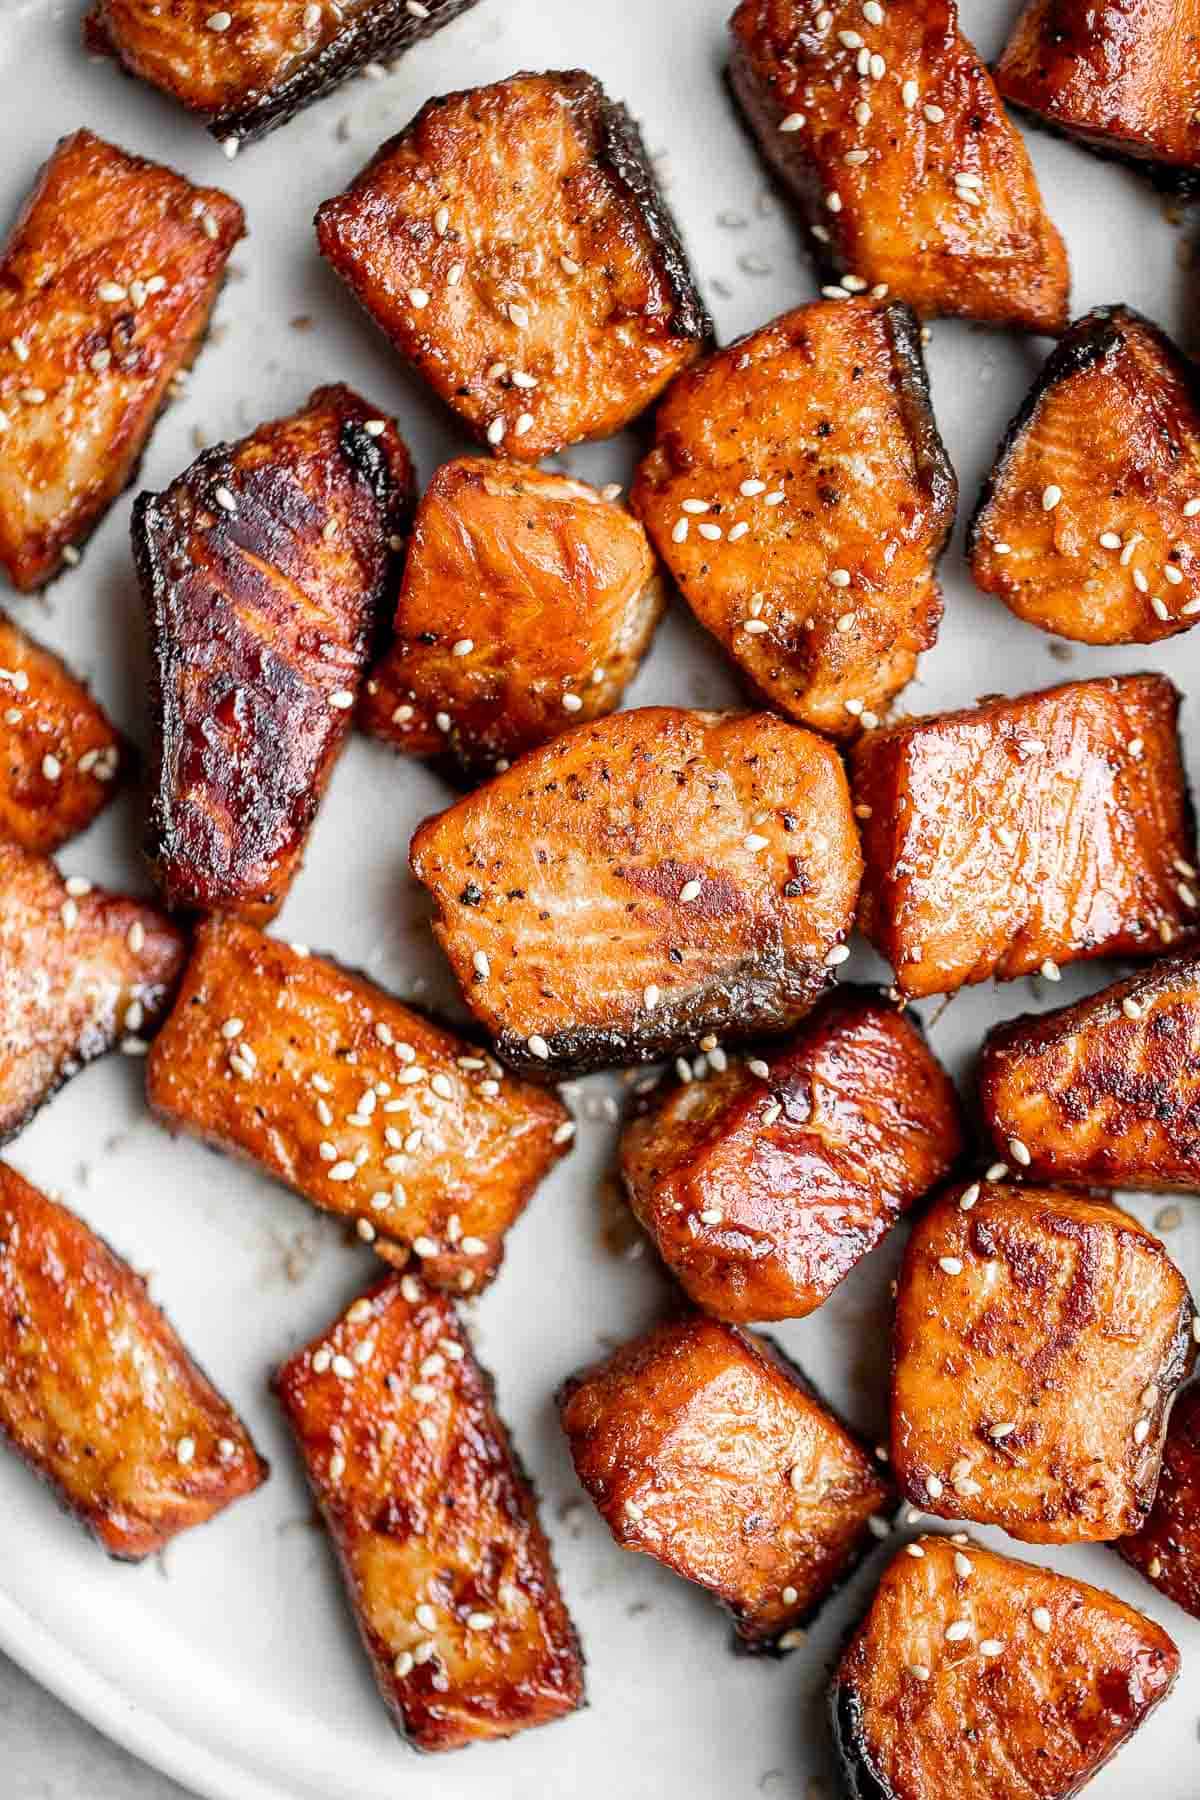
Salmon Bites are flavorful and delicious bite-sized pieces of salmon cooked until tender with crispy, golden edges and coated with an homemade sticky glaze.
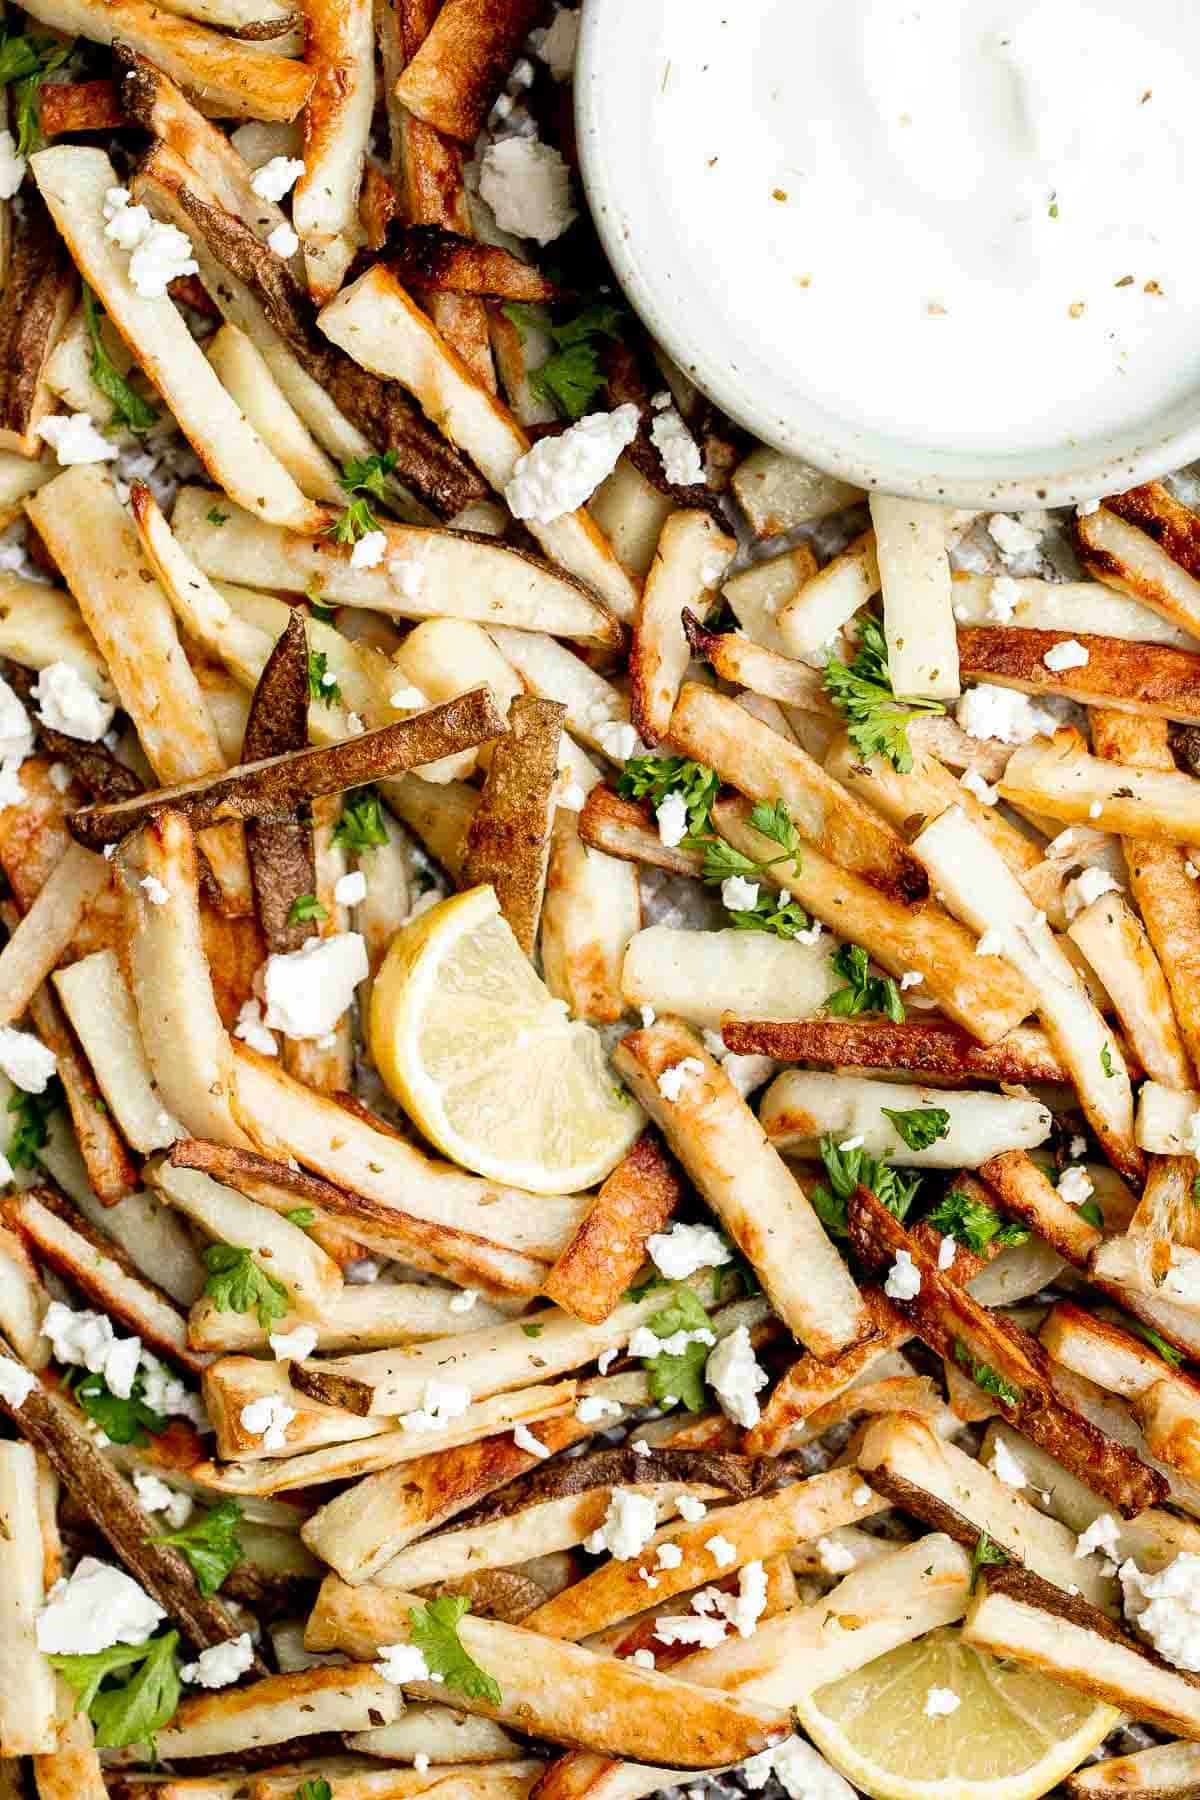
Homemade Greek fries bring a Mediterranean twist on a classic side dish, crispy fries are topped with crumbled feta cheese, fresh parsley, and lime juice.
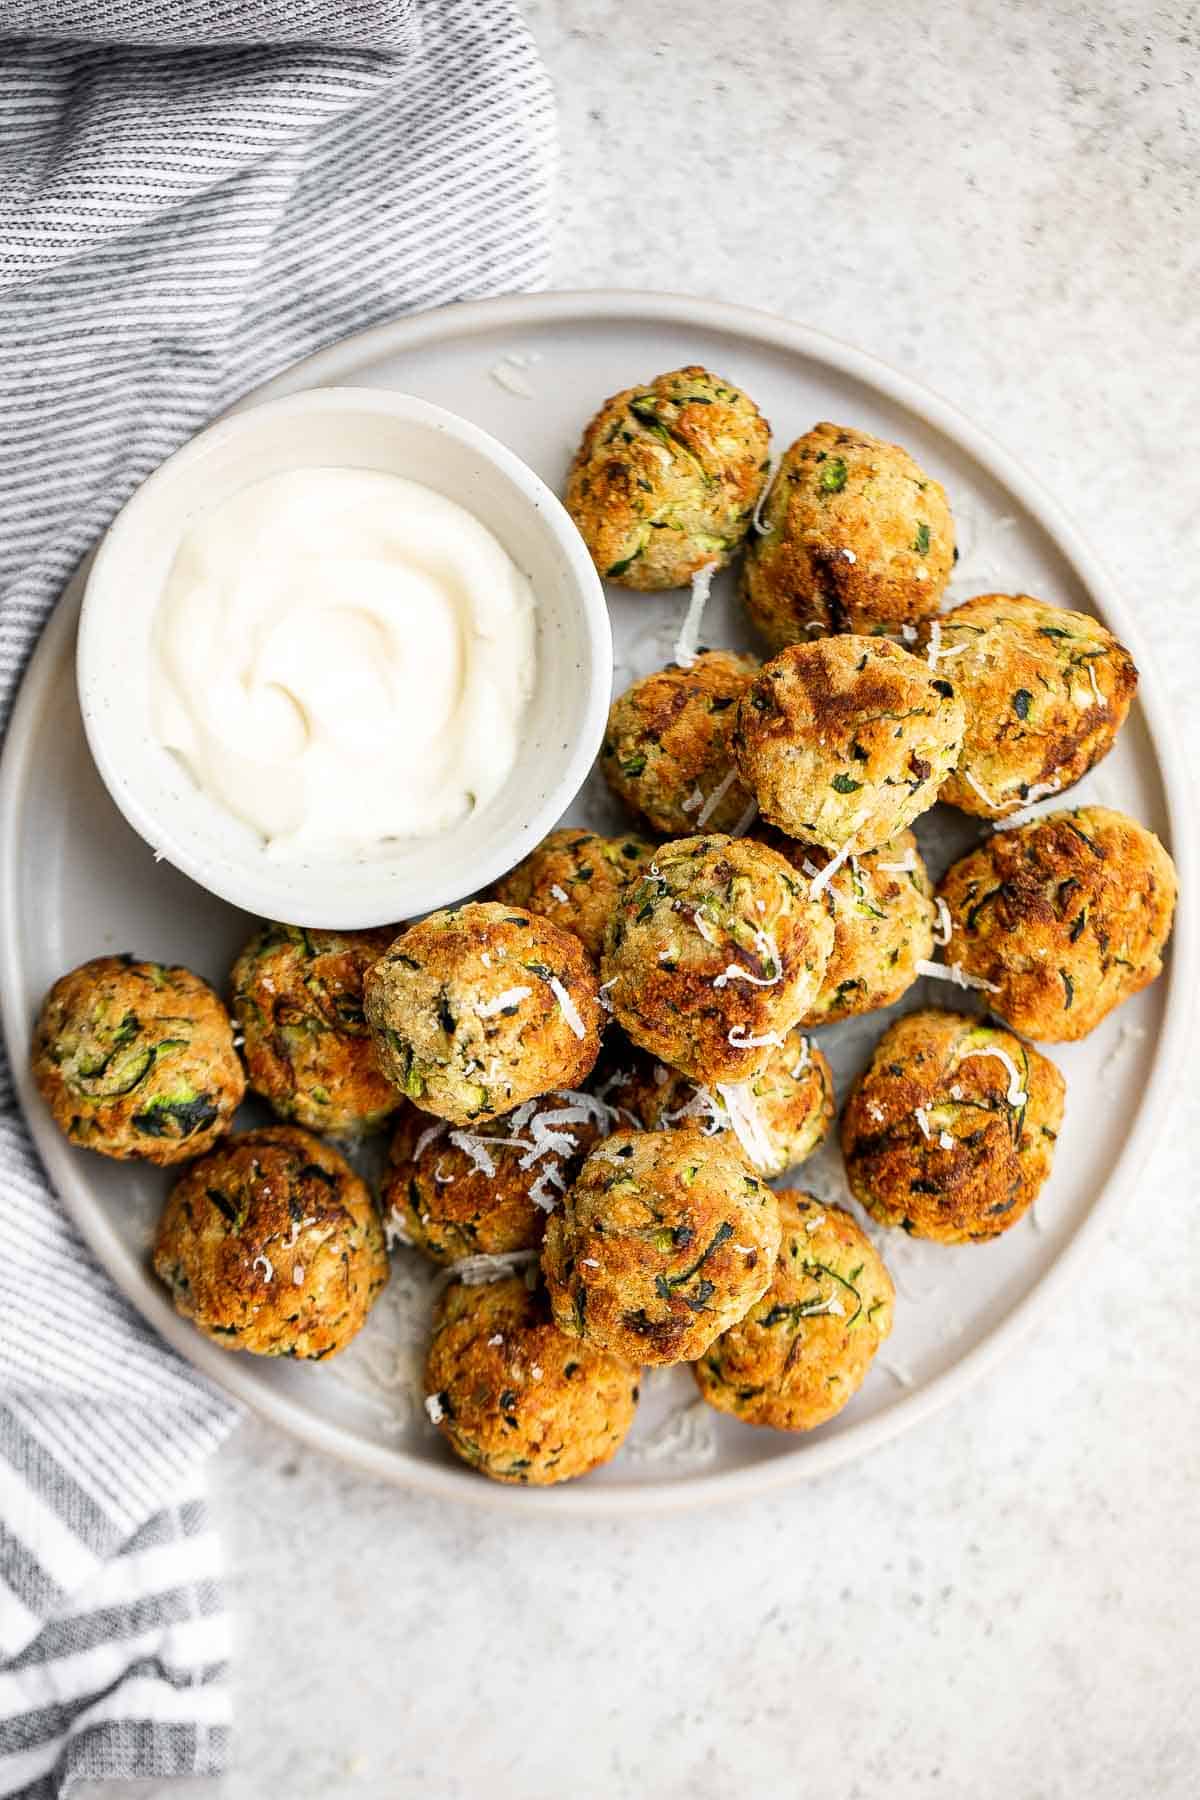
Zucchini Bites are savory balls that are loaded with fresh zucchini. They're quick and easy to make in under 30 minutes in the air fryer or oven.
Quick and easy shrimp cakes are juicy, tender, delicious, and flavorful. They're made simple with a food processor and your choice of three cooking methods.
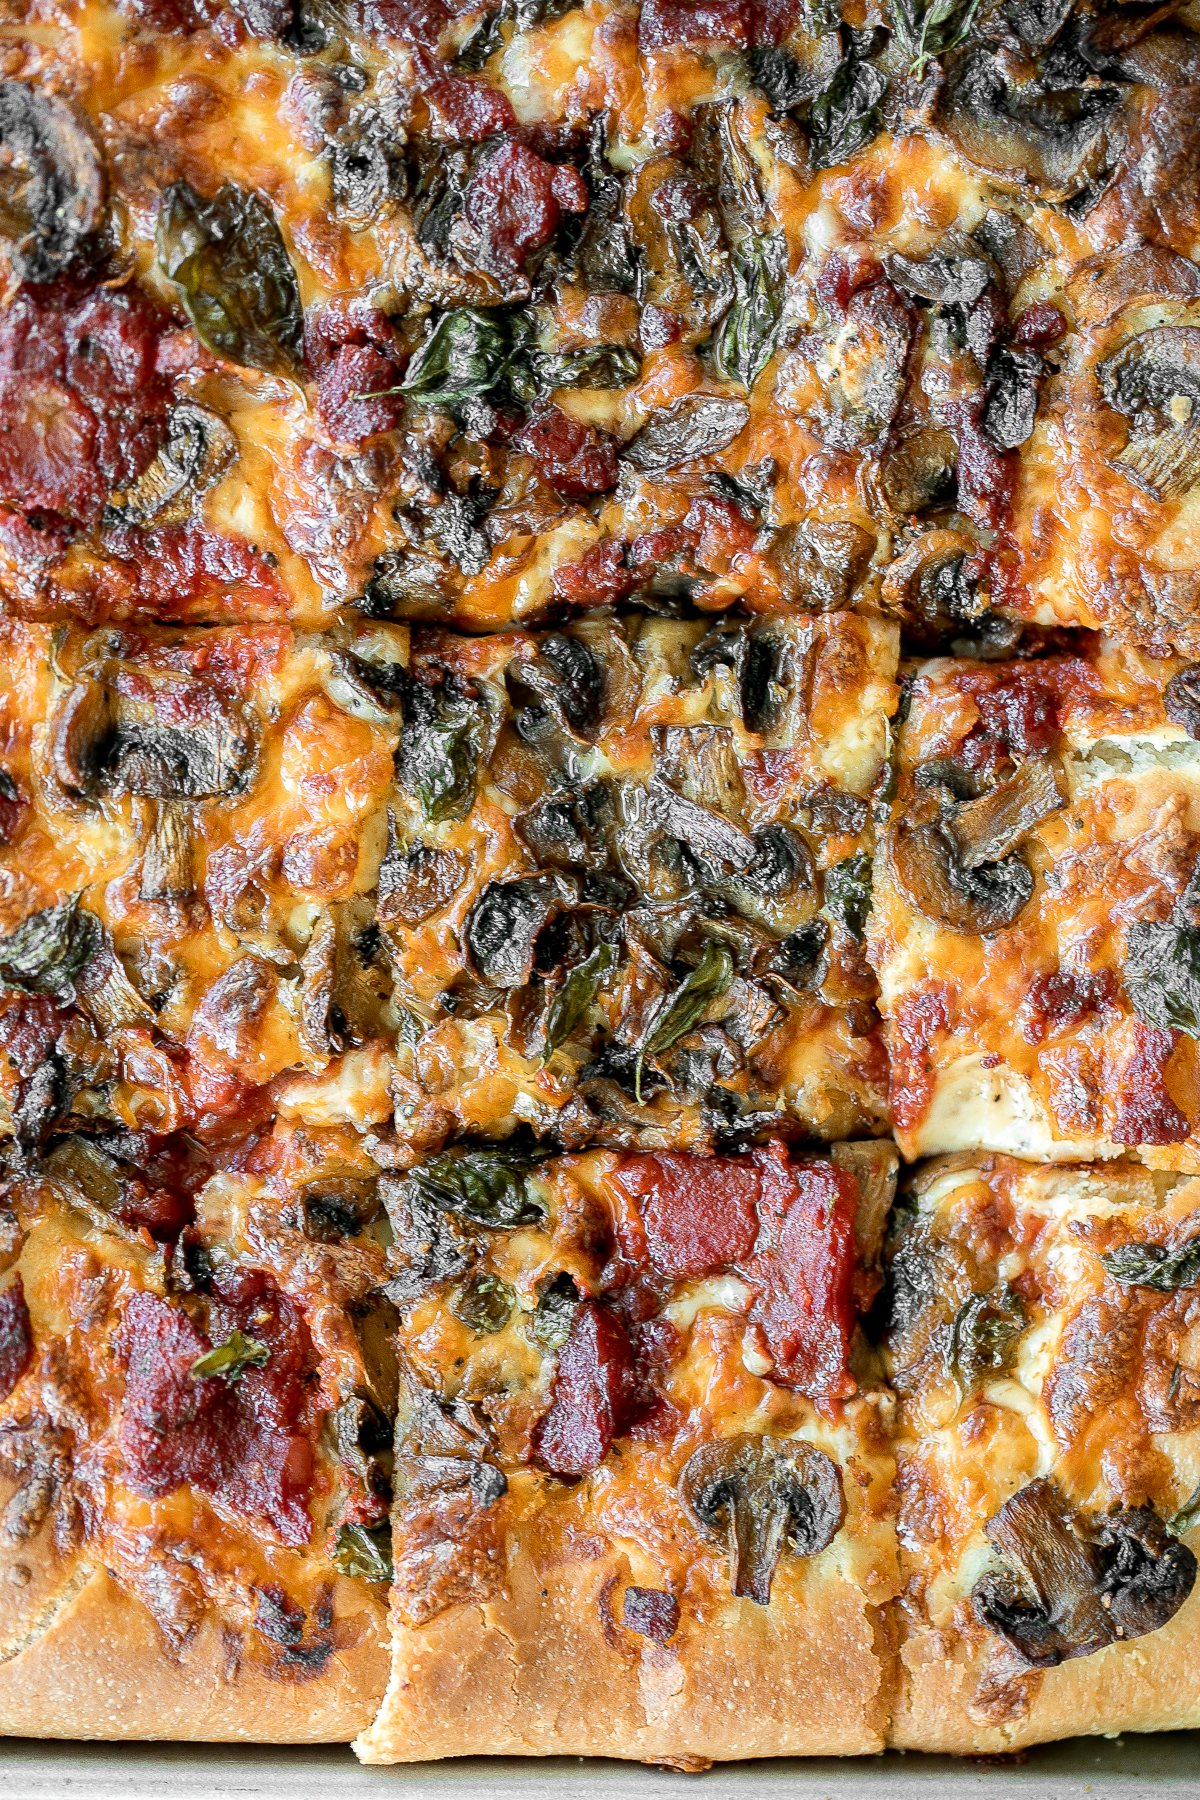
Sheet pan garlic mushroom focaccia pizza with a thick pillowy and crispy crust is topped with sautéed garlic mushrooms, melty mozzarella and lots of basil.
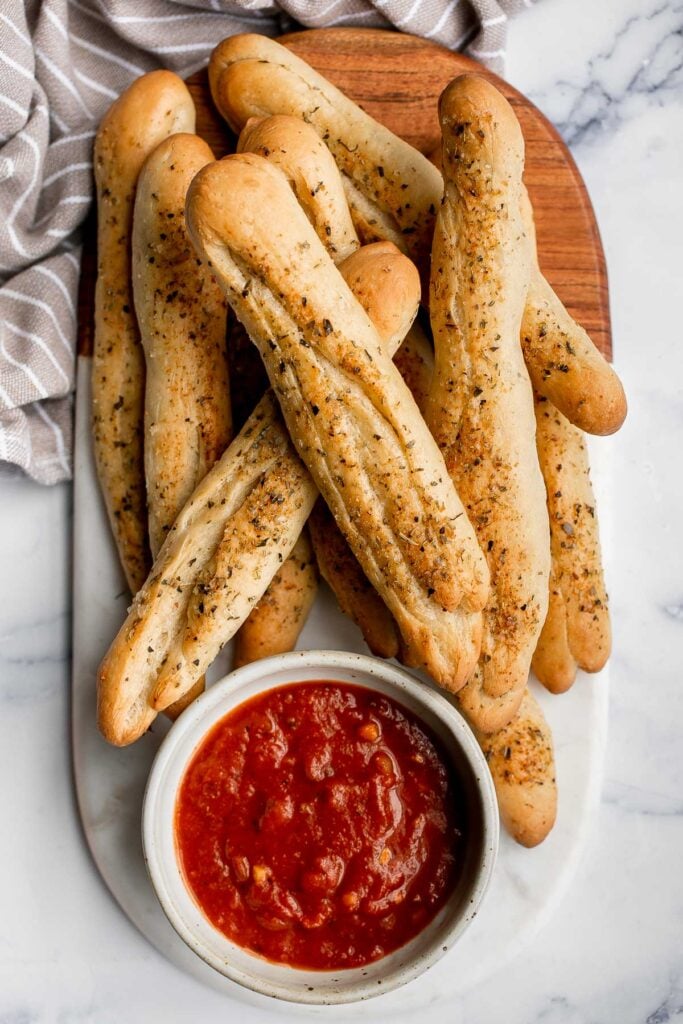
Soft garlic breadsticks are fluffy, airy, buttery, and delicious. They're an easy recipe that is perfect for beginners at baking bread.
Air fryer short ribs are crispy, flavorful, and delicious. The easy marinade ensures they're tender and juicy inside, while the air fryer makes them crispy.

Crunchy, cheesy, and paired with an awesome dipping sauce, these baked mozzarella sticks are just as amazing as what you would find in a restaurant.

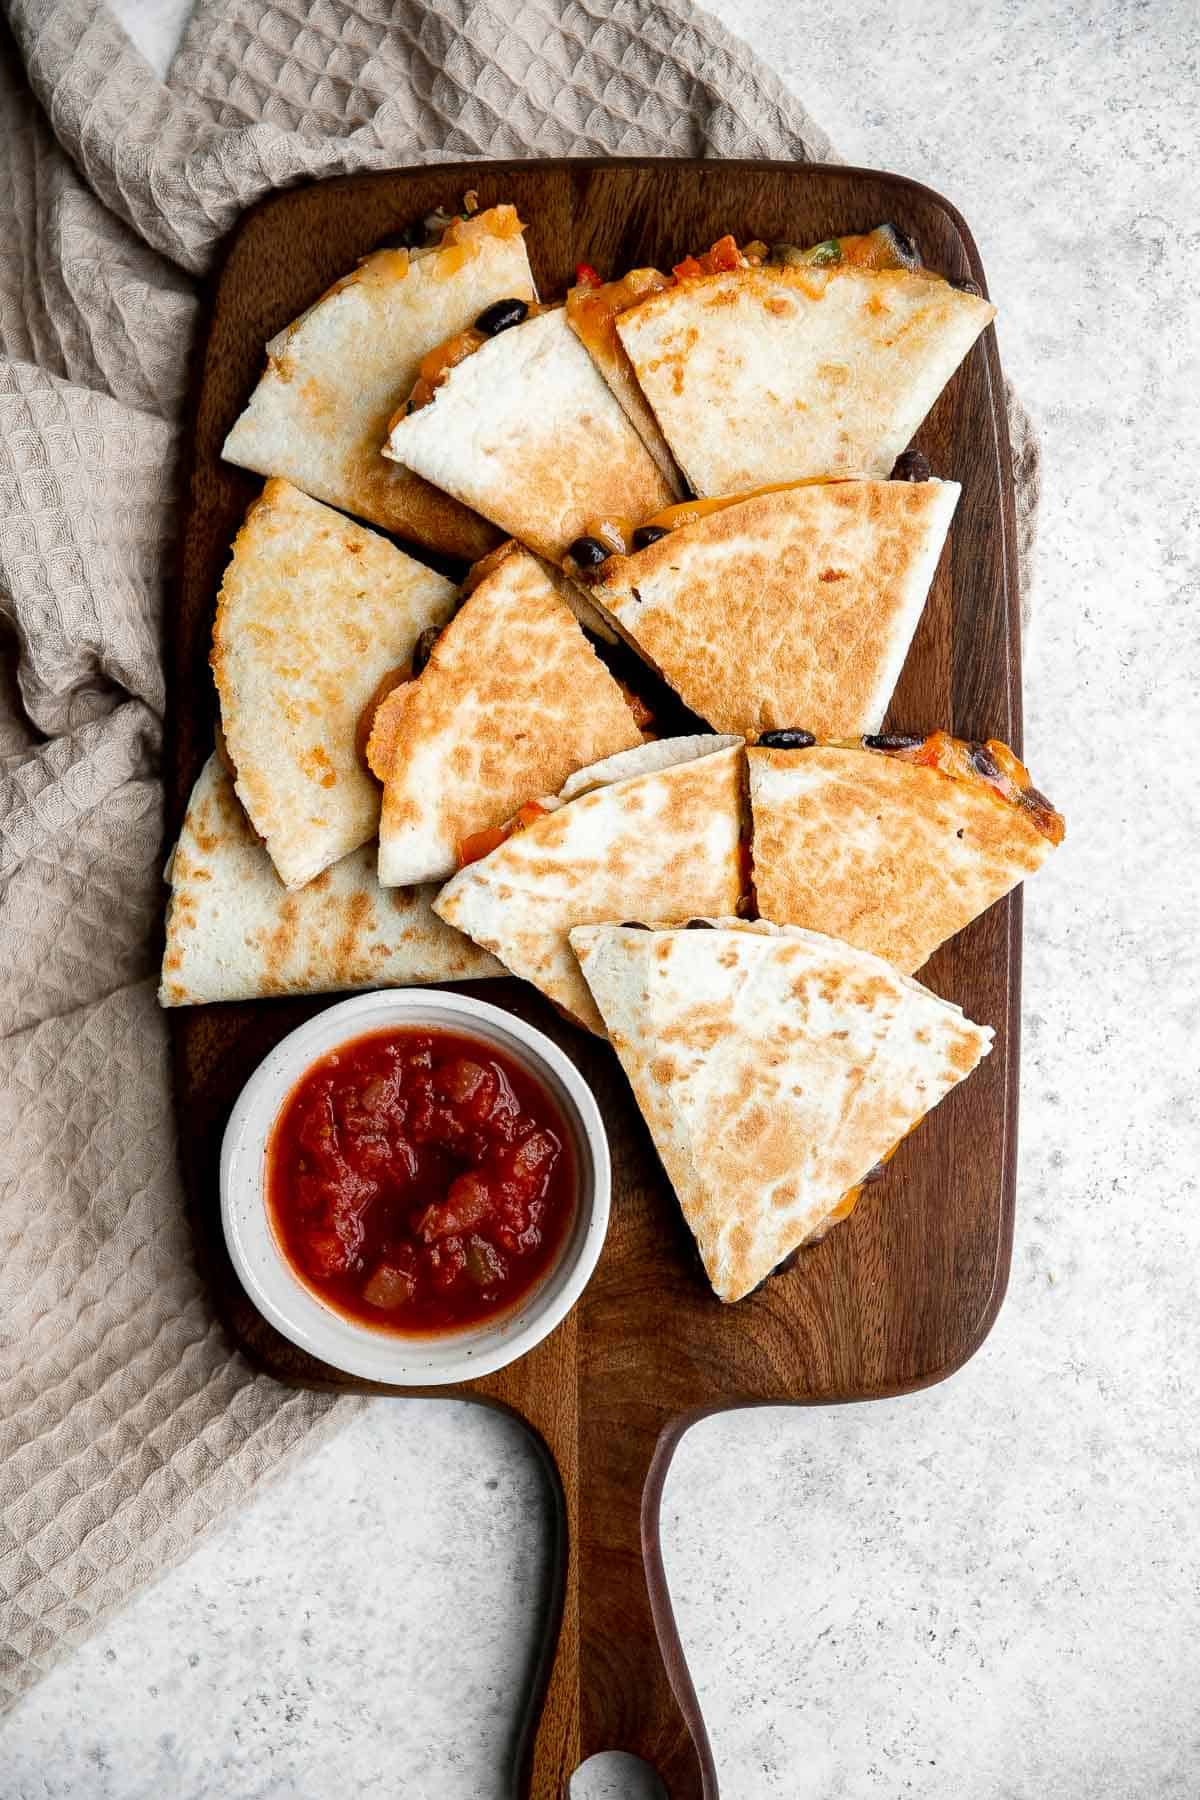
Vegetarian quesadillas are quick and easy, completely customizable, loaded with veggies and beans. Serve this kid-friendly Mexican meal for a snack, lunch, or dinner.
Homemade Tater Tots with Bacon
Homemade tater tots with bacon are golden and crispy on the outside, yet soft and tender inside. They're packed with flavour and a total family favourite.
Homemade pork dumplings are quick and easy to make, with perfect crispy bottoms and a tender, juicy pork filling inside. Easy to meal prep and freeze well.

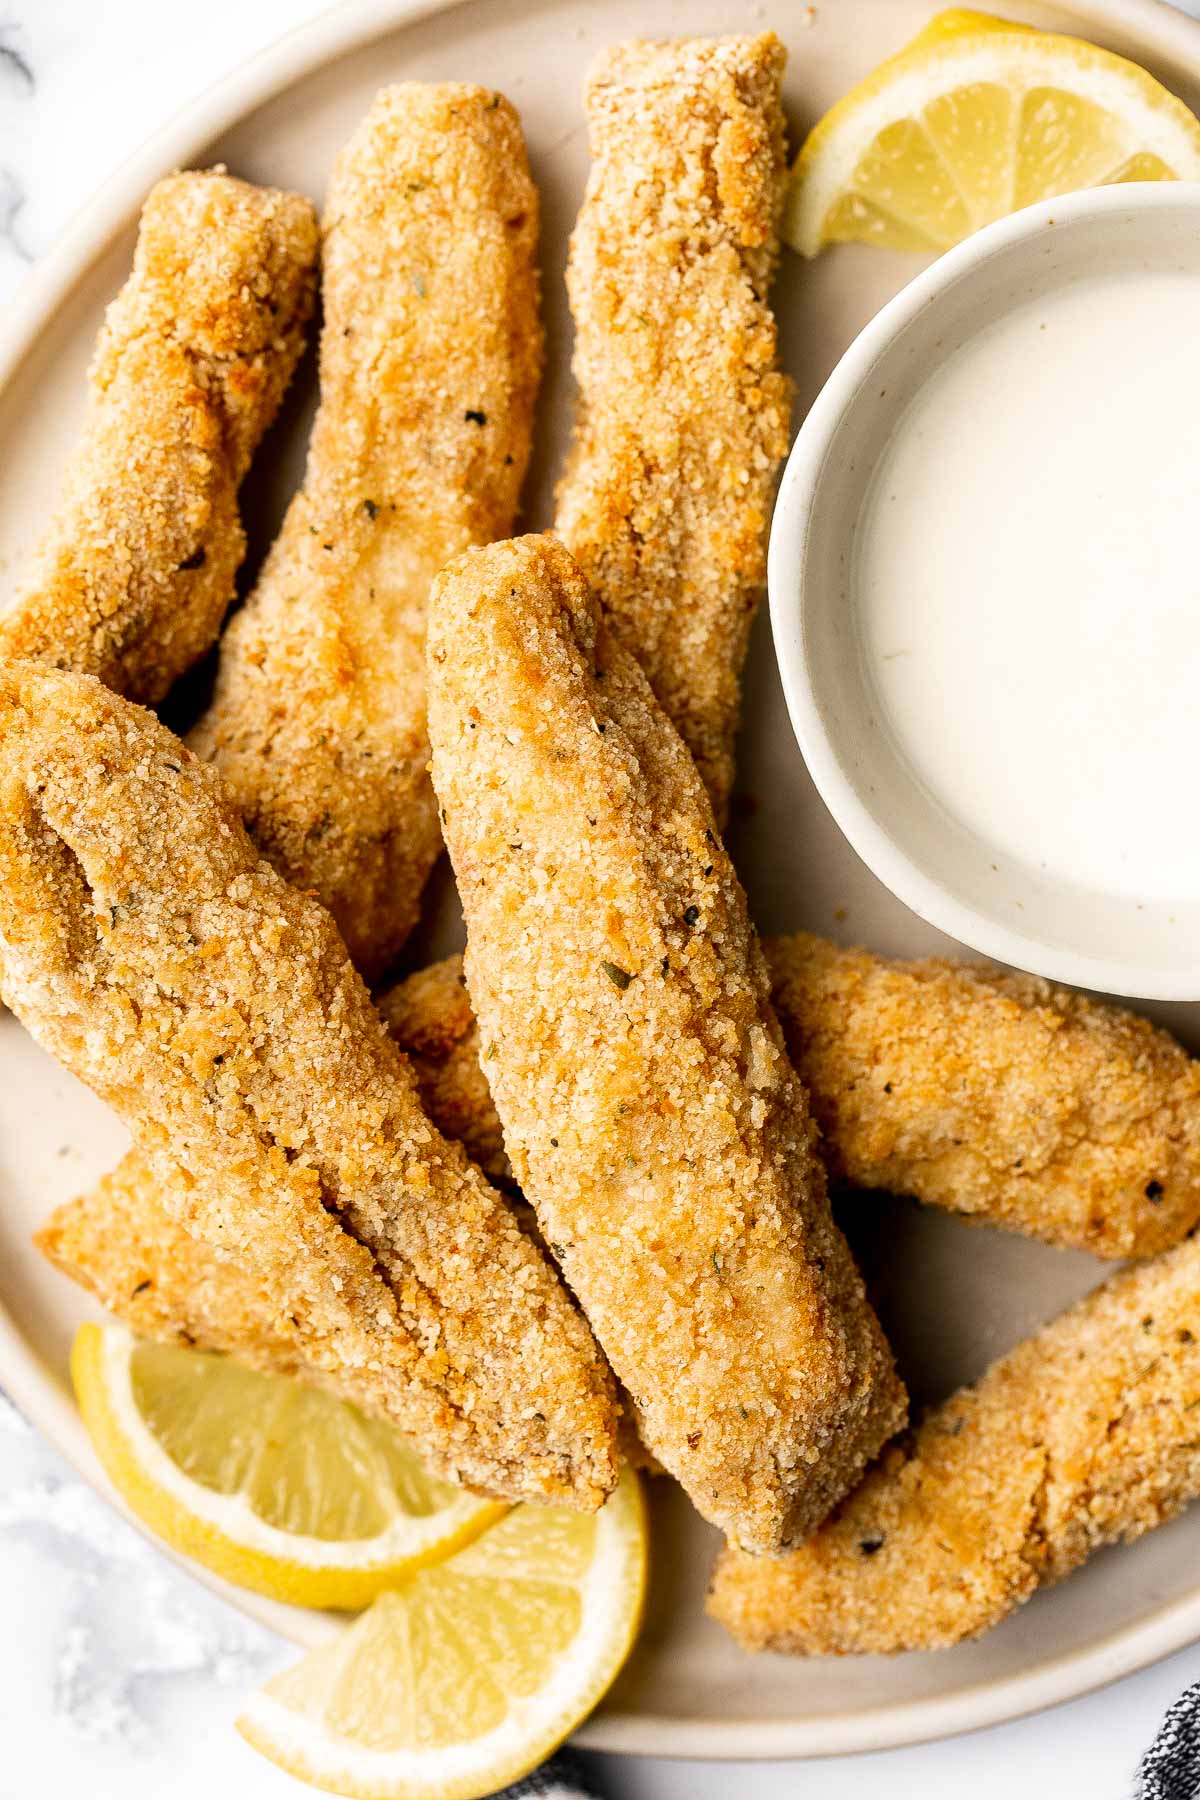
Quick easy baked homemade fish sticks are crispy on the outside, tender and flaky on the inside, and packed with flavor. Kid-friendly + freezer-friendly.
Pizza crescent rolls are a delicious, cheesy, easy appetizer ready in under 30 minutes - the perfect last minute bite, lunch or dinner, or party food.

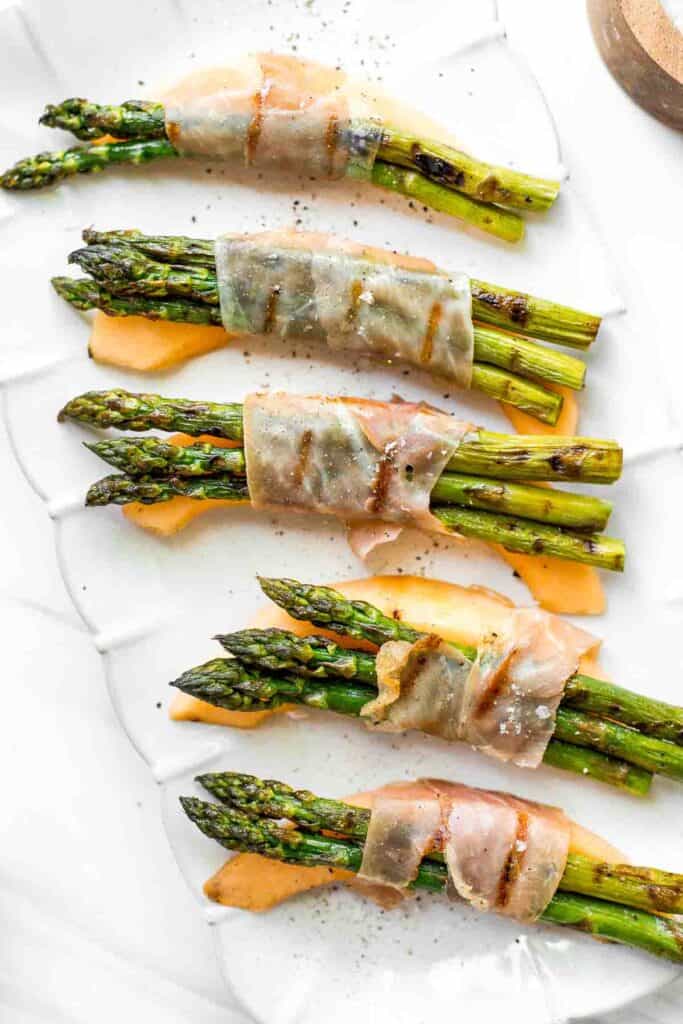
Prosciutto Wrapped Asparagus and Melon
Prosciutto wrapped asparagus and melon are salty, sweet, and juicy. They are easy to make with a handful of simple ingredients, then cooked on the grill.
Whipped ricotta crostini is a fancy easy appetizer to make in just minutes or prepare in advance and assemble before serving. A total crowd pleaser.

Fried Goat Cheese Balls are flavorful, delicious, and easy to make. With creamy, melty cheese oozing out of a crunchy, golden crust in every bite.

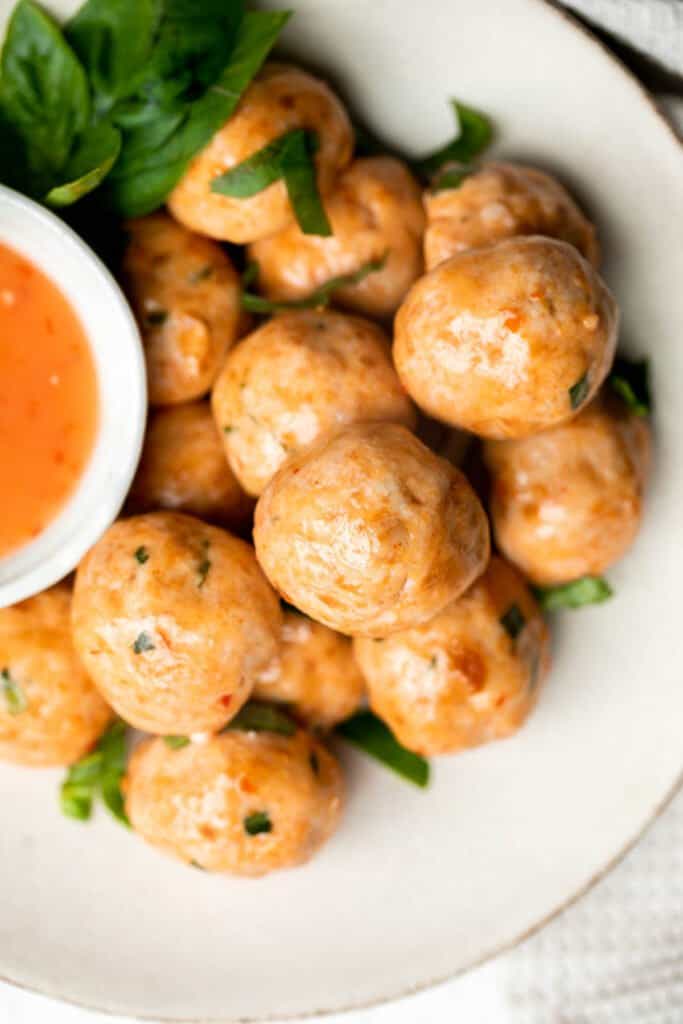
Sweet chili turkey meatballs are delicious, tender and juicy, loaded with classic Thai flavors, and quick and easy to make. Savory, sweet, and tangy.
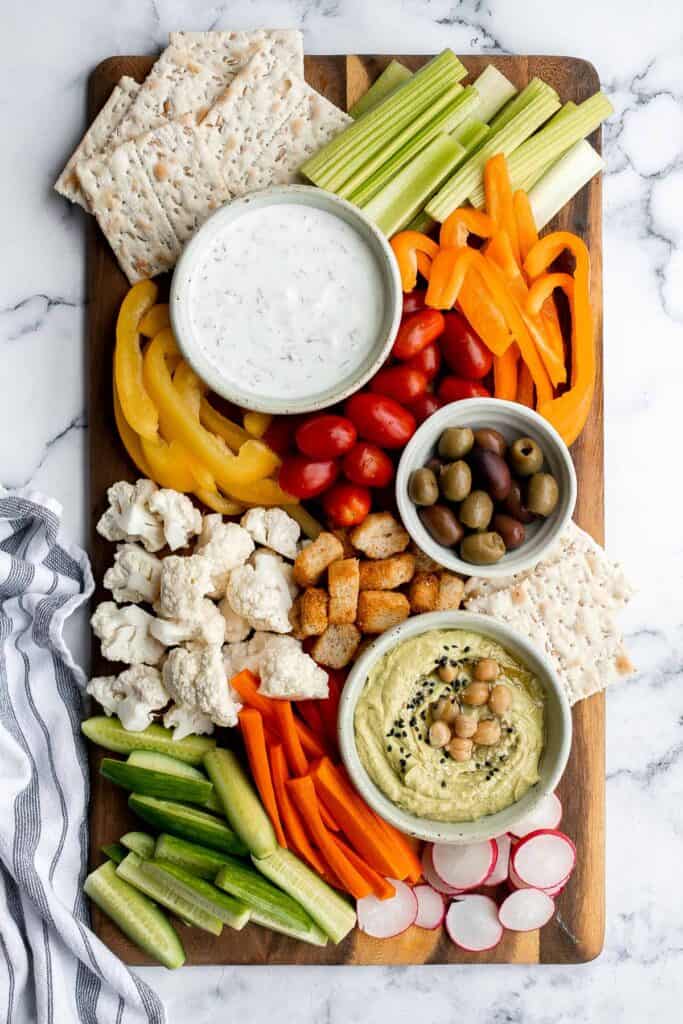
This homemade veggie tray is a quick easy healthy snack or appetizer to make for your next party, with a variety of colorful vegetables and delicious dips.
Vietnamese Summer Rolls with Chicken
Vietnamese summer rolls with chicken are fresh, light, and healthy. This Asian summer snack takes less than 20 minutes to make and easier than you think.

Healthy baked cauliflower nuggets are a vegetarian alternative to chicken nuggets. With parmesan panko breading, these bites are baked until crispy.
Zucchini fritters are crispy outside, tender inside, and loaded with zucchini. These healthy bites are one of my favorite ways to use up summer zucchini.
Bacon wrapped chicken bites are one of the best appys ever - well seasoned tender juicy chicken is wrapped in bacon and oven-baked to crisp perfection.

Whipped feta crostini with a herby olive topping is quick and easy snack or appetizer that is ready in less than 20 minutes - or 10 minutes if you're fast.

Sweet and sticky, baked BBQ chicken wings are perfectly crispy, so delicious, and smothered in barbecue sauce. They are the perfect party appetizer.
More Recipes
- 20 Best Dip Recipes
- 50 Best Healthy Snacks
- 40 Best Salad Recipes
- 25 Best BBQ Side Dishes
- 40 Best Pasta Recipes
- 40 Best Summer Desserts
Did You Make Any of These Finger Food Recipes?
Please leave a comment and rating below, and let me know what you thought of this round up of finger foods. Be sure to snap a picture and tag me on Instagram @aheadofthyme or share it on the Pinterest pin so that I can follow along.
HUNGRY FOR MORE? Don't forget to sign up for my email newsletter so that you don't miss any recipes. You can also follow along on Instagram and Pinterest for more recipe updates.
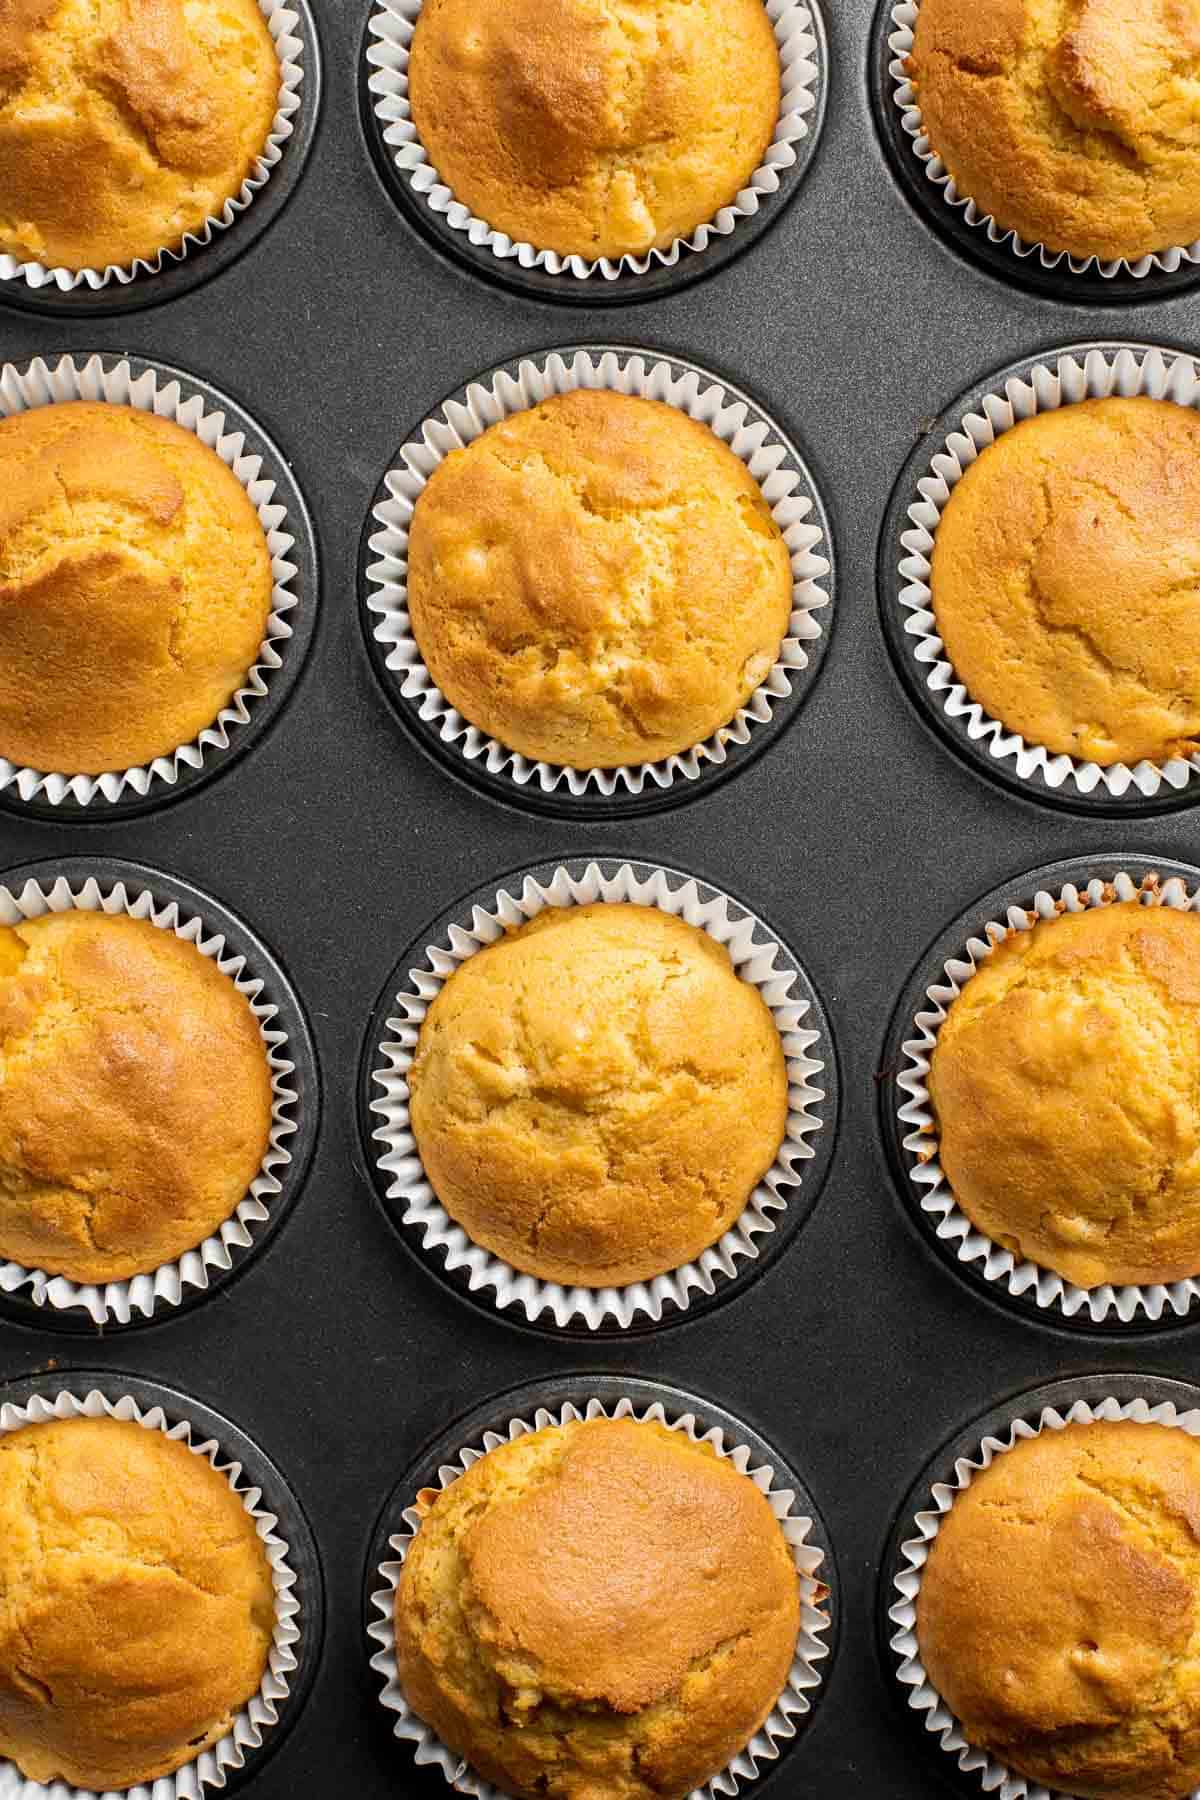
Cornbread Muffins
Easy Cornbread Muffins are moist, fluffy, tender, and sweet. They're the perfect side dish to serve with a Southern barbecue, with soup or chili, as a Thanksgiving holiday side dish, or just for snacking. The best part? These quick and easy muffins take just 10 minutes to prep and 20 minutes to bake - even the kids can help!
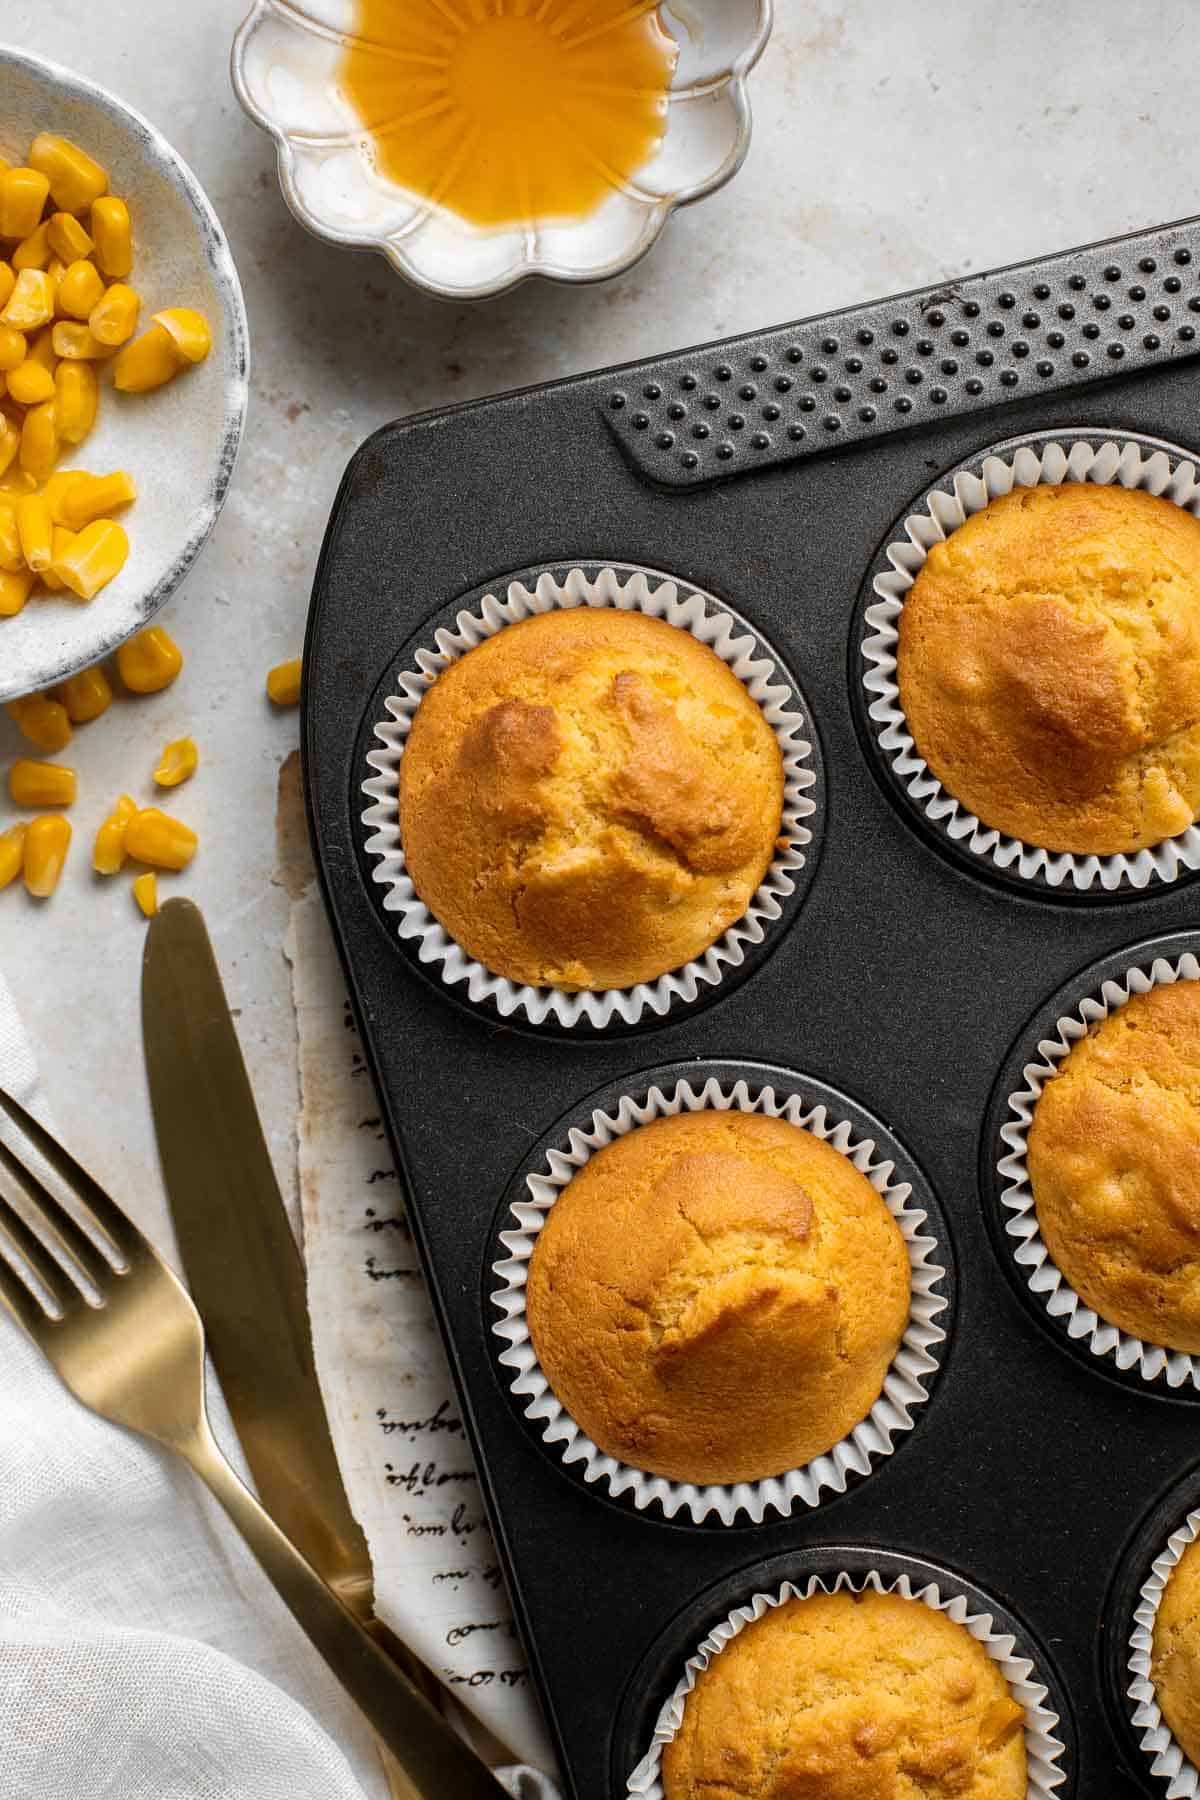
Loaded with cornmeal and corn kernels (if you want!), these fluffy Southern cornbread muffins are packed with flavor - savory with a hint of sweetness. We love them fresh out of the oven but they store well and are freezer-friendly so they can be enjoyed for days to come.

Why You'll Love These Cornbread Muffins
- Freshly baked muffins. Seriously, who doesn't love freshly baked cornbread muffins or bread? The smell that will waft through your kitchen as these muffins bake and cool is something else. It literally smells like sweet corn at the fair. The only problem is trying to control yourself from snacking on them as they cool.
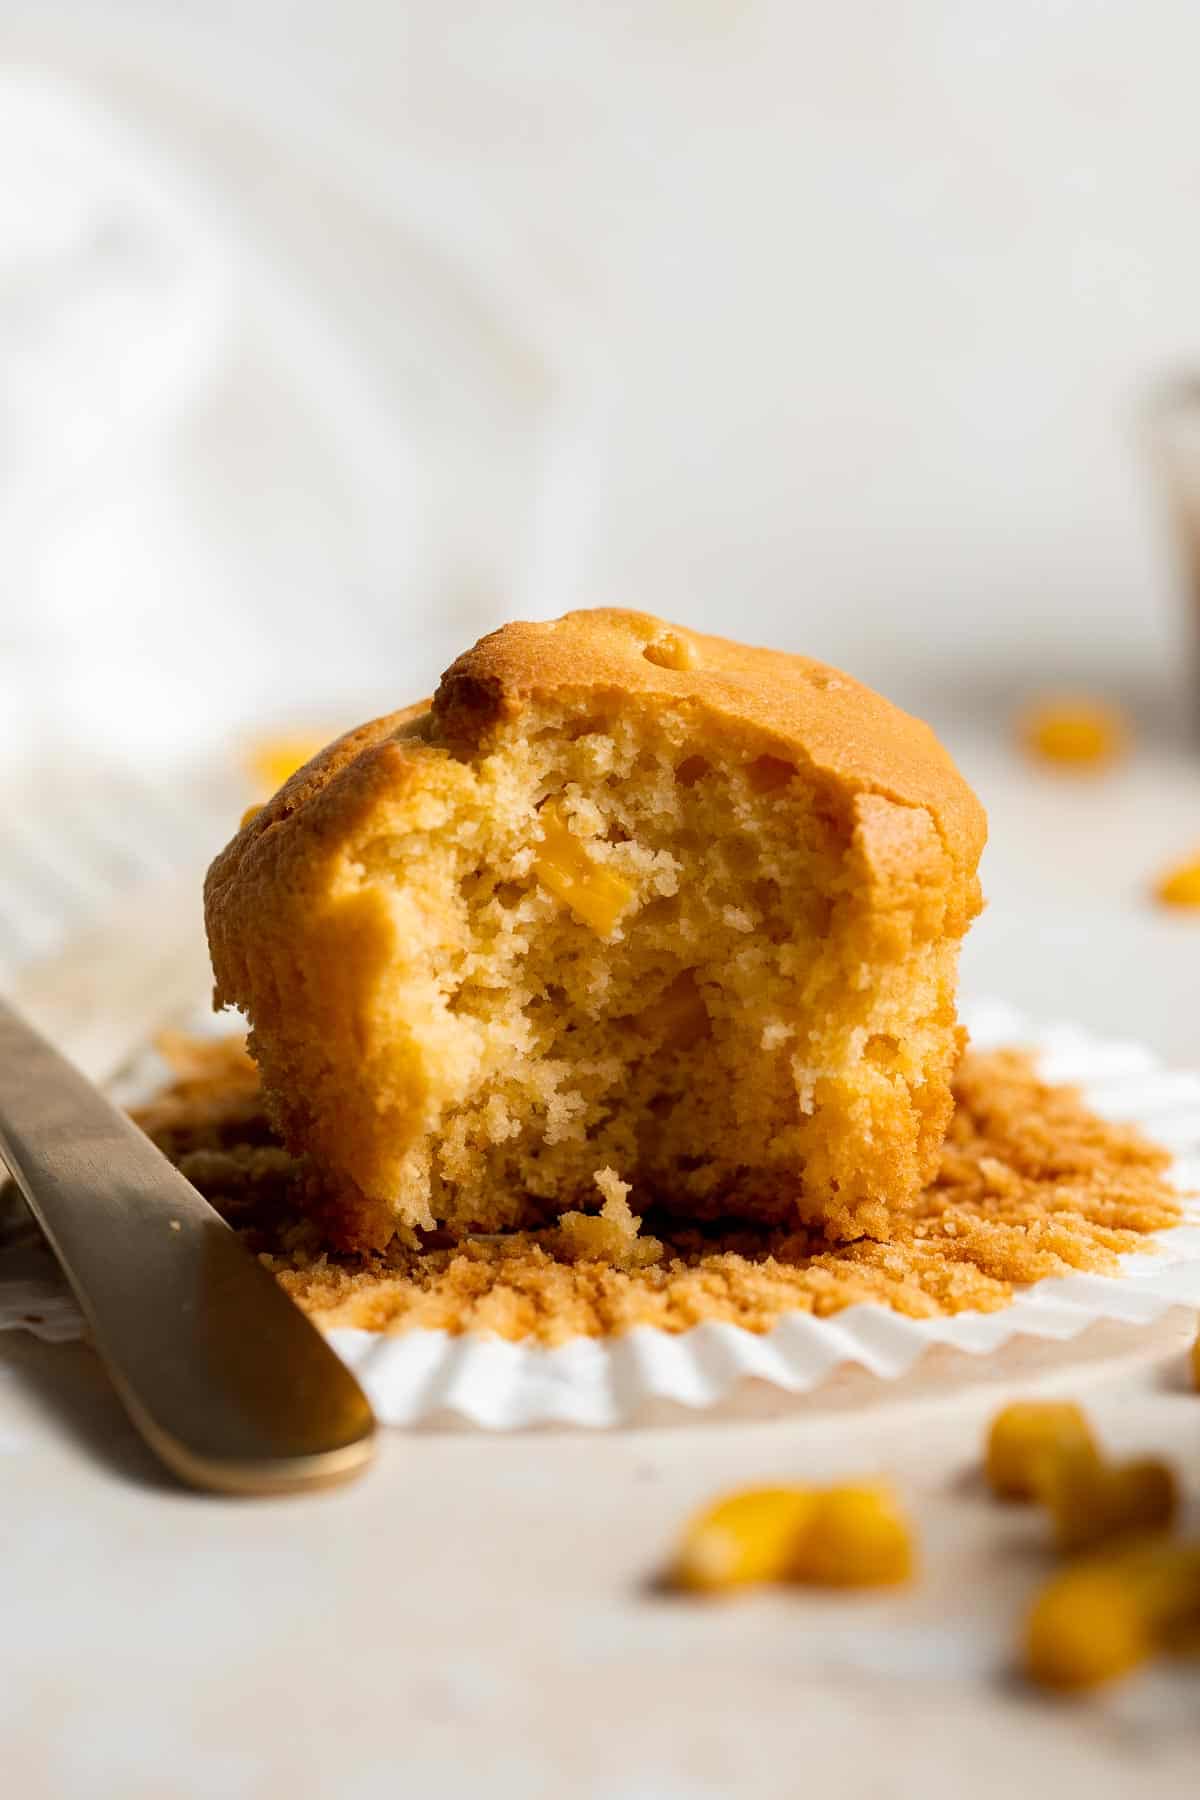
- They are loaded with real corn. Their delicious sweet corn smell which comes from the fact that these cornbread muffins are full of corn. They are not only made with crunchy cornmeal, but also with cooked corn kernels. The corn kernels actually make the muffins extra moist and fluffy, and the polenta adds a little crunch.
- A side dish that you can serve any time of the year. Corn muffins are one of those sides that can be served all year round. They are a well-known side dish for a Thanksgiving or Christmas holiday feast, but they are just as amazing any time of the year as a snack, breakfast, or lunch - and, let's not forget, they are an essential part of any Southern-style summer barbecue or cookout.
- Make a big batch to feed a crowd. This recipe yields 12 muffins, but you can easily double or triple the recipe to make a bigger batch. Plus, they are freezer-friendly so you don't have to worry about having too many leftovers, if any at all!
Ingredient Notes
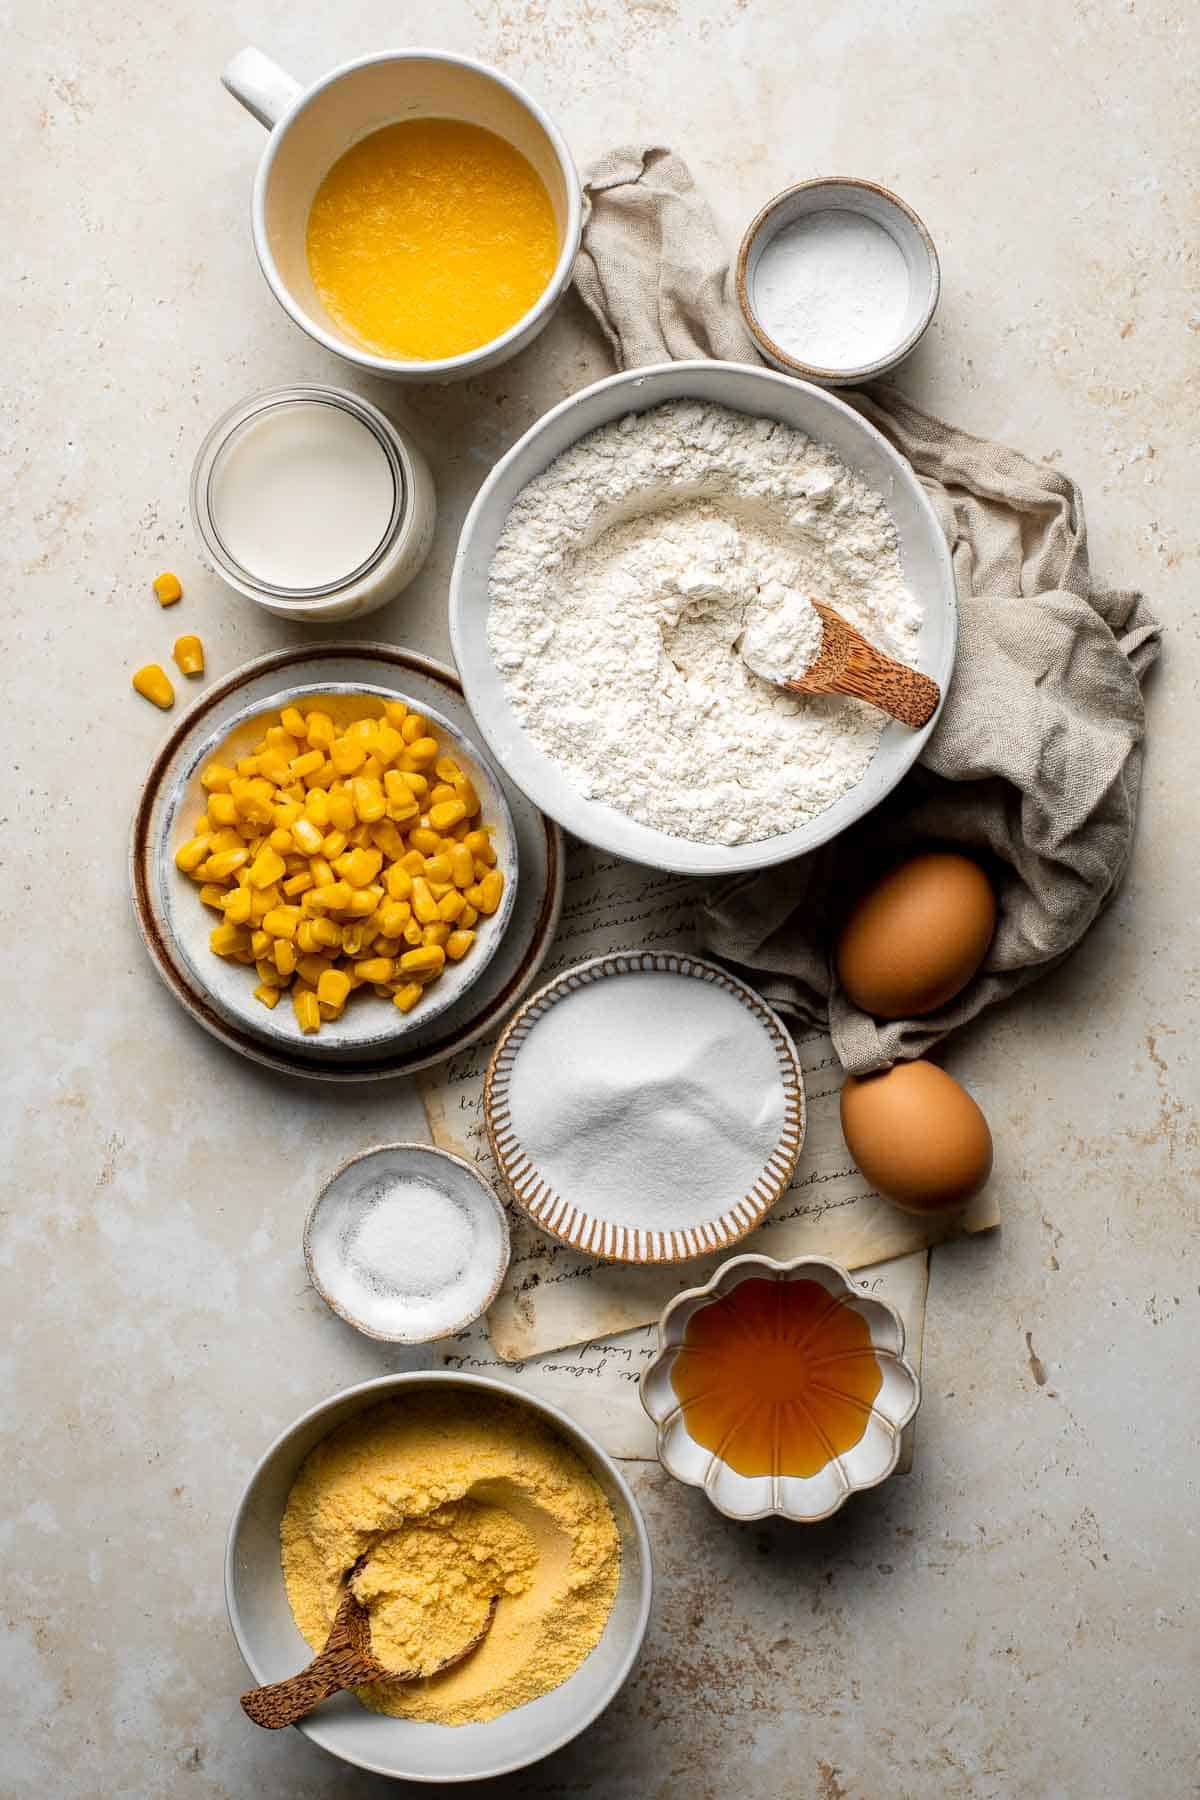
To make these delicious and easy Cornbread Muffins, you will need the following ingredients (full measurements in recipe card below):
- cornmeal - you can easily substitute this with polenta which has a more course texture.
- corn - adding cooked corn adds extra moistness and flavor to these muffins but you can leave them out completely if you prefer. You can cook Corn on the Cob and slice off the corn kernels, cook frozen corn, or use canned corn (drained and rinsed).
- all-purpose flour
- granulated sugar
- baking powder
- salt
- milk
- butter
- eggs
- honey
Baking Tools and Equipment
You will also need the following kitchen tools and equipment to make these corn muffins:
- measuring cups and spoons
- mixing bowls
- 12-tin muffin pan
- cupcake liners
- wire cooling rack
How to Make the Best Cornbread Muffins from Scratch
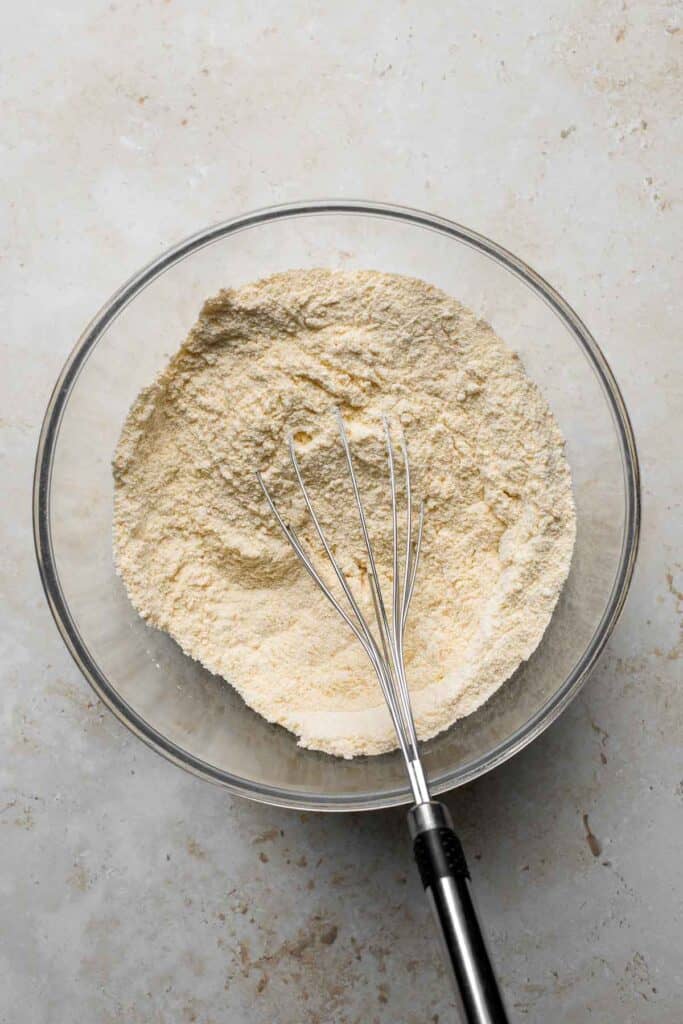
- Combine dry ingredients. Combine cornmeal, flour, sugar, baking powder, and salt together in a large mixing bowl and stir to combine. Set aside.
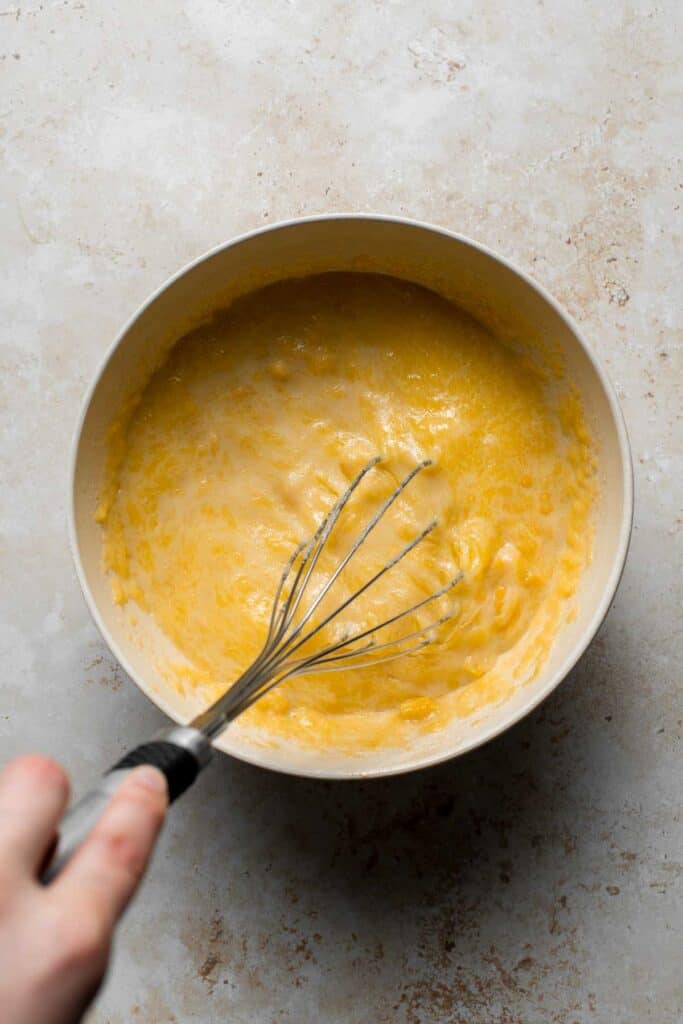
- Combine wet ingredients. In another mixing bowl, combine milk, corn (if using), butter, eggs, and honey and whisk together until mixed well.
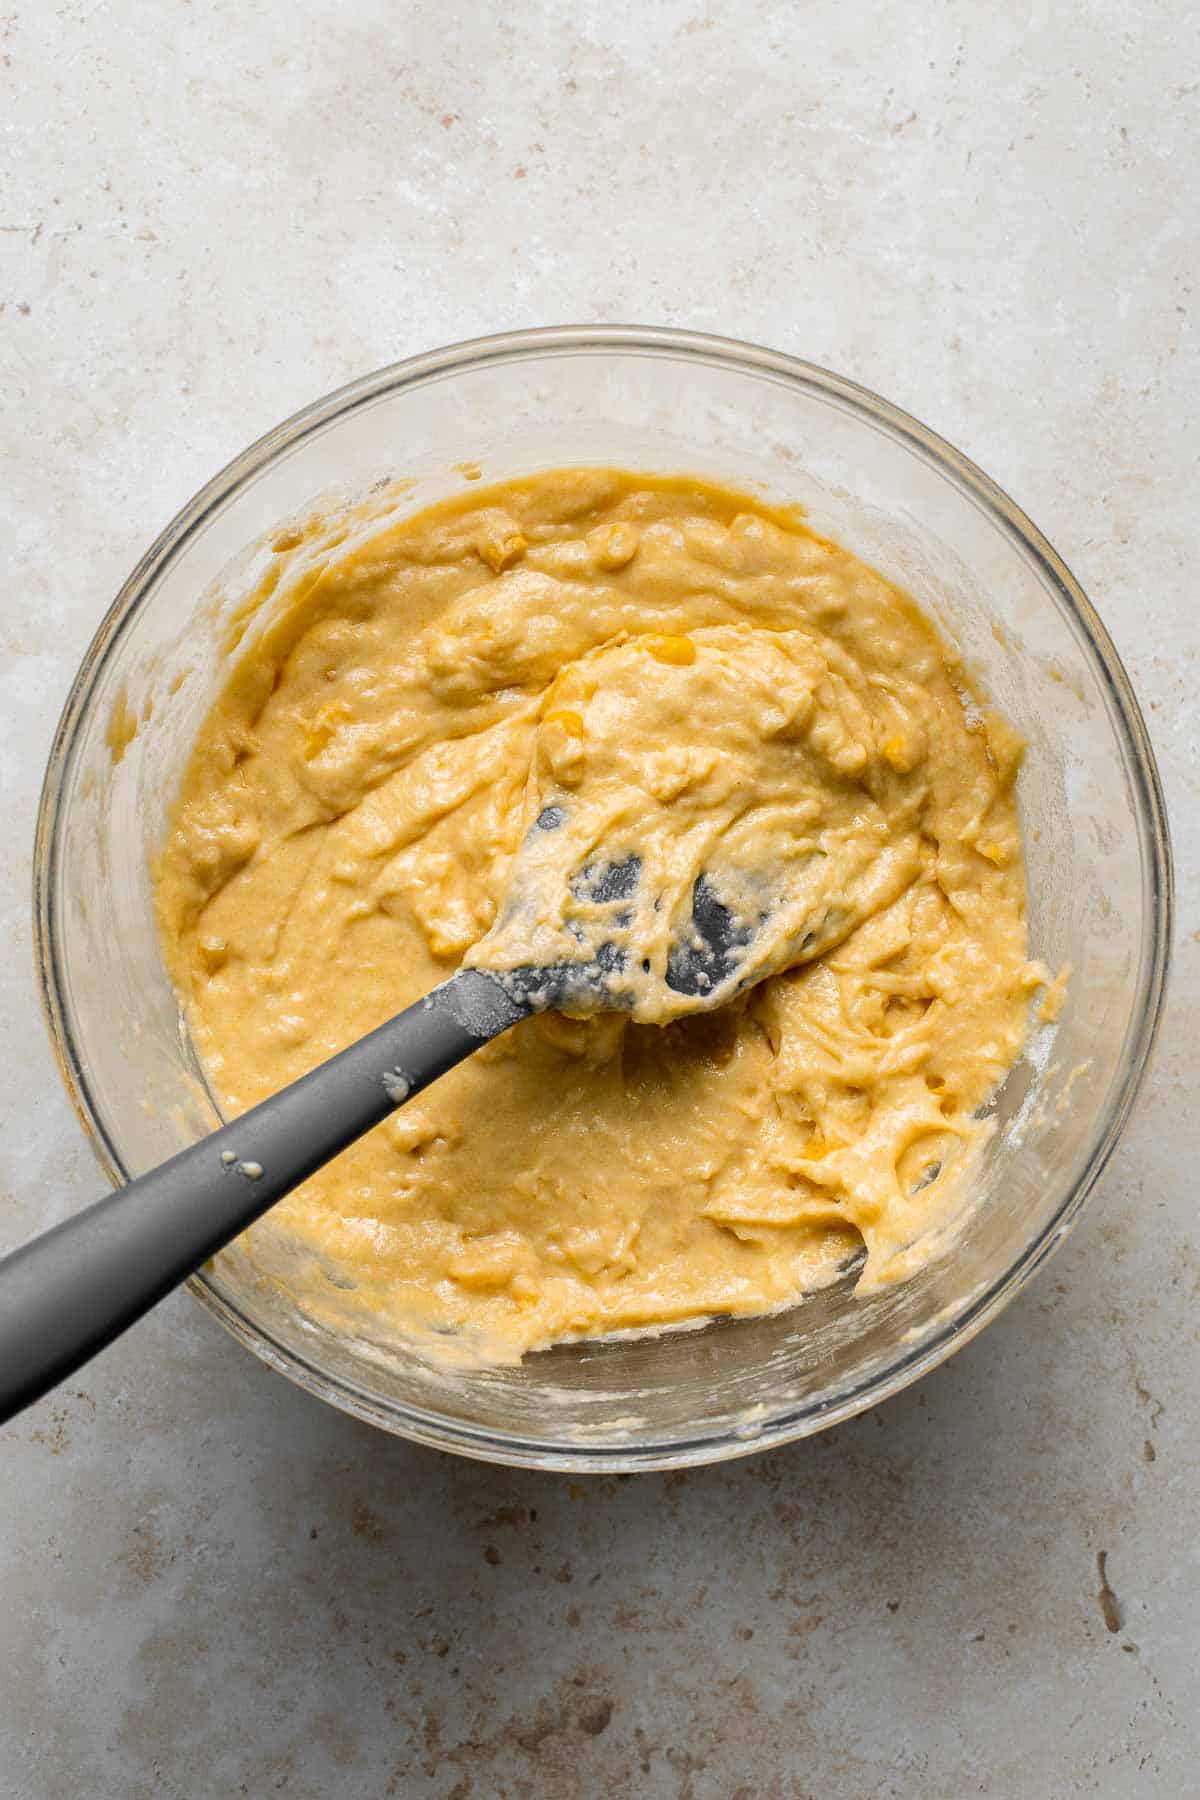
- Add wet ingredients to dry ingredients. Pour wet ingredients into dry ingredients and use a spatula to mix until just combined.
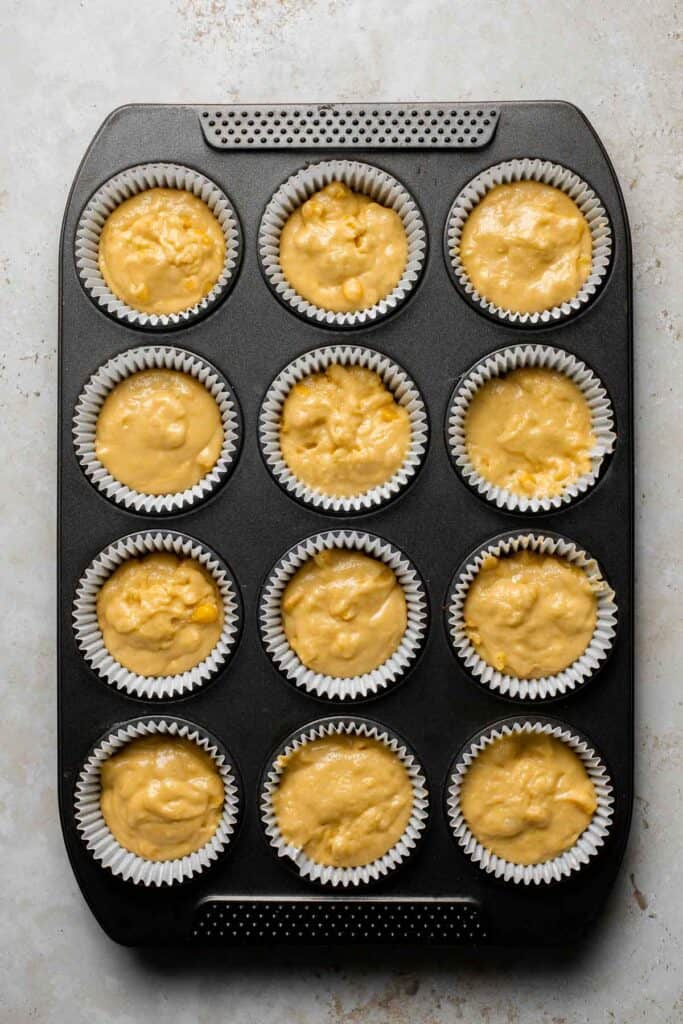
- Fill muffin tray. Grease a 12-tin muffin pan with non-stick cooking spray or line with paper cupcake liners. Use a medium cookie scoop to scoop the batter into the prepared muffin pan, filling up each compartment ¾ full.

- Bake. Bake in a 350F preheated oven for 20 minutes until golden brown on the edges. Let cool for 5-10 minutes and serve warm with butter or honey drizzled on top.
How to Serve
These cornbread muffins are best served warmed with some butter spread on top or drizzled with honey.
Storing Instructions
- How to store: Store cornbread muffins for up to 2 days in an airtight container at room temperature or up to 5 days in the refrigerator.
- How to freeze: You can freeze cornbread muffins in an airtight container or freezer bag for up to 3 months. Allow it to thaw overnight in the fridge before eating or reheating.
- How to reheat: You can reheat cornbread muffins in the microwave or in the oven or air fryer at 350F for 5-10 minutes until warmed through.
More Muffin Recipes
- Zucchini Muffins
- Carrot Cake Muffins
- Blueberry Yogurt Muffins
- Banana Chocolate Chip Muffins
- Chocolate Chip Zucchini Muffins
- Banana Chocolate Chip Oatmeal Muffins
Tried this recipe?
I'd love to hear what you think! Leave a comment and rating below to share your feedback. Your reviews help others discover this recipe and help me keep creating more free recipes for you. Snap a photo and tag me on social media @aheadofthyme too.

No Bake Strawberry Cheesecake
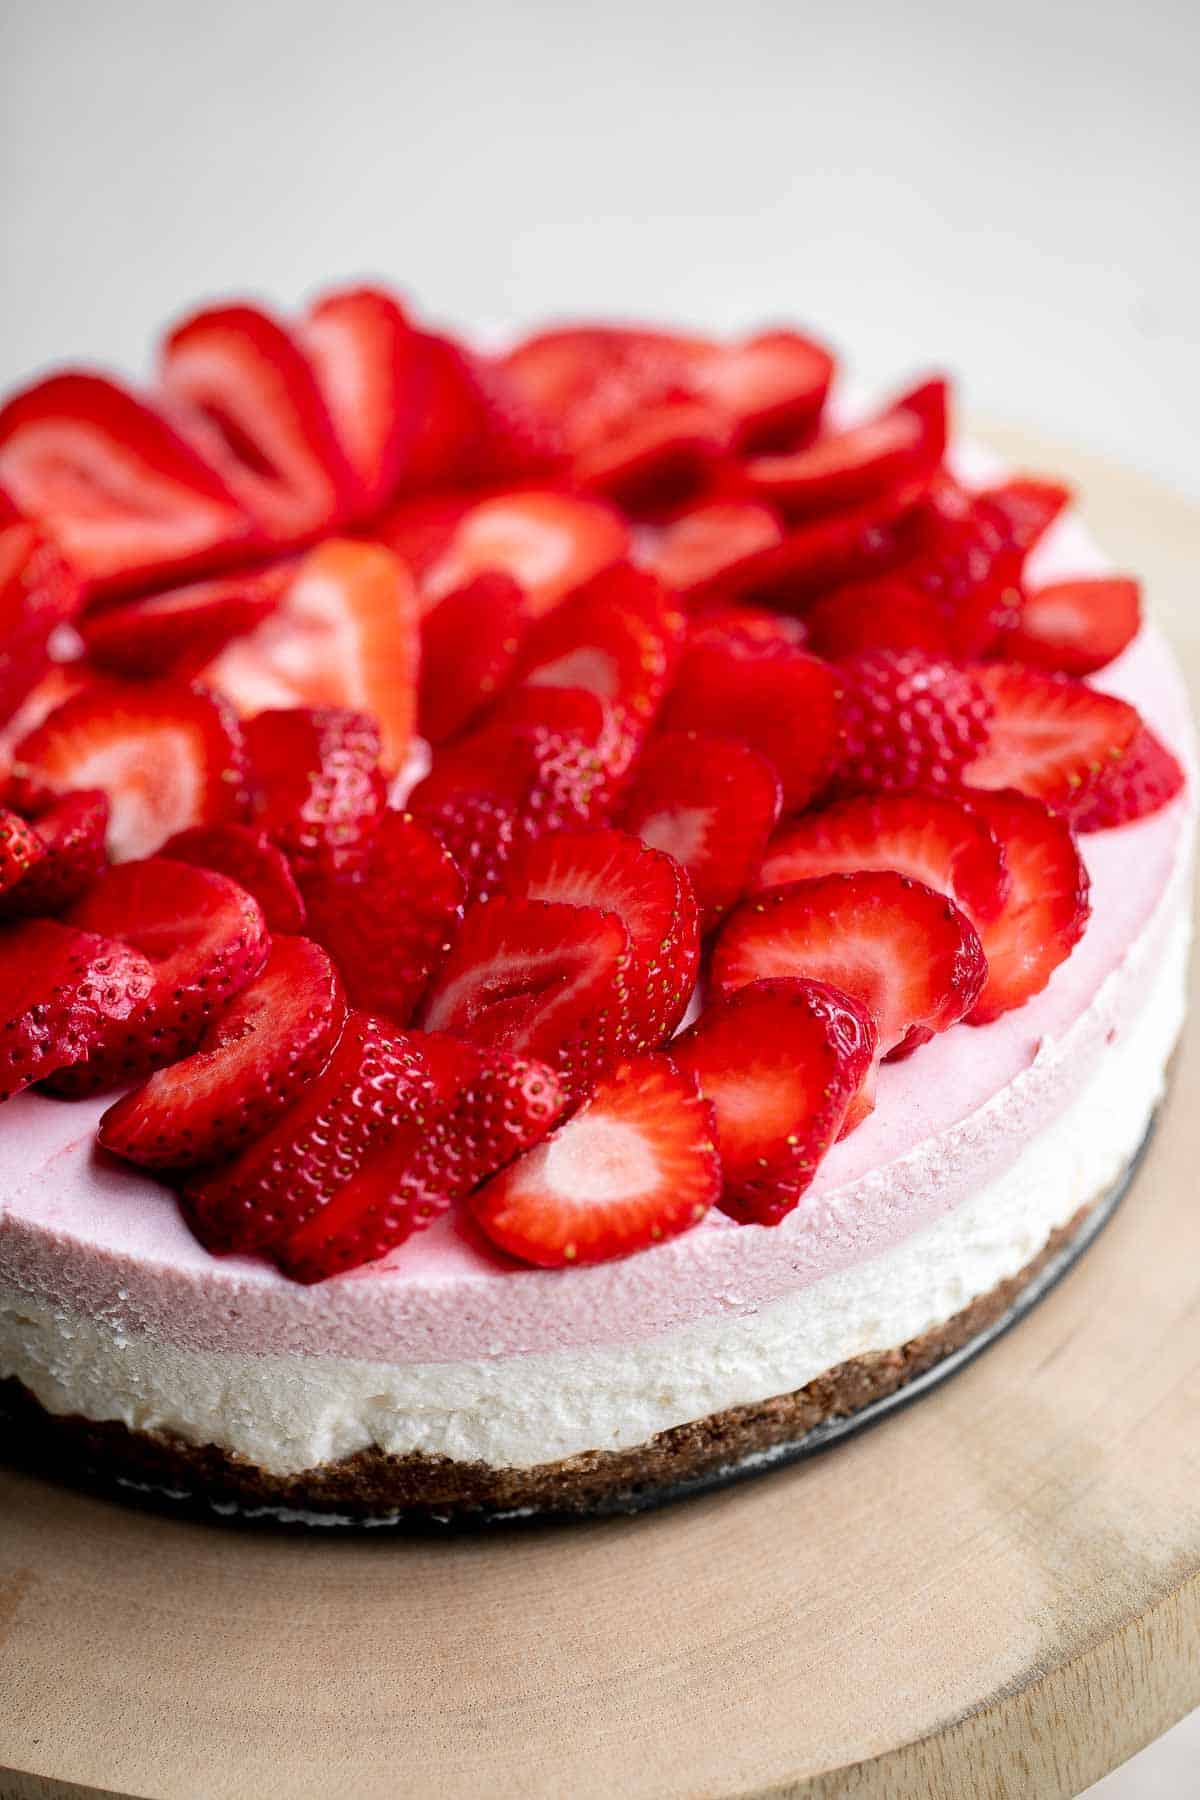
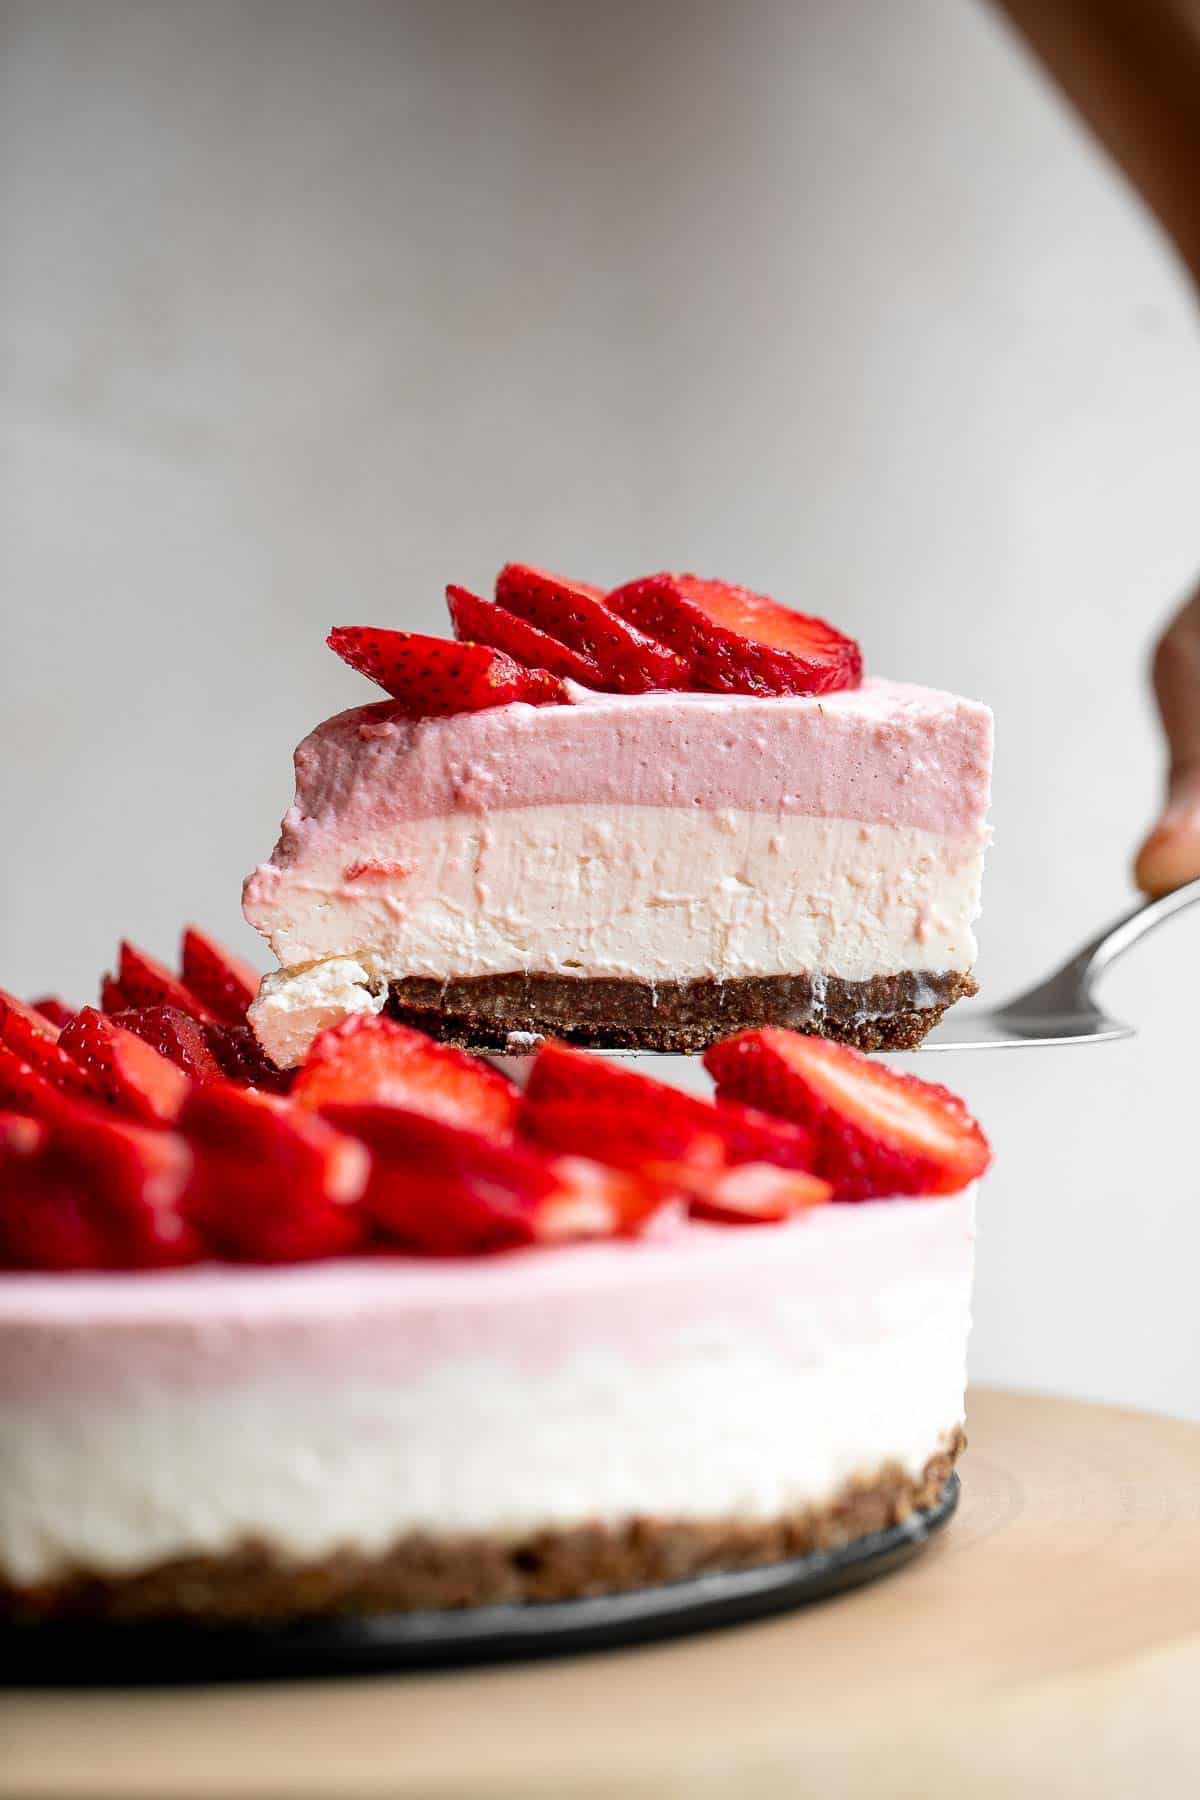
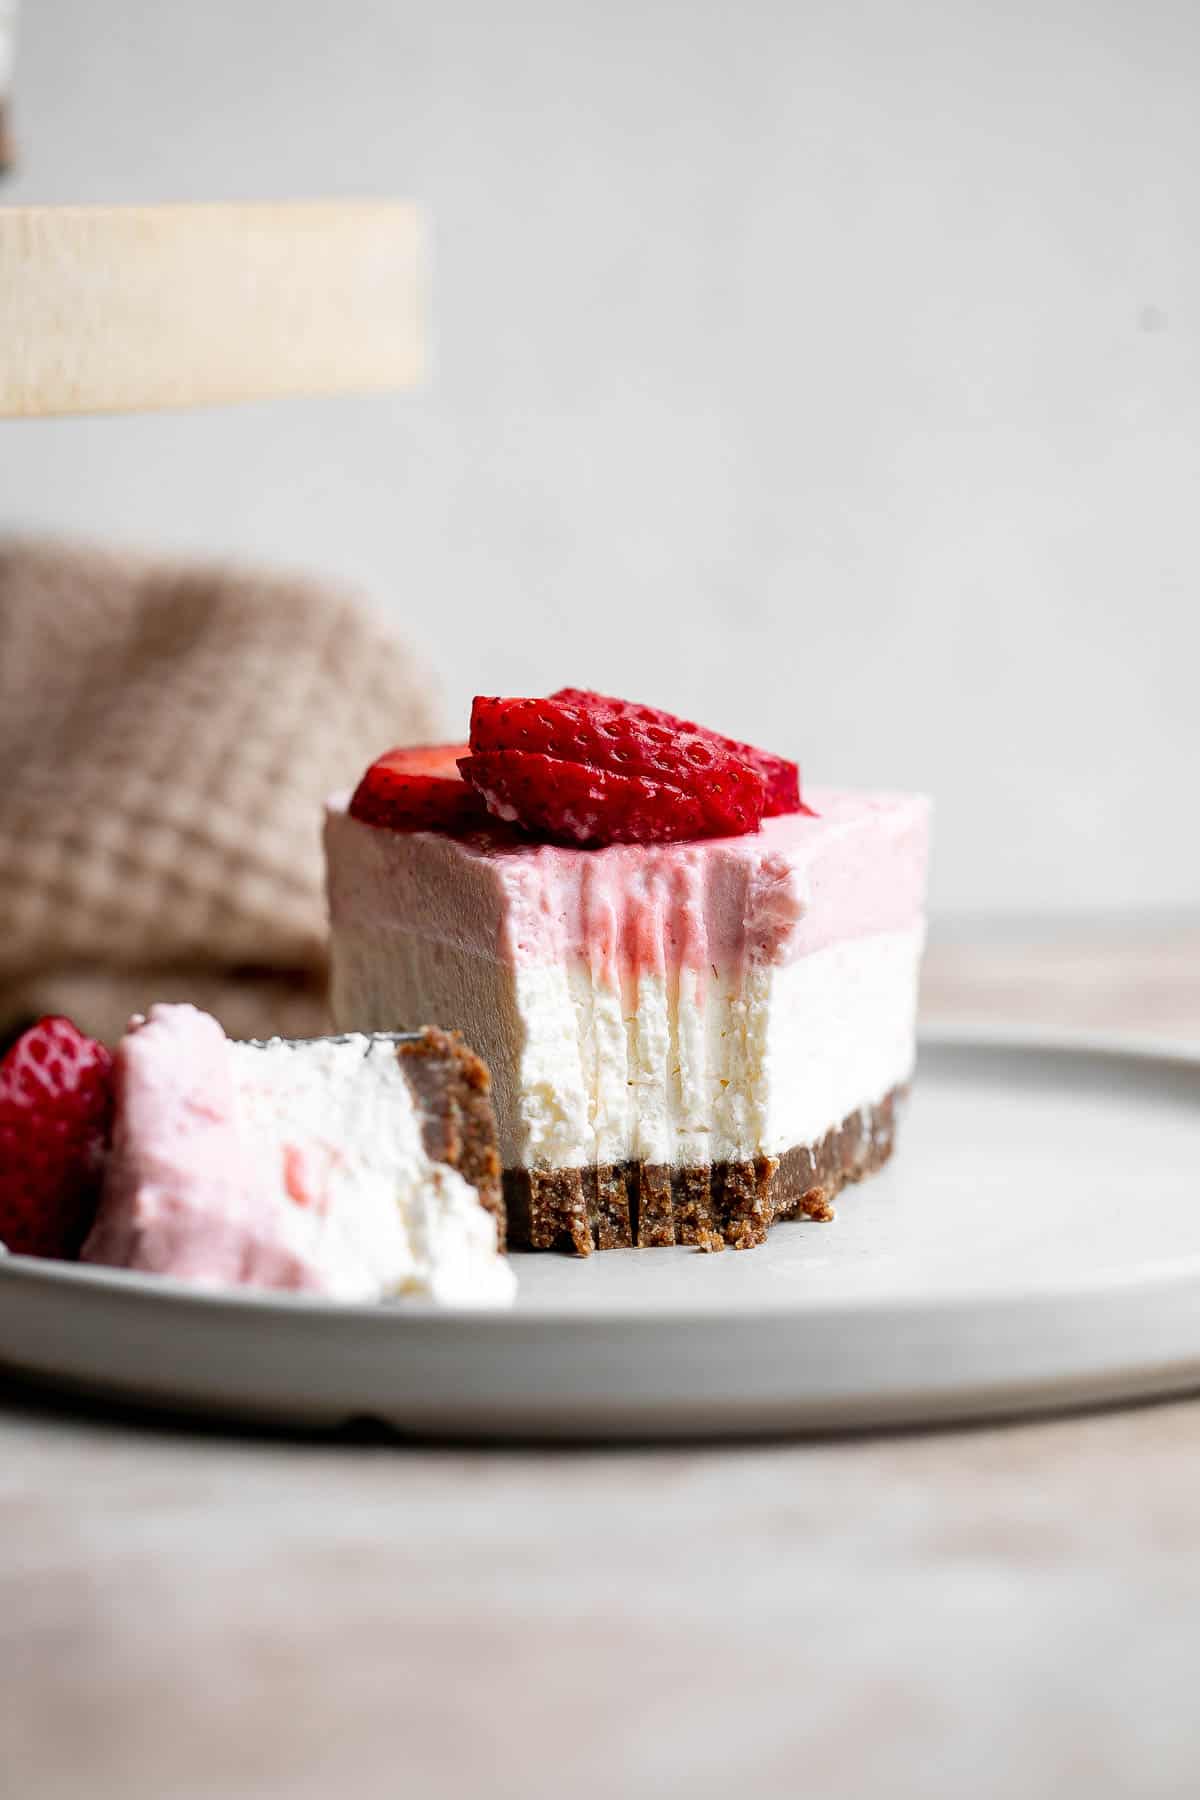
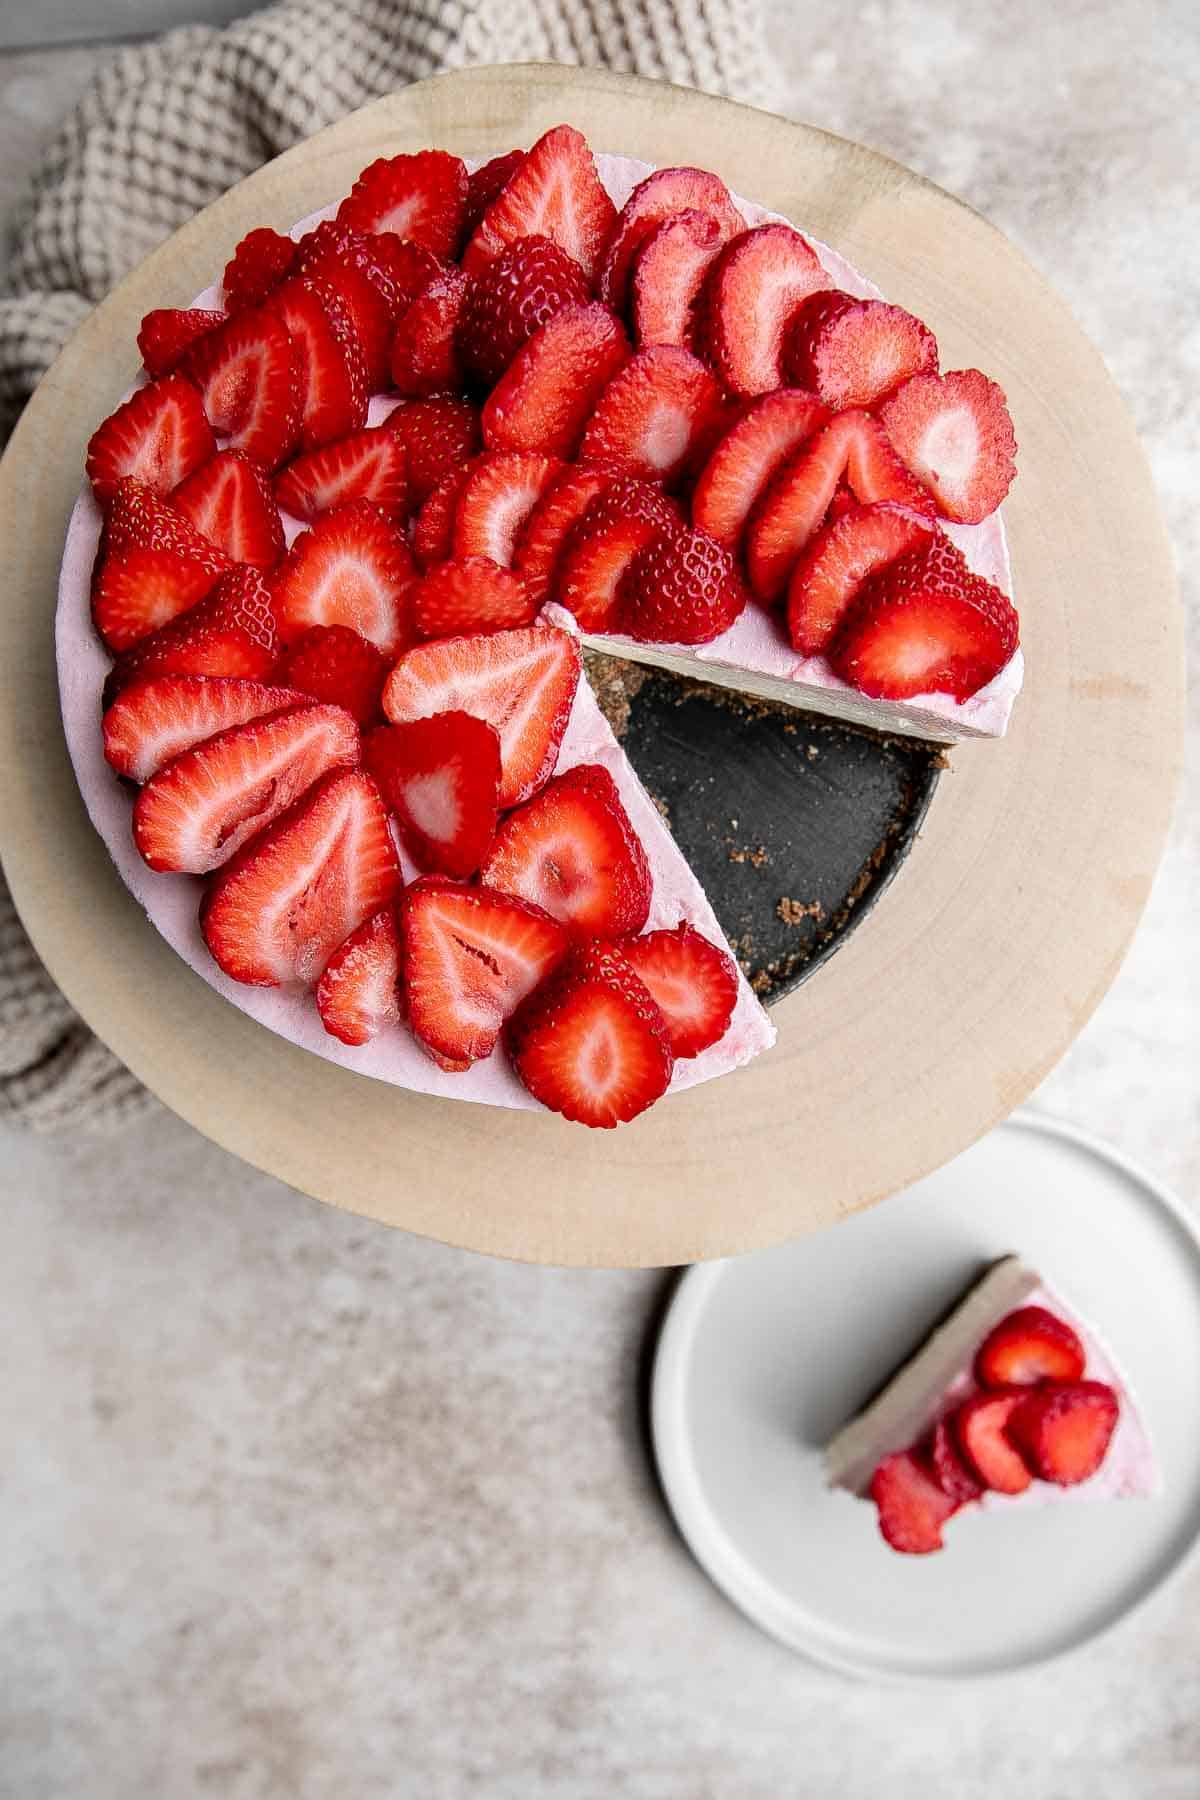
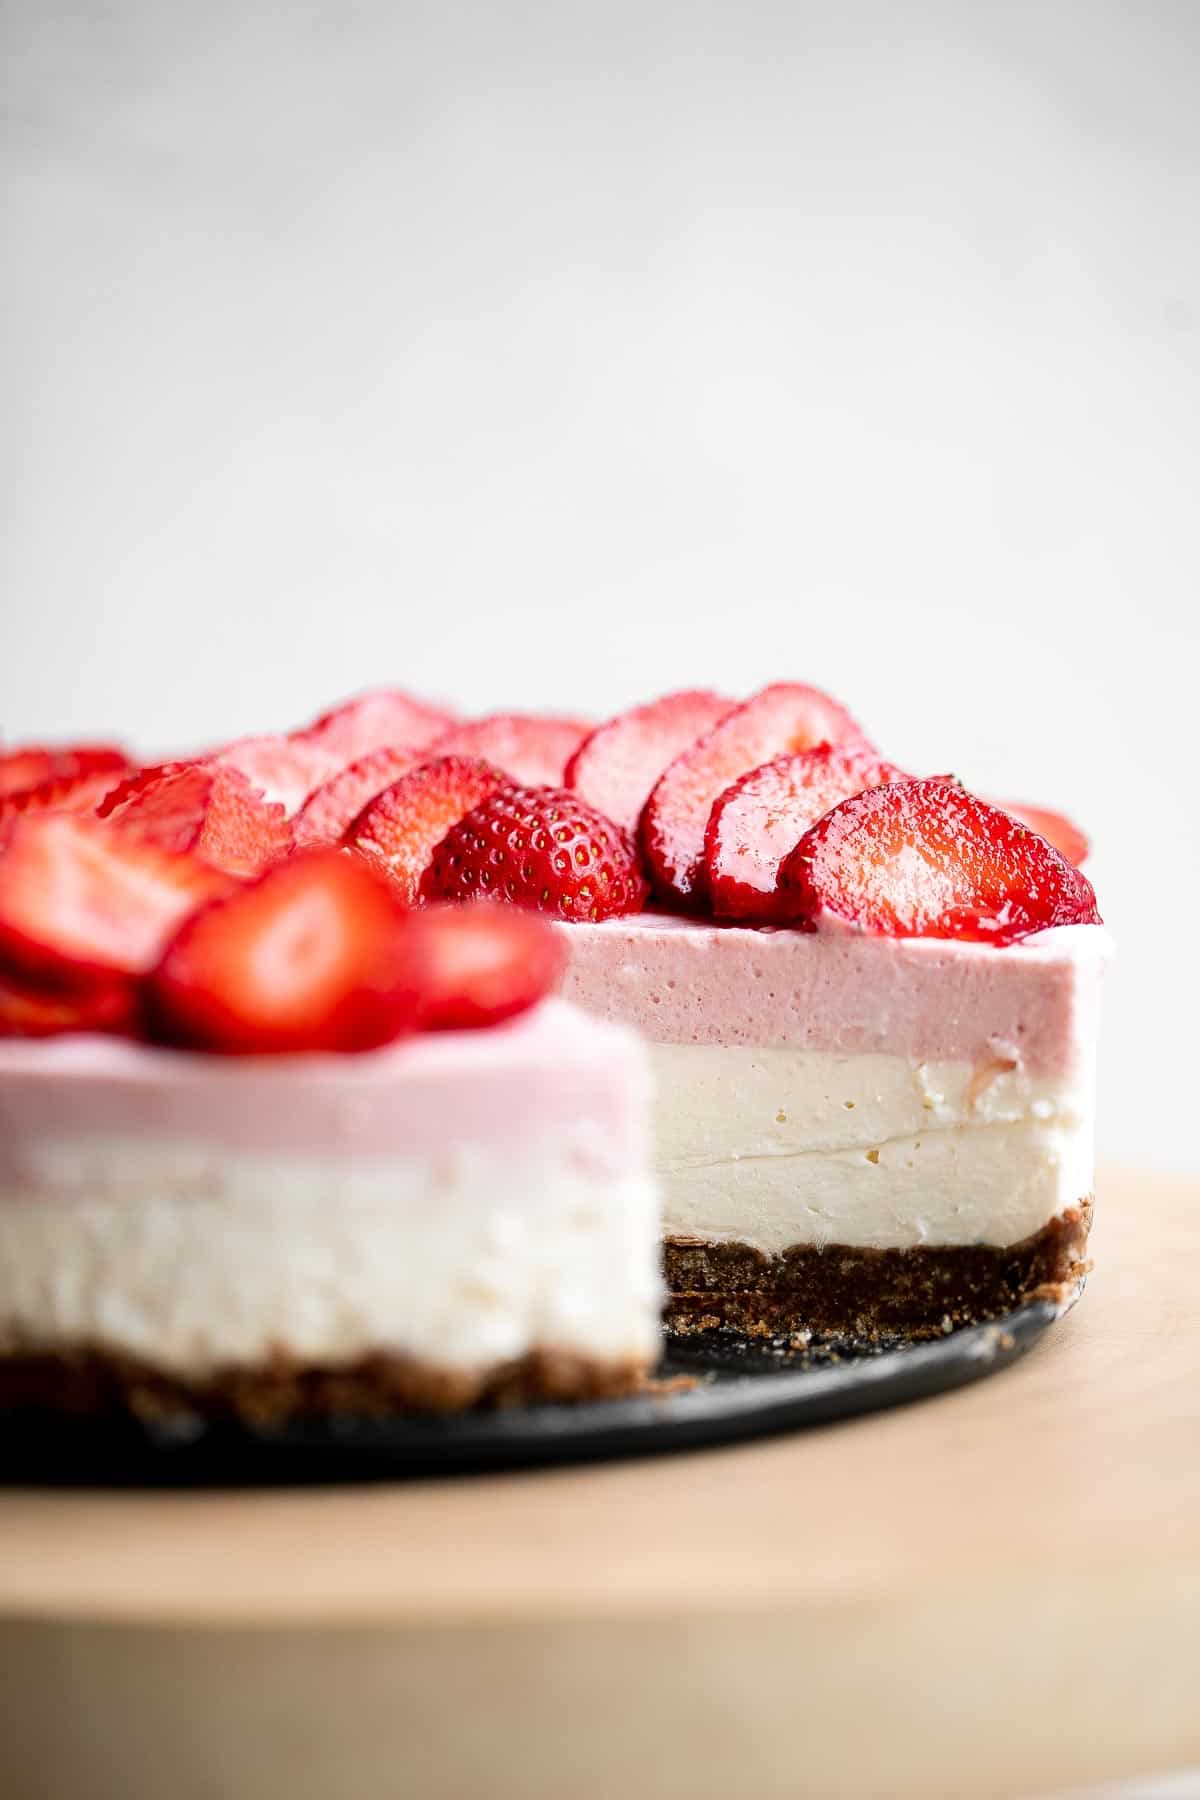
No Bake Strawberry Cheesecake is light, smooth, and creamy. This easy mousse cheesecake is made with a simple graham cracker crust, a rich cheesecake layer, a strawberry mousse layer, and topped with fresh strawberries on top. Plus, it tastes just as good as it looks.
The best part? Every layer is easy to make, assemble, and left in the refrigerator to set (no baking required!). It stores well and is freezer-friendly so it's a great make ahead dessert to make for another day too.
Why You'll Love No Bake Strawberry Cheesecake
- The graham cracker crust. Graham cracker crusts are the best for cheesecake. Not only is this crust simple (it has only 2 ingredients!), it's also so delicious. It crumbles perfectly yet holds the cheesecake together well.
- The creamy, decadent two layer filling. This no bake strawberry cheesecake has 2 decadent layers. The bottom layer consists of a classic cheesecake filling with a hint of lemon and vanilla, while the top layer features a rich strawberry mousse made with real strawberries. It's light, creamy, and smooth.
- The sweet and tart strawberry topping. After the cheesecake has set, you can create a beautiful design atop the cheesecake with fresh sliced strawberries. The result is a beautiful masterpiece with added sweetness and flavor. You can even add in other berries or opt out of the topping. It's totally optional!
- Stores well and is freezer-friendly. The best thing about no bake cheesecakes? They store well in the fridge and are freezer-friendly too. No bake strawberry mousse cheesecakes lasts close to a week in the refrigerator and lasts months in the freezer.
Ingredient Notes
To make this delicious and easy No Bake Strawberry Cheesecake, you will need the following ingredients (full measurements in recipe card below):
- strawberries - you can easily turn this into any flavour no bake cheesecake by using different berries or a mixture of berries. Try this recipe with raspberries, blueberries, peaches, or blackberries like in our No Bake Blackberry Cheesecake.
- Graham crackers - For another crust option, try Gingersnaps or digestive biscuits. You can also make this cheesecake gluten-free by substituting with gluten-free graham crackers or other gluten-free cookie.
- butter
- heavy cream
- cream cheese - use full-fat cream cheese for this recipe. The fat plays an important role in the texture and consistency of your cheesecake.
- icing sugar - The icing sugar adds a smooth and clean texture to this cheesecake, but you can substitute with granulated sugar if you don't have any on hand.
- lemon - adds a little brightness to this strawberry cheesecake.
- vanilla extract - adds a hint of flavor.
- gelatin powder + water - I use unflavored Knox gelatin.
You will also need measuring cups and spoons, mixing bowls, a hand mixer or stand mixer, and a round 8-inch springform pan.
How to Make the Best No Bake Strawberry Cheesecake
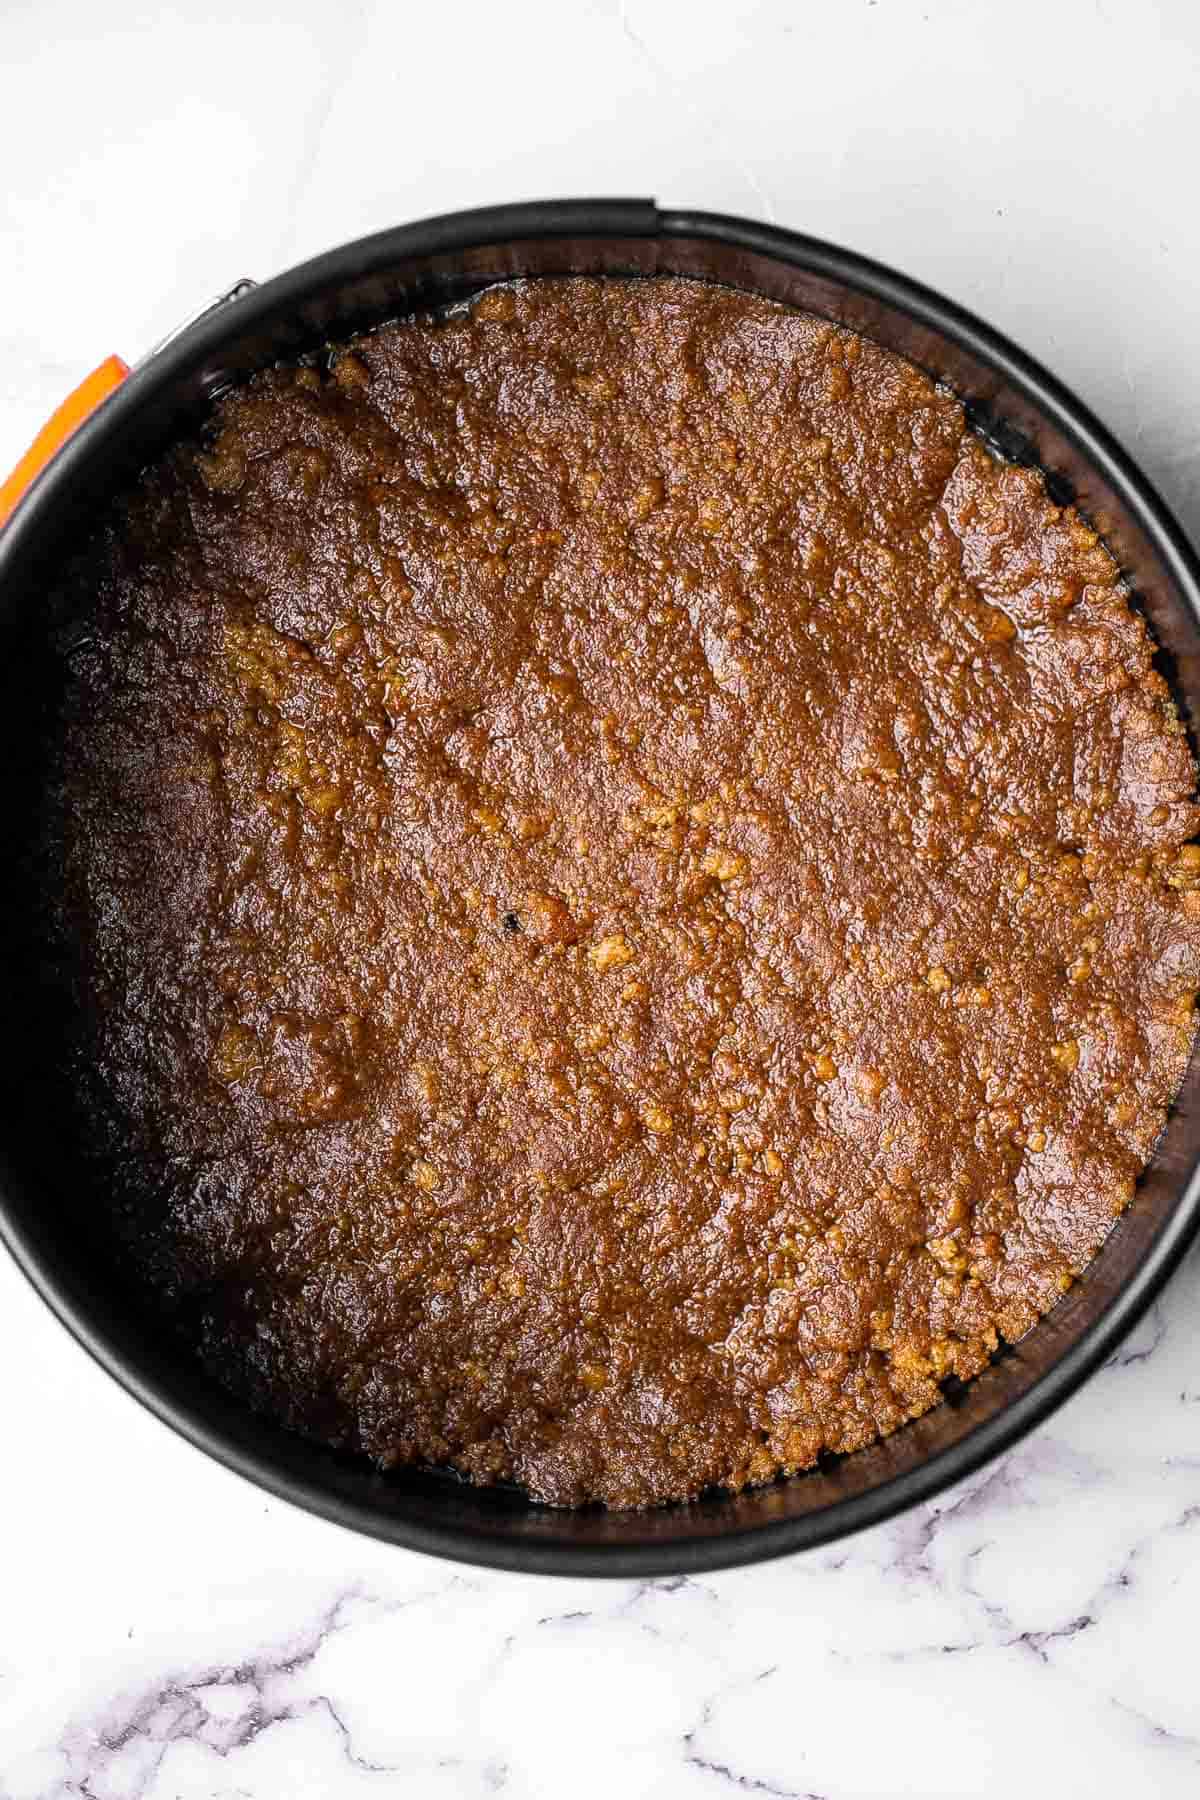
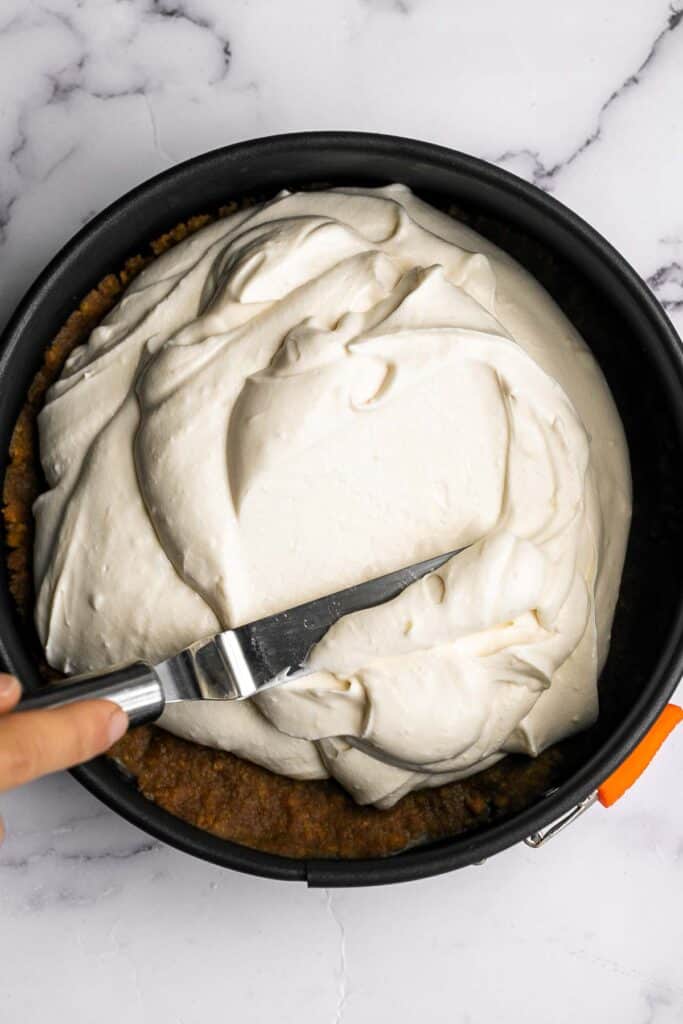
- Make the crust. In a large bowl, stir together graham cracker crumbs and melted butter until well mixed. If you are using whole graham crackers, simply add the crackers into a food processor and process until fine crumbs form. Press the crumb mixture firmly into a parchment lined 8-inch springform pan and freeze for at least 15 minutes, allowing the crust to set before filling.
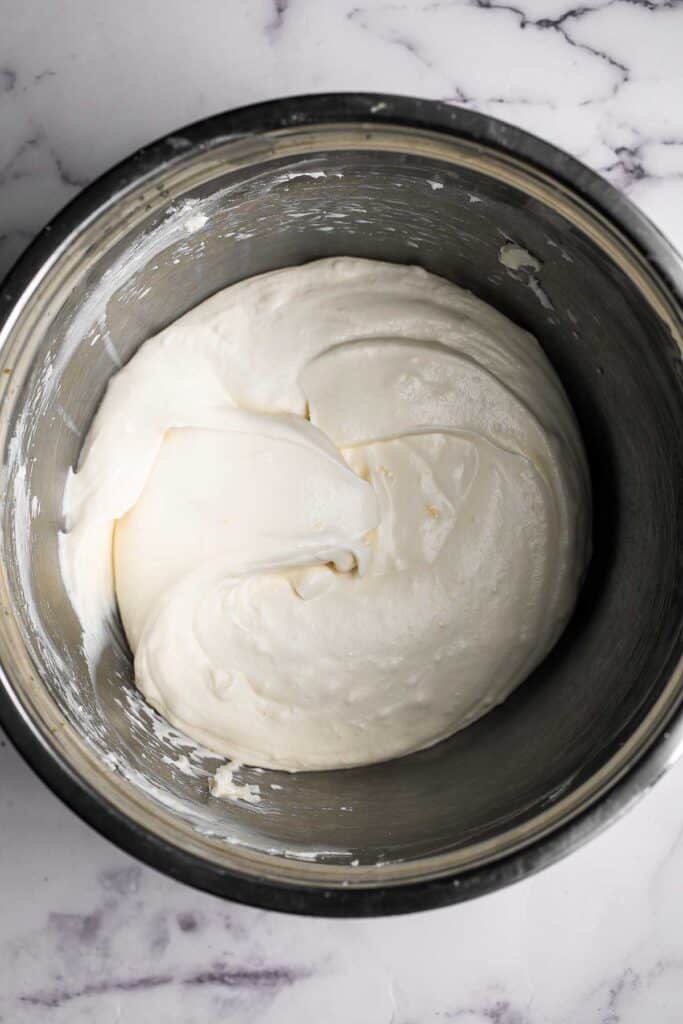
- Make the cheesecake filling. In a large mixing bowl, add heavy cream and whip with a stand mixer or hand mixer until stiff peaks form, about 3-4 minutes. Set aside. In a medium mixing bowl, use the mixer to combine cream cheese, sugar, lemon juice, lemon zest, and vanilla extract until evenly combined.
- Add gelatin. In a small mixing bowl, add hot water and 1 pack (15 ml) gelatin powder on top and let it sit for 3-4 minutes (or according to package instructions). Stir well until gelatin is completely dissolved. Add the dissolved gelatin and half of the whipped cream to the cream cheese mixture and stir until well combined.
- Add cheesecake filling. Pour the filling into the cooled crust and smooth out the surface using a small icing spatula. Refrigerate for at least 1 hour to set or freeze for at least 15 minutes.
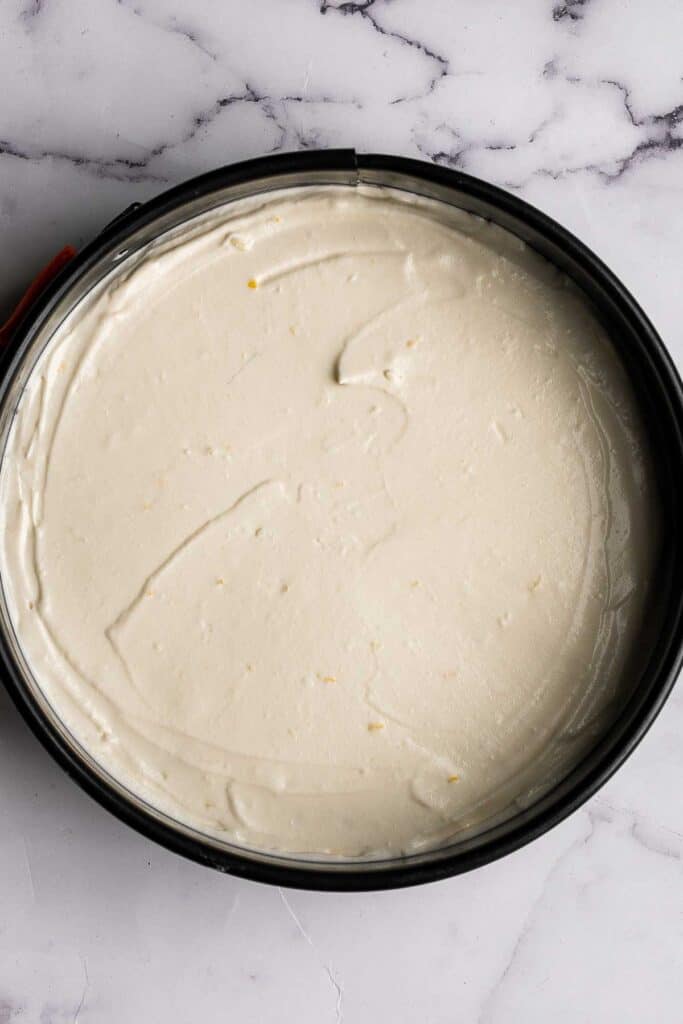
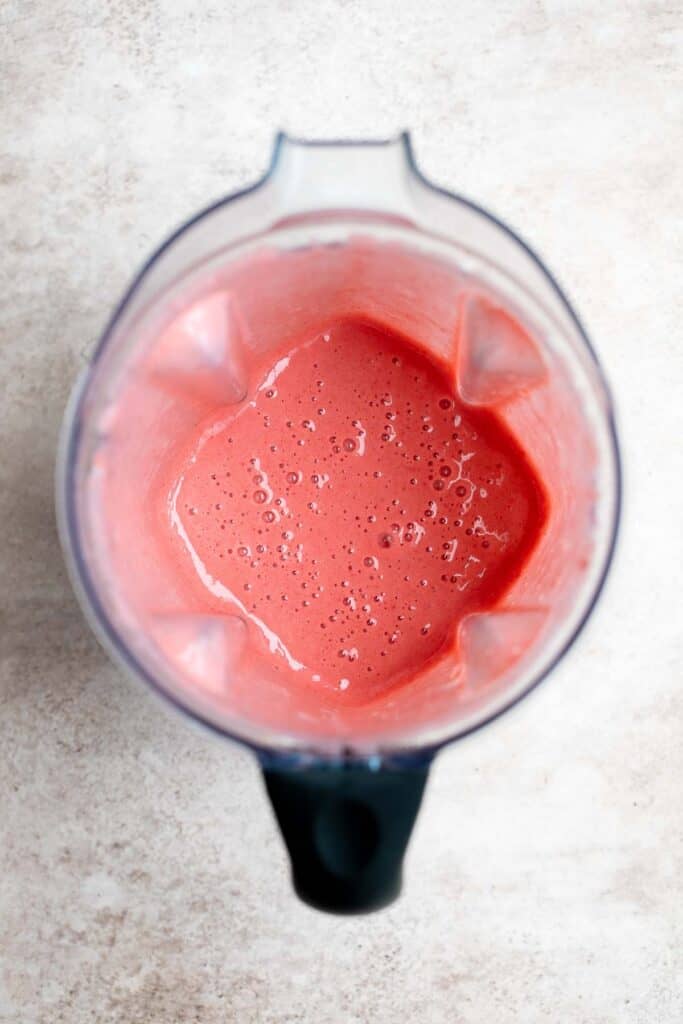
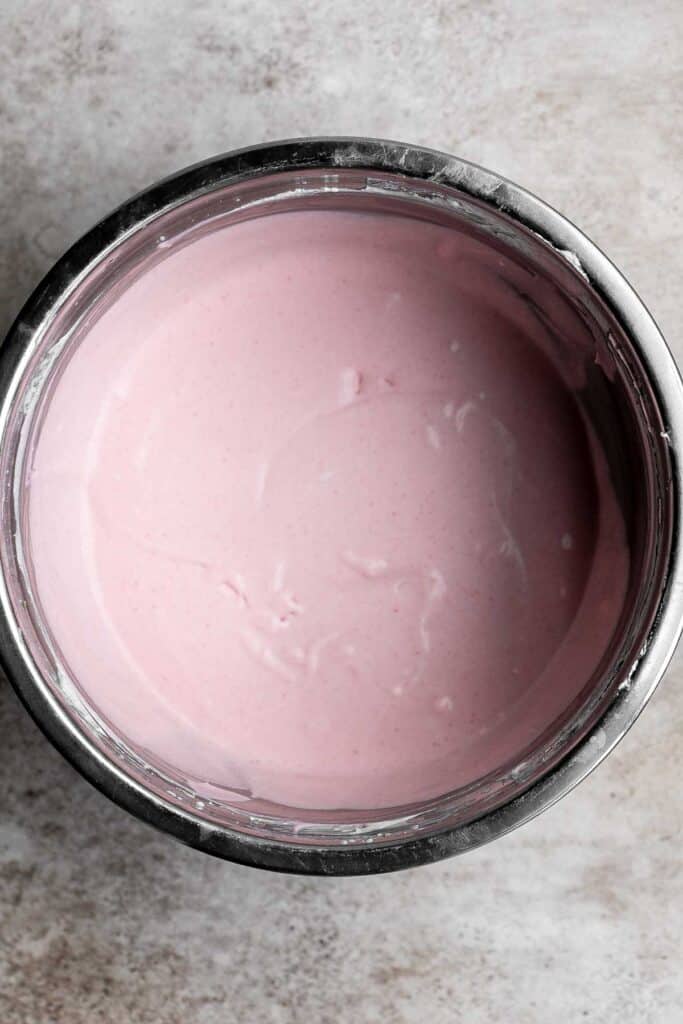
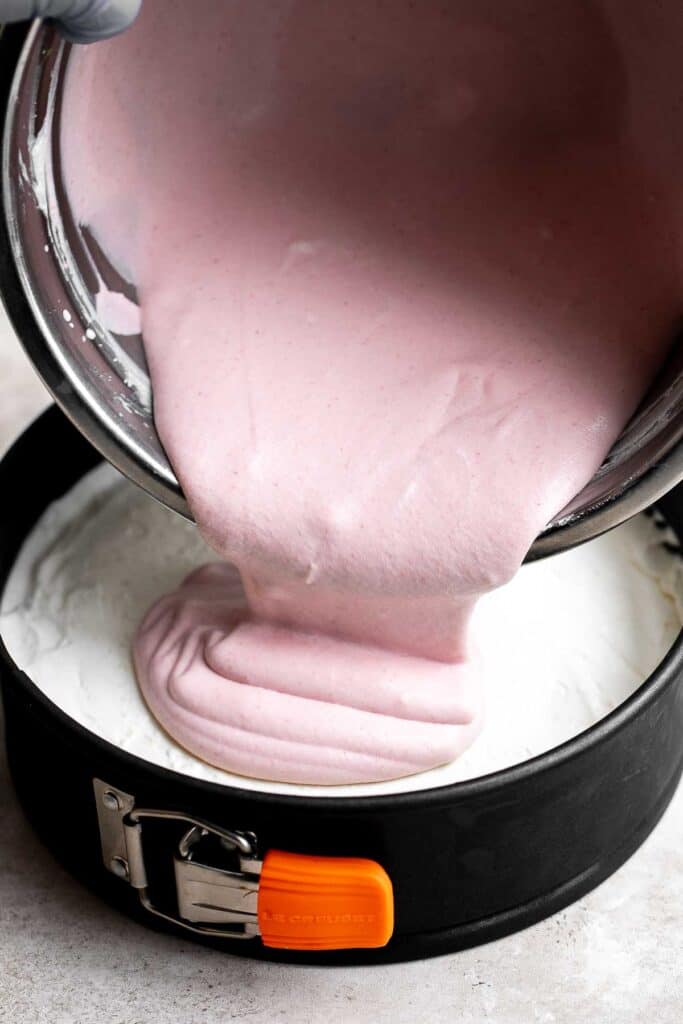
- Make the strawberry mousse layer. Add strawberries, water, and one pack of gelatin in a blender and blend until smooth, about 1 minute. If you prefer a smoother filling, strain the strawberry puree through a mesh sieve and discard the seeds. Add the strawberry puree into the remaining whipped cream and mix with a hand mixer or spatula until evenly combined.
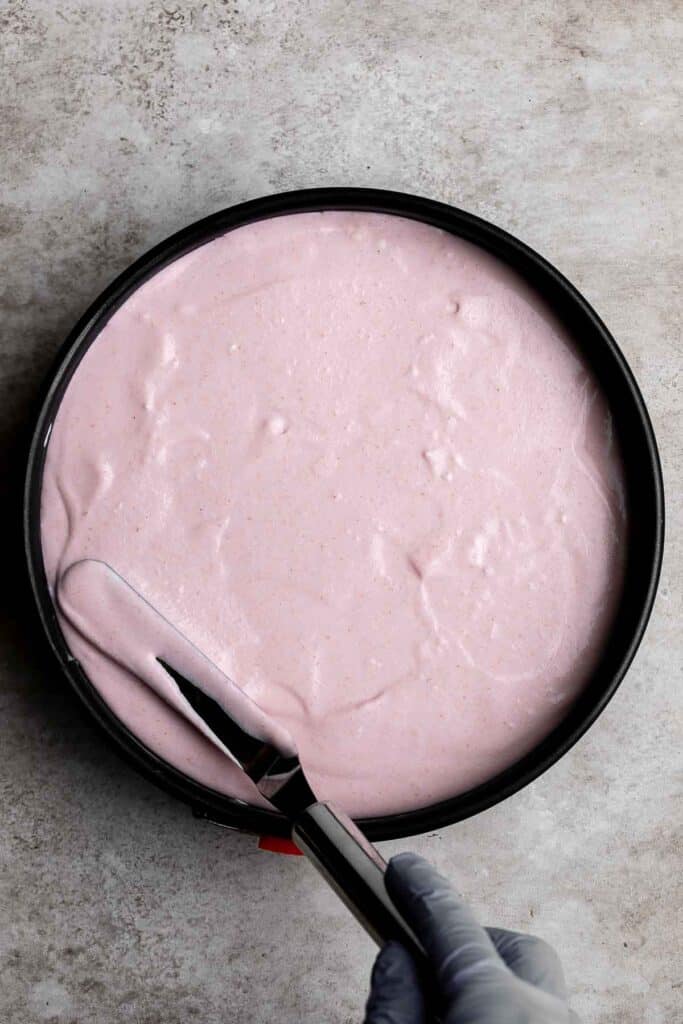
- Chill the cheesecake. Pour the strawberry mousse filling over the cooled cheesecake filling and smooth out the surface using a small icing spatula. Refrigerate for at least 6-8 hours or overnight to set completely. The longer the better it will set. You can also freeze for 30 minutes to an hour to speed things up if you are in a hurry.
- Garnish and serve. Garnish with sliced strawberries on top (if desired) and serve. You can also top with some whipped cream.
Recipe Tips and Tricks
- Give the cheesecake enough time to set: This no bake strawberry cheesecake recipe is easy to make and assemble, but it does take waiting time. Don't rush, especially when waiting to let the cheesecake set. If you cut into the cheesecake when it's not fully set, it won't keep its shape.
- How to store: No bake cheesecake should not be left out at room temperature for more than 1-2 hours. To store, cover the cheesecake or transfer to an airtight container and store in the refrigerator for up 4-5 days.
- How to freeze: Once set, wrap the entire strawberry cheesecake tightly in a few layers of aluminum foil or plastic cling wrap and transfer to a freezer bag and seal the bag. Store it upright in the freezer for up to 3 months.
More Cheesecake Recipes
- No Bake Blackberry Cheesecake
- Creamy Mango Cheesecake
- Classic New York Cheesecake
- No Crust Burnt Basque Cheesecake
- Caramel Apple Fall Cheesecake
- Caramel Pecan Pie Cheesecake Bars
Tried this recipe?
I'd love to hear what you think! Leave a comment and rating below to share your feedback. Your reviews help others discover this recipe and help me keep creating more free recipes for you. Snap a photo and tag me on social media @aheadofthyme too.

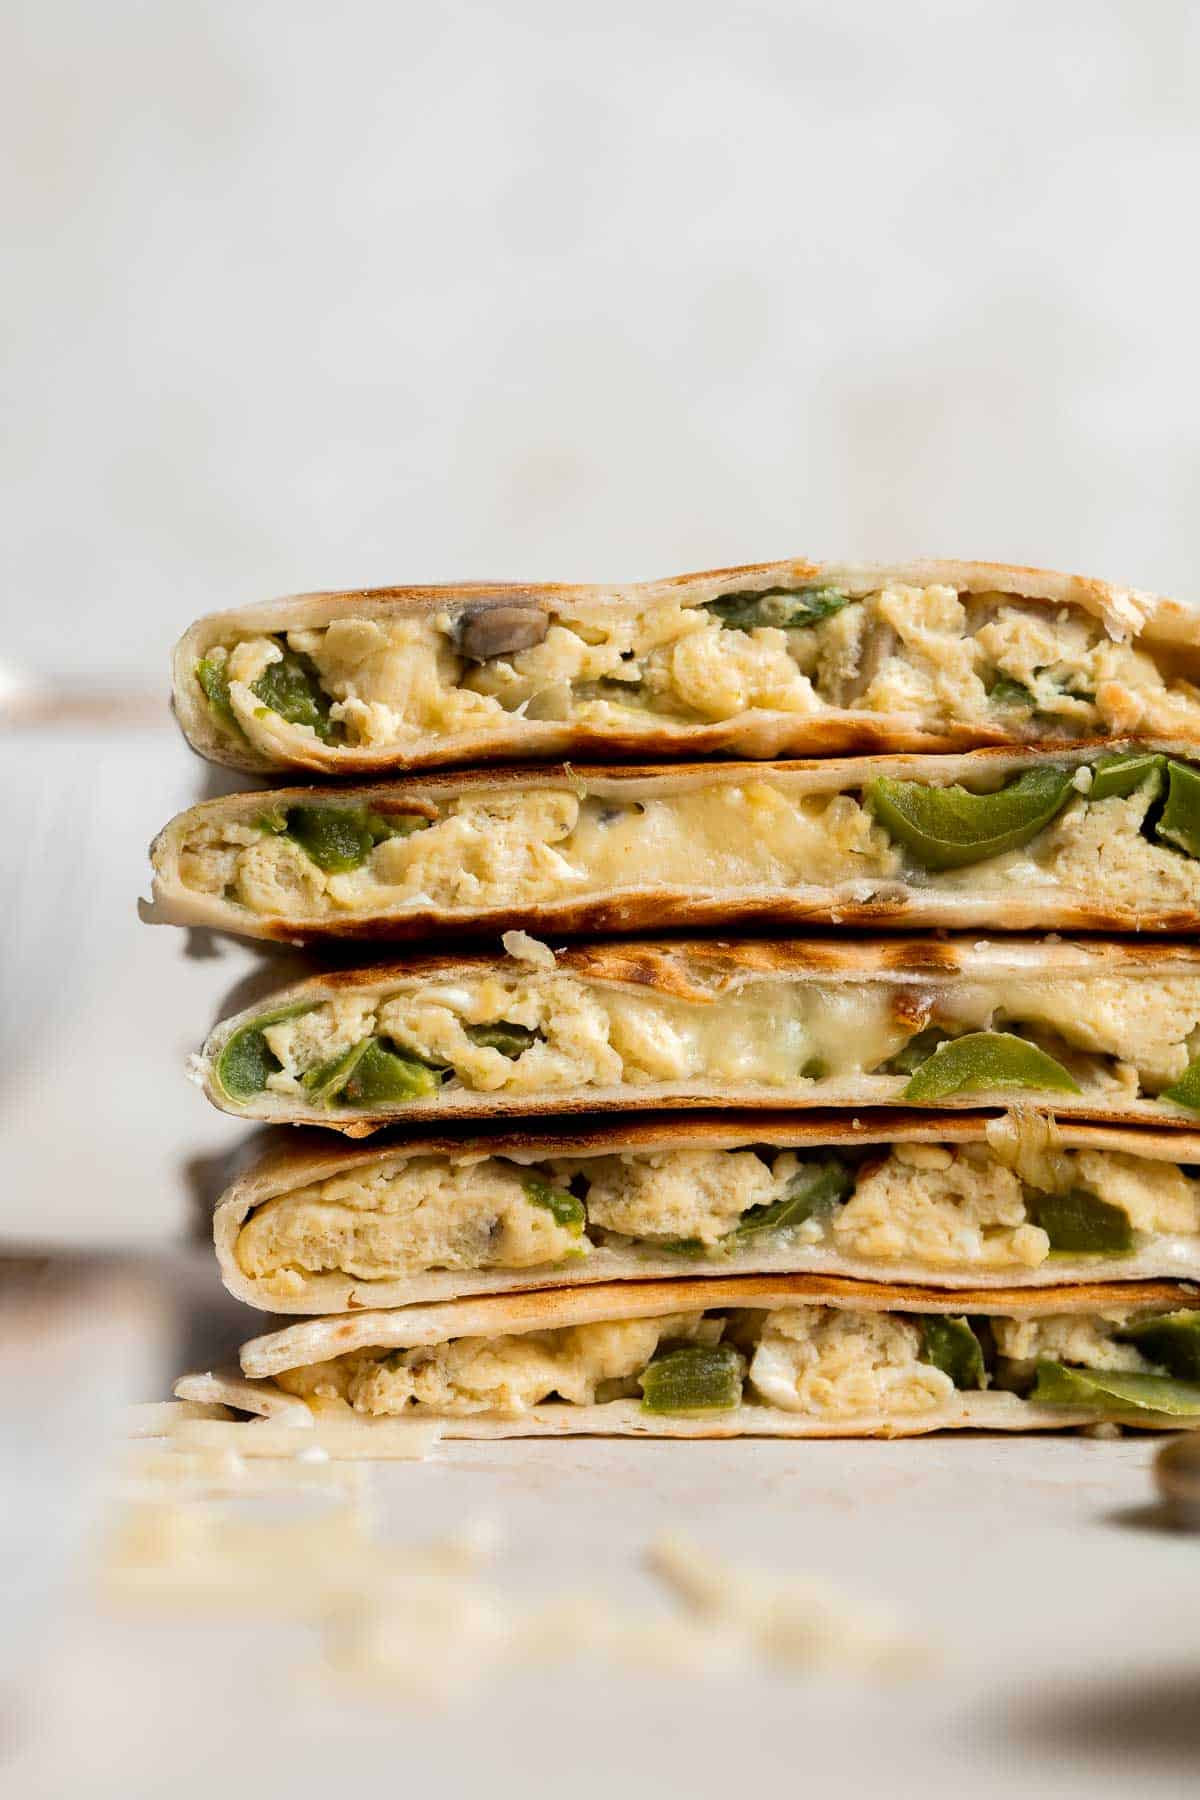
Vegetarian Breakfast Quesadillas
These Vegetarian Breakfast Quesadillas are quick and easy to make, loaded with eggs and veggies, and so flavorful. The best part? They are perfect for meal prep because they can be made ahead of time, freezer-friendly, and reheat well.
Plus, they are completely customizable with your favorite veggies or you can even add meat. This kid-friendly breakfast can be served any time of the day because why not?
Why You'll Love These Vegetarian Breakfast Quesadillas
- It's completely vegetarian with the best combination of ingredients. These breakfast quesadillas are stuffed with eggs, onions, green peppers, and mushrooms and topped with sharp white cheddar. These are basically my favourite ingredients to put in an omelette, but when wrapped up in a tortilla and grilled to crispy perfection, we enter breakfast heaven.
- Quesadillas are easy to make at home. It is so easy and convenient to make homemade quesadillas and they just taste so much better than the frozen aisle food. And these breakfast quesadillas come together in under 30 minutes, including prep!
- It's great for meal prep and freezes really well. My favorite thing about this recipe is that it tastes amazing fresh, but it is just as good in a month, or 2, or 3. These breakfast quesadillas freeze so well. So say good-bye to processed, pre-packed breakfast meals from the freezer aisle. By making your own freezer-friendly food, you know exactly what you are putting in your body.
- Make a big batch for later. When I prepare these egg quesadillas, I usually end up devouring a 1 or 2 quesadillas immediately because once you a try a bite, you just want more. And, the veggies smell amazing during the cooking process that it is kind of impossible not to sample some. So, I actually end up doubling this recipe so that I have a big batch to store and keep in the fridge or freezer.

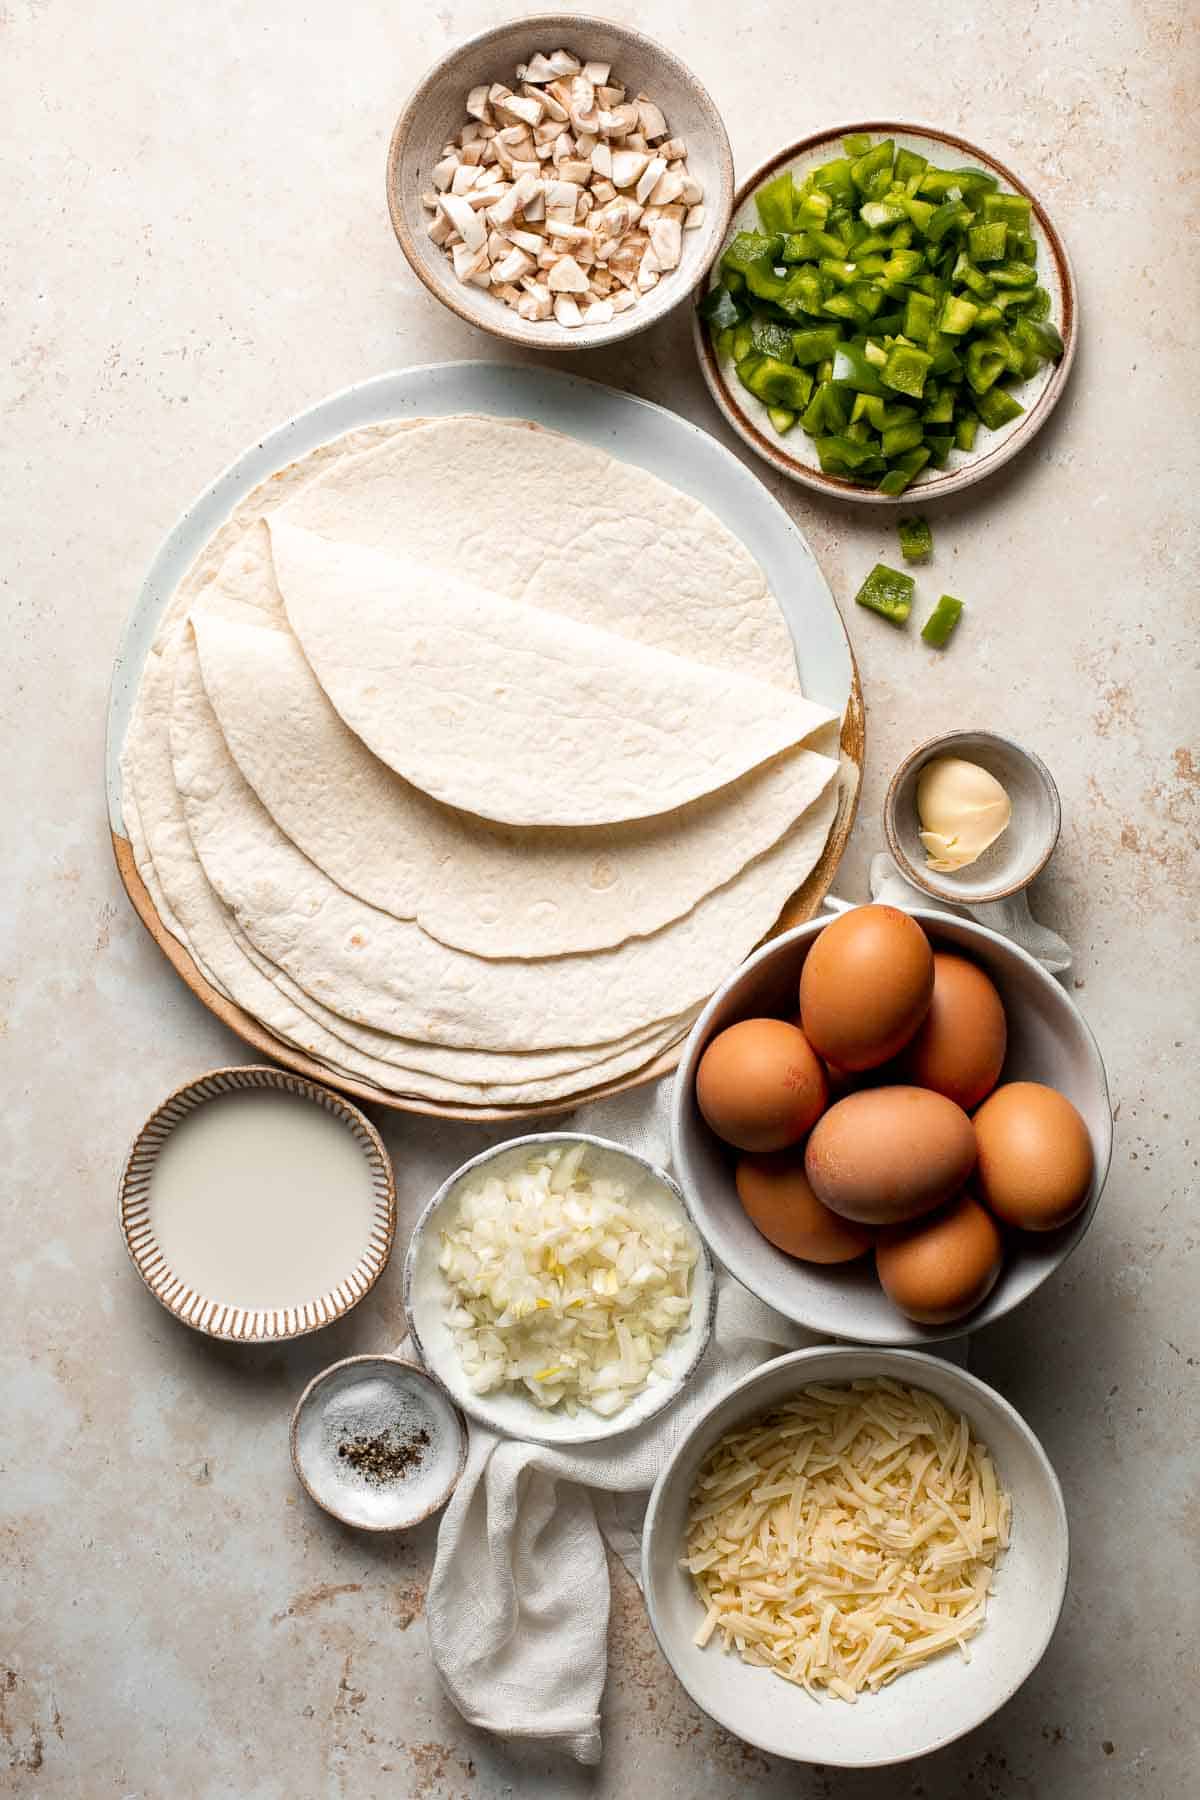
Ingredient Notes
To make this easy freezer-friendly Vegetarian Breakfast Quesadillas, you will need the following ingredients (full measurements in recipe card below):
- butter - for sautéing the vegetables. You can also substitute with your choice of vegetable oil for a healthier alternative.
- vegetables - we used onions and green pepper. You can also throw in any other veggies that you like. Try red peppers, tomatoes, spinach, or jalapeños.
- mushrooms - feel free to use white or brown mushrooms.
- eggs - we try to incorporate eggs into our diet because they are an excellent source of vitamins, minerals and protein. In fact, eating eggs is good for your bones, teeth, skin, and eyes.
- milk
- salt and pepper
- flour tortillas - I recommend 8-inch or 10-inch flour tortillas for these quesadillas.
- white cheddar cheese - or substitute with a melty cheese of your choice such as Monterey Jack, yellow cheddar, mozzarella, or a Tex Mex cheese blend.
- non-stick cooking spray - for cooking the quesadillas.
You will also need measuring cups and spoons, large skillet or griddle, and mixing bowl.
How to Make the Best Breakfast Quesadillas
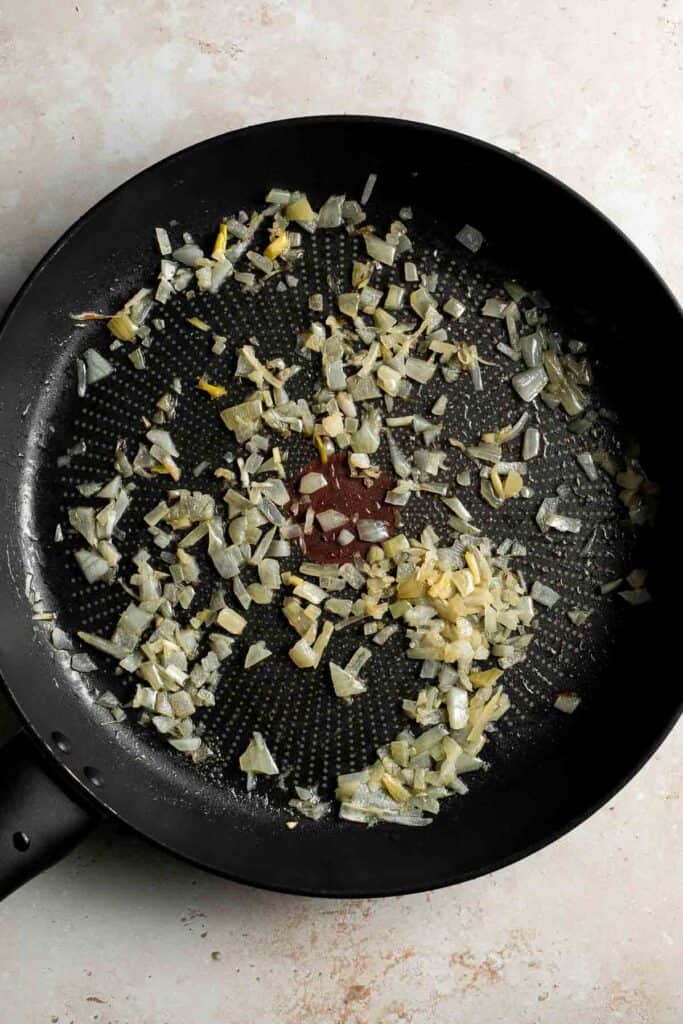
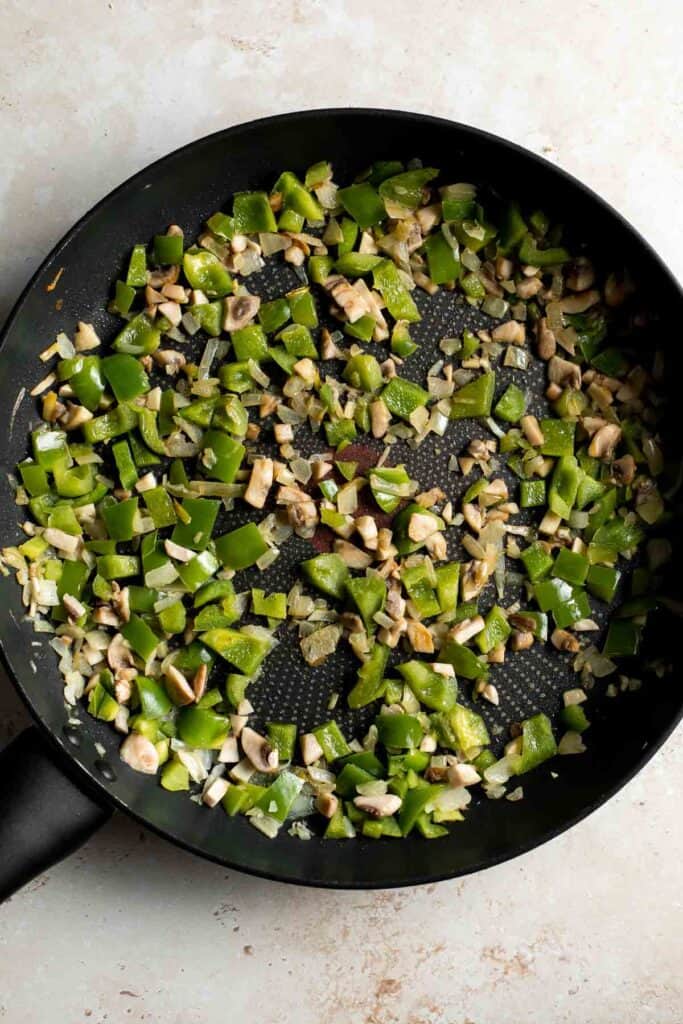
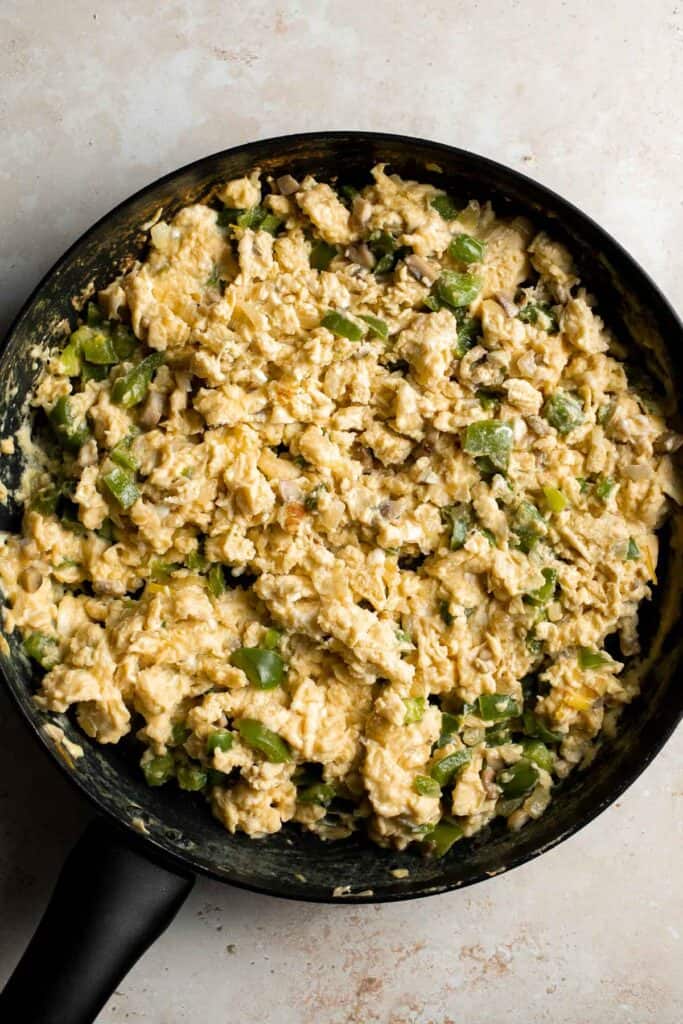
- Sauté vegetables. Melt butter in a large skillet over medium-heat heat. Add onions and cook until soft and translucent, approximately 5 minutes. Add green peppers and mushrooms and cook for 4-5 more minutes, until slightly tender.
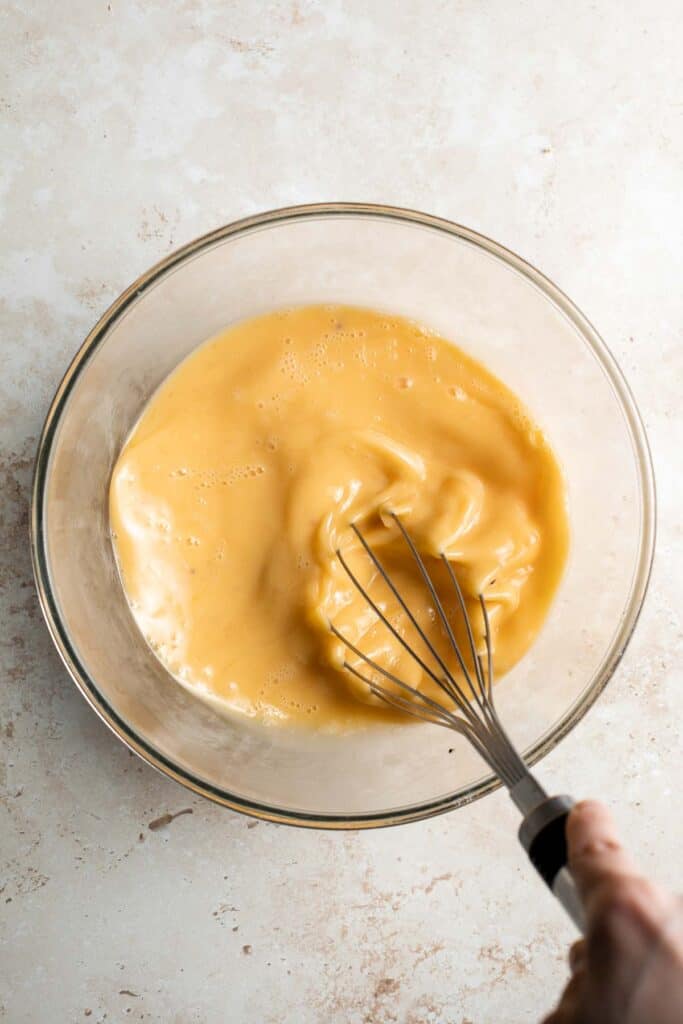
- Add eggs. Meanwhile, in a large mixing bowl, whisk together eggs, milk, salt, and pepper until completely mixed and slightly frothy. Add the egg mixture to the skillet and cook until eggs are scrambled and cooked through, approximately 2-3 minutes. Remove from heat and set aside.
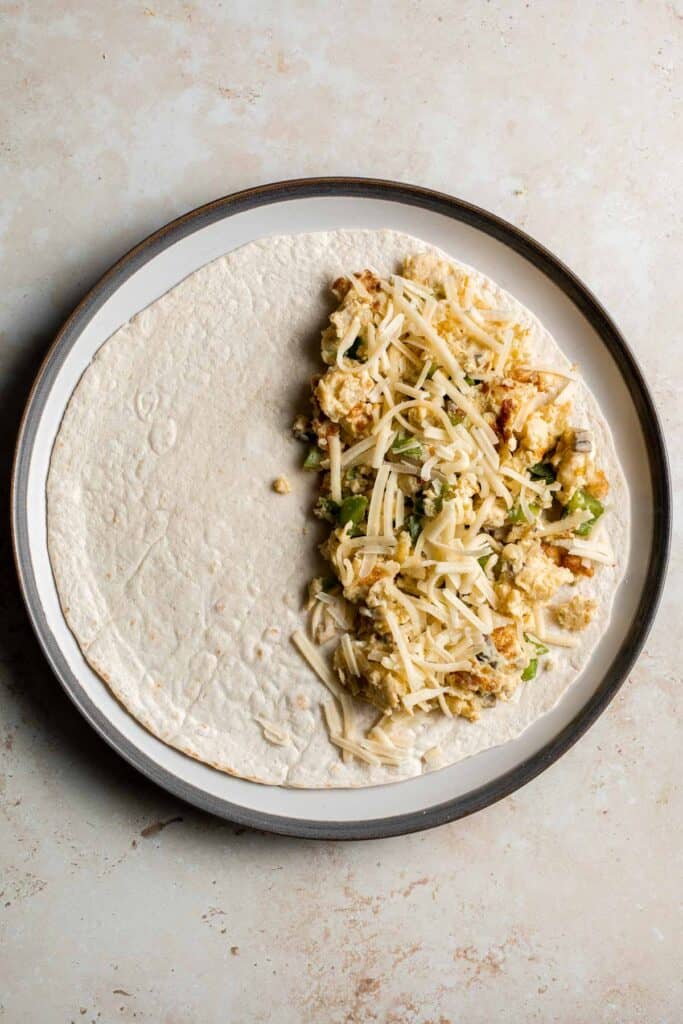
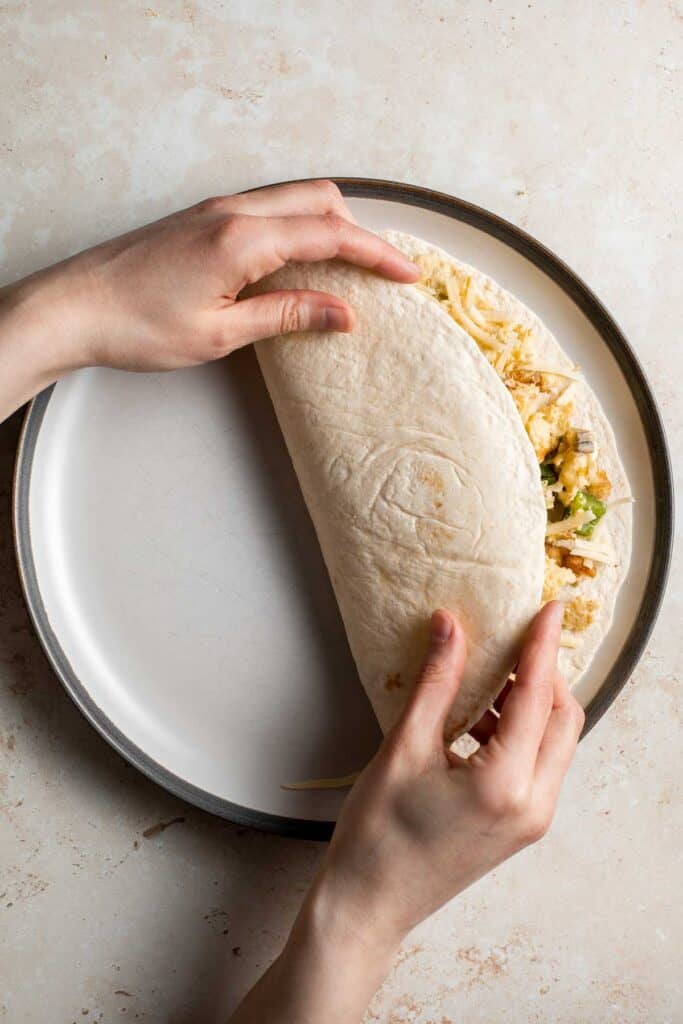
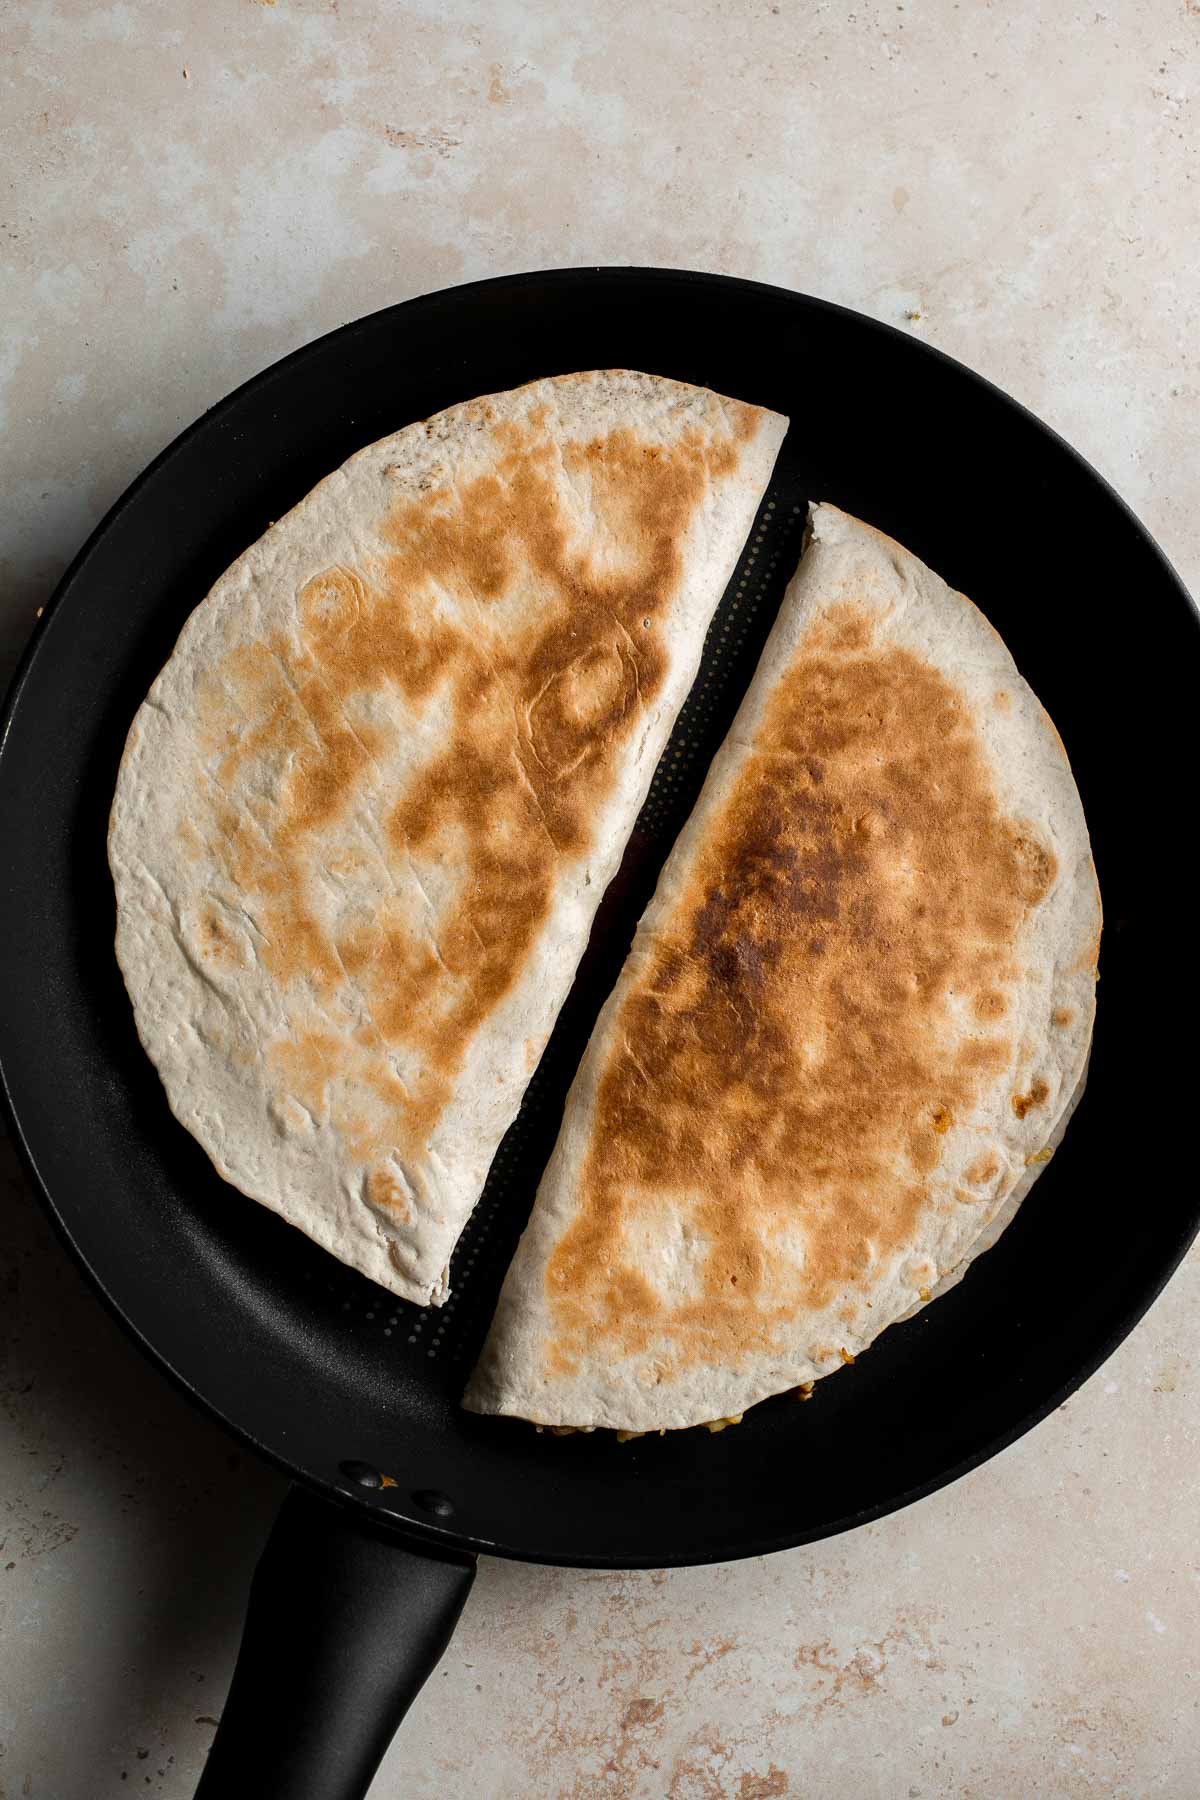
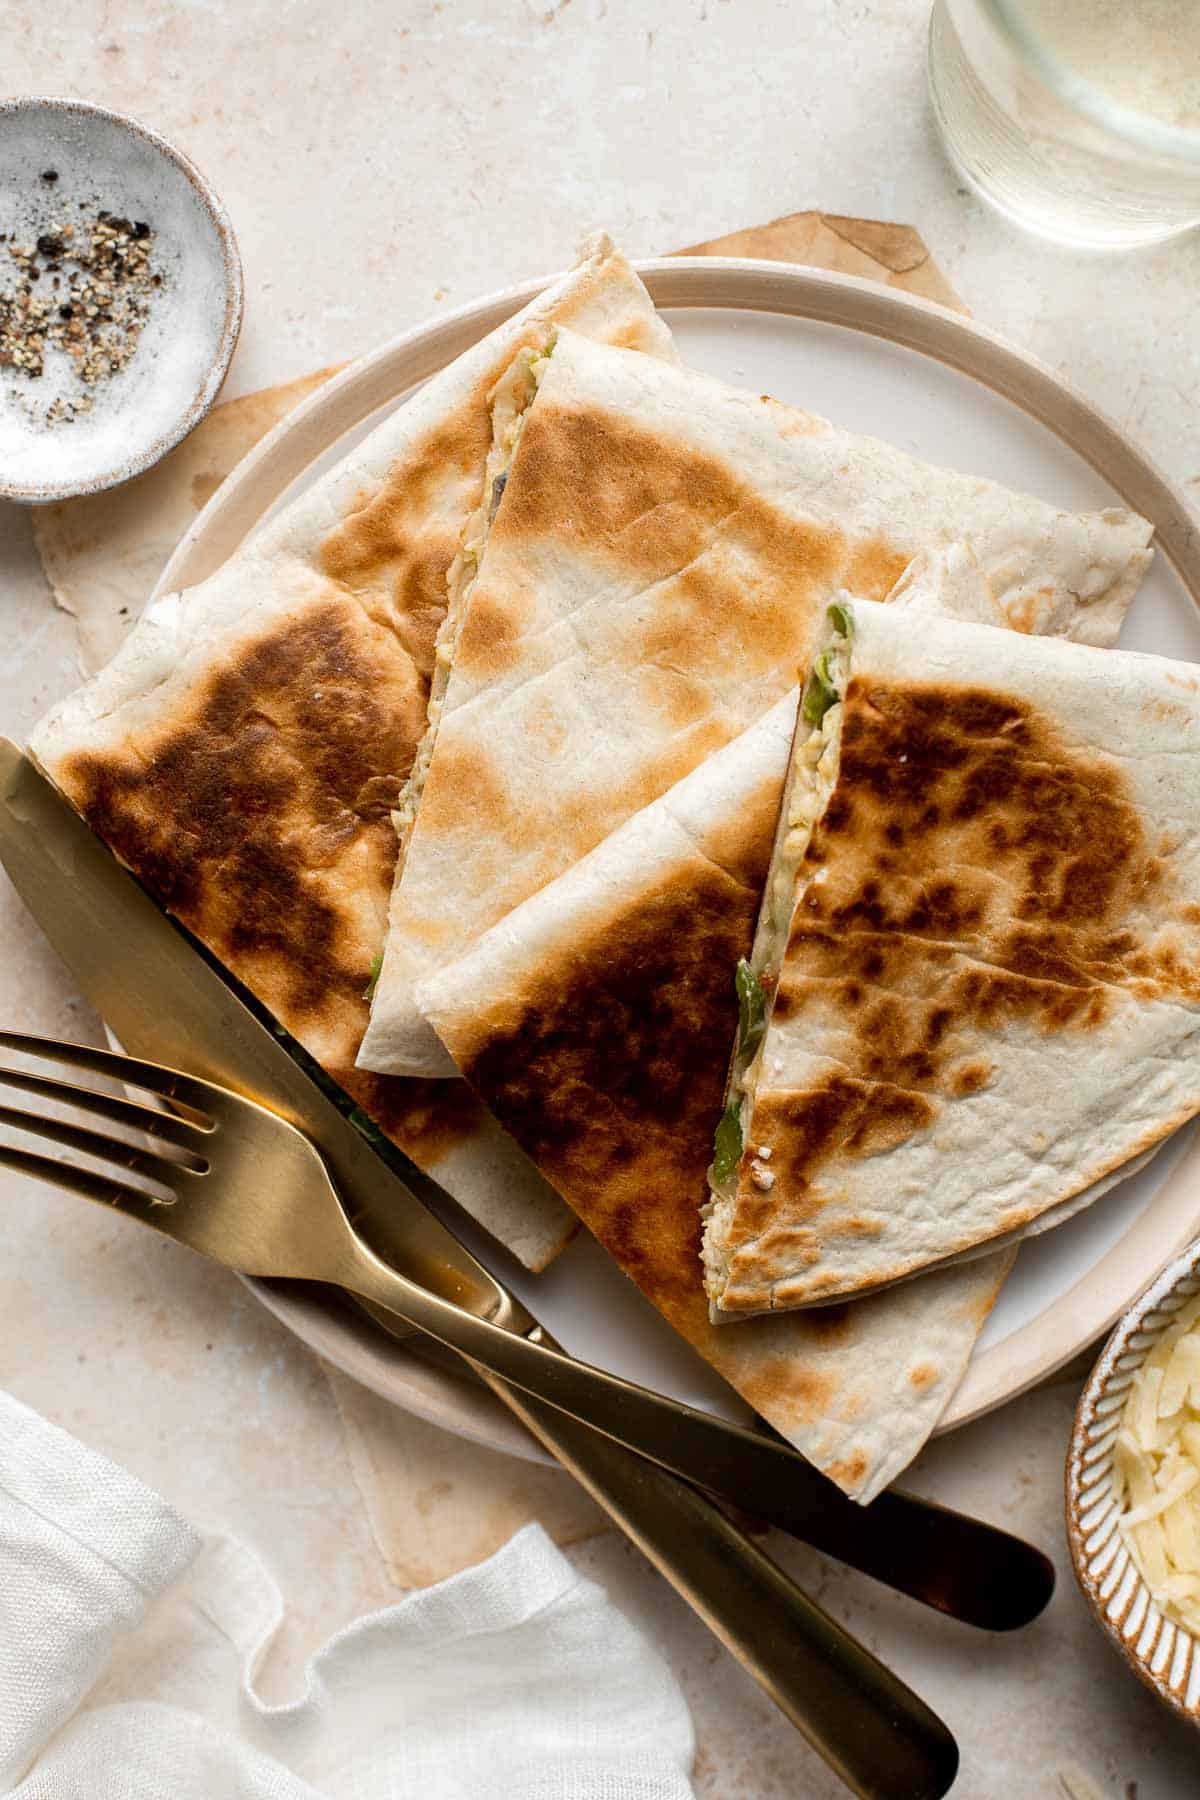
- Assemble quesadillas. Divide the egg filling evenly amongst the tortillas in an even layer on half of each tortilla. Sprinkle cheese on top, then fold the tortilla over to seal.

- Cook. Heat a large griddle or skillet over medium-high heat. Coat with non-stick spray and cook quesadillas until browned, about 2 to 3 minutes on each side. Repeat until all quesadillas are cooked.
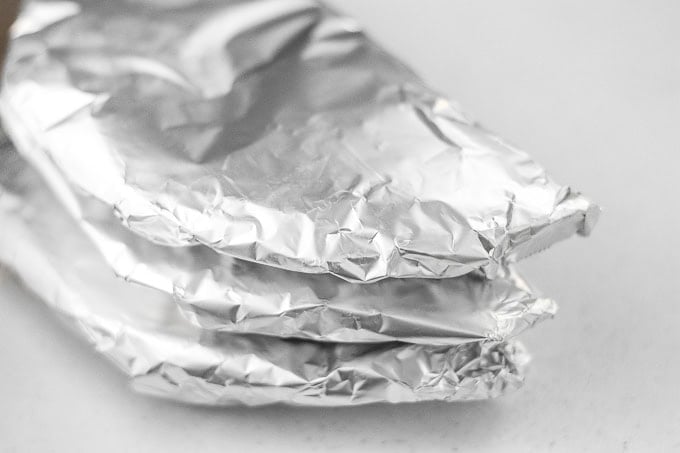
- Serve. Slice into wedges and serve immediately, or wrap in aluminum foil and store for later.
Breakfast Quesadilla Variations
One of the best things about these breakfast quesadillas is that it's completely customizable! Throw in any veggies you want, switch up the cheese, or even add in some cooked meat. Some ingredients we like to add are:
- Bacon
- Sausage
- Spinach and feta
- Black beans
- Chorizo and potatoes
- Ham and tomatoes
Storing and Reheating Quesadillas
- How to store: Wrap the unsliced cooked quesadillas separately in aluminum foil and store them in the refrigerator for up to 3 days.
- How to reheat: Preheat oven or toaster oven to 325°F. Remove foil and heat until warmed, approximately 20 minutes if refrigerated. You can also reheat by heating a non-stick pan to medium heat and grilling on each side for 2-4 minutes until warm and crispy.
- How to freeze quesadillas: Wrap unsliced cooked quesadillas separately in aluminum foil and place in freezer bags. Freeze for up to 3 months for an easy breakfast on another day.
- How to reheat from frozen: Preheat oven or toaster oven to 325°F. Remove foil and heat until warmed, approximately 30 minutes from frozen.
How to Serve
You can serve vegetarian breakfast quesadillas as is or with your favorite Mexican toppings, including:
- Guacamole
- Sour Cream or Yogurt
- Pico de Gallo Salsa or Mango Salsa
- Creamy Cilantro Lime Dressing
More Mexican Inspired Recipes
- 30 Best Mexican Recipes
- Vegetarian Quesadillas
- Chicken Enchiladas
- Cauliflower Tacos
- Vegetarian Chili
- Cilantro Lime Rice
- Baked Chicken Quesadillas
Tried this recipe?
I'd love to hear what you think! Leave a comment and rating below to share your feedback. Your reviews help others discover this recipe and help me keep creating more free recipes for you. Snap a photo and tag me on social media @aheadofthyme too.

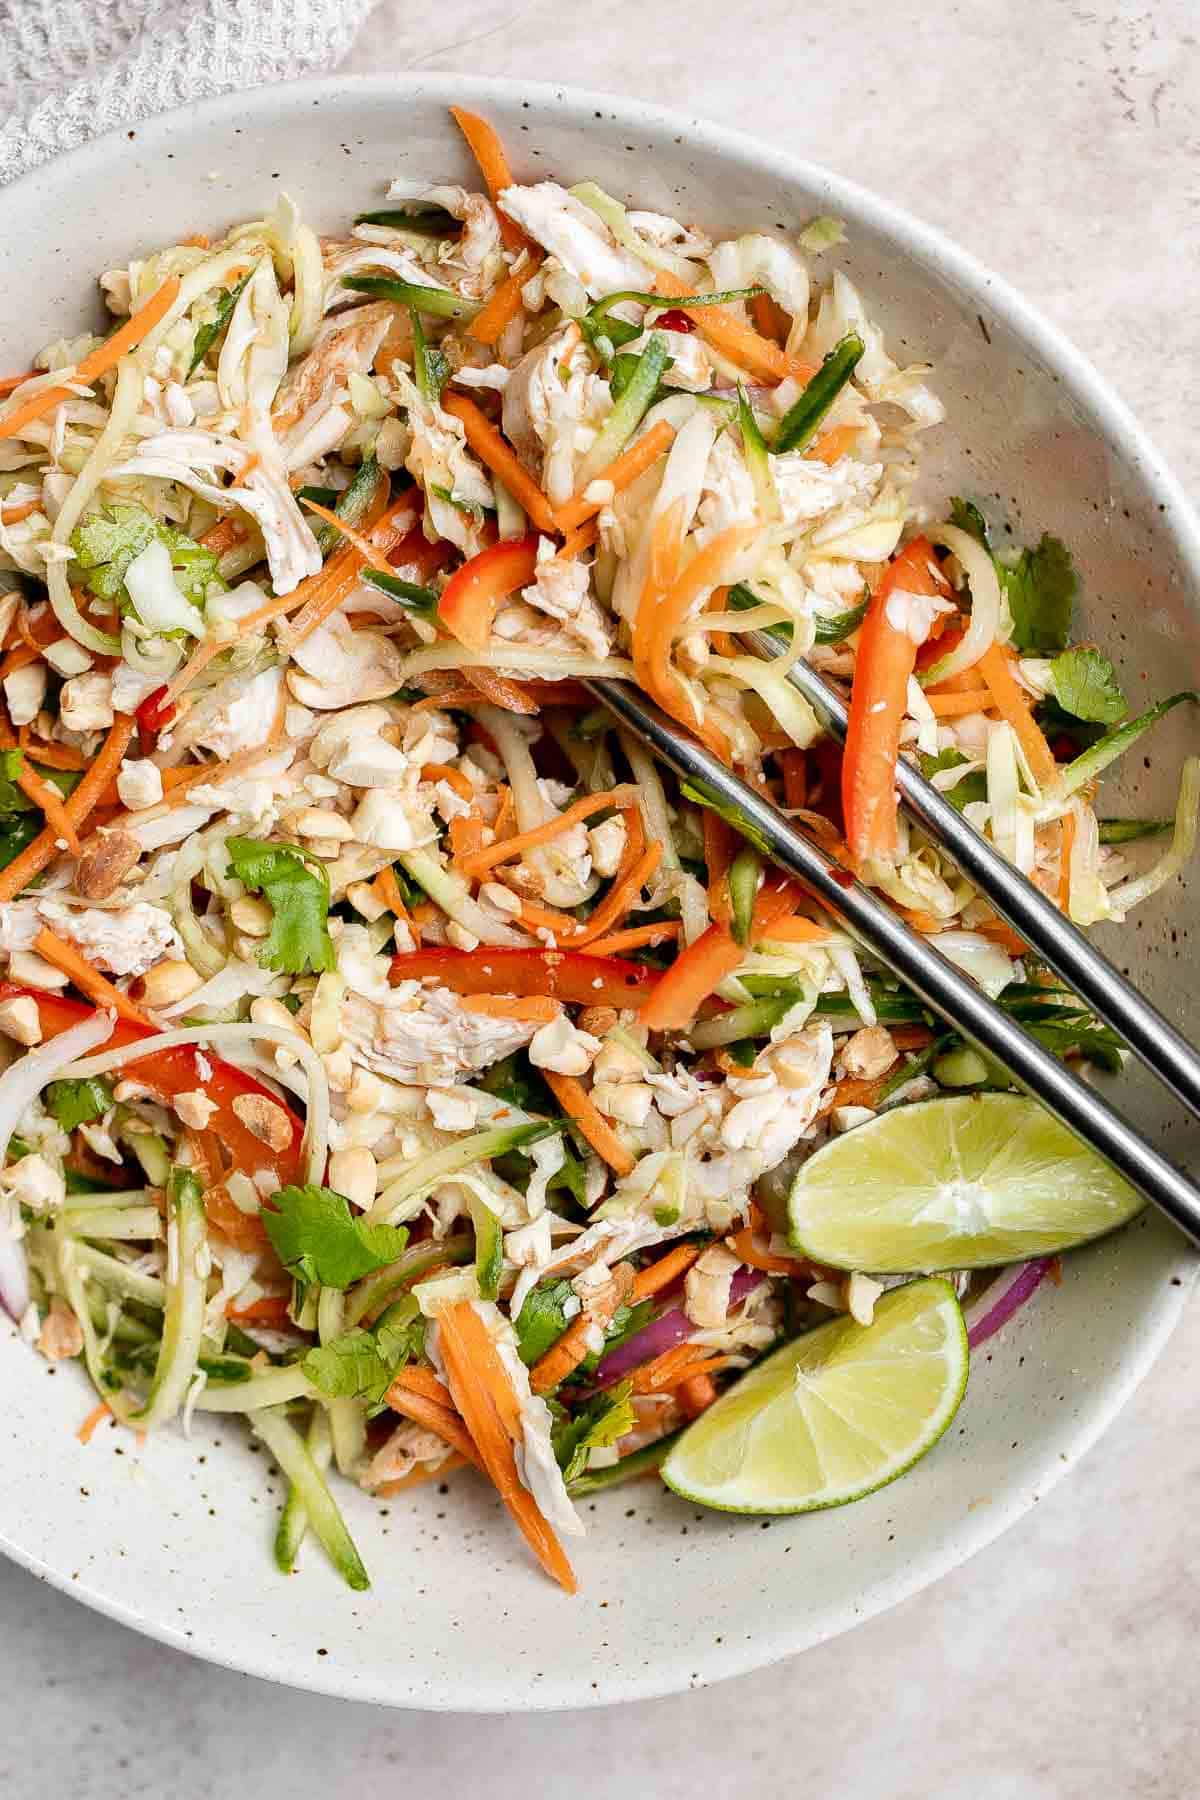
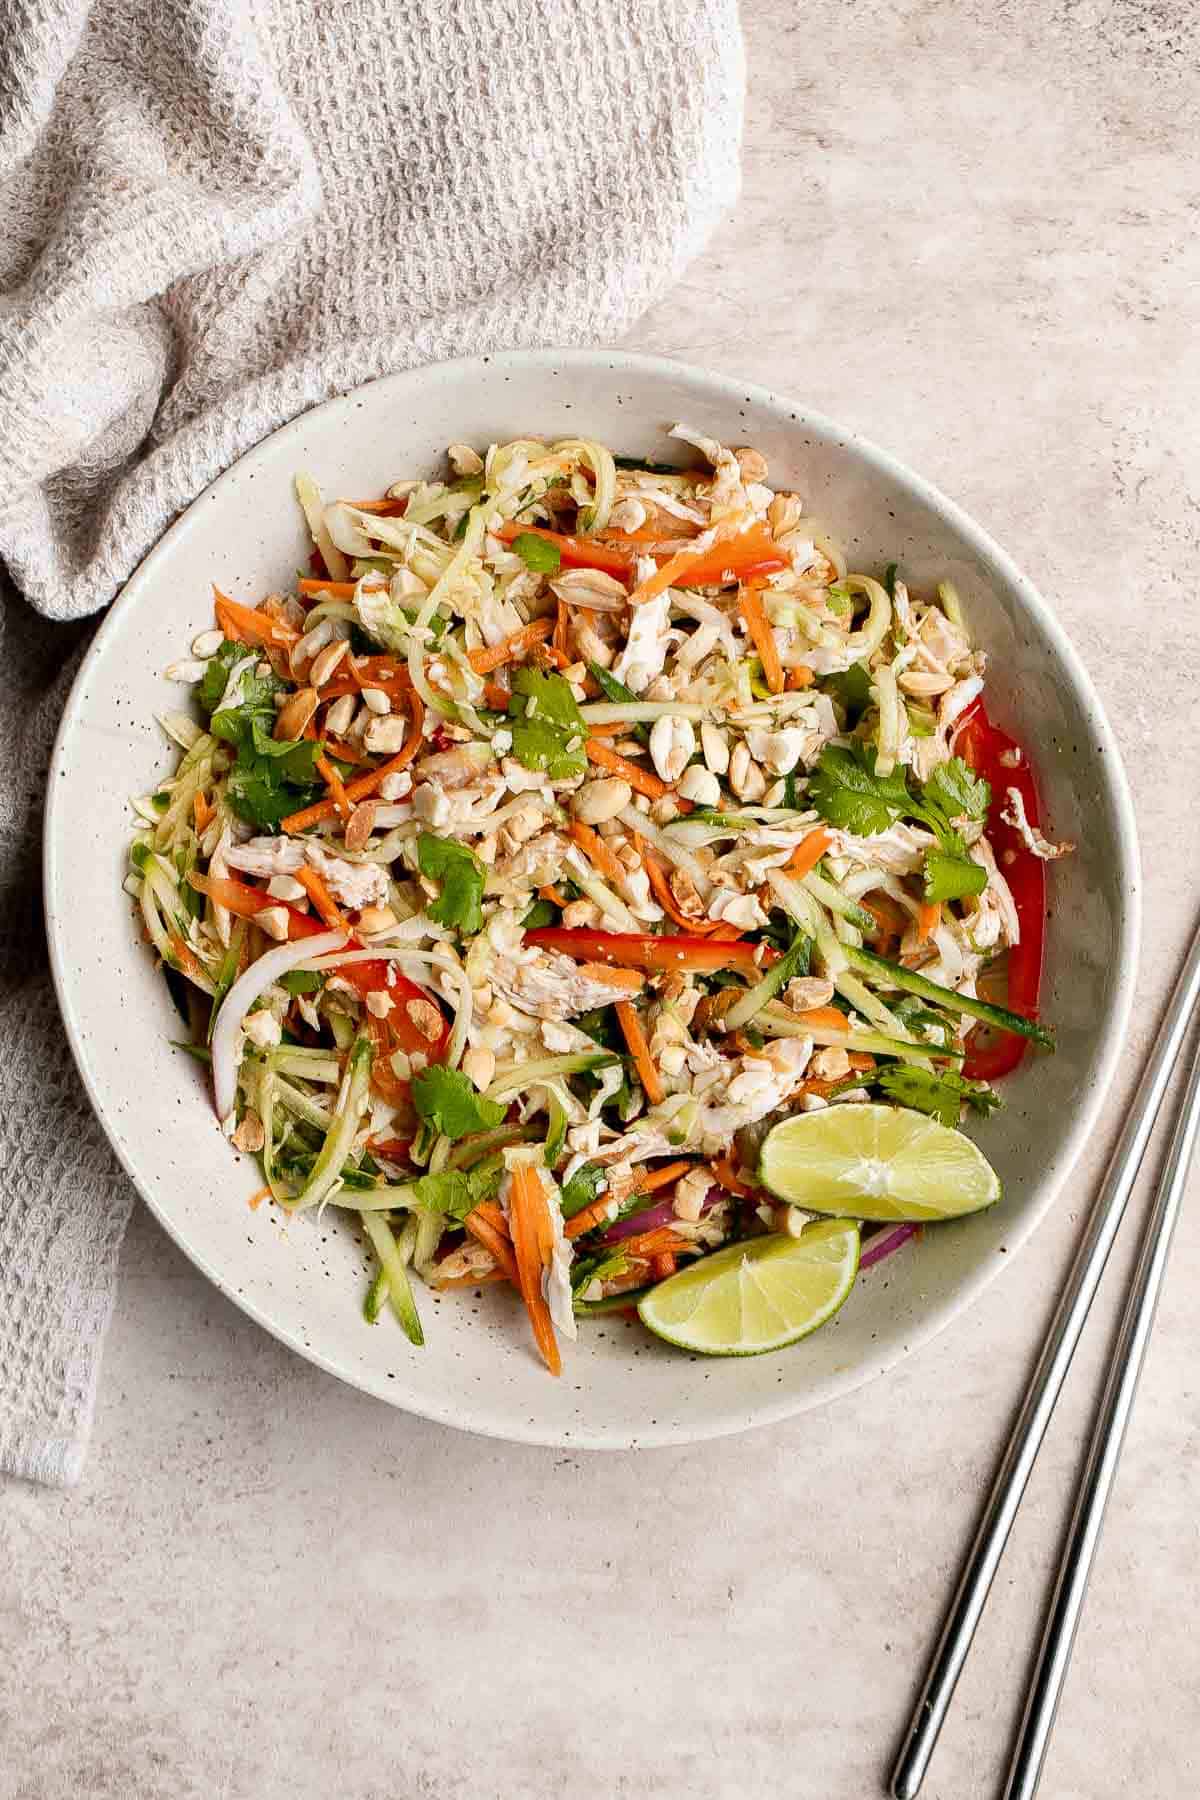
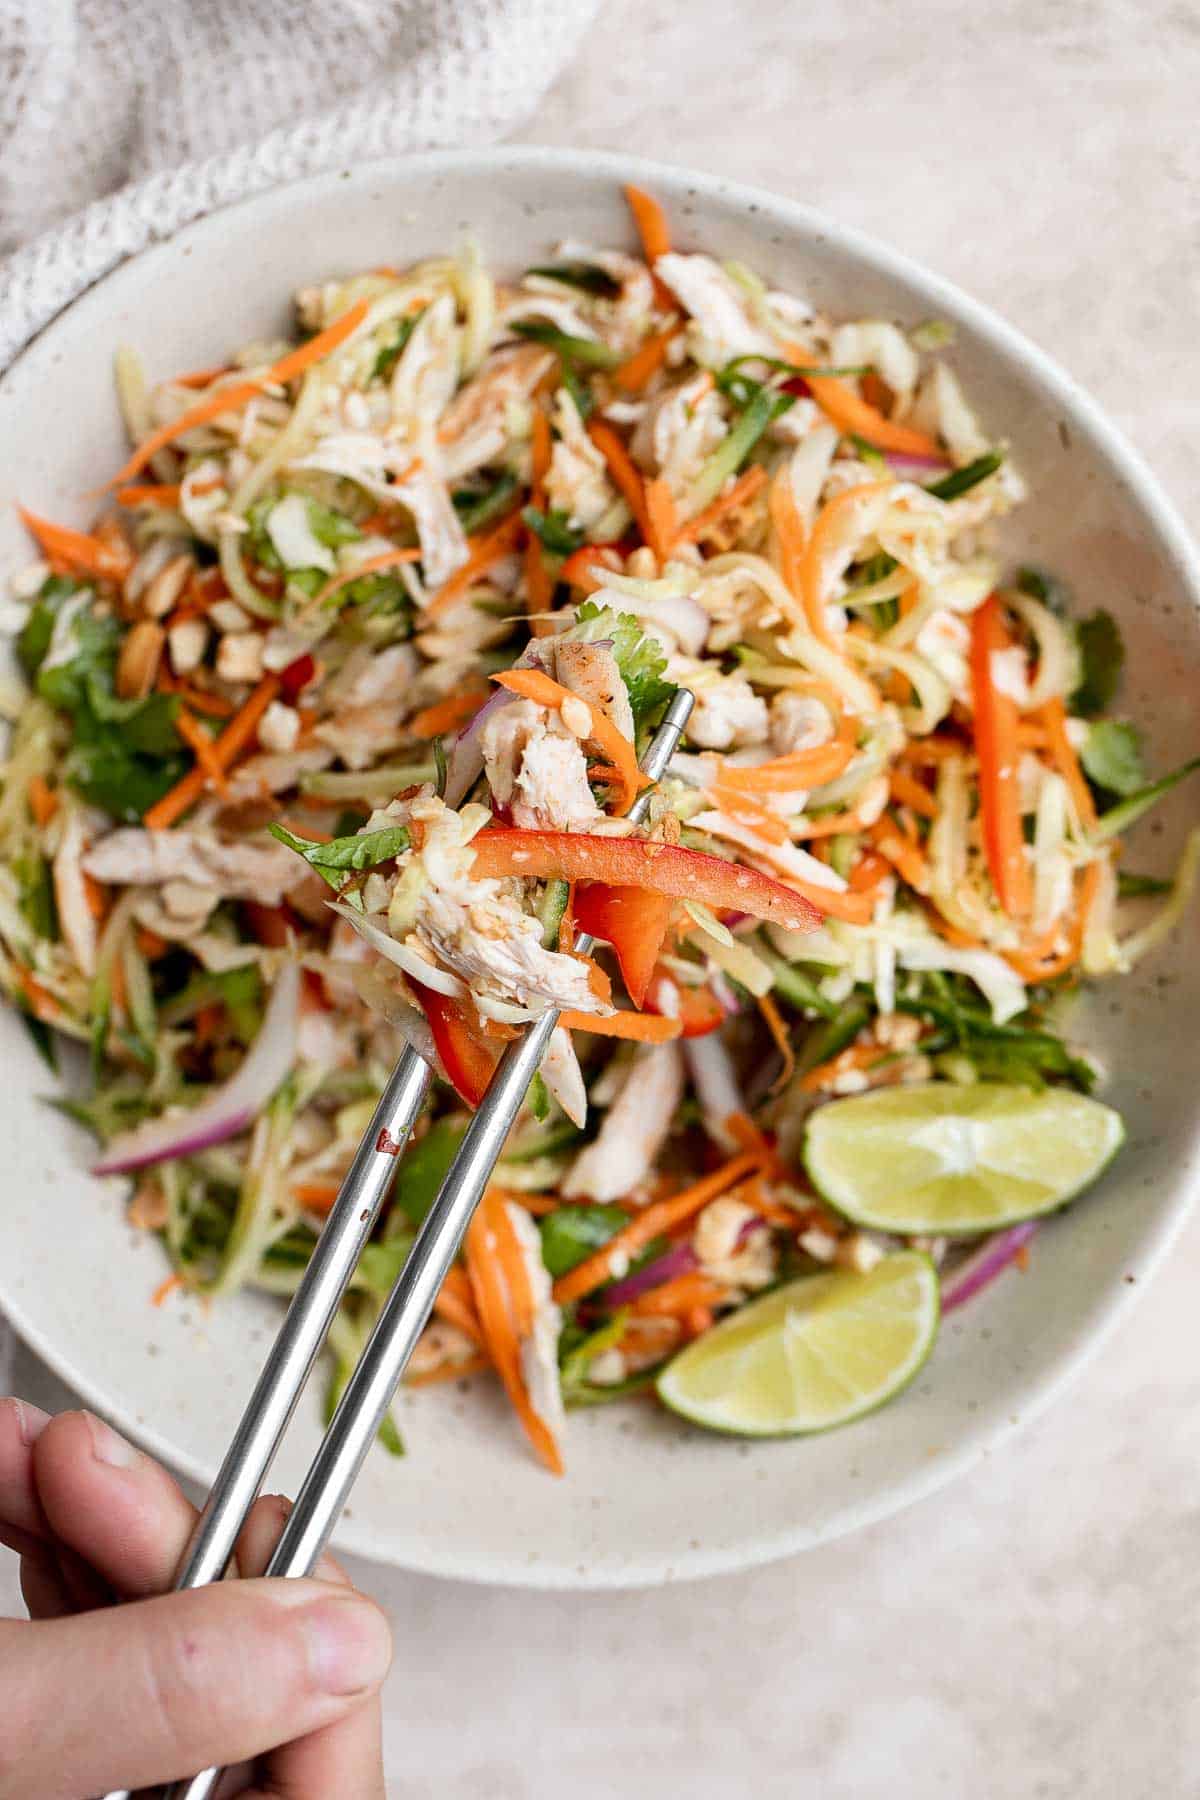
Vietnamese Chicken Salad
Vietnamese chicken salad (also known as goi ga) is a fresh, tangy, cold salad that is packed with bold flavors. It's quick and easy to make with shredded chicken, shredded vegetables including cabbage and carrots, and garnished with crushed peanuts and cilantro, all tossed in a fragrant homemade nuoc cham dressing. This Asian slaw salad is full of flavor, color, and texture.
Plus, it's a great way to use up any leftover chicken that you have in the fridge or use a rotisserie chicken that you pick up from the grocery store on your way home from work. Serve Vietnamese chicken salad is as a meal on it's own for lunch or dinner, or as a side salad.
Why You'll Love This Vietnamese Chicken Salad
- It's quick and easy. Cold chicken salad recipes are some of my favorites because they're always fast and easy. This Vietnamese chicken salad comes together in just 10 minutes by shredding and tossing the ingredients together. It also keeps well in the fridge for a couple of days, making leftovers great for meal prep lunch the next day.
- Loaded with flavor and texture. This refreshing Vietnamese chicken salad is packed with tender chicken, crispy veggies, and crunchy peanuts for a balance of different textures in every bite. It's also loaded with fresh, natural flavors from these ingredients - but the real star of the show is the nuoc cham dressing.
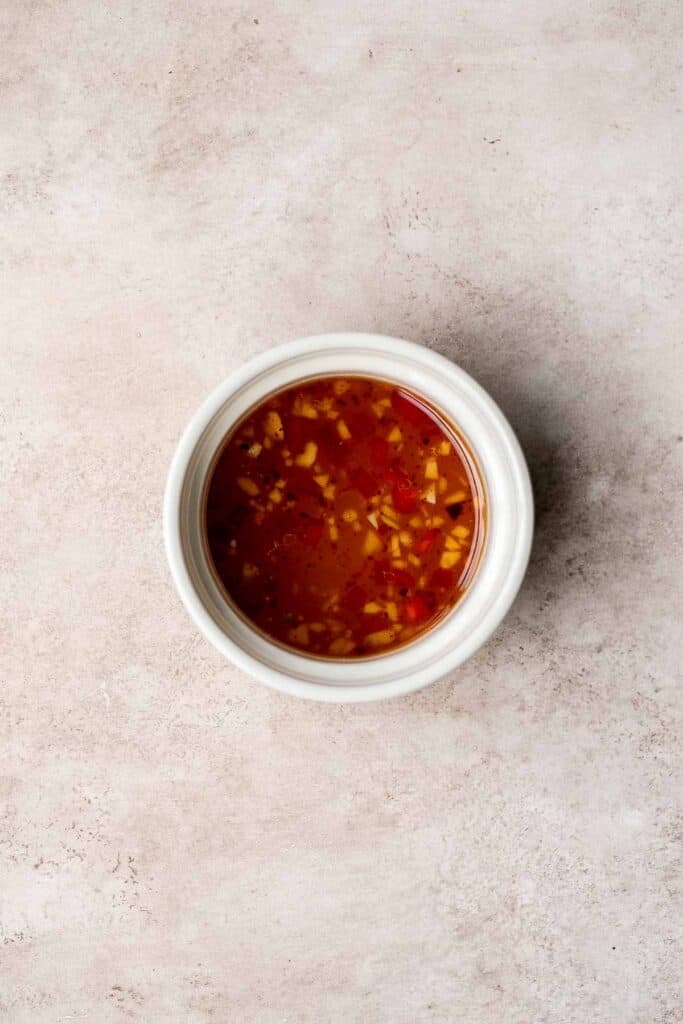
- The sweet and savory dressing. Made with fish sauce, lime juice, sesame oil, vinegar, sugar, garlic, white pepper, and crushed red pepper, this Asian sauce is salty, sweet, tangy, and thinner than most American dressings. It boasts a unique savory umami flavor that makes this Vietnamese chicken salad so good.
- A great way to use leftover chicken. Whether you've cooked a Roast Chicken or bought a rotisserie chicken, the leftovers can get boring the next day. Reinvent them in this Asian chicken salad. You can use any cooked chicken or leftover turkey such as Slow Cooker Turkey Breast or Roast Turkey.
Ingredient Notes
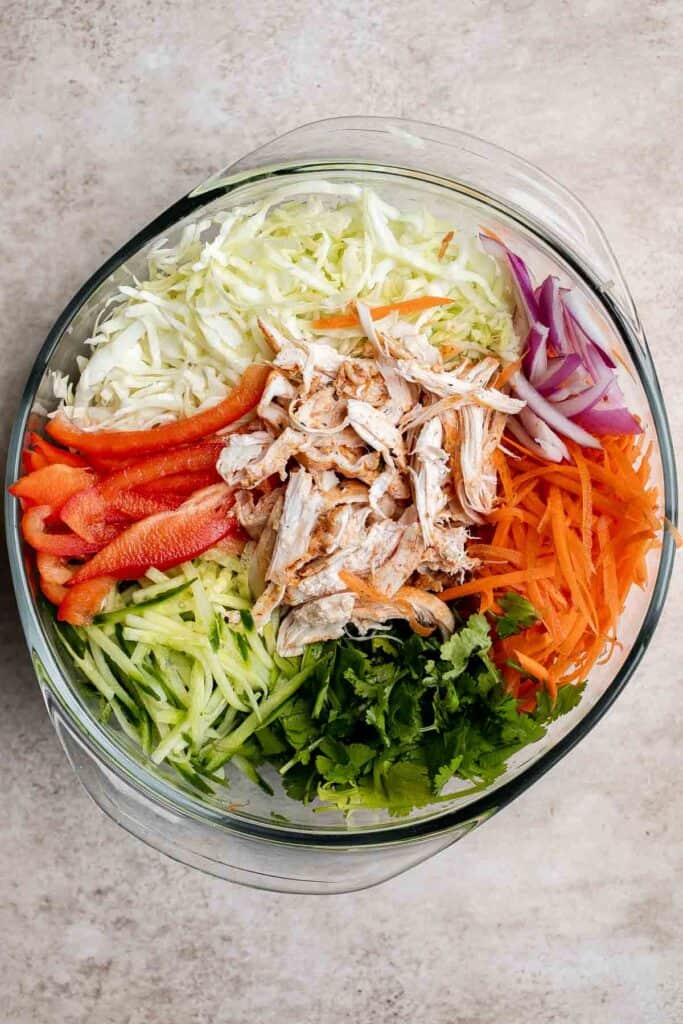
To make this easy Vietnamese Chicken Salad, you will need the following ingredients (full measurements in recipe card below):
- shredded chicken - you will need to shred 2 cooked chicken breasts. See our shredded chicken recipe for 3 different ways to prepare shredded chicken.
- vegetables - green cabbage, Persian cucumbers, carrot, red onion, and red bell pepper.
- cilantro
- peanuts
- Vietnamese dressing (nuoc cham) - made in minutes with a combination of rice vinegar (or white vinegar), fish sauce, lime juice, sesame oil, sugar, garlic, white pepper (optional), and crushed pepper (or Thai red chili).
You will also need measuring cups and spoons, a box grater and/or knife, and mixing bowls.

How to Make the Best Vietnamese Chicken Salad
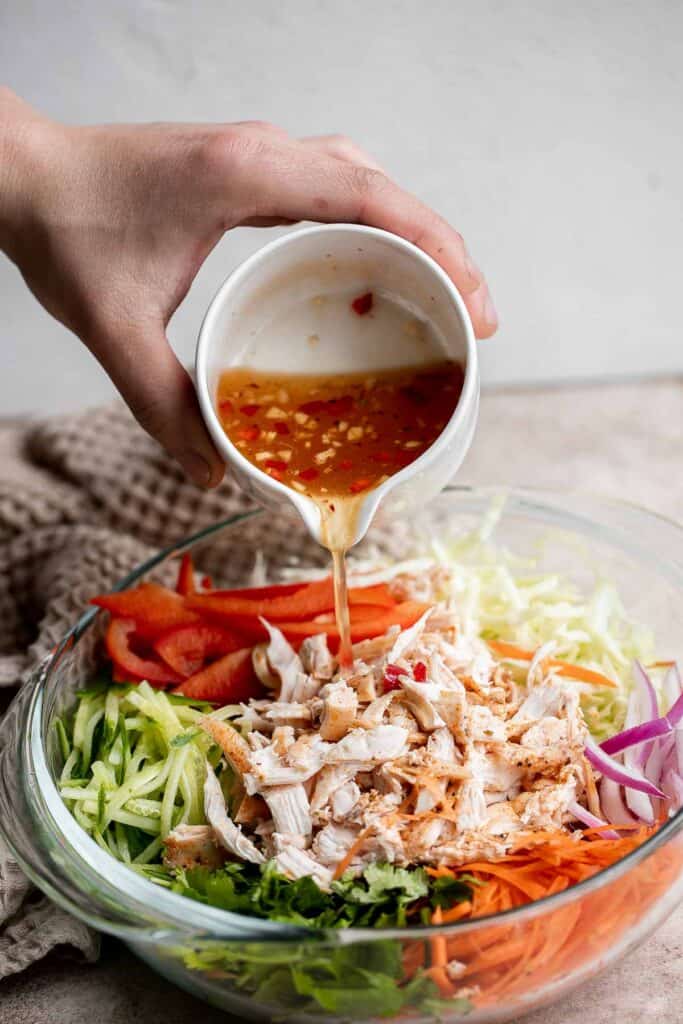
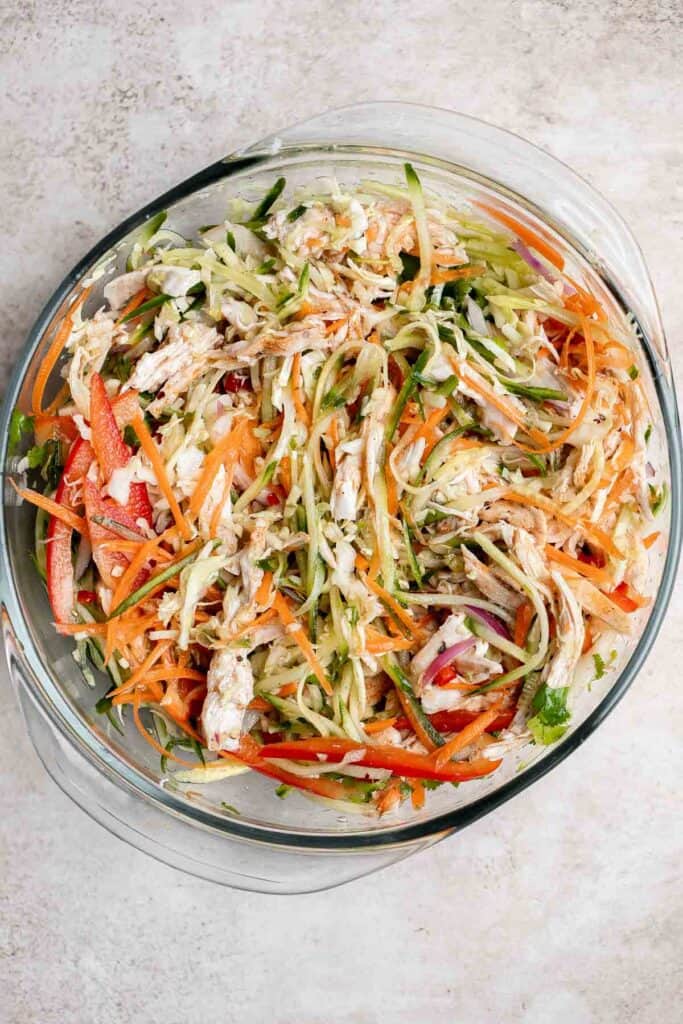
- Prepare the vegetables. Use a box grater to shred the cabbage, cucumbers, and carrot. You can also julienne them using a knife. Slice the red onion and bell peppers into thin strips. Transfer to a large mixing bowl or serving dish. Add the shredded chicken and cilantro.
- Make the dressing. In a medium mixing bowl, make the dressing by stirring together the vinegar, fish sauce, lime juice, sesame oil, sugar, garlic, white pepper (if using), and crushed pepper until smooth.
- Toss. Pour the dressing over the salad and toss well to coat evenly.
- Serve. Top with crushed peanuts and serve immediately.
How to Serve
This goi ga chicken salad can be served on its own as a full and filling meal for lunch or dinner, but it also makes a great side salad when served alongside Asian recipes such as:
- Lemongrass Chicken
- Banh Mi Sandwich
- Glazed Honey Balsamic Pork Chops
- Pho or Ramen
- Vietnamese Summer Rolls with Chicken
- Shrimp Egg Rolls or Crispy Vegetarian Spring Rolls
- Pineapple Fried Rice
- Peanut Noodles
Recipe Tips and Tricks
- Shredded chicken: See our shredded chicken recipe for 3 different ways to make shredded chicken for this Vietnamese chicken salad recipe. You can also save time by buying a whole rotisserie chicken and shredding it - whatever is convenient for you!
- Make ahead instructions: Prepare the salad ingredients and dressing separately and store in separate airtight containers in the refrigerator for up to 3-4 days. Toss together when ready to serve.
- How to store: With the nuoc cham dressing, this Vietnamese chicken salad will last for 1-2 days in the fridge in an airtight container. If undressed, it will last a little longer for 3-4 days.
More Asian Salad Recipes
- 40 Best Salad Recipes
- Asian Chopped Salad
- Thai Mango Salad
- Kani Salad
- Chinese Garlic Cucumber Salad
- Asian Cold Noodle Salad
Tried this recipe?
I'd love to hear what you think! Leave a comment and rating below to share your feedback. Your reviews help others discover this recipe and help me keep creating more free recipes for you. Snap a photo and tag me on social media @aheadofthyme too.

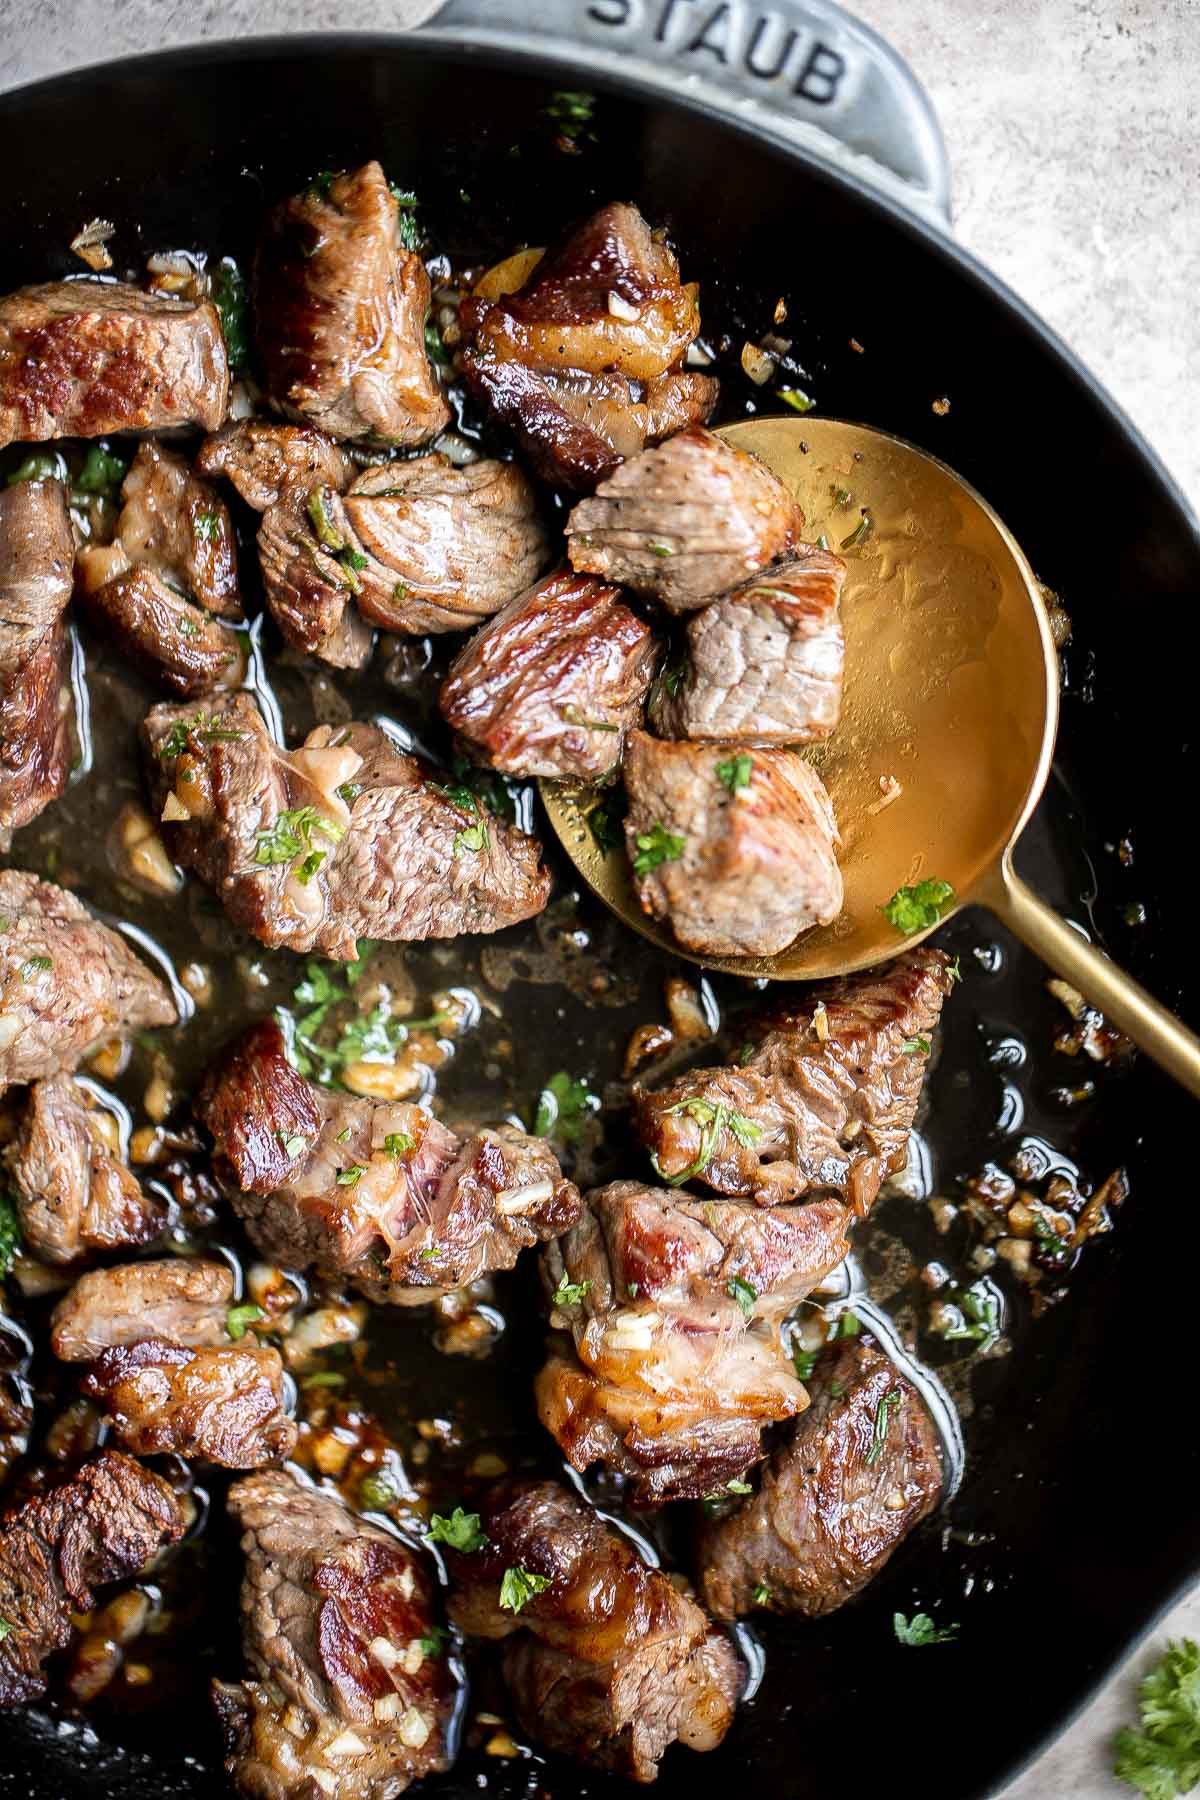
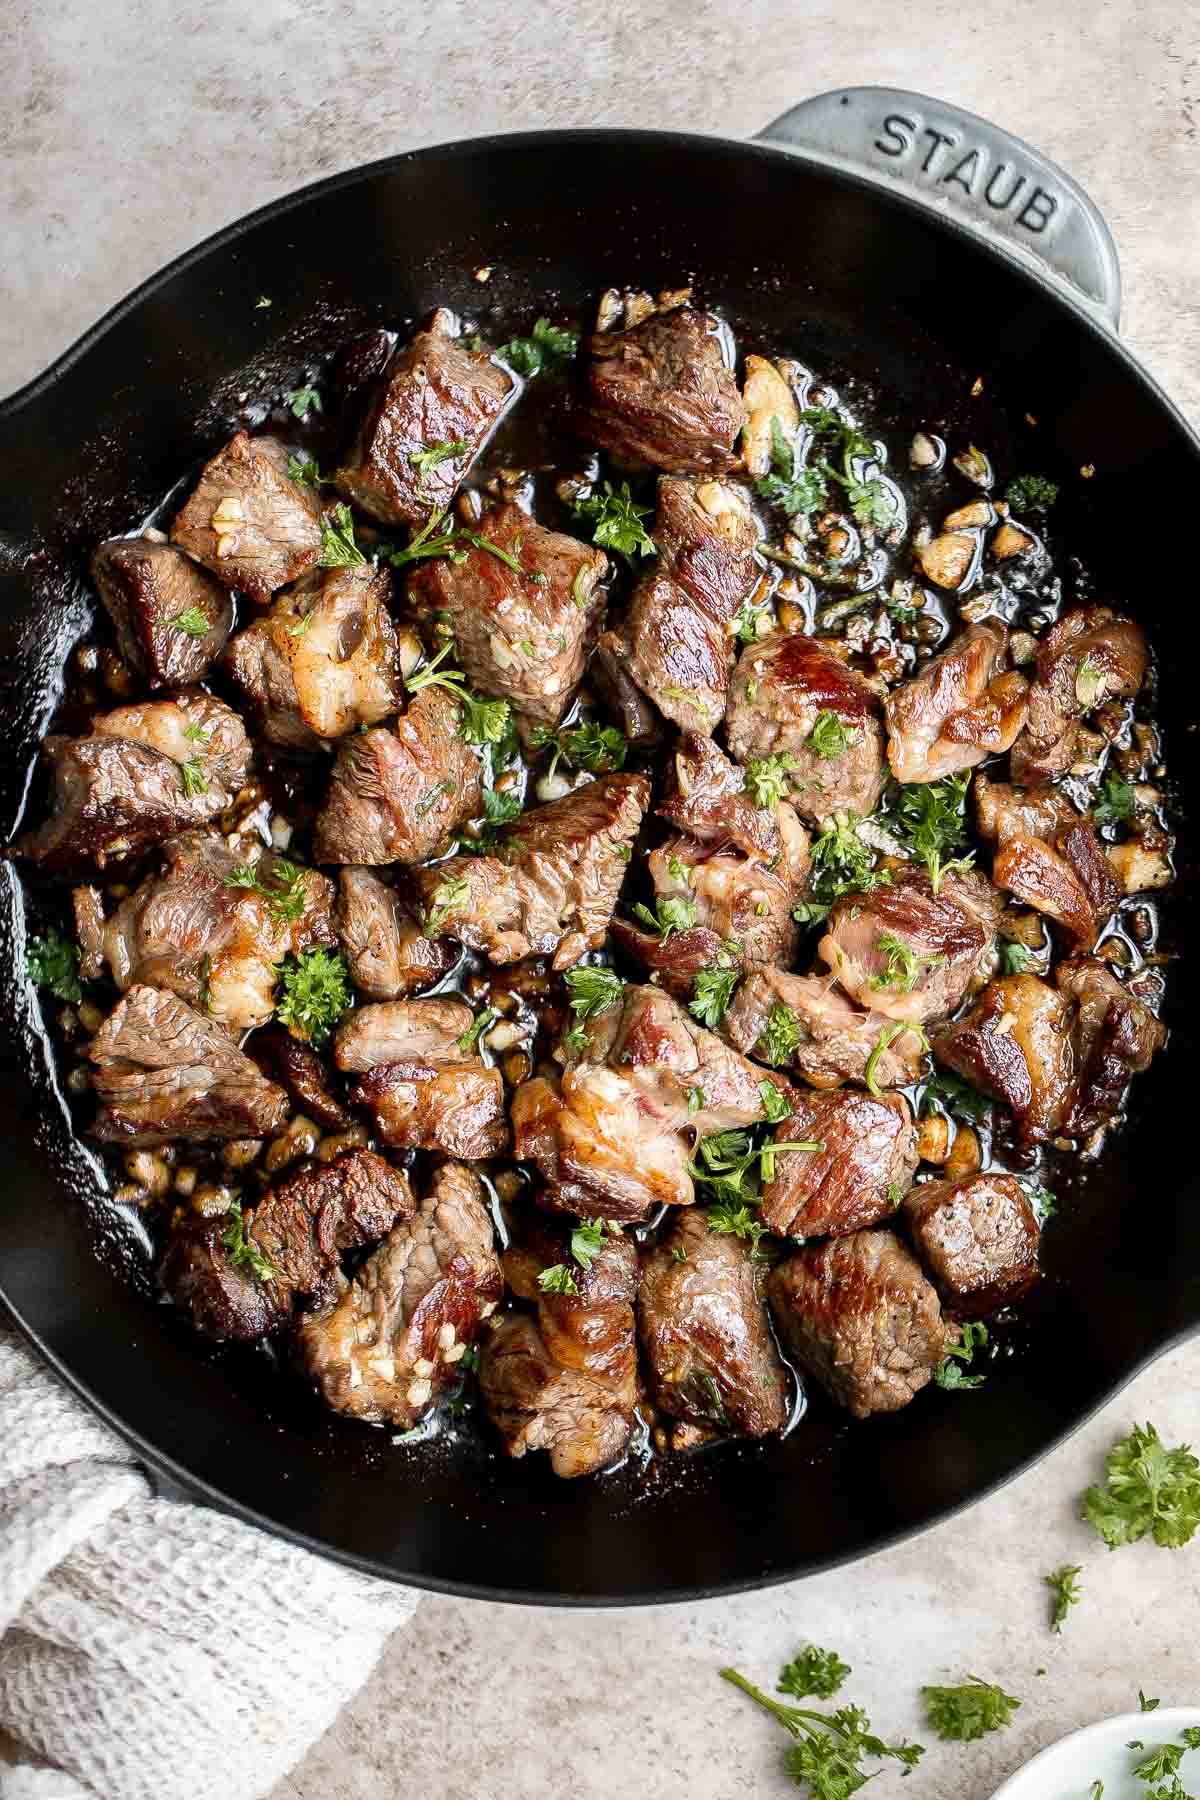
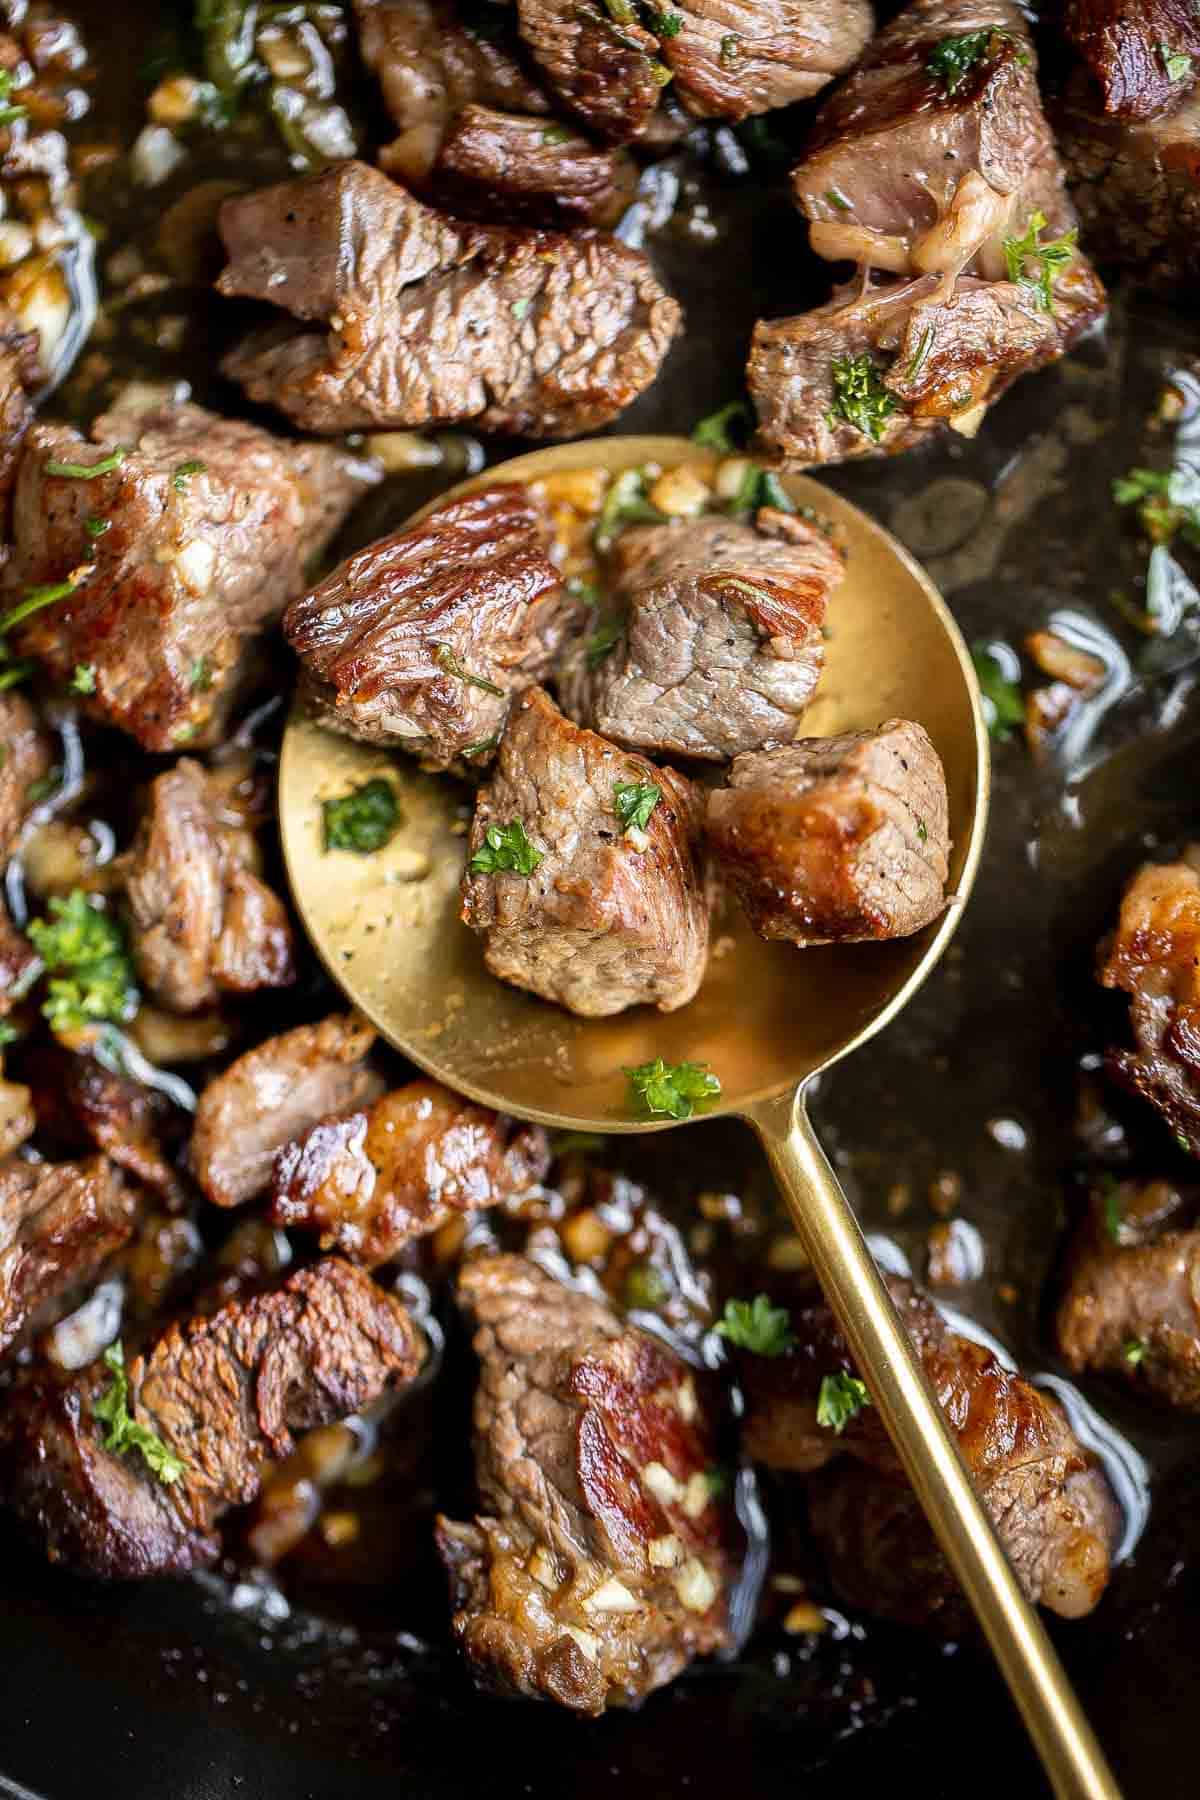
Garlic Butter Steak Bites
Garlic Butter Steak Bites are tender, juicy, and flavorful. This quick and easy homemade dinner takes just 15 minutes to make from prep to table in one skillet. With a cut of tender sirloin steak and a buttery garlic sauce that coats each piece, these bite-sized beef bites a crowd favorite and kid-friendly!
Serve these seared steak bites as it for an easy appetizer or snack, or pair them with your favorite sides for a filling dinner on busy weeknights. Once you try them, you'll find yourself making this over and over again.
Why You'll Love These Garlic Butter Steak Bites
- You only need 15 minutes and a handful of ingredients. This is one of the easiest and quickest dinners you can make. Since the steak is cut into smaller pieces to make steak bites, they take less time to cook, which means dinner is on the table sooner rather than later. And all you need to make steak bites is a handful of ingredients - steak, oil, butter, garlic, herbs, salt, and pepper. It's fast and easy.
- The garlic butter sauce is simple yet amazing. After cooking the steak bites, you'll add butter and fresh minced garlic to make a simple but delectable garlic butter sauce that brings out the natural flavor of the juicy, tender beef. You'll want to cook everything in this sauce.
- Steak bites are great as an appetizer or main dish with sides. Use these steak bites as a low-carb appetizer served with toothpicks, or serve it as the protein for your main meal with some starchy side to make them more filling. Pair garlic butter steak bites with pasta, rice, potatoes, seafood (hello surf and turf!), and your favorite vegetable side dishes.
Ingredient Notes
To make these easy Garlic Butter Steak Bites, you will need the following ingredients (full measurements in recipe card below):
- steak - use your favorite steak such as sirloin steak, ribeye, or strip steaks.
- salt and pepper
- vegetable oil - use any vegetable oil that you have on hand such as avocado oil or grapeseed oil.
- butter
- garlic
- fresh herbs - we added thyme to the garlic butter to add a delicious flavor. You can substitute with other fresh herbs that you like such as oregano, mint, or dill. We also garnished these steak bites with parsley on top.
You will also need measuring cups and spoons and and a large skillet (I used our cast-iron skillet).

How to Make the Best Garlic Butter Steak Bites
- Season the beef. Use a paper towel to pat the steak bites completely dry with paper towel. Season with salt and pepper.
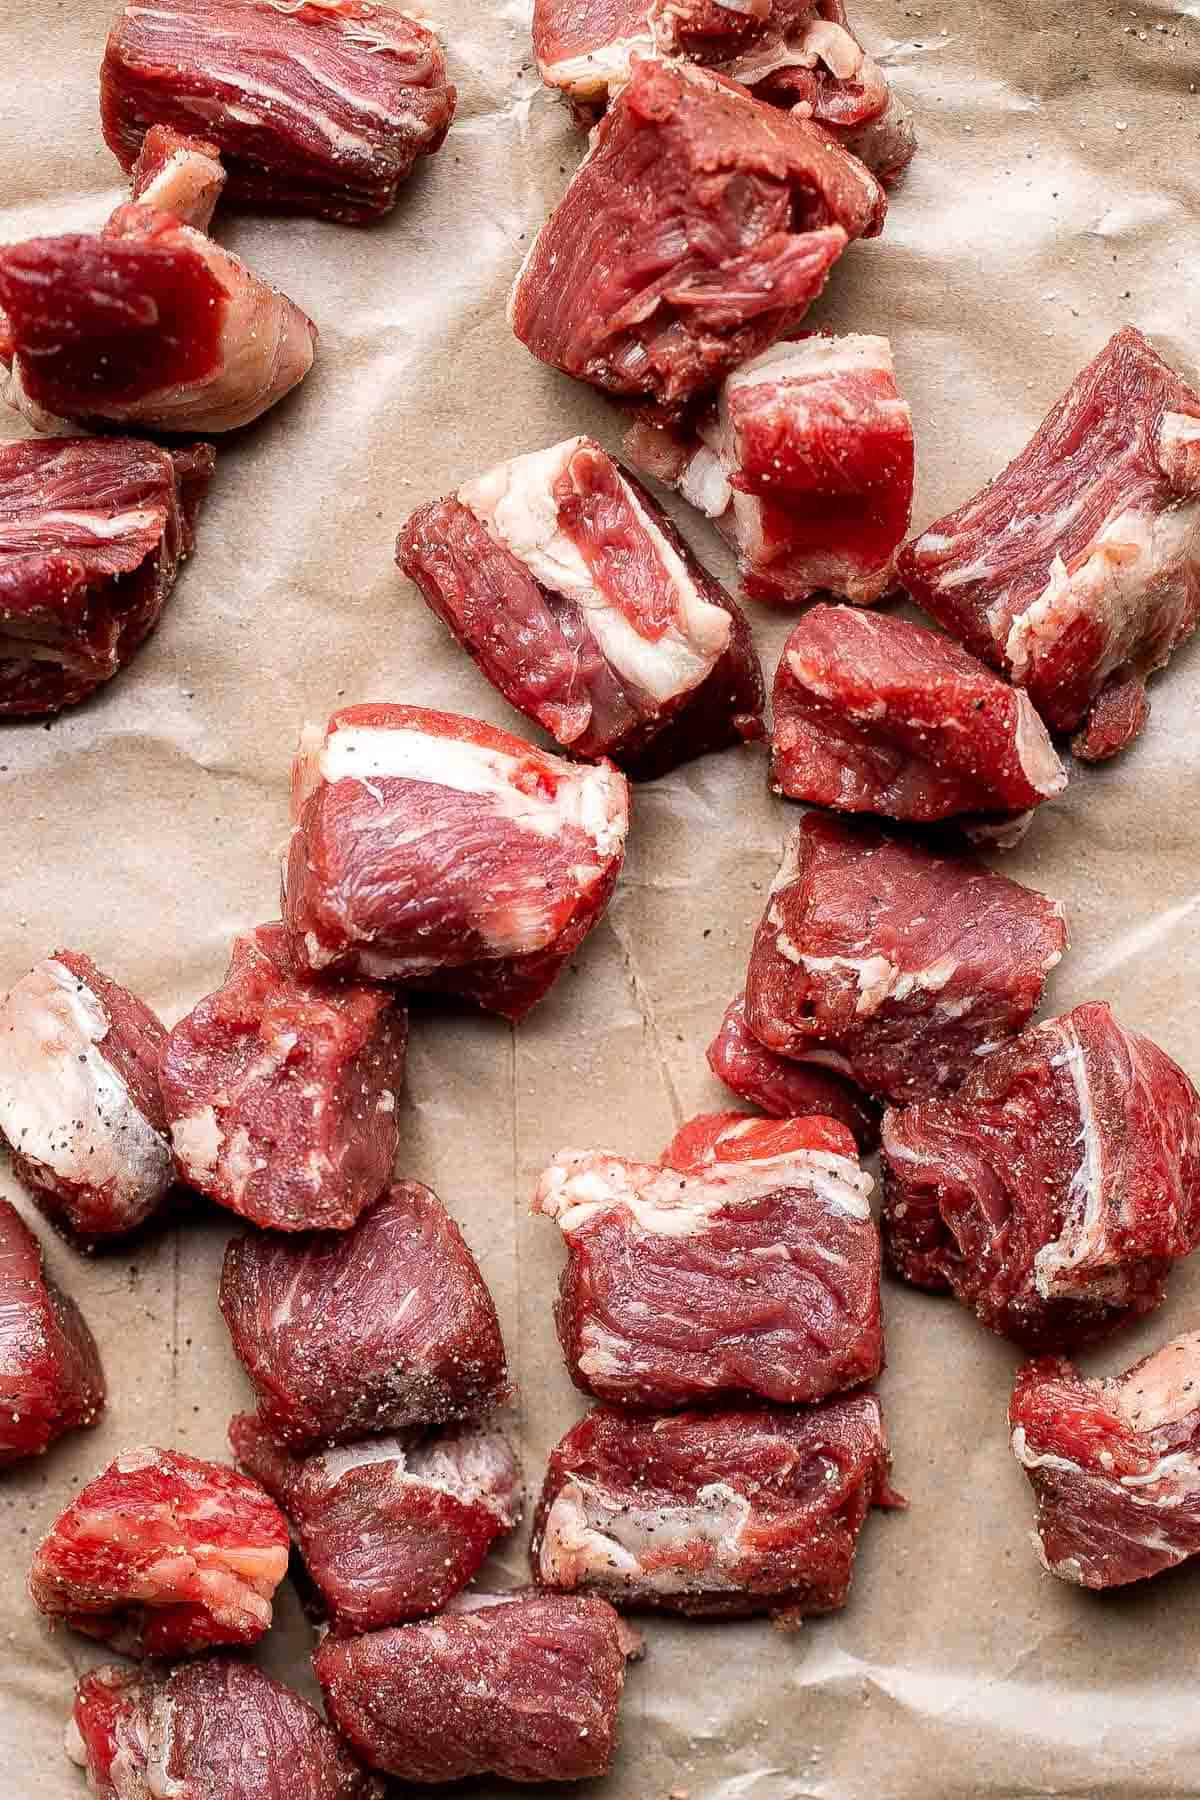
- Sear the beef. Heat oil in a large skillet over medium-high heat until the hot oil sizzles, about 1 minute. Add the steak bites in a single layer in the skillet and sear until browned, about 2 minutes. Flip them over and cook on the other side for 2 minutes until golden brown. Do not stir while searing the meat.
- Add butter and garlic. Add butter and melt until it starts to bubble. Stir well to coat the steak bites evenly. Stir in garlic and thyme and cook until fragrant, about 30 seconds.
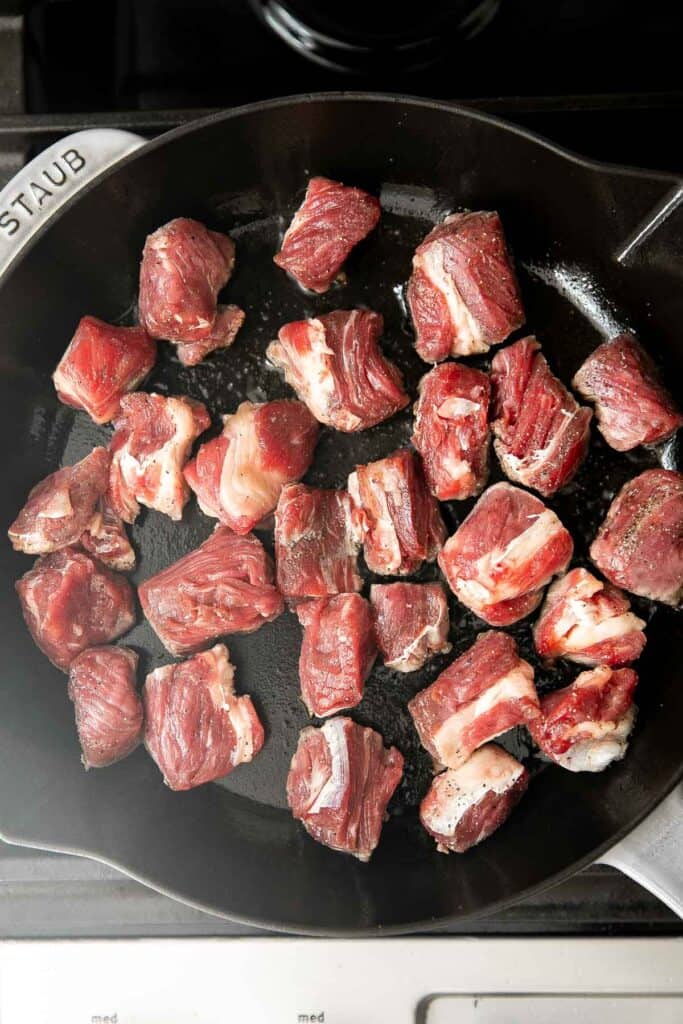
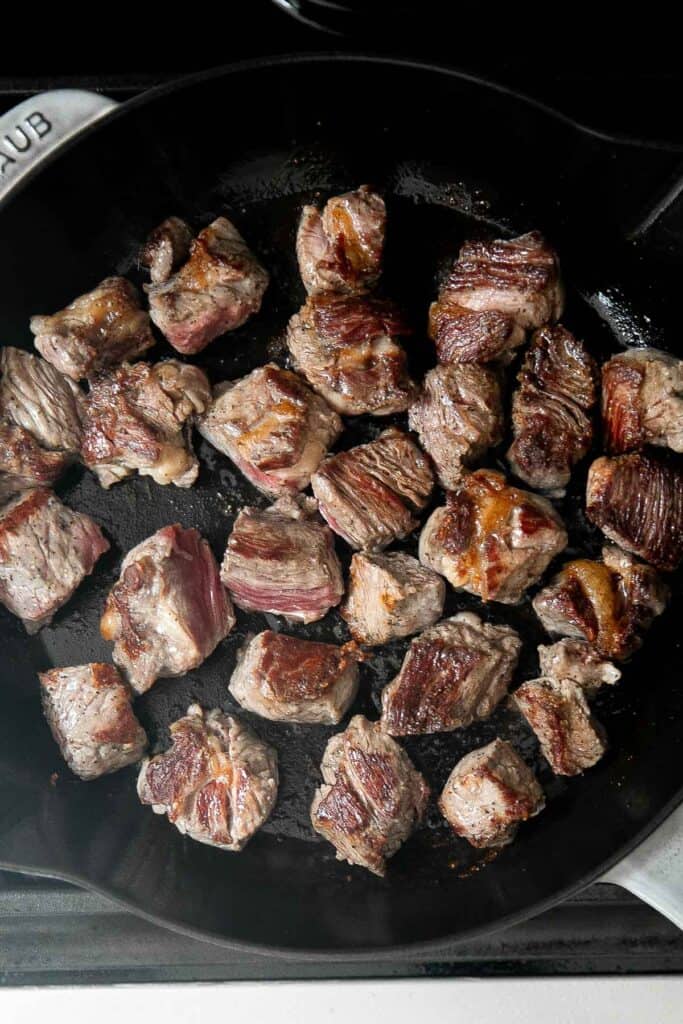
- Serve. Garnish with parsley and serve immediately.
How to Serve
Garlic Butter Steak Bites are delicious served on their own, or pair them with your favorite veggies and grains for a balanced meal. Try some of my favorite sides:
- Mascarpone Mashed Potatoes
- Cheesy Roasted Asparagus
- Air Fryer Vegetables
- Parmesan Risotto
- Crispy Smashed Potatoes
- Caesar Salad
- Baked Sweet Potato Wedges
Storing Instructions
- How to store: Keep leftover steak bites in an airtight container in the fridge for up to 3-4 days.
- How to reheat steak bites: The best way to reheat steak bites is in the oven at 350F. To keep them tender and juicy, wrap them in aluminum foil with a splash of liquid and bake for 10-20 minutes until warmed through. You could also reheat on the stove over medium-low heat until warmed through.
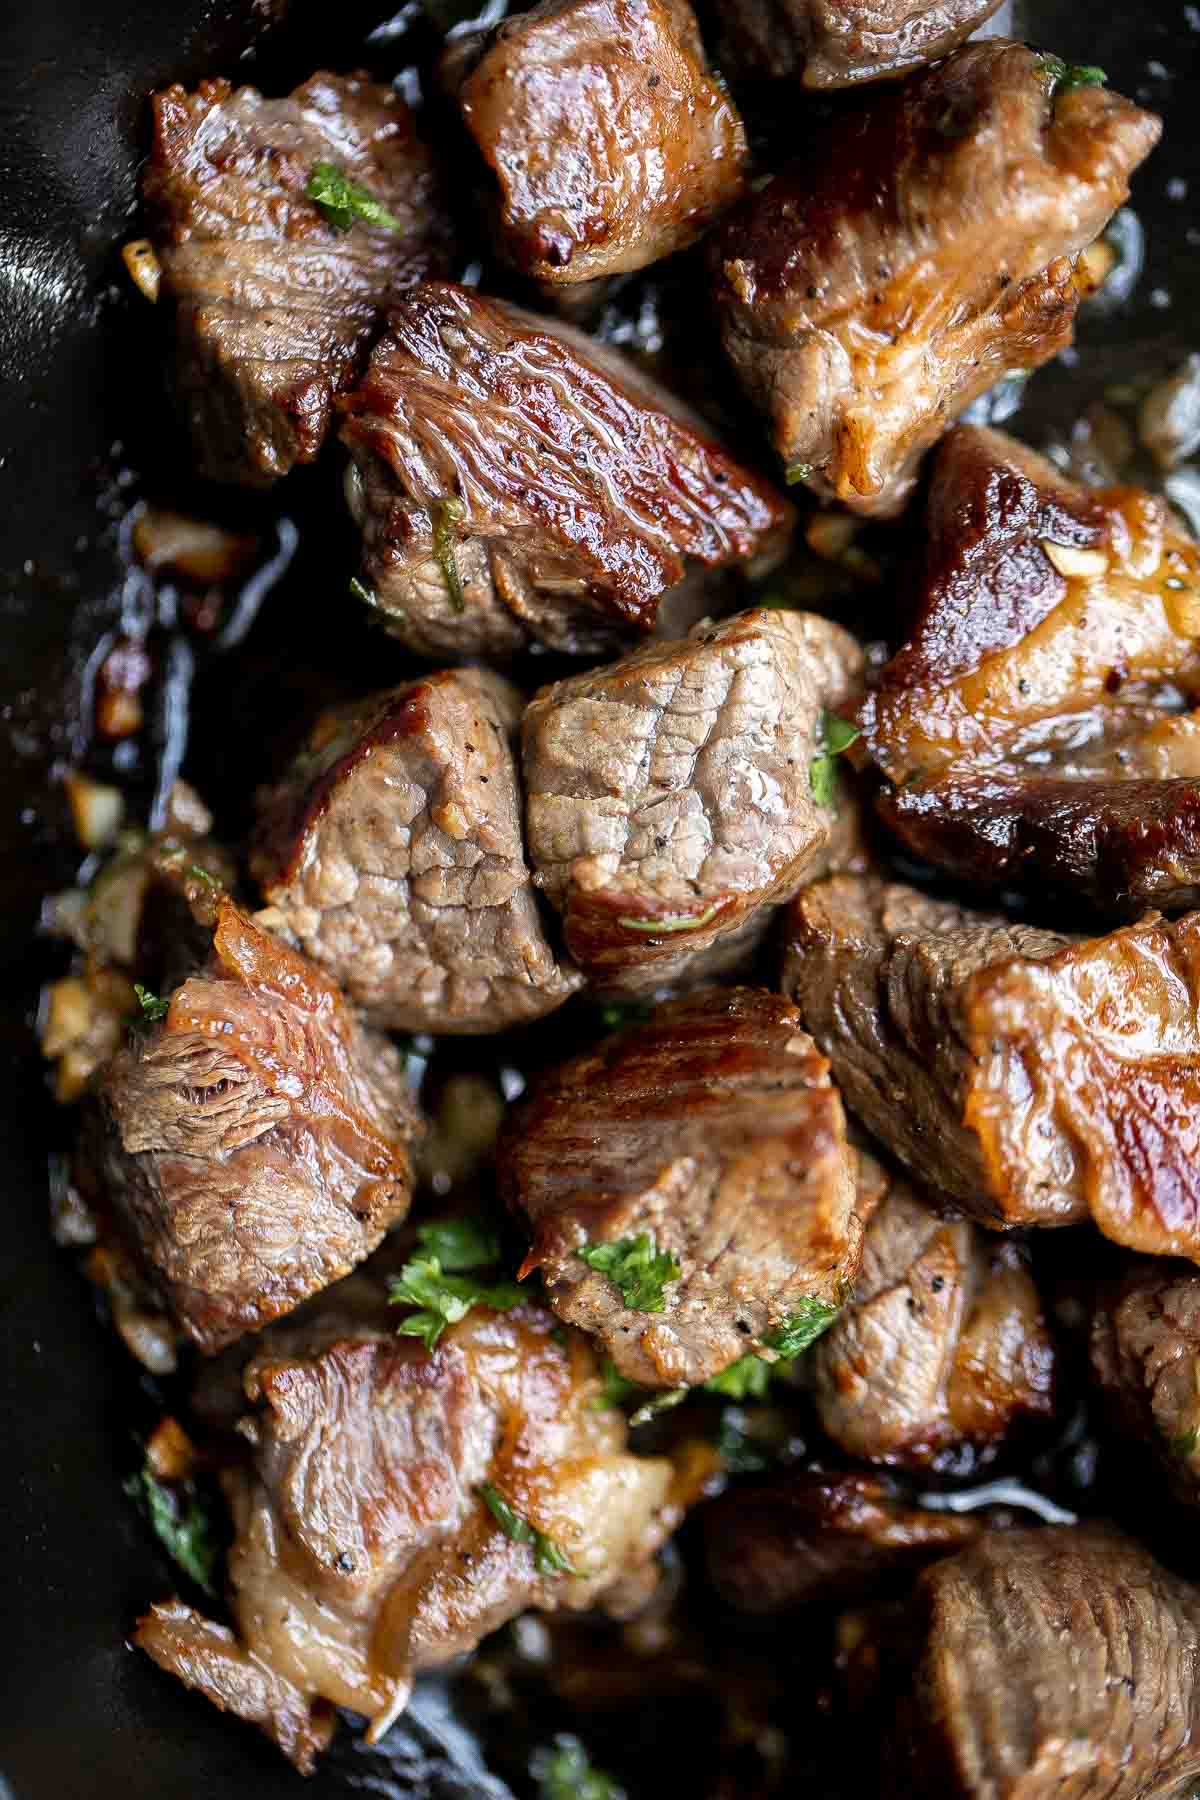
More Beef Recipes
Tried this recipe?
I'd love to hear what you think! Leave a comment and rating below to share your feedback. Your reviews help others discover this recipe and help me keep creating more free recipes for you. Snap a photo and tag me on social media @aheadofthyme too.
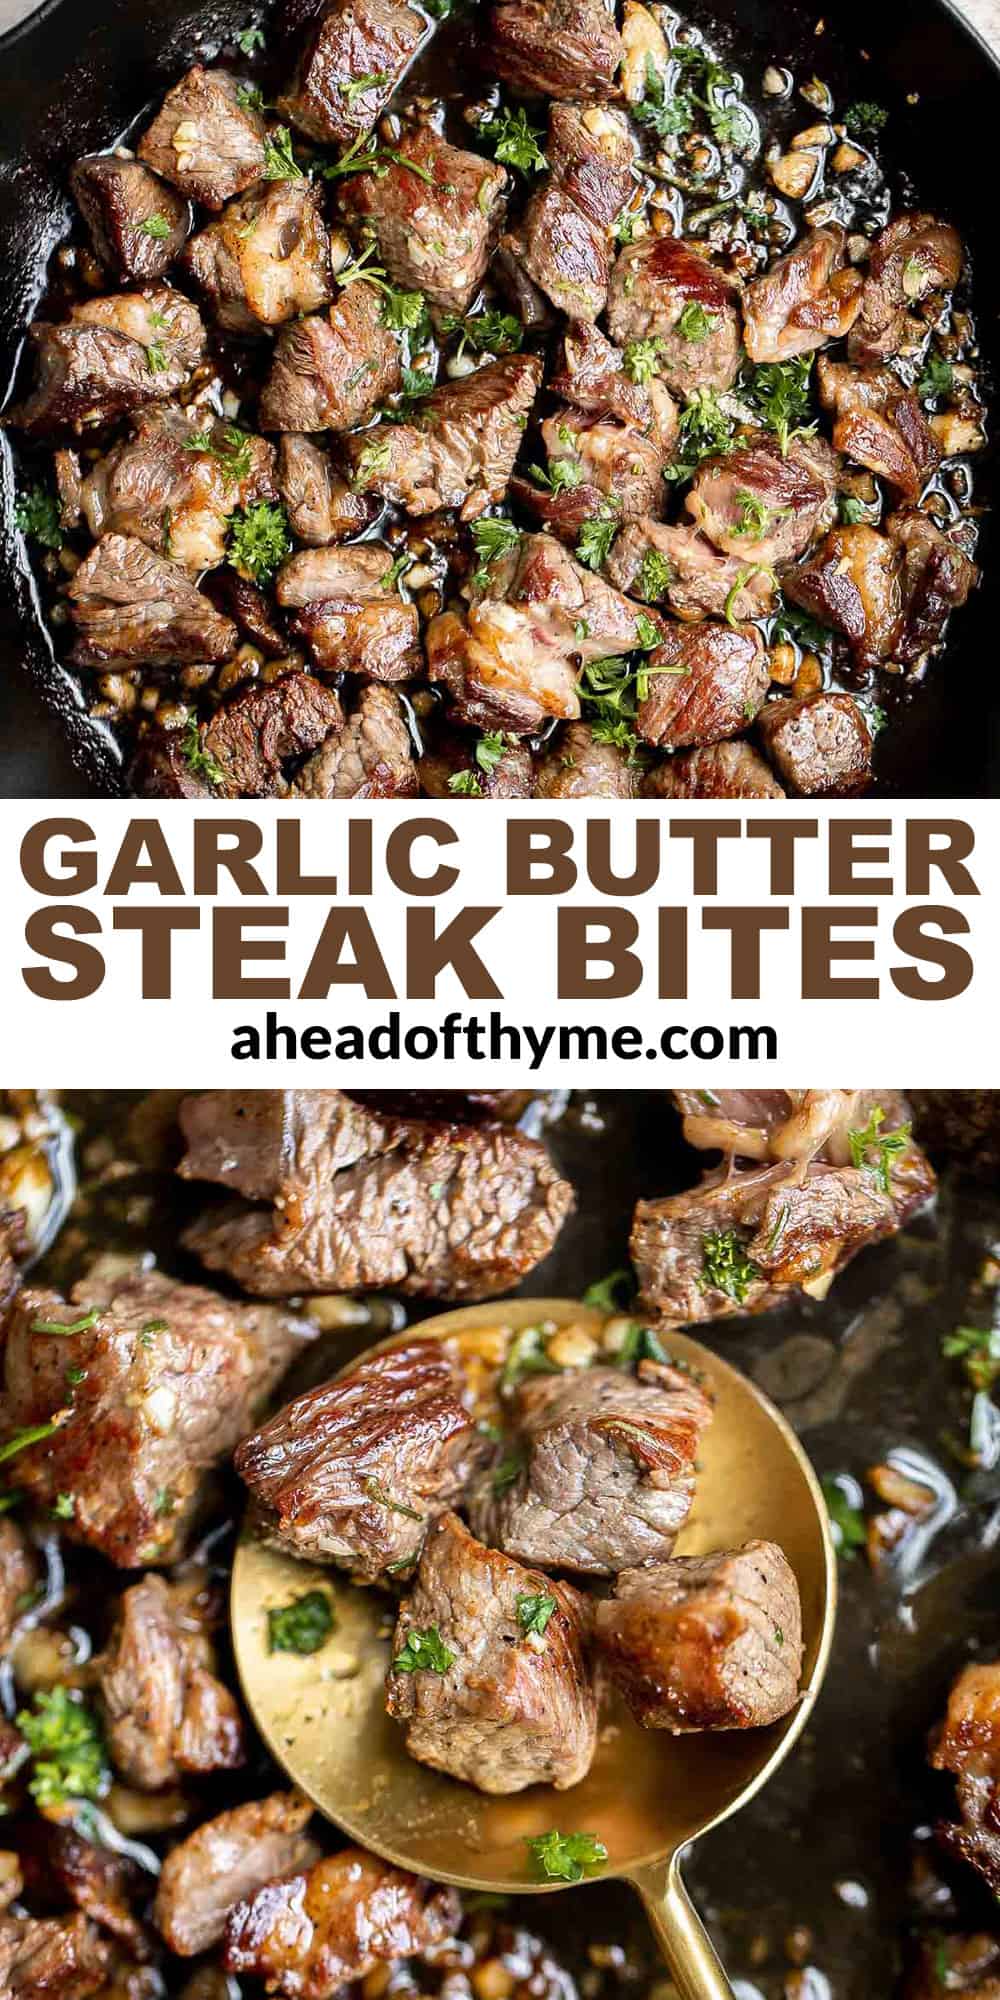
40 Best 4th of July Recipes
On the 4th of July, it's all about the American patriotic red, white, and blue recipes. So if you are planning an epic Independence Day party and are wondering what fourth of July food to serve on your summer menu, then you are in the right place. We are sharing over 40 best 4th of July recipes including summer berry recipes, burgers and grill recipes, fresh vibrant salads, festive and colorful desserts, refreshing drinks, and more.

Best 4th of July Recipes
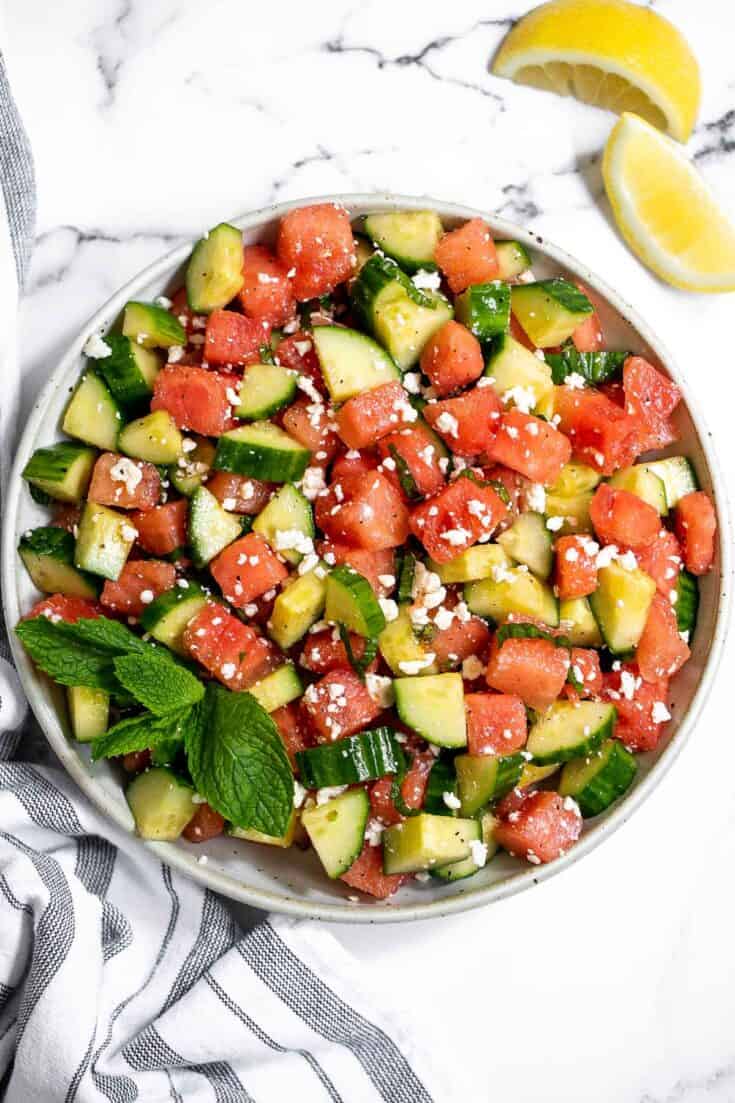
Watermelon Feta Salad
Watermelon feta salad with cucumbers and mint is a simple and delicious refreshing summer salad that you can toss together in 5 minutes.
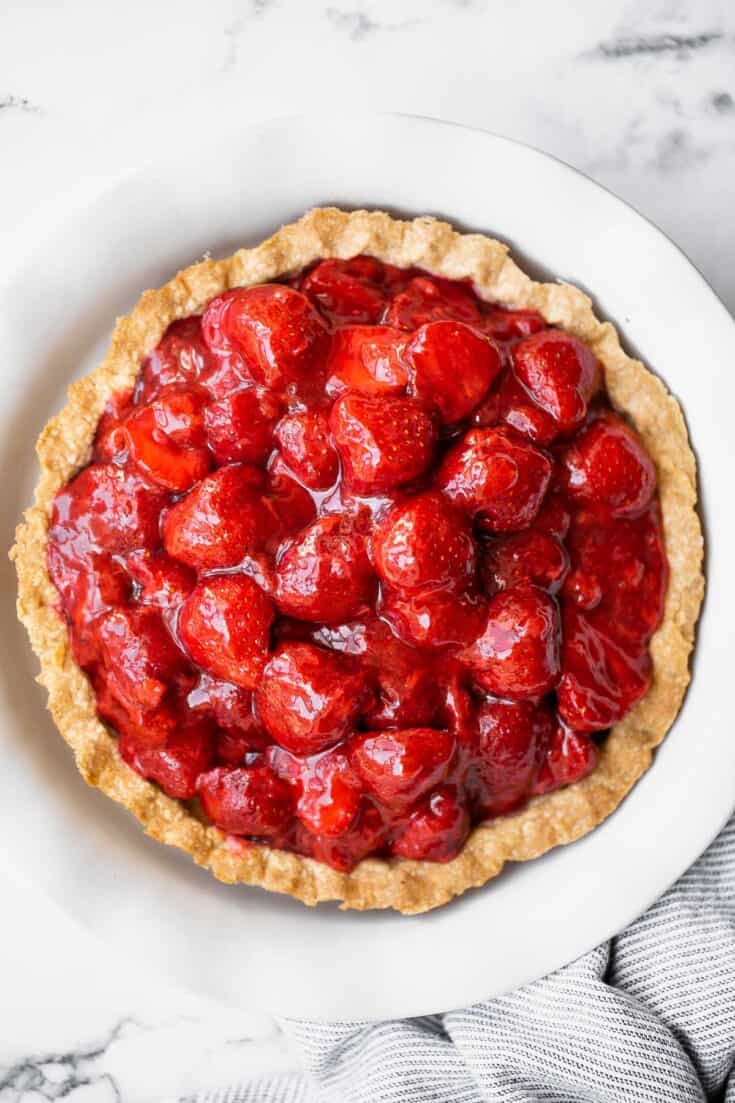
Fresh Strawberry Pie
Fresh strawberry pie is a delicious, summer dessert loaded with juicy strawberries and homemade strawberry glaze with no jello, in a flakey pie crust. The best 4th of July recipe.

Antipasto Skewers
Antipasto skewers with tortellini are a quick, easy, and delicious appetizer that can be served for any occasion.
Teriyaki Chicken Skewers with Pineapple
Juicy and tender teriyaki chicken skewers with pineapple, bell peppers and red onions are sticky, sweet, savoury, and tangy. So flavourful and delicious. Serve over some steamed rice or coconut rice.
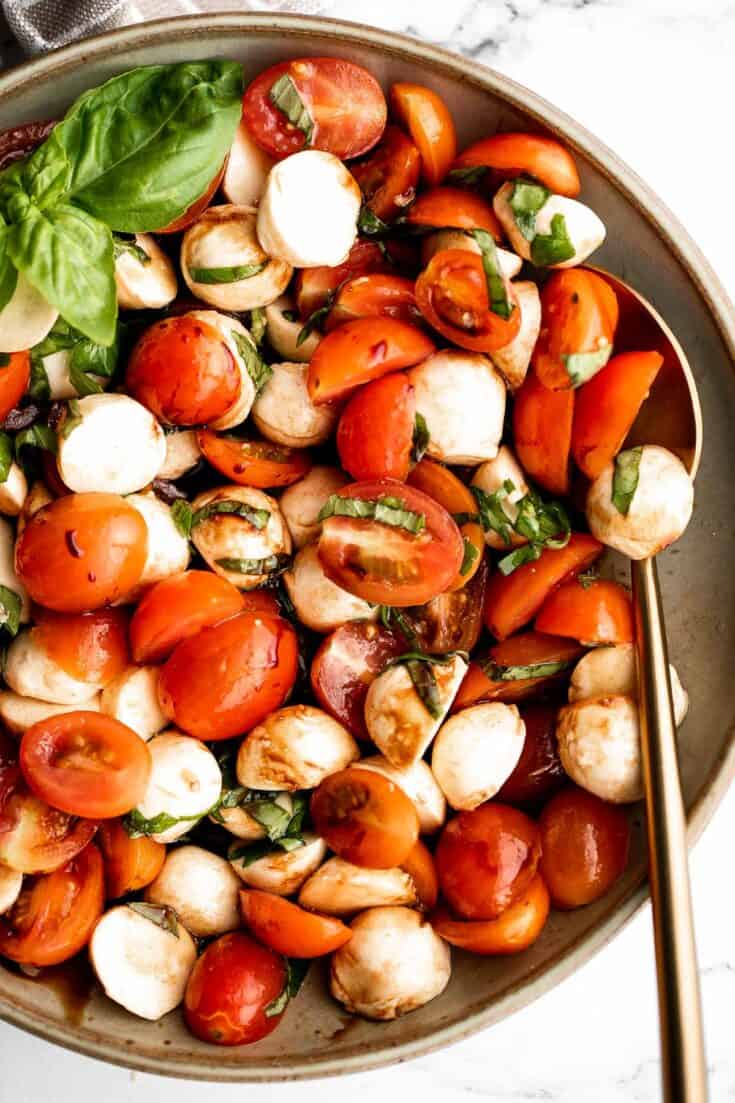
Tomato and Mozzarella Caprese Salad
Quick and easy tomato and mozzarella caprese salad is a fresh, light, and delicious summer salad, made with just a few simple ingredients in 10 minutes.
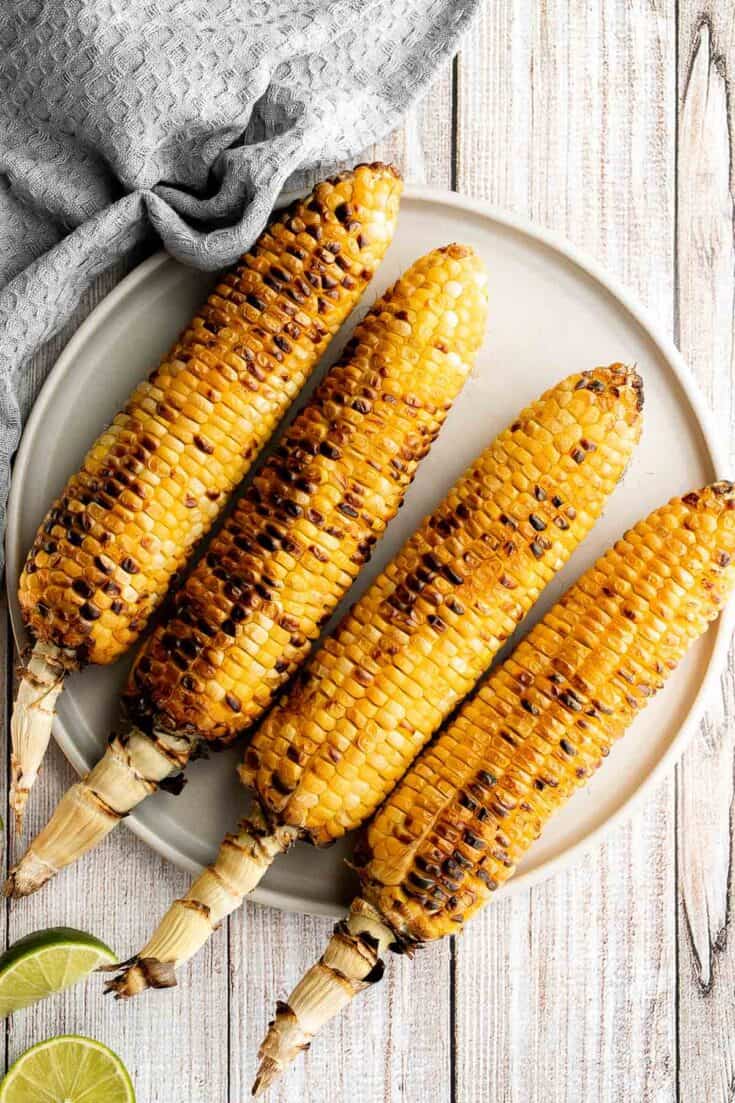
Grilled Corn on the Cob
Buttery and salty grilled corn on the cob with beautiful char marks, delicious flavor, and the best texture is the easiest recipe to throw on the grill.

Strawberry Lemonade
Homemade strawberry lemonade is refreshing, flavorful, and easy to make. This sparkling summer drink is loaded with fresh strawberries and lemon.
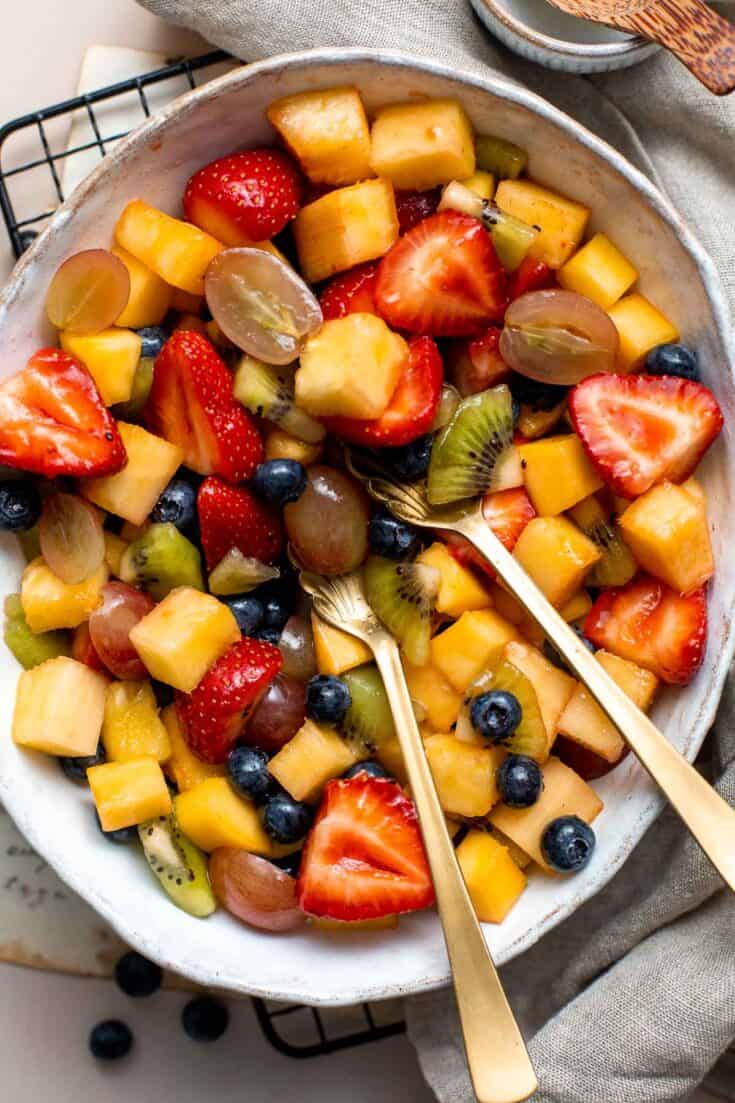
Summer Fruit Salad with Honey Lemon Dressing
This Summer Fruit Salad is colorful, delicious, and naturally sweet (no processed sugar!). It's easy to make with fresh fruit tossed in a homemade dressing.
Strawberry Popsicles
Homemade strawberry popsicles are healthy, refreshing, and sweet. Made with just 4 ingredients, they're packed with fresh strawberries and no refined sugar.
Classic Juicy Hamburgers
Better than the steakhouse, these classic juicy hamburgers are perfectly seasoned, so flavourful and delicious. Make them on the grill or on the stove.

Deviled Eggs
Classic deviled eggs are a simple, easy, and healthy appetizer to make when you need something quick for brunch, picnics, barbecues, potlucks, or the 4th of July.
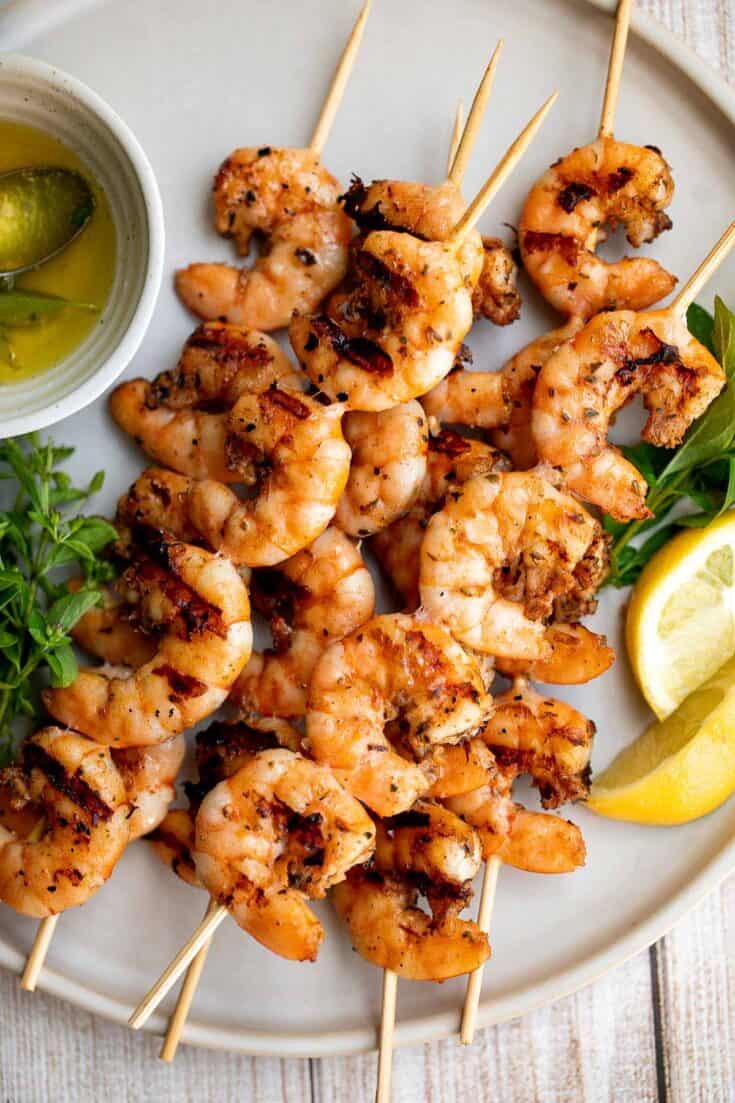
Garlic Shrimp Skewers
Garlic shrimp skewers are delicious and full of fresh flavor. These quick and easy kabobs can be grilled, baked or air fried for an easy summer dinner.

Strawberry Avocado Salad
Loaded with fresh ingredients, strawberry avocado salad with poppy seed dressing is the ultimate summer salad -- light, vibrant, fresh, sweet, and tangy.

Carne Asada
Juicy and tender Carne Asada with perfectly charred edges is flavorful, delicious, and so easy to make. Cook this Mexican steak in under 15 minutes.
Guacamole
Incredibly tasty, this easy and basic guacamole takes less than 5 minutes to make. It is the perfect dip for a 4th of July party.
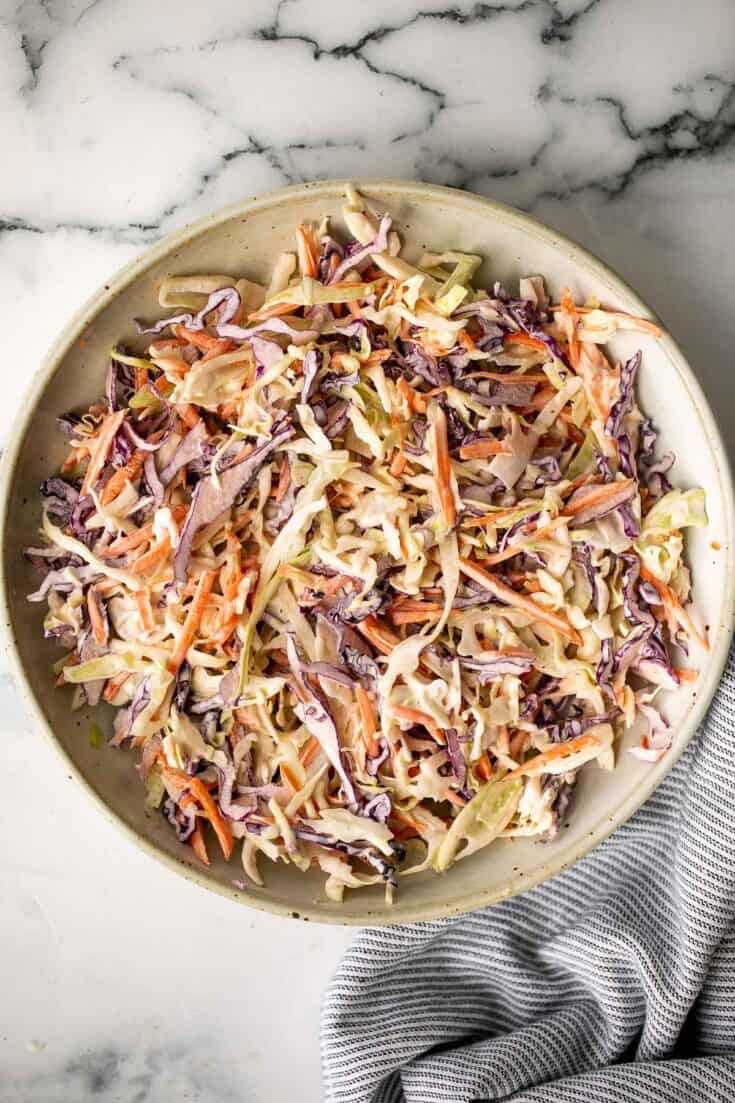
Classic Coleslaw
Fresh, crisp, classic coleslaw salad is a must-have recipe for a summer barbecue or picnic, or as an easy make-ahead lunch. Make it in less than 10 minutes.

Black Bean Burgers
Homemade vegetarian black bean burgers are thick, hearty, flavorful, and delicious. They are easy to make with the best texture (no mushy burgers here!).
Classic Blueberry Pie with Lattice Top
Summery classic blueberry pie is made with the perfect flaky pie crust, a jammy blueberry filling with a hint of lemon, and sealed with a lattice top.

Buckwheat Salad
Mediterranean Buckwheat Salad is quick, easy, and delicious. Loaded with superfood buckwheat, this salad is healthy, naturally gluten-free, and vegetarian.
Greek Chicken Souvlaki Skewers
Easy Greek chicken souvlaki skewers marinated in garlic, fresh herbs, lemon and bay leaves for that classic Mediterranean flavour.

Nutella Crepes
Nutella crepes with berries are sweet and indulgent. These French pancakes are an easy to make blender recipe that will have you craving breakfast all day.
Blueberry Cinnamon Rolls
Delicious blueberry cinnamon rolls are soft and fluffy, filled with cinnamon sugar, loaded with fresh blueberries, and topped with cream cheese icing.
Macaroni Salad
Classic macaroni salad is a creamy and delicious pasta salad that is easy to throw together. It's the perfect side to bring to a summer potluck or BBQ.
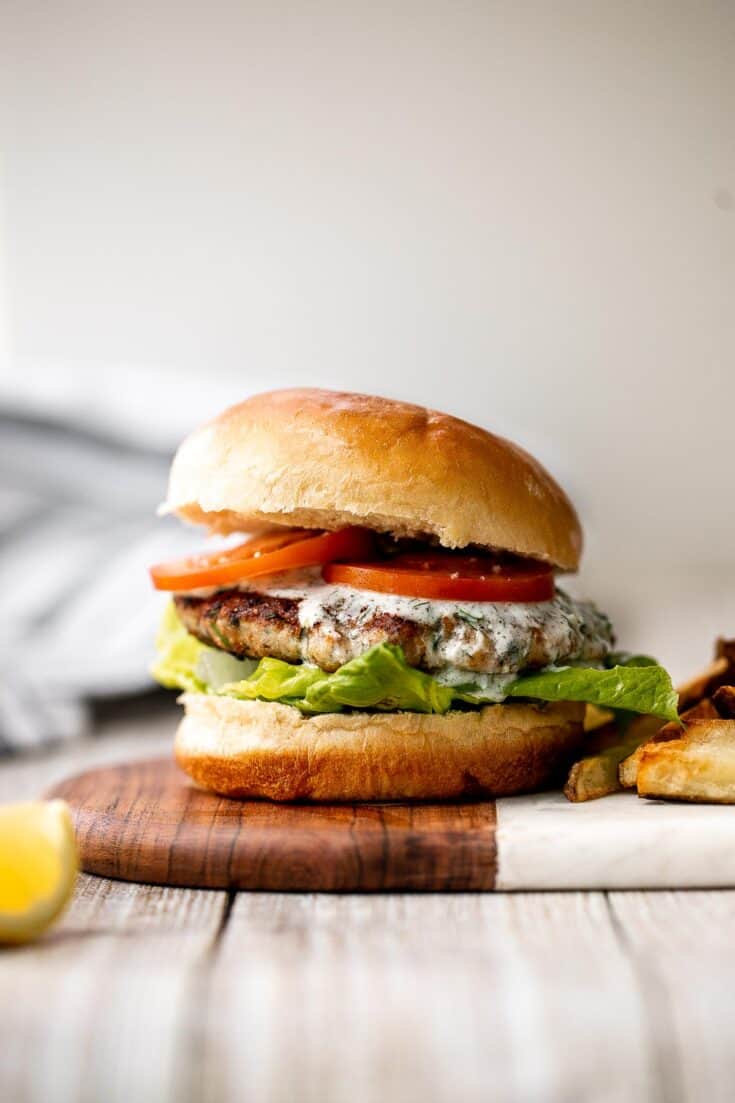
Mediterranean Turkey Burgers
Mediterranean turkey burgers are tender, juicy, and delicious, loaded with garlic, fresh dill, and lemon juice. The perfect summer weeknight meal.
Blackberry Milkshake
Looking for the perfect summer treat? Blend together fresh berries and ice cream to make creamy, quick and easy, 5-minute blackberry milkshake at home!

7 Layer Dip
This easy and delicious 7 layer dip is the perfect dip to serve at your next party, made with layers of beans, guacamole, salsa, cheese, and more.

Lemon Blueberry Bread
Easy lemon blueberry bread with lemon glaze is soft, moist, and delicious. This quick bread with fresh blueberries and lemon is the perfect summer dessert.

Veggie Tray
This homemade veggie tray is a quick easy healthy snack or appetizer to make for your next party, with a variety of colorful vegetables and delicious dips.
Souvlaki Beef Shish Kebabs
Easy Greek souvlaki beef shish kebabs are marinated in a garlicky lemony olive oil marinade and threaded with fresh vegetables. Cook on the grill or oven. Serve them wrapped inside some quick and easy pita bread.

Homemade Peach Iced Tea
Homemade peach iced tea is healthy summer drink — refreshing, peachy, sweet, and perfect. It's loaded with real fruit and vitamins and easy to make.
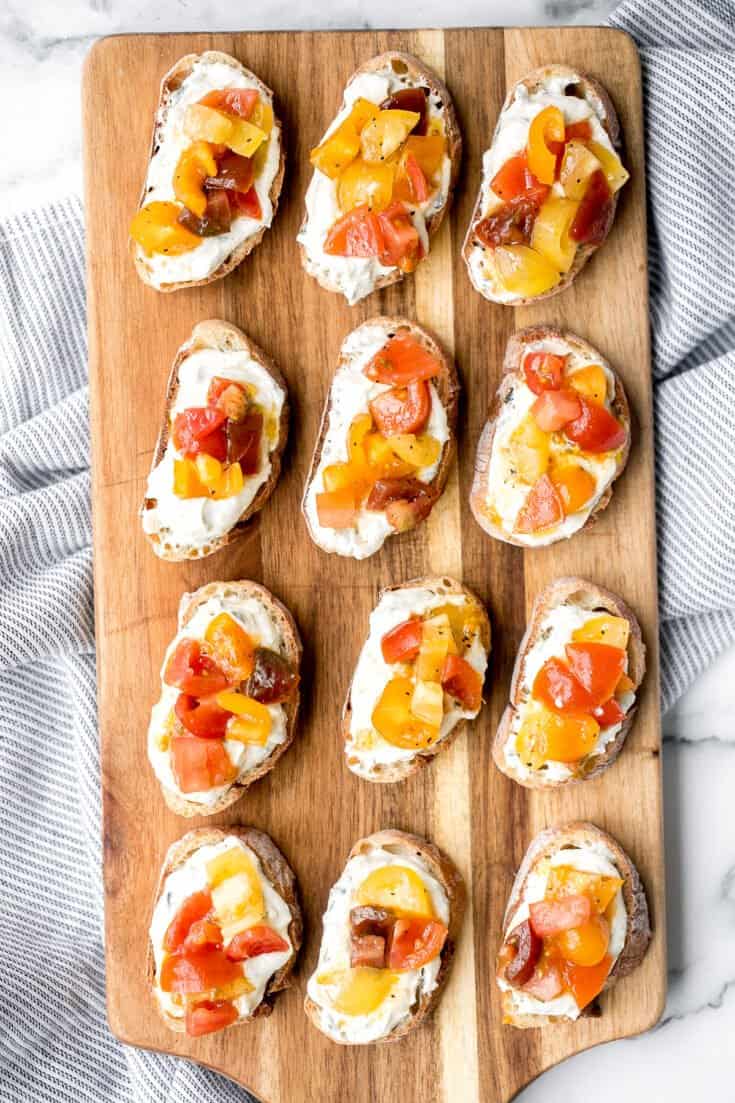
Whipped Ricotta Crostini
Whipped ricotta crostini is a fancy easy appetizer to make in just minutes or prepare in advance and assemble before serving. A total crowd pleaser.

Strawberry Sorbet
This 3-ingredient Strawberry Sorbet is a refreshing, healthy, vegan, and gluten-free frozen treat to enjoy on a hot day. Plus, no ice cream maker required!

Chickpea Greek Salad
Chickpea Greek salad is a fresh, healthy, vibrant, and colorful salad, packed with traditional Mediterranean ingredients, superfoods, and nutrients.

Grilled Orange Chicken Skewers
Flame-kissed, sticky and saucy, grilled orange chicken skewers with a rich, citrus-based marinade are delicious, juicy and so tender. The best summer weeknight dinner.
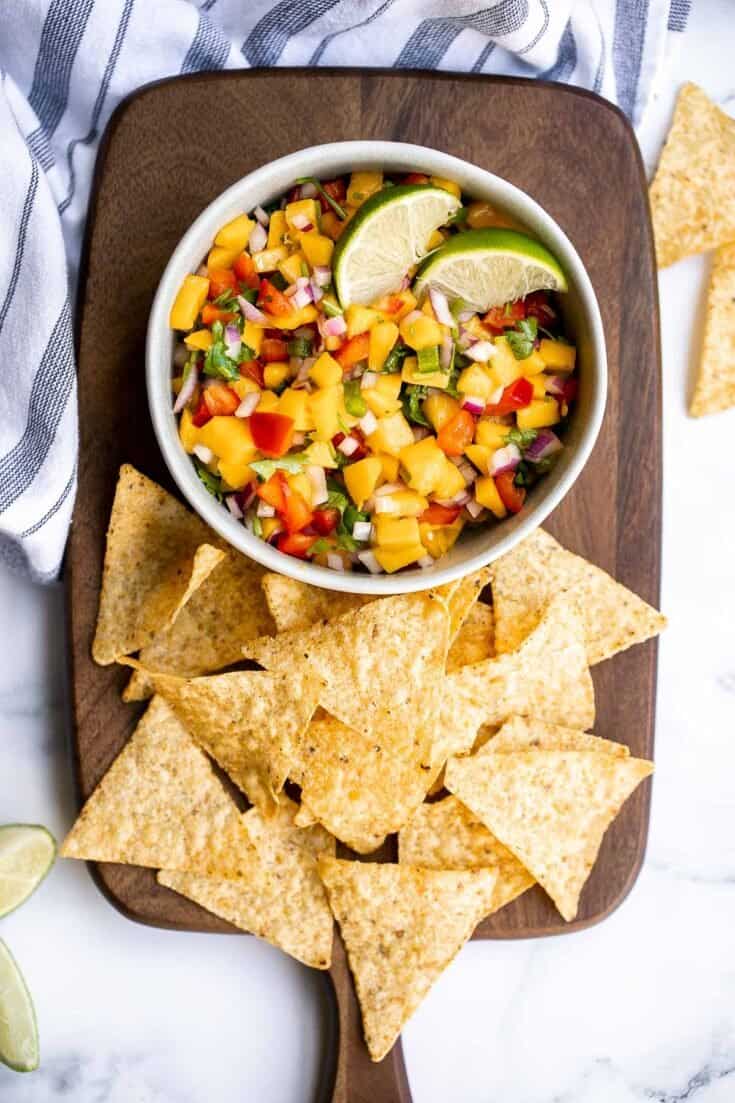
Mango Salsa
With fresh raw ingredients like mangoes, red peppers, onion, jalapeños, cilantro, and lime juice, this mango salsa tastes as juicy and bright as it looks.
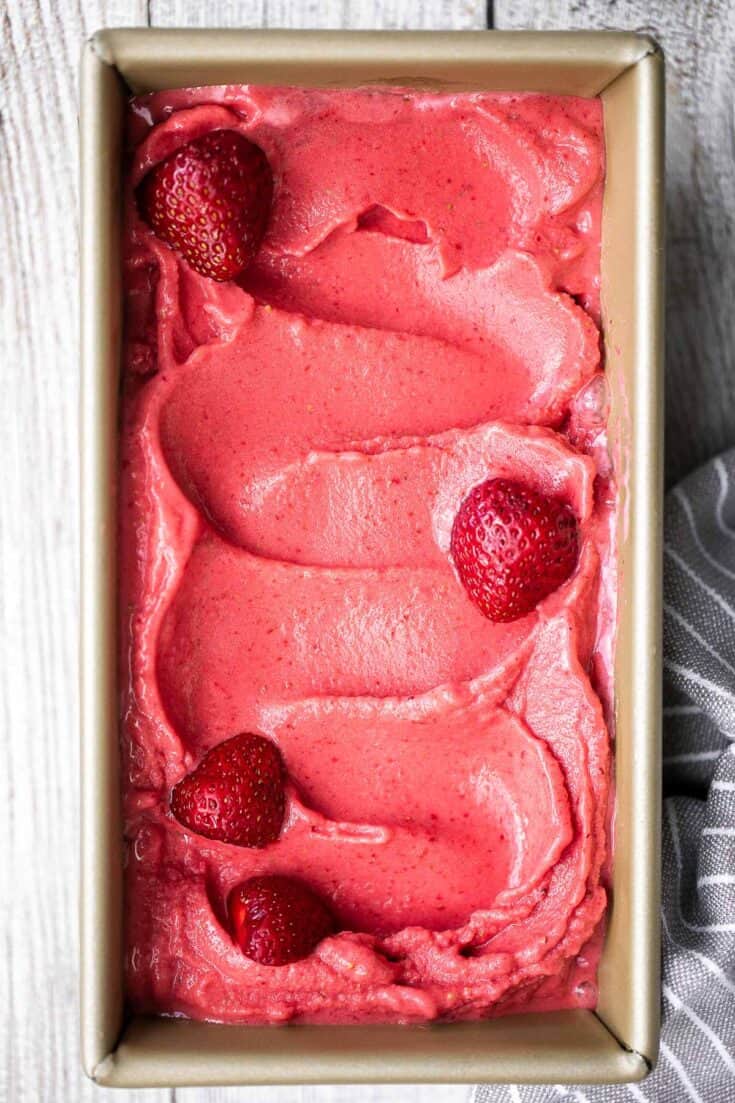
Strawberry Frozen Yogurt
Homemade strawberry frozen yogurt is a delicious, refreshing, healthy dessert made with 4 simple ingredients, no refined sugar, and in less than 5 minutes.

Vietnamese Summer Rolls with Chicken
Vietnamese summer rolls with chicken are fresh, light, and healthy. This Asian summer snack takes less than 20 minutes to make and easier than you think.
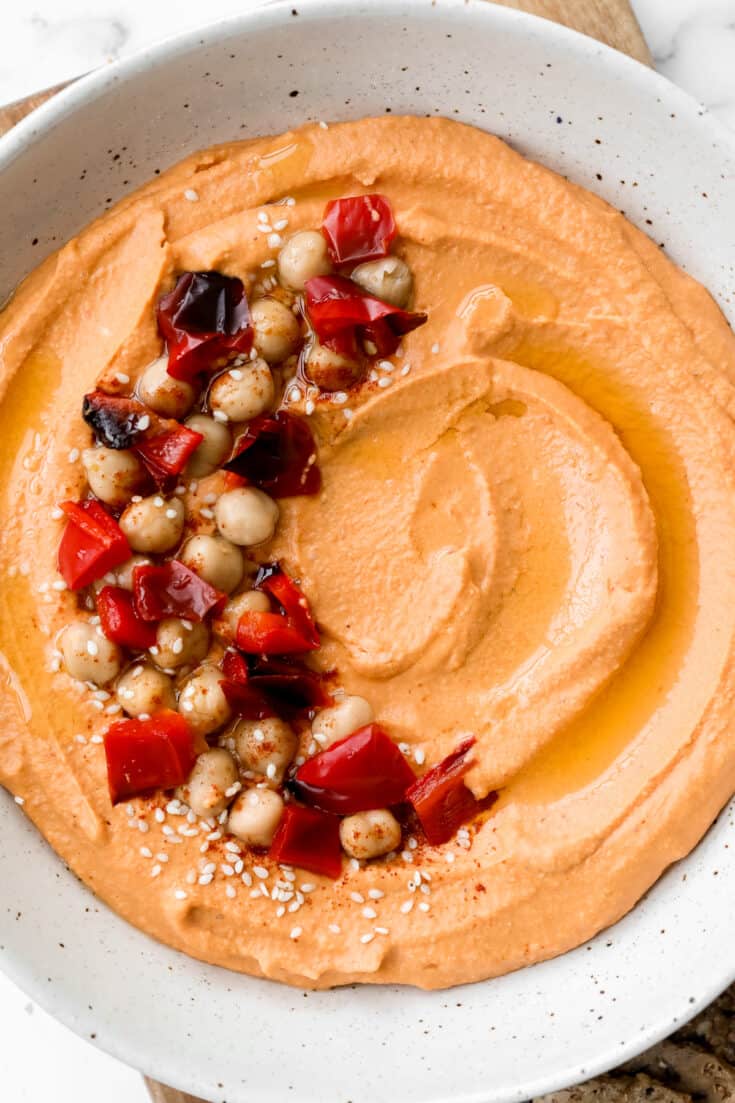
Roasted Red Pepper Hummus
Smooth creamy roasted red pepper hummus is a delicious, flavourful, vegan + gluten-free dip. This healthy appetizer is easy to make with a few ingredients.
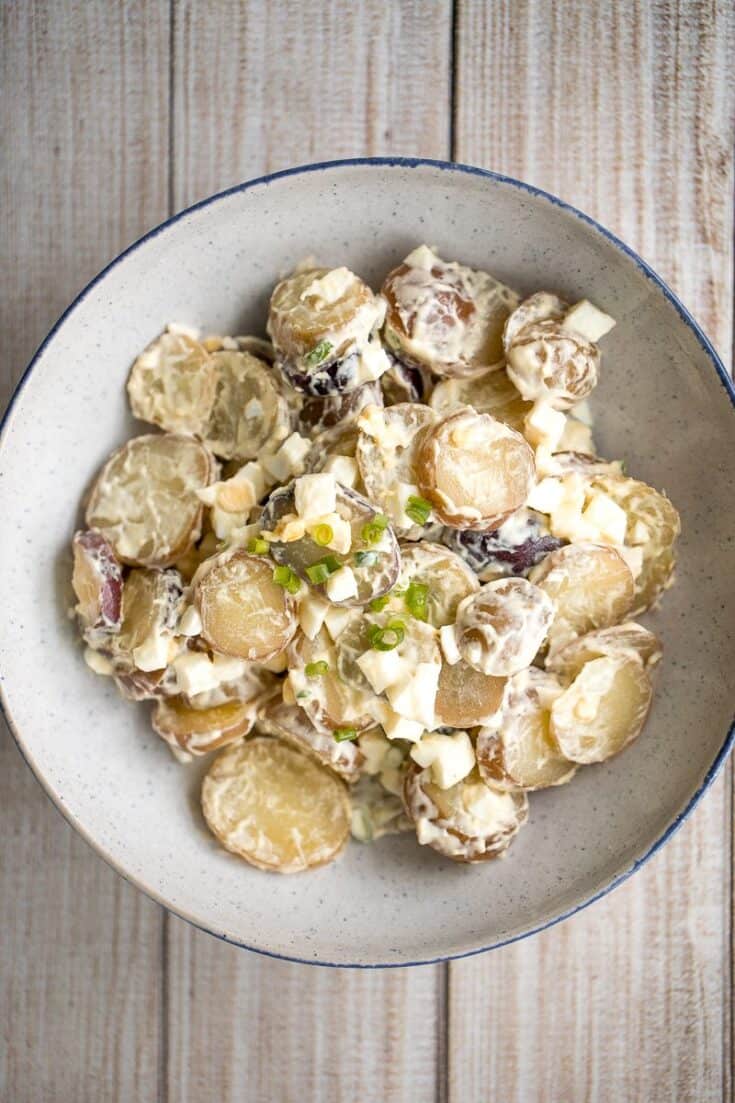
Potato Salad
Easy homemade potato salad is loaded with baby potatoes, eggs, and green onions and tossed in a mayo sauce and is a go-to for summer barbecues and picnics.
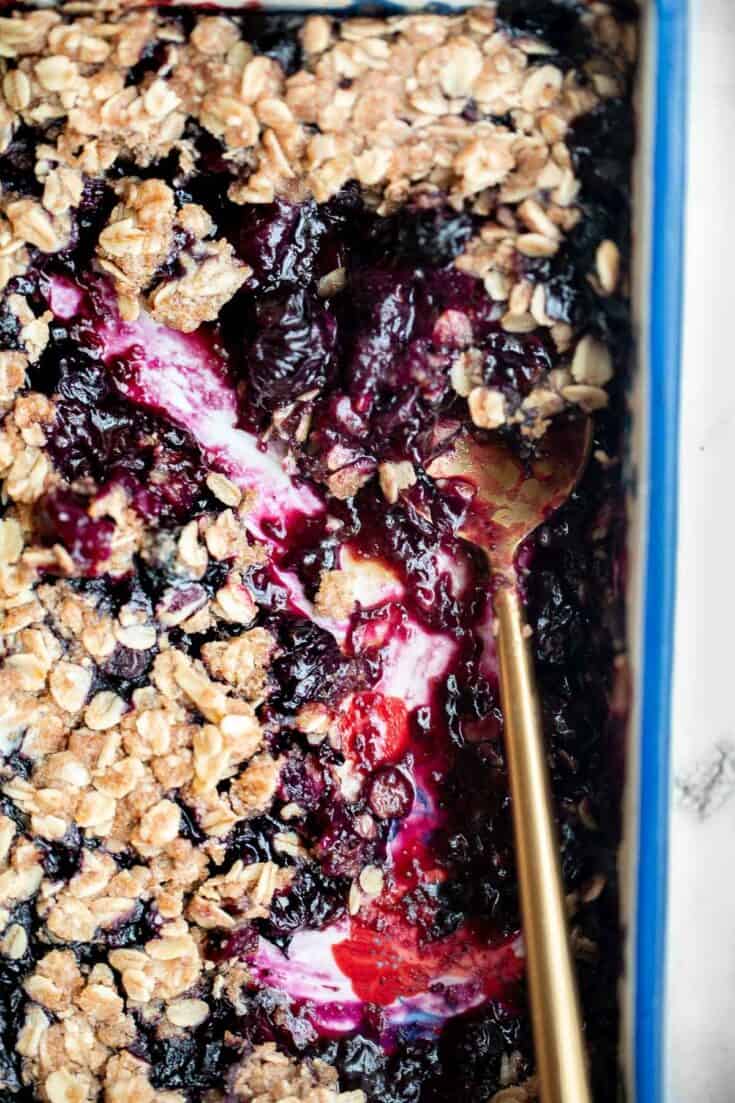
Blueberry Crisp
Blueberry crisp with a sweet blueberry filling and a buttery, crispy oat topping, is a delicious, fruity treat that's ready in just 45 minutes.
4th of July Summer Cookout Party Tips
- Plan your menu ahead of time. If you plan your menu early, you can prepare a complete shopping list, and can starting thinking about some tasks that you can do ahead of time. Some recipes, like skewers and patties, need to be marinated for at least an hour in advance (with better results overnight!), some can be made a day or 2 ahead of time and stored in an airtight container at room temperature or in the refrigerator, and some can made much further in advance and frozen. Check individual recipes for full storage instructions.
- Prep as much as possible. Once you have decided on what you are going to serve on the 4th of July, try to prepare as much as you can ahead of time. Some things that you can do to save you time are chopping up ingredients or preparing salads and dressings and separately in the refrigerator until ready to assemble.
- Set the table the night before. Get out all your festive and patriotic 4th of July plates and set your table early in the morning or even the night before so that you have one less thing to worry about on Independence Day.
Did You Make Any of These 4th of July Recipes?
Please leave a comment and rating below, and let me know what you thought of this round up of 4th of July recipes. Be sure to snap a picture and tag me on Instagram @aheadofthyme or share it on the Pinterest pin so that I can follow along.
HUNGRY FOR MORE? Don't forget to sign up for my email newsletter so that you don't miss any recipes. You can also follow along on Instagram and Pinterest for more recipe updates.
Sugar Cookie Bars
Sugar Cookie Bars are soft and chewy with a delicious homemade buttercream frosting on top. They are the easiest way to make Sugar Cookies with no rolling out dough or cookie cutters required!
The best part? This one bowl cookie bar recipe comes together in just 10 minutes with a handful of staple baking ingredients before it's ready to bake in the oven. It's the easiest way to bake cookies ever.

Why You'll Love these Sugar Cookie Bars
- Soft cookie bars with decadent icing. If you like soft and chewy cookies, then you'll love these sugar cookie bars. The sugar cookie itself is soft and crumbly, and the icing on top is rich and fluffy. It's the best of both worlds.
- They're easy to make. These sugar cookie bars are so easy to make. It's a one bowl cooke dough recipe which you then spread it on a baking tray before popping into the oven. No rolling and cutting out cookies or scooping and portioning out cookie dough here!
- They bake quickly. This easy recipe comes together after 10 minutes of prep and 15 minutes in the oven. You only need to wait a little while time to let it cool down completely before you can add frosting and sprinkles on top.
- Sugar cookie bars are great for crowds. Whether you're serving these sugar cookie bars at a birthday party, making them for a bake sale, or bringing them to a work potluck, these sugar cookie bars are the perfect to feed a crowd. With 24 individual slices, there's enough for everyone!
- Customize sugar cookie bars for any holiday. You can switch up the color of the frosting and sprinkles to suit any holiday. For instance, use green frosting with white and red sprinkles for Christmas, pink frosting with white and red sprinkles for Valentine's Day, orange frosting with black and white sprinkles for Halloween, or blue frosting with red and white sprinkles for the Fourth of July.

Ingredient Notes
To make this easy Sugar Cookie Bars, you will need the following ingredients (full measurements in recipe card below):
- butter - I recommend unsalted butter for the best results. You can substitute with salted butter, just leave out the extra salt called for in the recipe.
- granulated sugar
- egg
- vanilla extract
- almond extract
- all-purpose flour
- cornstarch
- baking powder
- salt
- buttercream frosting - made with butter, confectioners' sugar, vanilla extract, and heavy cream.
- food coloring - we used red food coloring to dye the frosting pink. You can leave it white or switch up the color based on a theme that you are making these for (eg. orange for Halloween, green for Christmas, or blue for the Fourth of July).
- sprinkles - use any color sprinkles to match the theme that you are going for.
Baking Tools and Equipment
You will also need the following kitchen tools and equipment to make these sugar cookie bars:
- measuring cups and spoons
- mixing bowls
- hand mixer or stand mixer
- half sheet baking pan and silicone baking mat (or parchment paper)
- wire cooling rack
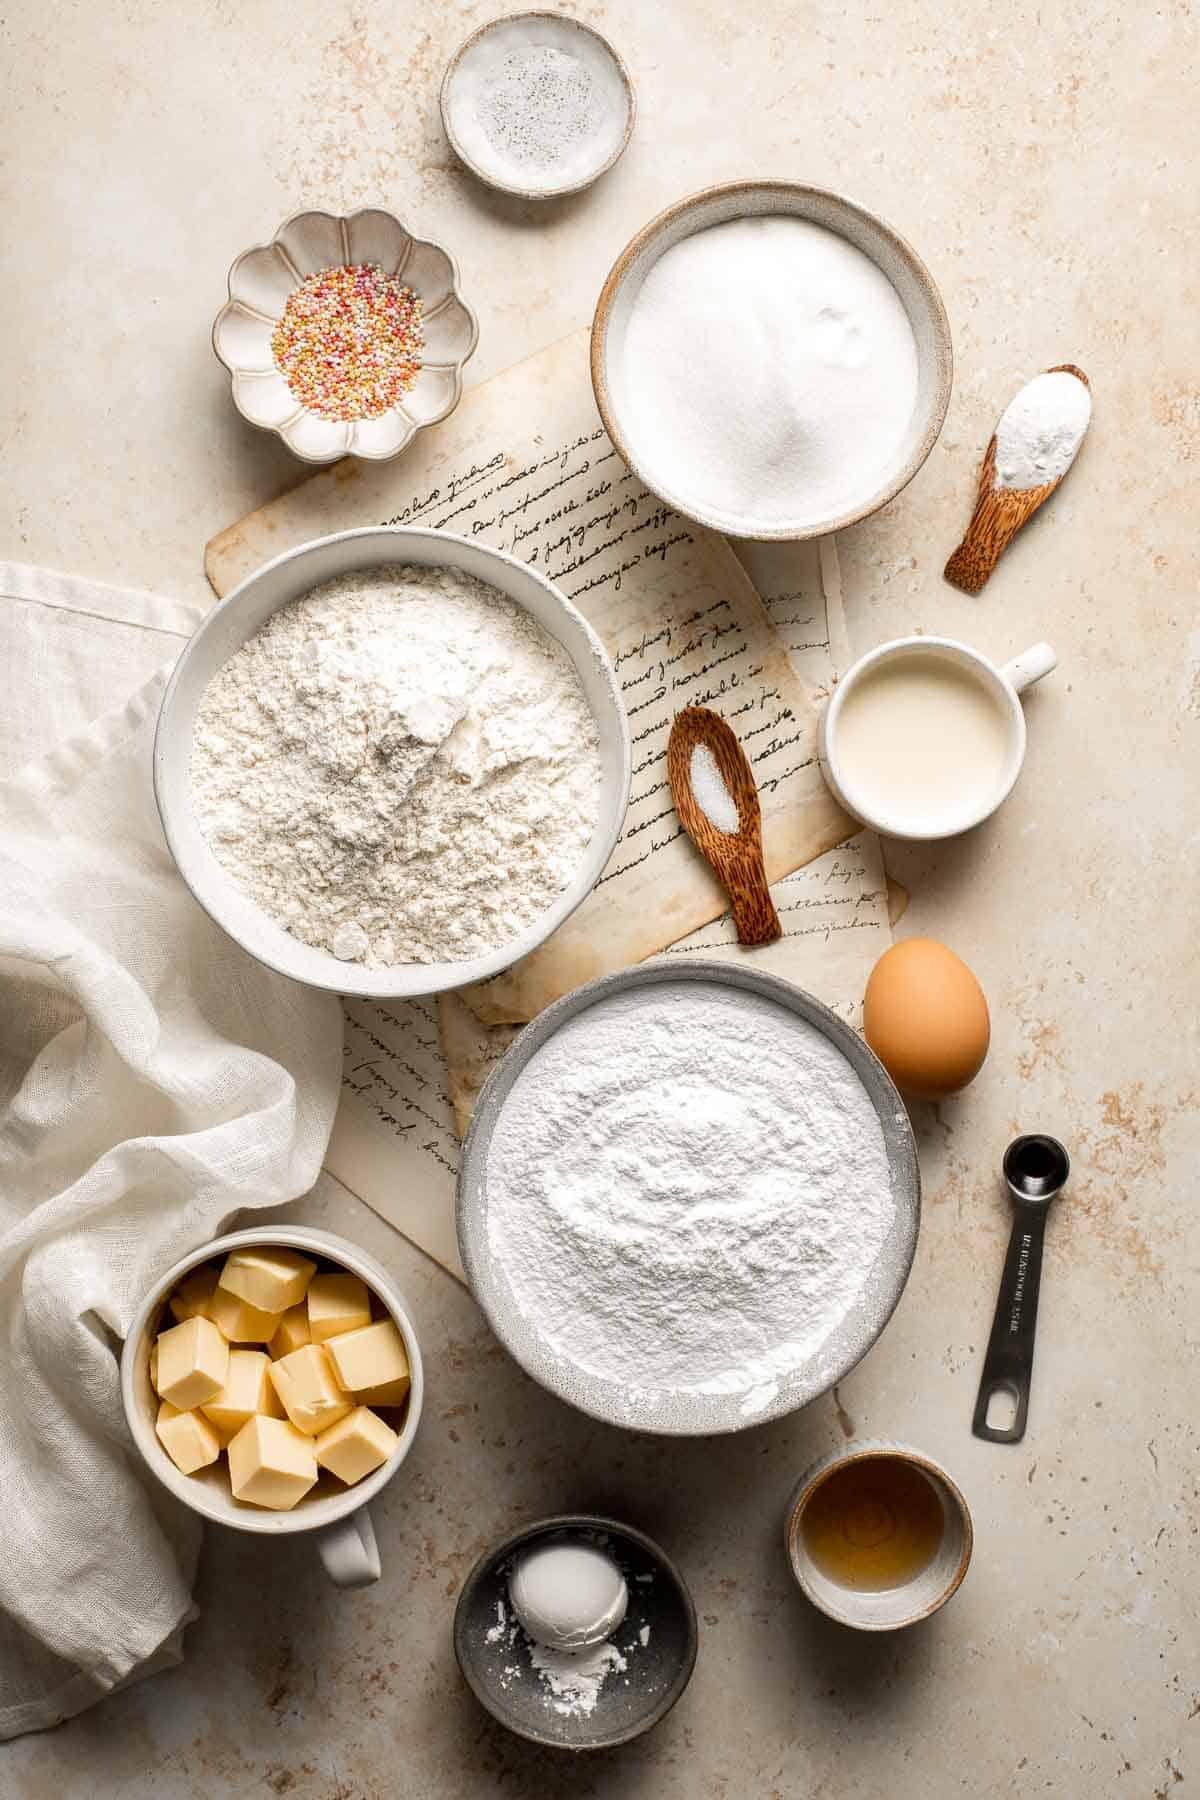
How to Make the Best Sugar Cookie Bars
- Cream butter and sugar. In a large mixing bowl, cream butter and sugar together using a hand mixer (or stand mixer fitted with a paddle attachment) on medium speed until light and fluffy, about 2 minutes.
- Add wet ingredients. Next, add egg, vanilla extract, and almond extract and beat until combined, scraping down the sides of the bowl if needed.
- Add dry ingredients. Turn the mixer to low speed and add cornstarch, baking powder, and salt. Gradually add flour and mix until just combined.

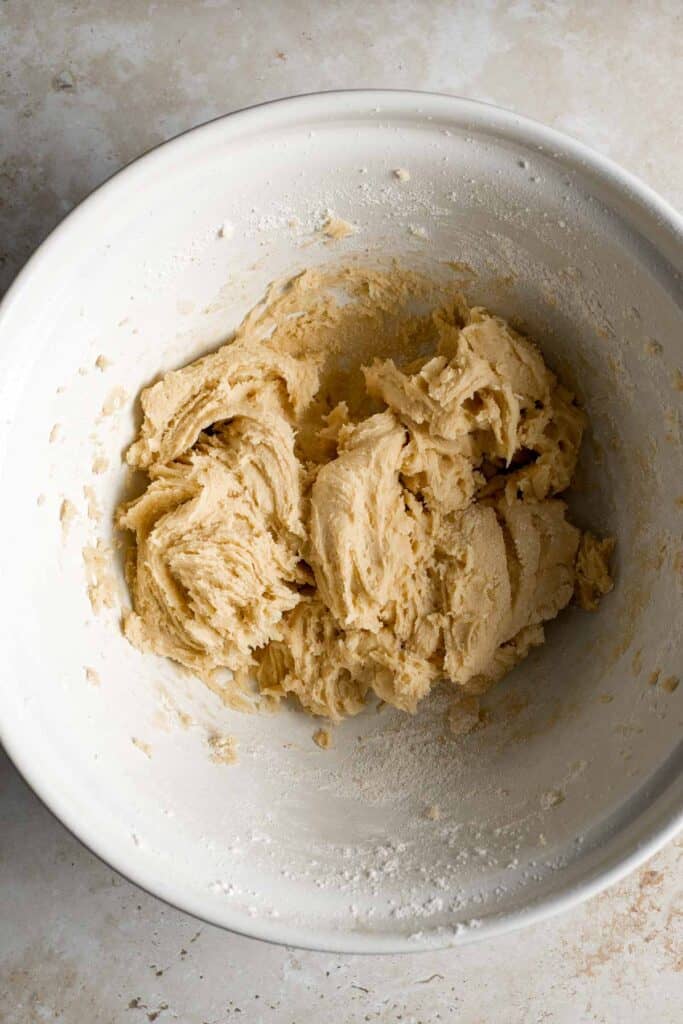
- Shape cookie bars. Line a large half sheet baking pan (9x13-inch baking sheet) with parchment paper or a silicone baking mat and lightly spray with cooking spray. Spread the cookie dough evenly in the prepared baking sheet.
- Bake. Bake in a preheated 350F oven until puffy and just baked through, about 14-16 minutes (do not overbake as they will continue to cook in the baking sheet when removed from the oven).
- Cool. Place the baking sheet on a wire cooling rack and allow it to cool completely, about an hour.
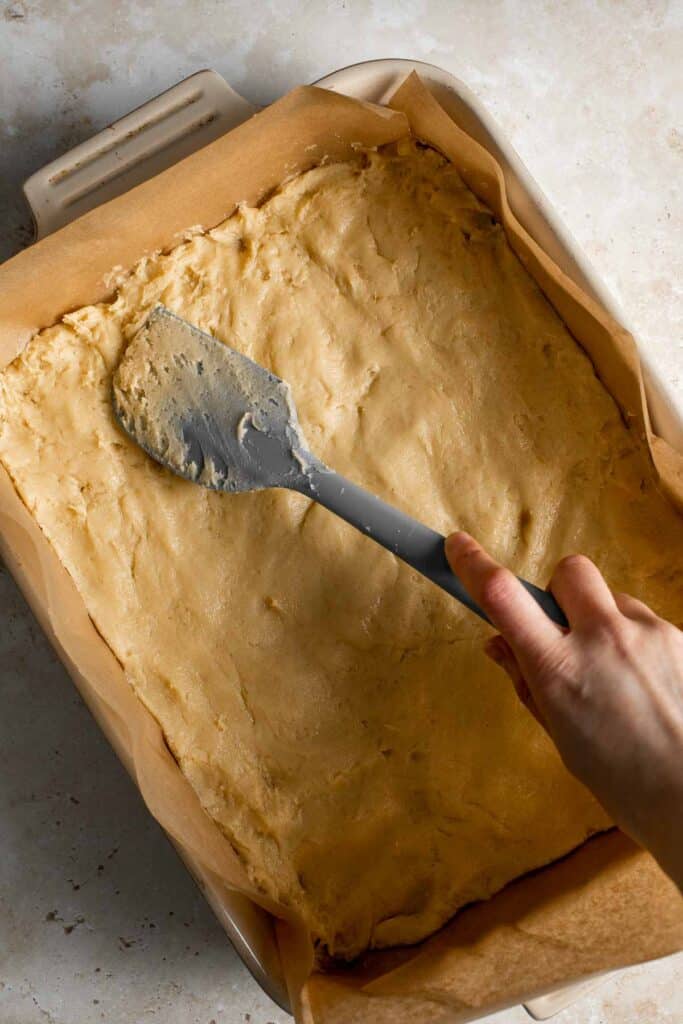
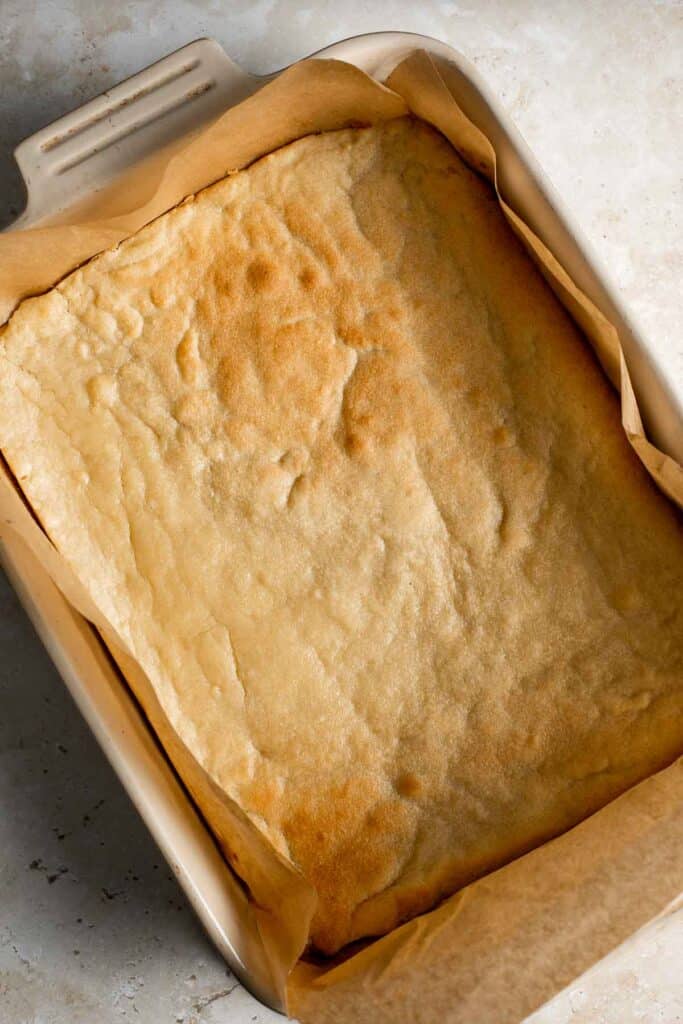
How to Make Frosting for Sugar Cookie Bars
In a large mixing bowl, combine butter, sugar, heavy cream, vanilla extract, and food coloring. Use a hand mixer to blend together until fluffy. If the frosting is too dry, add up to 1 tablespoon of heavy cream.
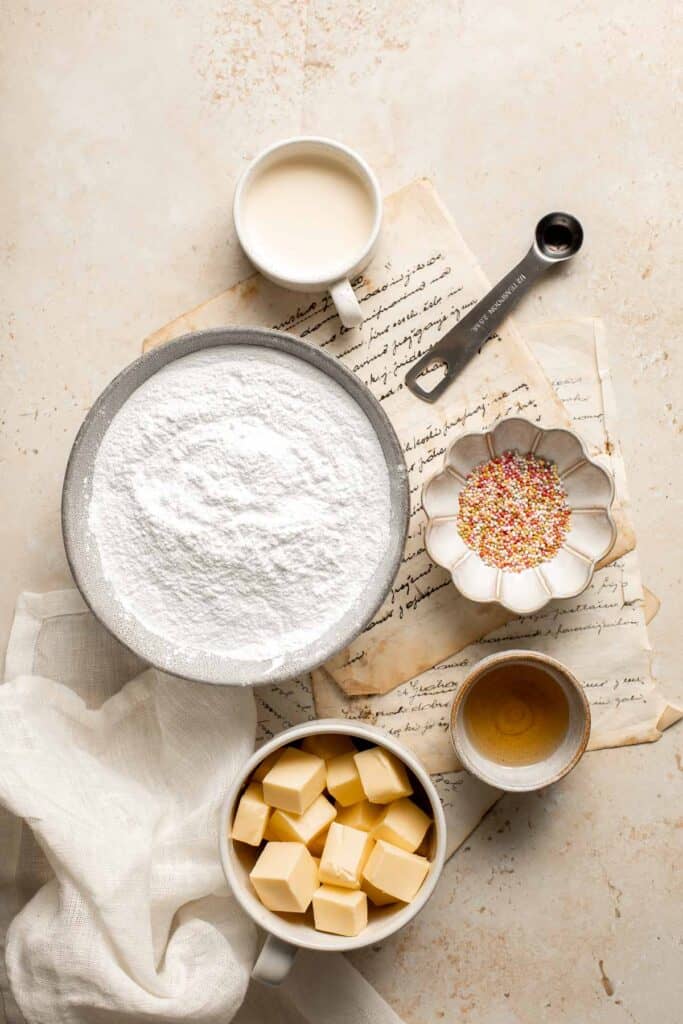
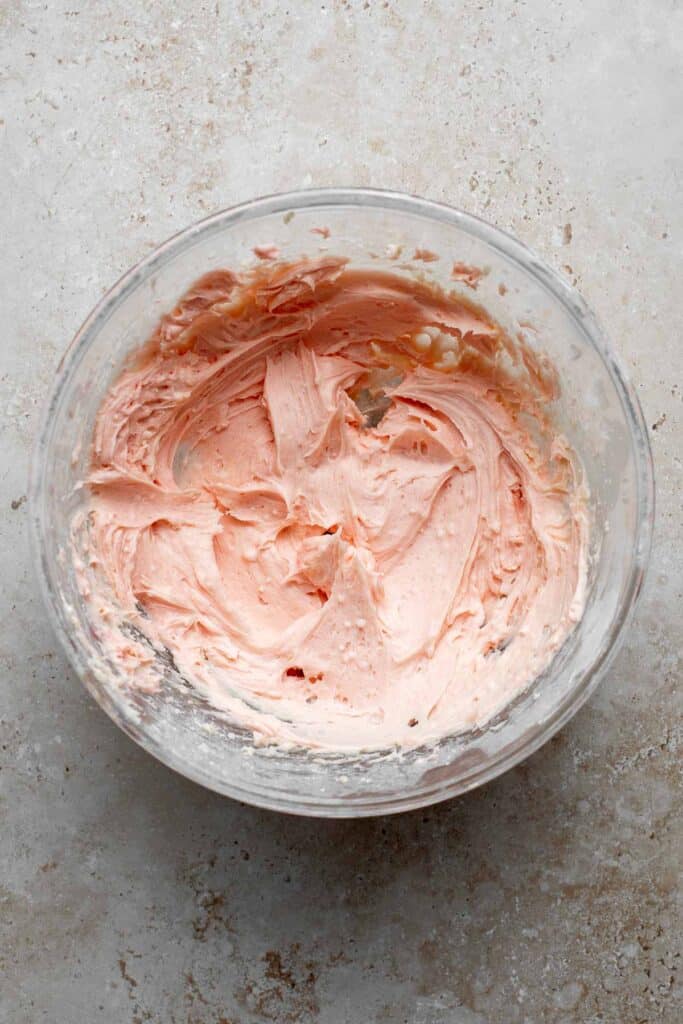
Spread the frosting evenly over the cooled sugar cookie bars and add sprinkles on top. Slice into 24 bars and serve.
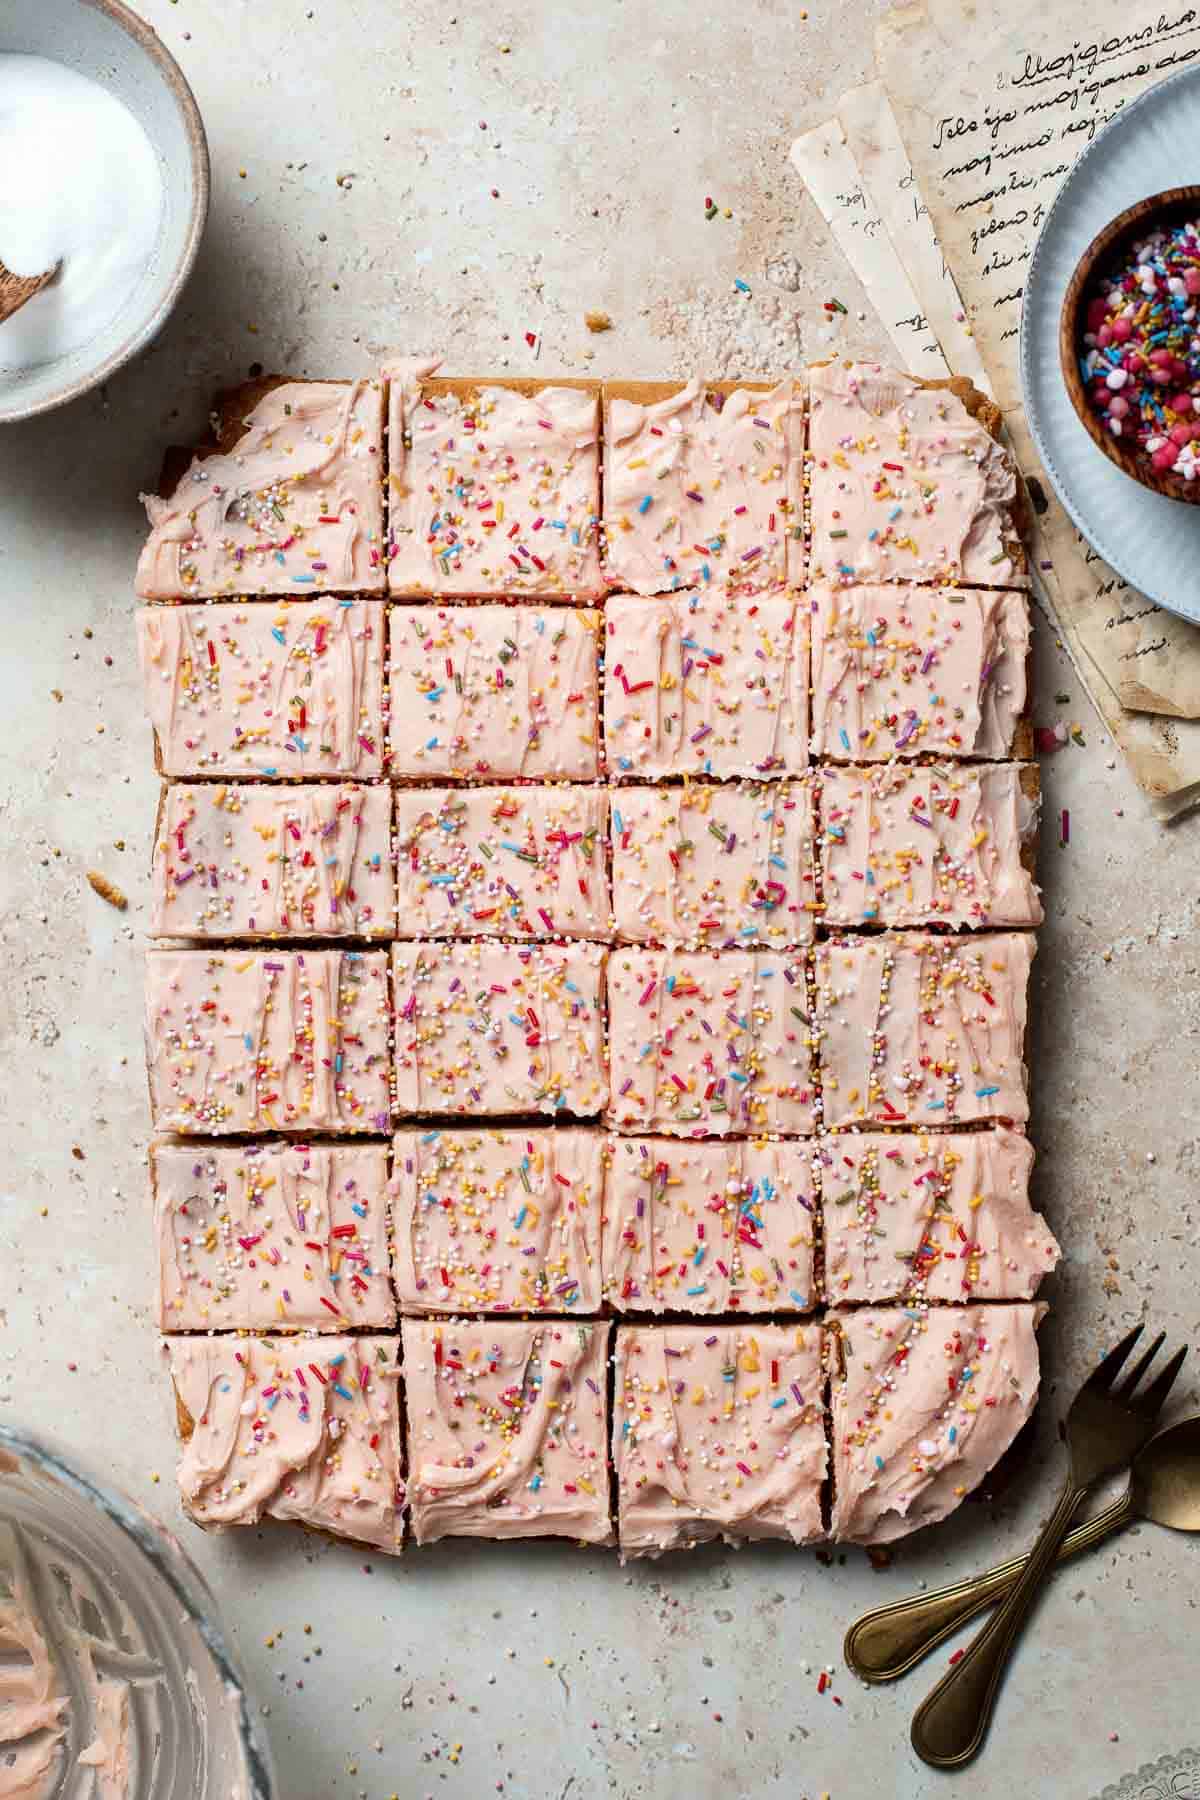
Storing Instructions
- How to store: Keep sugar cookie bars stored in an airtight container. Store them for up to 2 days at room temperature in a cool, dry place away from humidity, heat, or sunlight. You can store them for up to a week in the fridge but their texture will harden the longer they're stored in there.
- How to freeze sugar cookie bars: If you like preparing ahead of time, you should know that you can freeze these sugar cookie bars! Freeze the unfrosted sheet of cookie bars wrapped tightly in plastic cling wrap and stored in a freezer bag or airtight container for up to three months. Thaw overnight in the fridge, then frost, slice, and serve.

More Bar Recipes
- Chocolate Chip Cookie Bars
- Pecan Pie Bars
- Fudgy Brownies
- M&M Cookie Bars
- Blueberry Oat Squares
- Easter Blondies
Tried this recipe?
I'd love to hear what you think! Leave a comment and rating below to share your feedback. Your reviews help others discover this recipe and help me keep creating more free recipes for you. Snap a photo and tag me on social media @aheadofthyme too.

Southwest Salad
Southwest Salad is a delicious and hearty salad that is loaded with classic southwestern flavors with a Tex-Mex twist. With an assortment of fresh veggies, filling ingredients like chicken, beans, and avocados, and cheddar cheese, all tossed in a healthy homemade Southwest salad dressing, this salad has it all.
The best part? You can throw this simple and classic salad together in under 10 minutes for a quick dinner or a healthy lunch. Serve southwest salad on Taco Tuesday, at a summer potluck, or anytime of the week.
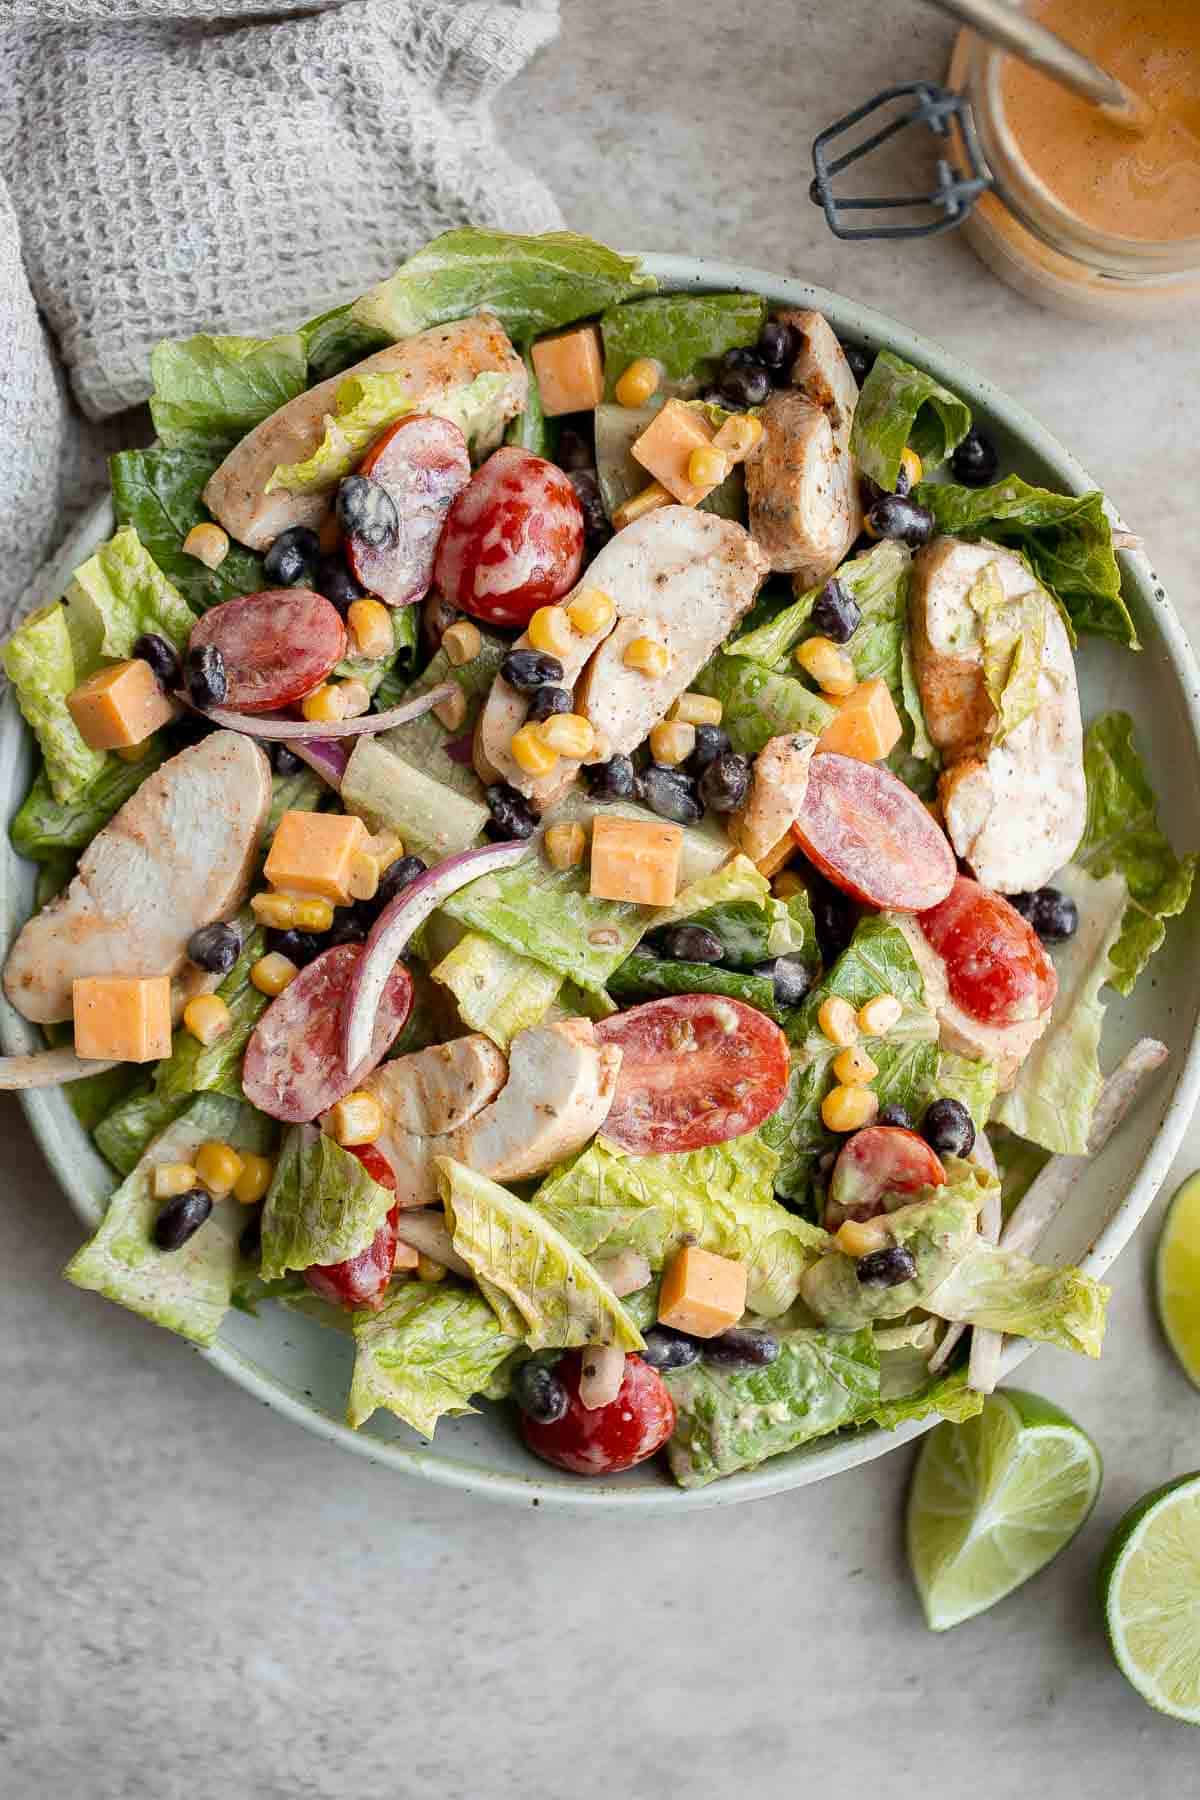
Why You'll Love Southwest Salad
- Quick and easy to make in 10 minutes. A tossed salad is so easy to make because you just combine all the ingredients together, drizzle on some salad, and toss together. It's so easy that you can get the kids to help. This recipe is perfect if you are making a salad for a crowd, meal-prepping, or just short on time.
- It's a nourishing and filling salad. When you make this southwest salad, you don't need to worry about pairing sides or finding other dishes to serve along with it. It stands its ground all on its own, thanks to the chicken, beans, bountiful veggies, and creamy dressing. But you can choose to make it with or without chicken - and it's still just as filling.
- Loaded with flavor. In this southwest chicken salad, you'll enjoy the flavorful homemade southwest dressing that is packed with lime juice, cilantro, cumin, paprika, and chili powder. But you'll also get to savor the natural flavors from all of the ingredients.
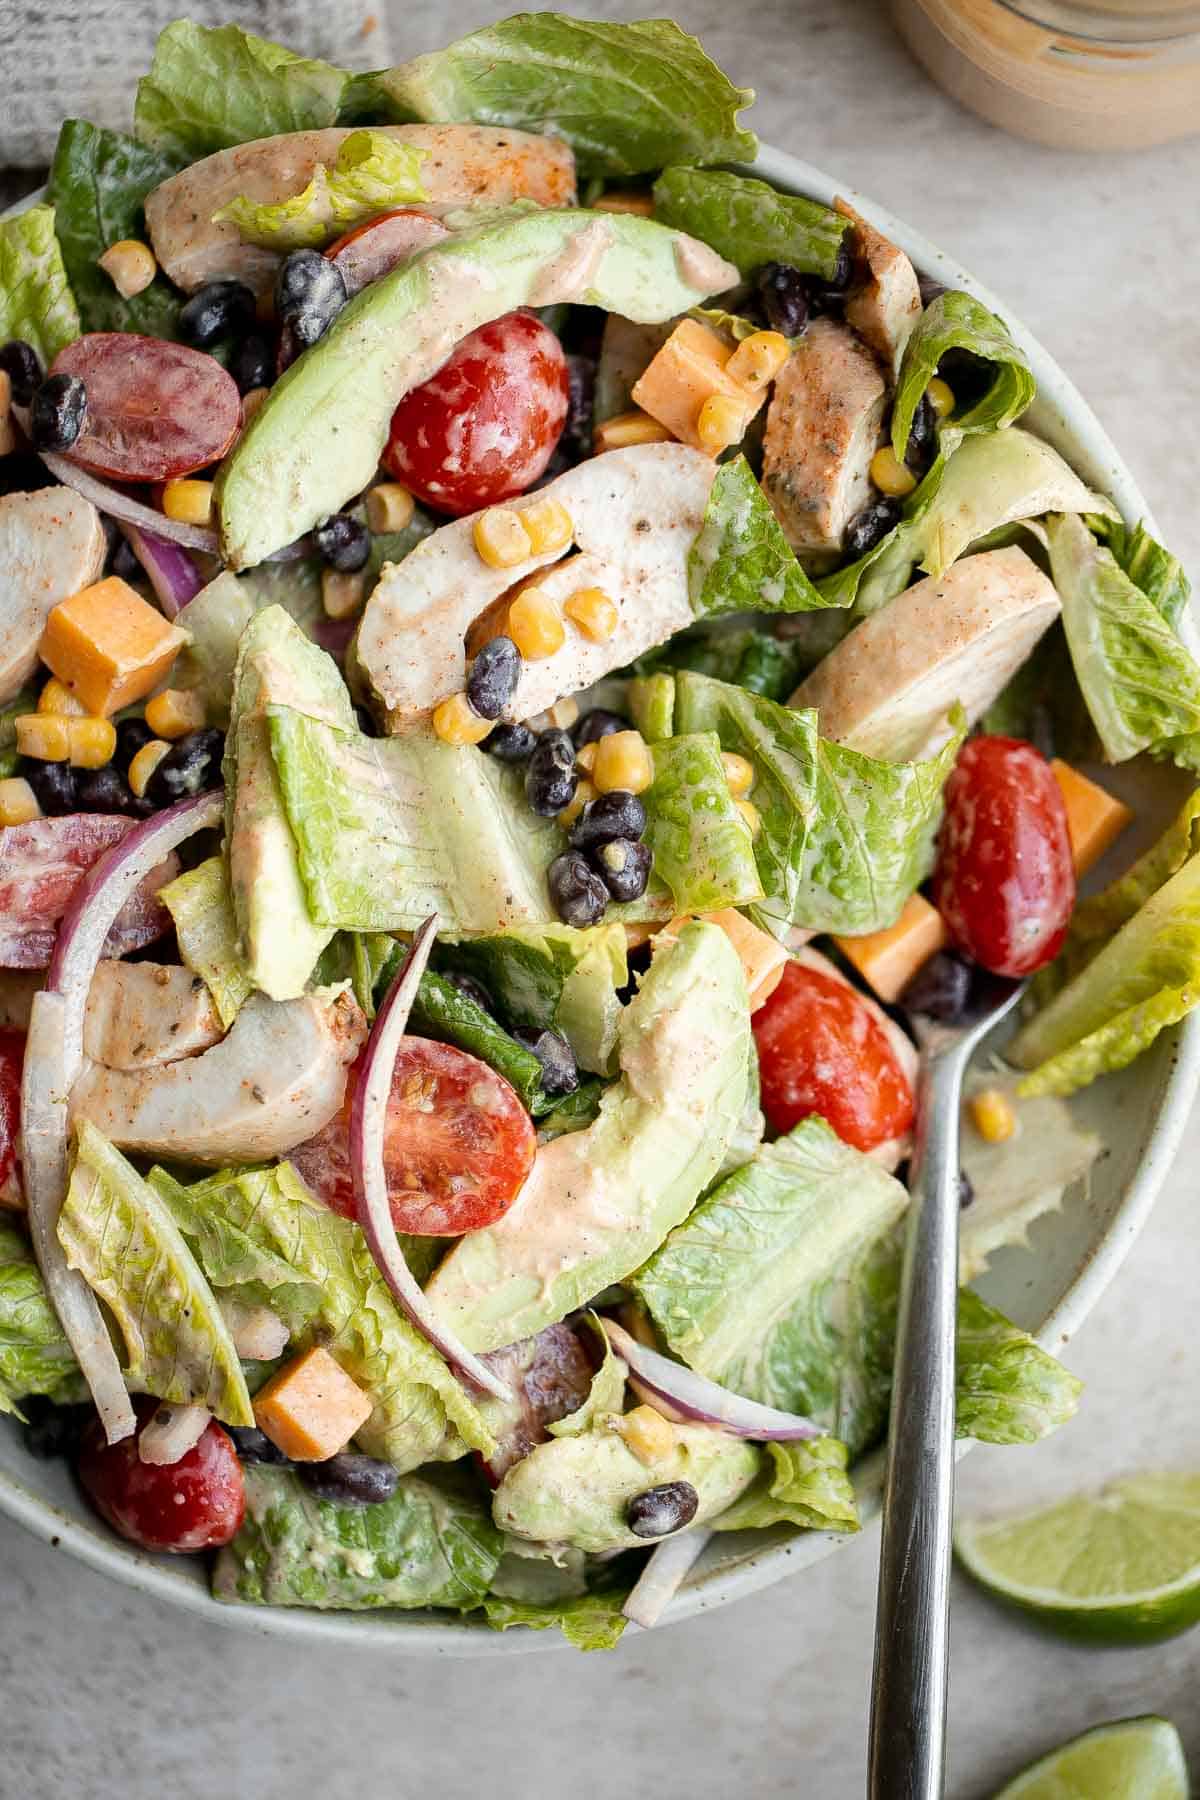
Ingredient Notes
To make this delicious Southwest Salad, you will need the following ingredients (full measurements in recipe card below):
- romaine lettuce - feel free to substitute with your favorite salad greens, whether you want to use a bag or spring mix greens, kale, or spinach.
- grape tomatoes or cherry tomatoes
- 1 (15 ounce) can black beans
- corn - you can use fresh corn kernels sliced off the cob, or canned corn (drained and rinsed), or frozen corn that has been thawed and cooked.
- avocado
- red onion
- yellow cheddar - feel free to substitute with your favorite cheese. Some great alternatives are cotija cheese, tex mex cheddar, or white cheddar.
- chicken breasts - you can add in some cooked chicken breast for extra protein, but it is completely optional. I used our Oven Baked Chicken Breast in here. Some other great options are Mexican Chicken Breast or Air Fryer Chicken Breast.
- southwest salad dressing - we used our homemade Southwest Salad Dressing here that takes just 5 minutes to make in the blender. You can also use store-bought dressing - whatever is more convenient for you. Another dressing options that works well in this salad is Creamy Cilantro Lime Dressing.
You can customize this salad and substitute or add in other ingredients that you like. You can try adding Tortilla Strips, bell peppers, or fresh cilantro.
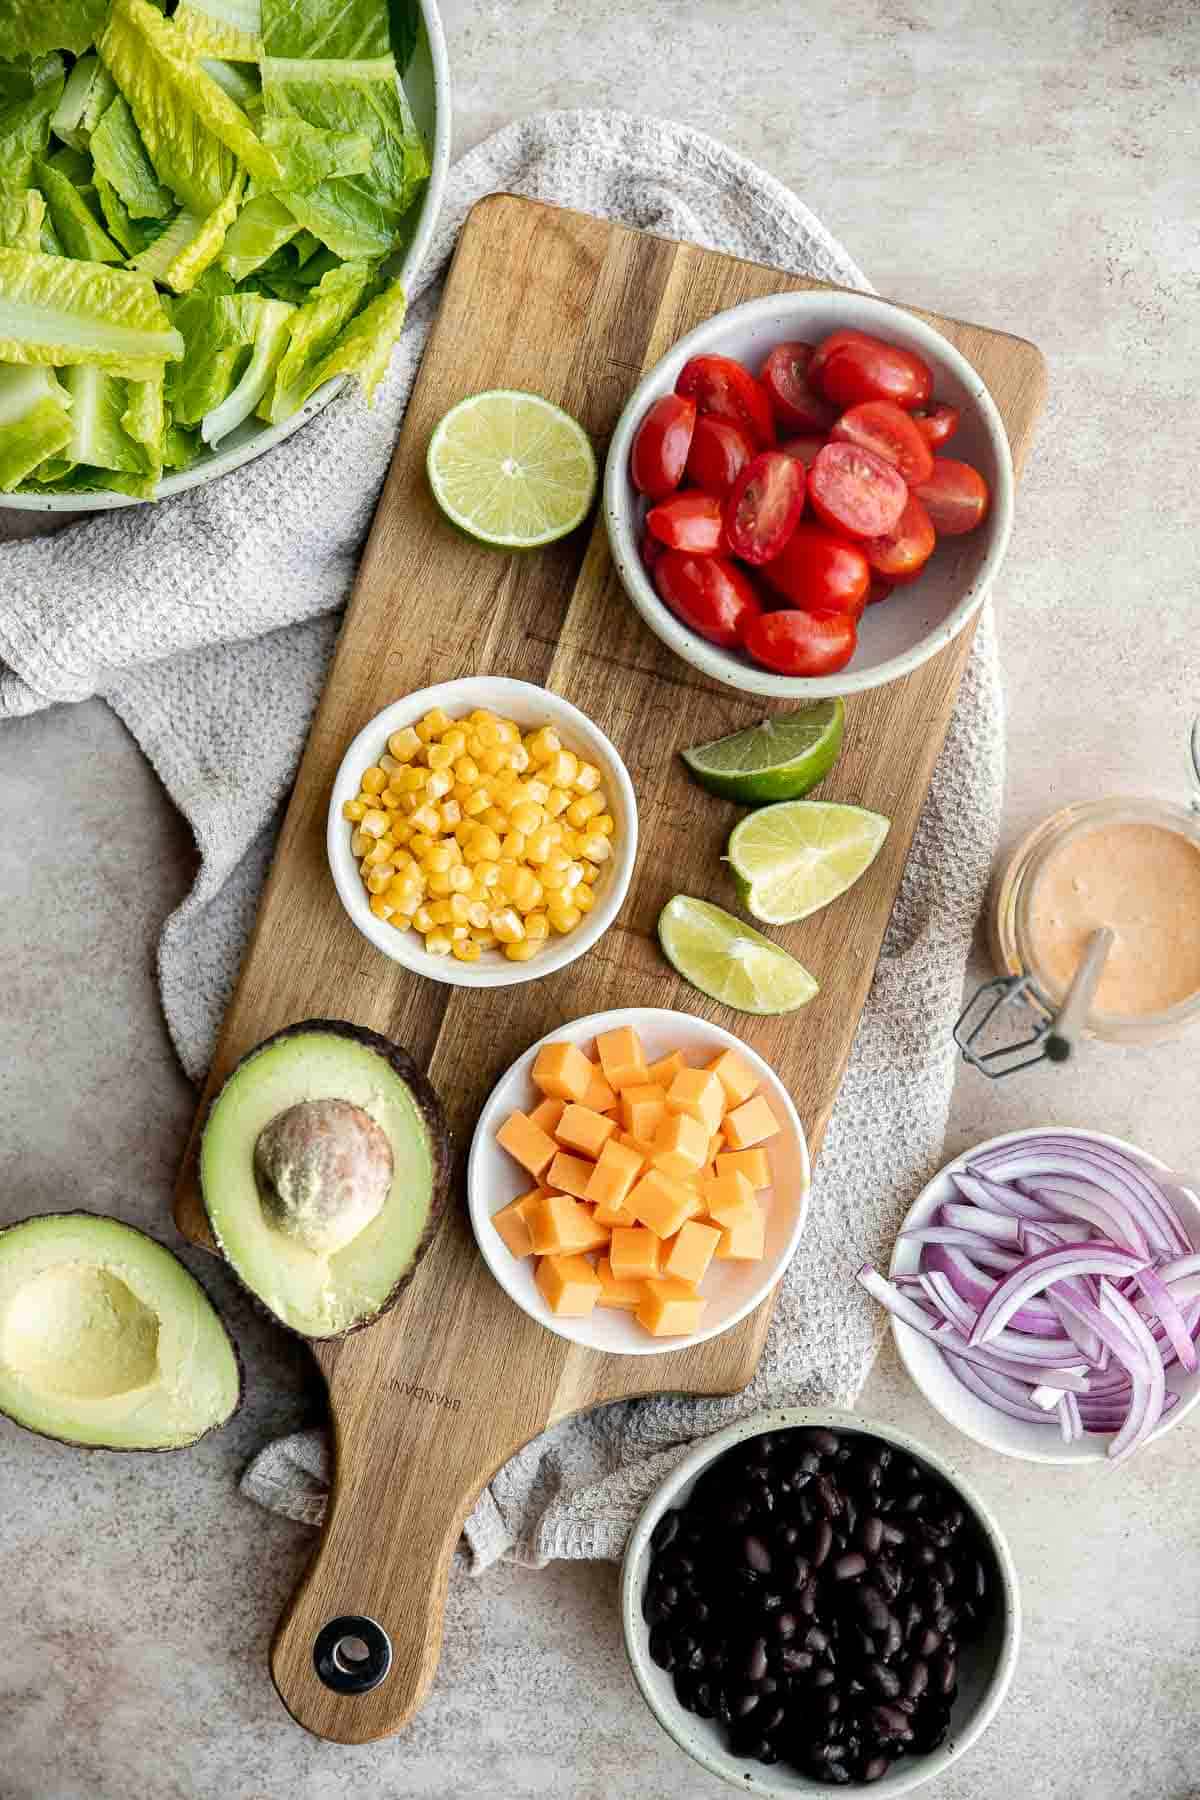
How to Make the Best Southwest Salad
Like most salad recipes, this Southwest Salad is so easy to make. You just combine everything into a large serving bowl and toss to coat - romaine lettuce, tomatoes, black beans, corn, avocado, red onion, yellow cheddar, and sliced chicken (if using).
Then, drizzle southwest salad dressing over the salad and serve or toss to coat. You can make your own southwest dressing in just 5 minutes or use store-bought dressing if it's more convenient.
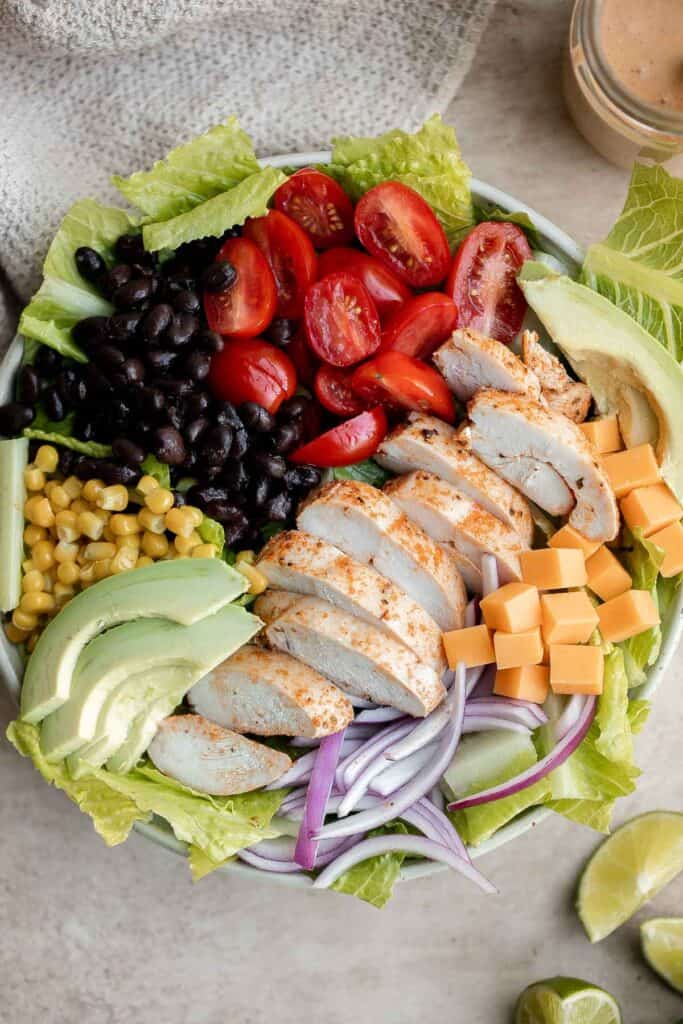
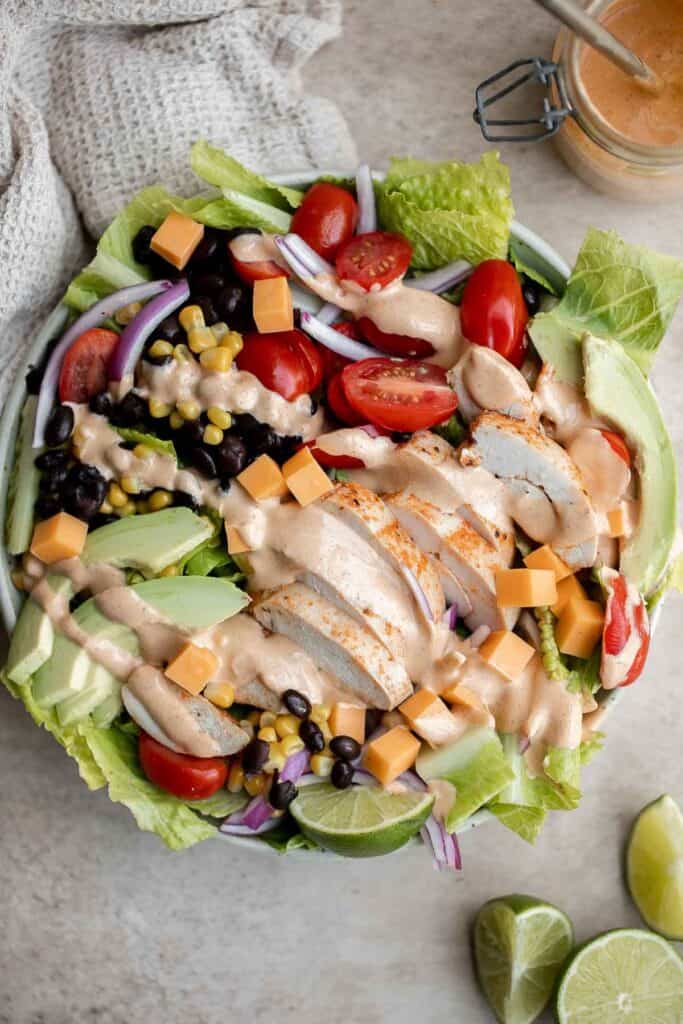
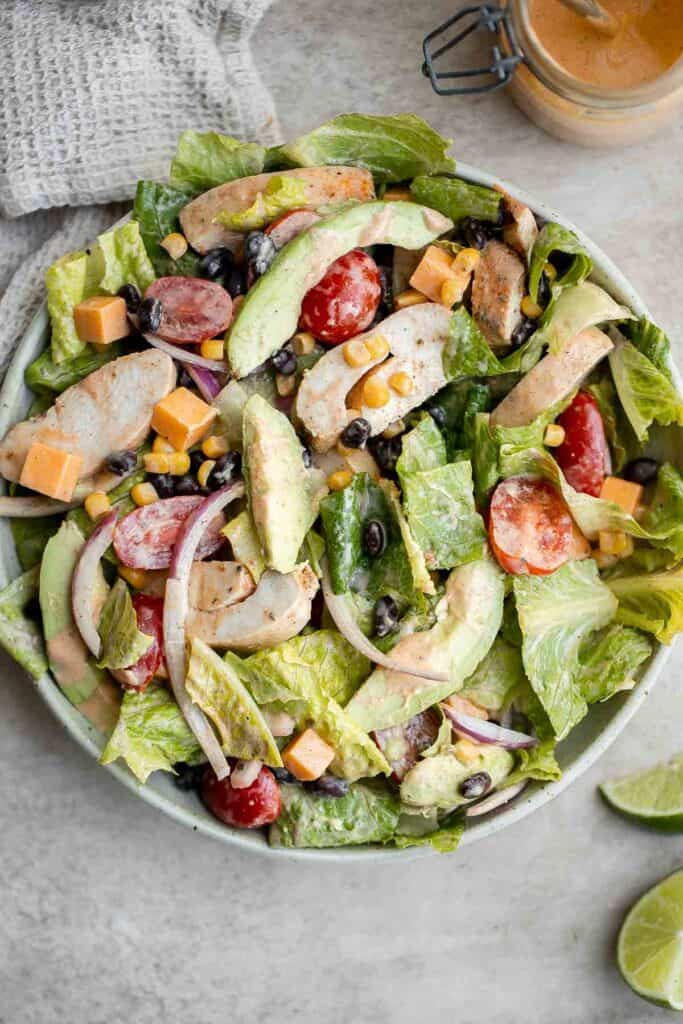
How to Serve
I like to serve this southwest salad on its own since it's packed with veggies and protein. However, if you're serving a large crowd, this salad also pairs well with southwest and Mexican-inspired dishes such as:
- Tacos
- Cilantro Lime Rice
- Beef and Bean Burritos
- Sheet Pan Nachos
- Mexican Street Corn (Elote)
- Tortilla chips with Salsa and Guacamole
Storing Instructions
- Make ahead instructions: To make this salad ahead of time, store the salad, chicken, and dressing separately in airtight containers in the refrigerator. I would also recommend leaving the avocado out and adding it when serving (to prevent browning). The chicken will last up to 3 days, and the salad will last 4-5 days, and the dressing will last up to 1 week. When ready to eat, just toss and combine just before serving or packing for a healthy lunch. This will keep your salad looking and tasting fresh.
- How to store: When storing leftover southwest salad, it's best to keep your dressing on the side if possible. If you don't, the acidic lime juice will wilt your romaine lettuce faster. Again, I also prefer to keep the avocados separate, so I can add fresh avocado when it's time to eat. Store leftovers in an airtight container in the refrigerator. Undressed, this salad will last for 4-5 days in the fridge. With dressing, it will last about 2-3 days.
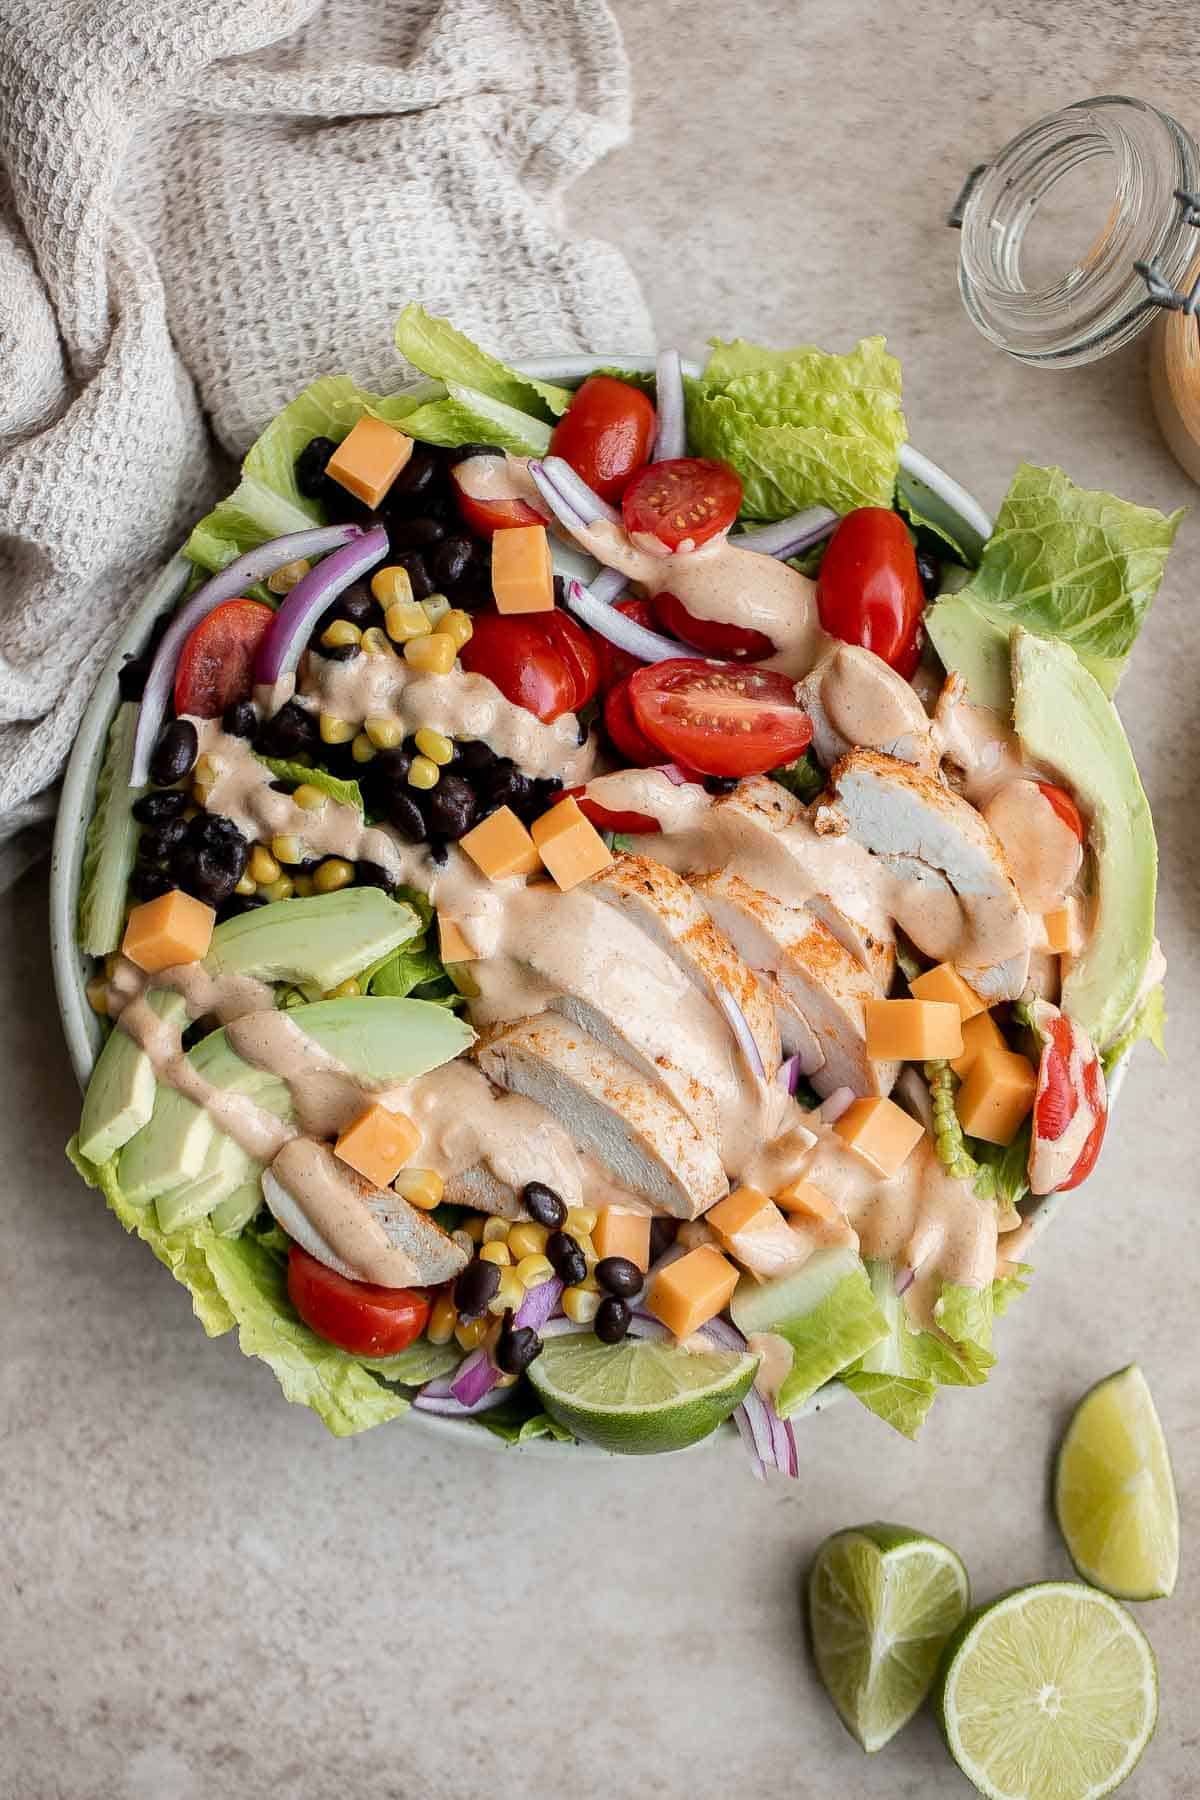
More Salad Recipes
- 40 Best Salad Recipes
- Mexican Chicken Caesar Salad
- Summer Corn Salad
- Garden Salad
- Kani Salad
- Mexican Street Corn Salad
Tried this recipe?
I'd love to hear what you think! Leave a comment and rating below to share your feedback. Your reviews help others discover this recipe and help me keep creating more free recipes for you. Snap a photo and tag me on social media @aheadofthyme too.
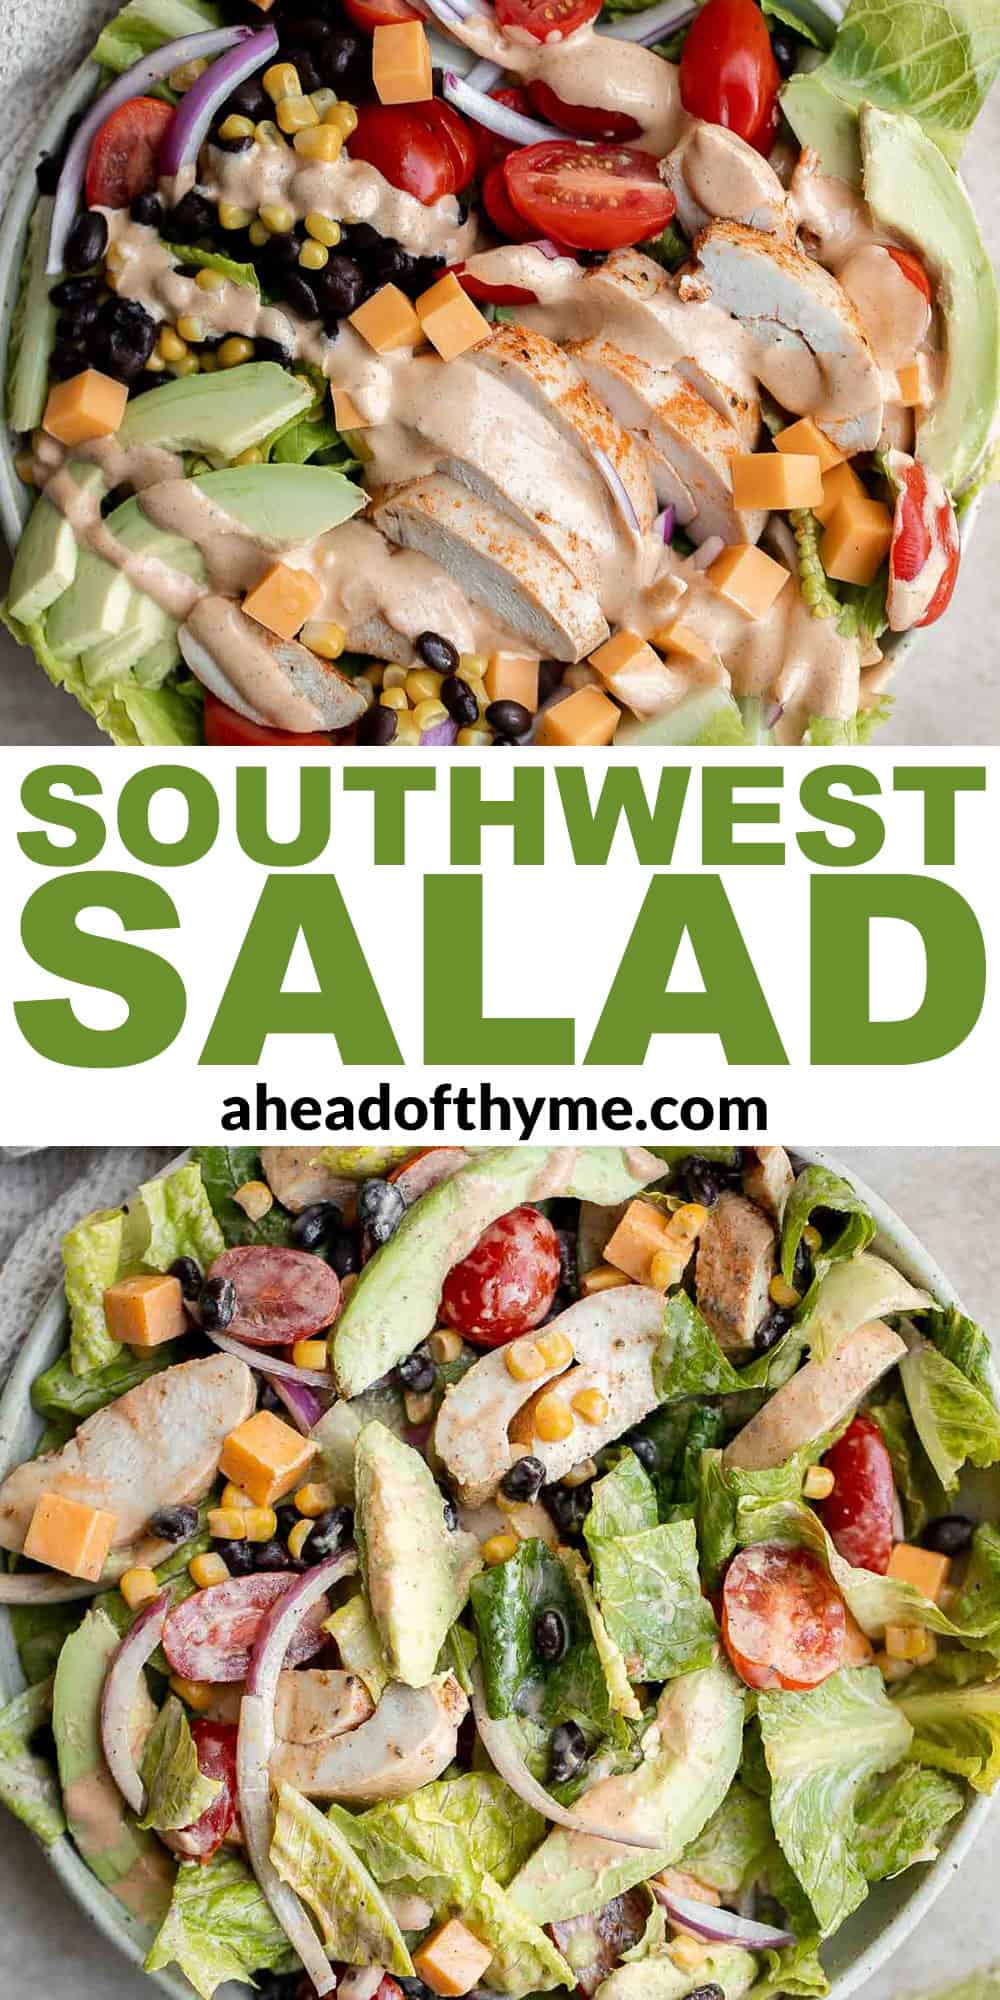
Southwest Salad Dressing
Homemade Southwest Salad Dressing is creamy and flavorful with a little spicy kick. This quick and easy yogurt-based dressing is ready in just minutes whether you make it in the blender or stir by hand.
Plus, making salad dressing from scratch is so much better, tastier, and healthier than store-bought. You might never go back to bottles dressing after realizing just how easy it is to make at home.
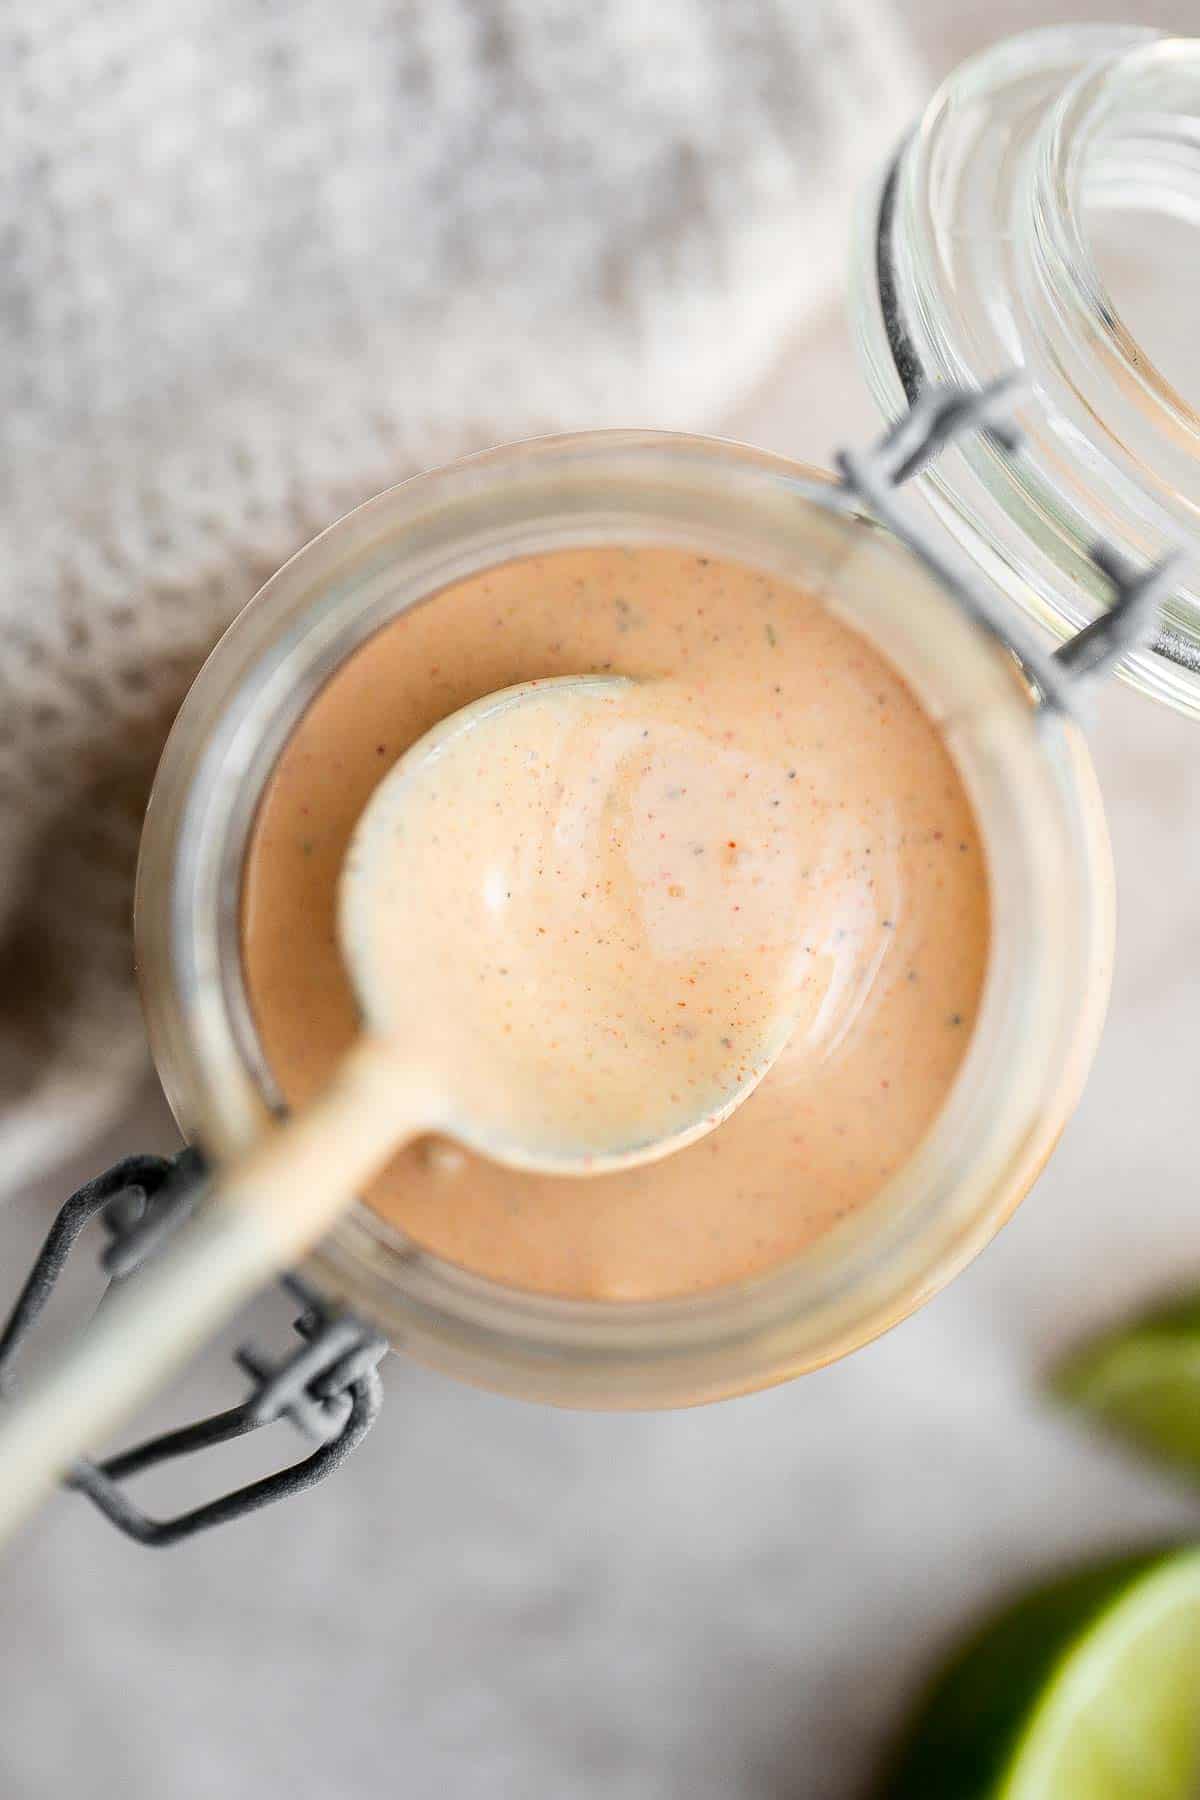
Why You'll Love this Southwest Salad Dressing
- It's quick and easy to make dressing at home. It can be really tempting to reach for a bottle of store-bought dressing because it's so convenient, but you may reconsider if you knew it takes just 5 minutes to make Southwest salad dressing at home. All you do is combine and mix the ingredients together.
- It's flavorful and delicious. This homemade southwest dressing is a creamy yogurt-based dressing loaded with classic seasoning with a TexMex twist that packs on the the flavor with the right amount of kick. It's perfect drizzled over Southwest Salad or any salad you like.
- It's better than store-bought. It's not surprising that making southwest salas dressing from scratch is cheaper and healthier than using bottled store-bought dressing. It has no preservatives, fillers, or artificial flavors like a lot of the dressings you can find at the store. Just real ingredients here.
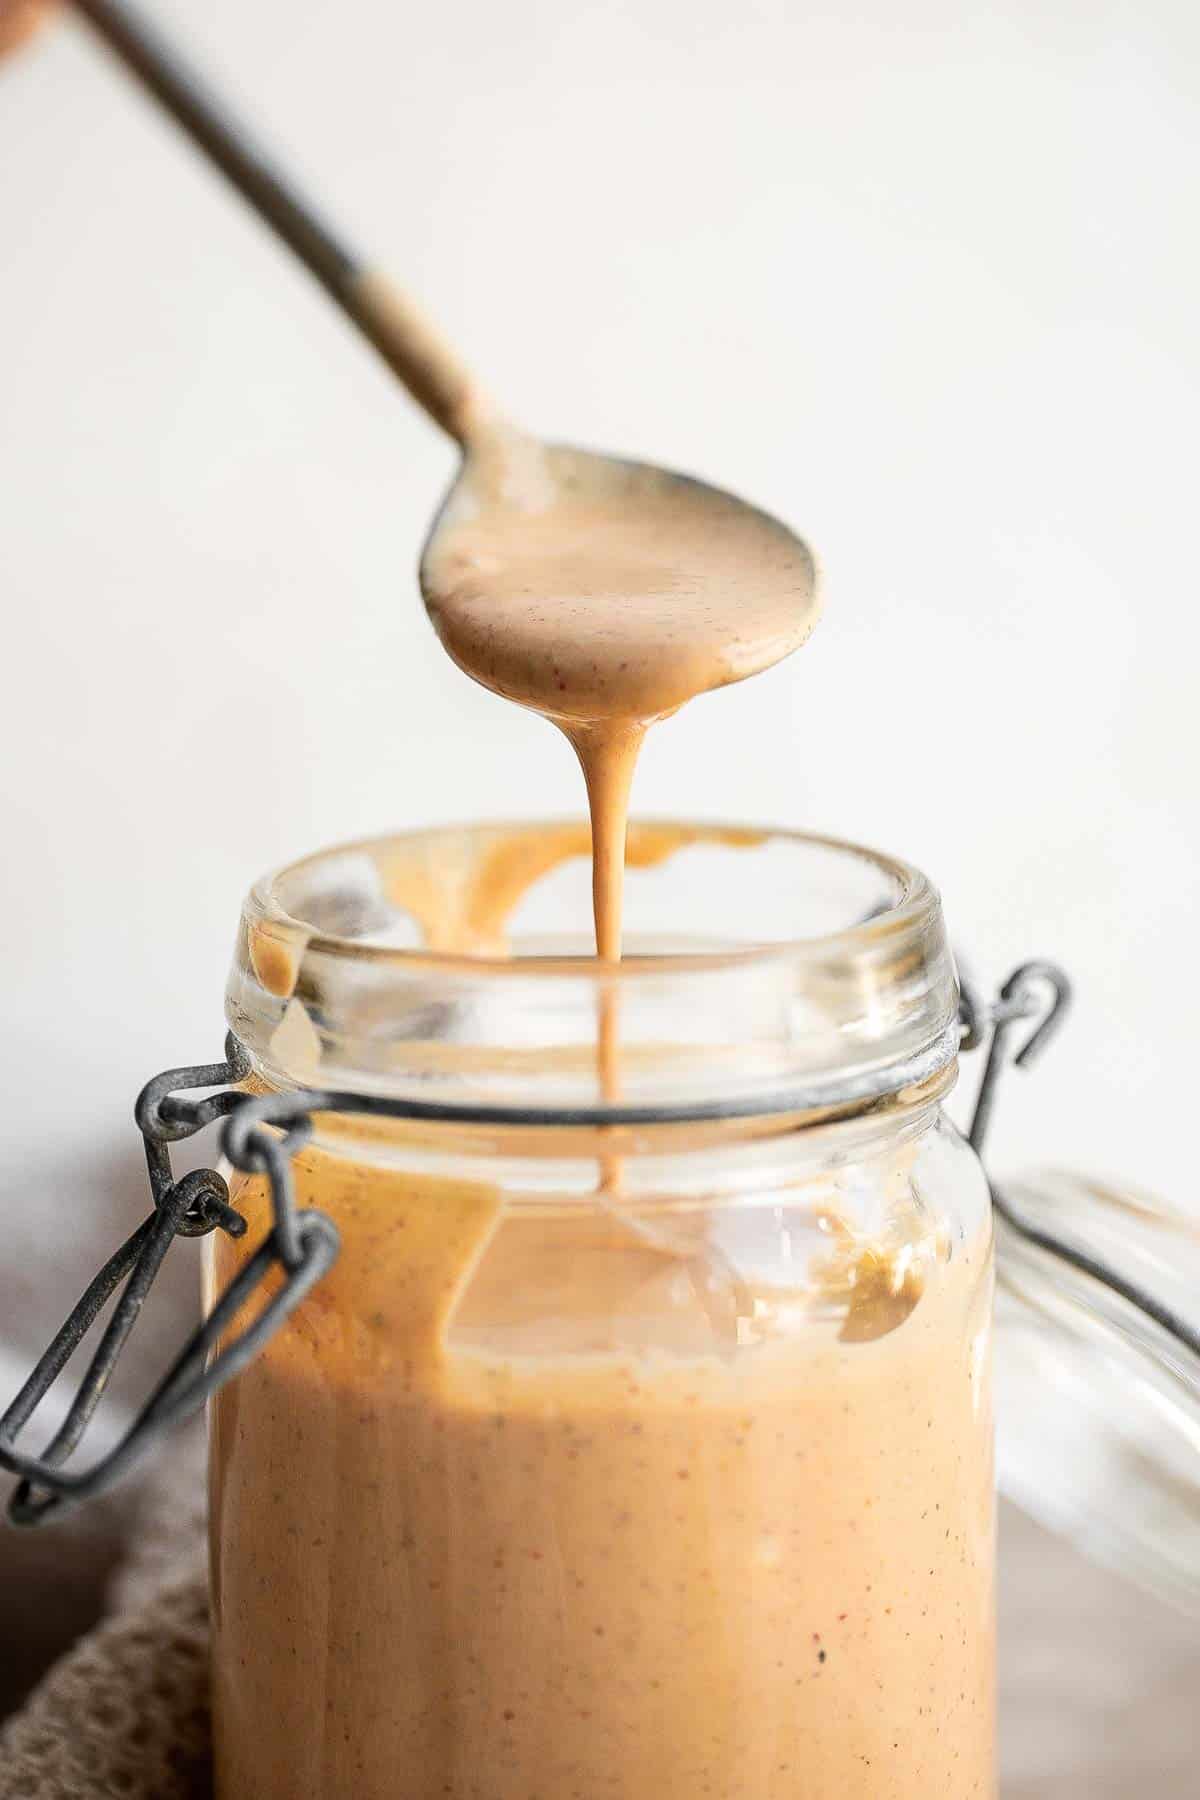
Ingredient Notes
To make this easy Southwest Salad Dressing, you will need the following ingredients (full measurements in recipe card below):
- Greek yogurt - you could substitute with plain yogurt but note that the dressing will have a much thinner consistency. If using plain yogurt, I recommend mixing the dressing by hand to keep it thicker.
- lime juice - lime juice adds a traditional tang but you can substitute with lemon juice if you need to.
- honey - adds a hint of sweetness. You can add more or less to your preference.
- cilantro - you can substitute with ½ teaspoon dried cilantro or Italian seasoning.
- seasoning - a flavorful seasoning blend made with a combination of chili powder, cumin, paprika, garlic powder, onion powder, salt, and pepper.
You will also need measuring cups and spoons, mixing bowl, and a mason jar or airtight container for storage.
How to Make the Best Southwest Salad Dressing
In a blender, combine ¾ cup Greek yogurt with the remaining ingredients. Pulse mix until combined and cilantro is well blended.
Transfer the dressing to a medium mixing bowl and add the remaining ¼ cup Greek yogurt. Stir it in with a spoon until combined.
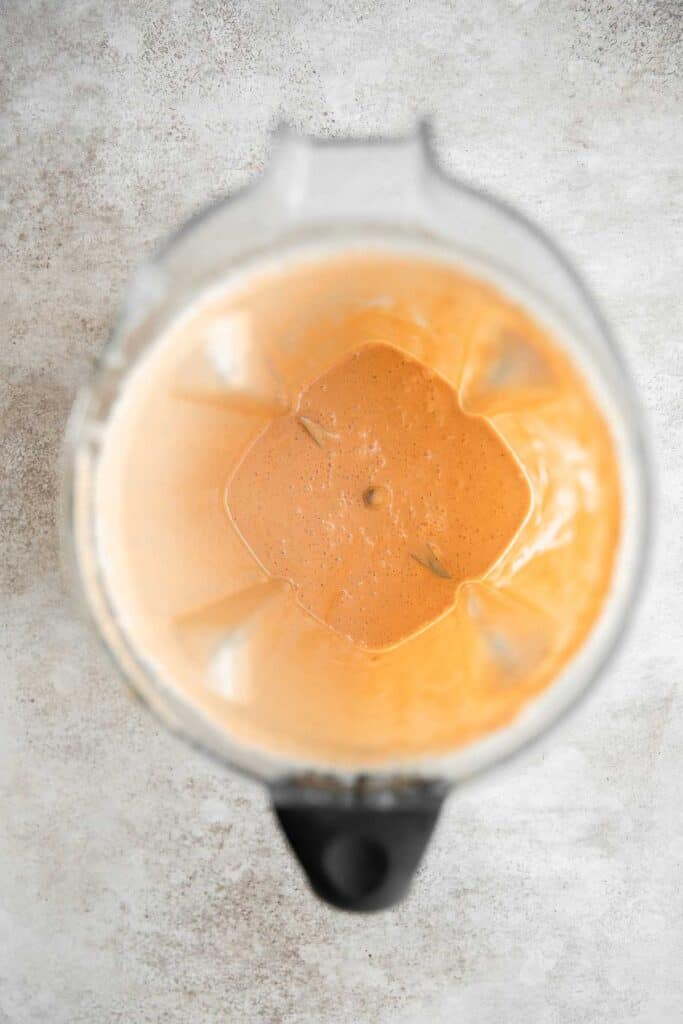
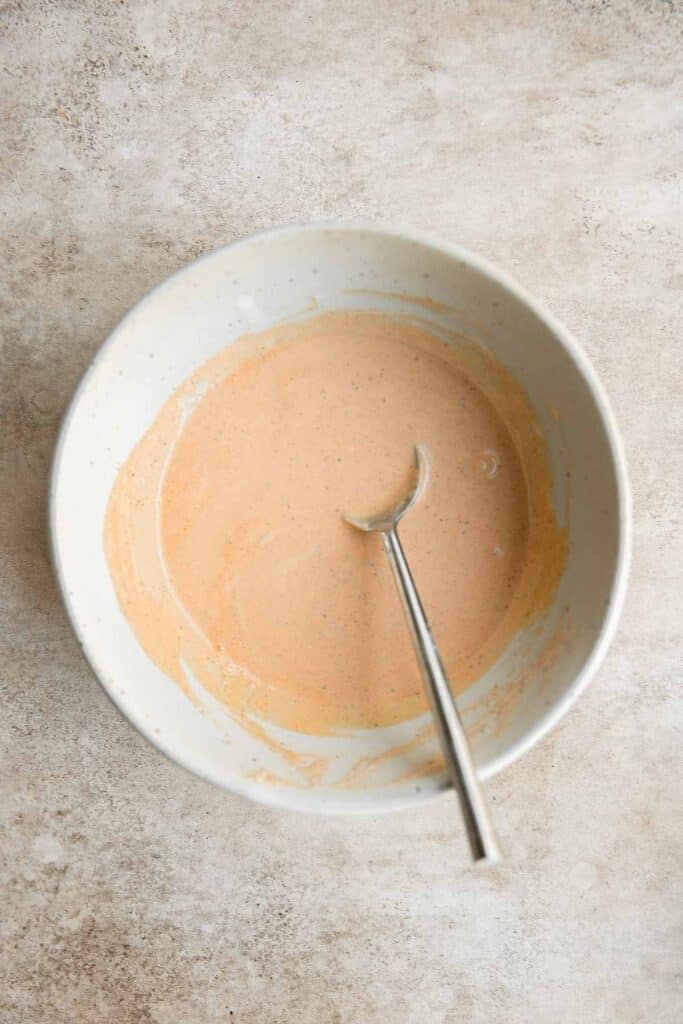
You could also just stir all the ingredients together in a mixing bowl. If doing this, make sure to finely chop up the cilantro.
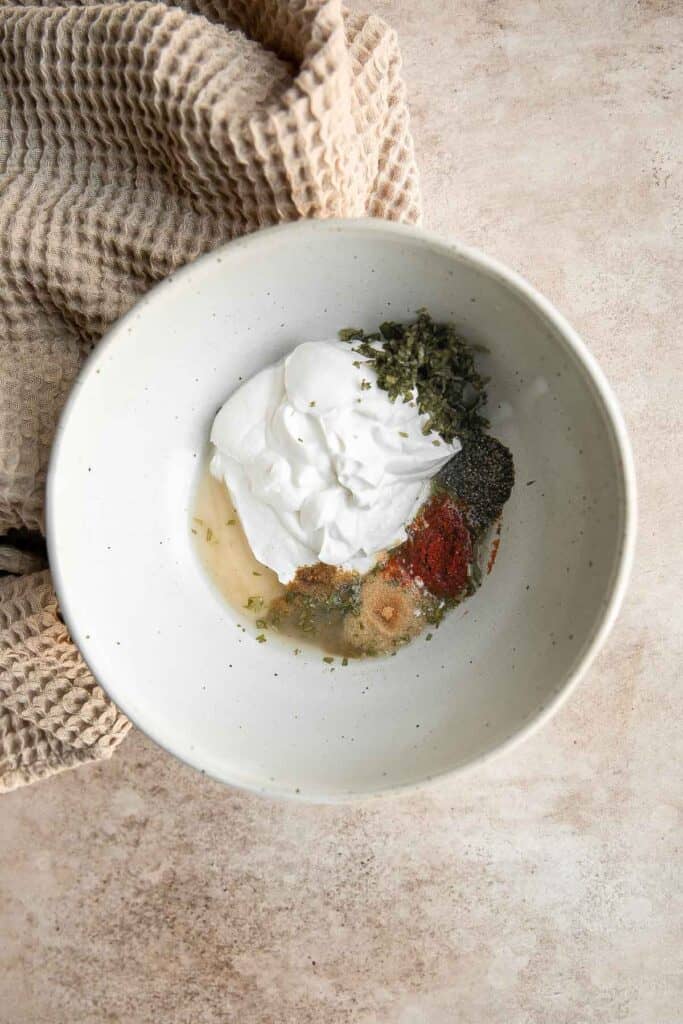
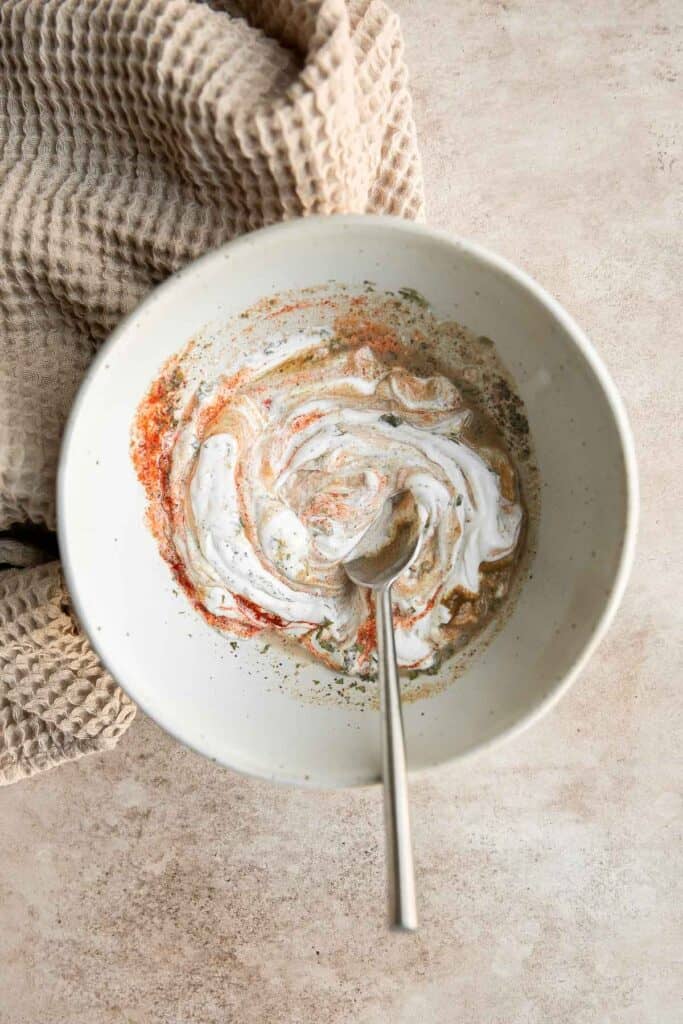
How to Serve
Drizzle homemade Southwest salad dressing with any salad that needs a little kick. Try it with:
- Southwest Salad
- Garden Salad
- Buckwheat Salad
- Tomato Cucumber Avocado Salad
- Chickpea Greek Salad
- Coleslaw
- Mexican Chicken Caesar Salad
But you don't have to just use it on salad. There are other ways to use this homemade dressing in other recipes. Try it as:
- A spread in sandwiches, wraps, and burgers. Try it with Classic Hamburgers or Black Bean Burgers.
- A dipping sauce in a Veggie Tray.
- A sauce to drizzle over meat or veggies such as Oven Baked Chicken Breast, Roasted Vegetables, or Grilled Corn on the Cob.
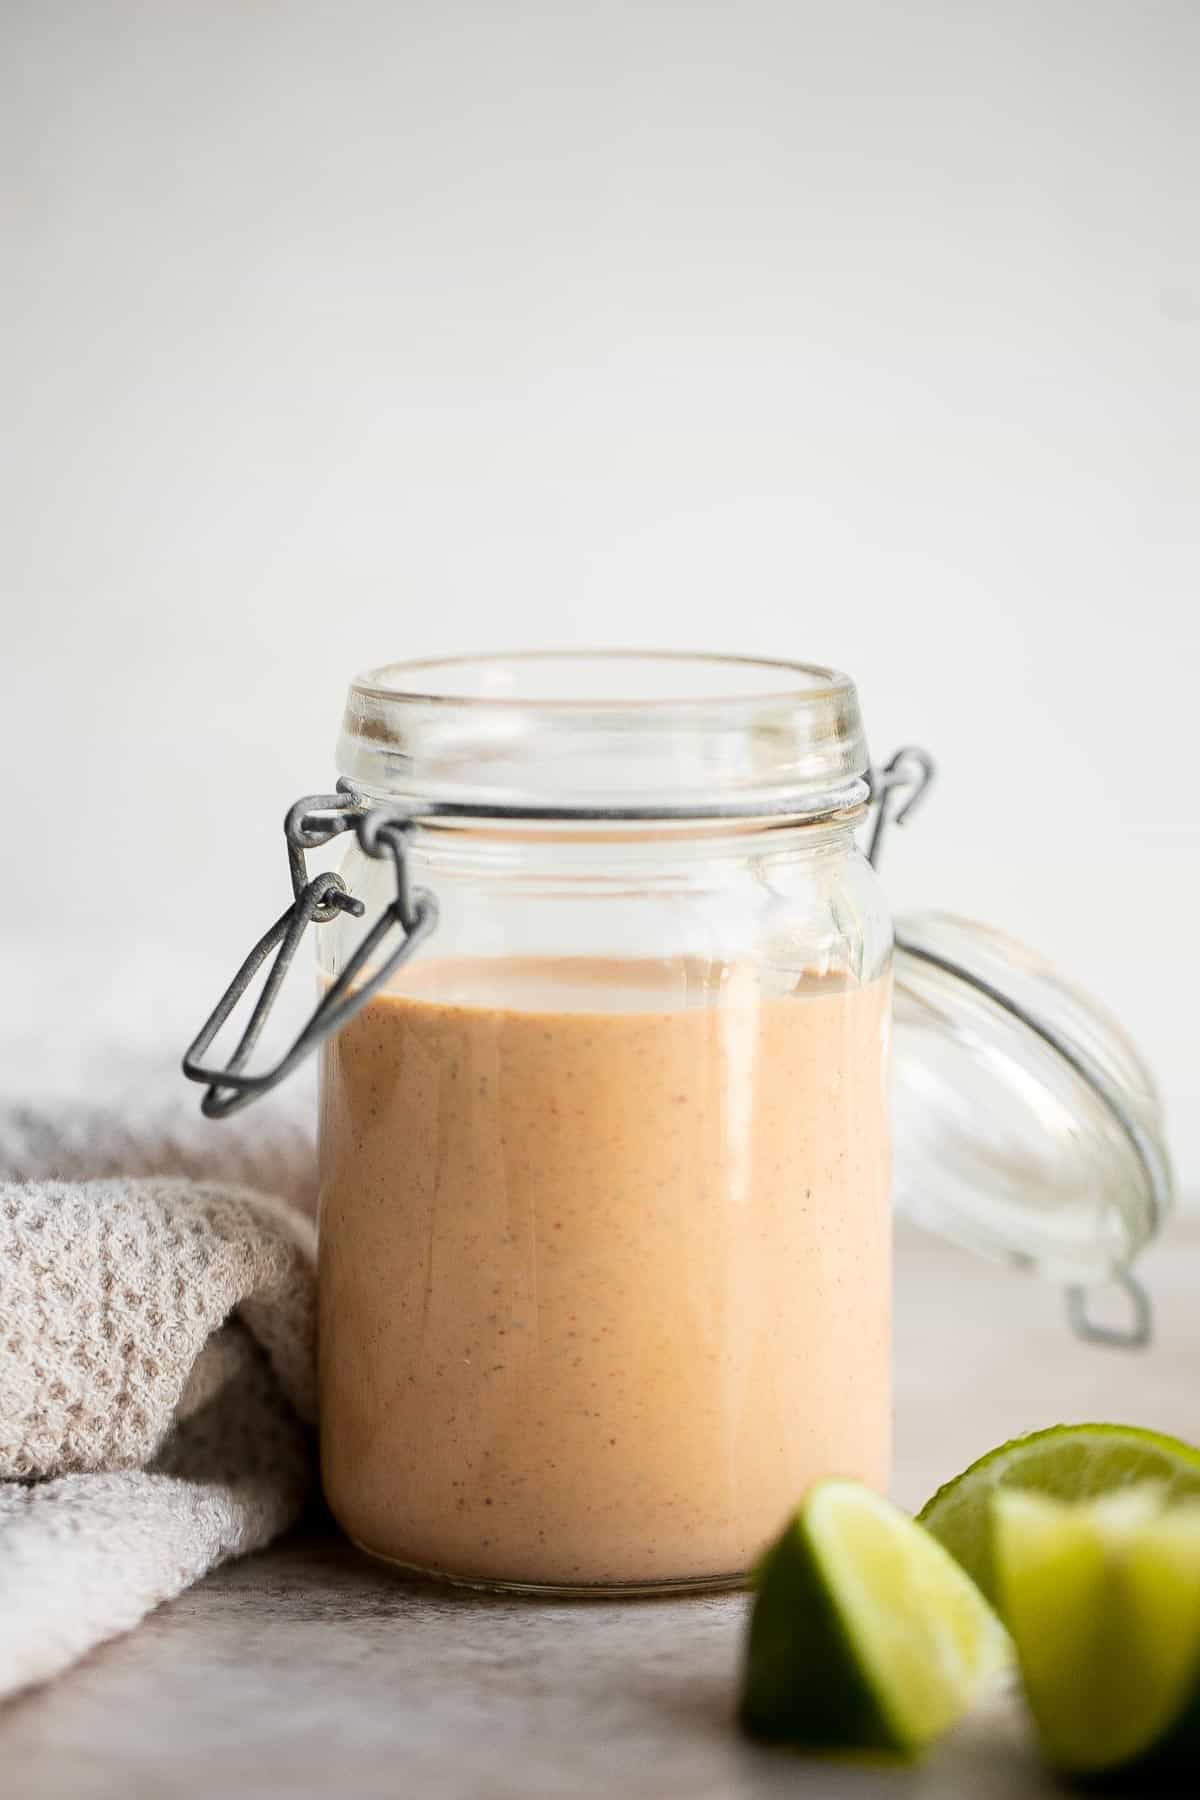
Recipe Tips and Tricks
- How to store: Since homemade dressings lack preservatives, they are better for you but don't last as long as store-bought. Store southwest dressing an airtight container or mason jar in the refrigerator for up one week.
- How to change the consistency: Blender dressings tend to be more thin than hand mixed dressings, which is why we reserve some of the yogurt to stir in later to add in thickness. You can also just stir the ingredients together instead of using a blender. Just be sure to finely chop the cilantro. If you prefer a thinner dressing, just add a little water to the dressing.
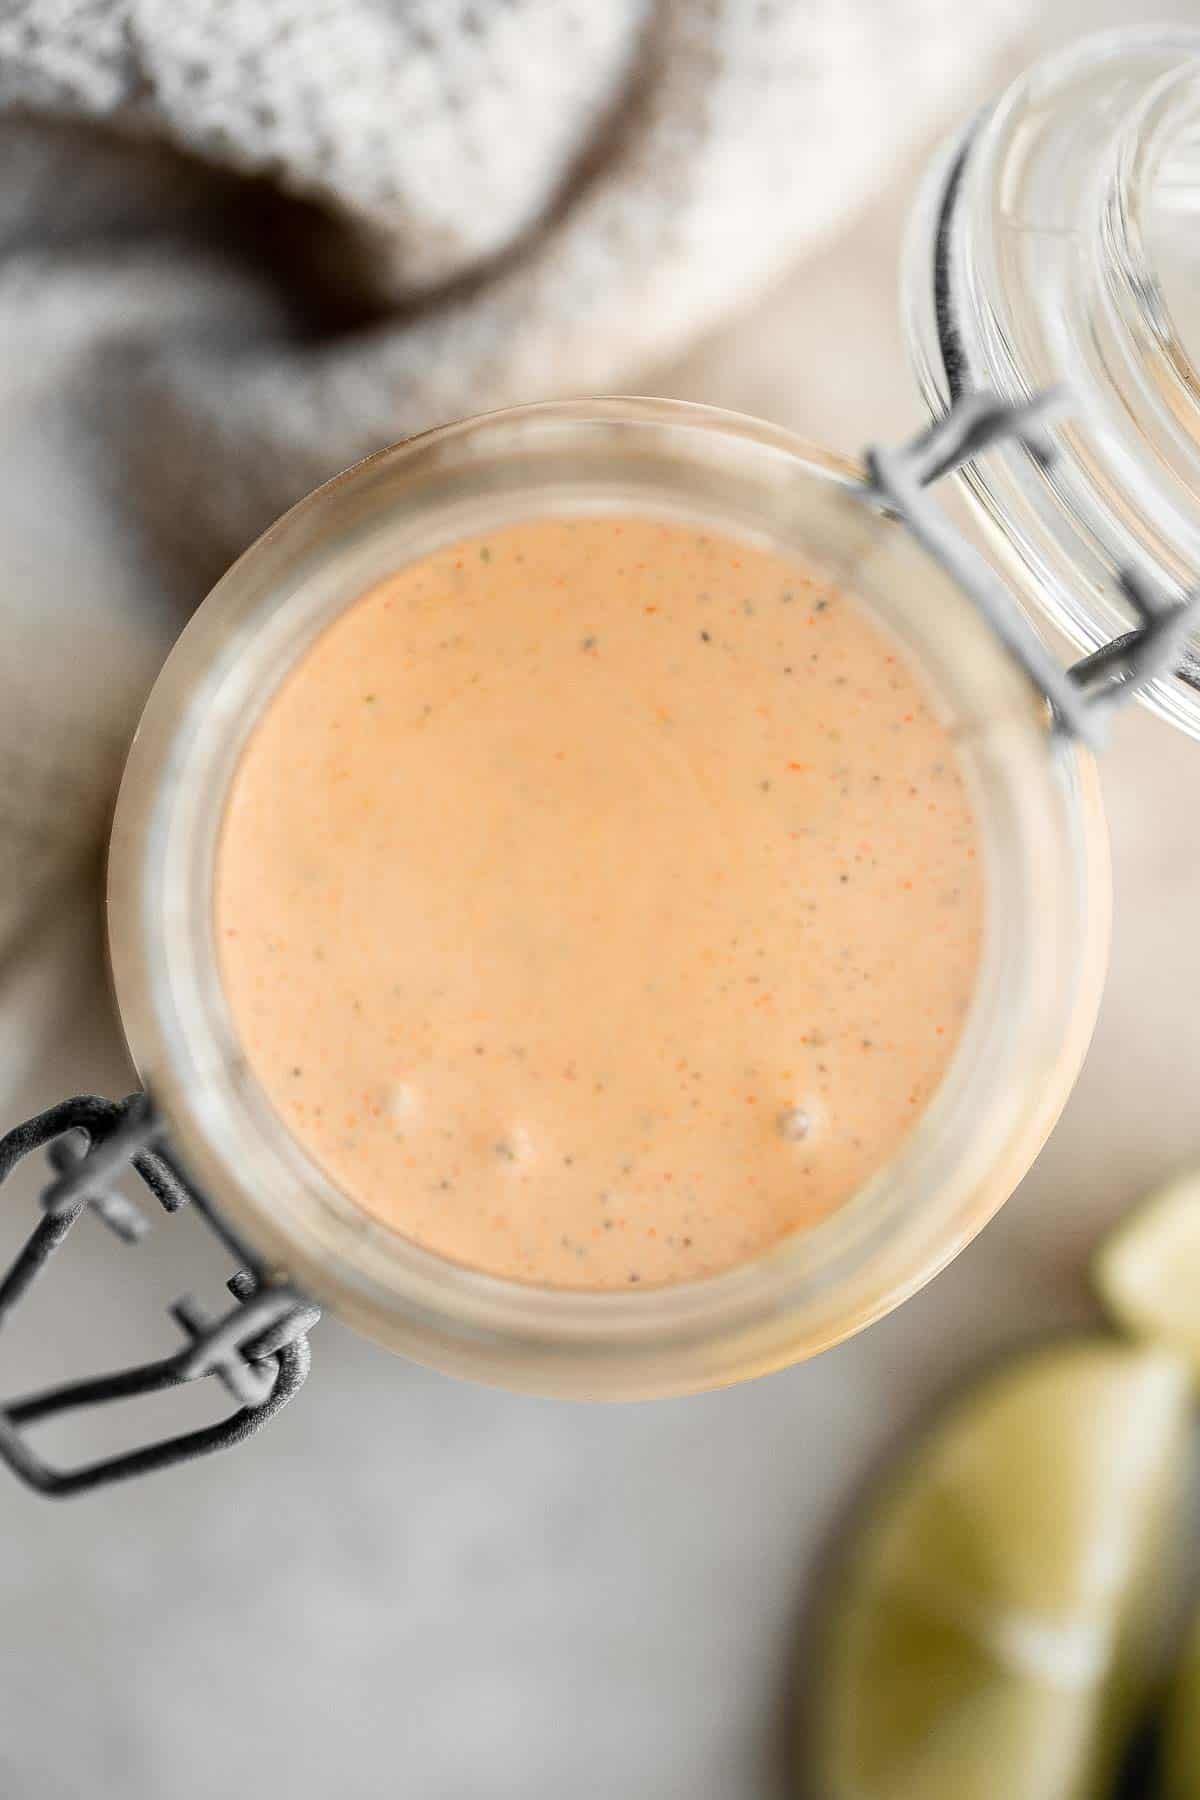
More Salad Dressing Recipes
- Caesar Salad Dressing
- Creamy Cilantro Lime Dressing
- Greek Salad Dressing
- Creamy Sesame Dressing
- Poppy Seed Dressing
- Homemade Italian Dressing
Tried this recipe?
I'd love to hear what you think! Leave a comment and rating below to share your feedback. Your reviews help others discover this recipe and help me keep creating more free recipes for you. Snap a photo and tag me on social media @aheadofthyme too.
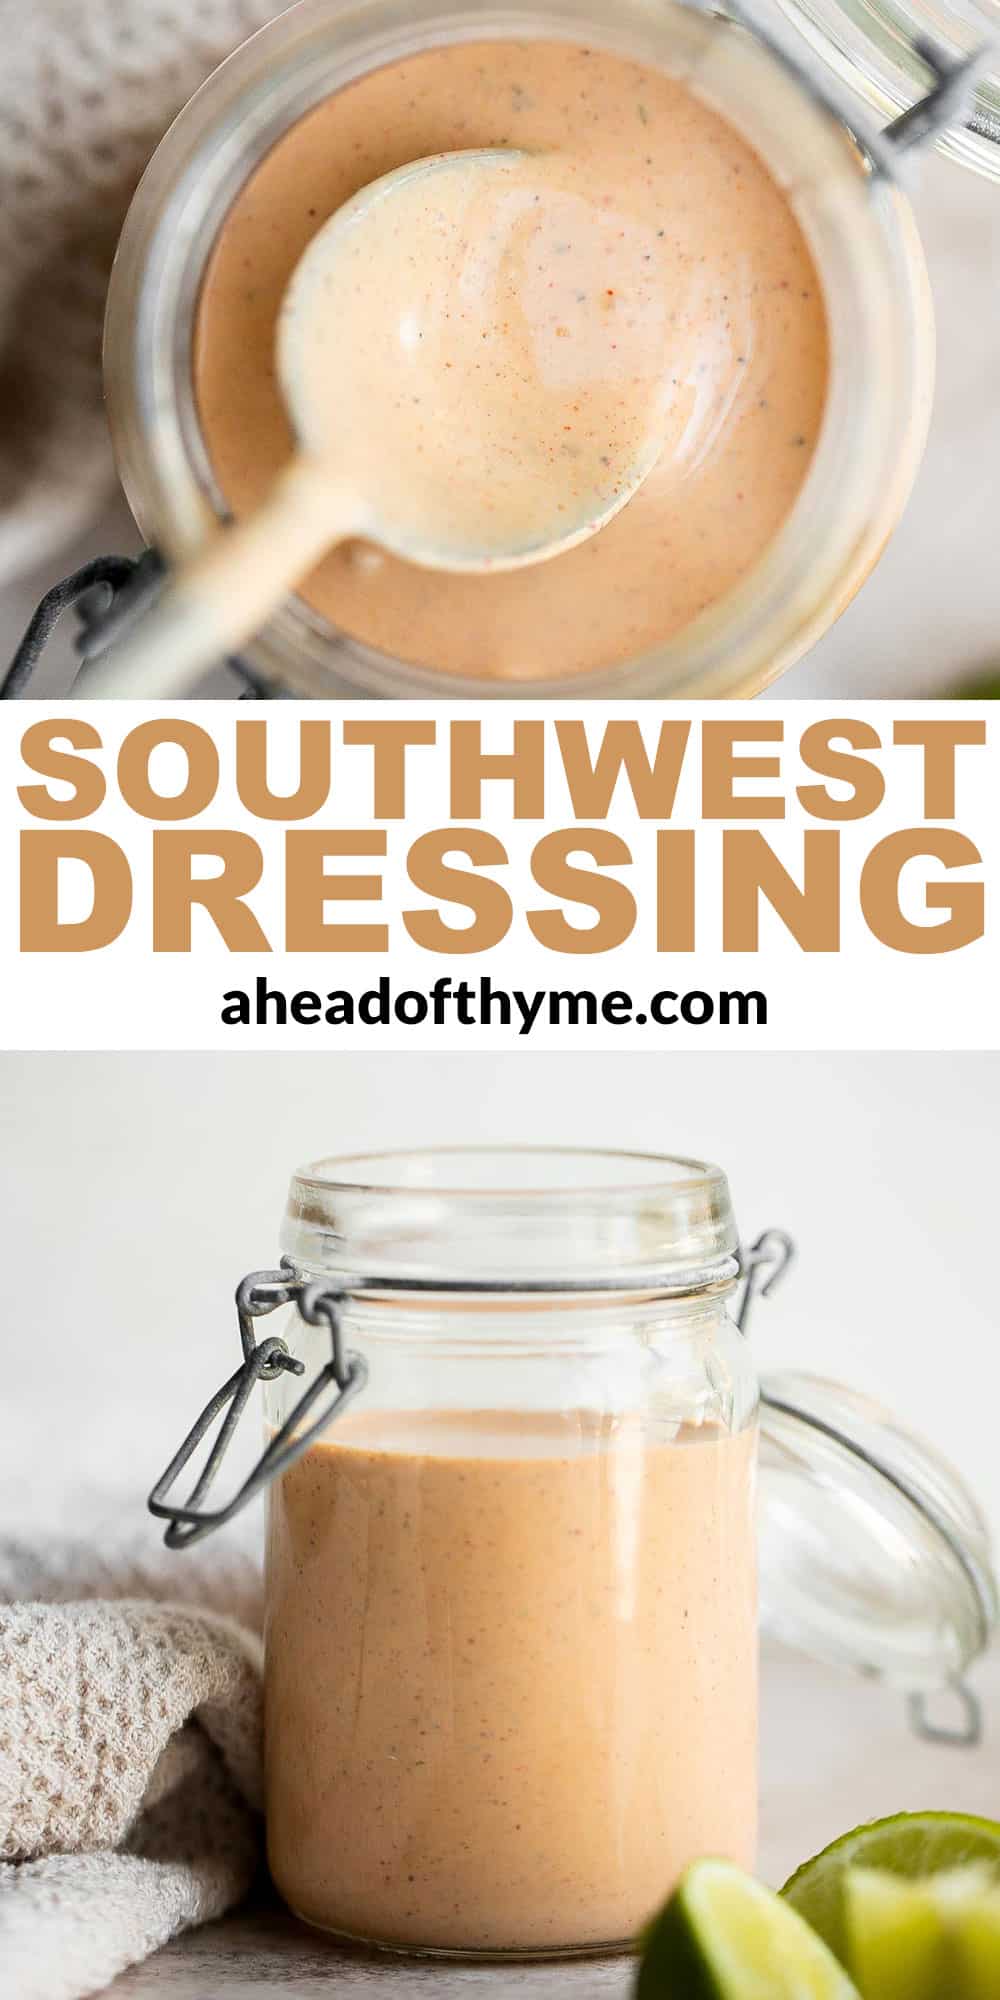
Homemade Peach Iced Tea
When it's a hot summer day and it's officially peach season, it's a no brainer that simple Homemade Peach Iced Tea is number one on my cravings list. So refreshing, so peachy, so sweet, and so perfect.
Peach iced tea from scratch is a healthy summer drink loaded with real fruit and vitamins. You can even customize the amount of sweetness based on your preference. The best part? It's loved by everyone who tries it, so make a big batch because this ice cold drink disappears fast (it's freezer-friendly too!)

Why You'll Love this Peach Iced Tea
- It's made with real fruit. This homemade peach iced tea is made with fresh peaches so it gets its beautiful color and flavor naturally from real peaches. Unlike most iced teas that you find at the store which typically contain added flavor, dyes, and preservatives.
- Loaded with real peach flavor. The hardest part of making iced tea from scratch is not eating spoonfuls of the peach mixture when you are cooking it. It seriously smells like a pot of fuzzy peaches. You will know exactly what I am talking about once you try making this yourself!
- A refreshing summer drink. Peach iced tea is the best refreshing drink to serve at at your next summer cookout, barbecue, potluck, or picnic. You may want to make a bigger batch though, because this thirst-quencher disappears fast!
- It's healthy and contains anti-oxidants. Homemade iced tea is healthy. Although it does have some sugar, you can totally customize the amount and add less if you want or substitute it with a refined-free sweetner such as honey or maple syrup. Either way, you can be confident knowing that it will still have way less sugar than store-bought iced teas. Plus, with real peaches, you know this drink is loaded with anti-oxidants, vitamins, and minerals.

Ingredient Notes
To make this easy and simple Homemade Peach Iced Tea, you will need the following ingredients (full measurements in recipe card below):
- peaches - use ripe peaches for the best and sweetest result. We're lucky where we live that we can get fresh and juicy locally harvested peaches every summer at the farmer's markets or directly from the farms (we can even grab a bucket and pick our own!). You can even substitute with any fruit that you want to make any flavor of fruit ice tea.
- sugar - feel free to customize the sweetness by adding more or less sugar. You can also substitute with other sweeteners such as honey or maple syrup.
- water
- tea - Feel free to use loose leaf tea or tea bags to brew your tea. You also have the choice between black or green tea.
- toppings - you can add in some ice cubes and peach slices when serving (optional).
You will also need measuring cups and spoons, a saucepan, blender, and mesh strainer.
How to Make the Best Homemade Peach Iced Tea
- Cook peaches. In a medium saucepan, combine peaches, sugar and 1.5 cups of water and bring to a boil over high heat. Lower the heat to medium-low and simmer for 30 minutes. Every 5 minutes, stir and crush the peaches into the mixture.
- Puree and strain. Transfer the peach mixture into a blender and puree until smooth. Pour the peach puree through a sieve or fine mesh strainer to strain out any clumps. Transfer into a large pitcher and set aside.
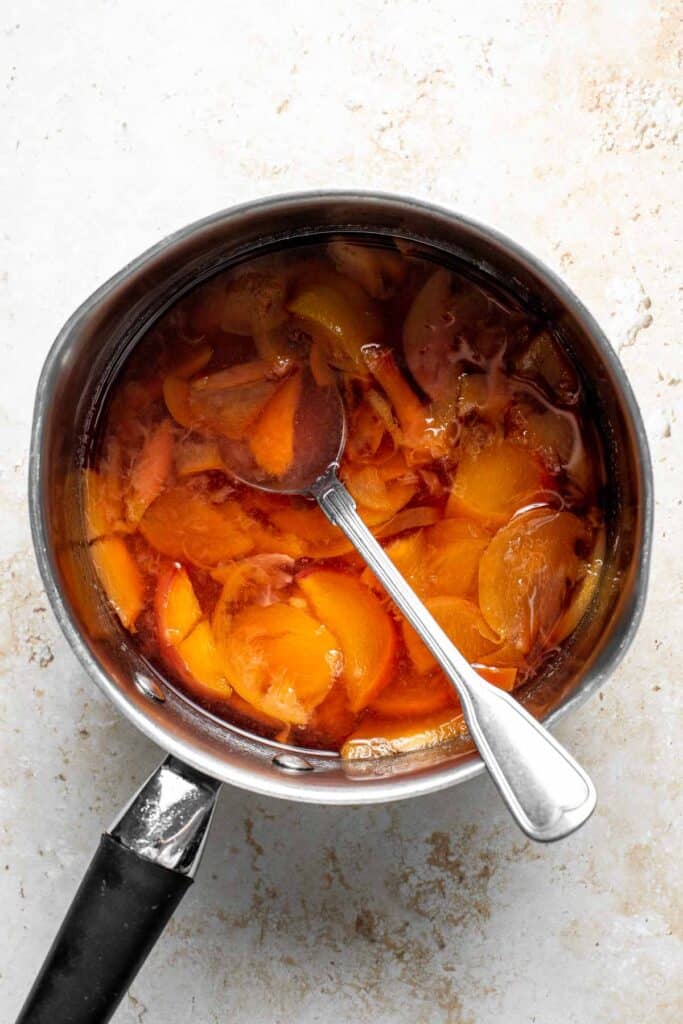
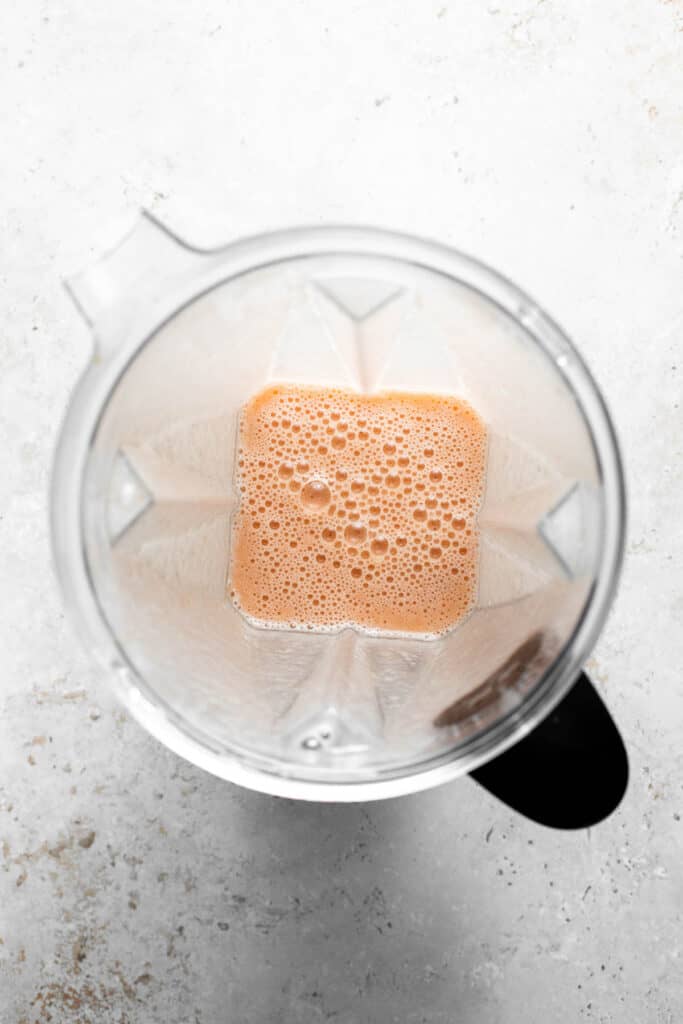
- Brew tea. Bring the remaining 6 cups of water to a boil in a medium saucepan. Remove from heat, add the tea and brew according to package directions (approximately 4-5 minutes). Once brewed, strain out the tea leaves or remove the tea bags and transfer the tea to the pitcher. Stir to combine and refrigerate until cool, about 20 minutes.
- Serve. Once cool, give the mixture a quick stir, add ice cubes and peach slices and serve!
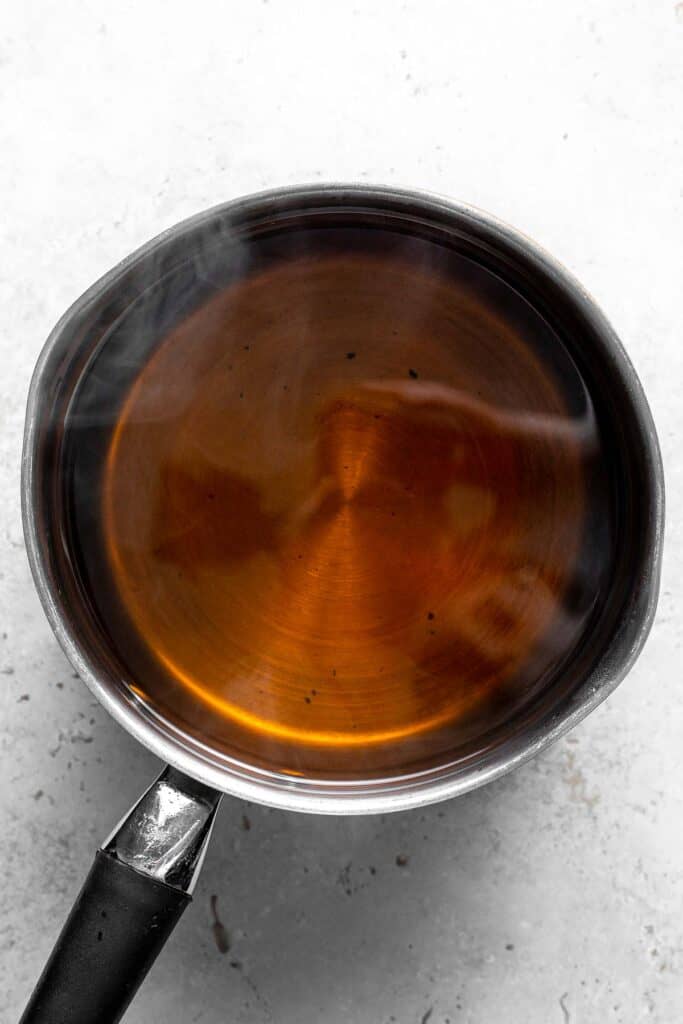
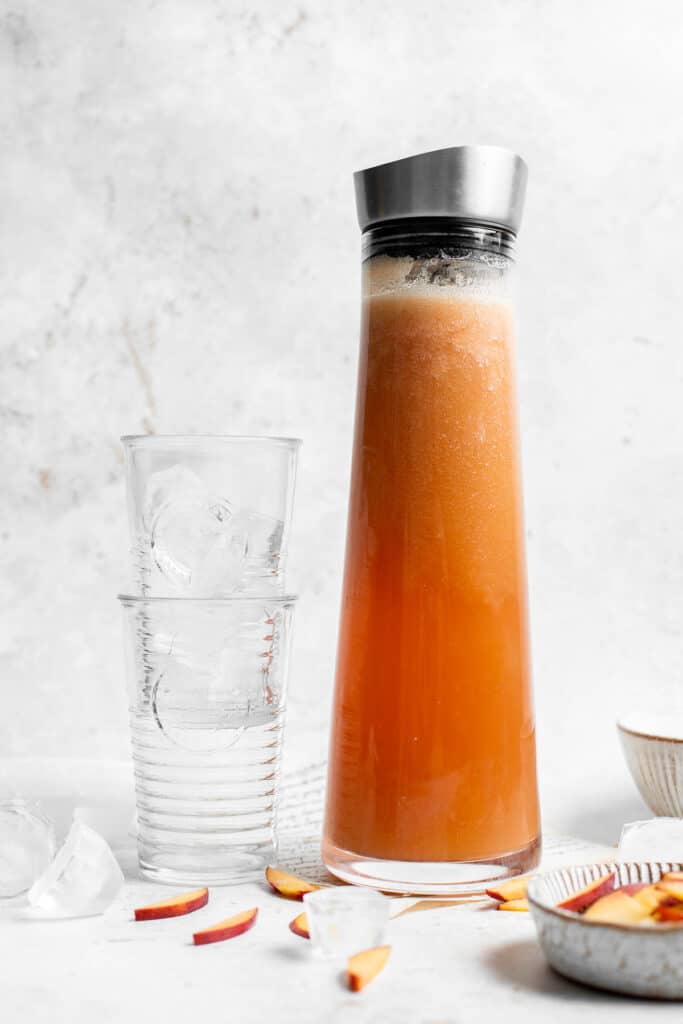
How to Store Homemade Iced Tea
- How to store: Store fresh homemade iced tea in a sealed pitcher or airtight container in the fridge for up to 1 week.
- How to freeze: You can also freeze homemade peach iced tea. Transfer the fresh iced tea to an airtight container or pour into ice cube molds. Once frozen, transfer the cubes to a freezer bag for easy storing. You can freeze it for up to 6 months.
Recipe Tips and Tricks
- Adjust the sweetness: This recipe makes a sweet iced tea. If you like a more of an unsweetened iced tea, you can leave it completely out or add in less.
- Make stronger iced tea: For a stronger iced tea, add in an extra ½ to 1 tablespoon of loose leaf tea, or an extra tea bag when you are steeping it in hot water.
- Make a different flavor: You can substitute the peaches with any fruit that you want to make to make a different flavor of fruit ice tea.

More Drink Recipes
Tried this recipe?
I'd love to hear what you think! Leave a comment and rating below to share your feedback. Your reviews help others discover this recipe and help me keep creating more free recipes for you. Snap a photo and tag me on social media @aheadofthyme too.

Carne Asada Tacos
Carne asada tacos are delicious, juicy, and tender beef steak tacos that everyone will be raving about on Taco Tuesday! Topped simply with onions, cilantro, and cotija cheese, these Mexican street tacos are loaded with flavor.
Plus, you can totally customize them with your favorite taco toppings. Add avocado, tomatoes, or guacamole and enjoy this easy dinner any day of the week this summer.

Why You'll Love Carne Asada Tacos
- Meaty carne asada filling. Carne asada is a Mexican dish that literally translates to "grilled meat". This well-seasoned marinated steak delivers slightly charred, zesty, tender, and juicy steak - it's seriously the best. That's why fresh carne asada steak bites are the star of the show in these carne asada tacos.
- Fresh ingredients. To compliment the carne asada in these beef tacos, you'll need just a few simple and fresh ingredients, including onion and cilantro. These aromatics that add a fresh zest and crunch.
- Cotija cheese. Cotija cheese is a Mexican cheese similar to feta or parmesan. If you can get some at your local supermarket, you'll definitely want to try it. If you can't, you can substitute your favorite cheese in these steak tacos.

Ingredient Notes
To make this delicious Carne Asada Tacos, you will need the following ingredients (full measurements in recipe card below):
- carne asada - this taco recipe is perfect when you have any leftover carne asada, but also a great reason to throw some flank steaks (or skirt steaks) on the grill. This recipe uses half of our carne asada recipe (or one 1 pound steak).
- red onions - or substitute with white onions or even green onions if you prefer.
- cotija cheese - or substitute with feta cheese for a similar taste or substitute with another cheese that you like.
- cilantro
- soft tortillas - feel free to use corn tortillas or flour tortillas.
- lime - optional, to squeeze on top.
How to Customize Taco Toppings
You can switch up or add your favorite toppings such as:
- avocado
- green onions
- cabbage or lettuce
- tomatoes
- sour cream
- Cilantro Lime Slaw
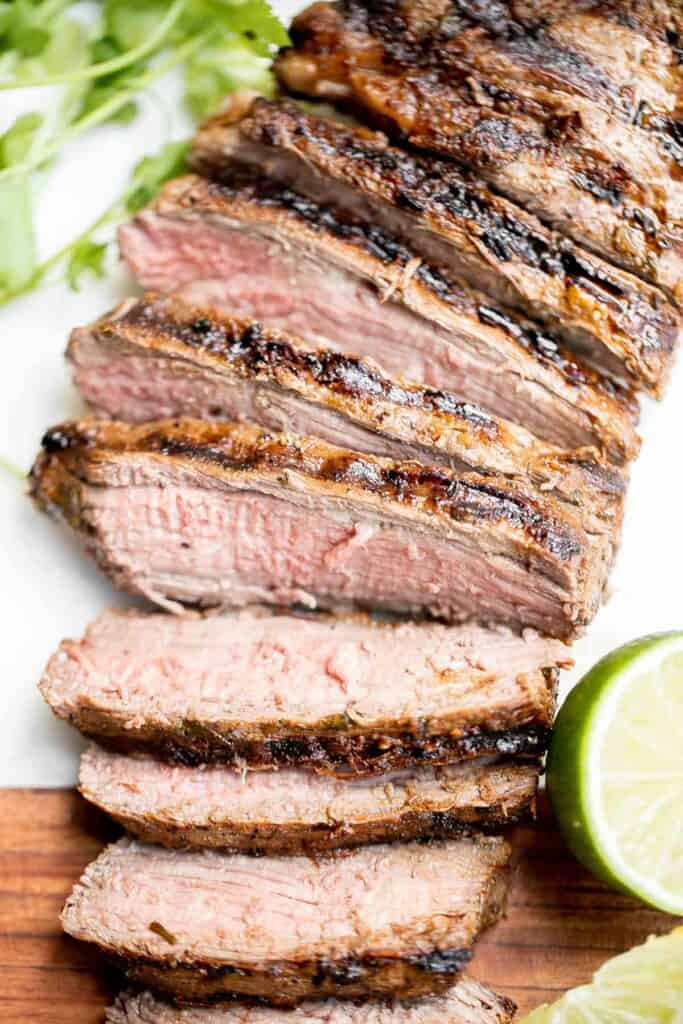
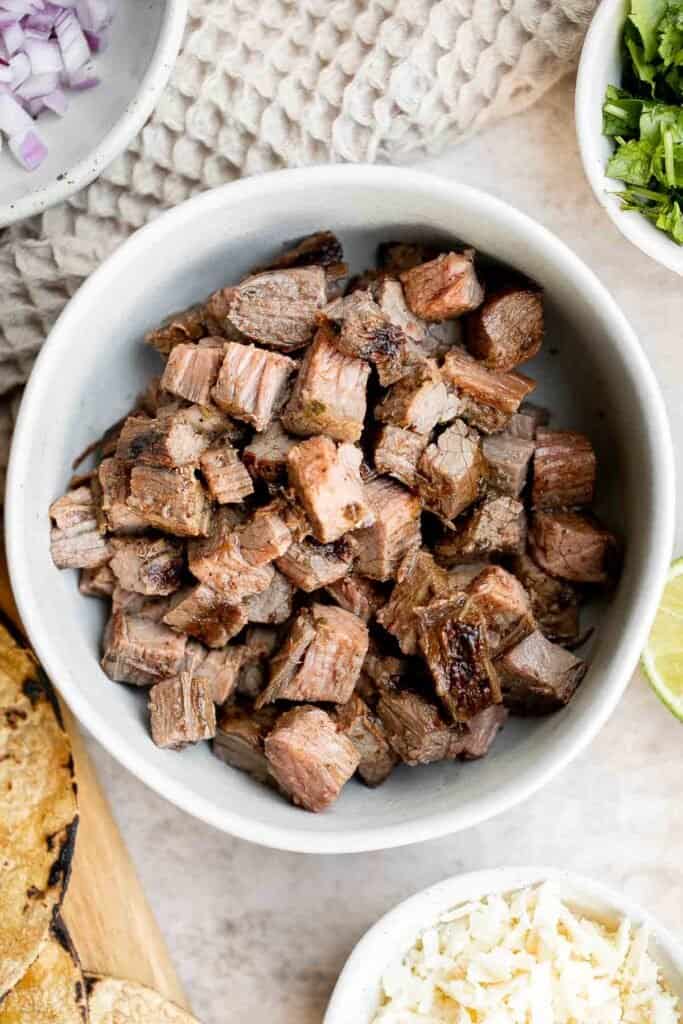
How to Make the Best Carne Asada Tacos
- Heat the tortillas. Heat the tortillas one-by-one in an ungreased cast-iron skillet over medium-high heat for 30 seconds per side. You can also heat them directly on a gas burner for a few seconds to get char marks on the edges.
- Assemble. Divide the chopped carne asada into each tortilla and top with onions, cotija cheese, and cilantro. Add a squeeze of lime juice, if desired.

How to Serve
Carne Asada Tacos are delicious and filling as is or with a side of Salsa or Guacamole. You can switch up the toppings or pair them with some classic Mexican side dishes such as:
- Mexican Street Corn (Elote) or Grilled Corn on the Cob
- Cilantro Lime Rice and beans
- Beef Taco Salad
- Cilantro Lime Slaw
- Sheet Pan Nachos
- Mexican Street Corn Salad
Recipe Tips and Tricks
- How to store: Store the ingredients for your carne asada tacos separately (freshly cooked carne asada will last 3-4 days in the refrigerator). Otherwise, the meat and veggies will make the tortillas soggy. If you must make your carne asada tacos to go for work or school, consider adding a single piece of dry lettuce between your filling and tortilla to prevent the tortillas from becoming soggy.
- How to reheat: You can heat carne asada filling in the microwave, oven, or on the stovetop. In the oven, wrap the meat in aluminum foil and bake for 5-10 minutes at 375F. On the stove, heat in a covered pan with a splash of water on medium heat.

More Taco Recipes
- 15 Best Taco Recipes
- Korean Beef Steak Tacos
- Chicken Tacos
- Fish Tacos with Lime Crema
- Mexican Ground Beef Tacos
- Cauliflower Tacos
- Shrimp Tacos with Lime Crema Slaw
Tried this recipe?
I'd love to hear what you think! Leave a comment and rating below to share your feedback. Your reviews help others discover this recipe and help me keep creating more free recipes for you. Snap a photo and tag me on social media @aheadofthyme too.

Buckwheat Salad
This Buckwheat Salad is quick and easy to make, healthy and delicious, and packed with Mediterranean flavors. Loaded with superfood buckwheat, this salad is healthy, naturally gluten-free, and vegetarian. It's the perfect salad to serve for a nourishing light dinner or meal prep for lunch throughout the week.
Plus, this Mediterranean buckwheat salad is loaded plant-based protein from the buckwheat, fresh vegetables and herbs, and a light olive oil dressing, adding nutrients and antioxidants to this healthy salad.
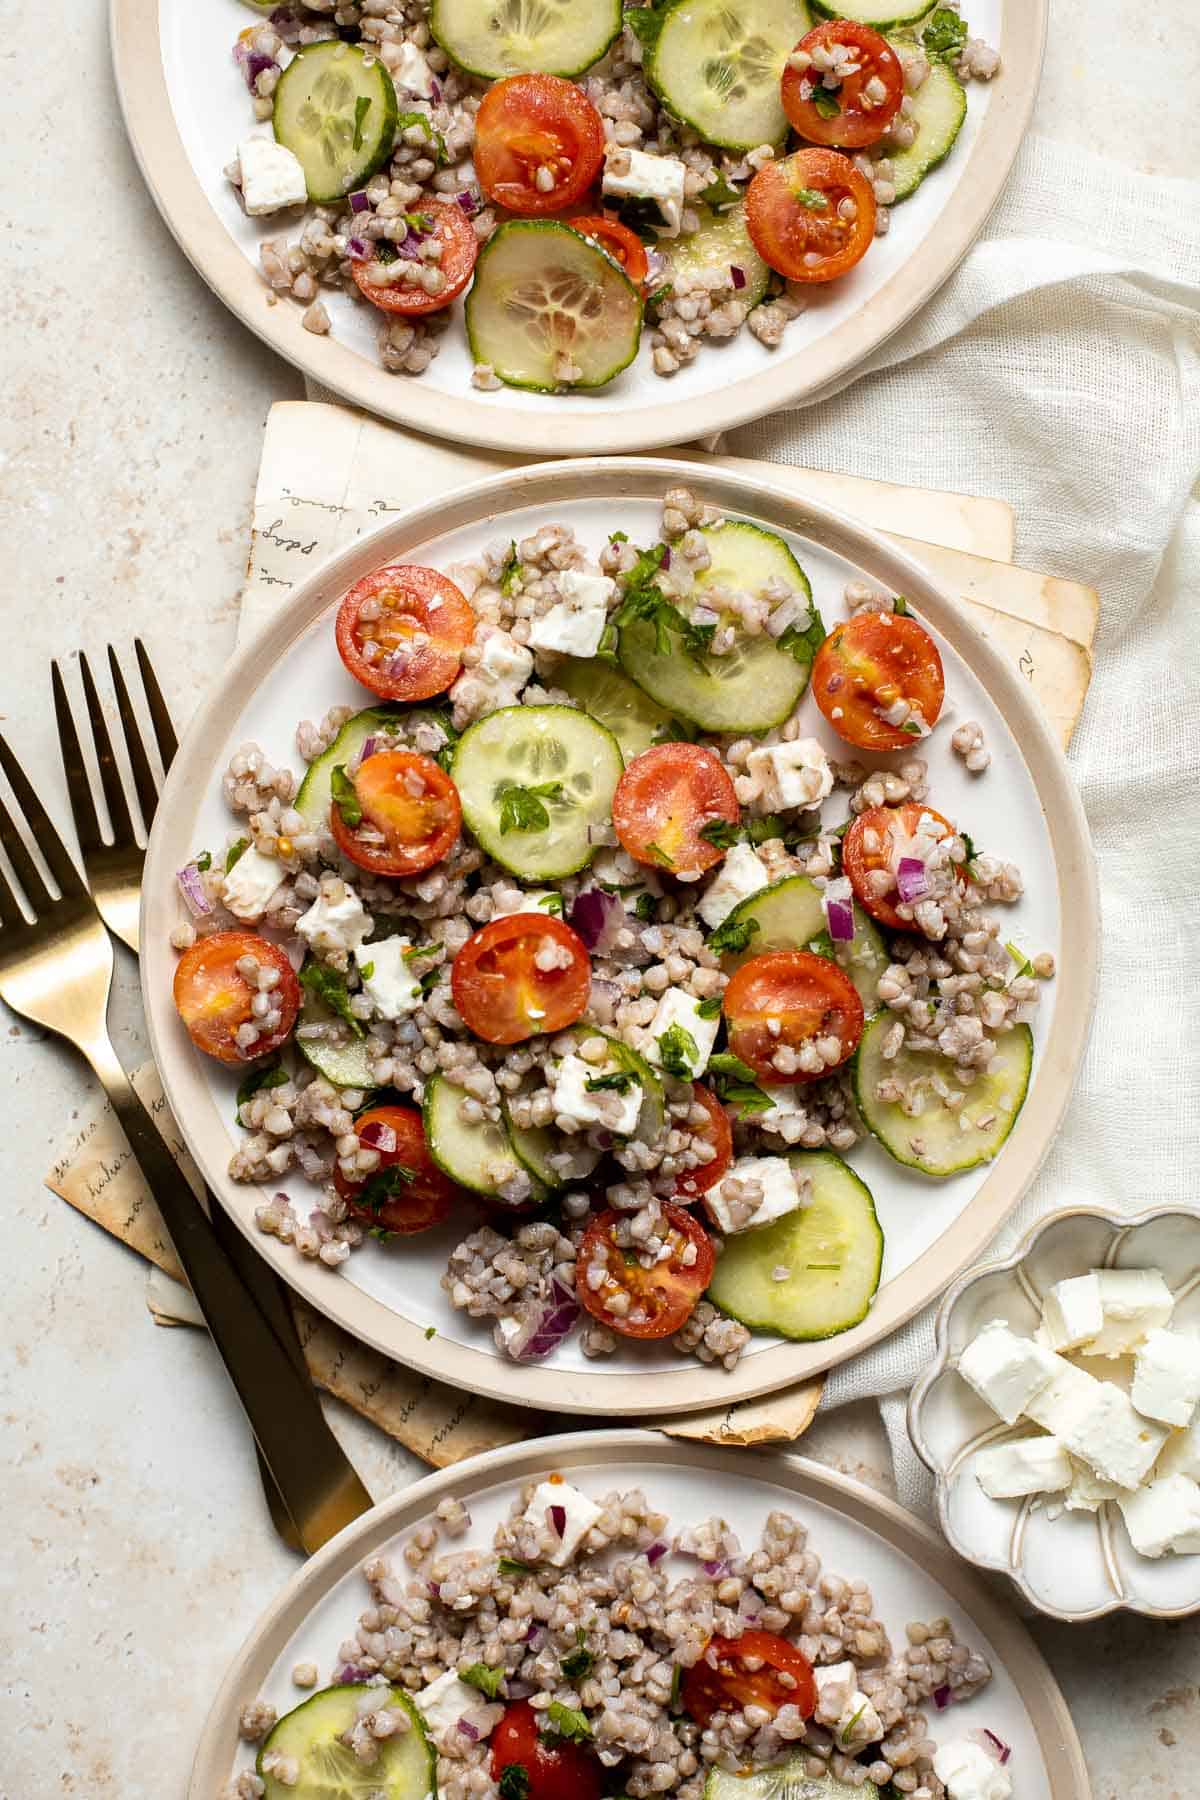
Why You'll Love this Buckwheat Salad
- It's a healthy and filling meal. This buckwheat salad with feta and tomatoes is my ideal vegetarian or gluten-free meal when I am craving a light yet filling dinner. It also stores well so it's perfect for meal prep for a healthy work lunch. The buckwheat keeps you full, while the veggies bring freshness and flavor - and they both add tons of nutrients.
- Buckwheat is easy to make. Buckwheat is a superfood seed that is really easy to prepare, taking about 15-20 minutes to cook. Similar to rice or quinoa, all you do is cook it in a saucepan of water, bring to a boil, and simmer. Then, fluff with a fork.
- Loaded with Mediterranean flavors. Mediterranean flavors are all over this buckwheat salad from the fresh ingredients like tomatoes, cucumbers, red onions, lemon, and fresh herbs, to Greek ingredients like feta cheese and olive oil.
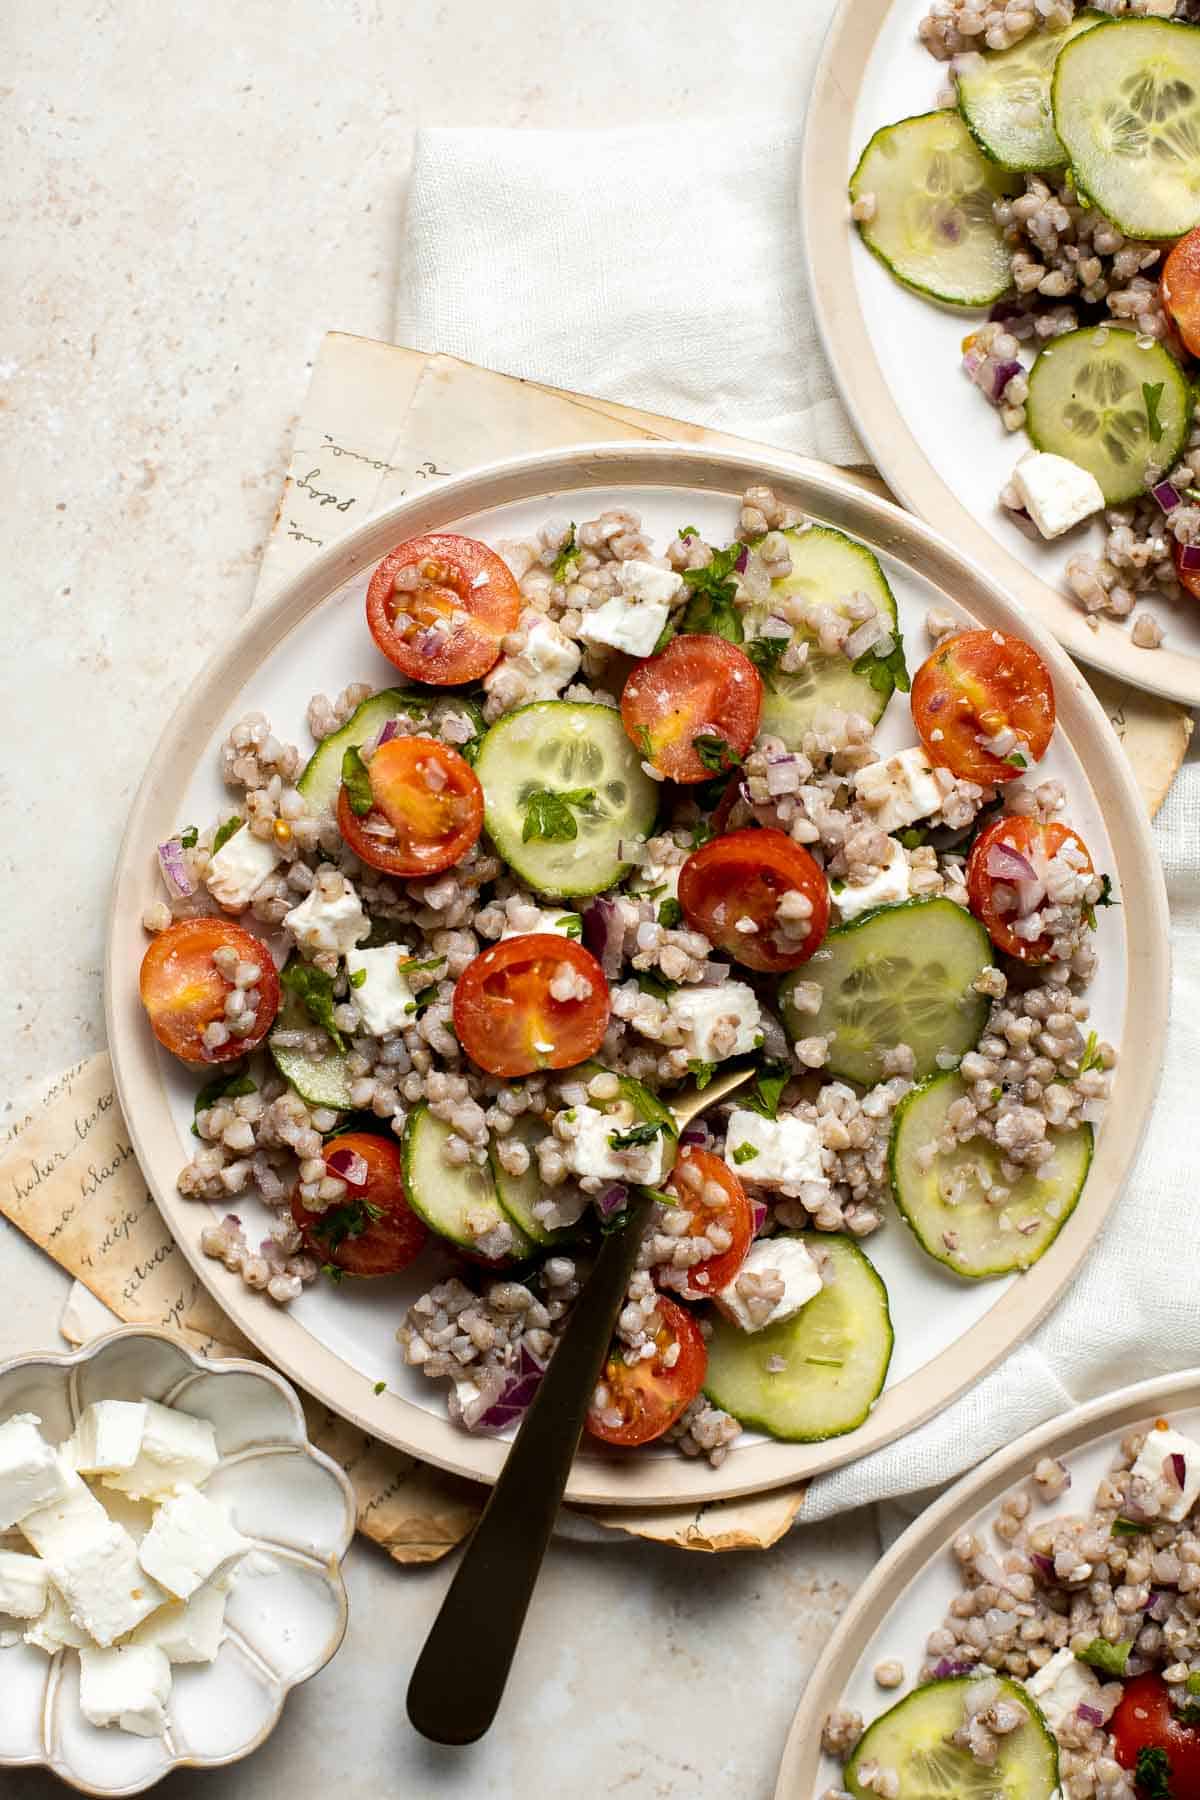
What is Buckwheat?
Buckwheat is a highly nutritious seed that is high in protein and fiber. It contains lots of vitamins and minerals and boasts numerous health benefits. Plus, despite it's name, buckwheat is not a grain - it's naturally gluten-free.
Some of the health benefits of superfood buckwheat are:
- promotes heart health by lowering the risk of developing high cholesterol and high blood pressure.
- promotes digestion.
- supports brain, liver and digestive health and helps prevents digestive disorders.
- contains antioxidants (it can help fight cancer and heart disease!).
- controls blood sugar and lowers risk of diabetes.

Ingredient Notes
To make this Mediterranean Buckwheat Salad, you will need the following ingredients (full measurements in recipe card below):
- buckwheat - you will also need water to cook the dry buckwheat in.
- tomatoes - I recommend grape or cherry tomatoes. You could also use larger tomatoes but you want to avoid ones that are too watery. If you do, put the sliced tomatoes in a colander (tossed with some salt) to drain out some of the excess water prior to tossing them in the salad.
- mini cucumbers
- red onion
- feta cheese - you could substitute with a mild crumbly goat's cheese instead. A grilled halloumi is also really nice with this salad. You can also leave out the cheese completely for a vegan buckwheat salad instead.
- herbs - throw in your favorite fresh herb such as parsley, mint, or dill. You can also substitute with ½ tablespoon dry herbs such as dried oregano or Italian seasoning.
- olive oil - use a high quality olive oil since this is the bulk of our dressing.
- lemon juice
- salt and pepper
You can customize this salad with your favorite veggies and ingredients. Try adding some:
- bell peppers
- kalamata olives
- chickpeas
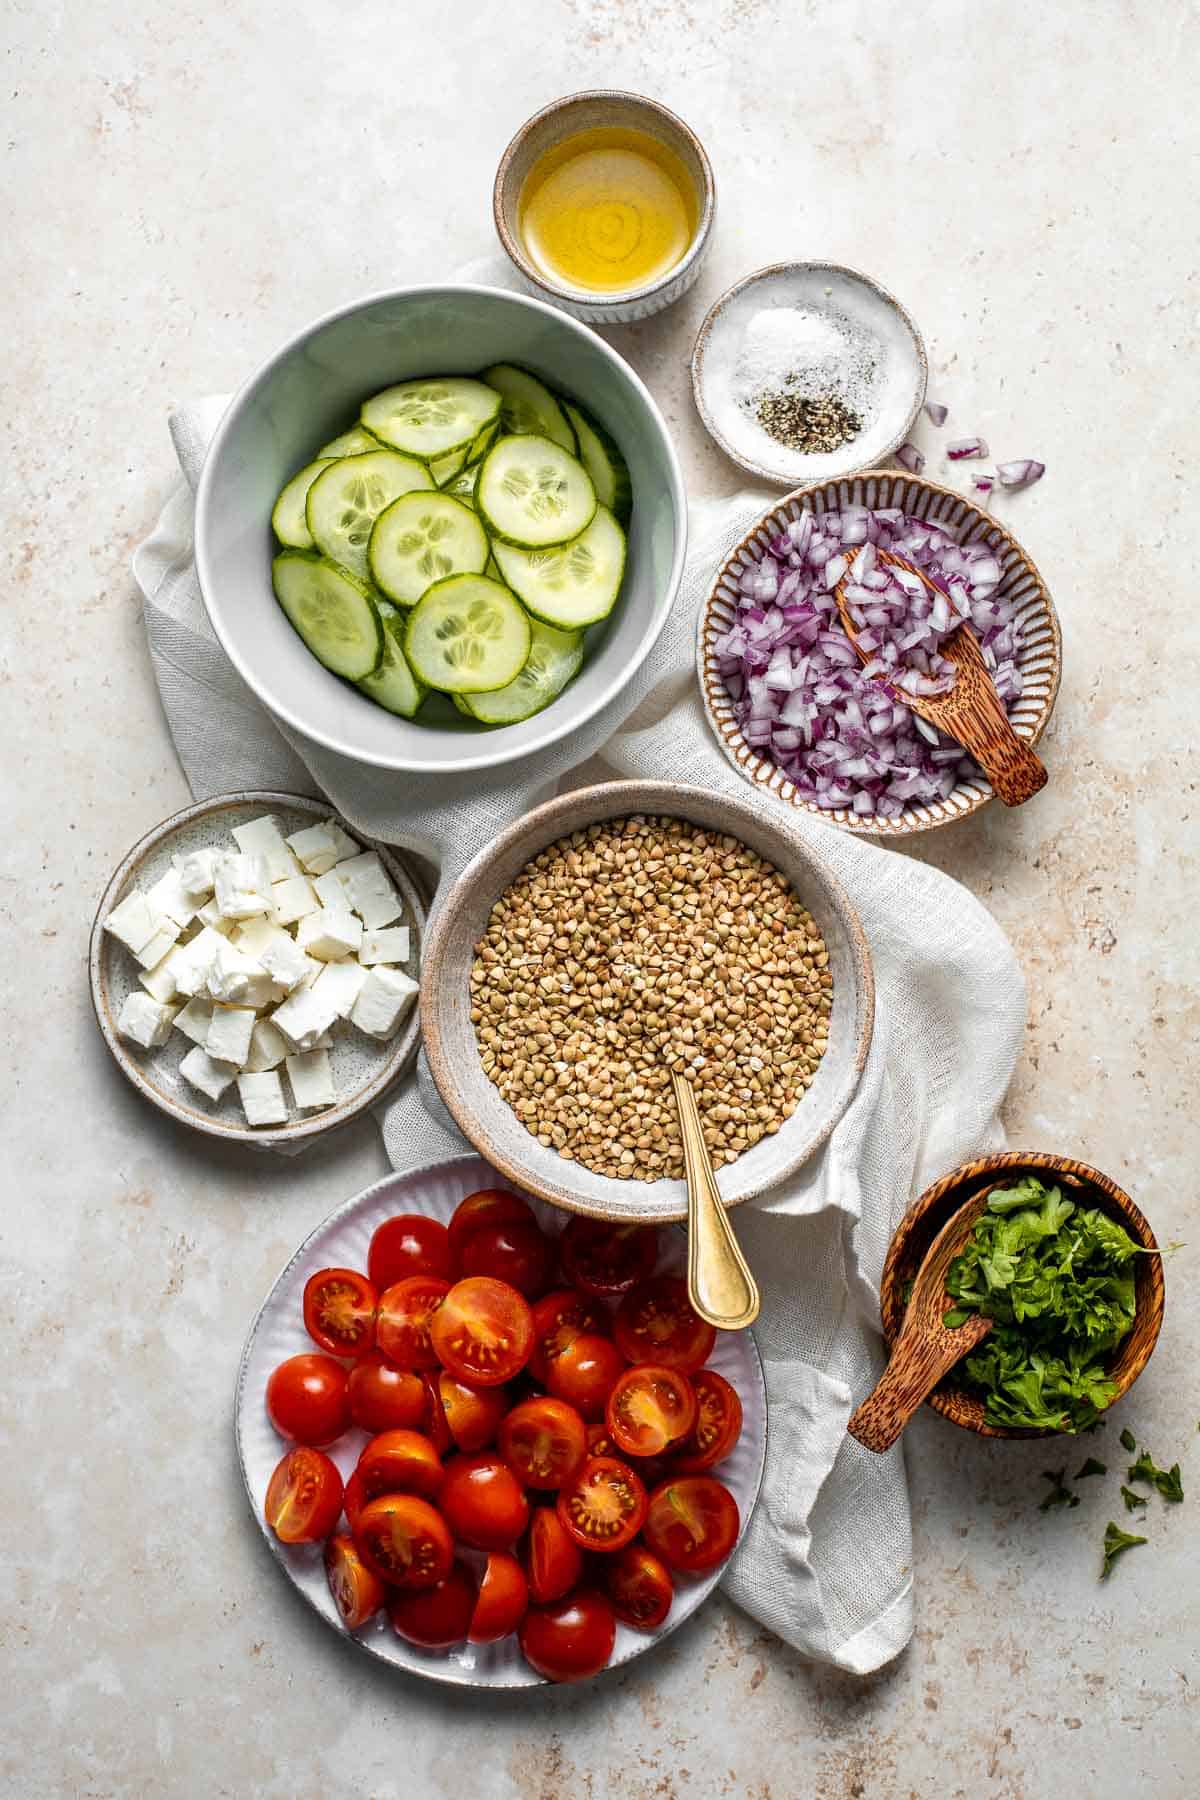
How to Make the Best Buckwheat Salad
- Make buckwheat. Rinse the buckwheat and place in a small saucepan. Add water and a pinch of salt and bring to a boil over high heat. Turn the heat down to low, cover, and simmer for 15-20 minutes until cooked. Let it sit for 5 minutes and then fluff with a fork. If the water has not all been absorbed, drain the buckwheat in a colander. Set aside and let it cool completely.
- Combine salad ingredients. Transfer the cooled buckwheat to a large mixing bowl or serving bowl. Add all the remaining ingredients, and toss to combine.
- Serve. Taste and season with more salt and pepper, if needed. Serve with extra parsley or mint on top (optional).
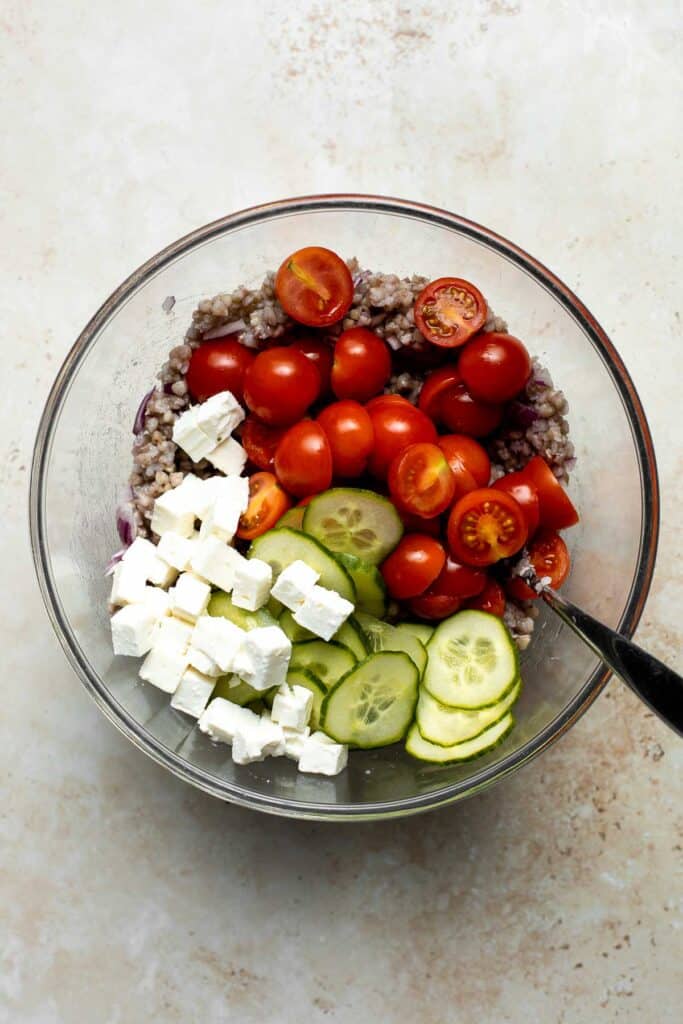
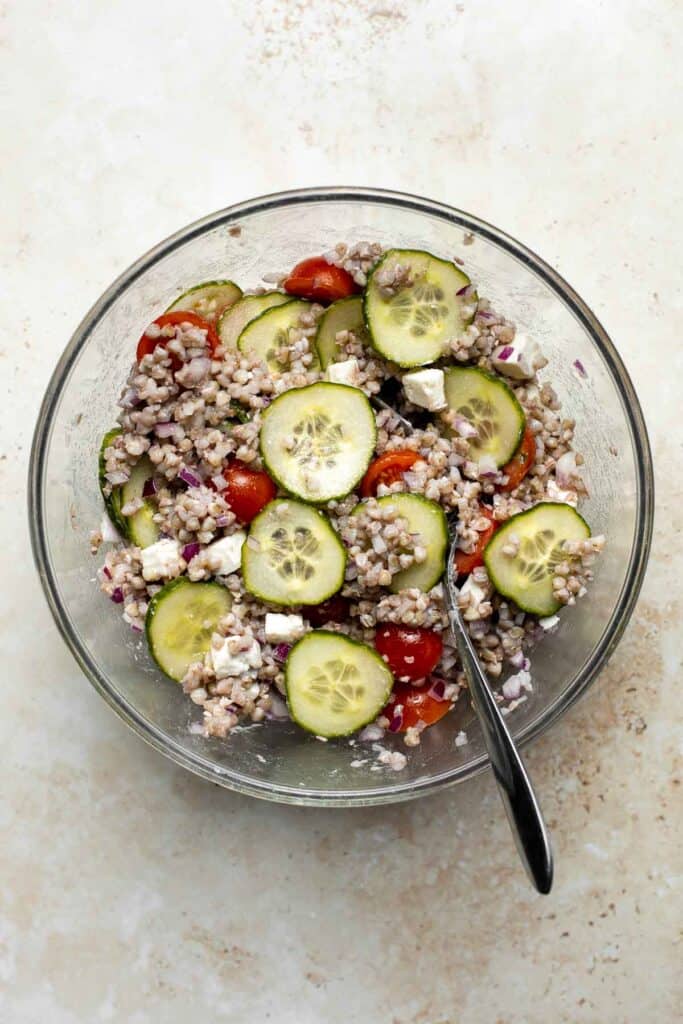
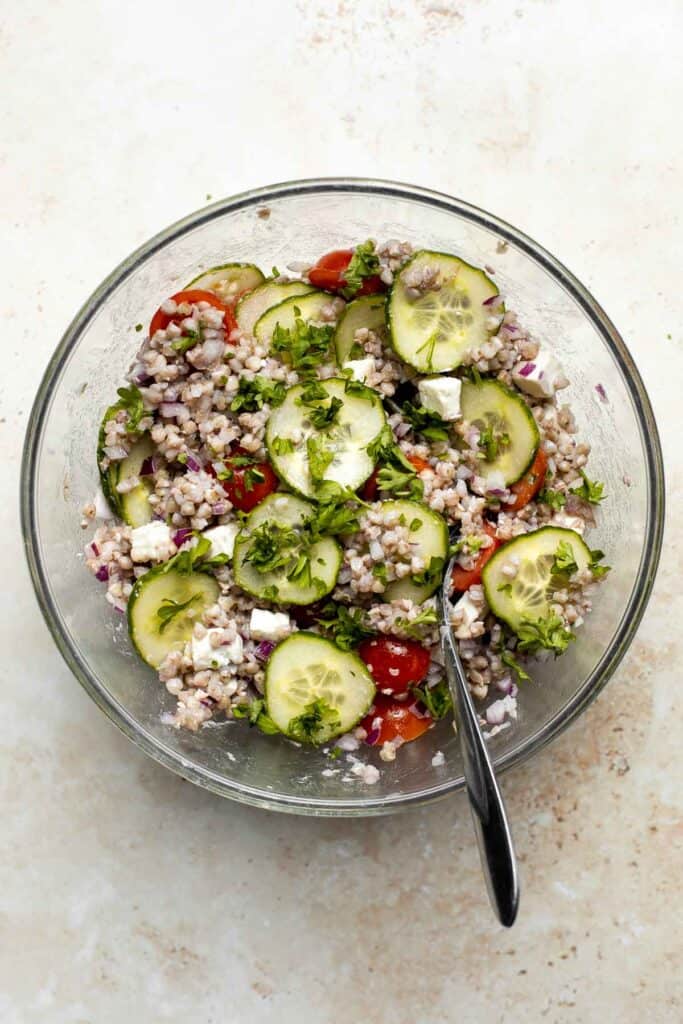
How to Serve
This Mediterranean Buckwheat Salad can be served warm, at room temperature, or cold. It is a nourishing and filling meal on its own but you can pair it with extra protein if you would like. Some of my favorites are:
- Baked Greek Souvlaki Chicken Breast
- Garlic Butter Shrimp
- Falafel
- Greek Salmon
- Air Fryer Chicken Tenders
- Seared Scallops
Recipe Tips and Tricks
- Make ahead instructions: Make the buckwheat and prep the salad ahead of time (leaving out the lemon juice and olive oil). Store the buckwheat and veggies in separate airtight containers (for up to 3 days) and toss together with lemon juice and olive oil just before you are ready to serve.
- How to store: Keep leftover buckwheat salad in an airtight container in the fridge for up to 3 days. As time goes on the buckwheat will get soft and soggy, so it's best to eat it sooner rather than later.
- How to freeze buckwheat: You can also make a big batch of buckwheat and freeze the extra to throw into salads whenever you want. Allow the buckwheat to cool to room temperature, then store in an airtight container or freezer bag for up to 3 months. Allow it to thaw overnight in the refrigerator before using.
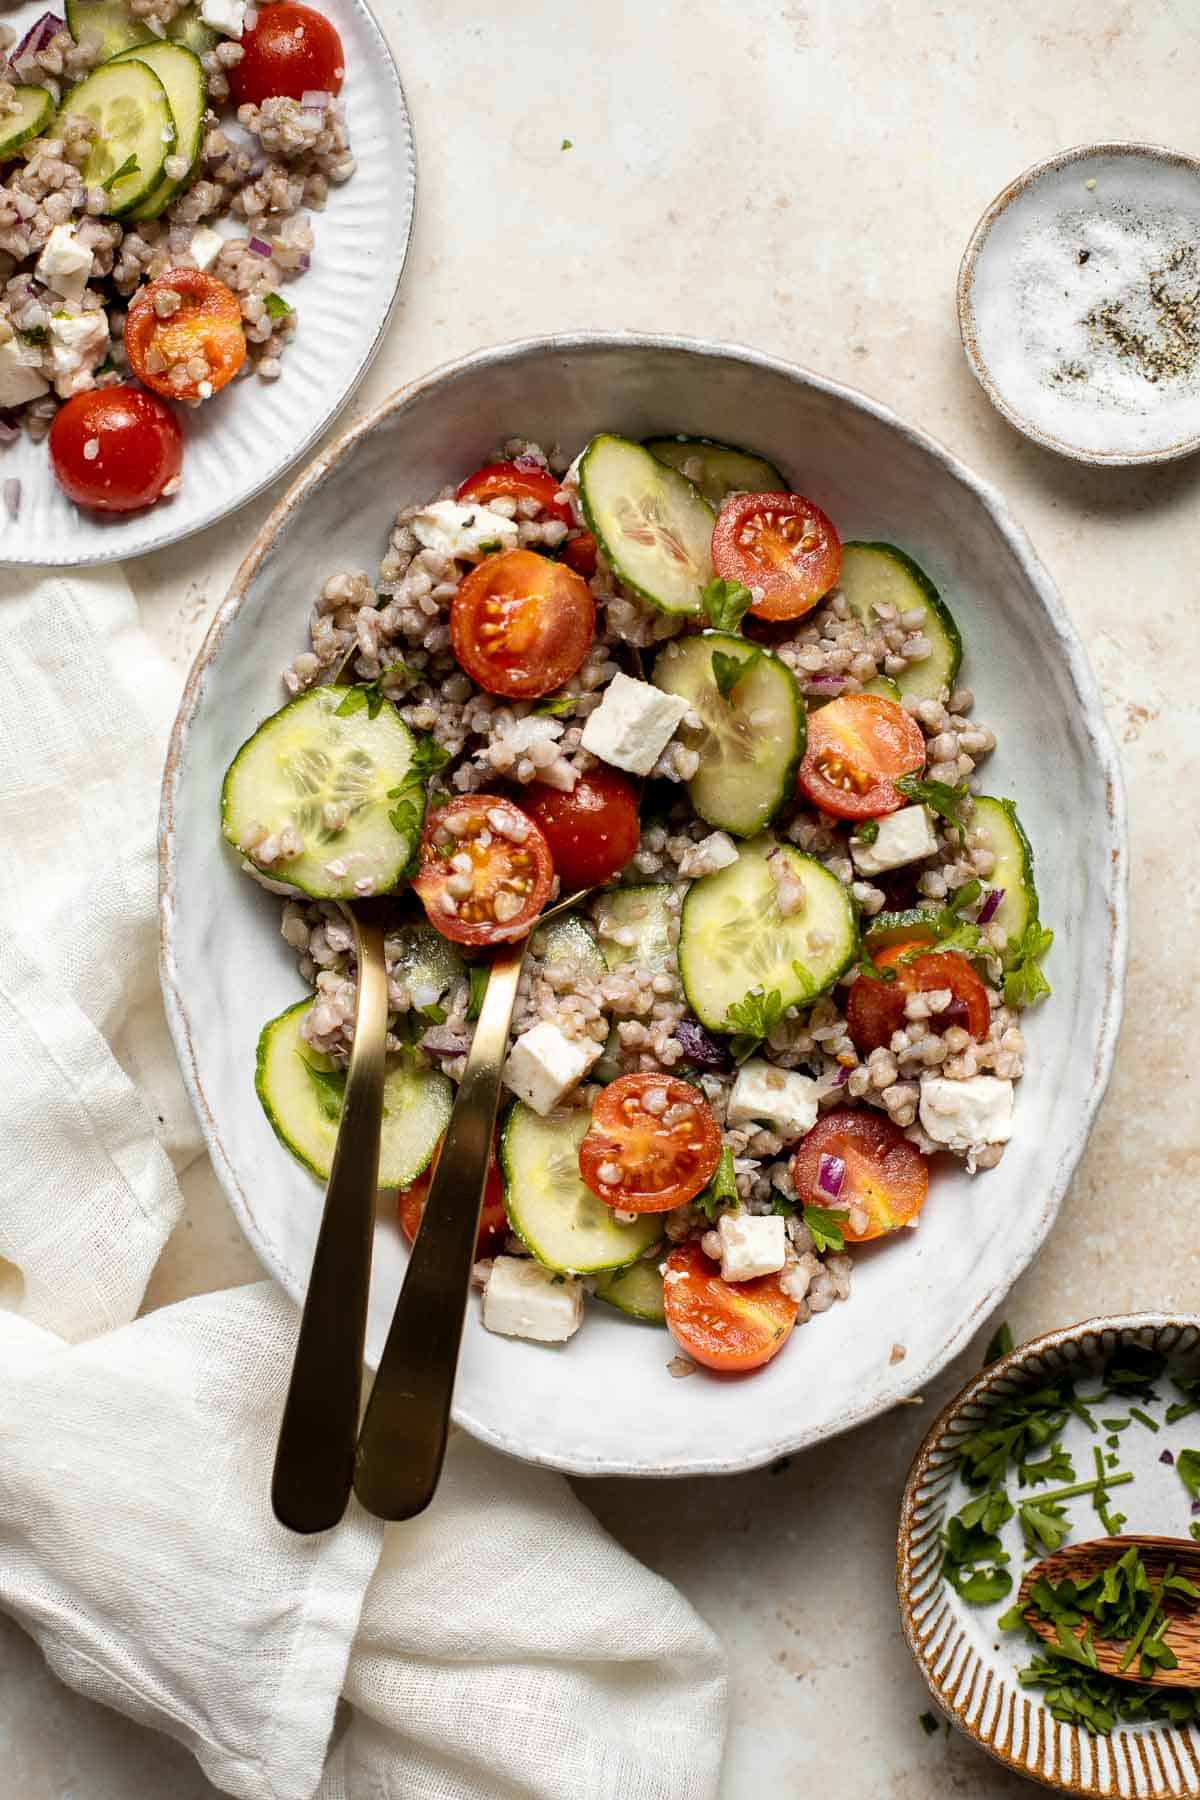
More Salad Recipes
- 40 Best Salad Recipes
- Chickpea Greek Salad
- Creamy Cucumber Salad
- Tomato Cucumber Avocado Salad
- Persian Shirazi Salad with Cucumbers and Tomato
- Greek Pasta Salad
Tried this recipe?
I'd love to hear what you think! Leave a comment and rating below to share your feedback. Your reviews help others discover this recipe and help me keep creating more free recipes for you. Snap a photo and tag me on social media @aheadofthyme too.
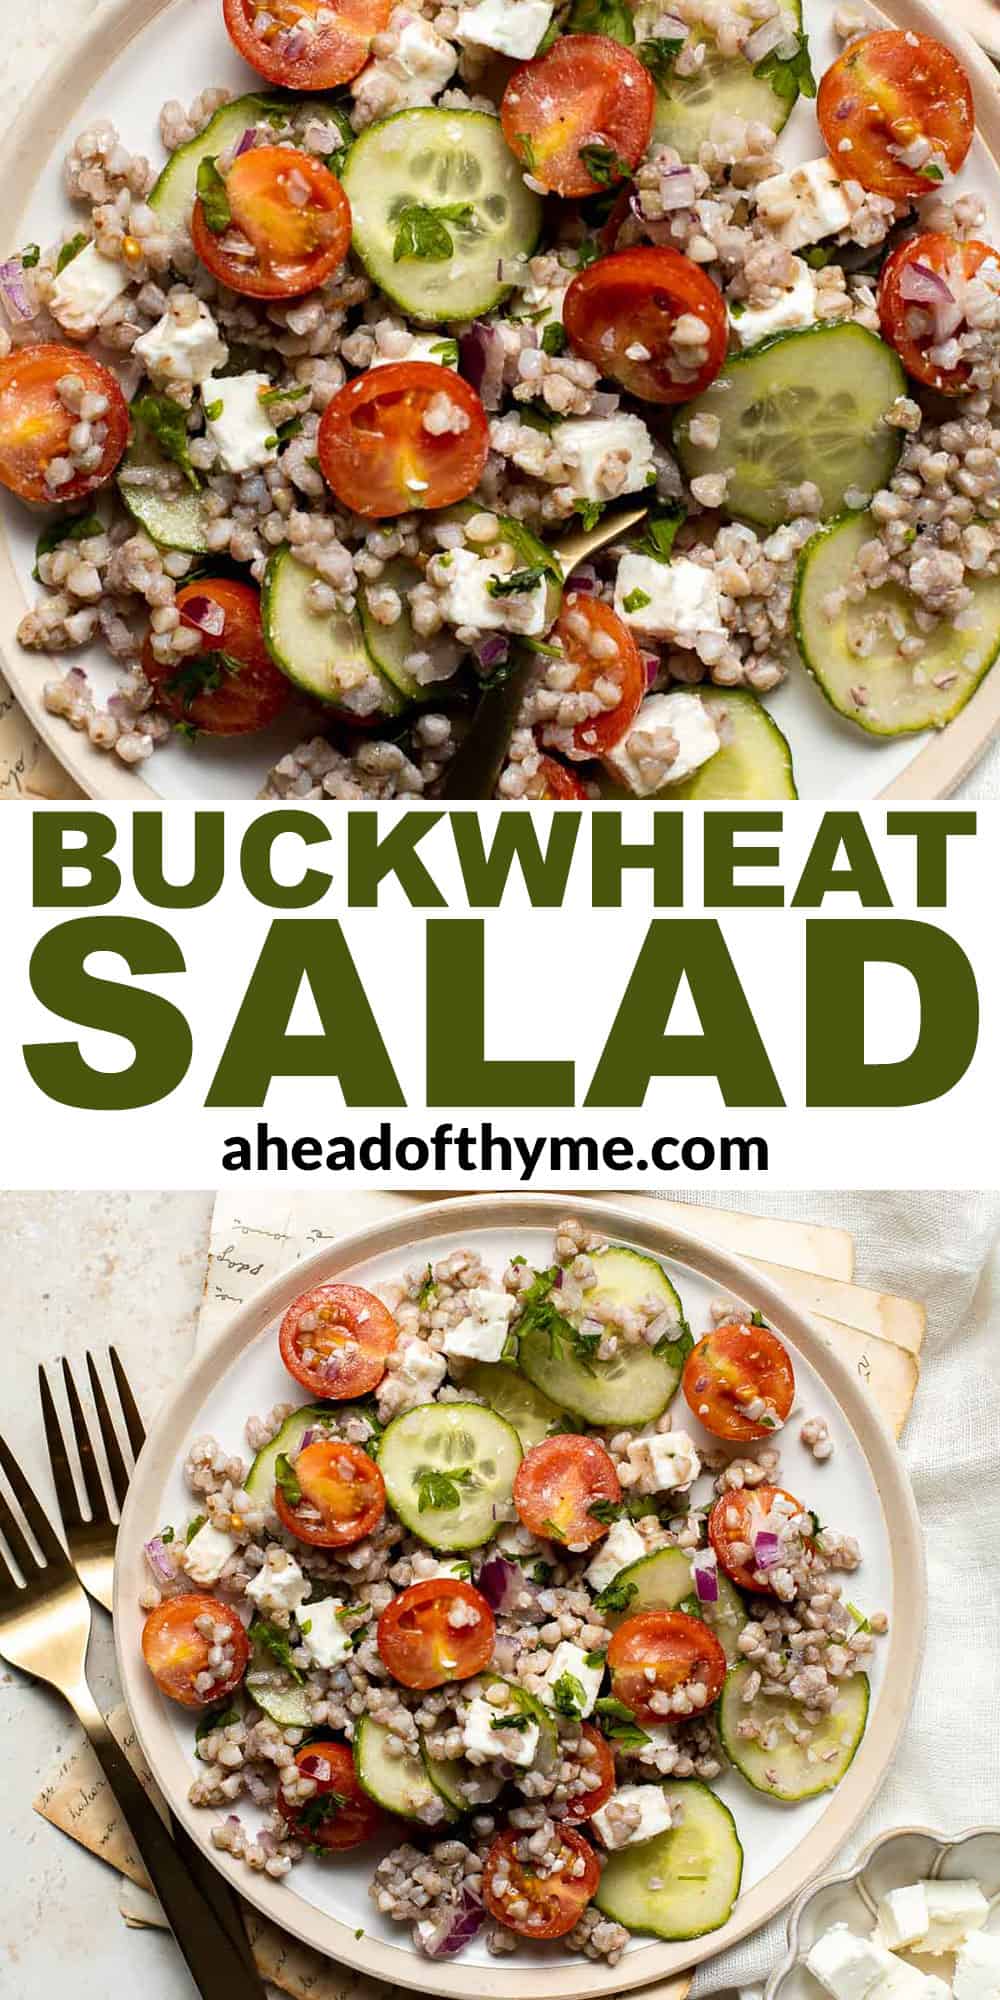
20 Easy Cherry Tomato Recipes
Fresh, vibrant, and juicy - tomato season is the best season of all! Whether you pick up a pint of grape tomatoes from the local farmer's market, grow cherry tomatoes on the vine in your own vegetable garden, or even cherry heirloom tomatoes, there are so many ways to use this veggie in tomato recipes all summer long. We are sharing over 20 easy cherry tomato recipes for when you are wondering what to make with cherry tomatoes or grape tomatoes, including everything from appetizers and salads, to pastas and entrees, and so much more.
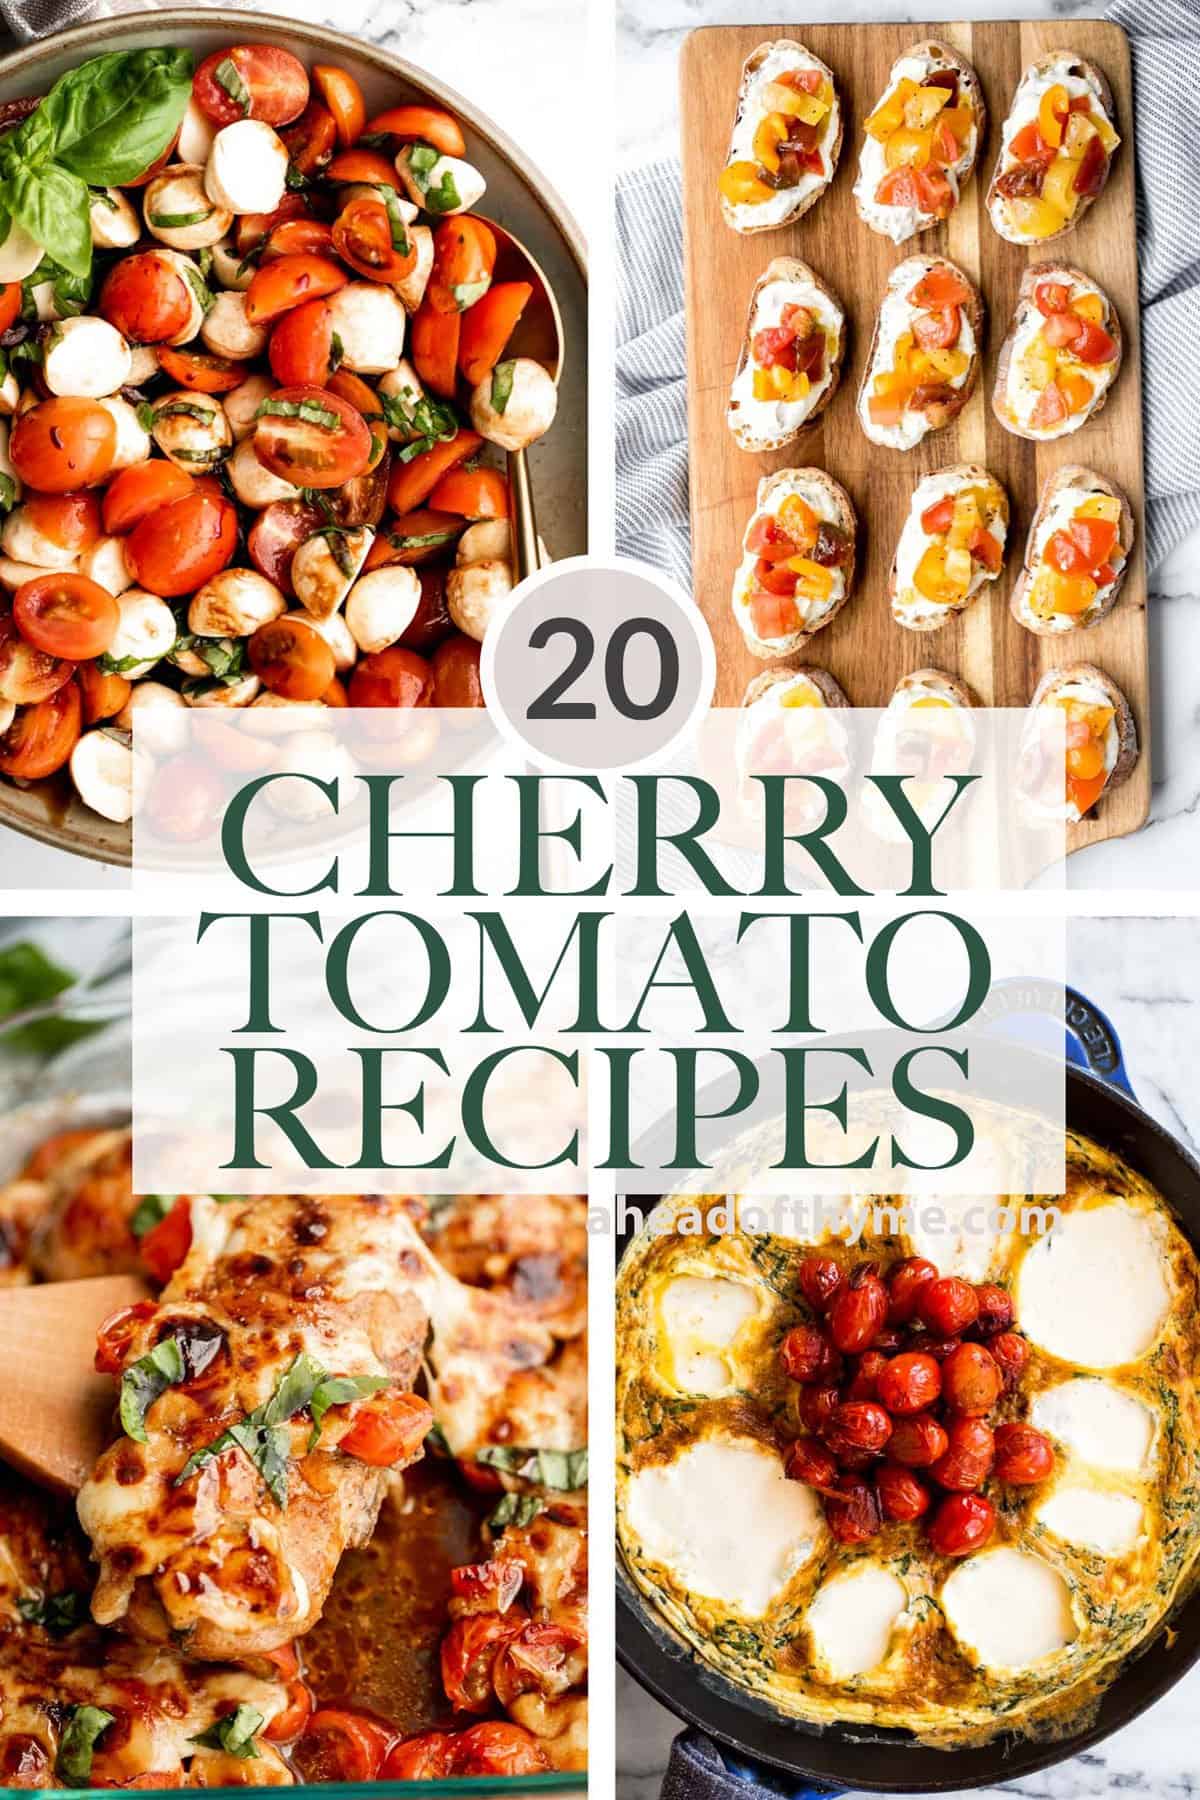
Best Cherry Tomato Recipes

Cherry Tomato Salad
This quick and easy Cherry Tomato Salad is made with sweet cherry tomatoes, red onion, fresh basil, and feta cheese tossed in a simple vinaigrette.
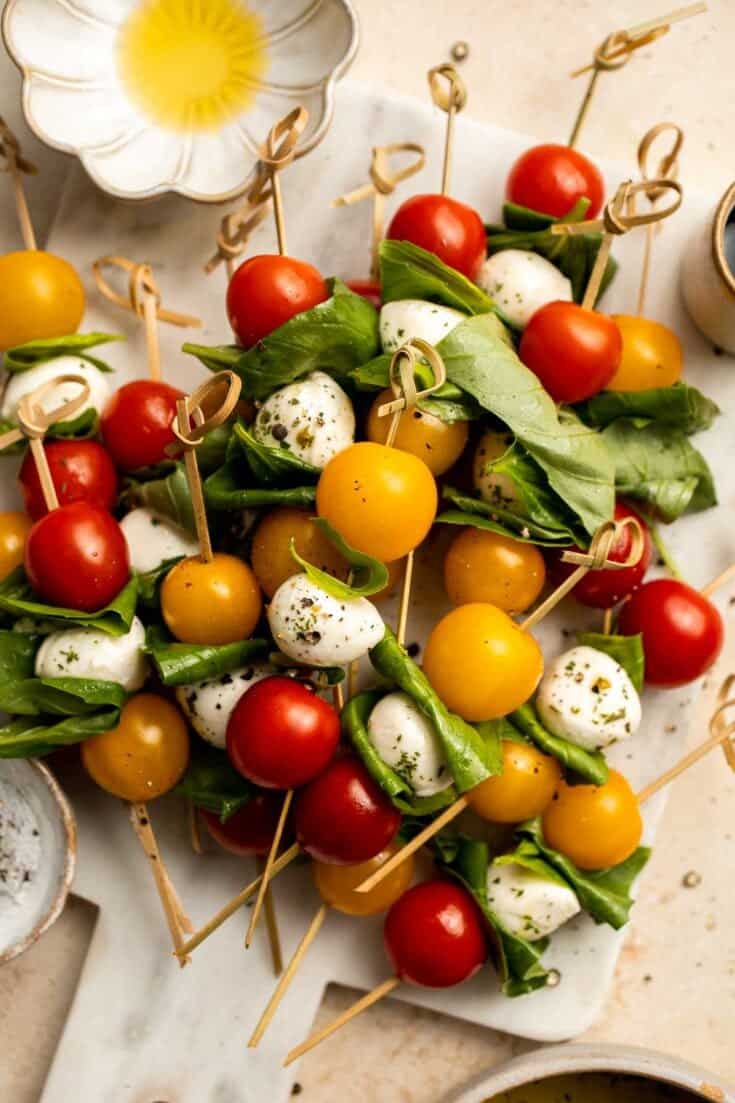
Caprese Skewers
Caprese Skewers are a quick and fresh appetizer made with bite-sized mozzarella, juicy tomatoes, and basil leaves with a drizzle of balsamic glaze.
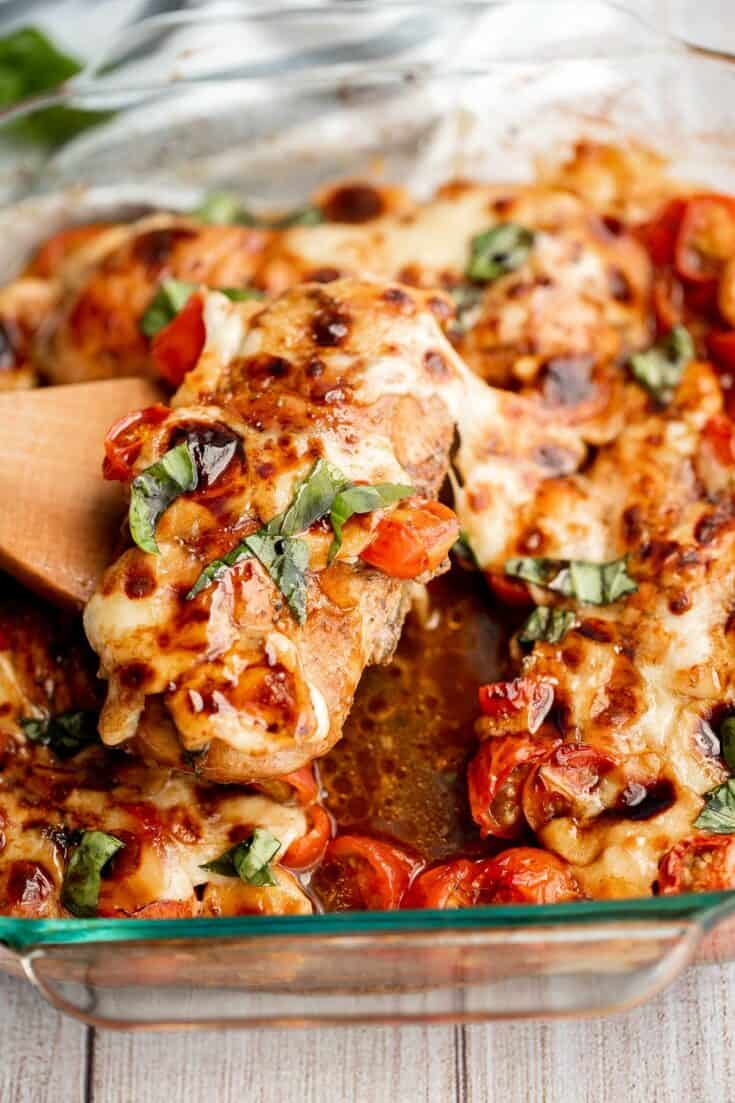
Baked Caprese Chicken
Baked caprese chicken is tender, juicy, and delicious, topped with fresh tomatoes, mozzarella cheese, fresh basil, and a good drizzle of balsamic glaze. One of my favorite cherry tomato recipes.
Whipped Ricotta Crostini
Whipped ricotta crostini topped with cherry tomatoes is a fancy easy appetizer to make in just minutes or prepare in advance and assemble before serving. A total crowd pleaser.

Tomato Burrata Salad
Tomato Burrata Salad is made with ultra creamy burrata over a bed of marinated tomatoes and onions and a drizzle of fresh basil pesto on top. So fresh!

Vegetable Orzo
This Vegetable Orzo is easy to make with seasonal vegetables that are roasted then topped with warm fluffy orzo, feta cheese, and fresh herbs.
Antipasto Skewers
Antipasto skewers with tortellini are a quick, easy, and delicious appetizer that can be served for any occasion.
Tomato and Mozzarella Caprese Salad
Quick and easy tomato and mozzarella caprese salad is a fresh, light, and delicious summer salad, made with just cherry tomatoes and a few simple ingredients in 10 minutes.

Pesto Penne Pasta
Quick and easy pesto penne pasta is a simple and light Italian pasta dish made with just five ingredients in under 15 minutes. The easiest dinner.

Beef Taco Salad
Beef taco salad is a simple, filling, and delicious meal loaded with your favorite taco fillings, and a creamy lime dressing. Make it in 20 minutes.
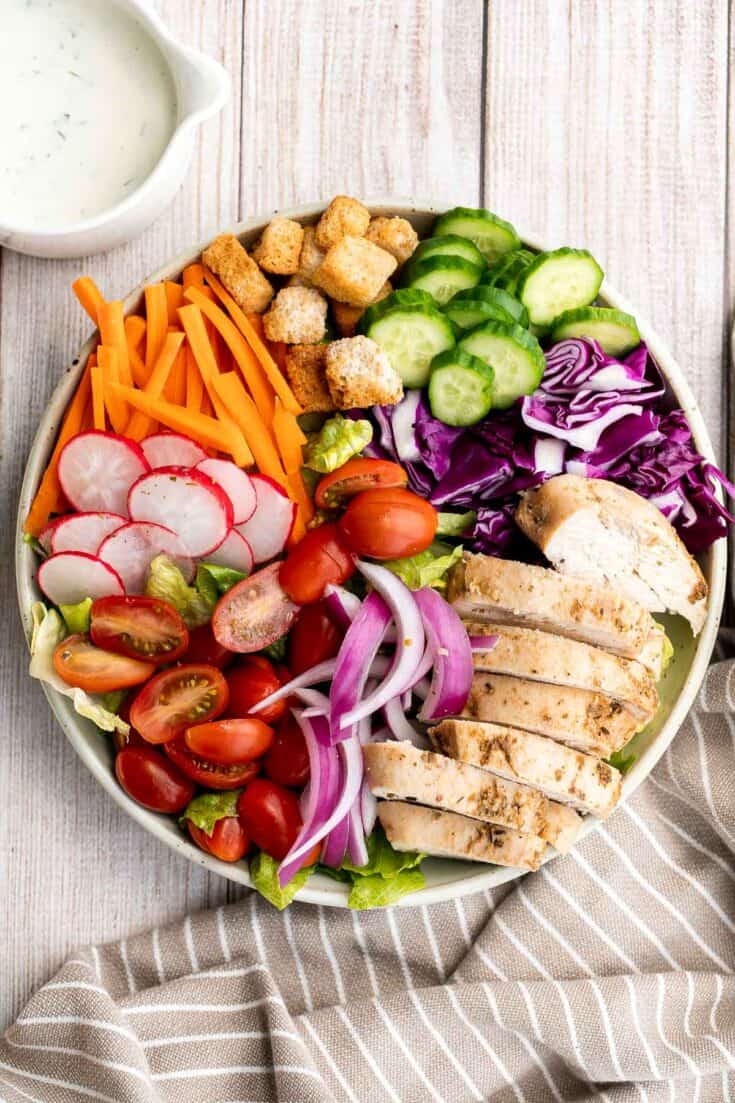
Chicken Garden Salad with Ranch Dressing
Chicken garden salad with ranch dressing is fresh, healthy, hearty, and colorful. It's a filling and wholesome lunch or dinner that is versatile too.
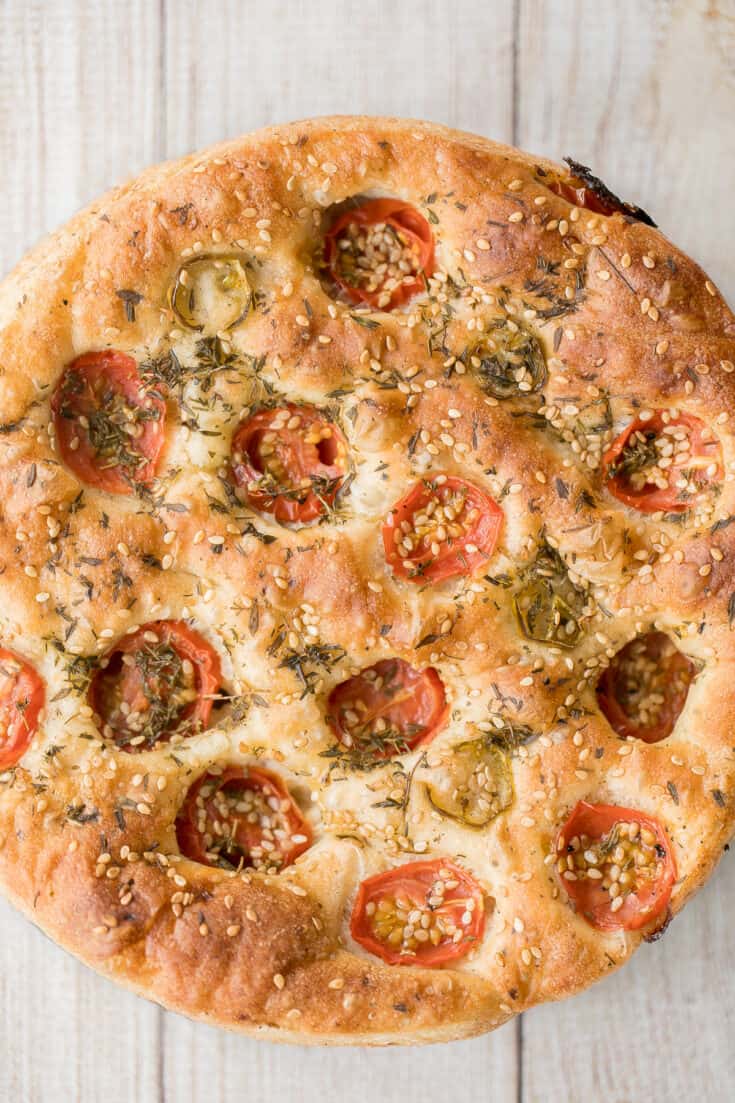
Easy No Knead Tomato Focaccia
Easy no knead tomato focaccia is so flavourful, packed with olive oil, cherry tomatoes and fresh herbs. It's crispy and golden outside, fluffy and pillowy inside.
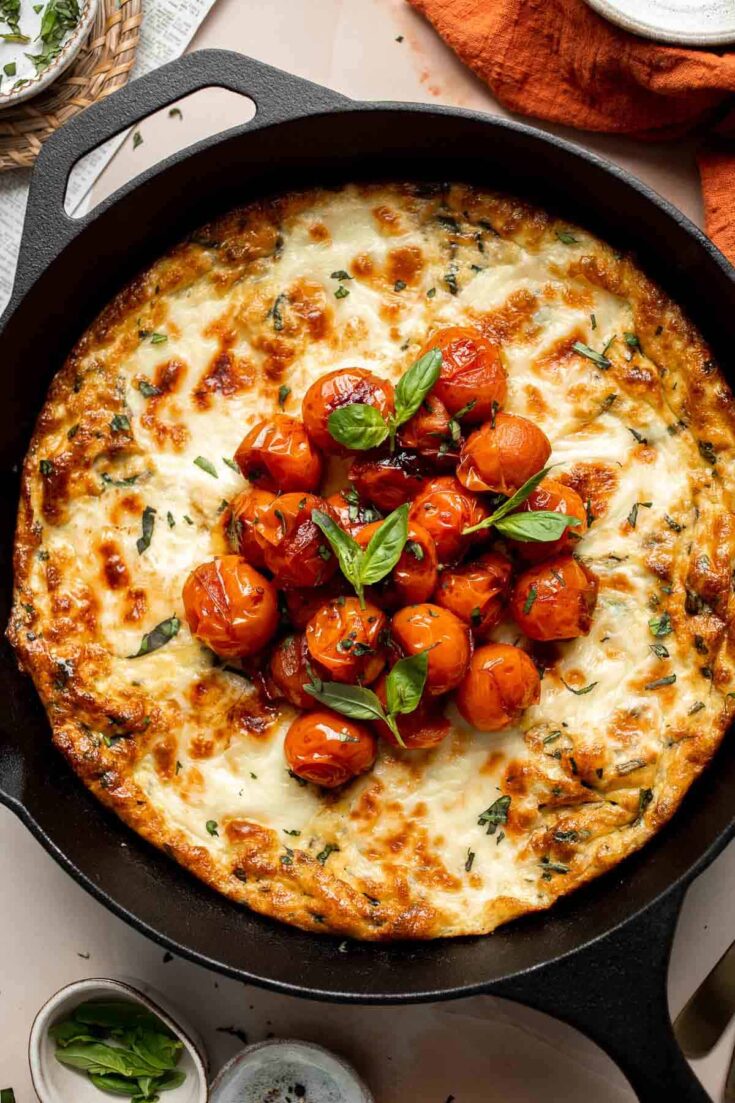
Caprese Frittata
Caprese Frittata is light and fluffy, laced with fresh basil and topped with melted mozzarella cheese and blistered balsamic tomatoes. Ready in 10 minutes!
Chickpea Greek Salad
Chickpea Greek salad is a fresh, healthy, vibrant, and colorful salad, packed with traditional Mediterranean ingredients, superfoods, and nutrients.
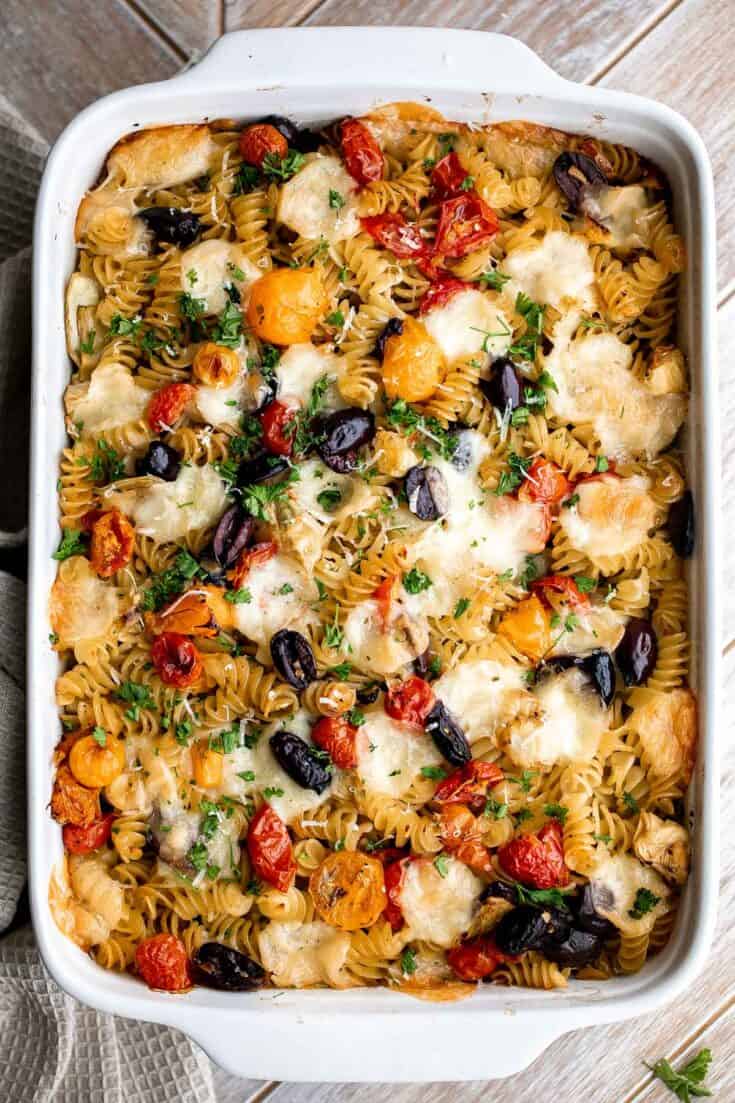
Baked Mediterranean Pasta
Baked Mediterranean pasta is simple, flavorful, and vibrant, loaded with fresh tomatoes, artichoke hearts, and olives, and topped with mozzarella cheese.
Veggie Tray
This homemade veggie tray is a quick easy healthy snack or appetizer to make for your next party, with a variety of colorful vegetables and delicious dips.
Shrimp Taco Salad
Shrimp taco salad with cilantro lime dressing is flavourful, delicious, and easy to make. It has all the fixings and of shrimp tacos, but without the mess.

Greek Salad Hummus Flatbread
This bright and colourful Greek salad hummus flatbread is perfect as an appetizer or a healthy lunch or snack.
Mussels Pasta in Tomato Sauce
Mussels pasta in tomato sauce is a simple, light and fresh, seafood pasta dinner that you can make at home in 30 minutes. Easiest weeknight dinner.
Italian Pasta Salad
Italian pasta salad is delicious, wholesome, and easy to make. Make it up to three days ahead for your summer picnics and cookouts.
Greek Chicken Gyros with Tzatziki
This refreshing and light, easy Greek chicken gyros is packed with tender souvlaki chicken, Greek salad, and homemade tzatziki sauce, all wrapped in a pita.
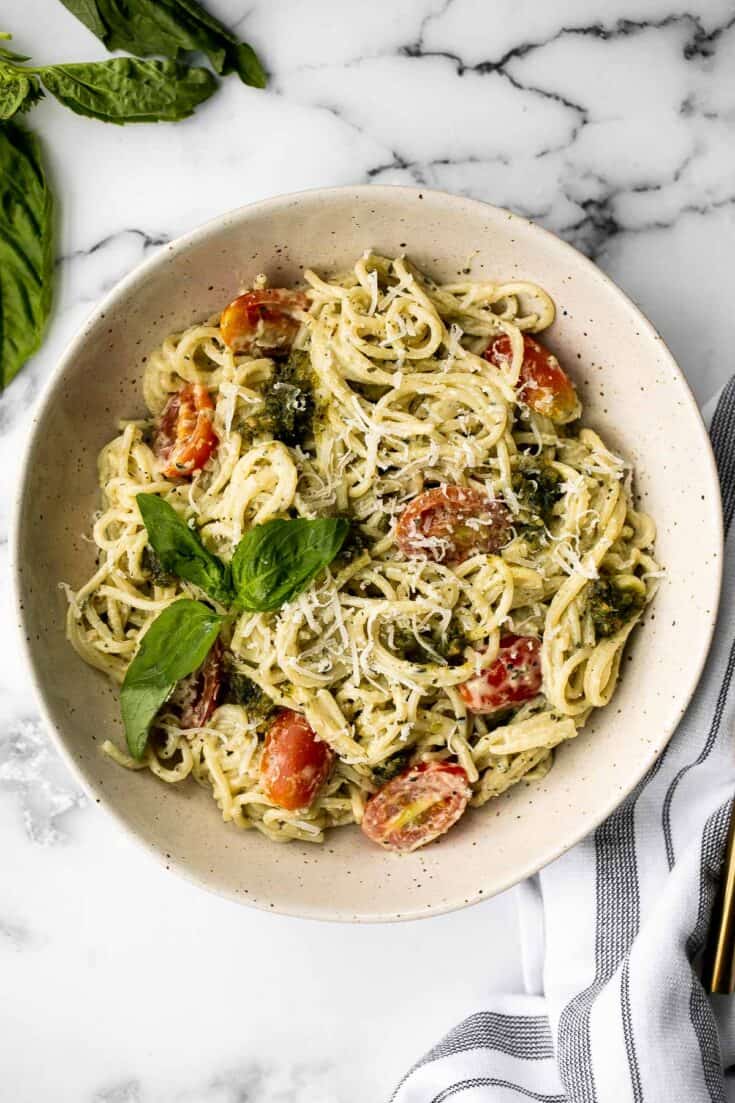
Mascarpone Pesto Pasta
Quick and easy mascarpone pesto pasta is the tastiest creamy pasta dish you’ll ever make in under 15 minutes. It's the best weeknight dinner.
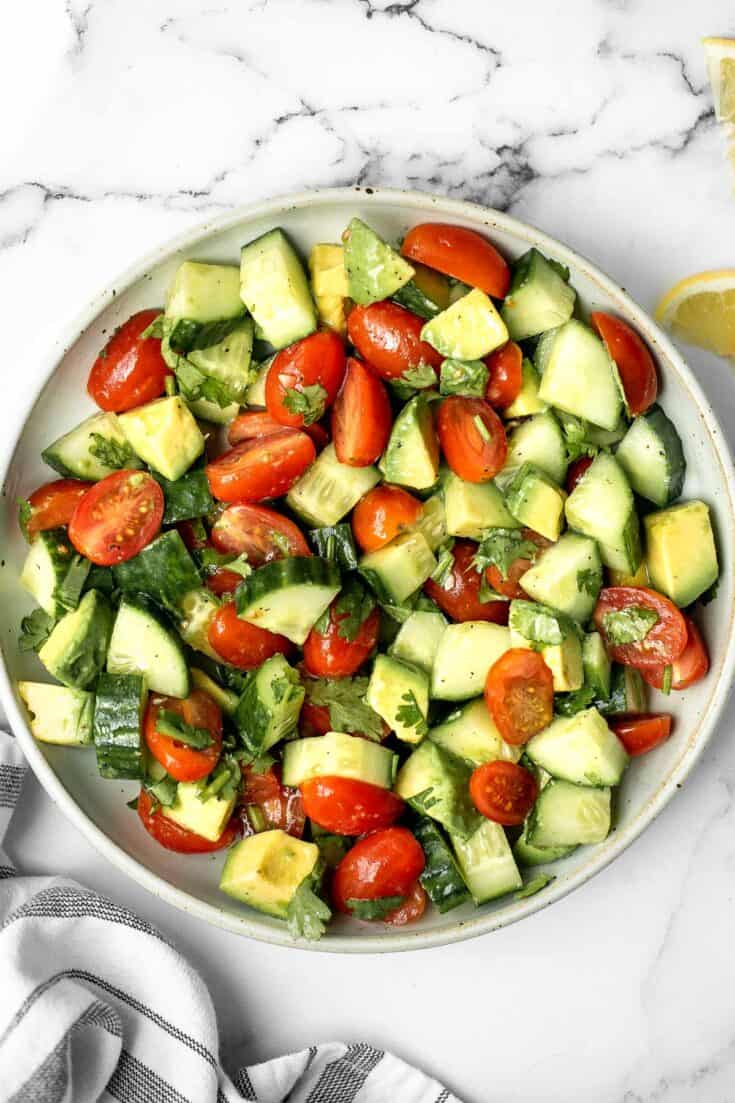
Tomato Cucumber Avocado Salad
Simple tomato cucumber avocado salad with a delicious lemon vinaigrette is a light and refreshing salad that comes together in literally 5 minutes.

Caprese Pasta Salad
Bright and colorful caprese pasta salad is the ultimate summer side dish. It's fresh, light, and loaded with vibrant summer flavors. Quick and easy too!
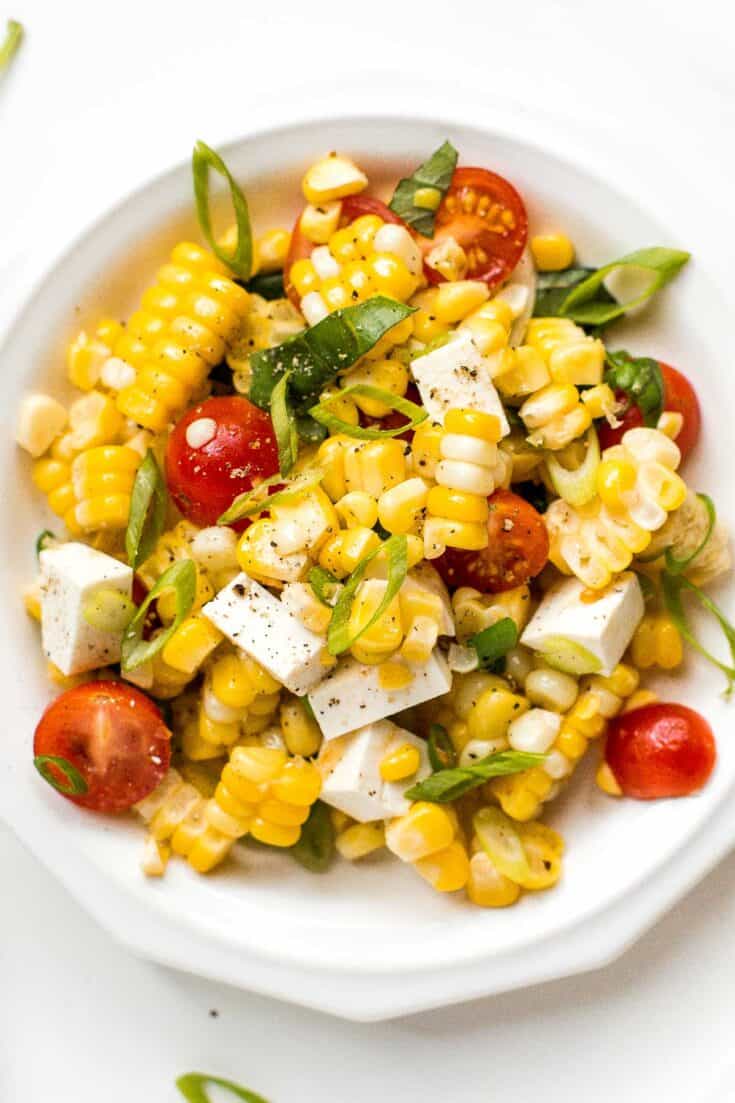
Summer Corn Salad
Take fresh-off-the-grill corn on the cob and turn it into a light, flavourful summer corn salad, topped with cherry tomatoes, fresh basil and cheese.
How to Make Ahead and Store
You can make or prepare some of these cherry tomato recipes ahead of time. You can chop and prep the salad ingredients in advance and store them in the refrigerator until ready to toss with dressing. The cooked recipes can be stored for a few days in the refrigerator or possibly in the freezer too. Confirm storing instructions by checking each recipe.
More Recipes with Summer Ingredients
- 60+ Summer Dinner Ideas
- 25 Best Strawberry Recipes
- 15 Best Blueberry Recipes
- 40 Summer Desserts
- 50 Best Breakfast Ideas
Did You Make Any of These Cherry Tomato Recipes?
Please leave a comment and rating below, and let me know what you thought of this round up of cherry tomato recipes, or let me know if there are any recipes you would like to see. Be sure to snap a picture and tag me on Instagram @aheadofthyme or share it on the Pinterest pin so that I can follow along.
Nutella Crepes
Homemade Nutella crepes with berries are sweet, delicious, and indulgent. These easy to make light and thin French-style pancakes are filled with Nutella, fresh strawberries and blueberries, and topped with a sprinkle of icing sugar.
The best part? French crepes are quick and easy to make - the batter comes together in just minutes in the blender, and each crepe takes less than 5 minutes to cook. Serve them for breakfast, brunch, dessert, or any time you crave a last-minute treat.
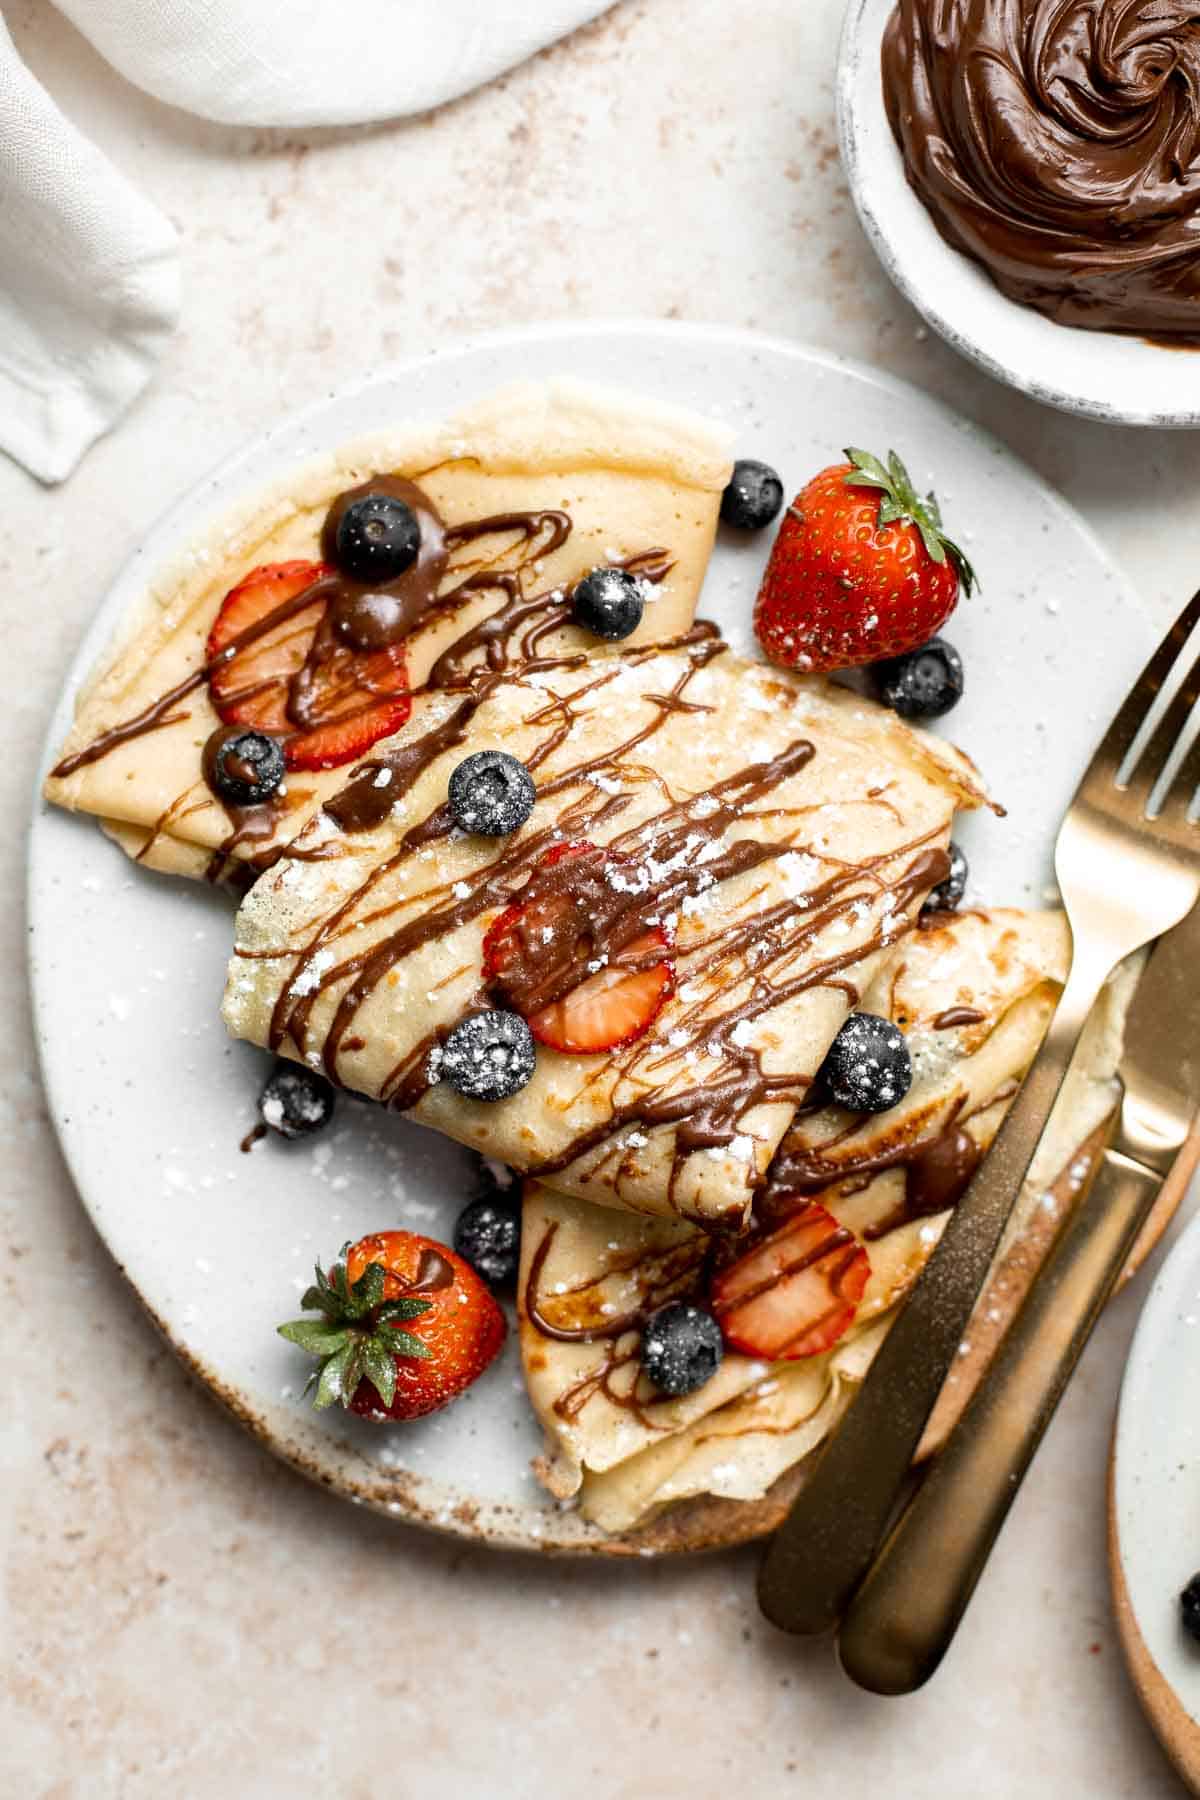
Why You'll Love these Nutella Crepes
- It's an easy blender recipe. These French-style pancakes are light, thin, and oh so buttery. Nutella crepes are an easy to make blender recipe that will have you craving breakfast all day long! The batter is literally mixed together in the blender. It can't get easier than that.
- Chocolate and berries are the best combination ever. I paired these Nutella crepes with berries because chocolate + berries = heaven. But if chocolate and berries are not your thing, then maybe chocolate and bananas are? You can easily substitute the berries for any other fruit that you prefer.
- They're quick so make them any time you want. These crepes come together in about 30 minutes for all 6, and just 4 minutes to cook each one. They're perfect for a quick breakfast or brunch, a last minute dessert craving, or for special occasions like Valentine's Day, Mother's Day, or Date Night.
- Perfect for all Nutella lovers. I am obsessed with anything and everything Nutella. I love to slather this amazing chocolate hazelnut spread is in crepes, on pancakes, or even toast.
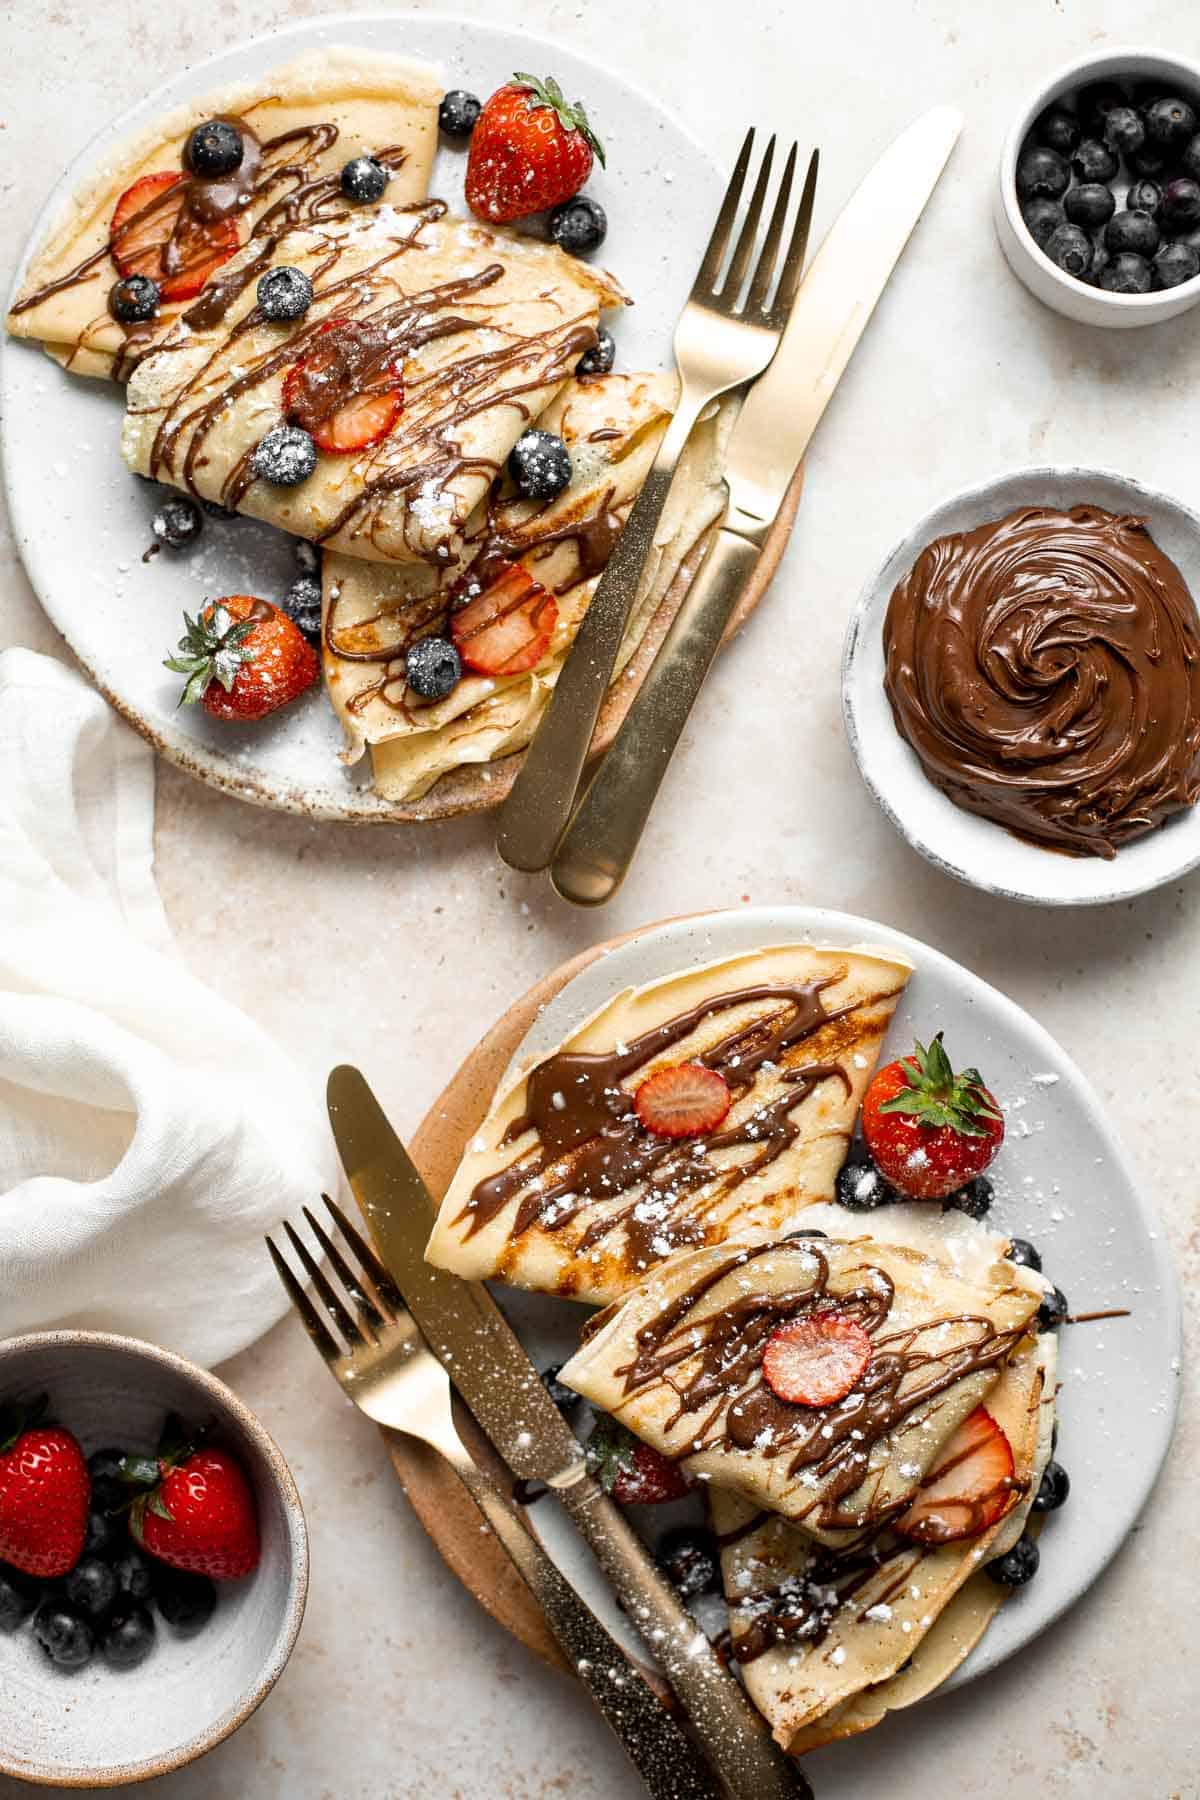
Ingredient Notes
To make this delicious and easy Nutella Crepes, you will need the following ingredients (full measurements in recipe card below):
- all-purpose flour
- eggs
- whole milk
- water
- butter
- salt
- berries - choose from your favorite berries or a combination such as strawberries, blueberries, blackberries, and/or raspberries.
- Nutella - or any alternate chocolate hazelnut spread or chocolate spread.
- confectioners' sugar - optional, to dust on top.
You will also need measuring cups and spoons, mixing bowl, blender, and non-stick skillet.
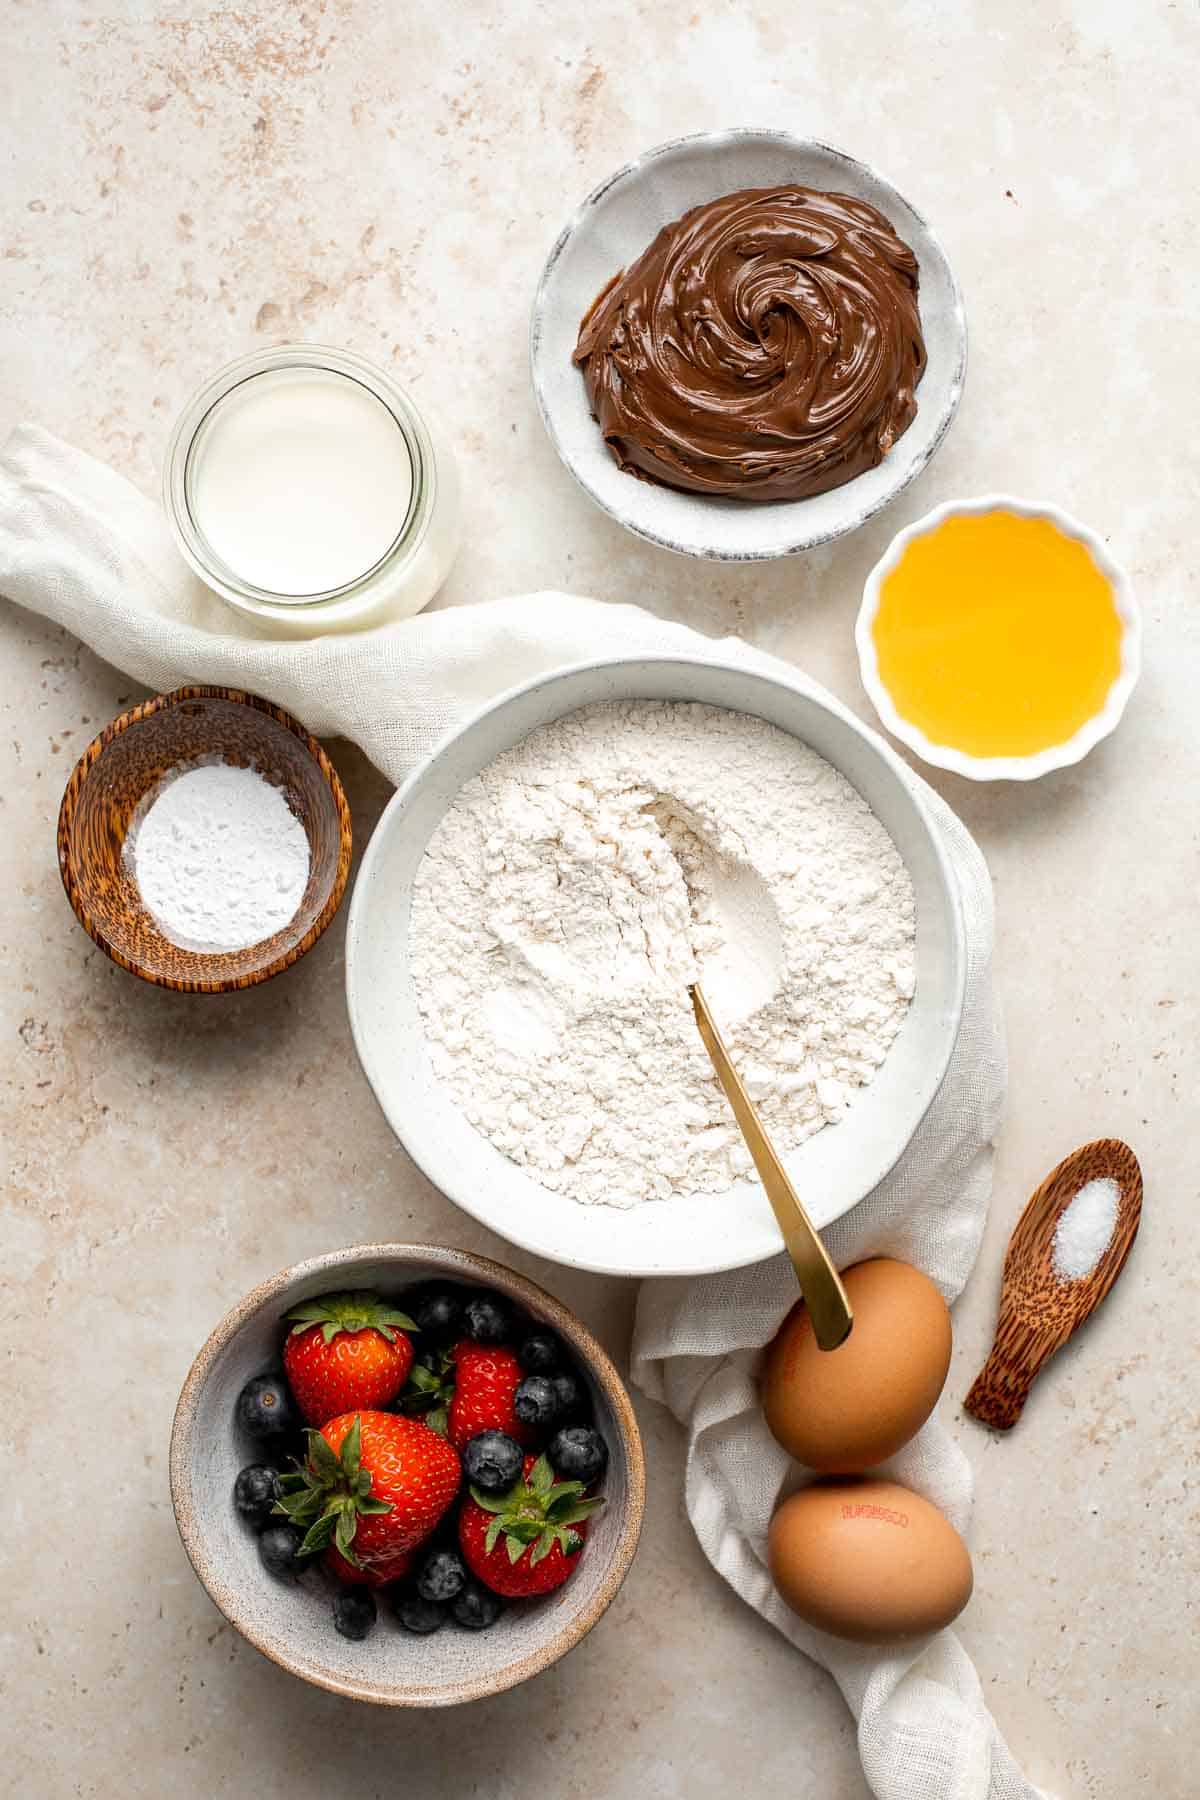
How to Make the Best Nutella Crepes
- Combine Ingredients. In a large mixing bowl, whisk together flour and eggs. Add in milk, water, melted butter, and salt, and stir to combine.
- Blend. Pour the batter into a blender. Blend for 1 minute until smooth.
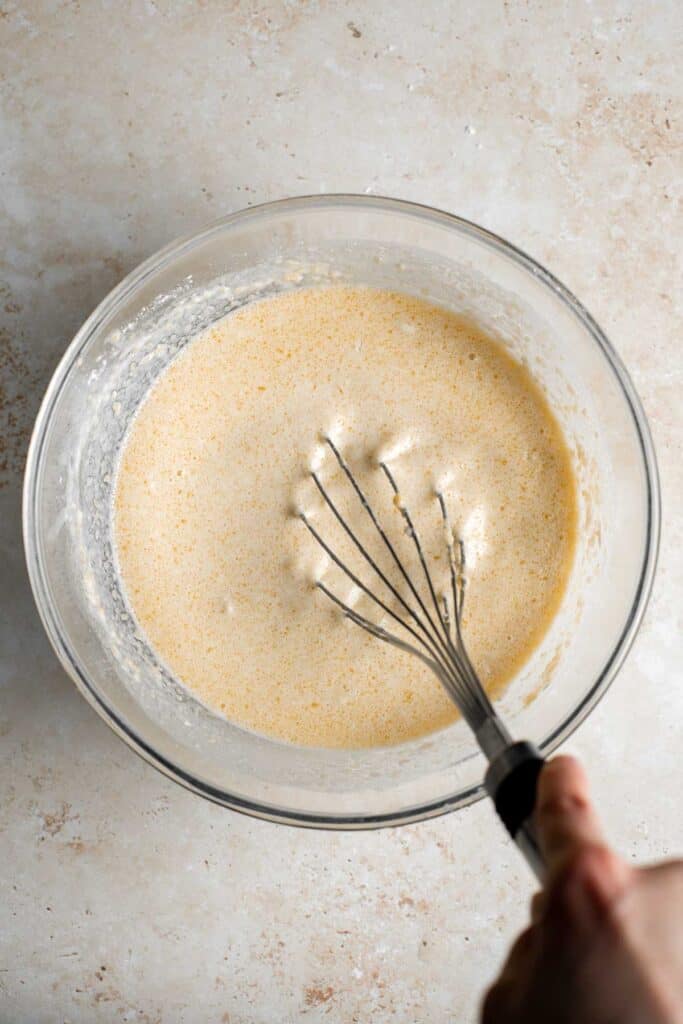
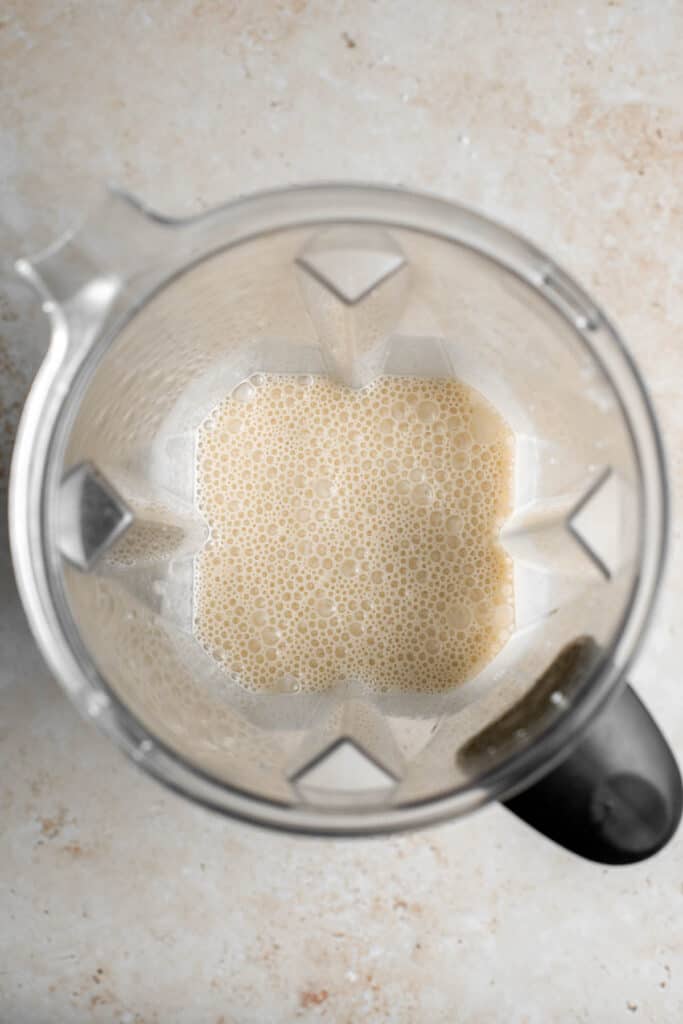
- Cook. Lightly grease a non-stick skillet and heat over medium heat. Scoop ¼ cup of batter on the pan. Quickly tilt the pan in a circular motion to spread the batter evenly on the surface of the pan. Cook the crepe for 2 minutes, or until it turns to a light golden brown colour.
- Flip. Carefully loosen with a spatula and flip over. Cook on the other side for another 1-2 minutes, until crepe is golden brown on that side too.
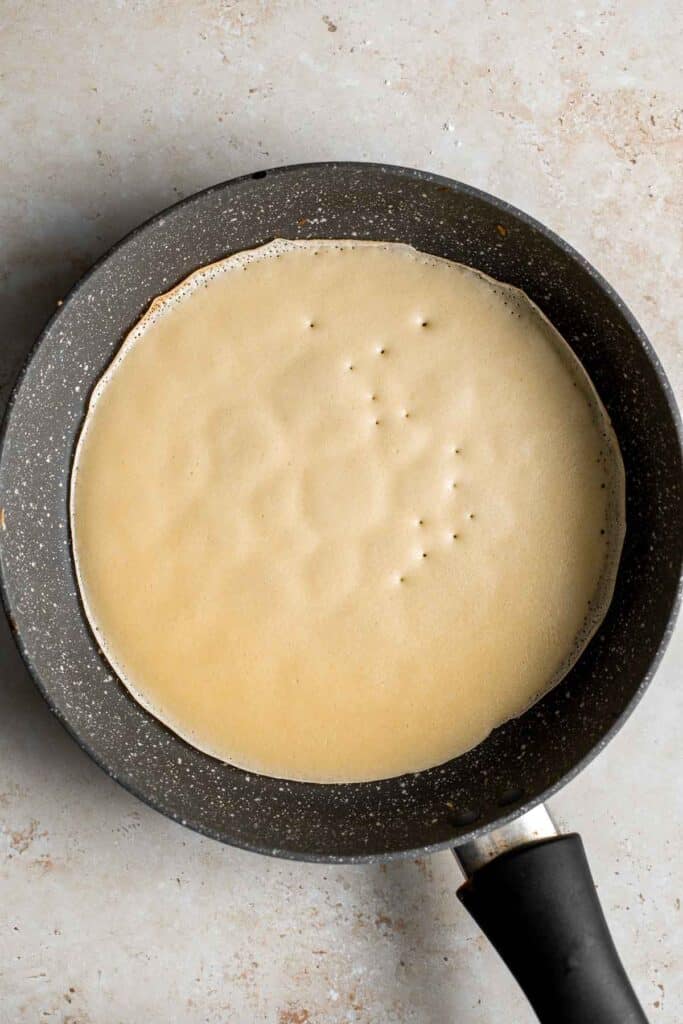
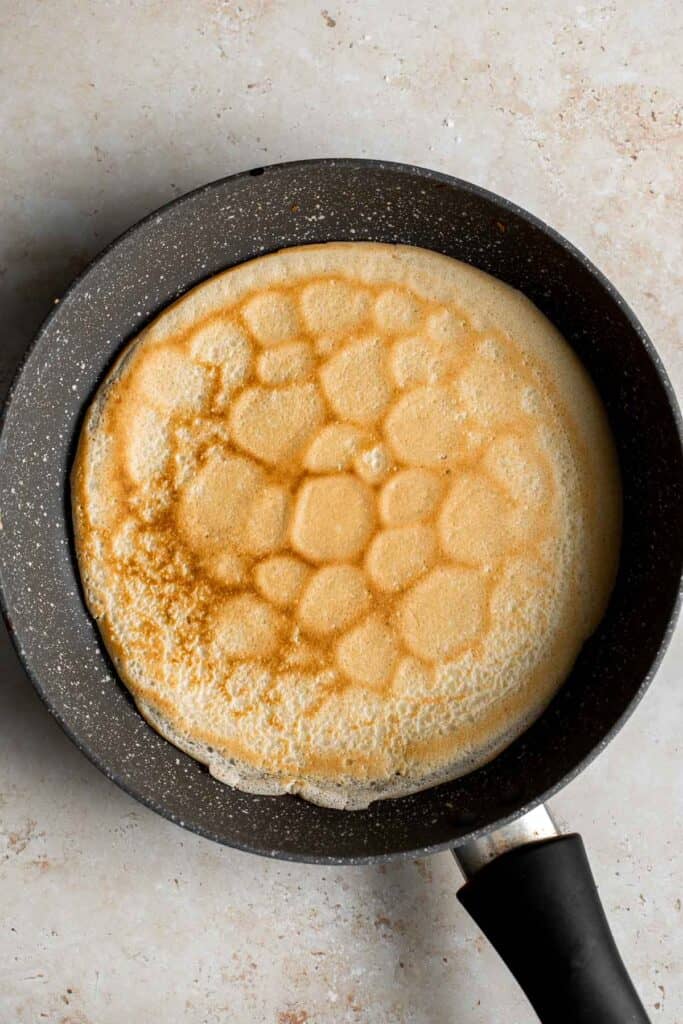
- Repeat. Slide the crepe out of the pan and onto a plate. Repeat above steps with remaining batter.
- Assemble and serve. For each crepe, spread berries on half of the crepe and drizzle with Nutella on top. Fold the crepe into quarters and drizzle extra Nutella on top. Sprinkle some icing sugar on top, if desired. Serve immediately.
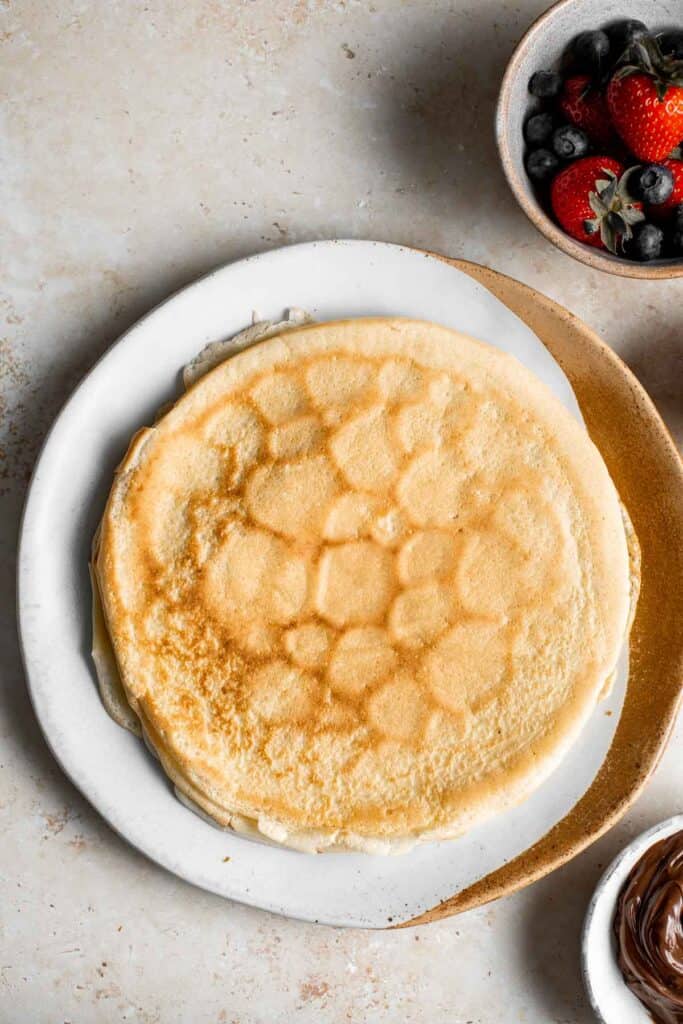
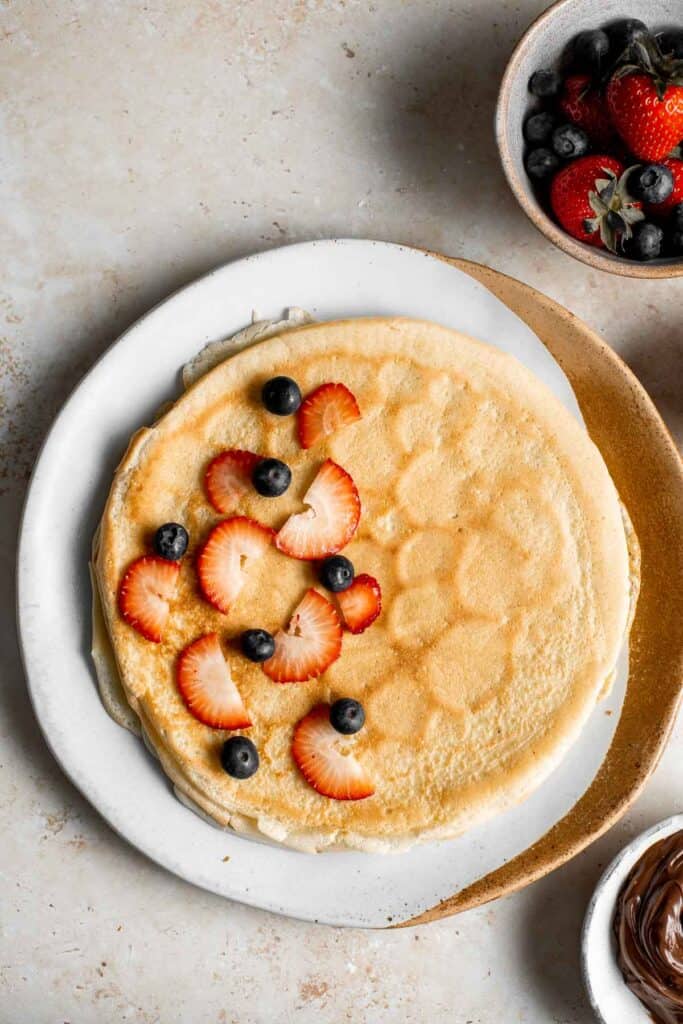
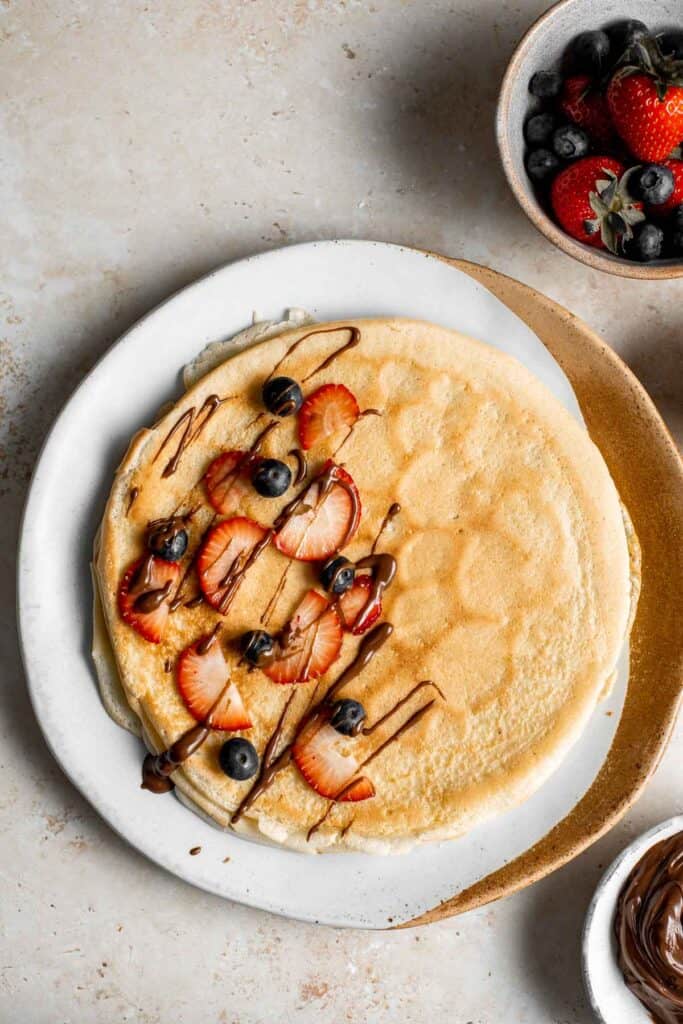
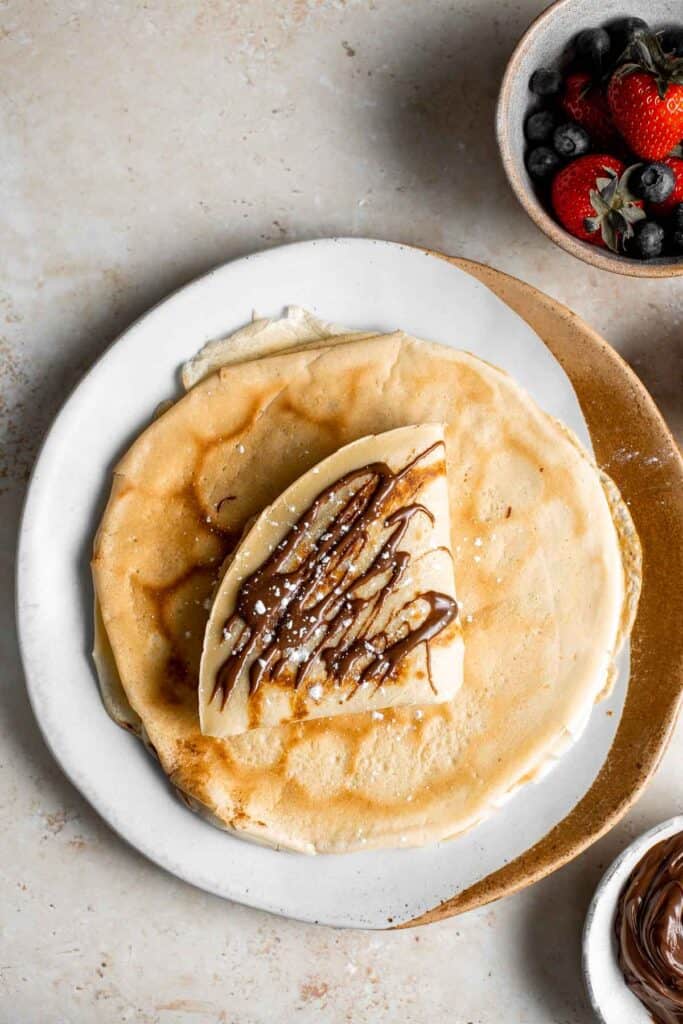
Secrets to Making the Perfect Crepes
There are 2 key steps for making the perfect crepe:
- Blend the ingredients. The best way to getting a smooth batter that spreads out thinly into the ideal crepe is to blend the ingredients together in the blender.
- Pay close attention when cooking. This probably seems like a no brainer but it is the most important step. Since crepes spread out so thin on the baking pan, you have act quick during the cooking process. You must be quick to pour and spread out (to ensure even cooking), and you must be quick to flip at the perfect time (once each side is a nice light golden brown colour, about 1-2 minutes).
What Kind of Filling is Used for Crepes?
We filled these crepes with Nutella and an assortment of our favorite berries, but there are so many ways that you can customize it with your favorite toppings. Try these combinations for a sweet crepe:
- Nutella and fruit - any combination of fruit such as strawberries and banana.
- Lemon and sugar - Squeeze some fresh lemon juice and sprinkle of granulated sugar inside.
- Cinnamon sugar - Sprinkle cinnamon and granulated sugar inside.
- Jam - Fill with any kind of jam. Our favorite is Strawberry Jam.
- Peanut butter or almond butter
- Honey or maple syrup
- Lemon curd
You can also make savory crepes with fillings such as: cured meats, fresh veggies, and cheese.
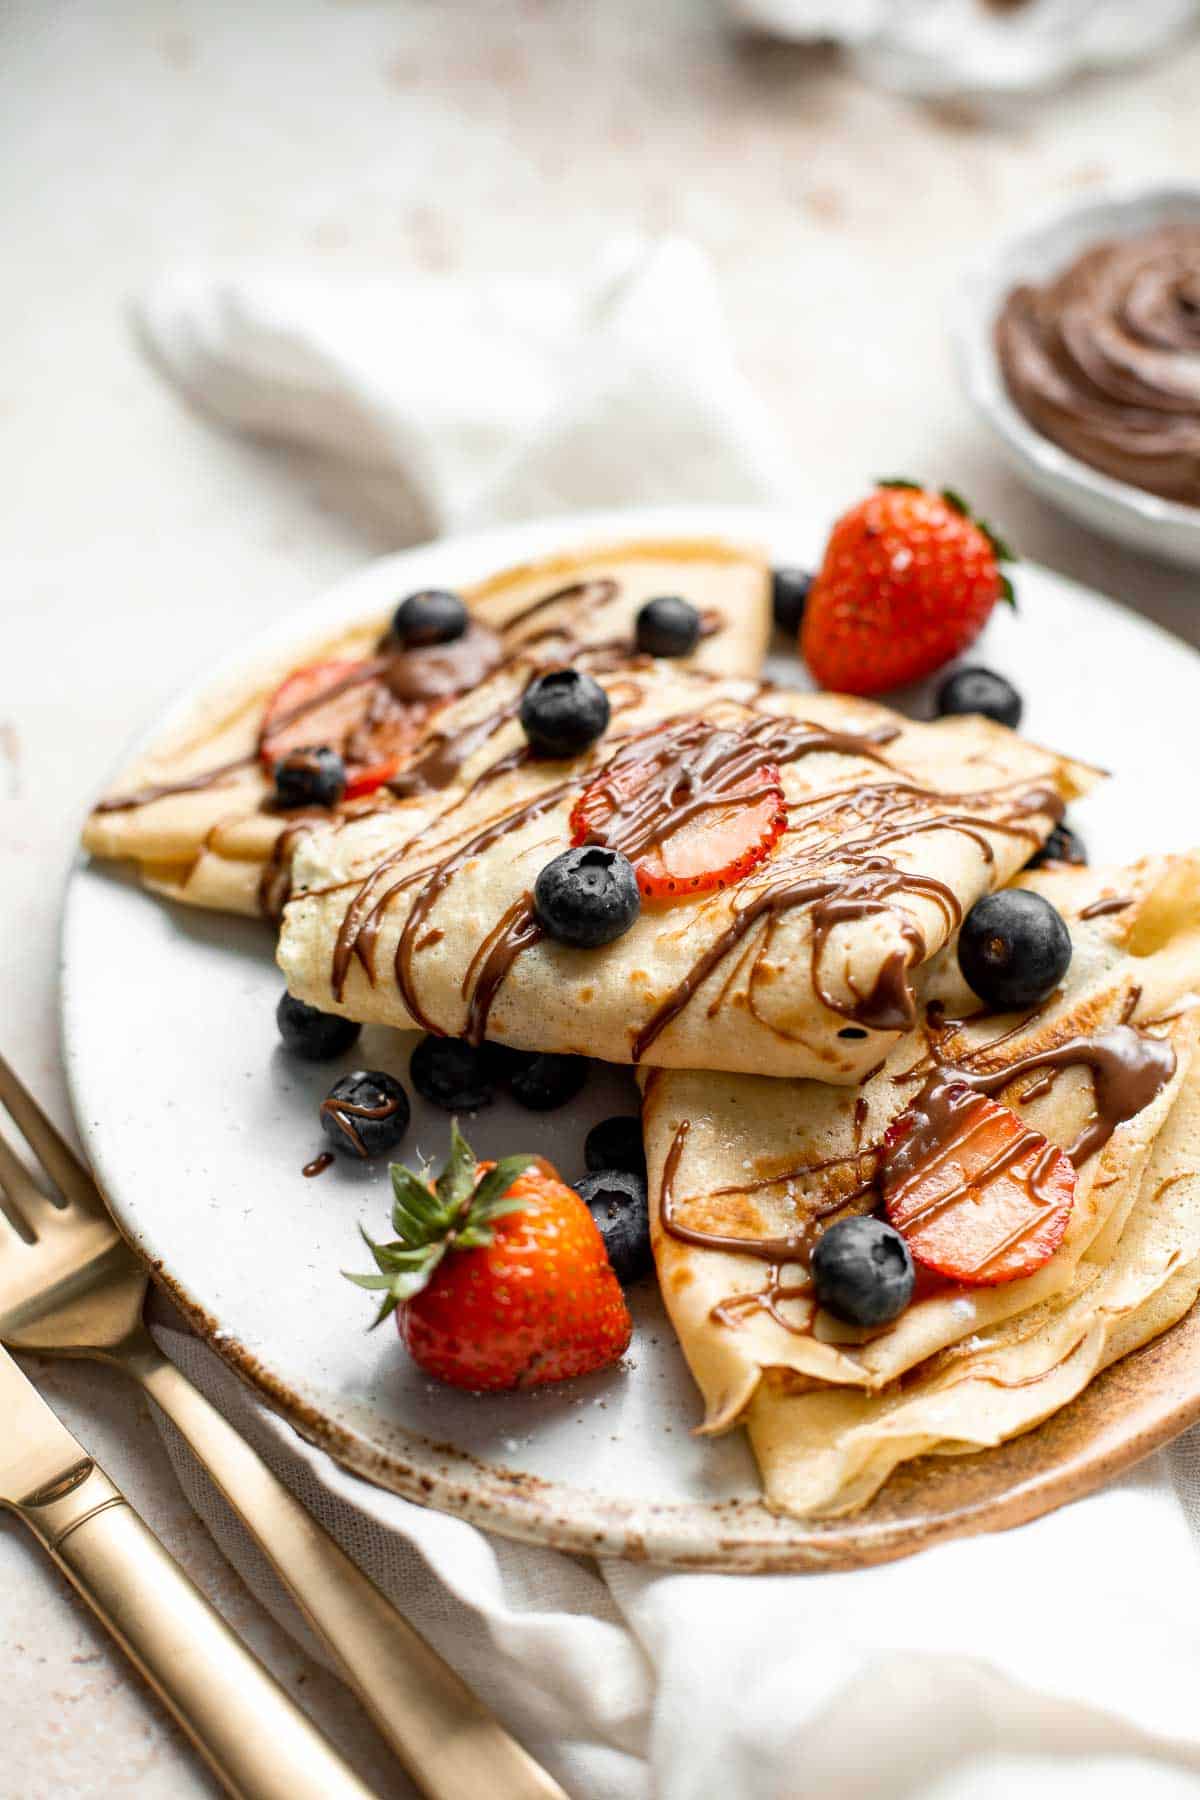
Storing Instructions
- Make ahead instructions: You can make the batter ahead of time and store in an airtight container in the fridge for up to 2 days.
- How to store: You can easily store the crepes before assembling with fillings. Allow the crepes to cool completely to room temperature. Then, stack and cover tightly in plastic cling wrap and place in an airtight container or wrap tightly in aluminum foil. Store in the refrigerator for up to 3 days.
- How to freeze: Allow the crepes to cool completely to room temperature. Then, stack them up with a piece of parchment paper in between each crepe. Wrap the stack tightly in plastic cling wrap and place in an airtight container or freezer bag and freeze for up to 1 month. Allow the crepes to defrost in the refrigerator overnight before reheating.
- How to reheat: To reheat, stack leftover crepes on a plate and microwave them for about 10-20 seconds until warm but not too hot that they will tear. You can also reheat in a skillet over medium-low heat until warmed through.
More Sweet Breakfast Recipes
- 50 Best Breakfast Ideas
- Skillet Cinnamon Rolls
- French Toast
- Blueberry Pancakes
- Easy Butter Croissants
- Lemon Sweet Rolls
Tried this recipe?
I'd love to hear what you think! Leave a comment and rating below to share your feedback. Your reviews help others discover this recipe and help me keep creating more free recipes for you. Snap a photo and tag me on social media @aheadofthyme too.

Oven Baked Chicken Breast
Oven Baked Chicken Breast is juicy, tender, and delicious. Made with a simple seasoning blend that packs on the flavor, this chicken recipe is also quick and easy with minimal clean up - it should be a staple in every home!
They're incredibly juicy and tender so you can say good-bye to dry chicken! These baked boneless skinless chicken breasts is all you need for a satisfying and healthy dinner that the whole family will love.
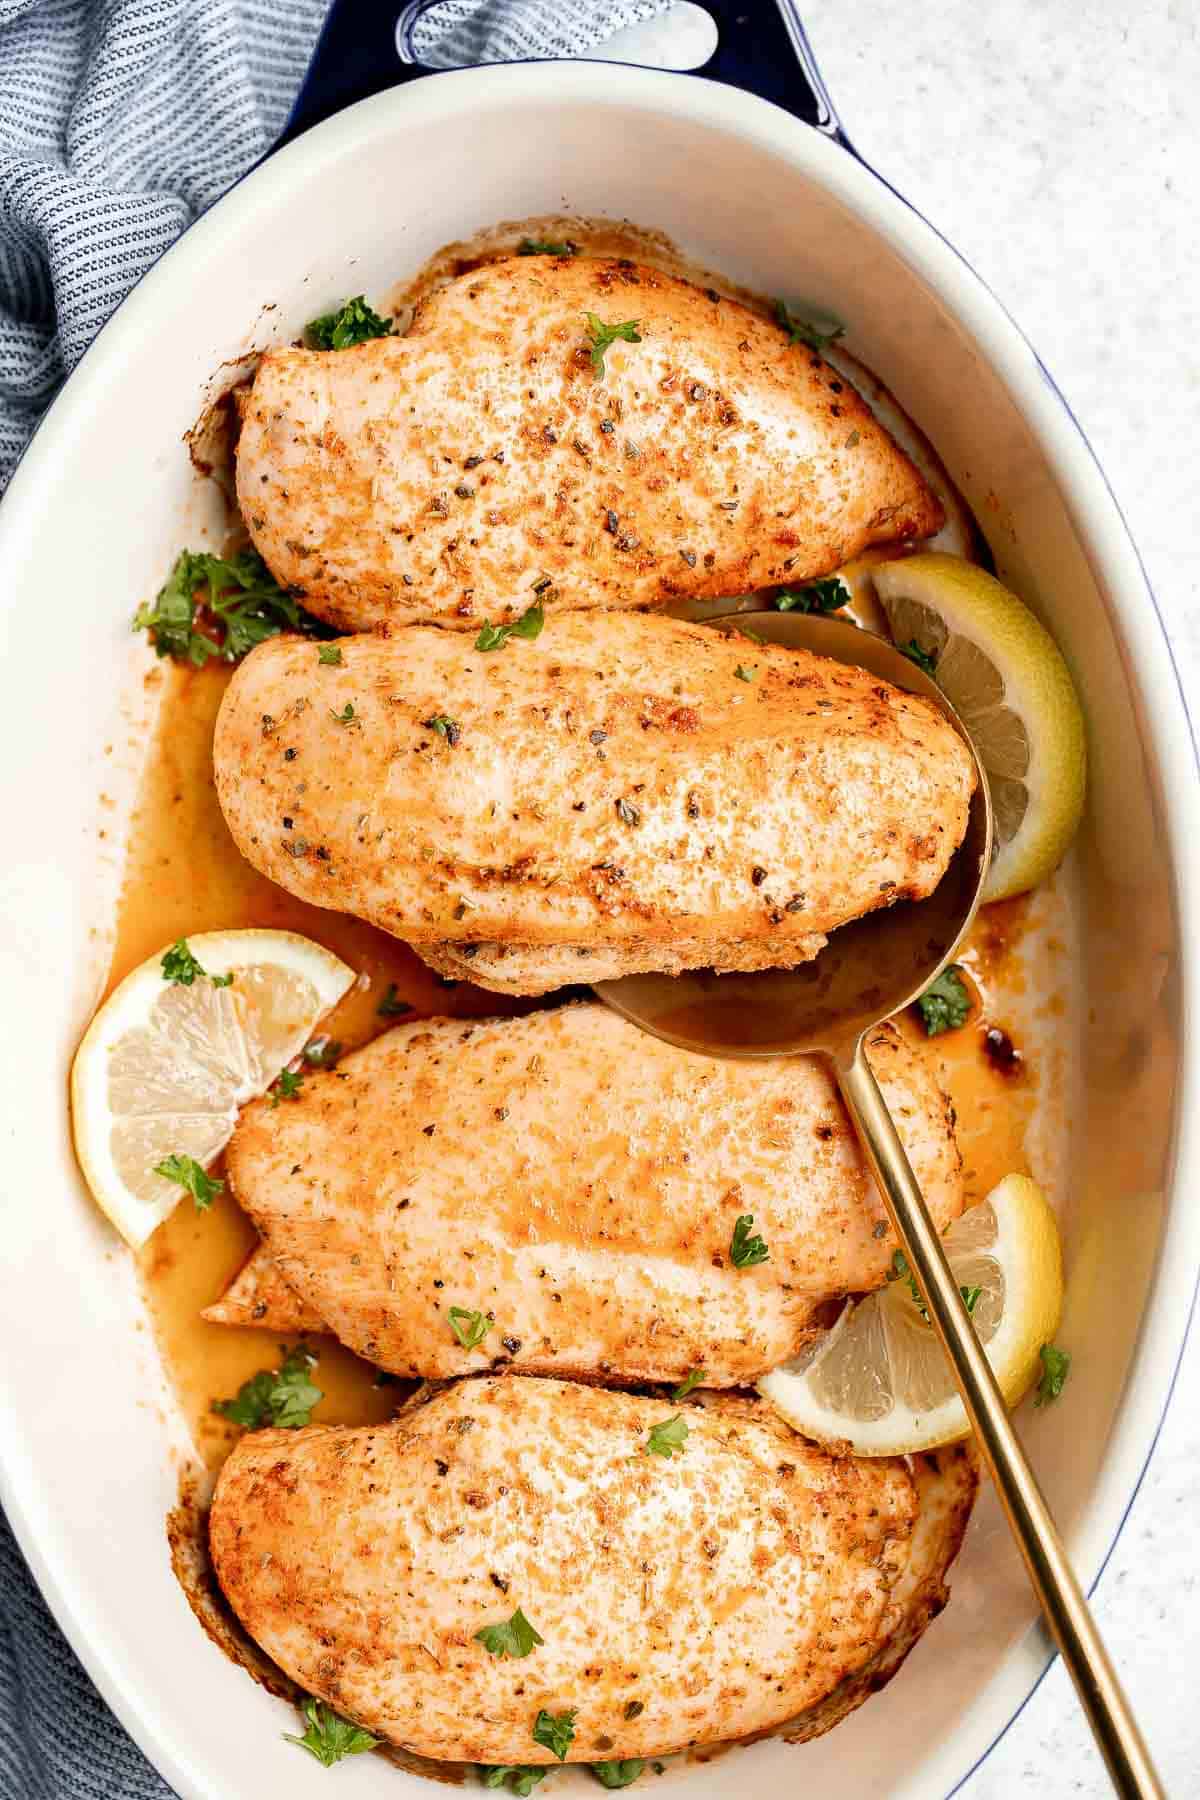
Why You'll Love This Oven Baked Chicken Breast
- It's a 30-minute dinner (or less!). These oven baked chicken breasts are ready in under 30 minutes - which makes it a quick and easy dinner on nights when you're short on time.
- The simple yet powerful spice rub. The seasoning for this oven baked chicken is simple. The simple mixture of olive oil, garlic powder, paprika, Italian seasoning, salt, and pepper gives your baked chicken all the flavor it needs.
- An easy way to cook chicken. This recipe gives you all the tips and tricks you need for baking chicken breasts in the oven to ensure you get evenly cooked, tender, and juicy chicken every time.
- Perfect for meal prep. These chicken breasts store well for several day making them great to portion out into meal prep containers for lunches throughout the week.
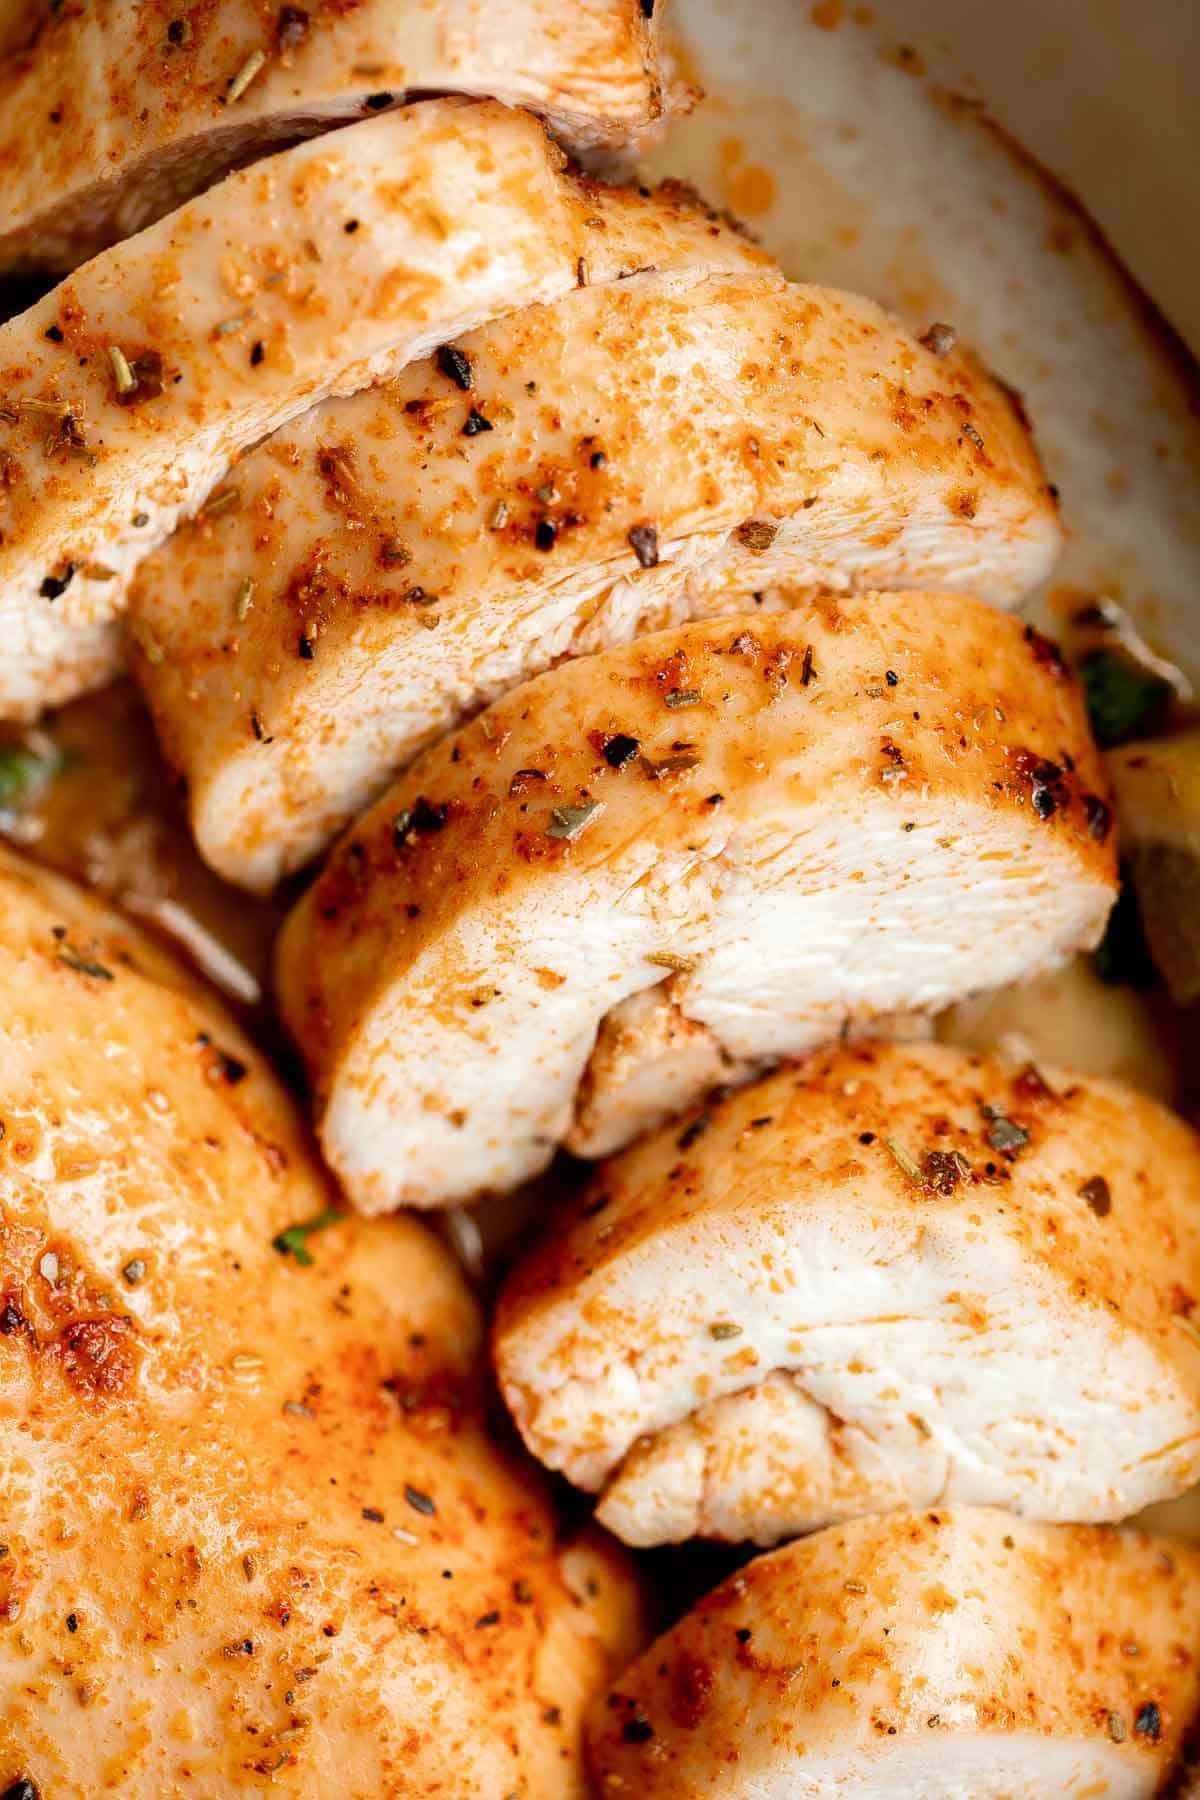
Ingredient Notes
To make this easy Oven Baked Chicken Breast, you will need the following ingredients (full measurements in recipe card below):
- chicken breasts - this recipe is for boneless and skinless chicken breasts. For bone-in breast, you will need to increase the cook time.
- olive oil
- garlic powder
- paprika
- Italian seasoning
- salt and pepper
The best thing about this recipe is that you can customize the flavors based on the seasoning you use. For instance, add some Mexican spices for a twist, marinate it in an Asian-style marinate, or add curry spices for an Indian twist.
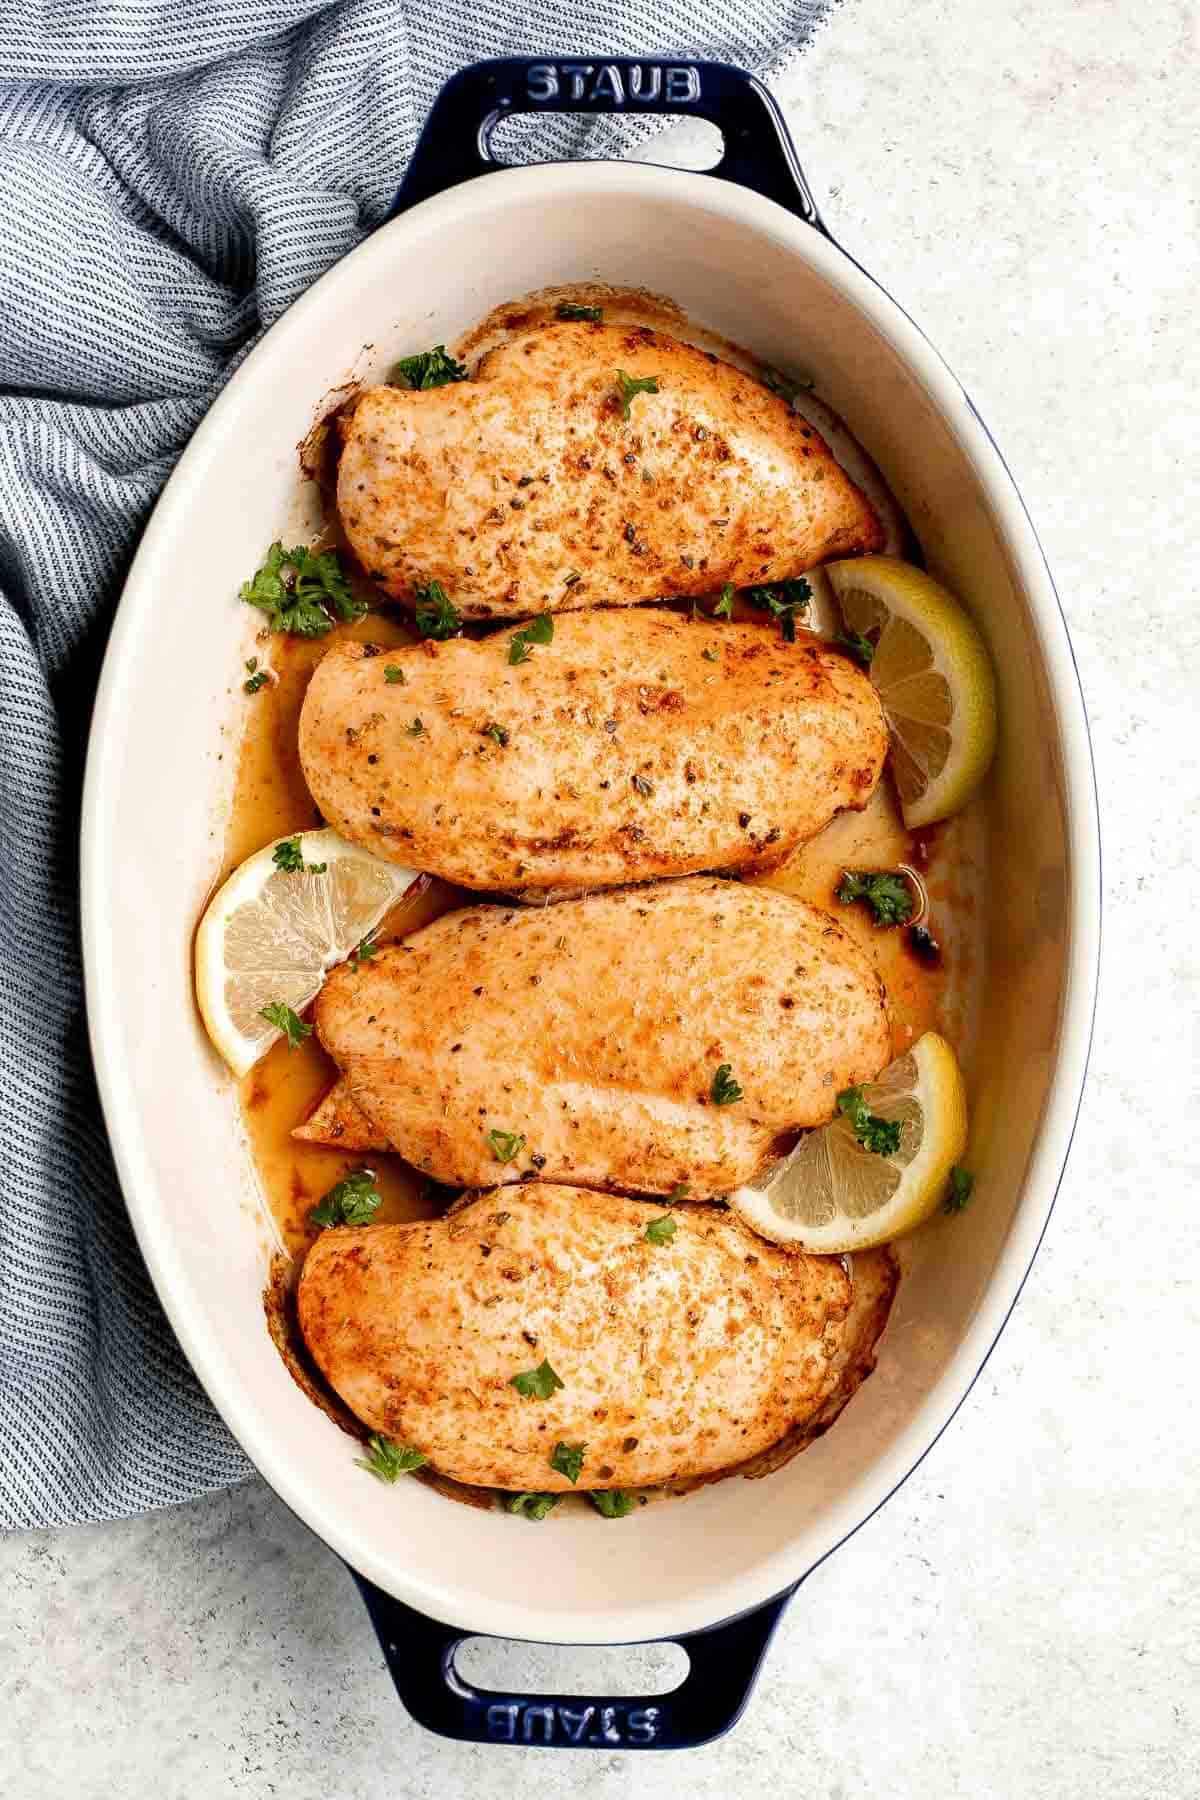
How to Make the Best Oven Baked Chicken Breast
- Season the chicken. In a large mixing bowl or Ziploc bag, combine chicken breasts with oil, garlic powder, paprika, Italian seasoning, salt, and pepper. Rub well to coat evenly and set aside until the oven is ready.
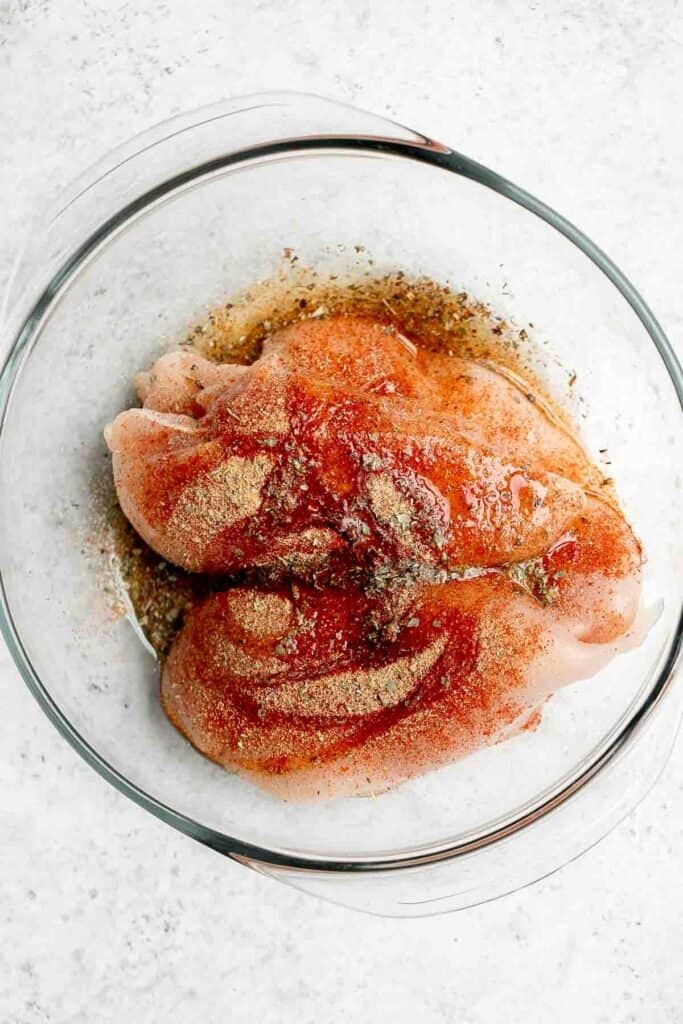
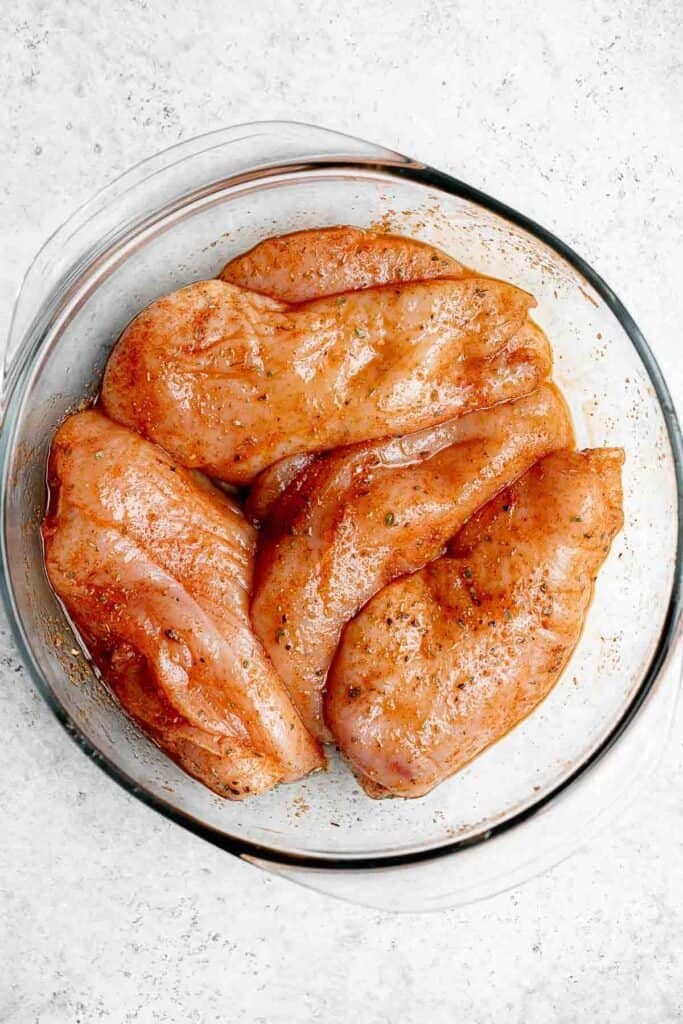
- Bake. Place the chicken breasts in a casserole dish or large half sheet baking pan. Bake in a 450F preheated oven for 20 minutes until fully cooked through. The internal temperature for the chicken should reach 165F as read on a meat thermometer.
- Rest. Loosely cover with aluminum foil and let the chicken rest at room temperature for 5 minutes.
- Serve. Drizzle with lemon juice, if desired. Slice and serve warm.
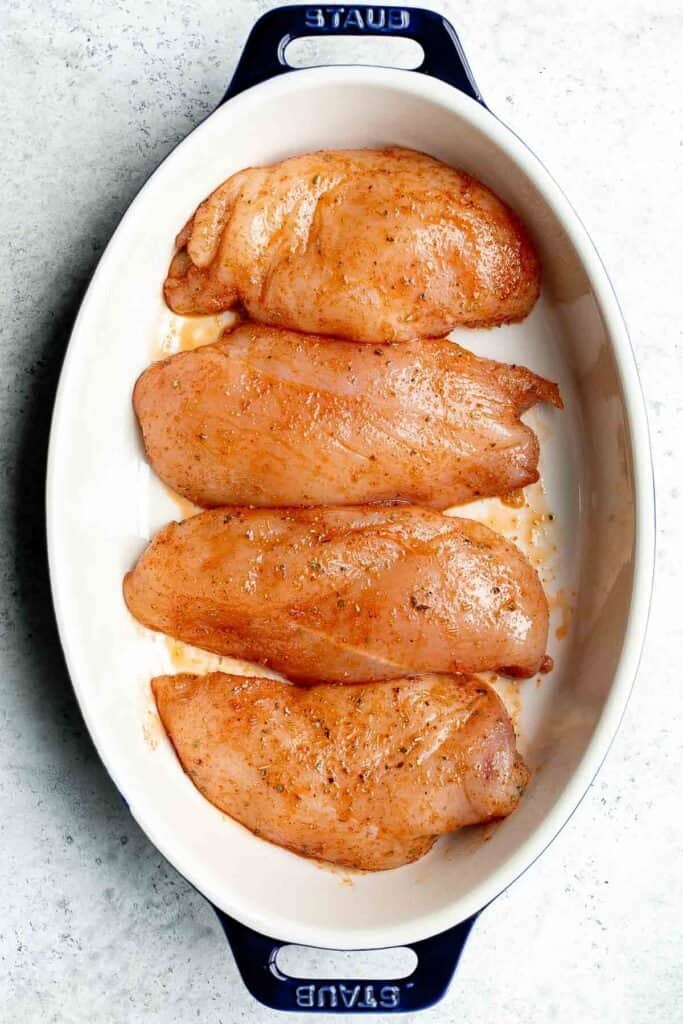
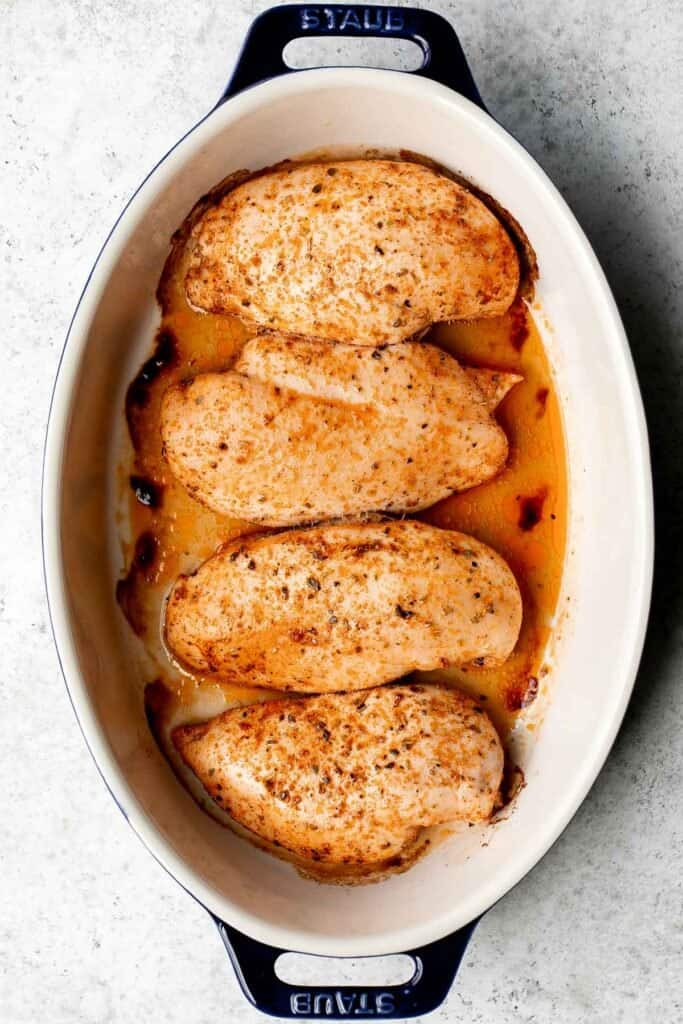
How to Serve
These baked chicken breasts are delicious served on their own, or paired with some of my favorite sides including:
- Mashed Red Potatoes
- Pesto Asparagus
- Roasted Asparagus and Mushrooms
- Caesar Salad
- Creamy Potatoes au Gratin
How to Use Leftovers
Reheat leftovers and enjoy them the same way you did when you first baked this chicken - whether on it's own, with vegetable sides, or served over salad.
You can also shred leftover chicken or chop them up and use in these popular Leftover Chicken Recipes:
- White Chicken and Spinach Lasagna
- Chicken Pot Pie
- Chicken Noodle Soup
- BBQ Chicken Pizza
- Chicken Enchiladas
Recipe Tips and Tricks
- Allow the chicken to rest: Allowing your chicken to rest for a few minutes after its cooked is a crucial step if you want to enjoy juicy meat. Your patience will pay off! As the chicken rests, juices that shrunk to the center of the chicken disperse throughout the meat. If you cut into your chicken right away, all those yummy juices will seep out.
- How to store: Keep leftover cooked chicken in an airtight container in the fridge for up to 3-4 days.
- How to reheat: The best way to reheat cooked chicken is in the oven. Wrap the chicken in aluminum foil, adding some juices or water. Then, bake the wrapped chicken in a 375F oven for 10 minutes or until warm. You can also reheat in the microwave until warmed through.
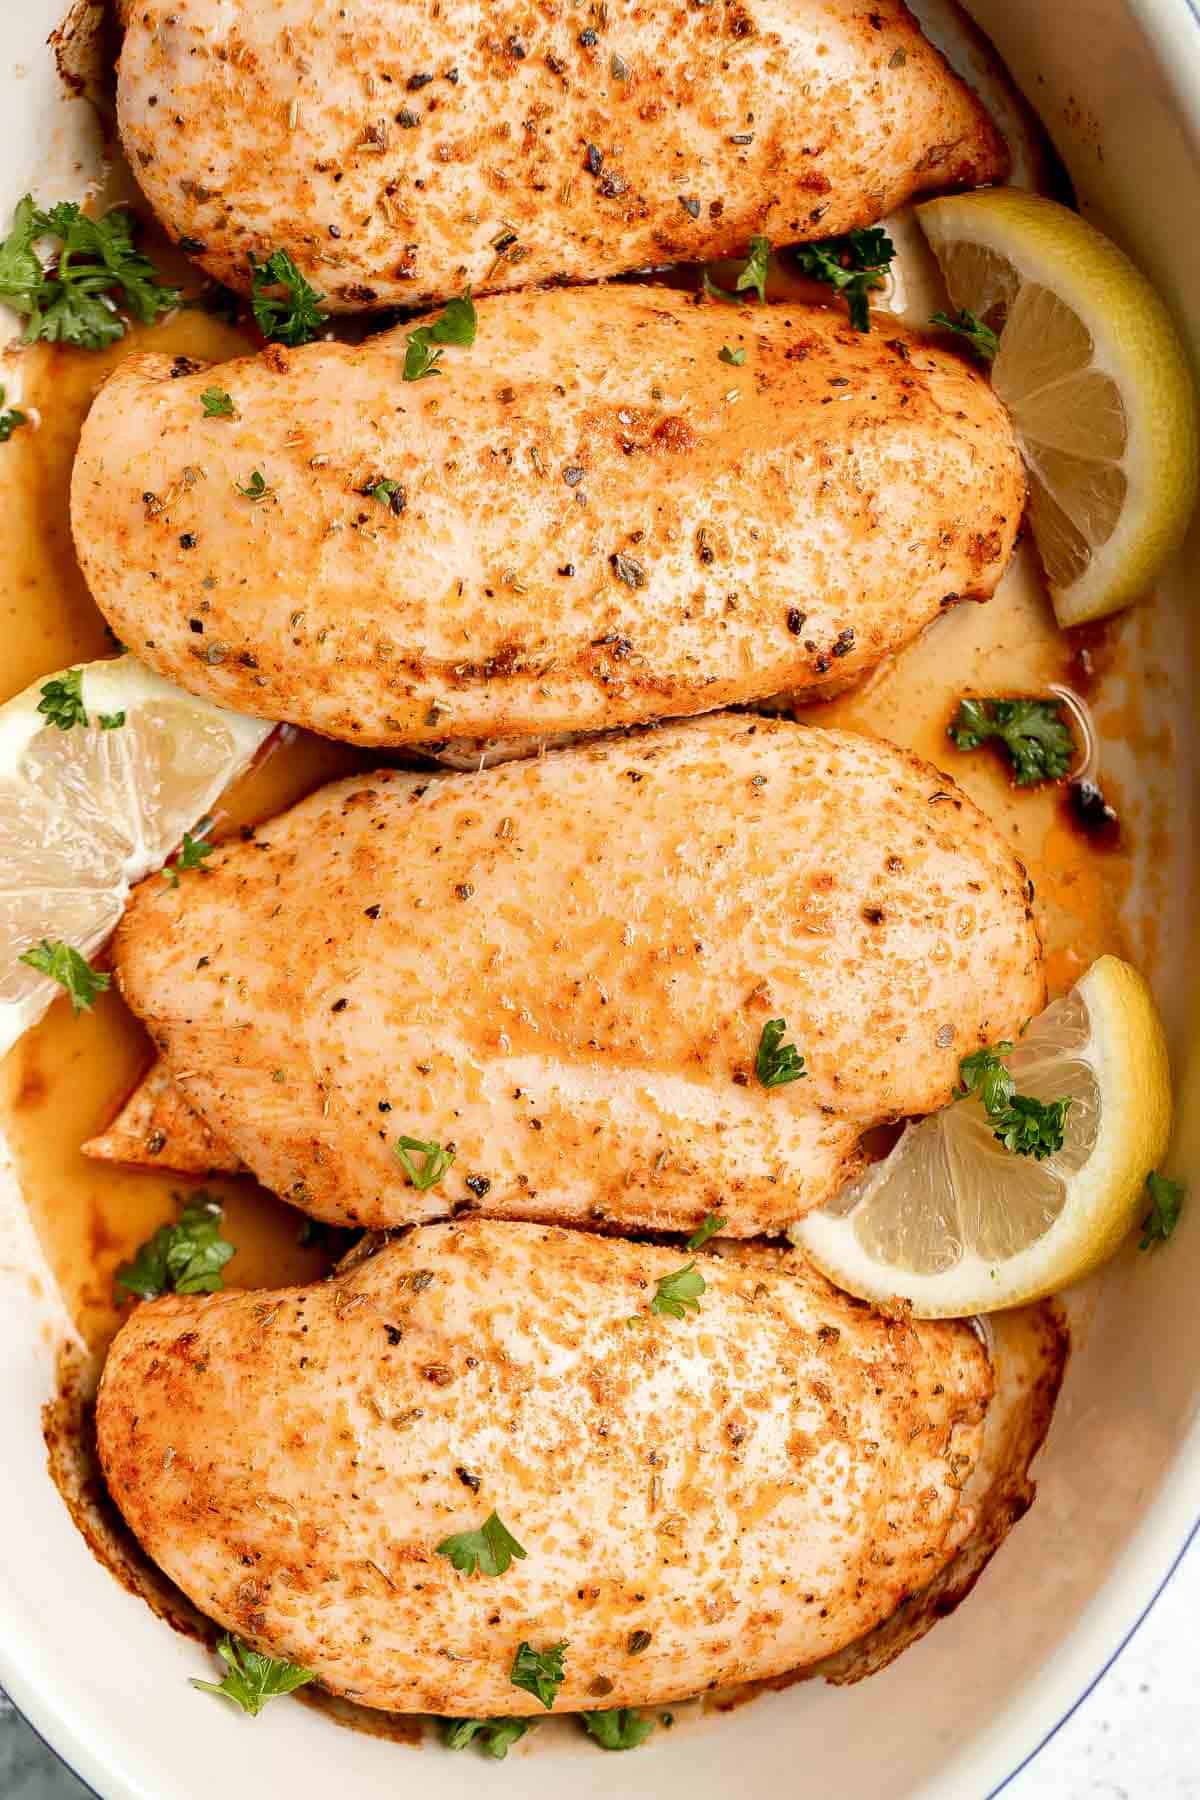
More Chicken Breast Recipes
- 50 Best Chicken Breast Recipes
- Baked Souvlaki Chicken Breast
- Mexican Chicken Breast
- Stuffed Chicken Breasts
- Air Fryer Chicken Breast
- Creamy Lemon Garlic Chicken
Tried this recipe?
I'd love to hear what you think! Leave a comment and rating below to share your feedback. Your reviews help others discover this recipe and help me keep creating more free recipes for you. Snap a photo and tag me on social media @aheadofthyme too.

Black Bean Burgers

Homemade vegetarian black bean burgers are thick, hearty, flavorful, and delicious. They are easy to make and have the best texture ever (no mushy burgers here!). Packed with plant-based protein, these veggie burgers are a healthy alternative to traditional beef hamburgers.
Make vegetarian burgers at home on the stove, in the oven, on the grill, or in the air fryer. And, serve them however you want - as patties on their own, in a burger bun, or over salad.

Why You'll Love These Black Bean Burgers
- They're healthy vegetarian burgers. Whether you're on a plant-based diet or simply trying to make healthy lifestyle changes by reducing the amount red meat in your diet, these black bean burgers are a great protein-packed recipe to make this summer.
- Loaded with flavor. These black bean burger patties are packed with flavor from some simple but flavorful ingredients like onion, garlic, feta, and a handful of simple seasonings and spices.
- Veggie burgers with the best texture. These black bean burgers are thick, hearty, and not mushy. To get the right texture, you'll leave some beans partially whole - and when you take your first bite, you'll understand why this is key!
- Serve them how you want. These black bean veggie burgers are so good that you can serve them on their own as patties, plain in a hamburger bun, on top of a salad, or bunless wrapped in lettuce. But of course you can add your favorite toppings for a traditional burger, add cheese for veggie cheeseburgers, or add bacon and avocado for a twist.
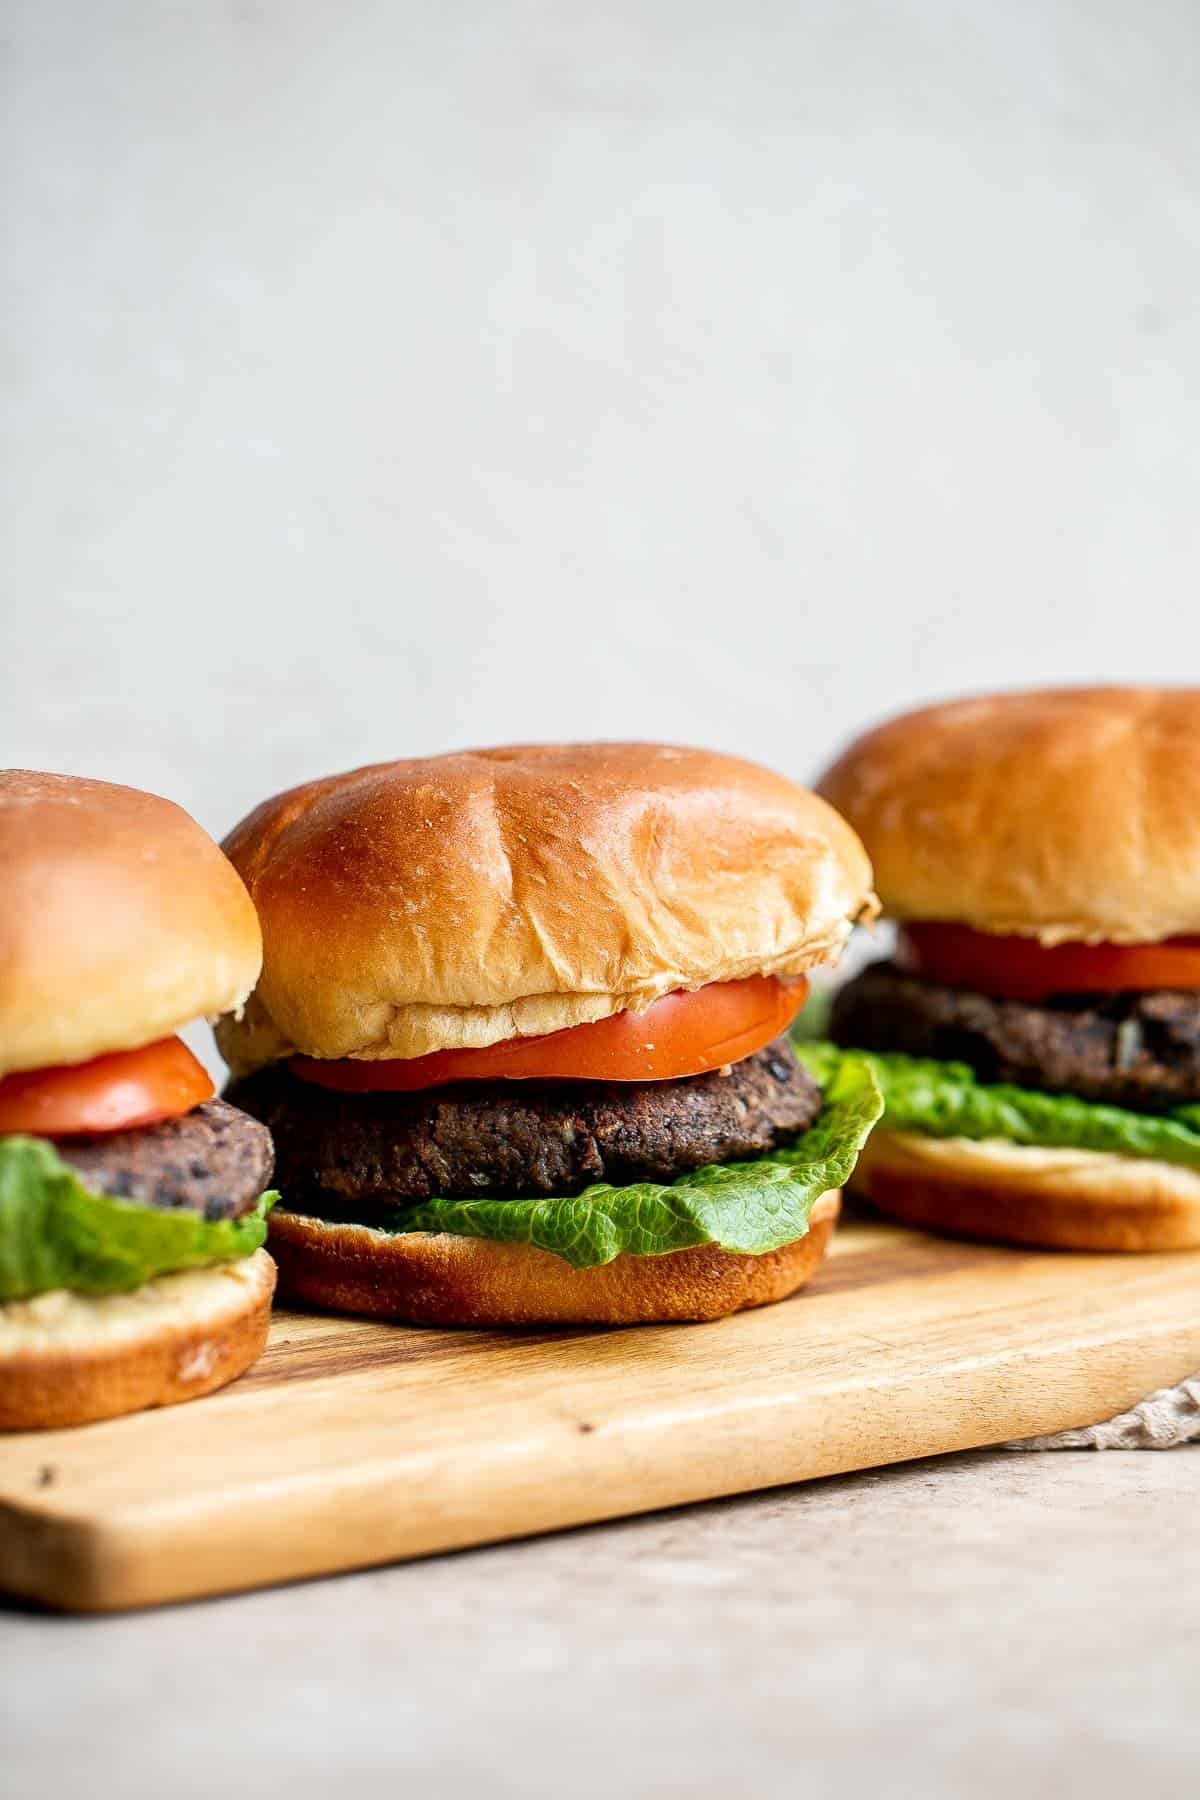
Ingredient Notes
To make this delicious Black Bean Burgers, you will need the following ingredients (full measurements in recipe card below):
- black beans - you will need 2 cans of black beans for this recipe. You can also cook 1 cup dry black beans. But you will need to prep ahead of time because dry beans need to soak overnight.
- onions and garlic - sautéed in a little vegetable oil.
- garlic
- breadcrumbs
- feta cheese
- egg
- seasoning - we added simple seasoning but that adds so much flavor: Worcestershire sauce, smoked paprika, salt, and pepper.
For assembling the burgers
- hamburger buns - if you like baking bread at home, you need to try these with our Homemade Hamburger Buns. They are so good and easy to make.
- greens - we topped these burgers with simple lettuce. We often top these burgers with Coleslaw or Cilantro Lime Slaw instead.
- sauce - ketchup or mayonnaise (or both!). You can also add in any other sauce that you like such as mustard, BBQ sauce, Creamy Cilantro Lime Dressing, Tahini Sauce, Caesar Salad Dressing, or Teriyaki Sauce.
- veggies - we added tomatoes, but you can add any other toppings that you like such as onions, pickles, or cucumbers.
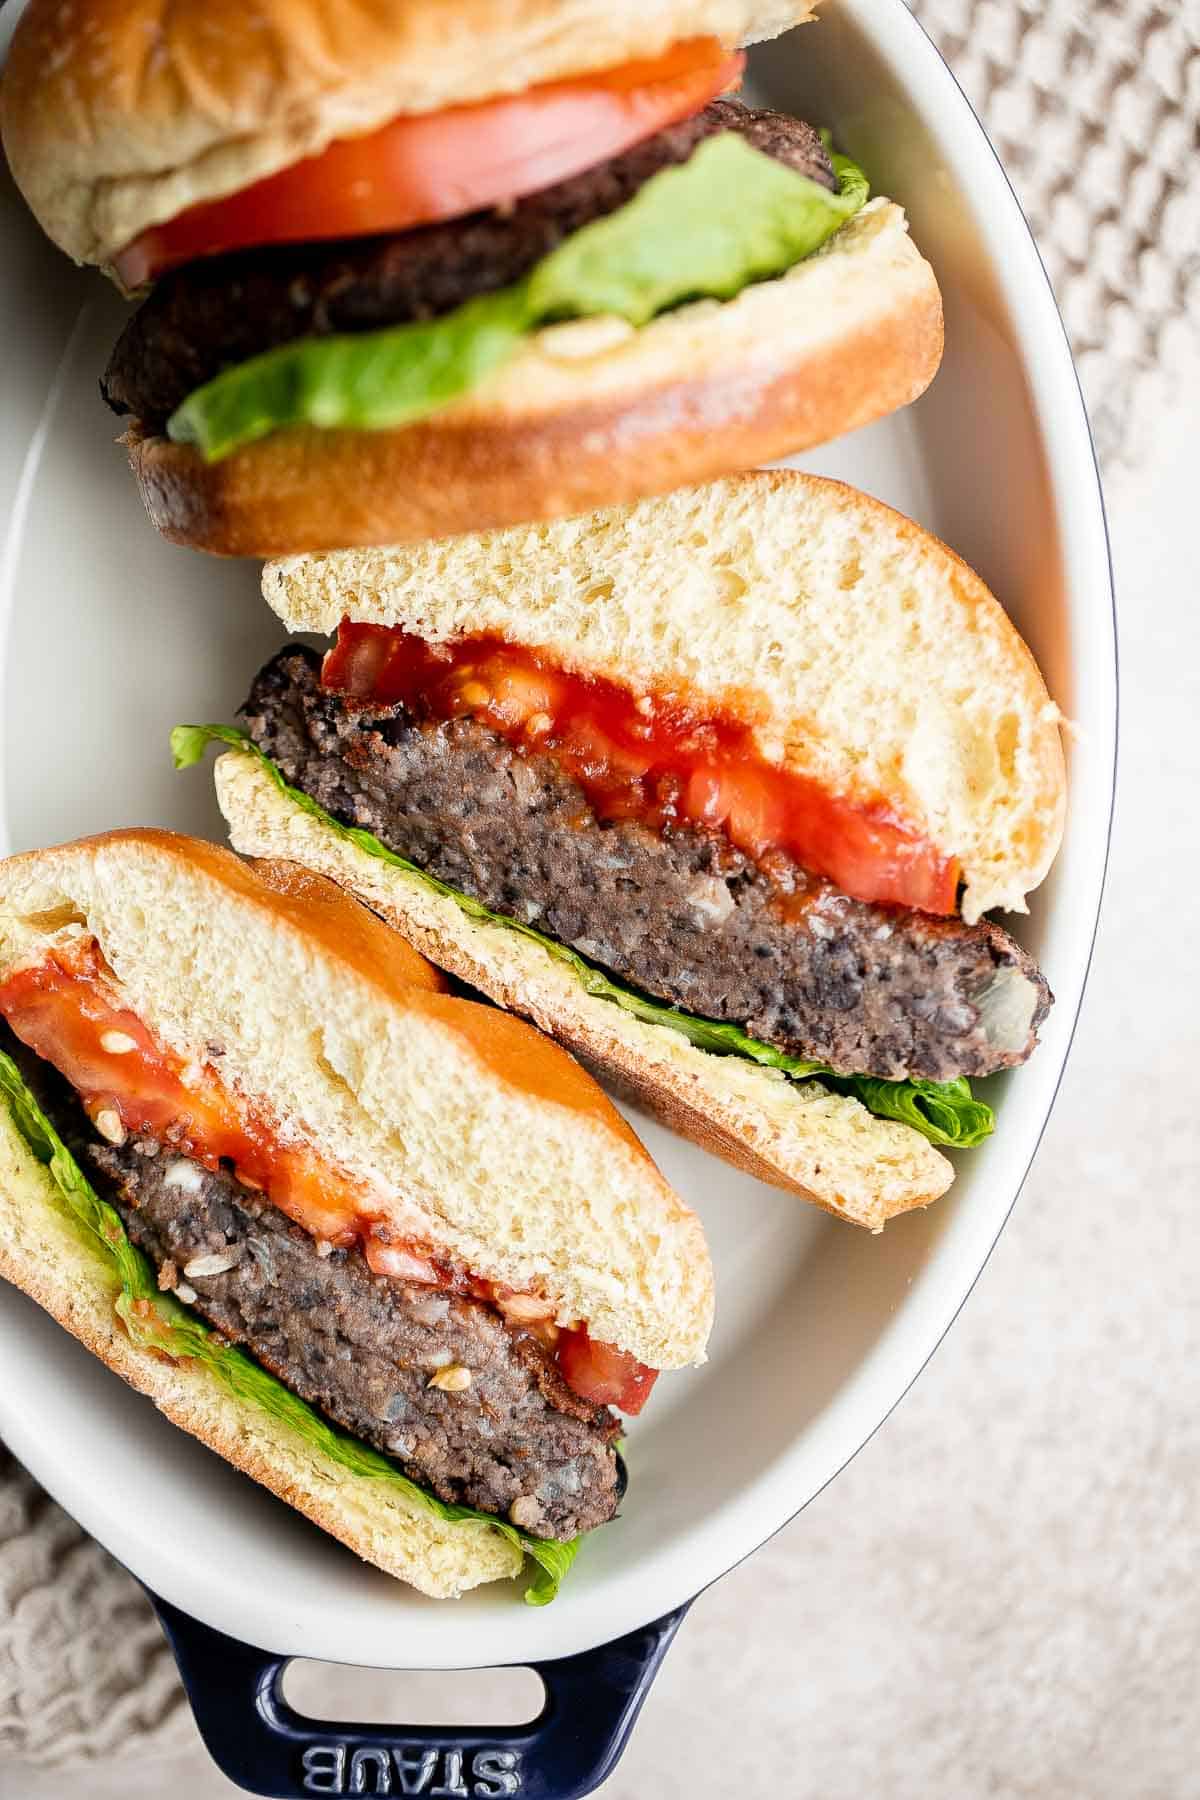
How to Make the Best Black Bean Burgers
First, make the vegetarian patties.
- Sauté aromatics. In a large skillet, heat oil over medium-high heat until sizzling hot, about 1 minute. Add onions and garlic and sauté until tender and nicely browned, about 3-4 minutes. Set aside on a plate to cool off for 5 minutes.
- Combine ingredients. Gently pat dry the rinsed and drained black beans. Set aside 1 cup of the black beans and transfer the rest into a food processor. Add the sautéed onions along with the rest of the ingredients (breadcrumbs, feta cheese, egg, Worcestershire sauce, paprika, salt, and pepper) into the food processor. Pulse mix on and off for 1 minute until coarsely chopped. Alternatively, you can mash everything with a fork or potato masher in a large mixing bowl until evenly combined.
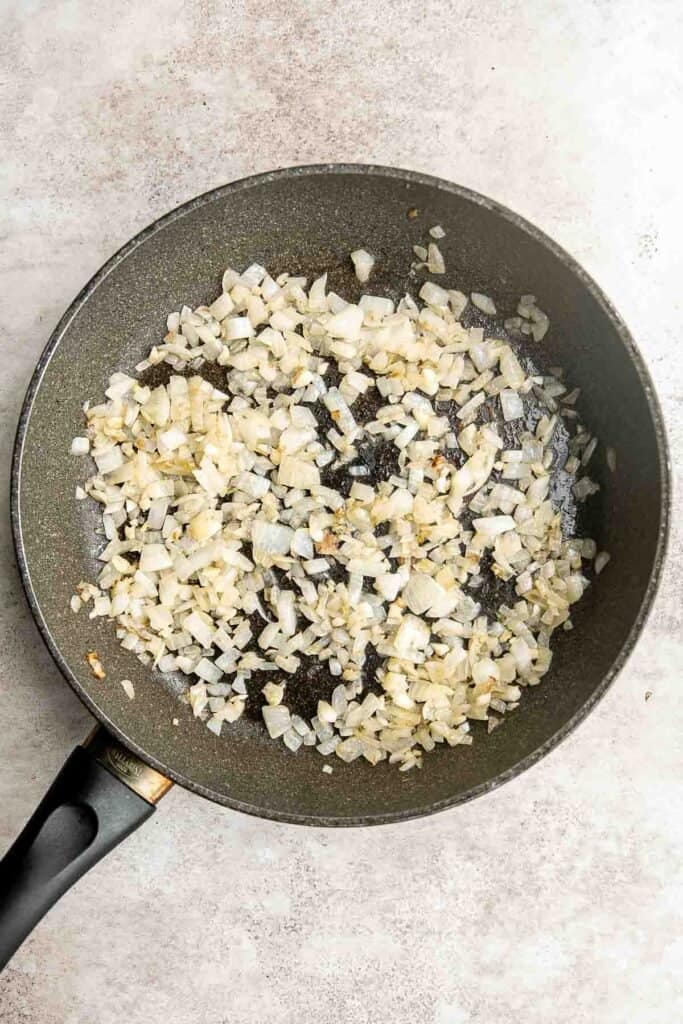
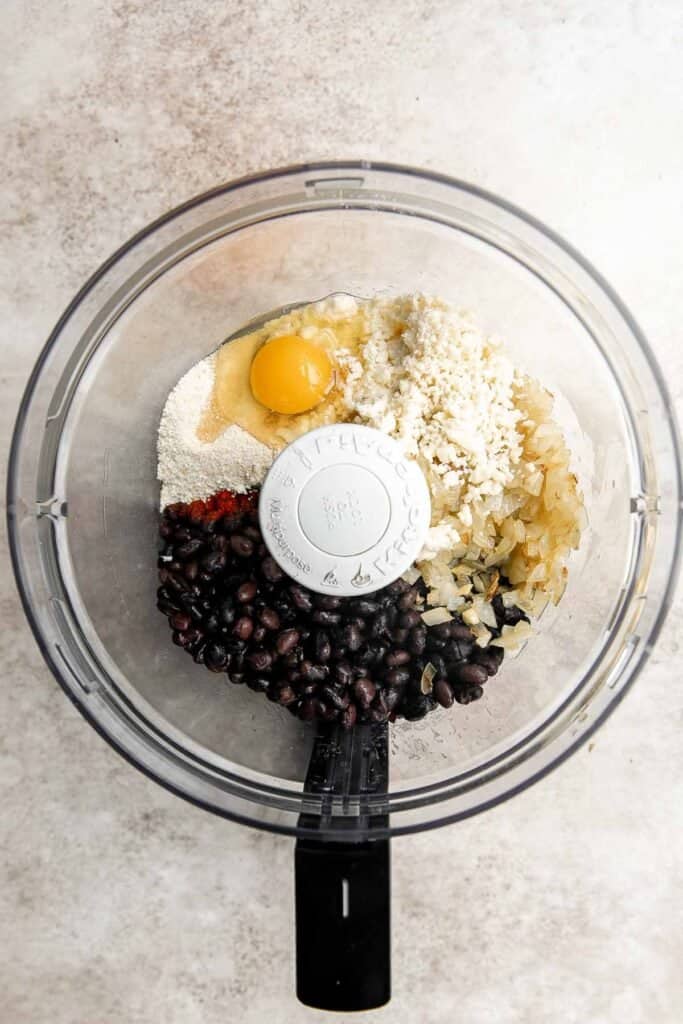
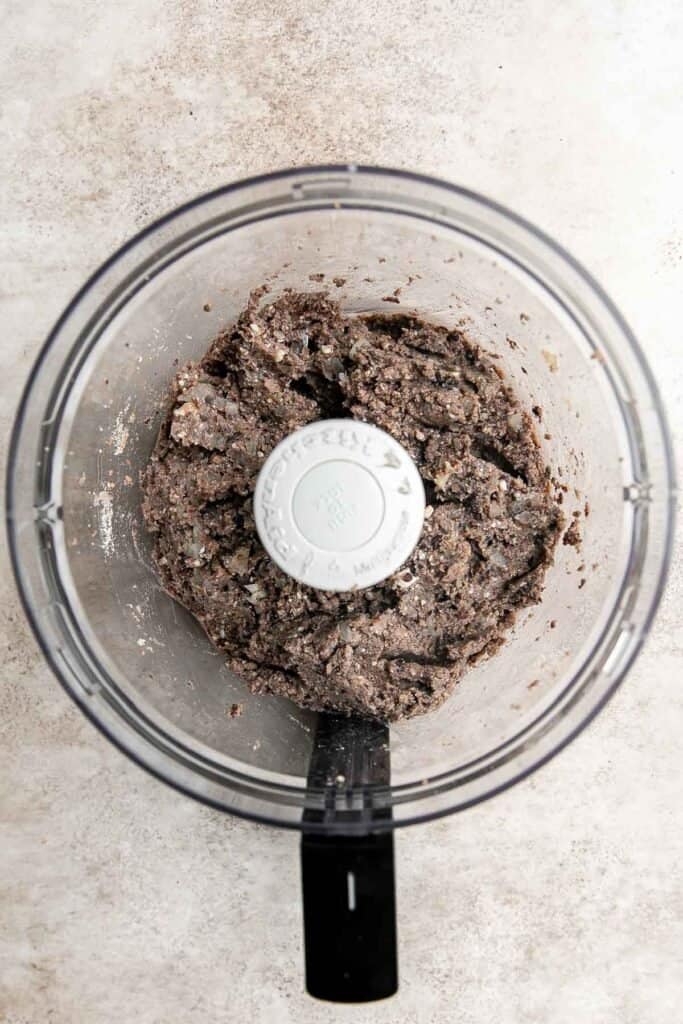
- Make the patty mixture. Transfer the bean mixture to a large mixing bowl, and add the reserved cup of black beans. Stir together until evenly distributed. This creates some texture and makes the patties a bit firmer.
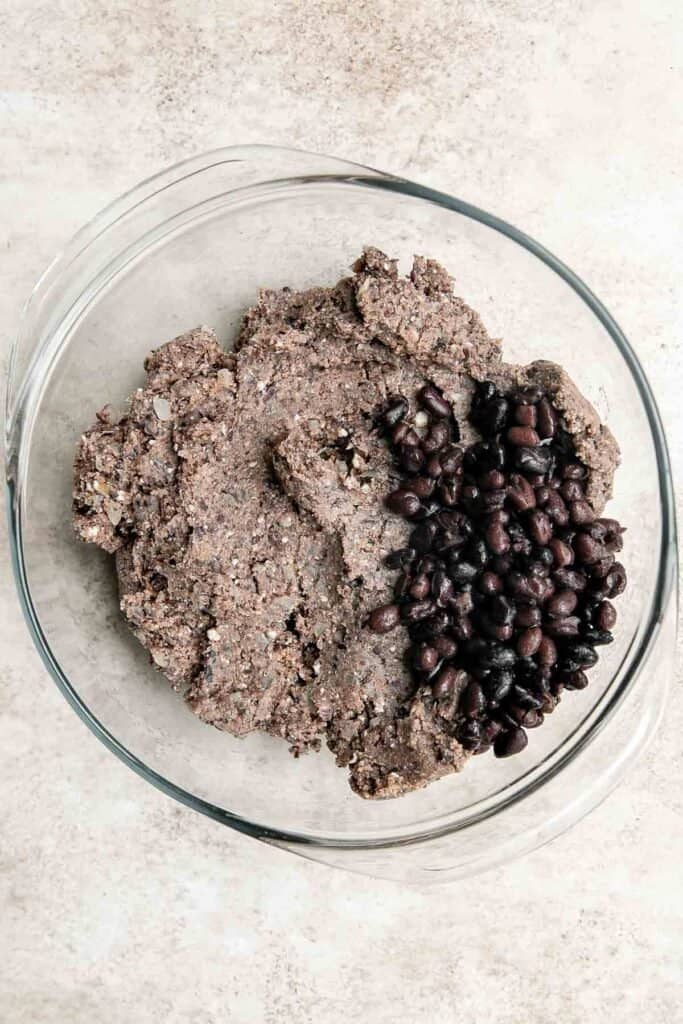
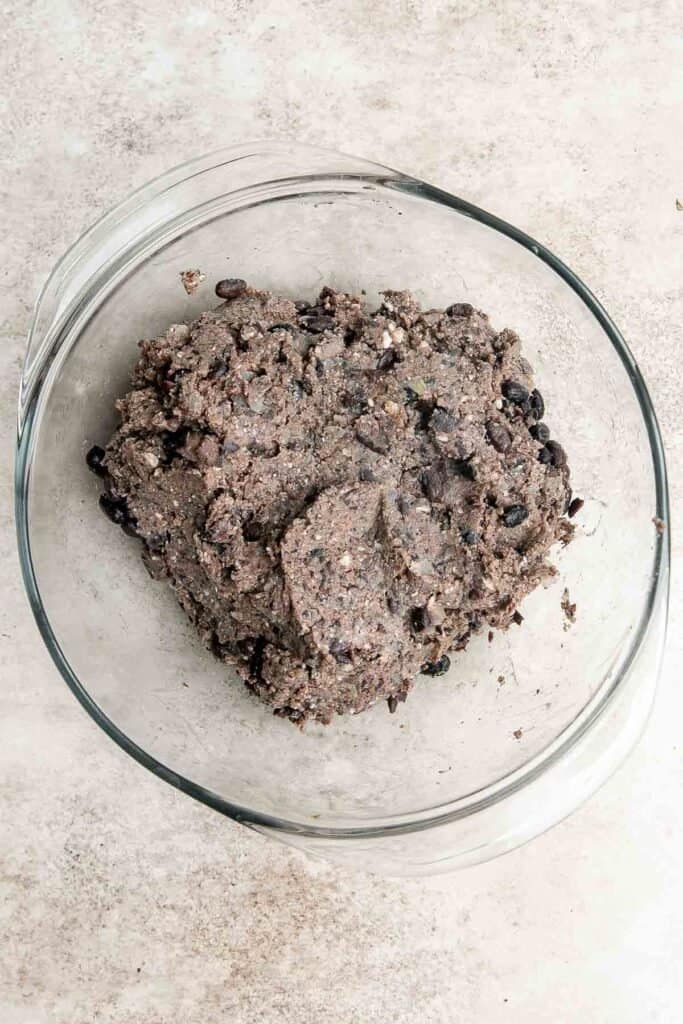
- Shape into patties. Take ½ cup of the bean mixture at a time and use your hands to shape into 6 large patties.
Next, cook the black bean patties.
To cook, you can pan fry, grill, bake, or air fry the patties.
- To pan fry: Heat 1 tablespoon oil in a large skillet over medium heat until sizzling, about 2 minutes. Place the patties on the skillet and cook until nicely browned and firm, about 5 minutes per side.
- To grill: Preheat the grill on medium-high until hot. Brush some oil onto the grilling grate and place patties on top. Brush some more oil on top of the patties as well. Cook for 3-5 minutes and then carefully flip over and cook on the other side.
- To bake: Preheat oven to 375F. Place patties on a large parchment-lined half sheet baking pan and bake for 15 minutes until nicely browned, flipping once halfway.
- To air fry: Add patties in batches to the air fryer basket and cook at 375F for 12-15 minutes until nicely browned.

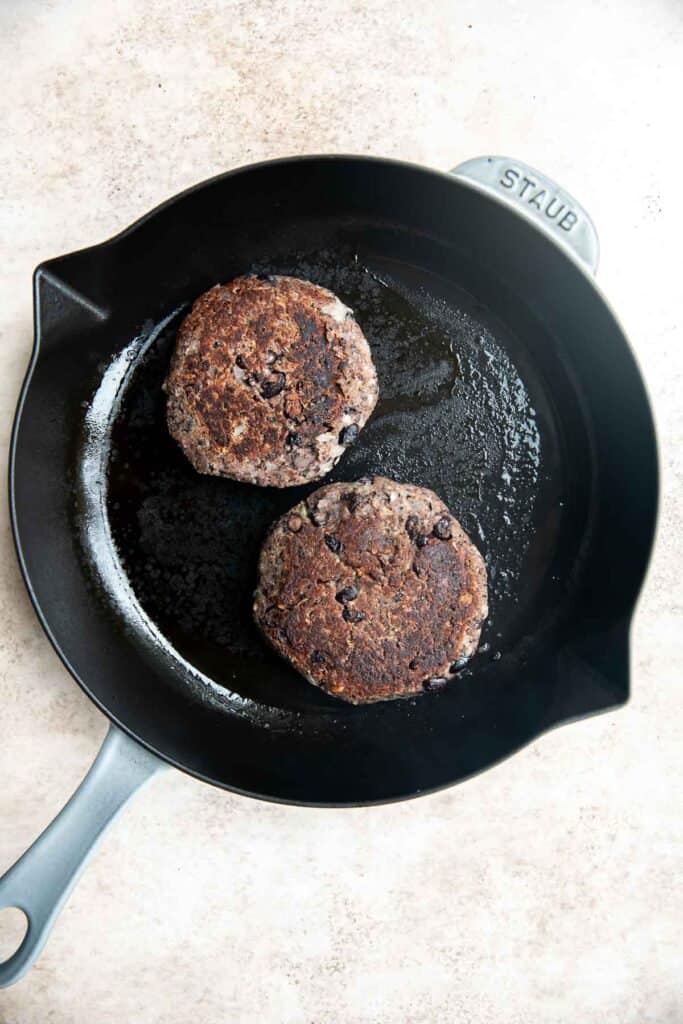
How to Assemble Burgers
- Prep the buns. Slice the hamburger buns and toast the slices on the grill, if desired.
- Add toppings. On the bottom half of each hamburger bun, add a piece of lettuce and a patty on top. a patty. Drizzle 1 to 2 tablespoons Ketchup or mayo (or both) on top of the patty, and top with a slice of tomato. Place the top half of the bun on top to assemble the hamburger.
- Serve. Serve immediately.
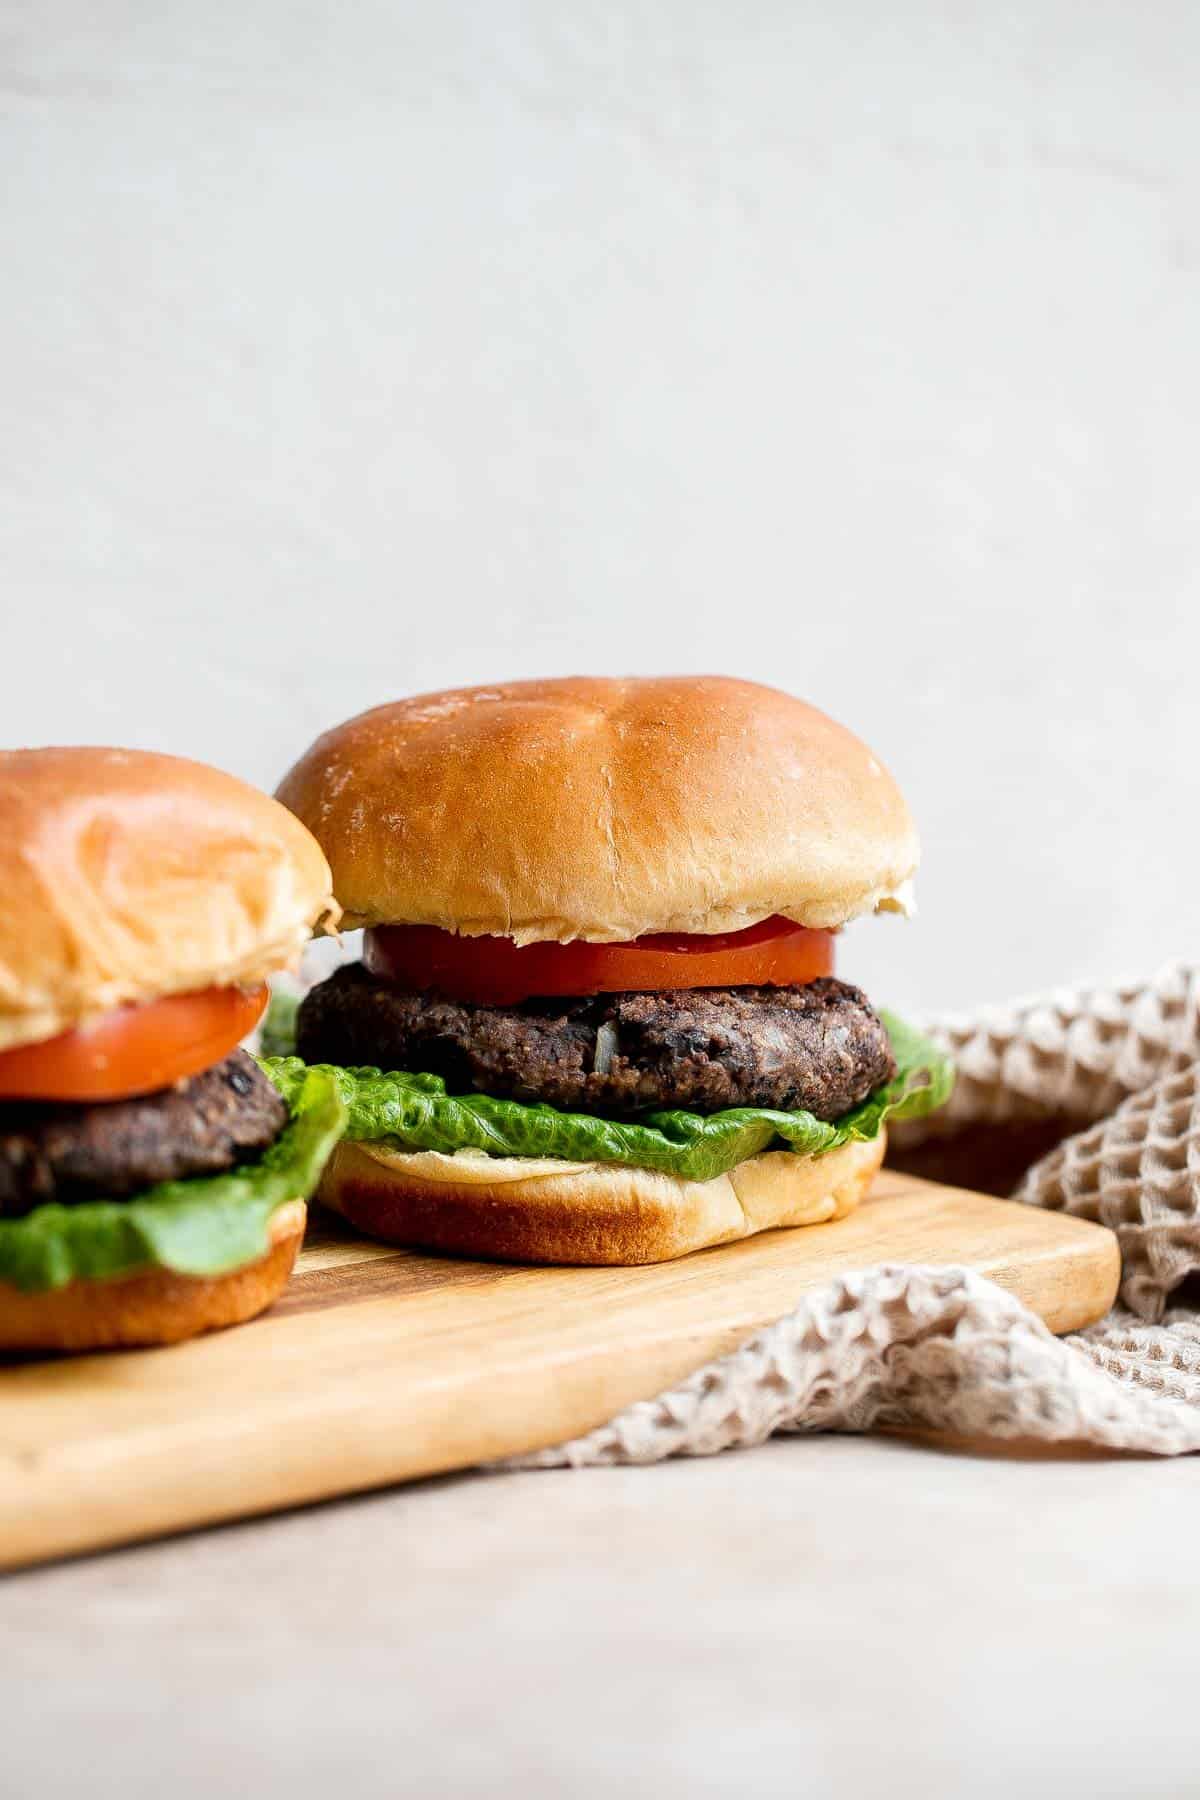
How to Serve
Serve these vegetarian black bean burgers alongside some of our favorite summer sides such as:
Storing Instructions
- Make ahead instructions: Make and shape the patties in advance and store the uncooked patties in the refrigerator (in an airtight container) for a 2-3 days, and cook them fresh when you're ready to eat.
- How to store: Store the burgers, buns, and any toppings separately in airtight containers. The black bean patties will last up to for 4-6 days in the fridge. Buns are best kept at room temperature for a few days. I would also recommend that you wait to heat the buns until you're ready to eat them.
- How to freeze: You can also freeze the uncooked patties for up to 3 months. Shape them and then place them on a lined baking sheet to freeze for 1-2 hours until hard. Then, wrap them tightly in plastic cling wrap and store in an airtight container or freezer bag.
- How to reheat: Reheat black bean burgers the same way you cooked them - in the oven, air fryer, or on the grill.
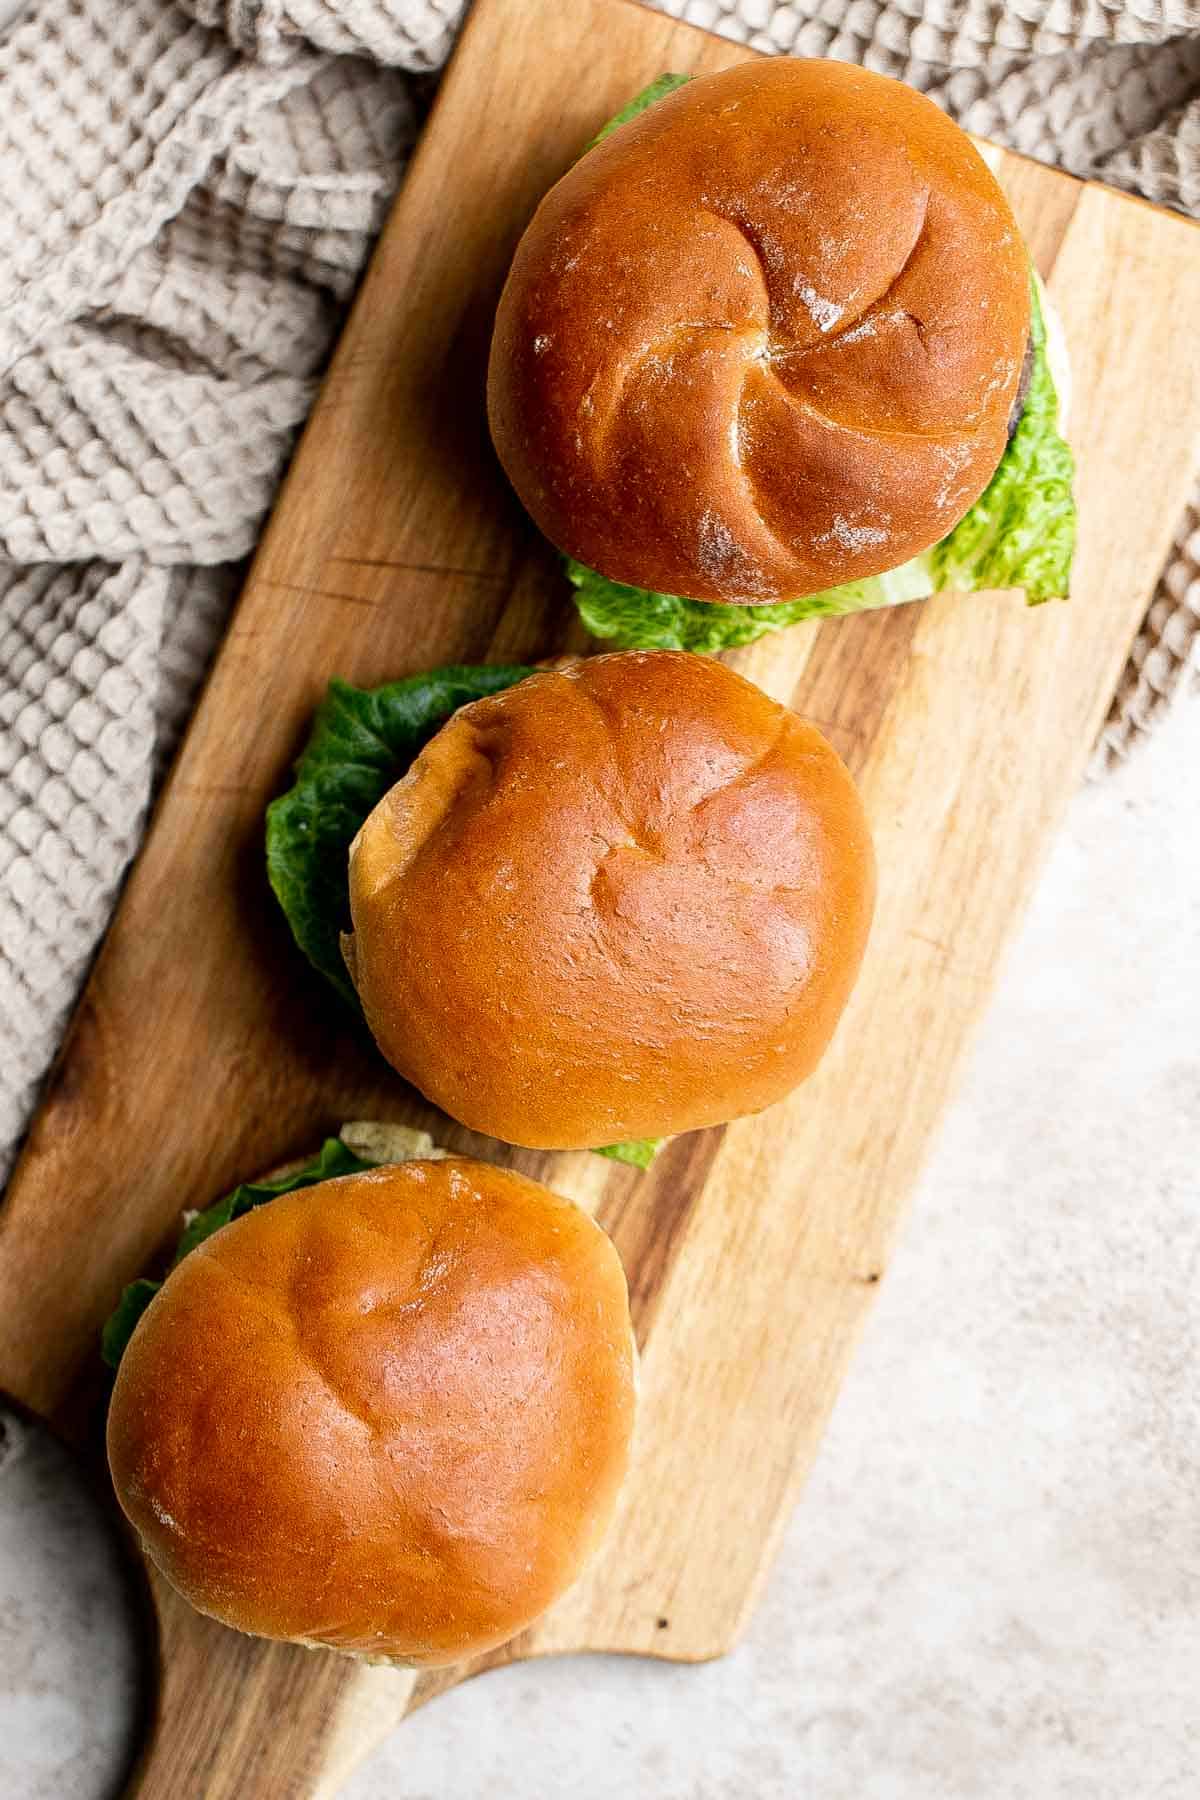
More Bean Recipes
- Veggie Burger with Lima Beans
- Vegetarian Chili
- Falafel
- One Pot Red Kidney Beans
- Vegetarian Quesadillas
- One Pot Lentils
Tried this recipe?
I'd love to hear what you think! Leave a comment and rating below to share your feedback. Your reviews help others discover this recipe and help me keep creating more free recipes for you. Snap a photo and tag me on social media @aheadofthyme too.

Carne Asada
Juicy and tender Carne Asada with perfectly charred edges is flavorful, delicious, and so easy to make. This Mexican dish is wildly popular thanks to a simple marinade that delivers fresh and bold flavors. The best part? You can cook this steak in under 15 minutes.
Plus, you can cook carne asada on the stove or on the grill for a delicious summer dinner (or any time of the year!). Pair it with your favorite sides or chop them up for tacos!

Why You'll Love Carne Asada
- It has all the characteristics of a good steak. Carna asada is a fine steak. In every bite, you'll enjoy a slight char, the savory taste of melted fat, and a kick from the spices in the marinade. Who doesn't love a tender, juicy, flavorful steak?
- The delicious and flavorful marinade. A good marinade makes such a big difference in how your steaks come out. For this carne asada marinade, you'll need oil, lime juice, fresh cilantro, and a collection of seasoning and spices.
- It's so easy to make. Although you will need to wait a couple of hours for your steak to soak up the delicious marinade, you really only need a few minutes to actually make carne asada. All it takes is making the marinade, letting the beef marinate, and then cooking the Mexican steaks.
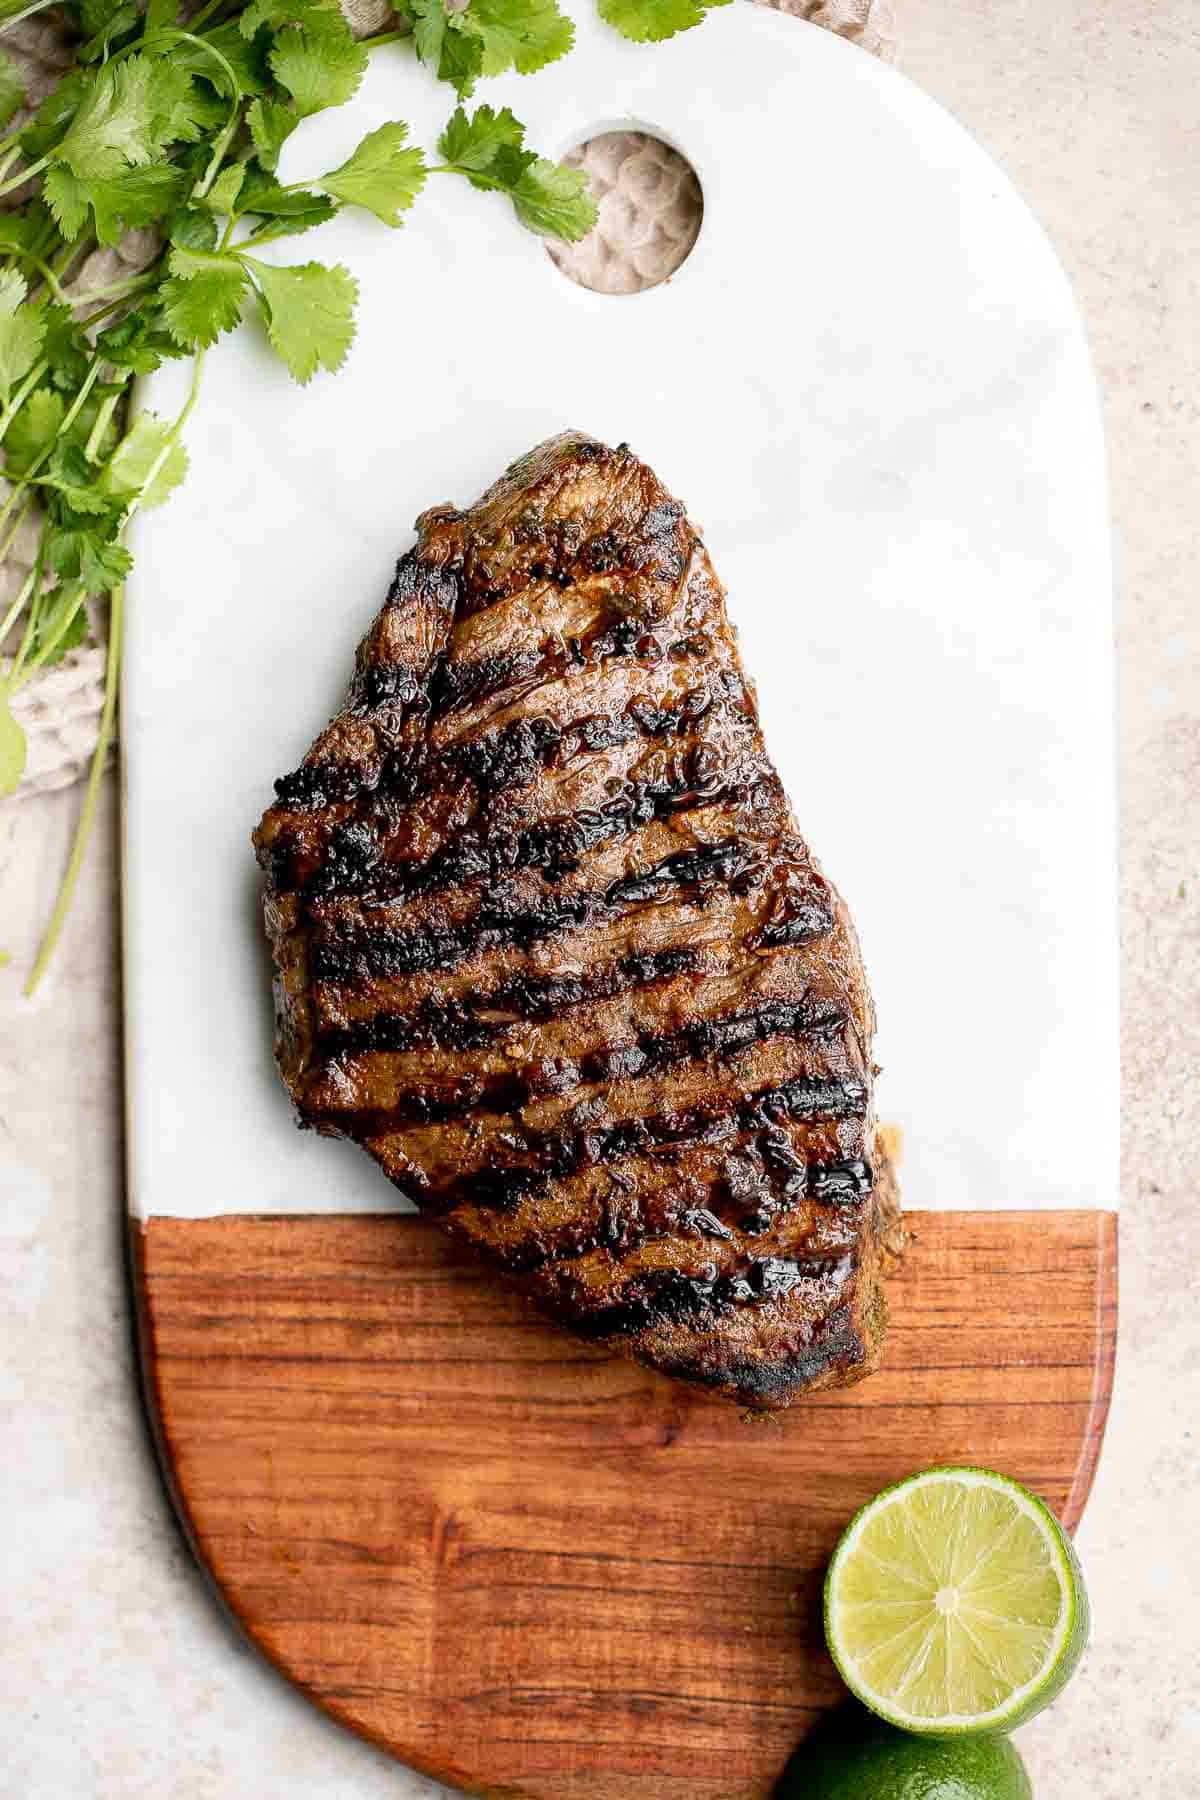
Ingredient Notes
To make this delicious Carne Asada, you will need the following ingredients (full measurements in recipe card below):
- flank steaks or skirt steaks - pick steaks that are similar in thickness so that you can ensure even cooking.
- avocado oil - feel free to substitute with any vegetable oil such as grapeseed oil or olive oil.
- lime juice
- cilantro
- soy sauce
- brown sugar - you can also substitute with granulate sugar or honey.
- paprika
- ground cumin
- garlic powder
- salt and pepper
You will also need measuring cups and spoons and a grill pan or cast-iron skillet. You can also throw these steaks on the barbecue.
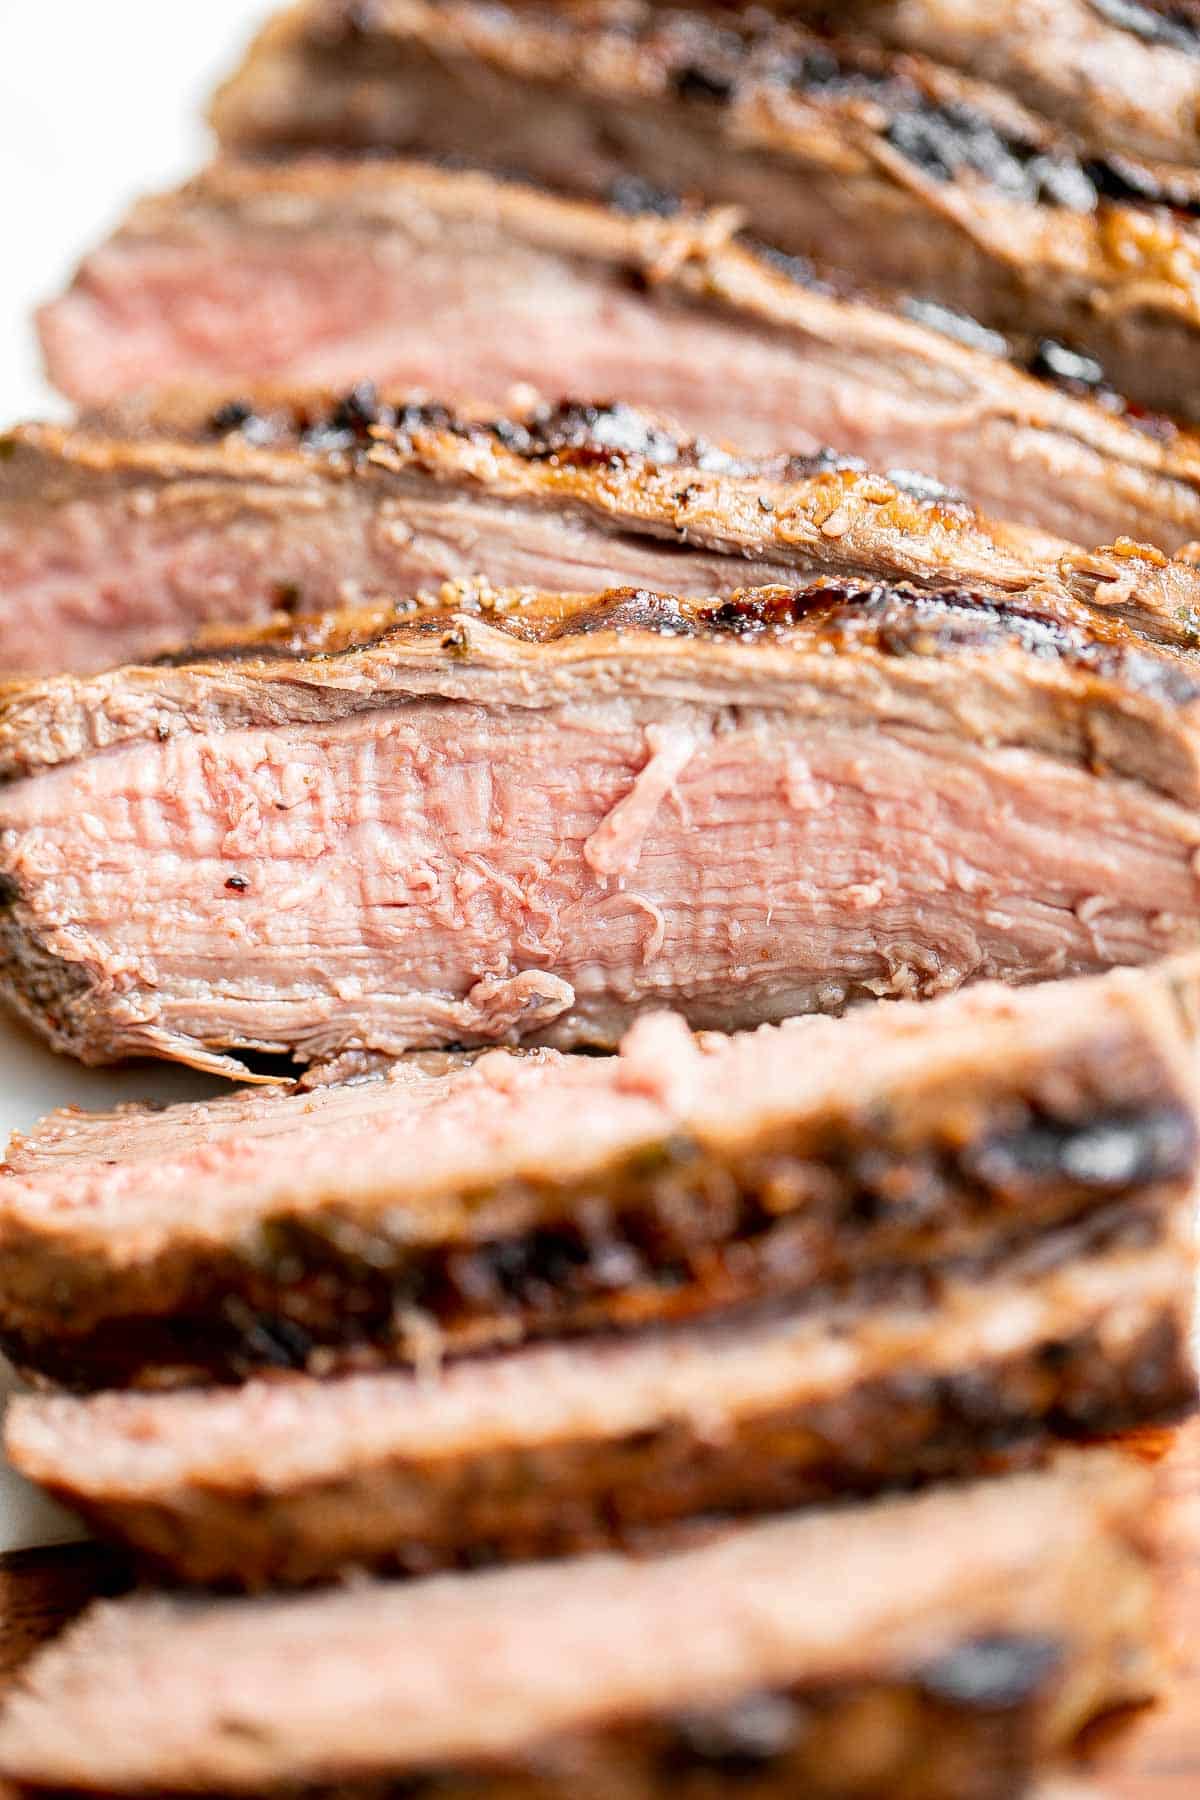
How to Make the Best Carne Asada
- Make the marinade. In a large mixing bowl, combine oil, lime juice, cilantro, soy sauce, sugar, paprika, cumin, garlic powder, salt, and pepper. Mix well until smooth.
- Marinate the steaks. Add steaks to the bowl and use your hands to rub the marinade evenly over them. (I recommend wearing disposable gloves for easy clean-up). Cover the bowl with plastic cling wrap and marinate for at least 2 hours (or overnight) in the fridge. You can also marinate the steaks in a large Ziploc bag.

- Prep for cooking. When ready to cook, remove the bowl from the fridge and place on the counter for 20-30 minutes to bring the steaks to room temperature. This will help the steak cook evenly. Use a paper towel to pat the steaks dry. Season with a little more salt and pepper.
- Grill. Brush some oil over a grill pan or skillet. Heat on medium-high heat for 2-3 minutes. You should notice the oil shimmer and sizzle when it's hot and ready. Place the steaks on the grill pan and cook until desired doneness, about 6-8 minutes per side.
- For medium doneness - Cook until the internal temperature reaches 140 F on a meat thermometer.
- For medium rare - The target temperature should be 135 F.
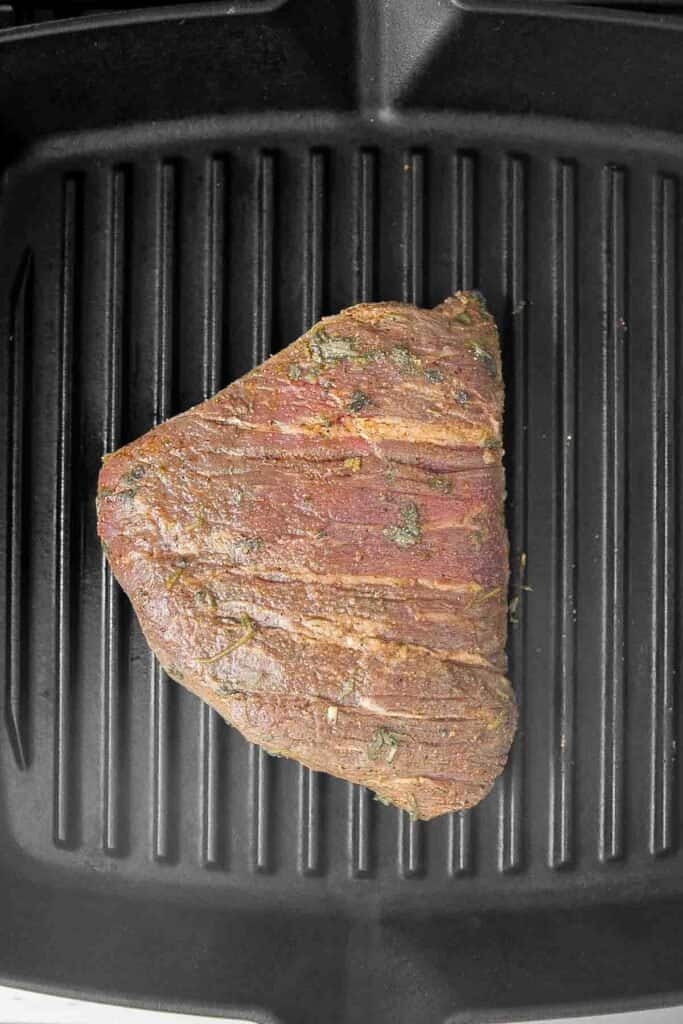
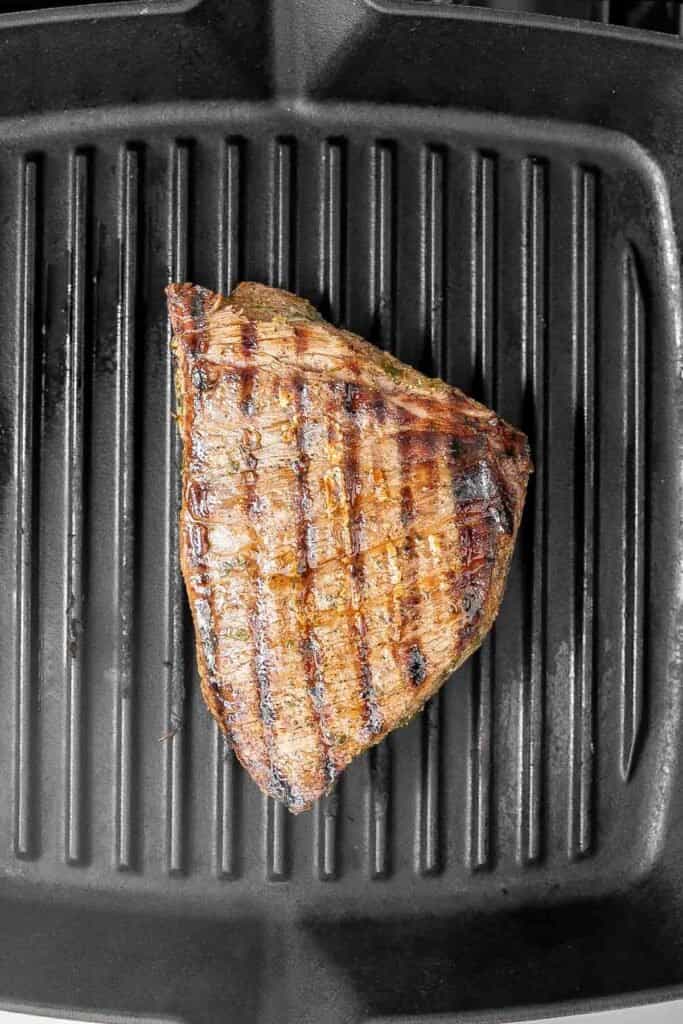
- Cover. Remove the steaks from the pan and cover loosely with aluminum foil to keep them moist.
- Rest. Let the steaks rest for 5 minutes. Resting after cooking helps the juices redistribute into the meat as the internal temperature for the steaks continue to rise a little while resting.
- Serve. Slice and serve warm.
How to Cook Carne Asada on the Grill
You can easily cook these steaks on your barbecue following the same instructions. The cook time might be a couple minutes shorter, about 5-7 minutes per side.
How to Serve
Carne asada can be enjoyed on its own or alongside sides that pair well with steaks, such as:
- Pico de Gallo Salsa
- Mexican Street Corn (Elote)
- Mashed Potatoes
- Classic Coleslaw
- Crispy Smashed Potatoes
- Mexican Caesar Salad
You can also chop up the steak and enjoy it inside Carne Asada Tacos or burritos.

Storing Instructions
- Make ahead instructions: Follow this recipe as directed and store the raw, marinated carne asada in an airtight container in the fridge for up to 2-3 days before cooking. However it's best to use it within 24 hours. If you notice your raw meat smells off or looks slimy after a few days, it's gone bad and should be thrown out.
- How to store: Keep leftover cooked carne asada in the fridge for 3-4 days in a shallow, airtight container.
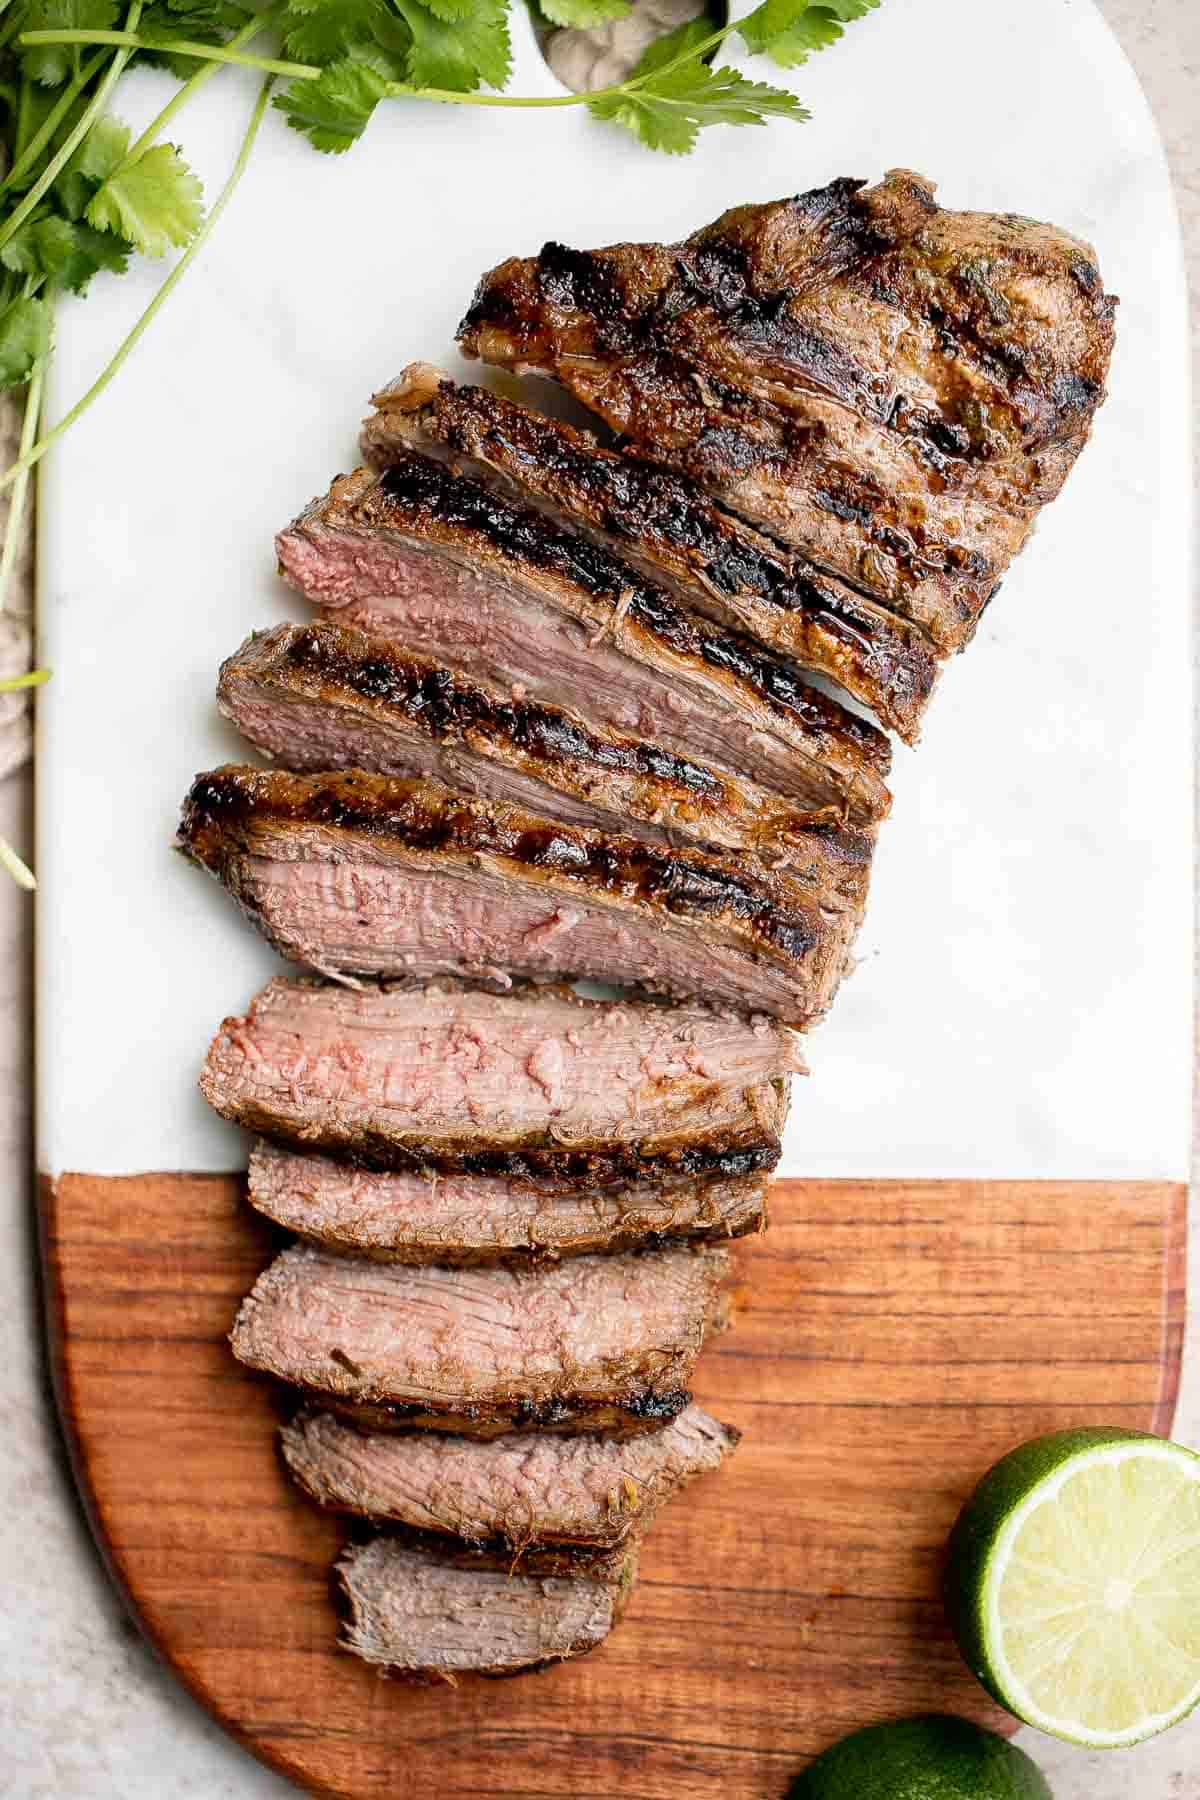
More Beef Recipes
- Ribeye Steak
- Roast Beef
- Korean Beef Steak Tacos
- Beef Stroganoff
- Beef Noodle Stir Fry
- Mexican Ground Beef Tacos
Tried this recipe?
I'd love to hear what you think! Leave a comment and rating below to share your feedback. Your reviews help others discover this recipe and help me keep creating more free recipes for you. Snap a photo and tag me on social media @aheadofthyme too.

Oven-Roasted Corn on the Cob
Oven-roasted corn on the cob is buttery, juicy, crunchy, and perfectly charred on the outside - without a grill. Which means you can enjoy this delicious "grilled" vegetable all year round!
Plus, it's quick and easy to make with a handful of ingredients and minimal prep! So when it's inconvenient to grill or boil your sweet ears of corn, slather on some homemade garlic butter and roast them instead for perfectly cooked corn every single time.
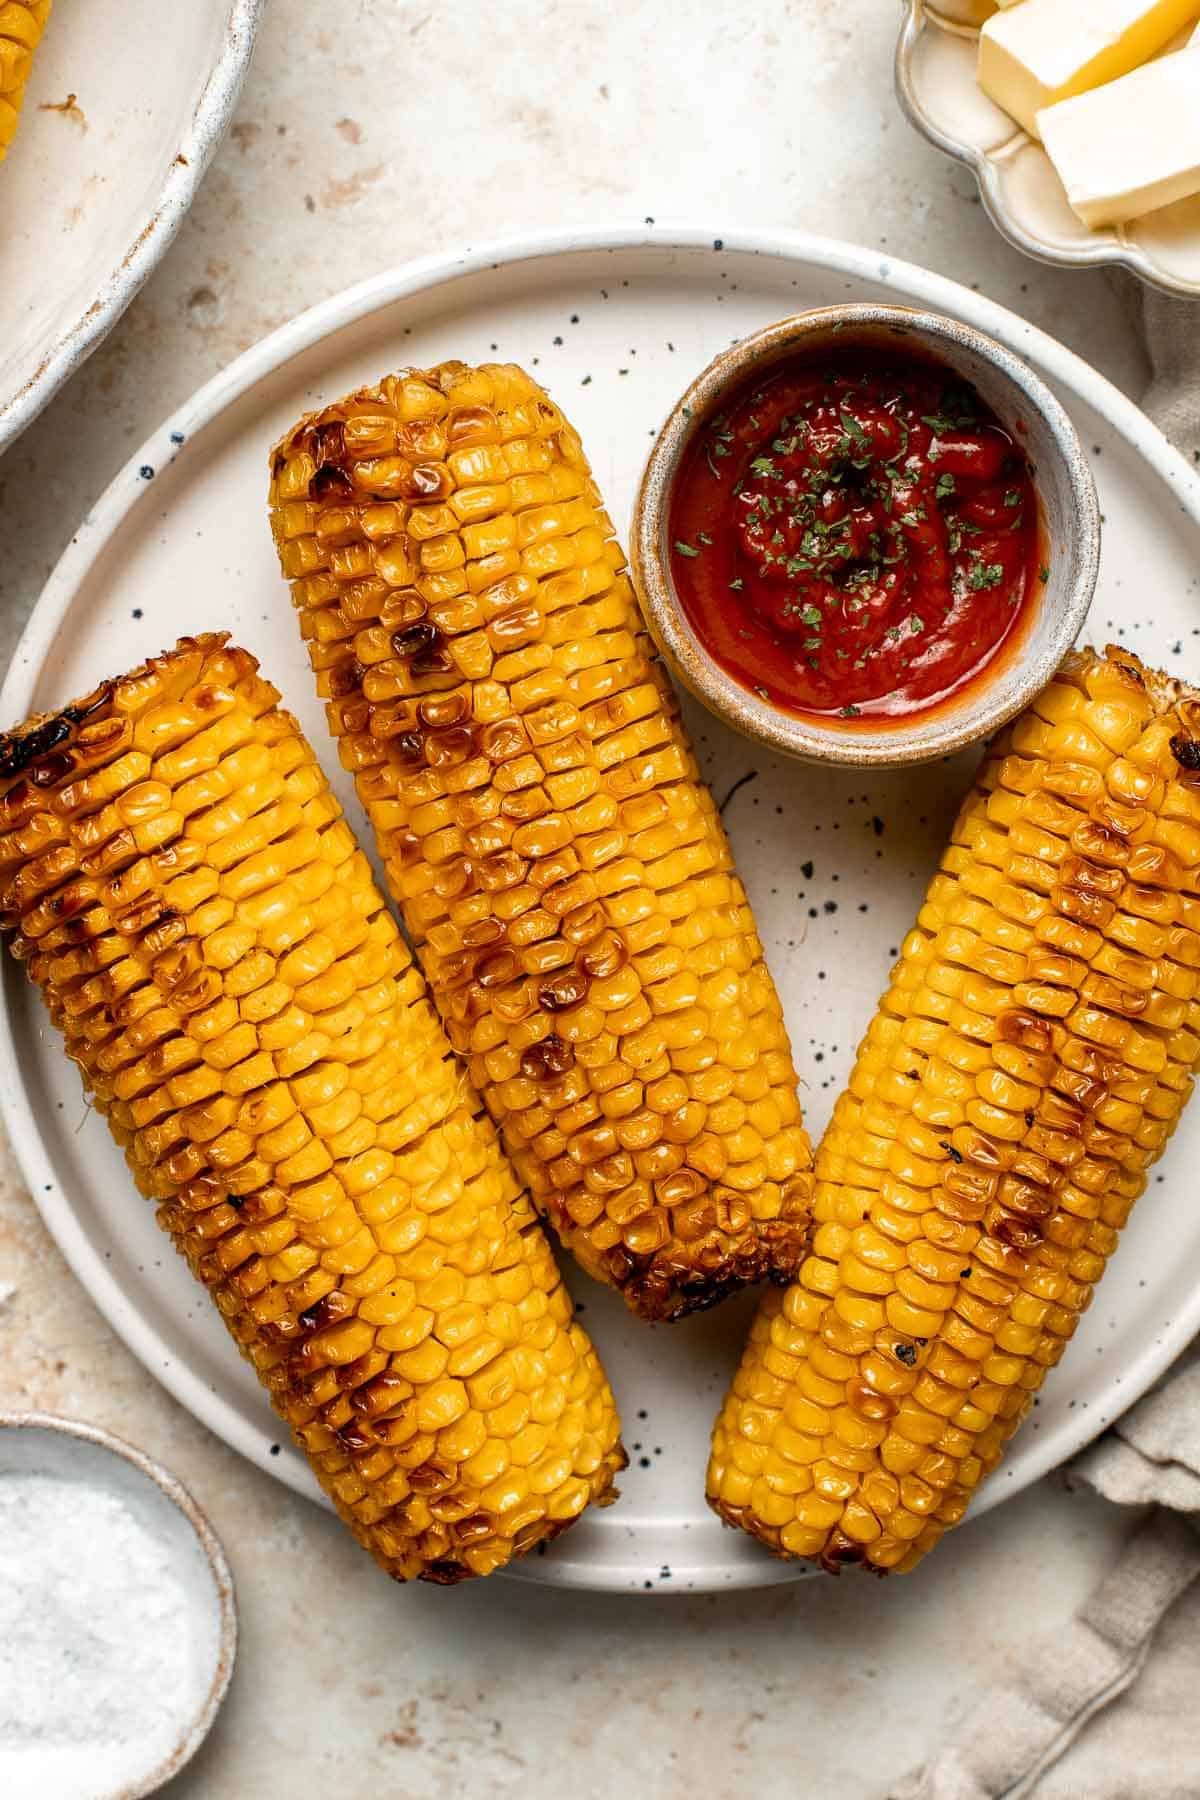
Why You'll Love Roasted Corn on the Cob
- You can enjoy it all year round. Even if the weather has cooled down and you've officially said good-bye to your barbecue for the season, you don't have say bye to "grilled" corn on the cob. You can enjoy perfectly charred, burnt marks without a grill!
- Perfect corn every time. This oven roasted corn is wrapped in aluminum foil to keep the moisture and heat in, keeping the corn tender. It's then unwrapped and broiled for the best charred texture on the outside, while keeping the corn soft and extra juicy.
- The homemade garlic butter. Made with literally just butter and garlic, this adds a subtle garlicky flavor and keeps the corn juicy. For extra juiciness, add even more butter on top and let it melt all over. So good!
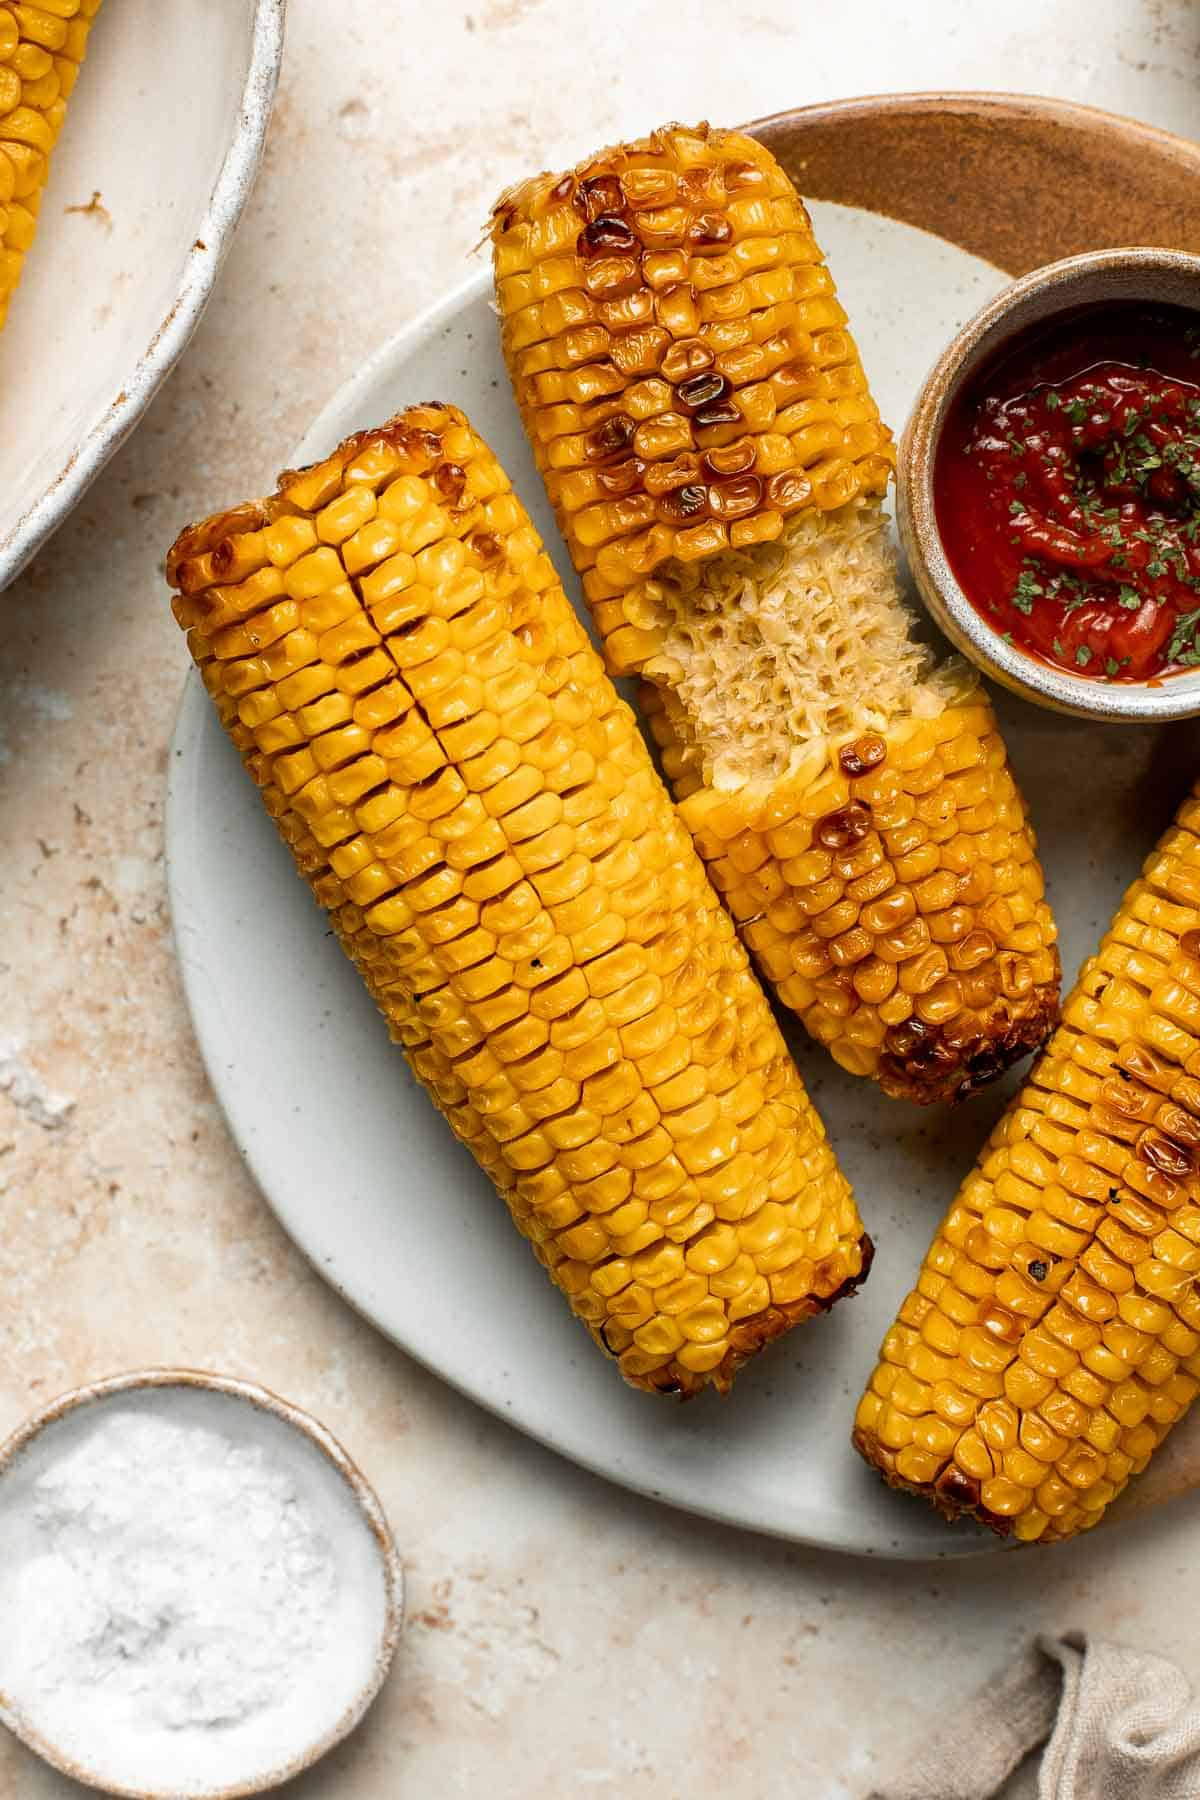
Ingredient Notes
To make delicious and easy Oven-Roasted Corn on the Cob, you will need the following ingredients (full measurements in recipe card below):
- corn on the cob - remove the husks before roasting.
- butter - There is nothing like butter melting over freshly cooked corn. But for a healthier option, free free replace it with olive oil instead.
- garlic
- salt and pepper
You can also add in your favorite toppings. Keep it simple by topping with your favorite herbs. Or turn it into a loaded Mexican Street Corn (Elote) by adding sour cream, mayo, garlic powder, paprika, chili powder, cilantro, and lime.
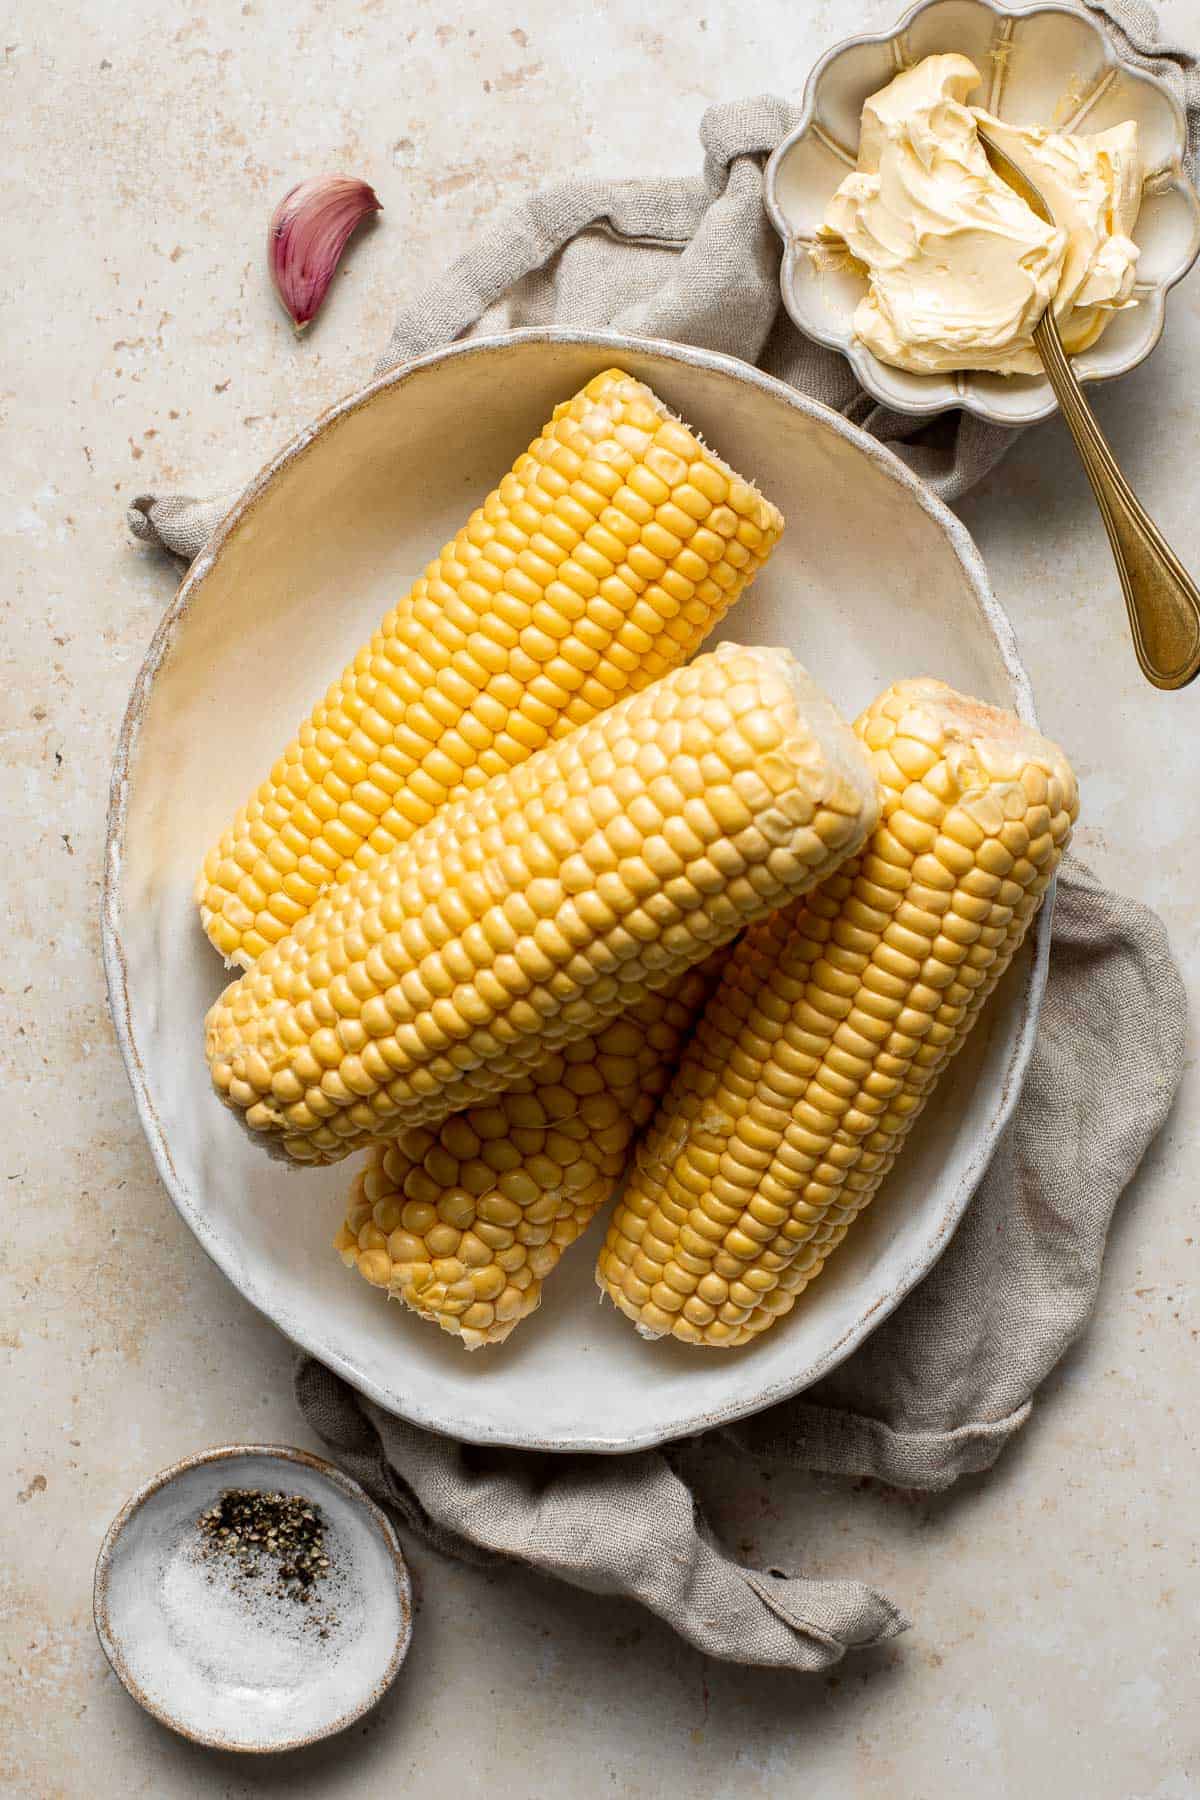
"Grilled" Corn on the Cob without a Grill
There are all kinds of ways to make corn on the cob without using your grill or barbecue.
- Boil the corn on the stove.
- Roast it in the oven.
- Cook it in the microwave.
But secret in getting those perfect burnt marks, is oven-roasting first before a little magic in the broiler (the broil setting on your oven).
How to Make the Best Oven-Roasted Corn on the Cob
- Make the garlic butter. In a small bowl, cream together the butter, garlic, salt and pepper. Spread the butter mixture over each corn.

Make garlic butter. Spread garlic butter on corn.
- Roast the corn. Wrap each corn in aluminum foil and place on a large half sheet baking pan. Roast in a 350F preheated oven for 40 minutes, turning the corn over halfway.
- Broil. Take out the corn and open the foil on top to expose it. Turn on the broiler function on the oven and place corn back in. Broil on high for 2-3 minutes.
- Serve. Serve with a piece of butter on top. Sprinkle more salt and pepper as desired.
Wrap corn in aluminum foil and bake. Unwrap foil and broil.
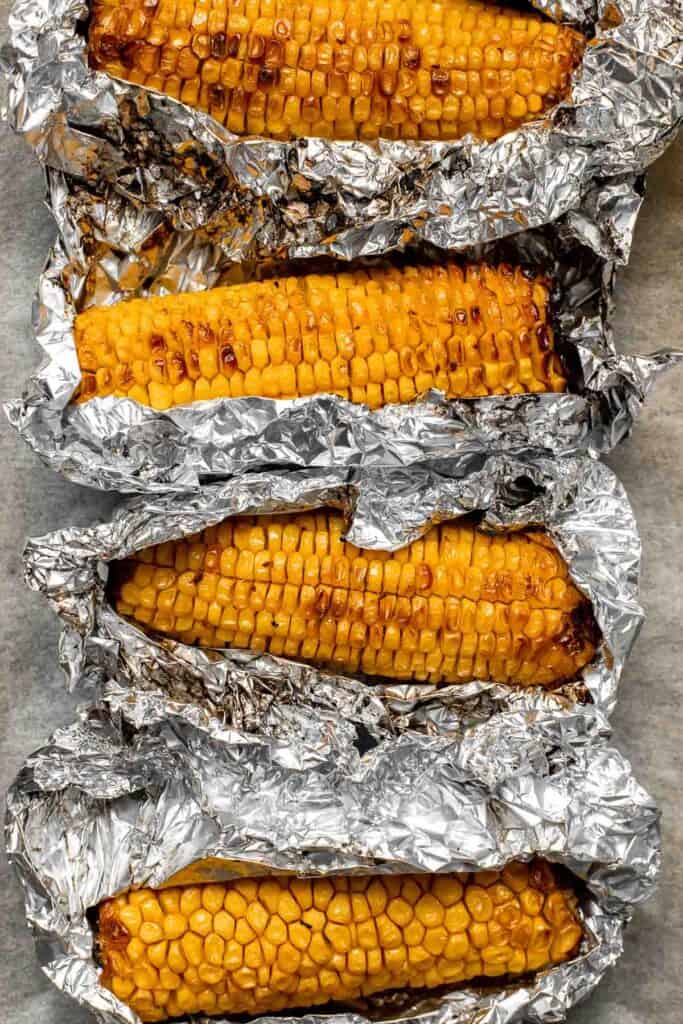
How to Serve Corn
Oven-roasted corn on the cob with garlic butter is the perfect side dish and goes with everything! You can eat it alone for a quick lunch or I pair it with some summer dishes such as:
- White Cheddar Mac and Cheese
- Greek Pasta Salad
- Teriyaki Chicken Skewers with Pineapple
- Classic Juicy Hamburgers
- Cauliflower Tacos
For more summer cookout recipe ideas, check out our Summer Grill Recipes and BBQ Side Dishes.
Recipe Tips and Tricks
- How to store: You can store roasted corn on the cob in the fridge for 3-5 days. Allow the corn to cool to room temperature and then store them wrapped in aluminum foil or in an airtight contaner. You can eat it cold or hot.
- How to reheat: To reheat, heat on the grill or in a 300 F preheated oven for 5-10 minutes until warmed through.
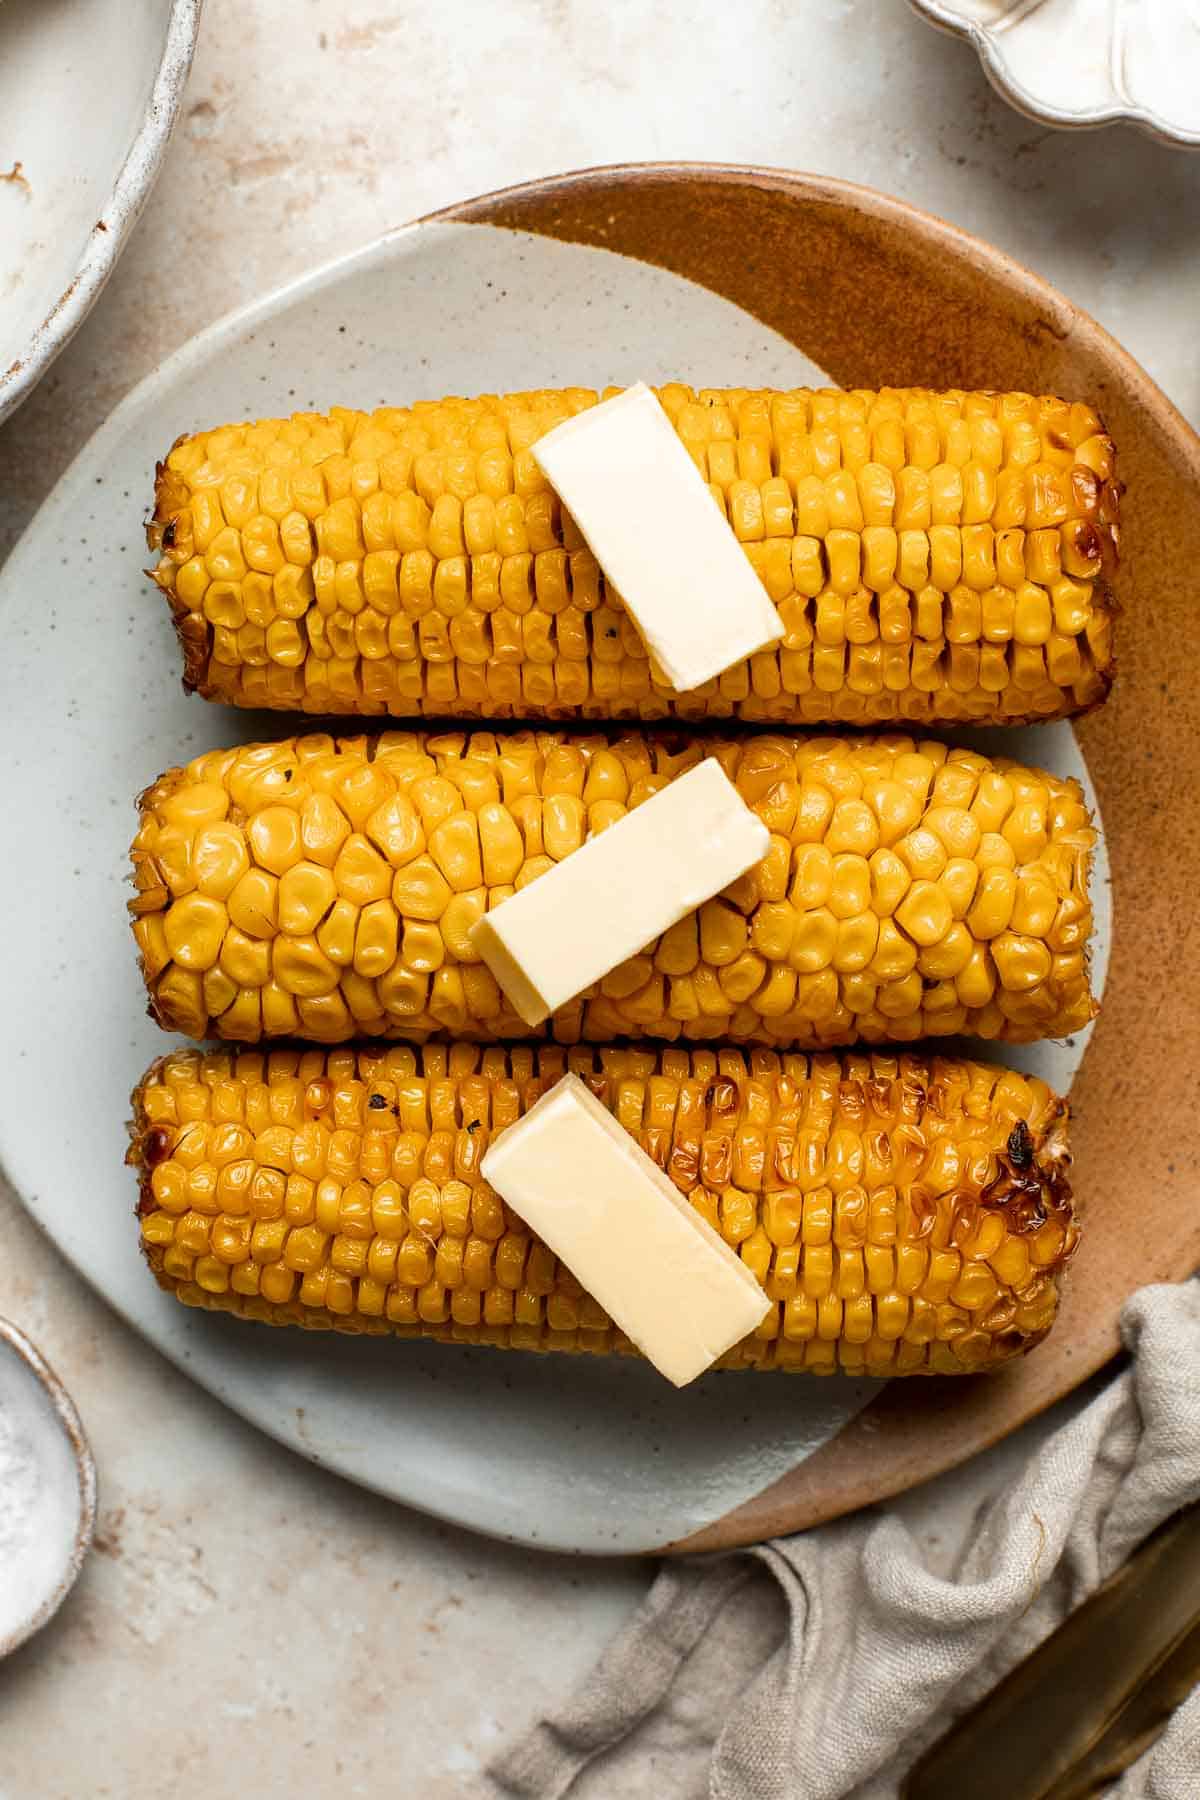
More Corn Recipes
- Grilled Corn on the Cob
- Summer Corn Salad
- Mexican Street Corn (Elote)
- Creamy Mexican Corn Soup
- Mexican Street Corn Salad
- Easy Cornbread Muffins
Tried this recipe?
I'd love to hear what you think! Leave a comment and rating below to share your feedback. Your reviews help others discover this recipe and help me keep creating more free recipes for you. Snap a photo and tag me on social media @aheadofthyme too.

Cilantro Lime Slaw
Cilantro lime slaw is fresh, light, crunchy, and zesty - making it the perfect pairing for dishes like tacos, burgers, sandwiches, and barbecued meats. This side dish is also quick and easy to make in about 5 minutes!
Plus, this cilantro lime coleslaw is healthy and loaded with fresh vegetables, Greek yogurt, herbs and aromatic seasoning, which add nutrients and antioxidants to the mix.
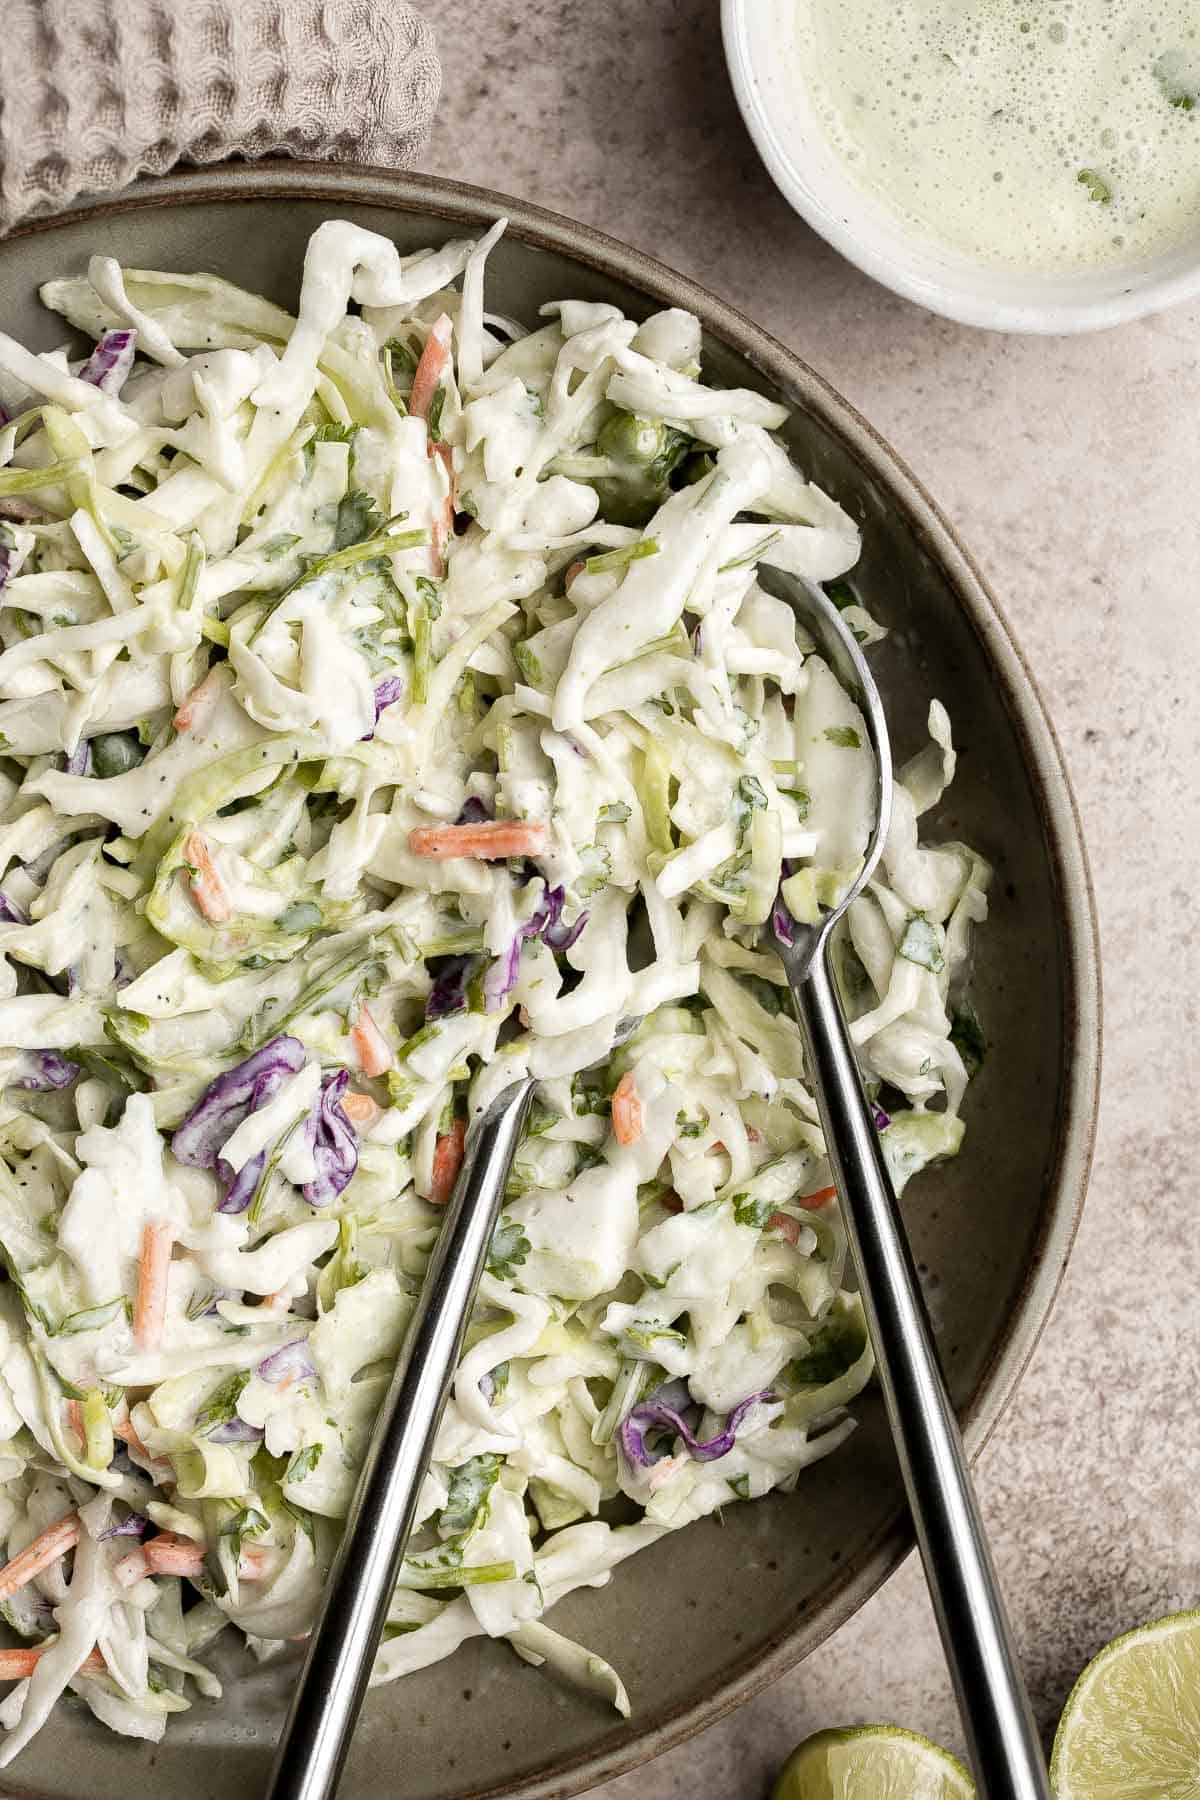
Why You'll Love Cilantro Lime Slaw
- It's quick and easy. This cilantro lime slaw is ready in just 5-10 short minutes. You'll love how quickly this side salad comes together, especially since we use a coleslaw salad mix to make things super quick.
- The yogurt dressing is healthy and creamy. Most coleslaw recipes use mayonnaise as it's main creamy base, but it's not always the healthiest option. This recipe does use a bit of mayo (which is totally optional) and a heaping cup of plain Greek yogurt. Not only is it lower in fat, it's also packed with essential nutrients and incredibly delicious!
- The zesty spice blend. Cilantro and lime aren't the only spices you'll find in this quick and easy 5-minute slaw. You'll also get a kick from cumin and garlic.
- It's the perfect pairing for proteins. I love making cilantro lime slaw to put on top of tacos, and it's also the perfect side to burgers, sandwiches, and grilled meats.
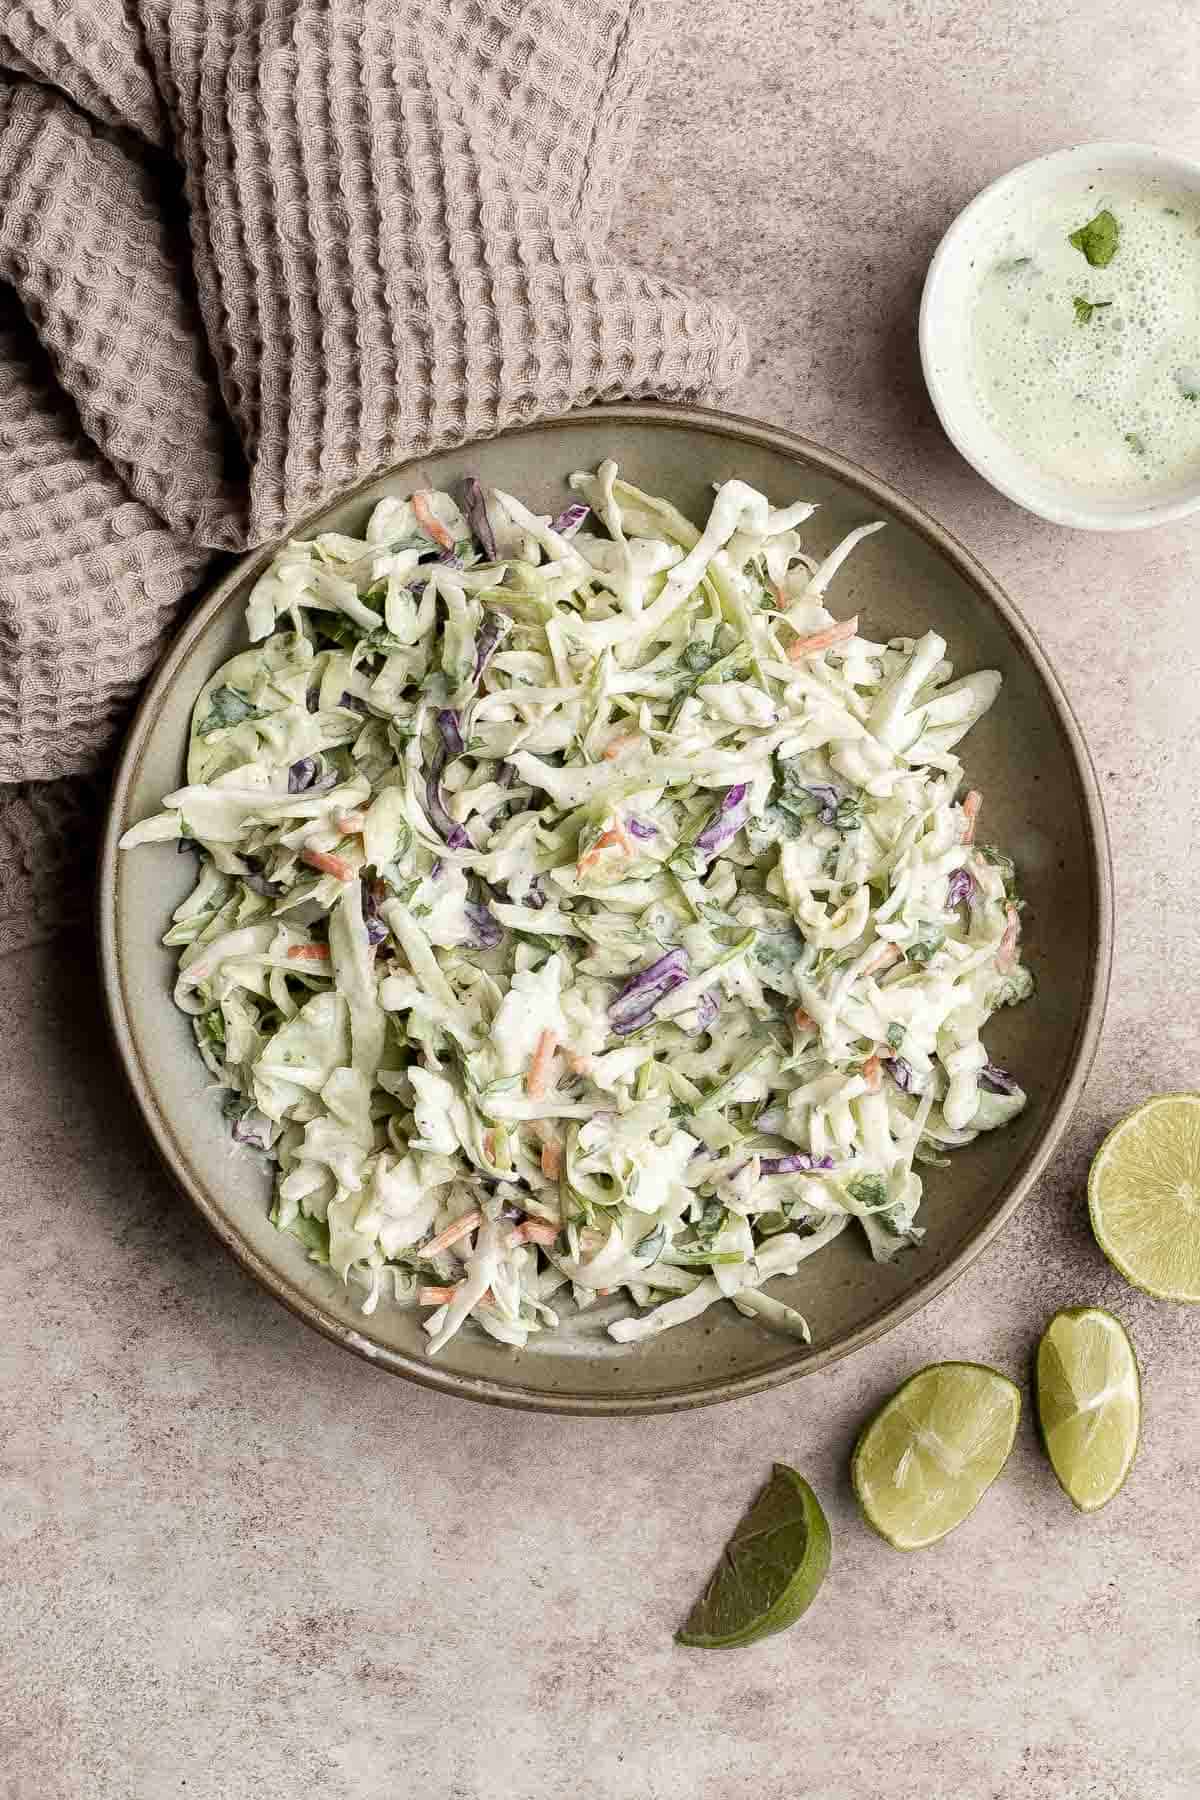
Ingredient Notes
To make this delicious Cilantro Lime Slaw, you will need the following ingredients (full measurements in recipe card below):
- coleslaw mix - you can also substitute this with shredded cabbage (green, purple, or a combination of the two).
- Greek yogurt - or substitute with sour cream.
- mayonnaise - I like the extra creaminess that the mayo add, but you can leave it out. It's completely optional.
- cilantro
- garlic
- lime juice
- seasoning - ground cumin, salt, and pepper.
Cilantro Lime Coleslaw Variations
Mix things up by adding in different ingredients into the lime cilantro slaw:
- Add in more veggies such as thinly sliced bell peppers, avocados, and red onions.
- Add in some spice with jalapeños or chipotle peppers.
- Sweeten it up with fresh fruit like mangos or pineapples.
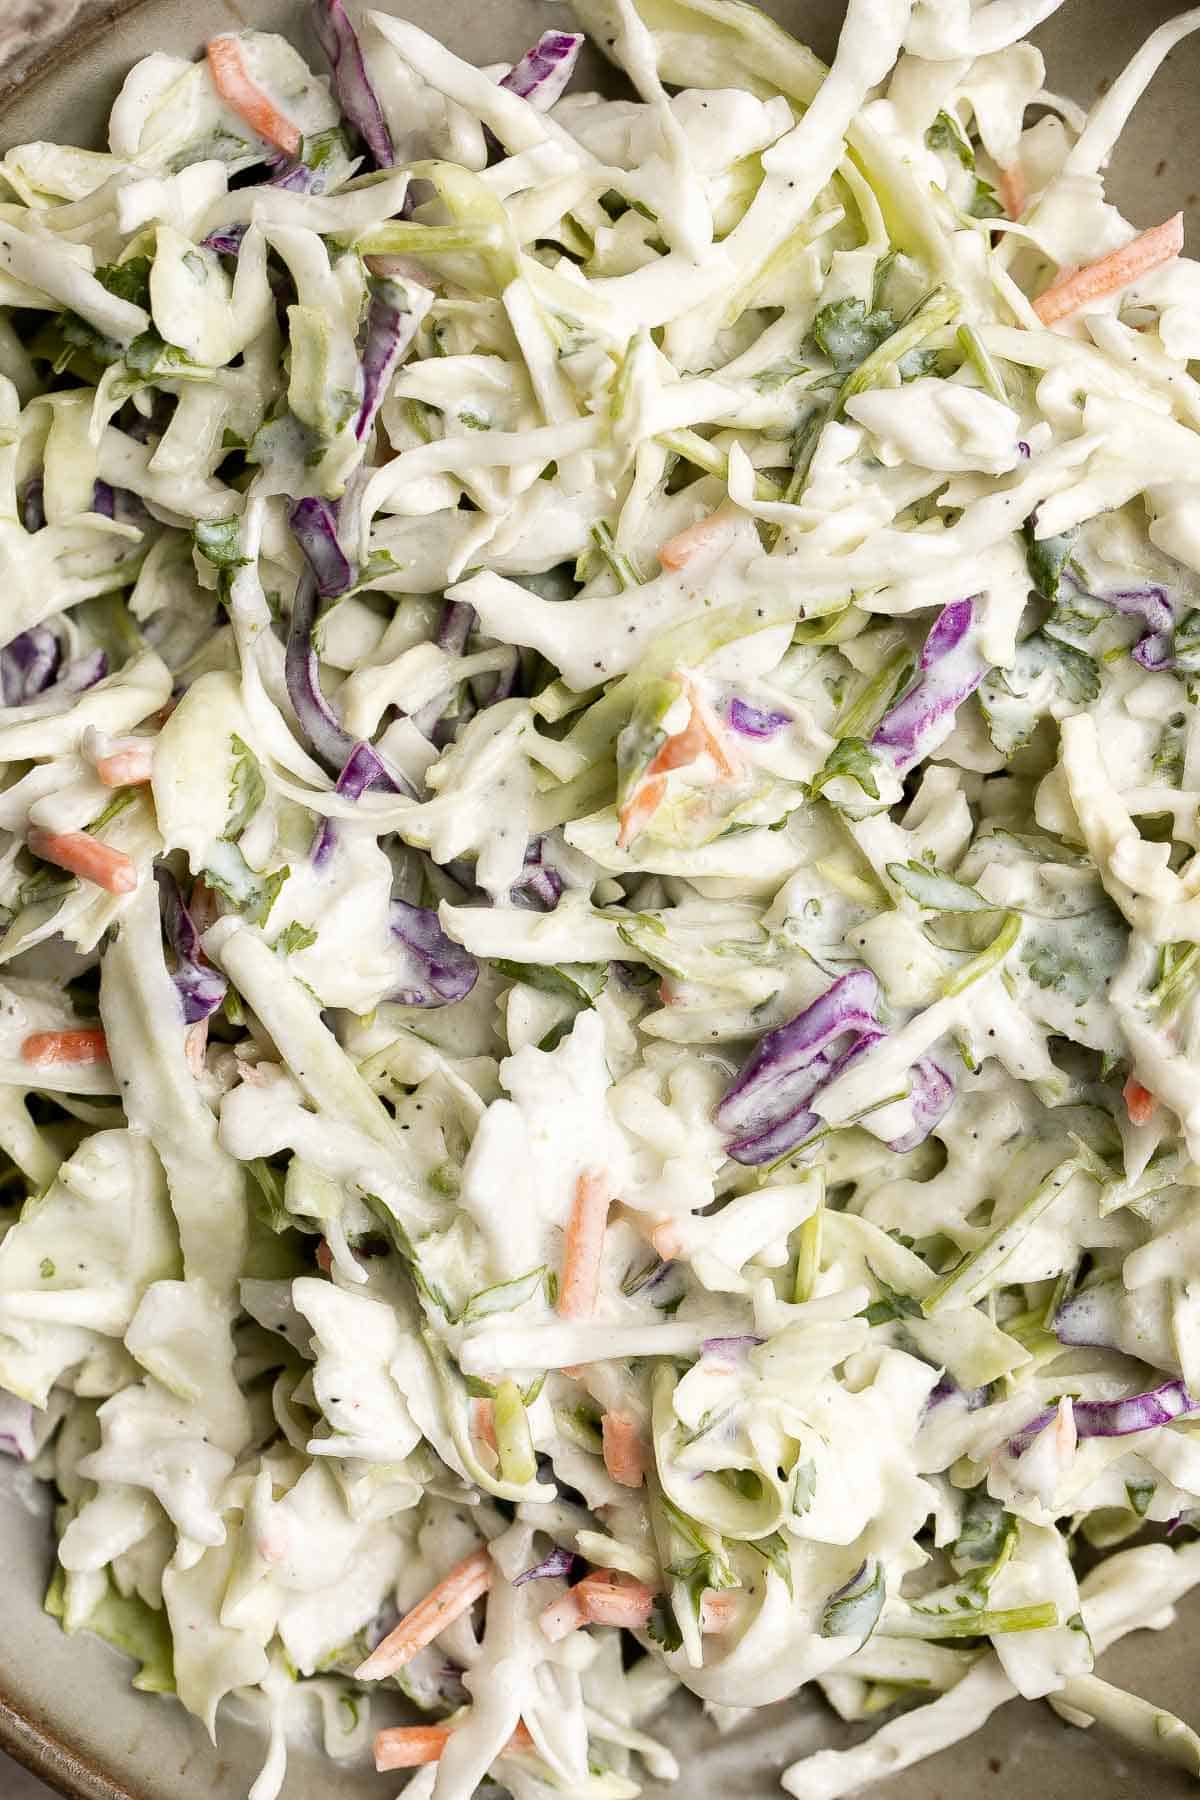
How to Make the Best Cilantro Lime Slaw
- Make dressing. In a medium mixing bowl, add yogurt, mayonnaise, cilantro, garlic, lime juice, cumin, salt and pepper. Stir well until smooth. You can also combine the dressing ingredients in a blender and pulse mix a couple times until combined (do not overmix or the dressing will be too watery).
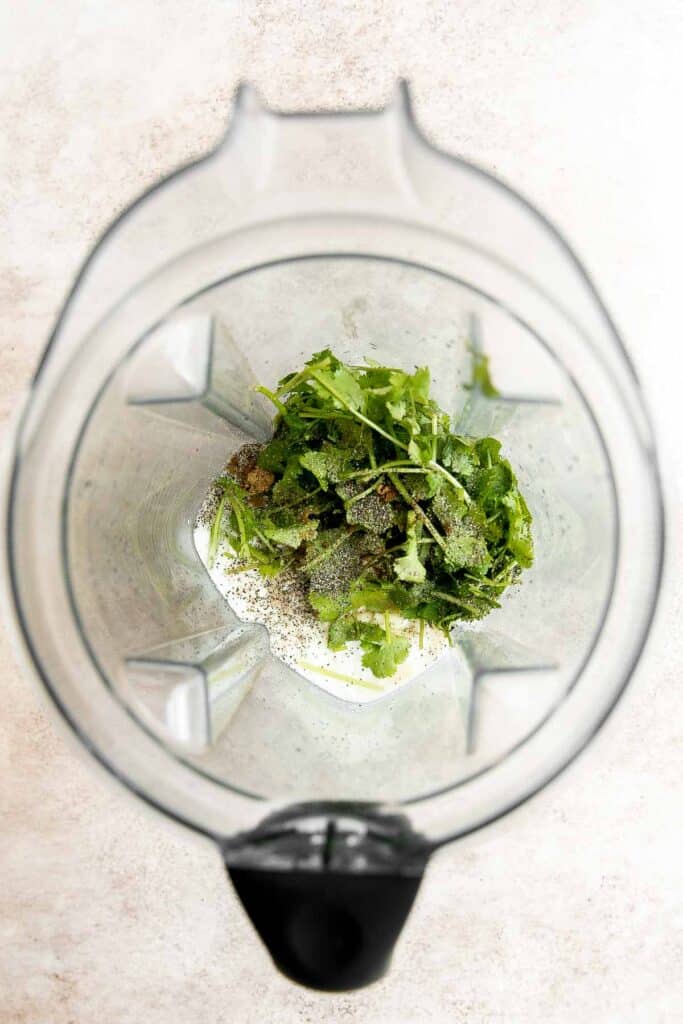
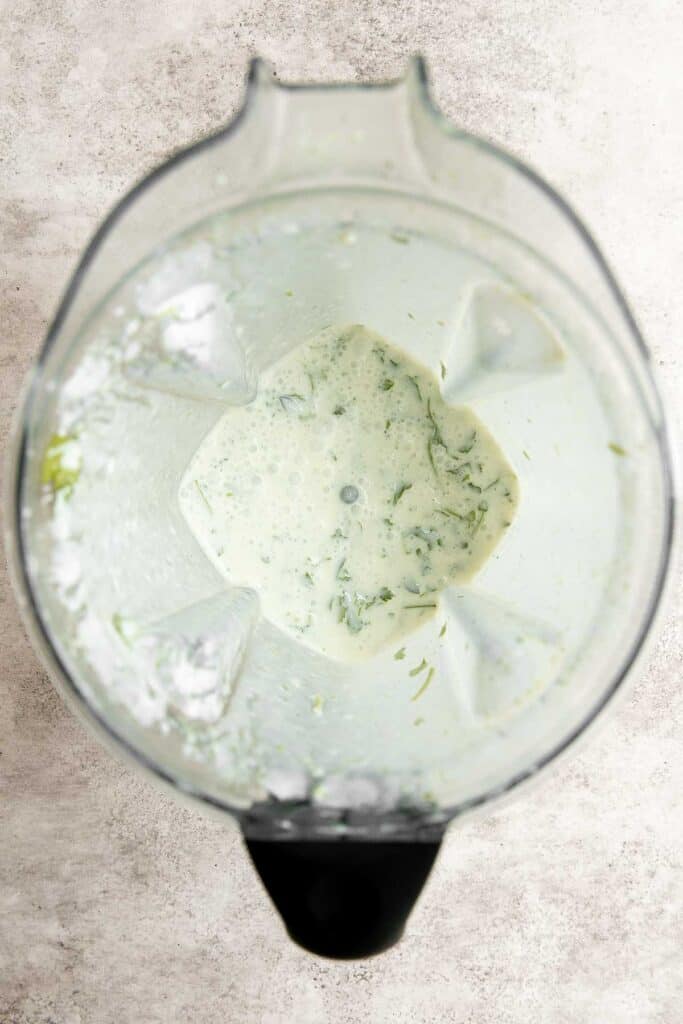
- Assemble. In a large bowl, combine coleslaw mix with the dressing and toss well to coat evenly.
- Serve. Serve immediately. Store any leftover slaw in an airtight container in the fridge for up to 2 days.
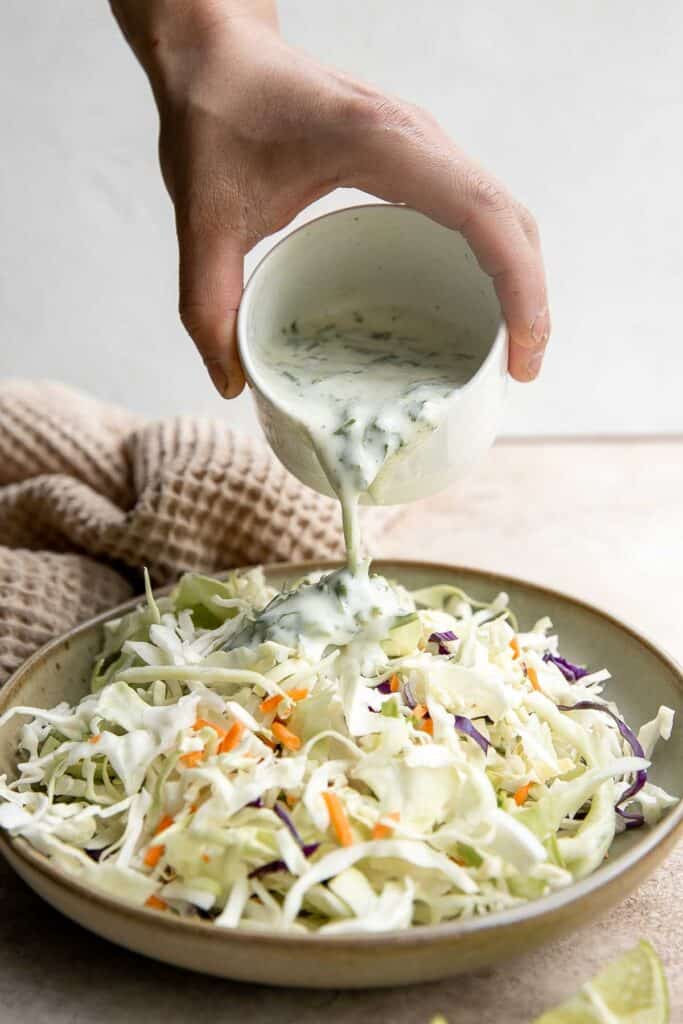
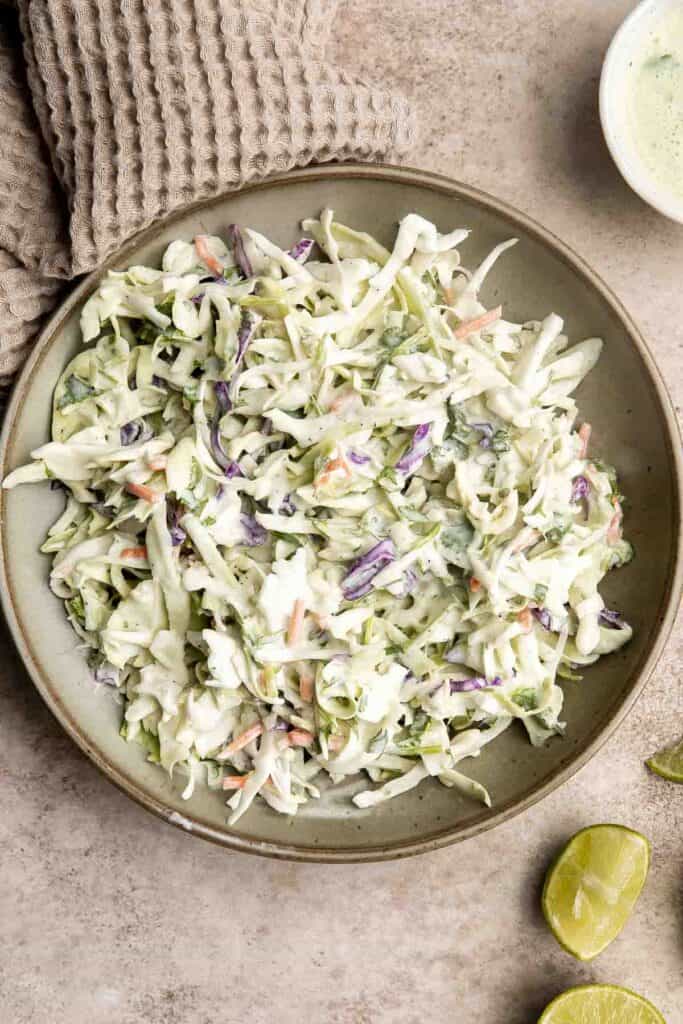
How to Serve
Serve cilantro lime slaw as a side salad on its own, or serve it as a topping for burgers, tacos, and sandwiches. It's especially great with:
Recipe Tips and Tricks
- Make ahead instructions: Prep the veggies and dressing ahead of time and store them separately in the refrigerator in airtight containers. Toss them together just before you are ready to serve.
- How to store: Keep leftover cilantro lime slaw in an airtight container in the fridge for up to 1-2 days. The acid in the slaw mixture will start to break down the cabbage as time goes on, eventually making it soft, soggy, and not as crunchy anymore.
More Creamy Salad Recipes
- 40 Best Salad Recipes
- Classic Coleslaw
- Creamy Cucumber Salad
- Mexican Caesar Salad
- Kani Salad
- Shrimp Taco Salad
Tried this recipe?
I'd love to hear what you think! Leave a comment and rating below to share your feedback. Your reviews help others discover this recipe and help me keep creating more free recipes for you. Snap a photo and tag me on social media @aheadofthyme too.
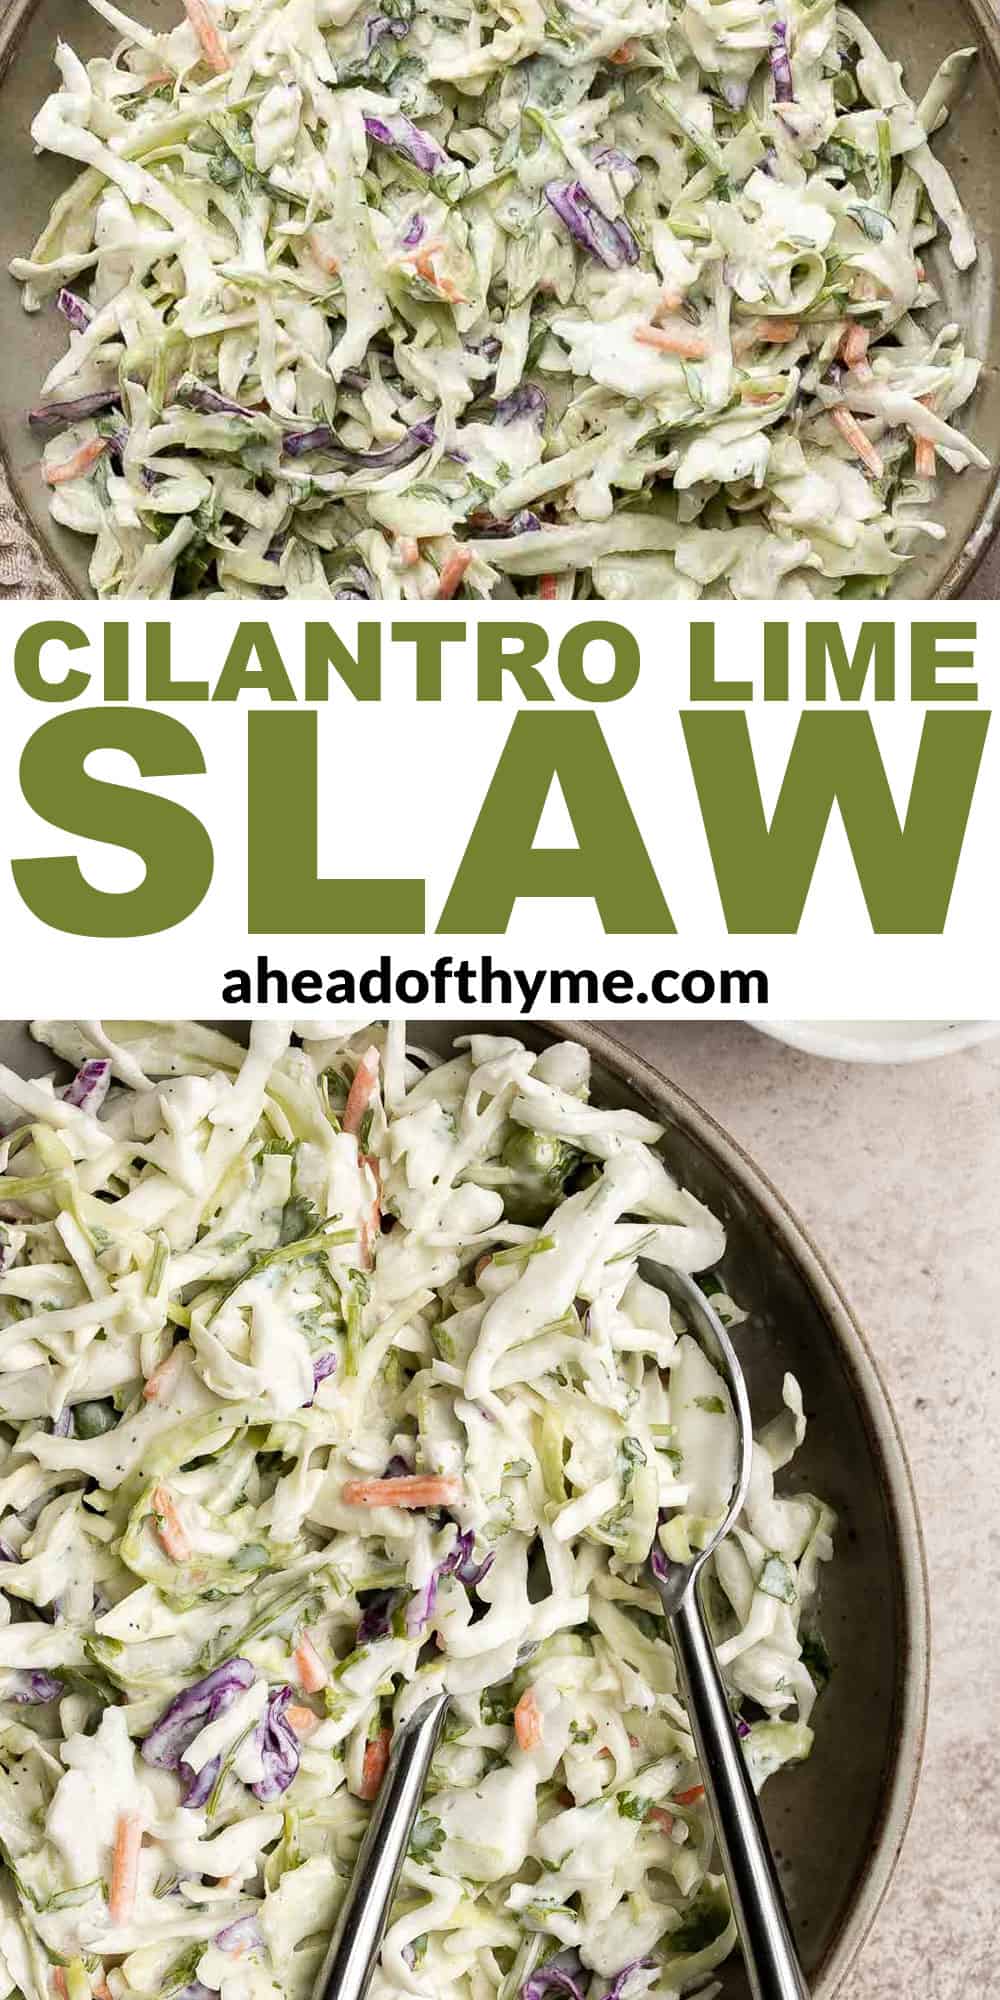
15 Best Taco Recipes
Need something quick and easy for lunch or dinner that's delicious and loaded with flavor? Tacos immediately comes to mind. They are typically ready to assemble in under 15 minutes (perfect for last minute meals!) and a total crowd-pleaser - loved by the entire family. So if you are wondering "how to make tacos" or looking for inspiration on "different kinds of tacos", you are in the right place.
We are sharing over 15 of the best taco recipes for Taco Tuesday, Cinco de Mayo, or anytime you are in a fiesta mood including beef tacos, chicken tacos, fish tacos, shrimp tacos, pork tacos, vegetarian tacos, and more!

Best Taco Recipes

Carne Asada Tacos
Carne asada tacos are delicious, juicy, and tender Mexican street tacos loaded with steak bites that everyone will be raving about on Taco Tuesday!
Fish Tacos with Lime Crema
Flavourful, easy fish tacos with lime crema is made with seasoned white fish, cabbage slaw, and lime sauce. It takes less than 25 minutes to prep and serve.
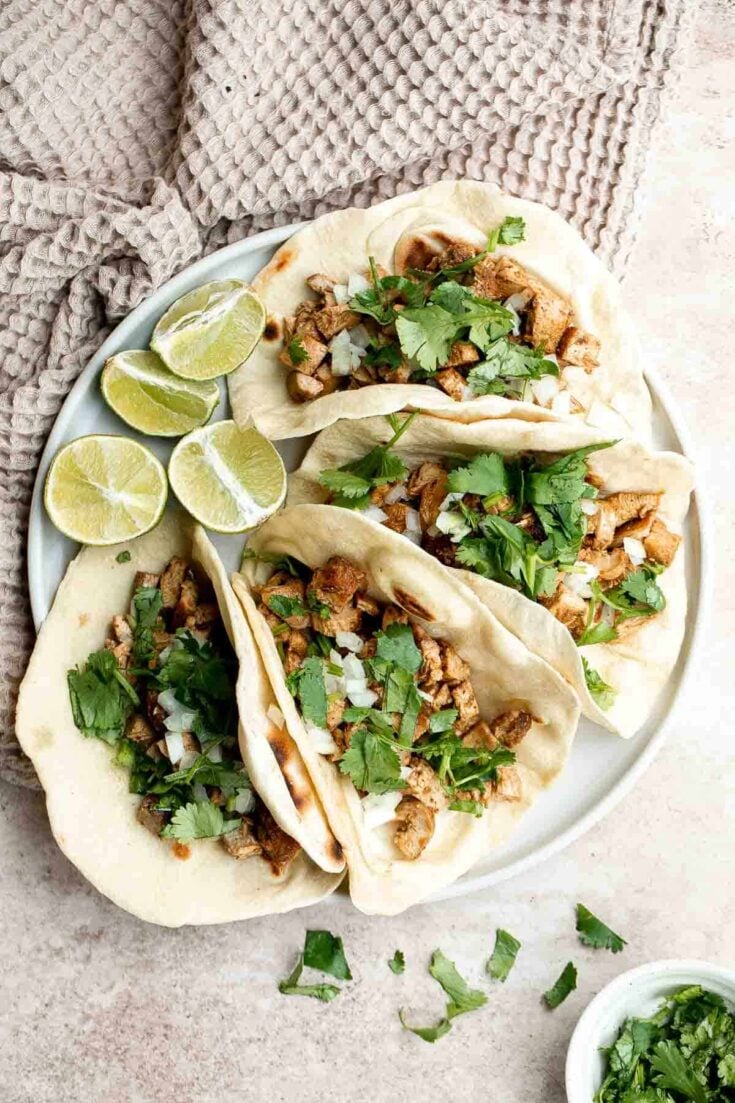
Chicken Tacos
Chicken tacos are juicy and tender, loaded with flavor, delicious, and so easy to make. They are perfect for Taco Tuesday or a Cinco de Mayo Mexican fiesta.
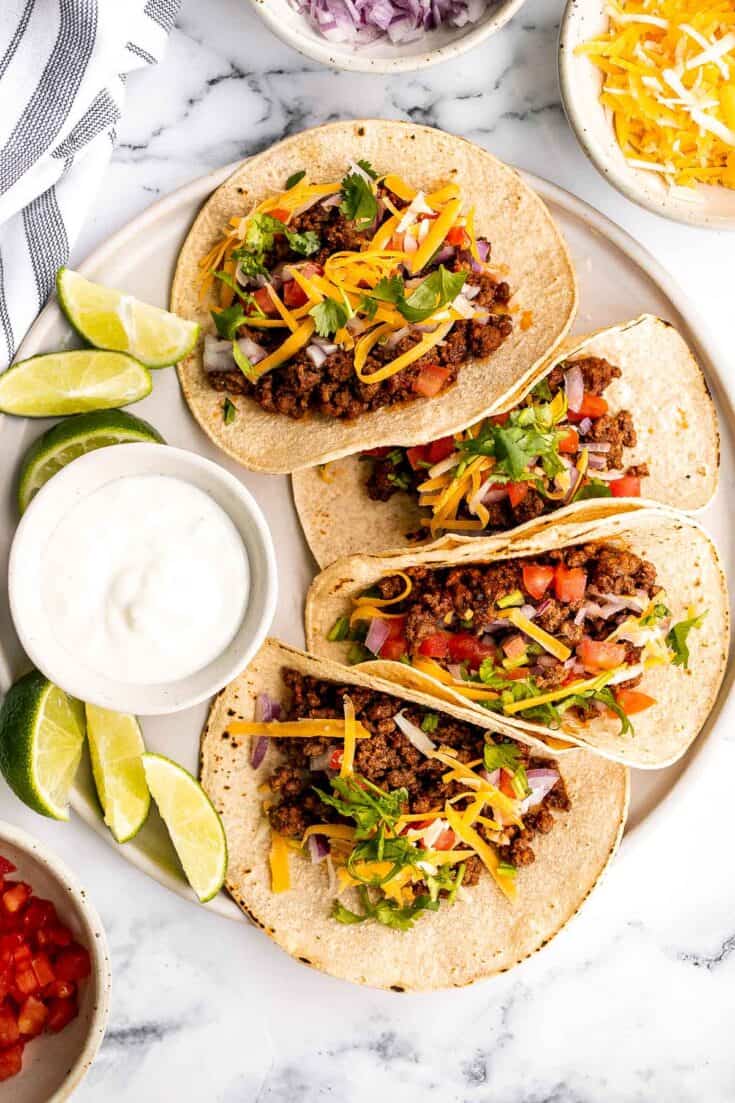
Ground Beef Tacos
Ground beef tacos are delicious, authentic, and so easy to make. They're savory, spicy, creamy, and fresh. The perfect recipe for a Mexican fiesta.

Cauliflower Tacos
Vegetarian cauliflower tacos are loaded with air-fried or baked cauliflower, a delicious seasoning blend, and creamy lime cilantro slaw inside a tortilla.
Shrimp Tacos with Lime Crema Slaw
Quick and easy shrimp tacos with lime crema slaw are ready in less than 30 minutes and are packed with flavourful crispy shrimp and creamy cabbage slaw.
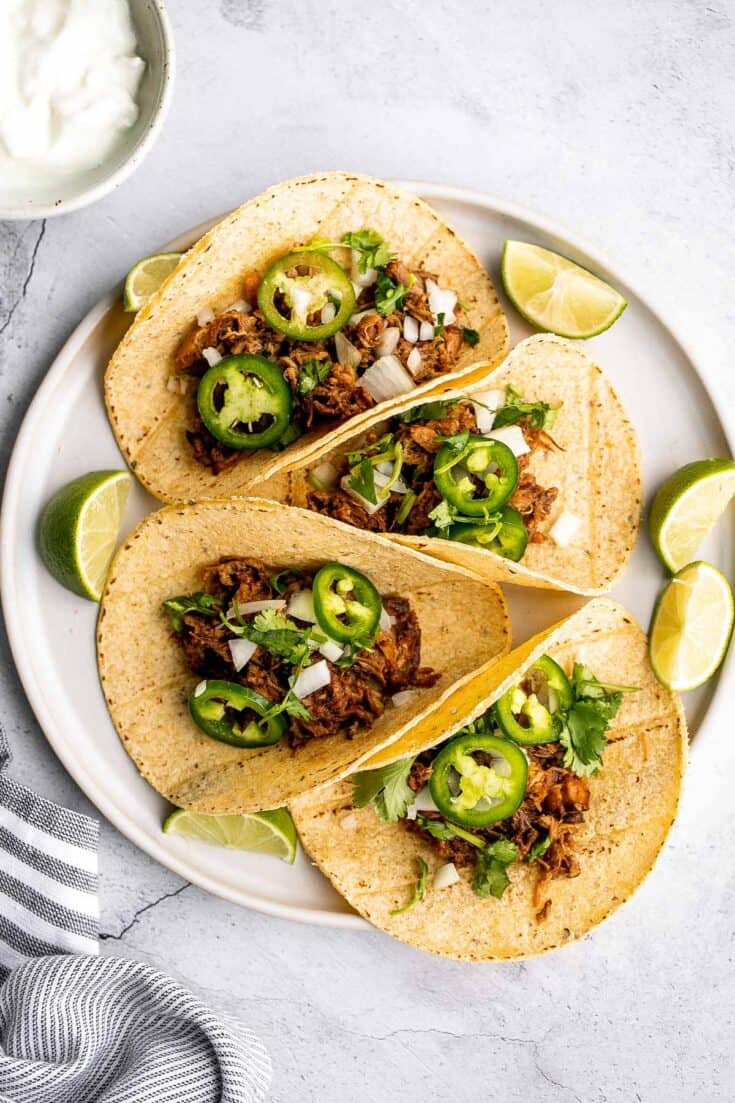
Mexican Pulled Pork Tacos (Carnitas)
Mexican pulled pork tacos with juicy and tender traditional carnitas wrapped in corn tortillas and topped with fresh onions, cilantro, and jalapeños.
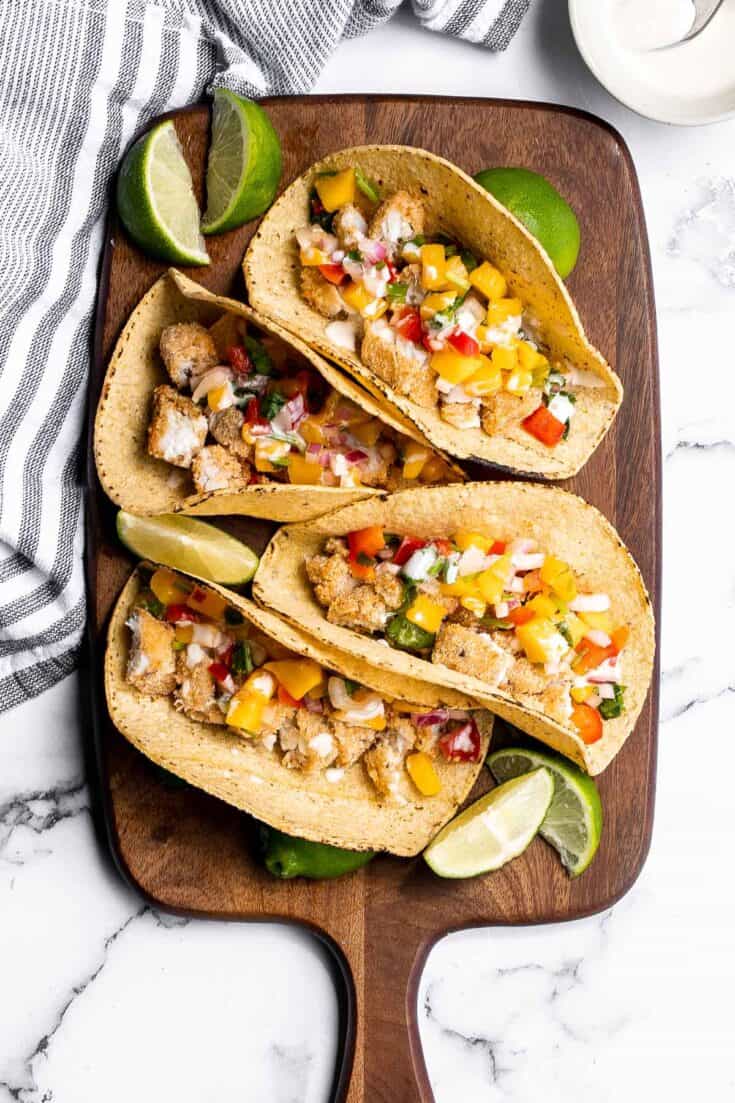
Fish Stick Tacos
Fish stick tacos are fun, quick, easy, and delicious. Crispy breaded fish sticks are topped with a homemade mango salsa and a drizzle of lime crema.
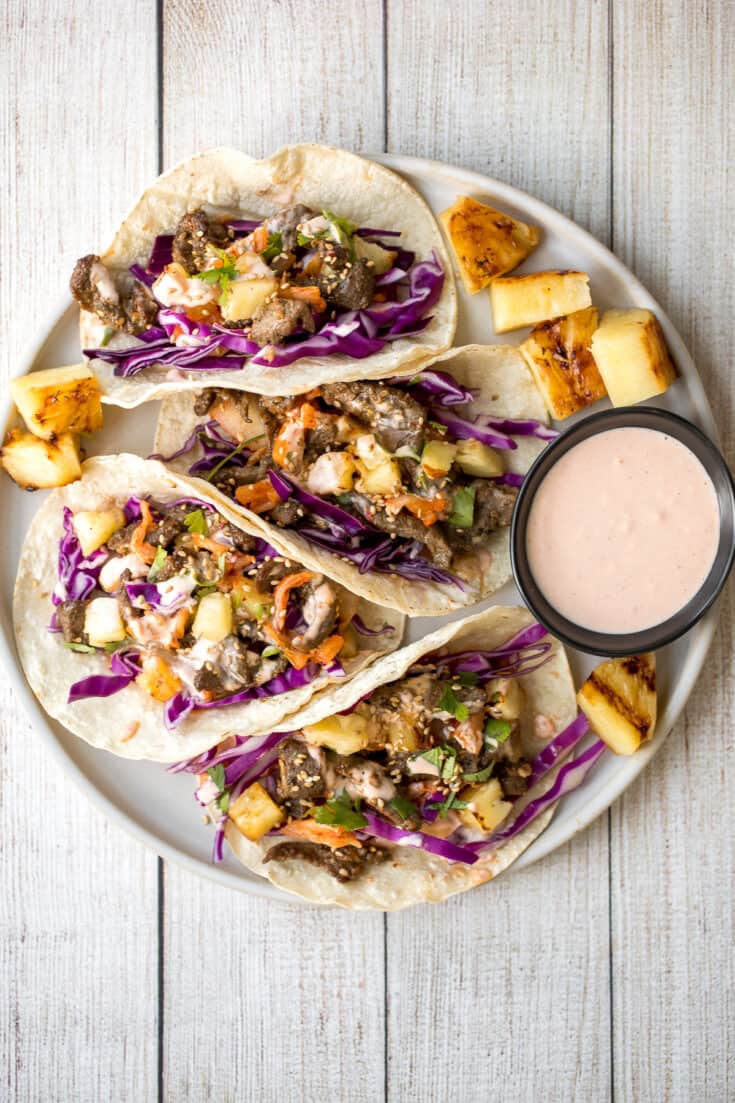
Korean Beef Steak Tacos
Fusion-style Korean beef steak tacos are made with tender, flavour-packed slices of beef and topped with caramelized pineapple, kimchi, and spicy mayo.
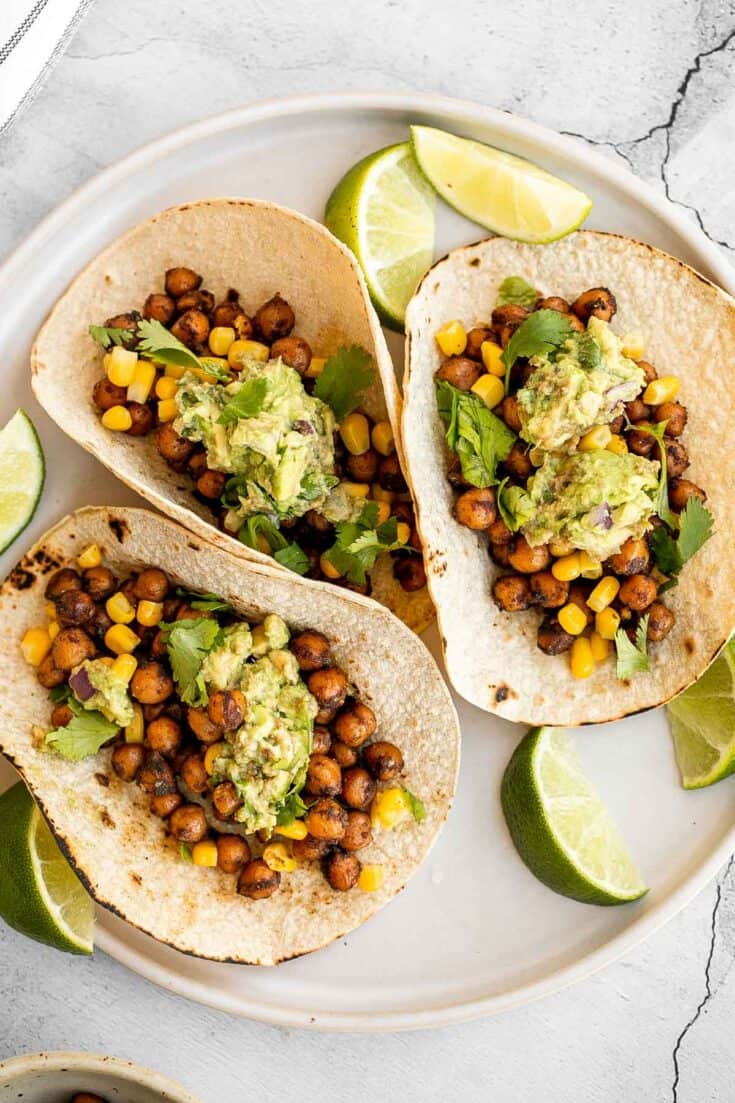
Vegan Chickpea Tacos
When it comes to vegetarian tacos, these vegan chickpea tacos are some of the best. They are delicious, filling, easy to make, and loved by all.

Shrimp Avocado Tostadas
Shrimp avocado tostadas are a delicious, crunchy, quick and easy Mexican dish you can make in just 15 minutes, loaded with the best combination of toppings.
How to Serve Tacos
Serve tacos with your favorite Mexican Recipes and Mexican Side Dishes. I like to serve some dipping sauce on the side such as:
How to Store Tacos
- How to store: If planning to make tacos ahead of time or planning to have leftovers, assemble only what you are going to eat and store the filling, any sauce, and tortillas separately. Then, only assemble the tacos you're ready to eat them. Check the specific recipe for storage details for the filling.
- How to reheat: Reheat tortillas over the stove for 30-60 seconds per side. To heat the filling, check specific recipe for details. Typically, you can reheat on the stovetop and sometimes in the oven or air fryer, depending on the recipe.
Did You Make Any of These Taco Recipes?
Please leave a comment and rating below, and let me know what you thought of this round up of the best taco recipes. Be sure to snap a picture and tag me on Instagram @aheadofthyme or share it on the Pinterest pin so that I can follow along.
HUNGRY FOR MORE? Don't forget to sign up for my email newsletter so that you don't miss any recipes. You can also follow along on Instagram and Pinterest for more recipe updates.
Strawberry Sorbet
This 3-ingredient Strawberry Sorbet is the perfect homemade frozen treat to enjoy on a hot summer day. It's refreshing, healthy, vegan, and gluten-free. Plus, it's super easy to make with only 5 minutes of prep and no ice cream maker required! It's well worth the effort (and freezer space!).
So go ahead and satisfy your sweet tooth with this simple and refreshing frozen dessert, and you will be glad that you did. In fact, make extra because this real fruit sorbet will disappear fast!
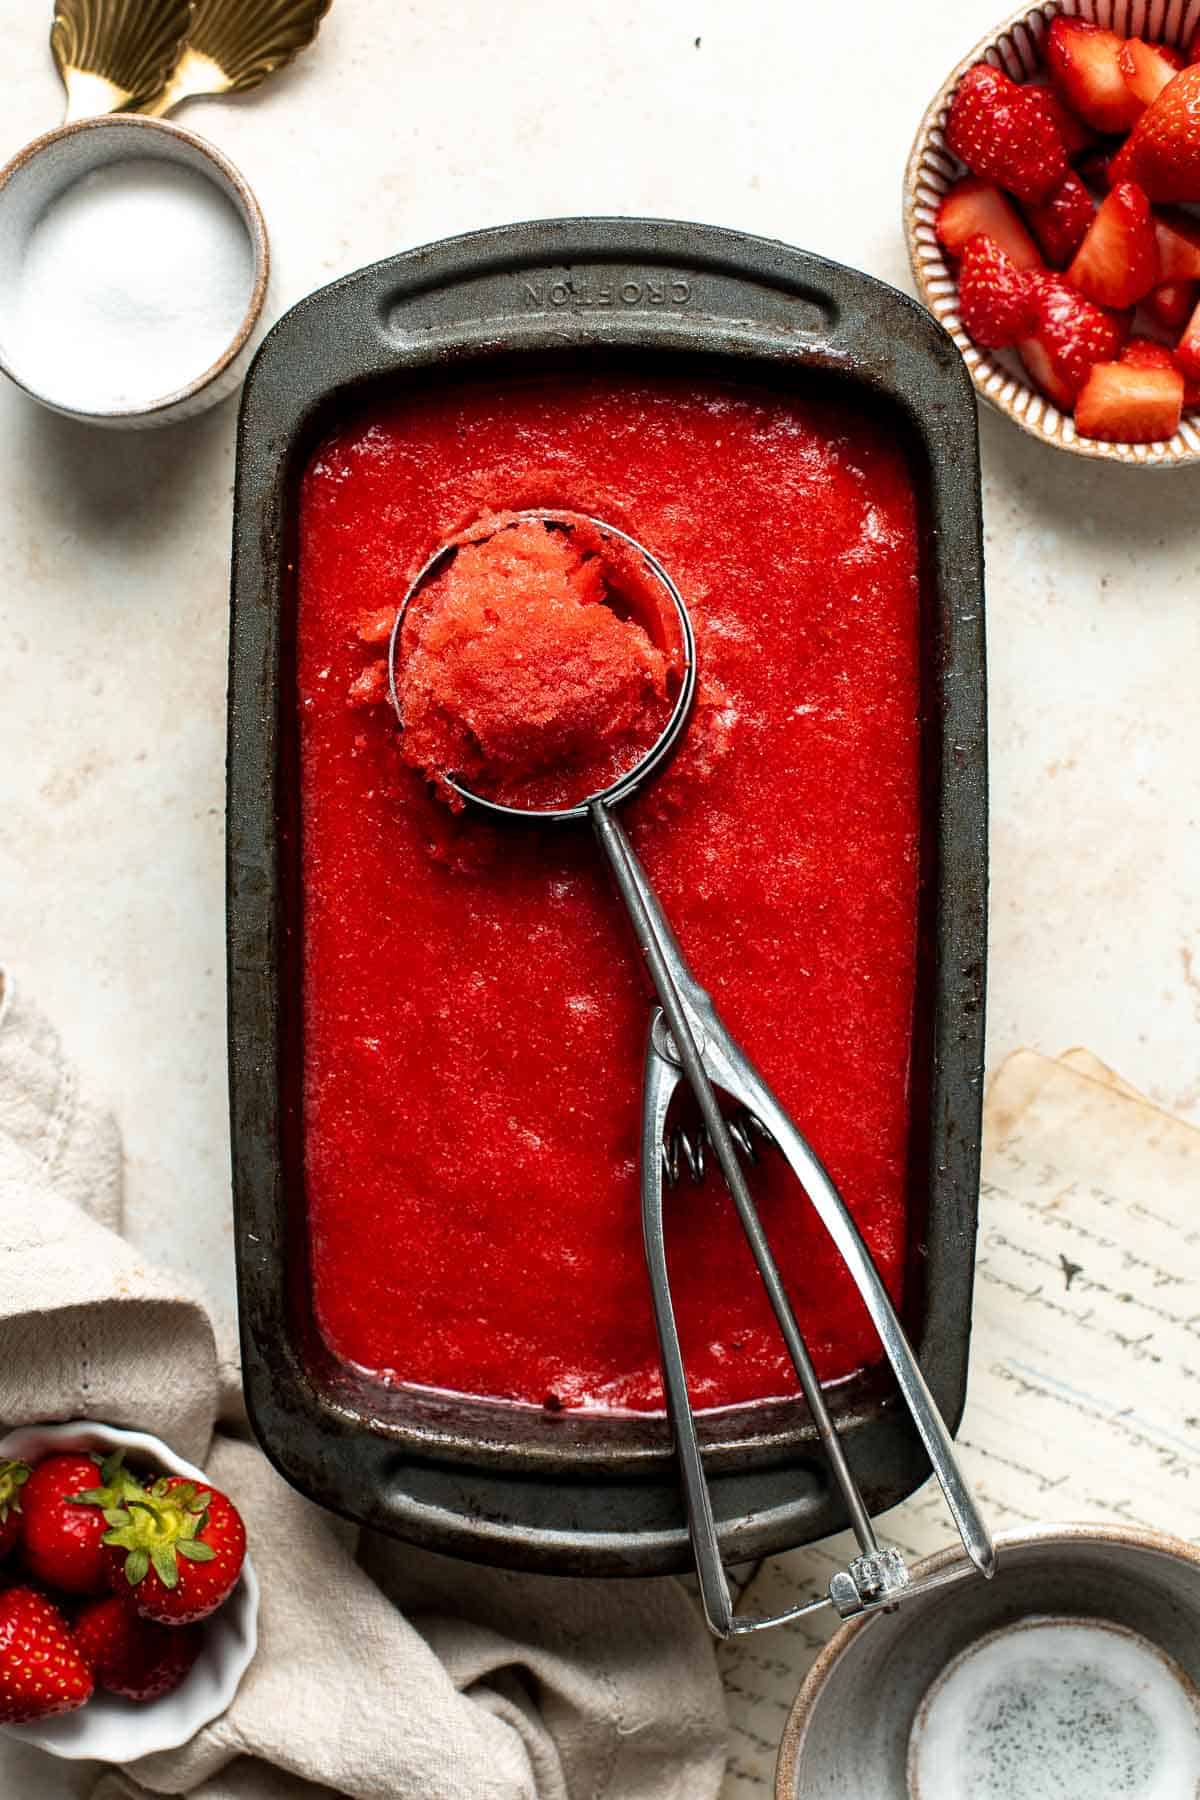
Why You'll Love this Strawberry Sorbet
- Loaded with fresh strawberries. I mean who doesn't love vibrant, sweet, and utterly succulent strawberries? They are low in calories and are one of nature's antioxidant powerhouses. And like most fruits, they have tons of nutrients, vitamins and minerals that all contribute to overall health. I love making it during strawberry season after picking fresh strawberries from our local farm. It's seriously the best!
- It's a clean and healthy dessert. Since the main ingredient in this strawberry sorbet is strawberries, this fruit sorbet is a mostly healthy, nutritious dessert packed with essential nutrients and antioxidants. It's also vegan, dairy-free, and gluten-free, and even though it has some sugar, it is still one of the healthiest dessert options out there.
- It's so easy to make. After making this strawberry sorbet once, you'll want to keep a batch in the freezer all the time. Why? Because it's seriously so easy to make with just 5 minutes of prep. You simply combine your ingredients in a blender and puree. Then, let your freezer do the rest and in a few hours you can scoop out a bowl of this refreshing dessert.
- You might have everything you need already. This strawberry sorbet consists of three simple ingredients along with water: strawberries, lemon juice, and sugar. It's all you need for a sweet and delicious treat on a hot summer day. You might want to double this recipe because there won't be much left once you have had a taste.

Ingredient Notes
To make this easy 3-ingredient strawberry sorbet, you will need a blender, and the following ingredients (full quantities in recipe card below):
- strawberries - you will need fresh strawberries for this sorbet recipe. You can also substitute with frozen. If using frozen, your sorbet will be ready faster.
- lemon juice
- granulated sugar - sugar is really important because it is what gives the sorbet its creamy texture. Without it, you will have a large frozen popsicle. The pureed mixture will taste quite sweet, but freezing will dull the sweetness. For a refined sugar free option, you can try this with honey (but be mindful that the texture might not be exactly the same).
- water
- sliced strawberries - optional, for garnish.
For a creamy and milkier sorbet, add in 1 cup yogurt.
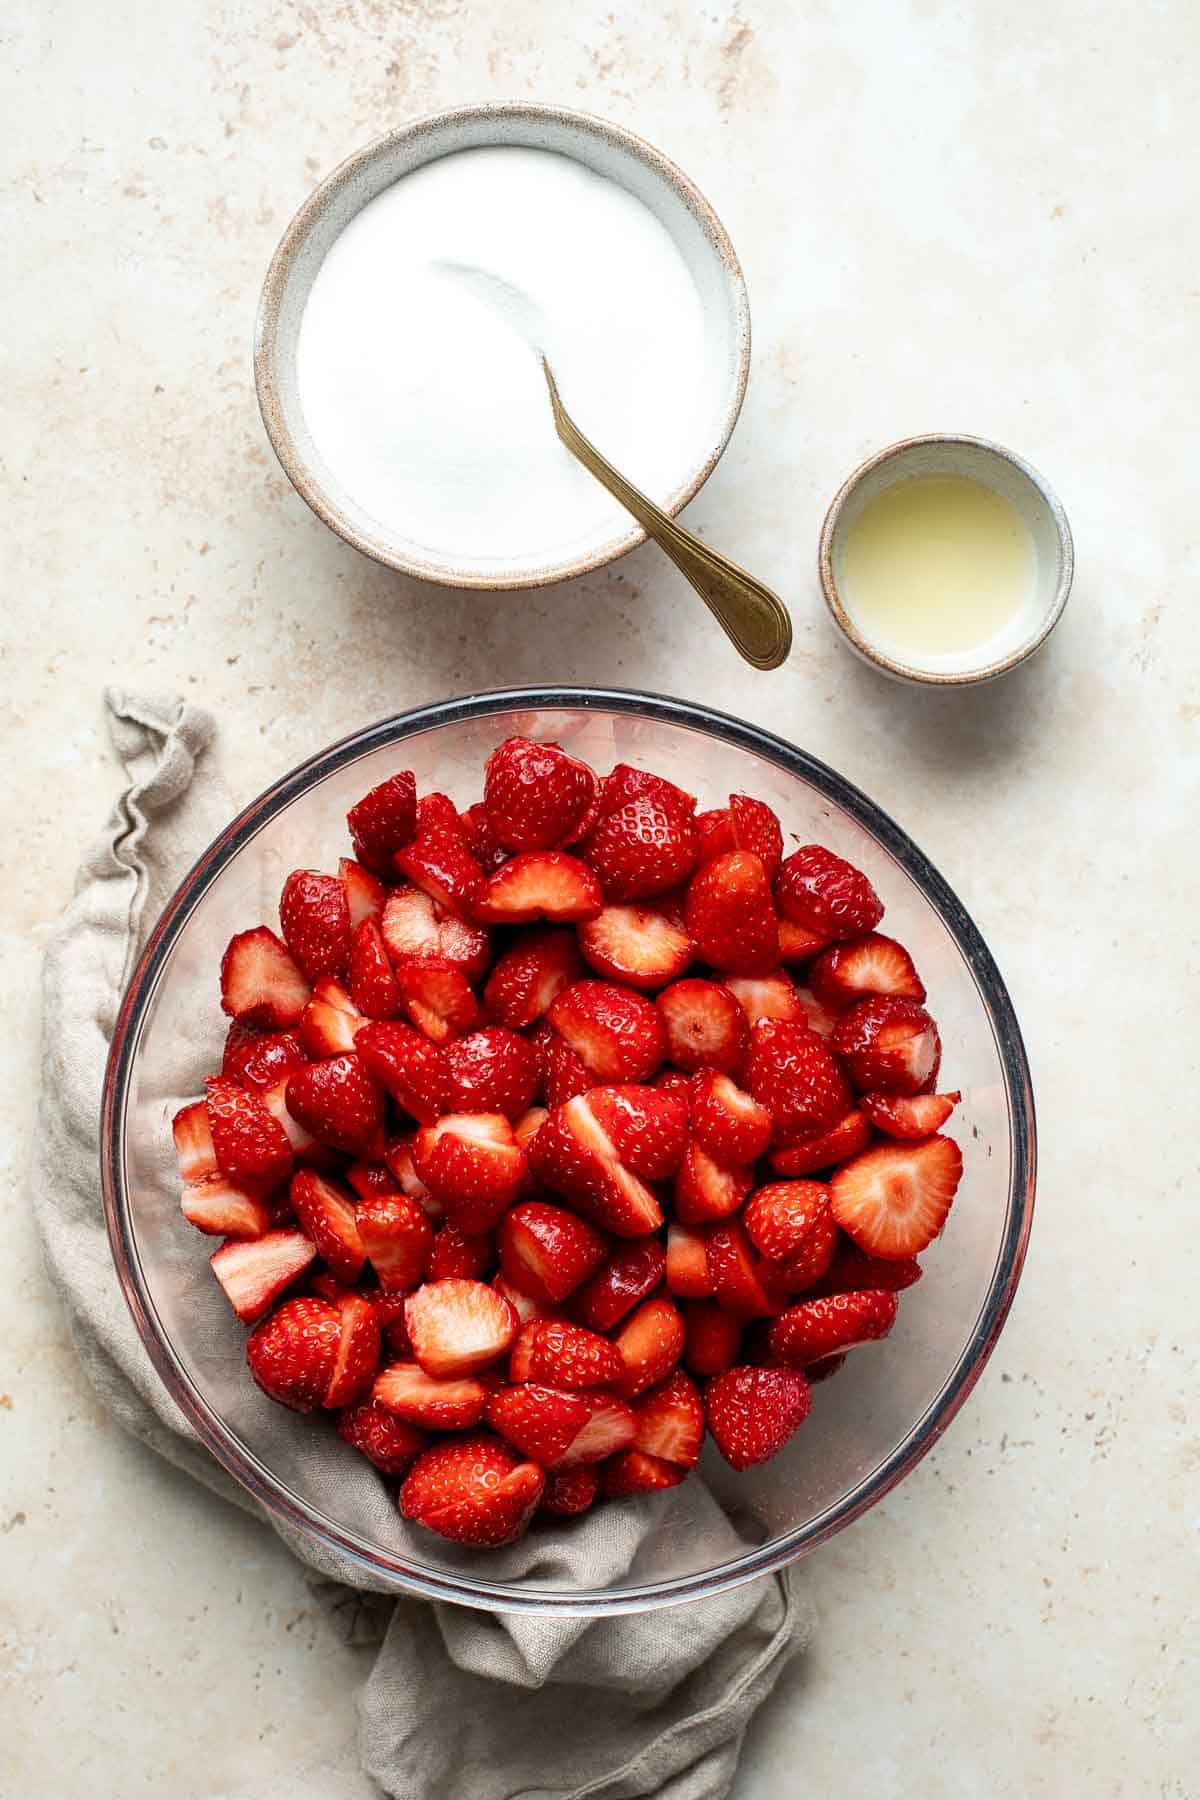
How to Make the Best Strawberry Sorbet
- Puree. Combine all ingredients in a blender. Process until smooth, about 1 minute.
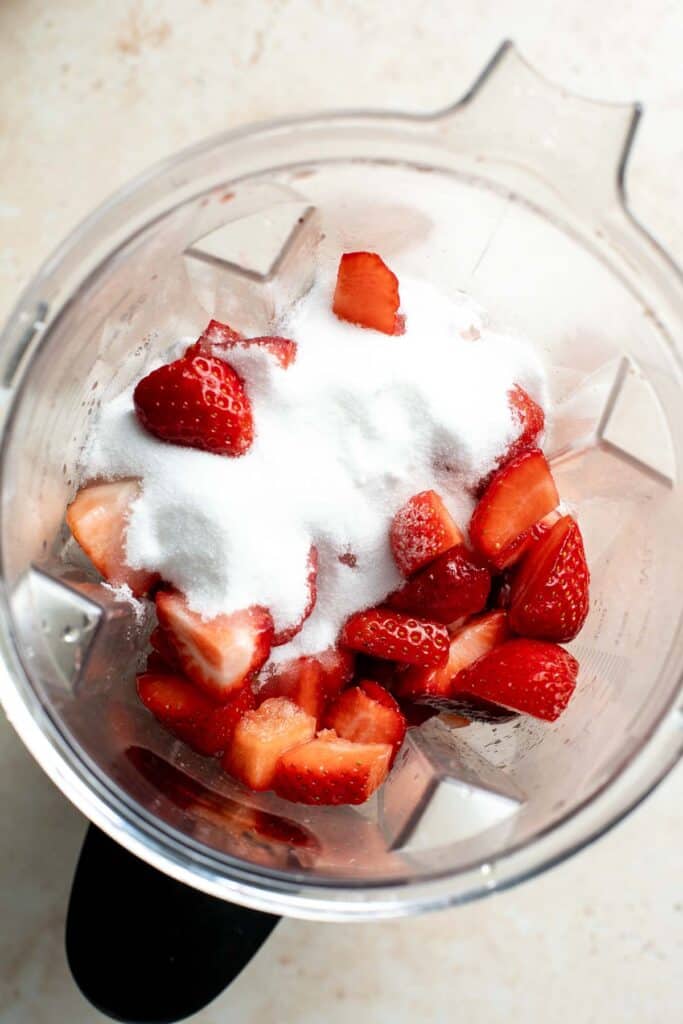
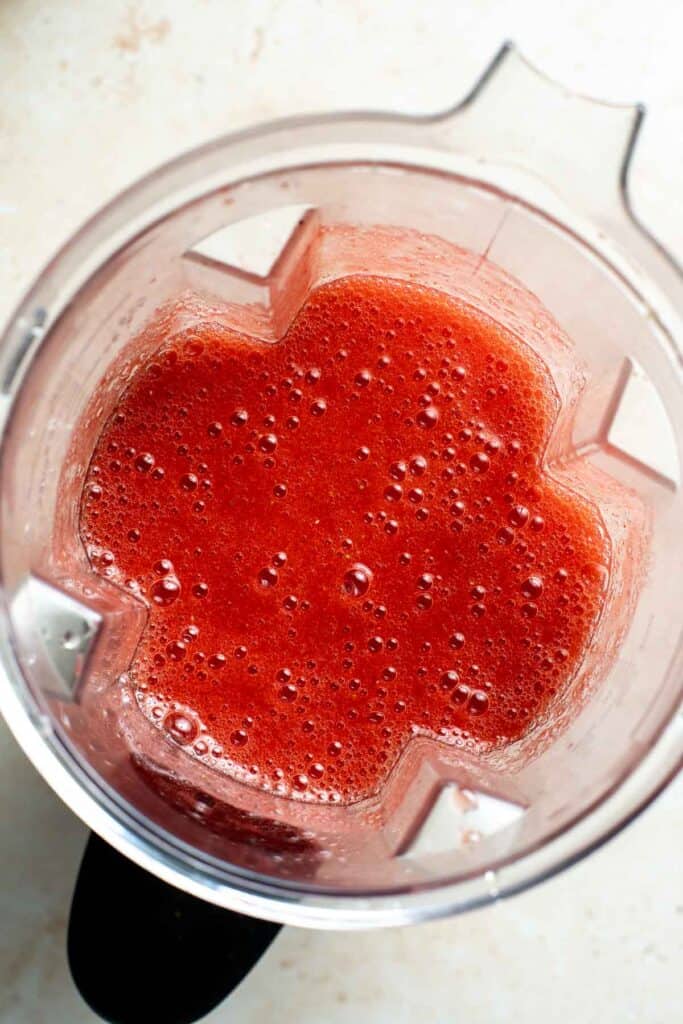
- Strain. Strain the strawberry puree mixture through a fine mesh strainer to remove any seeds and lumps.
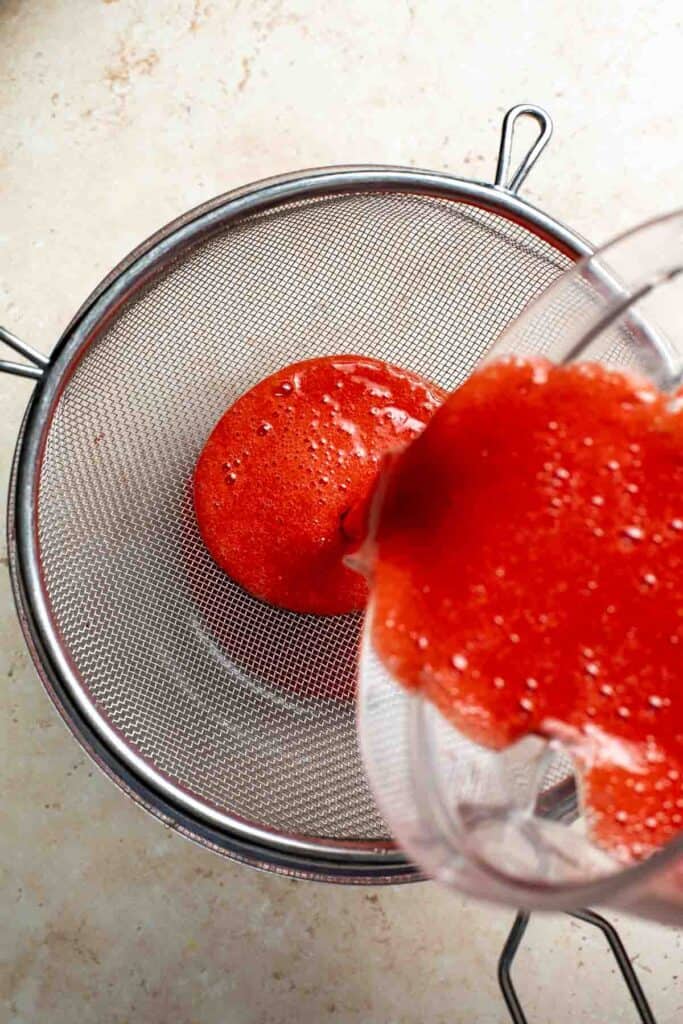
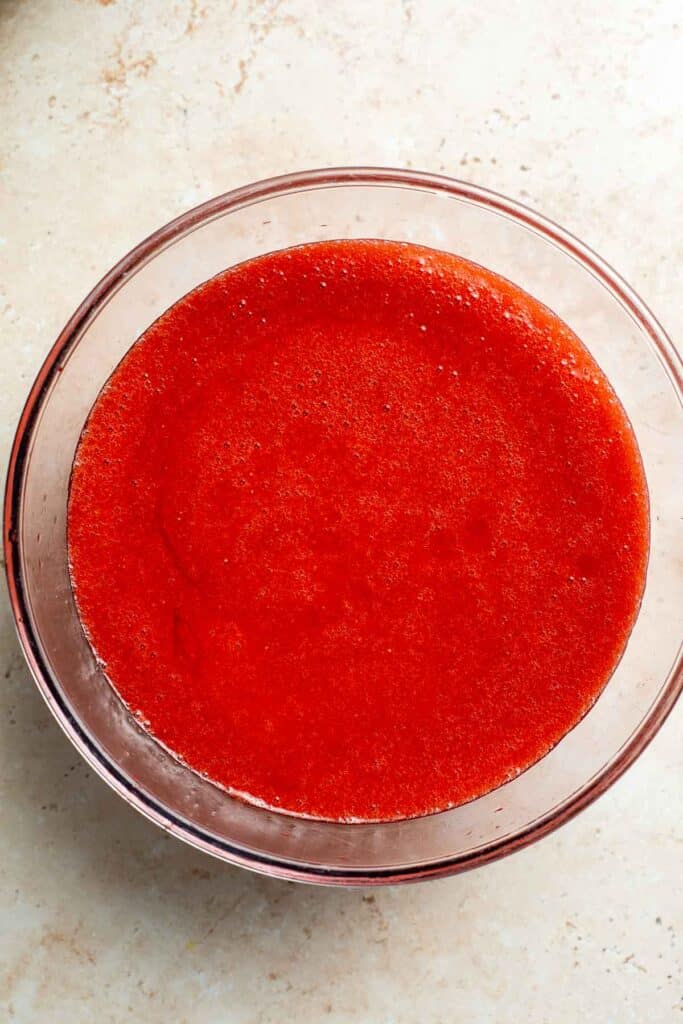
- Freeze. Transfer the puree into an airtight container or a loaf pan and cover tightly with plastic cling wrap. Freeze for 4 hours.
- Whisk. Take the sorbet out of the freezer and whisk it to a slushy consistency.


- Freeze again. Cover and return to the freezer and leave to fully set, about 4 more hours.
- Serve. Serve immediately. If the sorbet is too hard to scoop (if you stored it too long), then let it sit at room temperature for about 10 minutes to soften before scooping.
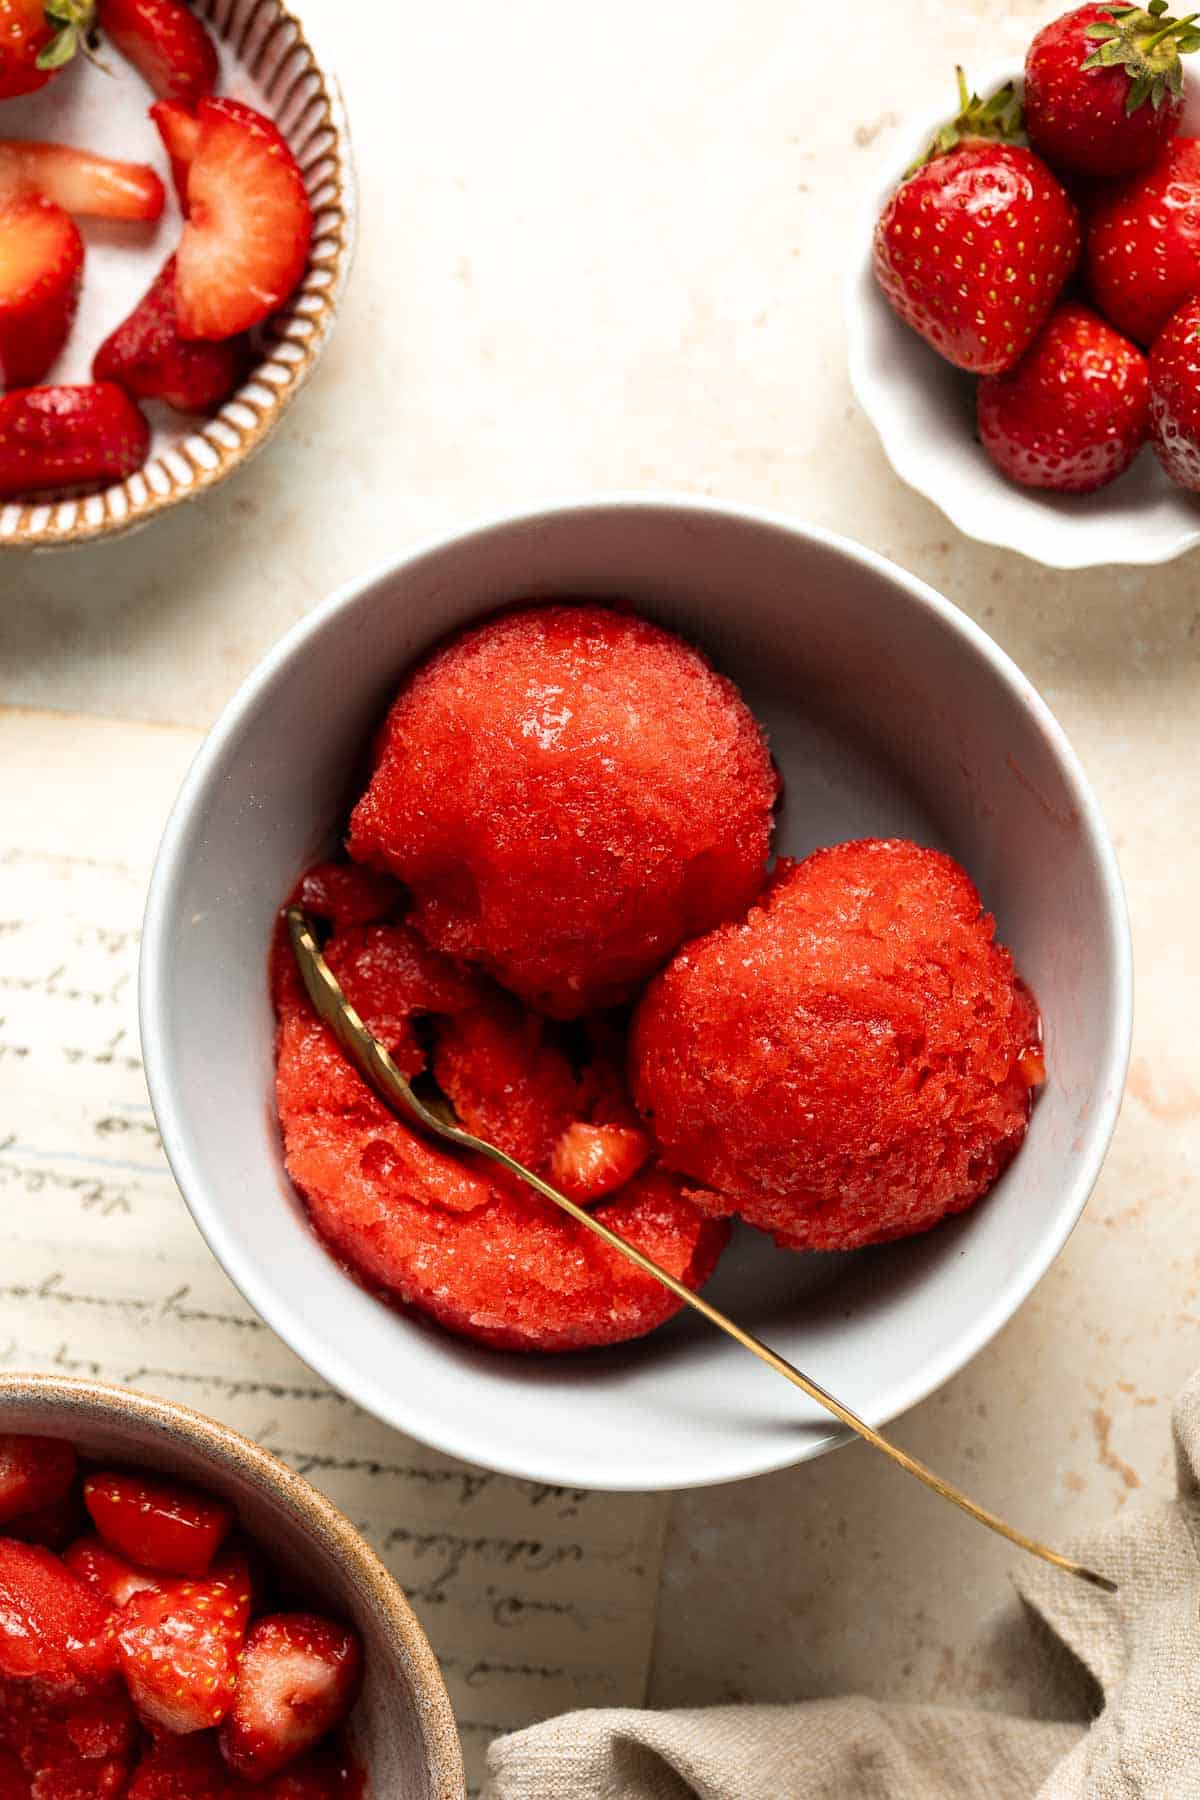
Recipe Tips and Tricks
- How to store: Store strawberry sorbet in an airtight container or covered container in the freezer for up to one month. After that, it will still be safe to eat, but it will start to become overly icy.
- Sorbet too hard to scoop? If you find that it is too hard to scoop, then let it sit at room temperature for about 10 minutes before scooping with an ice cream scoop.
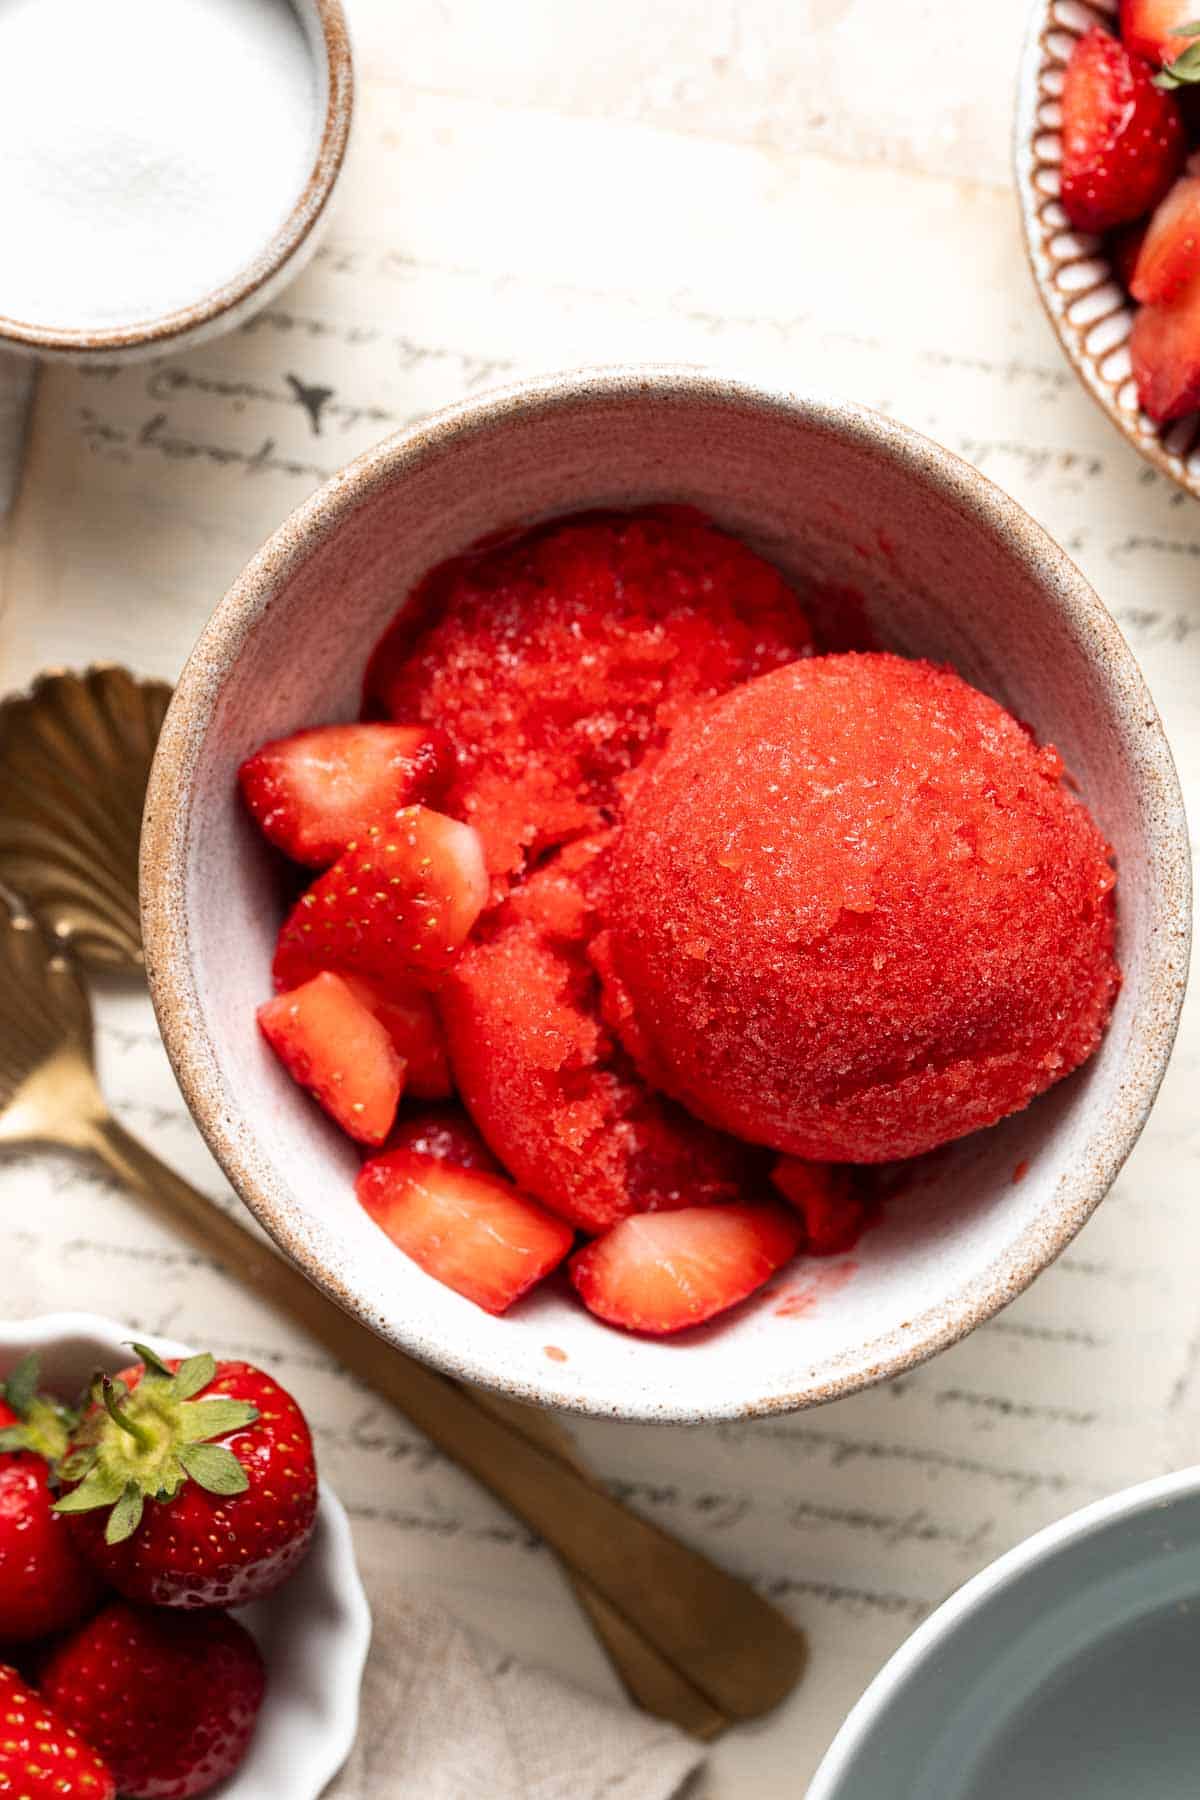
More Strawberry Recipes
- 25 Best Strawberry Recipes
- Strawberry Frozen Yogurt
- Strawberry Popsicles
- Strawberry Milk Tea
- Strawberry Lemonade
Tried this recipe?
I'd love to hear what you think! Leave a comment and rating below to share your feedback. Your reviews help others discover this recipe and help me keep creating more free recipes for you. Snap a photo and tag me on social media @aheadofthyme too.

Shrimp Fajitas
Shrimp fajitas are healthy, flavorful, and delicious. This one skillet recipe is loaded with juicy tender shrimp, colorful vegetables, and a homemade fajita seasoning blend. The best part? This quick and easy dinner is ready in just 20 minutes (including prep!).
Shrimp fajitas from scratch are a total crowd pleaser. Serve them on busy weeknights (hello Taco Night!) with Tortillas, Cilantro Lime Rice, and/or a drizzle of Cilantro Lime Dressing.
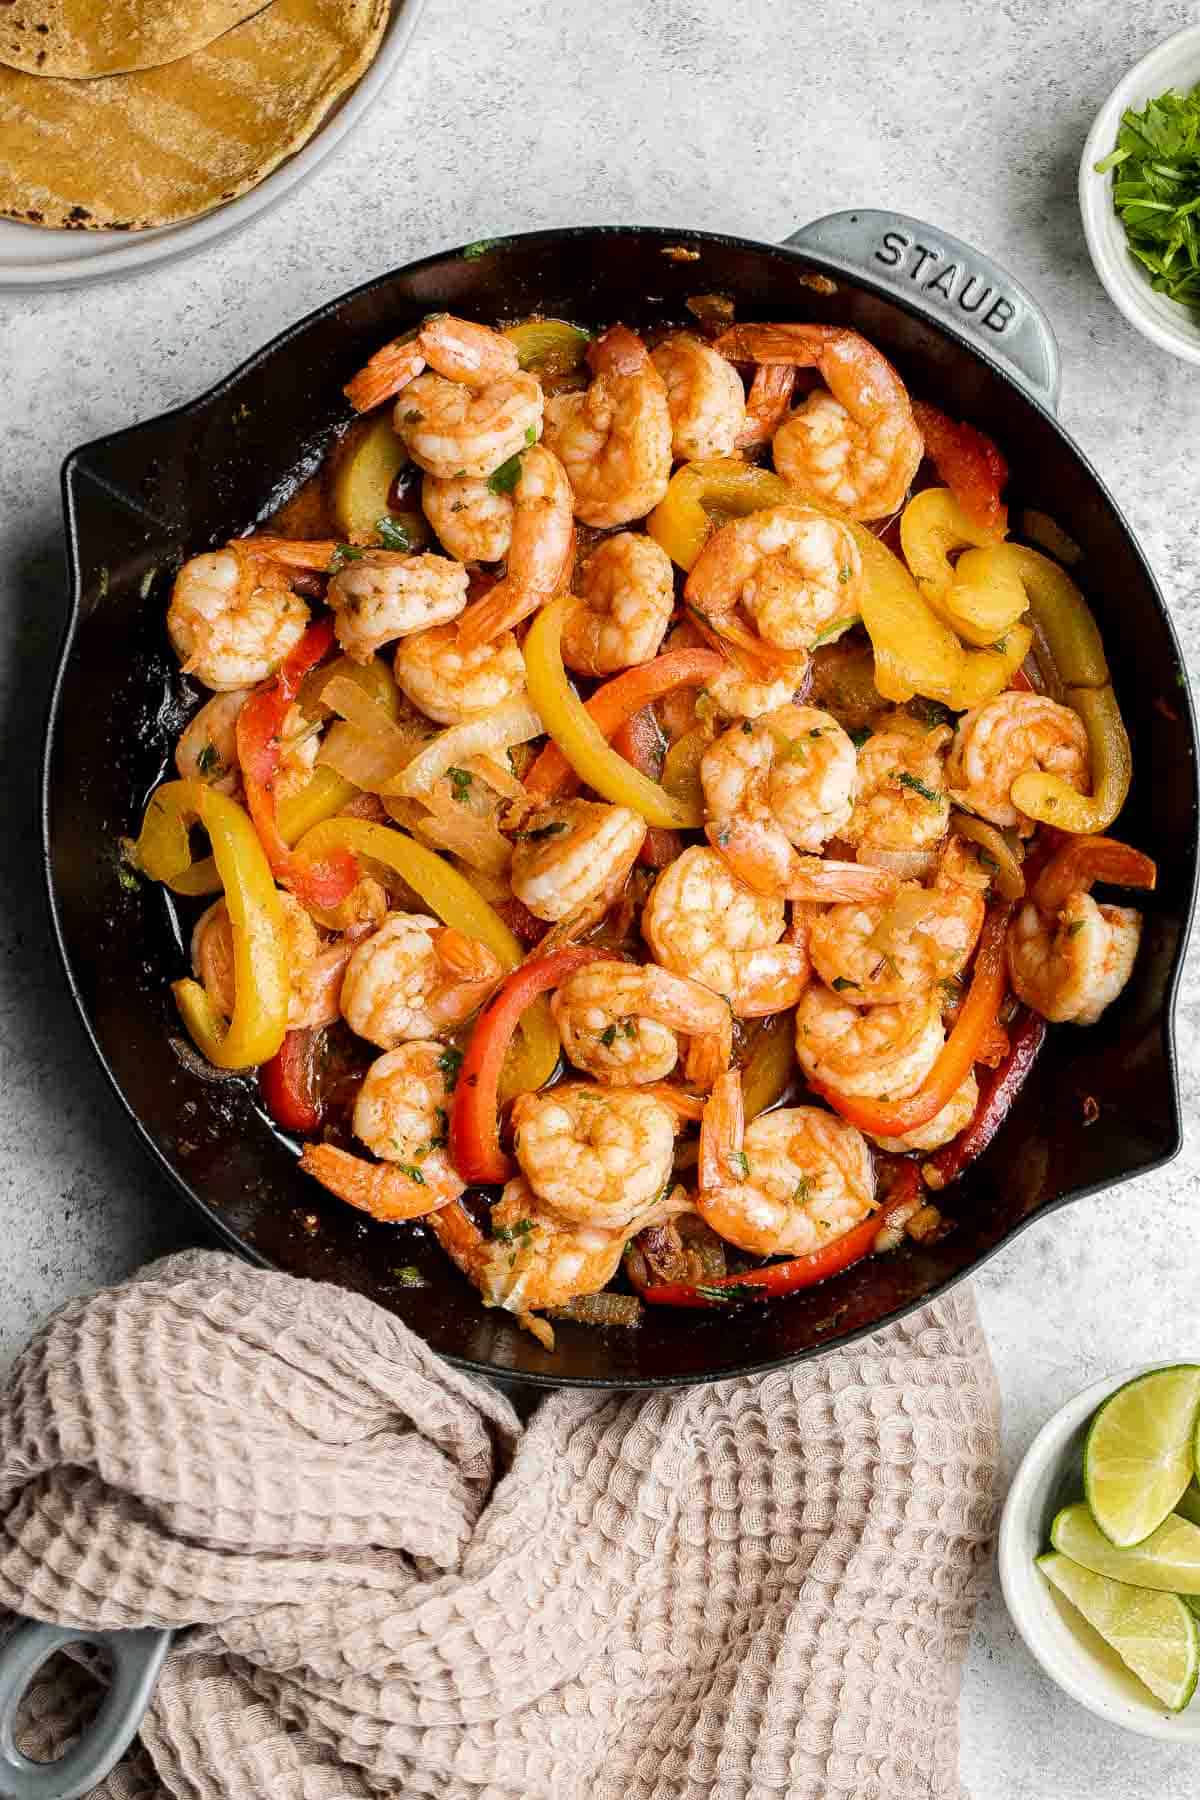
Why You'll Love Shrimp Fajitas
- Quick and easy dinner under 30 minutes. Who doesn't love a meal that comes together (with prep!) in less than 30 minutes? That's why we love shrimp recipes around here!
- Homemade fajita seasoning adds so much flavor. The fajita seasoning blend is easy to make with 5 simple spices and takes just a minute or 2 to combine together with the shrimp. But if you want to make things more convenient, feel free to substitute with 2.5 teaspoons of store-bought fajita seasoning.
- It's healthy and loaded with protein. This shrimp recipe is healthy, low-carb, and gluten-free (if serving with corn tortillas or rice). Plus, shrimp is high in protein and packed with nutrients.
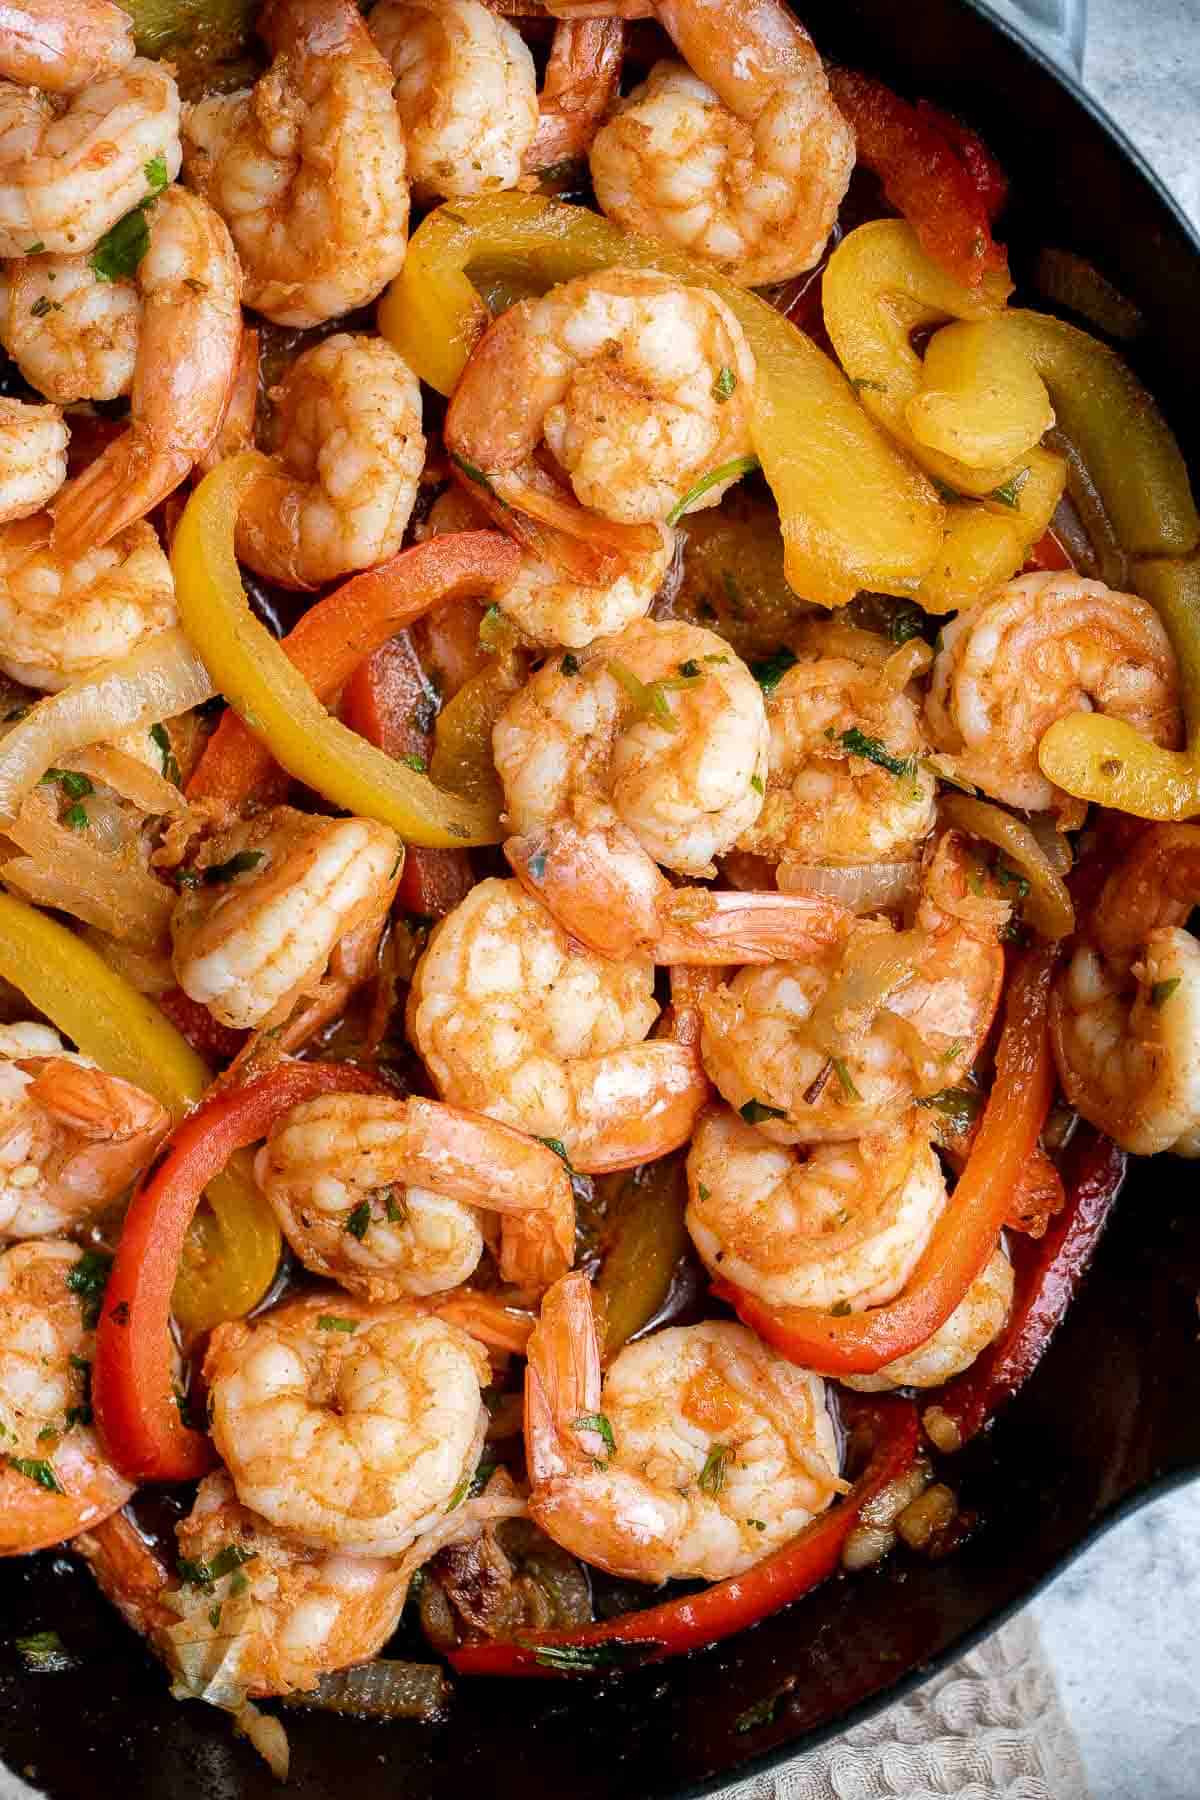
Ingredient Notes
To make these easy and delicious Shrimp Fajitas, you will need the following ingredients (full measurements in recipe card below):
- shrimp - I recommend using large white shrimp but you can feel free to use any type of shrimp that you like. I also kept the tails on when cooking, but I recommend removing the tails if you are planning to serve them with tortillas (for easy eating).
- fajita seasoning - we seasoned the shrimp with a homemade fajita seasoning blend of chili powder, ground cumin, paprika, garlic powder, and dried oregano.
- oil - we used avocado oil, but feel free to use any vegetable oil that you have on hand.
- vegetables - I used a variety of different colored bell peppers (feel free to use any color combination that you want), along with onions and garlic. You can also add in other quick-cooking such as green beans, zucchini, or sliced mushrooms.
- salt and pepper
- lime juice
- cilantro
- tortillas - optional, if serving with tortillas. Feel free to use corn tortillas or flour tortillas.
You will also need measuring cups and spoons, mixing bowl, and large skillet.
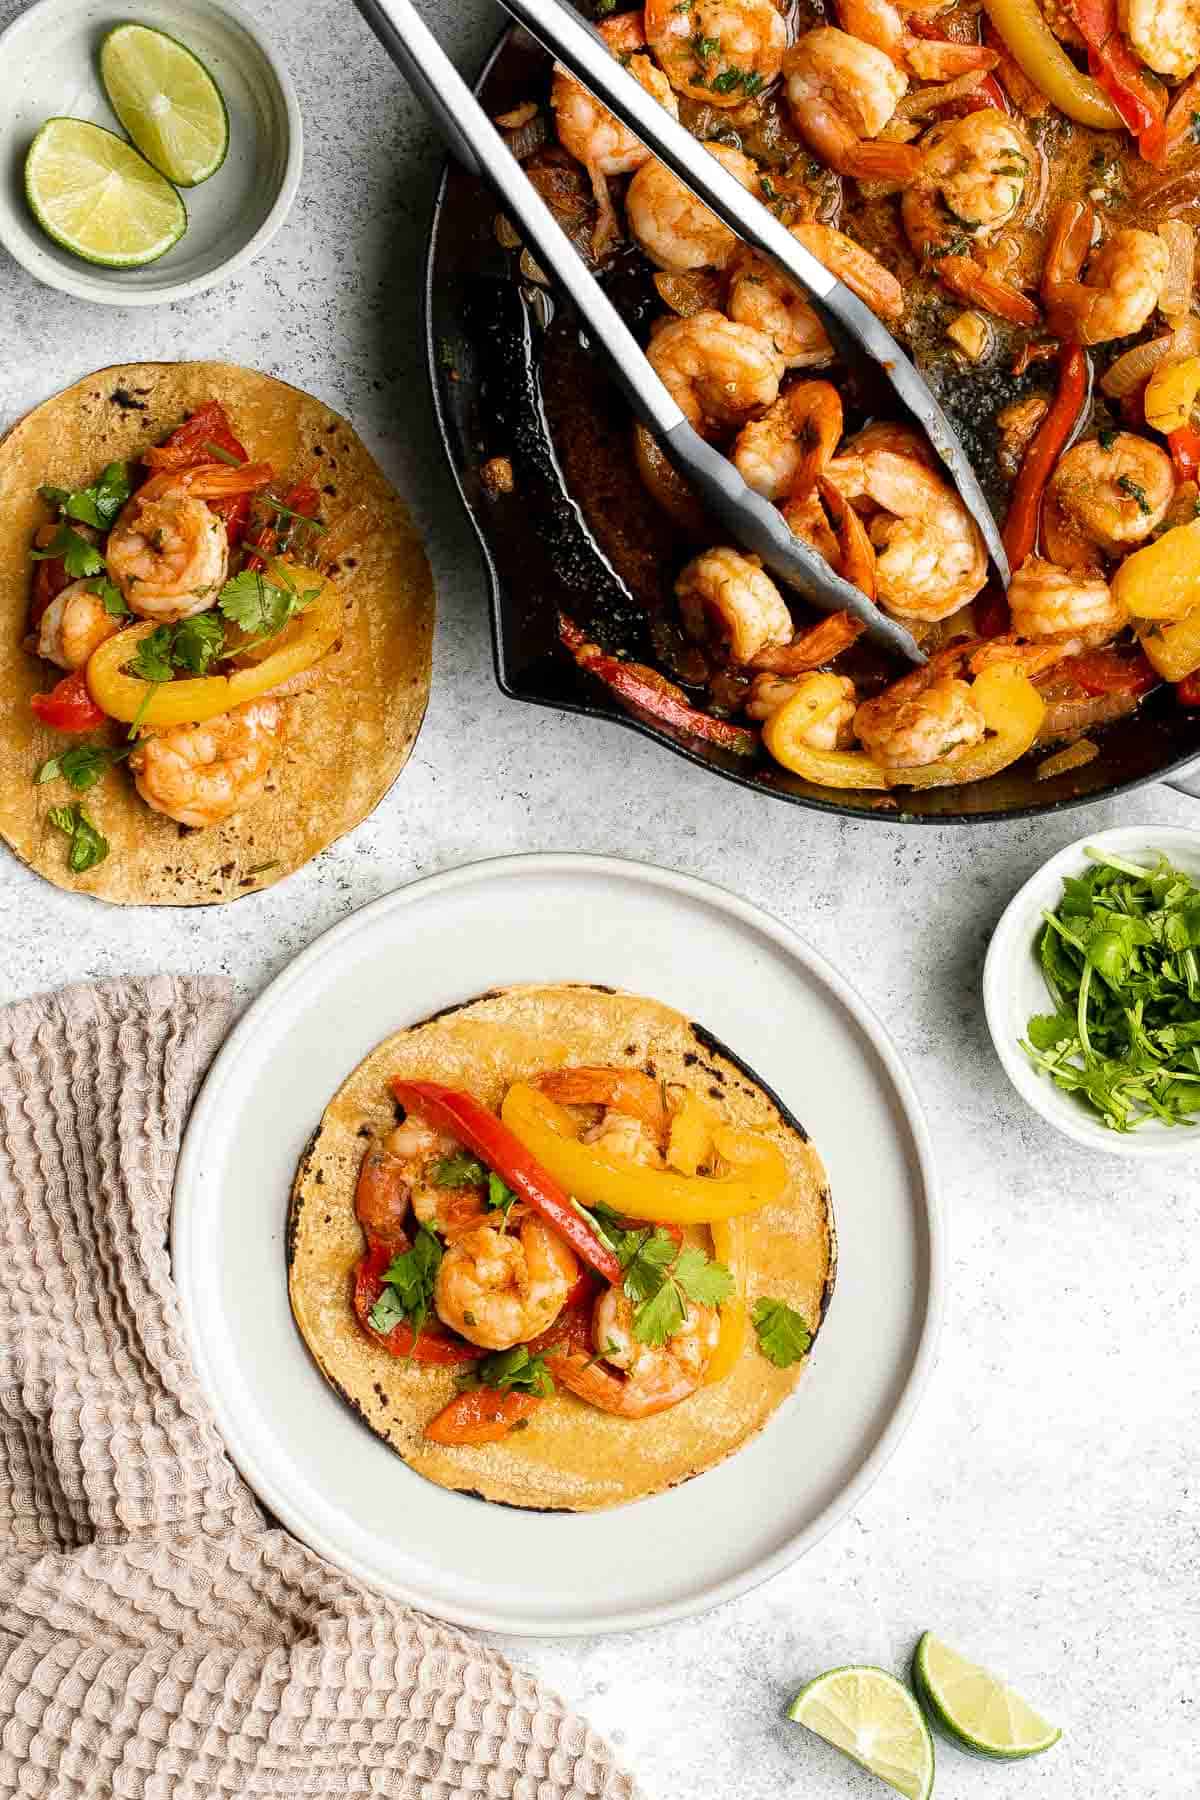
How to Make the Best Shrimp Fajitas
- Season the shrimp. In a medium mixing bowl or ziploc bag, add shrimp, chili powder, cumin, paprika, garlic powder, and oregano. Mix well until evenly coated, and set aside.
- Sauté vegetables. Heat 1 tablespoon oil in a large skillet over medium-high heat until the hot oil sizzles, about 1 minute. Add onion, garlic, and bell peppers and cook until soft, about 3-5 minutes.
- Cook shrimp. Add the seasoned shrimp and the remaining 1 tablespoon oil. Stir well and cook until the shrimp turn pink and is cooked through on both sides, about 4-5 minutes. Season with salt and pepper to taste. Stir in lime juice and cilantro, and mix well to combine.
- Serve. Serve immediately with tortillas or rice, if desired.
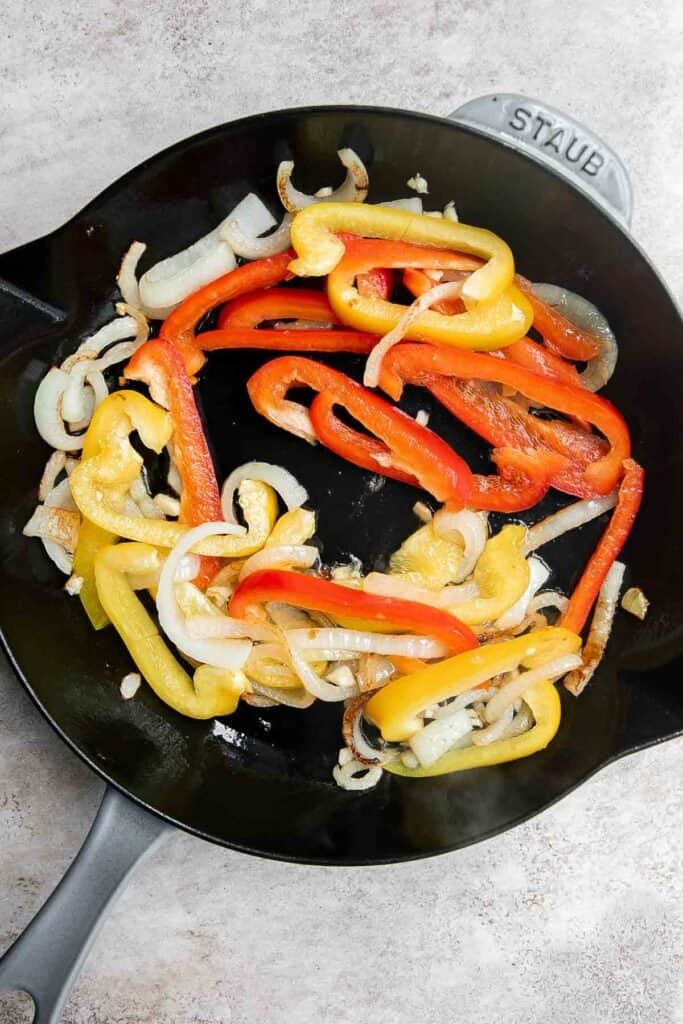
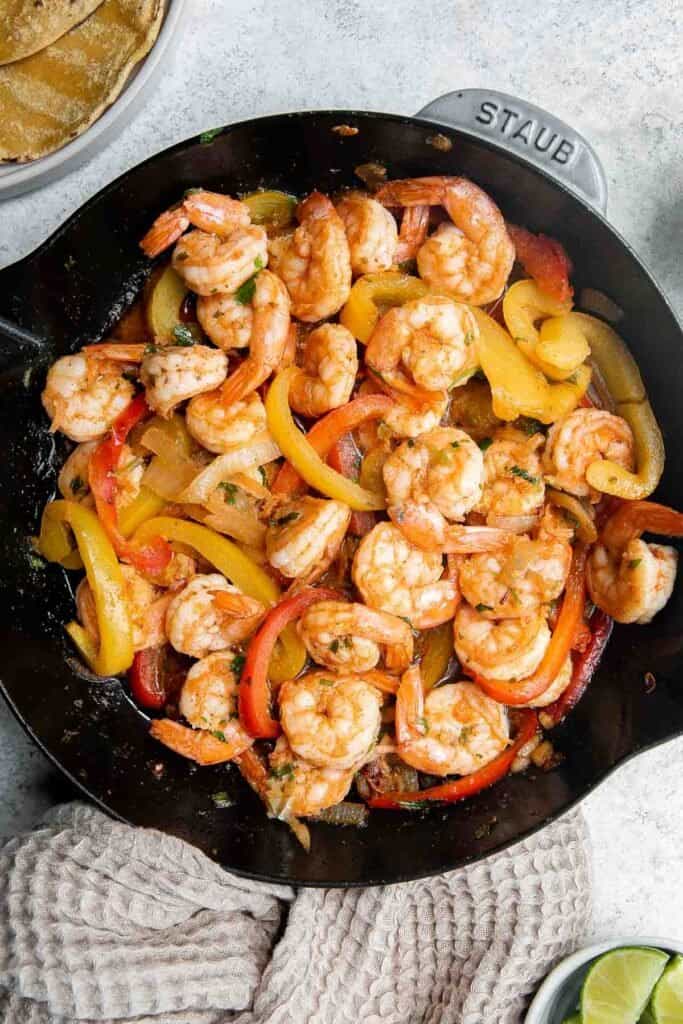
How to Serve
Shrimp Fajitas are delicious served on their own with a side of Salsa or Guacamole, or paired with some Mexican sides including:
- Corn or Flour Tortillas
- Cilantro Lime Rice
- Mexican Street Corn (Elote)
- Creamy Mexican Corn Soup
- Steamed Rice
Storing Instructions
- Make ahead instructions: You can season the shrimp and cut the veggies ahead of time. Store them separately in airtight containers in the fridge for up to 2 days (as long as the shrimp is fresh and doesn't expire beforehand). Once ready to cook, cook according to recipe instructions.
- How to store: Cooked shrimp is best eaten fresh on the day it's cooked or the day after. You can store leftover shrimp fajitas for about two days in an airtight container in the refrigerator.
- How to reheat: To reheat leftover shrimp fajitas, preheat a covered pan with a splash of water on medium-low heat. Add the shrimp and heat until warmed through, about 2 minutes. You can also enjoy leftover shrimp fajitas cold over Shrimp Taco Salad.
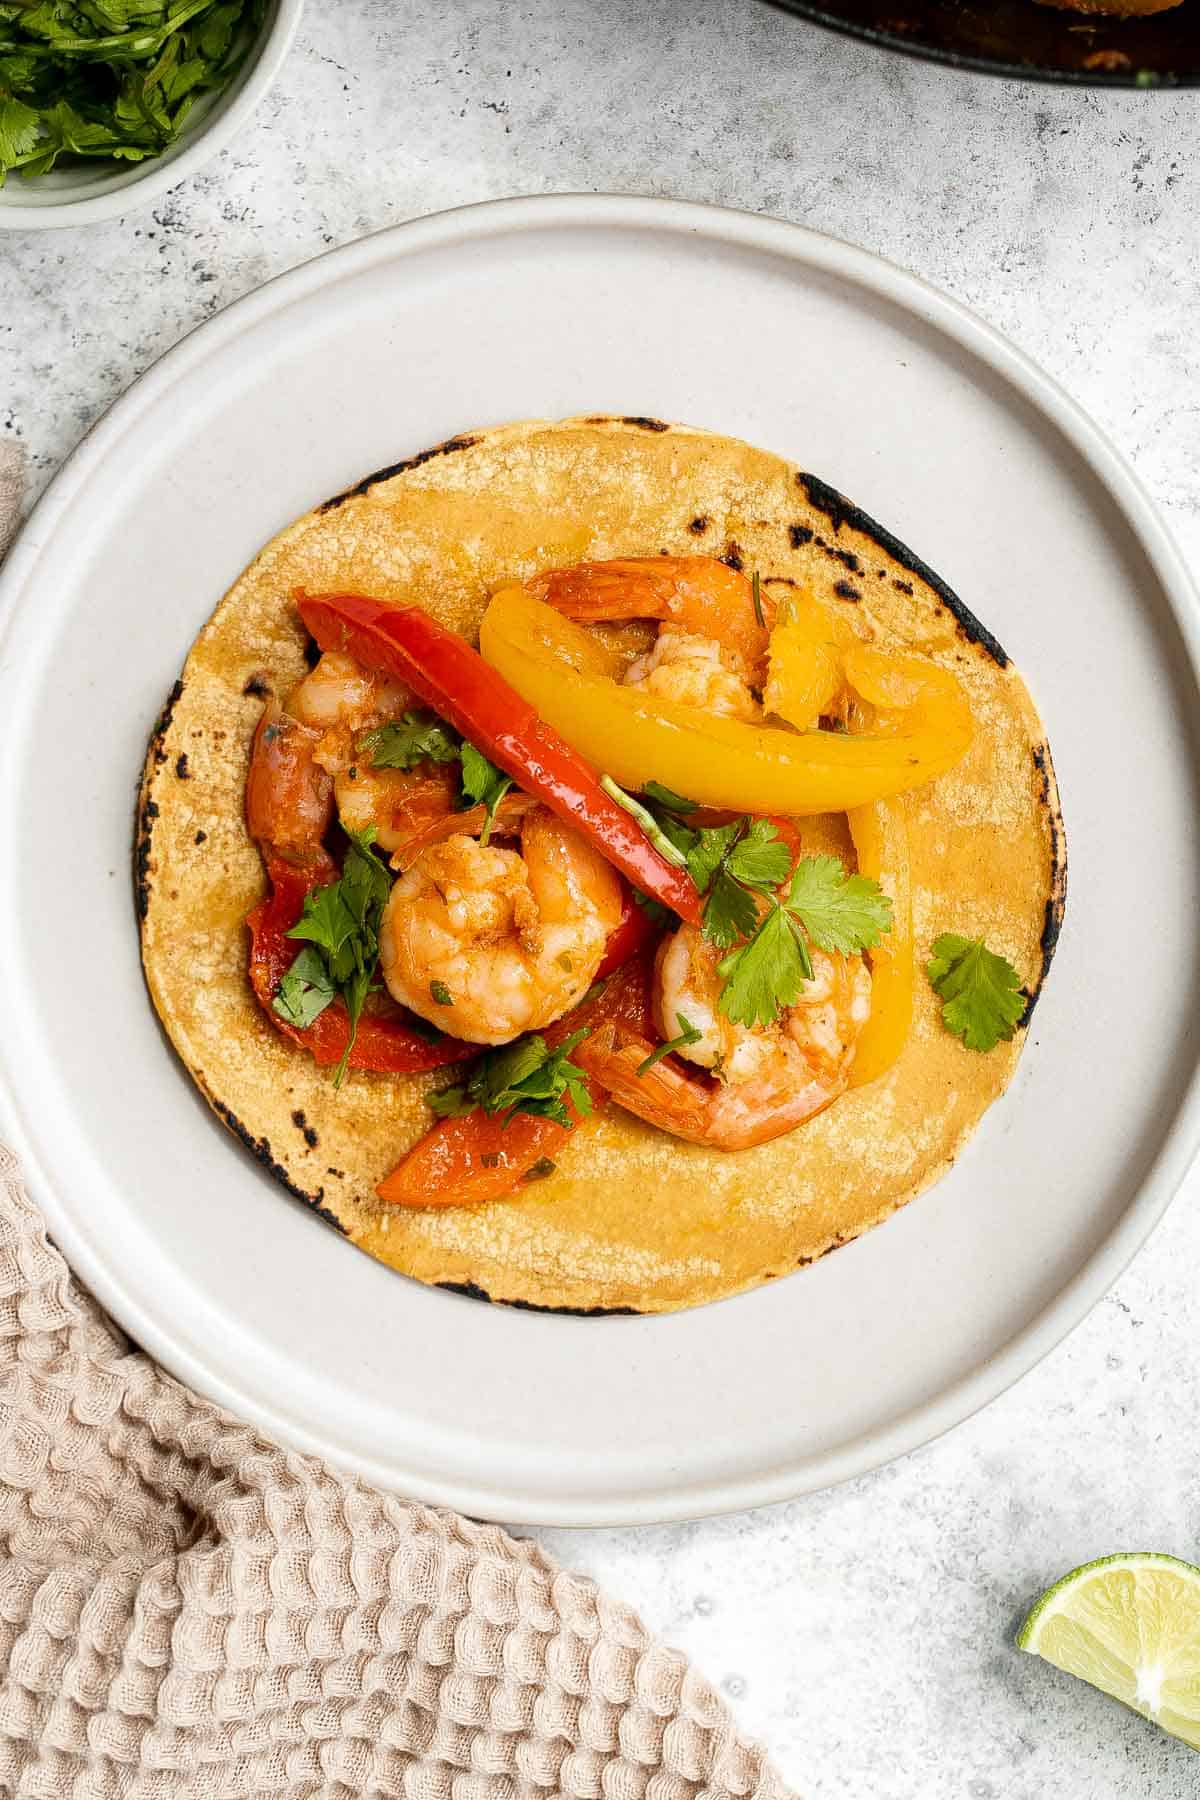
More Shrimp Recipes
- 30 Best Shrimp Recipes
- Air Fryer Mexican Shrimp
- Garlic Butter Shrimp
- Baked Coconut Shrimp
- Garlic Shrimp Skewers
- Shrimp Cakes
Tried this recipe?
I'd love to hear what you think! Leave a comment and rating below to share your feedback. Your reviews help others discover this recipe and help me keep creating more free recipes for you. Snap a photo and tag me on social media @aheadofthyme too.
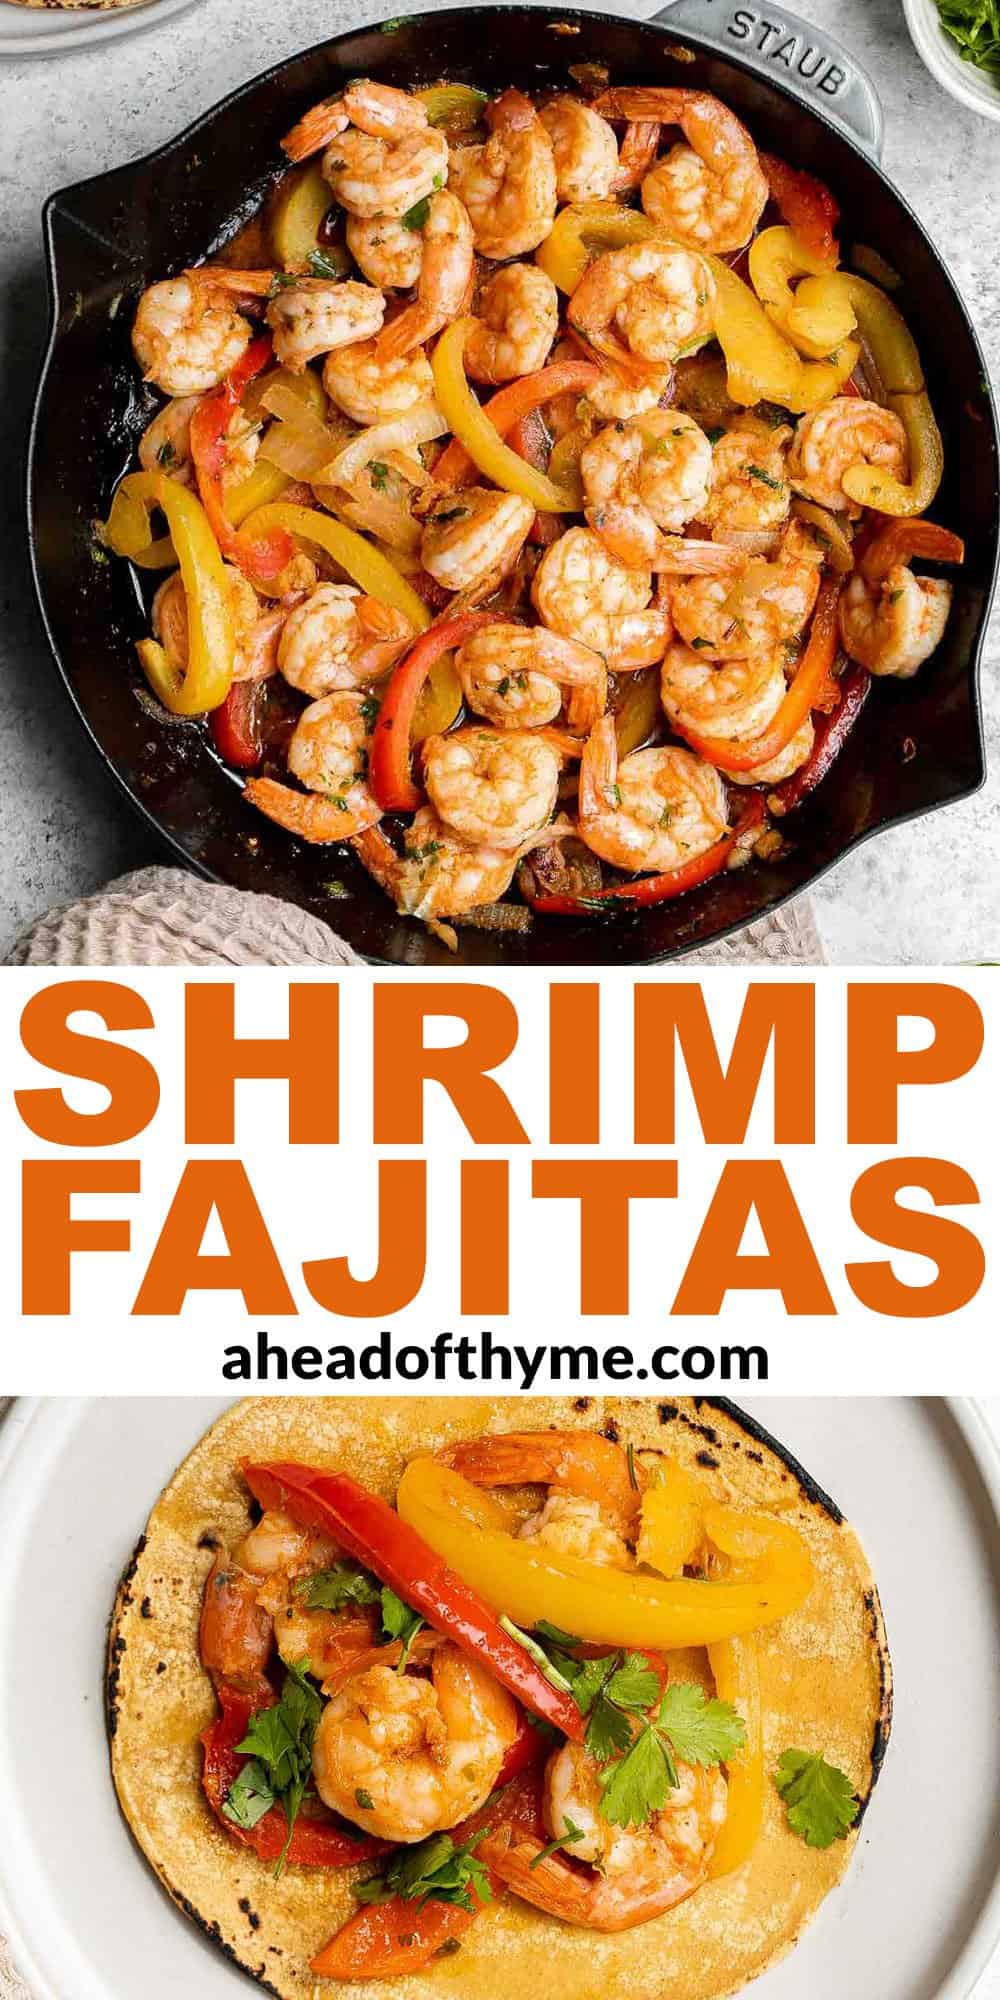
Vanilla Pudding
Homemade vanilla pudding is a rich, decadent, and creamy no bake dessert that you can make easily at home with 7 simple pantry staple ingredients and some patience letting it set.
So say good-bye to boxed pudding mixes or store-bought pudding cups because making vanilla pudding from scratch is better (no artificial flavors or filler ingredients here!) and tastes better too!
Why You'll Love Homemade Vanilla Pudding
- It's a creamy, indulgent dessert. This delicious homemade vanilla pudding is made rich by using whole milk and adding egg yolks and butter. You don't want to skip out on any of these ingredients because they're what make this vanilla pudding so decadent!
- It's easy to make homemade pudding (and better than store-bought!). To be fair, this vanilla pudding isn't as easy as making pudding from a store-bought pudding mix packet - but it's pretty close! Simply combine the ingredients over the stovetop, then cool before letting the pudding set in the fridge. Plus, with homemade you know exactly what ingredients are going in there.
- It's perfect to serve a crowd - both adults and kids. I love making vanilla pudding for celebrations because it's a real crowd-pleaser. Instead of chilling the pudding in a large bowl, I portion it into ceramic ramekins or small dessert glasses. Then, I cover each individual portion and store in the fridge. When it's time to serve, I remove the plastic wrap and top it with whipped cream.
Ingredients and Substitutions
To make this delicious Vanilla Pudding, you will need the following ingredients (full quantities in the recipe card below):
- sugar
- cornstarch - this is what thickens up the pudding.
- salt
- egg yolks
- whole milk
- butter
- vanilla extract
- ice cubes - for chilling the pudding in a water bath.
You will also need measuring cups and spoons, saucepan, and mixing bowls.
How to Make the Best Vanilla Pudding from Scratch
- Combine ingredients and cook. In a medium saucepan, whisk together sugar, cornstarch, salt, and egg yolks until well blended. Whisk in the milk and heat over medium heat, stirring often, about 5-8 minutes.
- Lower heat. Once the mixture starts to bubble, turn the heat down to low and continue cooking until thickened, whisking often, about 1-2 minutes more. Note that pudding will be pourable but will continue to thicken more as it cools. Remove from heat and immediately whisk in the butter and vanilla, stirring until smooth.
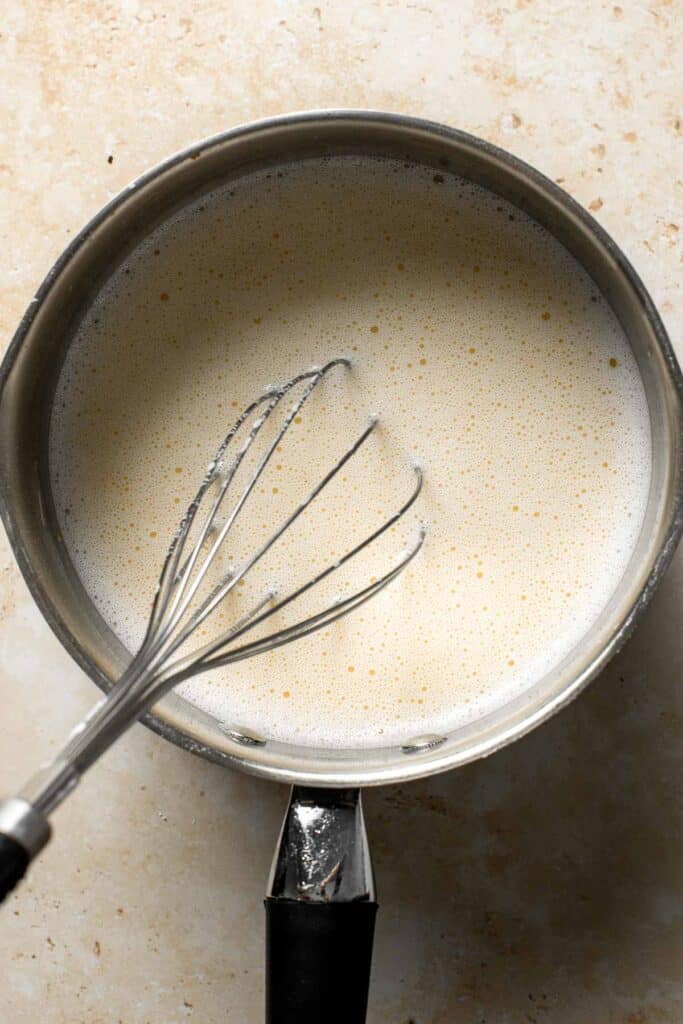
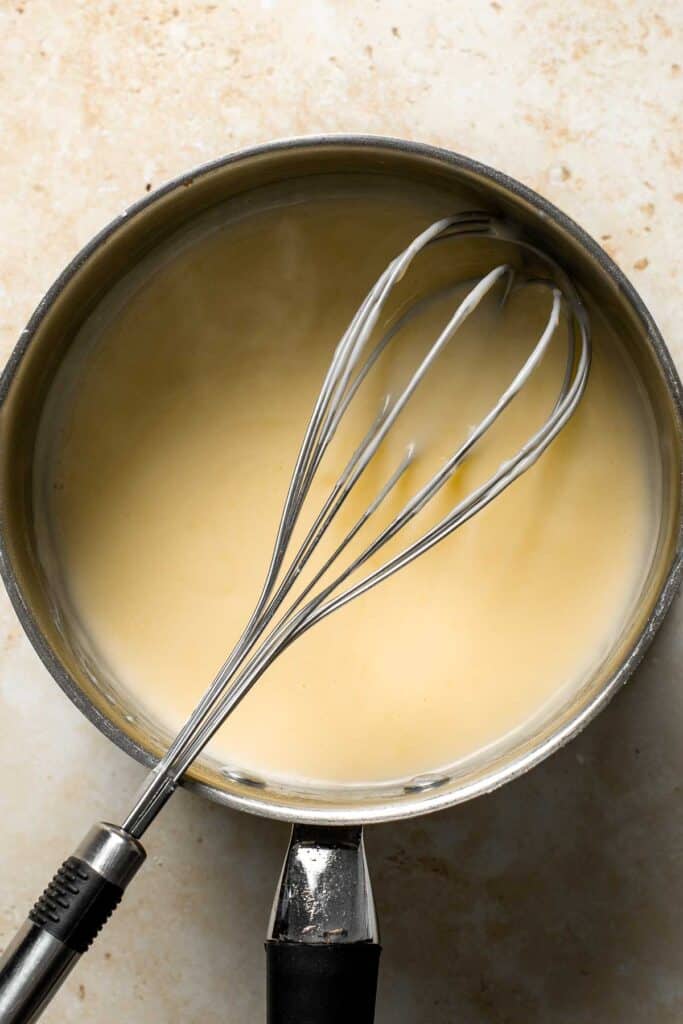

- Remove lumps. If you notice any lumps, pass the pudding through a fine-mesh sieve over a large heatproof bowl to remove any lumps. Skip this if you don't notice any lumps.
- Chill. Prepare a large bowl with some water and ice to make an ice bath. Place the saucepan directly into the ice bath, stirring occasionally, until the pudding reaches room temperature, about 30 minutes. Cover and refrigerate until the pudding has chilled through completely, at least 4 hours (up to 2 days).
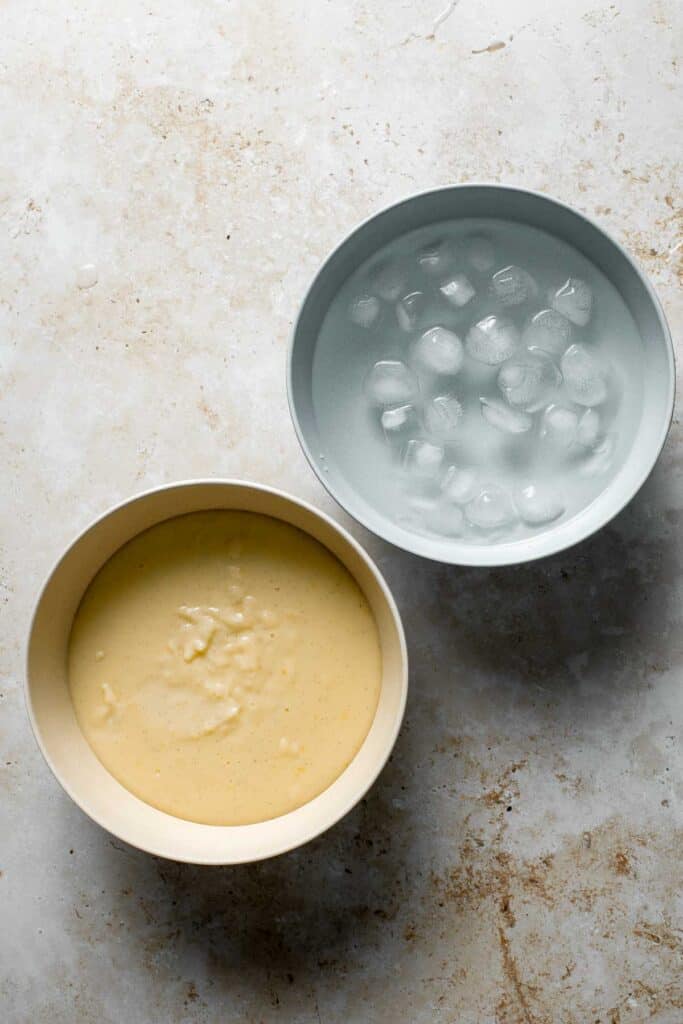
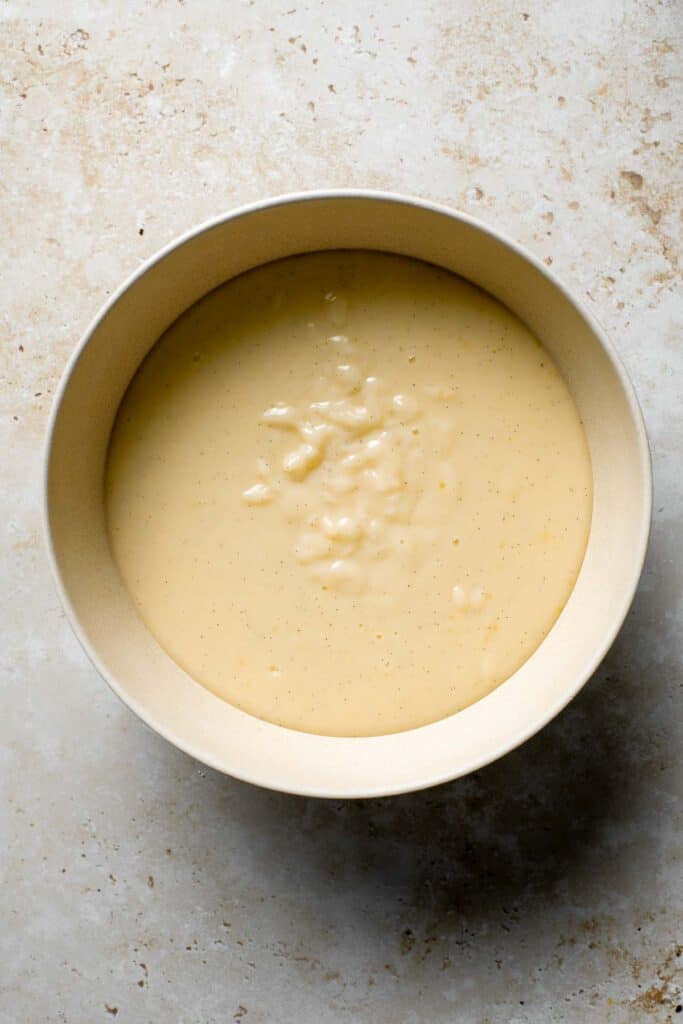
How to Serve
This homemade vanilla pudding tastes amazing on its own, but that doesn't mean you can't give it a special twist. You can make this pudding recipe even more decadent by adding:
- whipped cream and raspberries (or other fruit)
- chocolate or caramel sauce
- graham cracker crumbs
- oreo cookie crumbs
- bananas and vanilla wafers (to make Banana Pudding!)
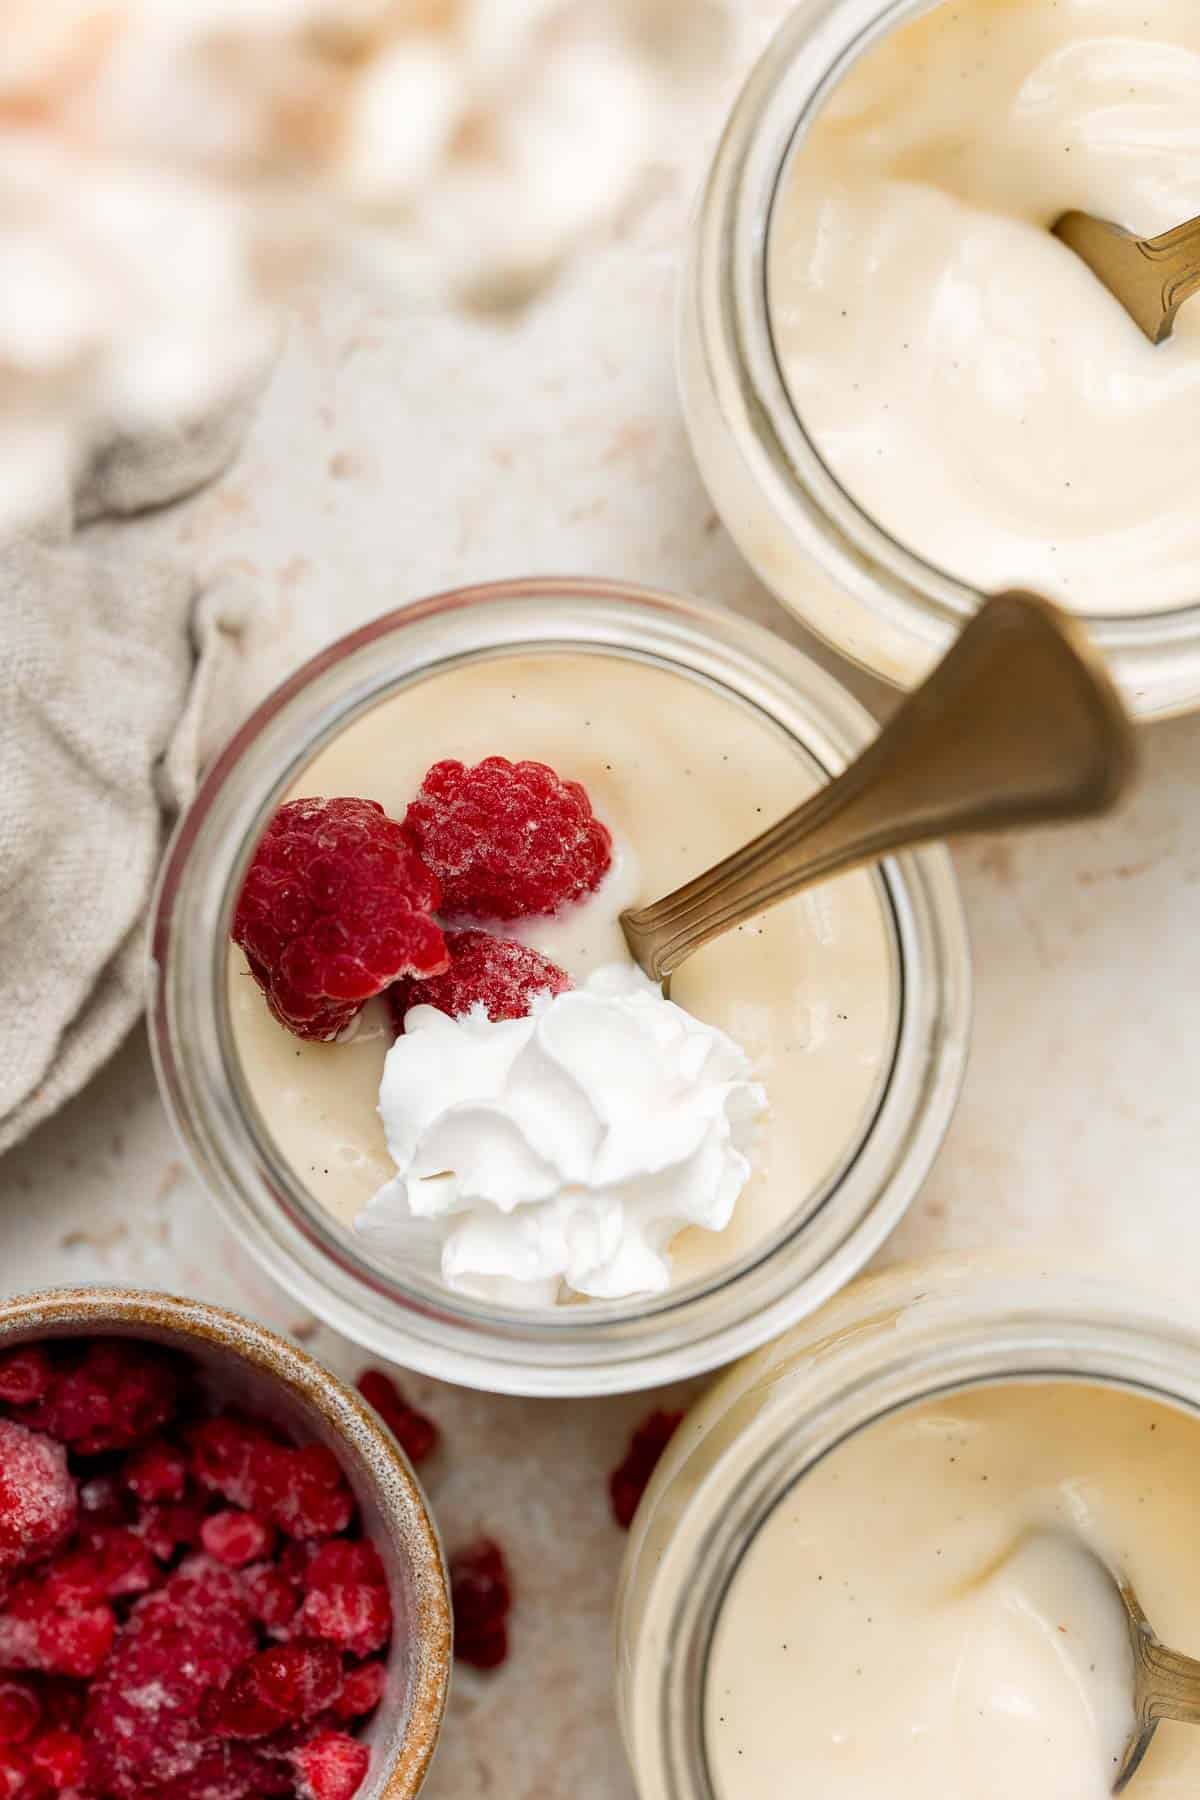
Recipe Tips and Tricks
- How to prevent lumps: To avoid lumping, ensure that your egg yolks and dry ingredients are blended well before adding any milk. Then, add the milk slowly, making sure to fully incorporate it before adding more milk. This method can help you avoid lumps and skip step four!
- How to store pudding: Homemade pudding will last for up to one week days when stored in an airtight container in the fridge. Try to avoid leaving your pudding out at room temperature for more than 1-2 hours.
- How to freeze pudding: You can freeze homemade pudding in a freezer bag or airtight container for up to 3 months in the freezer. The consistency will turn into a rich and creamy ice cream. You can enjoy it frozen or allow it to thaw overnight in the refrigerator before serving.
More No Bake Dessert Recipes
- Banana Pudding
- Nutella Mousse
- Mango Sago
- No Bake Blackberry Cheesecake
- Strawberry Frozen Yogurt
- Peanut Butter Eggs
Tried this recipe?
I'd love to hear what you think! Leave a comment and rating below to share your feedback. Your reviews help others discover this recipe and help me keep creating more free recipes for you. Snap a photo and tag me on social media @aheadofthyme too.
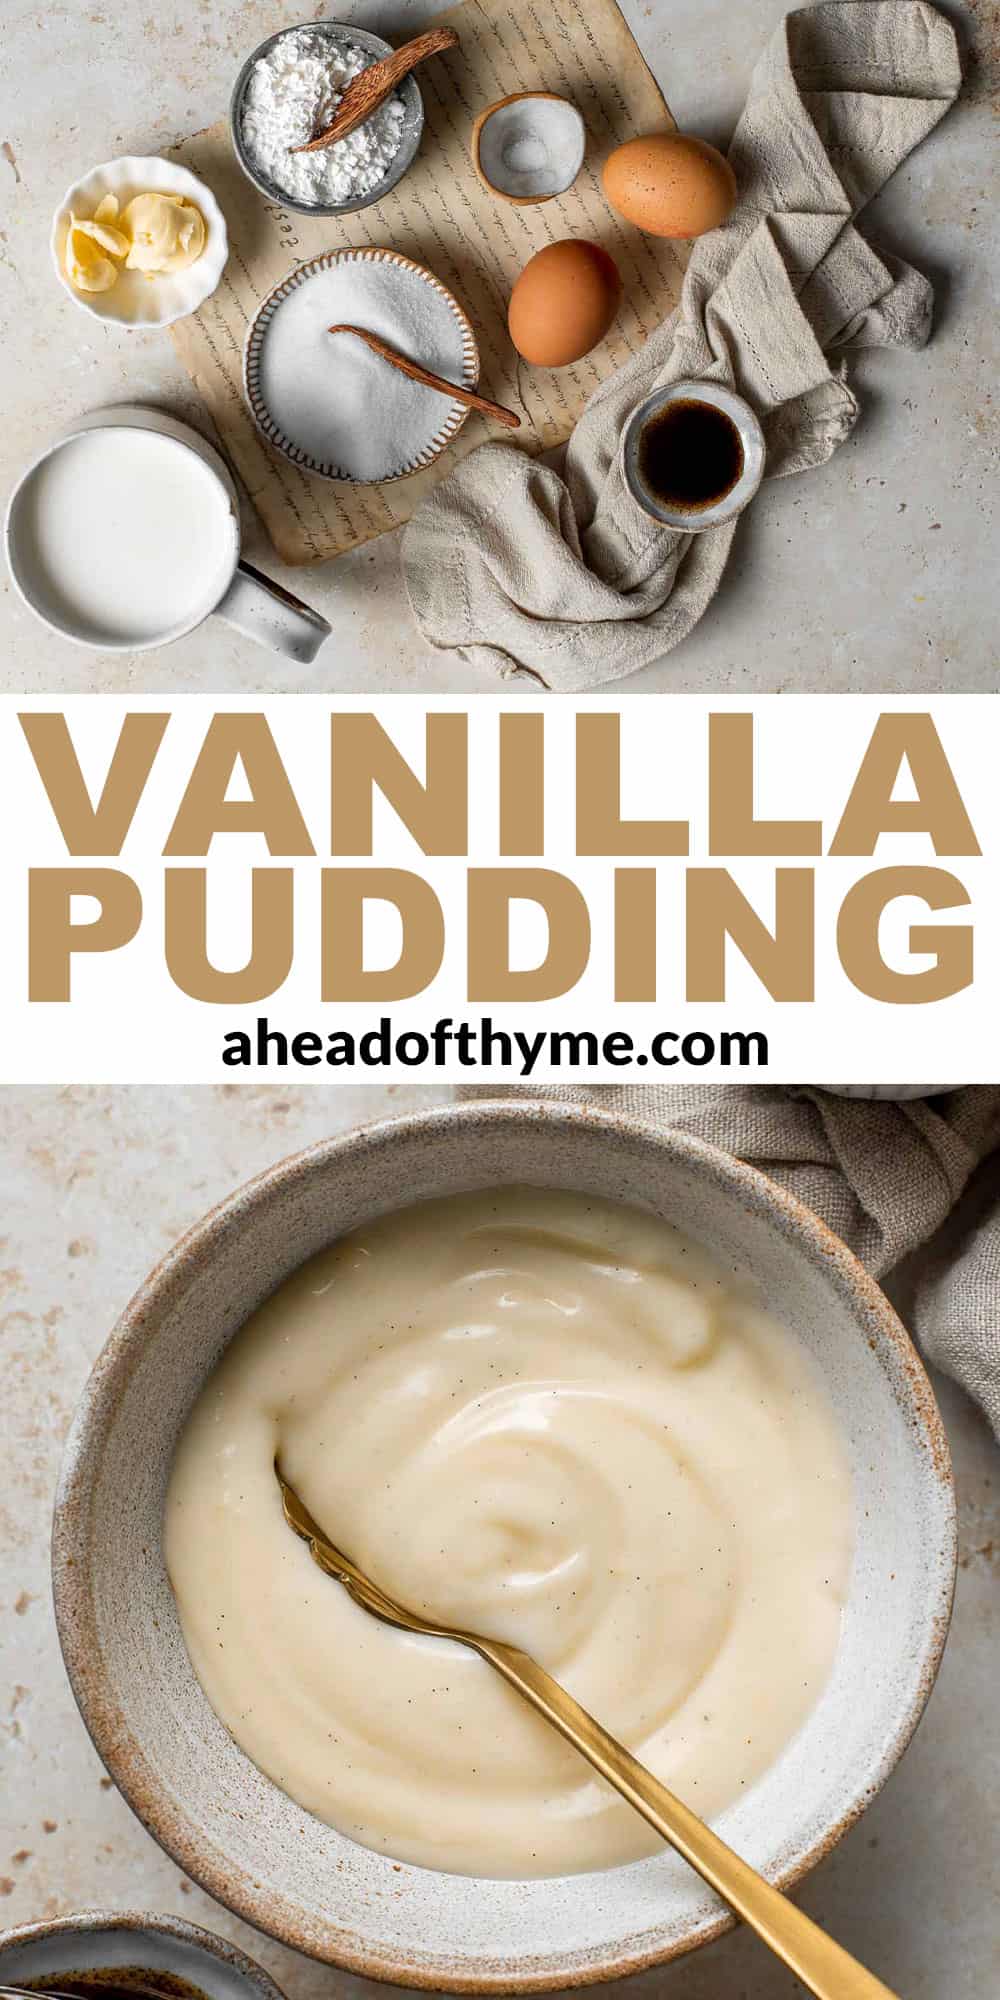
Shrimp Scampi
Shrimp scampi is an American-Italian dish that is quick and easy to make in just 15 minutes. Tender shrimp is coated in a delicious and flavorful buttery sauce made with garlic and lemon juice.
Serve this homemade shrimp scampi as an appetizer or for a light dinner over pasta, zucchini noodles, mashed potatoes, or rice. This quick shrimp recipe is perfect for busy weeknights but fancy enough for special occasions too.
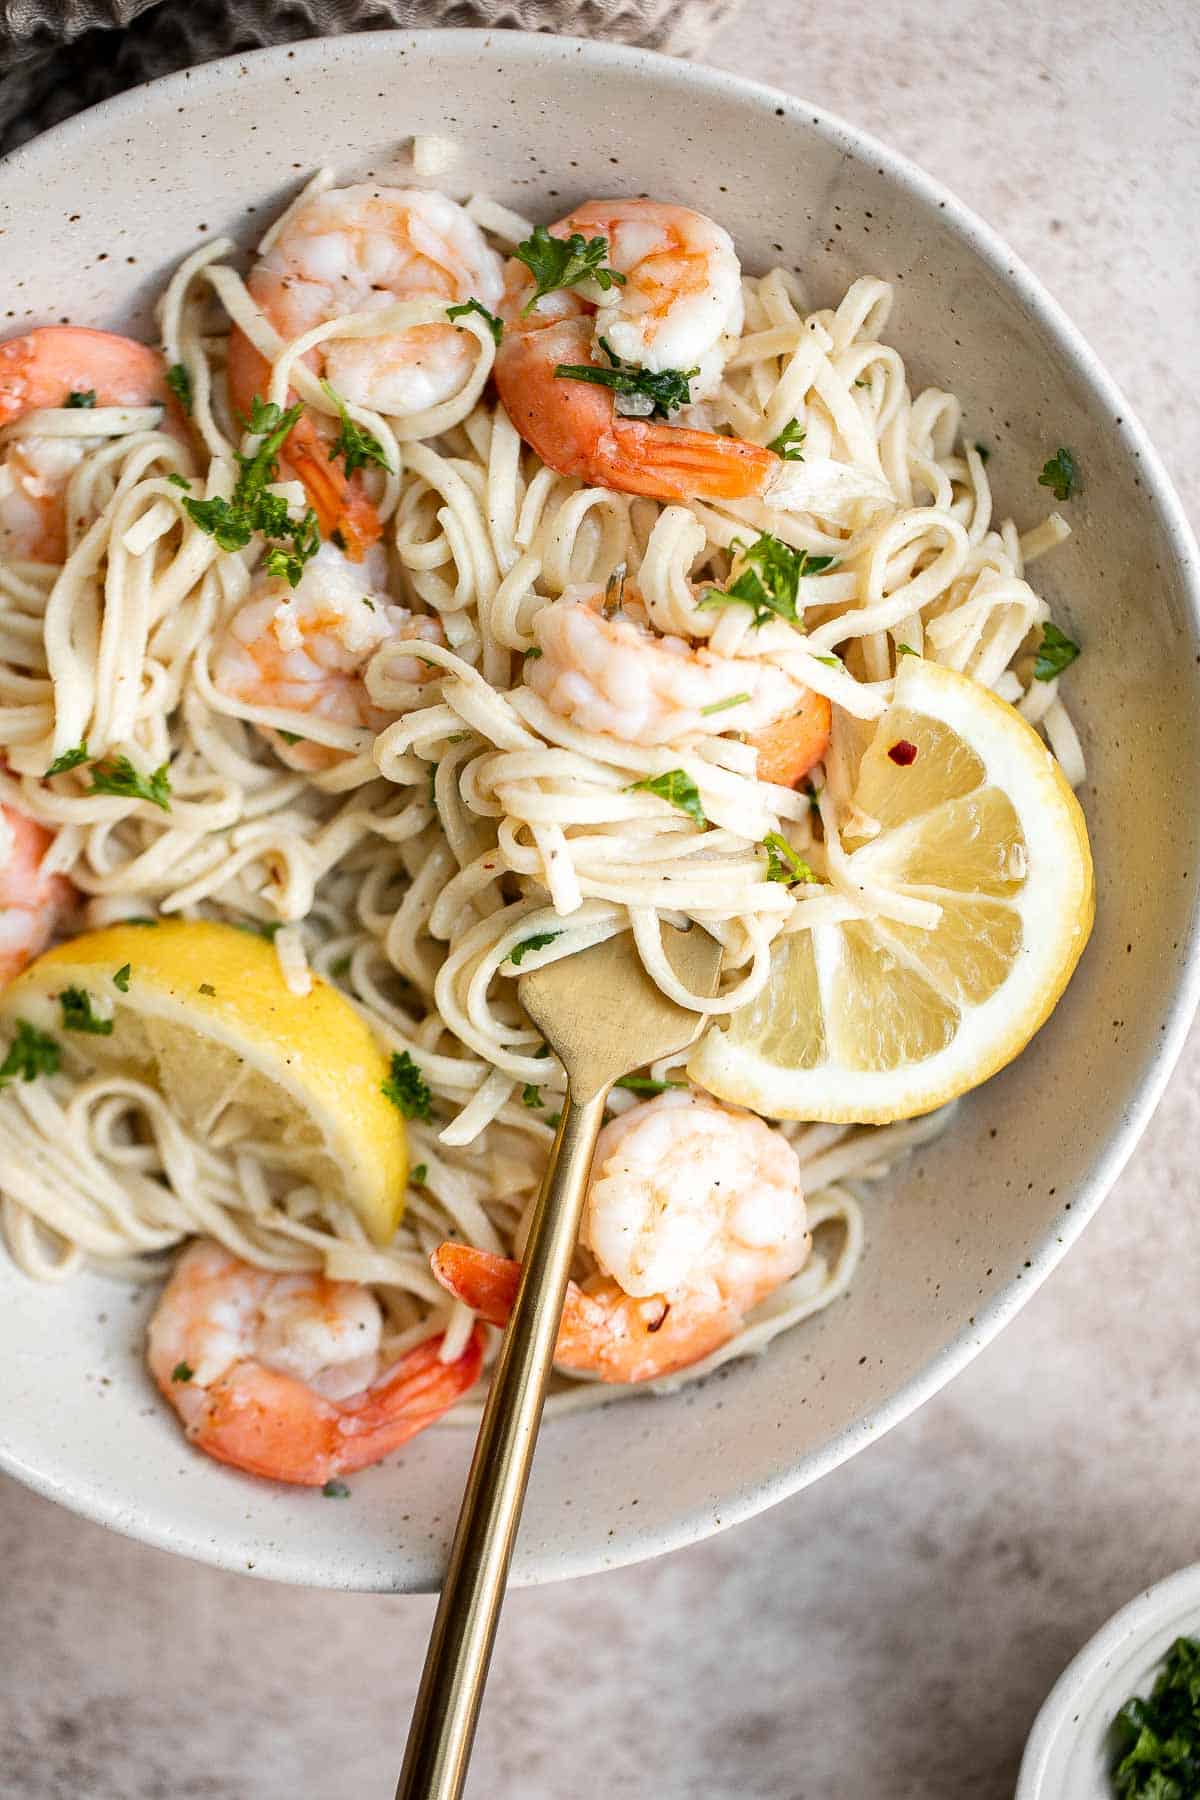
Why You'll Love Shrimp Scampi
- It's a quick 30-minute dinner. Shrimp scampi is ready in just 25 minutes from start to finish, which makes it perfect for those busy weeknights when you want something on the dinner table fast.
- The buttery scampi sauce. It's all about that buttery, lemony, scampi sauce. The best part? It is so simple to make. All you need it so start with some butter, cook the shrimp, then add stock (or wine) and some lemon juice. Be sure to have your pre-measured ingredients on hand as things move quickly and you don't overcook the shrimp.
- It's easy yet impressive. This shrimp scampi recipe is incredibly easy to make, but that doesn't mean your guests will know that. You can serve these on weeknights but it's impressive and fancy enough for a dinner party or on Date Night.
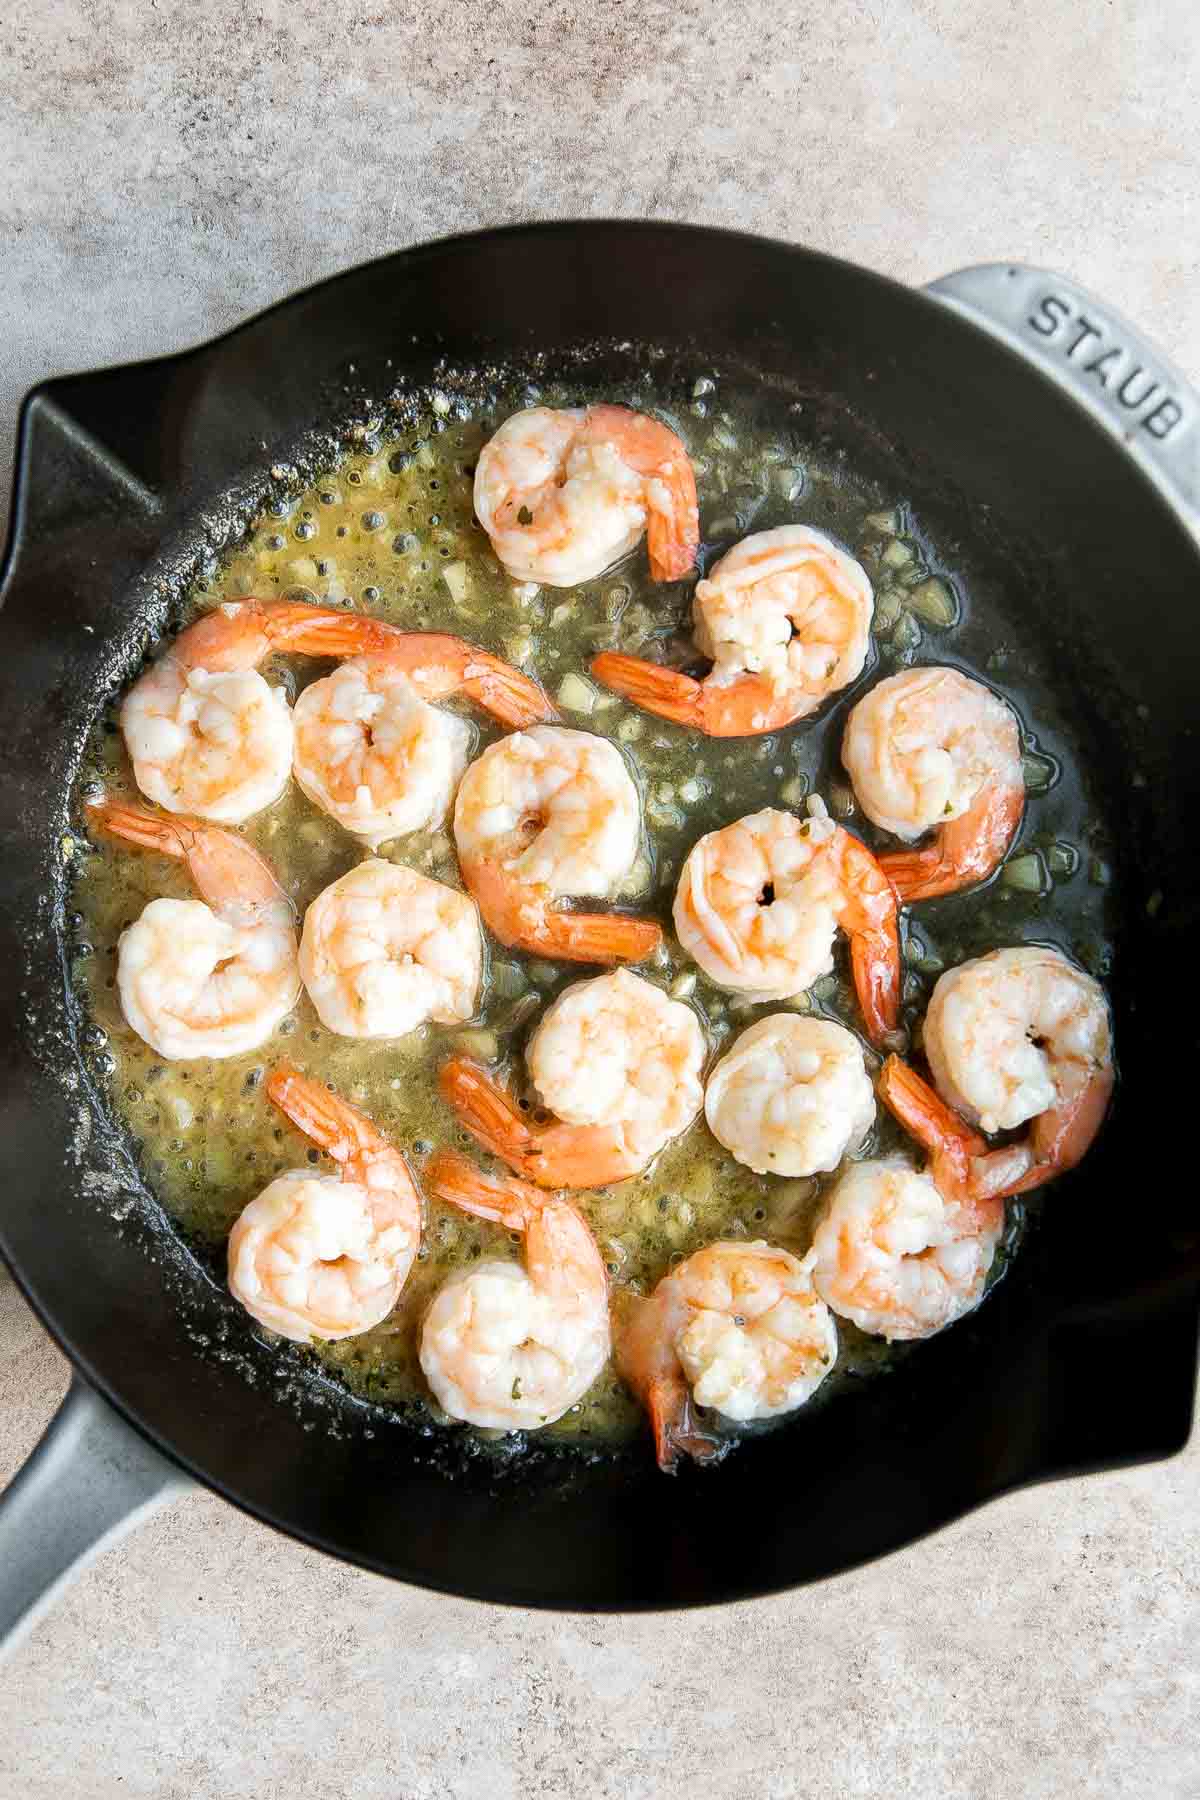
Ingredient Notes
To make this easy Shrimp Scampi, you will need the following ingredients (full measurements in recipe card below):
- pasta - we used linguine, but any long pasta will work such as angel hair, spaghetti, or fettuccine.
- butter
- garlic
- chicken stock (or white wine)
- shrimp - we used large white shrimp but you can use any type of shrimp that you want. I kept the tails on, but feel free to remove them for easy eating. Do this when you are preparing the shrimp (peeling and deveining) before cooking.
- salt and pepper
- lemon juice
- parsley
You will also need measuring cups and spoons, a large skillet (I used a 10-inch cast-iron skillet), and a large cooking pot for the pasta.

How to Make the Best Shrimp Scampi
- Cook pasta. Bring a large pot of salted water to a boil over medium-high heat. Add linguine and cook until al dente according to package directions, about 10 minutes. Reserve ¼ cup of the hot pasta water in a bowl. Drain the noodles well and set aside.
- Sauté aromatics. heat butter in a large skillet over medium-high until bubbly, about 1 minute. Add garlic and sauté until fragrant, about 1 minute. Pour in chicken stock and bring it to a simmer, about 1 minute.
- Add shrimp. Add shrimp and cook for 2-3 minutes on each side until they turn pink. Season with salt and pepper.
- Add seasoning. Add lemon juice, parsley, and ¼ cup reserved pasta water. Stir well until smooth and simmer until slightly thickened, about 1-2 minutes
- Toss in pasta. Add cooked linguine and toss well to coat evenly. Top with chili flakes (if desired) and serve immediately.
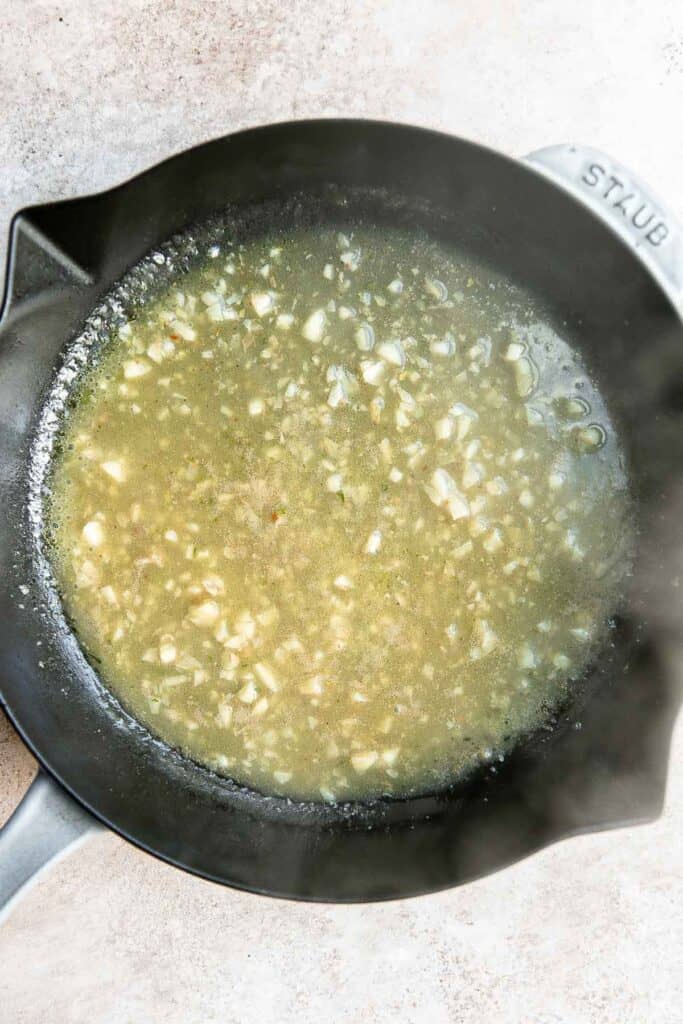
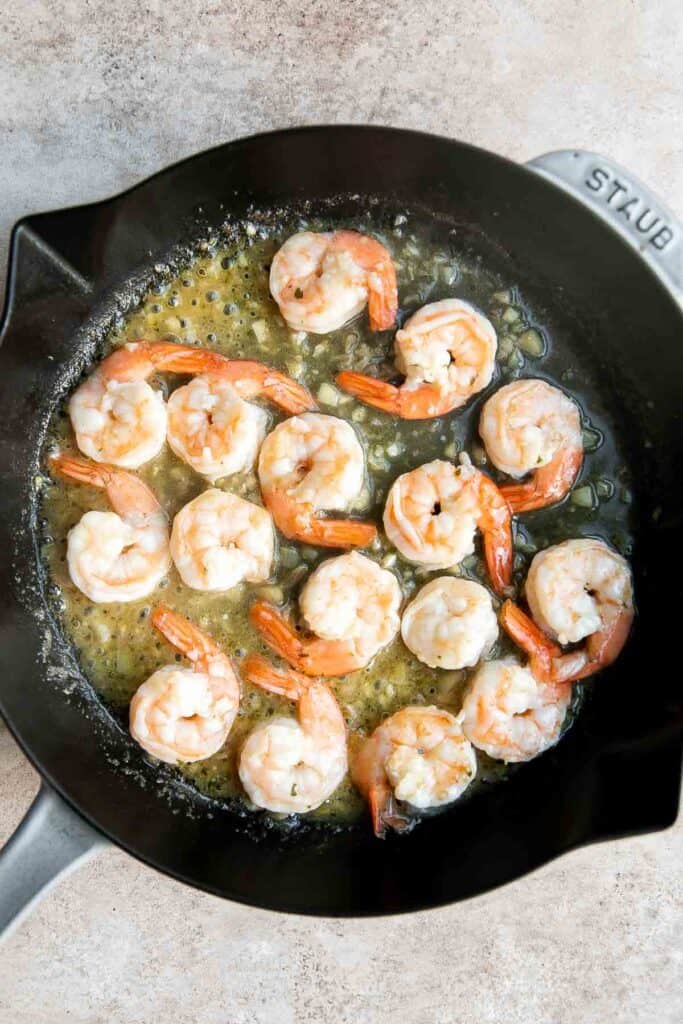
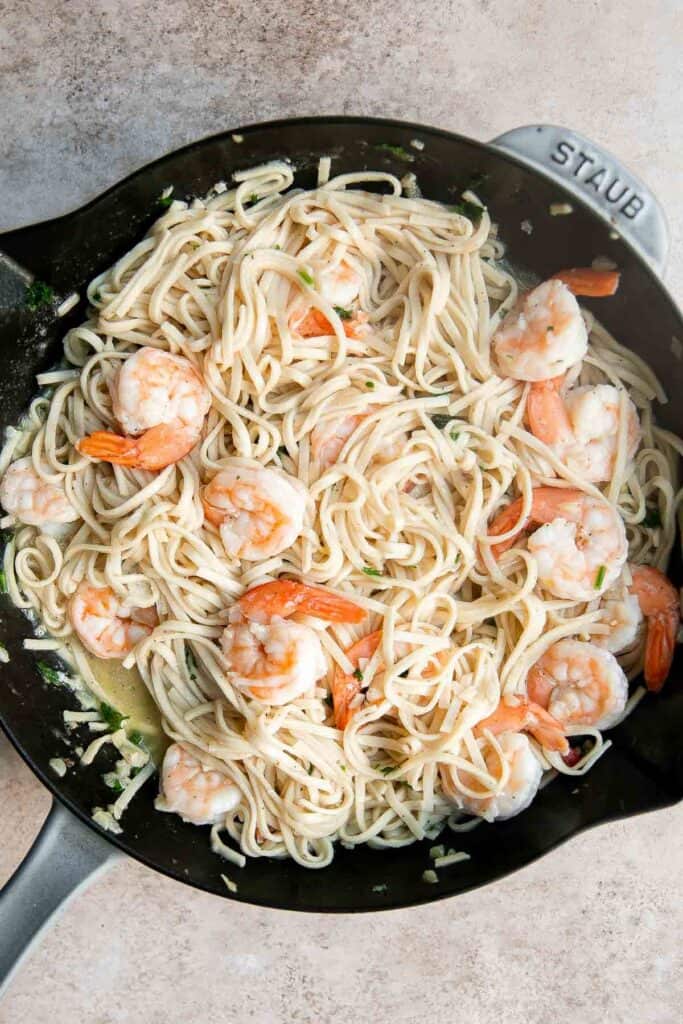
How to Serve
You can serve Shrimp Scampi is on its own, but I recommend serving it over pasta, rice, or potatoes. Some of favorite recipes to serve it with are:
Recipe Tips and Tricks
- Tips for cooking shrimp: Overcooked shrimp is tough and unpleasant to eat. The trick to making perfectly cooked shrimp is removing it from the heat once the shrimps turn pink and their tails start to curl inward.
- How to store: Shrimp scampi tastes best served fresh. If you have any leftovers, allow it to cool to room temperature. Then, store it in an airtight container in the fridge for up to two days.
- How to reheat: When reheating shrimp scampi, it's important to be mindful to not overcook the shrimp. You can heat this dish in the microwave on medium-low heat for a few minutes or in a pan on the stovetop, also over medium-low heat. In both cases, stir occasionally.

More Shrimp Recipes
- 30 Best Shrimp Recipes
- Garlic Butter Shrimp
- Garlic Shrimp Skewers
- Creamy Garlic Shrimp
- Garlic Shrimp Stir Fry
- Grilled Shrimp Salad
Tried this recipe?
I'd love to hear what you think! Leave a comment and rating below to share your feedback. Your reviews help others discover this recipe and help me keep creating more free recipes for you. Snap a photo and tag me on social media @aheadofthyme too.

Mediterranean Scrambled Eggs
Mediterranean Scrambled Eggs with spinach, tomato, and feta is the perfect breakfast to make when you are short on time but still want to enjoy a delicious and flavorful meal. Loaded with vibrant and bold Mediterranean ingredients, this scrambled egg recipe makes regular eggs more interesting.
Ready in less than 10 minutes (including prep!) with a few simple ingredients, this quick and easy breakfast will give you energy that will last all morning and will leave you feeling full and satisfied.
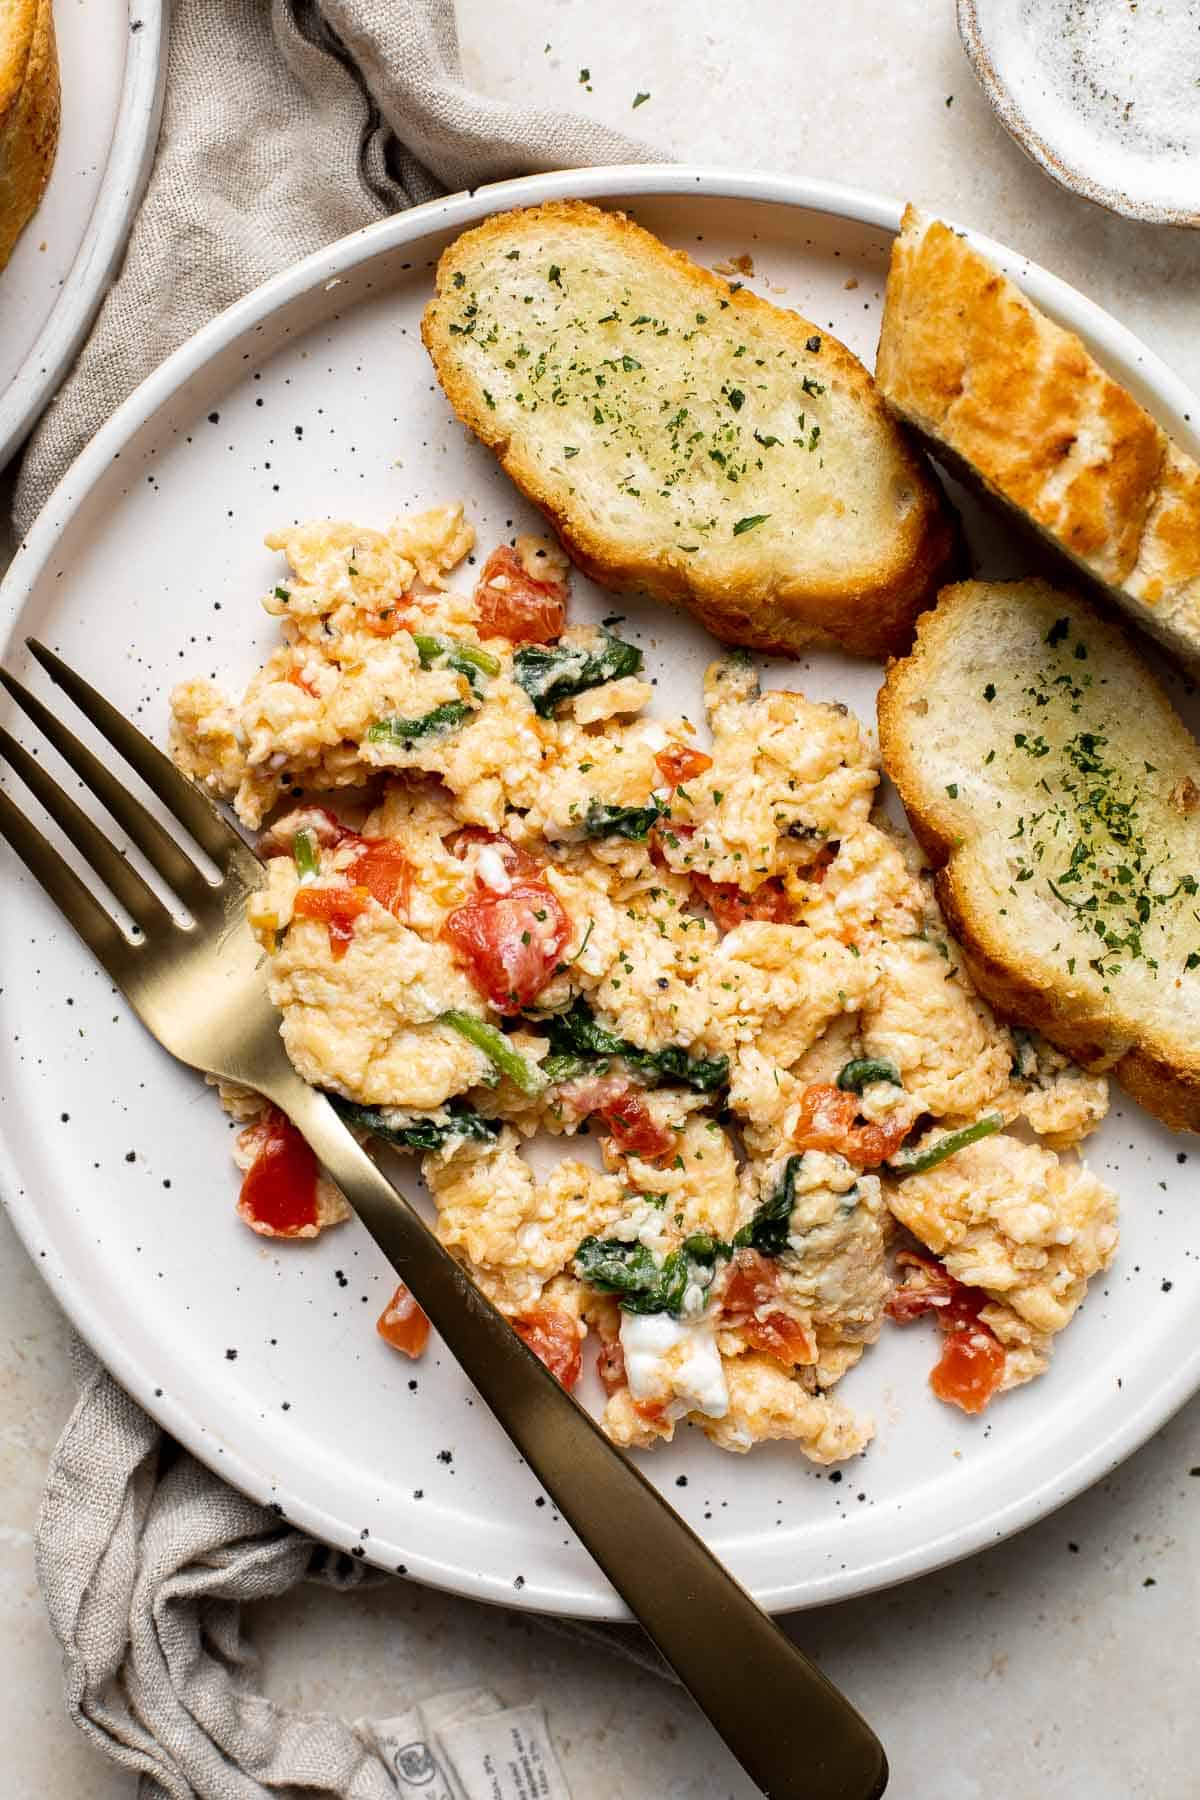
Why You'll Love Mediterranean Scrambled Eggs
- It's fast and easy to make. After you roll out of bed to get ready for your day, a quick breakfast is essential - especially if you're running late. This Mediterranean scrambled egg recipe is ready in under 10 minutes (with prep!), so it can keep you on track.
- Loaded with Mediterranean flavors. A classic omelet is great, but these Mediterranean eggs are better. Fresh tomatoes bring flavor and juiciness, while spinach adds a green kick. Add in the tang of feta cheese, and you've got a well-balanced meal that's as nutritious as it is delicious.
- It makes scrambled eggs exciting. Plain scrambled eggs make a great breakfast but adding in vegetables is one of the best things to switch things up. Not only does it boost the nutrition of your breakfast with added vitamins and minerals - it also keeps breakfast interesting!
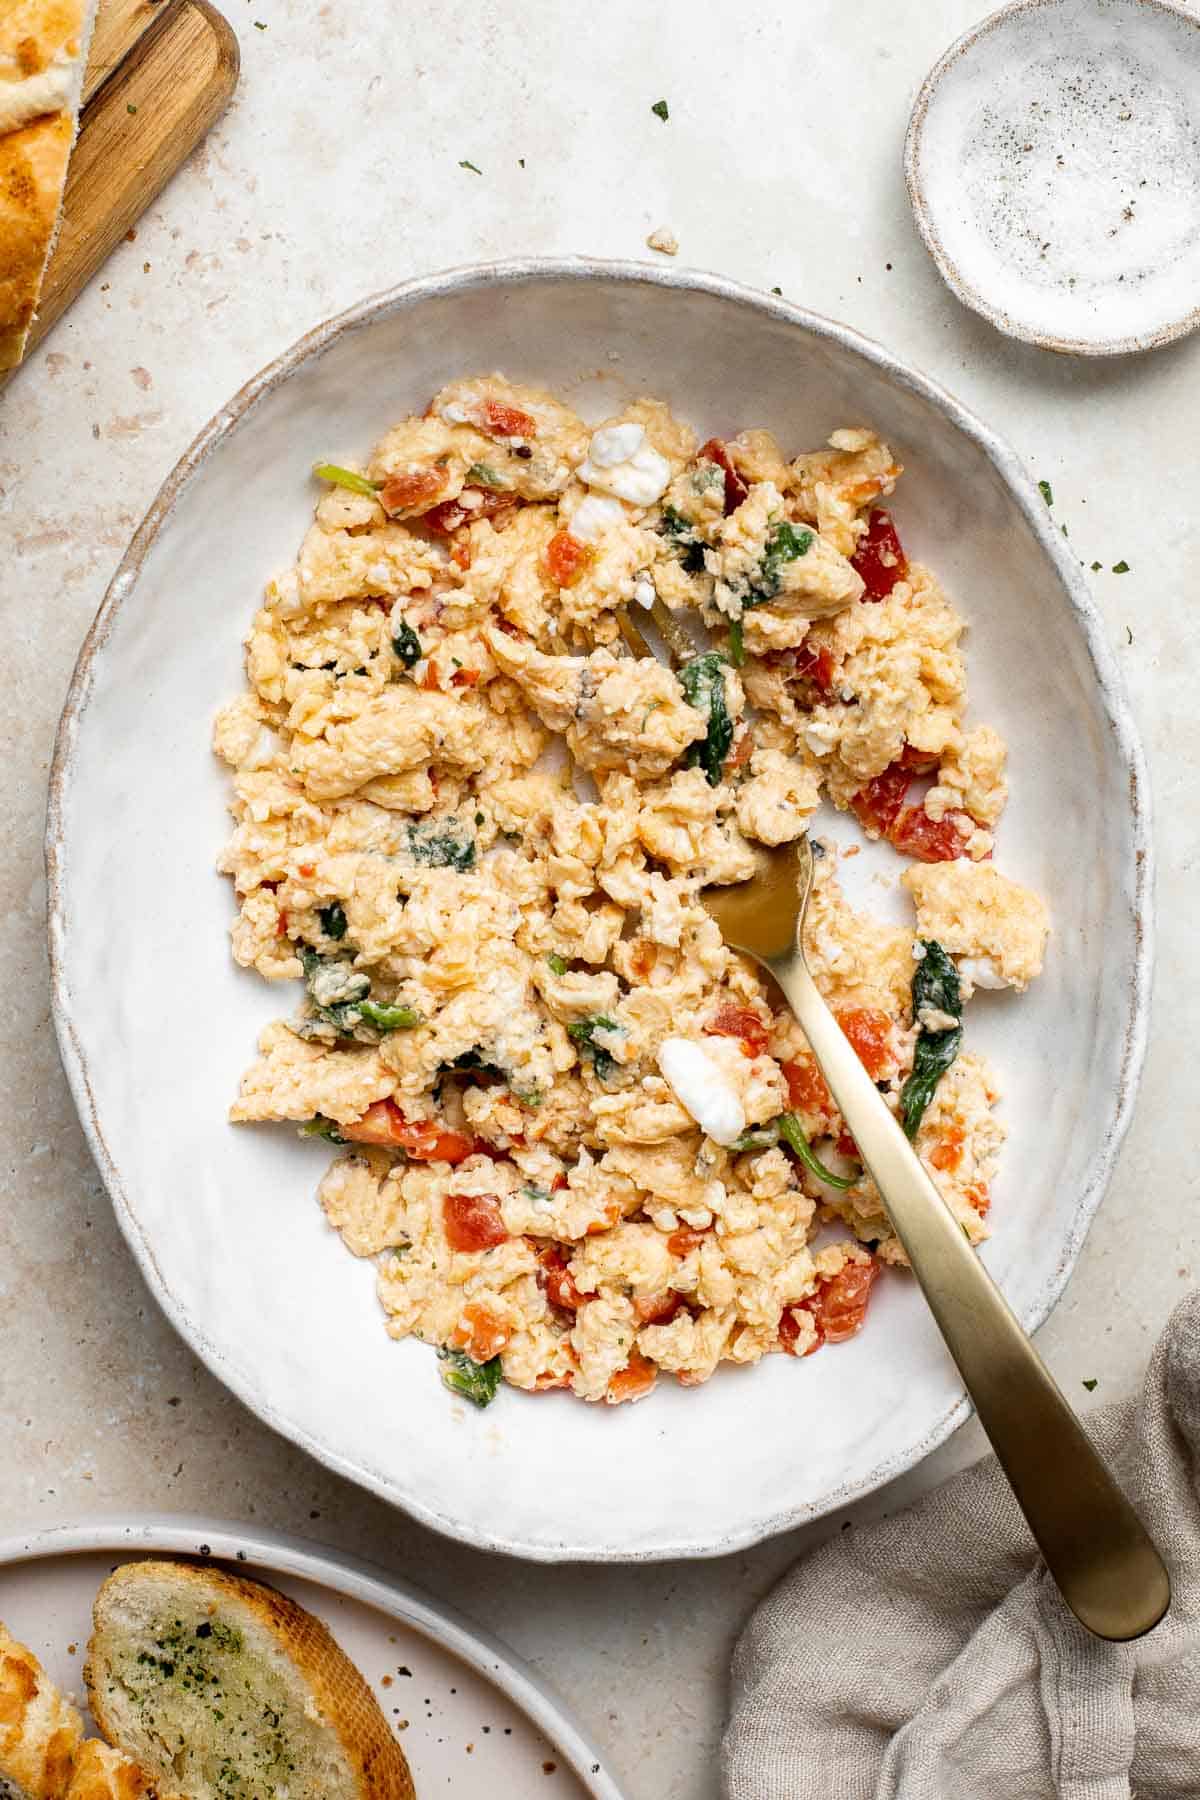
Ingredient Notes
To make quick and easy Mediterranean scrambled eggs, you will need the following ingredients (full measurements in recipe card below):
- eggs
- vegetable oil - for cooking the eggs.
- tomato - you will need to remove all the seeds so that the eggs don't get too soggy.
- baby spinach
- feta cheese - feel free to substitute with goat cheese if you prefer.
- salt and pepper
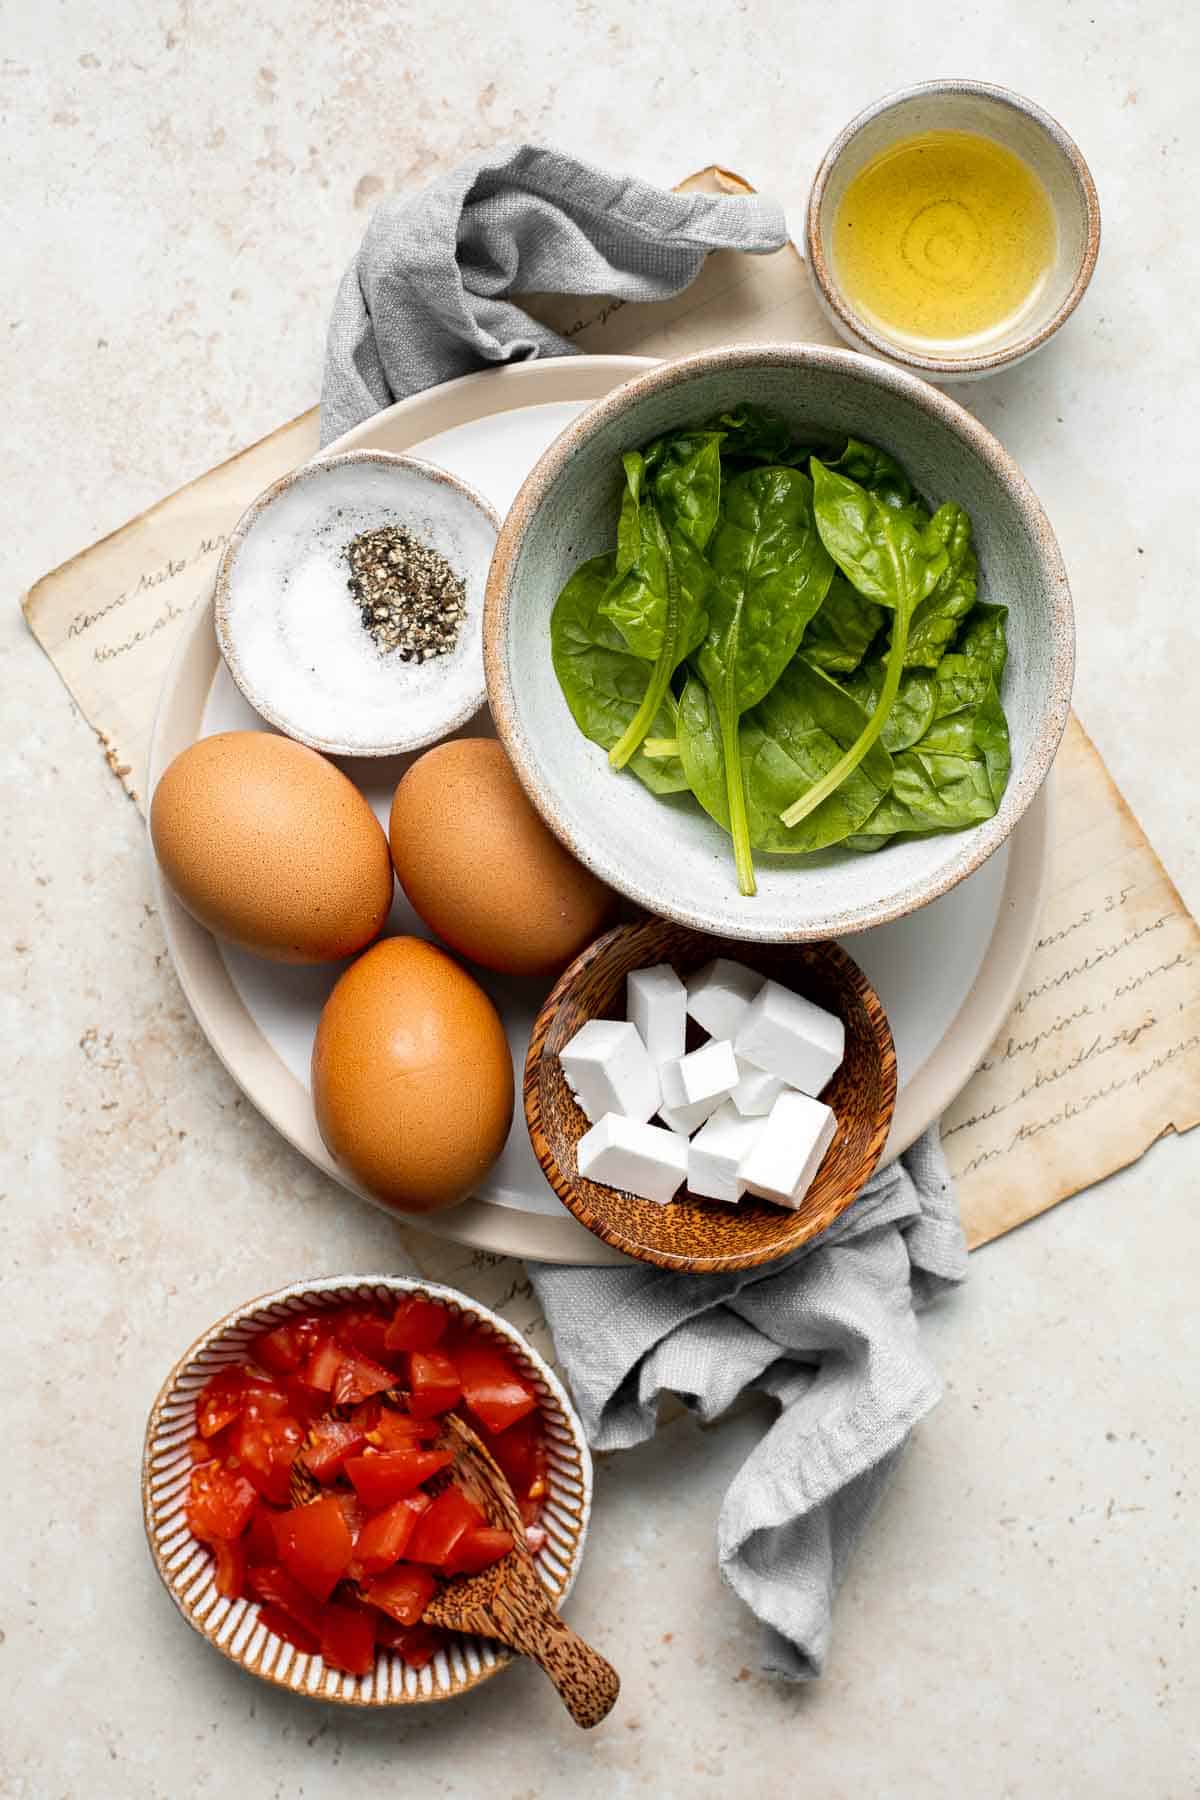
Scrambled Egg Add-Ins
These scrambled eggs are completely customizable too. Keep the Mediterranean flair and add in more ingredients like:
- chopped asparagus
- kalamata olives
- chopped ham, bacon, or sausage
- quinoa or riced cauliflower
- eggplant or zucchini
How to Make the Best Mediterranean Scrambled Eggs
- Sauté vegetables. Heat oil in a frying pan on medium heat. Add tomatoes and spinach and sauté until the spinach is wilted, about 1 minute.
- Add eggs. Add eggs and use a spatula to mix together and scramble, about 30 seconds.
- Add feta. Add feta cheese, and continue to cook until the egg is cooked to your preference.
- Season. Season with salt and pepper, to taste. Top with fresh herbs such as chopped dill or parsley, if desired.
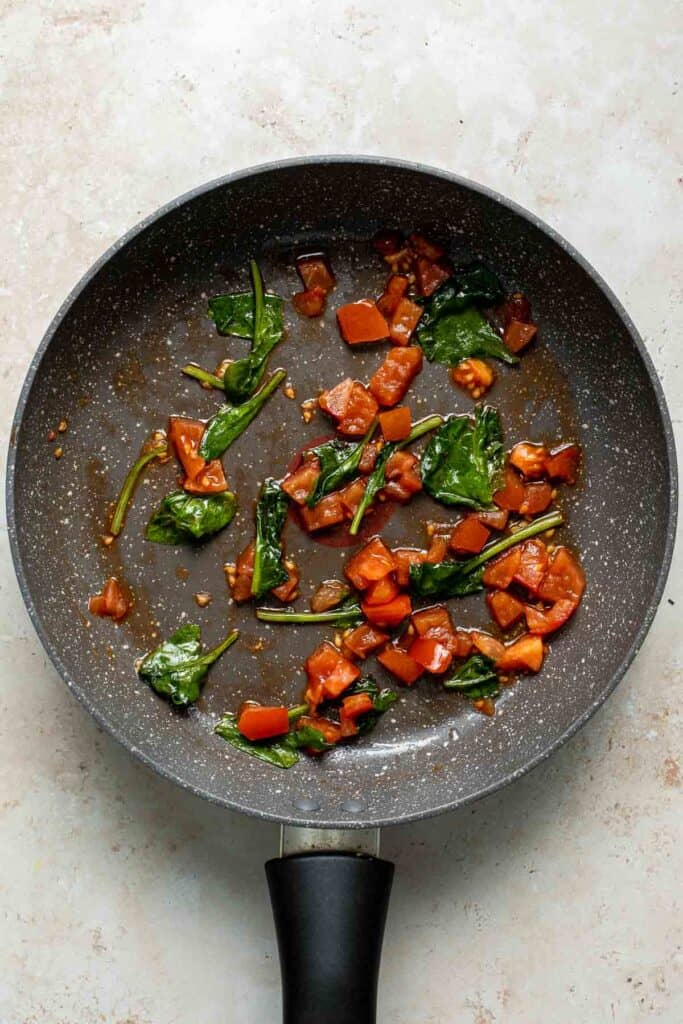
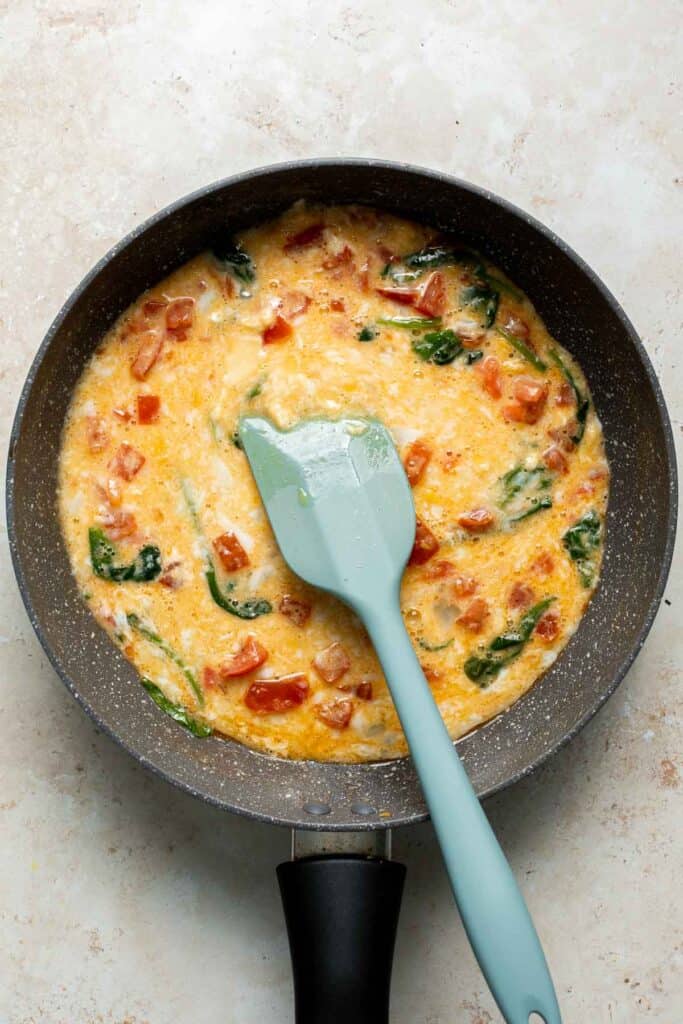
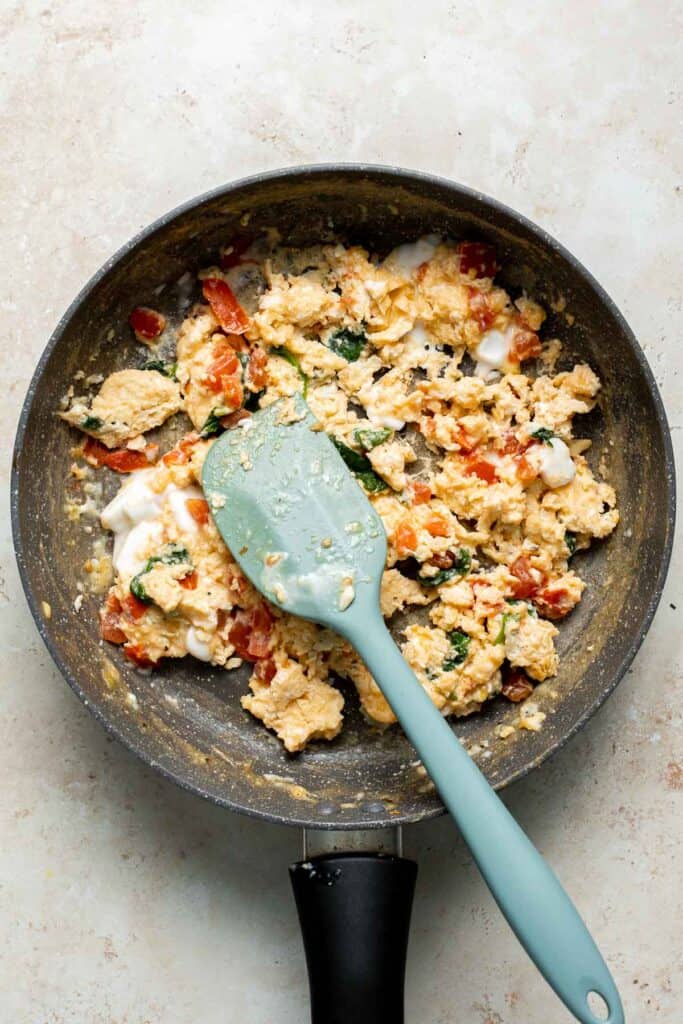
How to Serve
Enjoy this Mediterranean scramble on its own, or pair it with:
You can even make a breakfast wrap by stuffing the Mediterranean scramble inside a tortilla, similar to this Vegan Hummus Wrap, or stuff them into tortillas and fry on the pan for a Mediterranean version of these Breakfast Quesadillas.
Storing Instructions
Mediterranean scrambled eggs are best enjoyed fresh, but they will last in the fridge for up to 3 days. To reheat, microwave them on medium until warmed through or heat them in a covered pan over the stove.
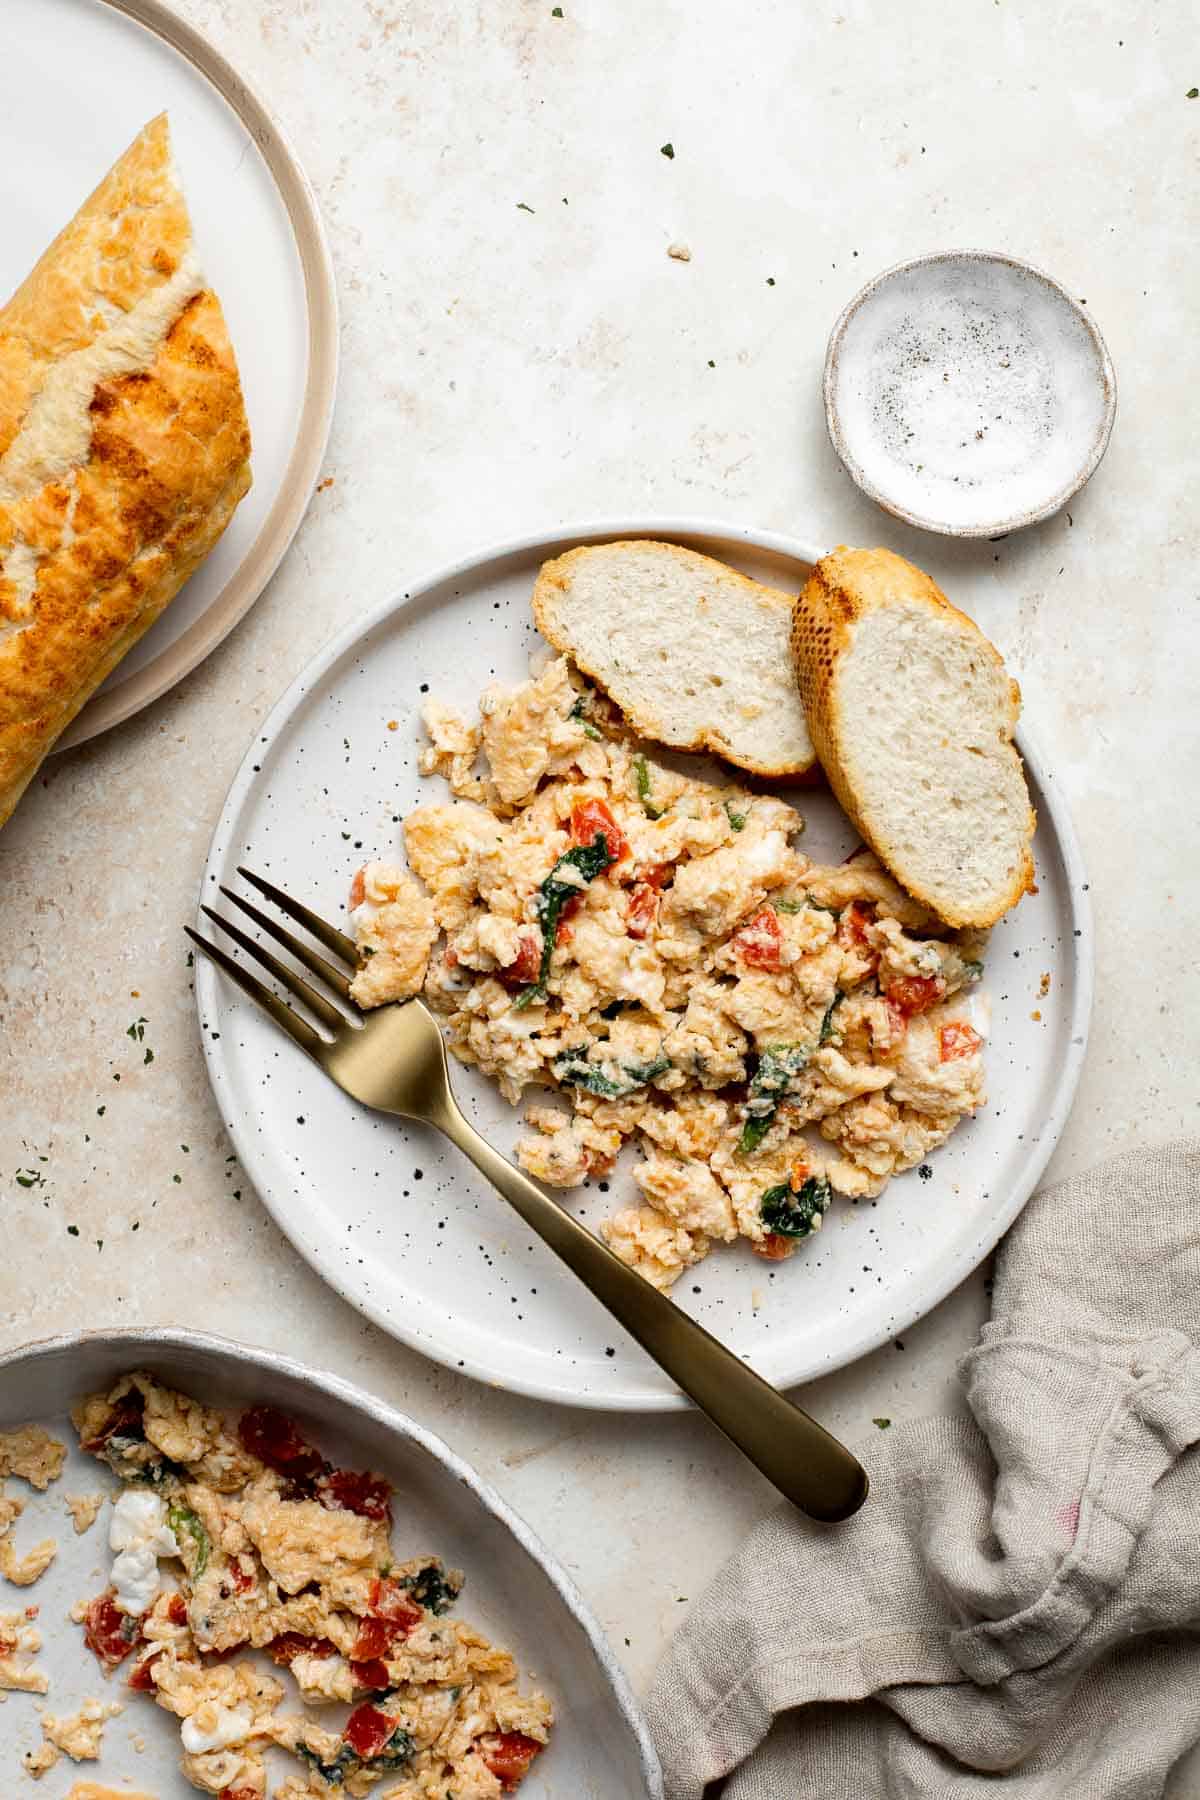
More Egg Recipes
- 20 Best Egg Recipes
- Egg Muffins
- Egg and Potato Breakfast Casserole
- Vegetable Frittata
- Deviled Eggs
- Egg Salad Sandwich
Tried this recipe?
I'd love to hear what you think! Leave a comment and rating below to share your feedback. Your reviews help others discover this recipe and help me keep creating more free recipes for you. Snap a photo and tag me on social media @aheadofthyme too.

Cauliflower Tacos
Vegetarian cauliflower tacos are loaded with air-fried or baked cauliflower, a delicious seasoning blend, and creamy lime cilantro slaw inside a corn tortilla. The best part? They are ready in just 30 minutes.
Loaded with flavor, these vegetarian tacos with cauliflower are so tasty that even meat-eaters will request them on Taco Tuesdays!

Why You'll Love Cauliflower Tacos
- They're quick and easy. A meal that is quick to make is always a good meal. These vegetarian tacos are ready in just 30 short minutes, and you know I'm a big fan of 30-minute dinners!
- Well-seasoned and flavorful. These cauliflower tacos get their incredible depth of flavor from two key places. The first is a spice blend of cumin, chili, and paprika that we season the cauliflower with. The second is a unique coleslaw that compliments the spiced cauliflower so well.
- Tender with a crunch. Whether oven-baked or air-fried, the cauliflower becomes soft and tender on the inside with a slight crisp crunch on the outside. It's so good.
- Stuffed with creamy slaw. Although there's nothing wrong with enjoying plain cauliflower tacos, the cilantro lime slaw adds sauciness to make these vegetarian cauliflower tacos even better.

Ingredient Notes
To make these vegetarian Cauliflower Tacos, you will need the following ingredients (full measurements in recipe card below):
- cauliflower - seasoned with avocado oil, garlic powder, paprika, dried oregano, ground cumin, balsamic vinegar, salt, and pepper. You can also make breaded cauliflower by following our Air Fryer Cauliflower Bites preparation instructions (and doubling the recipe).
- cilantro lime slaw - made with coleslaw mix (or shredded cabbage), Greek yogurt (or sour cream), mayonnaise, cilantro, garlic, lime juice, ground cumin, salt, and pepper. You can also substitute the slaw for Lime Crema Slaw, if desired.
- tortillas - feel free to use corn tortillas or flour tortillas.
- red onions
- fresh cilantro
You will also need measuring cups and spoons, mixing bowls, and an air fryer (if using).
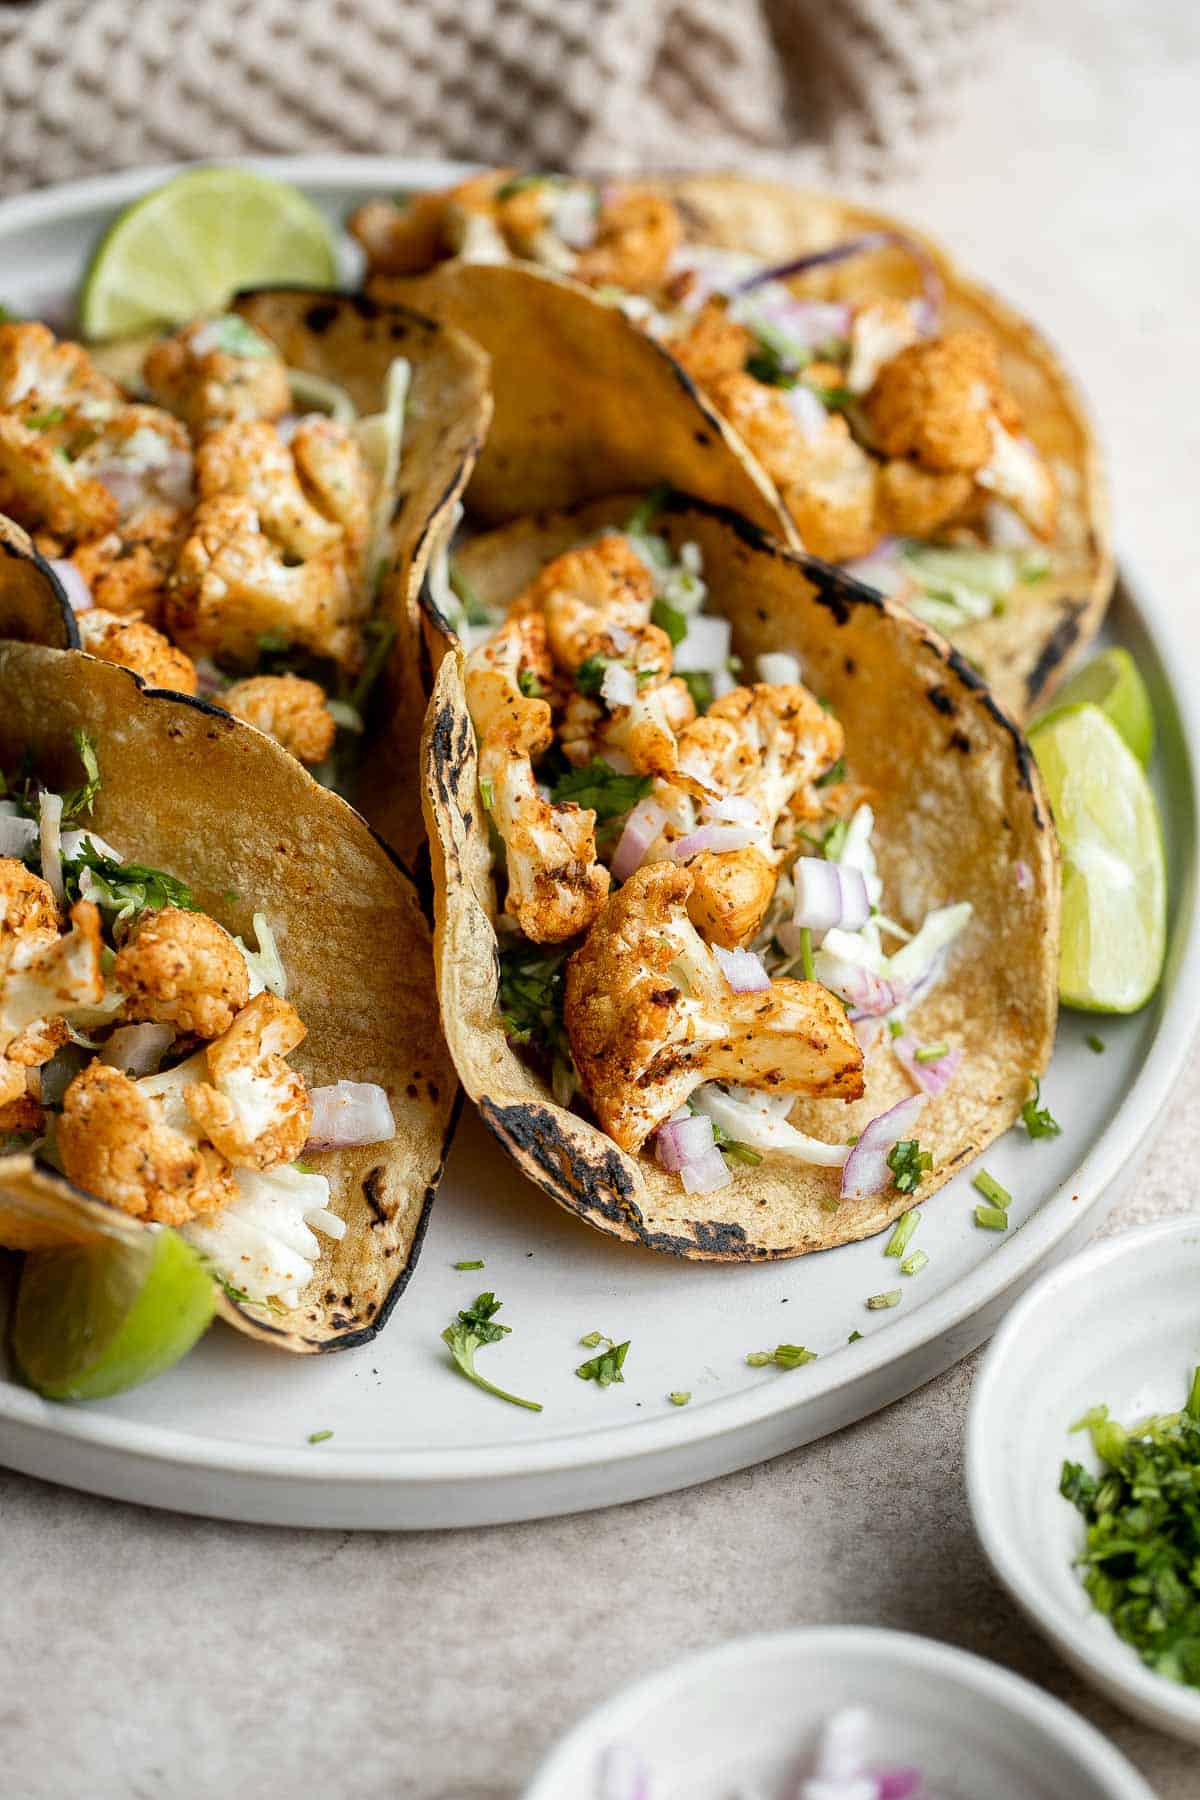
How to Make the Best Cauliflower Tacos
First, cook the cauliflower.
In a large mixing bowl or Ziploc bag, add cauliflower, oil, garlic powder, paprika, oregano, cumin, balsamic vinegar, salt, and pepper. Mix well until evenly coated.
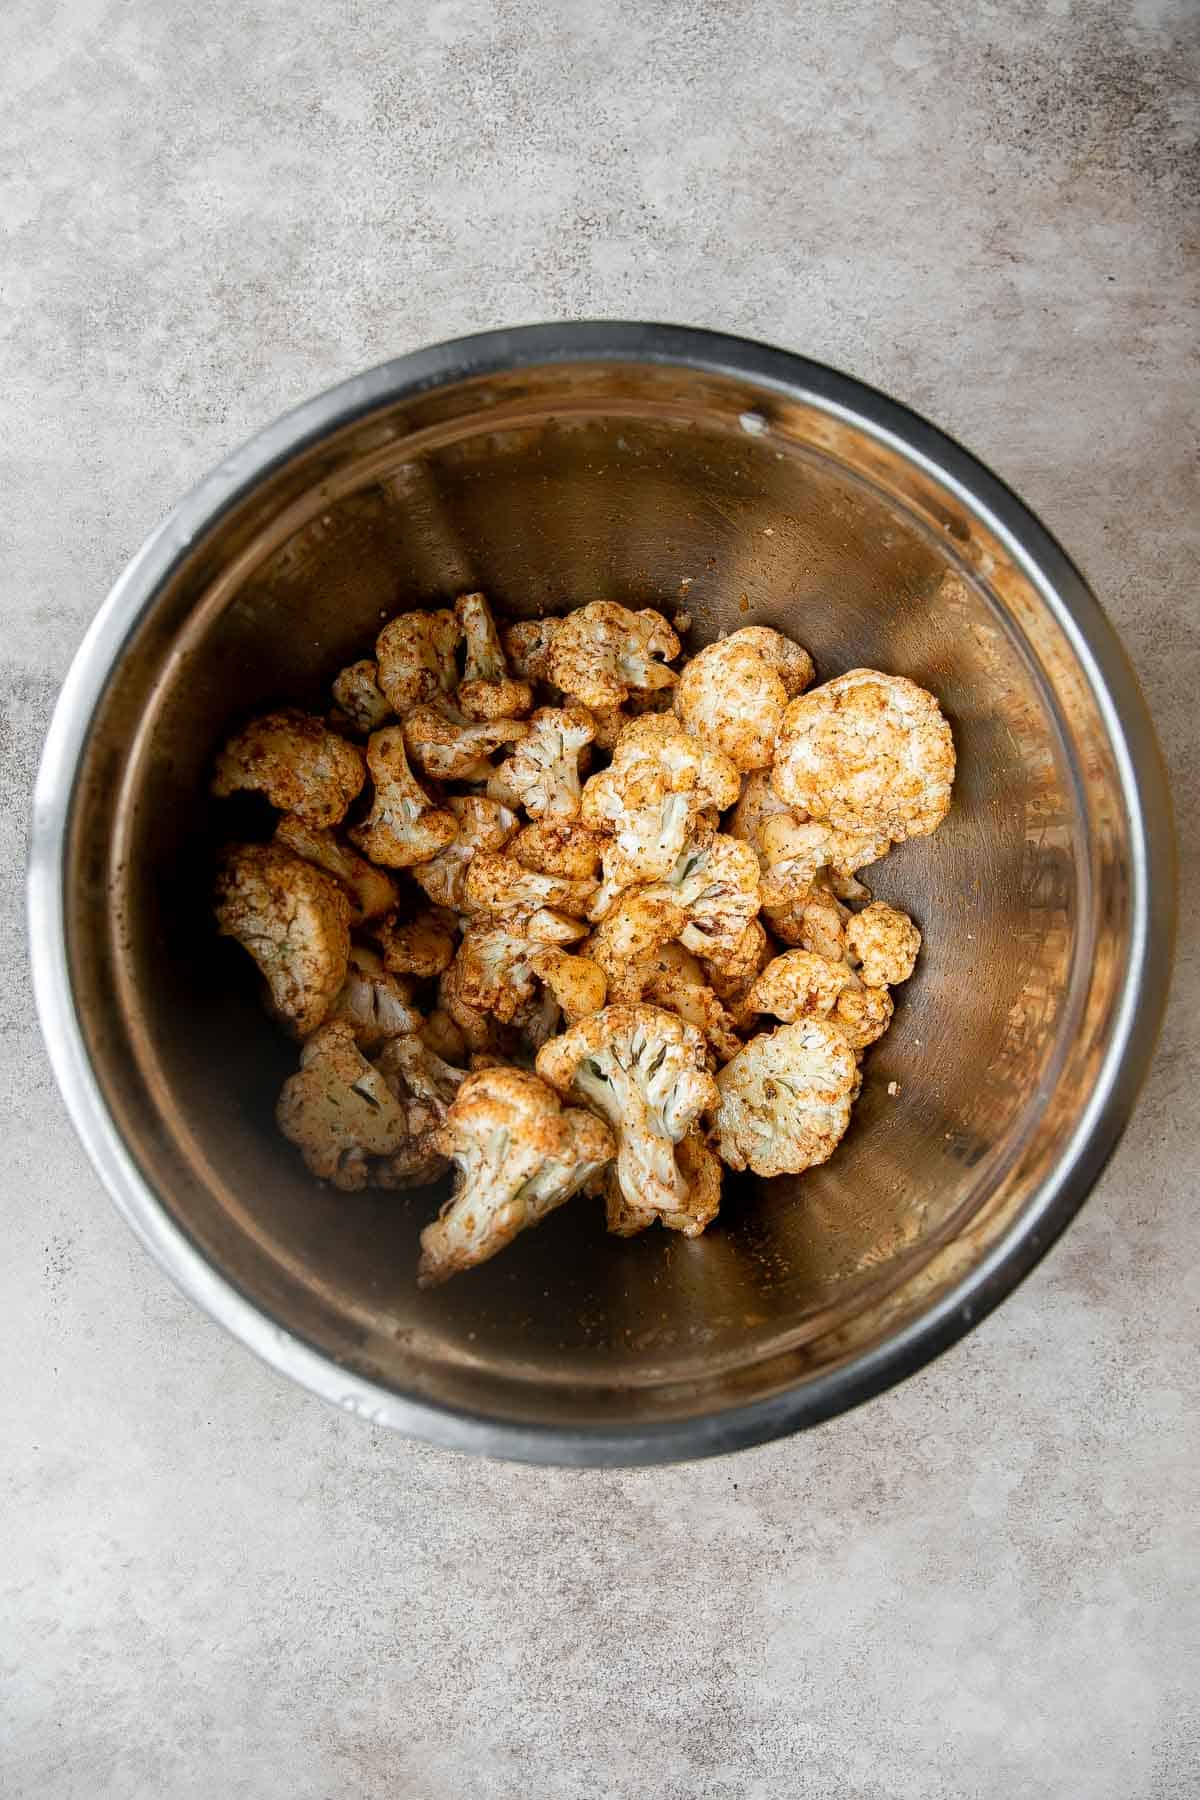
Cook the cauliflower in the oven: Preheat oven to 400F. Spread the seasoned cauliflower florets in a single layer in a large half sheet baking pan. Bake in the preheated oven for 20- 25 minutes until tender and the edges become crispy.
Cook the cauliflower the air fryer: Transfer the seasoned cauliflower into the air fryer basket and cook at 375F for 15 minutes until tender and the edges become crispy.
Set aside on a plate until ready to assemble the tacos.
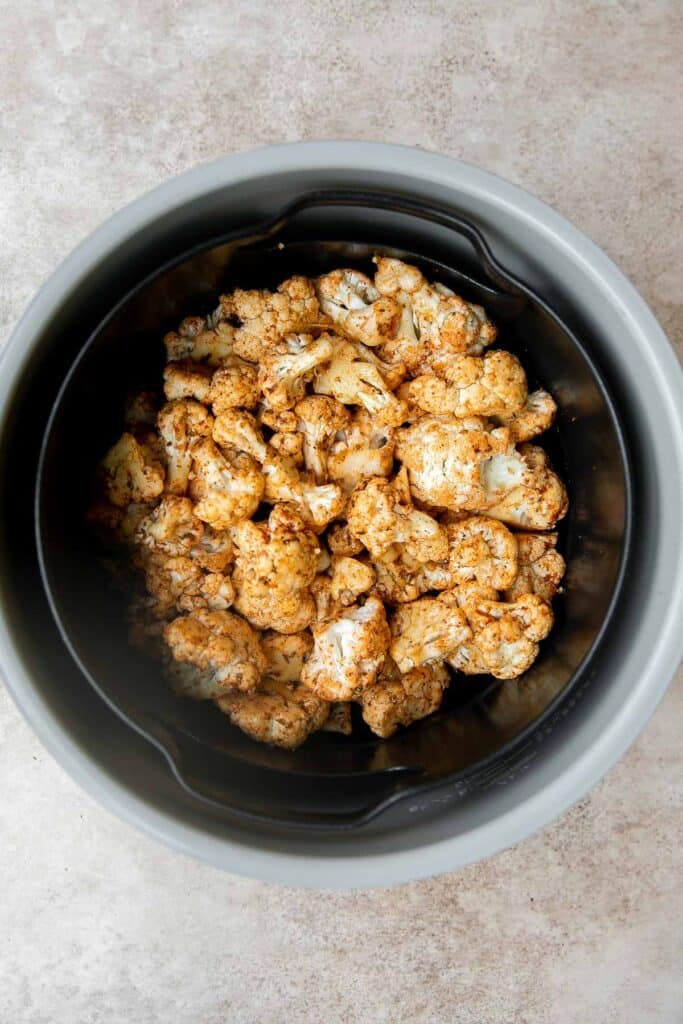
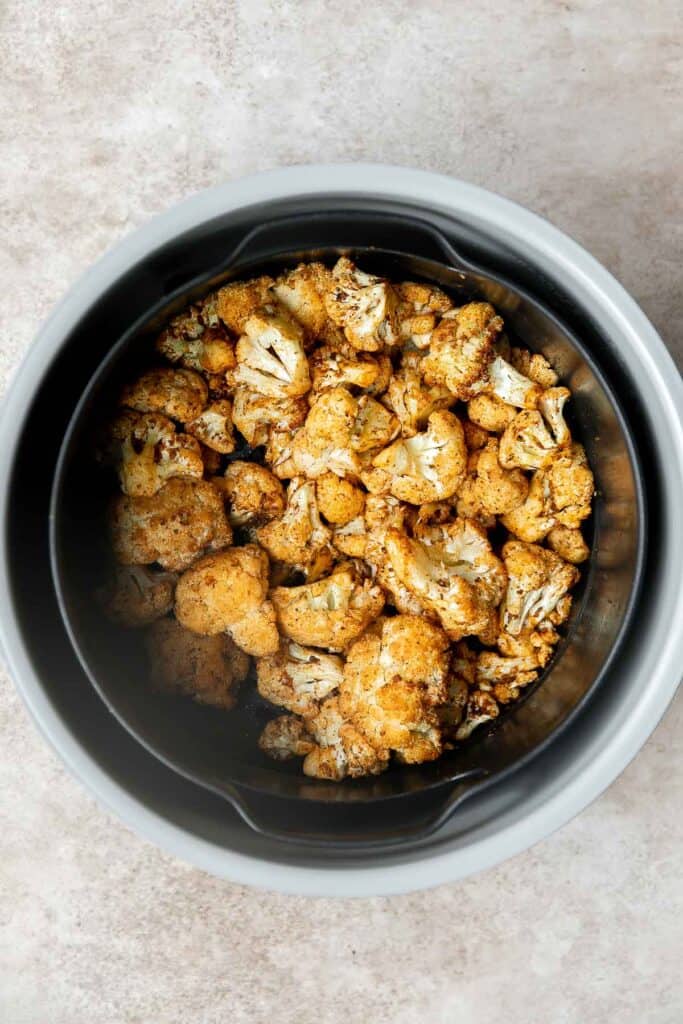
Make the cilantro lime slaw.
In a medium mixing bowl, add yogurt, mayonnaise, cilantro, garlic, lime juice, cumin, salt, and pepper. Stir well until smooth.
Place coleslaw mix in a large mixing bowl and pour in the dressing. Toss well to combine and coat evenly.
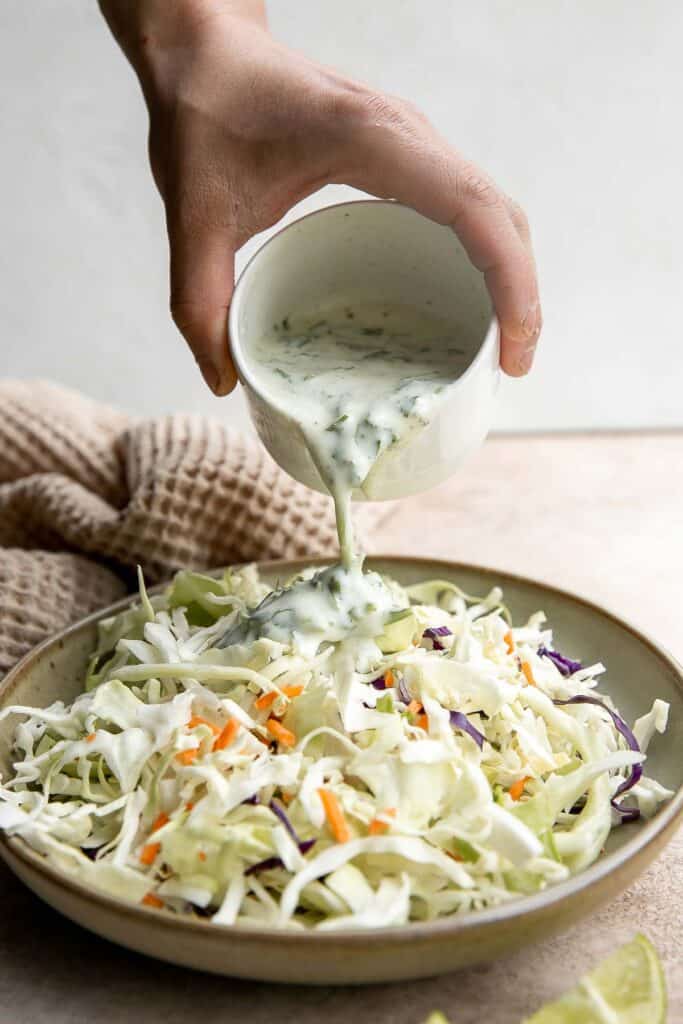
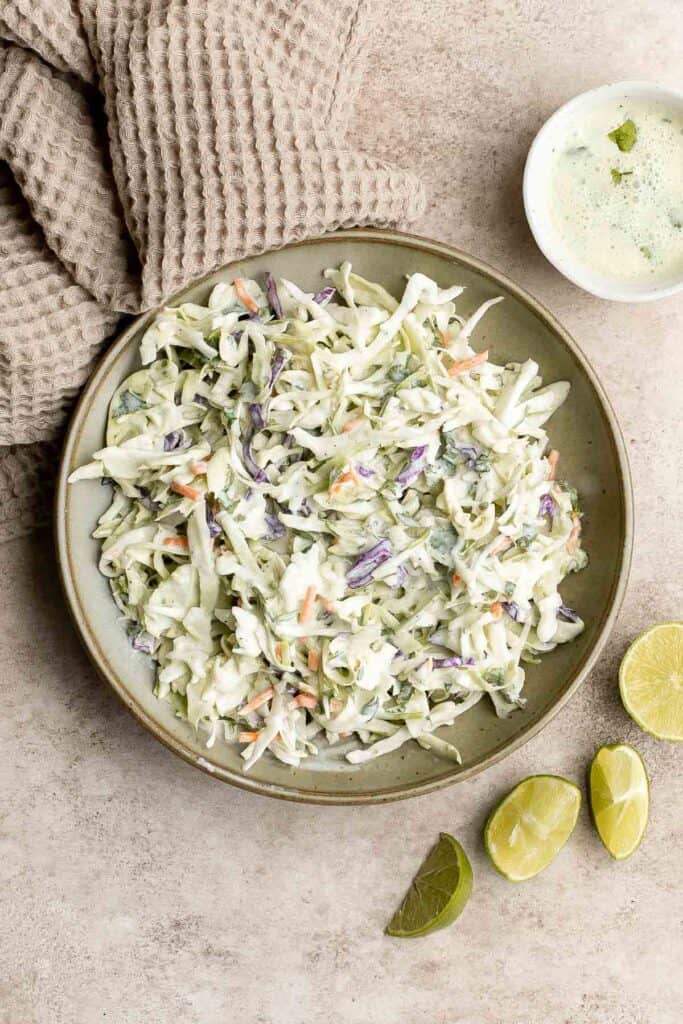
Assemble the tacos.
Heat the tortillas according to the package instructions, or heat in an ungreased cast-iron skillet over medium-high heat for 30 seconds per side. You can also heat corn tortillas directly on a gas burner for a few seconds per side to get char marks on the edges. Repeat with all tortillas.
Divide the cilantro lime slaw into each tortilla. Top with cooked cauliflower, red onions, and cilantro. Squeeze in some lime juice, if desired. You can also serve cauliflower tacos with a drizzle of Cilantro Lime Dressing or Lime Crema.
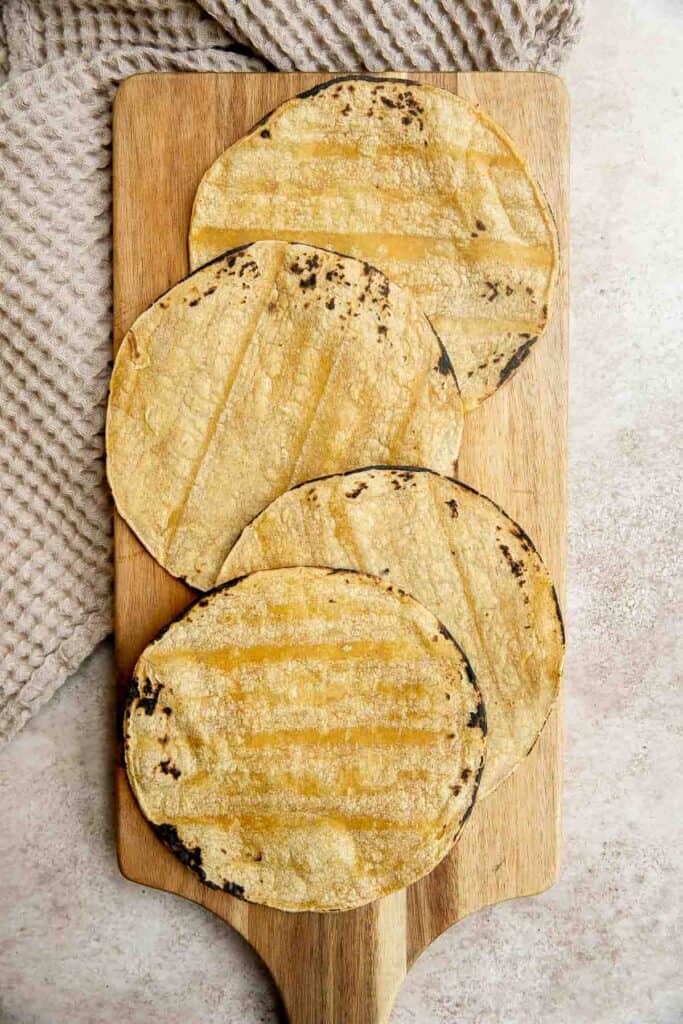
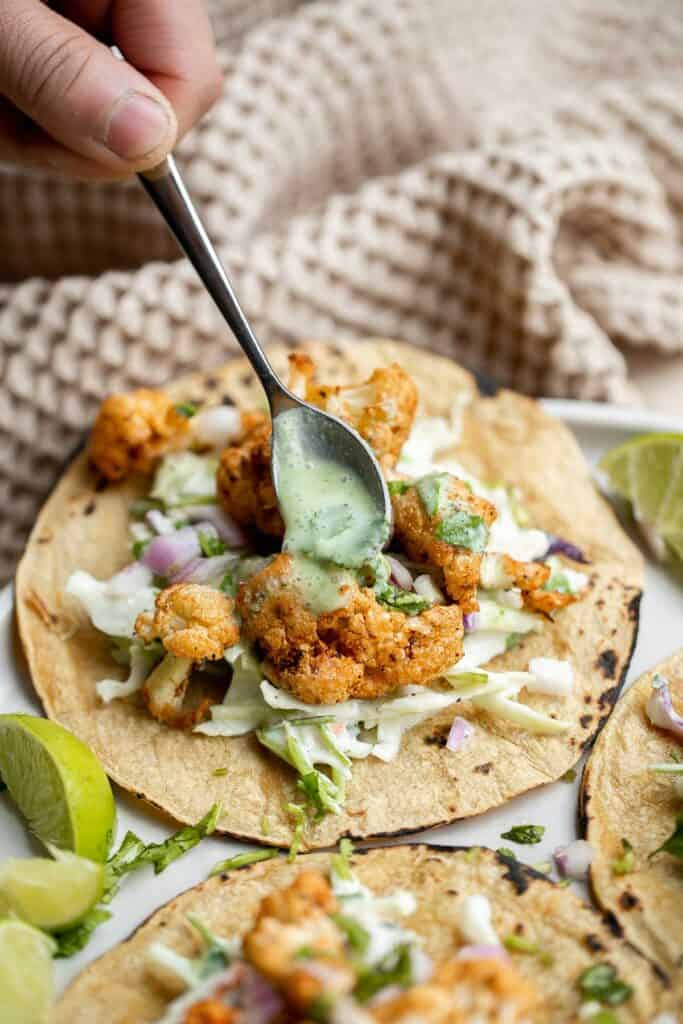
How to Serve
These cauliflower vegetarian tacos make a complete filling meal on their own loaded with veggies. You can also pair them with some other dishes to enjoy a Mexican-inspired feast, such as:
- Salsa or Guacamole
- Cilantro Lime Rice and beans
- Mexican Street Corn (Elote) or Grilled Corn on the Cob
- Sheet Pan Nachos
- Shrimp Taco Salad
Recipe Tips and Tricks
- How to store: Store the ingredients for cauliflower tacos separately. Allow the cooked cauliflower to cool completely before transferring it to an airtight container, and store for up to 3-4 days. You can store the cilantro lime slaw for up to 2-3 days.
- How to reheat: Reheat cauliflower in the oven or air fryer at 350F until warm, about 5 minutes. Then, assemble the cauliflower tacos as directed, or eat them on their own.

More Taco Recipes
- Chicken Tacos
- Fish Tacos with Lime Crema
- Mexican Ground Beef Tacos
- Vegan Chickpea Tacos
- Shrimp Tacos with Lime Crema Slaw
- Korean Beef Steak Tacos
Tried this recipe?
I'd love to hear what you think! Leave a comment and rating below to share your feedback. Your reviews help others discover this recipe and help me keep creating more free recipes for you. Snap a photo and tag me on social media @aheadofthyme too.

30 Best Potluck Recipes

Wondering what to bring to a potluck? When it comes to potluck food, you need recipes that are easy to make ahead, easy to store, and easy to transport. Whether you're tasked with preparing picnic recipes for a family gathering or a dish for a barbecue with friends or work potluck, we are here to help make things easier for you. We are sharing over 30 of the most popular and best potluck recipes including pasta salads, dips, bite-sized snacks, platters, and more, so that you don't have to search for any further potluck ideas.
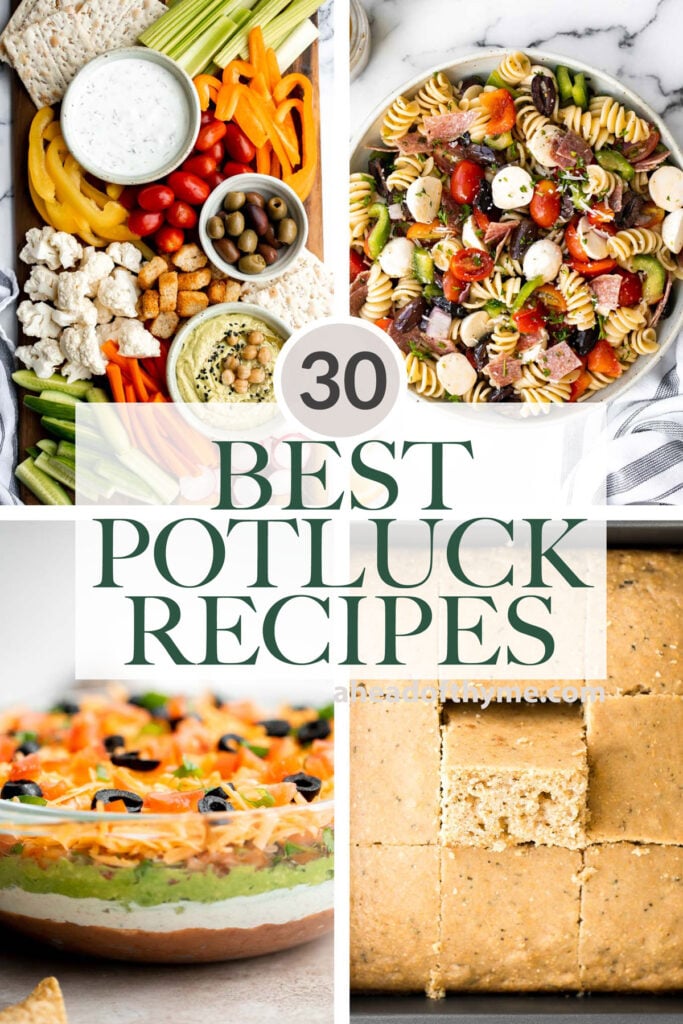
Best Potluck Recipes
Italian Pasta Salad
Italian pasta salad is delicious, wholesome, and easy to make. Make it up to three days ahead for your summer picnics and cookouts. You can't get more classic than Italian Salad at a potluck!
Deviled Eggs
Classic deviled eggs are a simple, easy, and healthy appetizer to make when you need something quick for brunch, picnics, barbecues, potlucks, or Easter.
7 Layer Dip
This easy and delicious 7 layer dip is the perfect dip to serve at your next party, made with layers of beans, guacamole, salsa, cheese, and more.
Sticky Honey Garlic Meatballs
Sticky honey garlic meatballs are a delicious and flavourful 30-minute meal to add to your weekly dinner rotation. A total crowd pleaser.
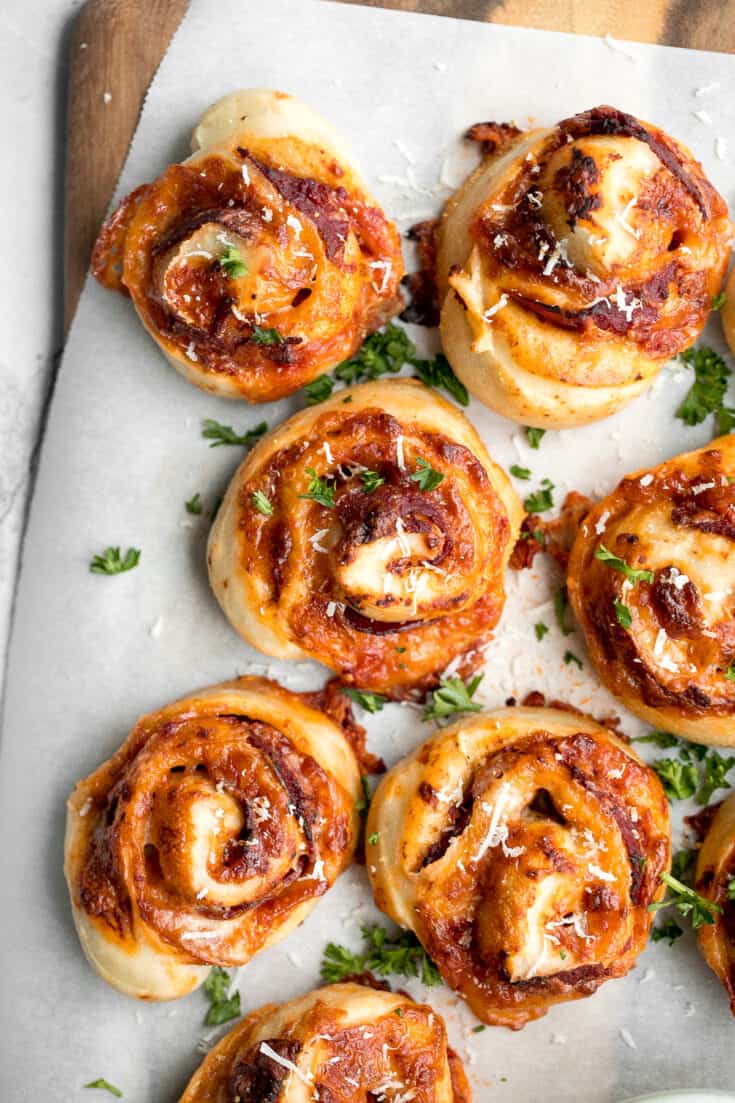
Pepperoni Pizza Rolls
Easy pepperoni pizza rolls are crispy on the bottom, tender and chewy inside, packed with pepperoni and cheese, and baked until bubbly.
Veggie Tray
This homemade veggie tray is a quick easy healthy snack or appetizer to make for your next party, with a variety of colorful vegetables and delicious dips.
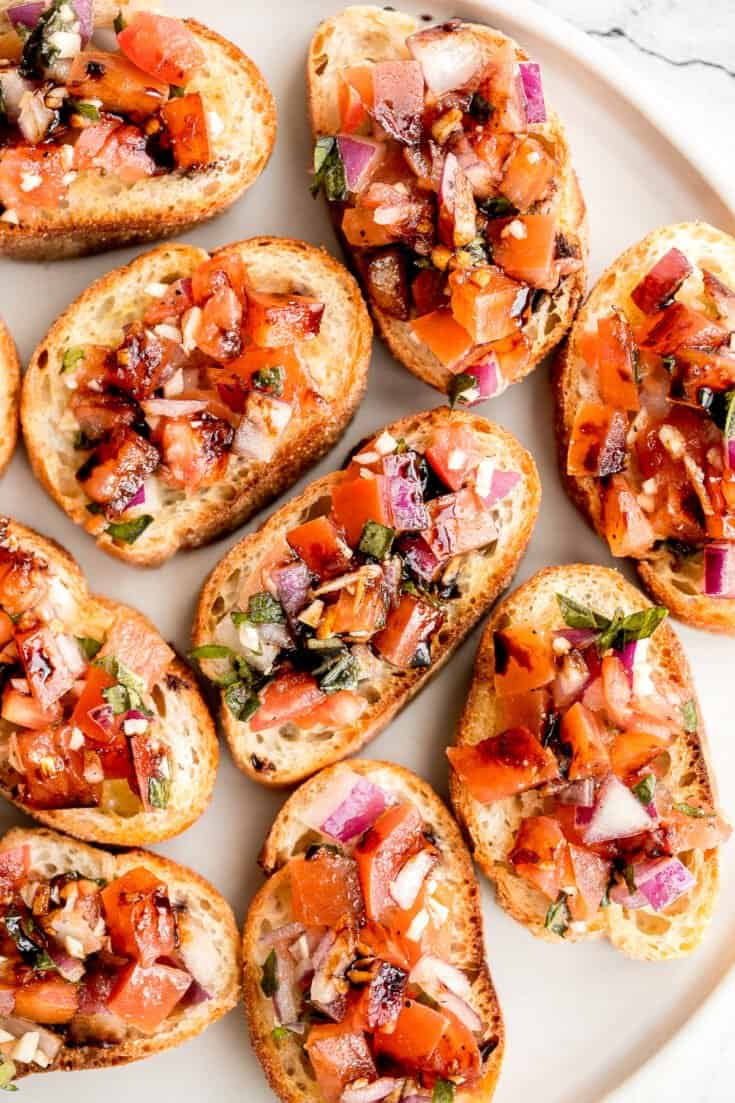
Tomato Bruschetta with Balsamic Glaze
Tomato bruschetta with balsamic glaze is an easy Italian appetizer topped with tomatoes, onions, garlic, basil and olive oil. Delicious, fresh and simple.
Antipasto Skewers
Antipasto skewers with tortellini are a quick, easy, and delicious appetizer with the best parts of a traditional antipasto platter but easier to eat.
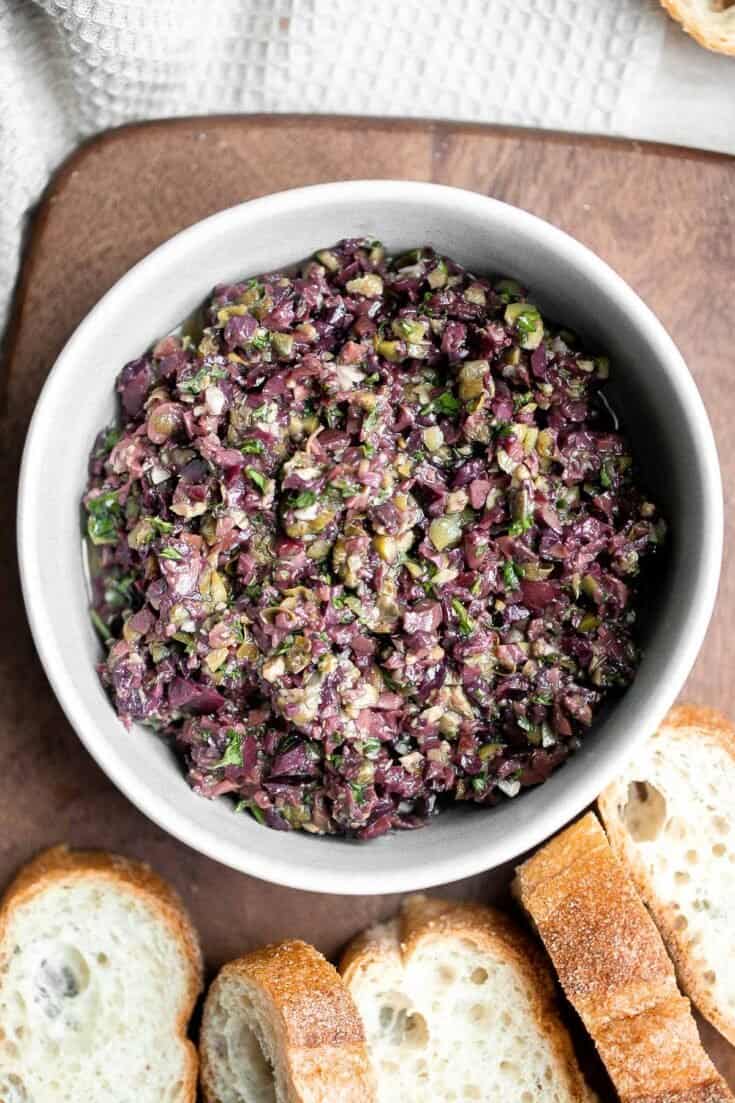
Olive Tapenade
Olive tapenade is a delicious, flavorful, easy dip that comes together in minutes, made with the perfect combination of sharp, tangy, salty, and savory.
Turkey Pinwheels
Turkey pinwheels are bite-sized finger food perfection and will make back-to-school lunch planning for the kids a total breeze. They are fully customizable and you can wrap them up in a tortilla or in pita bread.
Macaroni Salad
Classic macaroni salad is a creamy and delicious pasta salad that is easy to throw together. It's the perfect side to bring to a summer potluck or BBQ.
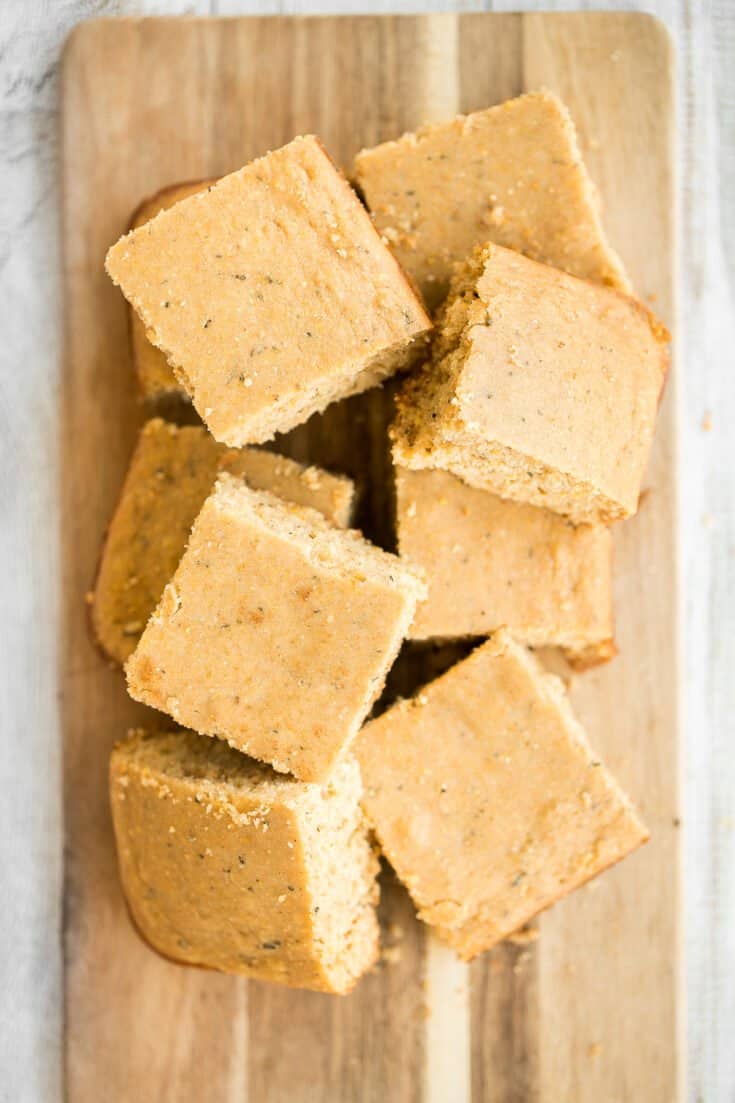
Rosemary Cornbread
Sweet and savoury, buttery rosemary cornbread is soft and moist with golden crispy edges, flavourful and delicious, and so easy to make.
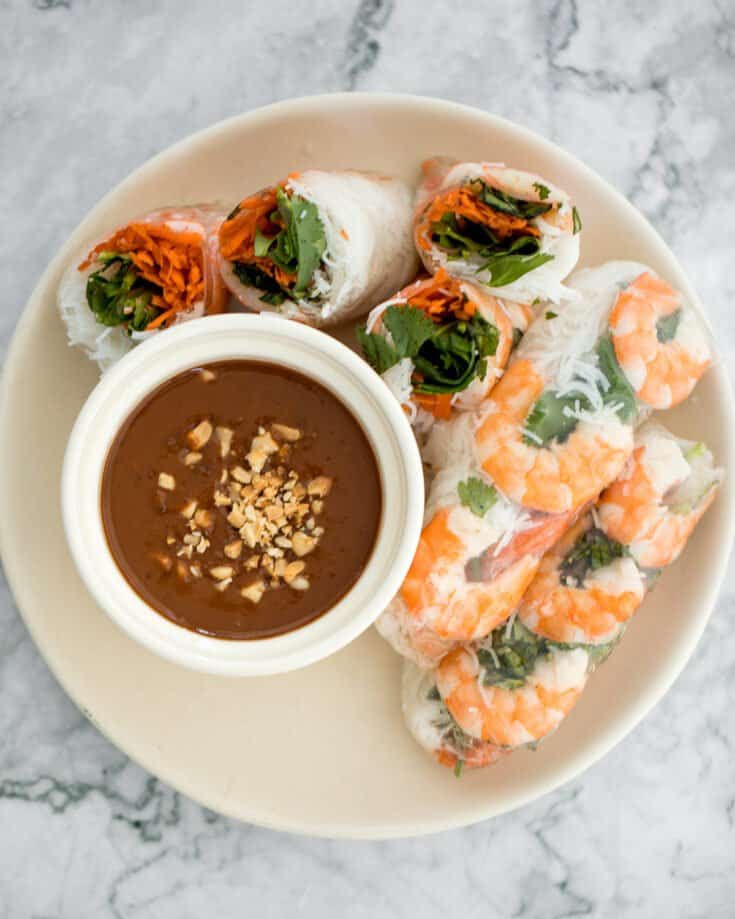
Vietnamese Salad Rolls with Peanut Dipping Sauce
Fresh, light and healthy Vietnamese salad rolls are packed with vermicelli noodles, shrimp, fresh vegetables and herbs and dipped in homemade peanut sauce.
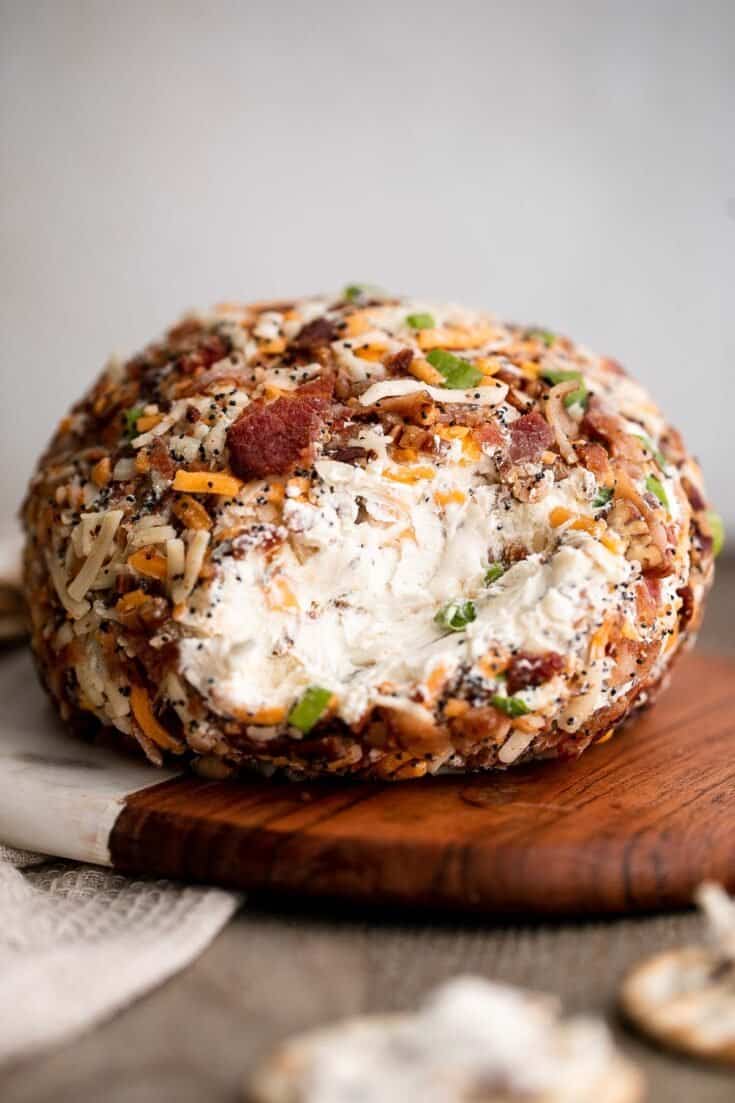
Bacon Cheddar Cheese Ball
Bacon cheddar cheese ball is an easy to make appetizer and delicious showstopper at holiday parties or game day. It's creamy, cheesy, and nutty.
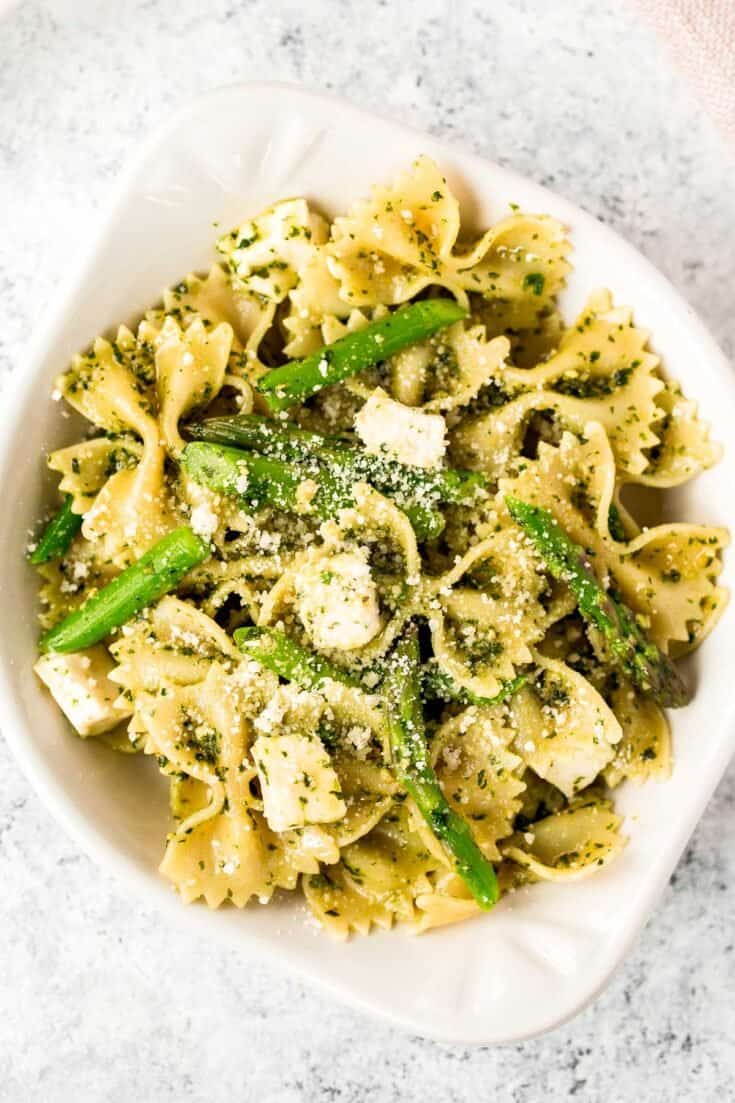
Spring Pesto Pasta with Asparagus
Spring pesto pasta with asparagus and chives is light and made with simple ingredients in under 20 minutes. Serve it hot for dinner or cold as pasta salad.
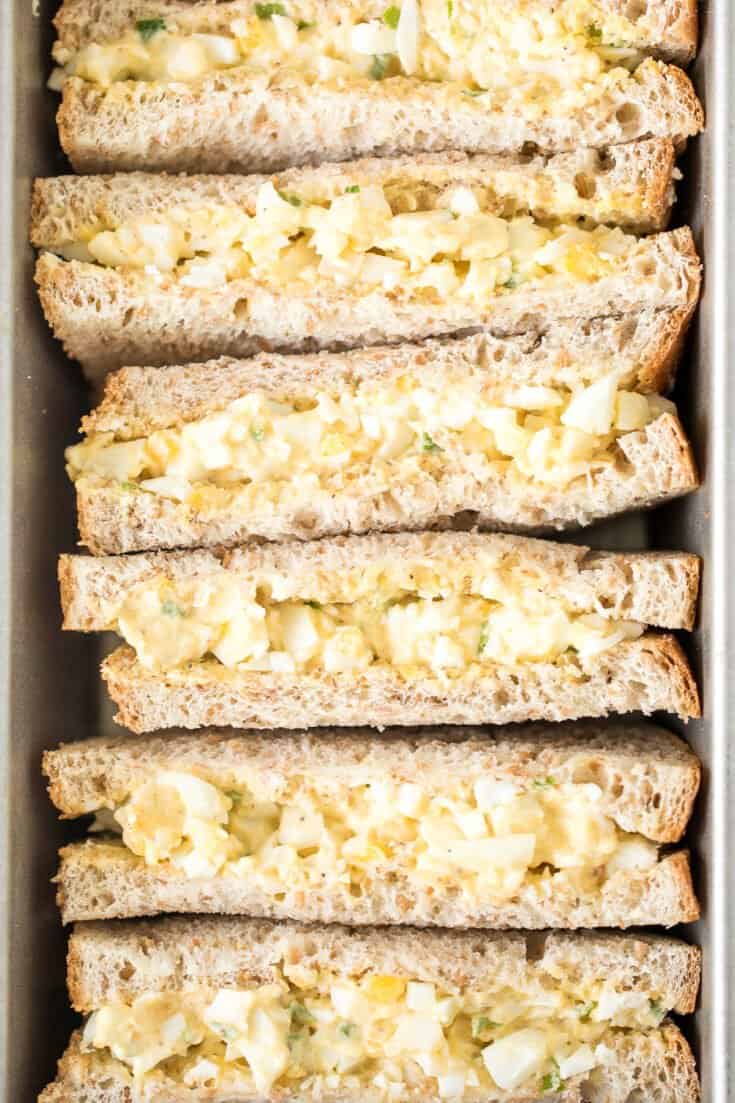
Egg Salad Sandwich
The best egg salad sandwich is a quick and easy picnic classic loaded with perfect hard-boiled eggs, mayonnaise, a touch of dijon mustard and green onions.
Mango Salsa
Fresh mango salsa is sweet, tangy, and delicious. It's a quick and easy recipe that you can whip up with just 6 ingredients and in under 10 minutes.
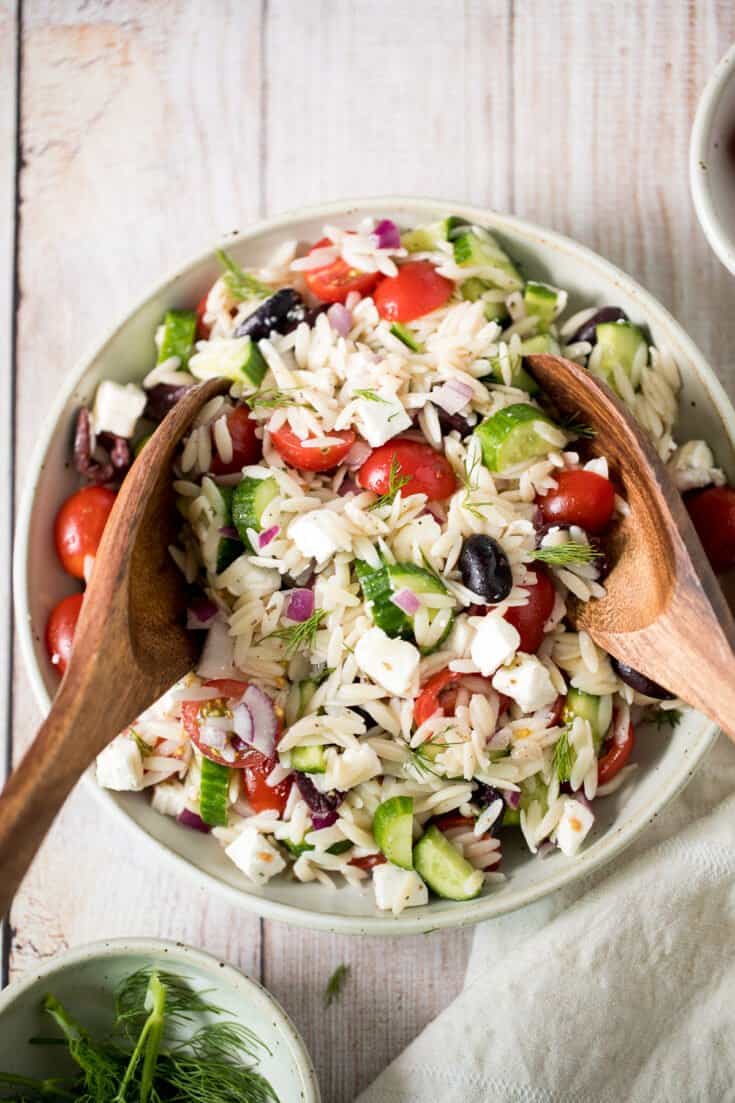
Mediterranean Orzo Pasta Salad
Quick and easy Mediterranean orzo pasta salad packed with fresh vegetables and herbs is tossed in a Greek lemon vinaigrette. Healthy, light and delicious.

Pigs in a Blanket
Pigs in a blanket from scratch are a delicious and easy appetizer or snack to make for your next party or gathering — juicy, cheesy, flaky, and buttery.
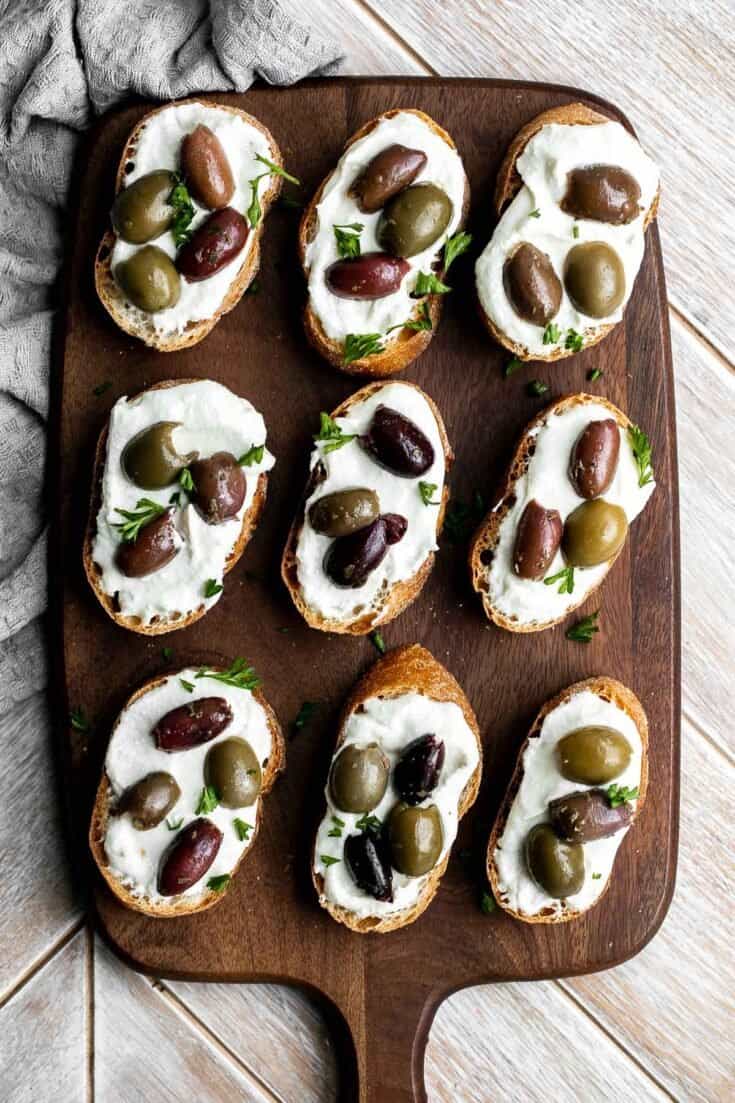
Whipped Feta Crostini
Whipped feta crostini with a herby olive topping is quick and easy snack or appetizer that is ready in less than 20 minutes — or 10 minutes if you’re fast.
Caprese Pasta Salad
Bright and colorful caprese pasta salad is the ultimate summer side dish. It's fresh, light, and loaded with vibrant summer flavors. Quick and easy too!
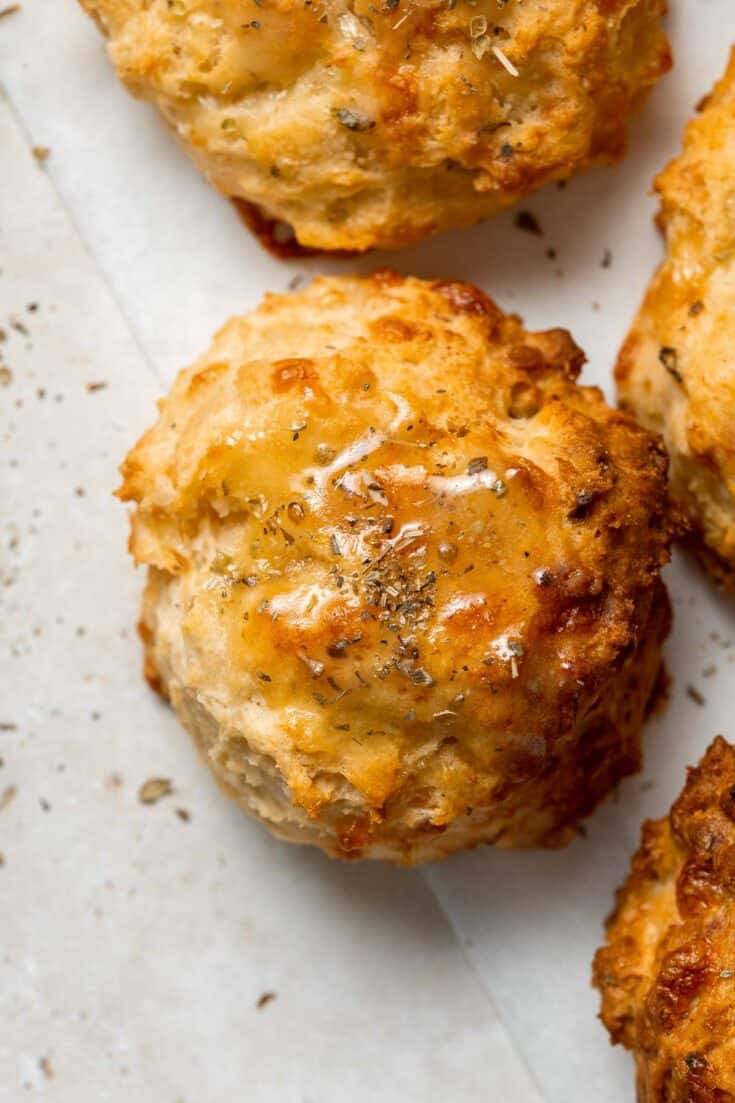
Garlic Cheddar Biscuits
Garlic Cheddar Biscuits are a simple but delicious and flavorful no yeast bread that is ready for the oven with less than 15 minutes of prep.
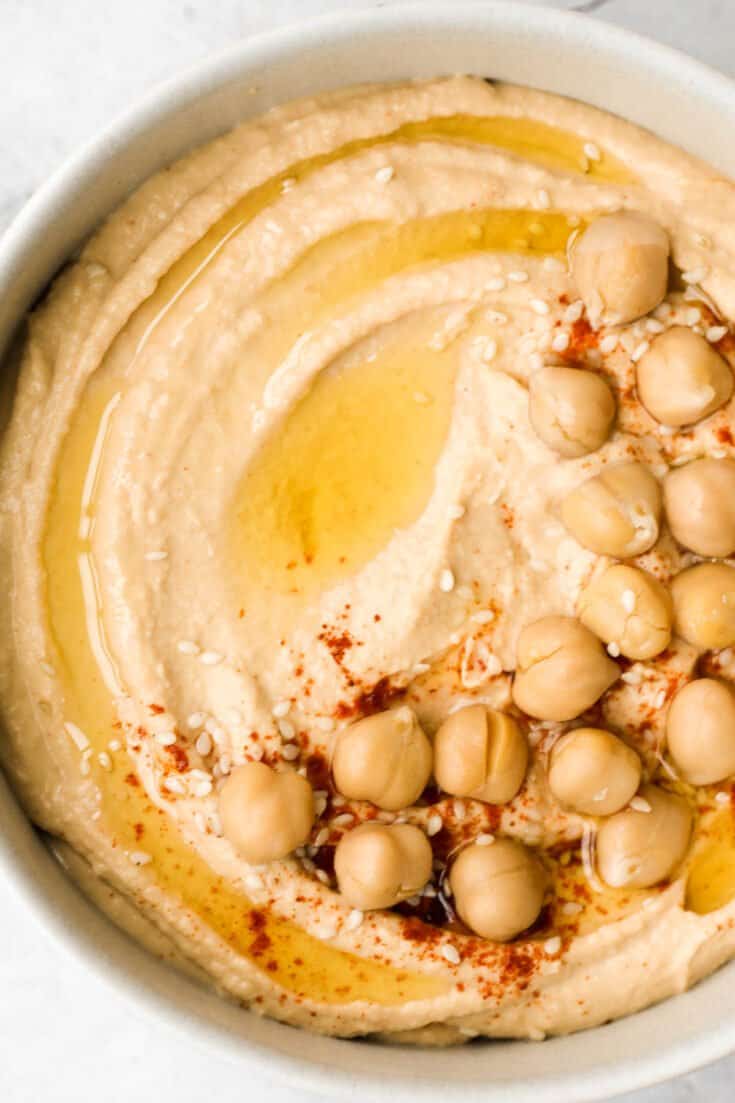
Classic Hummus
Whip up classic smooth and creamy hummus dip at home in just 5 minutes, by combining chickpeas, tahini, olive oil, lemon juice and garlic in the blender. Serve it with veggies or crackers, or use it in a vegan hummus wrap.

Sweet Chili Turkey Meatballs
Sweet chili turkey meatballs are delicious, tender and juicy, loaded with classic Thai flavors, and quick and easy to make. Savory, sweet, and tangy.
Potato Salad
Easy homemade potato salad is loaded with baby potatoes, eggs, and green onions and tossed in a mayo sauce and is a go-to for summer barbecues and picnics.
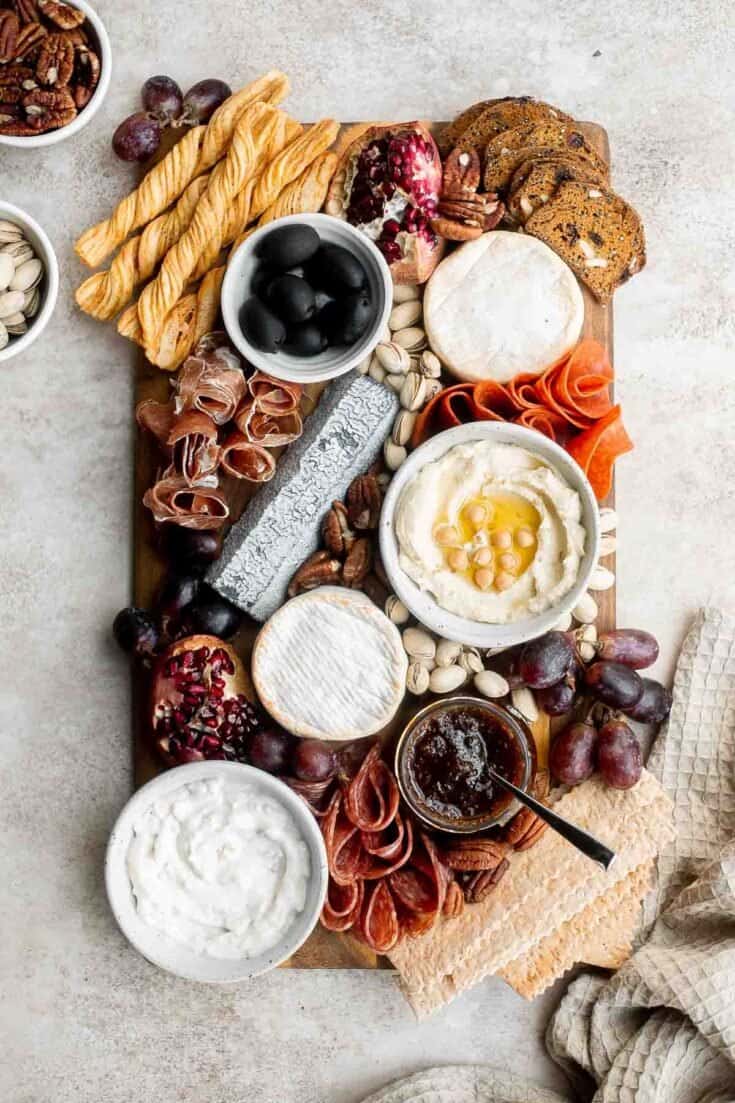
Fruit Salad
This Summer Fruit Salad is colorful, delicious, and naturally sweet (no processed sugar!). It's easy to make with fresh fruit tossed in a homemade dressing.
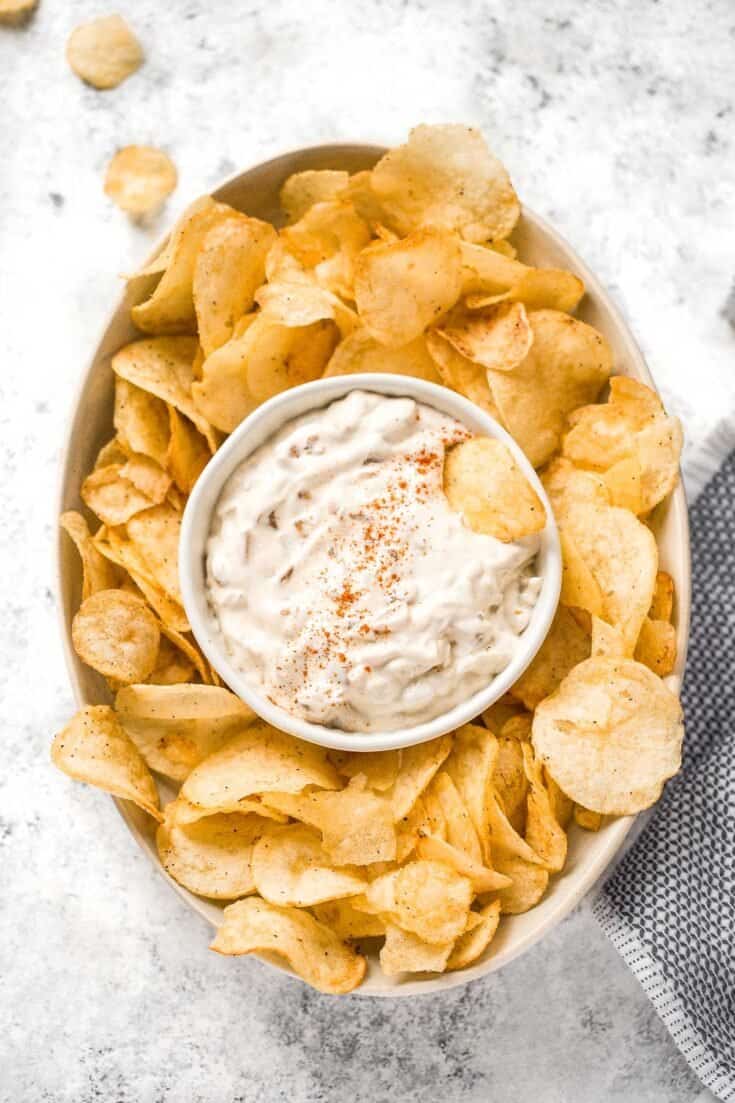
Caramelized Onion Dip
Caramelized onion dip is creamy, flavorful, and melt-in-your-mouth delicious. This easy appetizer is perfect for entertaining, on game day, or for a snack.
Greek Salad Hummus Flatbread
This bright and colourful Greek salad hummus flatbread is perfect as an appetizer or a healthy lunch or snack.
Summer Corn Salad
Take fresh-off-the-grill corn on the cob and turn it into a light, flavourful summer corn salad, topped with cherry tomatoes, fresh basil and cheese.
More Recipes
- 60+ Summer Dinner Ideas
- 40 Best Salad Recipes
- 25 Best BBQ Side Dishes
- 20 Best Dip Recipes
- 40 Best Pasta Recipes
- 40 Best Summer Desserts
Did You Make Any of These Potluck Recipes?
Please leave a comment and rating below, and let me know what you thought of this round up of potluck recipes. Be sure to snap a picture and tag me on Instagram @aheadofthyme or share it on the Pinterest pin so that I can follow along.
HUNGRY FOR MORE? Don't forget to sign up for my email newsletter so that you don't miss any recipes. You can also follow along on Instagram and Pinterest for more recipe updates.
Coconut Tapioca Pudding
Coconut Tapioca Pudding is a creamy, light, and refreshing Asian dessert to enjoy on a hot summer evening. Loaded with soft and chewy tapioca pearls (or sago) and topped with ripe mango, this tropical Thai coconut pudding is satisfying in flavor and texture.
If you're a fan of bubble tea and boba, this coconut tapioca pudding is a must try dessert! Plus, it's gluten-free and can easily be made vegan too.
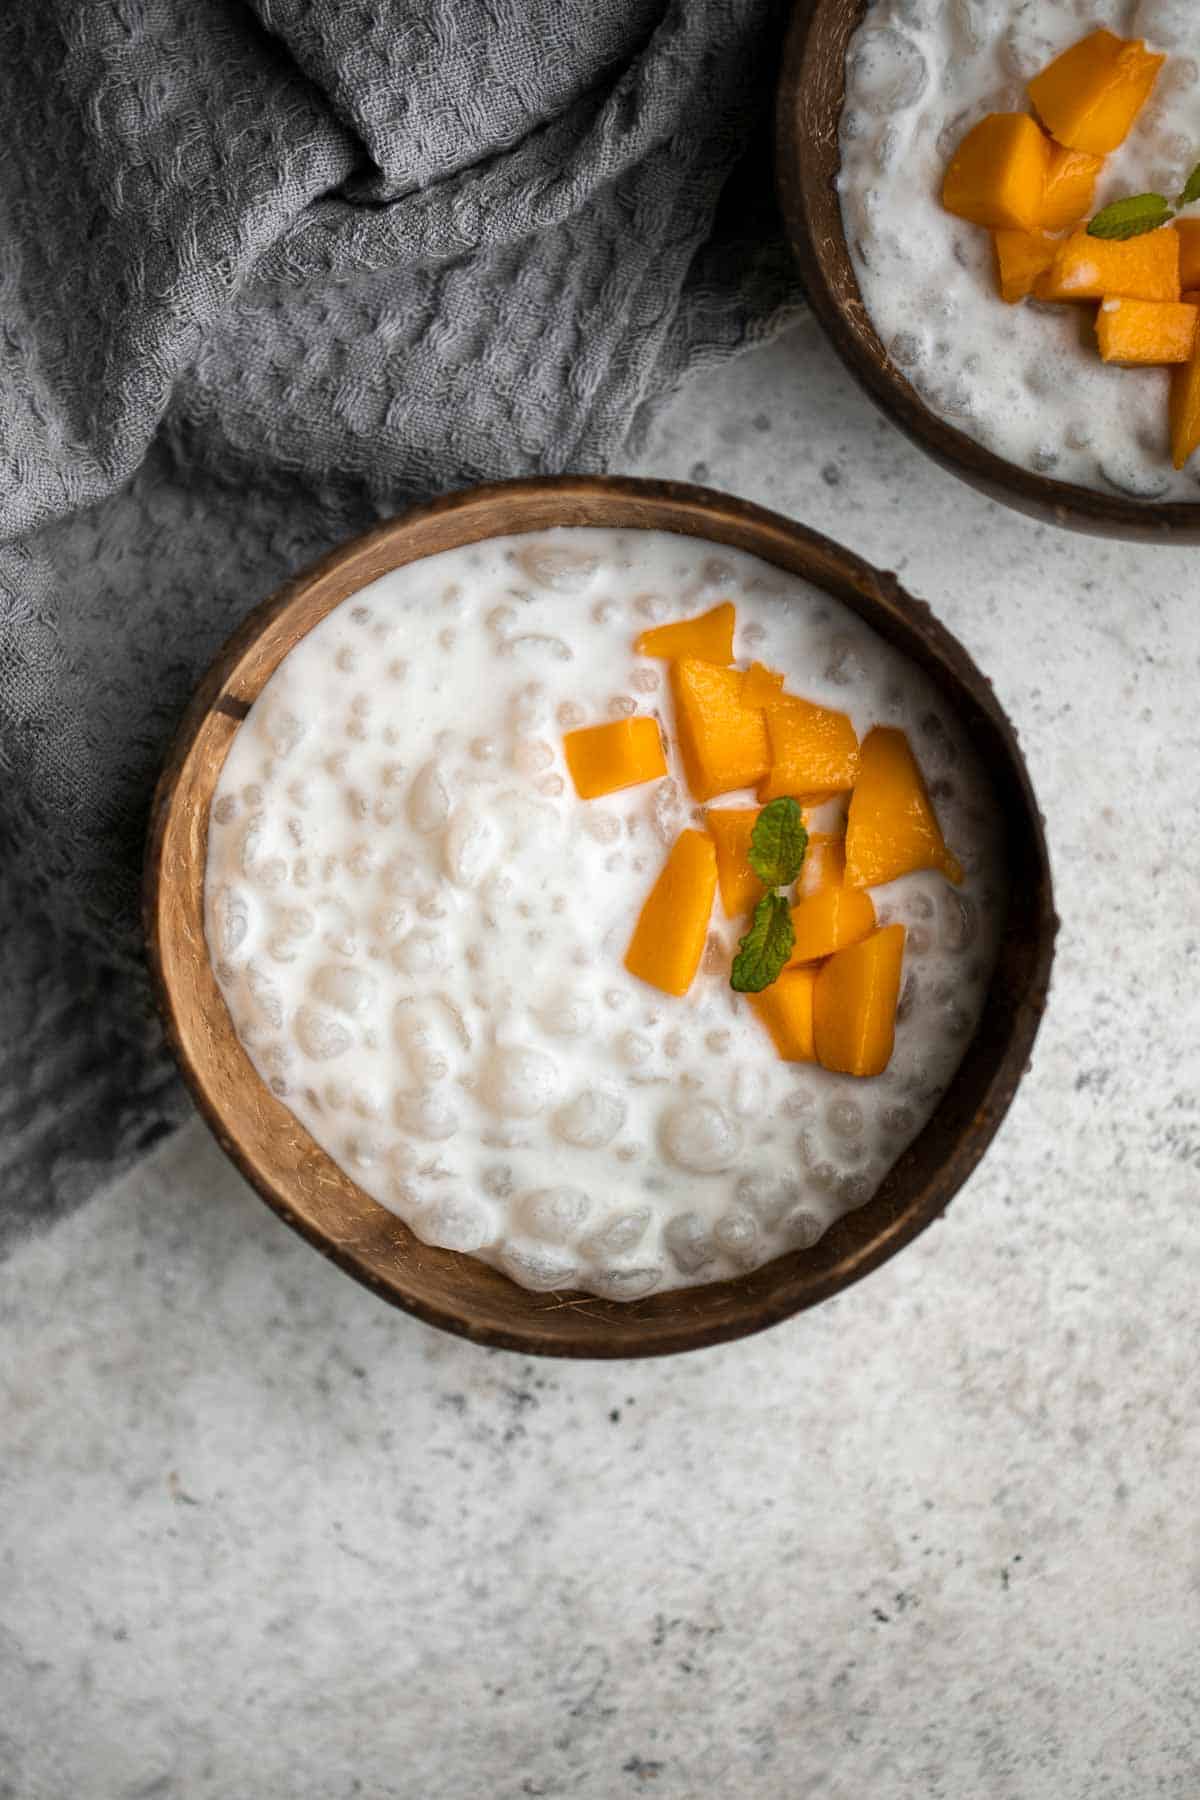
Why You'll Love Coconut Tapioca
- The flavors are simple but delicious. This coconut tapioca pudding is made with coconut milk, sweetened condensed milk, and tapioca pearls. Plus, you can add fresh mango or other fruit on top. Together, these flavors create a slightly sweet and tropical flavor.
- The texture of soft boba. You can use your favorite white pearls in this coconut tapioca pudding, whether large tapioca or small sago. Either way, you'll love the texture that the boba adds to this pudding.
- A perfect summer dessert. This sweet dessert, whether served at room temperature or cooled, is incredibly light and refreshing. Once you try this coconut tapioca pudding, it might become your new favorite treat on a hot summer day.
- It's quick to make. You can enjoy this coconut tapioca pudding just 40 minutes after you've decided to make it. Cooking the boba pearls takes some time, but assembling the pudding together takes seconds.
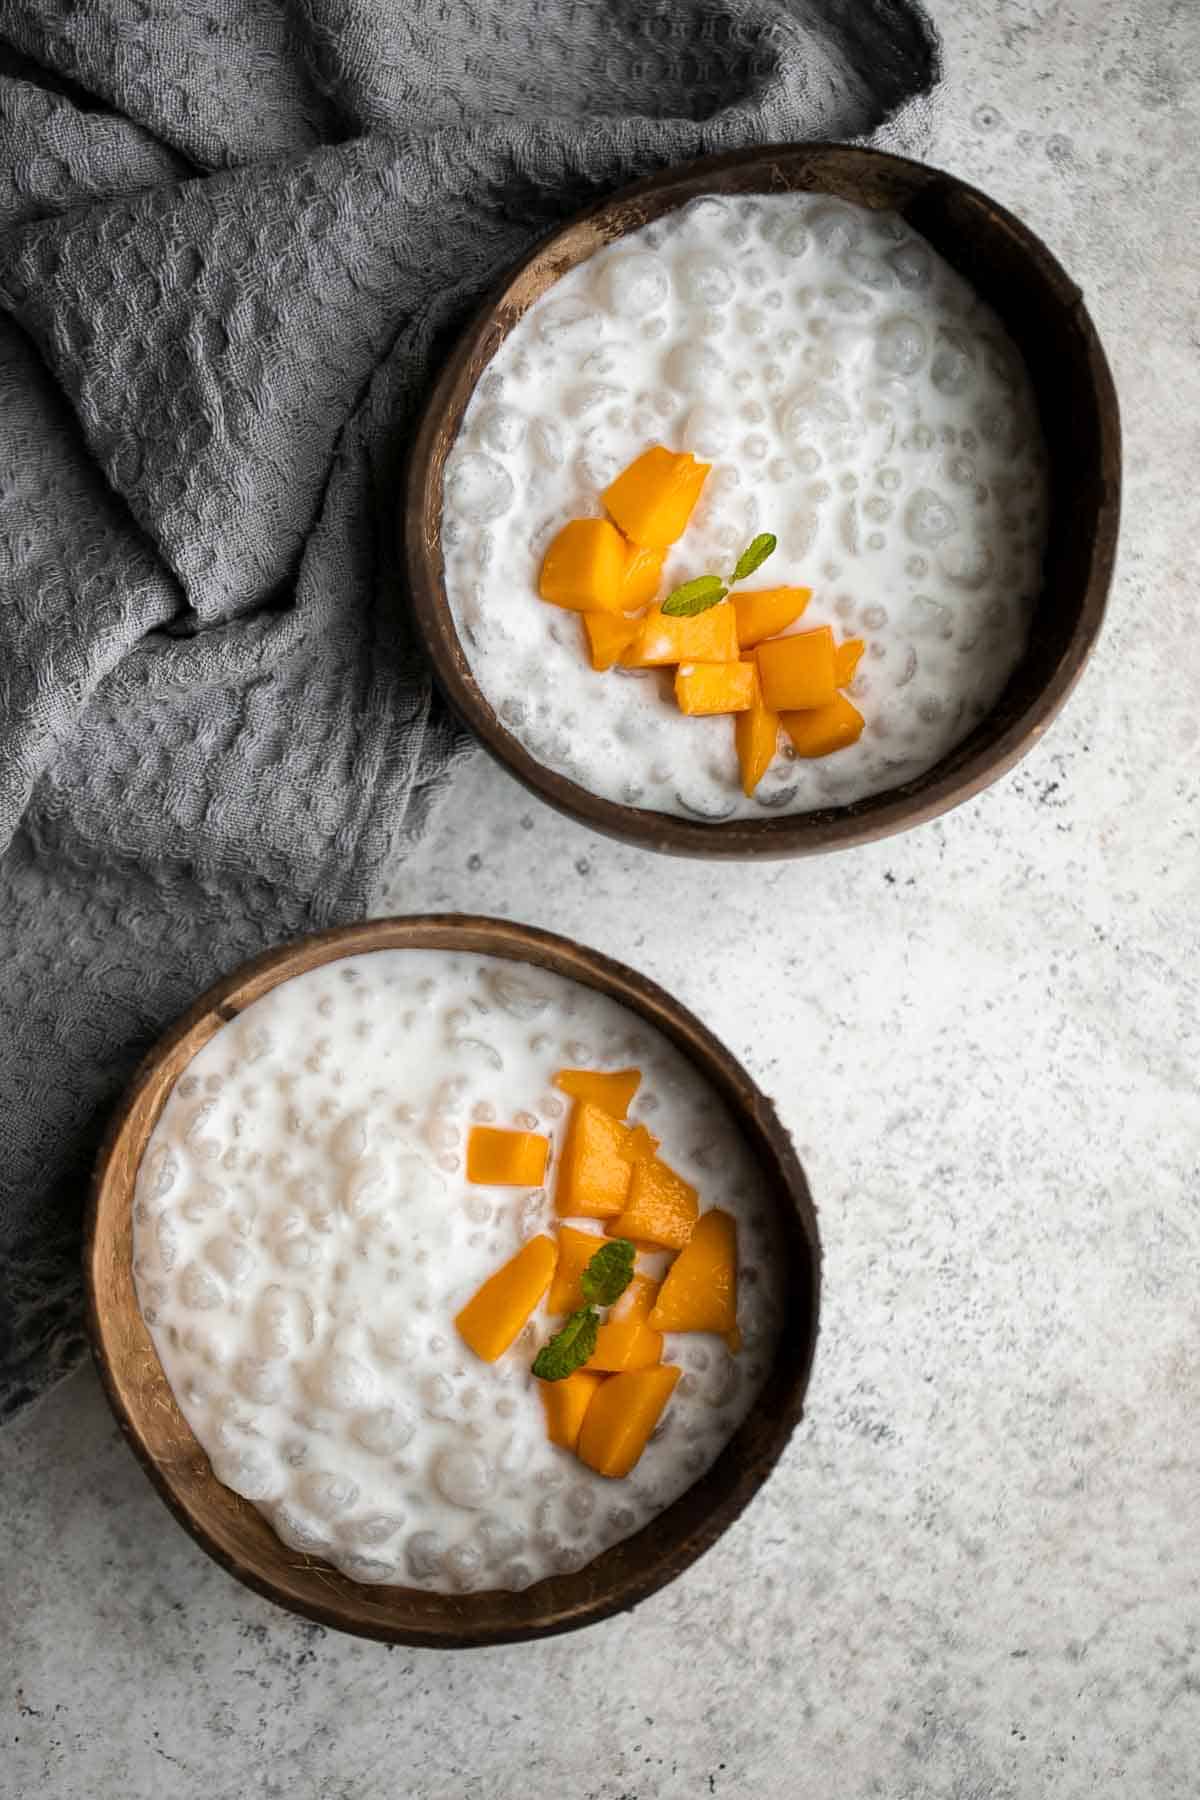
Ingredient Notes
To make this delicious Coconut Tapioca Pudding, you will need the following ingredients (full measurements in recipe card below):
- white pearls - you can use large white tapioca pearls or mini sago pearls or a combination of both (which is what we did). Note that sago pearls cook faster.
- honey - prevents the pearls from sticking together.
- coconut milk
- sweetened condensed milk
- mango - optional topping. You can also use any other tropical fruit on top such as pineapples, peaches, and berries.
- fresh mint - optional, to garnish on top.
How to Make Vegan Coconut Tapioca Pudding
To make this tapioca pudding vegan, substitute the condensed milk with coconut cream. You will also want to add a sweetener such as agave, maple syrup, or sugar to make up for the missing sugar.
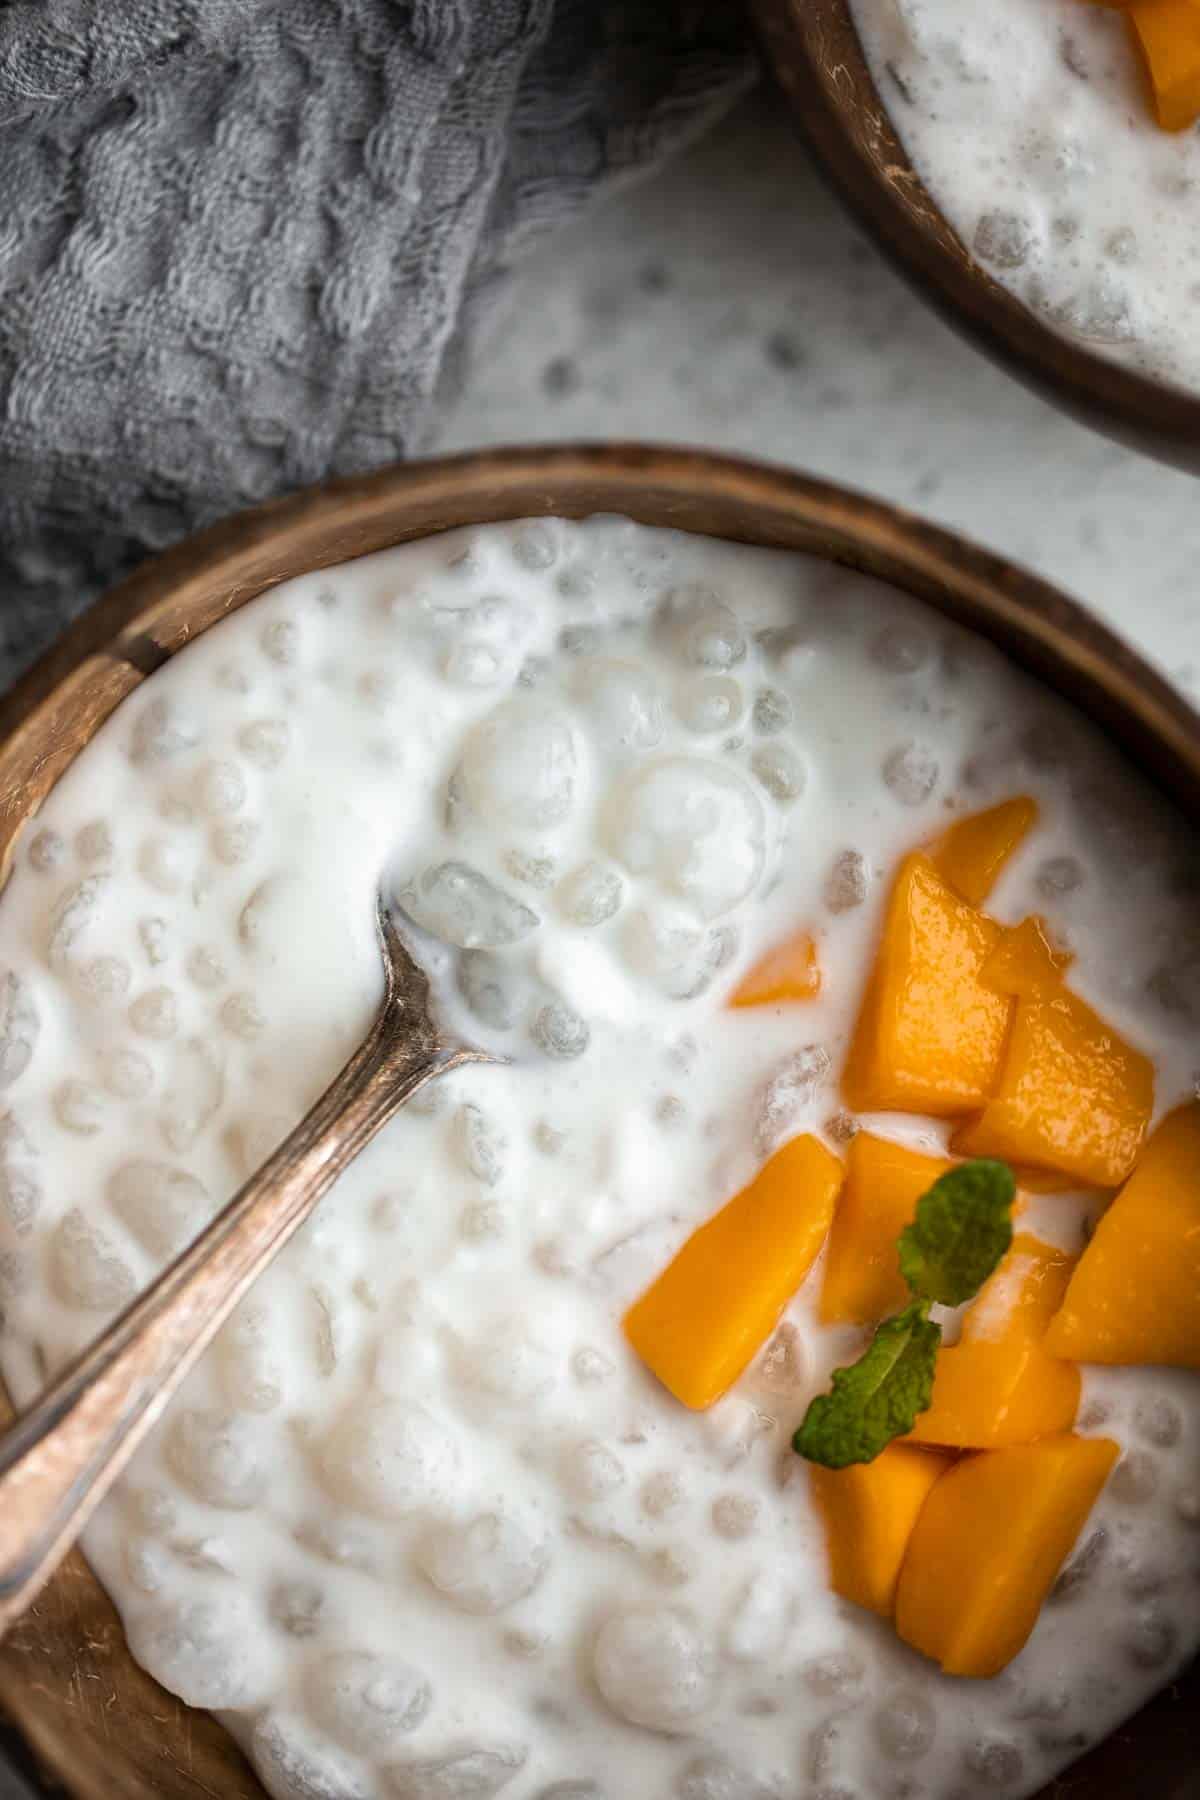
How to Cook White Tapioca Pearls
For Large Tapioca Pearls:
- Cook. In a medium saucepan, bring water to a boil over medium-high heat. Add tapioca pearls and turn the heat down to medium-low heat. Cook for 30 minutes, stirring occasionally to prevent them from sticking to the bottom of the pan.
- Rest. Turn off the heat and let the pearls rest in the hot water for another 30 minutes.
- Rinse. Rinse the pearls under running water to cool and drain well.
- Repeat if necessary. If you still see a white dot in each pearl, repeat the previous steps by boiling the pearls for 30 minutes and letting them sit for 30 minutes until all the tapioca pearls become completely transparent.
- Drain. Drain well and transfer into a bowl. Stir in honey to prevent them from sticking together.
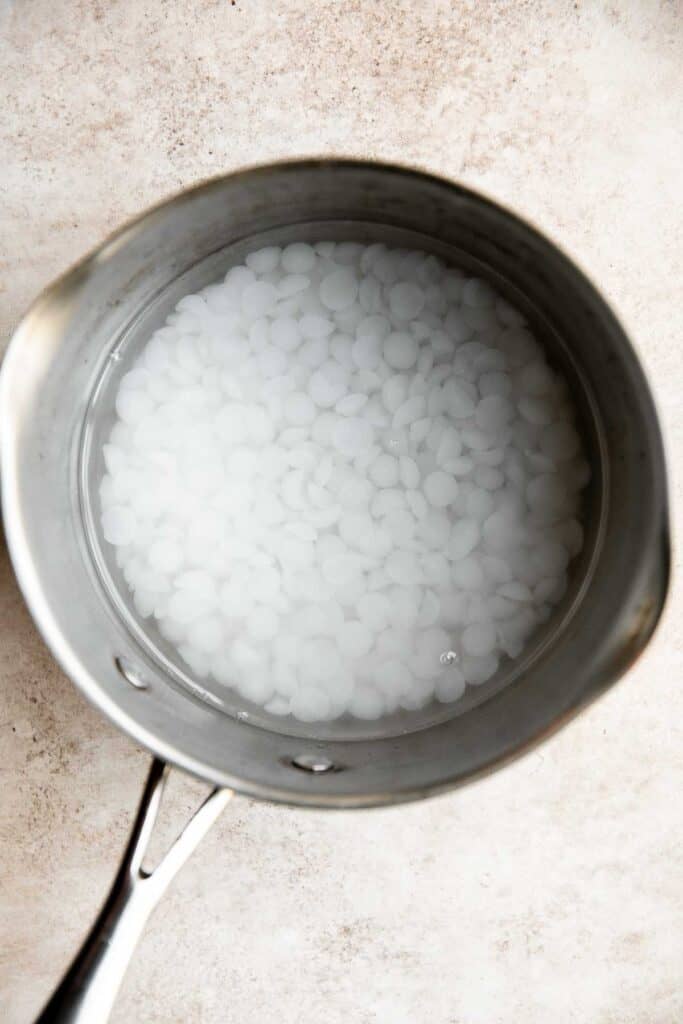
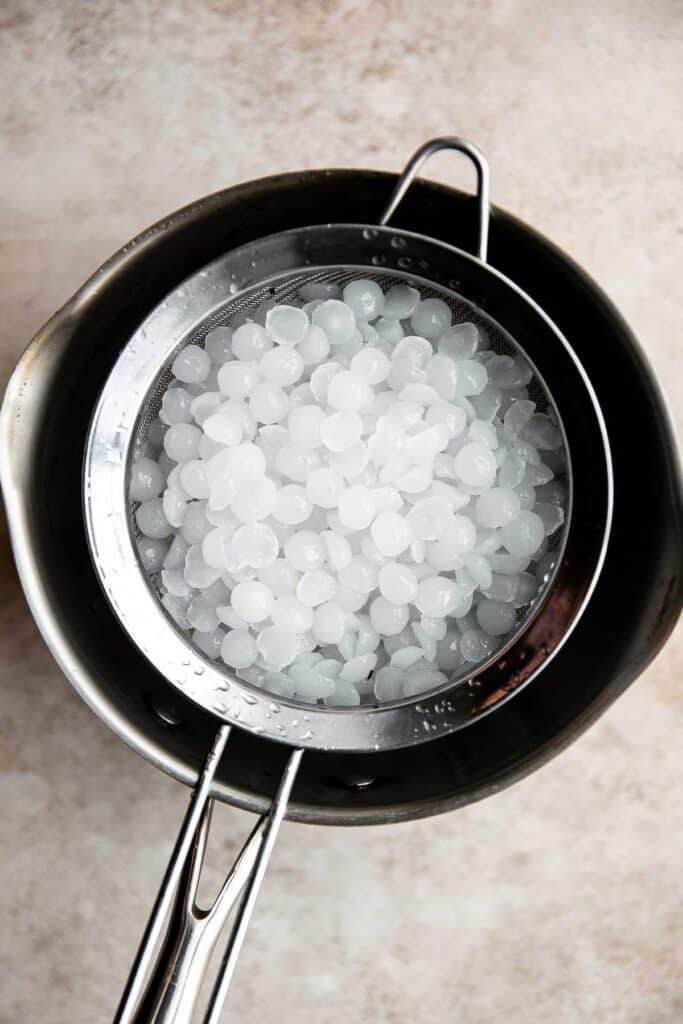
For Mini Sago Pearls:
- Cook. In a medium saucepan, bring water to a boil over medium-high heat. Add sago pearls and turn the heat down to medium-low heat. Cook for 15-20 minutes, stirring occasionally to prevent from sticking to the bottom of the pan. At this point, you might still see a tiny white dot in each pearl.
- Rest. Turn off the heat and let the pearls rest in the hot water until all the tapioca pearls become completely transparent, about 15-20 minutes.
- Rinse and drain. Rinse the pearls under running water to cool. Drain well and set aside in a bowl. Stir in honey to prevent the pearls from sticking together.
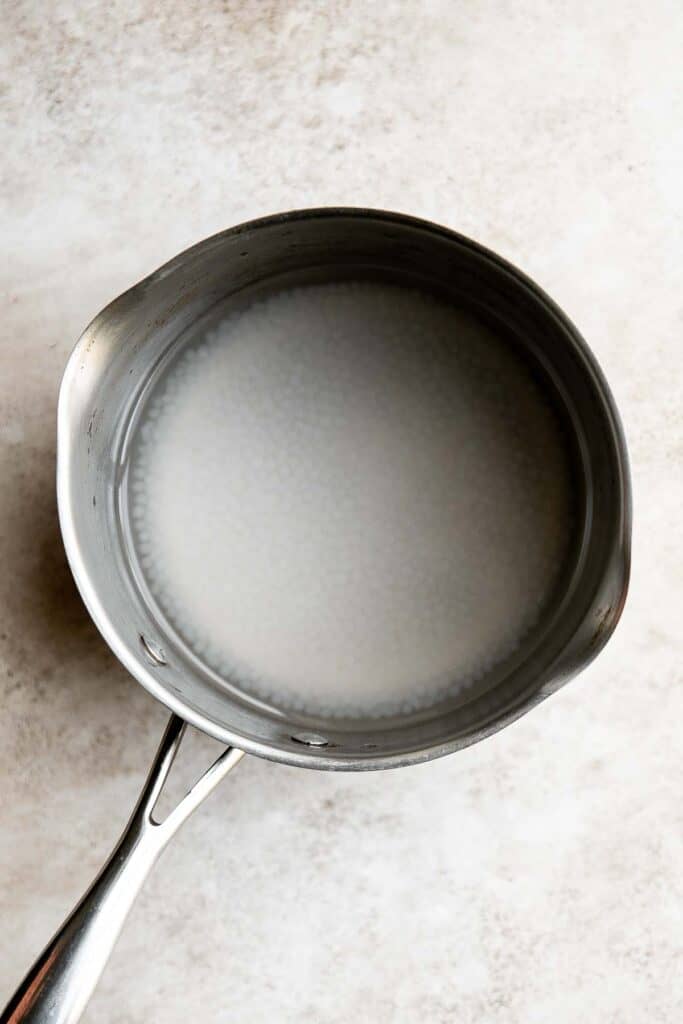
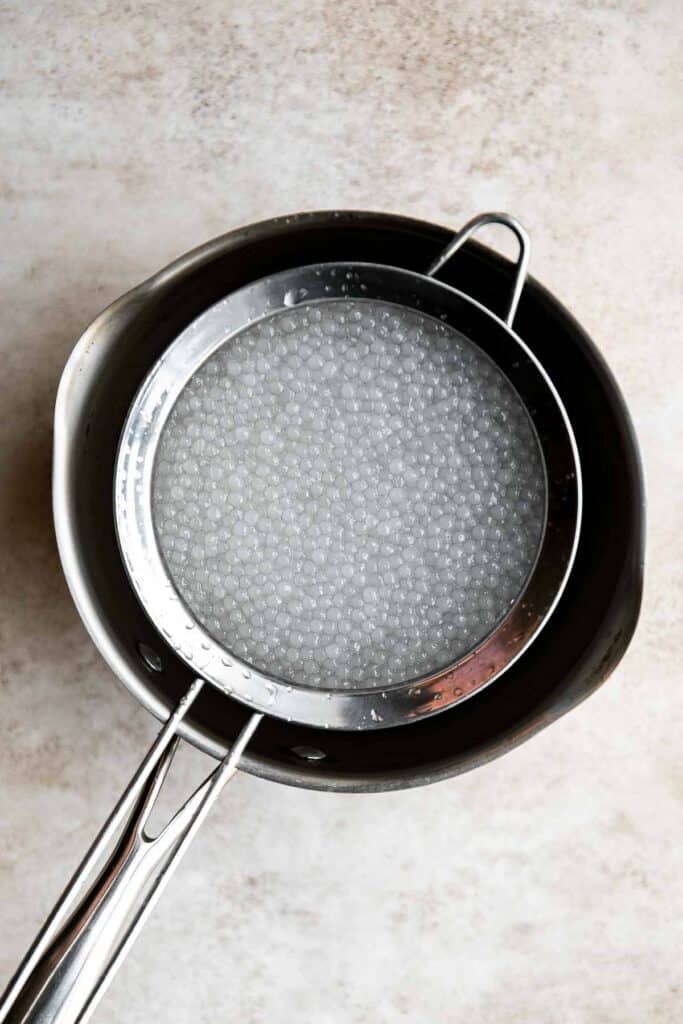
How to Make the Best Coconut Tapioca Pudding
In a medium mixing bowl, whisk together coconut milk and sweetened condensed milk until well combined.
Divide the cooked pearls between 4 serving bowls. Stir in the coconut milk mixture.
Top with diced mango and fresh mint (if using) and serve immediately.
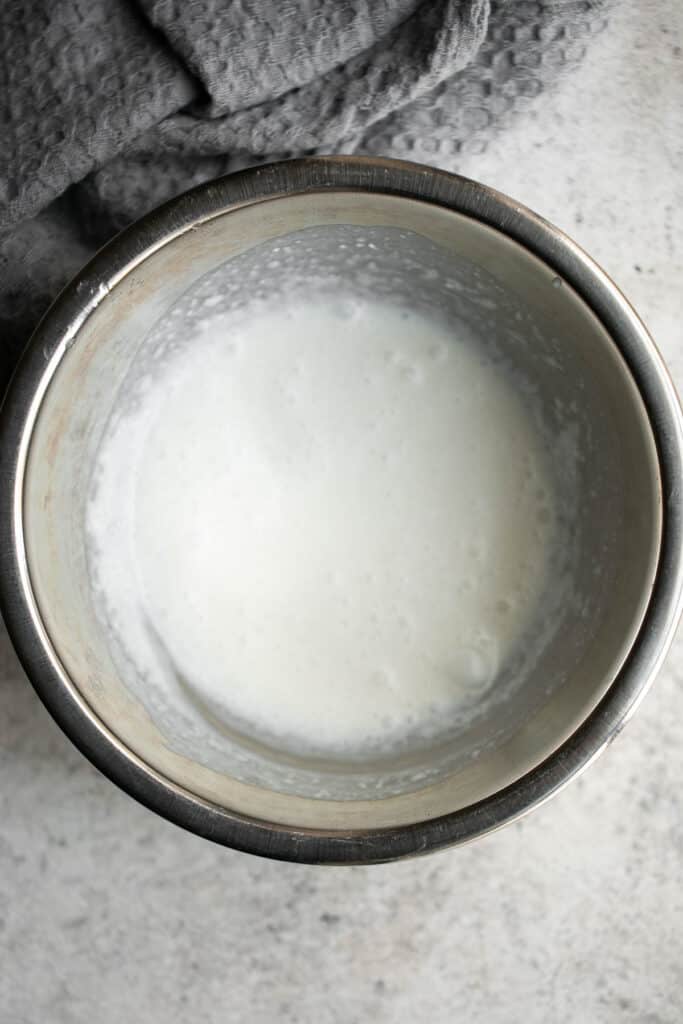
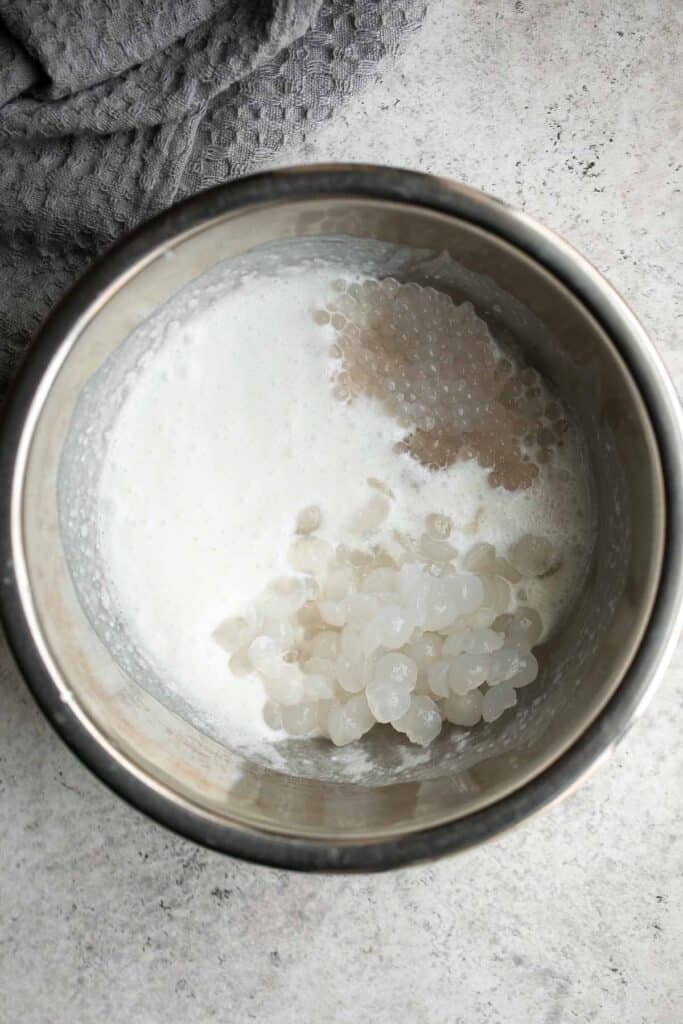
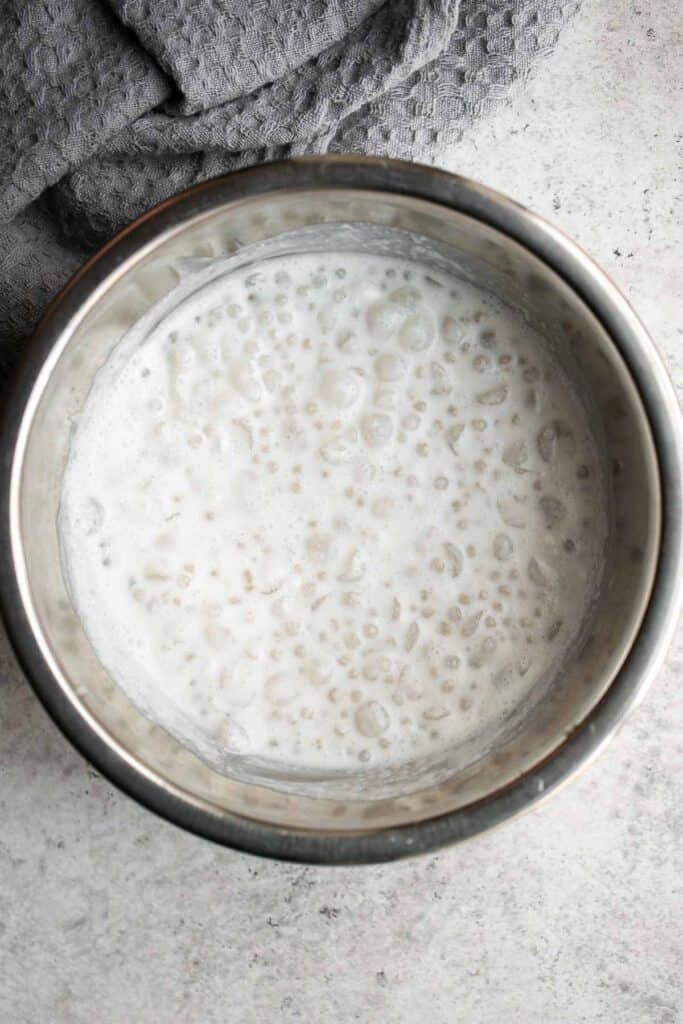
How to Serve
This Coconut Sago Pudding is a delicious Asian dessert to serve on a hot summer day after dinner. Some of my favorite summer dinners to serve this after are:
Recipe Tips and Tricks
- How to store: Keep leftover coconut tapioca pudding in an airtight container in the fridge for up to 5 days.
- How to freeze: You can also freeze tapioca pudding in an airtight container or freezer bag in the freezer for up to 3 months.
- How to thaw: Allow frozen coconut tapioca pudding to thaw overnight in the refrigerator before serving.
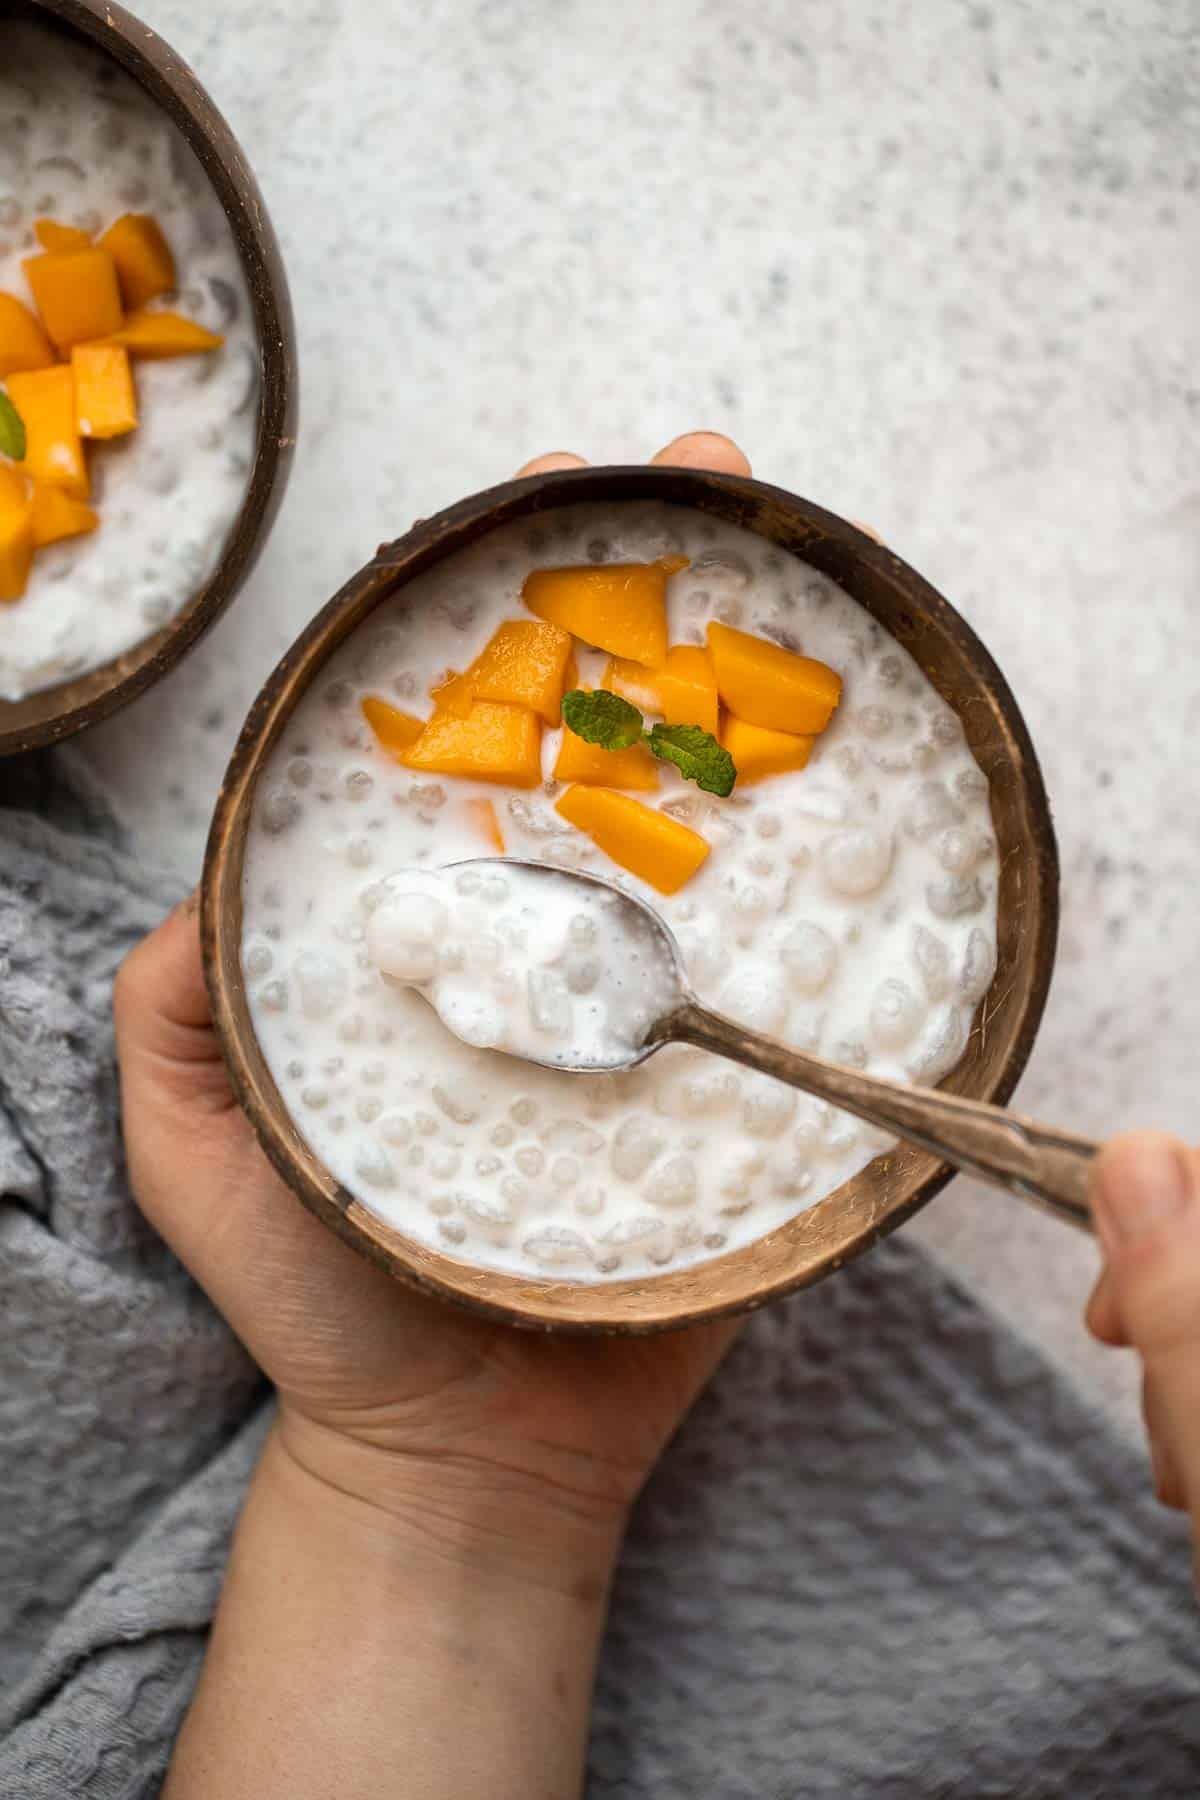
More Tapioca Recipes
Tried this recipe?
I'd love to hear what you think! Leave a comment and rating below to share your feedback. Your reviews help others discover this recipe and help me keep creating more free recipes for you. Snap a photo and tag me on social media @aheadofthyme too.

Garlic Butter Shrimp
Garlic butter shrimp is a quick and easy dinner ready in just 10 minutes! It's loaded with flavor - buttery, garlicky, and lemony. Perfect for busy weeknights but also for special occasions.
Like most shrimp recipes, it's so easy to make that you'll want to make it all the time! Serve pan-fried garlic shrimp over pasta, rice, salads, and more.
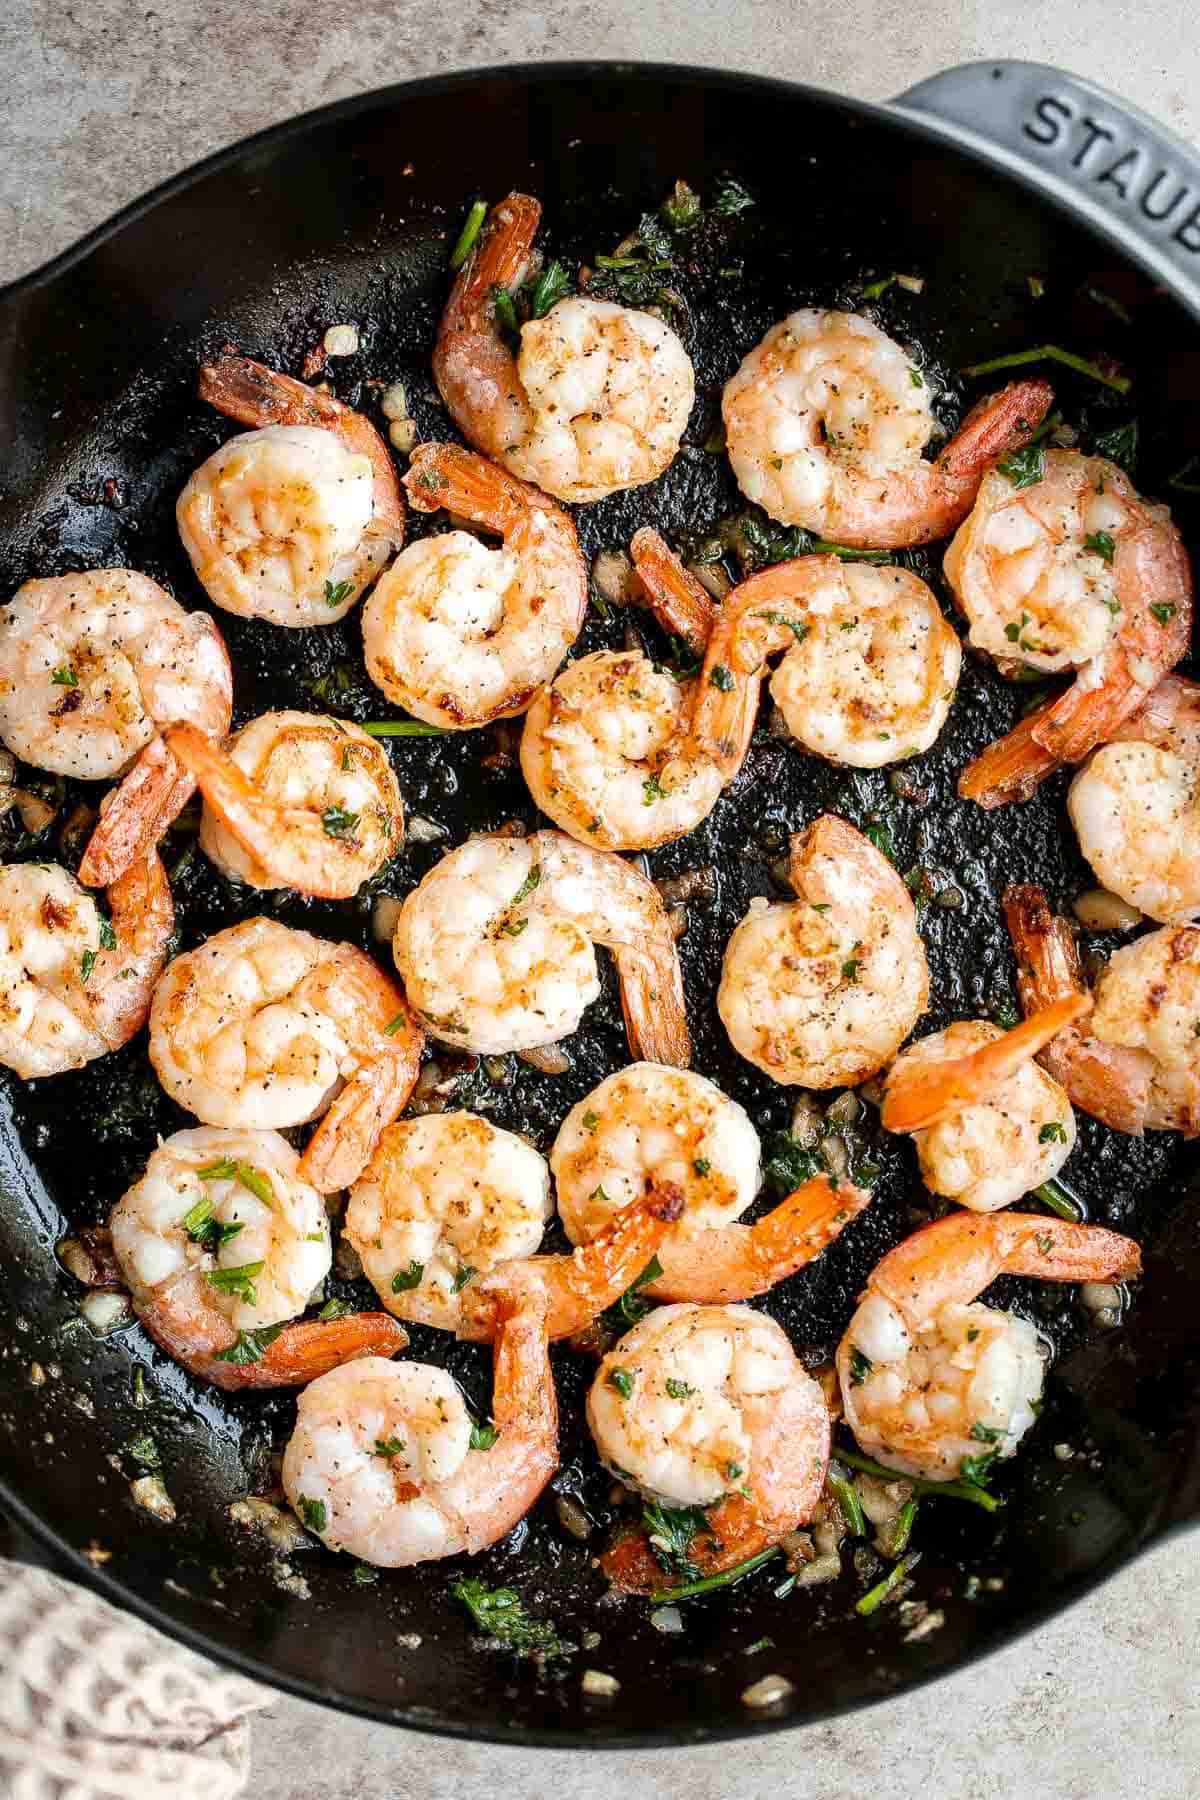
Why You'll Love Garlic Butter Shrimp
- It's a quick 15 minute dinner. The best part of this meal is that it's so fast to make. Spend 5 minutes prepping your ingredients and 10 minutes cooking it before you can enjoy fresh, perfectly cooked shrimp coated in a garlic butter sauce that is so crave-worthy.
- It's easy to make too. Did I mention anyone, especially beginners, can make this recipe? You only need to know is what to look for when cooking shrimp. As soon as they begin to turn pink, keep your eye on the shrimp. Once the tails begin to turn in, they're done! Any longer in the pan, and they could overcook into a rubbery mess. So, be sure to pull your garlic butter shrimp off the heat at the right time.
- It's delicious and flavorful. Shrimp has a yummy natural taste, and when you add garlic butter with lemon and herbs to the mix, it makes it even better.
- Shrimp is a healthy protein. Shrimp is a seafood that's high in protein and low in calories, carbs, and fat. It's also packed with essential nutrients like selenium, choline, niacin, zinc, and vitamins B6, B12, and E.
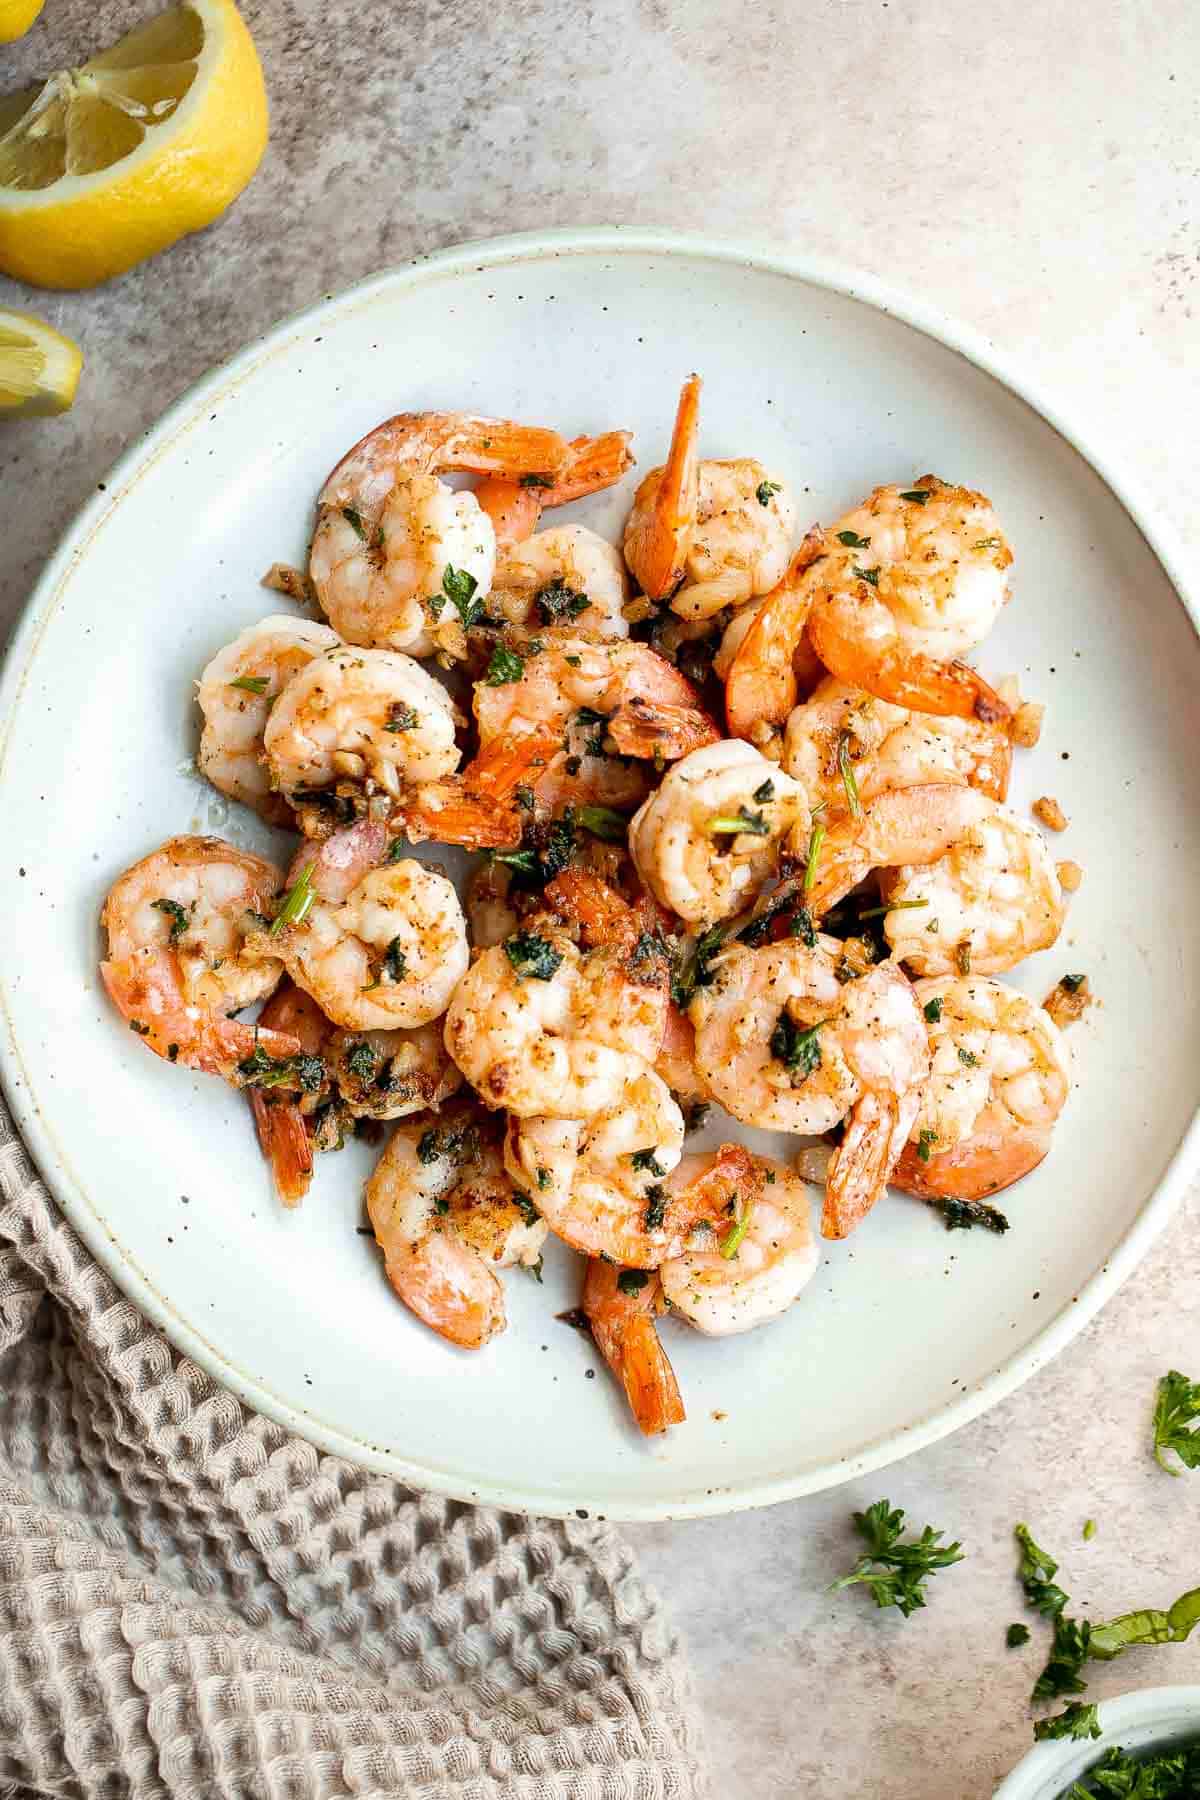
Ingredient Notes
To make this quick and easy Garlic Butter Shrimp, you will need the following ingredients (full measurements in recipe card below):
- shrimp - I used large white shrimp but you can feel free to use any type of shrimp that you like. I also kept the tails on, but for easier eating, you can remove them when you are peeling and deveining the shrimp before cooking.
- butter
- garlic
- lemon juice
- parsley
- salt and pepper
You will also need measuring spoons and a large skillet (I used a 10-inch cast-iron skillet).
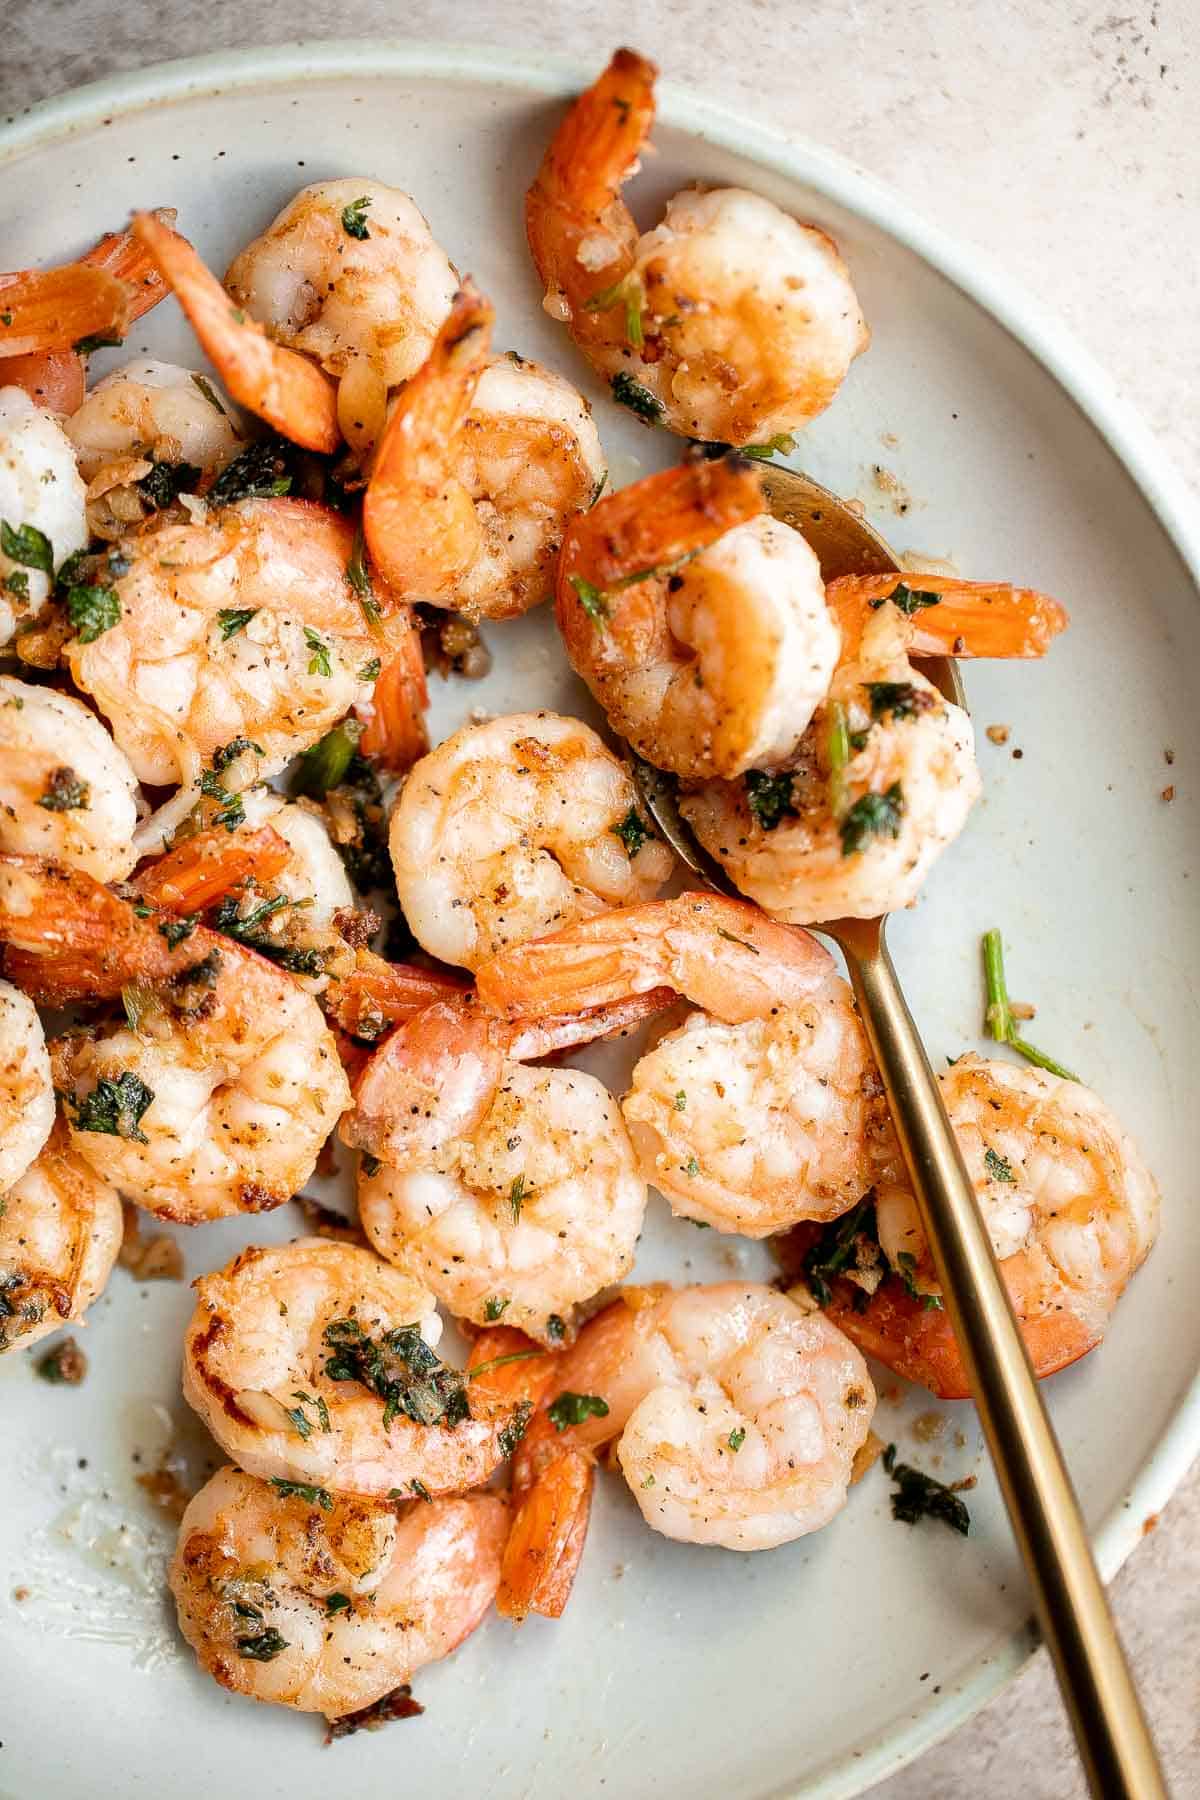
How to Make the Best Garlic Butter Shrimp
- Sear shrimp. Add butter in a large skillet over medium-high heat and melt until it starts to bubble, about 1-2 minutes. Sear the shrimp for 2-3 minutes on each side until the edges turn golden brown. Season with salt and pepper.
- Add seasoning. Add garlic and cook until fragrant, about 1 minute. Add lemon juice and parsley. Toss well to mix evenly.
- Serve. Serve immediately.
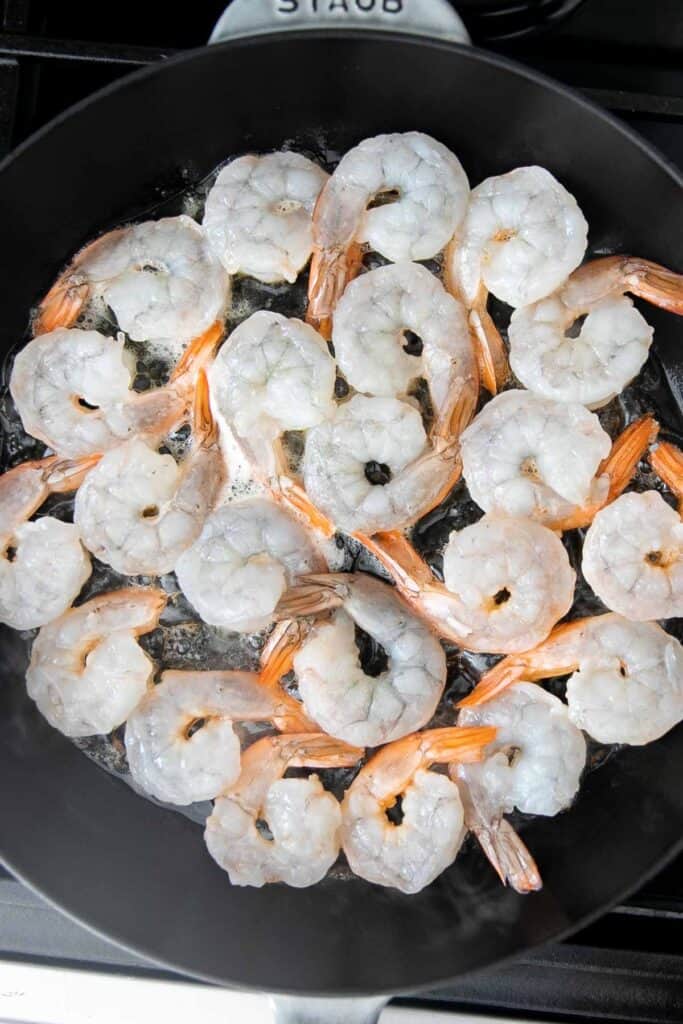
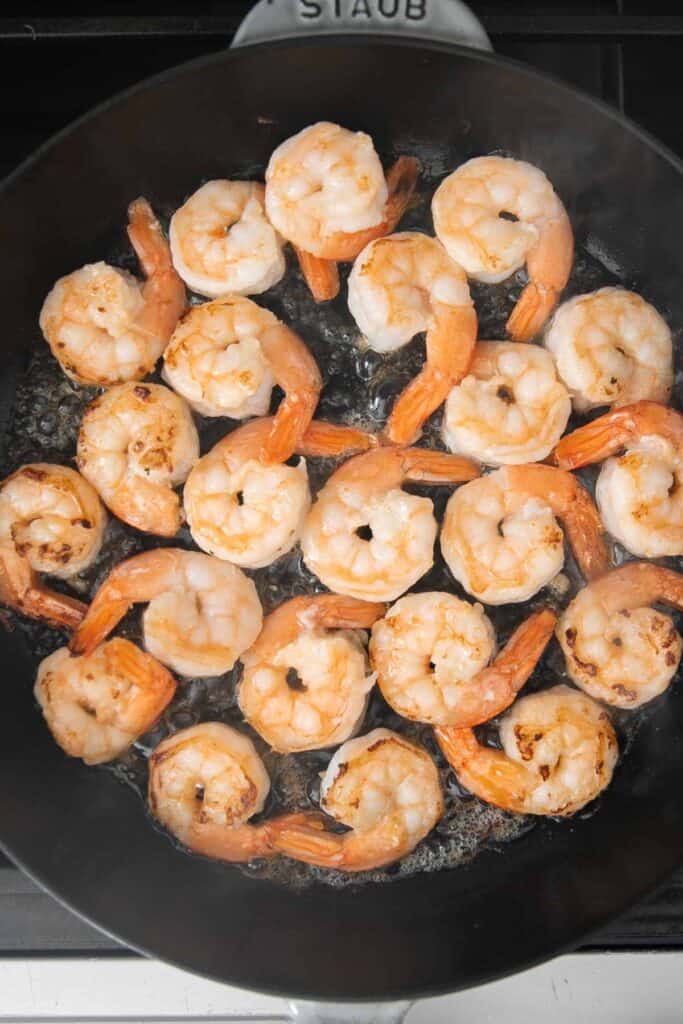
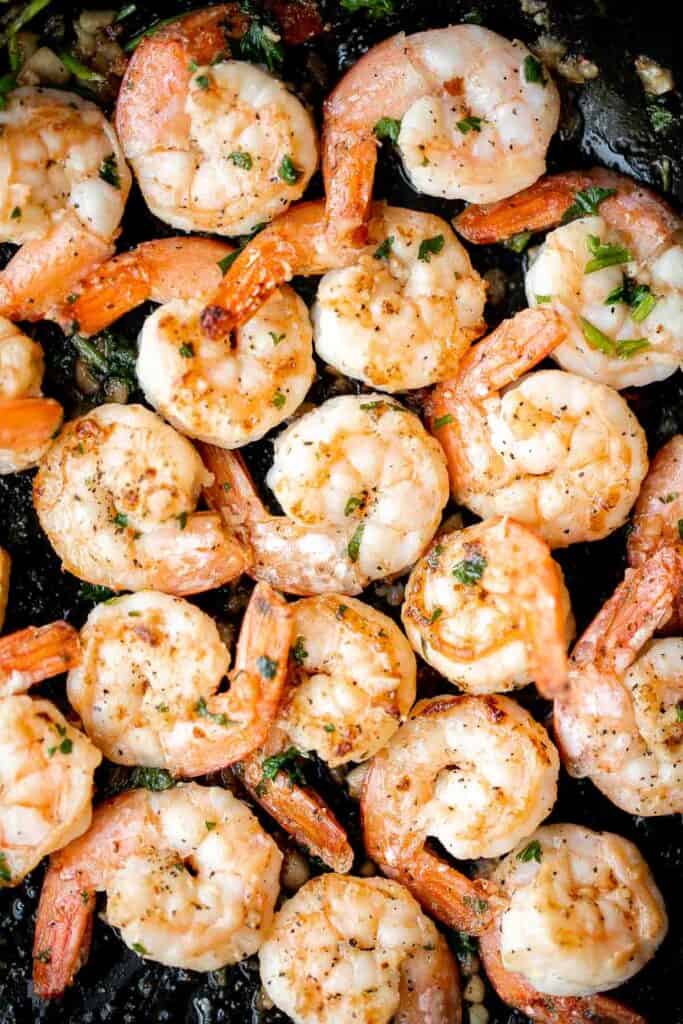
How to Serve
Garlic butter shrimp tastes best when served over pasta or rice. You can also use it to top salads or create a surf n turf meal when served with steak.
Serve garlic shrimp with:
Storing Instructions
- How to store: Cooked shrimp is best eaten fresh on the day it's cooked or the day after. Store it for about two days in an airtight container in the refrigerator.
- How to reheat: To reheat leftover garlic butter shrimp, preheat a covered pan with a splash of water on medium-low heat. Add the garlic butter shrimp and heat until warmed through, about 2 minutes. You can also enjoy garlic butter shrimp cold over salad.
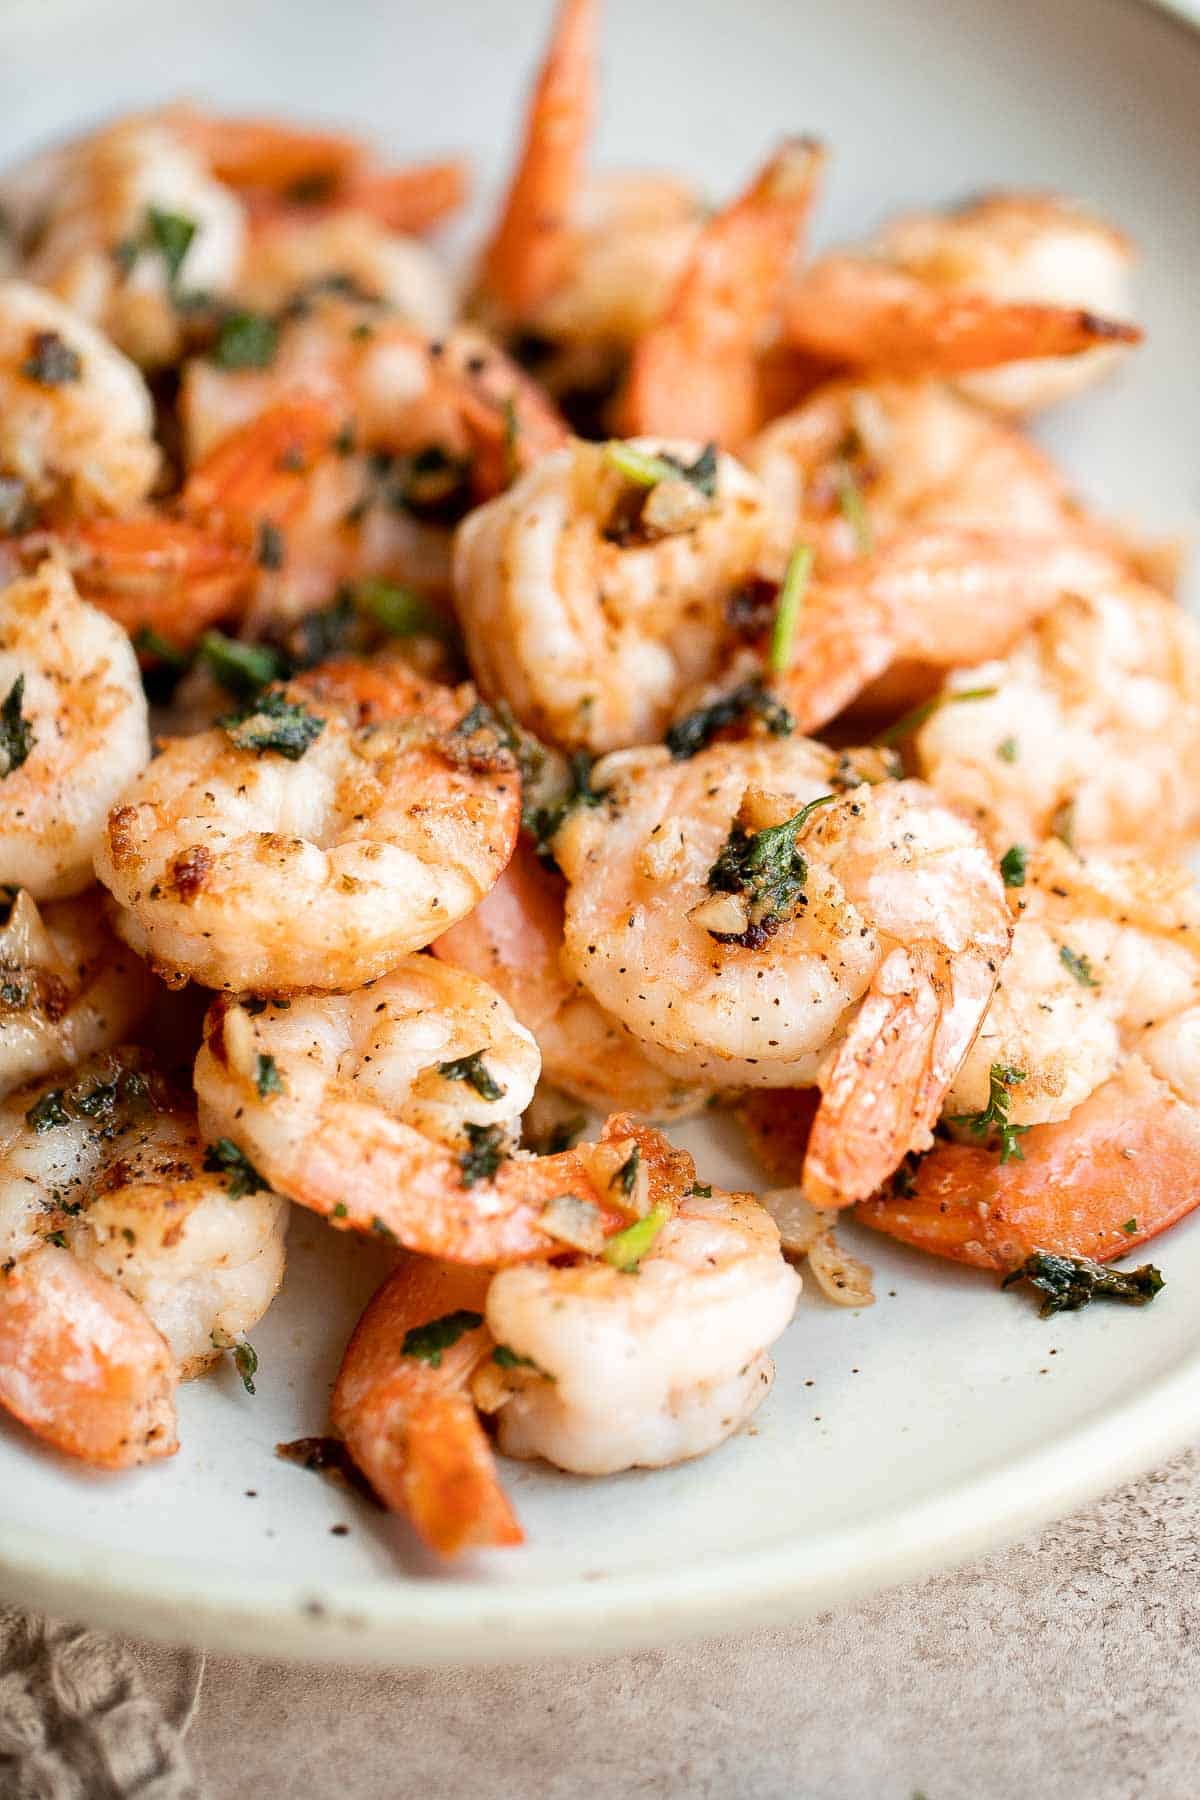
More Shrimp Recipes
- 30 Best Shrimp Recipes
- Creamy Garlic Shrimp
- Garlic Shrimp Skewers
- Garlic Shrimp Stir Fry
- Baked Coconut Shrimp
- Shrimp Cakes
Tried this recipe?
I'd love to hear what you think! Leave a comment and rating below to share your feedback. Your reviews help others discover this recipe and help me keep creating more free recipes for you. Snap a photo and tag me on social media @aheadofthyme too.
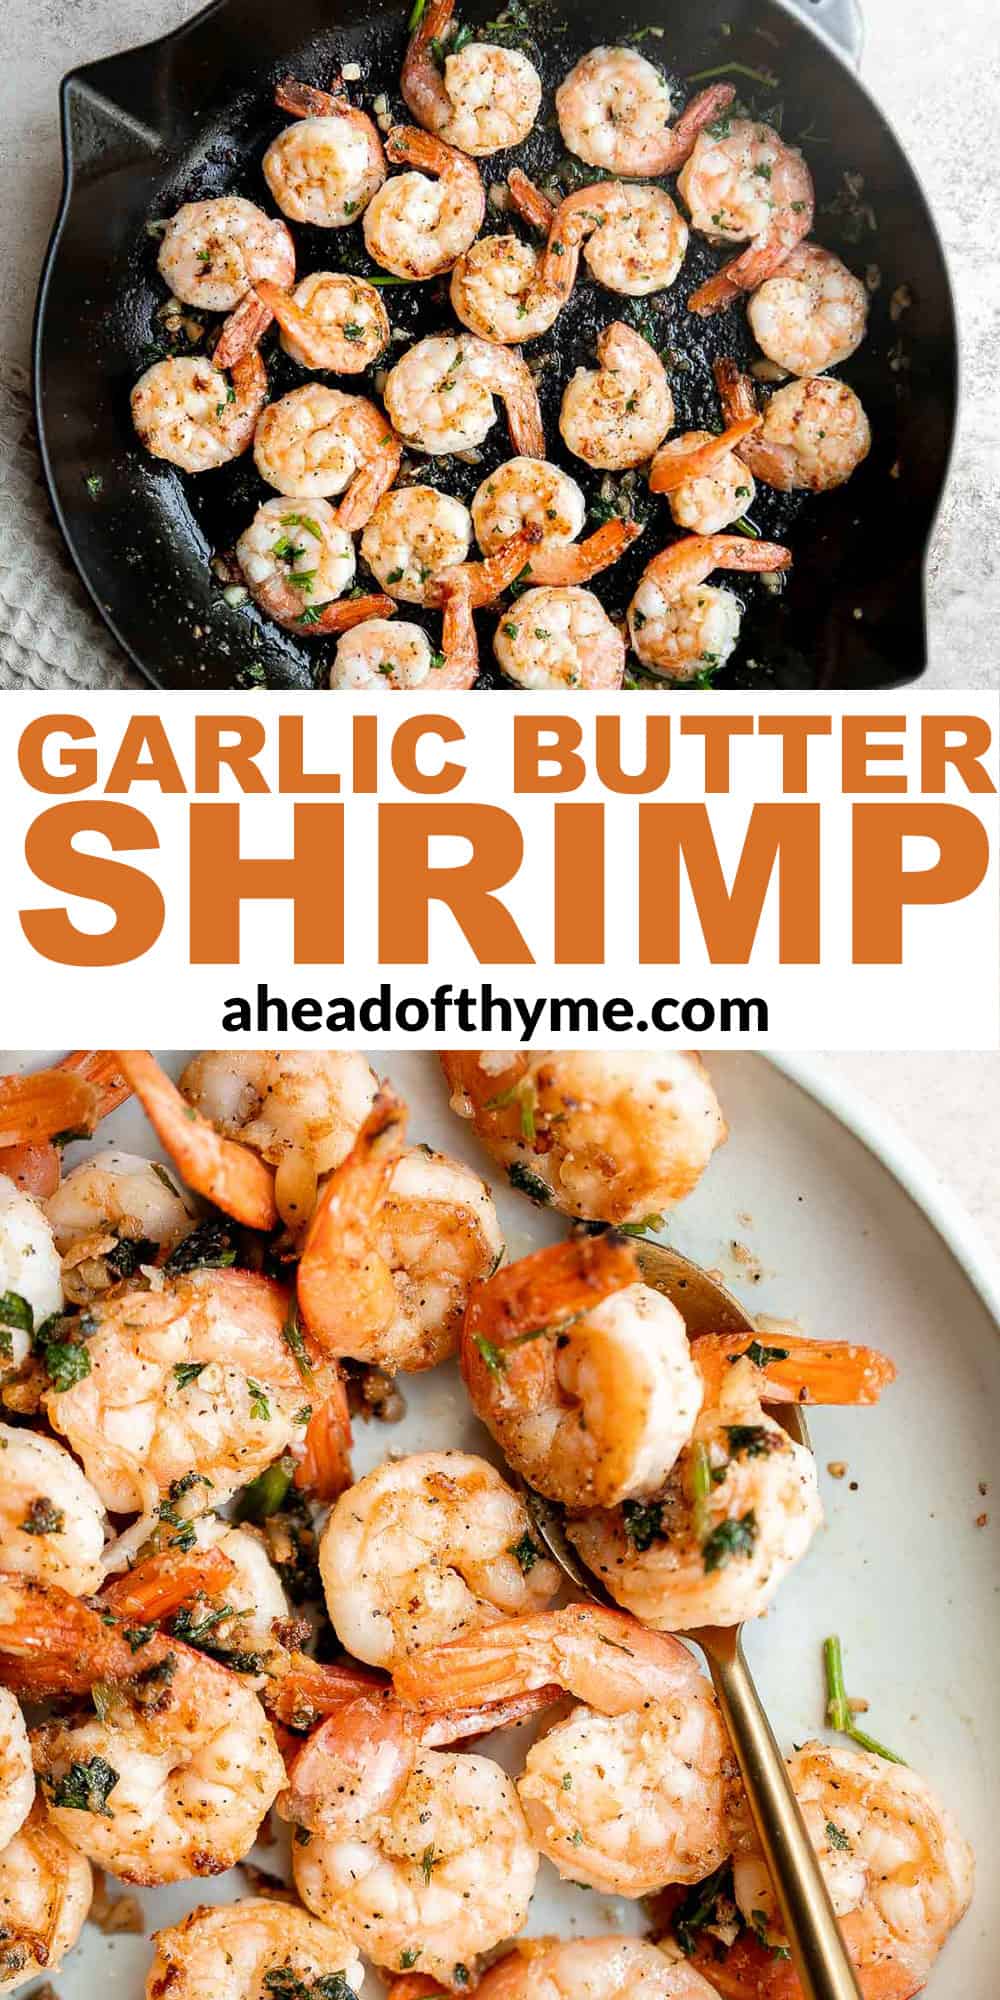
Kani Salad
Kani Salad is a common side dish that you can find at Japanese restaurants that can be easily made at home. It's loaded with thin strips of crab, julienned vegetables, and a creamy mayo dressing (which can be made spicy for a Spicy Kani Salad variation).
Made with a simple combination of ingredients, this Japanese crab salad is nonetheless packed with so much flavor and is cheap to make (compared to real crab). Serve it on sushi night or alongside your favorite Asian Takeout dishes.
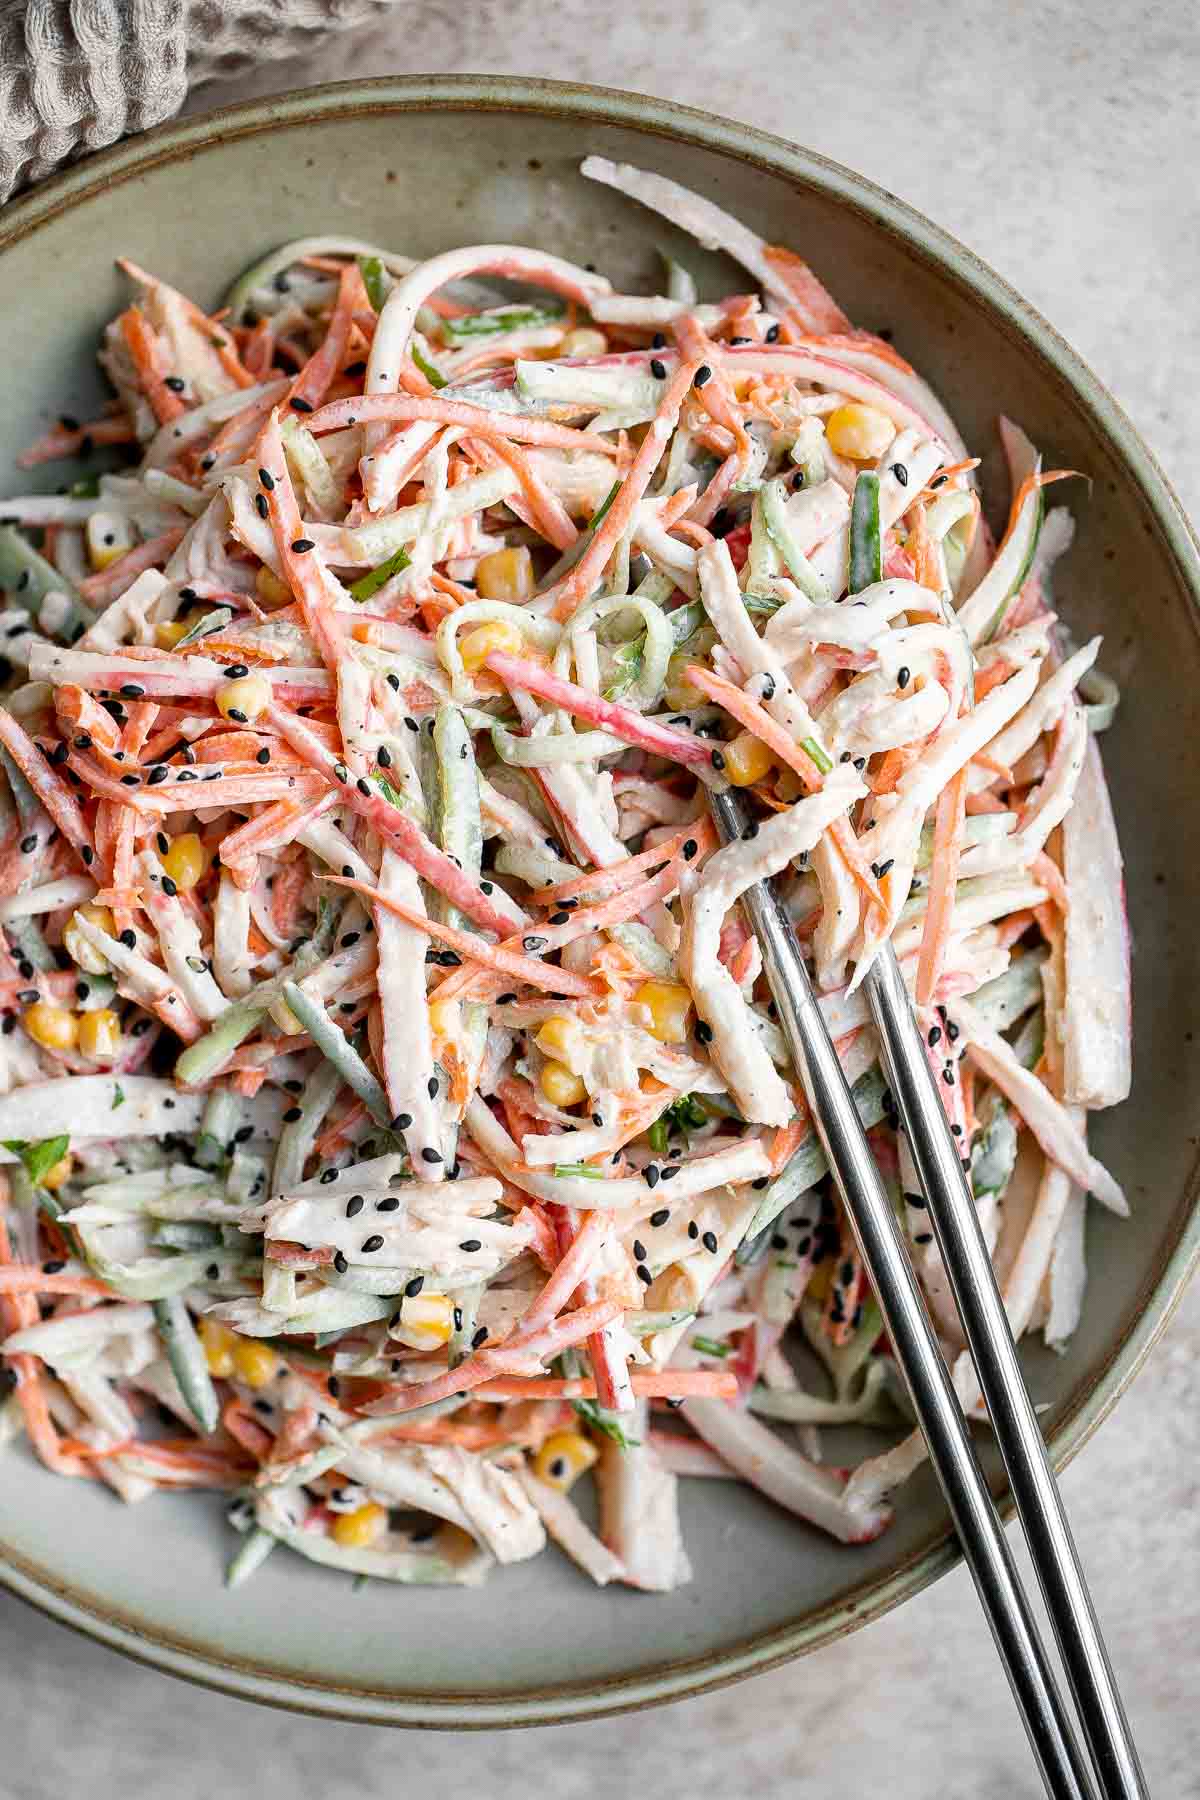
Why You'll Love Kani Salad
- Flavorful crab salad. Kani in Japanese means crab, and in kani salad, you can expect to find imitation crab meat. Imitation crab meat is typically made from white fish and processed in a way to look like crab meat and taste like it too. Plus, you can serve this mild or add extra flavor such as hot sauce to turn it into a spicy kani salad.
- Loaded with fresh vegetables. Fresh cucumbers and carrots bring a healthy crunch and vibrant color to this seafood salad. Plus the lemon juice in the dressing helps to soften the veggies just enough to create the perfect texture. It's so good.
- Quick and easy to make. Need to throw something together fast? This kani salad recipe has your back. It's ready in just 10 minutes, or less if you are really quick at chopping up ingredients. Once you have prepped all the ingredients, you simply throw them together, toss with the salad dressing, and serve!
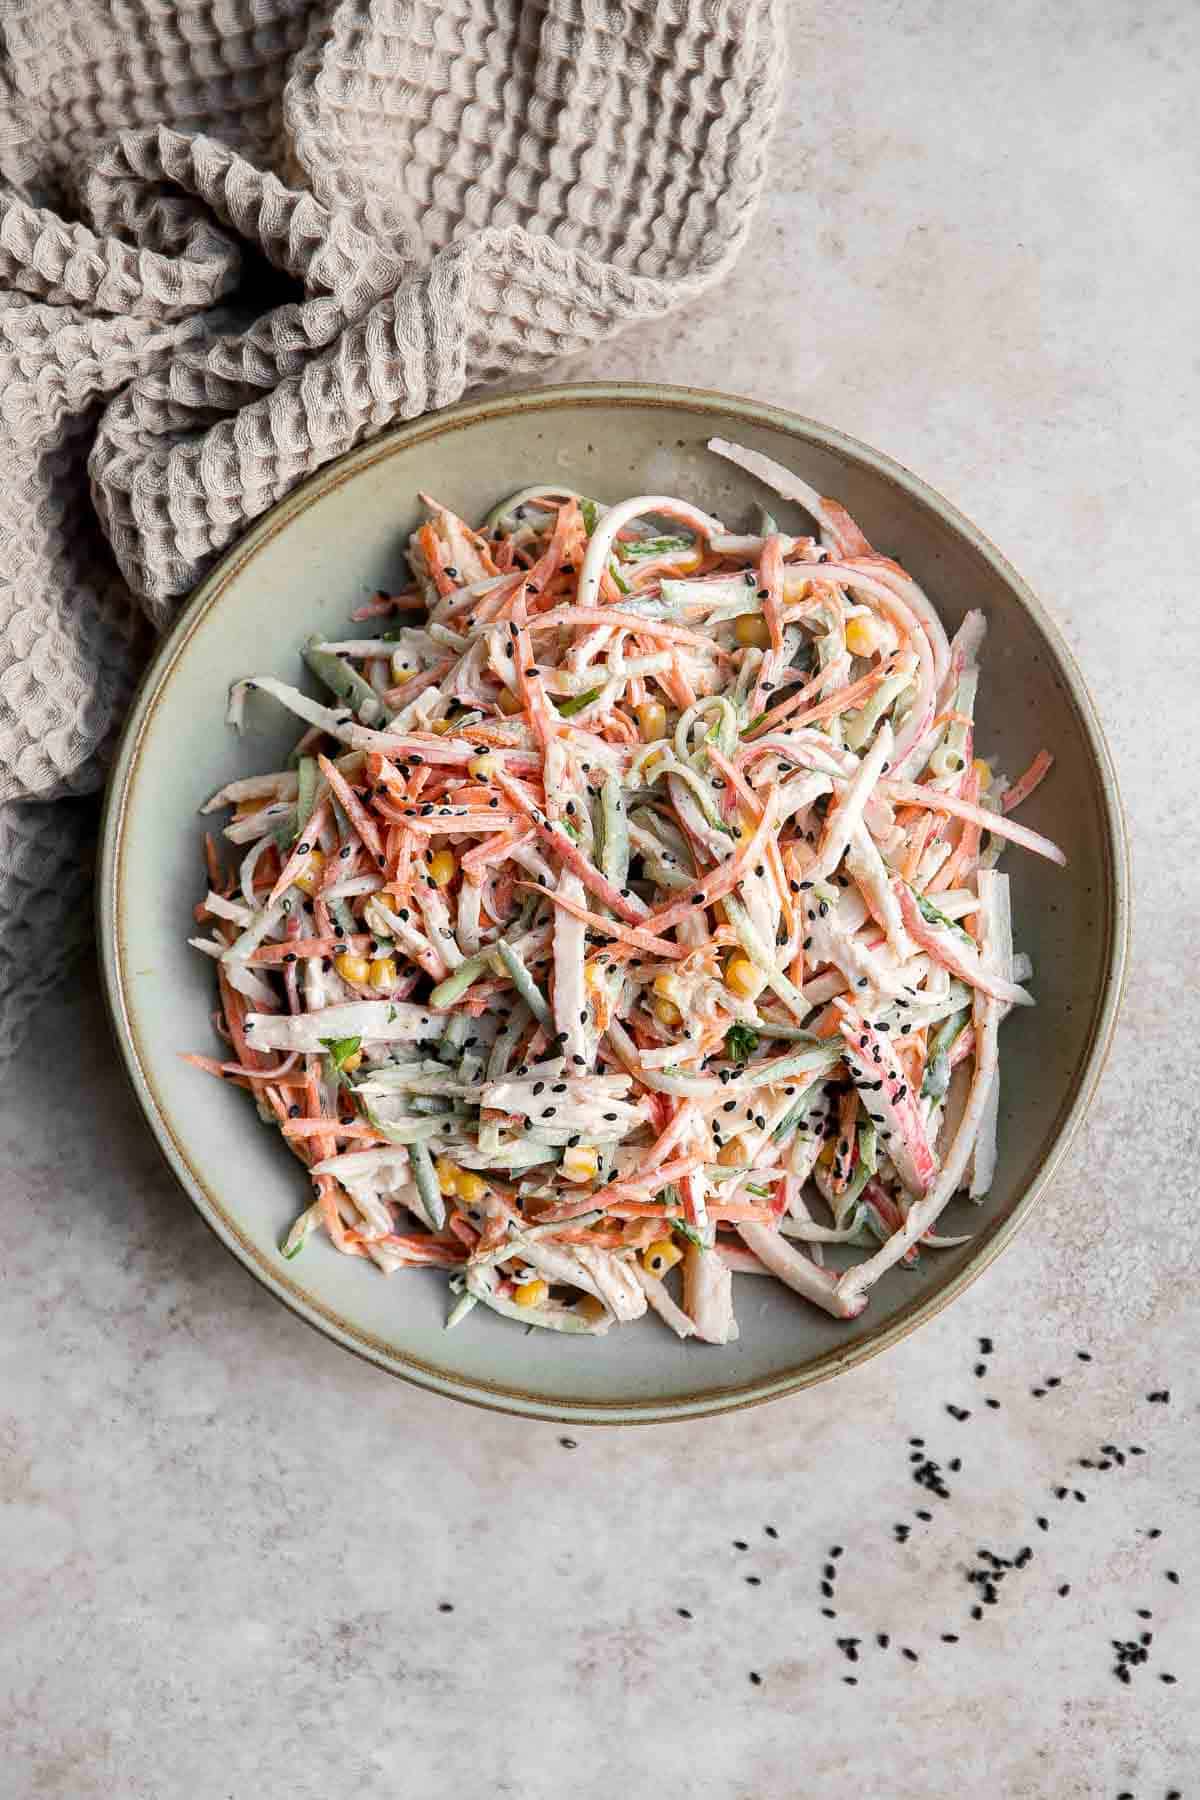
Ingredient Notes
To make this Asian Kani Salad, you will need the following ingredients (full measurements in recipe card below):
- imitation crab - although it's not real crab meat, imitation crab meat is delicious and it's affordable.
- Persian cucumbers - also known as mini cucumbers.
- carrot
- corn - I used corn that was thawed from frozen. You can thaw frozen corn quickly by letting it sit in a bowl of hot water for a few minutes before draining. You can also substitute with canned corn but drain and rinse the corn first.
- dressing - the creamy dressing is made with mayonnaise, lemon juice, sesame oil, black sesame seeds, salt, and pepper.
- sriracha or hot sauce - you can make a spicy kani salad by adding in some hot sauce to the dressing.
Variations
Kani salad is customizable with your favorite fruits or vegetables including avocados, lettuce, or mangos. You could also add in fish roe.
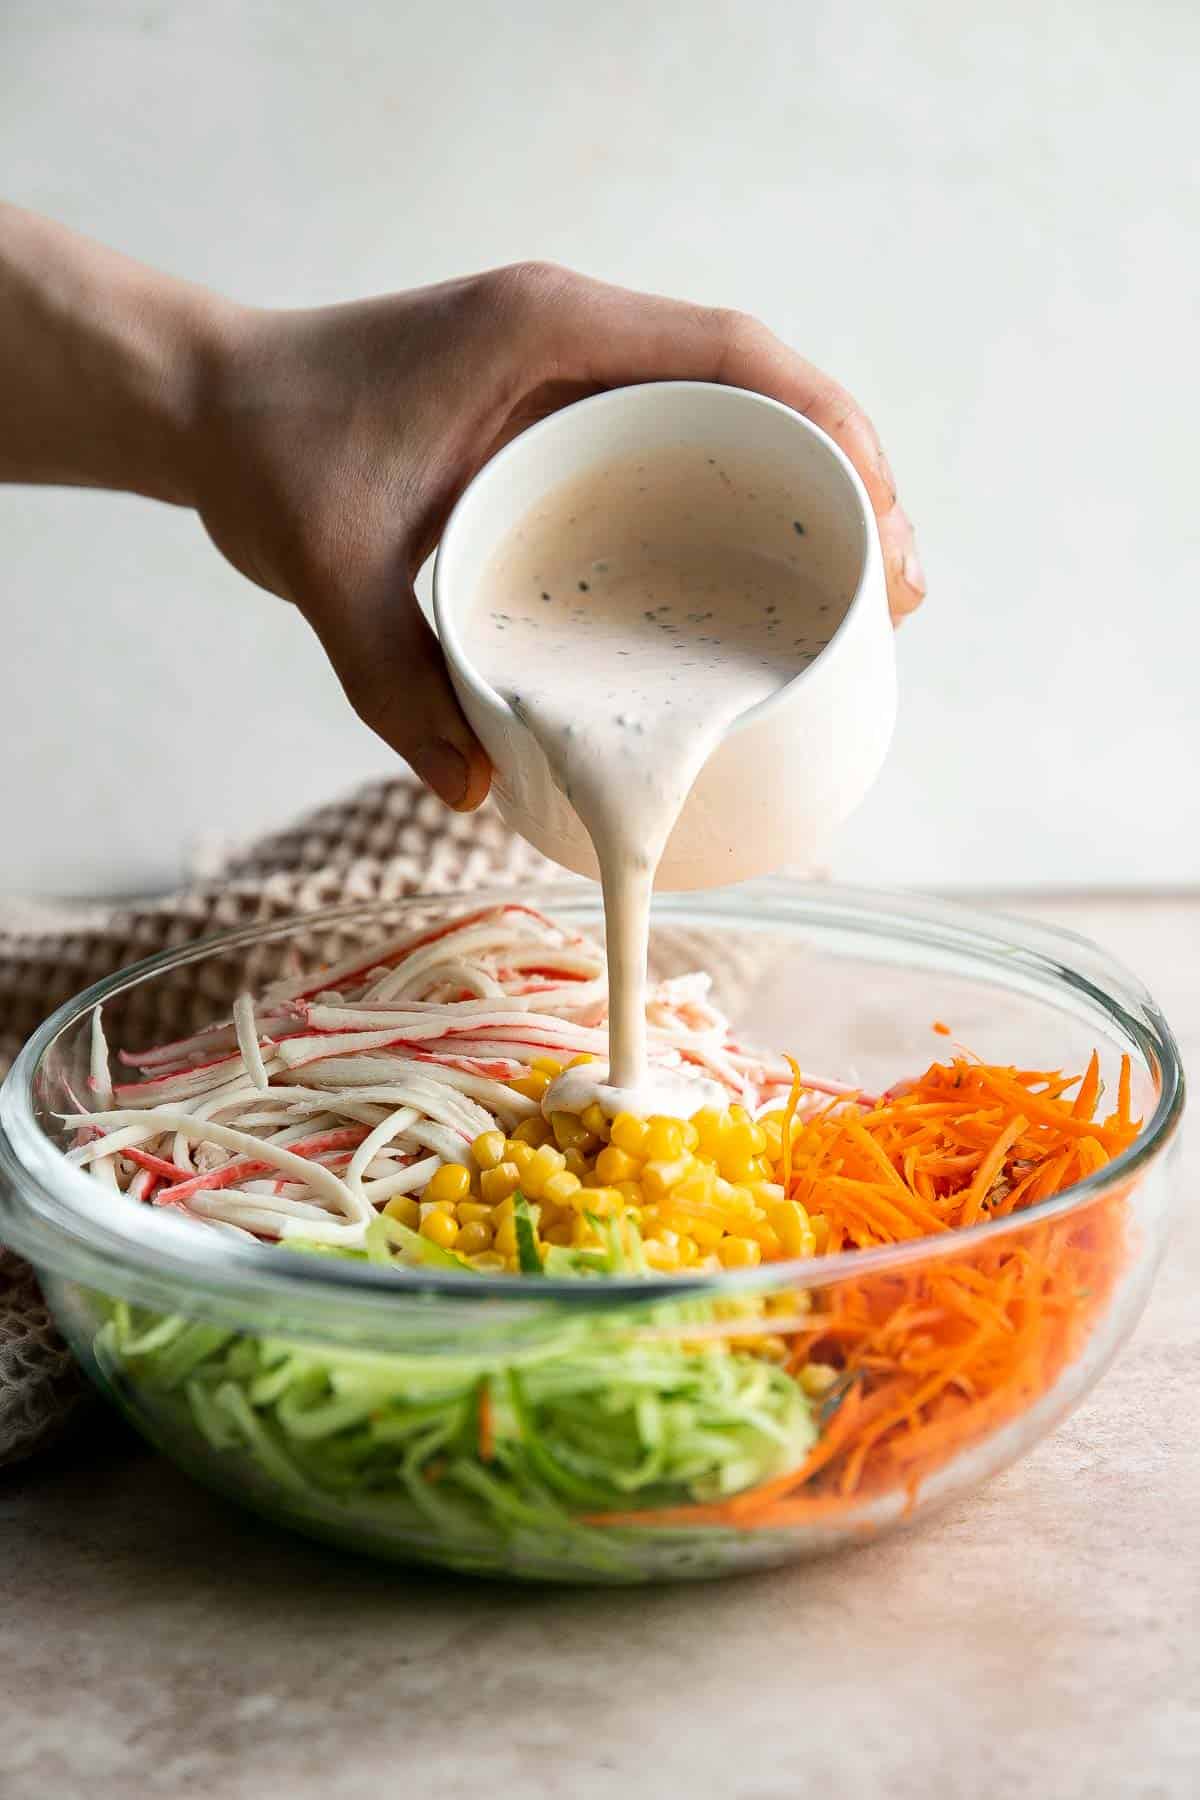
How to Make the Best Kani Salad
- Prepare vegetables. Prepare the salad ingredients by shredding the crab sticks using a box grater. Use a knife to julienne the cucumbers and carrots into thin strips, use the grater to shred them. Transfer to a serving bowl and add the corn.
- Make dressing. In a medium mixing bowl, make the dressing by stirring together mayonnaise, lemon juice, sesame oil, hot sauce, sesame seeds, salt, and pepper until smooth.
- Toss to combine. Add the dressing to the salad and toss well to coat evenly. Serve immediately.
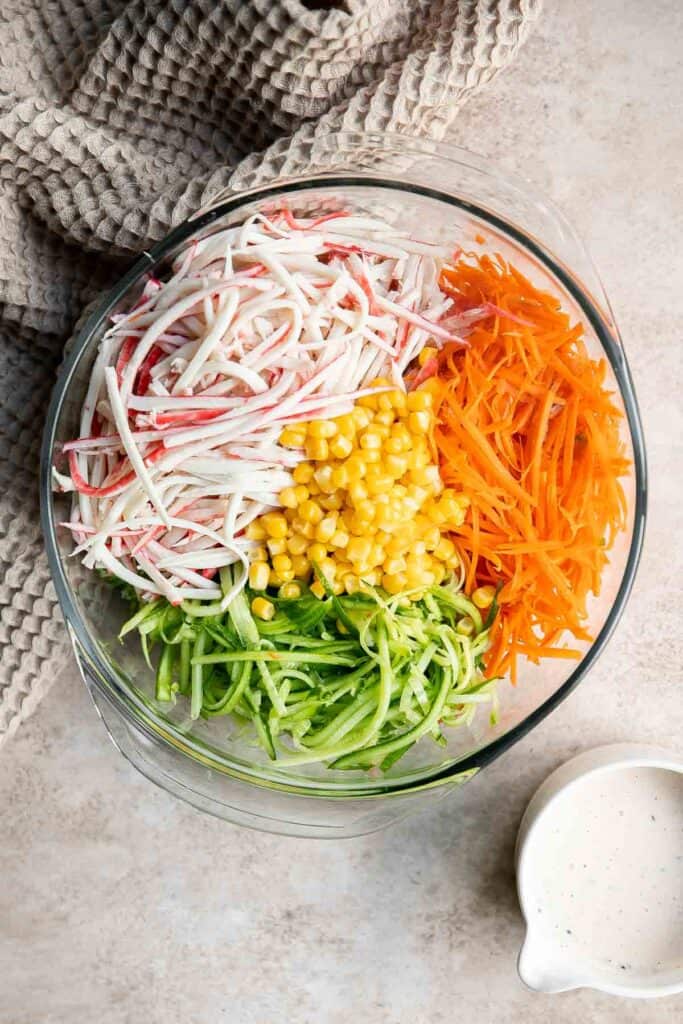
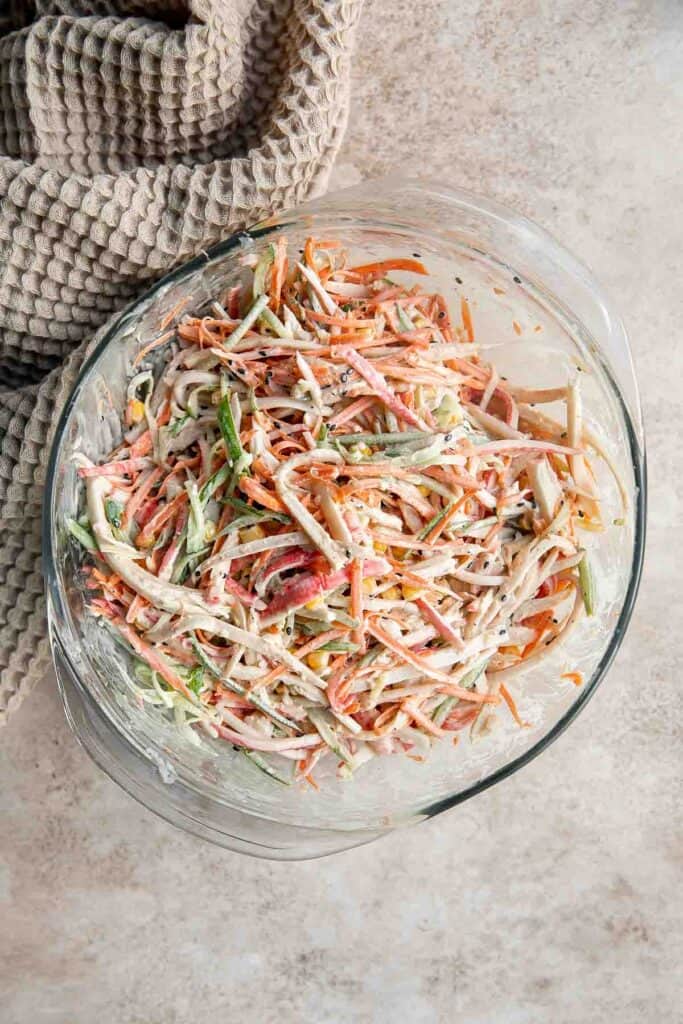
How to Serve
I like serving spicy kani salad alongside:
To make your presentation truly memorable, consider serving your kani salad over a whole iceberg lettuce leaf.
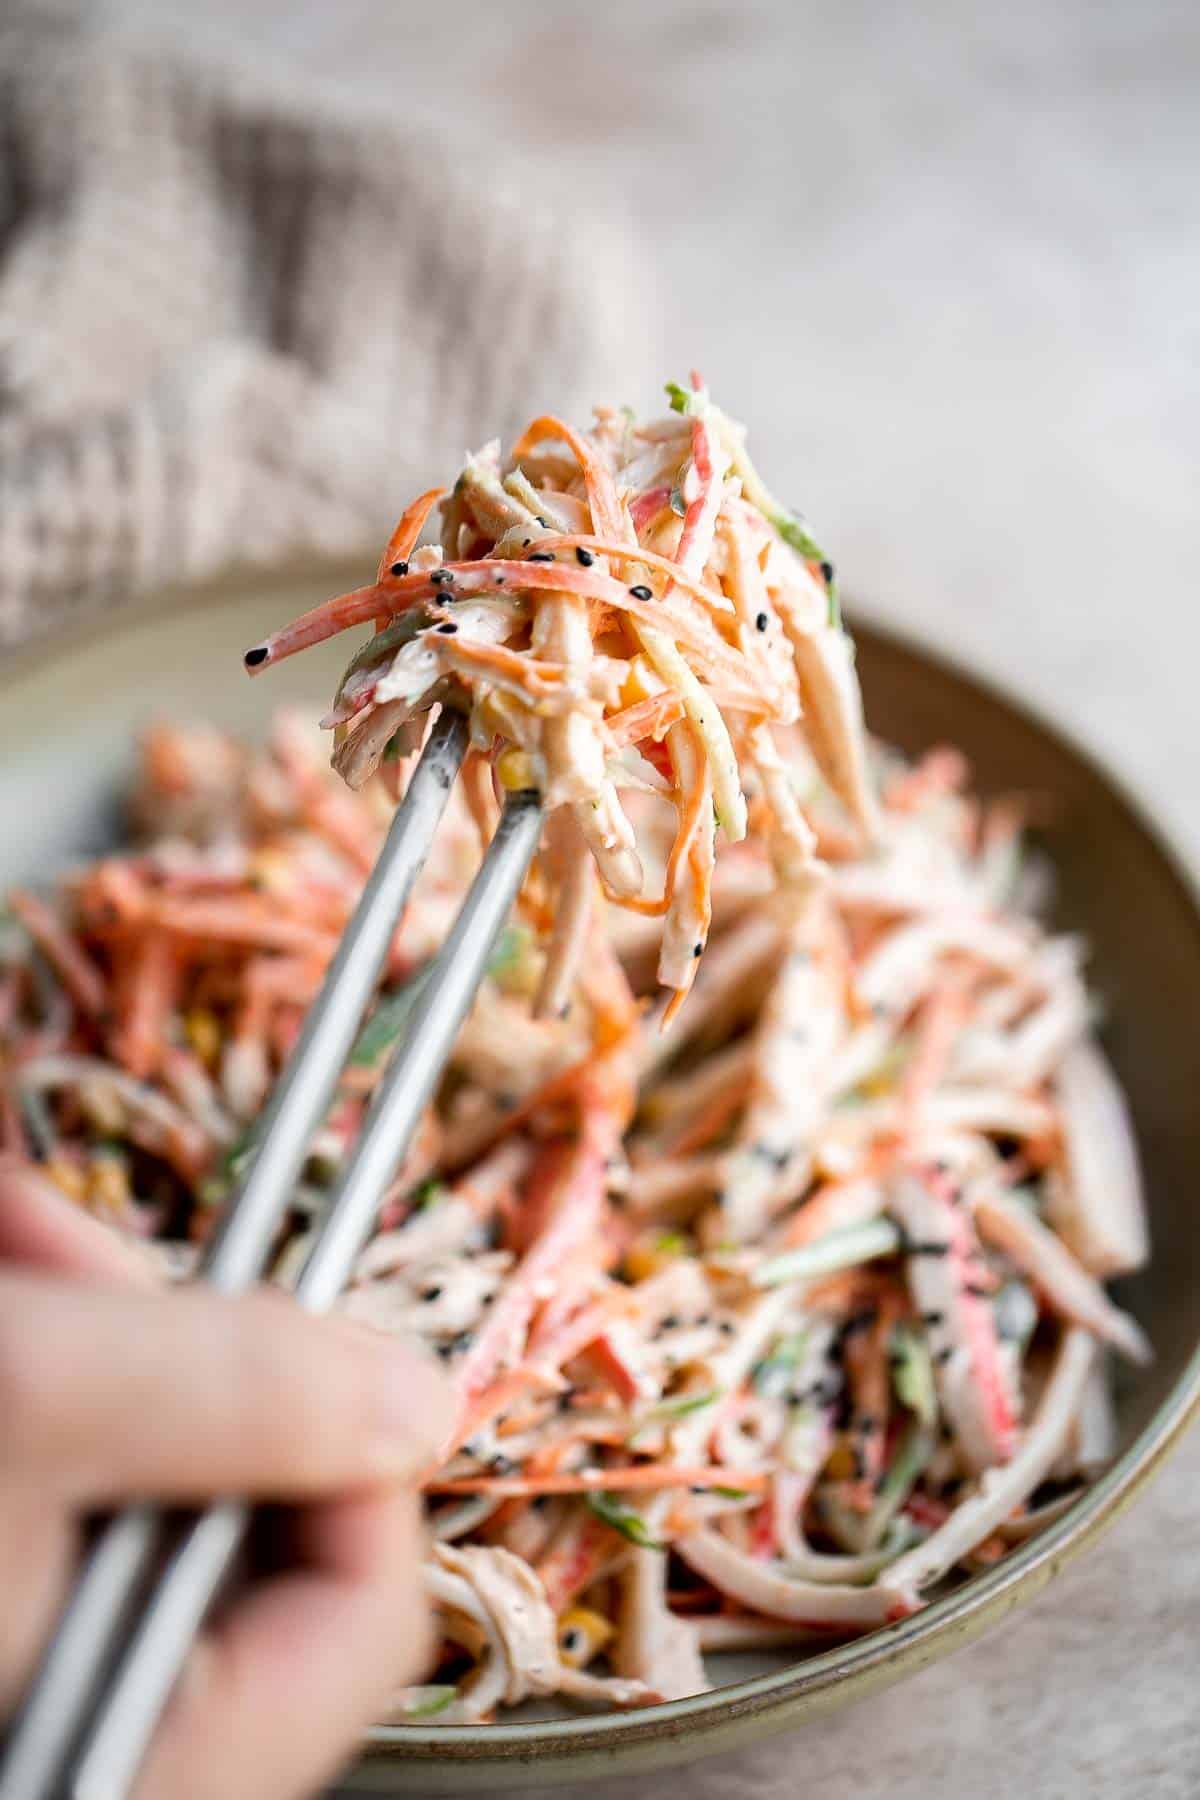
Storing Instructions
Keep leftover kani salad in the fridge inside an airtight container for up to 3 days. You can enjoy your kani salad as soon as you make it or store it until you're ready to eat.
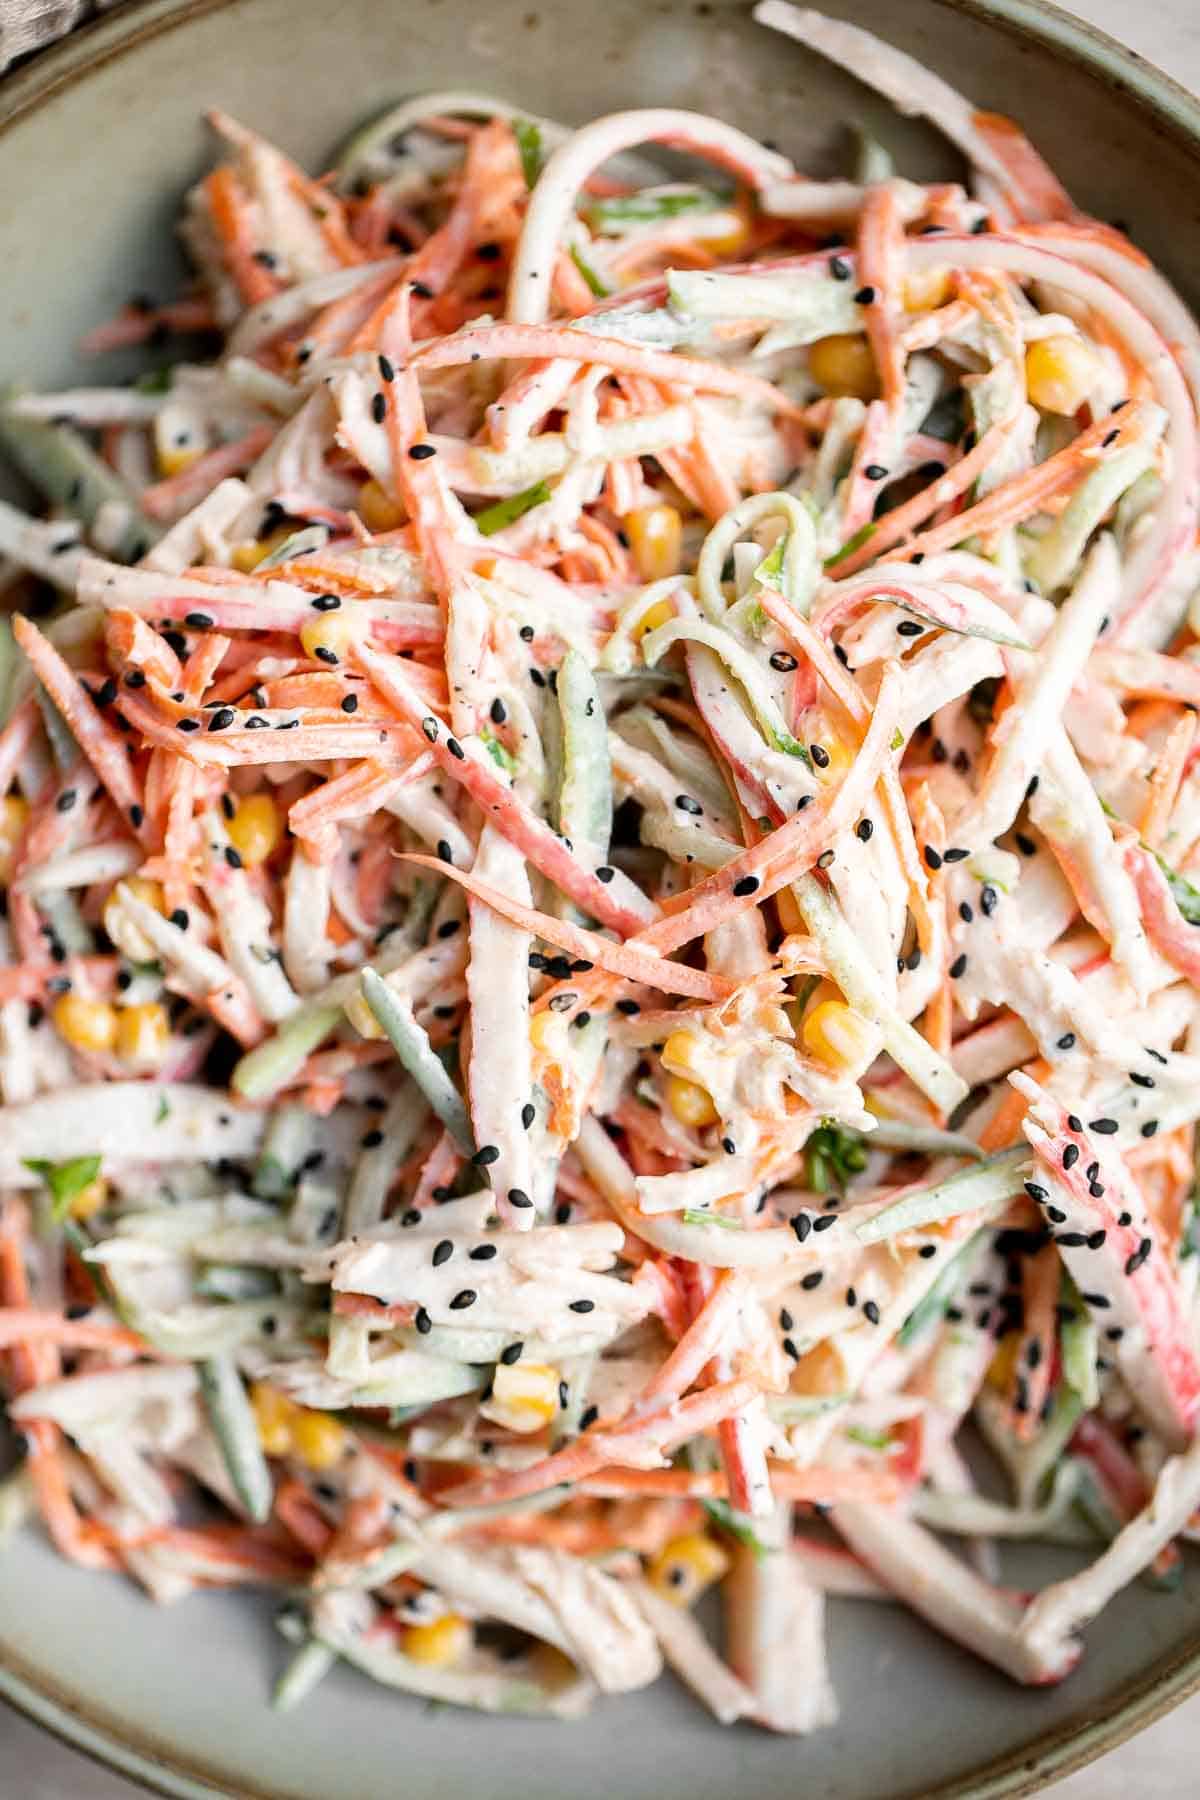
More Salad Recipes
- 40 Best Salad Recipes
- Asian Chopped Salad
- Cold Noodles with Peanut Butter Sauce
- Grilled Shrimp Salad
- Classic Coleslaw
- Gomae Spinach Salad
Tried this recipe?
I'd love to hear what you think! Leave a comment and rating below to share your feedback. Your reviews help others discover this recipe and help me keep creating more free recipes for you. Snap a photo and tag me on social media @aheadofthyme too.

Stuffed Chicken Breasts
These Stuffed Chicken Breasts loaded with mushrooms and spinach are juicy, tender, and flavorful. With just a handful of simple ingredients, you can completely transform a regular chicken dinner to something much more interesting and delicious! It's garlicky, cheesy, and so good.
If you want to impress guests with a recipe that seems complicated but is actually incredibly easy, give this stuffed chicken breast recipe a try! It's perfect for a special occassion like Date Night or a fancy dinner party but easy enough for any night of the week.
Why You'll Love Stuffed Chicken Breasts
- The mushroom-spinach stuffing. These stuffed chicken breasts are packed full of sautéed mushrooms and spinach seasoned with garlic, an Italian seasoning blend, and salt and pepper. This simple combination of ingredients yield big flavor and is the perfect companion to fresh chicken breast.
- The juicy, tender chicken. The secret to making these stuffed chicken breasts juicy and tender is to sear the chicken breasts on a skillet for a few minutes on each side before popping into the oven to fully cook in the middle. The most important step is to then let it rest - which locks in all the juice inside to ensure the most tender bites of chicken. Don't skip this last step!
- It looks and tastes beautiful. Cutting into a stuffed chicken breast is a great experience. It looks amazing, and every bite is well balanced between the chicken and the stuffing. It's a go to recipe when you want to impress.
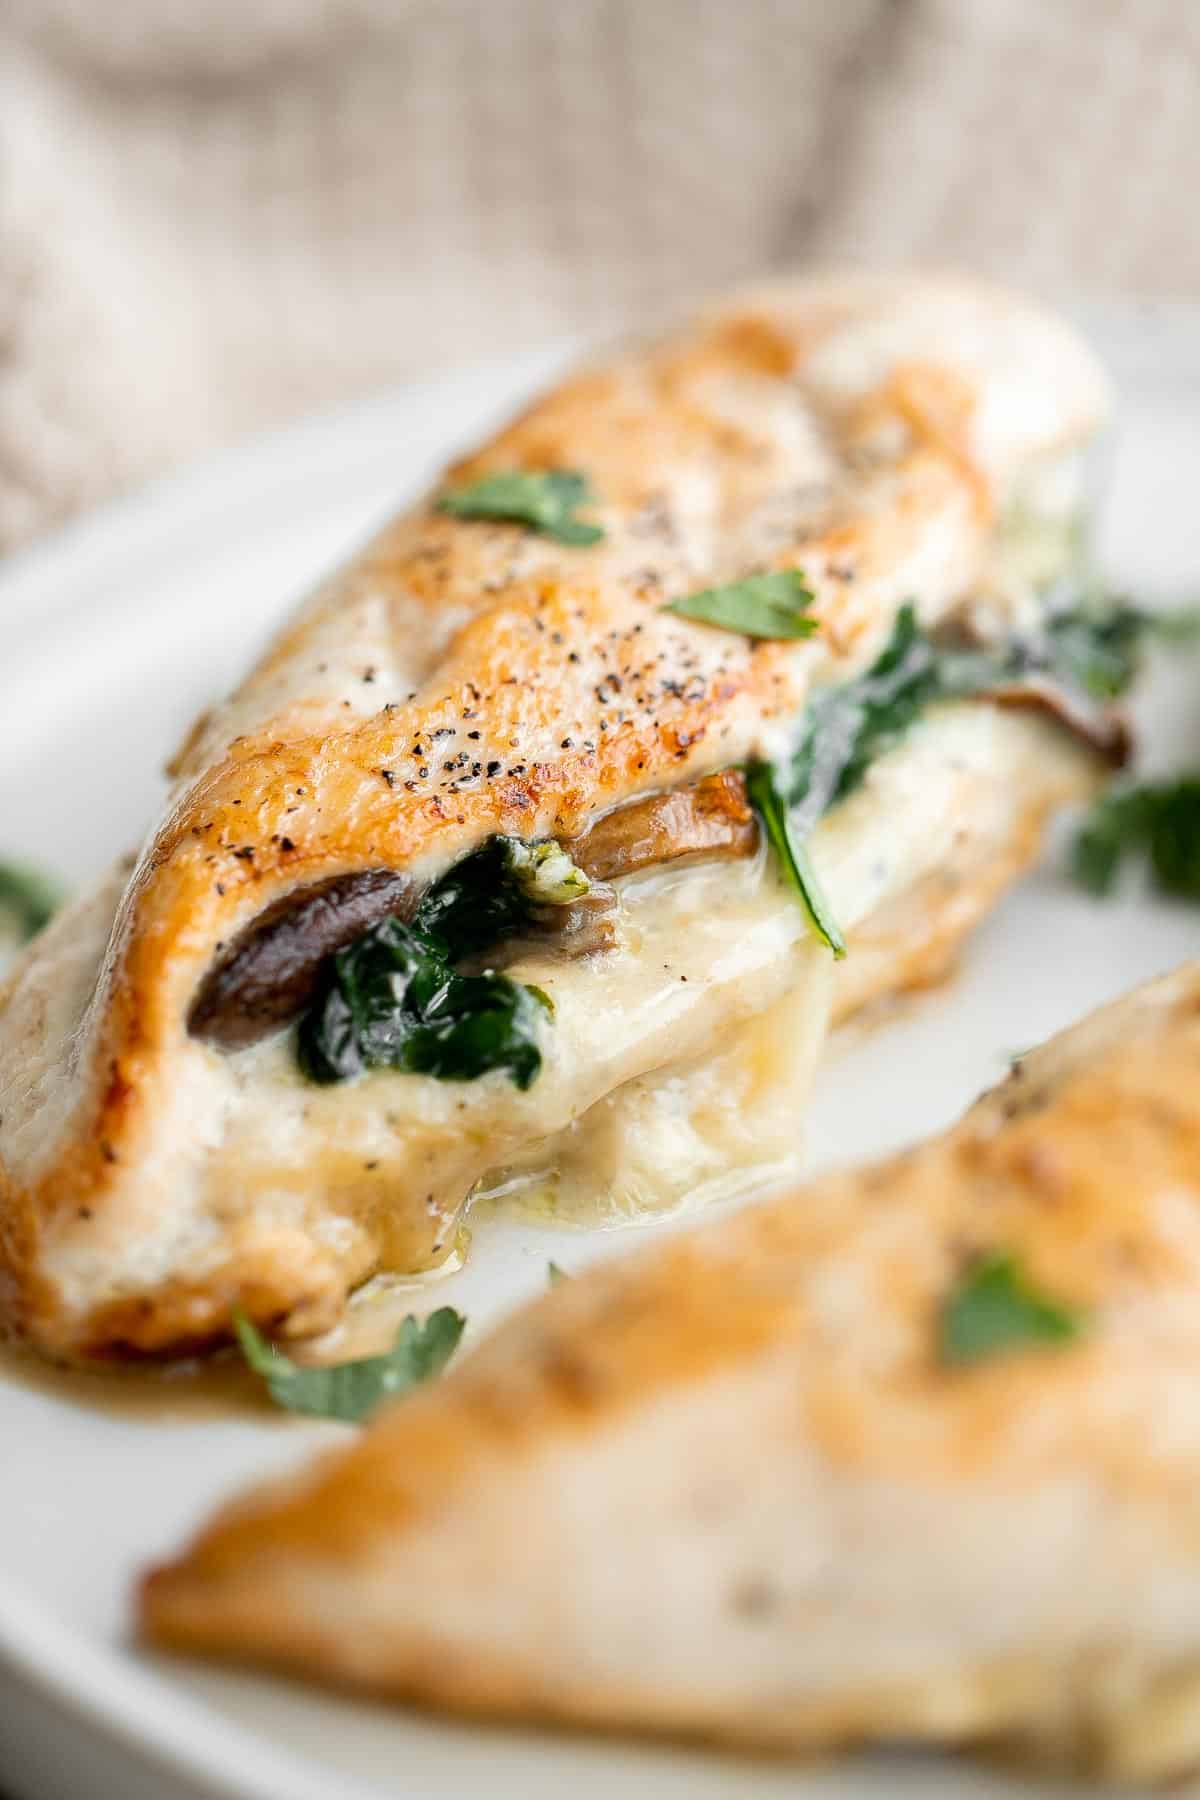
Ingredient Notes
To make these delicious Stuffed Chicken Breasts, you will need the following ingredients (full measurements in recipe card below):
- chicken breast - this recipe is for boneless and skinless breasts.
- brown mushrooms
- baby spinach
- mozzarella cheese - feel free to substitute with any melty cheese such as provolone or white cheddar.
- garlic
- seasoning - Italian seasoning, salt, and pepper.
- butter and olive oil - you need butter for sautéing the veggies, and olive oil for searing the chicken.
You will also need measuring cups and spoons and a large oven proof skillet (12-inch cast iron skillet),
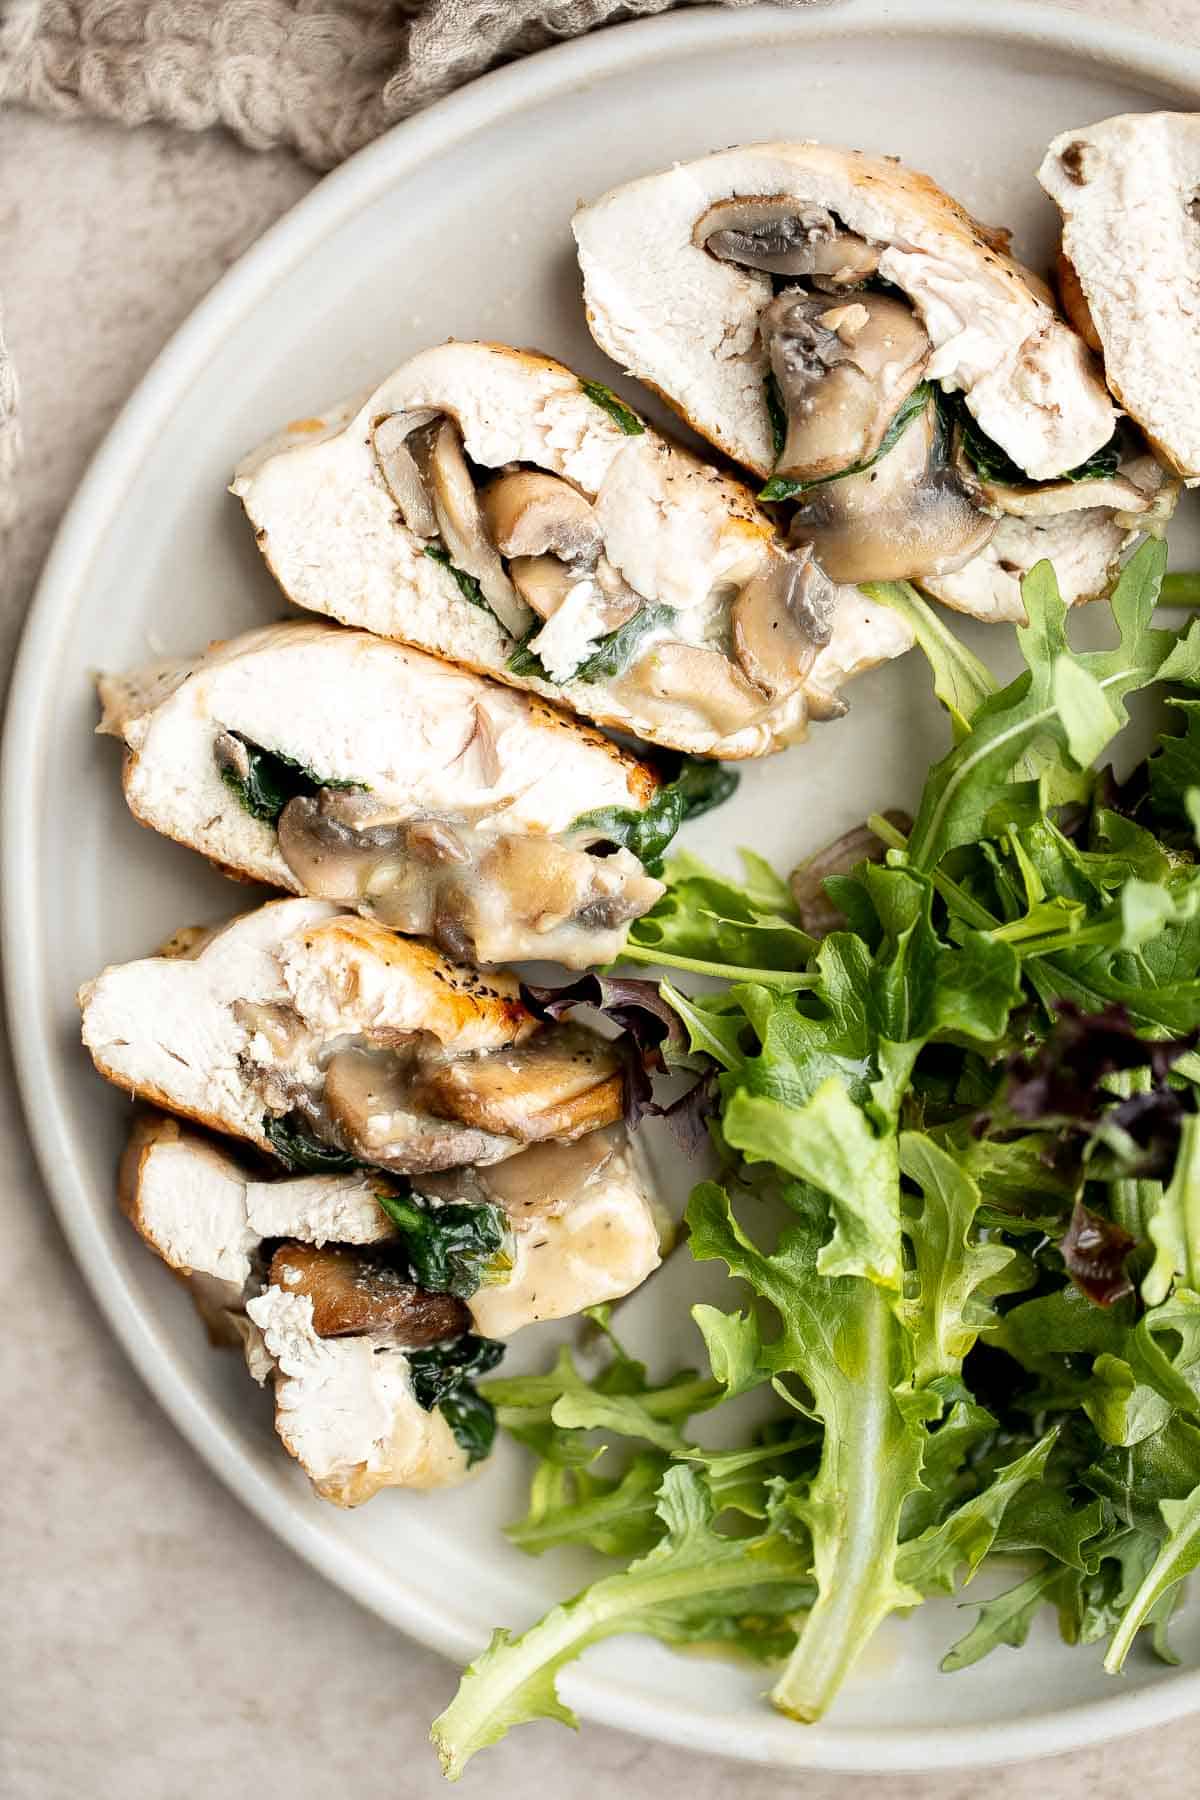
How to Make the Best Stuffed Chicken Breasts
- Preheat oven to 400F.
Make the stuffing:
- Add butter in a large oven-proof skillet (such as a cast-iron skillet) over medium-high heat and melt until it starts to bubble, about 1 minute. Add mushrooms and sauté until the moisture evaporates, about 5 minutes.
- Season with salt, pepper, and Italian seasoning and continue cooking for another 2-3 minutes until the color turns golden brown. Salt will further extract more water from the mushrooms, giving them a nice brown color.
- Stir in garlic and cook until fragrant, about 1 minute. Add spinach and cook until wilted, about 1 minute.
- Transfer the mushroom mixture to a plate and set aside.
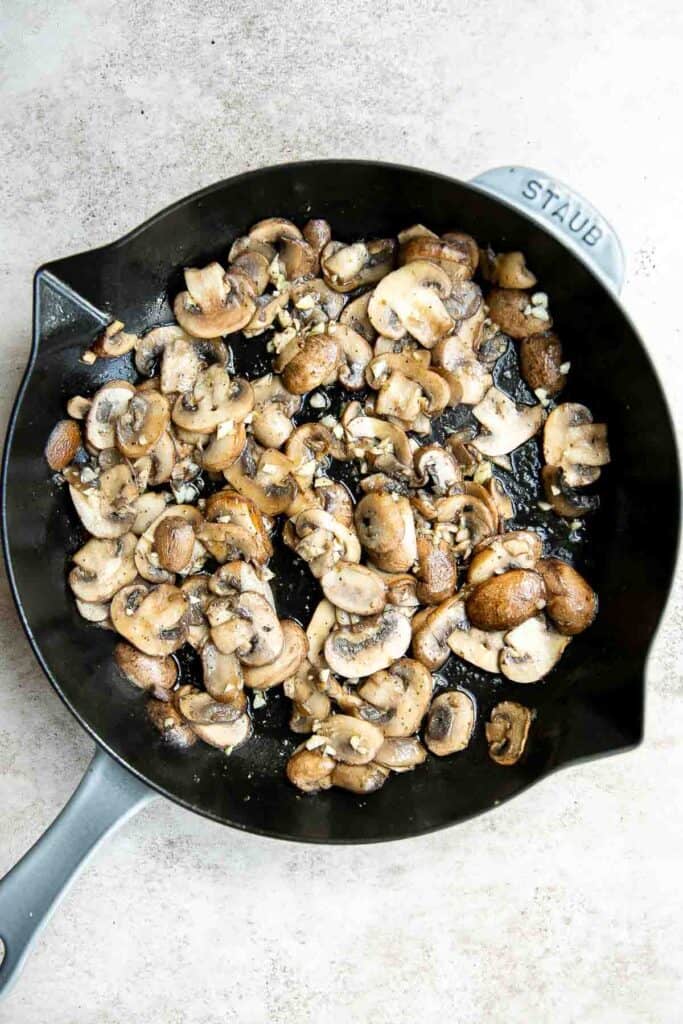
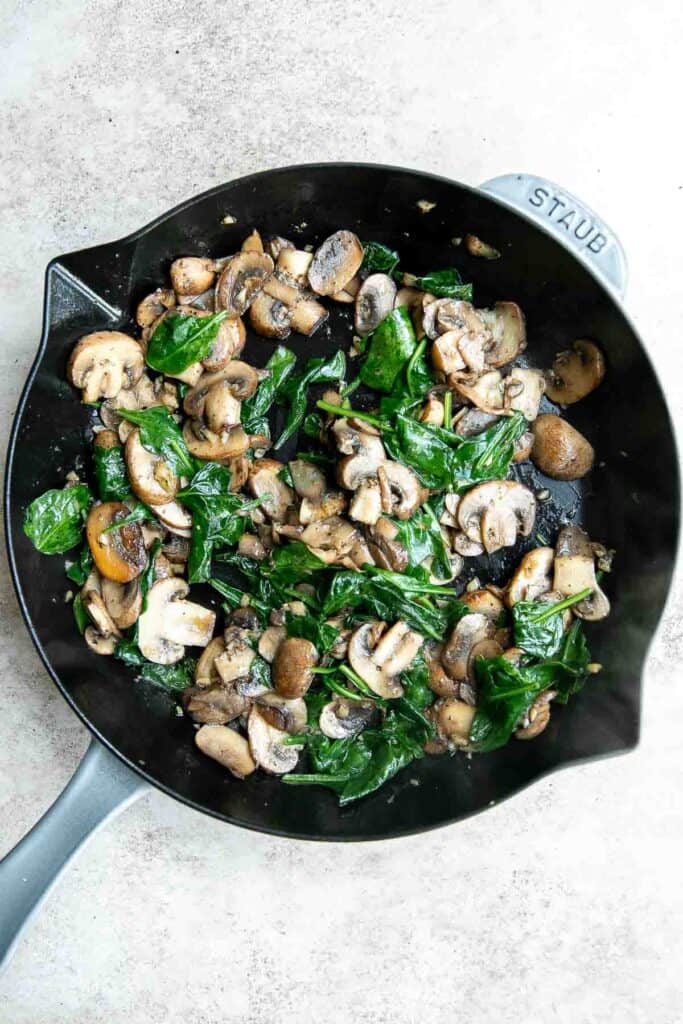
Stuff the chicken breasts:
- Carefully slice each chicken breast in the middle lengthwise to create a pocket, leaving about ¼ inch from the end (Do not cut all the way through!). Season with salt and pepper evenly on all sides.
- Stuff ¼ cup mushroom mixture and ¼ cup cheese into the pocket of each breast.
- Seal the edges with toothpicks (about 3-4 toothpicks per chicken breast).
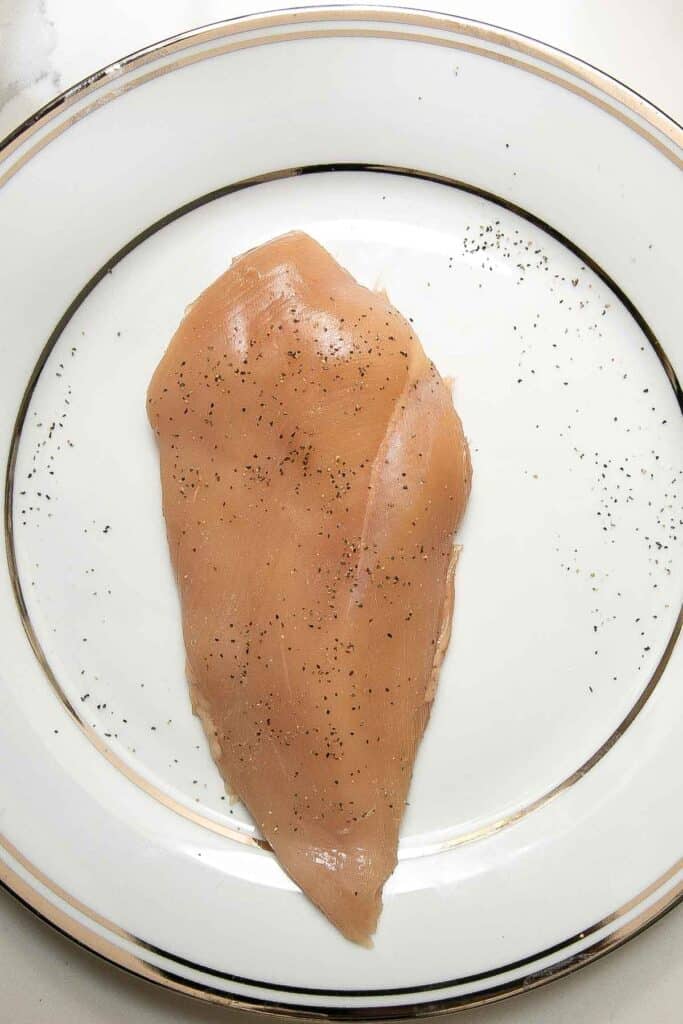
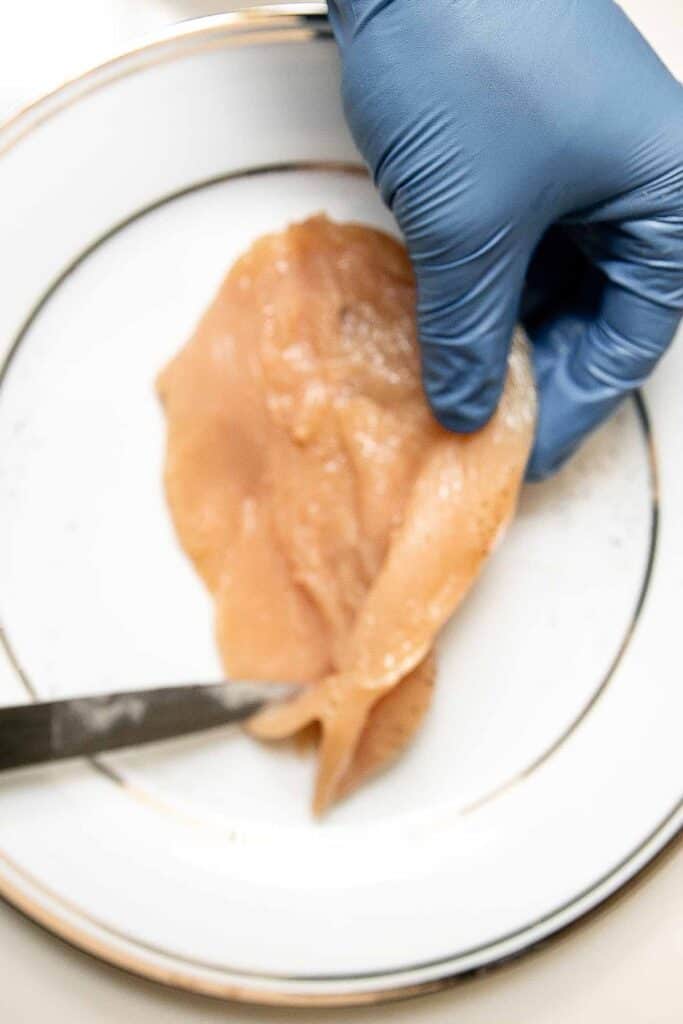
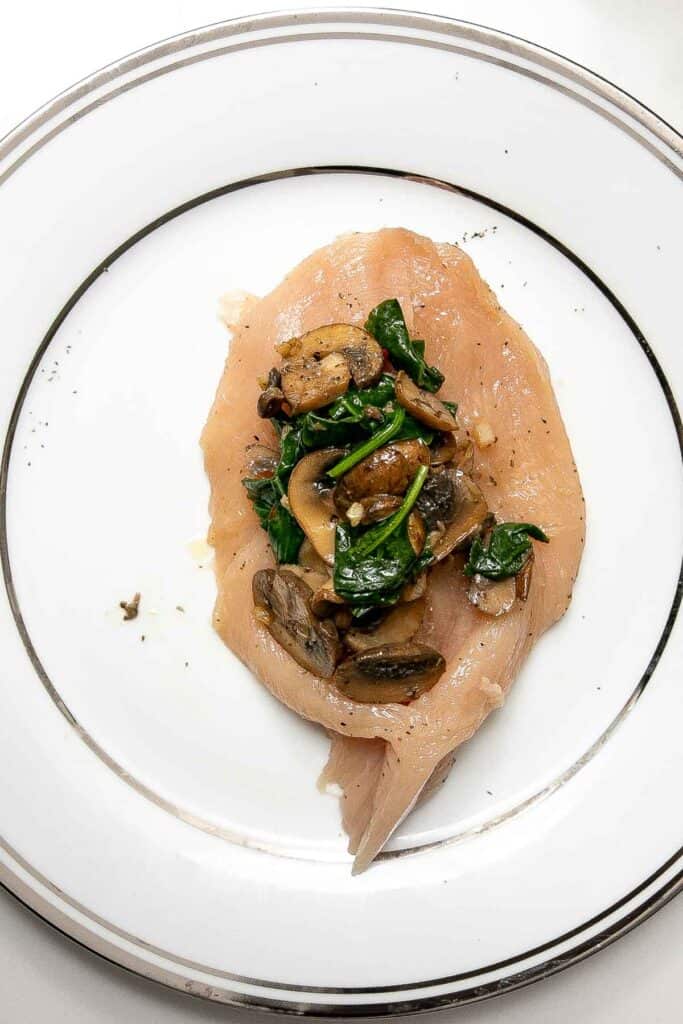
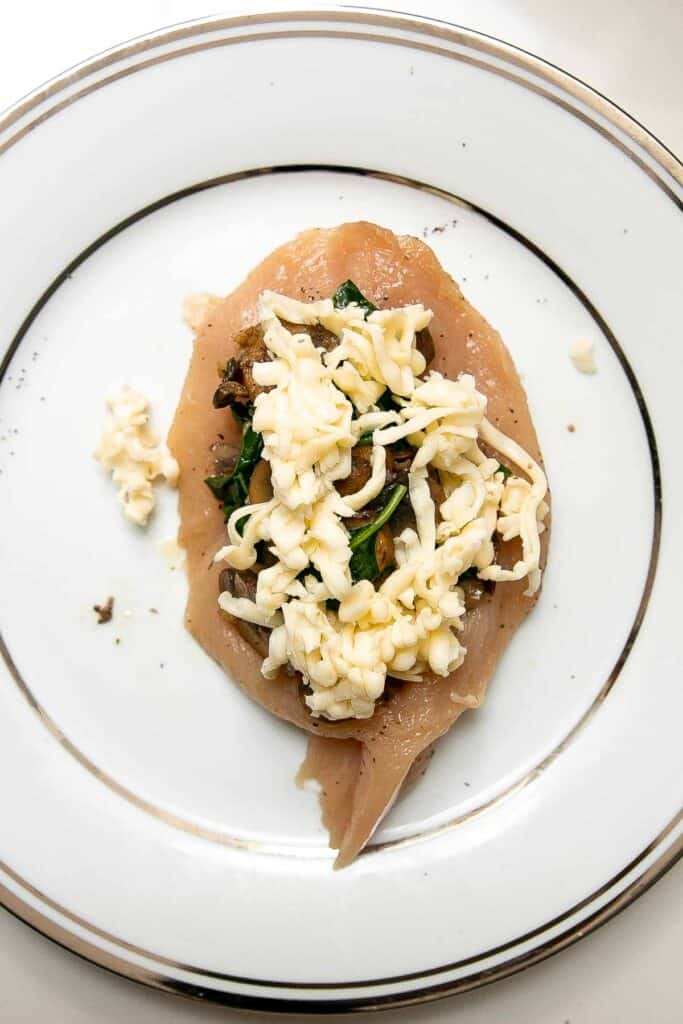
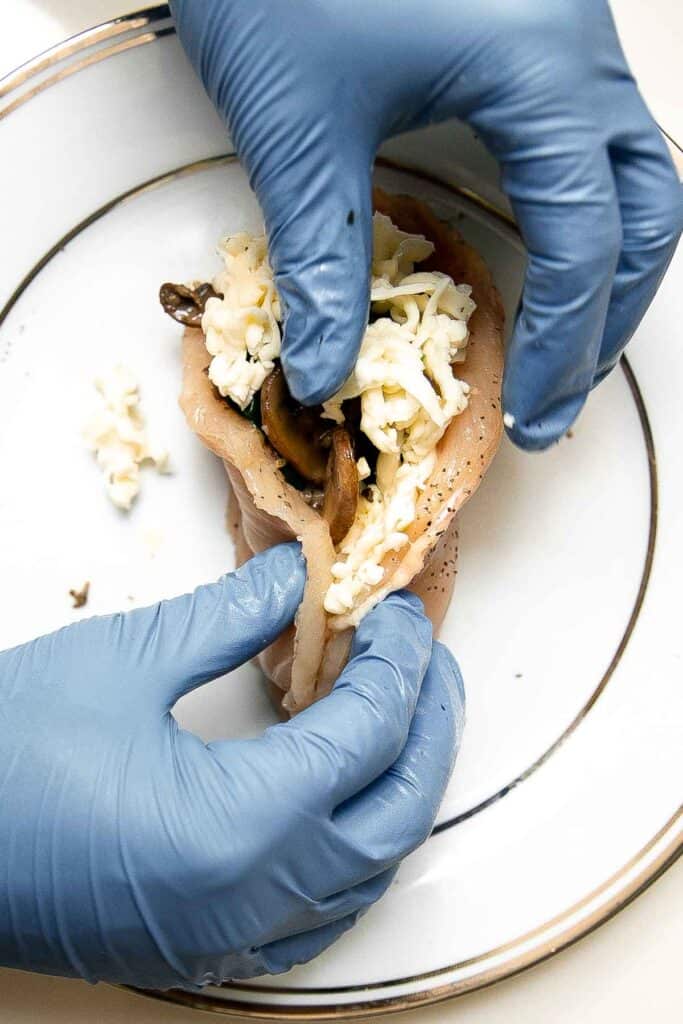
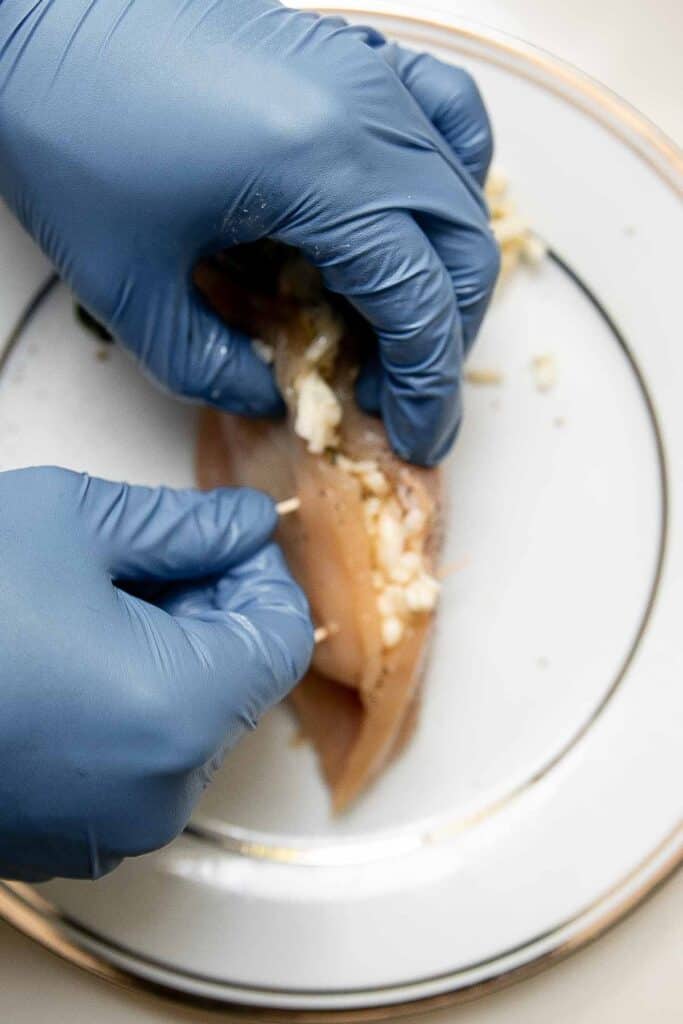
Cook the chicken breasts:
- Use a paper towel to wipe the same skillet clean. Heat olive oil over medium-high heat until it sizzles, about 1 minute. Carefully add the stuffed chicken and sear until golden brown, about 3-4 minutes per side. The chicken doesn't need to be fully cooked at this point.
- Transfer the skillet to the preheated 400F oven and bake for 15 minutes until the melted cheese is bubbly and the chicken is fully cooked through. The internal temperature for the chicken should reach 165F as read on a meat thermometer.
- Let the chicken rest for 2-3 minutes. Serve whole or slice into strips.
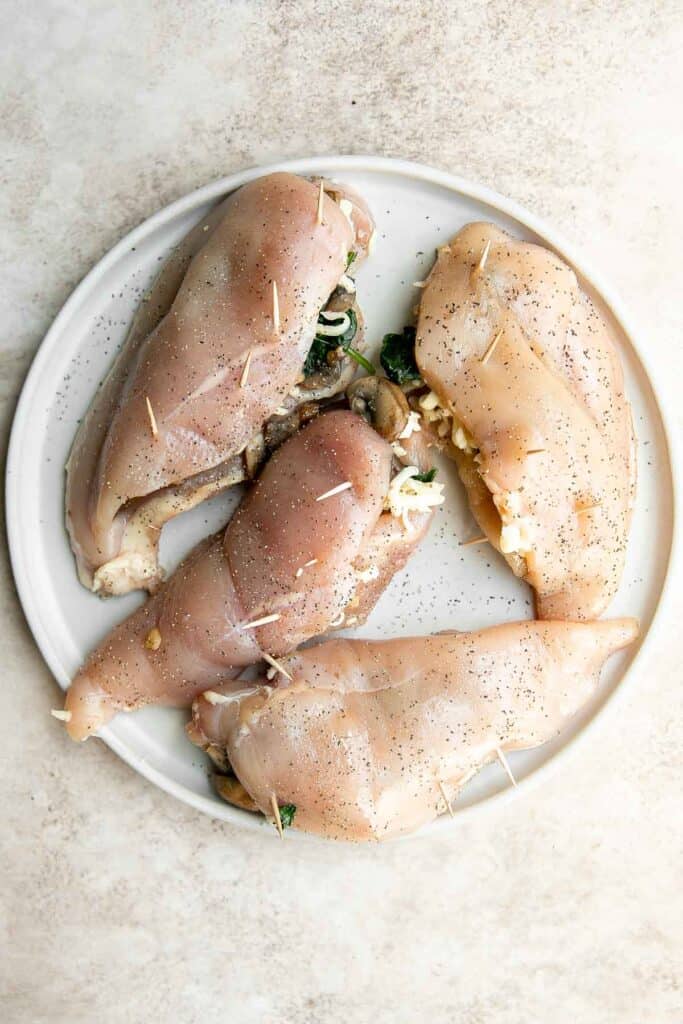
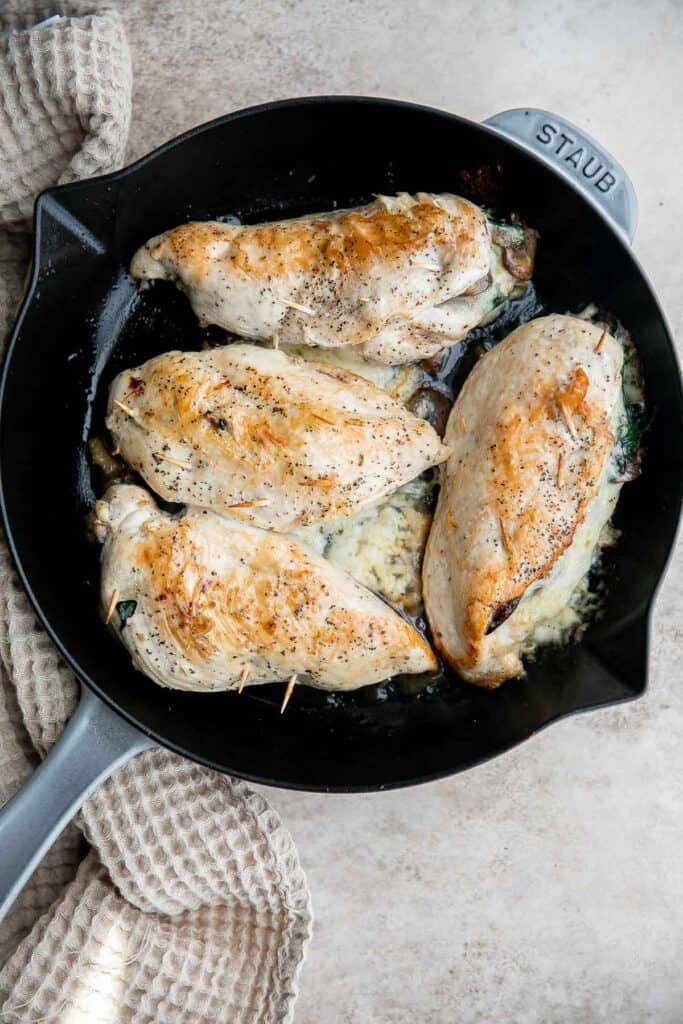
How to Serve
Stuffed Chicken Breasts are delicious served on their own, or paired with some of my favorite sides including:
- Pesto Asparagus
- Creamy Garlic Mashed Cauliflower
- Crispy Smashed Potatoes
- Caesar Salad
- Air Fryer Broccoli
Recipe Tips and Tricks
- Make-ahead instructions: To make this recipe ahead of time, cook the stuffing and stuff the chicken breasts. Then, refrigerate the raw, stuffed breasts for up to 2 days before searing and baking them. Bring the chicken to room temperature before you start to sear (about 20 minutes) for even cooking.
- How to store: Store leftover stuffed chicken breasts in an airtight container in the fridge for up to 4 days.
- How to reheat: The best way to reheat stuffed chicken breasts is wrapped in aluminum foil inside a 375F oven. Add a splash of water to the foil, and make sure air can circulate around the chicken. Then, bake for 10-20 minutes until warmed through. Note that larger pieces will need more time.
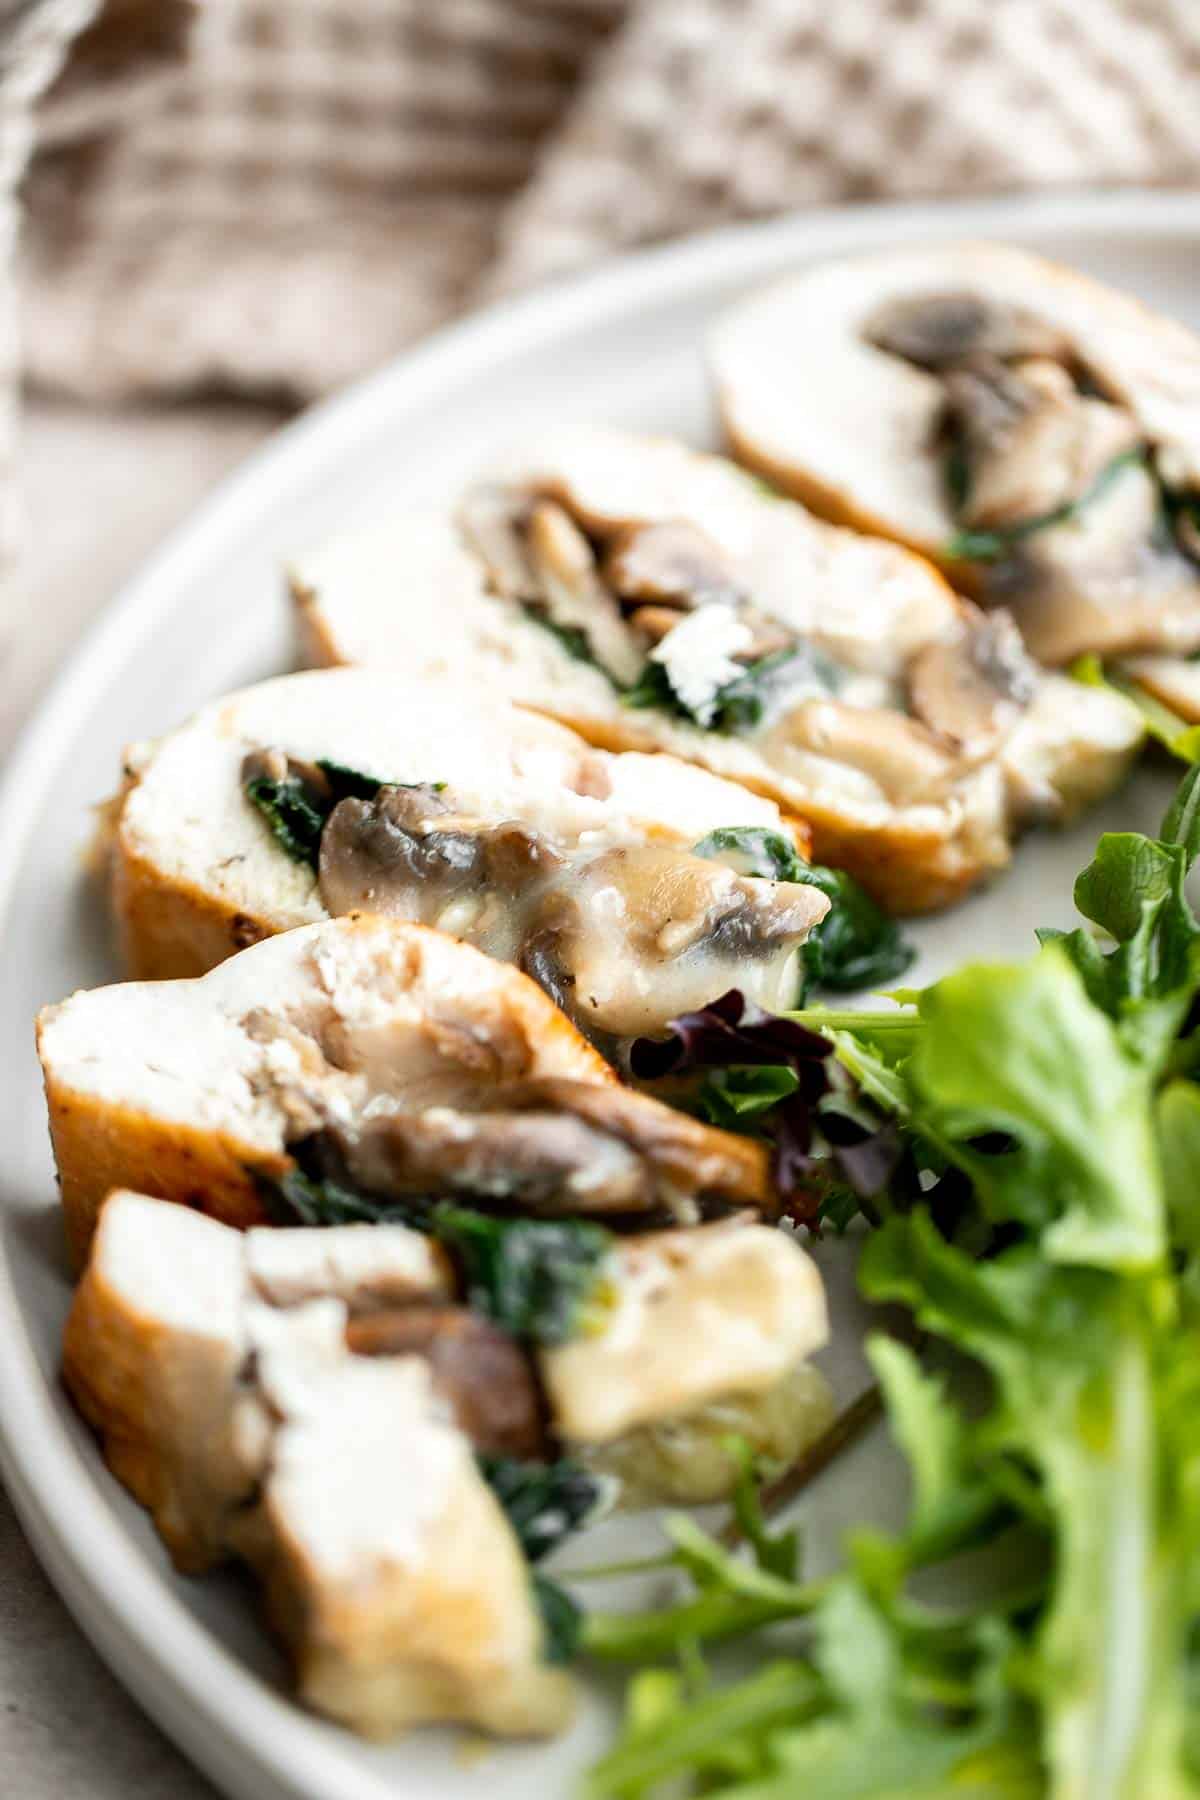
More Chicken Breast Recipes
- 50 Best Chicken Breast Recipes
- Chicken Roulade with Spinach and Mushrooms
- Chicken Madeira
- Mexican Chicken Breast
- Greek Souvlaki Baked Chicken Breast
- Creamy Lemon Chicken Piccata
Tried this recipe?
I'd love to hear what you think! Leave a comment and rating below to share your feedback. Your reviews help others discover this recipe and help me keep creating more free recipes for you. Snap a photo and tag me on social media @aheadofthyme too.

Lobster Bisque
Homemade lobster bisque is rich and creamy, loaded with seafood flavor, and so delicious. It's a quick and easy soup recipe generously packed with lobster meat throughout the flavorful broth.
Pair this lobster soup with soft bread, because you'll want to wipe the bowl clean to get every last drop of that delicious broth. This lobster bisque is perfect for a light lunch but fancy enough for dinner.
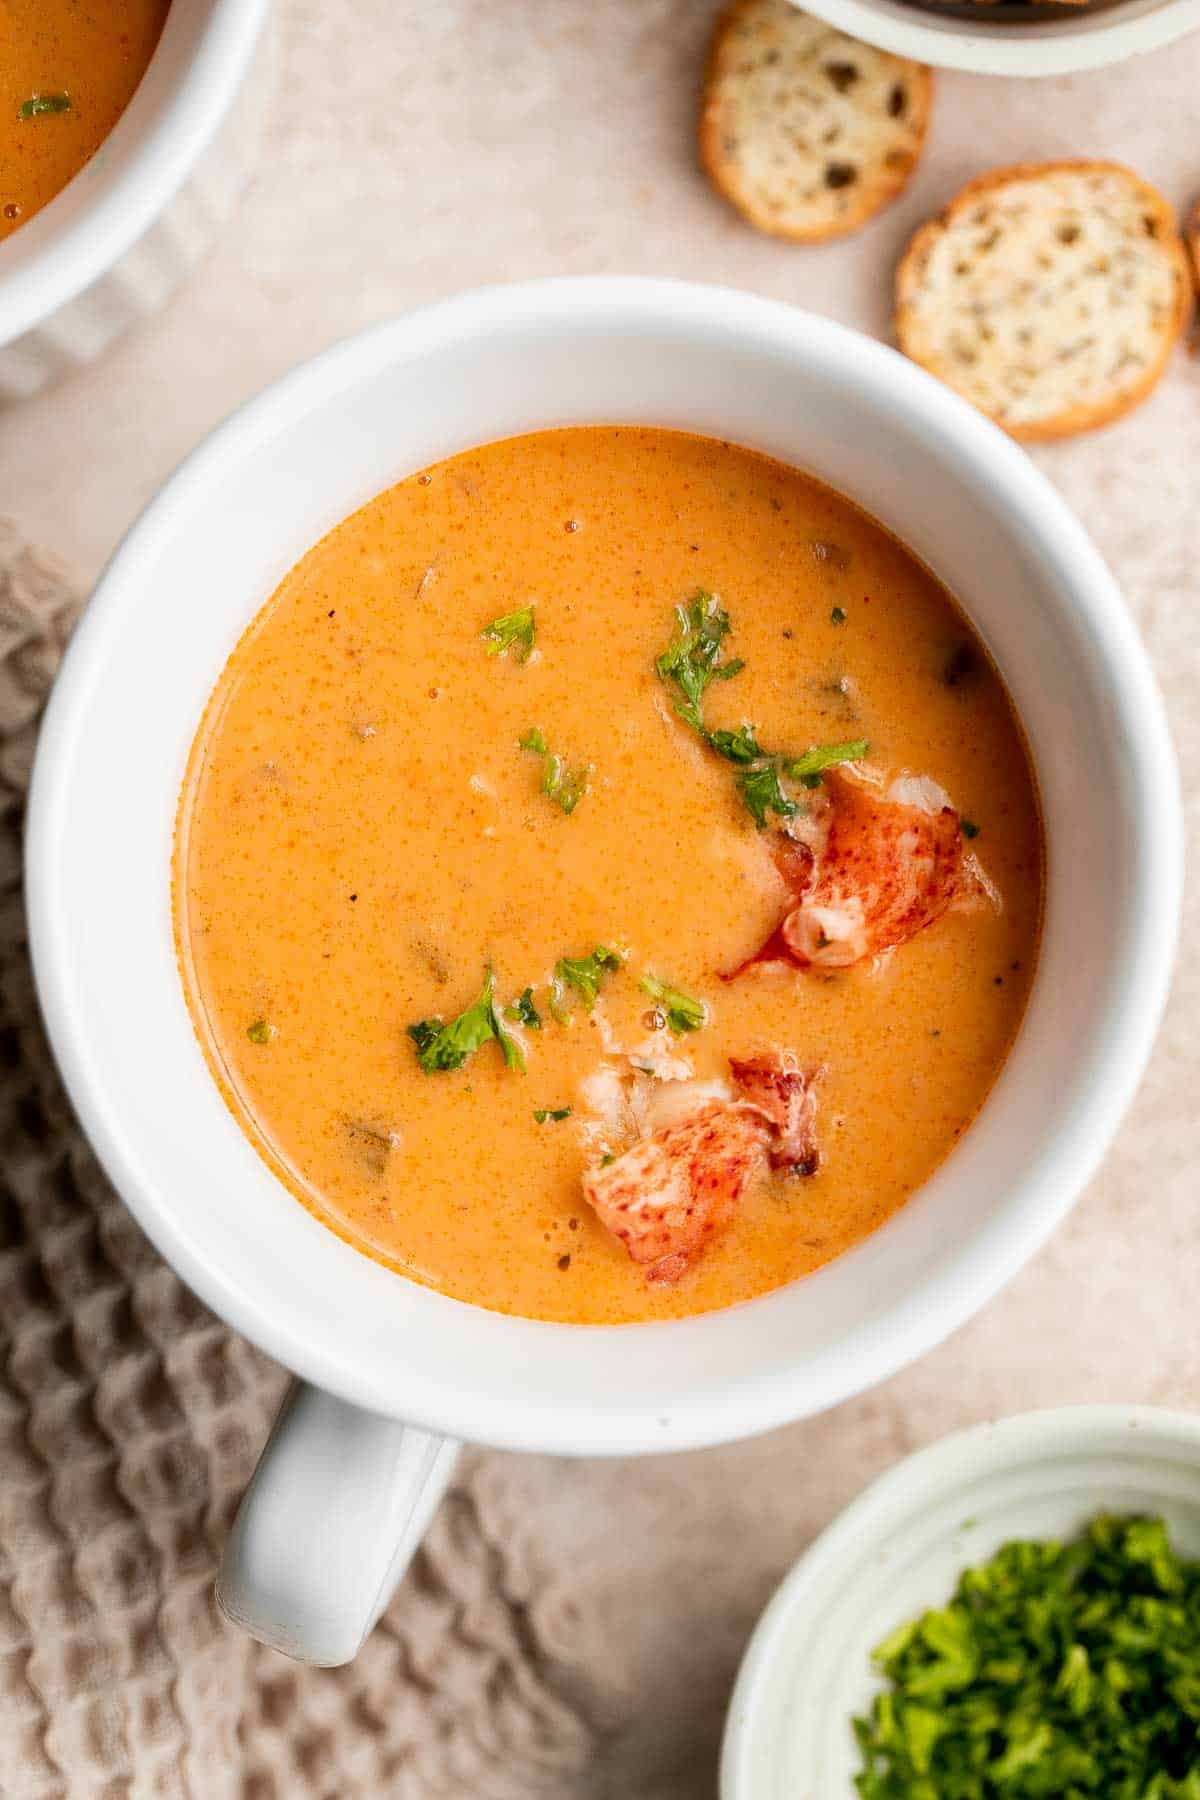
Why You'll Love Lobster Bisque
- It's ready in under an hour. If you love making soups, you know that many of them require long simmers. But this lobster bisque is ready in just 40 short minutes!
- The lobster soup broth. To make this lobster bisque, you'll start with a traditional mirepoix before adding Italian seasoning and garlic. Then, the body of the broth comes in with fish stock, white wine, and heavy cream. This trio is what makes this lobster bisque so tasty, so don't skip out on any of them.
- You can use fresh homemade lobster stock instead of fish stock. If you're using fresh lobster for this lobster bisque (which I highly recommend), you can make a simple homemade lobster stock to use in this lobster bisque using the excess lobster shells. It adds the best flavor to this lobster soup.

Ingredient Notes
To make this delicious lobster bisque, you will need the following ingredients (full measurements in recipe card below):
- butter
- onion
- carrots
- celery
- seasoning - Italian seasoning, salt, and black pepper.
- garlic
- all-purpose flour - helps to thicken the soup.
- tomato paste
- fish stock or seafood stock - if you boil a fresh lobster to extract the lobster meat, you can also use the shells to make homemade lobster stock instead of store-bought fish stock. Scroll down for the instructions.
- white wine - this is optional to add extra flavor.
- heavy cream
- lobster meat - I used lobster meat from 2 of our Garlic Butter Lobster Tails. You can also use meat from a 1 pound hard shell lobster. If cooking the lobster, remember that, like other shellfish, they begin to spoil quickly when not live. So, it's best to buy fresh lobster and cook right away.
- fresh parsley - optional, for garnish.
You will also need measuring cups and spoons, a 6 quart Dutch oven or large pot, and a blender or immersion blender.
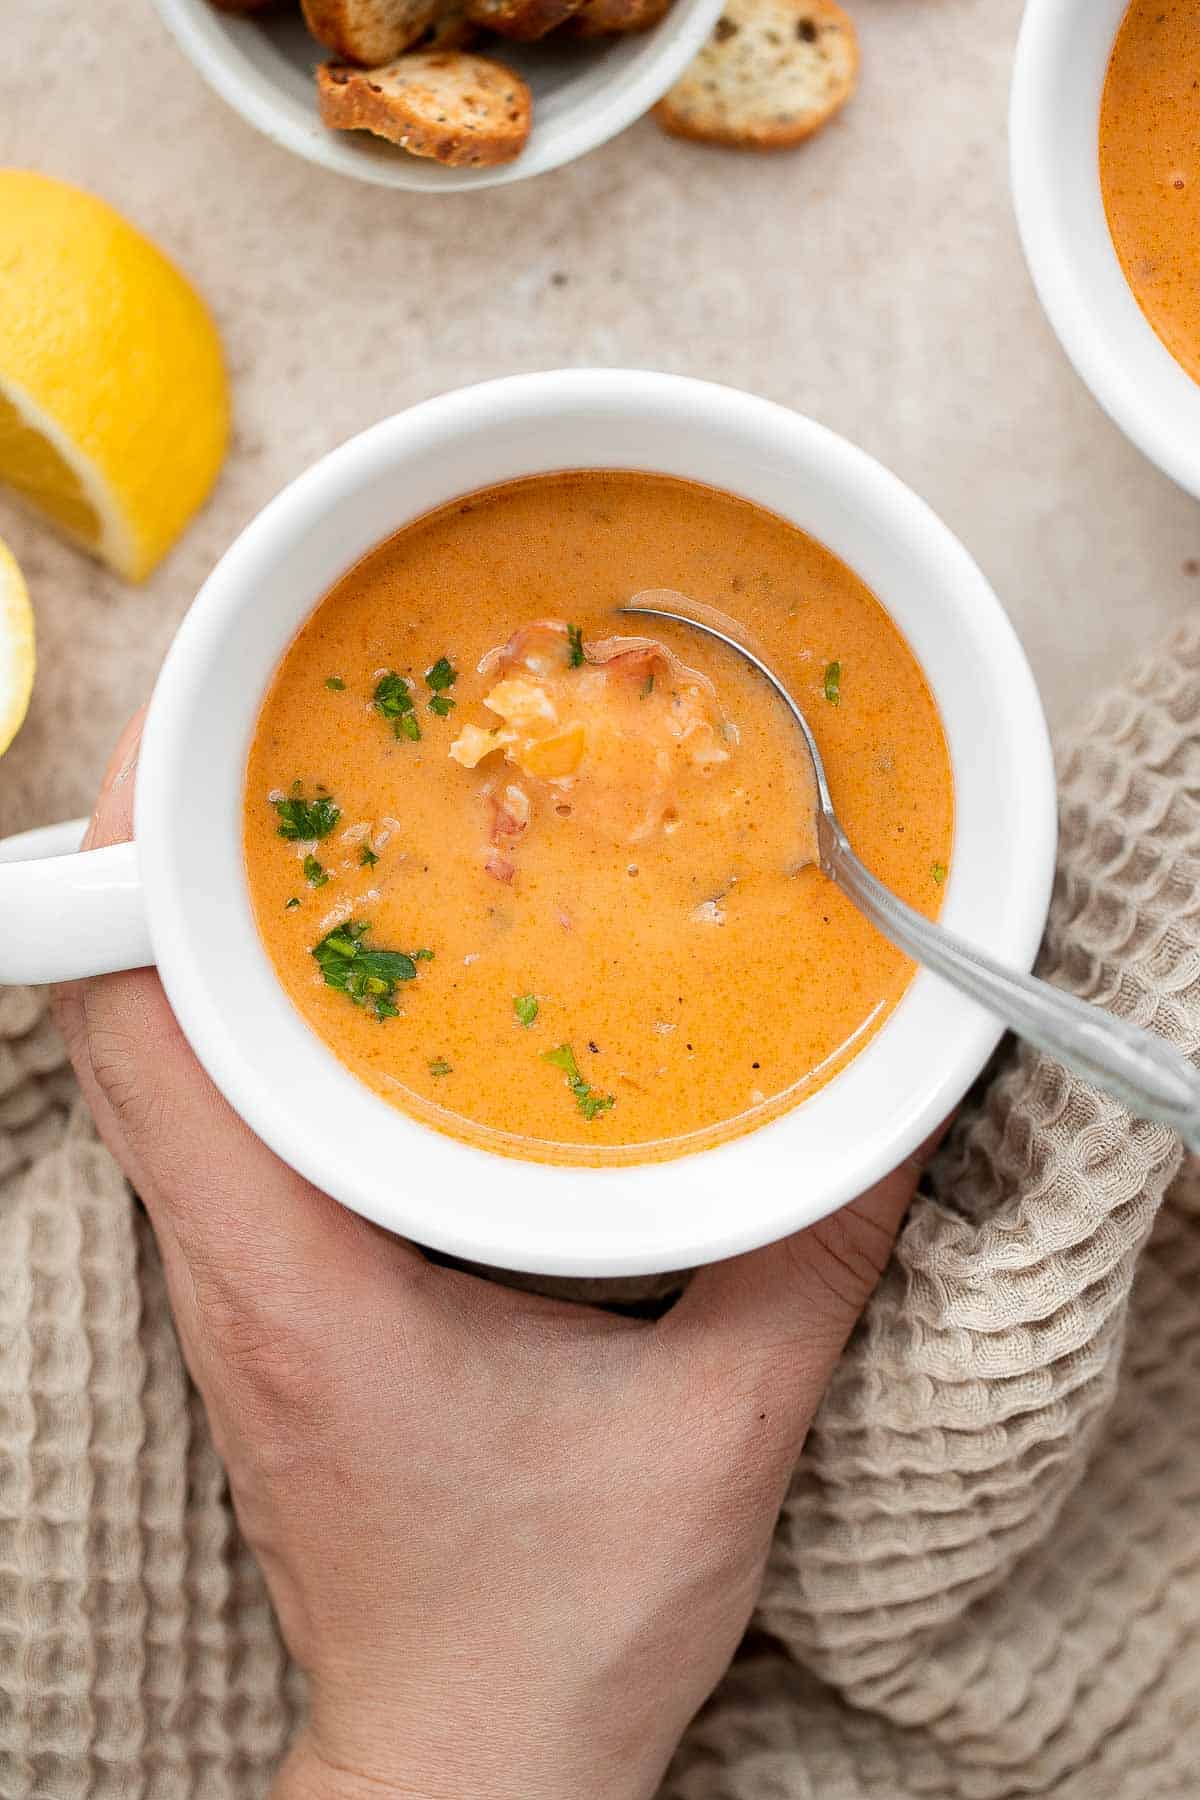
How to Make the Best Lobster Bisque
- Sauté aromatics. In a 6-quart Dutch oven or large pot, melt butter over medium-high heat until it starts to bubble, about 1 minute. Add onions, carrots, and celery. Sauté until soft and tender, about 5-7 minutes
- Add seasoning. Add garlic, Italian seasoning, salt, and pepper. Stir well and cook until fragrant, about 1 minute. Stir in flour and cook until thickened into a paste, about 1 minute. Add tomato paste and mix until well combined.
Sauté aromatics. Add seasoning and tomato paste.
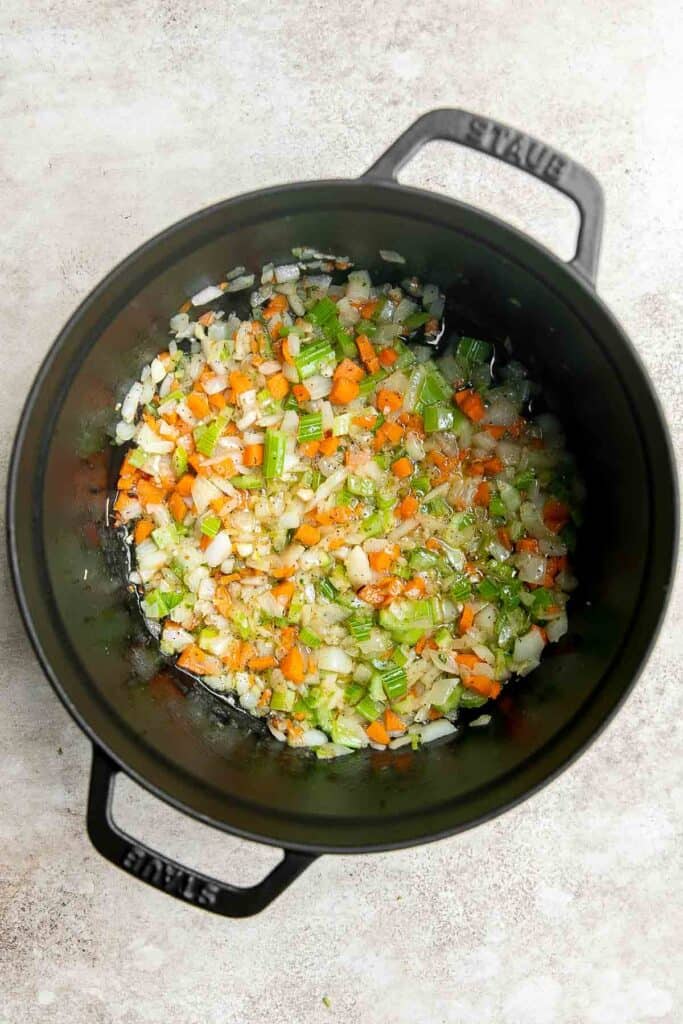
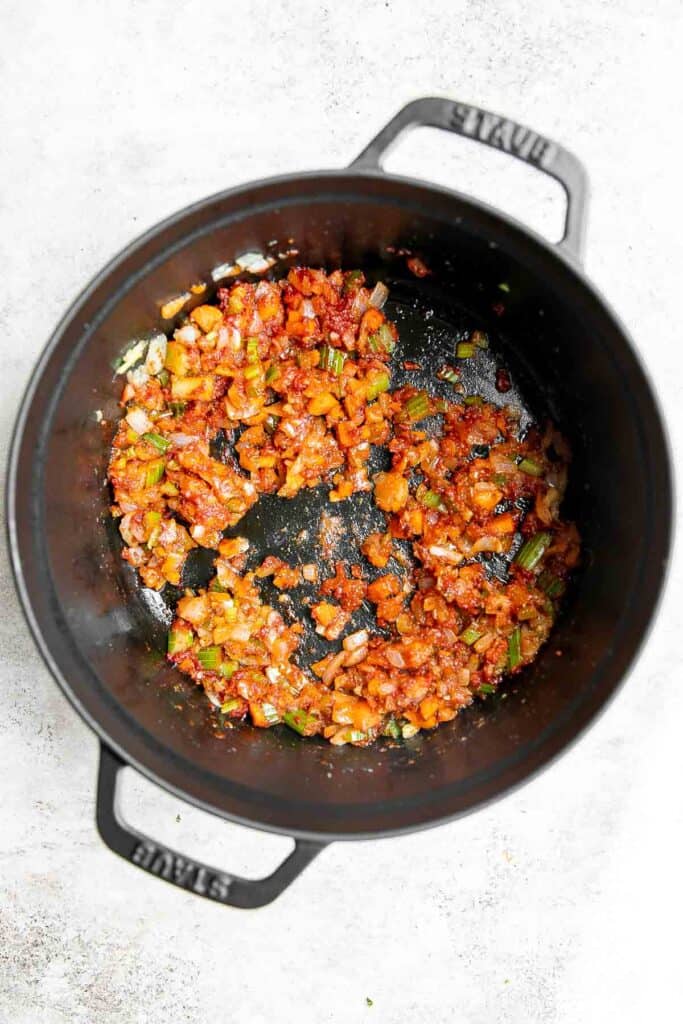
- Simmer. Add fish stock, wine and heavy cream. Bring the sauce to a simmer over medium heat and simmer for 8-10 minutes until thickened a bit, stirring occasionally.
- Puree. Transfer the soup into a blender and puree until smooth. Return the pureed soup to the pot. You can also puree the soup directly in the pot using immersion blender.
- Add lobster meat. Stir in the lobster meat and continue to cook over medium heat until the lobster is warmed through and the bisque has thickened to a desired consistency, about 5-7 minutes.
- Serve. Season with salt and pepper to taste and serve immediately. Sprinkle some fresh parsley if desired.
Simmer. Puree and add lobster meat.

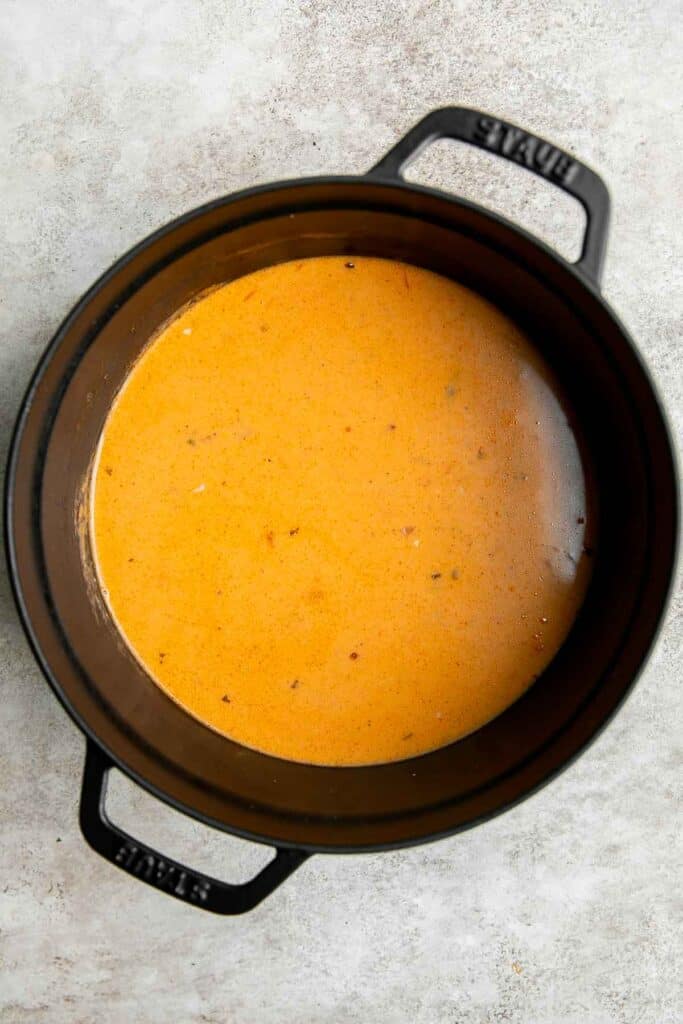
How to Make Homemade Lobster Stock
If you boil a fresh lobster to extract the lobster meat, you can use the shells to make homemade lobster stock instead of store-bought fish stock. First, boil the lobster for about 10 minutes until fully cooked through. Take the lobster out of the pot and remove all the meat from the shells. Return the shells to the pot and simmer for another 10-15 minutes to extract more flavor. Discard the shell, remove from heat, and set aside.
How to Serve
I love to serve Lobster Bisque with some crackers or crunchy bread for dipping. It's also delicious serve with a salad and/or grilled cheese sandwich. Some of my favorite sides to serve with Lobster Bisque are:
- Garlic Cheddar Biscuits
- Roasted Broccoli Grilled Cheese Sandwich
- Caesar Salad
- Garlic Breadsticks
- Pita Grilled Cheese
- Garden Salad
- Grilled Cheese Roll Ups
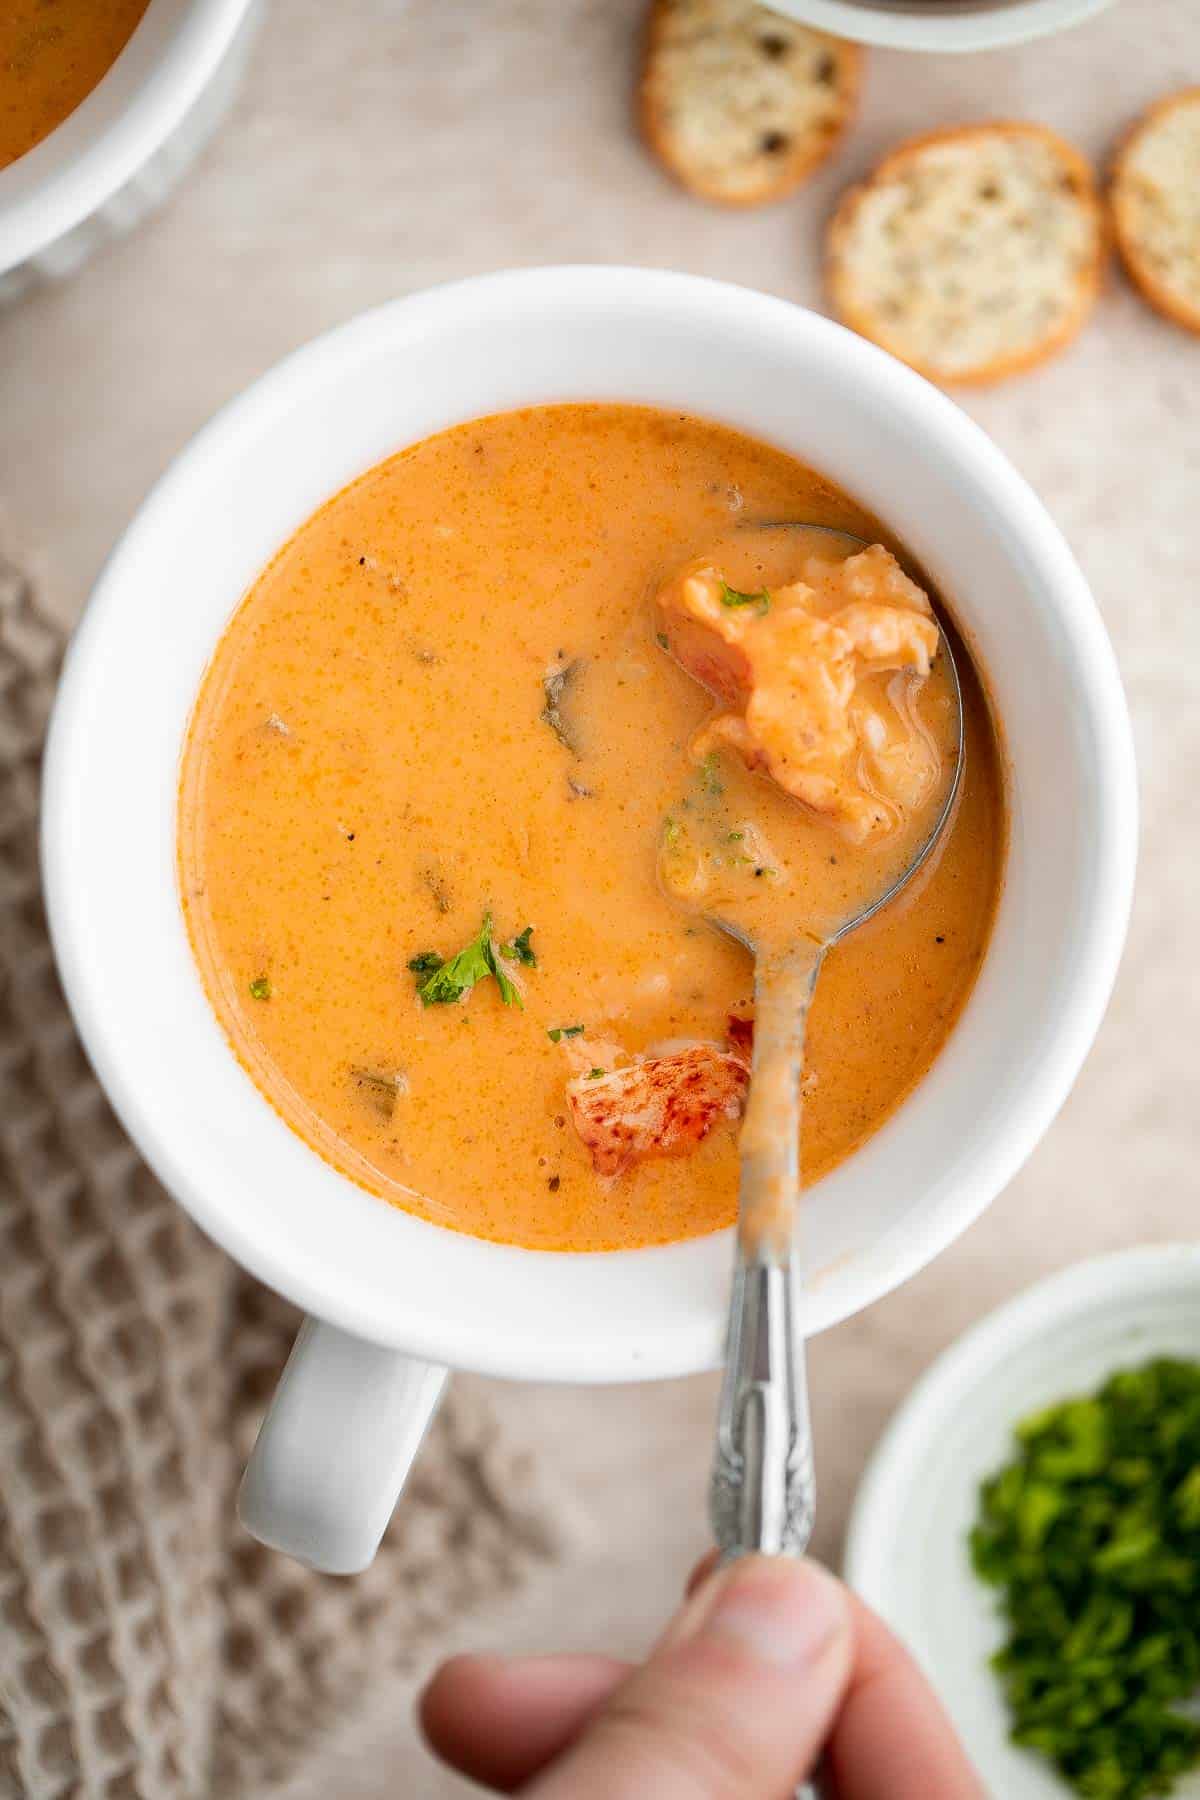
Storing Instructions
- How to store: Lobster bisque is best served fresh but you can store any leftovers in an airtight container in the refrigerator for up to 2 days.
- How to freeze: Allow the lobster soup to cool to room temperature before transferring to a freezer-safe airtight container or freezer bag. Freeze for up to 3 months. When ready to serve, allow it to thaw in the refrigerator overnight, then reheat.
- How to reheat: Reheat lobster bisque on medium-low heat in a covered pan on the stove until warmed through, about 5-10 minutes.
More Seafood Recipes
- Garlic Butter Lobster Tails
- Lobster Rolls
- Surf and Turf Steak and Lobster Tails
- Seared Scallops
- Miso Black Cod (Sablefish)
- Garlic Butter Salmon
Tried this recipe?
I'd love to hear what you think! Leave a comment and rating below to share your feedback. Your reviews help others discover this recipe and help me keep creating more free recipes for you. Snap a photo and tag me on social media @aheadofthyme too.

25+ Best BBQ Side Dishes

When planning a summer cookout or barbecue, the main dish sometimes takes all the focus, but the BBQ sides are just as important (if not more!). Grilled meat and skewers really shine when paired with salads, veggies, and bread. So if you are wondering "what side dishes to serve with BBQ", then you are in the right place. We are sharing over 25 of the best BBQ side dishes including summer salads, roasted vegetables, potato side dishes, creamy pasta, fluffy bread, and more.
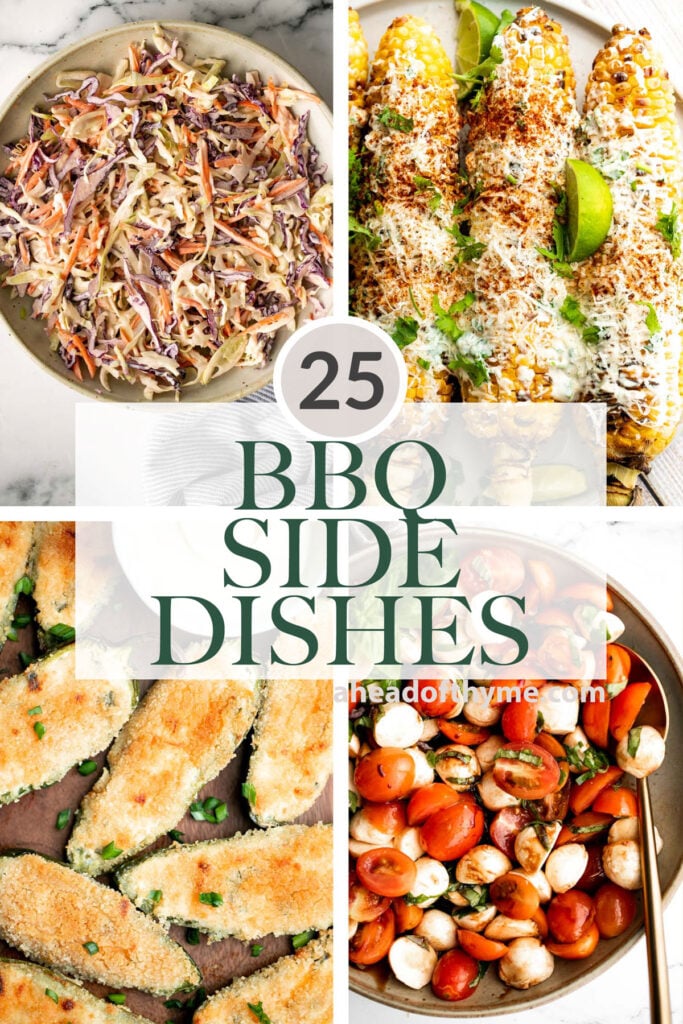
Best BBQ Side Dishes
Classic Coleslaw
Fresh, crisp, classic coleslaw salad is a must-have recipe for a summer barbecue or picnic, or as an easy make-ahead lunch. Make it in less than 10 minutes.
Grilled Corn on the Cob
Buttery and salty grilled corn on the cob with beautiful char marks, delicious flavor, and the best texture is the easiest recipe to throw on the grill.
Antipasto Skewers
Antipasto skewers with tortellini are a quick, easy, and delicious appetizer with the best parts of a traditional antipasto platter but easier to eat.
Summer Corn Salad
Take fresh-off-the-grill corn on the cob and turn it into a light, flavourful summer corn salad, topped with cherry tomatoes, fresh basil and cheese.
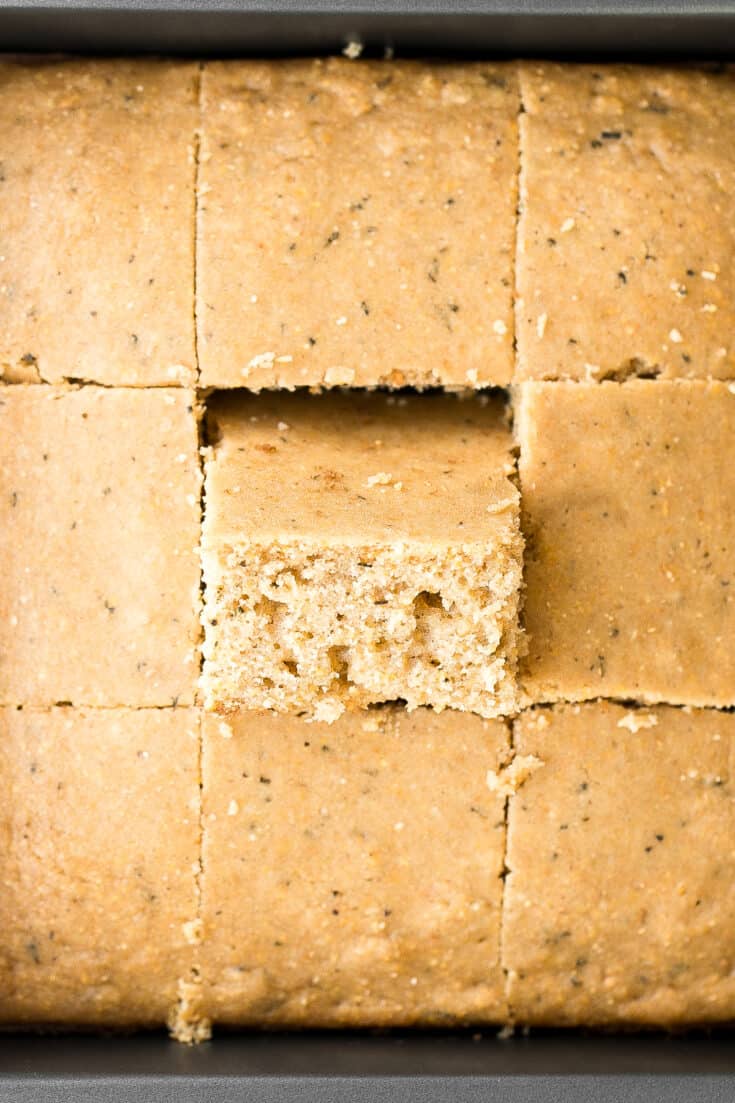
Rosemary Cornbread
Sweet and savoury, buttery rosemary cornbread is soft and moist with golden crispy edges, flavourful and delicious, and so easy to make.
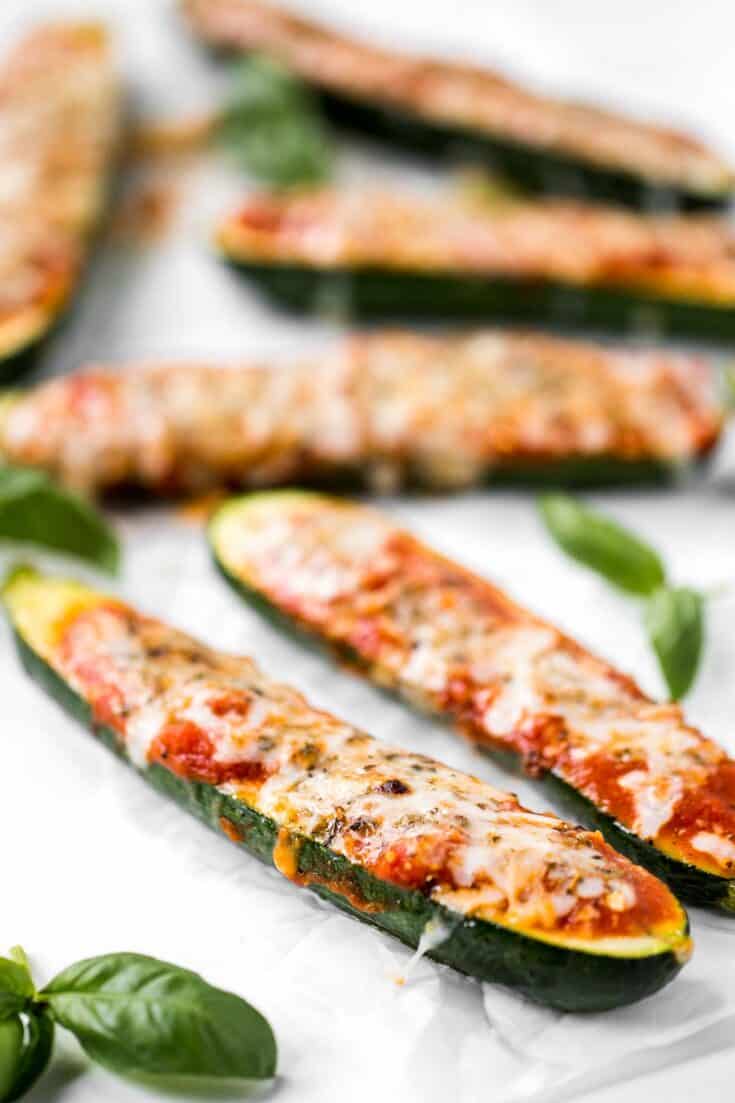
Cheesy Baked Zucchini with Marinara
Cheesy Baked Zucchini with Marinara will save your weeknight dinner routine (and the kids love it too!). It's low carb, vegetarian, gluten-free, and keto.
Macaroni Salad
Classic macaroni salad is a creamy and delicious pasta salad that is easy to throw together. It's the perfect side to bring to a summer potluck or BBQ.
Easy Tzatziki Sauce (Yogurt Cucumber Dip)
Light and fresh, easy tzatziki sauce is a creamy yogurt cucumber dip packed with fresh cucumbers, garlic, dill, lemon juice and olive oil. So easy to make.
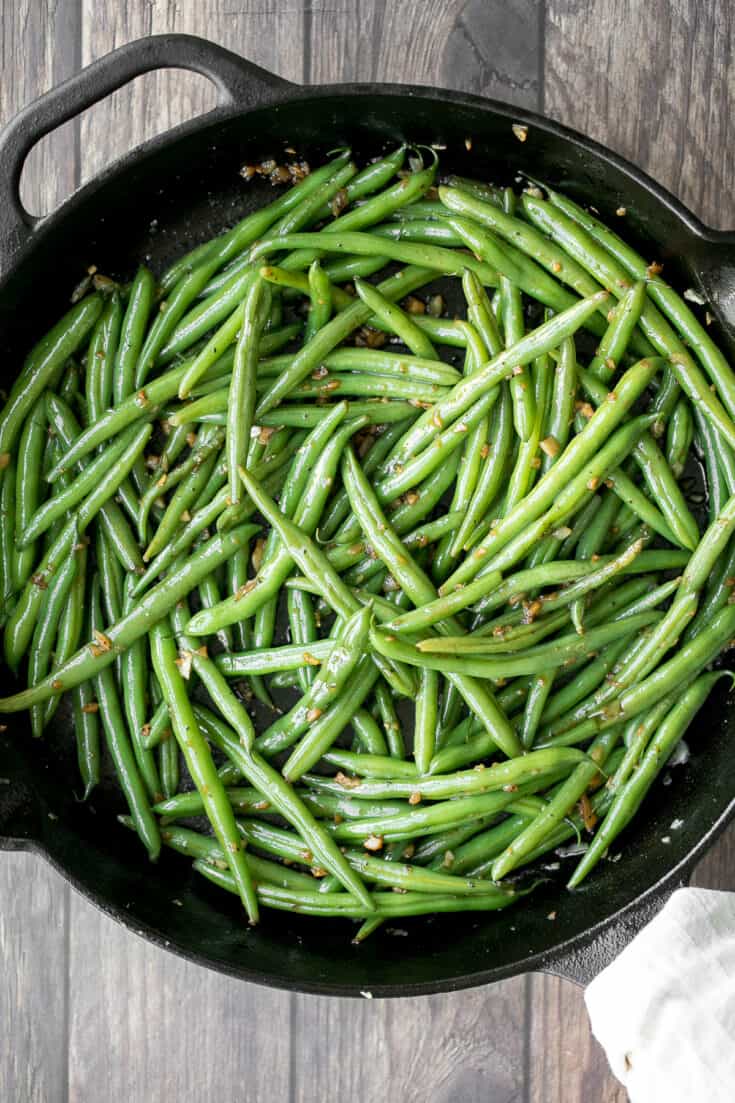
Garlic Green Beans
Buttery sautéed garlic green beans is a simple side dish that is quick, easy and delicious. Make these vibrant, crispy and tender green beans in 10 minutes.
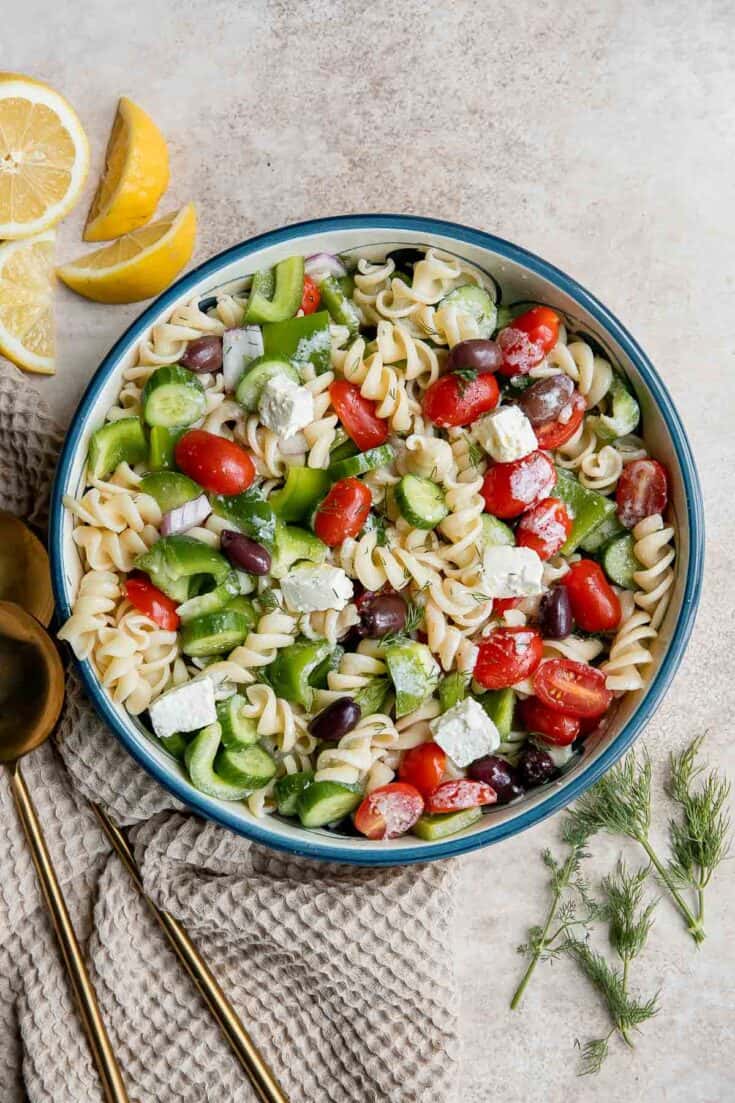
Greek Pasta Salad
Greek Pasta Salad is quick and easy, loaded with Mediterranean flavors, and delicious. Serve it at a summer cookout or potluck, or meal prep weekly lunches.

BBQ Chicken Stuffed Baked Potatoes
Try this delicious combination of BBQ chicken, scallions, cilantro and gruyere for an explosion of flavour in loaded BBQ chicken stuffed baked potatoes.
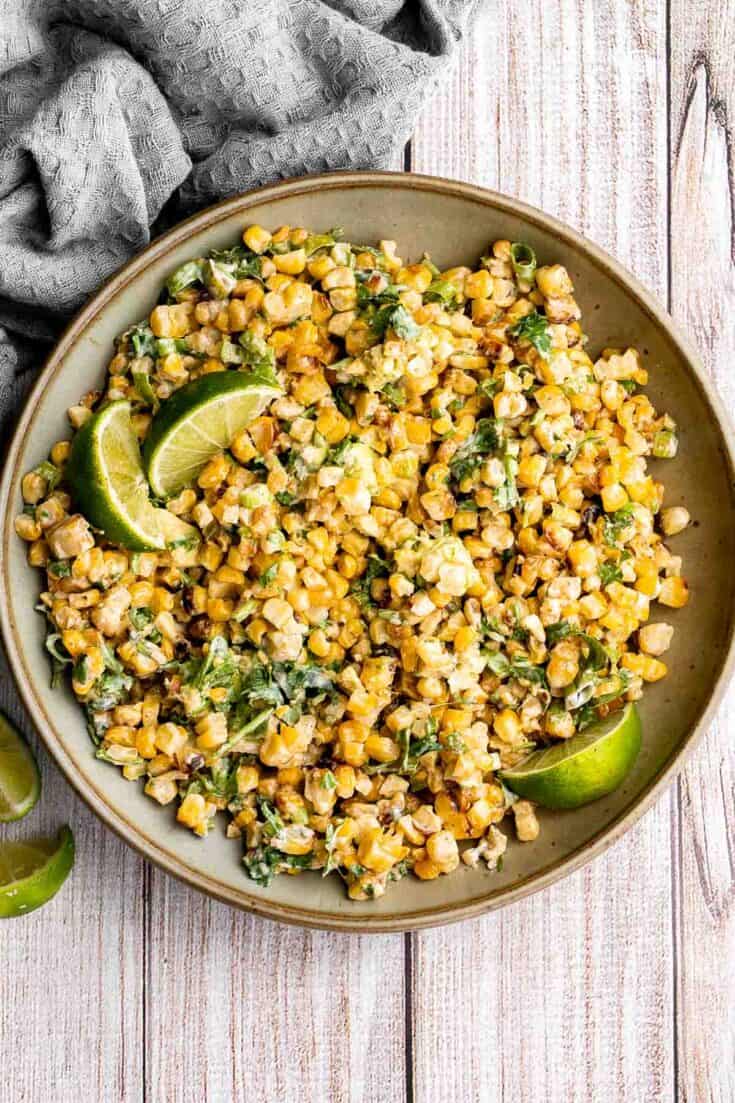
Mexican Street Corn Salad
Mexican street corn salad adds a twist to a classic street food, loaded with freshly grilled corn, a creamy cheesy dressing, and authentic flavor.
Pepperoni Pizza Rolls
Easy pepperoni pizza rolls are crispy on the bottom, tender and chewy inside, packed with pepperoni and cheese, and baked until bubbly.
Creamy Cucumber Salad
This creamy cucumber salad is the easy, refreshing snack and side dish your summer cookouts have been missing. Make it ahead with just 5 minutes prep.
Easy Homemade Biscuits
Flaky, fluffy, buttery, and soft, these easy homemade biscuits come together with only a handful of ingredients you already have at home!
Pigs in a Blanket
Pigs in a blanket from scratch are a delicious and easy appetizer or snack to make for your next party or gathering — juicy, cheesy, flaky, and buttery.
Tomato and Mozzarella Caprese Salad
Quick and easy tomato and mozzarella caprese salad is a fresh, light, and delicious summer salad, made with just a few simple ingredients in 10 minutes.
Baked Sweet Potato Wedges
Pair baked sweet potato wedges with warm spices and a homemade honey mustard dipping sauce and serve as an appetizer or side on game day or on any occasion!
Homemade Pickles
Homemade pickles are easy to make at home in just 5 minutes with no canning required. Plus, they are ready to eat in just 1 to 2 days!
Potato Salad
Easy homemade potato salad is loaded with baby potatoes, eggs, and green onions and tossed in a mayo sauce and is a go-to for summer barbecues and picnics.
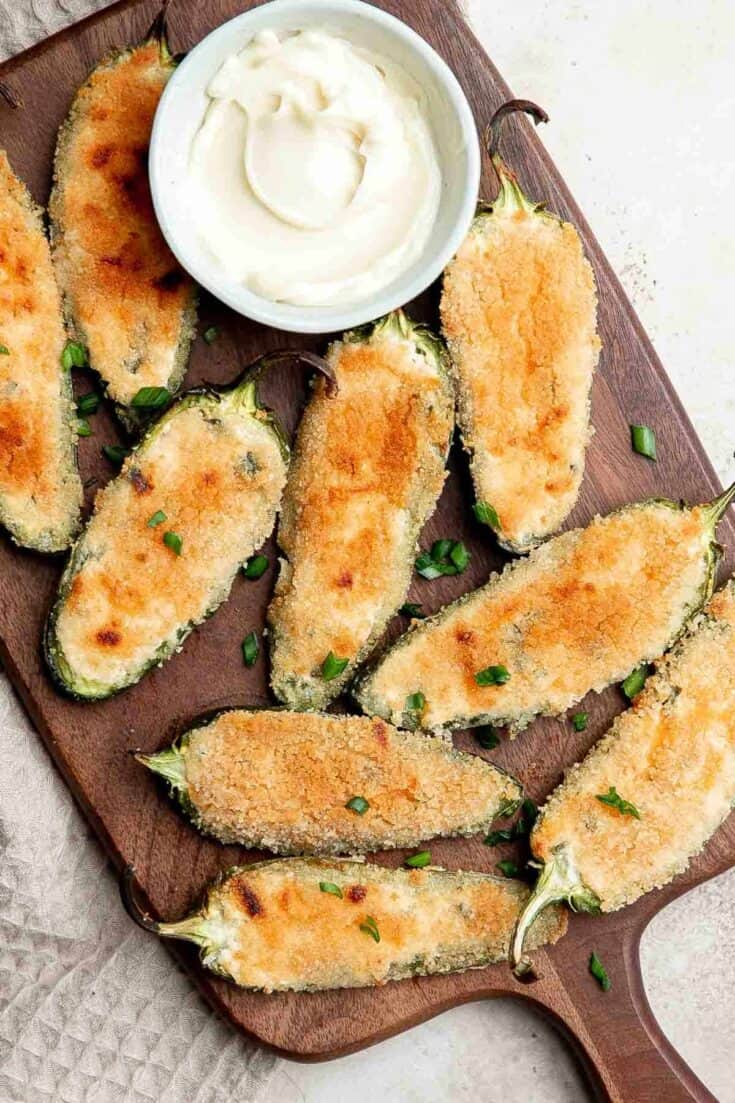
Jalapeño Poppers
Jalapeño poppers are the perfect appetizer — spicy, crispy, cheesy, and creamy, toasted to golden brown perfection. Plus easy to make ahead and freeze well.
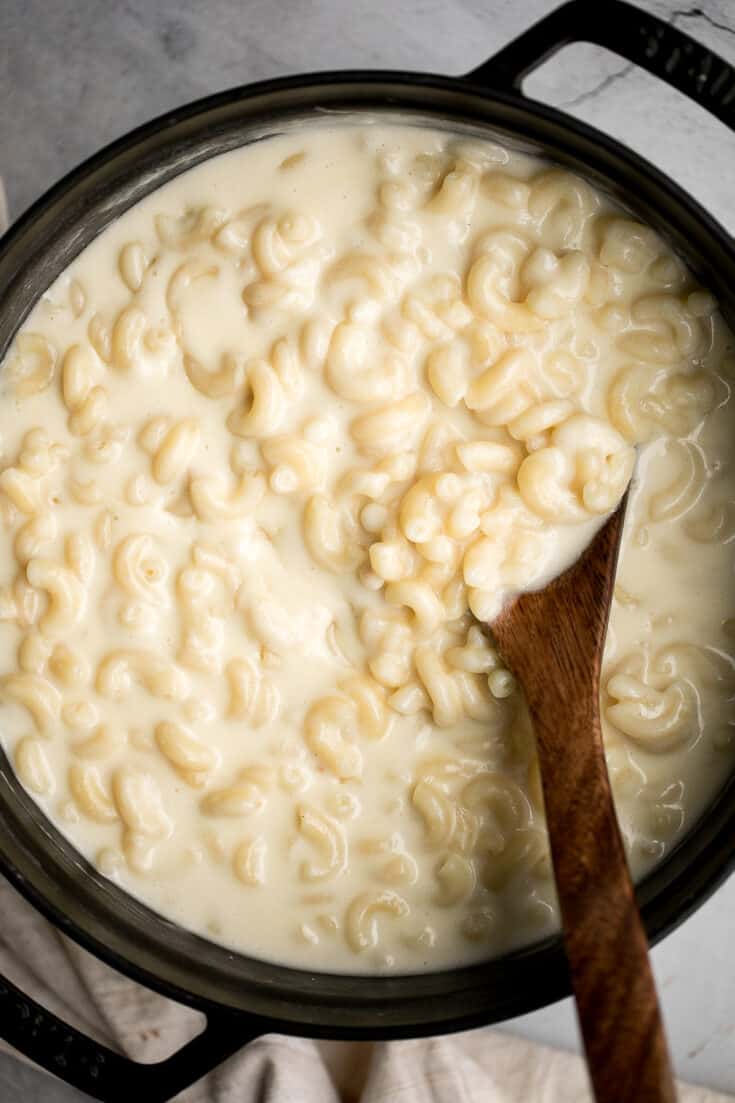
Stovetop Mac and Cheese with White Cheddar
Quick and easy, creamy stovetop mac and cheese with white cheddar is a delicious and comforting one pot 20-minute meal packed with three types of cheese.
Tomato Cucumber Avocado Salad
Simple tomato cucumber avocado salad with a delicious lemon vinaigrette is a light and refreshing salad that comes together in literally 5 minutes.
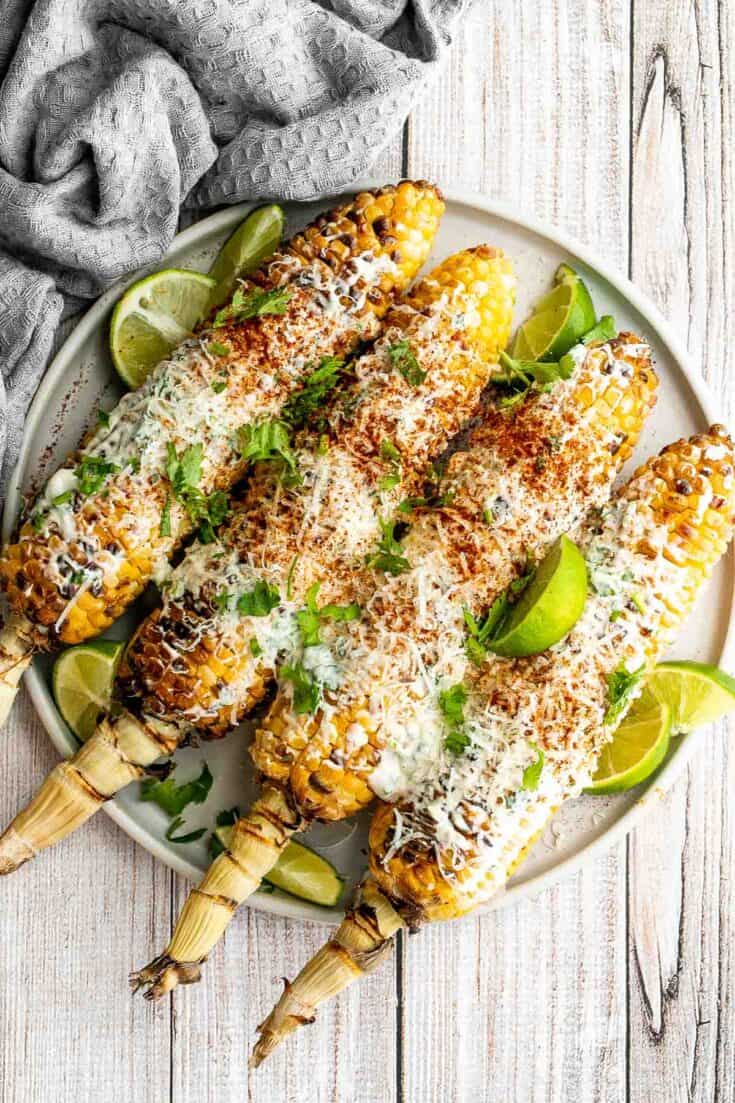
Mexican Street Corn (Elote)
Mexican street corn (elote) is a delicious corn on the cob loaded with a cheesy sauce elevated with cilantro and lime. Creamy, cheesy, spicy, and flavorful.
Garlic Cheddar Biscuits
Flaky Garlic Cheddar Biscuits are a simple but delicious and flavorful no yeast bread that is ready for the oven with less than 15 minutes prep.
Mediterranean Orzo Pasta Salad
Quick and easy Mediterranean orzo pasta salad packed with fresh vegetables and herbs is tossed in a Greek lemon vinaigrette. Healthy, light and delicious.

Greek Fries
Homemade Greek fries bring a Mediterranean twist on a classic side dish, crispy fries are topped with crumbled feta cheese, fresh parsley, and lime juice.
Summer Fruit Salad
This Summer Fruit Salad is colorful, delicious, and naturally sweet (no processed sugar!). It's easy to make with fresh fruit tossed in a homemade dressing.
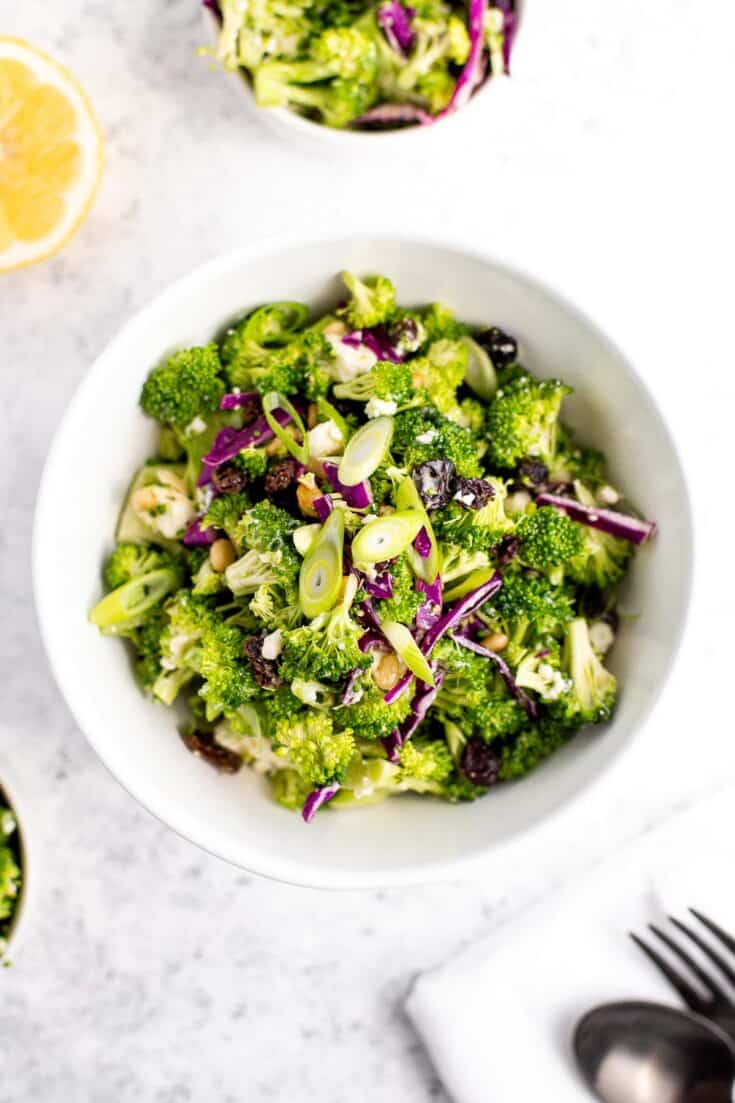
Creamy Broccoli Slaw Salad
Creamy broccoli slaw salad is healthy, delicious, and flavourful. It's packed with crunchy vegetables, salty feta, sweet raisins, and a creamy dressing.
More Side Dish Recipes
- 25 Side Dishes for Chicken
- 25 Side Dishes for Steak
- 25 Side Dishes for Salmon
- 40 Vegetable Side Dishes
- 30 Potato Side Dishes
- 15 Green Bean Recipes
Did You Make Any of These BBQ Side Dishes?
Please leave a comment and rating below, and let me know what you thought of this round up of BBQ side dish recipes. Be sure to snap a picture and tag me on Instagram @aheadofthyme or share it on the Pinterest pin so that I can follow along.
HUNGRY FOR MORE? Don't forget to sign up for my email newsletter so that you don't miss any recipes. You can also follow along on Instagram and Pinterest for more recipe updates.
- « Previous Page
- 1
- …
- 18
- 19
- 20
- 21
- 22
- …
- 41
- Next Page »