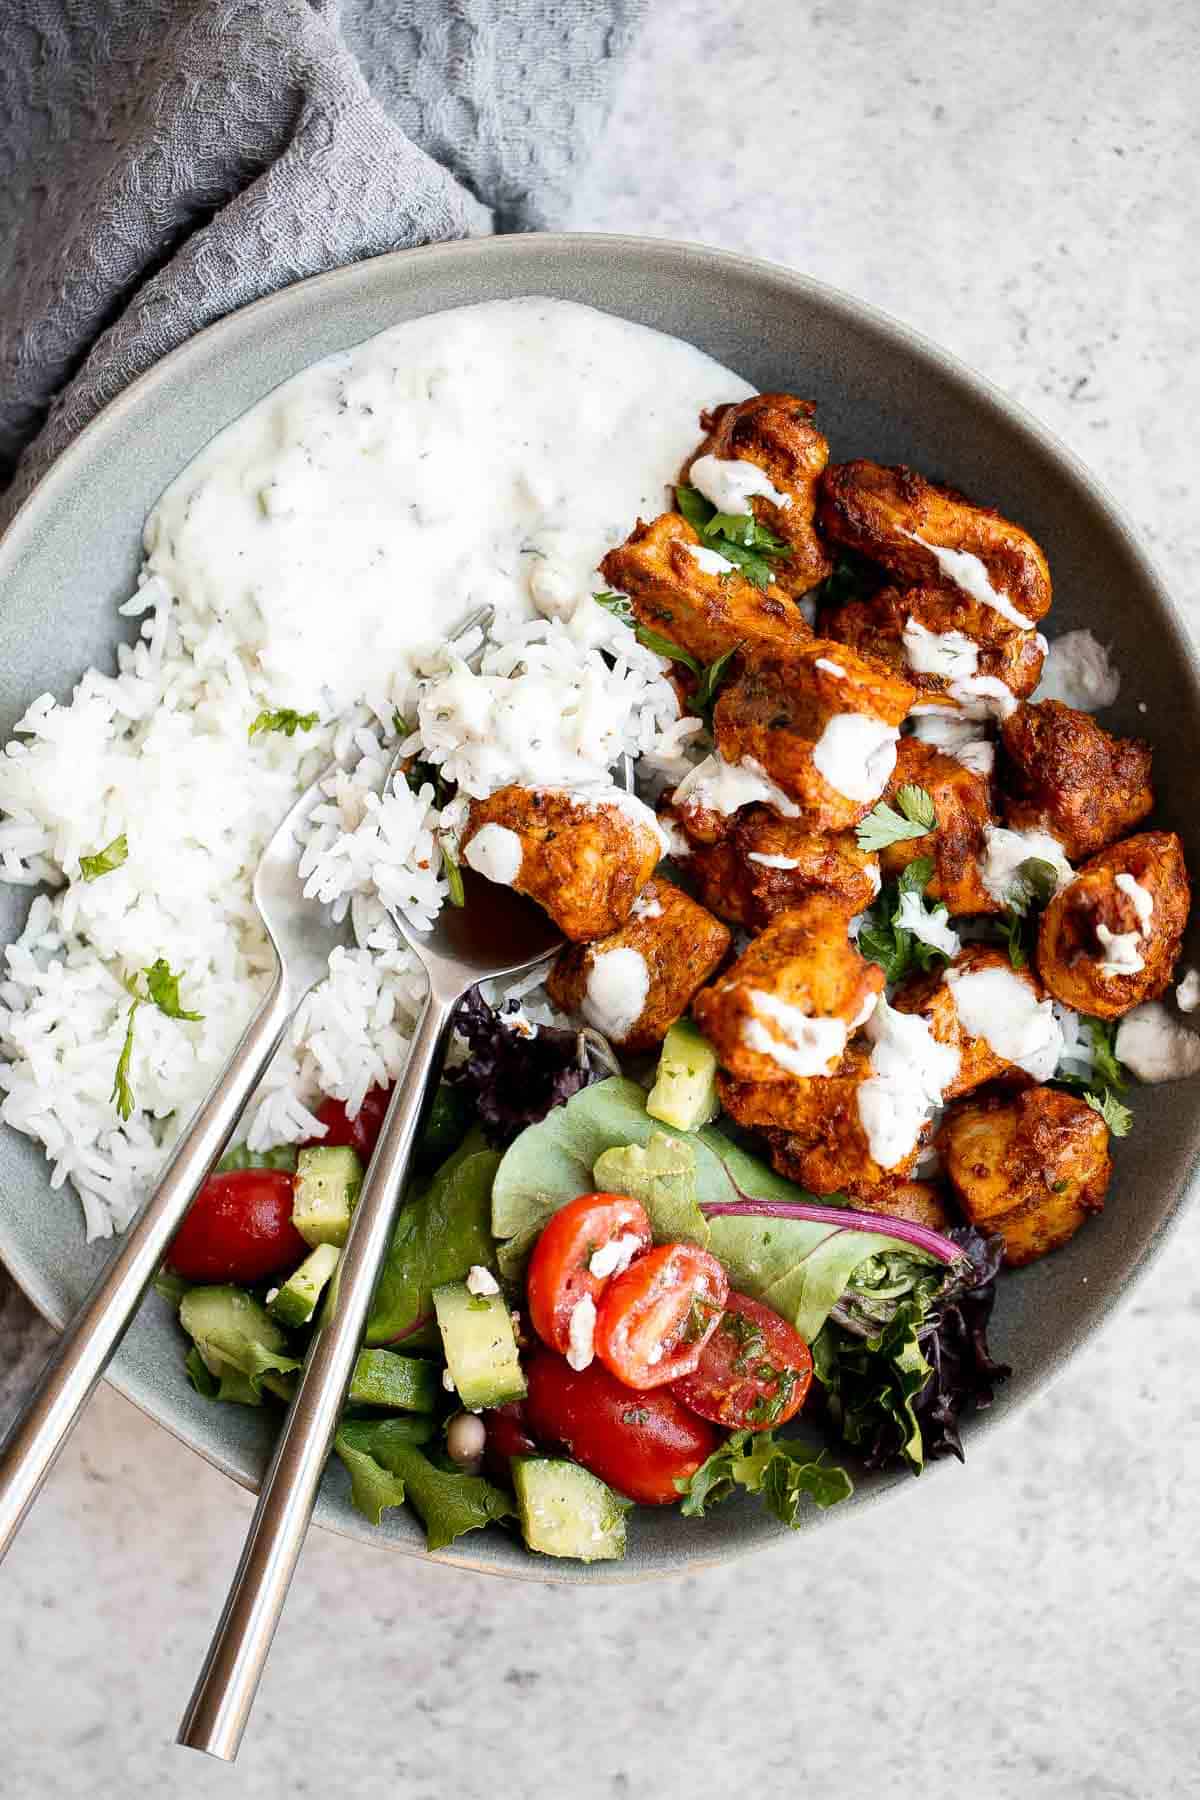
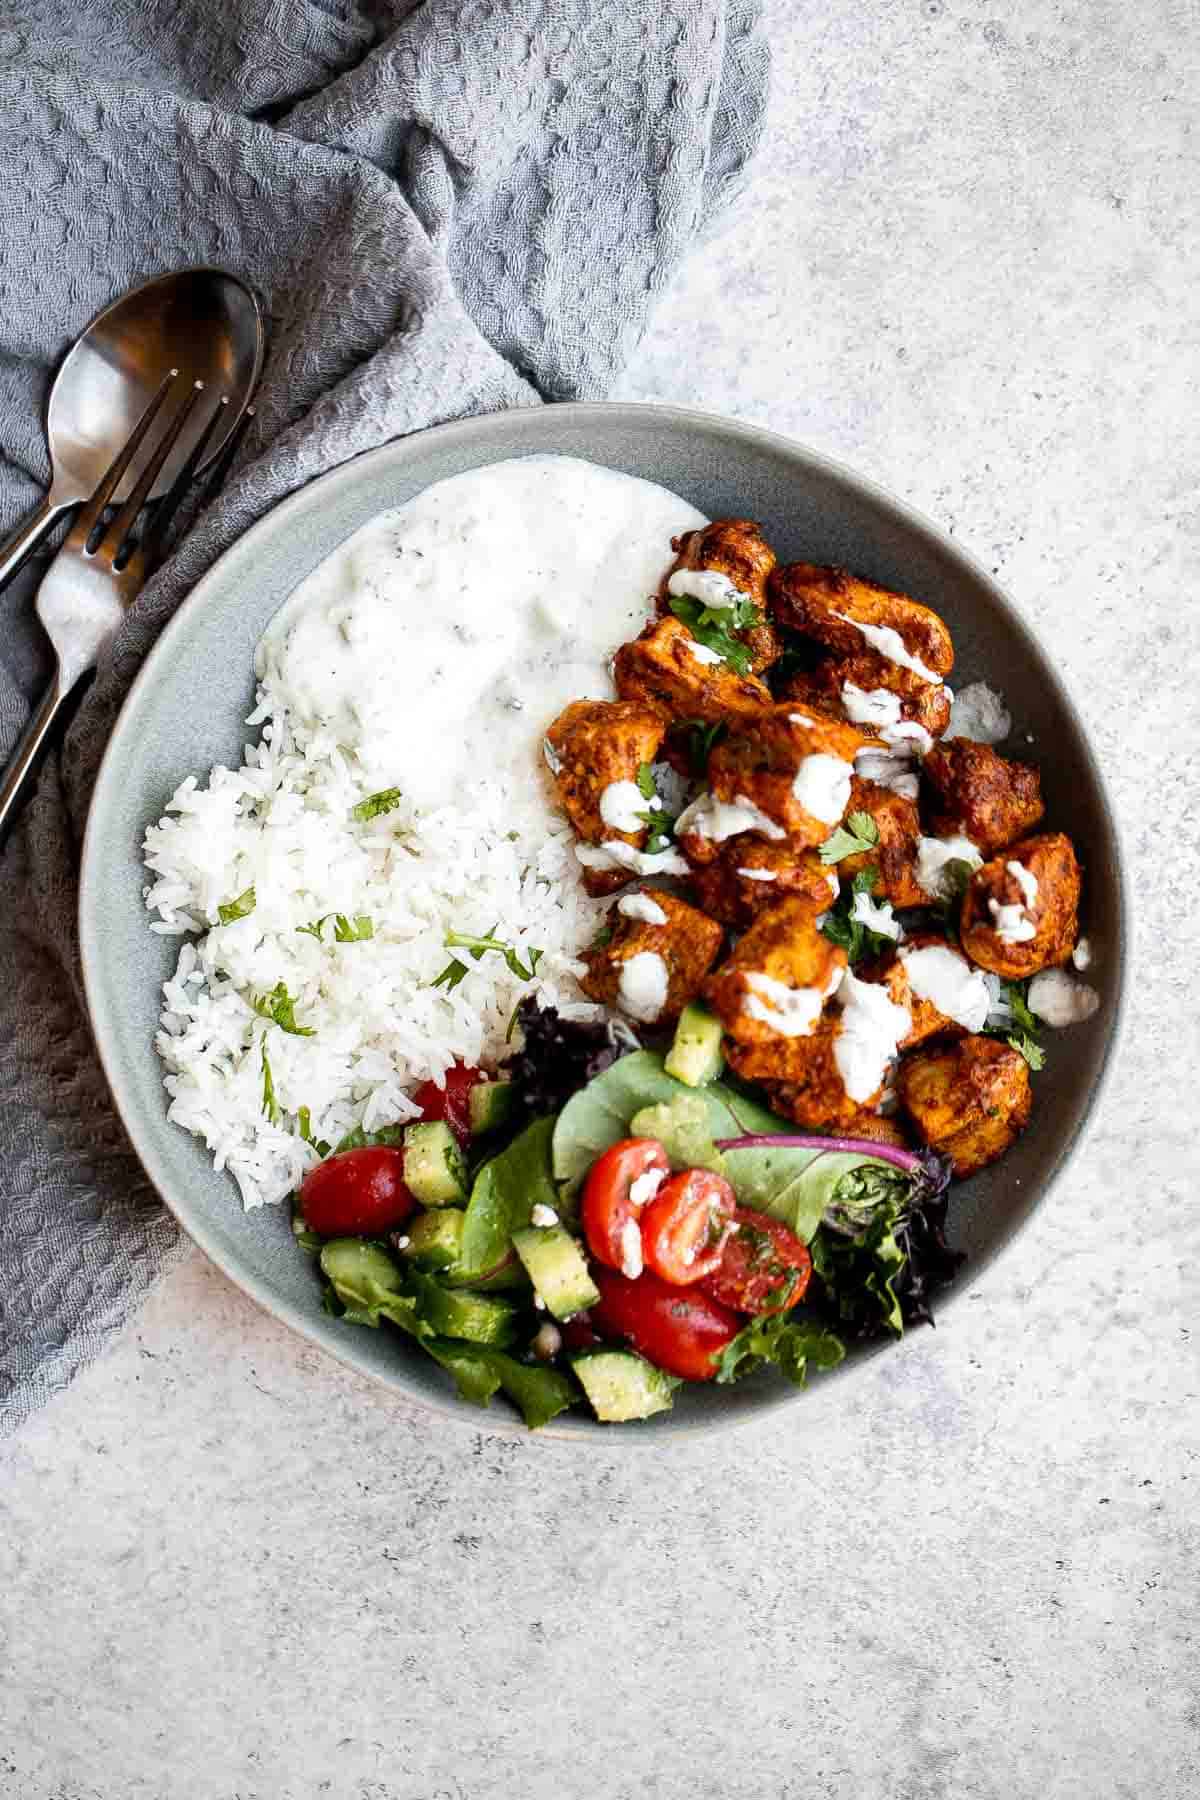
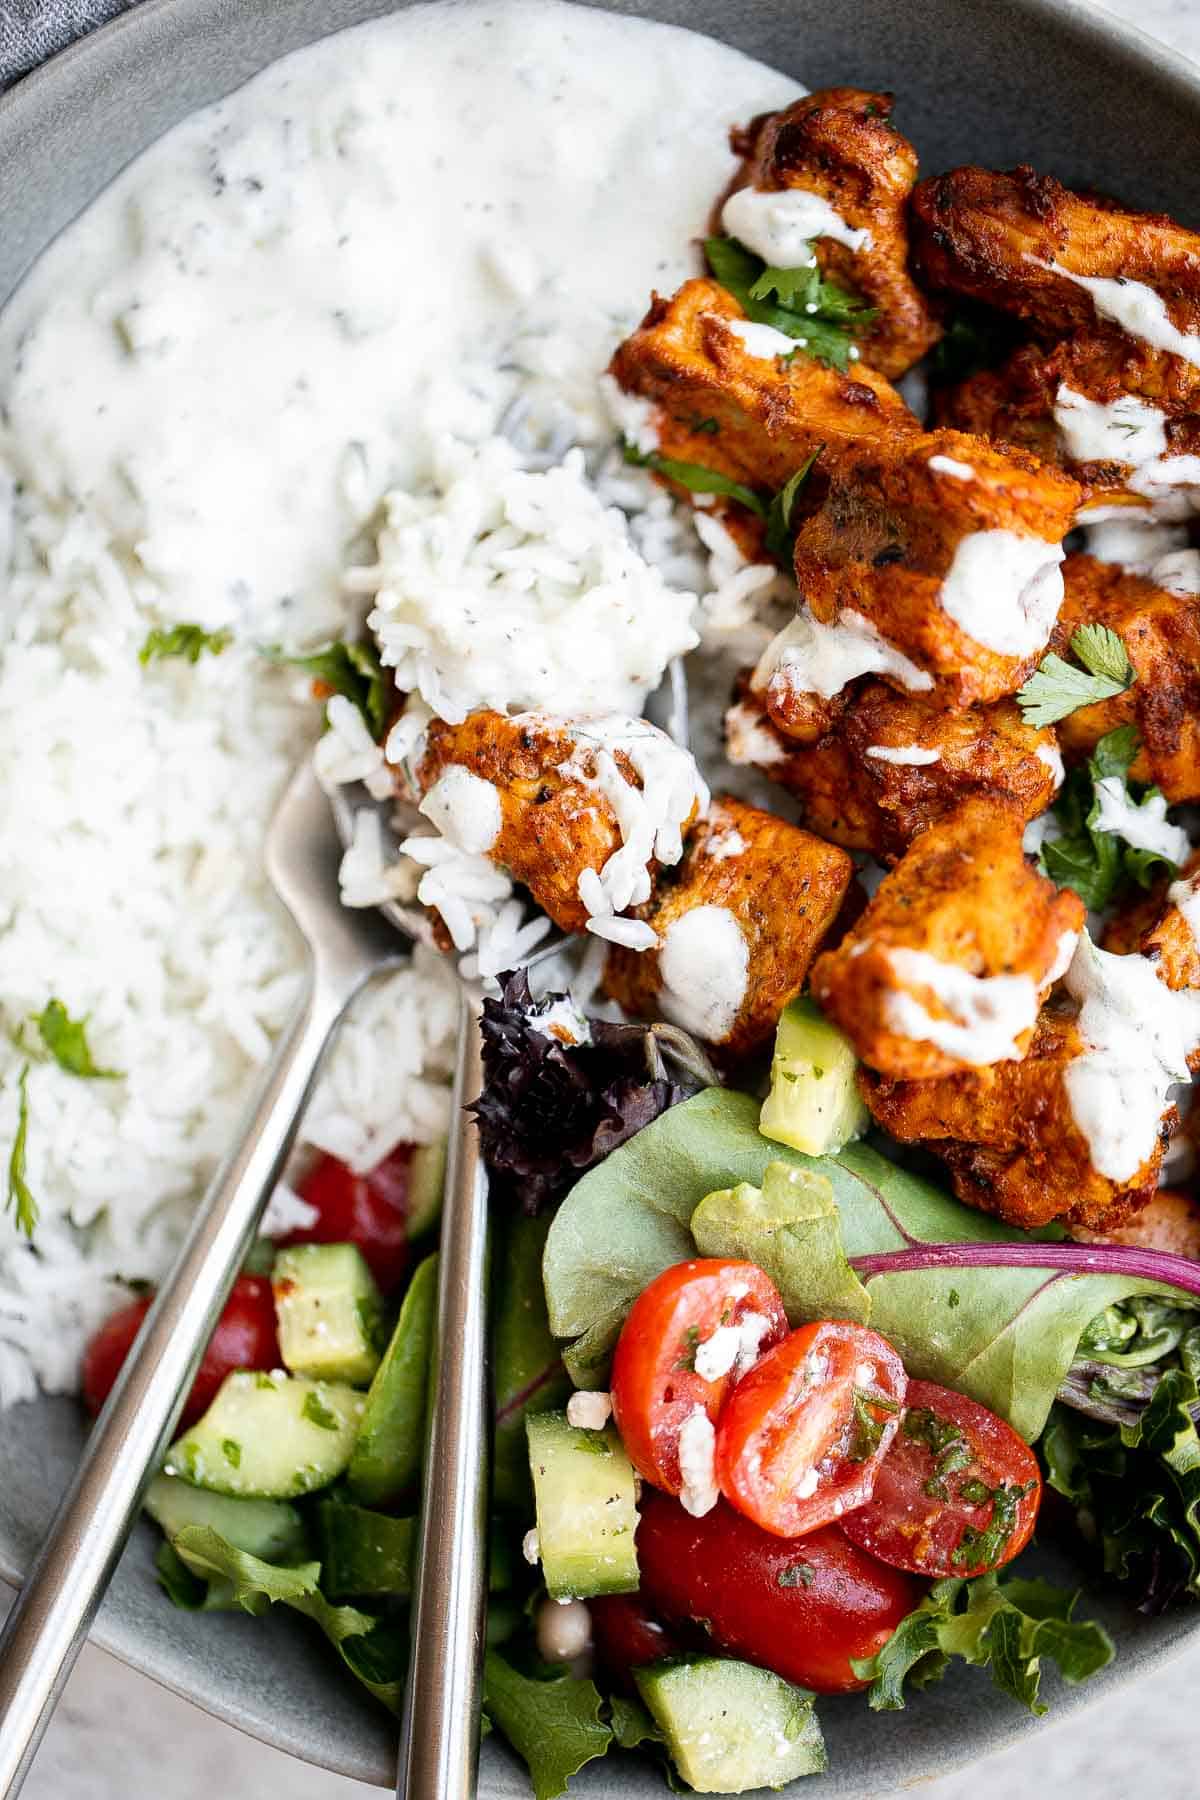
These Indian Rice Bowls are flavorful, delicious, filling, and easy to assemble. Made with steamed rice, juicy and tender tandoori chicken bites, fresh spring mix salad, and a drizzle of a refreshing yogurt sauce, these bowls have it all - grains, protein, and veggies.
Plus, this wholesome and complete meal is relatively quick to prep and takes just 30 minutes of cook time to make. Leftovers store well too, so they're great for meal prep lunches for a few days after.
Why You'll Love Indian Rice Bowls
- The tandoori chicken marinade. These Indian rice bowls are topped with delicious, juicy, and tender tandoori chicken bites loaded with flavor from a simple marinade including curry powder, paprika, cumin, garlic and ginger. You can also add some cayenne pepper powder for extra heat. Plus, it only takes an hour to marinate!
- The homemade yogurt sauce. These tandoori chicken bowls are topped with a drizzle of homemade yogurt sauce that gets inspiration from Tzatziki Sauce with dill, lemon juice, and garlic. Its a refreshing contrast to the tandoori spices - they go so well together.
- It's easy to assemble. These Indian chicken bowls are so easy to assemble, and you can coordinate and make sure all the items are ready at the same time. Plus, it's a great way to use up any leftover rice or salad from the fridge, and also saves you prep time.

Ingredient Notes
To make these delicious Indian Rice Bowls, you will need the following ingredients (full measurements in recipe card below):
- chicken - we used boneless skinless chicken breasts, but you can also use boneless chicken thighs if you prefer.
- tandoori seasoning - made simple with paprika, curry powder (or garam masala), ground cumin, garlic powder, ginger powder, salt, and pepper. You can also make it spicy with a pinch of cayenne powder or red pepper powder.
- plain yogurt - we love using our easy Homemade Yogurt.
- tomato paste - adds flavor and color.
- vegetable oil
- Basmati rice - cooked in water with salt. You can also substitute with any white rice that you'd like.
- spring mix salad - tossed together with salad greens, cherry tomatoes, cucumbers, and feta.
- balsamic salad dressing - a simple dressing made with olive oil, balsamic vinegar, lemon juice, salt, and pepper.
- yogurt sauce - this sauce is perfect for dipping or drizzling. You'll need plain yogurt, olive oil, lemon juice, garlic, dill, salt, and pepper. Alternatively, serve these chicken pieces with Tzatziki Sauce.
You will also need measuring cups and spoons, mixing bowls, medium cooking pot, and an oven or air fryer (if cooking the chicken in the air fryer).

How to Make the Best Indian Rice Bowls
There are 4 components in these tandoori chicken bowls - chicken, rice, salad, and sauce.
First, let's make the chicken.
- Prepare chicken. Cut the chicken breasts into 1-inch thick pieces and set aside in a large mixing bowl or Ziploc bag.
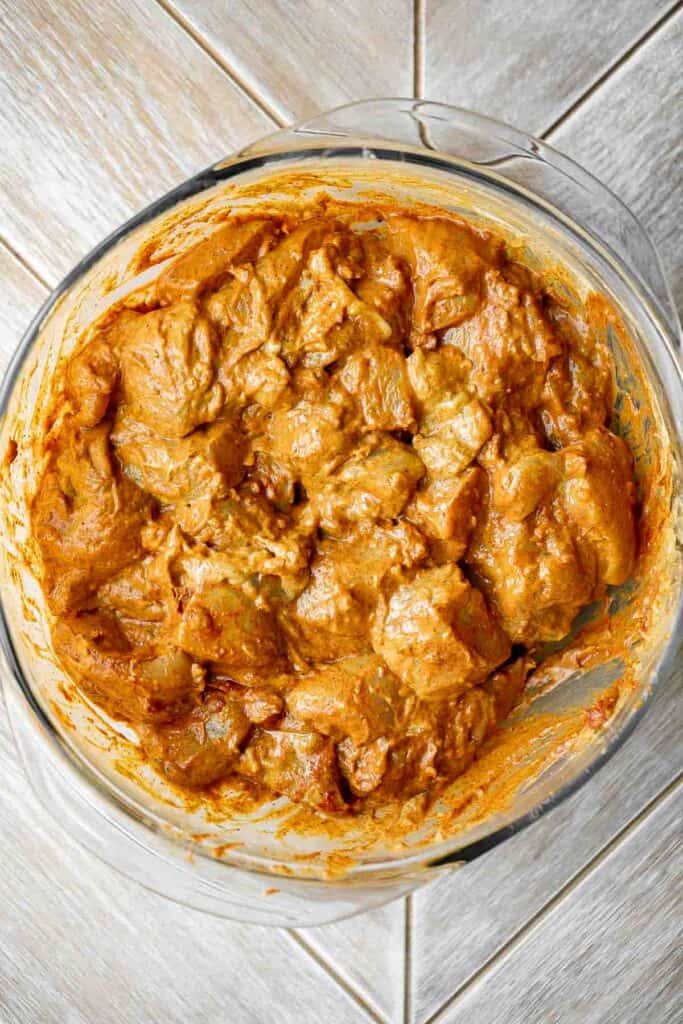
- Make marinade. Add paprika, curry powder, cumin, garlic powder, ginger powder, salt, and pepper. Rub the seasoning all over the chicken pieces to coat it evenly. Stir in yogurt, tomato paste, and oil. Toss well until evenly coated.
- Marinate the chicken. Cover the bowl with plastic cling wrap and refrigerate for at least 1 hour (or overnight for the best results).
- Cook. You can cook the chicken in the air fryer or in the oven.
- To air fry: Transfer the cubed chicken to the air fryer basket in a single layer in the air fryer basket. Spray with some cooking oil spray. Air fry at 350F for 13-15 minutes until golden brown and fully cooked through. The internal temperature for the chicken should reach 165F as read on a meat thermometer.
- To bake in the oven: You can also bake the chicken tandoori bites in a preheated oven at 450F for 16- 18 minutes until the chicken is fully cooked through.

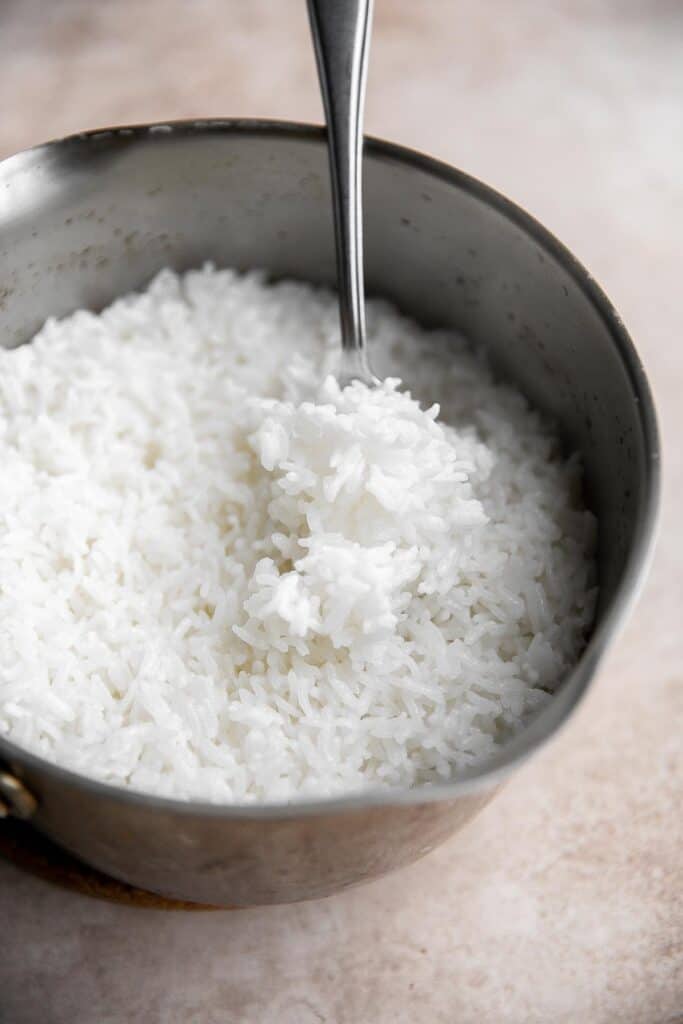
Next, let's make rice.
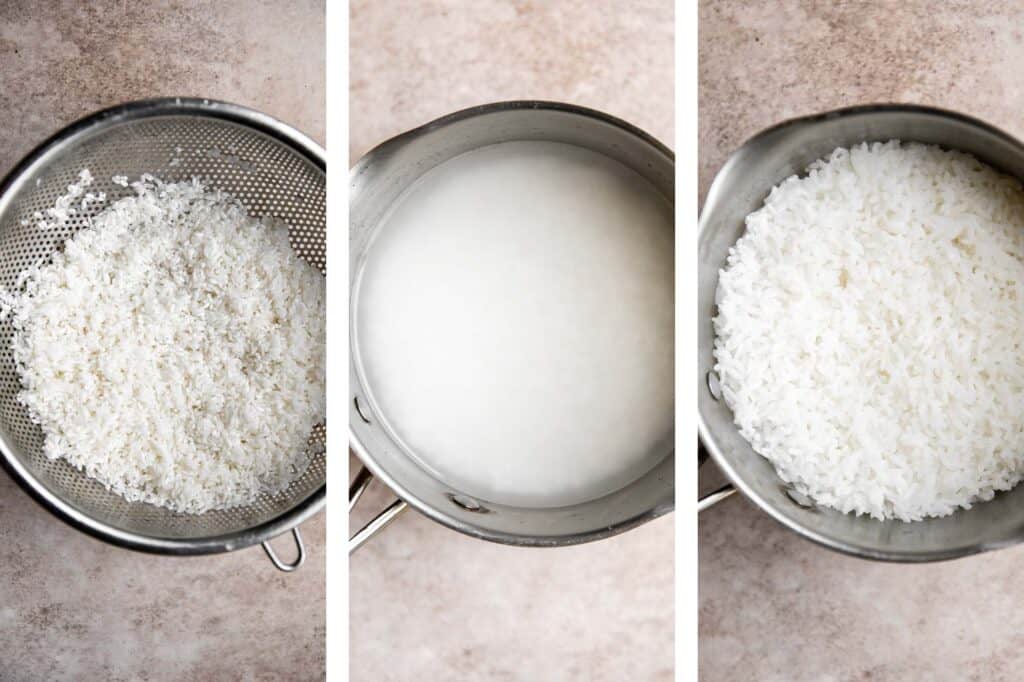
Rinse the rice in several changes of cold water until water is clear, then drain well in a large fine-mesh sieve.
Cook rice over the stove, in a rice cooker, or in a pressure cooker.
- On the stove: In a medium cooking pot, add rice, water and salt. Bring it to boil over medium heat, about 5 minutes. Close the lid and reduce heat to low. Let the rice simmer for 15 minutes until tender and the water is absorbed. Remove from heat and let the cooked rice rest for another 5 minutes. Fluff with a fork and serve warm.
- In the rice cooker: Add rice and cold water in 1:1.5 ratio in the rice cooker (for 2 cups of rice, you need 3 cups of water). Turn on the power and start cooking in the rice cooker. It typically takes about 15-20 minutes. The rice cooker will automatically switch to 'keep warm' setting. Let the cooked rice rest for another 5 minutes and fluff with a fork.
- In the instant pot: Add rice and cold water in 1:1 ratio in the Instant Pot Pressure Cooker (for 2 cups of rice, you need 2 cups of water). Switch the instant pot to pressure cooking mode on manual High and seal the lid (the steam release knob must be turned to the sealed position). Cook for 3 minutes. Once the time is up, let the instant pot slowly release the pressure for 10 minutes and then quickly release the remaining pressure by turning the steam release valve to the venting position. Fluff with a fork.
Now, it's the salad's turn.
- In a medium mixing bowl, combine spring mix salad greens, cherry tomatoes, cucumbers, feta, olive oil, balsamic vinegar, lemon juice, salt, and pepper.
Lastly, the yogurt sauce.
Make the yogurt sauce by whisking together yogurt, oil, lemon juice, garlic, dill, salt, and pepper in a small mixing bowl until smooth. Refrigerate the sauce until ready to use.

How to Assemble Chicken Rice Bowls
These bowls are so easy to assemble. Divide the rice, salad, and chicken into 4 shallow bowls or pasta bowls. I like to put the rice on half the bowl, some salad on a quarter of the bowl, and top with chicken on the remaining quarter.
Then, add a drizzle of the yogurt sauce on top and serve.
Chicken Rice Bowl Variations
The best part of this recipe is that you can switch up the components.
- Instead of Steamed Rice, try these rice bowls with a Rice Pilaf with Carrots or with Garlic Naan Bread.
- Instead of the spring mix salad, add a Persian Shirazi Salad, Creamy Cucumber Salad, or Garden Salad to these rice bowls.
- Add extra veggies such as Honey Roasted Carrots, Roasted Cauliflower, or Sautéed Garlic Green Beas.
Storing Instructions
- How to store: Store components of the Indian rice bowl separately in airtight containers in the fridge - the chicken, rice, salad, and yogurt sauce. Leftover tandoori chicken bites will keep for up to 3-4 days, rice for up to 4-5 days, salad for up to 4 days, and the yogurt sauce for up to 1 week.
- How to reheat: Reheat the tandoori chicken nuggets in the air fryer at 350F for 5-10 minutes until warm, or in a 350F preheated oven for 10-15 minutes. You can also reheat it over the stove on medium-low heat until warm.
More Indian Chicken Recipes
- Tandoori Chicken Drumsticks
- Tandoori Chicken Skewers
- Indian Butter Chicken
- Sheet Pan Curry Chicken and Vegetables
- One Pot Coconut Curry Chicken and Rice
- Butter Chicken Pizza
Tried this recipe?
I'd love to hear what you think! Leave a comment and rating below to share your feedback. Your reviews help others discover this recipe and help me keep creating more free recipes for you. Snap a photo and tag me on social media @aheadofthyme too.

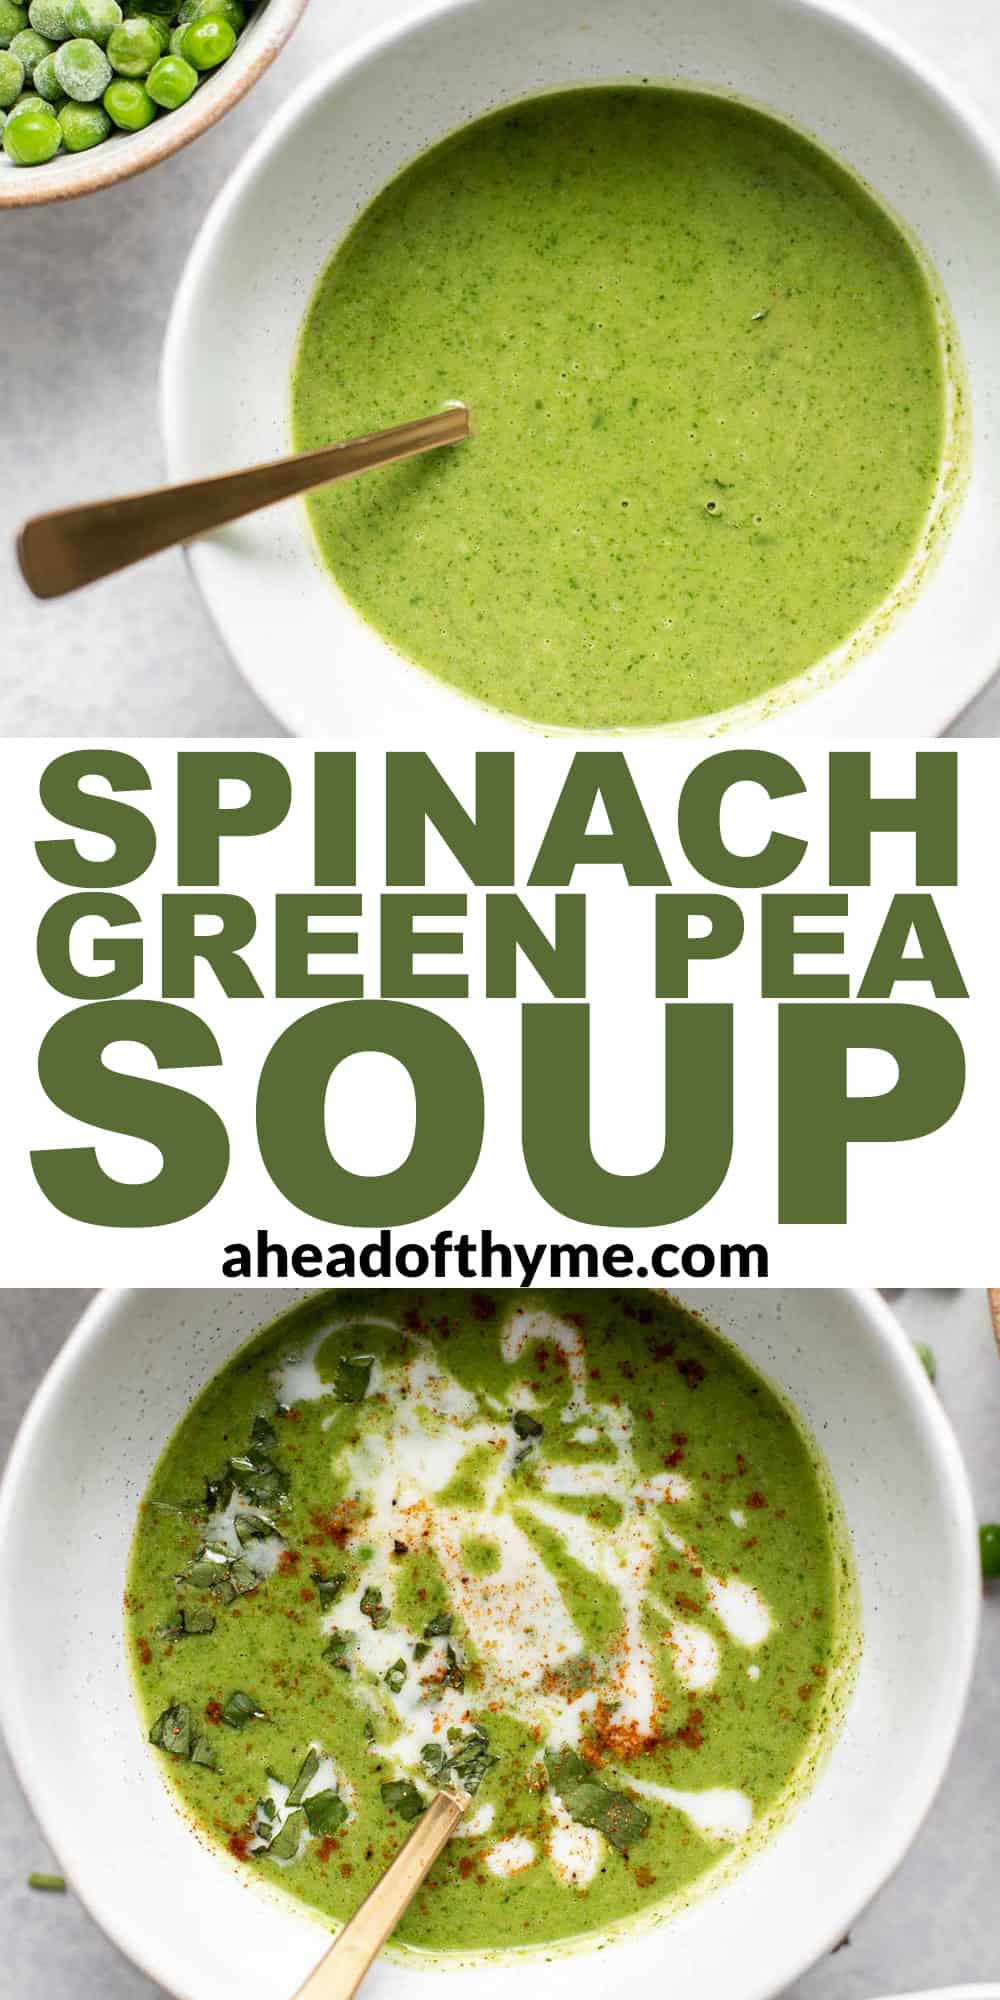
Spinach and Pea Soup
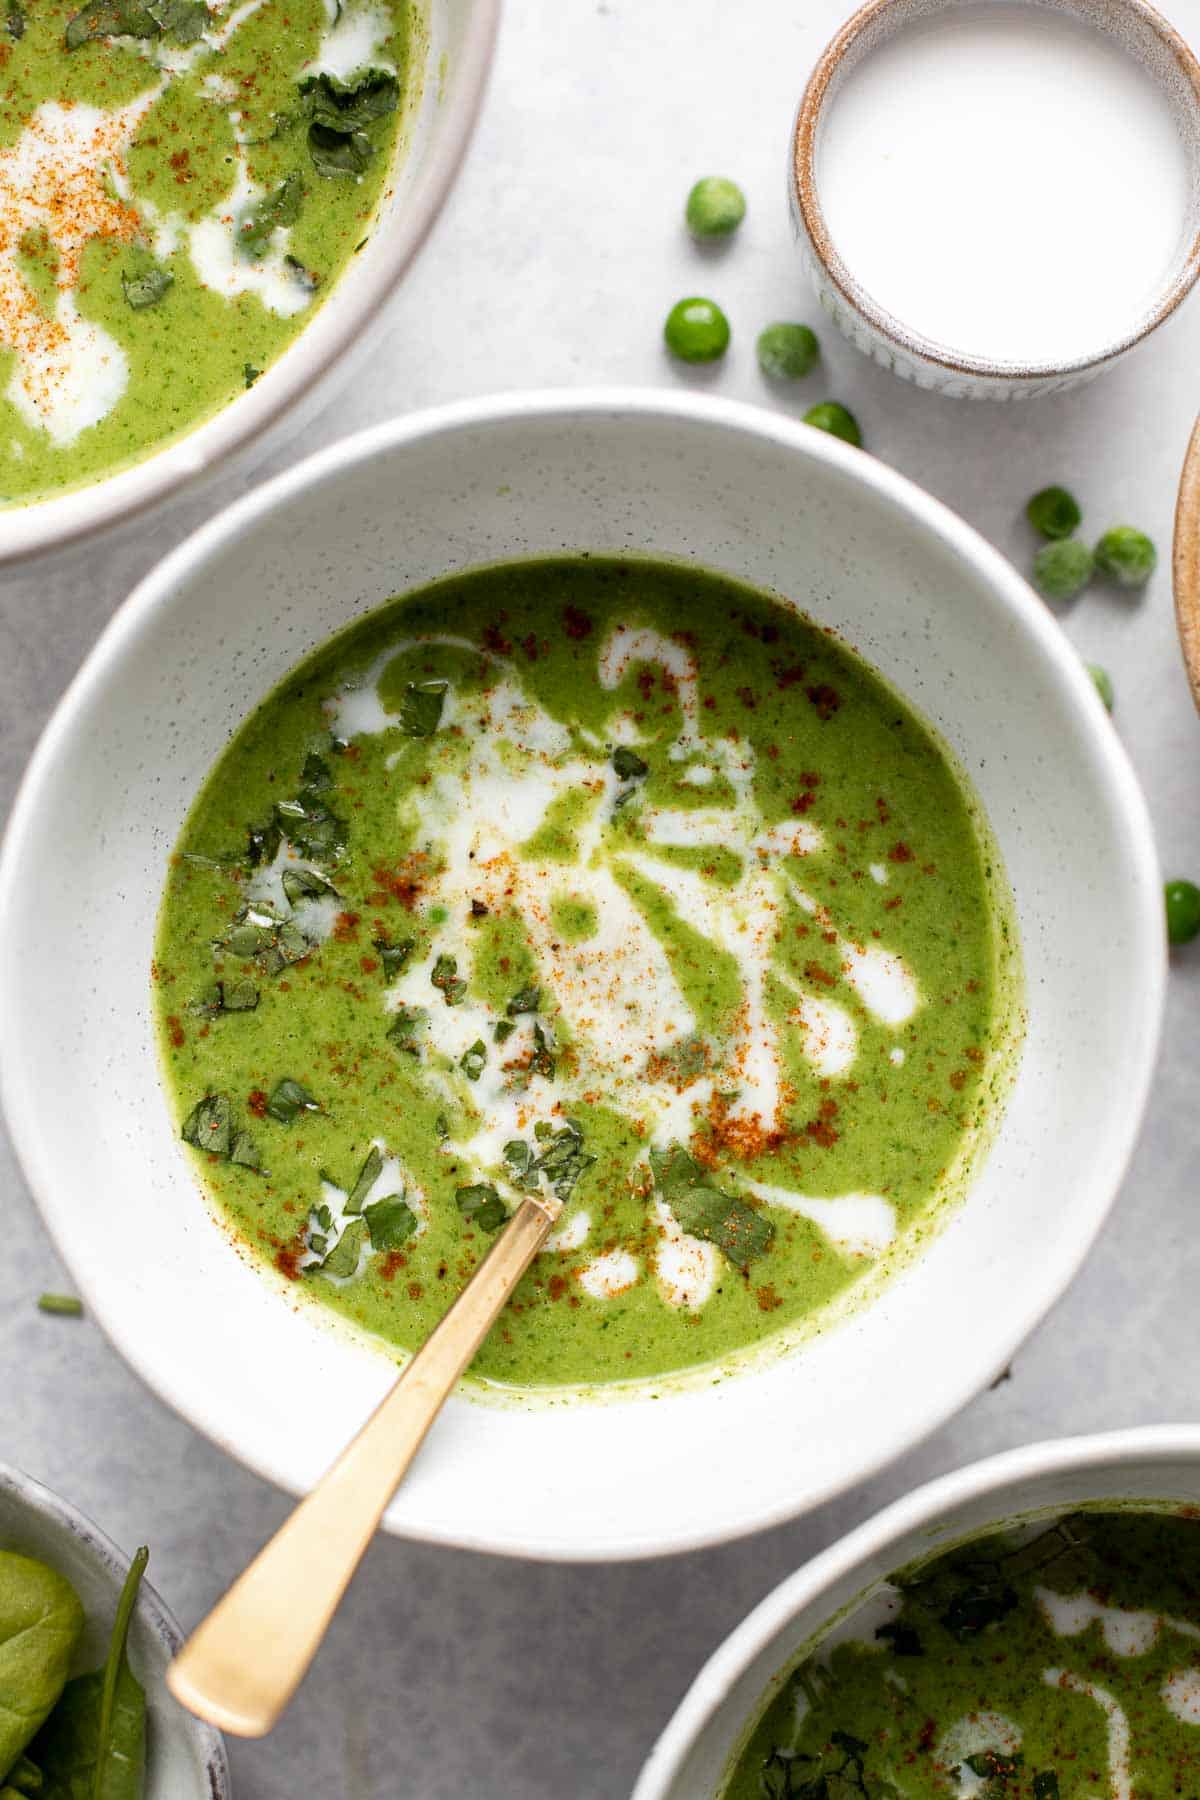
This Spinach and Pea Soup is creamy, velvety, healthy, and delicious. It's a curried soup with a vegan coconut milk base loaded with fresh spinach and green peas, and well seasoned with a variety of spices. Plus, it's vegan, gluten-free, and nutritious.
The best part? It's a quick and easy one pot recipe that's ready in under 30 minutes - perfect for busy weeknights or lazy cooking days when you don't feel like spending a lot of time in the kitchen. It also stores well and is freezer-friendly, so you can make this well in advance and enjoy it for months to come.
Why You'll Love this Spinach and Pea Soup
- It's healthy and nutrient dense. This spinach and green pea soup is packed with green goodness. I mean isn't it obvious? The two main ingredients are spinach and green peas. Spinach is a great source of iron, folic acid, vitamin K, and vitamin C. While, green peas are also bursting with B vitamins, a variety of minerals, and protein.
- Loaded with flavor. This soup is packed with veggies, greens, coconut milk, and seasoning - and these ingredients were made for each other. The curry and chili powder provide a little kick which livens up the subtle flavours of the peas and spinach, while the coconut milk provides a rich, smooth contrast to the hearty veggies.
- It's quick and easy to make. For a recipe that is packed with so much flavour, you will be surprised at how easy it is to make. It is one of the easiest soups you can make. It's a one pot recipe that takes under 20 minutes to cook. And, you do not even have to defrost any peas first.
- Serve it hot or cold. This is one of those soups that is cozy and comforting warm but it also refreshing and surprisingly good cold.
Ingredient Notes
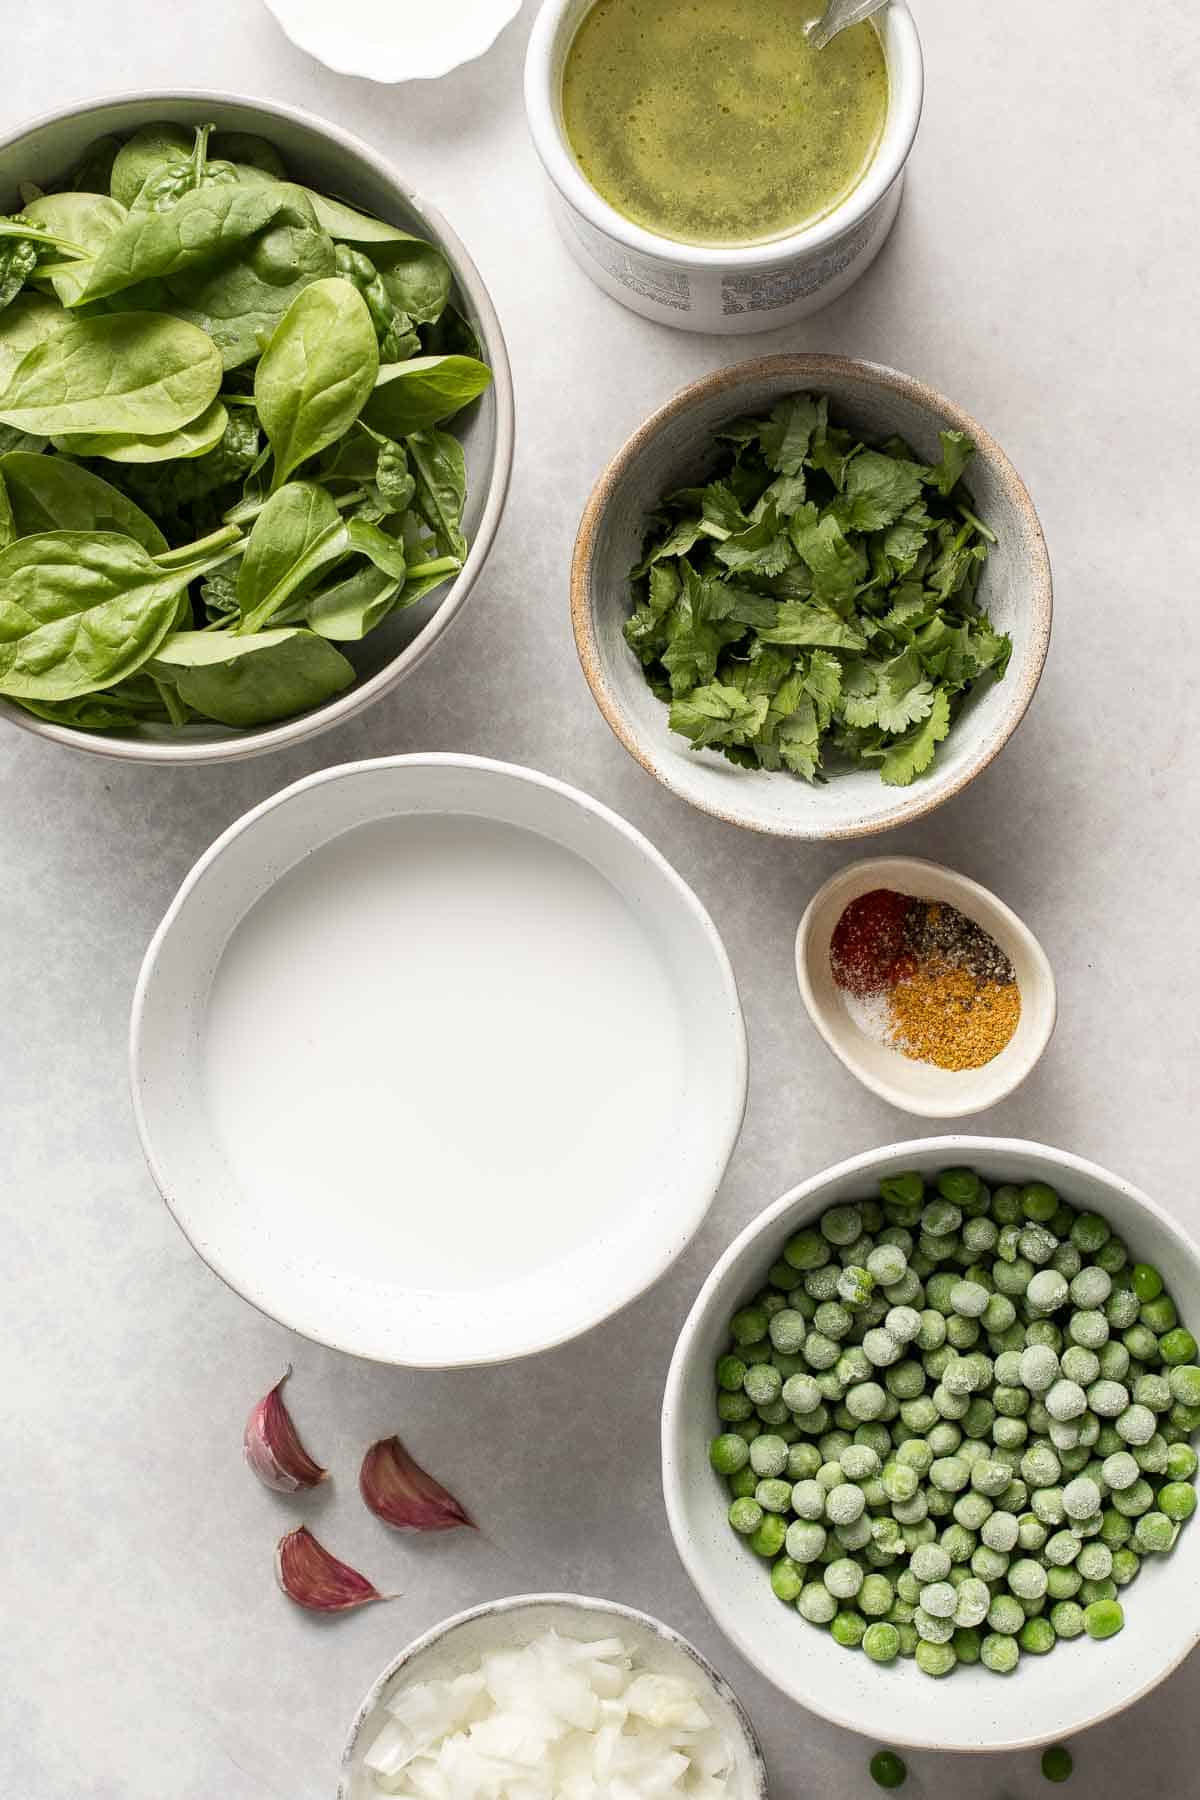
To make this easy Spinach and Pea Soup, you will need the following ingredients (full measurements in recipe card below):
- coconut oil - you can also substitute with any vegetable oil that you have on hand.
- onion
- garlic
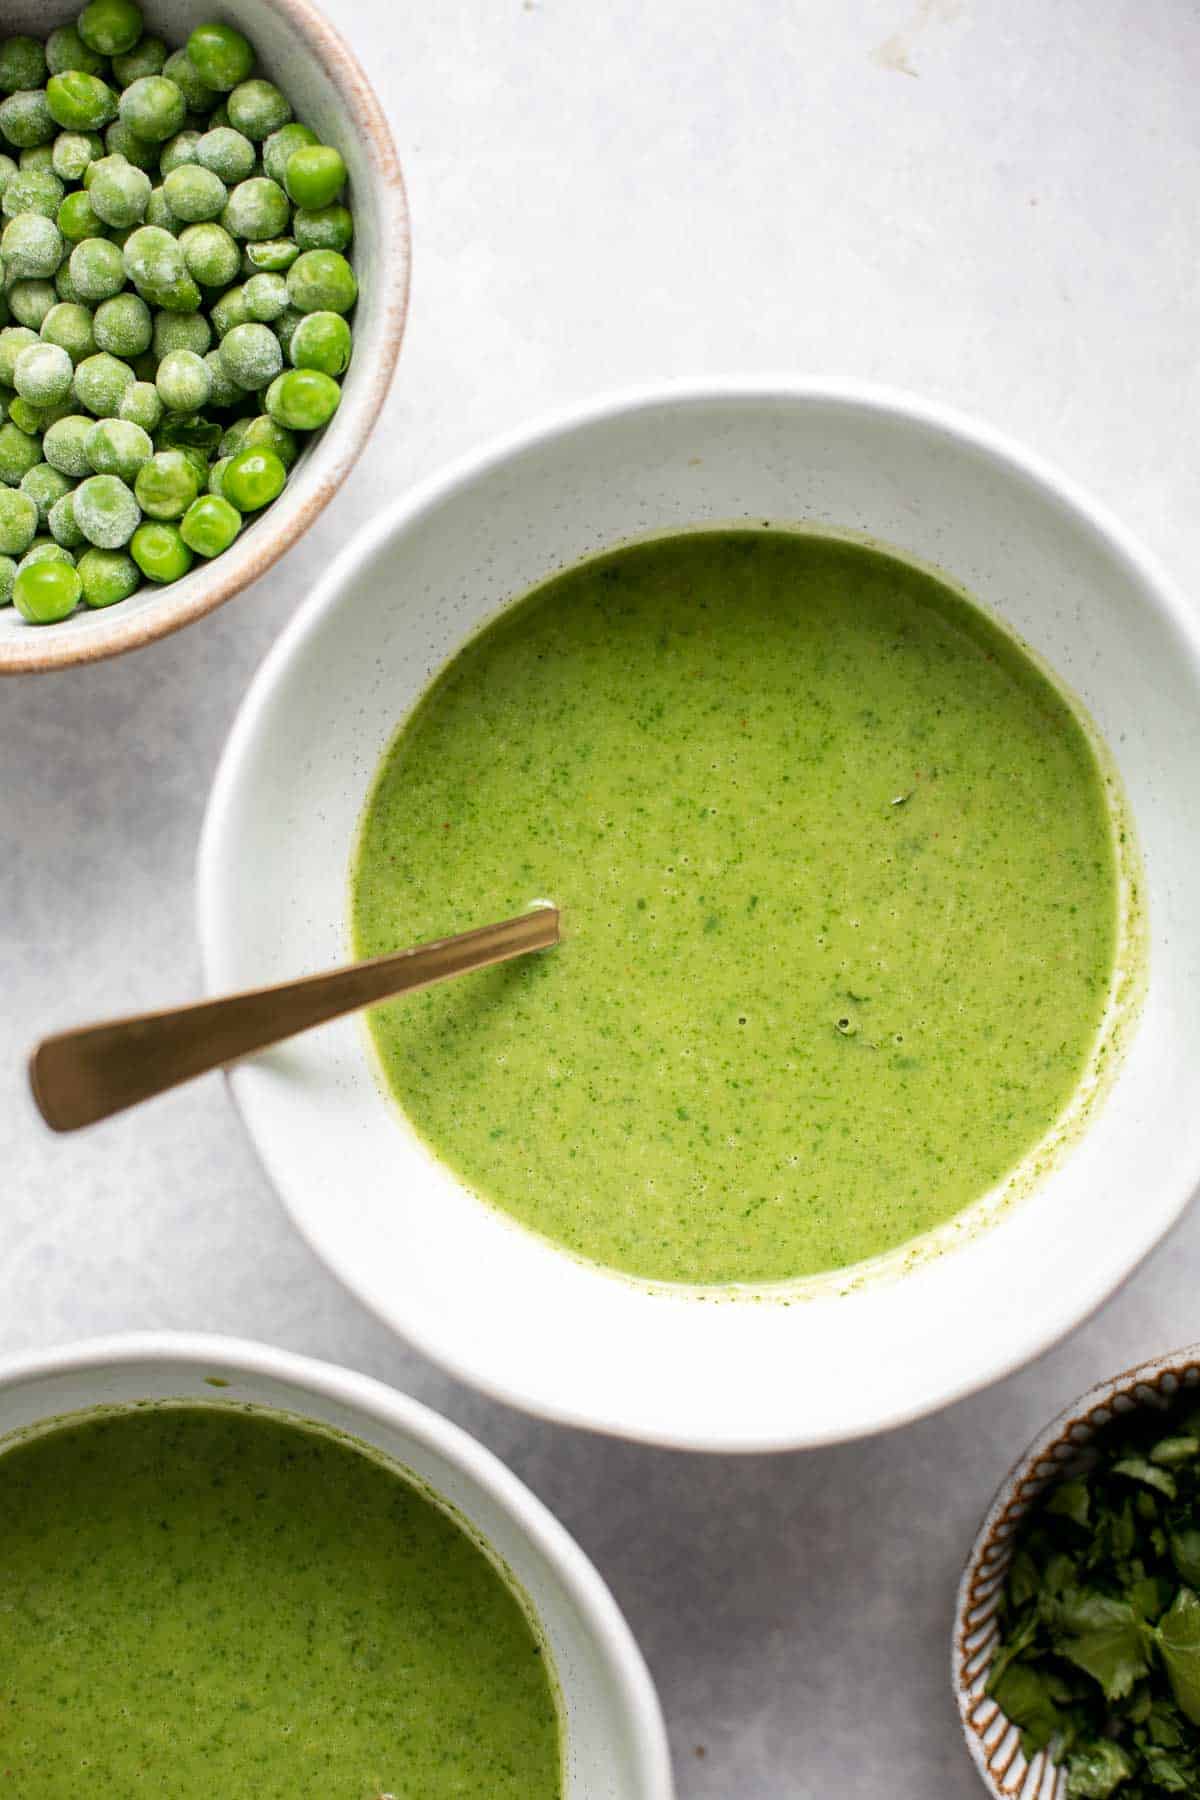
- green peas - feel free to use fresh green peas or frozen ones. You don't need to thaw them first, you can just throw them directly into the soup.
- baby spinach
- cilantro
- coconut milk - this is what makes the soup so lush and creamy but keeps it vegan too.
- vegetable stock - use vegetable stock to keep the recipe vegan, or substitute with chicken stock if you don't have any dietary restrictions.
- seasoning - a flavorful combination of paprika, curry powder, chili powder (adjust this to your level of spiciness), salt, and pepper.
- garnish - feel free to garnish the soup with a drizzle of coconut milk, some green peas, and/or baby spinach leaves. It's totally optional but looks great when serving.
You will also need measuring cups and spoons, a large saucepan, and an immersion blender or food processor / blender.
How to Make the Best Spinach and Pea Soup
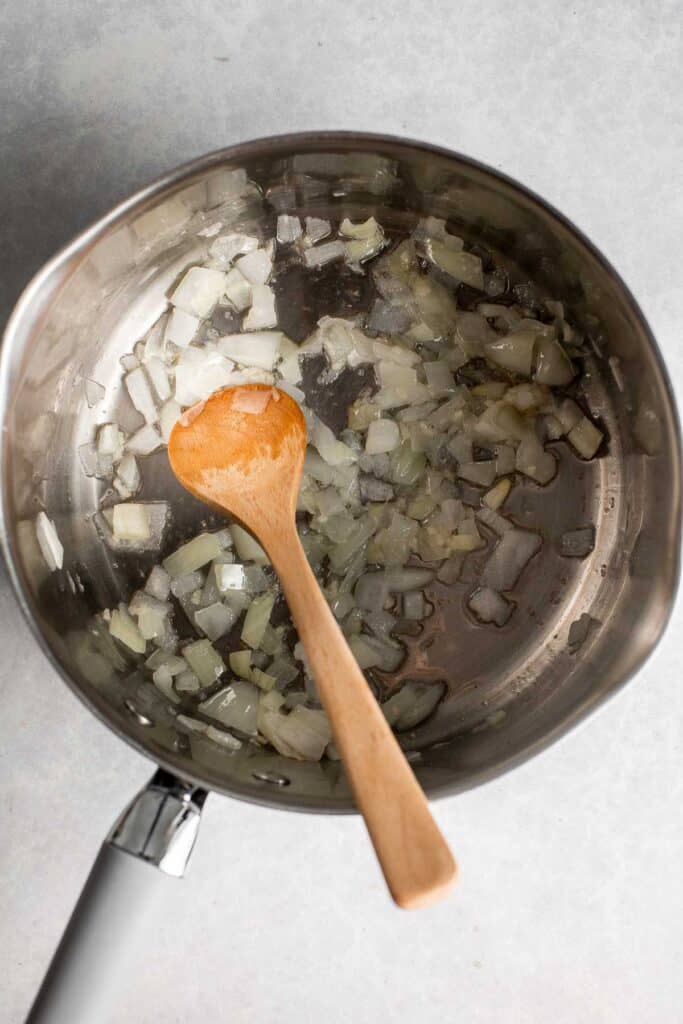
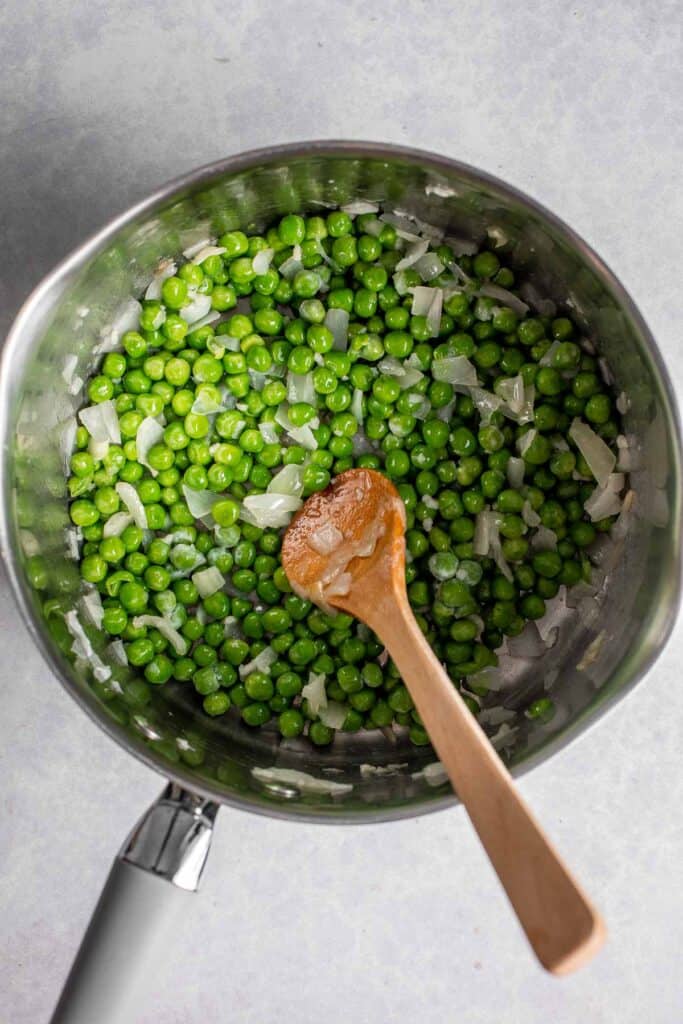
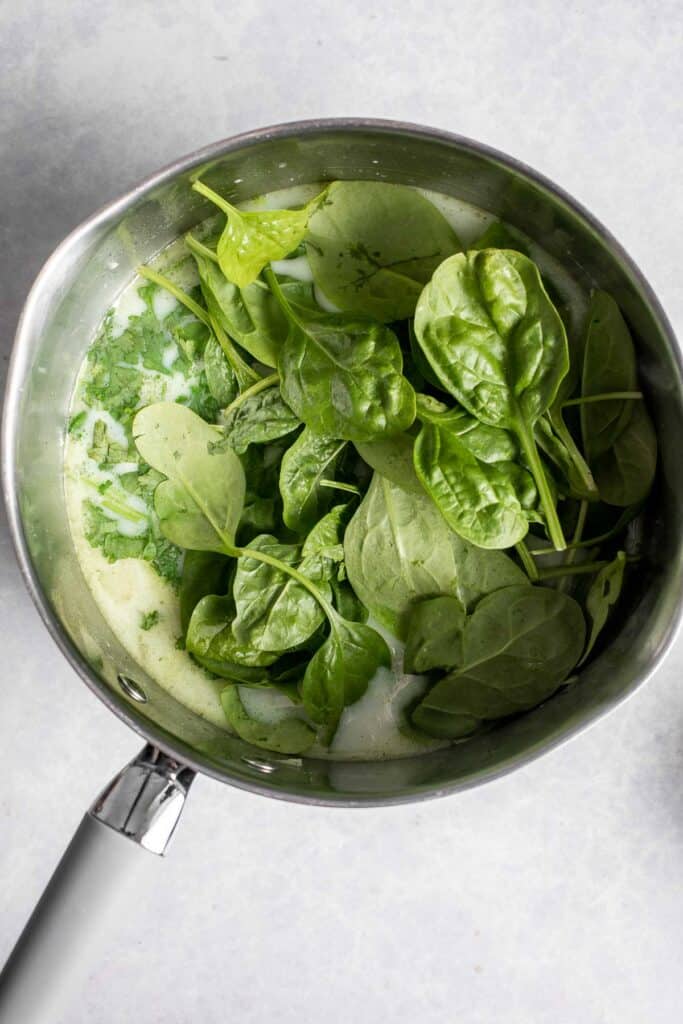
- Sauté aromatics. Heat coconut oil in a large saucepan over a medium heat. Add chopped onion and garlic, and sauté until soft and translucent, about 2-3 minutes. Then, add green peas and cook for another 2-3 minutes.
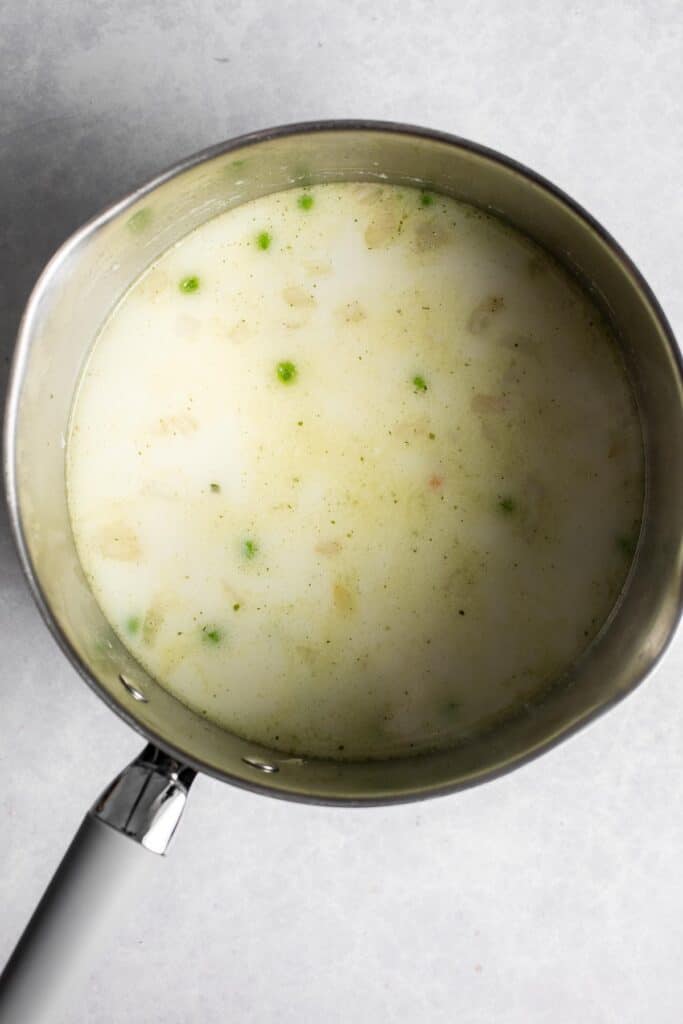
- Add liquids and simmer. Add coconut milk and stock. Bring the soup to a simmer, and simmer for 10 minutes.
- Add greens. Remove the soup from heat and add spinach and cilantro.
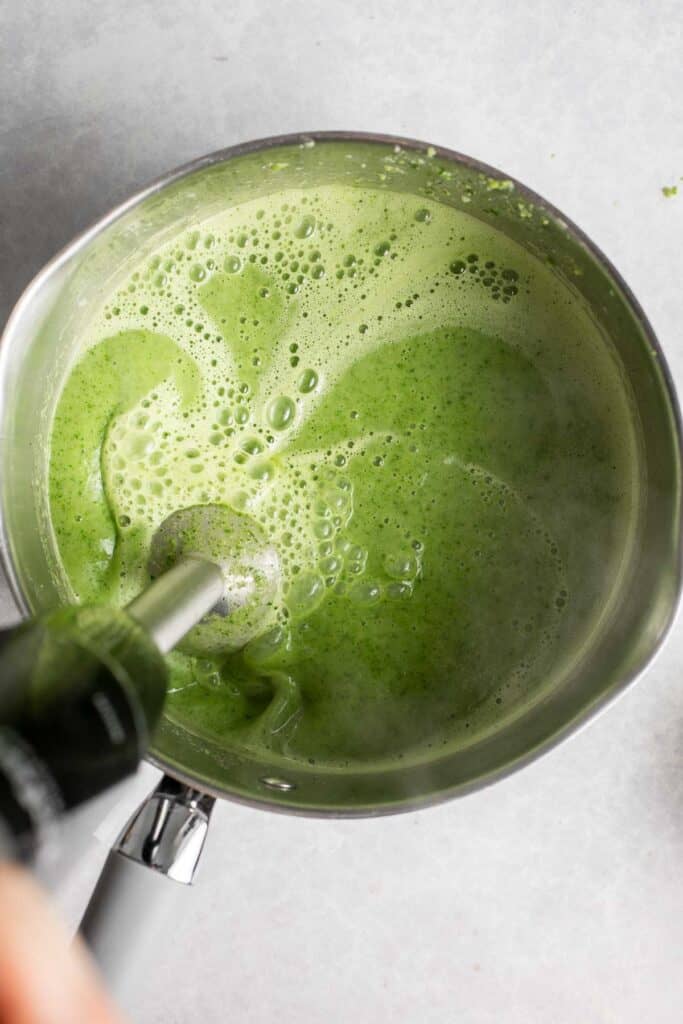
- Puree. Use an immersion blender to puree the soup until smooth and creamy. You can also transfer the soup to a food processor or blender and puree, then transfer the soup back into the pot.
- Season. Stir in paprika, curry, and chilli powder. Season to taste with salt and pepper.
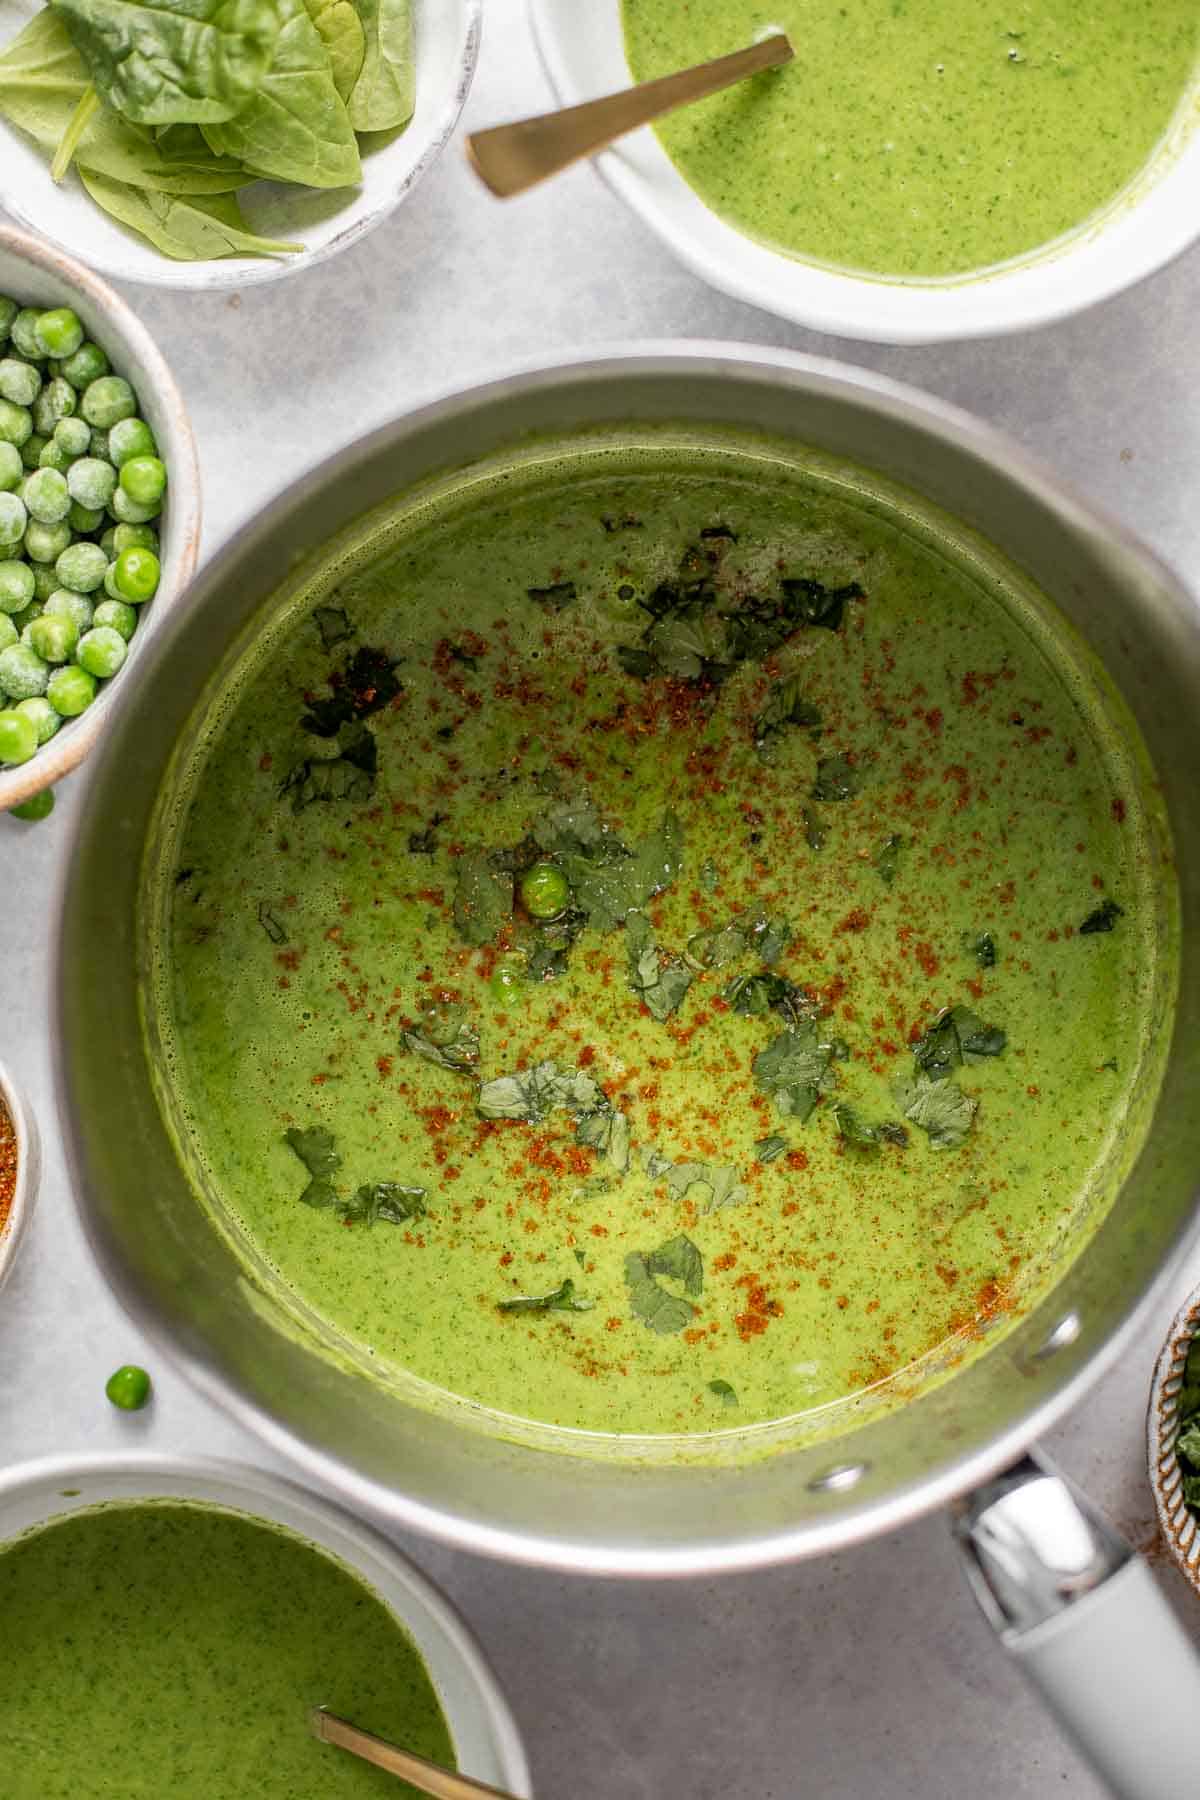
How to Serve
Serve this healthy spinach and green pea soup with a swirl of coconut milk, some spinach leaves and a few green peas. You can even add more chilli powder for more of a kick.
I like to serve this green soup for lunch with a salad and a sandwich or bread for dipping. It is also an excellent choice as a first course at dinner alongside your favorite mains. Some of my favorite dishes to pair pea soup with are:
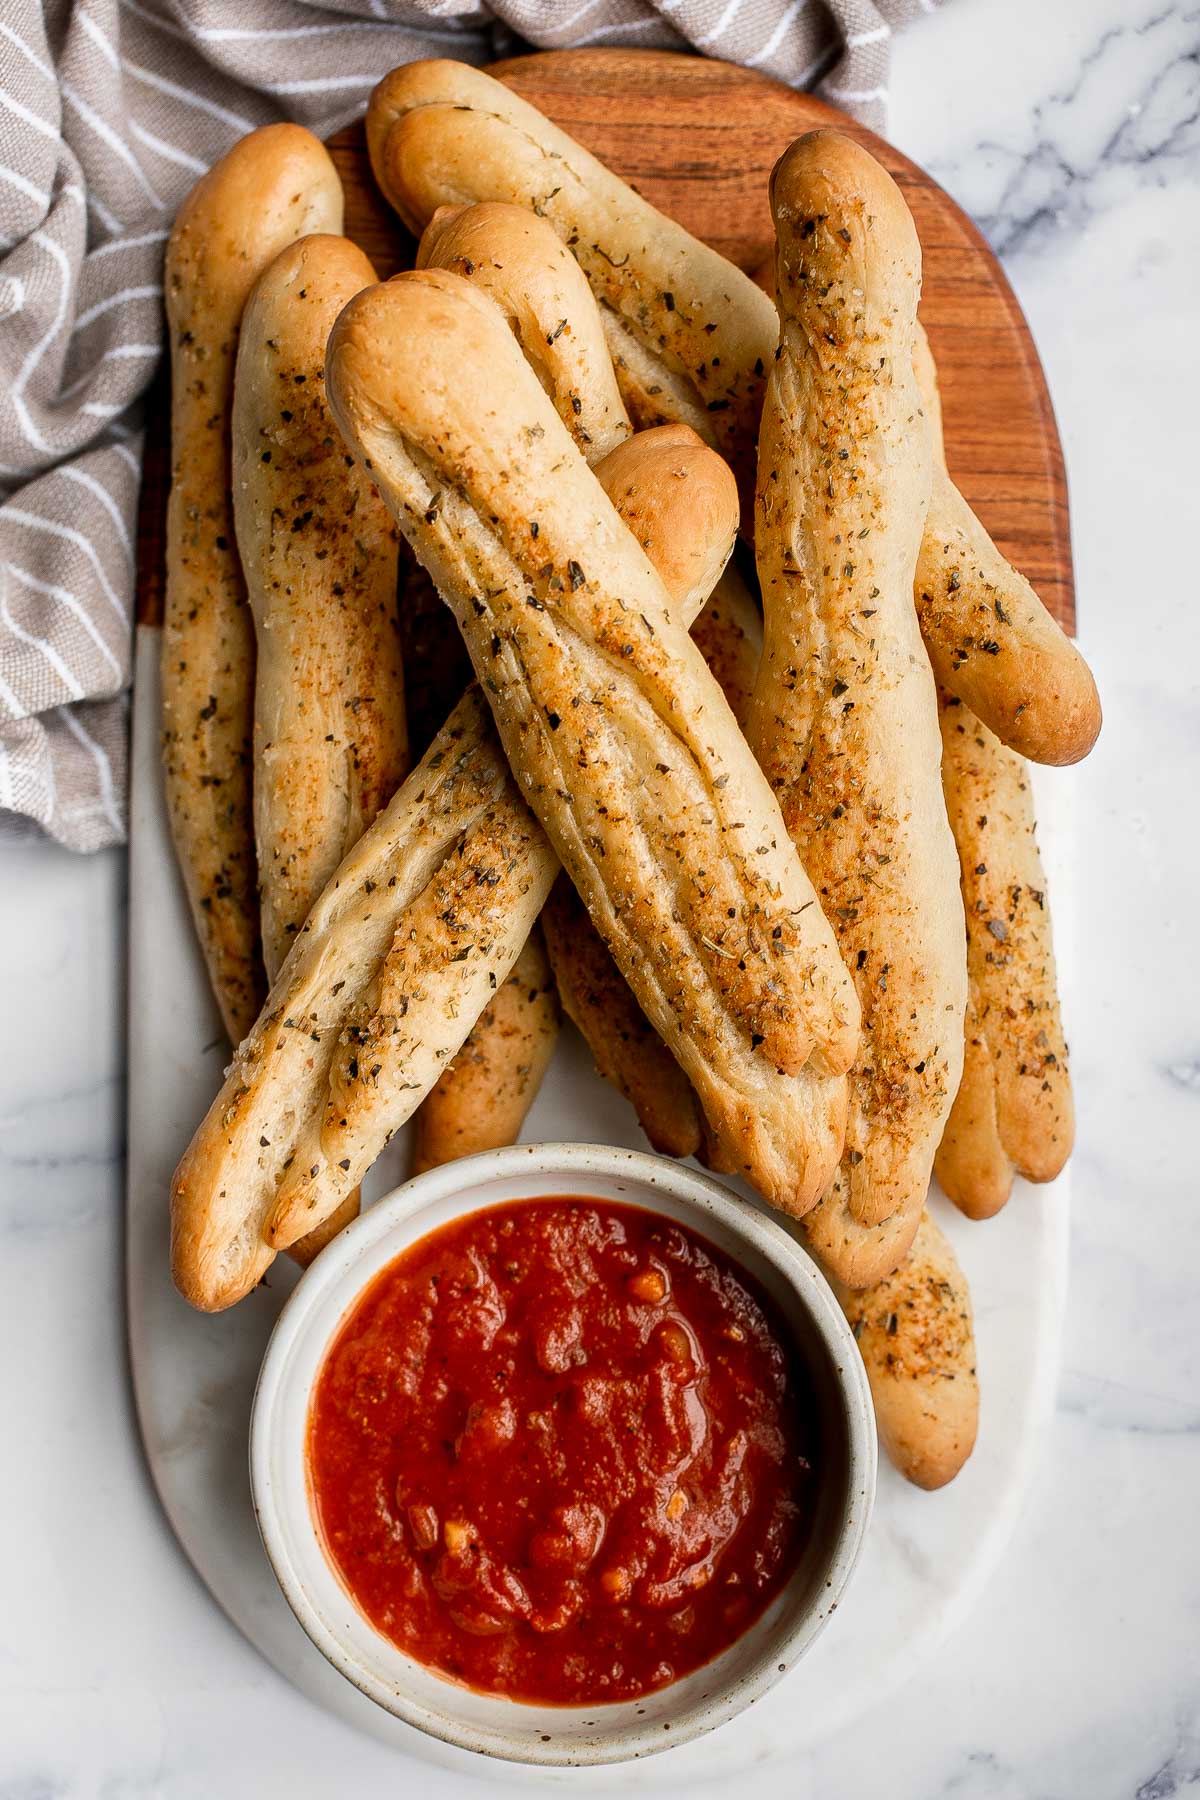
- Garlic Breadsticks
- Sweet Kale Salad
- Vegan Hummus Wrap
- Garlic Naan Bread
- Buckwheat Salad
- Pita Grilled Cheese
Recipe Tips and Tricks
- How to change the consistency: To thin out the consistency of the soup, add more stock. To thicken it, continue to simmer until you reduce the soup to your desired consistency, or add about 1 cup less stock.
- How to store: Spinach and green pea soup keeps for up to 4 days in the refrigerator. Store covered in the pot or in an airtight container.
- How to freeze: This soup also freezes very well. Allow the soup to cool to room temperature, then store in an airtight container or freezer bag for up to 3 months. To serve, defrost overnight in the refrigerator or at room temperature on the kitchen counter for a few hours.
- How to reheat: Reheat spinach soup on the stovetop over medium-low heat until warmed through. You may have to add a splash of water to thin out the soup if it has thickened up too much when stored.
More Soup Recipes
- 60 Best Soup Recipes
- Split Pea Soup
- Creamless Cream of Asparagus Soup
- Artichoke Soup
- Roasted Carrot and Ginger Soup
- Broccoli Cheese Soup
Tried this recipe?
I'd love to hear what you think! Leave a comment and rating below to share your feedback. Your reviews help others discover this recipe and help me keep creating more free recipes for you. Snap a photo and tag me on social media @aheadofthyme too.
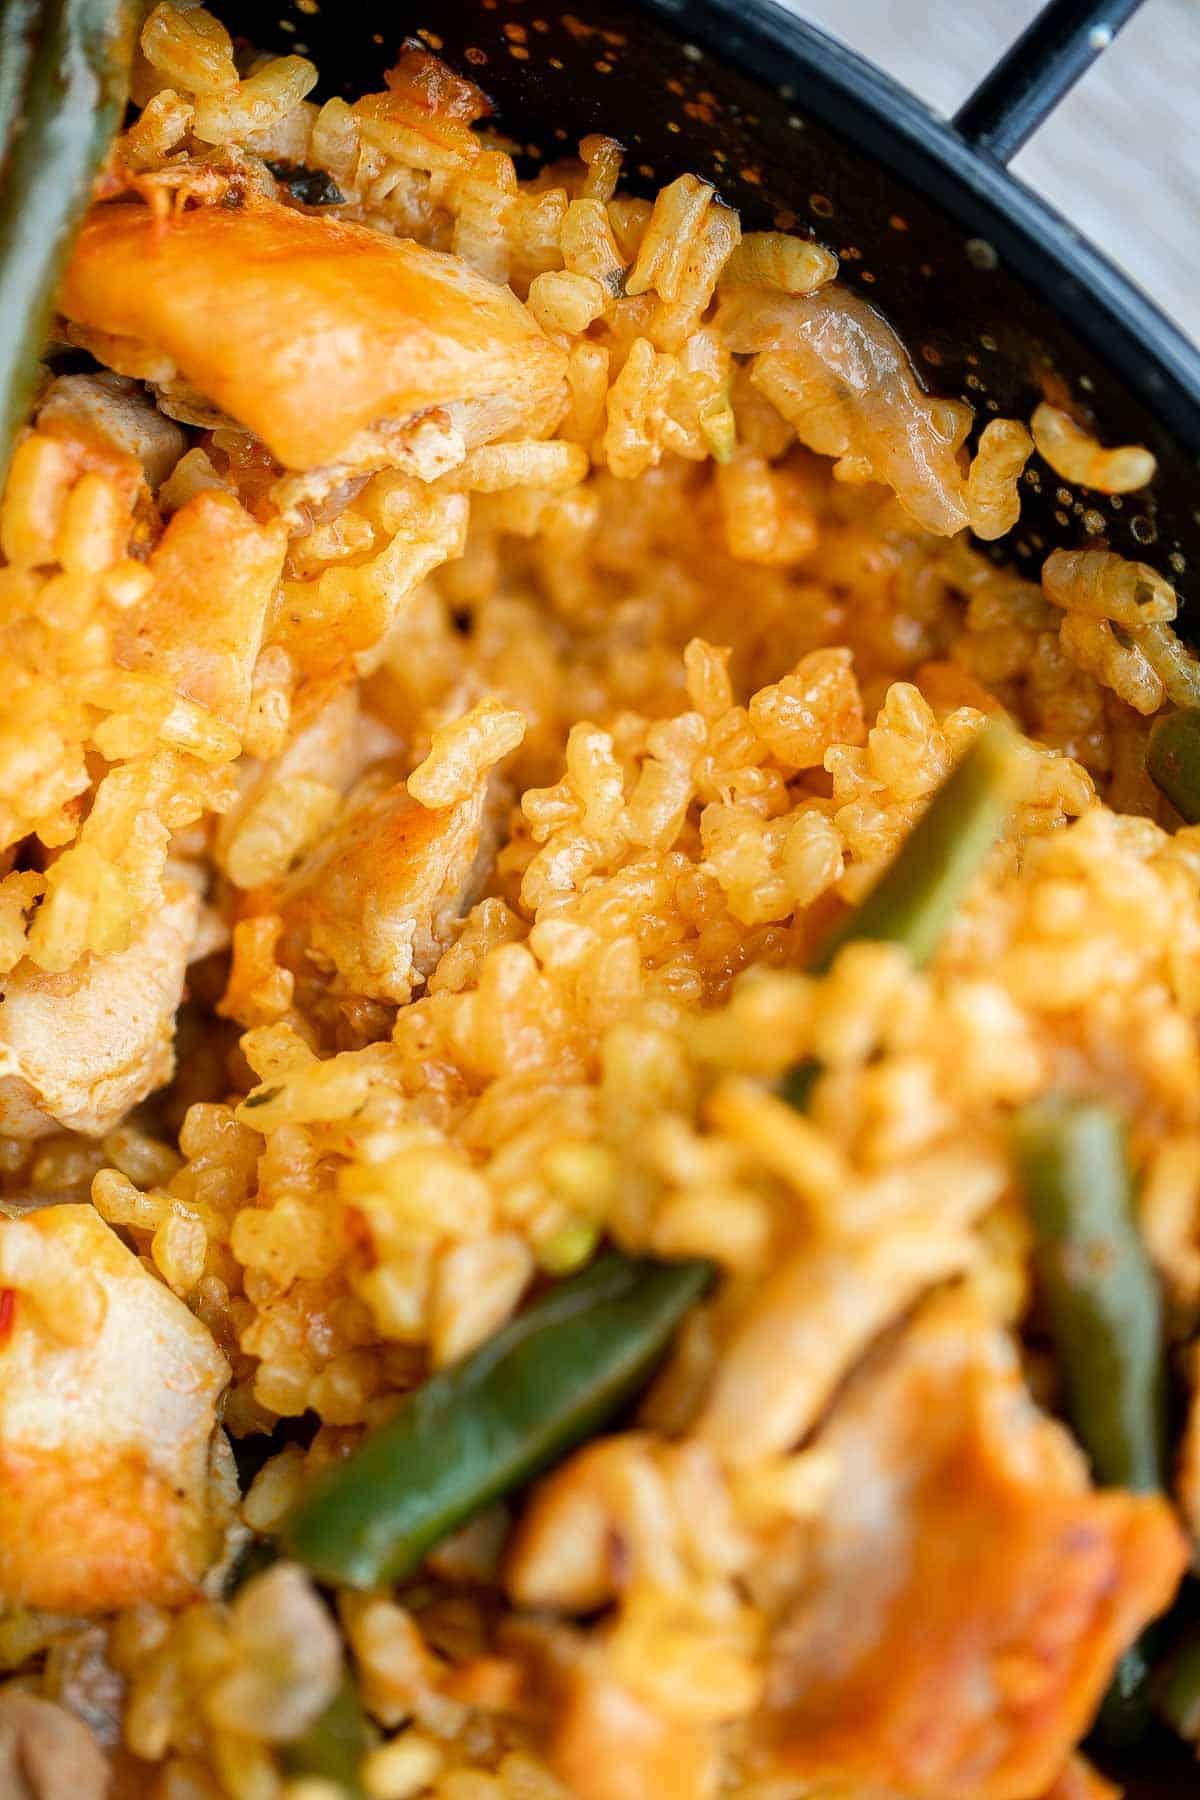
Chicken Paella (Paella Valenciana)
This authentic Chicken Paella (known as Paella Valenciana) is delicious, flavorful, and filling. It's loaded with protein, colorful veggies, and smoky rice, all cooked in a delicious saffron broth that makes the dish saucy, tender, and juicy, with crispy rice on the bottom.
The best part? You don't need to travel all the way to Spain to enjoy authentic Spanish paella. Making Spanish rice at home is a lot easier than you think with just a few simple steps.

What is Paella?
Paella is a rice dish that originated in Valencia, Spain. It contains proteins and veggies cooked in a saucy rice with lots of seasoning and flavor. It is considered a distinctly Spanish dish by everyone outside of Spain, although those from Spain will point directly to Valencia at the mention of paella. A bite of this Spanish chicken paella will transport you there through your tastebuds.
Why You'll Love This Chicken Paella
- Easy to make. You won't believe how easy it is to make delicious paella at home. All it takes is cooking the chicken, cooking the veggies, adding rice and sauce, and letting it simmer until it's done. It's become a staple in our home because it's easy and delicious, and it may become one in yours too.
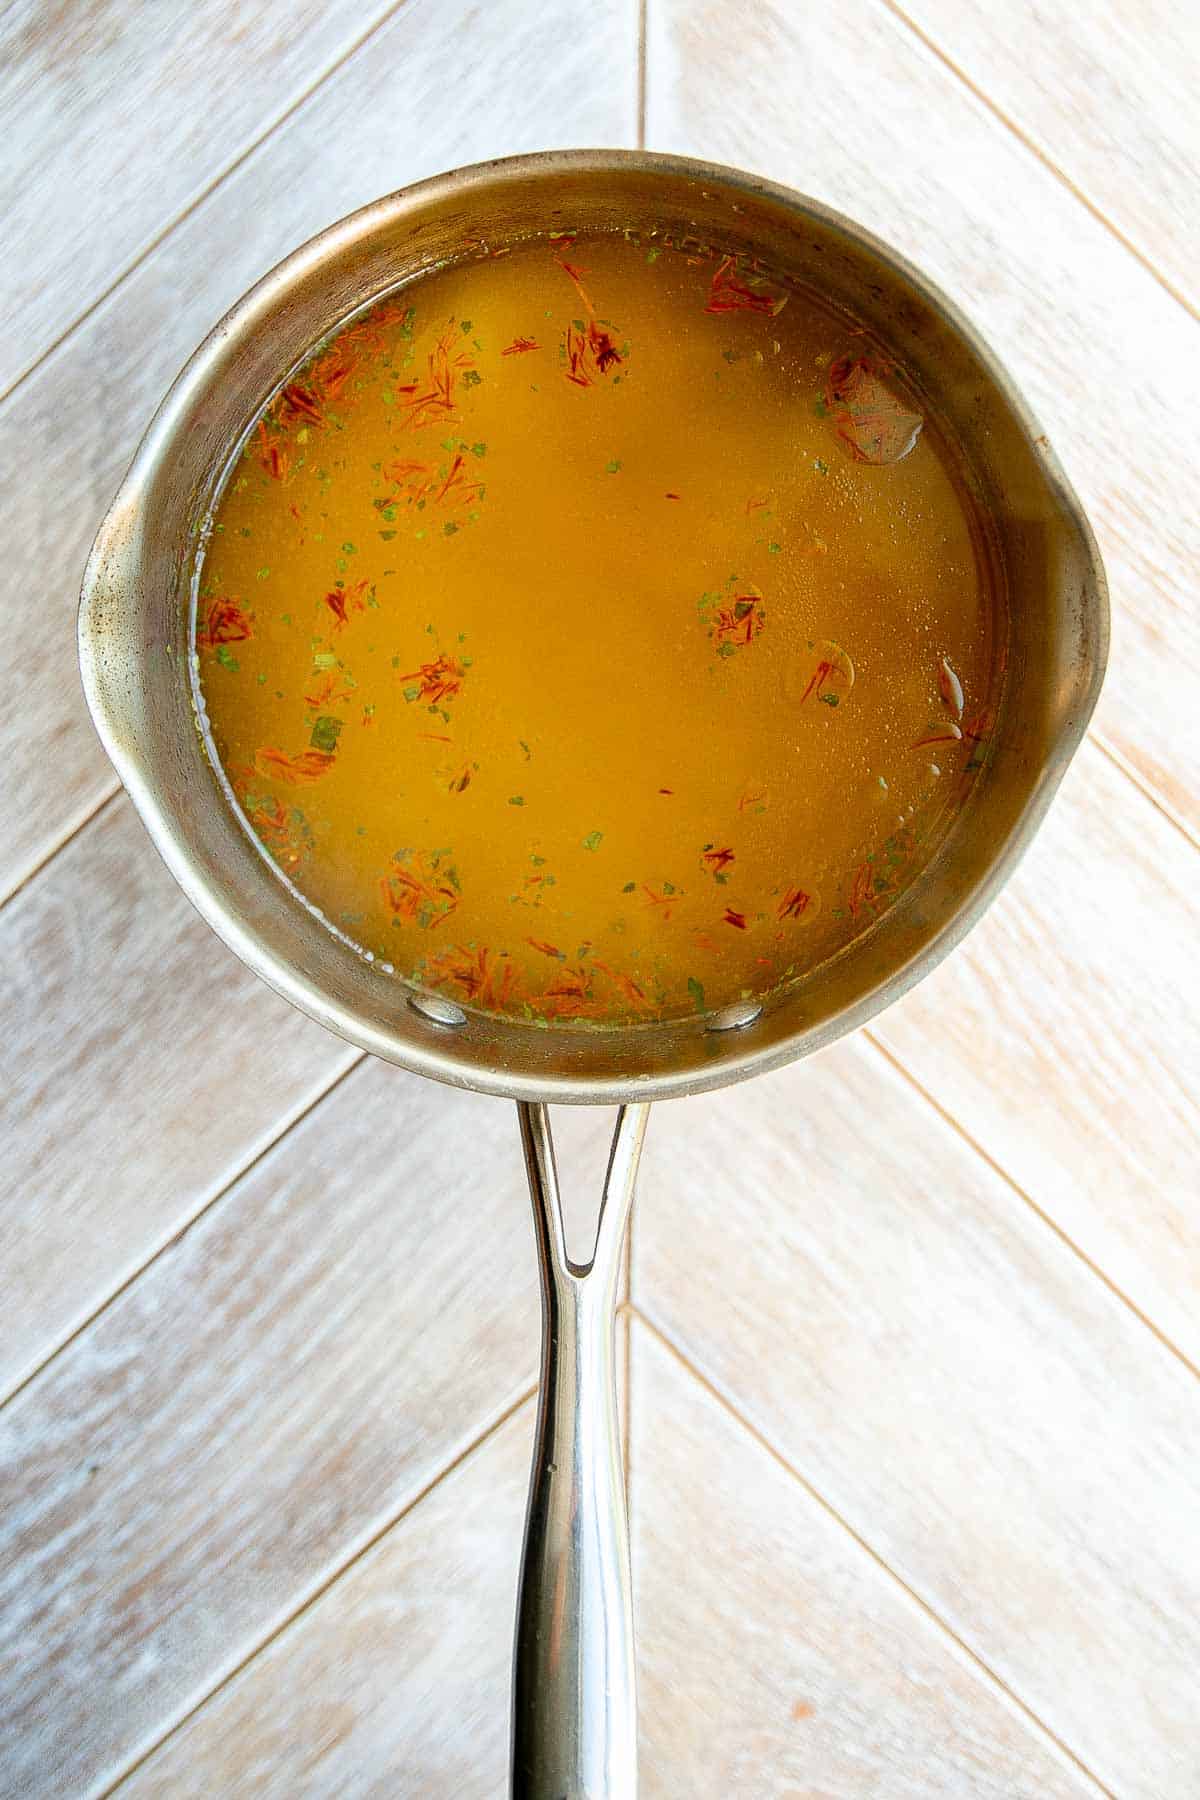
- The flavorful base. To make Spanish paella, we'll start by preparing the saffron broth which will form the base of this rice. Saffron is an essnetial spice in this recipe and gives paellas one of their iconic flavors. Saffron is a notoriously pricey spice, but when you taste it, you'll understand why. It has a distinctly sweet, floral, earthy flavor that can't be replicated. This Spanish rice also gets a lot of flavor from the sautéed aromatics (onions and garlic), chicken, veggies, and seasonings like paprika and tomato paste.
- Loaded with protein. Although Spanish paella is considered a rice dish, this paella is packed with chicken. In fact, the unique feature about Paella Valenciana is that it doesn't contain any seafood unlike other paella variations. But you could add in shrimp, mussels, or calamari to switch up the flavor.

Ingredient Notes
To make this delicious Chicken Paella, you will need the following ingredients (full measurements in recipe card below):
- rice - you will need to use paella rice (also called Bomba rice). For a similar substitute, you can try arborio rice, which is the rice used in Risotto.
- chicken - for the most authentic Paella Valenciana, use boneless and skinless chicken thighs. It is more tender thank chicken breast but you can absolutely substitute for chicken breast if you prefer.
- saffron broth - made with saffron and chicken stock. I do not recommend skipping the saffron, it's one of the most classic ingredients in a paella that adds a distinct flavor that is hard to replicate.
- aromatics - red onions and garlic add tons of flavor to this already flavorful paella recipe.
- veggies - we added green beans to our dish, but you can add other veggies that you like. Try it with red bell peppers, artichokes, or peas.
- seasoning - olive oil, smoked paprika, tomato paste, and salt and pepper.
You will also need measuring cups and spoons and a 10-inch paella pan or skillet.
How to Make the Best Chicken Paella
- Make the saffron broth. In a medium pot, add chicken stock and saffron. Heat over low heat until it simmers, about 8-10 minutes. Soaking the saffron helps to extract its flavor.
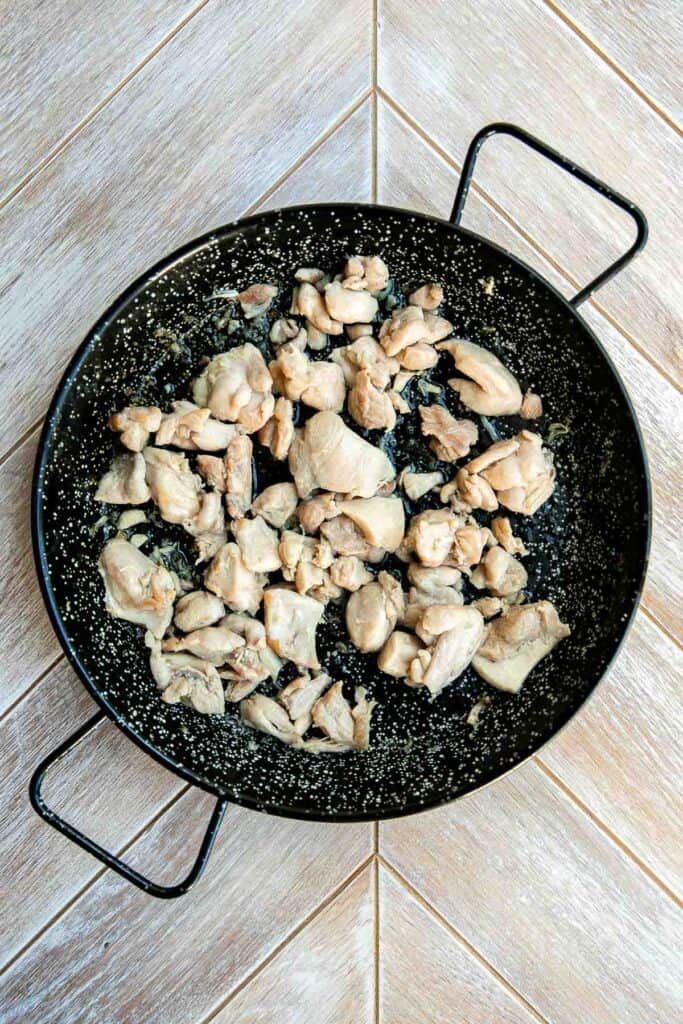
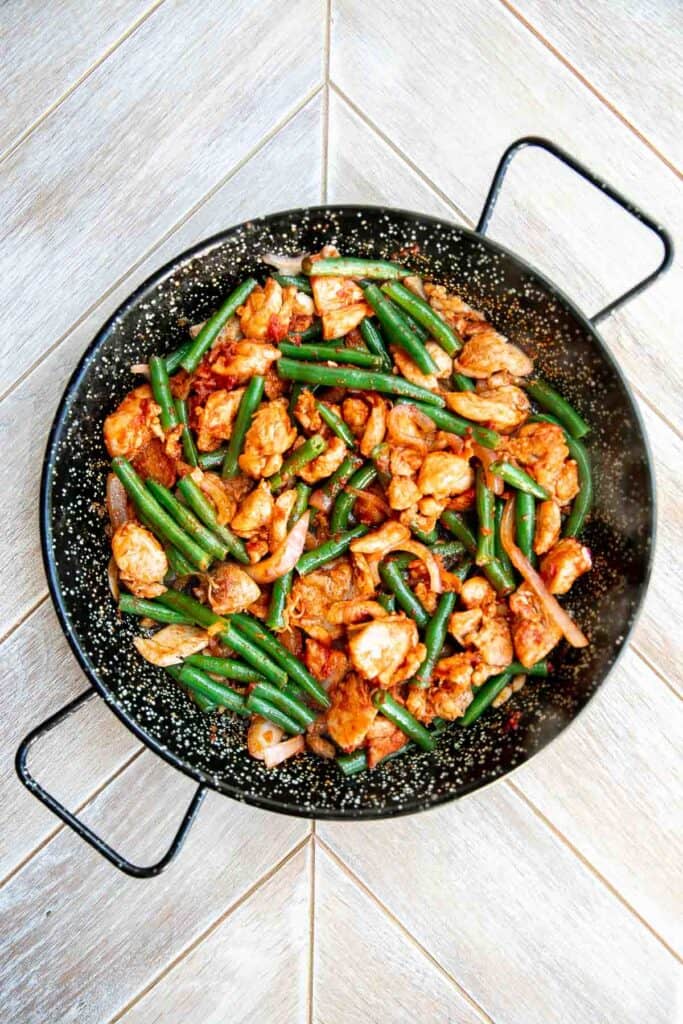
- Sear chicken. While heating the chicken stock, heat oil in a 10-inch paella pan or large skillet over medium-high heat until the hot oil sizzles, about 1-2 minutes. Add chicken and sear until golden brown on all sides, about 8-10 minutes. Season with salt.
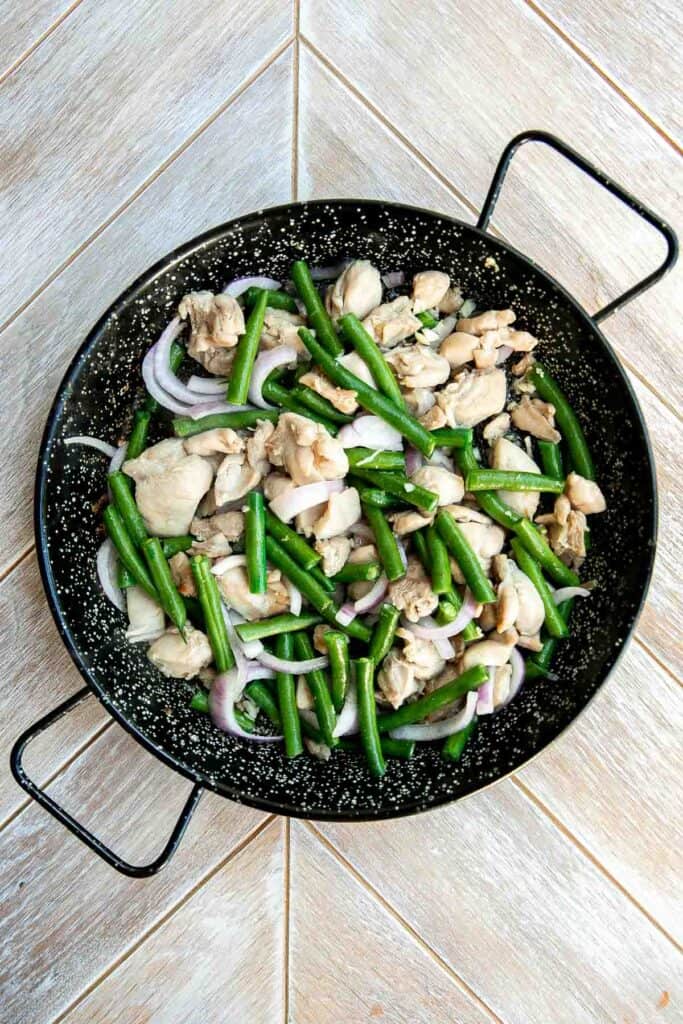
- Sauté veggies. Add onion, garlic, and green beans and cook until tender, about 2-3 minutes.
- Add seasoning. Stir in paprika and tomato paste. Mix well until evenly distributed.
- Add rice. Add rice and stir to coat evenly.
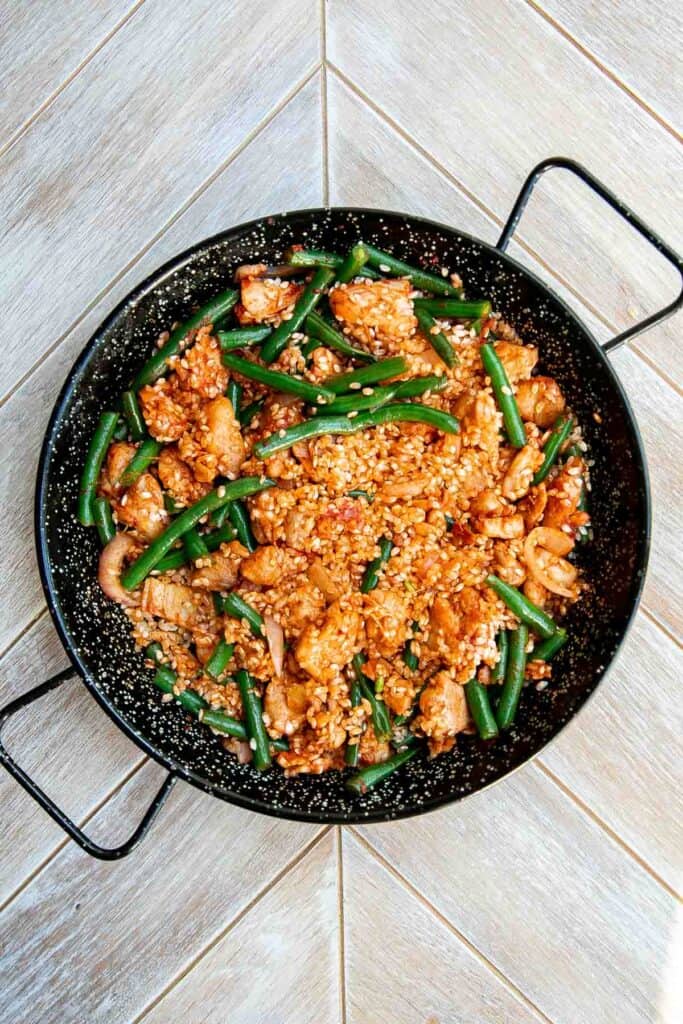
- Add saffron broth. Slowly pour the saffron-infused chicken stock into the pan and stir gently until the rice is evenly distributed (The ideal liquid to rice ratio is 3:1). Season with salt and pepper to taste.
- Cook. Cook uncovered on medium-high hear until the rice has absorbed all the liquid, about 20-22 minutes.
- Rest. Turn off the heat and cover the pan with aluminum foil. Let it rest for 6-8 minutes until the rice is al dente - tender yet firm.


How to Serve
This Paella Valenciana is a filling and complete meal on it's own, but if you are looking for some more sides to serve it with, try:
- Patatas Bravas
- Tomato Bruschetta
- Mediterranean Chickpea Wedge Salad
- Roasted Red Pepper and Tomato Soup
- Roasted vegetables such as Roasted Garlic Green Beans, Roasted Eggplant or red bell peppers.
- Charcuterie Board with cheese and olives
Storing Instructions
- How to store: Since this Spanish paella has chicken in it, it will last in the fridge for 3-4 days, although it's best eaten fresh. Keep it in an airtight container, and make sure you allow it to cool completely before storing.
- How to reheat: Reheat cold Spanish paella in a covered pan over the stovetop. Heat on medium-high heat, stirring occasionally and adding more water as needed until warm, about 5-10 minutes.

More Chicken and Rice Recipes
- Spanish Chicken and Rice
- Roasted Chicken and Baby Potatoes
- Curry Chicken Fried Rice
- Coconut Curry Chicken and Rice
- Instant Pot Chicken Fried Rice
- Chicken and Rice Soup
Tried this recipe?
I'd love to hear what you think! Leave a comment and rating below to share your feedback. Your reviews help others discover this recipe and help me keep creating more free recipes for you. Snap a photo and tag me on social media @aheadofthyme too.

25 Side Dishes for Pork Chops
You must be looking for a delicious side dish to serve with those juicy chops that you are planning to make for dinner. We love making Pork Chops because they are delicious, quick, and easy - making them perfect for busy weeknights. So we need sides that fit the same criteria. If you are wondering "what to serve with pork chops", then you are in the right place. We are sharing over 25 of the most popular and best side dishes for pork chops including everything from veggies, pasta, soup, bread, and more.

Best Pork Side Dishes
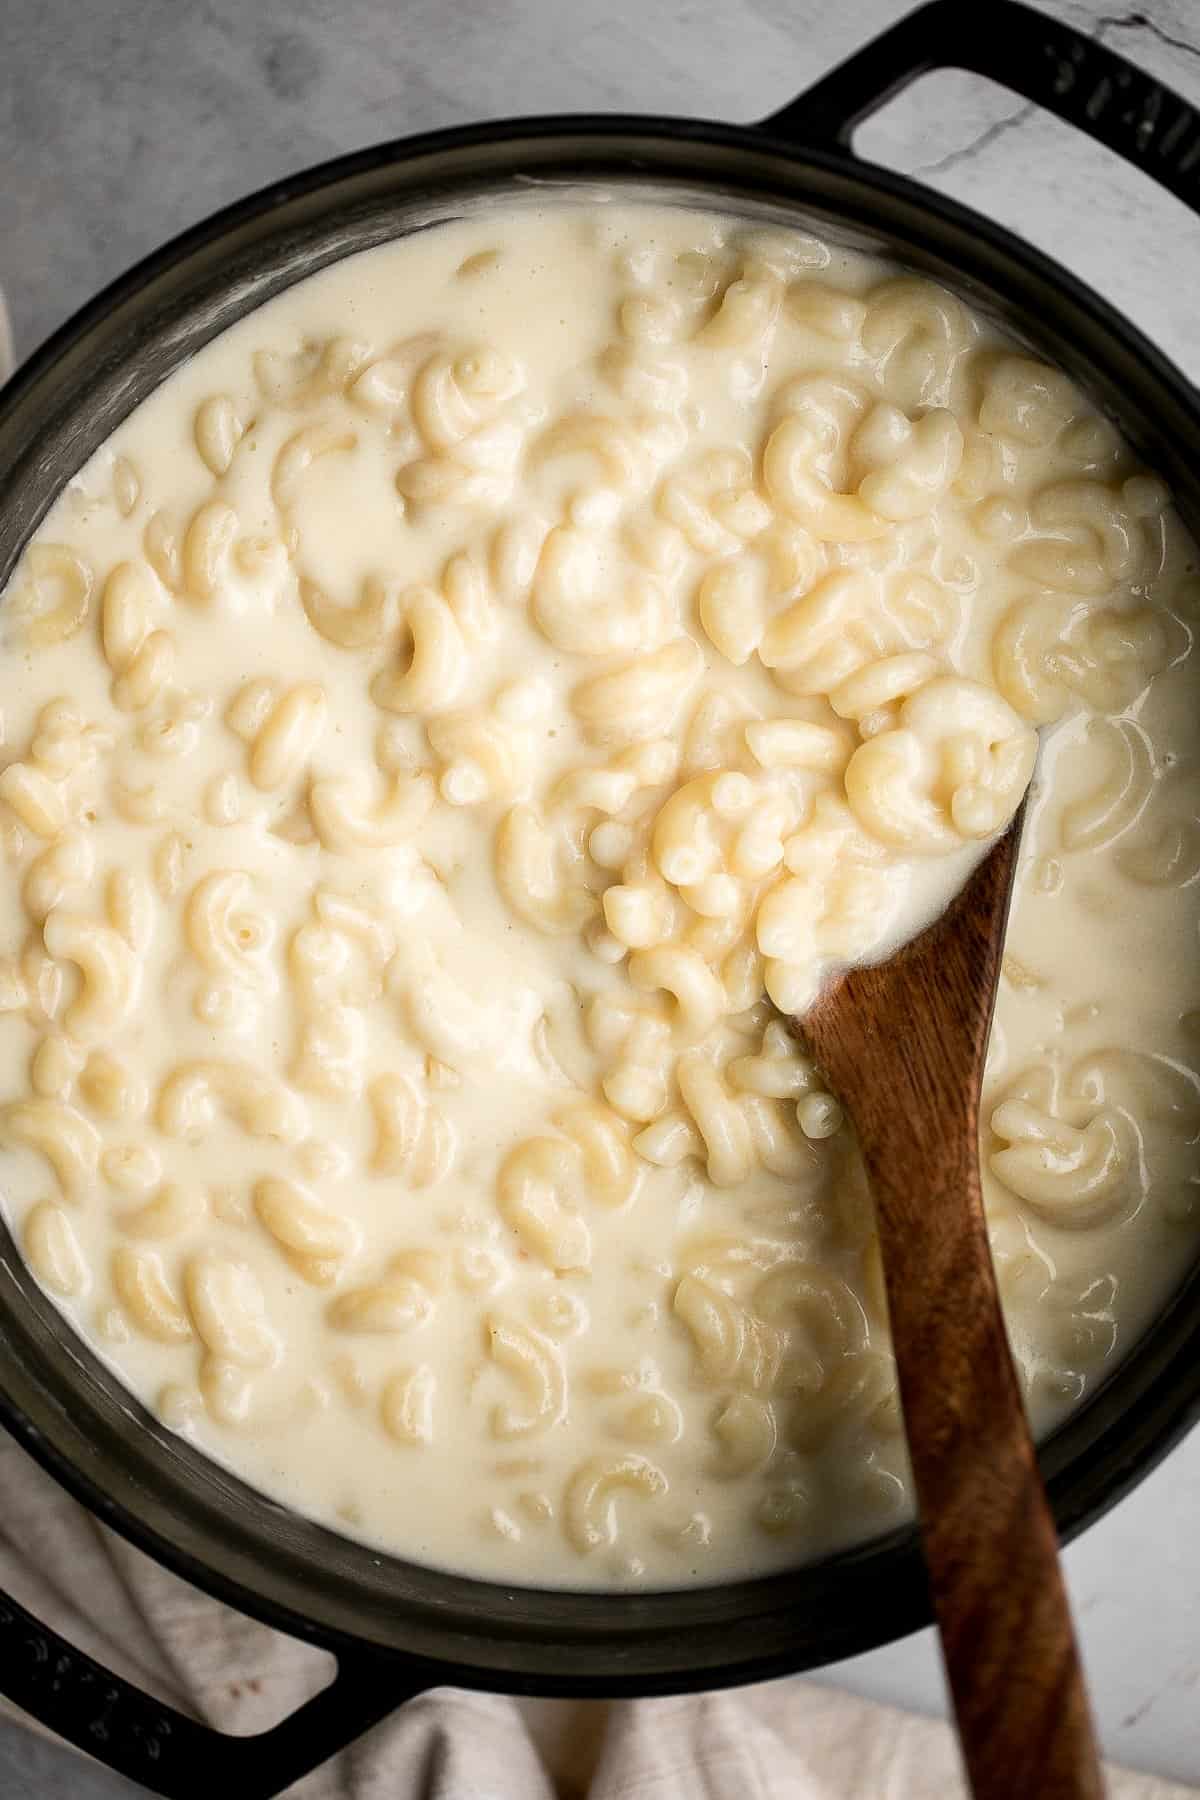
Stovetop Mac and Cheese with White Cheddar
Quick and easy, creamy stovetop mac and cheese with white cheddar is a delicious and comforting one pot 20-minute meal packed with three types of cheese.
Arugula Salad with Apple and Pecan
Arugula salad with apple and pecan is a quick and easy fall salad made with fresh seasonal ingredients in just minutes. Perfect for a holiday dinner table.

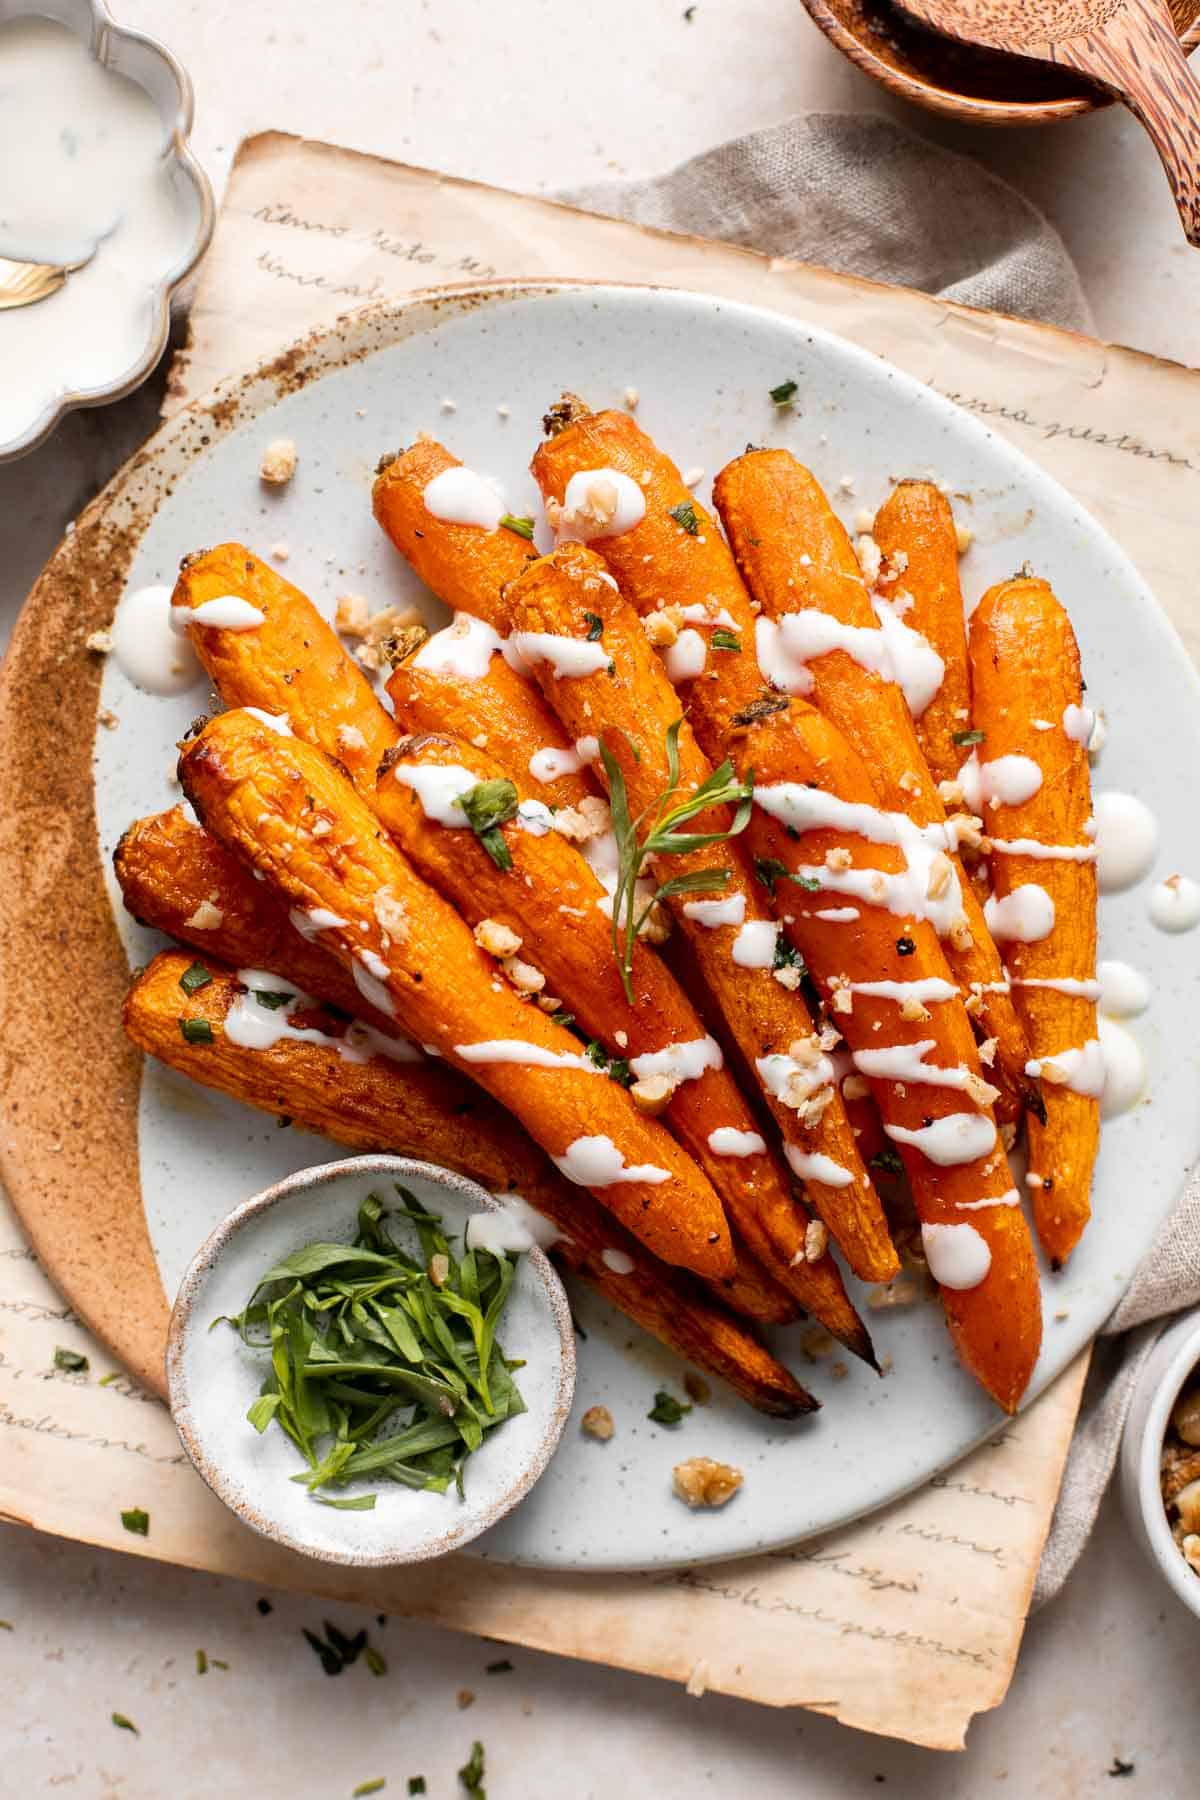
Maple Roasted Carrots with Yogurt Sauce
These maple roasted carrots with yogurt sauce are not only stunning, but they get all caramelized and crispy around the sides from the maple syrup… pure perfection!
Easy Cornbread Muffins are moist, fluffy, tender, and sweet. They're the perfect side dish to serve with a Southern barbecue or Thanksgiving holiday dinner.

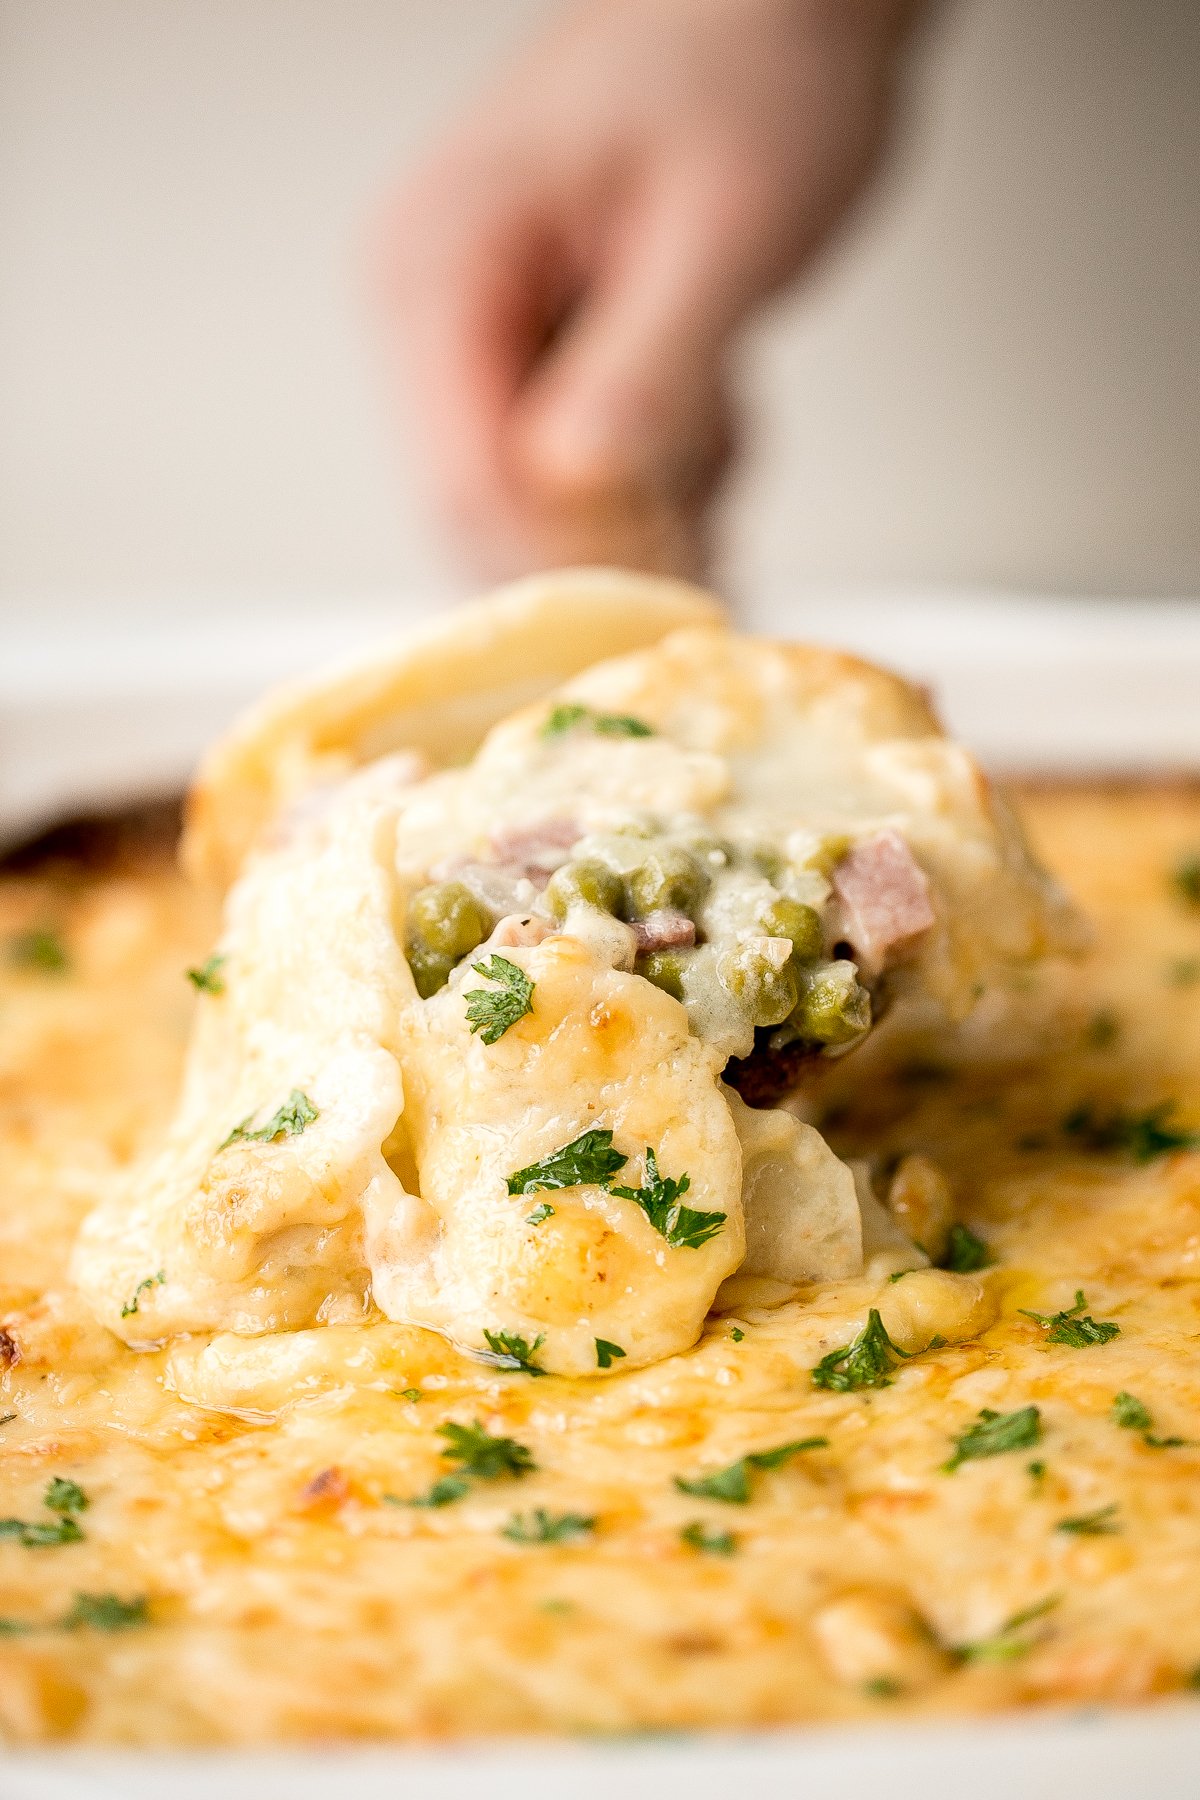
Easy creamy ham and potatoes au gratin is a great way to use leftover ham with tender sliced potatoes and a cheesy béchamel sauce. The best comfort food.
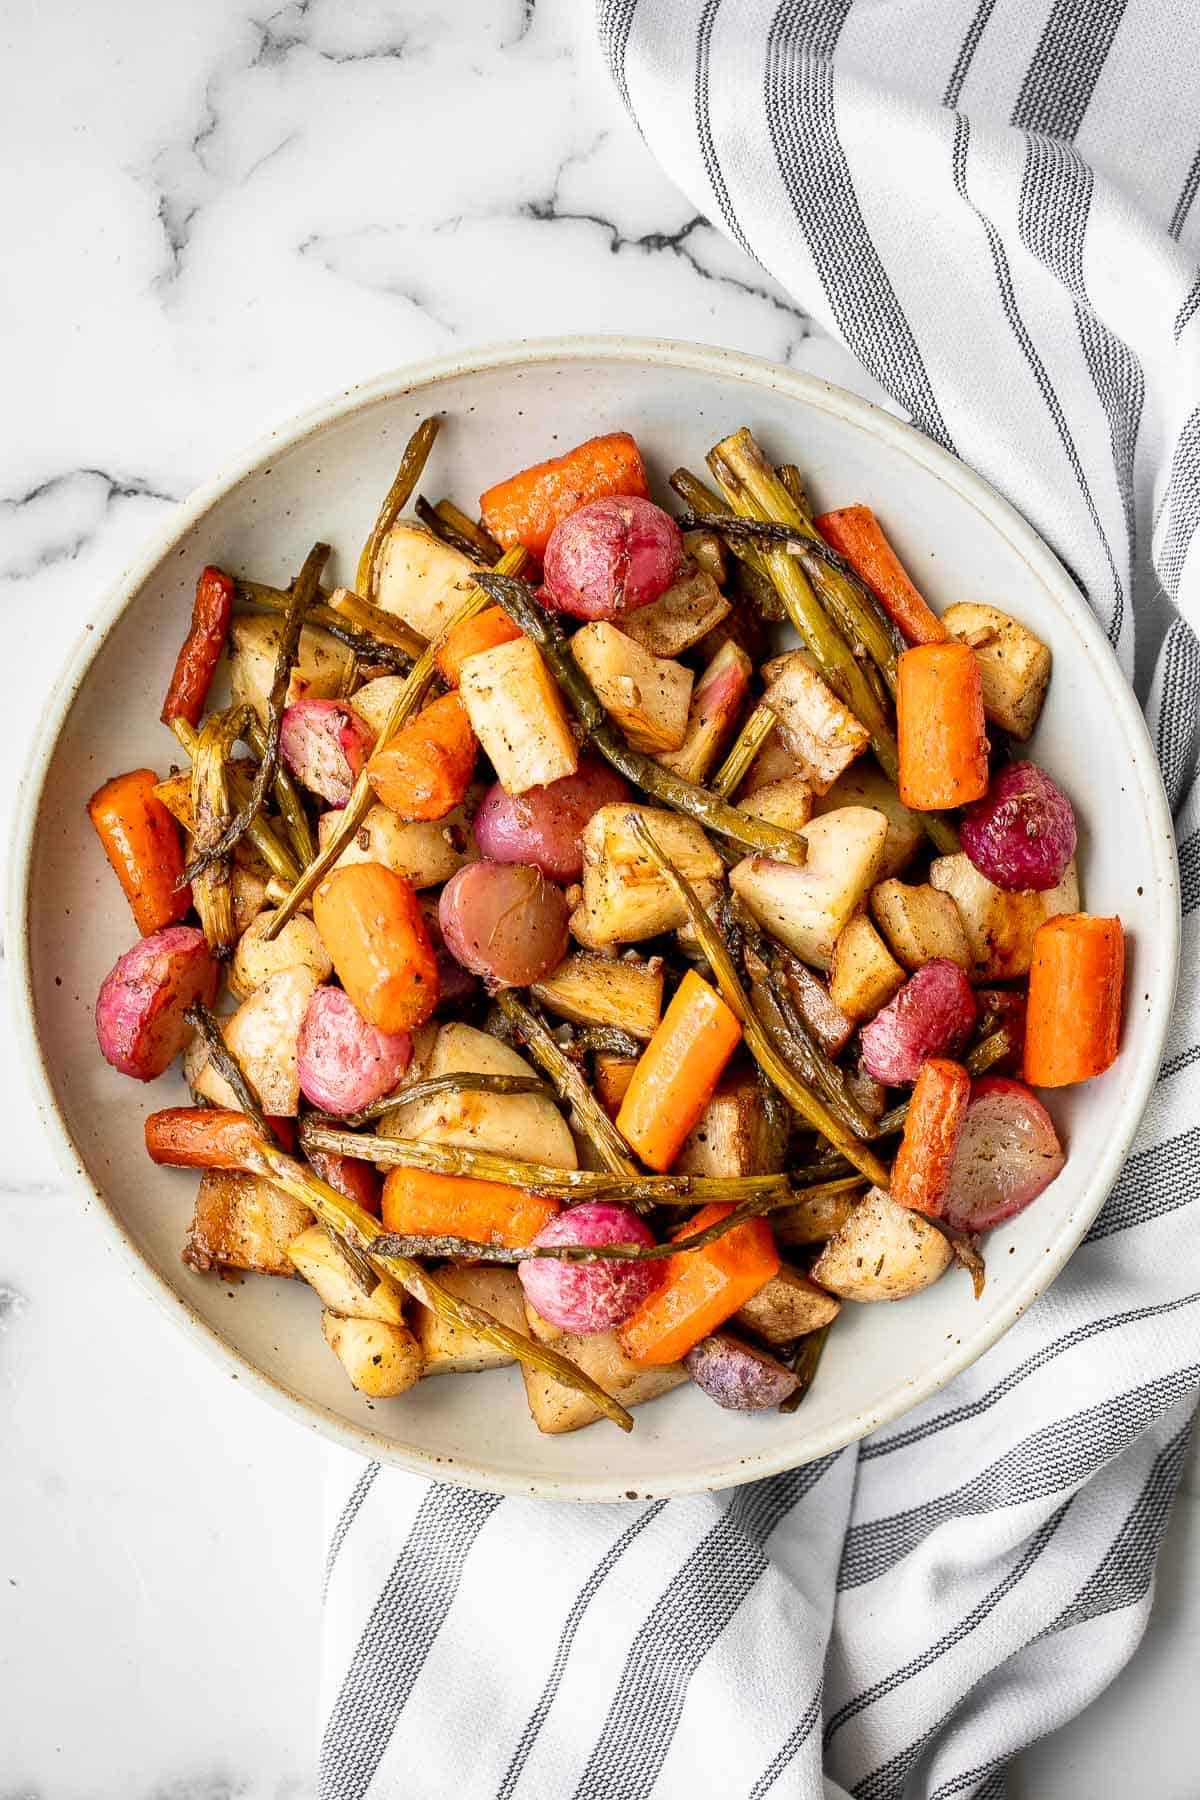
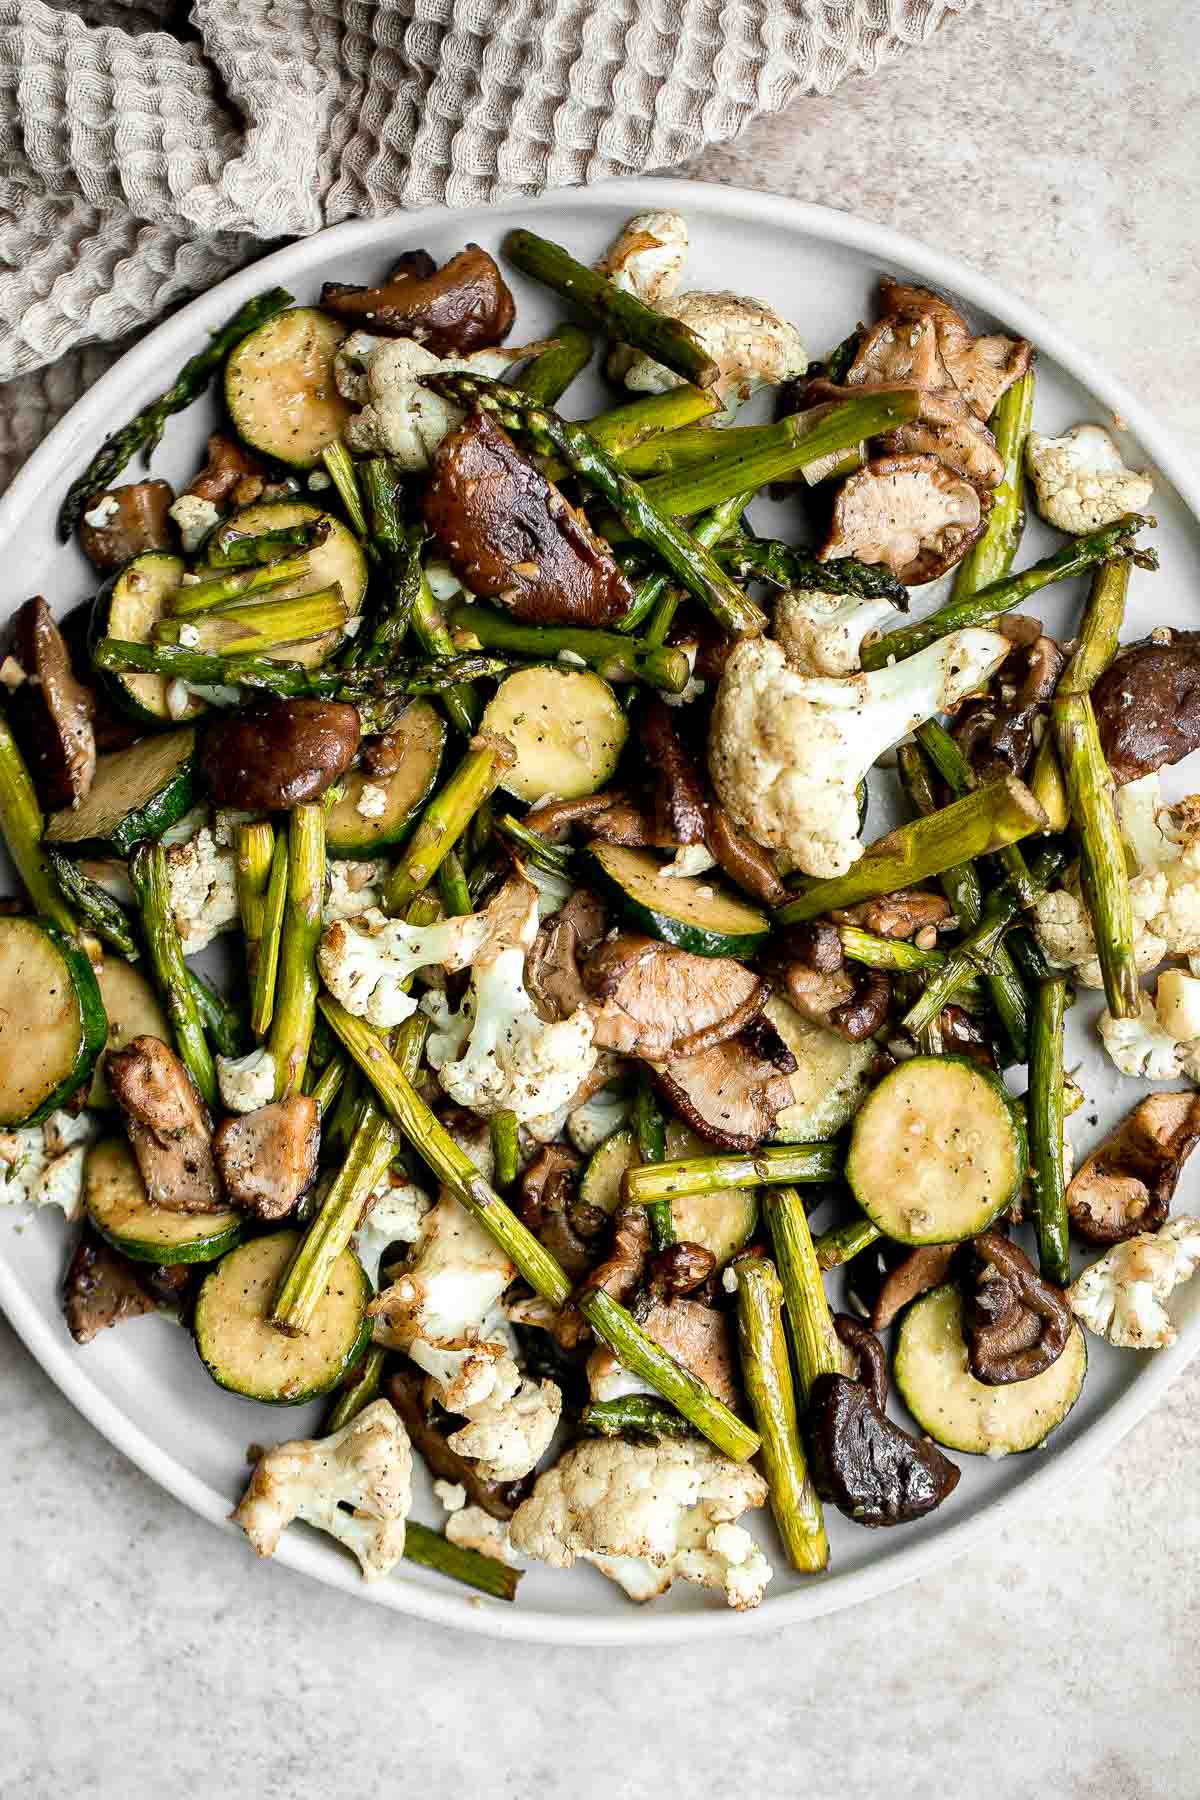
Roasted spring vegetables are an easy sheet pan side dish packed with all our favourite veggies of the season. Plus, it's so easy to prep and make.
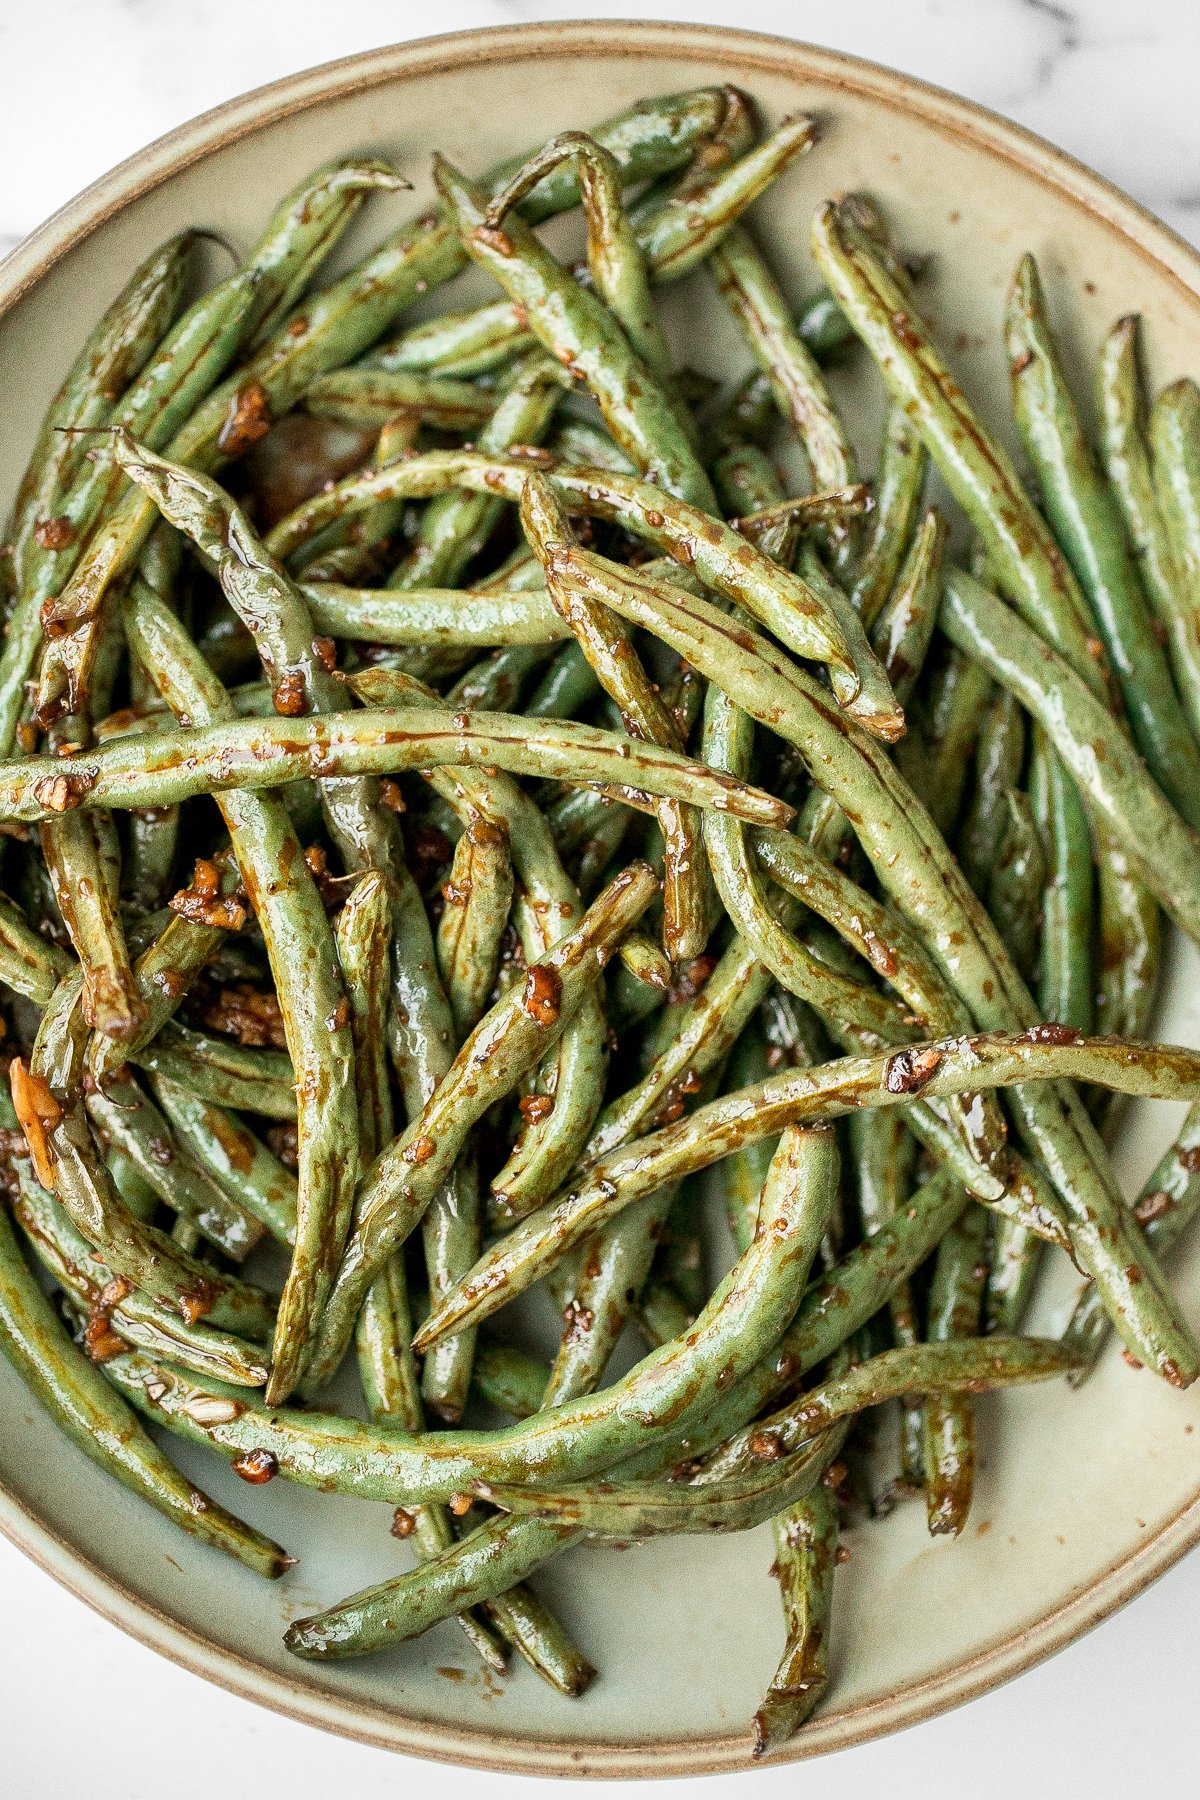
Quick easy roasted garlic green beans are tangy, sour, savoury, and sweet, with a tender and crunchy texture. Make them in the oven or air fryer in minutes.
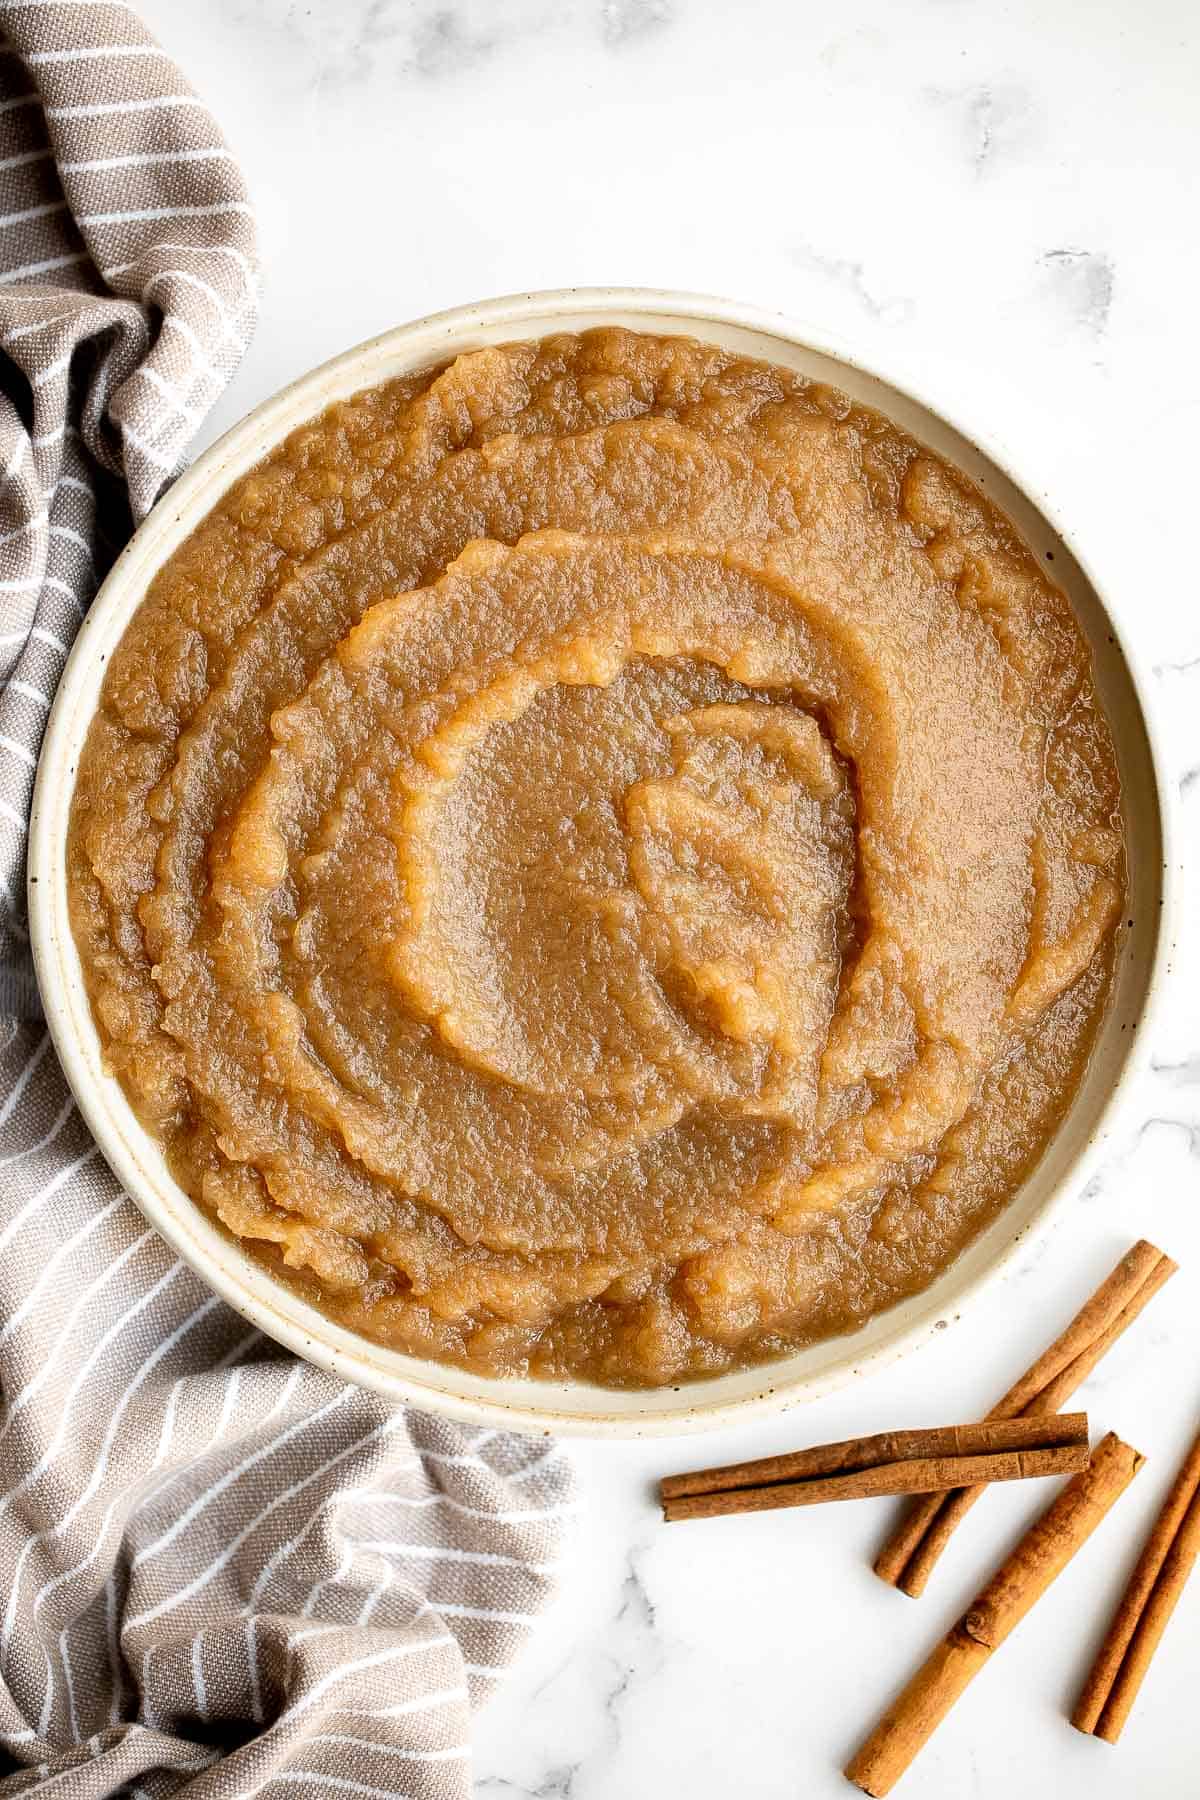
Homemade applesauce is a quick and easy fall treat with just 3 ingredients and very little time and effort. Serve it as a healthy snack or dessert.
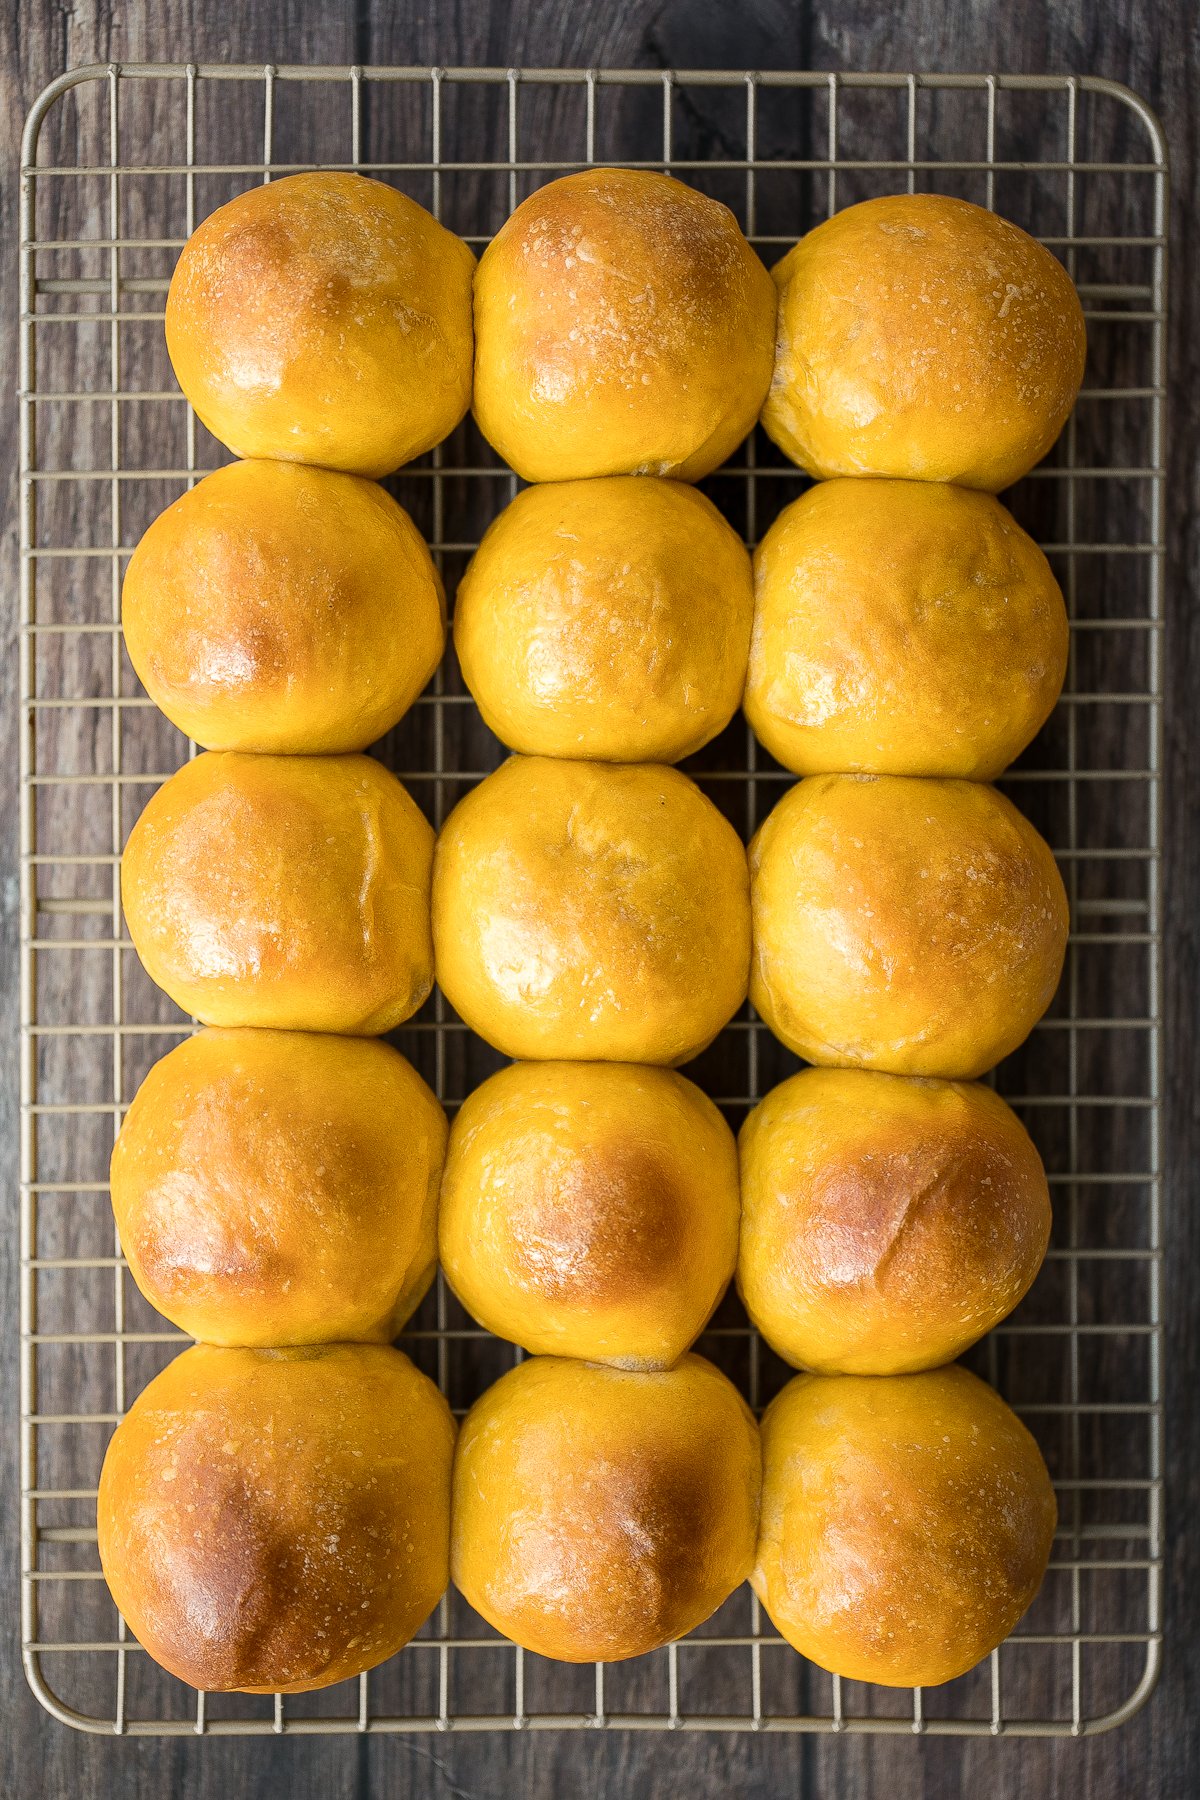
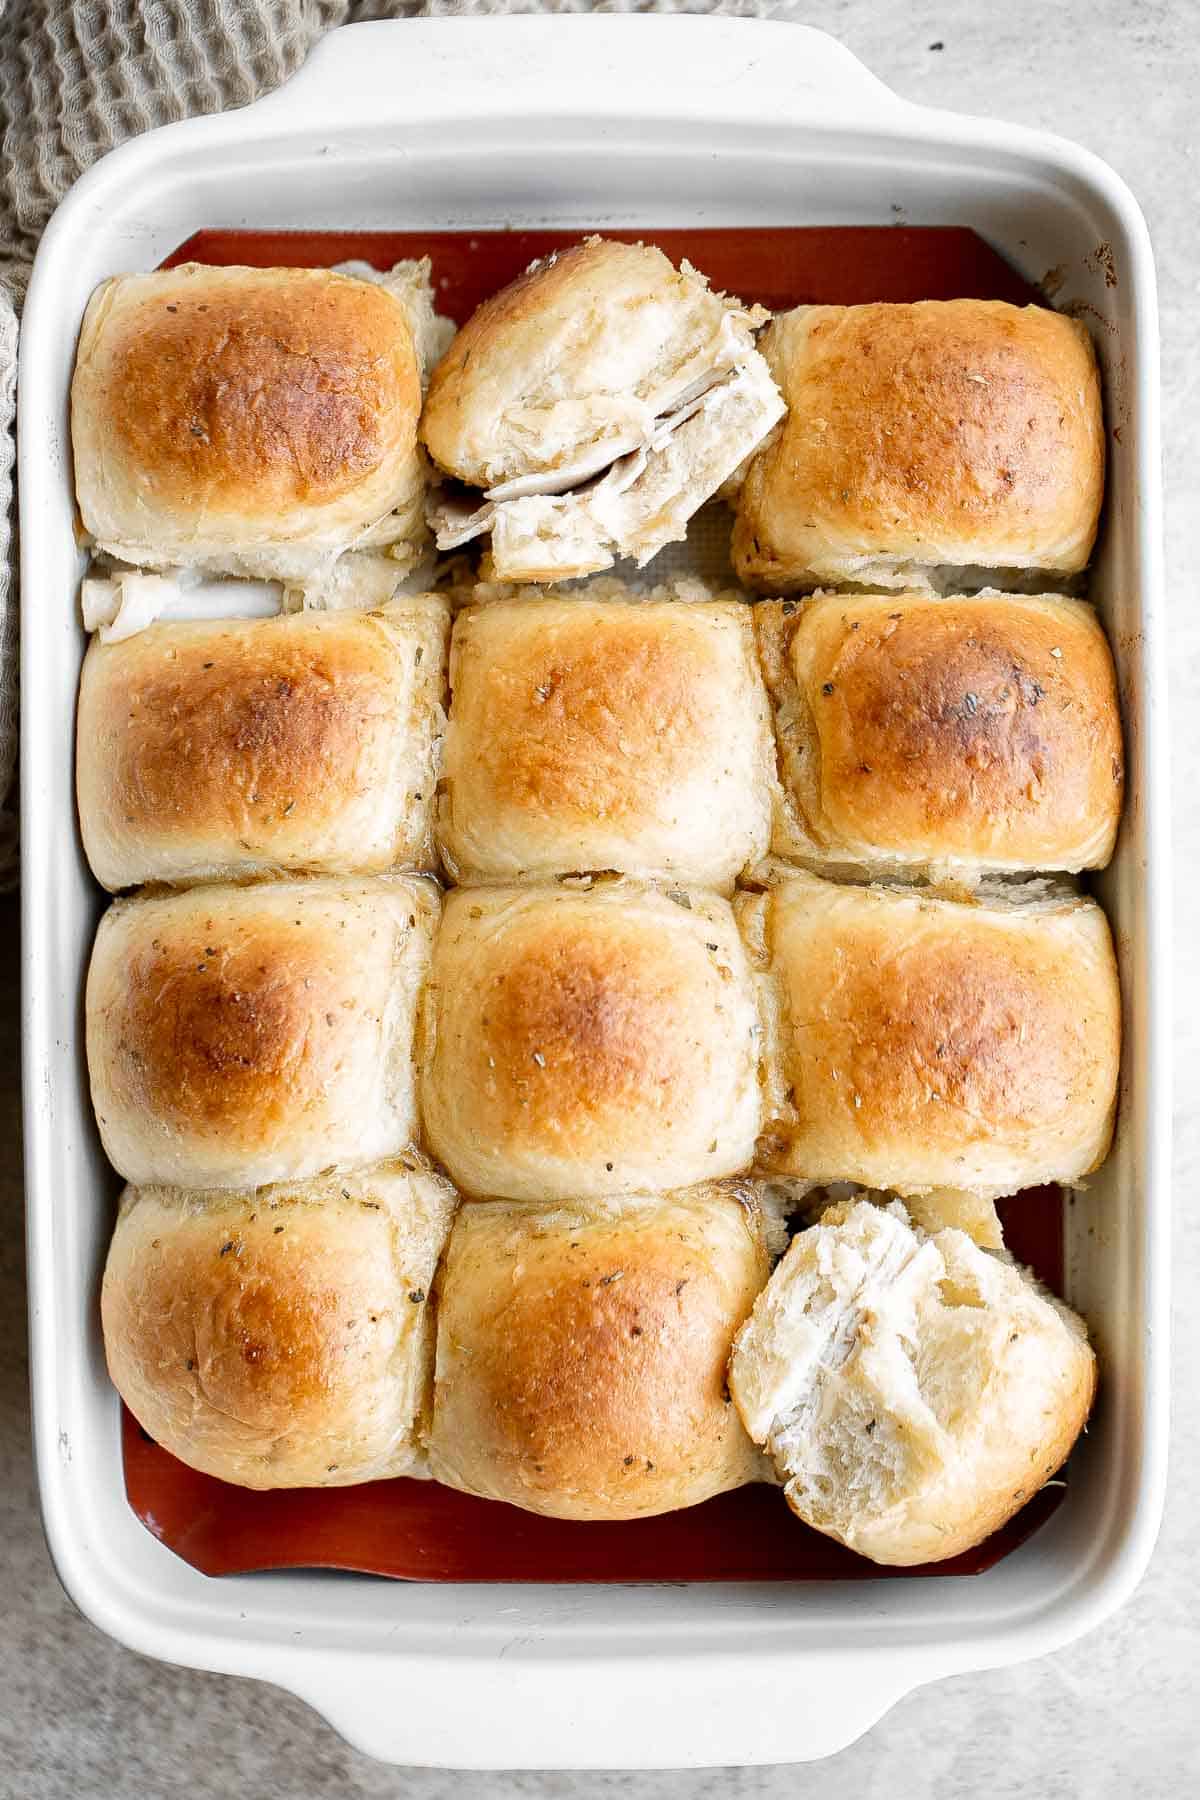
Quick and easy pumpkin dinner rolls are soft and fluffy, flaky and butter, and perfect to serve alongside a warm and cozy fall meal or Thanksgiving dinner.
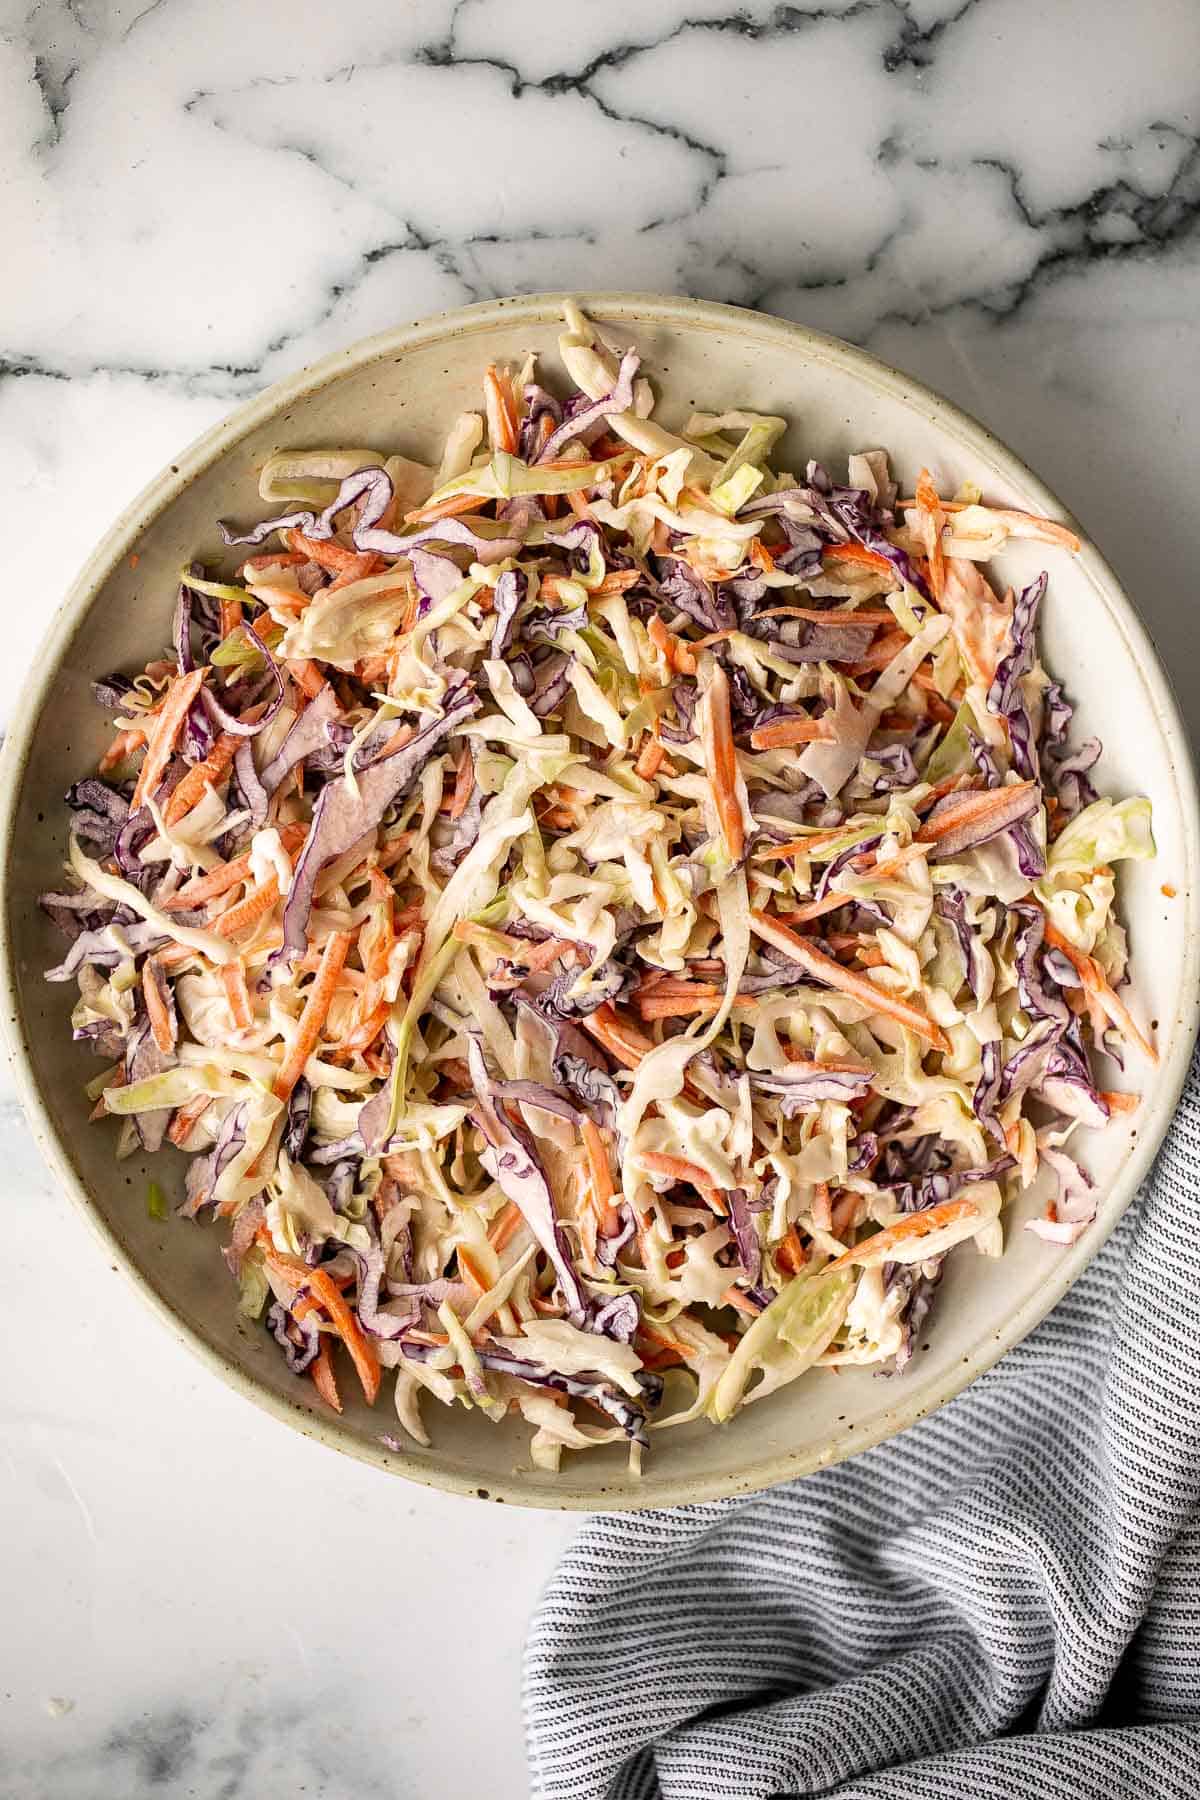
Fresh, crisp, classic coleslaw salad is a must-have recipe for a summer barbecue or picnic, or as an easy make-ahead lunch. Make it in less than 10 minutes.
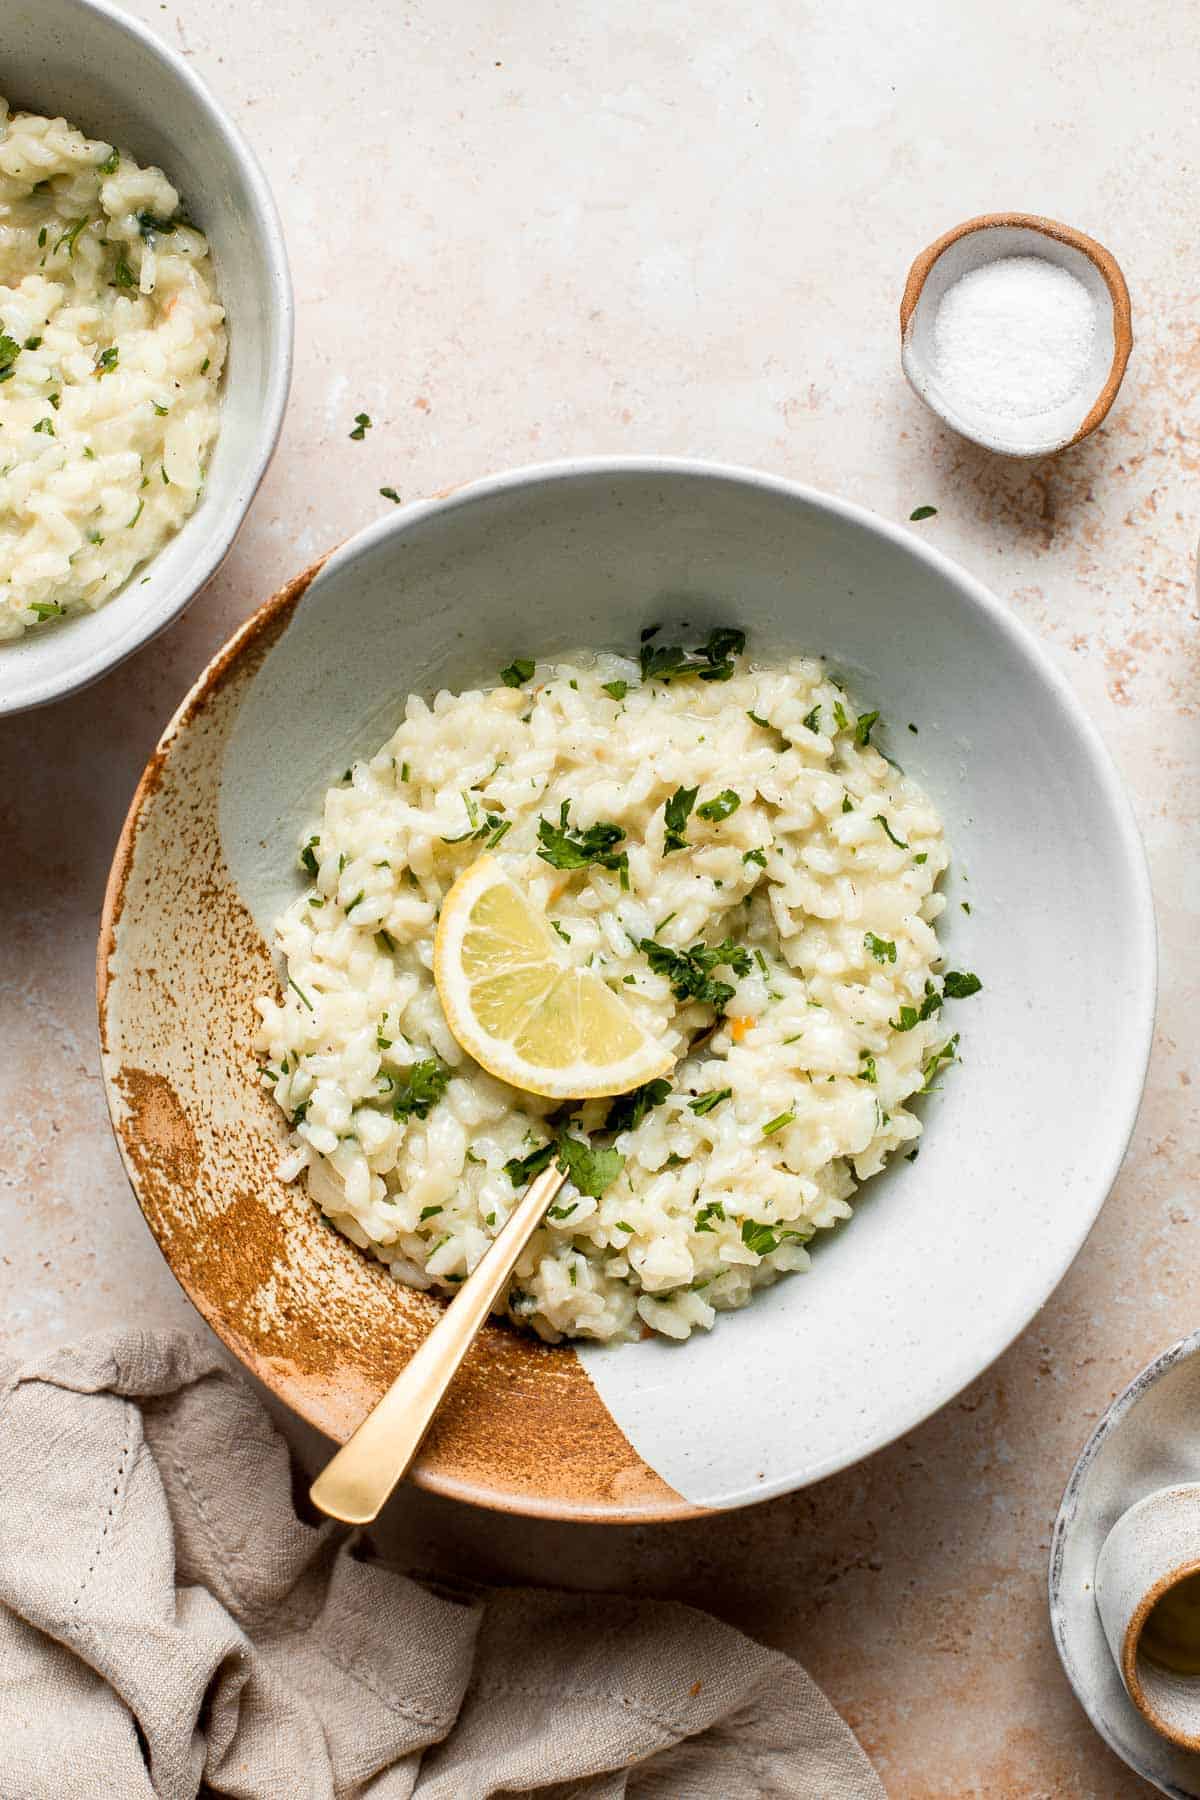
Creamy Parmesan (No Wine) Risotto is a rich, creamy, and comforting classic Italian dish that may be intimidating but is actually quick and easy to make.
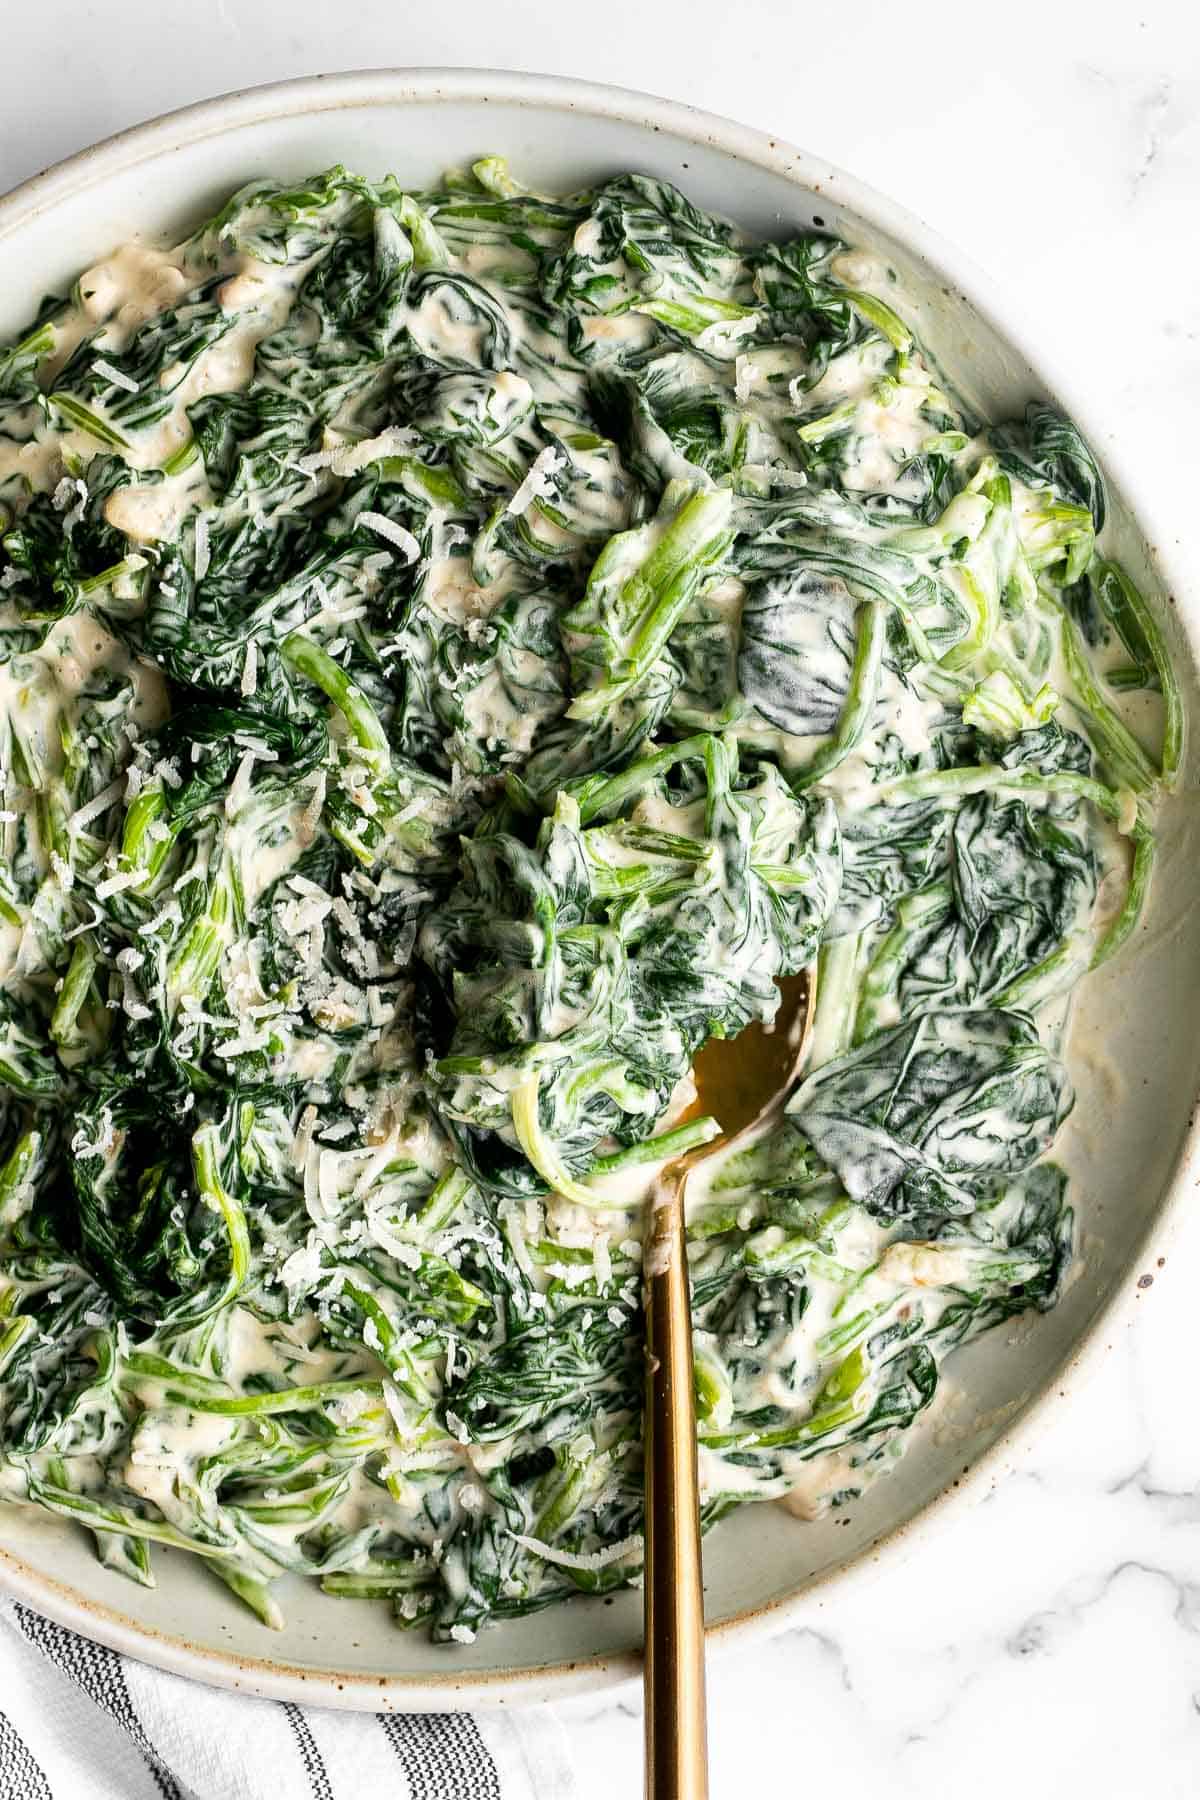
Creamed spinach is a rich, creamy, and delicious side dish to make this fall. Easy to make ahead and reheats well - perfect for Thanksgiving holiday dinner.
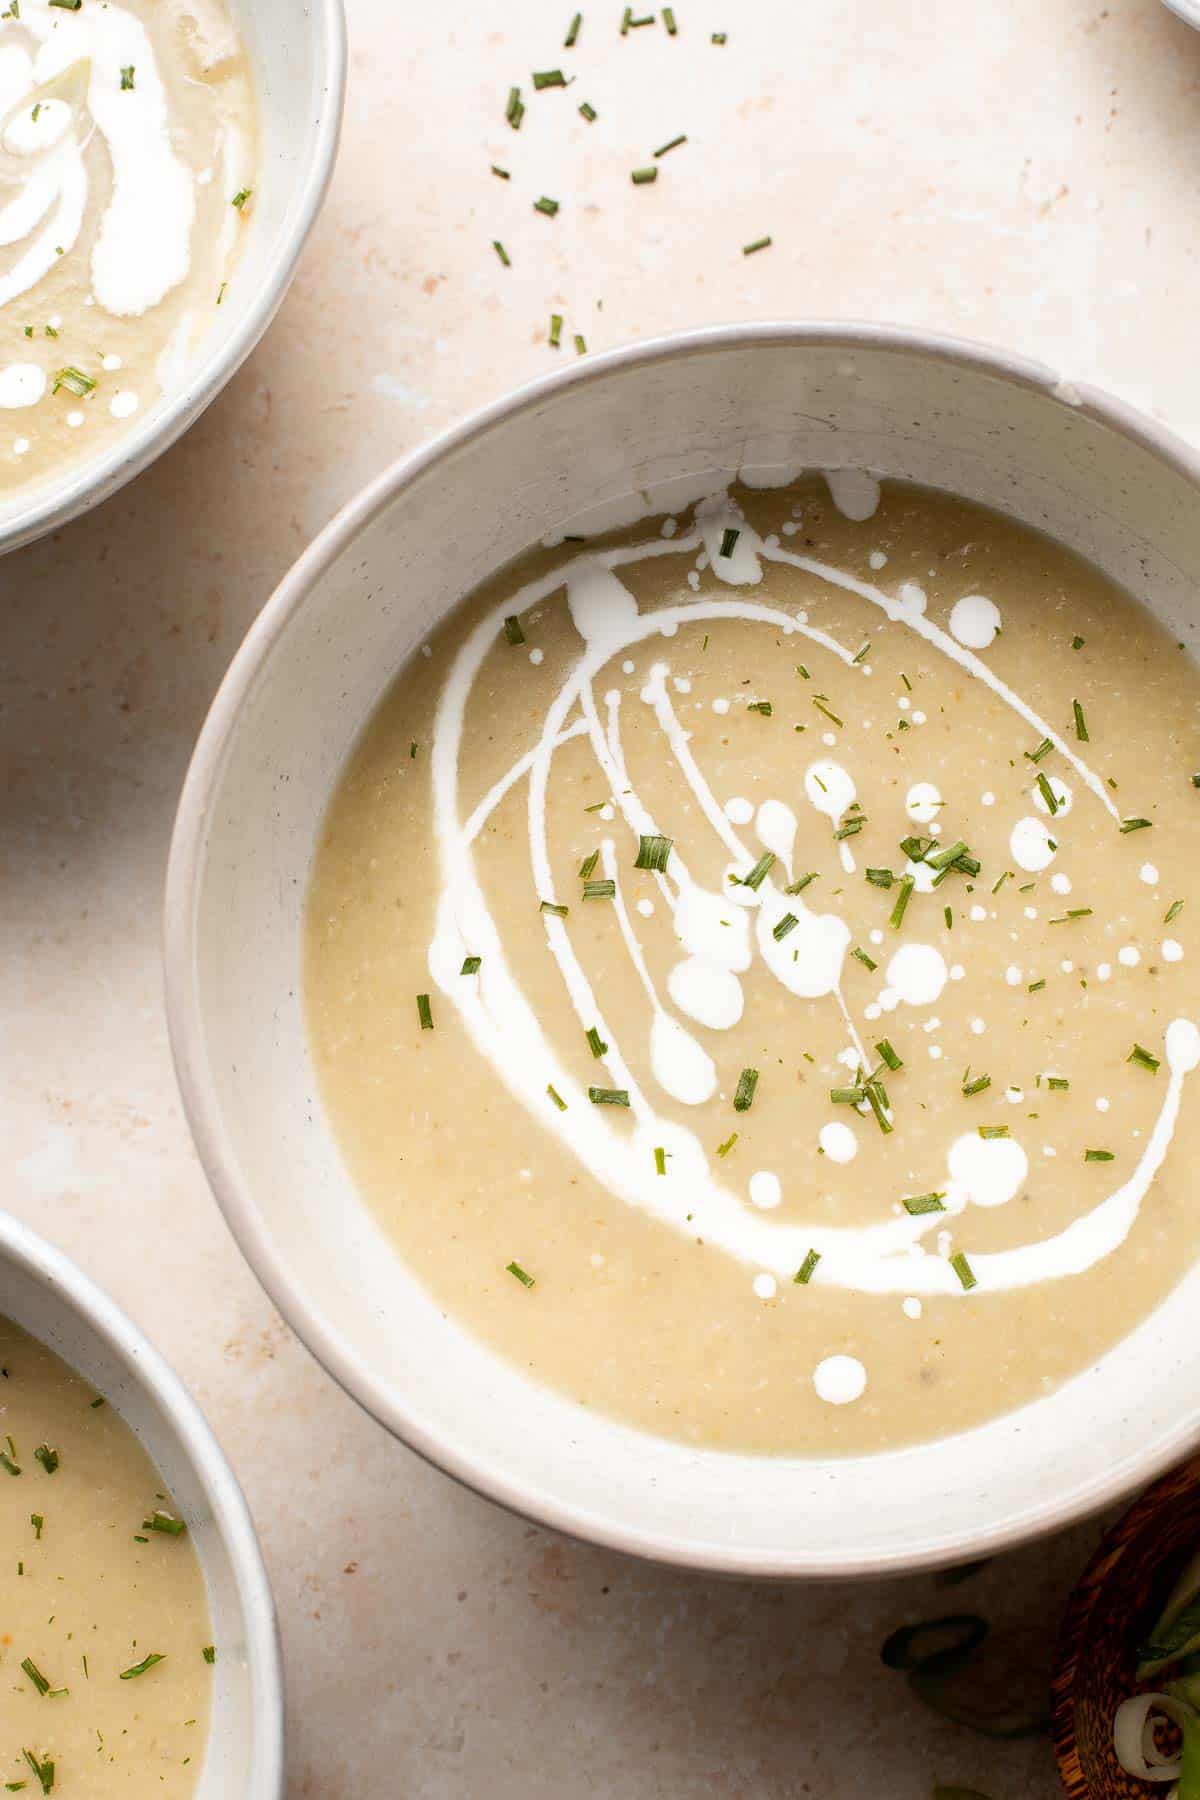
Creamy artichoke soup is rich, healthy, delicious, easy to make, and freezer-friendly. This vegetarian soup is loaded with artichokes, leeks, and potatoes.
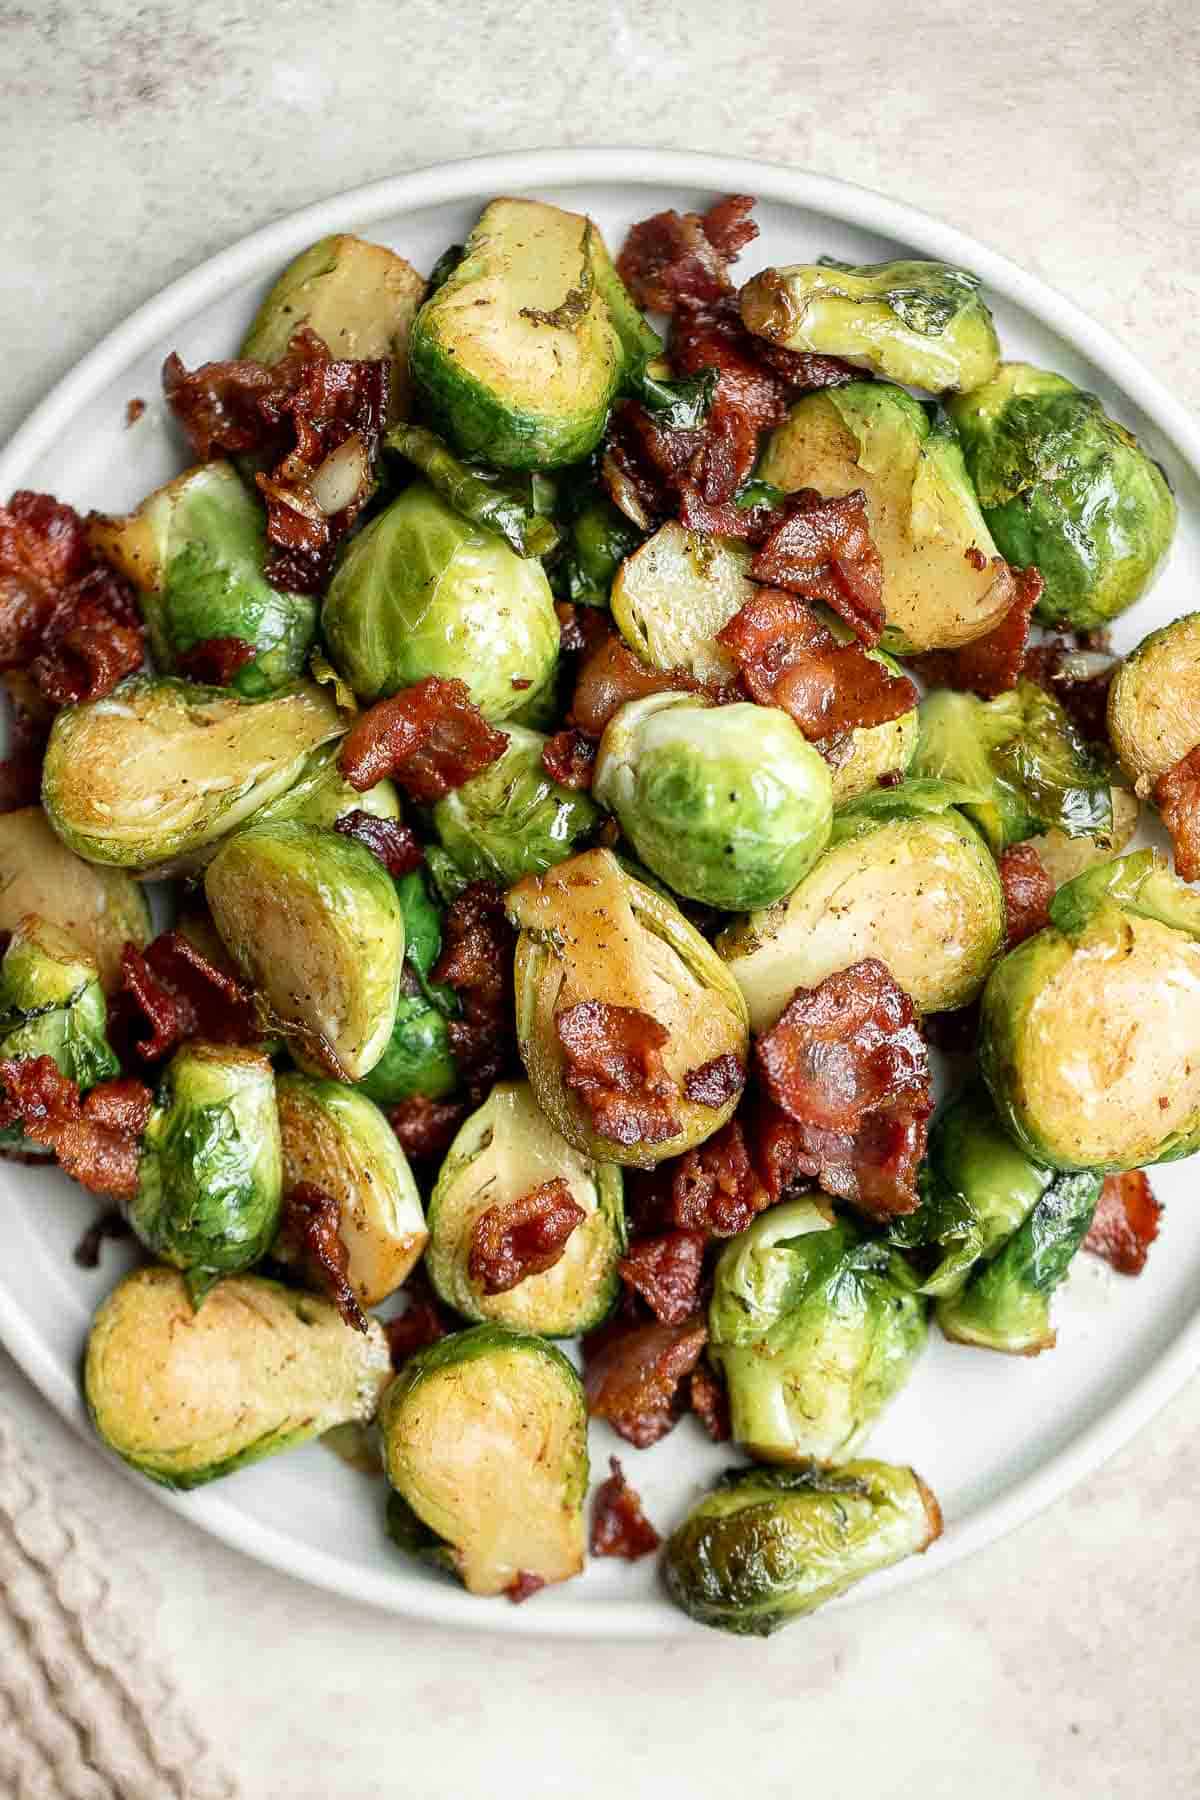
Brussels Sprouts with Bacon is a quick and easy side dish with the best flavor and texture. The best part? This holiday side is ready in under 15 minutes.
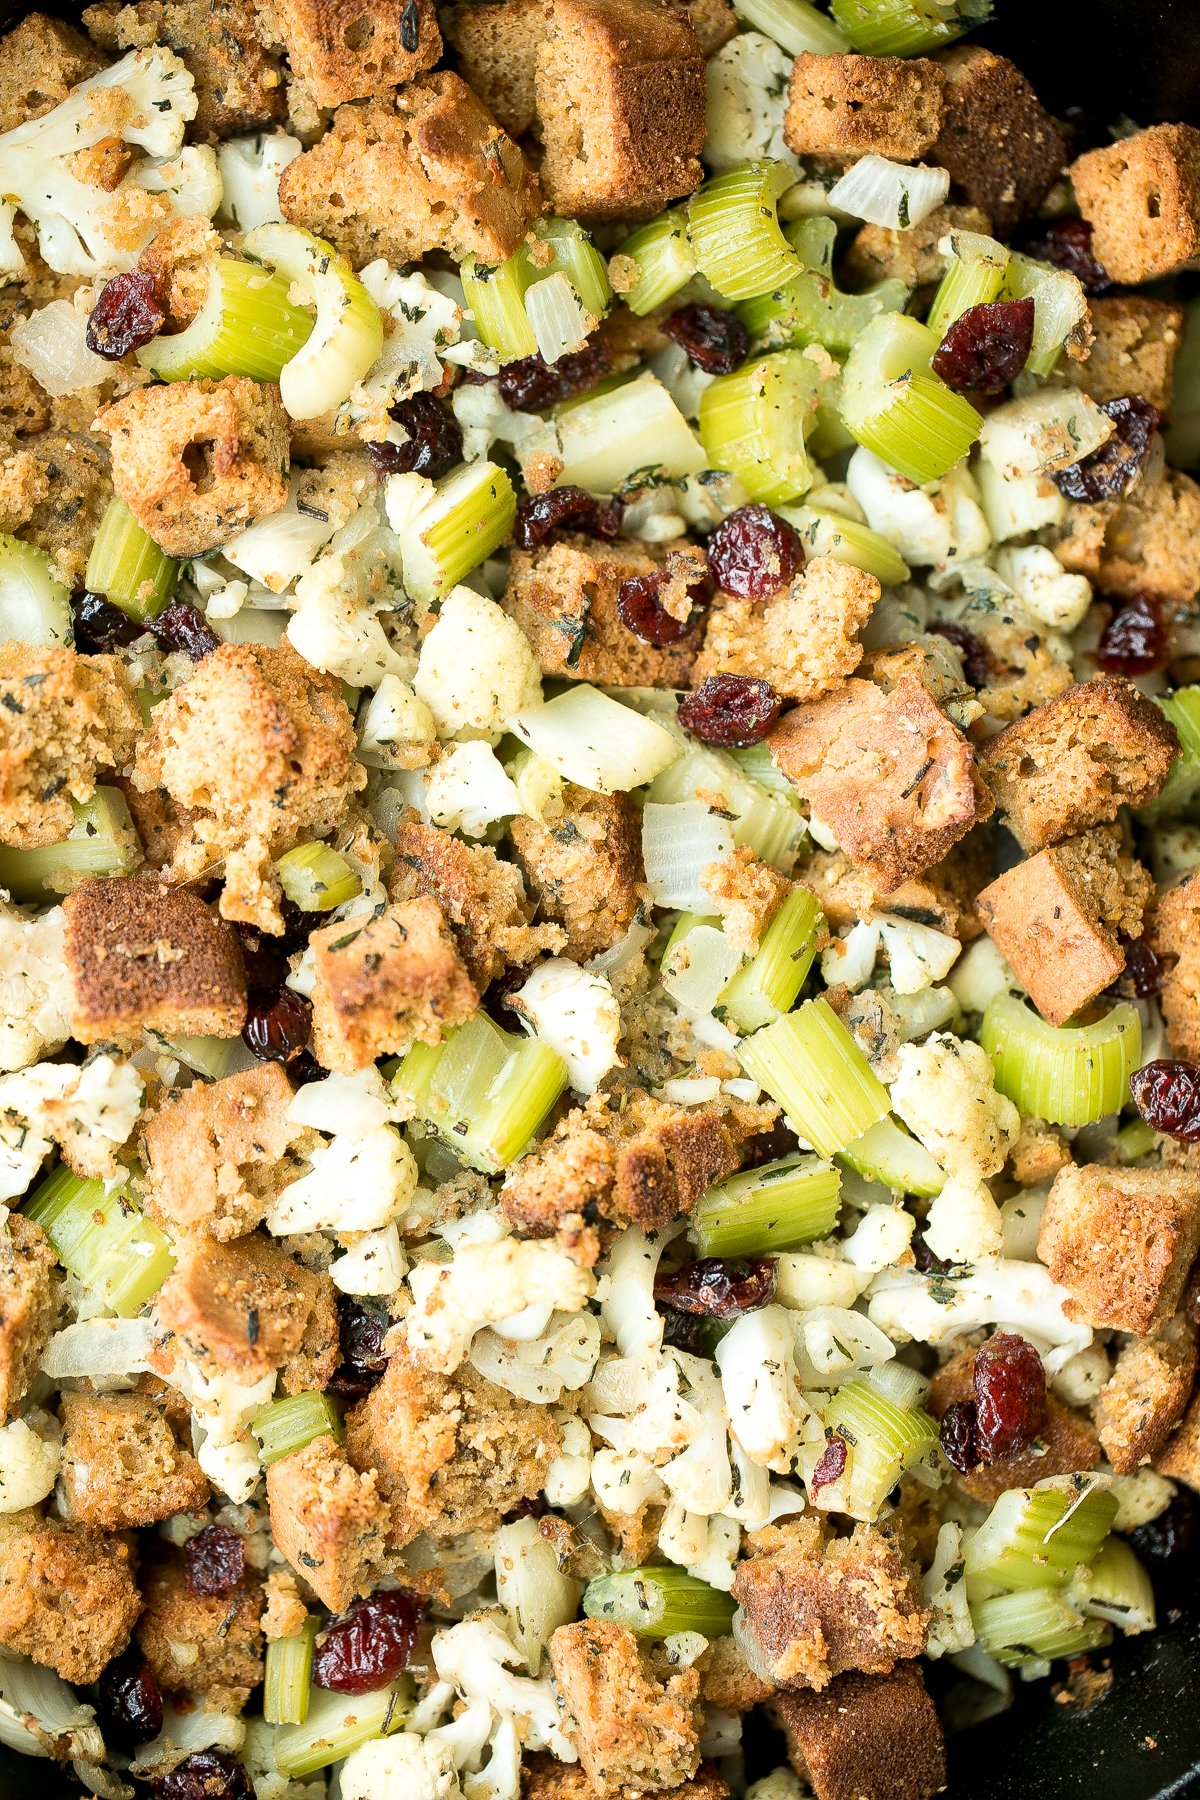
Easy vegetarian cornbread stuffing is the perfect make-ahead side dish to serve this Thanksgiving. So flavourful, moist and soft, yet crispy golden on top.
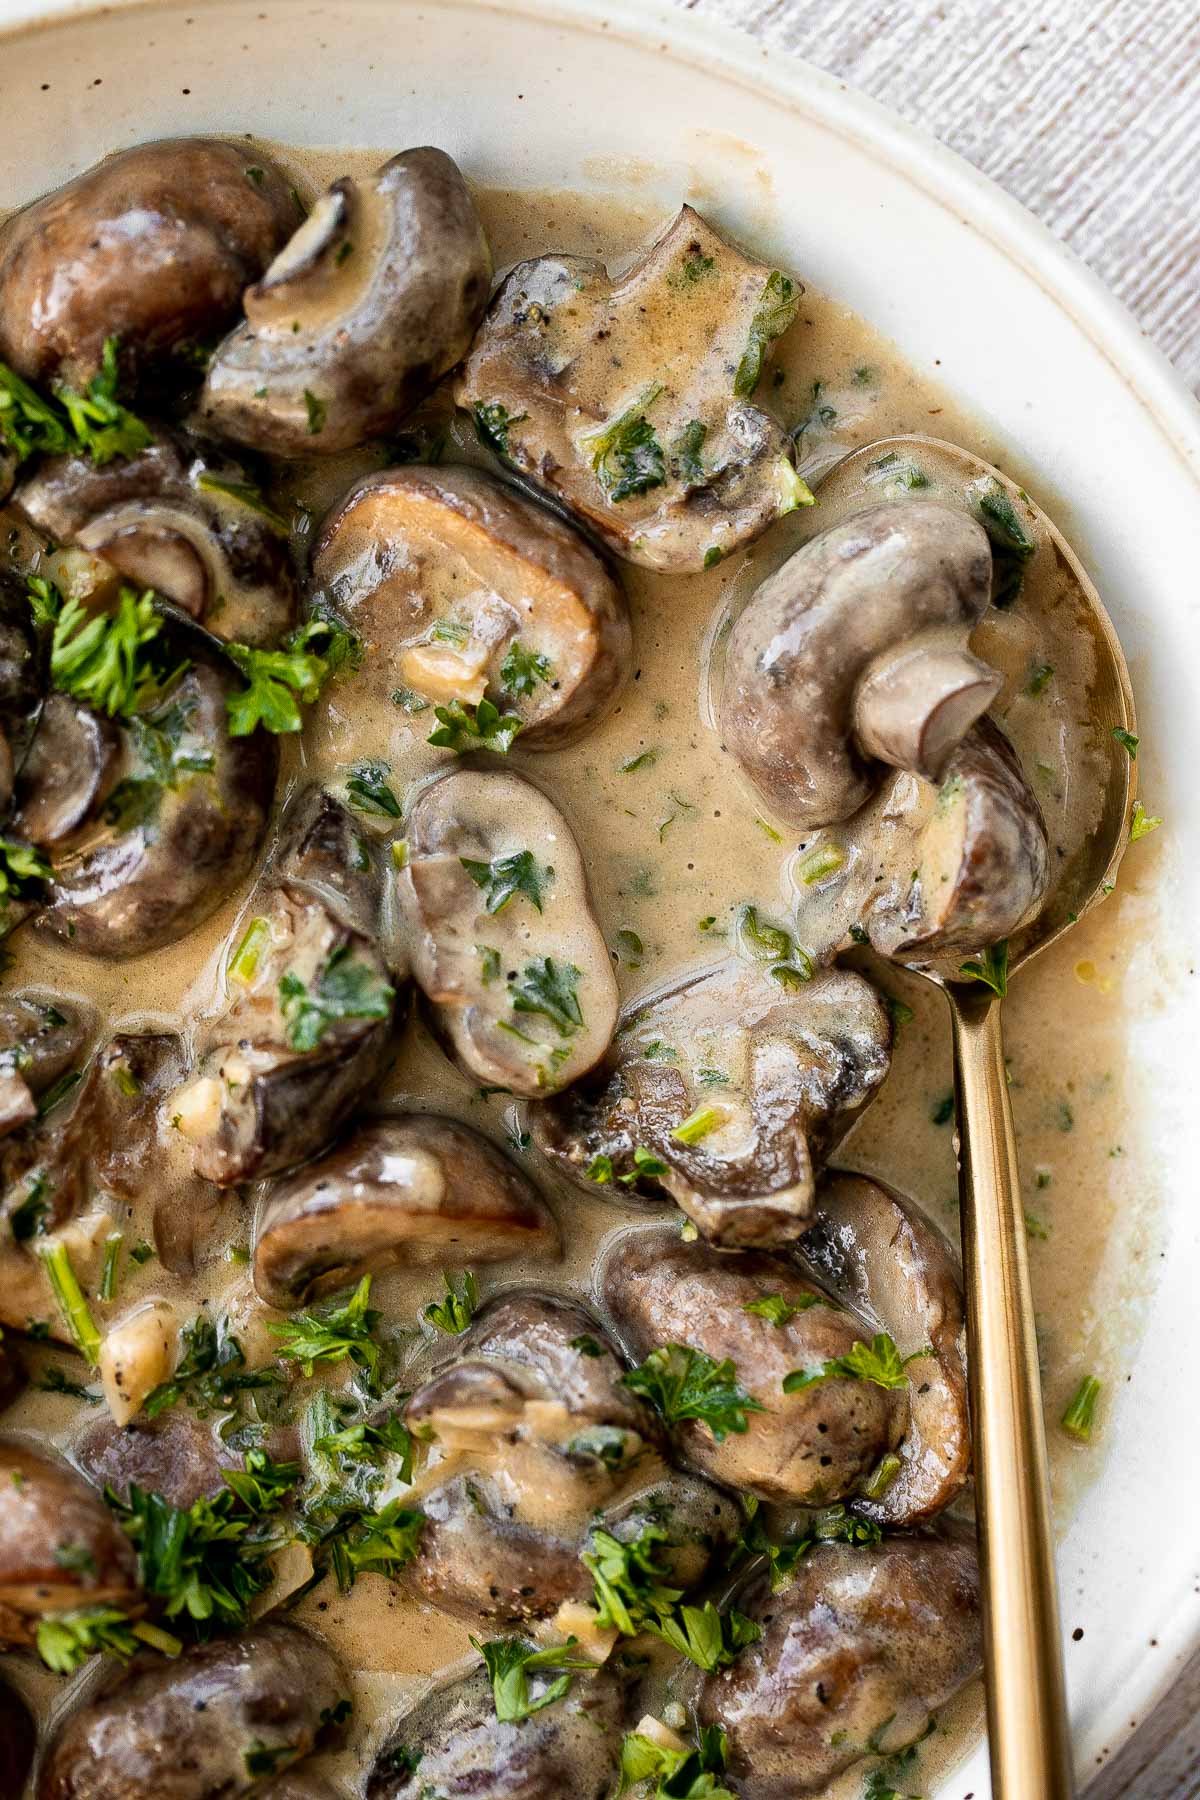
Creamy garlic mushrooms are a simple, delicious, and easy side dish. This comforting family favorite that is quick and easy to make in just 15 minutes.
This Sweet Kale Salad is loaded with hearty greens, veggies, and homemade poppy seed dressing - inspired by the Taylor Farms salad kit from Costco.
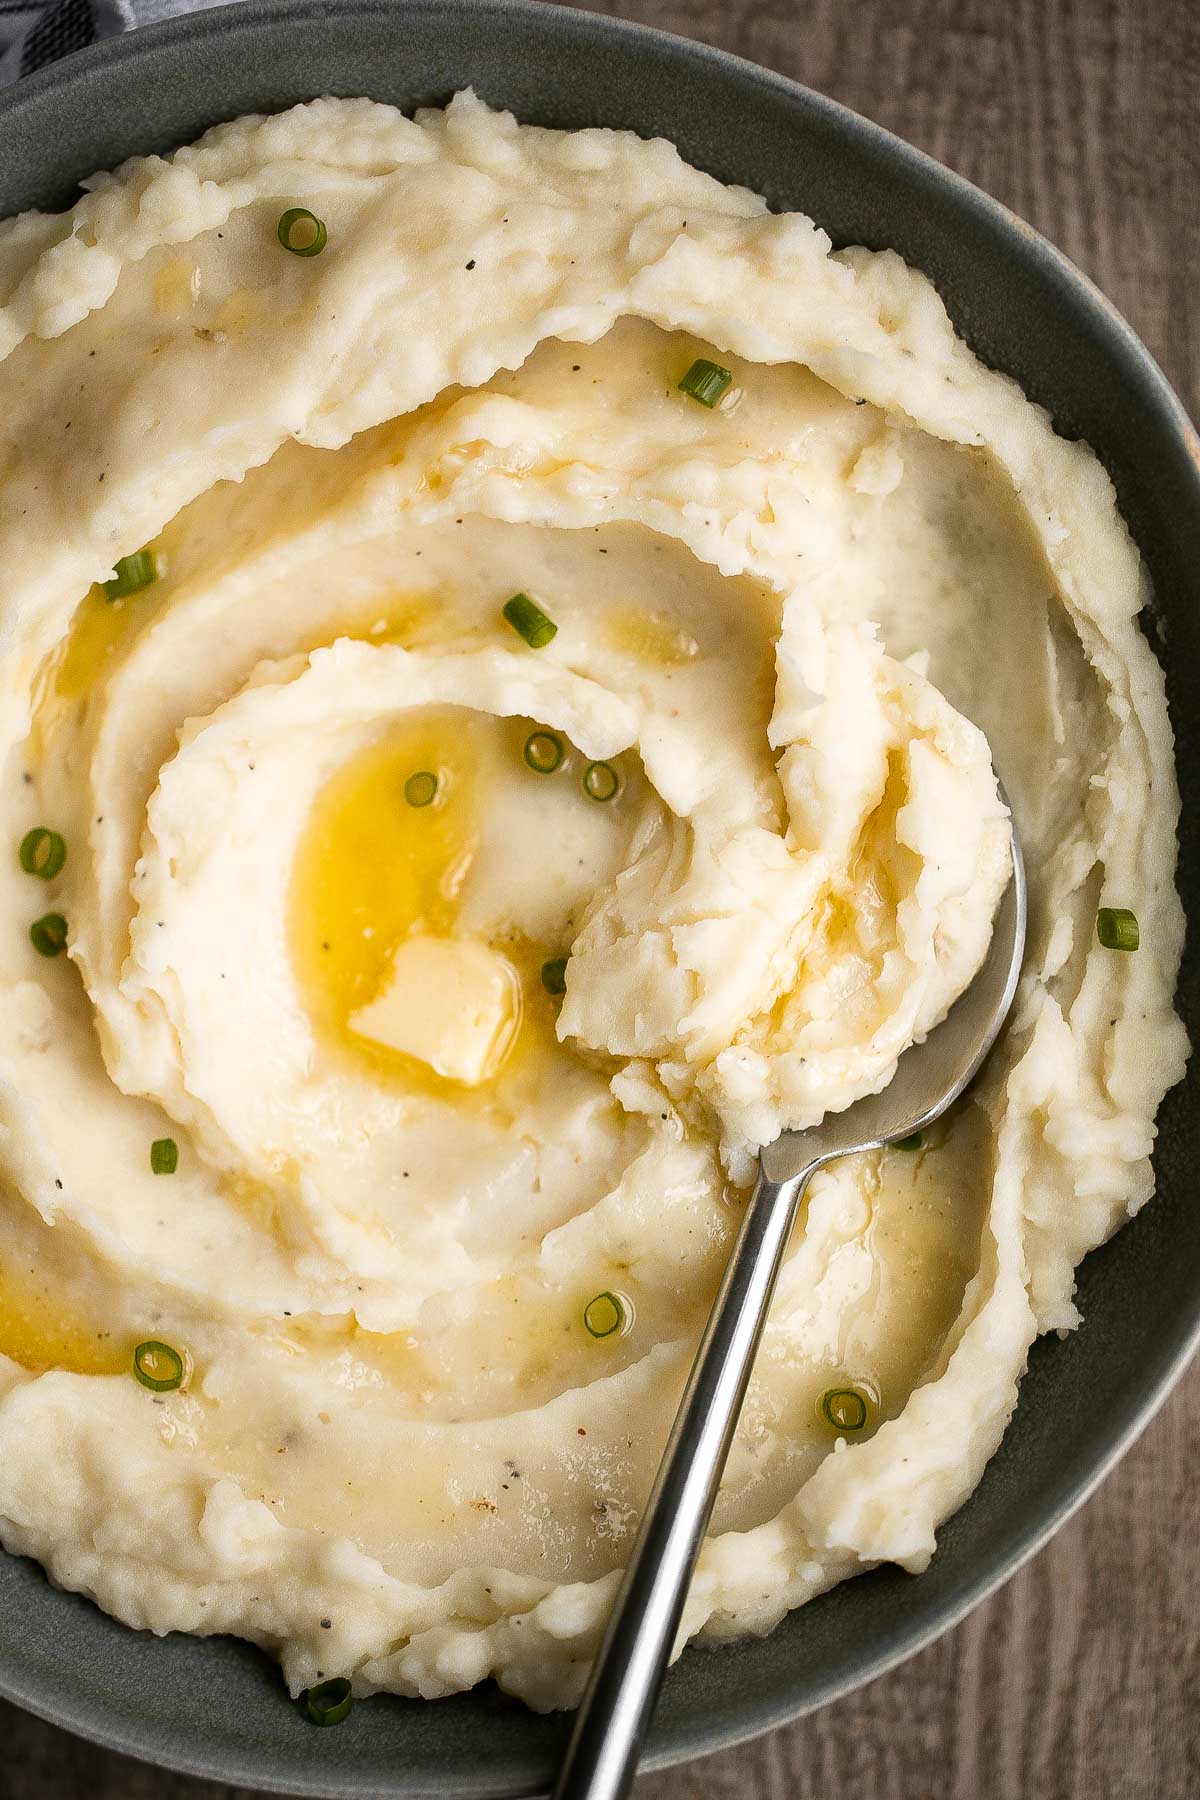
Instant pot mashed potatoes are the quickest and easiest mashed potatoes you'll make in under 20 minutes (including prep!) in the pressure cooker.
Air fryer vegetables are healthy, flavorful, and delicious. This vegan side dish is quick and easy to make in the air fryer in under 15 minutes.
Soft garlic breadsticks are fluffy, airy, buttery, and delicious. They're an easy recipe that is perfect for beginners at baking bread.
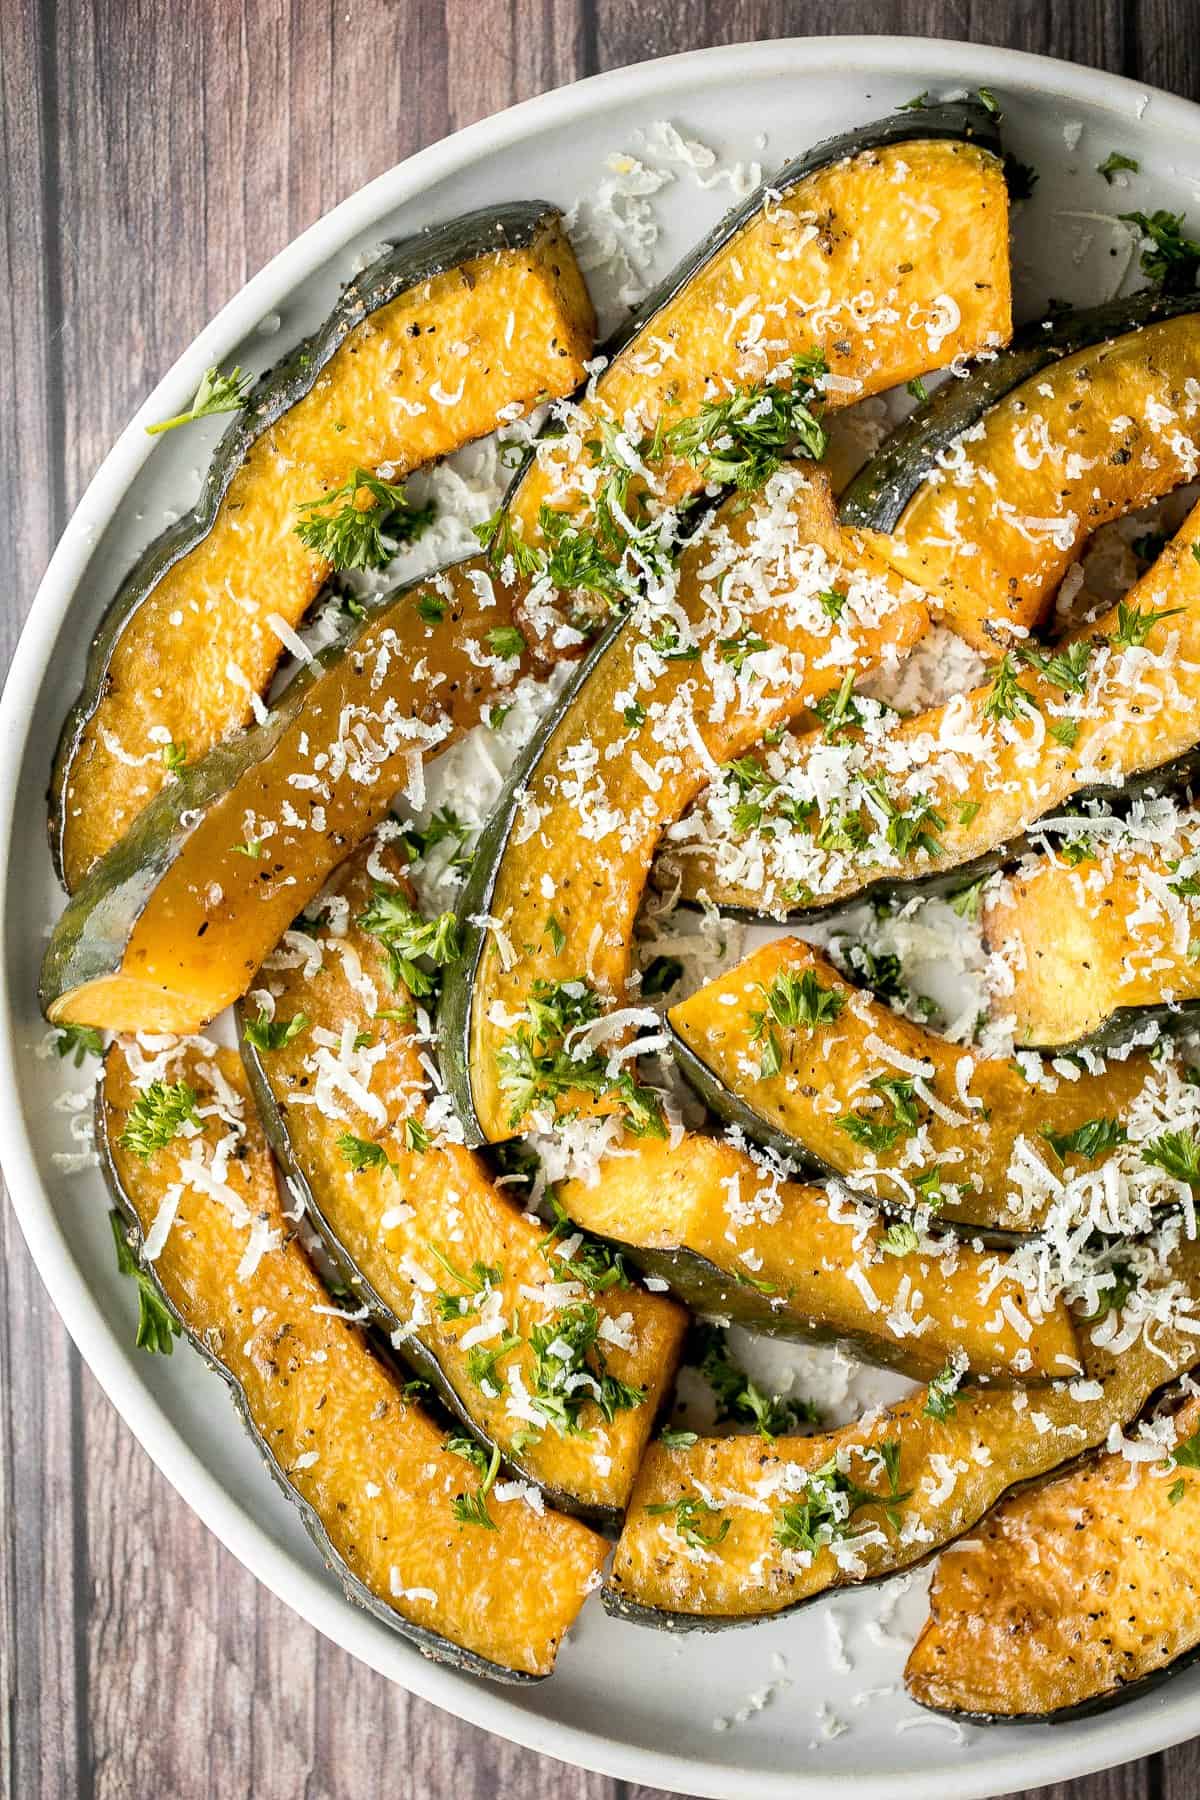
Soft and tender, easy roasted pumpkin wedges with Parmesan cheese is the easiest and most delicious side dishes to make this fall. Prep it in just minutes.
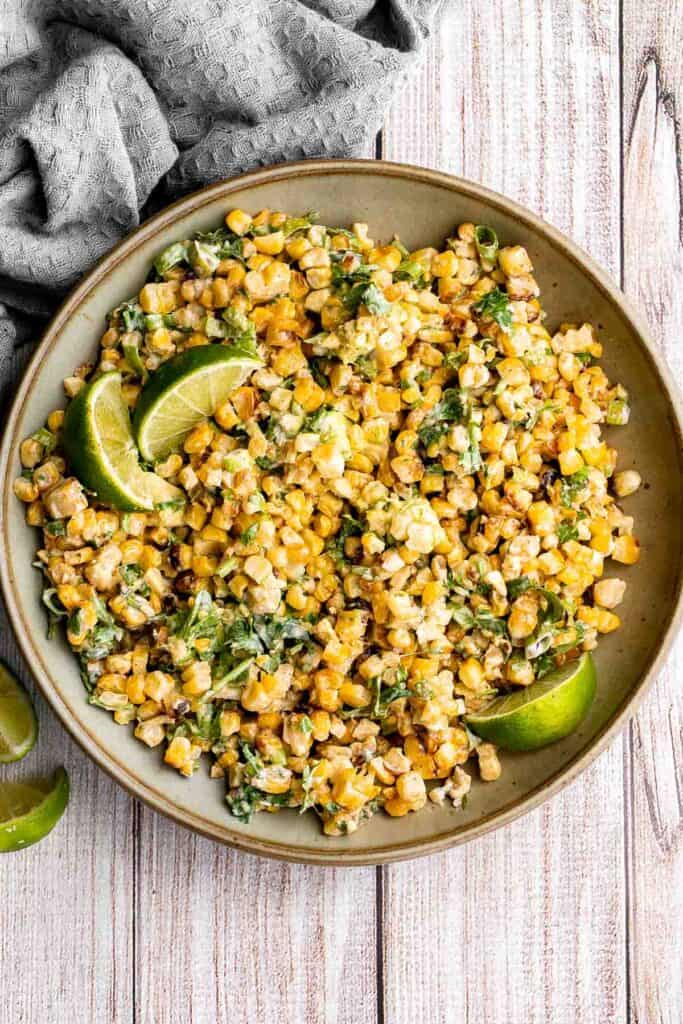
Mexican street corn salad adds a twist to a classic street food, loaded with freshly grilled corn, a creamy cheesy dressing, and authentic flavor.
Learn how to make steamed rice that's perfectly cooked, fluffy and delicious in 30 minutes. Cook white rice on the stove, rice cooker, or instant pot.

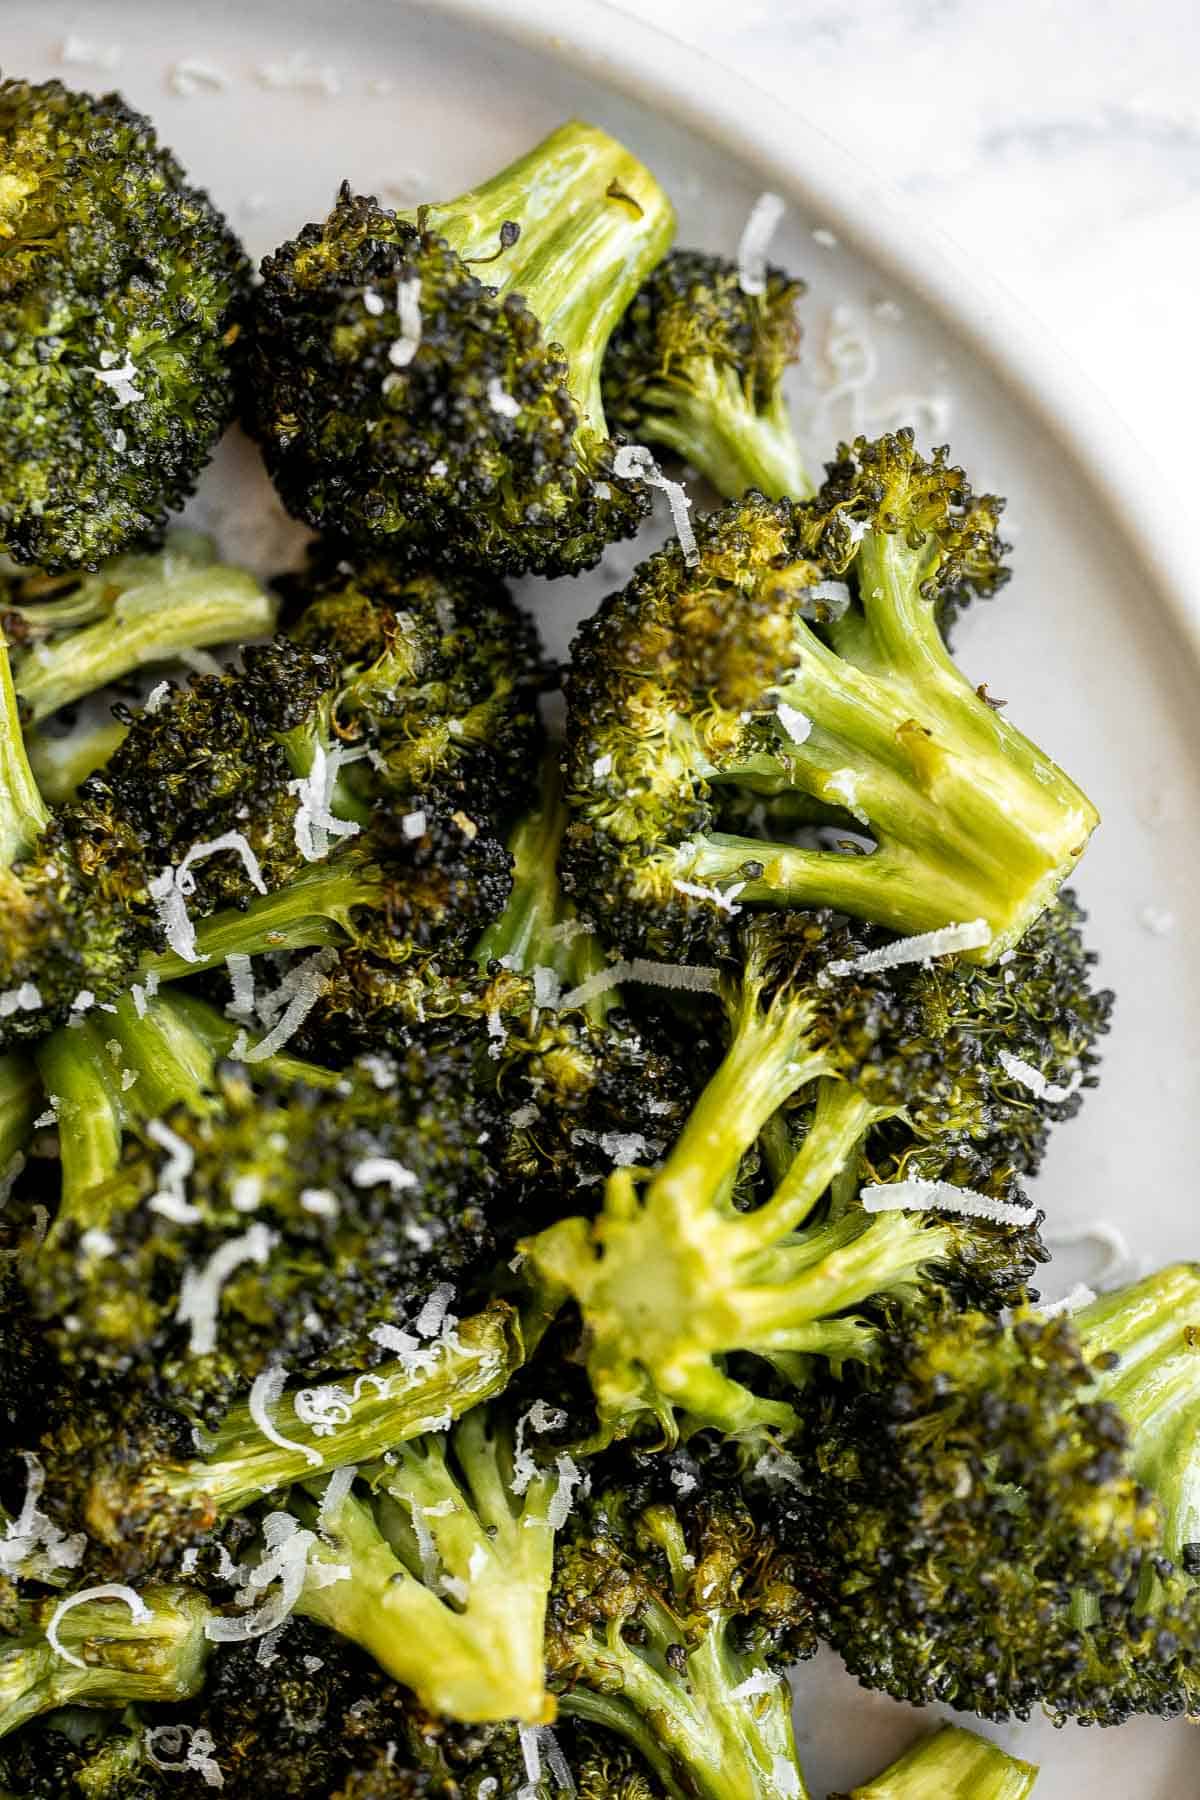
Quick and easy air fryer broccoli is a healthy side dish that takes just six minutes to cook in the air fryer. It's crispy, delicious, and flavorful.
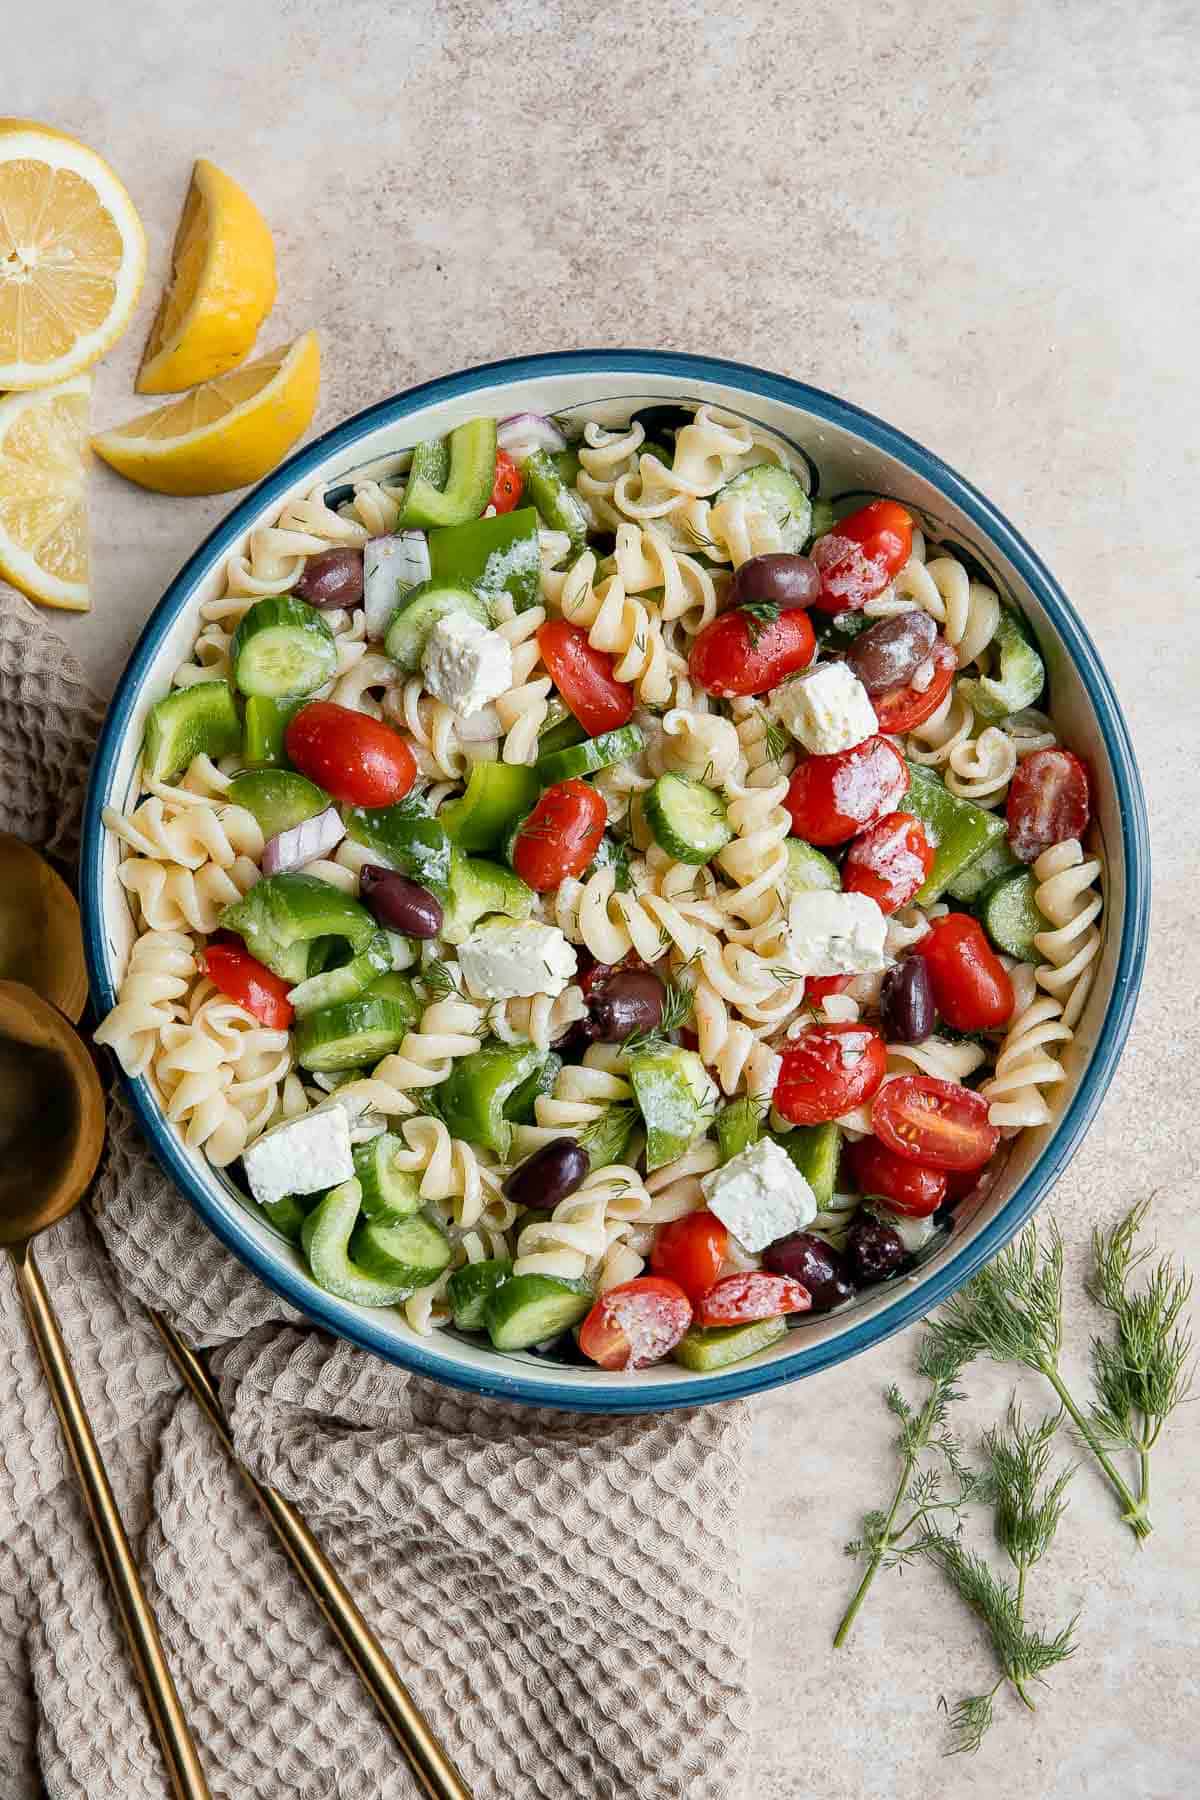
Greek Pasta Salad is quick and easy, loaded with Mediterranean flavors, and delicious. Serve it at a summer cookout or potluck, or meal prep weekly lunches.
How to Make Ahead and Store
You can make many of these pork side dish recipes ahead of time and store in the refrigerator for a few days or even in the freezer for up to 3 months. Otherwise, you can prepare the ingredients and store in the refrigerator until ready to assemble and/or cook. Check the individual recipes for full make ahead and storing instructions.
To reheat, place any leftovers in the air fryer or the oven at 300F for 10-15 minutes until warmed through, or on the stovetop over medium-low heat (depending on the recipe). If heating from frozen, let it thaw first and then reheat.
More Side Dish Recipes
- 25 Side Dishes for Chicken
- 25 Side dishes for Steak
- 40 Vegetable Side Dishes
- 25 Side Dishes for Salmon
- 25 Side Dishes for Ham
- 30 Potato Side Dishes
Did You Make Any of These Side Dishes for Pork Chops?
Please leave a comment and rating below, and let me know what you thought of this round up of side dish recipes to serve with pork chops. Be sure to snap a picture and tag me on Instagram @aheadofthyme or share it on the Pinterest pin so that I can follow along.
HUNGRY FOR MORE? Don't forget to sign up for my email newsletter so that you don't miss any recipes. You can also follow along on Instagram and Pinterest for more recipe updates.
Cheesy Baked Zucchini with Marinara
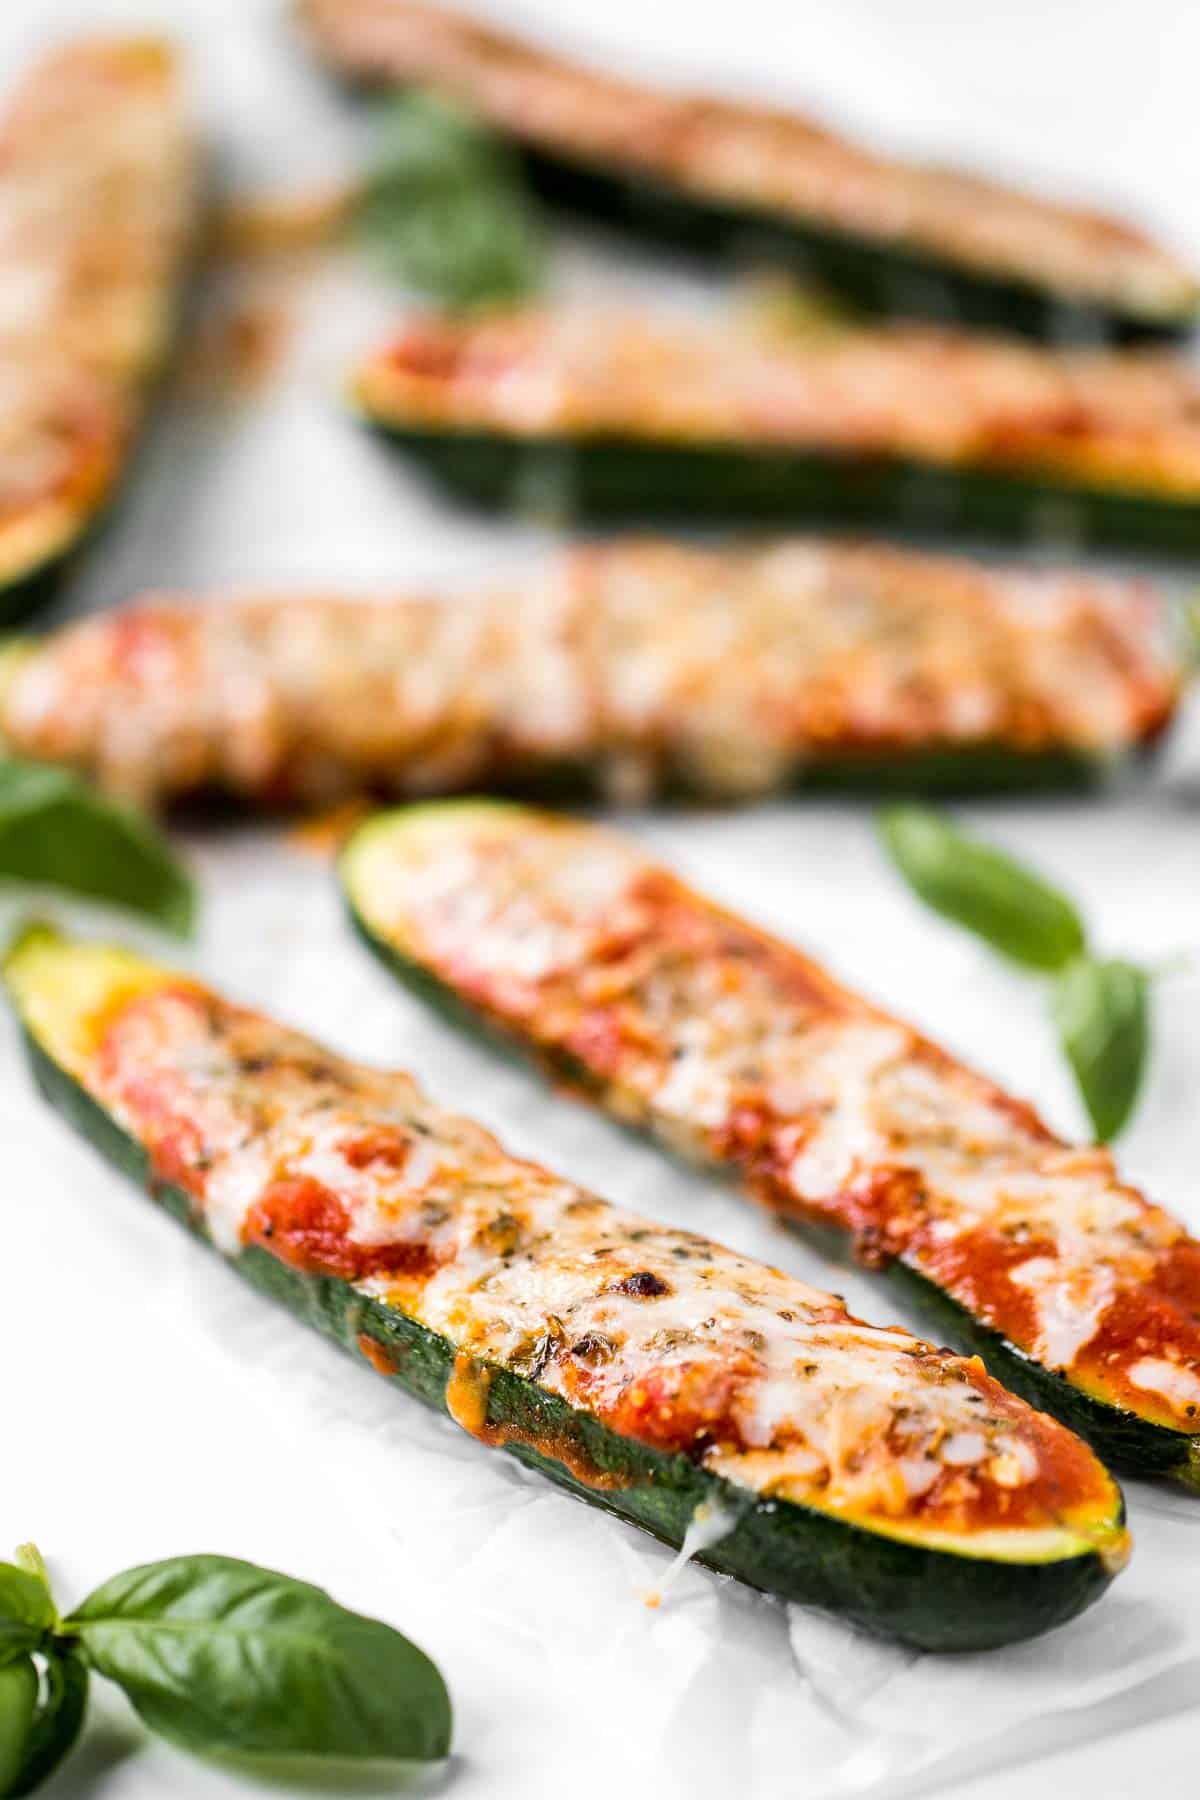
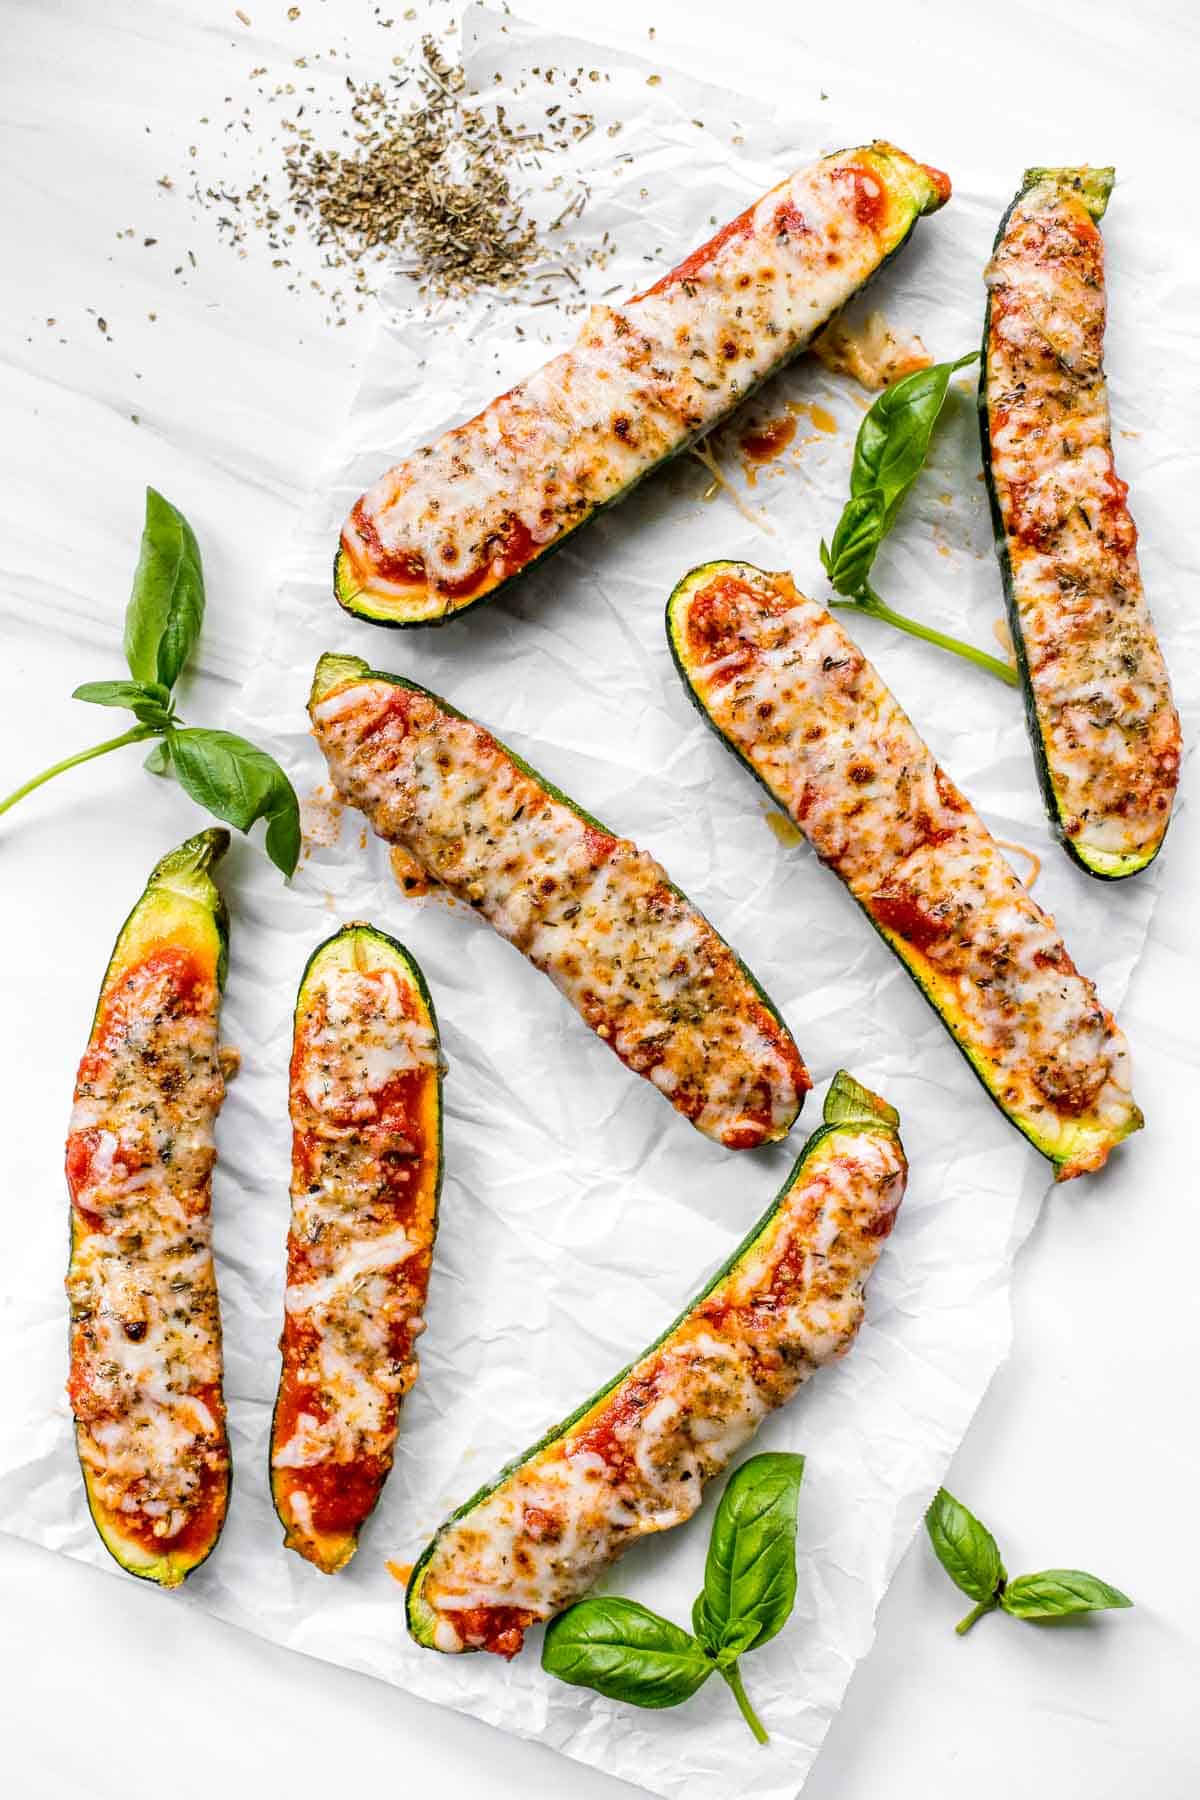
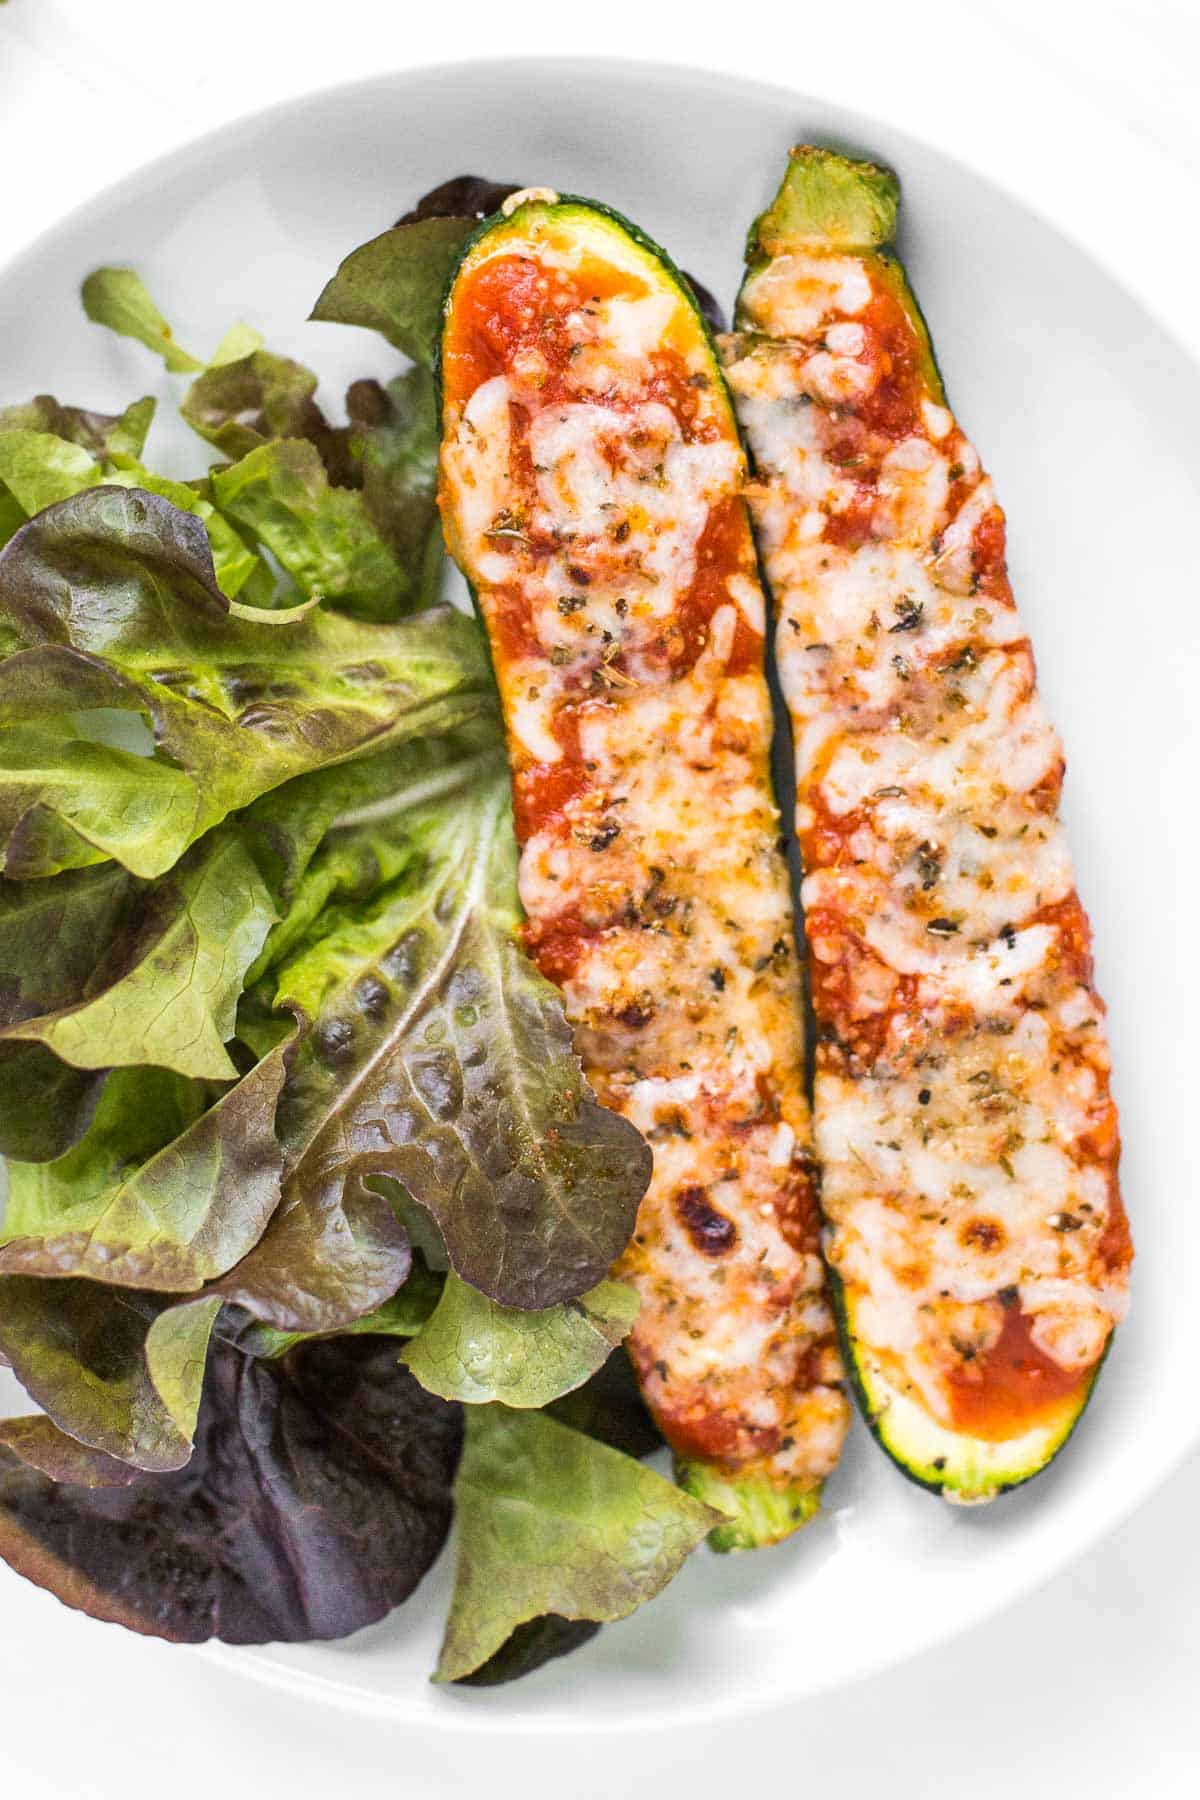
Cheesy Baked Zucchini with Marinara is about to save your weeknight dinner routine. Tender zucchini is topped with rich marinara sauce and baked with melty, bubbly cheese and served as a simple and delicious side dish.
It's low carb, vegetarian, gluten-free, and keto too. The best part? You can have this on the table in just under 30 minutes (including prep!).
We love to find new ways to cook with this summer squash at the peak of its season. Whether that's baking Zucchini Bread, making Zucchini Fritters, or cooking Air Fryer Vegetables. But honestly, baked zucchini with marinara and cheese is one of my favorite ways to cook with it because it's a kid-friendly and loved by the whole family.
Why You'll Love this Cheesy Baked Zucchini
- It's quick and easy. There is not much prep work when it comes to baking this cheesy zucchini. Simply slice the zucchini, season, and roast. Then top with marinara and a cheese mixture and bake again. Plus, you will be ready to bite into one in under 30 minutes, including prep!
- A low-carb side dish. These zucchini boats are low carb, vegetarian, gluten-free, and keto. They are a delicious way to incorporate more vegetable into your diet and the kids even love them!
- The tender and creamy texture. Baking the zucchini like this will transform the texture of the squash into something so tender and creamy - and you won't even need a knife to cut it!
- The marinara-cheese topping. We top these baked zucchini with marinara sauce and 2 types of cheese for the ultimate comfort. It's basically like a margherita pizza but using zucchini as the crust. So good!
Ingredient Notes
To make this easy Cheesy Baked Zucchini, you will need the following ingredients (full measurements in recipe card below):
- zucchini - I recommend using small zucchini if you can find them, as they will cook evenly and quickly. You could also use 4 medium sized zucchinis but you may need to increase the cook time slightly.
- olive oil
- salt and pepper
- cheese - we top these off with a combination of mozzarella and Parmesan cheese, because 2 cheeses are better than one! Feel free to use a little more or less to taste.
- Italian seasoning
- marinara sauce - we used our homemade marinara sauce because we always have a batch on hand. Feel free to use store-bought sauce if it's more convenient.
- fresh herbs - optionally, garnish the baked zucchini with fresh herbs such as basil, parsley, or oregano.
You will also need measuring cups and spoons, small mixing bowl. and quarter sheet baking pan.
How to Make the Best Cheesy Baked Zucchini
- Season zucchini. Cut each zucchini in half lengthwise and line them up on a quarter sheet baking pan. Drizzle with olive oil, salt, and pepper.
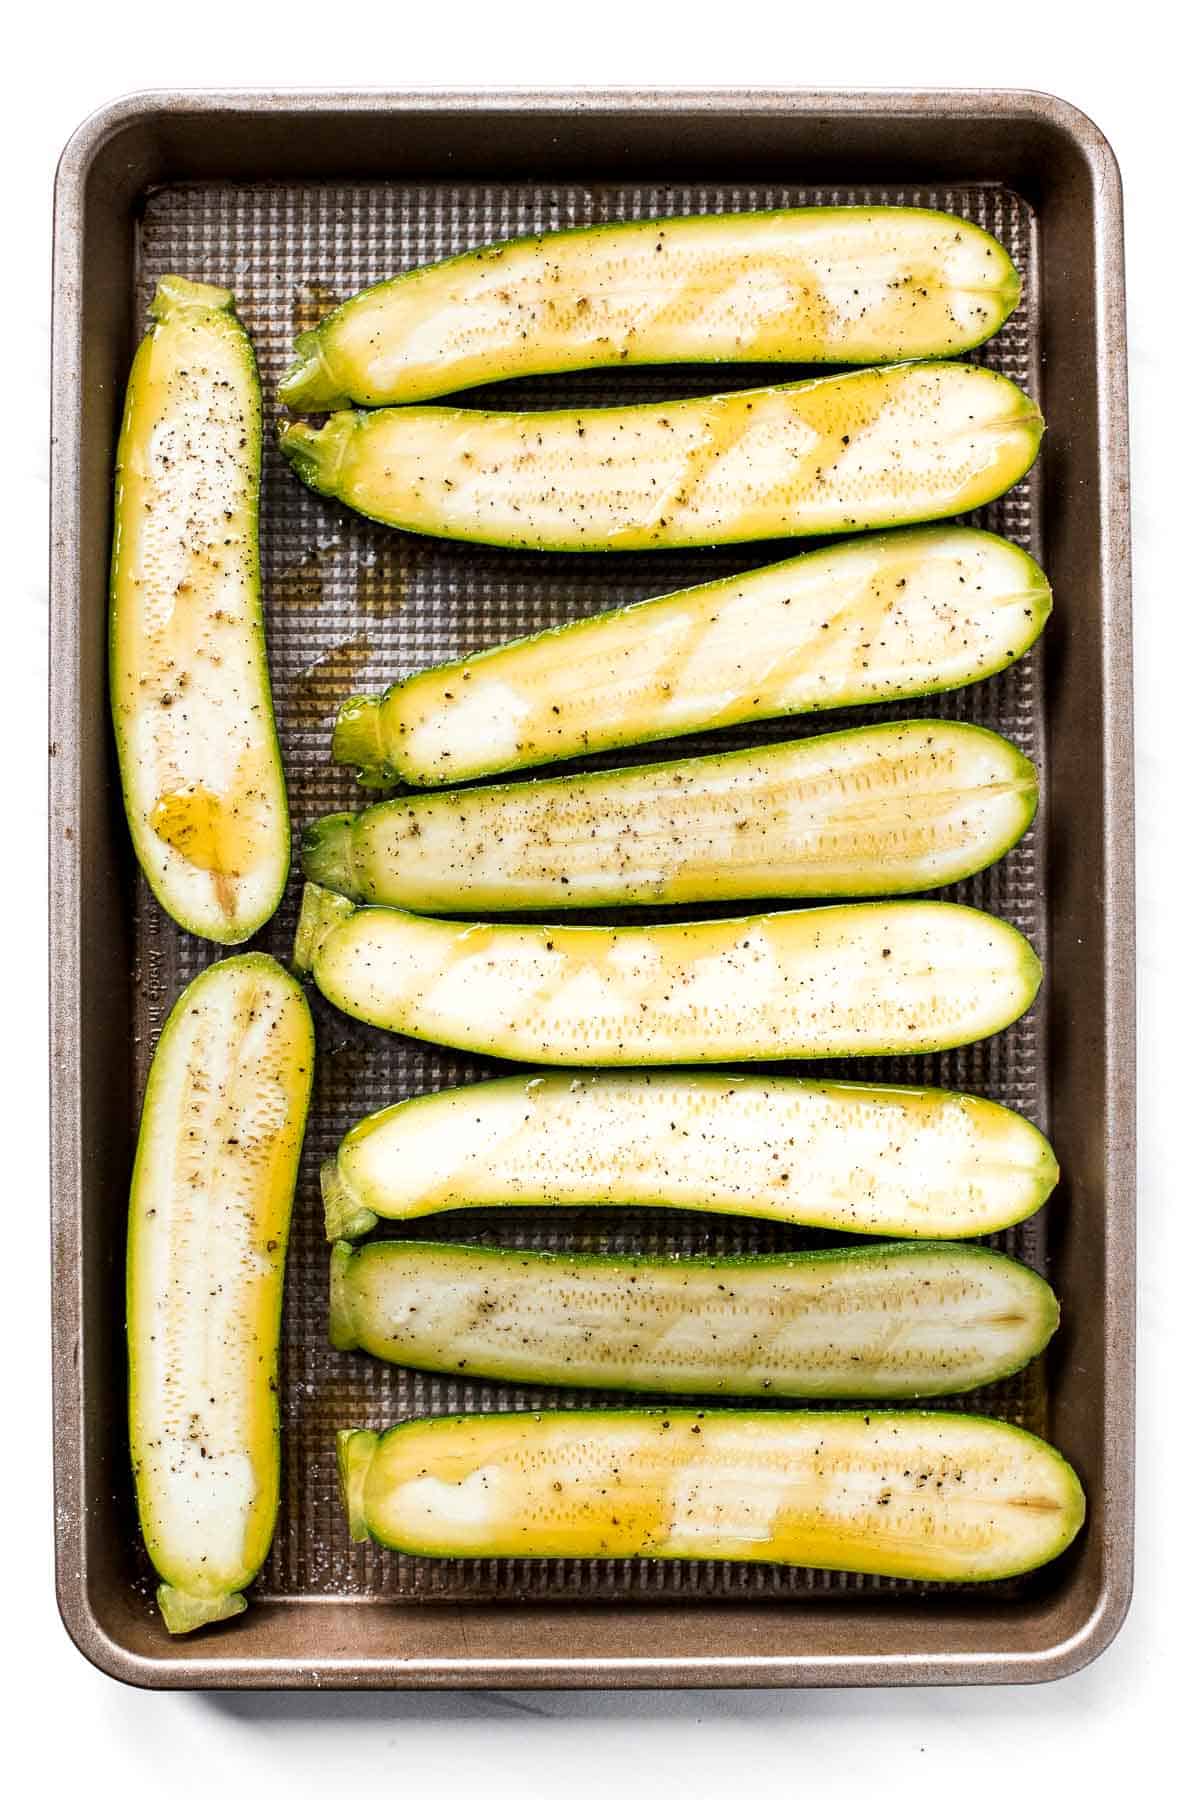
- Bake. Bake in a 375 F preheated oven for 25 minutes, or until a knife inserted into the center goes in easily and the zucchini are completely tender.
- Make cheese topping. While zucchini is baking, combine mozzarella, Parmesan, and Italian seasoning in a small mixing bowl and stir to combine.
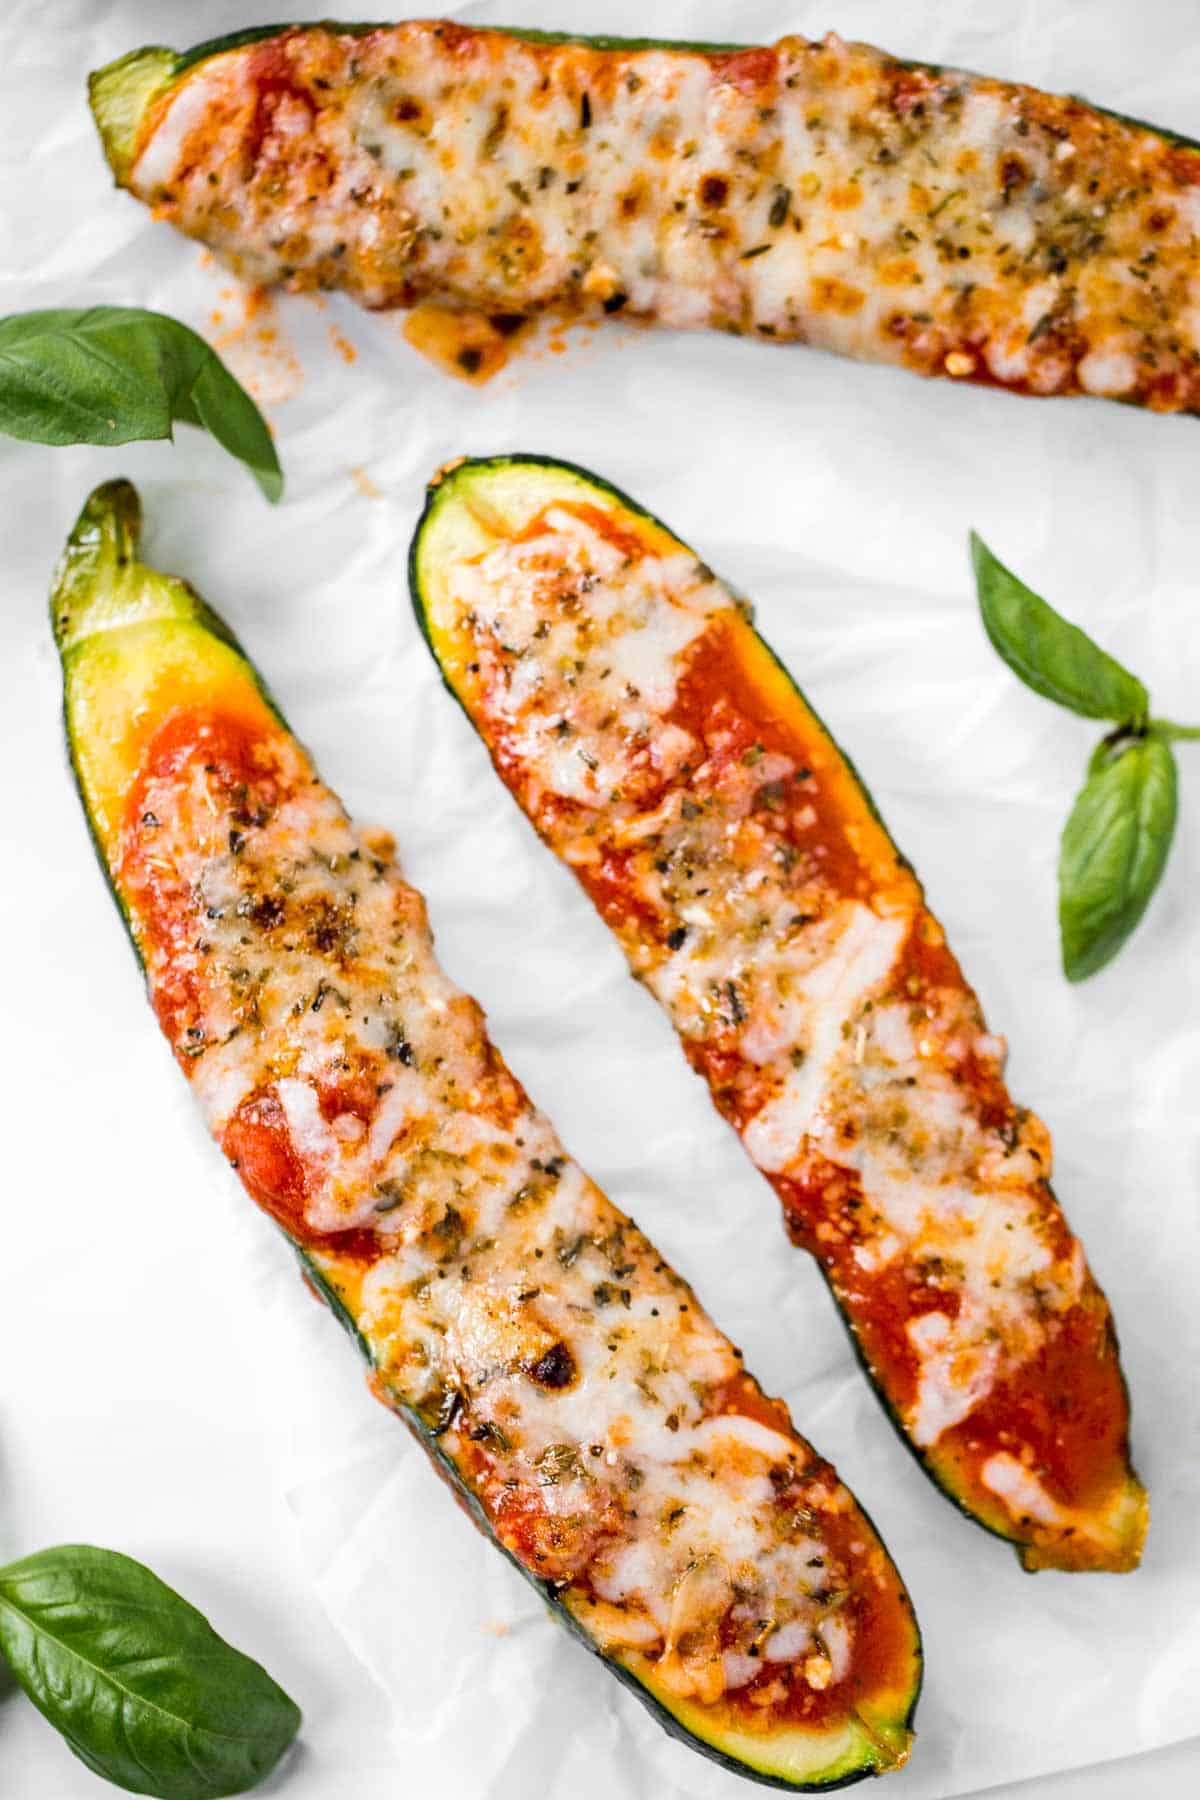
- Assemble. Top each zucchini with about 2 tablespoons marinara sauce, and sprinkle each with an equal amount of the cheese mixture.

- Broil. Broil on high until the cheese is golden brown and bubbly, about 2-3 minutes. Garnish with fresh herbs (optional) and serve immediately.
Storing Instructions
- How to store: Allow the baked zucchini to cool to room temperature, then store in an airtight container in the refrigerator. They will last for 3-4 days.
- How to reheat: Reheat cheesy zucchini in the microwave in 30 second intervals until warm. You can also reheat them in a 350F oven for 10 minutes or in the air fryer at 350F for 5 minutes. Note that the texture may be a little more mushier than when it was freshly baked, this is because zucchini tends to get mushy the longer it's cooked/reheated.
How to Serve
My favorite way to serve this cheesy baked zucchini is with mixed greens dressed simply with olive oil, salt and pepper. But of course, you can serve this on it's own as an appetizer, as a vegetable side dish with dinner, or even as the main course as a light summer meal.
Some of my favorite recipes to pair with vegetarian zucchini boats are:
- Greek Pasta Salad
- Creamy Parmesan Risotto
- Italian Chicken Skewers
- Stuffed Chicken Breasts
- Greek Salmon
- Sweet Kale Salad
More Zucchini Recipes
- Zucchini Fritters
- Zucchini Bites
- Shrimp Scampi with Zucchini Noodles
- Zucchini Bread
- Chocolate Chip Zucchini Muffins
- Chocolate Zucchini Cake
Tried this recipe?
I'd love to hear what you think! Leave a comment and rating below to share your feedback. Your reviews help others discover this recipe and help me keep creating more free recipes for you. Snap a photo and tag me on social media @aheadofthyme too.

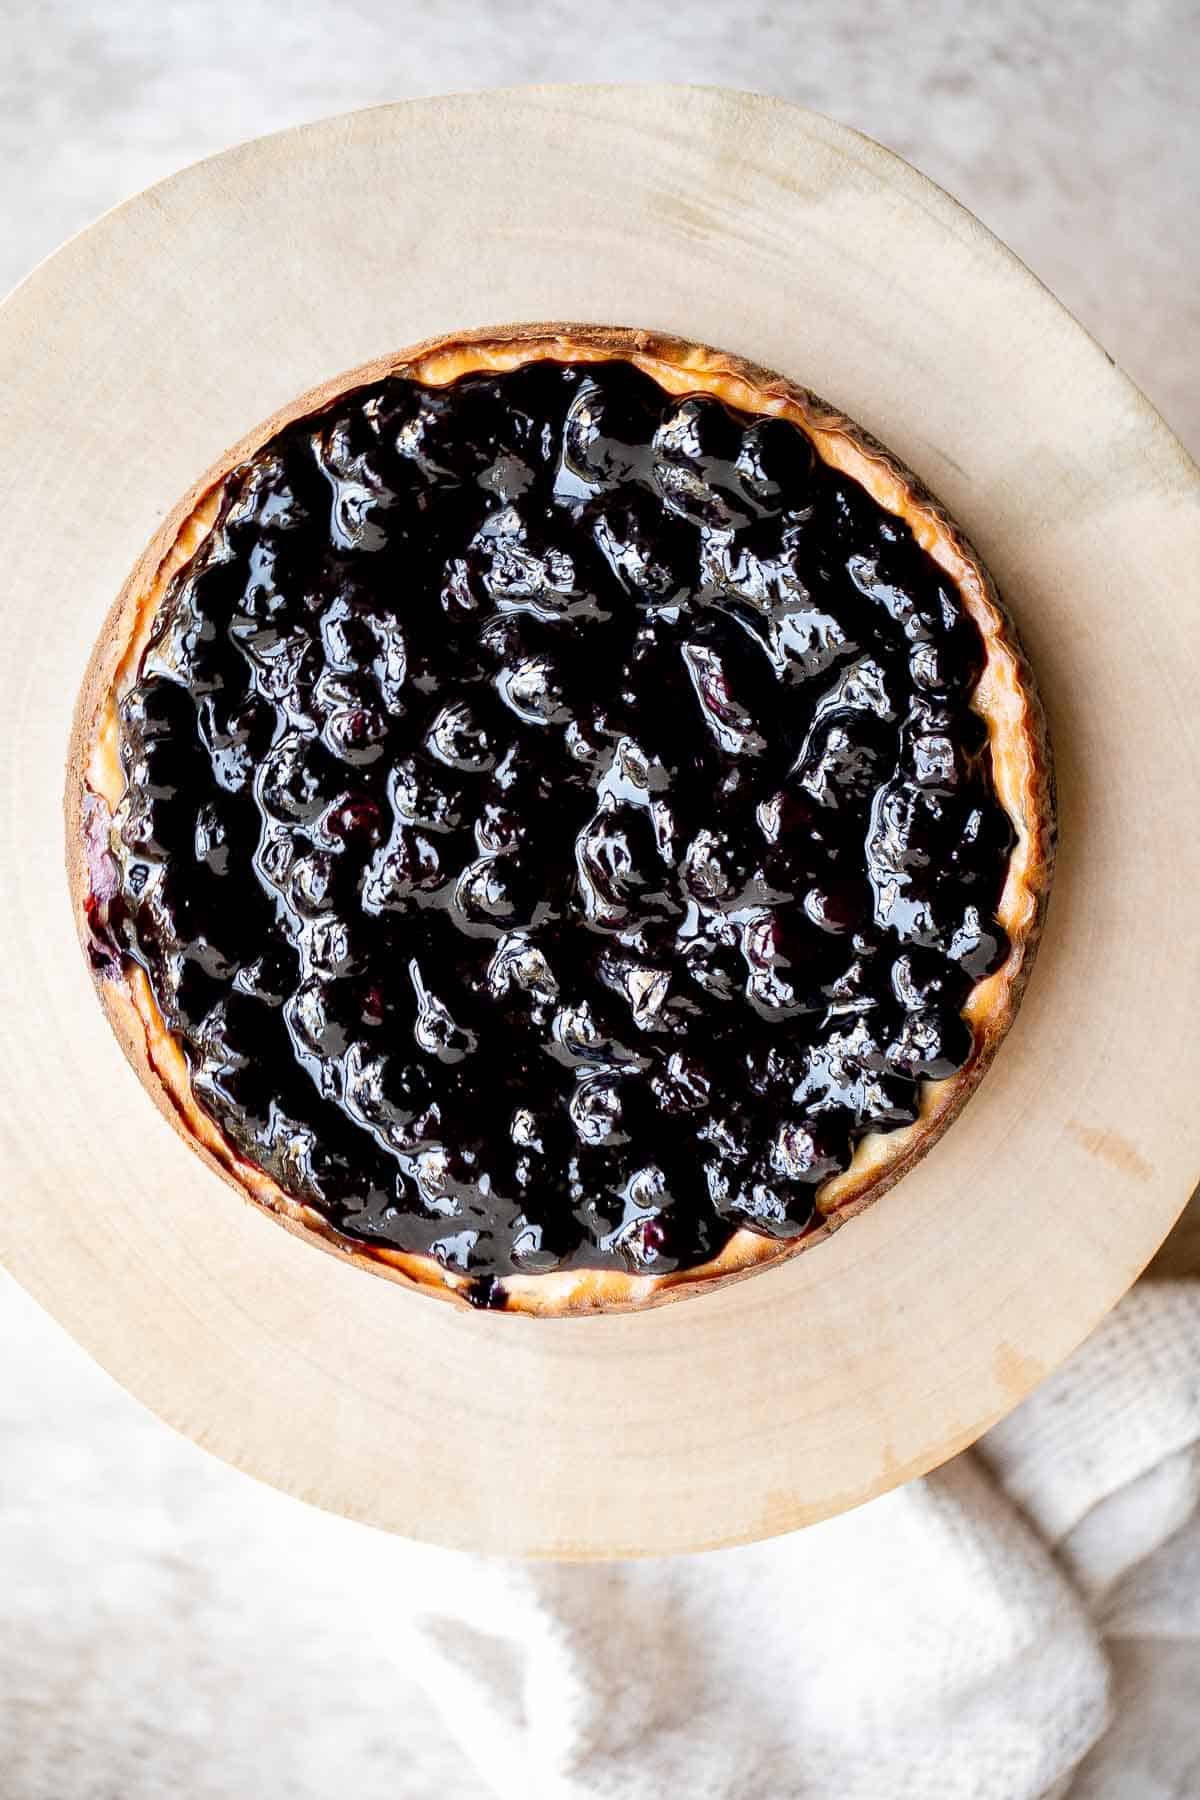
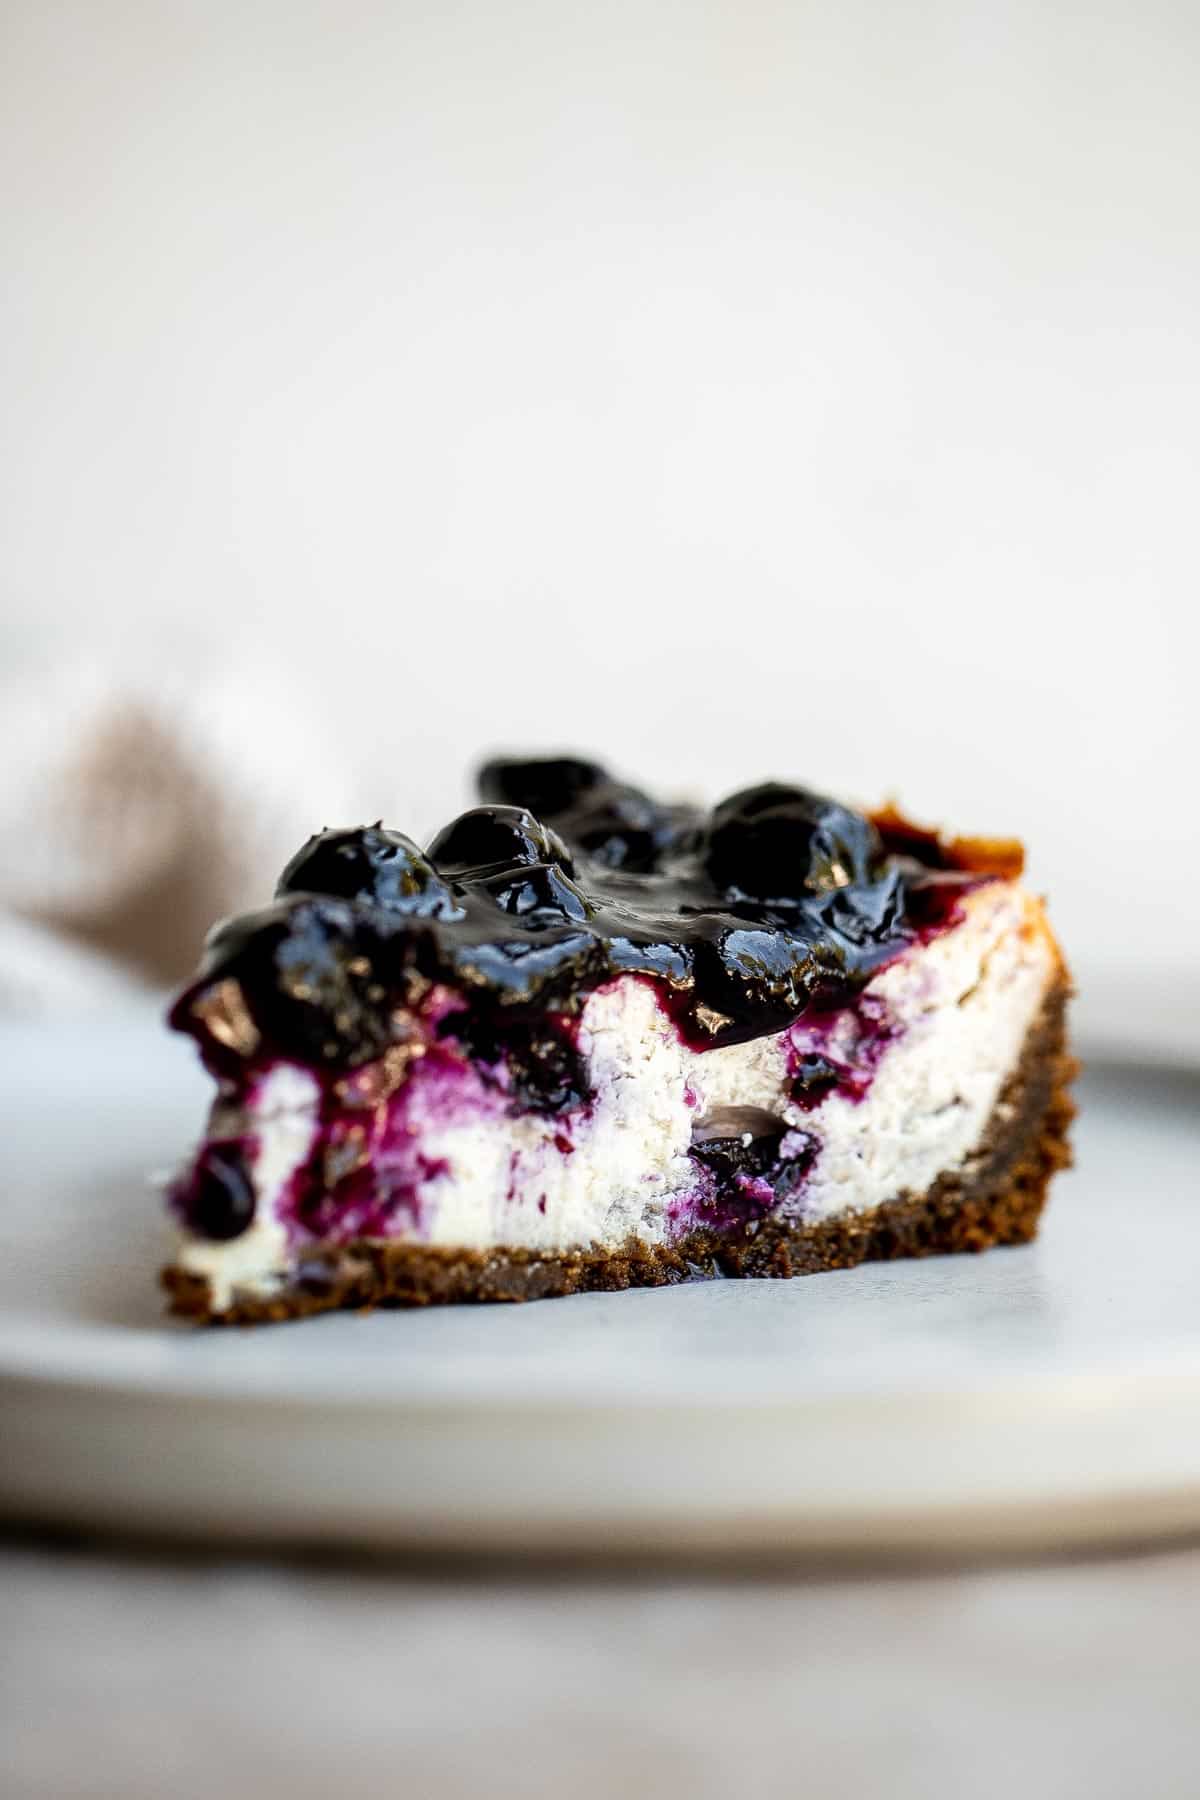
Blueberry Cheesecake
This Blueberry Cheesecake is rich, sweet, and smooth. The homemade crust is filled with a creamy cheesecake layer packed with blueberries and topped with sweet blueberry sauce. It looks like a masterpiece and tastes just as good.
Making cheesecake from scratch is a lot easier than you think. It does need to set for several hours so just plan ahead. Plus, it stores well and is freezer-friendly so you can make it ahead and serve for dessert on another day.
Why You'll Love This Blueberry Cheesecake
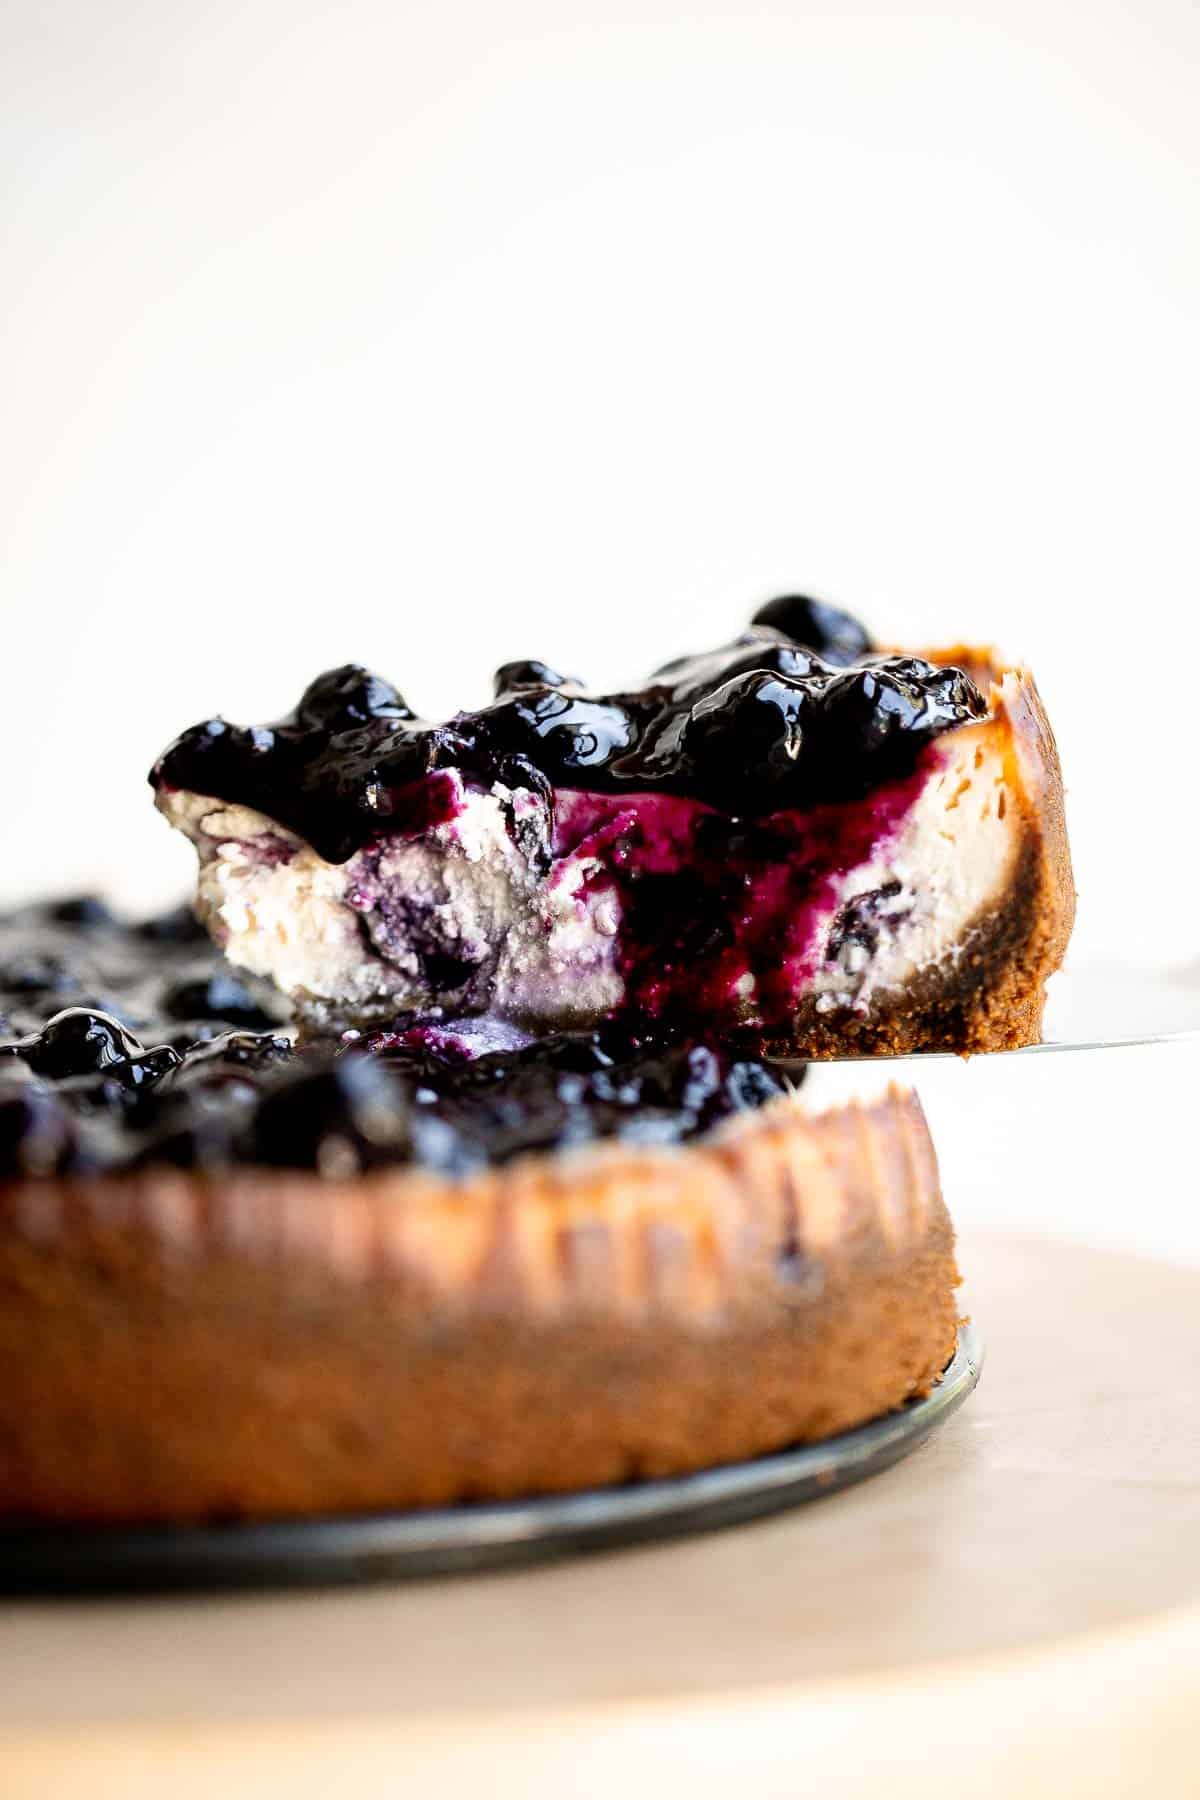
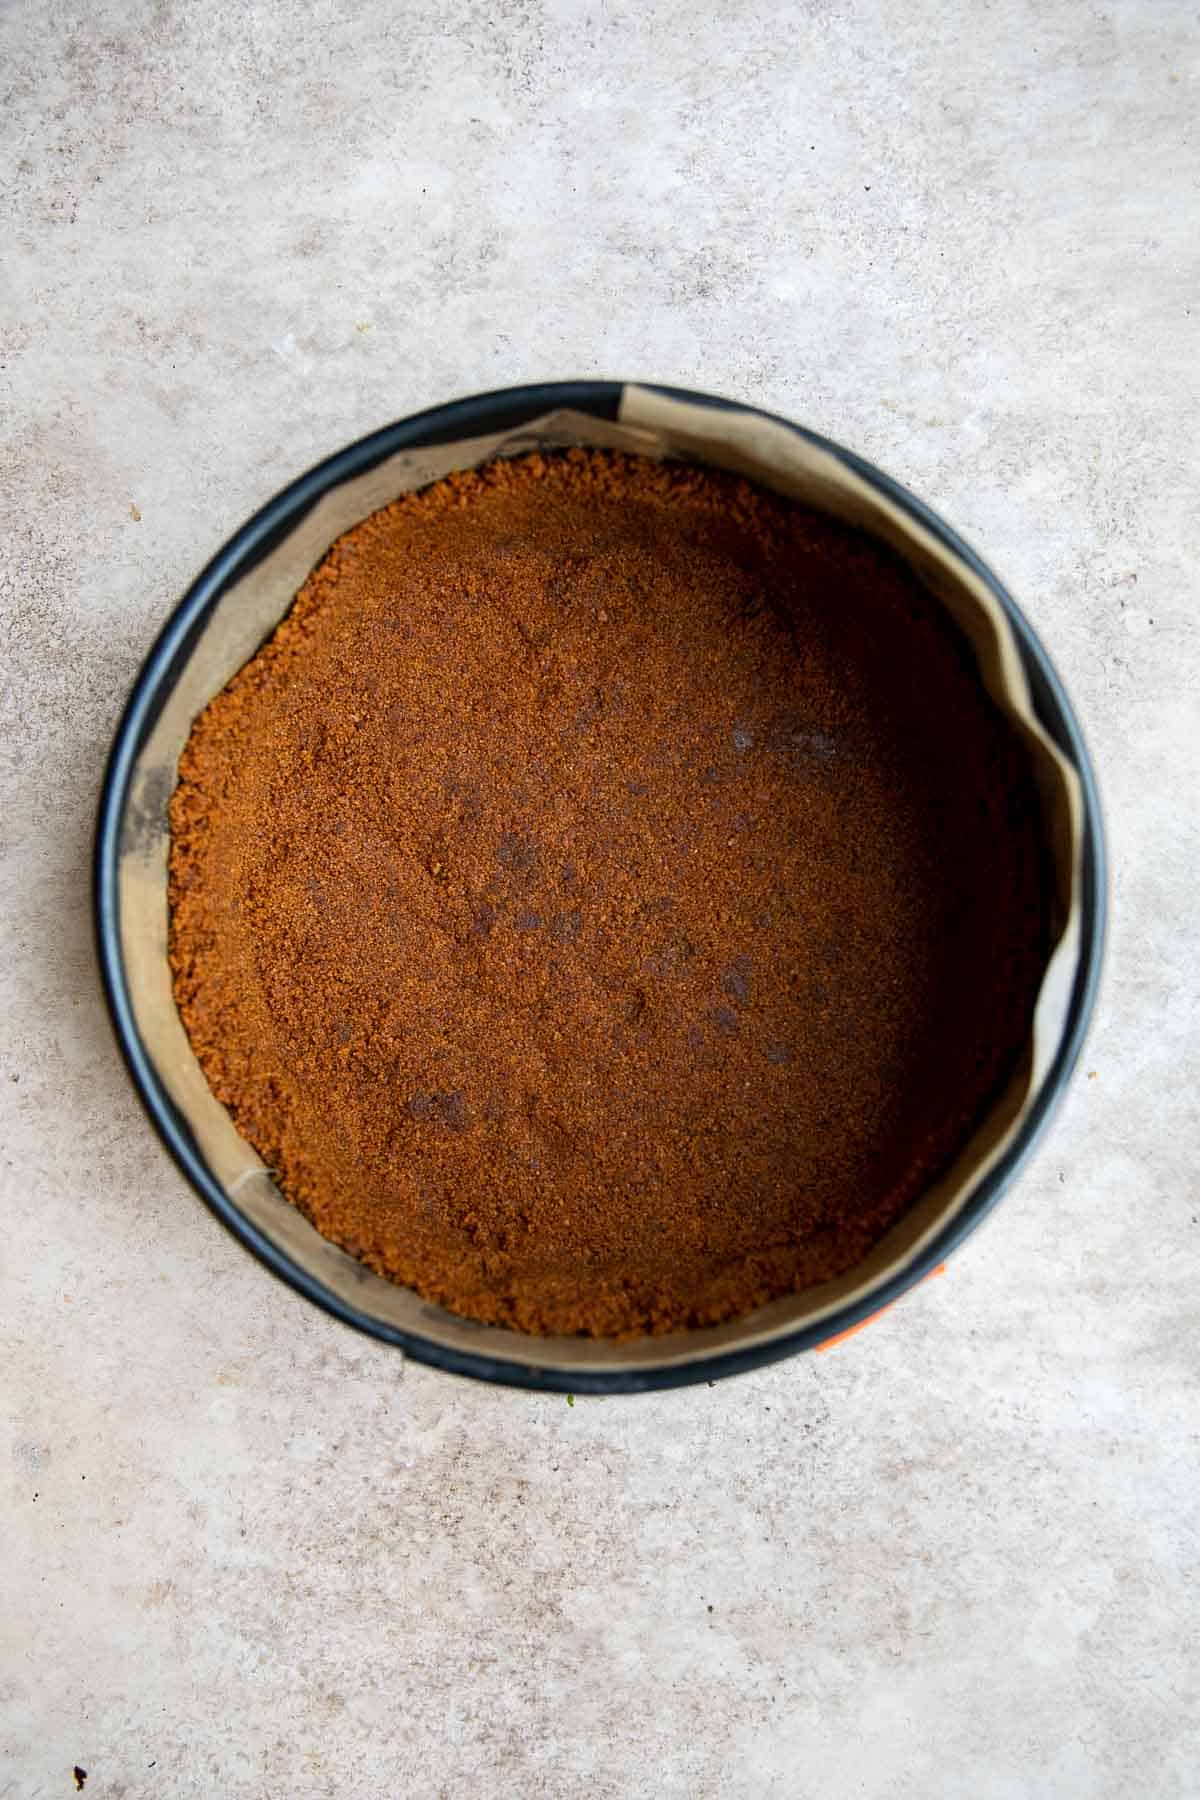
- The simple crust. If you have never made cheesecake crust before, then you won't know how easy it is to make. It is made with just 2 ingredients: Graham crackers (or Gingersnaps) and butter. It's delicious, crumbles perfectly, but still holds the cheesecake together well.
- The creamy blueberry filling. The cheesecake filling is made with classic cheesecake ingredients with the addition of a whopping cup of fresh blueberries. The light and creamy filling is balanced well with the tart blueberries mixed throughout. So good
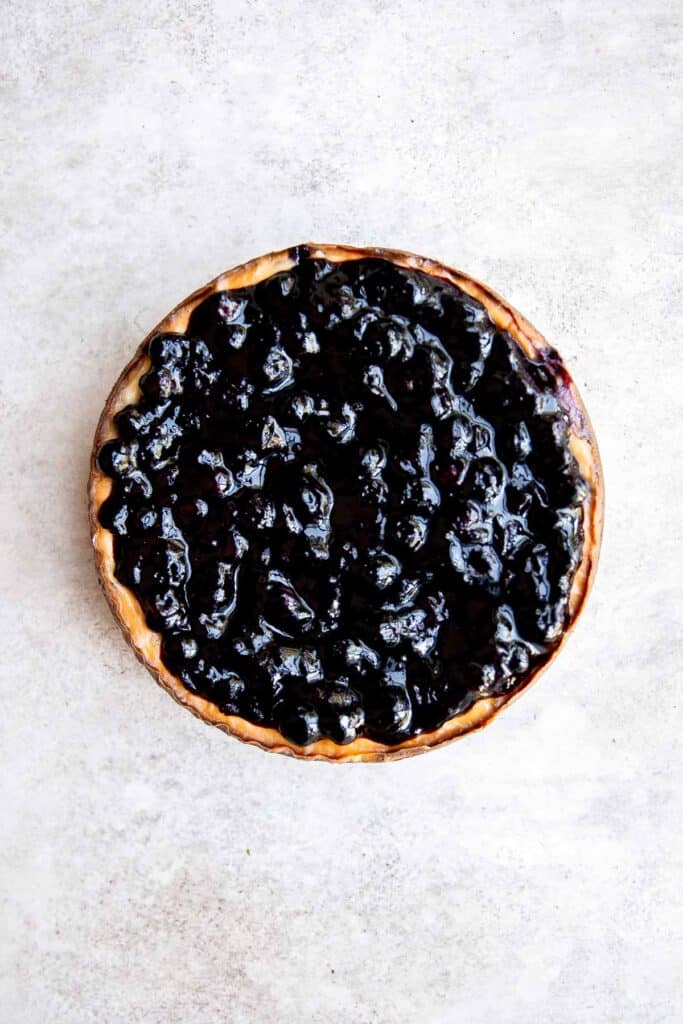
- The sweet blueberry compote topping. After we've baked the cheesecake and let it cool to room temperature, we add a sweet blueberry sauce (or blueberry compote) on top. It adds sweetness and flavor and turns the cheesecake into a showstopper that looks like it was ordered from a fancy restaurant.
Ingredient Notes
To make this delicious Blueberry Cheesecake, you will need the following ingredients (full measurements in recipe card below):
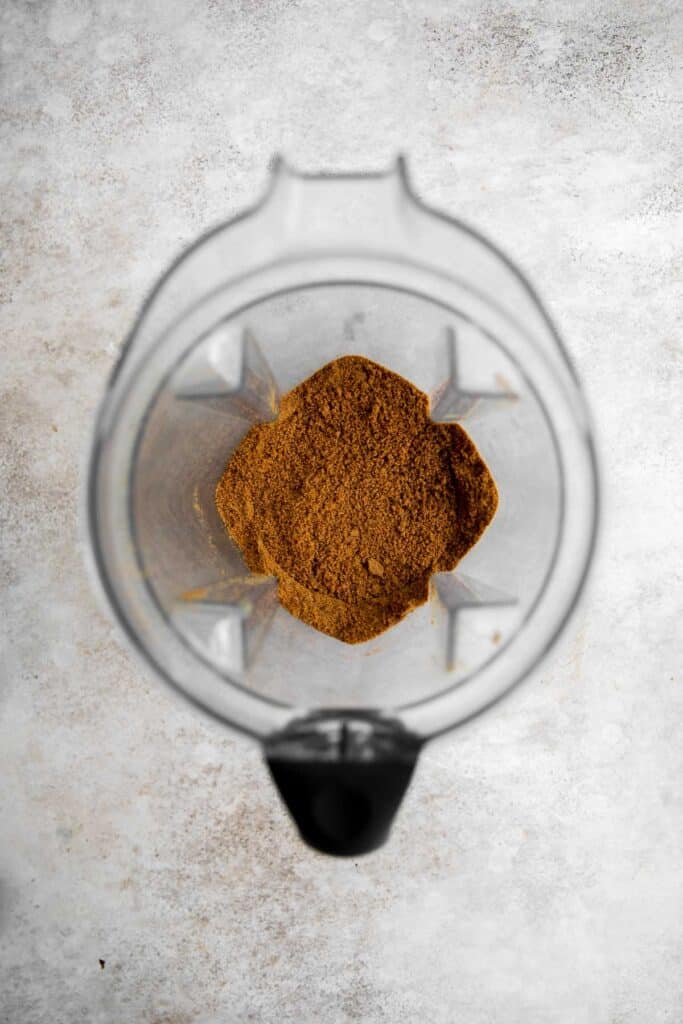
- cookie crumbs - for the crust, crush up Graham crackers, Gingersnaps, or digestive biscuits in the blender. You can also make this cheesecake gluten-free by substituting with gluten-free graham crackers or other gluten-free cookie.
- butter
- cream cheese - use full-fat cream cheese for this recipe. The fat plays an important role in the texture and consistency of your cheesecake.
- yogurt - we always have a batch of our Homemade Yogurt that we used in this recipe. You can also substitute with sour cream.
- sugar - feel free to use granulated sugar or confectioners' sugar. The type of sugar will slightly affect the texture of the cheesecake. If you use confectioners' sugar, the cheesecake will be a bit smoother.
- vanilla extract - adds a hint of flavor.
- lemon juice - adds a little brightness to this blueberry cheesecake.
- all-purpose flour
- eggs
- blueberries
- blueberry sauce - we used our homemade Blueberry Sauce (which is so easy to make) or store-bought sauce or jam - whatever is more convenient.
Equipment
You will also need:
- measuring cups and spoons
- mixing bowls
- hand mixer or stand mixer
- round 8-inch springform pan.

How to Make the Best Blueberry Cheesecake
First, make the crust.
In a medium mixing bowl, stir together the cookie crumbs and melted butter until well mixed. If you use whole graham crackers, add the crackers into a food processor or blender and process until fine crumbs form. Then, add in the melted butter and stir to combine.

Line an 8-inch springform pan with parchment paper. Press the crumb mixture firmly into the bottom base and the wall of the lined springform pan. Freeze for at least 15 minutes, allowing the crust to set before filling.
Next, make the filling.
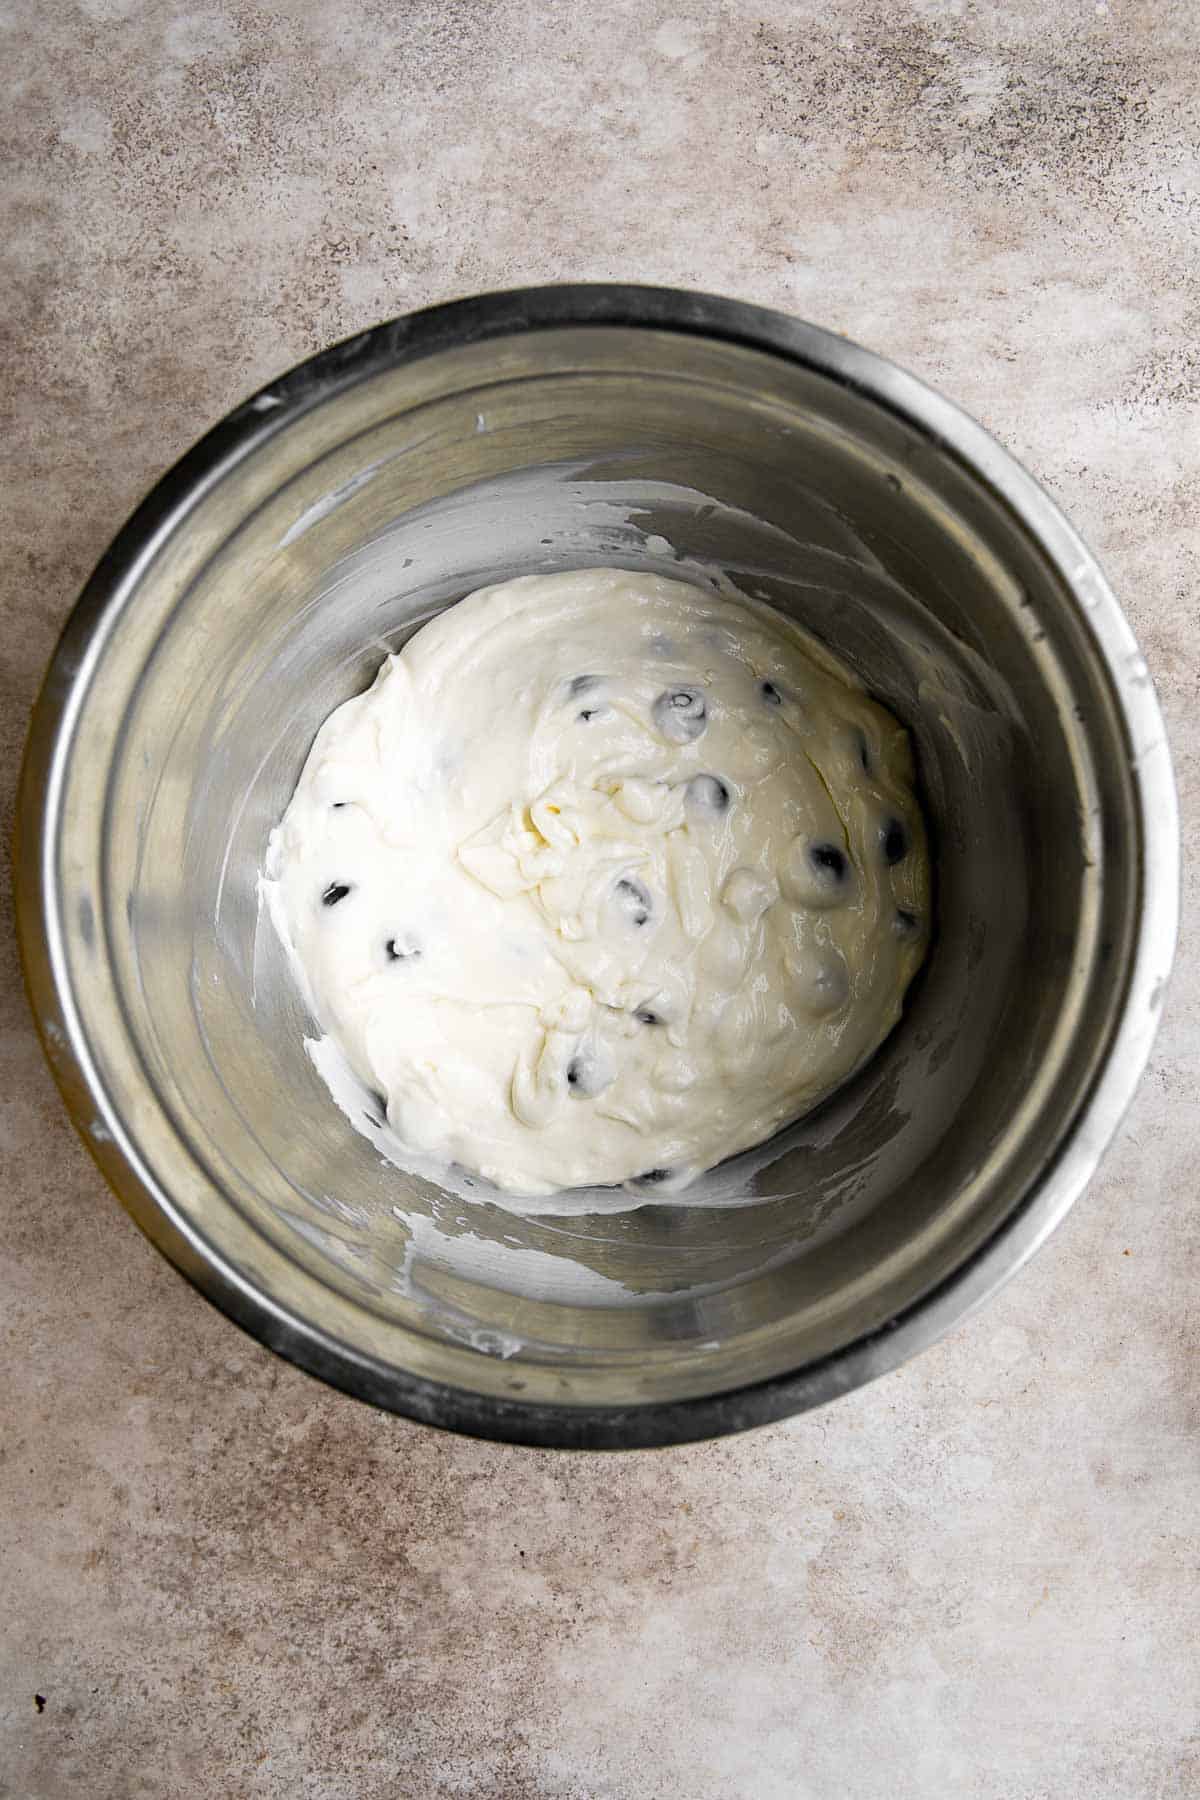
In a large mixing bowl, mix the softened cream cheese, yogurt, sugar, vanilla extract, lemon juice, and flour using a hand mixer until smooth, about 2 minutes. Scrape down the sides of the bowl to help mix the batter evenly.
Add eggs one at a time and beat until just blended. Do not overmix to avoid cracking during baking. Fold in the blueberries until evenly distributed.
How to Assemble and Bake Cheesecake
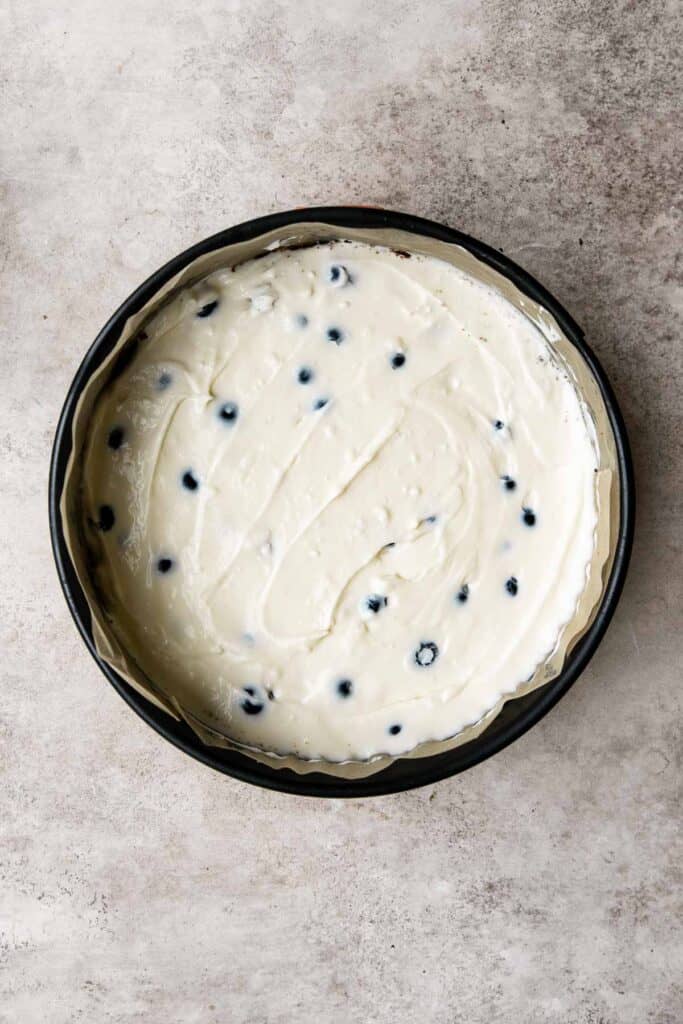
- Add filling. Carefully pour the cheesecake filling into the chilled crust and use a spatula to smooth out the surface. Gently tap the pan on the counter to remove air bubbles from the fillings.
- Bake. Transfer the pan to the middle rack in the oven and bake in a 325F preheated oven for 1 hour.
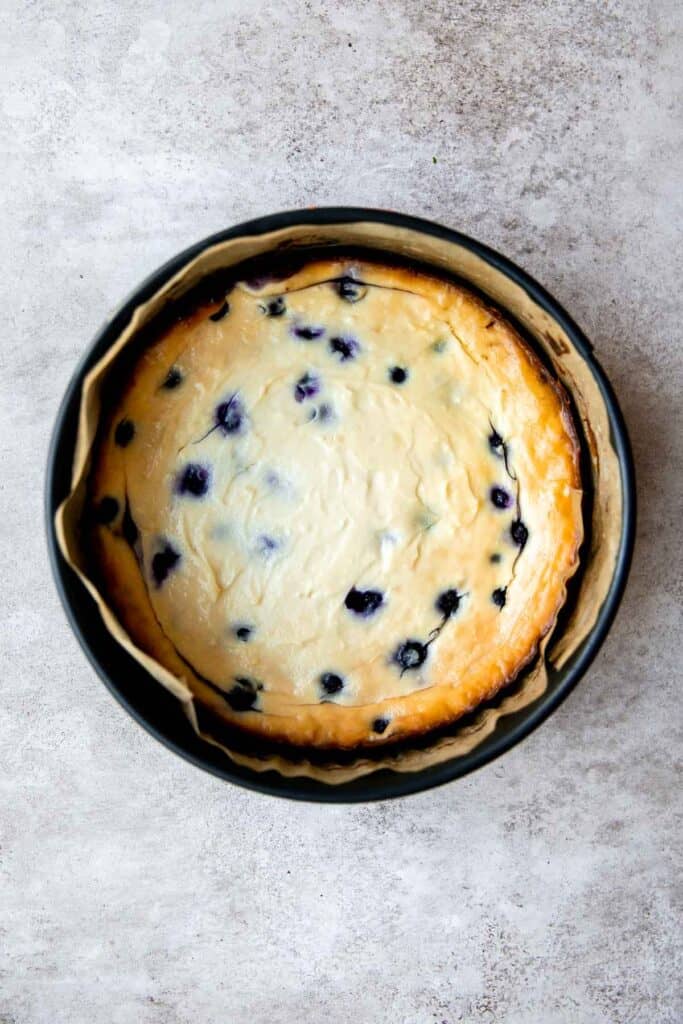
- Rest. After an hour, turn off the oven and let the cheesecake sit inside for another 30 minutes. This prevents the cheesecake from cracking from a sudden drop of temperature. (However, don't stress if the cheesecake cracks as we will be covering the top with blueberry sauce). Remove the cheesecake from the oven and let it cool at room temperature for 30 minutes.
- Add blueberry sauce and chill. Top the cheesecake with blueberry sauce (at room temperature) and refrigerate for 4 hours or overnight.
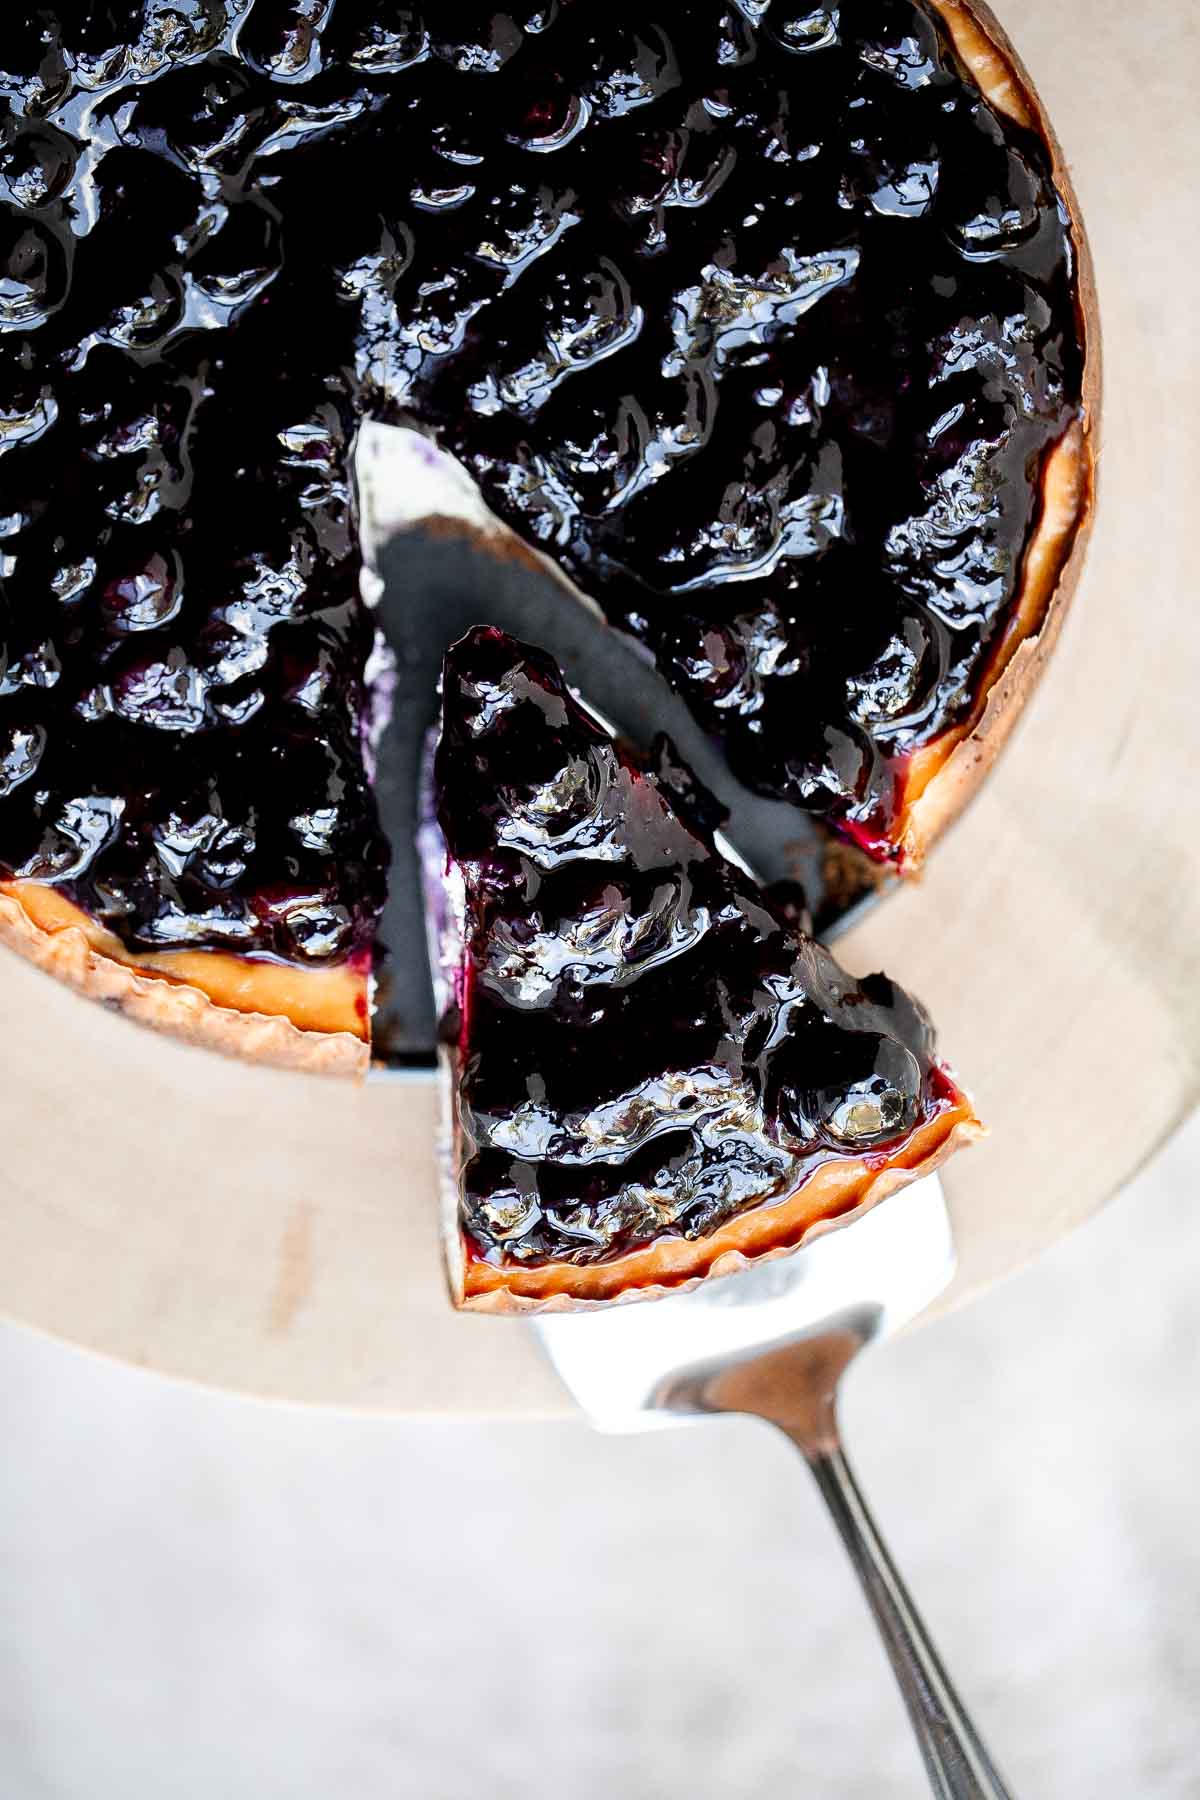
How to Serve
You can serve Blueberry Cheesecake any time of the year, but it especially hits the spot when made with fresh blueberries in season. You can serve it as is or with a scoop of Vanilla Ice Cream and an Iced Latte.
If preparing a dessert spread, some other summer desserts that you could serve with this are:
- Fresh Strawberry Pie
- Cherry Crumb Bars
- Lemon Sweet Rolls
- Mango Sago
- Strawberry Frozen Yogurt
- Banana Pudding
Storing Instructions
- How to store: Wrap the blueberry cheesecake tightly with plastic cling wrap and store in the refrigerator. You an also slice it up and store in an airtight container. Cheesecake will keep for up to 4 days in the fridge.
- How to freeze: Once set, wrap the entire strawberry cheesecake tightly in a few layers of aluminum foil or plastic cling wrap and transfer to a freezer bag and seal the bag. Store it upright in the freezer for up to 3 months.
More Cheesecake Recipes
- No Bake Strawberry Cheesecake
- Classic New York Cheesecake
- No Crust Burnt Basque Cheesecake
- No Bake Blackberry Cheesecake
- Creamy Mango Cheesecake
- Caramel Apple Fall Cheesecake
Tried this recipe?
I'd love to hear what you think! Leave a comment and rating below to share your feedback. Your reviews help others discover this recipe and help me keep creating more free recipes for you. Snap a photo and tag me on social media @aheadofthyme too.

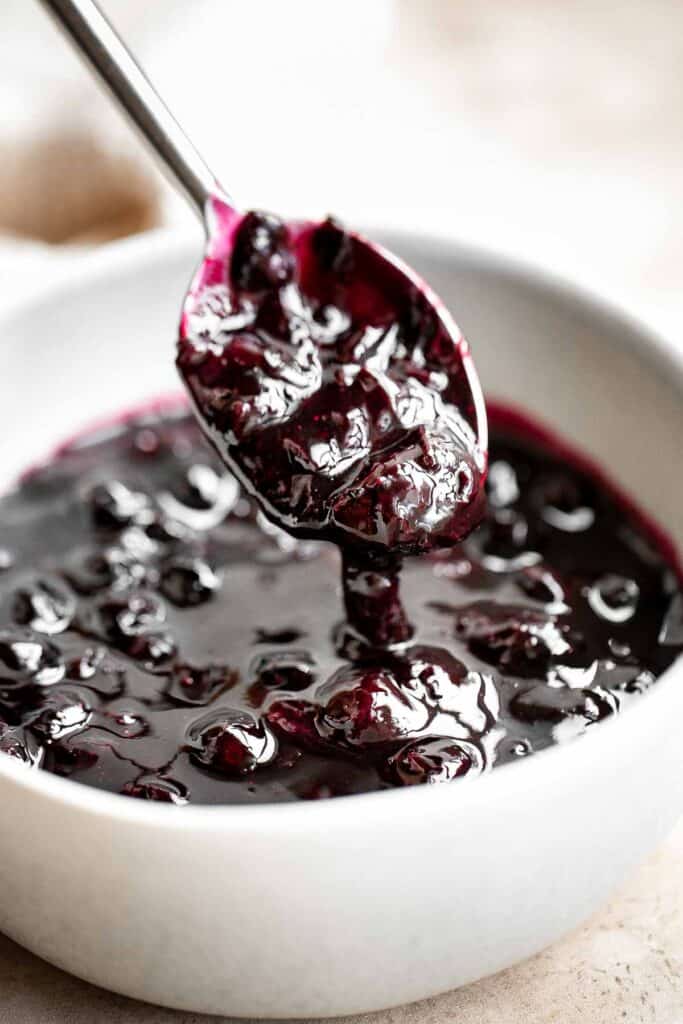
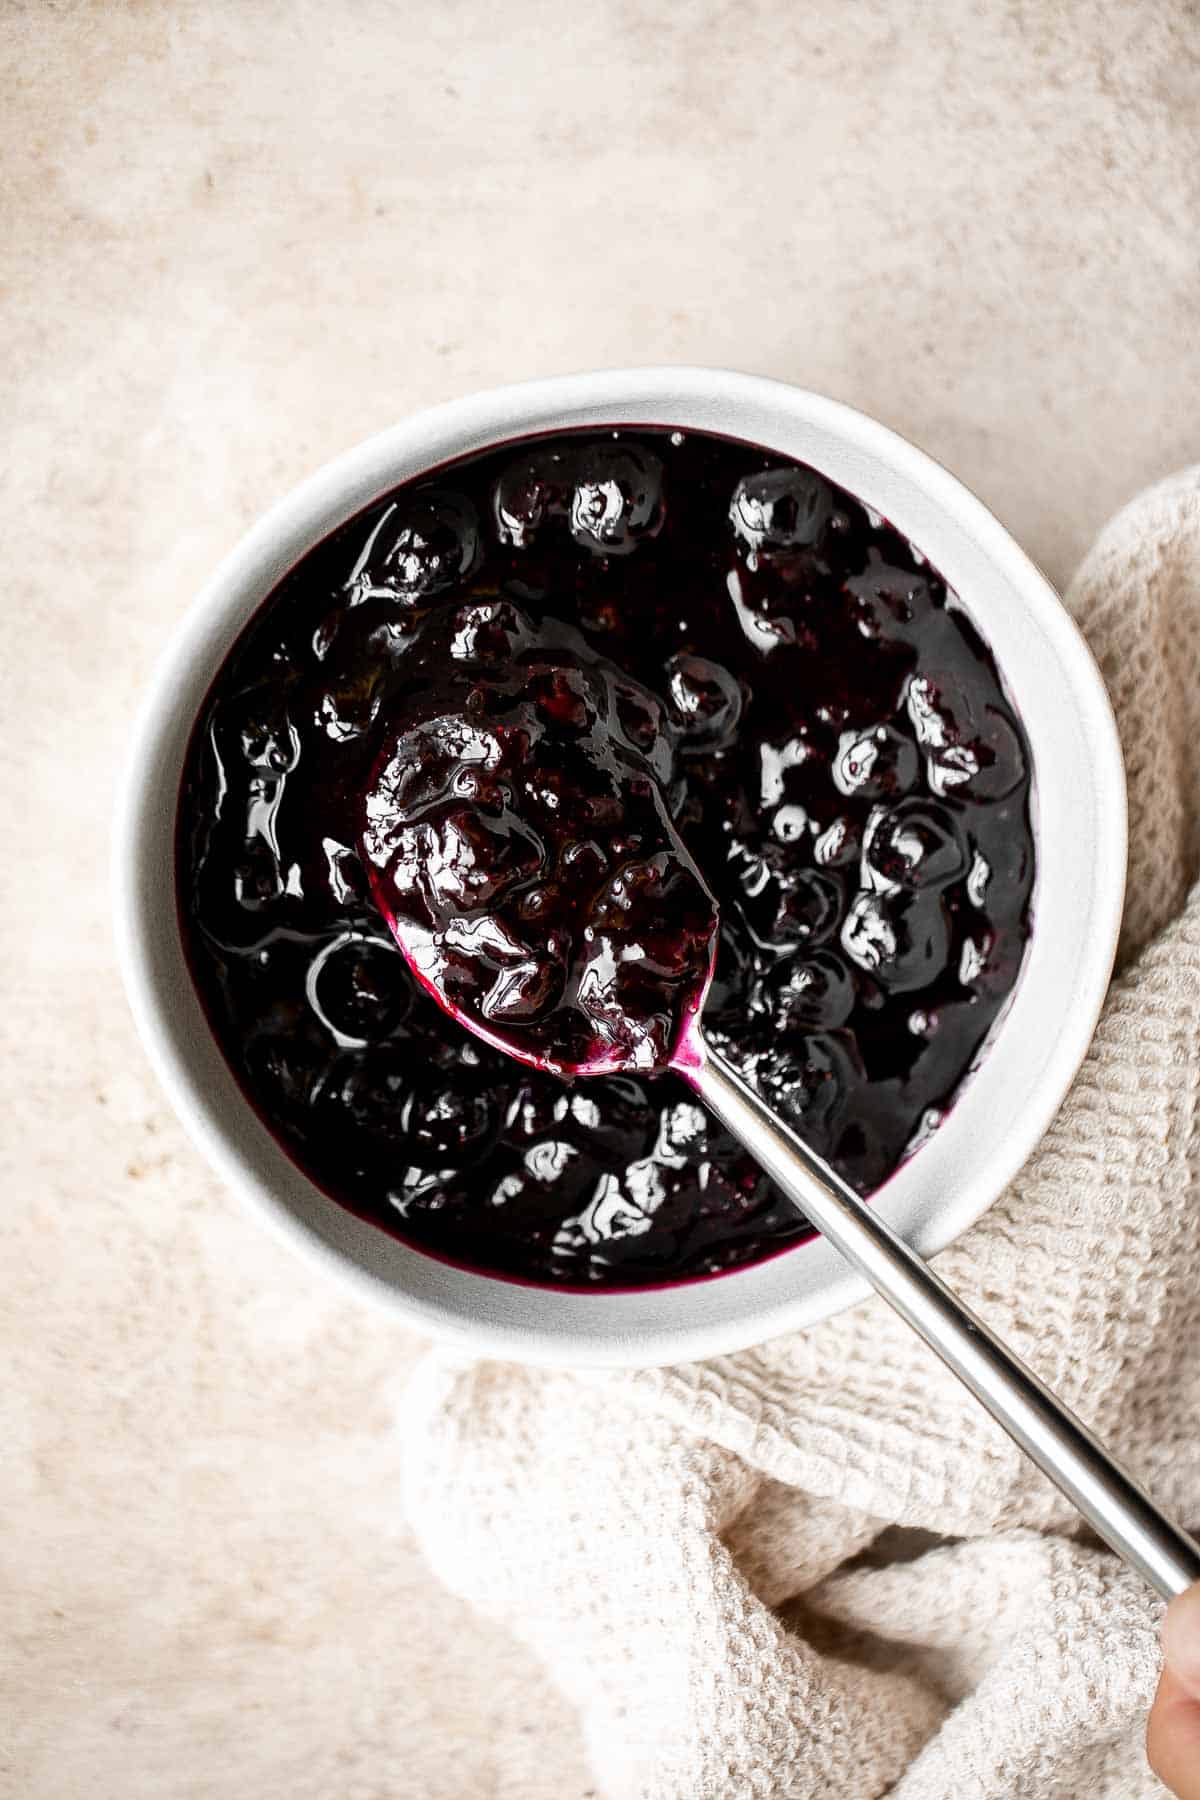
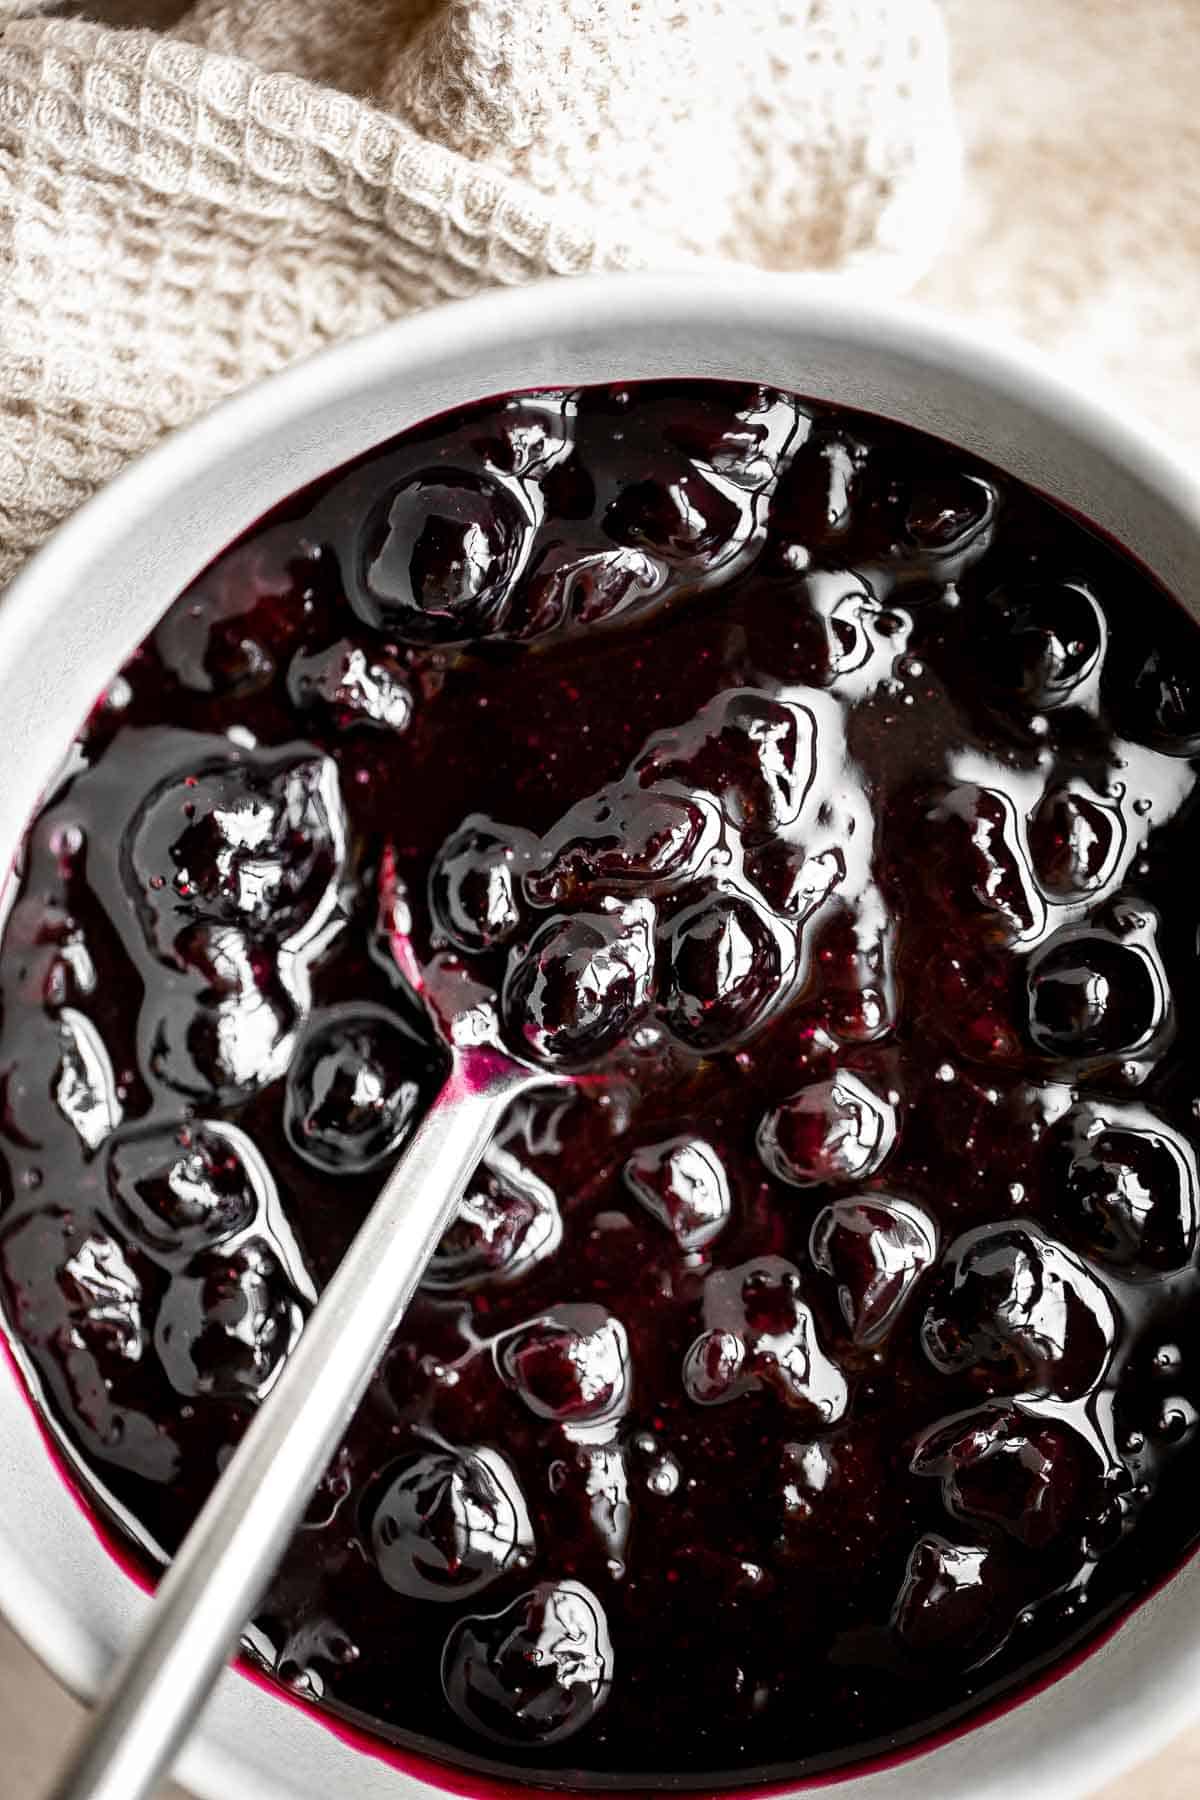
Blueberry Sauce
This Blueberry Sauce is easy to make with just a handful of simple ingredients in 15 minutes. Blueberry sauce is the perfect thick and fruity syrup to add to breakfast foods like pancakes and waffles or desserts like cheesecakes and donuts.
It's a go-to recipe when blueberries are abundant fresh in season, but you can make this any time of the year with frozen blueberries too!
Why You'll Love This Blueberry Sauce
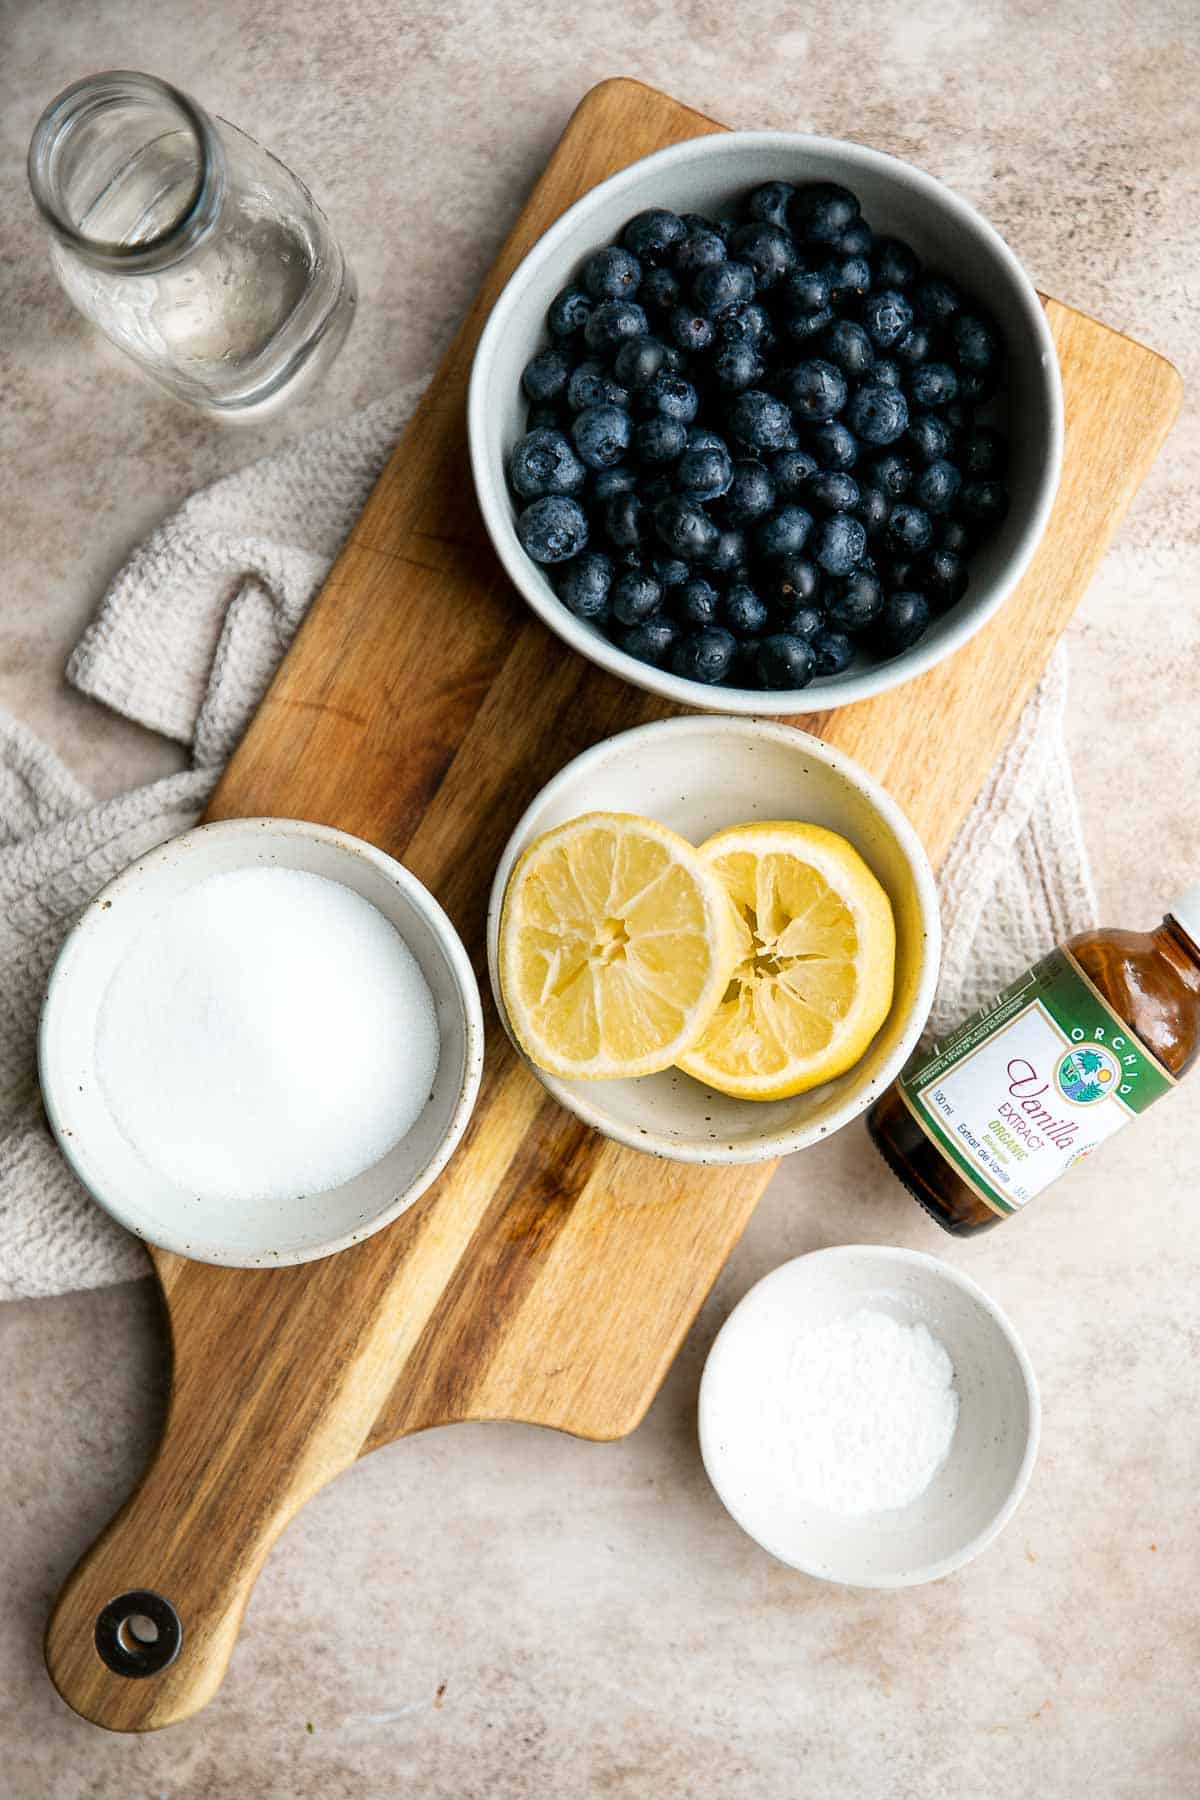
- Blueberry sauce is simple and easy. This blueberry sauce recipe requires just six ingredients: blueberries, water, sugar, lemon juice, cornstarch, and vanilla. It's so easy to make that anyone can do it.
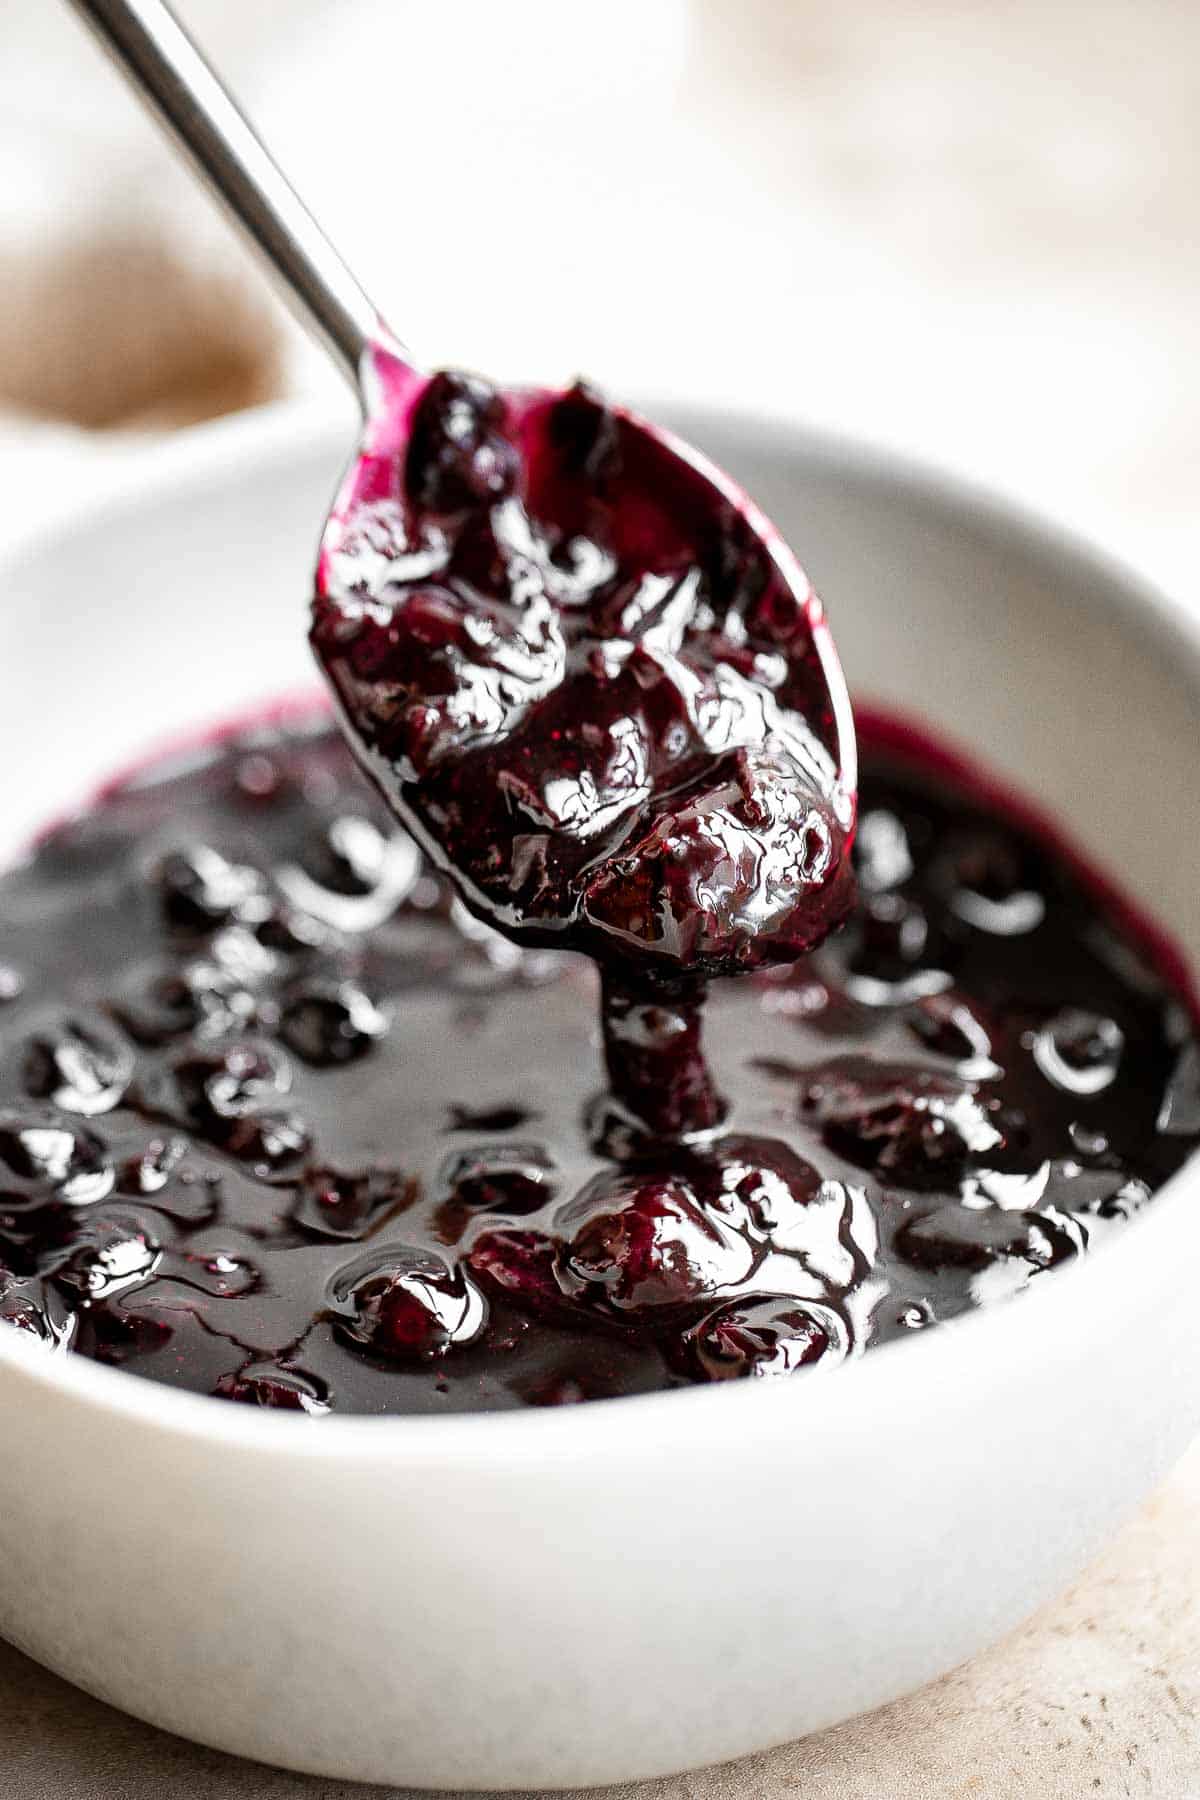
- It's incredibly fast. This blueberry sauce is ready in less than 15 minutes. This quick topping can take your dessert and breakfast game to the next level in just a few short minutes!
- It's thick, sweet, and delicious. Cornstarch is an important ingredient because it thickens the sauce. Plus, the consistency of this blueberry sauce can be adjusted to your tastes, which makes this sauce great for anything. Make a thin syrup to drizzle over French Toast or a thick sauce to top on a Blueberry Cheesecake! Your options are limitless.
Ingredient Notes
To make this sweet and easy Blueberry Sauce, you will need the following ingredients (full measurements in recipe card below):
- blueberries - you can make this easy blueberry sauce with fresh or frozen blueberries.
- water
- sugar - feel free to adjust the level of sweetness that you prefer by adding in more or less sugar.
- lemon juice - lemon pairs so well with blueberries, so we added it in. You can substitute this with orange juice for another citrus flavor.
- vanilla extract - adds a boost of flavor, but you can leave it out if you want.
- cornstarch - helps to thicken the sauce.
You will also need measuring cups and spoons, a medium saucepan, and a small mixing bowl.
How to Make the Best Blueberry Sauce
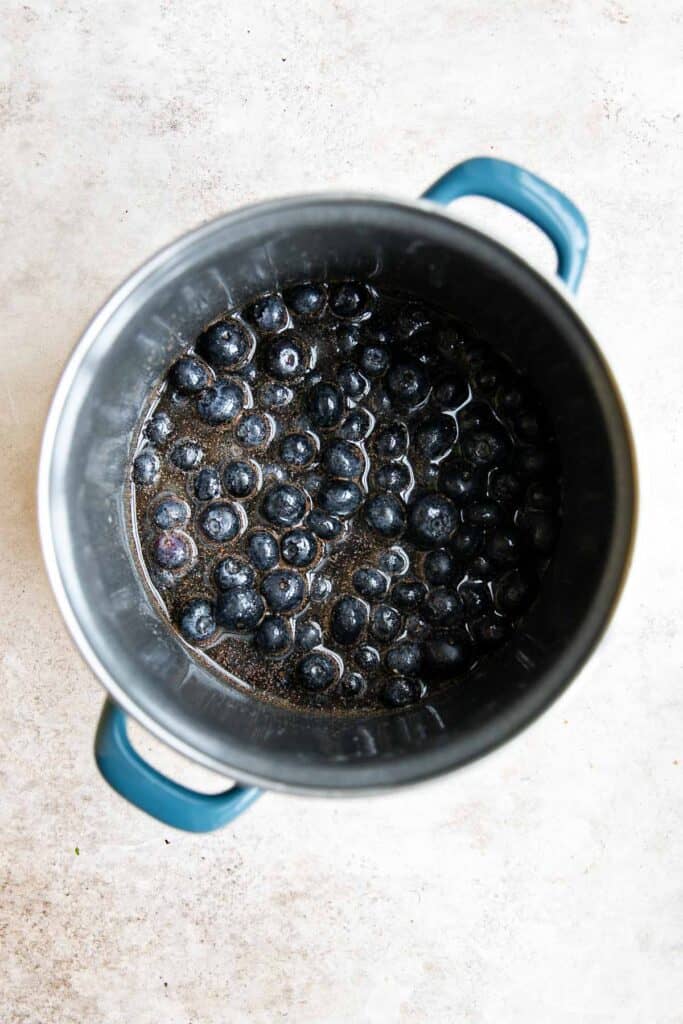
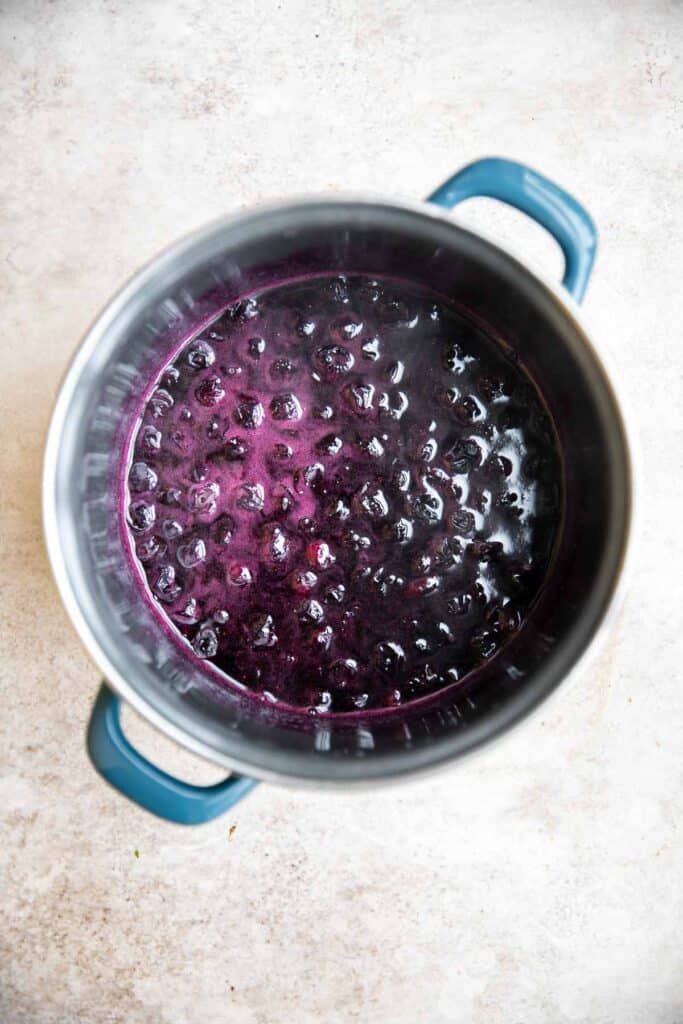
- Cook the ingredients. In a medium saucepan, Add 1.5 cups blueberries, water, sugar, lemon juice, and vanilla extract. Cook on medium-high heat until the mixture comes to a boil. Reduce the heat to low and simmer for 5-7 minutes until the blueberries start to break apart, stirring constantly.
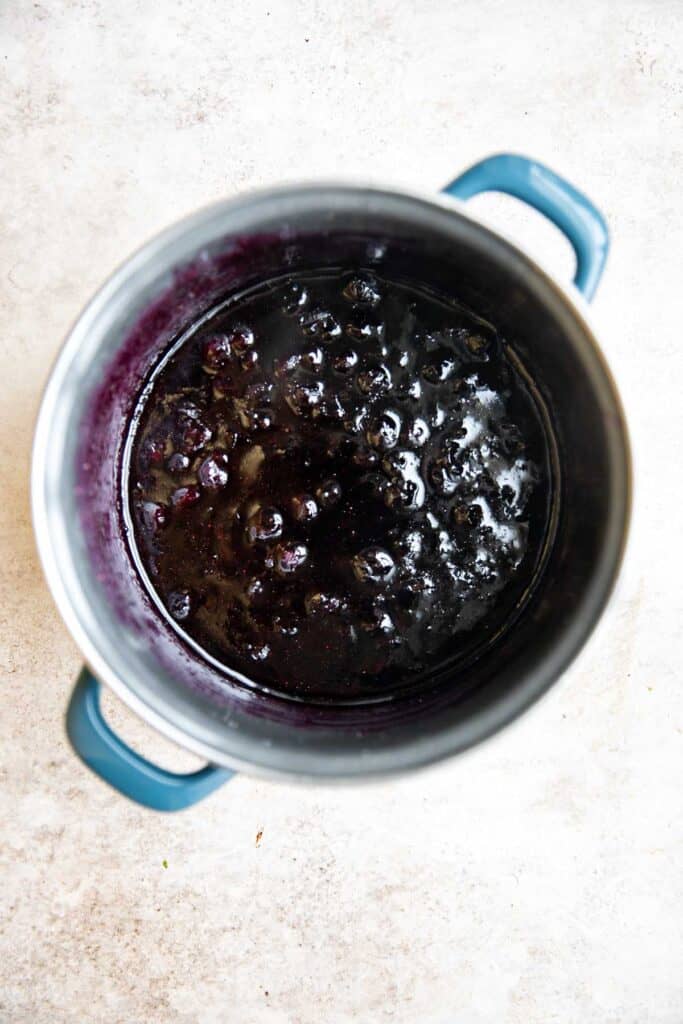
- Add cornstarch. In a small mixing bowl, whisk together cornstarch and water until smooth. Add the cornstarch slurry to the saucepan and stir constantly until thickened to a desired consistency, about 2-3 minutes. Note that the sauce will thicken more as it cools.
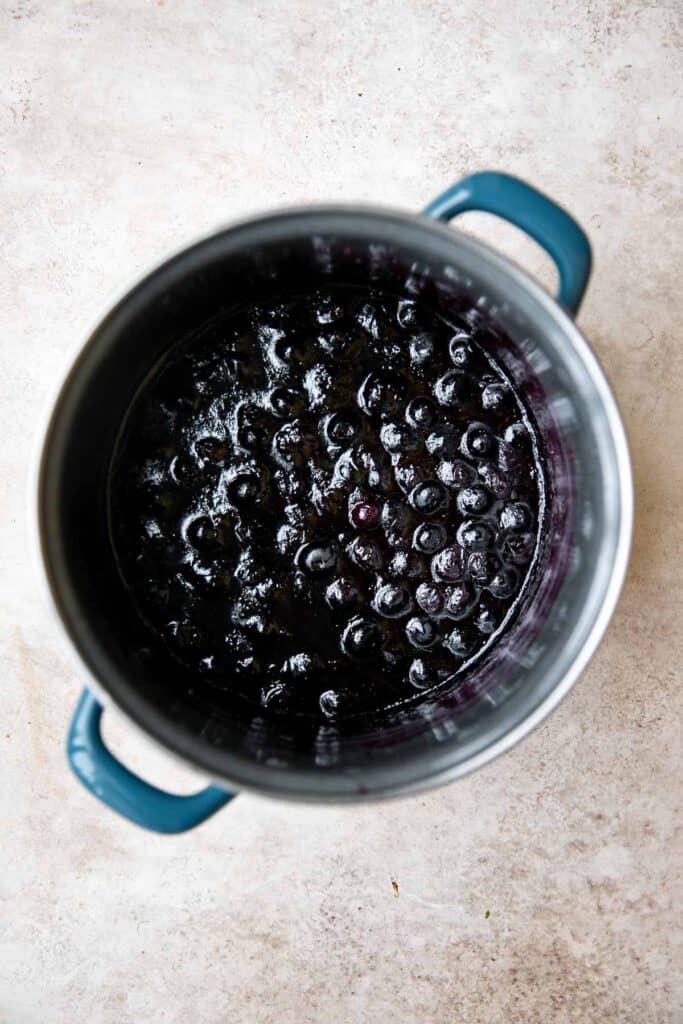
- Stir in more blueberries. Stir in the remaining 1 cup blueberries. Let the sauce cool to room temperature. Then, transfer the blueberry sauce to an airtight container and refrigerate overnight.
How to Serve
There are millions of ways you can use blueberry sauce. Here are some of my favorite ways to serve this sweet sauce:
- Stirred into Yogurt or Oatmeal.
- On the side of a Charcuterie Board.
- Over French Toast, Waffles, Pancakes, Scones, toast, or custard.
- Mixed into or over cheesecake such as in our Blueberry Cheesecake.
Storing and Reheating
- How to store: Leftover blueberry sauce will last for 5 days in the fridge when stored inside an airtight container.
- How to reheat:
- Reheat in the microwave: In a microwave-safe dish, heat the blueberry sauce in 5-15 second intervals until hot, stirring in between each interval.
- Reheat on the stovetop: Heat blueberry sauce over medium heat, stirring frequently until warm. Add a splash of water if the sauce becomes too thick.
More Recipes
- 15 Best Blueberry Recipes
- Blueberry Cake
- Blueberry Crisp
- Classic Blueberry Pie
- Blueberry Biscuits
- Blueberry Oat Squares
Tried this recipe?
I'd love to hear what you think! Leave a comment and rating below to share your feedback. Your reviews help others discover this recipe and help me keep creating more free recipes for you. Snap a photo and tag me on social media @aheadofthyme too.

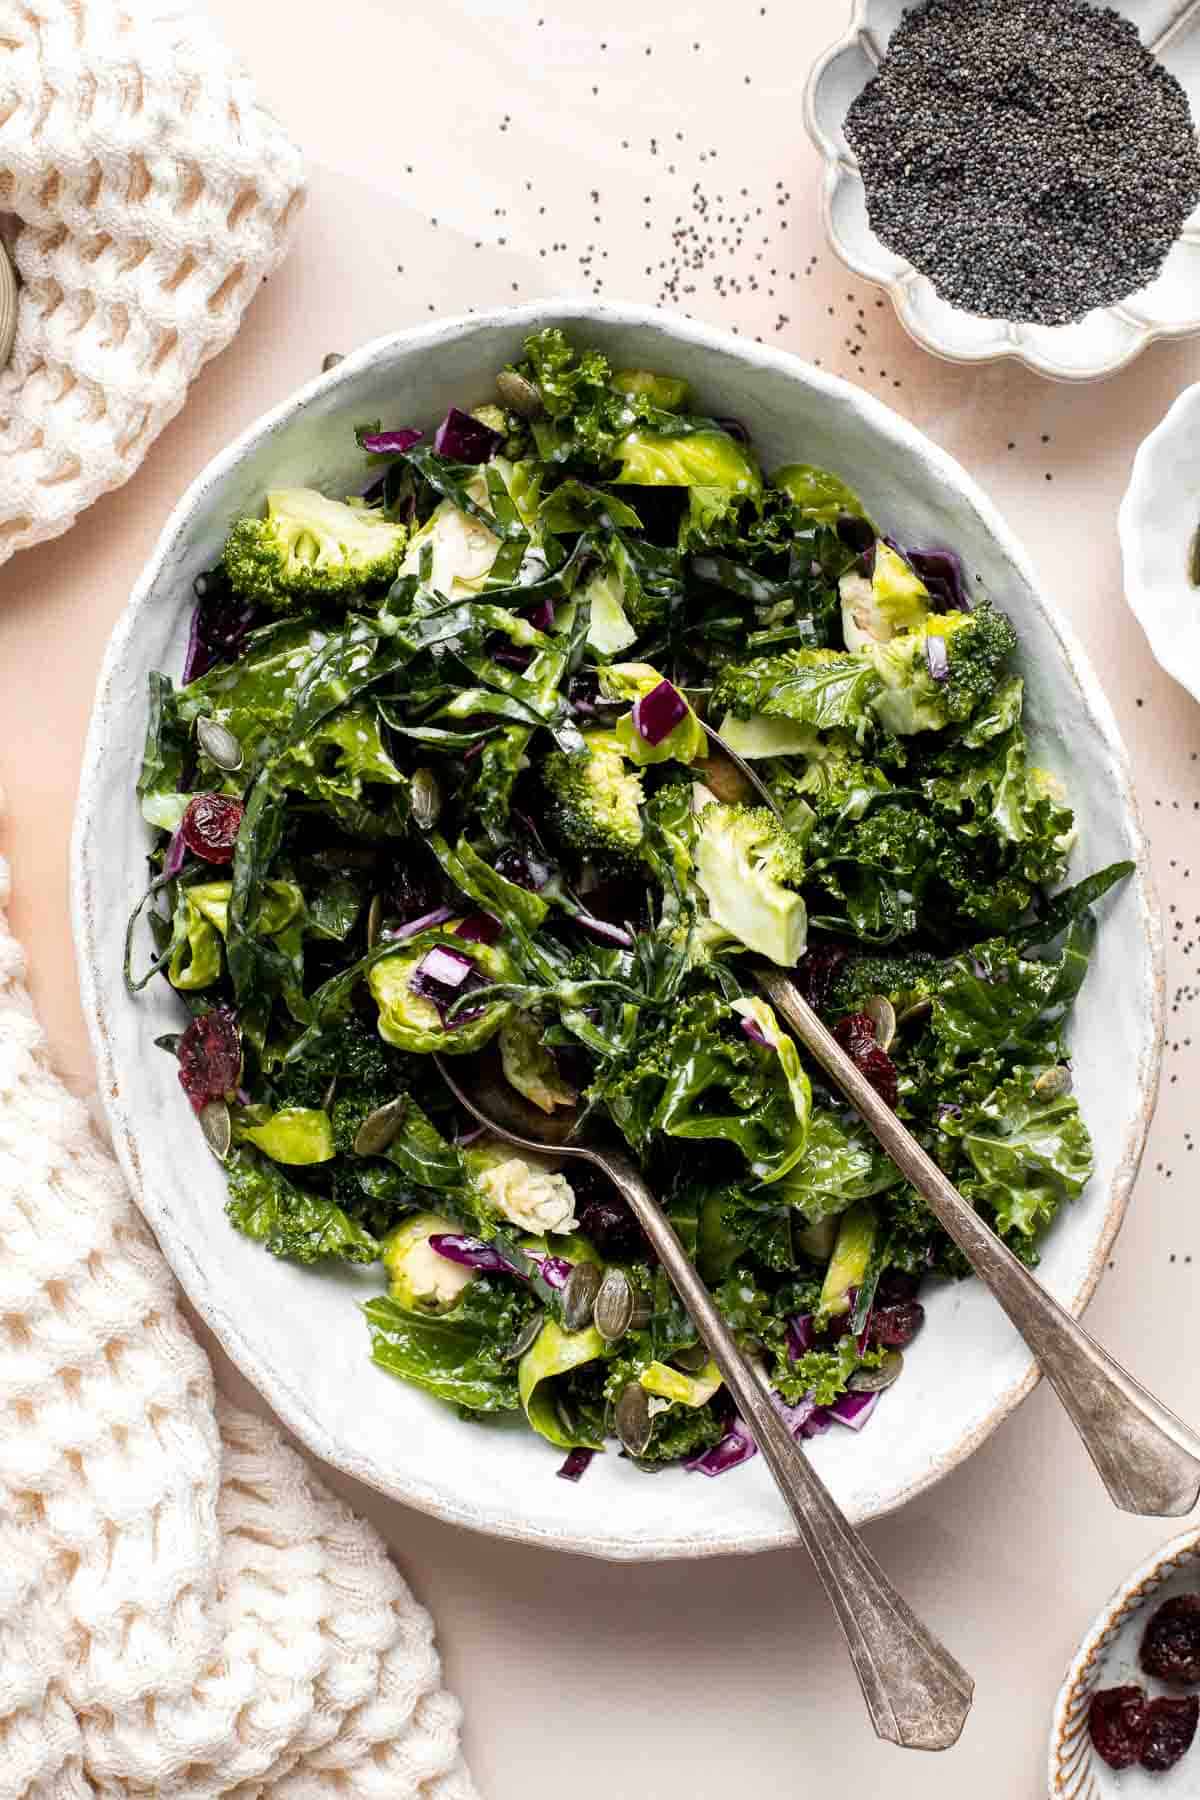
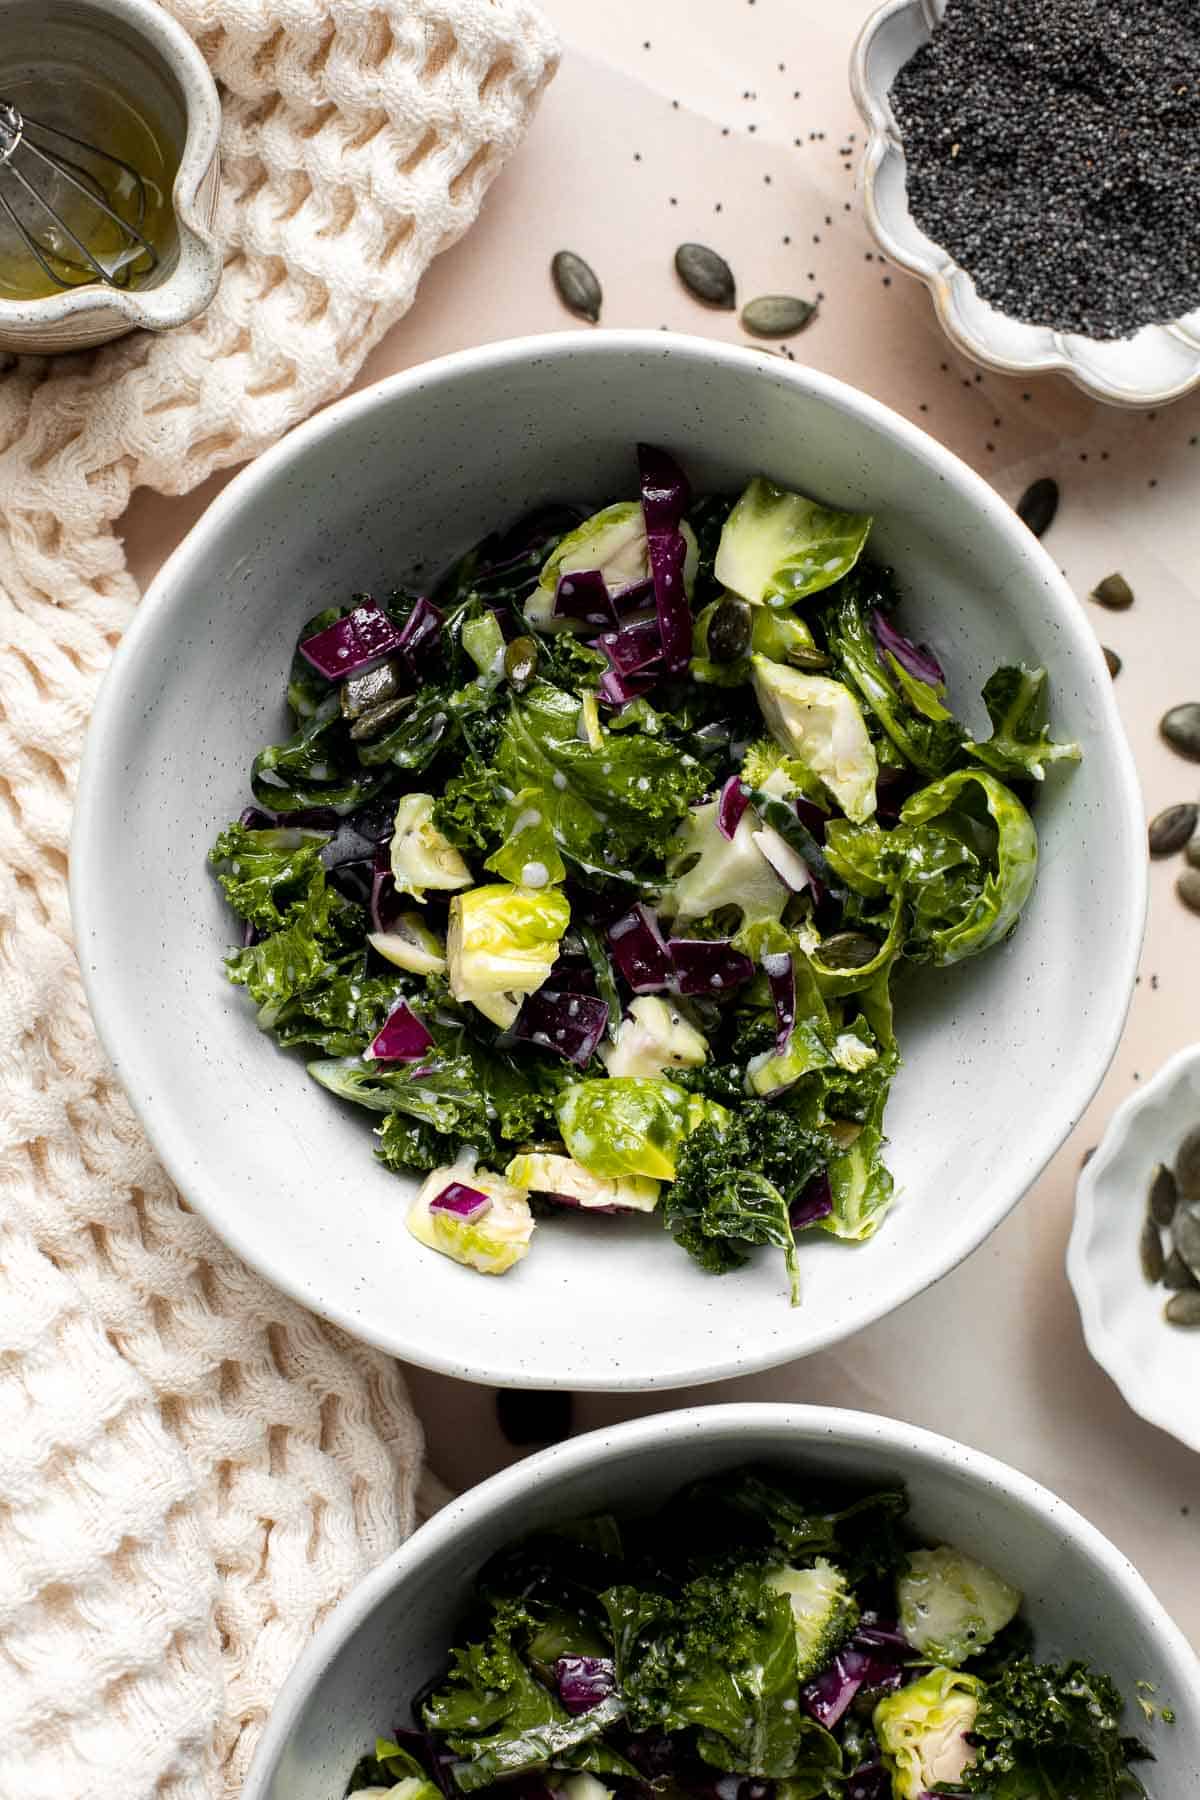
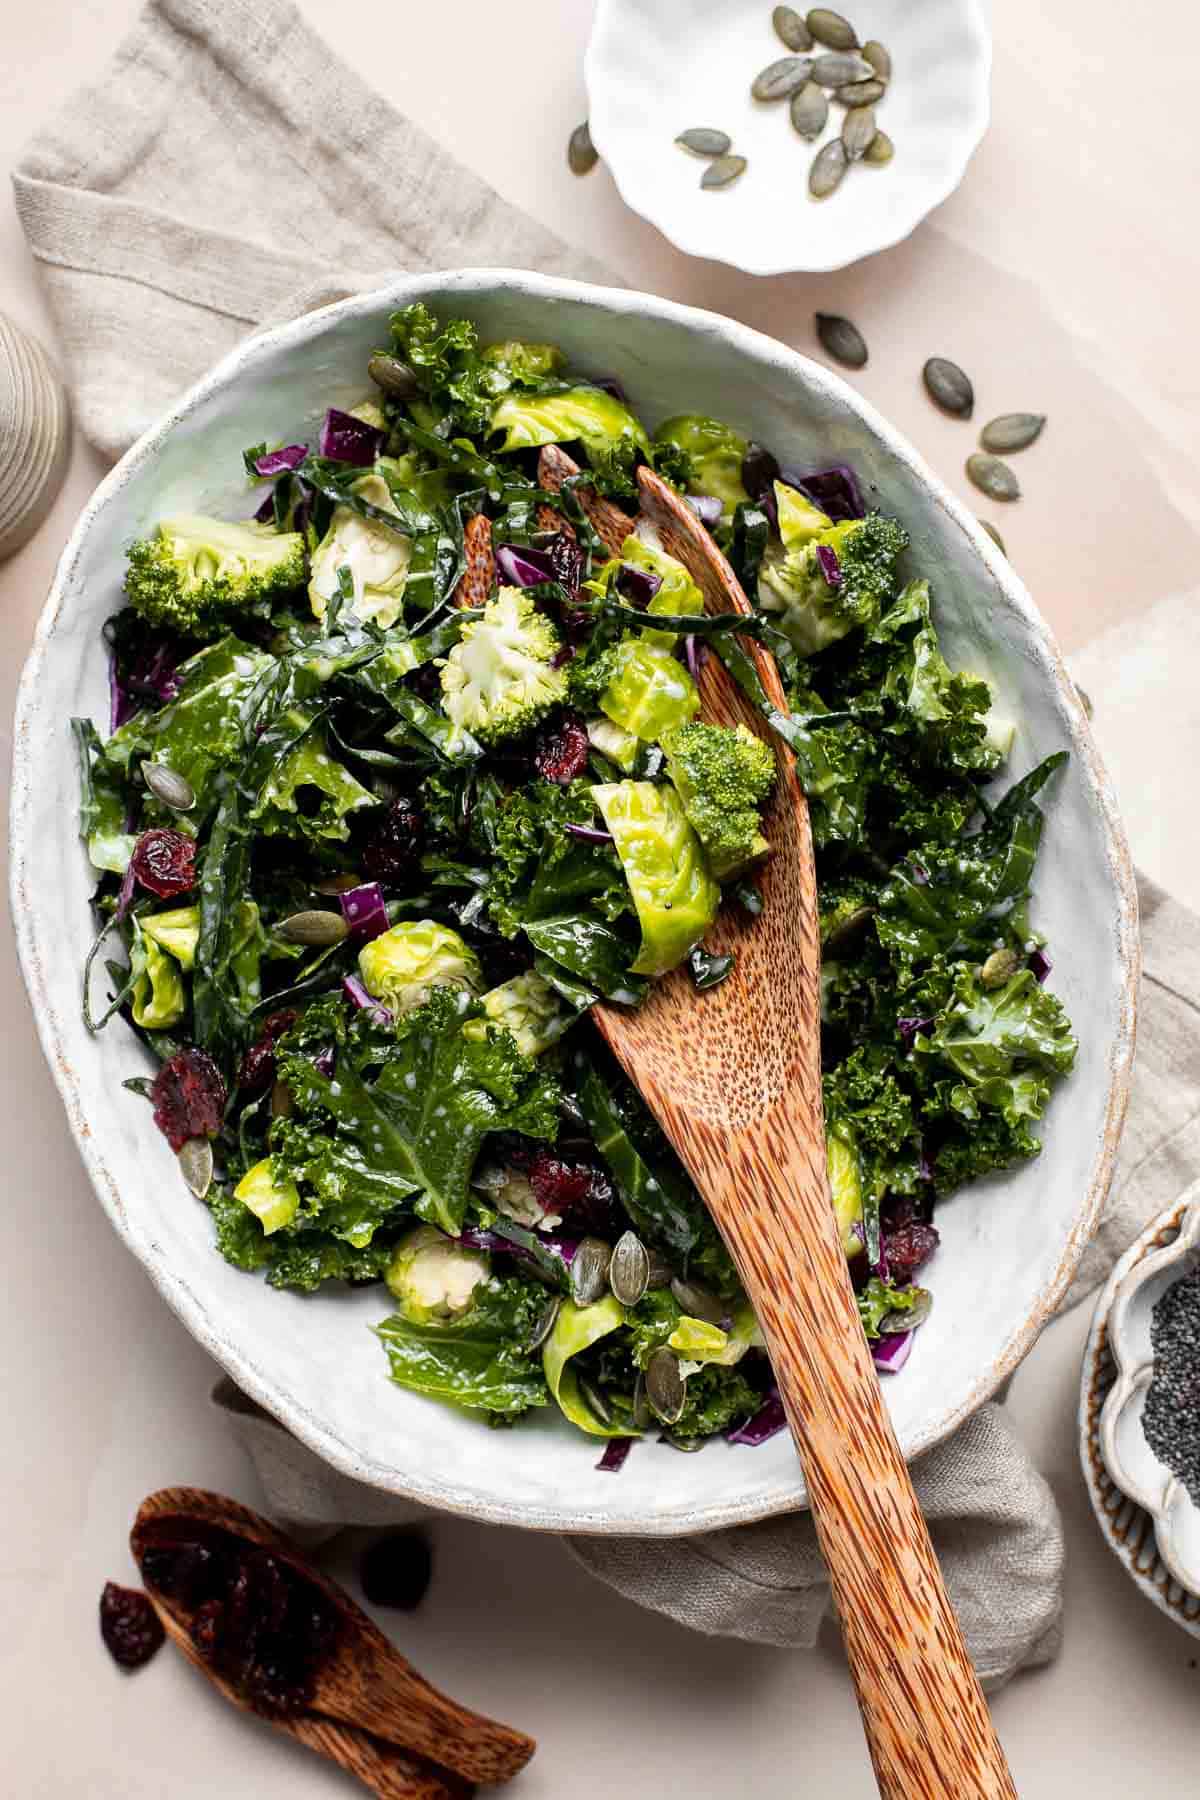
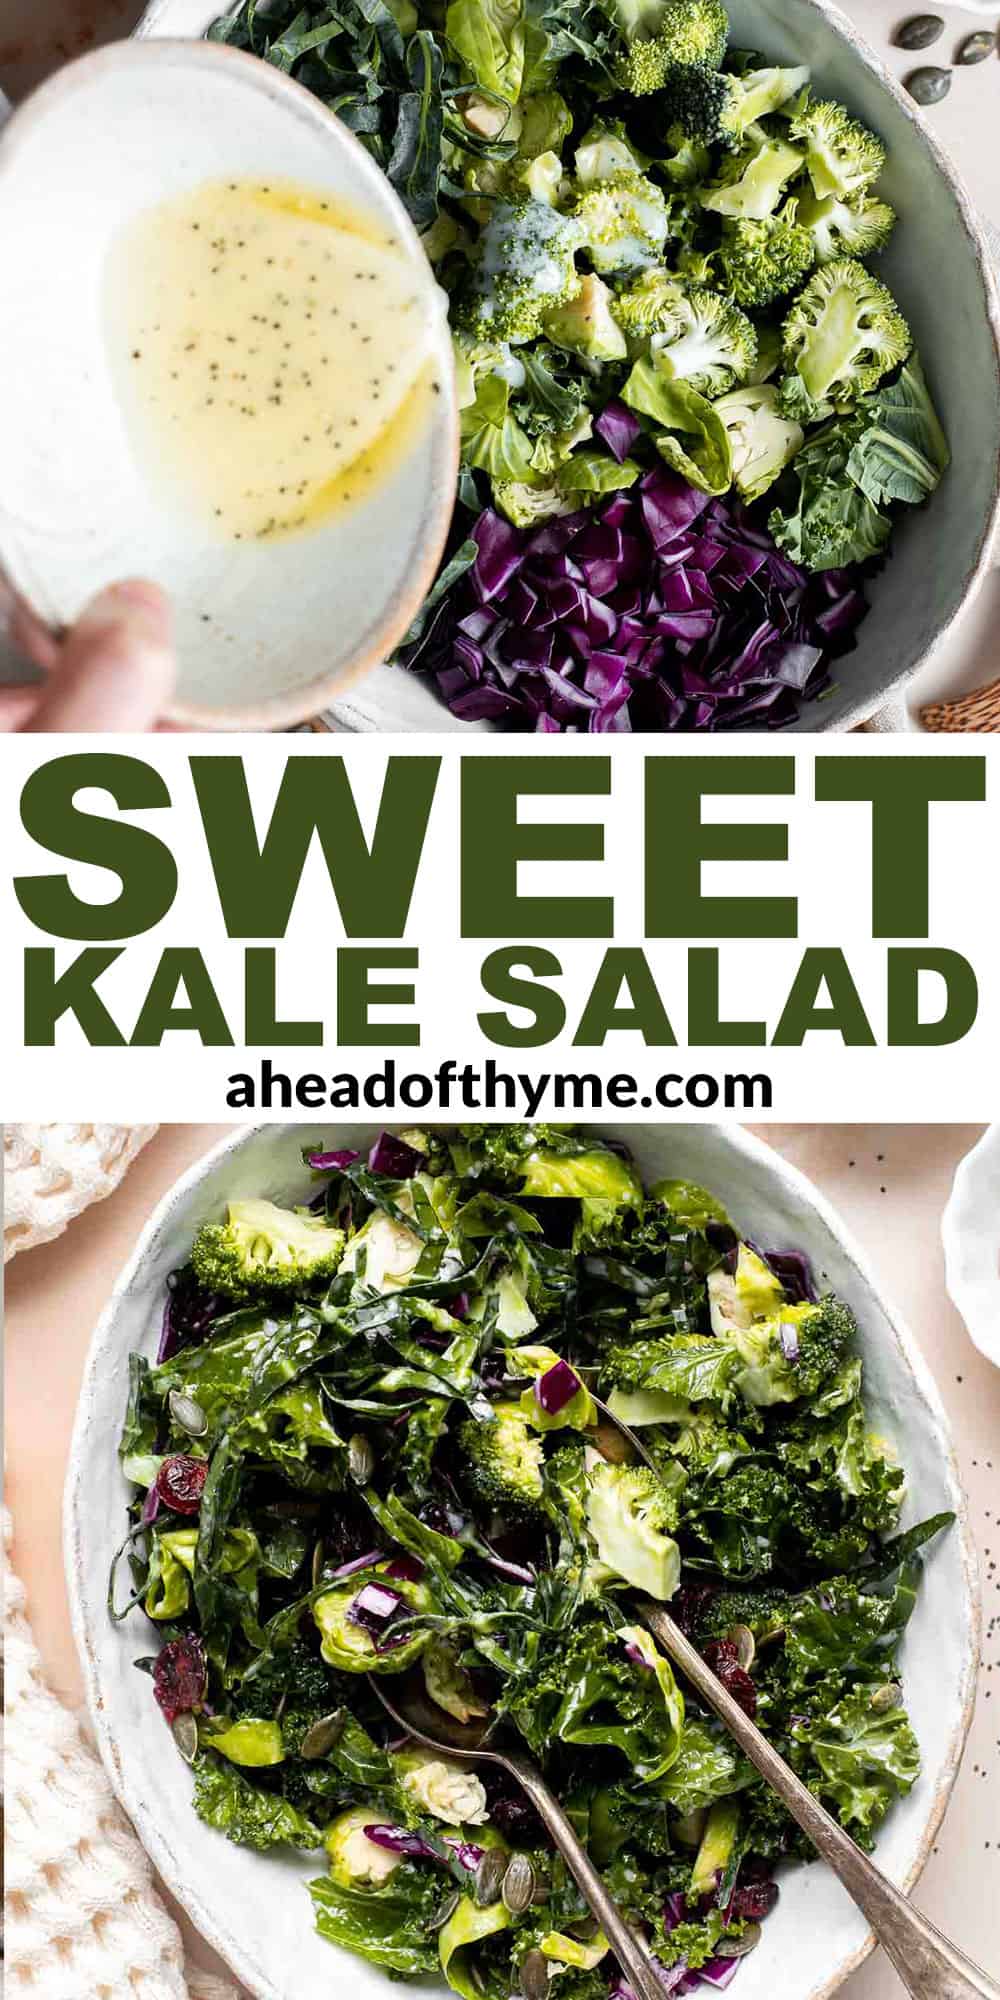
Sweet Kale Salad
Get your kale fix with this delicious Sweet Kale Salad, inspired by the Taylor Farms salad kit you can find at Costco and other grocery stores. This delicious salad is loaded with hearty greens and veggies, a homemade creamy poppy seed dressing, and pumpkin seeds and dried cranberries on top.
This DIY kale salad kit is fast, easy, and delicious! Your whole family is sure to love it - whether you're serving it up for lunch or as a side dish at dinner. Plus, leftovers store well for days and don't get soggy!
Why You'll Love This Sweet Kale Salad
- Filling and packed with fiber. This sweet kale salad is loaded up with all kinds of fibrous greens and cruciferous veggies. The kale, brussels sprouts, cabbage, and broccoli are sure to fill you up and leave you satisfied long after you put down your fork.
- Crowd-pleasing side or entrée. Make it for a filling lunch at home or serve it as a side dish at a fancy dinner party. This Costco copycat kale salad fits all occasions and palates. You can also customize it and add some protein to make it even more filling.
- Great for using up end-of-summer produce. Most of the ingredients (save for the pumpkin seeds, cranberries, and the homemade poppy seed dressing) are backyard garden favorites. As the growing season comes to a close and you find yourself with excess greenery, you can use up some of your bounty in a delicious way.
- No cooking necessary. This chopped salad recipe is quick, simple, and doesn't require you to fire up the stove or preheat the oven. Chopping, mixing, and sprinkling are the only skills you'll need to use to get kale salad on the table. It requires no cooking and minimal prep work, making it a perfect recipe for busy weeknights and activity-packed weekends.
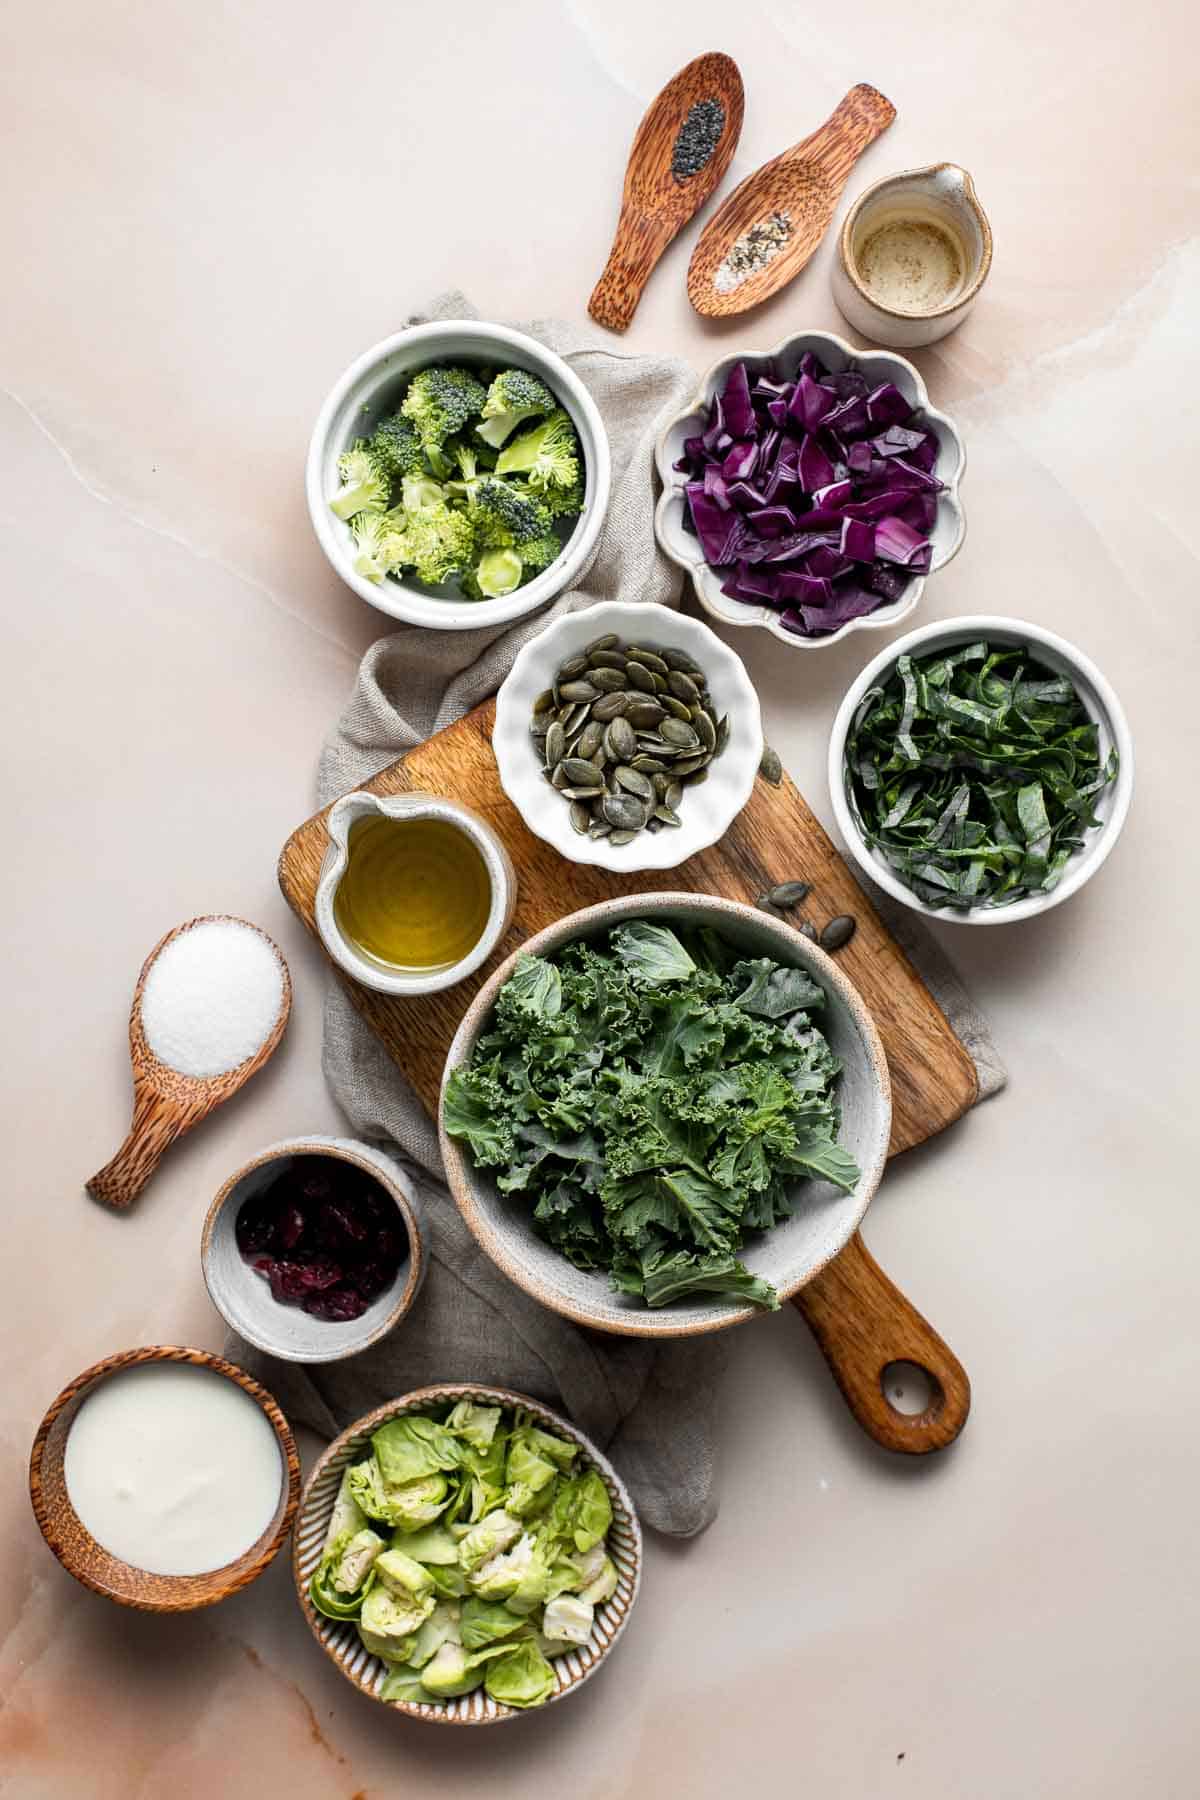
Ingredient Notes
To make this easy Sweet Kale Salad, you will need the following ingredients (full measurements in recipe card below):
- kale - kale is the ultimate superfood because it's one of the most nutrient dense foods out there. The whopping cup of kale in this recipe contains only 33 calories but it provides your daily requirement of vitamin A, K and C and is a good source elf a number of other vitamins and minerals. It's also loaded with antioxidants, helps lower cholesterol and contains cancer-fighting substances.
- brussel sprouts
- cabbage - as per the Costco DIY kale salad kit, we use both green cabbage and purple cabbage in here.
- broccoli florets
- pumpkin seeds - the pumpkin seeds in this recipe can be swapped for nuts or seeds of your choice. Slivered almonds, chopped walnuts, whole sunflower kernels, crushed pecans, cashews, and pistachios will each lend their unique flavor and crunchy texture to the salad, should you choose to use one of them here.
- dried cranberries
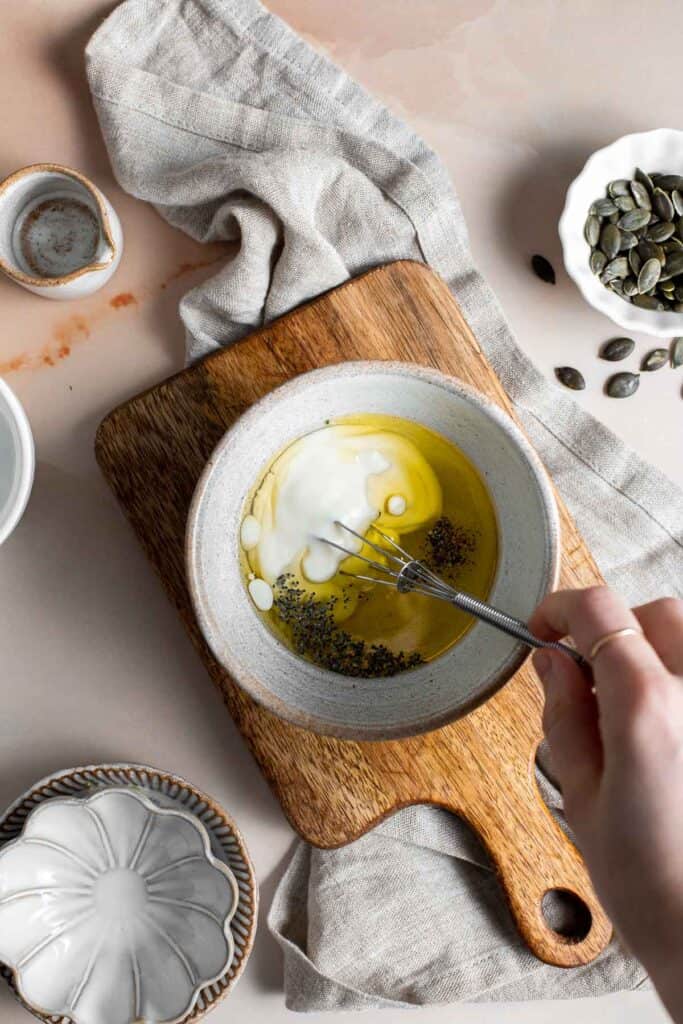
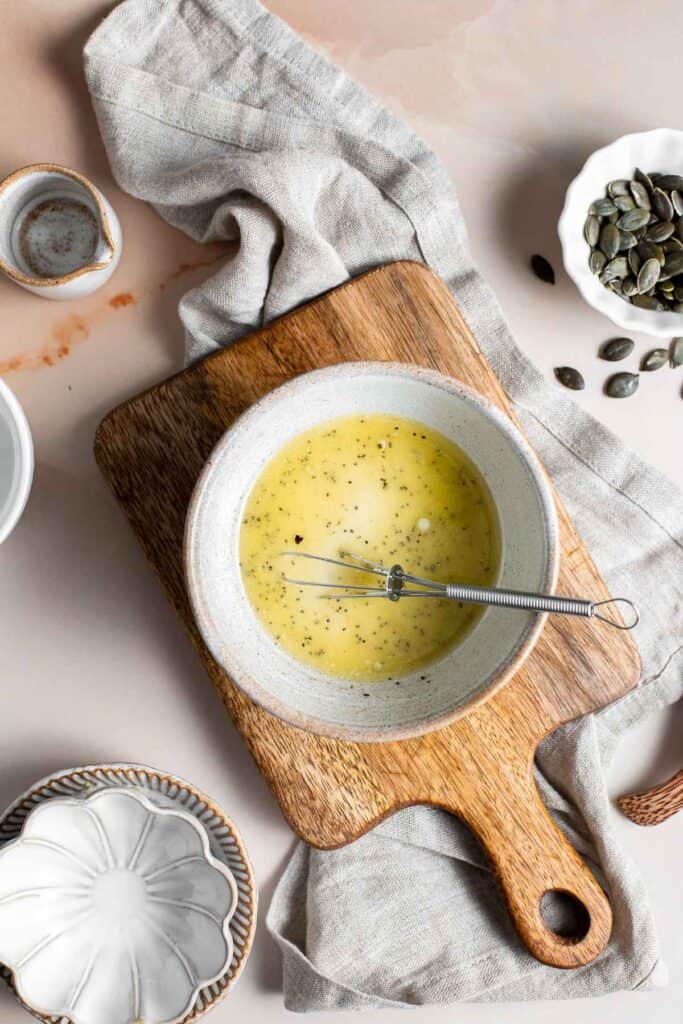
The creamy poppy seed dressing
The creamy poppy seed dressing is made in a minute or 2 by combining together Greek yogurt, olive oil, granulated sugar, white wine vinegar (or rice vinegar), poppy seeds, salt, and pepper.
- Greek yogurt - Greek yogurt is packed full of protein and probiotics, but it may not be the best option for you if you follow a vegan diet or have a dairy allergy. In either case, you can swap it out for unsweetened coconut or almond milk greek yogurt instead!
- sugar - though the sugar is essential to get the copycat dressing just right, it's not completely necessary if you have a strict no-sugar policy for whatever reason. For sugar-free dressings, replace at a 1:1 ratio with stevia, erythritol, Swerve, or simply omit for a less-sweet flavor.
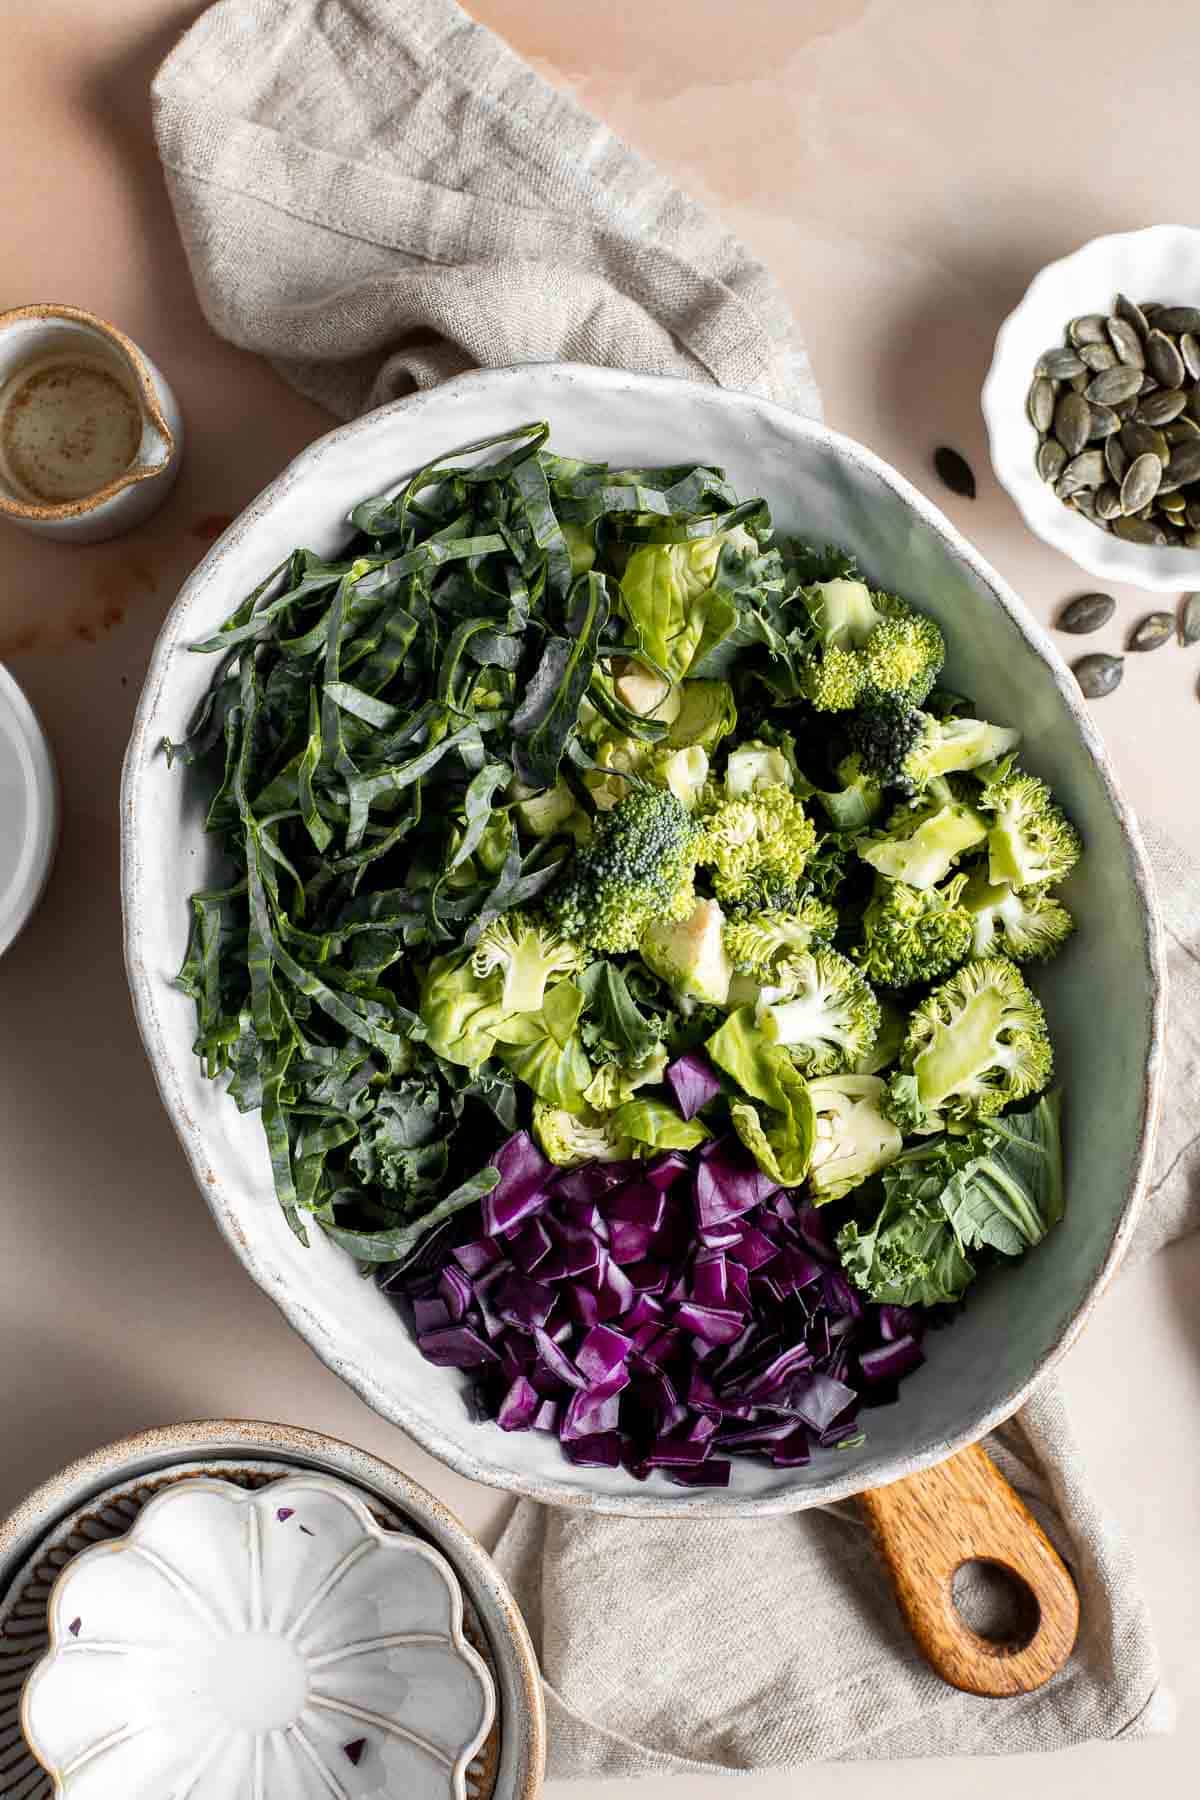
How to Make the Best Sweet Kale Salad
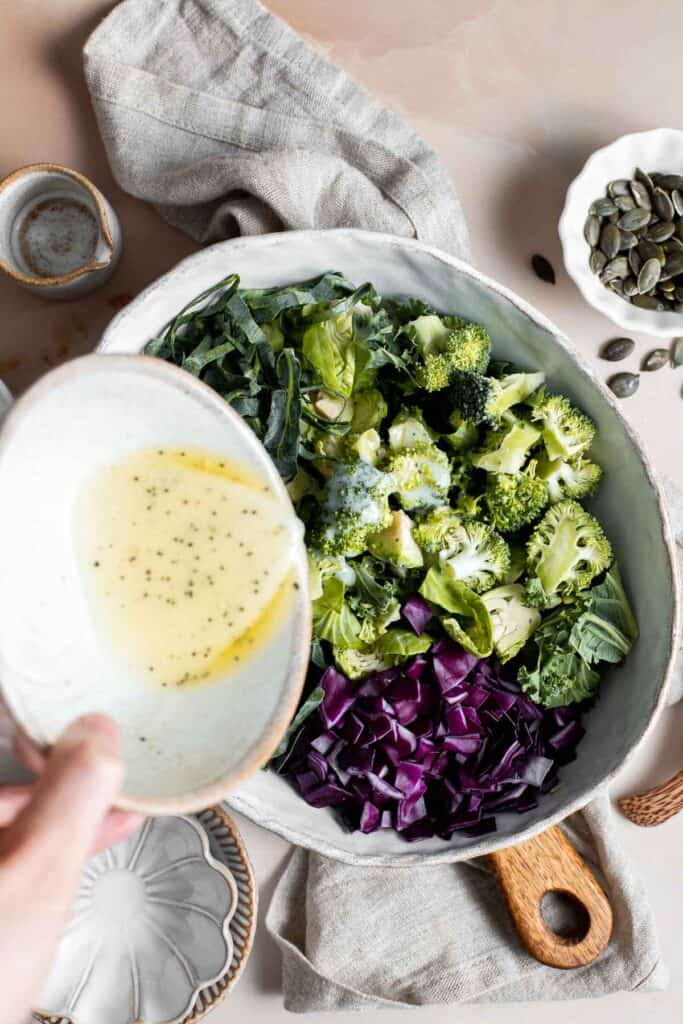
- Combine ingredients. In a large serving dish or bowl, combine the greens together including kale, brussels sprouts, green and purple cabbage, and broccoli.
- Make dressing. In a small mixing bowl, whisk together the vinegar and sugar until the sugar is dissolved. Add Greek yogurt, olive oil, poppy seeds, salt, and pepper and whisk until fully combined.
- Toss. Pour the dressing over the salad and toss to coat.
- Add toppings. Sprinkle the pumpkin seeds and dried cranberries on top and serve.

Storing Instructions
How to Store
Store leftover kale salad in an airtight container and refrigerate for up to 4 days. Although this salad doesn't get as soggy as other salads made with lettuce, I would still recommend storing the salad and dressing in separate containers to keep the texture as fresh as possible and then add the dressing when you are ready to serve.
How to Freeze
If you plan on eating this as an actual salad again, it's not typically recommended that you freeze the salad, as the cabbage and veggies will go limp when thawed. However, if you want to use the leftovers in other applications (see below for ideas!) you can freeze leftovers without the dressing and toppings in a sealed freezer bag for 3-6 months!
Recipe Tips and Tricks
- Use leftovers in a creative way. If you have an excess of chopped salad leftover or you do wish to freeze the remnants, you don't have to eat it the same way twice. The cruciferous vegetables in the salad are very versatile. Toss a cup of leftover kale salad in an egg scramble, sauté in a stir fry, or roast on a sheet pan in the oven!
- Add protein for a heartier dish. If you want to serve as a one-and-done entrée, add a significant source of protein to make the meal go further. Shredded chicken, sautéed tofu, diced steak or hard-boiled eggs are great choices to add to this already-filling salad.
More Salad Recipes
- 40 Best Salad Recipes
- Lemon Kale Salad
- Winter Kale Salad
- Classic Coleslaw
- Garden Salad
- Creamy Broccoli Slaw Salad
Tried this recipe?
I'd love to hear what you think! Leave a comment and rating below to share your feedback. Your reviews help others discover this recipe and help me keep creating more free recipes for you. Snap a photo and tag me on social media @aheadofthyme too.
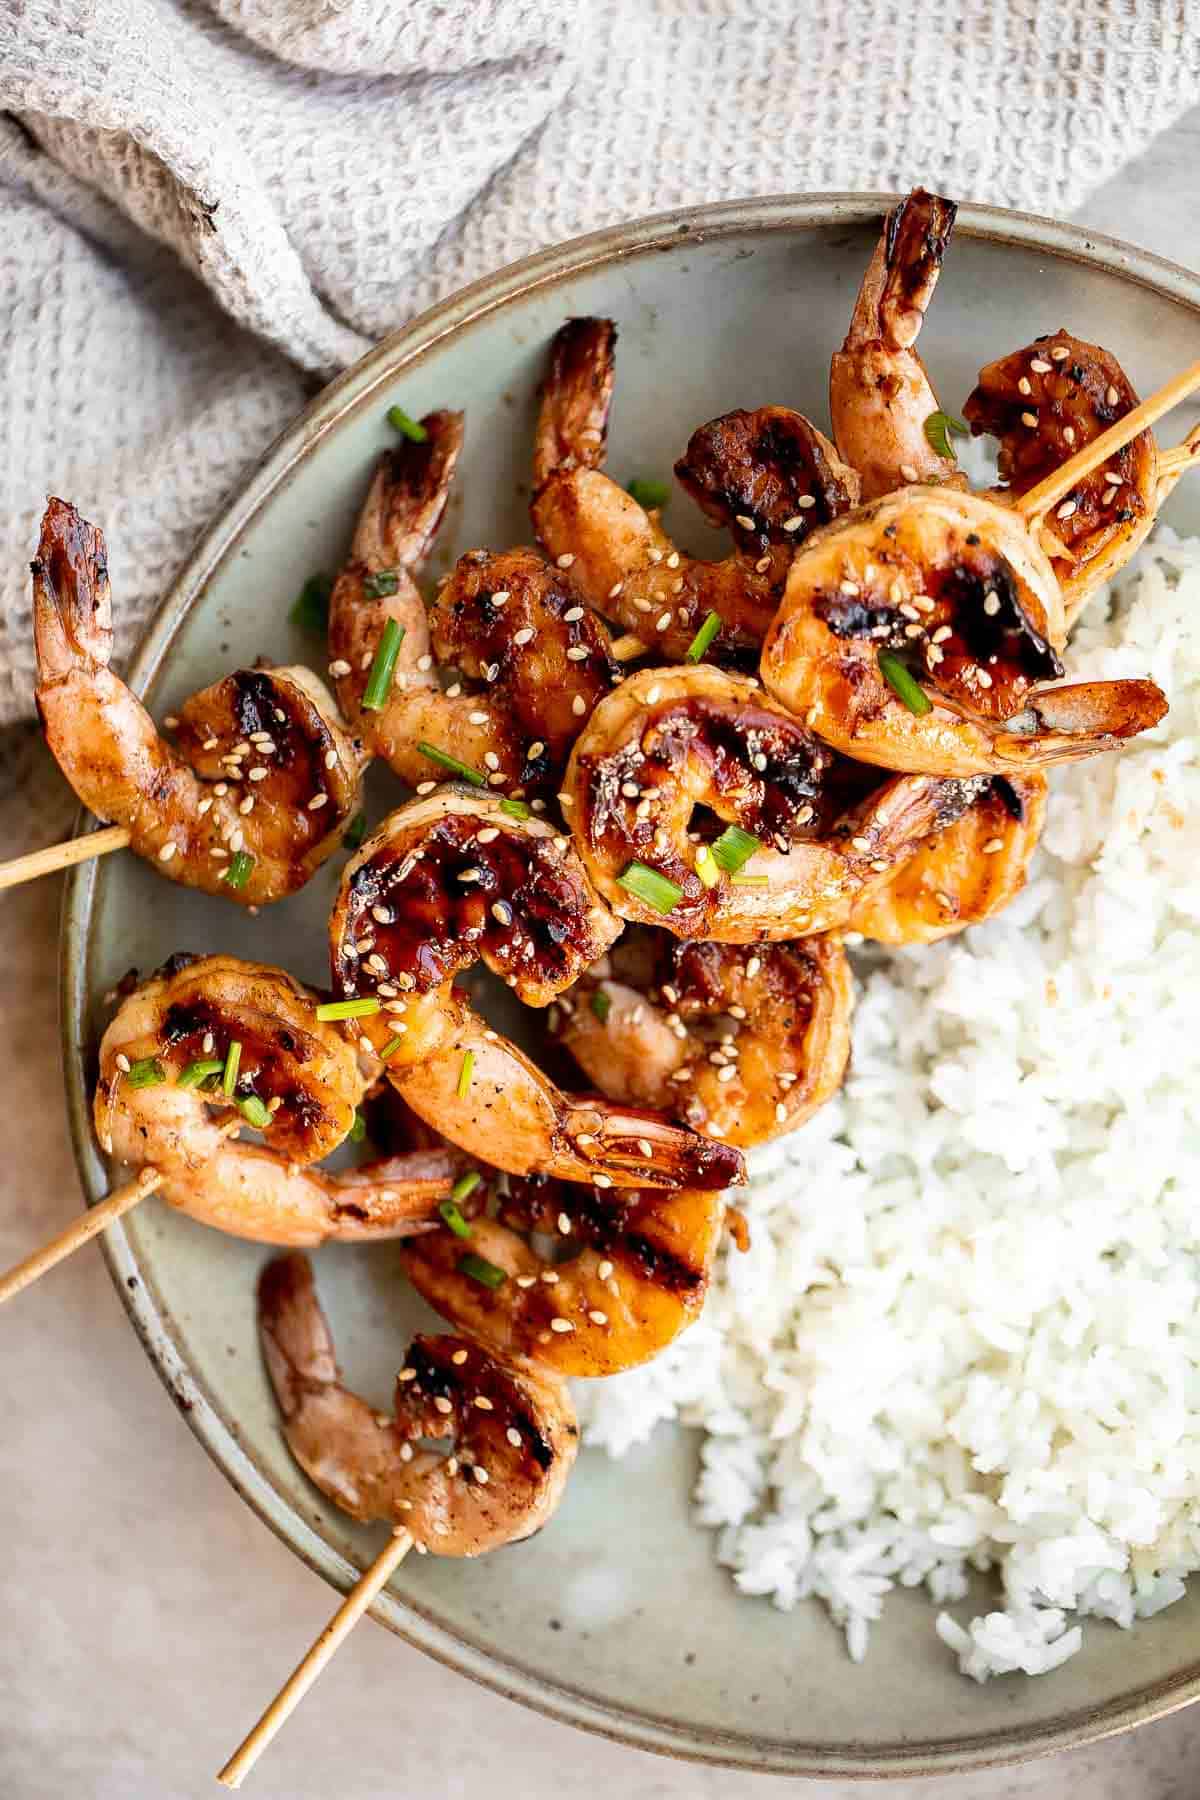
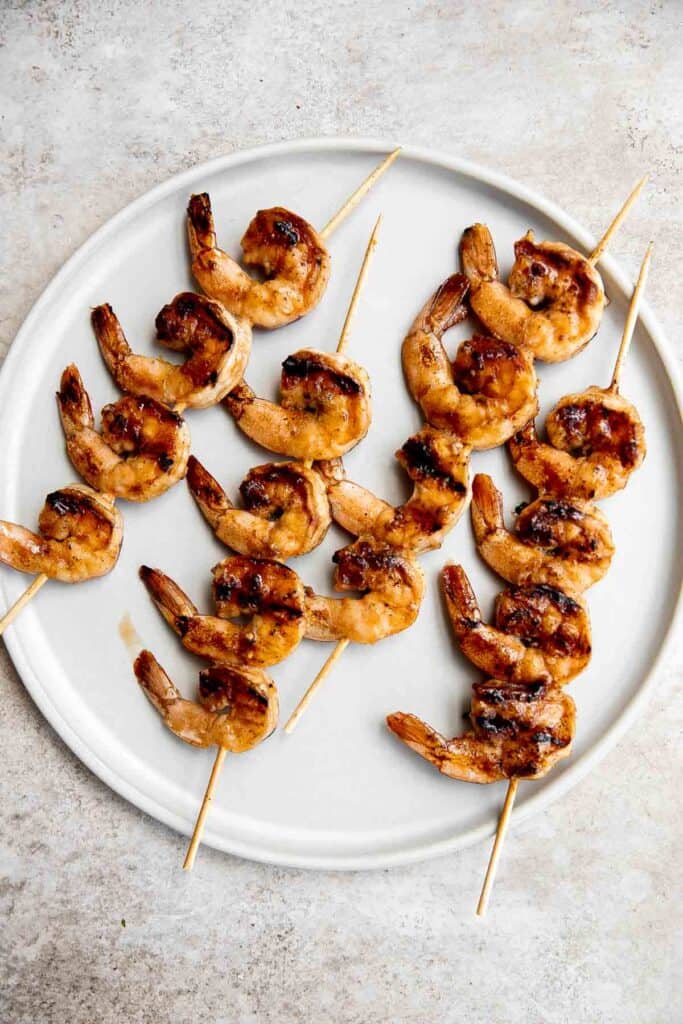
Honey Garlic Shrimp Skewers
Honey Garlic Shrimp Skewers are sweet and savory, loaded with flavor, and grilled to perfection. These delicious shrimp kabobs are marinated in a flavorful Asian marinade, threaded onto skewers, and grilled (or baked or air fried).
The best part? They are so quick and easy to make in under 25 minutes. Feed these shrimp skewers to the family on on busy summer weeknights, add it to a romantic surf n' turf dinner on Date Night, or serve them as appetizers at a summer dinner party.

Why You'll Love These Honey Garlic Shrimp Skewers
- The most flavorful shimp. These honey garlic shrimp skewers boast a balanced flavor that packs a punch without being overwhelming. Made with classic Asian ingredients such as soy sauce, honey, garlic, and ginger, each bite is saucy, sticky, and so good.
- Quick and easy. These garlic shrimp skewers are quick and easy to make in 25 minutes. All you need to do is whisk together a simple marinade, marinate the shrimp for 15 minutes, then grill them. You'll be surprised how little effort can make such a delicious and flavorful meal.
- Charred to perfection. Anything cooked on a hot grill is bound to be a favorite of mine. I'm obsessed with the delicate and tasty char marks that the grill gives these honey garlic shrimp skewers.
- So many ways to serve them. Put these honey garlic shrimp skewers atop a salad for a delicious lunch, pair them with steak or a Surf and Turf dinner, or serve them up as appetizers at a dinner party. No matter how you plate them, rest assured your guests will love these Asian shrimp skewers.

Ingredient Notes
To make this grilled Honey Garlic Shrimp Skewers, you will need the following ingredients (full measurements in recipe card below):
- shrimp - be sure to use fresh shrimp. The freshness of the shrimp impacts their flavor, and you want it to be as good as possible. In addition to using fresh shrimp, make sure you give your shrimp time to marinate - it makes a huge difference!
- paprika
- salt and pepper
- soy sauce
- honey
- sesame oil - or substitute with vegetable oil.
- vinegar - you can also use lemon juice instead.
- garlic + ginger
You will also need measuring cups and spoons, mixing bowls, skewers (I used these bamboo skewers), and a grill or grill pan.
How to Make the Best Honey Garlic Shrimp Skewers
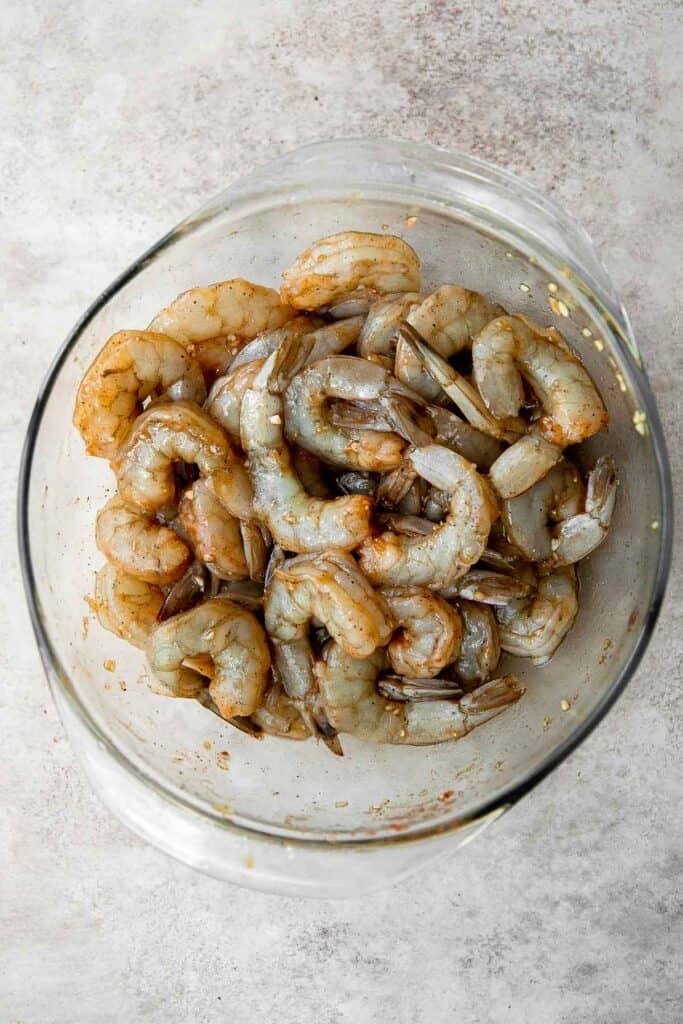
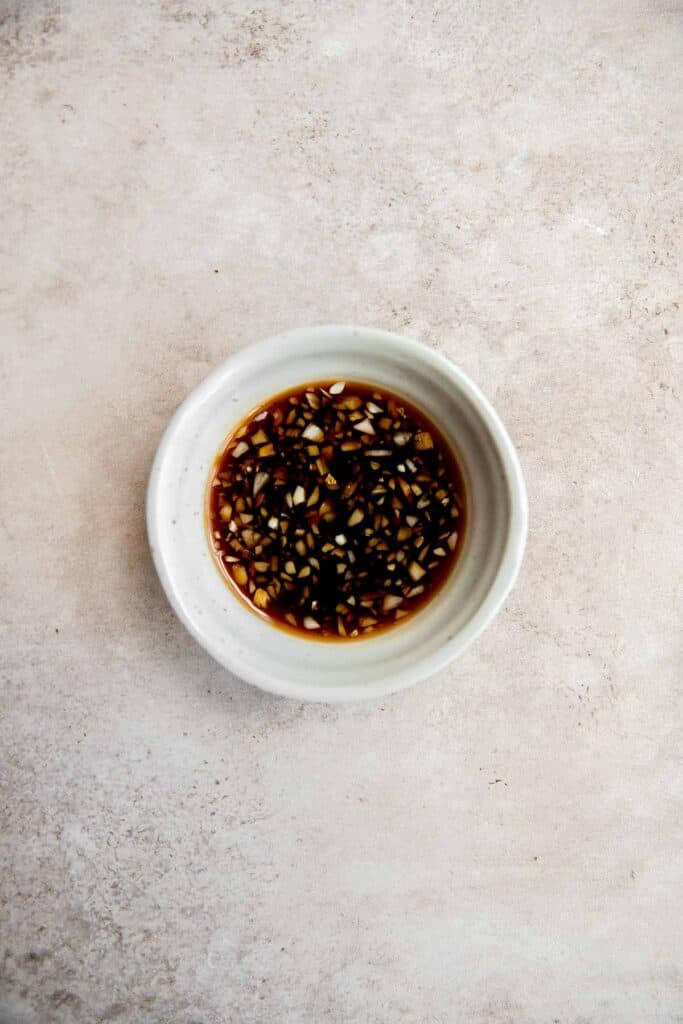
- Marinate shrimp. In a large mixing bowl, combine shrimp with paprika, salt, and pepper, and mix until evenly coated. In a separate mixing bowl, whisk together soy sauce, honey, sesame oil, vinegar, garlic and ginger until well combined. Reserve 2 tablespoons of the sauce mixture and add the remaining to the shrimp. Toss well to coat evenly and marinate for 10 minutes.
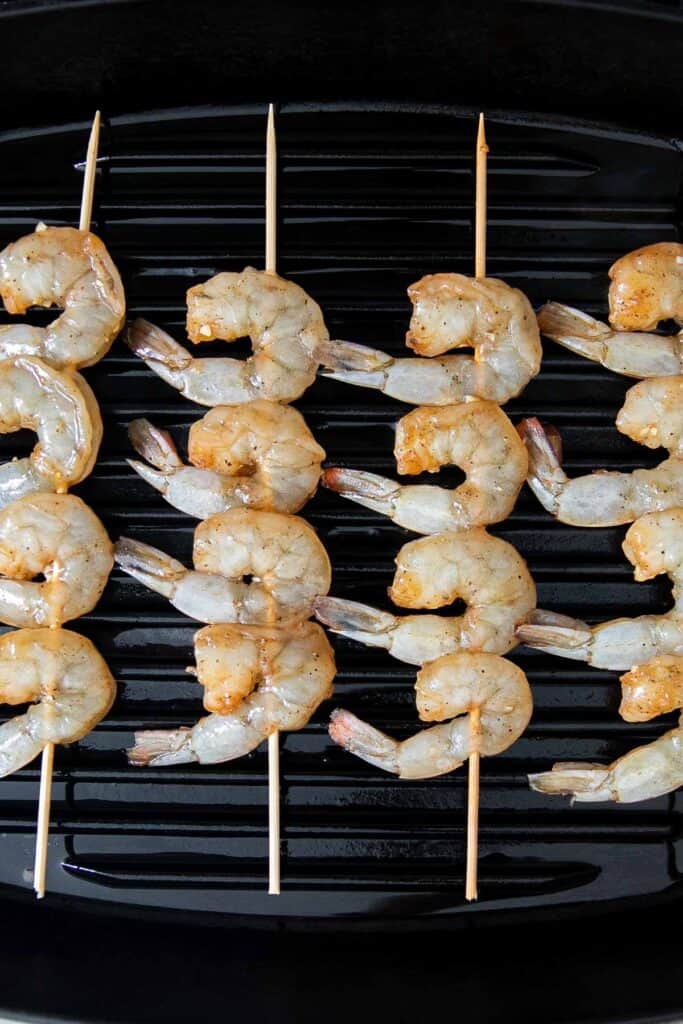
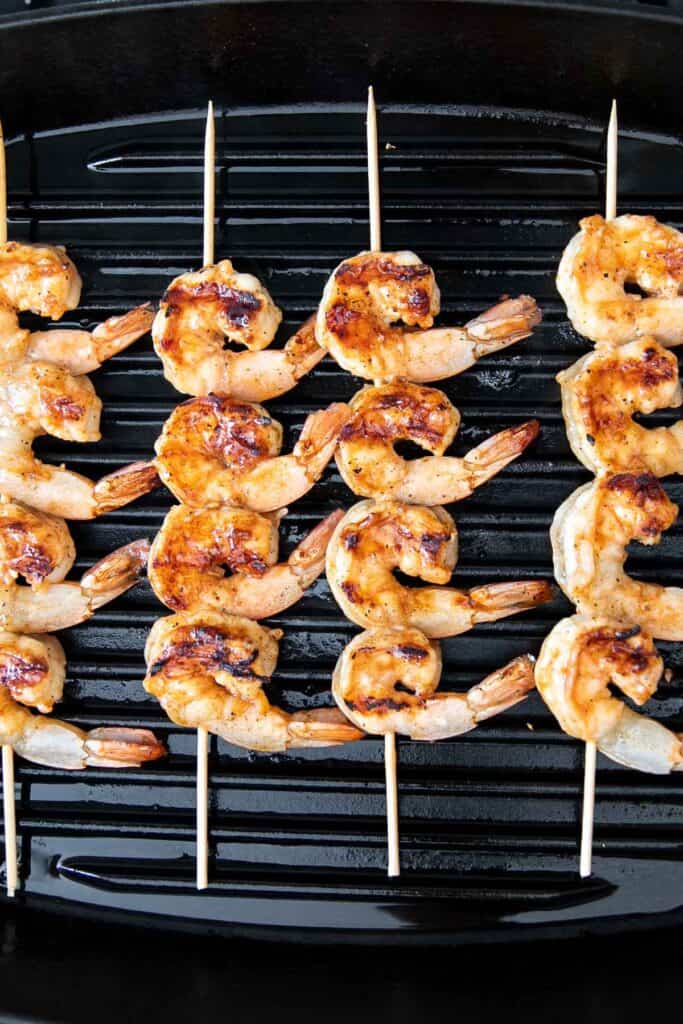
- Thread skewers. Thread 4-5 shrimp onto each skewer.
- Grill. Lightly brush some oil over the grill or grill pan and preheat the grill over medium-high heat for 1-2 minutes until the oil starts sizzling and shimmering. Place the skewers spaced evenly apart on the grill and grill for 3-4 minutes on each side or until nicely charred.
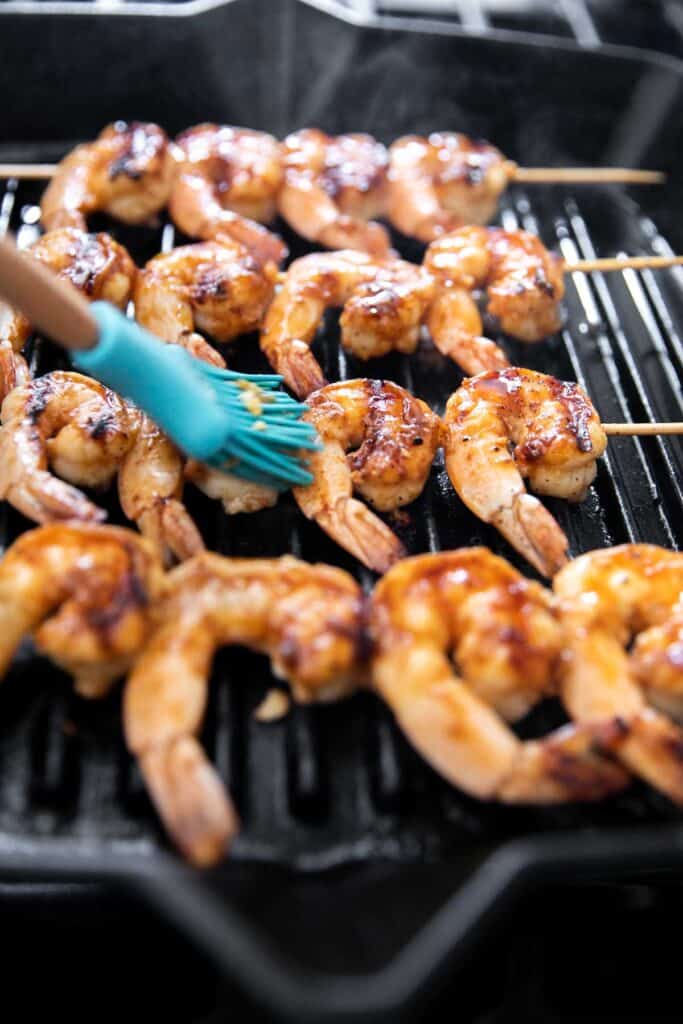
- Baste. Baste with reserved sauce mixture and cook for another 1-2 minutes on each side to enhance the flavor. Serve immediately.
How to Cook in the Oven or Air Fryer
You can also bake these shrimp skewers or air fry them (unthreaded or shortened skewers) at 375F for 12-15 minutes.
How to Serve
Serve honey garlic shrimp skewers on their own at a summer barbecue, or pair them with some of my favorite grilling sides including:
- Macaroni Salad
- Grilled Corn on the Cob
- Potato Salad
- Coconut Rice
- Air Fryer Vegetables
- Coleslaw
Storing Instructions
- How to store: Eat cooked honey garlic shrimp skewers within 3-4 days of making them. The sooner, the better. Shrimp, like other shellfish, tend to go off quicker than other meals. Store honey garlic shrimp skewers in an airtight container in the fridge, and avoid leaving them out at room temperature for longer than an hour.
- How to reheat: Reheating shrimp without overcooking it is a challenge. That's why I prefer to enjoy leftover honey garlic shrimp skewers cold over a fresh salad like this Grilled Shrimp Salad or over a classic Caesar Salad. If you must reheat them, I recommend steaming them in a covered pan over medium-highheat with a splash of water for 2-5 minutes.

More Shrimp Recipes
- 30 Best Shrimp Recipes
- Garlic Shrimp Skewers
- Cajun Shrimp Skewers
- Garlic Shrimp Stir Fry
- Shrimp Fajitas
- Air Fryer Mexican Shrimp
Tried this recipe?
I'd love to hear what you think! Leave a comment and rating below to share your feedback. Your reviews help others discover this recipe and help me keep creating more free recipes for you. Snap a photo and tag me on social media @aheadofthyme too.

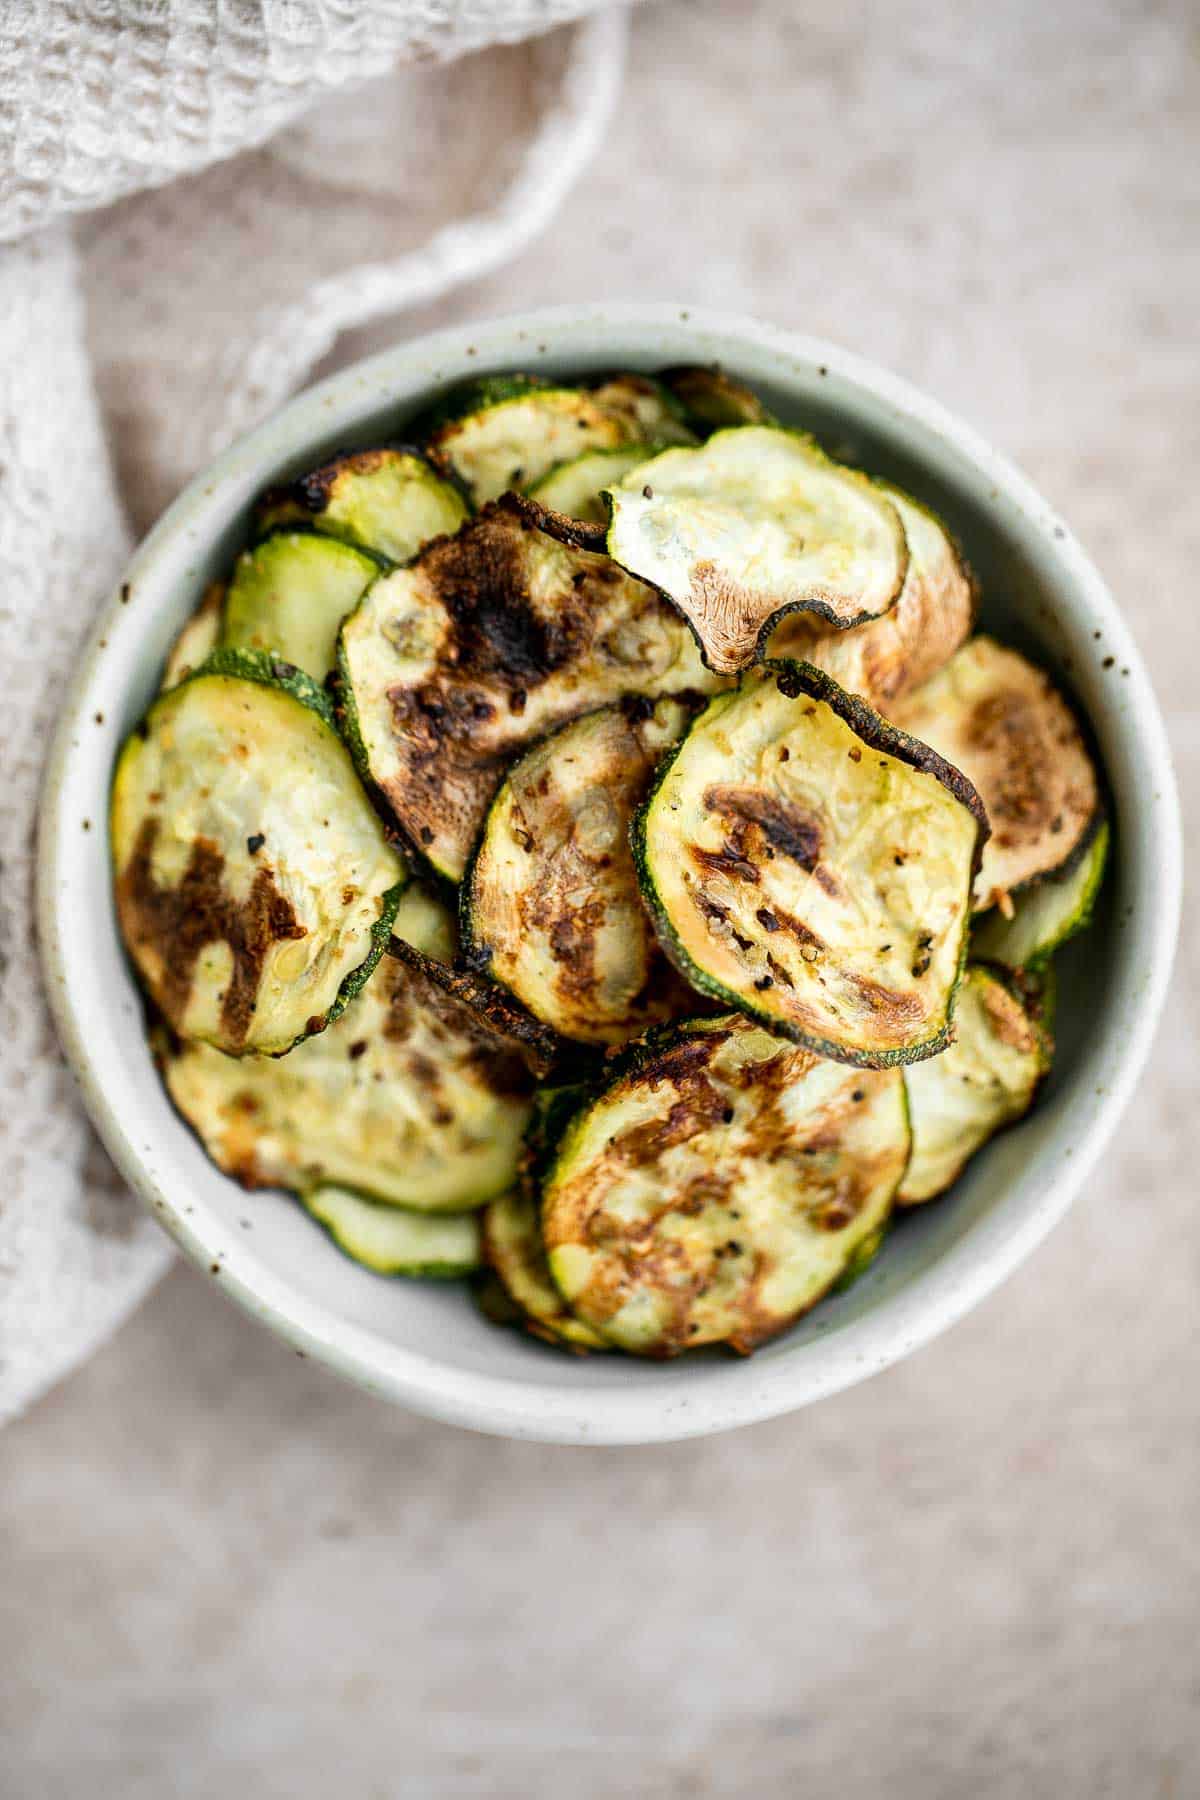
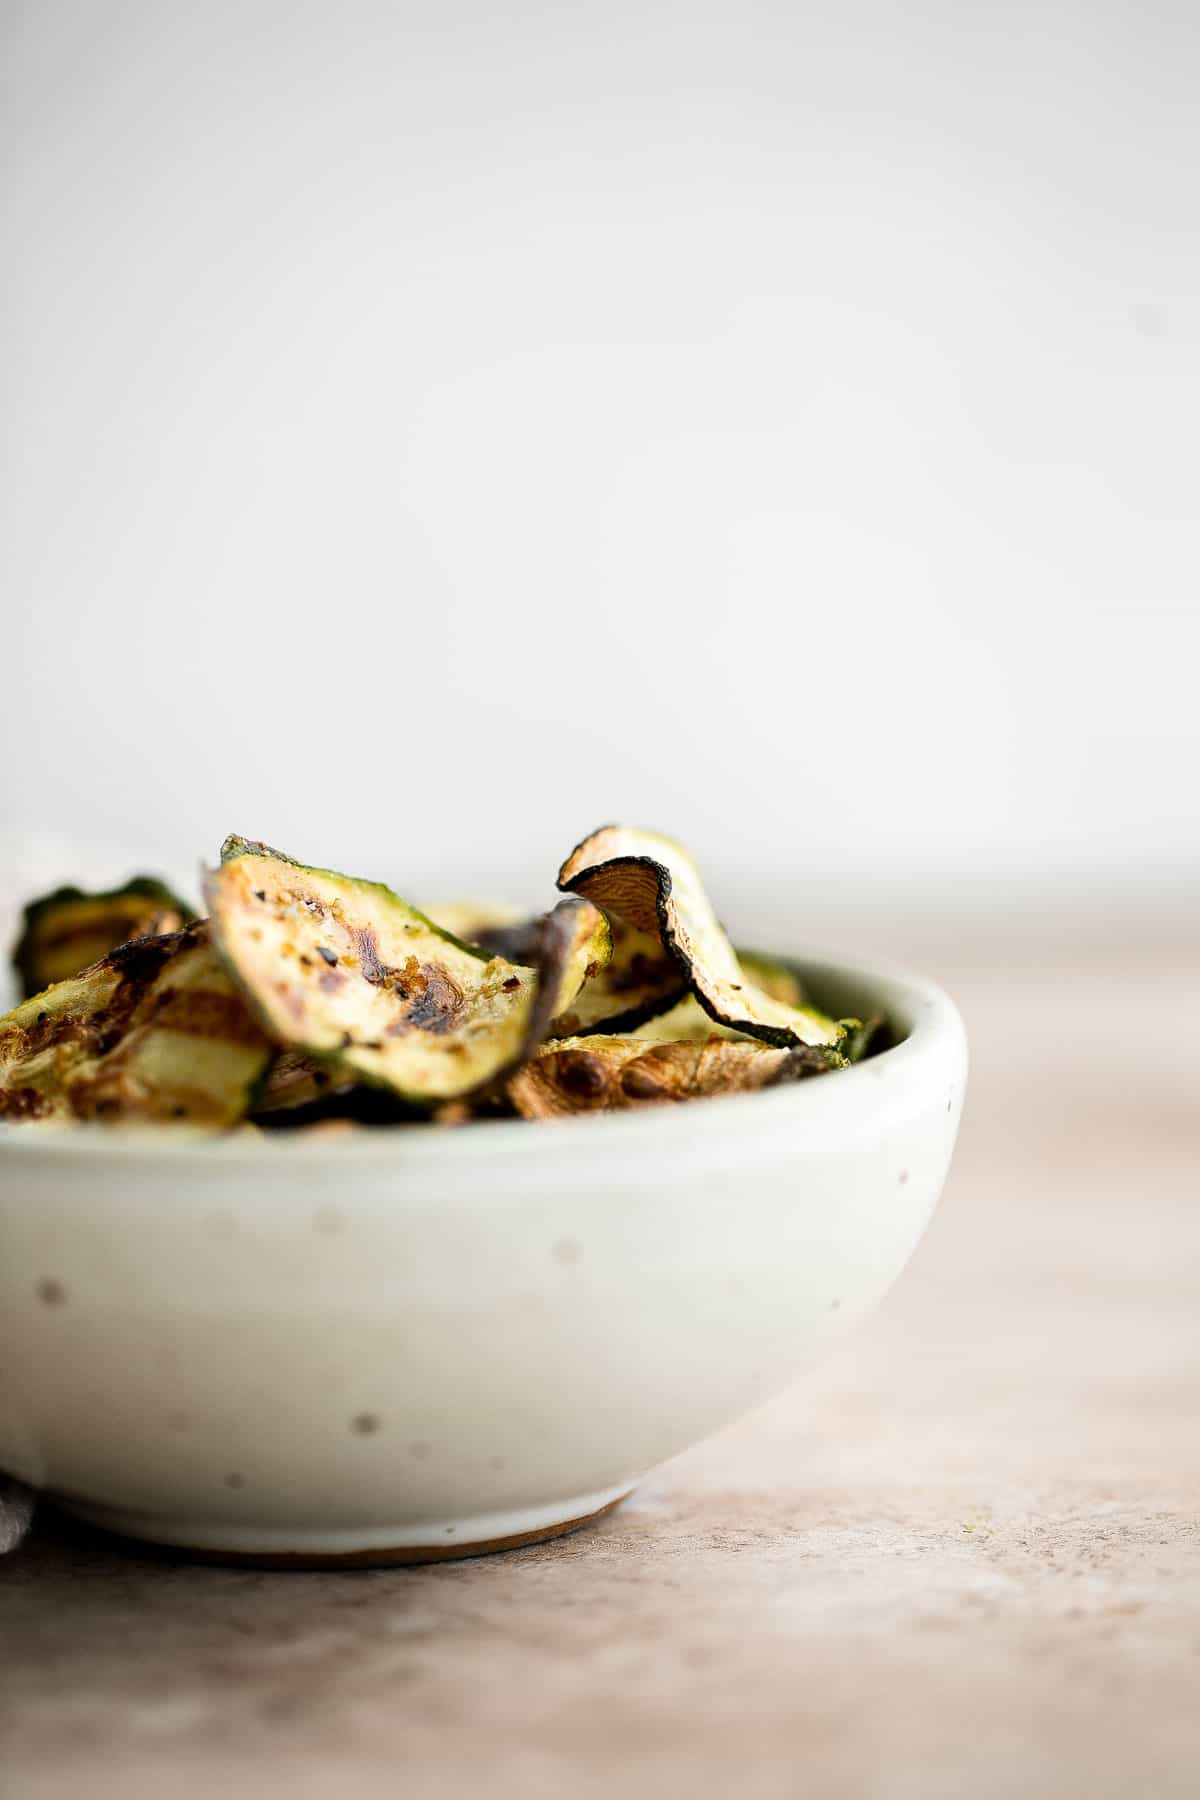
Air Fryer Zucchini Chips
These air fryer zucchini chips make an excellent snack or side dish - they are savory, salty, and flavorful! It's a quick and easy beginner-friendly recipe that takes just a handful of ingredients to make. Plus, homemade zucchini chips in the air fryer are healthy, nutritious, and vegan.
As an alternative traditional potato chips or tortilla chips, baked zucchini chips are a naturally gluten-free, low carb, and lower in calories alternative to traditional potato chips. You'll love snacking on these on their own, sharing them with friends and family, or packing them for your next picnic.
Why You'll Love These Air Fryer Zucchini Chips
- The cheesy flavor. Thanks to the addition of Parmesan, these zucchini chips have a delightfully cheesy flavor that your whole family will love. Plus, Italian seasoning adds an extra herby flavor that balances the cheese out so well.
- It's quick and easy. This recipe for air fryer zucchini chips calls for just 5 ingredients and only takes 30 minutes from start to finish, most of which is cooking time so you can prep other dishes (like a 5-minute dip) while you wait or just relax until your snack is ready.
- Great way to eat veggies. If you or your children struggle to get enough veggies in your diet, these seriously crave-worthy chips are a great way to increase your vegetable intake. You'll reach for this recipe over and over when you craving a salty and savory snack.
Ingredient Notes
To make these easy Air Fryer Zucchini Chips, you will need the following ingredients (full measurements in recipe card below):
- zucchini - zucchini comes in all sizes and can naturally grow to be massive, measuring over a foot long and several inches wide. For the purposes of this recipe, zucchini on the smaller side will be easier to use, both for slicing on the mandolin and for fitting in the air fryer.
- Italian seasoning - you can substitute Italian seasoning with your favorite spices or fresh chopped herbs to suit your palette! Try za'atar, dill, lemon pepper, or anything you can think of that would add a little extra flavor.
- garlic powder
- salt
- Parmesan cheese - the recipe calls for grated parmesan. Buying a block and grating it yourself is always the best option for shredded cheese, but you can use the store bought pre-grated kind if you're in a hurry. The only difference is that the pre-grated kind often has cornstarch added to prevent the cheese from sticking together, but it shouldn't make a big difference in the recipe.
- cooking oil spray
You will also need measuring spoons, mixing bowl, and an air fryer. If you decide to bake the chips instead, then you'll need a quarter sheet baking pan.

How to Make the Best Air Fryer Zucchini Chips
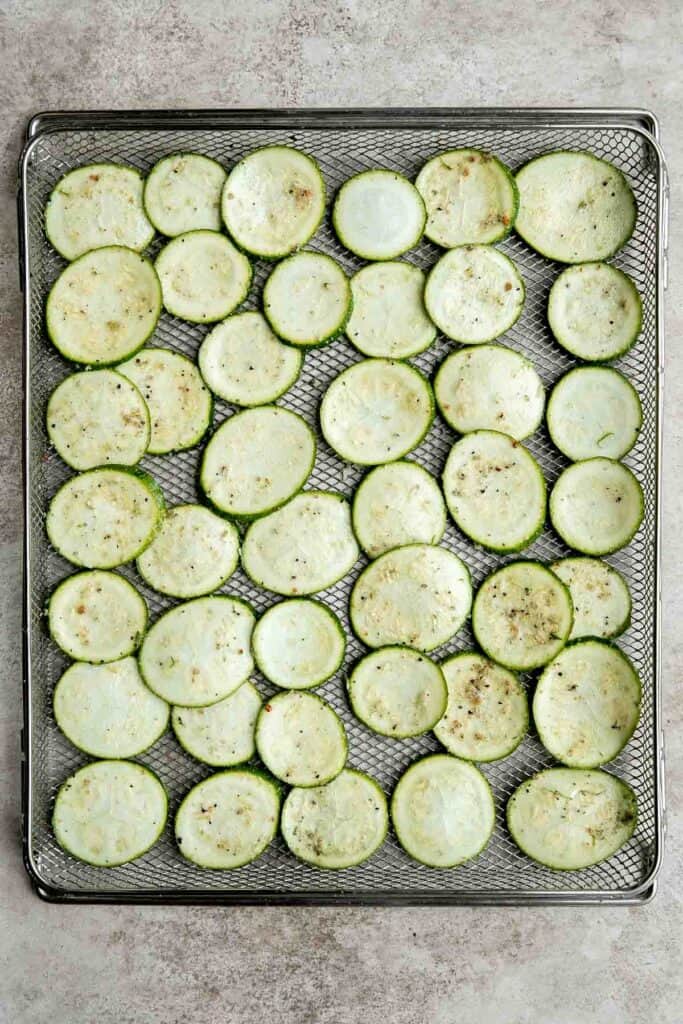
- Slice zucchini. Cut the zucchini into thin slices with a mandoline slicer. Use a paper towel to pat the zucchini slices dry.
- Season the zucchini. Place zucchini slices in a mixing bowl and add salt, Italian seasoning, garlic powder, and Parmesan. Toss well to coat evenly.

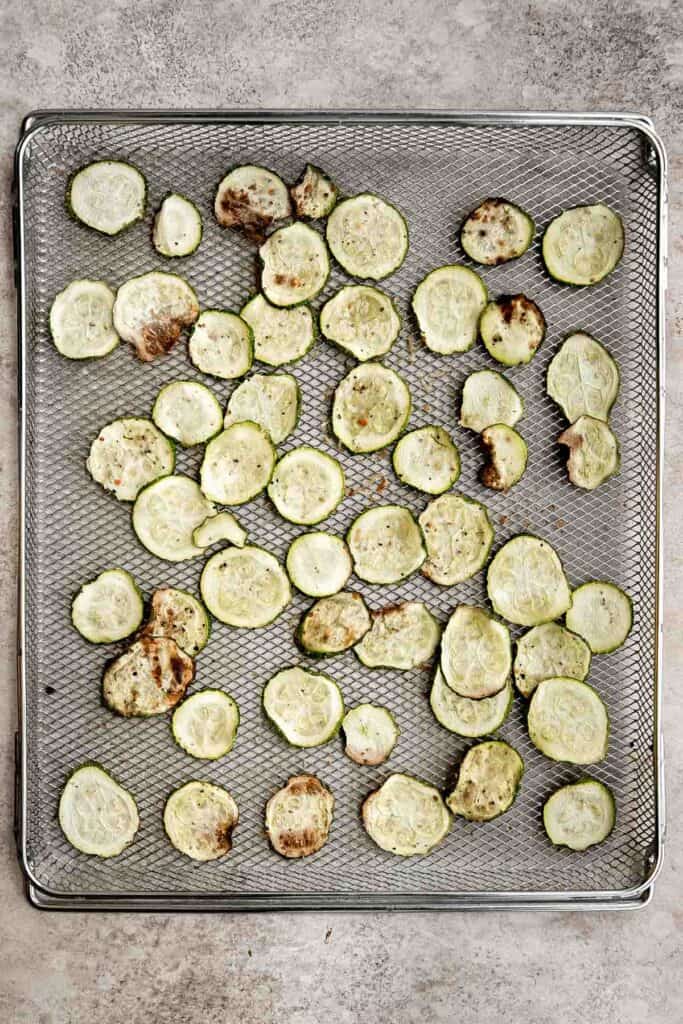
- Air fry. Place the zucchini slices in a single layer in the air fryer basket and lightly spray with cooking oil. Cook at 300F until golden brown and crispy, about 10-15 minutes. For extra crispiness, cook for another 10-15 minutes. Check occasionally to make sure they aren't getting burnt.
How to Bake Zucchini Chips in the Oven
Place the zucchini slices in a single layer on a parchment lined quarter sheet baking pan. Lightly spray with cooking oil until evenly coated. Bake in a 275F preheated oven for 45 minutes until crispy, flipping once halfway through cooking.
How to Serve
Serve these Air Fryer Zucchini Chips on their own or with your favorite dip. Homemade zucchini chips are great for scooping up a Ranch Dip or fresh Hummus for a more filling snack between meals. Some other dips to try it with are:
Storing/Freezing Instructions
How to Store
- Place leftover zucchini chips in an airtight container and refrigerate for up to 4 days. You can reheat them by placing them in the air fryer at 400 degrees for 3-5 minutes.
- These baked zucchini chips will store well in the freezer in a plastic freezer bag for up to 3 months. Reheat without thawing by following the same instructions as outlined above, adding a few minutes to account for extra moisture from freezing.
How to Freeze
These baked zucchini chips will store well in the freezer in a plastic freezer bag for up to 3 months. Reheat without thawing by following the same instructions as outlined above, adding a few minutes to account for extra moisture from freezing.

Recipe Tips and Tricks
- Never eat soggy chips again! If you're worried about reheating the chips to their original texture, you can easily avoid the hassle by slicing all of the zucchini at once, then make only as much as you can eat in one sitting and store the rest of the uncooked zucchini in the fridge for up to three days. You can pull them out any time and make a fresh, crispy, delicious batch of chips! This is also a great way to shave off some prep time for a make-ahead situation.
- Don't have a mandolin? Use a knife instead. If you don't have a mandoline slicer on hand (you should totally get one if you slice veggies often), you can use a sharp knife to slice the zucchini into thin slices. Using a mandolin helps to majorly cut down on time and ensure uniformity - and as a result, even cooking.
More Zucchini Recipes
- Zucchini Fritters
- Zucchini Bites
- Shrimp Scampi with Zucchini Noodles
- Zucchini Bread
- Zucchini Muffins
- Chocolate Zucchini Cake
Tried this recipe?
I'd love to hear what you think! Leave a comment and rating below to share your feedback. Your reviews help others discover this recipe and help me keep creating more free recipes for you. Snap a photo and tag me on social media @aheadofthyme too.

30 School Lunch Ideas

Are you are wondering what to pack in your kid's school lunchbox? Whether you are packing a lunch for your kid's first day of school or looking for inspiration to switch up the same lunch that your kid is getting bored of, you my friend, have come to the right place. Today we have rounded up over 30 of our best and most popular school lunch ideas that are easy, healthy, and kid-friendly. These school lunch recipes include everything from sandwiches and wraps, to bread and cheese, to crackers with dip, pasta, and more.

Kid-Friendly School Lunch Ideas
Easy pepperoni pizza rolls are crispy on the bottom, tender and chewy inside, packed with pepperoni and cheese, and baked until bubbly.

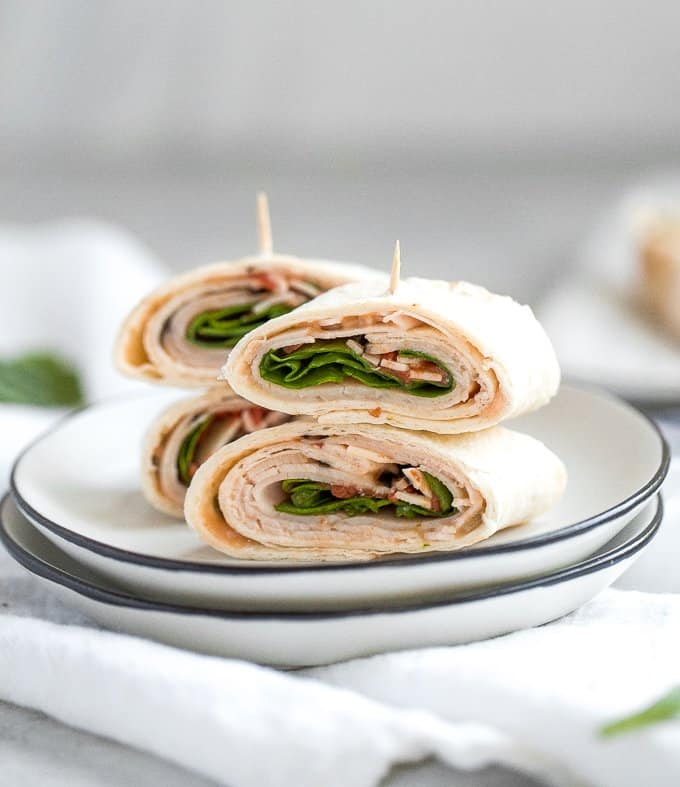
Turkey pinwheels are bite-sized finger food perfection and will make back-to-school lunch planning for the kids a total breeze. They are fully customizable and you can wrap them up in a tortilla or in pita bread.
Grilled cheese roll ups are a fun twist on a classic grilled cheese that gives you a hot handheld lunch to enjoy. They're kid-friendly and easy to make.

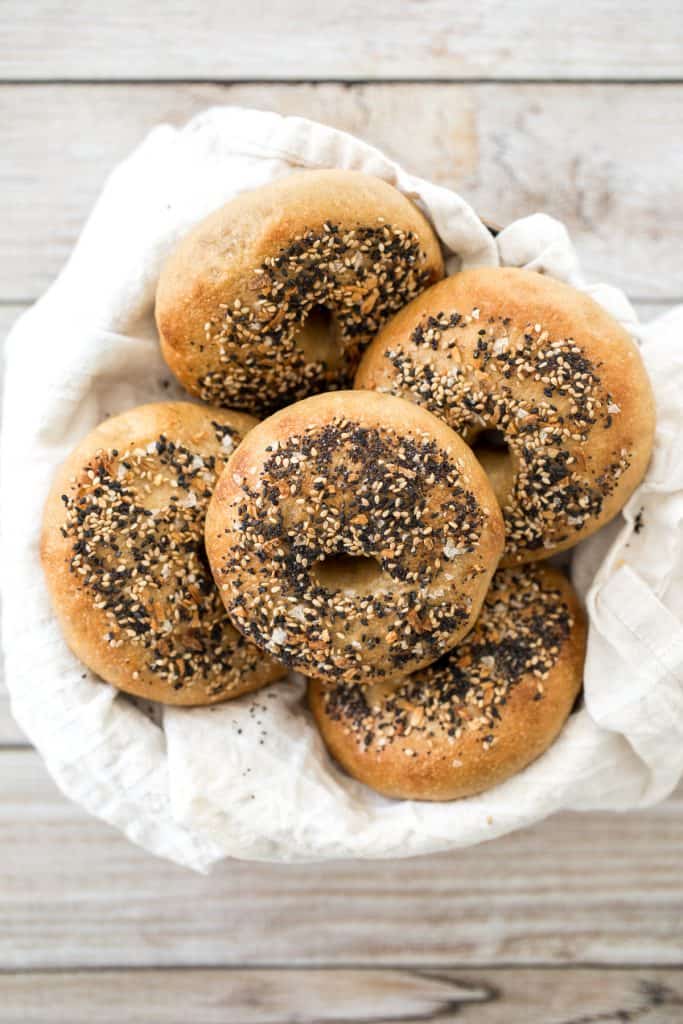
Everything Bagels with Cream Cheese
Easy homemade everything bagels with a signature everything bagel seasoning blend on top are just like bakery-style bagels and so easy to make at home.
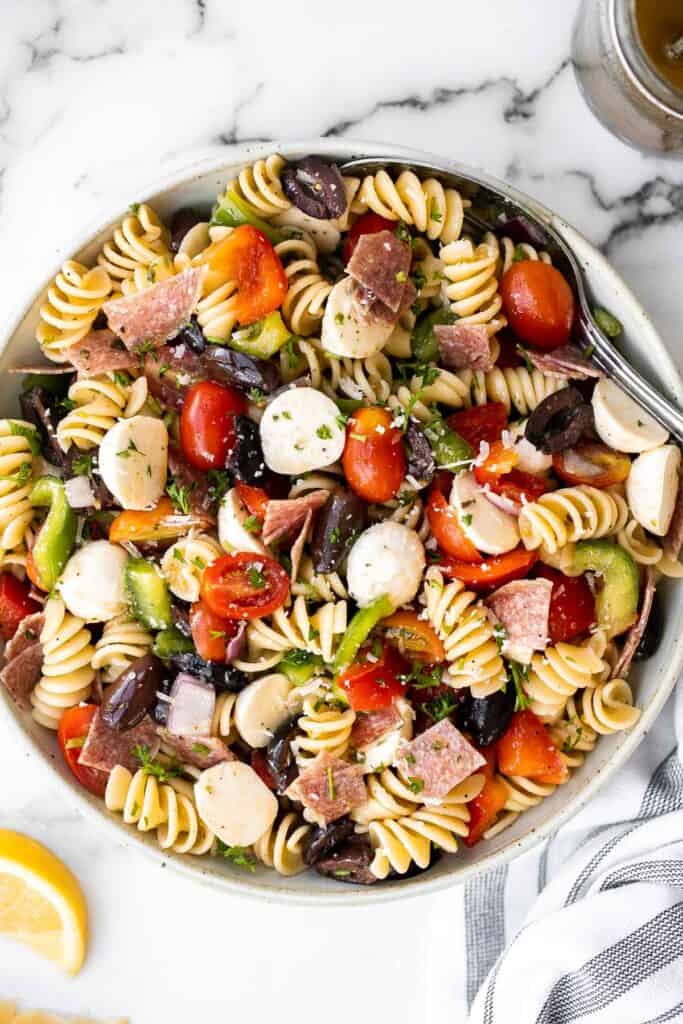
Italian pasta salad is delicious, wholesome, and easy to make. Make it up to three days ahead for your summer picnics and cookouts. You can't get more classic than Italian Salad on Memorial Day!
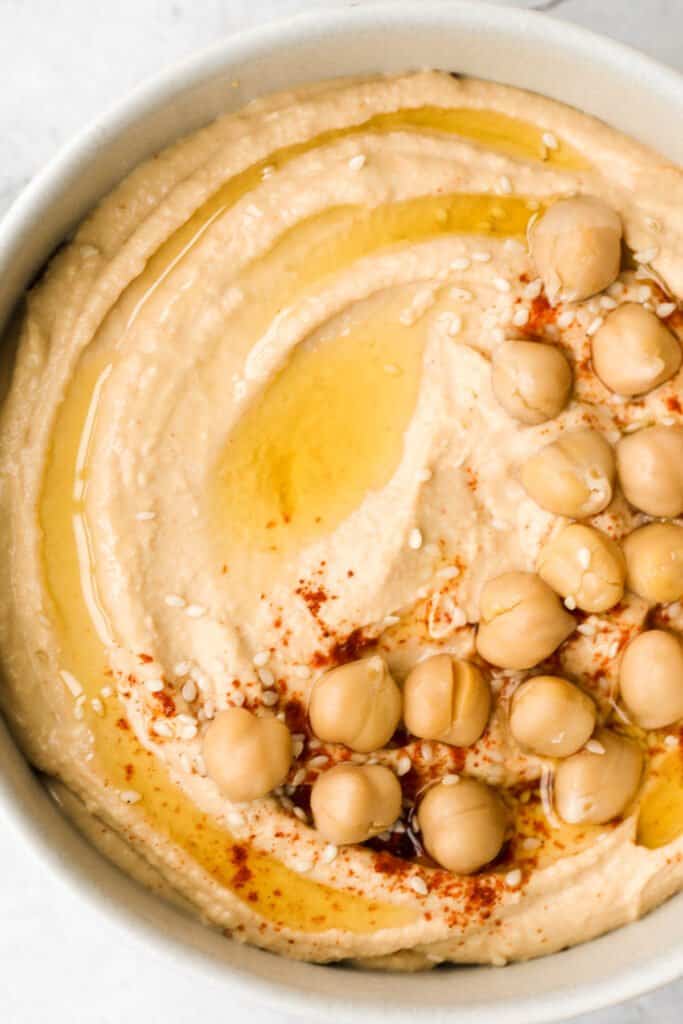
Pita Bread with Hummus
Nothing compares to freshly baked, quick and easy homemade pita bread. It's soft and puffy, with a perfect pocket. It takes just 15 minutes of actual prep.

Whip up smooth and creamy classic hummus dip at home in just 5 minutes, by combining chickpeas, tahini, olive oil, lemon juice and garlic in the blender.
The best egg salad sandwich is a quick and easy picnic classic loaded with perfect hard-boiled eggs, mayonnaise, a touch of dijon mustard and green onions.

Antipasto skewers with tortellini are a quick, easy, and delicious lunch with the best parts of a traditional antipasto platter but easier to eat. It's basically fancy homemade lunchables.

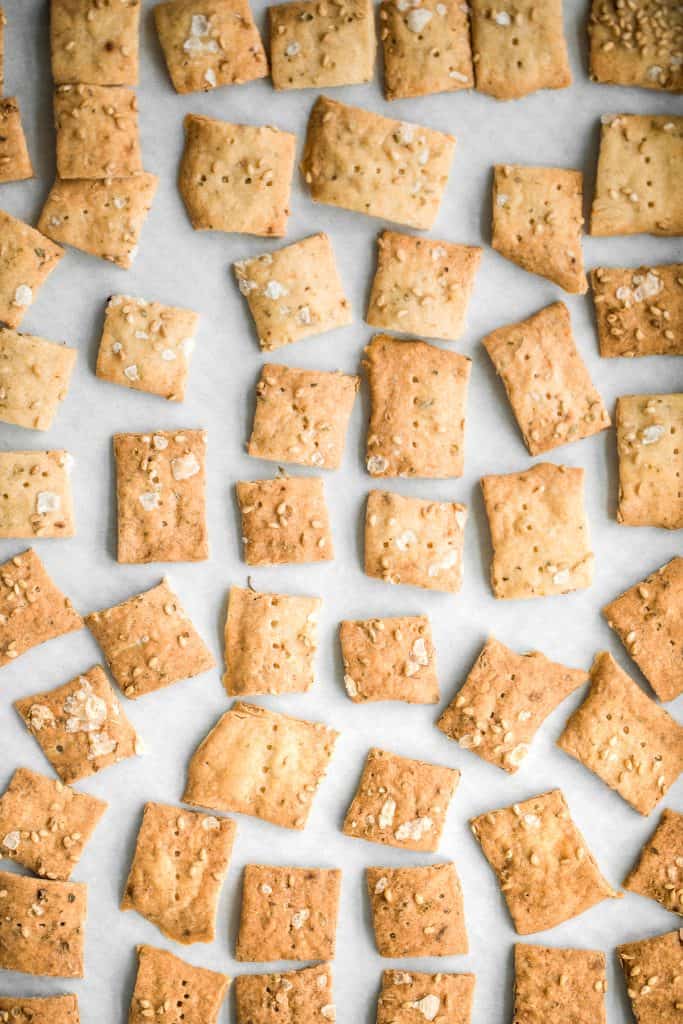
Sourdough Discard Crackers with Sliced Cheese
Quick and easy sourdough discard crackers are thin, crispy, crunchy and flavoured with sesame seeds, dried herbs and flaked salt. They are so crave-worthy.
Turkey and Cheese Sliders are quick and easy, made with deli meat and Swiss cheese filled inside soft Hawaiian dinner rolls topped with a buttery sauce.
Baked Chicken Quesadillas are cheesy, crispy, flavorful, and delicious. This family-friendly recipe is quick and easy to make in just 30 minutes!

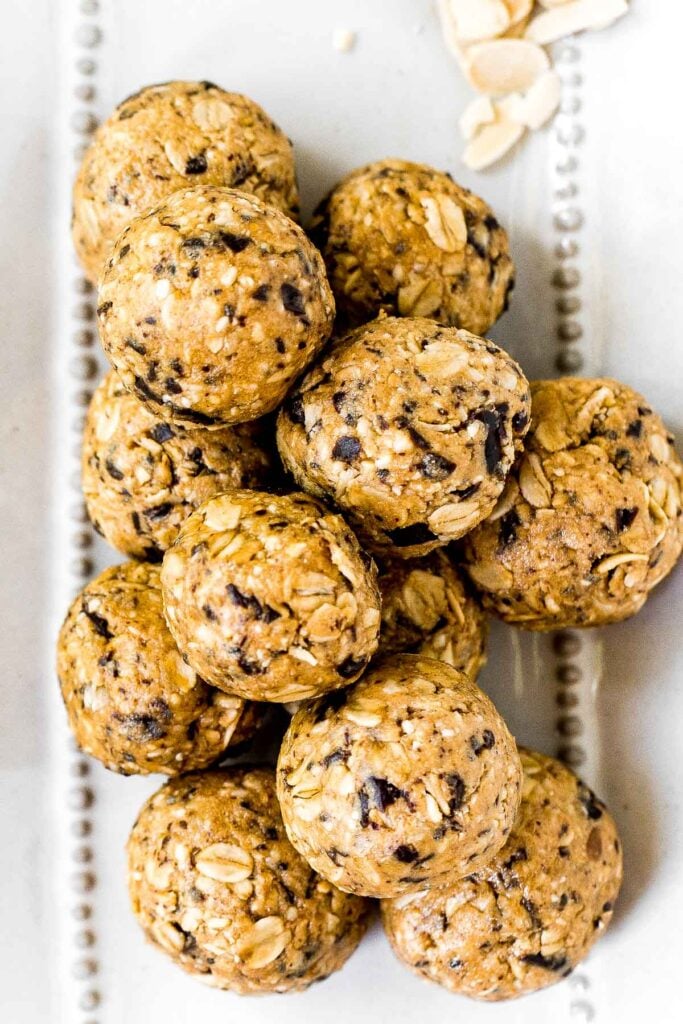
No bake protein-packed breakfast energy bites are chewy, easy to make, delicious, and loaded with healthy nutrients. Perfect for breakfast or as a snack.
Homemade calzones are delicious little pizza pockets filled with cheese and toppings and baked until golden. This Italian favourite is easy to make at home.

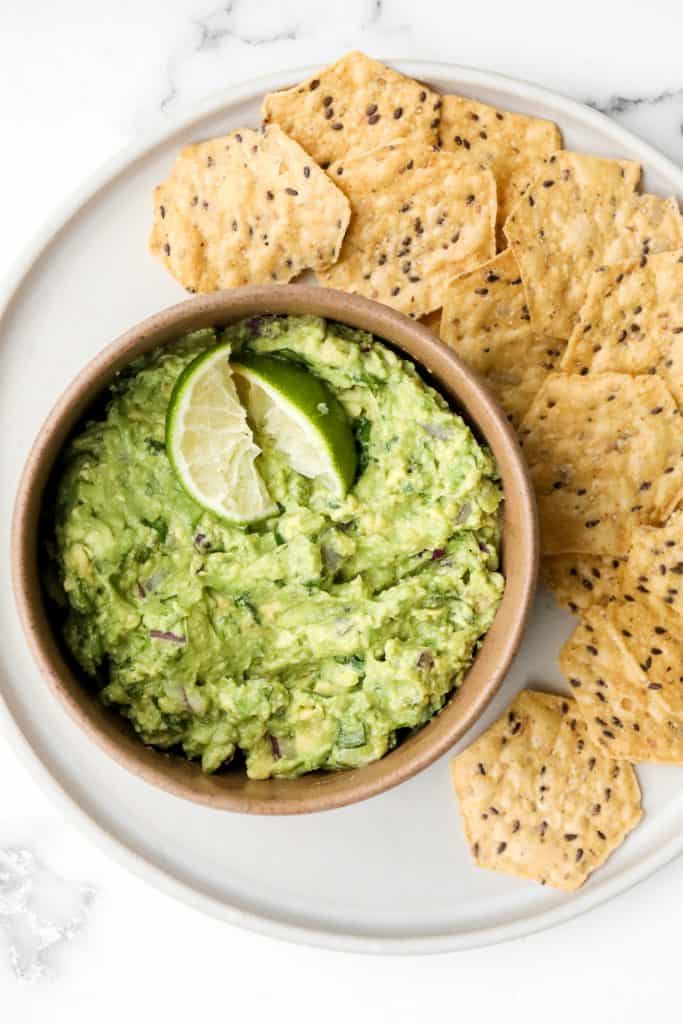
Tortilla Chips with Guacamole
Incredibly tasty, this easy and basic guacamole takes less than 5 minutes to make. It is the perfect dip for a Mexican-inspired Super Bowl party.
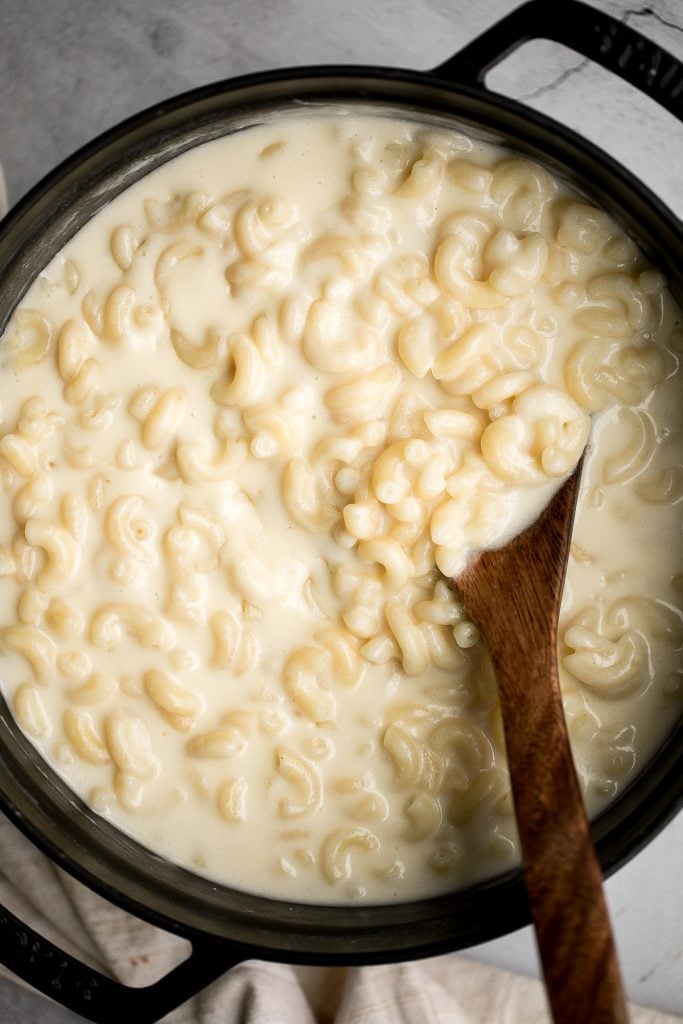
Stovetop Mac and Cheese with White Cheddar
Quick and easy, creamy stovetop mac and cheese with white cheddar is a delicious and comforting one pot 20-minute meal packed with three types of cheese.
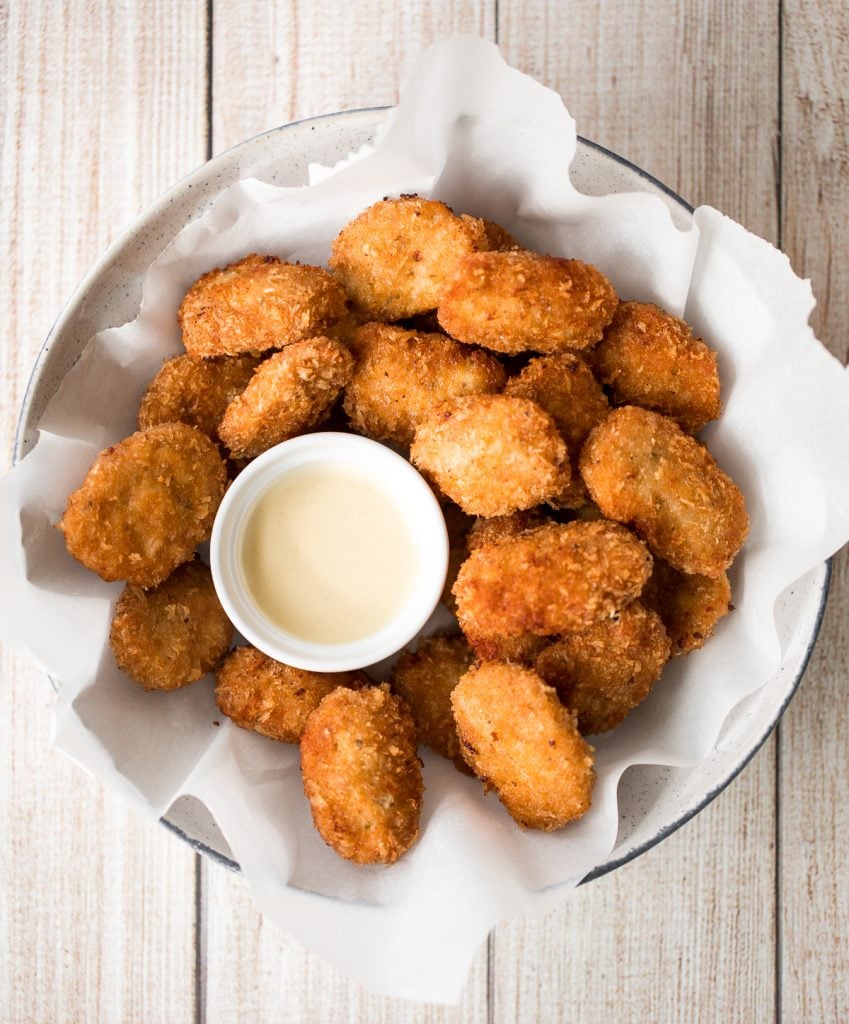
Easy homemade chicken nuggets with chicken breast are golden and crisp on the outside and juicy and tender inside. They're freezer-friendly so make extra.
Soft Pretzels with Hummus
Salted Soft Pretzels with Avocado Hummus
The best quick and easy salted soft pretzels are buttery, salty, and so delicious. They are golden brown and chewy on the outside, yet warm and soft inside.

Quick and easy avocado hummus is creamy, smooth, healthy, and delicious. Loaded with chickpeas and avocado, it's the perfect blend of hummus and guacamole.

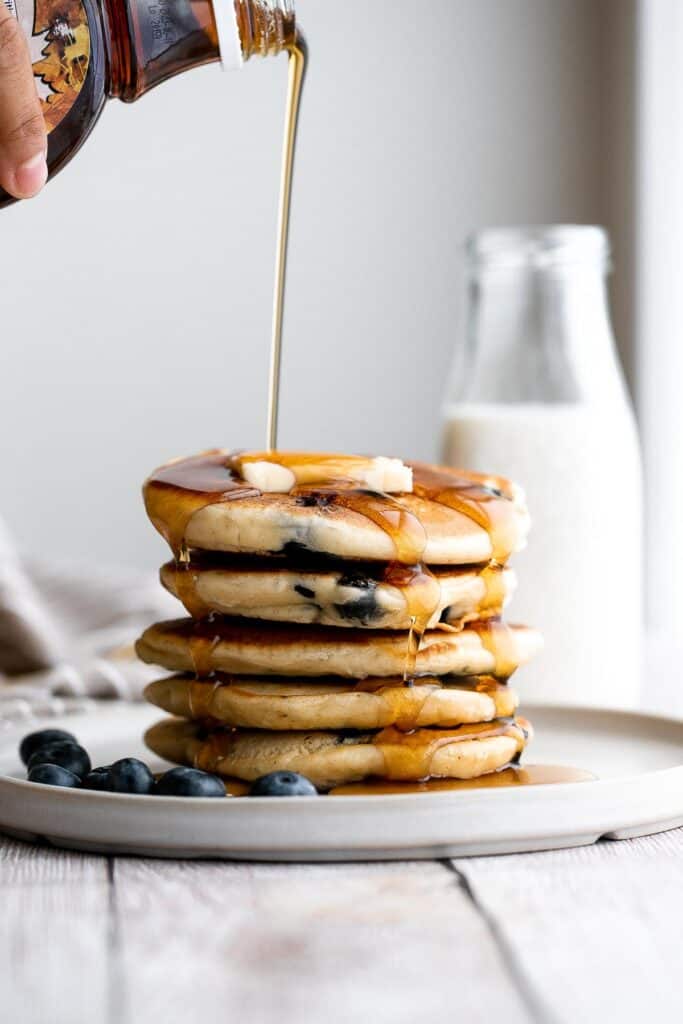
Leftover Blueberry Pancakes
There's nothing better in the morning than thick, soft, fluffy blueberry pancakes, loaded with fresh berries, topped with butter, and soaked in maple syrup.
Quick and easy skillet Neapolitan margherita pizza has an iconic thin and soft crust with a perfectly crisp exterior, and simple and fresh toppings.

Quick and easy pesto penne pasta is a simple and light Italian pasta dish made with just five ingredients in under 15 minutes. The easiest dinner.

Four Quick and Easy Ritz Crackers
Four super fun, quick and easy RITZ cracker recipes with both sweet and savoury options including my favourite smoked salmon and cheese cracker bites.

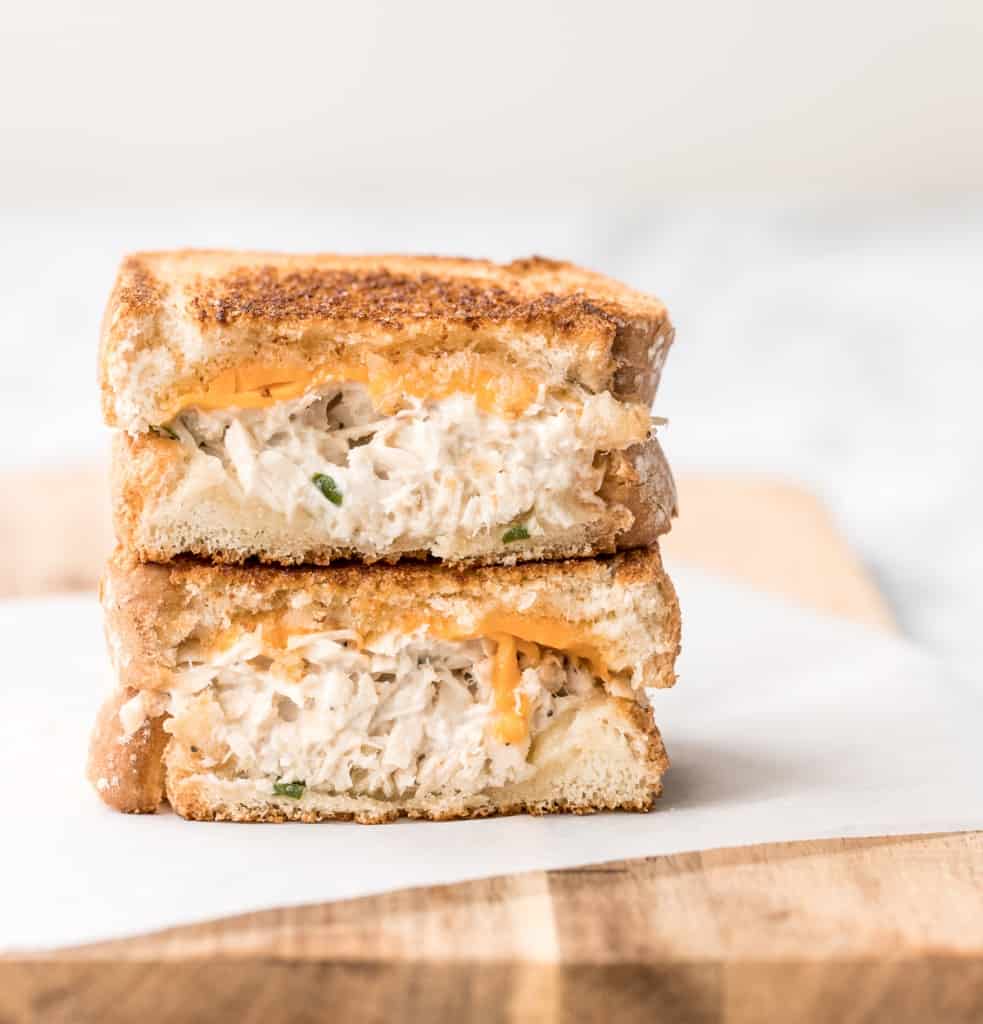
Tuna Melt Grilled Cheese Sandwich
Get your hands on pantry staple canned tuna and make a delicious, crunchy tuna melt grilled cheese sandwich in less than 10 minutes! It's so tasty and easy! For another grilled cheese option, try a roasted broccoli grilled cheese sandwich.
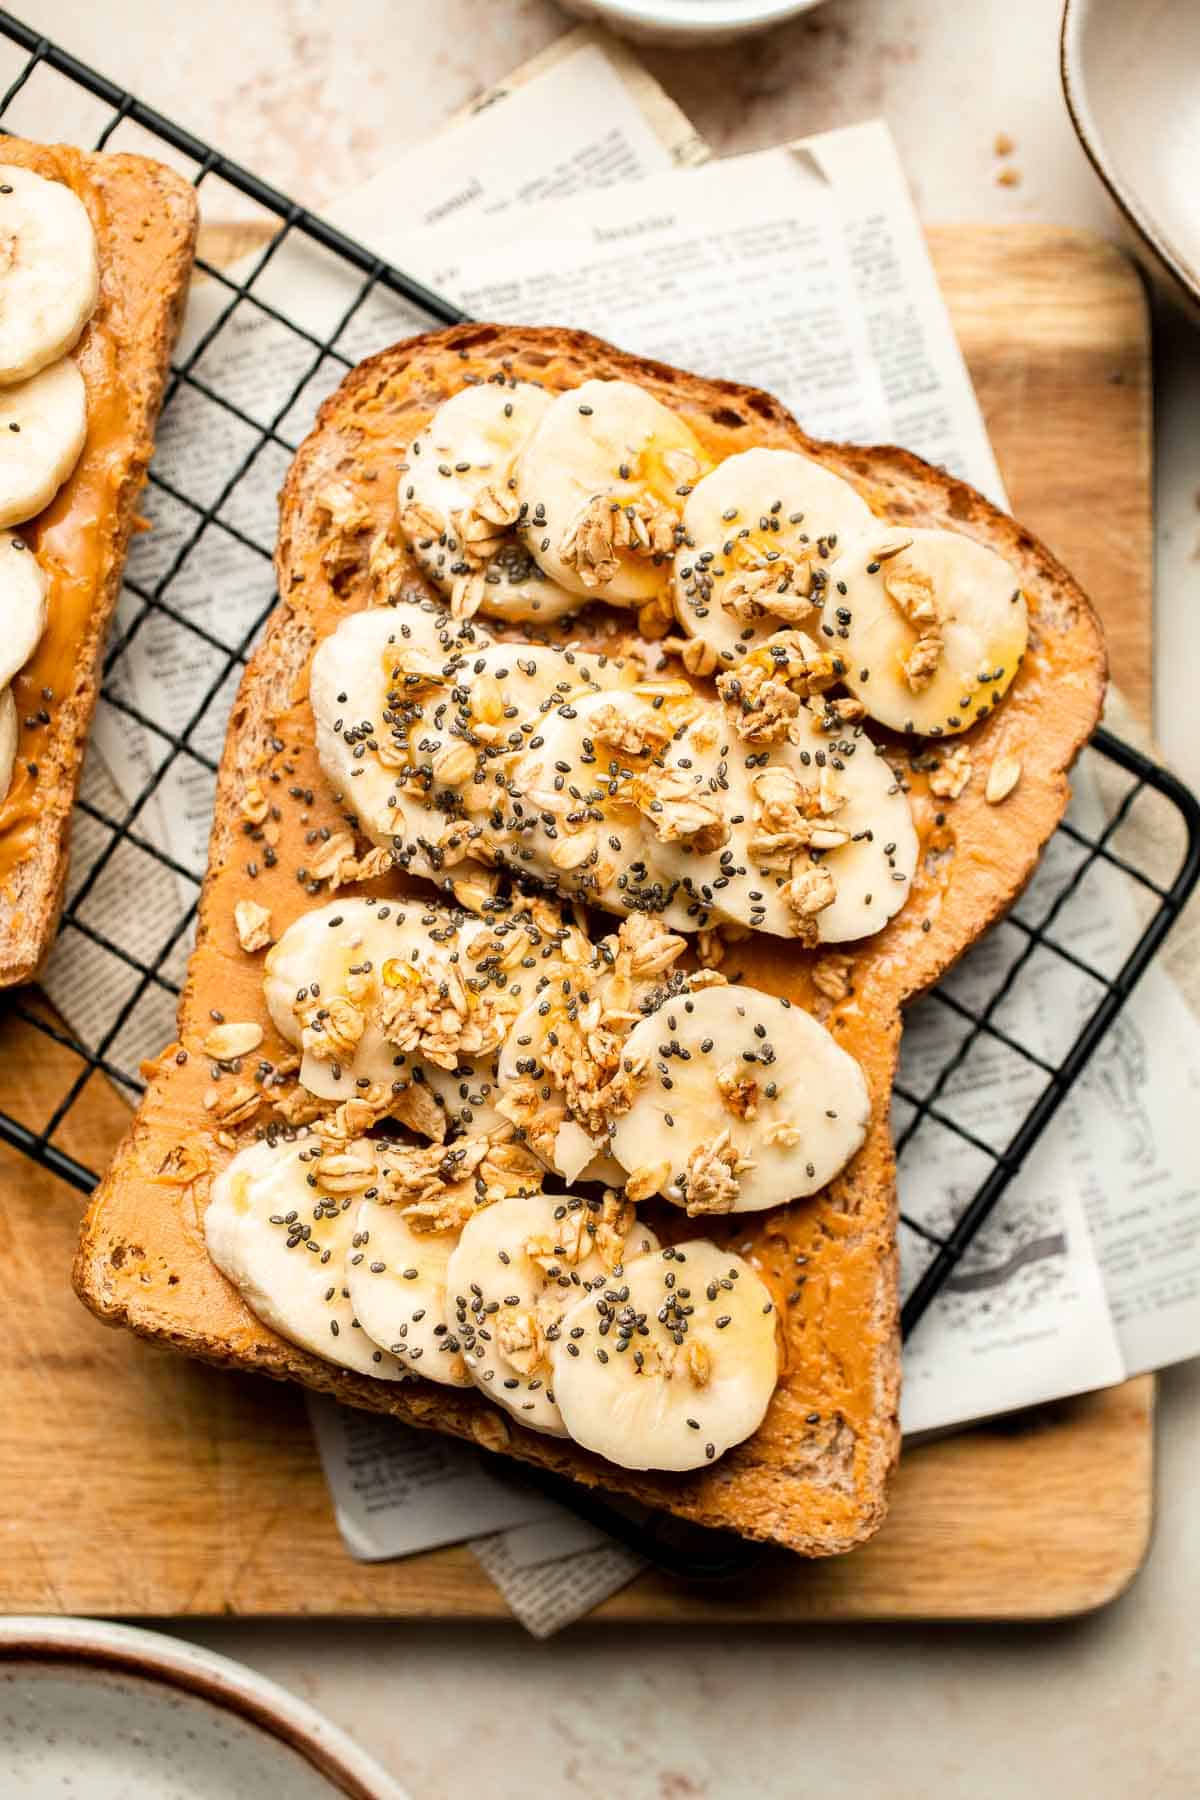
Peanut Butter Banana Toast is an incredibly simple yet healthy breakfast that's ready in a just 5 minutes. It's quick, satisfying, and protein-packed.
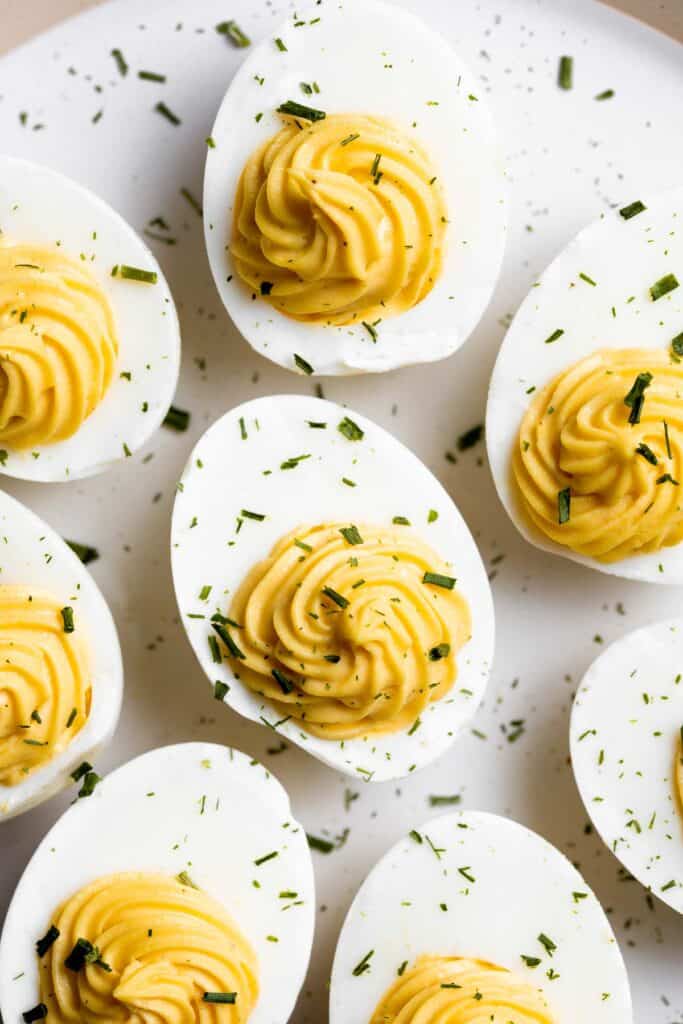
Classic deviled eggs are a simple, easy, and healthy appetizer to make when you need something quick for brunch, picnics, barbecues, potlucks, or Easter.
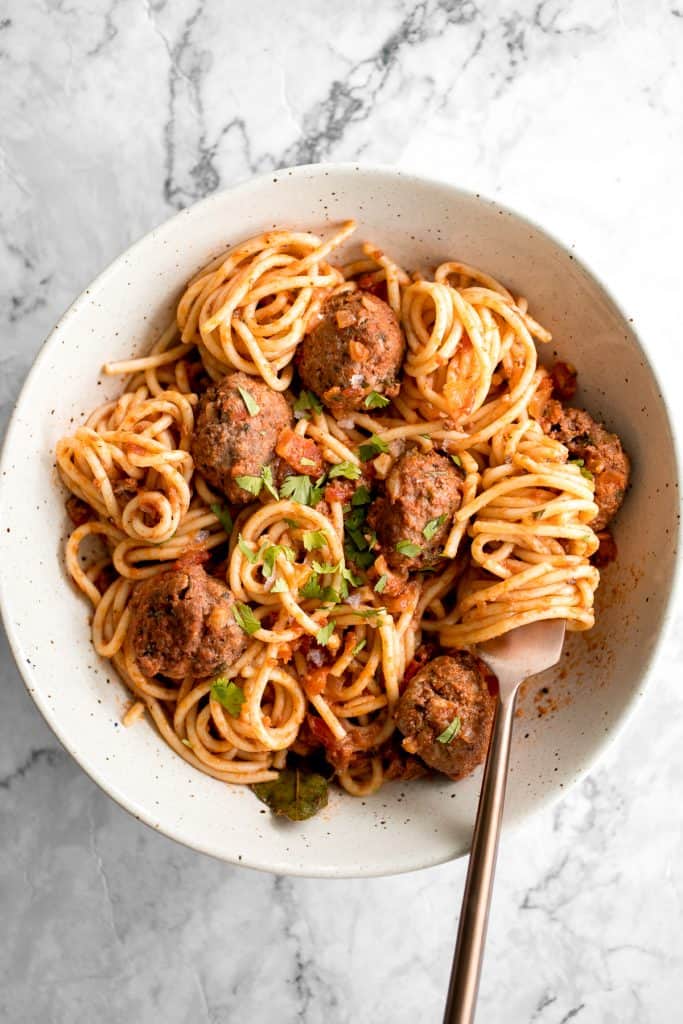
Quick and easy spaghetti and meatballs is delicious, rich, comforting with tender beef meatballs simmered in a savoury tomato sauce. Make it in 30 minutes.
Quick and Easy Butter Croissants
Quick and easy butter croissants are flaky, buttery, airy, and authentic, and are made in the fraction of the time using a special simplified technique.

Vegan hummus wrap is a quick easy lunch made in minutes with a handful of fresh ingredients. This delicious veggie wrap is healthy, fresh, nutritious.

How to Create an Easy School Lunchbox
To create an easy lunch box for back to school, pick one of the school lunch ideas listed above and pair them with 1-2 snacks.
- Fruit - Pack some chopped fruit on the side or turn them into a Fruit Salad.
- Veggies
- Nuts or trail mix
- Yogurt
- Cheese
- Muffins - Try Blueberry Yogurt Muffins, Banana Chocolate Chip Muffins, Zucchini Muffins, Cinnamon Apple Oatmeal Muffins, or Carrot Cake Muffins.
- Granola bars - Try Chewy Peanut Butter Granola Bars, Almond Cranberry Chocolate Granola Bars, or Almond Butter Granola Bars.
- Banana bread - Try Healthy Banana Bread or Nutty Banana Bread.
- Granola - Try Cinnamon Apple Granola, Coconut Maple Walnut Granola, Almond Pecan Granola, Pumpkin Pie Granola, or Gingerbread Granola.
Tips for Preparing School Lunch
- Prep ahead of time. When it comes to packing a school lunch, try to do it the night before. This saves so much time on busy mornings when you are trying to wrangle the kids together and get them ready for school. If you can't make something the night before, try to at least prep the ingredients and store in airtight containers in the refrigerator.
- How to pack lunch. When it comes to school lunches, the container that you pack them in might be one of the most important parts. There are so many options that you can choose from. Here are my favorites: bento-style lunch box, insulated lunch bag, kids cutlery, and toddler cutlery.
- Opt for foods that aren't super messy. This one is self-explanatory. 🙂
Did You Make Any of These School Lunch Recipes?
Please leave a comment and rating below, and let me know what you thought of this round up of school lunch ideas. Be sure to snap a picture and tag me on Instagram @aheadofthyme or share it on the Pinterest pin so that I can follow along.
HUNGRY FOR MORE? Don't forget to sign up for my email newsletter so that you don't miss any recipes. You can also follow along on Instagram and Pinterest for more recipe updates.
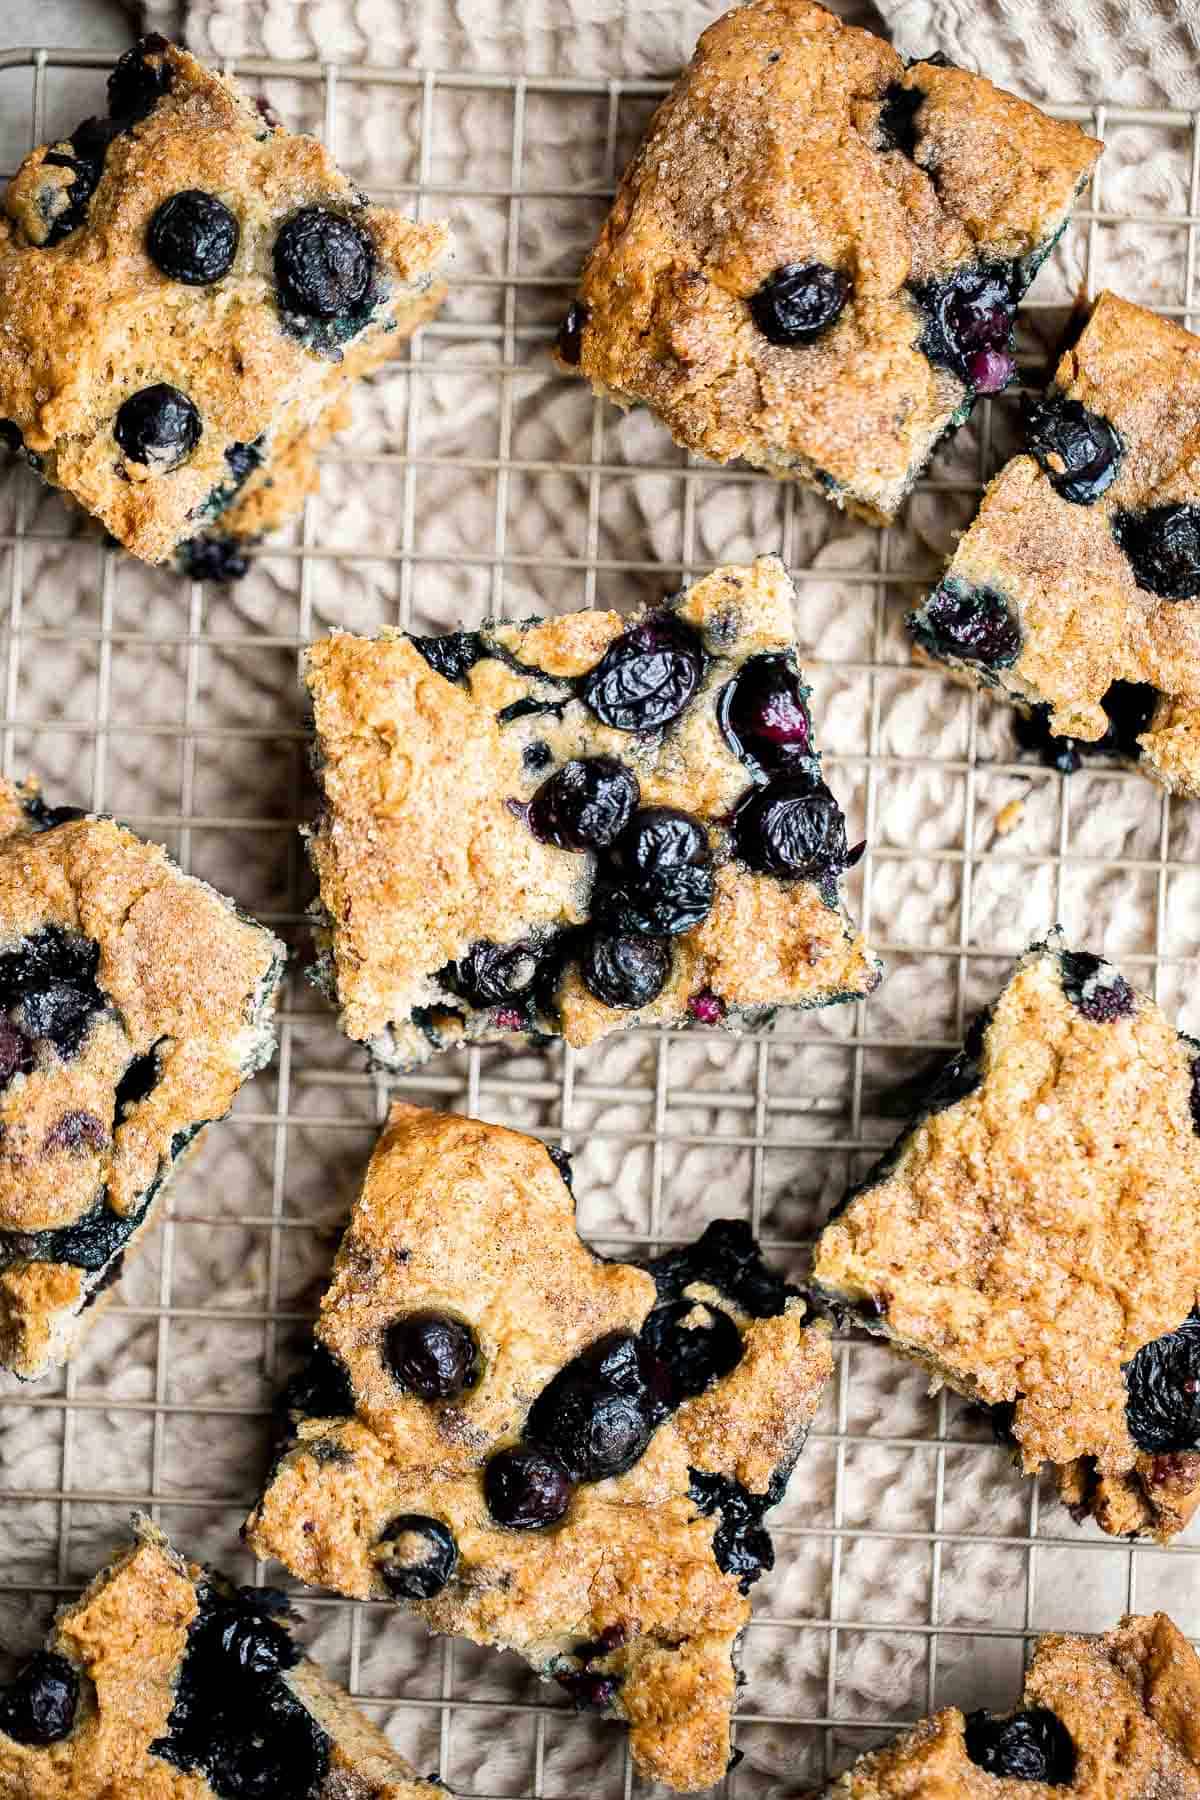
Blueberry Cake
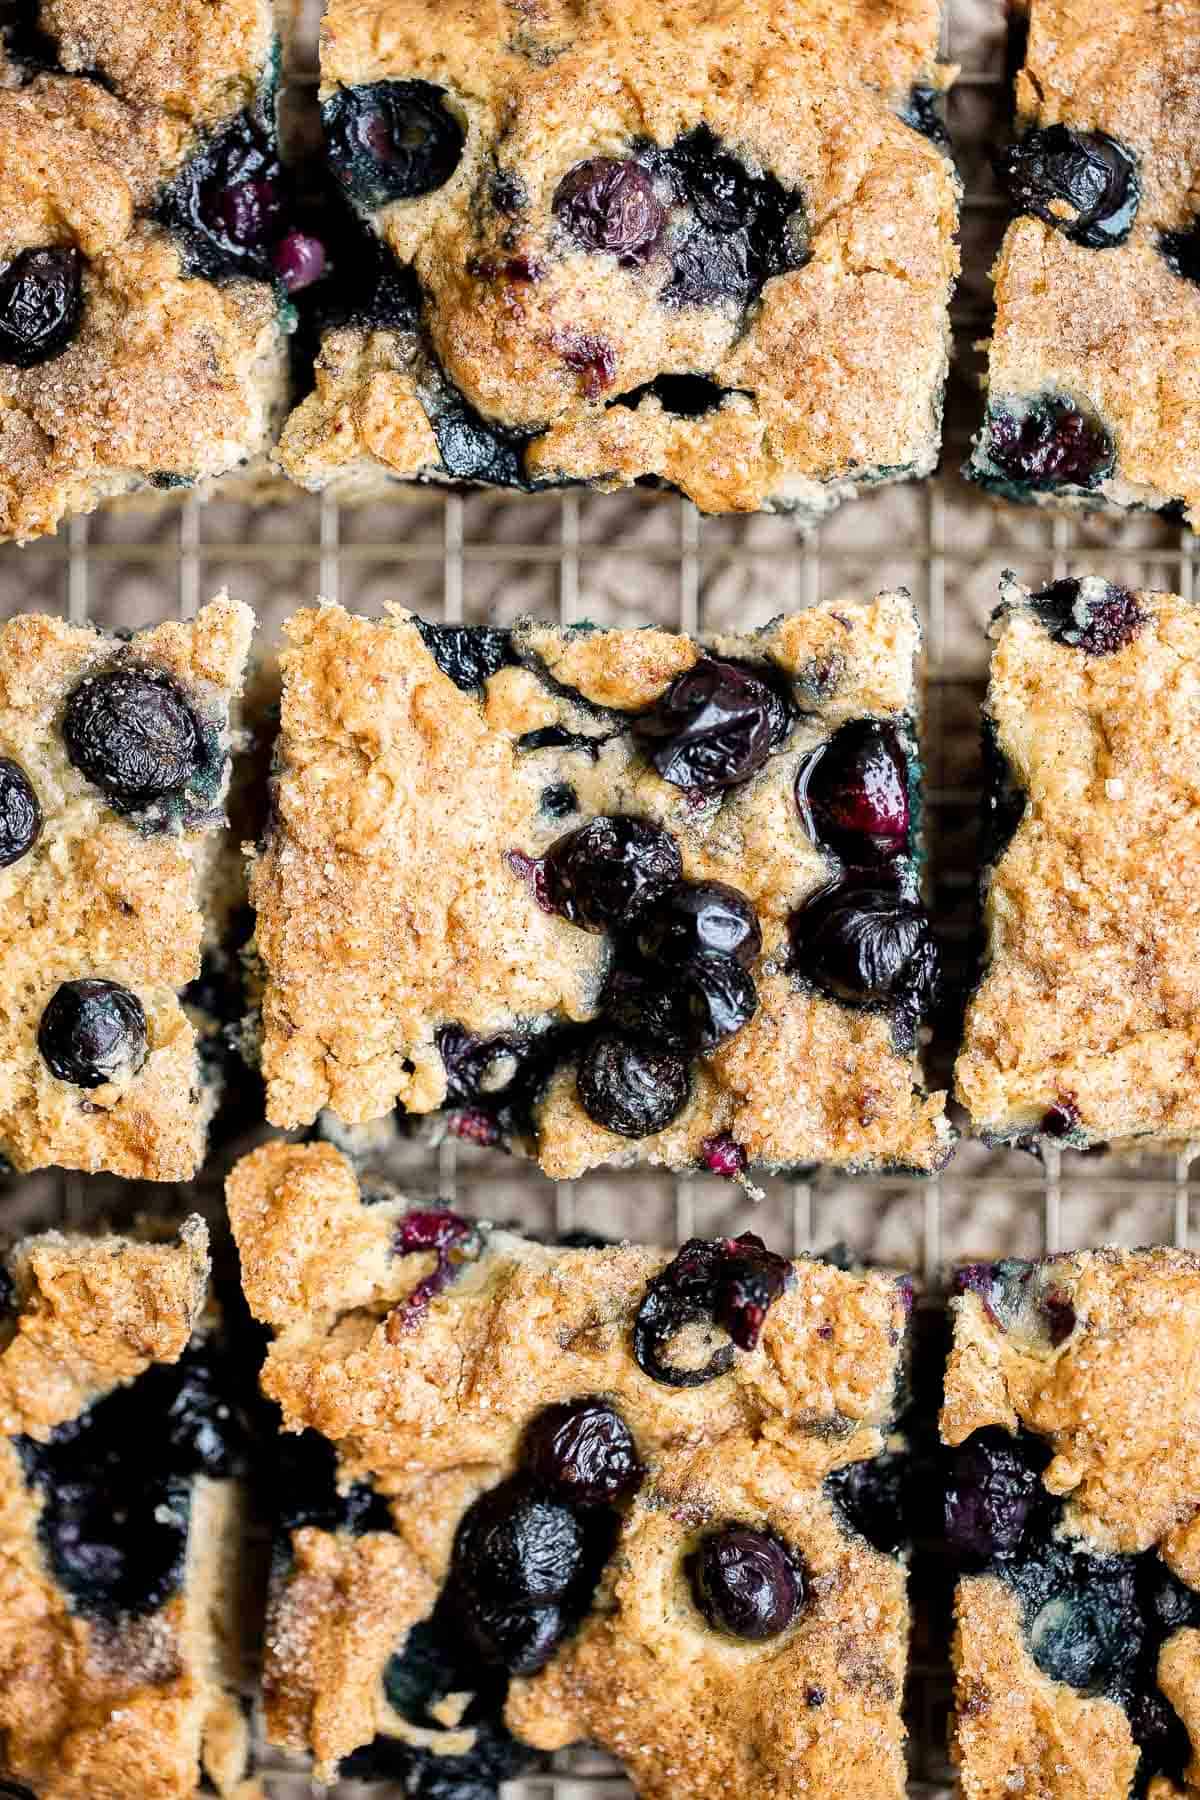
Calling all blueberry lovers! This Blueberry Cake is dense, moist, and chock-full of delicious blueberries with a dusting of cinnamon sugar on top. Plus, it takes only 10 minutes of preparation to get this blueberry coffee cake into the oven. It's so easy and good that it may become your go-to for using up extra blueberries.
Blueberry cake also stores well and can be eaten all at once or portioned out over time for weeks of enjoyment. Enjoy this any-time favorite in the mornings with a cappuccino, a slice after dinner, or as a snack any time in-between.
Why You'll Love This Blueberry Cake
- Perfectly sweet. This blueberry cake is perfectly balanced - not too sweet, but sweet enough to satisfy cravings. Processed sugars are kept exceptionally low (especially for a cake) thanks to the natural sweetness of blueberries.
- Bursting with berry flavor. Using fresh blueberries in this cake gives you bites of blueberry goodness that quite literally burst in your mouth! And you can totally use frozen blueberries when they're not fresh in season.
- It's a perfect summer snack or dessert. With blueberries in season, it's the absolute best time to take advantage of pint sales, farmer's market hauls, or u-pick bounties.
Ingredient Notes and Substitutions
To make this easy Blueberry Cake, you will need classic baking ingredients like flour, baking powder, sugar, salt, milk, oil, eggs, vanilla extract, and cinnamon (See the full measurements in the recipe card at the bottom of the post).
Do you need to make this blueberry cake a little more allergy-friendly? Easy! Here are a few simple swaps that will tailor this recipe to your specific needs:
- flour - this recipe calls for all-purpose wheat flour, but you can easily make it gluten free by substituting the wheat flour with the same amount of gluten free measure-for-measure flour. The texture may change a little bit because of the difference in flour, but the end result will still be a delicious blueberry coffee cake!
- milk - looking to veganize this blueberry cake or have a lactose allergy? Swap the milk for a non-dairy alternative! Coconut milk would be a great swap in this recipe because it has a similar fat content (which is important in baking) and a slightly sweet, mildly coconutty flavor that pairs well with blueberries.
- blueberries - it's a sad fact that not everyone is a blueberry lover, but that doesn't mean this cake can't still be enjoyed! Swap the blueberries for quartered or diced strawberries, diced apples, blackberries or raspberries for a different kind of fruity experience.
- vanilla extract - you can experiment with flavor by substituting the vanilla extract in your homemade blueberry cake with a different kind. Try almond, lemon, coconut, maple, rum, or butter extract in place of vanilla to switch things up.
- vegetable oil - you can use butter instead of vegetable oil to create a more buttery flavor.
Equipment
You will also need the following baking equipment:
- measuring cups and spoons
- mixing bowls
- spatula
- 8-inch square baking pan
- wire cooling rack
How to Make the Best Blueberry Cake
- Combine dry ingredients. In a large mixing bowl, combine all the dry ingredients including flour, baking powder, sugar, and salt. Whisk together until evenly distributed and set aside.
- Combine wet ingredients. In a medium mixing bowl, whisk well to combine all the wet ingredients including milk, oil, egg, and vanilla extract.
- Add wet ingredients to dry. Pour the wet ingredients into the dry ingredients and use a spatula to mix together until just combined and no dry ingredients are visible. Do not overmix.
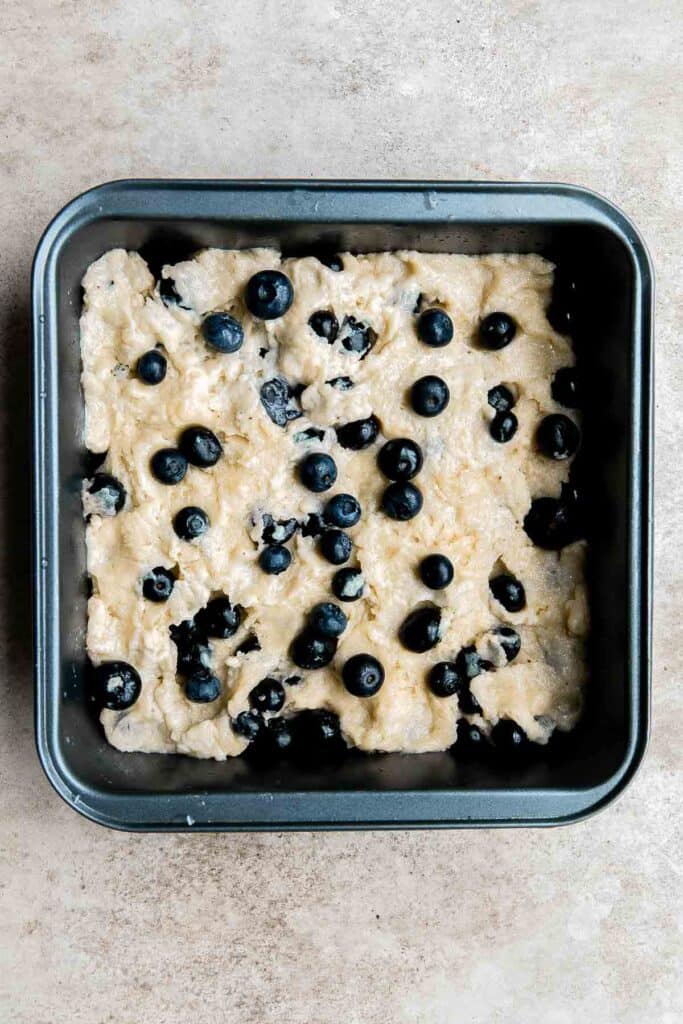
- Add blueberries. Fold in the blueberries.


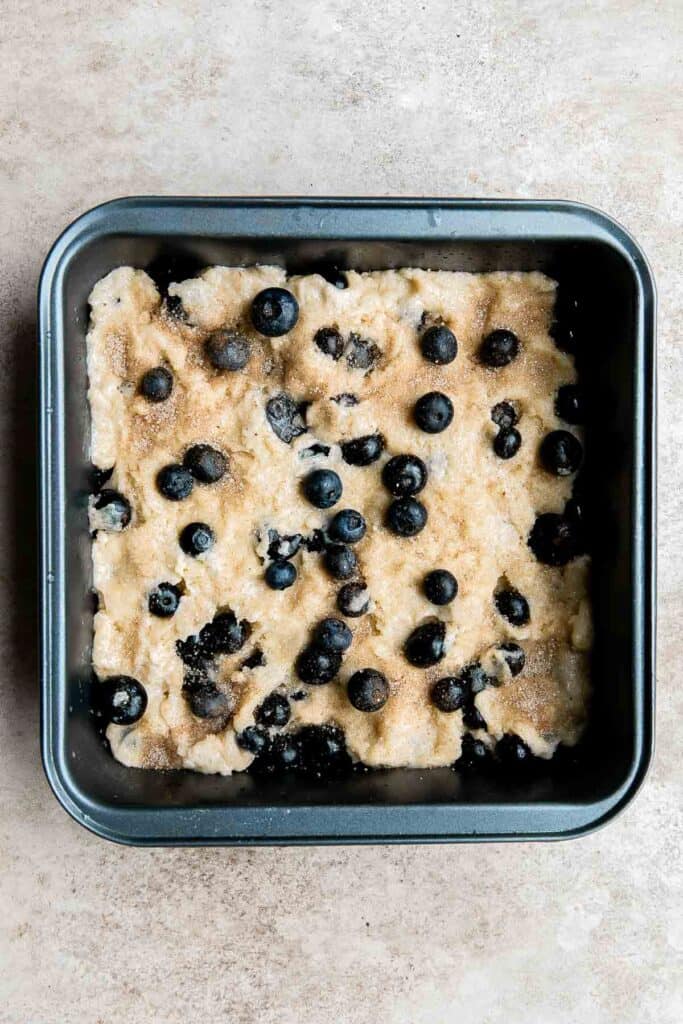
- Make cinnamon sugar. In a small mixing bowl, add sugar and cinnamon and use a spoon to mix evenly.
- Fill cakepan. Lightly grease an 8-inch square baking pan with butter or oil. Pour the batter into the prepared baking pan and top with the cinnamon sugar.
- Bake. Bake in a preheated 350F oven for 40-45 minutes until golden brown and a toothpick inserted into the center of the cake comes out clean.
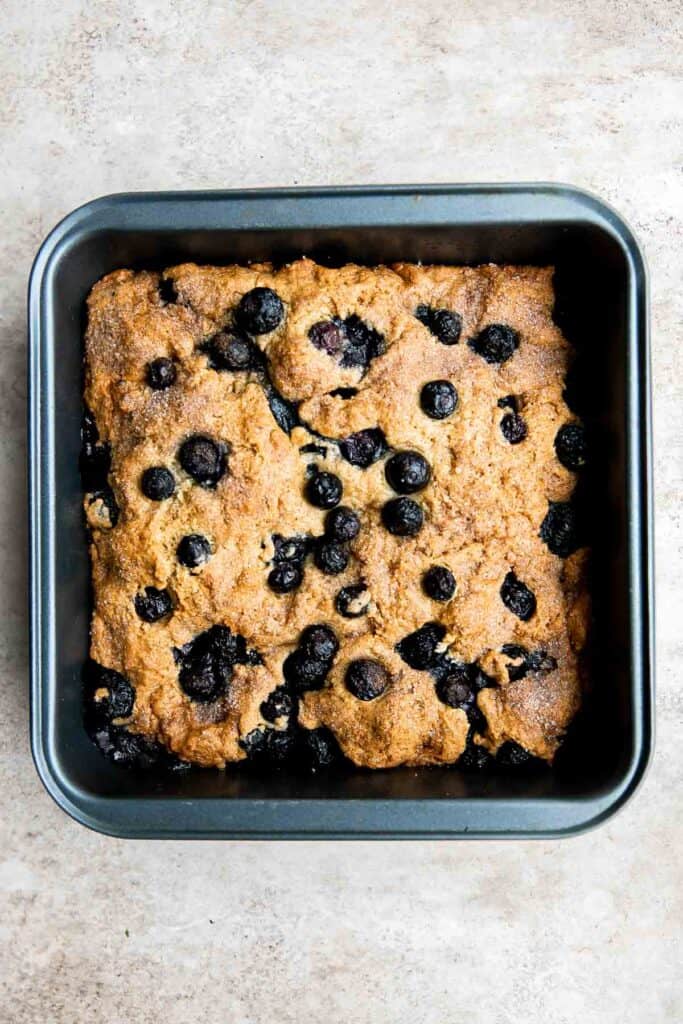
- Cool. Let cool for 10 minutes in the pan, then invert to remove the cake. Cool completely on a wire cooling rack or slice and serve warm.
Storing Instructions
How to Store
Cover with plastic cling wrap, aluminum foil, or place in a zippered plastic bag (squeeze the air out before sealing!) to keep the cake from drying out, and store in the fridge for up to a week. Enjoy leftovers cold or heated up in the microwave.
How to Freeze
Place the whole cake in an airtight freezer bag, or slice up and carefully arrange the slices to allow for single-serving access. Blueberry cake will keep in the freezer for 2-3 months.
Recipe Tips and Tricks
- Do not overmix the batter. When mixing the batter, stir with a spatula until just combined and no dry ingredients are visible. Overmixing will make the bread denser and firmer.
- Add a citrus twist. Lemon and blueberry are a match made in heaven! Marry them in this recipe by swapping the vanilla extract for lemon extract or juice as mentioned above and adding fresh lemon zest to the batter and the topping, leaving out the cinnamon.
- Serve warm with butter. Just like you would with Blueberry Muffins, you can up the coziness factor of this cake by serving slices warm with an optional pat of butter for a more fragrant and comforting snack or dessert!

More Blueberry Recipes
- 15 Best Blueberry Recipes
- Blueberry Biscuits
- Blueberry Buckle Cake
- Classic Blueberry Pie
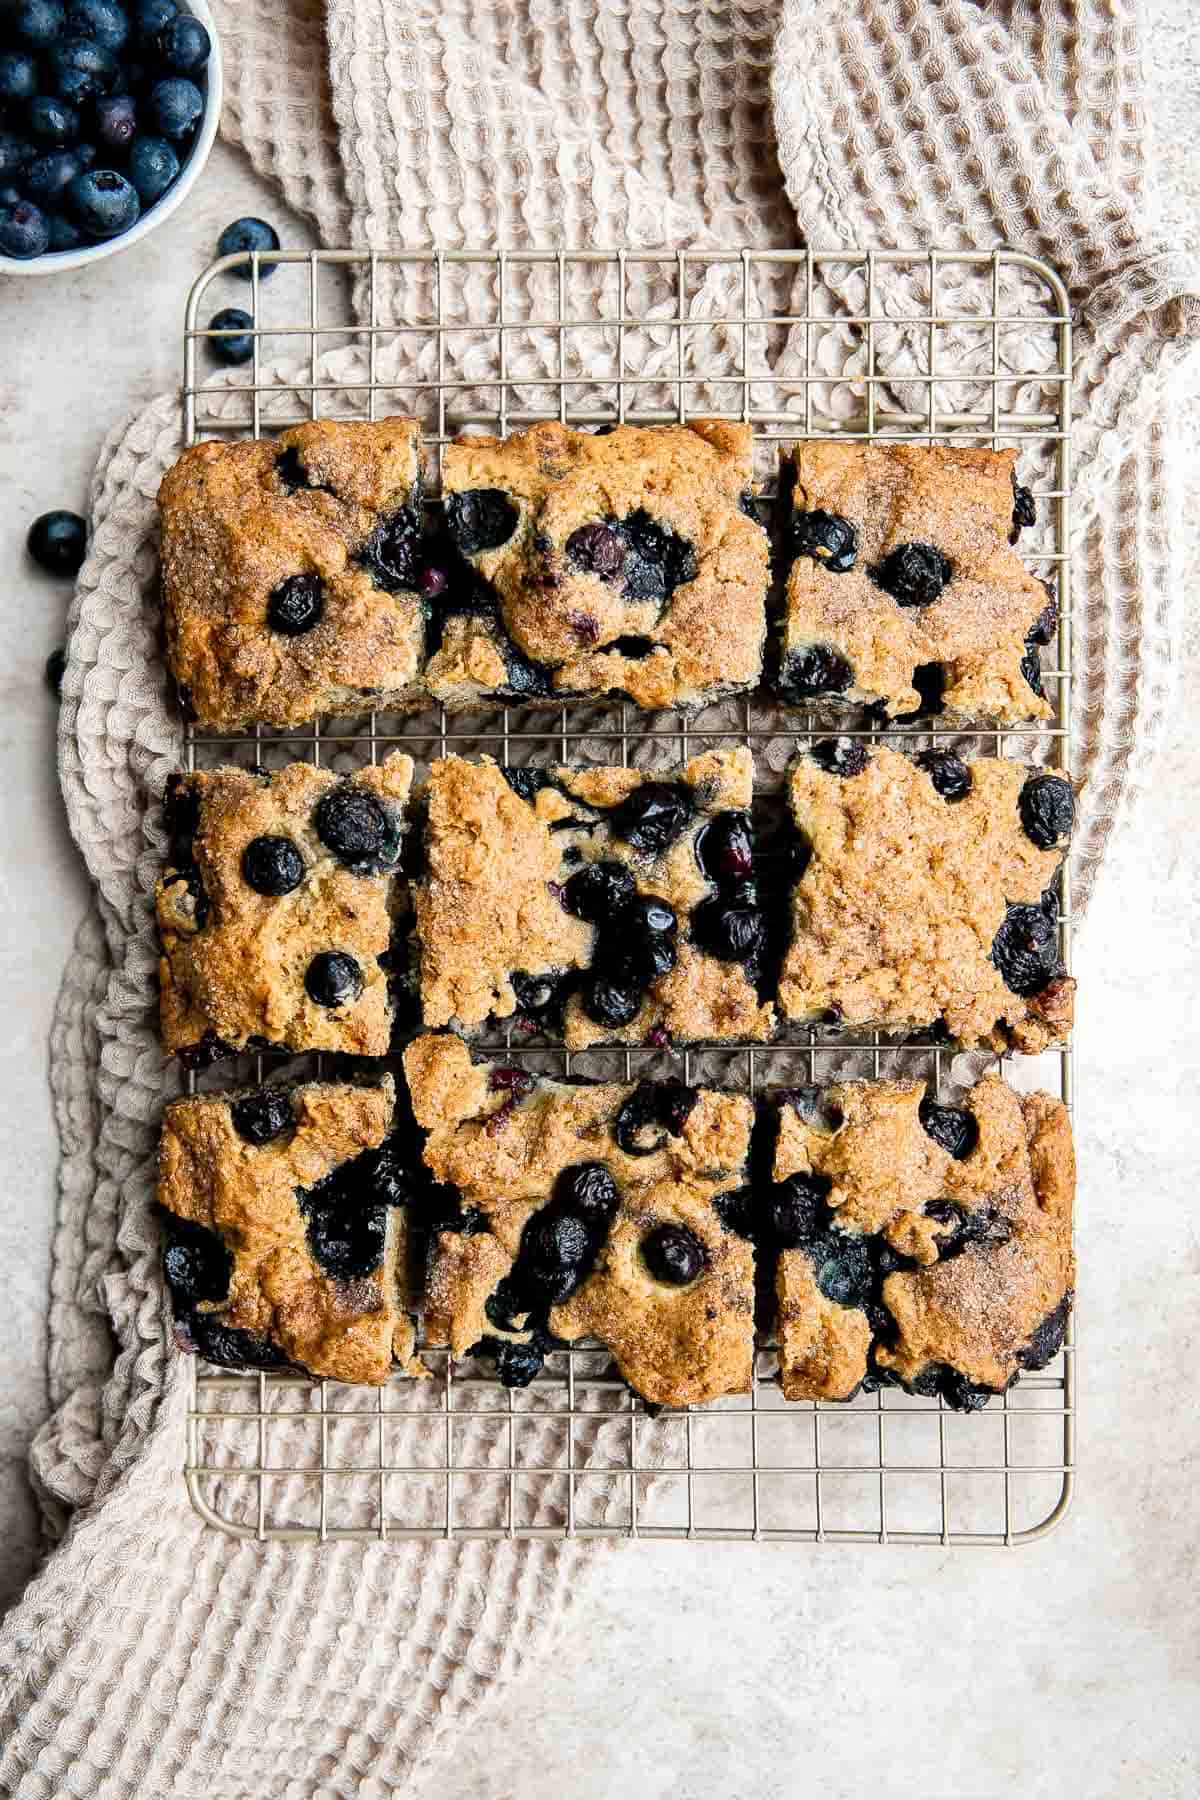
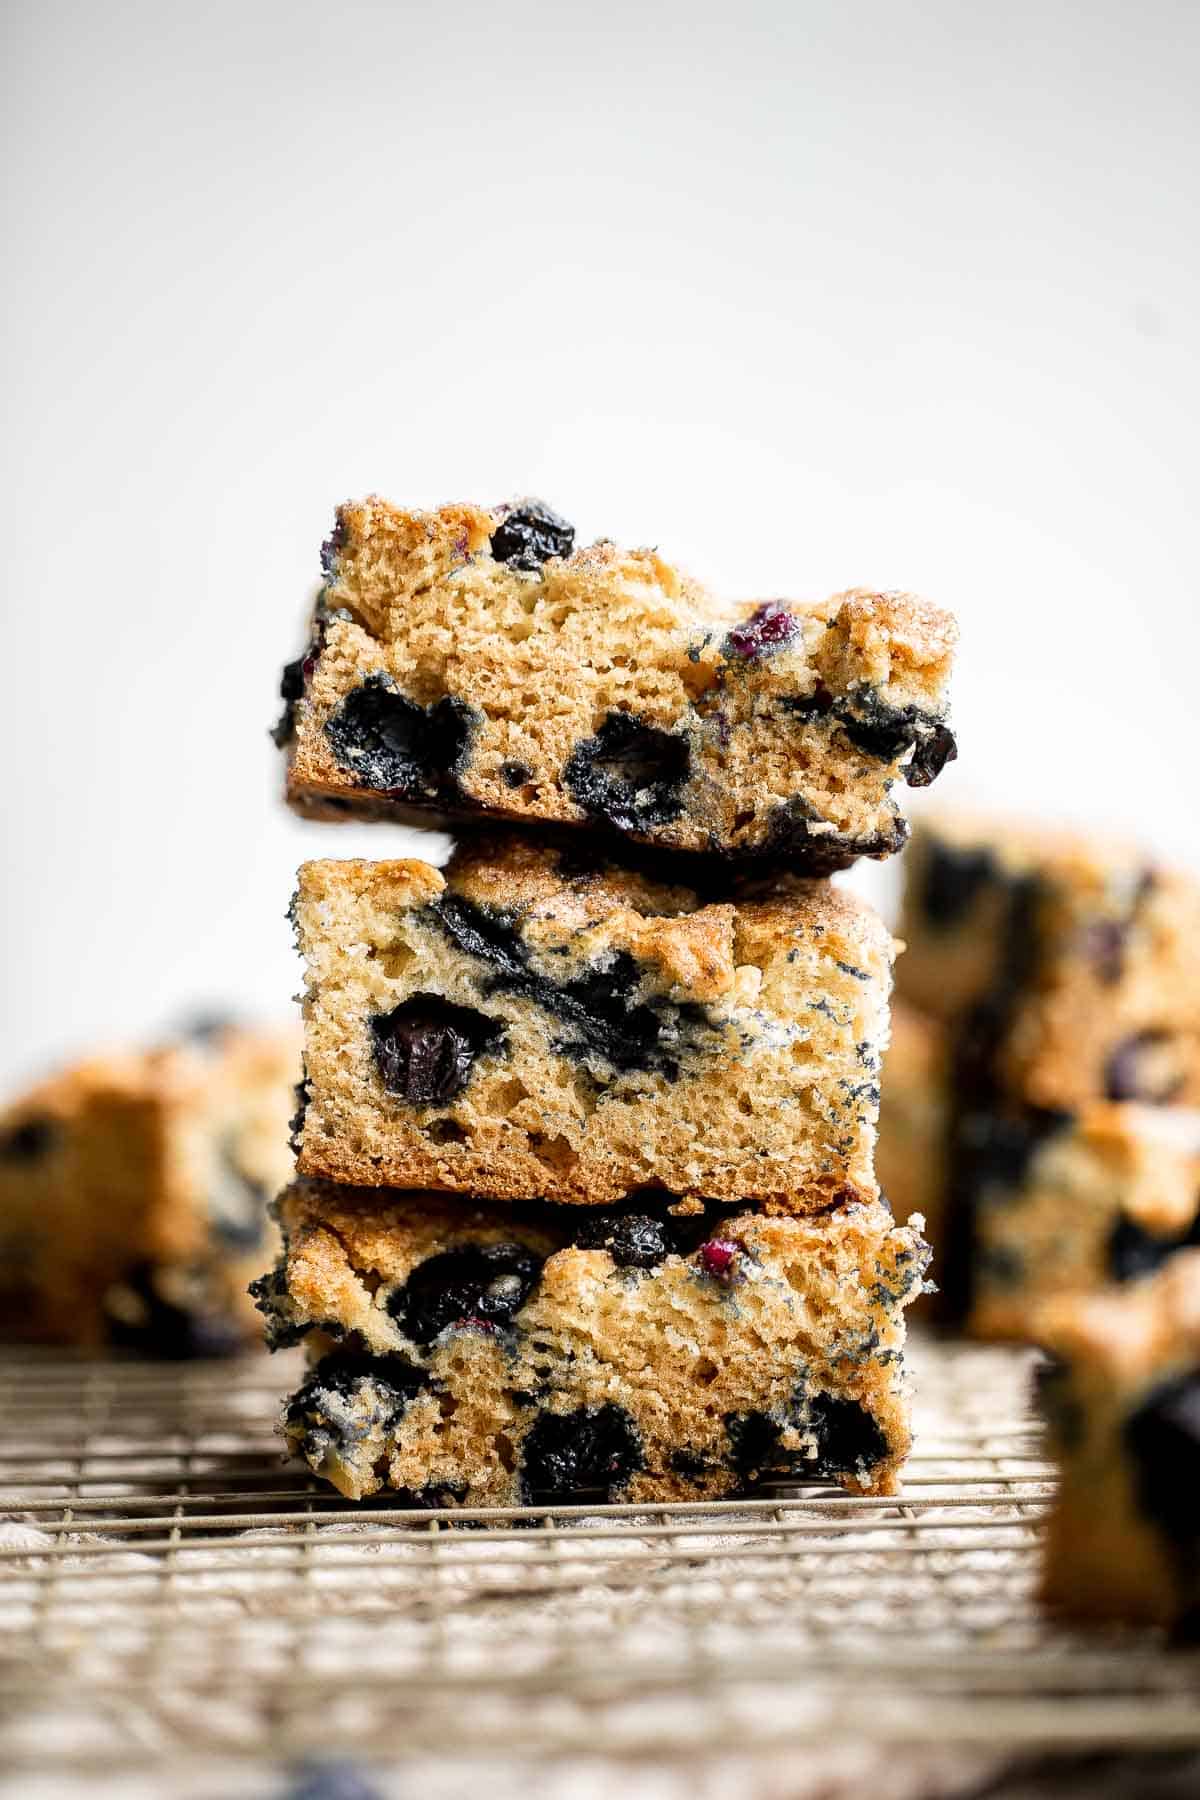
- Blueberry Oat Squares
- Blueberry Crisp
Tried this recipe?
I'd love to hear what you think! Leave a comment and rating below to share your feedback. Your reviews help others discover this recipe and help me keep creating more free recipes for you. Snap a photo and tag me on social media @aheadofthyme too.

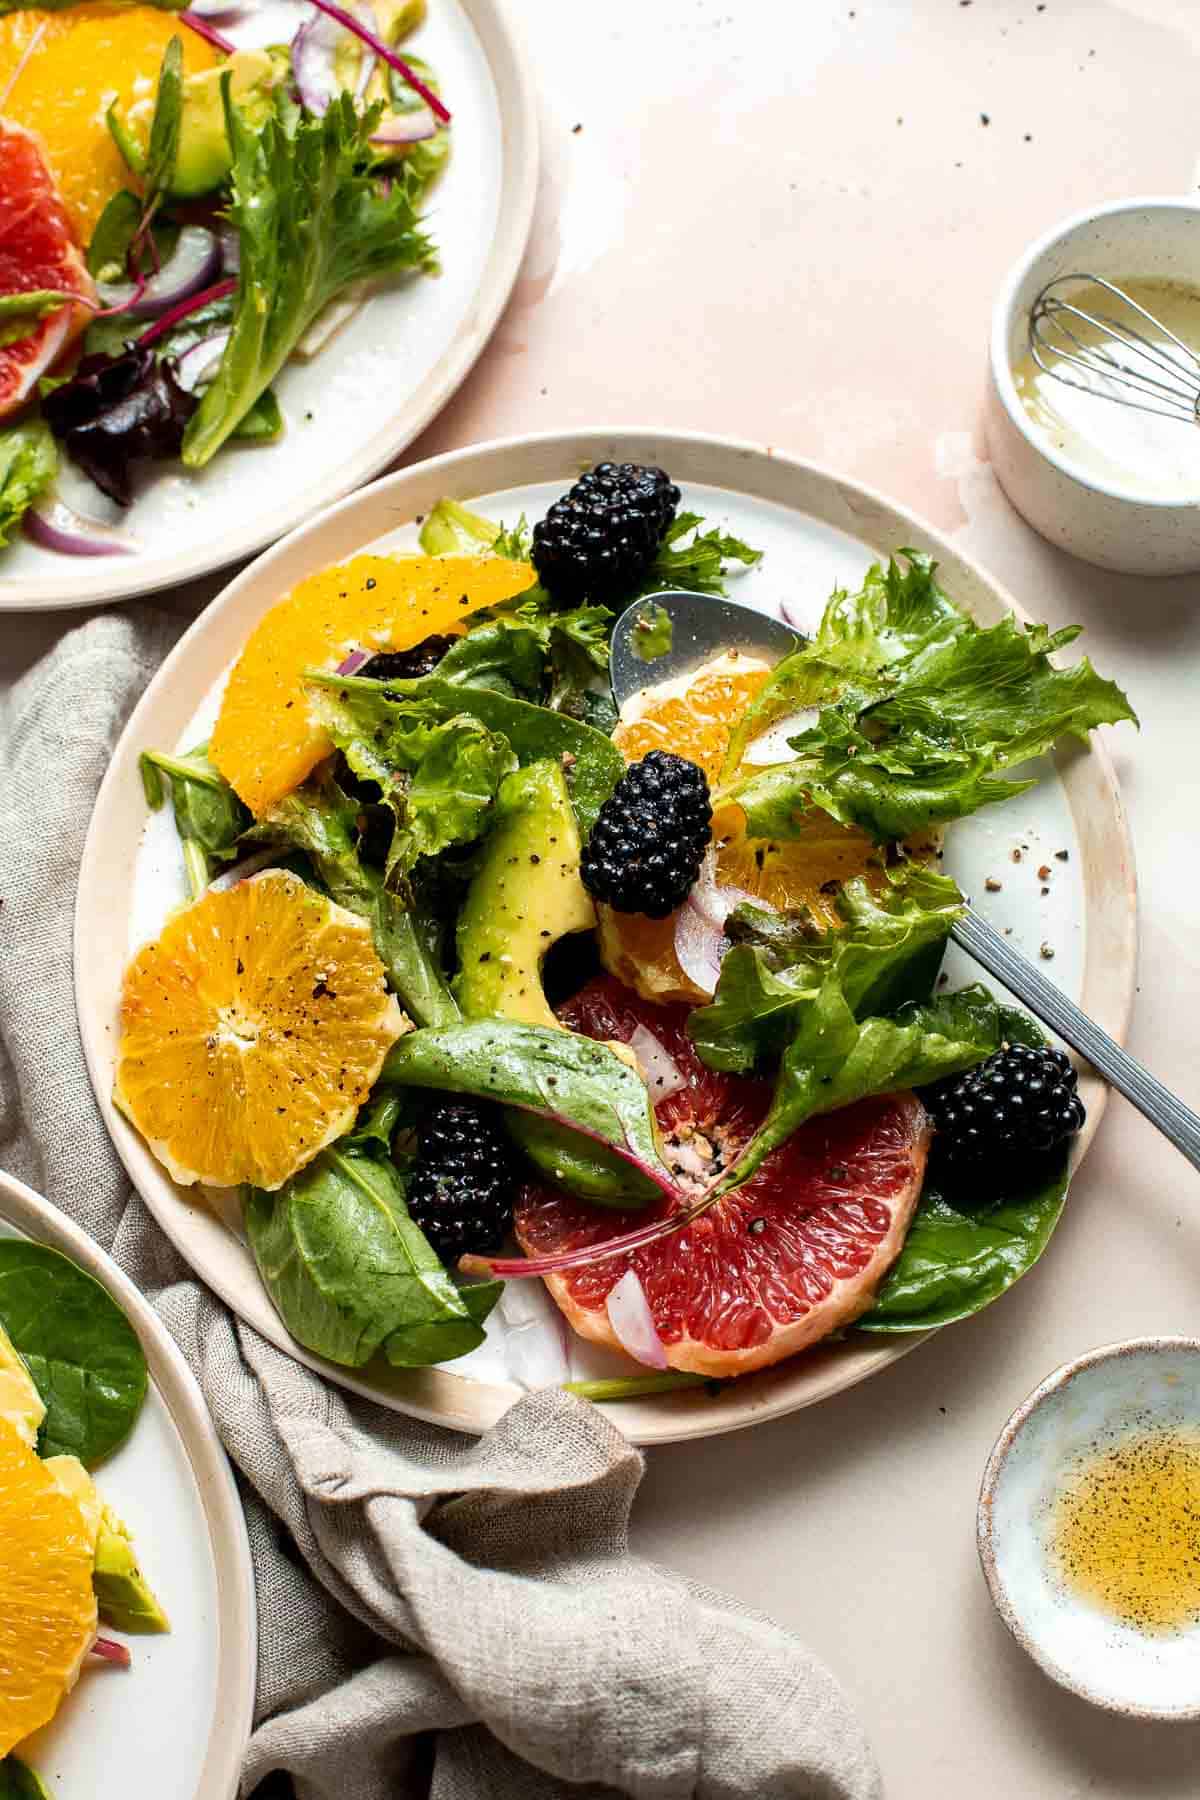
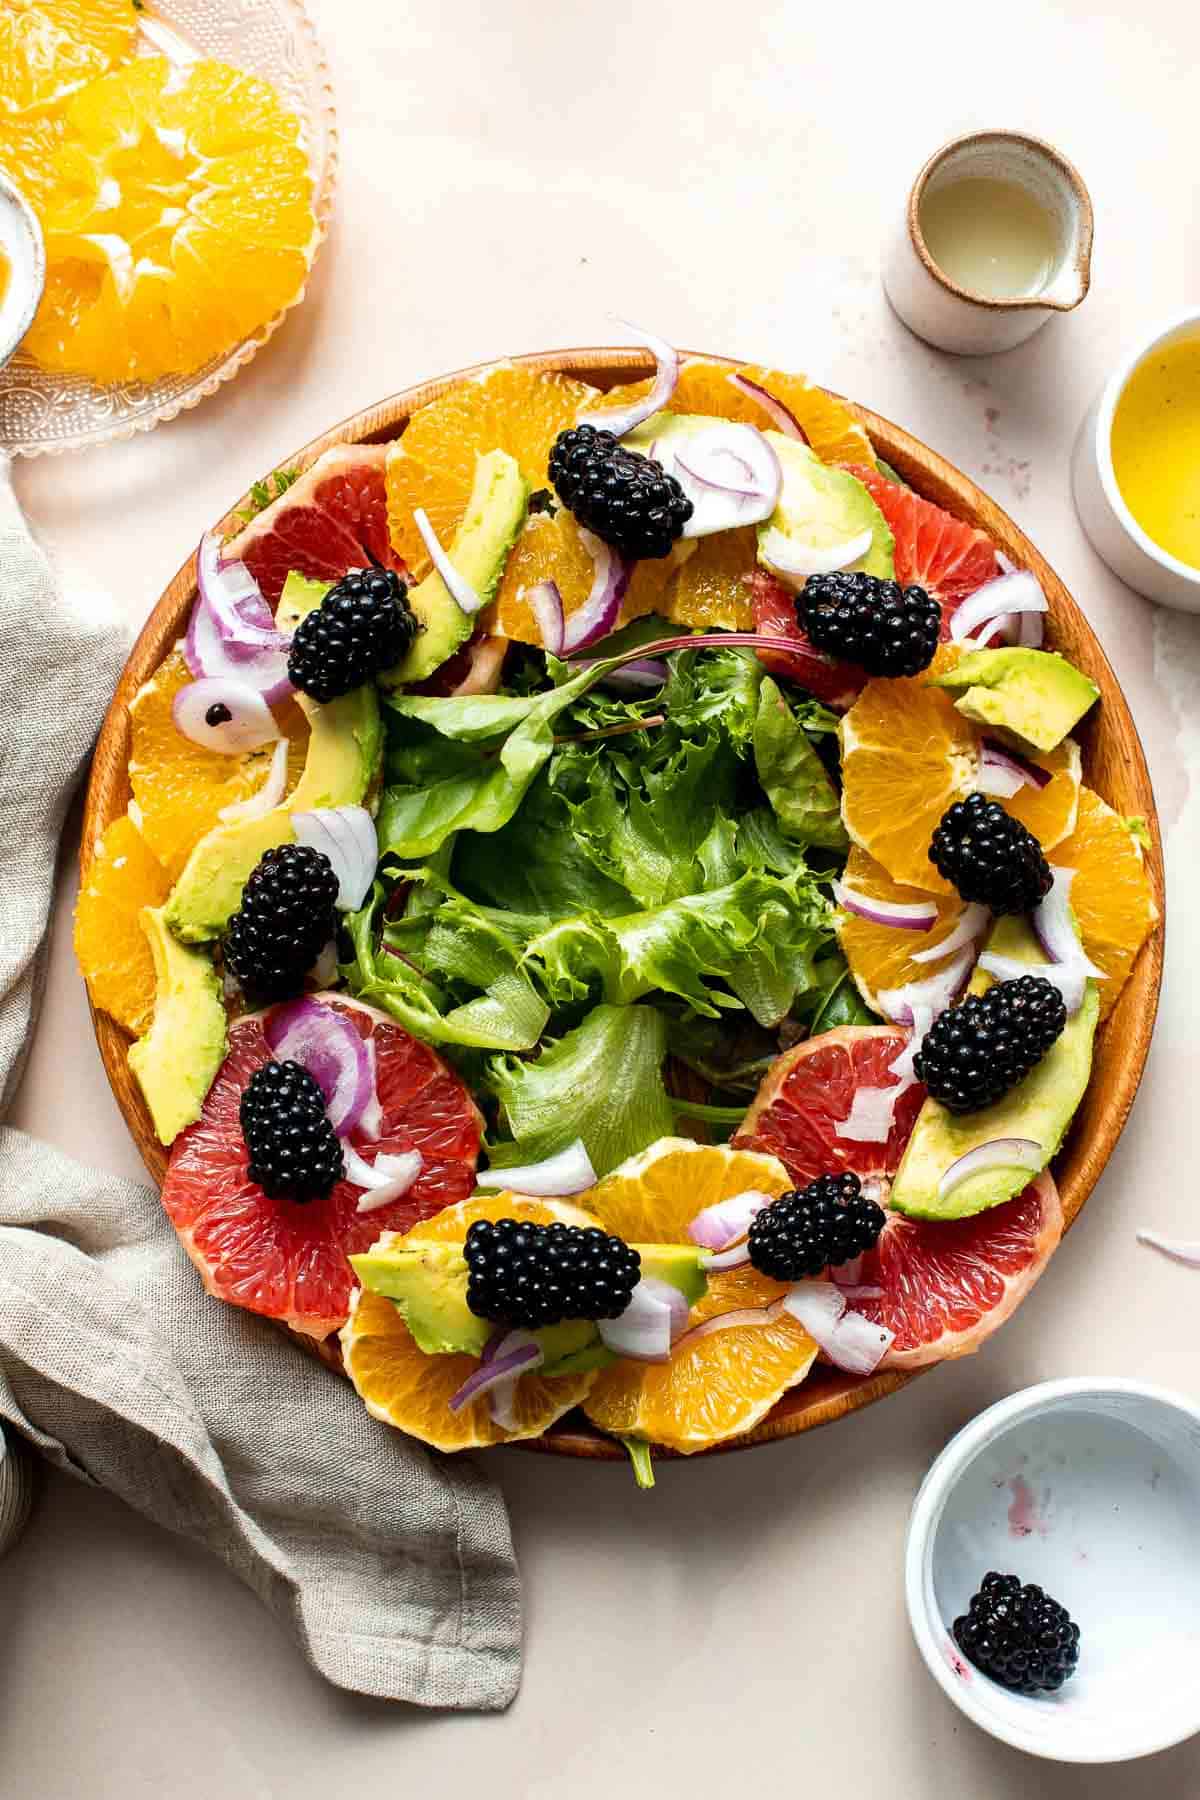
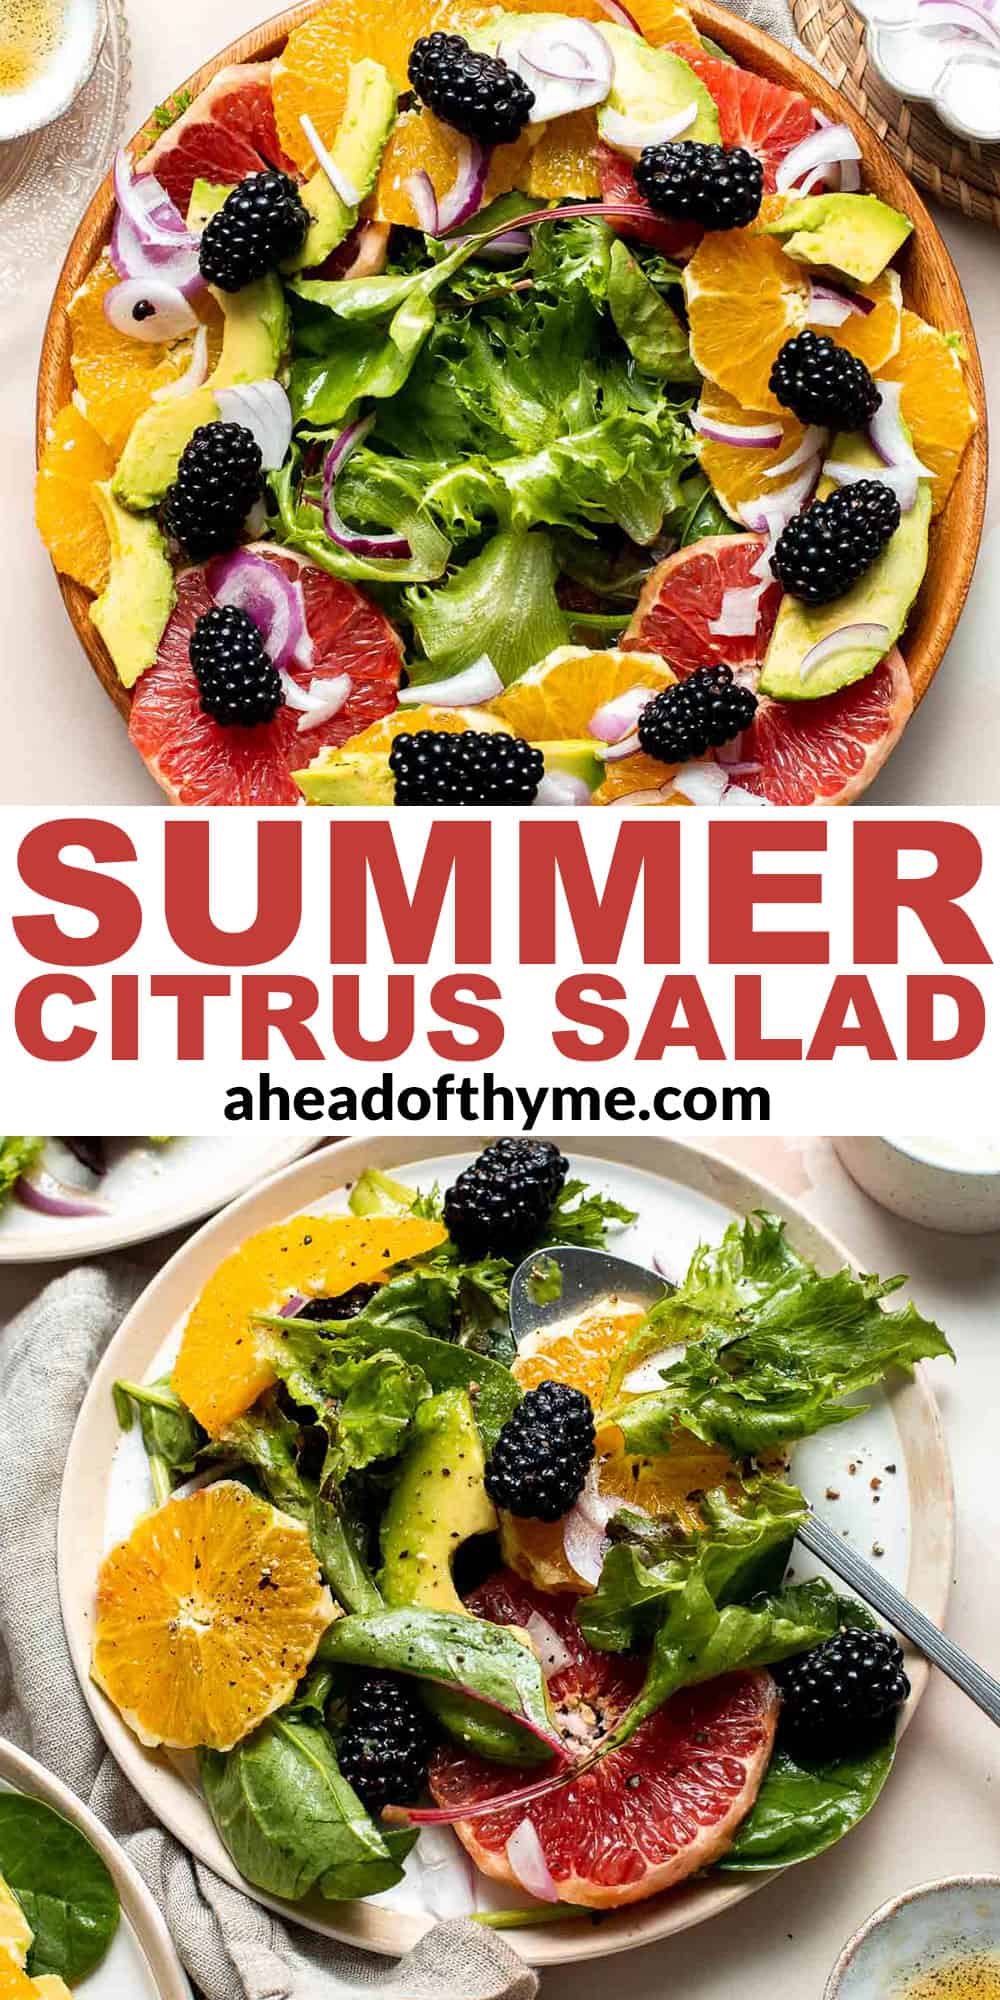
Summer Citrus Salad
This Summer Citrus Salad is delicious, tangy, and colorful. Loaded with fresh fruit including oranges, grapefruit, and blackberries, all tossed in a citrus dressing, this salad is not only nutritious but it's a beautiful addition to any meal.
Plus, it takes less than 10 minutes to make. Serve this citrus orange salad as a light lunch, part of a summer picnic or BBQ spread, or for a side at dinner.
Why You'll Love this Summer Citrus Salad
- A go-to summer recipe. This tasty, go-to salad contains the best summer fixings and local farmer's market finds such as like salad greens, oranges, and blackberries. It's a mashup of three of my favourite summer salad recipes: Summer Fruit Salad, Mixed Greens Salad, and Mandarin Orange Salad.
- Packed with Vitamin C. This salad is loaded with citrus fruits including oranges, grapefruits and lemon. These fruits are high in vitamin C, which helps support the immune system, prevents colds and recurrent infections, promotes cardiovascular health, and is associated with a reduced risk of heart disease, stroke and cancer.
- It's healthy and nutritious. This simple fruit salad is packed with nutrients, including vitamin c, vitamin a, vitamin b1, manganese, zinc, selenium, phytonutrients, fiber, potassium, copper, pantothenic acid, and calcium. Basically, a lot of good stuff!!
- Quick and easy to make. This no bake recipe takes less than 10 minutes to make, and even faster if you are quick with peeling oranges.
Ingredient Notes
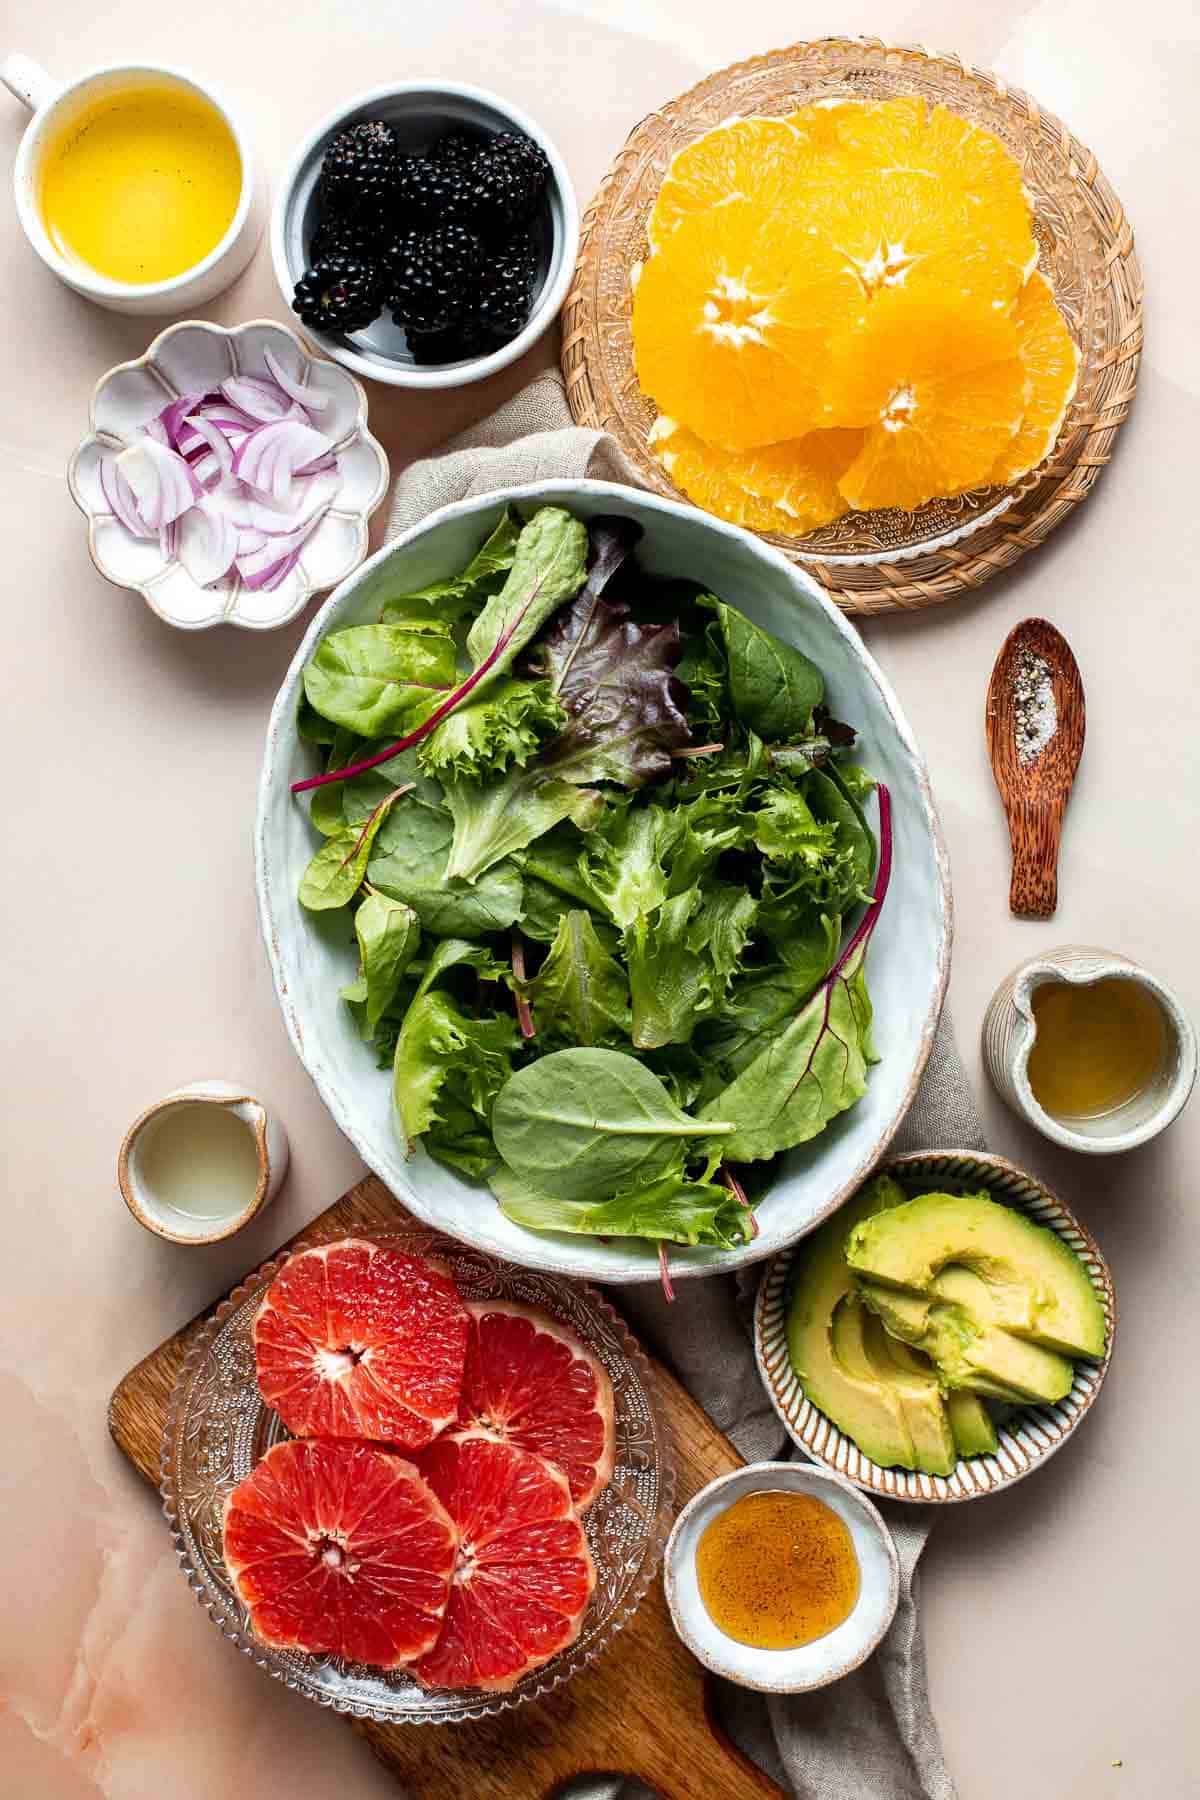
To make this delicious Summer Citrus Salad, you will need the following ingredients (full measurements in recipe card below):
- mixed greens - we used spring mix salad greens, but any salad greens will work. Try it with arugula, romaine lettuce, or spinach.
- citrus fruits - we use navel oranges and grapefruit. Feel free to switch it up with whatever is in season. In fact, I make this salad all the time in the winter too using blood oranges and other seasonal citrus fruits.
- avocado
- blackberries - or substitute with other berries such as blueberries, raspberries, or strawberries.
- red onions - adds a little kick that balances out the acidity of the salad. You can leave this out if you prefer.
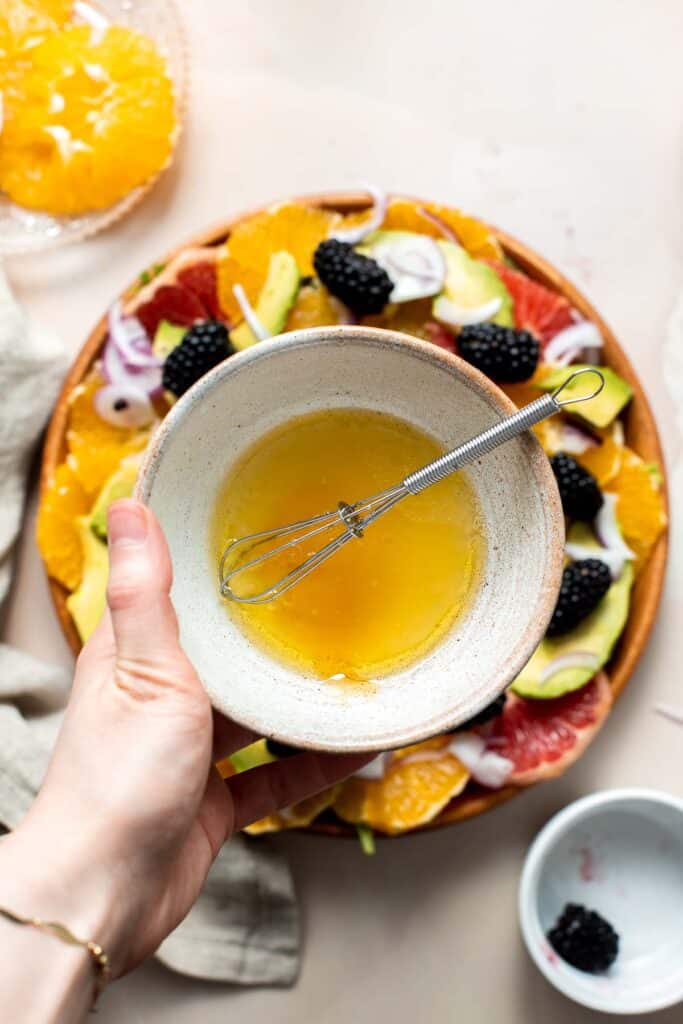
- orange citrus dressing - made in minutes with freshly squeezed orange juice, lemon juice, olive oil, honey, salt, and pepper. To make this salad vegan, substitute the honey with maple syrup or agave.
How to Make the Best Summer Citrus Salad
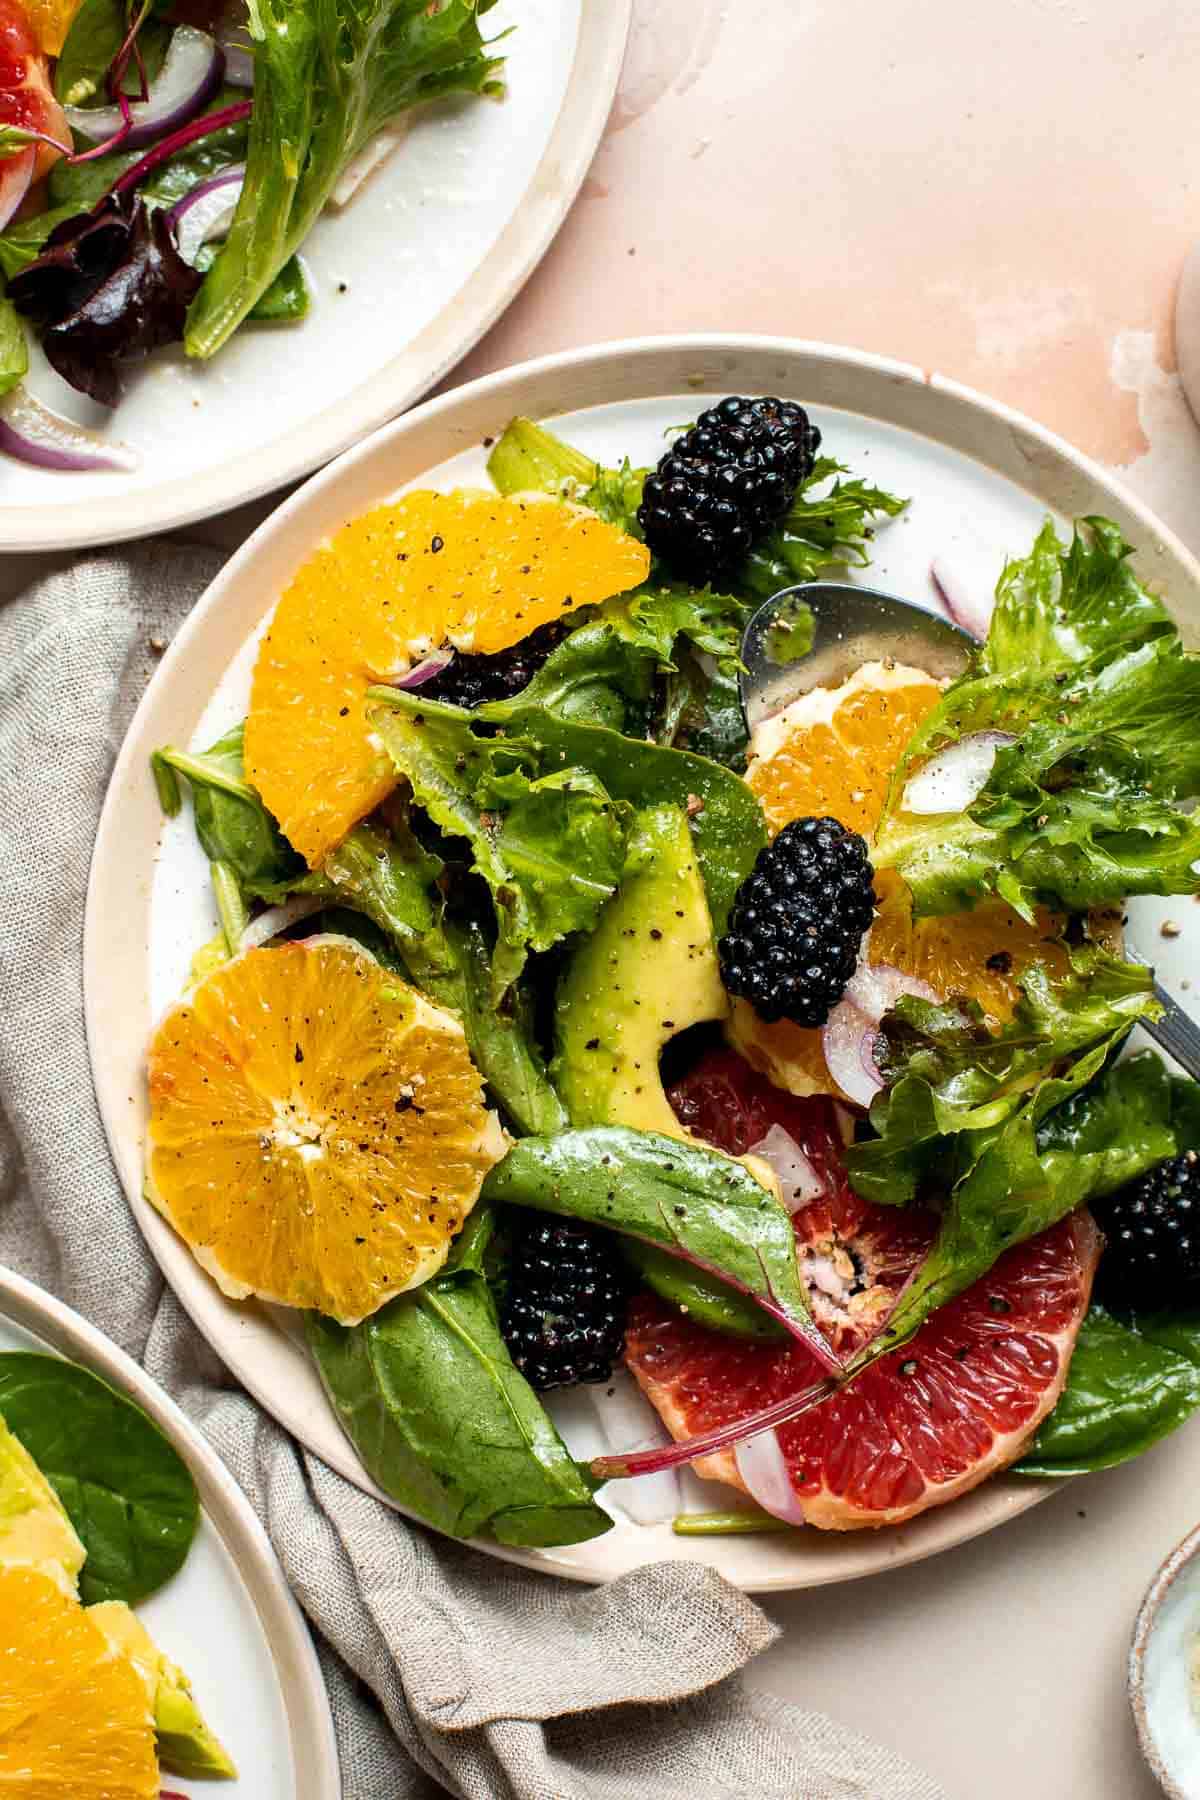
- Combine salad ingredients. Line a large serving bowl with the salad greens. Arrange the oranges, grapefruit, avocado, blackberries, and red onion on top and around the lettuce. Season with salt and pepper.
- Make dressing. In a small mixing bowl, combine the orange juice, lemon juice, olive oil, honey, salt, and pepper. Stir to combine.
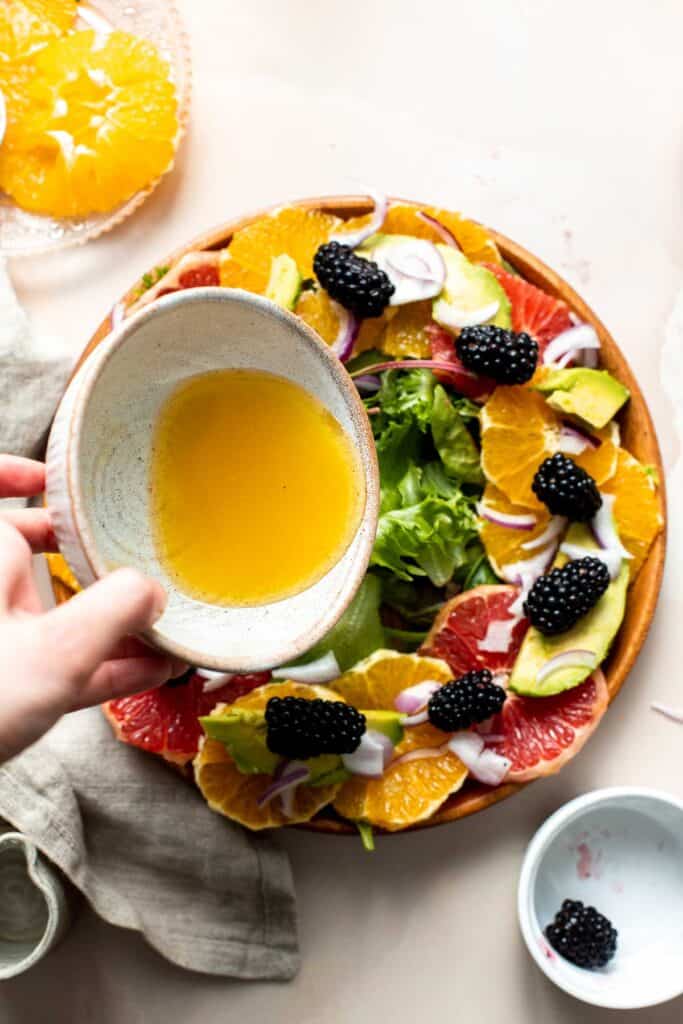
- Add dressing. Pour the dressing over the salad or serve on the side.
How to Serve
Serve this Summer Citrus Salad for a light lunch or as a side salad with dinner. You can also add in some protein such as grilled chicken, grilled shrimp, salmon, or tofu.
Some of our favorite summer recipes to pair this fresh fruit salad with are:
- Beef Kofta Kebabs
- Korean Chicken Skewers
- Salmon Burgers
- Pesto Penne Pasta
- Thai Turkey Burgers
- Classic Juicy Hamburgers
- Black Bean Burgers
Storing Instructions
- Make ahead instructions: To make this orange salad ahead of time, I would suggest prepping the ingredients (except the avocado), making the dressing, and storing the two in separate airtight containers. When ready to serve, cut up the avocado, assemble the salad, and pour the dressing on top.
- How to store: Summer citrus salad is best eaten fresh since the dressing will start to soften the greens. If you do have leftovers, store in the refrigerator in an airtight container for 1-2 days.
More Salad Recipes
- 40 Best Salad Recipes
- Mandarin Orange Salad
- Summer Fruit Salad
- Peach Arugula Salad
- Strawberry Avocado Salad
- Arugula Salad with Apple and Pecan
Tried this recipe?
I'd love to hear what you think! Leave a comment and rating below to share your feedback. Your reviews help others discover this recipe and help me keep creating more free recipes for you. Snap a photo and tag me on social media @aheadofthyme too.
Stuffed Eggplant
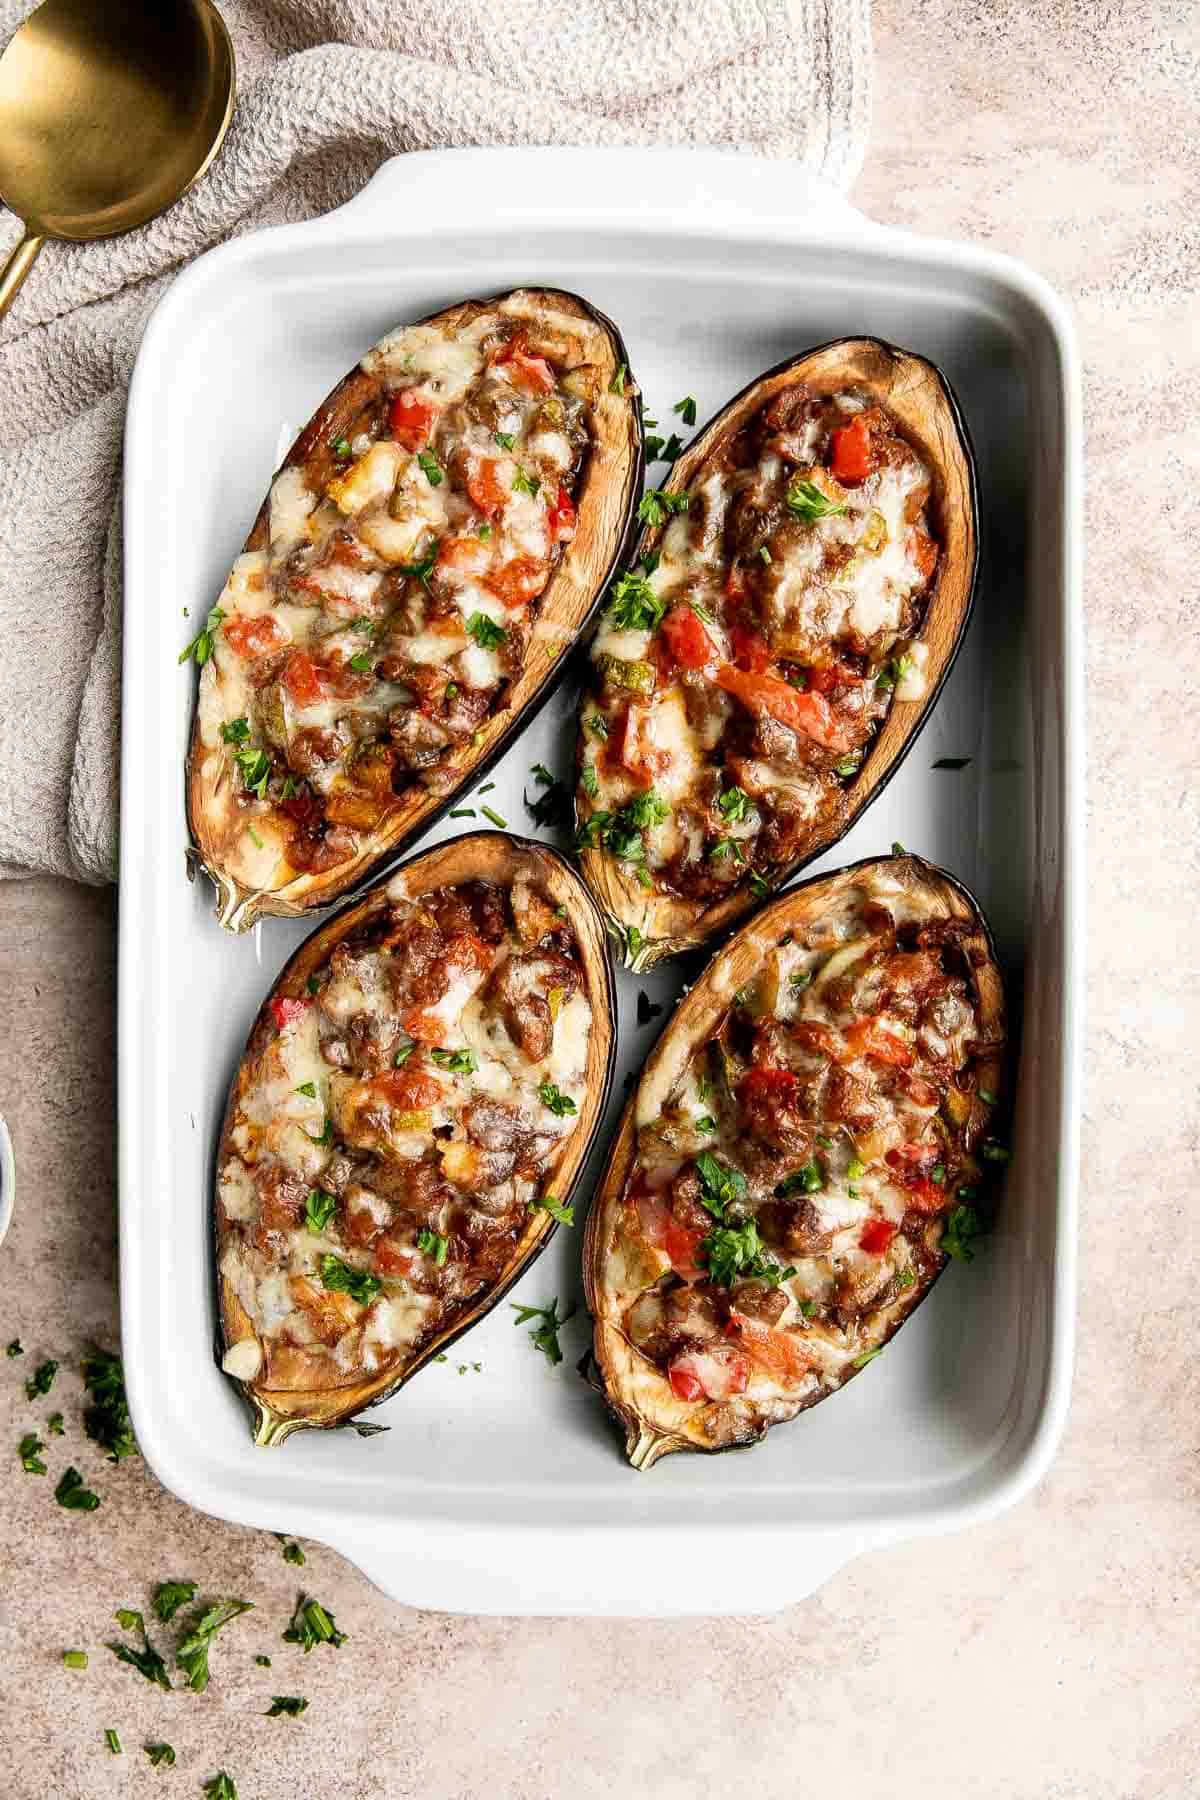
This Mediterranean Stuffed Eggplant is delicious, filling, and healthy. Loaded with veggies and topped with bubbly, melty cheese, this meal is vegetarian and can be customized to be vegan too. These eggplants are bursting with flavor, color, and nutrition!
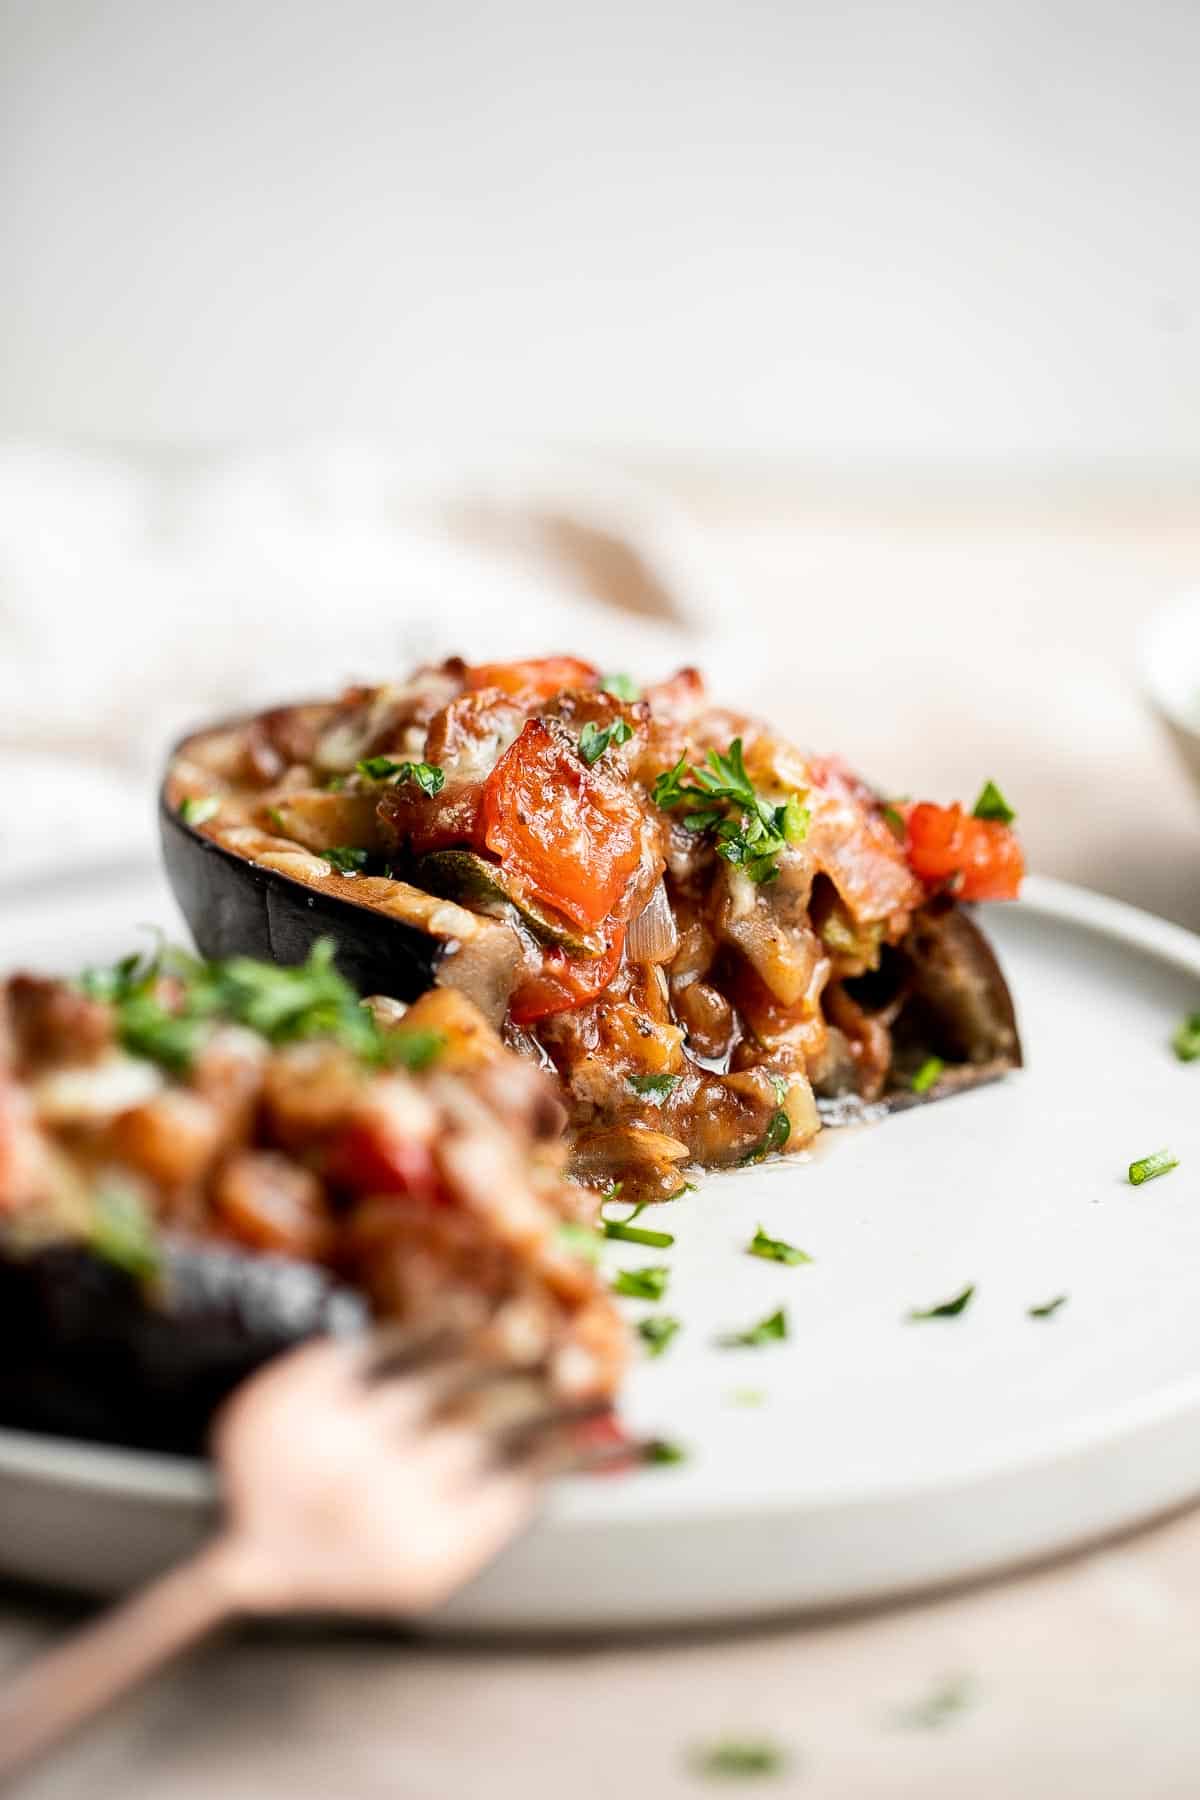
The best part is that stuffed eggplants are so easy to make. Make the filling, stuff the eggplants, bake, and serve. So simple! Serve them as a healthy side dish or as a main entree.
Why You'll Love These Stuffed Eggplants
- It's a healthy vegetarian meal. This vegetarian stuffed eggplant recipe is full of healthy filling ingredients packed with nutrition. You could even add in some cooked chickpeas, rice, or couscous to make it even more filling.
- The baked eggplant. Eggplant is one of those vegetables that you either love or hate - and we love it. These eggplants are seasoned simply with olive oil, salt, and, pepper before being stuffed. The result is a tender, juicy eggplant with a complex flavor that is so good.
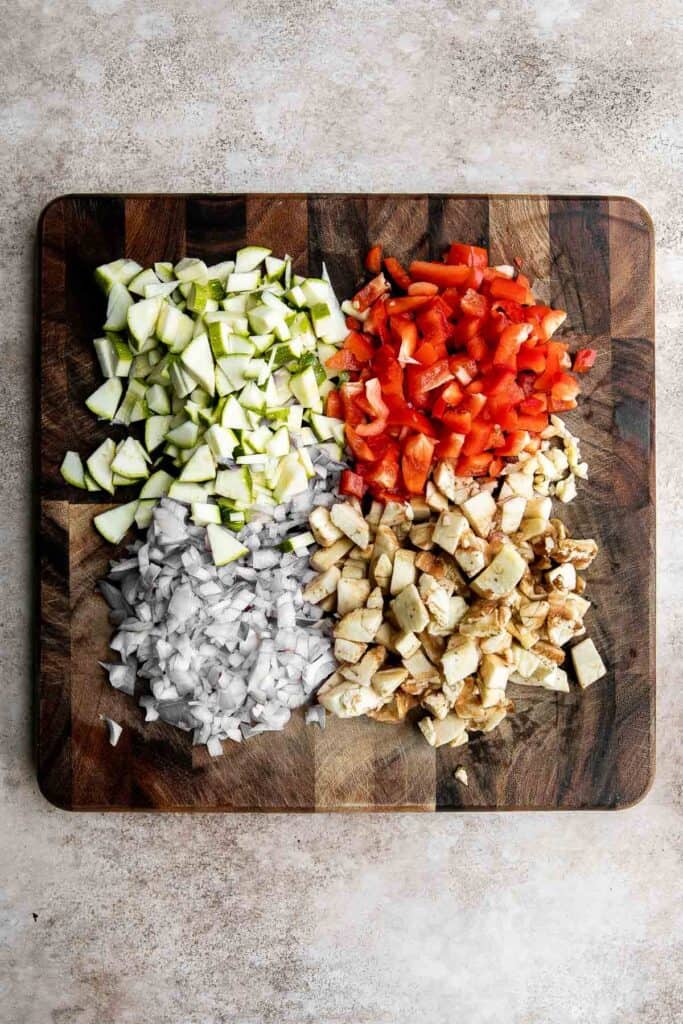
- The filling. The delicious vegetarian filling is loaded with veggies including eggplant (of course!), zucchini, onion, and bell peppers. It's loaded with even more flavor thanks to garlic and tomato sauce which pairs perfectly with the seasoned veggies.
- The cheesy topping. What makes this stuffed vegetable even better is the gooey, melty, and bubble cheese topping. You can leave it out to make the recipe vegan but if you don't have any dietary restrictions, then I highly recommend keeping it as is.
Ingredient Notes
To make delicious Stuffed Eggplant, you will need the following ingredients (full measurements in recipe card below):
- eggplants- look for large eggplant which will provide lots of flesh for the filling and a good base to stuff.
- olive oil
- onion + garlic - adds flavor to the filling that you can't skip or substitute.
- zucchini
- red bell pepper - or substitute with other types of bell pepper.
- tomato paste + tomato sauce
- seasoning - simple seasoning consisting of Italian seasoning, salt, and pepper.
- cheese - we top these eggplants with shredded mozzarella cheese. You can substitute with any melty cheese such cheddar cheese.
- parsley - optional, to garnish on top when serving.
You will also need measuring cups and spoons, a 4 quart Dutch oven or large skillet, and a half sheet baking pan or 9x13-inch casserole dish.
How to Customize
You can customize this recipe by switching up the vegetables in the filling. Try it with carrots, mushrooms, or cauliflower.
You can also add in a grain or beans such as cooked couscous, rice, quinoa, chickpeas, andor lentils.
How to Make the Best Stuffed Eggplant
First, prep the eggplants.
Cut the eggplants in half lengthwise. Scoop out the flesh from the inside, leaving a ½-inch border on the sides and bottom.
Season the eggplant shells evenly with salt and pepper.
Dice the eggplant flesh and set aside.
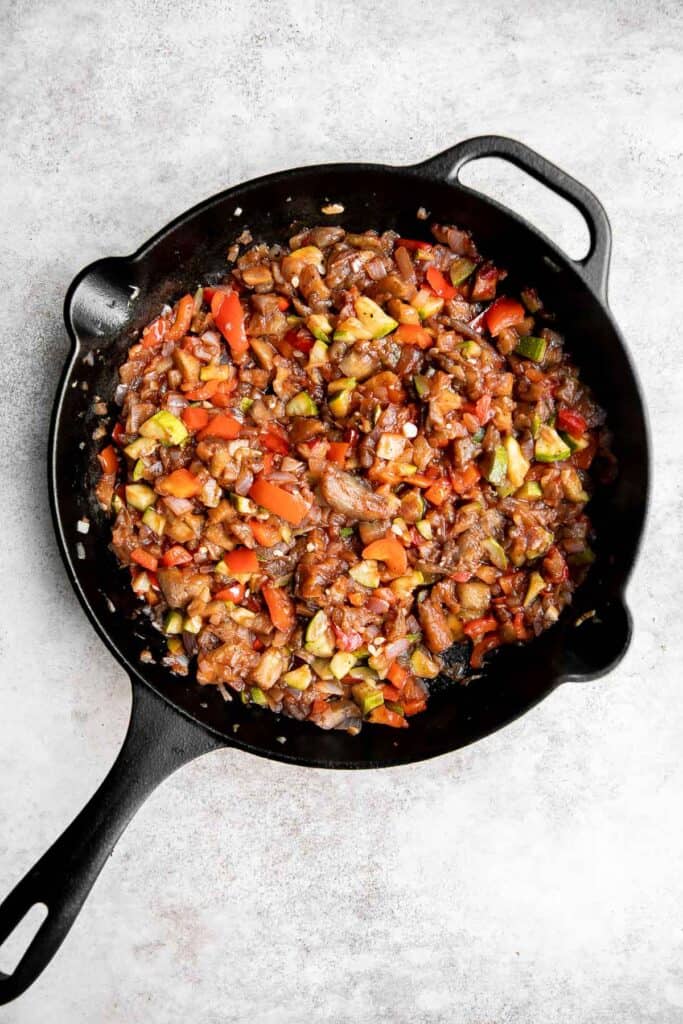
Next, make the filling.
- Heat olive oil in a 4 quart Dutch oven or large skillet over medium heat until the oil is sizzling hot, about 1 minute.
- Add onion, garlic, zucchini, bell pepper, and eggplant flesh. Sauté until tender, about 8-10 minutes.
- Stir in tomato paste, Italian seasoning, salt, and pepper. Stir in tomato sauce and cook until thickened to a desired consistency, about 10 minutes. Stir occasionally to ensure cooking evenly.
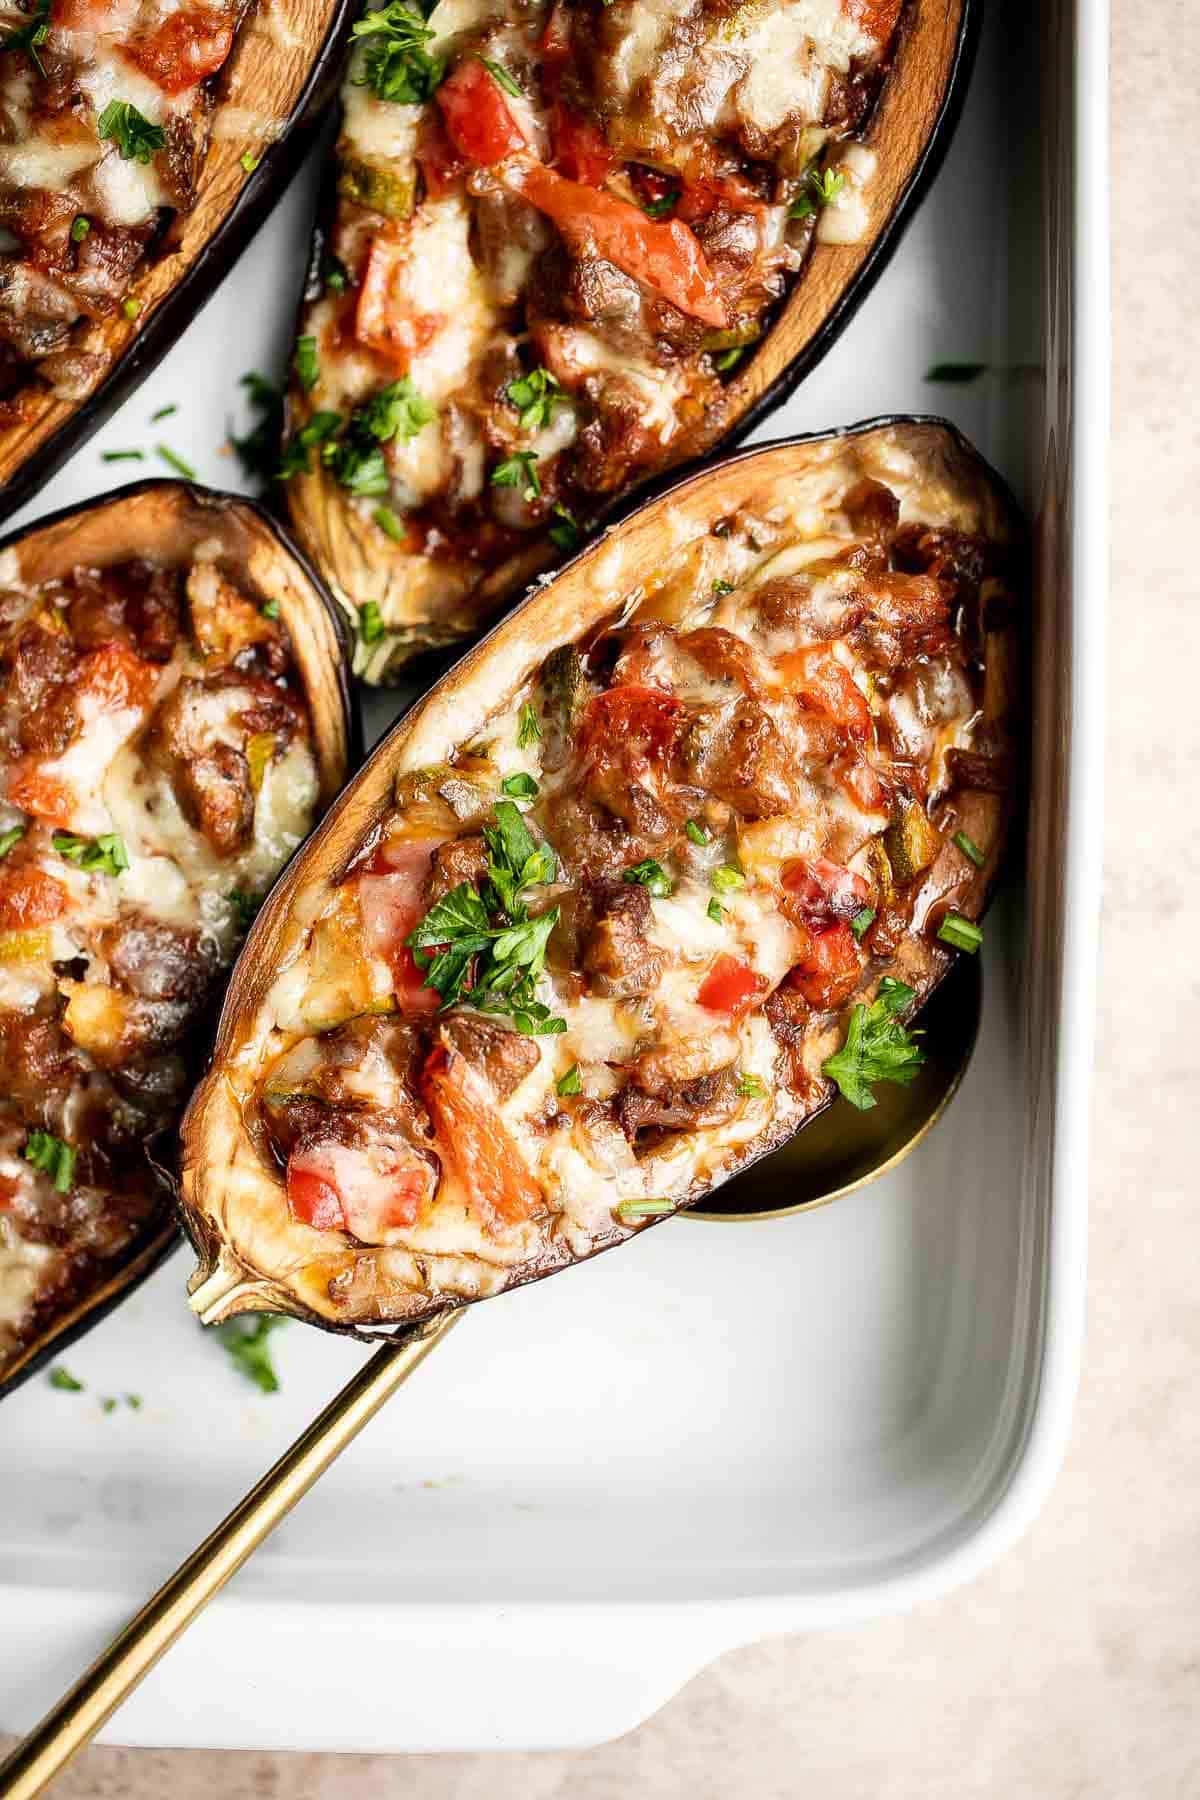
Assemble and bake.
Fill each eggplant shell with the filling. Sprinkle about 3 tablespoons of shredded cheese on top.
Place the stuffed eggplants on a large half sheet baking pan or 9x13-inch casserole pan and bake in a 375F preheated oven for 45-50 minutes until the cheese is melty and nicely browned on top. The eggplant shells should be cooked tender. Serve warm.
Tip
Once cooked, the eggplant shell will be sturdy enough to keep it's shape. If you'd rather have more tender flesh in the shell (and less structure when transferring), you can pre-bake the eggplant shells for 20 minutes before adding the filling and popping back into the oven.
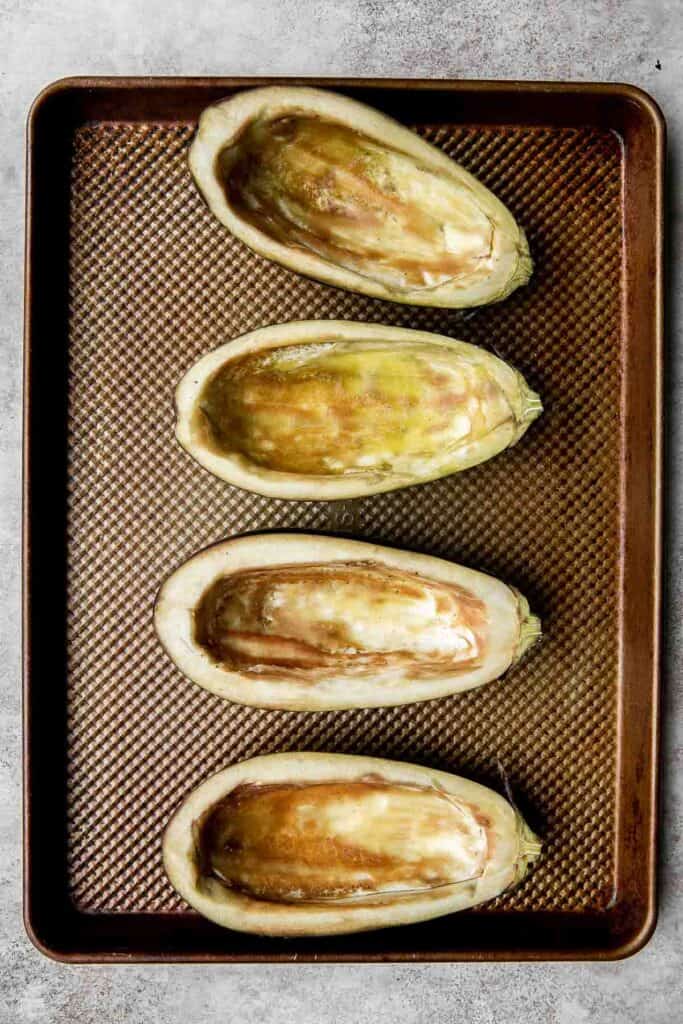


How to Serve
This Mediterranean Stuffed Eggplant is delicious and filling served on its own, or paired with some other Mediterranean style dishes and sides such as:
- Chickpea Greek Salad
- Souvlaki Beek Shish Kebabs
- Tomato Basil Soup
- Greek Fries
- Steamed Rice
- Mediterranean Orzo Pasta Salad
- Pita Bread
- Greek Lamb Shanks
Storing Instructions
- How to store: Keep leftover stuffed eggplants in a shallow airtight container for up to 4 days.
- How to reheat: Reheat stuffed eggplants in a preheated 375F oven for 15-30 minutes until warmed through.
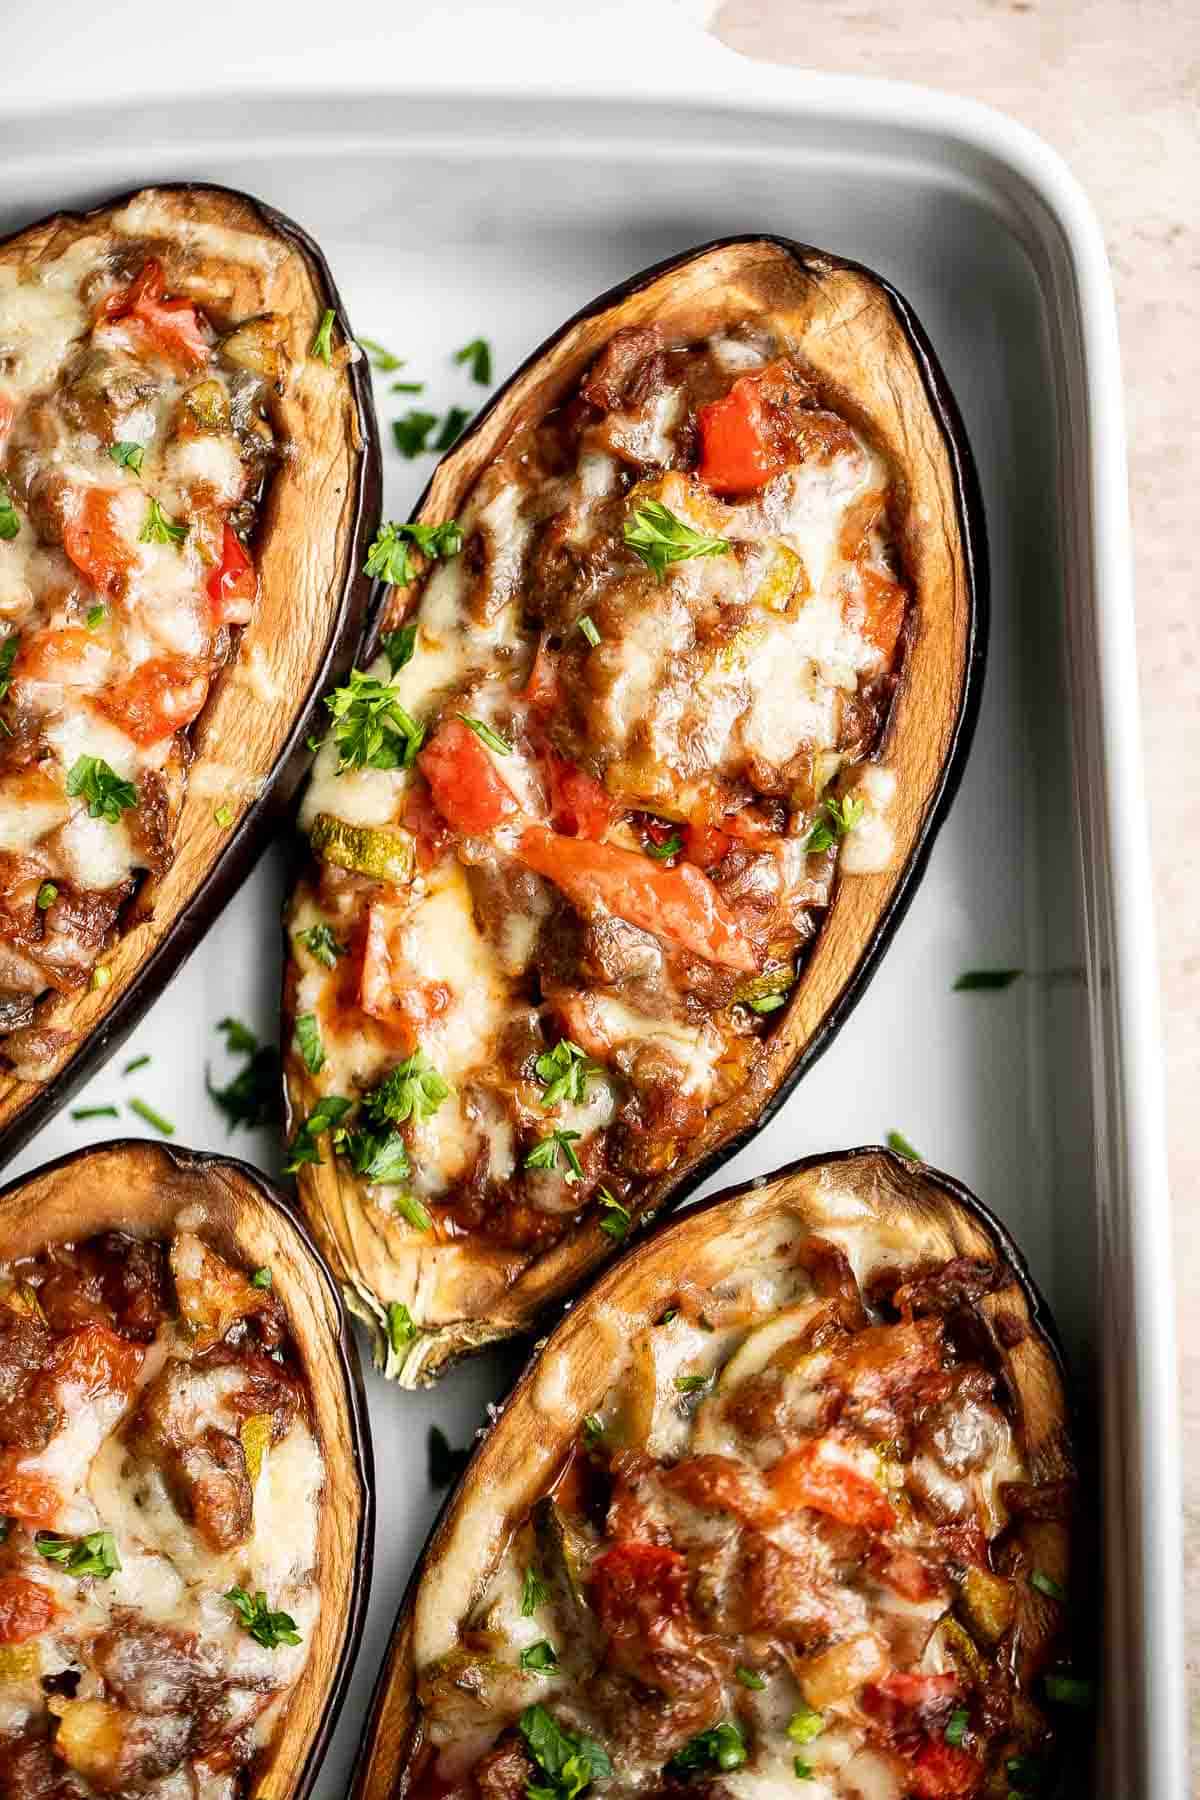
More Vegetarian Dinner Recipes
- 60 Easy Vegetarian Dinner Recipes
- Stuffed Butternut Squash
- Vegan Stuffed Bell Peppers
- Curried Chickpea Stuffed Acorn Squash
- Black Bean Burgers
- One Pot Lentils
Tried this recipe?
I'd love to hear what you think! Leave a comment and rating below to share your feedback. Your reviews help others discover this recipe and help me keep creating more free recipes for you. Snap a photo and tag me on social media @aheadofthyme too.

Italian Chicken Skewers
Italian Chicken Skewers are a quick, delicious, and flavorful grilled chicken dinner that you'll find yourself making all summer long. Juicy and tender chicken bites are smothered in a tomato-based marinade loaded with fresh herbs. Plus, they are easy to make on busy weeknights when you are short on time.
You can cook this easy dinner on the grill or in the oven (yes - you can enjoy these chicken kebabs all year long!). Serve them with Italian-style summer sides like salad, pasta, veggies or risotto.

Why You'll Love Italian Chicken Skewers
- The homemade tomato-based marinade. To make this Italian chicken, you need the perfect marinade - made with tomato paste, heaps of parsley, balsamic vinegar, onion, and garlic. This combination of classic Italian ingredients creates incredible flavor in every bite.
- Quick and easy to make. This grilled chicken recipe is easy enough that you can make it on busy weeknights. Just keep in mind that you need to set the meat aside to marinate for at least 1 hour to allow the flavors to infuse into the meat and tenderize it. If you have the time, I recommend marinating it the night before or in the morning. The longer you marinate, the more flavorful the chicken will be.
- Cook them on the grill or in the oven. You can enjoy these Italian chicken skewers any time of the year because you can fire them up on the grill in the summer months or bake them in the oven. We love grilled them because the charring and smoke add even more flavor to these already flavorful bites of chicken. You can also create a similar effect in the oven by turning the broiler on for a few minutes after they have been baked.

Ingredient Notes
To make these easy Italian Chicken Skewers, you will need the following ingredients (full measurements in recipe card below):
- chicken - we used boneless skinless chicken breasts, but you can also use boneless chicken thighs if you prefer.
- salt and pepper
- onion
- garlic
- parsley - or substitute with 1.5 tablespoons dried parsley or Italian seasoning.
- tomato paste - adds flavor and color.
- balsamic vinegar - adds flavor and color.
- vegetable oil
You will also need measuring cups and spoons, mixing bowl or ziploc bag for marinating, and skewers (we used bamboo skewers).

How to Make the Best Italian Chicken Skewers
- Season the chicken. Cut the chicken breasts into 1-inch thick pieces and season with salt and pepper. Set aside in a large mixing bowl or Ziploc bag.
- Marinate the chicken. In a food processor or blender, add onion, garlic, parsley, tomato paste, balsamic vinegar, and oil and puree for 1 minute until smooth. Pour in the mixture over the chicken. Toss well until evenly coated. Cover the bowl with plastic cling wrap and refrigerate for at least 1 hour (or overnight for the best results).
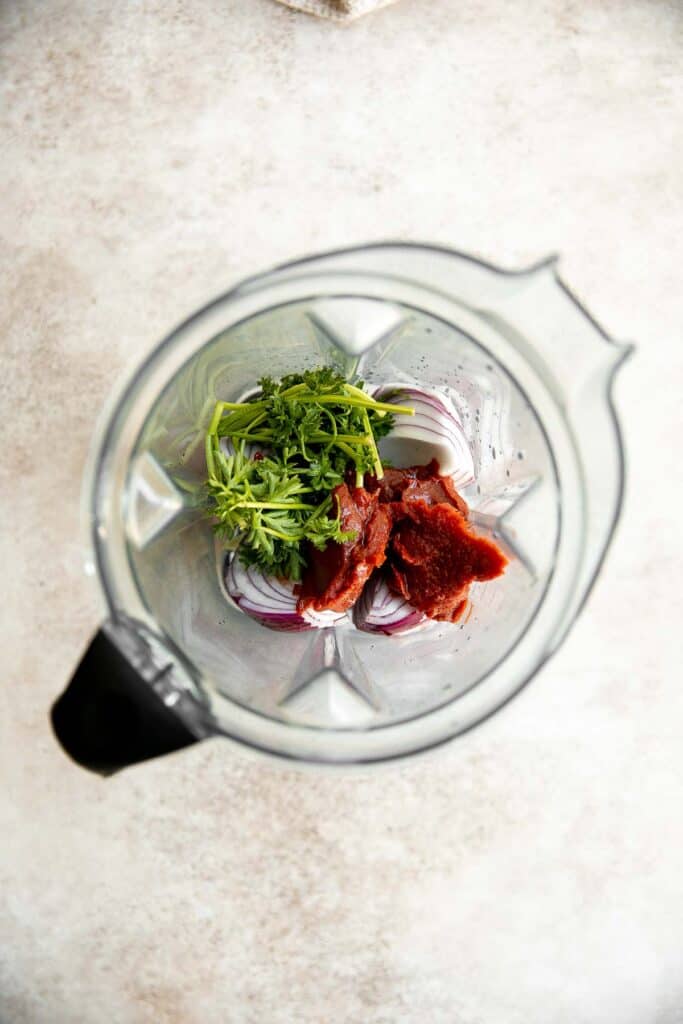
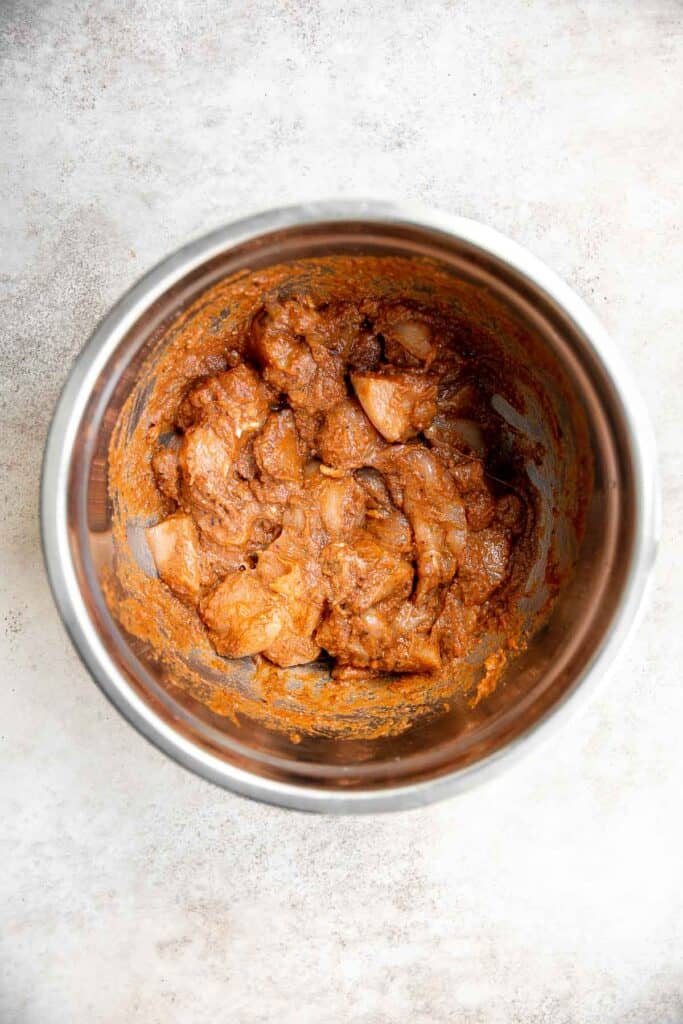
- Thread the chicken. Thread 6-8 marinated cubed chicken breasts onto each skewer. I used bamboo skewers.
- Grill the chicken. Preheat grill over medium high heat until hot, about 2-3 minutes. Place the skewers evenly apart on the grill and grill for 5-7 minutes on each side until the edges are nicely charred. The internal temperature for the chicken should reach 165 F as read on a meat thermometer. Do not overlap the skewers at any time to ensure even cooking. You can also cok them on a preheated grill pan for 8-10 minutes per side.
How to Bake Chicken Skewers in the Oven
Place the threaded chicken skewers spaced evenly apart on a parchment lined half sheet baking pan or on a lightly oiled wire rack in a baking pan. Bake in a 425F preheated oven for 15 minutes until golden brown and the internal temperature for the chicken reaches 165 F.
Optionally, turn on the broil function on the oven on HI and broil for 2-3 minutes until nicely charred on the edges. Let it rest at room temperature for 5 minutes and serve.
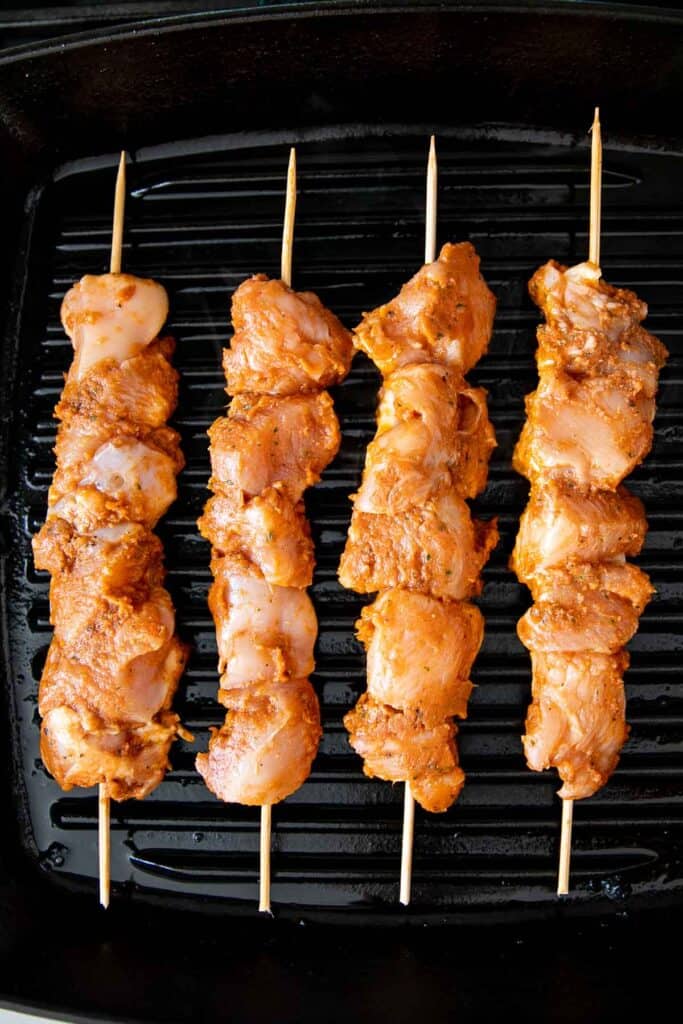
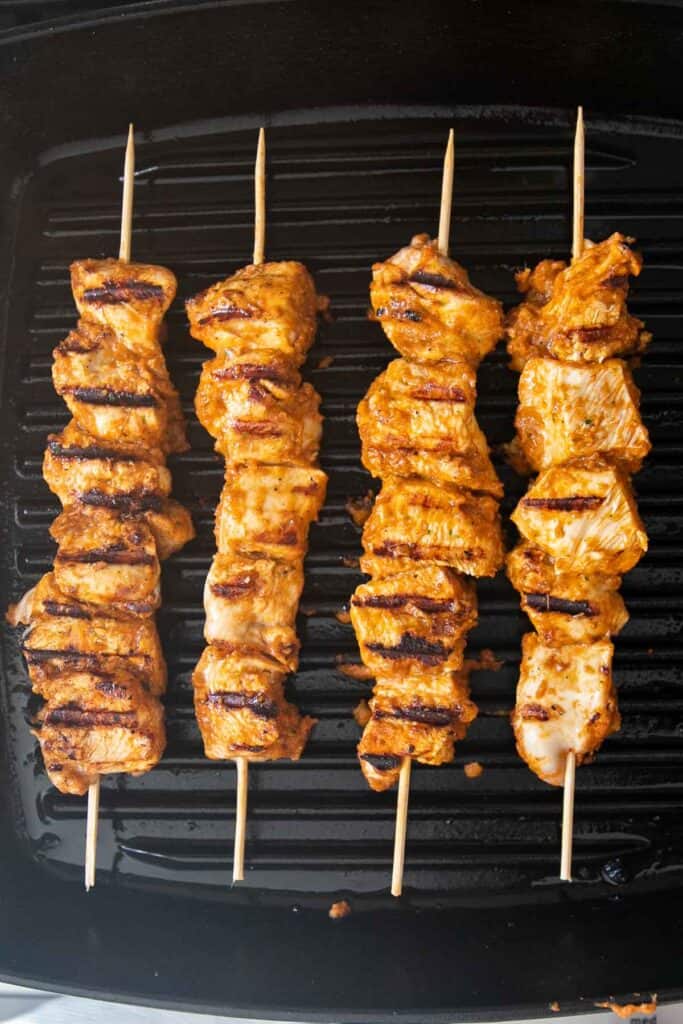
How to Serve
These Italian chicken skewers taste delicious on their own or paired with some summer side dishes. Some of my favorites are:
- Grilled Corn on the Cob or Grilled Zucchini
- Classic Coleslaw, Potato Salad or Caprese Salad
- Antipasto Skewers
- Parmesan Risotto
- Pita Bread
- Fettuccine Alfredo
Storing and Reheating
- How to store: Keep leftover Italian chicken skewers in a shallow airtight container for up to 3-4 days in the fridge. They can be stored on or off the skewers.
- How to reheat: The best way to reheat cold chicken skewers is to wrap them in aluminum foil with a splash of water and bake for 10-20 minutes in a 350F preheated oven. The foil should lay somewhat loosely around the chicken to allow for air circulation, but it should be pinched shut. You can also unthread the chicken and reheat in the air fryer at 350F for 5-10 minutes until warm.

More Chicken Skewer Recipes
- Easy Summer Grilling Recipes
- Balsamic Chicken Kabobs
- Chicken Satay Skewers with Peanut Sauce
- Persian Saffron Chicken Skewers (Joojeh Kabob)
- Lemongrass Chicken Skewers
- Greek Chicken Souvlaki Skewers
Tried this recipe?
I'd love to hear what you think! Leave a comment and rating below to share your feedback. Your reviews help others discover this recipe and help me keep creating more free recipes for you. Snap a photo and tag me on social media @aheadofthyme too.

Summer Fruit Salad with Honey Lemon Dressing
This summer fruit salad is unbelievably easy to make, not to mention delicious and contains no processed sugar. It's colorful, naturally sweet, and packed with refreshing fruity flavors. Serve it for breakfast, eat it with lunch, take as a side dish to the summer cookout, or use as a topping for more complex desserts.
This recipe is simple but sure to please time and time again, consisting only fruits, honey for a touch of natural sweetness, and lemon juice for balance (and to prevent browning). An all-around winner!

Why You'll Love this Summer Fruit Salad
- Best combination of ingredients. Who doesn't love strawberries, mangos, pineapple, kiwi, blueberries and grapes all tossed together in a honey lemon dressing? The honey lemon dressing adds just the right amount of sweetness to the tropical and decadent fruit, taking it from tangy to even better.
- Naturally sweet. Some fruit salad recipes call for simple syrup, a reduction of (usually) processed sugar and water, but this recipe gets its sweetness from two all-natural sources: fruit and honey.
- Highly customizable. The base of this homemade fruit salad is, you guessed it, fruit! The good news is that any of the fruits can be swapped to suit your tastes or color preferences.
- Requires no cooking. Are there any three words that sound so good together? There is no cooking time associated with this recipe. Simply chop, add dressing, and toss together. It couldn't be easier (or could it? Check out the tips section for a shortcut!).
- Visually compelling. If you think that aesthetics are important when it comes to food, you're in good company. The vibrant contrasts of the colors and textures of the produce in this fruit salad create a beautiful dish that won't last long on the serving table.
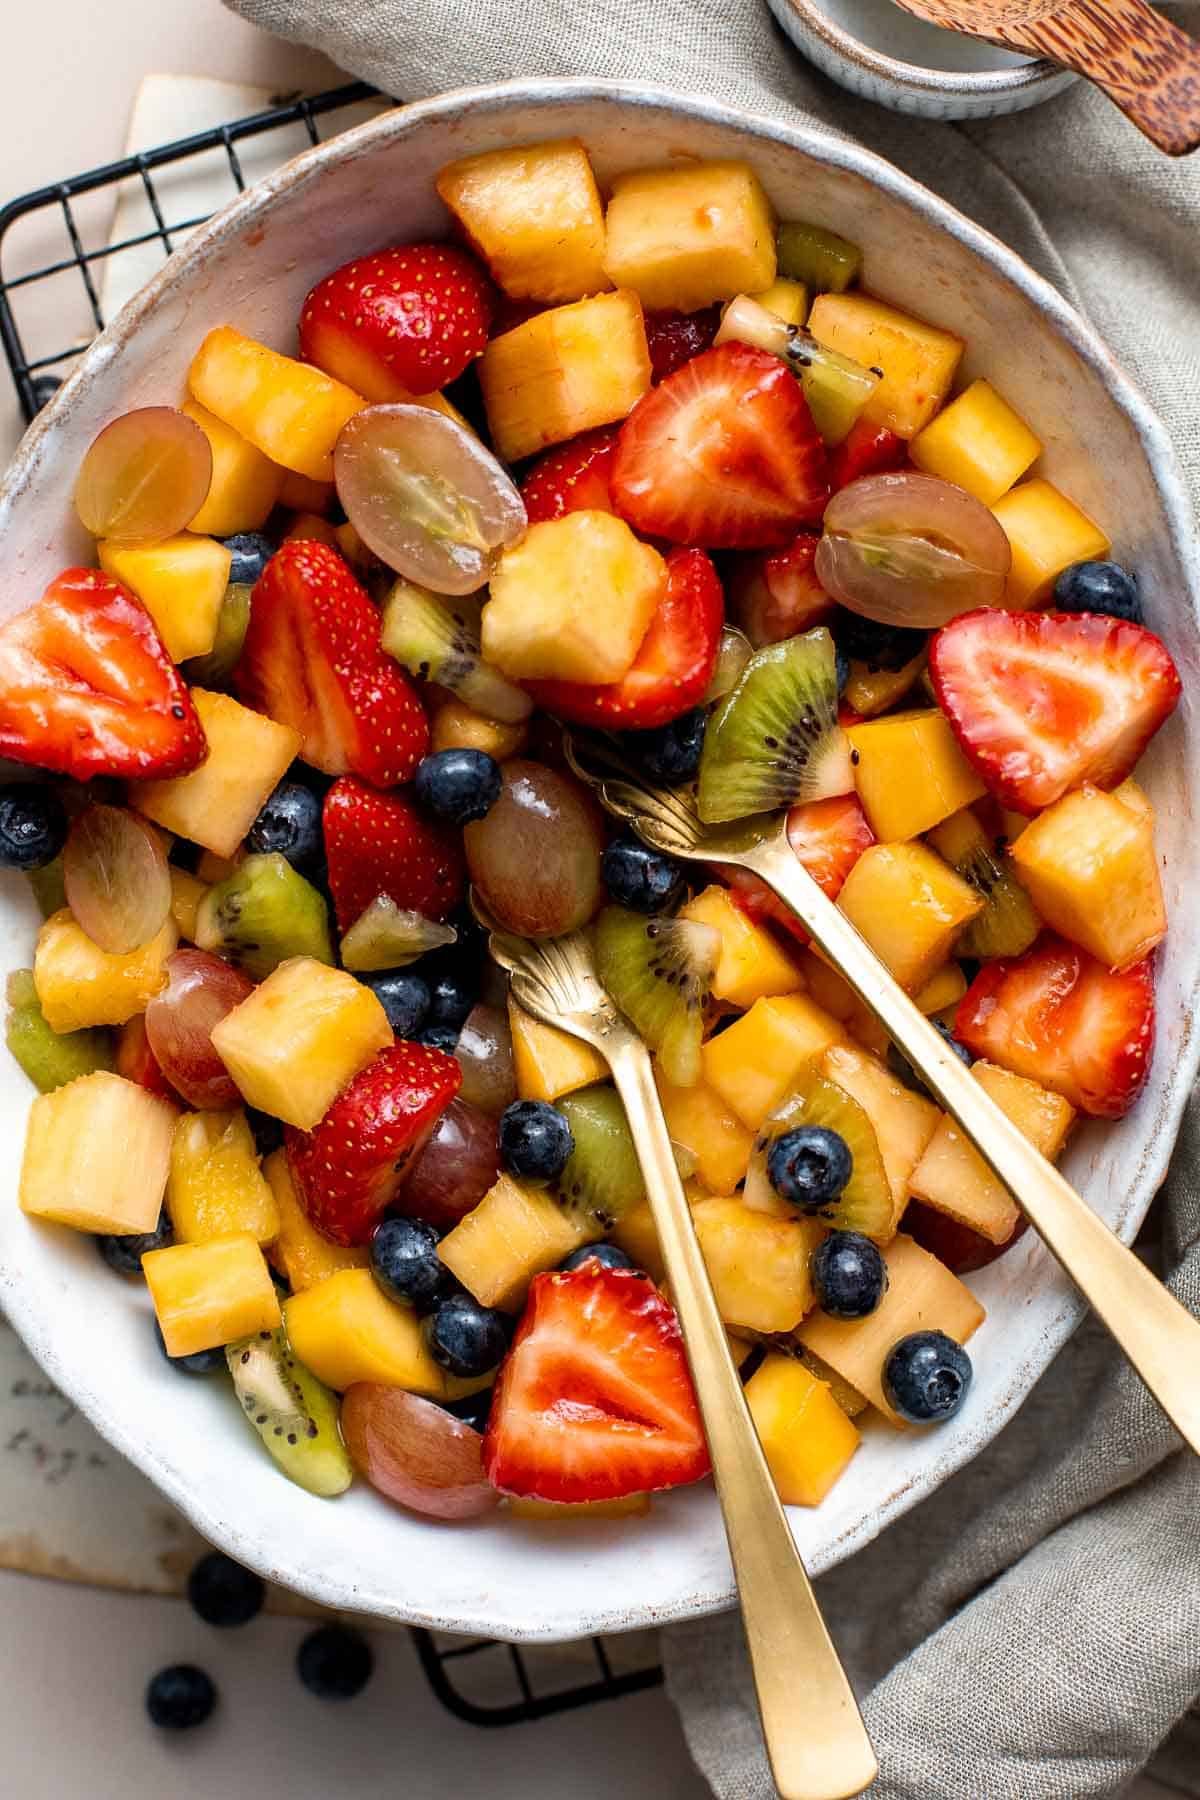
Ingredient Notes
To make this easy Summer Fruit Salad, you will need the following ingredients (full measurements in recipe card below):
- fruit - we use strawberries, pineapple, blueberries, kiwi, mango, and grapes. But there are a ton of things you can do fruit-wise to truly make this recipe your own. You can swap out virtually any of the fruits in exchange for others. As long as you have 4-6 different varieties of fruit, you'll be golden. Experiment with different flavors and color palettes as you see fit.
- honey - you can use honey from your local apiary or the store-bought kind, just double check the ingredients as a lot of mass-produced honey brands cut the honey with syrup. You can also substitute the honey for agave nectar at a 1:1 ratio if you don't partake in honey for various reasons like veganism. Also, adjust the amount of honey based on your level of desired sweetness. Add more honey if you prefer a sweeter salad.
- lemon juice - I recommend using freshly squeezed lemon juice for the most potent flavor. You can also substitute this with lime juice for similar results.
You will also need measuring cups and spoons, a large serving dish, and a small mixing bowl.
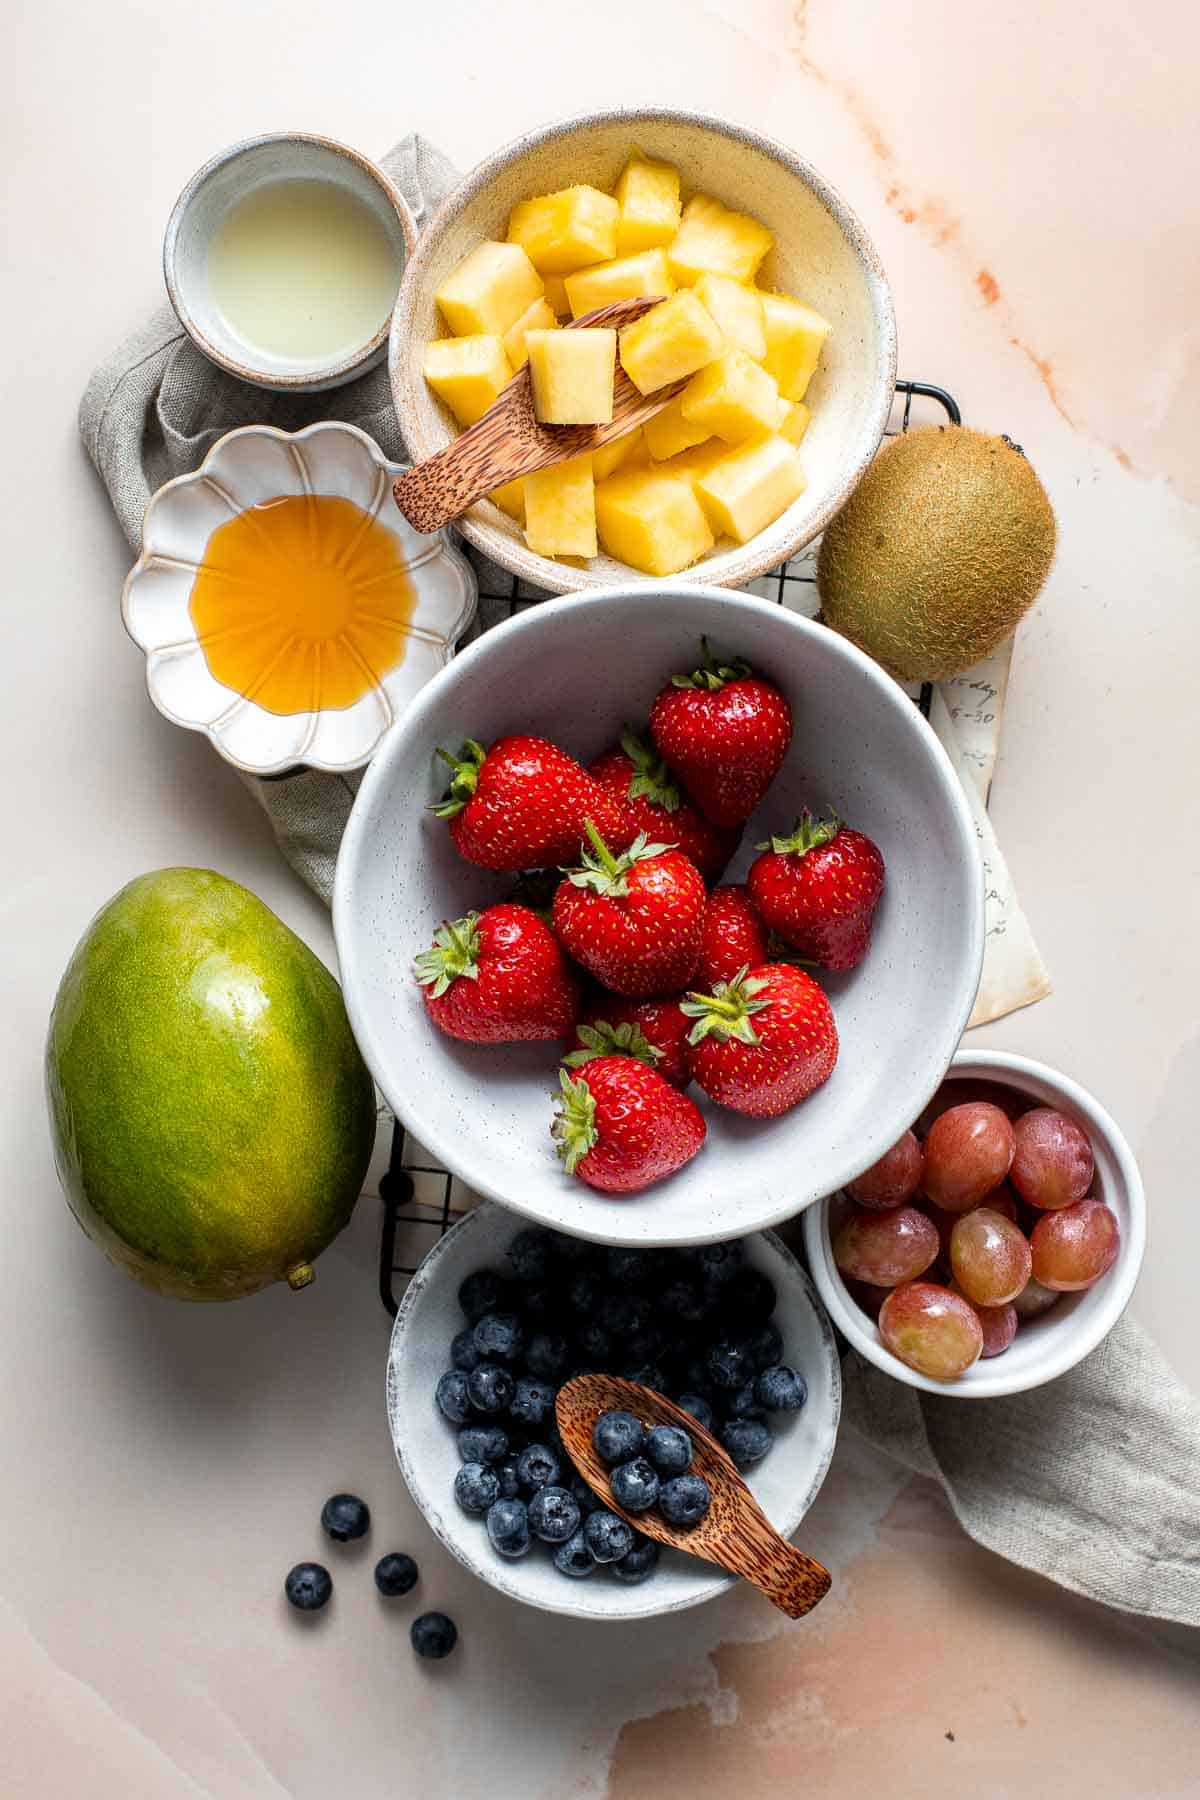
How to Make the Best Fruit Salad
- Arrange all the fruit in a large serving bowl (strawberries, pineapple, blueberries, kiwi, mango, and grapes). You can throw the fruit together or create a fruit rainbow, separating the fruit into rows.
- In a small mixing bowl, add honey and lemon juice. Stir until combined.
- Pour dressing over the fruit and toss to combine.
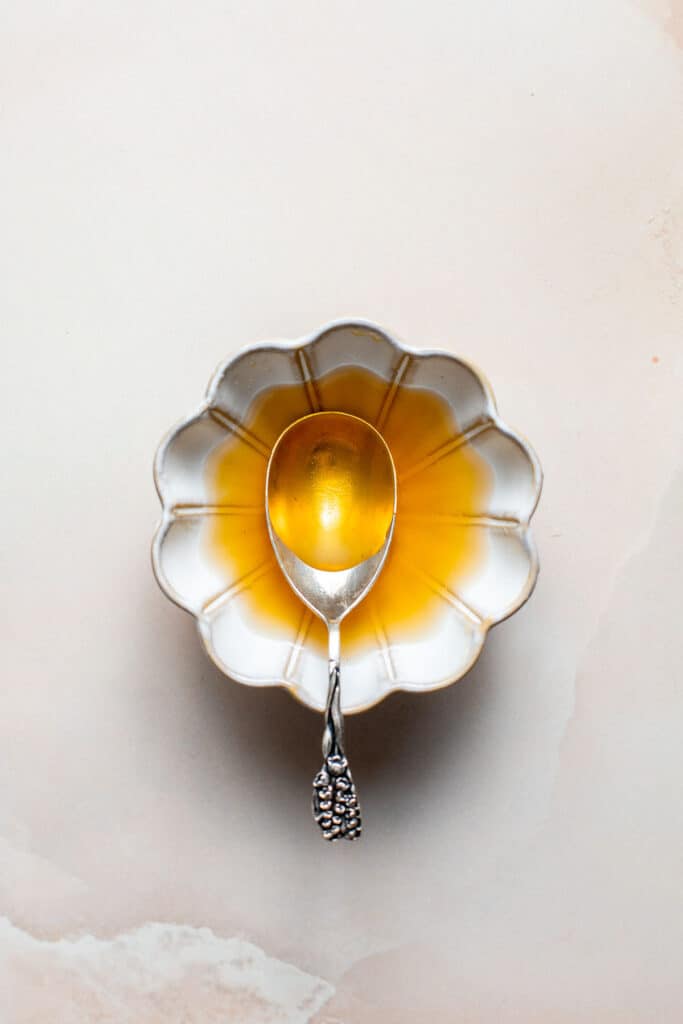
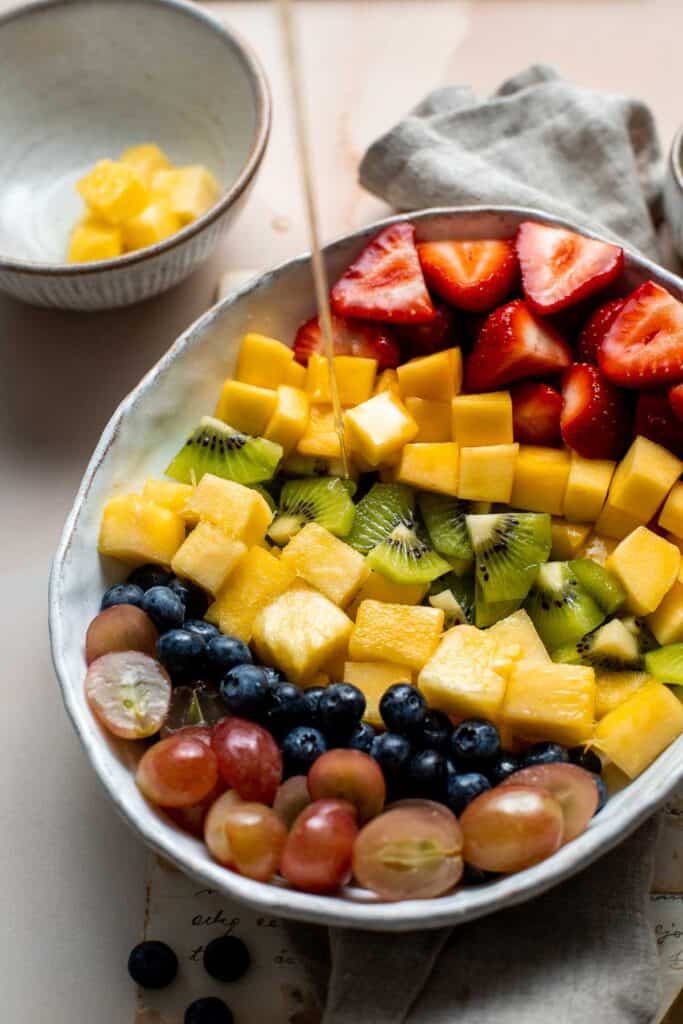
How to Serve
This summer fruit salad is one of go-to's when I need to prepare something for a pot-luck, picnic or barbecue. It's easy and makes the perfect snack or dessert. But, the thing about fruit salad is that although it may hit the spot during the summer, you can really devour this stuff all year long. It's kind of also one of my favourite breakfast options or snacks throughout the day. Move over smoothie, there is a new breakfast boss in town!
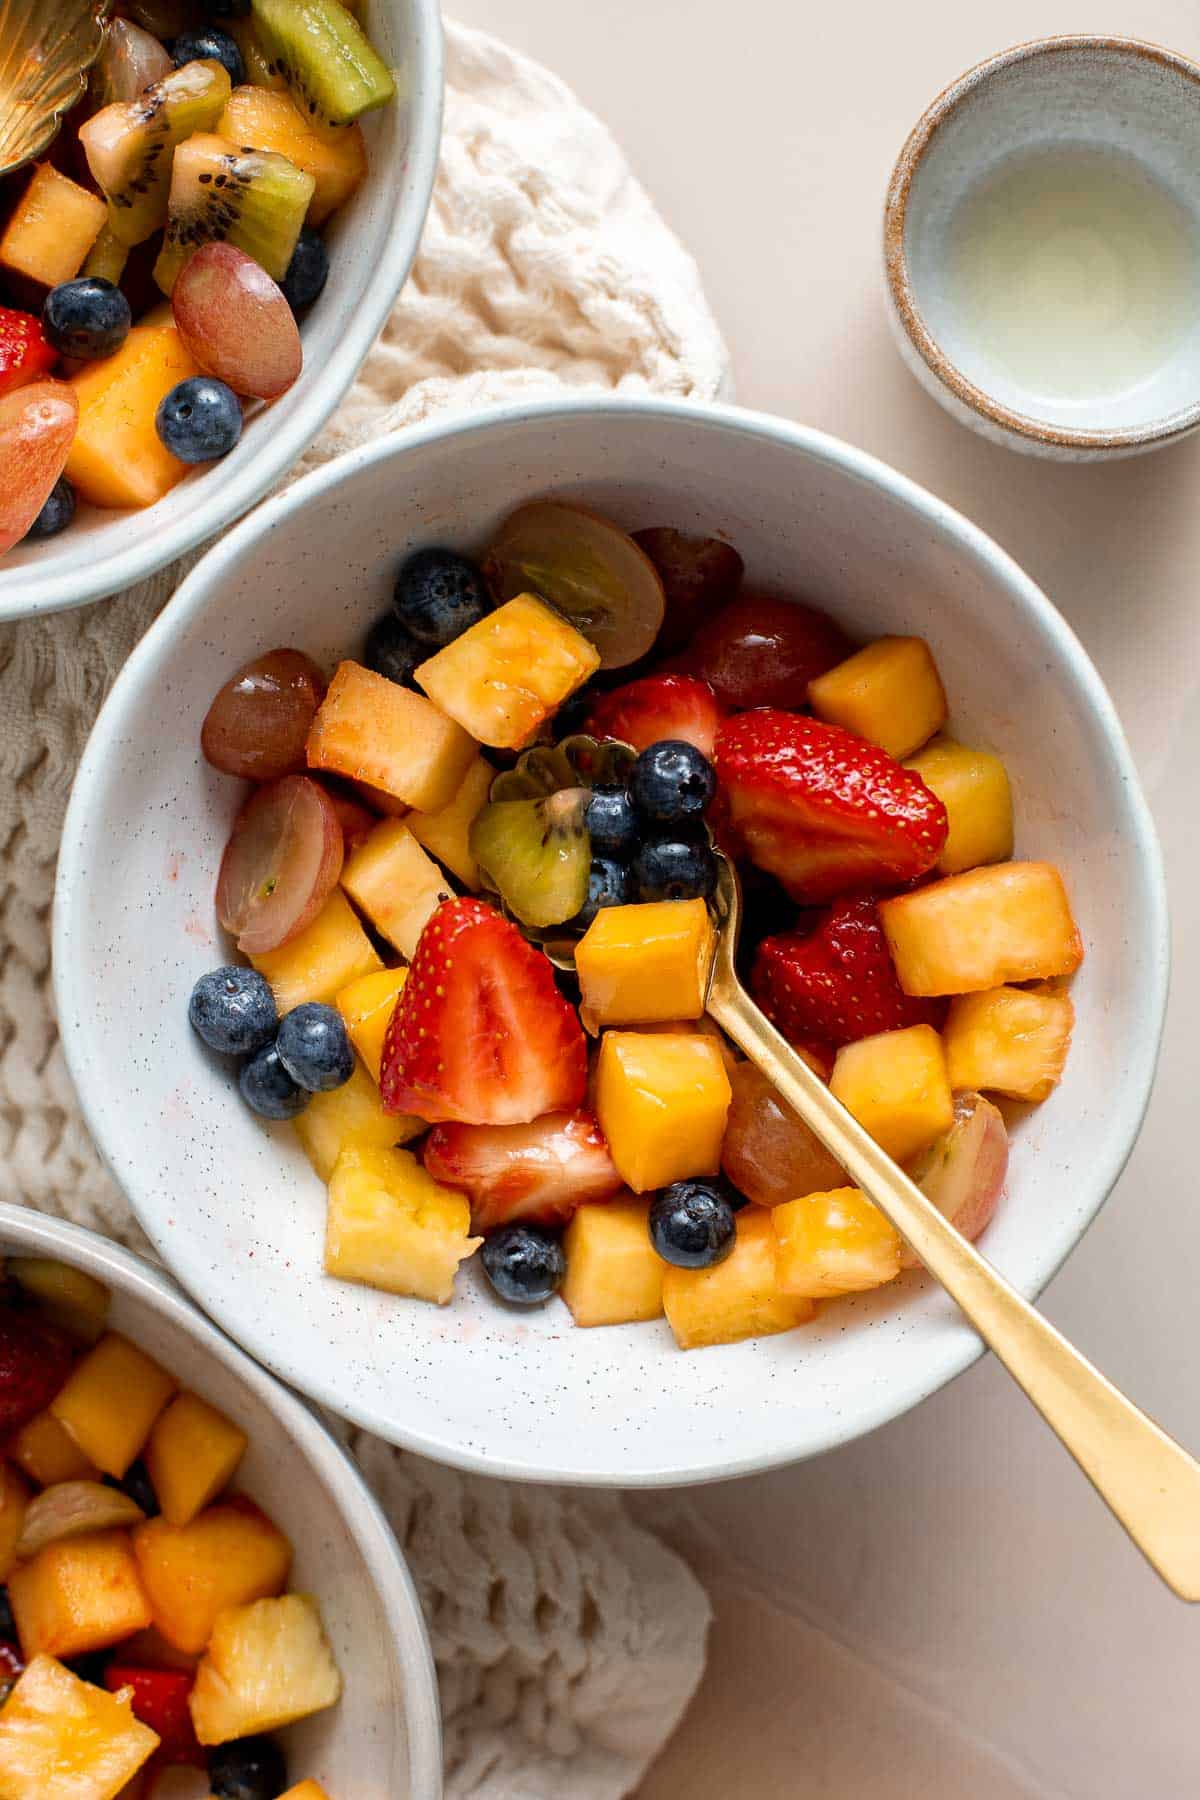
Storage Instructions
- How to store: Place in an airtight container and refrigerate for up to five days. Give the salad a good toss before serving.
- How to freeze: Unfortunately, this fruit salad won't come out of the freezer in the same state it went in. The texture may change slightly after thawing. However, that doesn't mean that freezing is out of the question! Frozen fruit salad could make an excellent addition to smoothies or serve as a base for quick fruit reductions for desserts and breakfasts. Just pop into a freezer storage bag and leave frozen for up to three months.
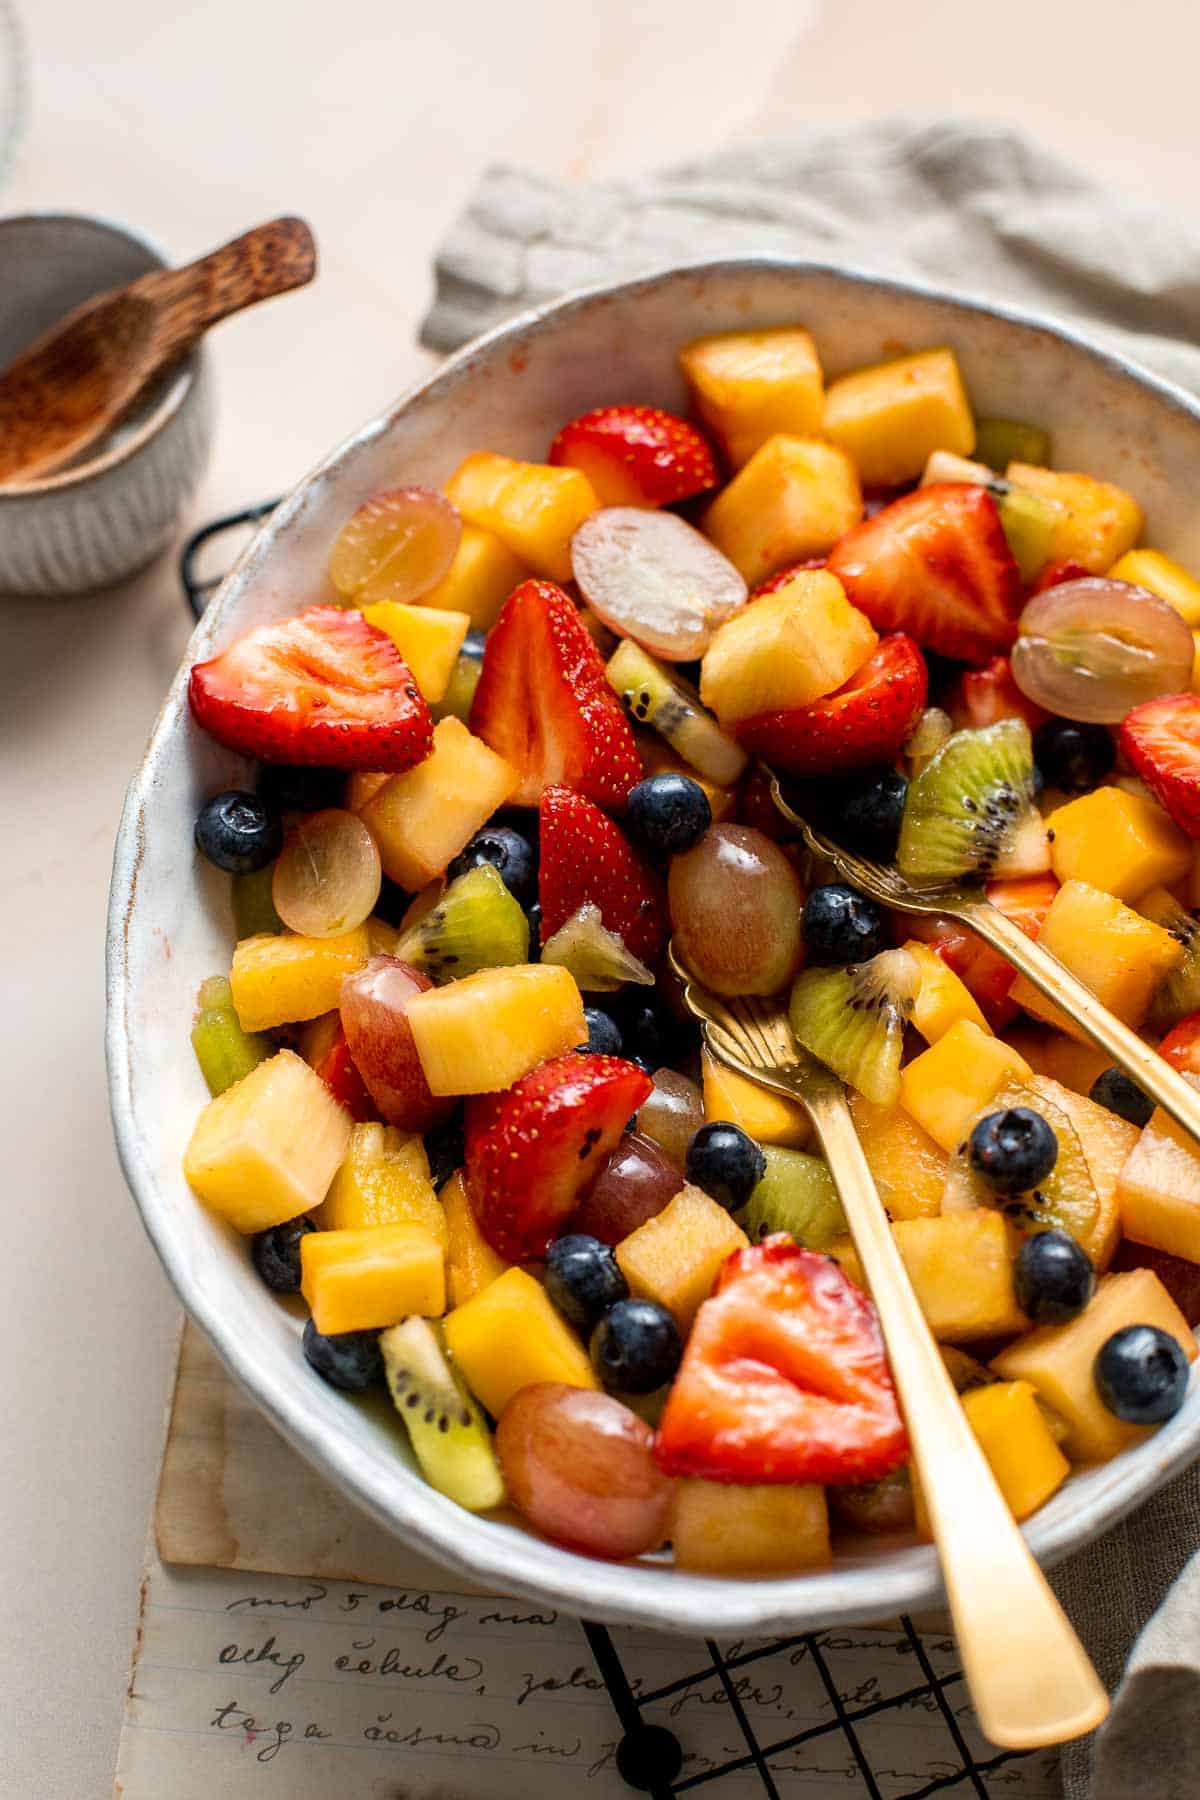
Recipe Tips and Tricks
- Shake things up. If you want to add even more visual interest and you have extra time on your hands, use cookie cutters to cut some of the fruit into fun shapes like hearts, stars, or triangles for cool variations that will wow the crowd every time.
- Use pre-cut fruit. In a pinch, you can save even more time on prep by shopping for pre-cut fruits in the produce section of your local grocery store - just be sure to check the "prepared on" date to ensure you're getting the freshest fruit possible, as well as the ingredients list to make sure there aren't any other ingredients added, like preservatives to maintain color.
More Fruit Recipes
- Blueberry Biscuits
- Fresh Strawberry Pie
- Peach Arugula Salad
- Blackberry Milkshake
- Mango Frozen Yogurt
- Mandarin Orange Salad
Tried this recipe?
I'd love to hear what you think! Leave a comment and rating below to share your feedback. Your reviews help others discover this recipe and help me keep creating more free recipes for you. Snap a photo and tag me on social media @aheadofthyme too.

Thai Turkey Burgers
These Thai Turkey Burgers topped with a crisp and creamy slaw stuffed between a well-toasted bun may be one of the best burger experiences you'll ever have. They're loaded with fresh and bright flavors, healthy, delicious, and quick and easy to make.
Cook these Asian turkey burgers any way you'd like - on the stove, in the oven, on the grill, or in the air fryer! This perfect weeknight meal has is so convenient.
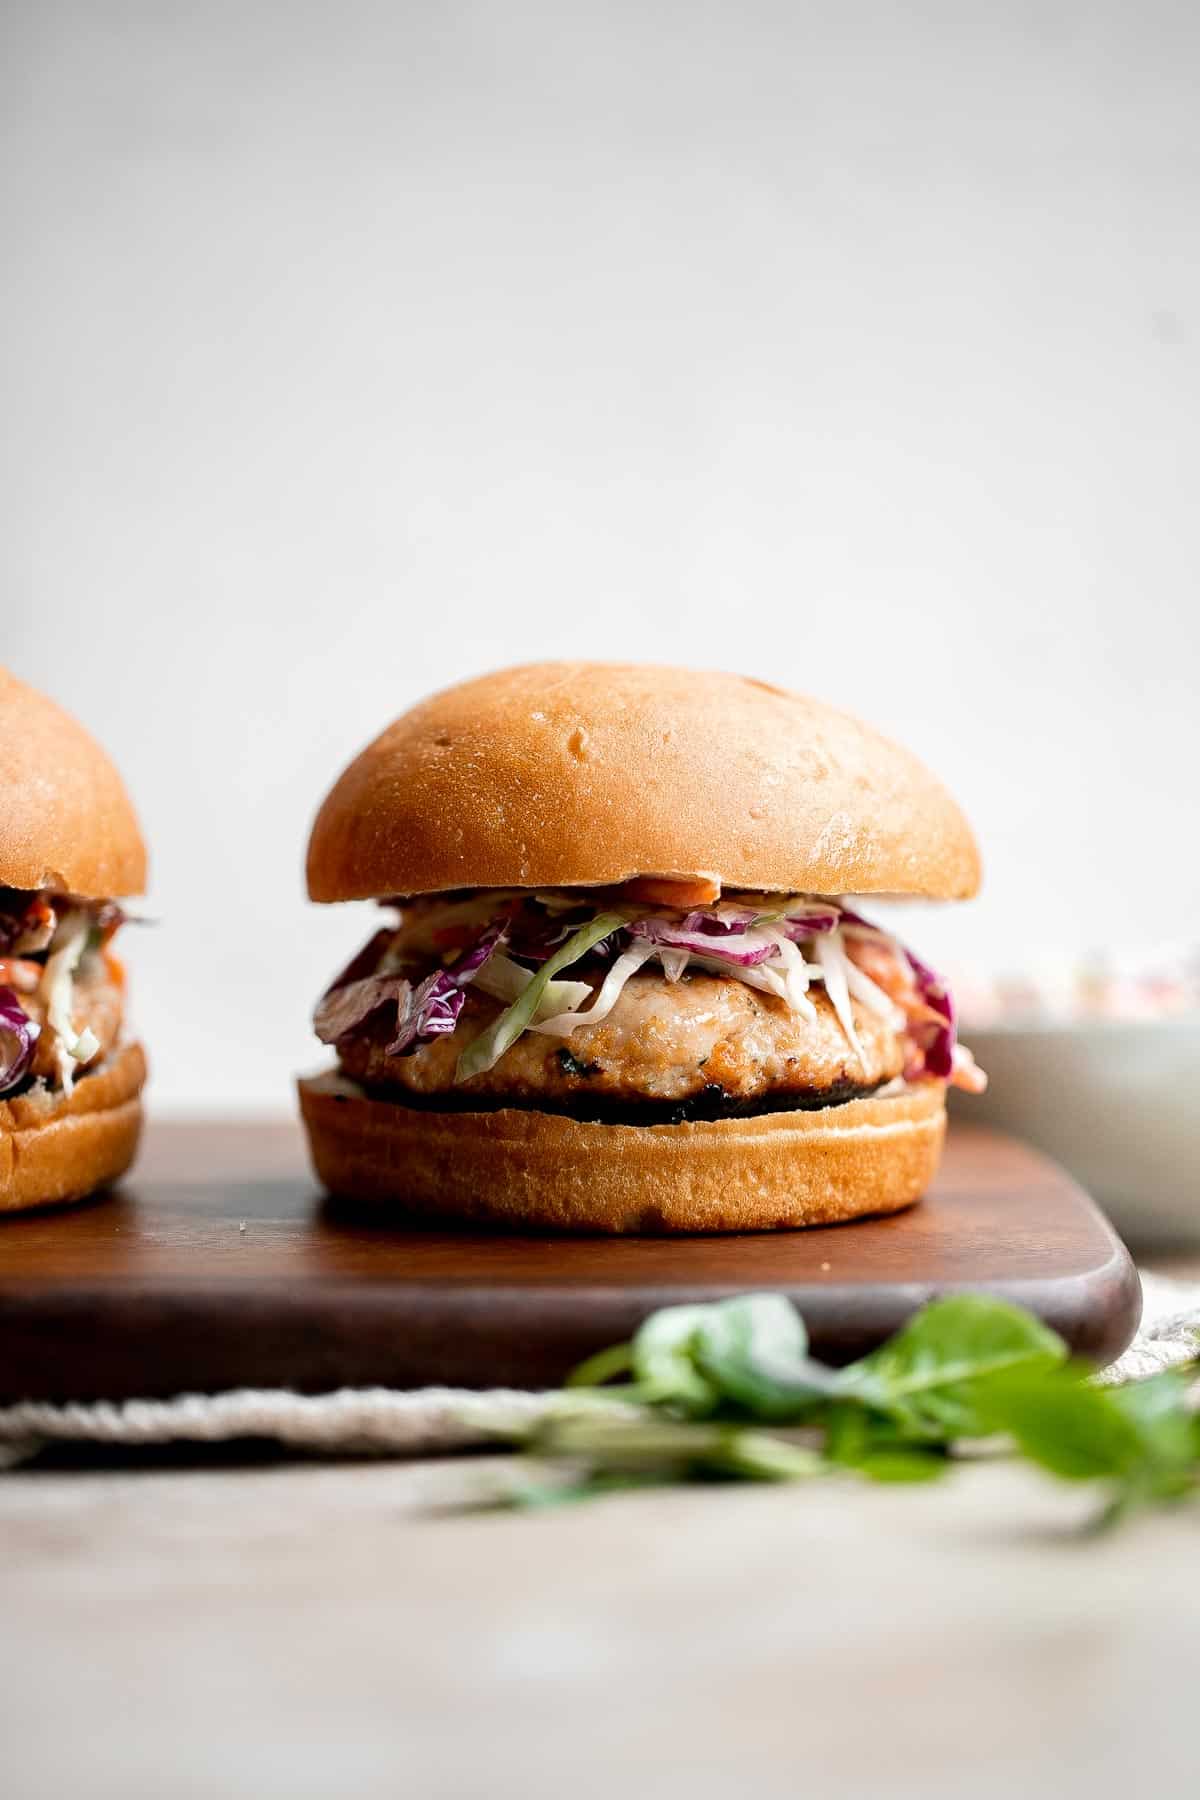
Why You'll Love Thai Turkey Burgers
- They're unique and delicious. Turkey is a healthy alternative to Classic Beef Hamburgers, but they can start to get boring after a while. By adding Thai flavors to these turkey burgers, you can make something unique that is healthy, tasty, and different.
- The flavorful patties. These Thai turkey burger patties are full of aromatic ingredients that create an Asian turkey burger like no other. Red curry paste and fish sauce add a hint of spice and umami to the fresh flavors of onion, ginger, and basil. Balance is key, and these Thai turkey burger patties have nailed it.
- The saucy slaw. In the coleslaw, you'll find cabbage and carrots smothered in a creamy and tangy sauce of mayo, lemon juice, salt, and pepper. The slaw is the perfect companion to these Thai turkey burgers because it softens the bright flavors in the burger patties and adds some sauciness to them.
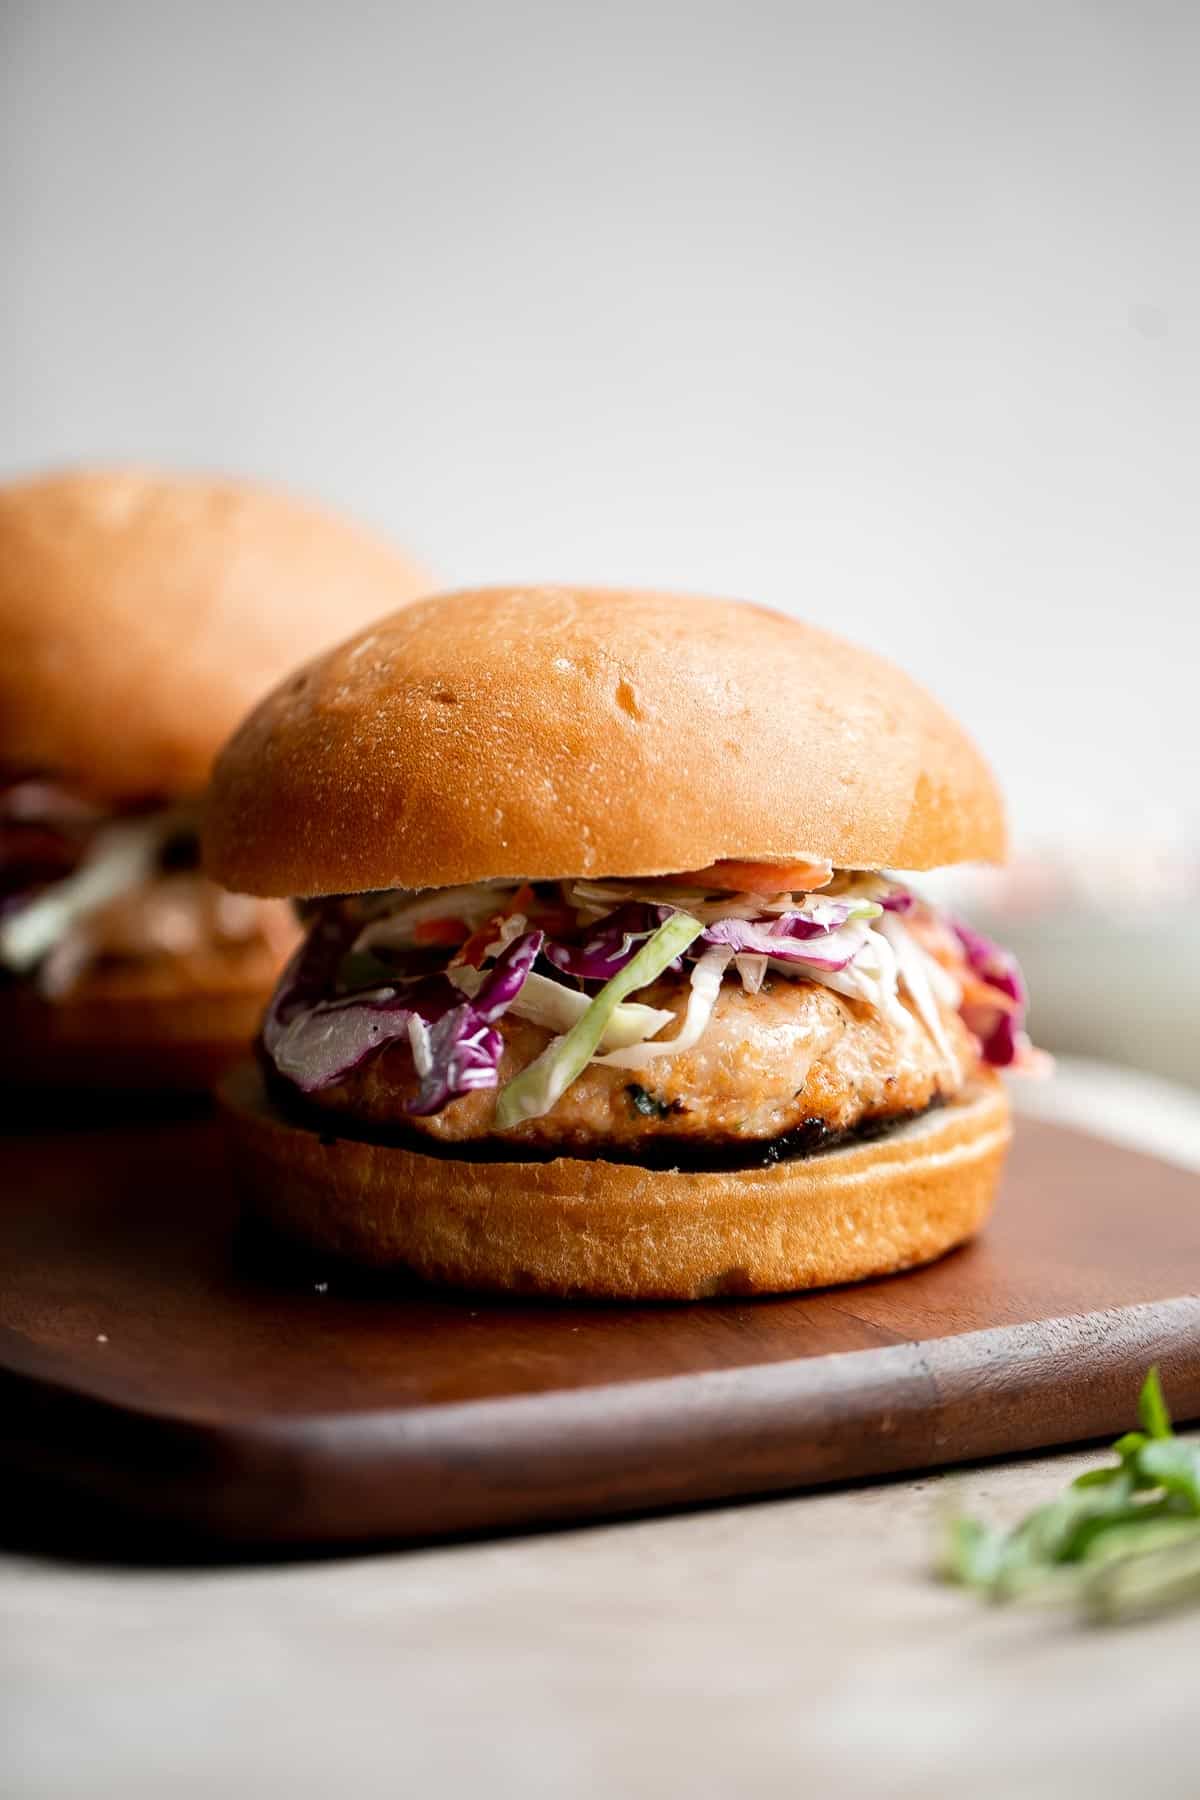
Ingredient Notes
To make these delicious Thai Turkey Burgers, you will need the following ingredients (full measurements in recipe card below):
- ground turkey - you can also substitute the ground turkey with ground chicken or pork.
- shallot - or substitute with red onion.
- breadcrumbs - helps to make the cooked turkey patties lighter and more tender.
- ginger
- red curry paste
- fish sauce
- basil - I recommend using fresh basil and not dried. Fresh basil compliments the other fresh Thai flavors so well.
- salt and pepper
- coleslaw - made easy with shredded cabbage, carrots, mayonnaise, lemon juice, salt, and pepper.
- vegetable oil - if pan frying the turkey patties.
- hamburger buns - try making homemade hamburger buns or use store-bought buns.
You will also need measuring cups and spoons, and a mixing bowl.
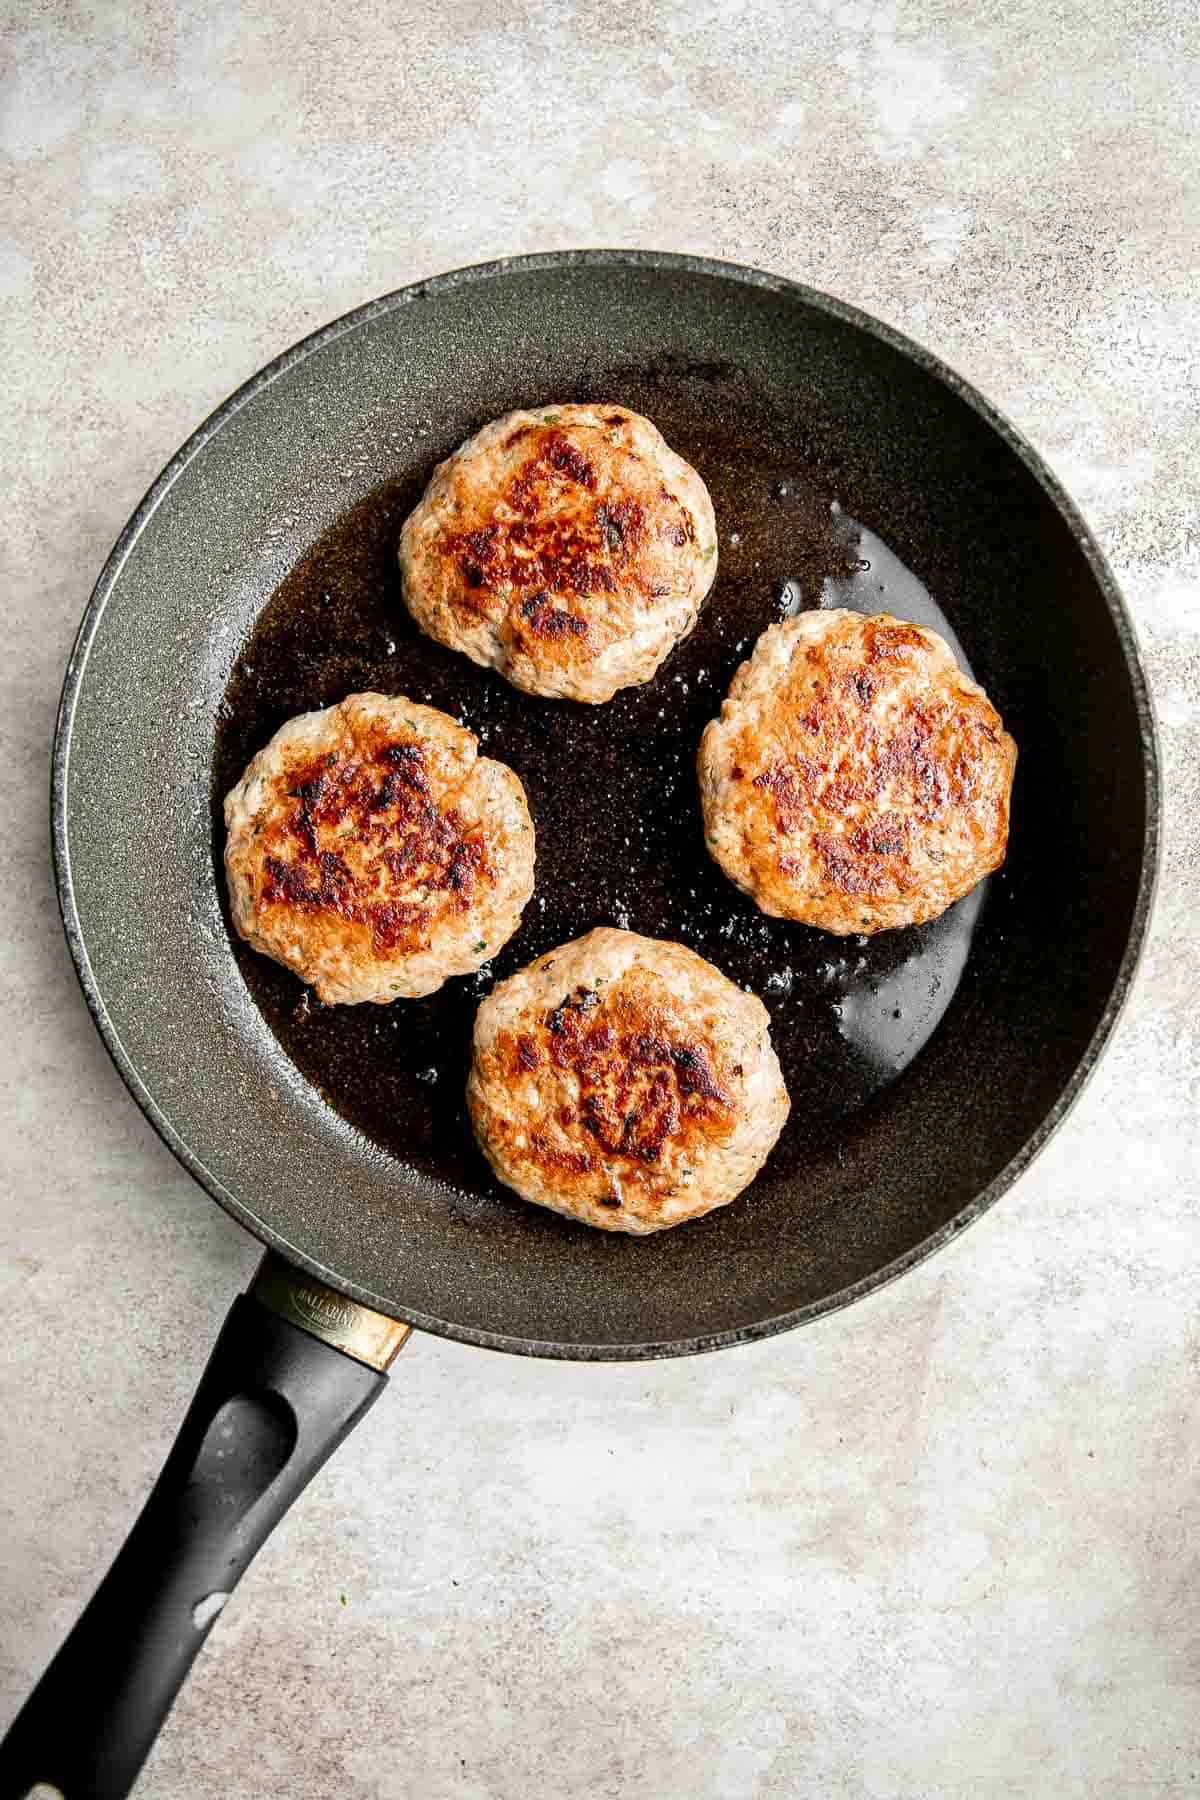
How to Make the Best Thai Turkey Burgers
First, make the turkey patties.
- Marinate the ground turkey. In a large mixing bowl, combine ground turkey with onion, breadcrumbs, red curry paste, fish sauce, basil, ginger, salt, and pepper. Mix well until evenly combined. Set aside for at least 15 minutes or refrigerate overnight to allow the flavors to infuse into the meat.

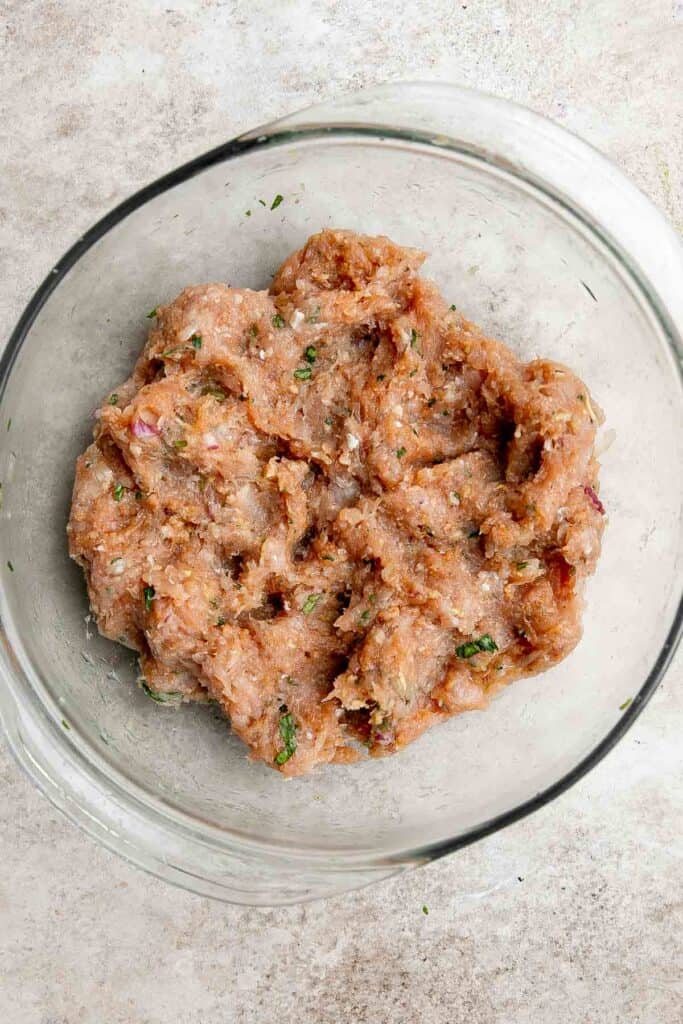
- Shape the patties. Divide the turkey mixture in 4 and use your hands to shape into 4 large patties (each about ½ cup of the mixture).
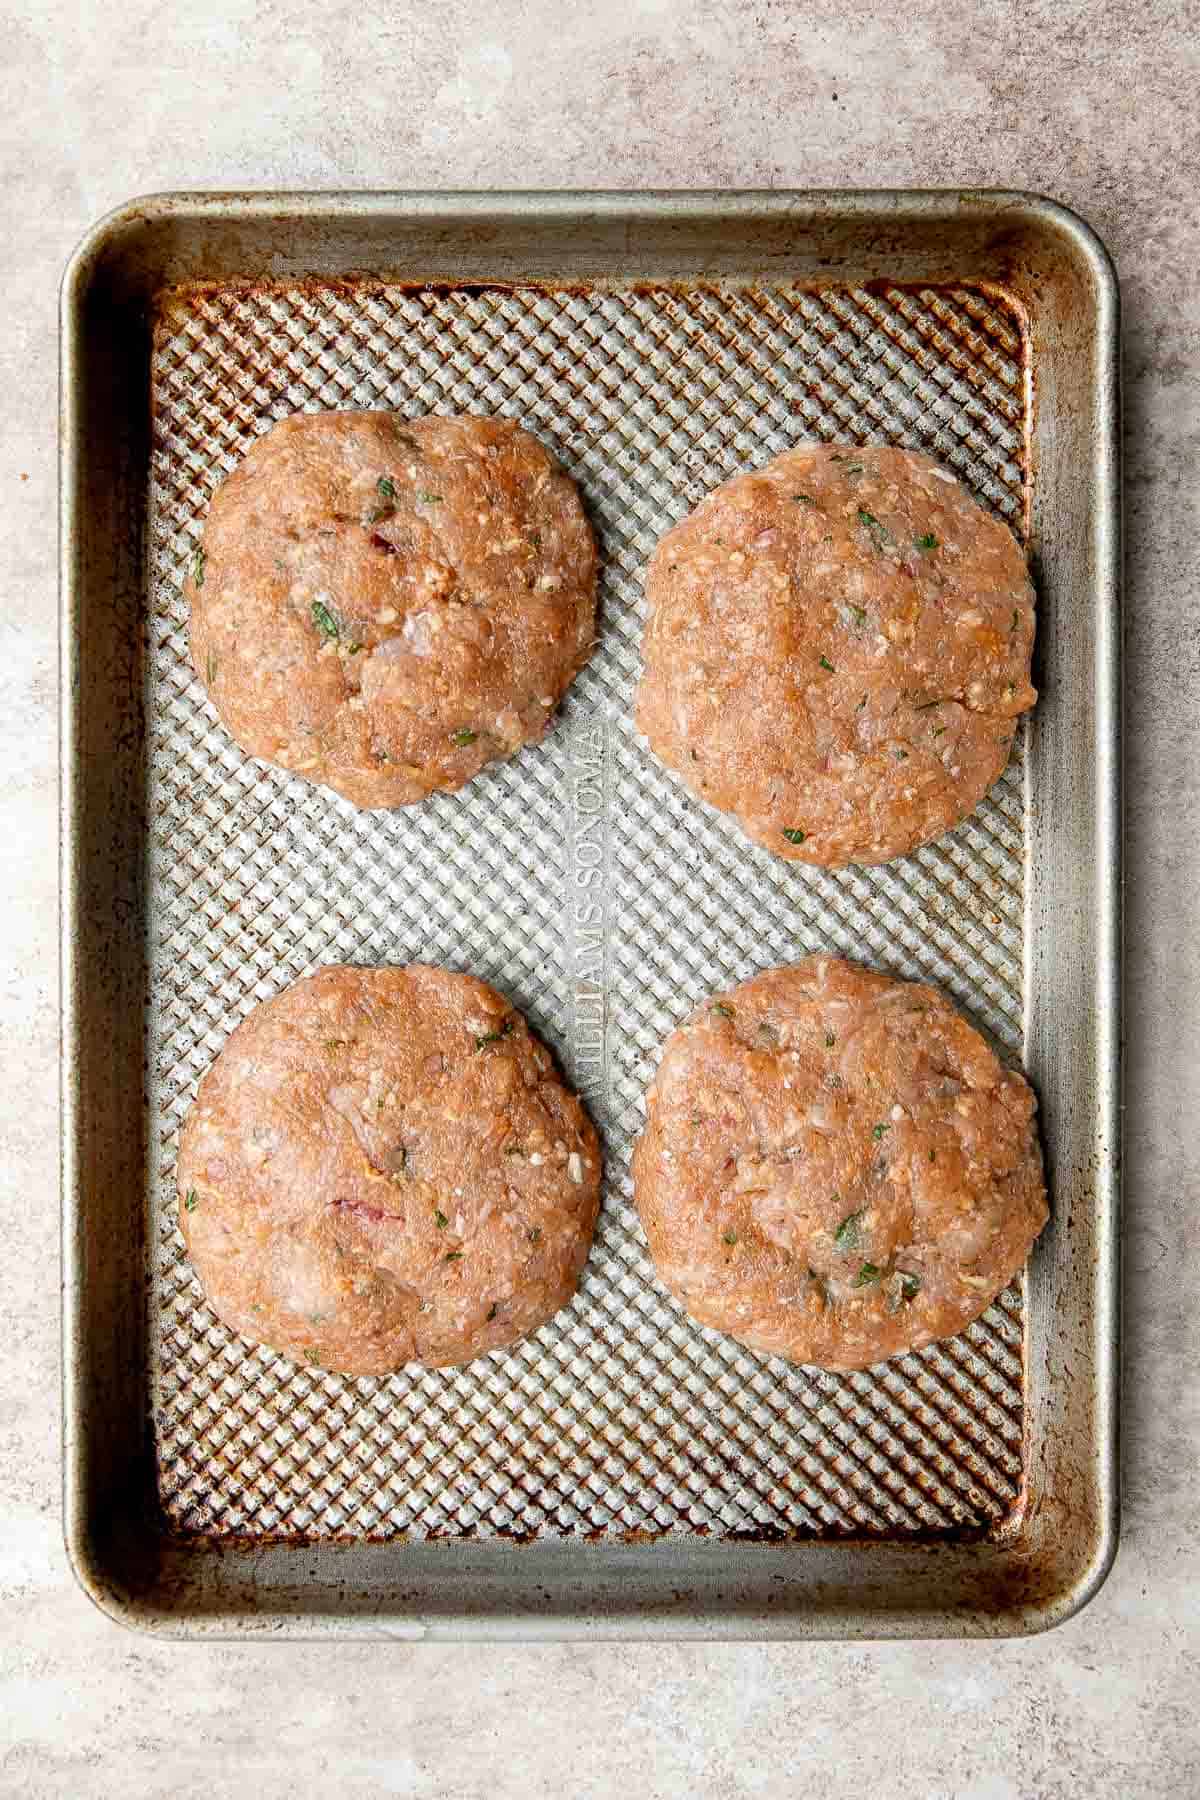
Next, cook the patties.
Cook the patties on a skillet, in the oven, on the grill, or in the air fryer.
- To pan fry: Heat 1 tablespoon oil in a large skillet over medium heat until sizzling hot, about 2 minutes. Place patties on the skillet and cook until nicely browned and firm, about 5 minutes per side. The internal temperature for the turkey should reach 165F as read on a meat thermometer.
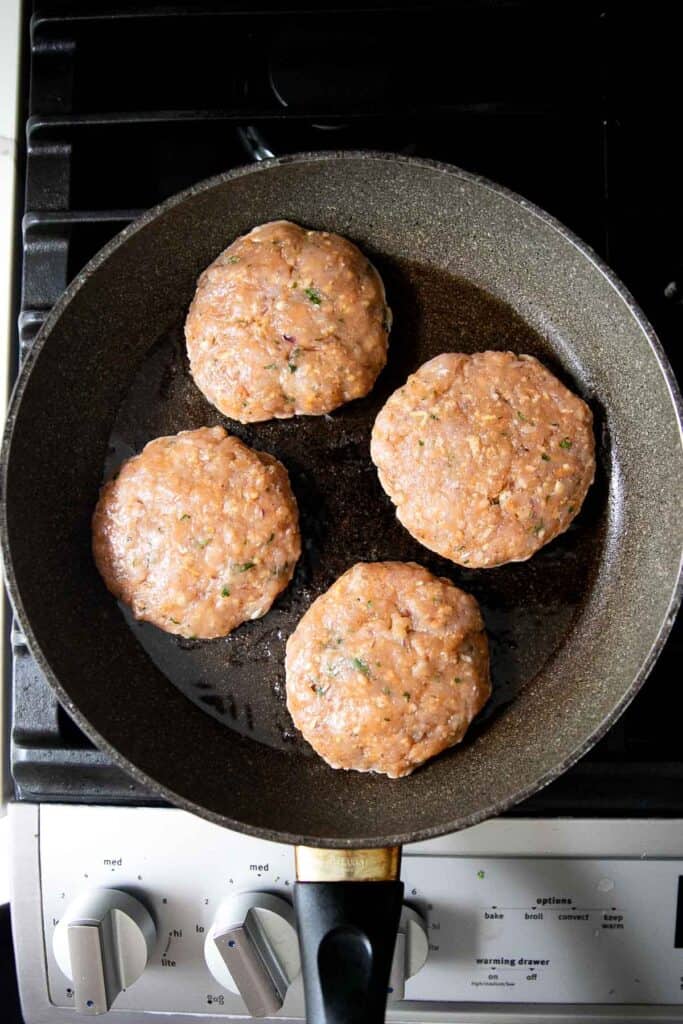

- To bake: Add patties to a large parchment lined half sheet baking pan and bake in a 375F preheated oven for 15 minutes until nicely browned, flipping once.
- To grill: Preheat the grill on medium-high until hot. Brush some oil onto the grilling grate and place patties on top. Brush some more oil on top of the patties as well. Cook for 4-5 minutes and then carefully flip over and cook on the other side.
- To air fry: Add patties in a single layer in the air fryer basket and cook at 375F for 12-15 minutes until nicely browned. Flip once halfway through cooking. Depending on the size of your air fryer, you may have to cook in batches.
Assemble the Asian turkey burgers.
- Make the slaw. In a medium mixing bowl, combine shredded cabbage, carrot, mayonnaise, lemon juice, salt, and pepper. Stir well until evenly combined.
- Toast the buns. Slice the hamburger buns and toast them on the grill or in the frying pan, if desired.
- Assemble the burgers. Place the turkey patties on the bottom half of the bun and top with coleslaw. Place top bun on top and serve immediately.
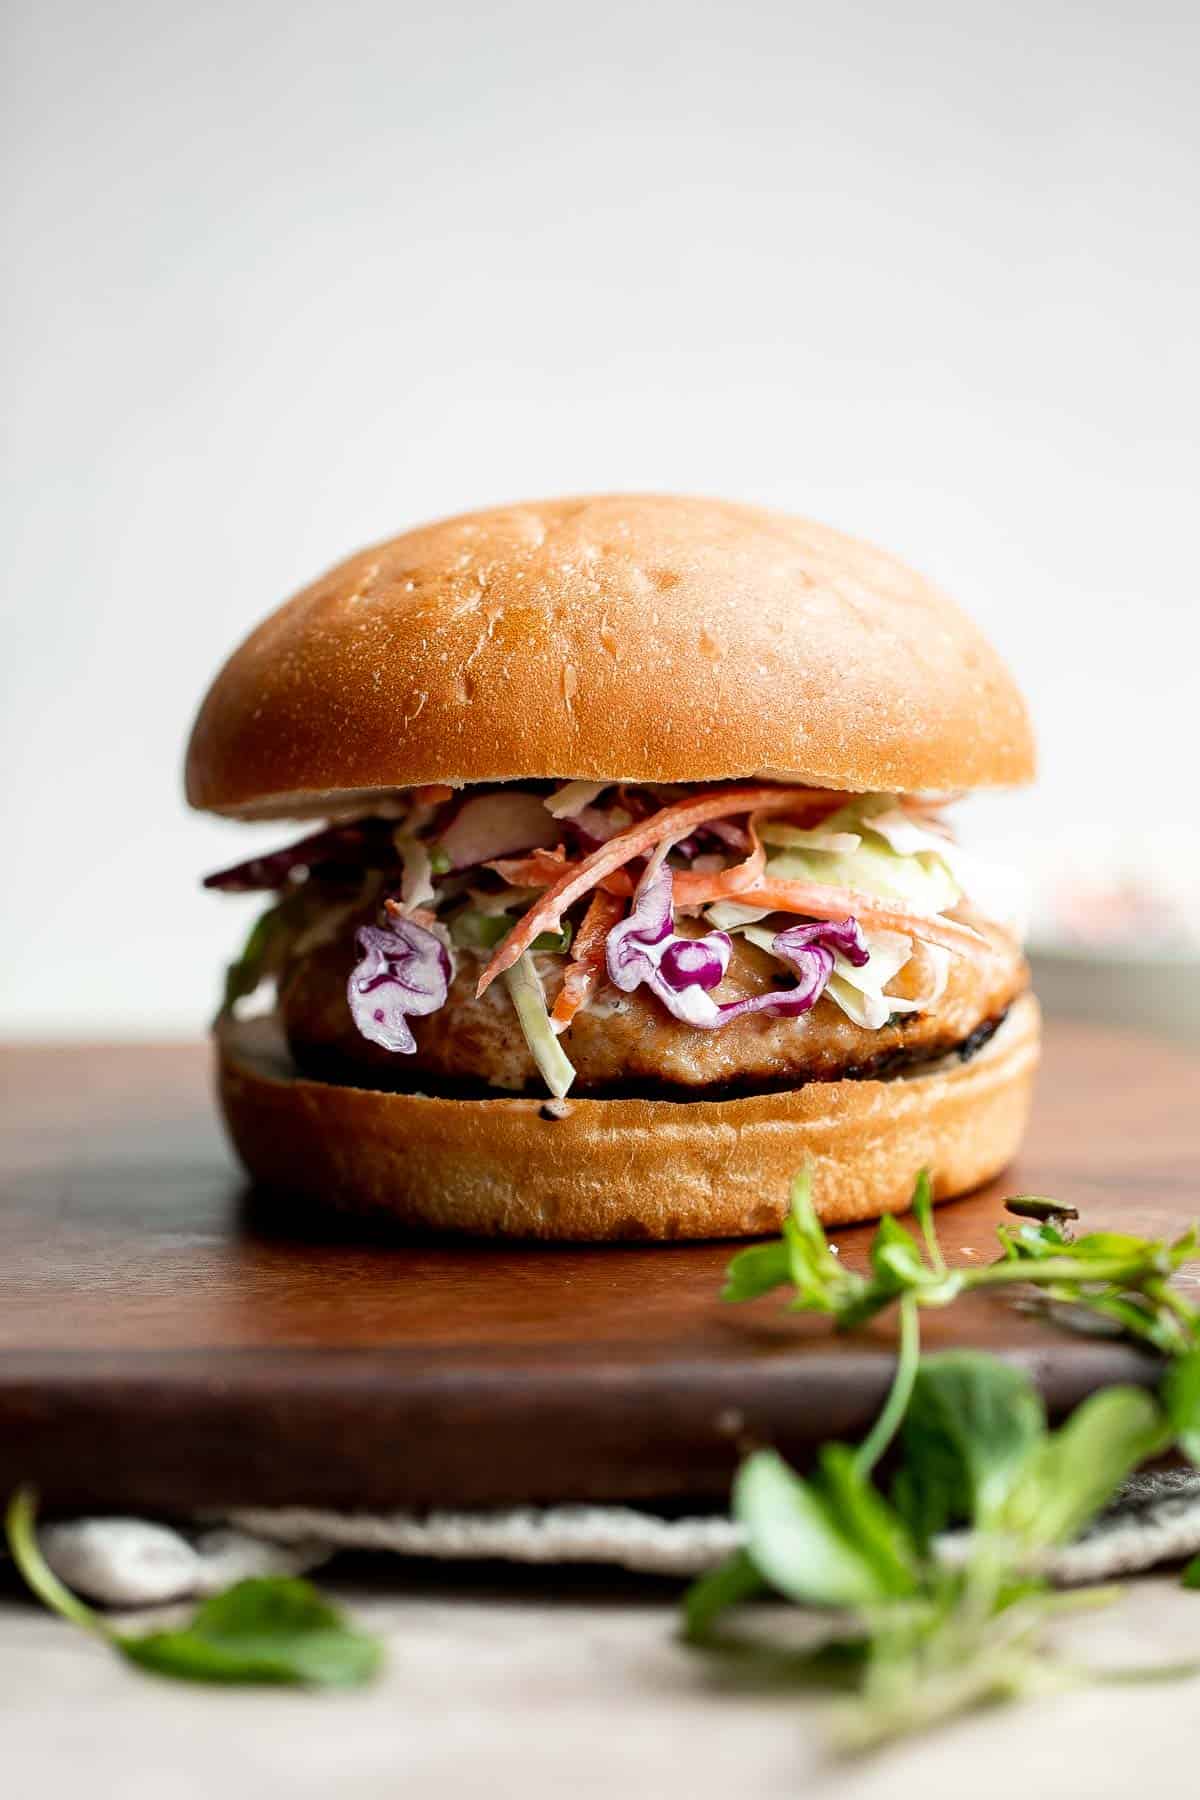
How to Serve
Thai Turkey Burgers are delicious and filling on their own. But you can add some sides for a complete meal, such as:
- Air Fryer French Fries
- Thai Mango Salad
- Grilled Corn on the Cob
- Zucchini Fritters
- Classic Coleslaw
- Baked Sweet Potato Wedges
Make Ahead and Storing Instructions
- Make ahead instructions: To prep burgers ahead of time and still enjoy them fresh, you can store the raw patties for up to 2 days. I recommend storing them in an airtight container, stacked on top of each other, with parchment paper in between to keep them separated.
- How to freeze: You can easily freeze uncooked Thai turkey burger patties for up to 3 months. Place them on a parchment lined baking tray and into the freezer for an hour. Then, stack them up and layer small squares of parchment paper in between. Tightly wrap the stack in plastic cling wrap and store in an airtight container or freezer bag and store in the freezer for up to 3 months. To cook, first defrost overnight in the refrigerator, then follow recipe instructions.
- How to store: Store cooked turkey burgers and coleslaw in separate airtight containers in the fridge for up to 3-4 days. Store hamburger buns separately at room temperature, also in an airtight container or bag.
- How to reheat: To reheat cold cooked Thai turkey burgers, pre-heat your oven to 350F. Wrap the burgers in aluminum foil with a splash of water, loose enough to allow air to flow around the burger but also tight enough that the humid air will stay inside the foil wrap. Bake for 10-15 minutes, or until warmed through.
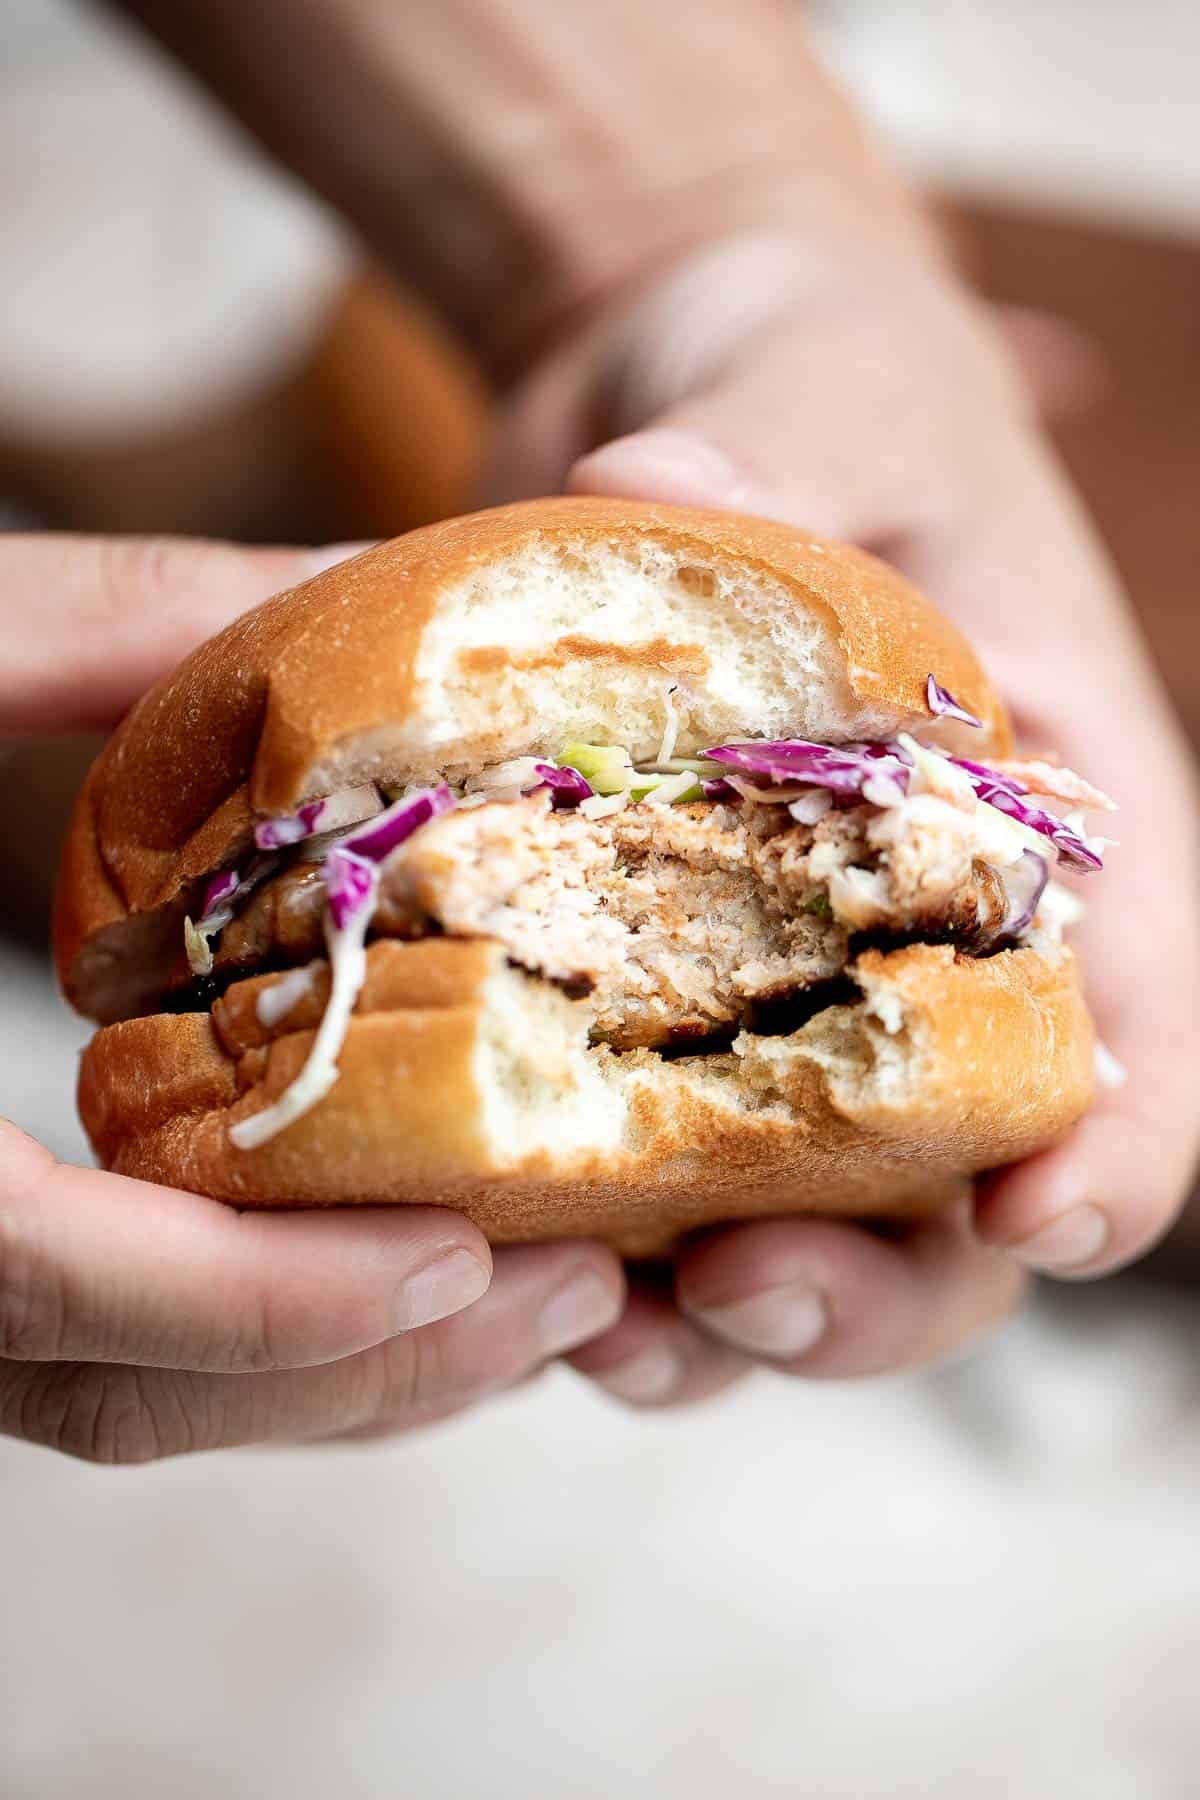
More Ground Turkey Recipes
- Thai Turkey Meatballs in Coconut Curry
- Sweet Chili Turkey Meatballs
- Korean Ground Turkey
- Ground Turkey Pasta Bake
- Turkey Chili
- Mediterranean Turkey Burgers
Tried this recipe?
I'd love to hear what you think! Leave a comment and rating below to share your feedback. Your reviews help others discover this recipe and help me keep creating more free recipes for you. Snap a photo and tag me on social media @aheadofthyme too.

50+ Healthy Lunch Ideas

Sometimes you just don't feel like having leftovers for lunch. If you are wondering "what to make for lunch" that is easy, healthy, and delicious, and you don't necessary want to spend all Sunday night meal prepping (although there is nothing wrong with that, we have some great meal prep ideas here too!), then you have come to the right place. We have rounded up over 50 of our best and most popular healthy lunch ideas.

Best Healthy Lunch Ideas
Browse through the best lunch sandwiches wraps and rolls, filling hearty salads, flavor-packed Asian bowls, hearty soups that are easy to make ahead and reheat well, and easy meal prep ideas (meatballs are the best for meal prep). Plus, many of these lunch recipes are quick and easy!
Sandwiches, Wraps and Rolls
Easy Greek Chicken Gyros with Tzatziki
This refreshing and light, easy Greek chicken gyros is packed with tender souvlaki chicken, Greek salad, and homemade tzatziki sauce, all wrapped in a pita. One of our most popular healthy lunch ideas.
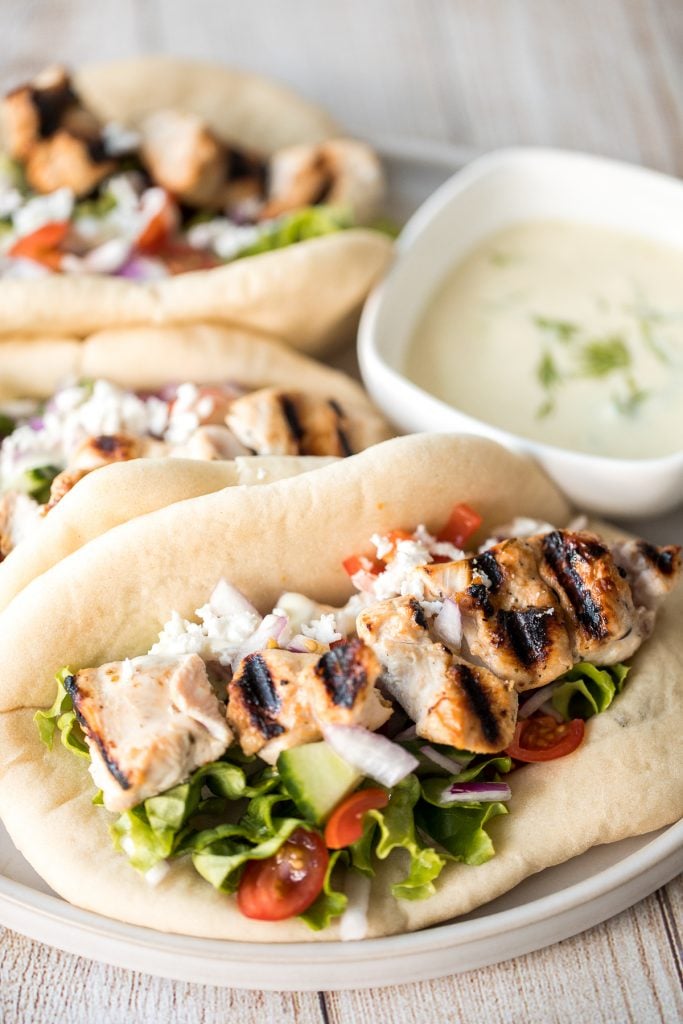
The best egg salad sandwich is a quick and easy picnic classic loaded with perfect hard-boiled eggs, mayonnaise, a touch of dijon mustard and green onions.
Turkey pinwheels are bite-sized finger food perfection and will make back-to-school lunch planning for the kids a total breeze. They are fully customizable and you can wrap them up in a tortilla or in pita bread.
Homemade chicken shawarma (donair) with juicy tender chicken marinated in Middle Eastern spices and wrapped in pita bread is easy to make at home. Serve it with a Persian Shirazi Salad on the side.

Vegan hummus wrap is a quick easy lunch made in minutes with a handful of fresh ingredients. This delicious veggie wrap is healthy, fresh, nutritious.
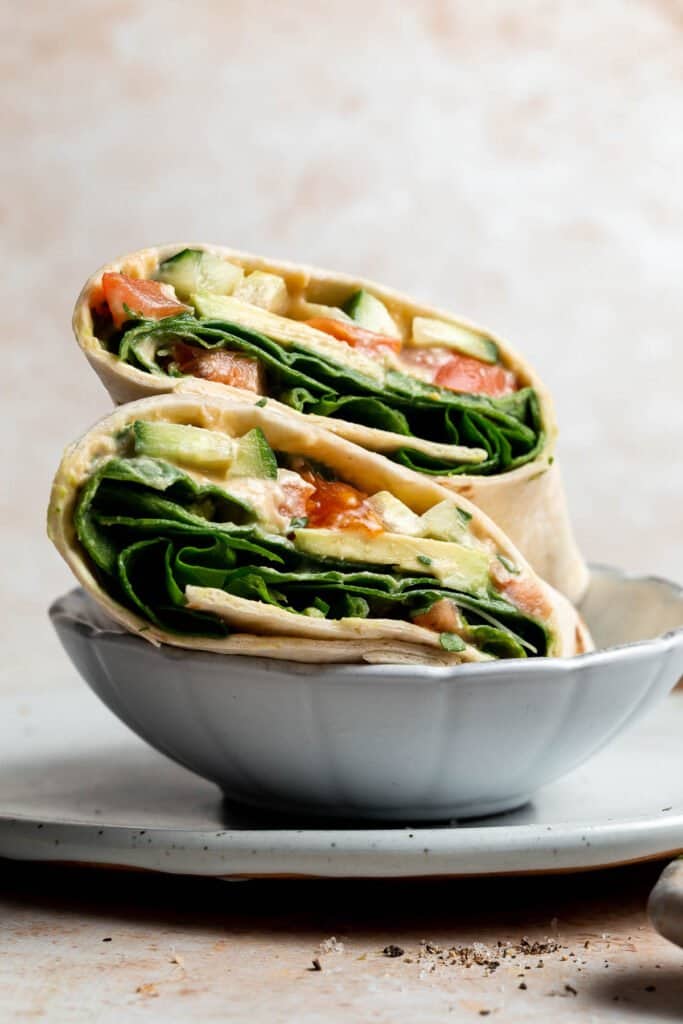
Vietnamese Summer Rolls with Chicken
Vietnamese summer rolls with chicken are fresh, light, and healthy. This Asian snack is a healthy lunch idea that takes less than 20 minutes to make and way easier than you think.

Hearty and filling beef and bean burritos are easy to make ahead, freezer-friendly, and take just 30 minutes for restaurant-quality Mexican food at home.
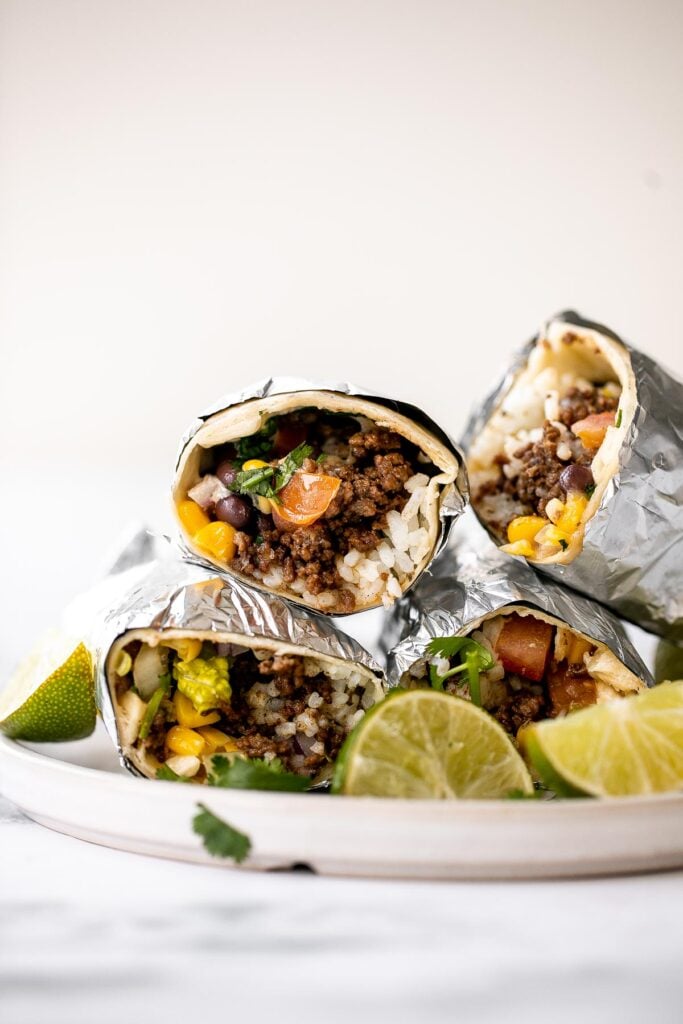
Tuna Melt Grilled Cheese Sandwich
Get your hands on pantry staple canned tuna and make a delicious, crunchy tuna melt grilled cheese sandwich in less than 10 minutes! It's so tasty and easy! For another grilled cheese option, try a roasted broccoli grilled cheese sandwich.
Szechuan Chicken Lettuce Wraps with Spicy Mayo
Spice it up and make copycat Szechuan chicken lettuce wraps with spicy mayo from the comfort of your own home with this easy to follow recipe. Plus, it is healthier than the original.

Lemongrass Chicken Banh Mi Sandwich
This easy-to-make, light and crunchy Vietnamese lemongrass chicken banh mi sandwich is packed with tender chicken, pickled vegetables and fresh herbs.
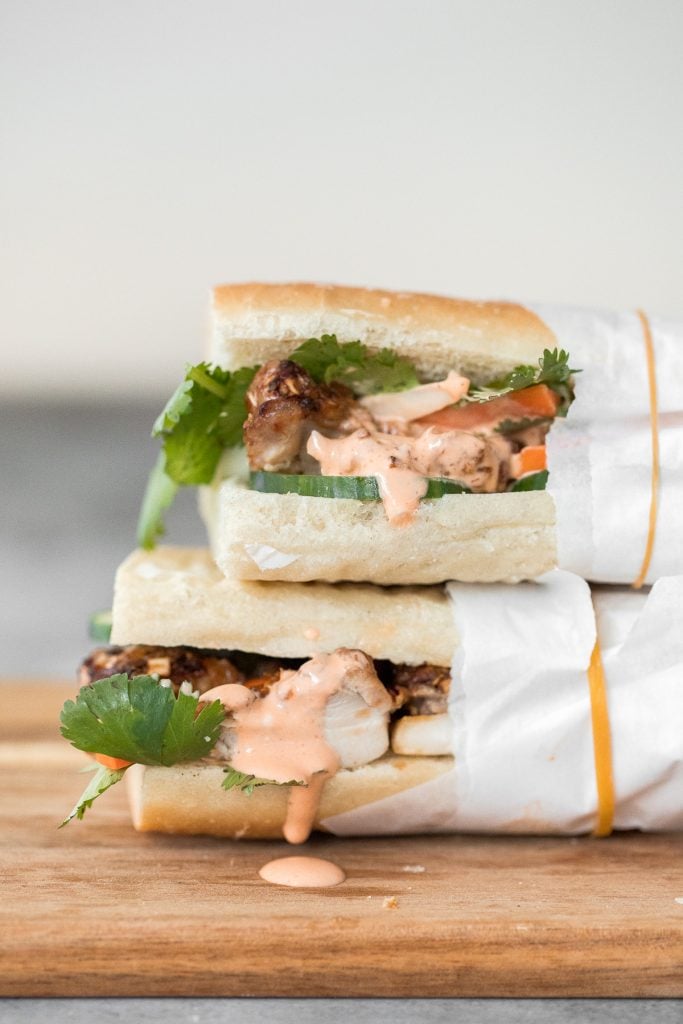
Vietnamese Salad Rolls with Peanut Dipping Sauce
Fresh, light and healthy Vietnamese salad rolls are packed with vermicelli noodles, shrimp, fresh vegetables and herbs and dipped in homemade peanut sauce. If you prefer chicken, try our Vietnamese Summer Rolls with Chicken.

Hearty Filling Salads = the Easiest Healthy Lunch Idea
Chicken Garden Salad with Ranch Dressing
Chicken garden salad with ranch dressing is fresh, healthy, hearty, and colorful. It's a filling and wholesome lunch or dinner that is versatile too. You can't get a healthy lunch idea than a fresh salad.
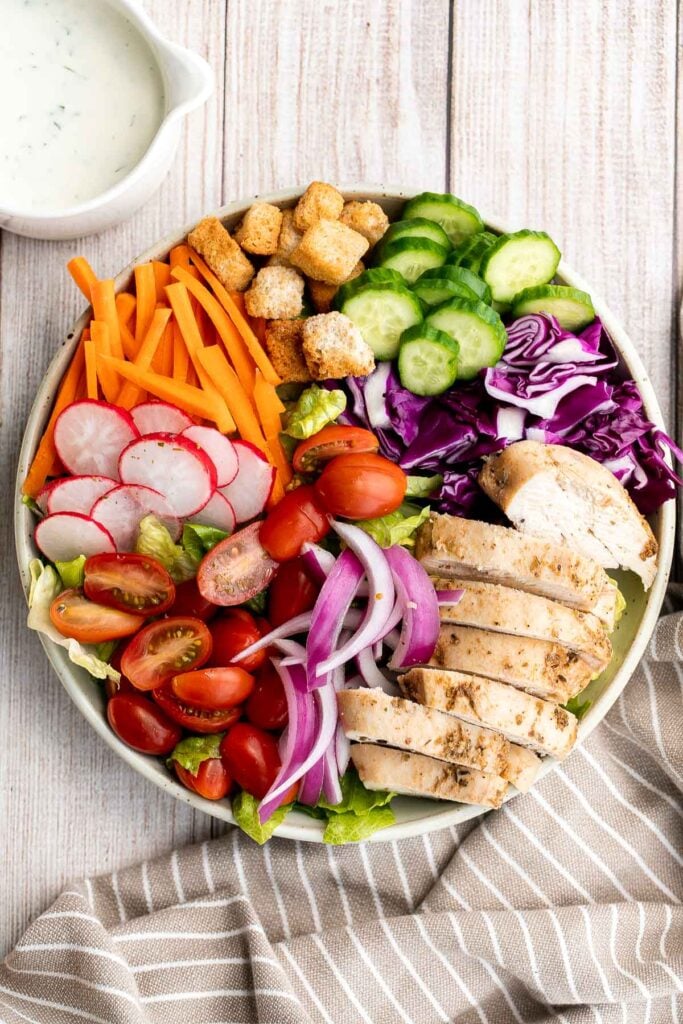
Italian pasta salad is delicious, wholesome, and easy to make. Make it up to three days ahead for your summer picnics and cookouts. You can't get more classic than Italian Salad for lunch.
Grilled shrimp salad is a quick and easy, healthy summer meal that is loaded with fresh, flavorful ingredients, all tossed in an easy homemade dressing.
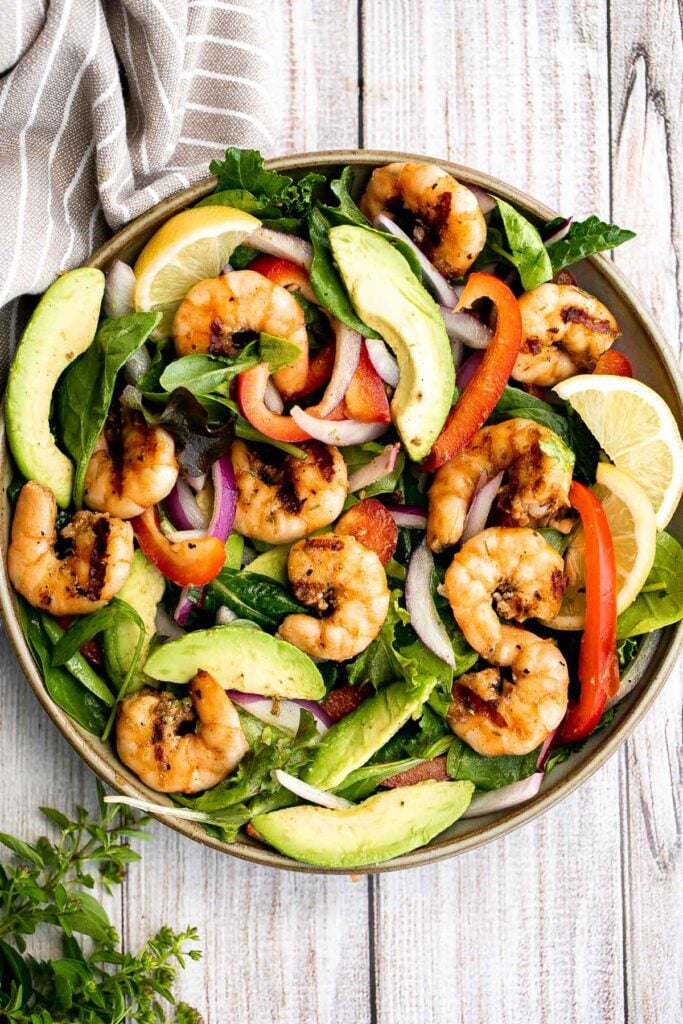
Beef taco salad is a simple, filling, and delicious meal loaded with your favorite taco fillings, and a creamy lime dressing. Make it in 20 minutes.
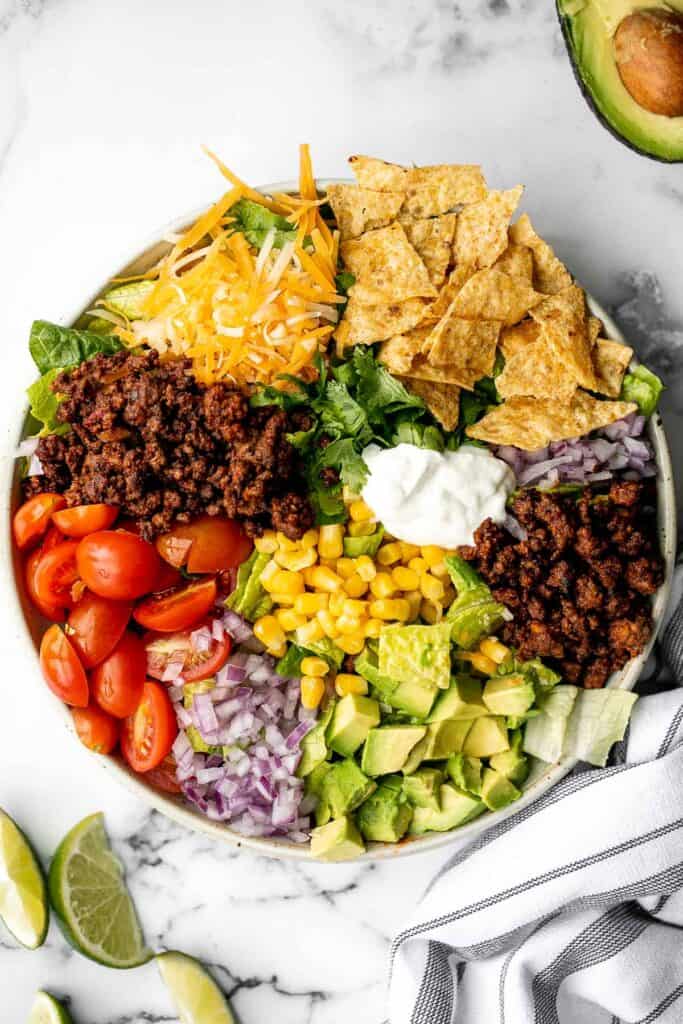
There's nothing better on a hot day than a cold and refreshing vegan soba noodle salad, tossed with fresh vegetables and a delicious saucy dressing.
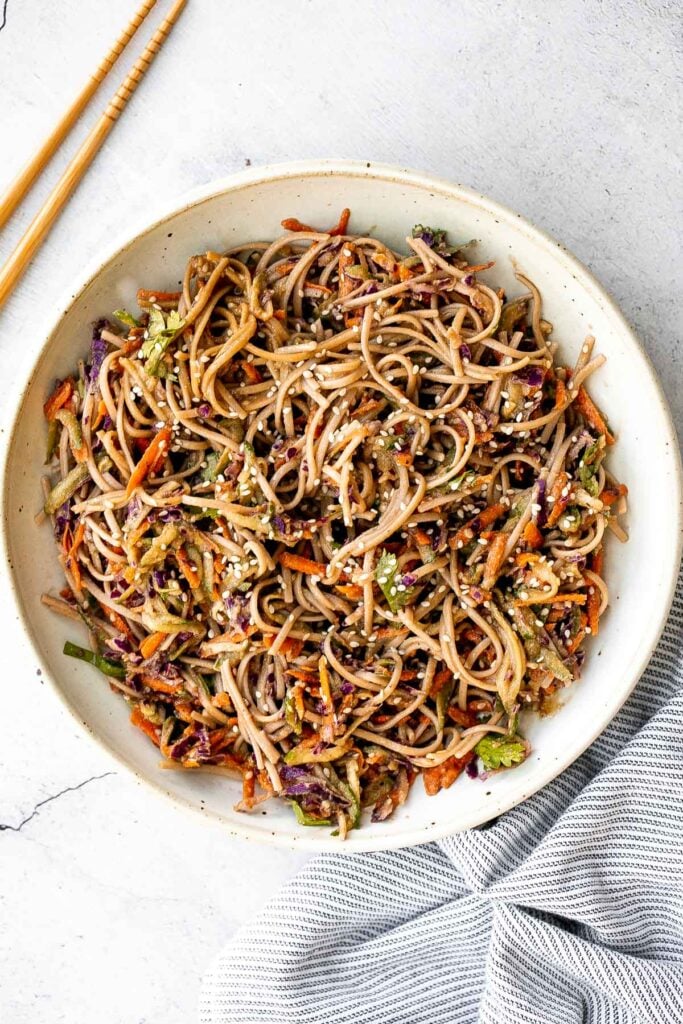
Greek chicken salad is fresh, healthy, and delicious, packed with classic Mediterranean flavors. Perfect as a light lunch or dinner, or for meal prep.

Mediterranean Orzo Pasta Salad
Quick and easy Mediterranean orzo pasta salad packed with fresh vegetables and herbs is tossed in a Greek lemon vinaigrette. Healthy, light and delicious.
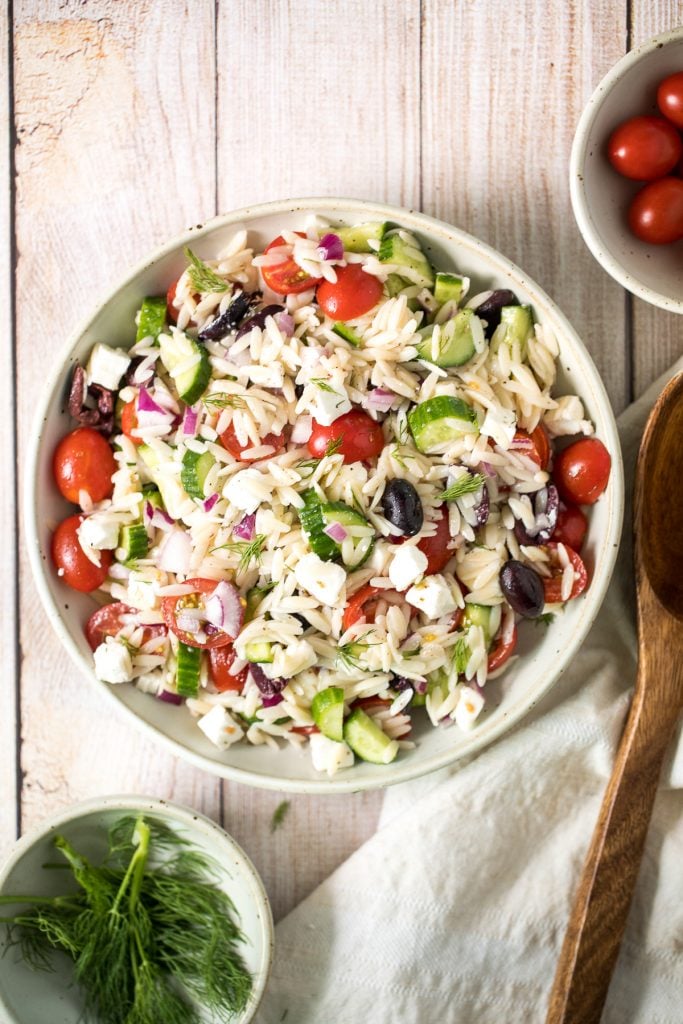
Shrimp taco salad with cilantro lime dressing is flavourful, delicious, and easy to make. It has all the fixings and of shrimp tacos, but without the mess.

Asian chopped salad is a delicious and colorful salad, loaded with refreshing crisp vegetables, plant-based protein, and a homemade creamy sesame dressing.
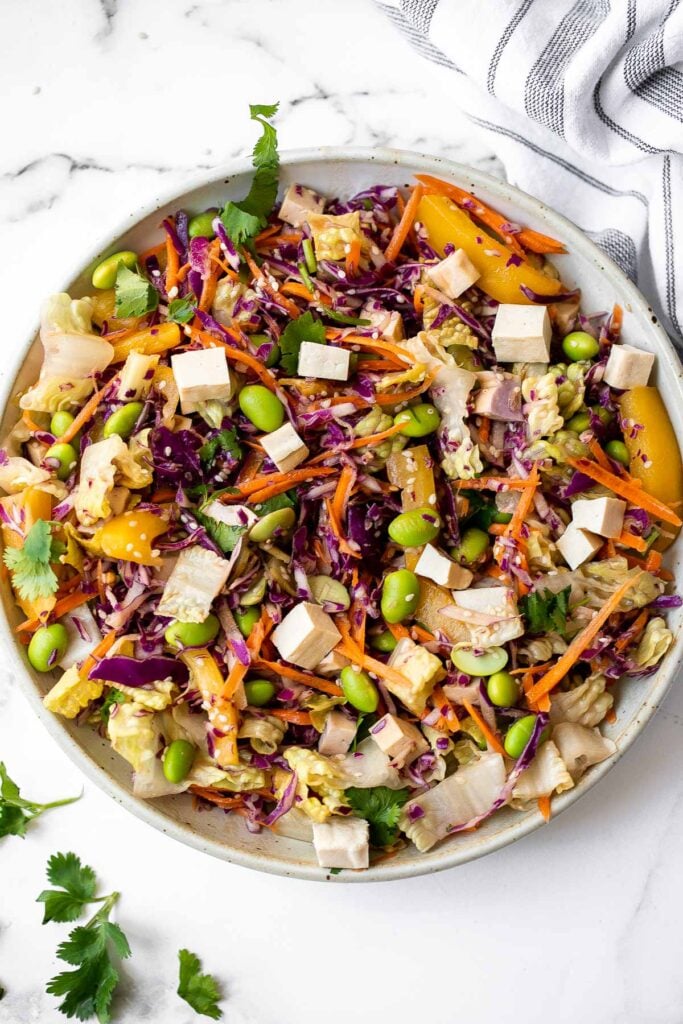
Chickpea Greek salad is a fresh, healthy, vibrant, and colorful salad, packed with traditional Mediterranean ingredients, superfoods, and nutrients.
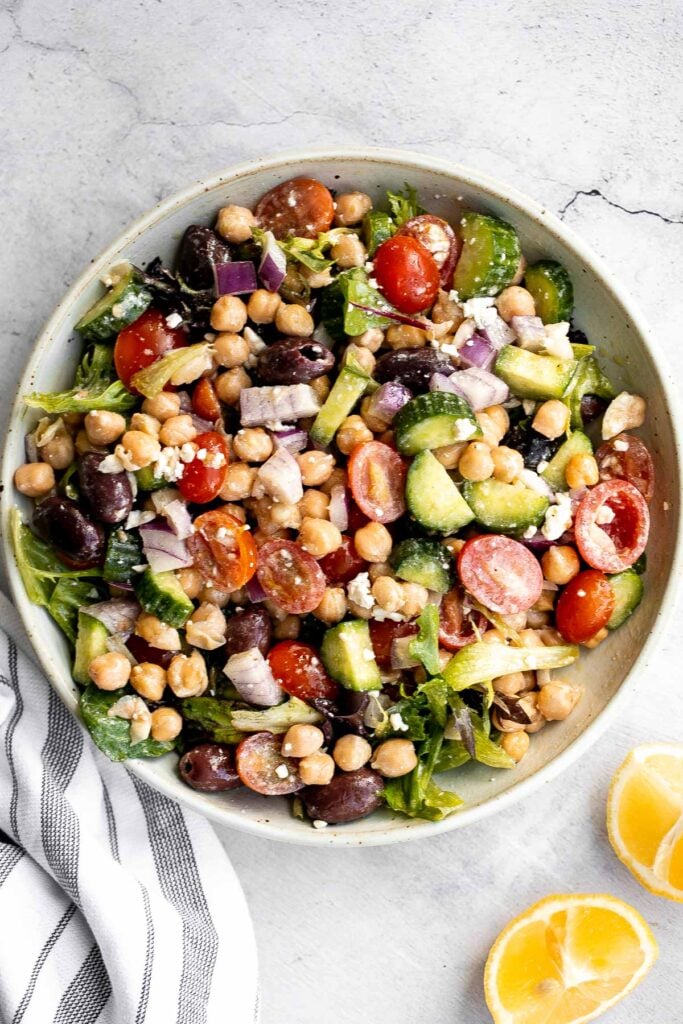
Take a bite into this refreshing, gluten-free quinoa and spinach salad bursting with colourful tomatoes, cucumbers and raisins.
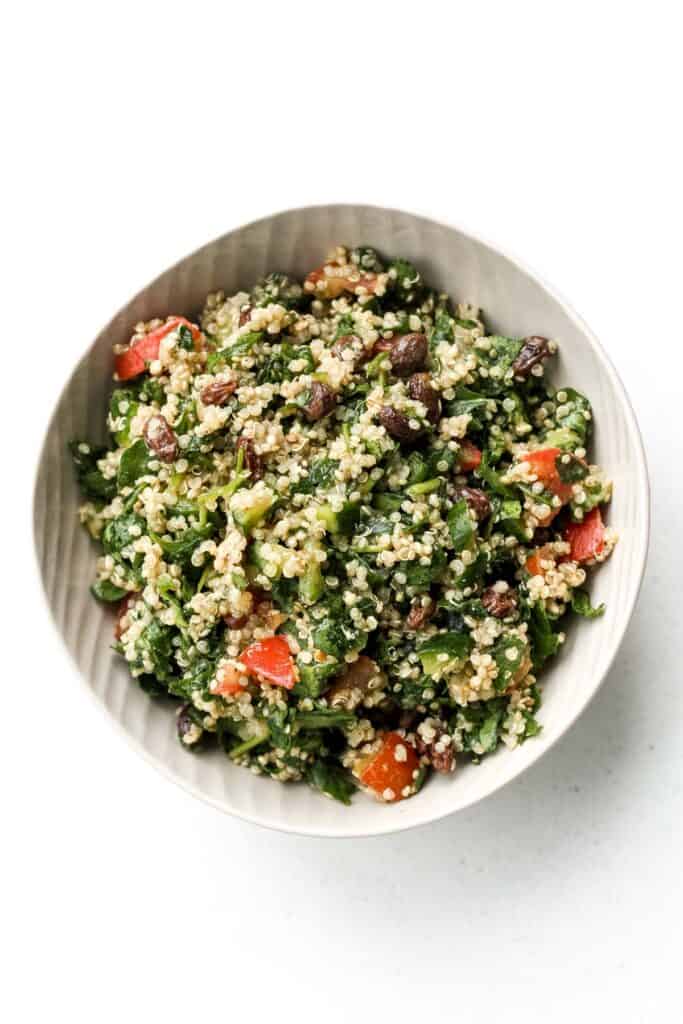
Filling Asian Bowls for the Most Flavourful Wholesome Lunch
Easy to make, light and fresh teriyaki grilled salmon rice bowl is topped with vegetables, seaweed and salmon roe, with homemade teriyaki sauce on top.
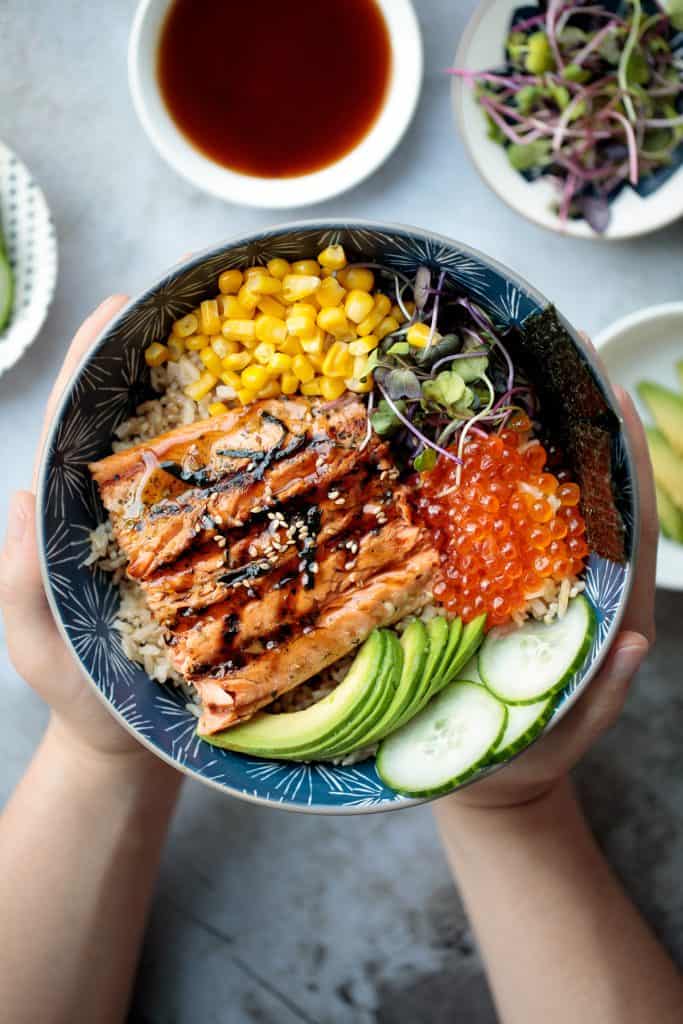
Vietnamese Noodle Bowl with Chicken
Vietnamese noodle bowl with lemongrass chicken, fresh vegetables and herbs, tossed in a homemade Vietnamese sauce is healthy, delicious, light, and filling.

Korean beef steak rice bowl is loaded with tender and juicy strips of beef, marinated vegetable sides (banchan), and kimchi. Make it in under 30 minutes!
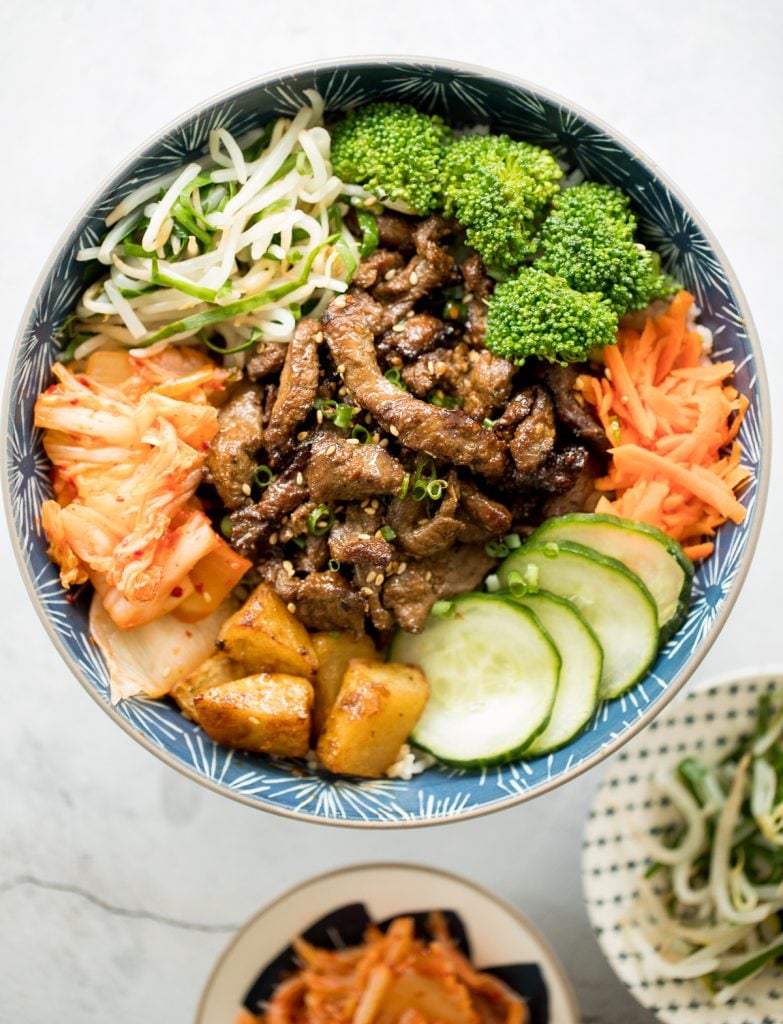
Cold Noodles with Peanut Butter Sauce
Easy vegan Shanghai style cold noodles tossed in peanut butter sauce with fresh vegetables and Asian seasonings, are flavourful and ready in 10 minutes.
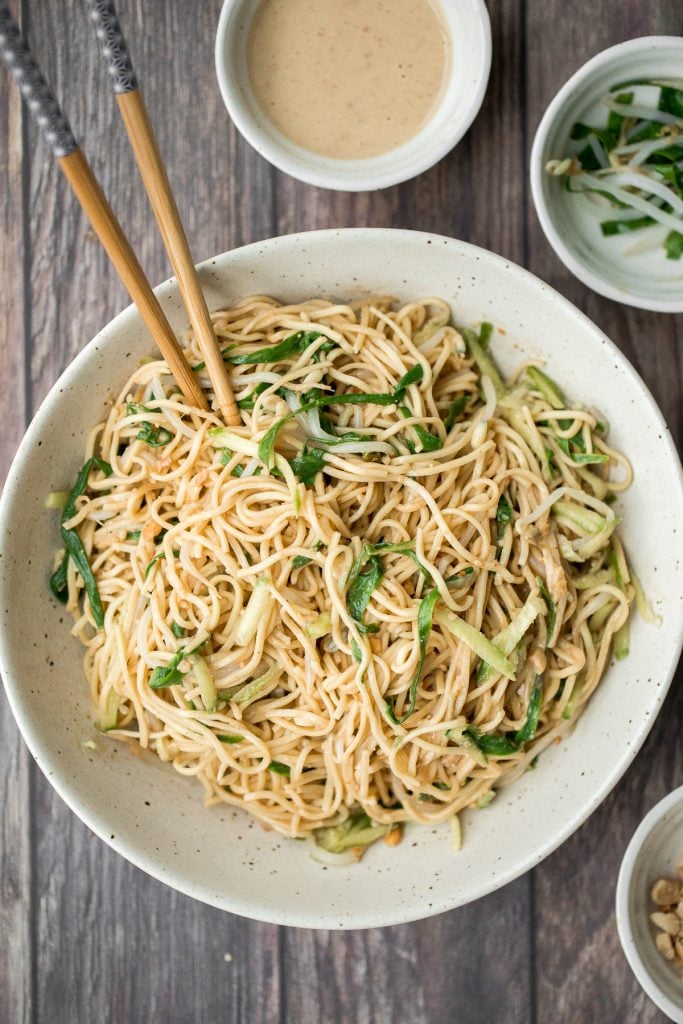
Easy Make Ahead Soups for Lunch that will Keep you Full Until Dinner
Creamy Tortellini Soup with Sausage
Hearty and creamy tortellini soup with sausage, spinach and kale is total comfort food in a bowl. Make this flavourful one pot meal in under 30 minutes.
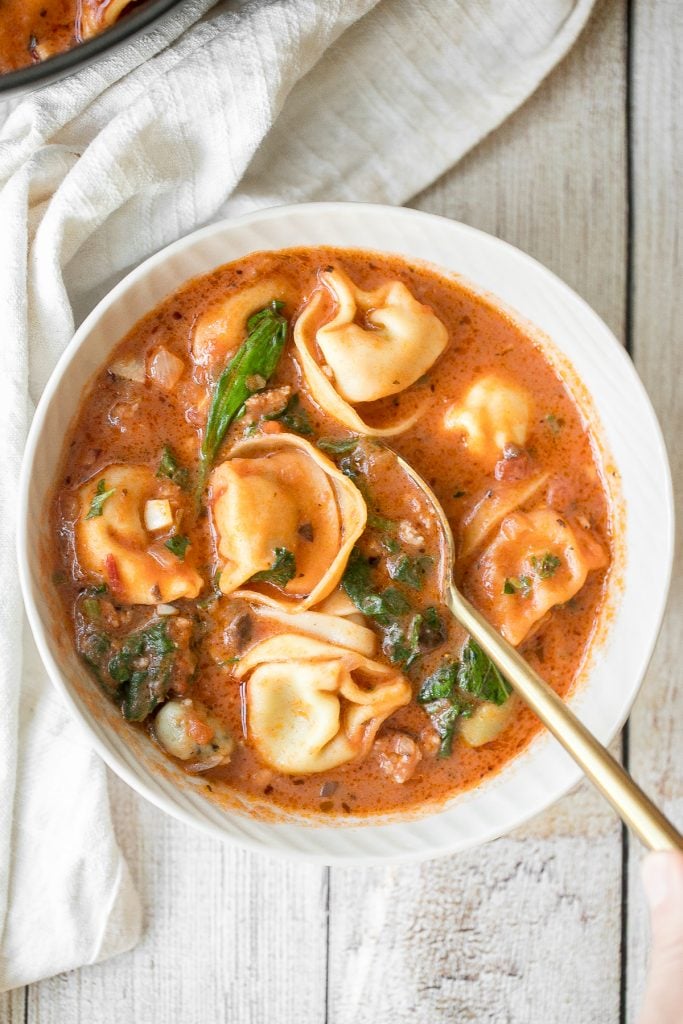
Hearty chicken tortilla soup is a delicious, wholesome and filling soup that you can make in about 30 minutes, packed with classic Mexican flavours.

Vegetarian Mushroom Barley Soup
Wholesome hearty vegetarian mushroom barley soup is healthy, filling, and so delicious. This one pot meal is easy to make with just 10 minutes of prep.

Indian-inspired, vegan, creamy coconut curry lentil soup is an easy and simple 30-minute pantry meal that is packed with spices for maximum flavour. Serve it as a soup or as a curry over some coconut rice.

Creamy ham and potato soup is hearty, filling, and so flavourful. This warm and cozy one pot meal is the easiest weeknight meal to make in just 25 minutes.

Delicious and flavourful, light cream of broccoli soup is a silky smooth, creamy, and thick soup made healthier with no cream. Make it in under 25 minutes.
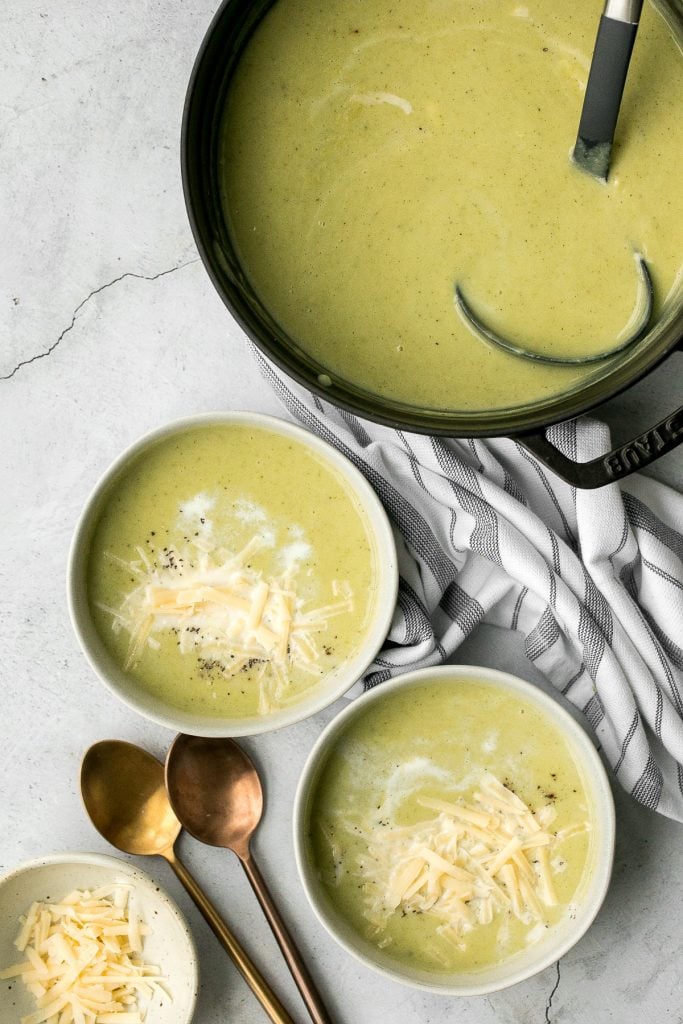
This vegetarian, hearty and filling, creamy Mexican corn soup is dense, bright, and full of flavour! It has all the warm and cozy vibes written all over it. Serve it with some butternut squash quesadillas.

Hearty beef cabbage barley soup is wholesome, filling and flavourful. This one pot meal can be made ahead and is freezer-friendly. Prep it in 10 minutes for one of the easiest healthy lunch ideas.
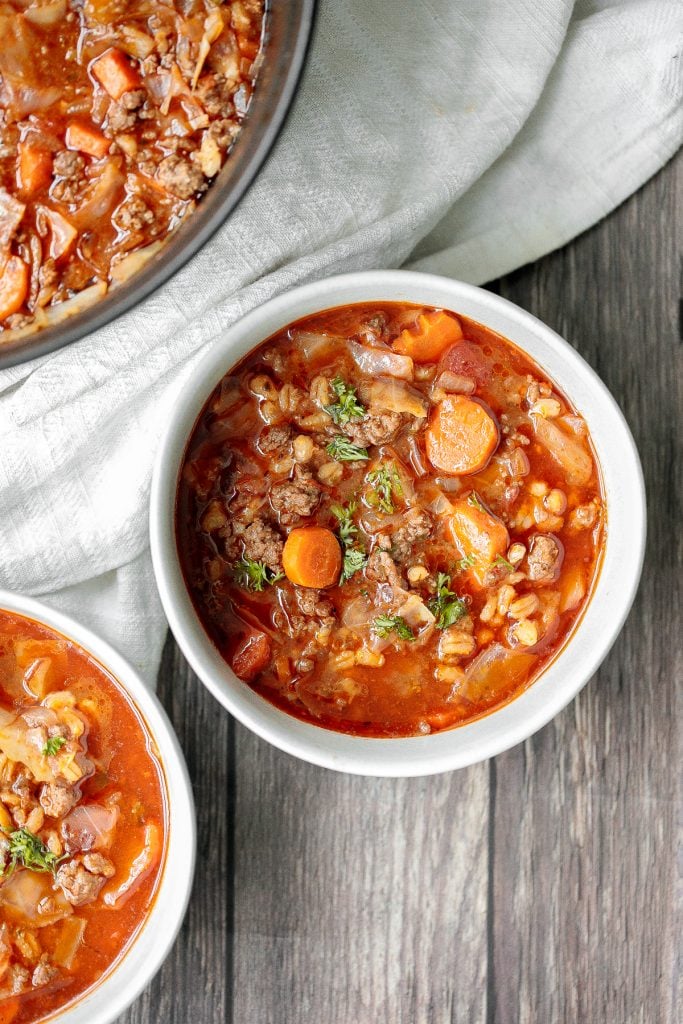
One pot sweet potato soup is super silky, creamy and vegan, and packed with fall flavours. Make this quick and easy fall and winter soup in 30 minutes. Serve with some rosemary cornbread or pumpkin dinner rolls on the side.
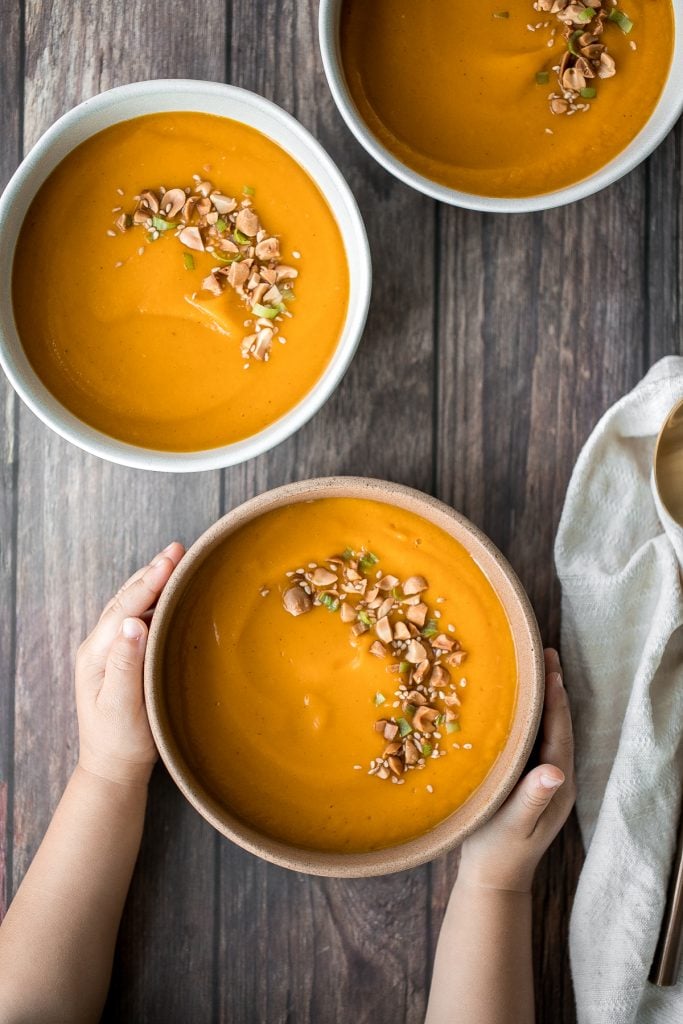
Easy Meal Prep Lunch Ideas
Delicious, moist and juicy Mediterranean chicken patties have everything you want in one bite: protein, veggies, herbs, and they're quick and easy to make. Serve it on it's own, with hamburger buns, or a side of Basmati rice.

Fresh, homegrown bell peppers baked with an assortment of veggies and brown rice is what these easy vegan stuffed bell peppers are all about!! Ready in under an hour, serve this at your next fancy dinner party or make it for an easy weeknight dinner!

Meal Prep Sheet Pan Balsamic Chicken and Vegetables
Quick and easy, throw everything into one pan, Asian-style meal prep sheet pan sesame balsamic chicken and vegetables is flavourful, juicy and tender. Serve with some steamed rice.
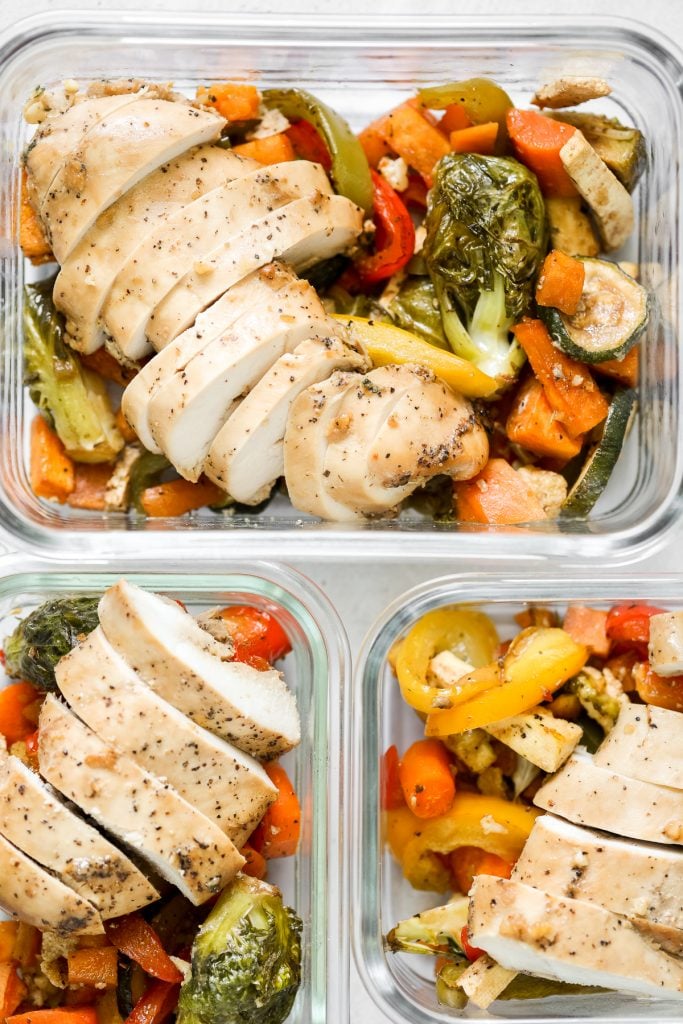
Meatballs are probably my favorite of all ground beef recipes. These quick, easy homemade Italian meatballs are juicy, flavourful, and delicious, simmered in a rich and savoury tomato sauce. Make them in just 30 minutes.
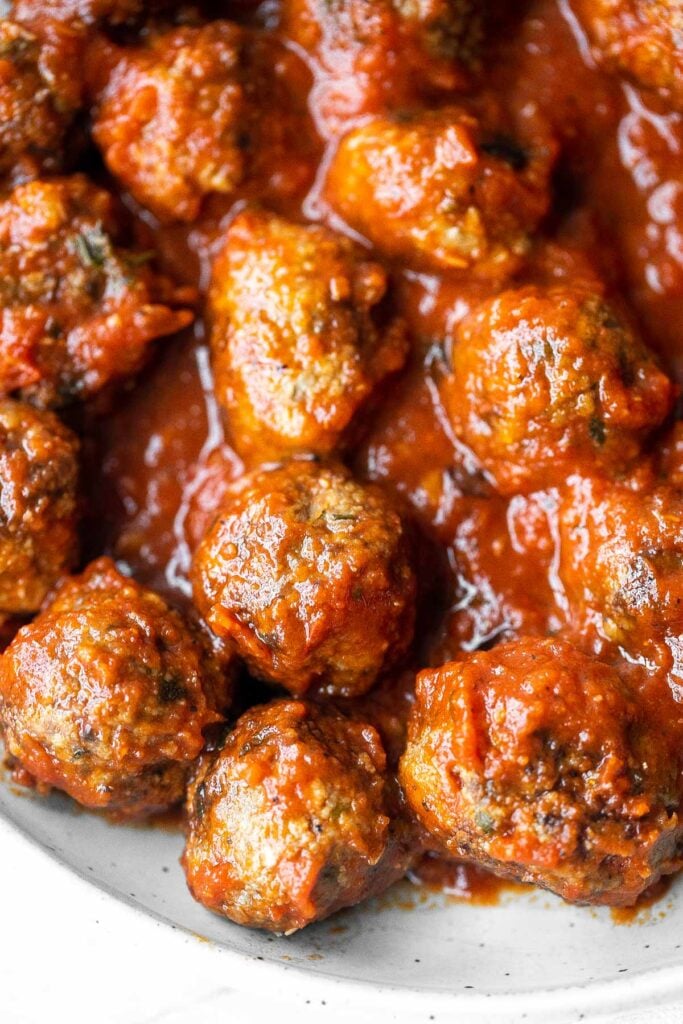
Spinach and Feta Quiche with Cauliflower Crust
Spinach and feta quiche is healthy and gluten-free with a keto cauliflower crust and savoury vegetarian filling. Serve for breakfast, lunch or dinner.
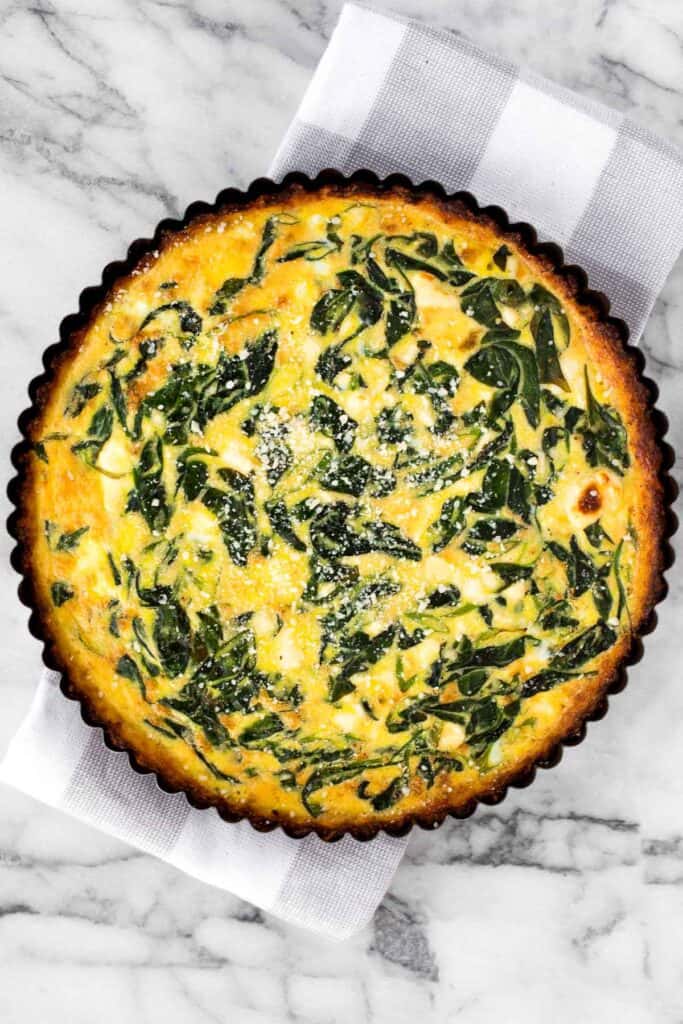
Sizzling and hot sheet pan chicken fajitas are on the table in less than 30 minutes. The best part is that you just throw everything into one sheet pan. Make it a total fiesta with some pico de gallo and fish tacos.

Baked Chicken Breast with Greek Souvlaki Marinade
Juicy, tender, and moist, baked chicken breast with the best Greek souvlaki marinade is the most flavorful and delicious chicken dinner in under 30 minutes.

One Pot Spanish Chicken and Rice
Packed with flavour, real ingredients and vibrant colours, one pot Spanish chicken and rice is the perfect no fuss, no clean up weeknight meal.

Sticky honey garlic meatballs are a delicious and flavourful 30-minute meal to add to your weekly dinner rotation. A total crowd pleaser.
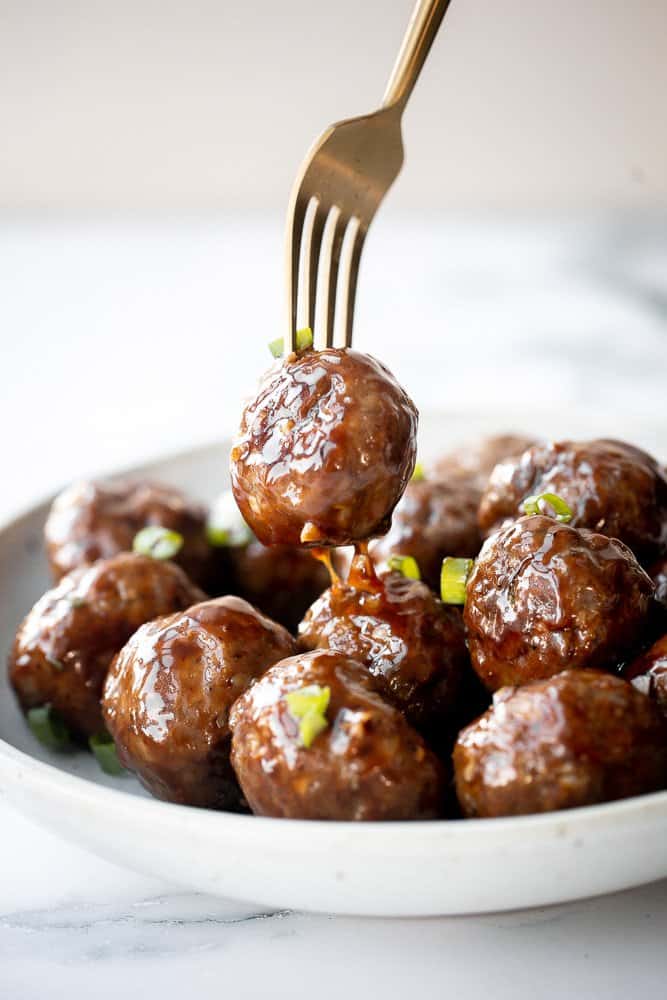
Classic easy meat lasagna is the ultimate Italian comfort food with layers of tender lasagna, meaty tomato sauce, cheese filling and melted cheese on top.
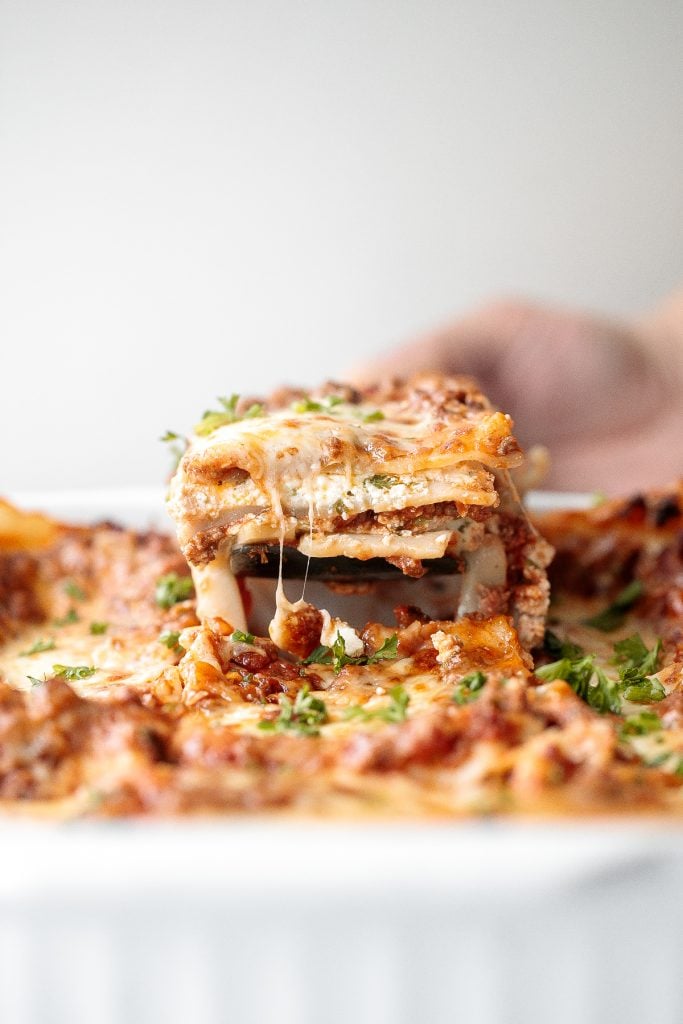
Ground beef stuffed peppers are delicious, healthy, and filling. Stuffed with beef rice and veggies, they're easy to make ahead and freezer-friendly.
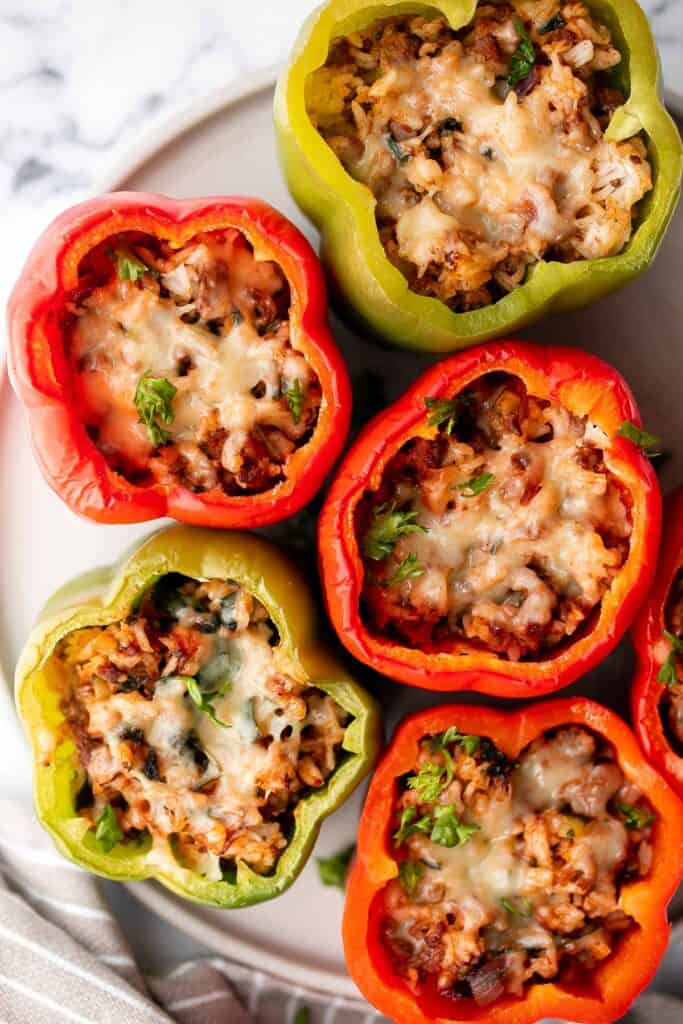
Spring vegetable frittata is a delicious breakfast or served at any time of the day. It's a one-pan meal that starts on the stove and moves to the oven.
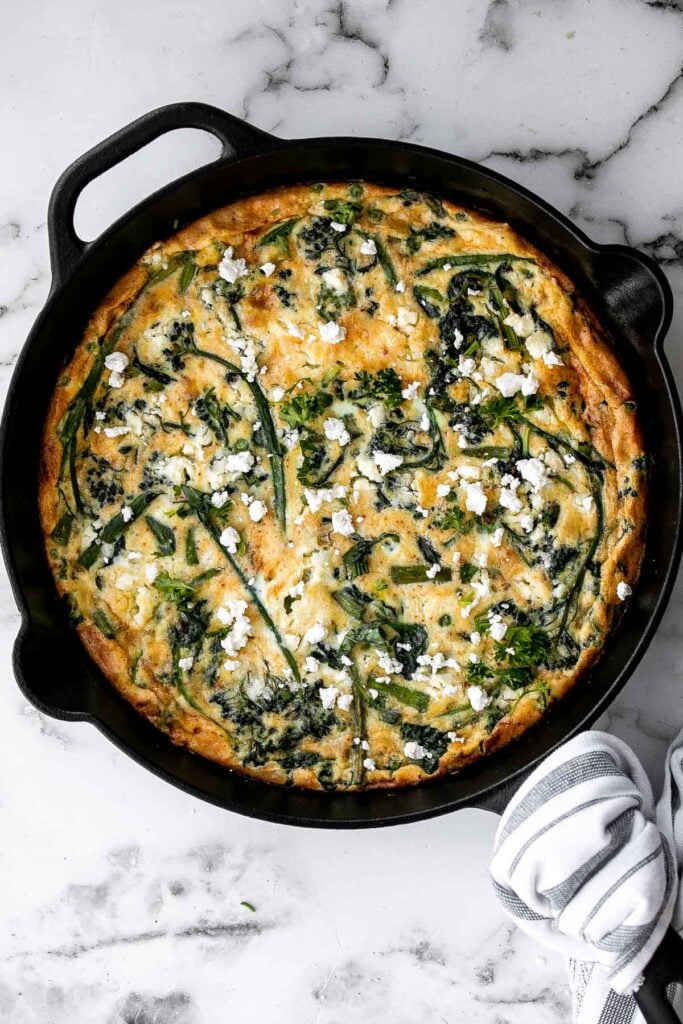
One Pot Coconut Curry Chicken and Rice
Creamy, delicious and flavourful, Thai-inspired one pot coconut curry chicken and rice is a 30-minute weeknight meal made with red curry and coconut milk.

Creamy White Chicken and Spinach Lasagna
Creamy white chicken and spinach lasagna with tender shredded chicken is the most comforting creamiest cheesiest white lasagna. Easy to make ahead & freeze.
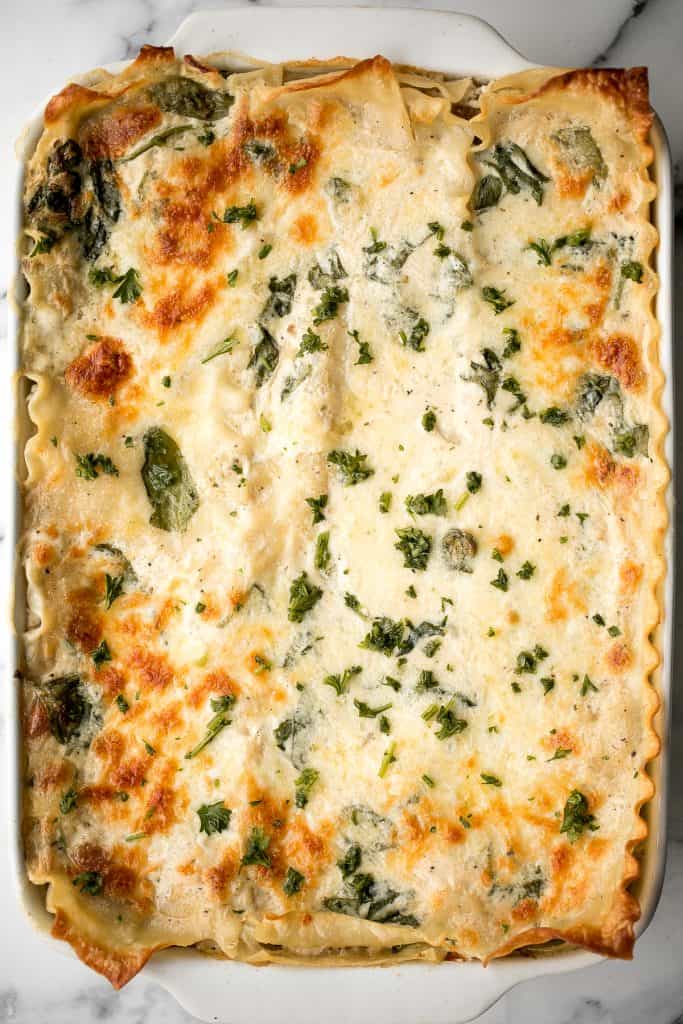
Tips for Storing and Reheating these Healthy Lunch Ideas
- Make ahead instructions. You can make many of these lunch recipes ahead of time and store in the refrigerator for a few days or even in the freezer for up to 3 months (the soups and meatballs freeze really well!). You can also prep the ingredients in advance and store in the refrigerator until ready to use or assemble.
- How to store: Store any leftovers in airtight containers in the refrigerator or even in the freezer. Check the individual recipe for complete storing instructions and to confirm if the recipe is freezer-friendly.
- How to reheat: Most of the leftovers can be reheated on the stovetop over medium to low heat for about 5-10 minutes until warmed through, in the air fryer or the oven at 300F for 10-15 minutes until warmed through, or in the microwave in 20-second increments until warmed through. If heating from frozen, let it thaw first and then reheat.
More Lunch Recipes
Did You Make Any of These Easy Lunch Recipes?
Please leave a comment and rating below, and let me know what you thought of this round up of these healthy lunch ideas. Be sure to snap a picture and tag me on Instagram @aheadofthyme or share it on the Pinterest pin so that I can follow along.
HUNGRY FOR MORE? Don't forget to sign up for my email newsletter so that you don't miss any recipes. You can also follow along on Instagram and Pinterest for more recipe updates.
Blueberry Biscuits
These Blueberry Biscuits are delicious, fluffy, and sweet. Made with fresh blueberries folded into a buttery dough, these homemade biscuits are a total crowd pleaser. The best part? It's a one bowl recipe that is ready in 30 minutes with minimal clean up.
Serve blueberry drop biscuits on their own with a pat of butter as breakfast on-the-go or a school snack, or as part of a weekend brunch spread. They're easy to make ahead and freeze well so you can enjoy them for months to come.
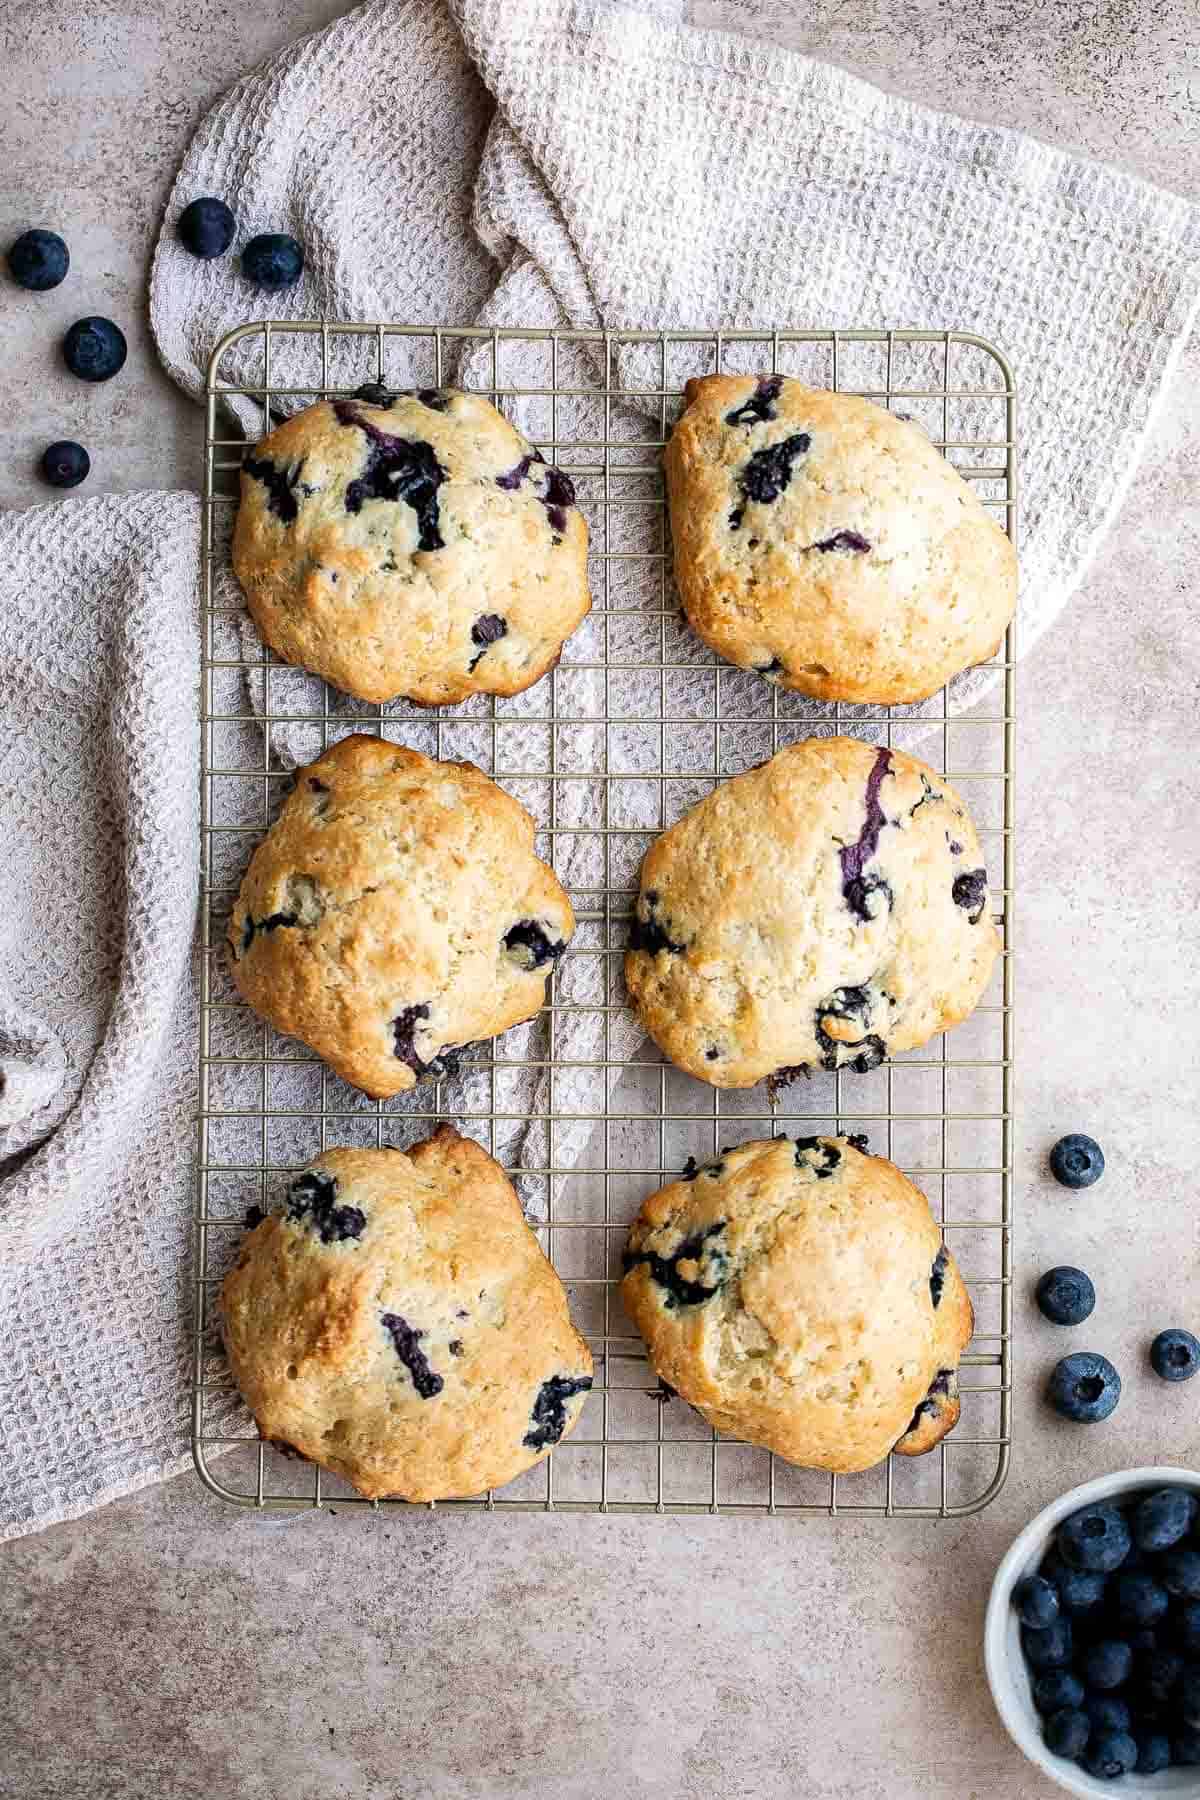
Why You'll Love these Blueberry Biscuits
- The blueberries. There's nothing comparable to a baked, juicy and bursting blueberry nestled into a buttery biscuit… or hot pancake or a sweet muffin… Anyway, you'll love how perfectly the blueberries pair with biscuit dough.
- Crisp edges, soft and fluffy inside. Think of the top part of a muffin - with browned edges with a slight crisp, yet moist and fluffy inside. Basically the best part of a muffin. Well these drop biscuits are basically muffin tops baked on their own.
- They're so easy to make. These blueberry biscuits are ready in just under 25 minutes, and the recipe contains three simple steps. You'll make the batter by adding the wet ingredients to the dry ones, then combining and folding in the blueberries. Finally, you'll bake the biscuits for 15 minutes and enjoy!
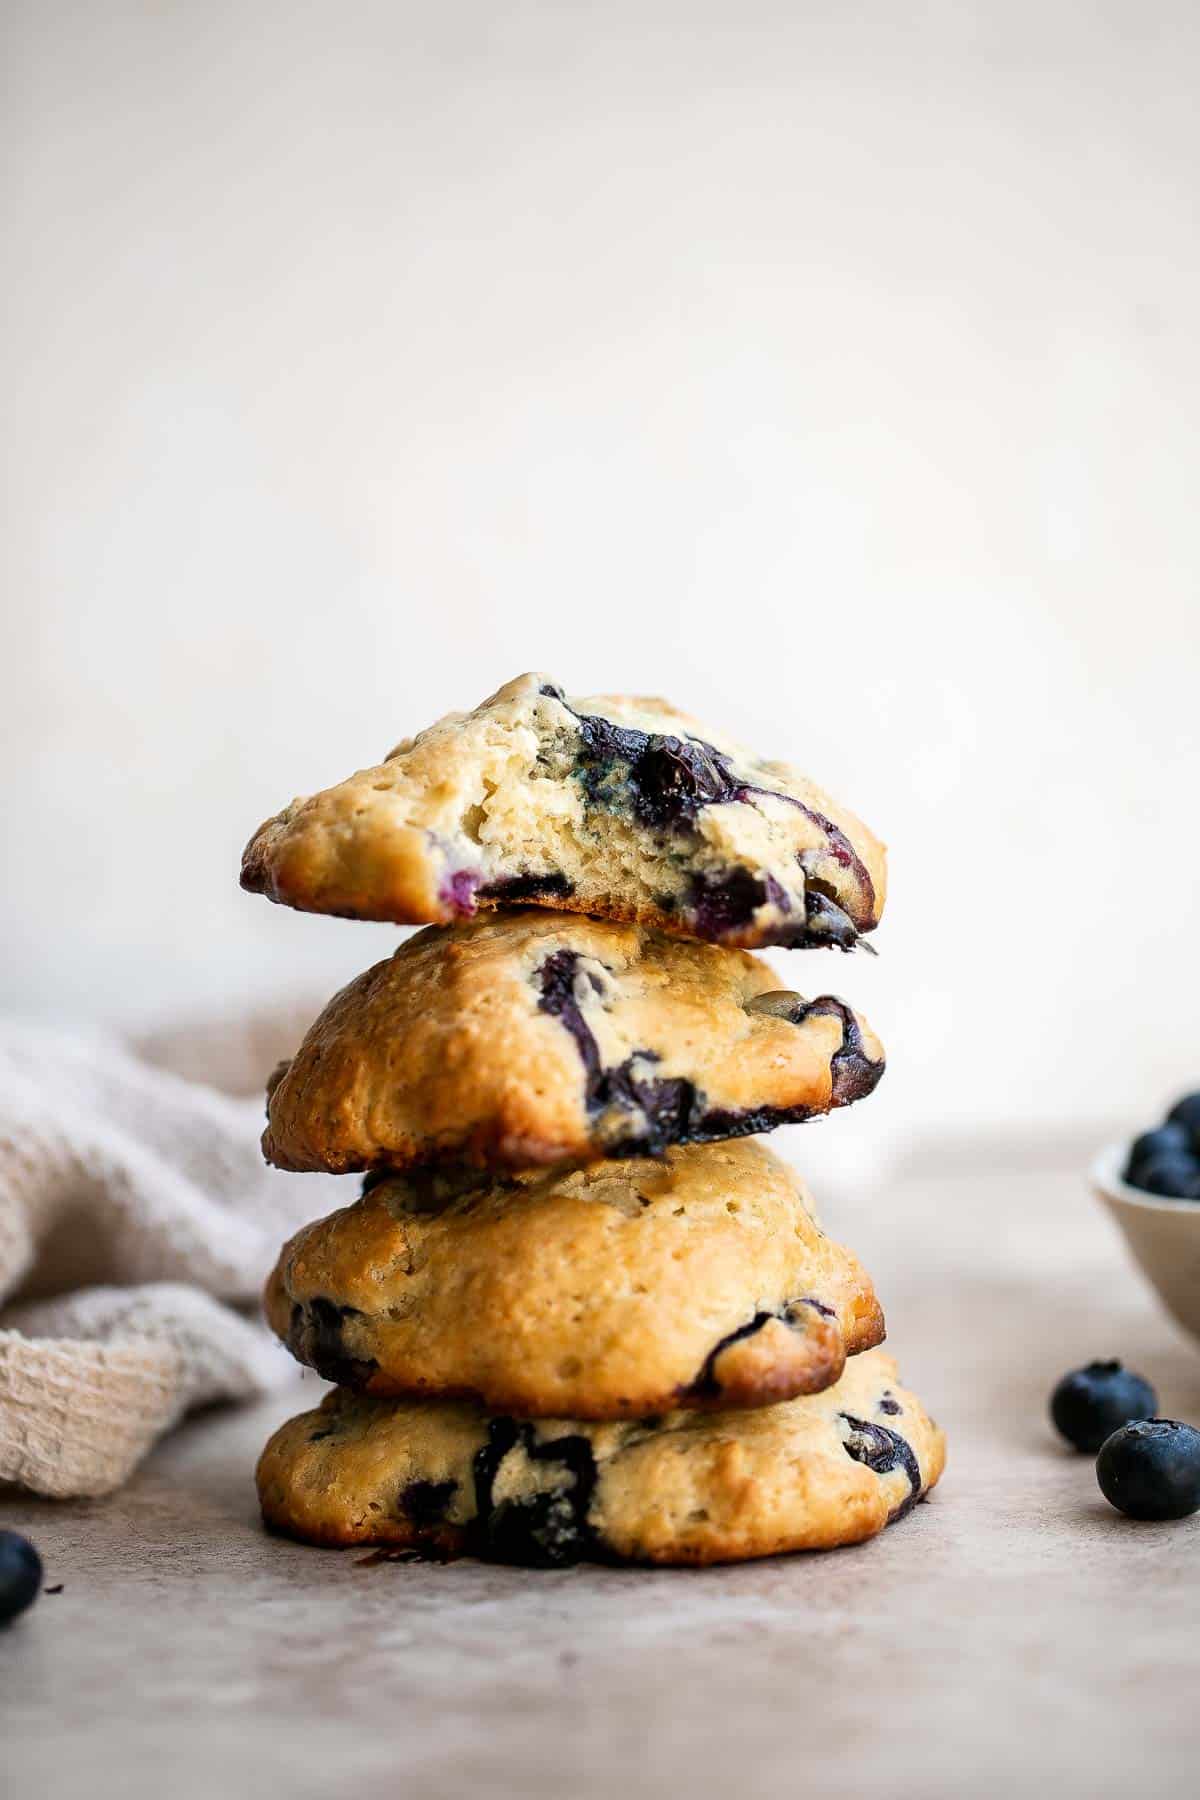
Ingredient Notes
To make these easy Blueberry Biscuits, you will need the following ingredients (full measurements in recipe card below):
- blueberries - we used fresh blueberries as it's in season right now. But you can make this recipe easily with frozen blueberries as well and enjoy them any time of the year.
- all-purpose flour
- granulated sugar - you can substitute with brown sugar if desired.
- baking soda + powder
- salt
- butter - you'll need to use cold butter cut into ½ inch cubes. I recommend cutting the butter and then placing back in the fridge until ready to use in the recipe.
- yogurt - this is what keeps the biscuits moist. We always have a batch of our homemade yogurt on hand. It's easy to make at home if you want to give it a try.
- egg
- vanilla extract
Equipment Needed
You will also need :
- measuring cups and spoons
- mixing bowl
- pastry cutter or fork
- cookie scoop
- half sheet baking pan
- wire cooling rack
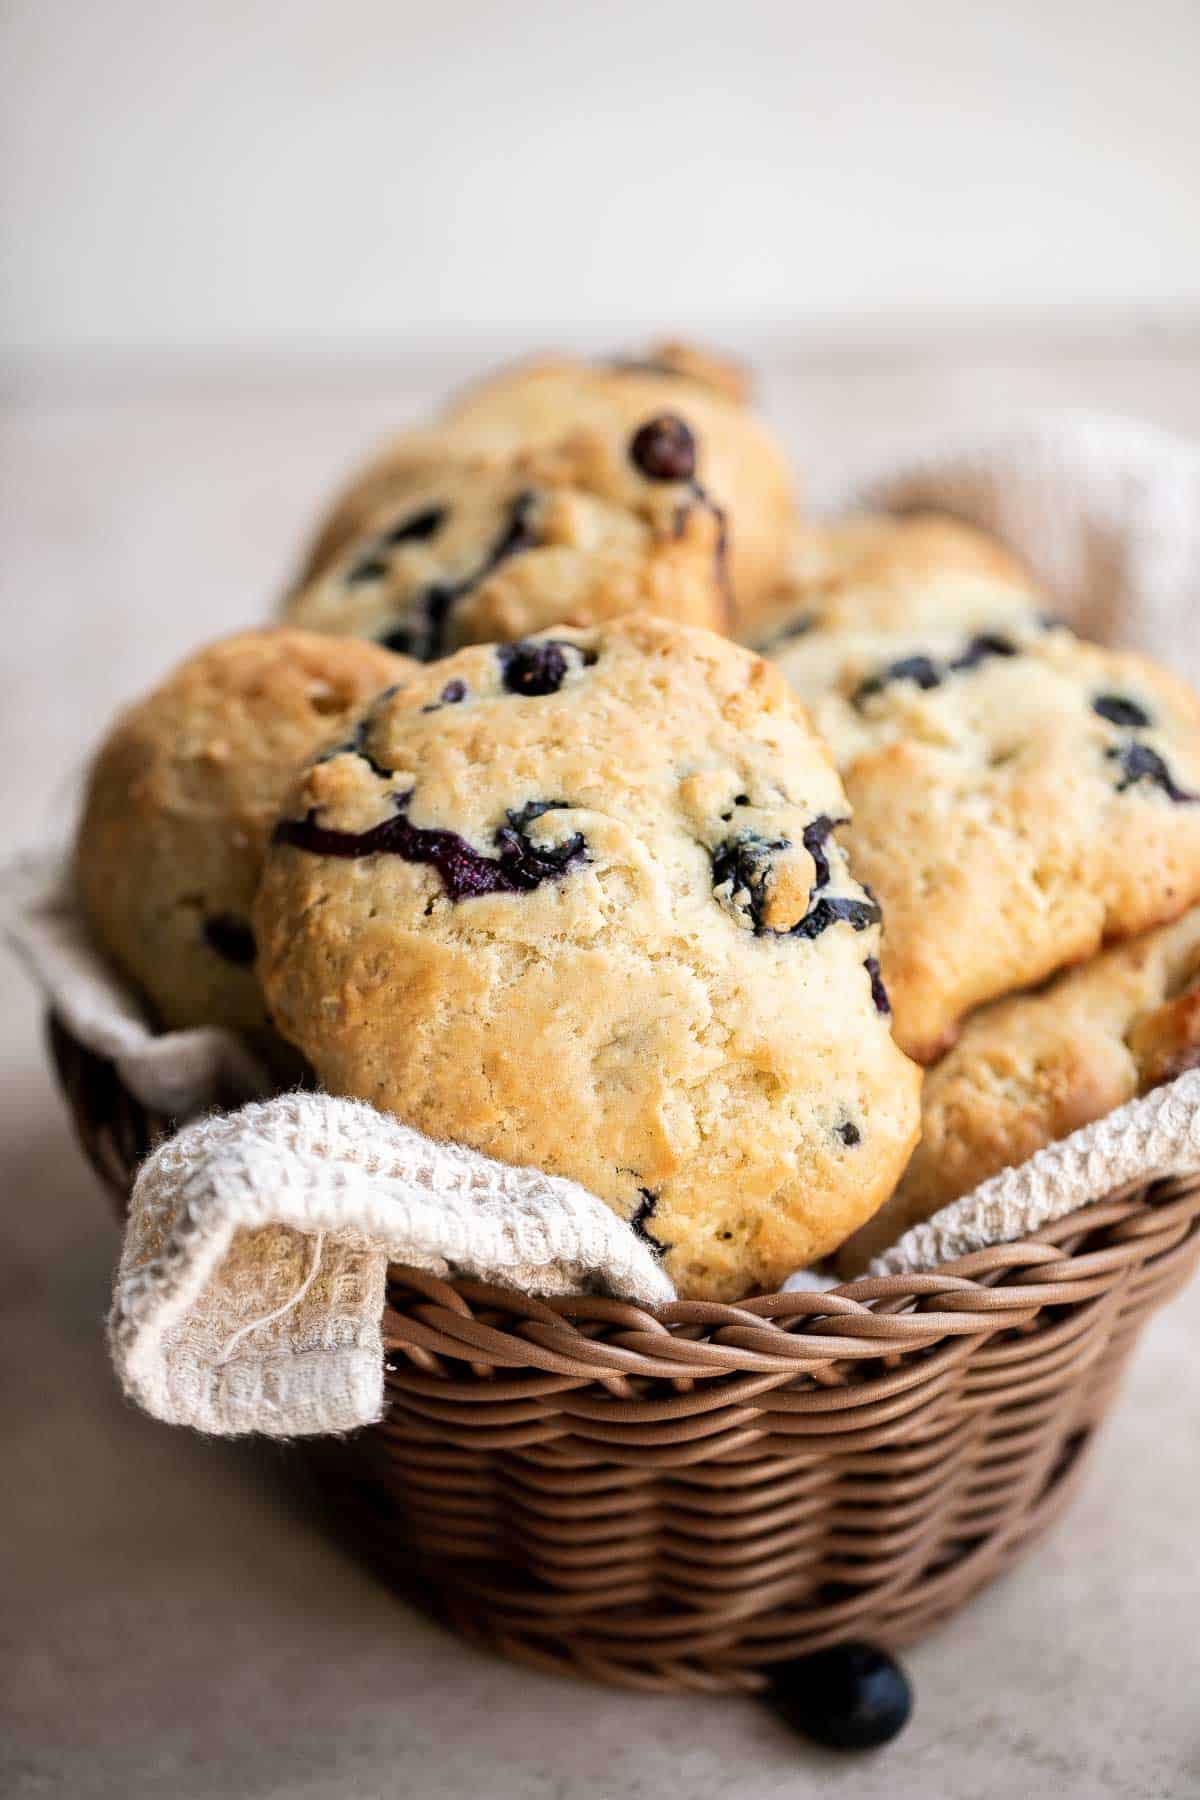
How to Make the Best Blueberry Biscuits
- Combine dry ingredients. In a large mixing bowl, add flour, sugar, baking soda, baking powder, salt, and cold butter. Stir well and mix the butter into the flour using pastry cutter or fork until the mixture becomes breadcrumb-like.
- Add wet ingredients. Add yogurt, egg, and vanilla extract. Use a spatula to mix together until just combined, and no dry flour particles are visible. Fold in the blueberries.
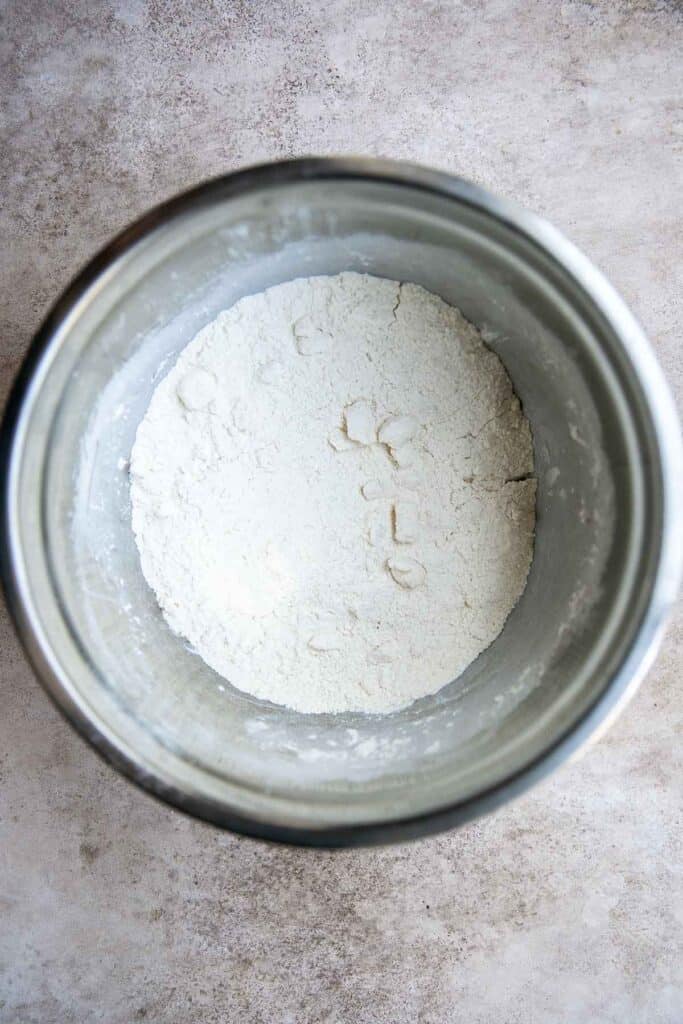
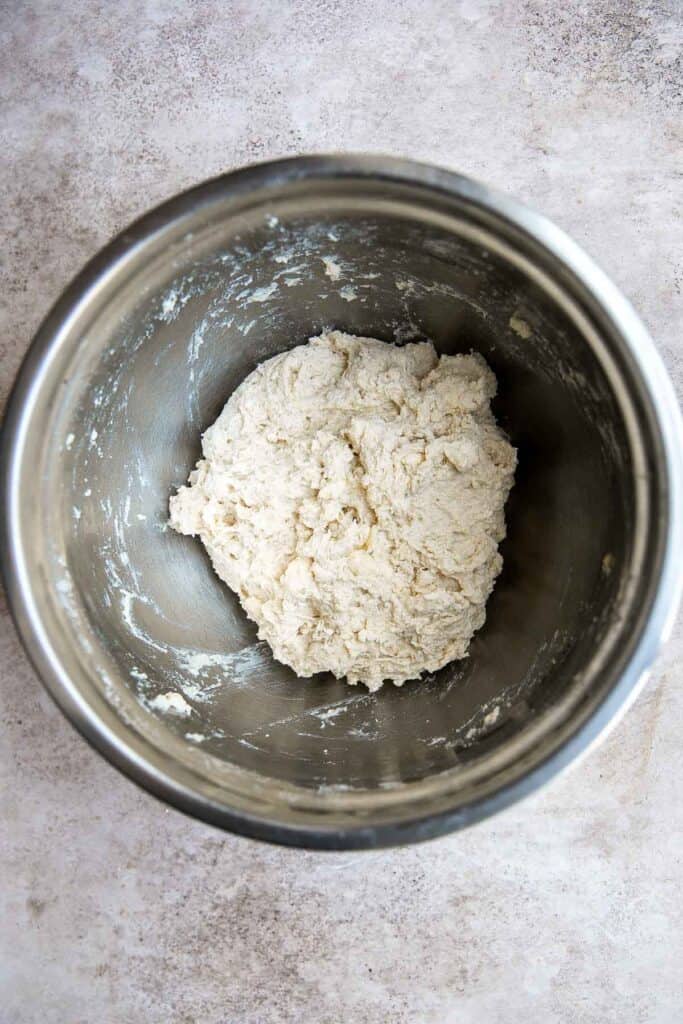
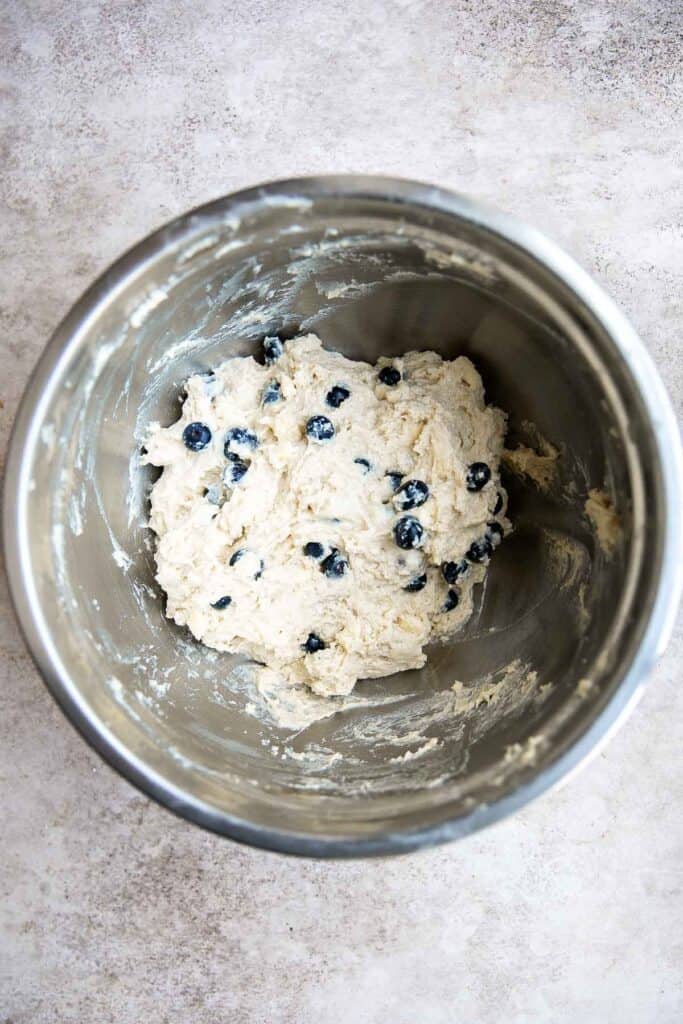
- Scoop biscuits. Line two large half sheet baking pan with parchment paper or a silicone baking mat. Use a medium cookie scoop (ice cream scoop) to scoop the batter and place on the lined baking sheet, at least 2 inches apart because they will spread during baking. You will be able to fit 6 biscuits on one half sheet baking pan, so you will have to use either two baking sheets or cook in batches.
- Bake. Bake in a 400F preheated oven for 18-20 minutes until the tops turn golden brown. Allow the biscuits to cool in the pan for 5 minutes, then transfer to a wire cooling rack to cool another 5-10 minutes and serve.
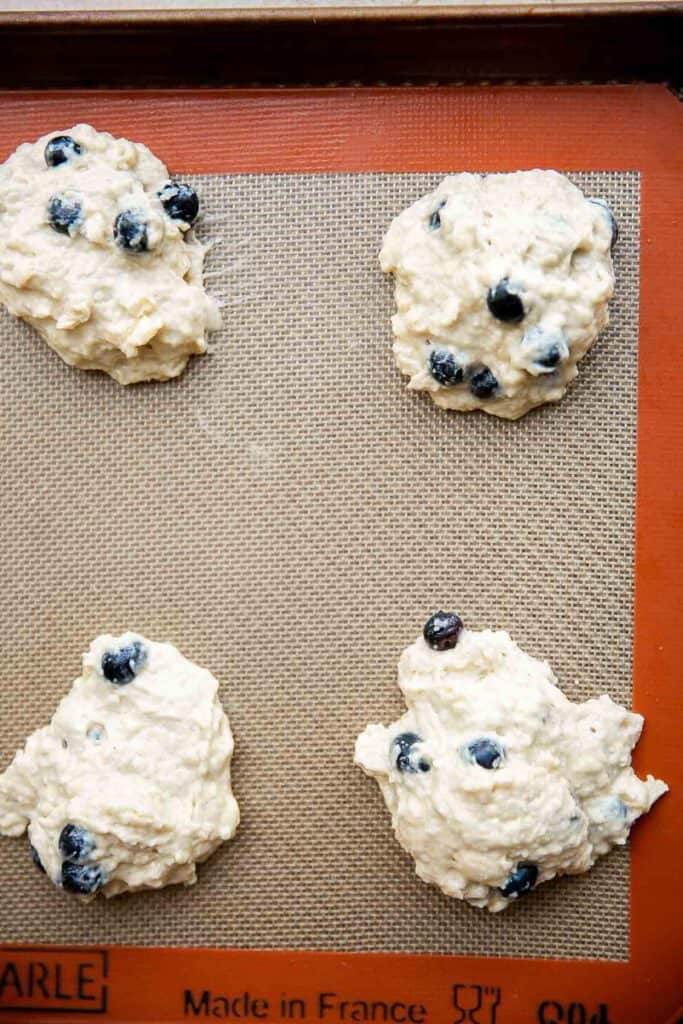

How to Serve
Enjoy a blueberry biscuit as a snack, light breakfast on it's own or with a pat of butter or Lemon Glaze, or serve for weekend whole brunch meal with other classic breakfast staples, like:
- Scrambled Mediterranean Eggs or any kind of eggs (scrambled, fried, sunny side up, or poached).
- Vegetable Frittata, Shakshuka, or Spinach and Feta Quiche with Cauliflower Crust.
- Breakfast meats like bacon, fried ham, or sausage.
- Roasted Garlic Parmesan Baby Potatoes or hash browns.
- Old Fashioned Pancakes, French Toast, or waffles.
Storage Instructions
- How to store: Allow the blueberry biscuits to cool to room temperature, then store leftovers in an airtight container at room temperature for up to 2 days, or in the refrigerator for up to 1 week. For the freshest blueberry biscuits, wrap each biscuit individually in plastic wrap before placing in the airtight container.
- How to freeze: Once cooler, place the biscuits on a cookie tray and freeze for 1 hour until hard. Then transfer to a freezer bag and freeze for up to 3 months.
- How to reheat: The best way to reheat biscuits is in the oven. Reheat them for 5-10 minutes in a 375F oven or for 3-5 minutes in a 350F air fryer.
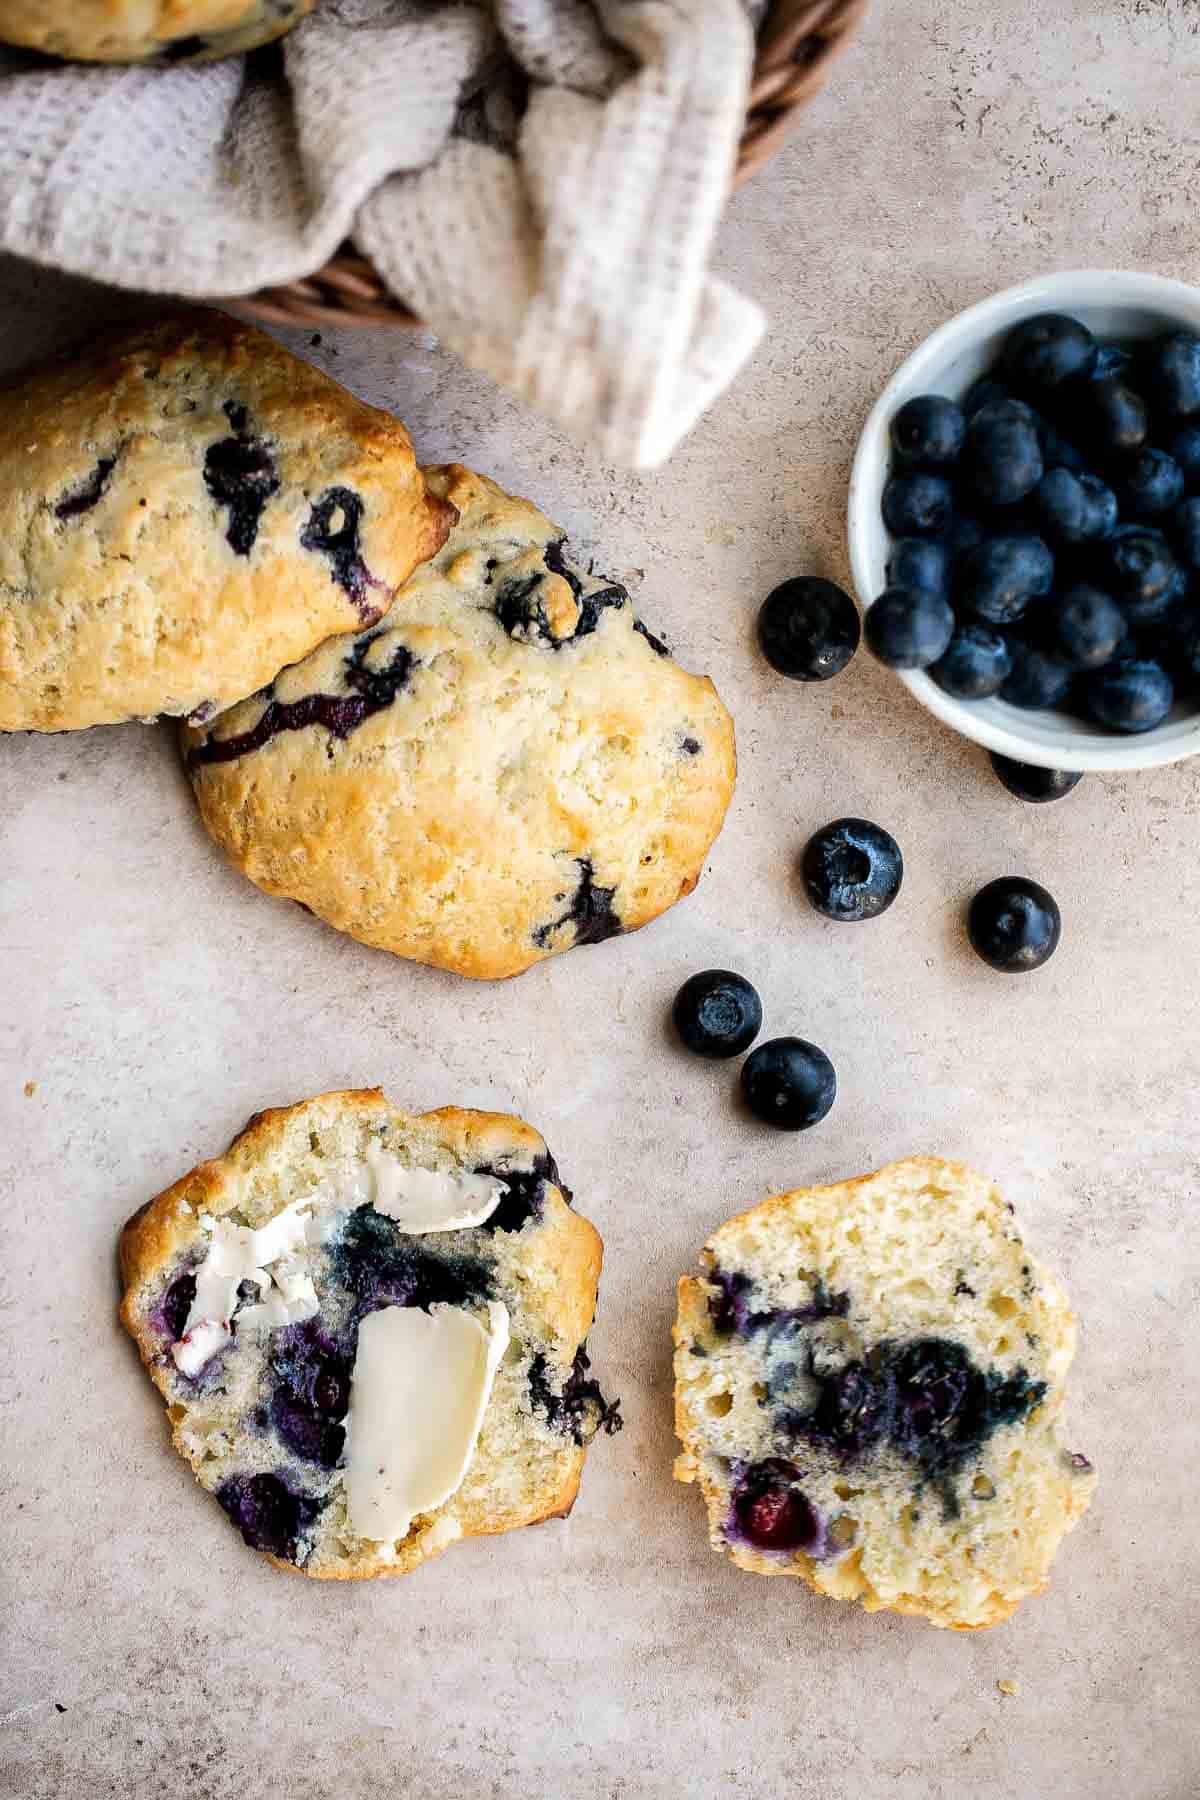
More Blueberry Recipes
- 15 Best Blueberry Recipes
- Blueberry Yogurt Muffins
- Glazed Lemon Blueberry Scones
- Blueberry Pancakes
- Lemon Blueberry Bread
- Blueberry Cinnamon Rolls
Tried this recipe?
I'd love to hear what you think! Leave a comment and rating below to share your feedback. Your reviews help others discover this recipe and help me keep creating more free recipes for you. Snap a photo and tag me on social media @aheadofthyme too.

Patatas Bravas
These delicious Patatas Bravas are made with crispy, roasted potatoes smothered in a homemade sweet and spicy tomato sauce with a drizzle of creamy garlic aioli. Plus, you don't need to go to the Spanish tapas bar to enjoy this easy meal at home.
Serve them as an appy or party food, as a complete meal for lunch or dinner, or as a side dish. However you decide to serve it, you are guaranteed to take your potatoes to the next level!
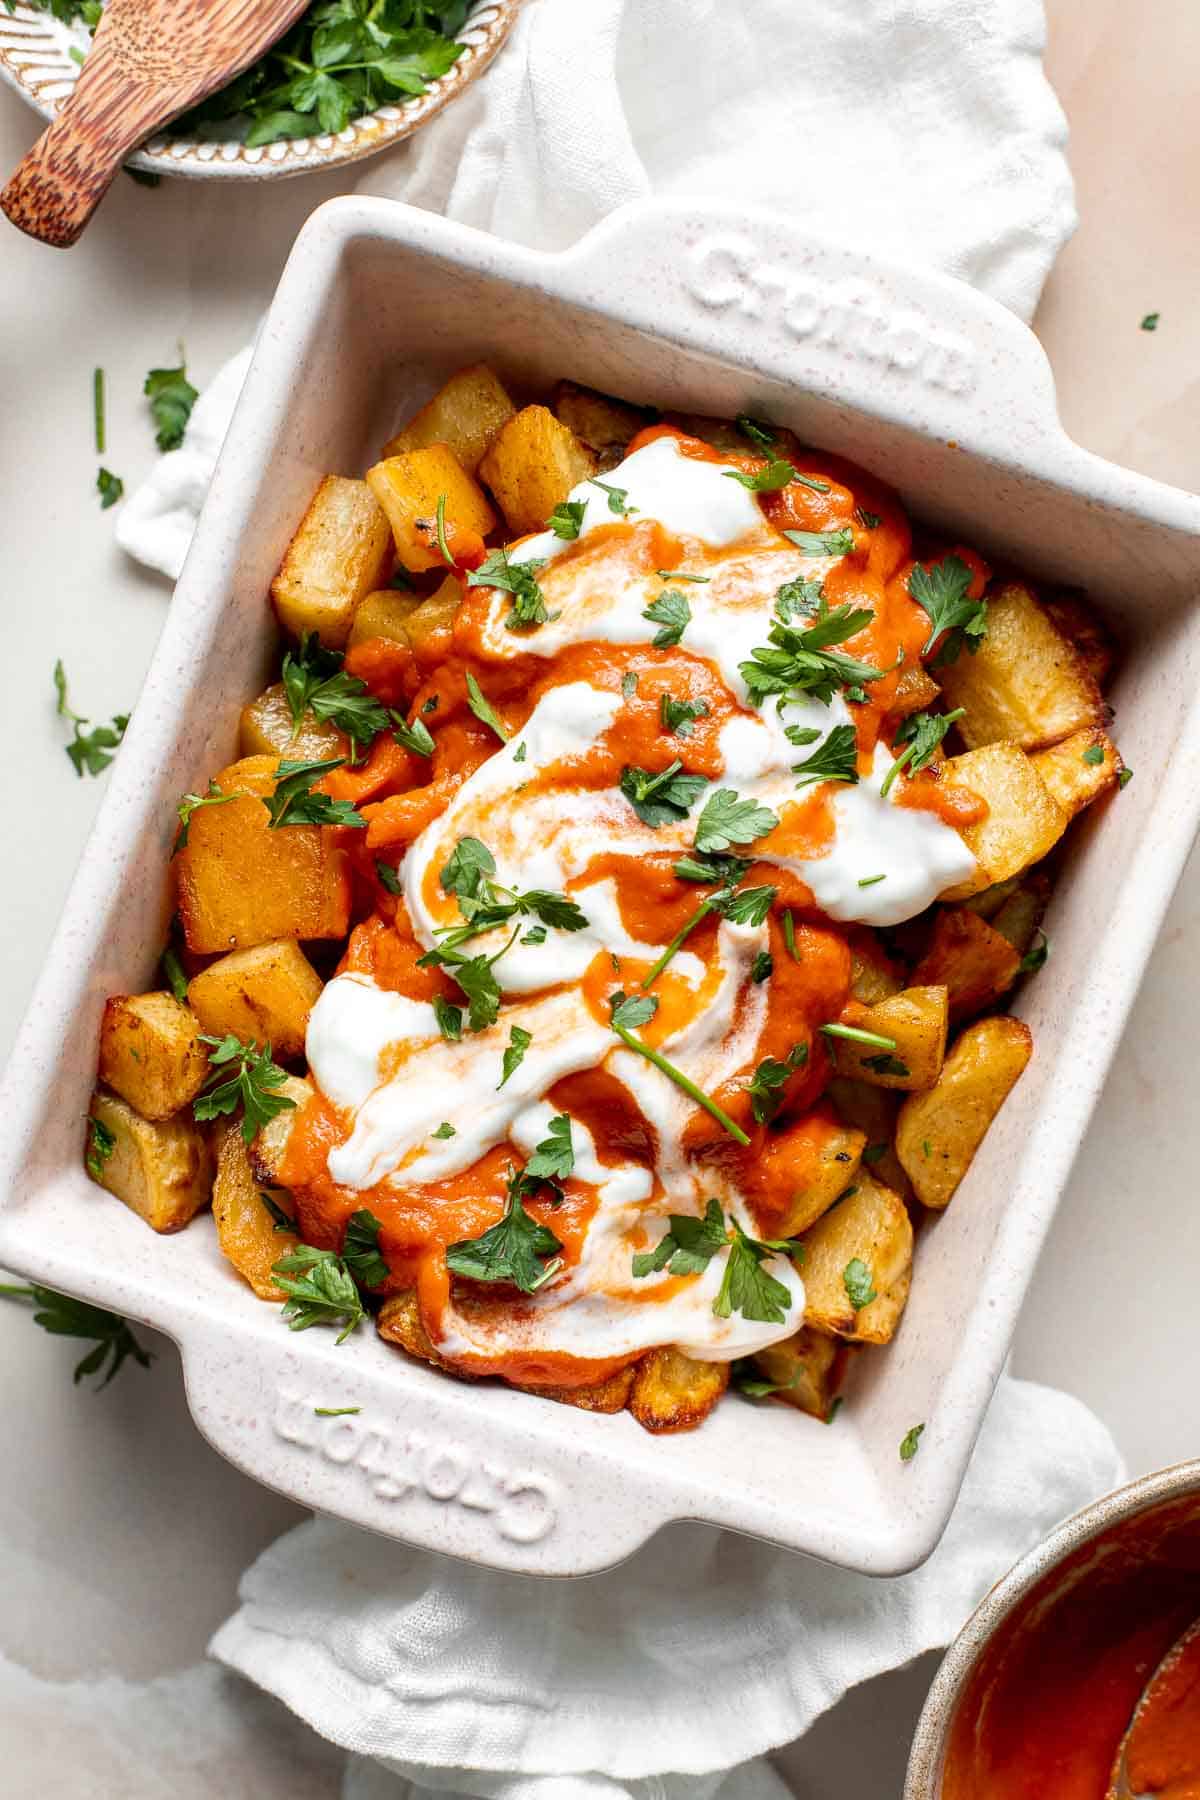
What are Patatas Bravas?
So what are patatas bravas? The phrase literally means potatoes with salsa brava, which is a spicy tomato sauce - kind of like Marinara Sauce but spicier and smokier. These saucy potatoes are a staple at Spanish tapas bars where they are traditionally served for dinner Spanish tapas style, along with other delicious snacks. I first tried them years ago in Spain and have become obsessed ever since. Once you try them, you too will understand why.
There are a few different ways to prepare these and they often differ from region to region. Some versions are served with a mayonnaise sauce or aoili, others are served tossed in the tomato sauce, and some have tomato sauce just spooned on top. The options are endless, but a few key ingredients always stay the same: potatoes, tomatoes, and spices. Smoked paprika is one of those key spices, since the smokey flavour is what this brava salsa is all about!
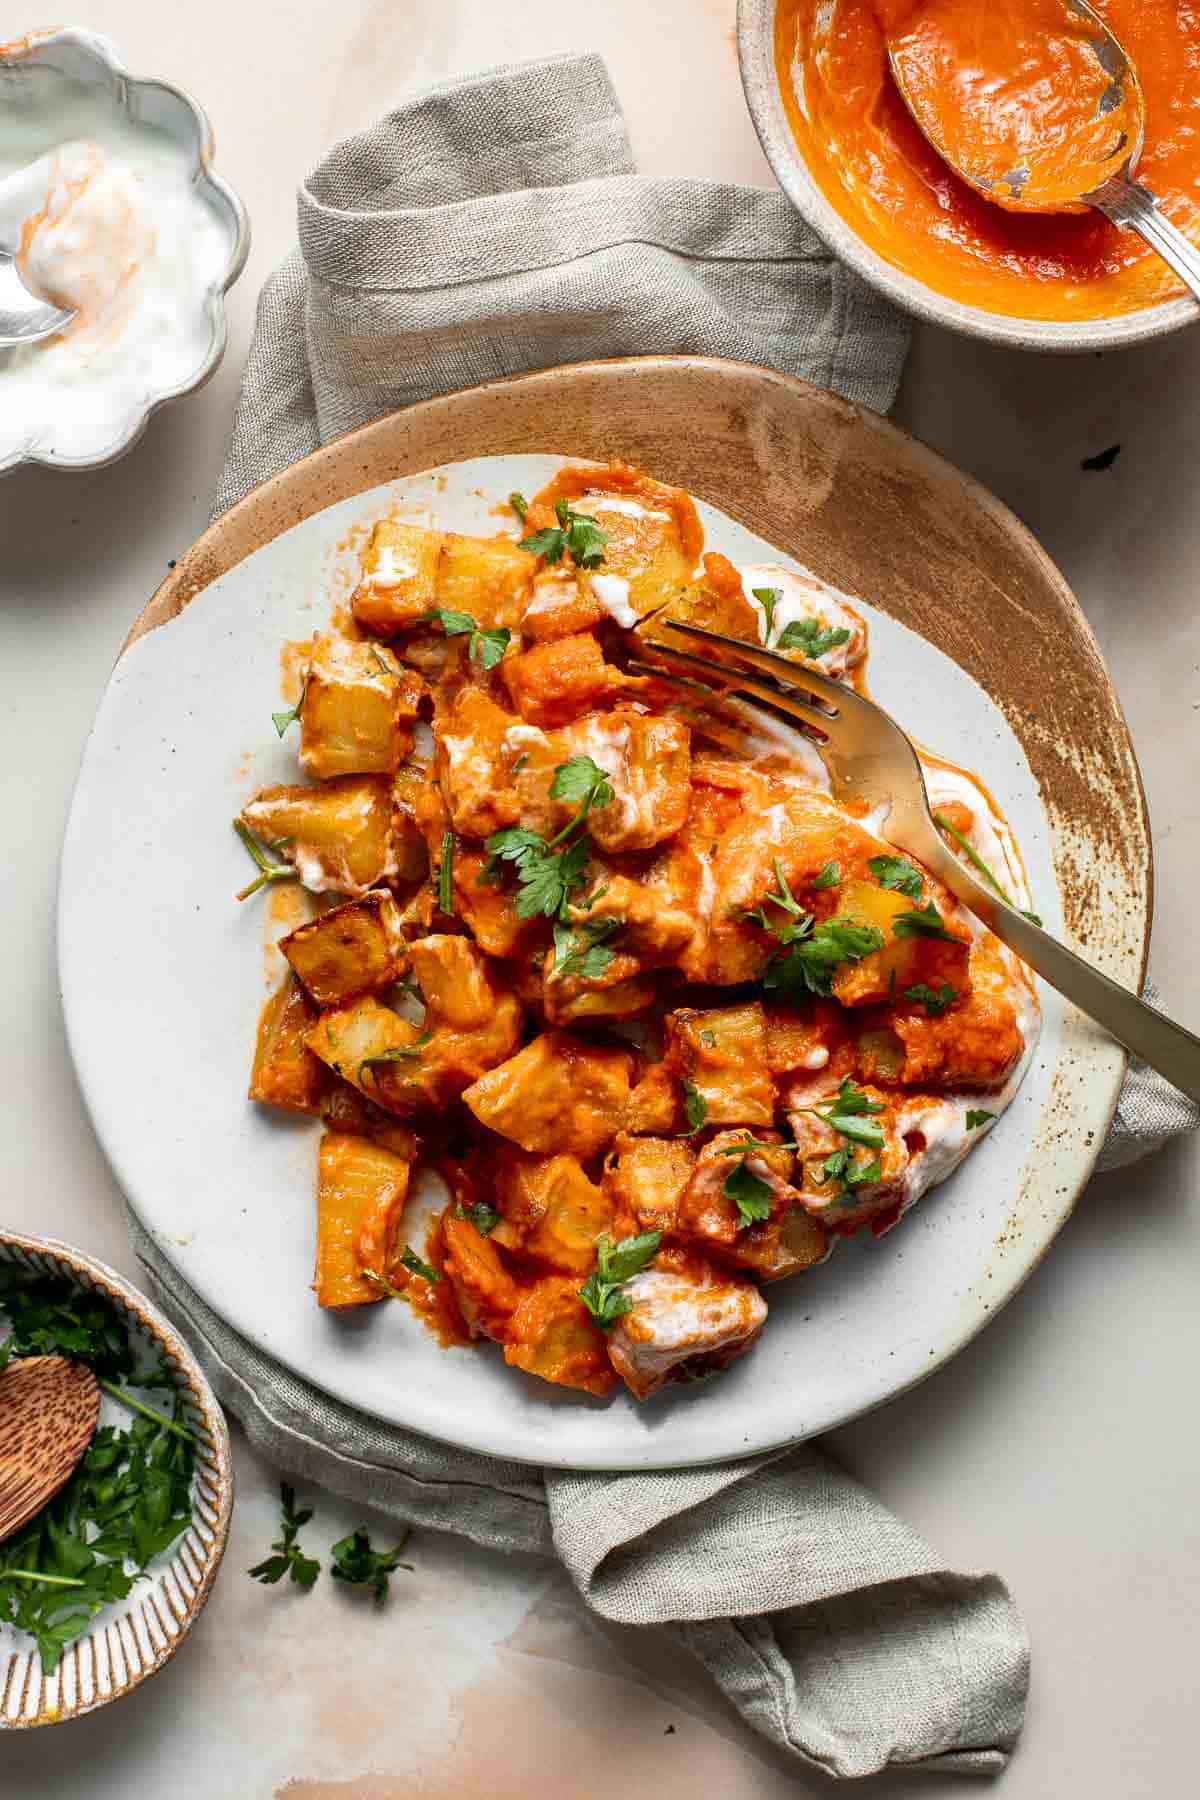
Why You'll Love These Patatas Bravas
- Made healthier with roasted potatoes. If you order these off the menu at your favorite Spanish tapas bar, the potatoes will often be boiled and then deep-fried in oil. However, ours are a healthier baked version, and you still end up with the perfect potatoes that are crispy and browned on the outside and fluffy on the inside.
- It's so easy to make. If you've had patatas bravas before, it may be intimidating to recreate at home, but let me tell you - this recipe is easy. You really just grab a few potatoes, chop them up, and pop into the oven. Meanwhile cook a simple tomato sauce and blend it. Then, make homemade garlic aioli in 2 minutes (or use store-bought). Assemble everything together and serve! , it may sound like a lot of steps, but they are simple and come together quickly.
- So many ways to serve them. Serve homemade patatas bravas as a side dish, or as a light lunch or dinner, tapas-style, with a few cocktail sticks for poking! These would also be an amazing addition to brunch.
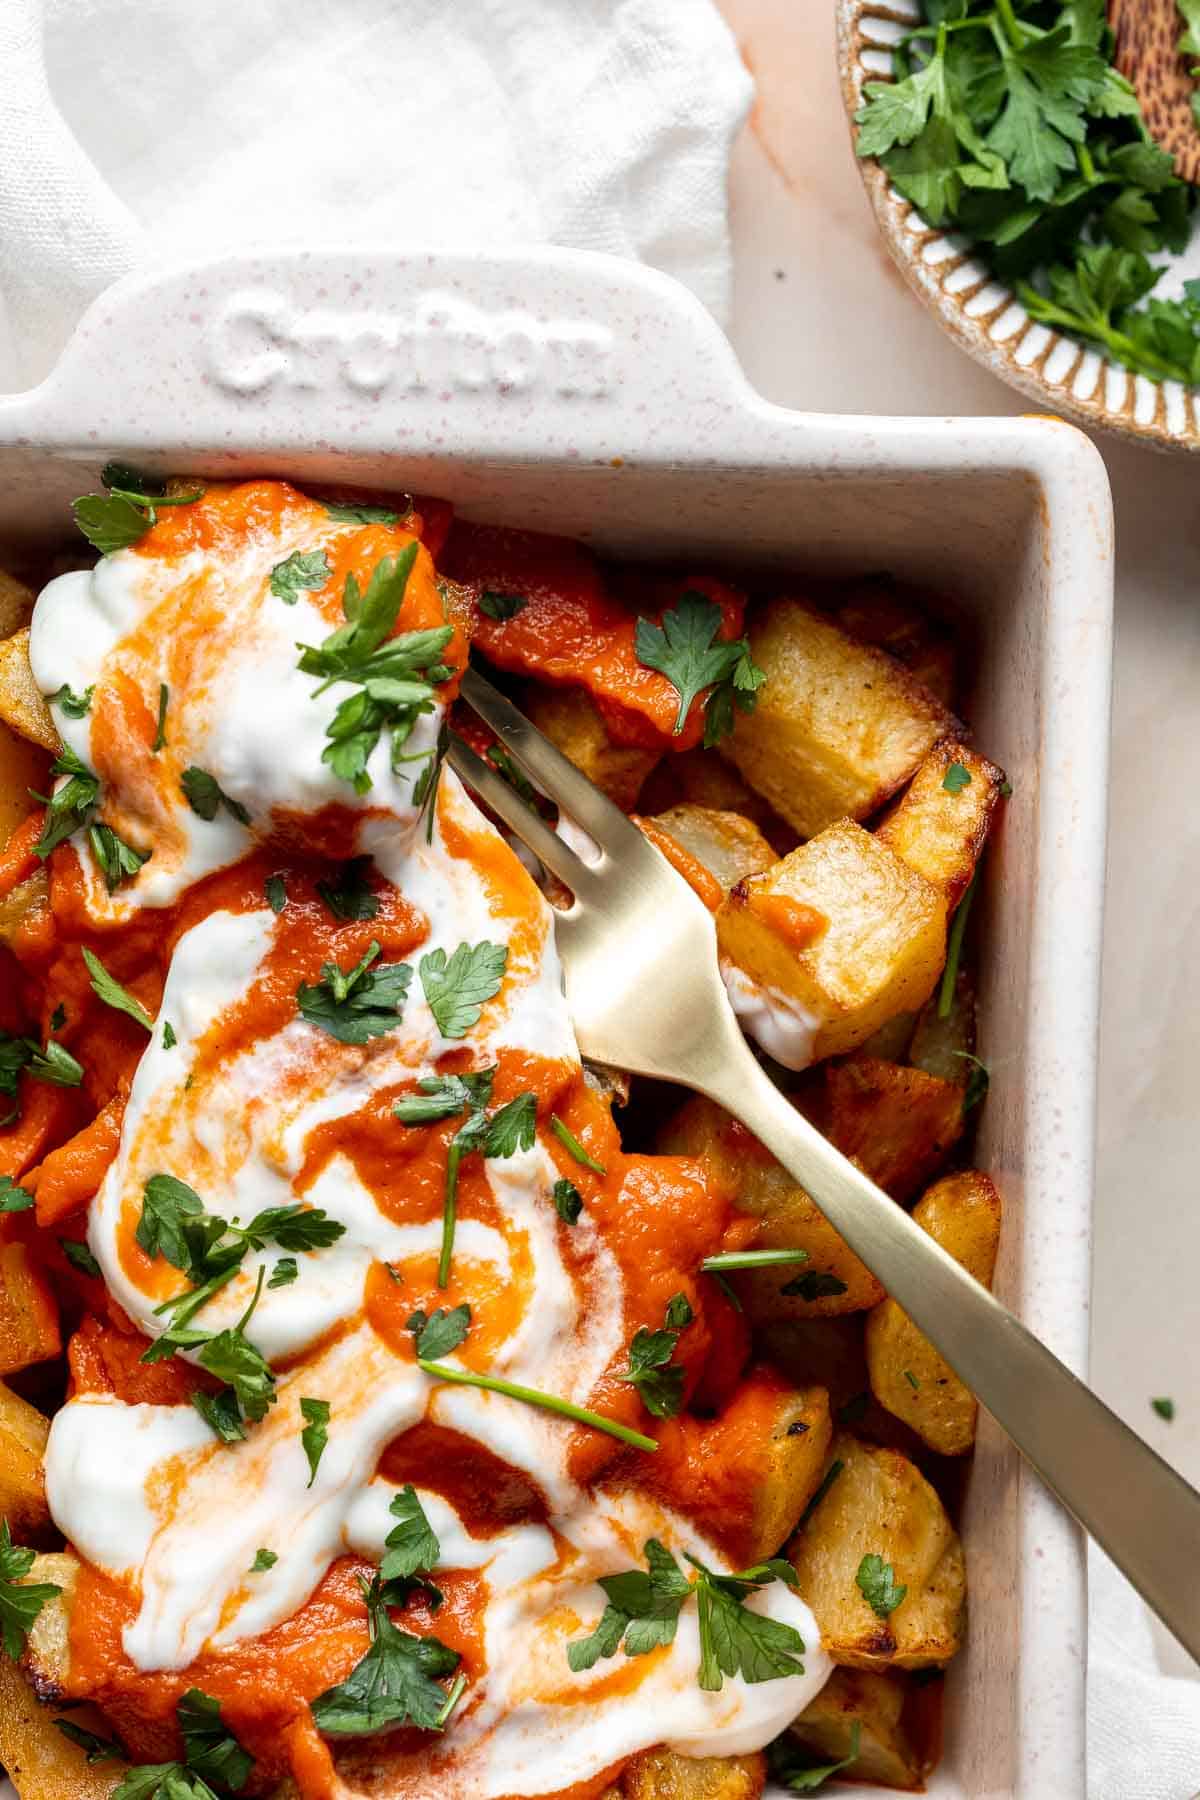
Ingredient Notes
To make these delicious Patatas Bravas Spanish Potatoes, you will need the following ingredients (full measurements in recipe card below):
- roasted potatoes - I recommend using red potatoes because they roast really well and hold their shape. Baby potatoes sliced in half also work well. You will also need to season it with paprika, salt, and pepper, tossed in olive oil.
- bravas sauce - we make homemade sauce using olive oil, white or yellow onion, garlic, canned diced tomatoes, smoked paprika, chili powder, sugar, salt, and pepper. You can also adjust the level of spiciness by adding more or less chili powder. You can similarly adjust the sweetness by adjusting the amount of sugar that you add.
- garlic aioli - made in less than 2 minutes by stirring together mayonnaise, minced garlic, and lemon juice. I recommend using freshly squeezed lemon juice for the most potent flavor. Feel free to use store-bought aioli if it's more convenient.
- fresh flat-leave parsley - optional to garnish on top and add extra flavor.
You will also need measuring cups and spoons, large half sheet baking pan, skillet, food processor or blender, and mixing bowl.
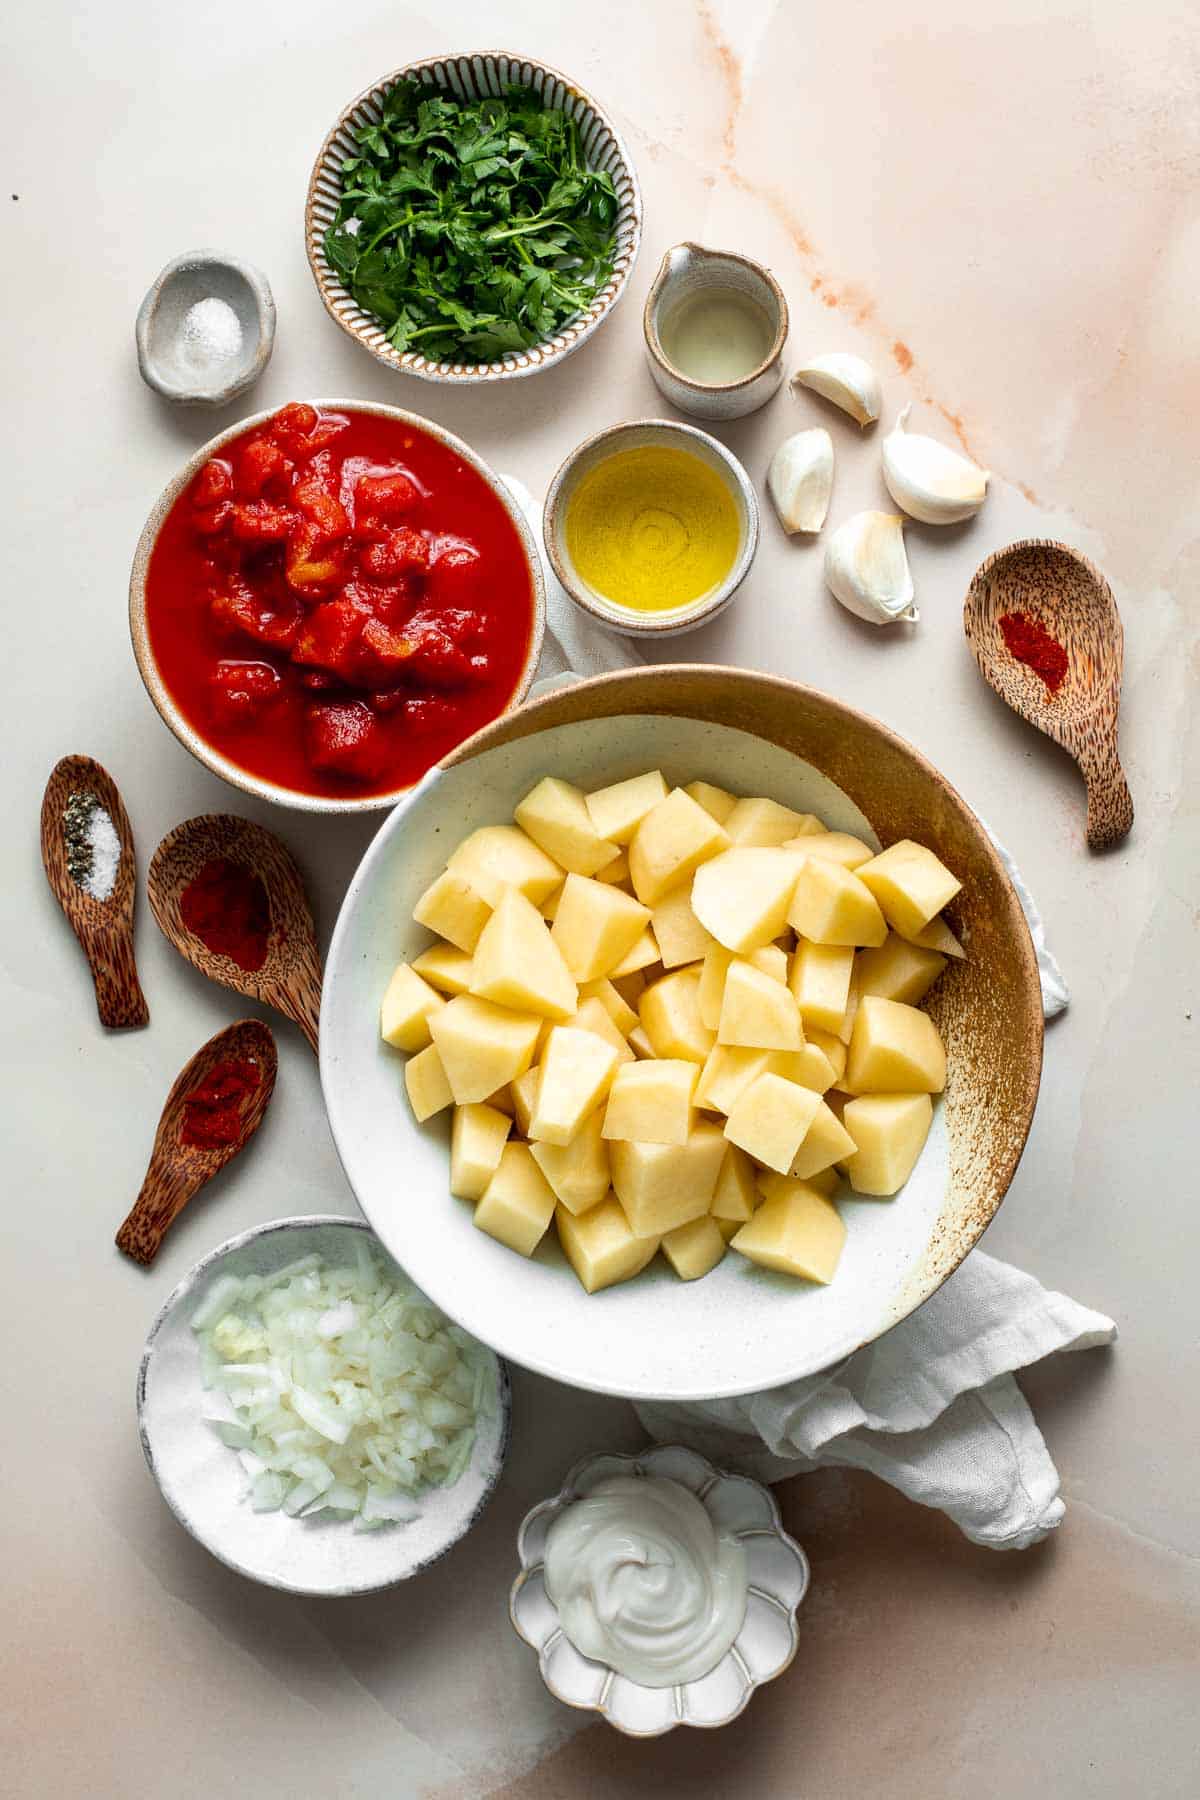
How to Make the Best Patatas Bravas
First, roast the potatoes.
- Peel and rinse the potatoes, and use a paper towel to dry them thoroughly. Cut the potatoes into 1-inch cubes.
- Place potatoes on a large half sheet baking pan. Drizzle with olive oil and season with paprika, salt, and pepper. Toss to combine and arrange the potatoes in a single layer.
- Transfer the baking sheet to the oven. Bake in a 425F preheated oven for 25 minutes, then remove from oven and give the potatoes a good stir. Return to the oven for 10 minutes until crisp, golden brown, and fork tender. Remove from the oven.
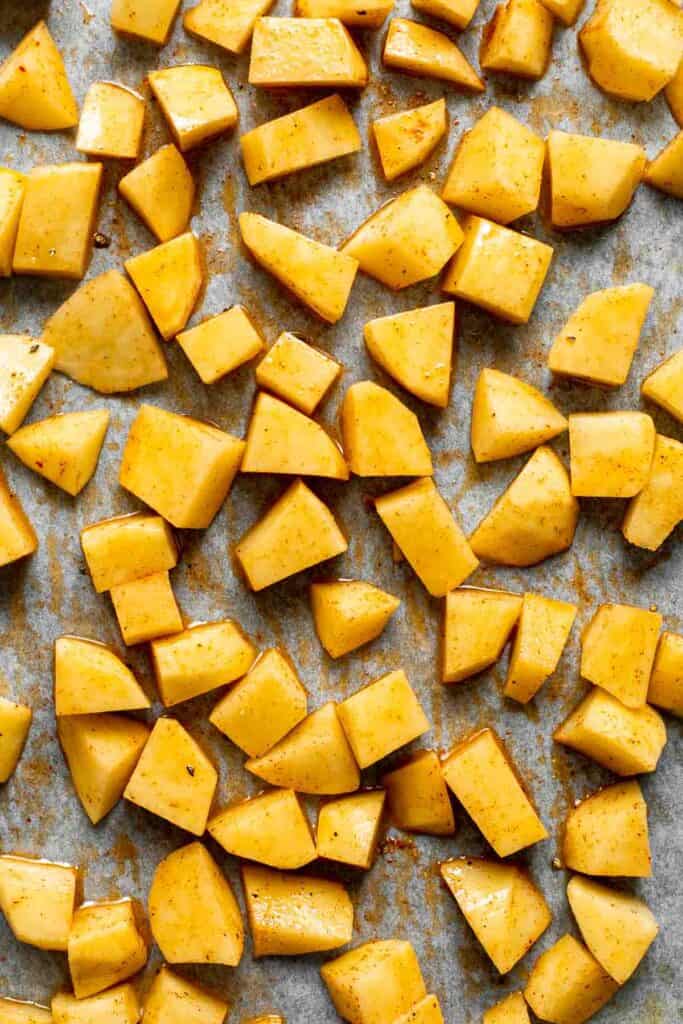
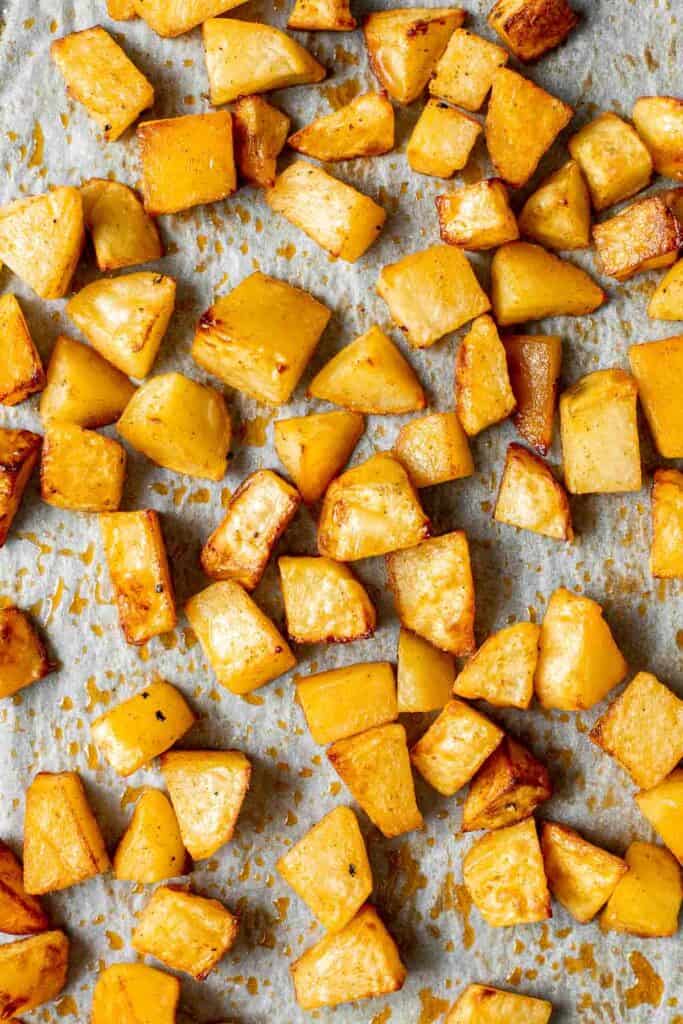
Next, make the salsa brava.
- In a large skillet, heat olive oil over medium-high heat until shimmering hot, about 1-2 minutes. Add onion and garlic and sauté for 3-4 minutes, until soft and translucent. Turn the heat down to low and add tomatoes. Simmer for 15 minutes.
- Remove the sauce from the heat and allow it to cool down a bit. Transfer to a food processor or blender. Puree until your sauce is smooth and creamy, about 1 minute. If you find the sauce too thick to blend, add a little water until desired consistency is reached.
- Add smoked paprika and season to taste with chilli powder, sugar, salt, and pepper. Stir until combined.
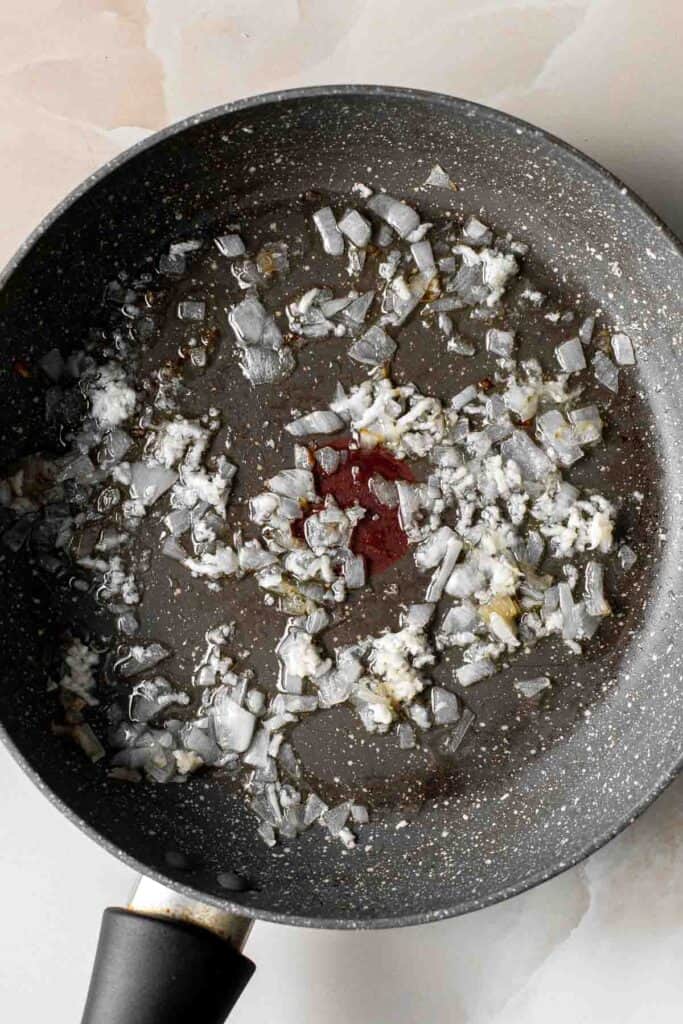
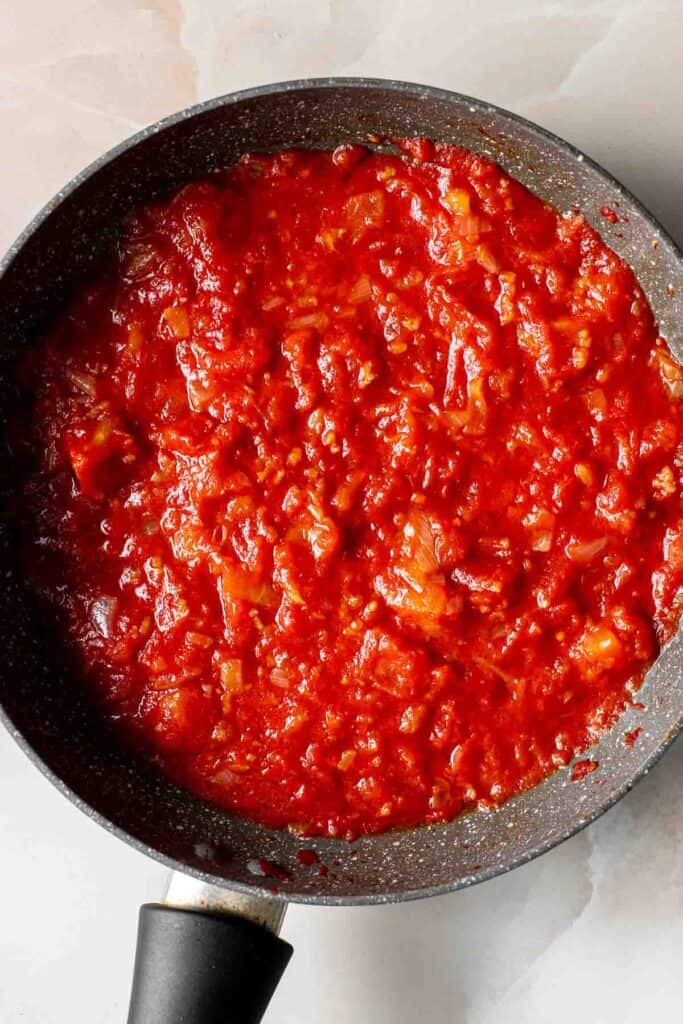
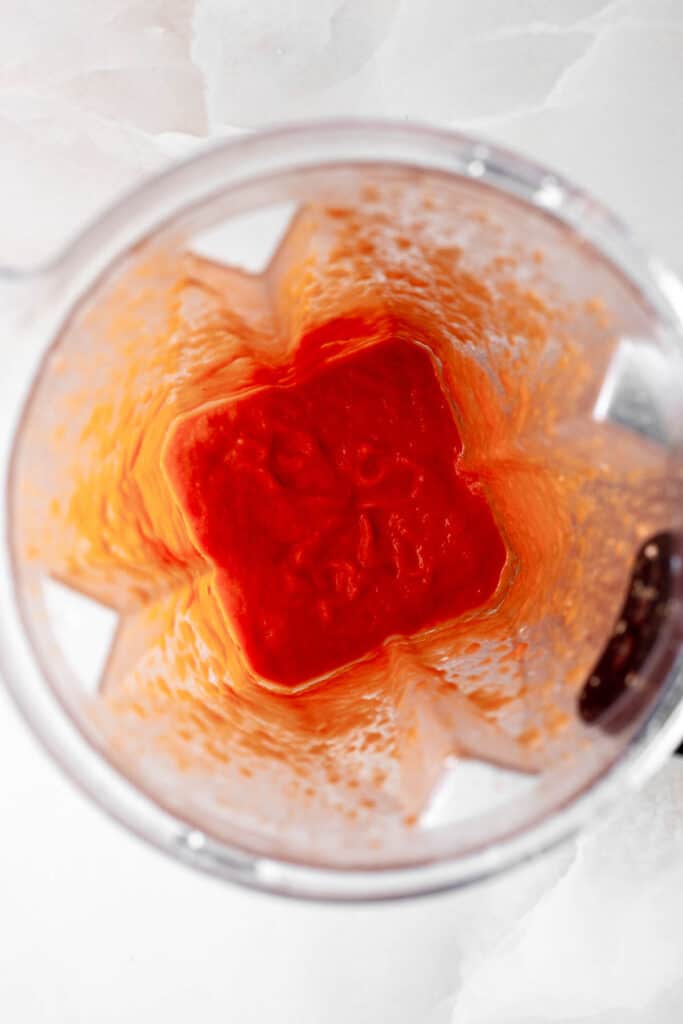
Don't forget the garlic aioli.
- In a small mixing bowl, combine the mayo, garlic, and lemon juice. Stir until smooth.
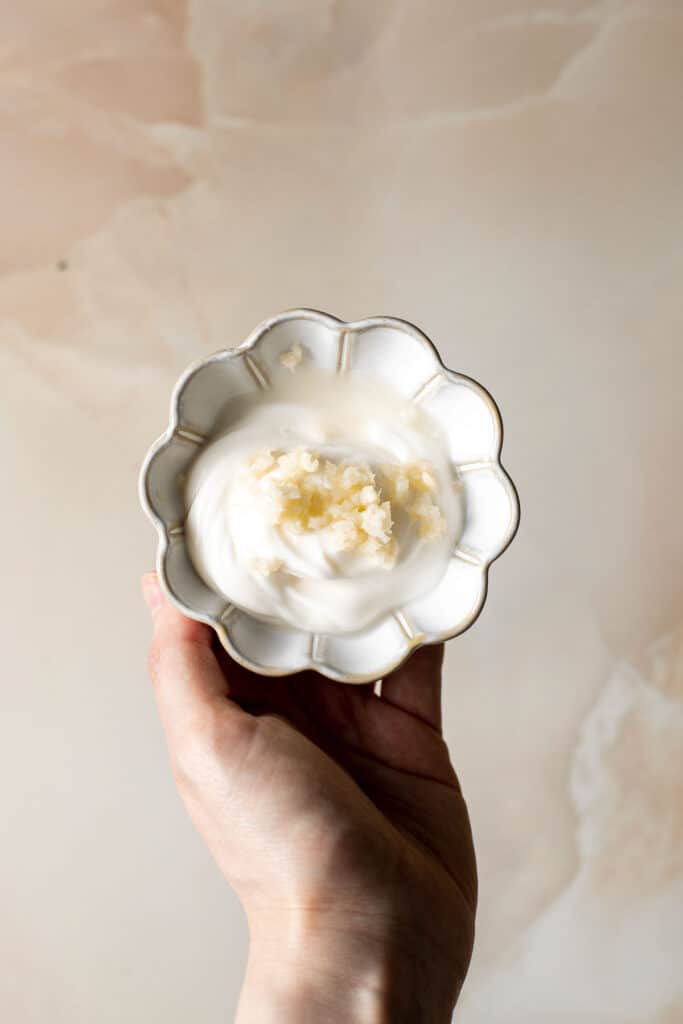
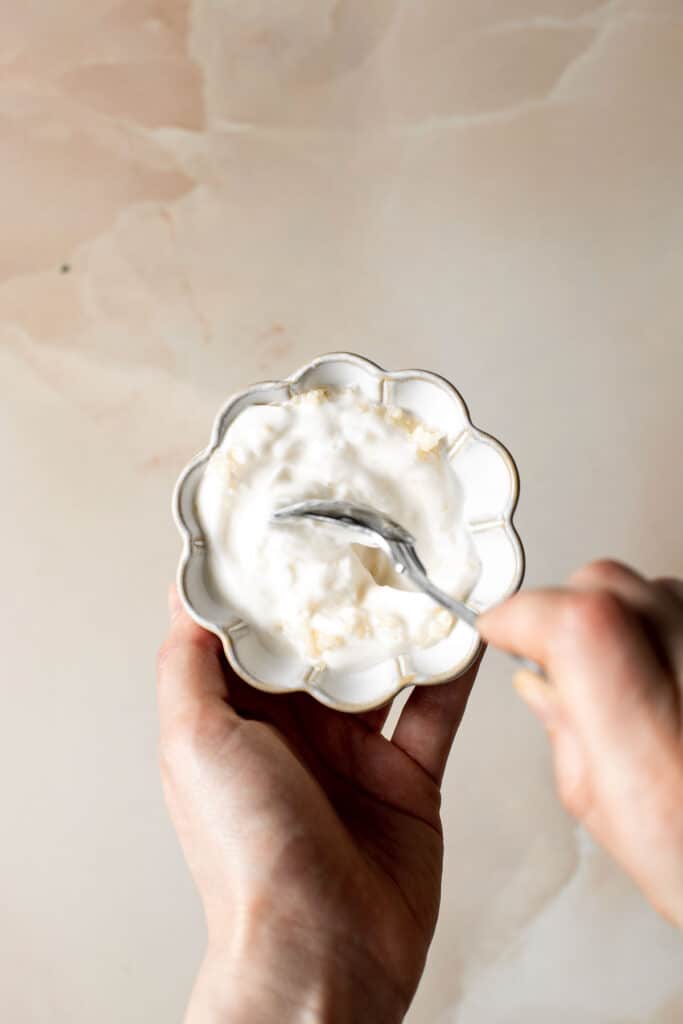
How to Serve
Serve these roasted potatoes in a serving dish with the bravas sauce and garlic aioli drizzled on top or on the side. I also like to sprinkle some parsley on top and serve.
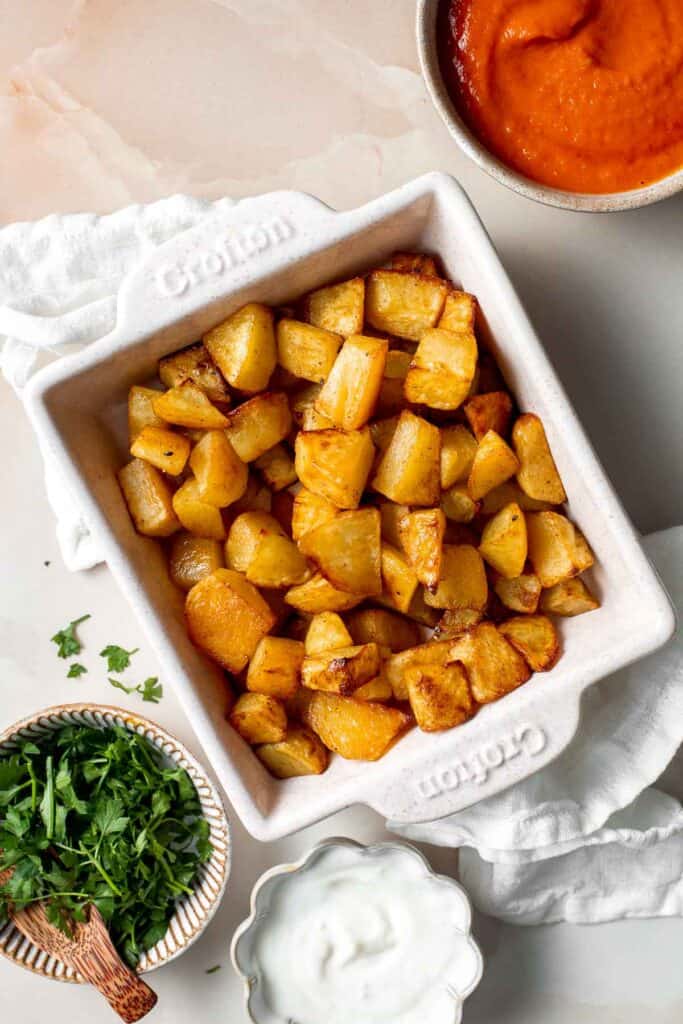
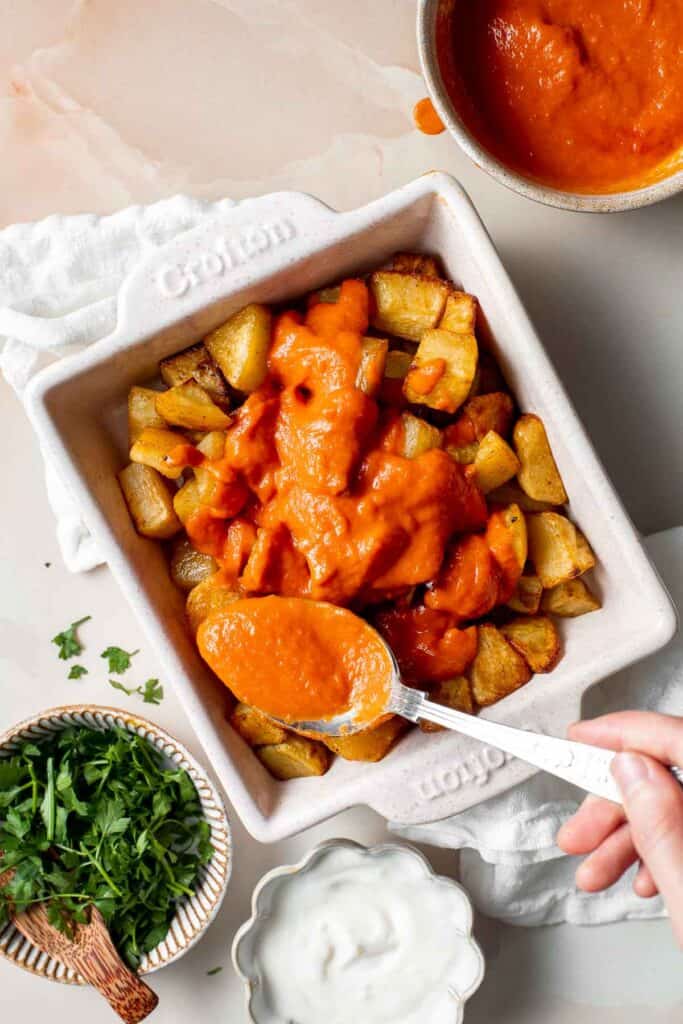
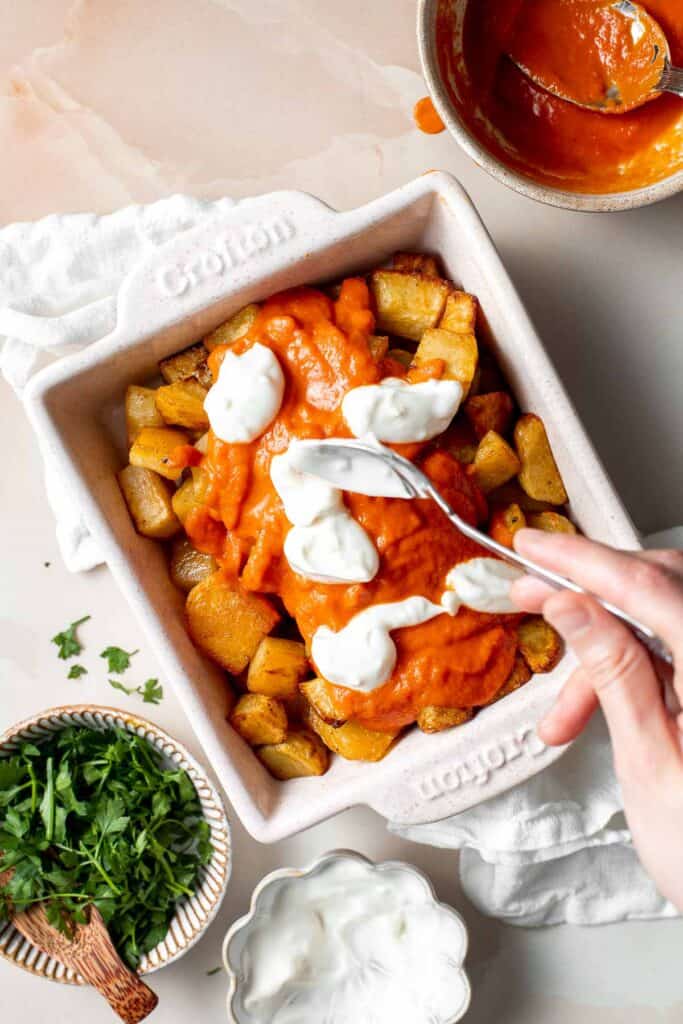
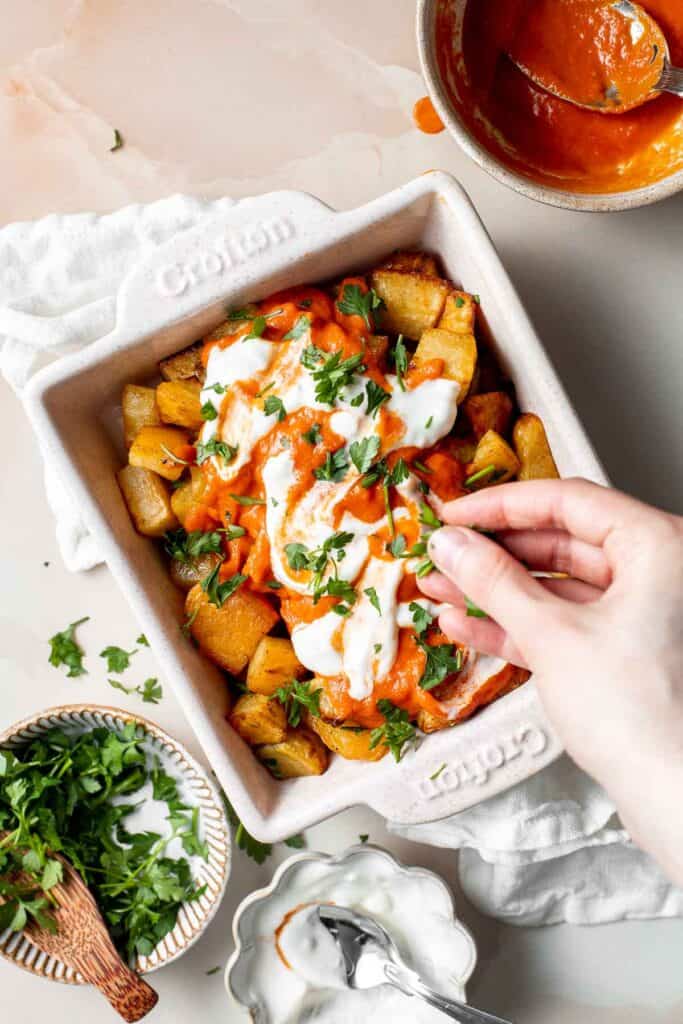
You can serve patatas bravas by itself as an appetizer, or as a side dish with a dinner entree. Some other Spanish-inspired dishes that you can serve these with are:
Storing Instructions
- Make ahead instructions: I recommended roasting the potatoes fresh before serving. You can easily make the bravas sauce and garlic aioli ahead of time. Store the bravas sauce in an airtight container for up to 1 week in the refrigerator or 2 months in the freezer. Store the garlic aioli in an airtight container for up to 10 days in the fridge.
- How to store: If planning for leftovers, I recommend serving the potatoes with the sauce on the side so that you can store them separately. However, it's not the end of the world if they have already been mixed. Store in an airtight container for up to 4 days.
- How to reheat: Reheat the potatoes and the bravas sauce (preferably separately, but together is okay too) in a skillet over medium heat for 5-10 minutes until warmed through.
More Potato Recipes
- 40 Best Potato Recipes
- Greek Fries
- Crispy Smashed Potatoes
- Mascarpone Mashed Potatoes
- Roasted Garlic Parmesan Baby Potatoes
- Hasselback Potatoes
Tried this recipe?
I'd love to hear what you think! Leave a comment and rating below to share your feedback. Your reviews help others discover this recipe and help me keep creating more free recipes for you. Snap a photo and tag me on social media @aheadofthyme too.

Beef Kofta Kebabs
Mediterranean Beef Kofta Kebabs are juicy, tender, flavorful, and well seasoned with a blend of herbs and spices. These grilled ground beef skewers are quick and easy to make in just 30 minutes (including prep!) and can be cooked on the grill, oven, or air fryer.
The best part? You can prepare these skewers ahead of time so that you only need to spend around 10 minutes grilling them for dinner. Serve beef kofta for lunch or dinner with rice or Pita Bread for a complete meal, or serve as an appy on Game Day with a drizzle of Tzatziki Sauce. However you serve them, sit back and watch them disappear fast. They are a total crowd pleaser.

Why You'll Love Beef Kofta Kebabs
- They're a quick and easy dinner. Although it might seem complicated, these beef kofta kebabs are incredibly simple. Think of it like a meatball, except you're crafting it on a stick and cooking it. And yes, these beef kofta kebabs are ready in under 45 minutes - and if you prepare them ahead of time, they can be a 15-minute dinner.
- The bold herbs and spices. To make beef kofta kebabs, you'll need fresh garlic, onion, and parsley, along with an assortment of Middle Eastern spices including paprika, cumin, sumac, and cardamom. Combined together, you'll end up with a beef kofta kebab that's so flavorful you can't help but ask for seconds, and thirds, and fourths.
- You can grill, bake in the oven, or air fry them. We like to make these Mediterranean beef kebabs on a grill or grill pan because the charring and smoke add even more flavor to this already flavorful meat. You can also bake them in the oven or air fryer all year long.

Ingredient Notes
To make these delicious Beef Kofta Kebabs, you will need the following ingredients (full measurements in recipe card below):
- ground beef - we use ground beef in this recipe but traditionally, kofta is made with ground lamb. Feel free to substitute with lamb or use a combination of the two ground meats.
- onion
- garlic
- parsley
- allspice powder
- paprika
- ground cumin
- ground sumac
- ground cardamom
- salt and pepper
- tzatziki sauce - you can serve these beef skewers with Tzatziki Sauce which pairs really well with it. We made our homemade Tzatziki Sauce in minutes, but you can easily use store-bought sauce - whichever is more convenient.
You will also need measuring spoons, mixing bowl, and skewers (I used bamboo skewers).

How to Make the Best Beef Kofta Kebabs
- Marinate the beef. In a large mixing bowl, combine ground beef with onion, garlic, parsley, and all the spices including salt, pepper, allspice, paprika, cumin, sumac, cardamom). Mix well until evenly combined. Cover the bowl with plastic cling wrap and set aside to marinate for at least 20 minutes or overnight in the fridge.
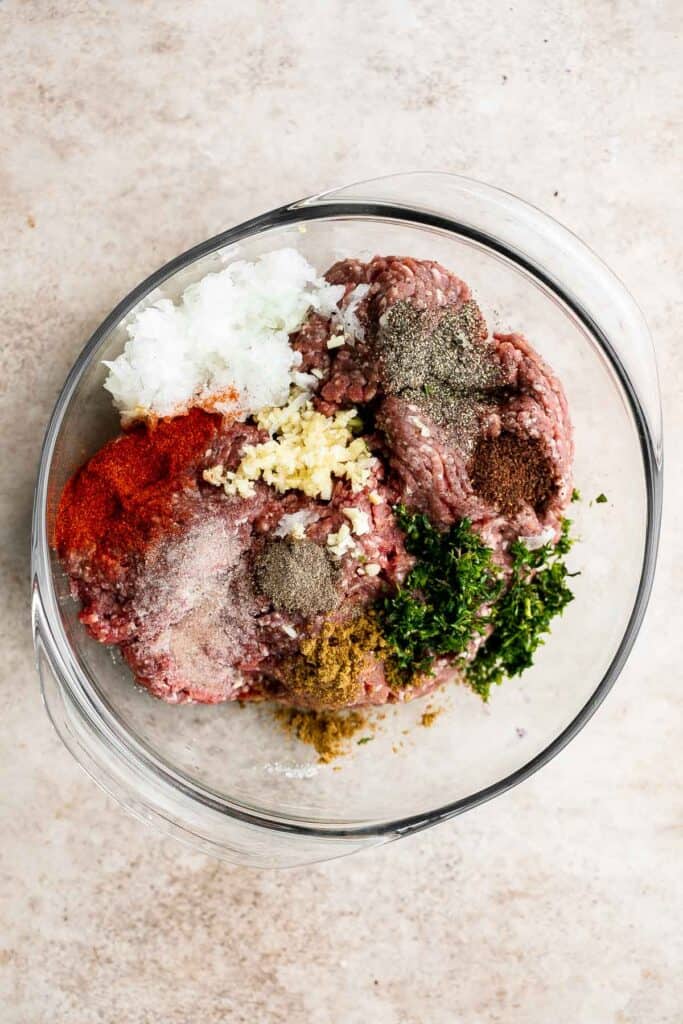
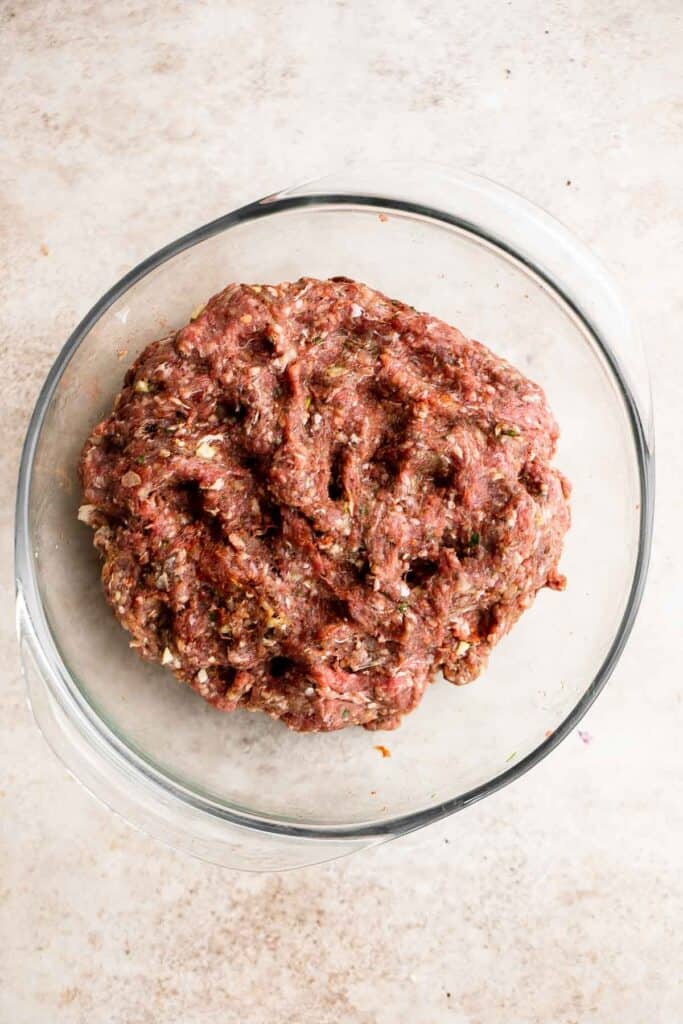
- Shape the skewers. Take about ½ cup of the beef mixture and shape into a cylinder on each skewer. Repeat this step until all the meat is used up. Set the skewers aside on a plate.
- Grill. Preheat a grill pan or gas grill over medium-high heat for 4-5 minutes and lightly brush the grill with cooking oil. You should notice the oil shimmers and sizzles when it's hot and ready. Grill the skewers until cooked through and nicely browned on all sides, about 10-12 minutes. Use tongs to flip around a few times to achieve even cooking on all sides. The internal temperature for the beef should reach 160 F as read on a meat thermometer.


How to Cook in the Oven or Air Fryer
You can also bake beef kofta in the oven or cook in the air fryer.
To bake in the oven, place the skewers in a single layer in a large half sheet baking pan and cook in a 375F preheated oven for 22-25 minutes until cooked through.
To cook the air fryer, shape the beef into cylinders or sausage shape without any skewers. Air fry at 375F for 20 minutes.
How to Serve
I like to serve beef kofta kebabs with Tzatziki Sauce. They also pair great with any Mediterranean-inspired dishes, such as:
- A fresh salad like Greek Salad, Chickpea Greek Salad, or Quinoa Spinach Salad
- Steamed Rice or Rice Pilaf
- Hummus
- Pita Bread
- Greek Lemon Roasted Baby Potatoes
Storing Instructions
- Make ahead instructions: You can marinate and/or skewer the beef up to one day ahead of time and store in the refrigerator in a covered container. When ready to eat simply skewer them or if already skewered, fire up the grill and cook.
- How to store: Keep leftover beef kofta kebabs in an airtight container in the fridge for 3-4 days. If serving at a party, make sure your kebabs do not sit out at room temperature for longer than 1-2 hours. If they're out in hot weather, be sure to get them in the fridge after 30-60 minutes.
- How to reheat: Reheat beef kofta kebabs in a 375F preheated oven for 10-15 minutes or until hot. You can also unthread from the skewers and reheat in the air fryer for 5-10 minutes at 350F until warm.
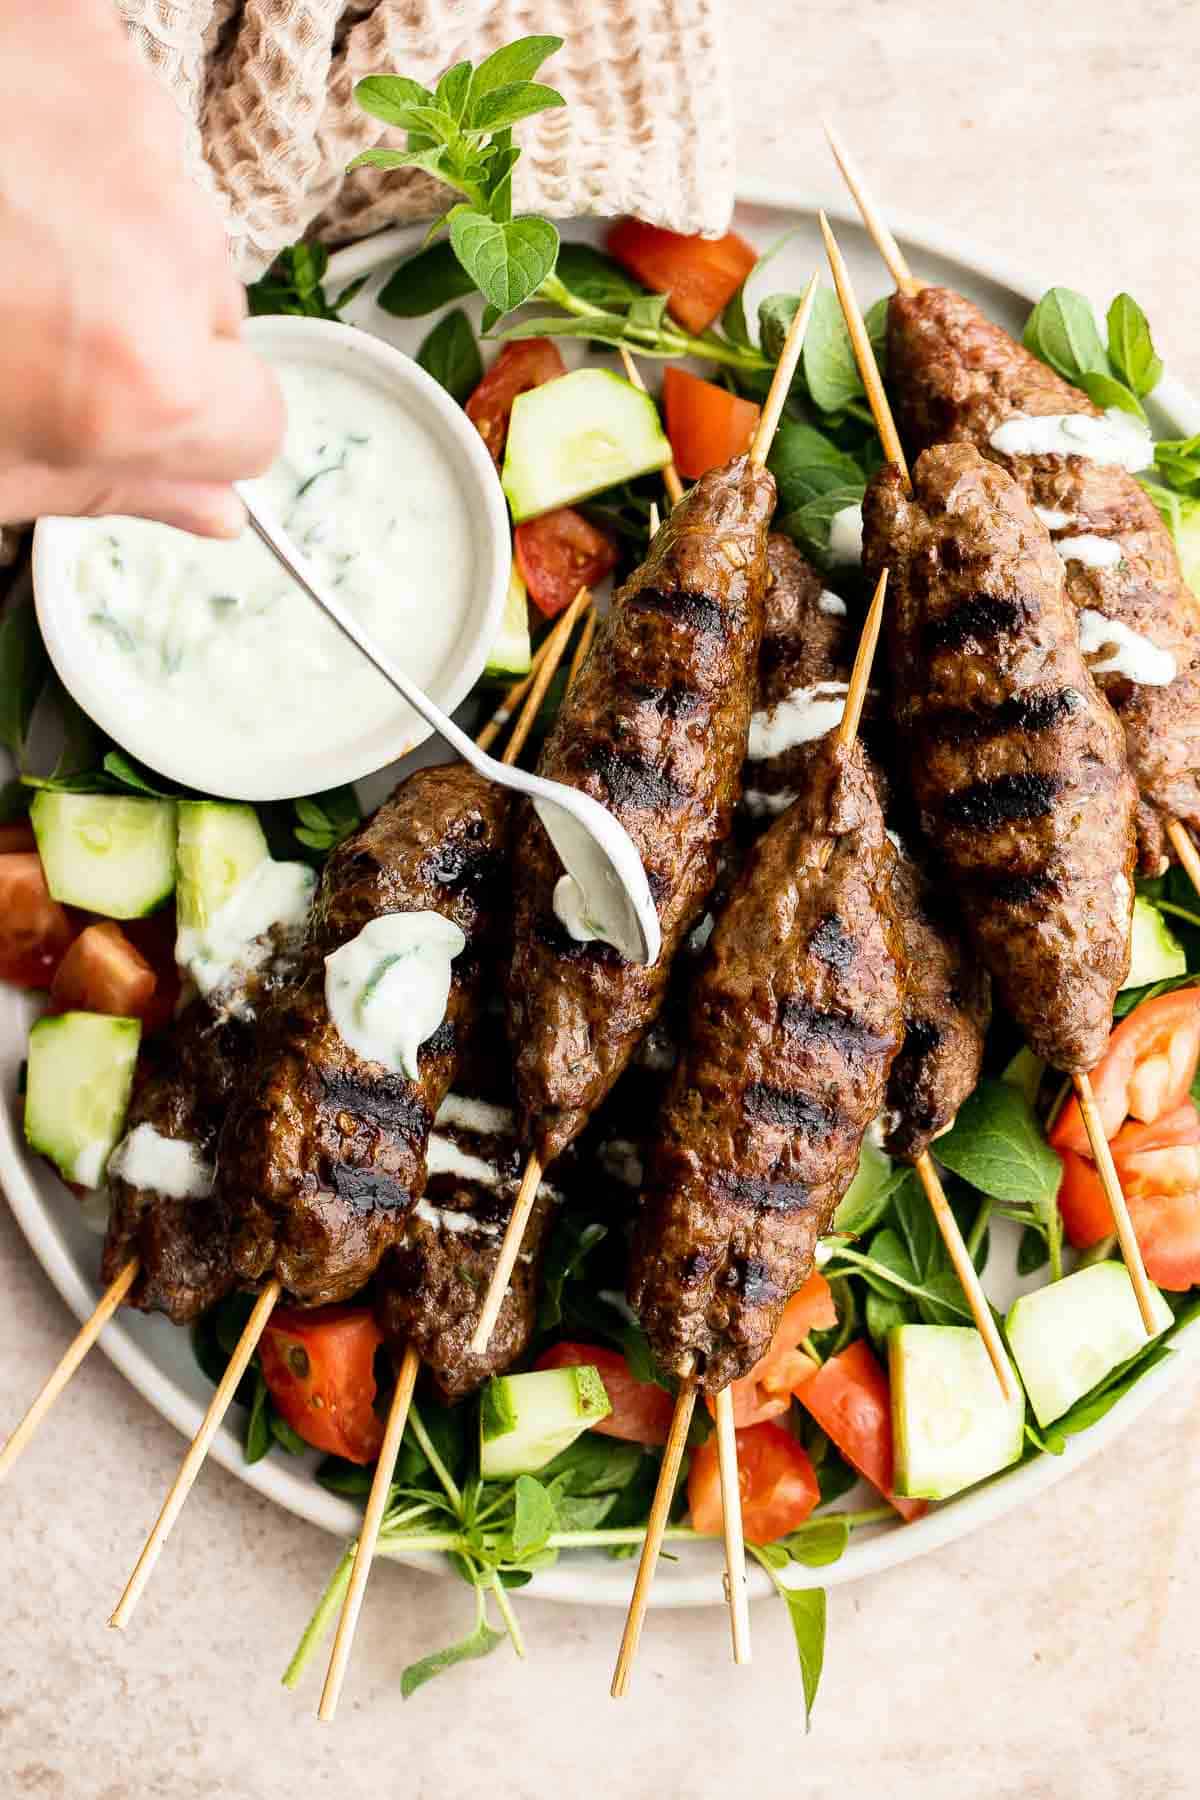
More Ground Beef Recipes
- 25 Best Ground Beef Recipes
- Juicy Hamburgers
- Classic Meatloaf
- Italian Meatballs
- Ground Beef Stuffed Peppers
- Homemade Hamburger Helper
- Mexican Ground Beef Tacos
Tried this recipe?
I'd love to hear what you think! Leave a comment and rating below to share your feedback. Your reviews help others discover this recipe and help me keep creating more free recipes for you. Snap a photo and tag me on social media @aheadofthyme too.

Zucchini Bread
This Zucchini Bread is moist, light, and fluffy. It's loaded with real zucchini - but you wouldn't even know it because you can't taste it! It adds moisture and nutrients to this delicious snack. Plus, this veggie loaf is quick and easy to make in just 10 minutes of prep.
It's my favorite way to use up all that zucchini from my vegetable garden. Plus, you can easily double or triple the recipe to make multiple loaves and freeze them to enjoy for months to come.
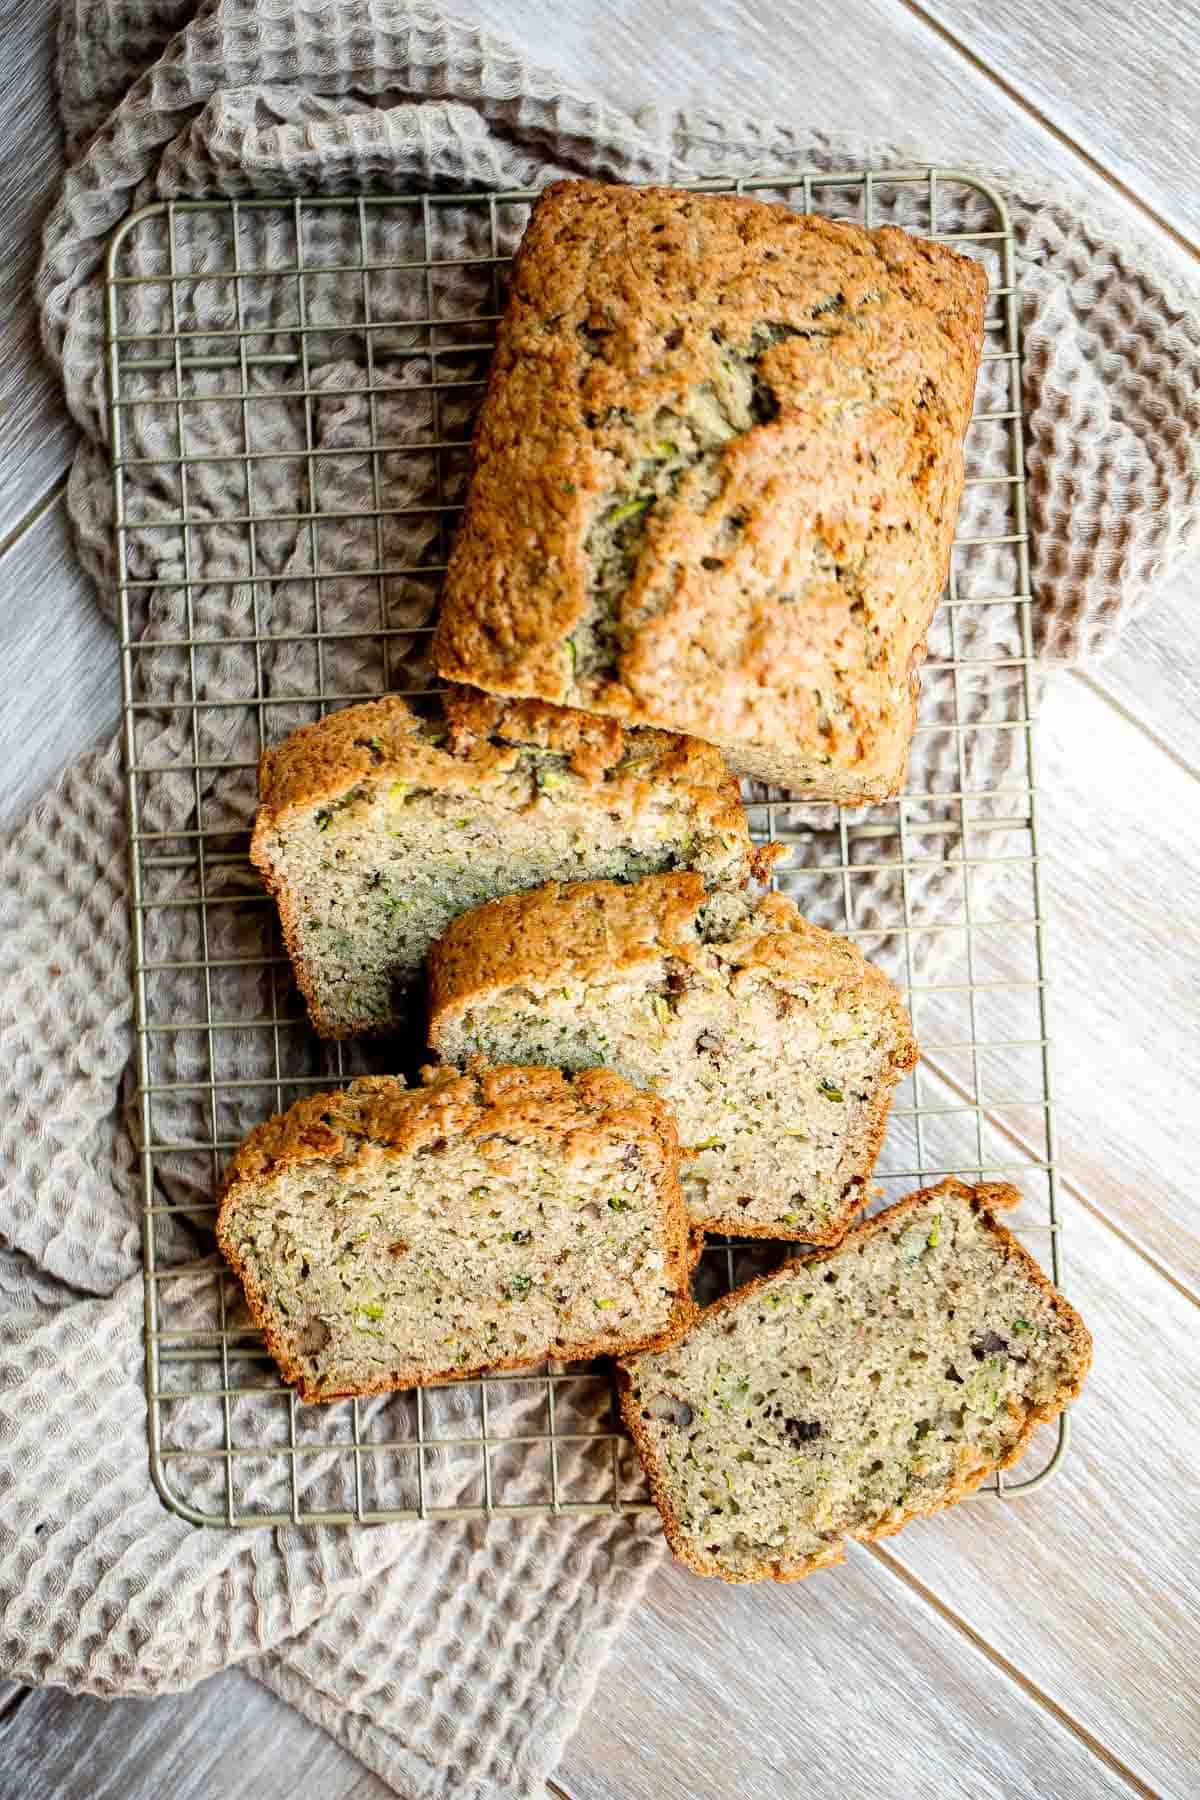
Why You'll Love Zucchini Bread
- Loaded with zucchini. This loaf cake is a great way to sneak in some veggies - a whopping 2 cups of zucchini. After all, zucchini is a superfood that adds vitamins A, B, K, and C, protein, potassium, folate, and fiber to this loaf. All these nutrients promotes heart health, lowers high blood pressure, and helps manage cholesterol.
- It's an end of summer go-to. If you grow your own vegetable garden, or if you keep an eye on seasonal produce, then you know how abundant zucchini is. Every year we get a ridiculous amount of zucchini from our garden and we love using it in our baking like in Chocolate Chip Zucchini Muffins and Chocolate Zucchini Cake.
- It's moist and delicious. If you're a fan of baking, you know that fresh vegetables like zucchini, pumpkin, or carrots have the potential to transform the texture and moisture of baked goods (like in Pumpkin Bread and Spiced Carrot Muffins). Grated zucchini adds a nice density and moisture without sacrificing fluffiness or texture. It's the best!
- Great for meal prep. Zucchini bread is a great to meal prep to set you up for the week with breakfast on-the-go, healthy snacks for your kid's lunchbox, or as a dessert to enjoy after a light summer dinner.
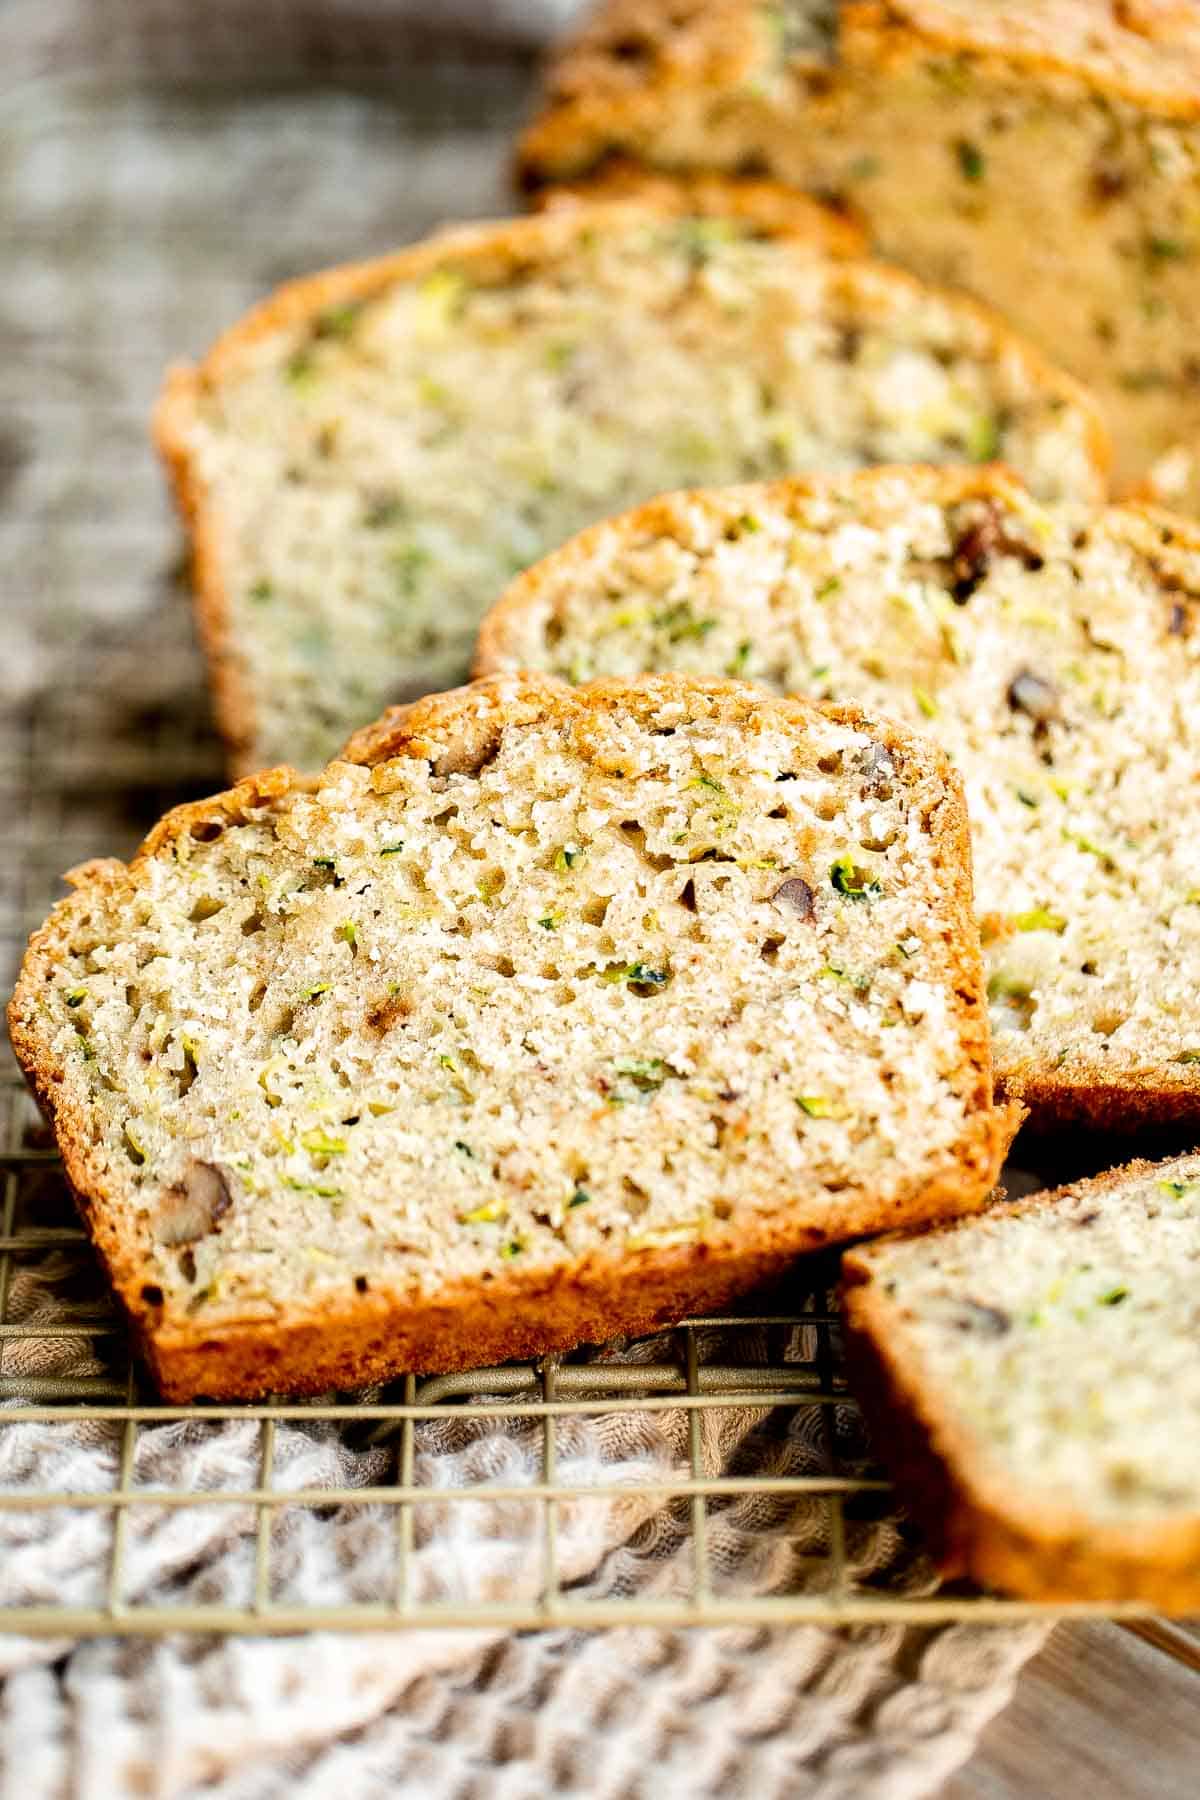
Ingredients and Substitutions
To make this easy Zucchini Bread, you will need the following ingredients (full quantities in the recipe card below):
- zucchini - I recommend using smaller zucchini versus larger ones because they have more moisture. Also, if the zucchini has seeds, remove them first. The seeds can make the muffins slightly bitter. Then, grate or shred the zucchini using a box grater or food processor and use a paper towel to lightly blot them to dry a little.
- nuts - chopped walnuts or pecans go really well in this loaf cake. But you can leave them out if you want.
- all-purpose flour - when measuring the flour, use a spoon to fill the measuring cup and then use a flat spatula or the back of a butter knife to level it. I actually recommend using a kitchen scale for the most accurate measurements.
- sugar - feel free to substitute with brown sugar.
- baking powder + soda
- ground cinnamon
- salt
- vegetable oil - you can use any vegetable oil such as avocado oil or melted coconut oil. You can use melted butter instead of for a more buttery flavor.
- milk
- eggs
- vanilla extract
You can also customize this zucchini bread by adding in up to 1 cup of chocolate chips or dried cranberries.
You will also need measuring cups and spoons, mixing bowls, and a 9x5-inch loaf pan (1 pound loaf pan).
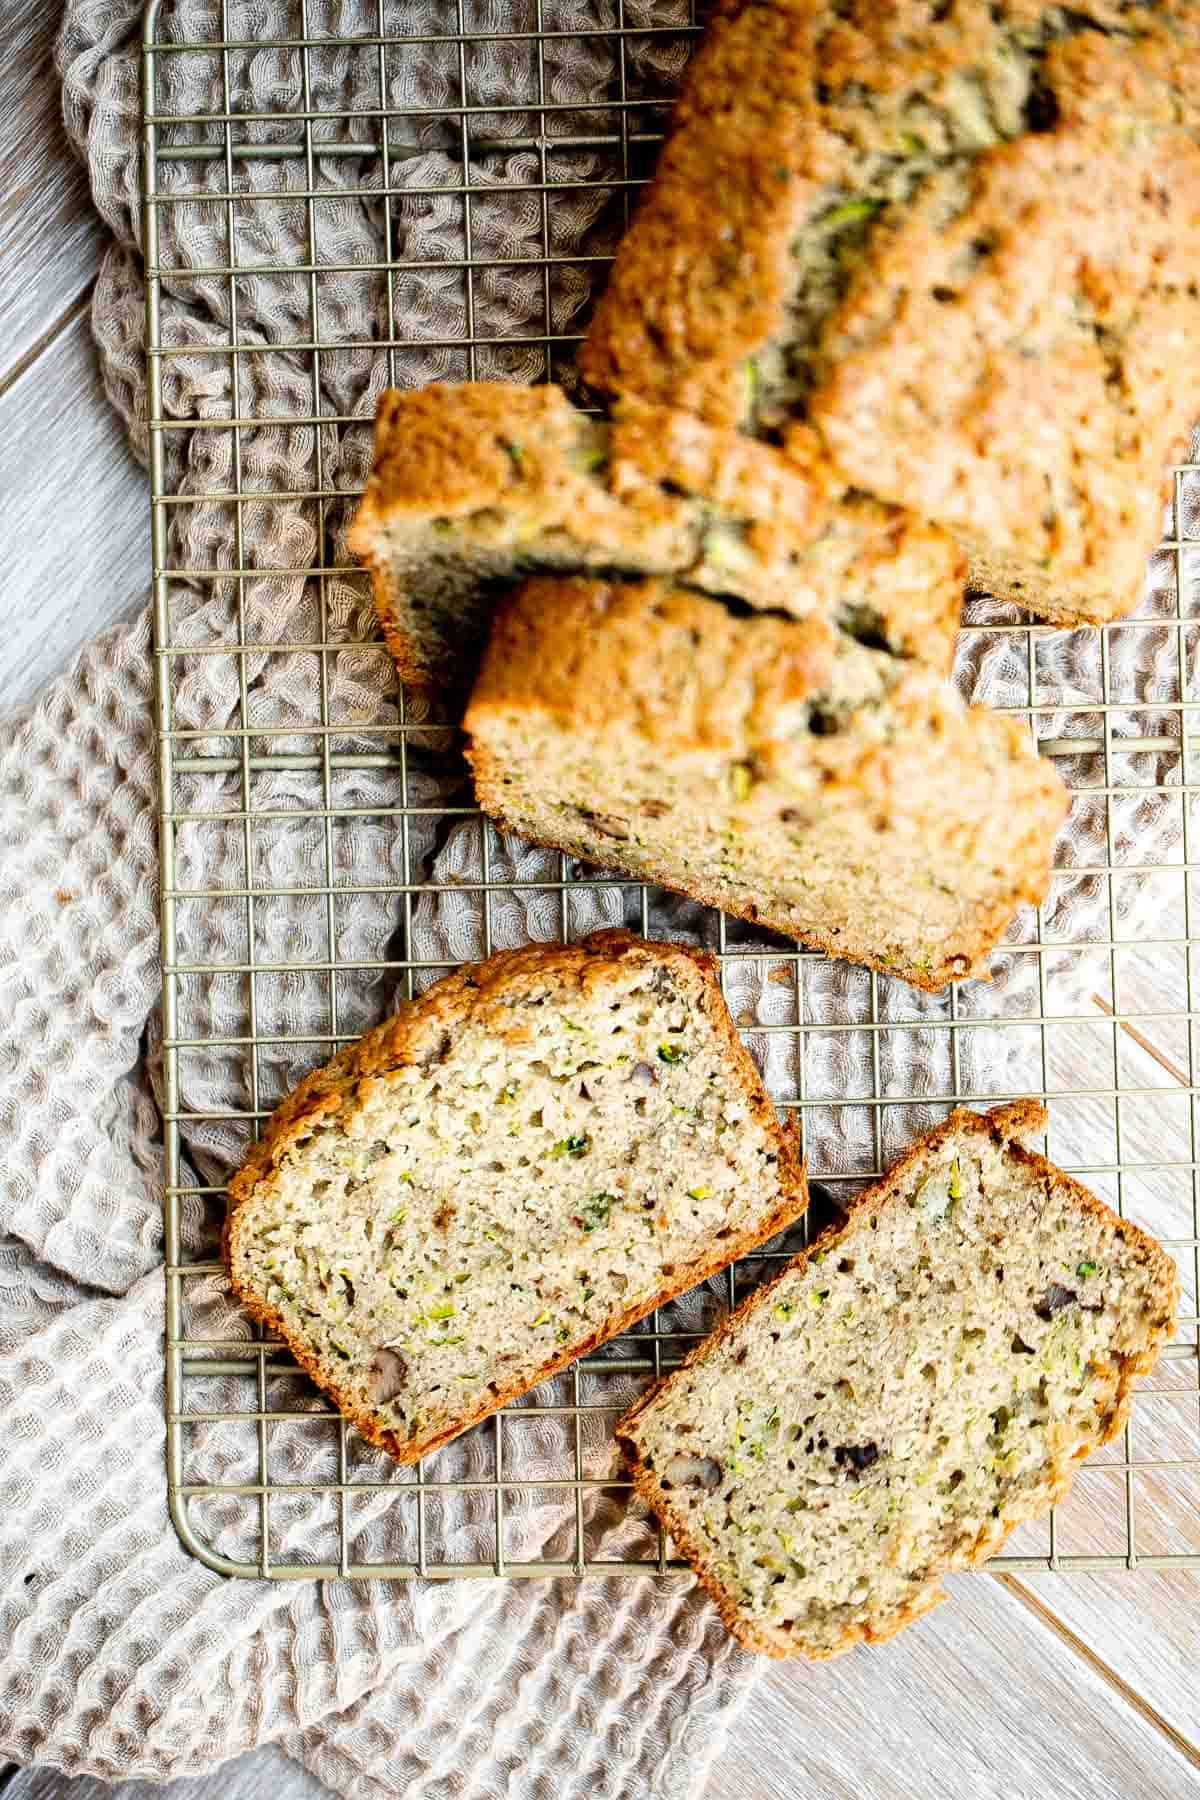
How to Make the Best Zucchini Bread
- Combine dry ingredients. In a large mixing bowl, combine all the dry ingredients including flour, sugar, baking powder, baking soda, cinnamon, and salt. Whisk together until evenly distributed.
- Add zucchini. Add zucchini and walnuts and mix well until evenly combined.
- Combine wet ingredients. In a medium mixing bowl, combine all the wet ingredients including oil, milk, eggs, and vanilla extract. Whisk well until smooth.
- Add wet ingredients to dry ingredients. Pour the wet mixture into the dry ingredients and use a spatula to mix together until just combined and no dry ingredients are visible. Do not overmix the batter. Overmixing will make the bread denser and firmer.
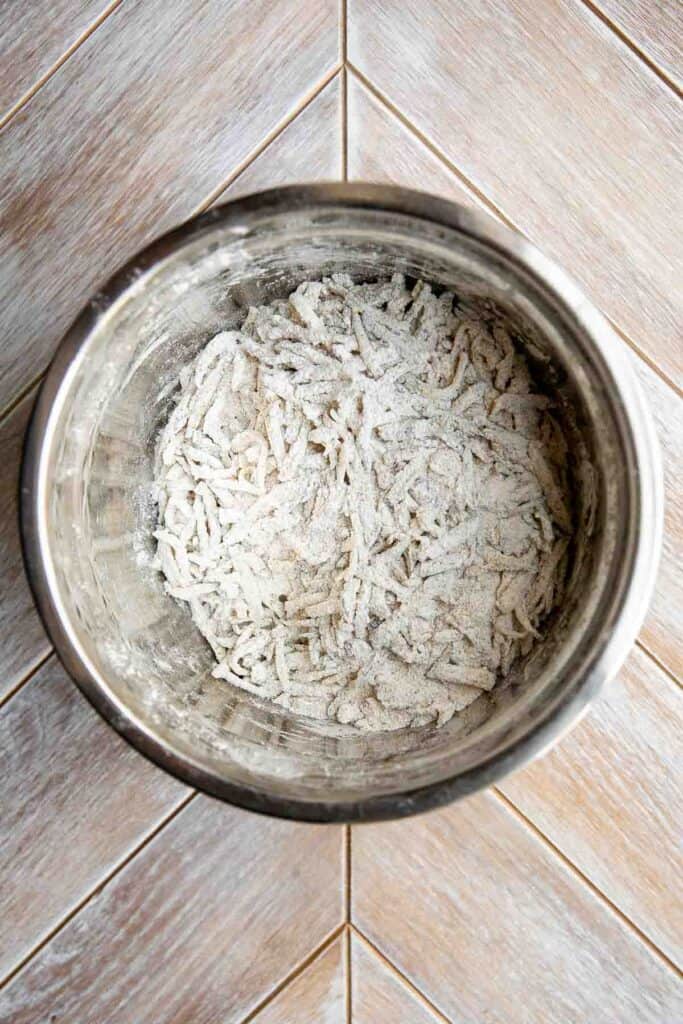
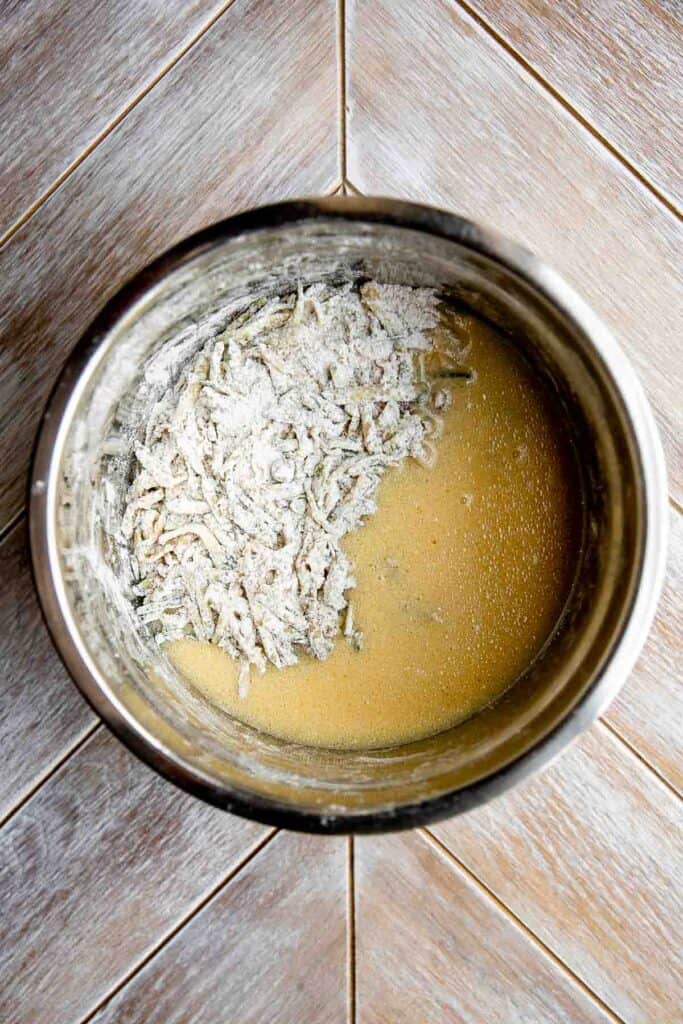
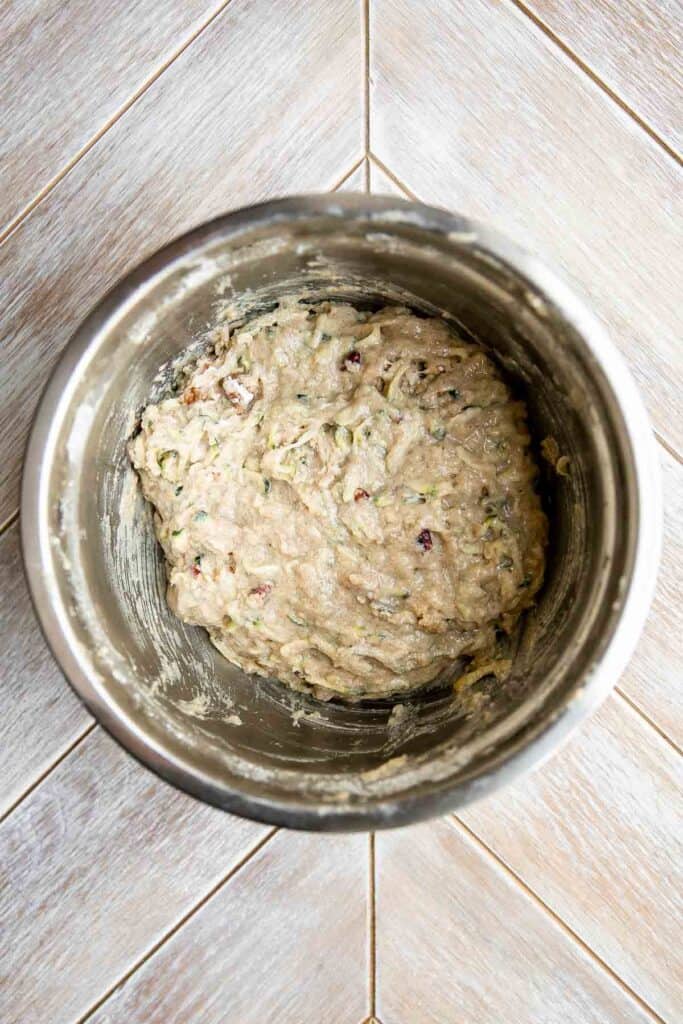
- Pour into pan. Lightly grease a 9x5-inch pan (1 pound loaf pan) with some cooking oil or butter. Pour the batter into the prepared loaf pan and smooth out the top with a spatula or the back of a spoon.
- Bake. Bake in a 350F preheated oven for 55-60 minutes on the middle rack until golden brown and a toothpick inserted into the center of the cake comes out clean.
- Rest and serve. Let cool for 10-15 minutes, then invert to remove the loaf. Place on a wire cooling rack to cool completely. Slice and serve.
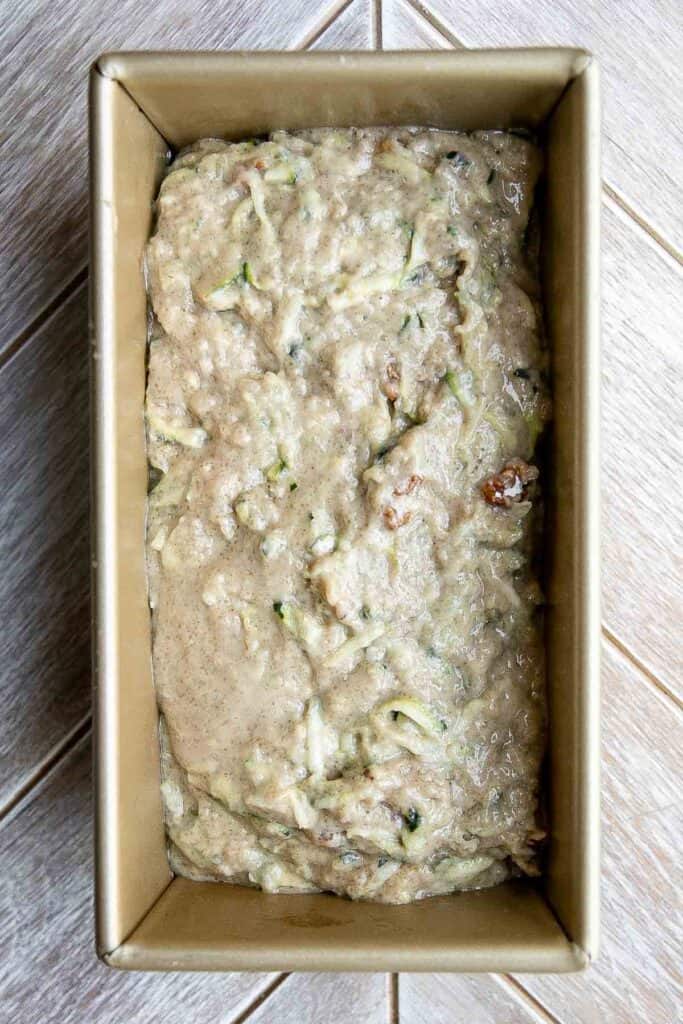
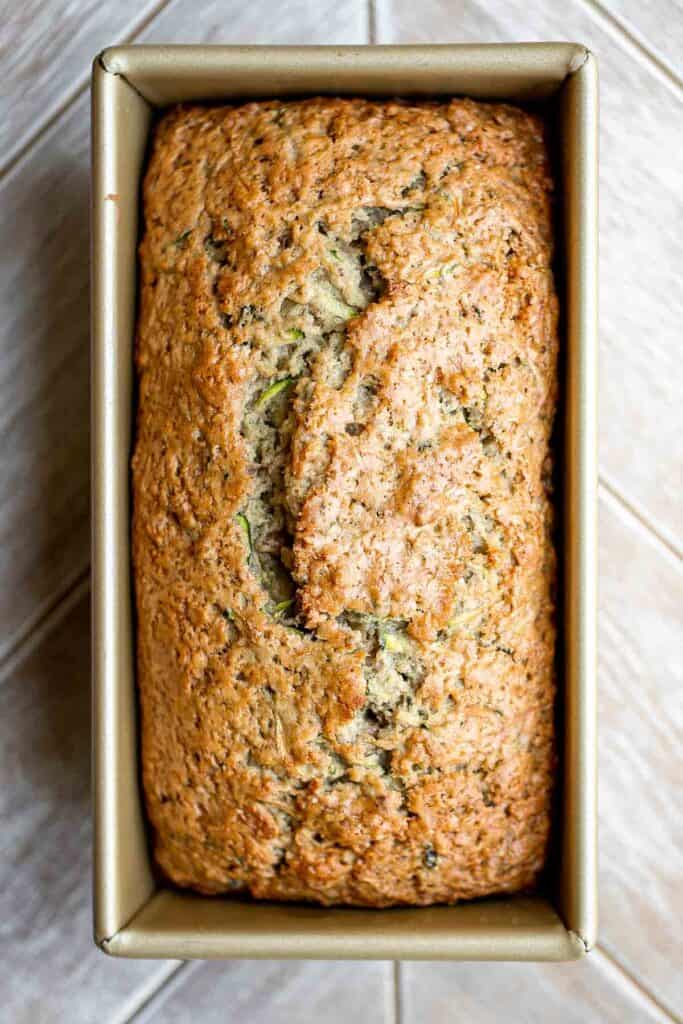
How to Serve
Serve zucchini bread is delicious served warm, at room temperature, or cold. I like serving it with tea or coffee. Try it with:
Storing Instructions
- How to store: Zucchini bread is best kept at room temperature in an airtight container or wrapped tightly in aluminum foil for up to 2-3 days. This will keep it fresh and moist. You can also store zucchini bread longer in the refrigerator. Allow it to cool to room temperature first, then cover tightly with plastic cling wrap to retain moisture. Store in the refrigerator for up to one week.
- How to freeze: Once cooled to room temperature, wrap the whole zucchini bread (or individual slices) in plastic cling wrap and place into a freezer bag or airtight container. Freeze for up to three months. Thaw frozen zucchini bread by transferring it into the refrigerator overnight.
- How to reheat: If you'd like to reheat your zucchini bread, place the slices you want into the microwave and heat in 20 second increments until warmed through.
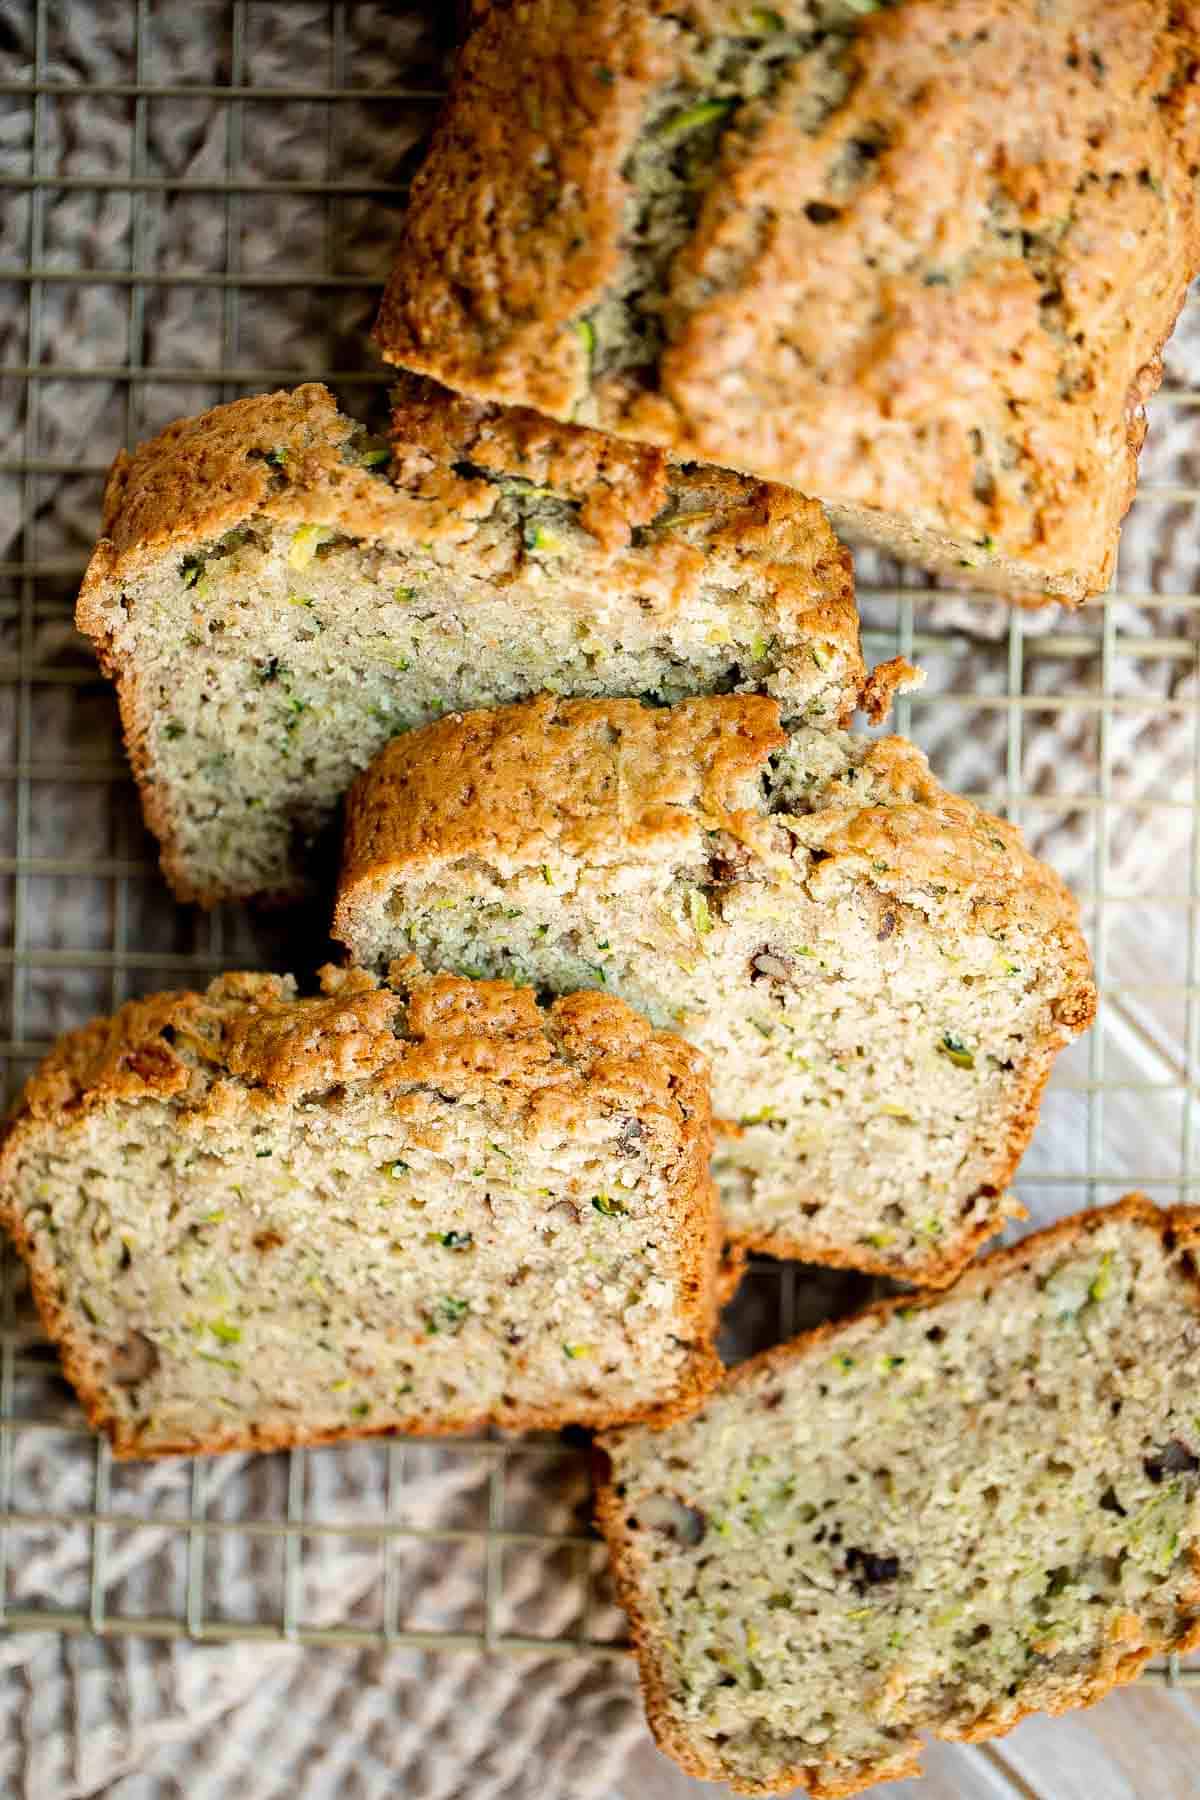
More Zucchini Recipes
- Zucchini Muffins
- Chocolate Zucchini Cake
- Zucchini Bites
- Zucchini Fritters
- Baked Zucchini with Marinara
- Chocolate Chip Zucchini Muffins
Tried this recipe?
I'd love to hear what you think! Leave a comment and rating below to share your feedback. Your reviews help others discover this recipe and help me keep creating more free recipes for you. Snap a photo and tag me on social media @aheadofthyme too.
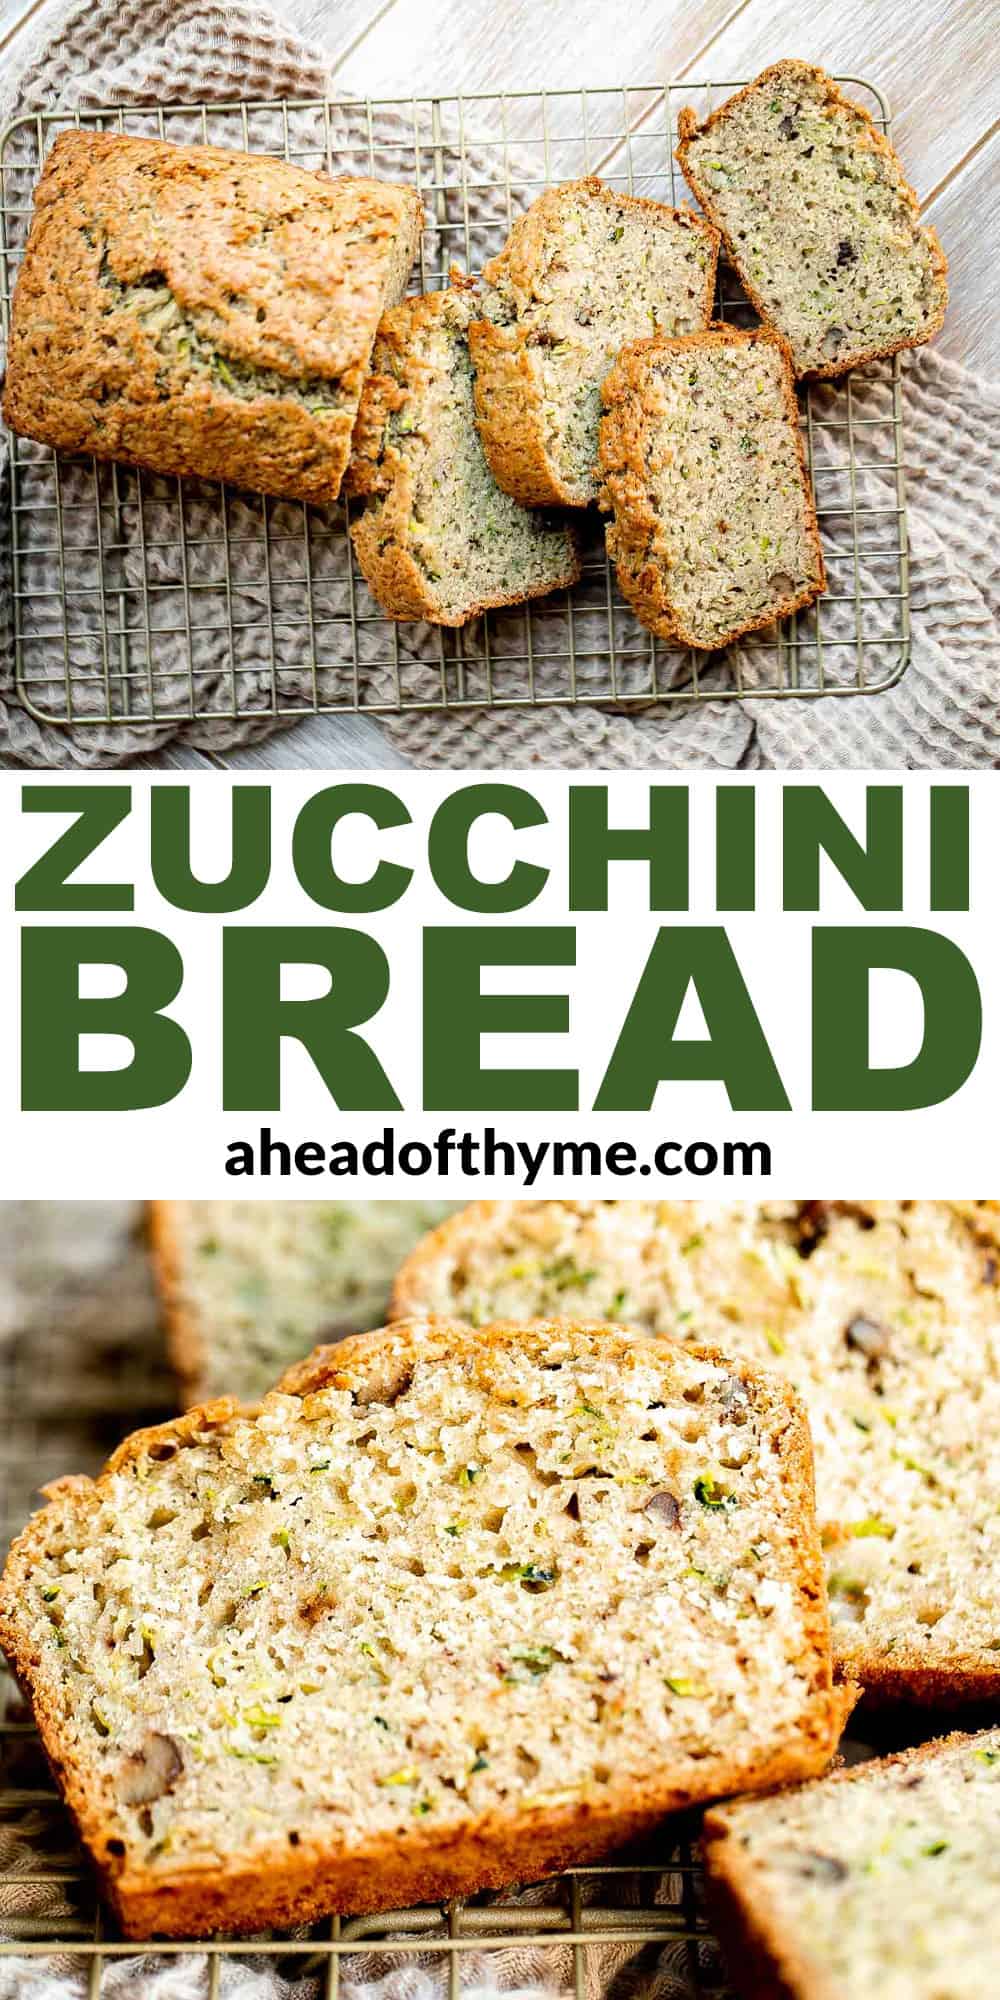
Roasted Broccoli Grilled Cheese Sandwich
Take your grilled cheese game to the next level with this Roasted Broccoli Grilled Cheese Sandwich made with crispy baked broccoli, sweet red peppers, two types of melty cheese and a drizzle of balsamic glaze. Once you try this vegetarian sandwich, you may never want to eat broccoli any other way!
Serve this broccoli sandwich on its own or pair it with a soup and salad for a complete meal. It's perfect for a quick and easy lunch or dinner that even the kids will love - and a great way to sneak in some veggies into their diet!
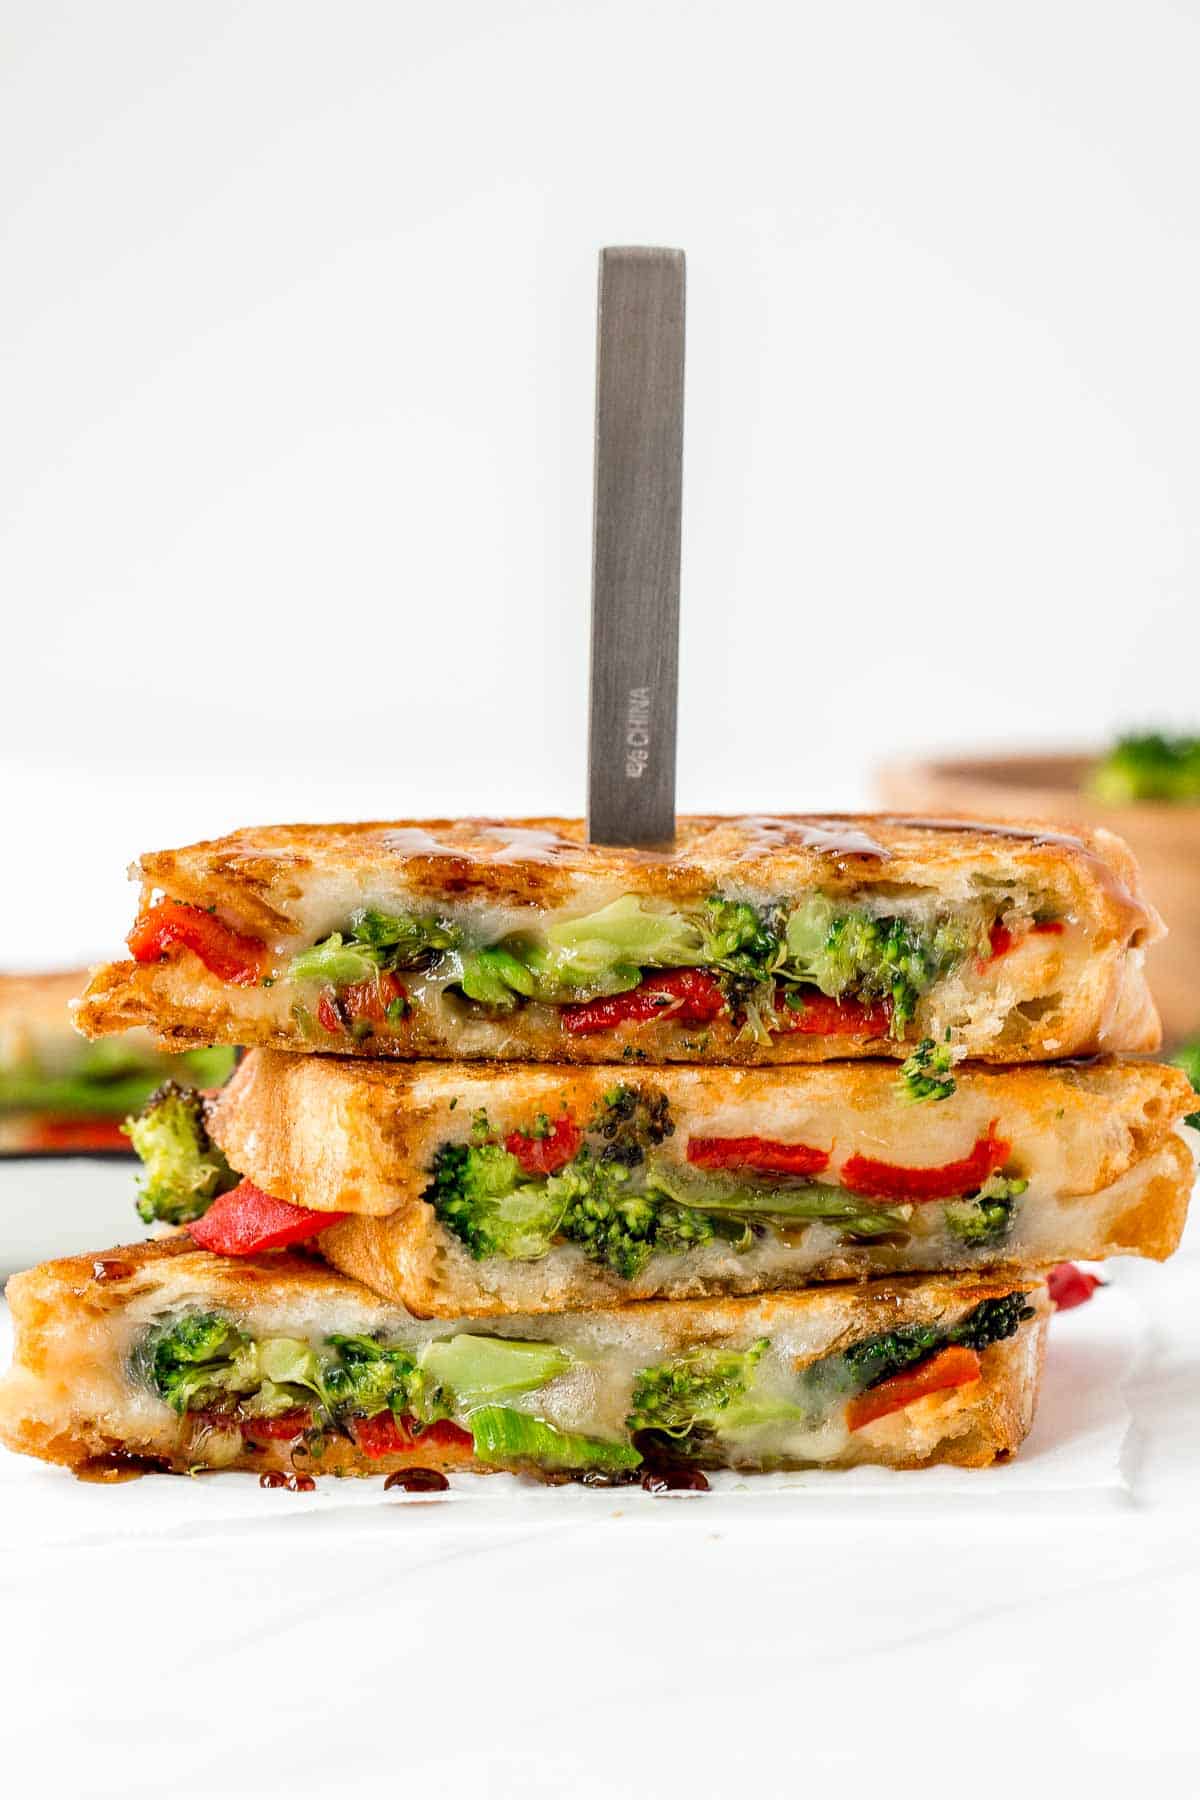
Why You'll Love this Roasted Broccoli Grilled Cheese Sandwich
- It's quick and easy to make. This broccoli cheese melt takes just 30 minutes to make including prep, roasting the broccoli, and grilling. It's perfect for a quick lunch, an after school snack, or even for a kid-friendly dinner.
- Loaded with veggies. This broccoli sandwich is a great way to sneak in some veggies into your diet. It's loaded with roasted broccoli and roasted red peppers all smothered in melty gooey cheese which makes it so delicious! Broccoli and cheddar cheese are already such a wonderful pairing that it makes sense to throw them together in a sandwich. But what you might not expect is how something tangy and acidic - roasted red peppers. They totally brighten the flavours of the other ingredients.
- It has the best flavor and texture. Roasting the broccoli adds so much more flavor to it than if you were to just boil them. It's crispy, charred, and delicious. Paired with savory, gooey, melty cheese, crunchy sliced bread, and delicate roasted red peppers, it's the best combination that you may have never known about. But you will be so happy to have discovered it now.

Ingredient Notes
To make this delicious Roasted Broccoli Grilled Cheese Sandwich, you will need the following ingredients (full measurements in recipe card below):
- broccoli - to roast the broccoli, cut them into florets and toss them in some olive oil, salt, and pepper before popping into the oven. You can also substitute with cauliflower in this recipe or a combination of the two.
- butter - for spreading on the bread to get that classic golden brown, crispy exterior.
- ciabatta bread - We love using homemade Ciabatta Rolls or slices of Sourdough Ciabatta Bread. But feel free to use any kind of crusty sliced bread that you have on hand.
- roasted red peppers - we just used roasted red peppers that you can find in a glass jar at the local supermarket. You can also roast your own from scratch in 45 minutes, which is perfect while the broccoli is roasting too. Check the full instructions in our Roasted Red Pepper and Tomato Soup recipe. If you don't have roasted peppers in the house, you could add sliced tomatoes instead.
- cheese - we used white cheddar cheese and mozzarella cheese, but you can substitute with any cheese that melts well. Try it with yellow cheddar, provolone, or Monterrey Jack cheese.
- balsamic vinegar reduction - this is optional to drizzle on top. Use store-bought balsamic glaze or make your own balsamic vinegar reduction using balsamic vinegar. Check the full instructions in our Tomato Bruschetta with Balsamic Glaze recipe.
You will also need measuring cups and spoons, half sheet baking pan, and a skillet or griddle.
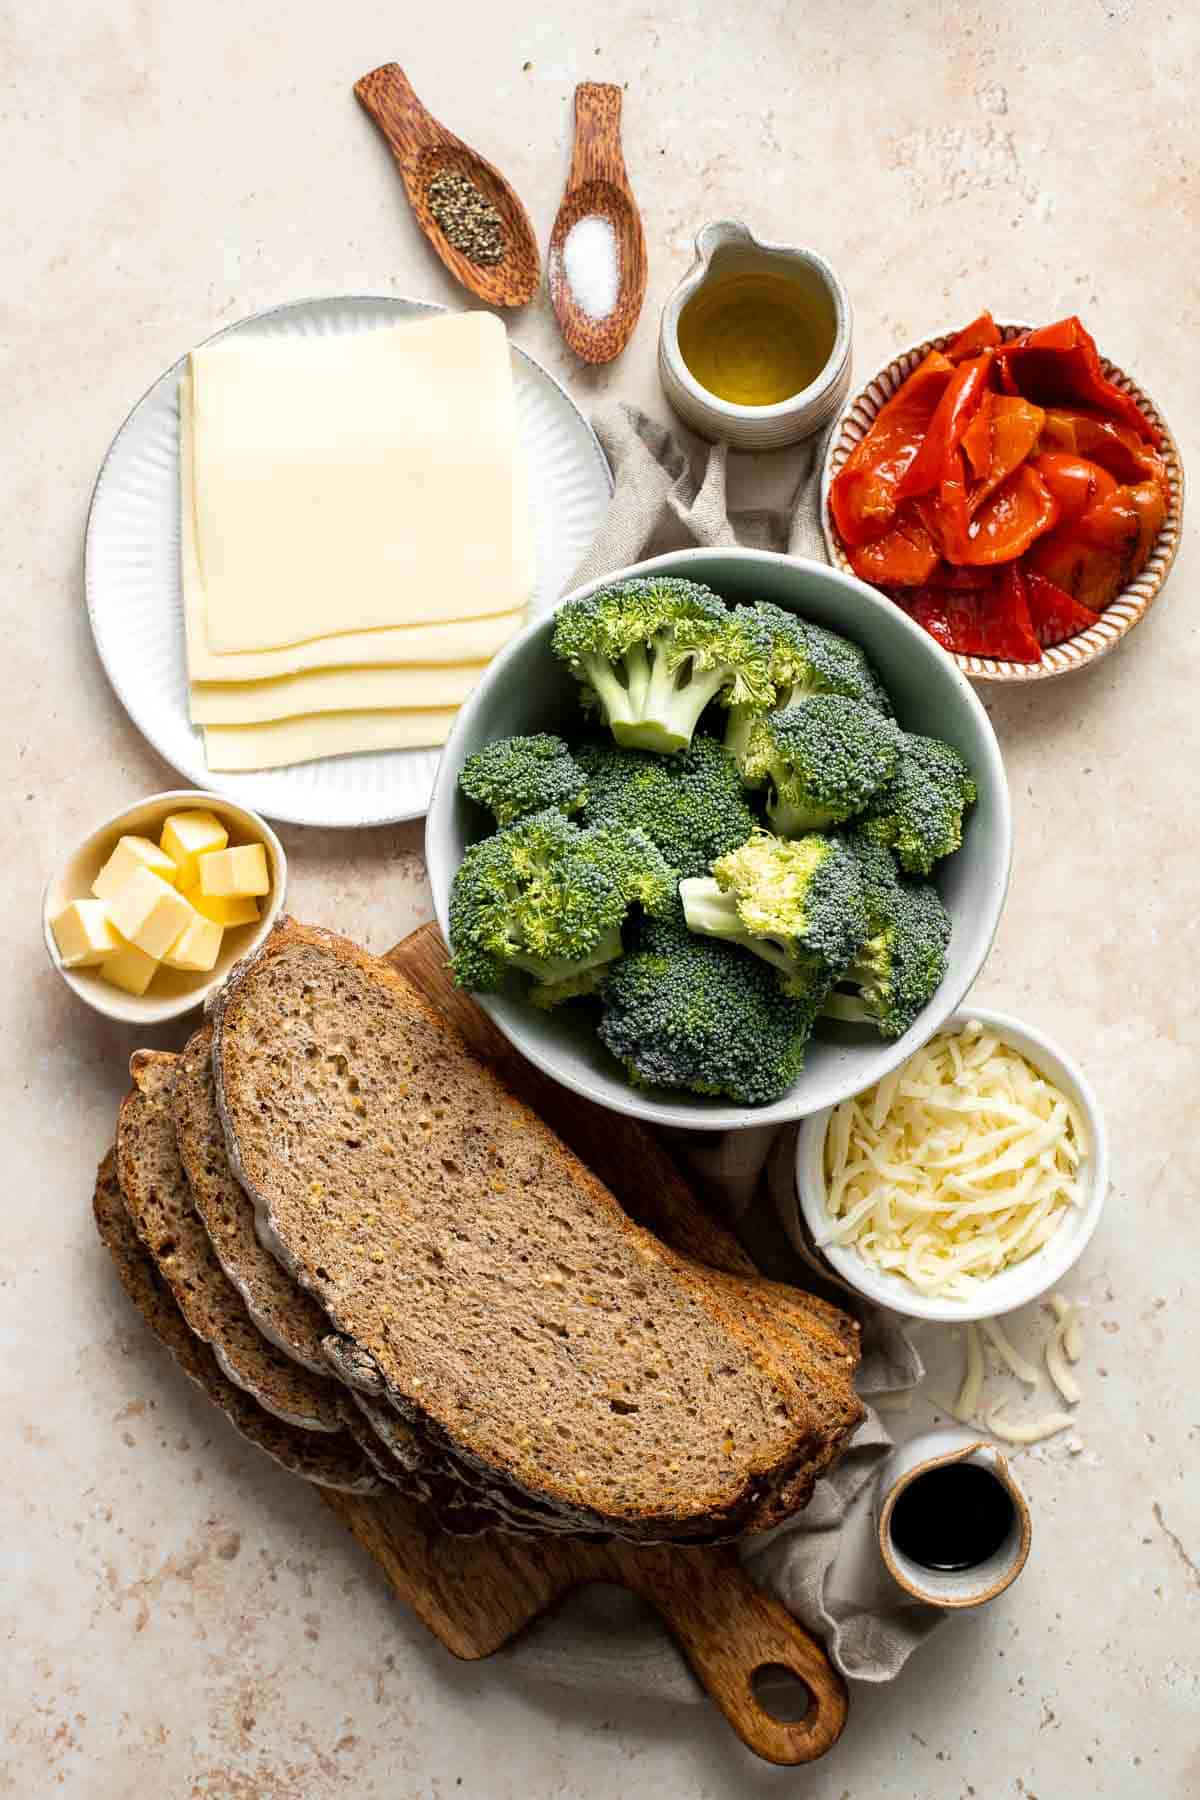
How to Make the Best Roasted Broccoli Grilled Cheese Sandwich
- Roast the broccoli. Place broccoli florets on a large half sheet baking pan. Drizzle with olive oil, salt, and pepper, and toss to combine. Roast in a 400F preheated oven for 12-15 minutes, or until lightly browned and tender. Set aside.
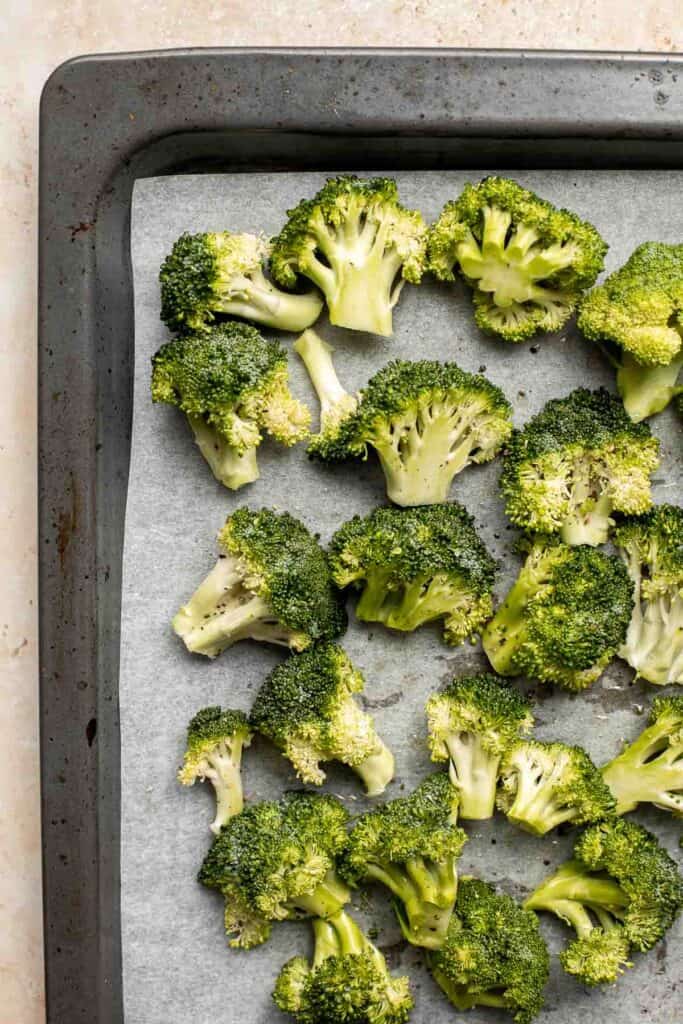
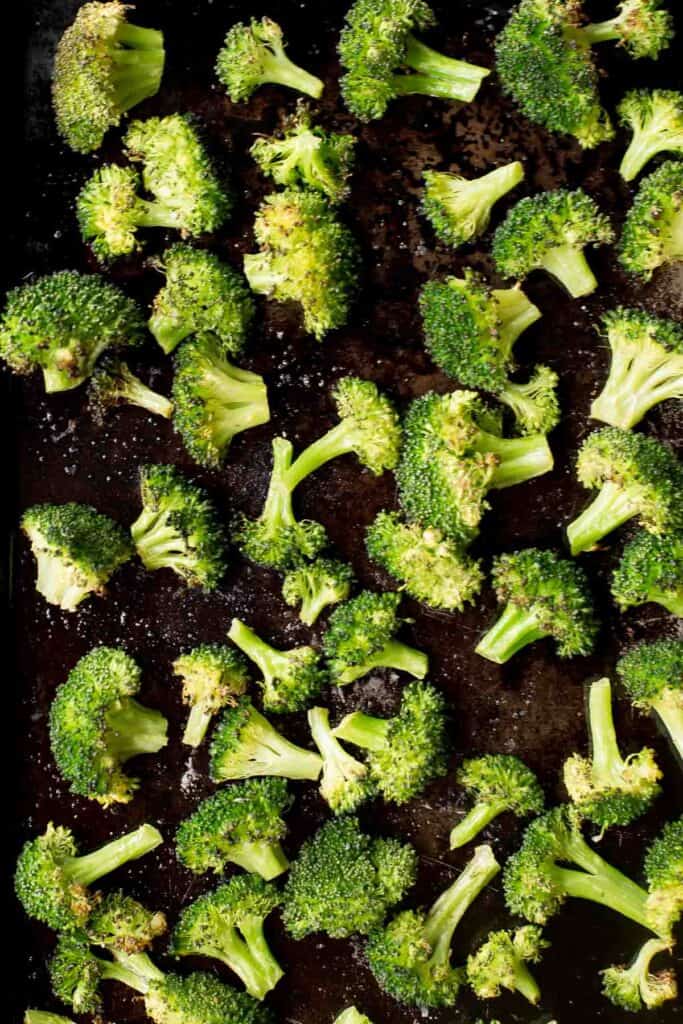
- Spread butter. Spread ½ tablespoon of butter on each of 4 slices of bread and place them on a plate with the butter side facing down.
- Assemble the sandwiches. Divide cheddar cheese equally onto 2 of the slices. Top those same 2 slices with an even layer of roasted broccoli, a few slices of roasted red peppers, and shredded mozzarella. Top each with the remaining slice of bread (butter side on top).
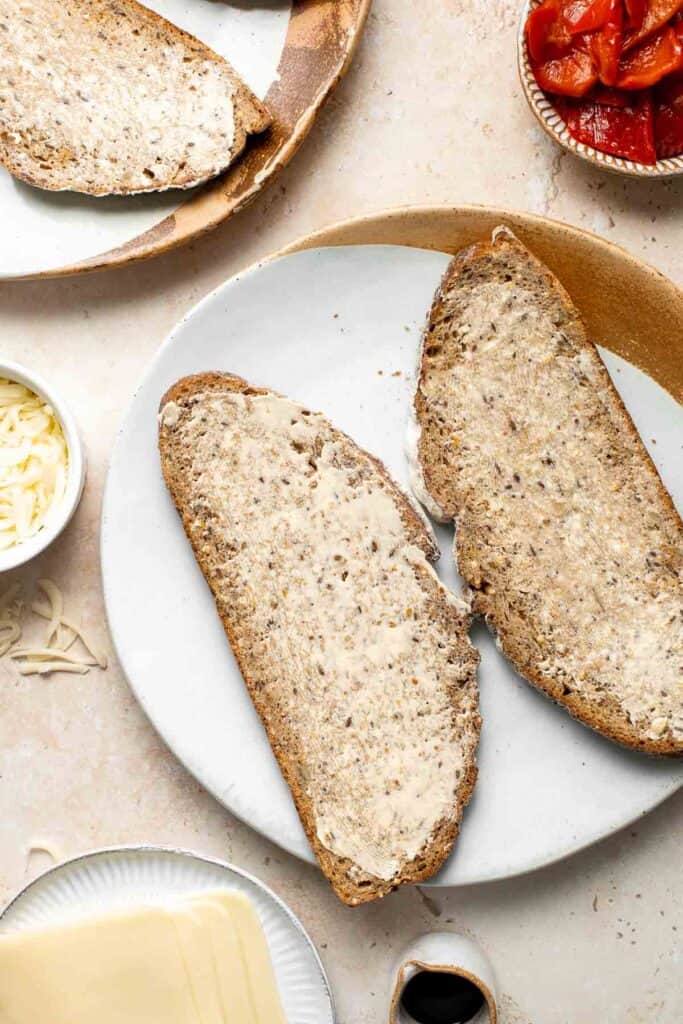
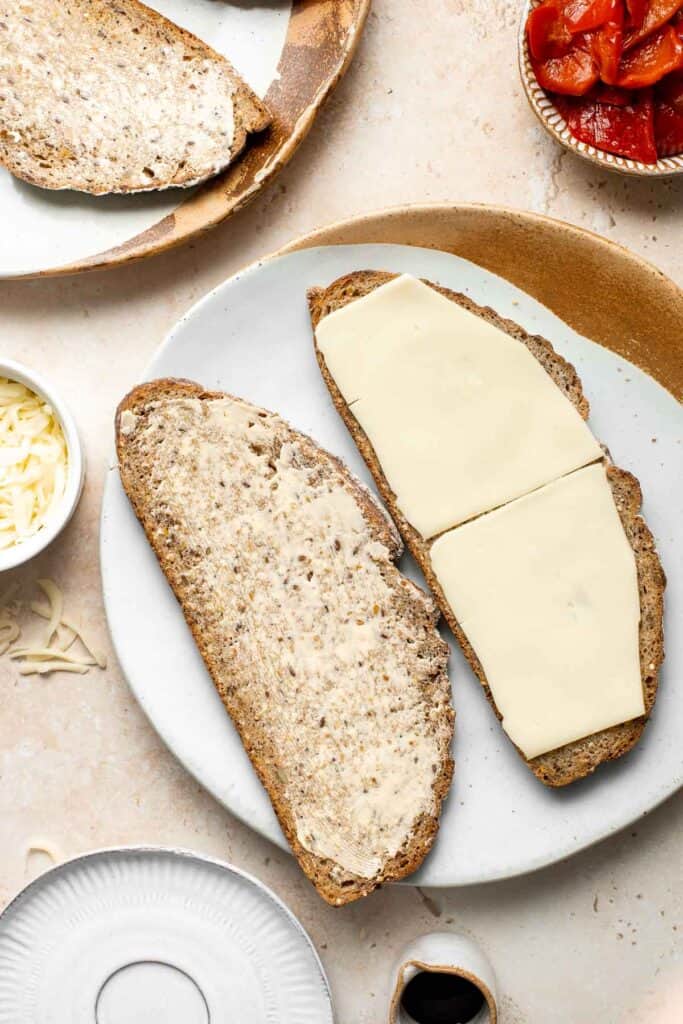
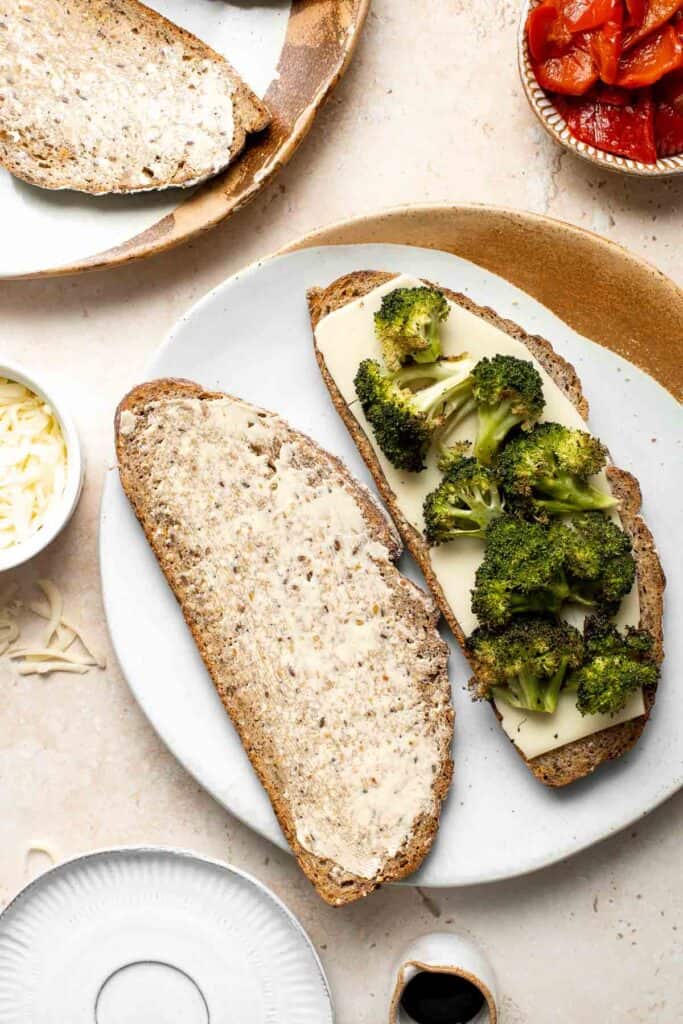
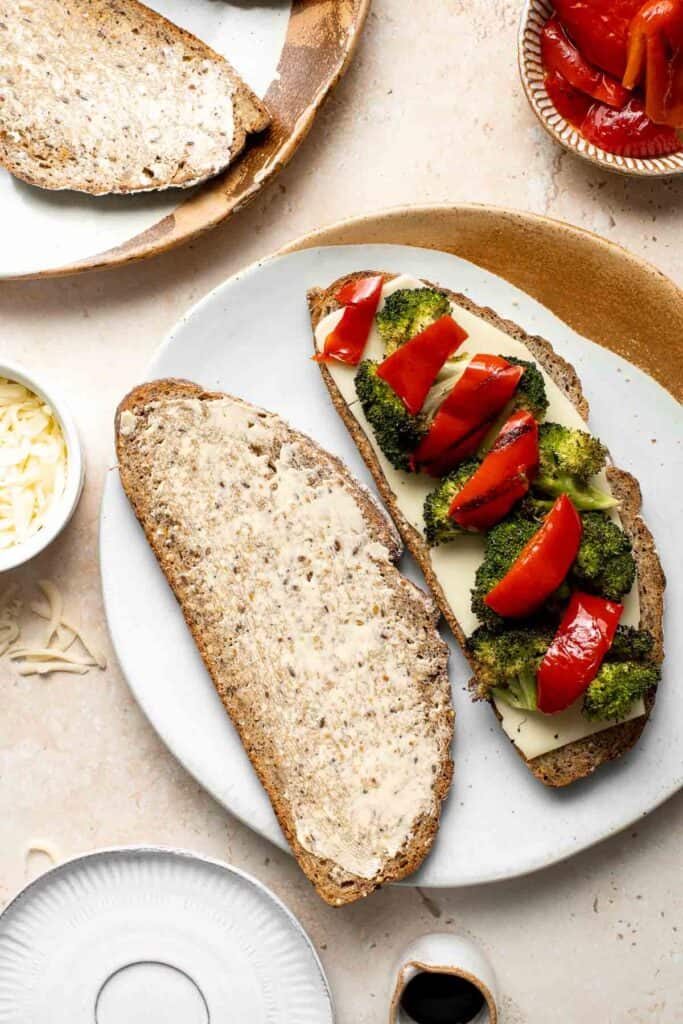

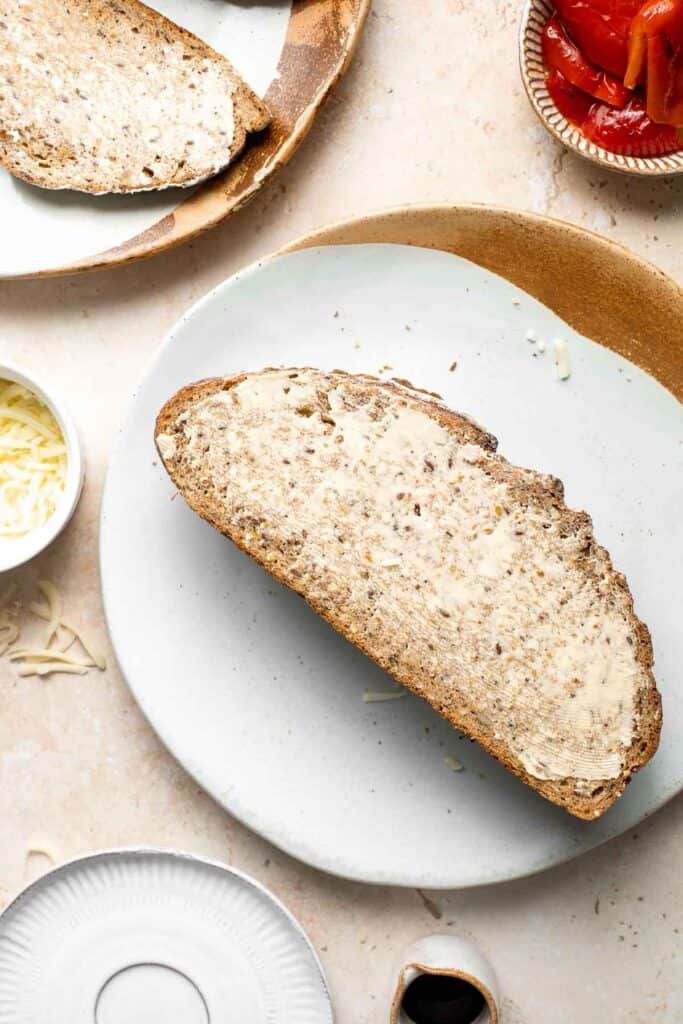
- Grill the sandwiches. Heat a large skillet or griddle pan over medium heat until it's hot, about 2 minutes. Add the sandwiches and cook for 3-5 minutes, until golden brown. Flip sandwiches and cook without any weight on top for another 2-3 minutes, until just browned.
- Serve. Slice in half, drizzle with balsamic vinegar reduction (if using), and serve immediately.
Secrets to the Perfect Crispy Grilled Cheese
- Use a skillet or griddle. While it may be tempting to bake the sandwiches in the oven since you can just pop them in there without monitoring and it will taste delicious - but you won't get that same classic texture that we want.
- Weigh down the grilled cheese sandwich. Place something heavy on top (like a cast-iron skillet) when you are cooking the broccoli grilled cheese. This helps to disperse the weight even to help the sandwich get that browned, crispy crust that makes for the perfect grilled cheese.
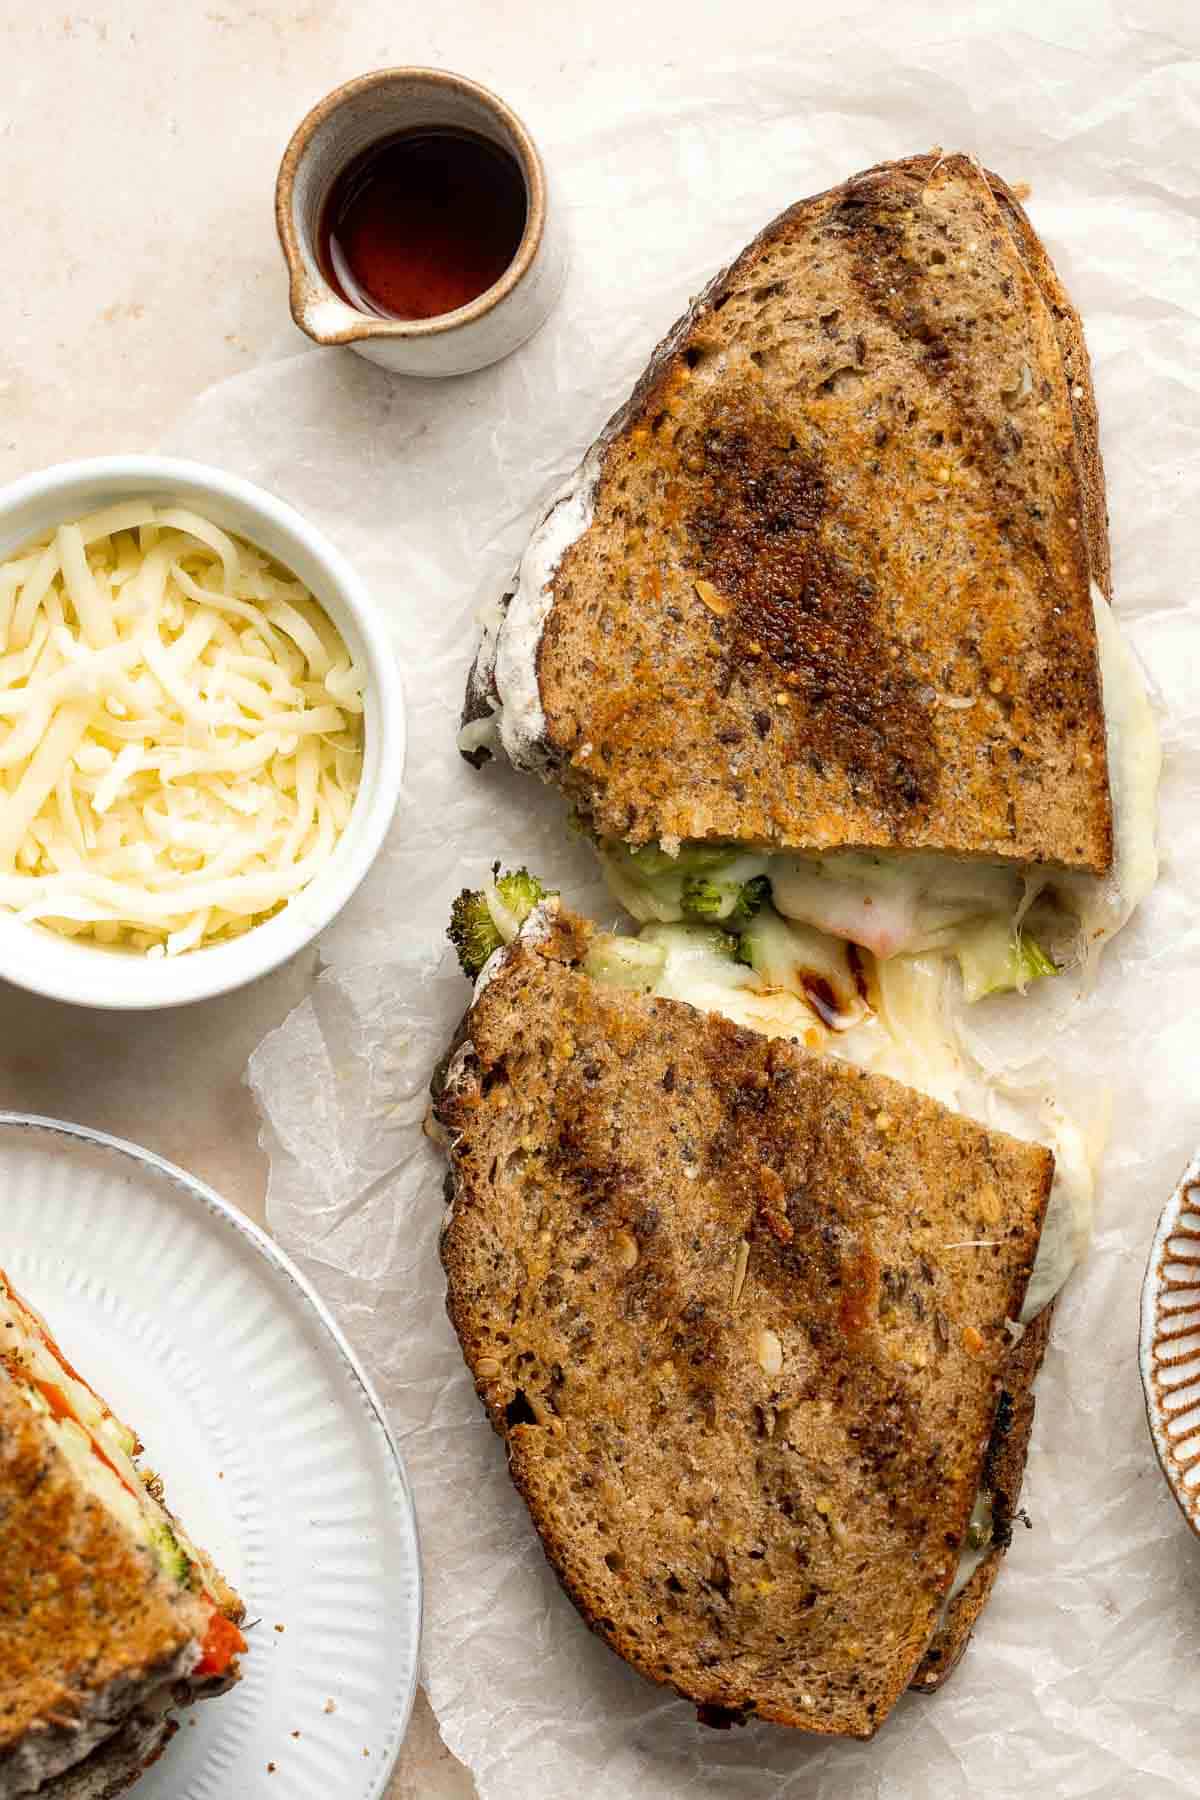
How to Serve
You can serve Broccoli Grilled Cheese on its own for a quick meal. I really like pairing it with a soup and salad for a more complete spread. Some of my favorite side dishes to pair this sandwich with are:
- Roasted Red Pepper and Tomato Soup
- Minestrone Soup
- Caesar Salad
- Tomato Basil Soup
- White Bean Salad
- Greek Pasta Salad
- Beef Wild Rice Soup
- Creamy Turkey Gnocchi Soup
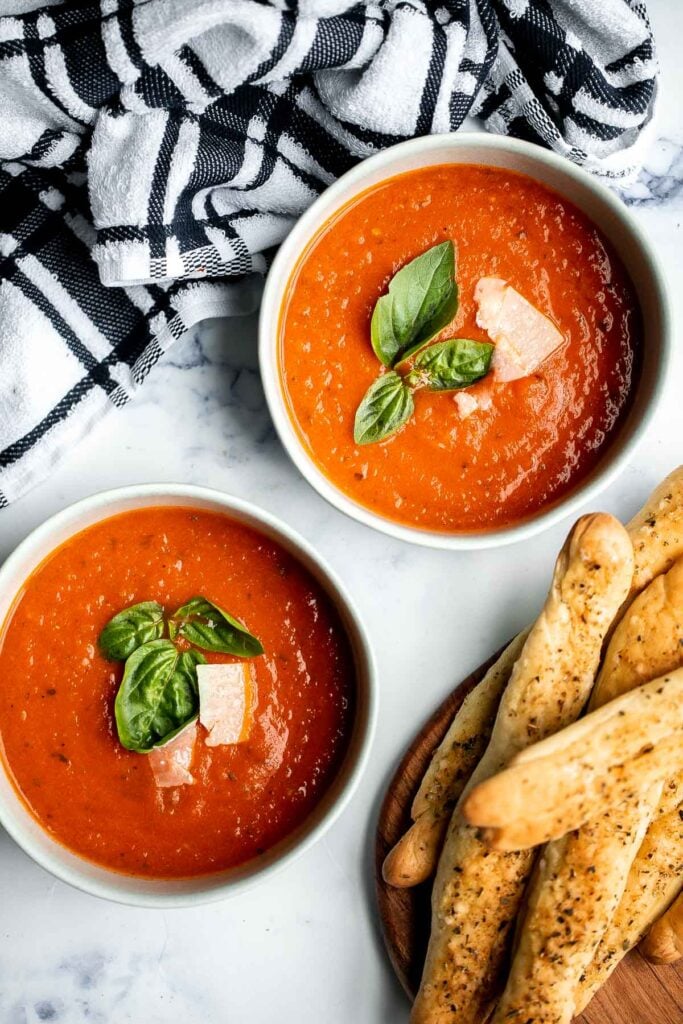
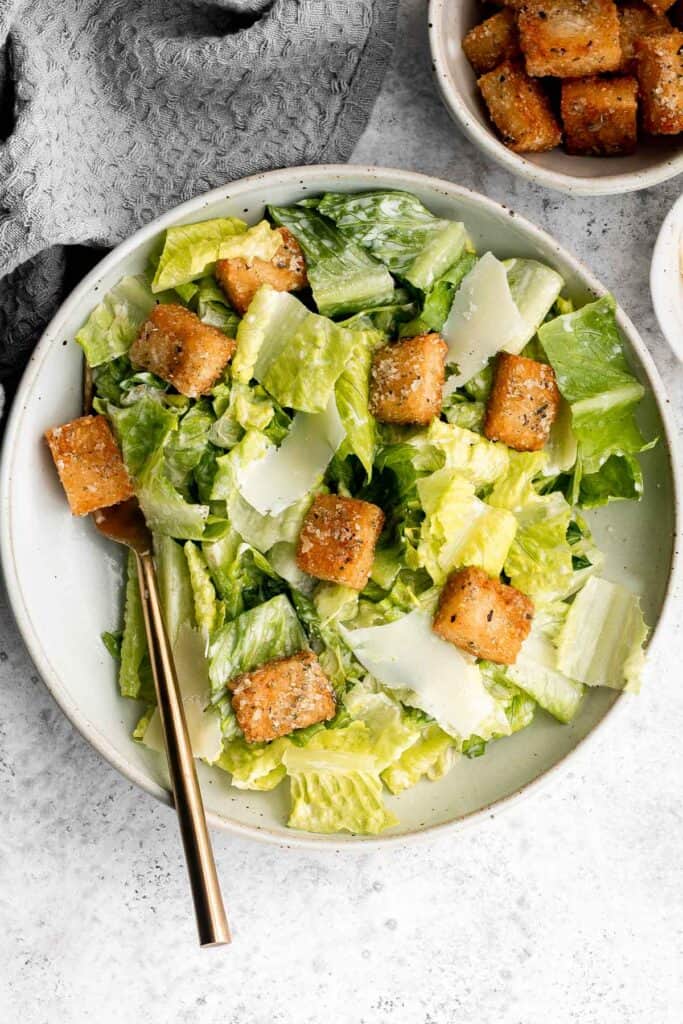
Make Ahead and Storing Instructions
- Make ahead instructions: You can roasted the broccoli, prep your ingredients, and store them in separate airtight containers, or even build your broccoli grilled cheese ahead of time. Wrap with plastic cling wrap or store in an airtight container and store it in the refrigerator for up to 2 days until ready to cook.
- How to store: Roasted broccoli grilled cheese sandwiches are best eaten fresh while the cheese is melty and gooey. However, you can still store it in the fridge for up to 3-4 days in an airtight container.
- How to reheat: The best way to reheat this vegetable grilled cheese after it has been cooked is in the oven. Place the grilled cheese on a baking tray and heat it for 10-15 minutes in a 375F preheated oven (or in the air fryer at 375 F for 5-8 minutes). You can also reheat on the stove over medium-low heat until cheese is melted.
More Sandwich Recipes
- Pita Grilled Cheese
- Tuna Melt Grilled Cheese
- Egg Salad Sandwich
- Lemongrass Chicken Banh Mi Sandwich
- Lobster Rolls
- Greek Chicken Gyros
Tried this recipe?
I'd love to hear what you think! Leave a comment and rating below to share your feedback. Your reviews help others discover this recipe and help me keep creating more free recipes for you. Snap a photo and tag me on social media @aheadofthyme too.

Chia Seed Pudding
Chia Seed Pudding is easy to make with superfood chia seeds, milk, and a little bit of sweetener. It's creamy, delicious, and healthy, loaded with protein, fiber, antioxidants, and healthy fats.
Plus, you can meal prep and make this vegan pudding ahead of time to enjoy for breakfast, lunch, or as a healthy snack all week long. Learn how to make chia seed pudding from scratch today!
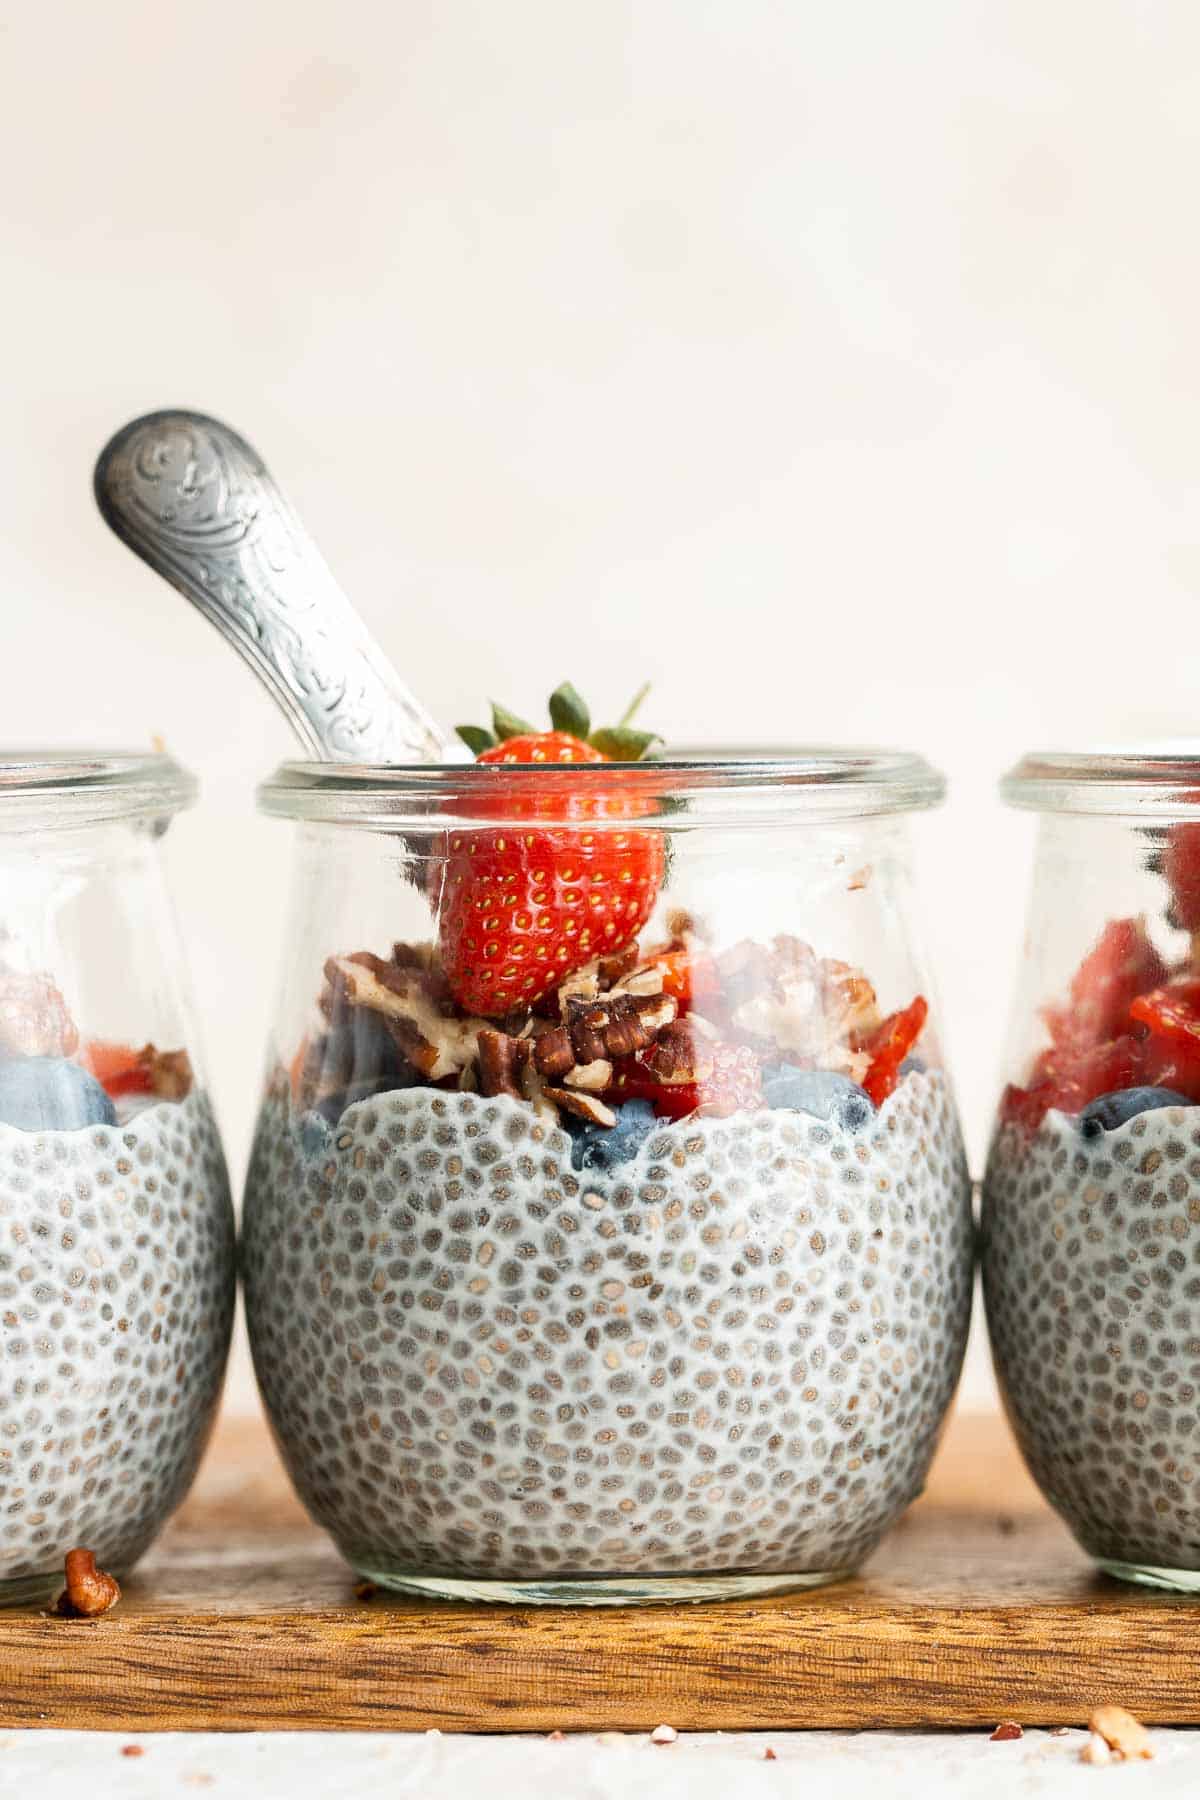
Why You'll Love this Chia Seed Pudding
- The healthiest pudding ever. Pudding is one of my favorite treats, whether it's Vanilla Pudding or Banana Pudding, I rarely say no to a bowl. But unlike these sweeter puddings, this chia seed pudding is vegan, dairy-free, gluten-free, and refined sugar-free - making it healthier and still totally delicious.
- Chia seeds are a superfood. The superfood chia seeds is what makes this pudding so healthy. I am all about this chia seed craze that has been going on the last few years and I am proud to take every opportunity to incorporate these seeds into all types of recipes - drinks, desserts, and smoothies. Chia seeds are full of protein, fiber, antioxidants, and omega-3 healthy fatty acids. In fact, it helps to overall lower your risk of developing many health problems.
- It's so easy to make. Making chia seed pudding is ridiculously easy. When chia seeds are combined with liquid, they form a gel-like substance that is similar to the texture of traditional pudding. To make chia seed pudding from scratch, all you need is to combine chia seeds with milk (I used almond milk to keep this recipe vegan) and a liquid sweetener (I used maple syrup to again keep it vegan) and set it aside to thicken for 5 minutes and then shake it and refrigerate.
- Great for meal prep. You can easily make a bigger batch by doubling or tripling the recipe. It stores well in the refrigerator for up to one week, so you can enjoy it for breakfast or lunch all week. You can also store it in the freezer for up to 2 months!
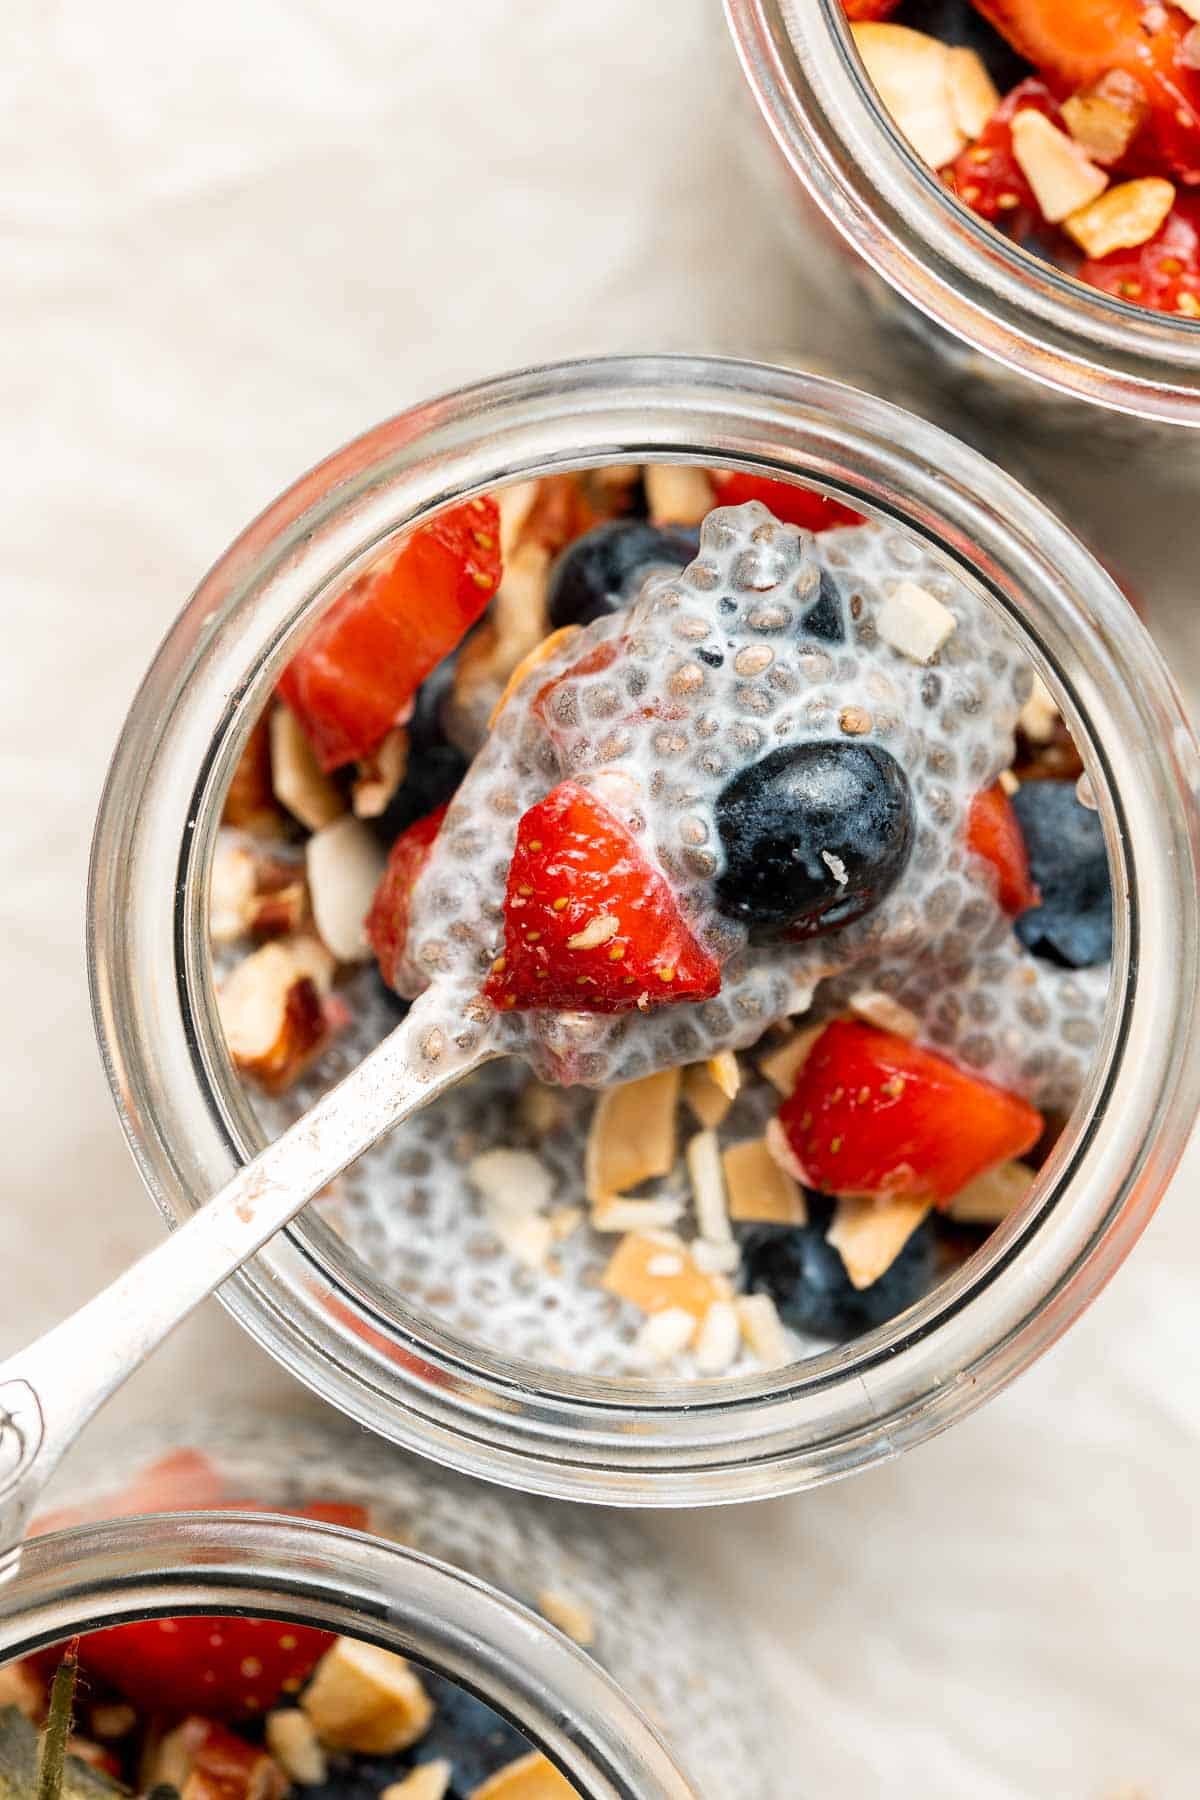
Ingredient Notes
To make easy Chia Seed Pudding, you will need the following ingredients (full measurements in recipe card below):
- chia seeds
- milk - use any dairy or non-dairy milk that you have on hand. Try almond milk soy milk, coconut milk, or rice milk.
- liquid sweetener - you can use maple syrup, honey, or agave syrup.
Toppings for Chia Seed Pudding
- fruit - I love topping chia seeds with berries such as chopped or sliced strawberries, blueberries, blackberries, and raspberries. Add any fruit you like. Some of my other favorites in this recipe are kiwi, mandarin oranges, and mangos.
- granola - if you have some time, I recommend making homemade granola. It takes just a few minutes to prep before you pop into the oven. Depending on the season, top this pudding with Coconut Maple Walnut Granola, Pumpkin Pie Granola, or Gingerbread Granola.
- nuts - add in some almonds, walnuts, pecans, pistachios, or any of your favorite nuts.
- coconut flakes
- maple syrup or honey
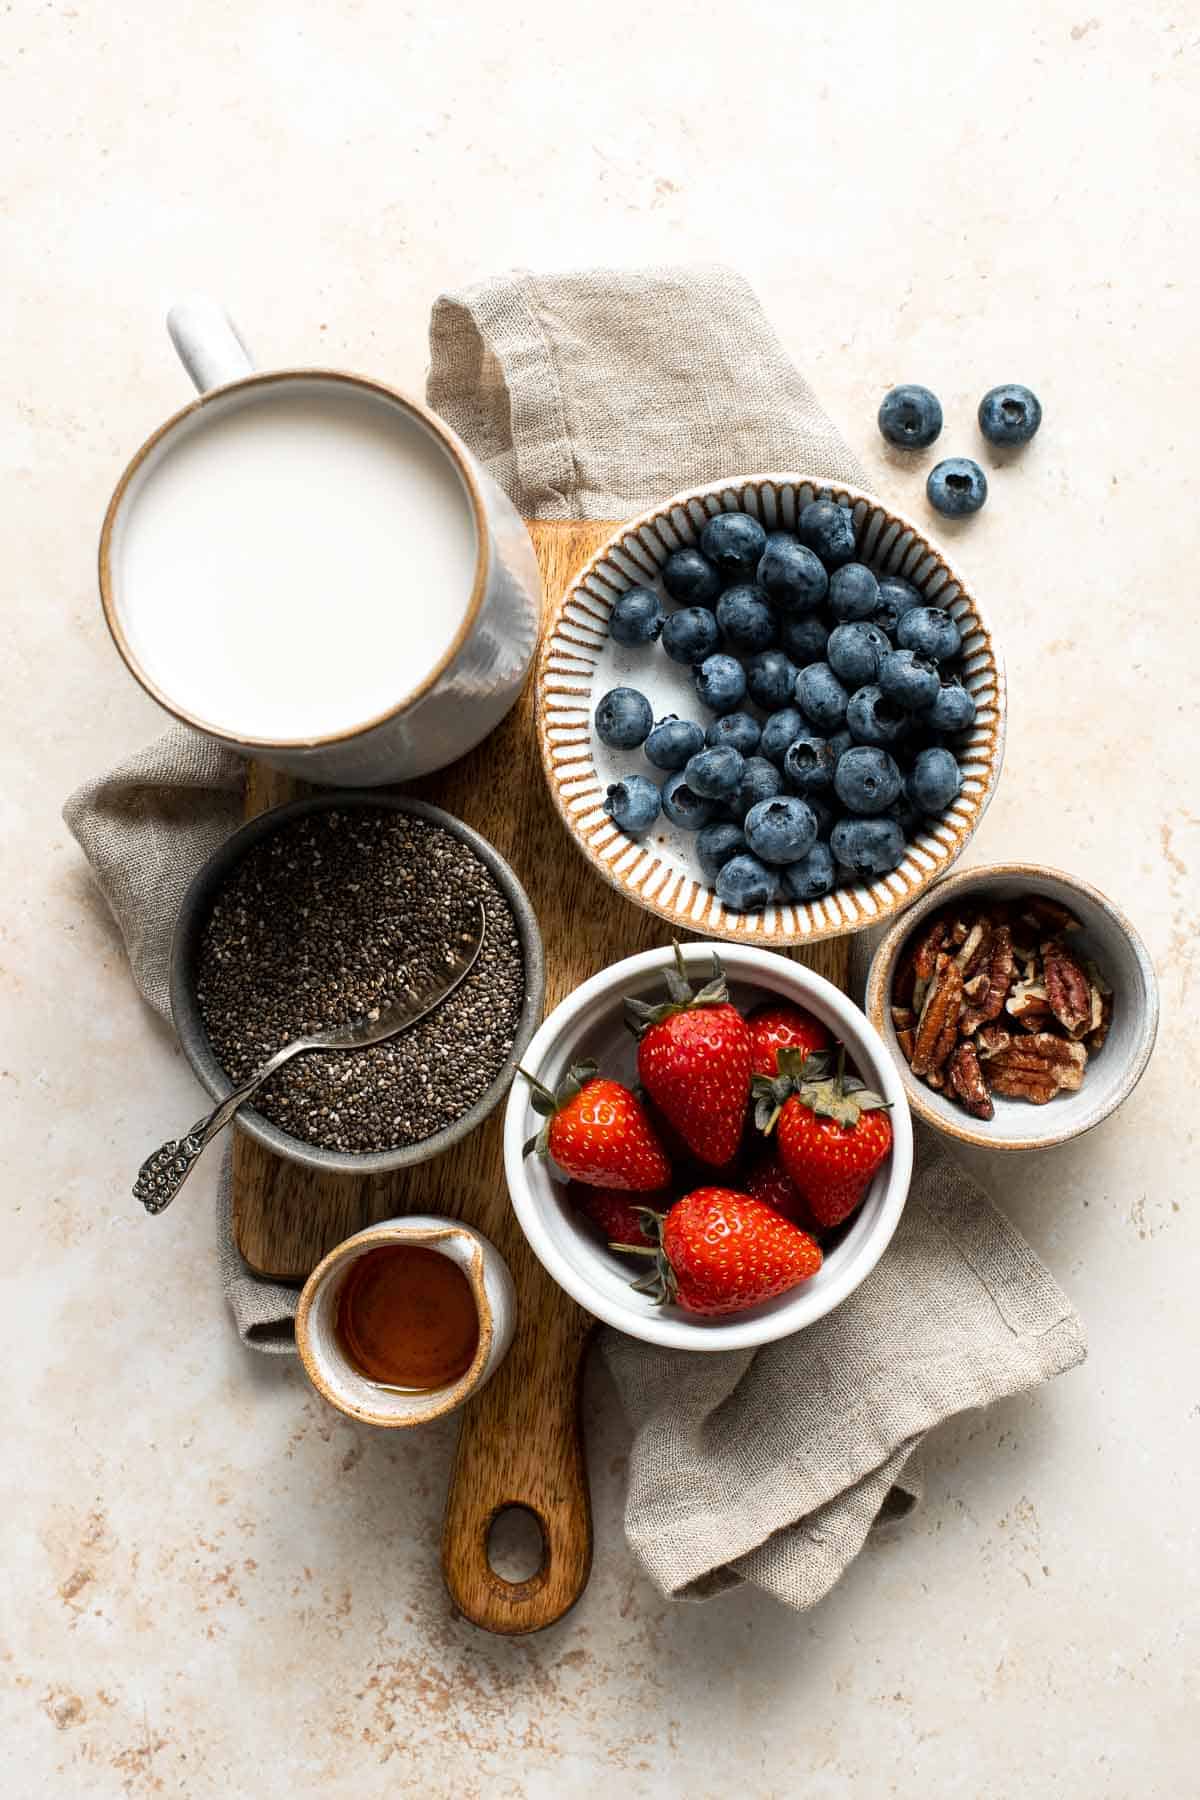
How to Make the Best Chia Seed Pudding
- Combine ingredients. In a large 4 cup mason jar or glass jar with a lid, add chia seeds, milk, and sweetener. Seal the lid and shake to combine. Set the jar down on the counter for 5 minutes to settle. Then shake again to remove any clumps.
- Chill. Transfer the jar to the refrigerator and chill 2 hours, up to overnight.
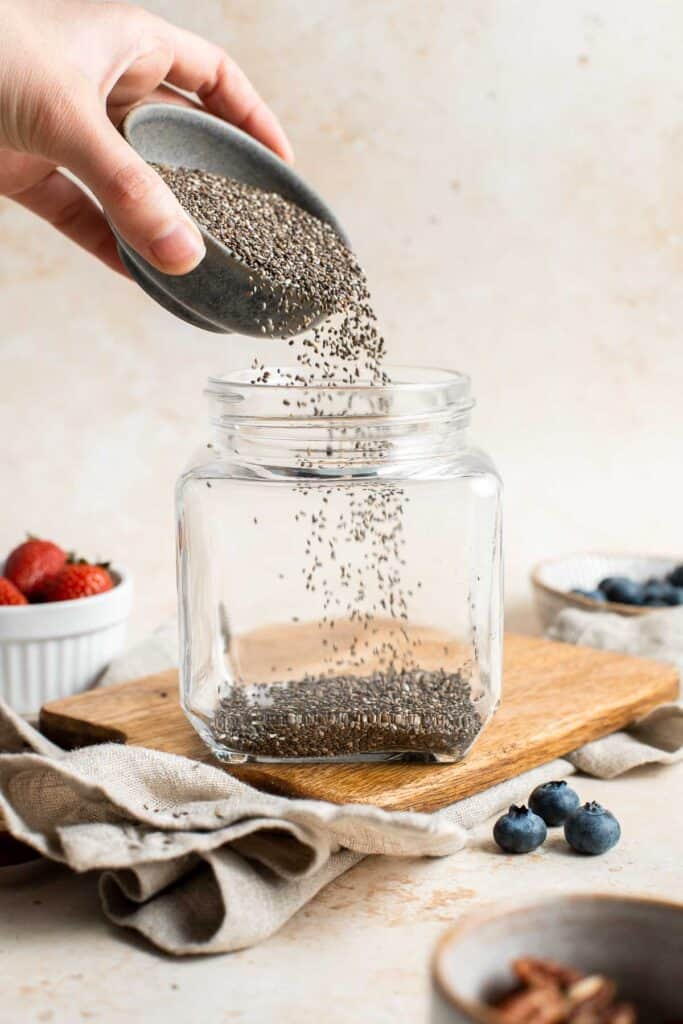
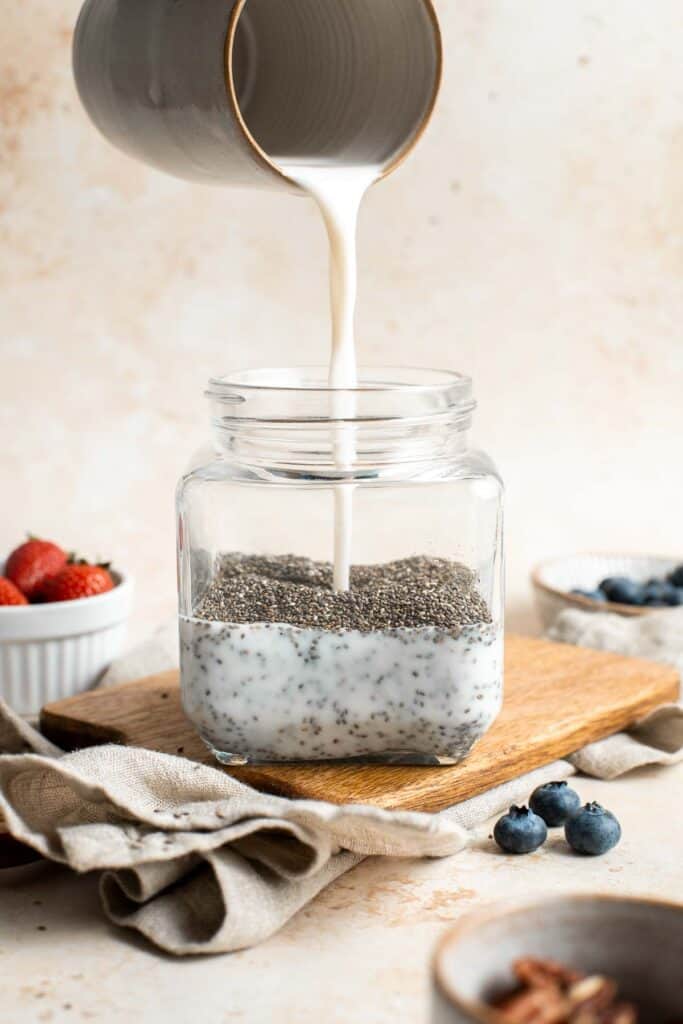
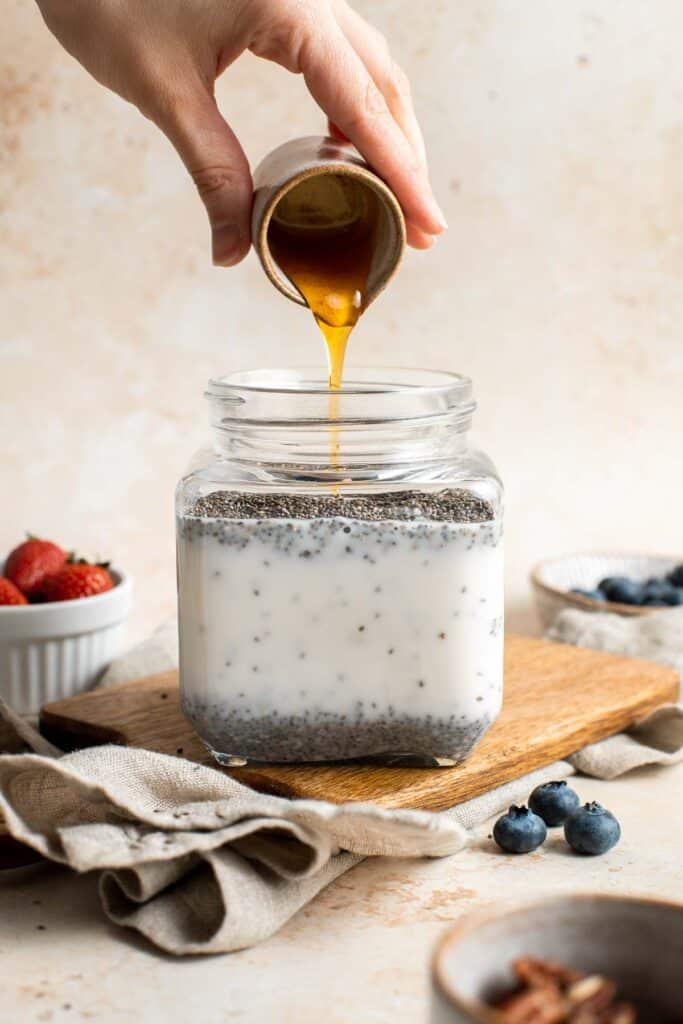
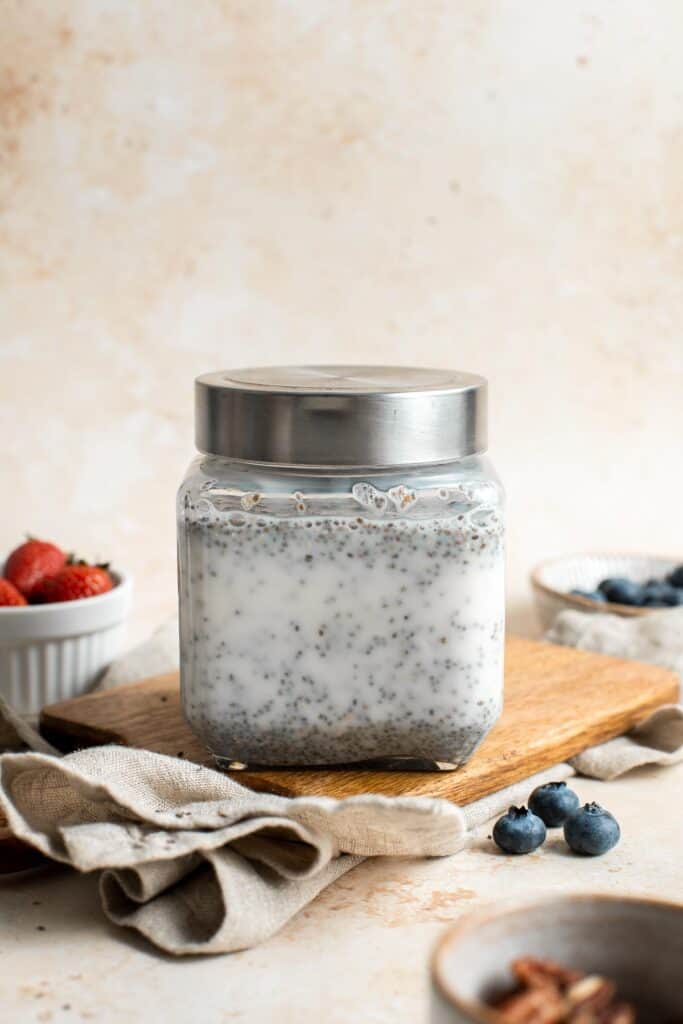
How to Serve
Transfer the chia seed pudding to small glasses or dessert cups and top with your favorite toppings such as fruit, granola, nuts, and/or coconut flakes with a drizzle of maple syrup, and serve.
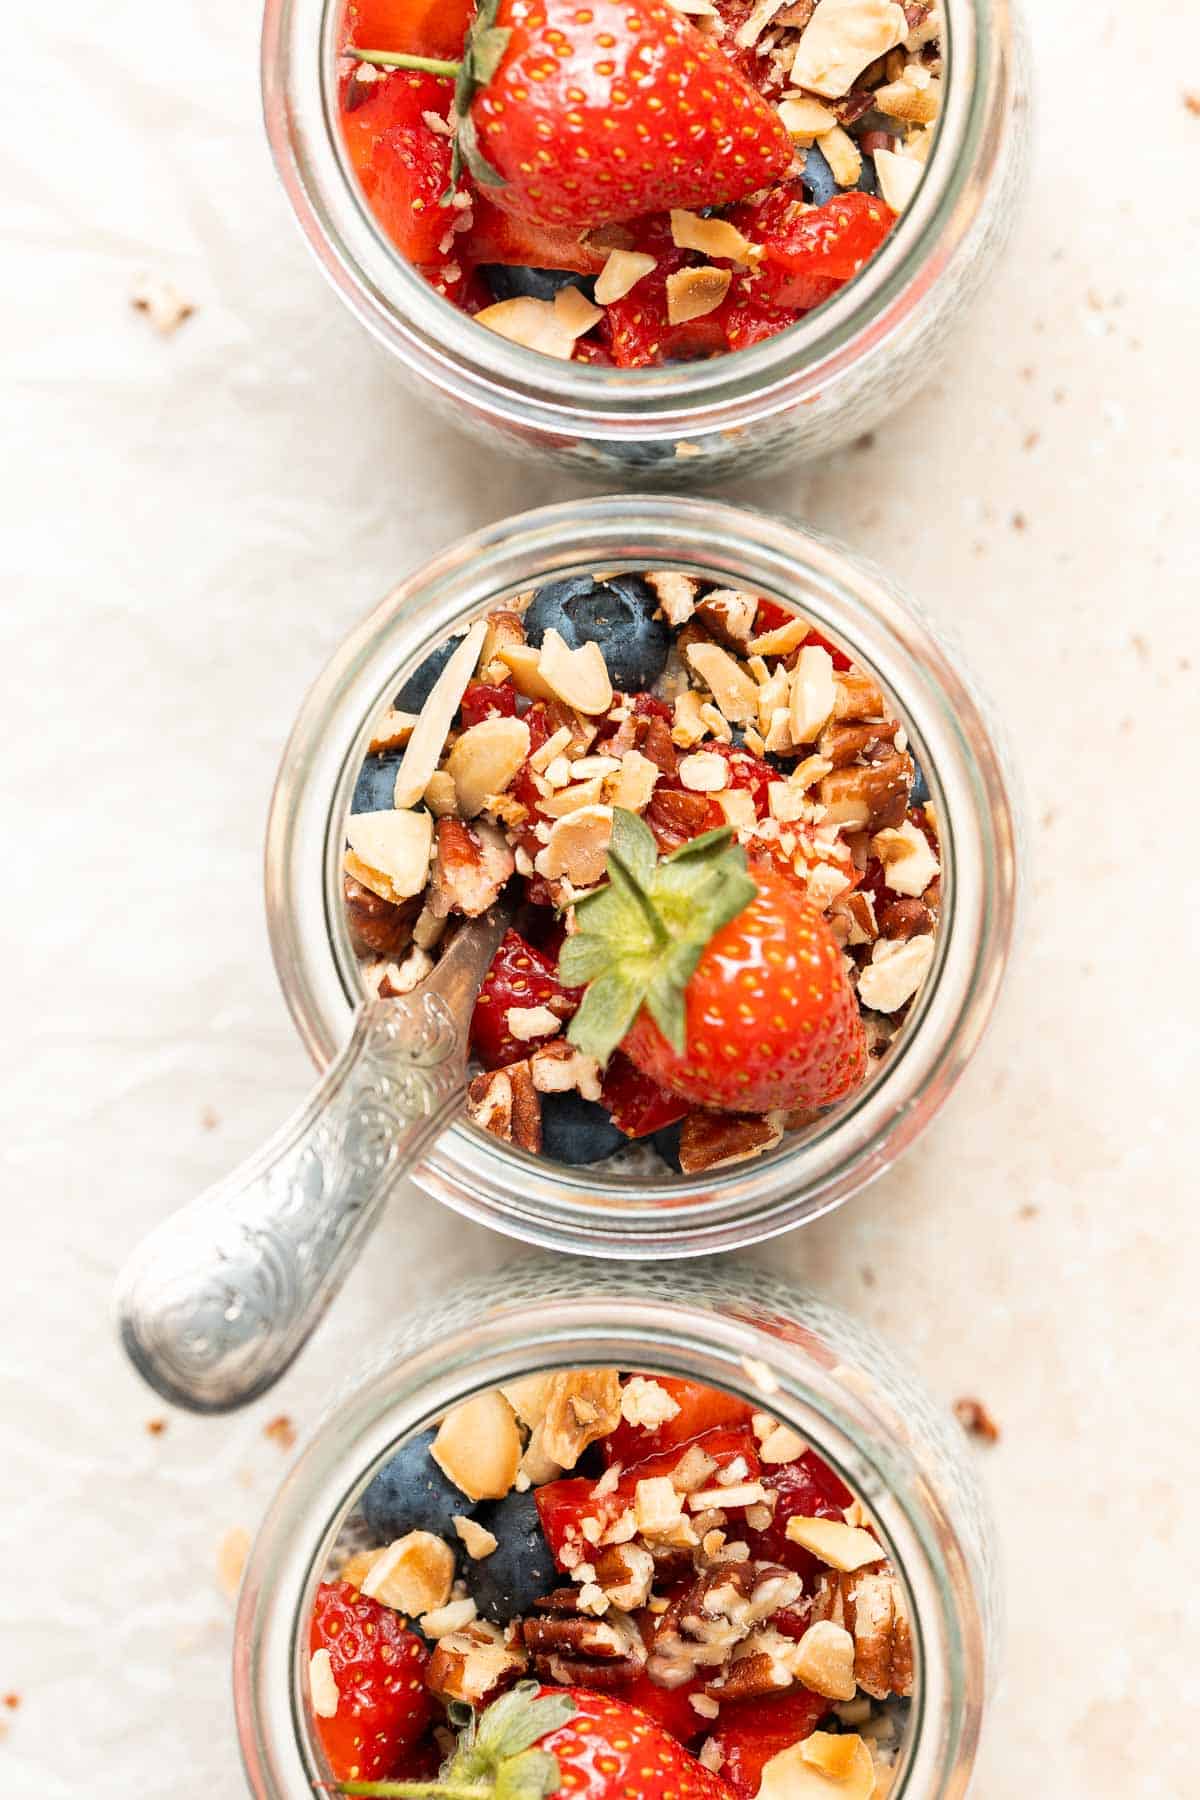
Storing Instructions
- Make ahead instructions: Make a big batch ahead of time and store in the fridge for an easy breakfast or lunch all week. You can also freeze it to last longer.
- How to store: Store chia seed pudding covered in an airtight container in the refrigerator for up to one week.
- How to freeze: Chia seed pudding freezes well! Portion it into small meal prep containers and freeze for up to 2 months. To serve, allow the pudding to thaw overnight in the refrigerator.

More Recipes with Chia Seeds
- Green Smoothie Bowl
- No Bake Protein Energy Bites
- Pineapple Mango Tropical Smoothie Bowl
- Banana Toast with Granola and Honey
Tried this recipe?
I'd love to hear what you think! Leave a comment and rating below to share your feedback. Your reviews help others discover this recipe and help me keep creating more free recipes for you. Snap a photo and tag me on social media @aheadofthyme too.
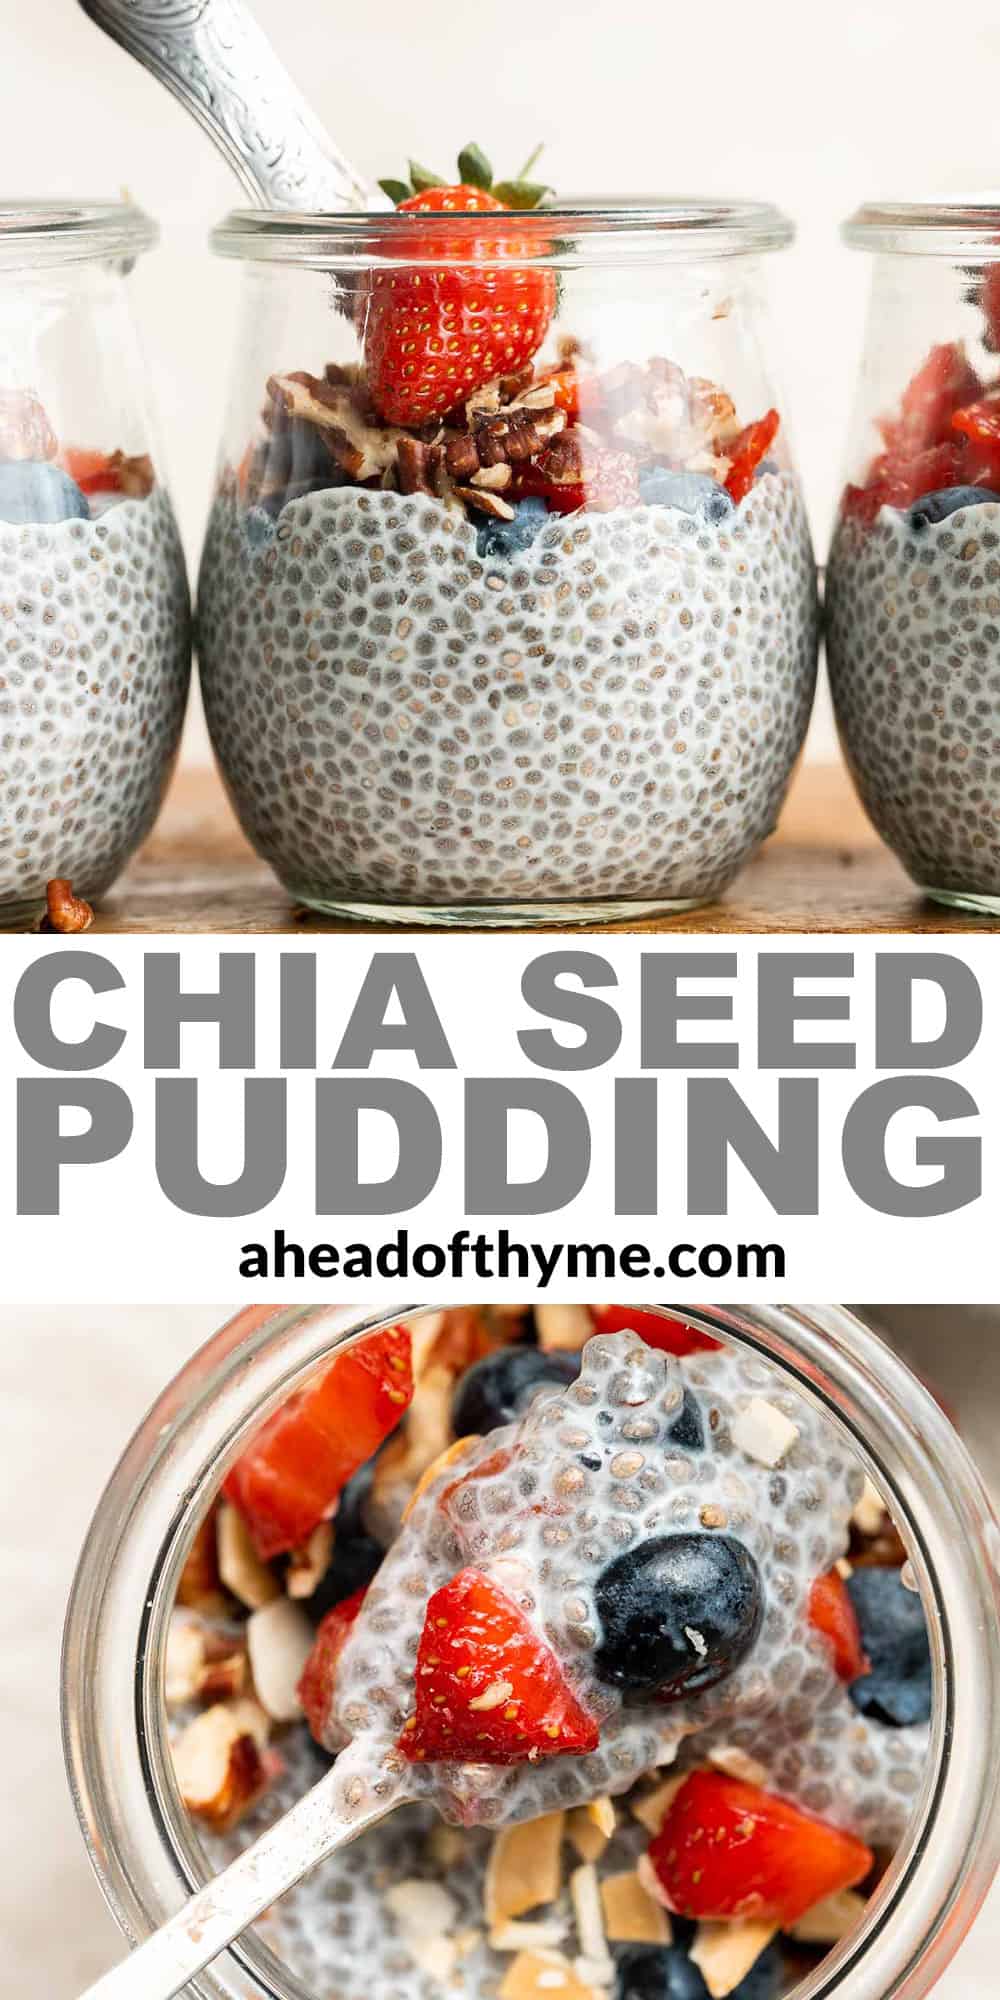
60+ Summer Dinner Ideas

Wondering what to make for dinner on a hot summer night? You know, something that is light, fresh, and packed with seasonal ingredients that are light and fresh. Well, you have come to the right place. We have rounded up over 60 of the best easy summer dinner ideas including quick and easy summer pastas, summer grill recipes, summer seafood, summer salads for dinner, recipes for a summer Mexican fiesta, and more! Plus, many of these recipes are quick and easy 30-minute meals with just a few simple ingredients.

Best Summer Dinners
Pesto Penne Pasta
Quick and easy pesto penne pasta is a simple and light Italian pasta dish made with just five ingredients in under 15 minutes. The easiest summer dinner recipe. If you like this recipe, try Mascarpone Pesto Pasta.

Creamy Lemon Chicken Piccata
Quick and easy, creamy lemon chicken piccata is a simple and delicious 30-minute meal made with tender chicken breast in a light lemon sauce with capers. One of my favorite summer dinner ideas. You can also try Creamy Lemon Parmesan Chicken.

Greek Salmon
Greek salmon is delicious, flaky, and tender. This healthy oven-baked salmon is packed with Mediterranean flavors and is ready in just 20 minutes.
Greek Chicken Gyros with Tzatziki
This refreshing and light, easy Greek chicken gyros is packed with tender souvlaki chicken, Greek salad, and homemade tzatziki sauce, all wrapped in a pita.

Easy Skillet Neapolitan Margherita Pizza
Quick and easy skillet Neapolitan margherita pizza has an iconic thin and soft crust with a perfectly crisp exterior, and simple and fresh toppings. Customize it completely with your favorite toppings, like Mushroom and Arugula Skillet Pizza or Butter Chicken Pizza.

Easy Grilled Shrimp Boil
Easy, garlicky and buttery grilled shrimp boil with prawns, corn, baby potatoes and sausage, seasoned and tossed with parsley takes just 20 minutes to cook. Throw some whole potatoes on the grill too and serve this with some BBQ Chicken Stuffed Baked Potatoes.
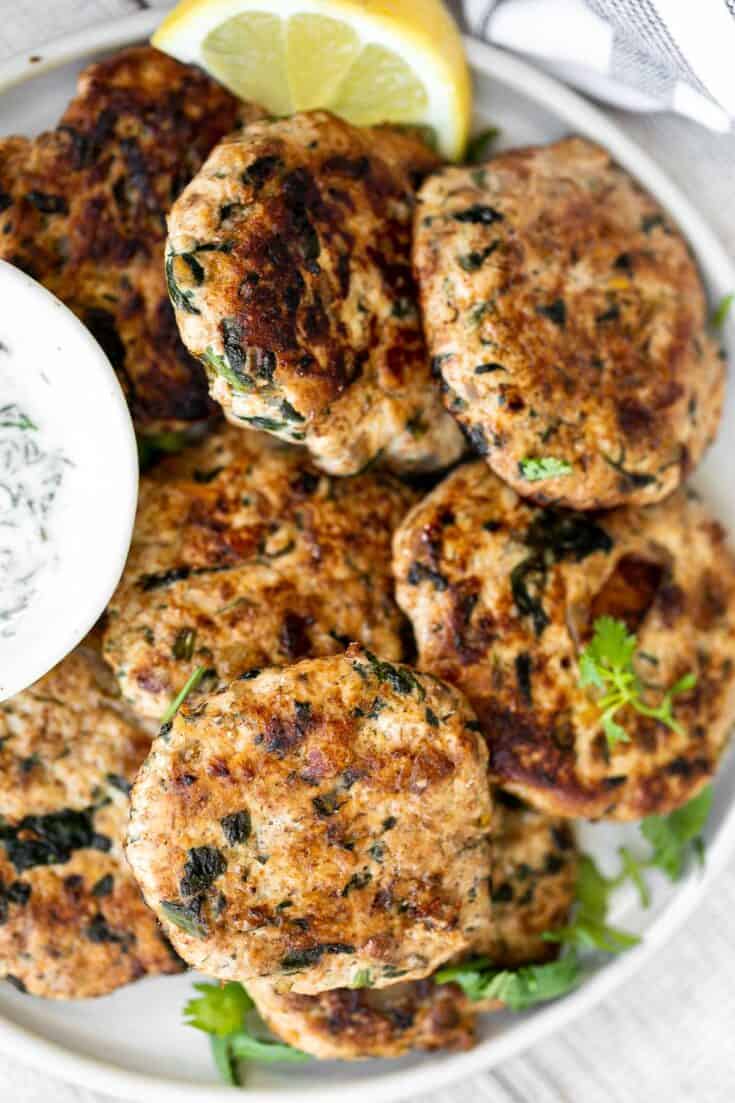
Mediterranean Chicken Patties
Delicious, moist and juicy Mediterranean chicken patties have everything you want in one bite: protein, veggies, herbs, and they're quick and easy to make. Serve it on it's own, with hamburger buns, or a side of Basmati rice.
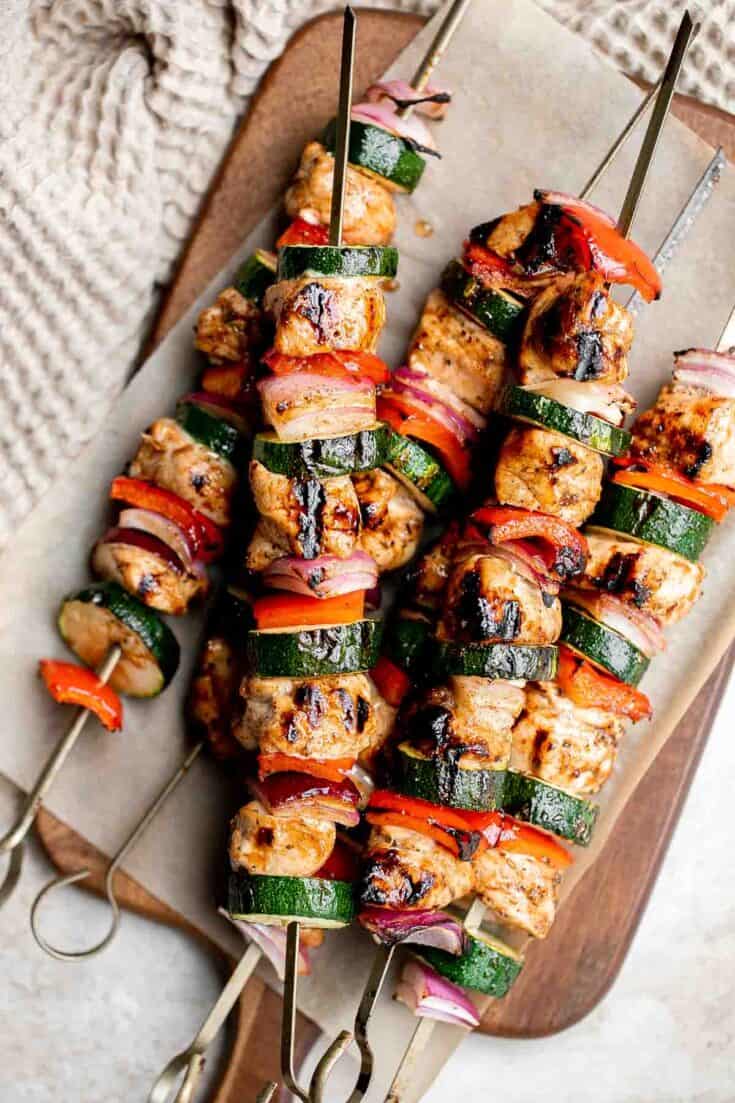
Balsamic Chicken Kabobs
Grilled Balsamic Chicken Kabobs are a delicious flavorful summer grill staple marinated in a balsamic sauce, skewered with vegetables, and grilled or baked.

Salmon Burgers
These Salmon Burgers made with real fresh salmon, are crispy on the outside and flaky inside, juicy and thick, and healthy and packed with protein.
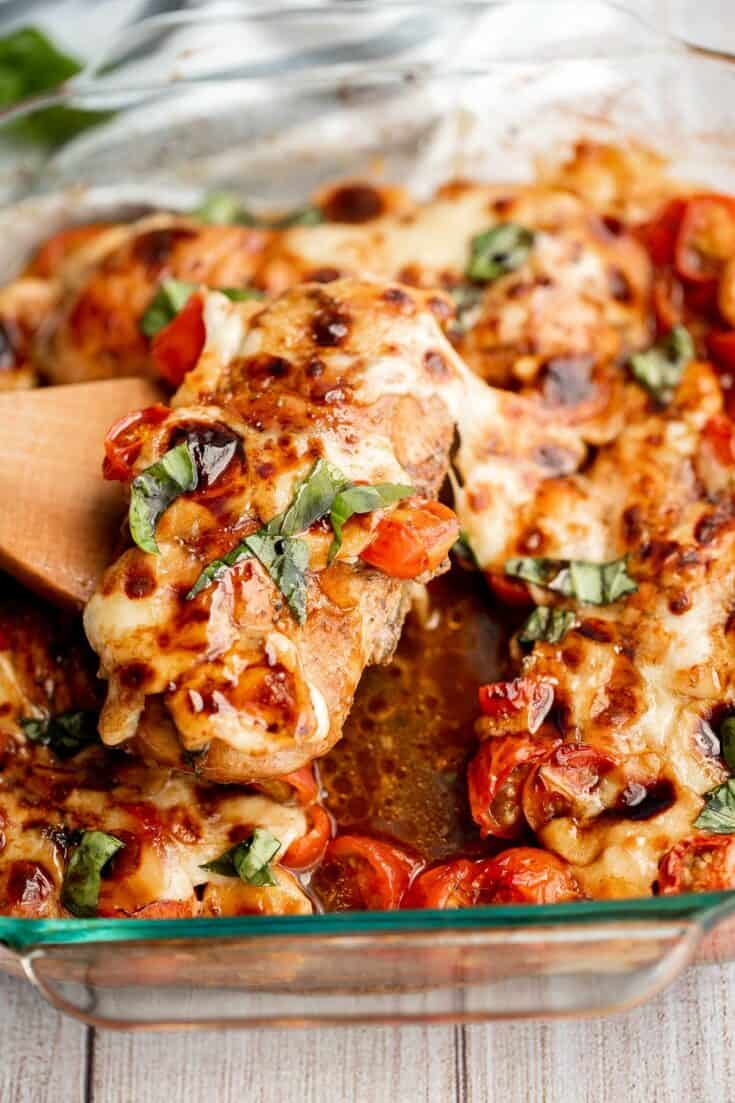
Baked Caprese Chicken
Baked caprese chicken is tender, juicy, and delicious, topped with burst tomatoes, mozzarella cheese, fresh basil, and a drizzle of balsamic glaze.

Vietnamese Salad Rolls with Peanut Dipping Sauce
Fresh, light and healthy Vietnamese salad rolls are packed with vermicelli noodles, shrimp, fresh vegetables and herbs and dipped in homemade peanut sauce. If you prefer chicken, try our Vietnamese Summer Rolls with Chicken.
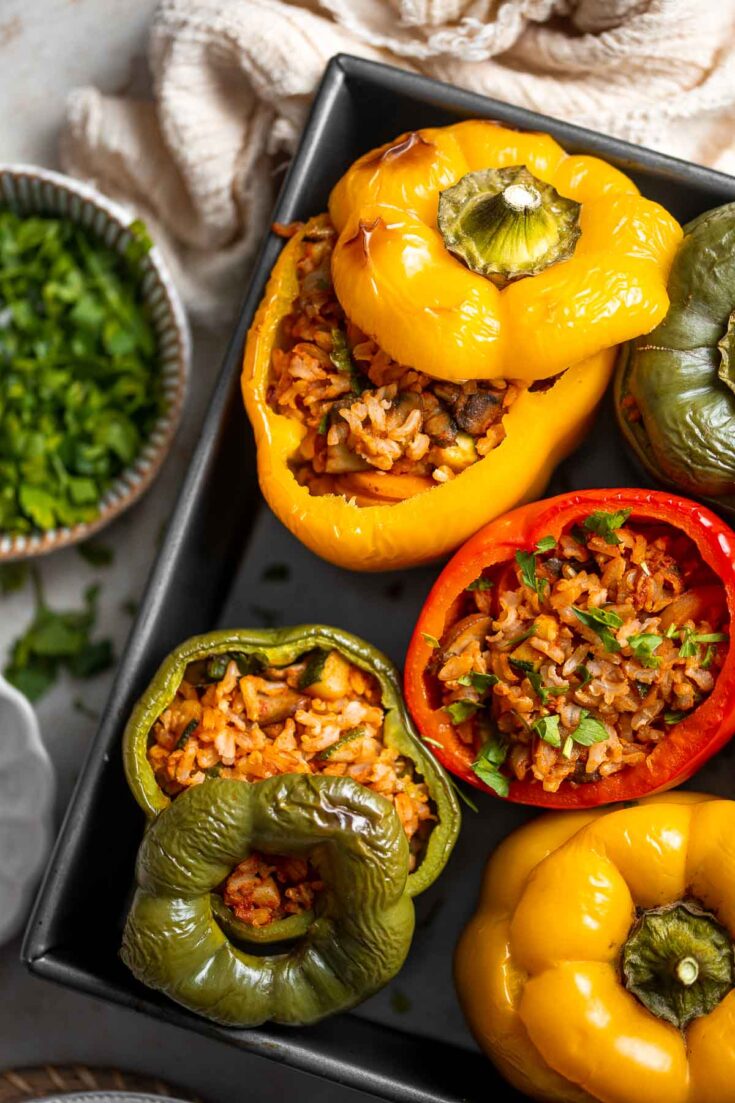
Easy Vegan Stuffed Bell Peppers
Easy vegan stuffed bell peppers are filled with brown rice, mushrooms, veggies, and seasonings, then baked for 40 minutes. It's a perfect summer weeknight dinner. Serve it with a Classic Coleslaw on the side.

Chicken Shawarma
Homemade chicken shawarma (donair) with juicy tender chicken marinated in Middle Eastern spices and wrapped in pita bread is easy to make at home. Serve it with a Persian Shirazi Salad on the side.
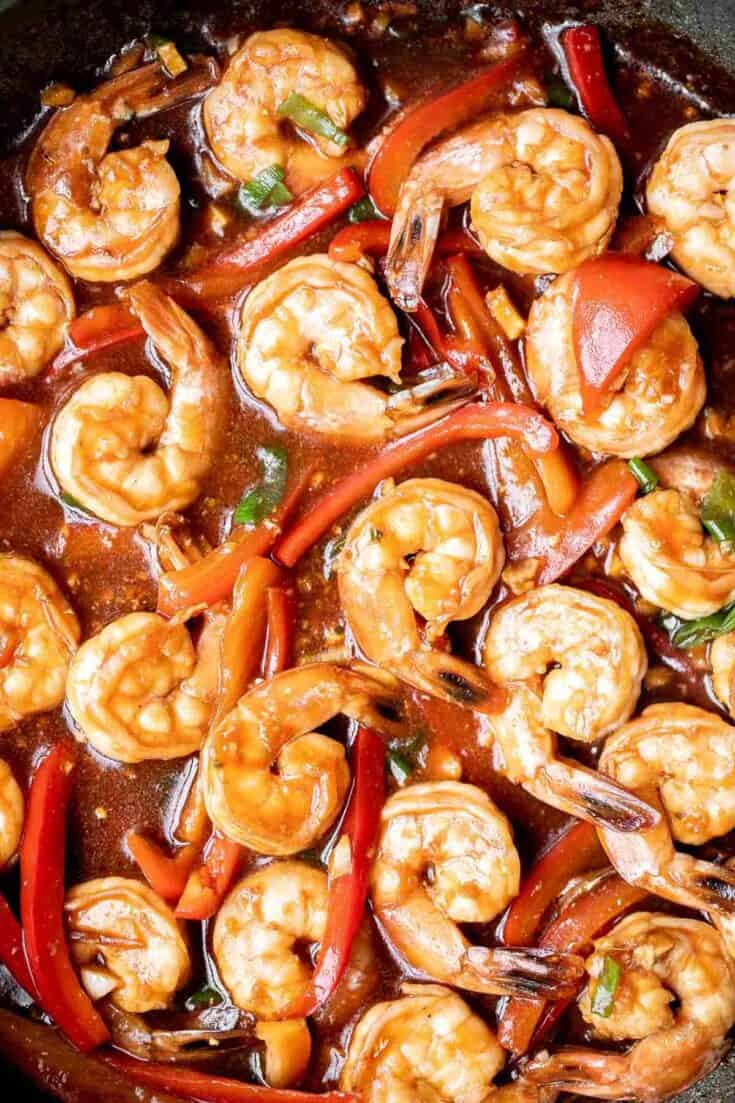
Garlic Shrimp Stir Fry
Better than takeout garlic shrimp stir fry is saucy, sticky, flavorful, and delicious. It's quick and easy to make in 15 minutes and great for meal prep.

Baked Queso Chicken
Baked queso chicken with tomatoes is an easy, cheesy, delicious chicken dinner that takes just 30 minutes to cook. One of the best comforting summer dinner ideas. Serve it on its own with or over Cilantro Lime Rice.
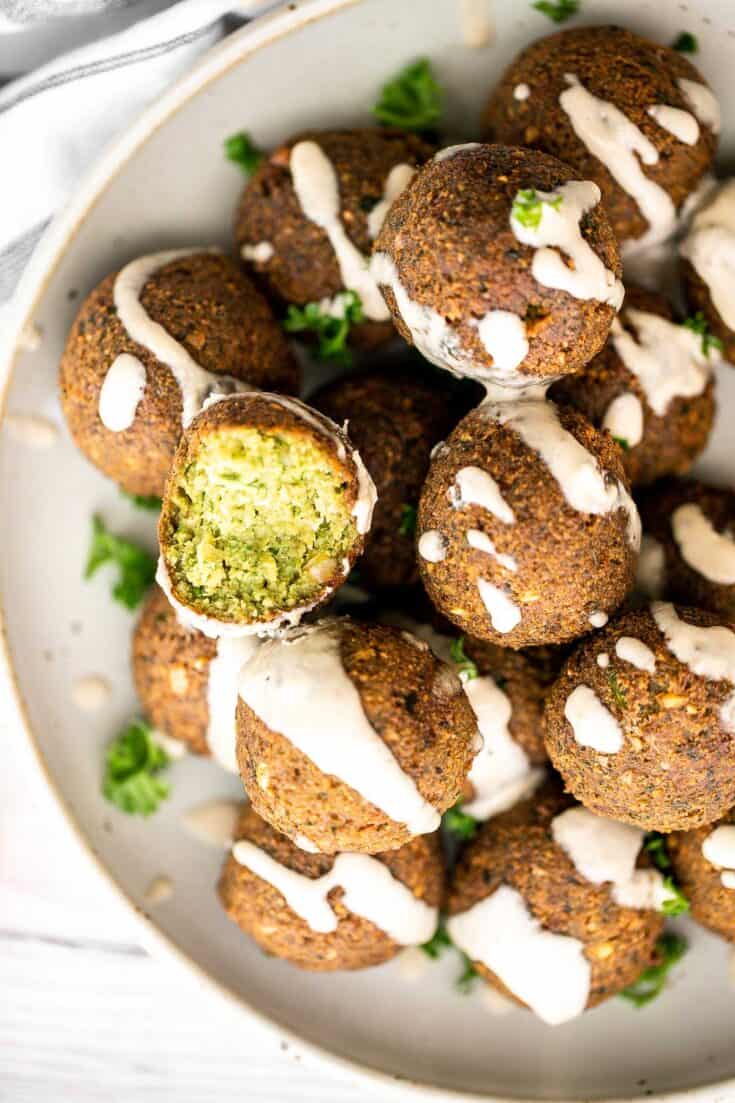
Falafel
Homemade falafel are delicious, golden brown and crispy on the outside, fluffy tender and soft inside. Plus, they're vegan, loaded with plant-based protein.
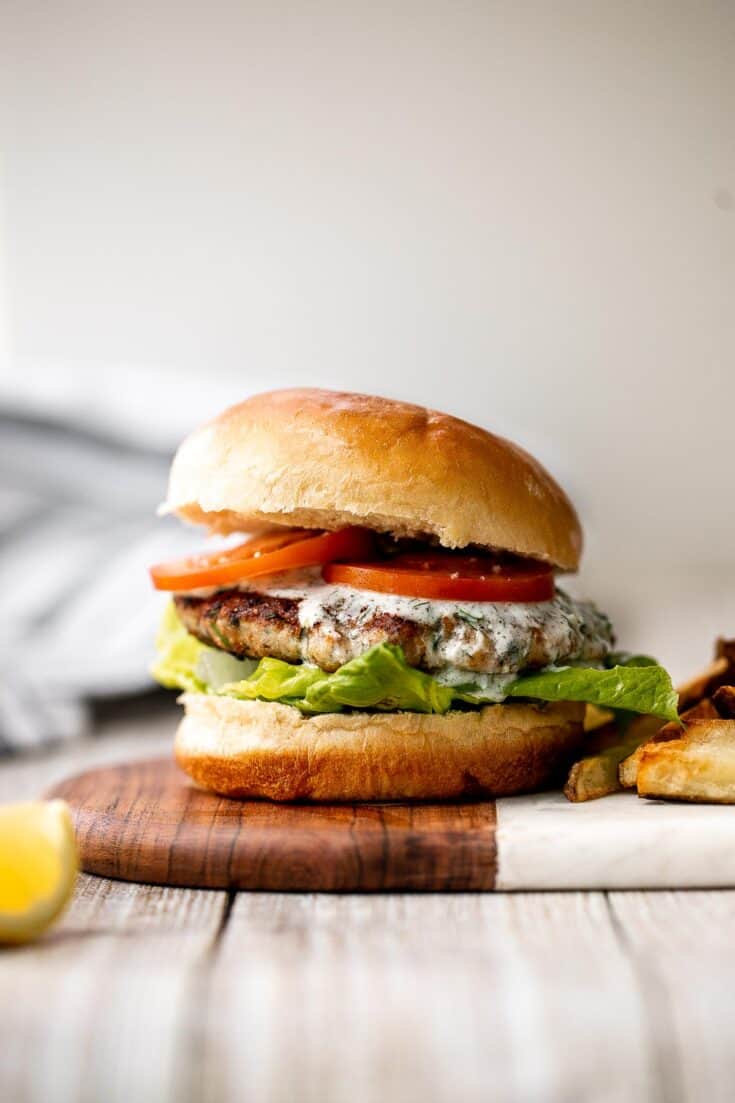
Mediterranean Turkey Burgers
Mediterranean turkey burgers are tender, juicy, and delicious, loaded with garlic, fresh dill, and lemon juice. The perfect summer weeknight meal.
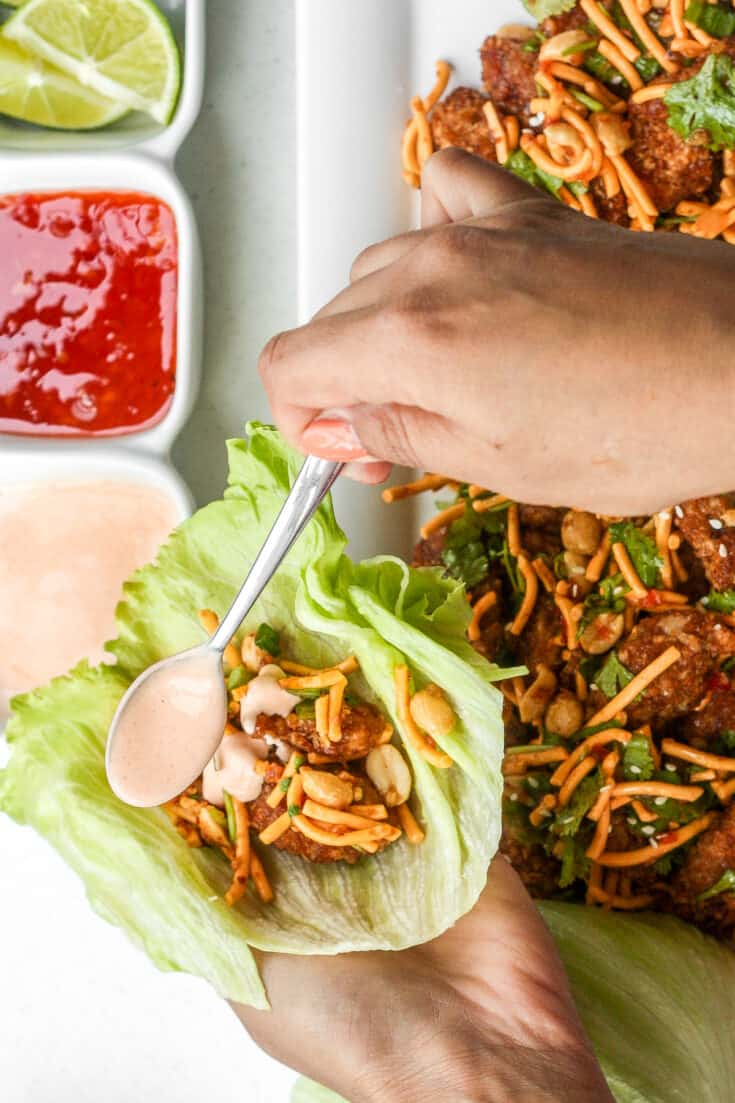
Szechuan Chicken Lettuce Wraps with Spicy Mayo (Cactus Club Copycat)
Spice it up and make copycat Szechuan chicken lettuce wraps with spicy mayo from the comfort of your own home with this easy to follow recipe. Plus, it is healthier than the original.
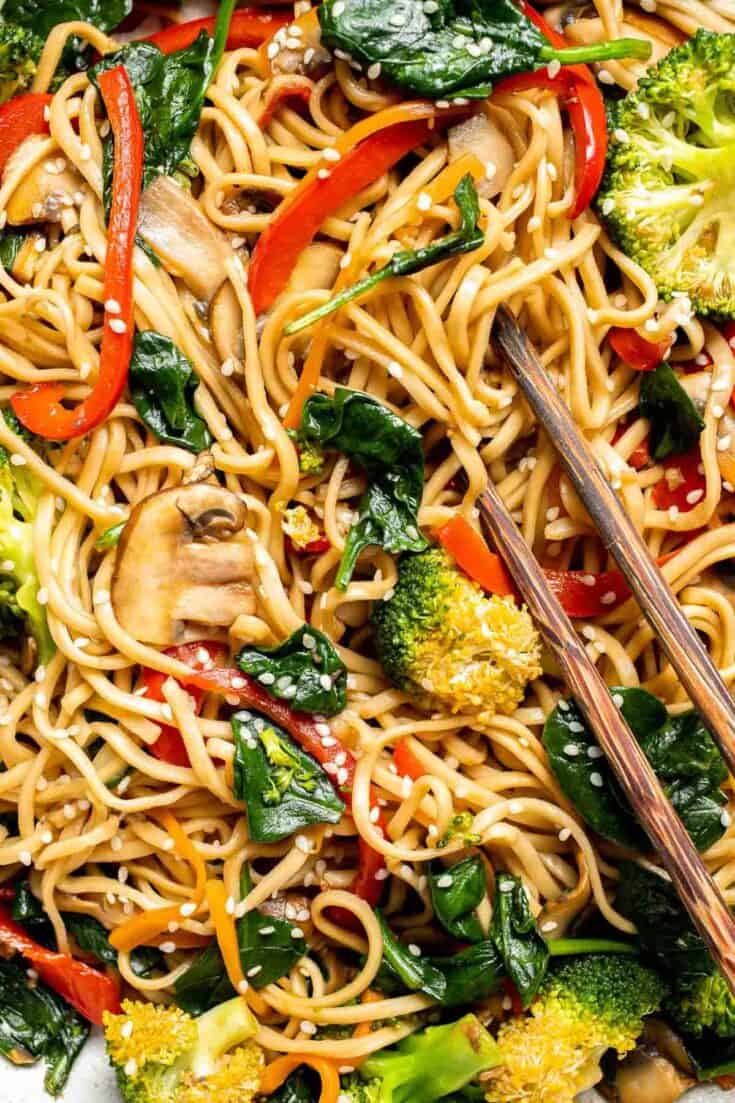
Easy 15-Minute Lo Mein
Say goodbye to takeout and make easy Lo Mein Noodles at home, packed with fresh veggies and healthy ingredients, in less than 15 minutes! Or try Vegetarian Chow Mein for an easy summer dinner recipe.
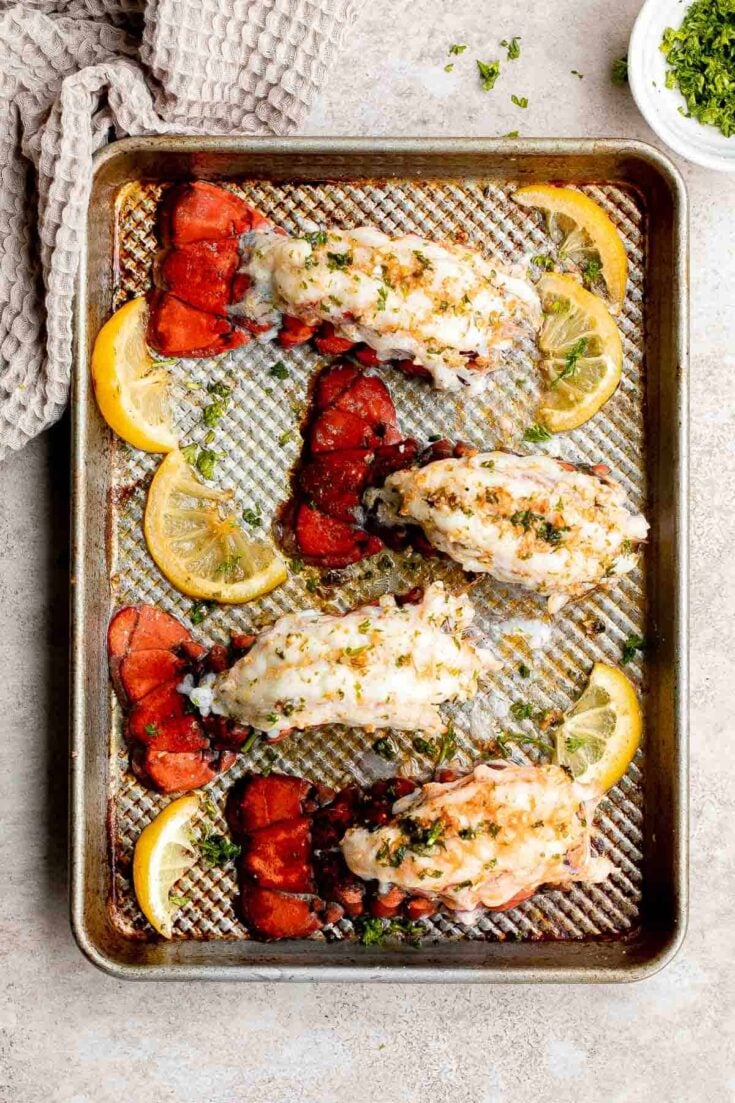
Garlic Butter Lobster Tails
Garlic Butter Lobster Tails are juicy, tender, and flavorful. This quick and easy seafood dinner is ready in less than 20 minutes (including prep!).

Cheesy Baked Zucchini with Marinara
Cheesy Baked Zucchini with Marinara will save your weeknight dinner routine (and the kids love it too!). It's low carb, vegetarian, gluten-free, and keto.
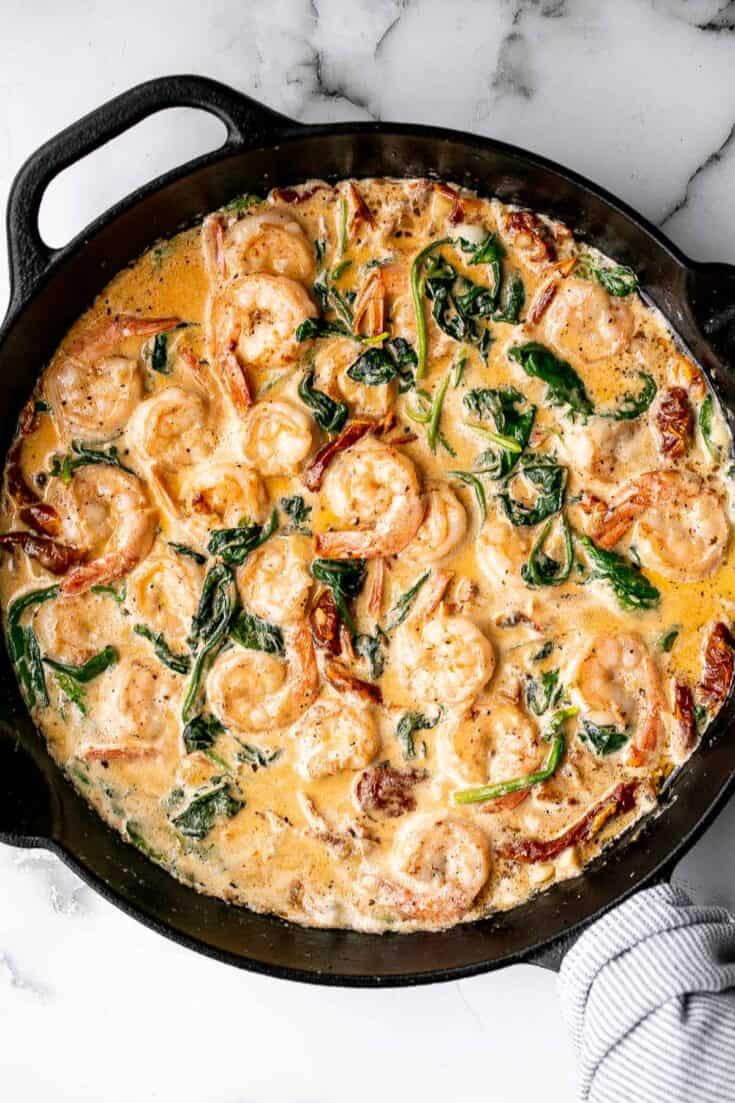
Creamy Tuscan Shrimp
Creamy Tuscan shrimp packed with sun-dried tomatoes, spinach, and garlic, is creamy, rich, and delicious. Make it in just 15 minutes, including prep!
Sticky Honey Garlic Meatballs
Sticky honey garlic meatballs are a delicious and flavourful 30-minute meal to add to your weekly dinner rotation. A total crowd pleaser.
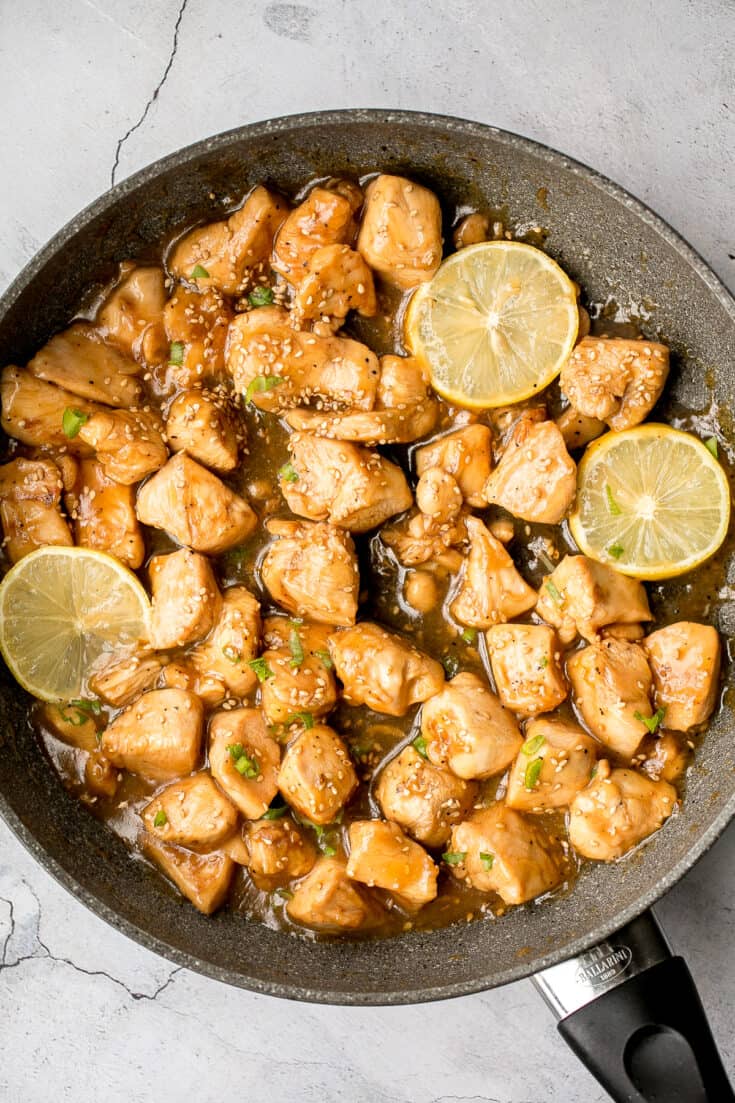
Healthy Lemon Chicken
Better than takeout, healthy lemon chicken is a delicious, sticky chicken stir fry coated in a flavourful, sweet and tangy sauce. The best weeknight dinner.

Chicken Pad Thai
No more takeout when you can make flavourful, restaurant-style, authentic chicken Pad Thai at home in just 10 minutes. It's sweet, savoury, sour and nutty.
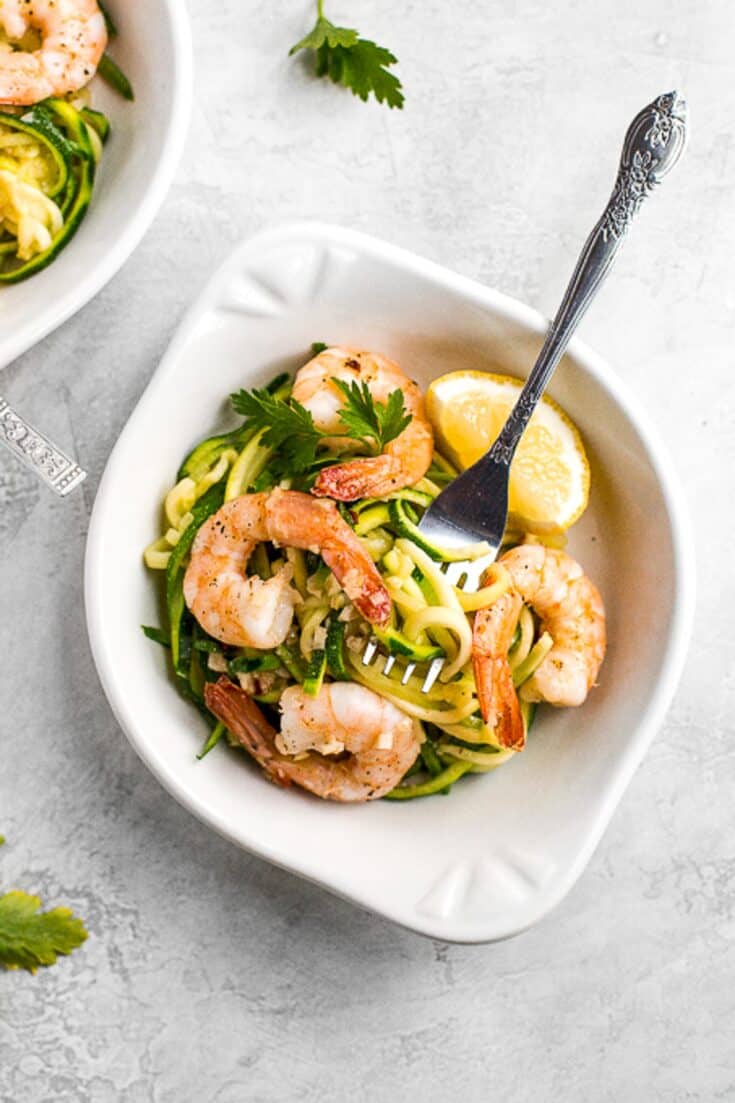
Shrimp Scampi with Zucchini Noodles
Shrimp scampi with zucchini noodles is filling, yet surprisingly light! Since we are using fresh zucchini noodles, you will feel no guilt in sopping up the sauce with an extra crusty piece of bread!
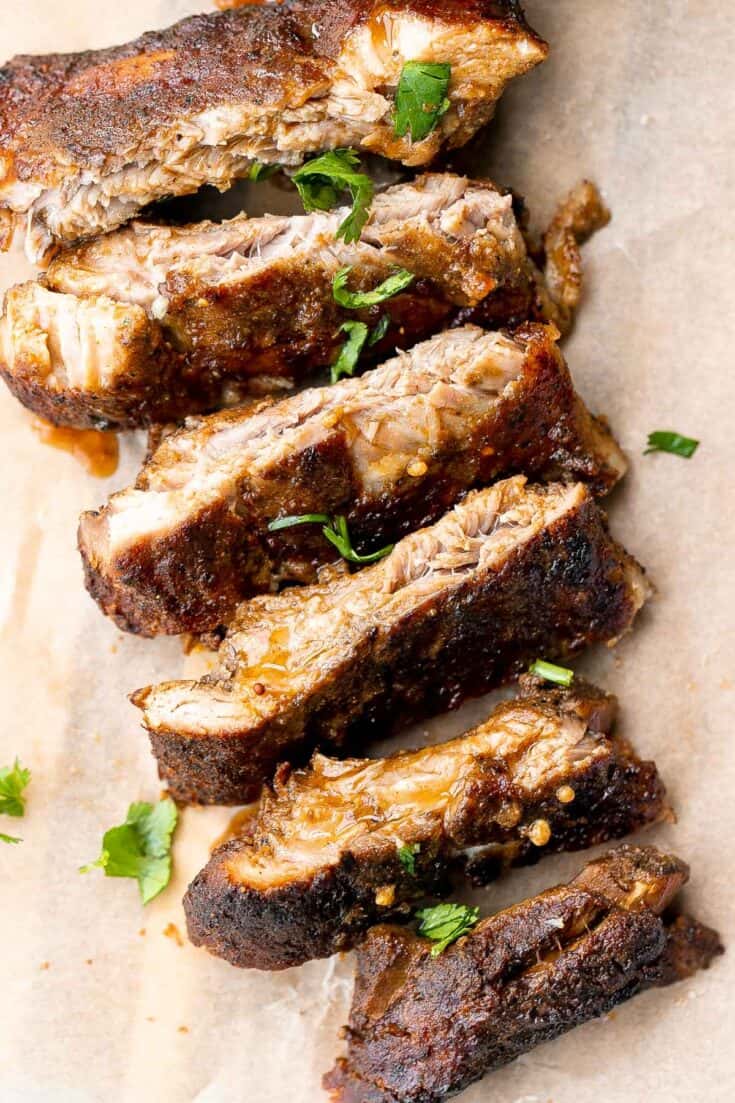
Slow Cooker BBQ Ribs
Slow cooker BBQ ribs are juicy, saucy, and tender -- the meat literally falls right off the bone. Add this easy recipe to your list of crockpot recipes.
Pan-Fried Lemongrass Chicken
Aromatic Asian pan-fried lemongrass chicken is healthy, gluten-free, and takes less than 25 minutes to prep and cook. Now that's what I call the perfect weeknight meal. Use any leftovers in a Lemongrass Chicken Banh Mi Sandwich.
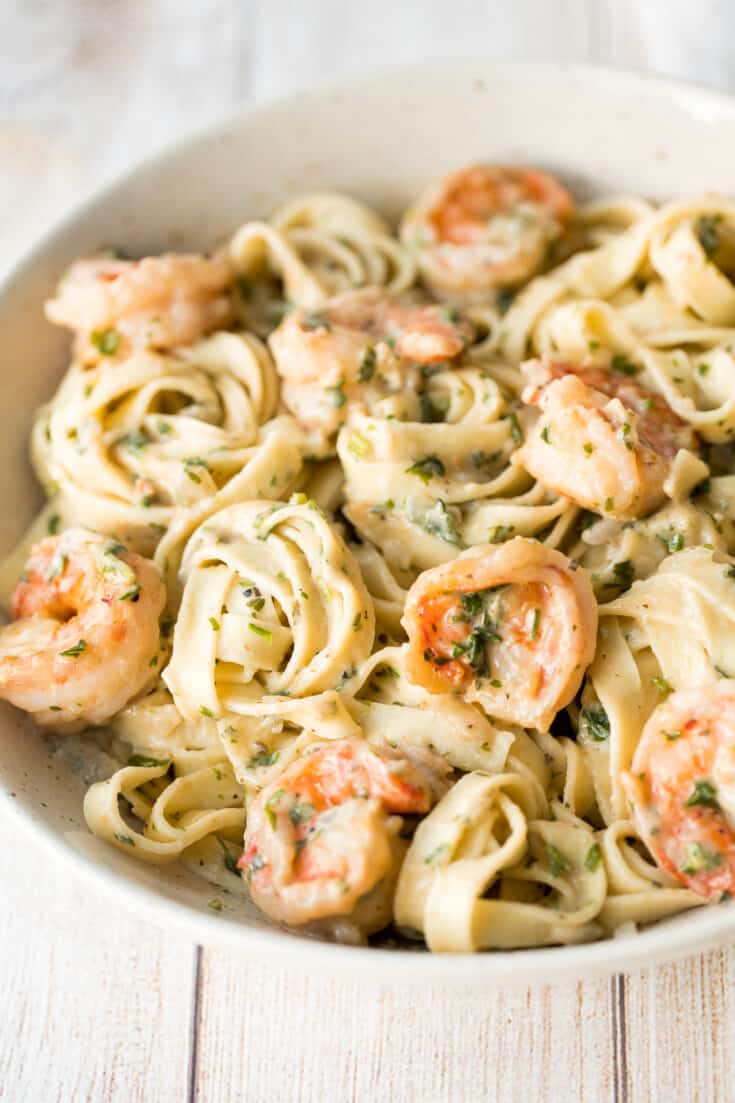
Shrimp Fettuccine Alfredo Pasta Bake
Creamy shrimp fettuccine alfredo pasta bake is garlicky, buttery, cheesy, loaded with shrimp and parsley and topped with mozzarella. Easy summer comfort food goals.
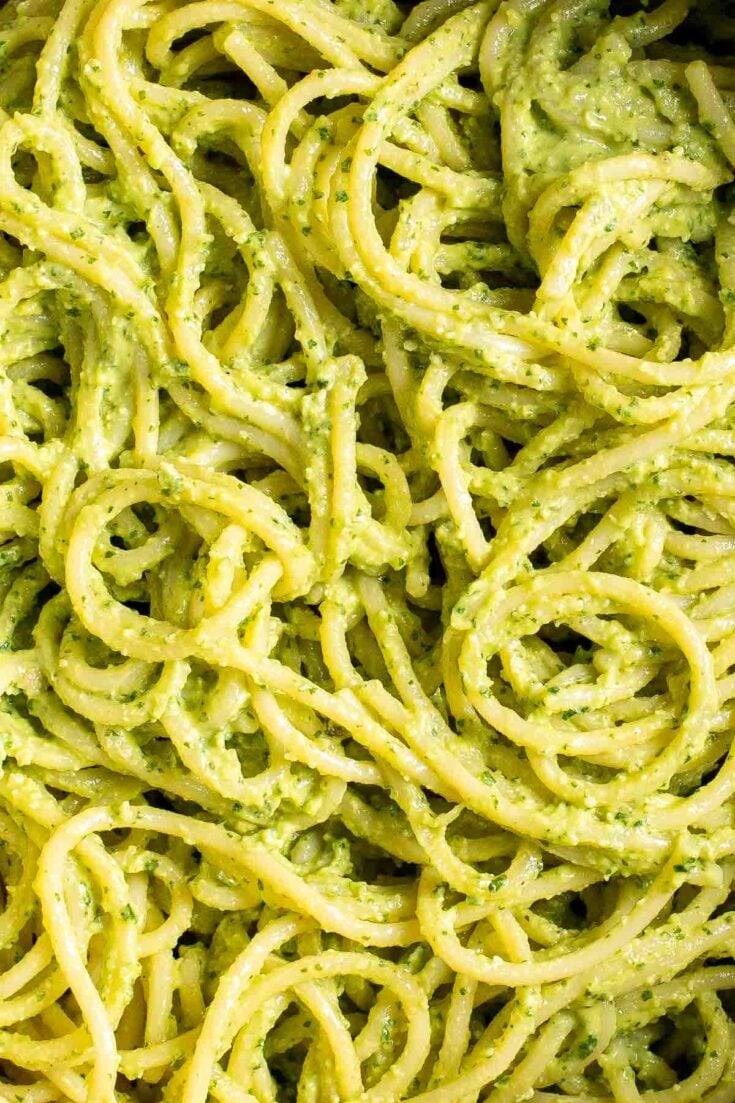
Creamy Avocado Basil Pesto Spaghetti
This easy 10-minute vegan light and creamy avocado basil pesto spaghetti is loaded with avocado, basil, walnuts, garlic, olive oil and lemon juice.
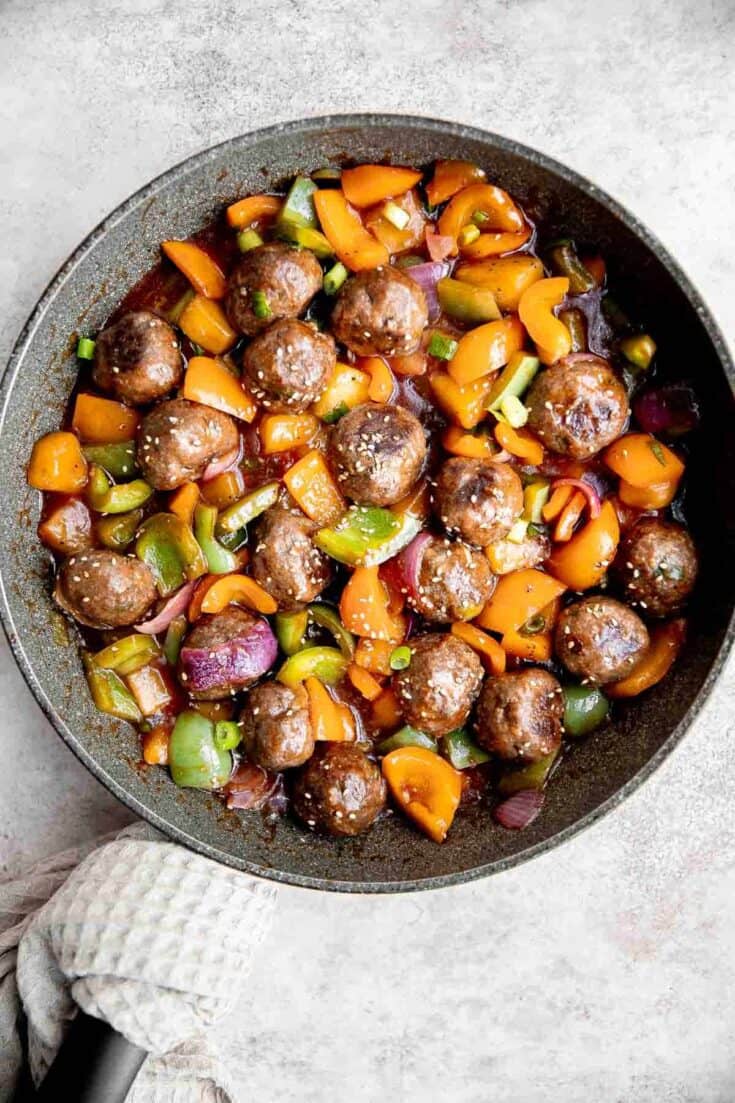
Sweet and Sour Meatballs
Sweet and sour meatballs are quick, easy, delicious, and flavorful, tossed in a vegetable and pineapple stir fry with homemade sweet and sour sauce.
Summer Grill Recipes
Easy Greek Chicken Souvlaki Skewers
Easy Greek chicken souvlaki skewers marinated in garlic, fresh herbs, lemon and bay leaves for that classic Mediterranean flavour. Grill in under 15 minutes. Serve alongside some easy Homemade Tzatziki Sauce. One of my favorite summer dinner recipes!
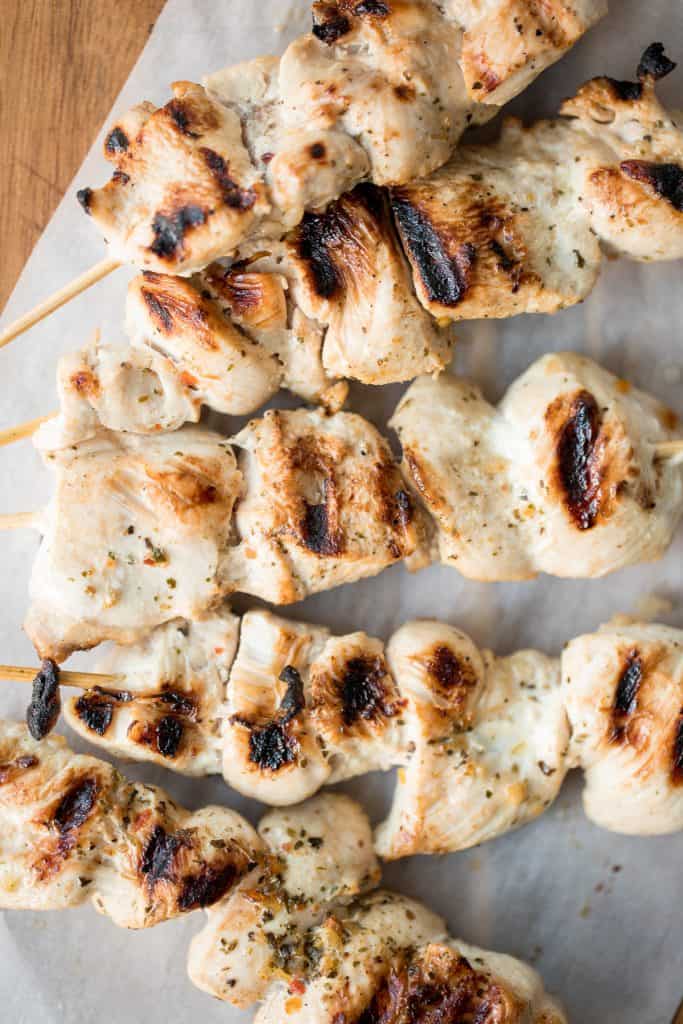
Juicy and tender grilled cajun shrimp skewers are garlicky, lemony, and packed with flavour with a cajun marinade. Ready in under 30 minutes including prep.

Better than the steakhouse, the best tender and juicy ribeye steak with a perfect seared crust is garlicky, buttery and packed with so much flavour. Serve with a side of Air Fryer Asparagus. Or, why not make your meal a full on Surf and Turf with Lobster Tails... um yes please!
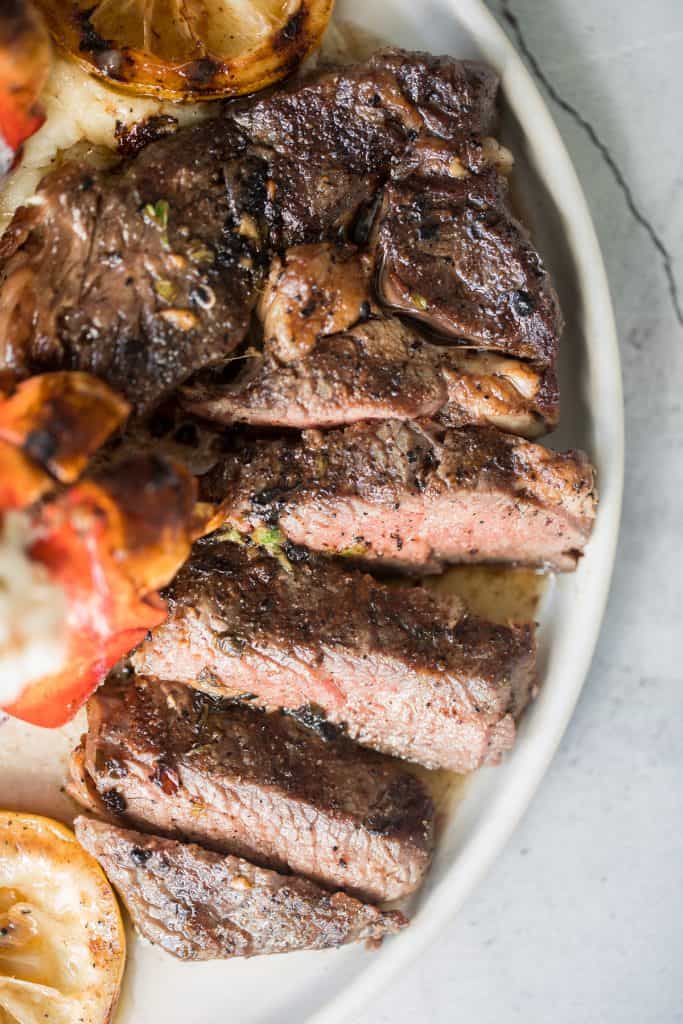
Easy Greek souvlaki beef shish kebabs are marinated in a garlicky lemony olive oil marinade and threaded with fresh vegetables. Cook on the grill or oven. Serve them wrapped inside some Homemade Pita Bread.
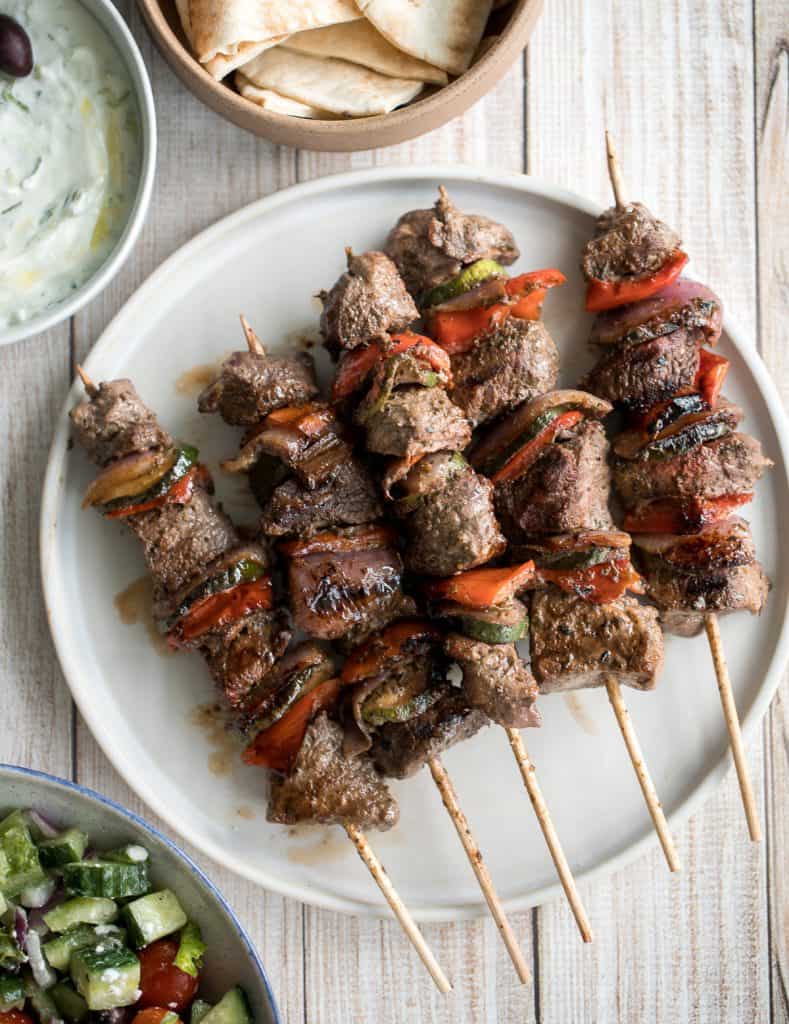
Better than the steakhouse, these classic juicy hamburgers are perfectly seasoned, so flavourful and delicious. You can't have a collection of summer dinner ideas without burgers. Plus, try your hand at Homemade Hamburger Buns.
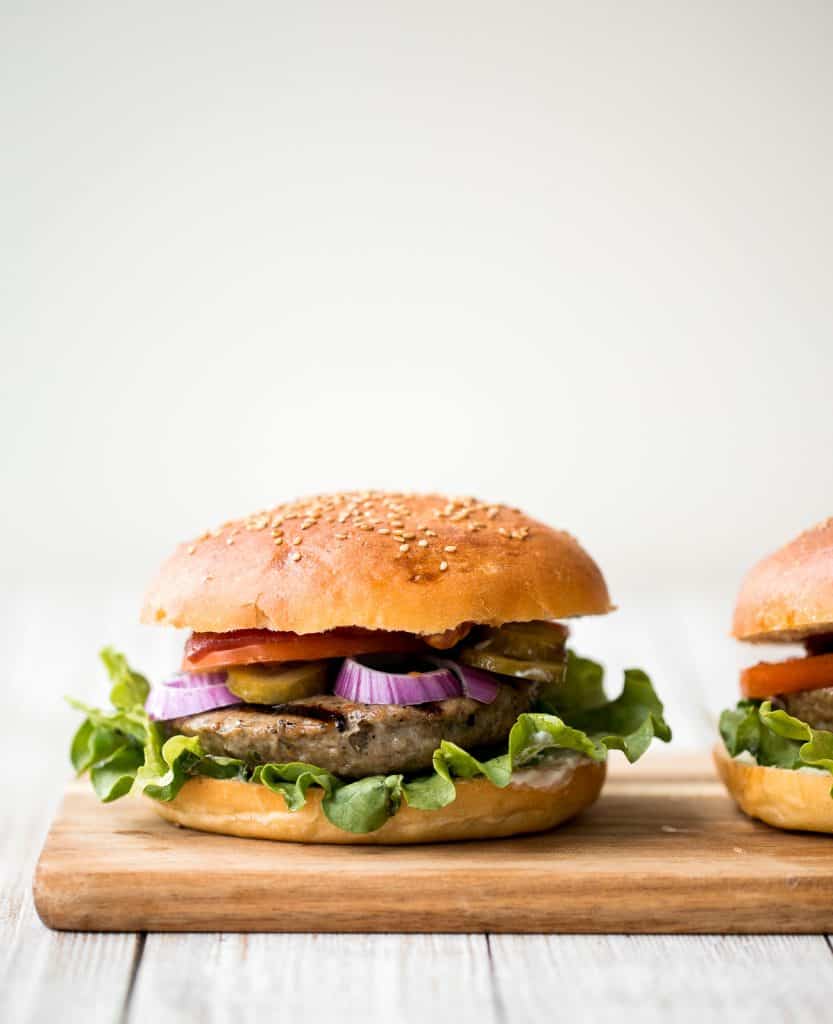
Teriyaki Chicken Skewers with Pineapple
Juicy and tender teriyaki chicken skewers with pineapple, bell peppers and red onions are sticky, sweet, savoury, and tangy. So flavourful and delicious. Serve over some steamed rice or Coconut Rice.
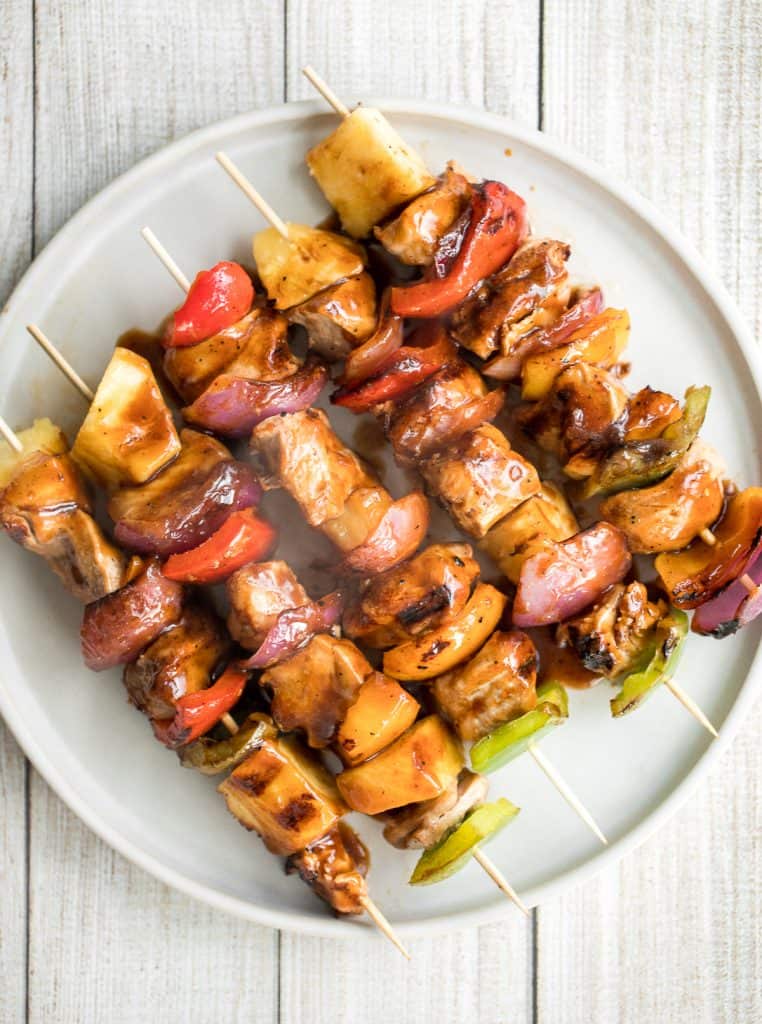
Grilled Orange Chicken Skewers
Flame-kissed, sticky and saucy, grilled orange chicken skewers with a rich, citrus-based marinade are delicious, juicy and so tender. Best summer weeknight dinner ever. Serve with a side of Vegetarian Fried Rice or Noodles.

Spinach and Feta Turkey Burgers
Greek-style spinach and feta turkey burgers are tender, juicy, and flavourful, loaded with spinach, feta and fresh Mediterranean herbs and is so easy to prep. Serve it with Tzatziki Sauce.
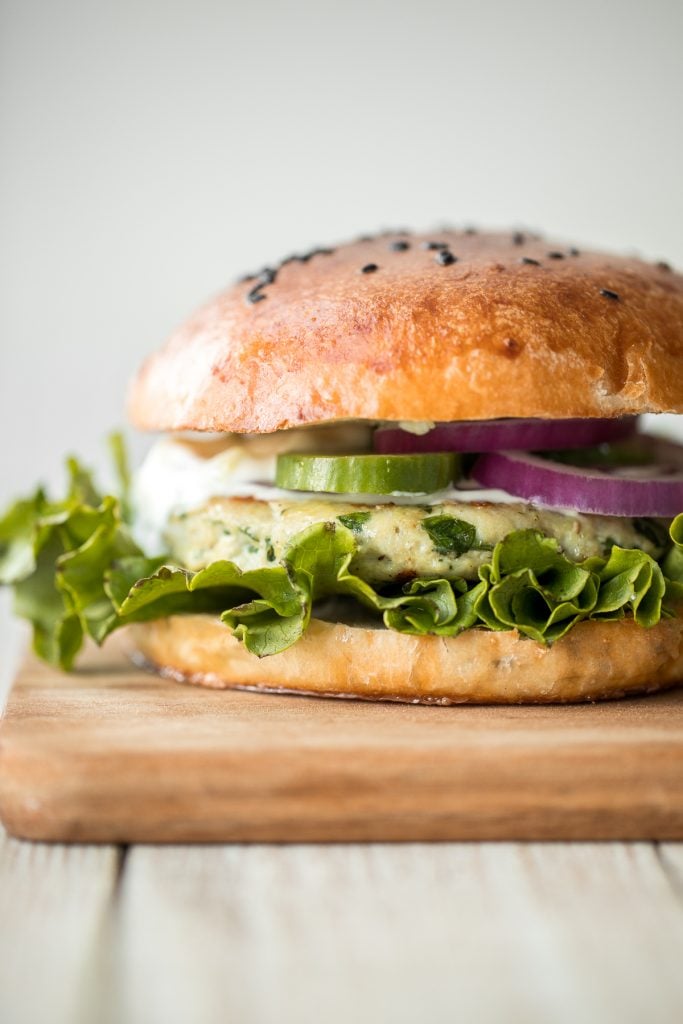
Juicy and tender, Xinjiang spicy cumin lamb skewers with a bold cumin and cayenne marinade, are so flavourful and easy to make on the grill or air fryer. Serve it with a fresh Chinese Garlic Cucumber Salad on the side.
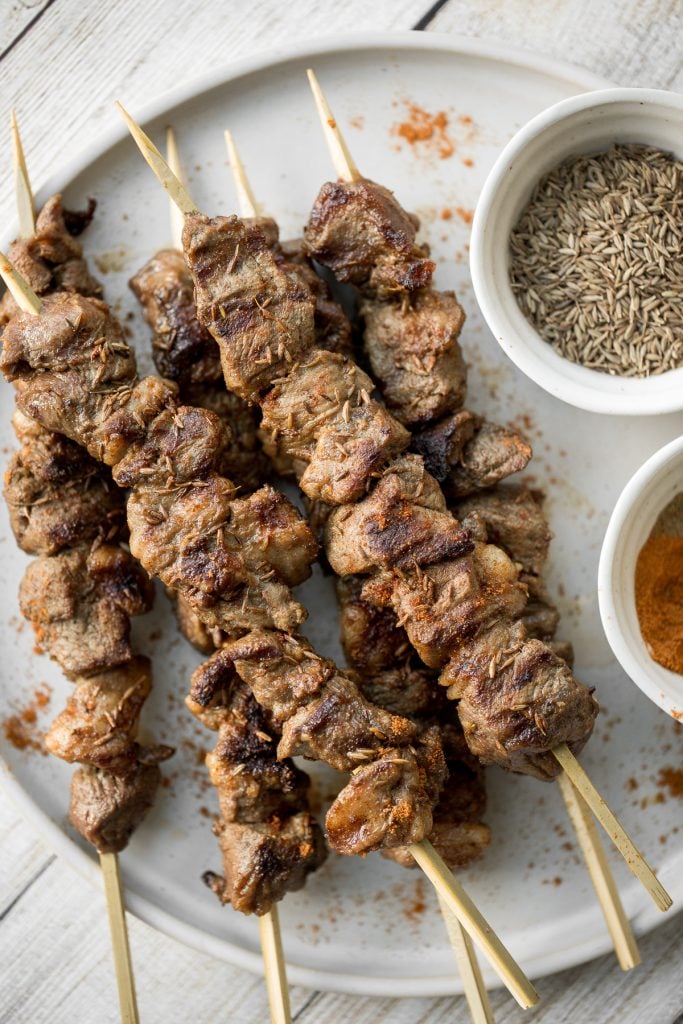
Chicken Satay Skewers with Peanut Sauce
Better than takeout, easy to make tender chicken satay skewers with coconut marinade and homemade peanut dipping sauce is savoury, sweet, tangy, and nutty. Serve this delicious summer dinner over some delicious Easy Coconut Rice.

These 15-minute fish burgers with creamy slaw are juicy, flakey, and packed with flavour. So easy that it's the perfect summer weeknight meal!
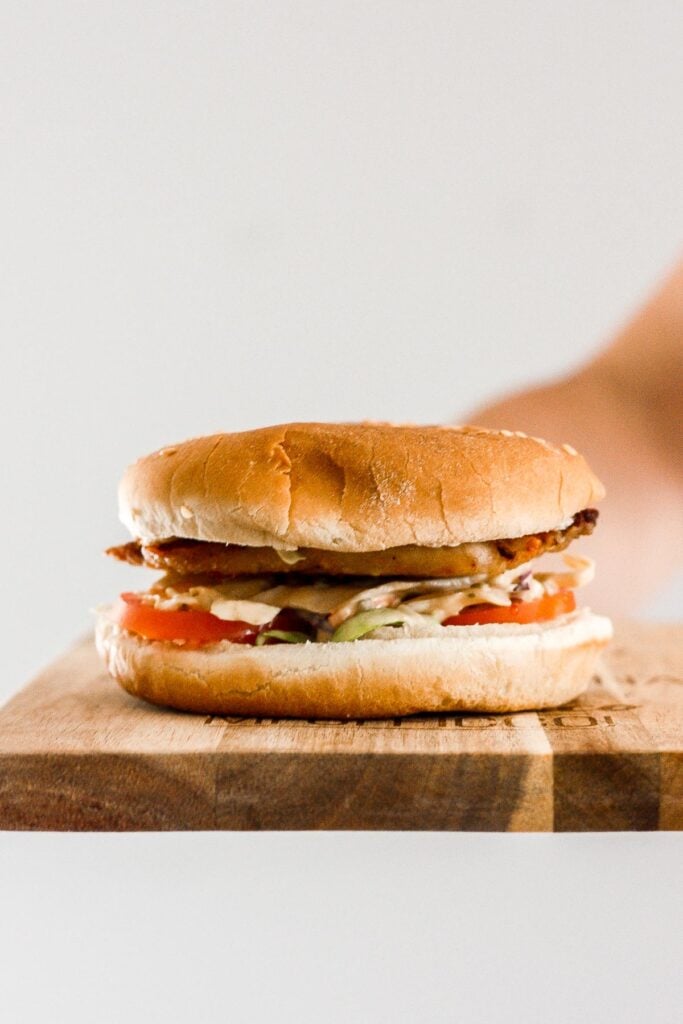
Quick and easy, grilled Greek lamb souvlaki skewers are marinated in a simple Mediterranean marinade for just 30 minutes. Serve with some tzatziki sauce. Serve over top of Rice Pilaf and Greek Salad on the side. So delicious.
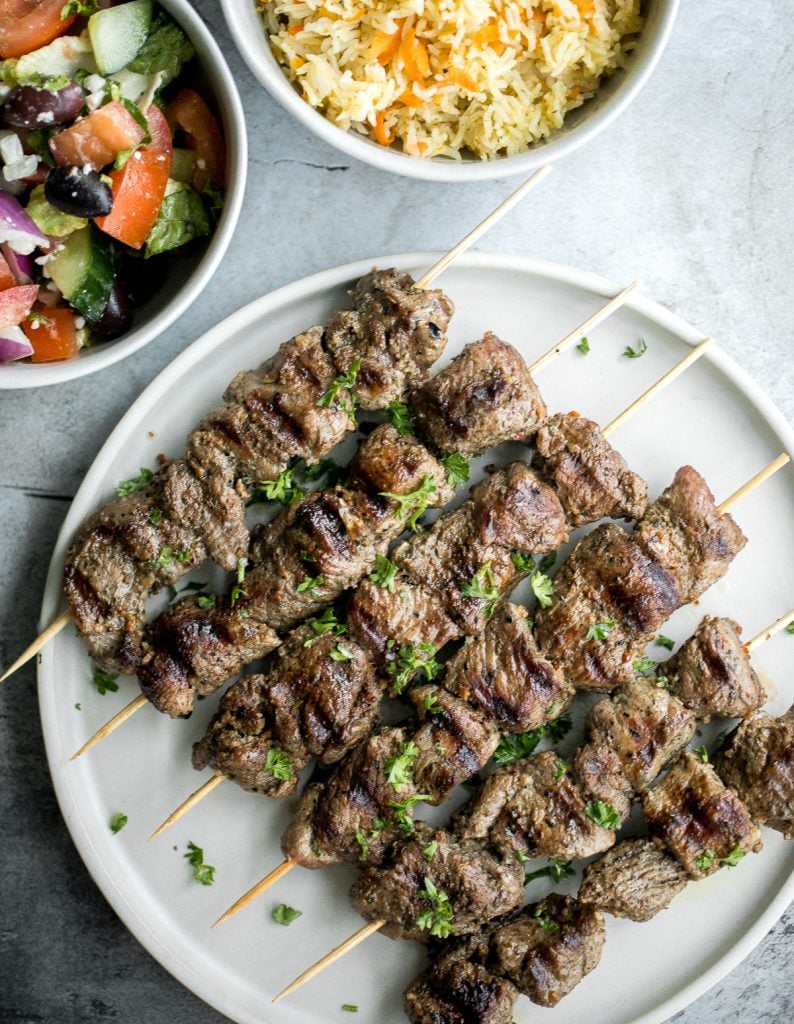
Persian Saffron Chicken Kebabs (Joojeh Kabob)
Quick and easy, classic Persian saffron chicken kebabs (joojeh kabob) is marinated in a simple saffron and lemon marinade for that classic Iranian flavour. Make it a full on Persian dinner with Basmati Rice with Saffron and Persian Shirazi Salad.
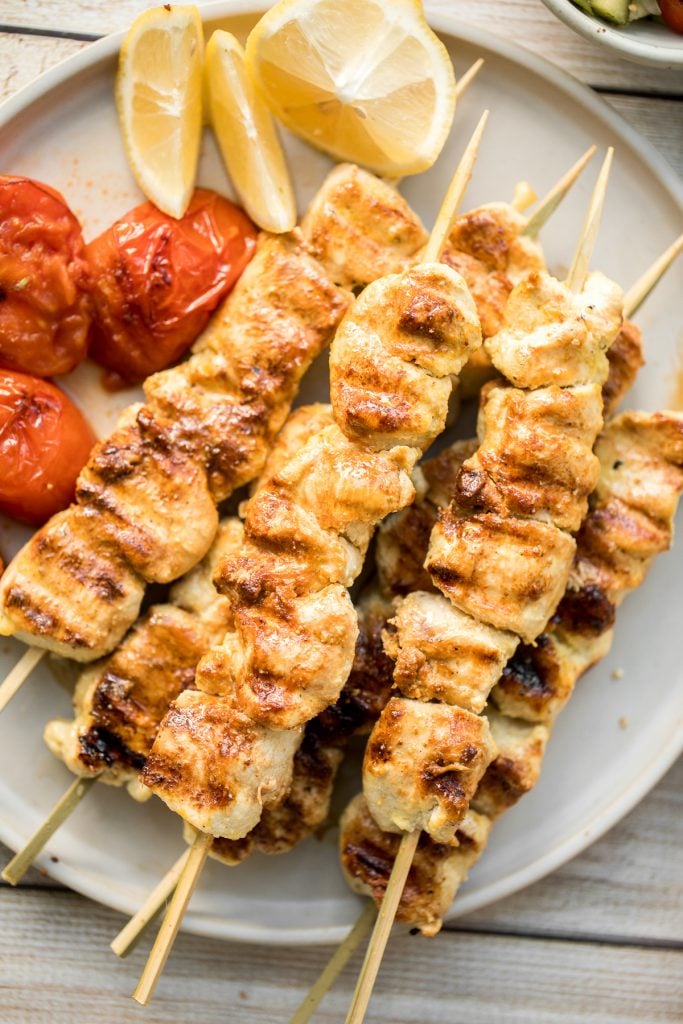
Juicy and tender Korean chicken skewers are packed with bold flavors bringing sweet, savory, and spicy your dinner table. The best summer weeknight dinner.

Seafood Summer
Tender, flaky, flavorful garlic butter salmon is well-seasoned, seared to perfection, and basted until juicy. Quick and easy to make in 20 minutes.
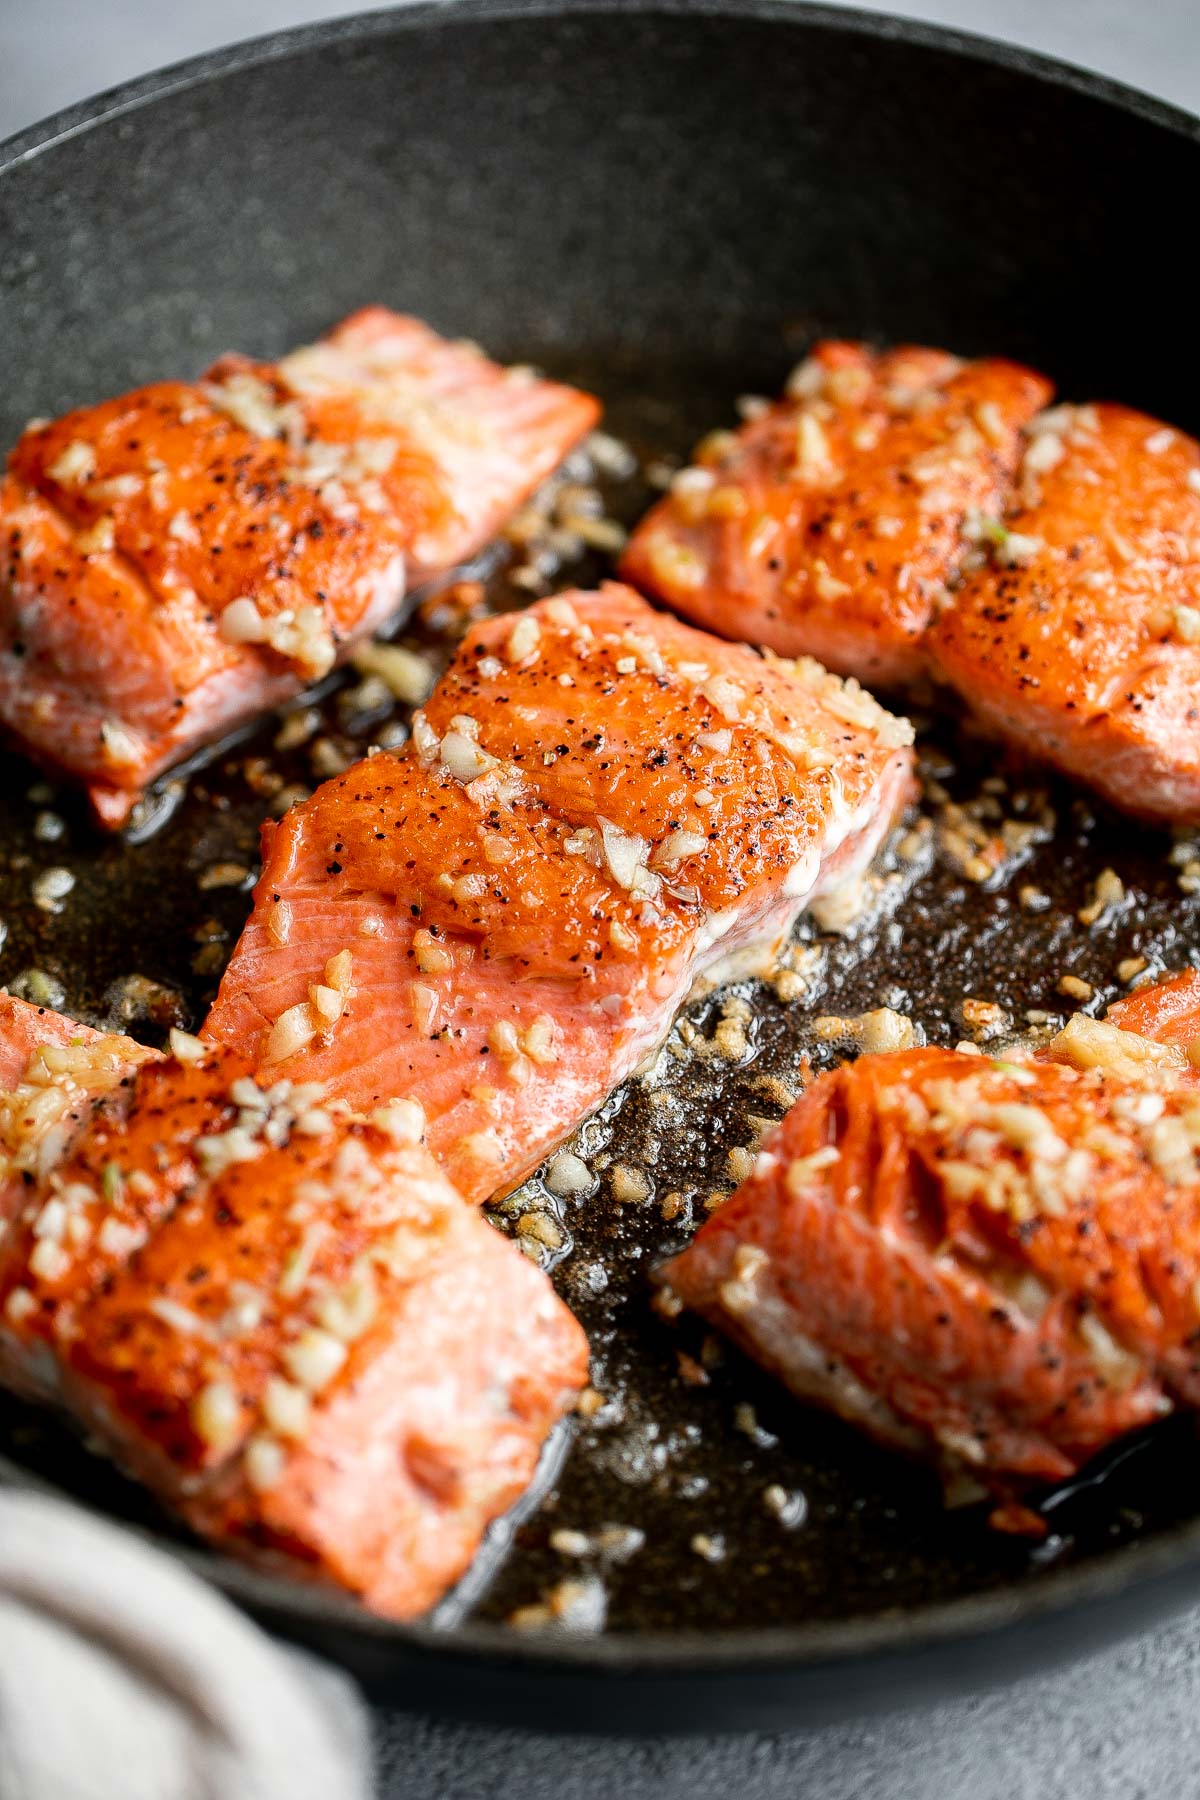
Creamy garlic shrimp is a delicious, quick and easy 15-minute meal (including prep!) that you need to include in your weeknight dinner meal plan.
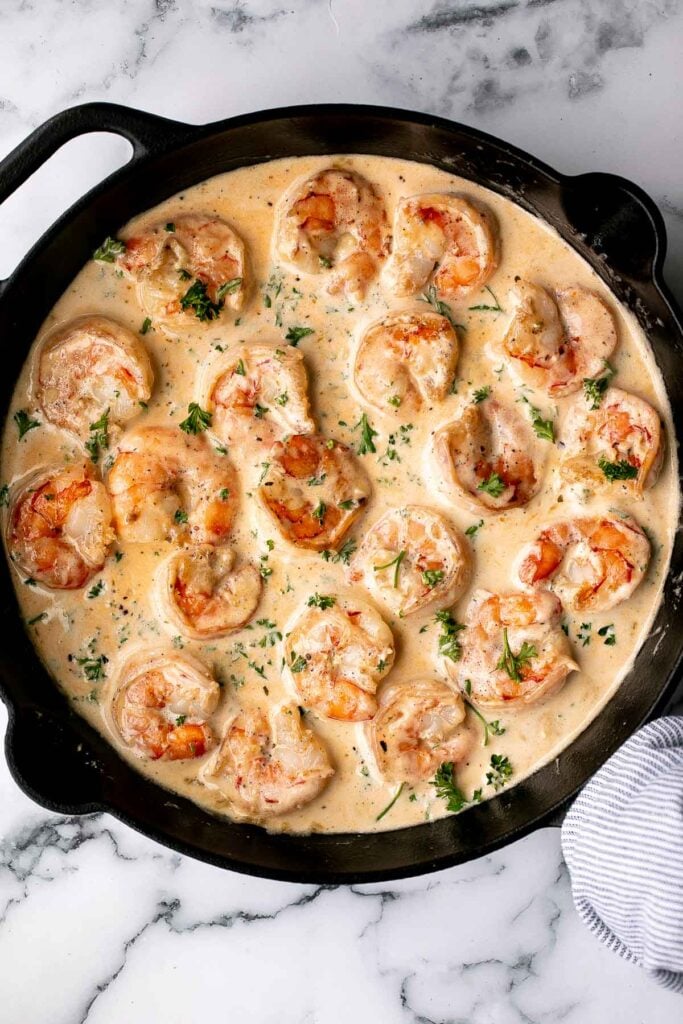
Quick and easy shrimp cakes are juicy, tender, delicious, and flavorful. They're made simple with a food processor and your choice of three cooking methods.

Creamy Shrimp Pasta with Sun-dried Tomatoes
Creamy shrimp pasta with sun-dried tomatoes is a delicious, quick and easy meal that takes just 20 minutes to prep and make. The perfect weeknight summer dinner.
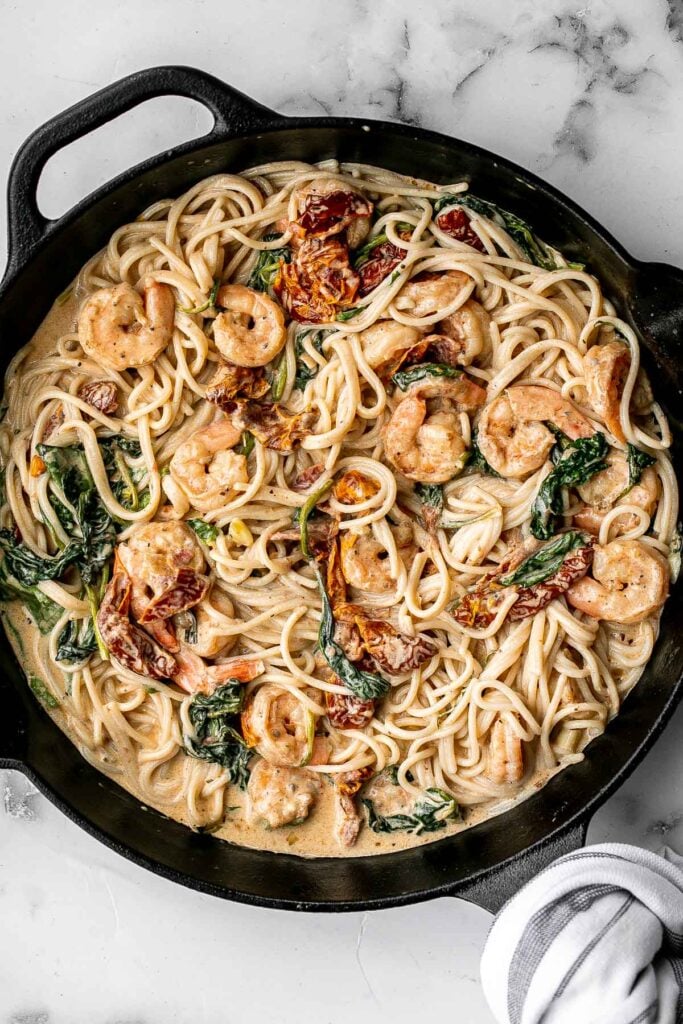
Quick and easy, one-pan, 10-minute seafood fried rice with tiger prawns is so much healthier, tastier and better than takeout. It's the easiest weeknight meal.
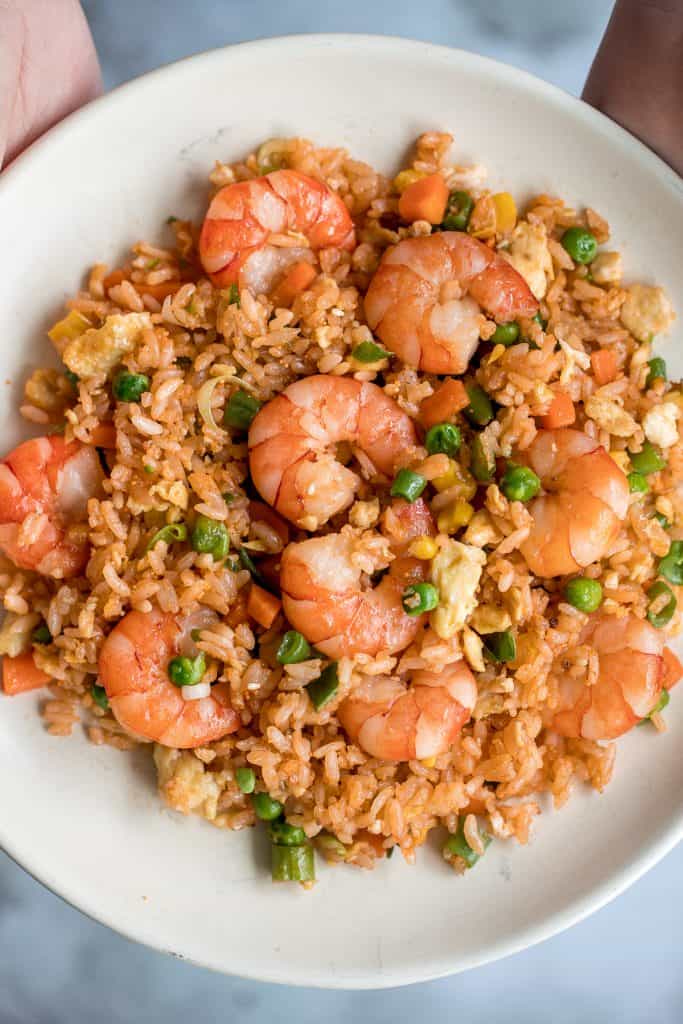
Summer Salads for Dinner
Italian pasta salad is delicious, wholesome, and easy to make. Make it up to three days ahead for your summer picnics and cookouts. You can't get more classic than Italian Salad on for dinner on a hot summer night!
Chickpea Greek salad is a fresh, healthy, vibrant, and colorful salad, packed with traditional Mediterranean ingredients, superfoods, and nutrients.
There's nothing better on a hot day than a cold and refreshing vegan soba noodle salad, tossed with fresh vegetables and a delicious saucy dressing.
Shrimp taco salad with cilantro lime dressing is flavourful, delicious, and easy to make. It has all the fixings and of shrimp tacos, but without the mess.
Mediterranean Orzo Pasta Salad
Quick and easy Mediterranean orzo pasta salad packed with fresh vegetables and herbs is tossed in a Greek lemon vinaigrette. Healthy, light and delicious.
Mediterranean Chickpea Wedge Salad
Mediterranean chickpea wedge salad combines chickpeas, crunchy vegetable toppings, and hummus dressing for a delicious deconstructed falafel flavour.
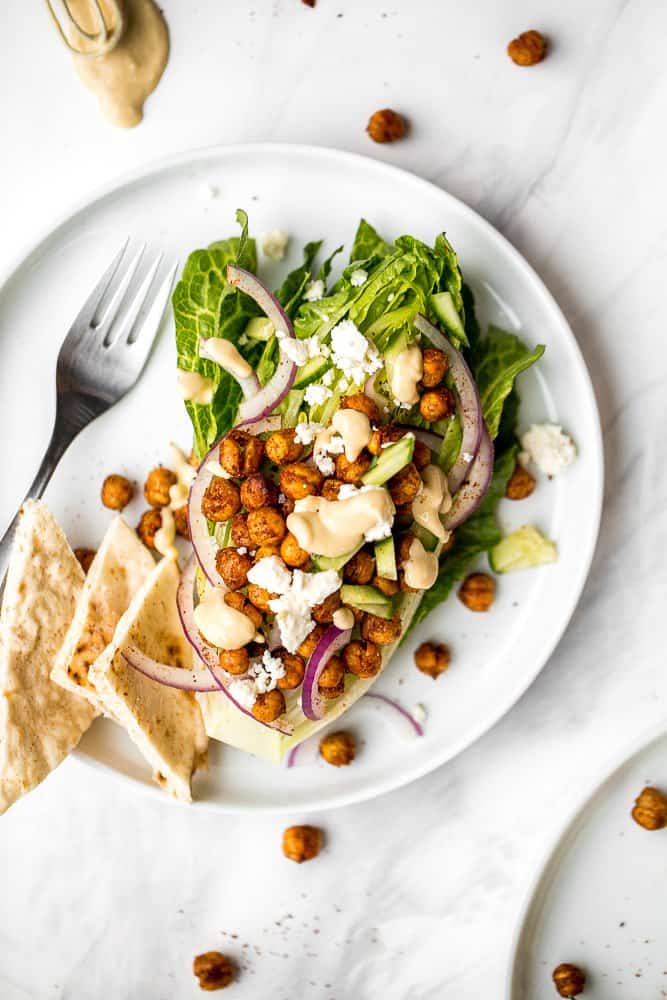
This creamy cucumber salad is the easy, refreshing snack and side dish your summer cookouts have been missing. Make it ahead with just 5 minutes prep. Another one of the classic Memorial Day recipes.

Asian chopped salad is a delicious and colorful salad, loaded with refreshing crisp vegetables, plant-based protein, and a homemade creamy sesame dressing.
Take a bite into this refreshing, gluten-free quinoa and spinach salad bursting with colourful tomatoes, cucumbers and raisins.
Classic macaroni salad is a creamy and delicious pasta salad that is easy to throw together. It's the perfect side to bring to a summer potluck or BBQ.
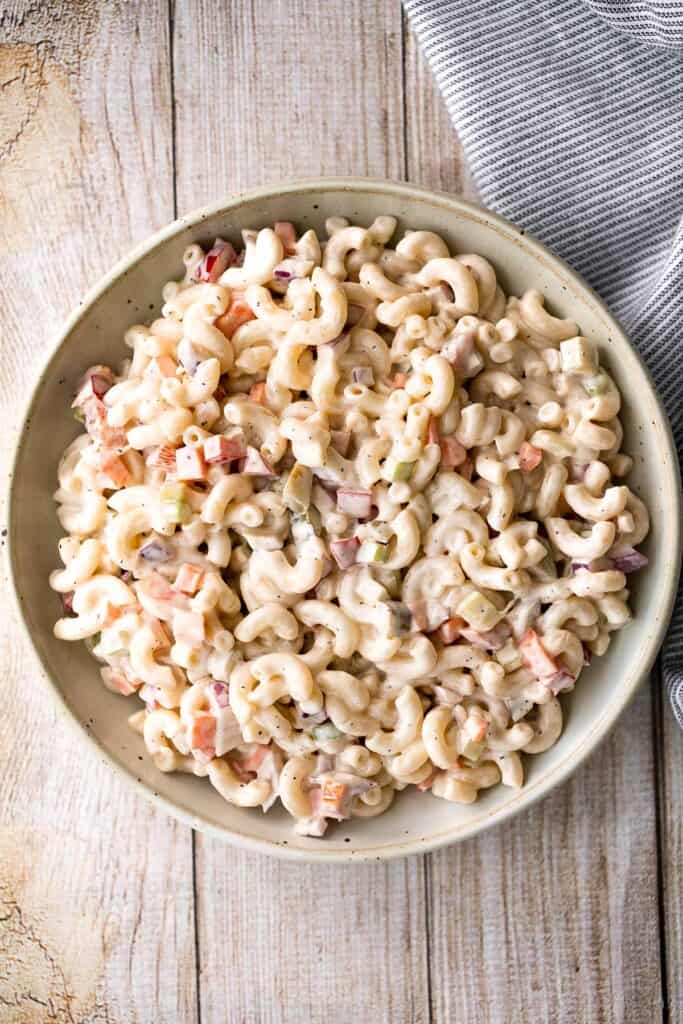
Take fresh-off-the-grill corn on the cob and turn it into a light, flavourful summer corn salad, topped with cherry tomatoes, fresh basil and cheese.

Easy homemade potato salad is loaded with baby potatoes, eggs, and green onions and tossed in a mayo sauce and is a go-to for summer barbecues and picnics.
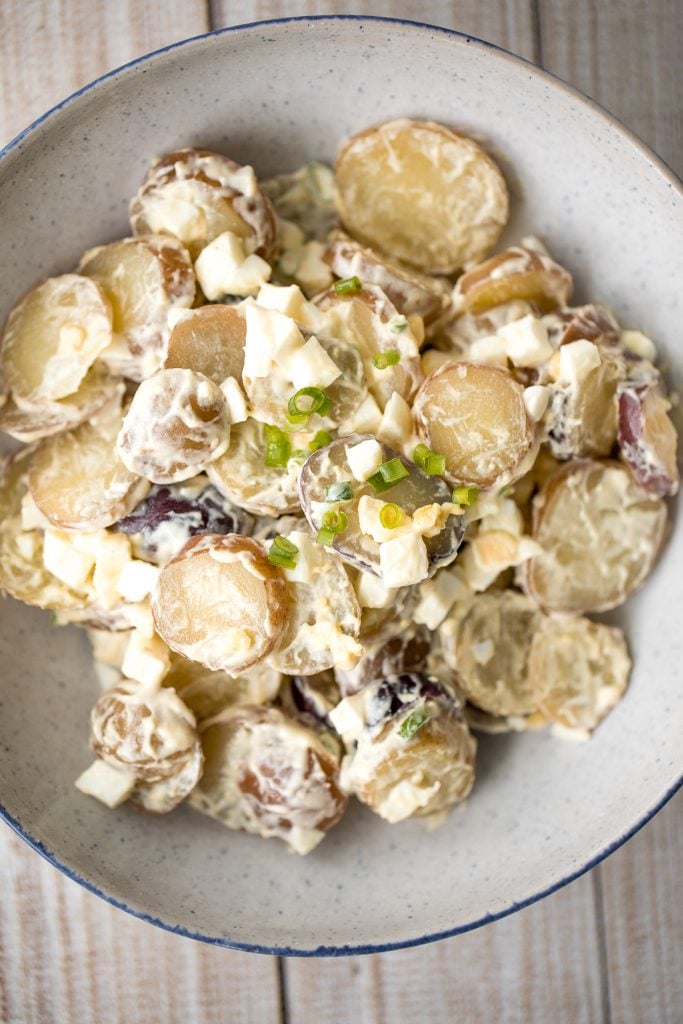
Summer Fiesta Menu
Flavourful, easy fish tacos with lime crema is made with seasoned white fish, cabbage slaw, and lime sauce. It takes less than 25 minutes to prep and serve.

Easy baked chicken enchiladas brings the taste of authentic Mexican food into your kitchen -- saucy, spicy, and savoury. Perfect for a Mexican fiesta on Cinco de Mayo.

Oven-baked loaded sheet pan nachos are a crowd pleaser for an easy weeknight dinner or a crave-worthy appetizer to serve at a Mexican fiesta.
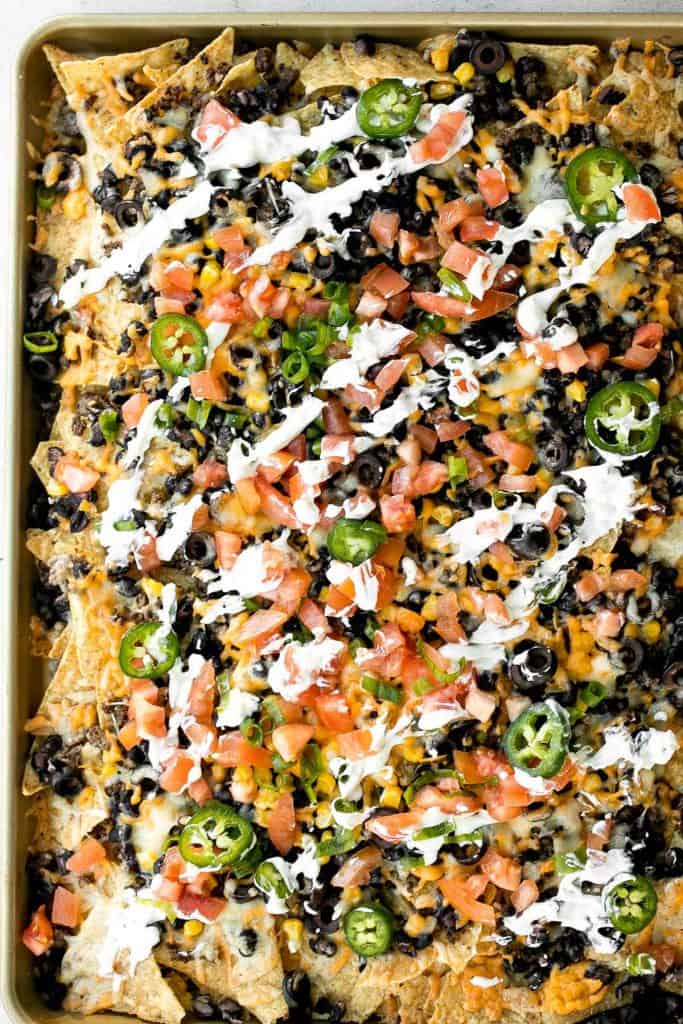
Ground beef tacos are delicious, authentic, and so easy to make. They're savory, spicy, creamy, and fresh. The perfect recipe for a Mexican fiesta.

Skillet chicken fajitas are a light, fresh, and sizzling dish bursting with flavour, packed with colorful vegetables, and wrapped in warm tortillas or with a side of Cilantro Lime Rice.
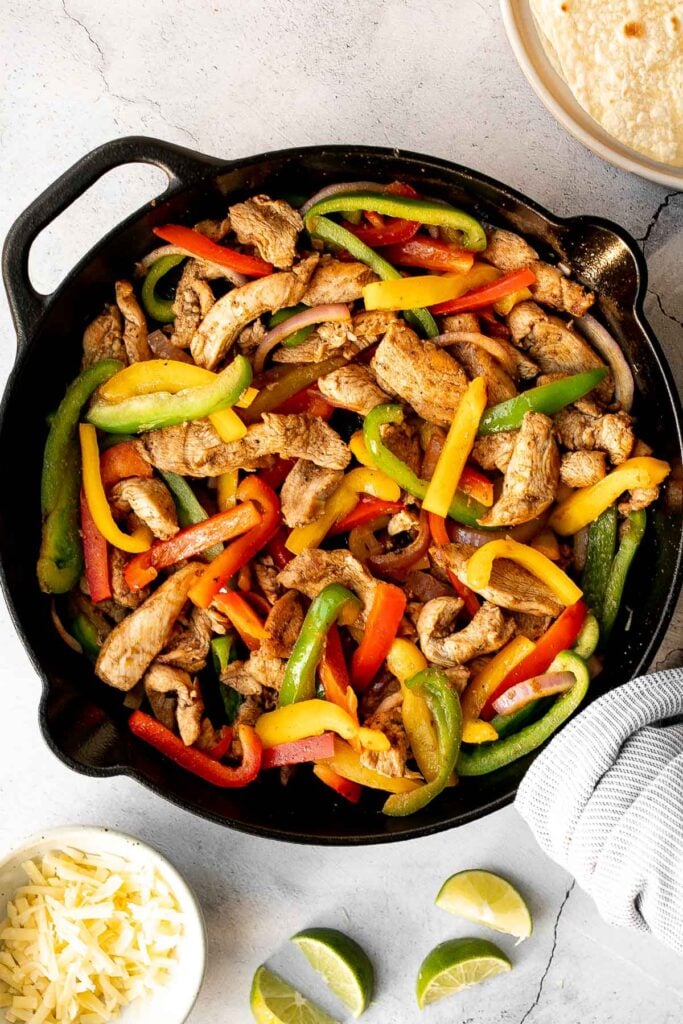
Shrimp Tacos with Lime Crema Slaw
Quick and easy shrimp tacos with lime crema slaw are ready in less than 30 minutes and are packed with flavourful crispy shrimp and creamy cabbage slaw.

Fusion-style Korean beef steak tacos are made with tender, flavour-packed slices of beef and topped with caramelized pineapple, kimchi, and spicy mayo.
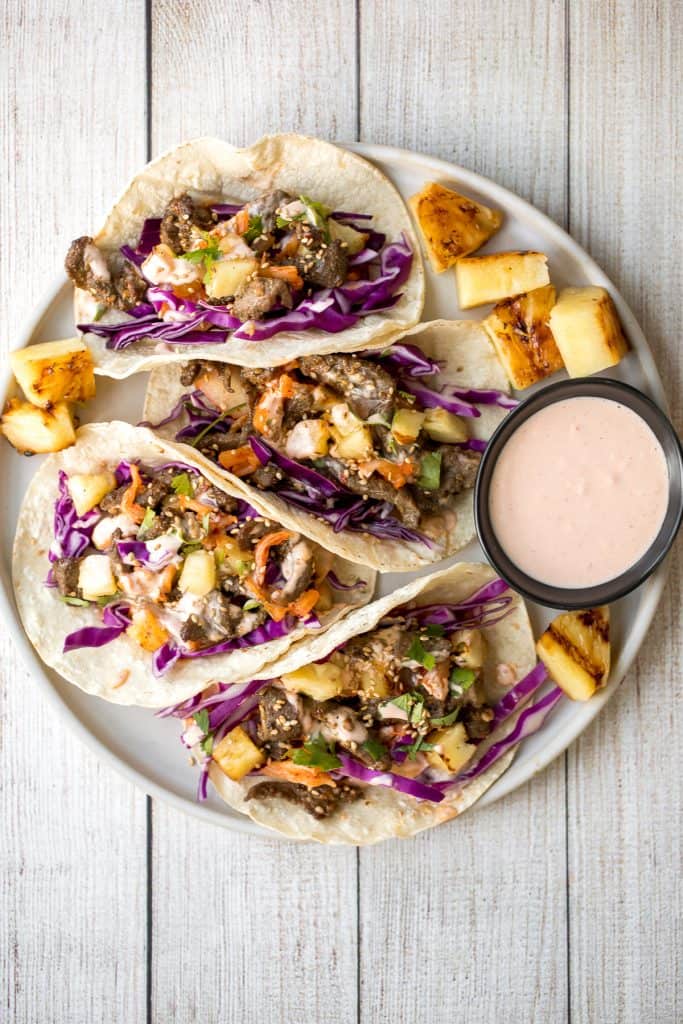
Shrimp avocado tostadas are a delicious, crunchy, quick and easy Mexican dish you can make in just 15 minutes, loaded with the best combination of toppings.

Beef taco salad is a simple, filling, and delicious meal loaded with your favorite taco fillings, and a creamy lime dressing. Make it in 20 minutes.
Mexican Pulled Pork Tacos (Carnitas)
Mexican pulled pork tacos with juicy and tender traditional carnitas wrapped in corn tortillas and topped with fresh onions, cilantro, and jalapeños.

Sizzling and hot sheet pan chicken fajitas are on the table in less than 30 minutes! The best part is that you just throw everything into one sheet pan.
When it comes to vegetarian tacos, these vegan chickpea tacos are some of the best. They are delicious, filling, easy to make, and loved by all.

Storing and Reheating Summer Dinners
- Make ahead instructions. You can make some of these summer dinners ahead of time and store in the refrigerator for a few days or even in the freezer for up to 3 months. You can also prep the ingredients in advance and store in the refrigerator until ready to use.
- How to store: Store any leftovers in airtight containers in the refrigerator or possible even in the freezer. Check the individual recipe for complete storing instructions and to see if the recipe is freezer-friendly.
- How to reheat: Most of the leftovers can be reheated on the stovetop over medium to low heat for about 5-10 minutes until warmed through, in the air fryer or the oven at 300F for 10-15 minutes until warmed through, or in the microwave in 20-second increments until warmed through. If heating from frozen, let it thaw first and then reheat.
More Summer Dinner Ideas
- 40 Best Pasta Recipes
- 60 Best Chicken Recipes
- 30 Best Shrimp Recipes
- 30 Best Mexican Recipes
- 25 Best Ground Beef Recipes
- 20 Best Dip Recipes
Did You Make Any of These Easy Summer Dinner Recipes?
Please leave a comment and rating below, and let me know what you thought of this round up of these easy summer dinner ideas. Be sure to snap a picture and tag me on Instagram @aheadofthyme or share it on the Pinterest pin so that I can follow along.
HUNGRY FOR MORE? Don't forget to sign up for my email newsletter so that you don't miss any recipes. You can also follow along on Instagram and Pinterest for more recipe updates.
Cherry Crumb Bars
These homemade Cherry Crumb Bars are sweet, buttery, and tart. With 3 delicious layers, they have a crumbly pastry crust layer, a sweet cherry pie filling, topped with a crumbly topping.
The best part? This crumble bar recipe is so easy to make and is ready to serve in just over hour - but they taste like they came from a fancy bakery. They're the perfect dessert to satisfy a last minute craving this summer.
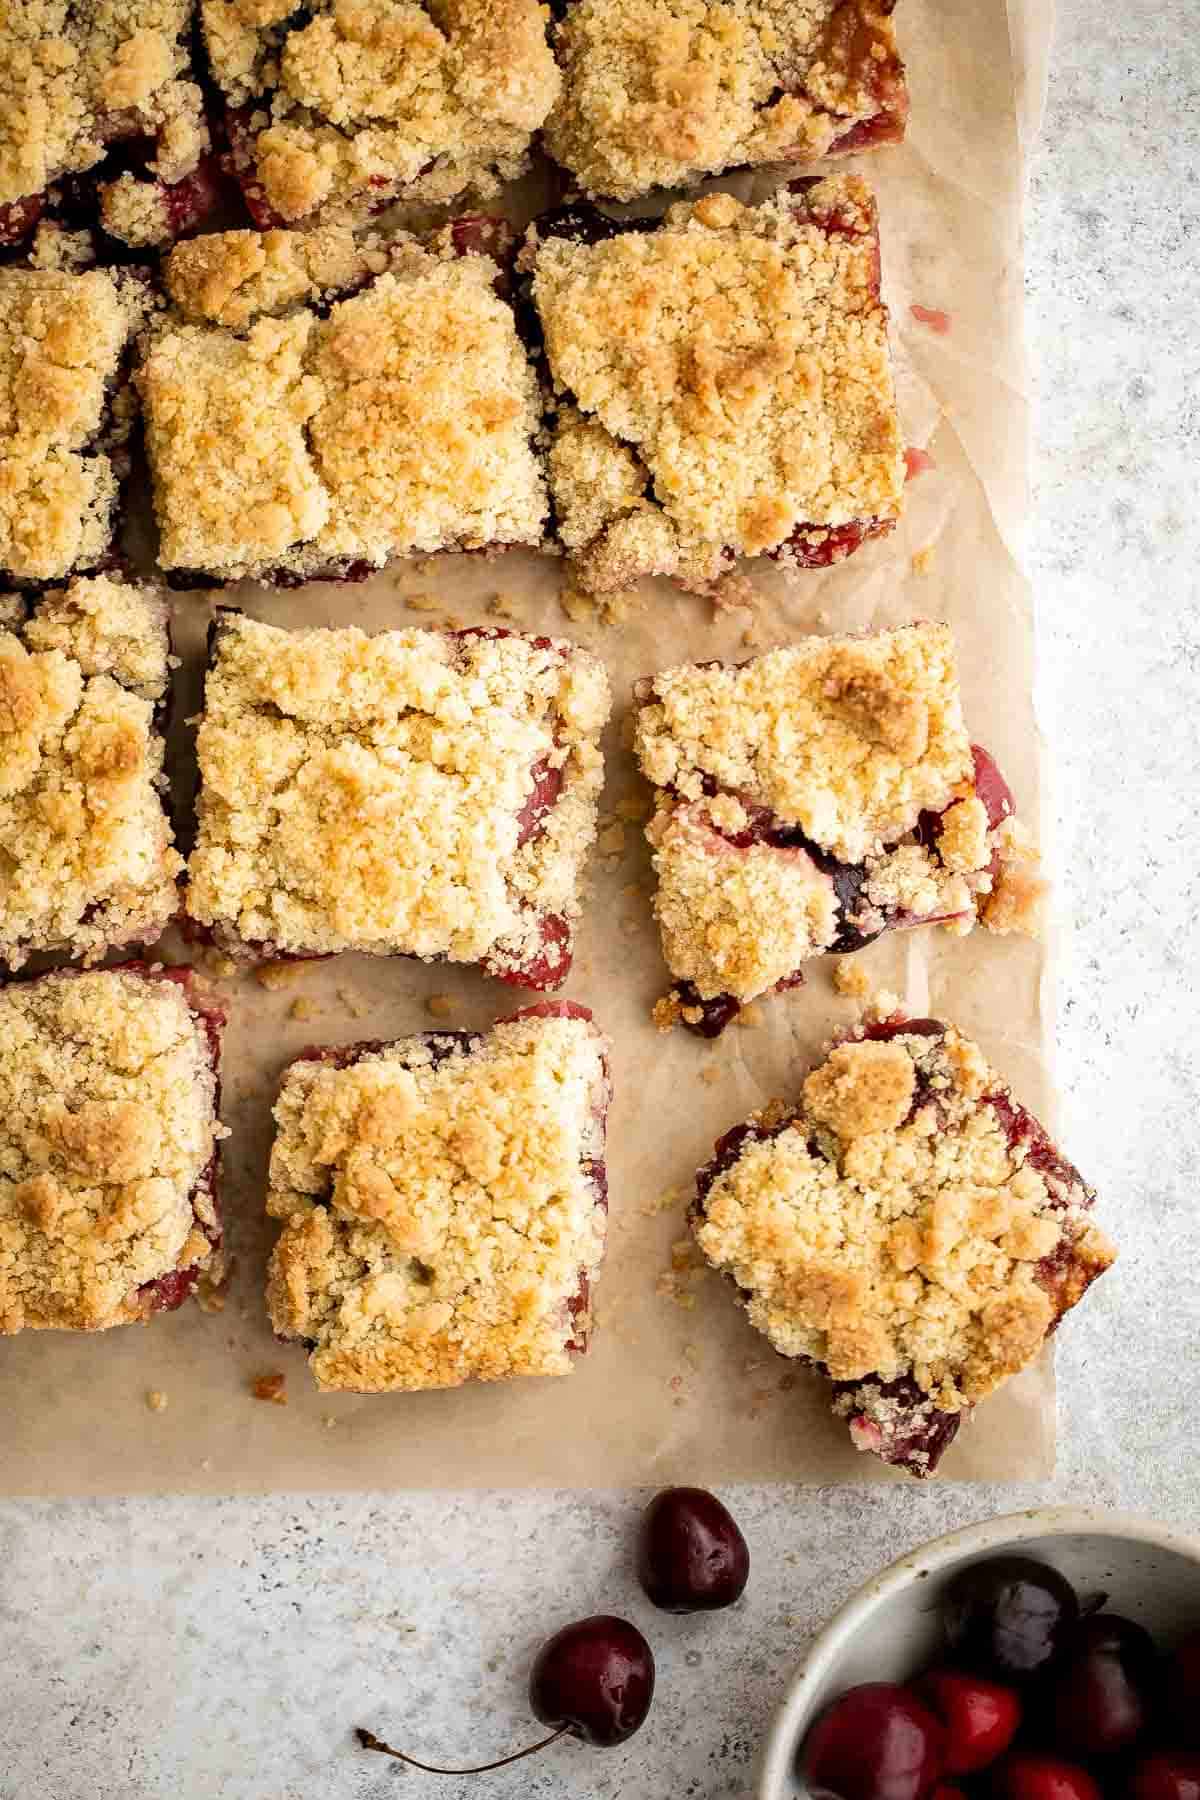
Why You'll Love Cherry Crumb Bars
- Loaded with fresh cherries. There's nothing quite like a freshly baked summer dessert that is loaded with berries. When cherry season comes around, we end up baking all the treats. But you can actually enjoy these cherry pie bars any time of the year by using frozen cherries!
- The easiest way to make "pie". These cherry crumb bars are basically cherry pie in bar form. They have a delicious cherry filling sandwiched between the easiest, buttery, homemade pie dough. But there is no rolling dough involved here. Just pack in the bottom layer and sprinkle on the top layer. So easy!
- They're quick and easy to make. Cherrt crumble bars are ready from start to finish in just over one hour, and the prep time is just 15 minutes. Plus, it's baked in one baking dish, so clean-up is relatively easy. All you need to do is cut the bars into a size that suits you and wash the baking dish.
- Serve it whenever you want. These bakery-style cherry bars are perfect as a late-night treat, served on weekend brunch, or as a snack on your coffee break. However you enjoy them, you're going to love them. They're a tota crowd pleaser.
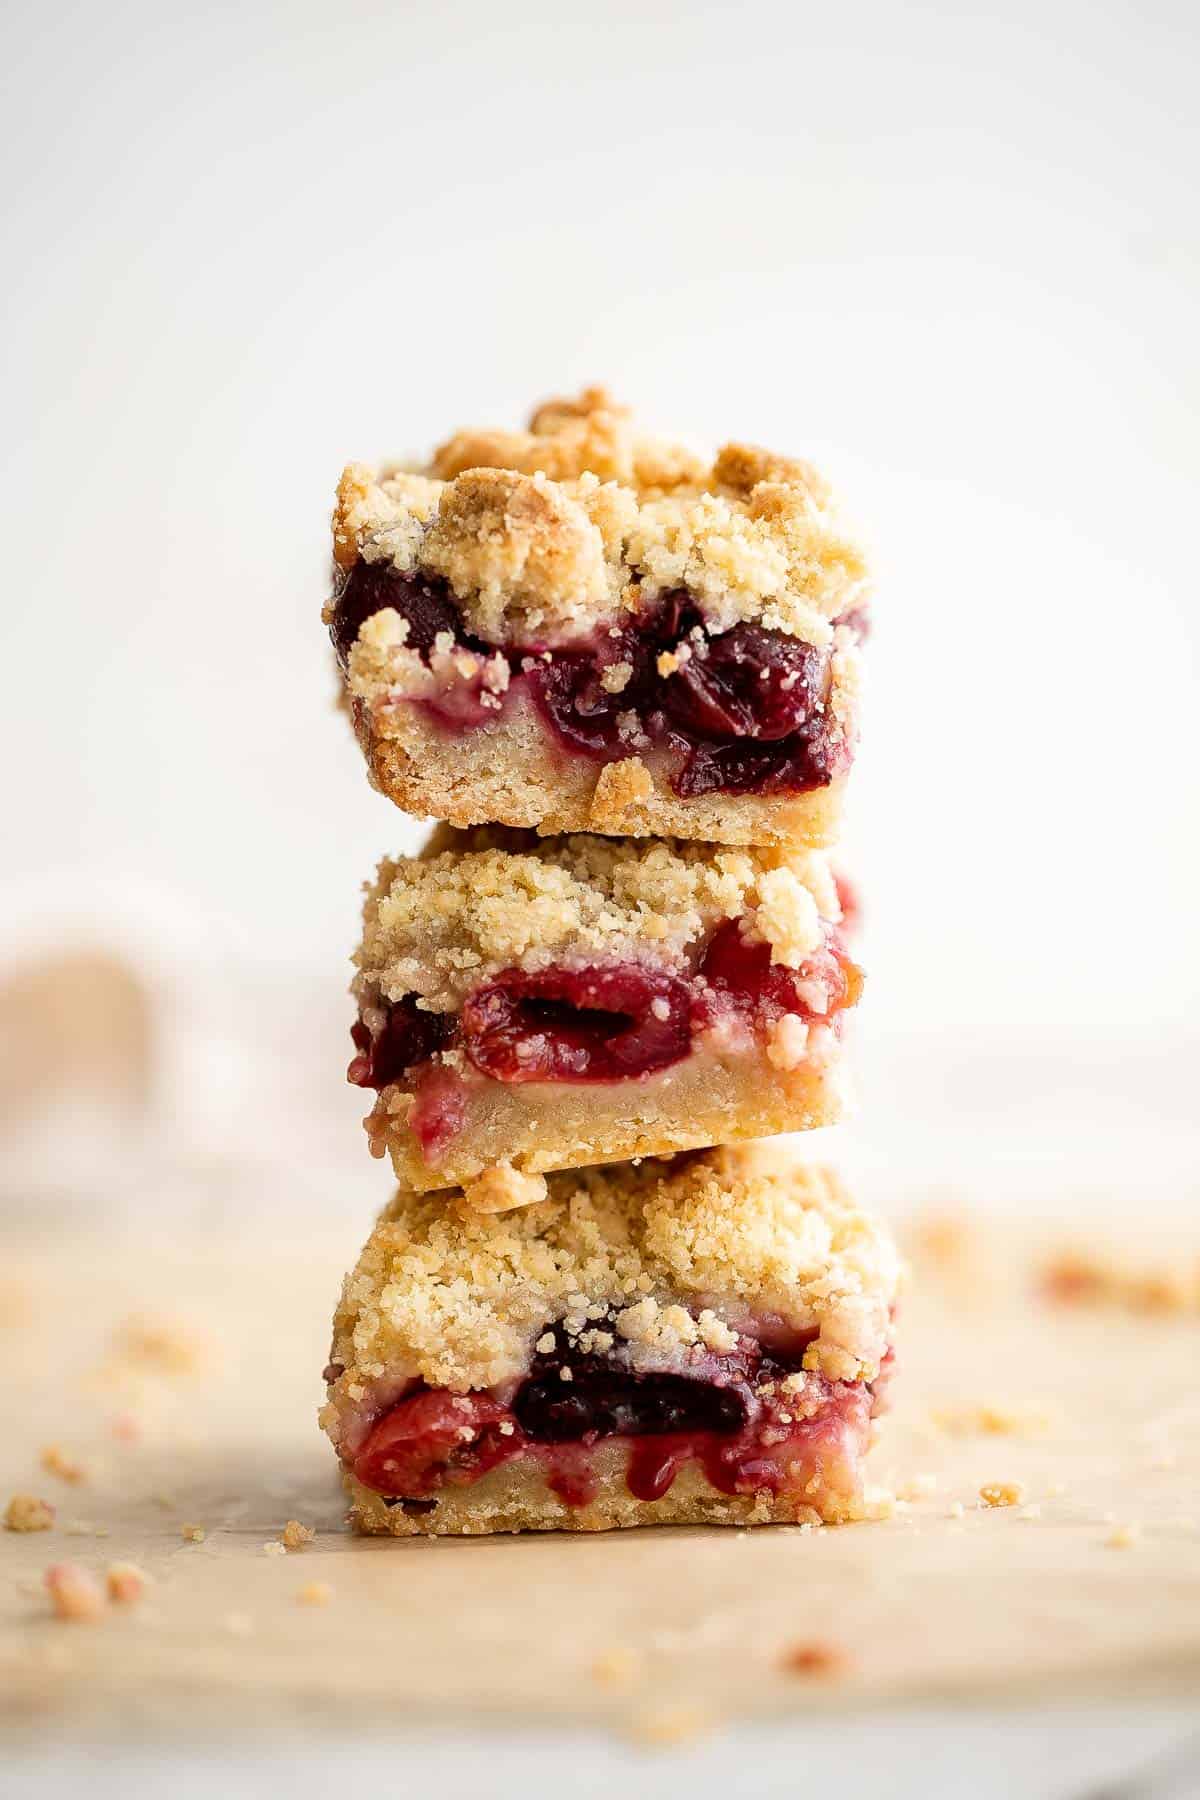
Ingredients and Notes
To make these delicious Cherry Crumb Bars, you will need the following ingredients (full measurements in recipe card below):
- all-purpose flour
- granulated sugar - we need sugar in both the pie crust, topping, and filling.
- baking powder
- salt
- cold butter - you will need to use cold butter for this recipe, cut into cubes. I recommend taking the butter out of the fridge and cutting it just before it's called for in the recipe. Or you can chop it up and put it back in the fridge until ready to use.
- egg
- cherries - we love making these crumb bars in season and used fresh cherries that we picked at our local cherry farm. However, you can use pitted frozen cherries in here too!
- cornstarch - helps to thicken the cherry filling. You can also substitute it with all-purpose flour.
- lemon juice
You will also need measuring cups and spoons, mixing bowls, and a 9-inch square baking pan.

How to Make the Best Cherry Crumb Bars
- Make the pastry mixture. In a large mixing bowl, add flour, sugar, baking powder, salt, butter, and egg. Stir well with a fork or pastry cutter until the flour mixture forms into small crumbs. You can also combine all ingredients in a food processor and pulse mix until it resembles coarse crumbs.
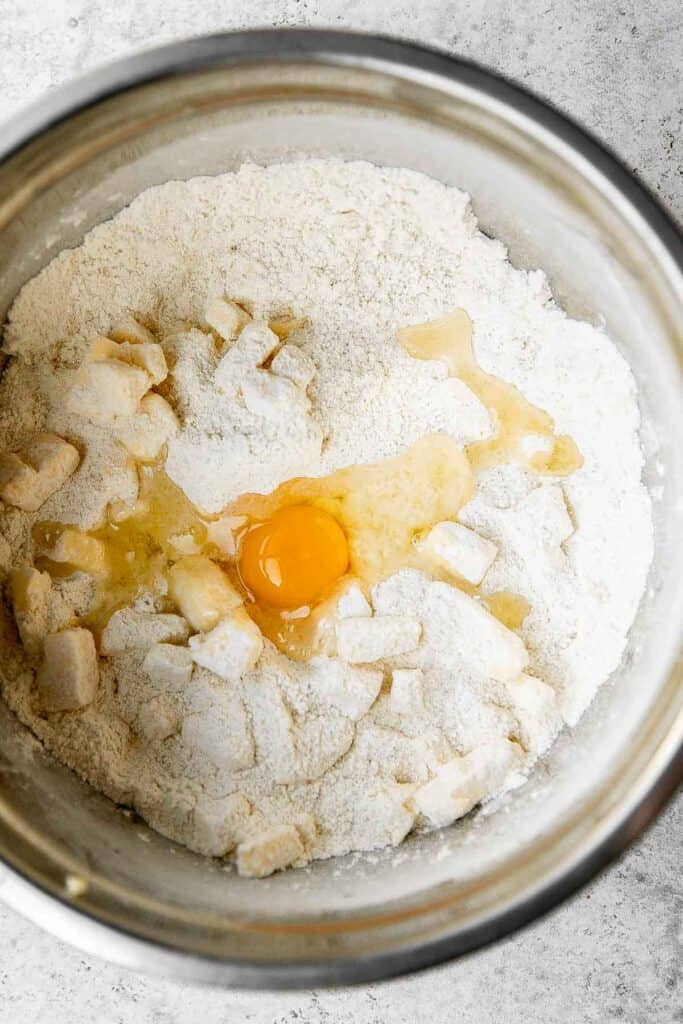
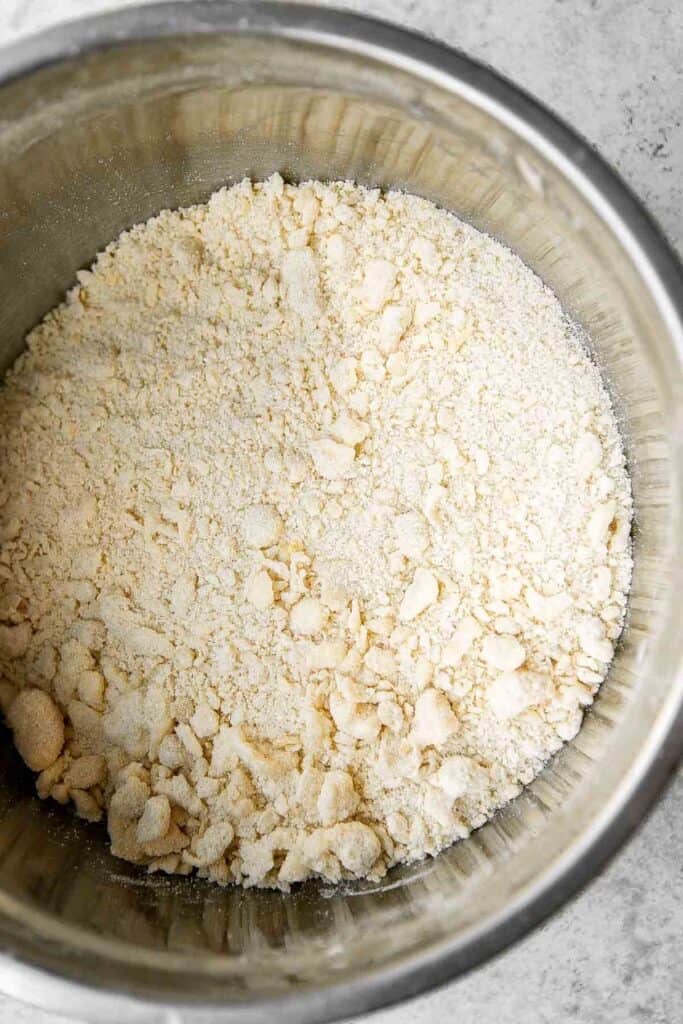
- Prepare the cherry filling. In a medium mixing bowl, mix together pitted cherries, sugar, cornstarch and lemon juice until evenly coated.
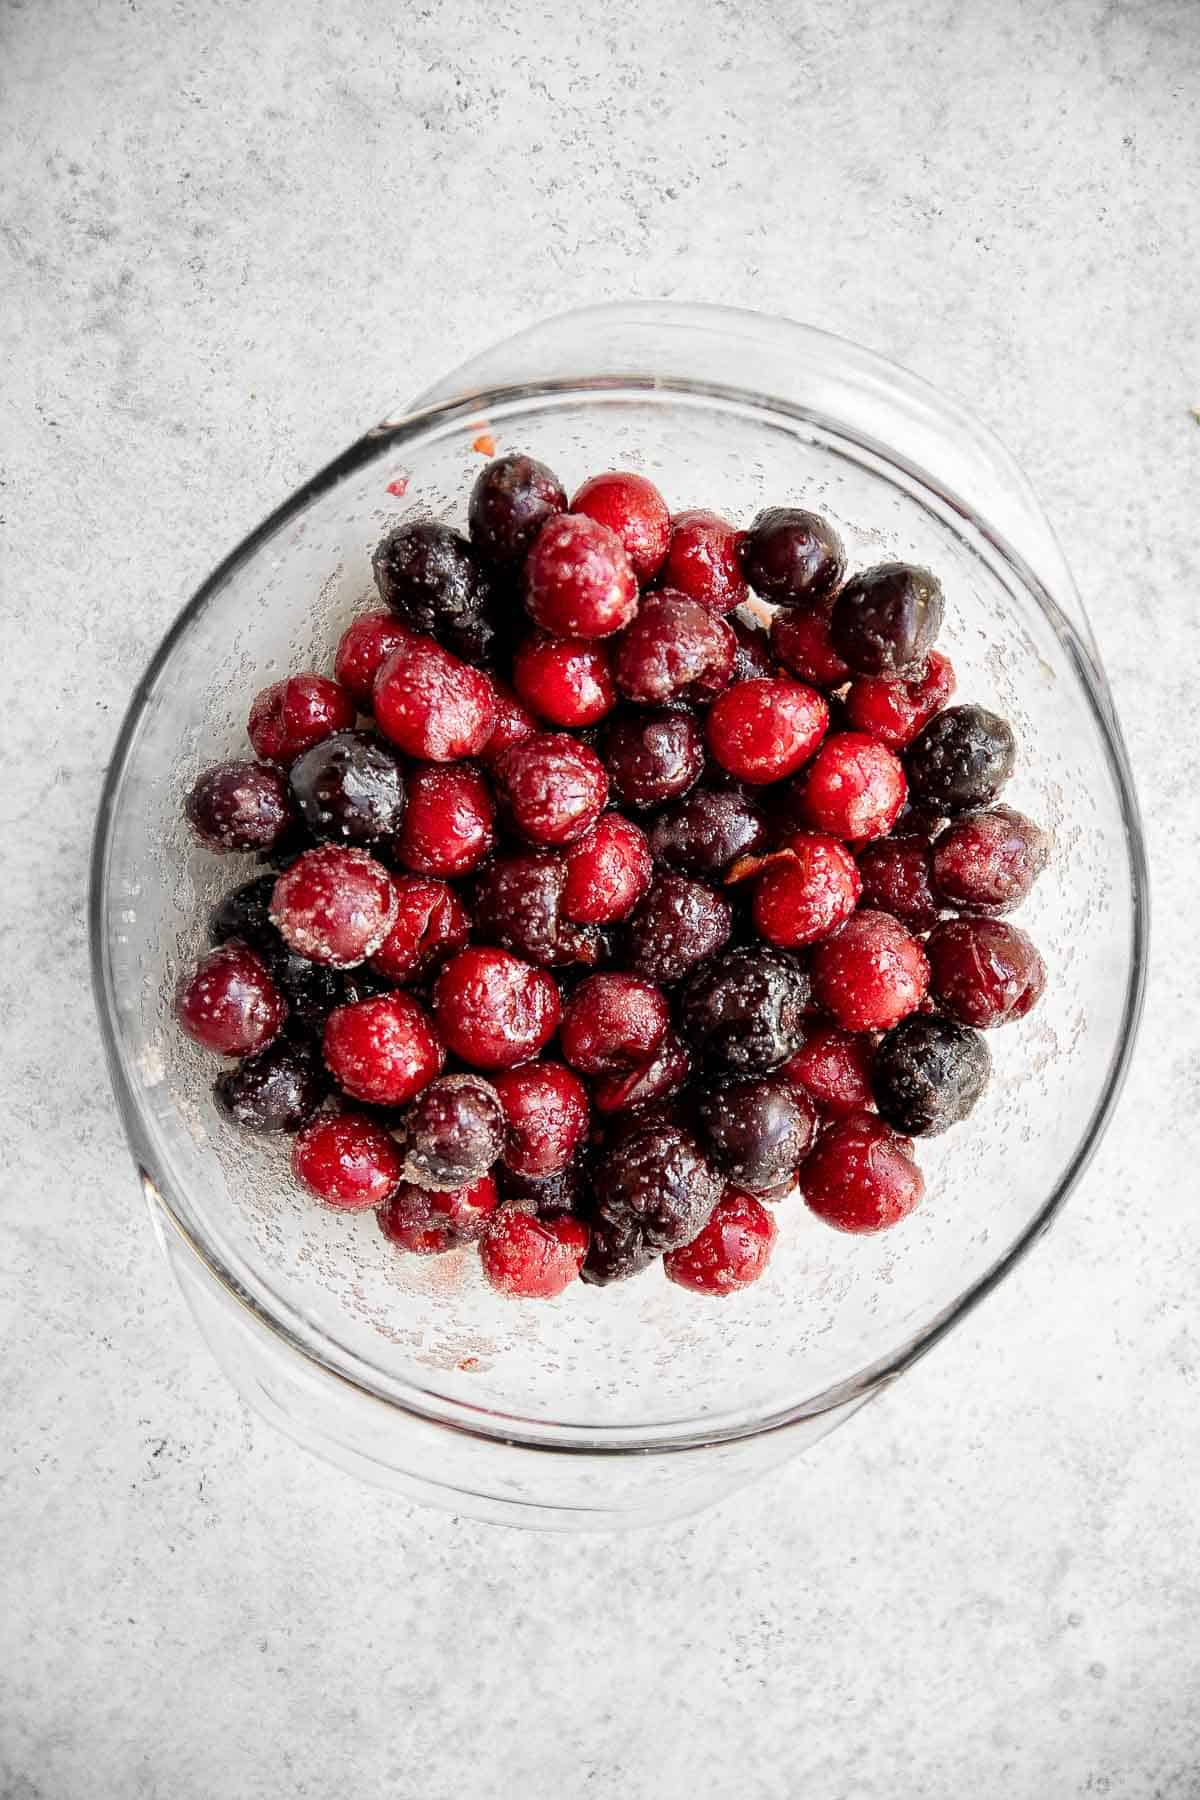
- Layer the crumb bars. Line an 9-inch square baking pan with parchment paper, leaving an overhang on 2 opposite sides to make it really easy to remove when baked. Spread half of the crumb mixture evenly into the baking dish and press it to pack it and form an even bottom crust. Spread the cherry mixture over the crust and crumble the remaining half of the crumb mixture on top.
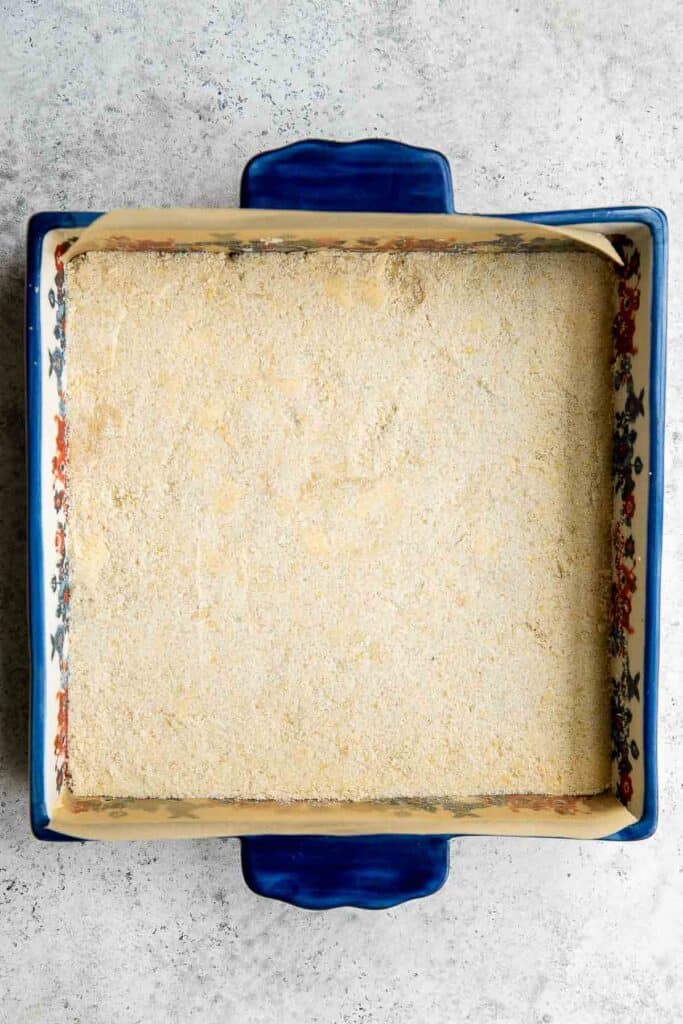
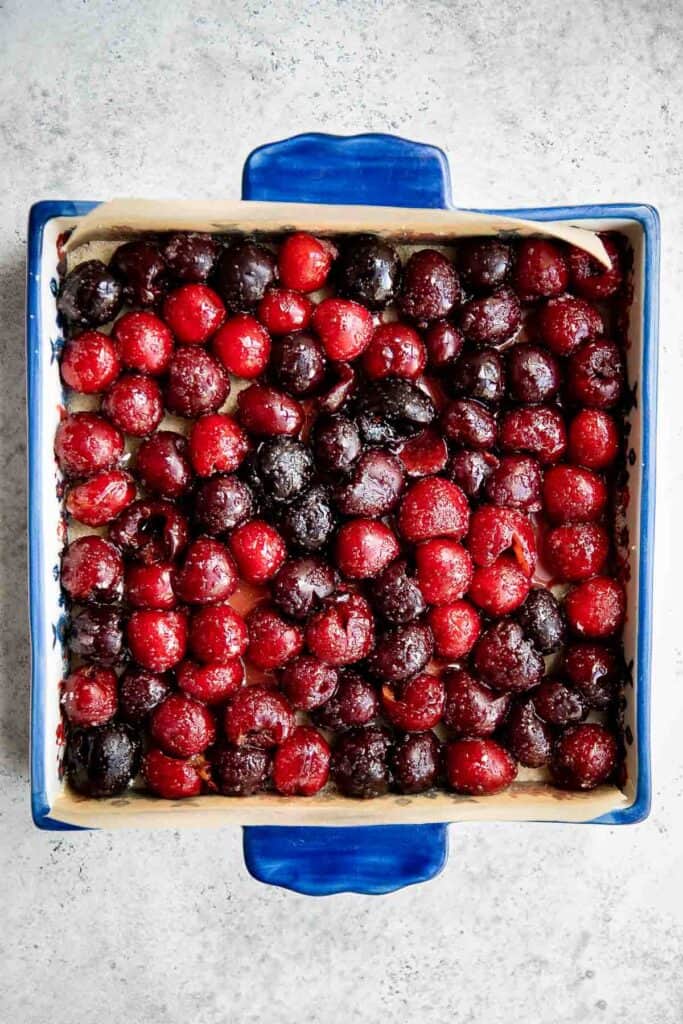
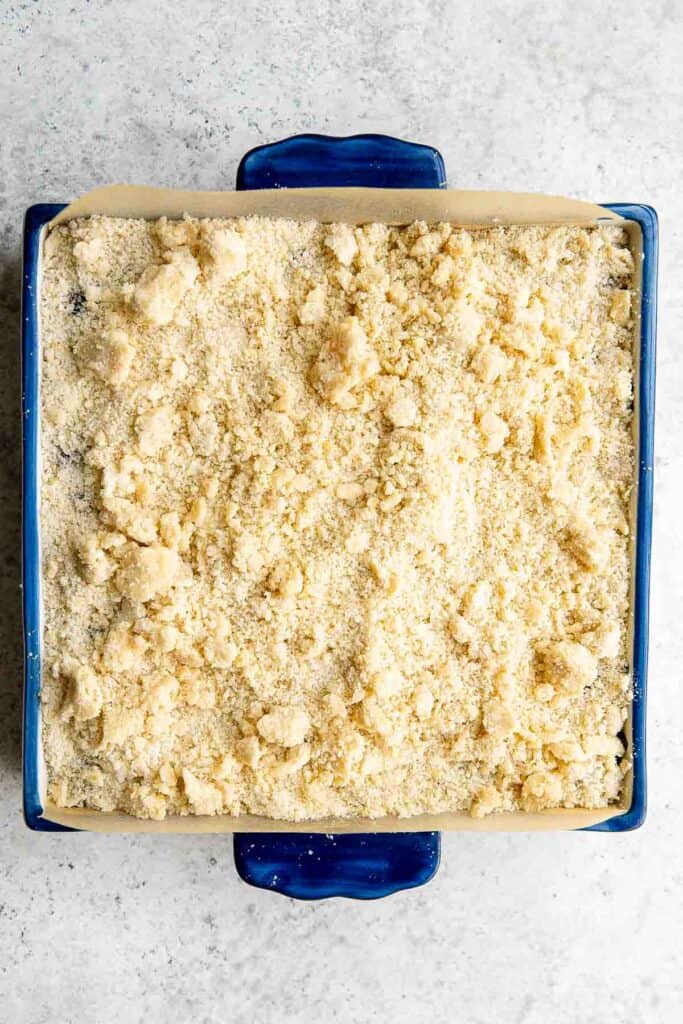
- Bake. Bake in a 375F preheated oven for 45-50 minutes until the crust turns golden brown. Let it cool at room temperature for about 30 minutes. You can serve it warm or let it cool completely to make it easier to cut. You can speed up on the process by storing in the refrigerator or freezer for 1 hour to help it set faster.
- Serve. Slice the cherry crumb bars into 9 or 16 squares and serve warm with a scoop of vanilla ice cream on the side or or cold.
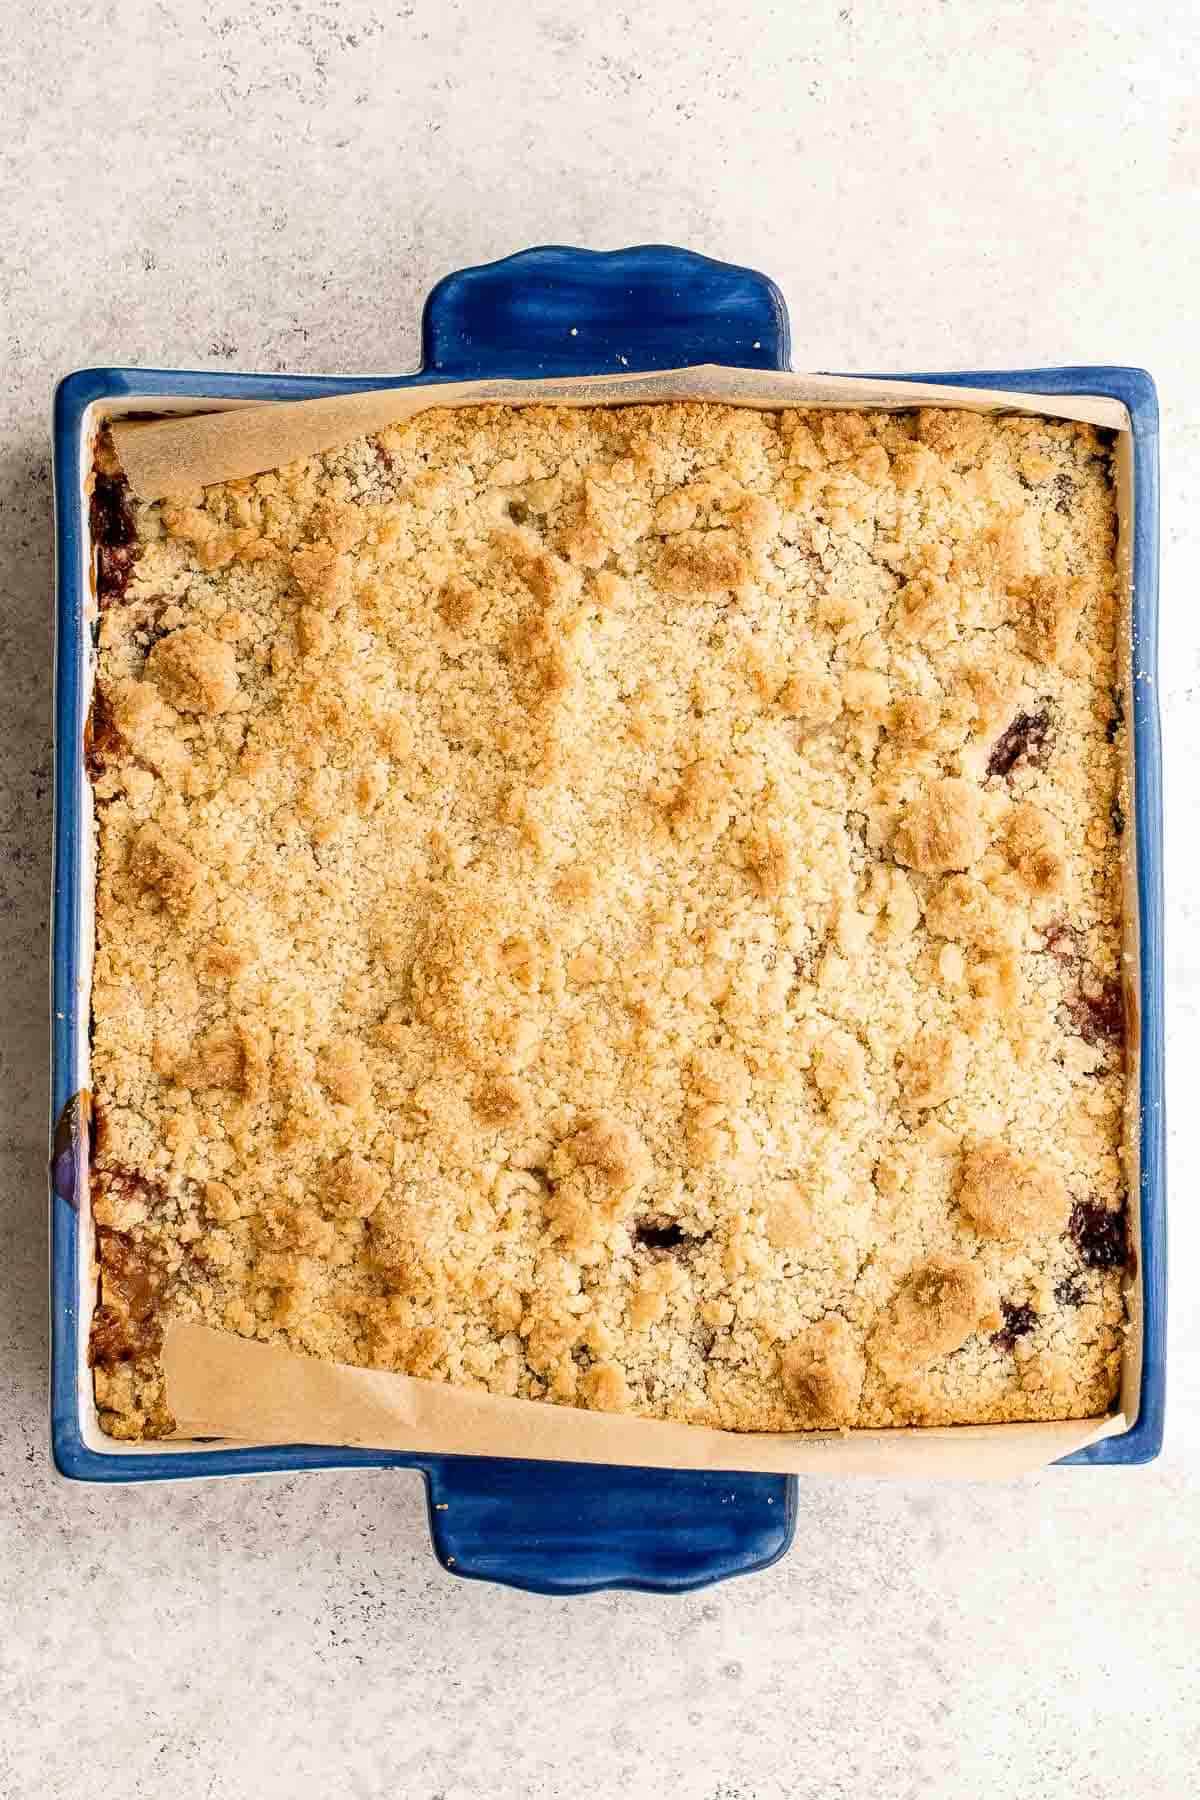
How to Serve
Cherry crumb bars are delicious on their own whether served warm, at room temperature, or cold. My favorite is warm with a scoop of Vanilla Ice Cream melting on top.
We love using up summer berries in baking recipes. Some of our other favorites are:
Storing Instructions
- How to store: Store cherry crumble bars in an airtight container in the refrigerator for up to 5 days.
- How to freeze: You can also freeze cherry crumb bars for up to 3 months. If sliced, individually wrap each crumble bar in plastic cling wrap and store in a freezer bag or airtight container. When ready to eat, allow them to thaw overnight in the refrigerator or on the kitchen counter for a couple hours.
- How to reheat: If you want to warm up your leftover berry bars, simply pop them into the air fryer at 350F for 5 minutes or in the oven for 10 minutes until warm. You can also reheat in the microwave in 30 second increments until warm.
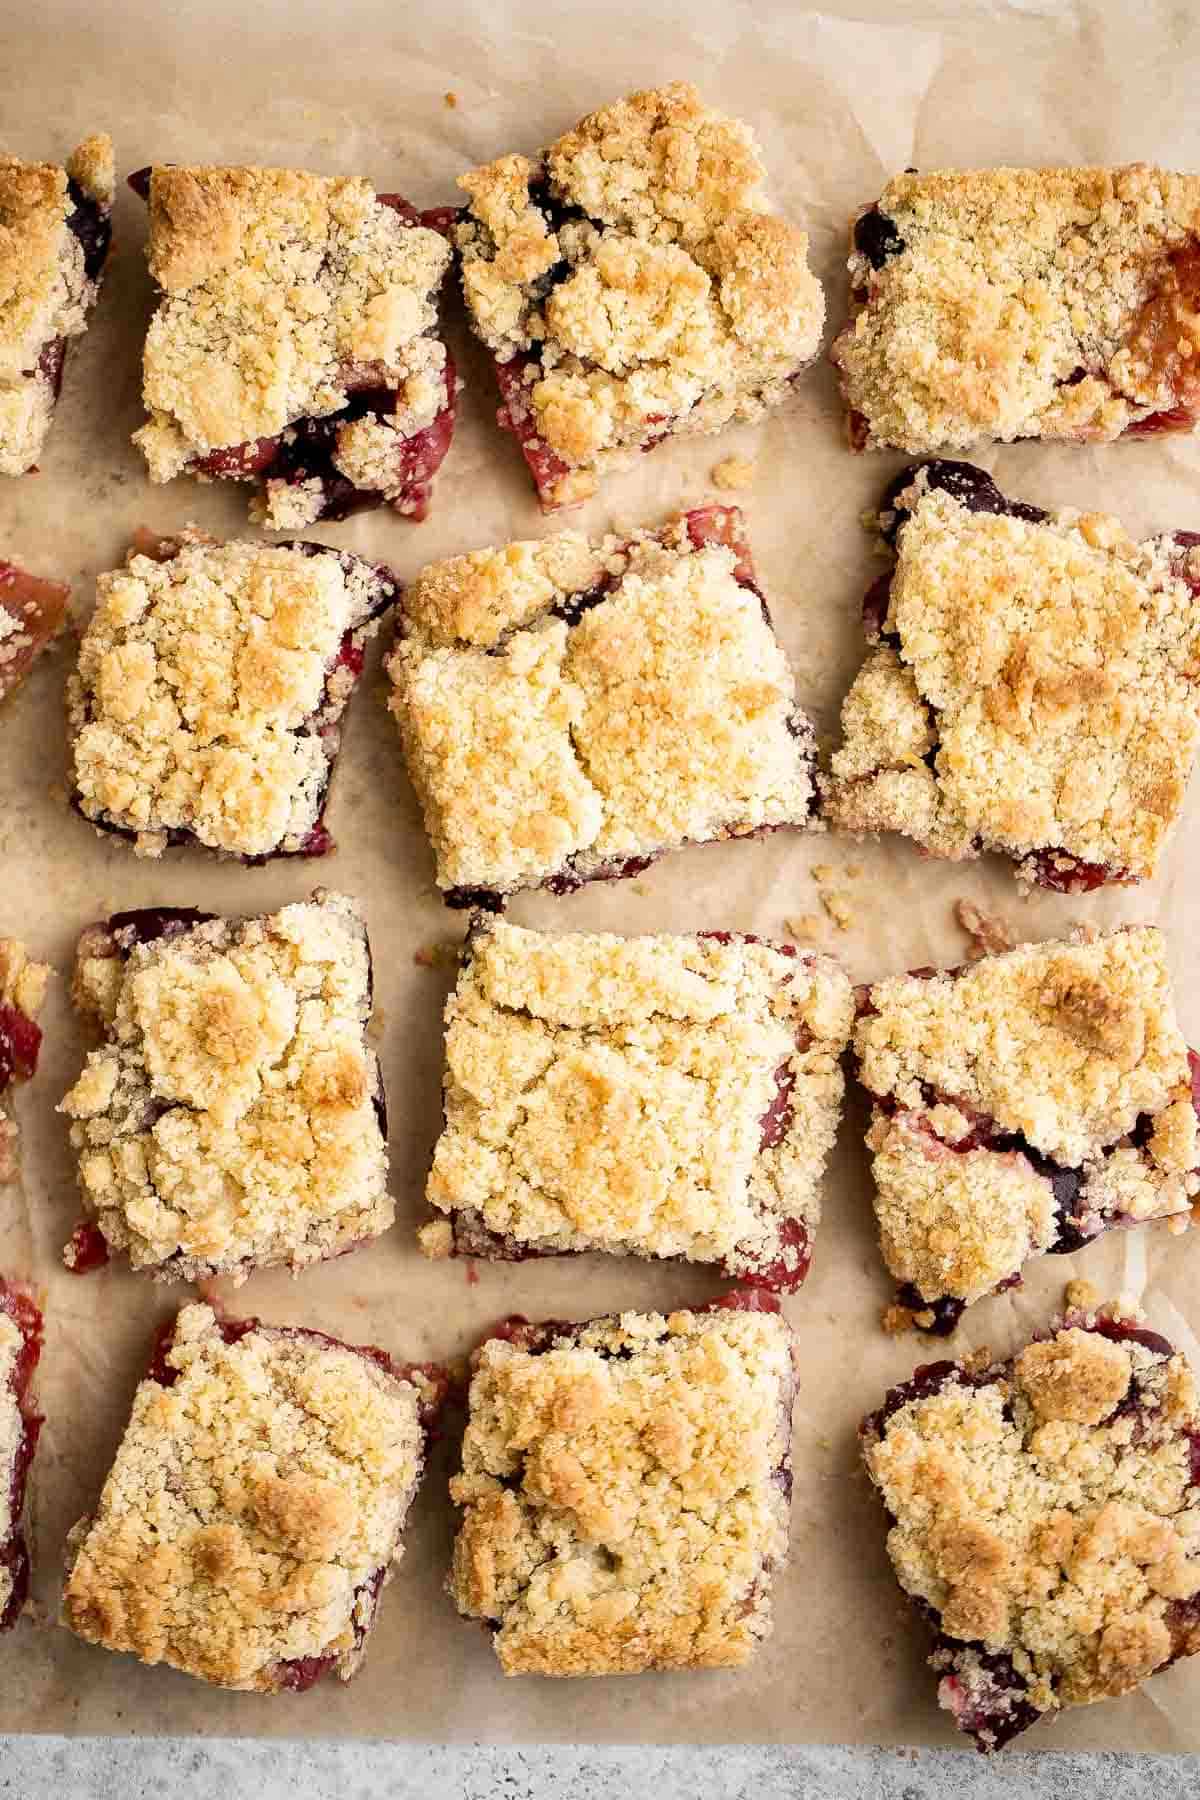
More Bar Recipes
- Blueberry Oat Squares
- Chocolate Chip Cookie Bars
- Sugar Cookie Bars
- Pecan Pie Bars
- Strawberry Crumb Bars
- M&M Cookie Bars
Tried this recipe?
I'd love to hear what you think! Leave a comment and rating below to share your feedback. Your reviews help others discover this recipe and help me keep creating more free recipes for you. Snap a photo and tag me on social media @aheadofthyme too.

Zucchini Bites
Zucchini Bites are little savory balls that are loaded with fresh zucchini, Parmesan, and an assortment of seasoning for the best flavor. They are crispy and golden brown on the outside, and tender inside. Plus, they're quick and easy to make in under 30 minutes and you can either bake them in the oven or cook in the air fryer.
So if you have an abundance of summer zucchini growing in your garden, zucchini balls are the perfect recipe to try. Serve these zucchini nuggets as an appetizer with your favorite dipping sauce, as a snack in your kid's lunch box, or as vegetarian meatballs in your favorite dinner recipes.
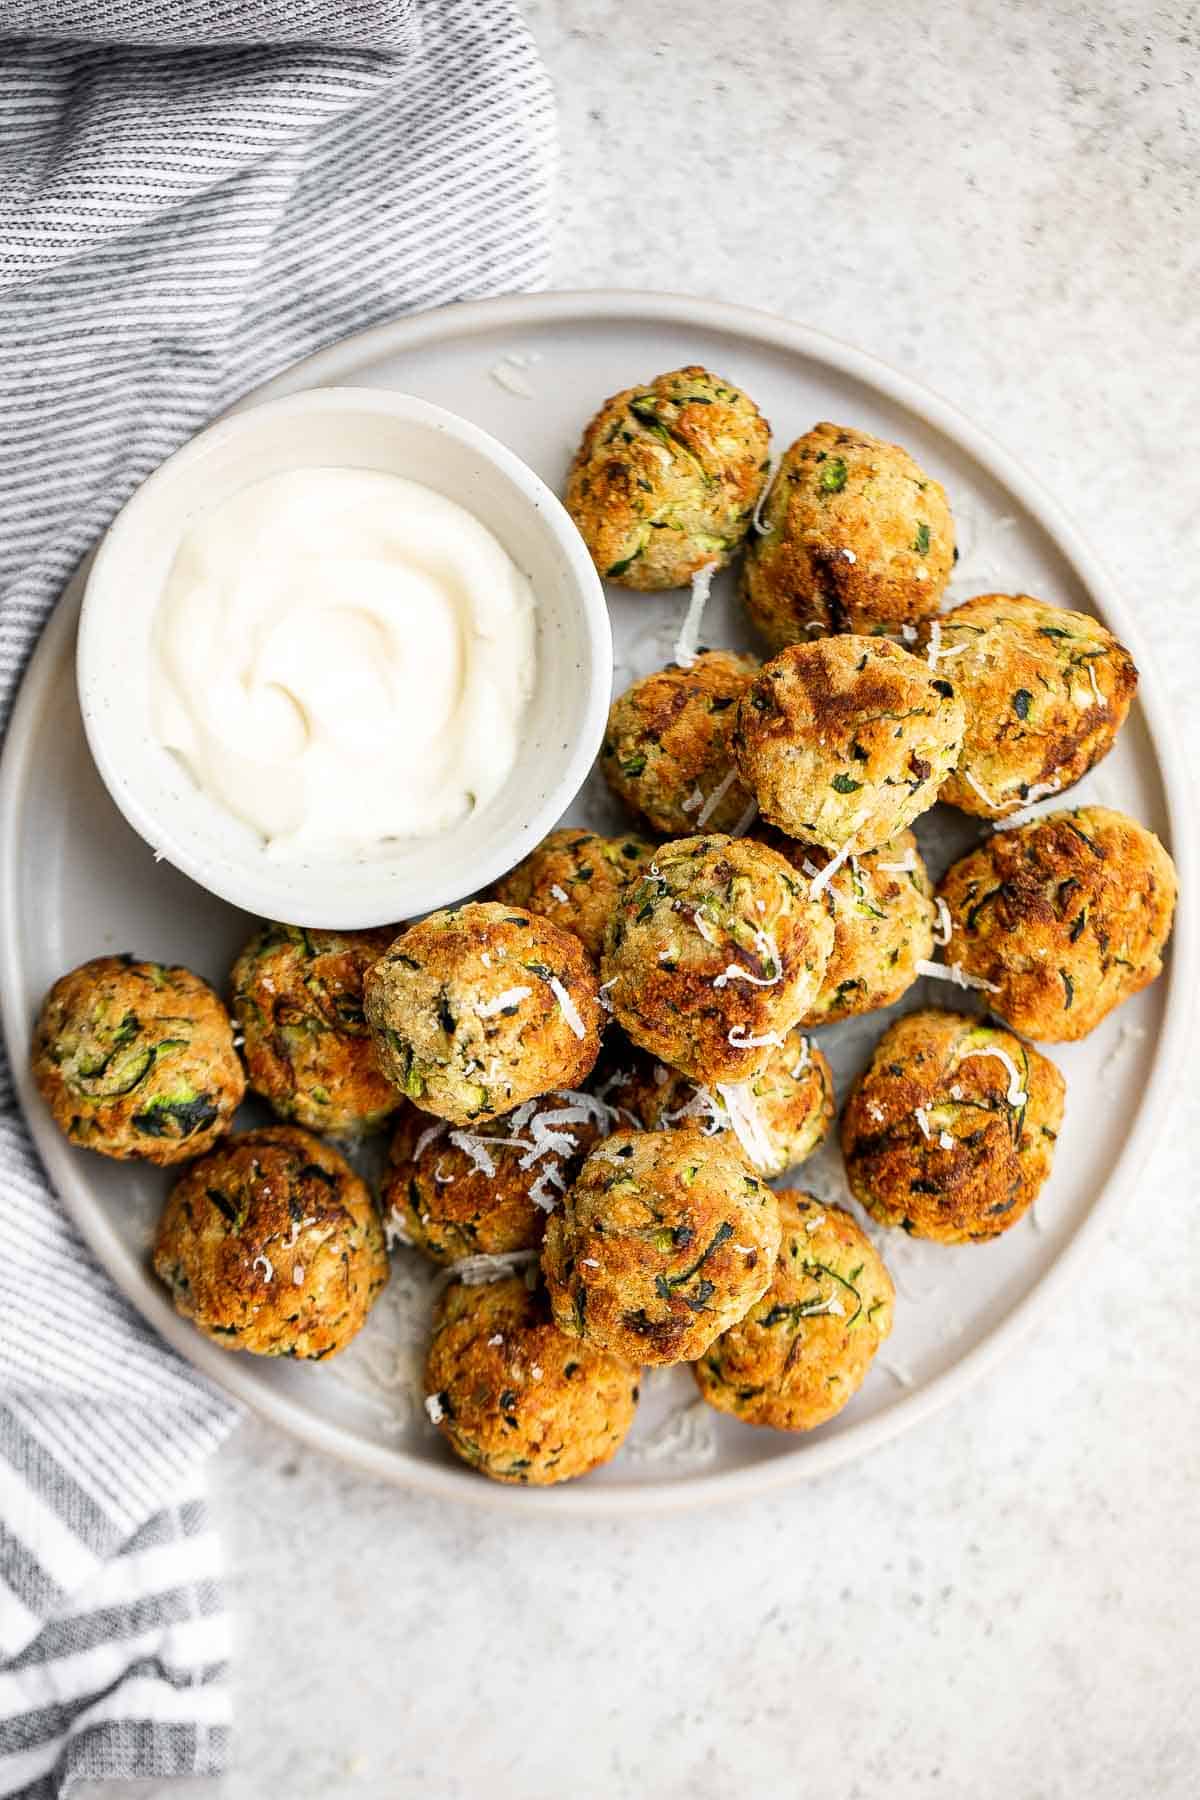
Why You'll Love These Zucchini Bites
- Quick and easy. Who doesn't love quick and easy recipes? These zucchini bites are ready to eat in under 30 minutes - including prep! All you need to do is shred the zucchini, combine the ingredients, roll into balls and cook. It's so easy that it's perfect for beginners to try and build some confidence in the kitchen, but seasoned home cooks will love it too!
- Crispy outside, soft and tender inside. These zucchini balls have the best texture thanks to the moisture in the fresh zucchini. They are crispy and golden on the outside, and tender on the inside.
- You can bake or air fry them. I love making these zucchini nuggets in the air fryer because it cooks fast, requires no preheating, and the results are delicious. But the good news is that if you don't have an air fryer, you can easily cook these bites in the oven.
- Serve them hot or cold. You can serve these zucchini parmesan bites hot and fresh out of the oven and enjoy the leftovers cold. Either way, it's delicious and totally your personal preference how you want to eat them. For this reason, they are also great for meal prep as a healthy snack in work lunches or as vegetarian meatballs for school lunches.

Ingredients and Substitutions
To make these delicious Zucchini Bites, you will need the following ingredients (full quantities in recipe card below):
- zucchini - these zucchini balls are made with shredded zucchini. Shred zucchini easily using a box grater or food processor.
- Panko breadcrumbs - I like the texture of Panko breadcrumbs in this recipe, but you can easily substitute it with regular breadcrumbs.
- Parmesan cheese
- egg - helps to hold the balls together.
- vegetable oil
- garlic powder
- paprika
- Italian seasoning
- salt and pepper
You will also need measuring cups and spoons, a box grater or food processor (to shred the zucchini), mixing bowl, and skillet.
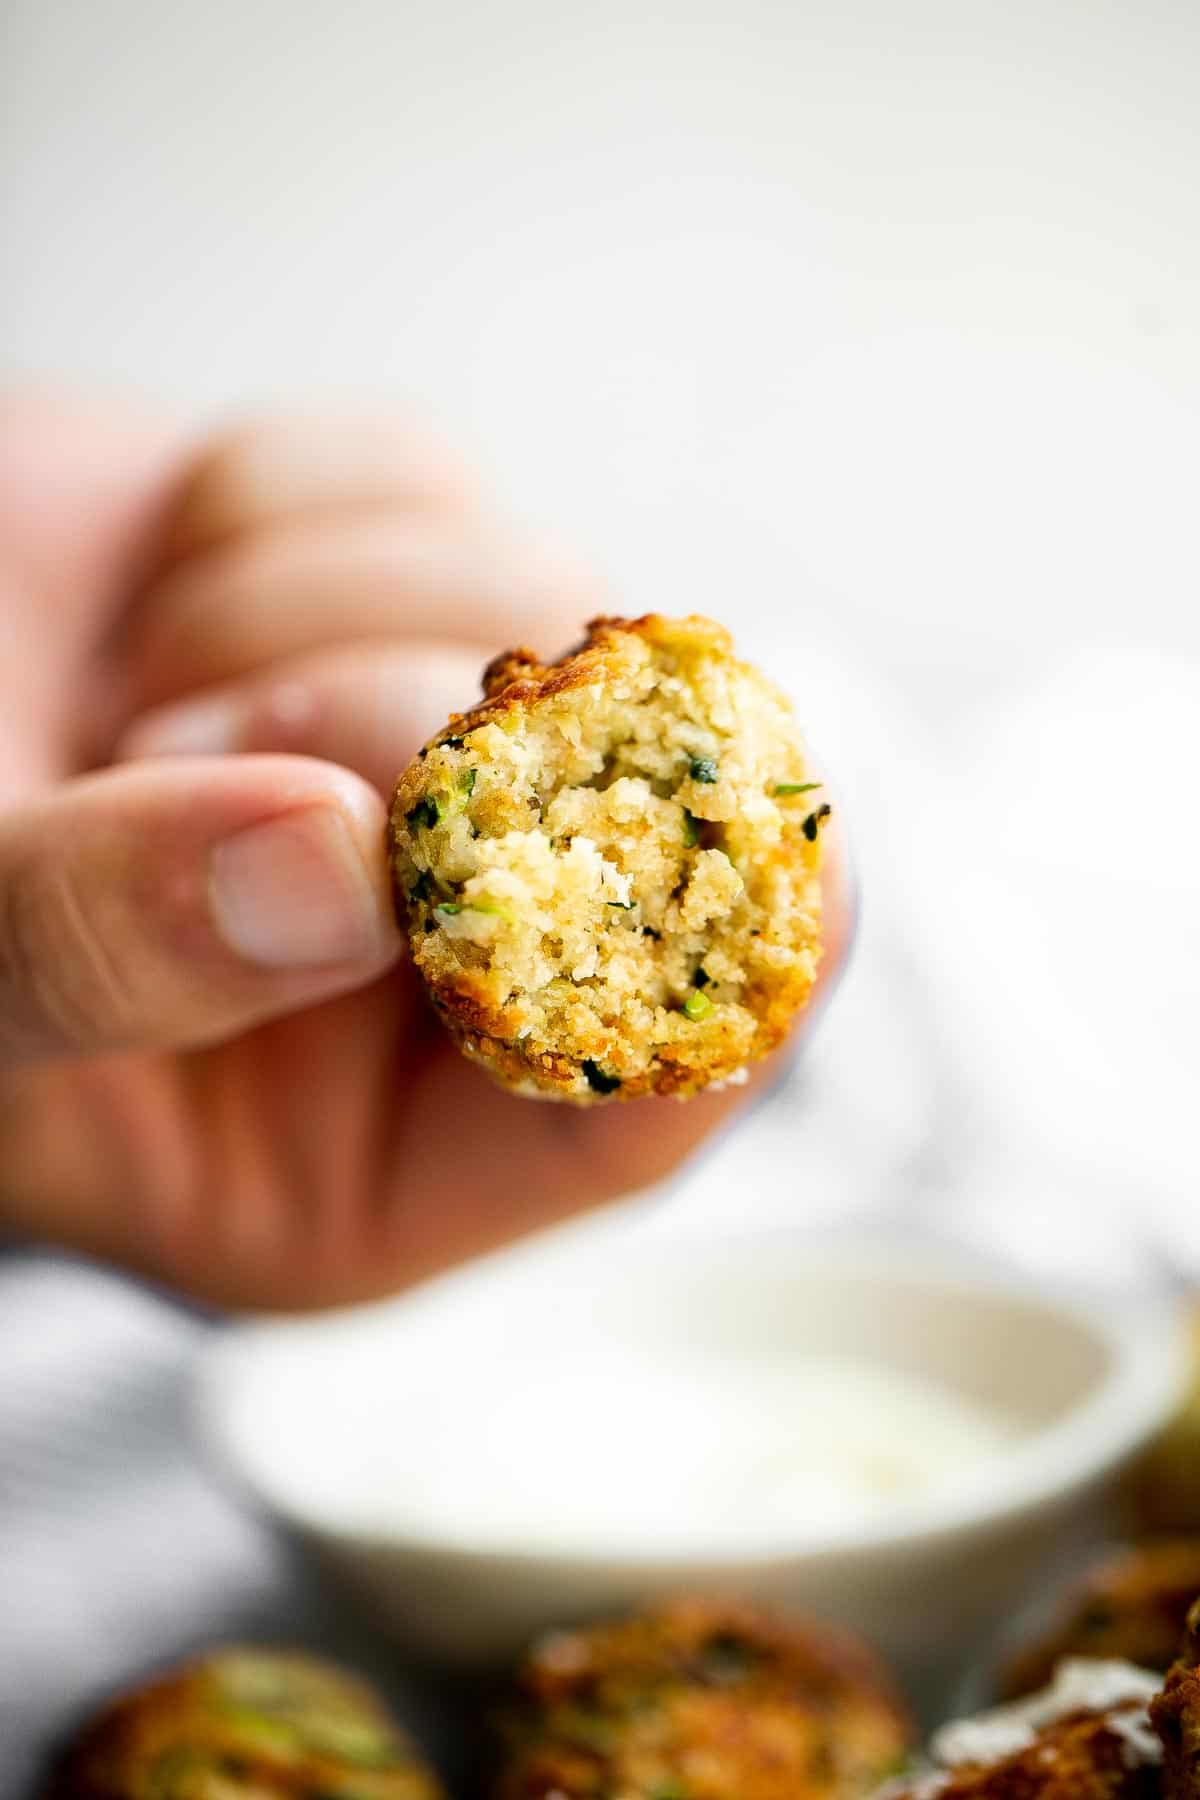
How to Make the Best Zucchini Bites
- Shred the zucchini. Use a box grater or food processor to shred the zucchini.
- Combine ingredients. In a large mixing bowl, combine shredded zucchini, breadcrumbs, Parmesan, egg, oil, garlic powder, paprika, Italian seasoning, salt, and pepper. Mix well until evenly combined.
- Shape zucchini bites. Take 2 spoonfuls of the zucchini mixture at a time and shape into 1.5-inch balls. Set aside on a plate.

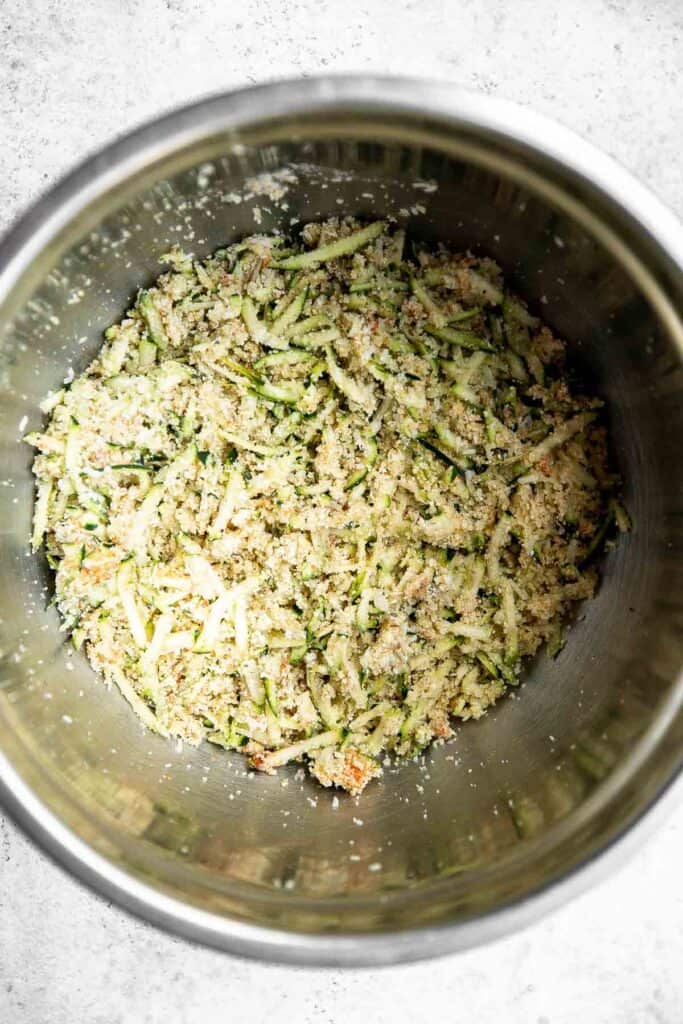
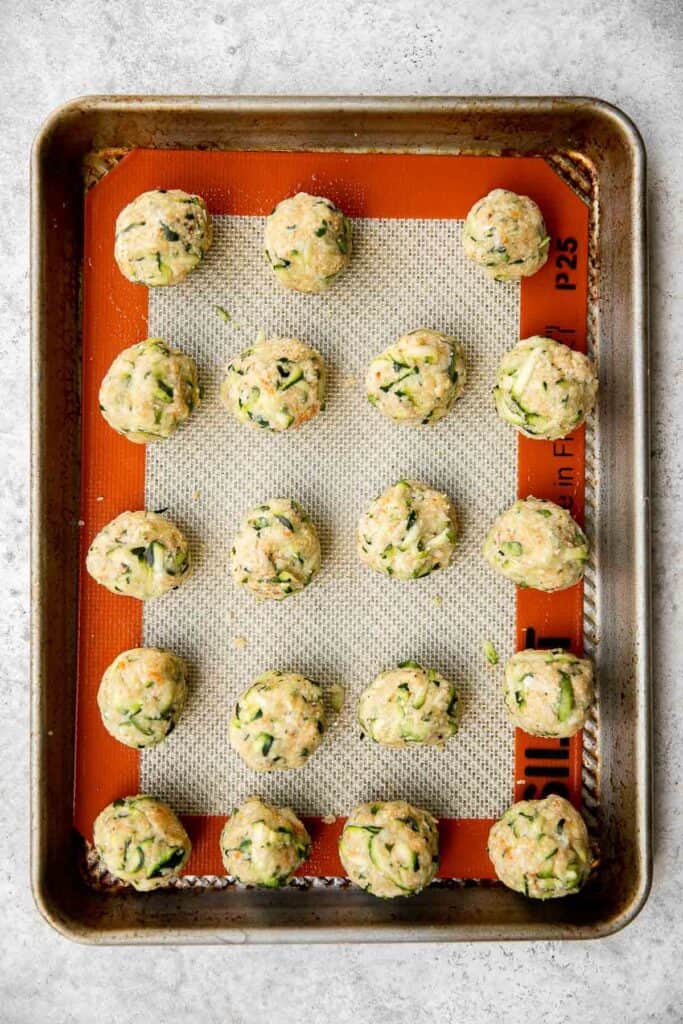
- Cook. Cook the zucchini bites in an air fryer or in the oven.
- To air fry: Place the zucchini balls in a single layer in the air fryer basket and spray with some cooking oil spray to keep them from sticking together. Cook at 350F for 13-15 minutes until golden brown.
- To bake: Bake in a 375F preheated oven for 15 minutes until golden brown.
- Serve. Serve immediately with your favorite dipping sauce, if desired.
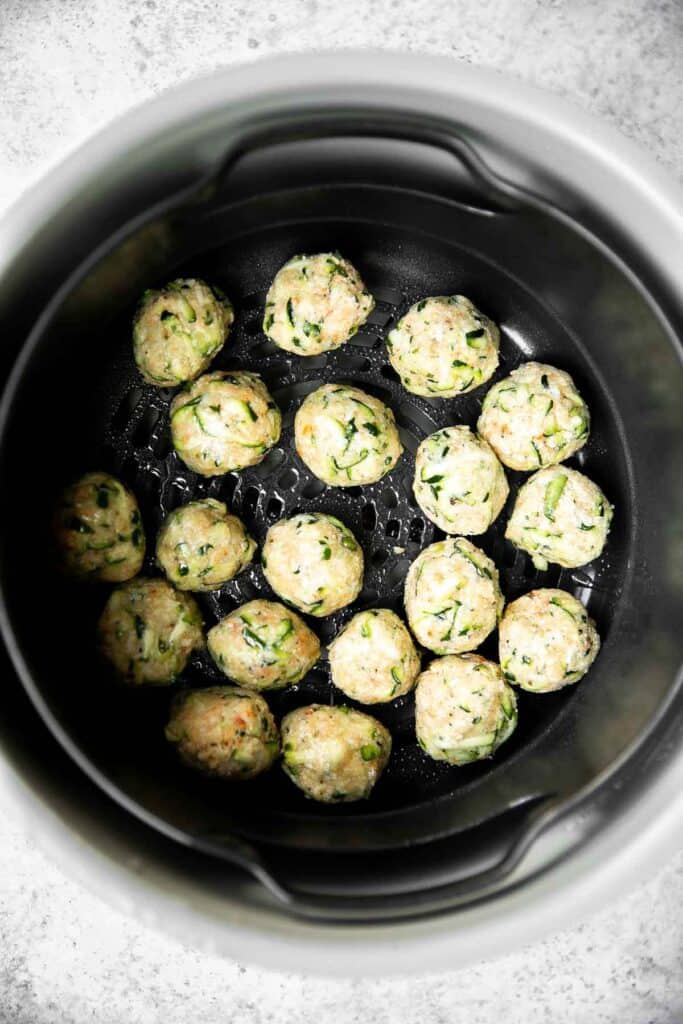
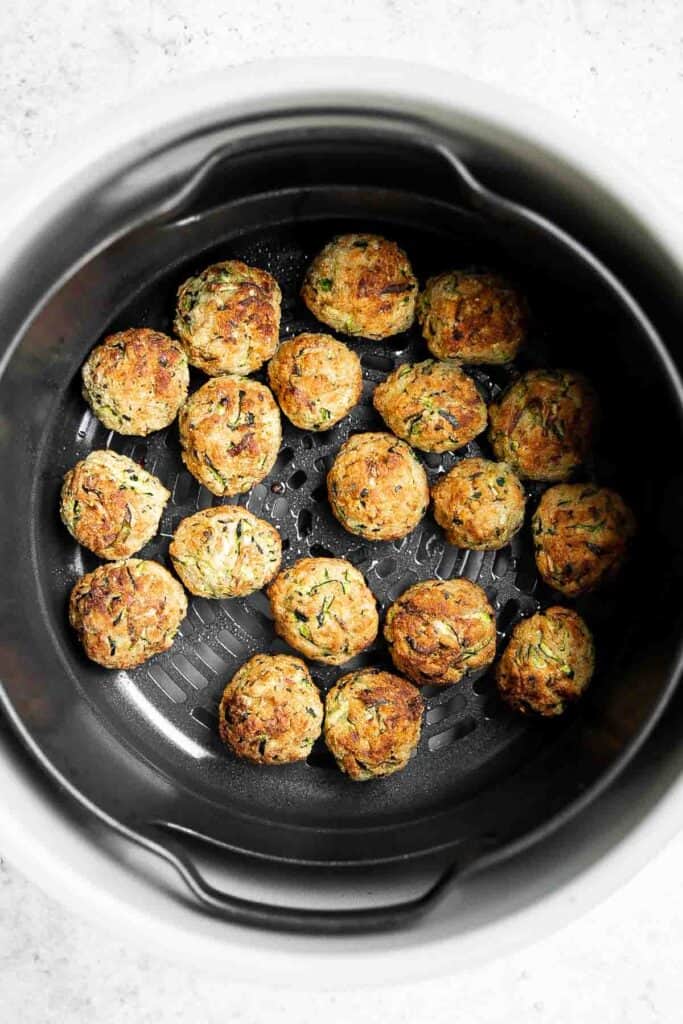
How to Serve
Serve zucchini balls as a hot appetizer on its own or with a side of your favorite dipping sauce. Try it with:
You can also serve these air fryer zucchini bites as vegetarian meatballs, substituting them in your favorite meatball recipes and just make the sauce to toss them in such as Teriyaki Meatballs, Swedish Meatballs, or Italian Meatballs.
Or serve them over salads to that need a little extra to make them more filling.
Recipe Tips and Tricks
- How to store: Allow the air fryer zucchini bites to cool to room temperature before storing in an airtight container in the refrigerator for up to four days.
- How to freeze: These zucchini balls also freeze well. Once they have cooled to room temperature, store in an airtight container or freezer bag and freeze for up to 3 months. To eat, allow it to thaw overnight in the refrigerator first. Then, serve it cold or warm it up and enjoy it hot.
- How to reheat: I recommend reheating these baked zucchini bites in an air fryer if you have one. Reheat at 350F for 4-5 minutes until warm and crisp on the outside. You can also reheat them in an 350F preheated oven for about 10 minutes until warm.
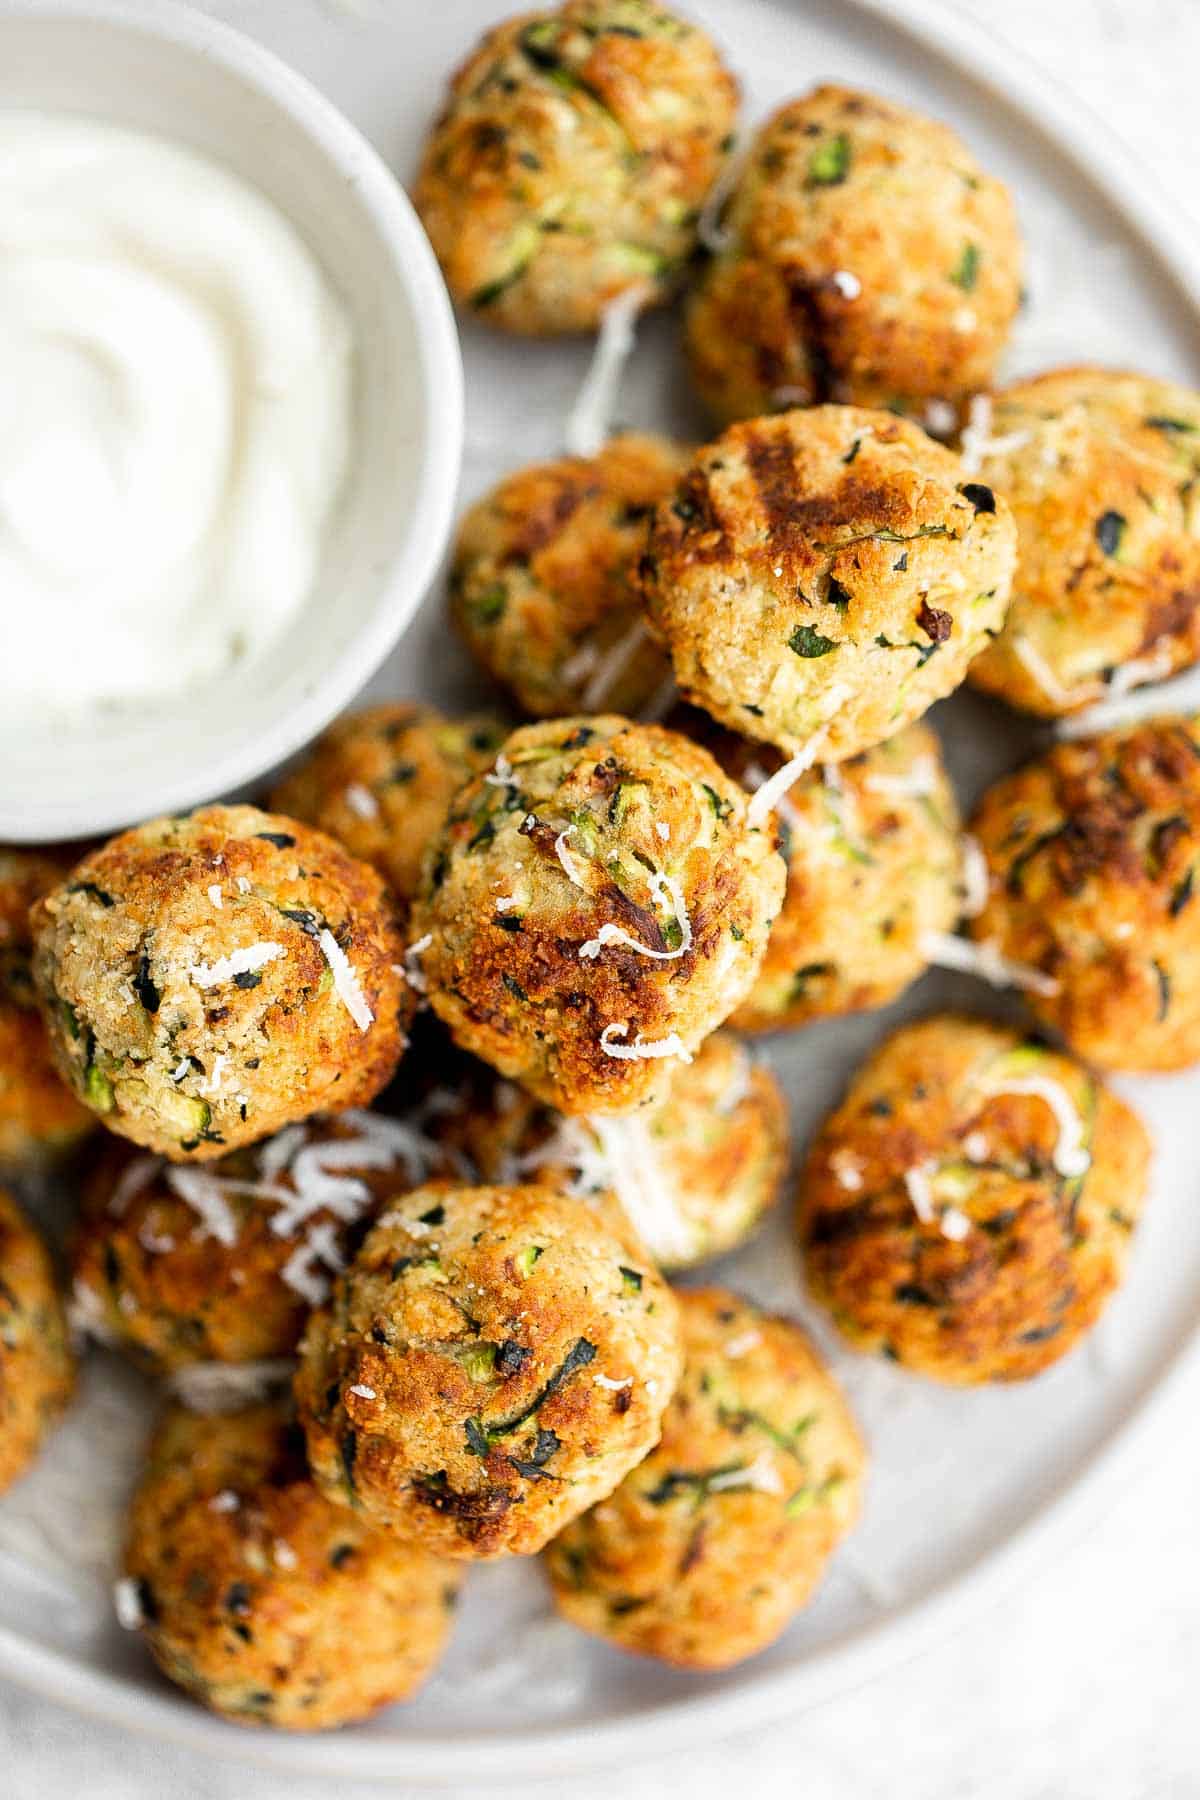
More Zucchini Recipes
- Zucchini Fritters
- Baked Zucchini with Marinara
- Shrimp Scampi with Zucchini Noodles
- Air Fryer Vegetables
- Chocolate Chip Zucchini Muffins
- Chocolate Zucchini Cake
Tried this recipe?
I'd love to hear what you think! Leave a comment and rating below to share your feedback. Your reviews help others discover this recipe and help me keep creating more free recipes for you. Snap a photo and tag me on social media @aheadofthyme too.

Iced Latte
Homemade Iced Latte is refreshing, quick, and delicious. With just 3 simple ingredients and under 5 minutes of time, this coffee is the easiest drink you'll make this summer. So skip the line at the local coffee shop and learn how to make iced lattes at home!
This Starbucks copycat recipe today to save time and money. Once you follow our simple step-by-step instructions, you may find yourself making iced lattes all season long!

Why You'll Love This Iced Latte
- This drink is quick and easy. Making a homemade iced latte takes about 5 minutes, which means you'll save time by choosing to make your latte at home instead of visiting the local coffee shop. Plus, it's easy and it will save you money! It's a win-win-win.
- Made with only 3 ingredients. One of the great things about making an iced latte at home is that it only requires 3 simple ingredients: espresso, milk, and a sweetener (if desired). You can use your favorite coffee and your favorite milk. Personally, I love using the extra creamy Chobani oat milk, which coffee shops don't usually carry.
- You can make it your own. Do you have a favorite way to enjoy an iced latte? Whether you want to add a splash of vanilla simple syrup, a dusting of cinnamon, salted caramel sauce, or something else, you can make your favorite latte from scratch with this iced coffee recipe.

Ingredient Notes
To make this easy Iced Latte, you will need the following ingredients (full measurements in recipe card below):
- espresso - I recommend using a high-quality coffee for the best flavor.
- ice
- sweetener - a liquid sweetener such as maple syrup or honey.
- milk - feel free to use your favorite milk, whether that's dairy or non-dairy such as oat milk, almond milk, or soy milk.
You will also need measuring cups and spoons.
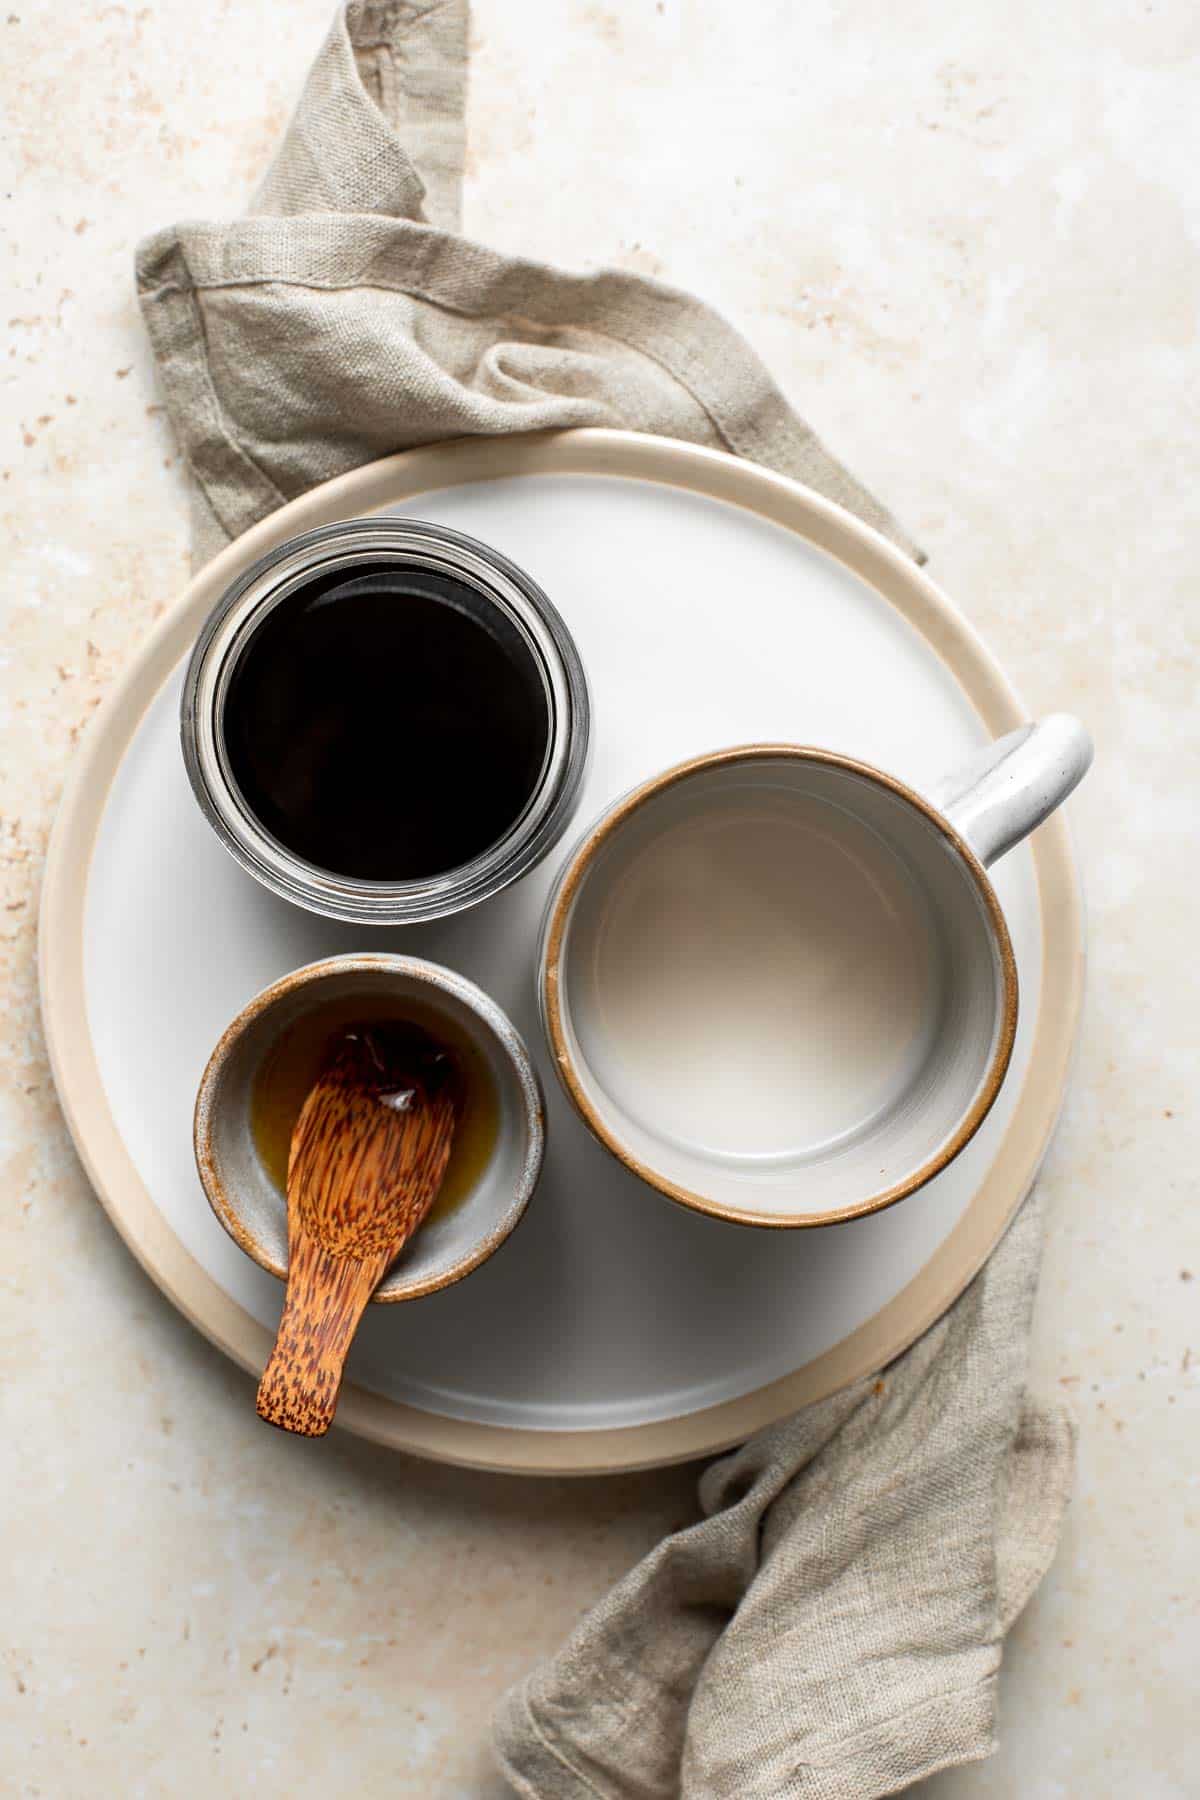
How to Make the Best Iced Latte
Make the espresso using an espresso machine, manual espresso maker, or French press.
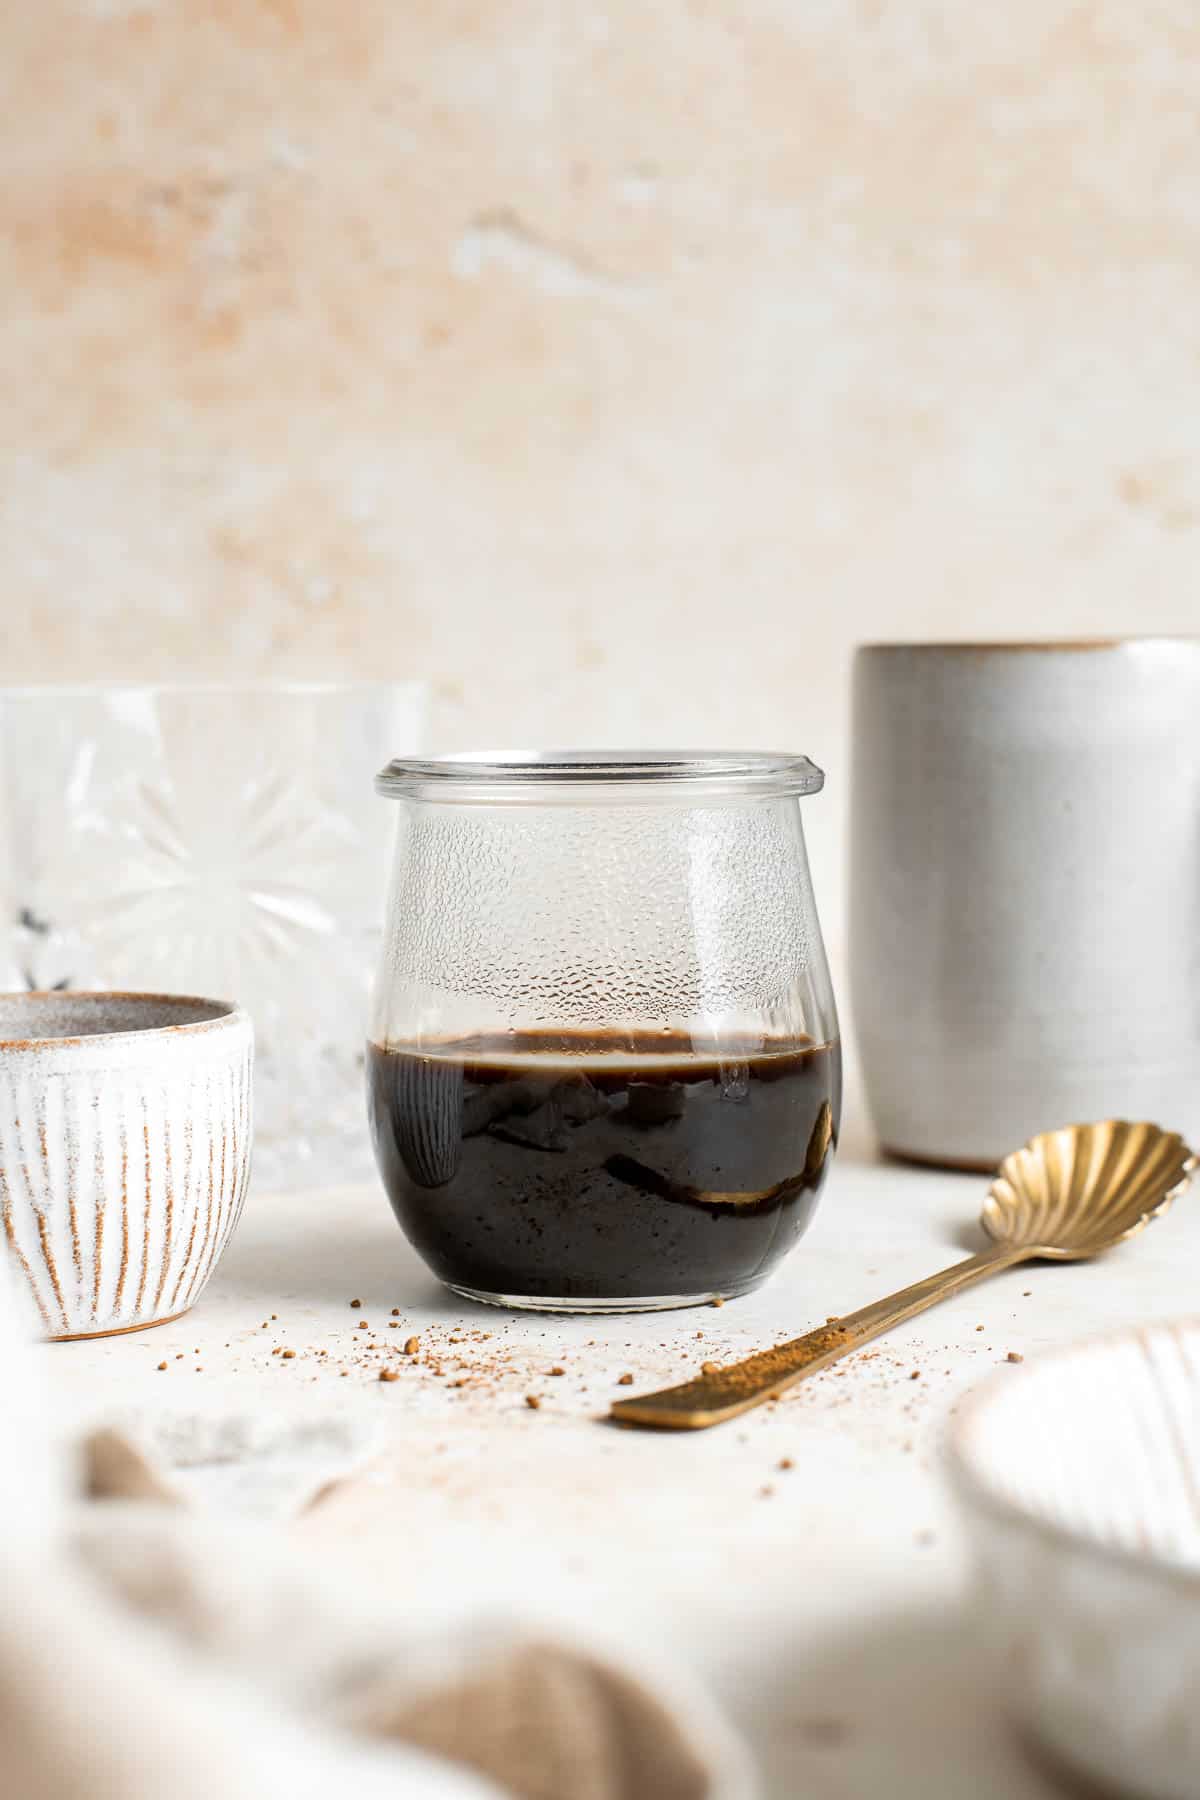
Fill 2 glasses with ice. In each glass add 2 shots of espresso. Stir in sweetener. Pour in ¼ cup milk in each glass and serve immediately.
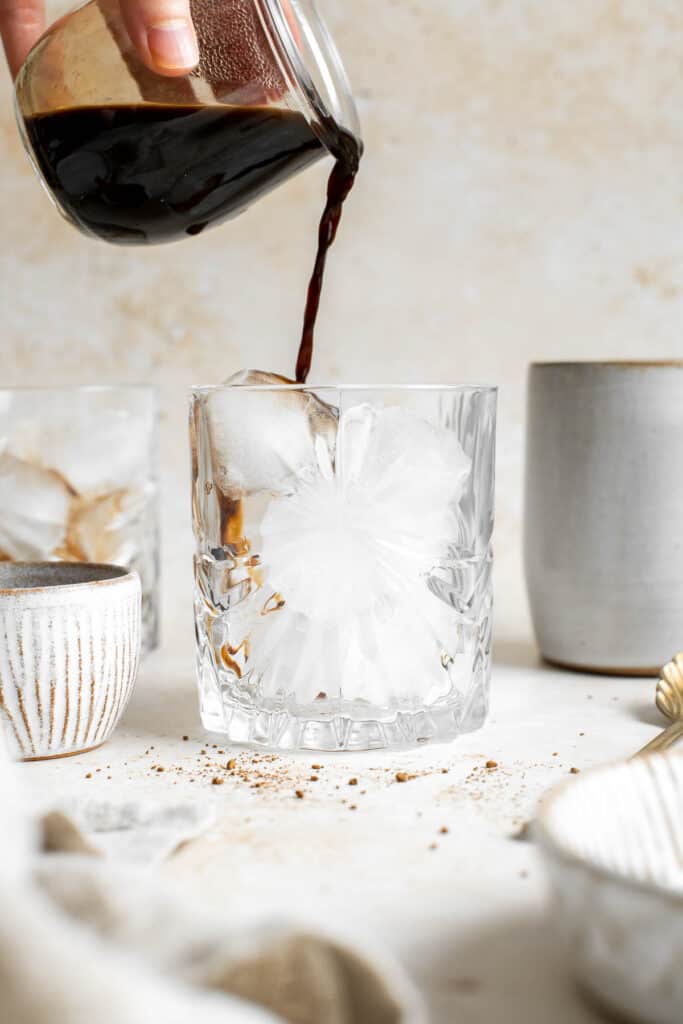
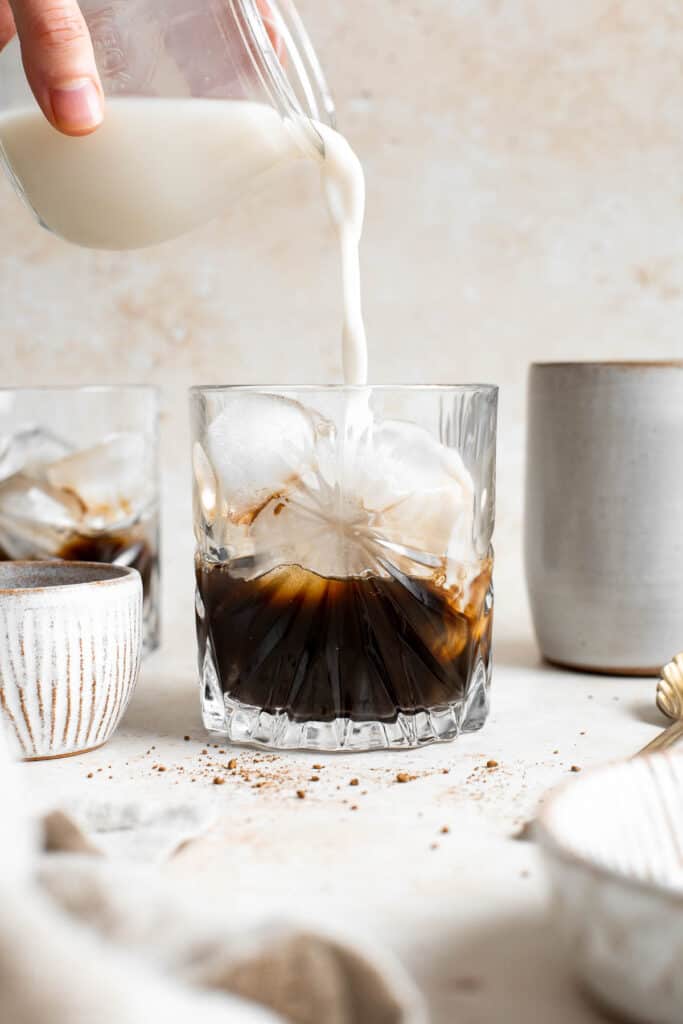
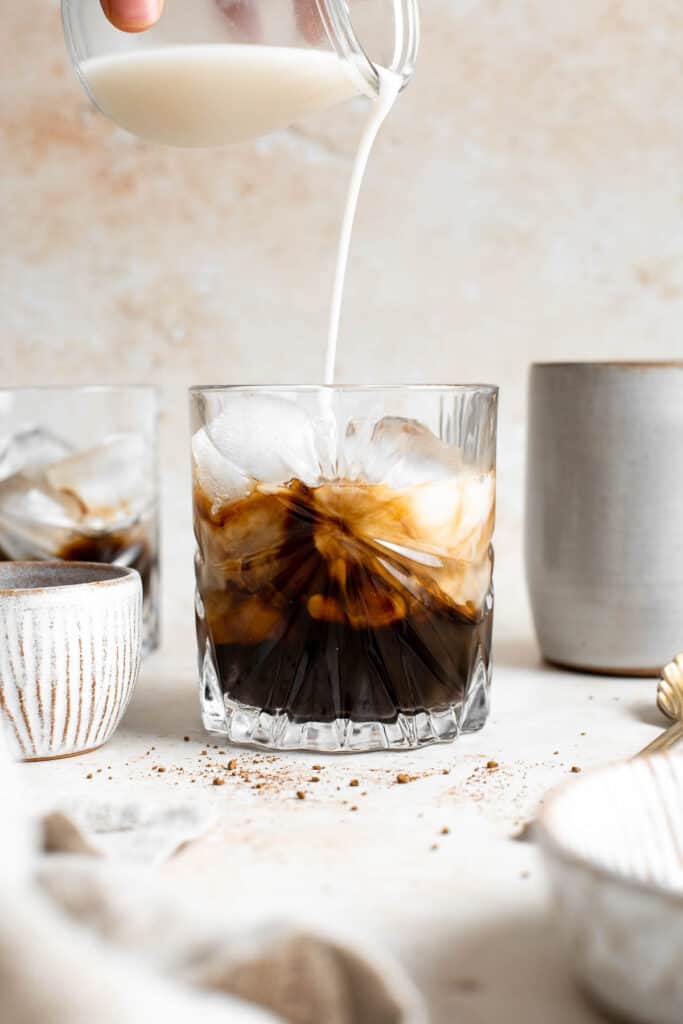
How to Customize
Make this iced latte recipe unique by adding your favorite toppings and flavors, like:
- whipped cream
- sprinkles
- chocolate or caramel syrup
- flavored simple syrup such as vanilla, hazelnut, or cinnamon dolce
Recipe Tips and Tricks
- How to store: Iced lattes are best enjoyed fresh, but if you want to make it ahead of time, omit the ice. Then, chill your latte in the fridge for 2-3 days. Add the ice at the last minute when you're ready to drink your iced latte.
- Tip on sweeteners: Because iced lattes are cold, sugar does not dissolve well in them. For that reason, it's best to use liquid sweeteners such as maple syrup, honey, agave, or simple syrup.

More Drink Recipes
Tried this recipe?
I'd love to hear what you think! Leave a comment and rating below to share your feedback. Your reviews help others discover this recipe and help me keep creating more free recipes for you. Snap a photo and tag me on social media @aheadofthyme too.

30 Best Greek Recipes

When it comes to delicious, healthy, light meals, Greek food might be on the top of the list. Made with fresh Mediterranean flavors like lemon, garlic, and olive oil, Greek cuisine never disappoints. Whether you are craving some grilled souvlaki skewers, fresh vibrant Greek salad, or homemade tzatiziki sauce, Greece has it all. So if you are wondering how to make Greek food at home for dinner, we have got you covered. We are sharing over 30 of our most popular and best Greek recipes including salads, grilled skewers, chicken, beef, vegetables, pita bread, and more!

Best Greek Recipes
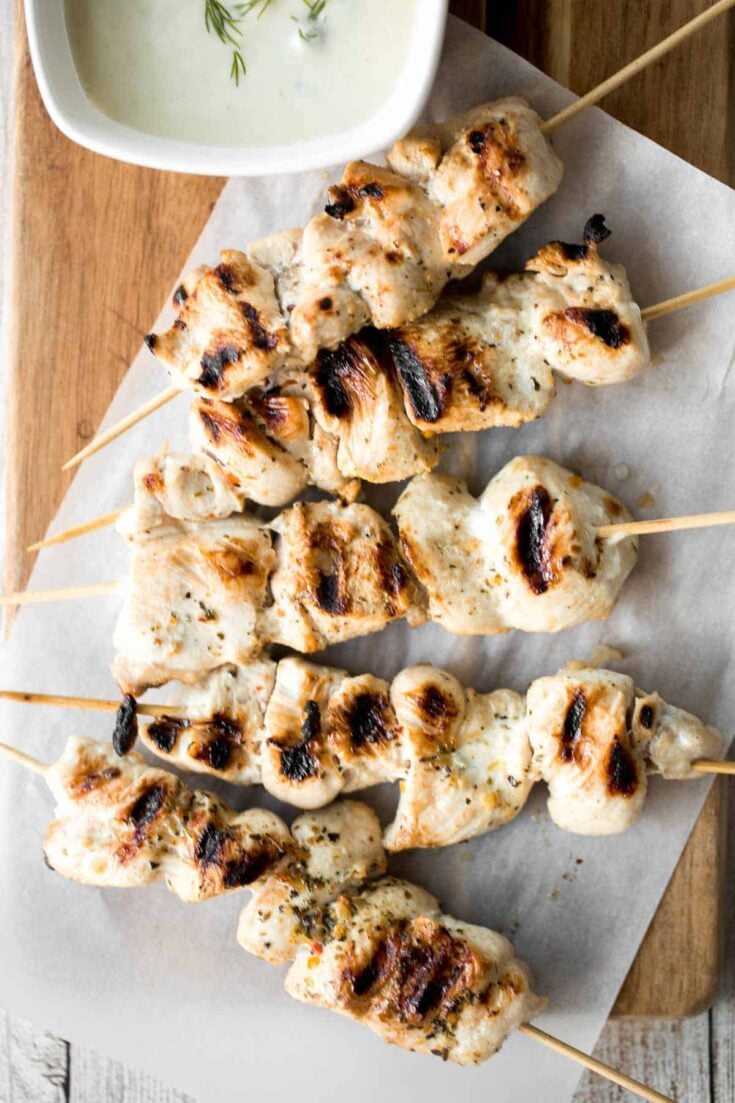
Greek Chicken Souvlaki Skewers
Easy Greek chicken souvlaki skewers marinated in garlic, fresh herbs, lemon and bay leaves for that classic Mediterranean flavour. Grill in under 15 minutes. Serve alongside some easy homemade tzatziki sauce and a Mediterranean orzo pasta salad. Or turn them into Greek chicken gyros wrapped in pita bread.
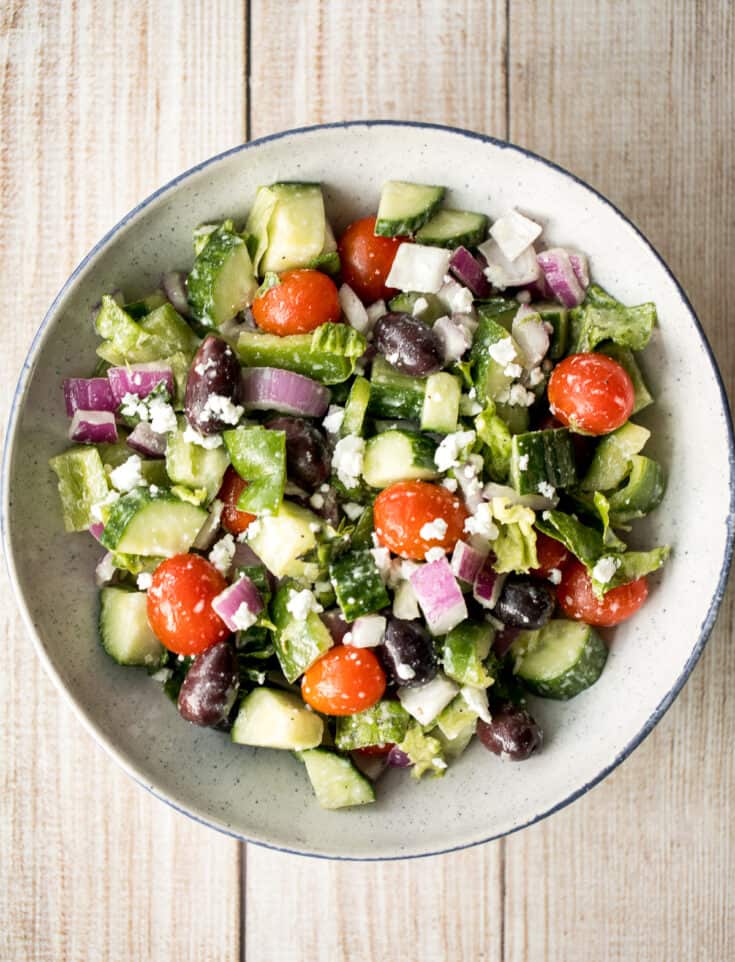
The Perfect Greek Salad
The perfect Greek salad with fresh tomatoes, cucumbers, red onions, green peppers, romaine lettuce, olives and feta cheese tossed in a lemon vinaigrette.
Easy Tzatziki Sauce (Yogurt Cucumber Dip)
Light and fresh, easy tzatziki sauce is a creamy yogurt cucumber dip packed with fresh cucumbers, garlic, dill, lemon juice and olive oil. So easy to make.
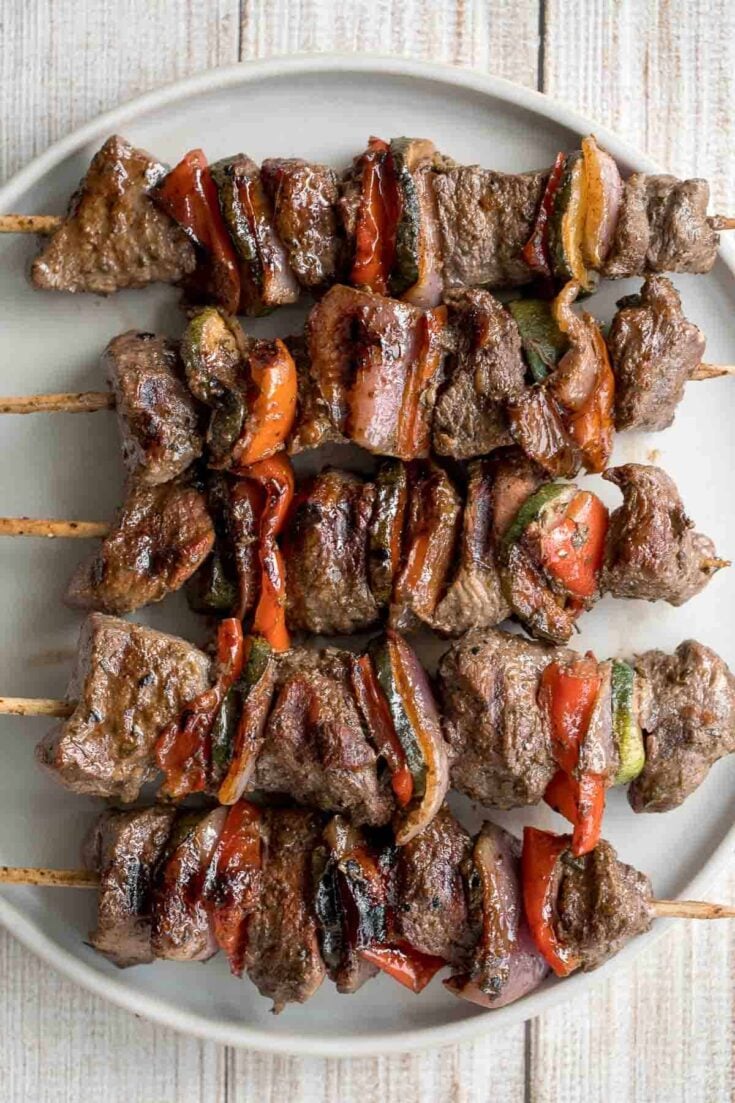
Souvlaki Beef Shish Kebabs
Easy Greek souvlaki beef shish kebabs are marinated in a garlicky lemony olive oil marinade and threaded with fresh vegetables. Cook on the grill or oven. Serve them wrapped inside some quick and easy pita bread.
Greek Chicken Gyros with Tzatziki
This refreshing and light, easy Greek chicken gyros is packed with tender souvlaki chicken, Greek salad, and homemade tzatziki sauce, all wrapped in a pita.
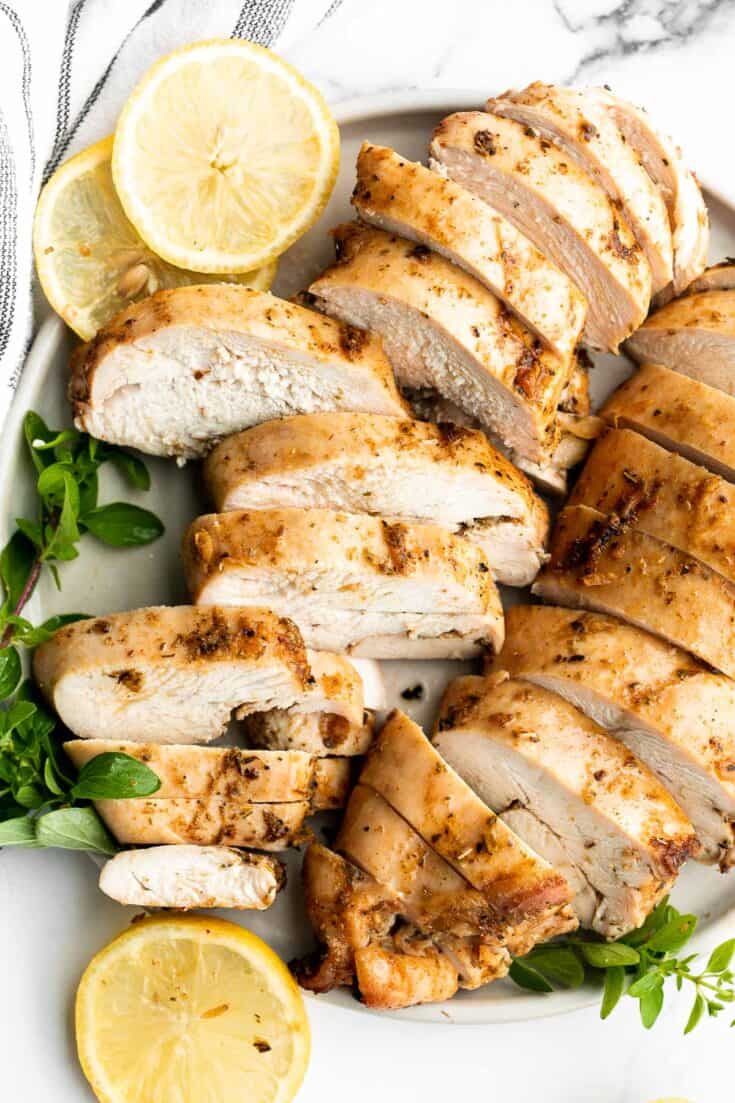
Baked Chicken Breast with Greek Souvlaki Marinade
Juicy, tender, and moist, baked chicken breast with the best classic Greek souvlaki marinade is the most flavorful and delicious chicken dinner in under 30 minutes. Serve it on its own with greek lemon roasted baby potatoes or use in a Greek chicken salad.
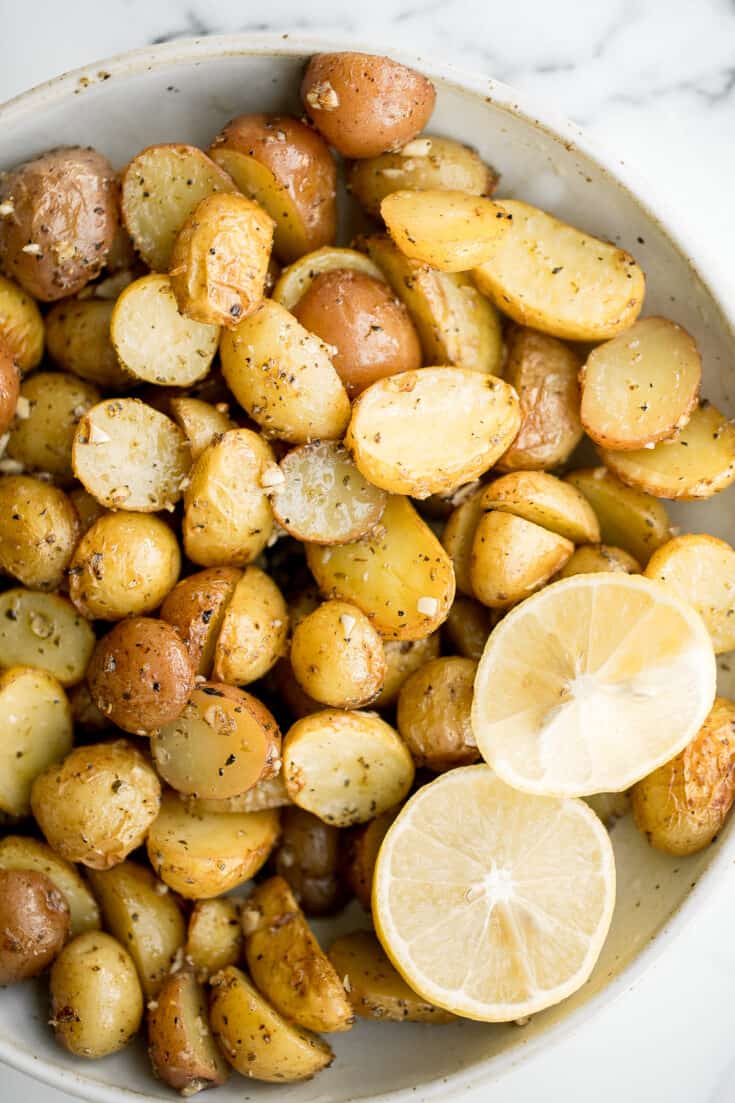
Greek Lemon Roasted Baby Potatoes
Quick and easy Greek lemon roasted baby potatoes are crispy on the outside and tender inside, packed with a Greek flavour blend of lemon, garlic and herbs.
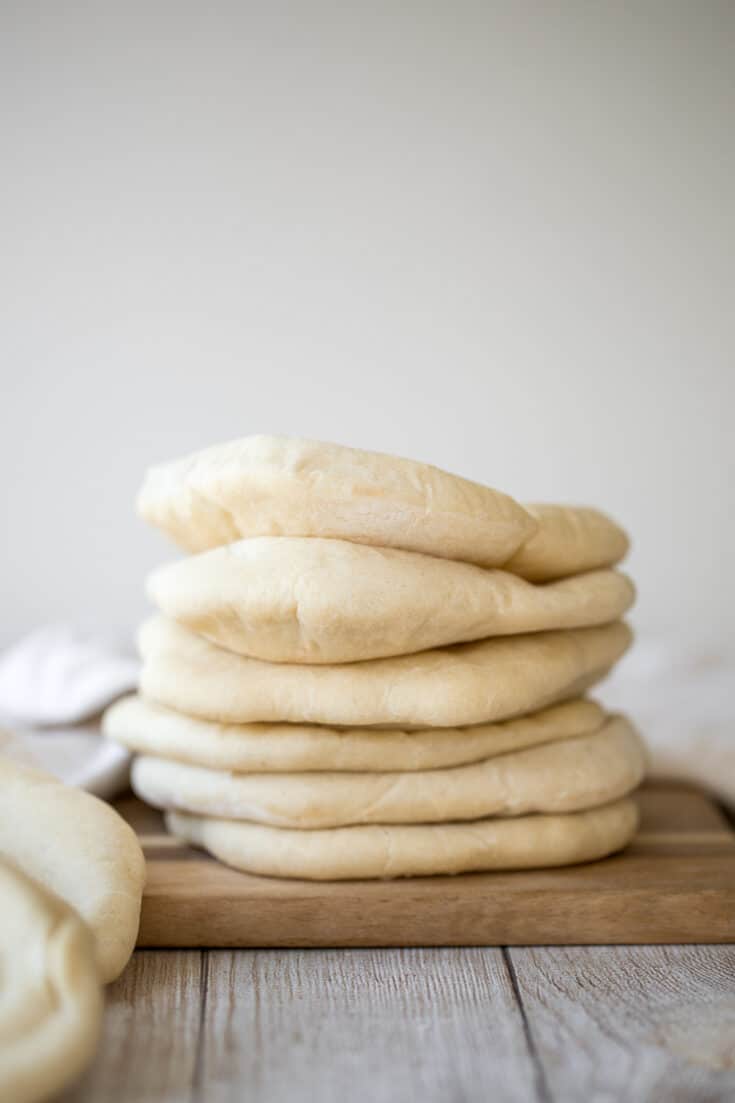
Homemade Pita Bread
Nothing compares to freshly baked, quick and easy homemade pita bread. It's soft and puffy, with a perfect pocket. It takes just 15 minutes of actual prep.

Classic Hummus
Whip up smooth and creamy classic hummus dip at home in just 5 minutes, by combining chickpeas, tahini, olive oil, lemon juice and garlic in the blender. Serve it with veggies or crackers, or use it in a vegan hummus wrap.
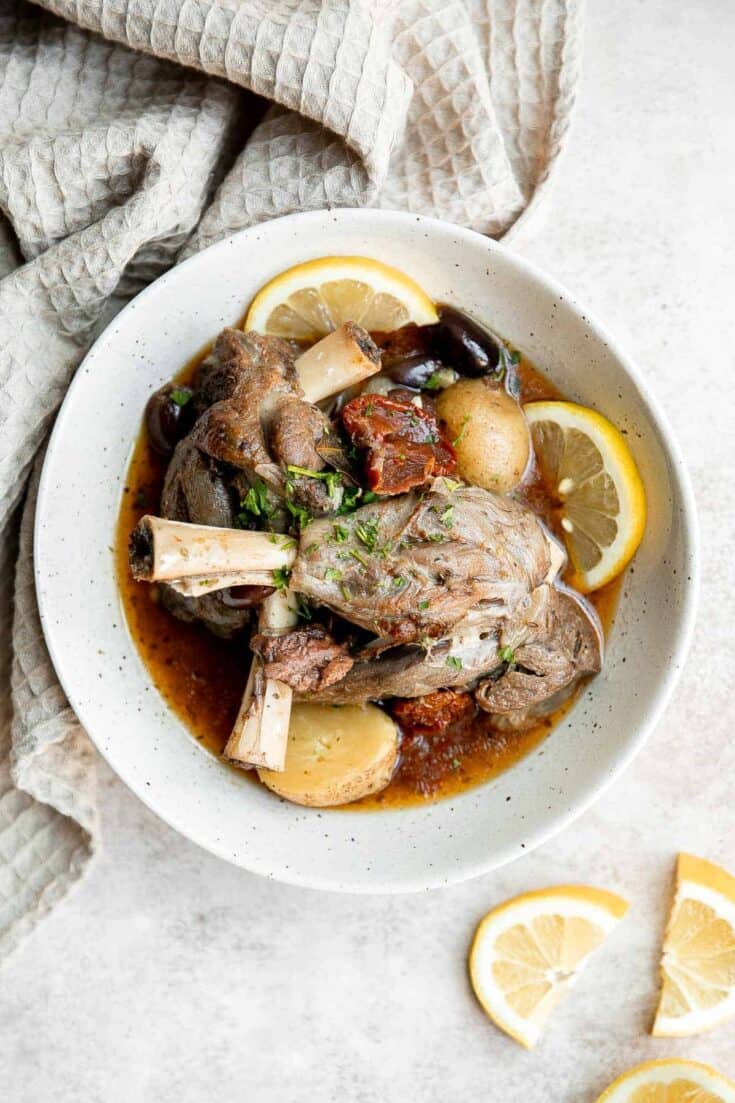
Greek Lamb Shanks
Greek lamb shanks are tender, flavorful, delicious, and literally fall off the bone. Make this Mediterranean lamb in the oven, instant pot, or slow cooker.
Greek Salmon
Greek salmon is delicious, flaky, and tender. This healthy oven-baked salmon is packed with Mediterranean flavors and is ready in just 20 minutes.

Chickpea Greek Salad
Greek salmon is delicious, flaky, and tender. This healthy oven-baked salmon is packed with Mediterranean flavors and is ready in just 20 minutes.
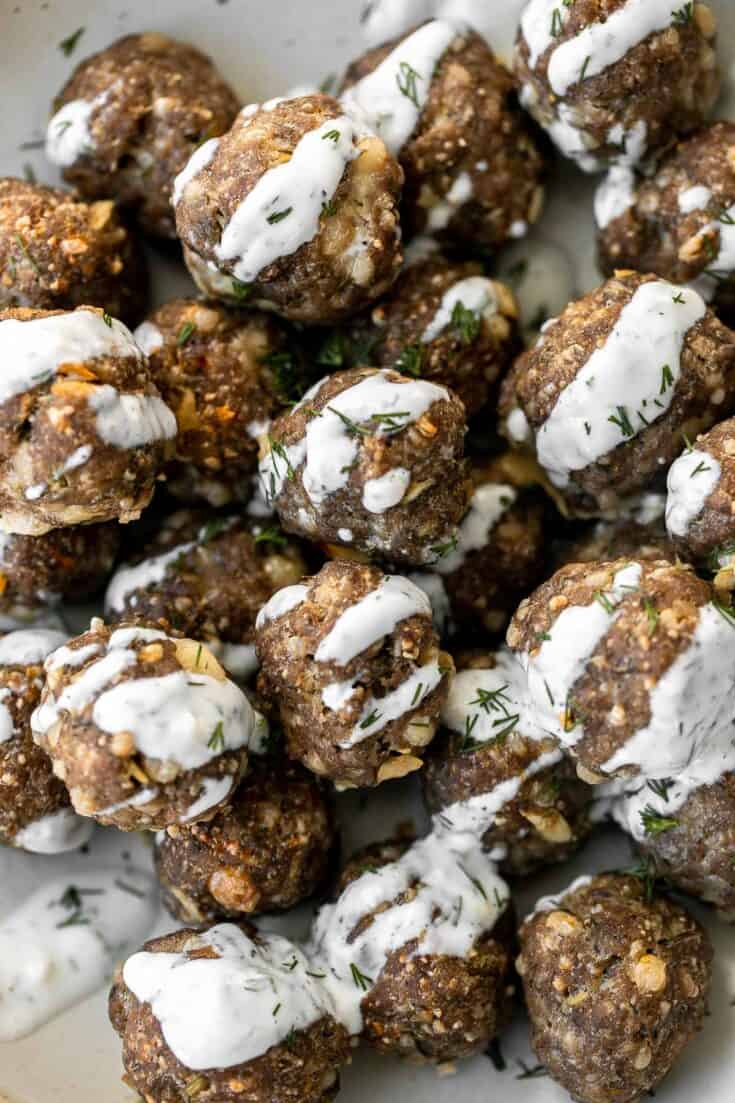
Greek Meatballs
Baked Greek meatballs are juicy, tender, flavorful, and delicious. They are quick and easy to make in 30 minutes, and freezer-friendly. Serve with tzatziki.
Greek Lamb Souvlaki Skewers
Quick and easy, grilled Greek lamb souvlaki skewers are marinated in a simple Mediterranean marinade for just 30 minutes. Serve with some tzatziki sauce. Serve over top of some rice pilaf with carrots and Greek salad on the side. So delicious.
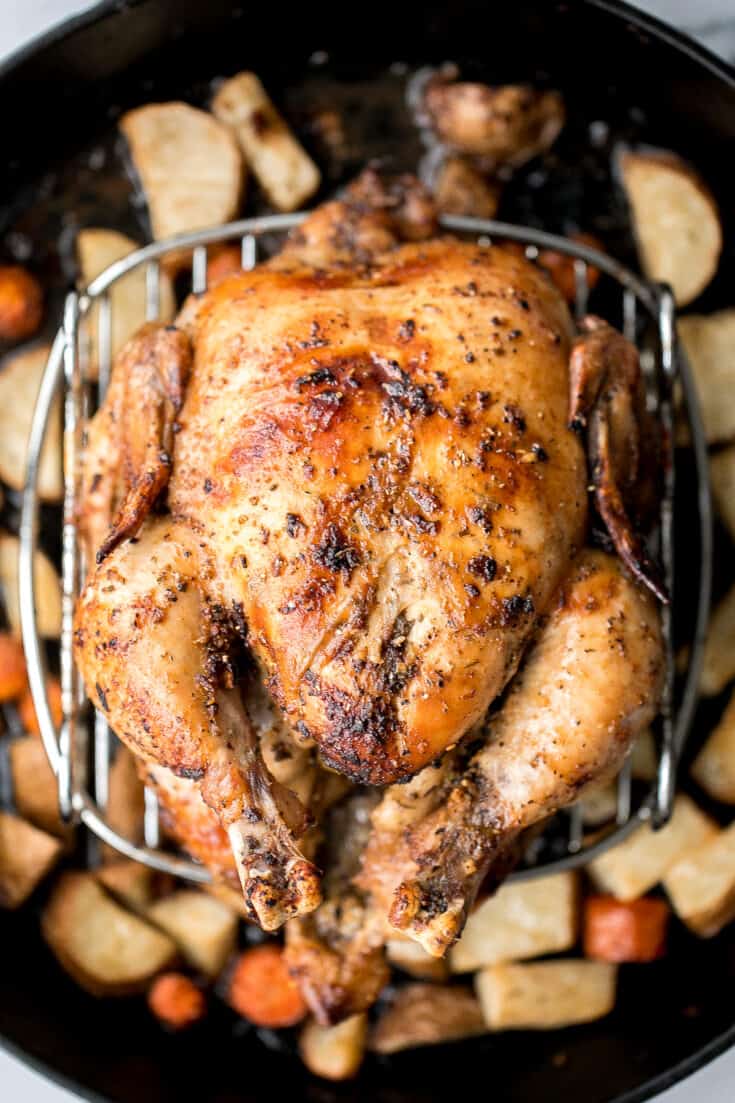
Greek Lemon Garlic Whole Roast Chicken
Easy Greek lemon garlic whole roast chicken is tender, juicy and succulent with the crispiest skin. Prep this flavourful one pan meal in just 15 minutes.
Mediterranean Turkey Burgers
Mediterranean turkey burgers are tender, juicy, and delicious, loaded with garlic, fresh dill, and lemon juice. The perfect summer weeknight meal.
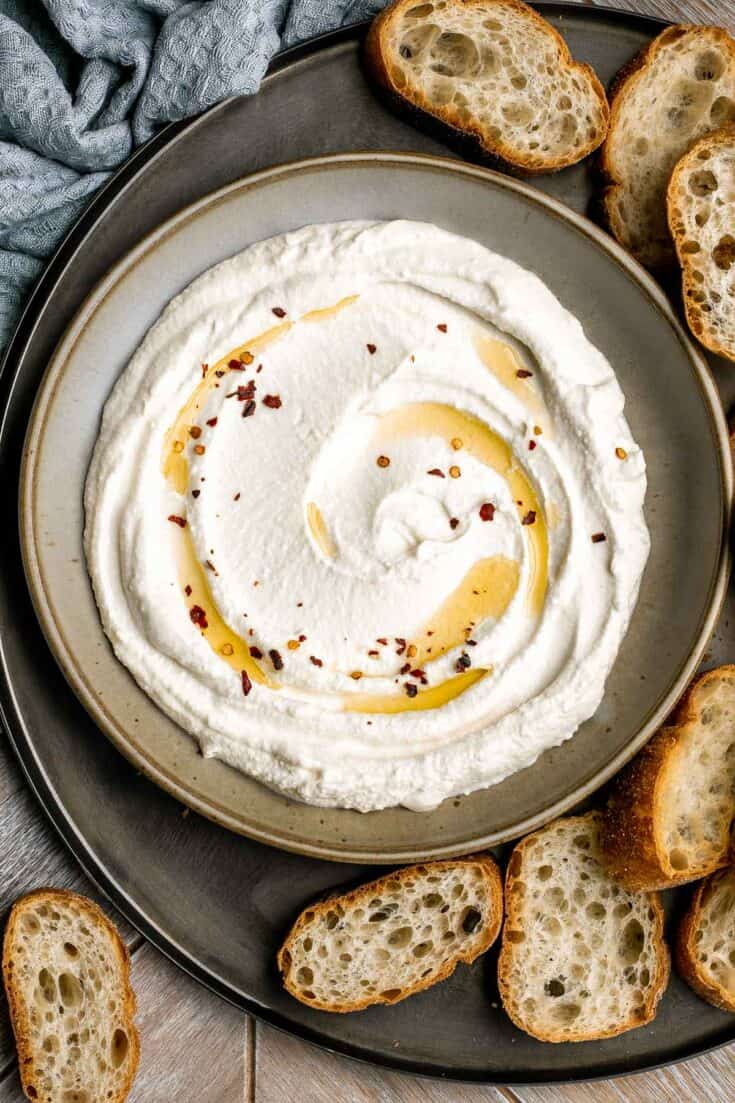
Whipped Feta
Whipped feta is light, airy, and fluffy. It's an easy yet impressive recipe that takes only 5 minutes to make in a blender with 3 simple ingredients.
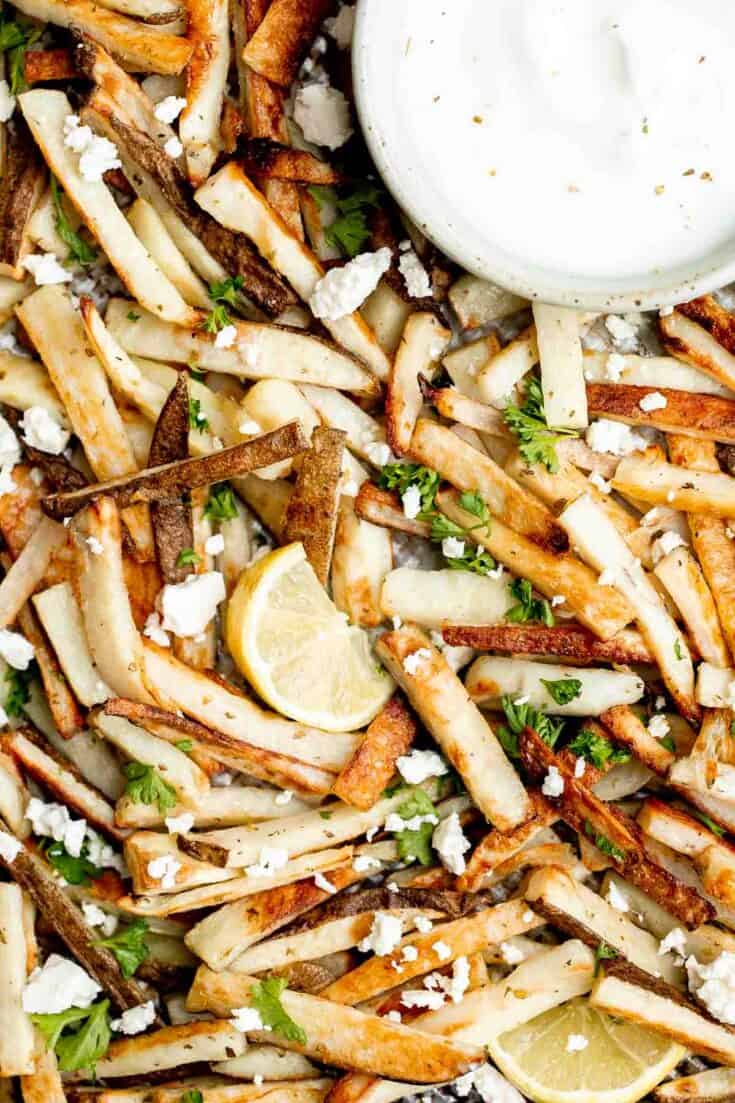
Greek Fries
Homemade Greek fries bring a Mediterranean twist on a classic side dish, crispy fries are topped with crumbled feta cheese, fresh parsley, and lime juice.

Greek Chicken Salad
Greek chicken salad is fresh, healthy, and delicious, packed with classic Mediterranean flavors. Perfect as a light lunch or dinner, or for meal prep.
Mediterranean Chicken Patties
Delicious, moist and juicy Mediterranean chicken patties have everything you want in one bite: protein, veggies, herbs, and they're quick and easy to make. Serve it on it's own, with hamburger buns, or a side of Basmati rice.
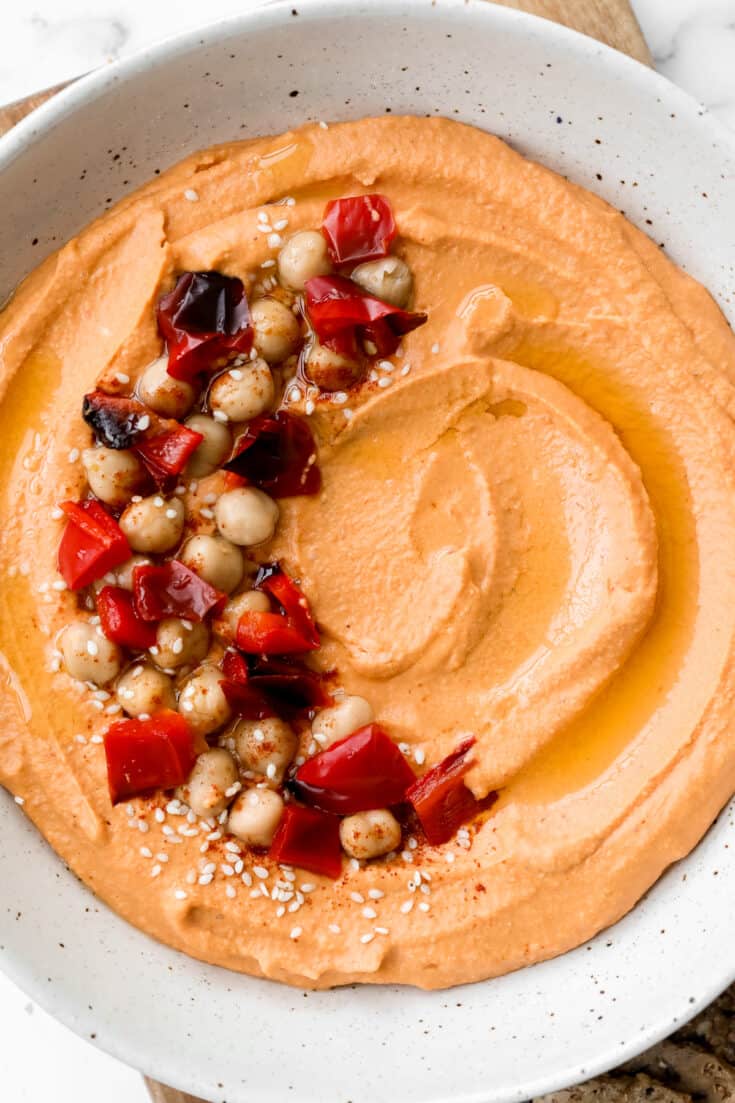
Roasted Red Pepper Hummus
Smooth creamy roasted red pepper hummus is a delicious, flavourful, vegan + gluten-free dip. This healthy appetizer is easy to make with a few ingredients.
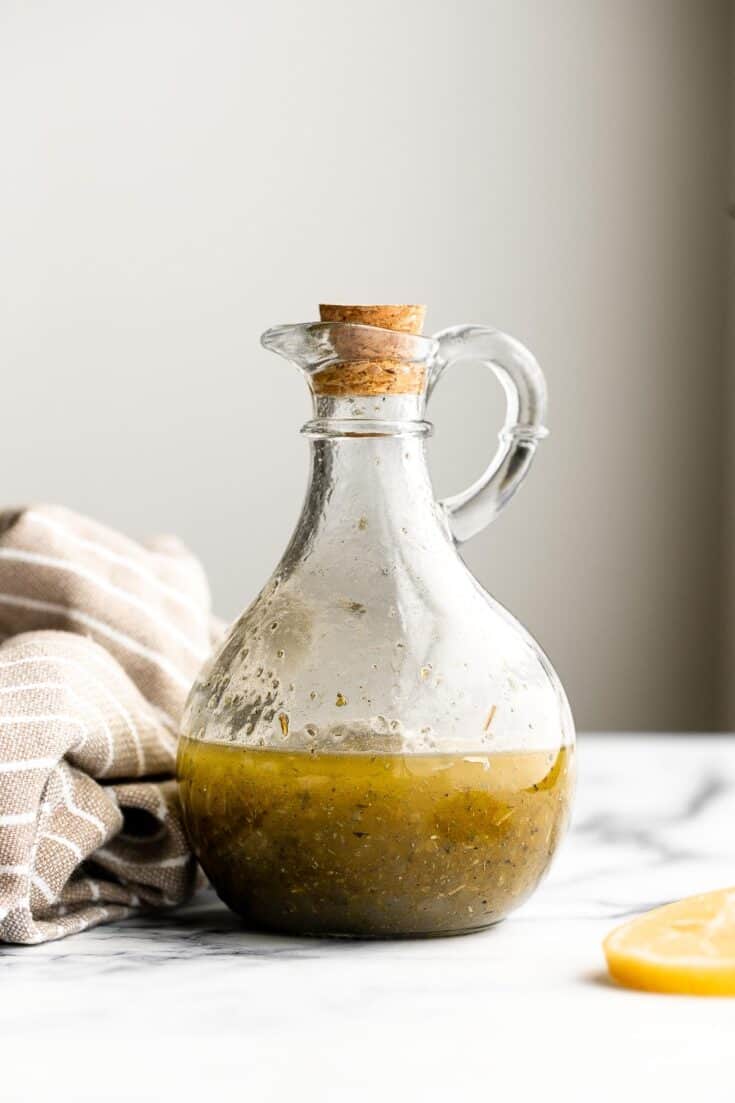
Greek Salad Dressing
Homemade Greek salad dressing is light, fresh, and flavorful. Quick and easy, and so much better, tastier, and healthier than store-bought.
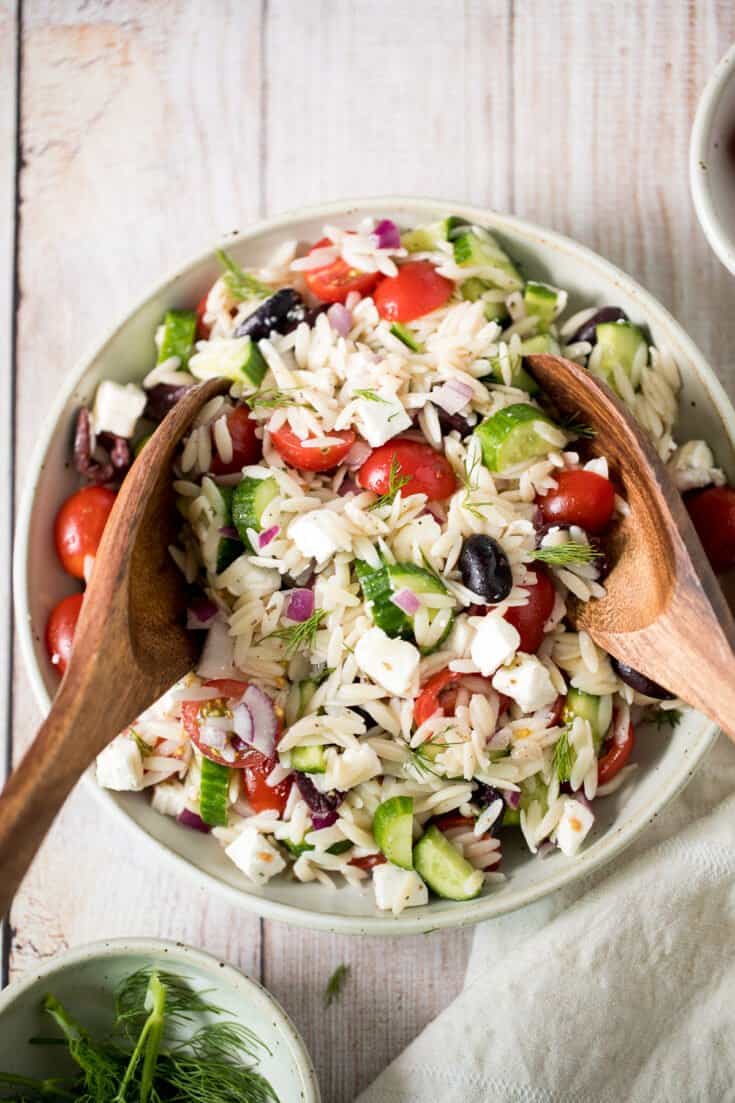
Mediterranean Orzo Pasta Salad
Quick and easy Mediterranean orzo pasta salad packed with fresh vegetables and herbs is tossed in a Greek lemon vinaigrette. Healthy, light and delicious.

Spinach and Feta Turkey Burgers
Greek-style spinach and feta turkey burgers are tender, juicy, and flavourful, loaded with spinach, feta and fresh Mediterranean herbs and is so easy to prep. Serve it with tzatziki sauce and homemade hamburger buns.
More Popular Recipes
- 60 Best Chicken Recipes
- 25 Best Ground Beef Recipes
- 15 Best Salmon Recipes
- 30 Best Shrimp Recipes
- 40 Best Pasta Recipes
- 40 Best Salad Recipes
Did You Make Any of These Greek Recipes?
Please leave a comment and rating below, and let me know what you thought of this round up of the best Greek recipes. Be sure to snap a picture and tag me on Instagram @aheadofthyme or share it on the Pinterest pin so that I can follow along.
HUNGRY FOR MORE? Don't forget to sign up for my email newsletter so that you don't miss any recipes. You can also follow along on Instagram and Pinterest for more recipe updates.
Watermelon Sorbet
This 2-ingredient Watermelon Sorbet is easy to make, healthy, and vegan. It's the perfect homemade frozen treat to enjoy on a hot summer day. You just need about 5 minutes to prep it and no ice cream maker is required! This all-natural dessert is totally worth the extra freezer space!
So grab a spoon and beat the heat with healthy watermelon sorbet from scratch! Loaded with real watermelons, this refreshing homemade sorbet is the answer to all your summer cravings.
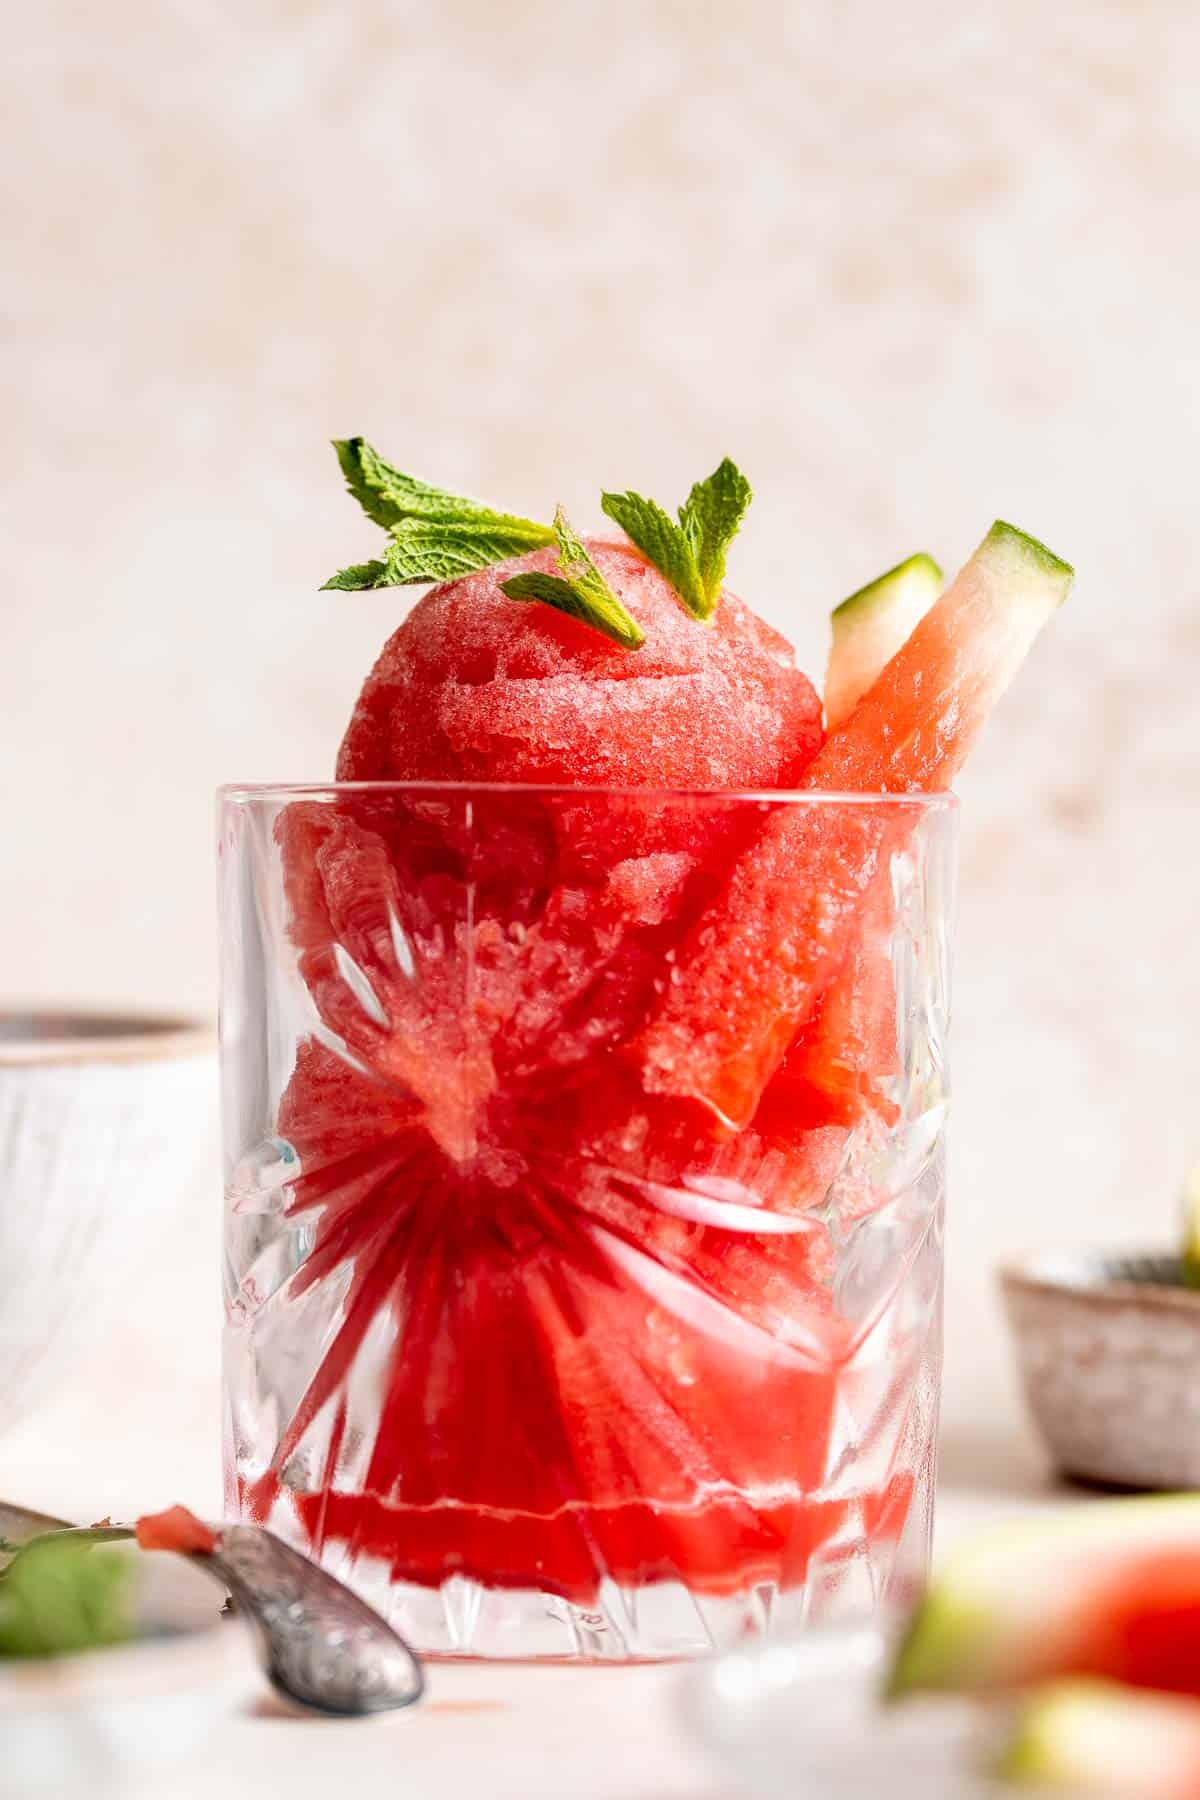
Why You'll Love this Watermelon Sorbet
- Loaded with real watermelon. I mean who doesn't love refreshing and fresh watermelon? They are low in calories and are loaded with vitamins and minerals. Watermelon contains significant levels of vitamins A, B6 and C, antioxidants, and amino acids, making this watermelon sorbet one the healthiest treats you will ever have. On top of all these, watermelons only contain 40 calories per cup, are low in sodium, and definitely fat-free! Made up of 92 percent water, watermelons are much more nutritionally dense than you might think.
- It's so easy to make. Preparing this watermelon sorbet is so easy. All it needs is a few minutes of prep work, a few seconds with the blender, and a few hours in the freezer. How could something so good be so simple? Well, as they say, sometimes the best things in life are the simple things! After making watermelon sorbet from scratch once, you'll want to keep a batch in the freezer all the time.
- It's one of the healthiest desserts. Since the main ingredient in this frozen fruit sorbet is watermelon (and it contains no added sugar!), this fruit sorbet is healthy, vegan, dairy-free, and gluten-free. It is still one of the healthiest dessert options to enjoy this summer.
- You only need 2 ingredients. This watermelon sorbet consists of three simple ingredients (and water too). You'll need watermelon, lime juice, and water. That's all you need for a sweet, healthy, and delicious frozen treat.
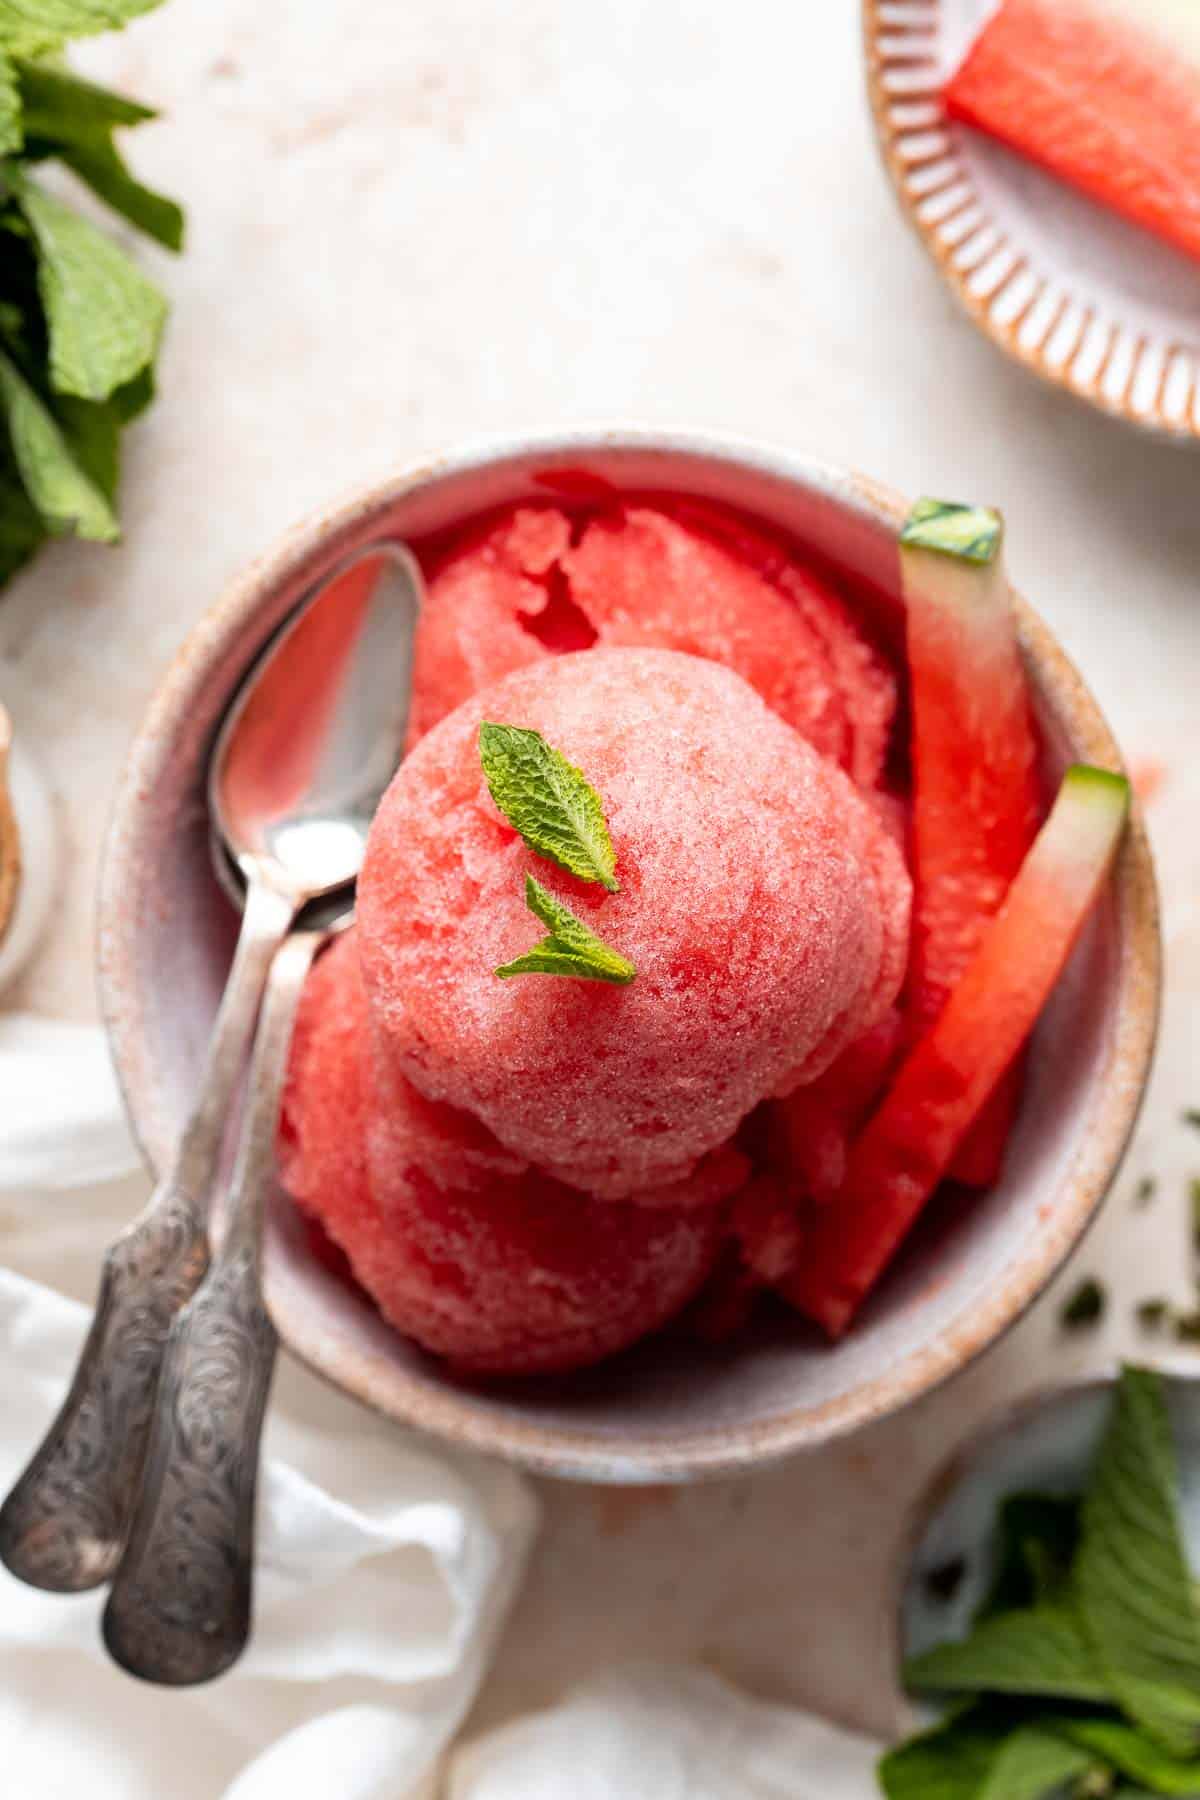
Ingredient Notes
To make this easy 3-ingredient strawberry sorbet, you will need a blender, and the following ingredients (full quantities in recipe card below):
- watermelon - we use fresh watermelon and then freeze it for this sorbet. You can save the overnight freezing time by using already frozen watermelon instead.
- lime juice
- water
- maple syrup or honey - optional, if needed for extra sweetness.
- watermelon slices (optional, for serving)
- basil or mint leaves (optional, for serving)
You will also need measuring cups and spoons, half sheet baking pan, food processor or blender, and loaf pan for storing (if needed).
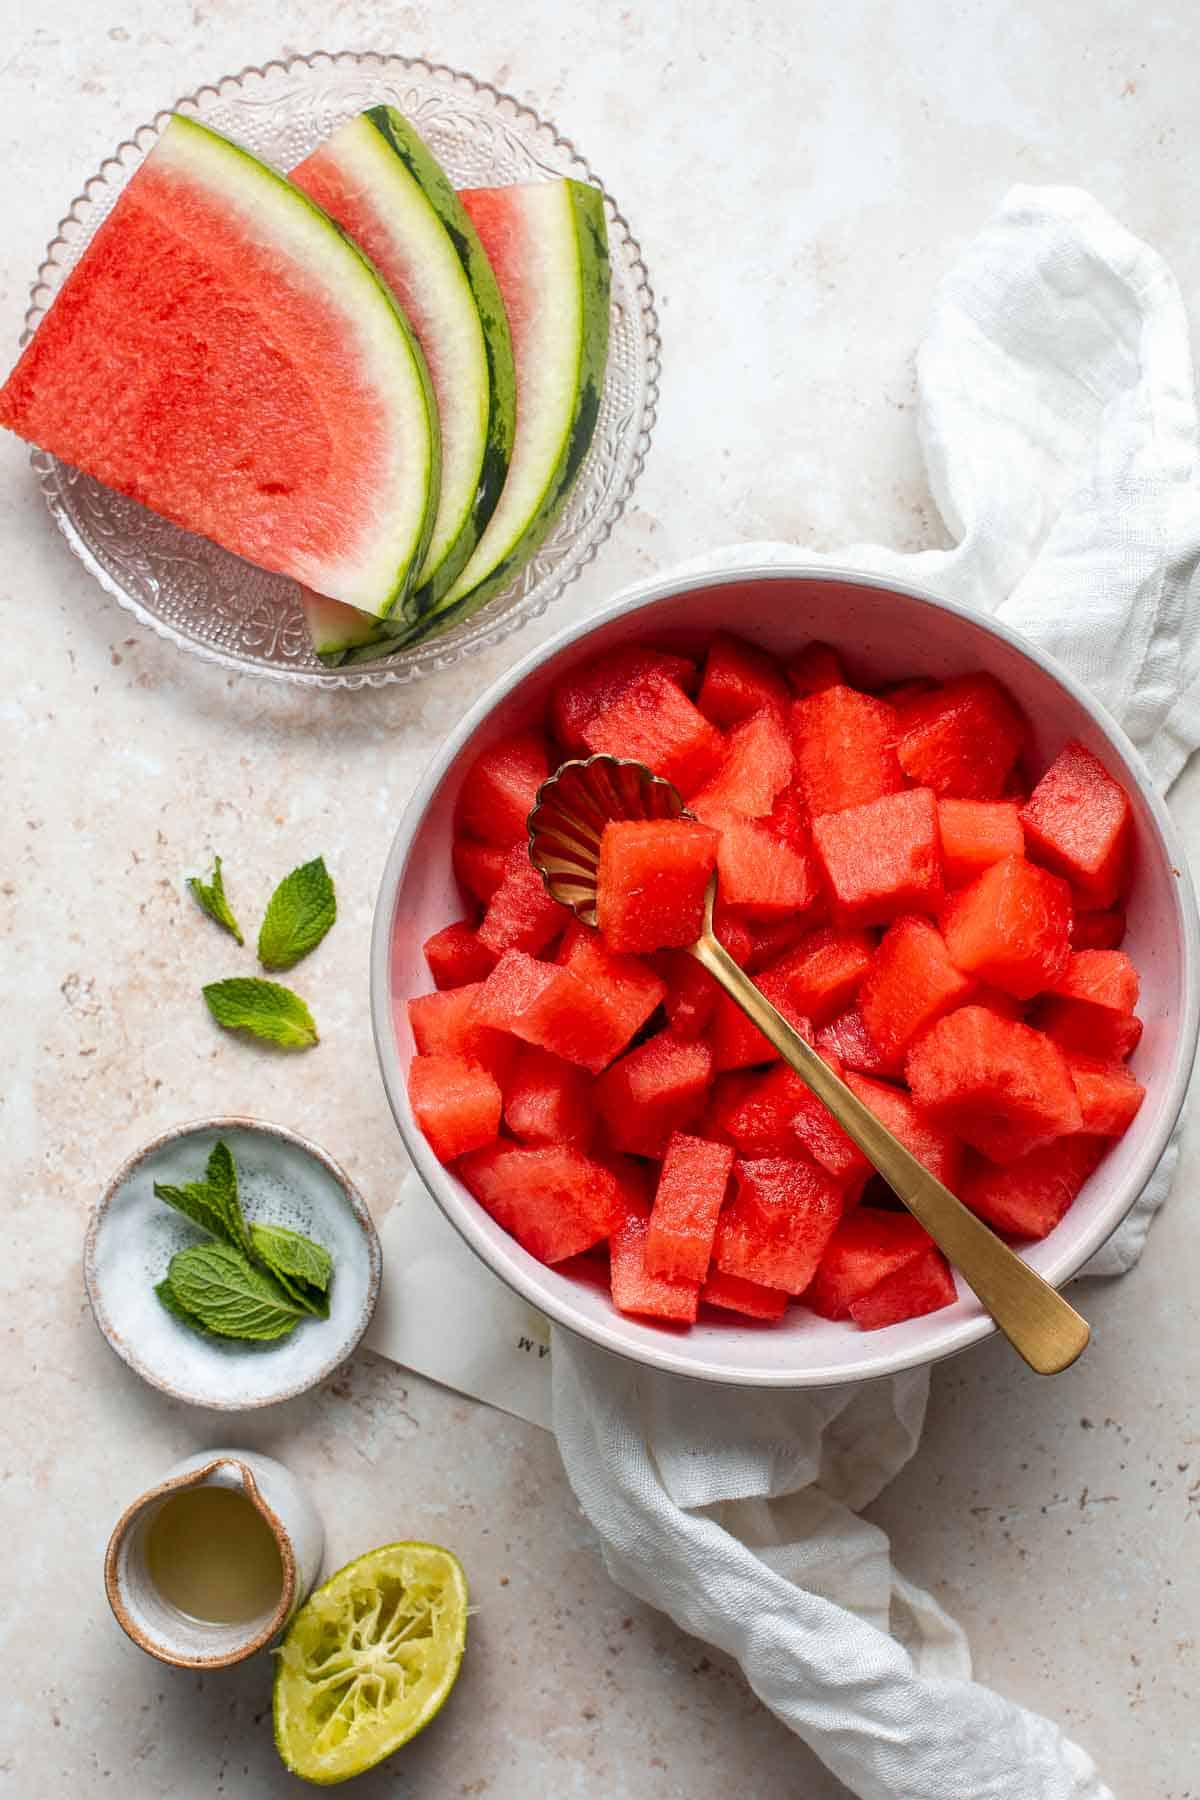
How to Make the Best Watermelon Sorbet
- Freeze watermelon. Line a large half sheet baking pan with parchment paper. Place cubed watermelon on the prepared pan spaced evenly apart. Freeze for 1-2 hours, then transfer to a freezer bag to freeze completely overnight.
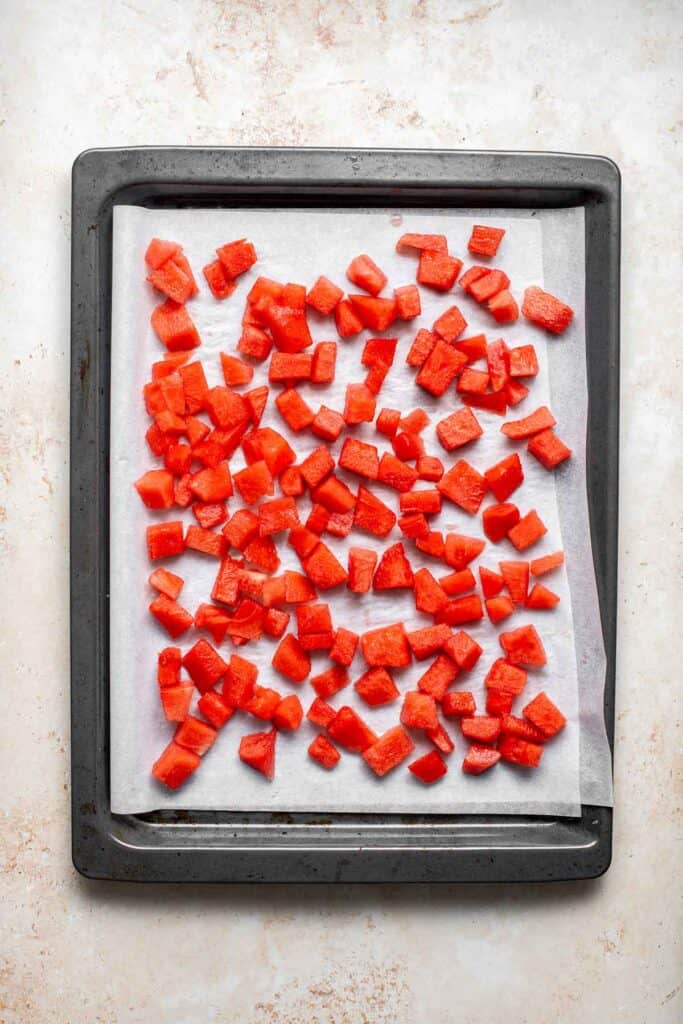
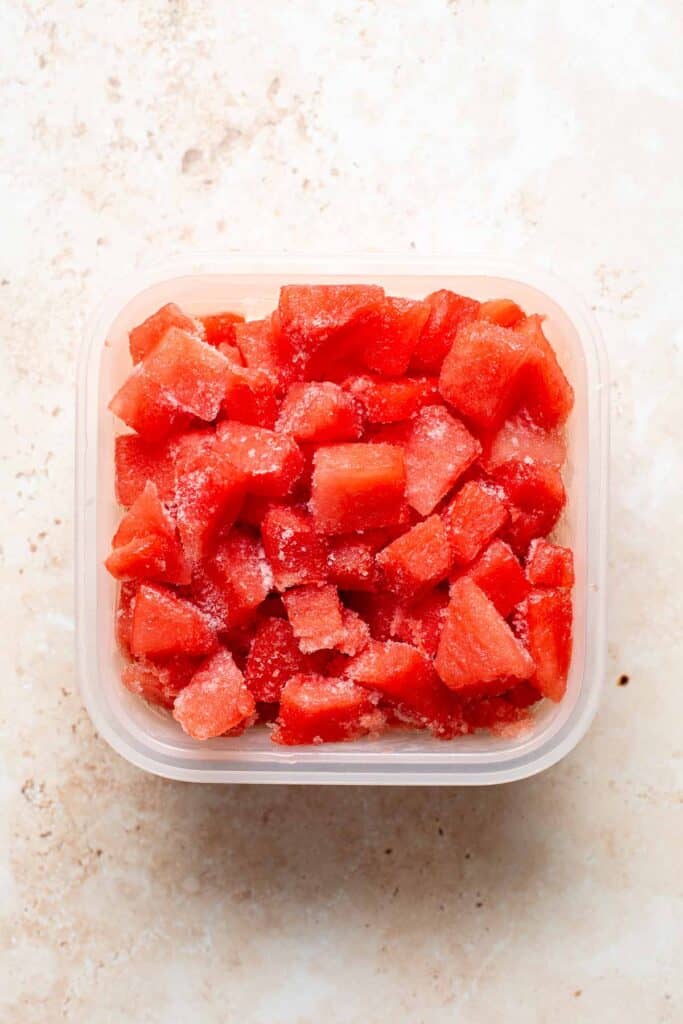
- Puree. Combine frozen watermelon and lime juice in a food processor or blender. Pulse mix to puree. Add water 1-2 teaspoons at a time, to get the sorbet to a smoother and scoop-able consistency.
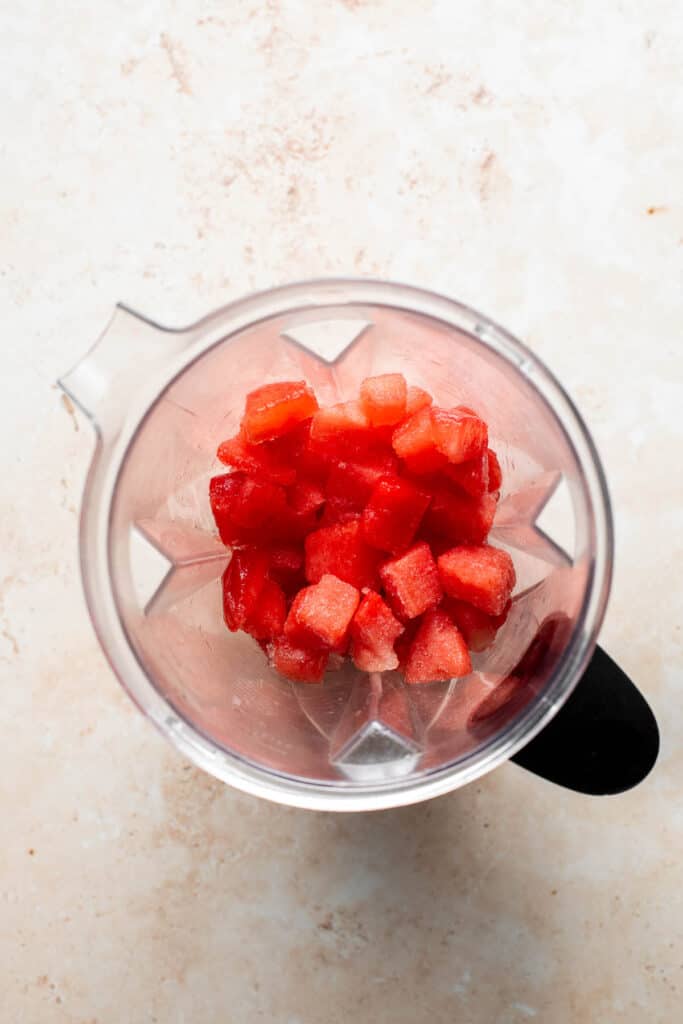
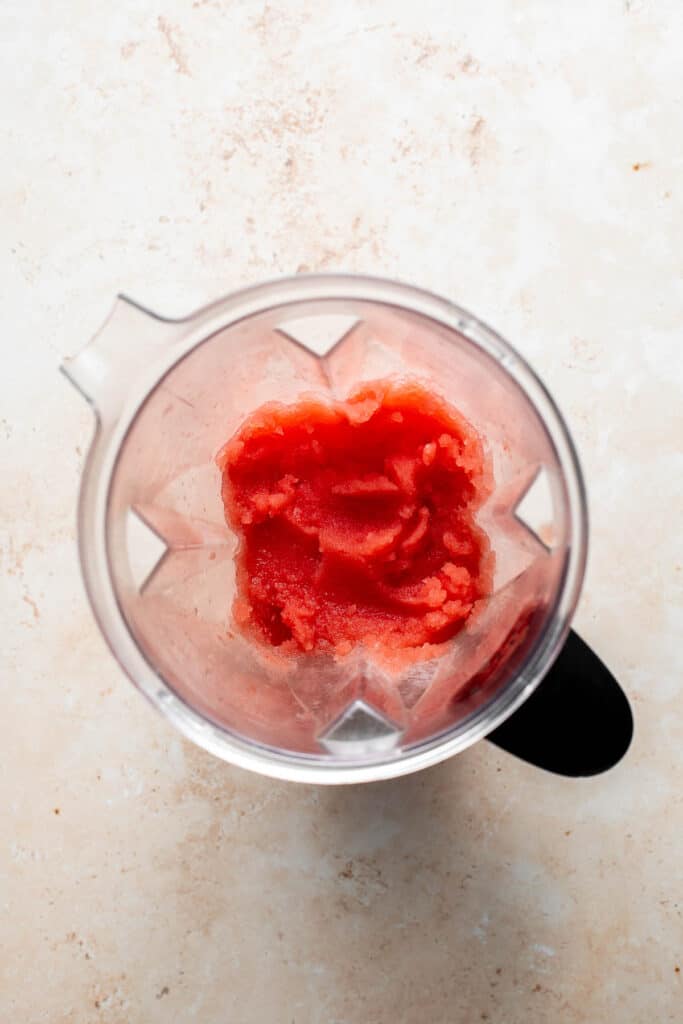
- Add sweetness (if needed). The sorbet should be sweet enough if using ripe watermelon. If it is not sweet, add a little maple syrup or honey until desired sweetness is achieved.
- Serve. Serve immediately with small watermelon slices and/or basil or mint leaves (optional). Store any leftovers in a covered loaf pan in the freezer.
How to Serve
Serve watermelon sorbet in a cup or cone. You can add some small watermelon slices or top with basil or mint leaves, or both! If not serving immediately, note that the longer the sorbet is in the freezer the harder it will get. If it is too hard to scoop, set the pan on the kitchen counter for 10-20 minutes until scoop-able.
Recipe Tips and Tricks
- How to customize: Use this easy recipe with other types of fruit to create different flavoured sorbet. You can also add some yogurt for a creamier, smoother treat.
- How to store: Store watermelon sorbet in an airtight container or covered container in the freezer for up to one month. You can still eat it for a few months after that but it will start to become overly icy.
- How to serve sorbet that is too hard: If you find that the sorbet has become is too hard to scoop after storing in the freezer, then let it sit at room temperature for about 10 minutes before scooping with an ice cream scoop.
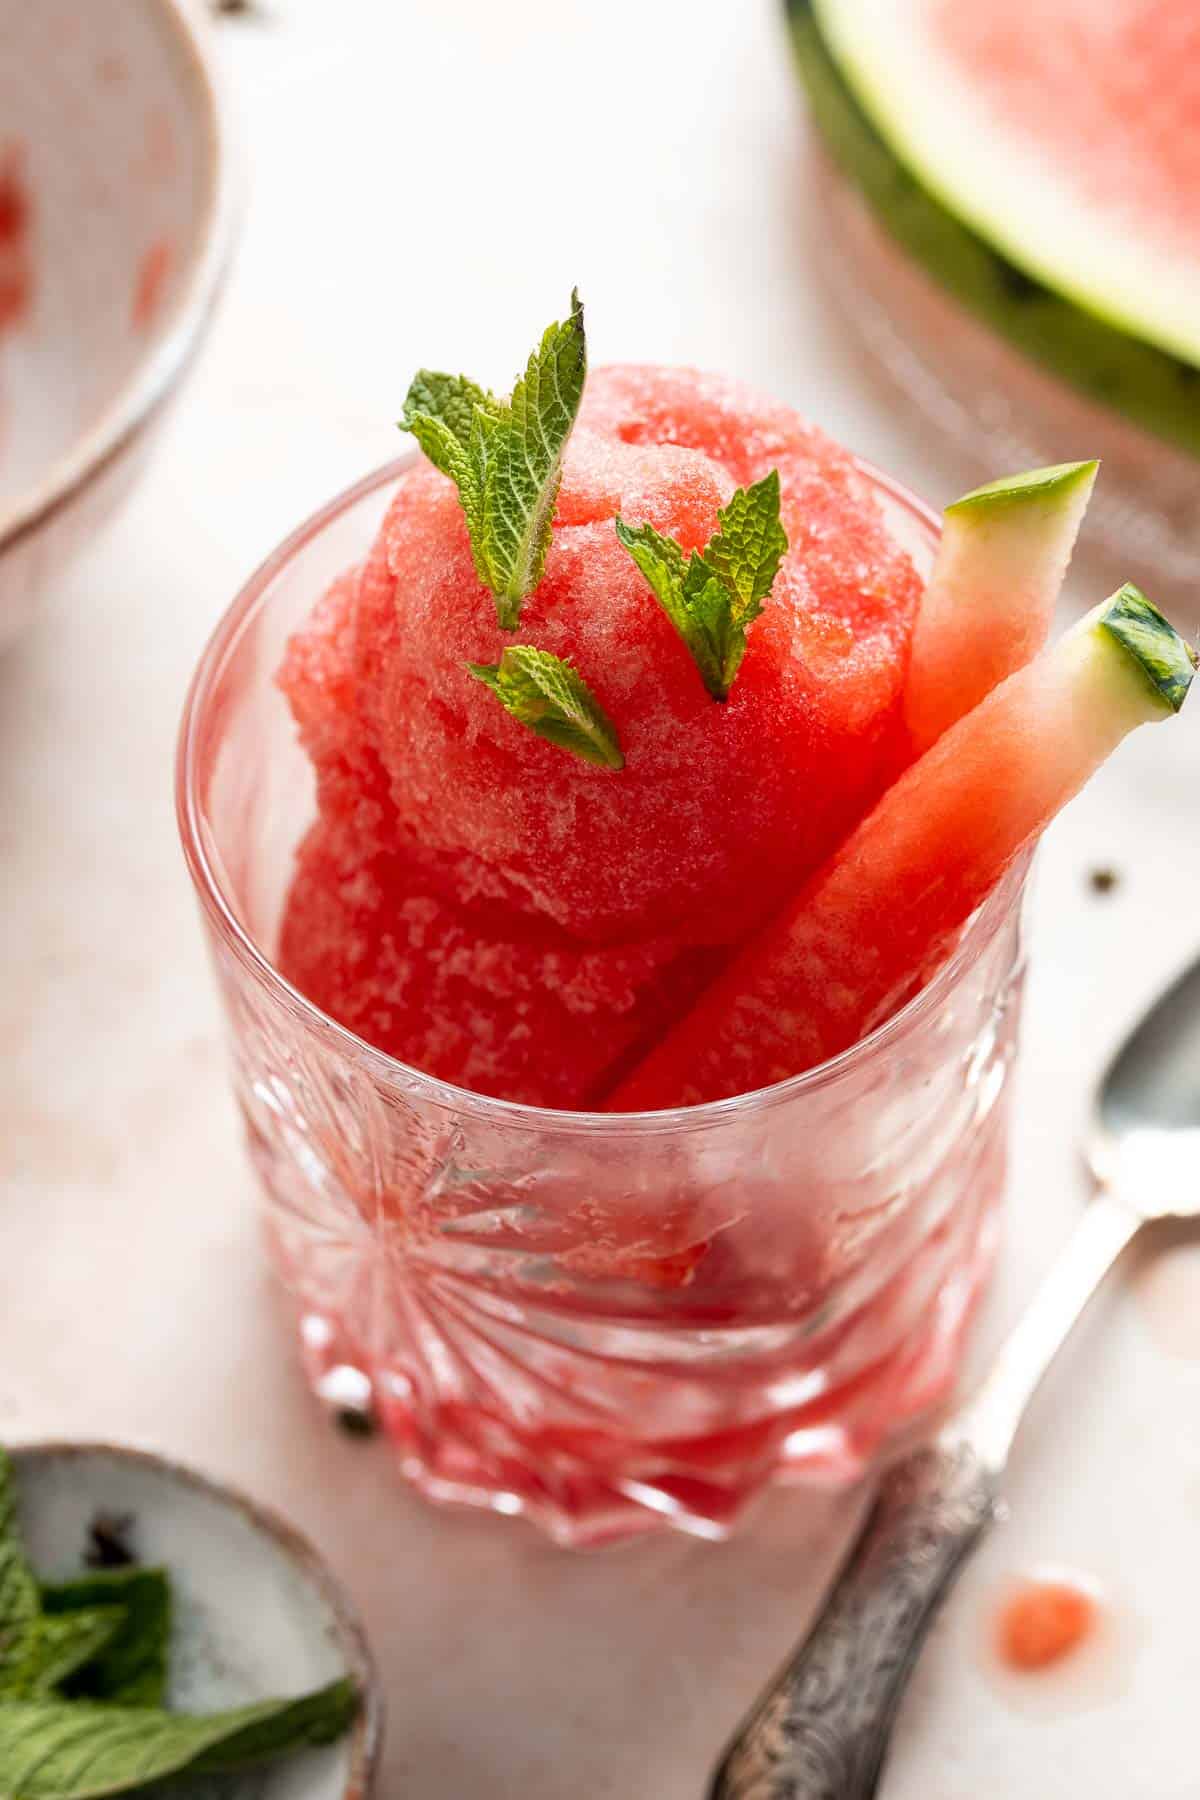
More Frozen Treat Recipes
- Strawberry Sorbet
- Mango Frozen Yogurt
- Blackberry Milkshake
- Peach Sorbet
- No Churn Vanilla Ice Cream
- Strawberry Popsicles
Tried this recipe?
I'd love to hear what you think! Leave a comment and rating below to share your feedback. Your reviews help others discover this recipe and help me keep creating more free recipes for you. Snap a photo and tag me on social media @aheadofthyme too.

Zucchini Fritters
Zucchini fritters are crispy on the outside, tender inside, and loaded with zucchini. These healthy bites are one of my favorite ways to use up summer zucchini from the garden. So if you are looking for fun new recipes to try with your abundance of zucchini this season, I've got you.

The best part? These zucchini fritters are quick and easy to make, ready in under 30 minutes! Serve these vegetable fritters for breakfast, as a snack, appetizer, or a side at dinner. It's delicious on it's own with Tzatziki Sauce or over a salad.
Why You'll Love These Zucchini Fritters
- They are pan-fried to perfection. There's something about fried foods that just can't be replicated. They are crispy, crunchy, slightly salty, and oh so good. These zucchini fritters are pan-fried (not deep fried) which makes them healthier and not overly greasy. They're light and delicious.
- Crispy outside, soft and tender inside. While the exterior of these vegetarian fritters is golden brown perfection, the interior is delicate, soft, and juicy. The moisture from the zucchini ensures the perfect texture every time.
- Zucchini is nutritious. Zucchini is rich in nutrients and antioxidants. It aids in digestion, heart health, vision, weight loss, and healthy blood sugar levels. Basically, it's a powerhouse vegetable. Since it's the main ingredient in these fritters, you know they're going to be good for you.

Ingredients and Substitutions
To make these delicious Zucchini Fritters, you will need the following ingredients (full quantities in recipe card below):
- zucchini - this recipe needs shredded zucchini. Shred it easily using a box grater or food processor.
- chives - you can also substitute with green onions.
- garlic powder
- paprika
- salt and pepper
- all-purpose flour - helps to thicken it up.
- egg - helps to hold the fritters together.
- vegetable oil - for cooking.
You will also need measuring cups and spoons, a box grater or food processor (to shred the zucchini), mixing bowl, and skillet.
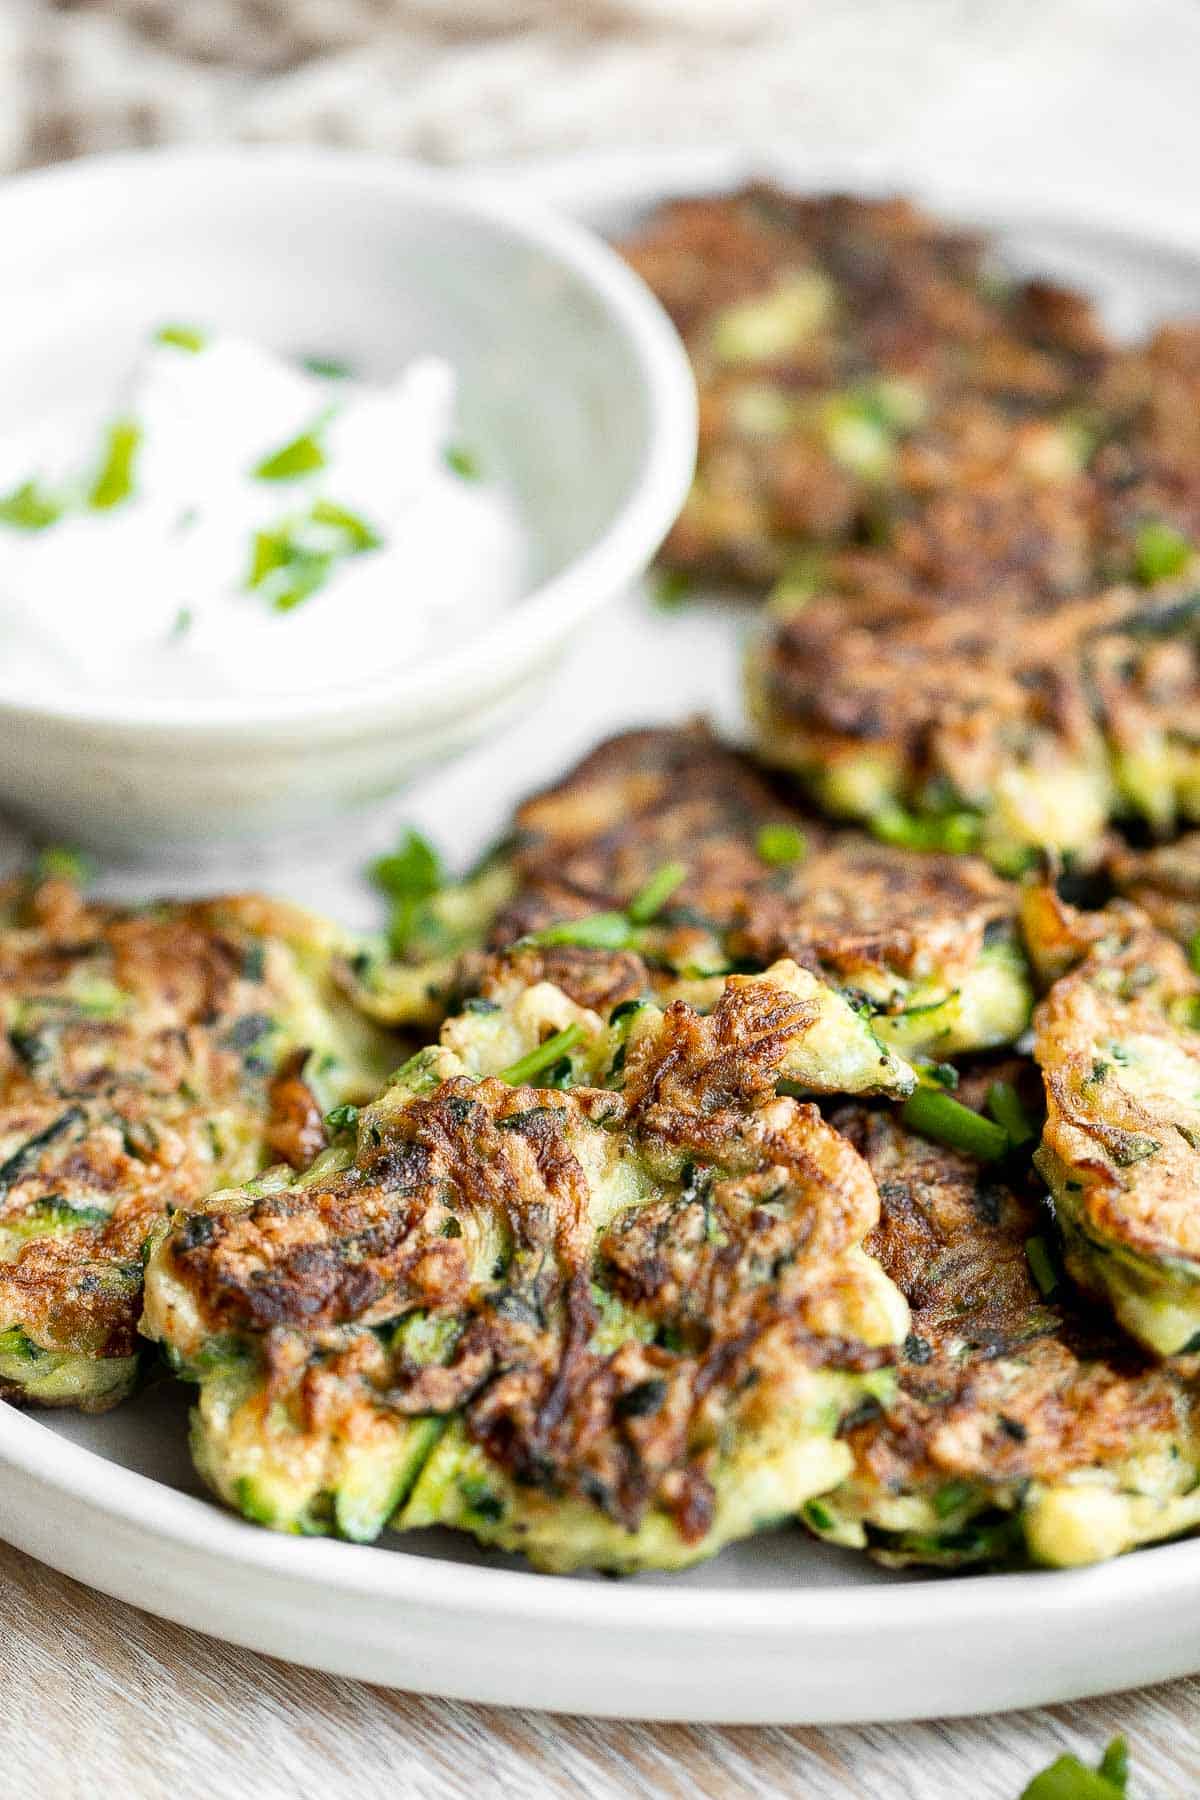
How to Make the Best Zucchini Fritters
- Shred the zucchini. Use a box grater or food processor to shred the zucchini.
- Drain zucchini. Place the shredded zucchini in a colander over a large bowl or the kitchen sink. Sprinkle the shredded zucchini evenly with a little bit of salt. Toss well to combine and let it sit for 10 minutes (Salt will draw out excess moisture inside the zucchini). Then, use your hands to squeeze out as much liquid as possible from the zucchini. Set aside in a large mixing bowl.
- Make fritter batter. Add flour, egg, chives, garlic powder, paprika, salt, and pepper. Mix well until evenly combined.
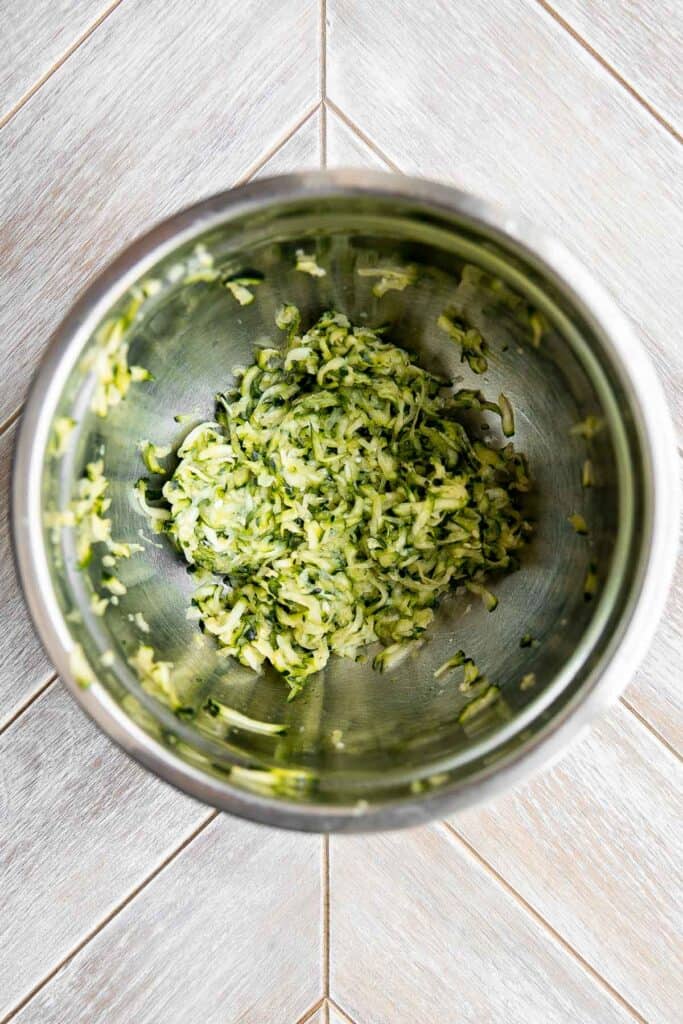
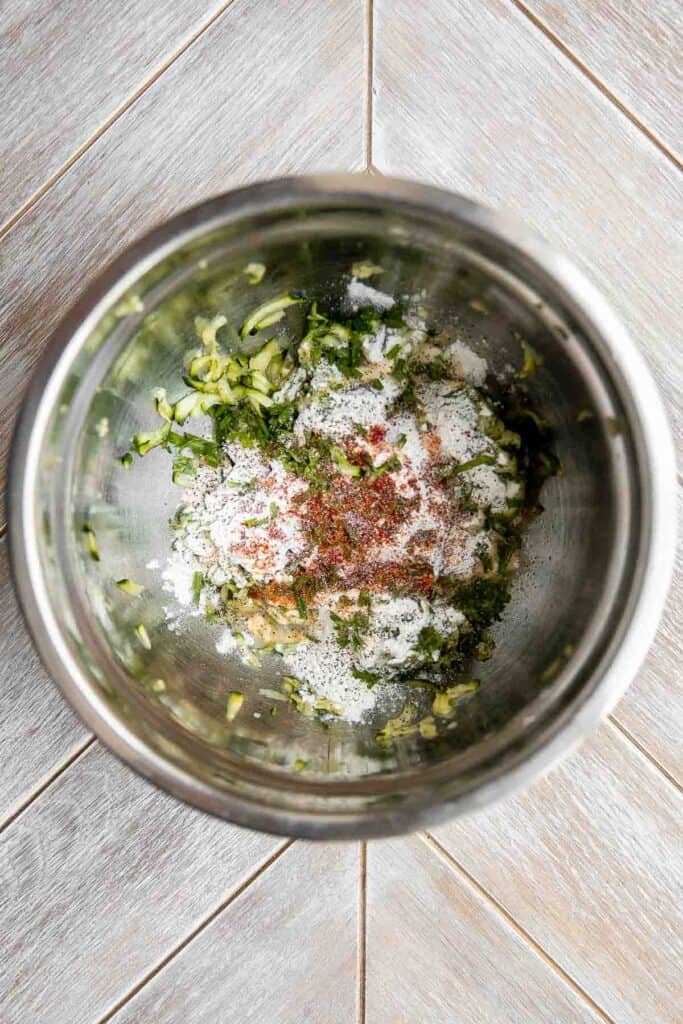
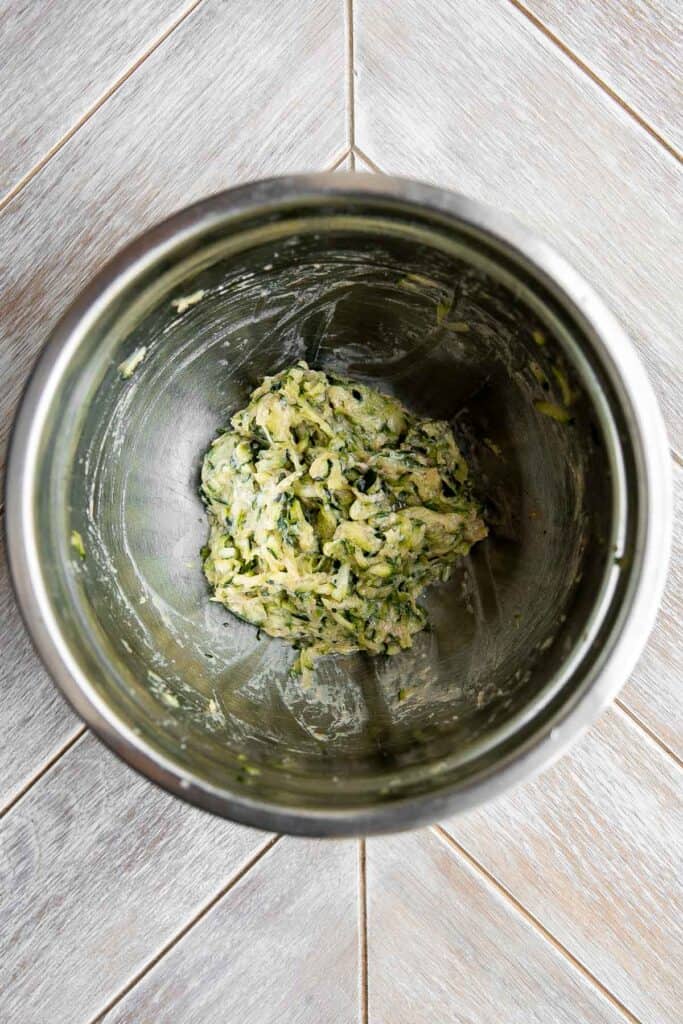
- Cook fritters. Heat oil in a large skillet over medium heat until sizzling hot, about 2 minutes. Place a tablespoon of the zucchini mixture in the skillet and gently flatten with the back of a spoon or spatula. You can probably fit 4-5 fritters in one skillet, depending on the size of your skillet. Cook until golden brown on the bottom, about 2 minutes, and flip over. Cook the other side until golden brown, another 2 minutes. Repeat in batches until the zucchini mixture is used up.
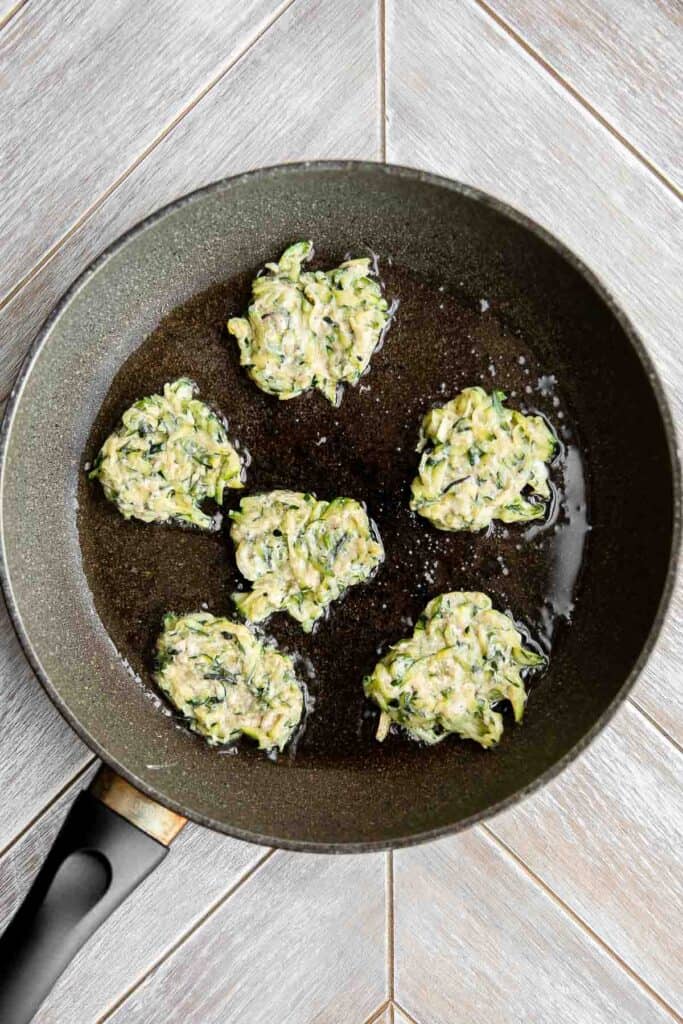
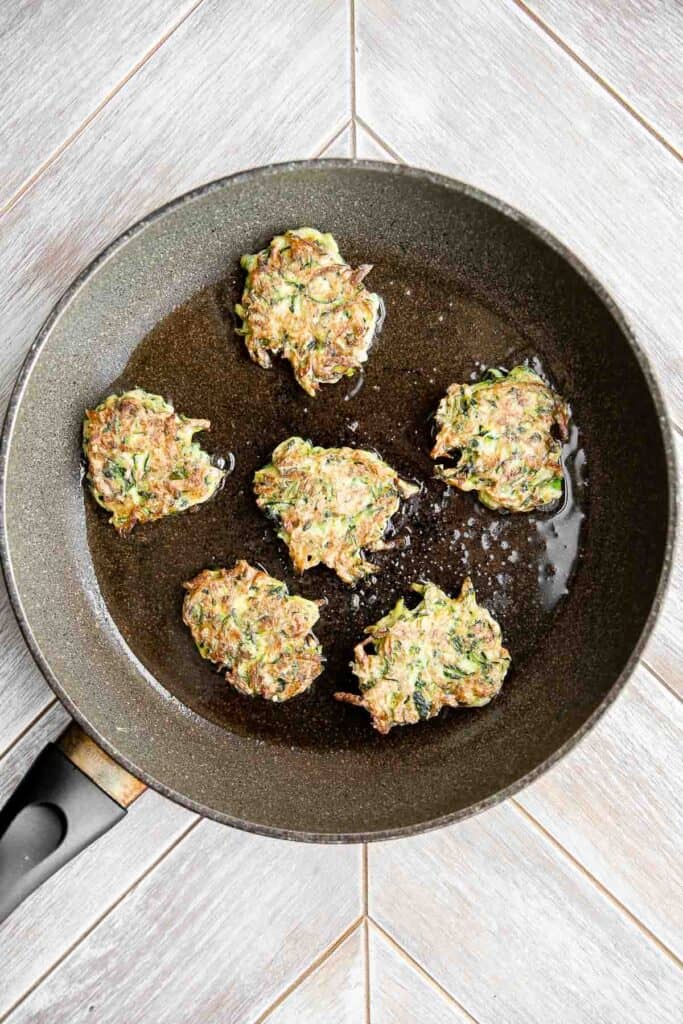
How to Serve
Serve zucchini fritters as an appetizer warm with a side of dipping sauce. Try it with:
- Tzatziki Sauce
- Whipped Feta
- Mayonnaise
- Sour Cream
- Ketchup
You can also serve these vegetable fritters over salad, or as a side with salmon or chicken.
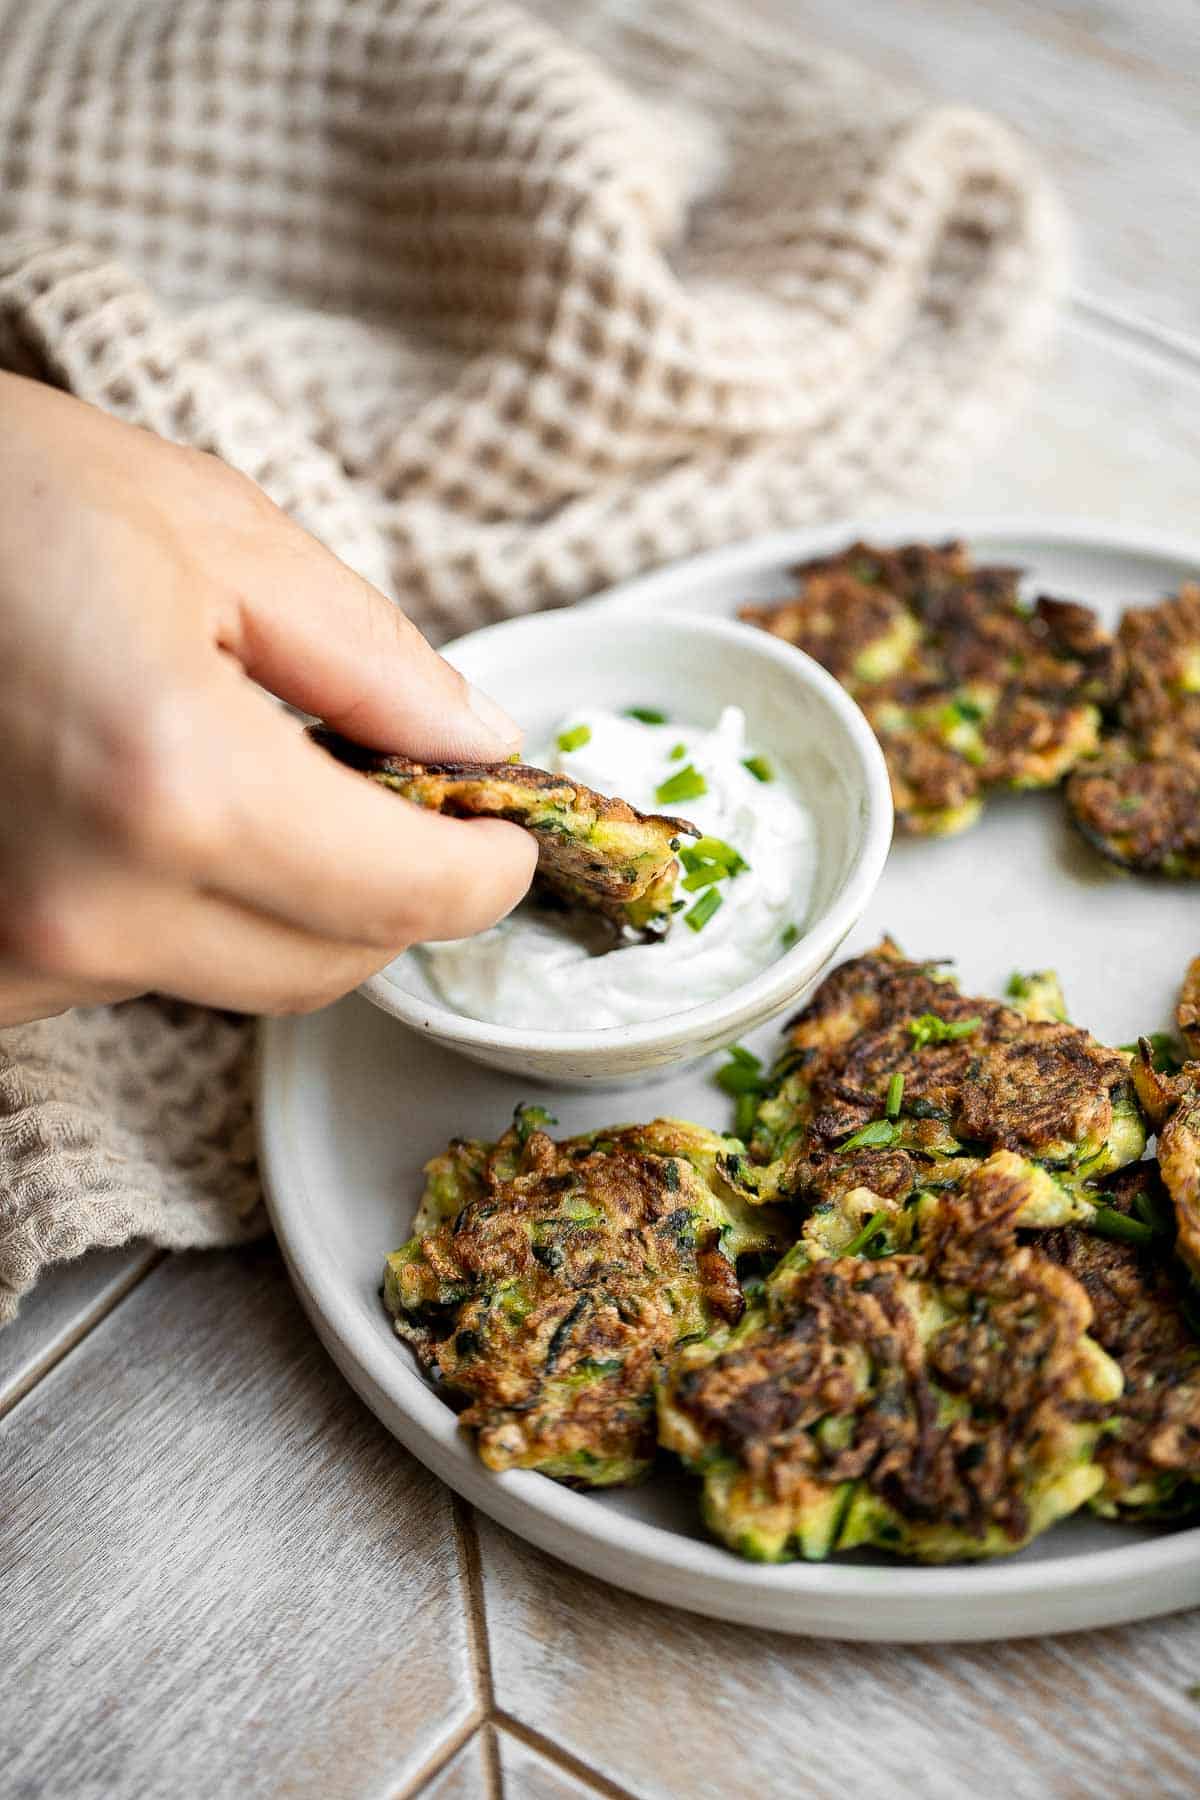
Recipe Tips and Tricks
- Pan-frying tips: When frying foods, it's essential to make sure your pan is at the right temperature. Too hot, and the fritters will burn before the inside is cooked. Too cold, and the fritters will absorb the oil and become a greasy mess. Adjust the temperature if needed while you cook, keeping in mind that adding fritters will cool the pan slightly, and an empty pan will heat quickly.
- How to store: Store zucchini fritters in an airtight container in the fridge for up to four days. Lining the container with a paper towel can help to absorb any excess moisture and prevent the fritters from becoming soggy.
- How to freeze: Allow the fritters to cool to room temperature, then store in an airtight container or freezer bag and freeze for up to 3 months. To serve, allow it to thaw overnight in the refrigerator and then reheat.
- How to reheat: I recommend reheating these zucchini fritters in an air fryer if you have one. Heat at 375F for 4-5 minutes. You can also reheat zucchini fritters in a 375F oven for 10-15 minutes until warm, or on in a pan over the stove on medium heat until warm.
More Zucchini Recipes Recipes
- Zucchini Muffins
- Baked Zucchini with Marinara
- Air Fryer Vegetables
- Shrimp Scampi with Zucchini Noodles
- Chocolate Zucchini Cake
- Chocolate Chip Zucchini Muffins

Air Fryer Tandoori Chicken Bites
Air Fryer Tandoori Chicken Bites are juicy and tender and loaded with authentic Indian spices. This quick and easy air fryer recipe is perfect to make on busy weeknights or any day of the week that you don't feel like spending a lot of time in the kitchen but crave a flavorful meal.
Serve tandoori chicken nuggets as an appetizer with homemade yogurt sauce or turn it into a complete meal with rice, vegetables, and salad.

Why You'll Love Air Fryer Tandoori Chicken
- So easy to make in the air fryer. If you use your air fryer often, you already know that it can make your favorite recipes cook up faster and even tastier. That's just the nature of this amazing appliance. And this tandoori chicken recipe is no different. You'll need to set aside 5 minutes to prep the marinade, and hour to marinate, and just 15 minutes to cook. That's it!
- The homemade tandoori marinade. To make Indian tandoori chicken, you need the perfect spice blend in the marinade. To achieve the authentic Indian flavor that you're looking for, you'll need paprika, curry powder (or garam masala), cumin, garlic, ginger, salt, and pepper. Then, add in yogurt to tenderize the meat while it marinates. It's the secret of how these tandoori chicken nuggets are so juicy and tender.
- The homemade yogurt sauce. Serving these tandoori chicken nuggets with the homemade yogurt is totally optional but highly recommended. The yogurt sauce draws inspiration from Tzatziki Sauce with dill, lemon juice, and garlic and provides a refreshing taste that pairs so well with the tandoori spices.

Ingredient Notes
To make these easy Air Fryer Tandoori Chicken Bites, you will need the following ingredients (full measurements in recipe card below):
- chicken - we used boneless skinless chicken breasts, but you can also use boneless chicken thighs if you prefer.
- tandoori seasoning - made simple with paprika, curry powder (or garam masala), ground cumin, garlic powder, ginger powder, salt, and pepper. You can also make it spicy with a pinch of cayenne powder or red pepper powder.
- plain yogurt - we use our easy Homemade Yogurt.
- tomato paste - adds flavor and color.
- vegetable oil
- cooking oil spray
- yogurt sauce - this sauce is perfect for dipping or drizzling. You'll need plain yogurt, olive oil, lemon juice, garlic, dill, salt, and pepper. Alternatively, serve these chicken pieces with Tzatziki Sauce.
You will also need measuring cups and spoons, mixing bowl or ziploc bag, and an air fryer.

How to Make the Best Air Fryer Tandoori Chicken Bites
- Prepare chicken. Cut the chicken breasts into 1-inch thick pieces and set aside in a large mixing bowl or Ziploc bag.
- Make marinade. Add paprika, curry powder, cumin, garlic powder, ginger powder, salt, and pepper. Rub the seasoning all over the chicken pieces to coat it evenly. Stir in yogurt, tomato paste, and oil. Toss well until evenly coated.
- Marinate the chicken. Cover the bowl with plastic cling wrap and refrigerate for at least 1 hour (or overnight for the best results).
- Air fry. Transfer the cubed chicken to the air fryer basket in a single layer in the air fryer basket. Spray with some cooking oil spray. Air fry at 350F for 13-15 minutes until golden brown and fully cooked through. The internal temperature for the chicken should reach 165F as read on a meat thermometer.
How to Bake in the Oven
You can also bake the chicken tandoori bites in a preheated oven at 450F for 16- 18 minutes or cook in the air fryer at 450F for 13-15 minutes until the chicken is fully cooked through.
How to Serve
Serve these tandoori chicken bites as an appetizer with a side of homemade yogurt dipping sauce.
Make the yogurt sauce by whisking together yogurt, oil, lemon juice, garlic, dill, salt, and pepper in a small mixing bowl until smooth. Refrigerate the sauce until ready to use.
You can also serve air fryer tandoori chicken bites as a complete meal by pairing them with some side dishes such as:
- Steamed Rice or Rice Pilaf with Carrots.
- Garlic Naan Bread or Pita Bread.
- Cucumber, tomato, and onion salad such as a Persian Shirazi Salad or Greek Salad.
- Roasted vegetables such as Honey Roasted Carrots, Air Fryer Vegetables, or Roasted Cauliflower.
- Sautéed vegetables such as Sautéed Garlic Green Beas, Sautéed Garlic Mushrooms, or Lemon Parmesan Asparagus.
Make Tandoori Rice Bowls by serving this air fryer chicken with steamed rice, salad, and a dollop or drizzle of the yogurt sauce.
Storing and Reheating
- How to store: Keep leftover tandoori chicken bites in a shallow airtight container for up to 3-4 days in the fridge.
- How to reheat: Reheat tandoori chicken nuggets in the air fryer at 350F for 5-10 minutes until warm.
More Air Fryer Chicken Recipes
- 25 Easy Air Fryer Recipes
- Air Fryer Chicken Tenders
- Air Fryer Chicken Breast
- Breaded Fried Chicken Wings (Air Fryer)
- Air Fryer Chicken Thighs
Tried this recipe?
I'd love to hear what you think! Leave a comment and rating below to share your feedback. Your reviews help others discover this recipe and help me keep creating more free recipes for you. Snap a photo and tag me on social media @aheadofthyme too.

Hot Dog Buns
Homemade Hot Dog Buns are soft, fluffy, and airy inside with the perfect golden brown crust. This easy to make bread recipe takes just 30 minutes to prep using basic bread making techniques that beginners can easily follow too.
Making hot dog buns from scratch is so easy that we never buy store-bought buns anymore! Plus, you can make a big batch and freeze any extras to enjoy over several months. Keep scrolling to learn how to make hot dog buns at home, including our tips and tricks.

Why You'll Love These Hot Dog Buns
- They're soft and fluffy. These homemade hot dog buns have all the elements you want in a good piece of bread. When you bite into one, your first impression will be the crisp, golden-brown crust. Then, you'll notice just how light and fluffy the inside crumb is. You may struggle to figure out which is your favorite.
- Quick and easy prep. Although making hot dog buns from scratch takes just under 3 hours from start to finish, 2 full hours of that time is spent waiting to allow the dough to rise. So, it doesn't take a lot of time to actually prep. You just have to plan ahead for the rise time.
- The best way to practice your bread baking skills. Making bread can be intimidating if you have never tried it before or if you tried a complex recipe and struggled with it. This hot dog bun recipe is perfect for beginners. It uses basic bread-making techniques so you can perfect your practice - and it's pretty easy so it's hard to go wrong.

Ingredient Notes
To make these easy Hot Dog Buns, you will need the following ingredients (full measurements in recipe card below):
- all purpose flour
- instant yeast - instant yeast is great because it's ready to use right away so it takes less time to prep than active dry yeast. You can use active dry yeast instead, but just let it sit in the milk mixture for a few minutes to activate it.
- sugar - it feeds the yeast, helping the dough rise faster, but it doesn't add sweet flavor to the bread.
- milk and butter - adds fat content to make the hot dog buns fluffier and softer.
- eggs - promotes rising because eggs are a leavening agent (similar to baking powder).
- salt - for flavour.
You will also need measuring cups and spoons (or kitchen scale), mixing bowls, bench scraper or knife, and a half sheet baking pan.
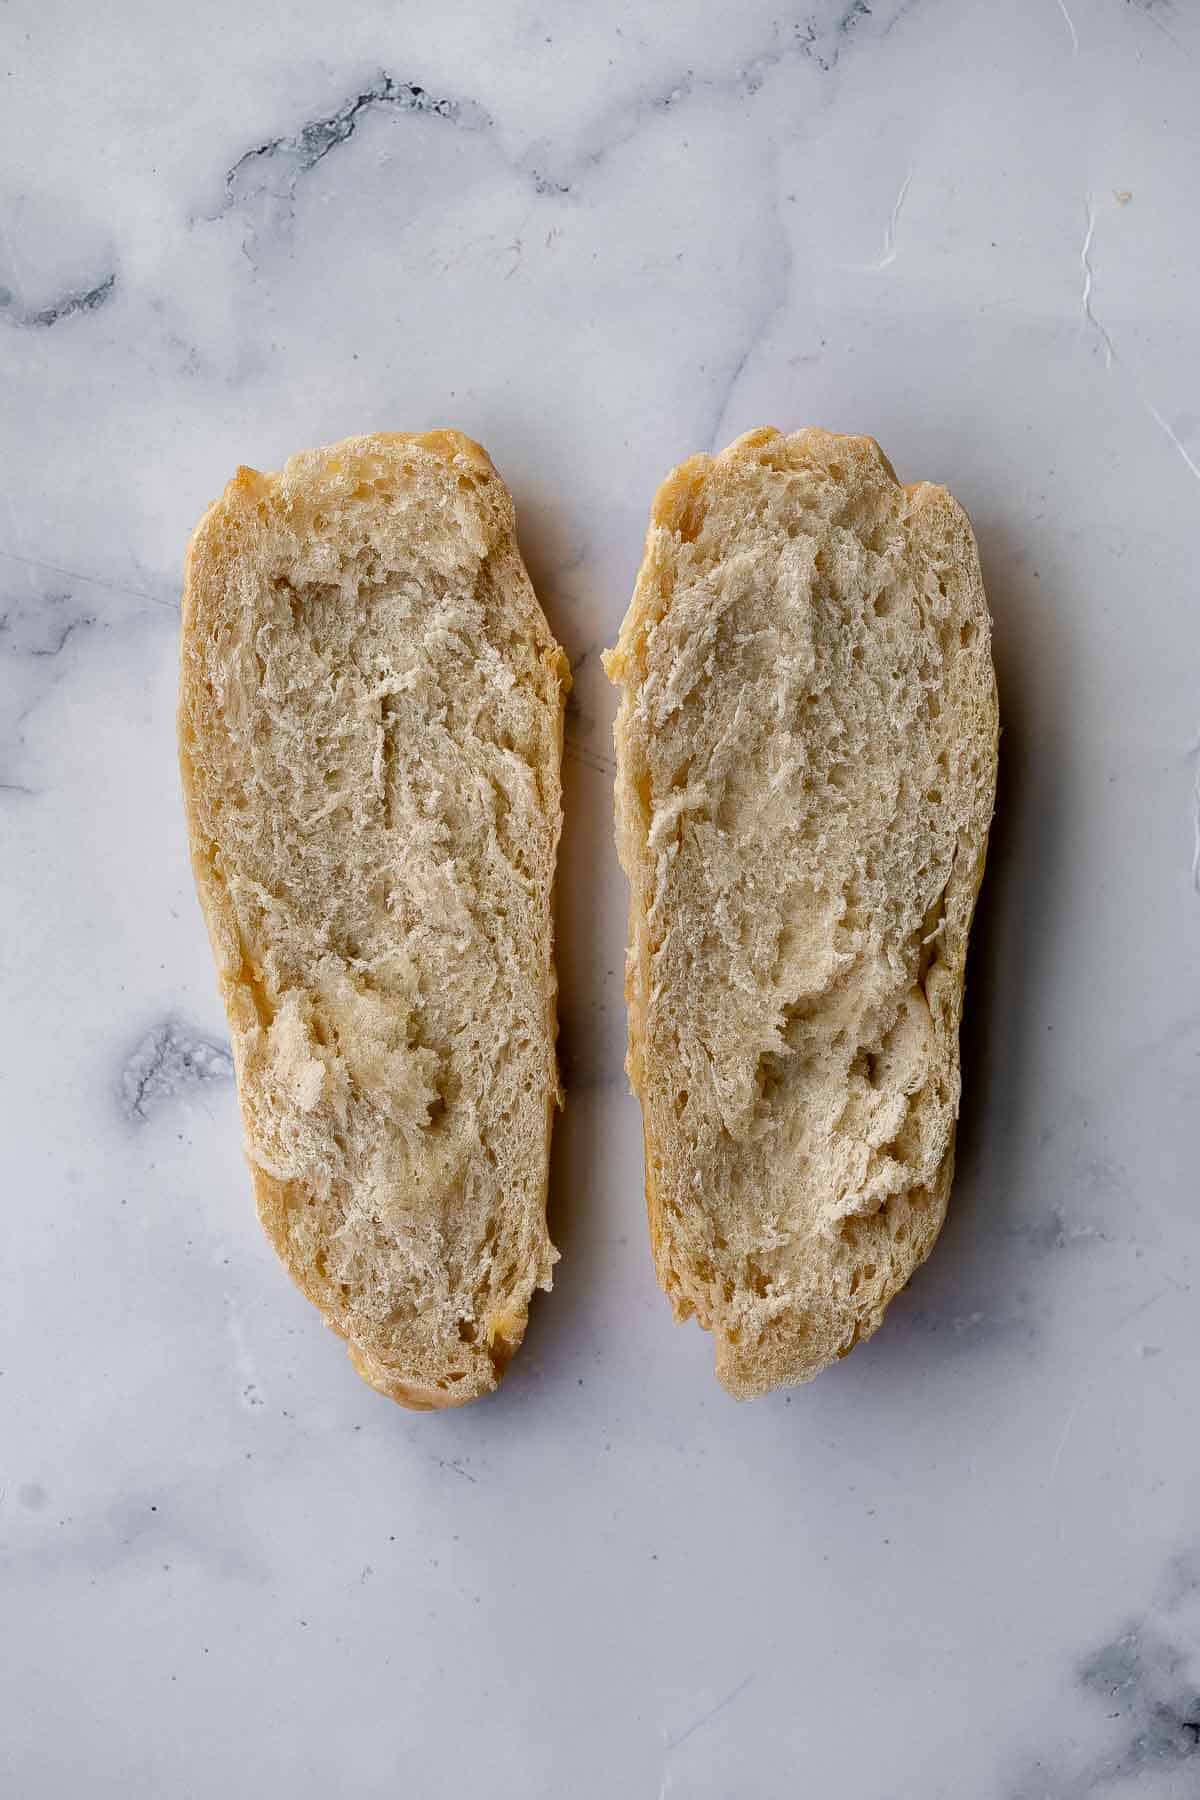
How to Make the Best Hot Dog Buns
- Prepare the dough. In a medium mixing bowl, whisk well to combine the milk, 1 egg, yeast, and sugar until fully dissolved, about 2 minutes. Whisk in 1 cup flour and mix well until smooth. In a large mixing bowl, add 3 cups flour, butter, and salt. Mix evenly with a spatula. Pour in the milk mixture and stir well to combine until it forms a shaggy dough, scraping down the sides of the bowl (there should be no dry flour particles visible).
- Rest. Cover the bowl with plastic cling wrap and let the dough rest for 10-15 minutes. This helps dough develop gluten naturally without kneading.
- Knead. Knead the dough on a clean lightly floured surface for 8-10 minutes until a smooth and soft dough ball is formed.
Tips for Kneading Dough
- How to knead dough: Knead the dough by pushing it down and outward using the palms of your hands. Fold the dough in half toward you and press down. Repeat this motion by pushing the dough down and outward, and then folding over towards you. This helps build up gluten strength in dough that is responsible for making the bread fluffy.
- How to test if dough is well-kneaded: A well-kneaded dough is smooth and can hold its shape. You can test the dough by giving it a firm poke with your finger. The indentation should bounce right back. If it doesn't bounce back and stays like a dimple, keep kneading for a few more minutes.
- First rise. Cover the bowl and let the dough rise until doubled in size, about 1 hour. You can lightly oil the dough ball to prevent it from sticking to the bowl.
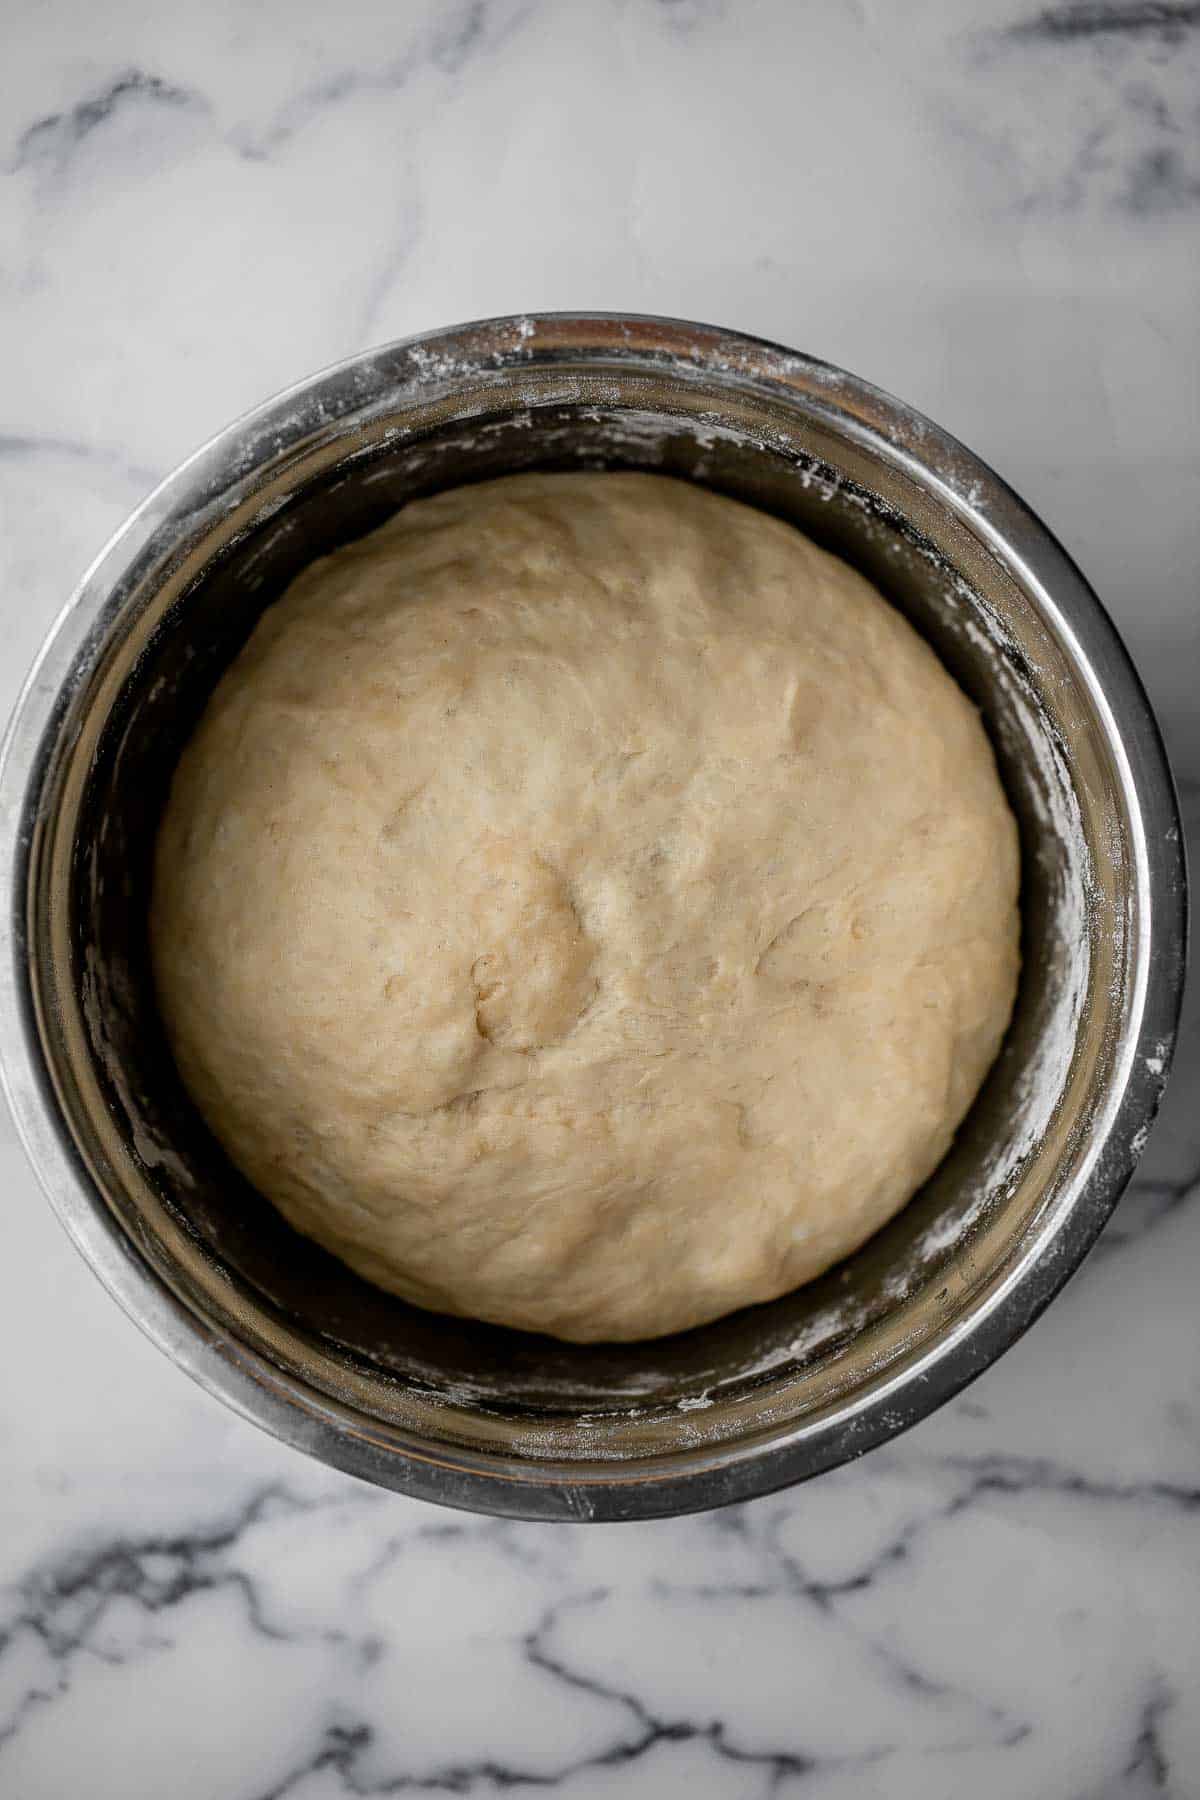
How to Shape Hot Dog Buns
- Roll the dough. Use a rolling pin to roll out the dough into an approximate 12x5-inch rectangle. Use a knife or bench scraper to divide the dough into 10 equal pieces.

Roll out the dough. Cut dough into 10 pieces.
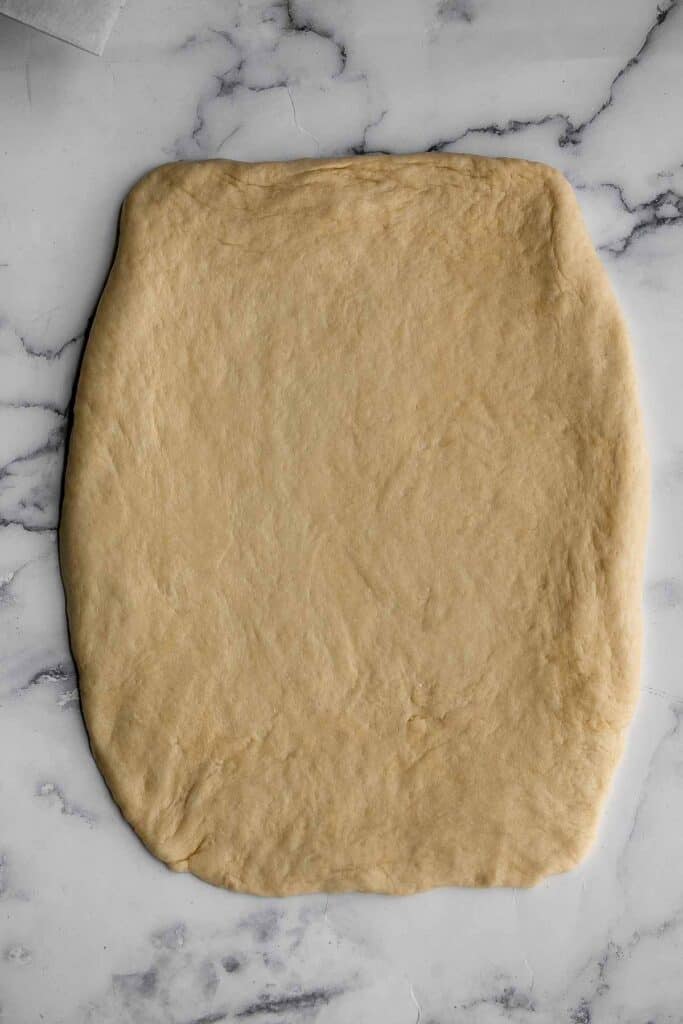
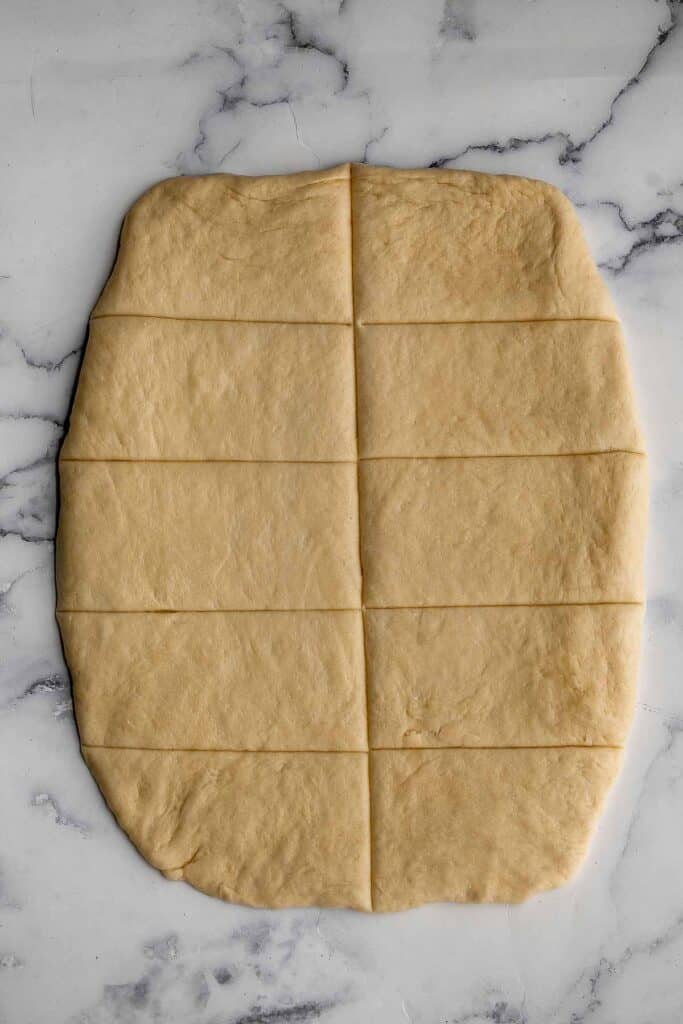
- Shape the buns. Shape them into the shape of a hot dog bun and arrange them on a parchment lined baking sheet, spaced evenly apart, about 2-inches apart. You can also roll the bread to shape it into a hot dog bun.
- Second rise. Cover the baking sheet loosely with cling wrap and let dough rise until almost doubled in size, about 45 minutes depending on the room temperature.
- Add egg wash. In a small mixing bowl, use a fork to beat the remaining egg. Brush the egg wash evenly over each bun. The egg wash creates shine and enhances the golden color of the buns when baking.
- Bake. Bake in a 375F preheated oven for 20 minutes until golden brown.
Shape the hot dog buns. First rise. Bake.


- Cool. Transfer the hot dog buns onto a wire cooling rack and allow the buns to cool completely before slicing, about 20 minutes.
How to Serve
The most obvious way to enjoy hot dog buns are with sausages or weiners. Buy you can also use them to make any sandwich that you like. Use them for:
- Egg Salad Sandwich
- Lobster Rolls
- Lemongrass Chicken Banh Mi Sandwich
- Simple sandwiches with deli meat
You can also cut them into squares and serve with a cheesy dipping sauce like Pizza Dip or Baked Spinach Dip.
If serving as a hot dog, pair them with some classic sides including:
Recipe Tips and Tricks
- Weigh the ingredients: I recommend weighing the ingredients using a kitchen scale for the most accurate measurements. You can totally use measuring cups instead, but it won't be as precise. A kitchen scale is a relatively cheap investment.
- The texture of the dough: With the butter and milk in this recipe, the dough should be a bit sticky in the beginning. After a few minutes of kneading, the dough will turn smooth and not sticky. By lightly oiling your hands when kneading, it will help keep the dough from sticking to your hands initially.
- How to store hot dog buns: You can store these hot dog buns in a bread basket or sealed container at room temperature for up to 3 days. You can also store them in an airtight container in the fridge for up to 1 week. Note that their texture will harden in the fridge so I recommend toasting them or warming them up to bring back some moisture.
- How to freeze: Let the buns cool to room temperature first and then freeze in an airtight container or freezer bag for up to 3 months. I recommend slicing them first before freezing so you can easily defrost them in the toaster under the defrost setting.
More Bread Recipes
Tried this recipe?
I'd love to hear what you think! Leave a comment and rating below to share your feedback. Your reviews help others discover this recipe and help me keep creating more free recipes for you. Snap a photo and tag me on social media @aheadofthyme too.

Lemon Curd Cookies
These Lemon Curd Cookies are made of buttery shortbread thumbprint cookies dusted with powdered sugar and filled with sweet and tangy lemon curd. They are crumbly and soft with the perfect crispy edges while creamy and lemony in the center. The perfect combination of sweet and sour!
Plus, these lemon curd thumbprint cookies are easy to make - the cookie dough comes together in one bowl and they bake in just 10 minutes after they've been shaped and chilled. Perfect for a last minute cookie craving.

Why You'll Love These Lemon Curd Cookies
- The soft, chewy, and crumbly sugar cookie base. These lemon curd cookies need a solid base to hold the lemon curd, and they deliver on it. Flavored with vanilla and almond extract, the shortbread cookie base is perfect in every way - flavor, texture, crumbliness, and softness.
- The creamy, sweet, and tart lemon curd. Lemon curd is dessert heaven. It's sweet, rich, creamy, buttery, and tart, and it has an intense flavor that pairs perfectly with the shortbread cookie. If you've got homemade lemon curd, these cookies will be even better and more flavorful.
- They're easy to make. With a few simple steps and one bowl, cookie dough has never been easier to make. Then, just shape, chill, and bake before you're ready to fill the thumbprint cookies with lemon curd.
- The perfect dessert for lemon lovers. If you love lemons or any tart foods, then these lemon cookies are a must-have recipe in your book. You'll find yourself making these cookies with lemon curd again and again - they're just that good.

Ingredient Notes
To make these easy Lemon Curd Cookies, you will need the following ingredients (full measurements in recipe card below):
- butter - you will need to use room temperature butter or else it won't cream properly with the sugar. Leave the butter out on the kitchen counter for about 1 hour to soften it.
- granulated sugar
- pure vanilla extract
- pure almond extract - I love the flavor that almond extract adds to these cookies, but you could leave this out if you don't have any on hand.
- salt
- all-purpose flour
- confectioners' sugar - optional, for dusting on the cookies.
- lemon curd - feel free to use store-bought or homemade lemon curd. We always use our homemade Lemon Curd in recipes that call for curd because it's easy to make at home and is so flavorful.
You will also need measuring cups and spoons, mixing bowl, half sheet baking pan with parchment paper or a silpat baking mat, and a wire cooling rack.
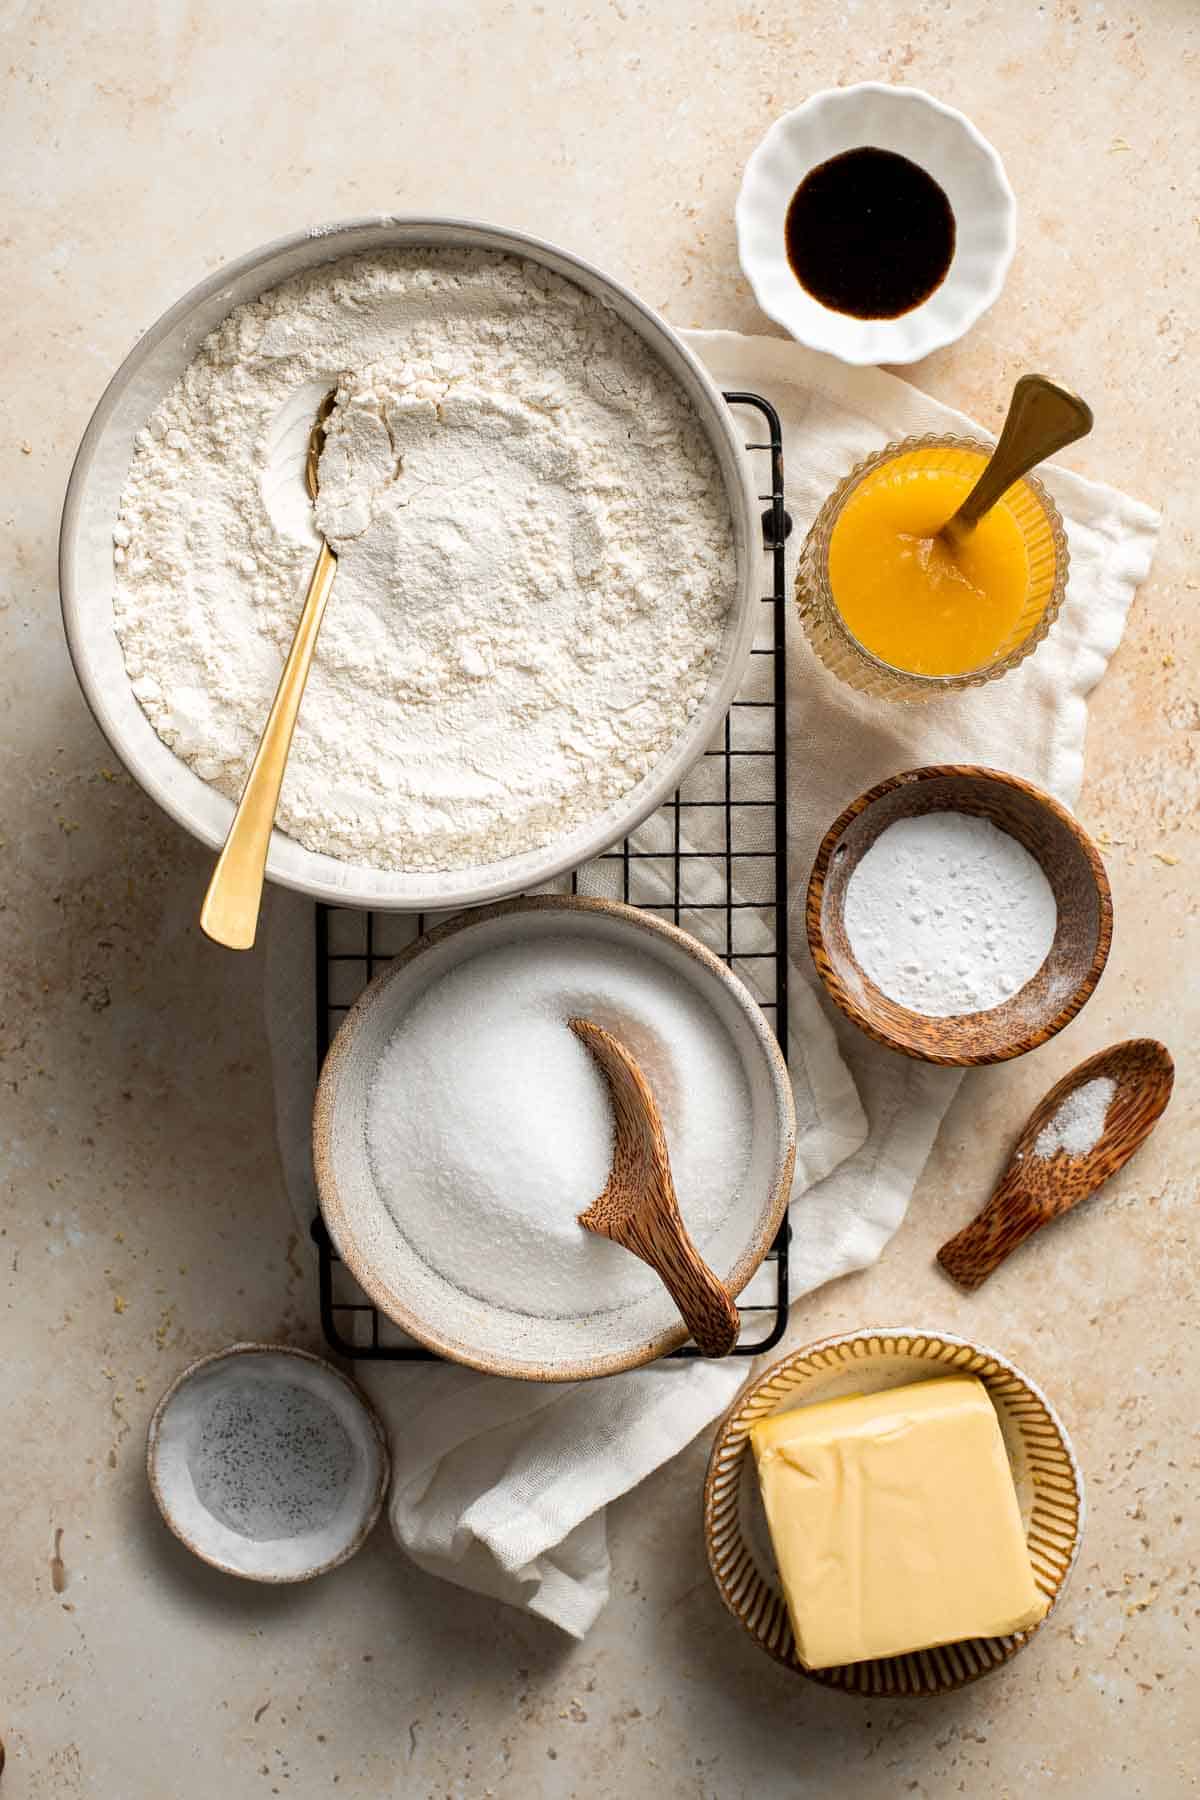
How to Make the Best Lemon Curd Cookies
- Cream butter and sugar. Use a stand mixer (or hand mixer) and cream the butter and sugar together in a mixing bowl on medium speed until light and fluffy, about 2 minutes.
- Add extracts and salt. Add vanilla, almond extract, and salt and continue to beat on medium until fully incorporated.
- Add flour. Add flour gradually until just combined.
Cream butter and sugar. Add extracts and salt. Add flour.
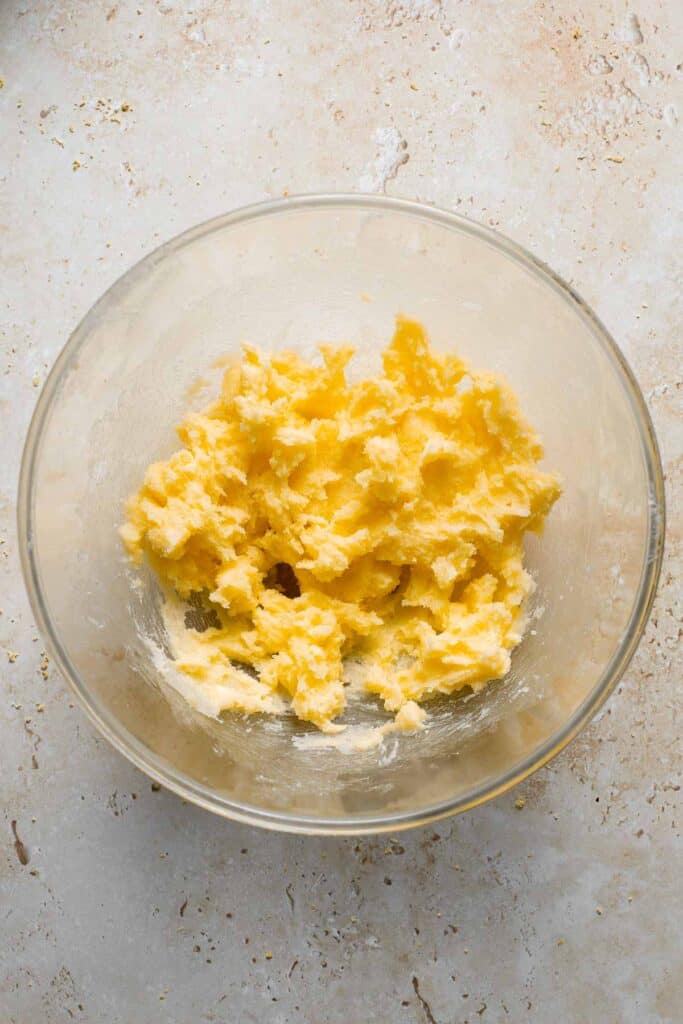
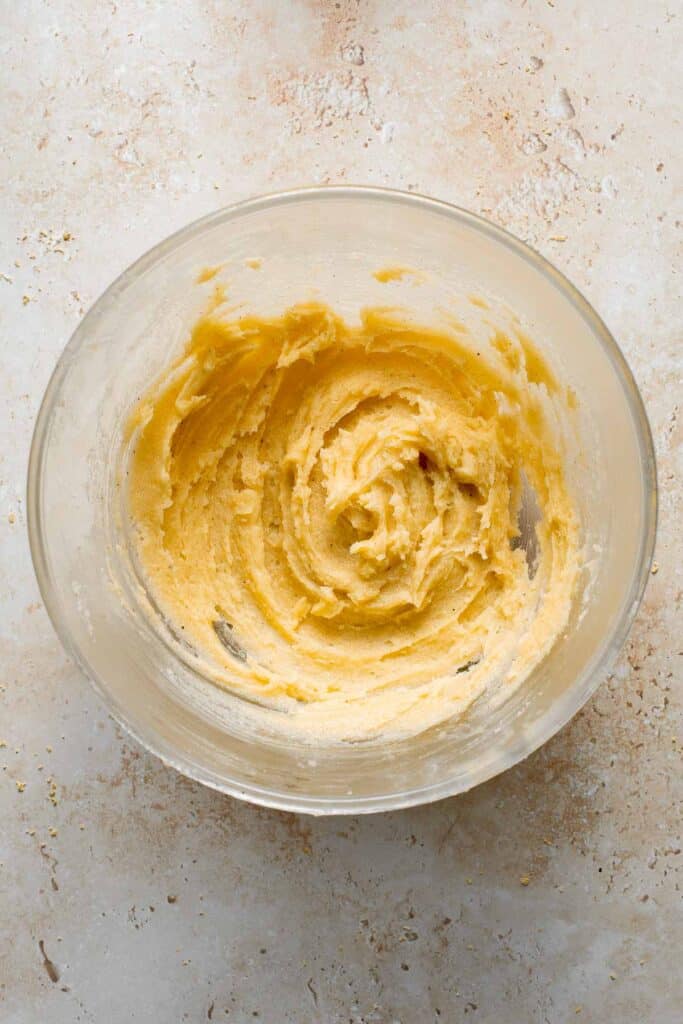
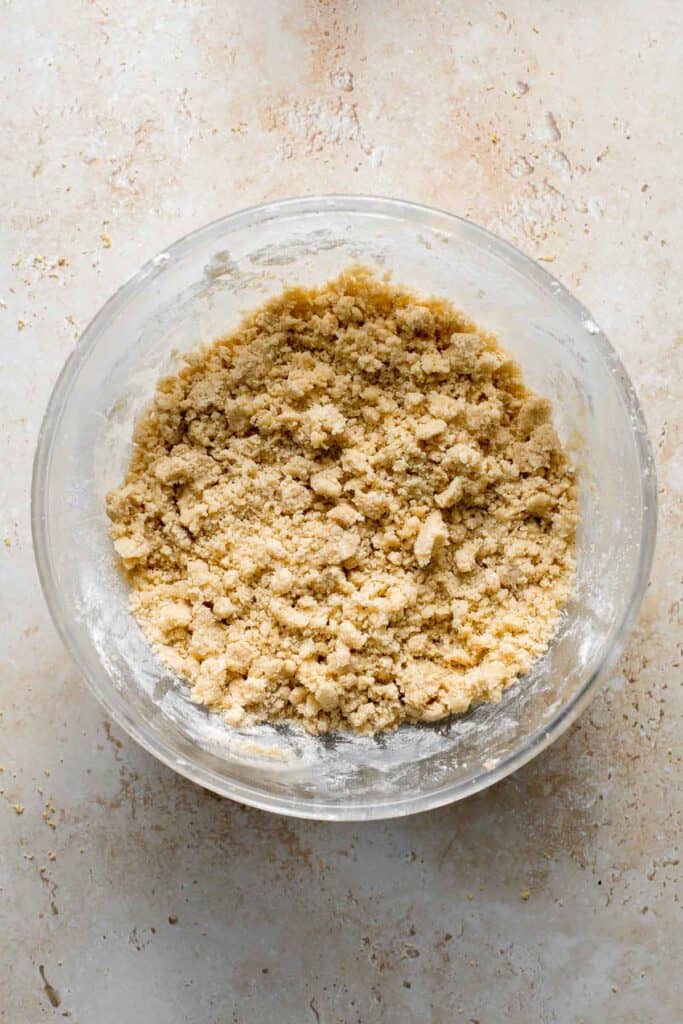
- Shape cookies. Take 1 tablespoon of dough at a time and roll into 1-inch balls. Make an indentation with your thumb (or the back of a small spoon or melon baller) into the centre of each ball.
- Chill. Place cookies on a silpat or parchment-lined half sheet baking pan, spaced 2 inches apart. Transfer the baking sheet to the refrigerator and chill the cookies for 1 hour (or place in the freezer for 30 minutes).
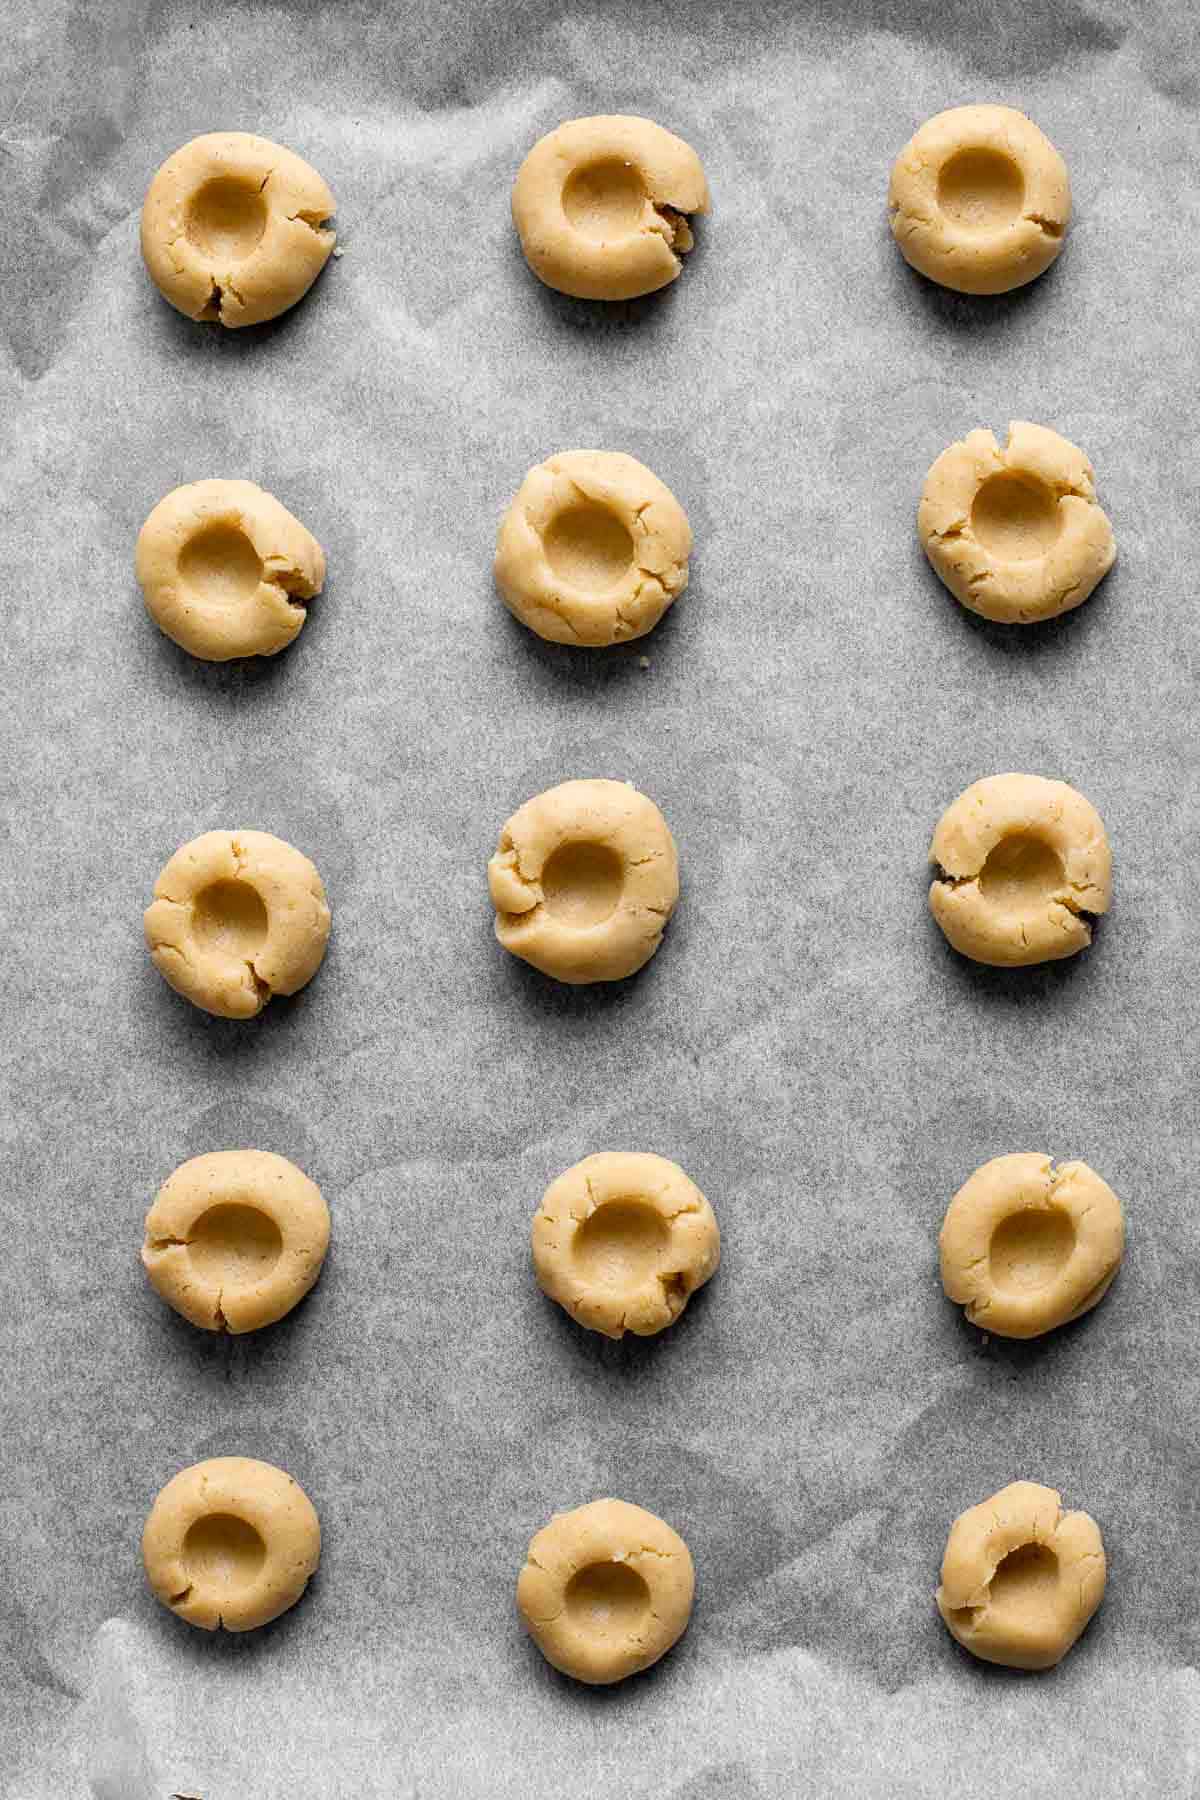
- Bake. Bake the cookies in a 350F preheated oven for 10-13 minutes or until edges are lightly browned. If the indentations have started to close, use the back of a spoon or melon baller to carefully make the indentation bigger again, while the cookies are still hot.
- Cool. Allow the cookies to cool on the baking sheet for 5 minutes, then carefully transfer to a wire cooling rack to cool completely.
- Fill with lemon curd. Once cooled, lightly dust the cookies with confectioner's sugar. Then, use a small spoon to carefully fill them with lemon curd. Serve immediately or store for later.

Recipe Tips and Tricks
- How to store: Keep leftover lemon curd cookies in the fridge inside an airtight container for up to four weeks. They are best consumed within the first 1-2 weeks but will last a few weeks longer. Also, make sure to store them in a single layer instead of stacking them so that the lemon curd filling doesn't smudge.
- How to customize: You can use this recipe as a base for different flavored thumbprint cookies! You can customize them easily by substituting the lemon curd filling with jam such as raspberry, peach, or strawberry jam.
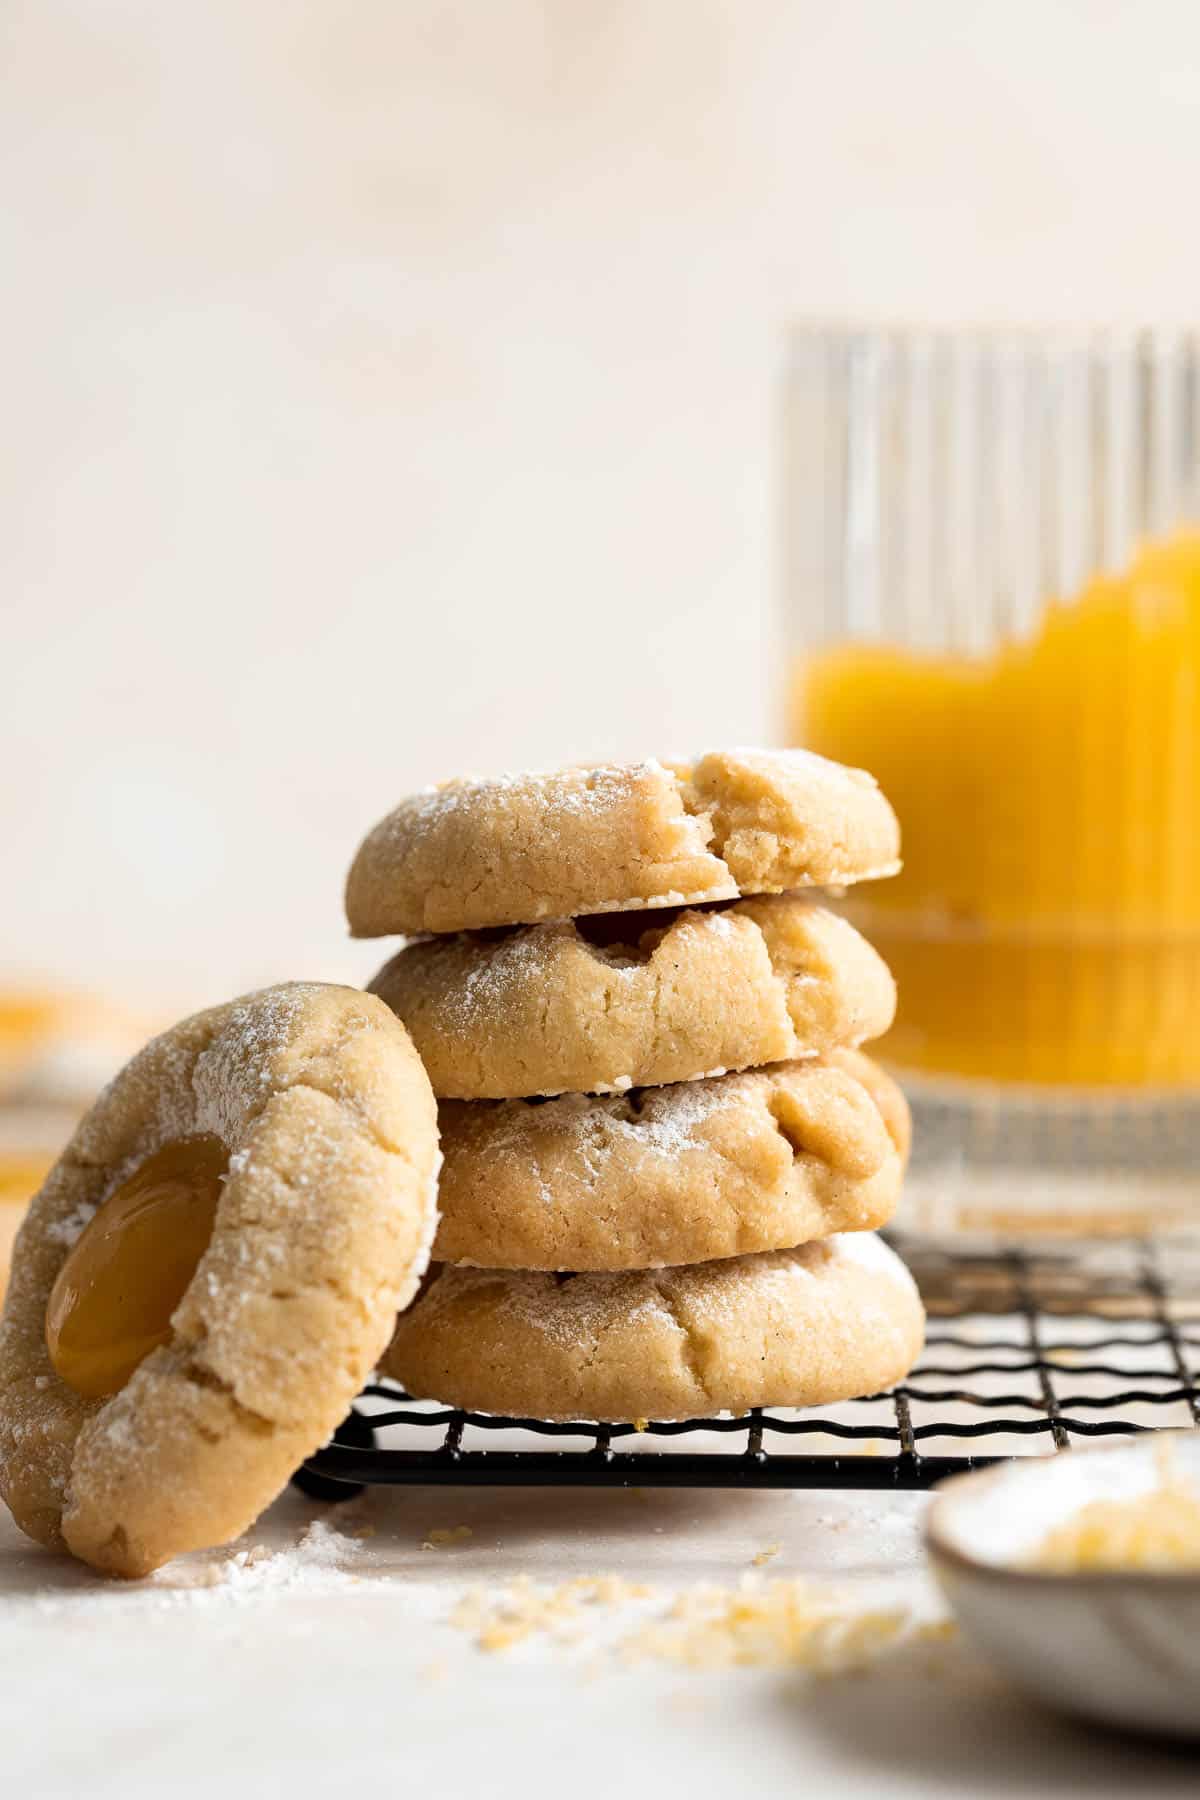
More Cookie Recipes
- 50 Best Cookie Recipes
- Jam-Filled Thumbprint Cookies
- S'mores Cookies
- Italian Rainbow Cookies
- Cut Out Shortbread Cookies
- Linzer Cookies
Tried this recipe?
I'd love to hear what you think! Leave a comment and rating below to share your feedback. Your reviews help others discover this recipe and help me keep creating more free recipes for you. Snap a photo and tag me on social media @aheadofthyme too.

20 Best Dip Recipes

Dips are one of the most satisfying items on a party table or when you are just craving a late-night snack. They can be creamy and cheesy, hearty and veggie-packed, or warm or cool. Either way they are all quick and easy to make. So if you are wondering what kind of dip to make, then you have come to the right place. We are sharing our 20 best and most popular dip recipes including cheesy dips, salsas, all the hummus (we might have a bit of an obsession), and more!

Best Dip Recipes
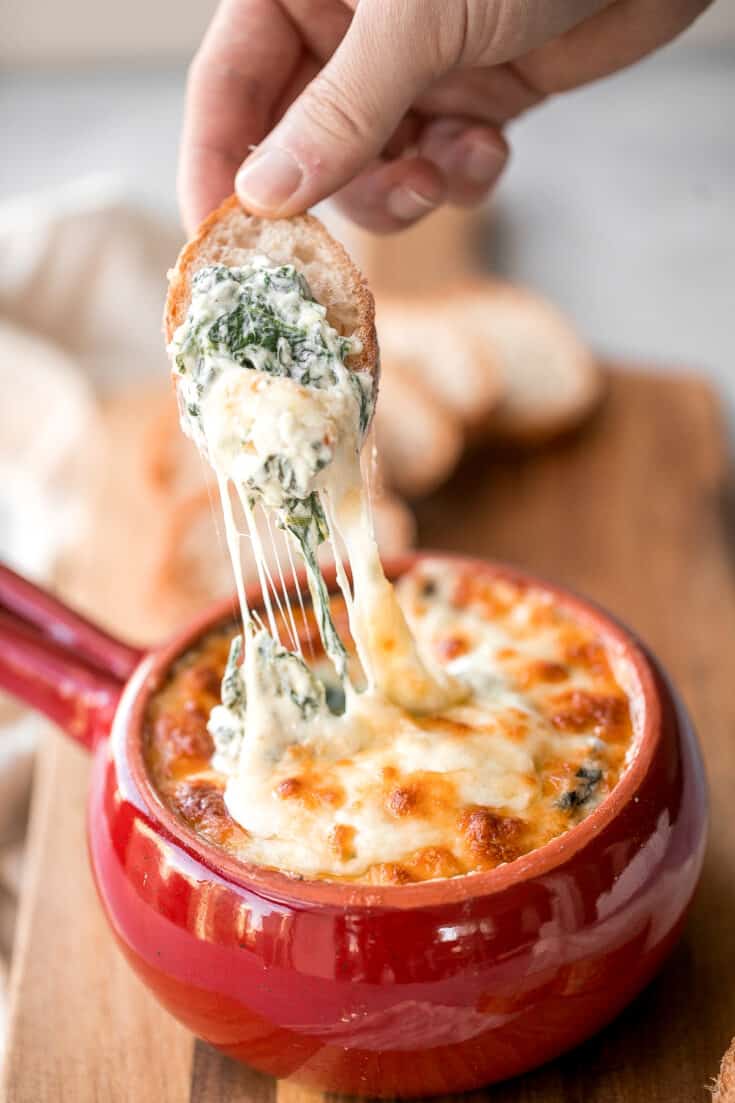
Baked Spinach Dip
Warm, rich, creamy baked spinach dip is a delicious and easy appetizer that is baked until warm and melty. Easy to make ahead and a total crowd pleaser. It's one of my favourite Super Bowl recipes of all time.
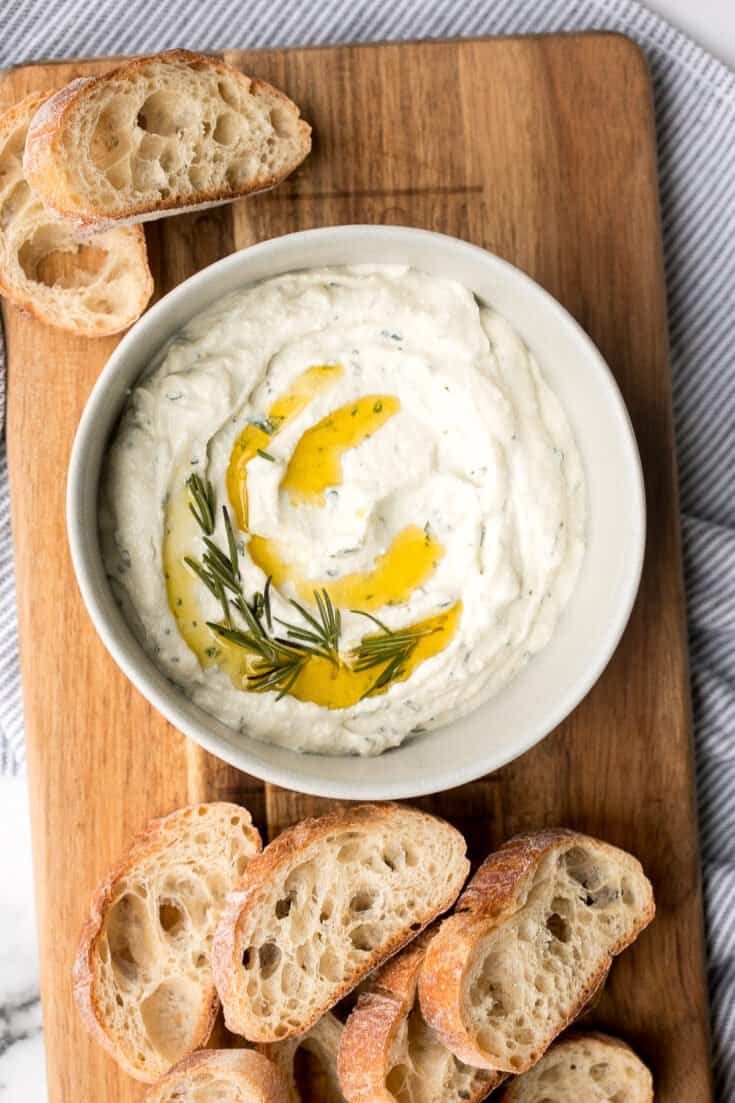
Whipped Ricotta Dip
Light and airy, whipped ricotta dip is so easy to make in just 5 minutes with a few fresh ingredients including fresh herbs, olive oil, garlic, and honey.
Classic Hummus
Whip up smooth and creamy classic hummus dip at home in just 5 minutes, by combining chickpeas, tahini, olive oil, lemon juice and garlic in the blender. Serve it with veggies or crackers, or use it in a vegan hummus wrap.
Easy Guacamole
Incredibly tasty, this easy and basic guacamole takes less than 5 minutes to make. It is the perfect dip for a Mexican-inspired Super Bowl party.

Homemade Ranch Dip
Homemade ranch dip is creamy, tangy, flavorful, and delicious. This classic dip is easy to make at home in minutes, and is so much better than store-bought.

Queso Mexican Cheese Dip
Homemade queso Mexican cheese dip is smooth, creamy, delicious, flavorful, and so easy to make. It's so much better than store-bought in every way.
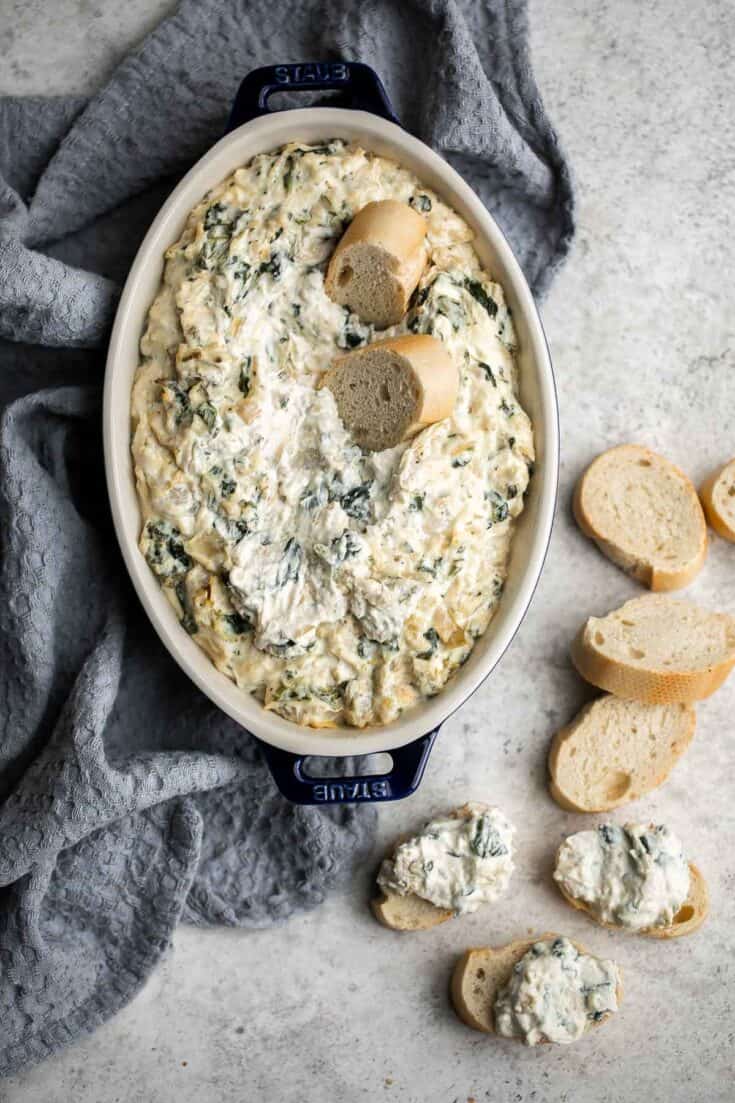
Spinach Artichoke Dip
This baked spinach artichoke dip is quick, easy, creamy, flavorful, and delicious. This warm dip is baked in the oven and served with bread or crackers.
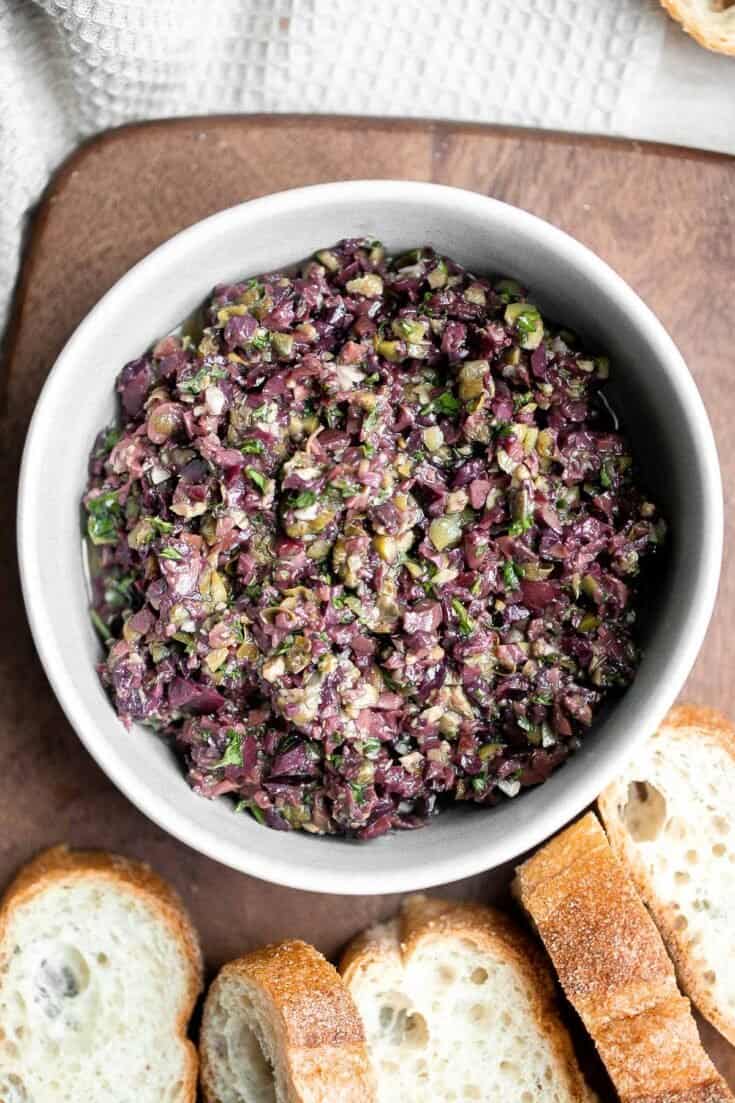
Olive Tapenade
Olive tapenade is a delicious, flavorful, easy dip that comes together in minutes, made with the perfect combination of sharp, tangy, salty, and savory.

7 Layer Dip
This easy and delicious 7 layer dip is the perfect dip to serve at your next party, made with layers of beans, guacamole, salsa, cheese, and more.

Caramelized Onion Dip
Caramelized onion dip is creamy, flavorful, and melt-in-your-mouth delicious. This easy appetizer is perfect for entertaining, on game day, or for a snack.
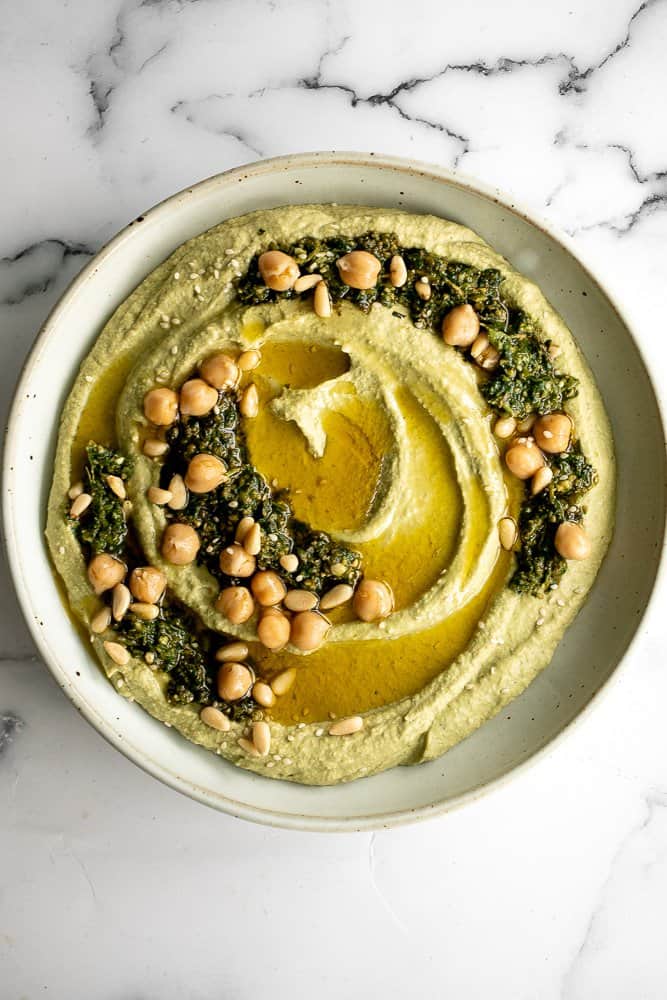
Pesto Hummus
Smooth and creamy pesto hummus is a healthy, delicious and flavourful dip that is easy to make in just 5 minutes. It's vegan and gluten-free.
Whipped Feta
Whipped feta is light, airy, and fluffy. It's an easy yet impressive recipe that takes only 5 minutes to make in a blender with 3 simple ingredients.

Pico de Gallo Chunky Salsa
Easy 5-minute pico de gallo chunky salsa is packed with fresh tomatoes, onion, cilantro, and lime juice (and optional jalapeños for a spicy kick).
Easy Tzatziki Sauce (Yogurt Cucumber Dip)
Light and fresh, easy tzatziki sauce is a creamy yogurt cucumber dip packed with fresh cucumbers, garlic, dill, lemon juice and olive oil. So easy to make.
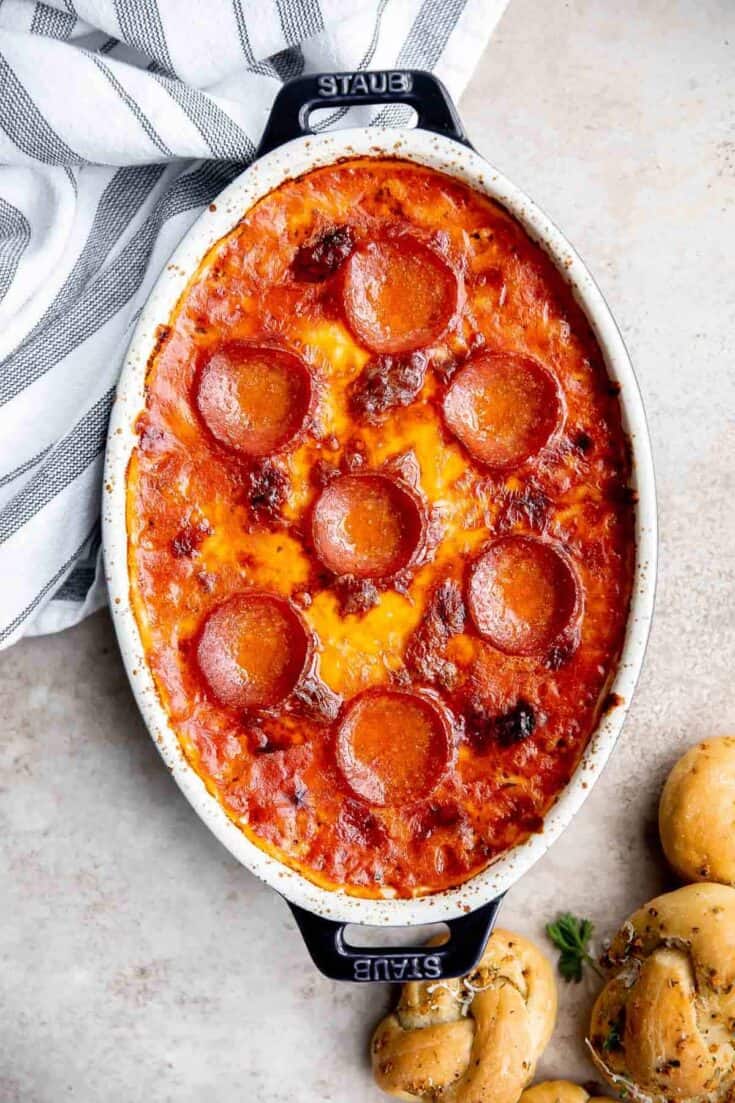
Pizza Dip
Pepperoni pizza dip is creamy, rich, comforting, and delicious. This appetizer is easy to make, easy to prepare ahead of time, and easy to eat.
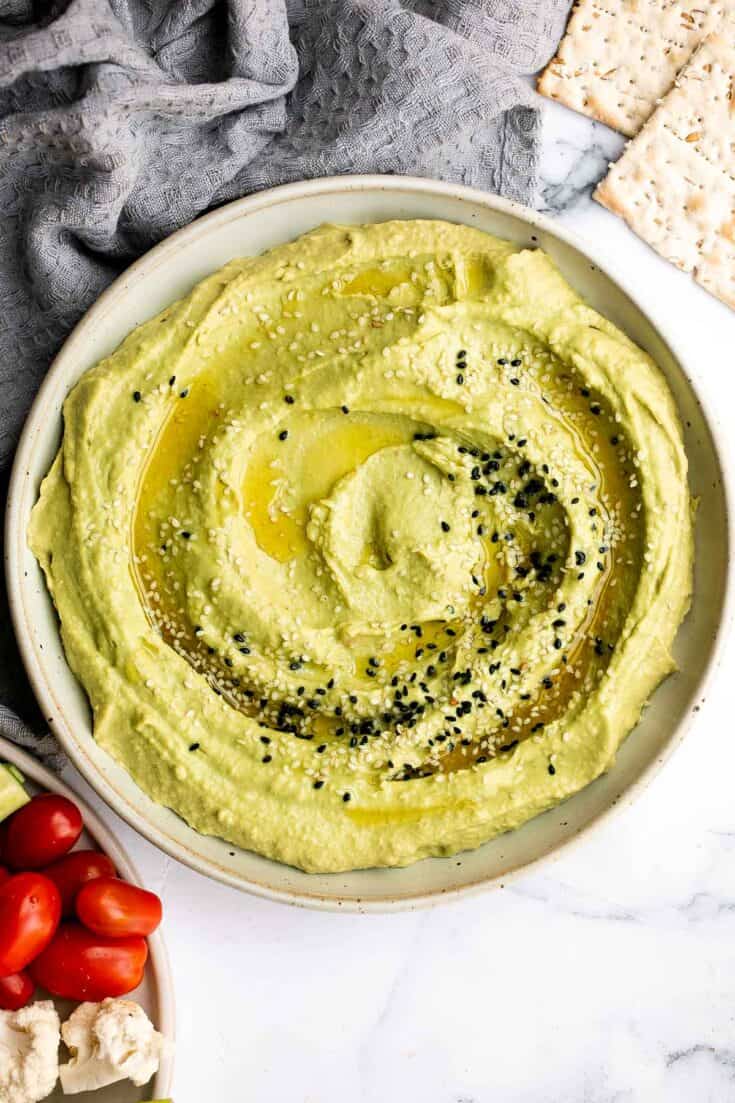
Avocado Hummus
Quick and easy avocado hummus is creamy, smooth, healthy, and delicious. Loaded with chickpeas and avocado, it's the perfect blend of hummus and guacamole.
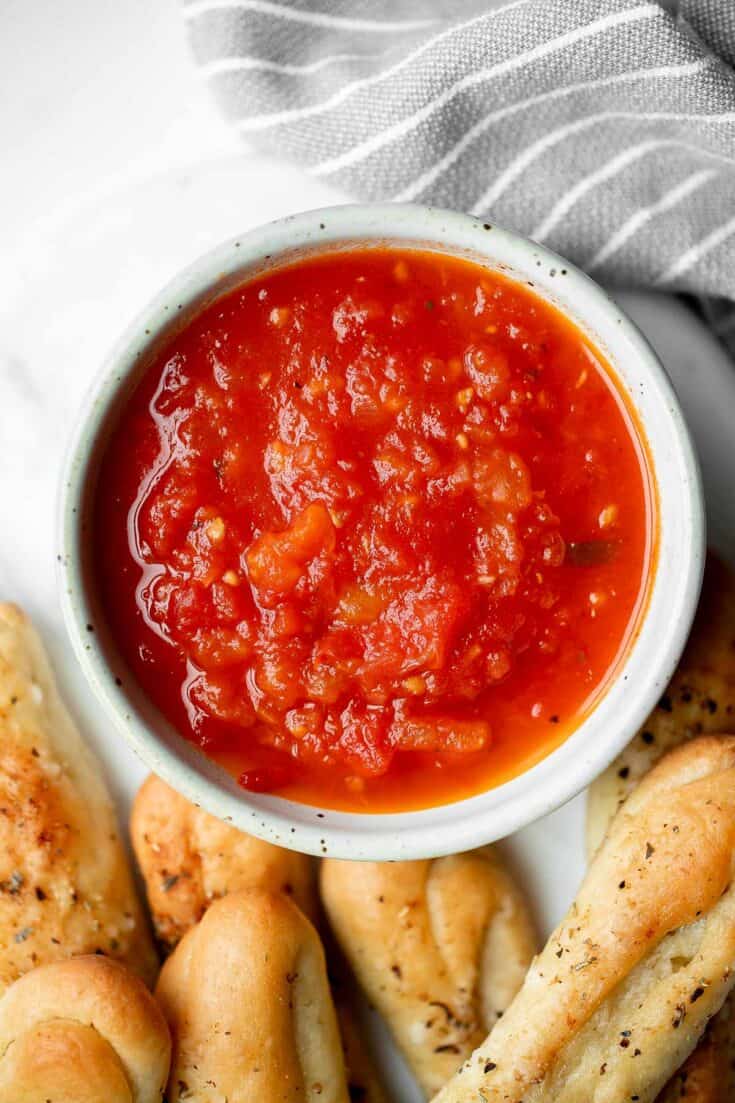
Marinara Sauce
Marinara sauce is rich, vibrant, and loaded with flavor. It’s easy to make with a few simple fresh ingredients. Serve as a dip or in pasta and pizza.
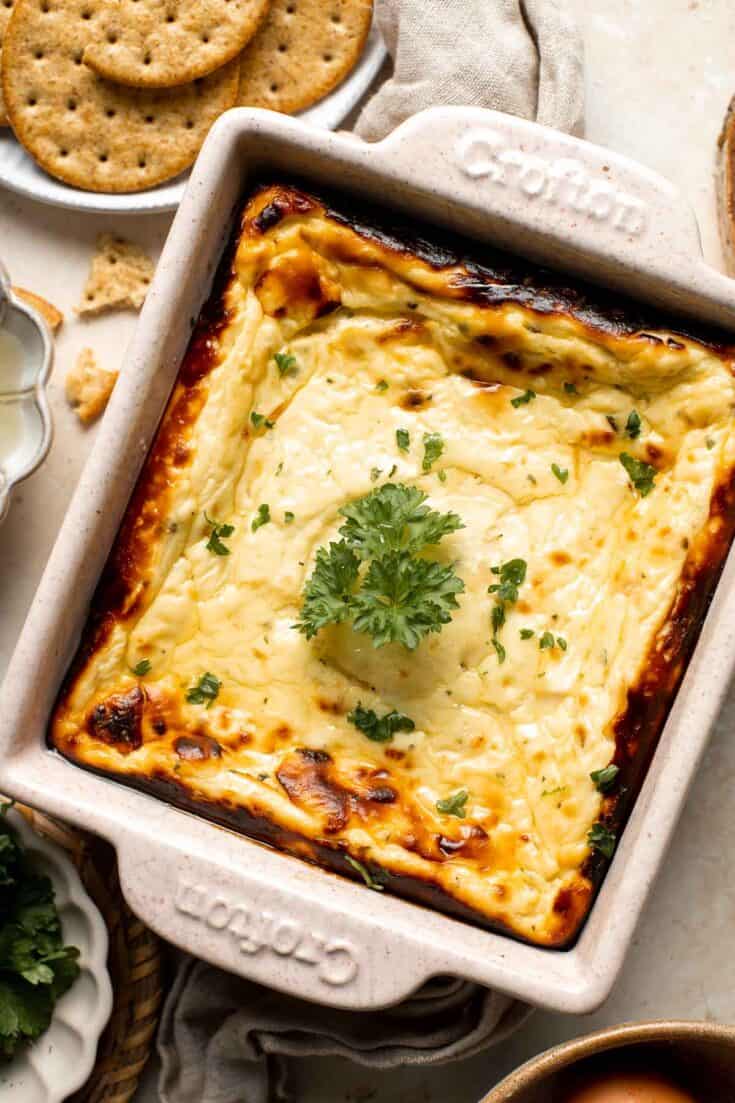
Baked Ricotta
Baked ricotta is creamy, smooth, and flavorful. This delicious warm dip is packed with Parmesan and seasoned with dried herbs for the ultimate cheesy dip.
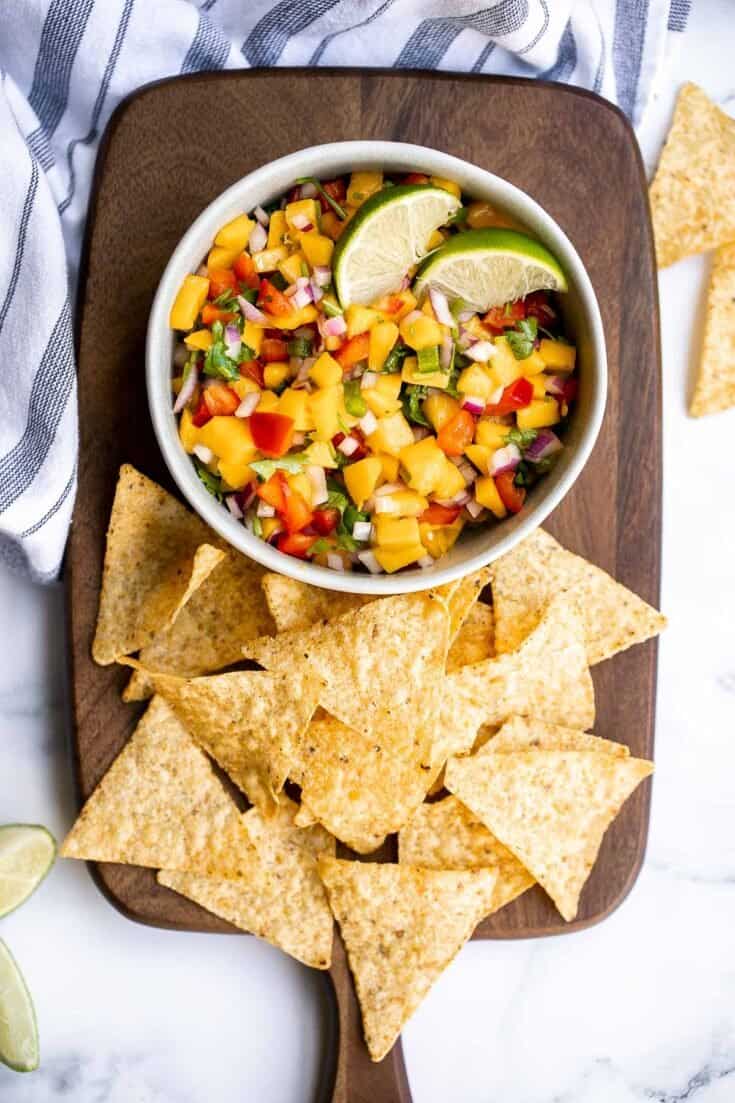
Mango Salsa
Fresh mango salsa is sweet, tangy, and delicious. It's a quick and easy recipe that you can whip up with just 6 ingredients and in under 10 minutes.
Roasted Red Pepper Hummus
Smooth creamy roasted red pepper hummus is a delicious, flavourful, vegan + gluten-free dip. This healthy appetizer is easy to make with a few ingredients.
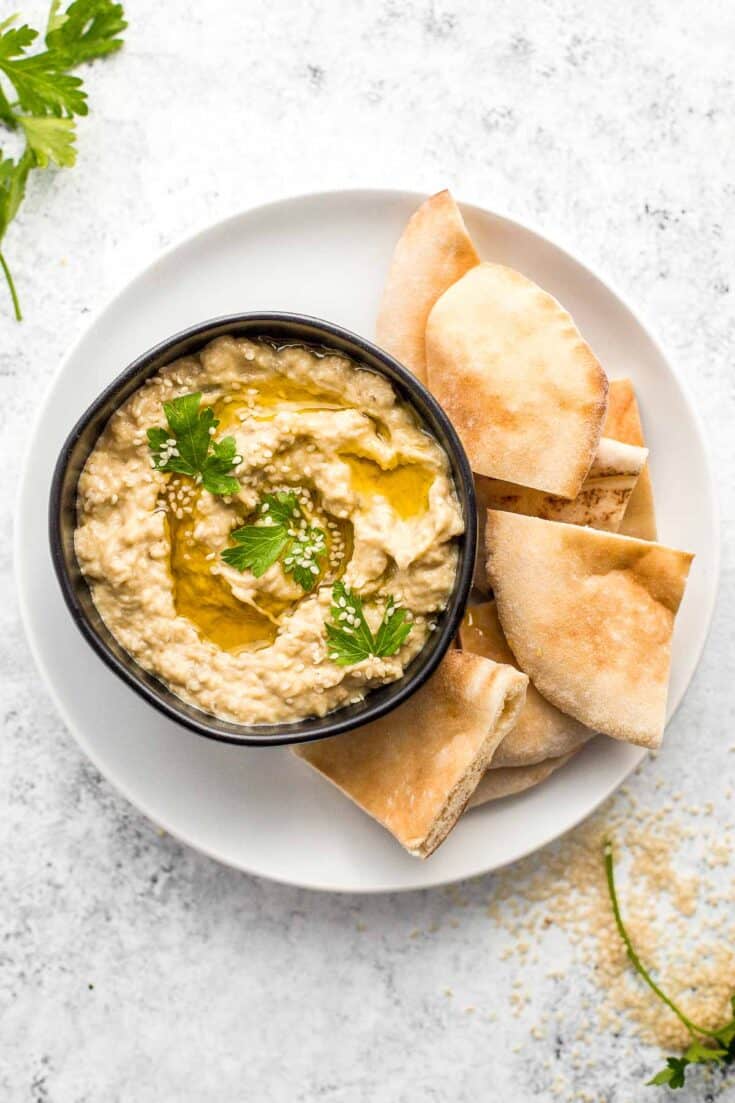
Baba Ganoush Eggplant Dip
Baba ganoush is a creamy, roasted eggplant dip mixed with garlic and tahini for an explosion of flavour! It is perfect served with pita chips or veggies.
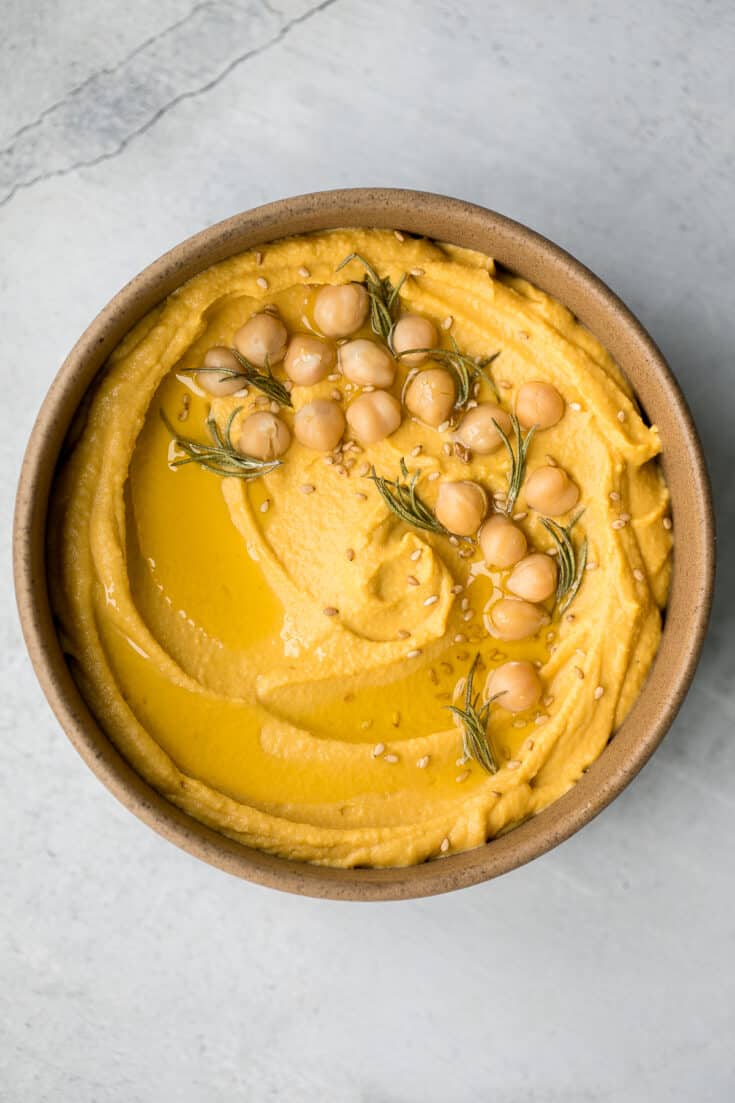
Creamy Pumpkin Hummus
Make creamy pumpkin hummus in under 5 minutes with a few pantry staples including canned pumpkin. It's the best healthy and delicious fall snack or appy.
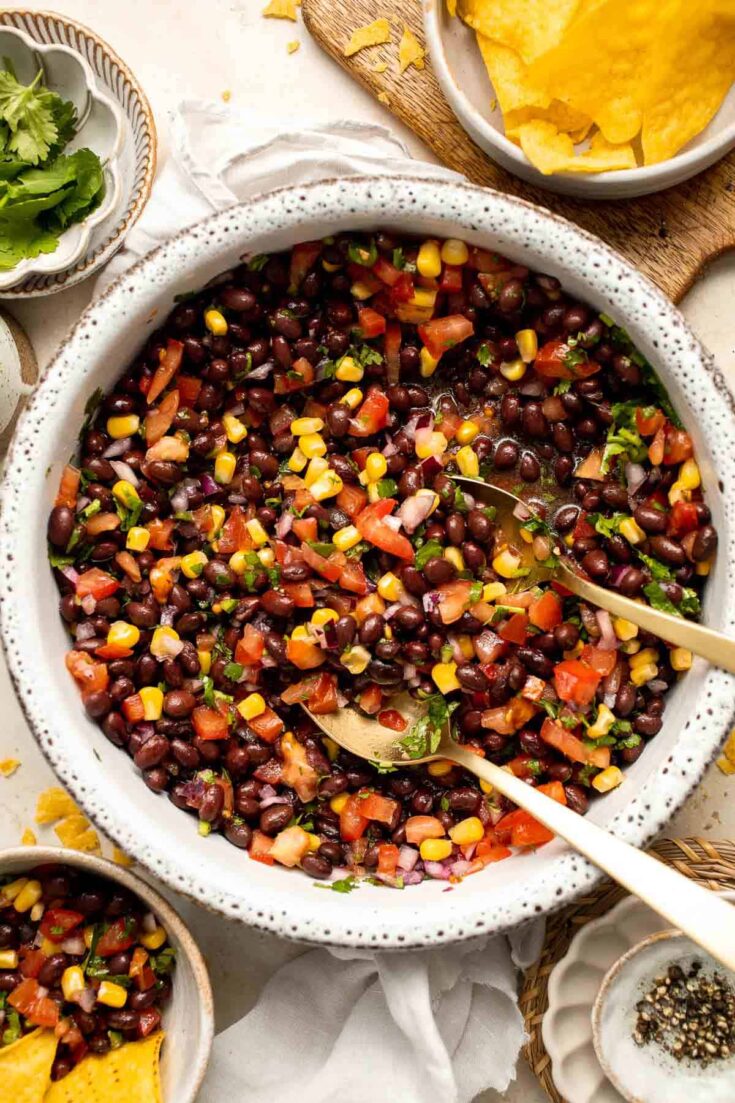
Black Bean Salsa
This quick and easy Black Bean Salsa is a delicious Mexican dip loaded with black beans, veggies, cilantro, and lime juice for the best summer flavor.
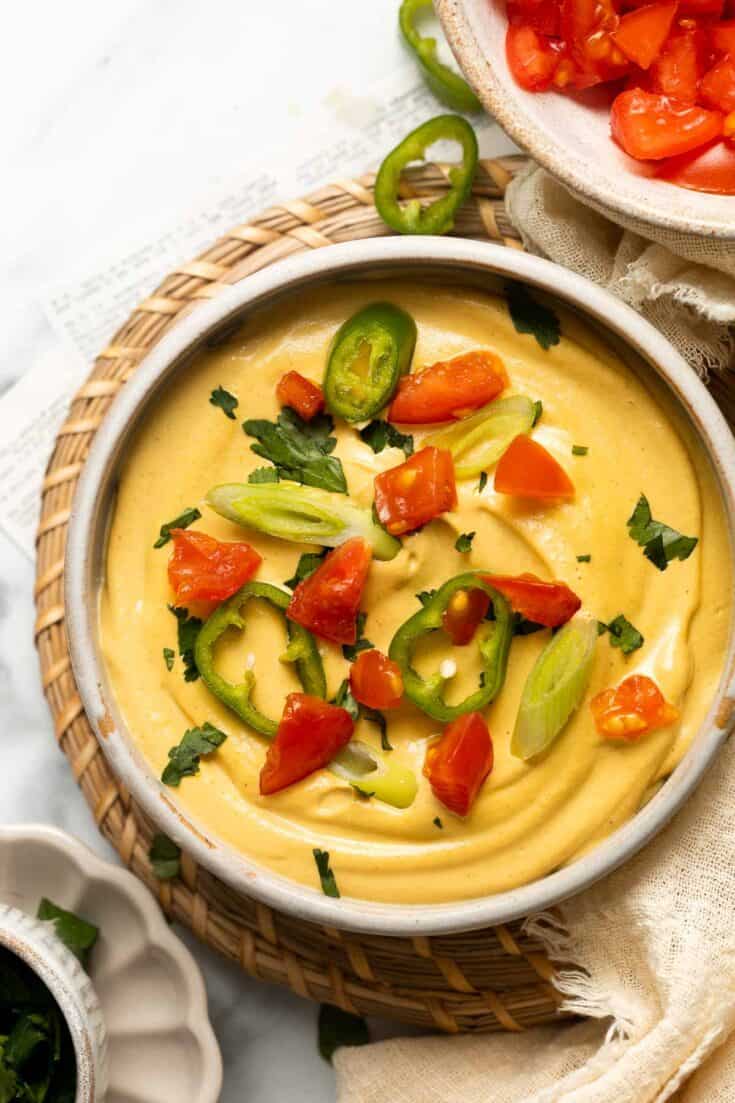
Vegan Queso
Vegan Queso is a 5-minute dip that is creamy, cheesy, and perfectly spiced to mimic the classic dip — without any dairy! It tastes like the real thing!
How to Make Ahead and Store Dip
You can make or prepare most of these savory dip recipes ahead of time. You can store them in an airtight container in the refrigerator for up to one week (depending on the reicpe) or evne in the freezer for up to 3 months (hummus freezes well!). Confirm storing instructions by checking each recipe.
To reheat any of the warm dips, you can reheat in a 300F preheated oven or air fryer for 5-15 minutes until fully warmed through. I would check on it every 5 minutes until ready. Some dips can also be reheated on the stove over medium-low heat until warmed through.
More Popular Recipes
- 50 Best Chicken Breast Recipes
- 30 Best Shrimp Recipes
- 25 Best Ground Beef Recipes
- 50 Best Bread Recipes
- 40 Best Salad Recipes
- 40 Best Pasta Recipes
Did You Make Any of These Dip Recipes?
Please leave a comment and rating below, and let me know what you thought of this round up of dip recipes. Be sure to snap a picture and tag me on Instagram @aheadofthyme or share it on the Pinterest pin so that I can follow along.
HUNGRY FOR MORE? Don't forget to sign up for my email newsletter so that you don't miss any recipes. You can also follow along on Instagram and Pinterest for more recipe updates.
Lemon Curd
Homemade Lemon Curd is rich, creamy, sweet, and tangy. This delicious fruit curd is easy to make with just 6 simple ingredients and a few basic steps. Loaded with real lemons, this curd so much more potent and better than store-bought curd that is filled with preservatives and filler ingredients.
Use this lemon curd made from scratch as a dessert spread in cakes, crepes, scones, cookies, and more. It's powerful lemony tartness add the best flavor to any dessert.
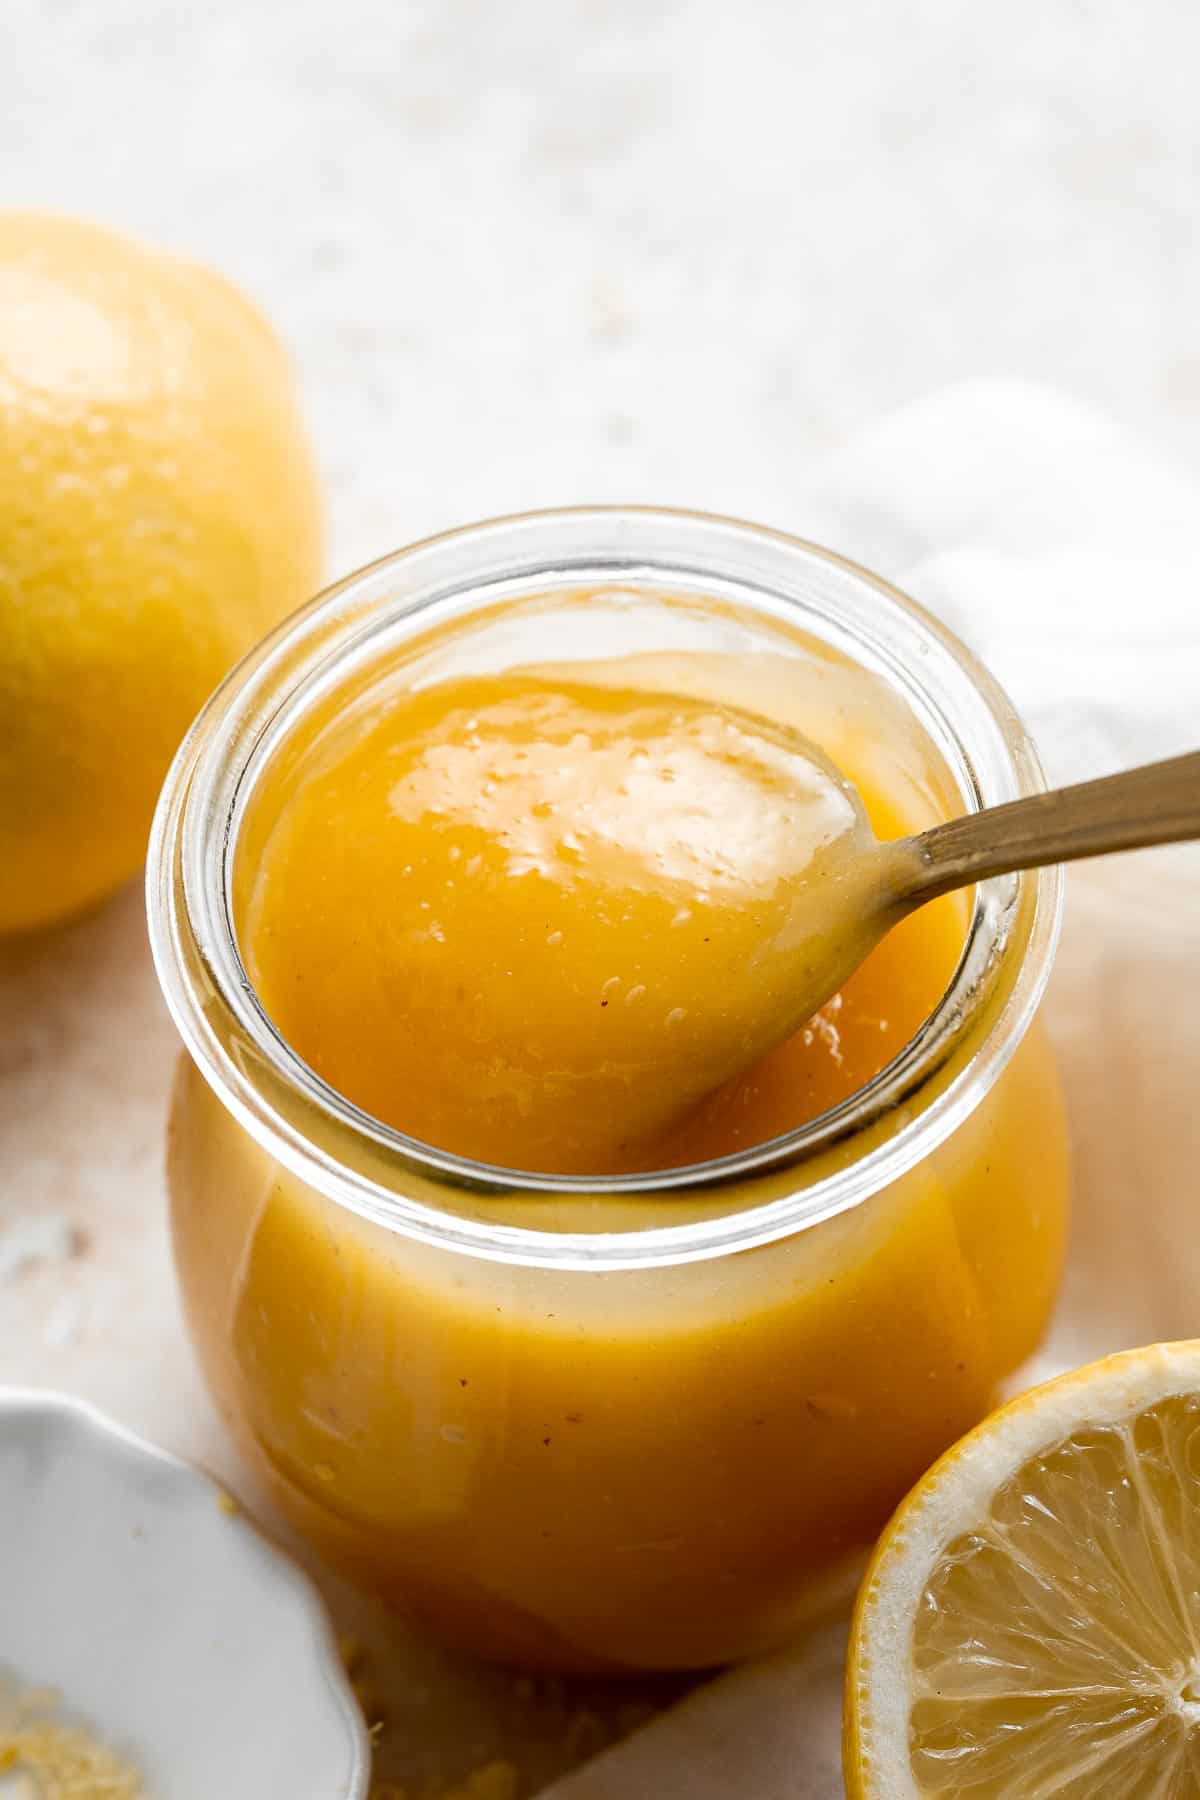
Why You'll Love This Lemon Curd Recipe
- Lemon curd is rich and creamy. Made with a half cup of butter, six egg yolks, and a full cup of sugar, this lemon curd is extremely rich. It's creamy from the fat, indulgent from the egg yolks, and sweet from the sugar. Altogether, it's the perfect topping or ingredient in desserts.
- Loaded with sweet and tart flavor. This homemade lemon curd gets its flavor from freshly squeezed lemon juice and a generous spoonful of lemon zest. The result is a pungent, sweet, and tart fruit curd that is delightfully lemony and delicious.
- Made with just 6 ingredients. If you've never made lemon curd at home, you wouldn't believe how easy it is to make. You only need 6 ingredients and less than 15 minutes to make before it's ready to be chilled for an hour.
- Lemon curd is the perfect dessert spread. You can use this lemon curd for just about anything: cakes, scones, pies, cookies, crepes, and more. You can even spread it on plain toast, make lemon bars, or put it inside a strudel. The options are endless.
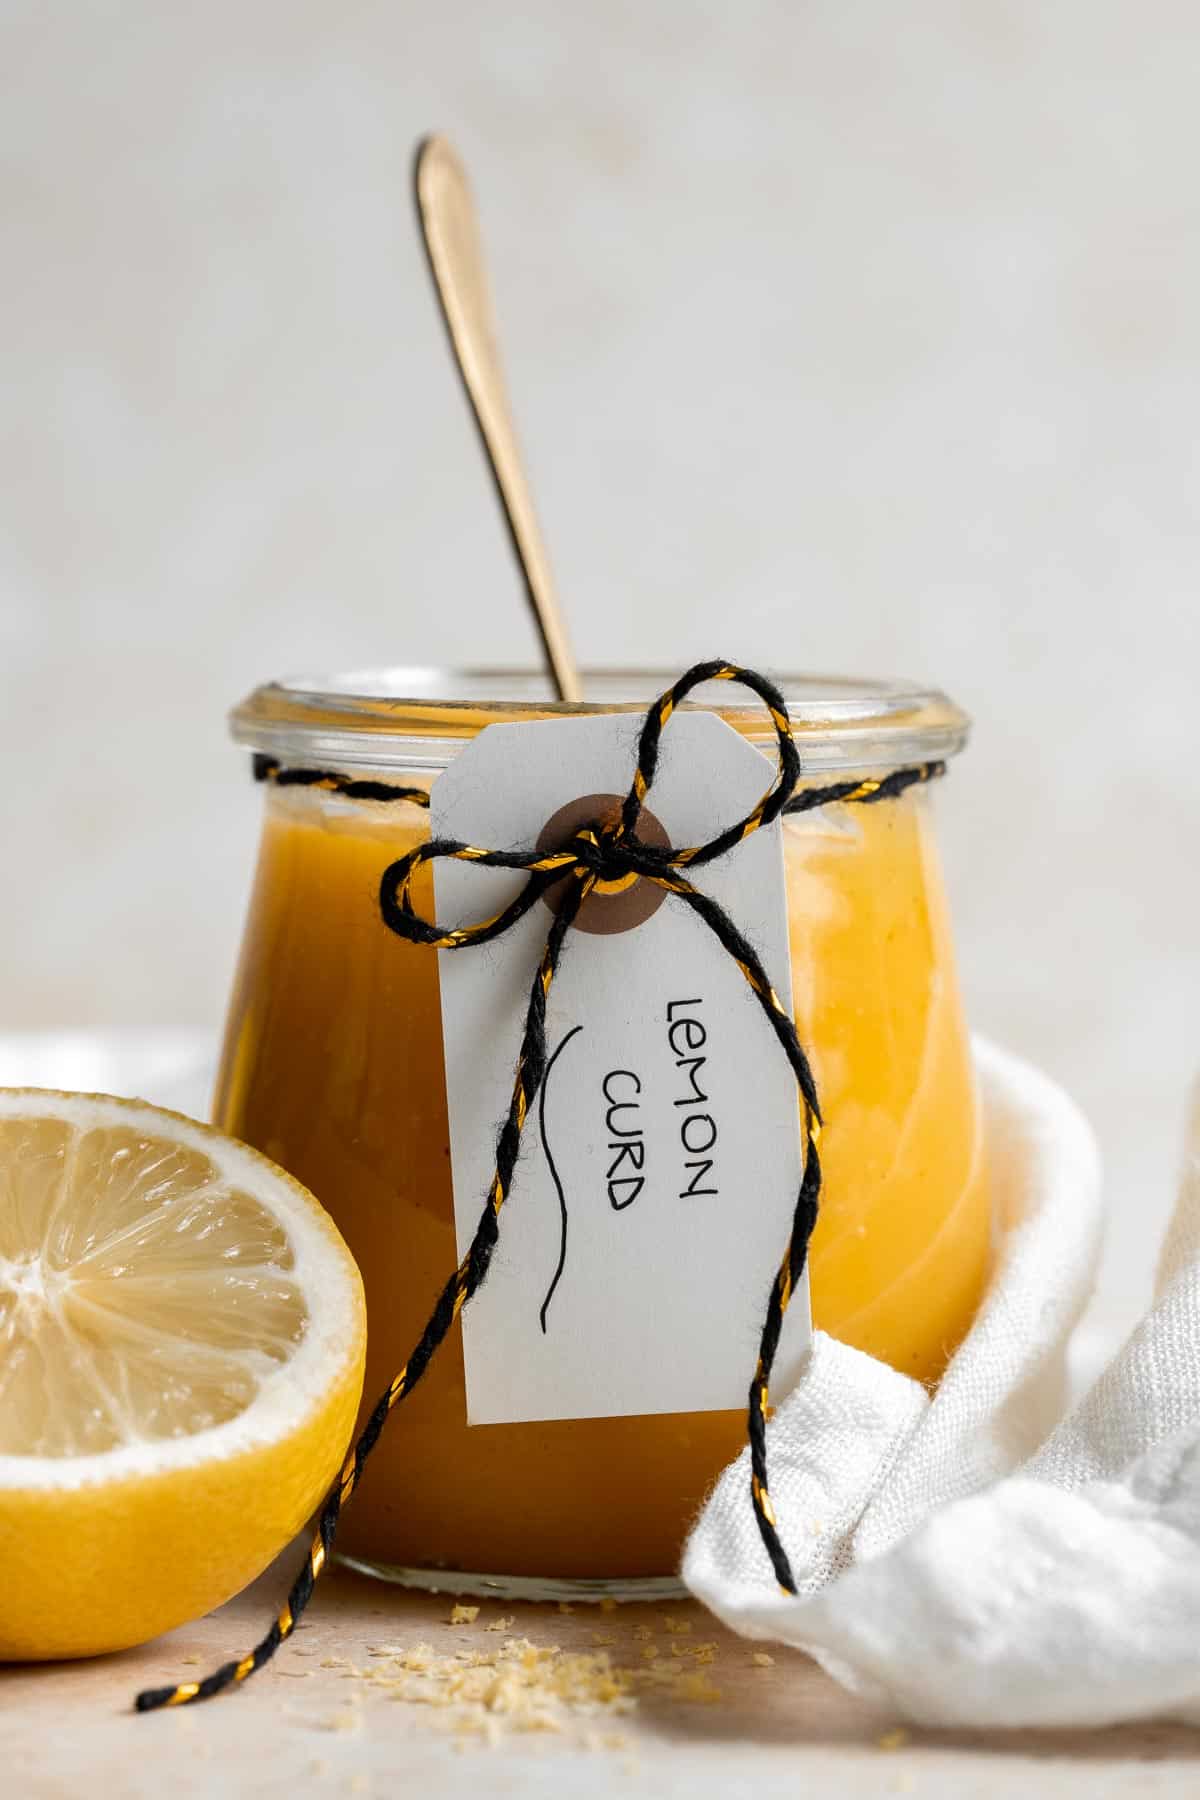
Ingredient Notes
To make this delicious Lemon Curd, you will need the following ingredients (full measurements in recipe card below):
- egg yolks - save the egg whites to make Vanilla French Macarons or Chocolate Macarons.
- granulated sugar
- lemon juice
- lemon zest
- salt
- butter
You will also need measuring cups and spoons, small saucepan, and a glass jar such as a mason jar.
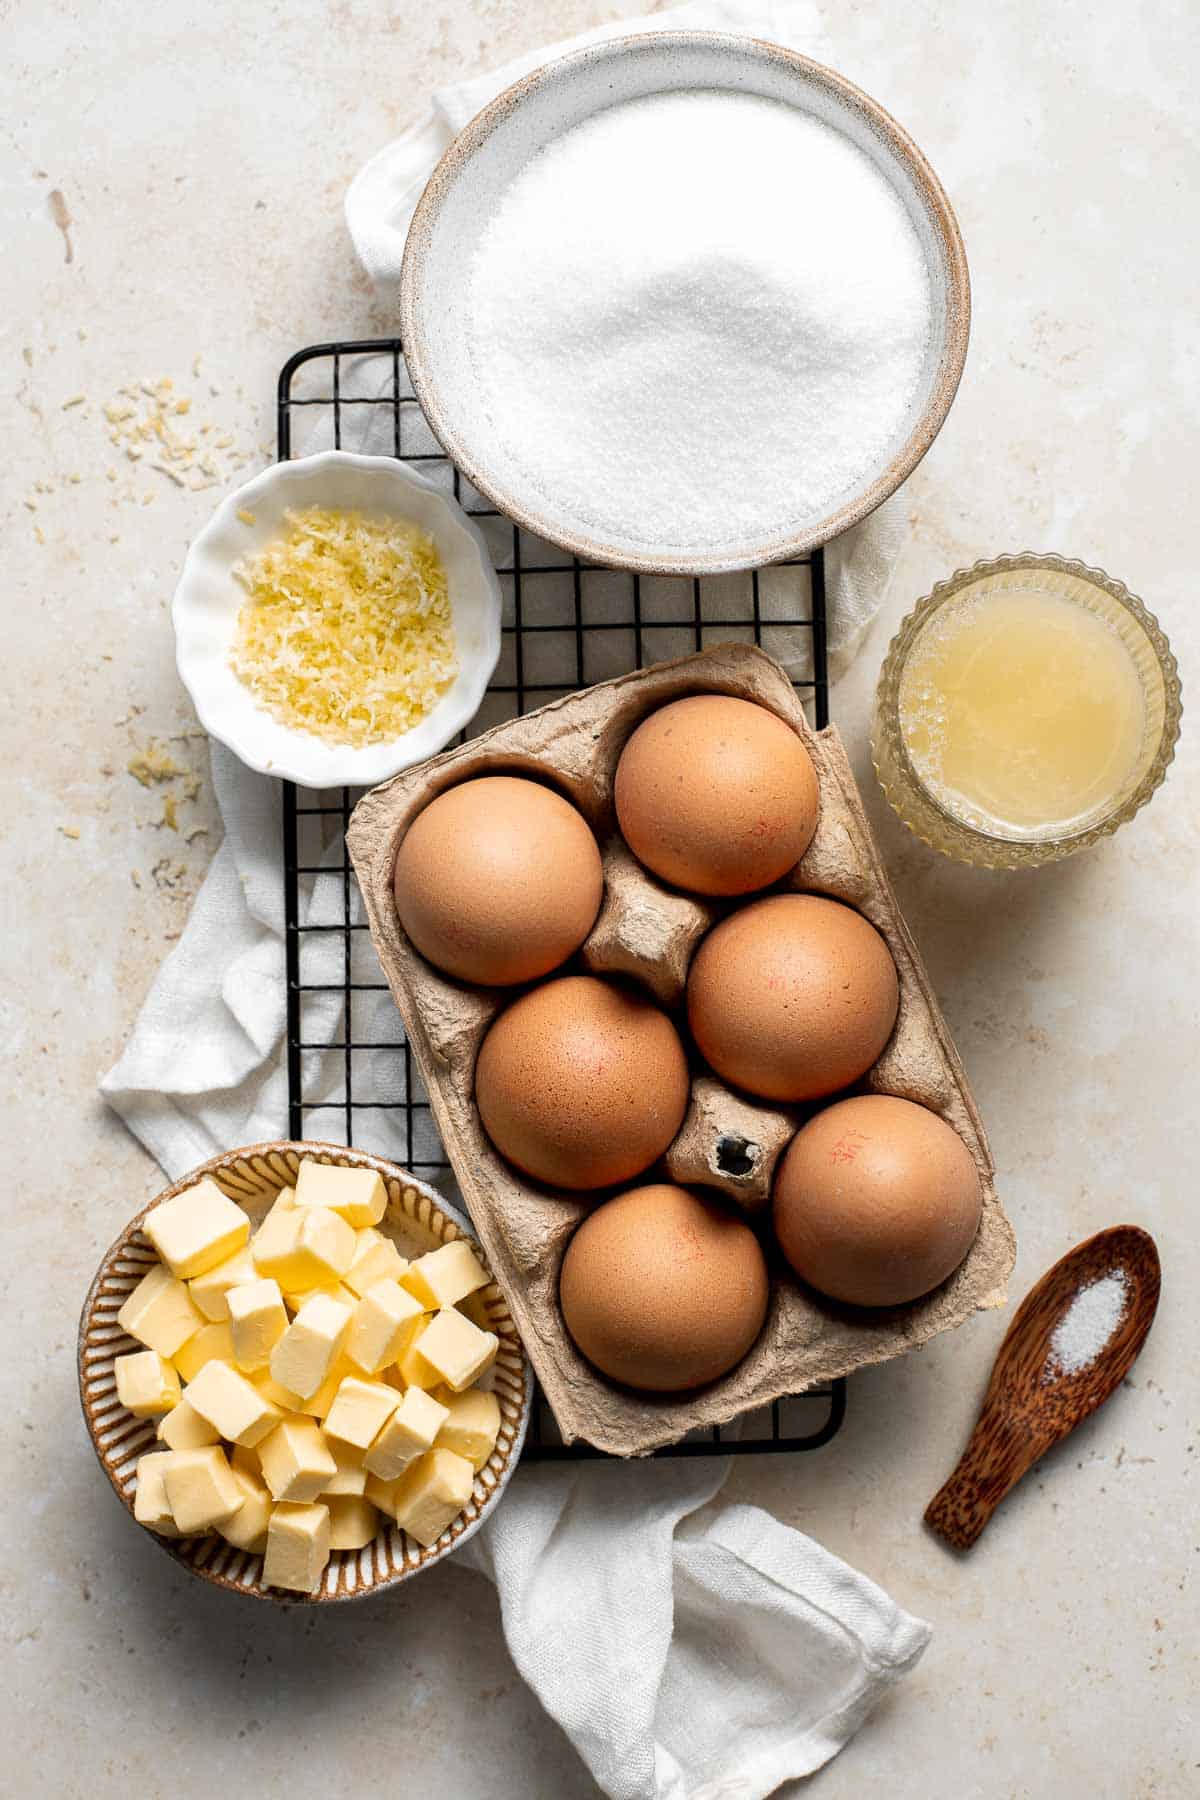
How to Make the Best Lemon Curd
- Combine ingredients. In a small saucepan, add egg yolks, sugar, lemon juice, lemon zest, and salt. Whisk until completely combined.
- Cook. Cook over medium-low heat, whisking constantly until mixture thickens and bubbles, about 10 minutes.
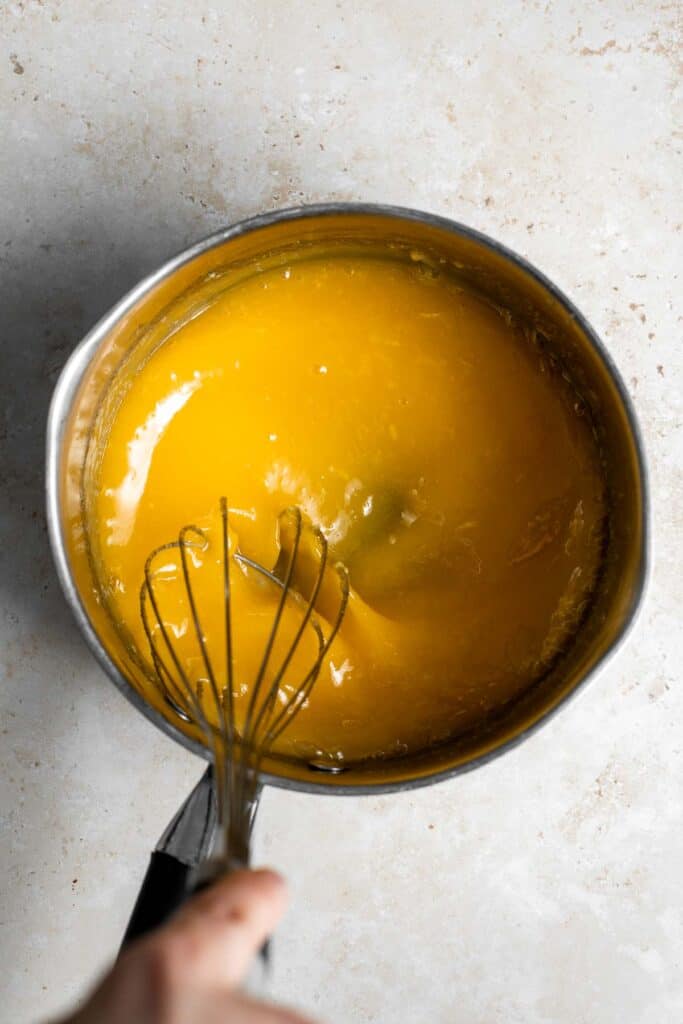

- Add butter. Remove from heat and add the butter. Continue to whisk until fully combined and smooth.
- Strain. Pass the lemon curd through a fine mesh strainer to remove the zest for a smoother curd (optional).
- Cool. Transfer to a glass jar (such as a mason jar) and let it cool to room temperature, about 1 hour. Cover and store in the refrigerator.
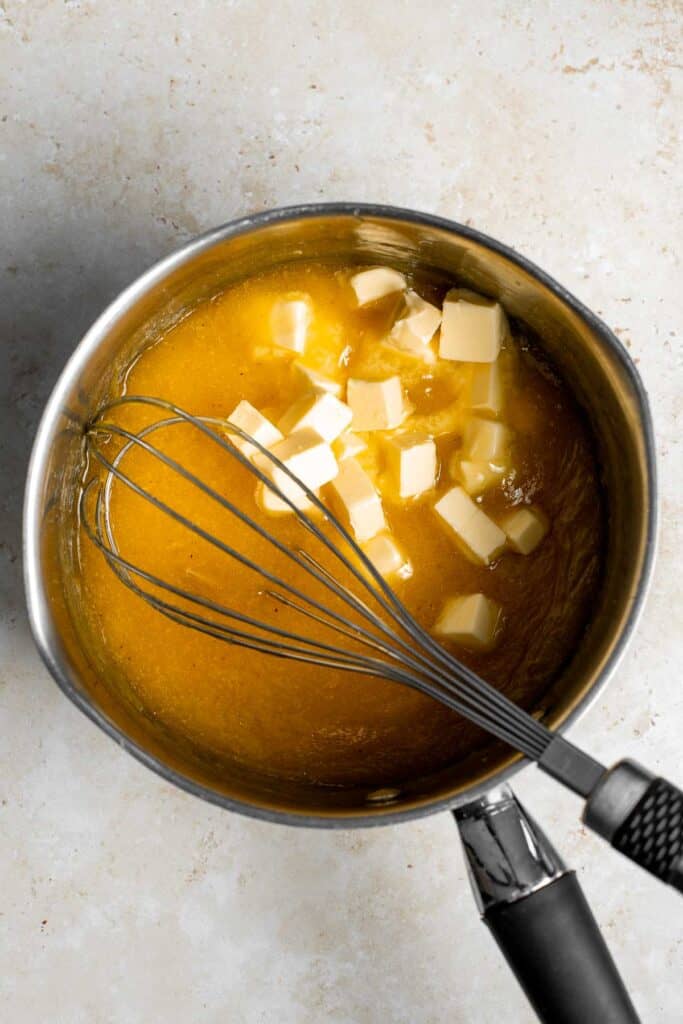
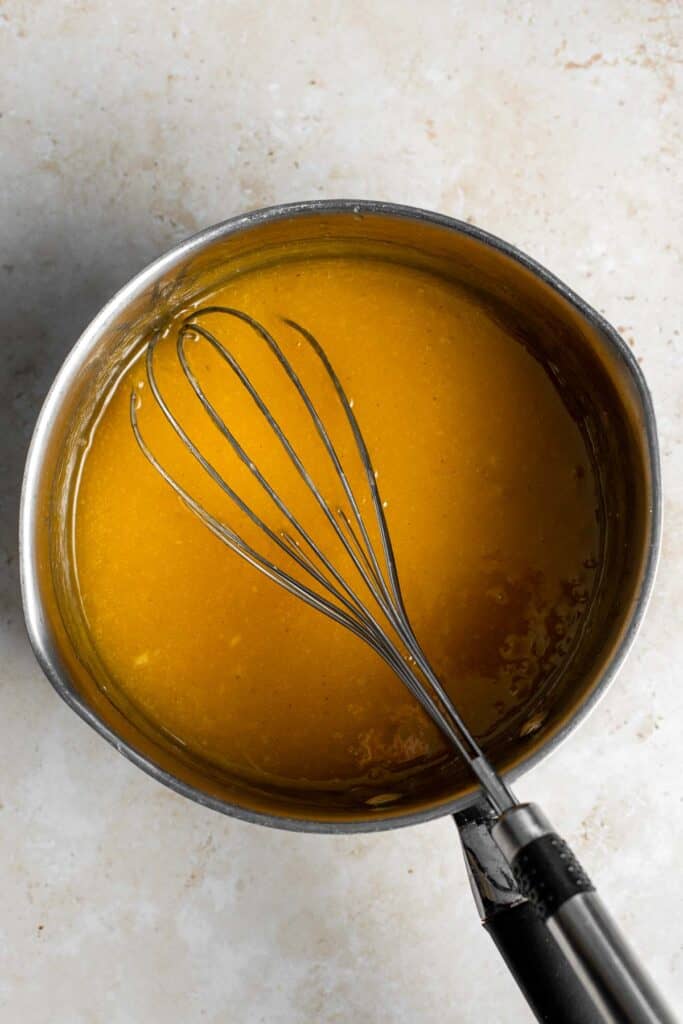
How to Store
Once cool, keep the lemon curd in a sealed glass jar (mason jar) or airtight container and store in the refrigerator for up to 2 weeks.
How to Use Lemon Curd
It's a good idea to keep a batch of lemon curd on hand because there are so many delicious ways to use and serve it. Some of my favorites are:
- On it's own with a spoon or with berries on top.
- As a filling in cookies such as Lemon Curd Cookies or a filling in between sandwich cookies like French Macarons.
- As a topping drizzled over Pancakes, French Toast, or Crepes.
- As a tart or pie filling.
- As a filling in between layers of cake.
- As a topping over Vanilla Ice Cream or New York Cheesecake.
Recipe Tips and Tricks
- Doubling the recipe: If you want to double or triple this recipe, you totally can. Just keep in mind that it will take a little more time to cook since there will be more volume.
- Tips for thickening lemon curd: If your lemon curd doesn't seem to be thickening, be patient. It likely means that the curd hasn't been heated to a high enough temperature. Try increasing your temperature very slightly or waiting a bit longer.
- Don't overcook: Overcooking your curd will scramble the egg yolks. So be careful not to let the curd get to a boil. You may need to lower the heat or even remove the pan from the heat if your lemon curd starts to get too hot too quickly.
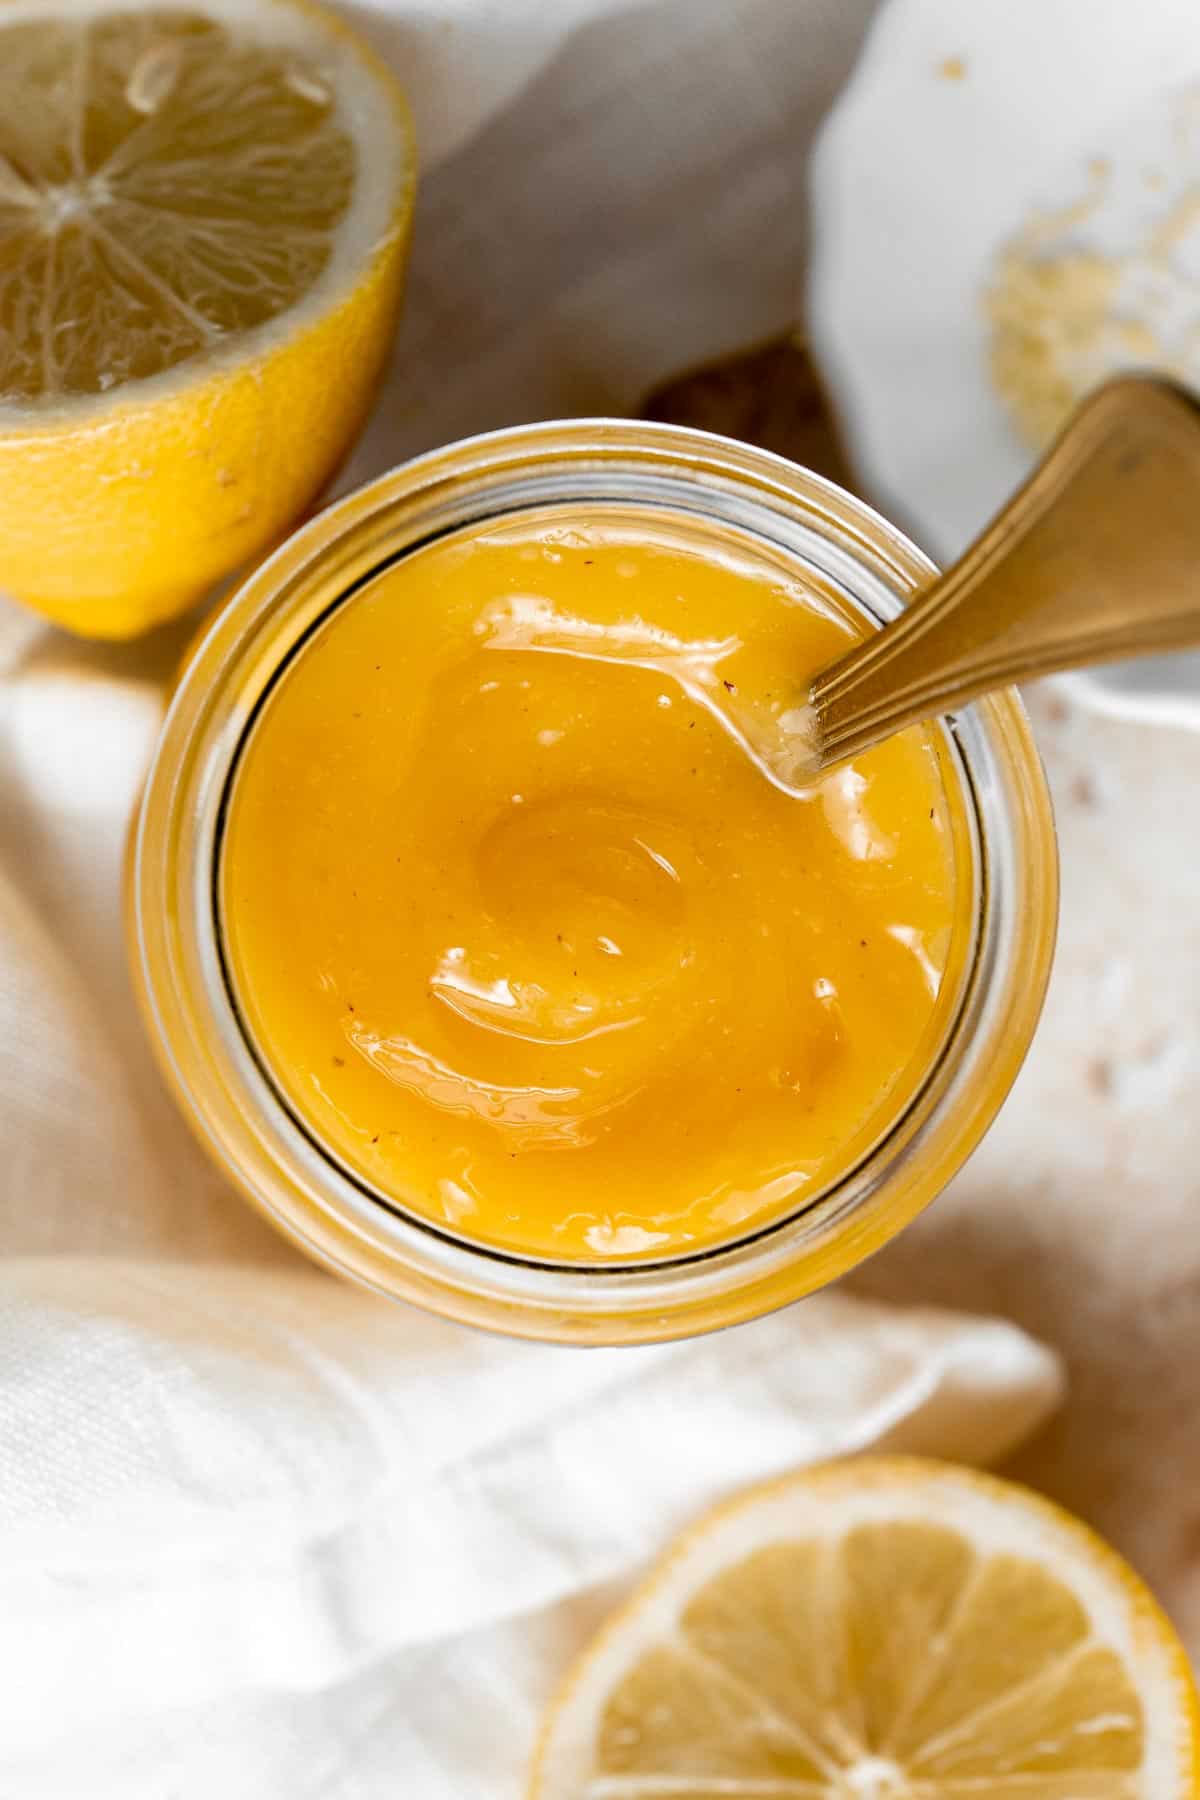
More Lemon Recipes
- Lemon Loaf with Lemon Glaze (Starbucks Copycat)
- Strawberry Lemonade
- Lemon Butter Pasta
- Lemon Blueberry Bread
- Healthy Lemon Chicken
- Lemon Parmesan Asparagus
Tried this recipe?
I'd love to hear what you think! Leave a comment and rating below to share your feedback. Your reviews help others discover this recipe and help me keep creating more free recipes for you. Snap a photo and tag me on social media @aheadofthyme too.

Homemade Ranch Dip
Homemade ranch dip is creamy, tangy, flavorful, and delicious. This classic dip is so easy to make at home in just minutes, with the perfect combination of ingredients including fresh herbs and seasoning. Plus, it's so much better than store-bought dip because it contains real ingredients with no fillers or preservatives.
Ranch is the perfect appy to serve with veggies for easy entertaining, as a spread in sandwiches for a healthy lunch, or drizzled over salads and rice bowls for extra flavor.
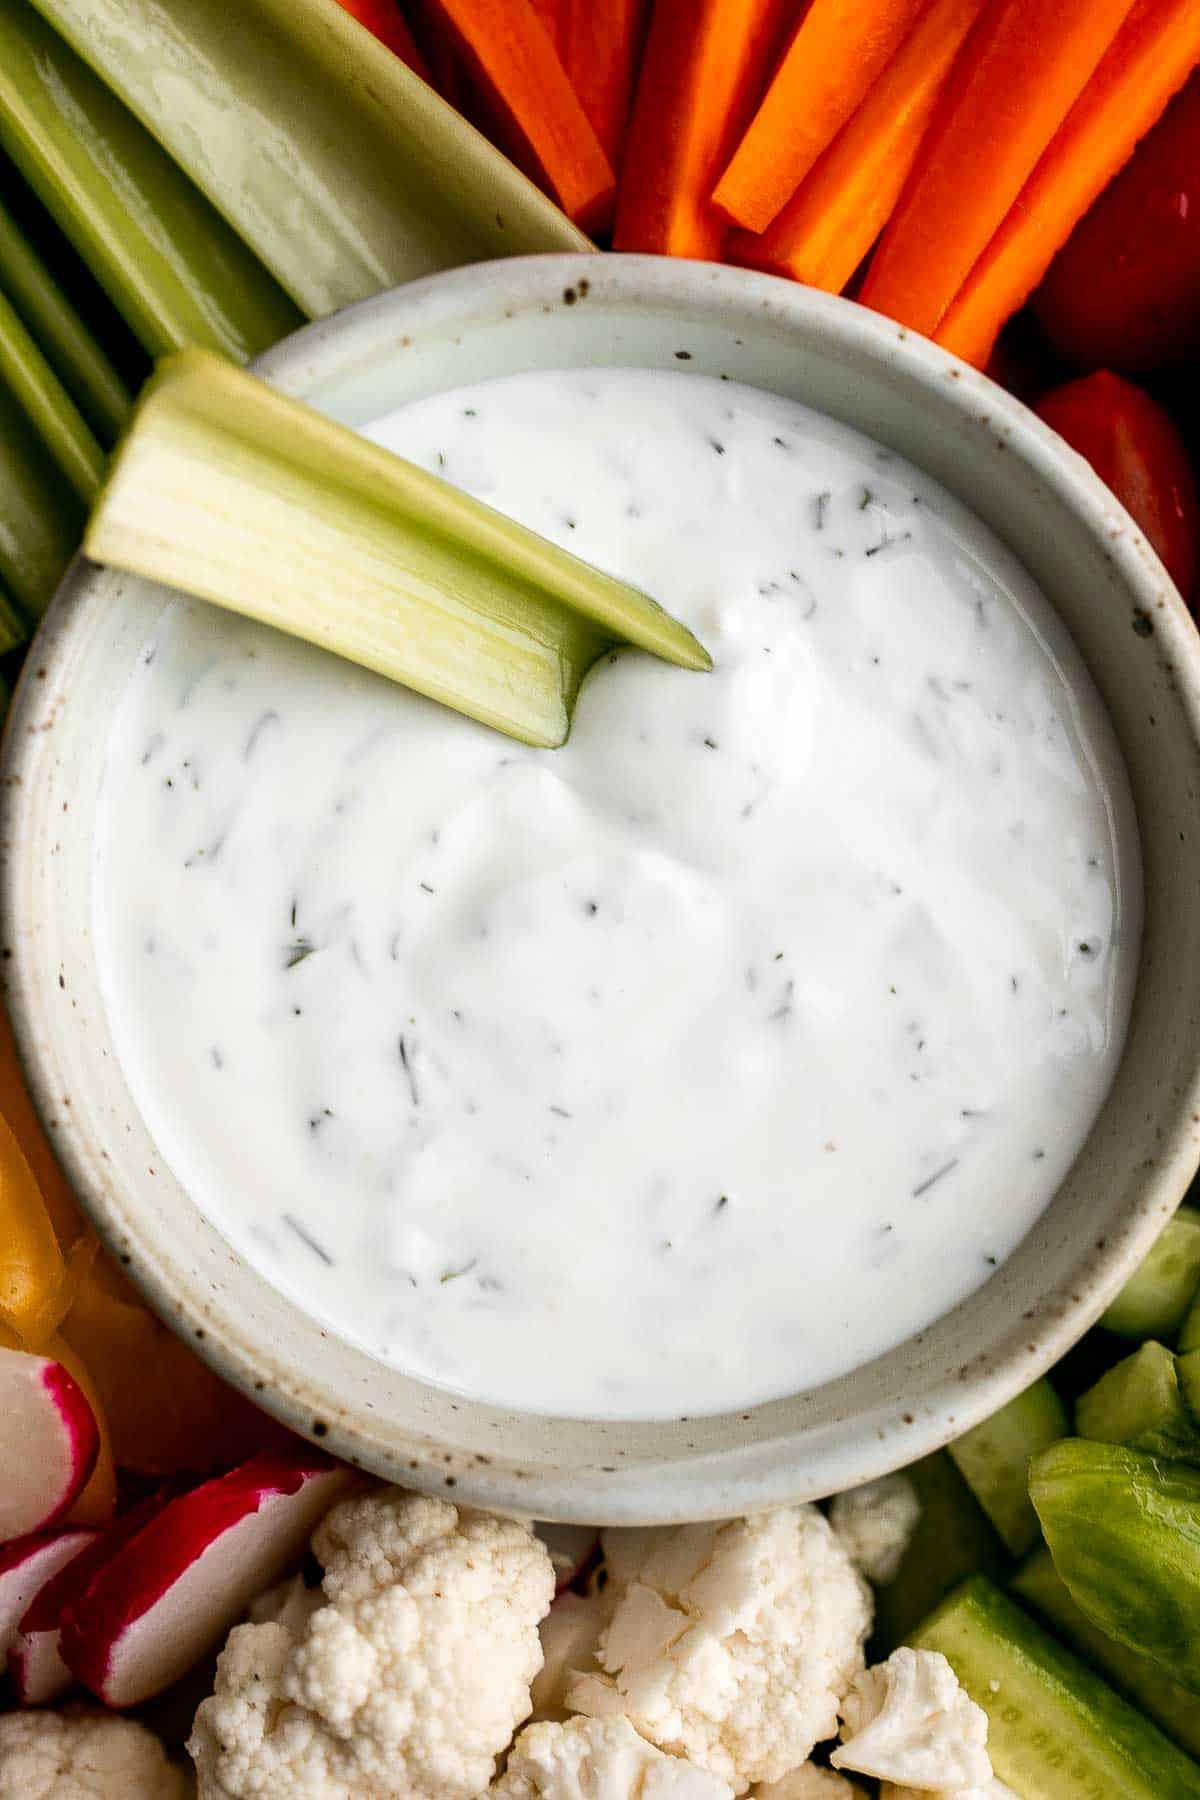
Why You'll Love This Homemade Ranch Dip
- It's ready in five minutes. You won't believe how easy it is to make ranch dip at home. You simple combine all your ingredients in a bowl and mix them together until combined. You don't need a food processor or any fancy equipment, and there is no cooking or baking involved. Just less than 5 minutes of time from start to finish - maybe ten if you count washing the dishes.
- Loaded with classic ranch flavor. This ranch dip is creamy, tangy, and slightly sour with hints of lemon, garlic, and fresh herbs like dill and parsley. Plus, this dip made with fresh ingredients so it's so much more potent and flavorful than store-bought dip.
- So much better than store-bought dips. Store-bought ranch is convenient but they're typically filled with preservatives and filler ingredients, and sometimes even sugar. When you make homemade dips, you know exactly what ingredients are going in there. But since there are no preservatives, this homemade ranch lasts only one week. Some other easy last minute dips that you can make at home are Avocado Hummus, 7 Layer Dip, and Whipped Ricotta Dip.

Ingredient Notes
To make this quick and easy Ranch Dip, you will need the following ingredients (full measurements in recipe card below):
- sour cream - or substitute with Greek yogurt.
- mayonnaise
- lemon juice
- fresh herbs - parsley and dill.
- seasoning - onion powder, garlic powder, salt, and pepper.
- whole milk - this is optional to thin out the consistency of the dip, if desired.
You will also need measuring cups and spoons and a mixing bowl.
How to Make the Best Ranch Dip
In a medium mixing bowl, stir to combine all ingredients including sour cream, mayo, lemon juice, parsley, dill, onion powder, garlic powder, salt, and pepper. If you prefer ranch dip with a thinner consistency, add in some milk to thin it out.
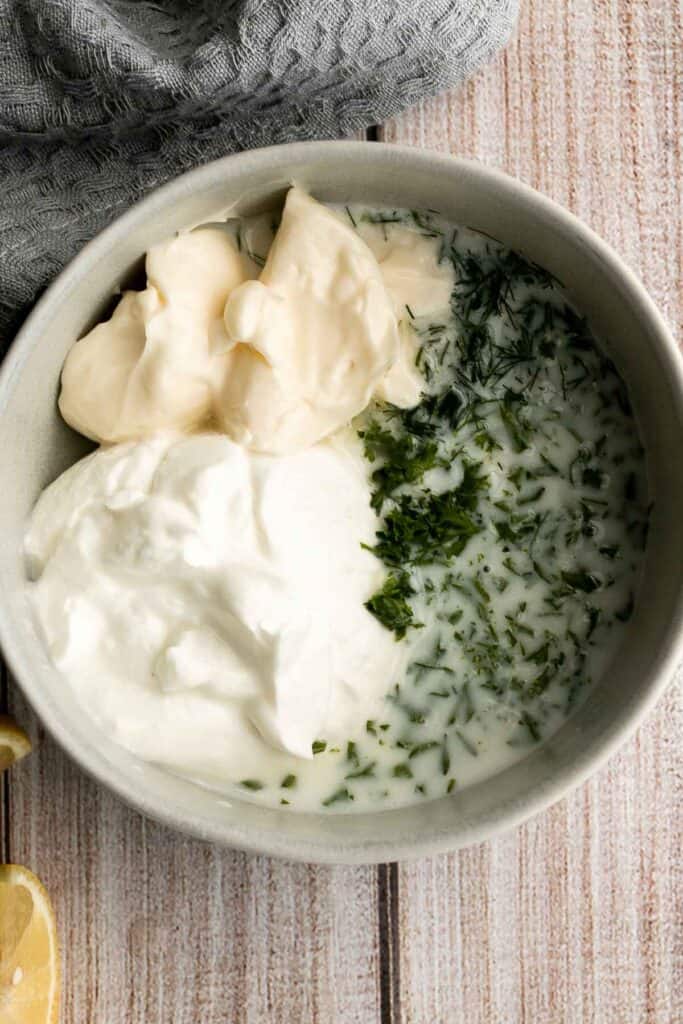
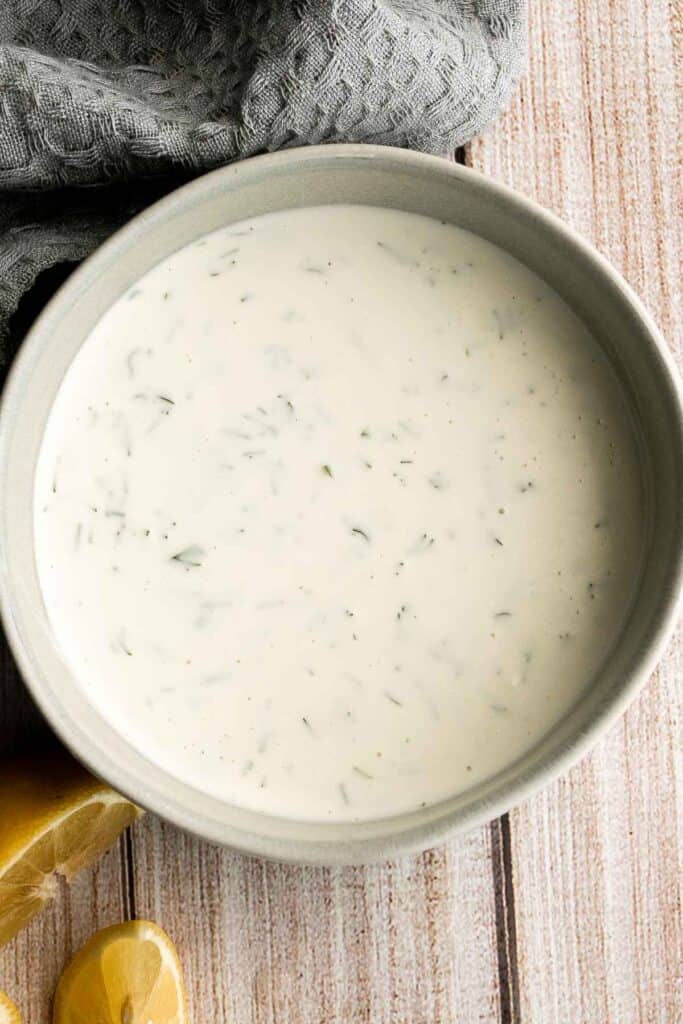
Serve immediately or chilled.
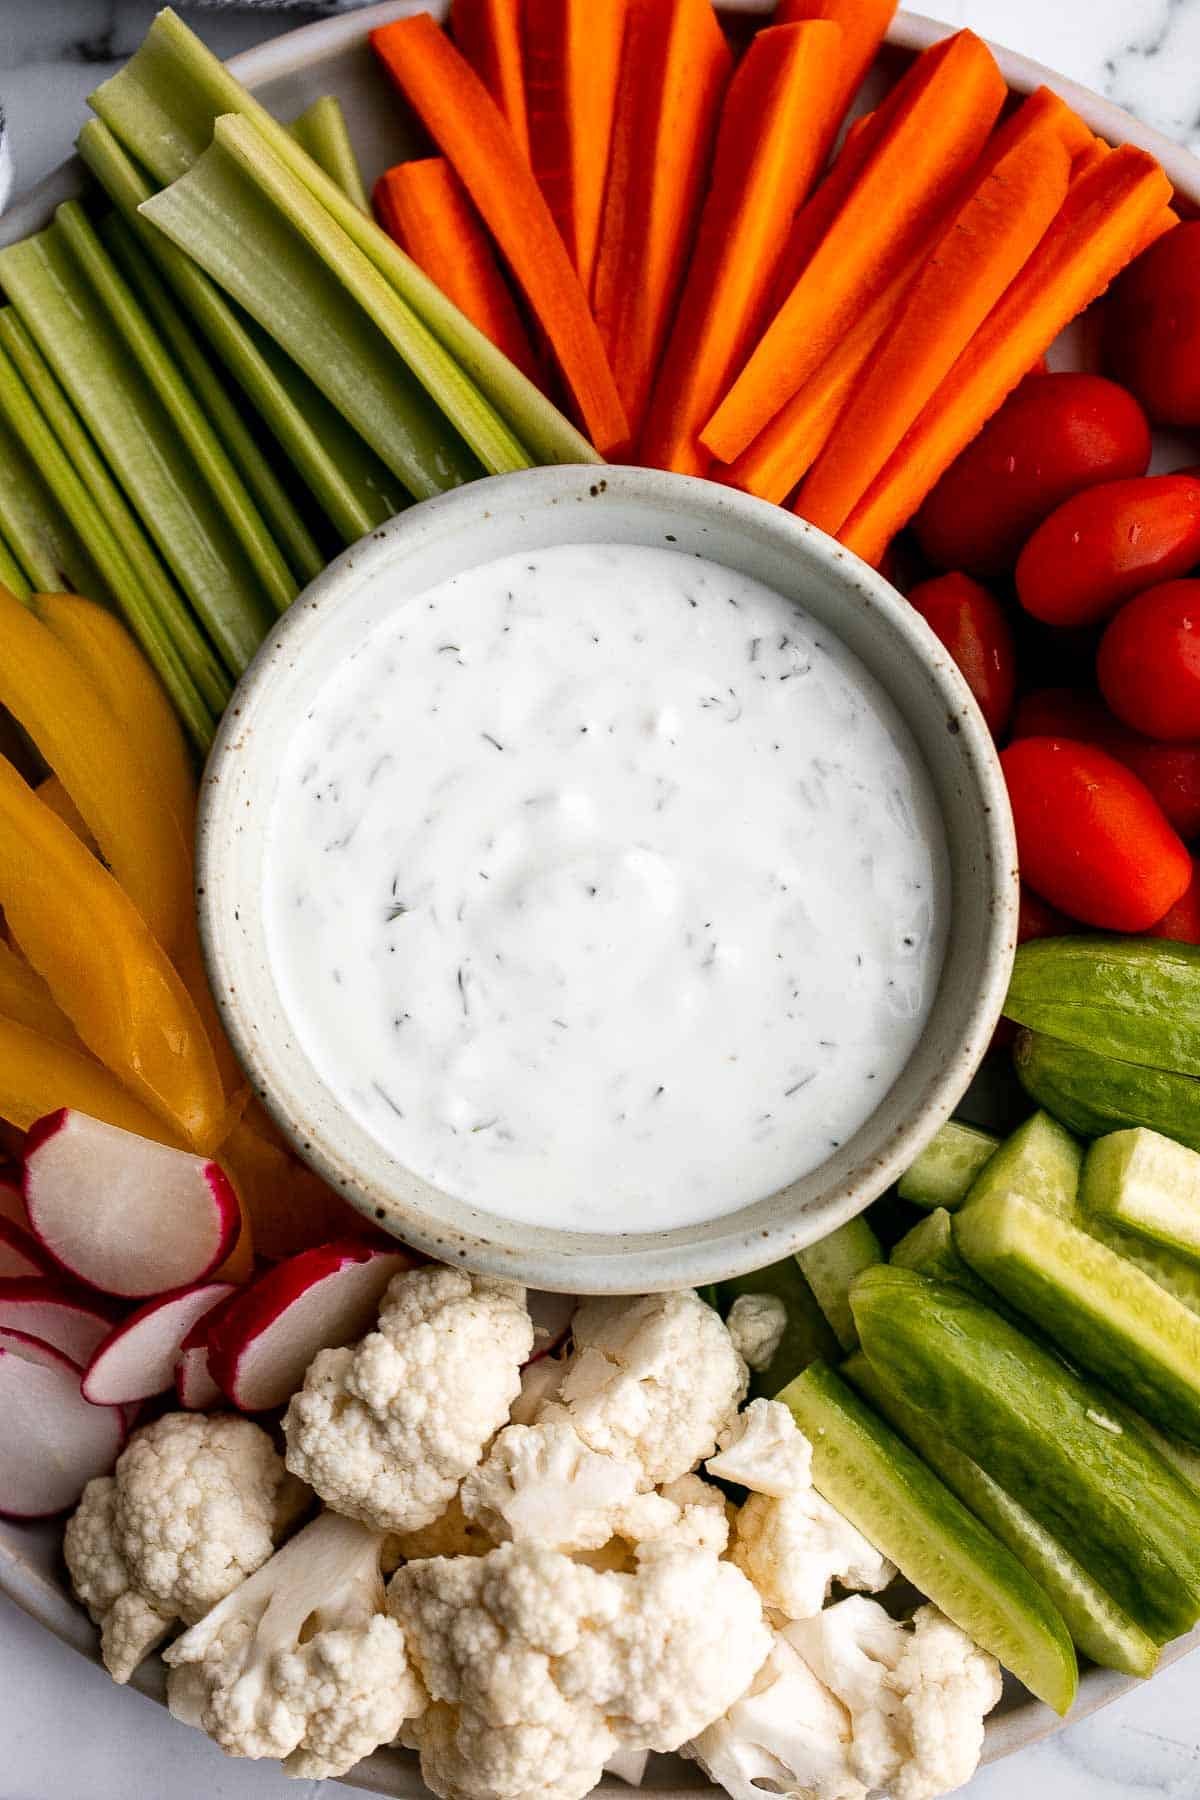
Storing Instructions
Store homemade ranch dip in an airtight container in the refrigerator for up to 1 week.
How to Serve
You can serve ranch dip on a Charcuterie Board or Veggie Tray with a side of veggies, crackers, or meat for dipping. Try it with:
- Pita Bread, crackers or bread.
- Raw vegetables such as carrots, celery, cucumber, and cauliflower.
- Air Fryer Cauliflower Bites or Baked Cauliflower Nuggets.
- Roasted Garlic Parmesan Baby Potatoes or Crispy Smashed Potatoes.
- Bacon Wrapped Chicken Bites or Baked BBQ Chicken Wings.
You can also serve this ranch dip as:
- A salad dressing in salads such as Garden Salad.
- A sandwich spread.
- Drizzled over rice bowls.
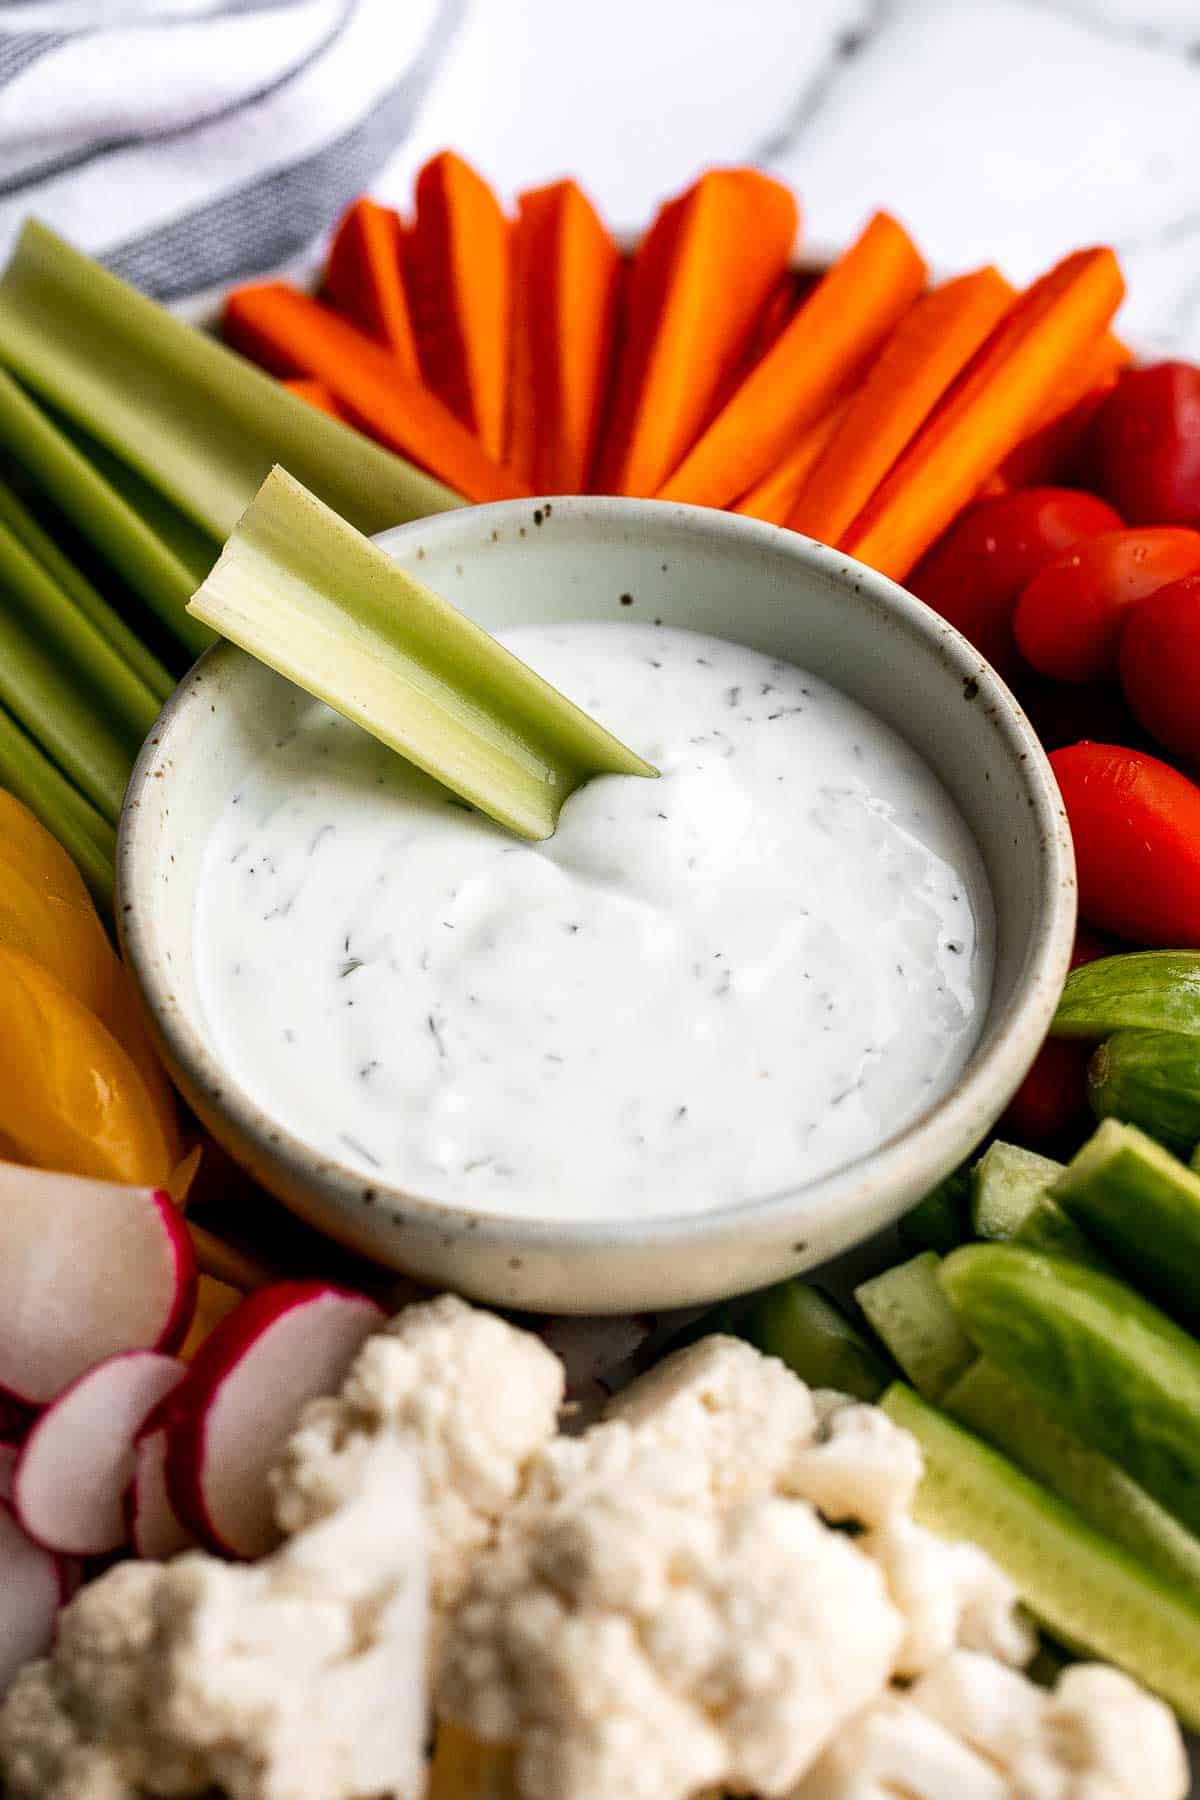
More Dip Recipes
Tried this recipe?
I'd love to hear what you think! Leave a comment and rating below to share your feedback. Your reviews help others discover this recipe and help me keep creating more free recipes for you. Snap a photo and tag me on social media @aheadofthyme too.
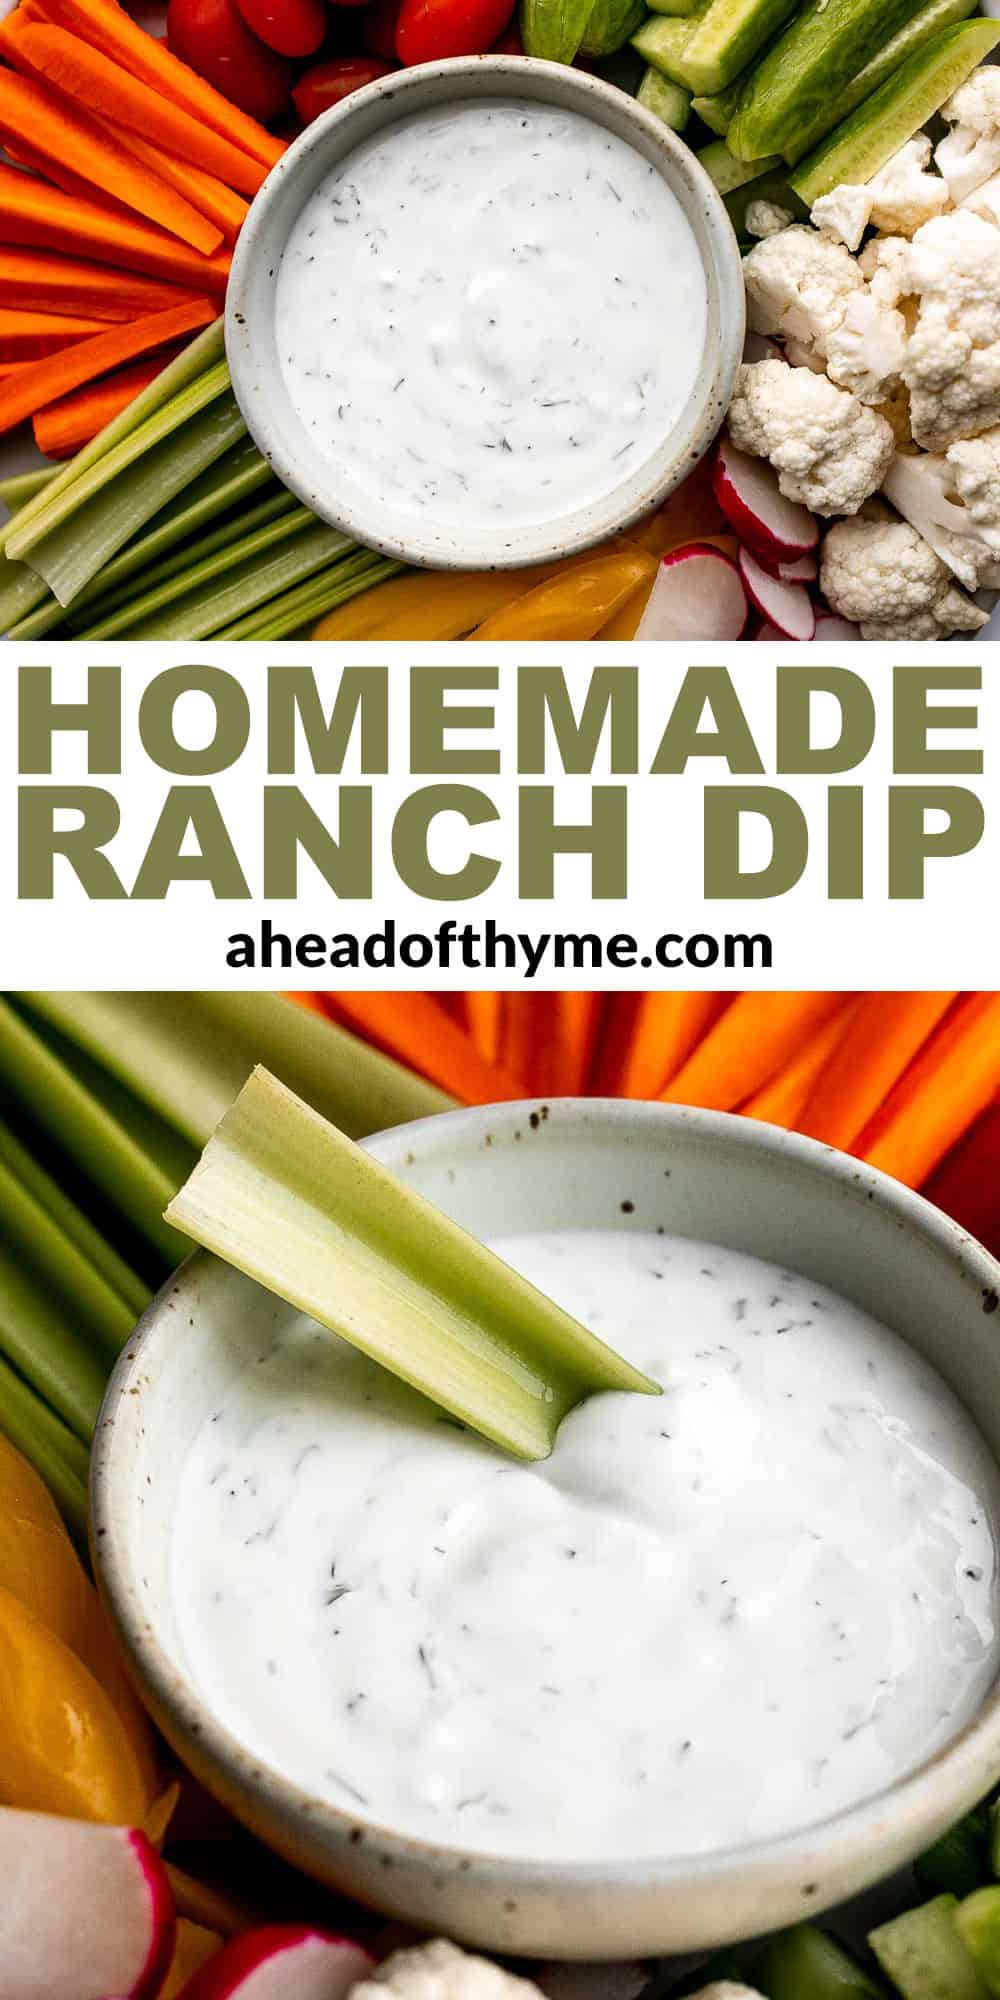
Cold Brew Coffee
Homemade Cold Brew Coffee is rich, smooth, and mellow. It's less acidic and bitter than regular coffee, making it the best iced coffee drink to enjoy this summer. Plus, it's so much cheaper than buying at your local coffee shop.
The best part? Making cold brew coffee at home is so much easier than you think. Although it takes time to allow the coffee to steep, it really only requires a few simple steps and no special equipment (especially if you grind the coffee at the grocery store).

What is Cold Brew?
Cold brew coffee is coffee that is steeped very slowly in low temperature (at room temperature or in the fridge). This process makes it taste a lot different from hot brewed coffee using the exact same coffee beans. Cold brew coffee is less acidic and less bitter than regular iced coffee, and it boasts a more mellow taste overall.
Cold brew coffee is also more expensive than regular coffee when you buy it at your local coffee shop. Why? It's more time-consuming - but it's also better. The good news is that it's incredibly easy to make it at home. So, save your money and try this cold brew coffee recipe!

Why You'll Love This Cold Brew Coffee
- It's so easy to make. You won't believe how easy it is to make homemade cold brew. Although it takes a while to steep, the steps are simple. Grind your coffee beans. Soak them in water. Strain out the coffee grounds. Store the filtered coffee in the fridge. That's it.
- It will save you money. Say goodbye to those premium charges for cold brew coffee at Starbucks or local coffee shops by making your own cold brew at home. You'll be surprised just how much you can save every month by choosing coffee at home instead of the cafe.
- Make it a weekly routine this summer. Your filtered cold brew will last in the fridge for up to one week. That means you can add cold brew to your weekly meal prep to enjoy easy iced coffee all week long!
Ingredient Notes
To make this easy homemade Cold Brew Coffee, you will need the following ingredients (full measurements in recipe card below):
- whole coffee beans
- water
You will also need measuring cups, a coffee grinder, large pitcher or jar, fine mesh sieve, and a cheese cloth or coffee filter.
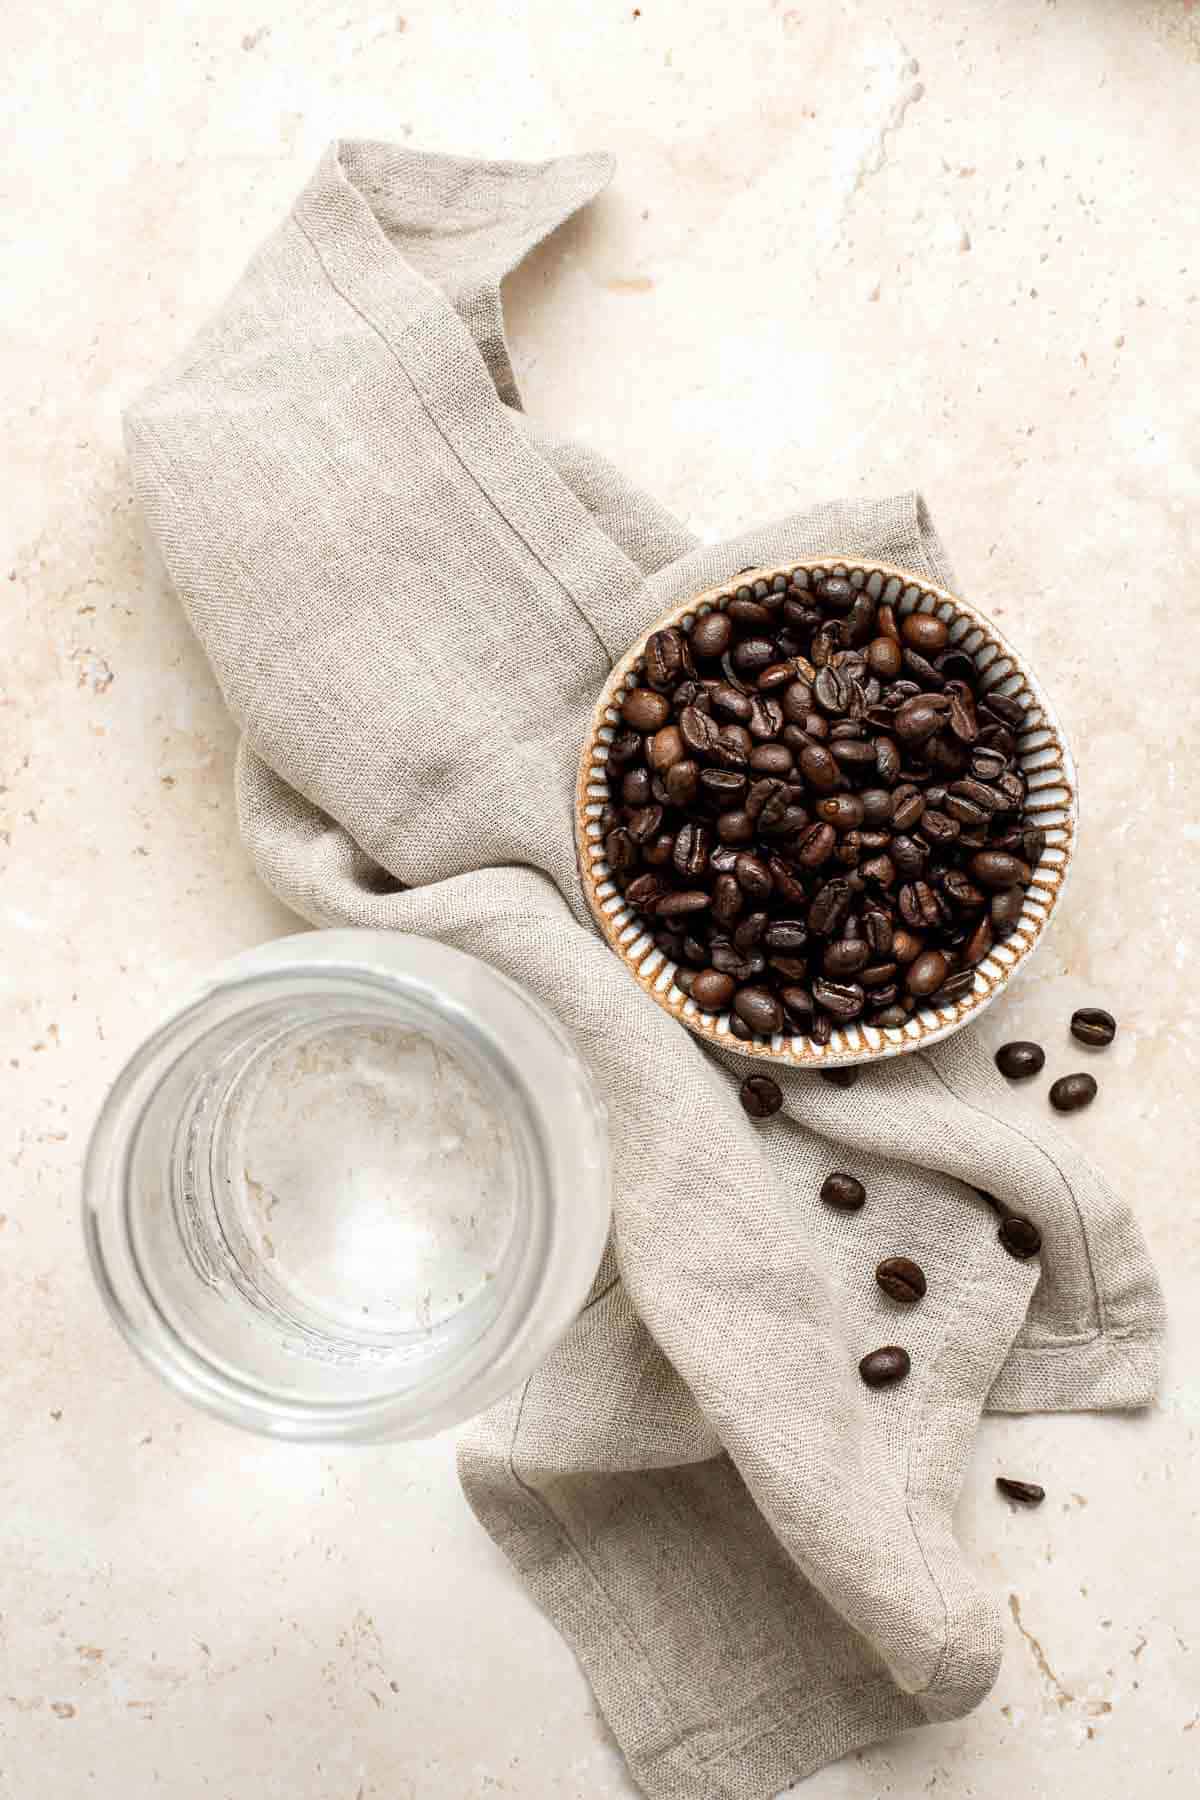
How to Make the Best Cold Brew Coffee
- Grind coffee beans. Transfer the coffee beans to a coffee grinder and grind them on the coarsest setting. If you grind the beans at the grocery store, make sure to choose the coarse setting or French Press-style.
- Steep coffee. In a large pitcher or jar, combine the coffee grounds and water. Stir the coffee in to make sure that the grounds are completely saturated with water. Cover the pitcher with the lid or a small plate and let it steep on the counter at room temperature or in the refrigerator for 18 hours.
Grind coffee beans. Steep coffee.
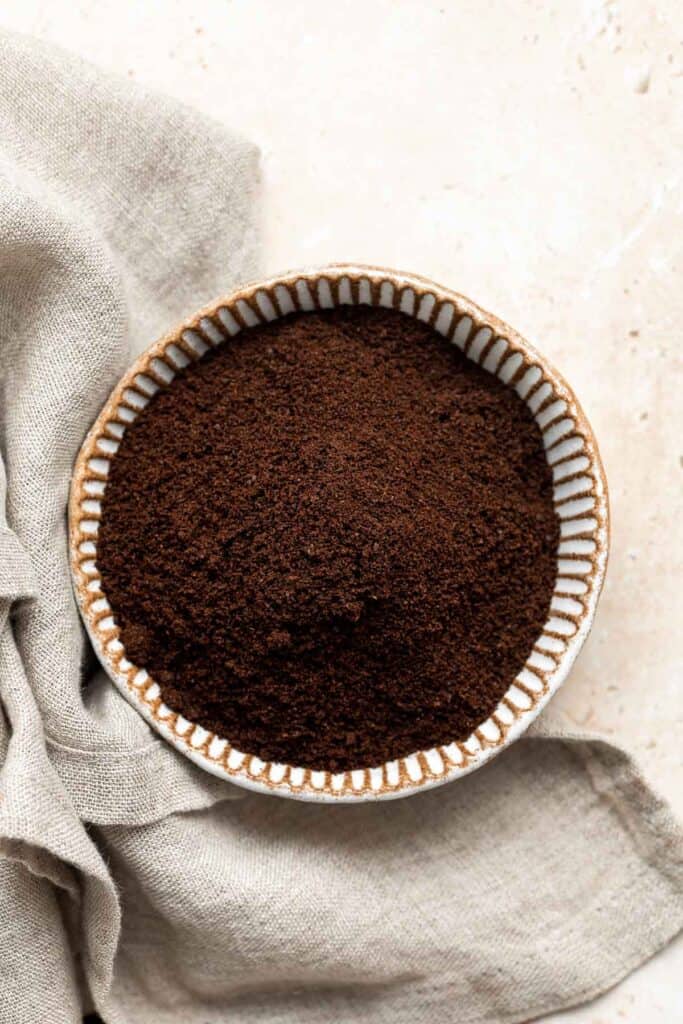
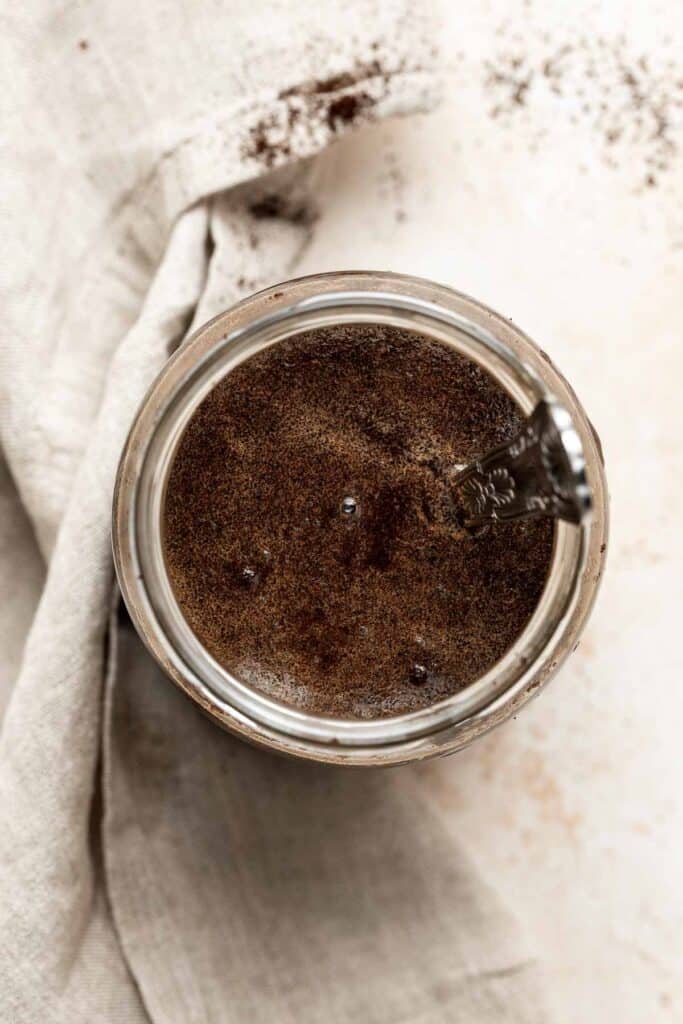
- Strain. Line a fine mesh sieve with a cheese cloth or coffee filter. Pour the coffee through the prepared sieve and into a clean jar or container.
Strain coffee. Store cold brew in a jar or container.
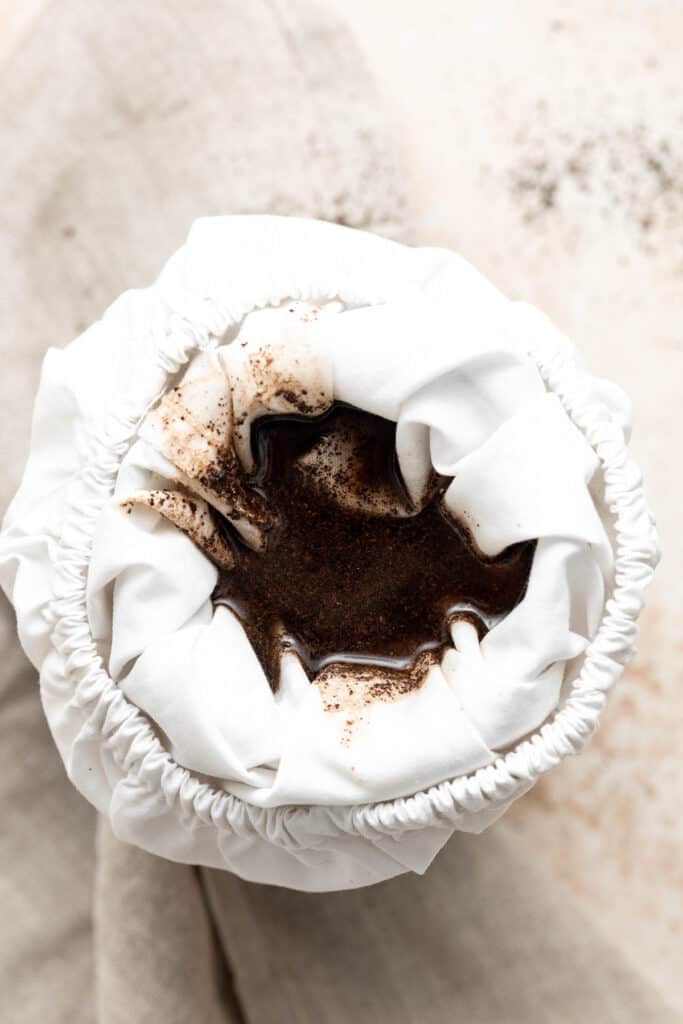
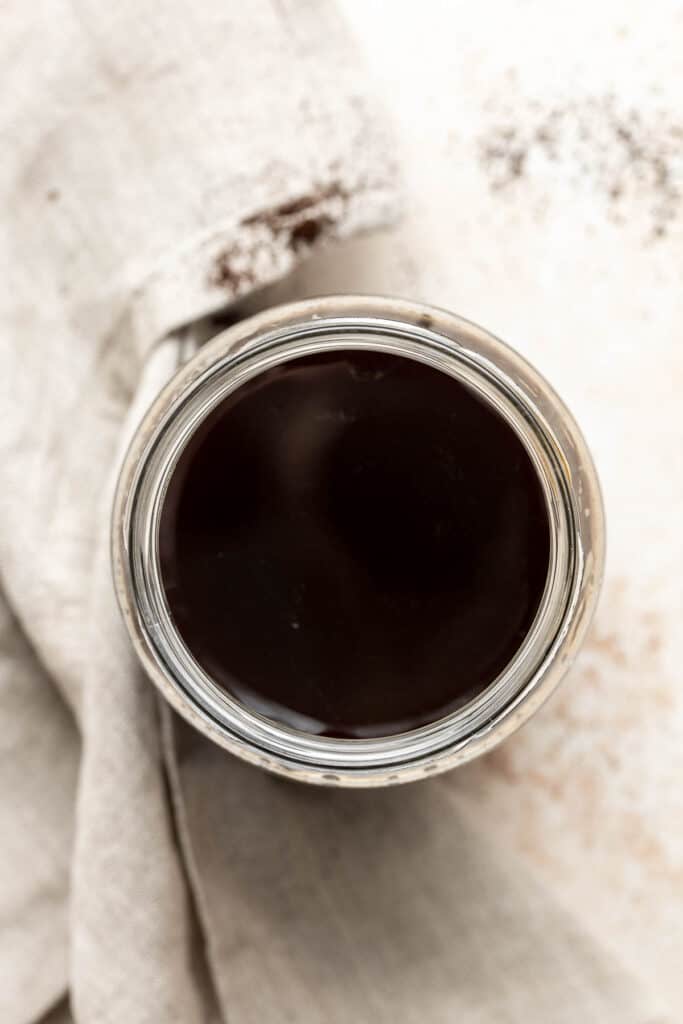
- Serve. Pour the cold brew concentrate over a glass of ice leaving about ¼ of the cup empty to allow room to dilute it with water, milk, or creamer.
How to Store Cold Brew
Store the strained cold brew in a sealed jar or container in the refrigerator for up to one week.

Recipe Tips and Tricks
- Use you favorite coffee beans: Don't switch to a cheaper coffee bean to make cold brew. Higher quality beans will yield higher quality cold brew, so stick with your favorite coffee beans when making this recipe.
- Use whole coffee beans: You cannot make good cold brew coffee using pre-ground coffee beans. You need to purchase whole coffee beans and grind them coarsely. This is very important when making the best cold brew coffee.
- Use filtered water: Depending on where you live, you can use tap water otherwise filtered water will make a difference in the outcome of your cold brew. Consider buying bottled water or using filtered water from a Brita pitcher or other water filtering system.
More Drink Recipes
Tried this recipe?
I'd love to hear what you think! Leave a comment and rating below to share your feedback. Your reviews help others discover this recipe and help me keep creating more free recipes for you. Snap a photo and tag me on social media @aheadofthyme too.

Pork Noodles
Pork Noodles is a quick and easy stir fry recipe that's ready in just 20 minutes (including prep!). It's filling, delicious, flavorful, and so much better than takeout. Loaded with healthy carbs, protein, and veggies, these noodles have it all.
Plus, this pork Pad Thai can be customized with different meat or veggies so that you can use what you have on hand. It's the perfect dinner to make on busy weeknights or for a quick lunch.
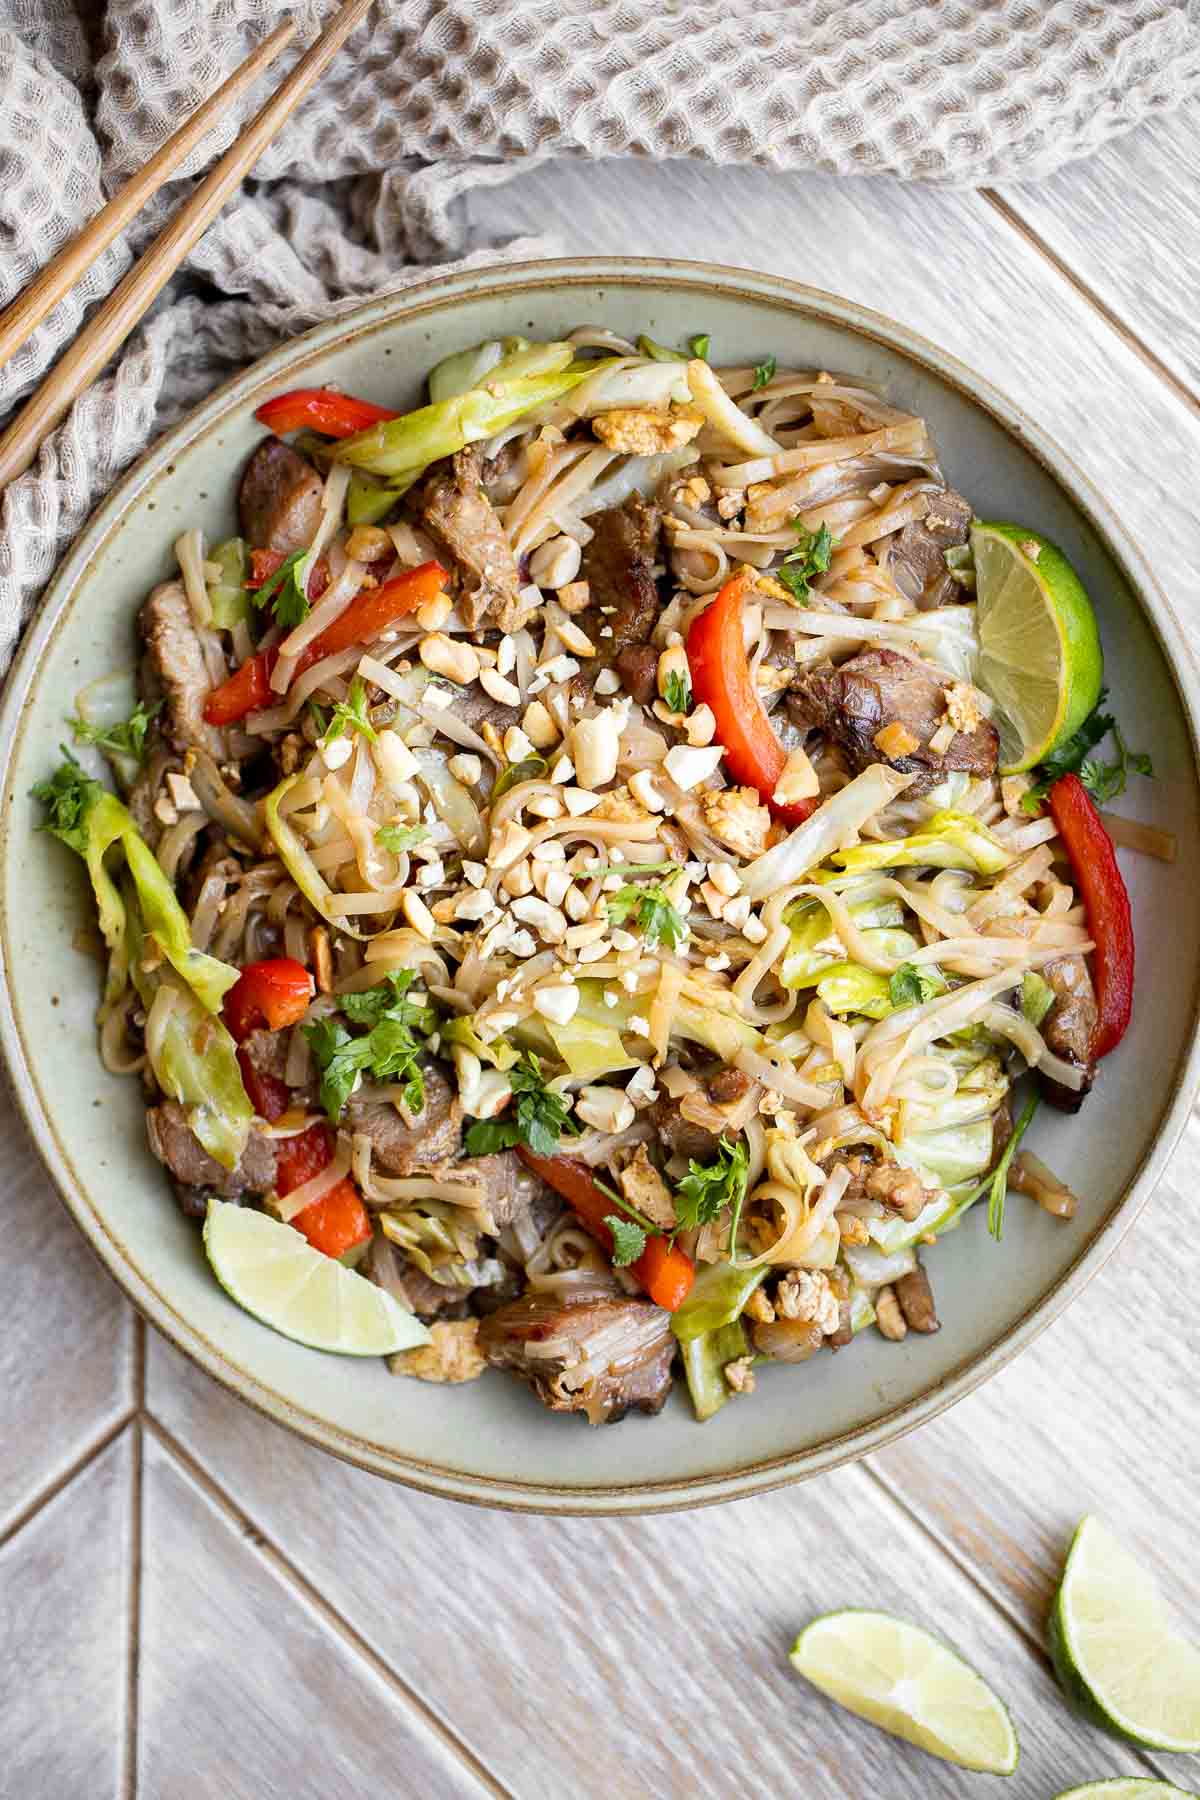
Why You'll Love These Pork Noodles
- A quick 20-minute meal. This filling and protein-packed meal is ready in just 20 minutes. These Pad Thai noodles with pork is the perfect recipe to whip up on busy weeknights. You can even use leftover pork like Vietnamese Grilled Pork to make it even faster.
- It's so easy to make. This pork noodle stir fry is not only fast to make - it's also really easy! It's a one skillet recipe that takes just a few steps to make. It's so easy that it's a great recipes for beginners to try too.
- It's a complete wholesome meal. These noodles have healthy carbs, protein, and veggies makes it a wholesome and balanced meal. You don't need any extra side dishes to complete these boodles, but you could totally could if you wanted to!
- It's customizable. This quick Asian stir fry noodle recipe is also completely customizable. You can substitute with a different kind of meat or use tofu. You can also add in or substitute the veggies for other veggies that you have on hans hand. Try adding in bok choy, bean sprouts, or cauliflower.
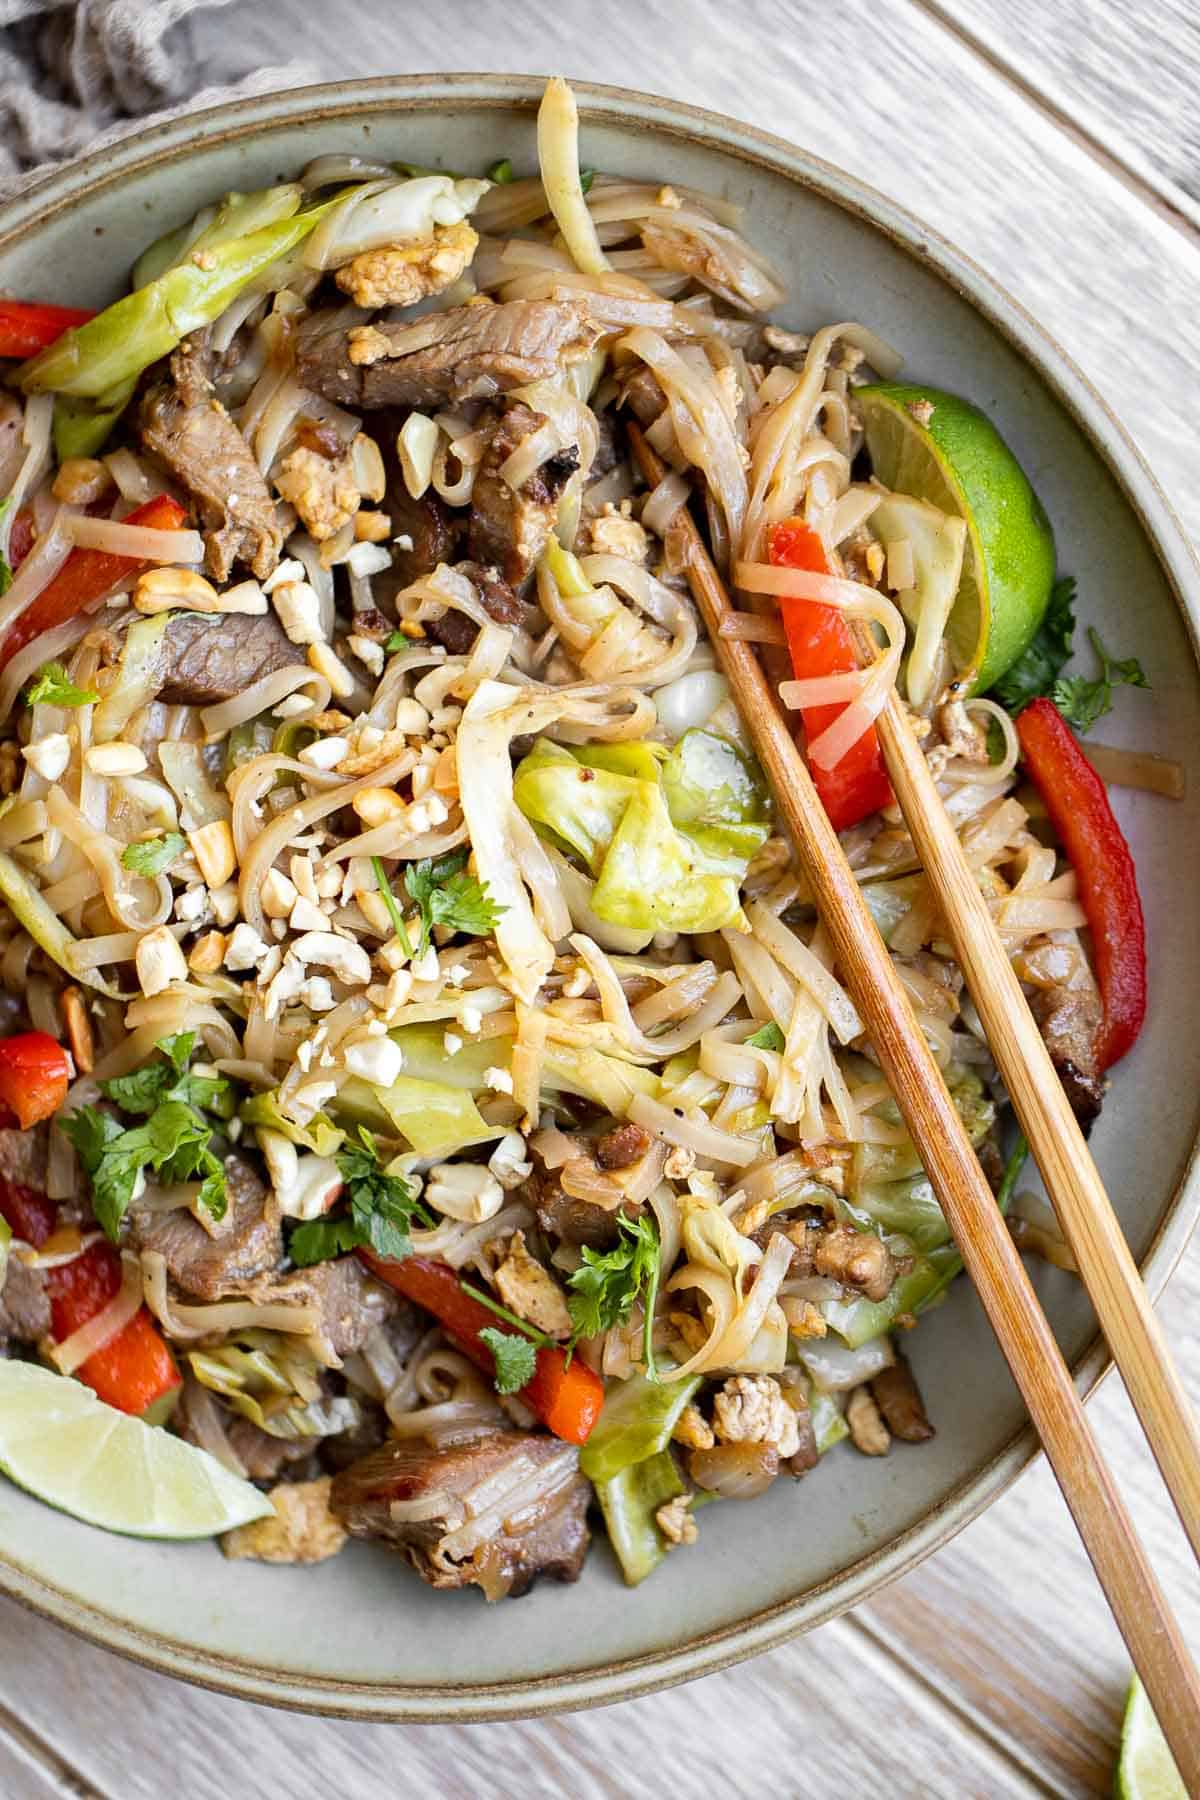
Ingredient Notes
To make this delicious Pork Noodle Stir Fry, you will need the following ingredients (full measurements in recipe card below):
- stir-fry rice noodles - I use the Thai Kitchen brand and recommend them for this recipe.
- vegetable oil - for stir frying the noodles.
- lean pork - you can also use leftover pork cut into strip such as Vietnamese Grilled Pork.
- yellow onion or shallot
- eggs
- green cabbage
- red bell pepper - or substitute with a different colored bell pepper.
- sauce - an easy sauce made with soy sauce, fish sauce, lime juice, rice vinegar, brown sugar (or honey), and chili flakes (optional for a little kick).
You will also need measuring cups and spoons, mixing bowl, and large skillet or wok.
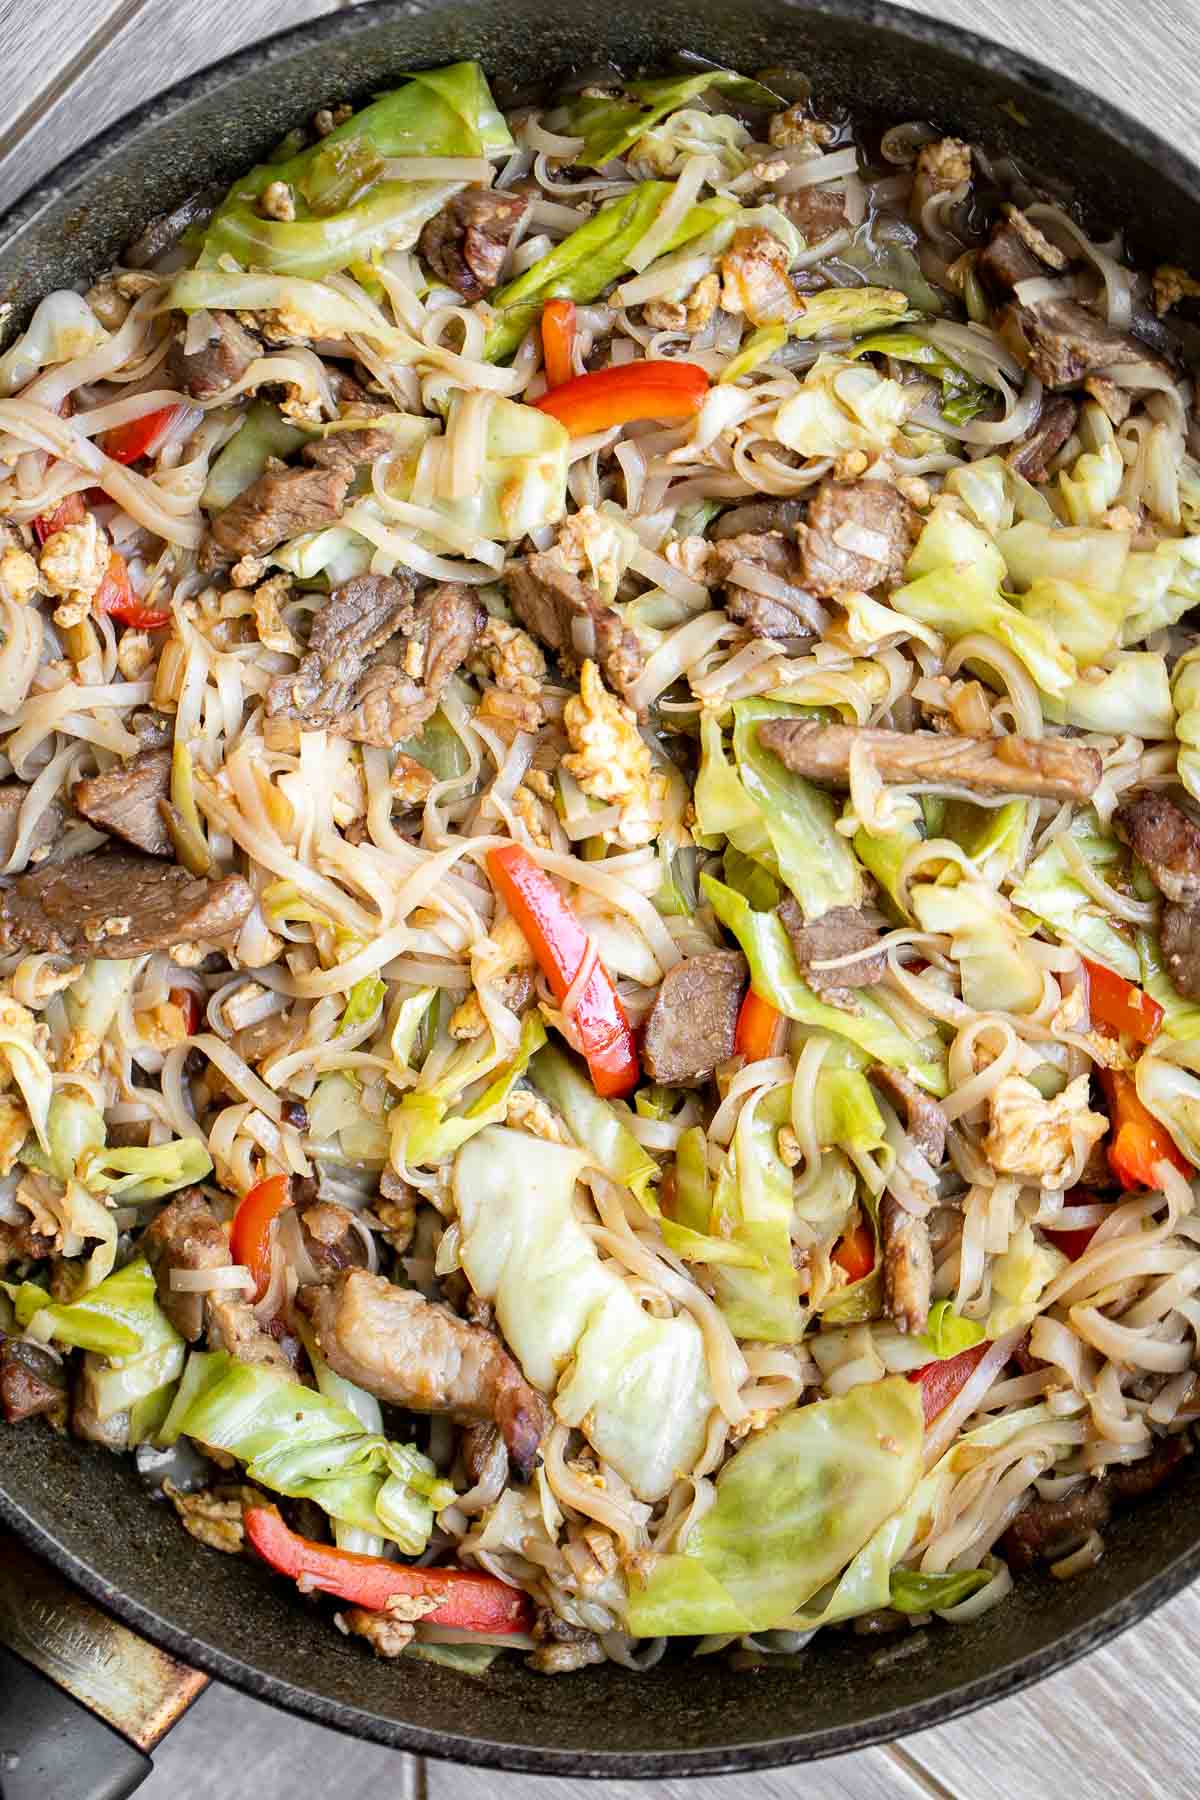
How to Make the Best Pork Noodles
- Soak noodles. In a large mixing bowl, soak the dry rice noodles in lukewarm water for 10 minutes (or according to the package instructions) until soft but firm. Drain and set aside. If the noodles become sticky, rinse gently with water to separate them.
- Cook pork. Heat oil in a large skillet or wok over medium-high heat until sizzling hot, about 1 minute. Add pork and sauté until lightly browned, about 2-3 minutes. (You can also use leftover Vietnamese Grilled Pork in this recipe instead).
- Sauté onions. Add onion and cook until tender, about 1 minute.
- Add eggs. Shift the pork and onions over to one side of the skillet to make some space in the pan to crack the eggs on the other side. Add the eggs, scramble, and cook until they have thickened and there are no visible liquid parts remaining.
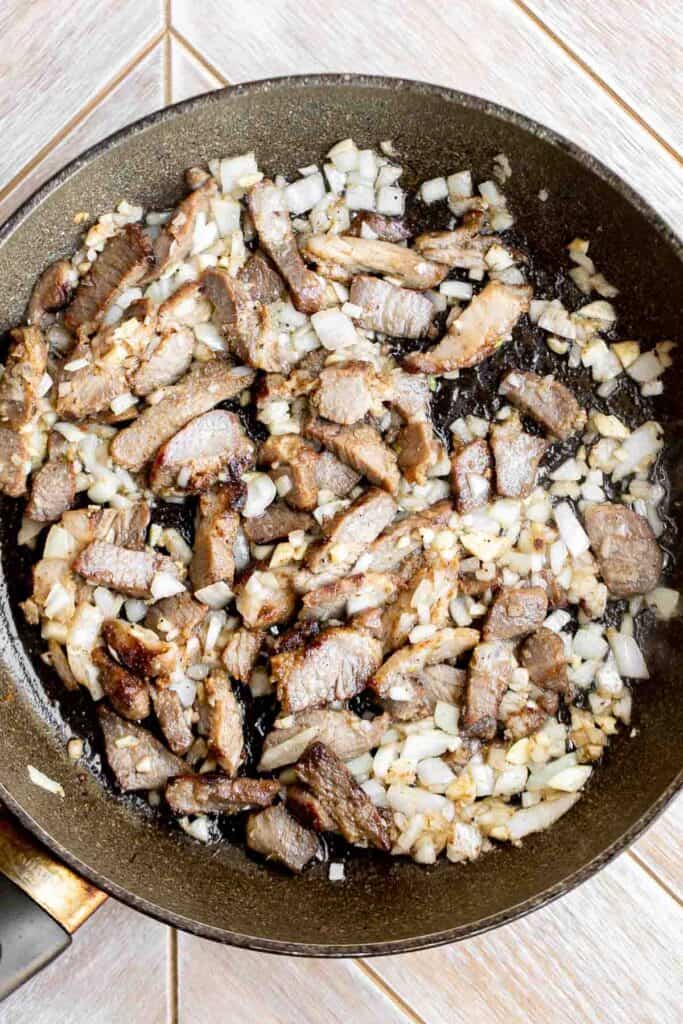

- Add vegetables. Add cabbage and bell pepper and stir everything together. Cook the veggies until tender, about 2-3 minutes.
- Add noodles. Stir in the drained noodles and stir to combine evenly, about 1 minute.
- Make sauce. In a small mixing bowl, whisk together all the sauce ingredients until smooth including soy sauce, fish sauce, line juice, rice vinegar, brown sugar, and chili flakes (if using).
- Add sauce. Pour the sauce into the pan, toss well, and cook for another 1-2 minutes until the noodles, pork, and veggies are evenly coated. You can add 1-2 tablespoons of water if desired to make it a bit more saucy.
- Serve. Serve immediately.
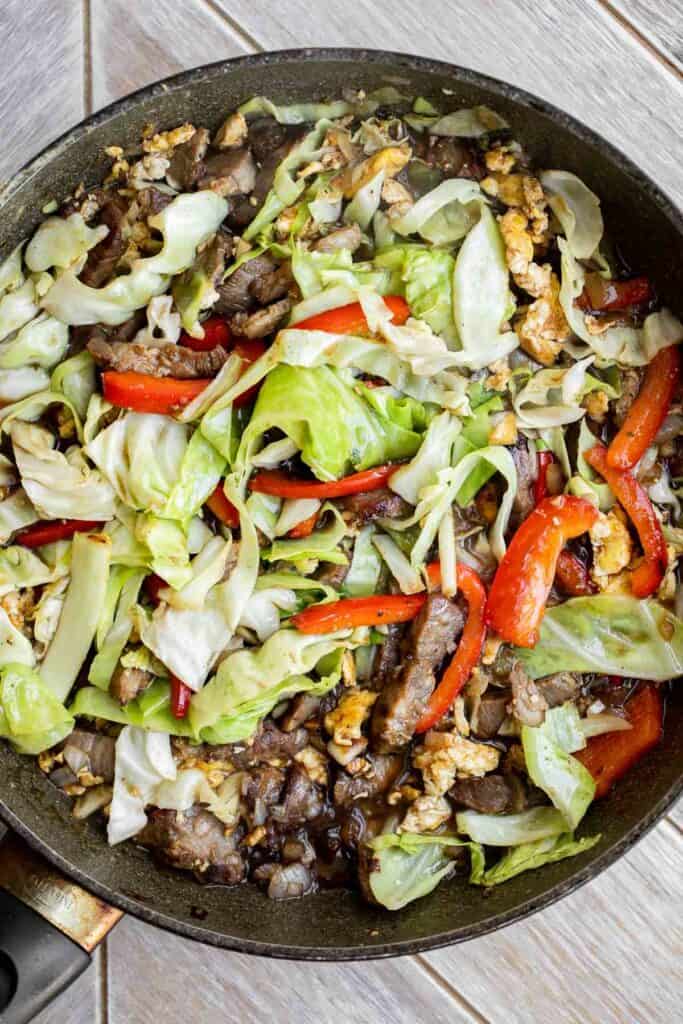

How to Serve
Serve Pork Pad Thai Noodles on their own as a delicious quick lunch or dinner. You can also switch up the protein and use chicken or tofu if you want or, and pair it with some sides such as:
- Thai Mango Salad
- Vegetarian Spring Rolls
- Air Fryer Vegetable "Stir Fry"
- Vegetarian Steamed Buns
- Chinese Garlic Cucumber Salad
- Vietnamese Salad Rolls with Peanut Sauce
Storing Instructions
- How to store: Pad Thai noodles with pork are best serve fresh. If you have leftovers, allow them to cool to room temperature first. Then, transfer to an airtight container and store in the fridge for 3-4 days.
- How to reheat: Reheat these Asian pork noodles the same way you cooked them - on the stovetop over medium heat, stirring frequently until warmed through. You can also pop them in the microwave on medium heat in 30-second intervals until warm.
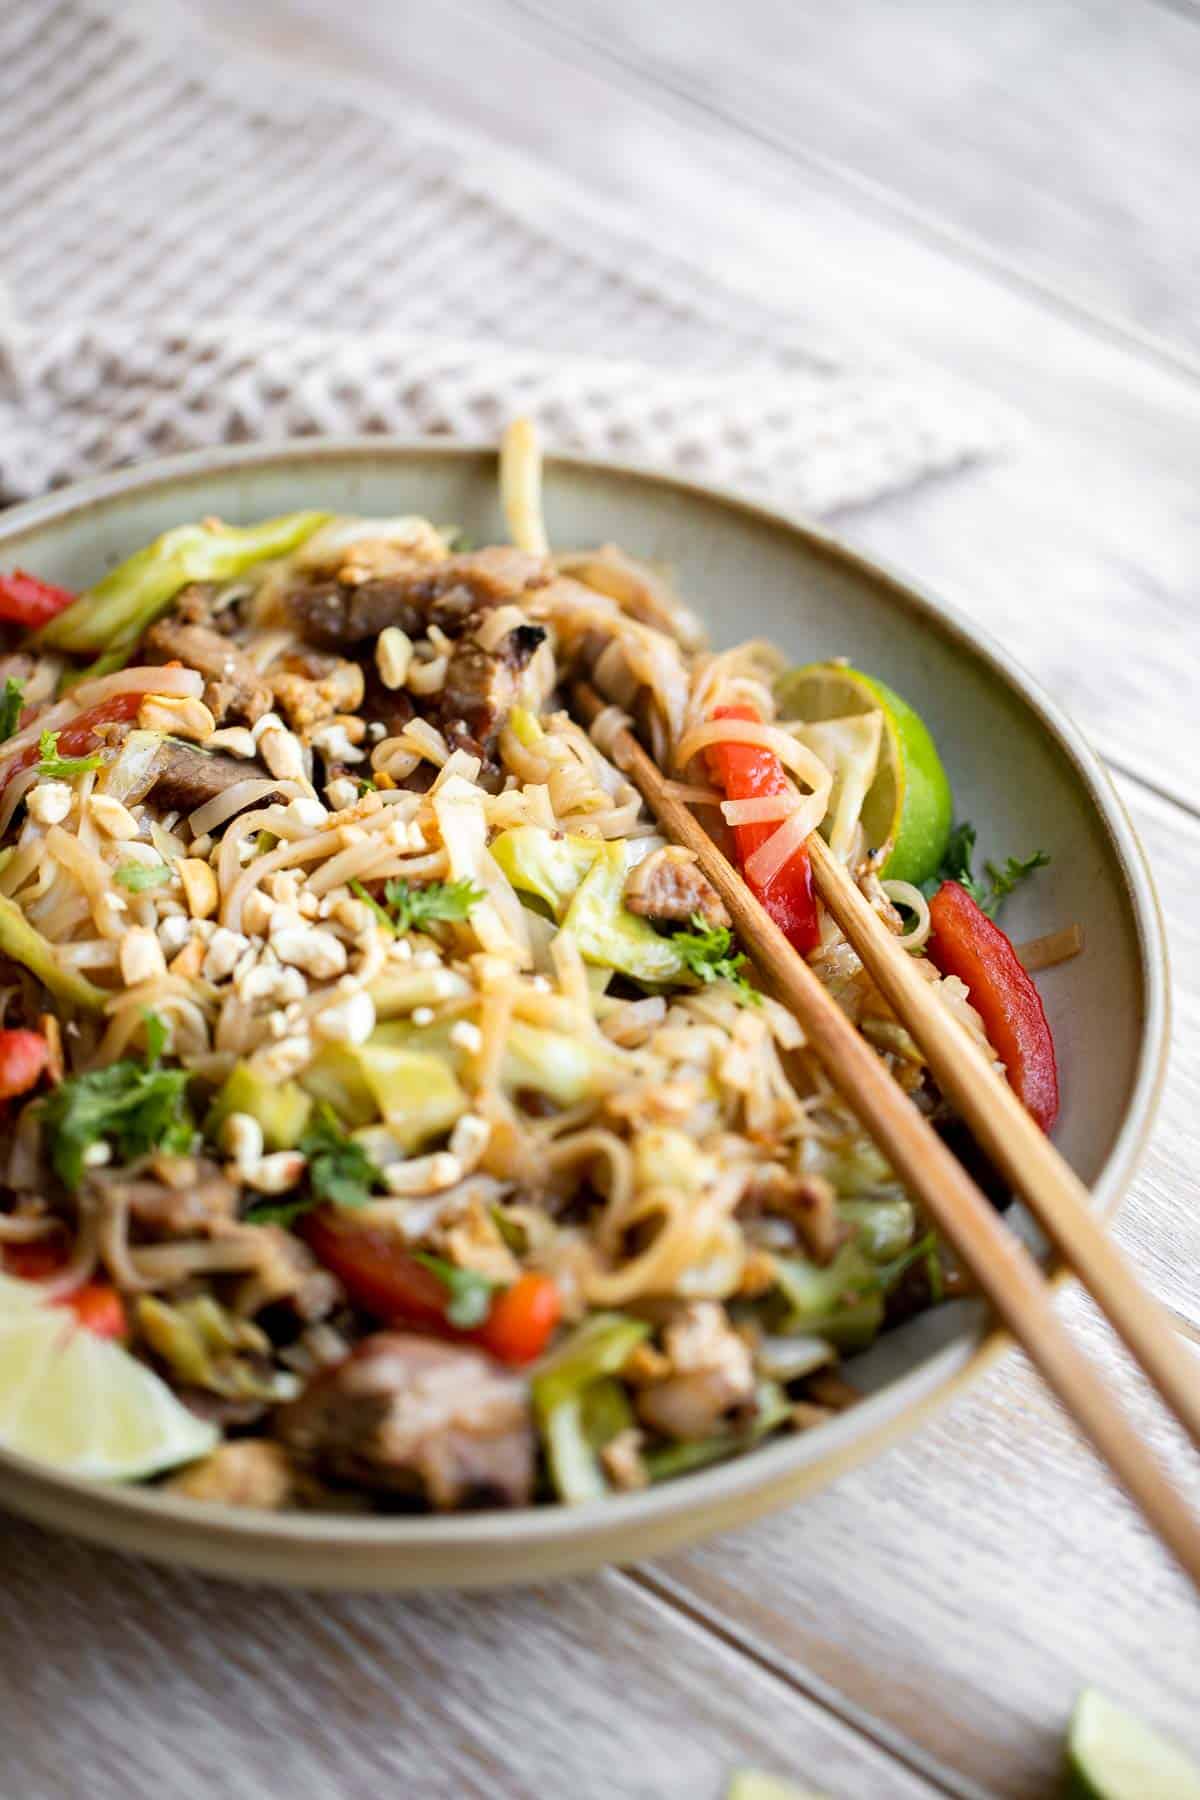
More Noodle Recipes
- 25 Best Noodle Recipes
- Beef Noodle Stir Fry
- Shanghai Style Fried Noodles
- Scallion Oil Noodles
- Spicy Cumin Lamb Noodles
- Peanut Noodles
Tried this recipe?
I'd love to hear what you think! Leave a comment and rating below to share your feedback. Your reviews help others discover this recipe and help me keep creating more free recipes for you. Snap a photo and tag me on social media @aheadofthyme too.

Blackberry Milkshake
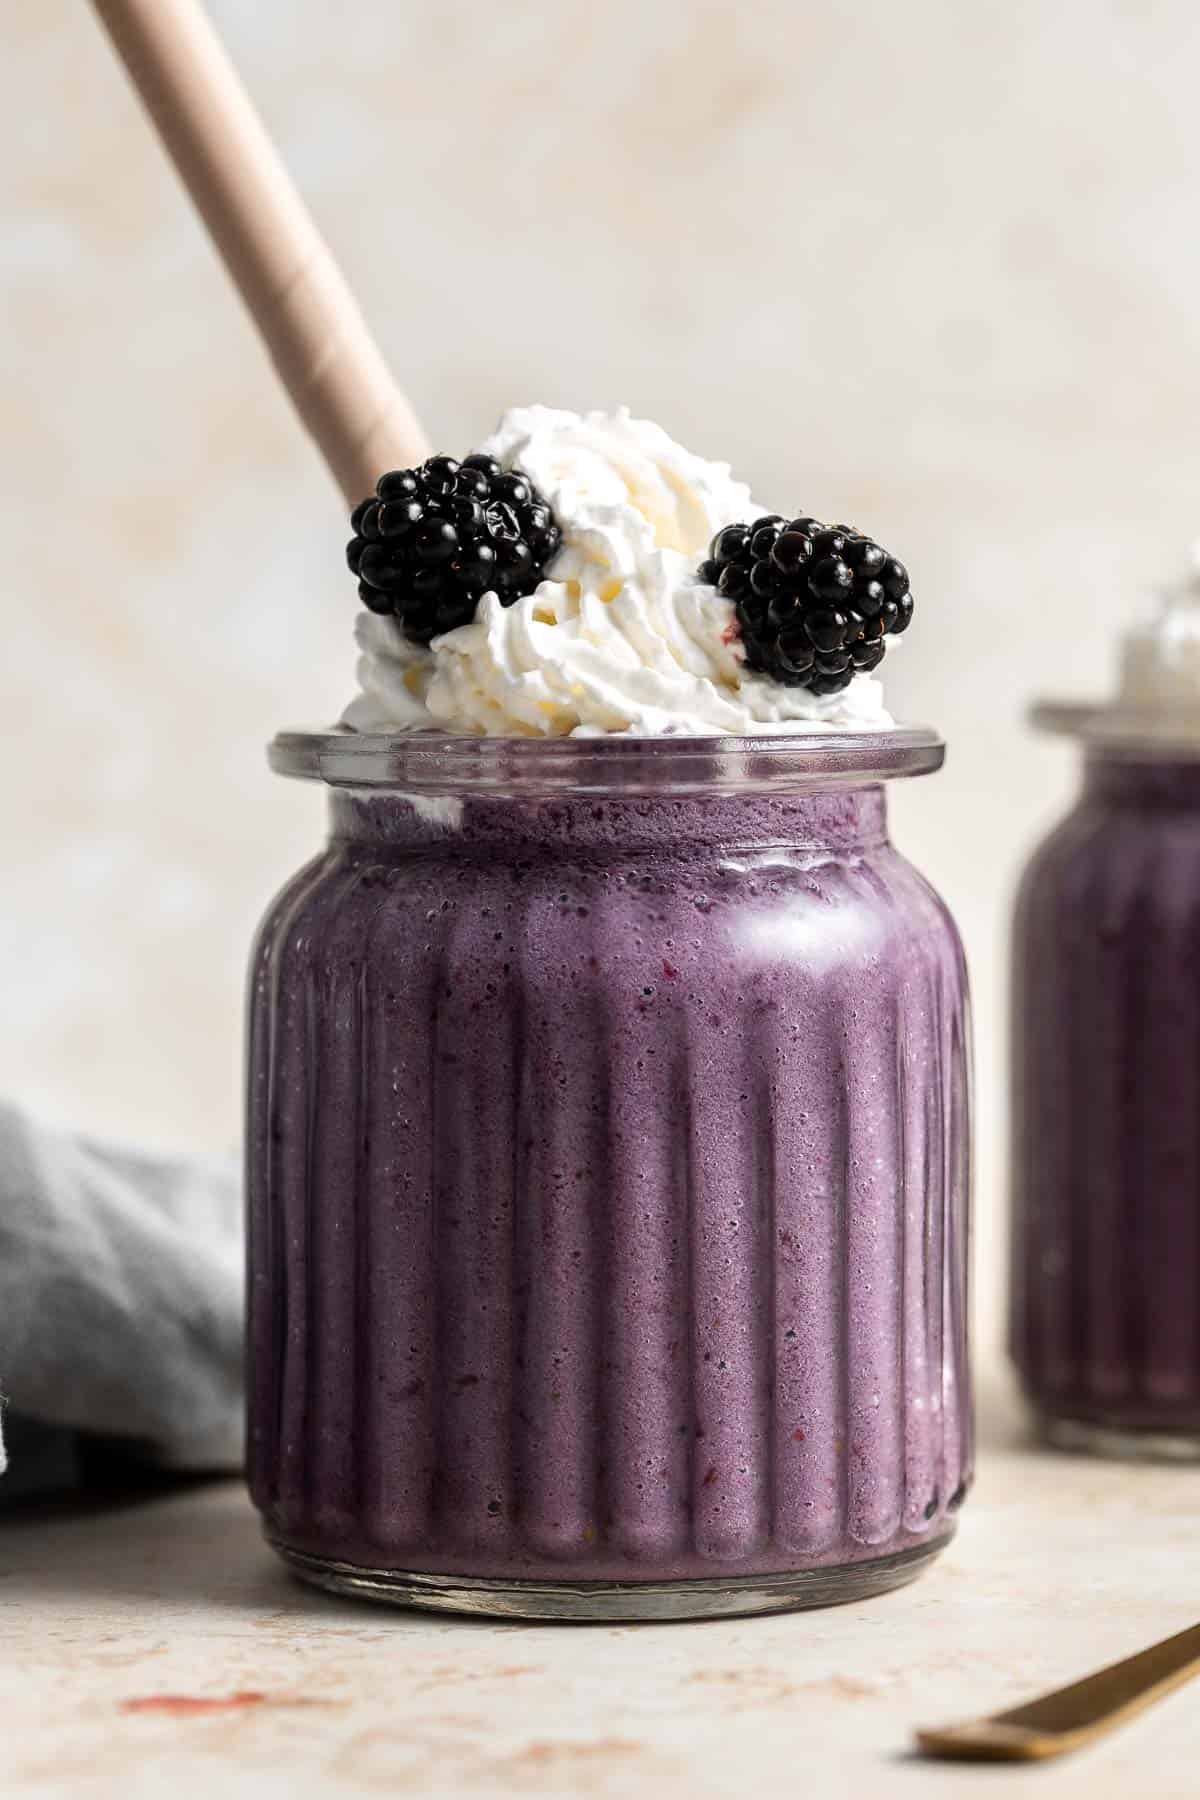
This blackberry milkshake is thick, creamy, and smooth. You won't believe how quick and easy it is to make this refreshing drink at home with just 3 ingredients in under 5 minutes.
These berry milkshakes are perfect in the hot summer months when blackberries are fresh in season or enjoy them all year long with frozen berries or even other kinds of fruit!
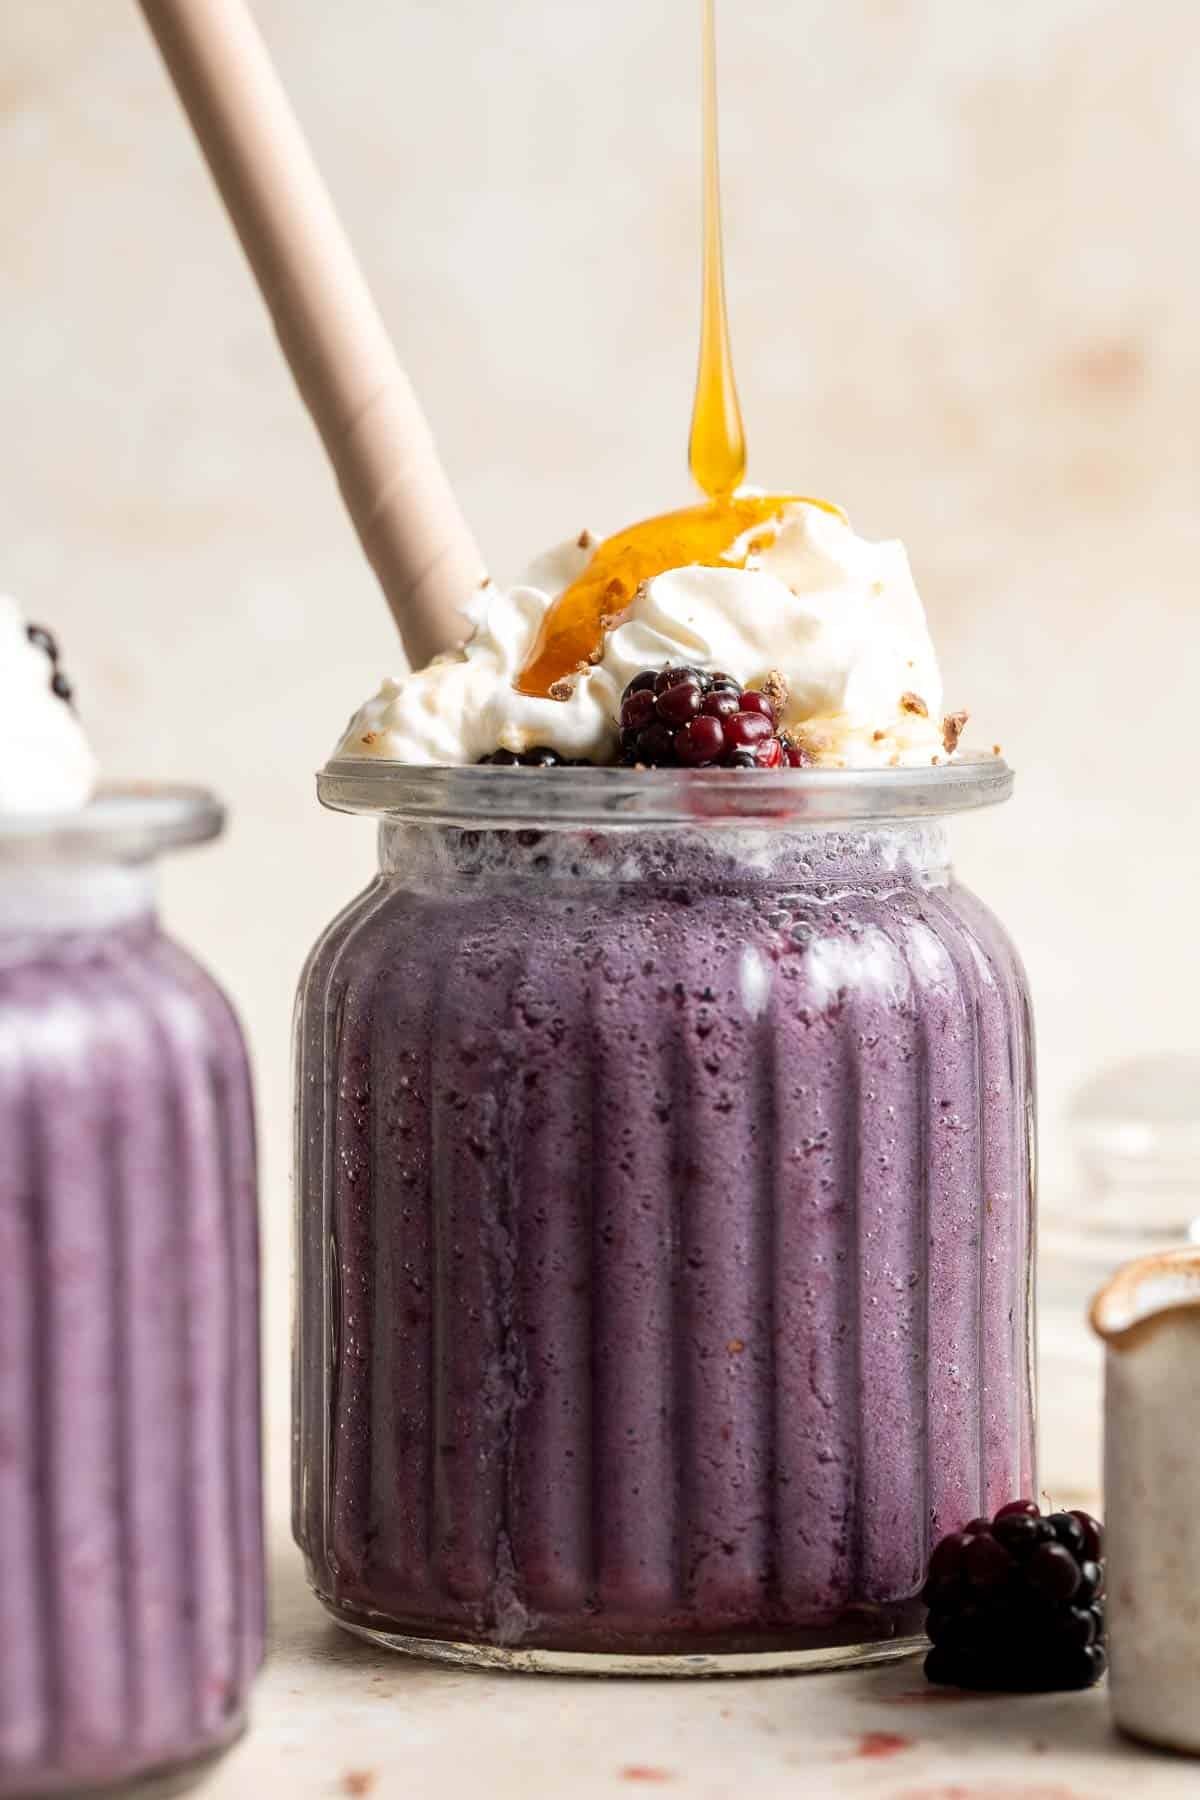
Why You'll Love This Blackberry Milkshake
- It's thick and creamy. Like any good milkshake should be, this blackberry milkshake recipe delivers the best texture every time - thick, creamy, and smooth.
- You only need 3 ingredients. Milkshakes are a lot easier to make at home than you thjnk. All you need to make this blackberry milkshake is a blender, ice cream, milk, and blackberries. You can also add in your favorite toppings if you want.
- Ready in under 5 minutes. Why run to your local dessert shop to order a milkshake, when you can make one at home in under 5 minutes? All you need to do is combine the ingredients in the blender and puree. It's so quick to make and tastes better than store-bought!
- It's customizable. Whether you prefer dairy vs. dairy-free or sweet vs. unsweetened, you can completely customize the ingredient measurements to suit your tastebuds. Plus, use this recipe as a base and change up the fruit to create different flavored milkshakes.
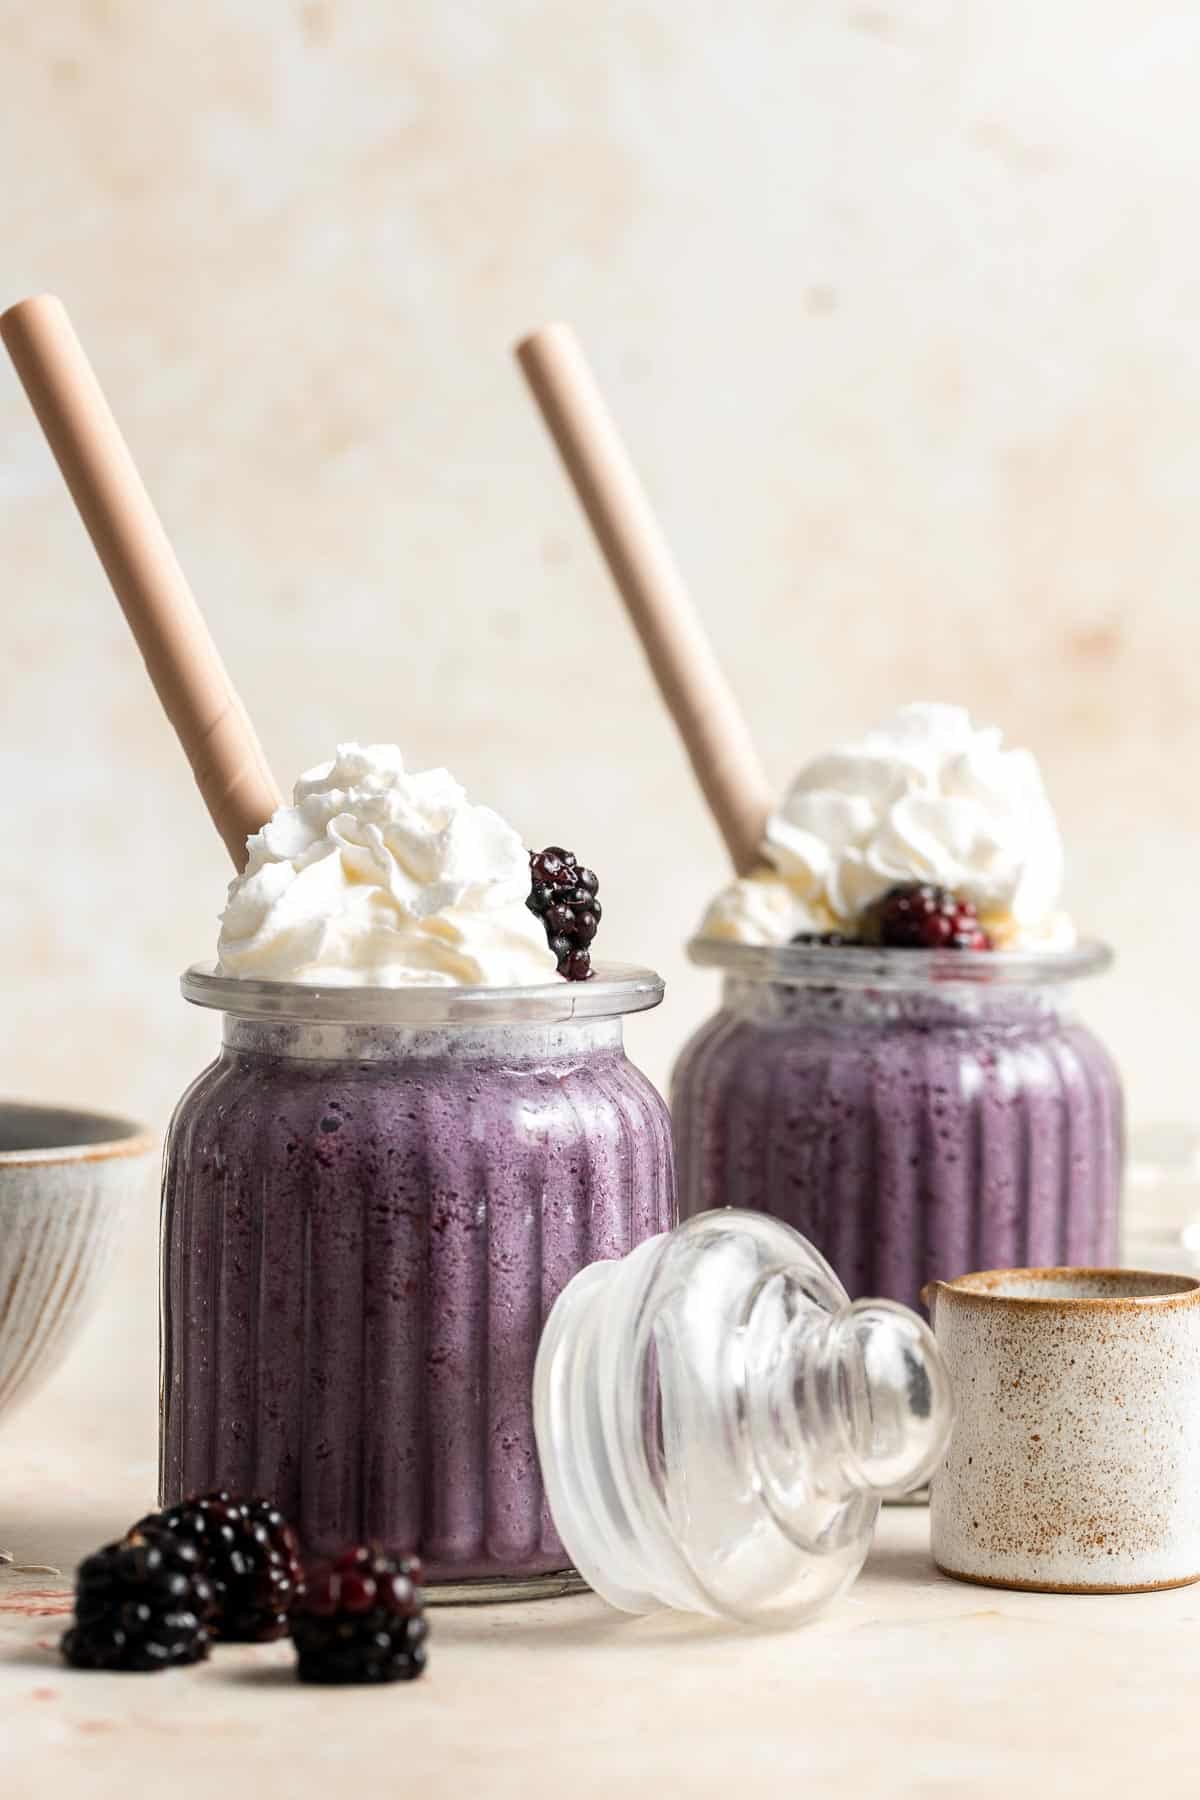
Ingredient Notes
To make these easy Blackberry Milkshakes, you will need the following ingredients (full measurements in recipe card below):
- blackberries - I recommend ripe blackberries for the best results.
- vanilla ice cream - you can used homemade no churn vanilla ice cream or store-bought ice cream - whatever is more convenient!
- milk - feel free to use any milk that you like, whether that's dairy milk or half and half or non-dairy milk like soy milk, oat milk, or almond milk.
- honey - add more or less depending on your desired level of sweetness. You can also substitute it with another sweetener such as maple syrup or sugar.
- toppings - top these milkshakes with extra whipped cream and extra blackberries (optional).
You will also need measuring cups and spoons and a blender.
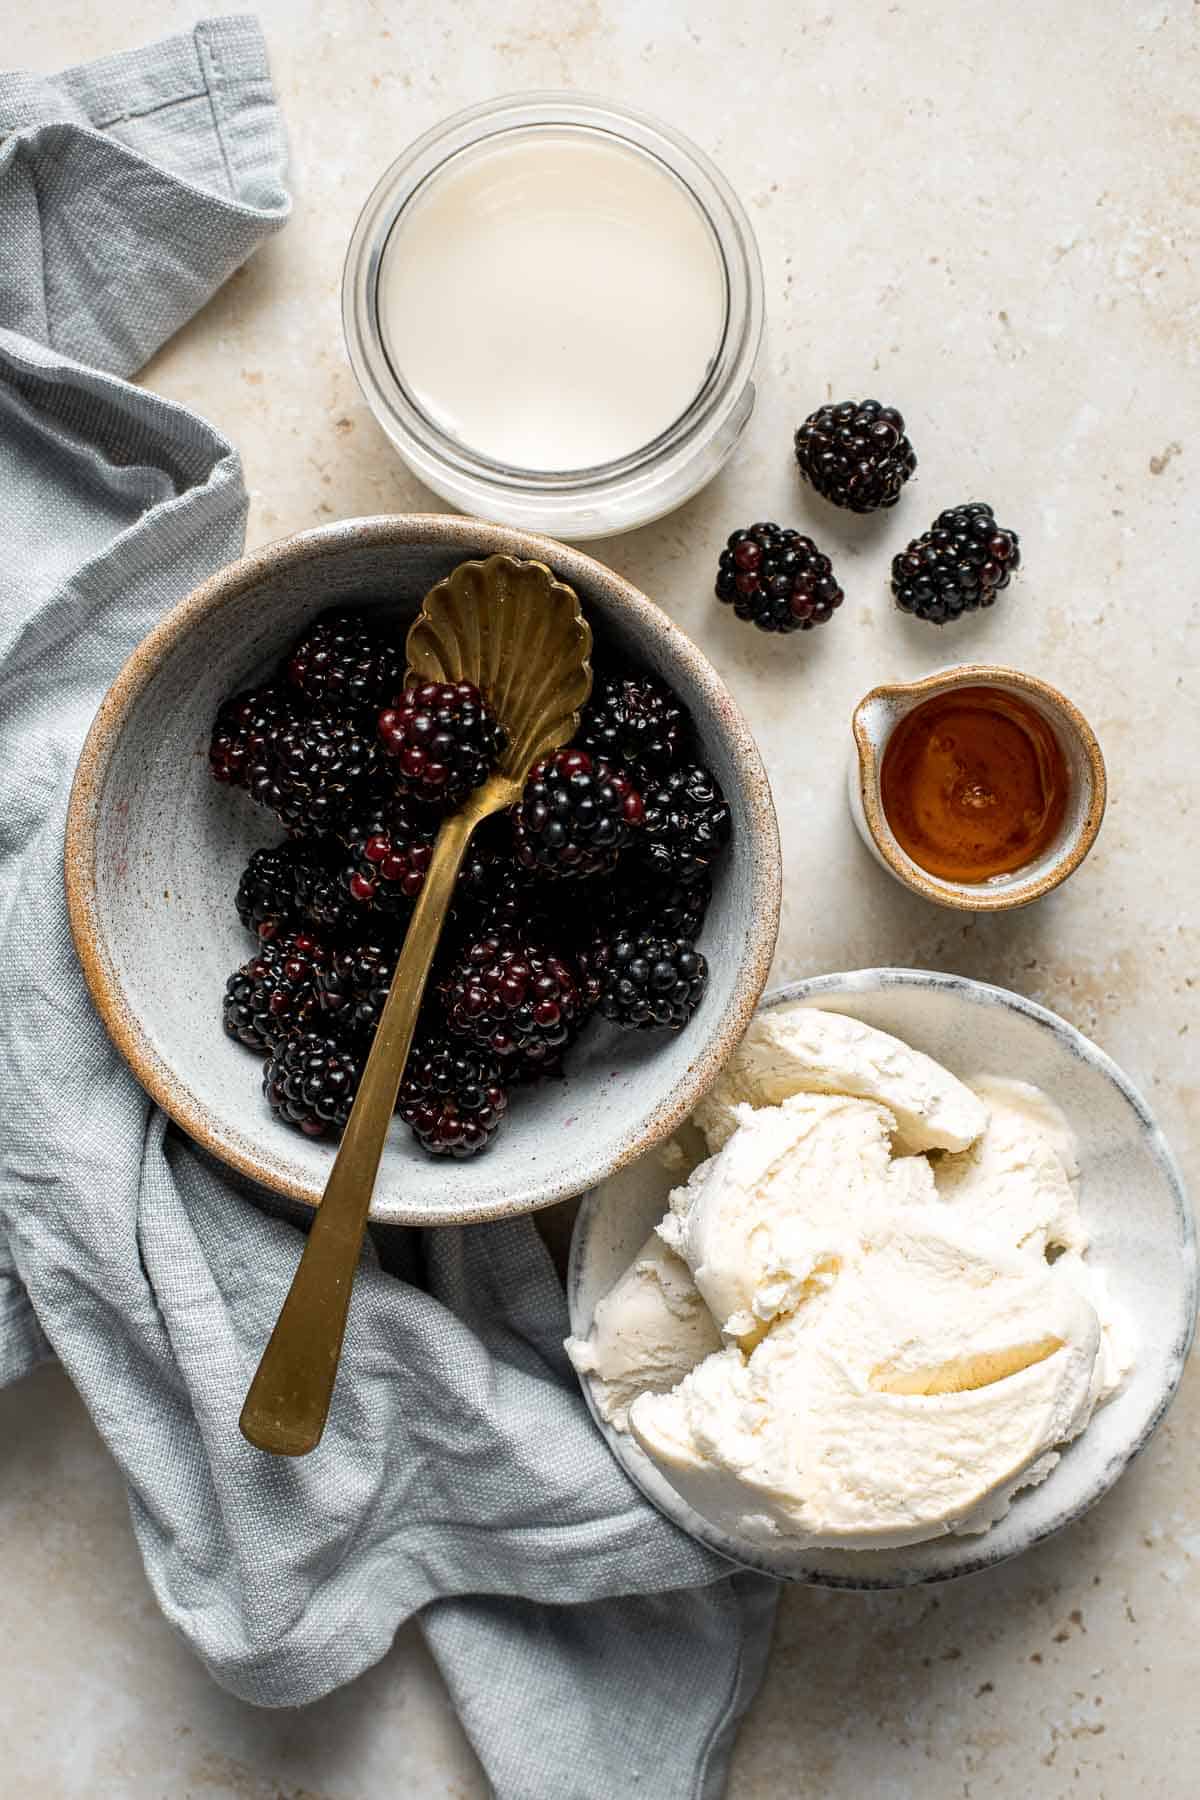
How to Make the Best Blackberry Milkshake
If you've never make milkshakes at home, you may be surprised to find out how easy they are to make. All you do is combine the blackberries, ice cream, milk, and honey together in a blender and puree until smooth.
Then, divide the drink into two glasses. Garnish with whipped cream and extra blackberries, if desired.
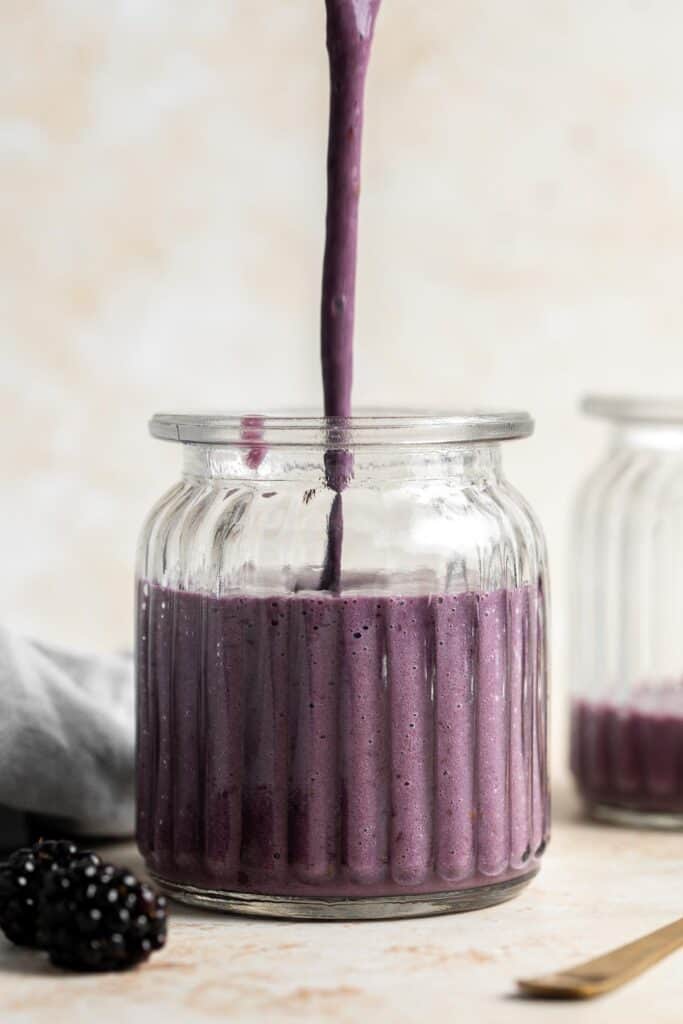
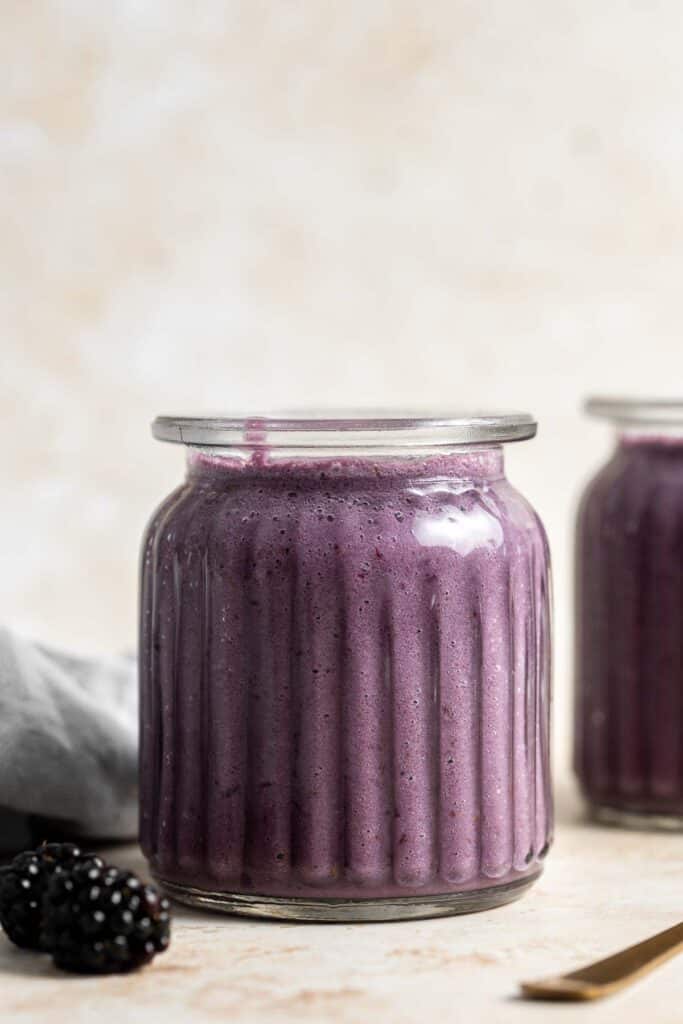
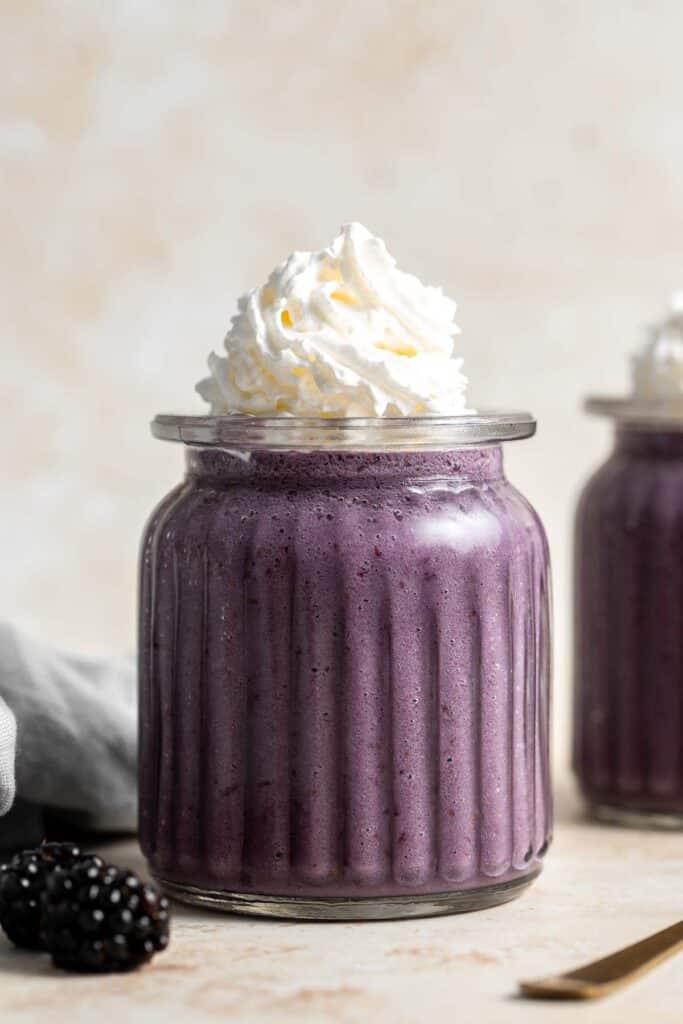
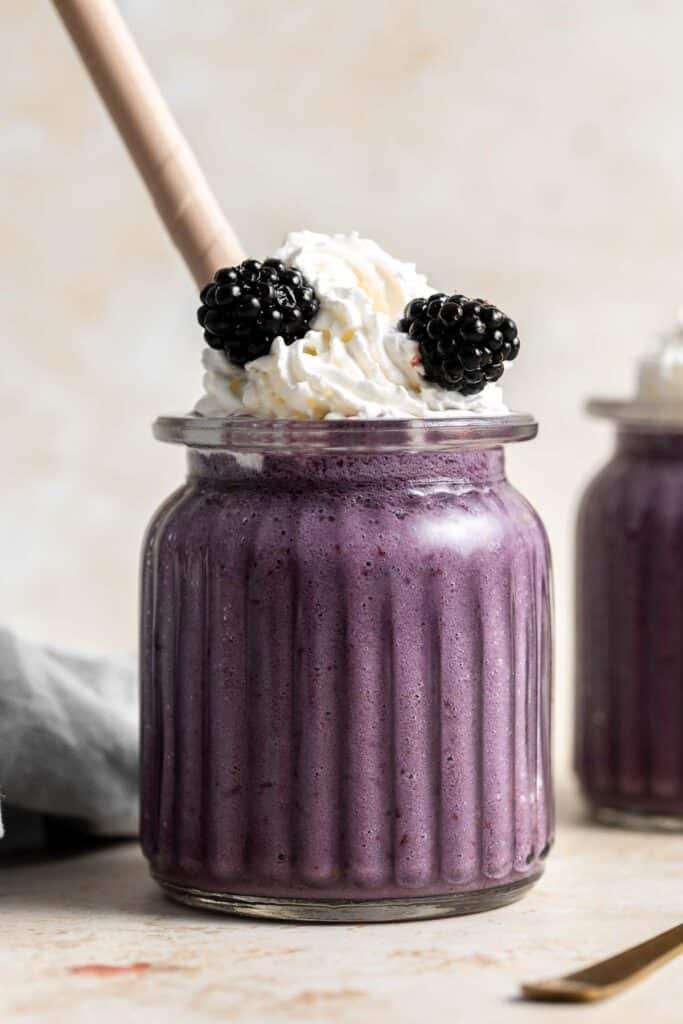
Recipe Tips and Tricks
- How to customize: Use this recipe as a base for any fruit flavored milkshake. Substitute with other fruit such as strawberries, blueberries, or peaches. You can also use a combination of different fruit, just make sure the total amount that you add is 1 cup.
- How to store: Homemade milkshakes are best enjoyed freshly made. You can store leftovers for a few hours in the fridge, but anything longer than that should be stored in the freezer. Store in an airtight container for up to 3 months. When ready to eat, allow it to defrost on the kitchen counter for about 20 minutes.
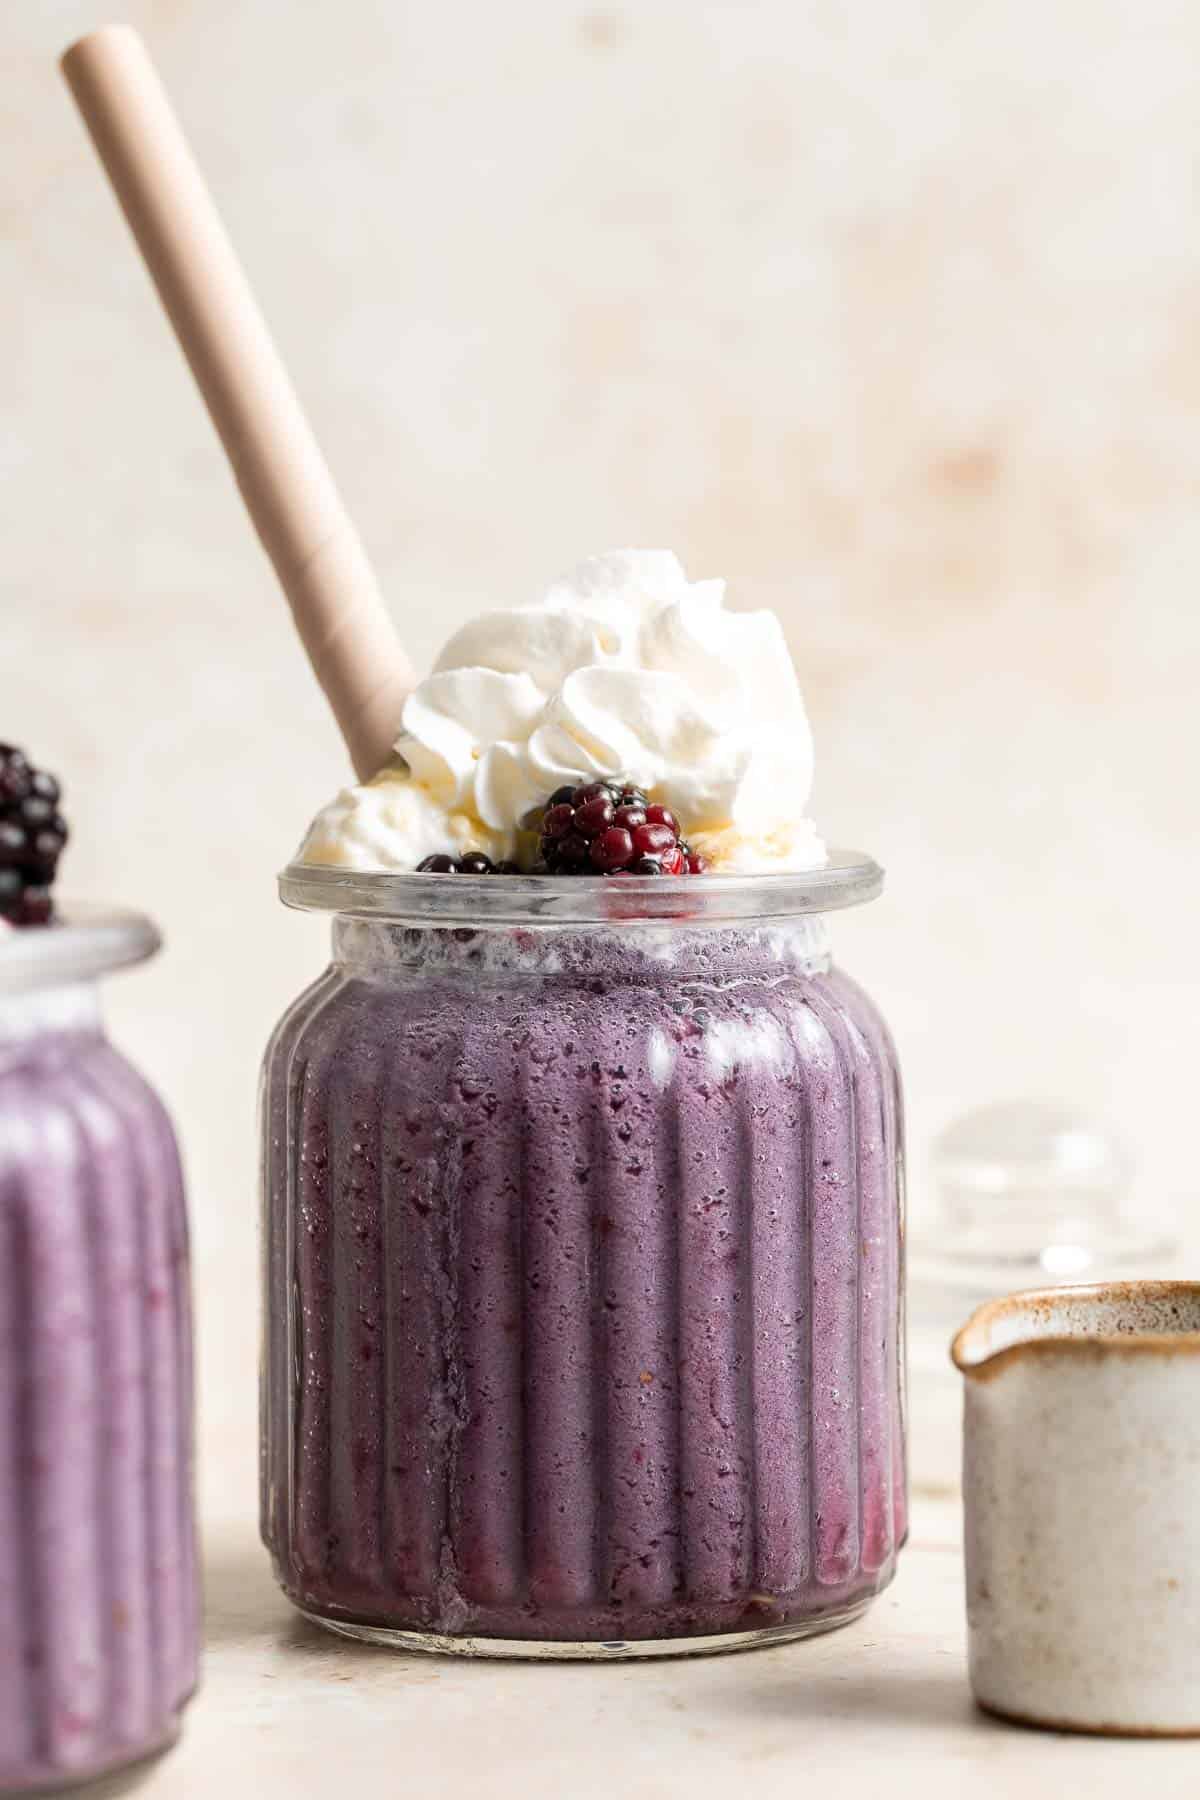
More Drink Recipes
- Strawberry Lemonade
- Mango Bubble Tea
- Peach Iced Tea
- Frappuccino
- Majoon (Banana and Date Smoothie)
- Matcha Milk Tea
Tried this recipe?
I'd love to hear what you think! Leave a comment and rating below to share your feedback. Your reviews help others discover this recipe and help me keep creating more free recipes for you. Snap a photo and tag me on social media @aheadofthyme too.
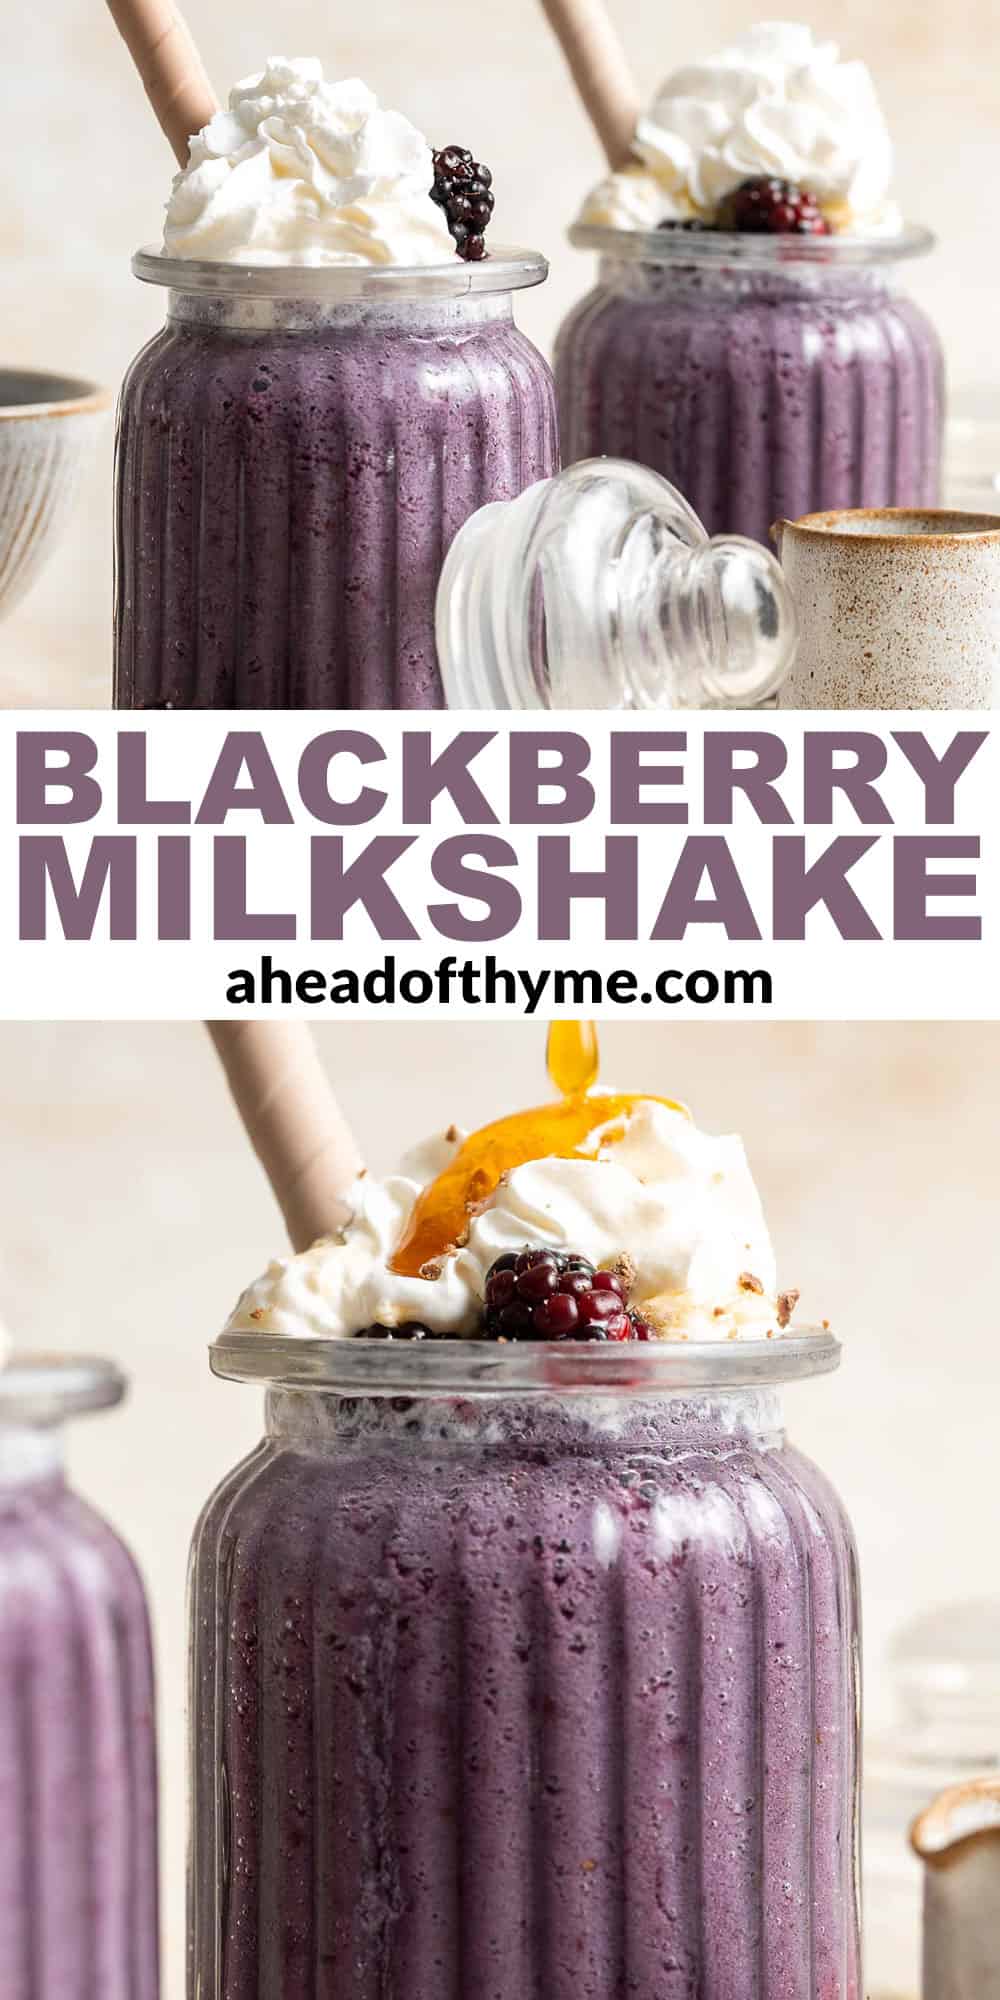
15 Best Blueberry Recipes
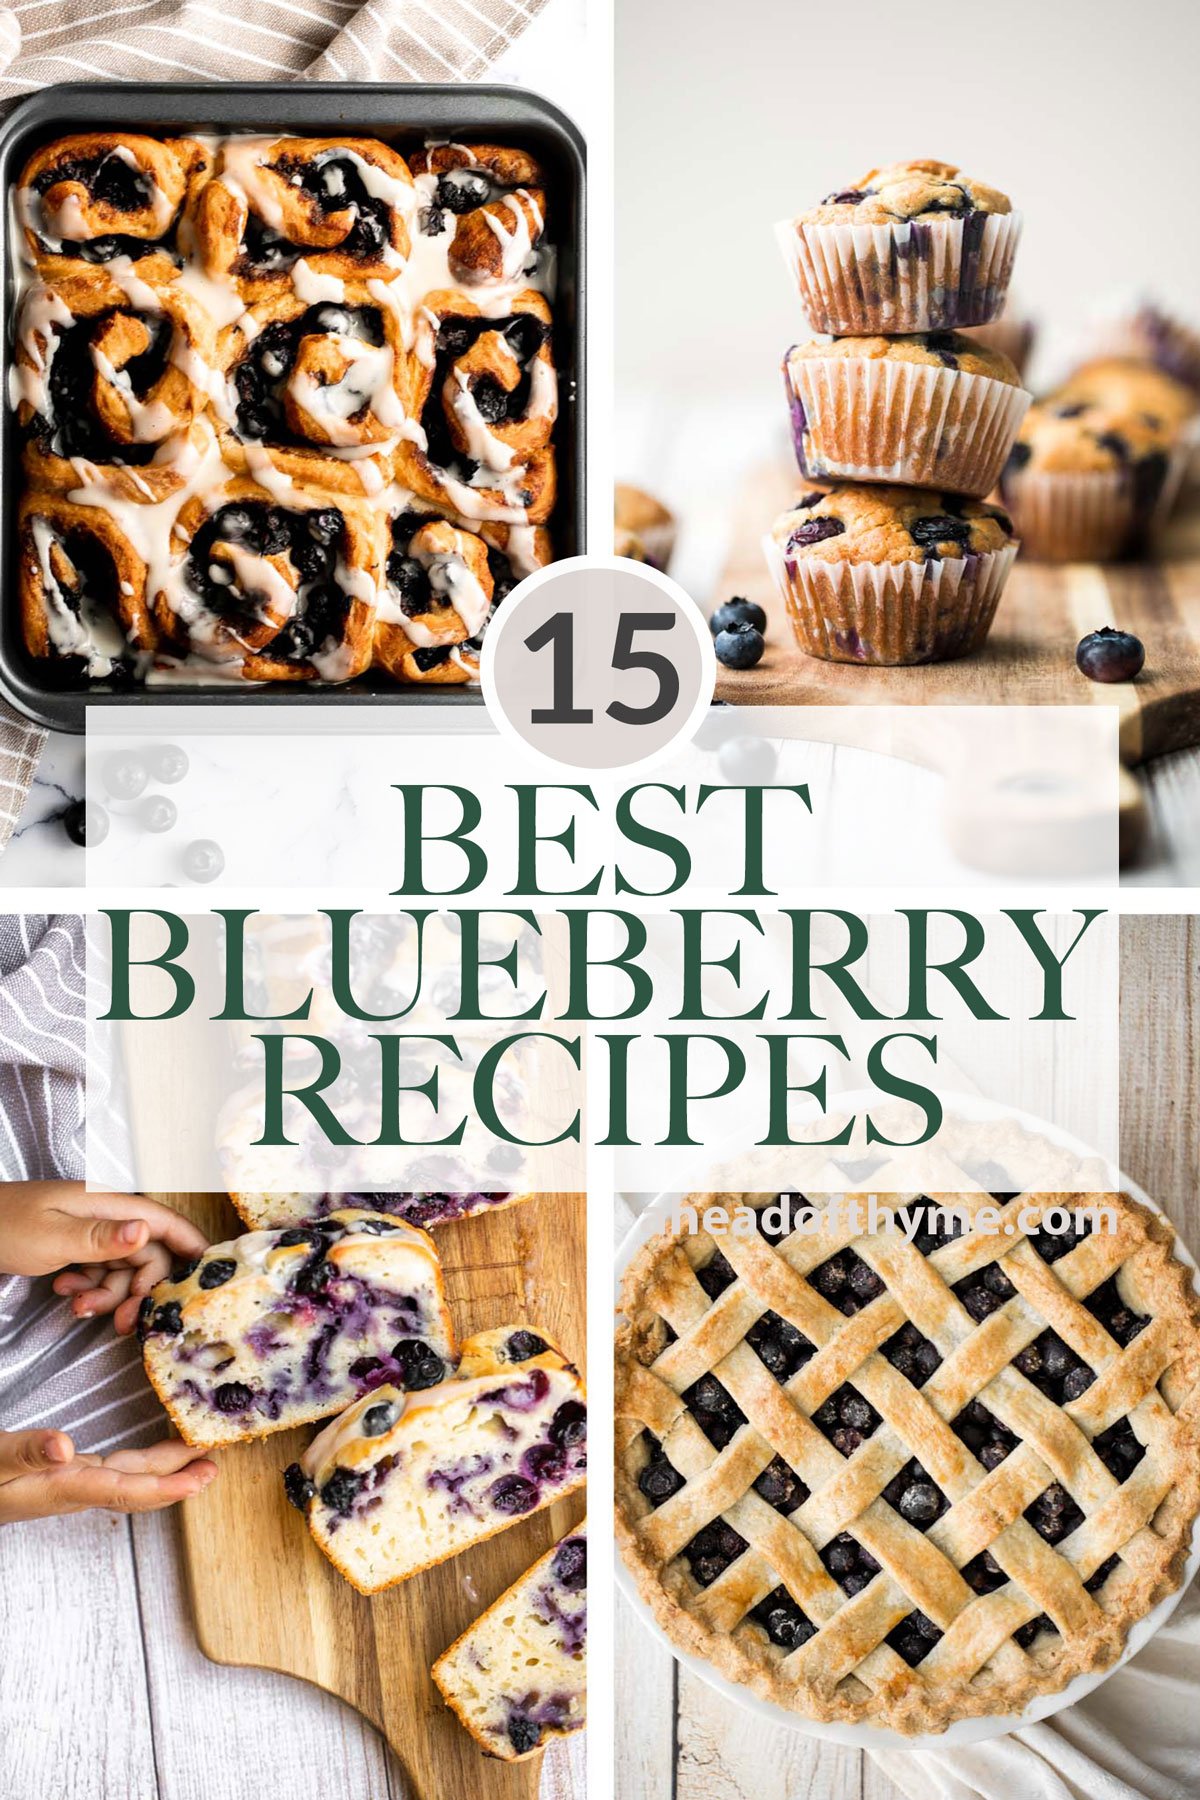
When we are right in the middle of blueberry season, it's time to make all the blueberry recipes. Whether you are picking fresh blueberries at the local farms, grabbing a carton from the farmer's market, or even substituting with a bag of frozen blueberries, I have rounded up our 15 best and most popular blueberry recipes for when you are wondering what to make with blueberries. From desserts like cakes and pies, to breakfast and baked goods, I have got you covered.

Best Blueberry Recipes

Lemon Blueberry Bread
Easy lemon blueberry bread with lemon glaze is soft, moist, and delicious. This quick bread with fresh blueberries and lemon is the perfect summer dessert.
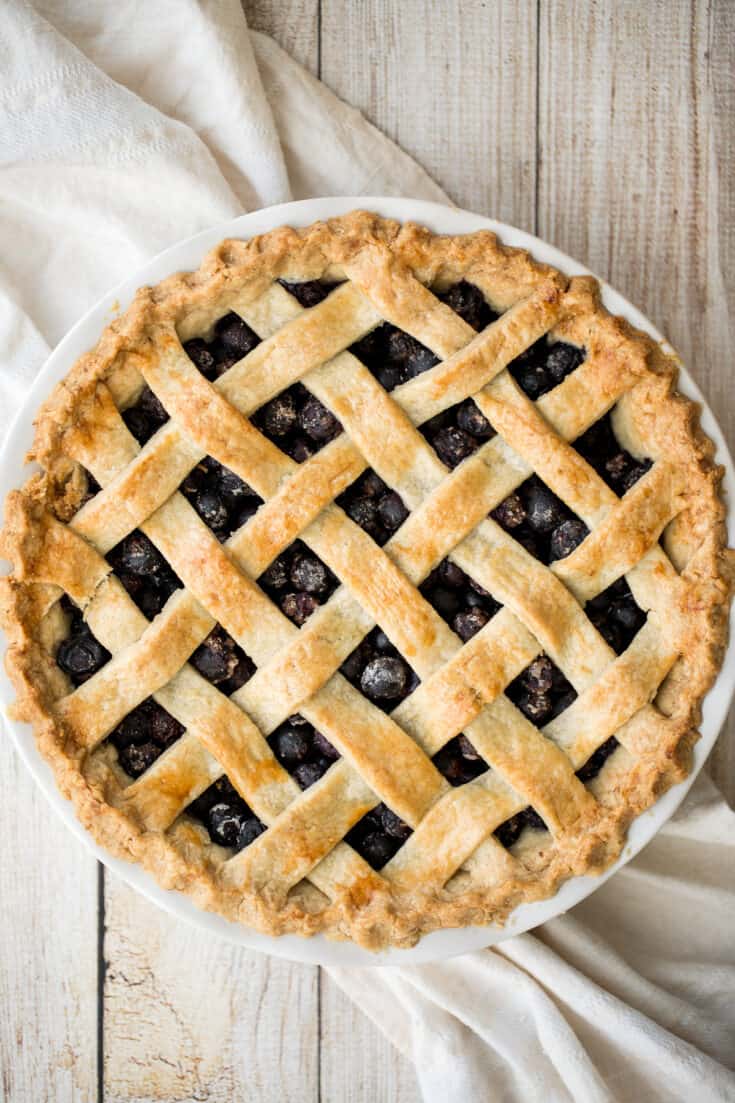
Classic Blueberry Pie with Lattice Top
Summery classic blueberry pie is made with the perfect flaky pie crust, a jammy blueberry filling with a hint of lemon, and sealed with a lattice top.
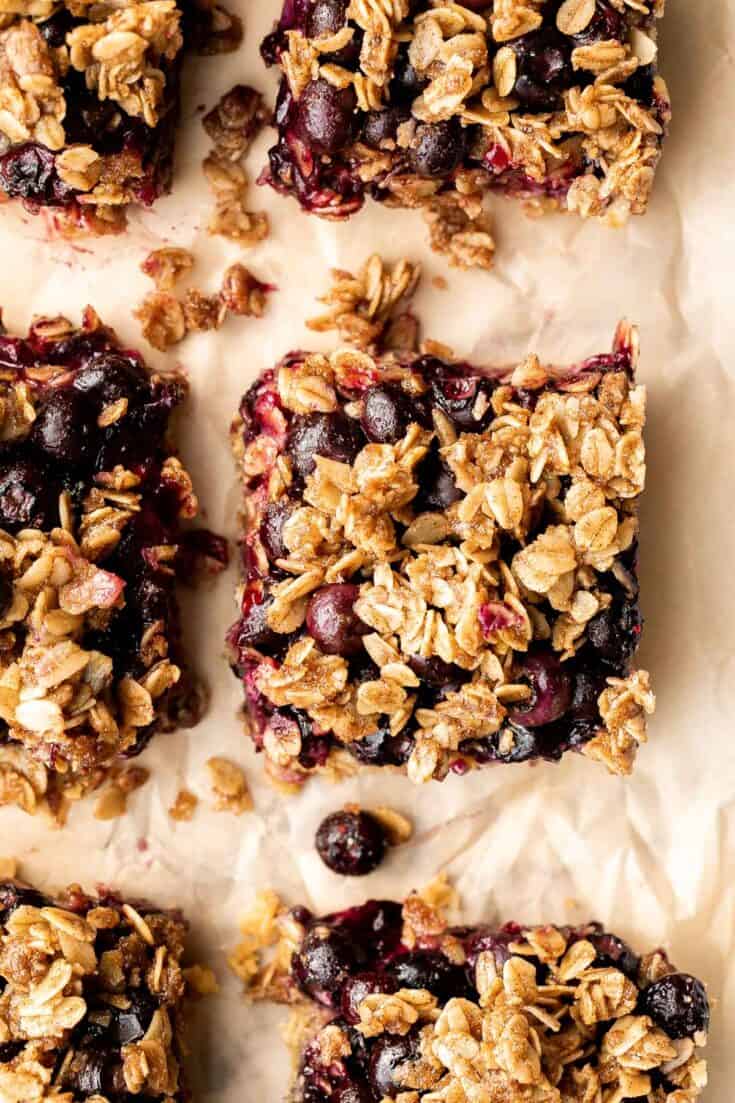
Blueberry Oat Squares
Blueberry oat squares are sweet, buttery, and delicious, with three mouthwatering layers. With just 15 minutes of prep, they are the perfect treat.
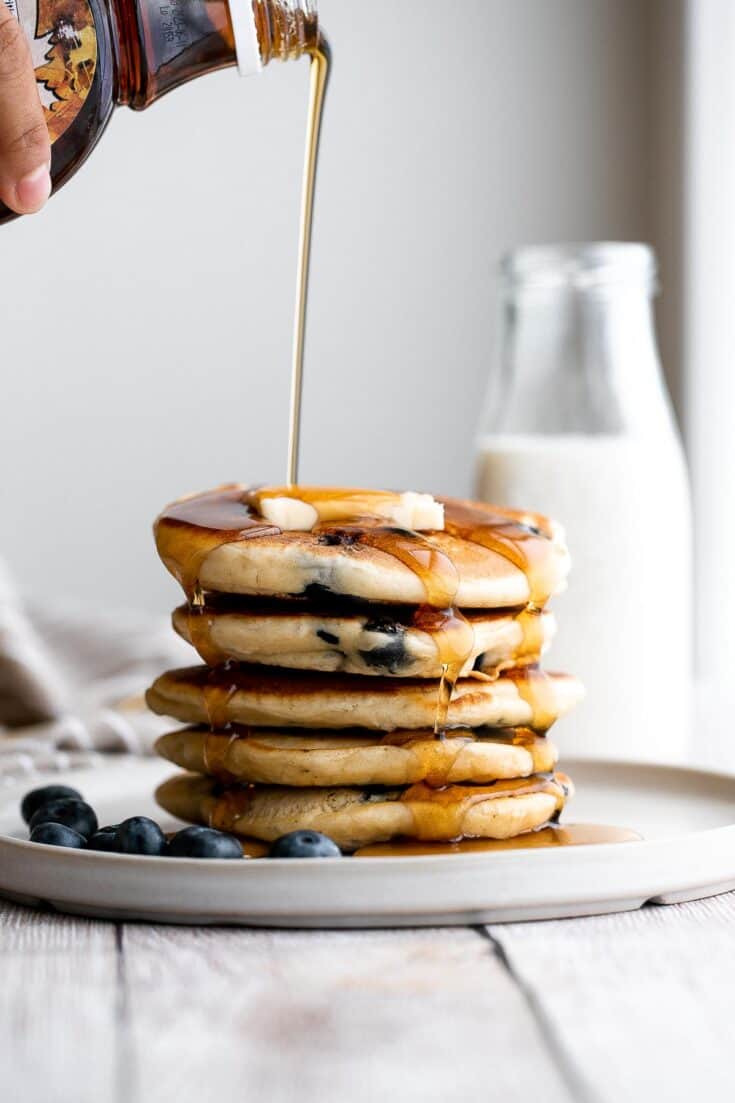
Blueberry Pancakes
There’s nothing better in the morning than thick, soft, fluffy blueberry pancakes, loaded with fresh berries, topped with butter, and soaked in maple syrup.
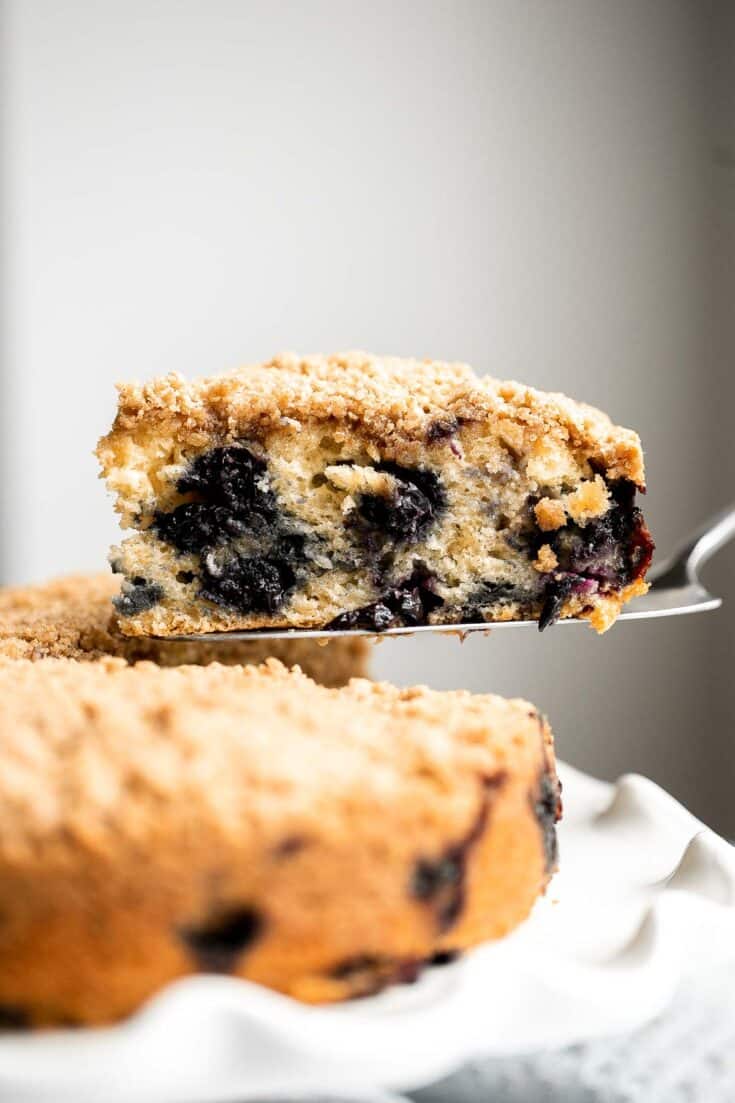
Blueberry Buckle Cake
Blueberry buckle cake is soft and moist, loaded with fresh blueberries, and has a crunchy, sweet and buttery streusel topping. It's the best coffee cake.
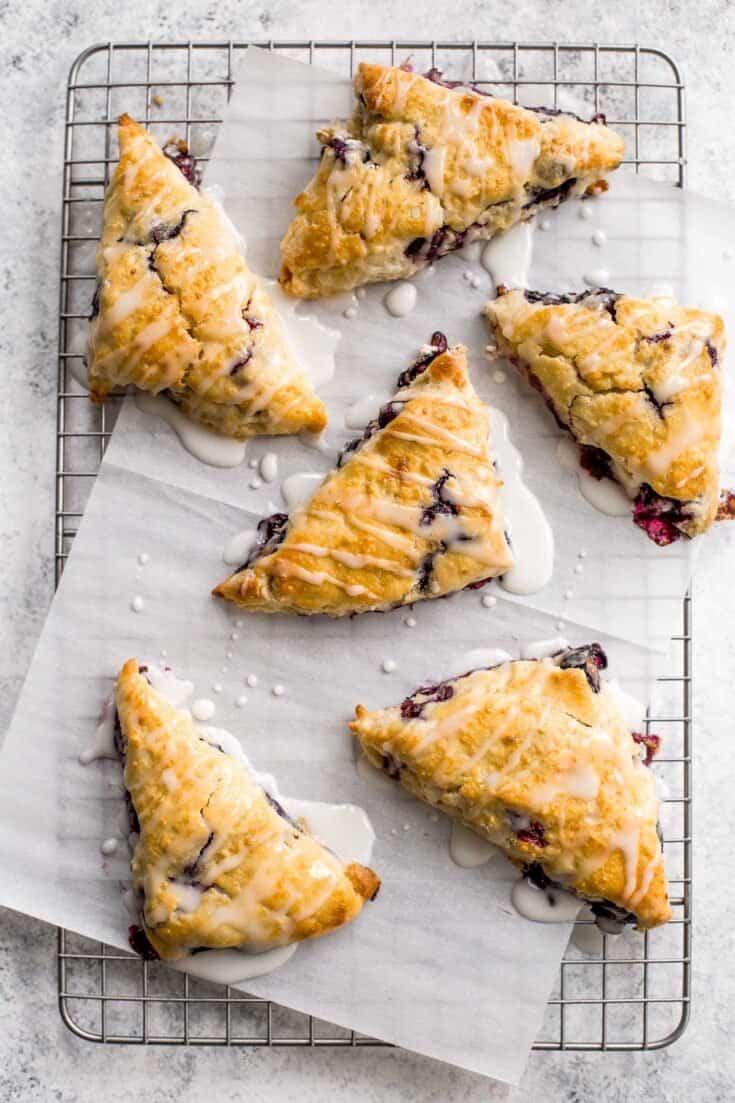
Glazed Lemon Blueberry Scones
Light, tender and flakey, glazed lemon blueberry scones are crunchy and golden on the outside, soft and moist in the middle, with a drizzle of lemon glaze.
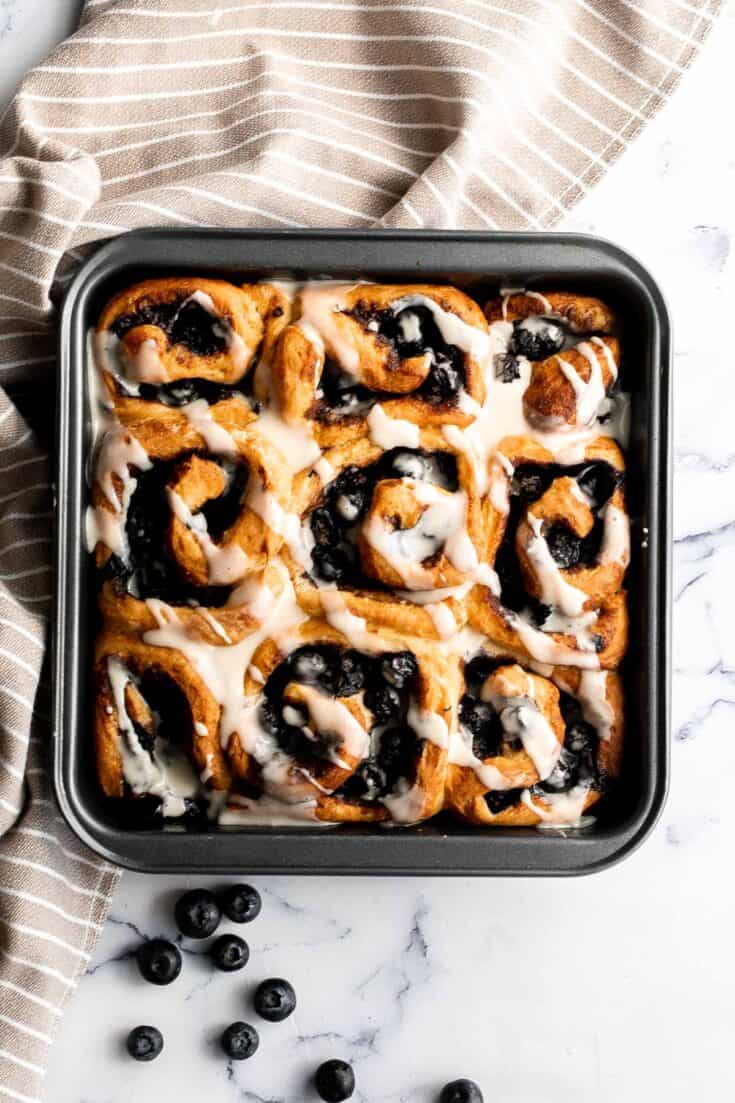
Blueberry Cinnamon Rolls
Delicious blueberry cinnamon rolls are soft and fluffy, filled with cinnamon sugar, loaded with fresh blueberries, and topped with cream cheese icing.
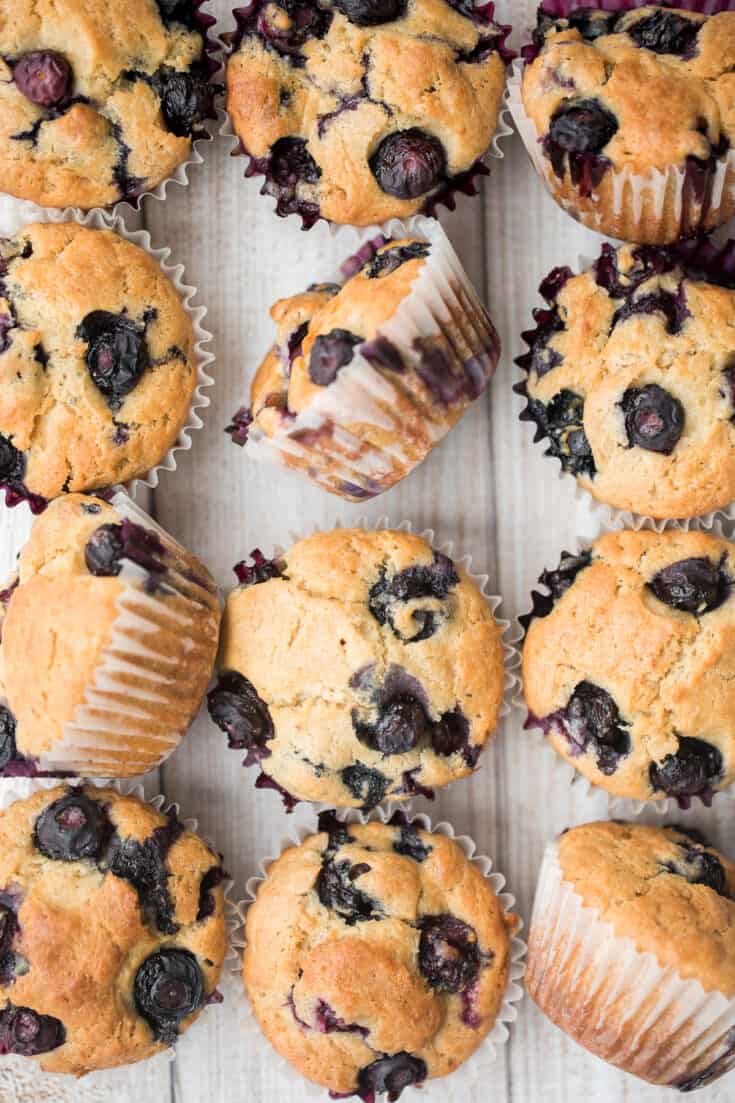
Blueberry Yogurt Muffins
Blueberry yogurt muffins are buttery, moist, soft, and cakey and bursting with blueberries in every single bite. They are super quick and easy to make.
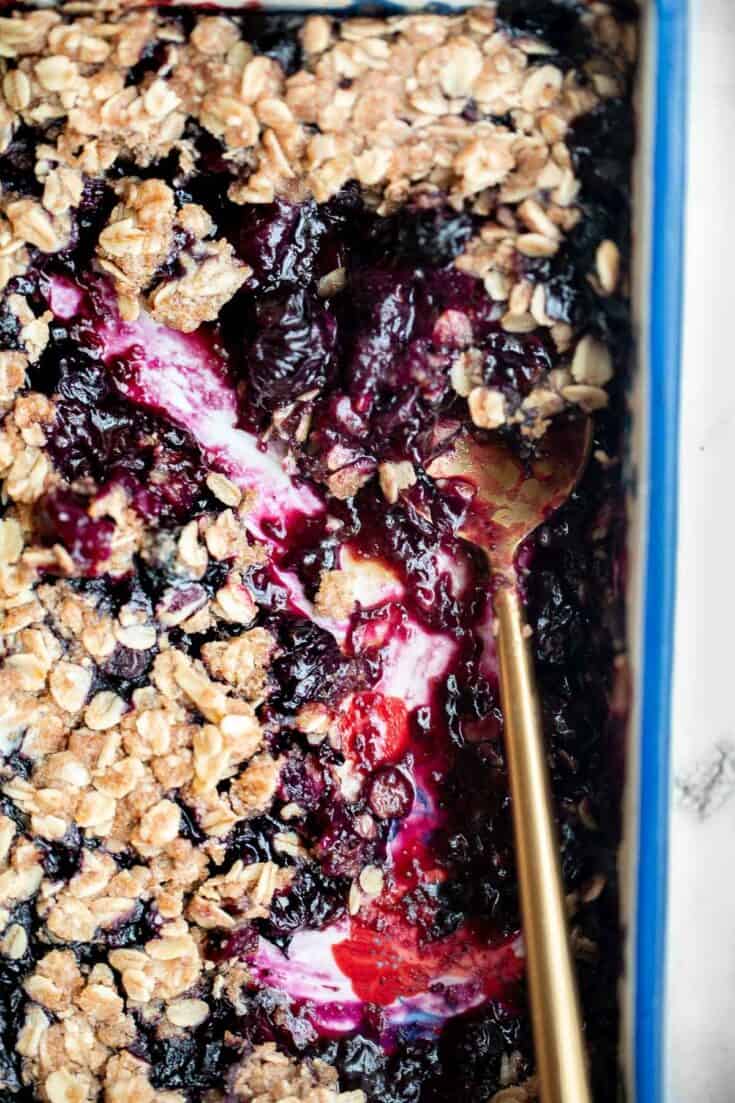
Blueberry Crisp
Blueberry crisp with a sweet blueberry filling and a buttery, crispy oat topping, is a delicious, fruity treat that's ready in just 45 minutes.
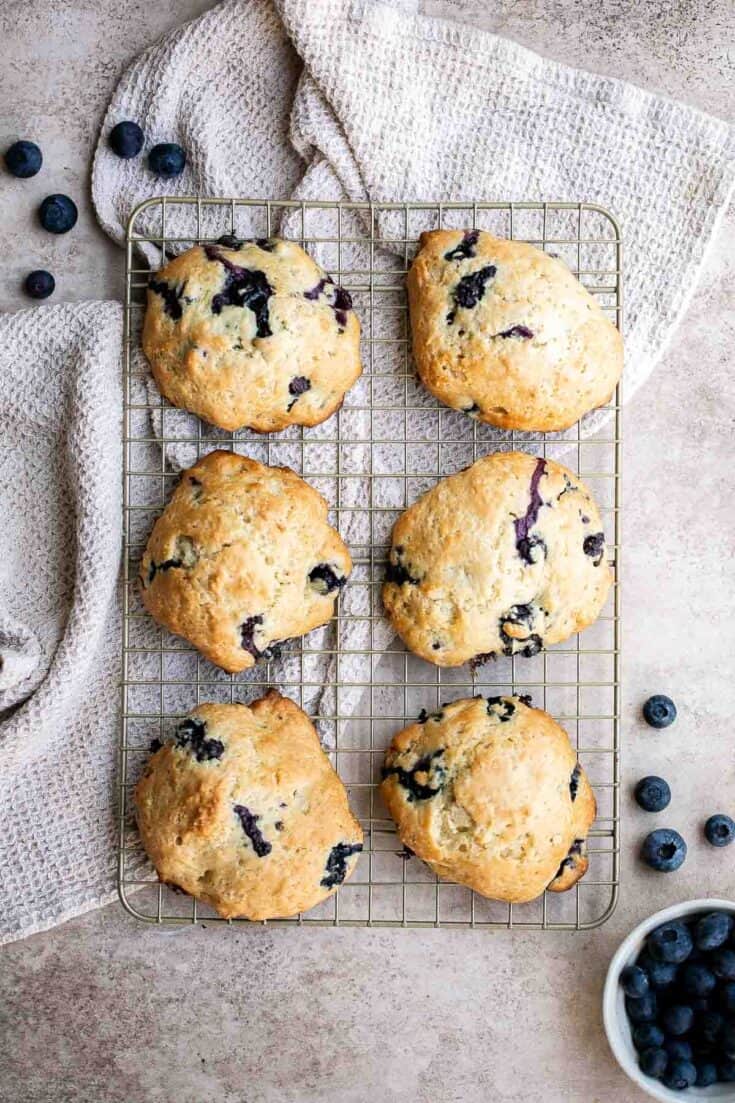
Blueberry Biscuits
These Blueberry Biscuits from scratch are delicious, fluffy, moist, and sweet. It’s a one bowl recipe that is ready in 30 minutes with minimal clean up.
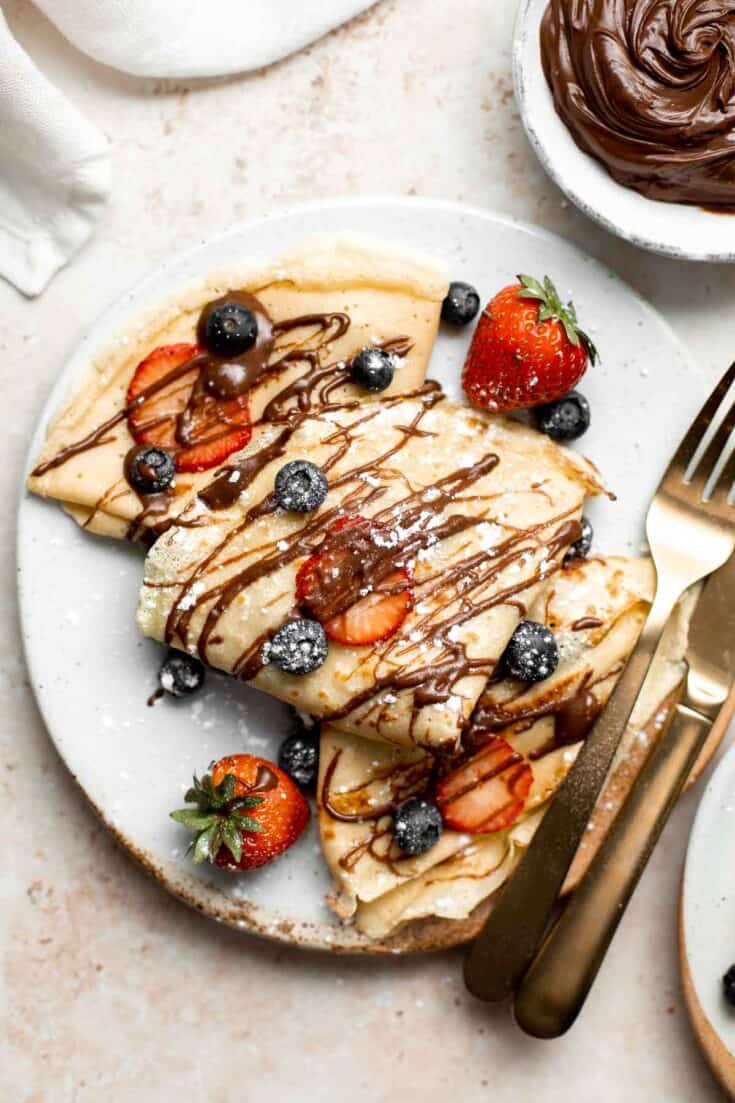
Nutella Crepes
Nutella crepes with berries are sweet and indulgent. These French pancakes are an easy to make blender recipe that will have you craving breakfast all day.
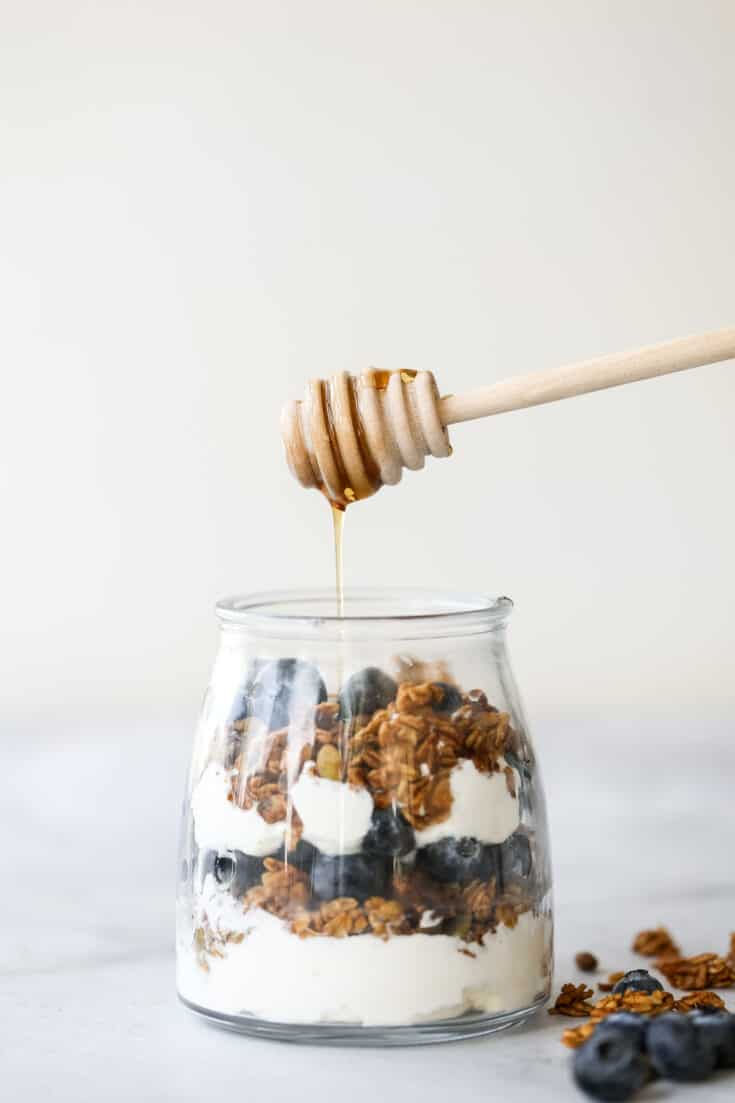
Fruit and Yogurt Parfait with Granola
Layer fresh fruits, creamy Greek yogurt and crunchy granola and have a delicious and healthy fruit and yogurt parfait with granola for breakfast, a snack or even a simple dessert.
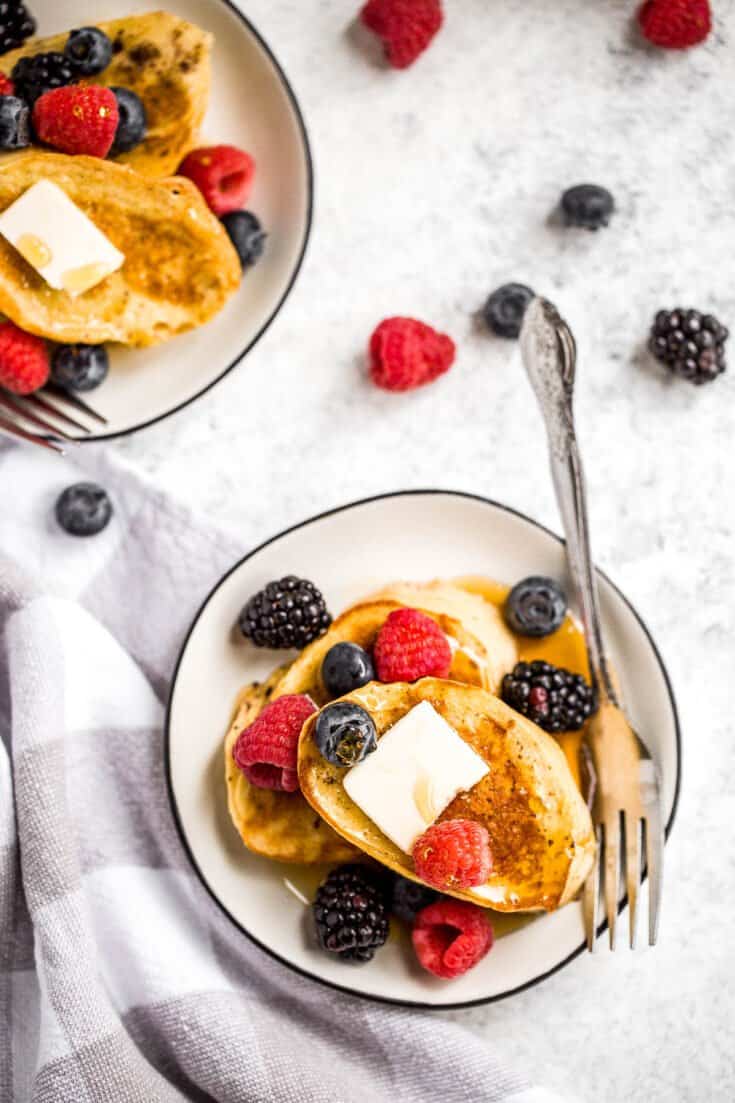
Triple Berry French Toast
Triple berry french toast with warm slices of bread, creamy egg mixture, an overload of berries, and maple syrup drizzled on top is breakfast goals.

Summer Fruit Salad with Honey Lemon Dressing
This Summer Fruit Salad is colorful, delicious, and naturally sweet (no processed sugar!). It's easy to make with fresh fruit tossed in a homemade dressing.
How to Make Ahead and Store
You can make or prepare some of these blueberry recipes ahead of time. You can store the desserts and baked goods at room temperature for 1-2 days. You can also store them in the refrigerator for up to one week or in the freezer for up to 3 months. Confirm storing instructions by checking each recipe.
To reheat any of these recipes and serve them warm, reheat in a 300F preheated oven or air fryer for 5-15 minutes until fully warmed through. I would check on it every 5 minutes until ready. If heating from frozen, let it thaw first and then reheat.
Did You Make Any of These Blueberry Recipes?
Please leave a comment and rating below, and let me know what you thought of this round up of blueberry recipes, or let me know if there are any recipes you would like to see. Be sure to snap a picture and tag me on Instagram @aheadofthyme or share it on the Pinterest pin so that I can follow along.
Vietnamese Grilled Pork
Vietnamese Grilled Pork (also known as Bún Thịt Nướng) is delicious, flavorful, and easy to make. It's a popular Asian dish that's tender and juicy on the inside, and perfectly charred on the outside. Serve this summer grill recipe on it's own, in a Banh Mi Sandwich, over salad, or in a noodle or rice bowl.
The best part? This grilled pork is marinated in an authentic and easy marinade that only takes an hour to infuse the meat with so much flavor. It's the perfect recipe to prep in the morning or the night before and throw on the grill after work so you can enjoy dinner in about 10 minutes.
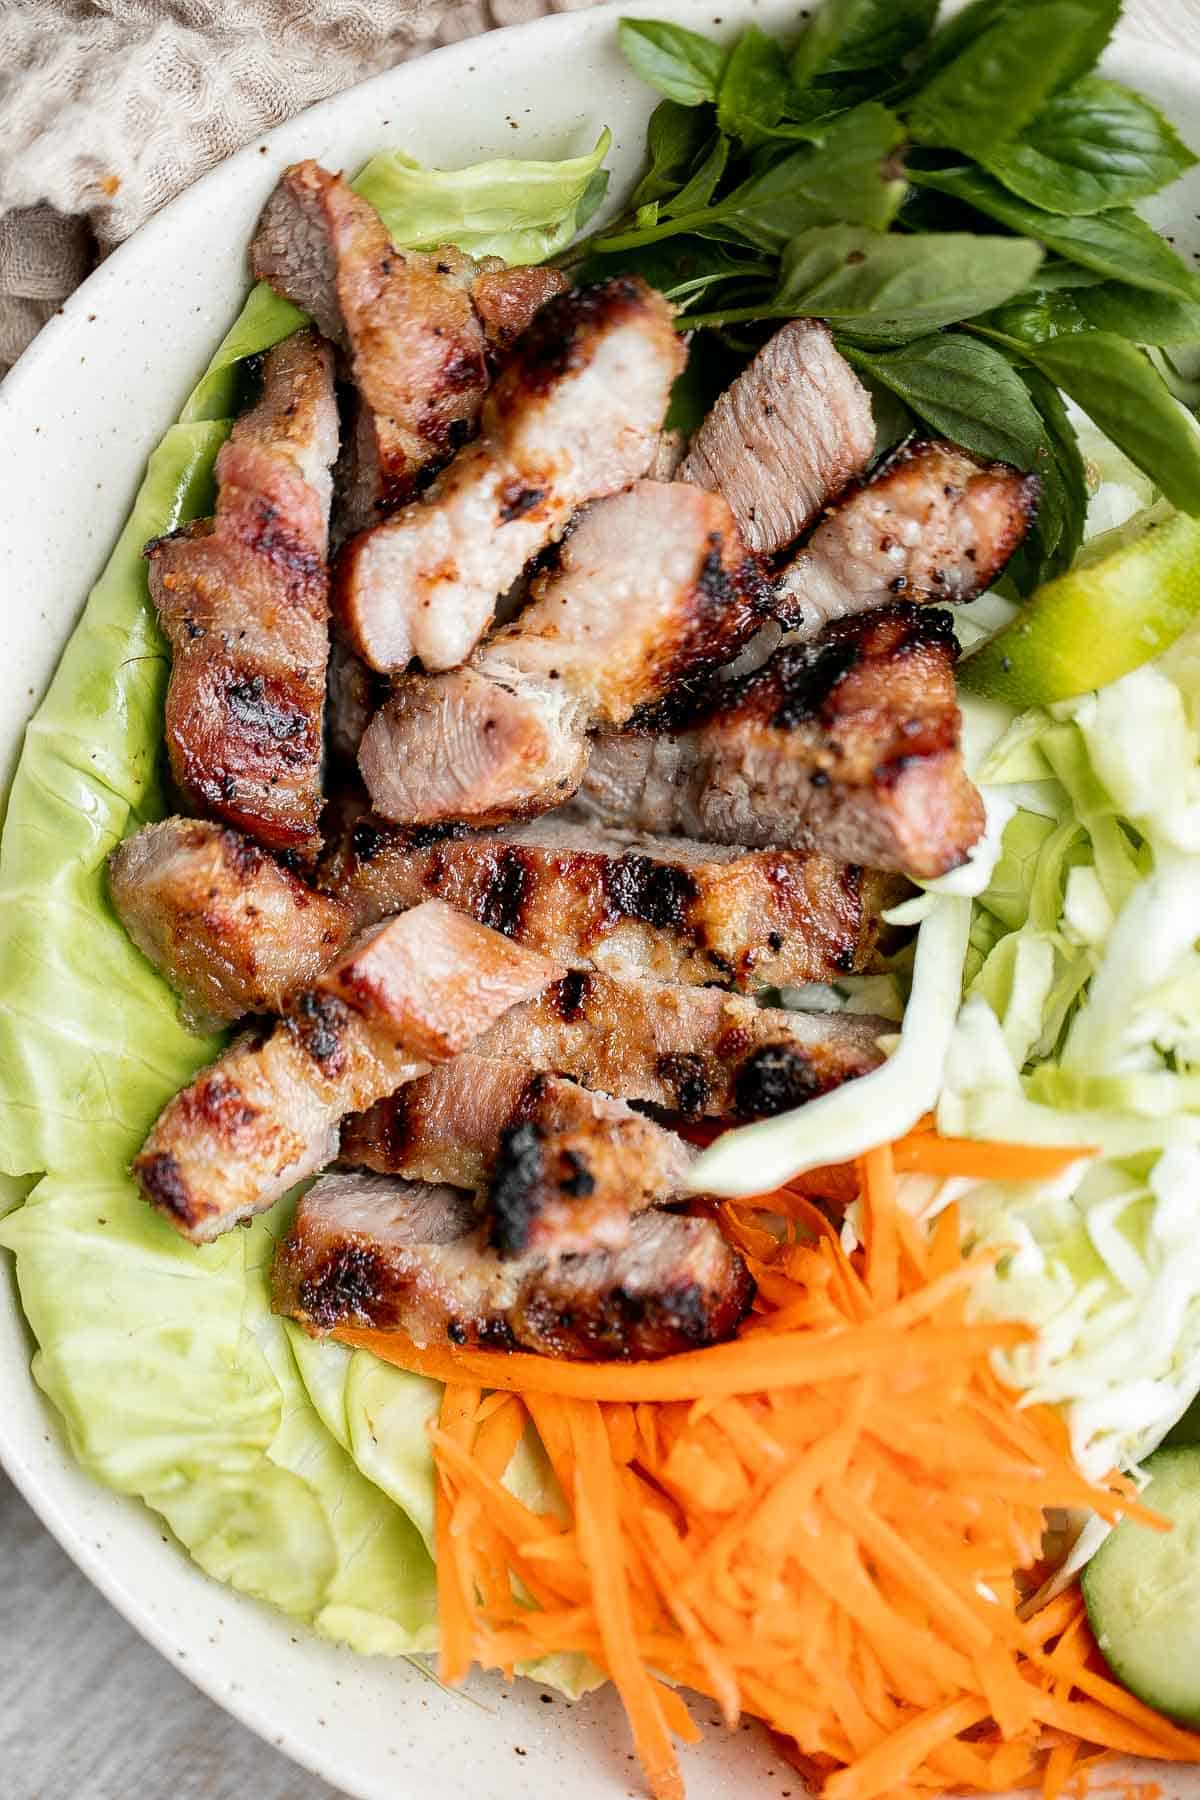
Why You'll Love This Vietnamese Grilled Pork
- It's quick and easy. This Vietnamese grilled pork takes about 10 minutes to prep and coat in marinade, and another 10 or so minutes to grill. It's a low stress meal that you can serve all summer long on busy weeknights.
- Packed with lemongrass and other authentic ingredients. Similar to Lemongrass Chicken, this Vietnamese pork is loaded with lemongrass, which is a staple herb in Vietnamese cuisine. It gives the pork an aromatic and lemony taste and smell. And when paired with ingredients like lime juice and fish sauce you get different layers of flavors in every bite which compliment the natural flavor of pork really well.
- Made with a lean cut of meat. Pork is a staple meat in Vietnamese or Asian cuisines so it's no surprise that this grilled lemongrass pork is widely available in Vietnamese restaurants. Plus, pork shoulder or pork chops are lean cuts of meat that is low in fat and an excellent source of protein. It is also a great source of vitamins and minerals including B vitamins, potassium, and zinc.
- Cook pork on the grill, in the oven, or in the air fryer. Vietnamese grilled pork is traditionally cooked on the grill as the charring and smoke adds even more flavor to this already flavorful dish. But you can enjoy them all year long by baking in the oven or in the air fryer.

Ingredient Notes
To make this easy and delicious Vietnamese Grilled Pork, you will need the following ingredients (full measurements in recipe card below):
- pork shoulder or boneless pork chops - these cuts are recommended because they are lean with a little fat which creates beautiful charring when the fat is caramelized on the grill.
- lemongrass
- shallots
- garlic
- brown sugar
- fish sauce
- lime juice - use freshly squeezed like juice for the best flavor.
- vegetable oil - I used avocado oil, but any vegetable oil can be used. Try coconut oil, olive oil, or grapeseed oil.
You will also need measuring cups and spoons and mixing bowl or ziploc bag for marinating.
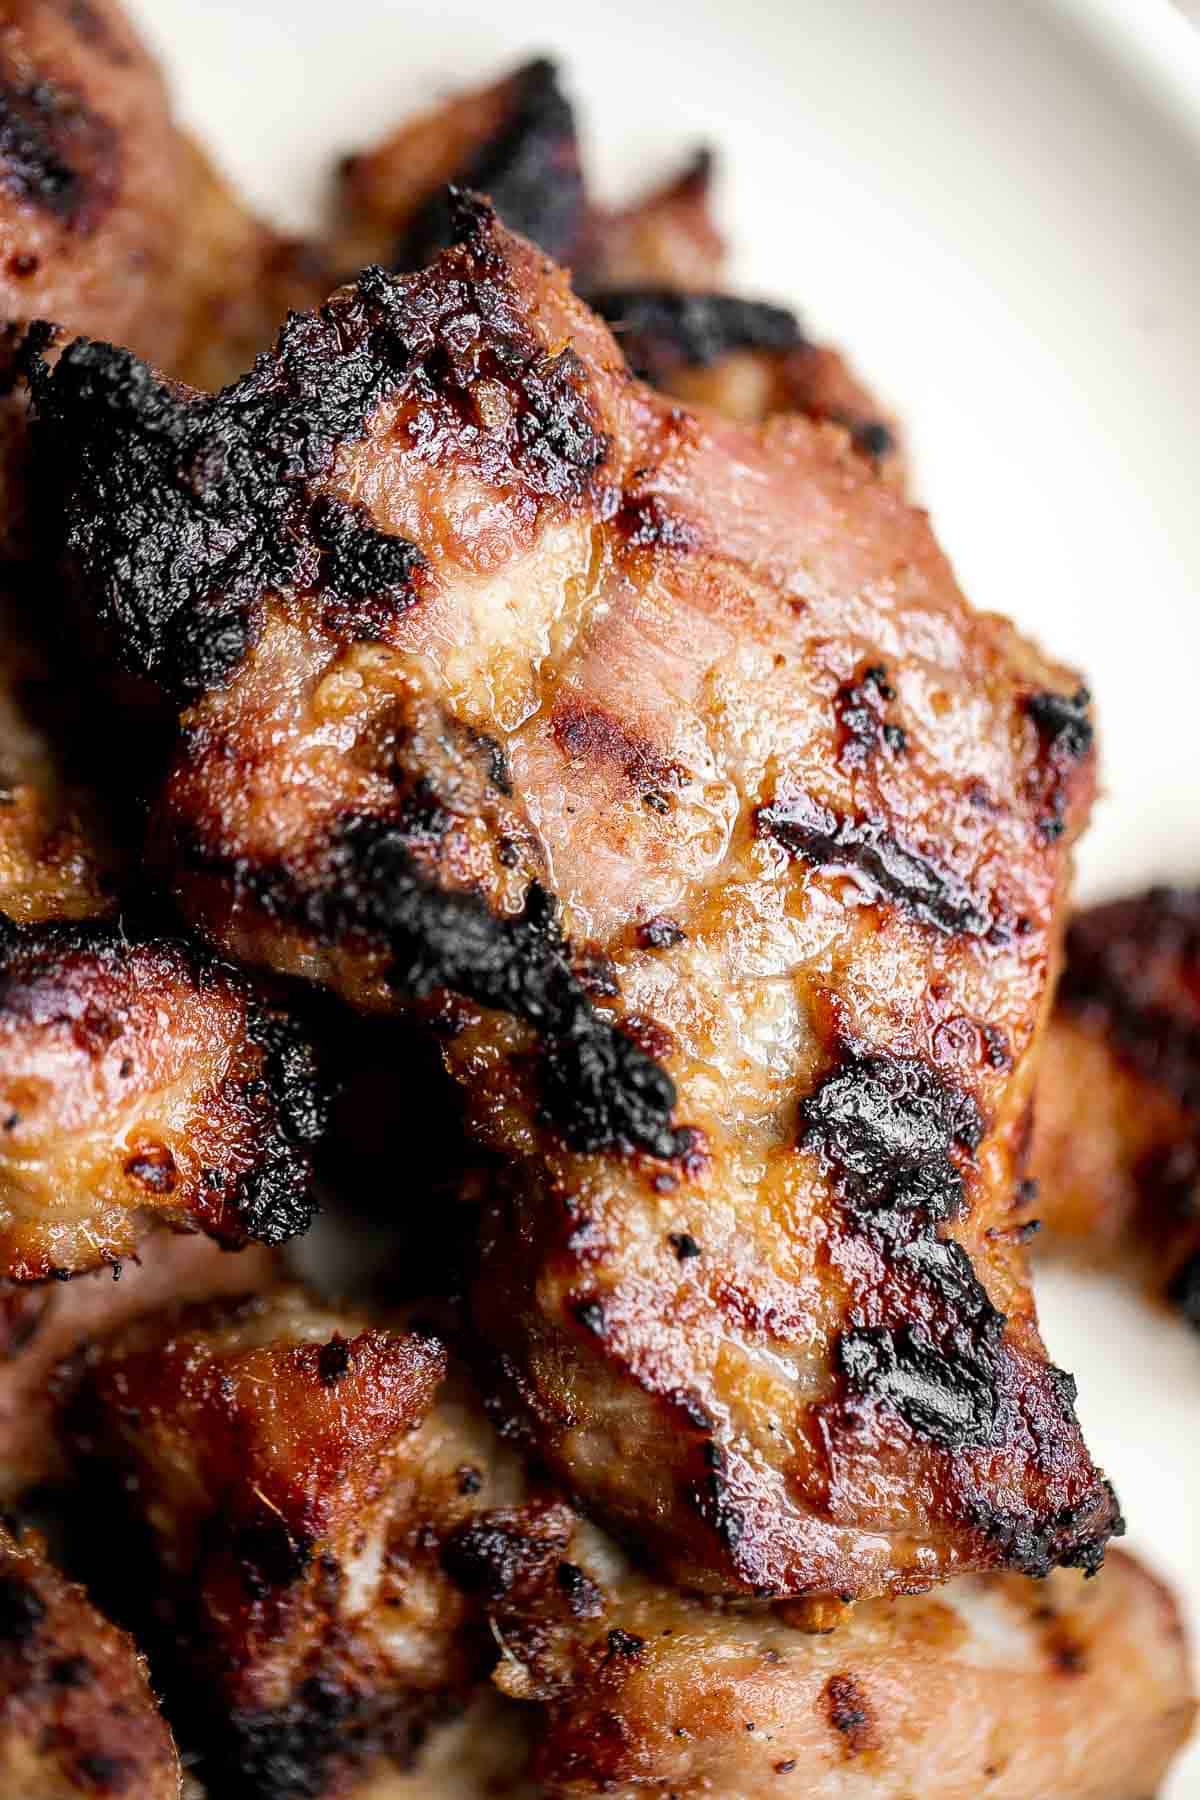
How to Make the Best Vietnamese Grilled Pork
- Prep the pork. Cut the pork shoulder into 2-3 inch pieces, about ¼ inch thick. Set aside in a large mixing bowl or Ziploc bag.
- Marinate the pork. In a blender or food processor, add the remaining ingredients (lemongrass, shallots, garlic, brown sugar, fish sauce, lime juice, and vegetable oil). Mix for 1 minute until blended and smooth. Pour the marinade over the pork and toss well to coat evenly. Cover the bowl with plastic cling wrap (or seal the ziploc bag). Refrigerate for at least 1 hour (or overnight for the best results).
- Grill the pork. Preheat grill over medium high to 450F, about 6-8 minutes. Place the marinated pork spaced evenly apart on the grill and grill for 5-7 minutes on each side until nicely charred. (You can also chop up the meat smaller and thread onto bamboo skewers and grill them). The internal temperature for the pork should reach 150F as read on a meat thermometer.
- Rest and serve. Let the pork rest at room temperature for 5 minutes and serve.


How to Cook Vietnamese Pork in the Oven or Air Fryer
- In the oven: You can also bake the pork in a 425F preheated oven for 16-18 minutes until golden brown, and the internal temperature for the pork reaches 150F as read a meat thermometer. Optionally, turn the broiler on HI and broil for another 2-3 minutes until nicely charred on the edges. Keep a close eye on it though as things can burn quickly in the broiler
- In the air fryer: Cook at 350F for 15 minutes until internal temperature of the pork reaches 150F.
- Rest: Let the pork rest at room temperature for 5 minutes, then serve.
How to Serve
Vietnamese Grilled Pork is delicious served on their own dipped in nuoc cham sauce or sweet chili sauce. You can also make a complete meal by pairing them with some side dishes such as:
- Steamed Rice or Pineapple Fried Rice.
- Vietnamese Chicken Salad
- Shrimp Egg Rolls or Crispy Vegetarian Spring Rolls
- Spring Vegetable Stir Fry or Air Fryer Vegetables.
- Pho or Ramen
- Vietnamese Summer Rolls with Chicken
- Peanut Noodles
You can also make Vietnamese Pork Salad Bowls with lettuce, carrots, and cucumbers and a drizzle of nuoc cham sauce. Add a side of rice or noodles to make it more filling.
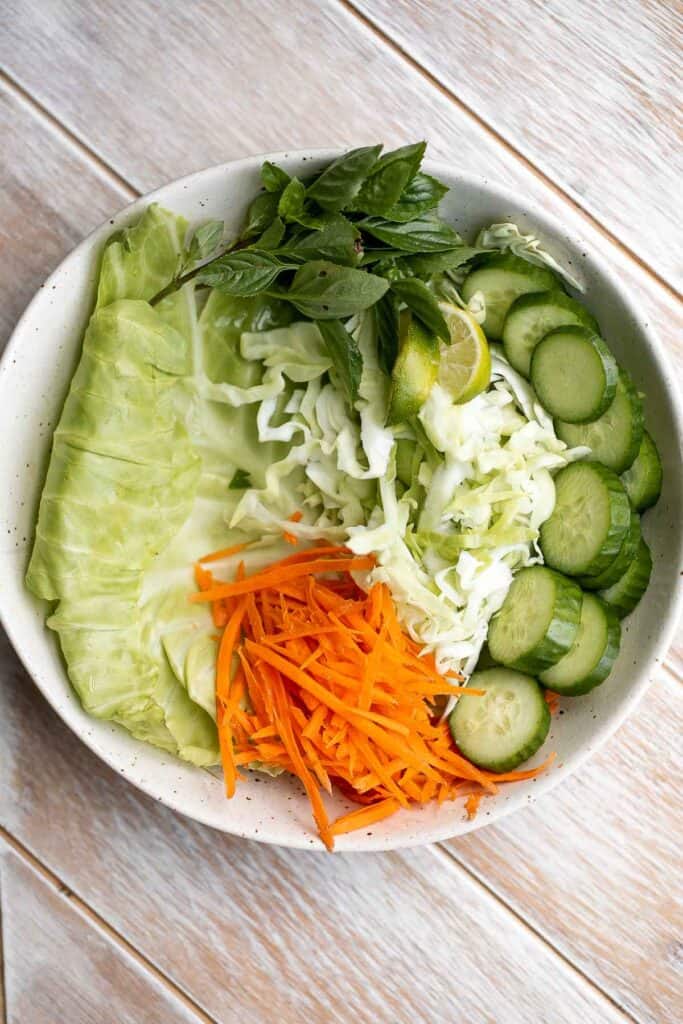
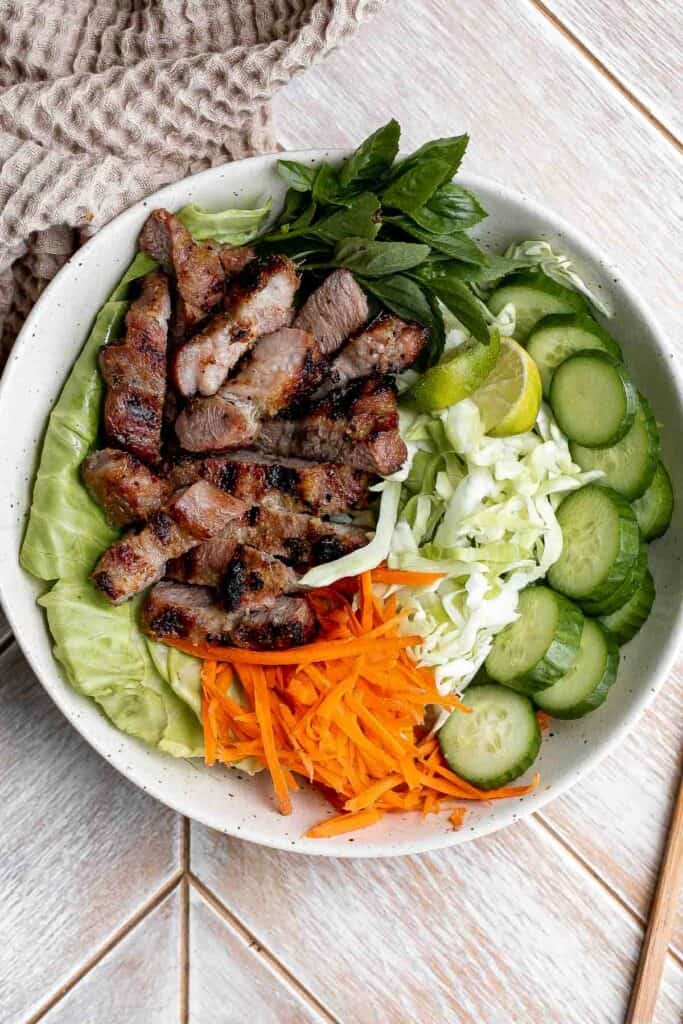
Recipe Tips and Tricks
- How to store: Keep leftover grilled pork in an airtight container in the refrigerator for 3-4 days.
- How to freeze uncooked pork: You can freeze pork either before or after you cook it. If freezing raw, I highly recommend marinating the pork, then wrapping tightly with plastic cling wrap and placing in a freezer bag, trying to get as much of the air out as possible before sealing. Frozen raw pork is best cooked and eaten within 6 months but will remain safe for longer.
- How to freeze cooked pork: Store cooked Vietnamese pork in a freezer bag or airtight container for up to 2-3 months.
- How to thaw: Thaw both raw or cooked frozen pork in the fridge overnight before cooking or reheating.
- How to reheat: When reheating pork, you want to be mindful of not making it too dry. Coat your pork in extra marinate or even a splash of water. Then, wrap loosely in aluminum foil, leaving room for air to circulate, and pinch the sides closed. Bake at 400F in the oven for 5-15 minutes (depending on how much you are reheating) until warmed through. You can also reheat in the air fryer (without foil) at 350F for 5-10 minutes until warm.
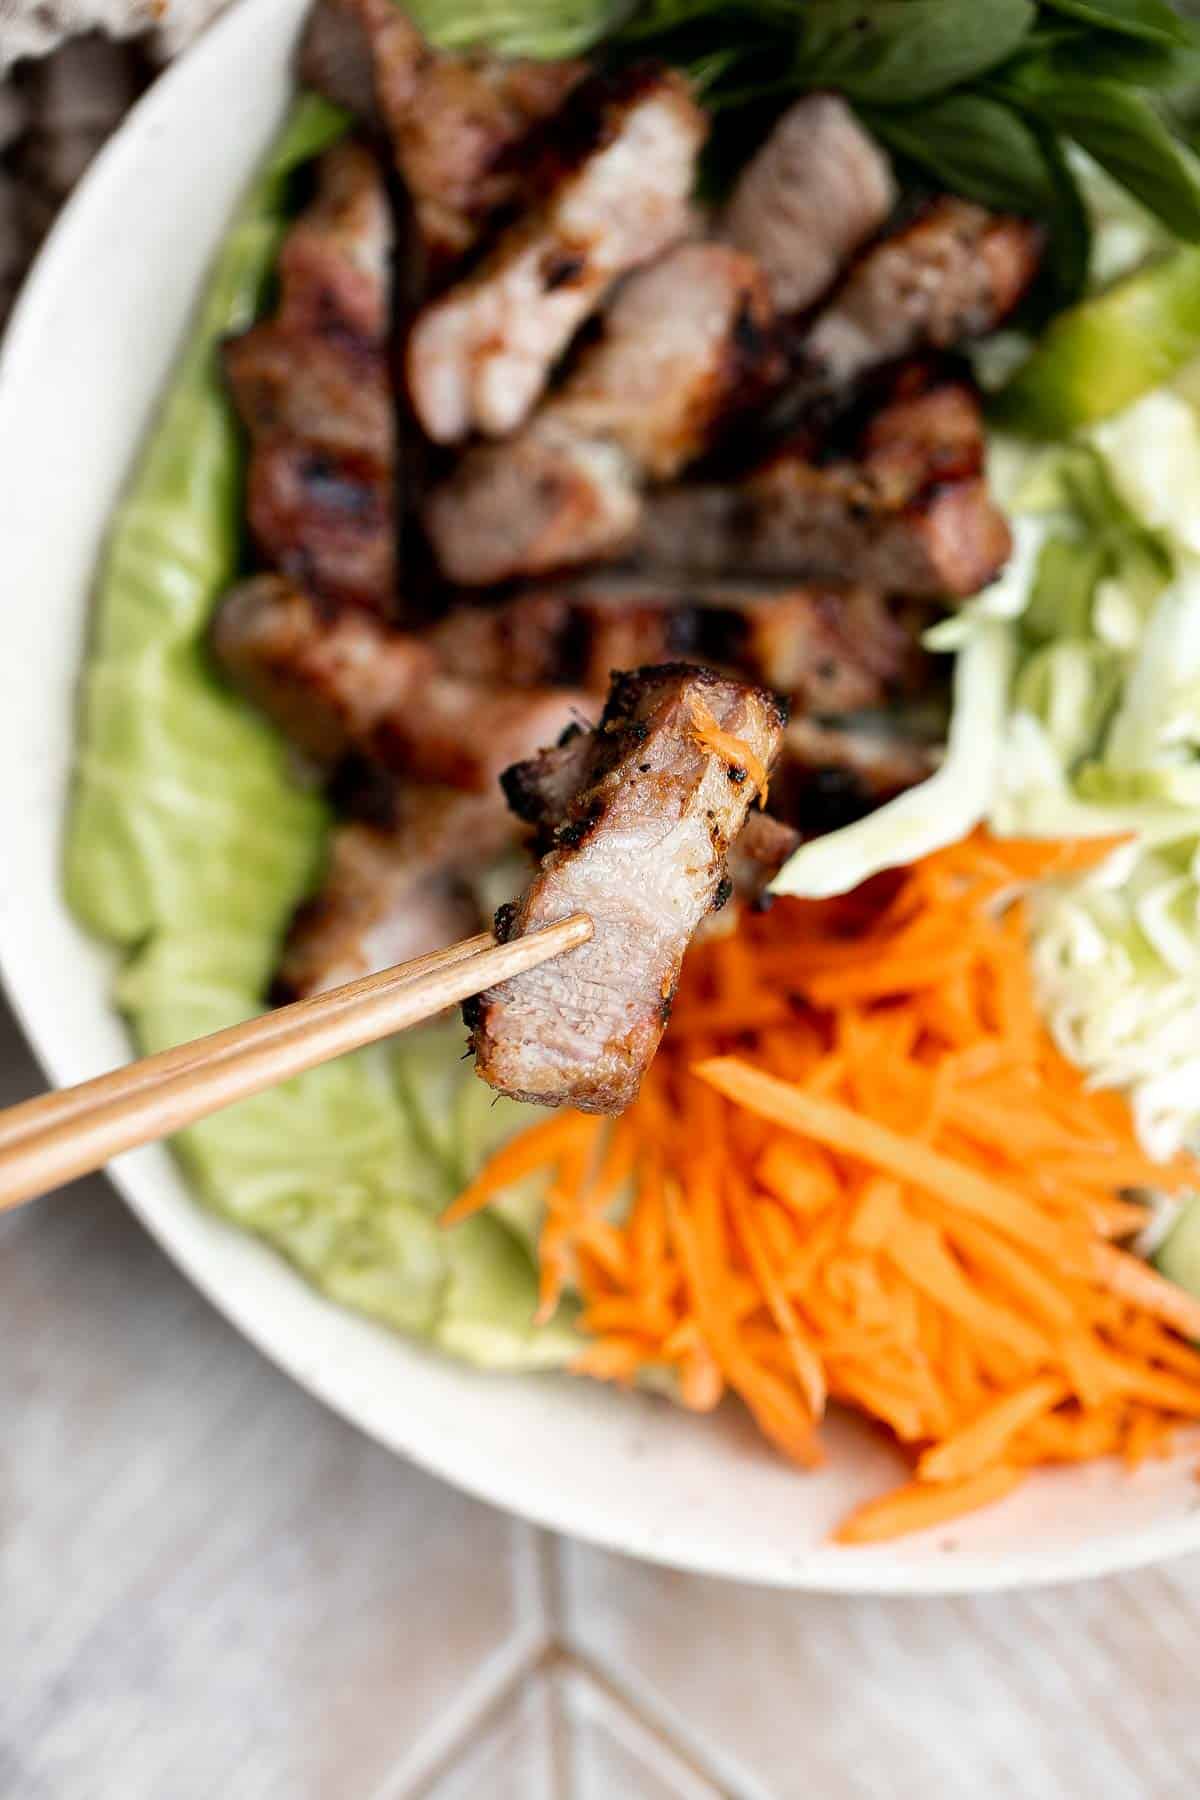
More Pork Recipes
- Honey Glazed Roast Pork
- Roasted Pork Tenderloin
- Char Siu (Chinese BBQ Pork)
- Sweet and Sour Pork
- Glazed Honey Balsamic Pork Chops
- Pork Dumplings
Tried this recipe?
I'd love to hear what you think! Leave a comment and rating below to share your feedback. Your reviews help others discover this recipe and help me keep creating more free recipes for you. Snap a photo and tag me on social media @aheadofthyme too.

- « Previous Page
- 1
- …
- 17
- 18
- 19
- 20
- 21
- …
- 41
- Next Page »