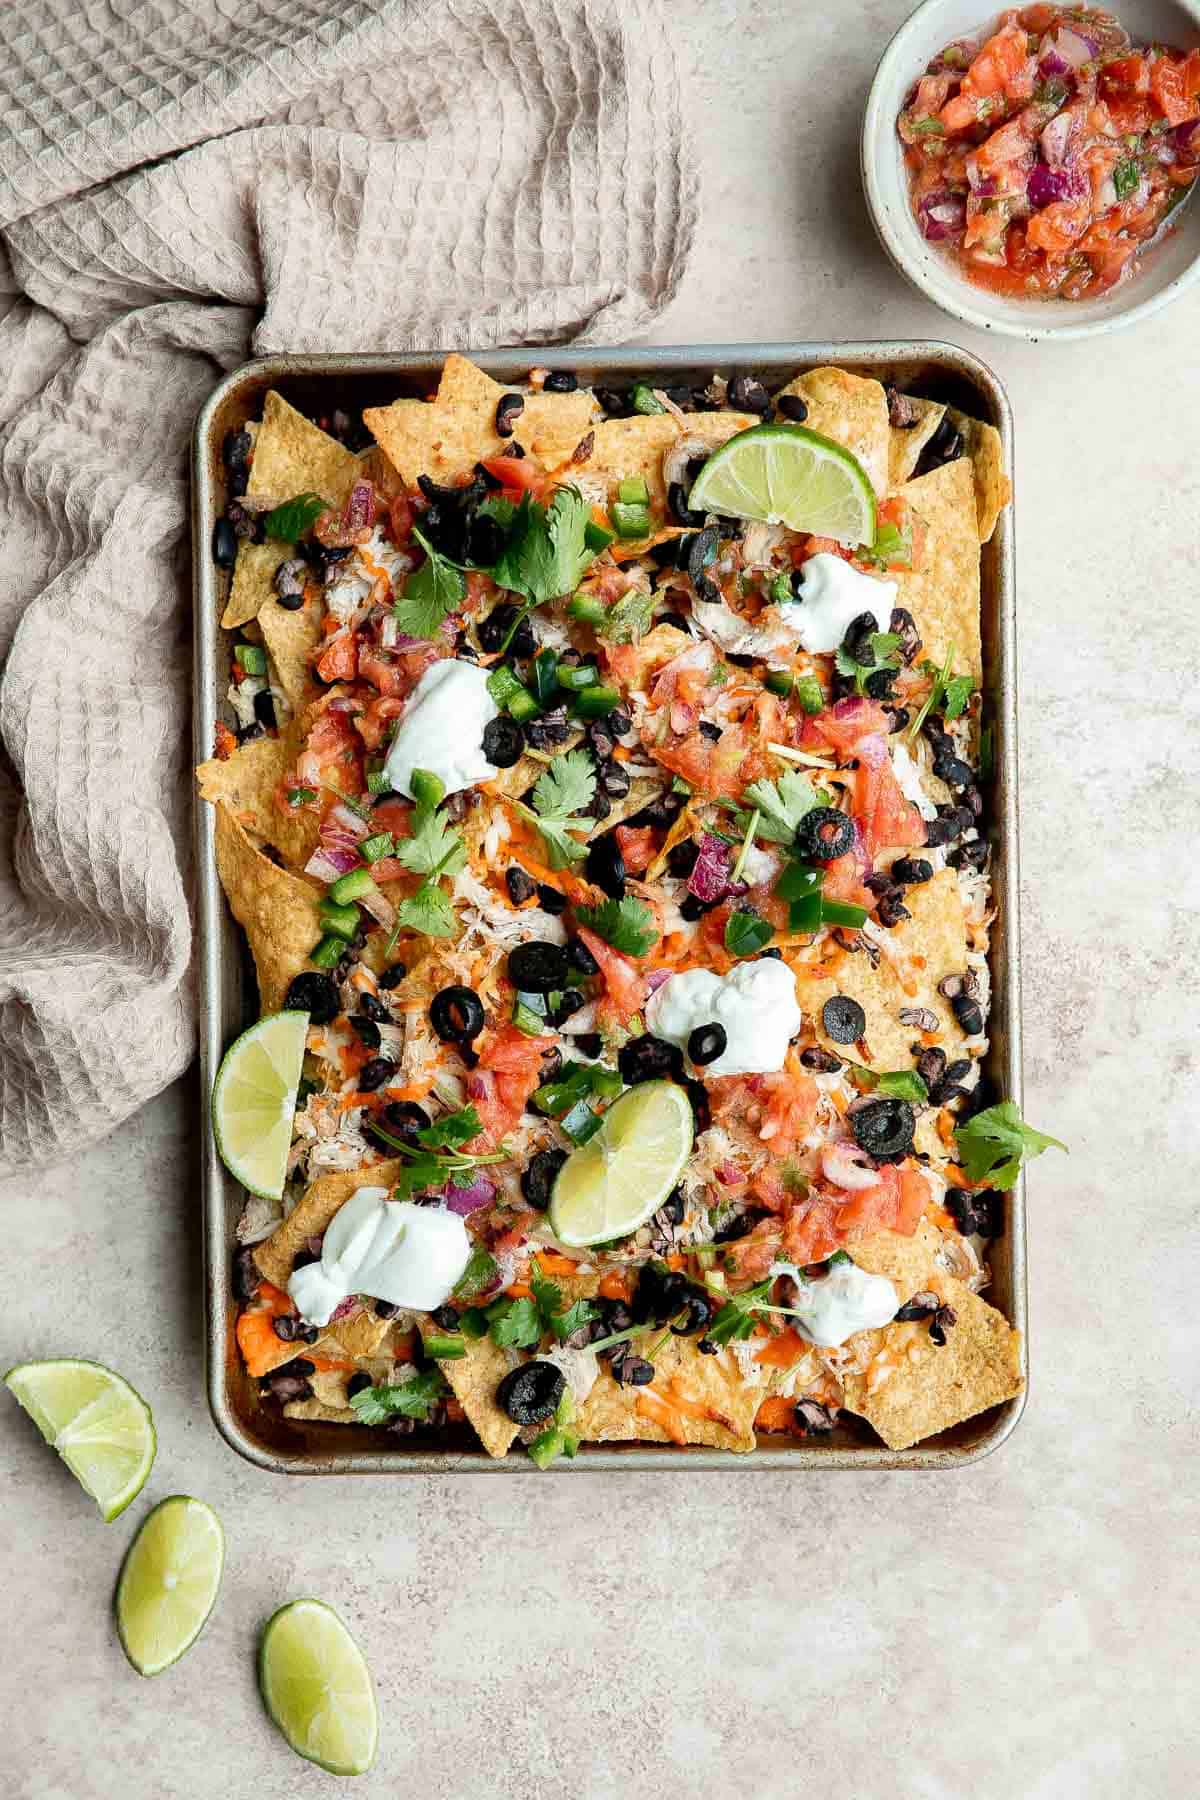
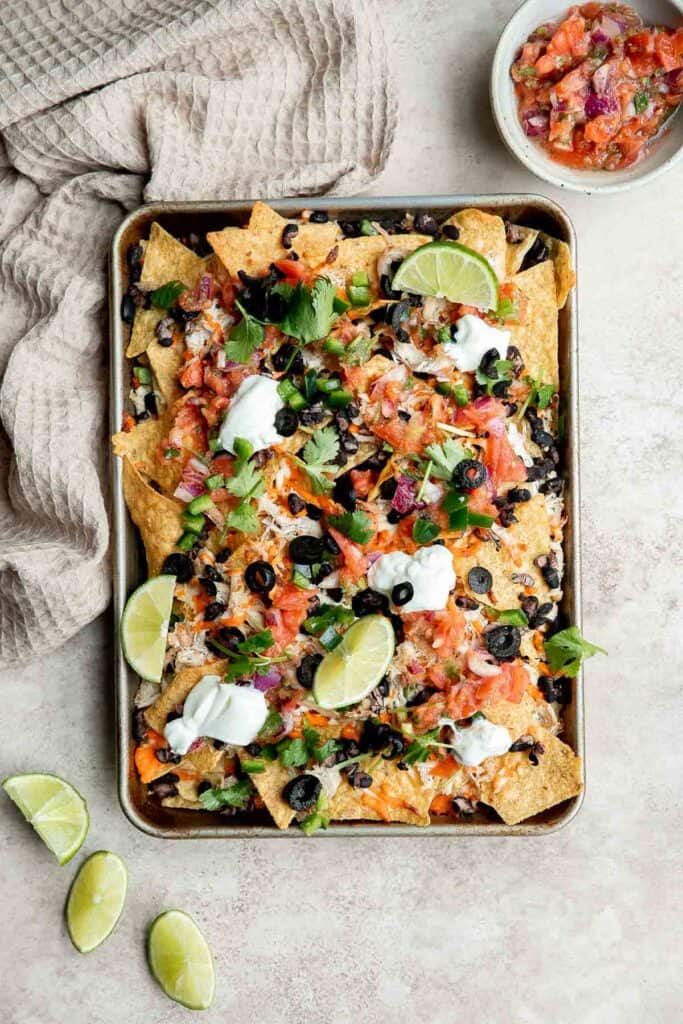
Chicken nachos are an easy meal to make when you're craving something filling, crunchy, cheesy, and satisfying. Seriously. These chicken nachos tick all the boxes. Crispy tortilla chips are covered with cheddar cheese, shredded chicken, black beans, and jalapeños. After 15 minutes in the oven, they're ready to top with your favorite toppings like salsa, sour cream, olives, and fresh cilantro. Rotisserie chicken nachos are perfect for parties, a quick meal, a game day appetizer, or a late-night snack.
Why You'll Love Chicken Nachos
- It's ready in less than 30 minutes. These shredded chicken nachos only take 15 minutes to bake. And if you have everything prepped, you can assemble chicken nachos in as little as 5 minutes.
- Crisp and bubbly cheddar cheese. The melted cheddar cheese is by far the best part of these rotisserie chicken nachos. It cooks to melty, crispy perfection in the oven.
- Nachos are the ultimate sharable food. I love nachos because they're a one-pan meal that's easy to share. And you can enjoy them right off the pan if you don't want to dirty any plates. Try Beef Nachos or Chili Nachos.
- Customize chicken nachos your way. Nachos are one of the most versatile meals out there. Don't like an ingredient on the list? Leave it out. Craving something specific - like pepperoni, garlic, or Refried Beans? Add it in. Make these chicken nachos perfect for you by making substitutions.

Ingredients and Substitutions
To make delicious Chicken Nachos, you will need the following ingredients (full quantities in recipe card below):
- shredded chicken - this recipe is a great way to use up any leftover roast chicken or a store-bought rotisserie chicken. You can also make shredded chicken by cooking chicken breast.
- olive oil
- seasoning - season the chicken with garlic powder, cumin powder, paprika, dried oregano, salt, and ground black pepper.
- tortilla chips
- cheddar cheese
- black beans
- toppings - salsa (or substitute with diced tomatoes), black olives, jalapeño, sour cream, and fresh cilantro.
You will also need measuring cups and spoons and a quarter sheet baking pan.

How to Make the Best Chicken Nachos
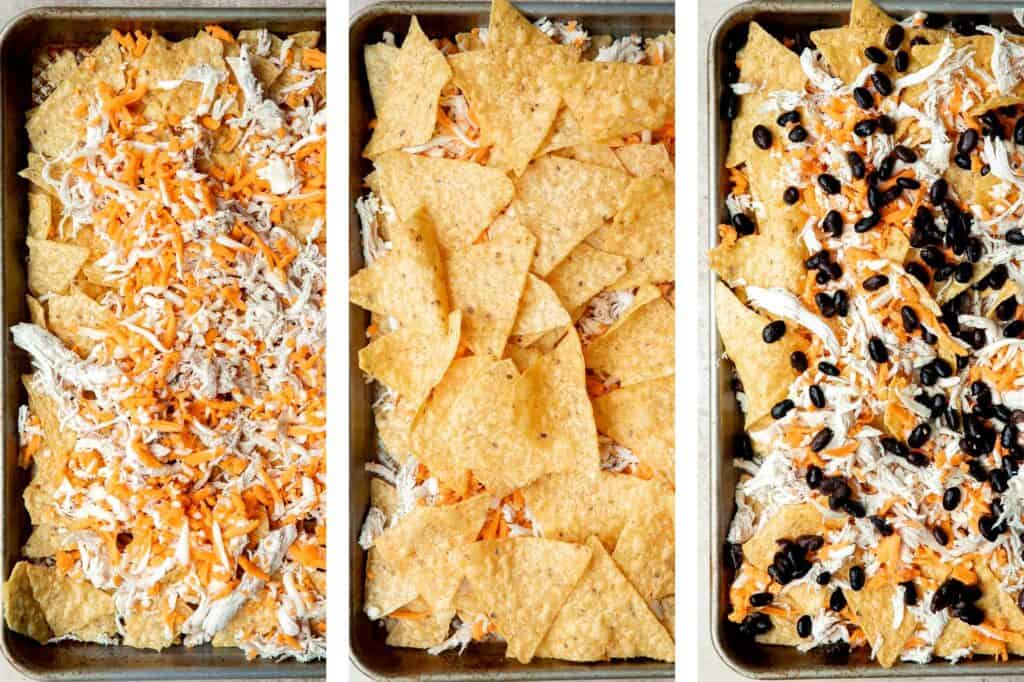
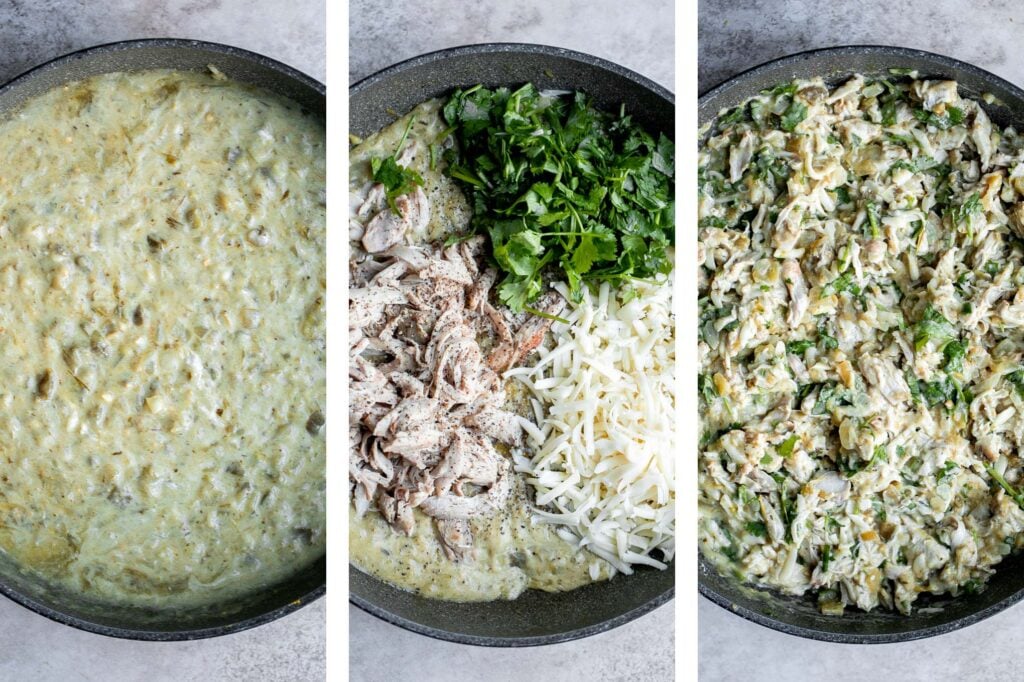
- Prepare chicken. In a large mixing bowl, combine shredded chicken, oil, and all seasoning including garlic powder, cumin, paprika, oregano, salt, and pepper. Mix well to coat the chicken evenly.
- Layer the nachos. Arrange half of the tortilla chips in an even layer on a quarter sheet baking pan (9x13-inch pan) and top with half of the seasoned chicken and cheddar cheese. Repeat the step with another layer of the remaining chips, chicken and cheese. Sprinkle evenly with black beans.
- Bake. Bake in a preheated 400F oven for 12-15 minutes until the melted cheese turns golden brown and bubbly.
- Serve. Top with salsa, black olives, jalapeño, sour cream, and cilantro. Serve immediately.
Recipe Tips and Tricks
- For crispier chips: For crispier chips, pre-bake your tortilla chips for 2-5 minutes without any toppings added. This will ensure the chips are crispy and don't get soggy.
- Easy clean up tip: Bake nachos over aluminum foil for easy clean up.
- How to store: Store chicken nachos in an airtight container in the fridge for up to 4-5 days.
- How to reheat: Reheat leftover chicken nachos in the oven for 12-15 minutes at 375F. If you saved the foil, you can reheat them on the same sheet.

More Appetizers
- Vegetarian Quesadillas
- Jalapeño Poppers
- Pizza Dip
- Bacon Wrapped Chicken Bites
- Pepperoni Pizza Rolls
- Air Fryer Short Ribs
Tried this recipe?
I'd love to hear what you think! Leave a comment and rating below to share your feedback. Your reviews help others discover this recipe and help me keep creating more free recipes for you. Snap a photo and tag me on social media @aheadofthyme too.

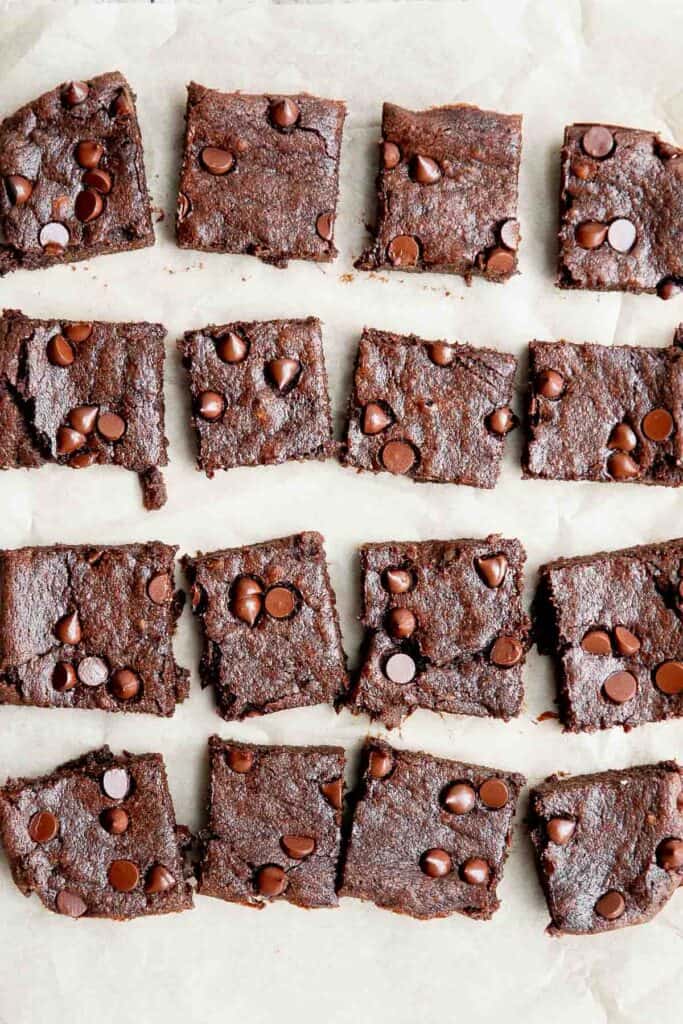
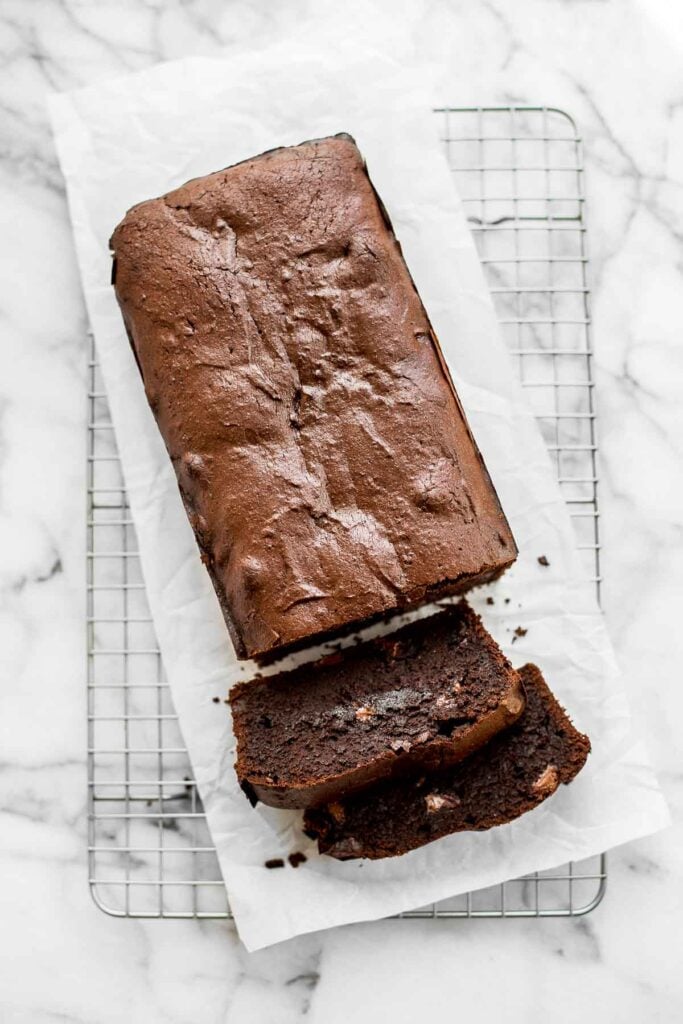
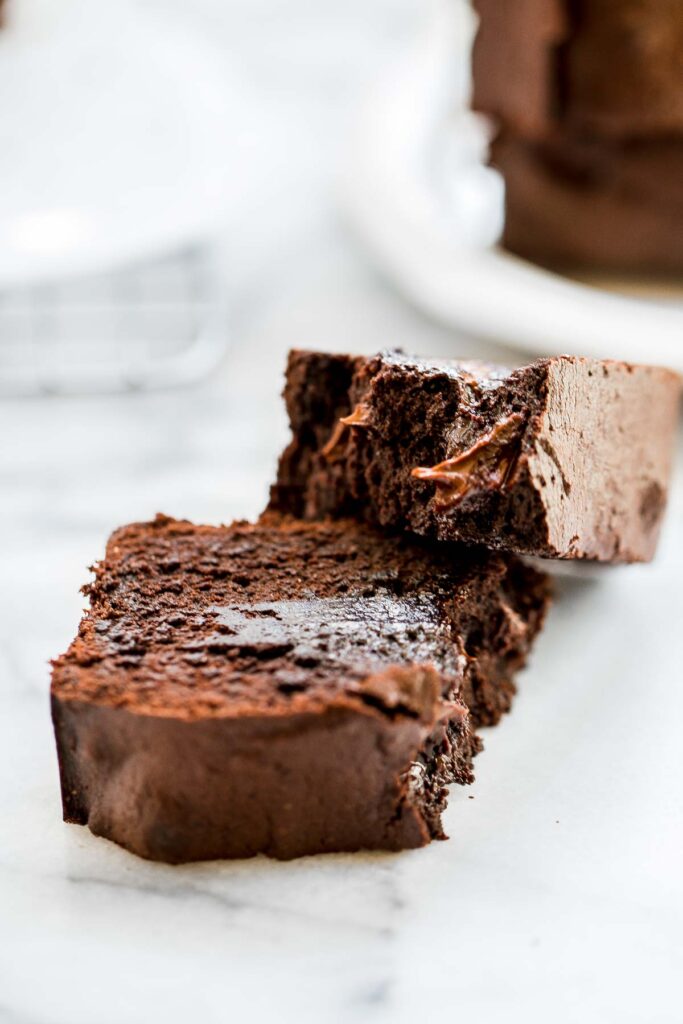
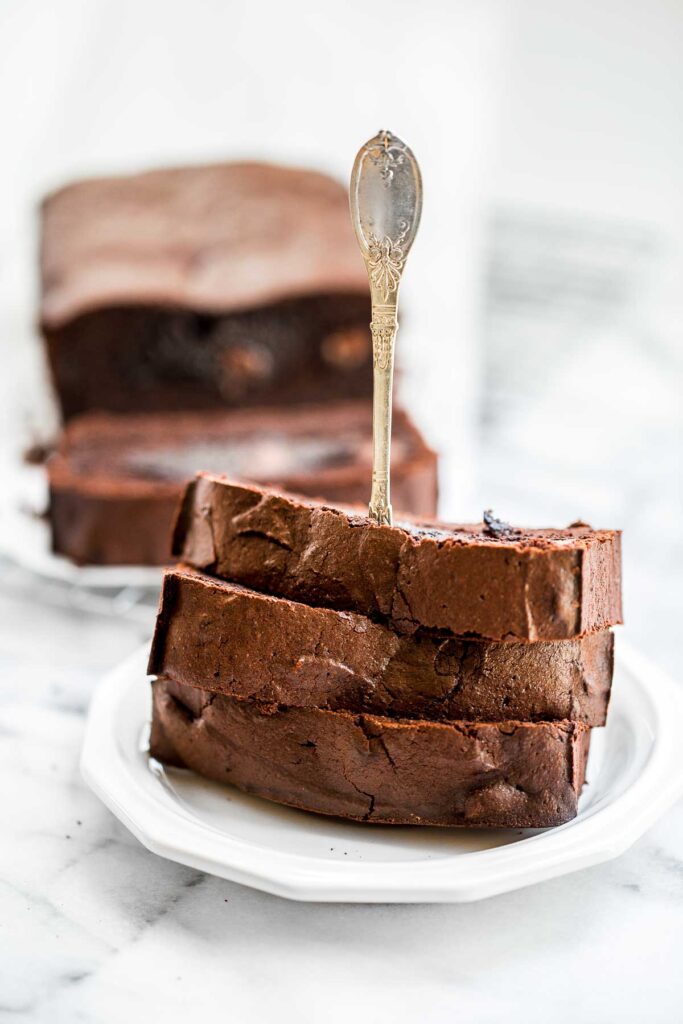
Flourless Banana Brownies

Flourless banana brownies are rich, moist, delicious, and gluten-free. Made with ripe bananas for natural sweetness, real chocolate and cocoa powder (because well, brownies), and nut butter to help hold it all together, these fudgy brownies might be one of the best gluten-free desserts you'll ever have. The best part? You can take a bite in just 30 minutes.
Why You'll Love Flourless Banana Brownies
- They're gluten-free. Whether being gluten-free is a lifestyle choice or a requirement for your health, finding truly great gluten-free recipes can sometimes be challenging. But these flourless banana brownies are so good, you won't even miss the gluten.
- Bananas and chocolate = the perfect pair. Bananas add incredible flavor and moisture in baked goods like Banana Bread or Banana Bread Cookies, but they are even better when paired with chocolate like in these gluten-free brownies and Chocolate Chip Banana Muffins.
- Dessert in 30 minutes. These banana brownies bake quickly, which is great when you need to make a large batch for an event or when you're impatiently waiting for dessert to satisfy a last minute sugar craving.

Ingredients and Substitutions
To make these delicious flourless banana brownies, you will need the following ingredients (full quantities in the recipe card below):
- semi-sweet chocolate
- bananas
- tahini - these brownies are nut-free, but you can substitute the tahini for peanut butter or almond butter. I highly recommend using your favorite nut butter for a nutty flavor.
- egg
- vanilla extract
- granulated sugar
- unsweetened cocoa powder
- chocolate chips - optional, for adding on top.
You will also need measuring cups and spoons, mixing bowl, hand mixer, and an 8-inch square baking pan.

How to Make the Best Flourless Banana Brownies
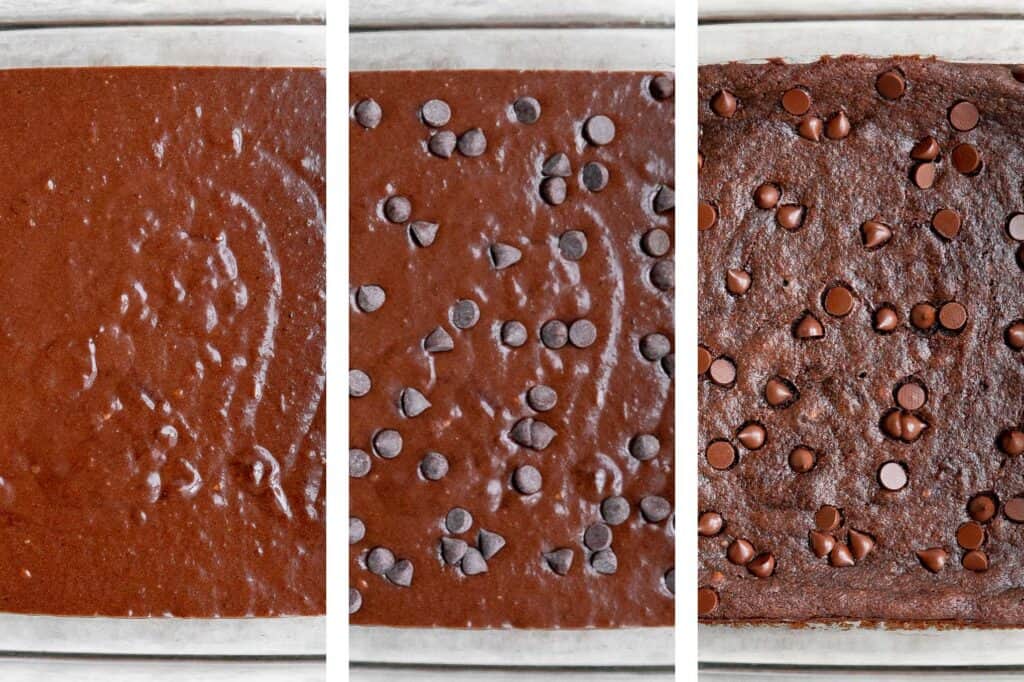
- Melt chocolate. Melt the chocolate in a medium heatproof bowl over a pan of simmering water. Make sure the bottom of the bowl does not touch the water, or you will burn the chocolate. Whisk until melted and smooth. Remove from heat and let the chocolate cool down.
- Make the brownie batter. In a large mixing bowl, mash the bananas with a fork. Add tahini and use a hand mixer to beat together until incorporated. Add egg, vanilla extract, and sugar, and beat on medium speed for 2 minutes. This will ensure that the brownies have a classic crinkly top. Add in cocoa powder and melted chocolate and beat on low until incorporated, about 30 seconds.
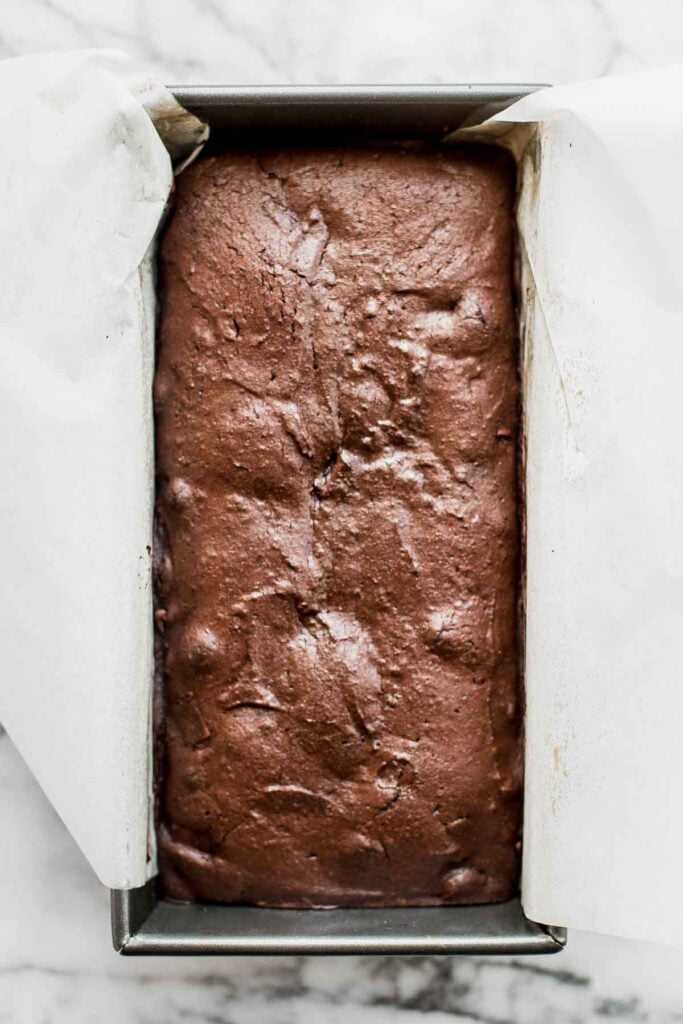
- Prepare the baking pan. Spray an 8-inch square baking pan with cooking oil spray and line with parchment paper, allowing the paper to overhang off of the two sides for easy removal. Transfer batter into the lined baking pan and top with chocolate chips (optional).
- Bake. Bake in a 350F preheated oven for 20-25 minutes for extra fudgy brownies (a toothpick inserted should still have some crumbs on it, and the middle should slightly jiggle), or bake for 25-30 minutes for brownies that are more set with a cakey texture (toothpick inserted won't have many crumbs on it with minimal to no jiggling in the middle).
- Cool. Allow the brownies to cool in the baking pan on a wire cooling rack. Once cooled completely, lift it out of the pan and cut into squares. Or grab a spoon and enjoy it hot out of the pan with vanilla ice cream.

Storing and Freezing Instructions
- How to store: Store these flourless banana brownies at room temperature for up to four days in an airtight container. You can extend their shelf life to 7-10 days by storing in the refrigerator.
- How to freeze: Wrap each brownie tightly in plastic wrap and then place in a freezer bag or airtight container, then freeze for up to 3 months. Allow it to thaw overnight in the refrigerator or for an hour or two at room temperature.
- How to reheat: Enjoy these gluten-free brownies at room temperature or warm. To reheat, place in a preheated 350F oven for about 10 minutes until warmed through.

More Chocolate Dessert Recipes
- 30 Best Chocolate Desserts
- Fudgy Brownies
- Caramel Brownies
- Caramel Cheesecake Brownies
- Molten Chocolate Lava Cakes
- Moist Chocolate Cupcakes
Tried this recipe?
I'd love to hear what you think! Leave a comment and rating below to share your feedback. Your reviews help others discover this recipe and help me keep creating more free recipes for you. Snap a photo and tag me on social media @aheadofthyme too.

Jalapeño Poppers

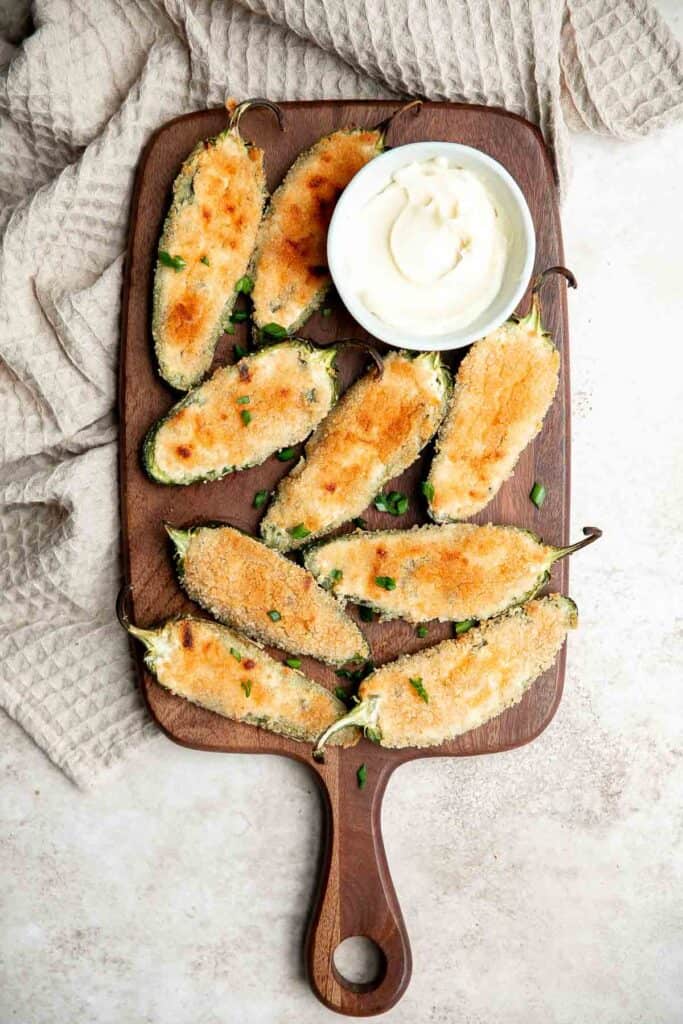
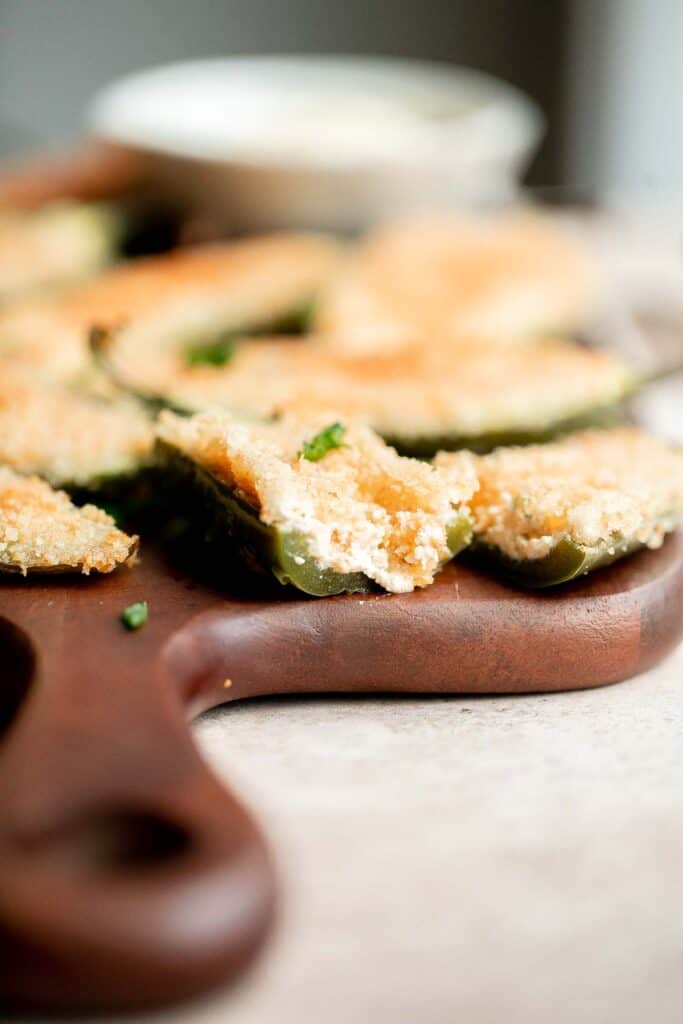
Jalapeño poppers are the perfect appetizer - spicy, crispy, cheesy, and creamy. These bites maintain the perfect balance of spicy jalapenos, the savory cheesy filling, and a crispy breadcrumb topping toasted to golden brown perfection. These jalapeno poppers are the life of any party, whether it's a party of one watching a late-night movie, a family get-together, or a game day party with friends. They are truly a delight from tip to stem. Plus, they are easy to make ahead and freeze well.
Why You'll Love Jalapeño Poppers
- They're so easy to make. Jalapeño poppers might seem difficult to make, but they're actually so easy to make. You simply cut and prep the peppers, stuff them, top them with breadcrumbs, and pop them in the oven. Then, after baking, you can finally stuff them into your mouth!
- They look and taste amazing. If you have guests to impress, make these jalapeno poppers. They look beautiful and make a great addition to a table of snacks for party guests. And it's true that they taste as good as they look. These appys are spicy, creamy, cheesy, salty, and savory.
- Prep them ahead of time. You can prepare jalapeno poppers a day before you need them. Just store them in the fridge, bake them when it's time, and serve them hot and fresh! It's one less thing to stress about when preparing for a party or game day.

Ingredients and Substitutions
To make these delicious jalapeño poppers, you will need the following ingredients (full quantities in the recipe card below):
- jalapeño peppers
- cream cheese
- garlic powder
- paprika
- cheddar cheese - feel free to substitute with Tex Mex Mexican cheese blend, Monterey Jack cheese, or mozzarella cheese.
- chives or green onions
- Panko breadcrumbs
- vegetable oil - use any vegetable oil that you have on hand such as avocado oil.
You will also need measuring cups and spoons, mixing bowl, and half sheet baking pan.
How to Make the Best Jalapeño Poppers
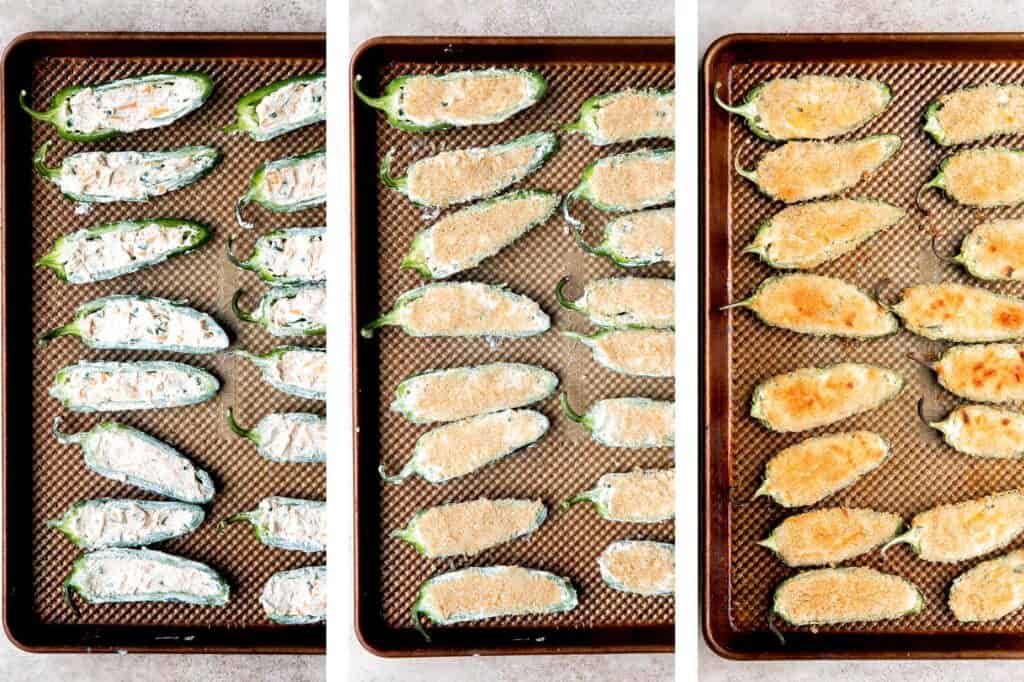
- Prepare jalapeños. Prepare the jalapeños by slicing them in half lengthwise and remove all the seeds and membranes. Make sure to wear gloves during the preparation and do not touch your eyes or nose while cutting the jalapeño peppers.
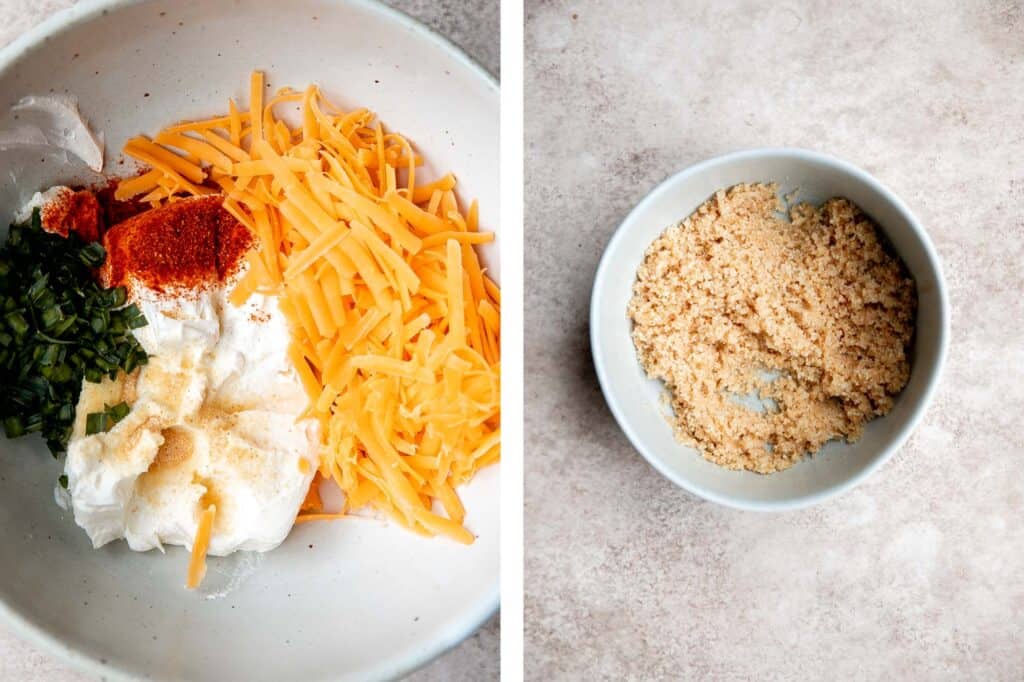
- Prepare filling. In a small mixing bowl, combine cream cheese, garlic powder, paprika, cheddar cheese, and chives. Mix well until smooth and set aside. In a separate bowl, stir together the breadcrumbs and oil until well mixed. Set aside.
- Stuff the jalapeños. Fill each halved jalapeño evenly with 2 tablespoons of the cheese mixture and spread with 1 tablespoon of the crumb mixture on top.
- Bake. Place the jalapeño poppers evenly on a large half sheet baking pan and bake in a 400F preheated oven for 20 minutes until golden brown. Optionally, you can broil for another 3-5 minutes to make the crumb toppings more crispy and golden (but keep a close eye on them to make sure they don't burn). Let cool for 5-10 minutes and serve with your favorite dipping sauce.
Recipe Tips and Tricks
- Don't overfill the jalapenos: The cream cheese mixture will settle as it heats up in the oven. So, to avoid a cheesy mess, be sure not to overfill your peppers.
- Make ahead instructions: You can prep these poppers up to one day ahead of time, store covered in the refrigerator, and bake them when it's time to serve them fresh at your party or dinner.
- How to store: Store leftover jalapeno poppers in the refrigerator for 3-5 days. Reheat them in a preheated 400F oven for about 15 minutes until warmed through. You can also reheat them in the air fryer for 5-10 minutes until warm and crispy.
- How to freeze: Jalapeño poppers freeze well both before and after baking. You can freeze them overnight on a baking tray making sure that they are not touching. Then, transfer them to a freezer bag or airtight container for freezer storage. You can thaw them in the fridge or bake/reheat them from frozen (add a few extra minutes to the cooking time).

More Appetizers
- Bacon Wrapped Chicken Bites
- Pigs in a Blanket
- Pizza Crescents Rolls
- Chili Nachos
- Sweet Chili Chicken Bites
- Air Fryer Short Ribs
Tried this recipe?
I'd love to hear what you think! Leave a comment and rating below to share your feedback. Your reviews help others discover this recipe and help me keep creating more free recipes for you. Snap a photo and tag me on social media @aheadofthyme too.

Pizza Dip
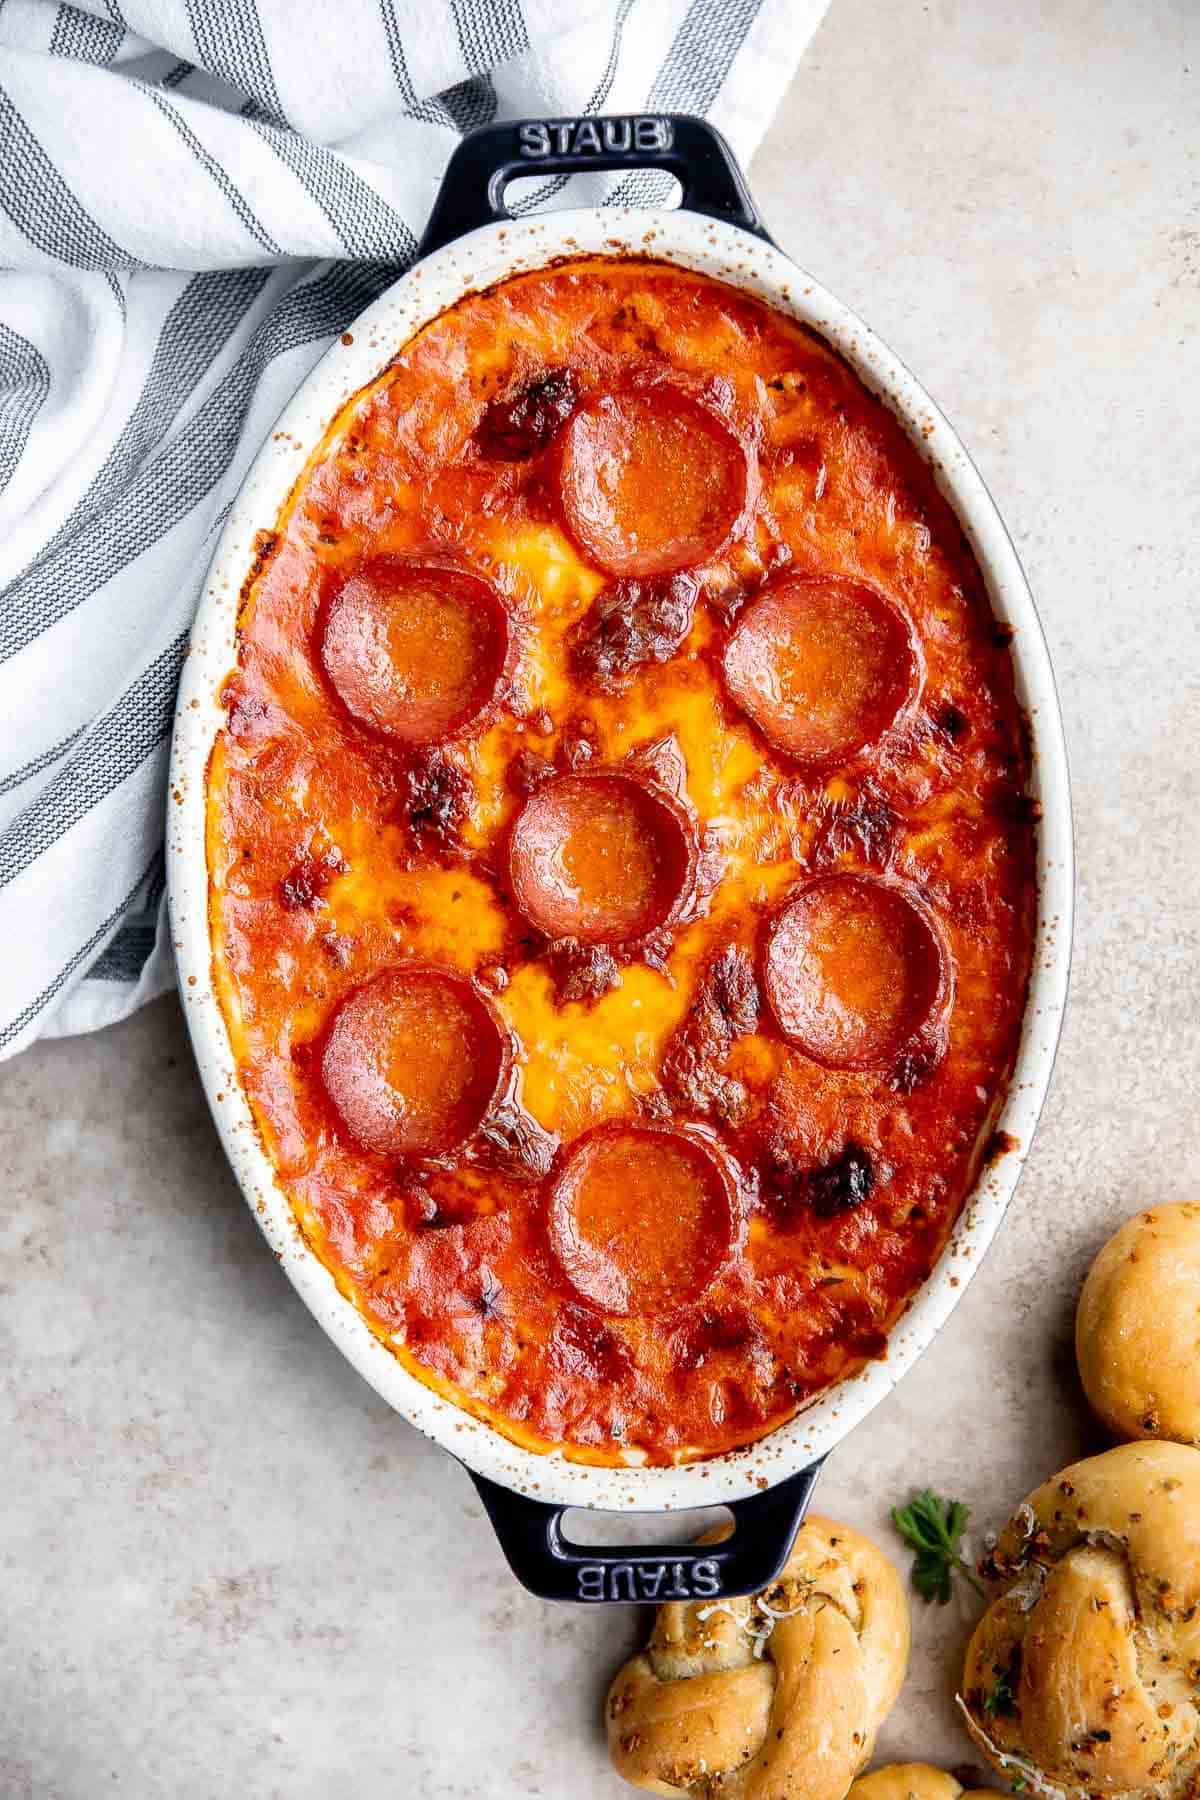
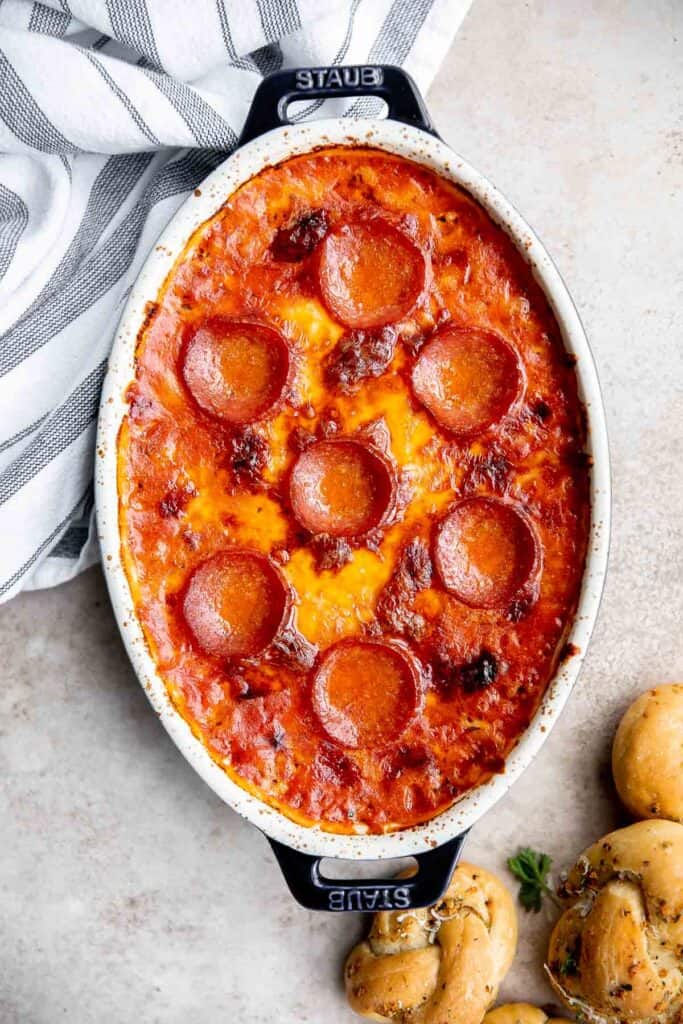
Pepperoni pizza dip is creamy, rich, and delicious. This comforting appetizer is just what you need to get the party started - and it makes the best late-night snack when you are having a last minute craving. It's easy to make, easy to prepare ahead of time, and easy to eat. With three layers of cheesy, saucy goodness, topped with your favorite pizza toppings which is then popped into the oven until warm and bubbly, it's no surprise that everyone loves this total crowd please. Serve pizza dip with any bread side, including crackers, breadsticks, and sliced French baguettes.
Why You'll Love Pizza Dip
- It's pizza dip. What more do I have to say? This three-layer pizza dip features a rich layer of seasoned cream cheese on the bottom, a generous helping of marinara sauce with an extra cheesy layer of mozzarella and parmesan on top, and topped with pepperoni (or your favorite pizza toppings). It's dreamy. It's cheesy. It's pizza dip. What's not to love?
- It's incredibly easy to make. Baked dips are an easy hot appetizer to serve at parties. There's no complex assembly, careful organizing, or painstaking details to worry about. Just throw it together, bake it in a dish, and let it get gooey and bubbly before serving it up with some bread. It's the perfect warm dip to serve on Game Day.
- It's 100% customizable. You can use your favorite toppings to this pizza. For instance, omit the pepperoni and make a veggie pizza. Add meatballs, sausage, and more for a meat lover's pizza. Want onions and peppers? No problem. Light sauce and extra cheese? You can do that, too. Enjoy the freedom of customizing your pizza dip just the way you like it.

Ingredients and Substitutions
To make this easy Pepperoni Pizza Dip, you will need the following ingredients (full quantities in recipe card below):
- cream cheese - use a block of cream cheese for the best results (creamier and richer), but other types will still work.
- mozzarella cheese
- Parmesan cheese
- marinara sauce - feel free to use marinara sauce or substitute with pizza sauce. You can use store-bought sauce or homemade. We love using our homemade marinara sauce here.
- pepperoni slices
- bread - serve with your favorite bread for dipping.
You will also need measuring cups, mixing bowl, and 1 quart baking dish.
How to Customize the Toppings
We kept things simple and topped our dip with pepperoni. You can get creative and use any of your favorite pizza toppings. Try:
- Ham and pineapple for a Hawaiian twist
- Sausage and green bell pepper
- Mushroom, olive, pepperoni, and onion
- Spinach, broccoli, and ricotta cheese
- Sliced meatballs, sausage, and pepperoni
- Fresh diced tomatoes and crumbled bacon

How to Make the Best Pizza Dip
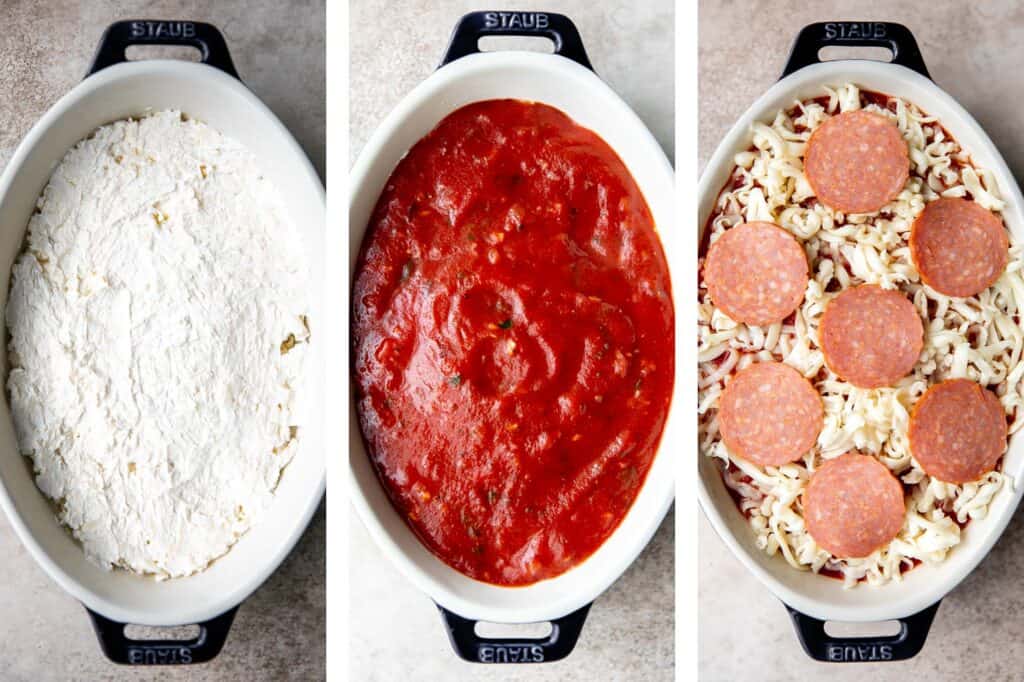
- Make cheese mixture. In a medium mixing, stir to combine cream cheese, 1 cup mozzarella, and Parmesan.
- Layer the dip. Spread onto the bottom of a 1 quart baking pan. Top with marinara sauce, remaining mozzarella, and pepperoni slices.
- Bake. Bake in a 425F preheated oven for 20 minutes until cheese is melted and bubbly.
- Serve. Let it cool for 5-10 minutes and serve warm with bread for dipping.
How to Serve
You can serve this Pepperoni Pizza with anything that would taste good with cheese. My favorites to serve with this are:
- Garlic Breadsticks
- Sliced French Baguettes
- Salted Soft Pretzels
- Pita Bread
- Ciabatta Rolls
- Crackers
- Pull Apart Garlic Bread
Storing Instructions
- Make ahead instructions: You can assemble the dip a few hours in advance (follow the recipe until just before baking). Then cover it tightly with aluminum foil or plastic cling wrap and store in the refrigerator until ready to bake.
- How to store: You can store this pizza dip in its original container in the fridge for up to 3-5 days. Cover it with plastic cling wrap or aluminum foil before storing.
- How to reheat: Pizza dip is best served warm. You can reheat the leftovers (or a portion of the dip) in an oven-safe container in your conventional or toaster oven at 375F for 5-15 minutes until warmed through. You can also reheat it in the microwave until warmed through.

More Dip Recipes
- 20 Best Dip Recipes
- Baked Spinach Dip
- Queso Mexican Cheese Dip
- Marinara Sauce
- Baba Ganoush Eggplant Dip
- Spinach and Artichoke Dip
Tried this recipe?
I'd love to hear what you think! Leave a comment and rating below to share your feedback. Your reviews help others discover this recipe and help me keep creating more free recipes for you. Snap a photo and tag me on social media @aheadofthyme too.

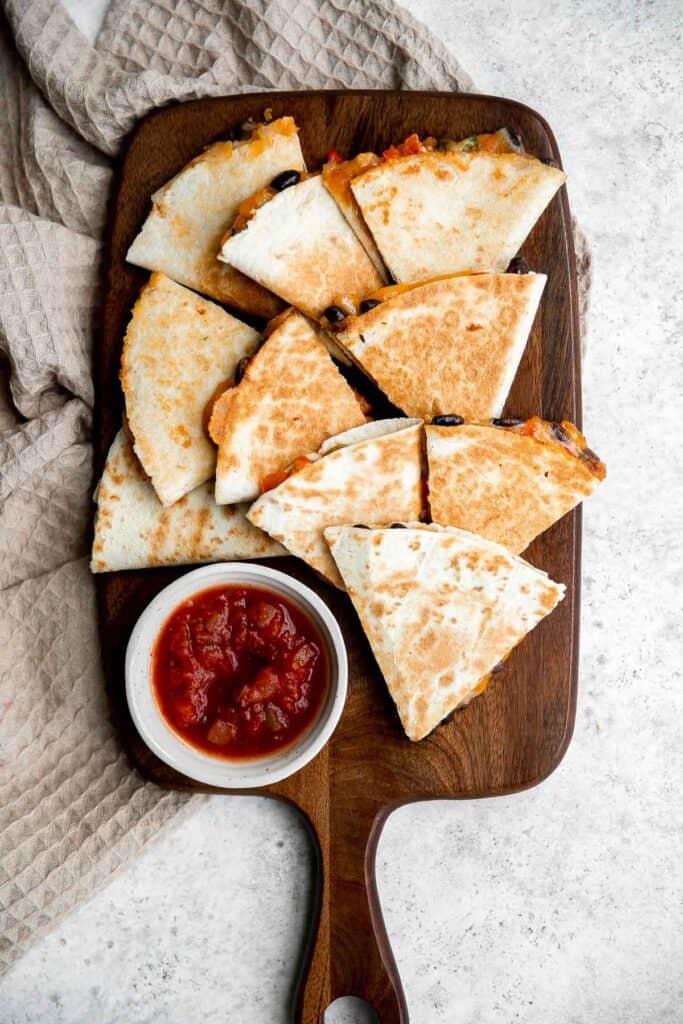
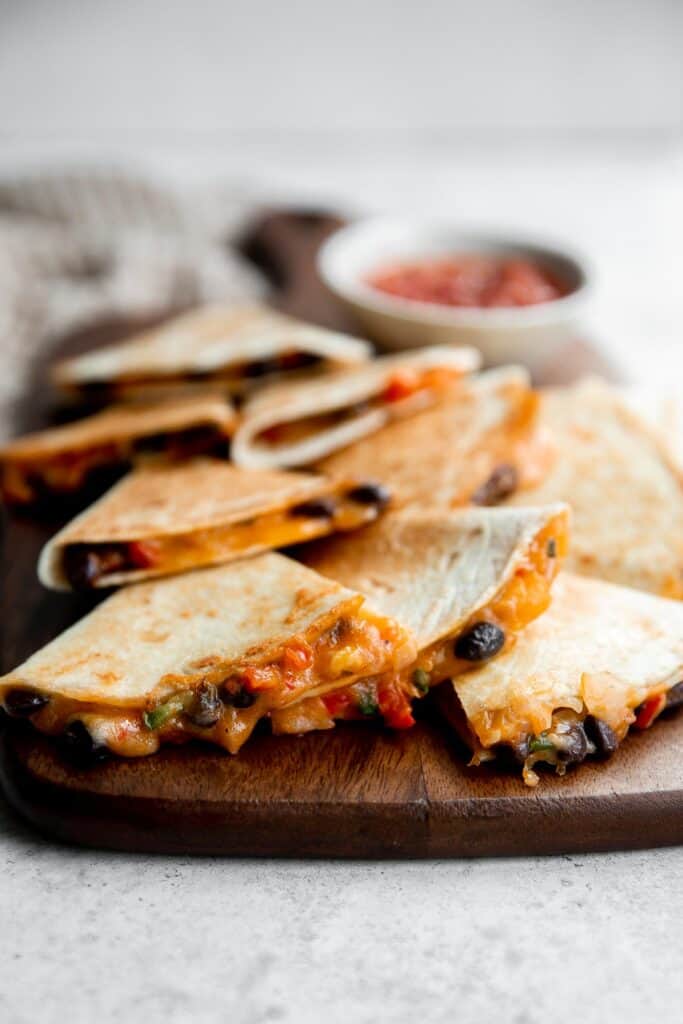
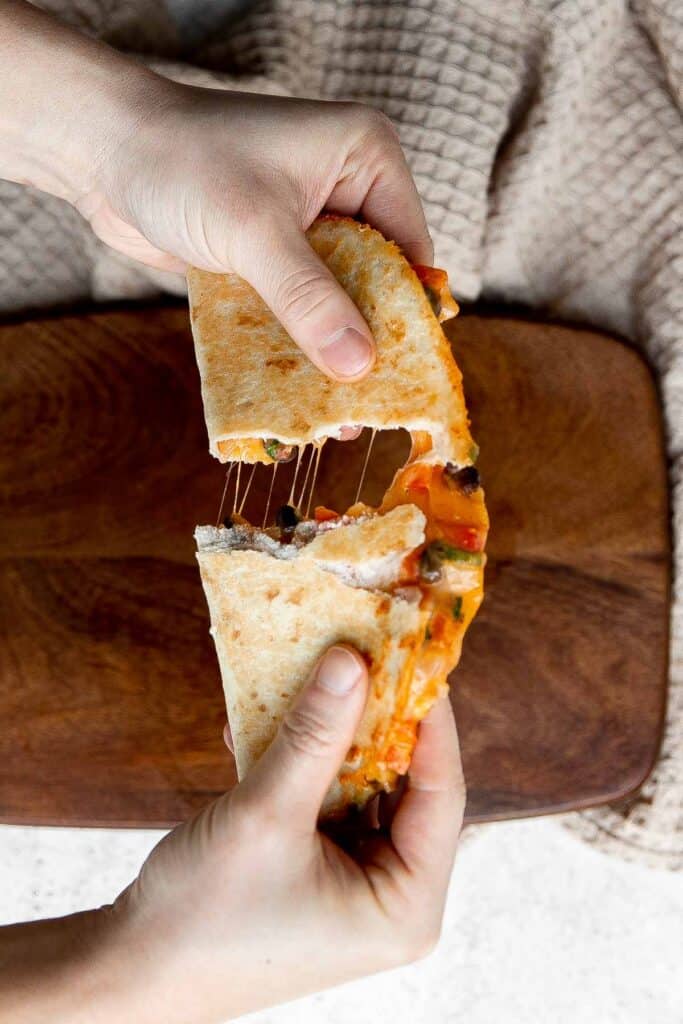
Vegetarian Quesadillas
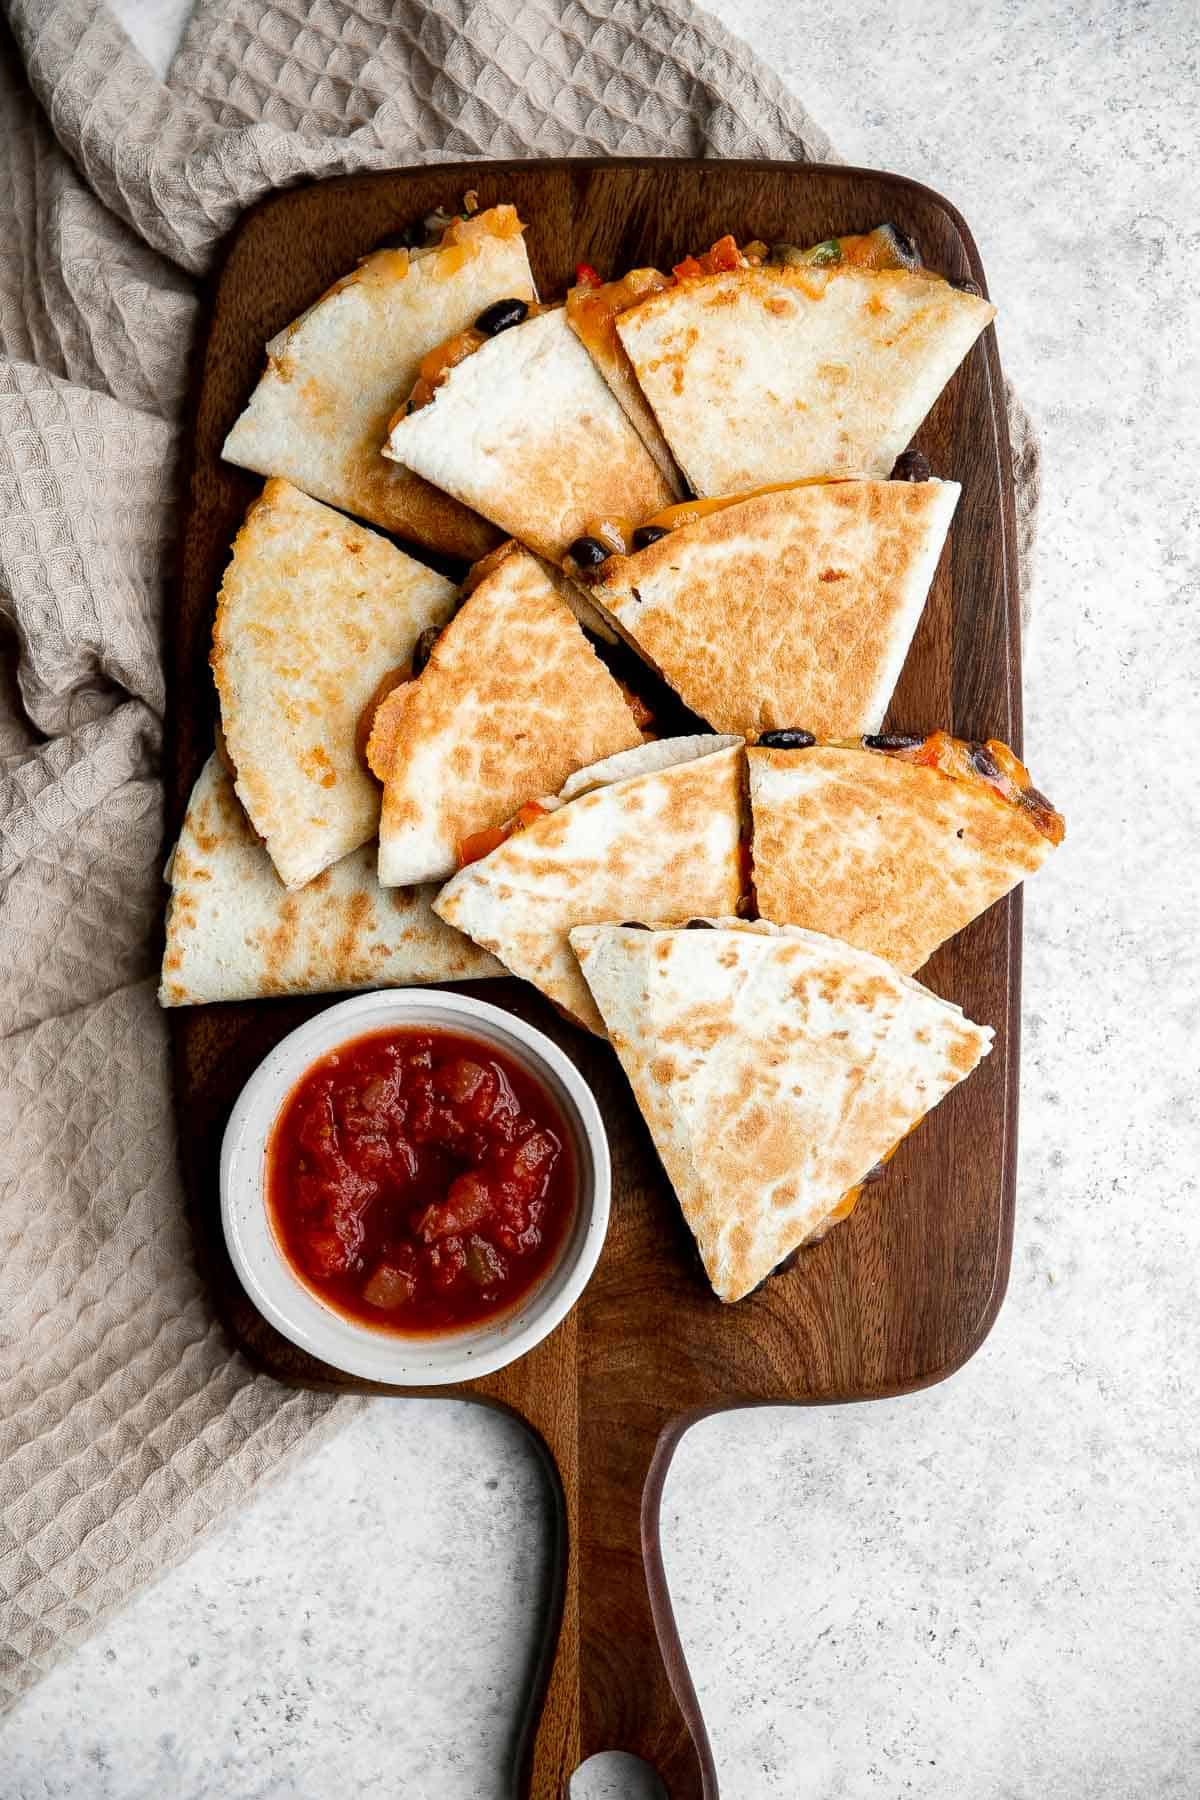
Vegetarian quesadillas are a quick and easy meal that satisfies your cravings for Mexican food on Meatless Mondays. Fresh tortillas are filled with a delicious and flavorful vegetarian mixture of beans, corn, and peppers, then topped with cheese, and cooked until the cheese is melted and the tortillas are crispy. Plus, they are completely customizable with your favorite veggies. Serve this kid-friendly dish for lunch or dinner, or as an appetizer on Game Day, along with your favorite toppings such as guacamole and salsa.
Why You'll Love Vegetarian Quesadillas
- They're quick and easy to make. Quesadillas are one of my favorite go-to meals when I'm looking to cook something at the last minute. The steps for making quesadillas are super simple, and it's ready in about 20 minutes. Just make the filling, heat the tortilla, add the filling and cheese, then fold and grill. Once you get this down, you can speed up the process and enjoy vegetarian quesadillas even faster.
- They are loaded with Mexican flavor. These meatless quesadillas are loaded with flavor in every bite. From the cumin and paprika to garlic and jalapeños, this meal doesn't take much to boast with authentic Mexican flavors.
- They're 100% customizable. One of the best things about making quesadillas is that you can customize it in so many ways. Add in jalapenos to make it spicy, add more seasoning to add extra flavor, add in protein, or switch up the vegetables with whatever veggies that you have on hand, or omit the cheese to make it vegan. The options are endless.
Ingredient Notes
To make these delicious Vegetarian Quesadillas, you will need the following ingredients (full quantities in recipe card below):
- tortillas - I like the taste and texture of flour tortillas when it comes to quesadillas, but you can easily substitute with corn tortillas if you prefer. I often use my homemade flour tortillas - they are a lot easier to make than you think!
- beans - we use a 15 ounce can of black beans for the vegetarian filling. You can also cook about ¾ cup (or 4.5 ounces) of dried black beans and use that instead. Dried beans need to be soaked overnight so keep that in mind when planning to make the recipe. See all our beginners guide on how to cook dried beans.
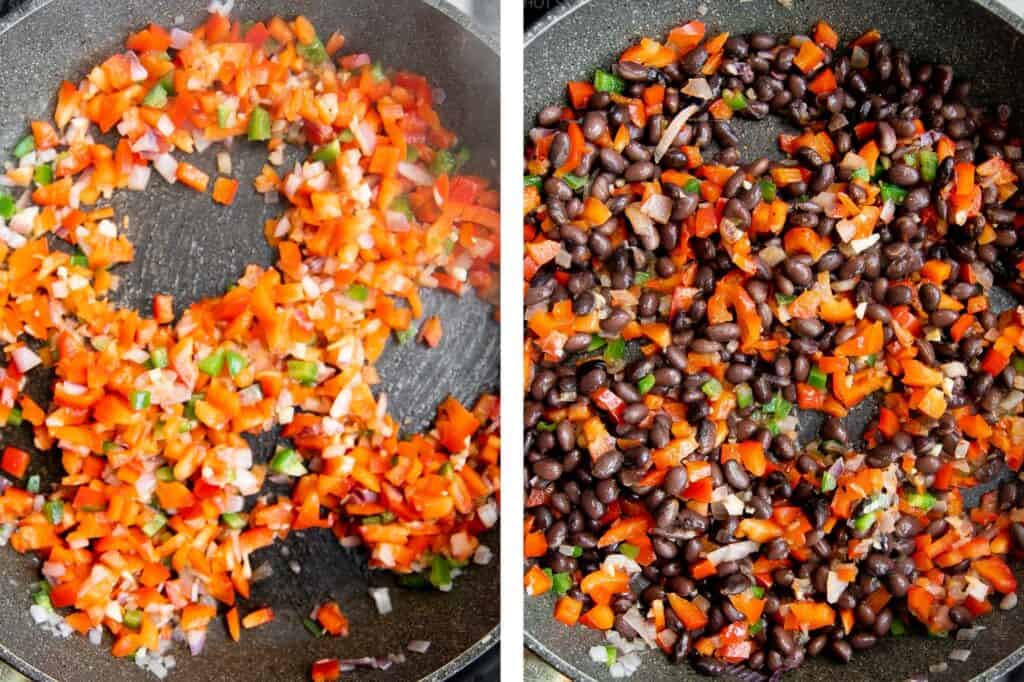
- vegetables - we sautéed red onion, garlic, red bell pepper, and jalapeño pepper in vegetable oil.
- seasoning - all you need to throw in some Mexican flavors is ground cumin, paprika (or chili powder for extra spice), salt, and pepper. We also added some fresh cilantro.
- cheese - we opted for yellow cheddar cheese, but you can substitute with white cheddar, Monterey Jack cheese, or a Tex Mex / Mexican cheese blend. And even though the cheese is my favorite part of a quesadilla, you can omit it to make the recipe vegan. Vegetarian Refried Beans make a great substitution for cheese.
How to customize
You can completely these vegetarian quesadillas to suit your palate. Here are some of my favorite ways to change things up:
- Make it spicy. Try adding chili powder or jalapeños for a spicy kick.
- Add protein. Feel free to add in cooked shredded chicken (or use store-bought rotisserie chicken), ground beef, steak, pulled pork carnitas, or shrimp. Just toss in the protein with the cooked veggies before assembling the quesadillas.
- Add pickled onions. Add in some pickled red onions to the vegetable mixture.
- Use different vegetables. Quesadillas are a great way to get rid of any veggies that you have in the fridge. Try broccoli, carrots, cauliflower, mushrooms, zucchini, or asparagus.
How to Make the Best Vegetarian Quesadillas
- Make the black bean veggie filling. Heat oil in a large skillet over medium-high heat until the hot oil sizzles, about 1 minute. Add onion and garlic and sauté until fragrant, about 1 minute. Add bell pepper and jalapeño and sauté until tender, about 2-3 minutes. Then, add black beans and season with cumin, paprika, salt, and pepper. Mix well and cook until beans are heated through, about 2-3 minutes. Stir in cilantro and remove the skillet from the heat. Transfer the black bean veggie filling to a bowl and set aside.
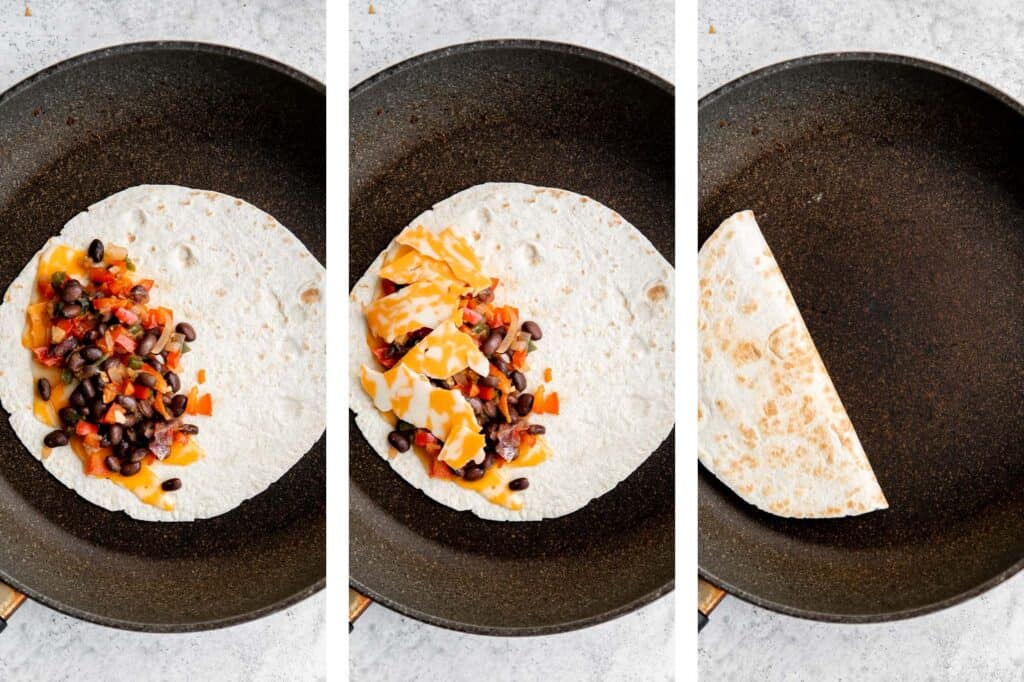
- Assemble and cook the quesadillas. Heat a clean skillet over medium-low heat for 1 minute and brush with a little bit of oil.
- Place one tortilla in the pan.
- On one half of the tortilla, sprinkle ¼ cup cheddar cheese, top with 3 tablespoons of the black bean filling, and top with another ¼ cup cheddar cheese.
- Fold the empty half of the tortilla over to create a half moon.
- Cook until the tortilla is crispy and the cheese melts, about 2 minutes per side.
- Serve. Repeat with remaining tortillas. Transfer the quesadillas onto a plate and slice into 3 triangles. Serve with sour cream, guacamole, and/or salsa if desired.
How to Bake Quesadillas in the Oven
You can easily bake these vegetarian quesadillas in the oven. To bake, spread the quesadilla filling onto one half of the tortillas. Sprinkle with cheese and fold the tortilla over. Place on a baking tray and bake in a 350F preheated oven for 10 minutes until cheese is melted. Cut into 4 slices and serve.
Quesadilla Toppings
You can serve quesadillas with your favorite Mexican inspired sides and toppings, including:
- Guacamole
- Sour Cream or Yogurt
- Pico de Gallo Salsa or Mango Salsa
- Creamy Cilantro Lime Dressing
- Mexican Street Corn Salad

Recipe Tips and Tricks
- How to store: If you happen to have any leftovers, store them in an airtight container in the fridge for up to 3-5 days.
- How to freeze: You can assemble the quesadillas and wrap them individually in plastic cling wrap or aluminum foil. Freeze them in a single layer on a baking sheet until firm, about 1-2 hours, then transfer to a freezer bag or airtight container. Freeze for up to 3 months. To cook, allow them to thaw overnight in the refrigerator, then cook according to recipe instructions.
- Make a quesadilla bar: Instead of taco night, you can mix things up by making a quesadilla bar! Let everyone choose their own fillings, cook fresh, and have an assortment of toppings to choose from.
More Mexican Inspired Recipes
- 30 Best Mexican Recipes
- Salsa Verde Green Chicken Enchiladas
- Mexican Pulled Pork Tacos (Carnitas)
- Vegetarian Chili
- Fish Tacos with Lime Crema
- Cilantro Lime Rice
- Baked Chicken Quesadillas
Tried this recipe?
I'd love to hear what you think! Leave a comment and rating below to share your feedback. Your reviews help others discover this recipe and help me keep creating more free recipes for you. Snap a photo and tag me on social media @aheadofthyme too.

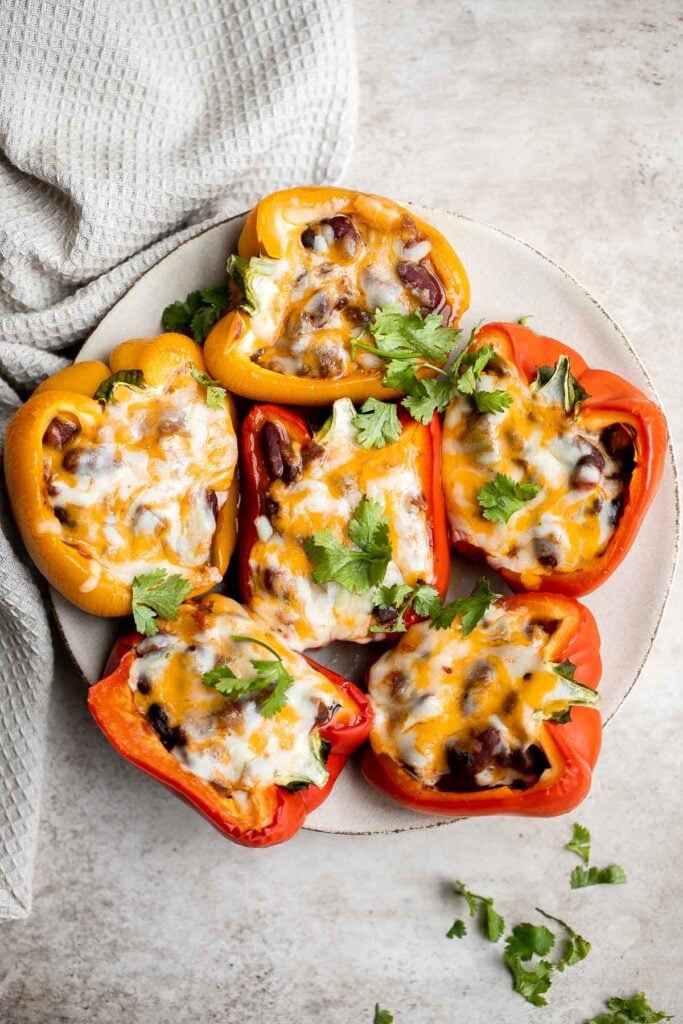
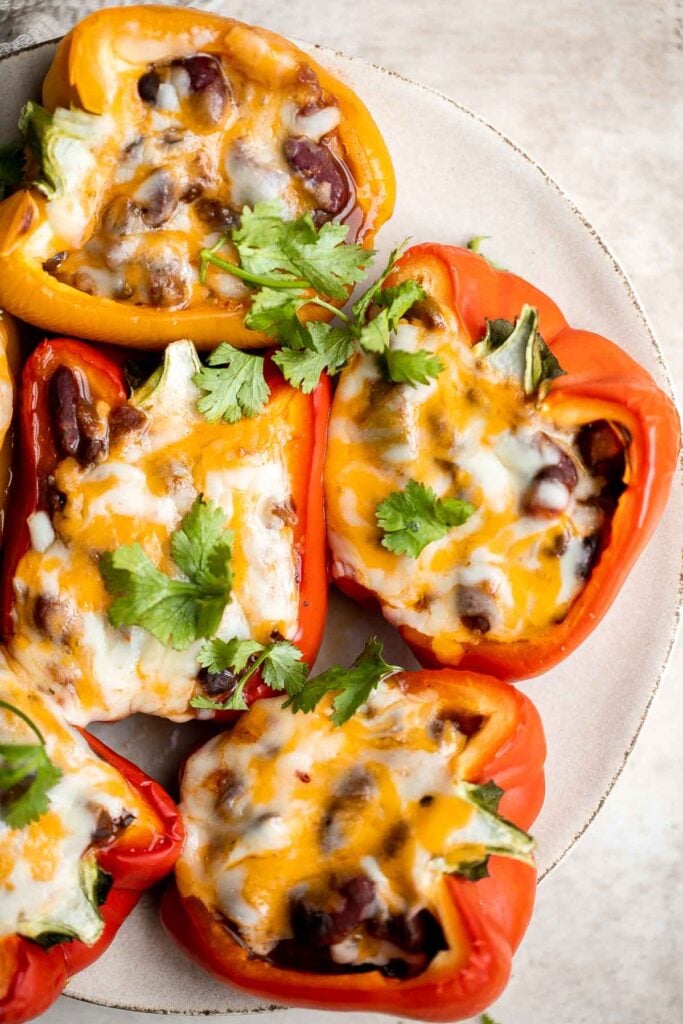
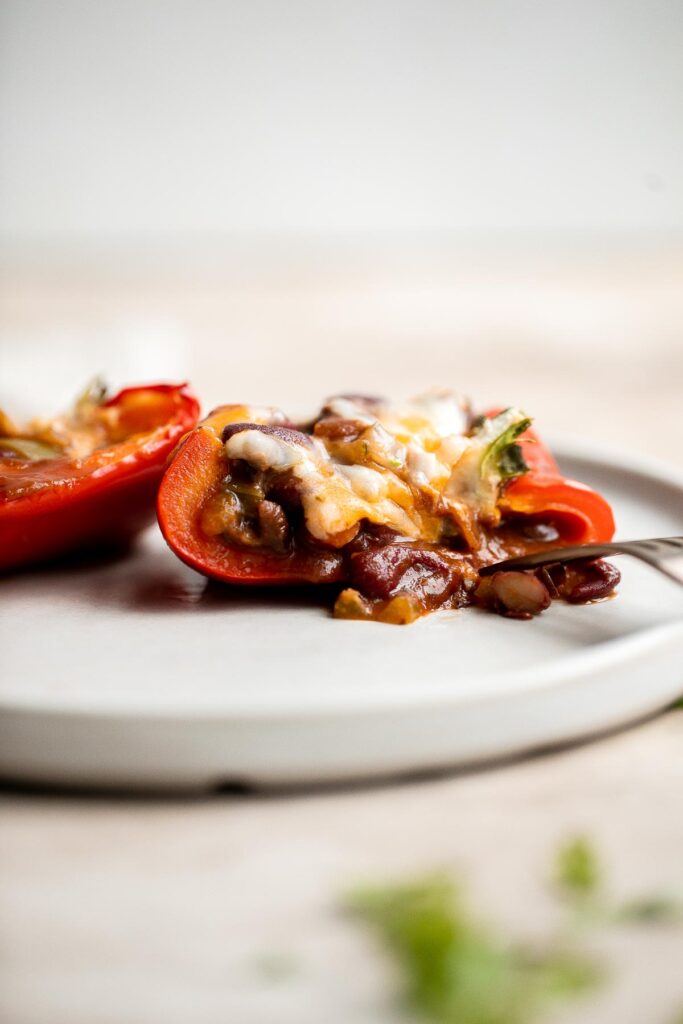
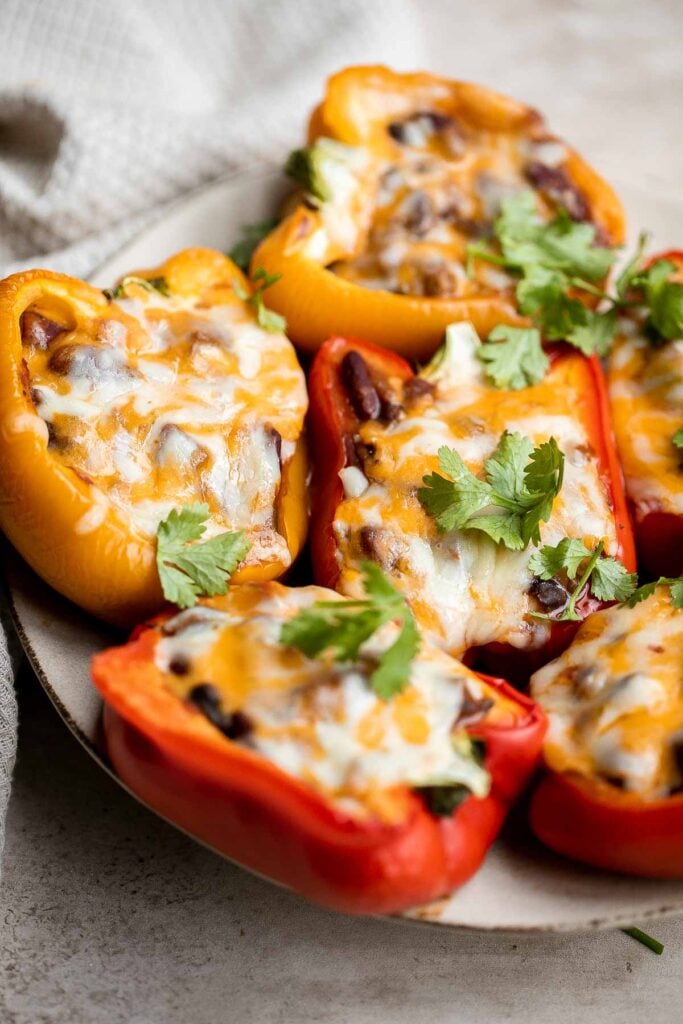
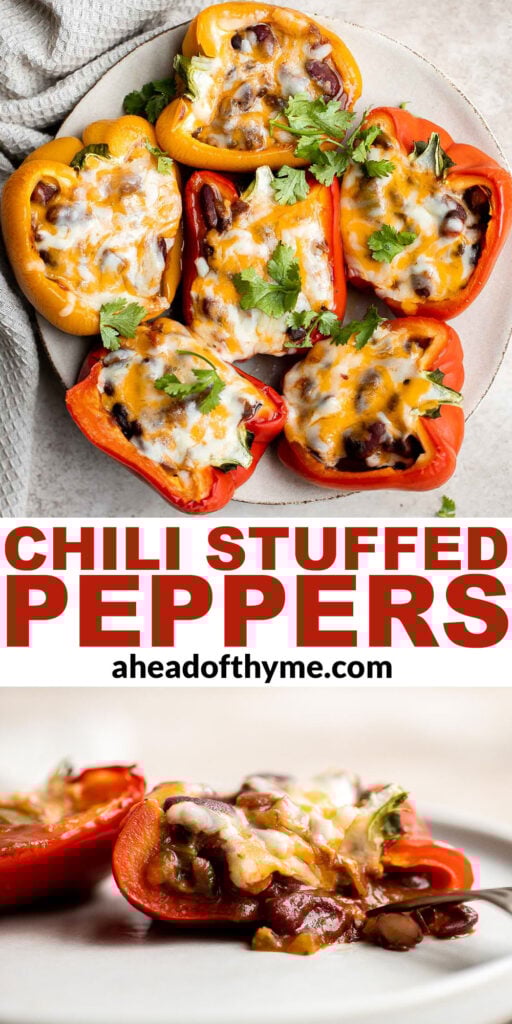
Chili Stuffed Peppers
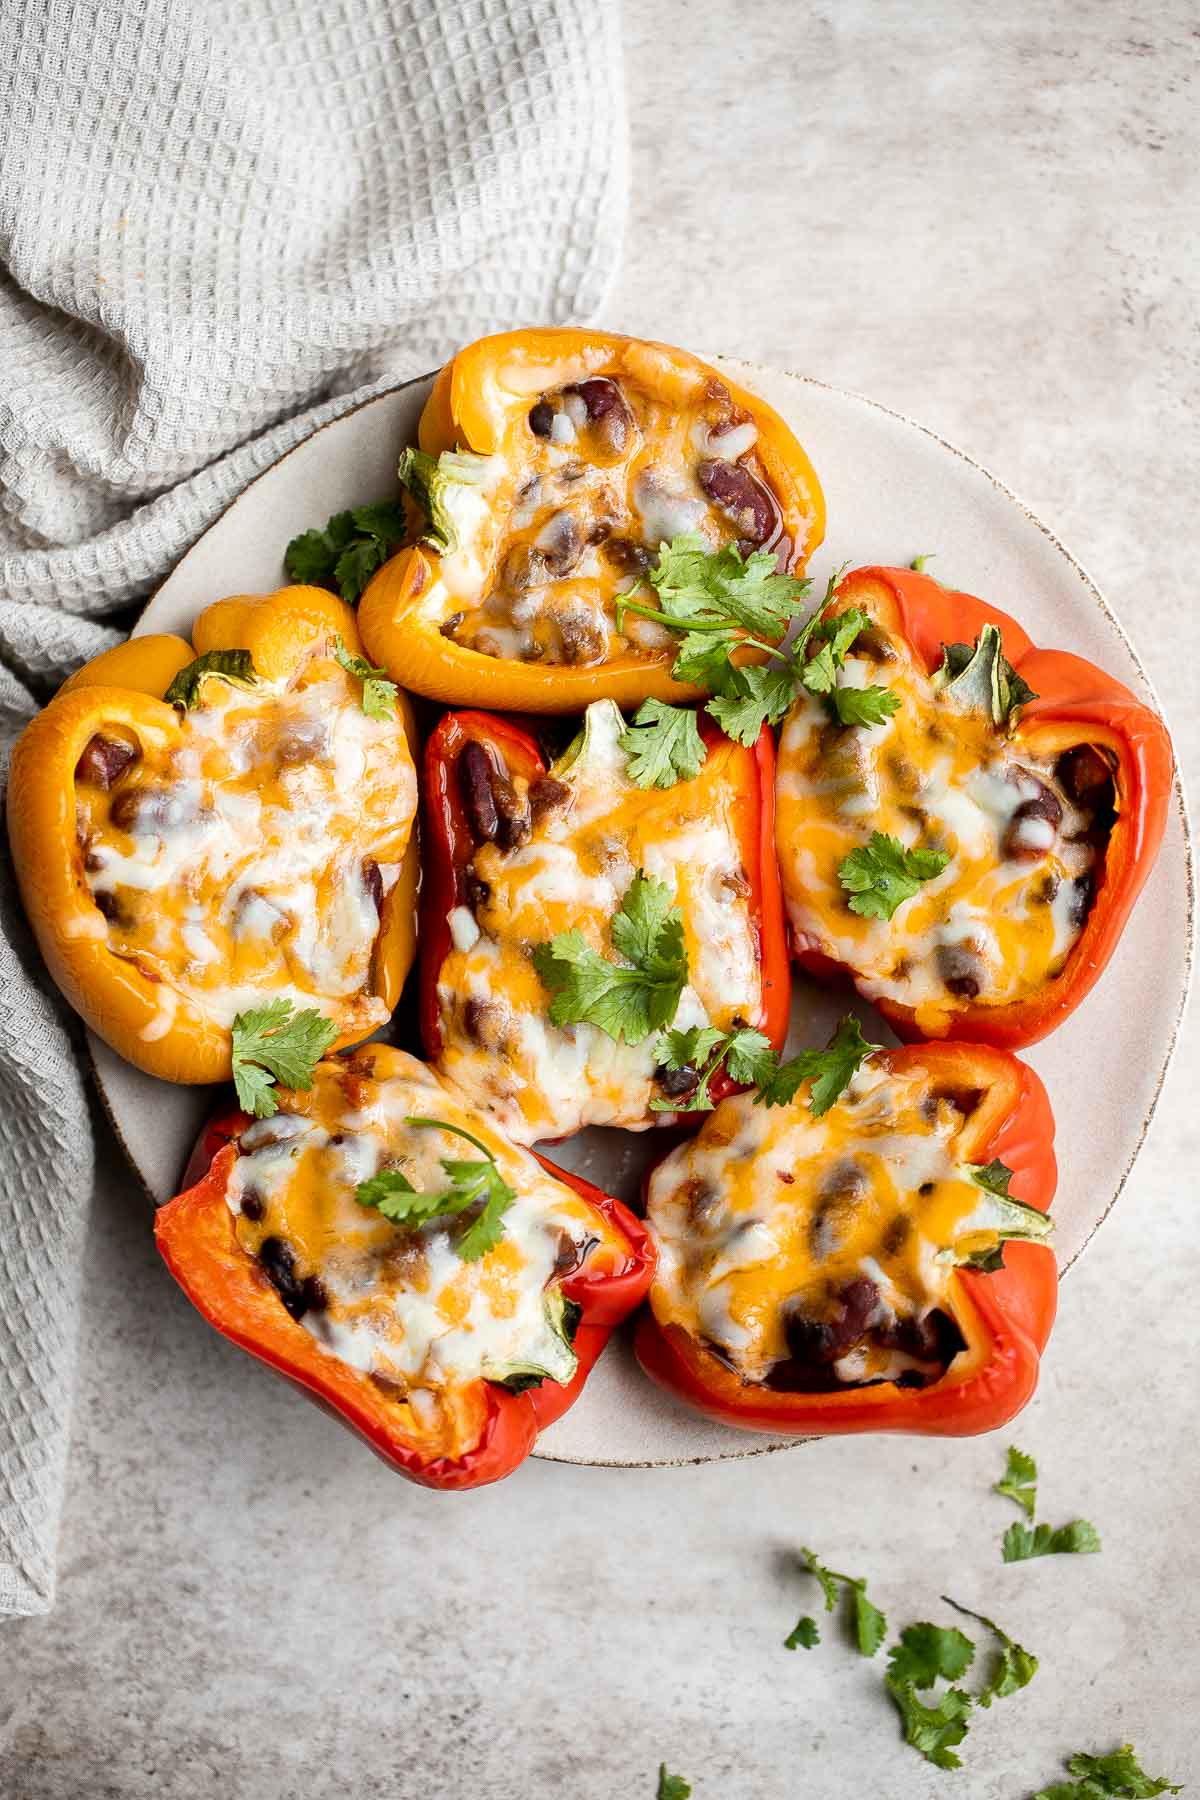
Chili stuffed peppers are the easiest way to make stuffed peppers. They are delicious, flavorful, and so good. With only three ingredients and five minutes of prep time, you might never make stuffed peppers any other way! Fresh, vibrant peppers are stuffed with leftover chili and shredded cheese, and baked until melty and gooey. That's all it takes to make and serve this family favorite for dinner, or meal prep for an easy lunch.
Why You'll Love Chili Stuffed Peppers
- Easy to make with 3 ingredients. Making these leftover chili stuffed peppers is pretty straightforward. You'll prep the peppers, stuff them with chili and cheese, bake, and top with more cheese. Seriously, you just need 3 ingredients for these.
- They're super fast. This recipe is great for busy cooks. Even though it will take about 45 minutes to bake the stuffed peppers, you can spend that time doing something else. These chili stuffed peppers only require just five minutes of active prep time.
- It's the best way to use leftover chili. Getting creative with leftovers is the best way to ensure they get eaten. These chili stuffed peppers can transform leftover chili into something new and exciting. What's not to love about that? Make it meaty with Slow Cooker Beef Chili or One Pot Chili, or vegetarian with Vegetarian Chili.
Ingredients and Substitutions
To make easy chili stuffed peppers, you will need the following ingredients (full quantities in the recipe card below):
- bell peppers - Look for peppers that are large and round and easy to stuff. Feel free to use any color that you want.
- leftover chili - this is a great recipe to use up any leftover chili like Slow Cooker Beef Chili or with Vegetarian Chili.
- cheese - I used shredded Tex Mex cheese blend, but any melty cheese will work. Try Monterey Jack cheese, cheddar cheese, or mozzarella.
You will also need a 9x13-inch casserole pan and aluminum foil.
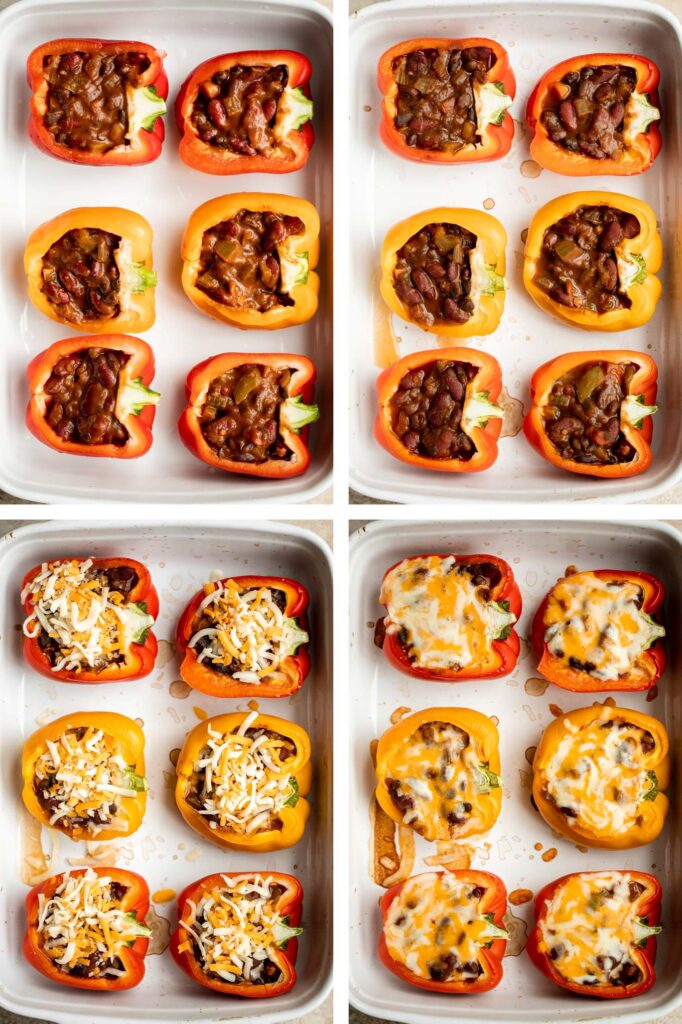
How to Make the Best Chili Stuffed Peppers
- Make the filling. Place leftover chili in a medium mixing bowl and add ½ cup cheese. Stir to combine.
- Stuff the peppers. Cut the bell peppers in halves. Remove and discard the seeds. Fill up each pepper with chili filling.
- Bake. Place the stuffed peppers in a 9x13-inch casserole pan or large baking pan. Cover the casserole dish with aluminum foil and bake in a 375F preheated oven for 40 minutes.
- Add cheese. Remove from the oven and sprinkle 1-2 tablespoons of shredded cheese on top of each stuffed pepper. Continue baking (uncovered) for 5-7 minutes until the cheese is melted.
- Serve. Let the stuffed peppers rest for 5 minutes before serving.
Storing and Reheating
- How to store: Keep leftover chili stuffed peppers in an airtight container. They will keep as long as your chili is fresh. For example, fresh beef chili will last for 3-4 days. So if you used 3-day old chili, your chili stuffed peppers would only last for 1 day.
- How to reheat: Reheat chili stuffed peppers in a 375F preheated oven for 20-30 minutes. To speed up cooking, cut the stuffed pepper open (either in halves or quarters). You can also reheat it in the air fryer at 350F for 10 minutes.
More Stuffed Peppers
- 10 Best Stuffed Peppers Recipes
- Ground Beef Stuffed Peppers
- Parmesan Chicken Stuffed Peppers
- Vegan Stuffed Bell Peppers
- Leftover Turkey Stuffed Peppers
- Mexican Stuffed Peppers
Tried this recipe?
I'd love to hear what you think! Leave a comment and rating below to share your feedback. Your reviews help others discover this recipe and help me keep creating more free recipes for you. Snap a photo and tag me on social media @aheadofthyme too.
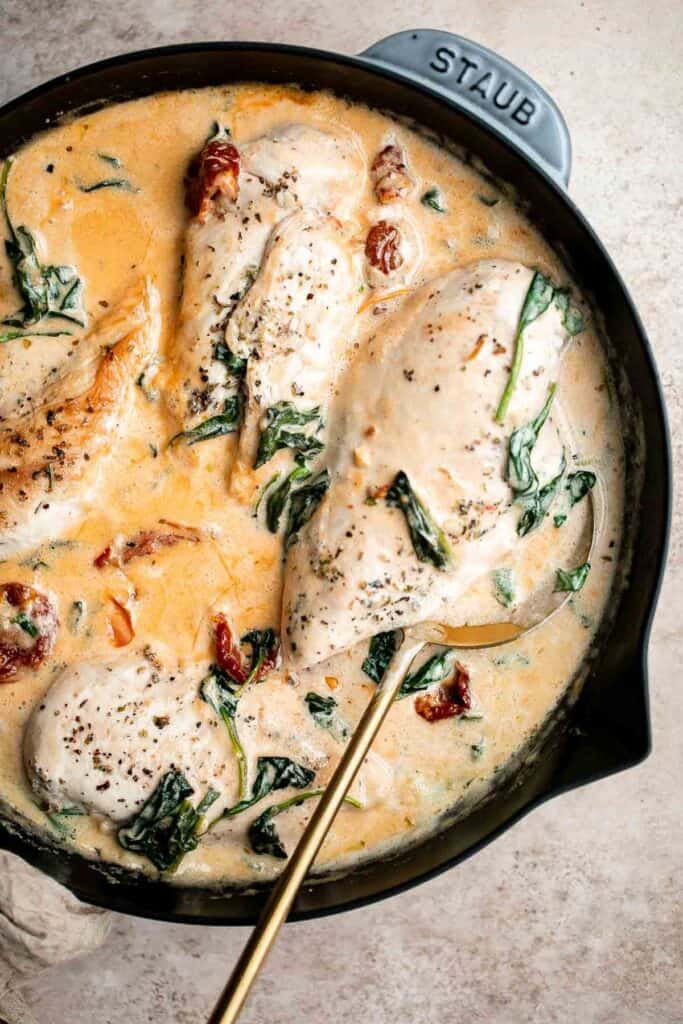
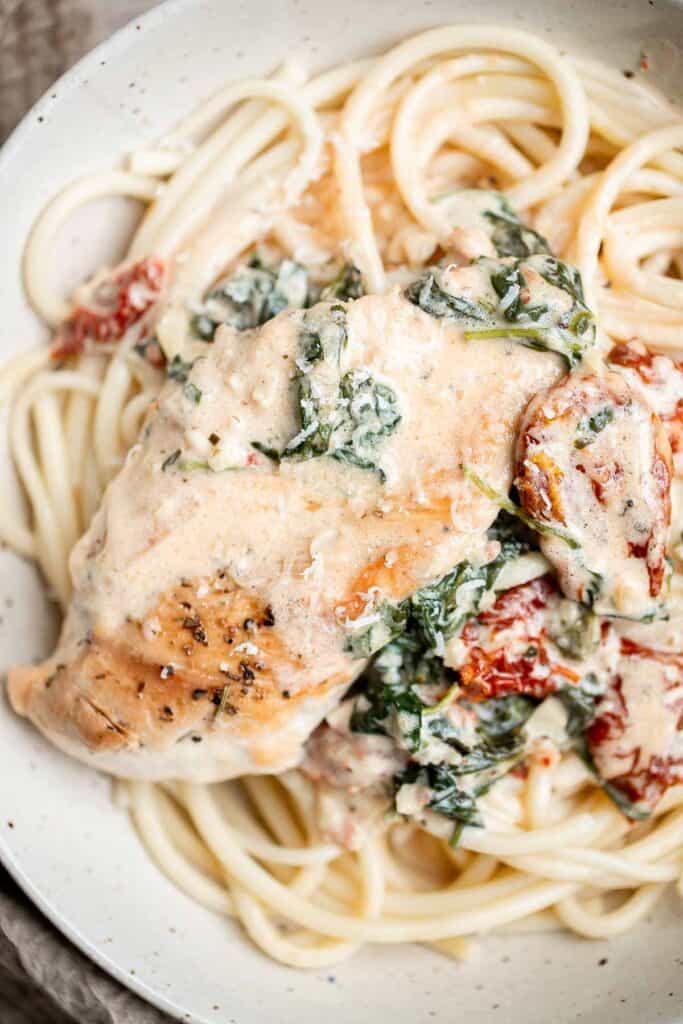
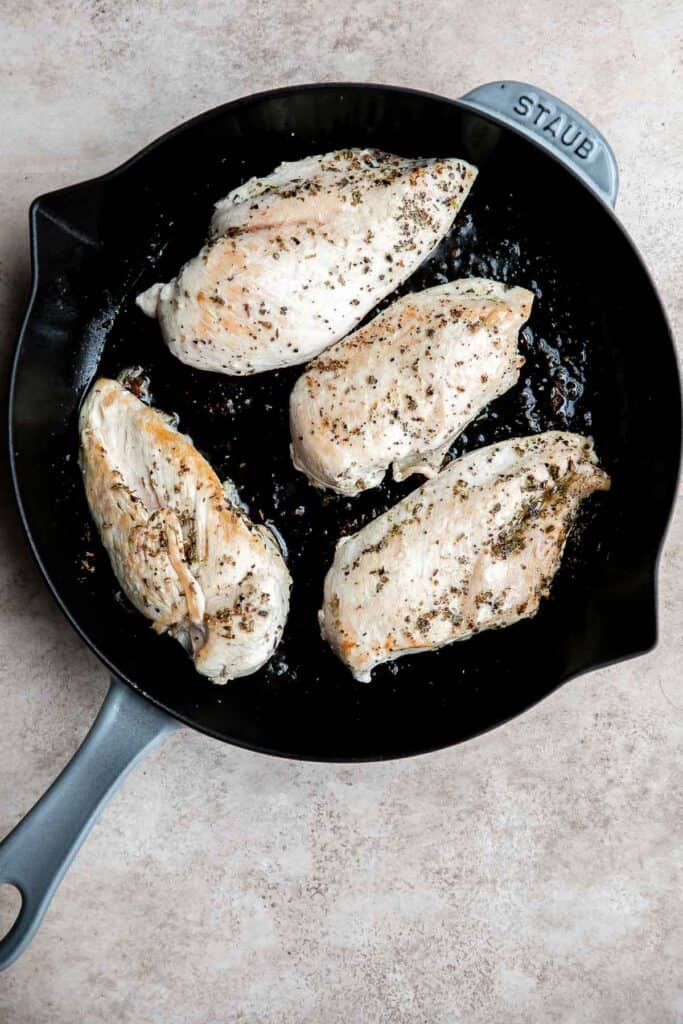
Creamy Tuscan Chicken

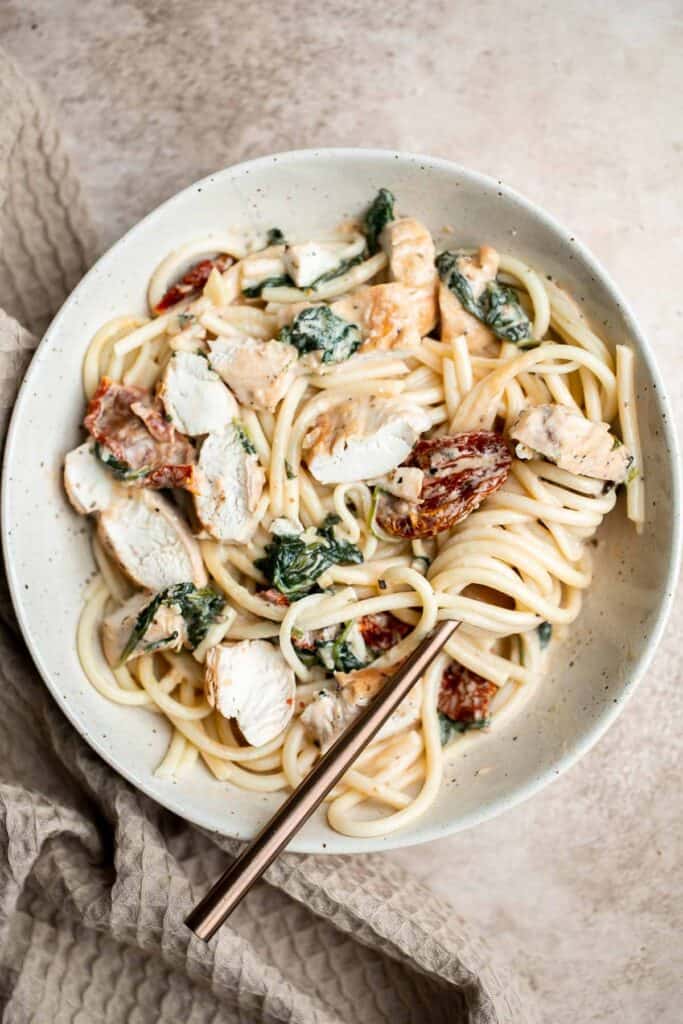
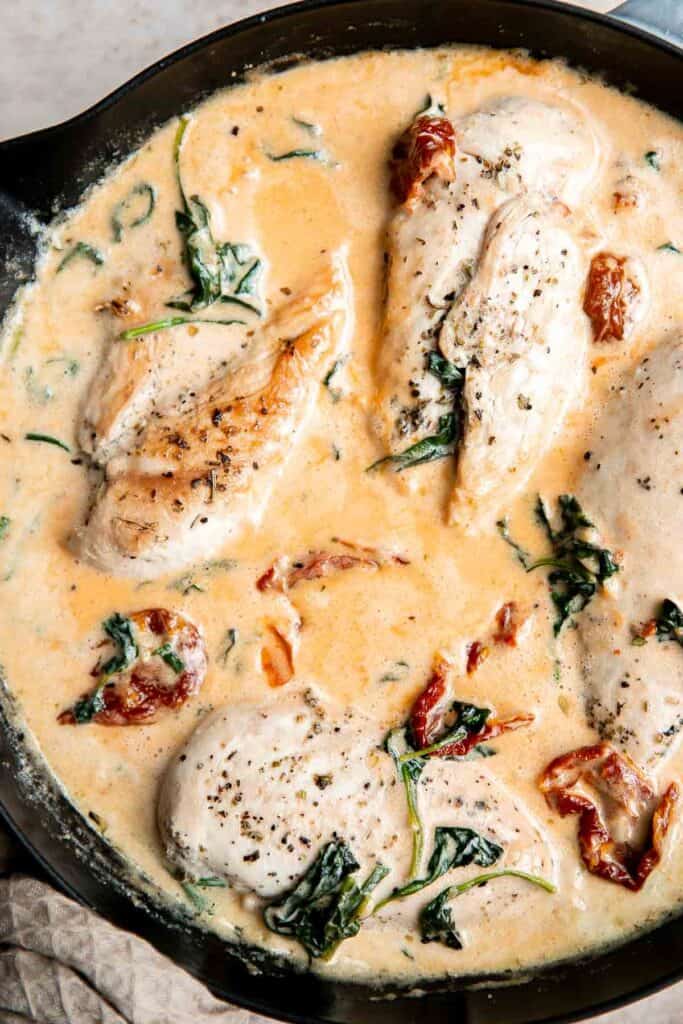
Creamy Tuscan chicken is a quick and easy 30 minute chicken dinner recipe that is delicious, flavorful, and comforting. Juicy and tender is seared then smothered in a creamy, garlicky, and buttery sauce packed with sun-dried tomatoes and spinach. This Italian favorite is fancy enough for Date Night or Sunday Dinner, but easy enough to serve on busy weeknights. Serve it over pasta, rice, or potatoes for a balanced meal.

Why You'll Love Creamy Tuscan Chicken
- It's a 30 minute dinner. Most of us don't have the time or energy to spend hours in the kitchen, especially on busy weeknights. It is essential to have a few easy dinner recipes in your back pocket. This tuscan chicken is not only quick and easy, but it's absolutely delicious and flavorful.
- Loaded with flavor. To make the amazing creamy Tuscan sauce, you'll start with the natural juices from pan-searing the chicken mixed with fresh garlic, butter, cream, spinach, sun-dried tomatoes, and more. It has the best combination of ingredients for incredible depth of flavor in every bite.
- Juicy and tender chicken. The chicken is well-seasoned and seared to perfection. It's juicy and tender, and even juicier when smothered in the delicious creamy sauce. Some other creamy chicken favorites are: Chicken Marsala, Creamy Lemon Chicken Piccata, and Creamy Lemon Parmesan Chicken.
Ingredient Notes
To make this easy creamy tuscan chicken, you will need the following ingredients (full quantities in the recipe card below):
- chicken breasts - use boneless and skinless breasts. You could also substitute with boneless skinless chicken thighs if you want.
- salt and pepper
- Italian seasoning
- vegetable oil - use any kind of vegetable oil such as olive oil, avocado oil, or sun-dried tomato oil.
- butter
- garlic
- heavy cream
- chicken broth
- tomato paste
- Parmesan cheese
- baby spinach
- sun-dried tomatoes - you can substitute with fresh cherry tomatoes and cook until they've burst.
You will also need measuring cups and spoons and a 10-inch skillet.
How to Make the Best Creamy Tuscan Chicken
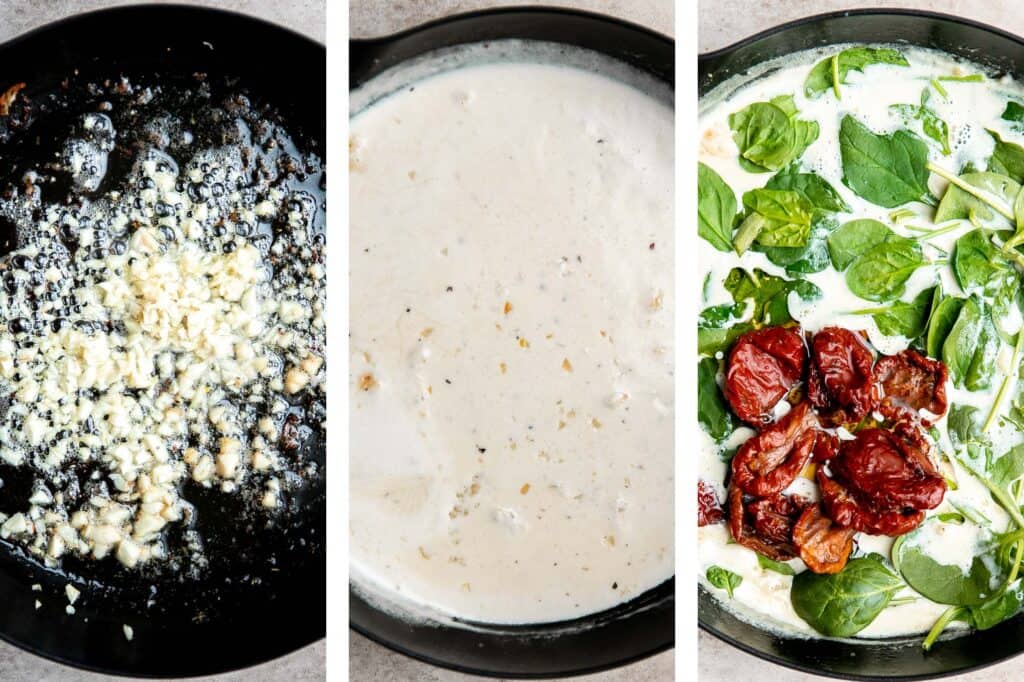
- Sear chicken. Use a paper towel to pat the chicken breasts completely dry. Season with salt, pepper, and Italian seasoning. In a large skillet, heat oil over medium-high heat until the hot oil sizzles, about 1-2 minutes. Add chicken and sear until golden brown, 6-8 minutes per side. Set aside on a plate.
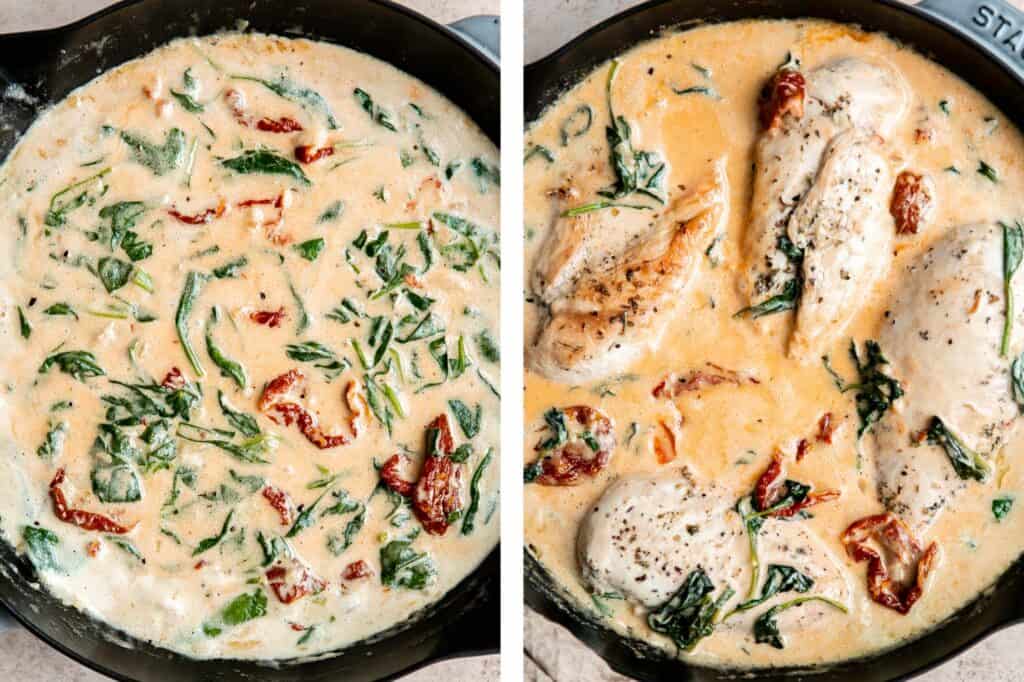
- Make the sauce. In the same skillet, add butter and garlic and sauté until fragrant, about 1 minute. Add heavy cream, chicken broth, tomato paste, and Parmesan cheese. Mix well until smooth and bring the sauce to a simmer over medium heat, about 3-4 minutes. Stir in spinach and sun-dried tomatoes and cook until the spinach has wilted, about 1 minute.
- Add chicken. Return the chicken to the skillet and spoon some sauce over to coat. Let the chicken simmer in the sauce until the sauce has thickened to a desired consistency, about 3-4 minutes. Season with salt to taste.
- Serve. Serve immediately with pasta, rice, or potatoes.
How to Make Tuscan Chicken in the Instant Pot
- Pat dry chicken breasts completely with a paper towel and season with salt, pepper and Italian seasoning. Turn on the Sauté function on high on the Instant Pot.
- Heat oil for 1-2 minutes until it sizzles and sear the chicken until golden brown, about 3-4 minutes per side.
- Add all the cream sauce ingredients including butter, garlic, heavy cream, chicken broth, tomato paste, Parmesan cheese. Mix well until smooth.
- Switch to pressure cooking mode on manual High and seal the lid (the steam release knob must be turned to the sealed position). Cook for 5 minutes. Once the time is up, quick release the remaining pressure by turning the steam release valve to the venting position.
- Turn on sauté on high and stir in spinach and sun-dried tomatoes. Cook for 2-3 minutes until the spinach has wilted and the sauce thickens to a desired consistency. Season with salt to taste.
What to Serve with Creamy Tuscan Chicken
When you serve creamy Tuscan chicken, I highly recommend that you keep some fluffy bread on the table. You won't want to waste any of this sauce. This creamy Tuscan chicken also tastes great paired with pasta, rice, or potatoes. Some of my favorite sides to serve are:
- Ciabatta Rolls
- Cacio e Pepe
- Crispy Smashed Potatoes
- Garlic Breadsticks
- Mascarpone Mashed Potatoes
- Roasted Vegetables
Storing Instructions
- How to store: Store any leftover creamy Tuscan chicken in an airtight container for 3-4 days in the refrigerator.
- How to reheat: Reheat leftover Tuscan chicken on the stove in a covered pan over medium-low heat until warmed through, about 10-15 minutes. Add some water to the sauce if it has thickened too much in the fridge.
More Chicken Recipes
- 60 Best Chicken Recipes
- Creamy Lemon Chicken Piccata
- Chicken Marsala
- Air Fryer Chicken Breast
- Creamy Lemon Parmesan Chicken
- White Chicken Lasagna Soup
Tried this recipe?
I'd love to hear what you think! Leave a comment and rating below to share your feedback. Your reviews help others discover this recipe and help me keep creating more free recipes for you. Snap a photo and tag me on social media @aheadofthyme too.

30 Best Instant Pot Recipes
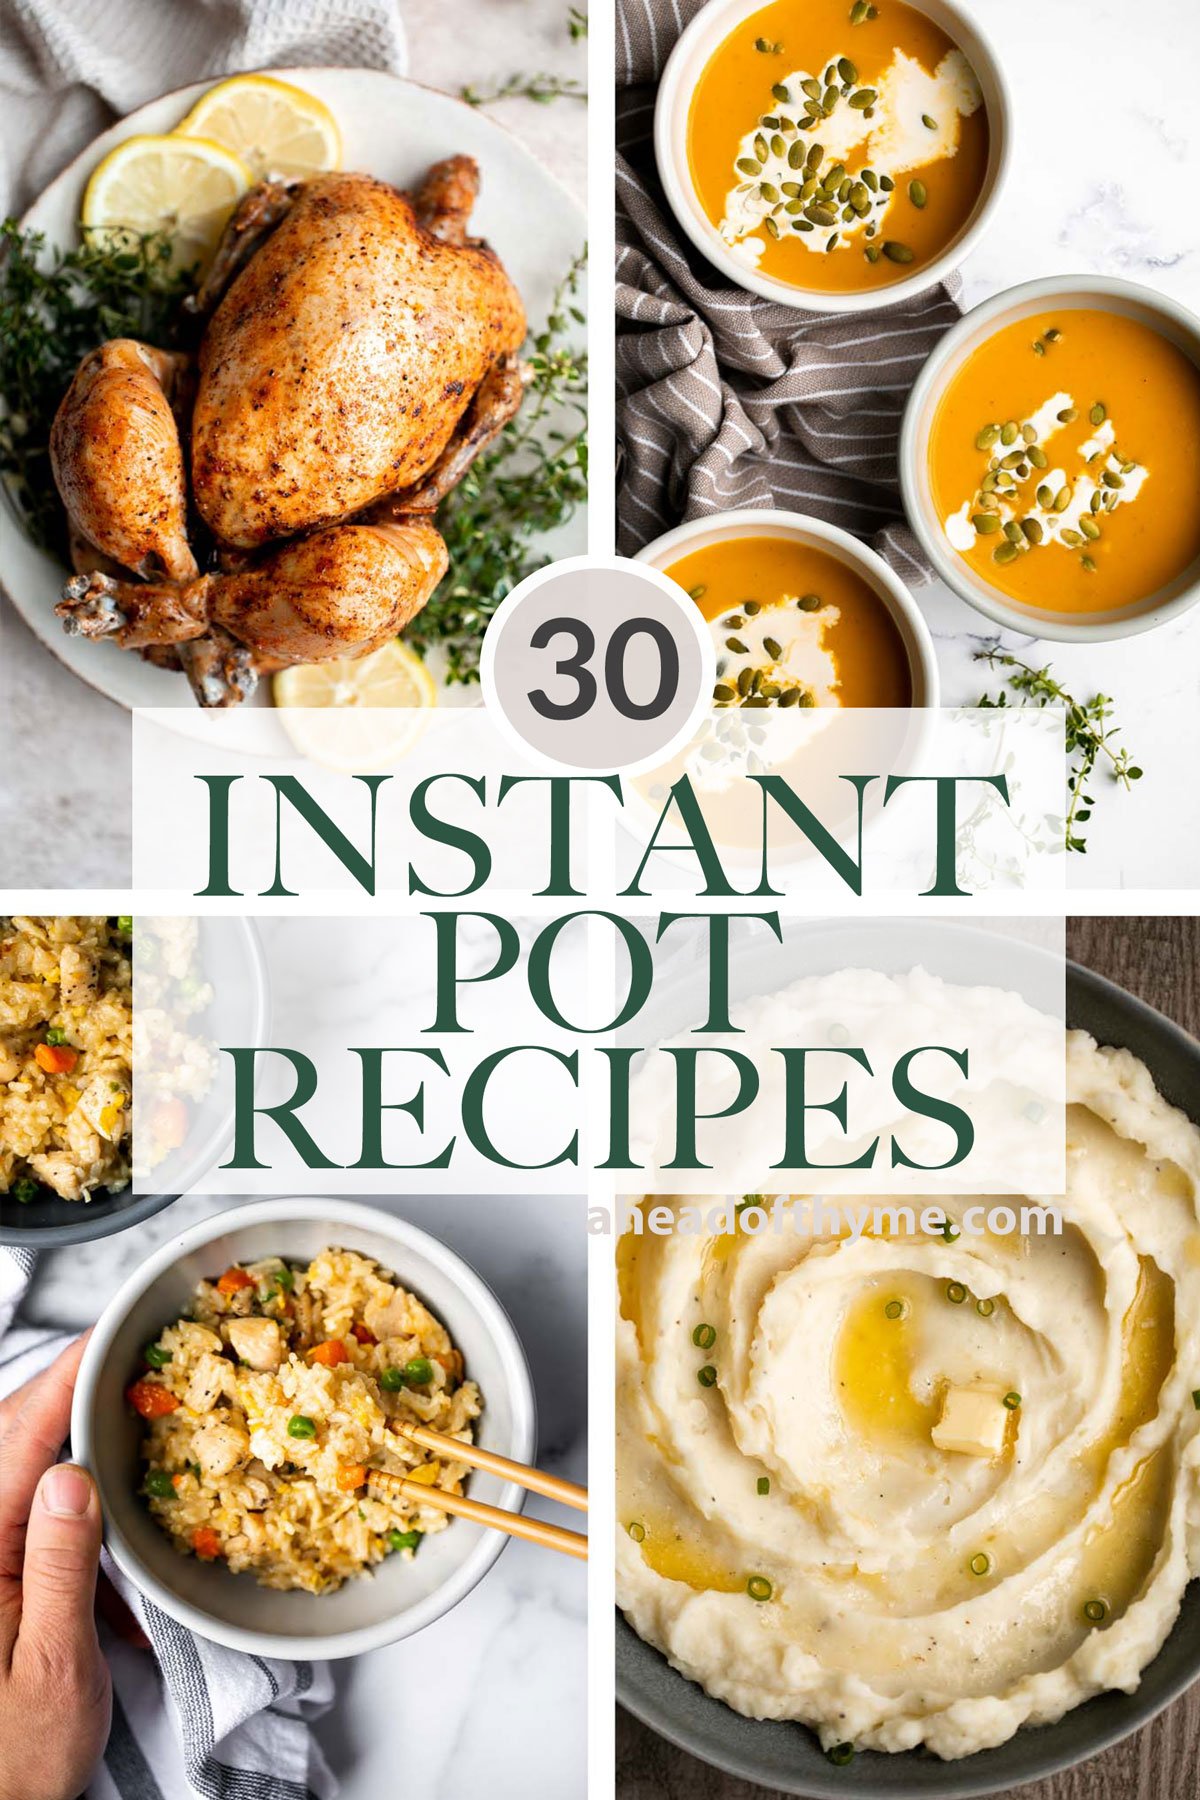
When it comes to quick and easy dinners, it's all about the instant pot. You can throw in your ingredients, let the pressure cooker do it's thing, and have dinner ready much faster than if you cooked it over the stove. So whether you just purchased a new instant pot and can't wait to use it, you have had it for a while but want to switch up your dinner routine, or you are just wondering "what to cook in the instant pot", then you are in the right place. We are sharing over 30 of the best instant pot recipes for the pressure cooker including instant pot chicken and turkey, curries and stews, soup, rice, vegetables, and more!

Best Instant Pot Recipes
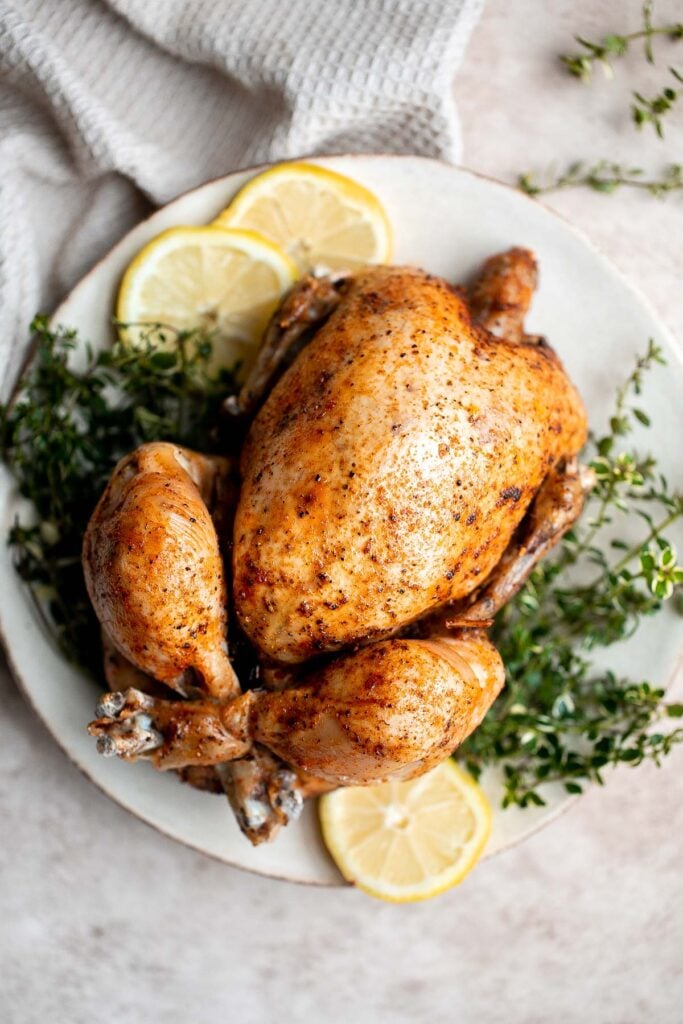
Instant pot whole chicken with gravy is tender, juicy, and flavorful. It's the fastest way to cook a whole rotisserie chicken for dinner in just 40 minutes. Shred it and use it in any of our 25 Best Leftover Rotisserie Chicken Recipes.
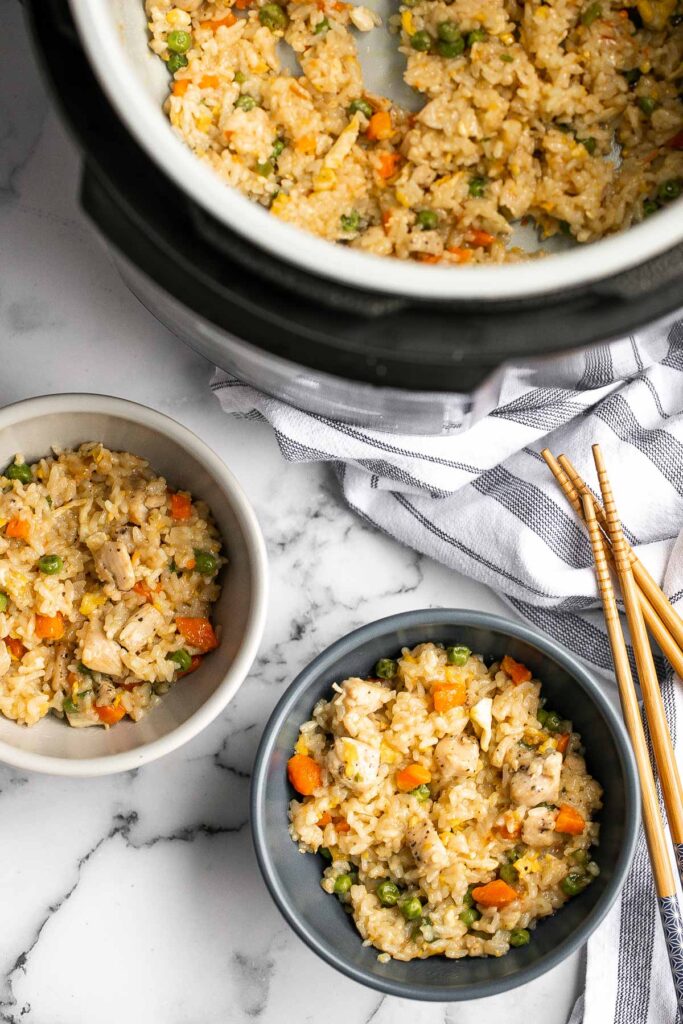
Instant Pot Chicken Fried Rice
Instant pot chicken fried rice is easy to throw together, packed with flavor, and delicious. It's perfect for a weeknight family dinner or meal prep. | aheadofthyme.com
Instant pot beef curry with potatoes and carrots is delicious, hearty, comforting, and flavorful. It's made quick and easy in the pressure cooker.

Teriyaki chicken is a quick easy chicken stir fry that is delicious, flavorful, healthy, and better and faster than takeout. Perfect for busy weeknights. Instant pot instructions included in the recipe tips.
Instant Pot Butternut Squash Soup
Instant pot butternut squash soup is the perfect fall dish to cook in your pressure cooker - warm, cozy, comforting, and creamy. Make in 15 minutes.
Creamy Tuscan chicken with sun-dried tomatoes and spinach is a quick and easy 30 minute Italian chicken dinner that is delicious, flavorful, and comforting. Easy instant pot instructions in the recipe tips.
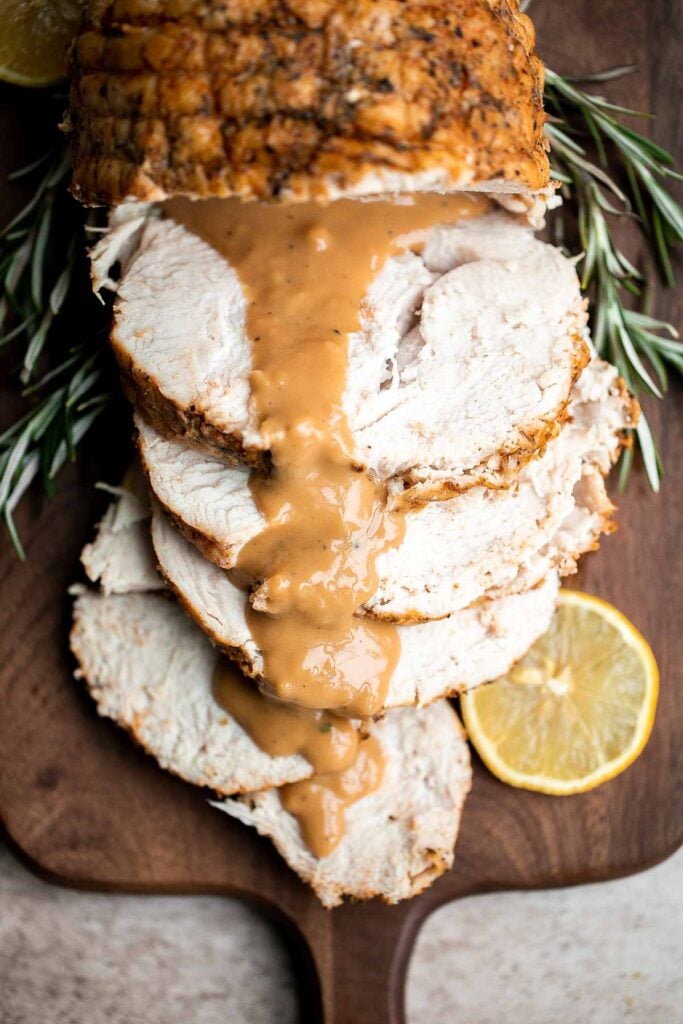
Instant pot turkey breast is the most tender and juicy turkey you'll ever try. It's so easy to make in the pressure cooker and requires little prep.
Instant pot mashed potatoes are the quickest and easiest mashed potatoes you'll make in under 20 minutes (including prep!) in the pressure cooker.
Instant Pot Short Ribs are rich, tender, and delicious. These short ribs fall-off-the-bone after being braised in a red wine broth in the pressure cooker.
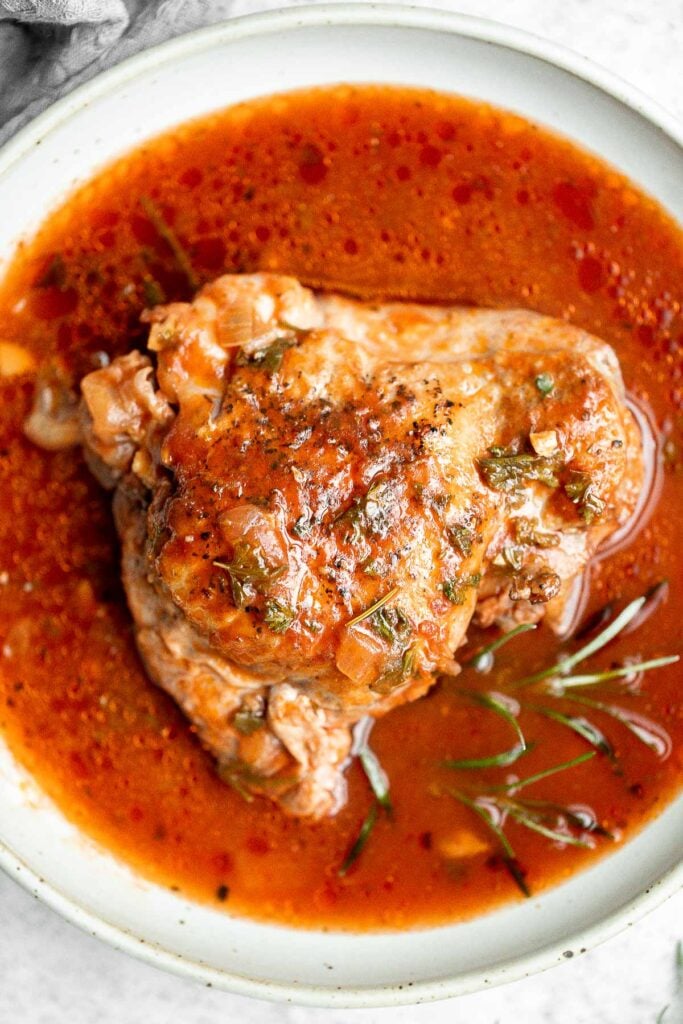
White chicken chili is an easy and delicious one pot meal made with shredded chicken, hearty veggies, and a creamy broth that's loaded with flavor. Instant pot instructions in recipe tips.

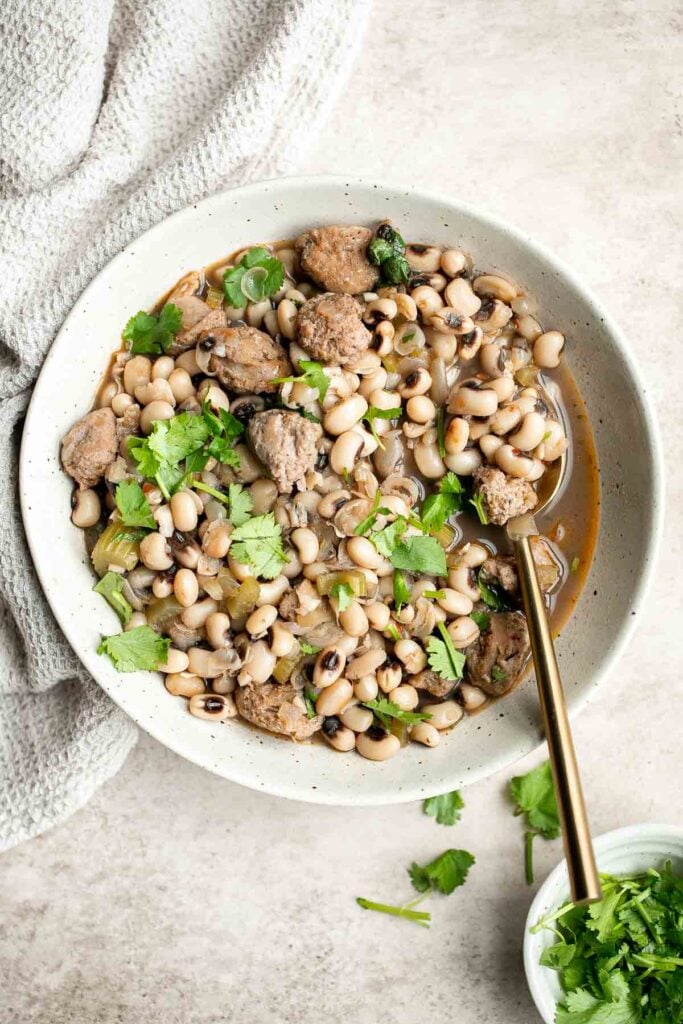
Southern Black Eyed Peas (Hoppin' John) is classic comfort food that is hearty, delicious, flavorful, and comforting. Serve it on New Year's for good luck. Full Instant Pot instructions in the recipe tips.
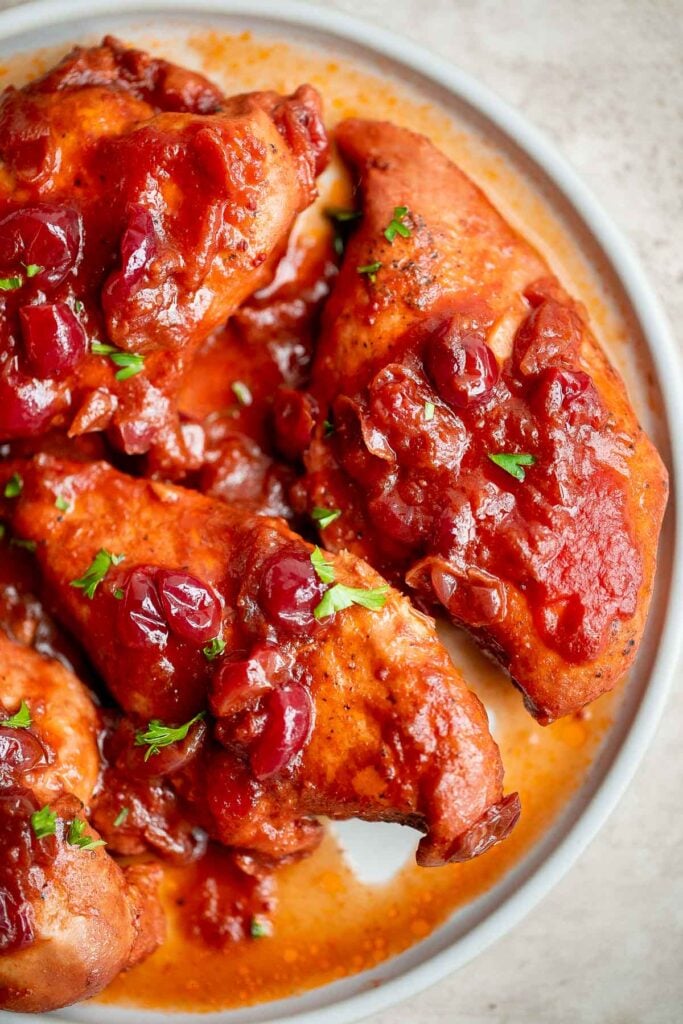
Instant Pot Cranberry Sauce Chicken
Instant pot cranberry chicken is sweet, tart, savory, and delicious. Make this chicken dinner in the pressure cooker in just 30 minutes. So quick and easy!
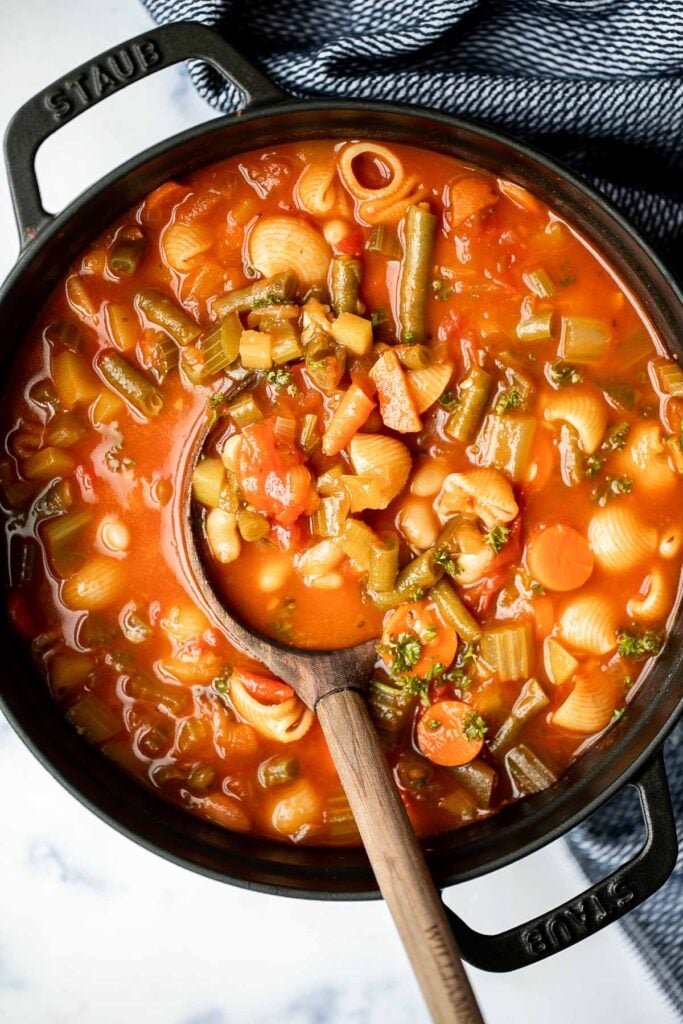
Minestrone soup is a hearty, healthy, nourishing, and delicious classic Italian soup, packed with vegetables and pasta simmered in a rich tomato broth. Easy instant pot instructions in recipe tips.
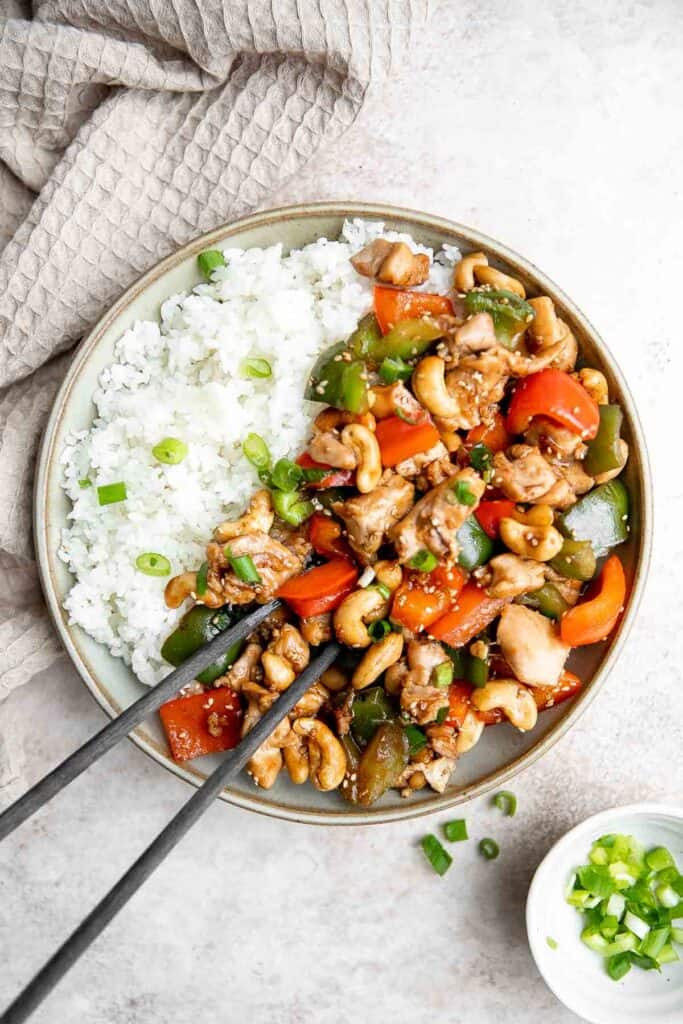
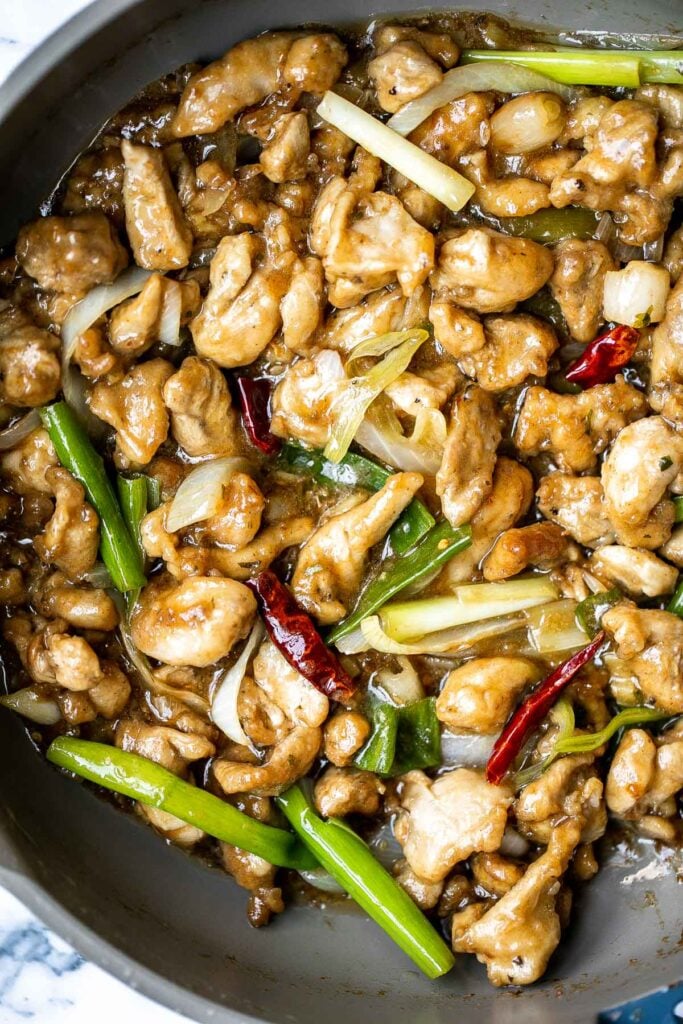
Cashew chicken is a quick and easy chicken stir fry ready in under 30 minutes. It's flavorful, delicious, and so much better and faster than takeout. Easy instant pot instructions in the recipe tips.
Instant pot turkey roast with homemade gravy is easy to prepare in minutes, the fastest way to cook turkey, and delivers flavorful, juicy, tender turkey.
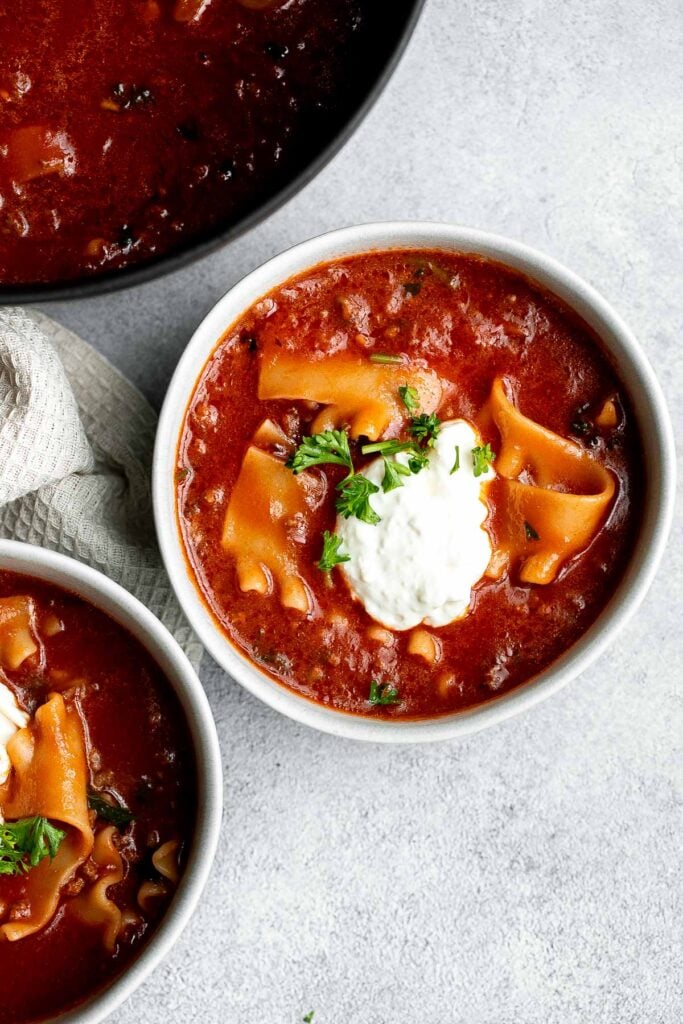
Lasagna soup is a twist on a classic Italian recipe with all the same delicious comforting flavors in the form of a hearty one pot soup. Pressure cooker instructions in recipe tips.
Mongolian chicken is a quick and easy chicken stir fry dish that you can make at home in just 30 minutes. Healthier, faster, and better than takeout. Instant pot instructions in recipe tips.
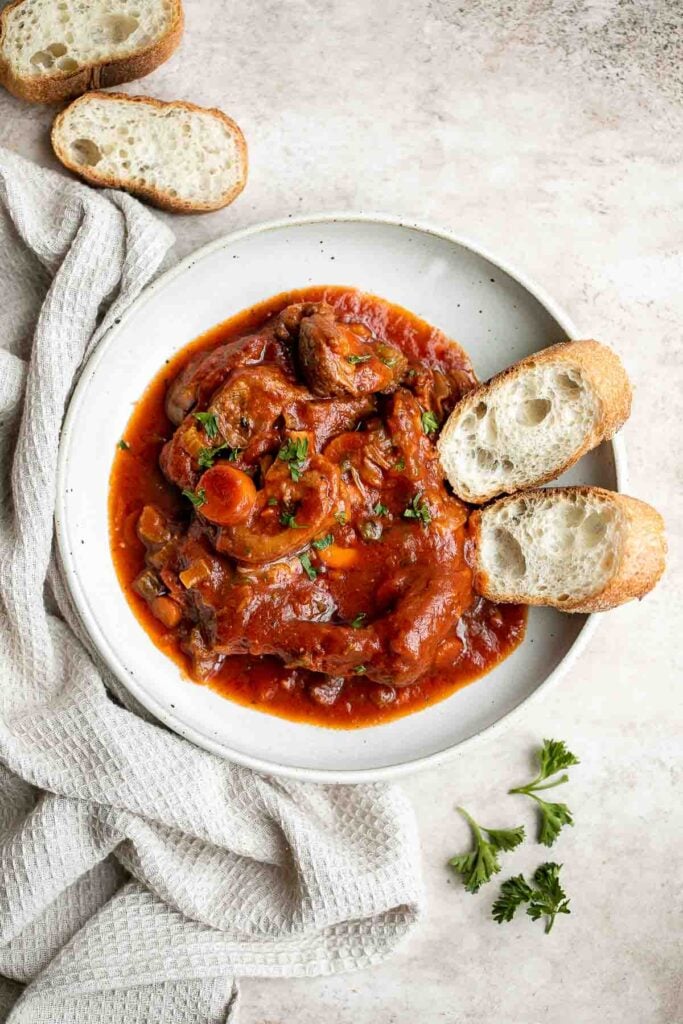
Instant pot osso buco is a delicious, classic Italian recipe with braised veal shanks stewed with vegetables in a thick, savory red wine and tomato sauce.
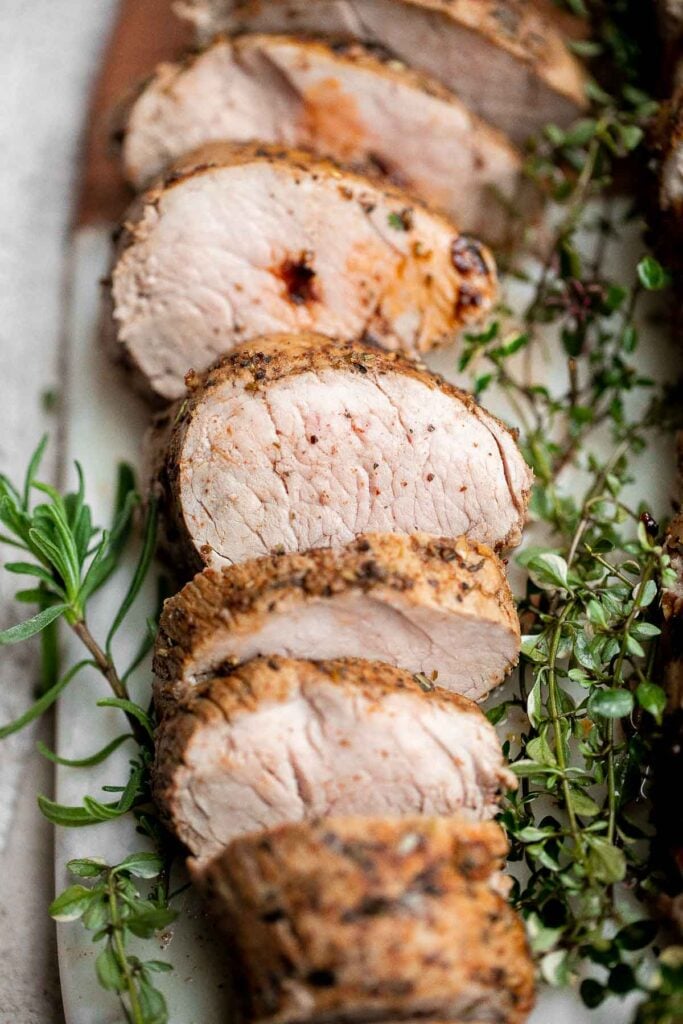
Quick easy roasted pork tenderloin with sauce is juicy, tender, and flavorful. Ready in 30 minutes, it's perfect for busy weeknights or a holiday dinner. Pressure cooker instructions in the recipe tips.
Instant Pot Chinese Braised Pork
Instant Pot Chinese Braised Pork (Hong Shao Rou) is tender, juicy, flavorful, and easy to make in a pressure cooker. Try this Shanghai dinner at home today!
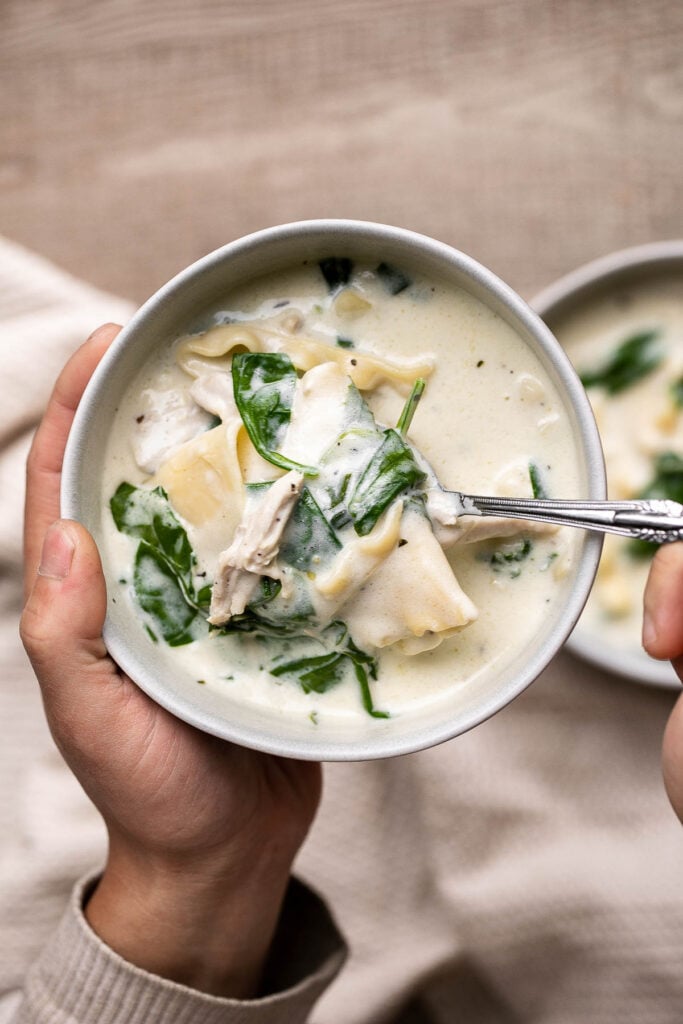
White chicken lasagna soup is a thick and creamy soup version of this classic Italian dish. It's quick and easy to make in just 30 minutes. Instant Pot instructions in recipe tips.
Instant pot turkey thighs are tender, juicy, and delicious. Perfect for a small holiday dinner or weeknight dinner with little effort and 10 minutes prep.
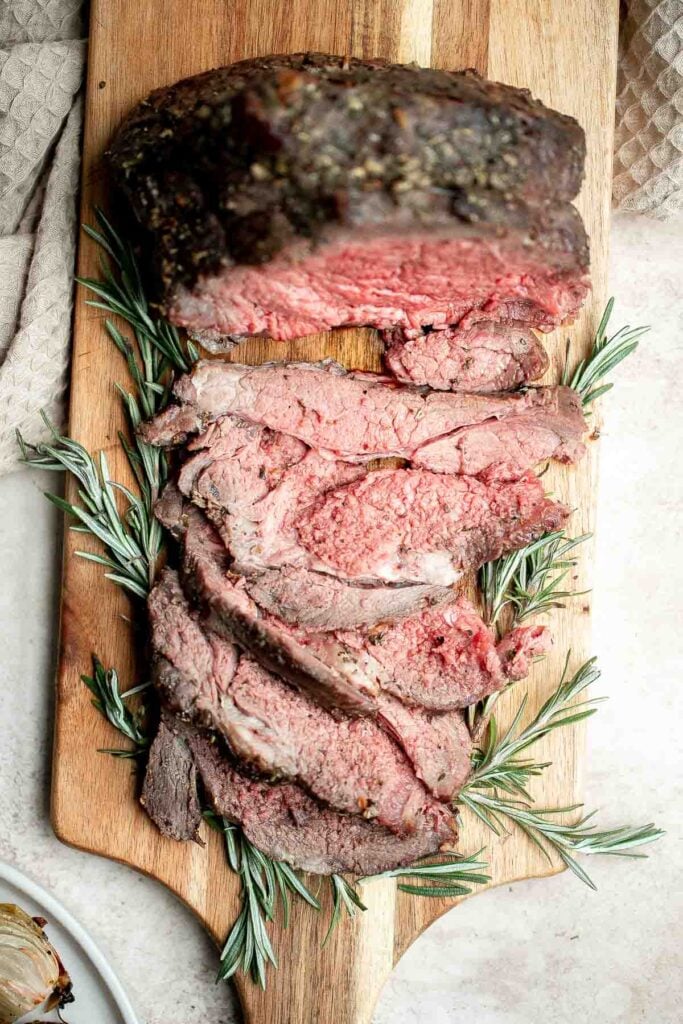
Homemade roast beef is roasted on high heat and slow cooked on low heat for the best texture - browned crust on the outside and tender, moist, juicy inside. Instant pot instructions in the recipe tips.
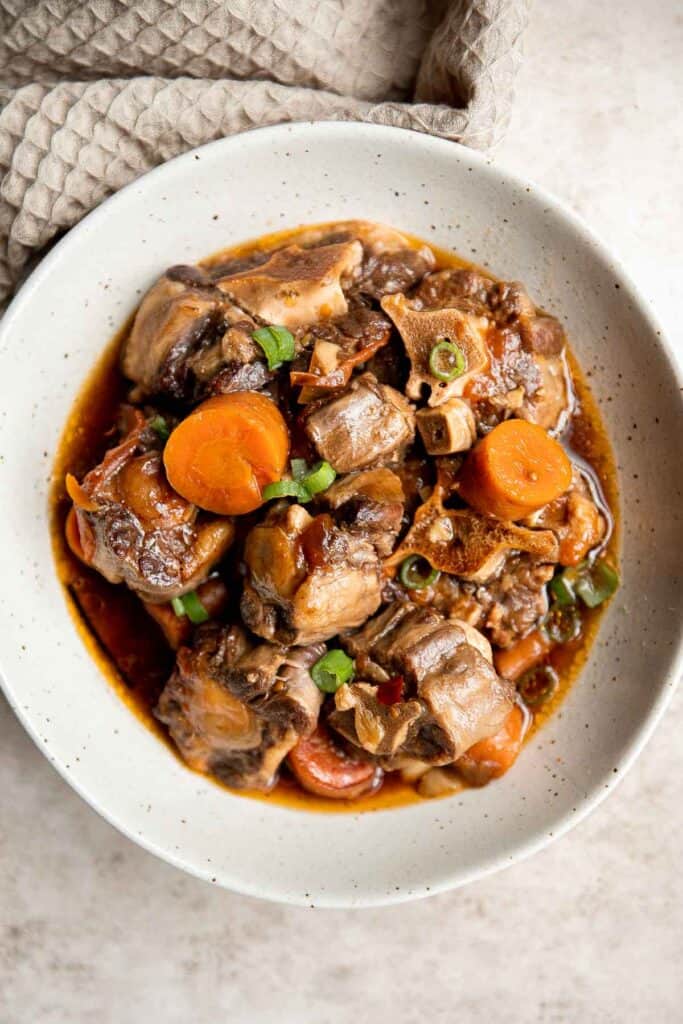
Instant Pot Oxtail Stew is filling, nourishing, flavorful, and satisfying. This Asian stew is easy to make in the pressure cooker and is freezer-friendly.
Storing and Reheating Instant Pot Recipes
- How to store: Store any leftovers in airtight containers in the refrigerator or even in the freezer for up to 2-3 months. Check the individual recipe for complete storing instructions and to see if the recipe is freezer-friendly.
- How to reheat: Most of the leftovers can be reheated in a saucepan over the stove over medium-low heat until warmed through. If heating from frozen, let it thaw first and then reheat.
More Popular Recipes
- 60+ Easy Dinner Ideas
- 20 Crockpot Recipes for the Slow Cooker
- 25 Easy Air Fryer Recipes
- 60 Best Chicken Recipes
- 25 Leftover Rotisserie Chicken Recipes
- 50 Sunday Dinner Ideas
Did You Make Any of These Instant Pot Recipes?
Please leave a comment and rating below, and let me know what you thought of this round up of these easy instant pot recipes for the pressure cooker. Be sure to snap a picture and tag me on Instagram @aheadofthyme or share it on the Pinterest pin so that I can follow along.
HUNGRY FOR MORE? Don't forget to sign up for my email newsletter so that you don't miss any recipes. You can also follow along on Instagram and Pinterest for more recipe updates.
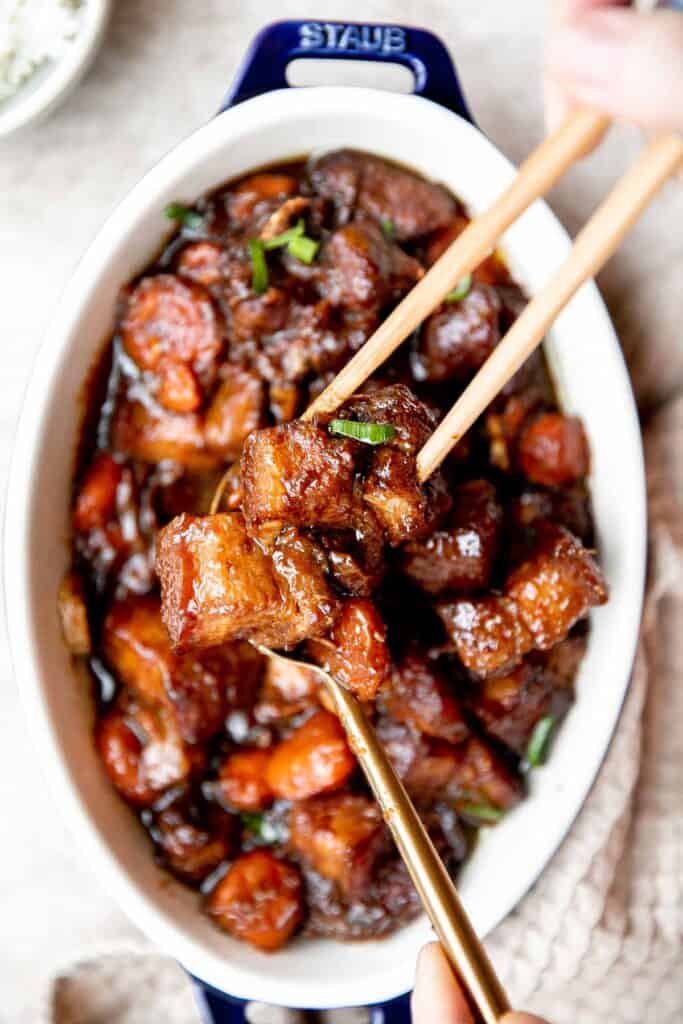
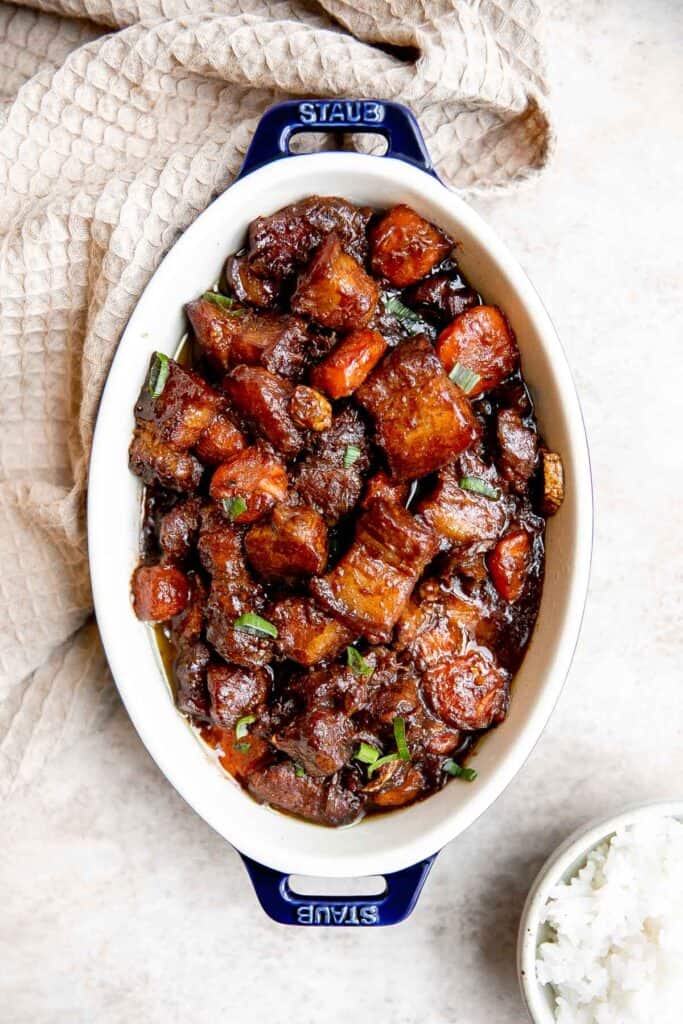
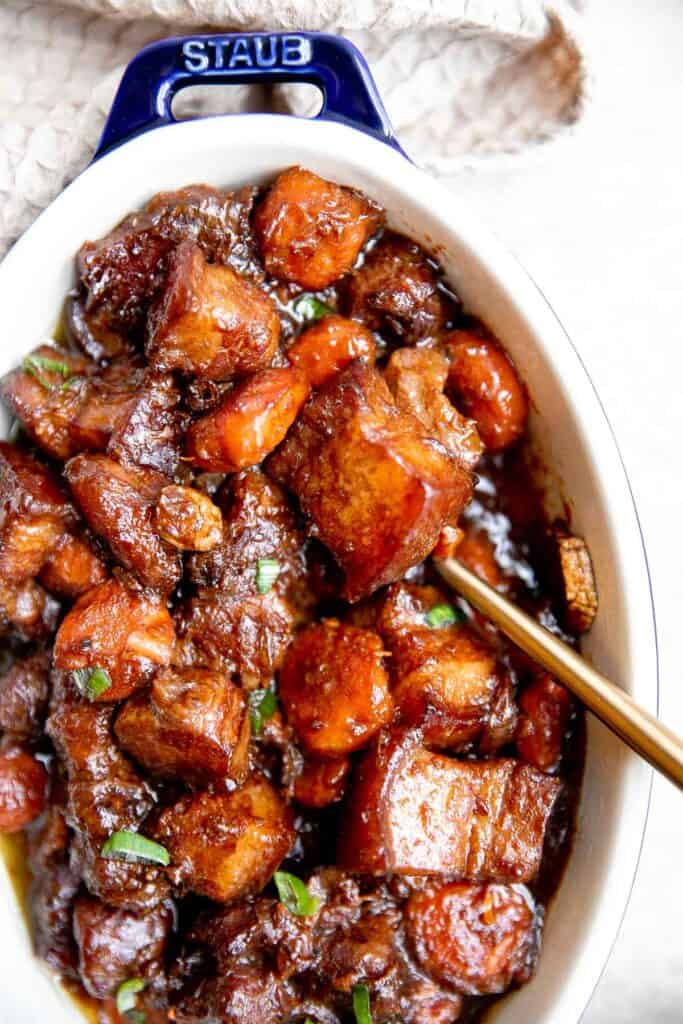
Instant Pot Chinese Braised Pork

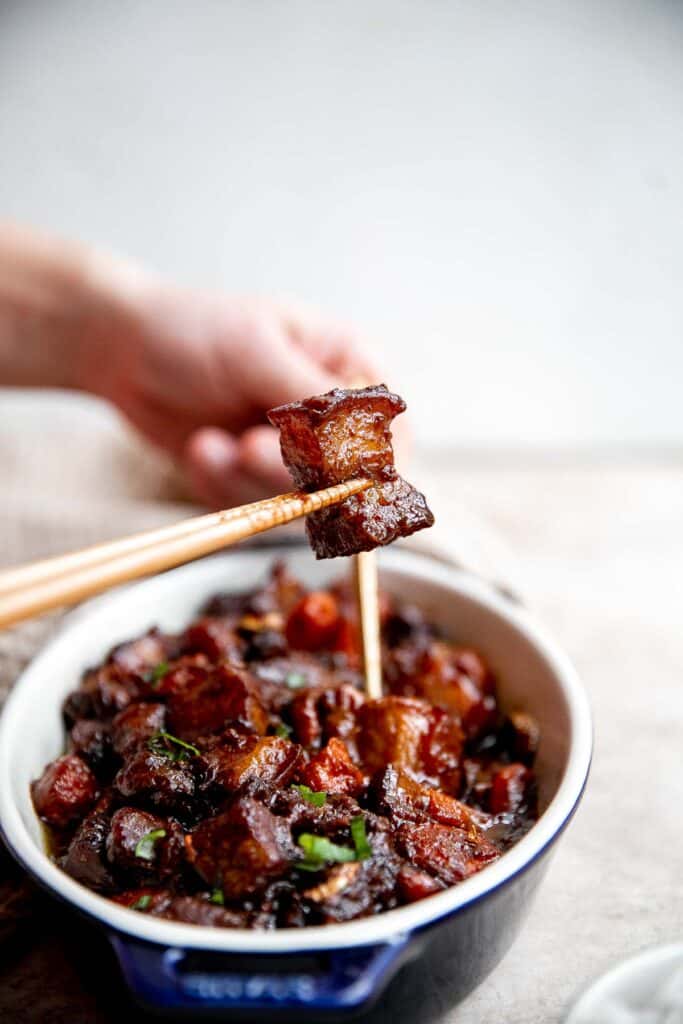
Instant Pot Chinese Braised Pork (also known as Hong Shao Rou) is tender, juicy, and flavorful. This Shanghai-style braised pork belly is so easy to make in a pressure cooker, and so much faster than the traditional slow-cook method. Juicy and tender pork belly is seared in the instant pot and pressure cooked with carrots and an easy and delicious sauce loaded with Asian flavor. Once you try it, you'll wonder why you haven't spent more time making Chinese takeout dishes in the comfort of your home. It's cheaper and just as (if not more) delicious!
Why You'll Love Instant Pot Chinese Braised Pork
- Braised meat is easy to make in a pressure cooker. Braising is a unique cooking method where you sear your meat (usually pork or beef) on high heat before slow cooking it in a tasty liquid. Braising is traditionally done in a Dutch oven or slow cooker, and this pressure cooker braised pork is just as good but so much faster.
- Tender, juicy meat and a delicious sauce. The magic of braising is that the liquids lend flavor the meat - and the meat lends flavor to the liquids. You reserve all the goodness stored in the pork fat since it melts into the sauce, and the instant pot braised pork belly delivers flavor in every bite. It is truly a delight.
- It's a crowd favorite. It always feels good to cook food that people rave about. Well, this Shanghai-style braised pork belly is exactly that. Even if you don't feel very confident in the kitchen, you'll be able to impress anyone with an easy to follow recipe like this.
Ingredients and Substitutions
To make this delicious Instant Pot Braised Pork, you will need the following ingredients (full quantities in recipe card below):
- pork belly
- brown sugar
- soy sauce - or substitute with oyster sauce.
- Shaoxing wine
- sauce - the flavorful sauce is made from dark soy sauce (for color), chicken broth (or water), sugar, five spice powder, ground white pepper (optional), ginger, star anise, and cornstarch (to thicken it up).
- carrots
- green onions - optional, for garnish.
You will also need measuring cups and spoons and a pressure cooker like an instant pot.
How to Make the Best Instant Pot Braised Pork
- Marinate the pork. In a large mixing bowl, combine pork belly, sugar, soy sauce, and Shaoxing wine. Stir well to coat evenly. Cover and marinate for at least 15 minutes to soak in all the flavour. You can also marinate it in a ziploc bag, seal, and press the marinade around to coat.
- Sear the pork. Turn on the Sauté function on high on the Instant Pot or pressure cooker. Add the pork belly and cook until browned on all sides, about 5 minutes.
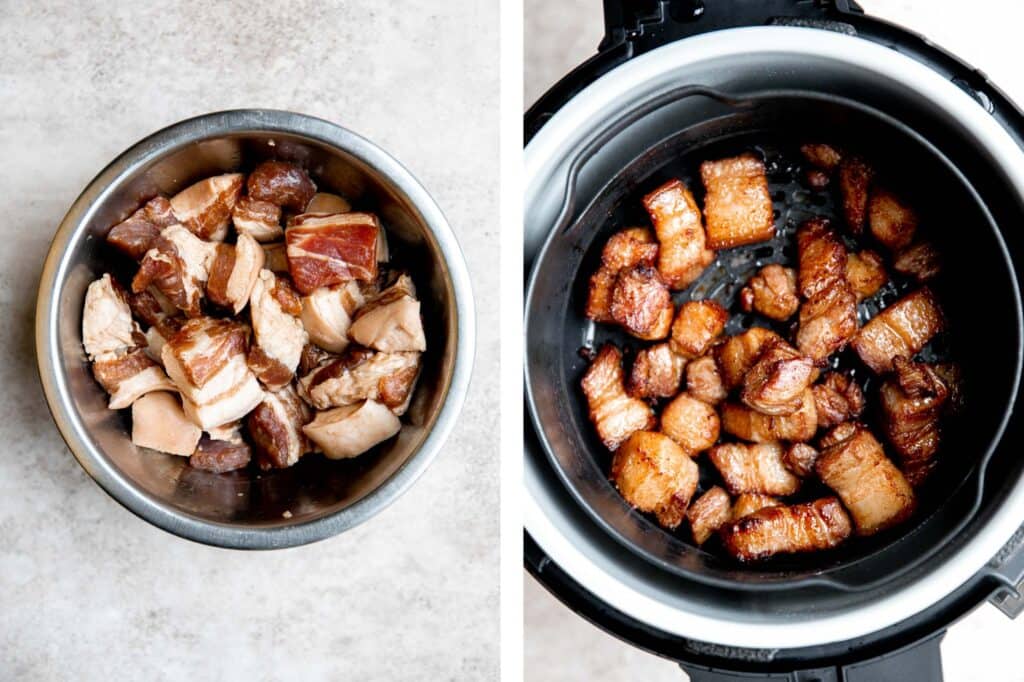
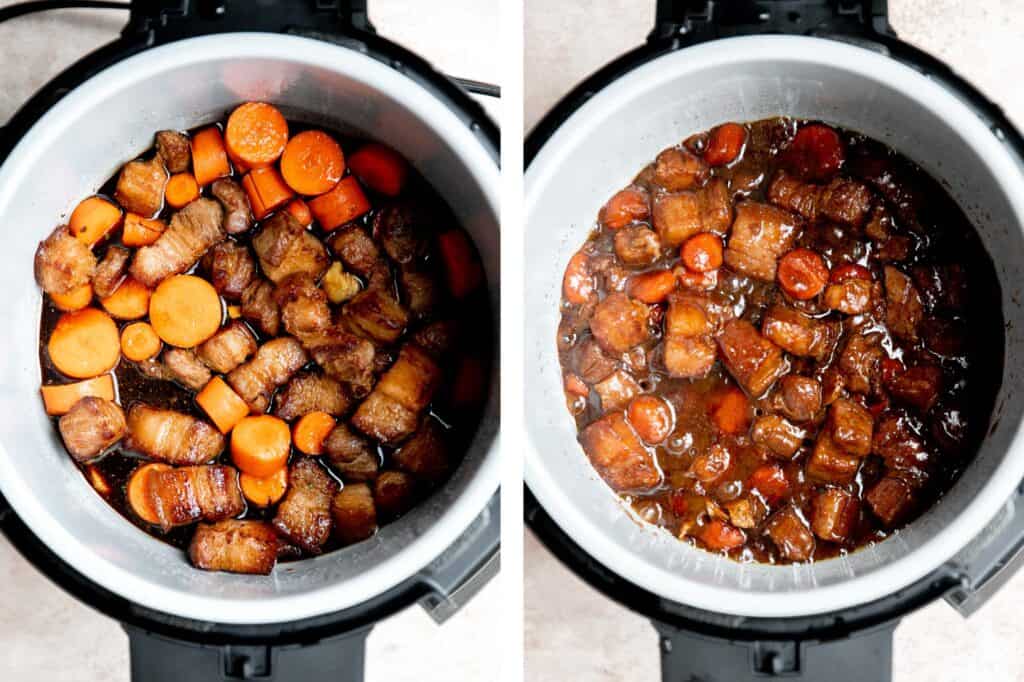
- Add remaining ingredients. In a separate bowl, combine all the sauce ingredients and mix well until smooth. Add the sauce mixture and carrots to the instant pot.
- Pressure cook. Switch the instant pot to pressure cooking mode on manual High and seal the lid (the steam release knob must be turned to the sealed position). Let the pork belly pressure cook for 10 minutes until tender. Once the time is up, you can let the instant pot slowly release the pressure, about 20 minutes or quick release the remaining pressure by turning the steam release valve to the venting position.
- Serve. Garnish with green onions and serve warm with a bowl of steamed rice.
Recipe Tips and Tricks
- Make it thicker: To thicken the sauce more, stir in an additional ½ teaspoon cornstarch and sauté on HIGH for 2-3 minutes until thickened to a desired consistency.
- Skin on or skin off: Whether you cook your pork belly with or without the skin in this braised pork recipe is up to you. I recommend keeping the skin on for the best texture, but it's truly a matter of preference.
- How to store: Instant Pot braised pork belly will stay good in the fridge for 3-4 days inside an airtight container.
- How to reheat: Reheat this Shanghai braised pork belly in a steamer pot of boiling water until warmed through. You can also reheat in the microwave in 30 second increments until warmed through.
More Instant Pot Recipes
- 30 Best Instant Pot Recipes
- Instant Pot Chicken Fried Rice
- Instant Pot Beef Curry
- Instant Pot Cranberry Chicken
- Instant Pot Whole Chicken
- Instant Pot Mashed Potatoes
Tried this recipe?
I'd love to hear what you think! Leave a comment and rating below to share your feedback. Your reviews help others discover this recipe and help me keep creating more free recipes for you. Snap a photo and tag me on social media @aheadofthyme too.

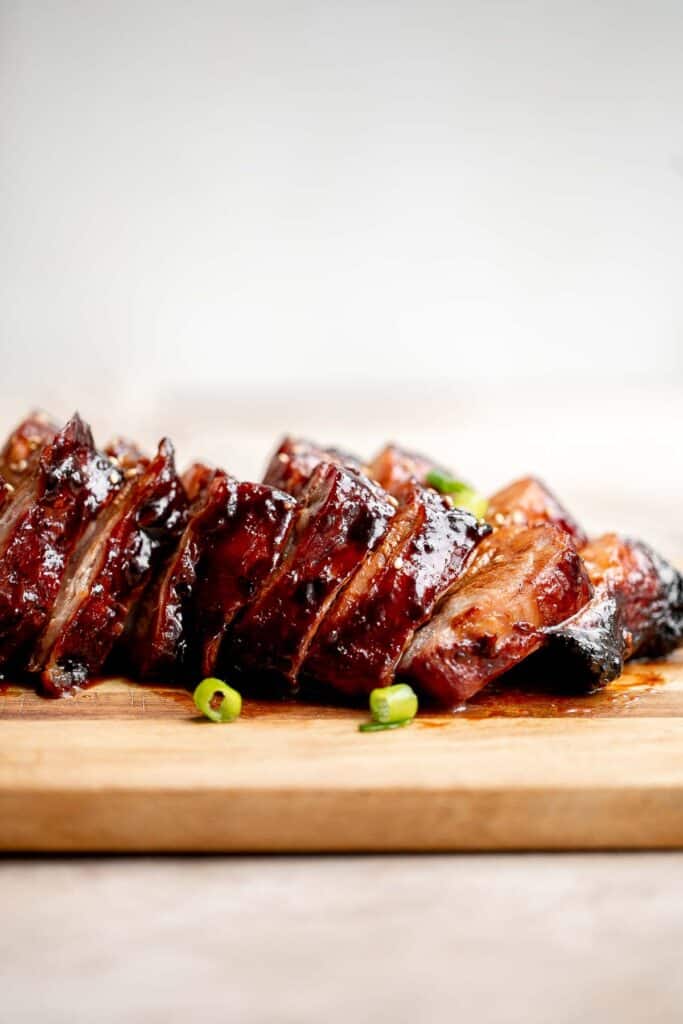
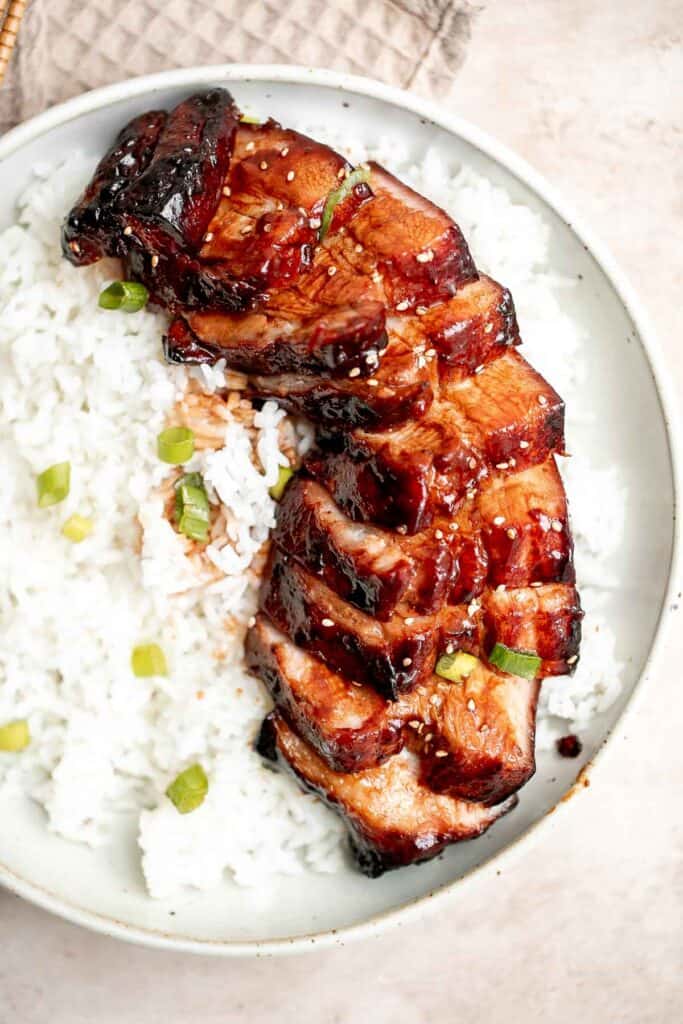
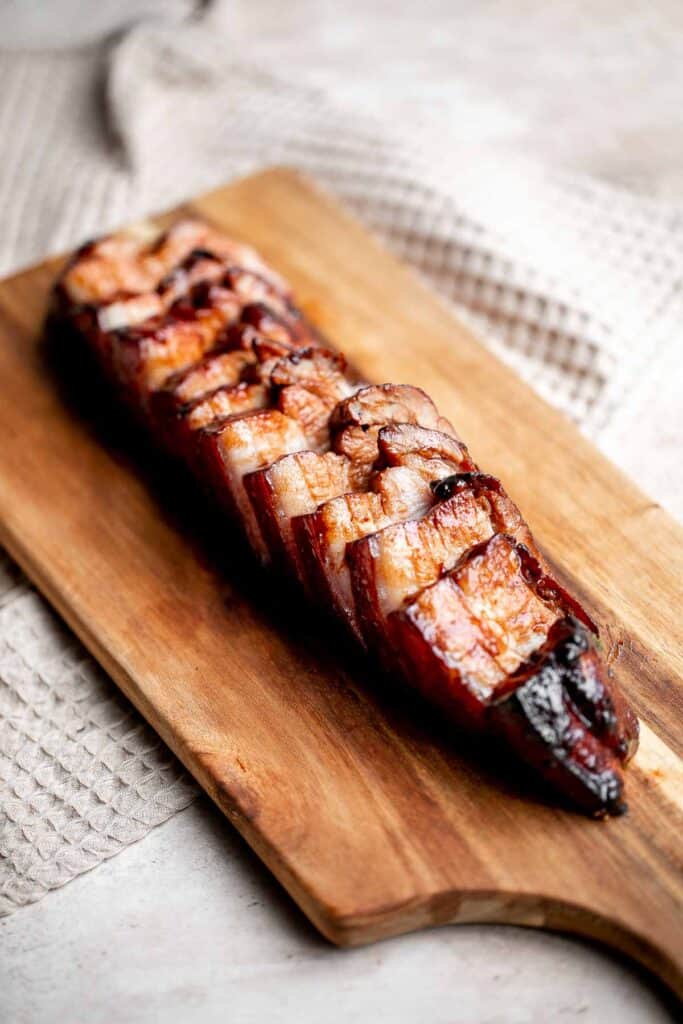
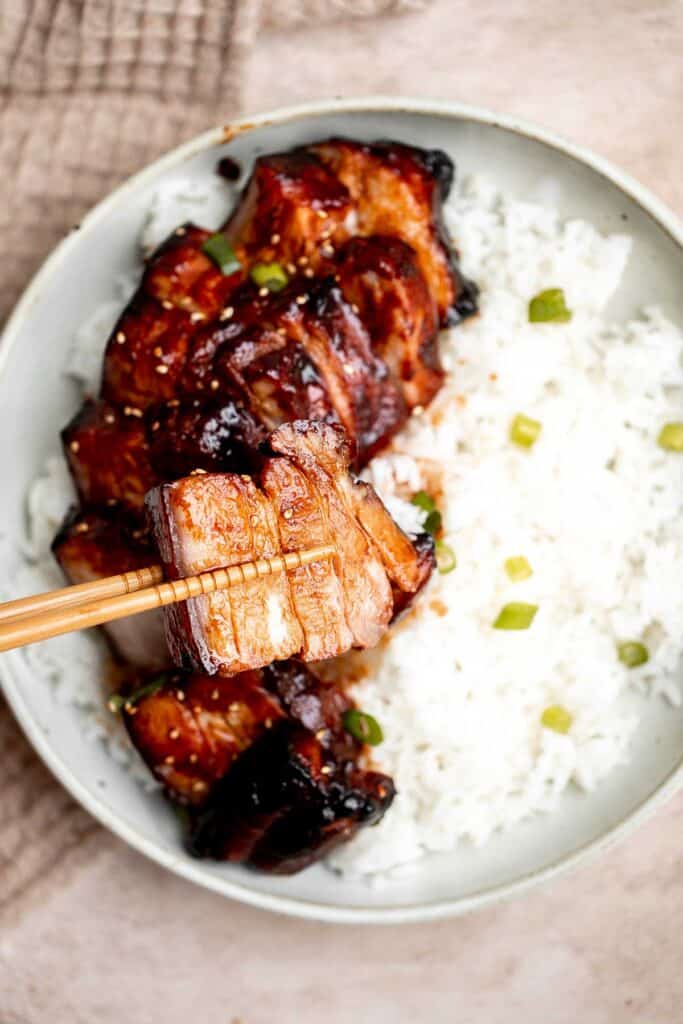
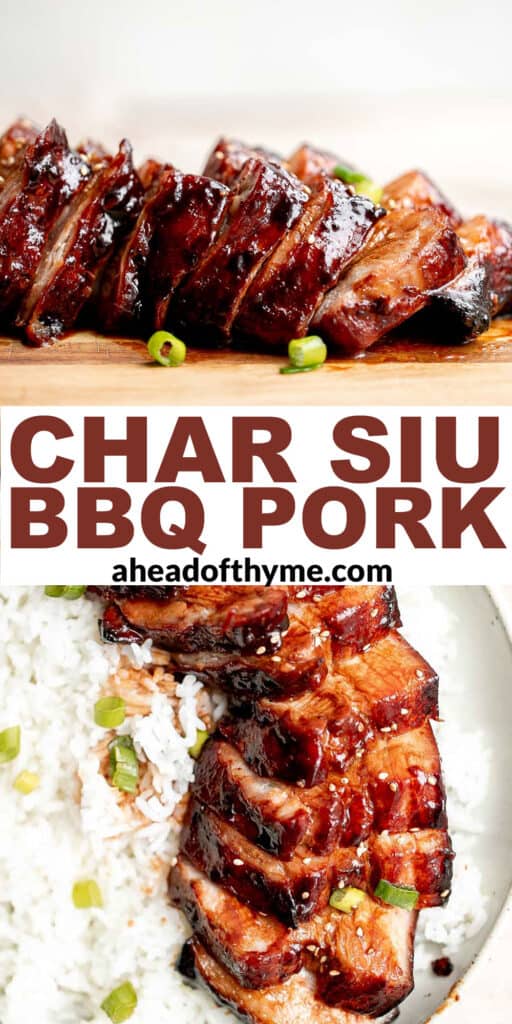
Char Siu (Chinese BBQ Pork)
Char siu (also known as Chinese BBQ pork or cha shao in Mandarin) is a delicious and flavorful roasted pork dinner that is slathered in a distinct sticky, sweet and savory barbecue sauce. It's a traditional dish that originated in Southern China and has gained popularity throughout the country. Fatty pork is marinated, roasted, and basted with a homemade Asian barbecue sauce to create its iconic caramelization and color. Serve for Chinese new year, or marinate it ahead of time and pop it into the oven on busy weeknights.

Why You'll Love Chinese BBQ Pork (Char Siu)
- The thick Chinese BBQ glaze. Just like in Char Siu (Chinese BBQ) Chicken, the star of the recipe is the meat and the Asian barbecue sauce. Authentic char siu has an incredible depth of flavor that originated in the Canton region of Southern China. When you first take a bite of Char Siu, you will immediately feel and taste the sticky, sweet, and savory BBQ sauce loaded with classic Asian flavors. If you thought BBQ Chicken Wings were good, wait until you try Chinese BBQ.
- The slow-roasted pork. You can roast Char Siu in the oven or the air fryer. Either way, the fat will reduce over the 40-45 minutes that roasts, leaving you with a delicious, juicy and tender, slow-roasted pork belly (or shoulder) that has absorbed that delicious Chinese BBQ marinade and glaze on top.
- The marinade. Generally marinated meat it better than non-marinated meat. Marinades cause the mean to become more tender and soft, and soak into the meat making it more delicious and tastier. It's a great way to introduce moisture into the pork. For this recipe, you'll want to take your time -three hours is sufficient but the longer you can wait, the better. Let your patience pay off.
Ingredients and Substitutions
To make this delicious Char Siu (Chinese BBQ Pork), you will need the following ingredients (full quantities in the recipe card below):
- pork - the best cuts to use fattier cuts of pork such as pork belly or pork shoulder. fattier. But, you can always substitute lean meat and still make a tasty (and slightly healthier) Chinese BBQ pork.
- hoisin sauce
- dark soy sauce
- Shaoxing rice wine - or substitute with mirin.
- honey - or substitute with granulated sugar.
- fermented red bean curd - optional, for coloring.
- sesame oil
- garlic
- five spice powder
- pepper - you can use white pepper or ground black pepper.
You will also need measuring cups and spoons and a roasting pan with a wire rack insert.
How to Make the Best Char Siu (Chinese BBQ Pork)
- Marinate the pork. Use a paper towel to pat dry the pork belly completely before adding seasoning. In a Ziploc bag, combine pork with all the ingredients (hoisin sauce, honey, soy sauce, Shaoxing wine, red bean curd, sesame oil, garlic, five spice powder, and pepper). Press the air out of the bag and seal tightly. Press the marinate around the pork to coat and place in the fridge to marinate for at least 3 hours or overnight. The longer you let the pork marinate, the better the flavor.
- Make the glaze. Once marinated, reserve the marinade and transfer it into a medium cooking pot or shallow saucepan. Bring it to a low simmer over low heat, until reduced in half (consistency should be similar to maple syrup). Remove from heat and set aside.
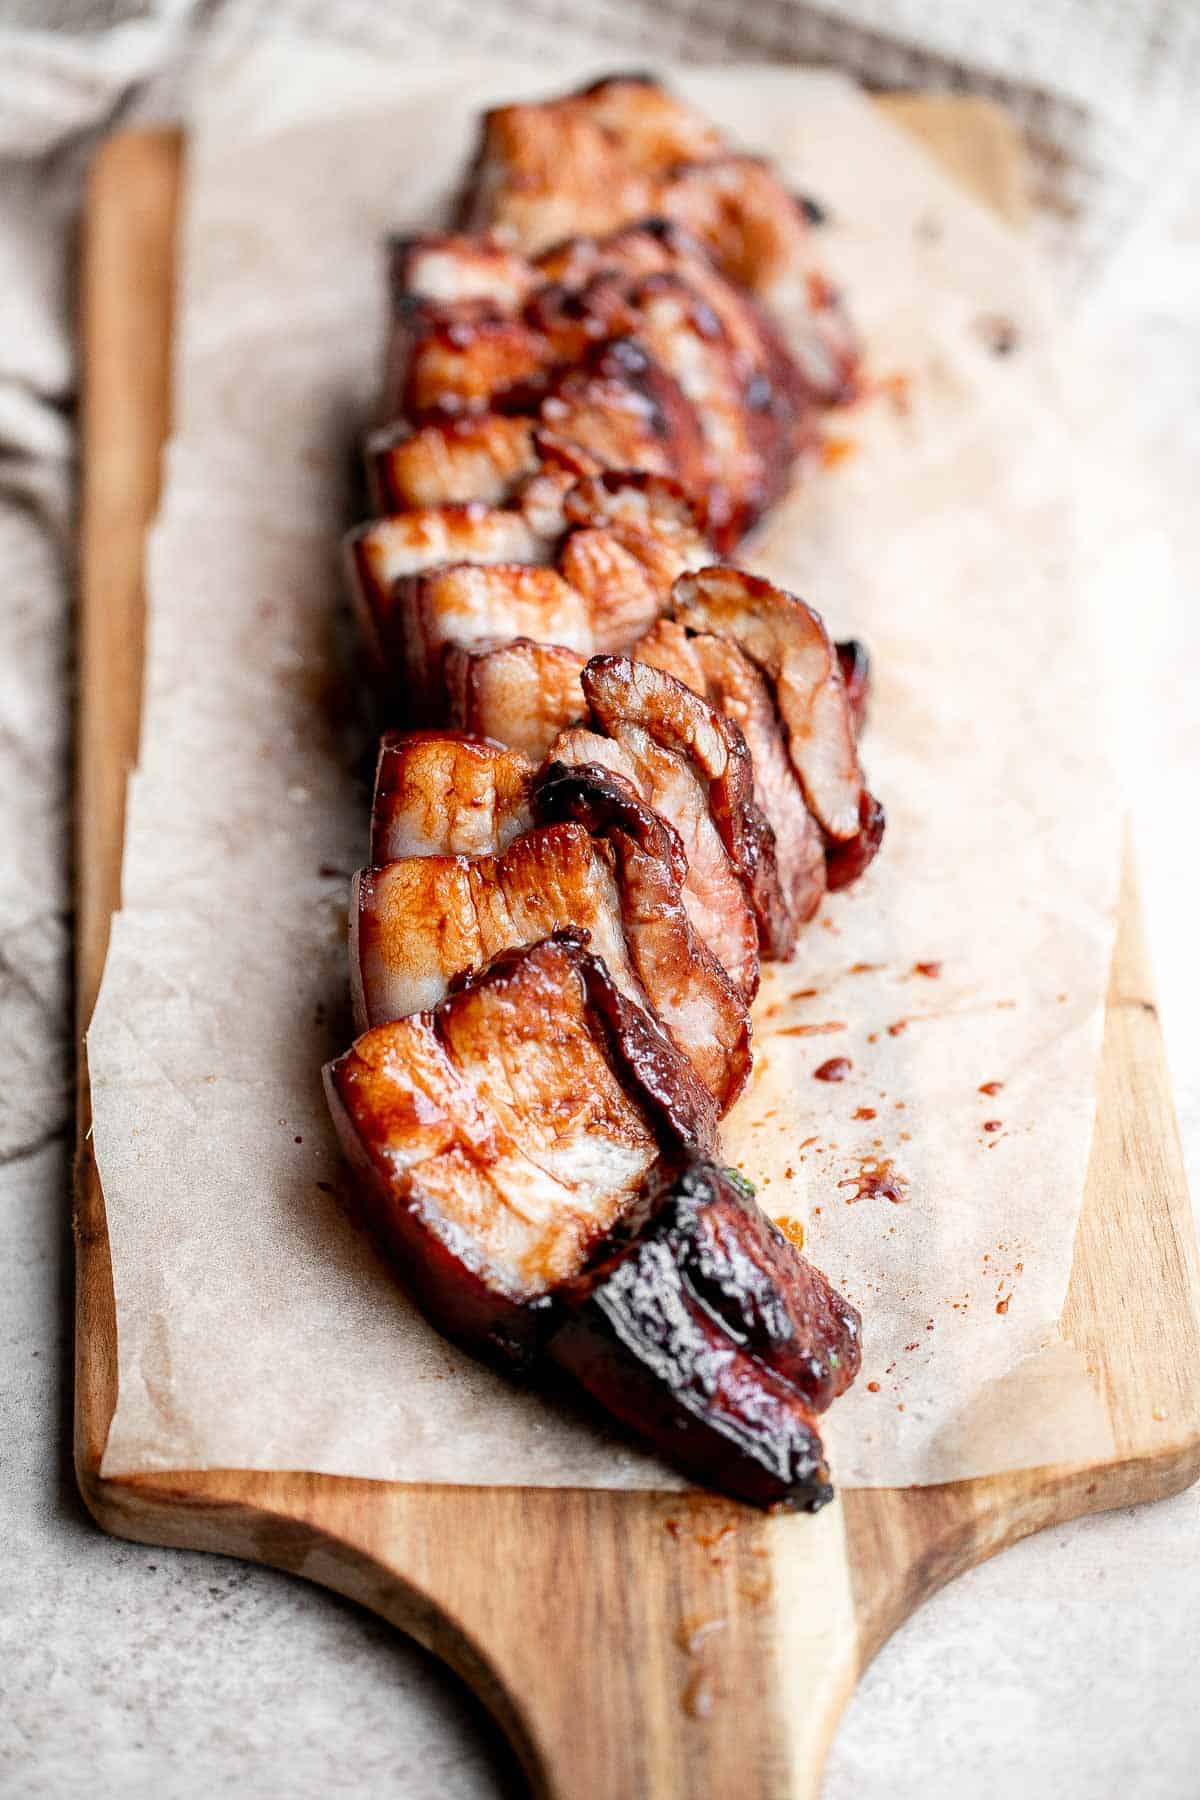
- Roast. Arrange the marinated pork on the wire rack of a roasting pan (or place oven-safe wire rack on a large half sheet baking pan). Bake the pork in a 400F preheated oven for 20 minutes and then flip it over. Return the roasting pan back in the oven and bake for another 20 minutes, until the edges start to char.
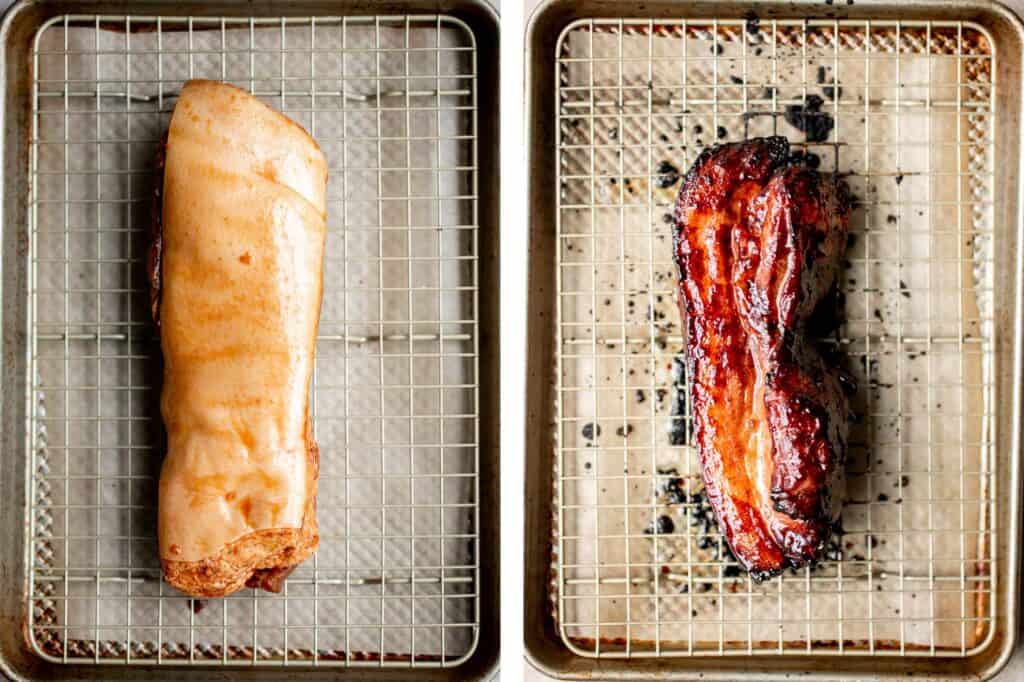
- Baste. Remove the pork from the oven and brush evenly with the cooked marinade. Roast for another 5 minutes. The extra marinade adds a beautiful caramelizing glaze on the meat from the browning of sugar during baking. Baste with any remaining marinade and roast for another 5-7 minutes until nicely charred on the edges. If you prefer a crispier skin, turn the broiler on high and broil for an additional 2-3 minutes.
- Serve. Serve warm with a bowl of steamed rice or fried rice.

How to Cook Char Siu in the Air Fryer
Preheat the air fryer to 375 F, about 3 minutes. Place the pork belly in the air fryer and cook for 20 minutes. Flip the pork and baste with the extra marinade to create the beautiful glaze. Continue to cook for another 20-25 minutes until the edges turn brown.
How to Serve Char Siu Chinese BBQ Pork
This Chinese BBQ Pork holds its own when served with a simple bowl of steamed white rice and a garnish of green onions, but you can also enjoy it with our favorite Chinese takeout recipes at home including:
- Vegetarian Fried Rice
- Tofu and Mushroom Vegetables
- Noodles
- Spring Vegetable Stir Fry
- Instant Pot Mashed Potatoes
Recipe Tips and Tricks
- Don't trim the fat: For this recipe, the fat is everything. Do not trim the fat off your pork belly because that's where a lot of the flavor comes from.
- Roasting tip: Add a cup of water to the roasting pan when it is ready for the oven. This keeps the baking pan from smoking due to pan drippings getting burnt.
- How to store: Keep leftover Char Siu (Chinese BBQ pork) in an airtight container in the refrigerator for 3-4 days.
More Pork Recipes
- Honey Glazed Roast Pork with Vegetables
- Roasted Pork Tenderloin
- Glazed Honey Balsamic Pork Chops
- Pork Dumplings
- Mapo Tofu
- Slow Cooker Carnitas (Pulled Pork)
Tried this recipe?
I'd love to hear what you think! Leave a comment and rating below to share your feedback. Your reviews help others discover this recipe and help me keep creating more free recipes for you. Snap a photo and tag me on social media @aheadofthyme too.
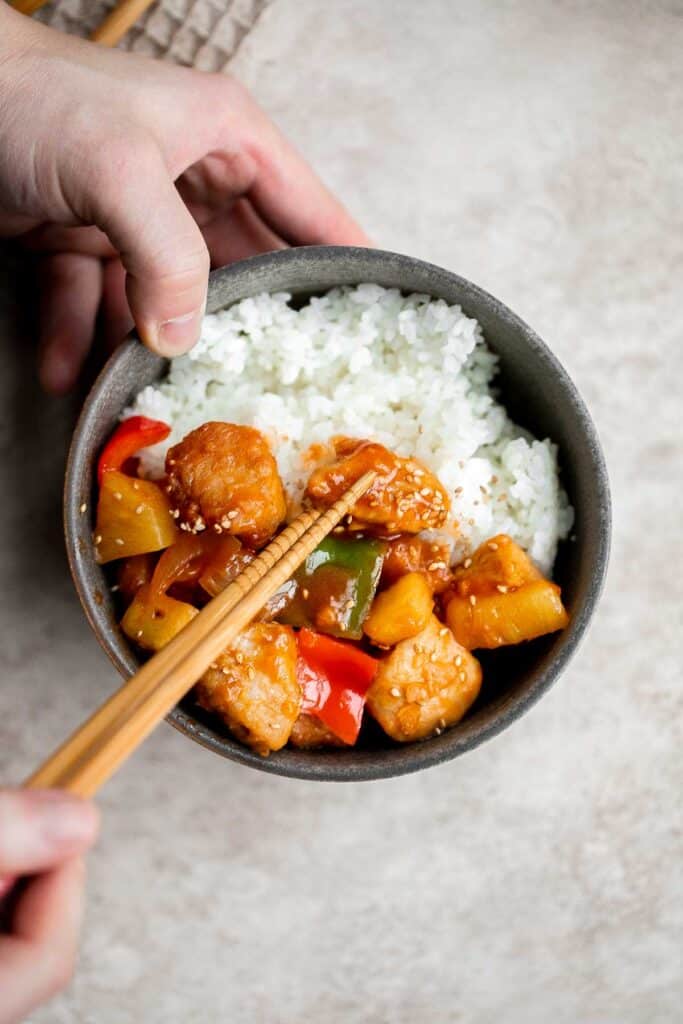
Sweet and Sour Pork
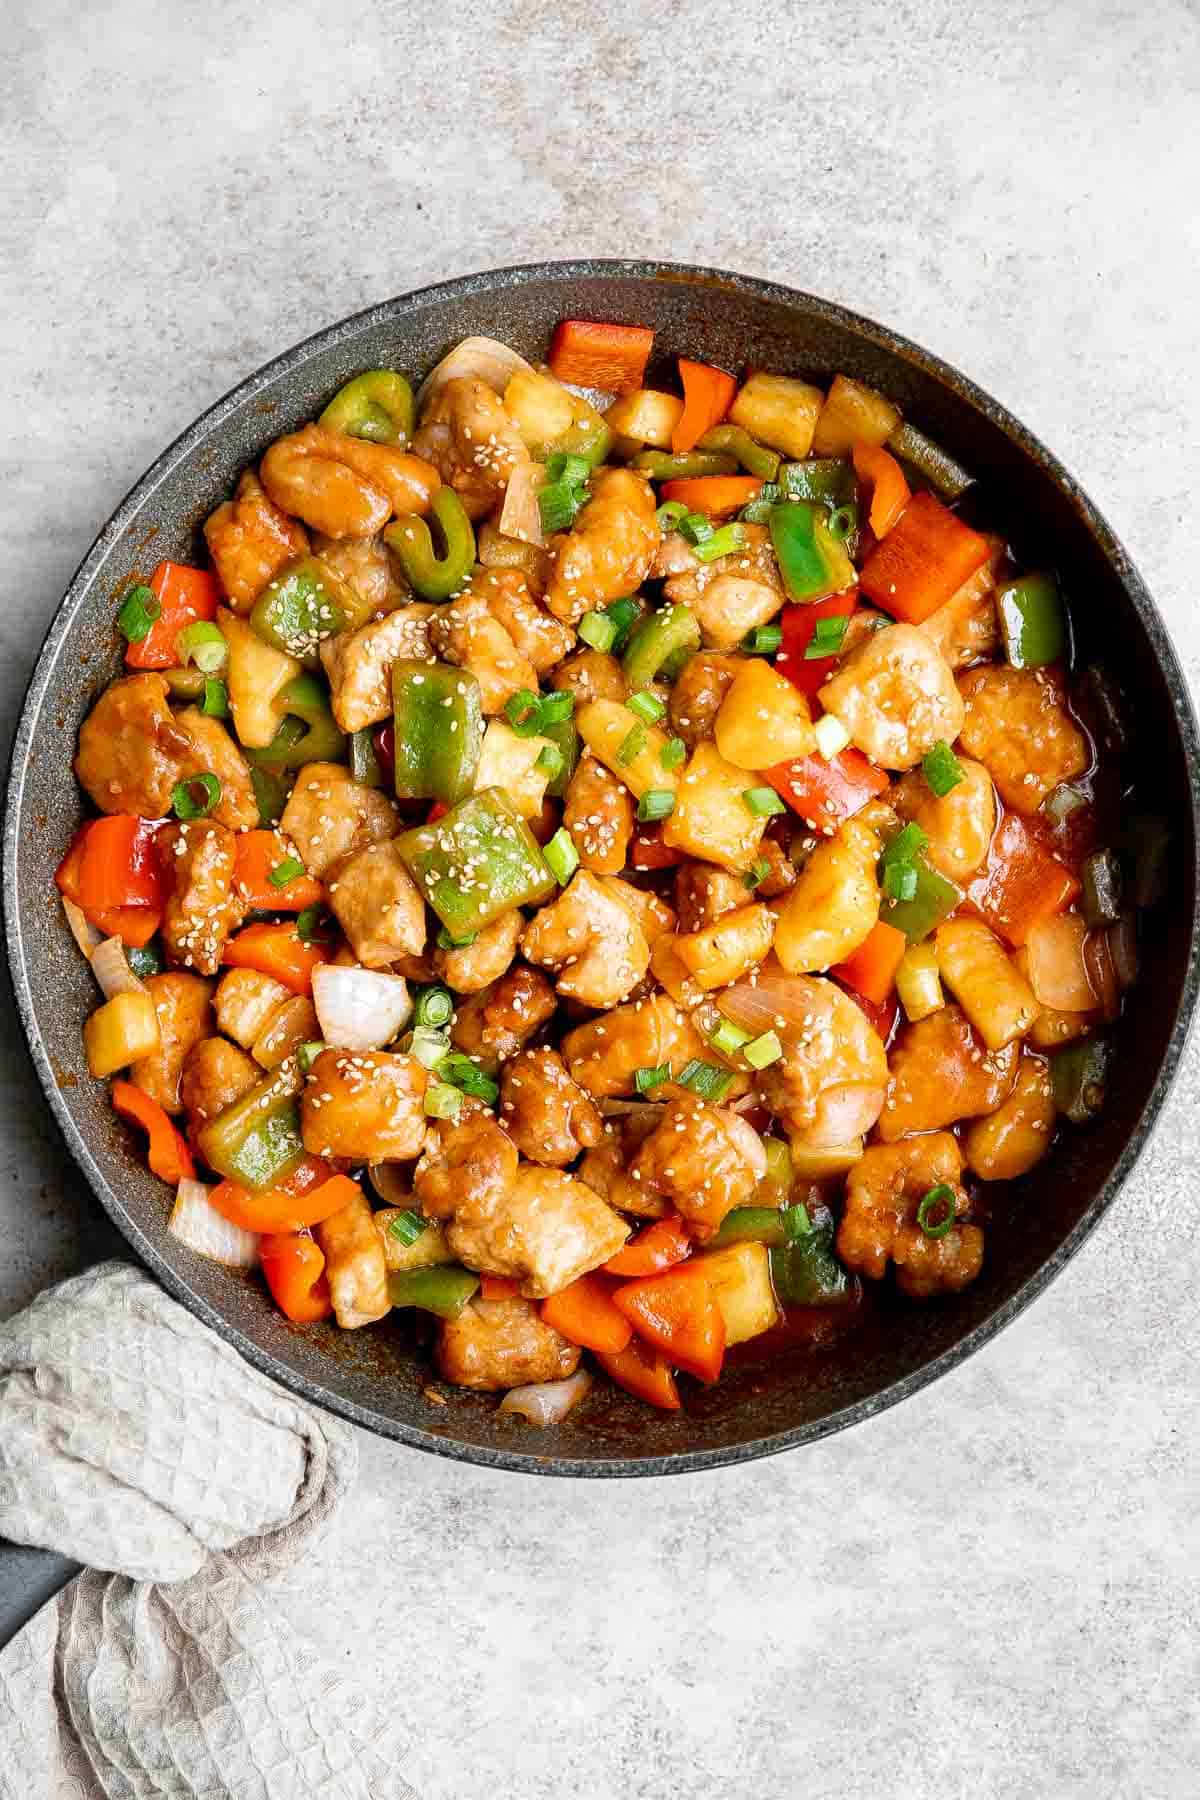
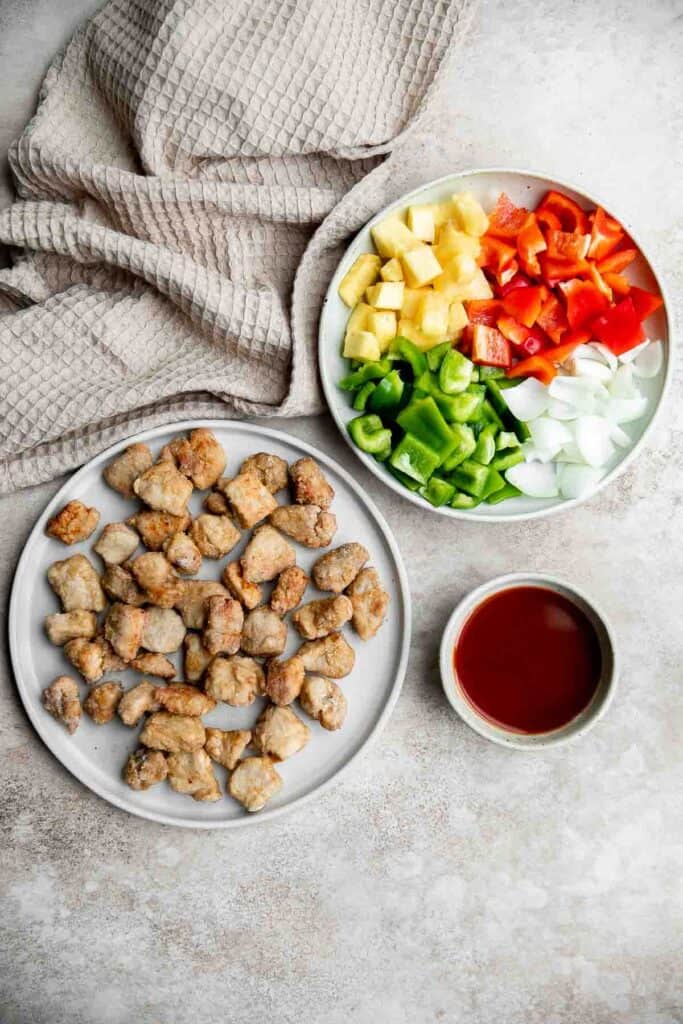
Sweet and sour pork is a delicious, quick and easy Chinese stir fry that takes just 30 minutes to make. Bite-sized pork is loaded with flavor from a delicious Asian marinade, coated with cornstarch, and cooked (either deep fried, baked, or air fried) before being tossed in a saucy sweet and sour vegetable stir fry. You won't believe how easy it is to recreate this classic Chinese restaurant meal at home. Serve it over steamed rice or fried rice for a better than takeout experience you won't forget.

Why You'll Love Sweet and Sour Pork
- Complex flavor in one simple dish. This sweet and sour pork is just that: sweet and sour. It's loaded with flavor from classic Asian seasonings and is also savory, tangy, and gets a bit of a fresh kick from the garlic and ginger. It's so delicious.
- You can cook the pork in three ways. A part of the reason this sweet and sour pork recipe is so good is that it's versatile. You coat and cook the pork first, before tossing it into the stir fry, but you can cook the pork using your favorite cooking method. You can deep fry, bake in the oven, or air fry. We love using our air fryer and cooked this one in there. Whichever method that you use, you will love the crispy exterior and crunch in ever bite, even after you sauce and stir-fry the pork.
- It's quick and easy. This sweet and sour pork, like most Chinese stir fries, is a quick 30 minute meal (including prep!). Some other quick Chinese dinners we like to make on busy weeknights are Cashew Chicken, Vegetarian Chow Mein, and Mongolian Chicken. They are so much faster, cheaper, and better than takeout.
Ingredients and Substitutions
To make this easy homemade sweet and sour pork, you will need the following ingredients (full quantities in the recipe card below):
- pork - the best cuts to use are loin chops or pork shoulder (known as pork butt)
- pork marinade - made with salt, Shaoxing wine (optional), soy sauce (or oyster sauce), egg, cornstarch (or all-purpose flour). I prefer using cornstarch because it dries out the pork better.
- vegetable oil
- vegetables - we added bell peppers, onion, and green onions.
- pineapple - we used fresh pineapple but canned pineapple works too. Make sure to use one without any added sugar.
- sweet and sour sauce - made with ketchup, soy sauce (or oyster sauce), chicken broth (or water), sugar (or honey), white vinegar (or apple cider vinegar), cornstarch, and salt.
- white sesame seeds - optional, for garnish.
This sweet and sour pork pairs really well with bell peppers and pineapple bit you can feel free to mix things up. Consider adding broccoli, cauliflower, or water chestnuts.
You will also need measuring cups and spoons and a skillet or wok. You will also need a medium cooking pot, air fryer, or half sheet baking pan depending on the cooking method that you use to cook the pork.
How to Make the Best Sweet and Sour Pork
- Marinate the pork. In a large mixing bowl, add cubed pork, salt, Shaoxing wine (if using), soy sauce, and egg. Stir well and press the marinade to coat evenly. Let the marinated pork rest for 5 minutes to soak in all the flavour.
- Dredge the pork. Prepare a shallow bowl with cornstarch (or flour) and dip the marinated pork to coat evenly on all sides. Set aside on a plate.
- Cook the pork. You can deep fry, air fry, or bake the pork.
- To deep fry: Preheat oil (at least 2-inches deep) in a medium cooking pot over medium-high heat for 3-4 minutes until the oil shimmers. Deep fry the battered pork in batches (2 batches) until golden brown, about 5-7 minutes. Turn the pork occasionally to get an even golden crust on all sides. Transfer the pork on a paper towel lined plate to drain excess oil.
- To air fry: Place the battered pork in a single layer in the air fryer basket and lightly spray with cooking spray oil to coat evenly. Cook the pork (in 2 batches) at 350F for 10-12 minutes until golden brown and cooked through. Shake the basket halfway to cook the pork evenly. Set aside on a plate.
- To bake in the oven: Place the battered pork in a single layer on a parchment lined baking sheet and lightly spray with cooking spray oil. Bake in a 400F preheated oven for 15 minutes until golden brown. Set aside on a plate after baking.
- Prepare the sauce. In a small mixing bowl, whisk together all the sauce ingredients including ketchup, soy sauce (or oyster sauce), water (or chicken broth), sugar, vinegar, cornstarch, and salt until smooth. Set the aside.
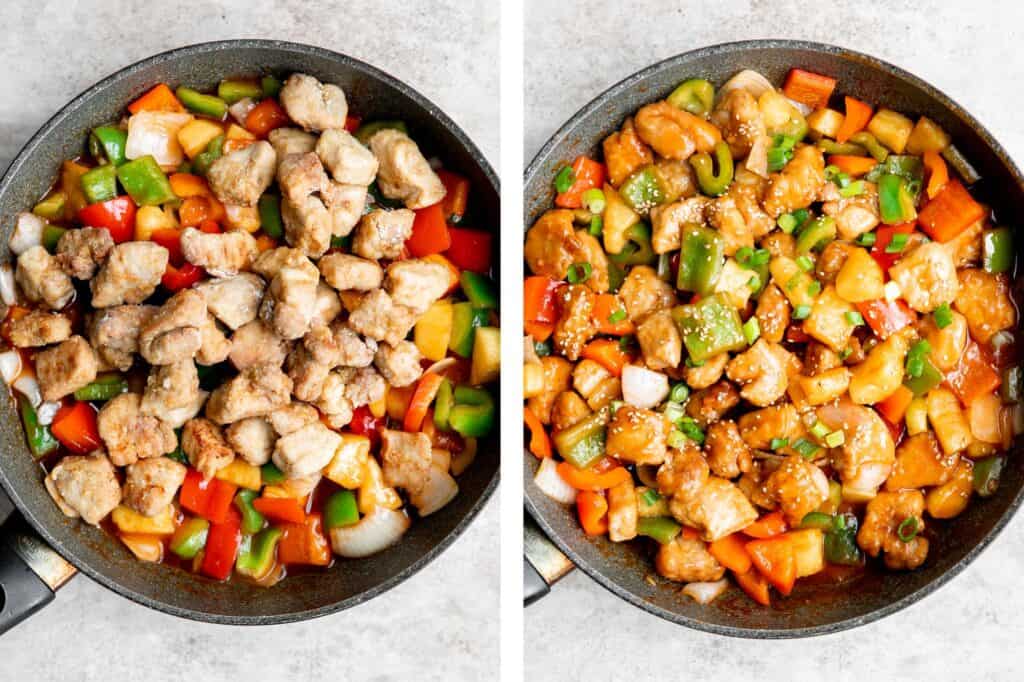
- Stir fry. Heat oil in a large skillet over medium-high heat until the hot oil sizzles, about 1 minute. Add bell peppers, onion, and pineapple and sauté for 1 minute.
- Add sauce. Stir in the sauce mixture and let it simmer over medium heat for 3-4 minutes until thickened to a desired consistency, stirring constantly.
- Add pork. Add the cooked pork and toss well to coat, about 1 minute.
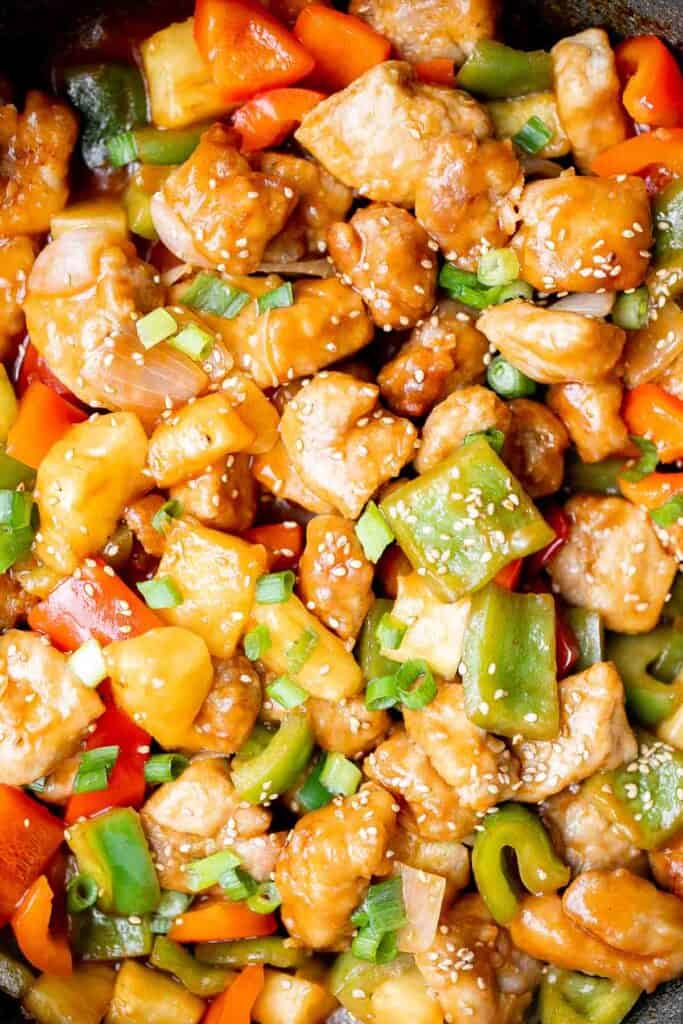
- Serve. Garnish with sesame seeds and green onions and serve warm with a bowl of steamed rice or fried rice.
Storing Instructions
- How to store: Store leftover sweet and sour pork in an airtight container in the fridge for up to 3-4 days.
- How to reheat: Reheat stir fried pork in a pan over the stove until warmed through. You can also microwave it covered for a couple minutes.
More Chinese Stir Fry Recipes
- 60 Chinese Takeout Recipes at Home
- General Tso's Chicken
- Kung Pao Chicken
- Seafood Fried Rice
- Shanghai Fried Noodles
- Healthy Lemon Chicken
Tried this recipe?
I'd love to hear what you think! Leave a comment and rating below to share your feedback. Your reviews help others discover this recipe and help me keep creating more free recipes for you. Snap a photo and tag me on social media @aheadofthyme too.

Double Chocolate Loaf Cake

This fudgy double chocolate loaf cake is delicious, moist, and rich. With double the chocolate, this treat is ultra decadent and indulgent. I mean, the more chocolate, the better, right? Plus, it's easy to make with a quick one-bowl batter that's ready to pop into the oven in just 10 minutes. Serve this showstopper for dessert after dinner, alongside brunch when you are feeling fancy, or even as a mid-day snack because you deserve it!
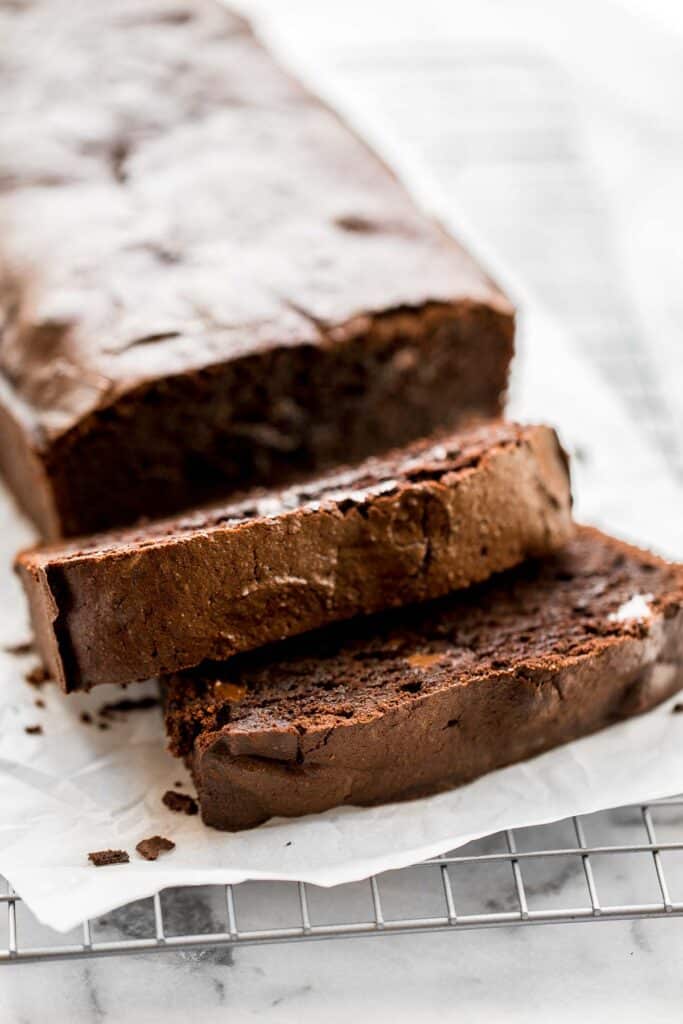
Why You'll Love This Double Chocolate Loaf Cake
- It has the best texture. This loaf is dense and chewy like Carrot Cake, but it tastes like you're eating fudge. And you can never go wrong with anything that resembles fudge. Ever.
- Double the chocolate. If the name didn't already give it away, this cake has double the chocolate with both cocoa powder and real chocolate folded in. They are a total crowd-pleaser that takes just under an hour to bake - perfect for a last minute sweet craving.
- Leftovers make the best french toast. And oh my god, if there are any leftovers, this would make the most crave-worthy french toast. Actually, I think that idea alone warrants making this recipe again... asap. If you are a chocolate lover, this one will not disappoint!
Ingredients and Substitutions
To make this delicious double chocolate loaf cake, you will need the following ingredients (full quantities in recipe card below):
- whole wheat flour
- granulated sugar
- Dutch cocoa powder - Dutch cocoa powder has a richer, darker hue and produces a smoother, flavor. Feel free to substitute with regular cocoa powder if that is all that you have on hand.
- baking powder
- butter
- eggs
- vanilla extract
- whole milk Greek yogurt
- boiling water
- chocolate - feel free to use chocolate chunks or chocolate chips. You could also switch this out completely for white chocolate chips, peanut butter chips, or even sprinkles! Chocolate funfetti loaf? Sign me up please.
You will also need measuring cups and spoons, stand mixer (or hand mixer with mixing bowl), and standard 1 lb. loaf pan.
How to Make the Best Double Chocolate Loaf Cake
- Combine the dry ingredients. Sift together flour, sugar, cocoa powder, and baking powder into the bowl of a stand mixer.
- Add wet ingredients. Add butter, eggs, vanilla, and yogurt, and beat slowly, turning the speed up as the ingredients begin to blend. Beat on medium-high speed for 2-3 minutes, until fully blended and smooth. Turn the mixer off and add boiling water. Beat until completely incorporated and batter is smooth and shiny, about 2 minutes, scraping down the sides as needed.
- Add chocolate. Fold in chocolate chunks or chocolate chips.
- Bake. Line a standard loaf pan with parchment paper, then grease with baking spray. Pour the batter into the pan and bake in a 325F preheated oven for 55 minutes, or until a toothpick inserted into the center of the cake comes out with few to no crumbs.
- Serve. Let cool 10-15 minutes, then invert to remove loaf. Serve warm or at room temperature.
Recipe Tips and Tricks
- How to serve: There are so many ways to eat this chocolate loaf cake. You can simply pop them in your mouth warm out if the oven, or enjoy them cooled to room temperature. You could also microwave them for a few seconds before adding a scoop of vanilla ice cream and a drizzle of salted caramel sauce. So good!
- How to store: Store this double chocolate loaf cake at room temperature for a few days or keep it in the fridge for up to five days. Either way, ensure it's in an airtight container, so it doesn't get stale.
- How to freeze: This chocolate cake freezes well too. Wrap the entire cake or individual slices tightly with plastic cling wrap and then store in a freezer bag or airtight container. Freeze for up to 3 months. Allow the cake to thaw in the refrigerator overnight before serving, or place or on the kitchen counter for a few hours until defrosted.
More Chocolate Desserts
- Molten Chocolate Lava Cakes
- Chocolate Covered Strawberries
- Chocolate Zucchini Cake
- Moist Chocolate Cupcakes
- Chocolate Crinkle Cookies
- Fudgy Brownies
Tried this recipe?
I'd love to hear what you think! Leave a comment and rating below to share your feedback. Your reviews help others discover this recipe and help me keep creating more free recipes for you. Snap a photo and tag me on social media @aheadofthyme too.

Pizza Crescent Rolls

Pizza crescent rolls are a delicious, cheesy, and easy appetizer for all the pizza lovers out there. Flaky, buttery, crescent rolls are filled with pepperoni, pizza sauce, and melty cheese, rolled, and baked to golden brown perfection. The best part? This kid-friendly snack is ready in under 30 minutes making it the perfect last minute bite, easy lunch or dinner, or appy to serve on game day.
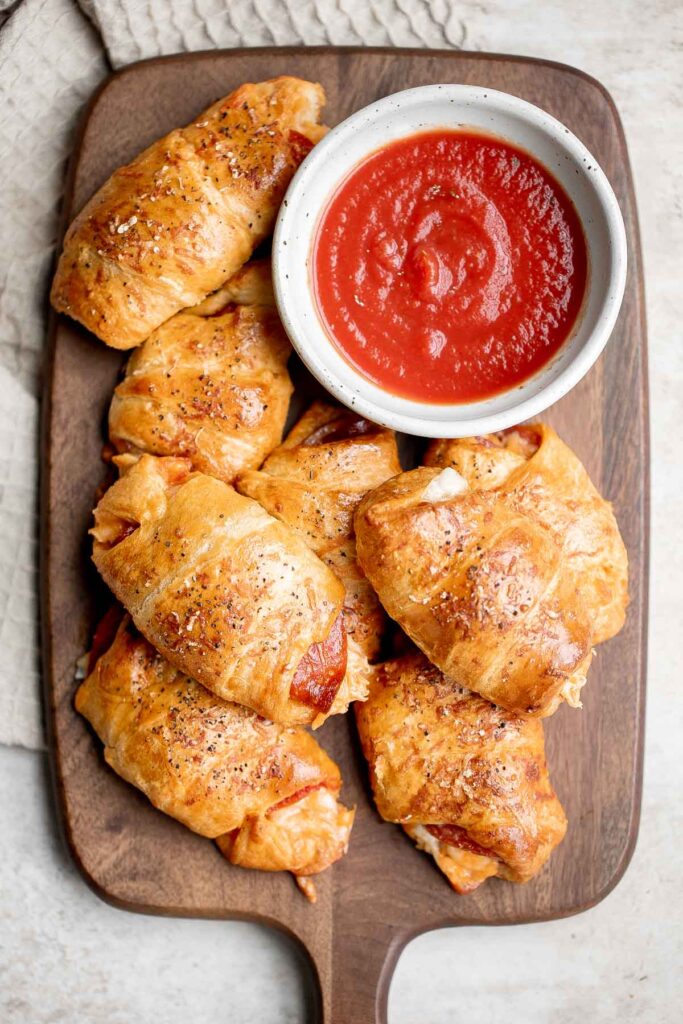
Why You'll Love Pizza Crescent Rolls
- They're quick and easy. These pizza crescent rolls are a true lifesaver when you're short on time. They are ready in just 25 minutes from beginning to end with minimal clean-up, so you'll love how fast and easy this simple recipe is. Serve it for lunch, dinner, or as an appetizer on game day.
- They are individually portioned. If you are a fan of Pizza Pepperoni Rolls, Calzones, or Pigs in a Blanket, you will love pizza crescent rolls. They are the perfect hand-held bite which makes serving so easy! Everyone gets their own portioned size snack.
- It's so convenient with store-bought dough. Although you can absolutely make your own homemade puff pastry dough, using store-bought crescent rolls or dough makes this recipe so easy and convenient!

Ingredients and Substitutions
To make this delicious pizza crescent rolls, you will need the following ingredients (full quantities in the recipe card below):
- crescent rolls - use a store-bought can of crescent rolls or substitute with one 10x15-inch sheet pf puff pastry dough.
- tomato sauce
- pepperoni - or substitute with salami or cooked bacon.
- cheddar cheese - you can also substitute with other kinds of melty cheese such as mozzarella cheese.
- egg - for the egg wash.
- ground black pepper
- Parmesan cheese
Interested in other toppings? No problem! Try out these topping combinations. Just be sure you finely chop or slice all ingredients, and don't overstuff your crescent rolls.
- Peppers, onions, and mushrooms
- Black olives, broccoli, spinach, and onion
- Fresh garlic, fresh basil, and no red sauce
- Meatball, sausage, bacon, and pepperoni
- Bacon, fresh tomato, and no tomato sauce
- Pepperoni and sausage

How to Make the Best Pizza Crescent Rolls
- Make the crescent rolls. Separate the crescent rolls by hand into 8 triangles (or cut out puff pastry dough into 8 triangles on a lightly floured surface). On each triangle, spread 1 tablespoon of tomato sauce evenly and top with 2 slices pepperoni and 2 tablespoons cheese. Gently roll the crescent dough from the wide end over the toppings and pinch the sides to seal.
- Bake. Line a large half sheet baking pan with parchment paper. Arrange the crescent rolls seam side down on the lined baking sheet. Apply egg wash evenly on top of each roll and sprinkle with black pepper and Parmesan cheese. Bake in a 375F preheated oven for 15 minutes until golden brown.
- Serve. Serve immediately with marinara sauce, if desired.

Storing Instructions
- How to store: Allow pizza crescent rolls to cool to room temperature before storing. Then, place in an airtight container and refrigerate for up to 3-4 days.
- How to reheat: To reheat cold pizza crescent rolls, place in a preheated 375F oven for 10-15 minutes.

More Appetizers
- Pepperoni Pizza Rolls
- Pigs in a Blanket
- Homemade Calzones
- Baked Mozzarella Sticks
- Homemade Tater Tots with Bacon
- Skillet Neapolitan Margherita Pizza
Tried this recipe?
I'd love to hear what you think! Leave a comment and rating below to share your feedback. Your reviews help others discover this recipe and help me keep creating more free recipes for you. Snap a photo and tag me on social media @aheadofthyme too.

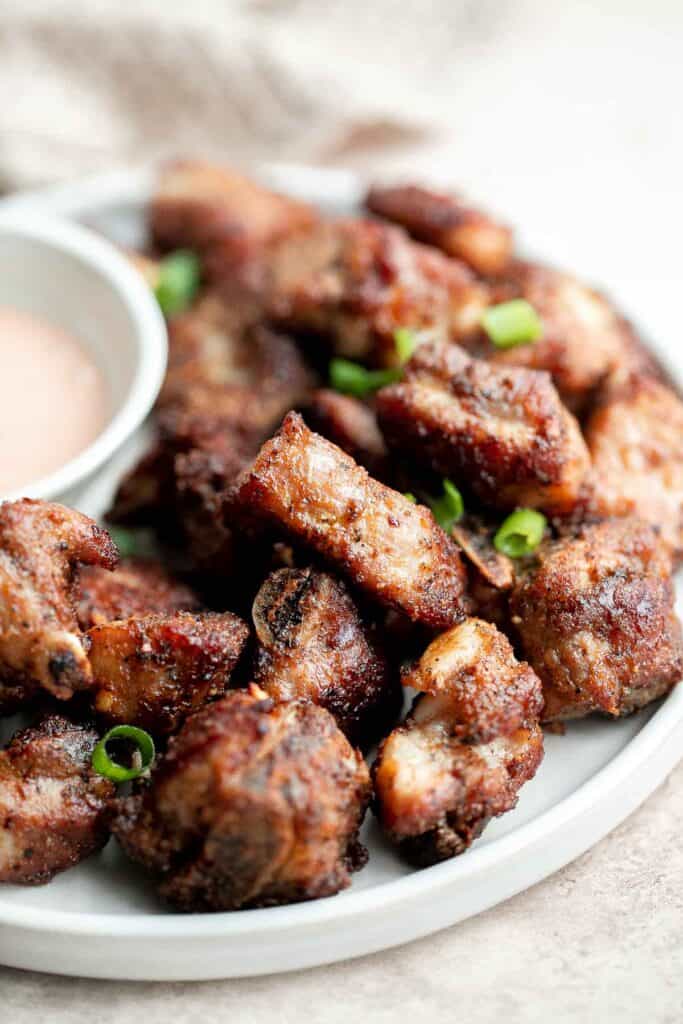
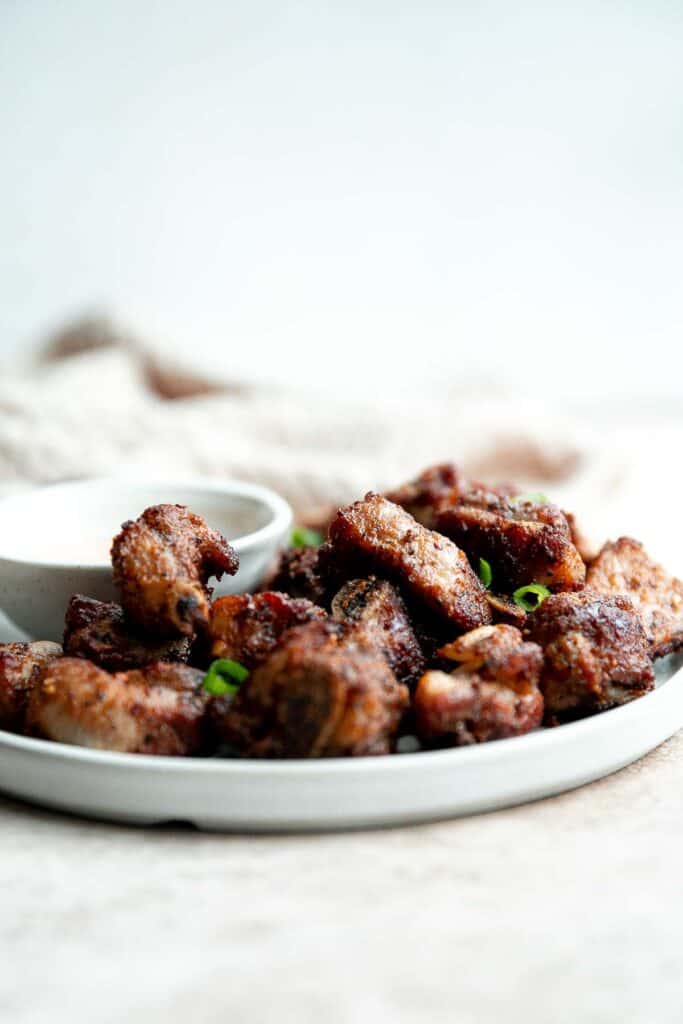
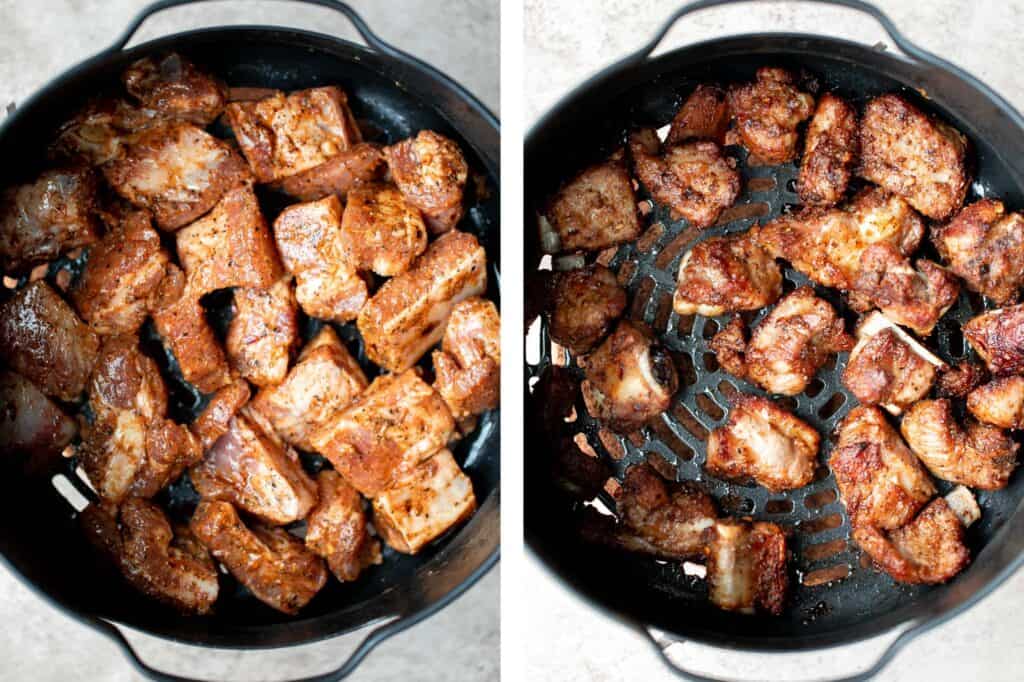
Air Fryer Short Ribs

Air fryer short ribs are crispy, flavorful, and incredibly delicious. The easy marinade ensures that the interior is tender and juicy, while the air fryer helps form a crispy outer layer. These meaty bites are typically braised, baked, or deep-fried, but you might never make them any other way once you try them in the air fryer. They're fast, easy, and so good. Seriously, they take just 15 minutes to cook!
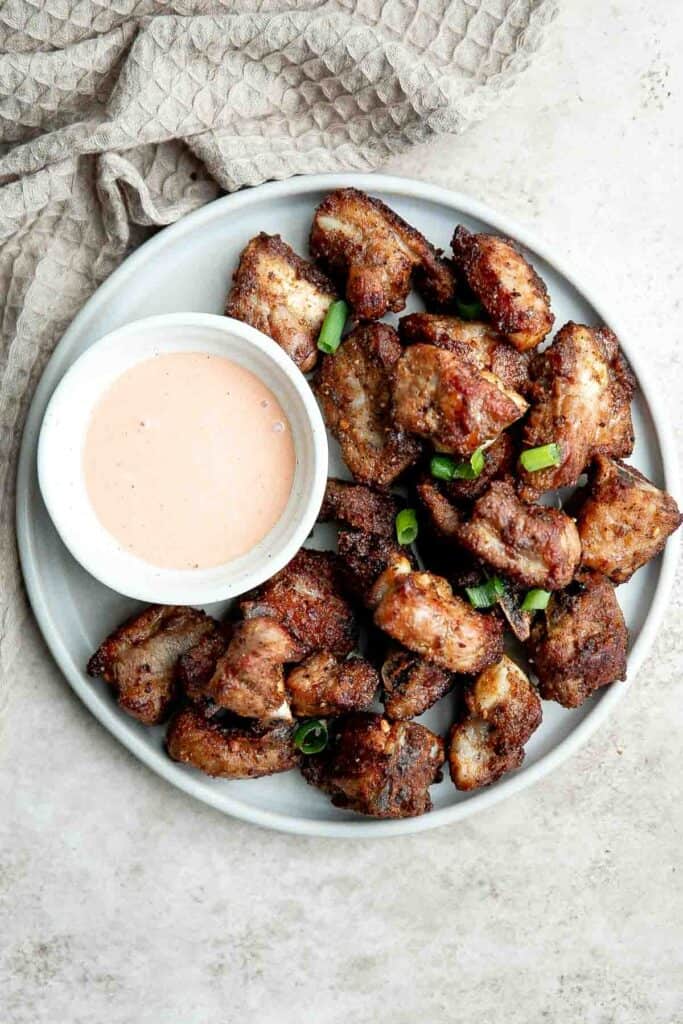
Why You'll Love Air Fryer Short Ribs
- Short ribs are so easy to make in the air fryer. If you use your air fryer often, you already know that it can speed up recipes and make them even crispier and tastier. That's just the nature of this amazing appliance. And this short rib recipe is no different. You'll need to set aside 5 minutes to prep the marinade and 15 minutes to cook the short ribs. That's it!
- They're juicy, tender, and crispy. The air fryer dries out the exterior of the meat just enough to form a crisp outer layer and the pressure from the air fryer ensures that the interior of the short ribs remains juicy and tender. It's the perfect combination.
- The perfect appetizer. Although you can certainly enjoy these air fryer short ribs as a meal on their own, they are great as an appetizer or side dishes to a bigger meal. Since they're not time or energy intensive, there's plenty of time for you to devote to other dishes in the kitchen. Serve them for Game Day for an appy that no one will be able to put down.
Ingredients and Substitutions
To make these easy air fryer short ribs, you will need the following ingredients (full quantities in the recipe card below):
- short ribs - you can use pork ribs or beef ribs.
- vegetable oil - use any vegetable oil that you have on hand. We used avocado oil.
- soy sauce - or substitute with oyster sauce.
- Shaoxing wine - this Chinese cooking wine adds delicious flavor but it's completely optional.
- seasoning - you will need salt and pepper, garlic powder, paprika, and ground cumin powder. You can also add crushed red pepper for a spicy kick, but it's optional.
- cornstarch
You will also need measuring spoons and an air fryer.
How to Make the Best Air Fryer Short Ribs
- Marinate the short ribs. In a large mixing bowl or Ziploc bag, combine the ribs with all the ingredients and mix well to coat evenly. If you use the Ziploc bag, press the seasoning around to coat evenly. Let the marinated ribs rest for at least 15 minutes to soak in all the flavour.
- Air fry. Place the marinated ribs in a single layer in the air fryer basket. Cook at 350F for 13-15 minutes until golden brown and crispy. Shake the basket halfway to cook the ribs evenly.
- Serve. Serve immediately with your favorite dipping sauce, such as spicy mayo, sweet chili sauce, ketchup, or ranch.
Other Ways to Cook Dry Short Ribs
To bake in the oven, place the marinated short ribs in a single layer on a parchment-lined quarter sheet baking pan and bake at 400F for 15-20 minutes until crispy and golden brown.
To deep fry, heat oil in a medium cooking pot (at least 2-inches deep) over medium high heat for 3-4 minutes until the oil shimmers. Deep fry the marinated ribs until golden brown, about 5-7 minutes. Turn the ribs occasionally to get an even golden crust on all sides. Transfer the ribs on a paper towel lined plate to drain excess oil.
Storing Instructions
- How to store: Keep air fryer short ribs in an airtight container in the fridge for up to 3-4 days.
- How to reheat: Reheat these dry short ribs in the air fryer at 350F for 5 to 10 minutes until warm and crispy. You can also reheat them in a 350F preheated oven for 10 to 15 minutes.

More Air Fryer Recipes
- 25 Easy Air Fryer Recipes
- Breaded Fried Chicken Wings (Air Fryer)
- Air Fryer Mexican Shrimp
- Crispy Air Fryer French Fries
- Air Fryer Chicken Breast
- Air Fryer Broccoli
Tried this recipe?
I'd love to hear what you think! Leave a comment and rating below to share your feedback. Your reviews help others discover this recipe and help me keep creating more free recipes for you. Snap a photo and tag me on social media @aheadofthyme too.

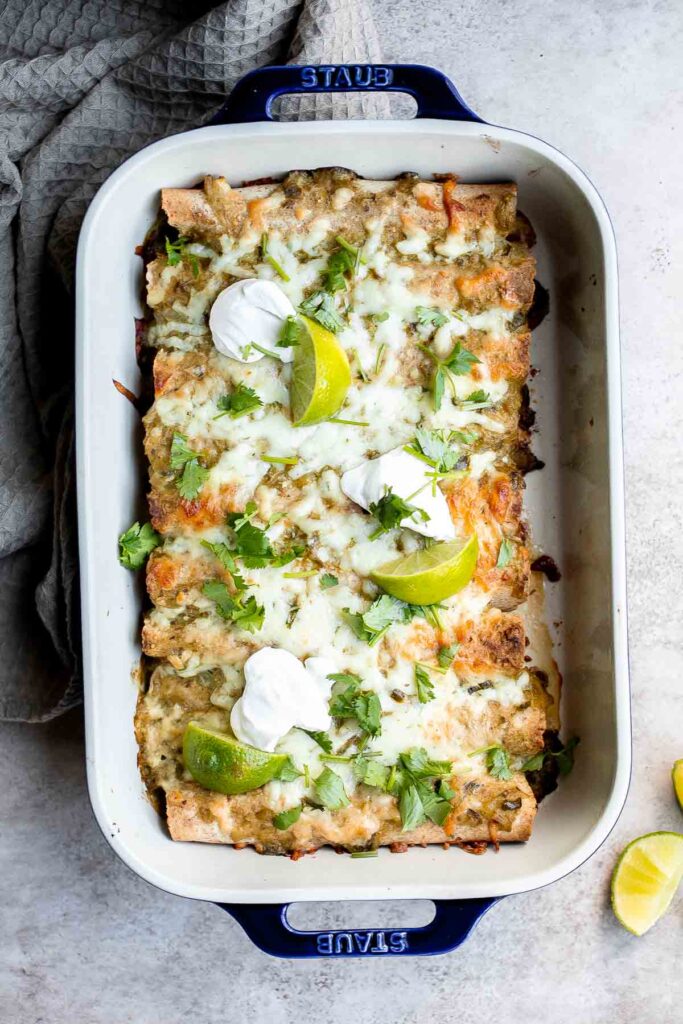
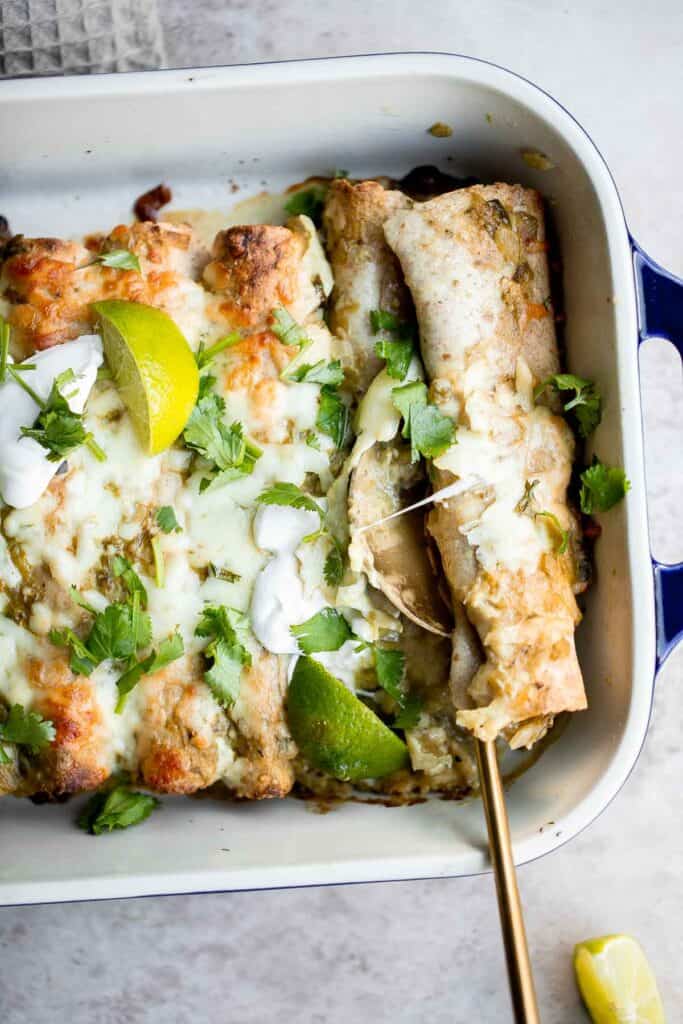
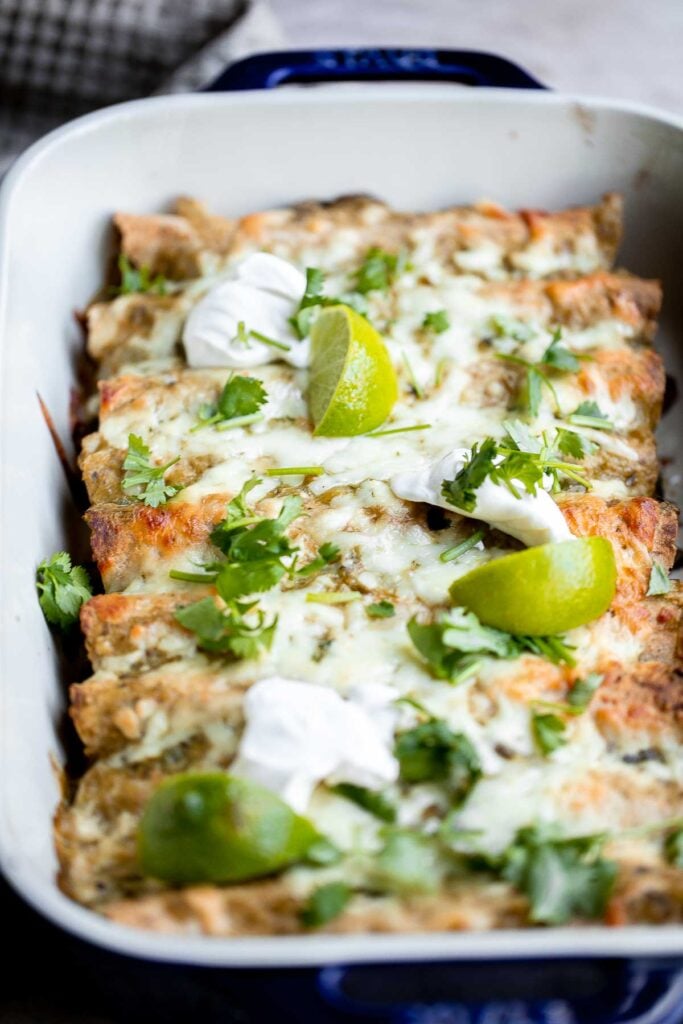
Salsa Verde Green Chicken Enchiladas

Salsa verde green chicken enchiladas are delicious and flavorful, quick and easy to make, and saucy and spicy. If you love authentic Mexican food, then you will love these baked enchiladas. The delicious chicken filling is loaded with seasoning and spices and is made easy with leftover cooked chicken, is wrapped inside soft tortillas and topped with green enchilada sauce and cheese before popping into the oven to bake until melty perfection. The best part? These restaurant-quality salsa verde chicken enchiladas will be on your table in just 40 minutes.
Why You'll Love Salsa Verde Green Chicken Enchiladas
- They're quick and easy. Who doesn't love a quick and easy recipe? Made with cooked chicken, you can expect these chicken enchiladas to be ready in under an hour! It's the best way to use up a leftover rotisserie chicken.
- The ultimate comfort food. Authentic Mexican food is always satisfying, but these salsa verde chicken enchiladas are seriously the best comfort food - plus they've got a kick. With a spicy green enchilada sauce, this hot and cheesy dish just hits the spot differently.
- Loaded with flavor. These green chicken enchiladas are packed with flavor from the seasoning spices to the salsa verde sauce to the spicy green chiles. Plus, the aroma that wafts through the kitchen as you bake them is something else. The process of baking these enchiladas will be almost as good as the experience of eating them.
Ingredients and Substitutions
To make these delicious salsa verde green chicken enchiladas, you will need the following ingredients (full quantities in the recipe card below):
- vegetable oil
- onion
- garlic
- green chiles
- salsa verde - you can use a homemade version of this green Mexican sauce or store-bought - whatever makes your life easier!
- sour cream
- seasoning - dried oregano, ground cumin, salt, and pepper.
- cooked chicken breasts - this is a great recipe to use up any leftover chicken from Baked Chicken Breast or Air Fryer Chicken Breast. You can also use a store-bought rotisserie chicken.
- cheese - I recommend something that melts well such as mozzarella or Monterey Jack cheese. You could also use a Mexican cheese blend (Tex-Mex).
- tortillas - I used flour tortillas but you can substitute with corn tortillas.
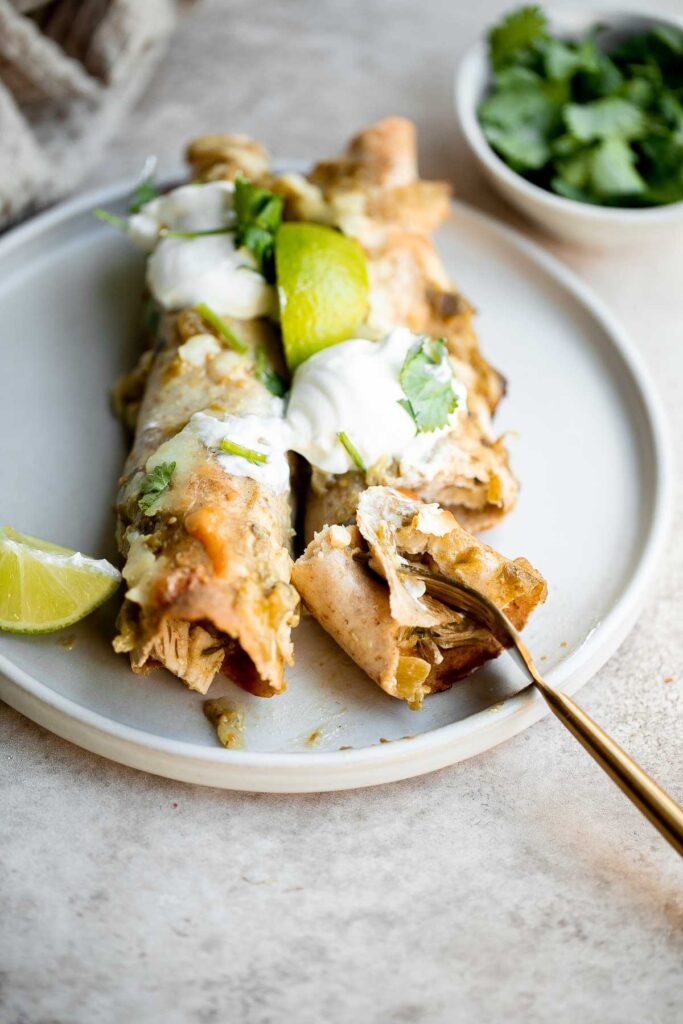
- toppings - serve these salsa verde chicken enchiladas with fresh cilantro, sour cream, and freshly squeezed lime juice.
You will also need measuring cups and spoons, a large skillet or shallow saucepan, and a 9x13-inch baking pan.
How to Make the Best Salsa Verde Green Chicken Enchiladas
- Make the green enchilada sauce. Heat oil in a large skillet over medium-high heat until the hot oil sizzles, about 1 minute. Add onion and garlic and sauté until tender, about 2 minutes. Add green chiles, salsa verde, and sour cream and season with oregano and cumin. Stir well and cook for 1 minute until evenly combined. Turn off the heat and set aside 1 cup sauce mixture in a bowl.
- Add chicken. Add chicken, 1 cup cheese and cilantro into the skillet. Mix well and season with salt and pepper to taste.
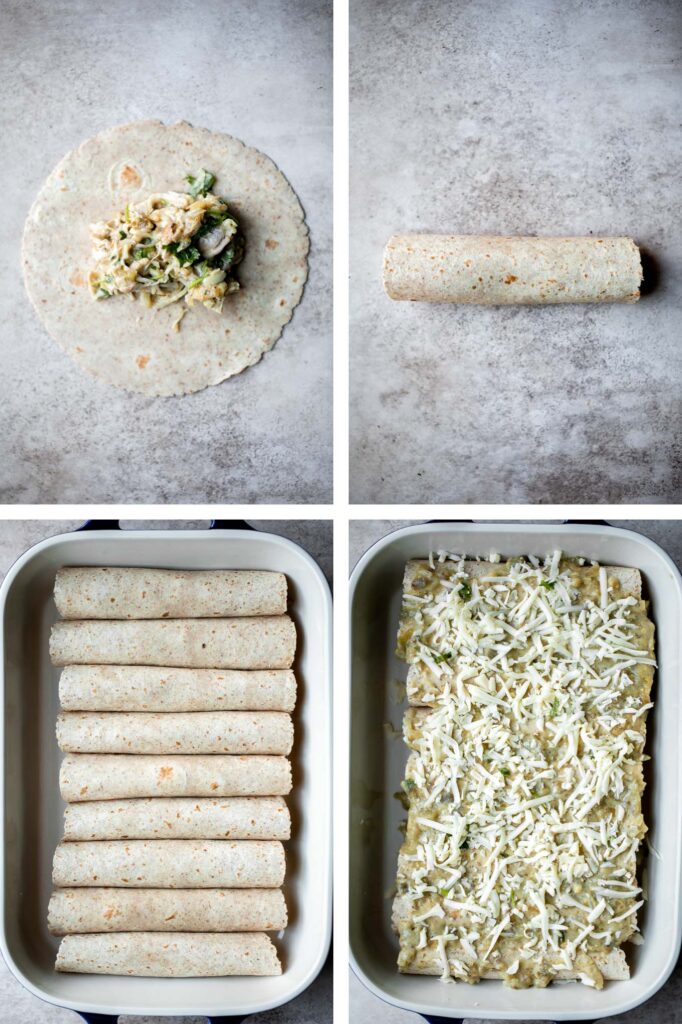
- Assemble the enchiladas. Add 2 tablespoons of the chicken mixture across the centre on top of each tortilla wrap, carefully roll them up and arrange seam side down into a 9x13-inch casserole pan. Spread the reserved 1 cup salsa verde sauce mixture evenly on top and sprinkle with the remaining cheese.
- Bake the enchiladas. Bake in a 350F preheated oven for 15-20 minutes until the melted cheese turns golden brown. Let rest for 5 minutes. Serve warm with cilantro, sour cream, and lime juice, if desired.
How to Serve
Serve these salsa verde green chicken enchiladas with your favorite Mexican side dishes. I like serving these with:
- Guacamole
- Cilantro Lime Rice
- Mexican Street Corn
- White Chicken Chili
- Creamy Cilantro Lime Dressing
- Mexican Street Corn Salad

Recipe Tips and Tricks
- Double the sauce: Feel free to double the sauce ingredients to make saucier enchiladas.
- How to store: Keep leftover green chicken enchiladas in an airtight container for 3-4 days in the refrigerator.
- How to reheat: Reheat leftover salsa verde chicken enchiladas in oven. Place them in an oven-safe dish and heat uncovered in a 350F preheated oven for 15-20 minutes. Add extra sauce and cheese if you want to! If reheating a couple, you can also heat in the air fryer for 10-15 minutes, or in the microwave until heated through.
- For firmer enchiladas: If you expect to have leftovers and want to prevent soggy enchiladas, you can briefly fry each rolled tortilla before assembling and baking your enchiladas. Cooking the tortillas will prevent them from absorbing too much sauce and becoming soggy.
More Chicken Recipes
- 25 Leftover Rotisserie Chicken Recipes
- Chicken Enchiladas
- Baked Queso Chicken
- Chicken Parmesan Stuffed Peppers
- Chicken Tortilla Soup
- Kung Pao Chicken
Tried this recipe?
I'd love to hear what you think! Leave a comment and rating below to share your feedback. Your reviews help others discover this recipe and help me keep creating more free recipes for you. Snap a photo and tag me on social media @aheadofthyme too.

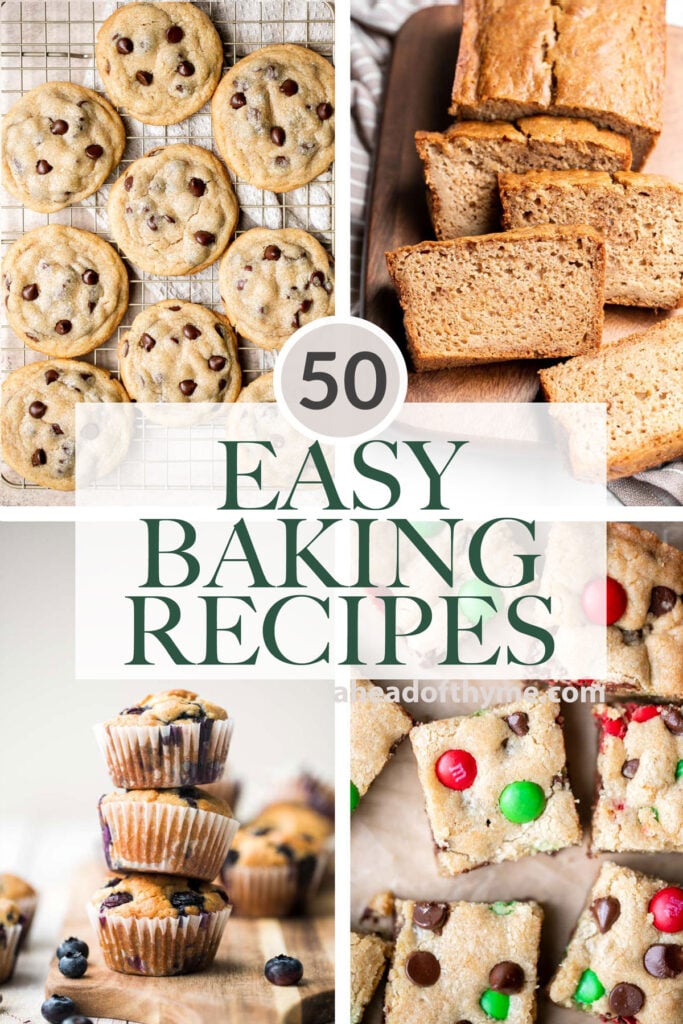
50 Easy Baking Recipes

Looking for easy baking recipes to satisfy a last minute sugar craving? Whether you are an experienced baker, a true beginner, or looking for dessert recipes to make with kids, these easy baking recipes are simple and quick with just 10-15 minutes of prep time before ready to pop into the oven. Some are also one-bowl recipes (hello chocolate chip cookies!) which makes clean up minimal too. So if you are looking for easy dessert recipes, then you have come to the right place. We are sharing over 50 of the best easy baking recipes including cakes, cookies, brownies, muffins, cupcakes, sweet breads, pies, and more!
Easy Baking Recipes
Homemade chocolate chip cookies are soft and chewy, have perfectly crisp edges, and are loaded with chocolate chips. This classic cookie is quick and easy and one of the best easy baking recipes.

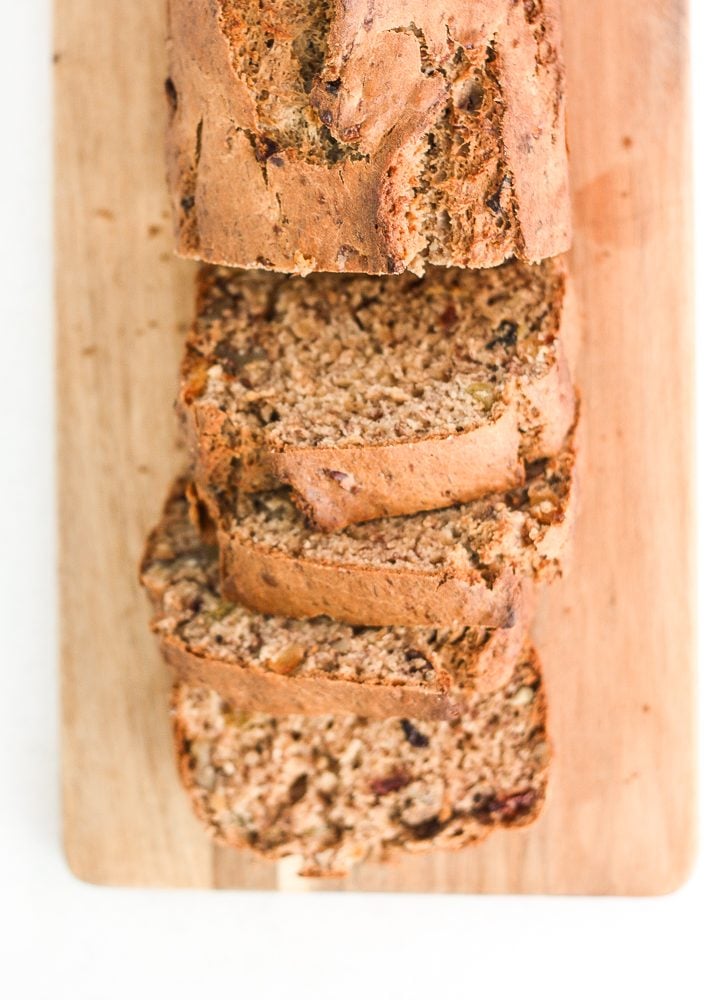
When you combine walnuts, raisins and dried fruit in a nutty banana bread, the result is a tender and moist loaf that is truly irresistible.
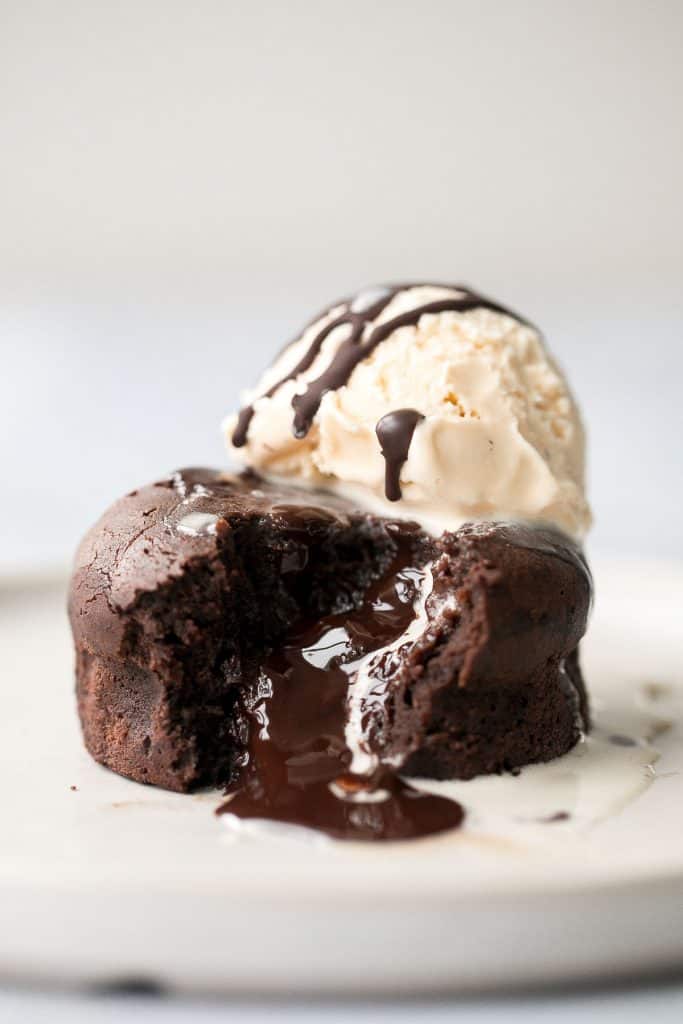
Molten chocolate lava cakes are rich and fudgy with a classic gooey chocolate center that flows out like lava. So simple and easy to make.
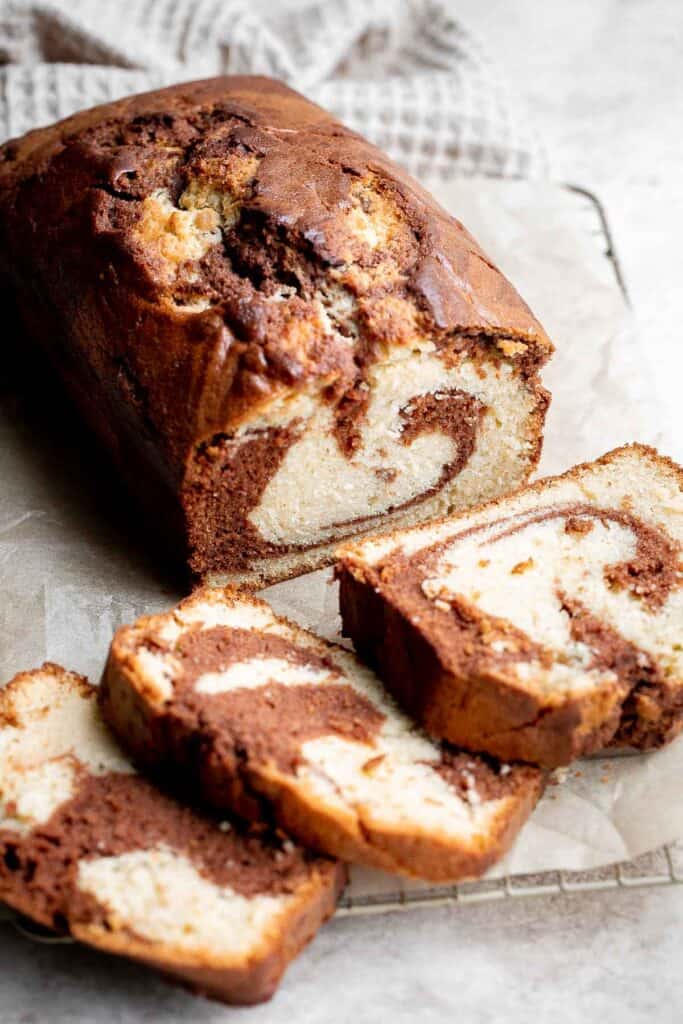
Chocolate and Vanilla Marble Cake
Chocolate and vanilla marble cake is delicious, moist, fluffy with the perfect golden brown crust. With two classic cake flavors, this loaf cake has it all.
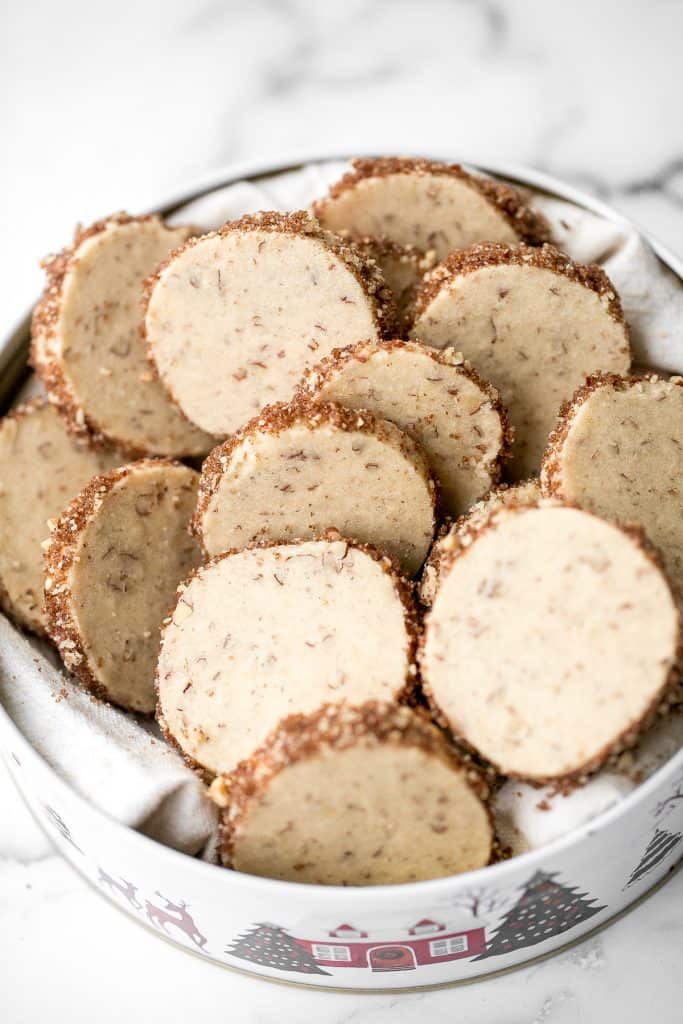
Slice and Bake Pecan Shortbread Cookies
Easy slice and bake pecan shortbread cookies are sweet, nutty and buttery shortbread cookies packed with finely chopped pecans that melt in your mouth. It's an easy baking recipe with no cookie cutters or cookie scoop required.
Fluffy soft and moist, these are the best banana chocolate chip muffins ever. Prep this easy one bowl recipe in less than 10 minutes with a few ingredients.
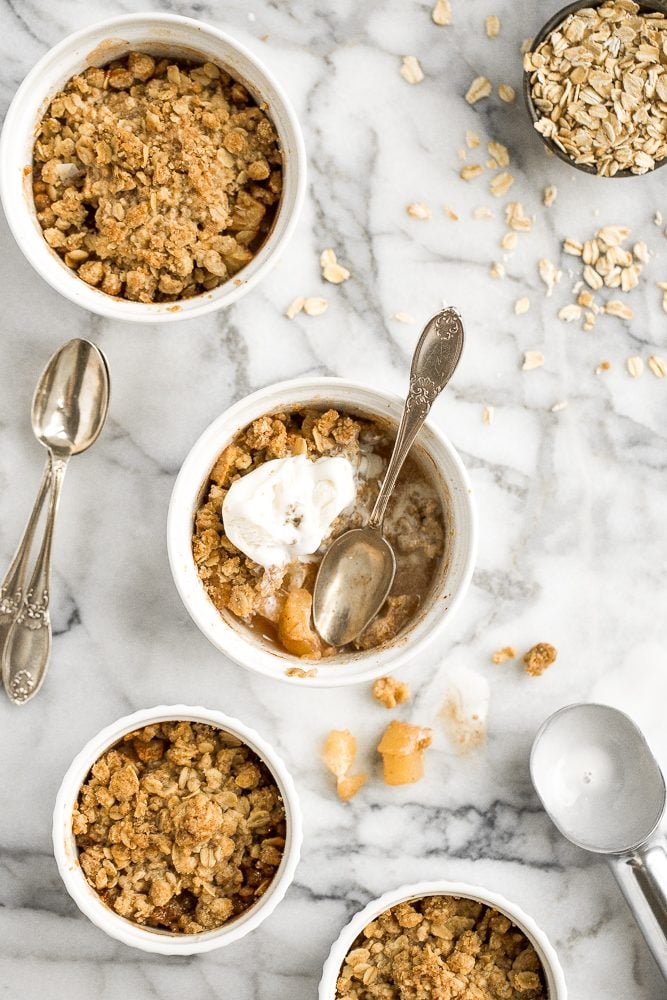
Individual apple crisp are served in ramekins so that you and your guests can enjoy single-sized servings meaning you will get the crunchy corners of crumble all to yourself. Add a big scoop of Vanilla Ice Cream on top for maximum happiness.
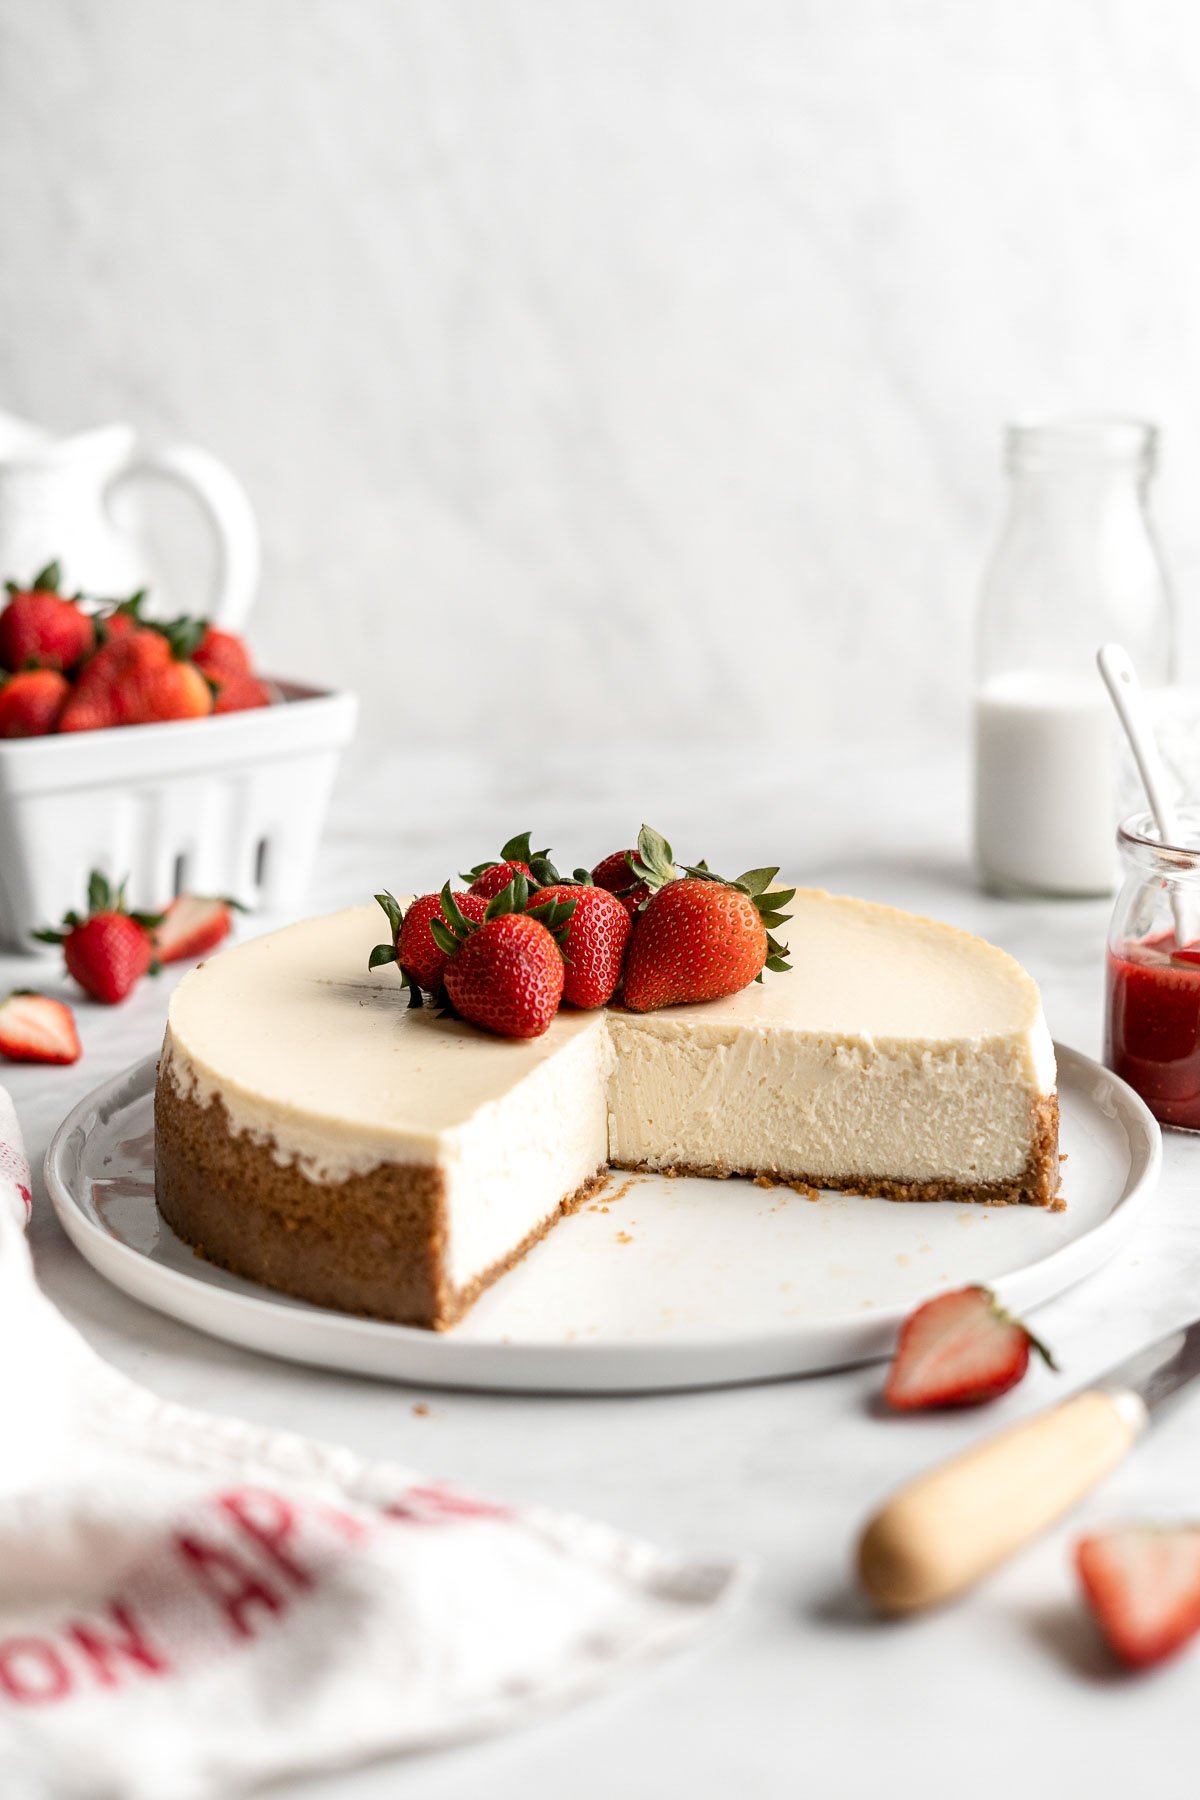
Any level baker can make a beautiful, decadent, thick and fluffy, classic New York cheesecake without any cracks using this easy to follow recipe. Baking cheesecake is easy than you think with this easy baking recipe.
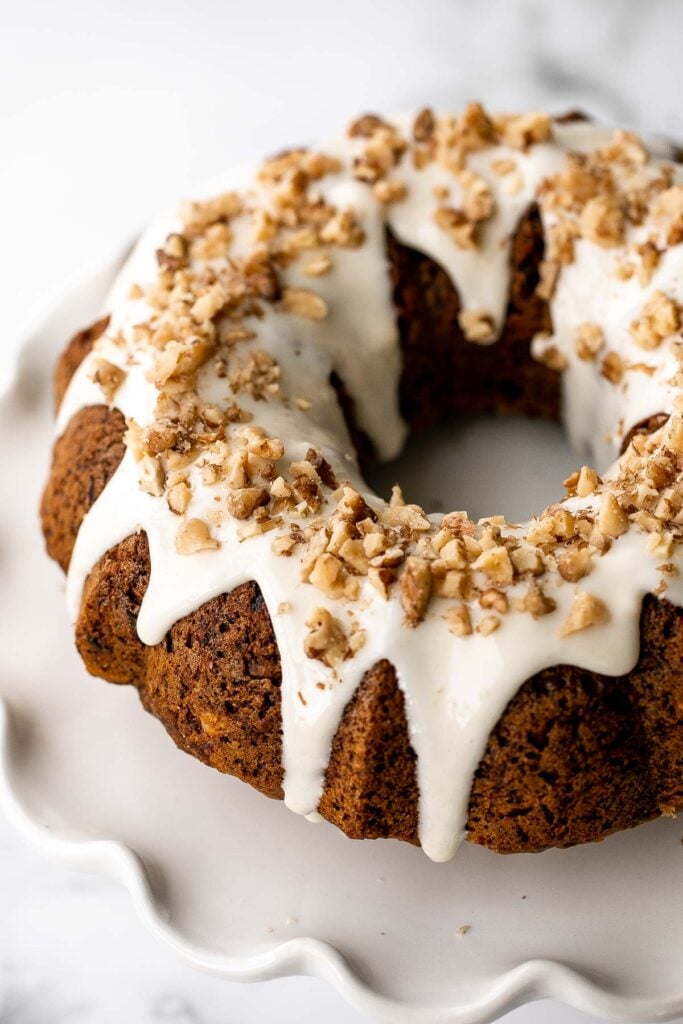
Carrot Bundt Cake with Cream Cheese Glaze
Showstopping carrot bundt cake with cream cheese glaze is light, fluffy, and moist. It's loaded with sugar, spice, and everything nice -- including grated carrots.
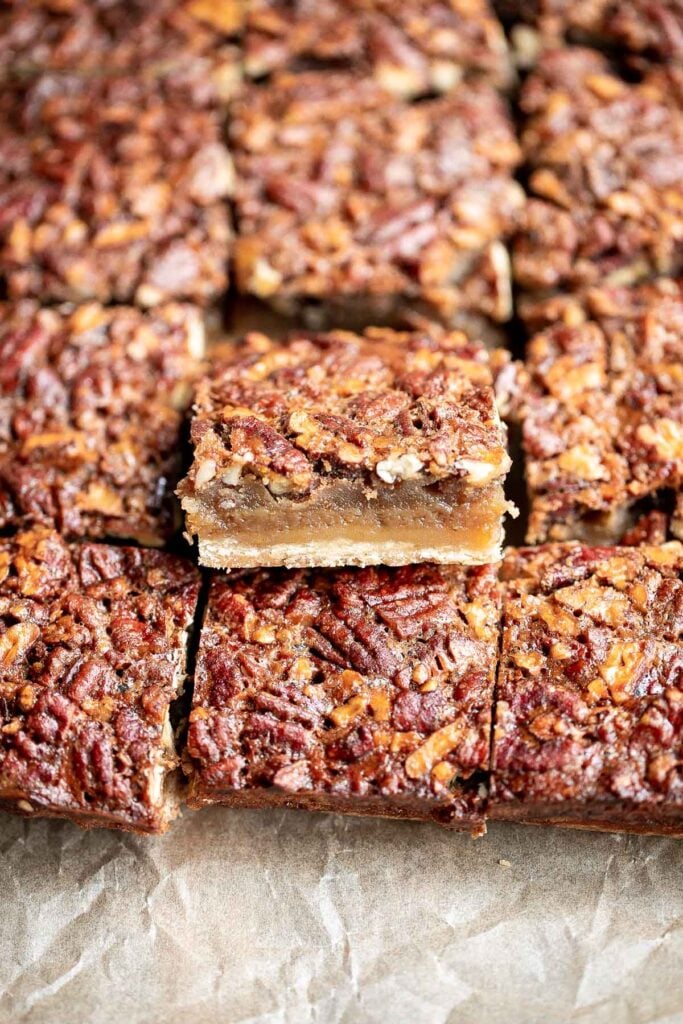
Pecan pie bars are the best and easiest way to enjoy the flavors of pecan pie but with half the effort and in a handheld bite-sized form. One of my favorite easy baking recipes.
Moist chocolate cupcakes topped with chocolate buttercream frosting and sprinkles, are a chocolate triple threat. They're rich, decadent, sweet, and easy to make.

M&M cookie bars are soft and chewy, have crisp edges with a gooey center, and are loaded with M&M's and chocolate chips. The easiest way to bake cookies and possibly my favorite easy dessert recipe!

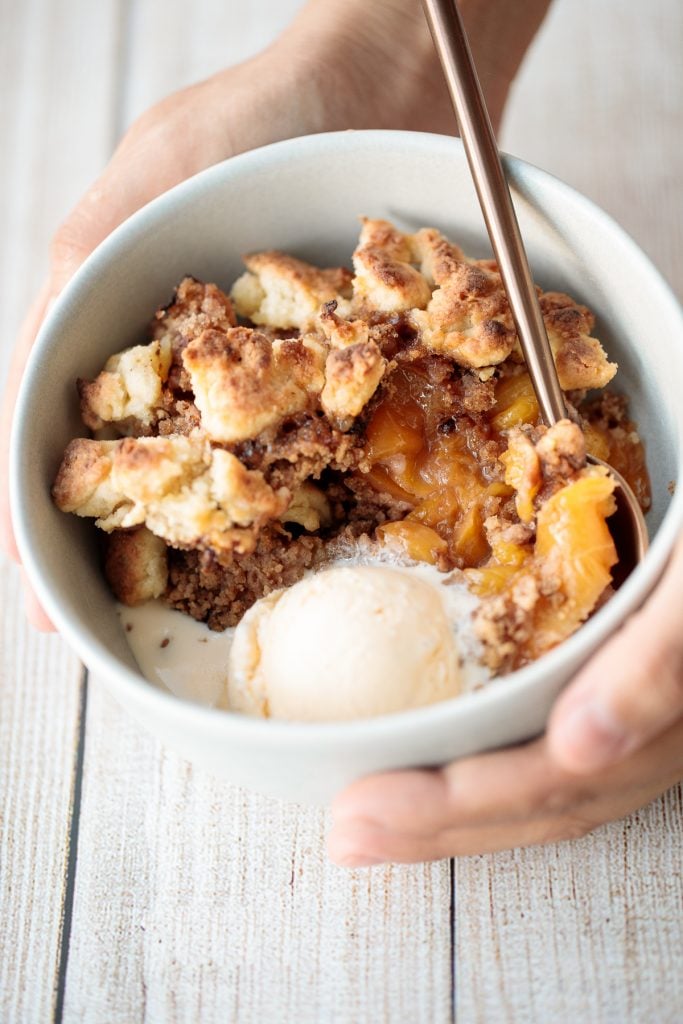
Easy peach cobbler is packed with sweet and juicy fresh peaches and topped with a buttery, golden topping. Make it with just 15-minutes of actual prep work.
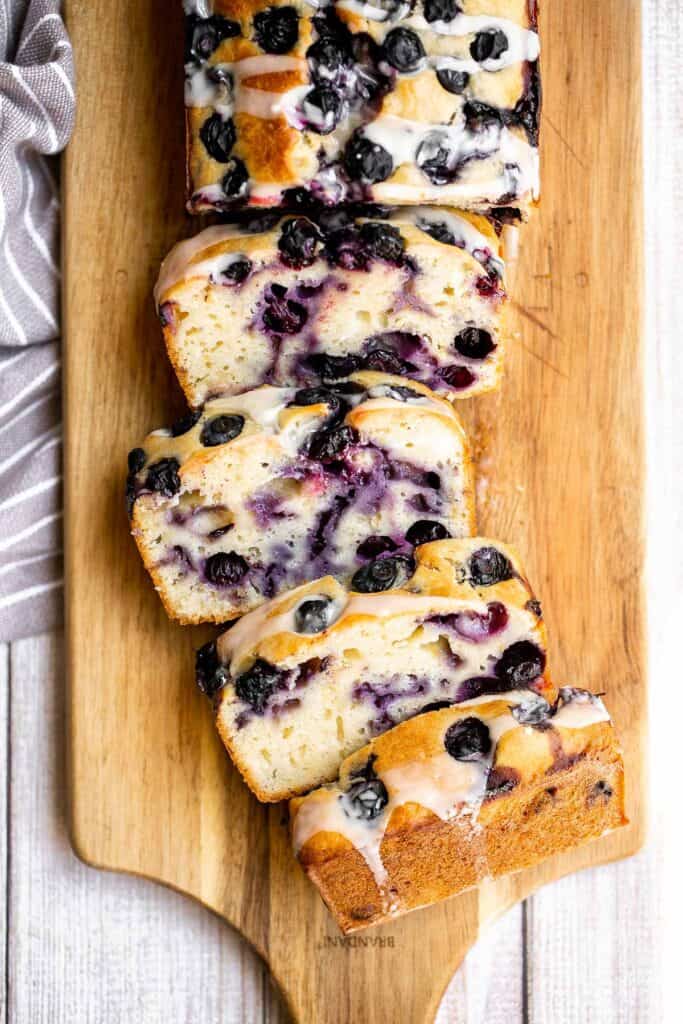
Easy lemon blueberry bread with lemon glaze is soft, moist, and delicious. This quick bread with fresh blueberries and lemon is the perfect summer dessert.
Cake mix cookies are the easiest cookies to bake with just three simple ingredients in 20 minutes! Mix and match different cake mix flavors and add-ins.

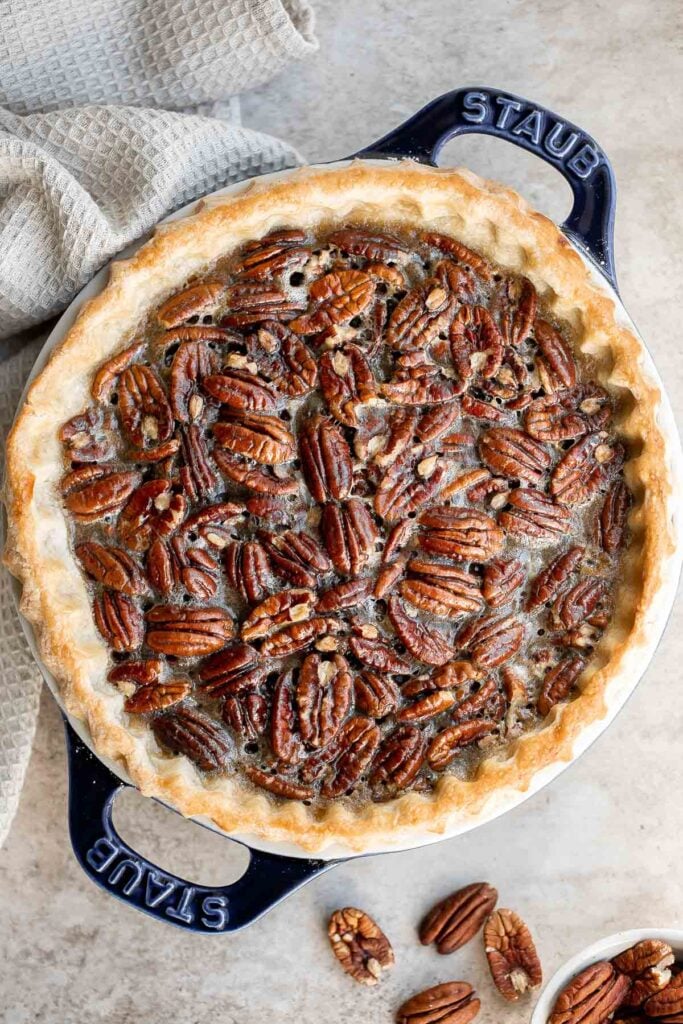
Old-fashioned pecan pie is a classic fall dessert with a homemade pie crust and sweet custard filling loaded with crunchy pecans - perfect for Thanksgiving. For such a fancy pie, it is actually embarrassingly easy to make, especially if you use a store-bought pie crust.
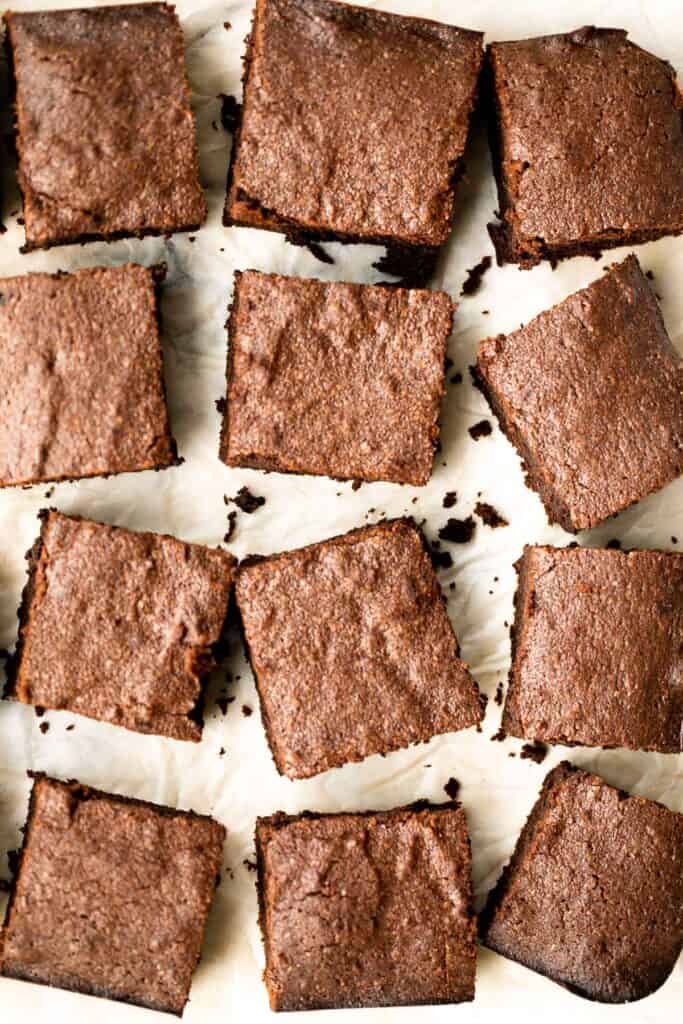
Fudgy brownies are rich, sweet, moist, and decadent. Plus, they're easy to make in one bowl (meaning less cleanup!) and ready in about 30 minutes. It's the definition of easy baking recipes.
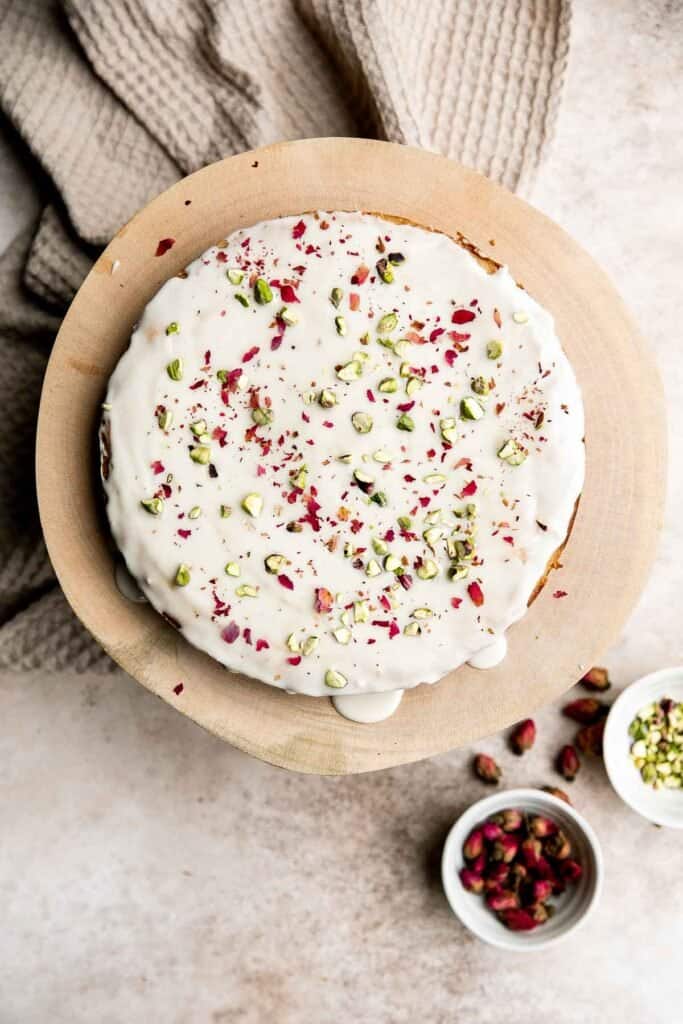
Persian Love Cake is a rich, moist, and nutty almond cake loaded with floral and citrus flavors, topped with a lemon glaze, pistachios, and rose petals.
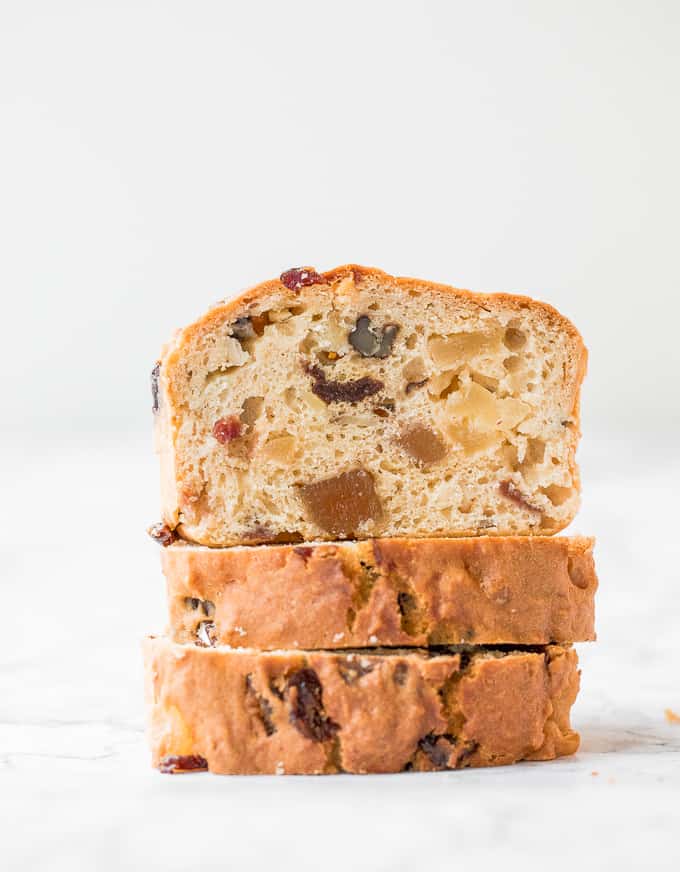
Perfect for the holidays, this super moist and tender, festive yogurt fruitcake is loaded with dried fruits and nuts for a burst of flavour in every bite.
Chocolate Chunk Peanut Butter Cookies
These perfectly soft, chewy and a little crumby chocolate chunk peanut butter cookies literally melts in your mouth. Make them in under 20 minutes.

Apple crisp with tender cinnamon-sugar apples and crispy oat topping is sweet, tart, and just as delicious as an apple pie but takes a lot less effort.
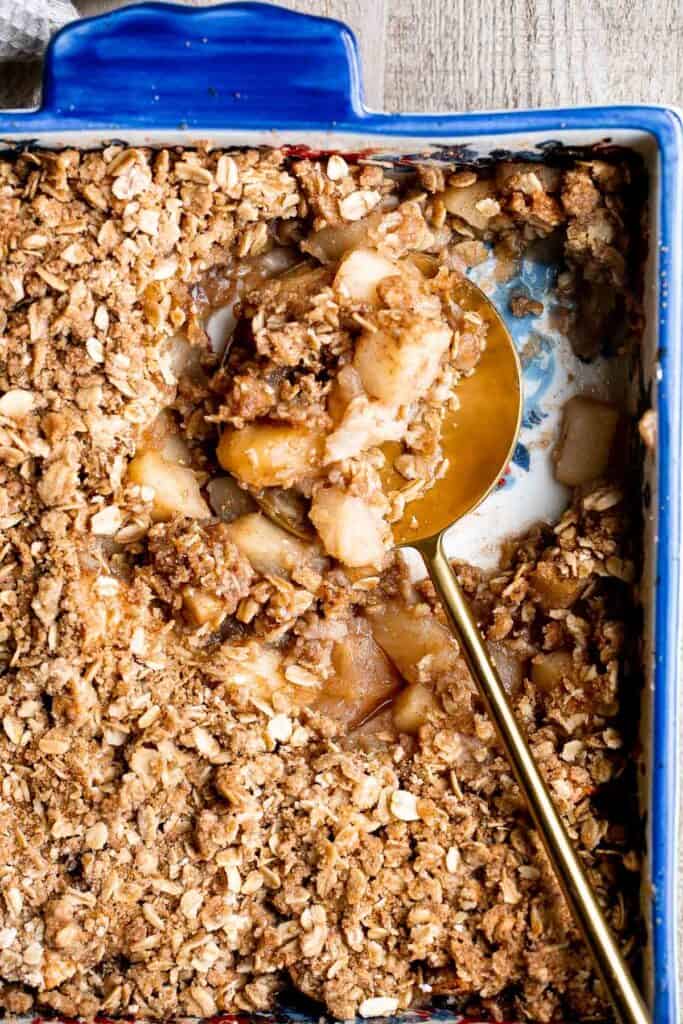
Moist vanilla cupcakes with buttercream frosting are soft, fluffy, simple, sweet, and delicious. Secret ingredient yogurt keeps them moist for days!

Easy No Crust Burnt Basque Cheesecake
Easy no crust burnt Basque cheesecake is the easiest one bowl recipe. It is perfectly caramelized on the top and edges and creamy yet firm on the inside.
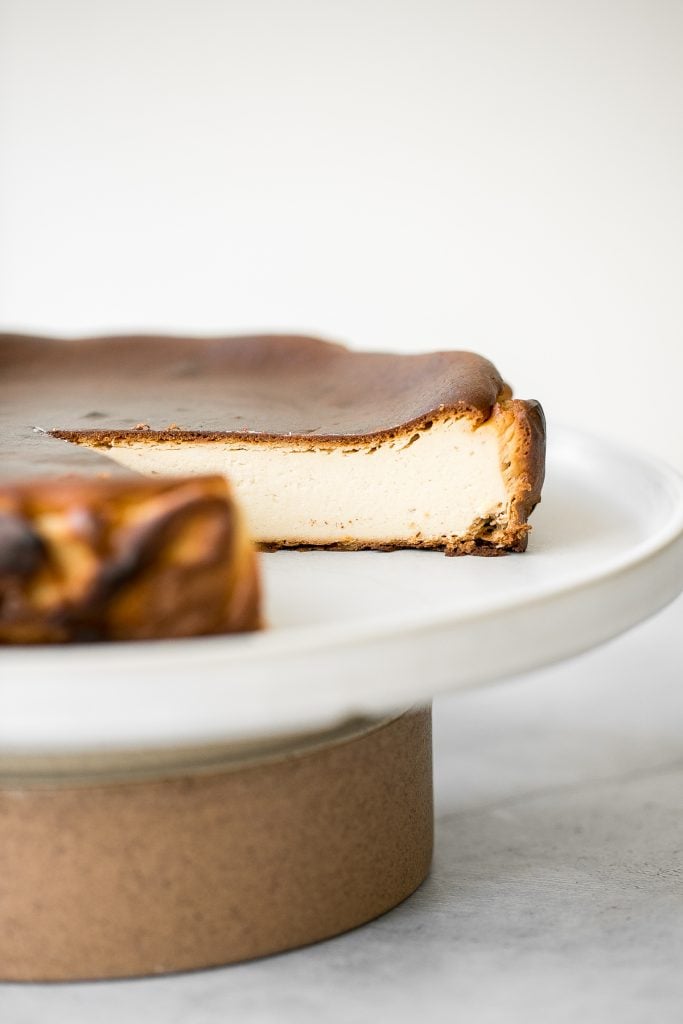
Pumpkin bread is fluffy, moist, and delicious. This classic fall loaf cake is loaded with real pumpkin and seasonal spices like cinnamon and ginger.
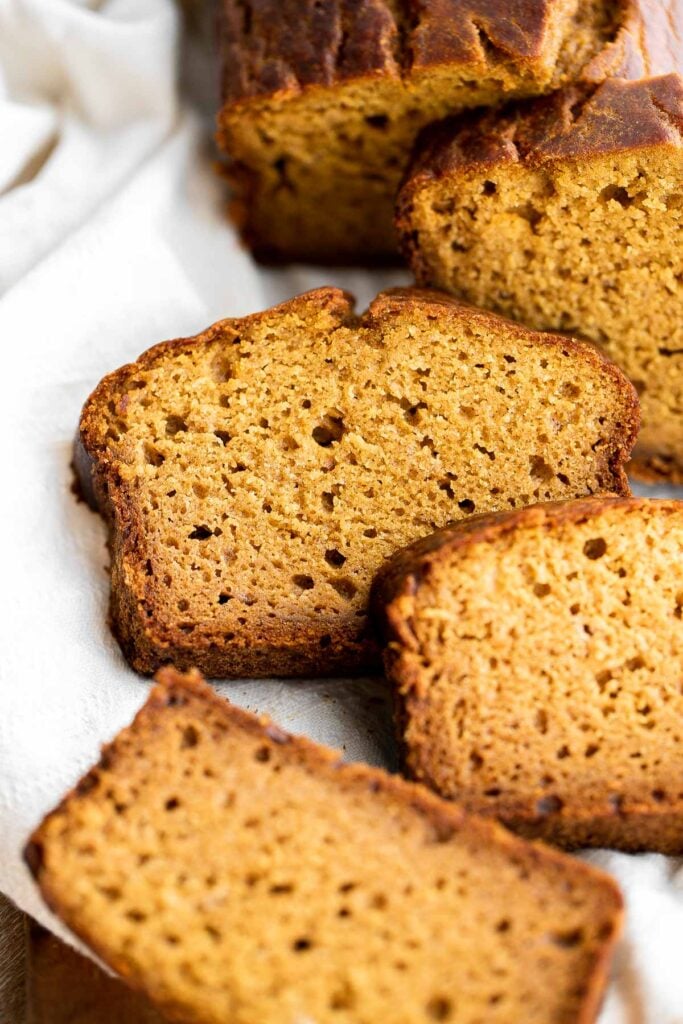
Easier than pie, this strawberry galette with a buttery flaky crust and a sweet and tart strawberry filling is a beautiful treat to serve this berry season.
Blueberry yogurt muffins are buttery, moist, soft, and cakey and bursting with blueberries in every single bite. They are super quick and easy to make.
Soft and Chewy White Chocolate Cranberry Walnut Cookies
Soft and chewy white chocolate cranberry cookies are golden brown with crisp edges, quick and easy, and freeze well - the perfect holiday cookie.
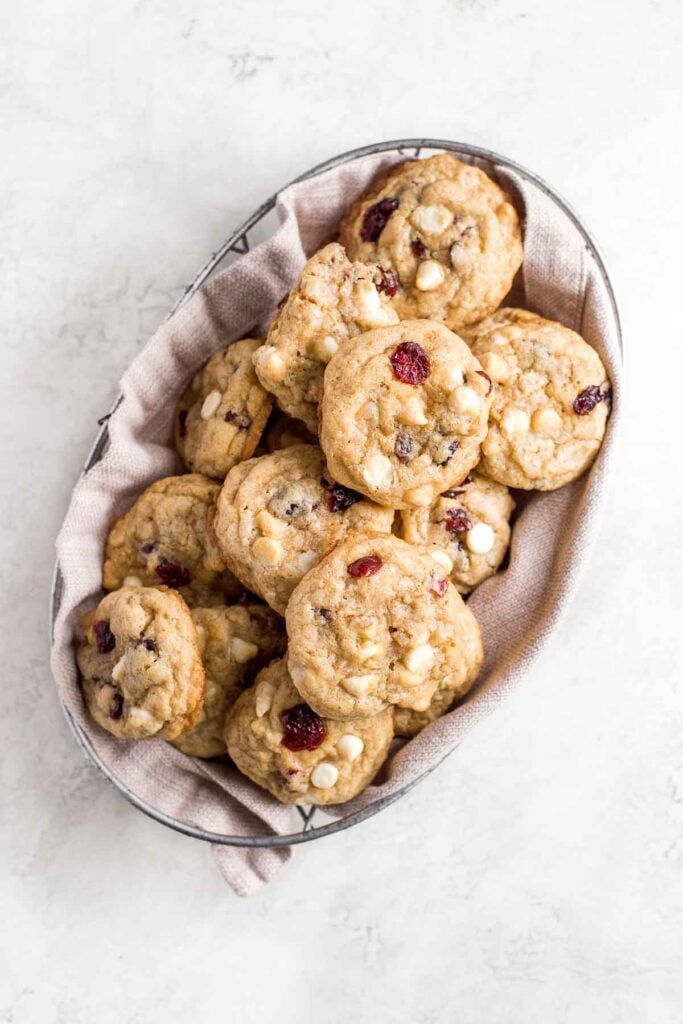
Chocolate zucchini cake is moist, fluffy, and delicious. Loaded with fresh zucchini for a burst of nutrition, and topped with a homemade cream cheese icing.
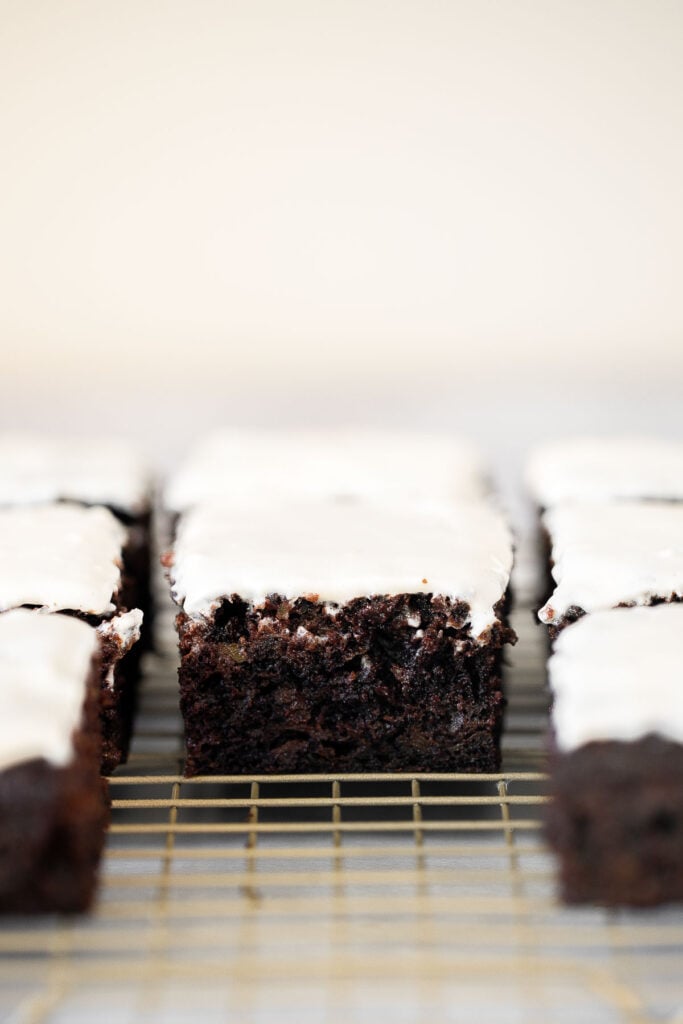
Blueberry buckle cake is soft and moist, loaded with fresh blueberries, and has a crunchy, sweet and buttery streusel topping. It's the best coffee cake recipe.
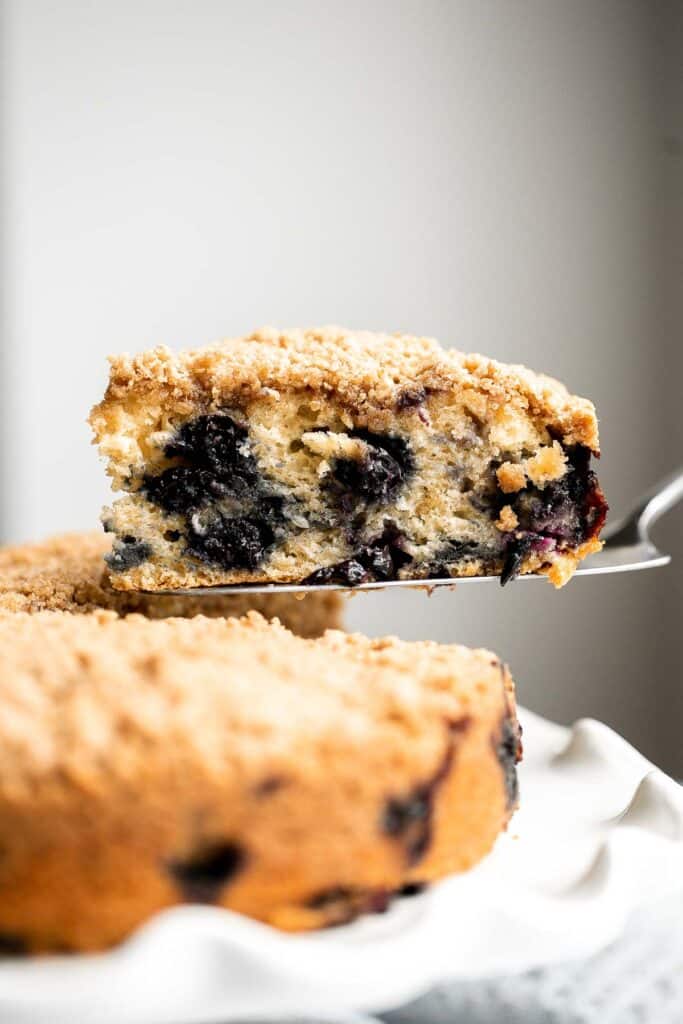
Inspired by Starbucks lemon loaf, this moist, homemade lemon loaf with lemon glaze has the perfect balance between sweet and tangy, and so so flavourful.
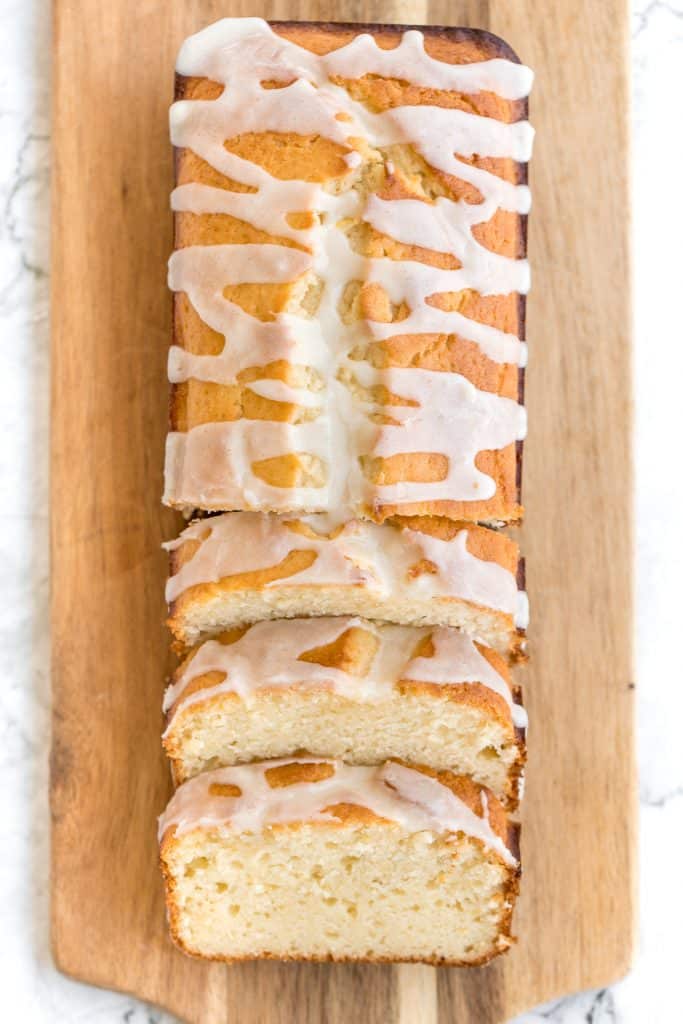
Soft tender chewy chocolate crinkle cookies are a classic Christmas cookie that tastes like a rich fudgy brownie with a crackly crust and coated in powdered sugar.
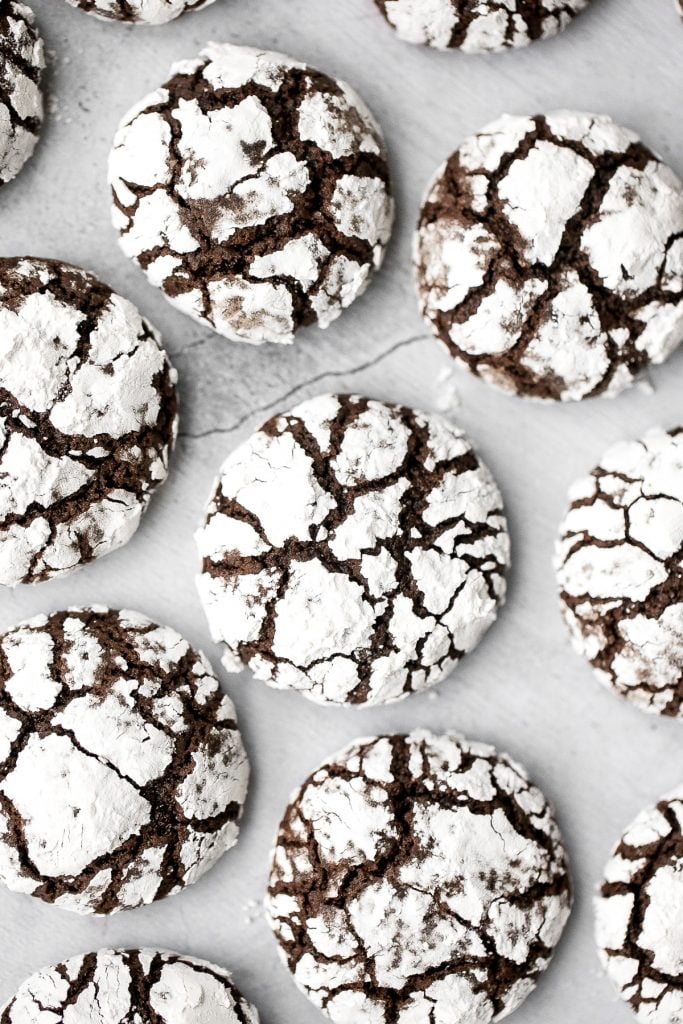
No one will be able to resist this perfectly sweet and moist, glazed brown sugar bundt cake. Made with Greek yogurt for major decadence and richness.

Chewy Chocolate Chip Oatmeal Cookies
Grab a tall glass of milk and start dipping the best homemade, soft-centered, chewy chocolate chip oatmeal cookies you will ever try.

Buttery, soft and moist, cranberry yogurt muffins are packed with tarty and sweet cranberries in every single bite. Great for breakfast, snack or dessert.
This fudgy double chocolate loaf cake is delicious, moist, and rich. It's easy to make with a quick one-bowl batter that's ready for the oven in 10 minutes.
Festive red and green M&M Christmas cookies are super soft and chewy with the crispiest edges. Quick and easy to make in under 20 minutes with no chill time.
Carrot Cake with Cheesecake Topping
Super moist and perfectly spiced carrot cake with a creamy cheesecake topping is flavourful, comforting, and the perfect homemade spring dessert.
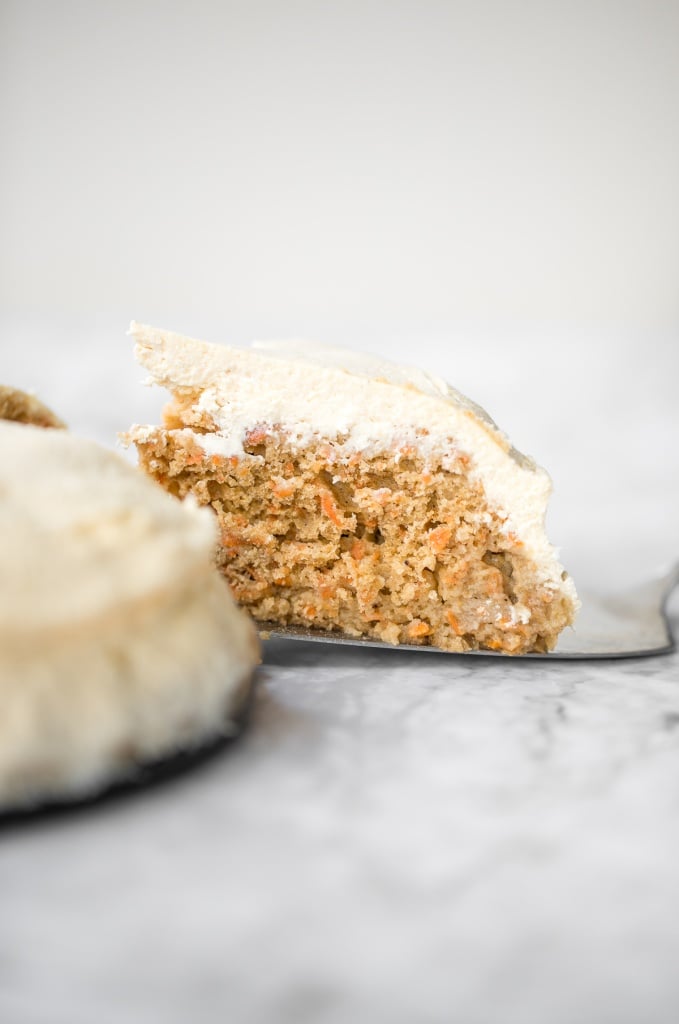
Strawberry bread is fluffy, soft, and moist, packed with farm-fresh strawberries. Simple, sweet, and delicious, perfect for a summer brunch.
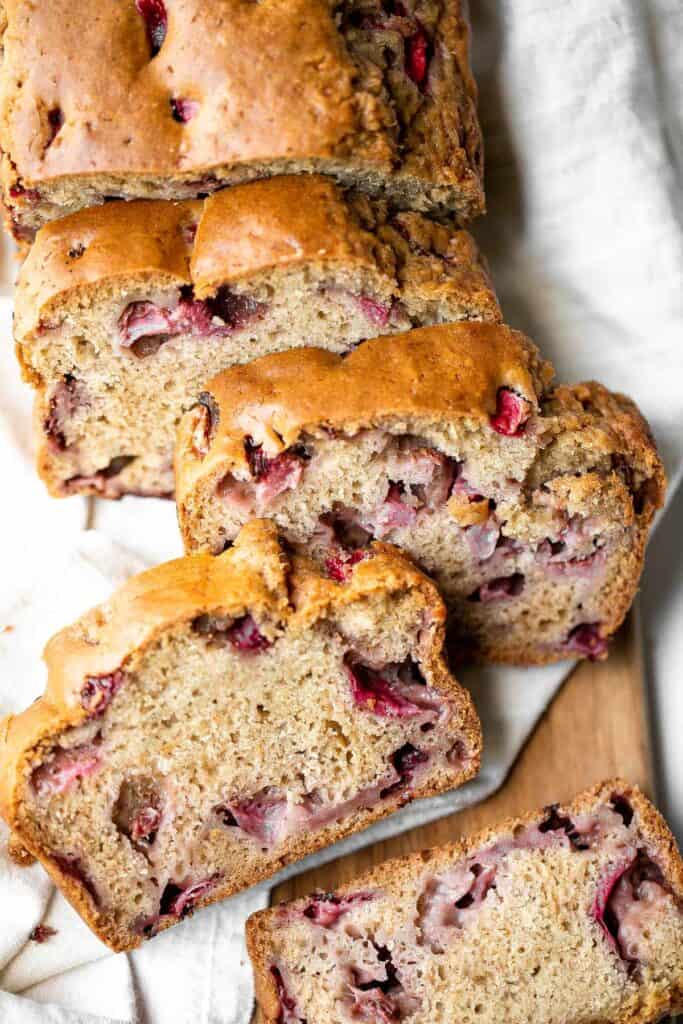
Carrot cake muffins are moist, light, chewy and full of carrots which means breakfast this week is healthy! Carrot muffins are great for meal prep too.
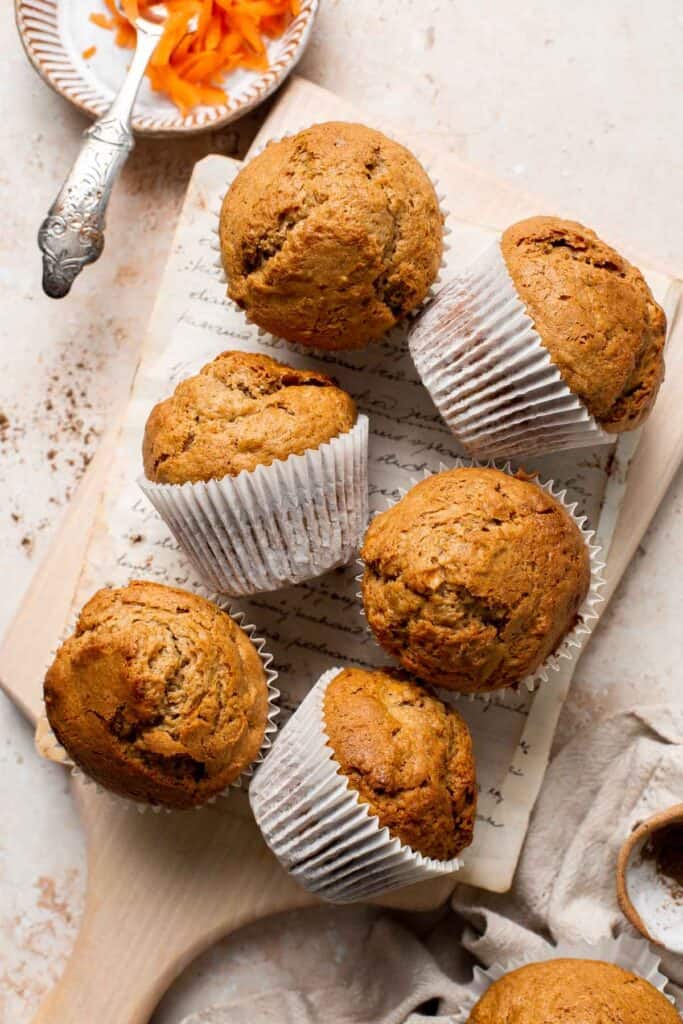
Soft and Chewy Peanut Butter Cookies
The best classic soft and chewy peanut butter cookies are puffy and thick, stay soft for days, and melt in your mouth. Make them in under 20 minutes.

Gingerbread Bundt Cake with Maple Cinnamon Glaze
This showstopping festive gingerbread bundt cake with maple cinnamon glaze and pecans is moist, soft, and fluffy, and packed with warm holiday spices. This is one of my favorite cake recipes to make during the holidays.
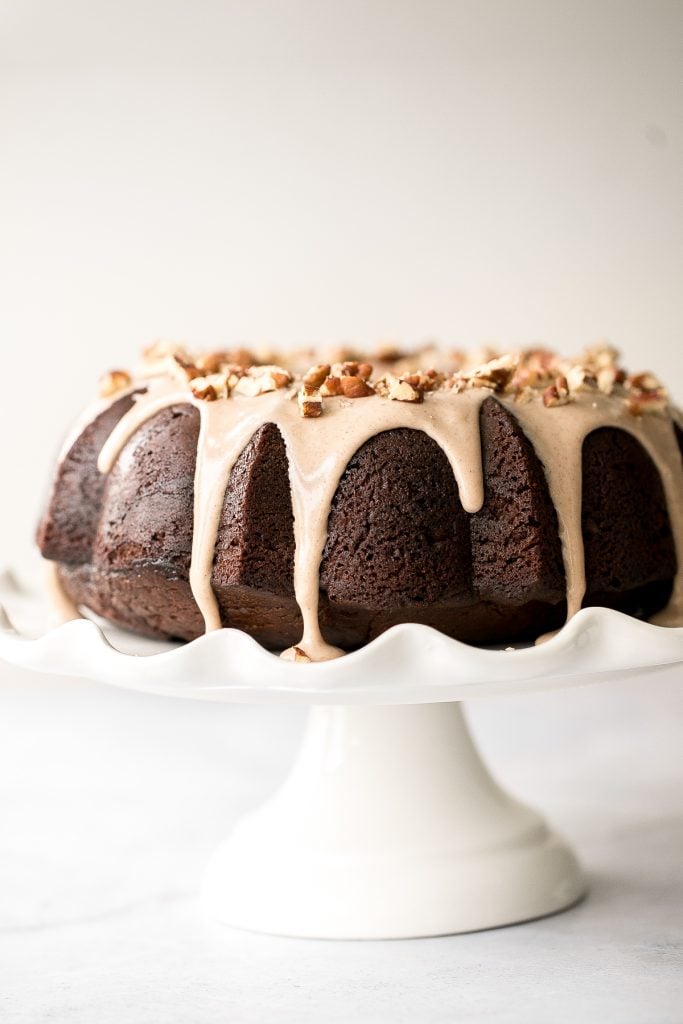
Chocolate Chip Zucchini Muffins
Chocolate chip zucchini muffins are moist, fluffy, and delicious. They are made healthier with fresh zucchini and yogurt which also adds amazing texture.

Cranberry Orange Shortbread Cookies
Cranberry orange shortbread cookies are bursting with flavour from dried cranberries and fresh orange zest. These easy cookies are rolled, sliced and baked. One of our favorite cookie recipes.
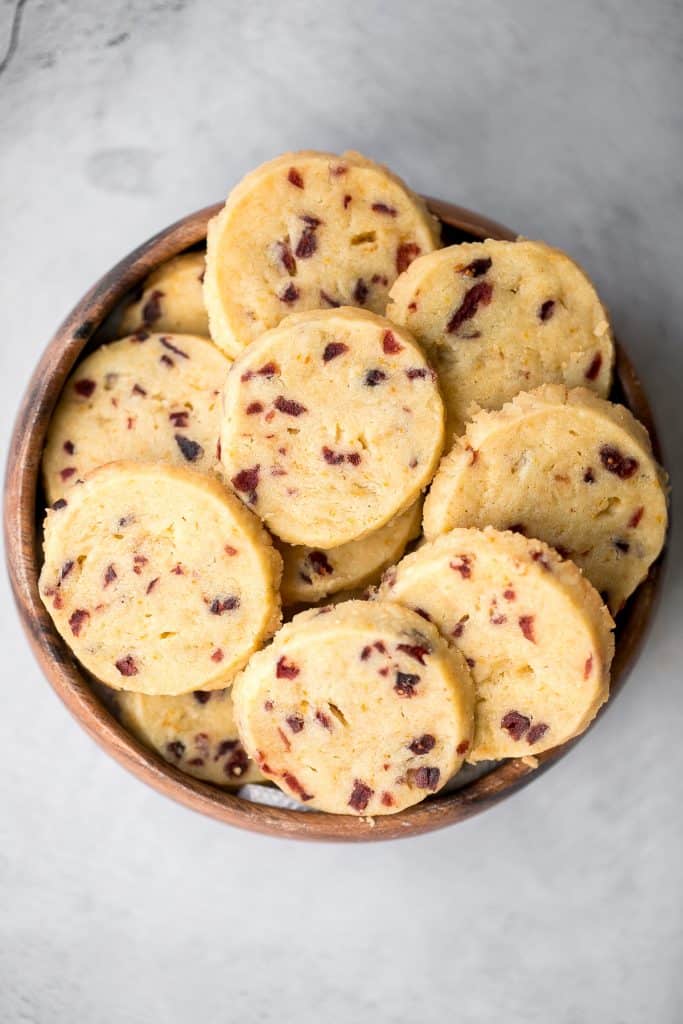
Homemade applesauce bread is fluffy, moist, and delicious. Loaded with fall flavors that transforms your favorite snack into a loaf cake.
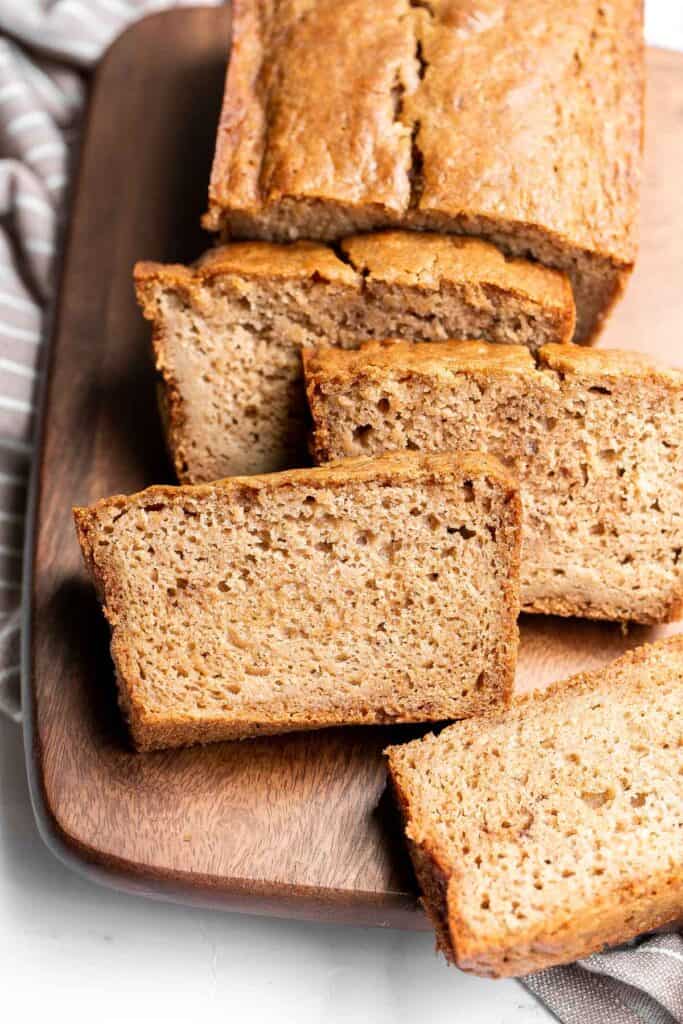
Blueberry oat squares are sweet, buttery, and delicious, with three mouthwatering layers. With just 15 minutes of prep, they are the perfect treat.
Thanksgiving just isn't the same without a slice of classic Thanksgiving pumpkin pie. There is nothing better than a bite into that flaky crust and smooth pumpkin filling, full of those classic pumpkin spice flavours. Even easier to make with store-bought pie crust.
Chocolate Chip Banana Bread Cookies
Brown butter oatmeal chocolate chip banana bread cookie bites are thick, fluffy, pillowy, cake-like little bites of banana bread heaven.

Healthy banana bread is delicious and moist and contains no refined sugar or butter. Quick and easy to make with 10 minutes prep and few pantry staples.
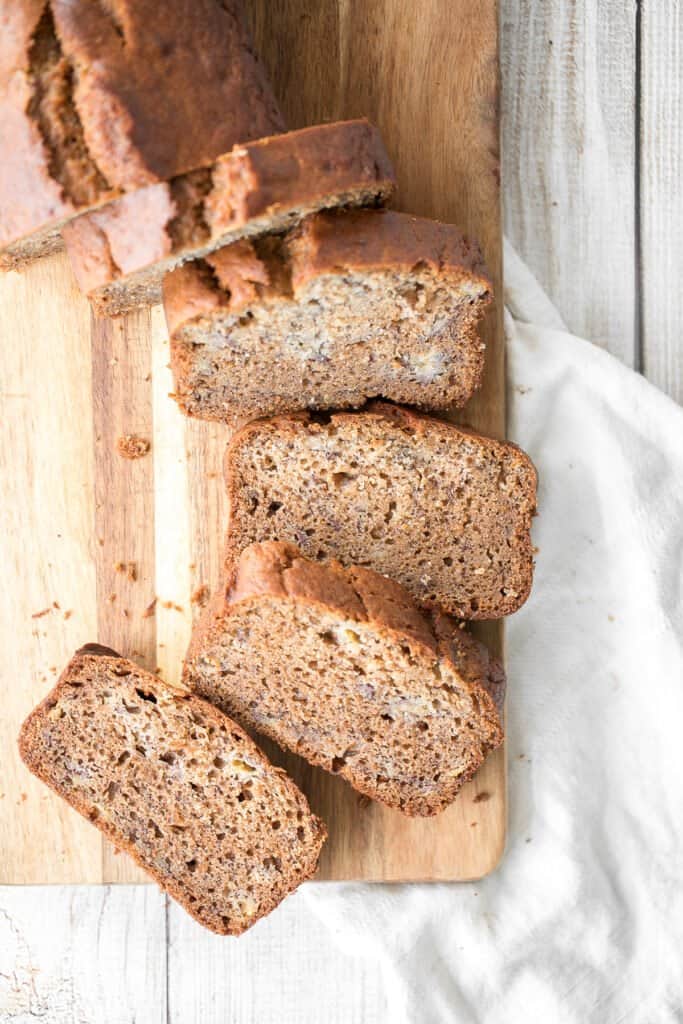
Blueberry crisp with a sweet blueberry filling and a buttery, crispy oat topping, is a delicious, fruity treat that's ready in just 45 minutes.
Cinnamon Apple Oatmeal Muffins
Cinnamon Apple Oatmeal Muffins are fast, easy and delicious- loaded with apples, oats, and fall spices. A quick nutritious bite for breakfast or snack time.
More Dessert Recipes
- 50 Best Cookie Recipes
- 50 Best Cake Recipes
- 45 Best Chocolate Desserts
- 25 Easy Pie Recipes
- 40 Best Summer Desserts
- 50 Best Fall Desserts
Did You Make Any of These Easy Baking Recipes?
Please leave a comment and rating below, and let me know what you thought of this round up of the best easy baking recipes. Be sure to snap a picture and tag me on Instagram @aheadofthyme or share it on the Pinterest pin so that I can follow along.
HUNGRY FOR MORE? Don't forget to sign up for my email newsletter so that you don't miss any recipes. You can also follow along on Instagram and Pinterest for more recipe updates.
Steamed Scallion Buns

Steamed scallion buns (hua juan 花卷) are a Chinese dim sum dish that is popular all over China, especially in the northern region. These delicious flower rolls have a pillowy, light, and fluffy dough layered with green onions which is twisted into it's unique shape, and steamed to perfection. This simple recipe can be served for breakfast, as a snack throughout the day, or a side along with your favorite classic Chinese dishes.

Why You'll Love Steamed Scallion Buns
- Known as Chinese flower rolls for a reason. These steamed scallion buns (hua juan 花卷) get their name from their unique shape. A traditional folding method turns a green onion packed dough into beautifully layered mounds speckled with color.
- Steamed buns have the fluffiest pillowy dough. If you've ever enjoyed Chinese steamed buns (also known as bao buns, baozi, or mantou), then you know how the airy nature of these flower rolls are incomparable to anything else. They are literally clouds made of bread.
- They're easier to make than you think. Although bread recipes generally tend to be perceived as a more difficult task to take up in the kitchen, these bao buns are nearly foolproof. Assembling and shaping the steamed scallion buns might take a little bit of time, but you can feel confident that they'll turn out just how you imagine - even if you have zero experience making bread.
Ingredients and Substitutions
To make these steamed scallion buns, you will need the following ingredients (full quantities in the recipe card below):
- all-purpose flour
- instant yeast
- granulated white sugar
- salt
- lukewarm water
- scallions - also known as green onions, or you can substitute with chives.
- vegetable oil
You will also need a kitchen scale (or measuring cups and spoons), mixing bowl, rolling pin, pizza cutter or knife, and steamer basket over a large cooking pot.
How to Make the Best Steamed Scallion Buns
- Make the dough. In a large mixing bowl, whisk together all the dry ingredients including flour, yeast, sugar, and salt. Add water and stir well to combine until no dry flour is visible in the bowl. Make sure to scrape down the sides of the bowl with a spatula. (Lukewarm water and sugar "wakes up" the yeast and speeds up the fermentation, which helps build up gluten strength).
- Knead the dough. Transfer the dough onto a clean and lightly greased surface and knead the dough until the dough ball is smooth, about 6-8 minutes. You can rest the dough covered in the mixing bowl for 5 minutes and continue kneading until smooth.
Tips for Kneading Dough
- How to knead dough: Knead the dough by pushing it down and outward using the palms of your hands. Fold the dough in half toward you and press down. Repeat this motion by pushing the dough down and outward, and then folding over towards you. This helps build up gluten strength in dough that is responsible for making the bread fluffy.
- How to test if dough is well-kneaded: A well-kneaded dough is smooth and can hold its shape. You can test the dough by giving it a firm poke with your finger. The indentation should bounce right back. If it doesn't bounce back and stays like a dimple, keep kneading for a few more minutes.
- First rise. Cover the bowl with plastic cling wrap and let dough rise at room temperature (preferably in a warmer area) for 1 hour until doubled.
- Make the filling. In a small mixing bowl, add scallions, salt, and oil and stir well to combine. Set aside.
How to Shape Scallion Flower Rolls
- Roll out the dough. Use a rolling pin to roll the dough into an approximate 12x9-inch rectangle. Use a silicone brush and brush the scallion filling evenly on top.
- Fold the dough. From the long side of the rectangle, fold the dough in to the ⅔ mark. Take the other long side and fold it in on top, to form a three-layer rectangle approximately 12x3-inches in diameter.
- Cut strips. Use a pizza cutter or knife to cut the rectangle crosswise into 12 even strips (about 1-inch wide). Make sure all the layers are cut through.
- Stack and pull. Take two strips at a time and stack them up together. Use a chopstick or straw to press down lengthwise in the centre to create an indentation. Hold the two ends and gently stretch it a little.

- Pinch and twist. Hang the end side over a chopstick (the side without the indentation), and pinch the two ends together. With the other hand, rotate the chopstick in a full 360 degree circular motion to twist the bun into a coil.
- Repeat. Repeat with the rest of dough strips to form 6 shaped buns
How to Steam Buns
- Prepare to steam the buns by adding some water into a large cooking pot and placing a fitted steamer basket on top. Lightly oil the steamer basket and line it with parchment paper to prevent sticking during steaming.
- Place the buns into the lined steamer basket and cover with the lid. Set it aside, and let the buns rise for 25 to 30 minutes before cooking. You don't need to wait till the buns double in size, as they will rise further during steaming.
- Turn the stove on to medium heat and bring the water to a boil. Steam the buns for 15 minutes (covered) over boiling water . Turn off the heat and leave the buns in the steamer for another 5 minutes before uncovering or removing from the steamer. This will help prevent the buns from shrinking due to temperature drop. Serve immediately.
Recipe Tips and Tricks
- How to store: place steamed scallion buns in an airtight container or ziploc bag and store in the refrigerator for up to one week. When storing, make sure the buns do not touch each other, or else they will stick to each other.
- How to freeze: Wrap each flower roll in plastic cling wrap and place in a freezer bag. Freeze for up to 3 months. You can also them on a sheet pan for an hour, then transfer them to an airtight container. Use parchment paper to separate them.
- How to reheat: To reheat the buns, steam the buns using the same instructions as in the recipe (steam covered for 15 minutes, then remove from heat and let it sit covered for another 5 minutes). To reheat directly from frozen, steam for an extra 5 minutes.
- Microwave instructions: You can also reheat them in the microwave. Wrap one steamed bun in a damp paper towel. Microwave for 1 minute or until the bun looks steamy. Allow it to rest for one more minute, then enjoy!
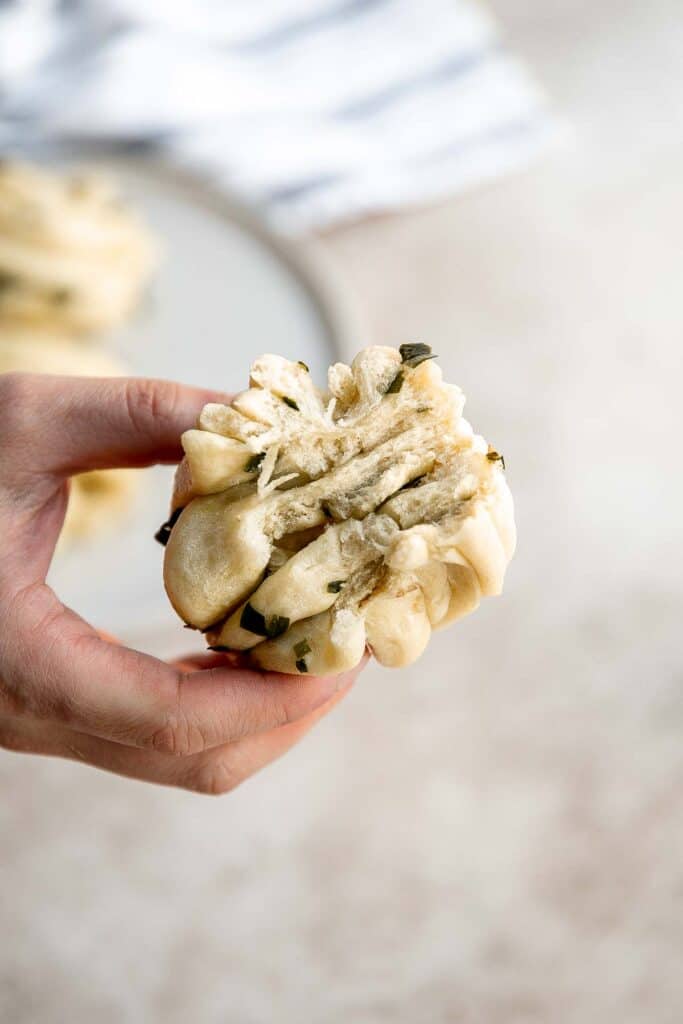
More Chinese Recipes
- 60 Chinese Takeout Recipes at Home
- Green Onion Dinner Rolls
- Savory Chive Pancakes with Sourdough Starter
- Cranberry Pumpkin Steamed Buns
- Scallion Oil Noodles
- Pork Dumplings
Tried this recipe?
I'd love to hear what you think! Leave a comment and rating below to share your feedback. Your reviews help others discover this recipe and help me keep creating more free recipes for you. Snap a photo and tag me on social media @aheadofthyme too.
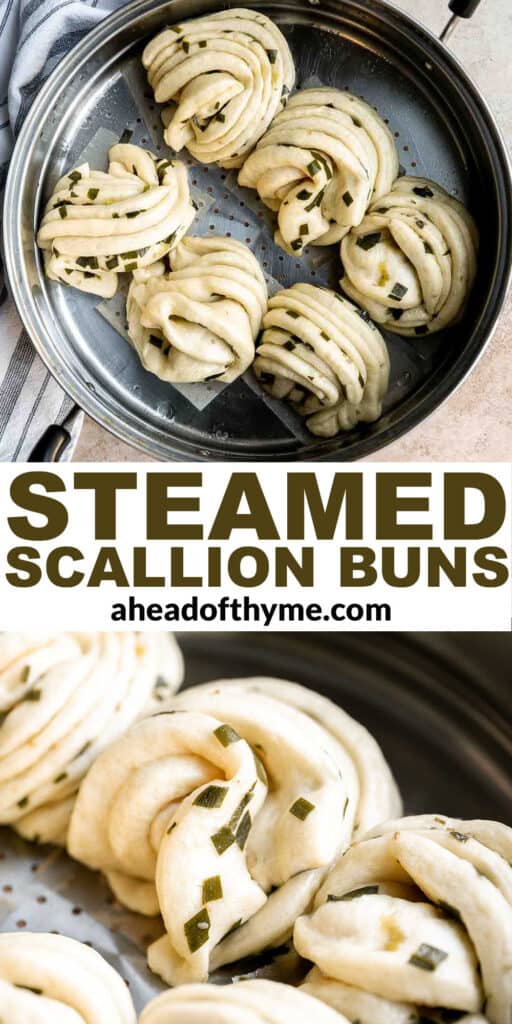
35 Best Turkey Recipes

Wondering how to cook turkey for dinner? When it comes to making something delicious, lean, and healthy, turkey usually comes to mind. Whether you are looking to roast a whole turkey, cook turkey breast, or use up that package of ground turkey that you just picked up from the grocery store, we've got you covered. We are sharing over 35 of the best turkey recipes including roast turkey, instant pot turkey, slow cooker turkey, turkey meatballs, turkey pasta, leftover recipes, and more poultry recipes.
Whole Turkey Recipes
Best and Juiciest Roast Turkey
The best and juiciest roast turkey cooks faster that traditional methods and requires no brining. It's so tender and juicy every time. And use the giblets and drippings to make delicious homemade turkey gravy.
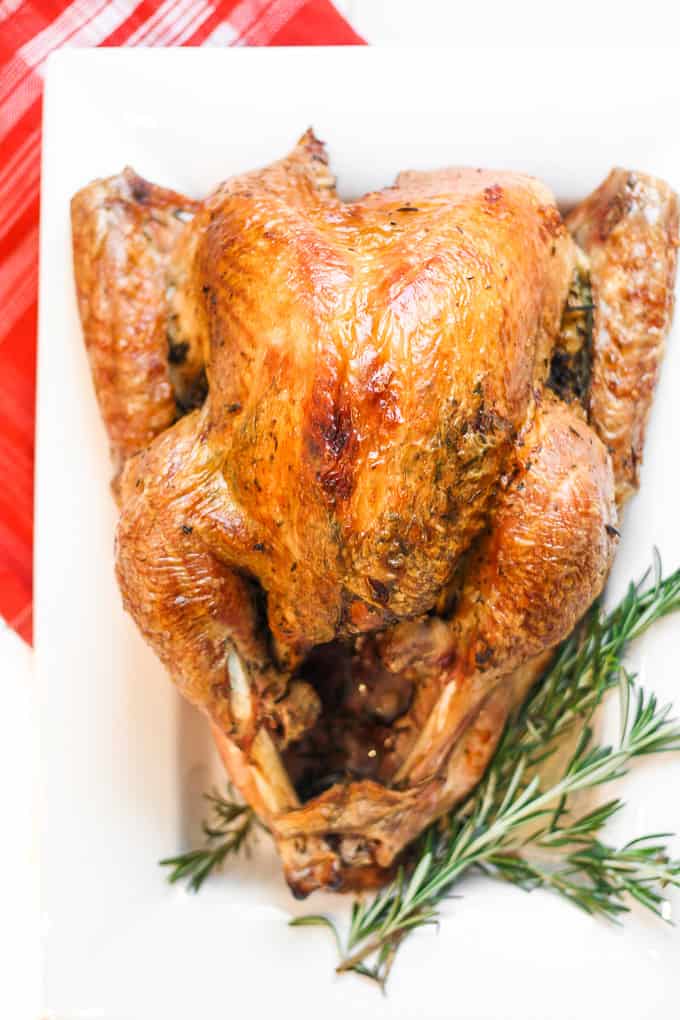
Asian five-spice roast turkey is tender and juicy, marinated with a delicious flavourful Asian rub and has a crispy brown skin. The perfect holiday dinner.
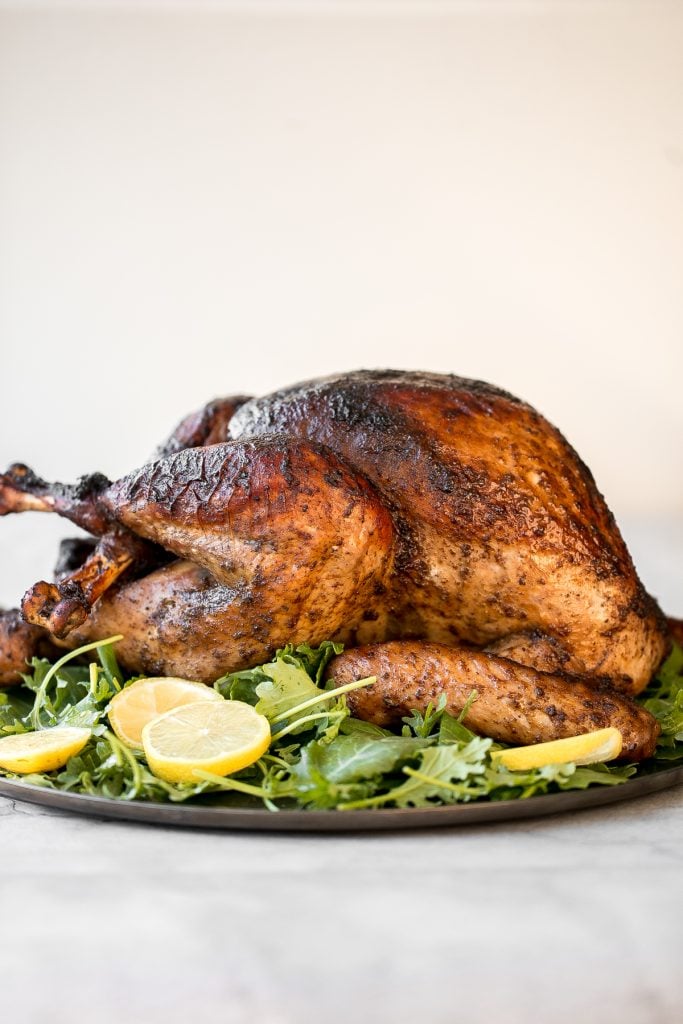
Instant pot whole turkey is a tender, juicy, and delicious holiday main. Ready in under 2 hours, it's the fastest and easiest way to cook a whole turkey!

Turkey Breast Recipes
Easy juicy roasted turkey breast is the perfect holiday dinner, minus the headache…tender meat, crispy skin, and a layer of roasted onions. Serve it with easy 2-ingredient gravy made with the drippings.
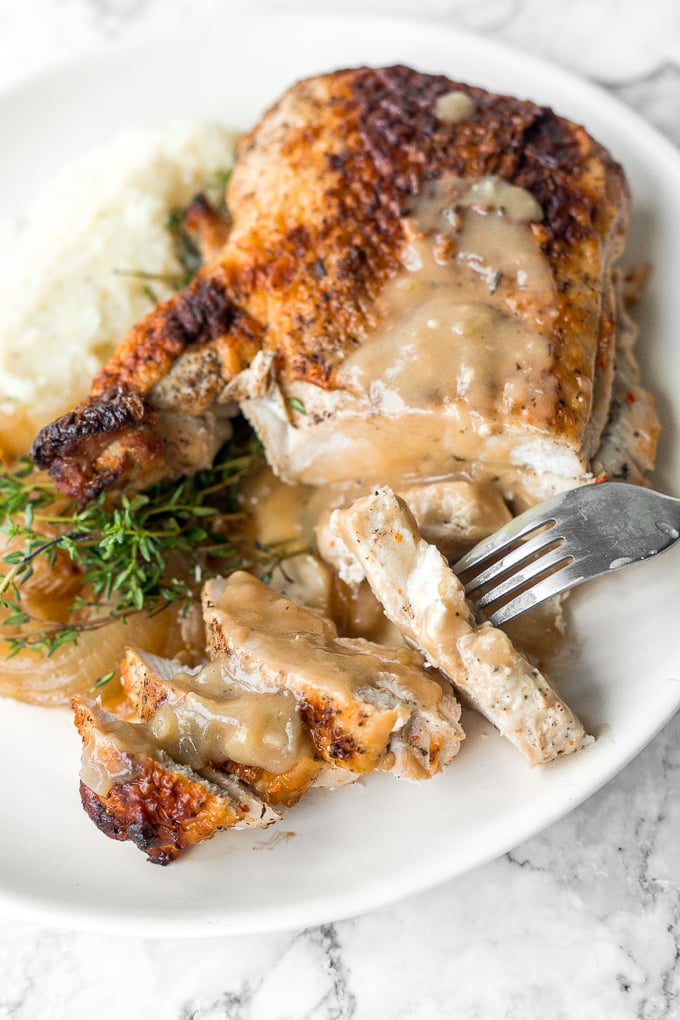
Baked turkey parmesan with a delicious, crispy, breaded coating covered in a rich homemade tomato sauce and topped with melted mozzarella and parmesan.
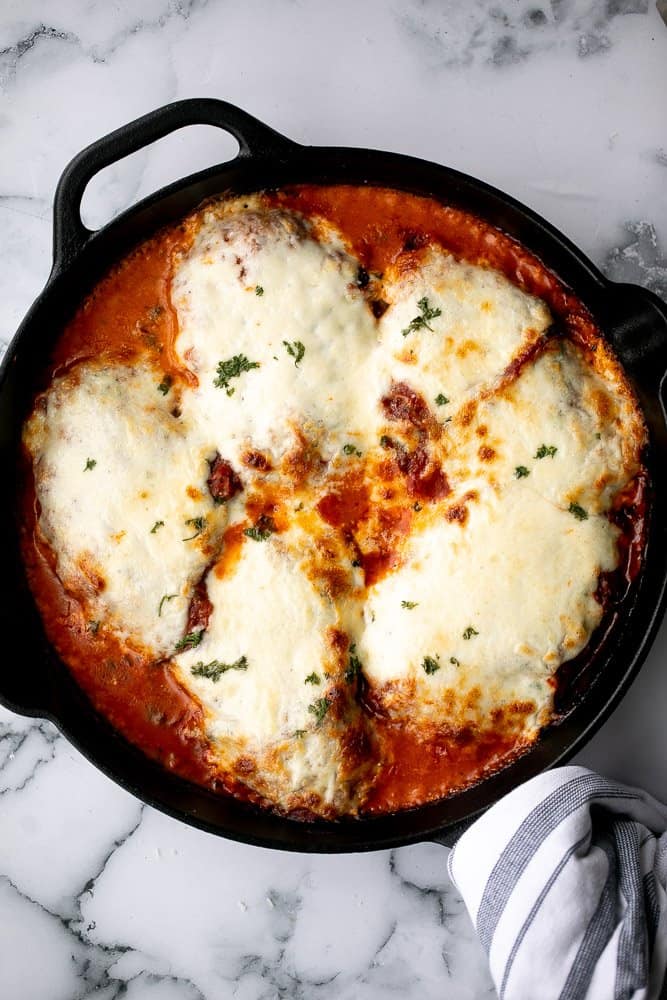
Soft, tender and juicy slow cooker turkey breast with the crispiest skin and fresh fall herbs is the easiest way to cook a turkey this holiday season. Serve it with make ahead cranberry sauce.
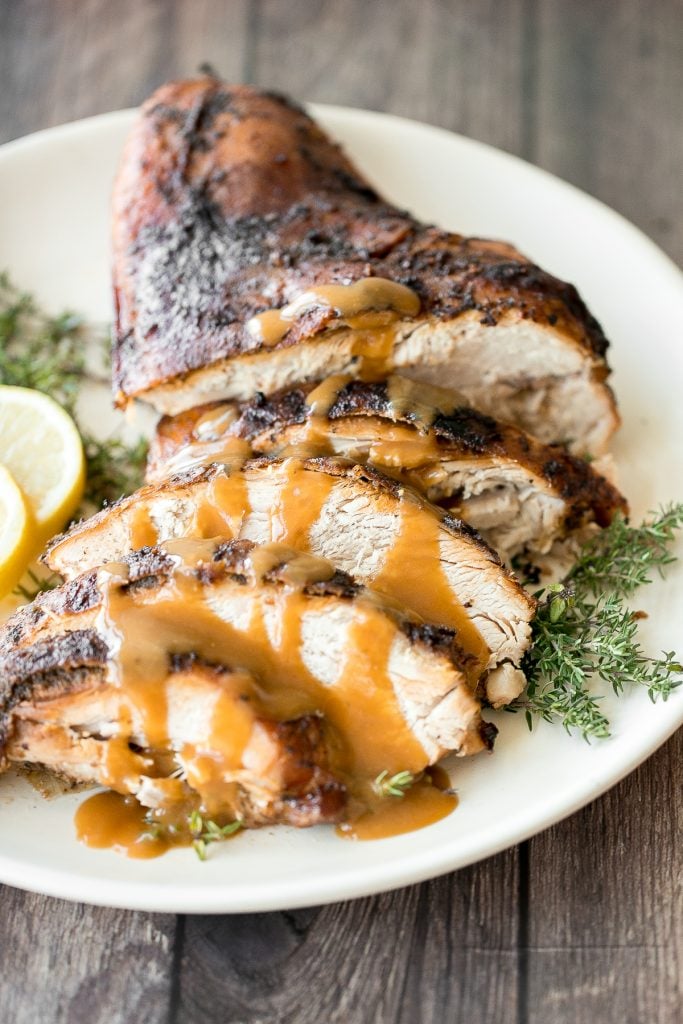
Instant pot turkey breast is the most tender and juicy turkey you'll ever try. It's so easy to make in the pressure cooker and requires little prep.
Soy Glazed Braised Turkey Breast with Five-Spice
Soy glazed braised turkey breast with Asian five-spice is moist, tender, succulent and the juiciest turkey ever with browned and crispy skin. So flavourful. Serve it with delicious cornbread stuffing.
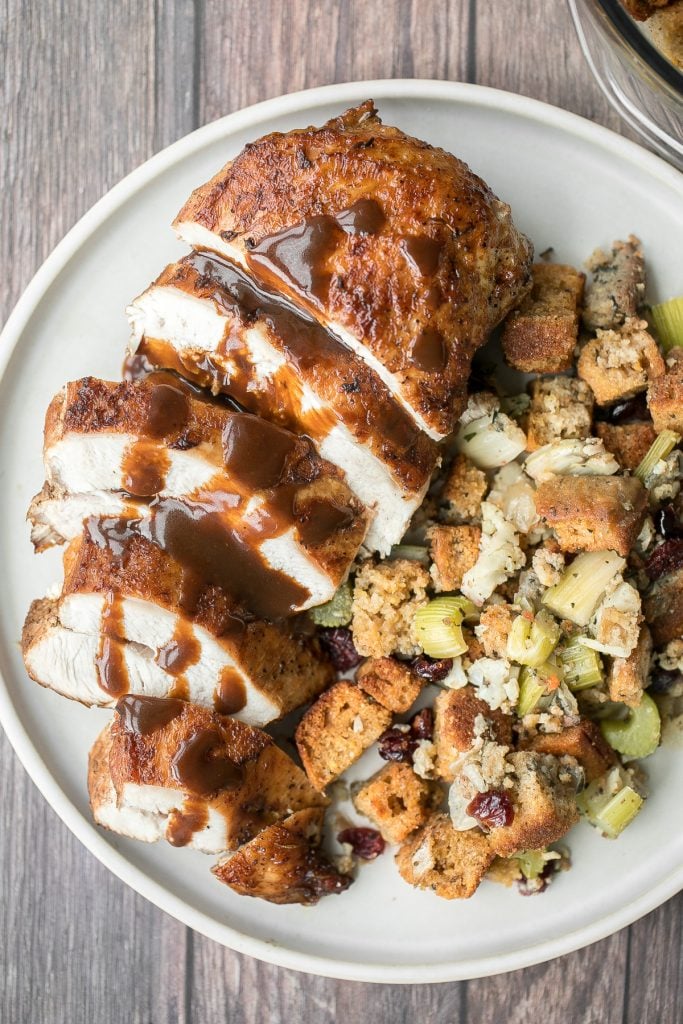
Instant pot turkey roast with homemade gravy is easy to prepare in minutes, the fastest way to cook turkey, and delivers flavorful, juicy, tender turkey.
Tender juicy Asian sesame soy turkey roast is a creative take on a holiday classic, packed with sweet, salty, and savoury umami flavours in every bite.
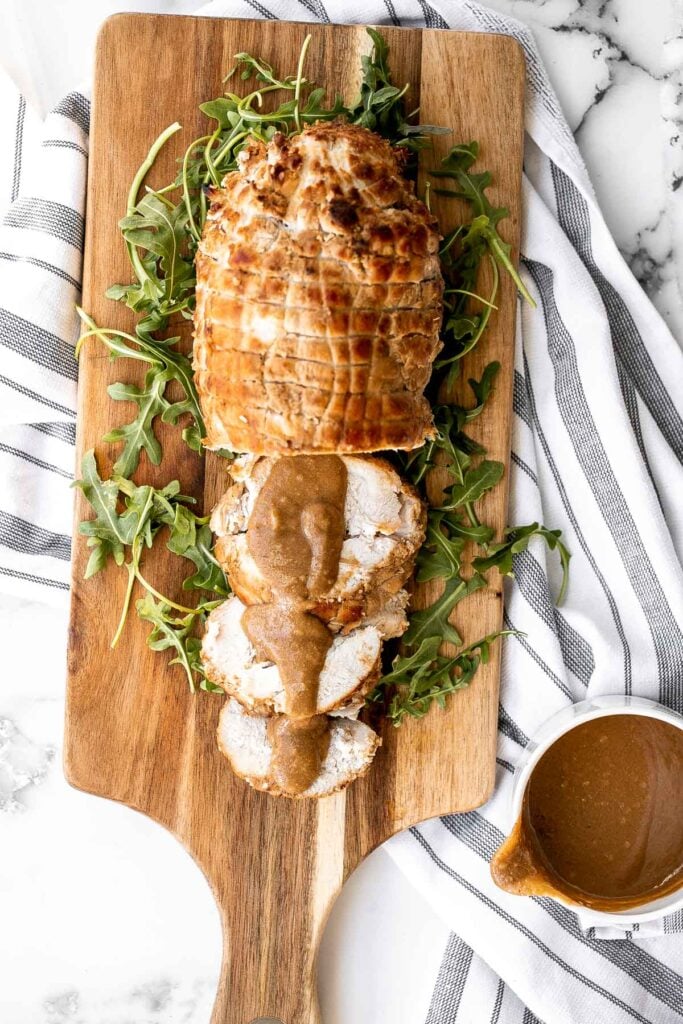
Ground Turkey Recipes
Sweet chili turkey meatballs are delicious, tender and juicy, loaded with classic Thai flavors, and quick and easy to make. Savory, sweet, and tangy.
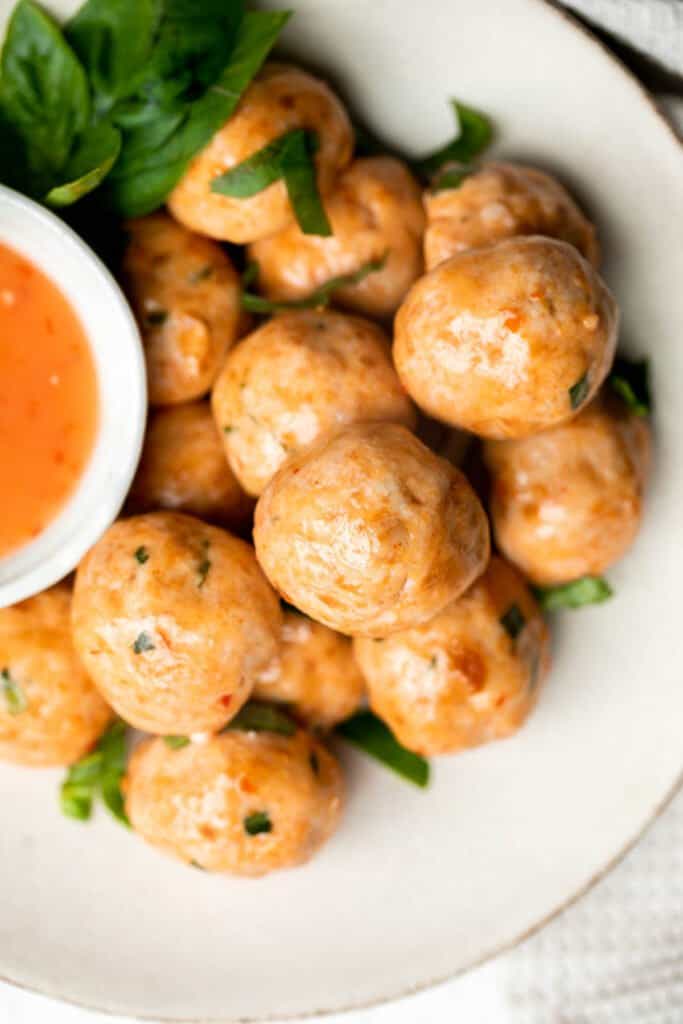
Ground turkey pasta bake is an easy yet impressive meal that is cozy, comforting, and satisfying. A family-friendly casserole dinner ready in 45 minutes.
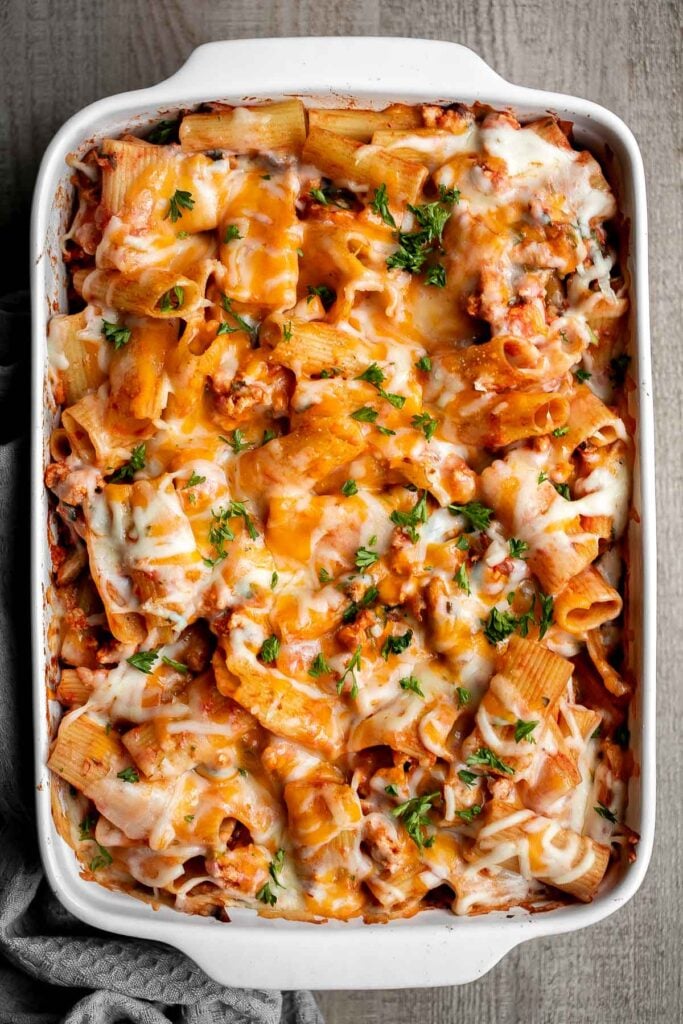
Ground Turkey Soup is hearty, nourishing, and healthy. Loaded with protein and veggies, this Italian soup is packed with flavor and is super filling.
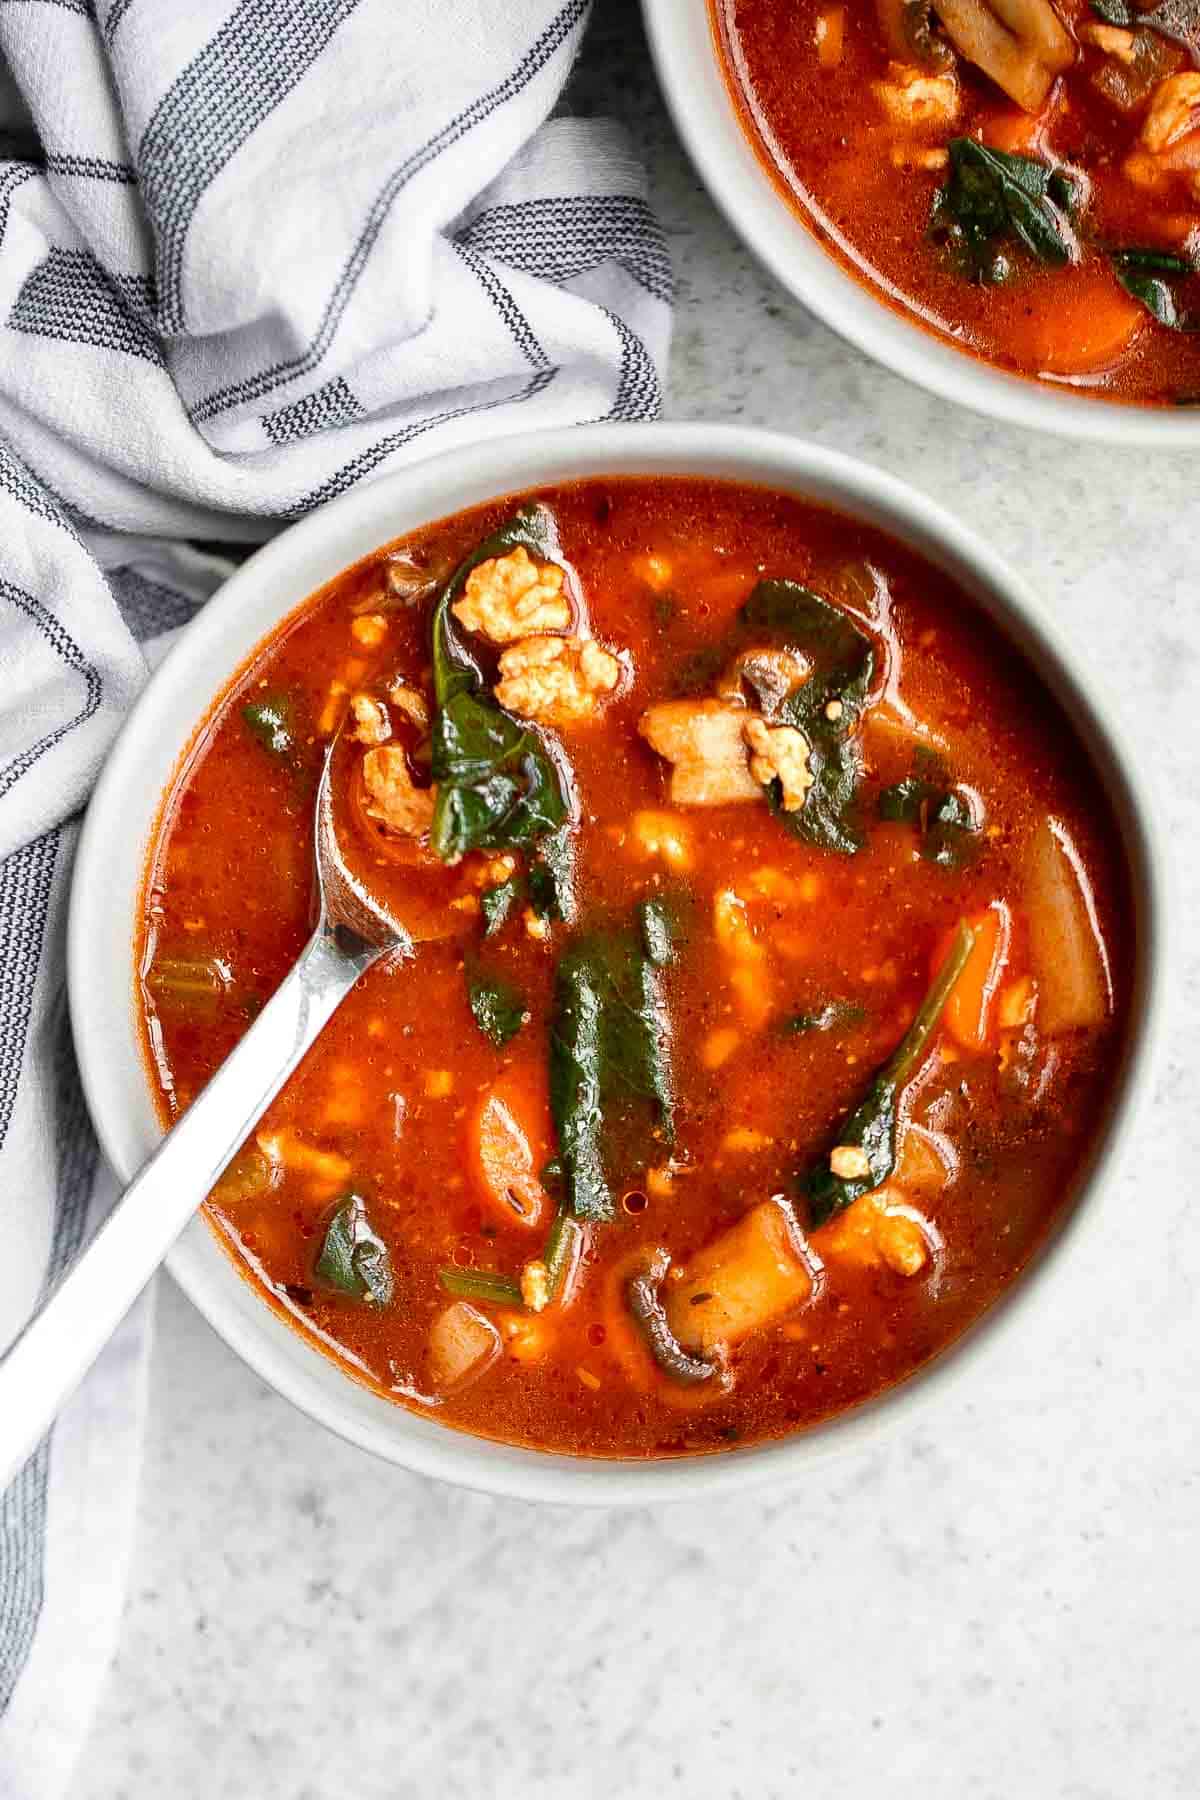
Mediterranean turkey burgers are tender, juicy, and delicious, loaded with garlic, fresh dill, and lemon juice. The perfect summer weeknight meal.
Thai Turkey Meatballs in Coconut Curry
Thai turkey meatballs in coconut curry are the perfect weeknight dinner when you want something delicious, healthy, flavorful, and satisfying.
Turkey chili is hearty, filling, flavorful, and delicious. It's warm and cozy, quick and easy to make in one pot, and can be made faster in the instant pot.

When it comes to weeknight menu planning, baked turkey meatballs reign supreme. Say hello to dinner ready in under 20 minutes from prep to table!
Spinach and Feta Turkey Burgers
Greek-style spinach and feta turkey burgers are tender, juicy, and flavourful, loaded with spinach, feta and fresh Mediterranean herbs + so easy to prep.
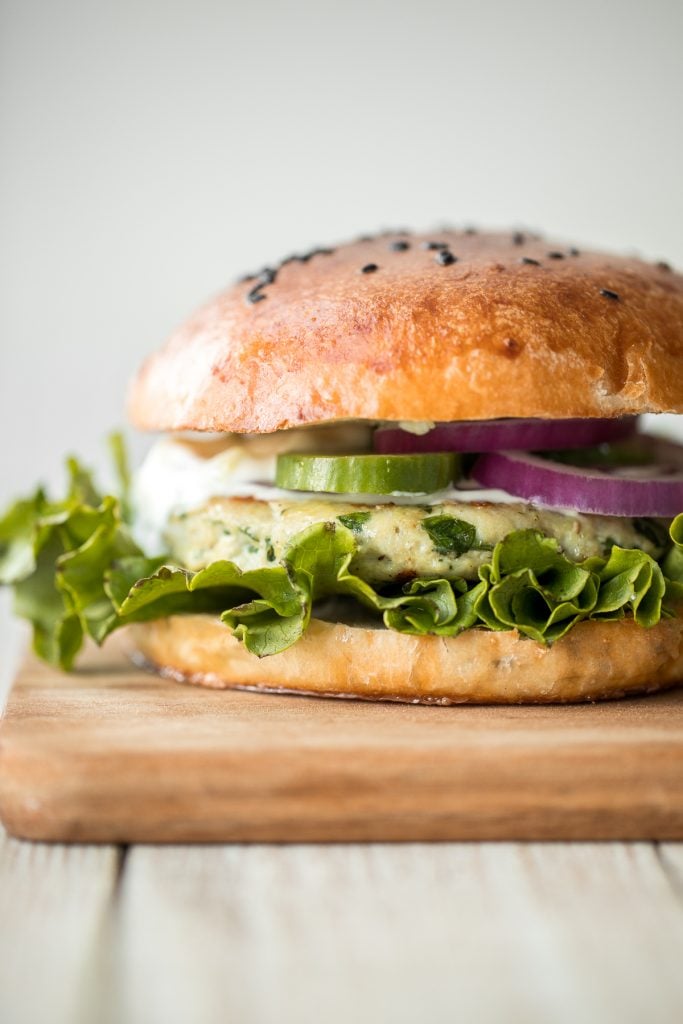
Delicious, moist and juicy Mediterranean chicken patties have everything you want in one bite: protein, veggies, herbs, and they're quick and easy to make. Made with ground turkey, but you can easily substitute with ground turkey.
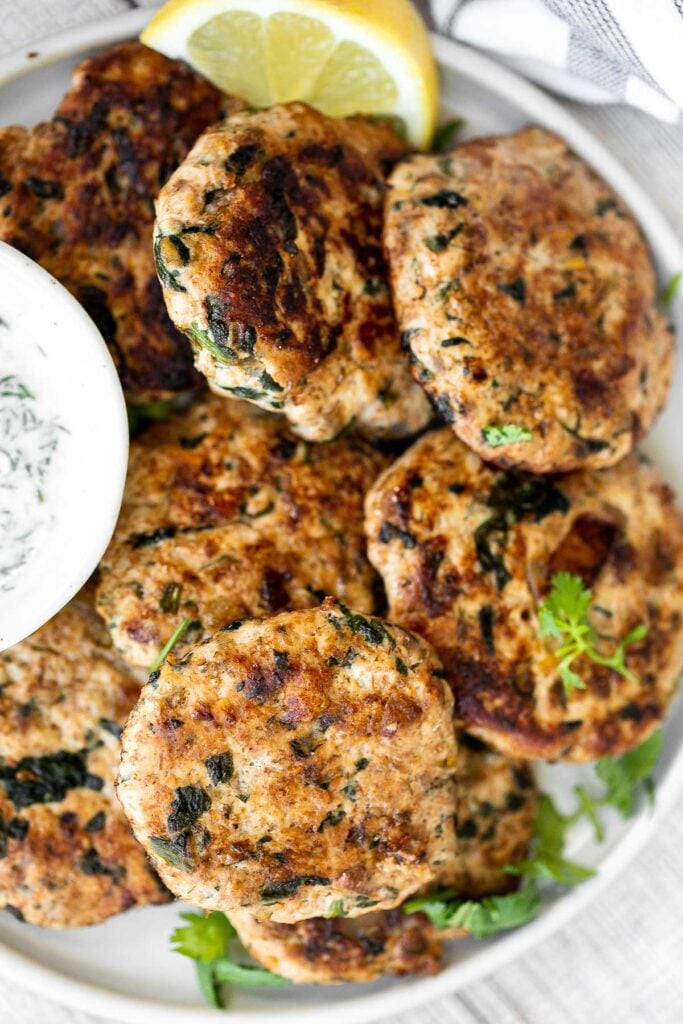
Turkey Thigh and Drumstick Recipes
Instant pot turkey thighs are tender, juicy, and delicious. Perfect for a small holiday dinner or weeknight dinner with little effort and 10 minutes prep.
Roasted Turkey Legs with Vegetables
Tender, succulent and flavourful, easy roasted turkey legs with crispy skin and vegetables is a complete wholesome turkey dinner and family favourite. It's perfect over a side of creamy mashed potatoes.
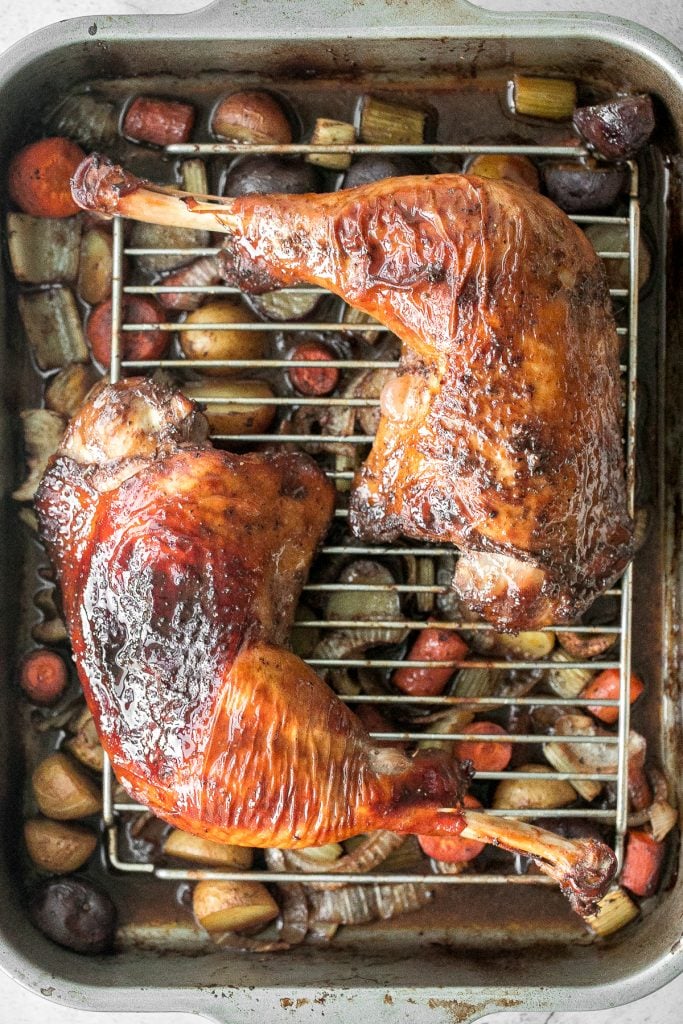
Leftover Turkey Recipes
Turkey Tetrazzini with Spinach
Creamy leftover turkey tetrazzini with spinach is a simple, easy and delicious pasta recipe that is comforting, creamy and cheesy. It's a family favourite.
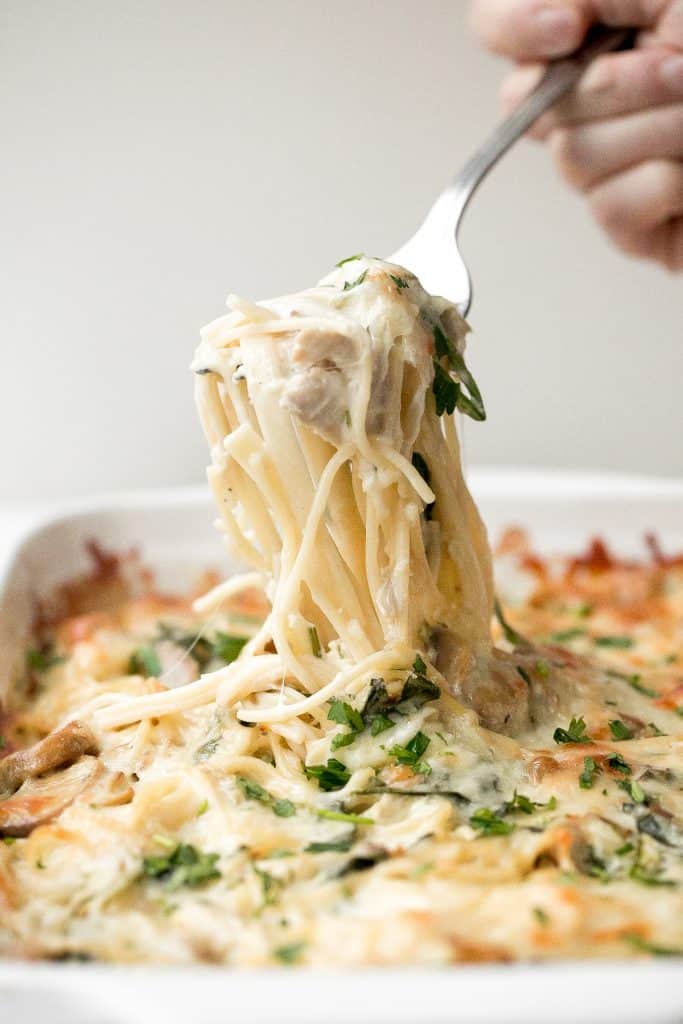
Leftover Turkey Stuffed Bell Peppers
Leftover turkey stuffed peppers are a nutritious, wholesome and healthy dinner that you can throw together easily and quickly. A total crowd-pleaser and delicious Thanksgiving leftover recipe.
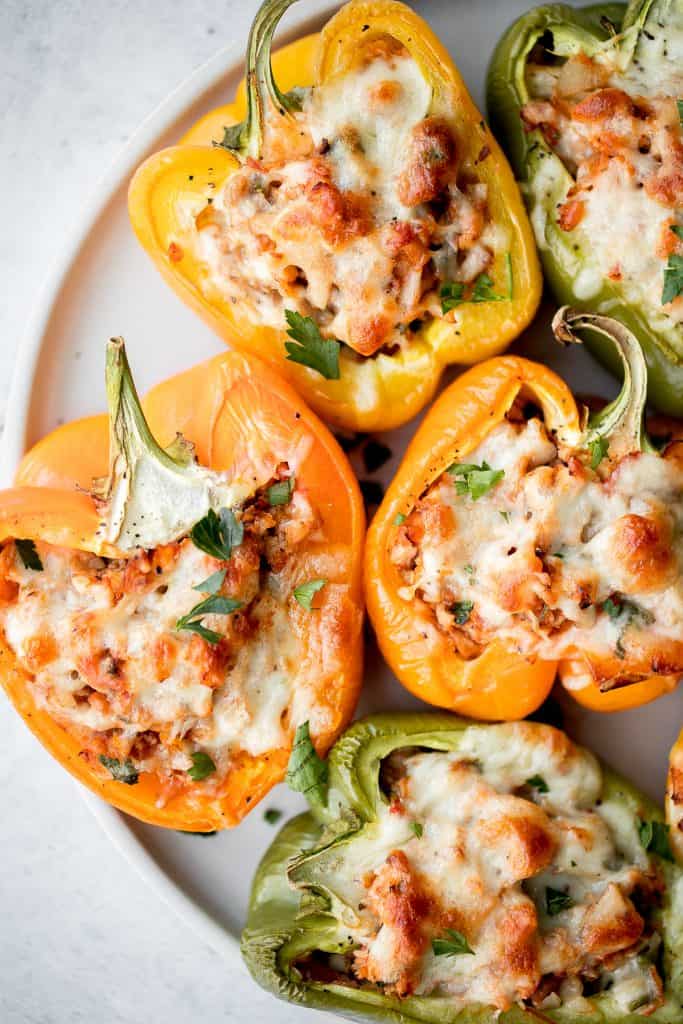
Creamy turkey gnocchi soup is the ultimate comfort food - creamy, rich, and delicious, made with good carbs, clean protein, and veggies in 25 minutes.
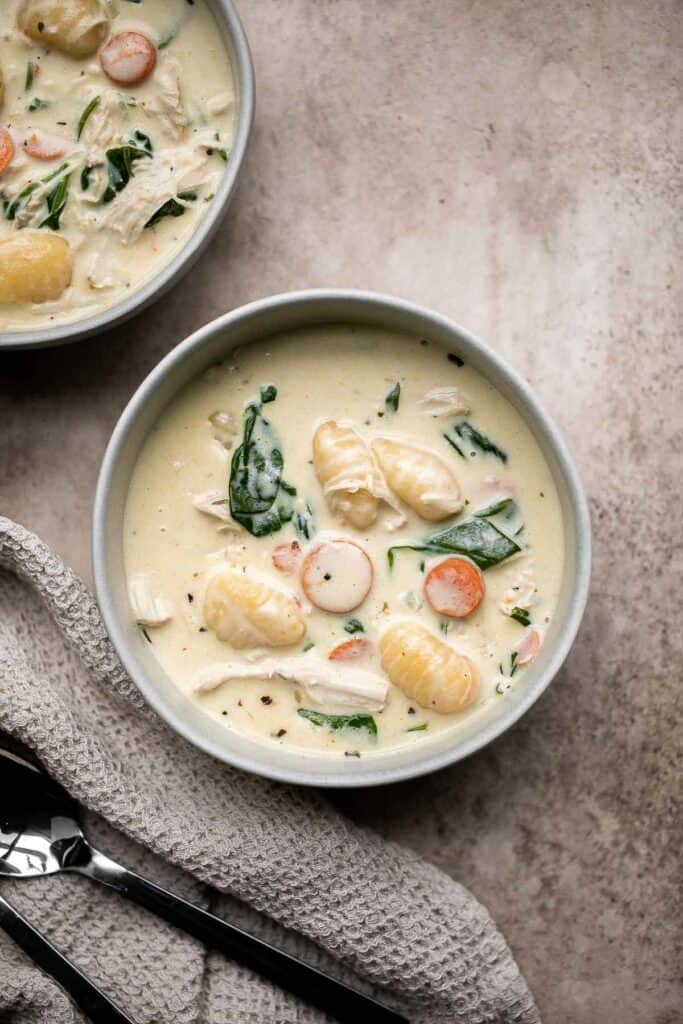
Leftover turkey fried rice with turkey, fluffy rice, scrambled eggs, vegetables, and classic Asian seasonings is a one skillet meal made in just 10 minutes.

Wholesome hearty one pot leftover turkey wild rice soup is the most comforting way to use leftover turkey from Thanksgiving turkey dinner. So easy to make.

Quick easy buffalo turkey wraps with homemade buffalo sauce are flavorful, spicy, and delicious. A healthy lunch that will keep you full until dinner.

Leftover turkey potato chowder is a creamy, savory, and delicious soup that is loaded with holiday leftovers. Quick and easy, ready in under 30 minutes.

Leftover Thanksgiving Turkey Sandwich with Cranberry Sauce
Looking for comfort food in a hand-held serving? You got it! Put those leftovers to good use in this leftover Thanksgiving turkey sandwich with cranberry sauce.
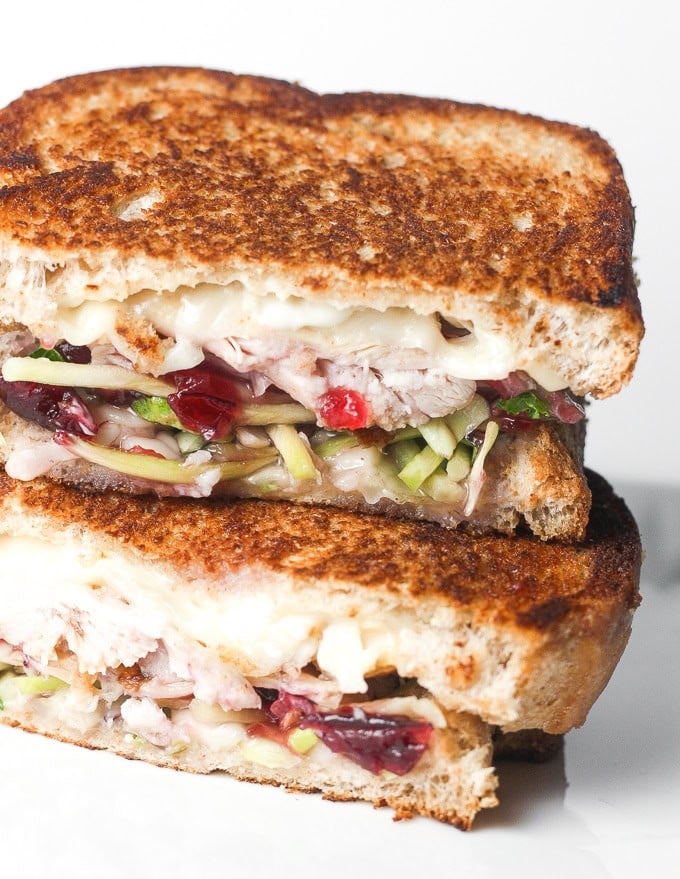
Warm and cozy, creamy turkey orzo soup is wholesome, hearty, filling, and flavourful. Make this delicious one pot meal with leftover turkey in 30 minutes. One of my favorite ways to use Thanksgiving leftovers.
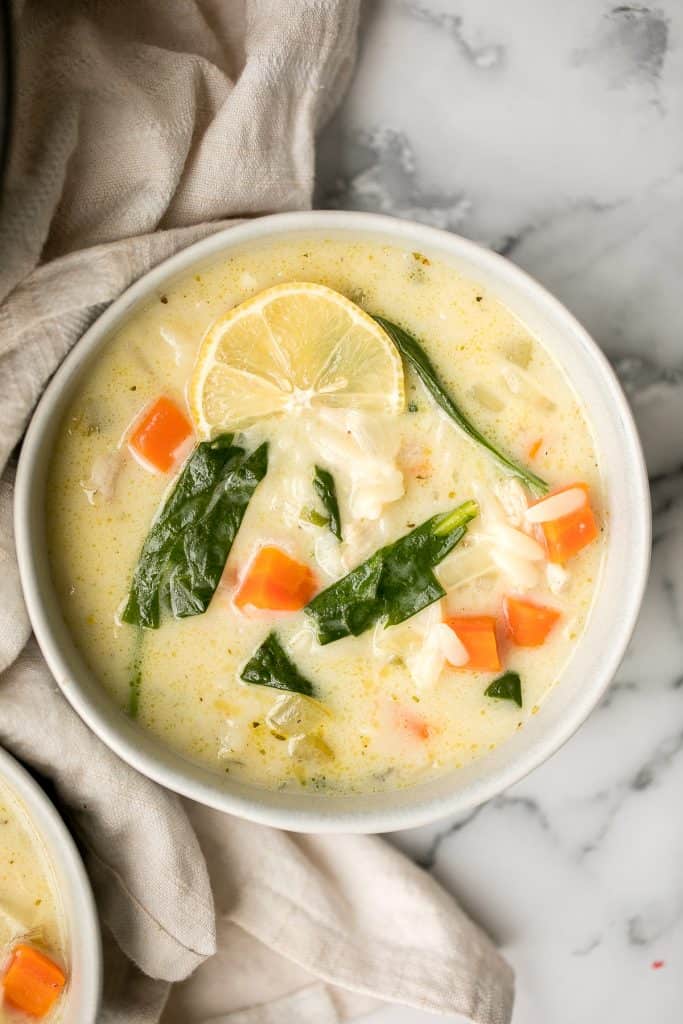
Coconut turkey curry is creamy, rich, and flavorful. This delicious curry is the perfect recipe to make when you have turkey leftovers, ready in 30 minutes!
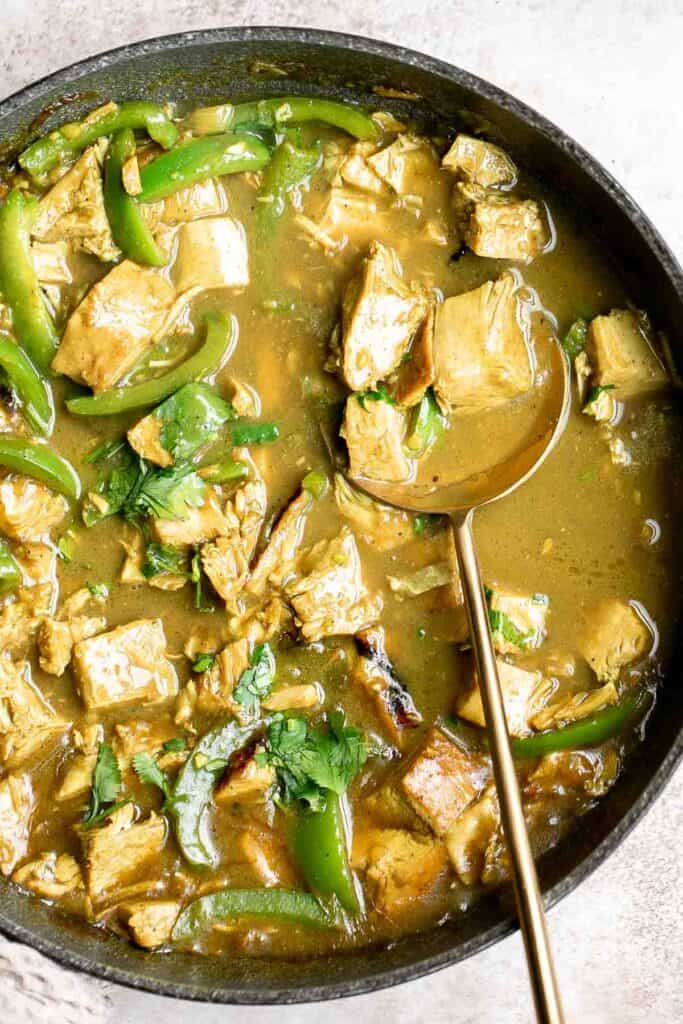
More Popular Recipes
- 60 Best Chicken Recipes
- 25 Best Ground Beef Recipes
- 15 Best Salmon Recipes
- 30 Best Shrimp Recipes
- 40 Best Salad Recipes
- 40 Best Pasta Recipes
- 60 Best Soup Recipes
Did You Make Any of These Turkey Recipes?
Please leave a comment and rating below, and let me know what you thought of these turkey recipes. Be sure to snap a picture and tag me on Instagram @aheadofthyme or share it on the Pinterest pin so that I can follow along.
HUNGRY FOR MORE? Don't forget to sign up for my email newsletter so that you don't miss any recipes. You can also follow along on Instagram and Pinterest for more recipe updates.
Creamy Salmon Pasta

This simple creamy salmon pasta is quick and easy to make, delicious and flavorful, and loaded with salmon. Perfectly seared salmon is flaked and tossed in into a creamy, buttery, and garlicky homemade white sauce with pasta. The best part? It's ready in less than 30 minutes. Salmon pasta perfect for busy weeknights but fancy enough for date night.
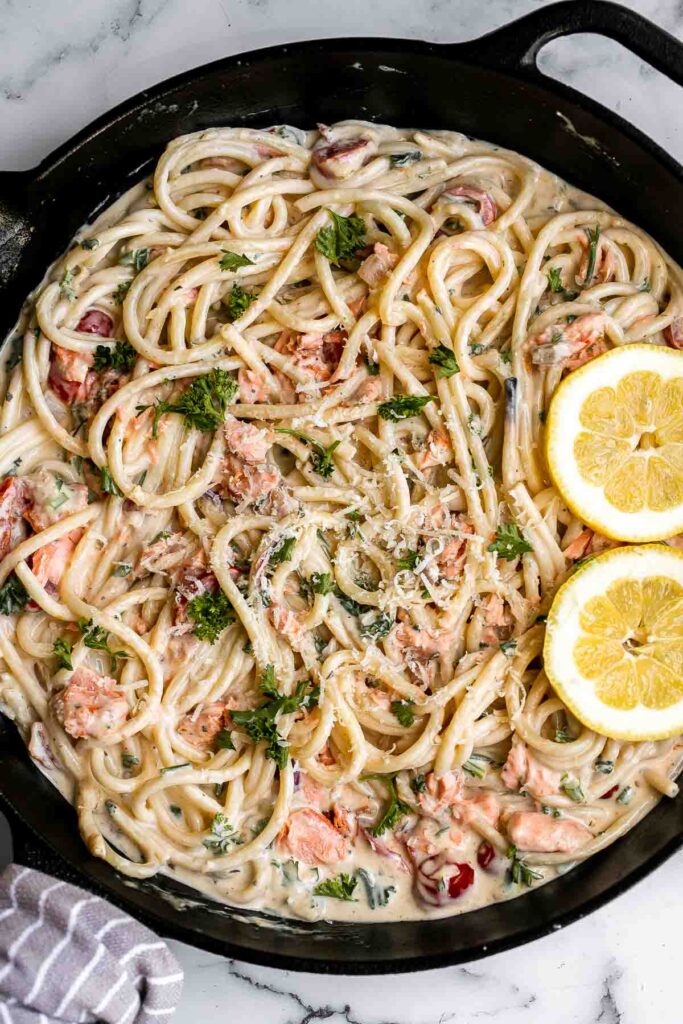
Why You'll Love Creamy Salmon Pasta
- It's quick and easy to make. This creamy salmon pasta only takes 25 minutes from start to finish. You'll cook the pasta, sear the salmon, prepare a quick sauce, and mix it all together. If you think that sounds easy, it's because it is!
- It tastes like a restaurant-quality meal. Even though this recipe is quick and easy, it doesn't taste like a last-minute meal. Bring home restaurant-quality taste with this homemade salmon pasta using real ingredients (no jar of pasta sauce here!). This recipe will leave you and any guests you might have very impressed and satisfied.
- Salmon is a healthy protein. Salmon is full of protein, plus essential nutrients like omega 3 fatty acids. Fish is one of the best types of protein to get into your diet, and salmon is one of the tastiest. Just be mindful that salmon should only be eating in moderation due to mercury levels.
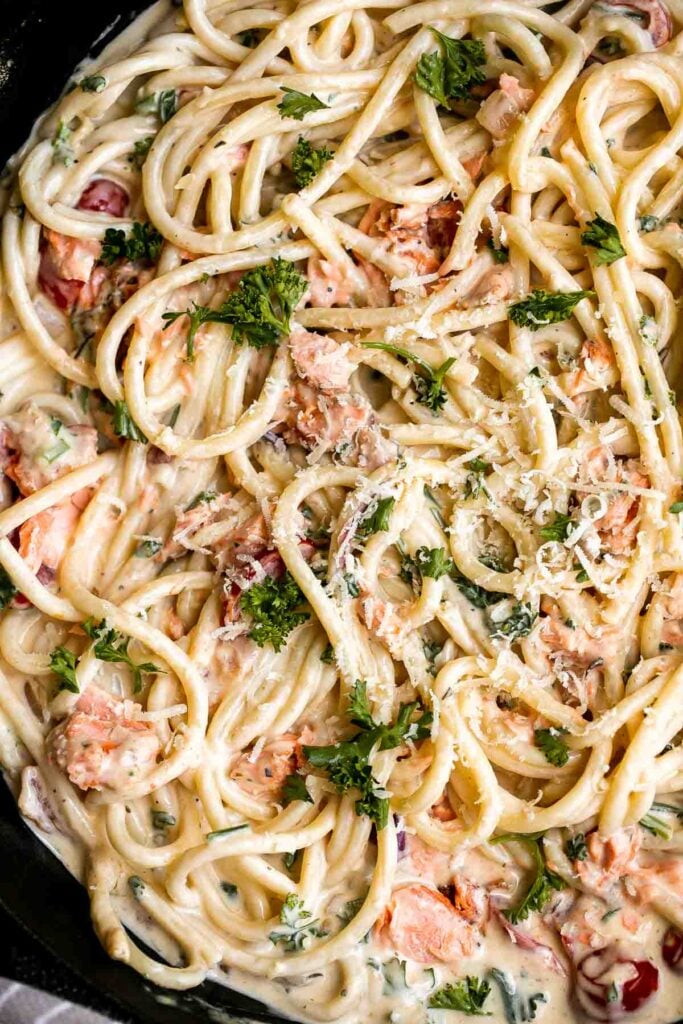
Ingredients and Substitutions
To make this creamy salmon pasta, you will need the following ingredients (full quantities in the recipe card below):
- pasta - feel free to use any pasta that you like. I prefer a long string pasta like spaghetti, fettuccine, or linguine.
- salmon fillets - use any kind of salmon.
- salt and pepper
- olive oil
- butter
- onion
- garlic
- cornstarch - or substitute with all-purpose flour. Either ingredient will help to thicken up the creamy sauce.
- heavy cream
- white wine - adds flavor but you can feel free to leave it out if you prefer.
- Italian seasoning
- Parmesan cheese
- fresh parsley - optional, for serving.
- lemon wedges - optional, for serving.
You will also need measuring cups and spoons, a cooking pot, and a large skillet or shallow saucepan.
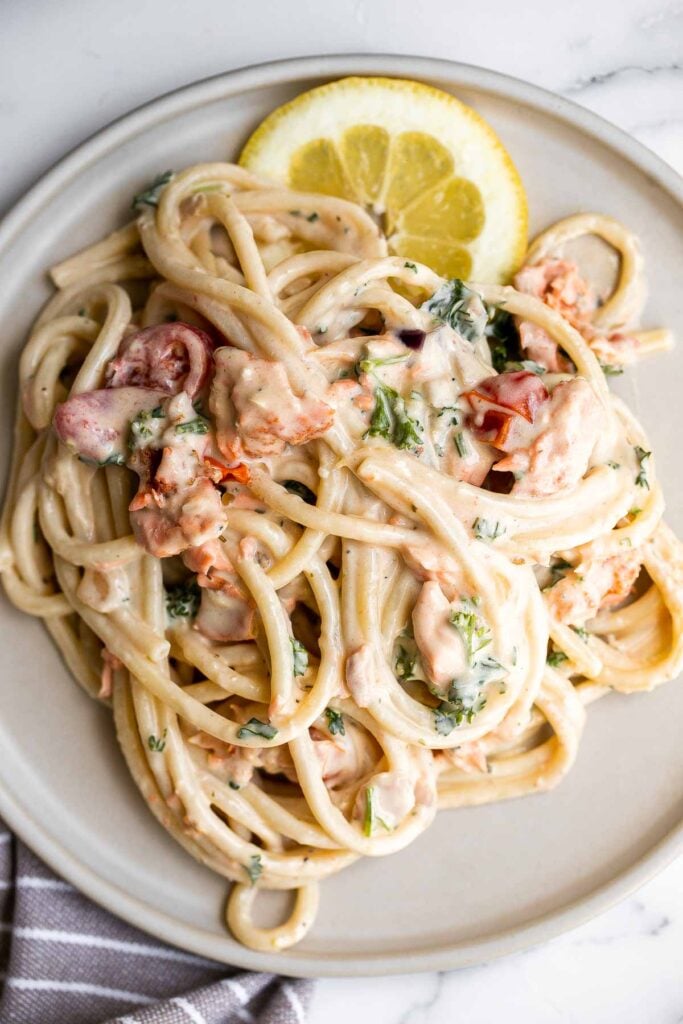
How to Make the Best Creamy Salmon Pasta
- Boil the pasta. Bring a large pot of salted water to a boil over medium-high heat. Add pasta and cook until al dente (fully cooked but still firm), or according to package directions, about 8-10 minutes. Drain well and set aside in the pot. Drizzle a little olive oil and toss together to keep the pasta from sticking together.
- Prep salmon. Pat dry salmon fillets and season with salt and pepper. Set aside at room temperature for 10 to 15 minutes.
- Sear salmon. In a large skillet, heat oil for 2 minutes over medium-high heat until the hot oil sizzles. Sear the salmon fillets (skin side facing up first) for 5-6 minutes on each side until golden browned and fully cooked. When salmon is cooked, the flesh will turn opaque, and it will flake easily when inserting a fork. Transfer the cooked salmon onto a plate and use 2 forks to shred it into flakes.
- Make the creamy sauce. Add butter, onion, and garlic to the same skillet, and sauté until fragrant, about 1 minute. Stir in cornstarch and mix well until combined, about 1 minute. Add wine and stir well to combine, about 1 minute. Add heavy cream, Italian seasoning and Parmesan cheese. Stir well and bring the sauce to a simmer. Reduce heat to medium and keep stirring until thickened to a desired consistency, about 4-5 minutes.
- Add salmon and pasta. Return the cooked shredded salmon to the skillet and toss in the creamy sauce over to coat. Add cooked spaghetti into creamy salmon sauce and toss well to combine.
- Serve. Sprinkle with extra Parmesan and fresh parsley on top, and serve immediately.
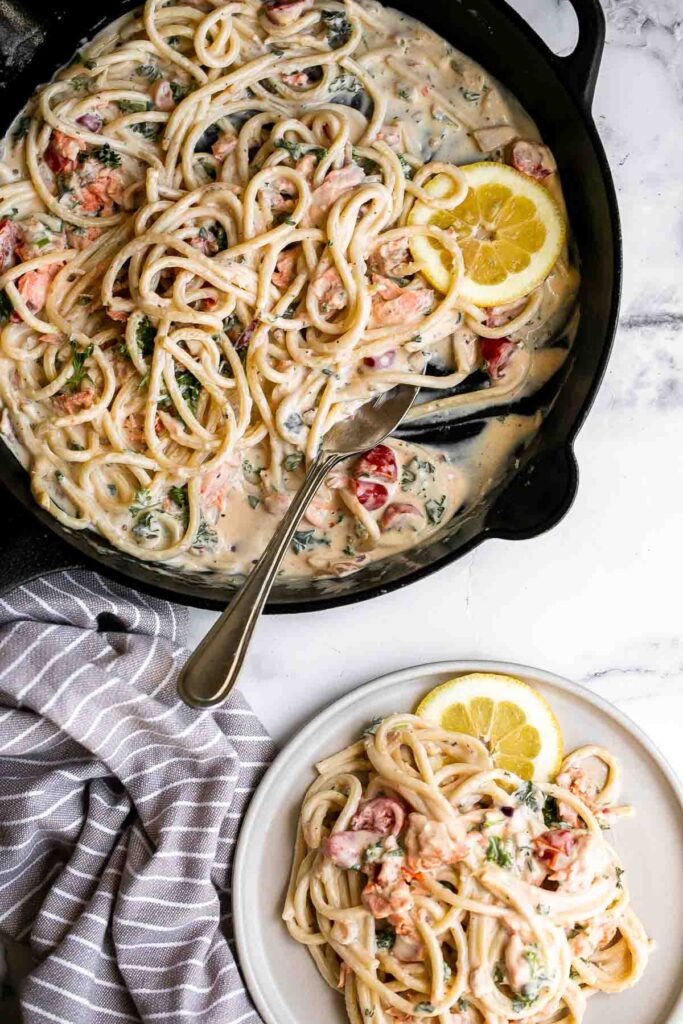
Recipe Tips and Tricks
- Adjusting the sauce: You can adjust the creamy sauce to be as flavorful and thick as you like by adding more flour, onions, or garlic and simmering for longer.
- How to store: Keep leftover creamy salmon pasta in an airtight container in the fridge for up to 3-4 days.
- How to reheat: The best way to reheat creamy salmon pasta is in a covered dish in a 350F oven for 15-30 minutes. To make cleanup easy, I like to place my leftovers on a large piece of tin foil. Then, I wrap it up and sinch the edges. Covering this dish when reheating is essential so that it doesn't dry out. You can also reheat it on the stove over medium-low until warmed through. Add a splash of water if the sauce has thickened up too much in the fridge.
- Microwave instructions: You can also reheat salmon alfredo in the microwave (covered) on medium-low heat for 30 seconds to 3 minutes, until warmed through. The time will vary based on how much pasta you're reheating.

More Pasta Recipes
- 40 Best Pasta Recipes
- Fettuccine Alfredo
- Creamy Shrimp Pasta with Sundried Tomatoes
- Spaghetti Carbonara
- Cacio e Pepe
- Homemade Hamburger Helper
Tried this recipe?
I'd love to hear what you think! Leave a comment and rating below to share your feedback. Your reviews help others discover this recipe and help me keep creating more free recipes for you. Snap a photo and tag me on social media @aheadofthyme too.

Mapo Tofu
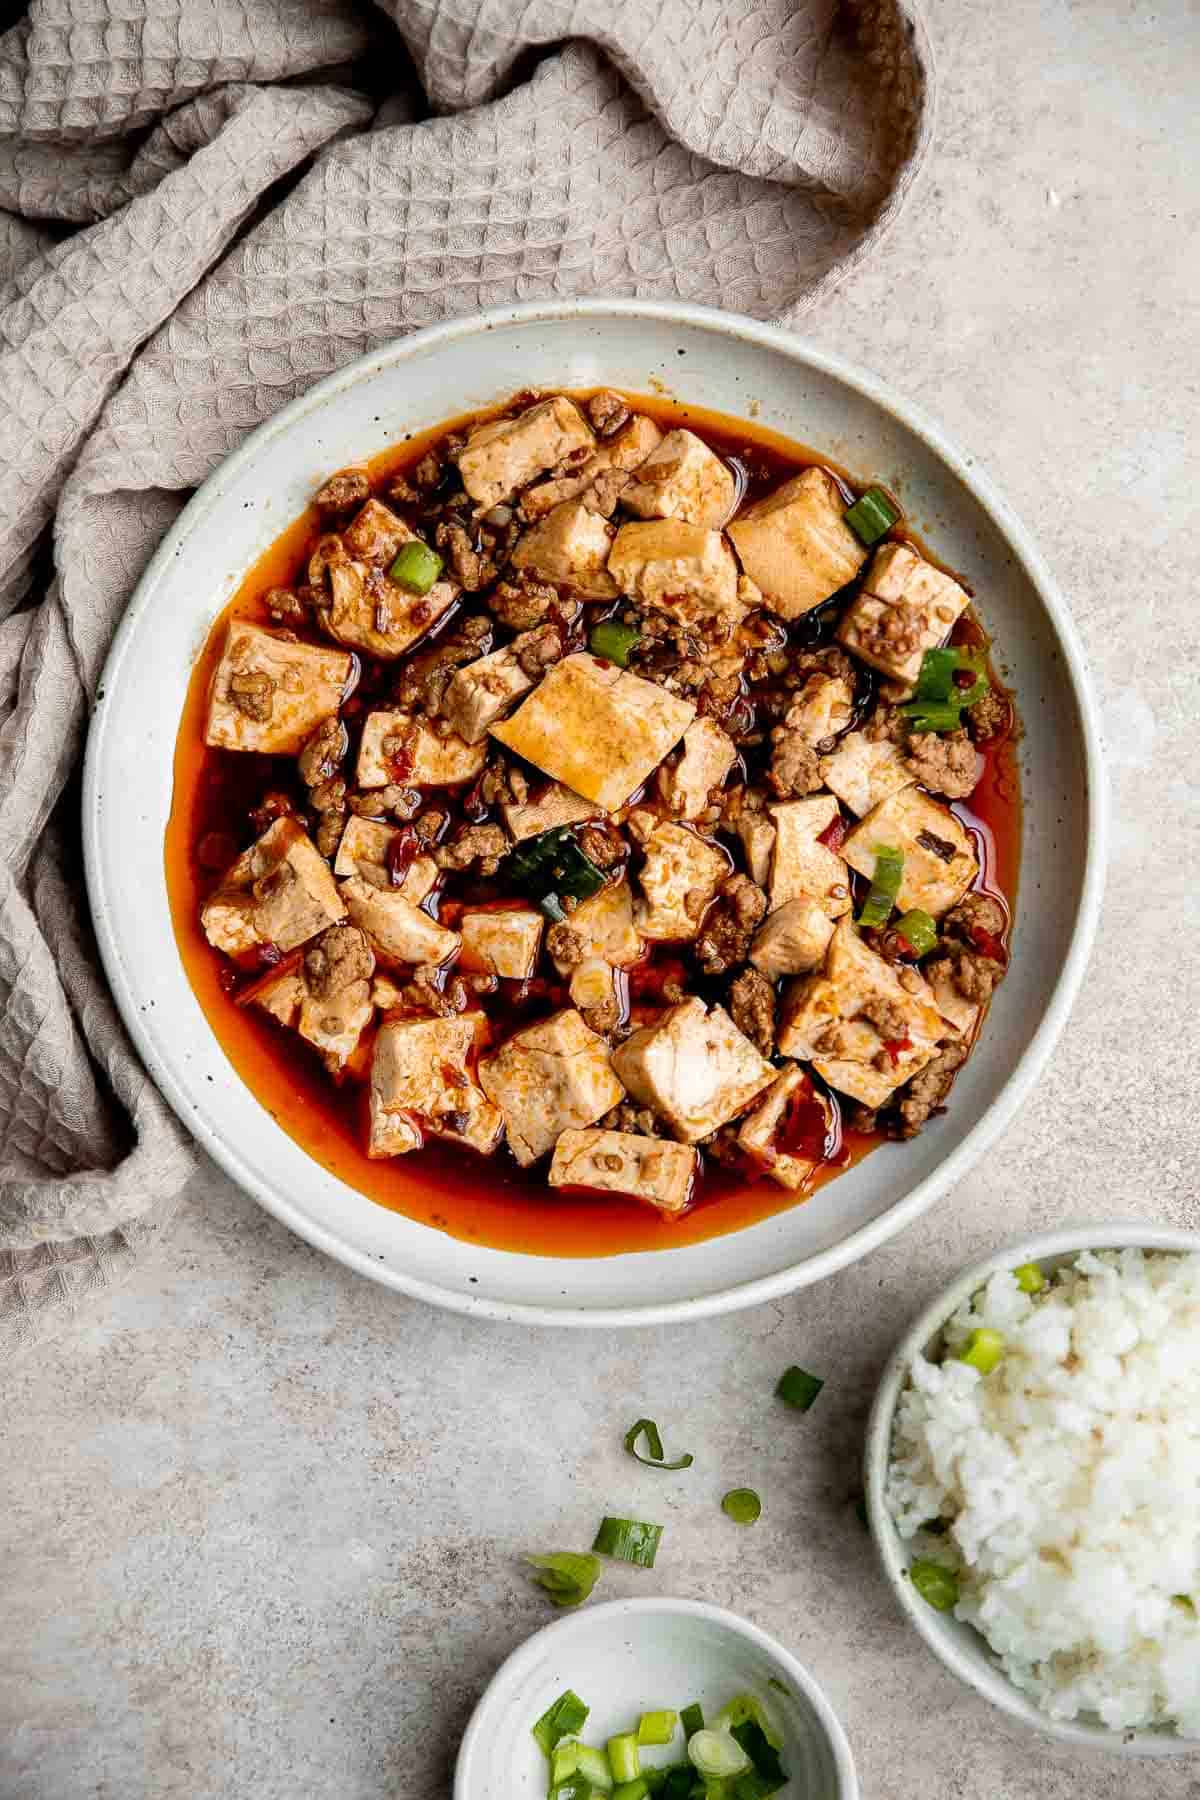
Mapo tofu is a quick and easy tofu dish that's delicious, flavorful, spicy, and numbing. Made with tender tofu and well-seasoned ground pork or beef in a spicy chili oil sauce, this signature recipe from the Sichuan province of China is ready in just 20 minutes. Serve it alone for a spicy experience that will heat you up, or if your spice tolerance is low, adjust the spices and serve with steamed rice.

Why You'll Love Mapo Tofu
- It's Sichuan-level spicy. If you know anything about Sichuan cuisine, you know that the region is well known for its spicy food. Mapo tofu is no different. For this recipe, you'll need a healthy dose of Sichuan peppercorns, crushed red pepper, and spicy chili bean paste to bring the heat to the table. Of course you can take down the heat by adjusting how much you add.
- It has the perfect balance of flavor and texture. If you've never had mapotofu, you need to try it. The tofu brings a unique texture and flavor, which contrasts well with the tender pork. And everything is coated in a deep umami flavor that will blow you away.
- It's quick and easy. Most Chinese recipes are so fast to make. After prepping the ingredients, you just cook everything in one pan over the stove (which makes for easy clean up too!). The entire process from prep to table takes just 20 minutes.
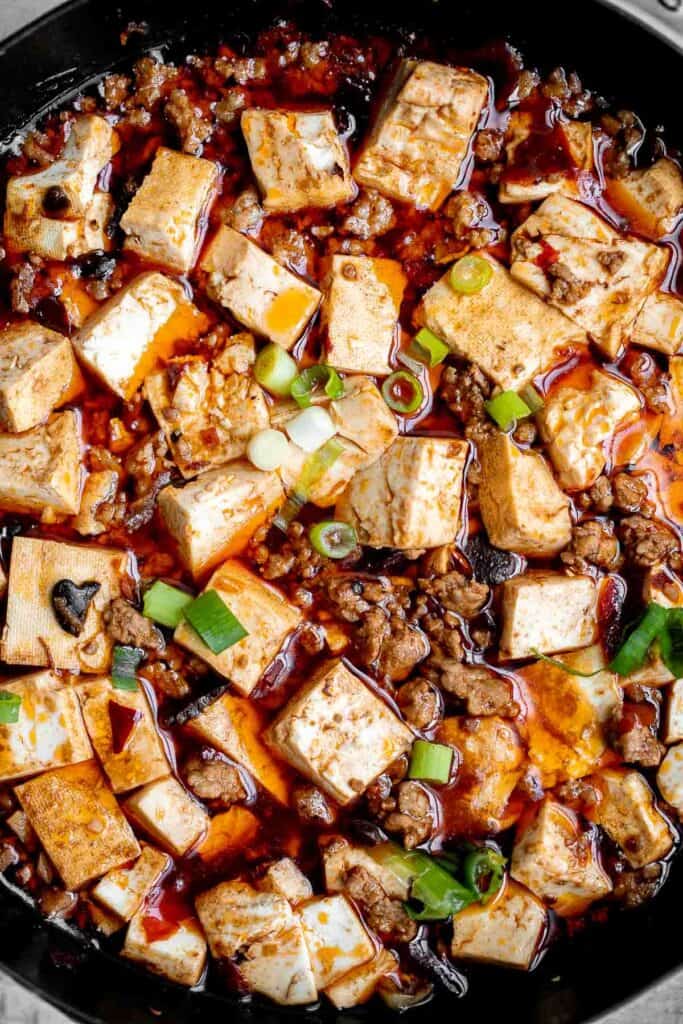
Ingredients and Substitutions
To make this easy homemade mapo tofu, you will need the following ingredients (full quantities in the recipe card below):
- medium firm tofu - we used medium firm tofu, but soft tofu is commonly used as well. It depends on your personal preference when it comes to the texture.
- meat - ground pork is traditionally used, but you can use either ground beef or ground pork in this recipe.
- vegetable oil - feel free to use any vegetable oil that you have on hand. I use avocado oil.
- ginger + garlic
- Sichuan peppercorns - Not all Sichuan peppercorns are the same. Fresher peppercorns have a more powerful numbing effect, and low-quality peppercorns include a bitter black seed inside. The real flavor comes from the husks. To avoid the bitter taste, you want to buy quality Sichuan peppercorns. And if your peppercorns are very fresh, you may want to add less.
- seasoning - you will also need crushed red pepper, ground white pepper (optional), and chili bean paste (called Doubanjiang in Chinese).
- Shaoxing wine - this Chinese cooking wine adds traditional flavor, but you can leave it out if you can't get your hands on it.
- chicken broth or water
- cornstarch
- sesame oil - you can substitute with chili oil for some extra heat.
- green onions
You will also need measuring cups and spoons and a 10-inch skillet. You will also need a large cooking pot if preheating the tofu.
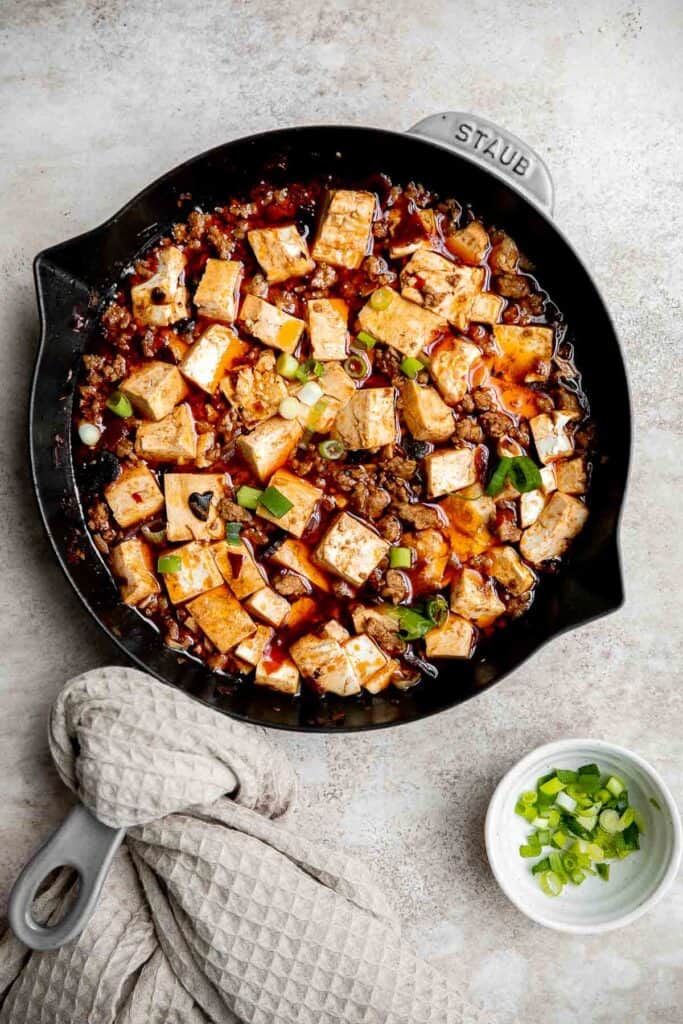
How to Make the Best Mapo Tofu
- Cook ground meat. Heat oil in a large skillet over medium high heat until the hot oil sizzles, about 1 minute. Add ground beef (or ground pork) and cook until browned on all sides, about 5-7 minutes. Make sure to break up the meat into small pieces to help even browning.
- Add seasoning. Add ginger, garlic, Sichuan peppercorns, crushed red pepper, and white pepper (if using). Stir well and cook until fragrant, about 1 minute. Add Shaoxing wine, chili bean paste, chicken broth (or water), and cornstarch. Mix well until smooth and let the sauce mixture simmer over medium heat for 3-4 minutes until thickened a bit.
- Add tofu. Carefully add tofu and toss gently to coat. Optionally, you can gently heat the cubed tofu in a large cooking pot of boiling water over medium heat for 1-2 minutes to firm up a bit, and then transfer into the sauce mixture.
- Add remaining ingredients. Stir in sesame oil (or chili oil) and green onions and let the tofu simmer in the sauce for 1 minute.
- Serve. Serve immediately with a bowl of steamed rice or fried rice.
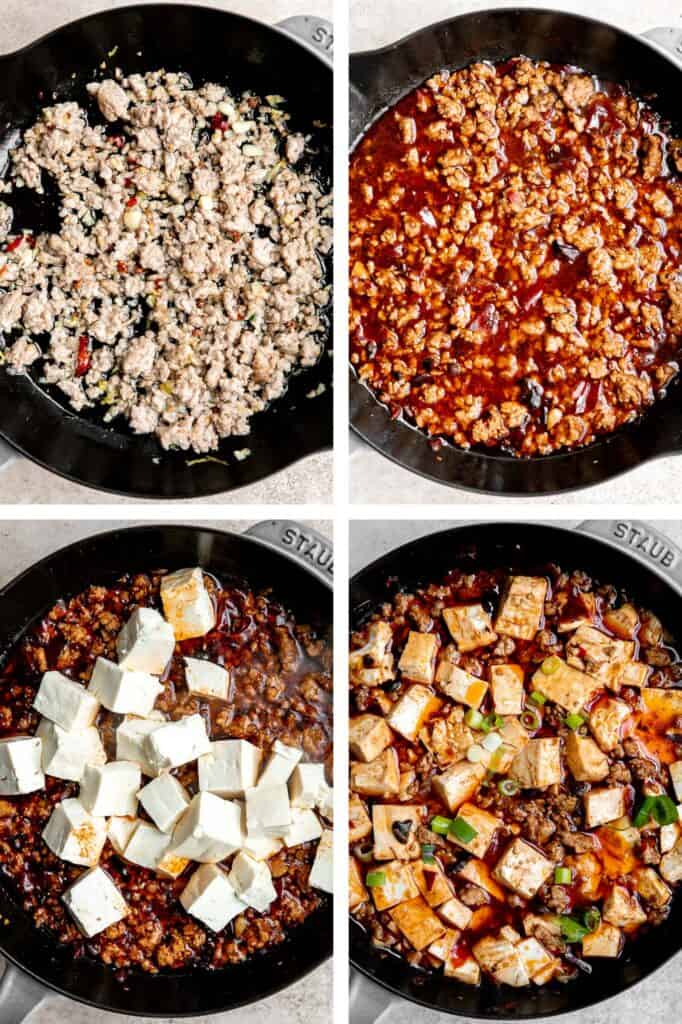
How to Serve Mapo Tofu
You can serve this spicy mapo tofu alone or with sides. It's typically served with steamed rice or noodles, but tastes great with other sides like dumplings and egg rolls.
Our favorite dishes to serve with it are:
- Vegetarian Fried Rice
- Scallion Oil Noodles
- Chinese Garlic Cucumber Salad
- Stir-Fried Lotus Root
- Hand Pulled Noodles
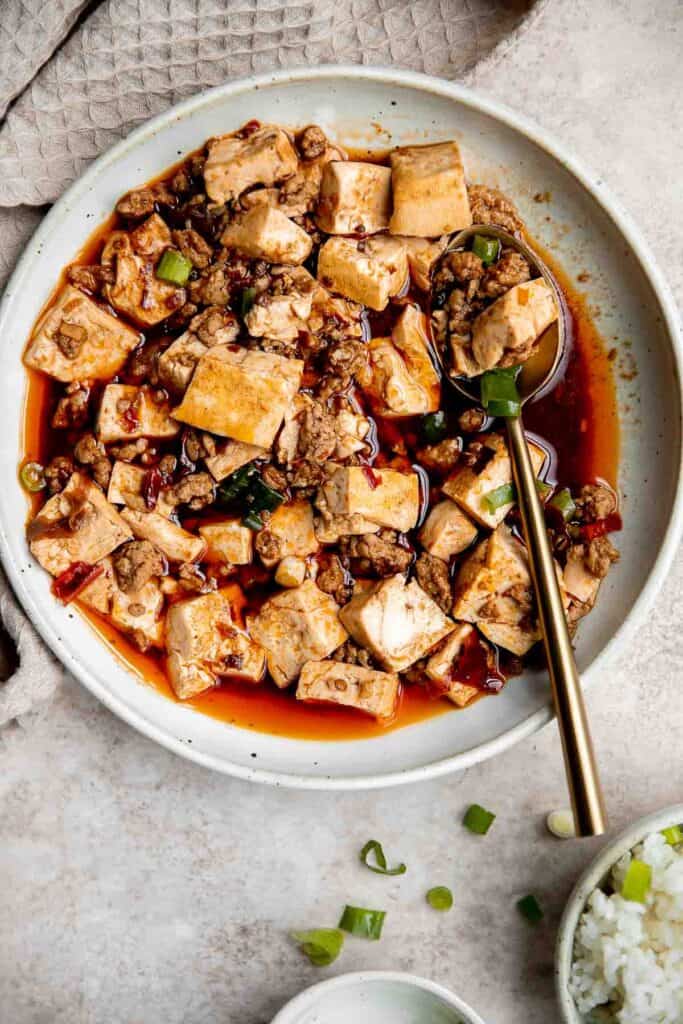
Storing Instructions
- How to store: Mapo tofu is best served fresh. You can keep leftover mapotofu in an airtight container in the fridge for up to 2-3 days.
- How to reheat: Reheat in a pan over the stove until warmed through. You can also microwave it covered for a couple minutes.
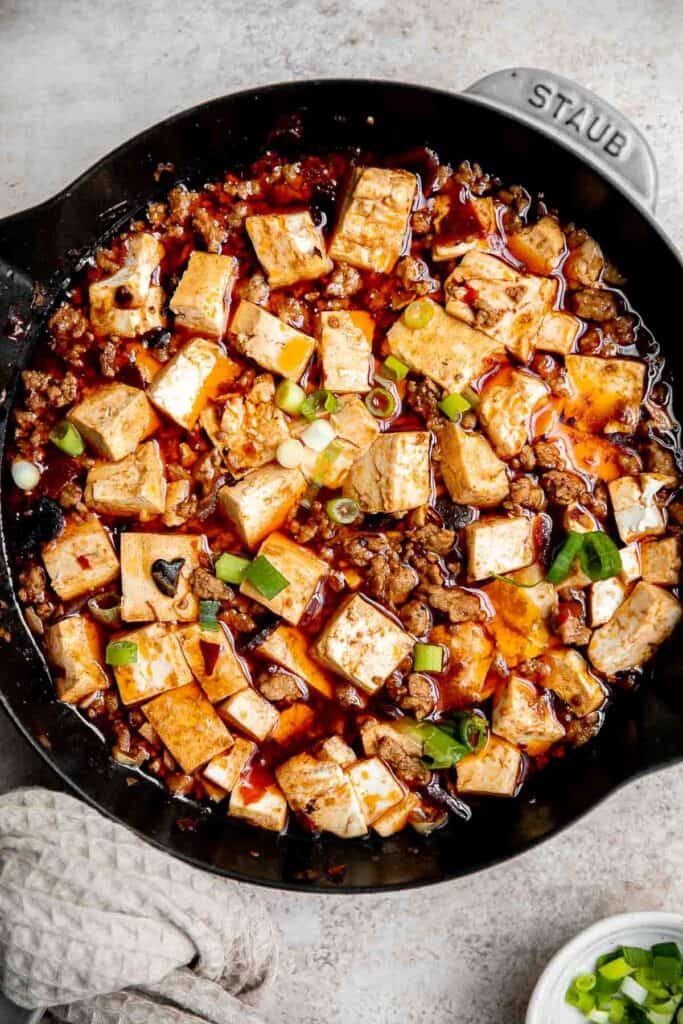
More Chinese Recipes
- 60 Chinese Takeout Recipes at Home
- Tofu and Mushroom Stir Fry
- Air Fryer Stir Fry Vegetables with Tofu
- Spicy Dan Dan Noodles
- Lion's Head Chinese Meatballs
- Beef Potstickers (Dumplings)
Tried this recipe?
I'd love to hear what you think! Leave a comment and rating below to share your feedback. Your reviews help others discover this recipe and help me keep creating more free recipes for you. Snap a photo and tag me on social media @aheadofthyme too.

20 Best Egg Recipes
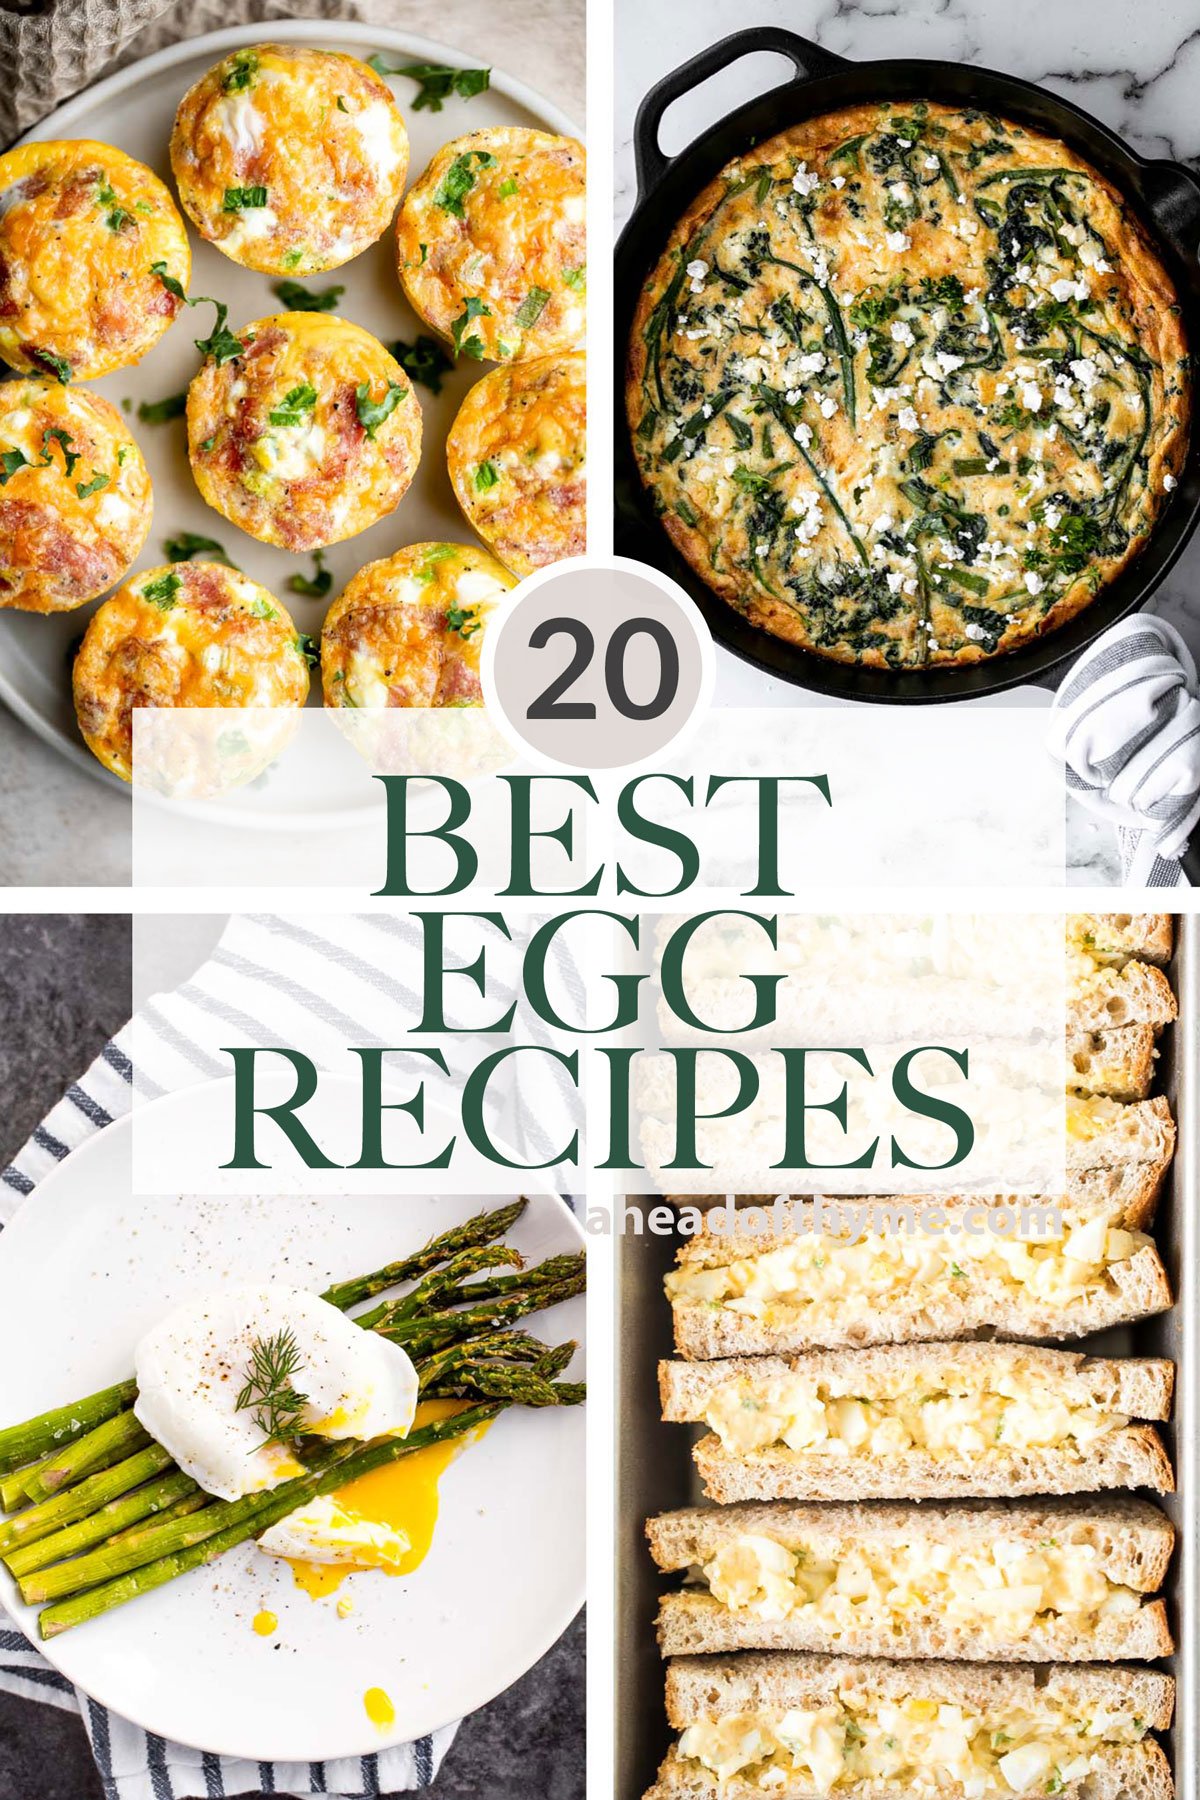
Getting tired of the same egg recipes that you make for breakfast or brunch every day? Well, we are here to help! Eggs are one of my favorite ingredients to cook with - they are loaded with nutrients, protein, and omega-3s. Plus, they are versatile and be cooked in so many different ways whether for breakfast, lunch, dinner, and they are quick and easy to make. So if you are wondering "how to cook eggs", then you are in the right place. We are sharing over 20 of our favorite and best egg recipes including baked eggs, poached eggs, scrambled eggs, egg salad, egg sandwiches, and more.
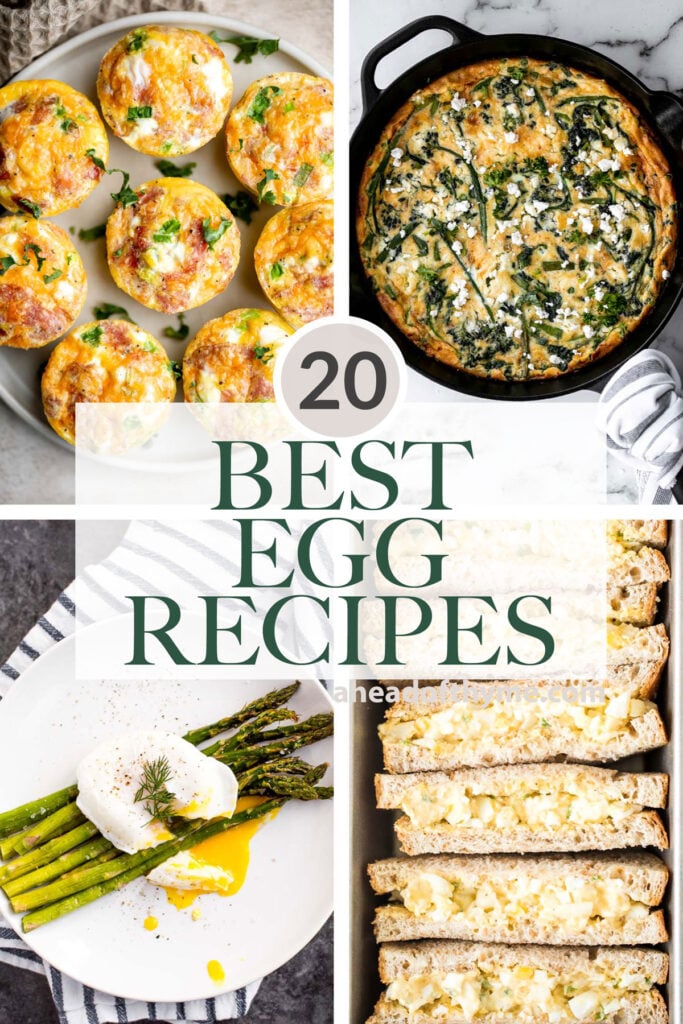
Best Egg Recipes
Spring vegetable frittata is a delicious breakfast or served at any time of the day. It's a one-pan meal that starts on the stove and moves to the oven. This is one of my favorite breakfast ideas!
Egg and Potato Breakfast Casserole
Make this easy make-ahead egg and potato breakfast casserole by simply combining all the ingredients into a casserole dish, pop it in the oven and let it do its thing.
Egg muffins are a quick and easy way to meal prep breakfast on-the-go, loaded with cheddar cheese, bacon or salami, and green onions. Make 12 in 30 minutes.

The best egg salad sandwich is a quick and easy picnic classic loaded with perfect hard-boiled eggs, mayonnaise, a touch of dijon mustard and green onions.

Avocado Toast with Poached Egg
Avocado Toast with Egg is the perfect recipe to make for breakfast when you are short on time but looking for something delicious, healthy, and nutritious.
Classic deviled eggs are a simple, easy, and healthy appetizer to make when you need something quick for brunch, picnics, barbecues, potlucks, or Easter.
Mediterranean Scrambled Eggs with spinach, tomato, and feta is loaded with flavor and a quick and easy breakfast to make in under 10 minutes (with prep!). One of the easiest breakfast ideas.
Huevos Rancheros is a classic Mexican breakfast dish that features fried eggs perched atop a bed of warm tortillas and beans and topped with salsa.
Shakshuka is a quick and easy, one-pan Middle Eastern classic with a savory saucy tomato-vegetable base and perfectly poached eggs on top.
Spinach and Feta Quiche with Cauliflower Crust
Spinach and feta quiche is healthy and gluten-free with a keto cauliflower crust and savoury vegetarian filling. The perfect breakfast to give you the energy to do all the things you want to do on Christmas morning.
Caprese Frittata is light and fluffy, laced with fresh basil and topped with melted mozzarella cheese and blistered balsamic tomatoes. Ready in 10 minutes!
Breakfast Strata is a hearty baked casserole dish loaded with bread, eggs, ham, cheese, and veggies that will keep you full until lunchtime.
Deviled Egg Salad is the perfect spring side dish! It has the signature tang and smokiness of deviled eggs with the pillowy texture of egg salad.
Egg and Chive Vegetarian Dumplings
Fragrant chives with fluffy scrambled eggs, and a dash of flavour come together to create the perfect appetizer - egg and chive vegetarian dumplings.
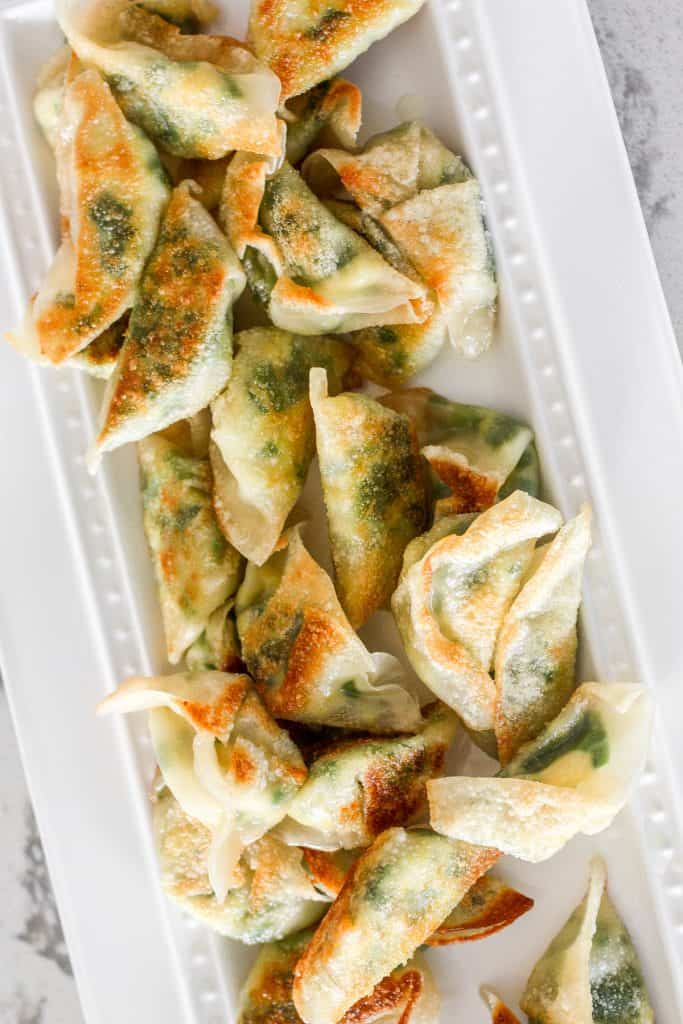
Vegetarian Breakfast Quesadillas
Make-ahead, freezer-friendly vegetarian breakfast quesadillas stuffed with eggs, onions, green peppers, mushrooms, and sharp white cheddar, are grilled to crispy perfection. Eat them now or freeze for a later day.

Roasted Asparagus with Poached Eggs
Roasted asparagus with poached eggs is a match made in food heaven. Serve this topped with fresh herbs and lots of black pepper for a classy, elevated brunch dish that will leave you feeling light, but completely satisfied.
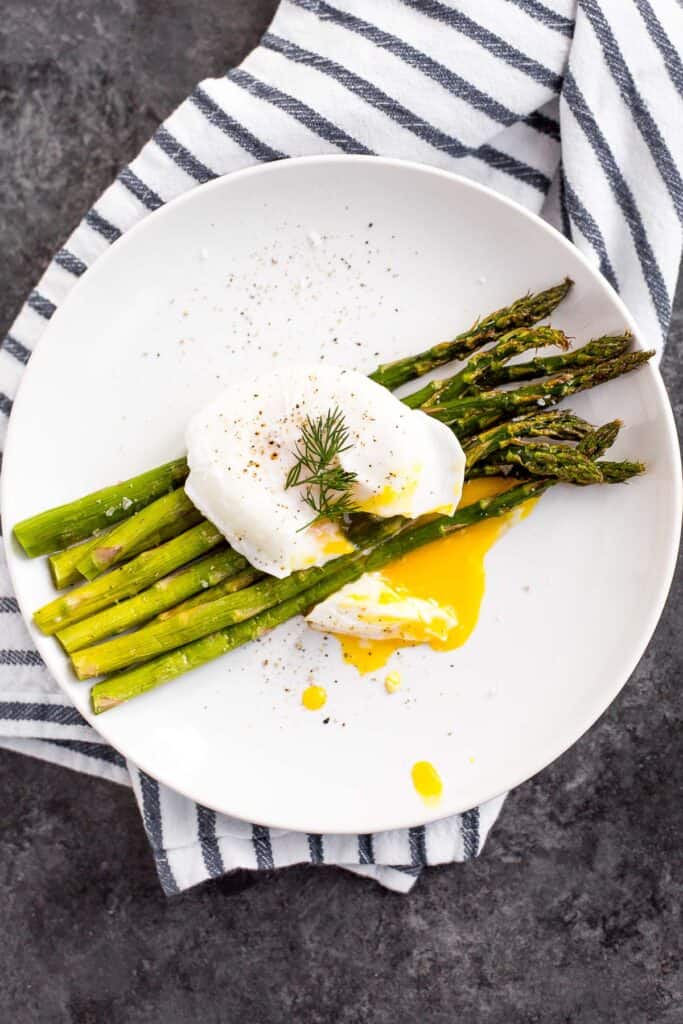
Tex Mex egg muffins are a delicious, filling, and healthy breakfast or snack. They are light and fluffy, perfect for meal prep, and freezer-friendly.

Mini egg tarts with a flaky buttery crust and silky smooth rich egg custard filling are a delicious Hong Kong pastry served as dessert with dim sum.

Non-alcoholic homemade eggnog is thick, sweet, creamy, and smooth. This family-friendly version of a classic holiday drink is way better than store-bought.
Start your morning right and curb your hunger with a healthy and classic breakfast bagel with eggs, lettuce, and tomato.

More Recipes
- 50 Best Breakfast Ideas
- 50+ Healthy Lunch Ideas
- 60+ Easy Dinner Ideas
- 30 School Lunch Ideas
- 50 Best Healthy Snacks
- 60 Best Soup Recipes
Did You Make Any of These Egg Recipes?
Please leave a comment and rating below, and let me know what you thought of this round up of the best egg ideas. Be sure to snap a picture and tag me on Instagram @aheadofthyme or share it on the Pinterest pin so that I can follow along.
HUNGRY FOR MORE? Don't forget to sign up for my email newsletter so that you don't miss any recipes. You can also follow along on Instagram and Pinterest for more recipe updates.
7 Layer Dip

This easy and delicious 7 layer dip is the perfect dip to serve at your next party - but we won't judge you if you just want to eat it at home as a whole meal (because we do that, too!). The 7 layers of this Tex Mex dip include creamy refried beans, sour cream and cheese, guacamole, salsa, cheddar cheese, black olives, tomatoes, and green onions. This layered dip is truly impressive from top to bottom. But the thing you'll love the most is that it only takes 10 minutes to make. So grab some tortilla chips and get dunking.
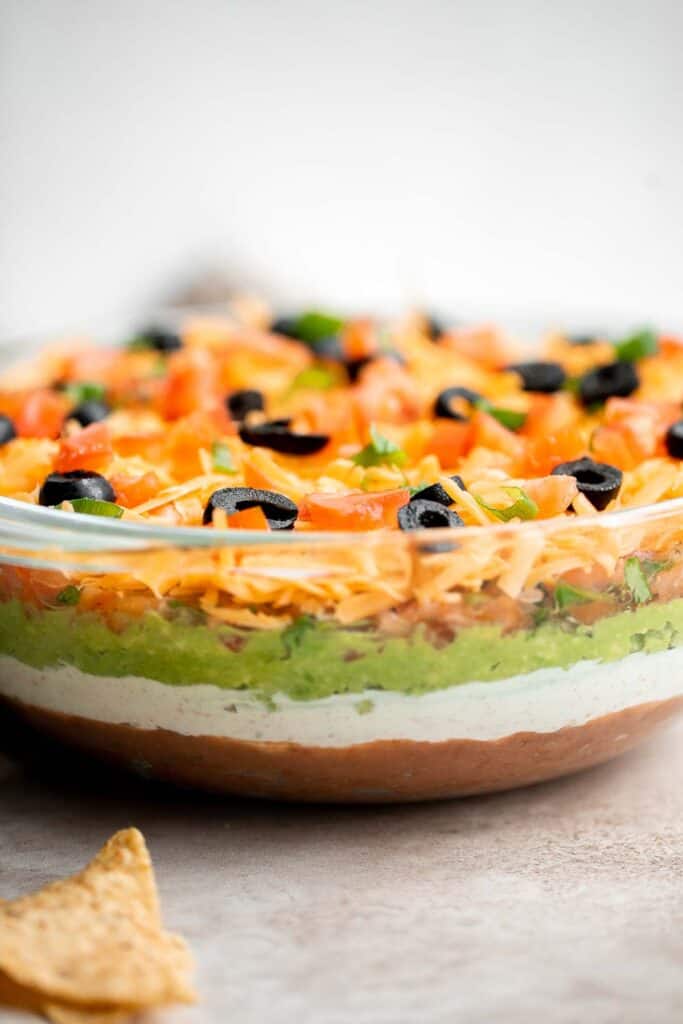
Why You'll Love 7 Layer Dip
- It only takes 15 minutes to make. You can serve this dip immediately, but if you have the time, I recommend chilling it in the refrigerator for 1 hour to allow the dip to firm up and bring the flavors together. But of course, if you and your crowd is hungry now, this dip is ready in no time.
- It's so simple, yet so delicious. This 7-layer dip with cream cheese is incredibly easy to make. It consists of refried beans, salsa, guacamole, and a creamy cheesy layer with taco seasoning. It's not rocket science, but the taste is out of this world - and so much better than store-bought Costco 7 layer dip.
- A no bake appetizer or snack. There is no cooking or baking involved in this 7-layer dip. Just make it, cool it, and eat it. The hardest part of this recipe is remembering to pick up the tortilla chips. Some other favorite easy last minute dips that you can make are Whipped Feta, Avocado Hummus, and Tzatziki.
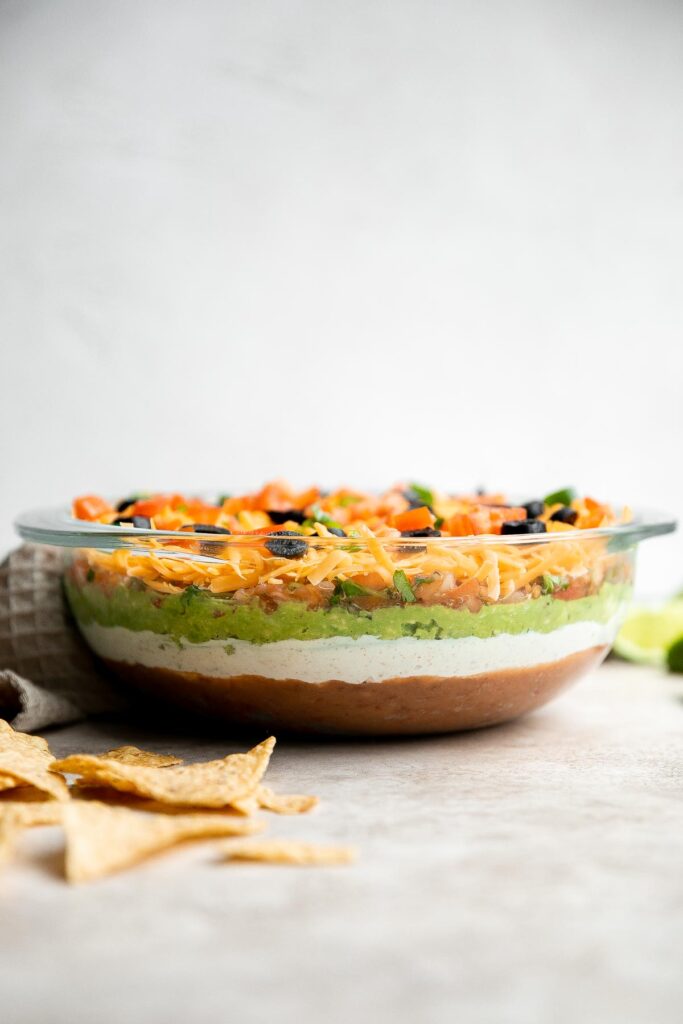
Ingredient Notes
To make this easy 7 layer dip, you will need the following ingredients (full quantities in the recipe card below):
- refried beans - feel free to use canned refried beans or homemade Refried Beans.
- cream cheese
- sour cream
- 2 tablespoons taco seasoning
- guacamole - feel free to use store-bought guacamole, or make homemade Guacamole in 5 minutes with a few ingredients .
- salsa - feel free to use store-bought salsa or make Salsa at home in 5 minutes. You could even switch up the flavor and use Mango Salsa.
- cheddar cheese - or substitute with Monterey Jack cheese or a Tex Mex blend.
- black olives
- tomatoes
- green onions
Want to make adjustments to this 7-layer dip? No problem.
- You can also customize the toppings and add in your own. Some popular options are shredded lettuce, jalapeños, and cilantro.
- Make this dip vegetarian by using vegetarian refried beans. Canned refried beans often contain lard, so look for one that doesn't.
- Make it dairy-free by omitting the sour cream layer or replacing it with pre-cooked taco meat or chili.
- Make it vegan by substituting vegan cream cheese, vegan sour cream, and vegan cheddar.
You will also need measuring cups and spoons and an 8-inch square casserole pan or 2.5 quart casserole dish. You can also use a 9x13-inch casserole pan with thinner layers.
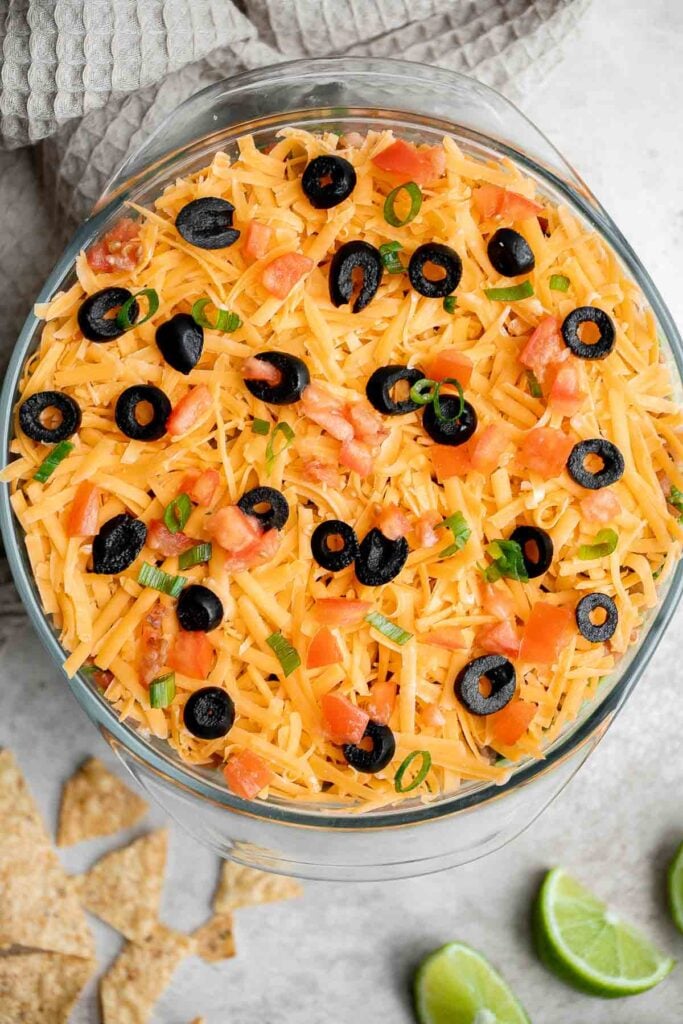
How to Make the Best 7 Layer Dip
It is really easy to make 7-layer dip. All you do is spread out each of these layers on top of each other in an 8-inch square casserole pan or 2.5 quart casserole dish.
- Refried beans. Spread the refried beans in a single layer on the bottom.
- Sour cream mixture. In a medium mixing bowl, combine cream cheese, sour cream, and taco seasoning and stir to combine. Gently spread mixture over the refried beans in an even layer.
- Guacamole. Add a layer of guacamole.
- Salsa. Use a fine mesh sieve to drain the salsa to remove any excess water. Then, spread the drained salsa over the guacamole.
- Cheese. Top with shredded cheese.
- Black olives and/or tomatoes. Sprinkle black olives and tomatoes on top.
- Green onions. Sprinkle green onions on top.
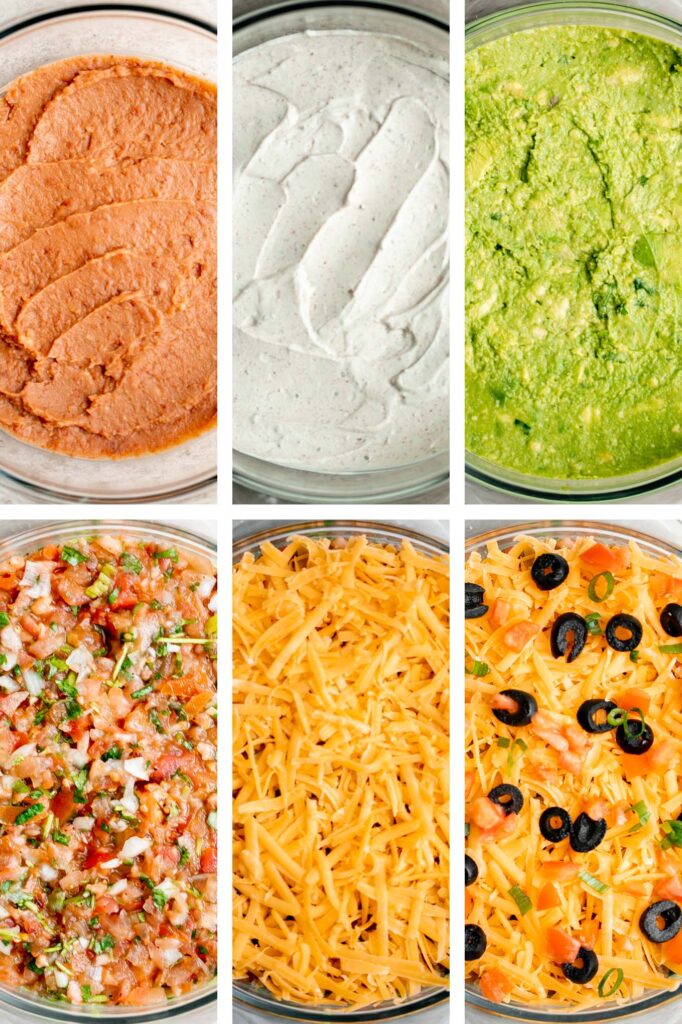
Then, serve immediately with tortilla chips, tortilla strips, or crackers, or store in the refrigerator until ready to serve.
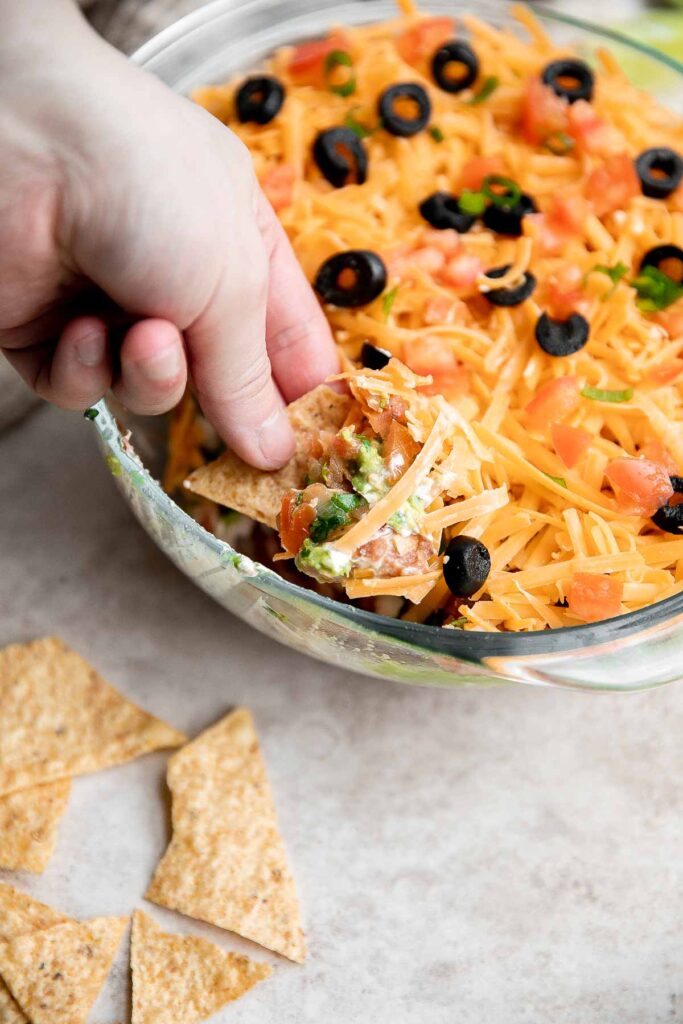
Recipe Tips and Tricks
- How to store: 7-layer dip is best served fresh or within 24 hours. Keep leftover 7 layer dip in the fridge for 4-5 days. Cover the pan with plastic cling wrap or aluminum foil. Note that the longer it is stored, the more the layers will start to blend into each other and won't look as good, but the taste will still be the same.
- How to use leftovers: Serve leftovers as dip for your favorite Mexican dishes such as Fish Stick Tacos, Shrimp Avocado Tostadas, Beef and Bean Burritos, or Chicken Quesadillas.
More Dip Recipes
- 20 Best Dip Recipes
- Easy Guacamole
- Mango Salsa
- Mexican Queso Cheese Dip
- Olive Tapenade
- Spinach Artichoke Dip
Tried this recipe?
I'd love to hear what you think! Leave a comment and rating below to share your feedback. Your reviews help others discover this recipe and help me keep creating more free recipes for you. Snap a photo and tag me on social media @aheadofthyme too.

Creamy Vegan Ramen
Creamy vegan ramen is delicious, flavorful, and healthy. With a creamy miso peanut broth, fragrant garlic and ginger, and a load of vegetables, this plant-based ramen is packed with nutrients that will give you an immunity boost in the colder winter months (or any time of the year!). It's rich and creamy comfort food at it's finest. Ready in just 30 minutes, this one pot vegan ramen soup is perfect on busy weeknights or for a work-from-home lunch.

Why You'll Love Creamy Vegan Ramen
- It's ready in 30 minutes. This creamy vegan ramen isn't the same as authentic ramen with pork broth that takes 10 plus hours to cook - after all, it's vegan. But to us, it's a huge pro (not a con) that this one pot recipe is ready in just 30 minutes. You can literally fit this homemade ramen recipe into a work-from-home healthy lunch break!
- The creamy miso peanut broth. The combination of miso paste and peanut butter is my go-to when it comes to homemade vegan ramen broth. It's creamy, delicious, and flavorful. I used this same umami combination in my popular Healthy Miso Ramen with Chicken and Vegetarian Peanut Miso Ramen. It's just that good.
- It's a healthy and nutritious plant-based meal. Whether you follow a strict vegan diet or are just incorporating more plant-based meals into your meal plan, it's a great way to add some healthy recipes to your weekly dinner list. Vegan mushroom ramen noodle soup is a great choice for your health, the planet, and your wallet. Loaded with miso, ginger, shiitake mushrooms, and vegetables, this soup is healthy and packed with nutrients.

Ingredients and Substitutions
To make this easy creamy vegan ramen, you will need the following ingredients (full quantities in the recipe card below):
- vegetable oil
- onion
- ginger + garlic
- carrot
- hot water - or substitute with vegetable stock.
- miso paste
- smooth peanut butter
- shiitake mushrooms - or substitute with any other kind of mushrooms such as brown mushrooms or enoki mushrooms.
- ramen noodles - you could also use thicker udon noodles.
- green onions
- ground black pepper (optional, to taste)
This miso ramen recipe is customizable too. You could add some protein in here like tofu, or add meat if not keeping it vegan (try chicken or shrimp).
Ramen Toppings
The ramen toppings might just be my favorite part. You can totally customize this noodle soup just based on the toppings that you add. We added:
- edamame beans
- sweet corn
- carrots
- green onions
- sesame seeds
Some other toppings that you can add instead are:
- soft-boiled egg
- bean sprouts
- seaweed
- bok choy
- fresh cilantro
How to Make the Best Creamy Vegan Ramen
- Sauté aromatics. Heat oil in a 5.5 quart Dutch oven over medium-high heat until the oil is sizzling hot, about 1 minute. Add onion, ginger, and garlic and sauté until tender and fragrant, about 1 minute. Stir in carrot and cook until tender, about 2 minutes.
- Add water. Slowly pour in hot water (or stock). Stir occasionally and bring it to a simmer, about 3-4 minutes.
- Add ingredients. Stir in miso paste and peanut butter and mix well until dissolved, about 2 minutes. Add mushrooms and simmer over medium heat until tender, about 3-4 minutes.
- Add noodles. Then, add ramen noodles into the broth and cook according to package instructions until soft, about 2-3 minutes. Make sure to stir the noodles with chopsticks or a fork to prevent them from sticking to each other.
- Season. Stir in green onions and season with black pepper, if desired. Turn off the heat and set the pot to the side.
- Assemble. Use a steel mesh strainer or a slotted spoon to transfer the ramen noodles into serving bowls. Use a soup ladle to slowly add the soup and mushrooms over the noodles. Top with a spoonful of corn, edamame, shredded carrots, and green onions.
- Serve. Sprinkle sesame seeds on top and serve immediately.

Recipe Tips and Tricks
- For more fragrant garlic: If you like your garlic to taste lively rather than subdued, wait to add it until after the carrots. Fresh garlic retains a somewhat spicy kick, so you'll want to sauté it only slightly.
- Make it gluten free: You can make this gluten-free by using gluten-free ramen noodles and soy sauce.
- How to store: This creamy vegan ramen is best eaten fresh, but it does store surprisingly well. If storing for more than a few hours, it's best to drain and store the noodles and broth separately so the noodles don't become too soft.
- How to reheat: Reheat on the stovetop over medium heat. If you stored your noodles separately, wait to add them until the broth is hot, then heat until warmed.

More Noodle Soup Recipes
- 60 Best Soup Recipes
- Vegetarian Ramen
- Creamy Vegetarian Peanut Miso Ramen
- Healthy Miso Ramen with Chicken
- Slow Cooker Asian Beef Noodle Soup
- Wonton Soup
Tried this recipe?
I'd love to hear what you think! Leave a comment and rating below to share your feedback. Your reviews help others discover this recipe and help me keep creating more free recipes for you. Snap a photo and tag me on social media @aheadofthyme too.

Cashew Chicken

Cashew chicken is a quick and easy chicken stir fry meal that you can whip up at home in under 30 minutes. Juicy and tender chicken and fresh vegetables are stir fried and smothered in a garlicky, sweet and savory Asian sauce with crunchy cashews. This Chinese restaurant takeout favorite is so much better, healthier, and faster than ordering takeout (and cheaper too!). Favorful homemade cashew chicken is perfect for busy weeknights when you are looking to make a quick dinner that's absolutely delicious.
Why You'll Love Cashew Chicken
- Better than takeout. You could fool anyone with this cashew chicken recipe because it's so good and tastes like you paid someone to cook it for you (and deliver it right to your door). It tastes absolutely delicious with ingredients that you know, it's faster than getting delivery, and it's cheaper. You might be tempted to never order takeaway again.
- Chicken and cashews are the perfect pair. Nuts are an amazing superfood, and we're quick to throw them in salads or smoothies, but we tend to shy away from nuts when cooking up proteins. Not today. The juicy and tender saucy chicken and crunchy cashews complement each other so well regarding both flavor and texture. You might start adding cashews to all your chicken stir fries!
- It's so quick easy to make. One of my favorite things about Chinese cuisine, and stir fries in particular, is that its so quick to make. You may spend some time prepping and chopping vegetables, but the entire process from prep to table takes less than 30 minutes! It's easy to prep, easy to make, easy to clean up after, and it's incredibly easy to enjoy. The best takeaway fakeaway ever!
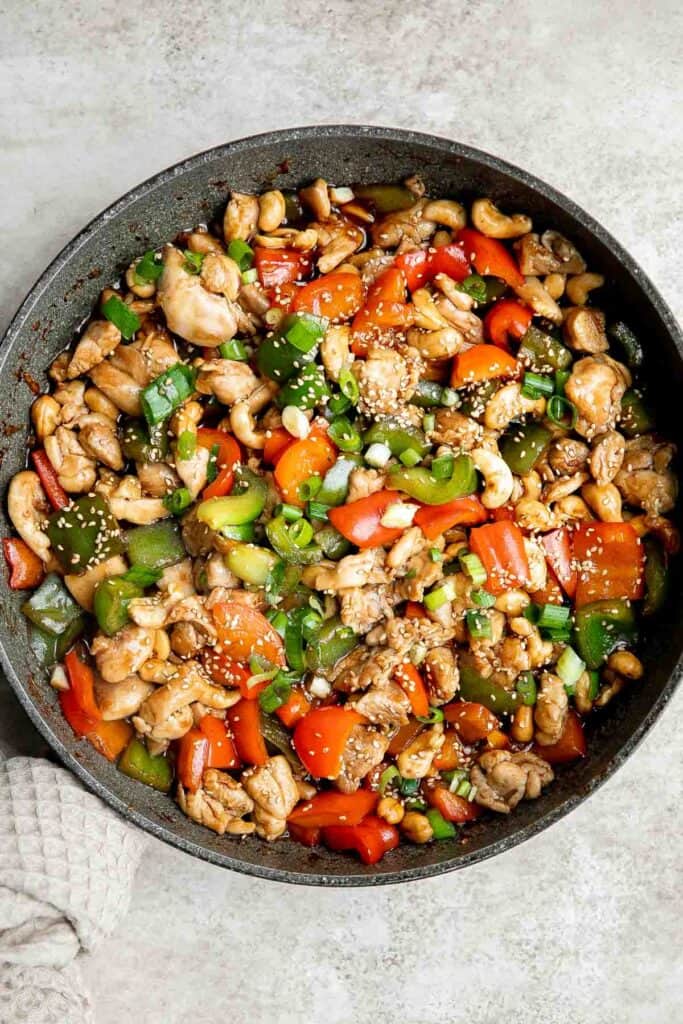
Ingredients and Substitutions
To make this delicious and easy cashew chicken, you will need the following ingredients (full quantities in the recipe card below):
- chicken - use boneless and skinless chicken breast or chicken thighs. I like using thighs in chicken stir fries because they are more tender.
- vegetable oil - feel free to use any vegetable oil that you have on hand. I typically use avocado oil.
- salt
- cornstarch - or substitute with all-purpose flour.
- bell peppers - I used green and red bell peppers. Feel free to use any colors that you like.
- roasted cashews
- green onions - optional, for garnish.
- white sesame seeds - optional, for garnish.
- sauce - made with soy sauce (or substitute with oyster sauce), rice vinegar (or mirin), chicken broth (or water), brown sugar (or honey), ginger, garlic, sesame oil, and cornstarch.
You will also need measuring cups and spoons and a large skillet.
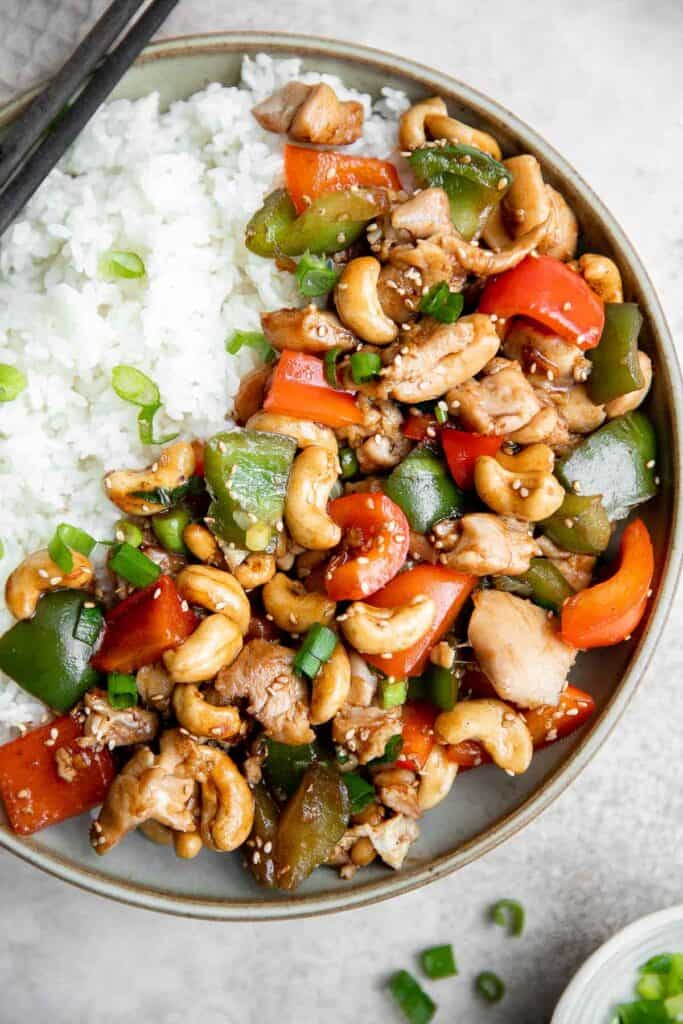
How to Make the Best Cashew Chicken
- Prepare the chicken. Use a paper towel to pat dry the chicken completely dry. Cut the chicken into 1-inch cubes. Transfer the chicken to a mixing bowl and add 1 tablespoon oil, salt, and cornstarch. Stir well to coat evenly.
- Cook chicken. Heat the remaining 1 tablespoon oil in a large skillet over medium-high heat until the hot oil sizzles, about 1 minute. Add chicken and sauté until golden brown on all sides, about 5-6 minutes. Transfer the cooked chicken onto a plate.
- Sauté the vegetables. In the same skillet, add bell peppers and sauté over medium heat until tender, about 2-3 minutes
- Make the sauce. In a small mixing bowl, whisk together soy sauce, vinegar, chicken broth, sugar, ginger, garlic, sesame oil, and cornstarch until smooth.
- Add sauce. Stir in the sauce mixture and let it simmer over medium heat for 3-4 minutes until thickened to a desired consistency, stirring constantly.
- Add chicken and cashews. Add the cooked chicken and cashews and toss well to coat, about 1 minute. (Do not overcook the cashews, which will make them soggy).
- Serve. Garnish with green onions and sesame seeds and serve immediately with a bowl of steamed rice or fried rice.

How to Cook Cashew Chicken in the Instant Pot
- Pat dry chicken breasts completely with a paper towel and cut into 1-inch cubes.
- In a small mixing bowl, whisk together soy sauce, vinegar, chicken broth, sugar, ginger, garlic, sesame oil and cornstarch until smooth.
- Add chicken and sauce mixture in the instant pot. Seal the lid and turn the steam release knob to SEAL position. Pressure cook for 6 minutes. Once the time is up, quick release the remaining pressure by turning the steam release valve to the venting position.
- Turn on sauté on high and stir in bell peppers. Cook for 2-3 minutes until tender and the sauce thickens to a desired consistency.
- Stir in cashews and toss to coat. Garnish with sesame seeds and green onions and serve warm with a bowl of steamed rice.
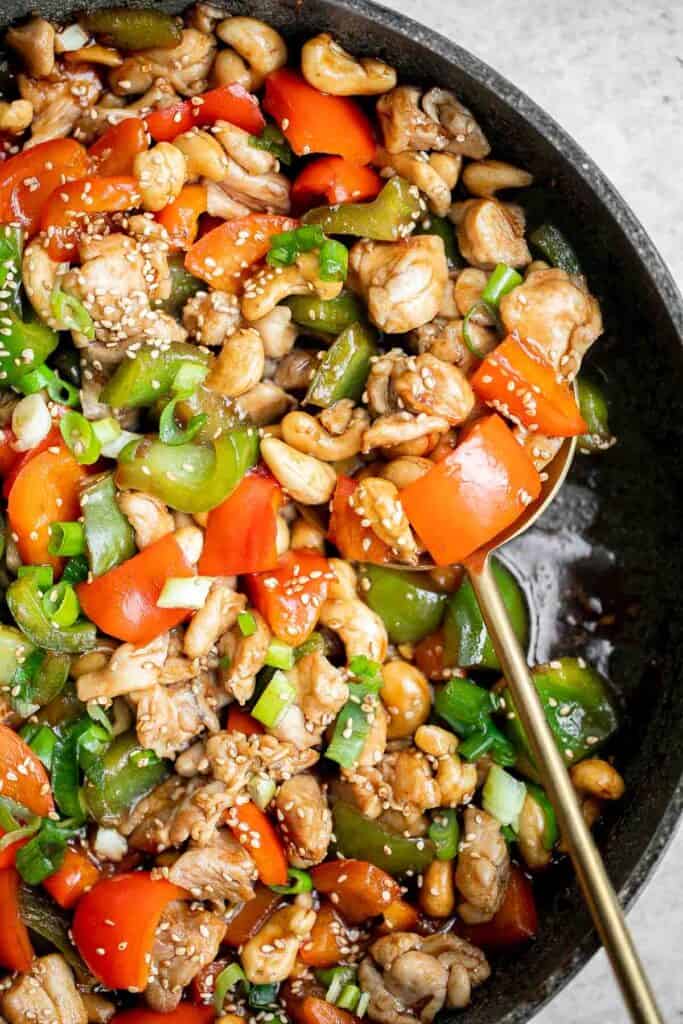
Storing Instructions
- How to store: Keep any leftover cashew chicken in an airtight container in the fridge for 4-5 days. Allow it to cool before storing, or else the veggies and cashews may get soggy.
- How to reheat: Cashew chicken is best served fresh because that's when the cashews are crunchiest. Once stored and reheated, the cashews will get softer. To reheat leftover cashew chicken, place it on a pan over the stove. Stir fry the chicken and veggies on medium-low heat until warmed through. Cover the pan to speed up the cooking time. You can also reheat cold cashew chicken in the microwave. Heat the chicken in a microwave-safe dish covered in plastic wrap on a medium or low heat setting for about 3 minutes, until warmed through.
More Asian Chicken Recipes
- 60 Chinese Takeout Recipes at Home
- General Tso's Chicken
- Teriyaki Chicken
- Kung Pao Chicken
- Baked Sesame Chicken
- Mongolian Chicken
- Healthy Lemon Chicken
Tried this recipe?
I'd love to hear what you think! Leave a comment and rating below to share your feedback. Your reviews help others discover this recipe and help me keep creating more free recipes for you. Snap a photo and tag me on social media @aheadofthyme too.

50 Sunday Dinner Ideas
Sunday dinners are one of our favorite meals to serve in the entire week. It's all about spending quality time with family and friends and enjoying the best comfort food to end the week right. Whether you are looking for delicious family-friendly dinner recipes that are meaty and hearty, something creamy and cheesy, or easy recipes that you can throw into the Instant Pot or Slow Cooker to spend less time in the kitchen, this is what Sunday dinner recipes are all about. So if you are wondering "what to cook on Sundays", we are sharing over 50 of our most popular and best Sunday dinner ideas including comforting dinners like soups, stews, and casseroles, meaty Sunday main dishes, seafood recipes, delicious side dishes, and more!

Best Sunday Dinner Ideas
There's nothing better than a classic Pot Roast for Sunday Dinner. It's hearty, wholesome, and filling comfort food that can feed the whole family.
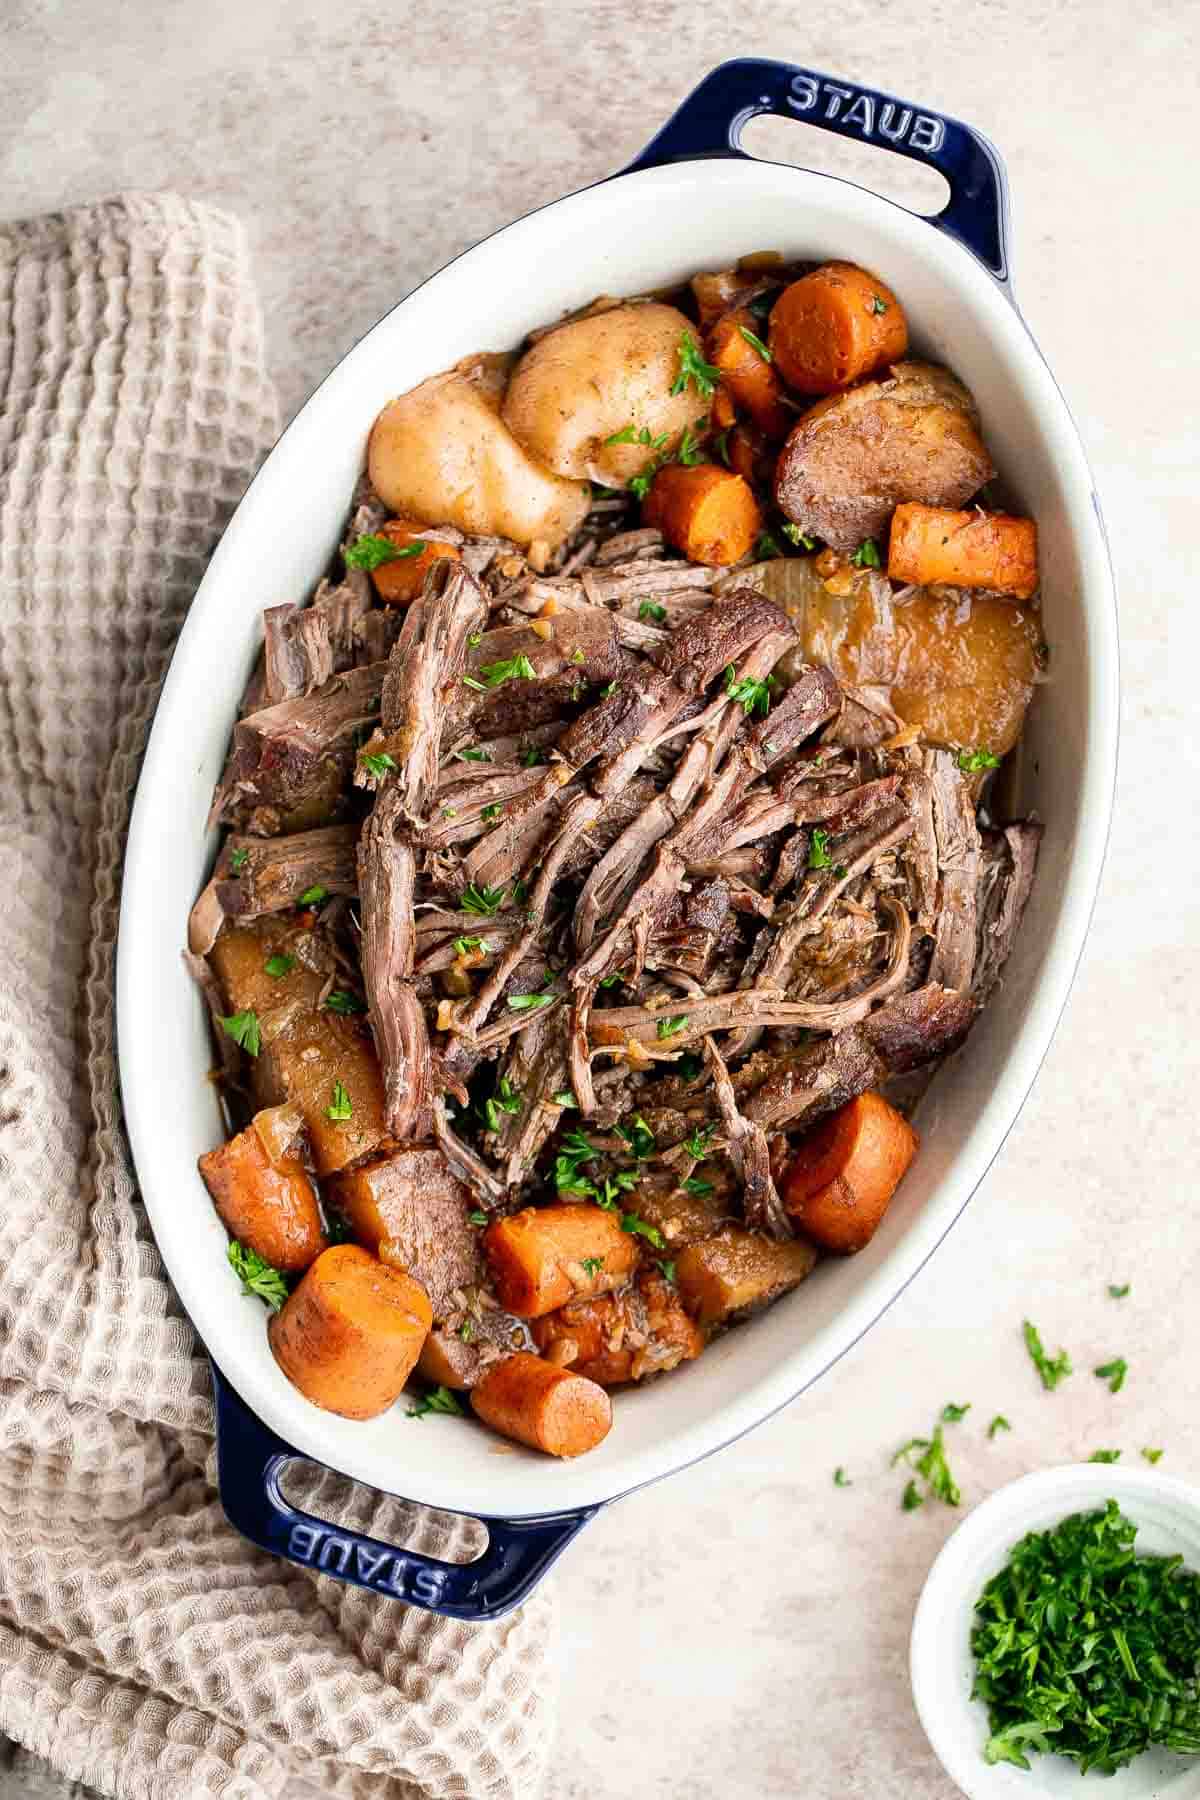
Classic easy meat lasagna is the ultimate Italian comfort food with layers of tender lasagna, meaty tomato sauce, cheese filling and melted cheese on top. One of my favorite Sunday dinner ideas.
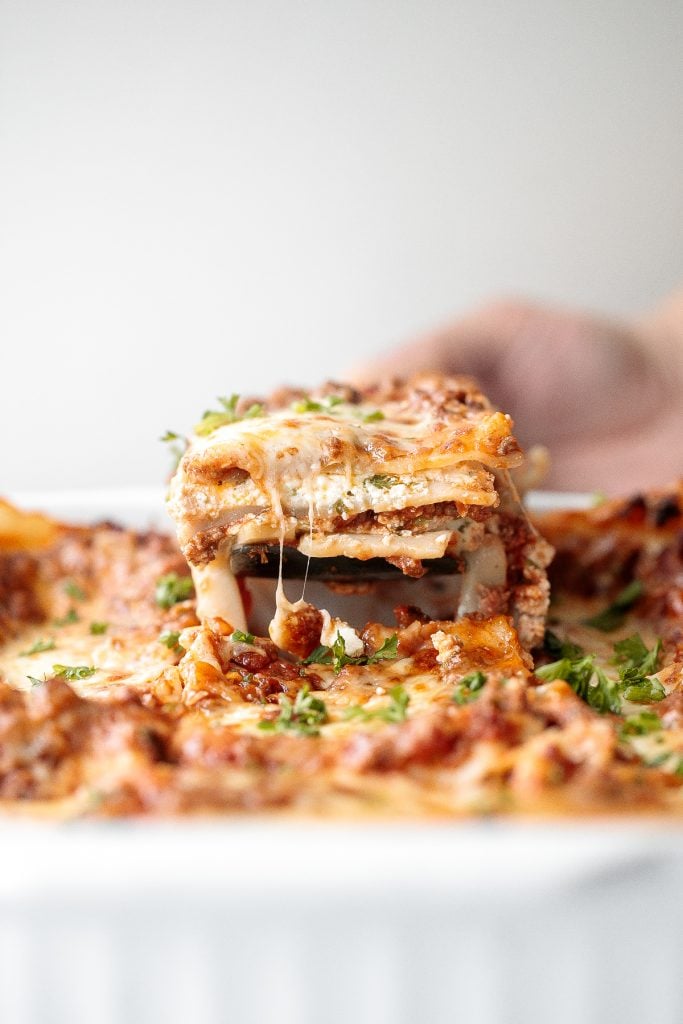
Homemade chicken pot pie is loaded with a delicious, creamy, savory filling contained by a crispy, buttery, and flaky pie crust. It stores and freezes well.

Beef stroganoff is a delicious, flavorful, and comforting Russian pasta dish that is ready in under 25 minutes. The perfect weeknight dinner.

Skillet shepherd's pie is a savoury and hearty traditional comfort food. With flavourful beef and fluffy potatoes, this cozy meal it will warm you up.
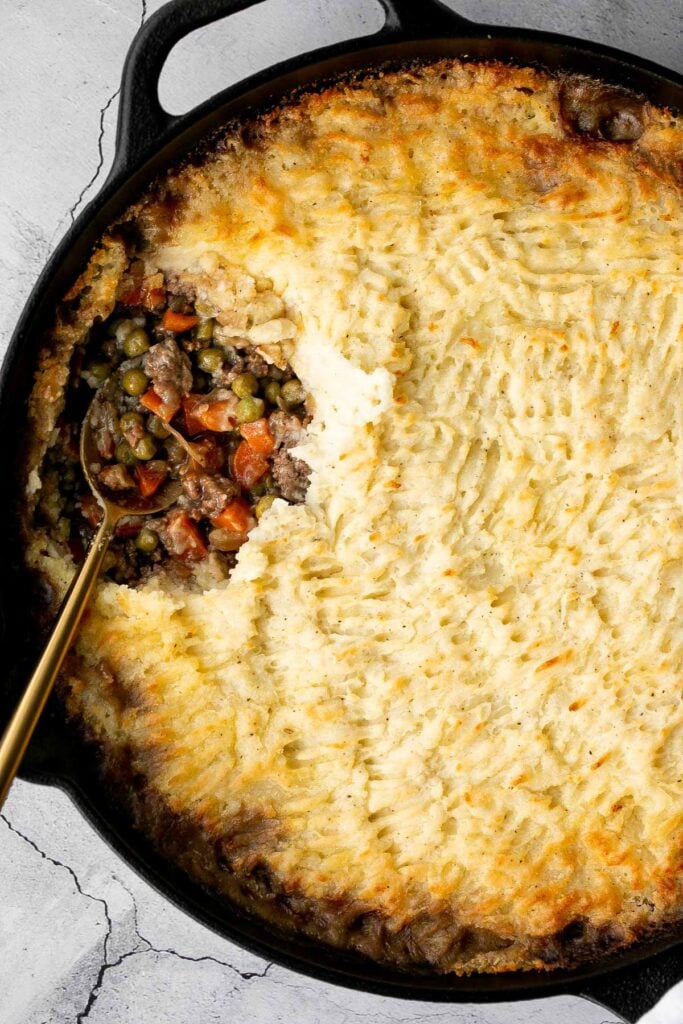
One Pot Coconut Curry Beef Stew
Warm and cozy, easy one pot coconut curry beef stew is hearty yet creamy, packed with tender beef chunks, potatoes and carrots, and creamy coconut milk.

Mac and Cheese with White Cheddar
Quick and easy, creamy stovetop mac and cheese with white cheddar is a delicious and comforting one pot 20-minute meal packed with three types of cheese. A family-friendly Sunday dinner idea.
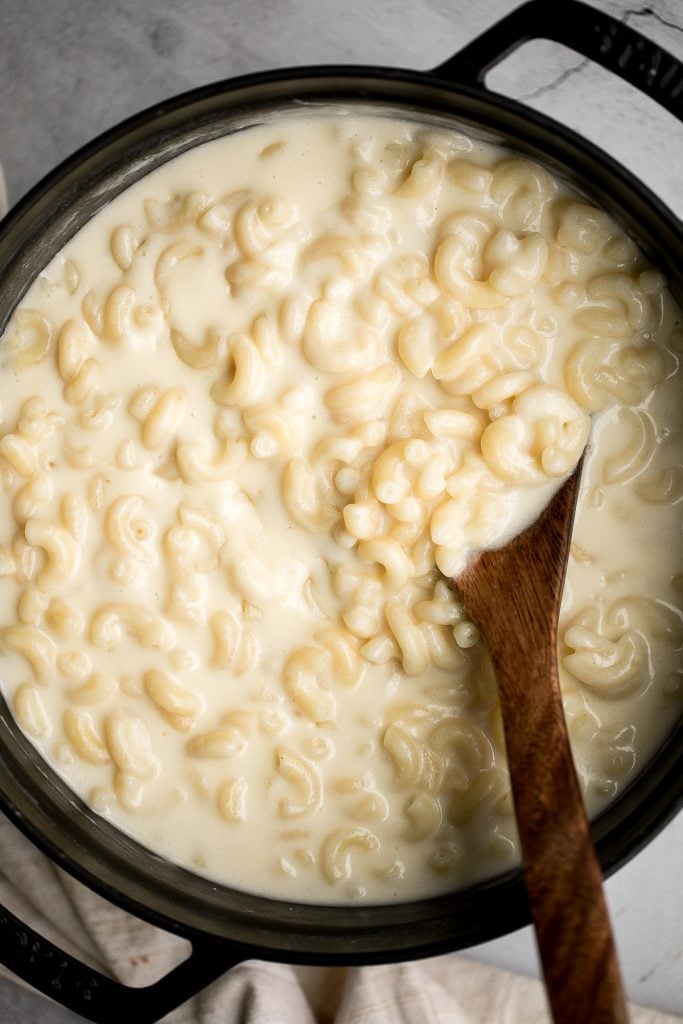
This hearty classic meatloaf with a caramelized glaze will nourish your body and soul. Feed the whole family with a simple yet flavourful classic winter dinner.

Glazed Honey Balsamic Pork Chops
Quick and easy, glazed honey balsamic pork chops are tender and juicy, seared in thyme and coated with a honey balsamic sauce. Make it in under 30 minutes for one of the easiest winter dinner ideas.
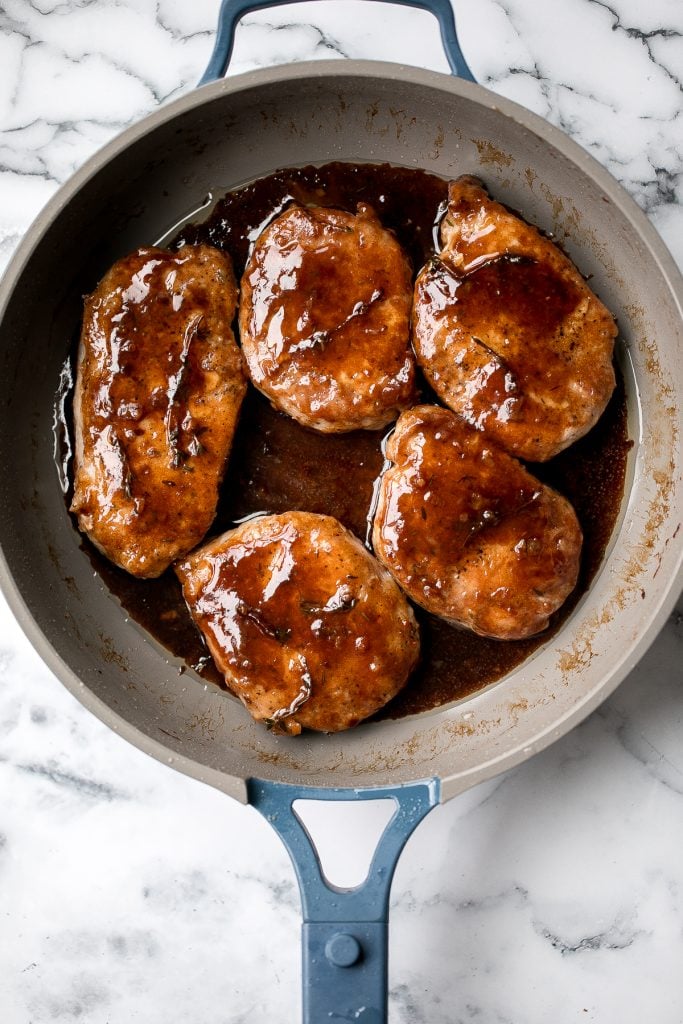
Pasta Bake with Sausage (Baked Ziti)
Pasta bake with sausage (baked ziti) is a lazy day lasagna with layers of pasta tossed in a rich meat sauce, layered with mozzarella, and baked. The perfect winter dinner for families.
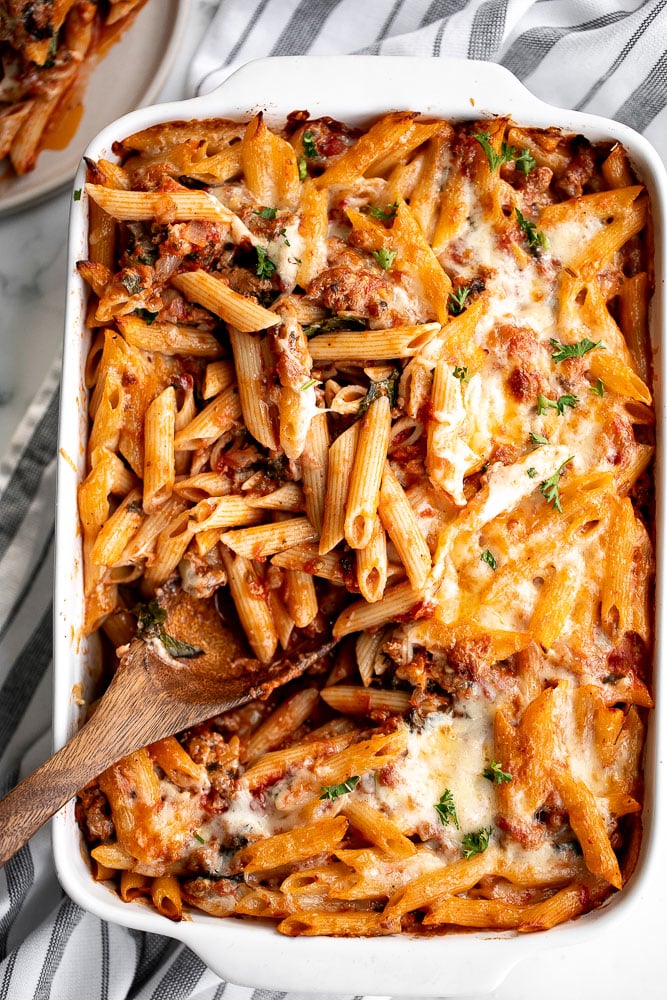
White chicken chili is an easy and delicious one pot meal made with shredded chicken, hearty veggies, and a creamy broth that's loaded with flavor. One of my absolute favorite winter dinner ideas.
Homemade hamburger helper is a family favorite but you can make a cheaper, healthier, and way tastier version at home, ready in just 30 minutes.
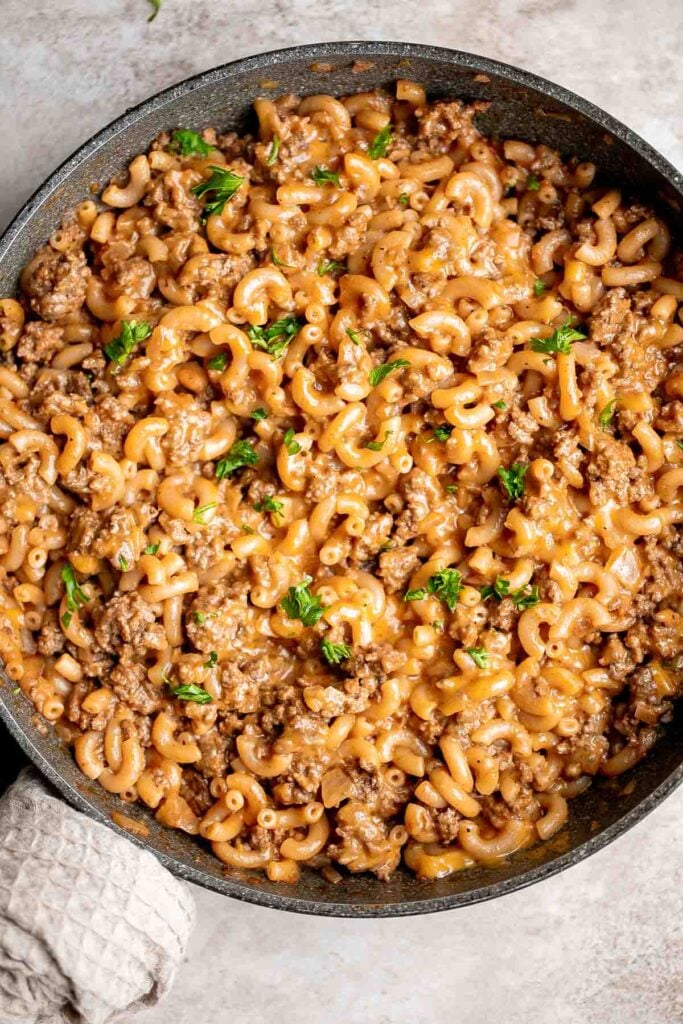
Sunday Dinner Main Courses
Pesto whole chicken baked over a bed of vegetables is the juiciest and most flavorful chicken you'll ever taste. Quick and easy to prep and pop in the oven.
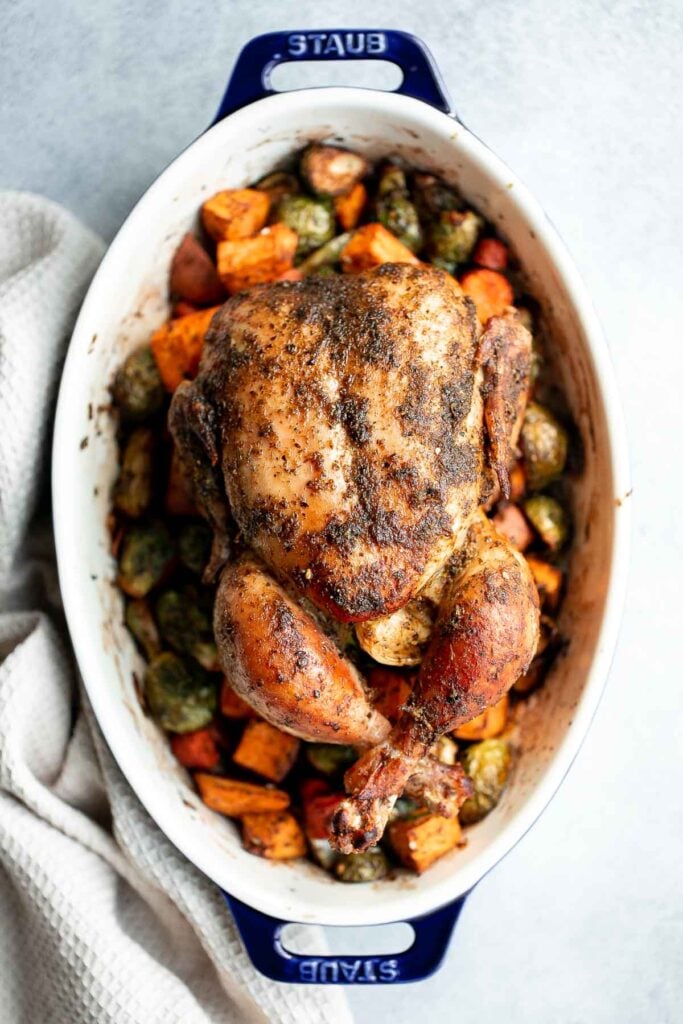
Air Fryer Breaded Fried Chicken Wings
The best breaded fried chicken wings - extra crispy and crunchy outside, tender and juicy inside. You can't even tell they're air fried, not deep-fried!
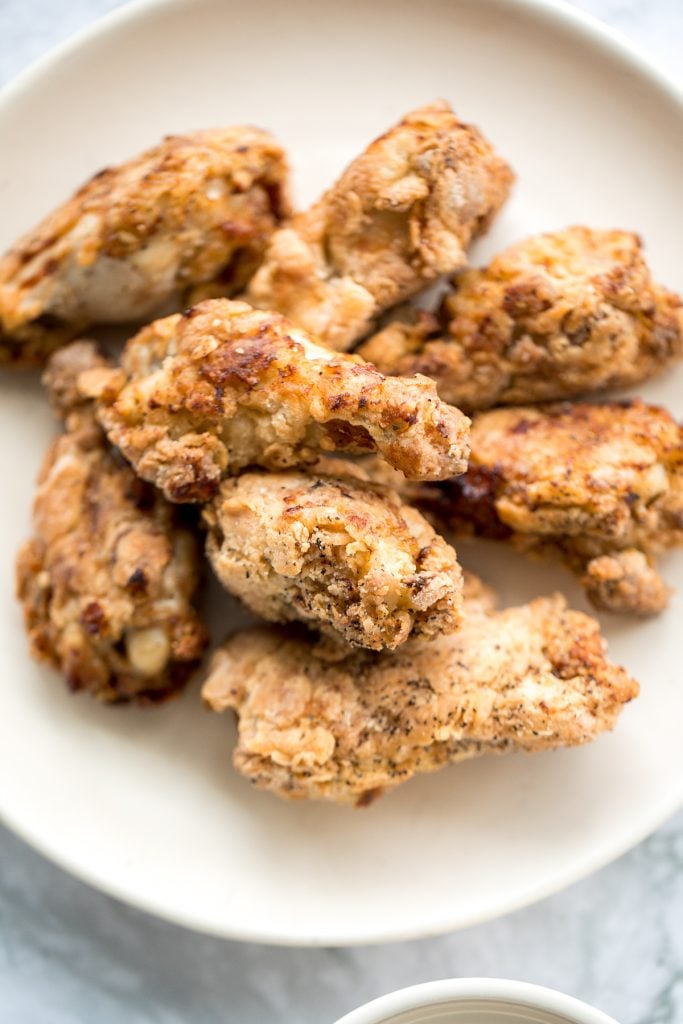
Delicious, comforting homemade Swedish meatballs are seared and smothered in a creamy gravy sauce and taste so much better than IKEA meatballs.
Slow cooker BBQ ribs are juicy, saucy, and tender - the meat literally falls right off the bone. Add this easy recipe to your list of crockpot recipes.
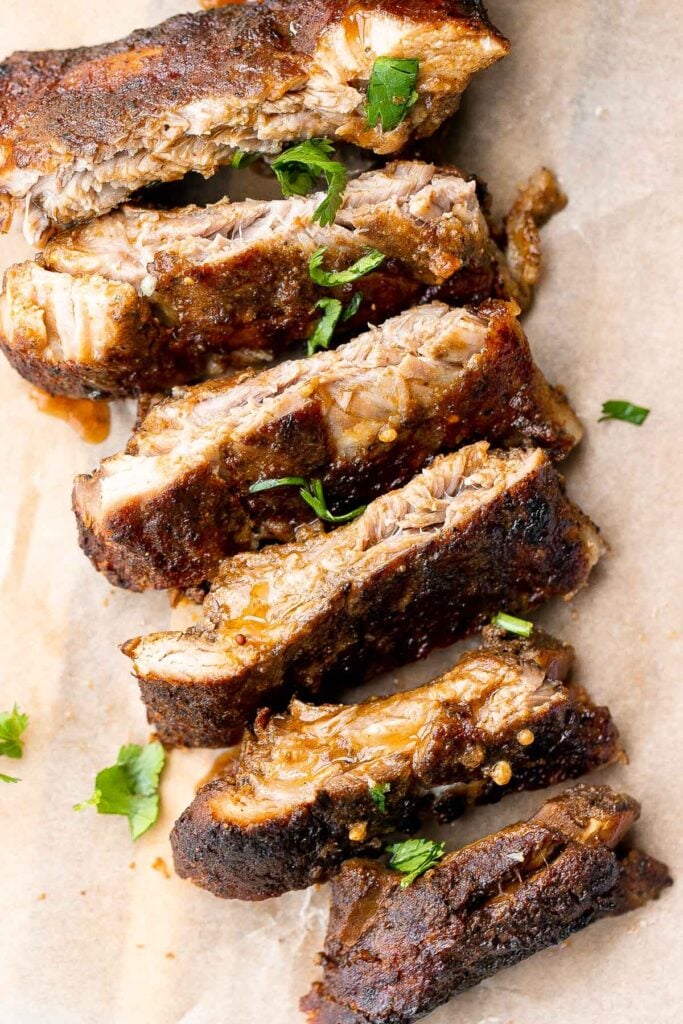
Baked parmesan crusted chicken is breaded in a herby parmesan breadcrumb mixture and baked until crispy perfection. So flavourful and delicious.
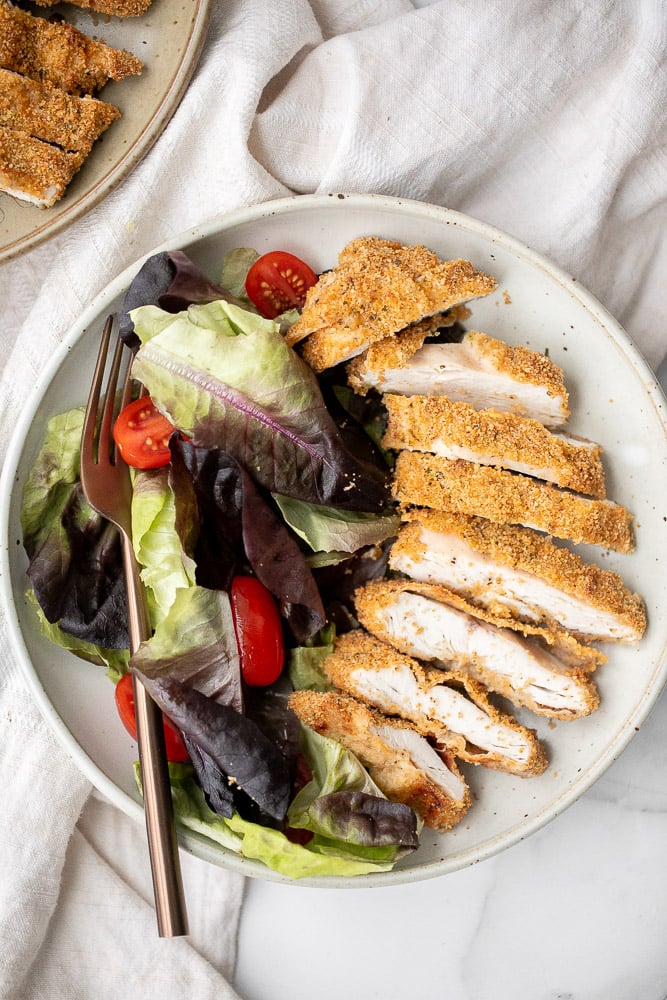
Lasagna roll ups are a twist on traditional lasagna. Lasagna noodles are filled with cheese and meat sauce and rolled up. Make ahead and freezer-friendly!
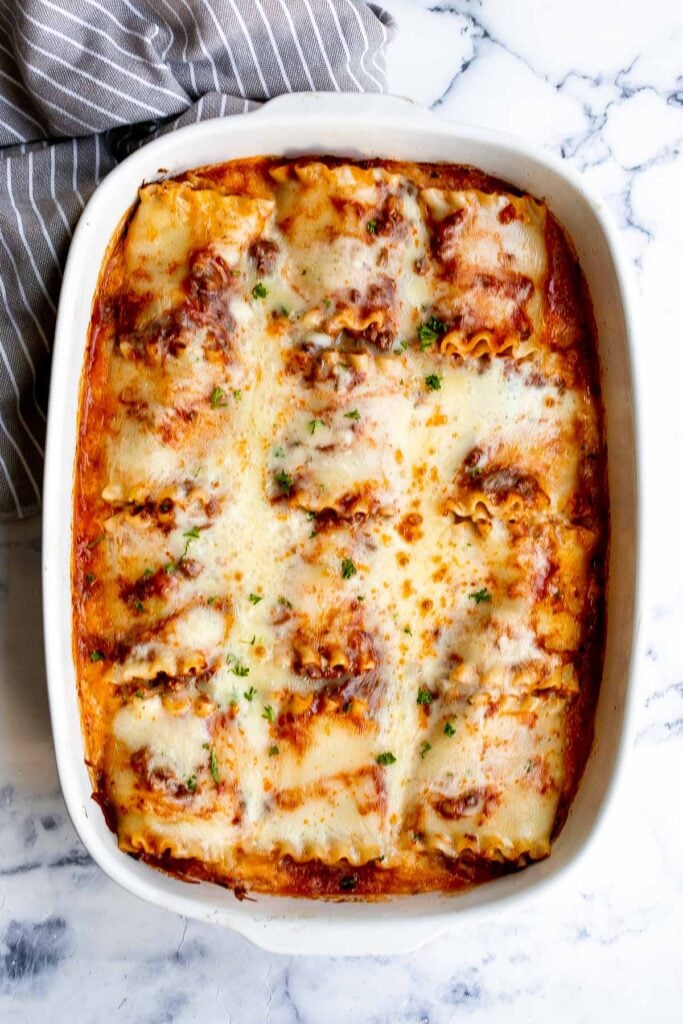
Harissa spatchcock chicken (butterflied chicken) is juicy and tender, has the crispiest skin, and is packed with flavor from red pepper harissa paste.
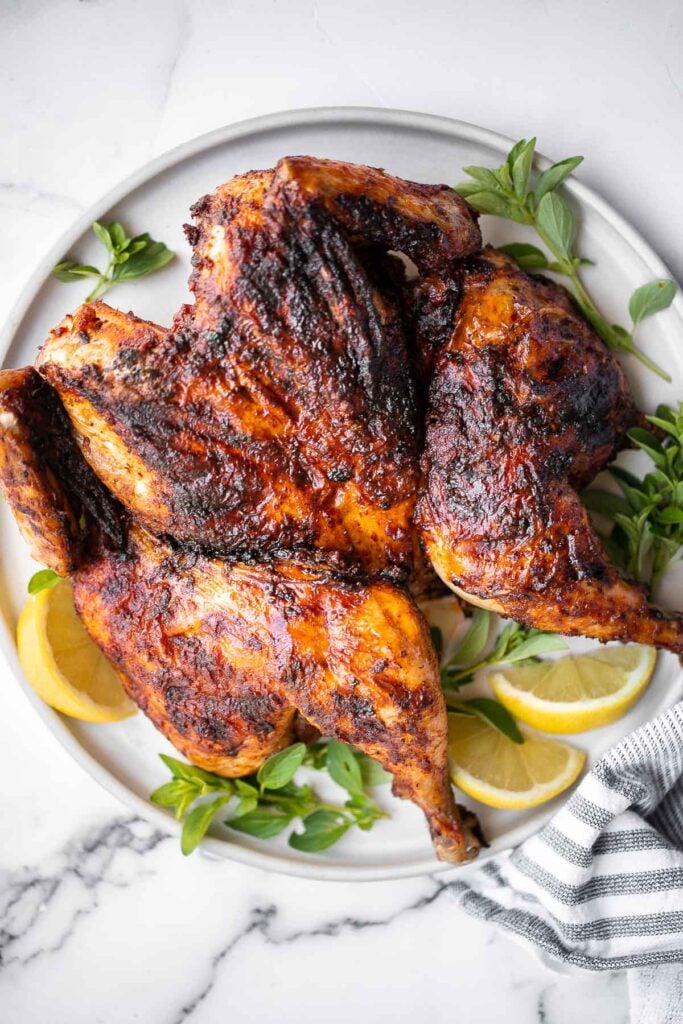
Meatballs are probably my favorite of all ground beef recipes. These quick, easy homemade Italian meatballs are juicy, flavourful, and delicious, simmered in a rich and savoury tomato sauce. Make them in just 30 minutes.
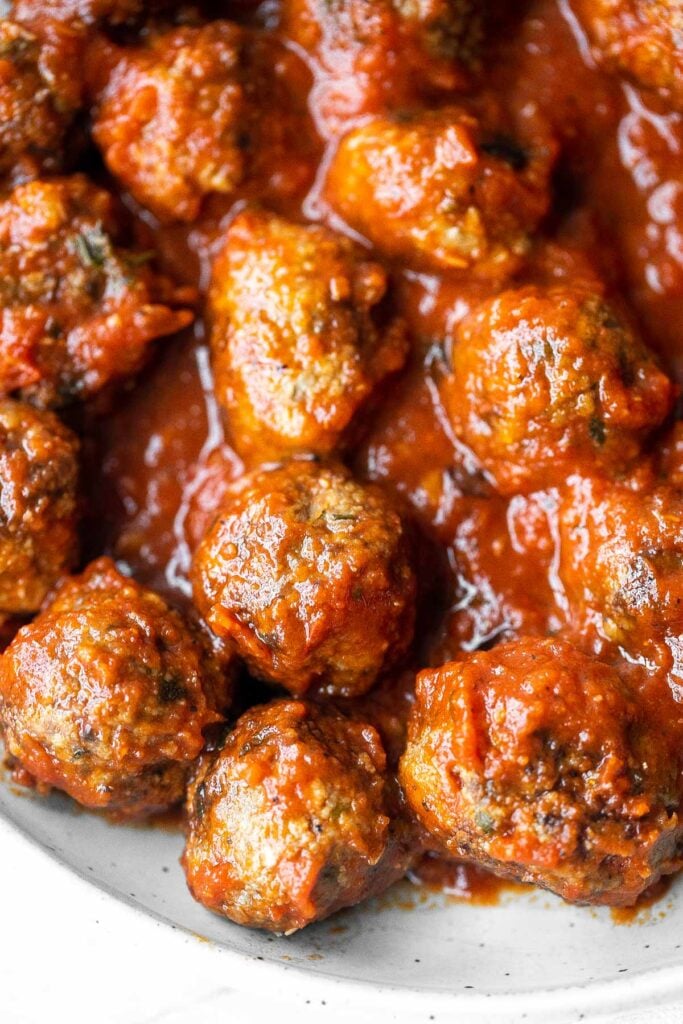
Creamy Chicken Broccoli and Quinoa Casserole
Nothing says comfort food better than a creamy chicken, broccoli and quinoa casserole made with fresh and healthy ingredients.
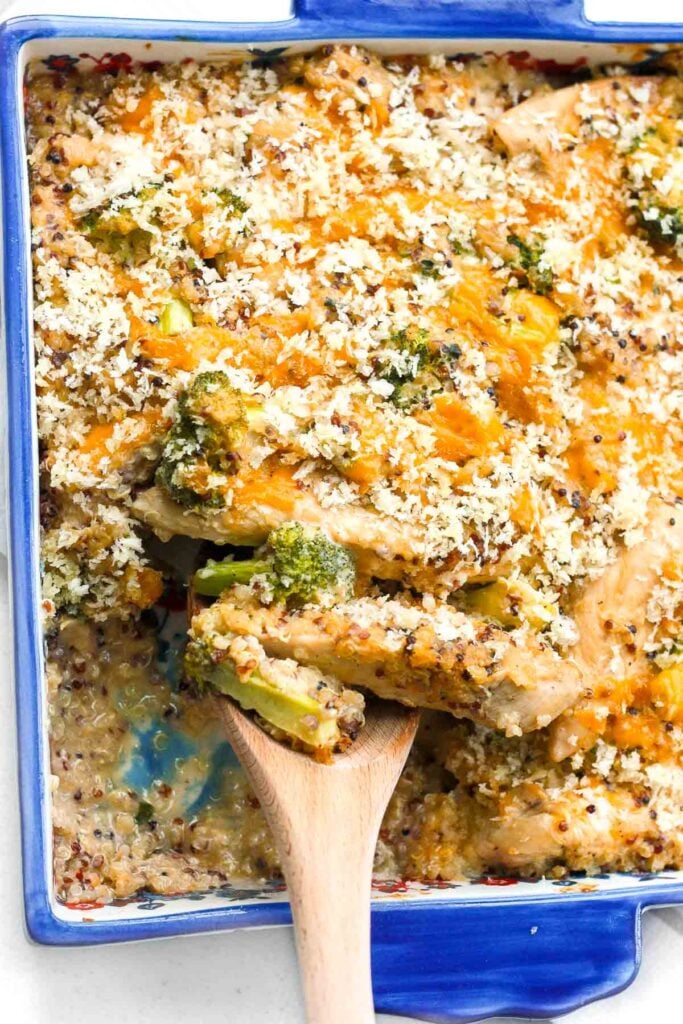
Homemade roast beef is roasted on high heat and slow cooked on low heat for the best texture - browned crust on the outside and tender, moist, juicy inside.
Creamy White Chicken and Spinach Lasagna
Creamy white chicken and spinach lasagna with tender shredded chicken is the most comforting creamiest cheesiest white lasagna. Easy to make ahead & freeze.
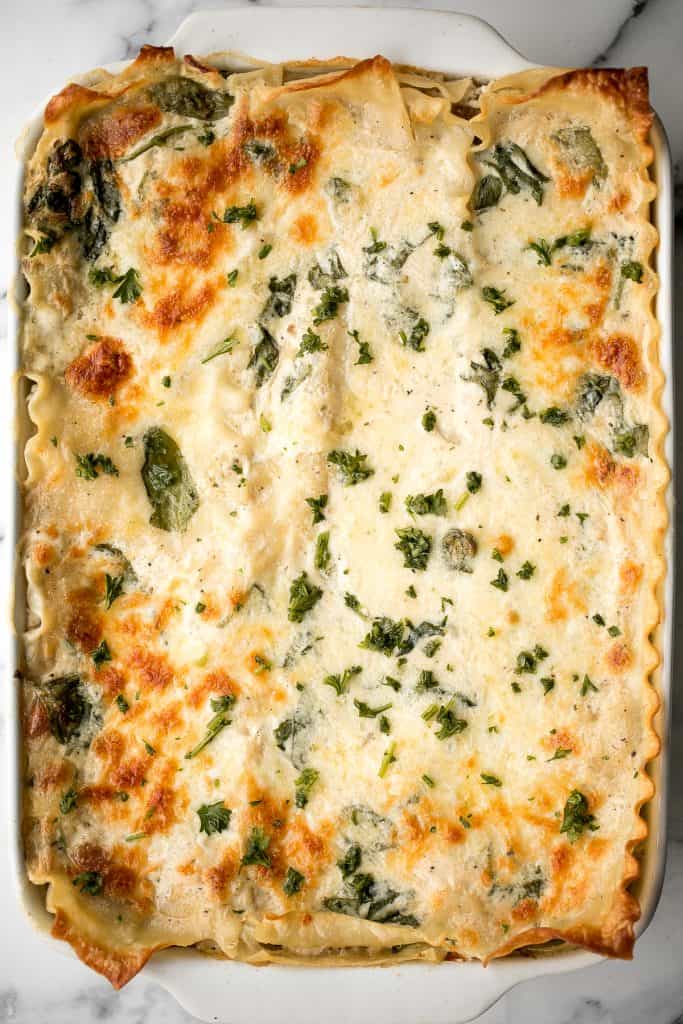
Dutch Oven Whole Roast Chicken
Easy Dutch oven whole roast chicken with the crispiest golden skin is juicy, tender and succulent and packed with flavour. Just takes 15 minutes to prep.
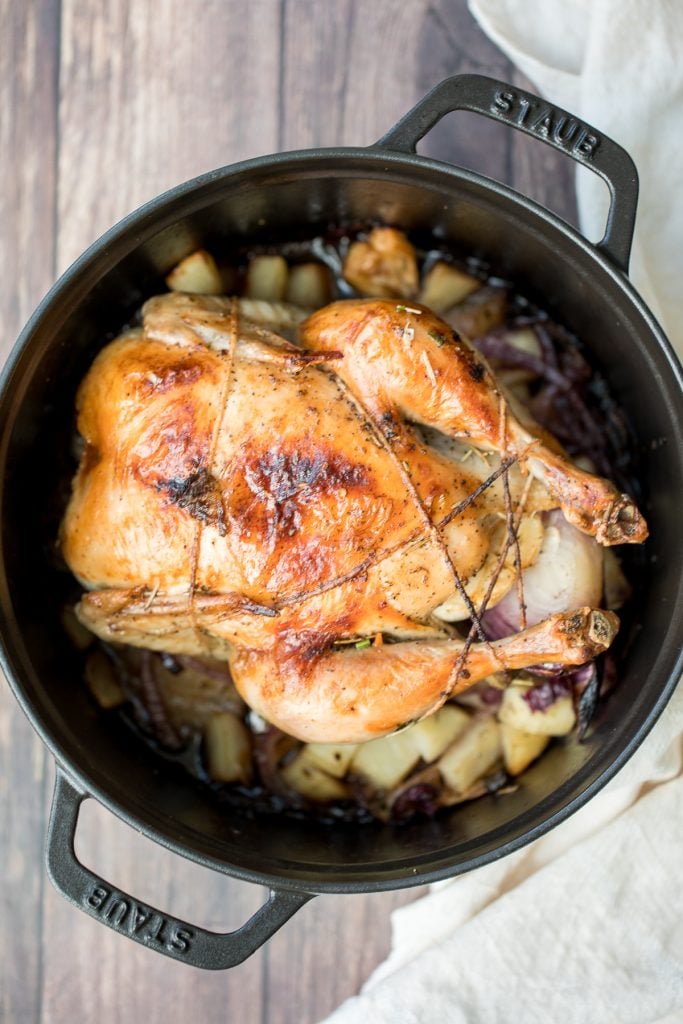
Sunday Dinner Seafood Recipes
Easy, garlicky and buttery grilled shrimp boil with prawns, corn, baby potatoes and sausage, seasoned and tossed with parsley takes just 20 minutes to cook. Throw some whole potatoes on the grill too and serve this with some BBQ Chicken Stuffed Baked Potatoes.

Tender, flaky, flavorful garlic butter salmon is well-seasoned, seared to perfection, and basted until juicy. Quick and easy to make in 20 minutes.
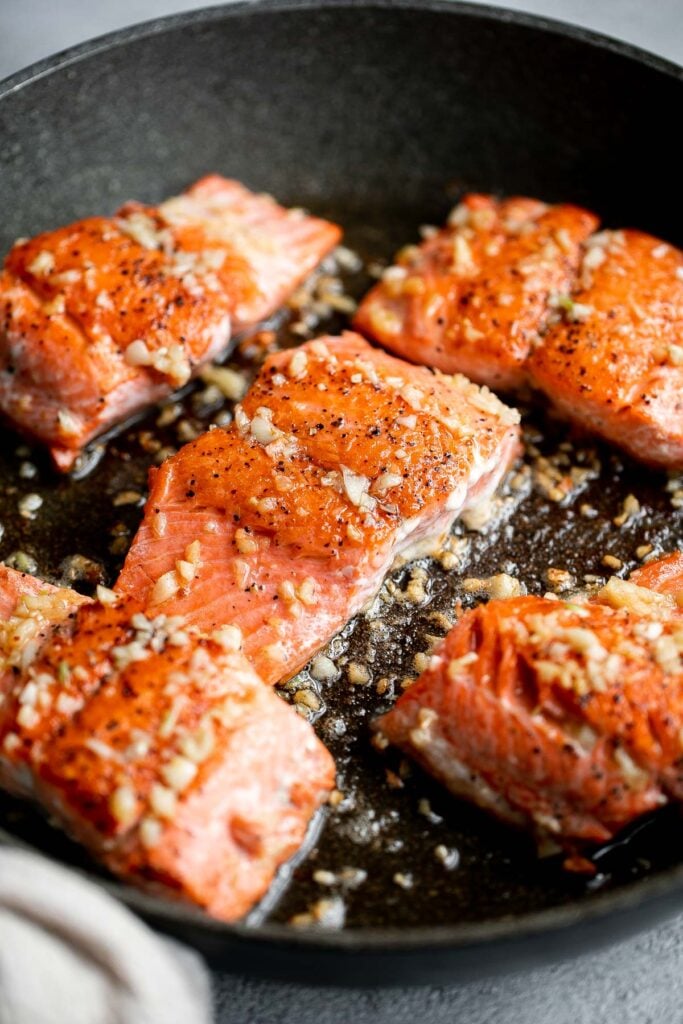
Creamy Tuscan shrimp packed with sun-dried tomatoes, spinach, and garlic, is creamy, rich, and delicious. Make it in just 15 minutes, including prep! One of the best Sunday dinner ideas.
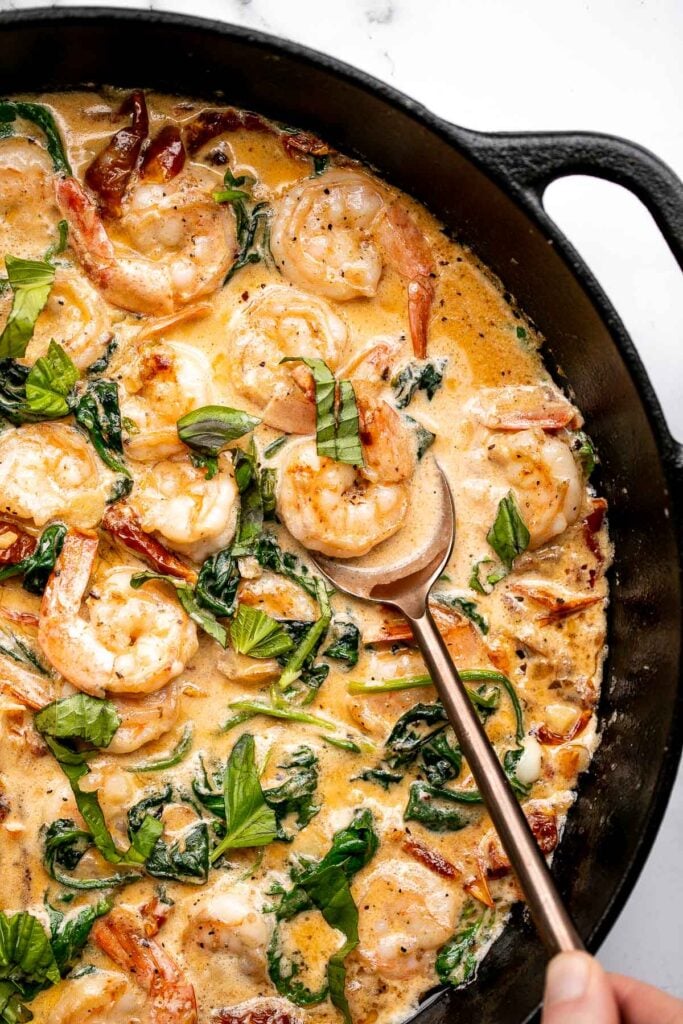
Garlicky, buttery, and perfectly seared scallops take less than 10 minutes to prep and cook. It's the easiest fancy, restaurant-grade meal to make at home and one of my favorite New Year's dinner ideas.
Shrimp Fettuccine Alfredo Pasta Bake
Creamy shrimp fettuccine alfredo pasta bake is garlicky, buttery, cheesy, loaded with shrimp + parsley and topped with mozzarella. Easy comfort food goals.
Creamy garlic salmon is a quick easy one-pan meal ready in under 30 minutes, with seared flaky tender salmon tossed in a delicious creamy garlic sauce.
Creamy Shrimp Pasta with Sun-dried Tomatoes
Creamy shrimp pasta with sun-dried tomatoes is a delicious, quick and easy meal that takes just 20 minutes to prep and make. The perfect weeknight dinner. | aheadofthyme.com
Flavourful, easy fish tacos with lime crema is made with seasoned white fish, cabbage slaw, and lime sauce. It takes less than 25 minutes to prep and serve.
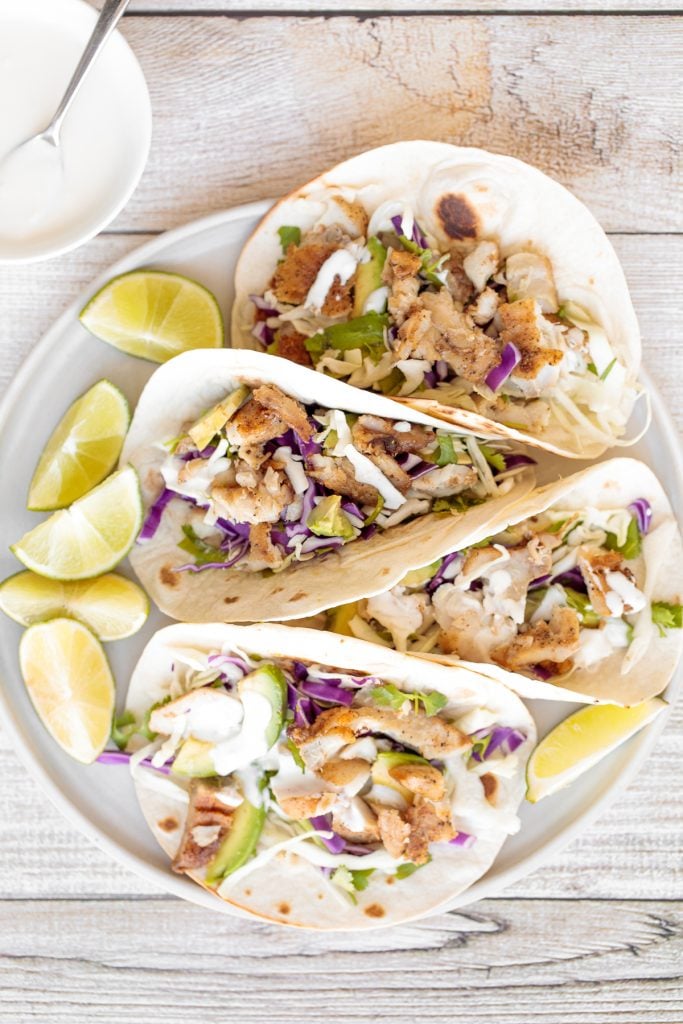
Sunday Dinner Ideas in the Crockpot or Instant Pot
Instant pot whole chicken with gravy is tender, juicy, and flavorful. It's the fastest way to cook a whole rotisserie chicken for dinner in just 40 minutes.
Hearty slow cooker beef chili is an easy, comforting, low-maintenance dinner in fall and winter months. It's a family favourite crockpot chili.
Instant pot beef curry with potatoes and carrots is delicious, hearty, comforting, and flavorful. It's made quick and easy in the pressure cooker.
Instant pot turkey breast is the most tender and juicy turkey you'll ever try. It's so easy to make in the pressure cooker and requires little prep.
Instant pot mashed potatoes are the quickest and easiest mashed potatoes you'll make in under 20 minutes (including prep!) in the pressure cooker.
Slow cooker Korean short ribs deliver complex Asian flavours with little effort. Simply add your ingredients in the crockpot and let it cook dinner for you.
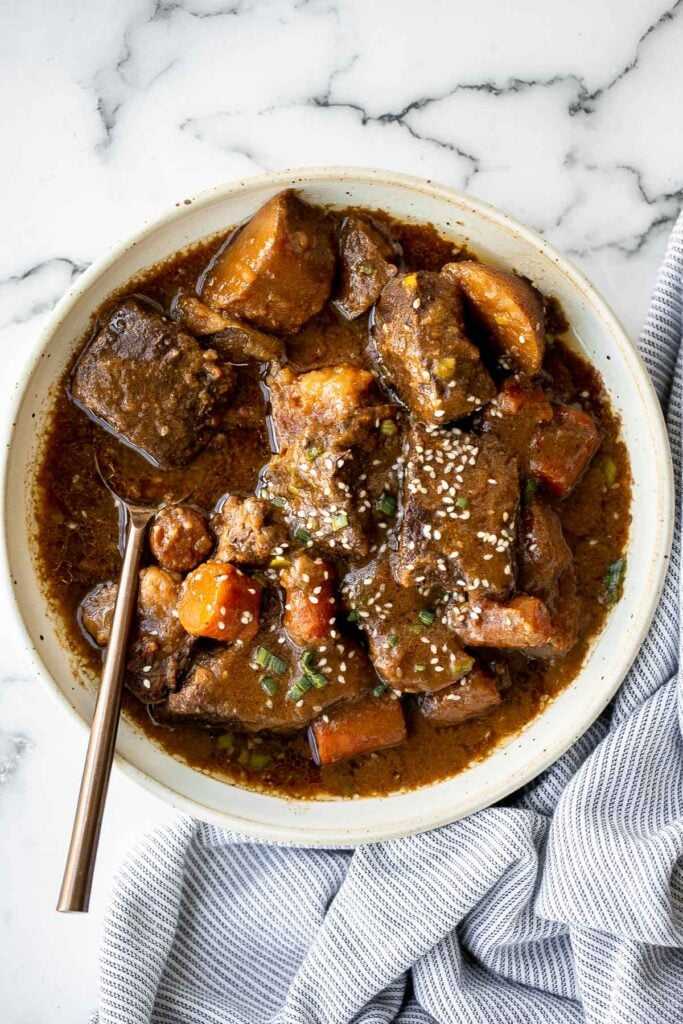
Side Dishes for Sunday Dinner
Easy creamy ham and potatoes au gratin is a great way to use leftover ham with tender sliced potatoes and a cheesy béchamel sauce. The best comfort food for Sunday dinner.
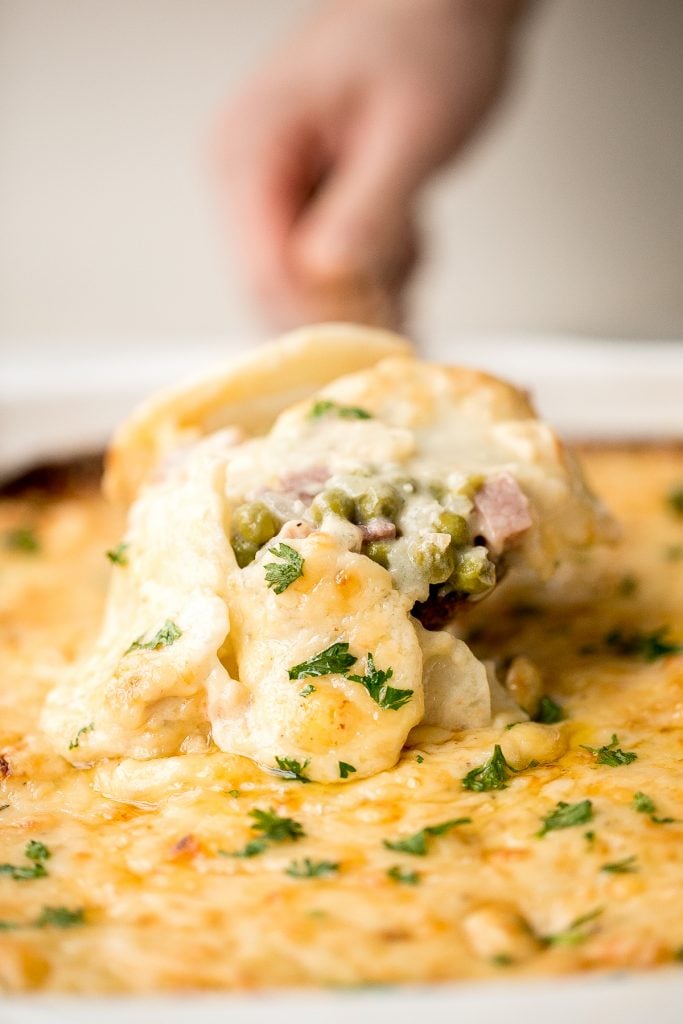
Fresh, crisp, classic coleslaw salad is a must-have recipe for a summer barbecue or picnic, or as an easy make-ahead lunch. Make it in less than 10 minutes.
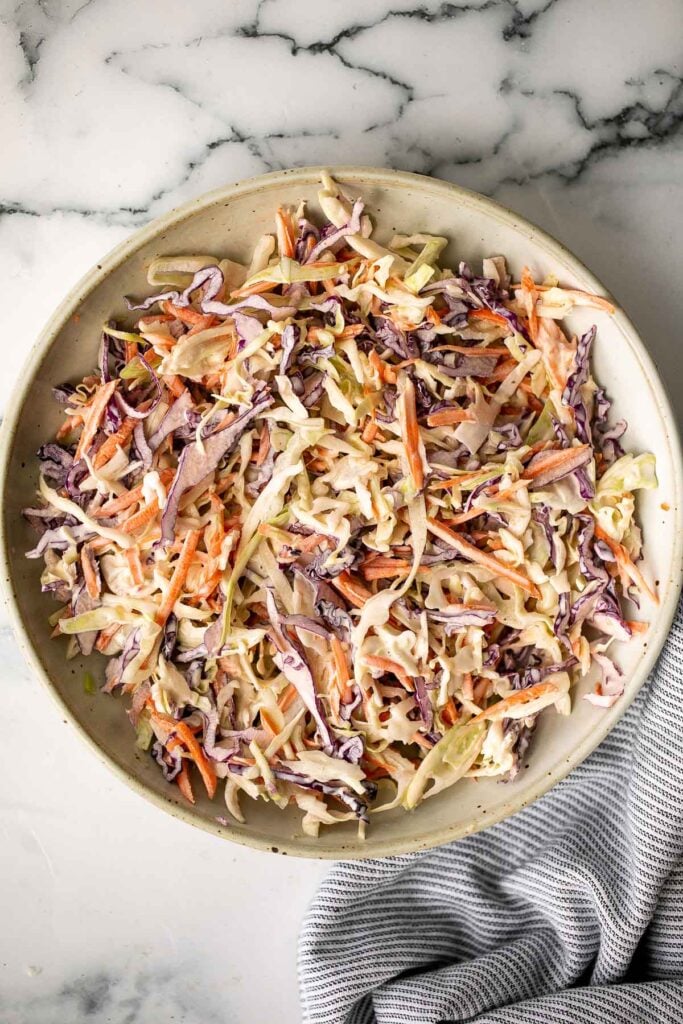
These crispy smashed potatoes are the perfect side dish. They're easy to make, crispy on the outside, tender and fluffy on the inside, and so flavorful.

Flaky, fluffy, buttery, and soft, these easy homemade biscuits come together with only a handful of ingredients you already have at home!

Broccoli cheese casserole is creamy, cheesy, and delicious - the most comforting side dish. It's crispy on the outside but soft and tender inside.

The Best and Creamiest Mashed Potatoes.
Creamy, buttery, and delicious, this is the best and creamiest mashed potatoes recipe you will ever find. It's velvety, smooth, and melts in your mouth.
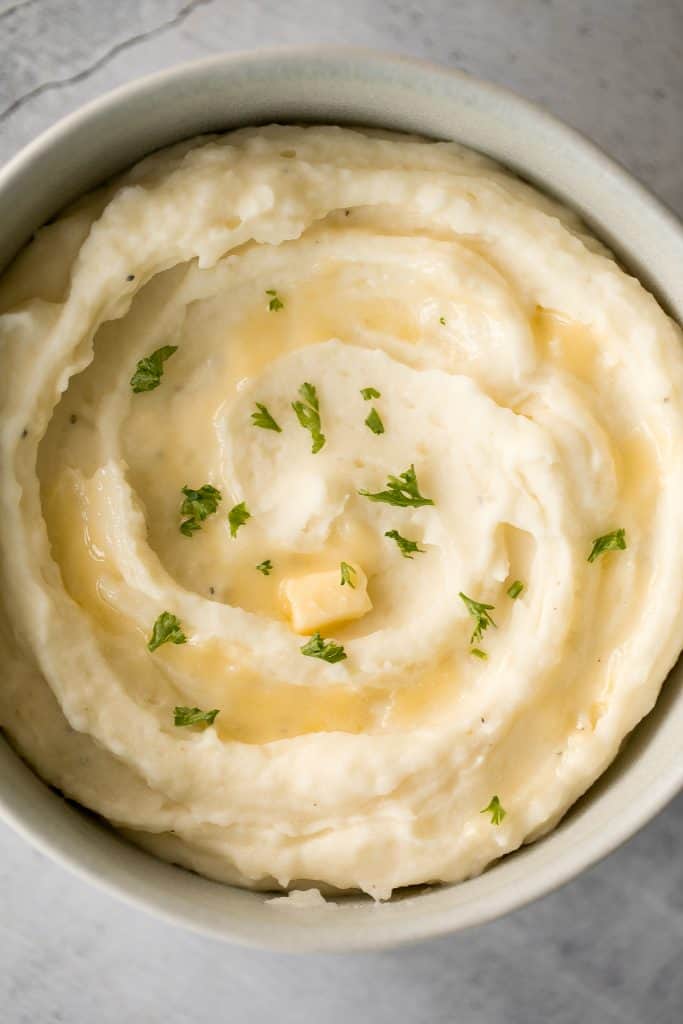
Creamy corn casserole is a comforting side dish that is creamy, savory, slightly sweet, and filling - a classic and traditional holiday side.
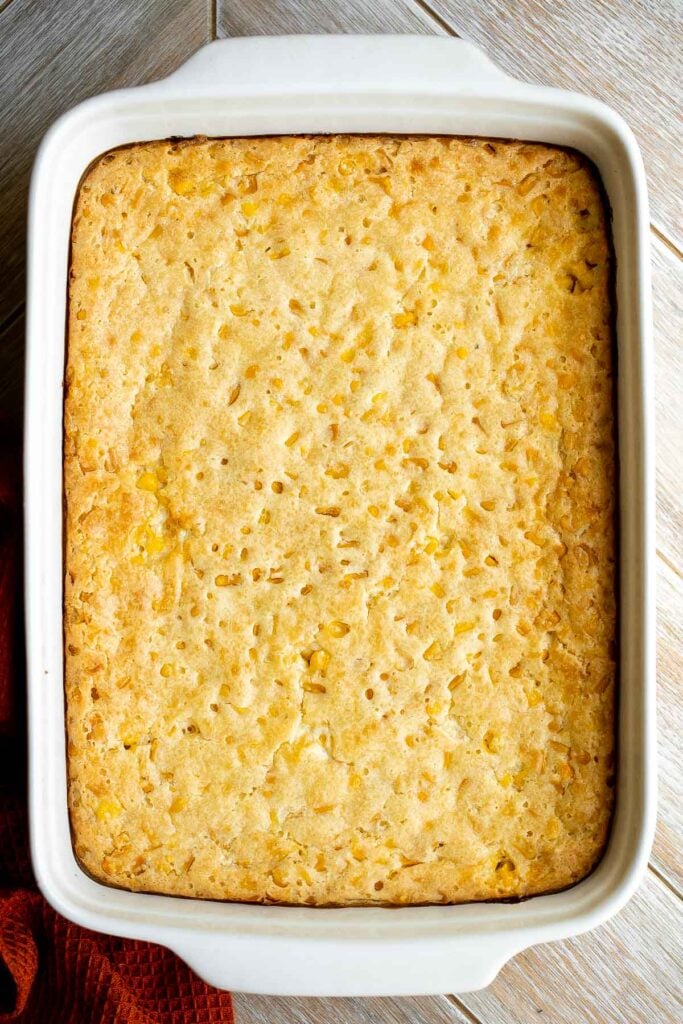
Creamy beef wild rice soup is savory, flavorful, and delicious, packed with vegetables and beef flank steak (or leftover roast beef!), and freezes well.
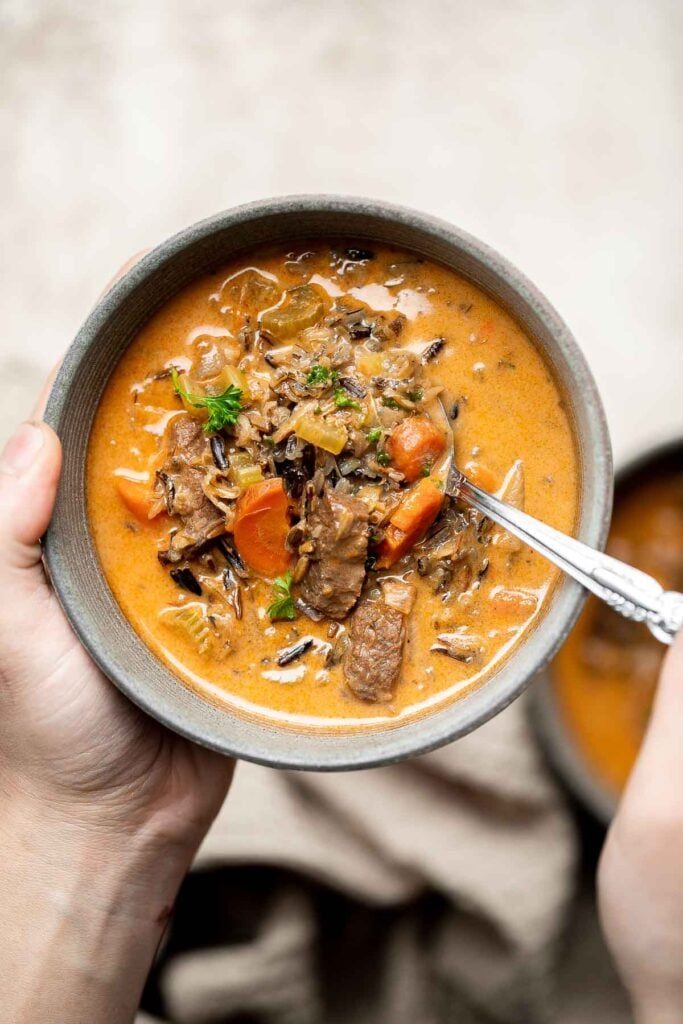
Flaky Garlic Cheddar Biscuits are a simple but delicious and flavorful no yeast bread that is ready for the oven with less than 15 minutes prep.

Scalloped potatoes are a creamy, cheesy, indulgent side dish that will make cheese lovers swoon. Every bite is savory, rich, comforting, and delicious.
More Dinner Recipes
- 60+ Easy Dinner Ideas
- 60+ Healthy Dinner Ideas
- 60 Vegetarian Dinner Recipes
- 50 Best Chicken Breast Recipes
- 40 Best Pasta Recipes
- 60 Best Soup Recipes
Did You Make Any of These Sunday Dinner Recipes?
Please leave a comment and rating below, and let me know what you thought of this round up of easy Sunday dinner ideas. Be sure to snap a picture and tag me on Instagram @aheadofthyme or share it on the Pinterest pin so that I can follow along.
HUNGRY FOR MORE? Don't forget to sign up for my email newsletter so that you don't miss any recipes. You can also follow along on Instagram and Pinterest for more recipe updates.
50 Best Healthy Snacks

Looking for healthy snacks that you can make at home that are easy and delicious? Whether you are craving something that is savory and salty, sweet and fruity, rich and creamy, or nutty and crunchy, I have got you covered with over 50 of the most popular and best healthy snacks that you can make at home. So next time you want to reach for the cookie jar (even though there is nothing wrong with that!), try some healthy snack recipes that will give you energy and keep you full throughout the day, including snacks by the handful, easy dips and spreads, healthy baked goods and bread, smoothies, savory snacks, and more! Plus, there are lots of vegan and gluten-free options to choose from too.
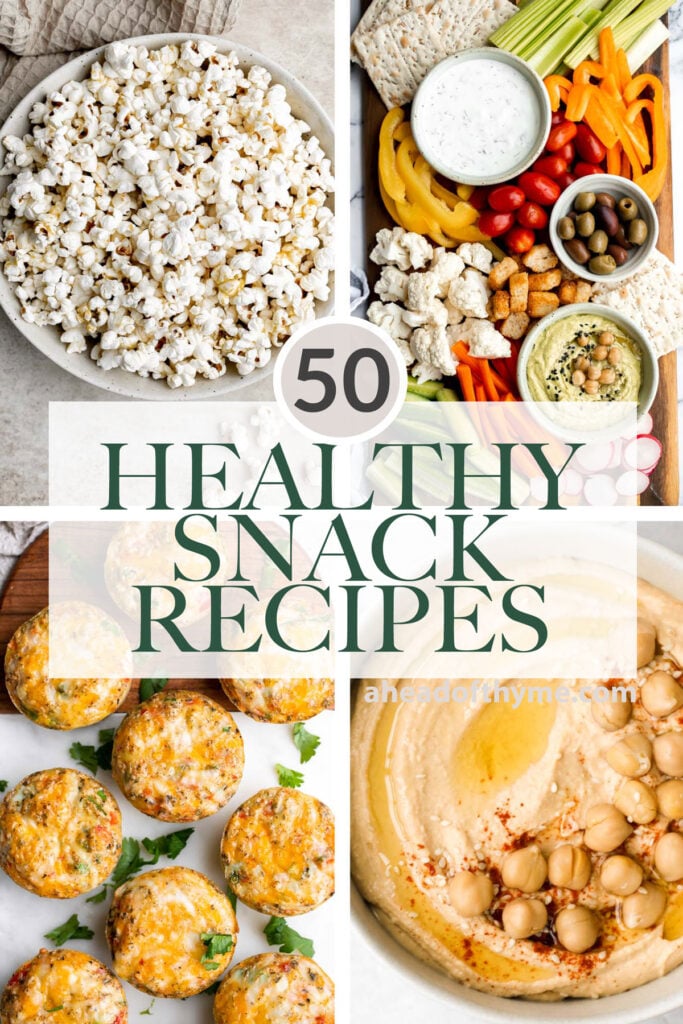
Our Most Popular Healthy Snacks
Homemade popcorn from scratch is quick and easy to make, a delicious and healthy snack, and is completely customizable with your favorite seasonings.

Tex Mex egg muffins are a delicious, filling, and healthy breakfast or snack. They are light and fluffy, perfect for meal prep, and freezer-friendly.
Antipasto skewers with tortellini are a quick, easy, and delicious appetizer with the best parts of a traditional antipasto platter but easier to eat.

No Bake Protein-Packed Energy Bites
No bake protein-packed breakfast energy bites are chewy, easy to make, delicious, and loaded with healthy nutrients. Perfect for breakfast or as a snack.
Whip up smooth and creamy classic hummus dip at home in just 5 minutes, by combining chickpeas, tahini, olive oil, lemon juice and garlic in the blender. Serve it with veggies or crackers, or use it in a vegan hummus wrap.
This homemade veggie tray is a quick easy healthy snack or appetizer to make for your next party, with a variety of colorful vegetables and delicious dips.
This Berry Smoothie Bowl is the best way to start the day. It's quick and easy to make, healthy, and packed with nutrients. Customize it with toppings!
Blueberry yogurt muffins are buttery, moist, soft, and cakey and bursting with blueberries in every single bite. They are super quick and easy to make.
Classic deviled eggs are a simple, easy, and healthy appetizer to make when you need something quick for brunch, picnics, barbecues, potlucks, or Easter.
Healthy Snacks by the Handful
Homemade tortilla strips are crispy, crunchy, delicious, and easy to make using 3 simple ingredients. Serve as a snack or a topping on soups and salad.

Cinnamon Apple Granola is quick and easy to make, tastes like apple pie, and is much better than store-bought - plus easier to make than you think! Some of my other favourite granolas to make are Pumpkin Pie Granola and Gingerbread Granola.
One-ingredient homemade baked apple chips are healthy, light, crispy and crave-worthy. Plus, unlike most store-bought chips, these contain no added sugar.
Say goodbye to store-bought popcorn and hello to homemade Kettle Corn - sweet and salty, loved by all, and quick and easy to make with just 4 ingredients.
Enjoy street vendor roasted chestnuts at home in three different ways - roast in the oven, cook over the stove, or in the air fryer.
The easiest thing to fill up those lunch-boxes with are chewy almond cranberry granola bars. They are chewy and delicious, contain real dried fruit, and made healthier with less processed sugar. For a different flavour, try almond butter granola bars or pecan toffee bars.

Quick and easy gingerbread granola with nuts, cranberries and warm winter spices is vegan, gluten-free, and refined sugar-free. The best Christmas snack.
Quick and easy sourdough discard crackers are thin, crispy, crunchy and flavoured with sesame seeds, dried herbs and flaked salt. They are so addictive.
Wholesome and healthy pumpkin energy bites are a delicious, gluten-free and vegan alternative to pumpkin pie. Easy to whip up with just 15 minutes prep.
Gluten-free rice croutons are a delicious, crunchy, and chewy homemade snack with the same texture as the best part of rice - the crispy bottom of the pot!
Quick and easy pumpkin pie granola packed with oats, pumpkin, pumpkin spice, and nuts, is vegan, gluten-free, and refined sugar-free. The best fall snack.
Healthy Dips and Spreads
Incredibly tasty, this easy and basic guacamole takes less than 5 minutes to make. It is the perfect healthy snack dip.
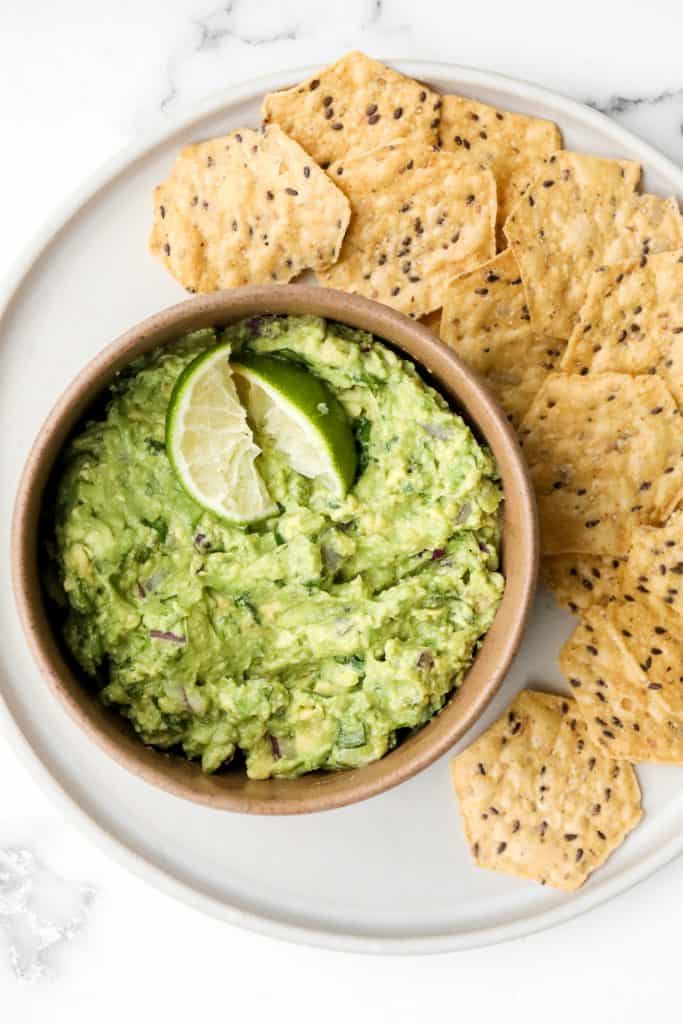
Light and airy, whipped ricotta dip is so easy to make in just 5 minutes with a few fresh ingredients including fresh herbs, olive oil, garlic, and honey.
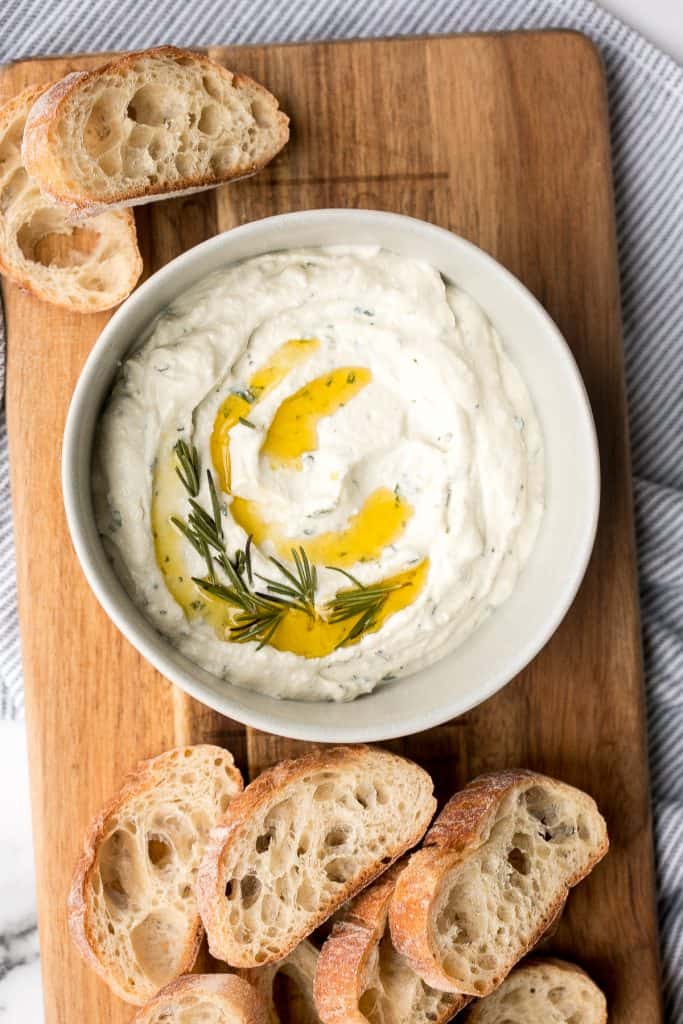
Easy 5-minute pico de gallo chunky salsa is packed with fresh tomatoes, onion, cilantro, and lime juice (and optional jalapeños for a spicy kick).
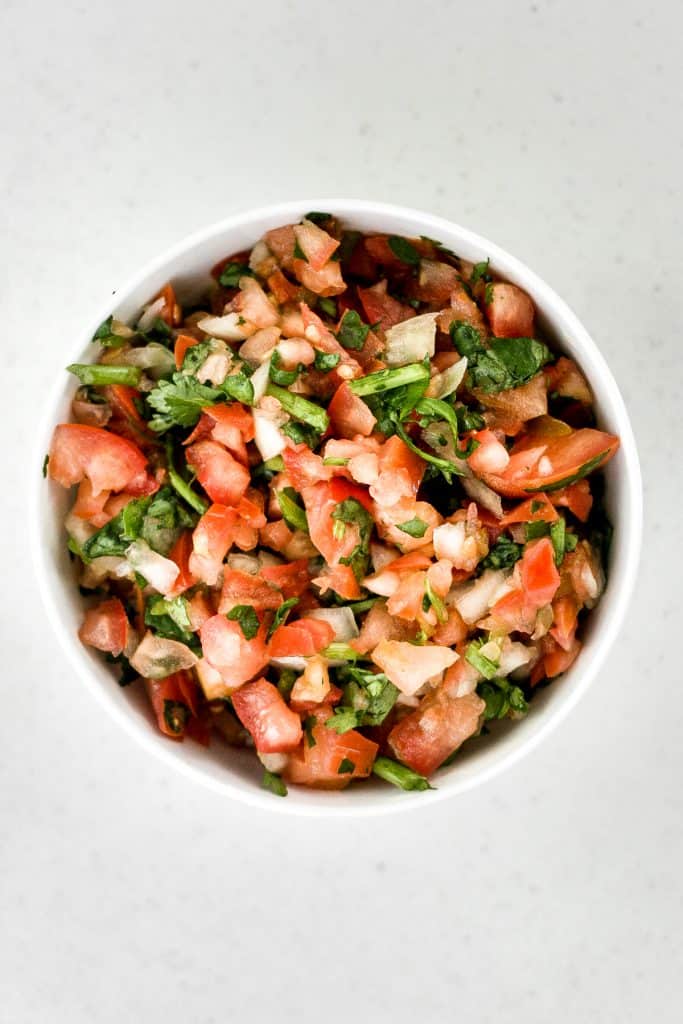
Quick and easy avocado hummus is creamy, smooth, healthy, and delicious. Loaded with chickpeas and avocado, it's the perfect blend of hummus and guacamole.

Easy Tzatziki Sauce (Cucumber Yogurt Dip)
Light and fresh, easy tzatziki sauce is a creamy yogurt cucumber dip packed with fresh cucumbers, garlic, dill, lemon juice and olive oil. So easy to make.
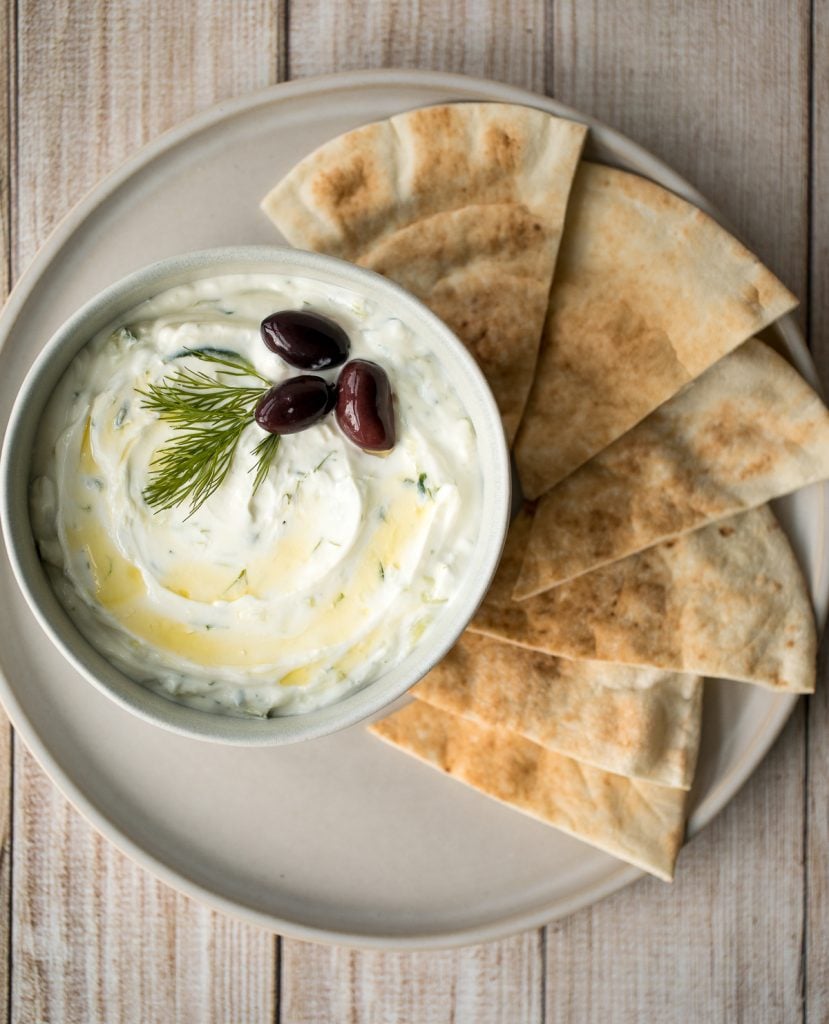
Baba ganoush is a creamy, roasted eggplant dip mixed with garlic and tahini for an explosion of flavour! It is perfect served with pita chips or veggies.
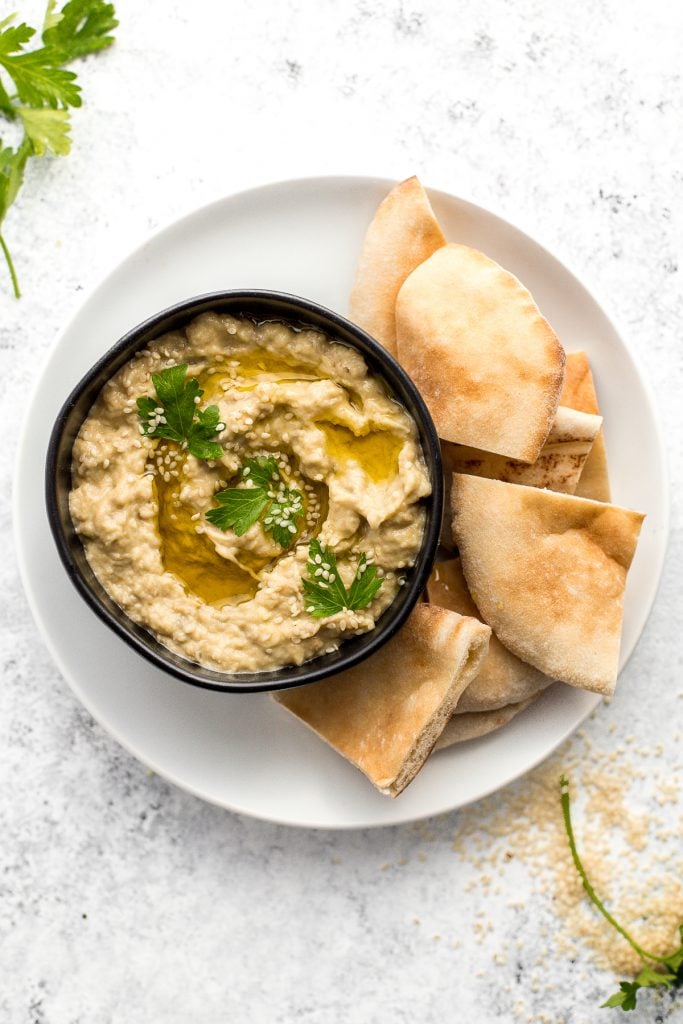
Marinara sauce is rich, vibrant, and loaded with flavor. It's easy to make with a few simple fresh ingredients. Serve as a dip or in pasta and pizza.
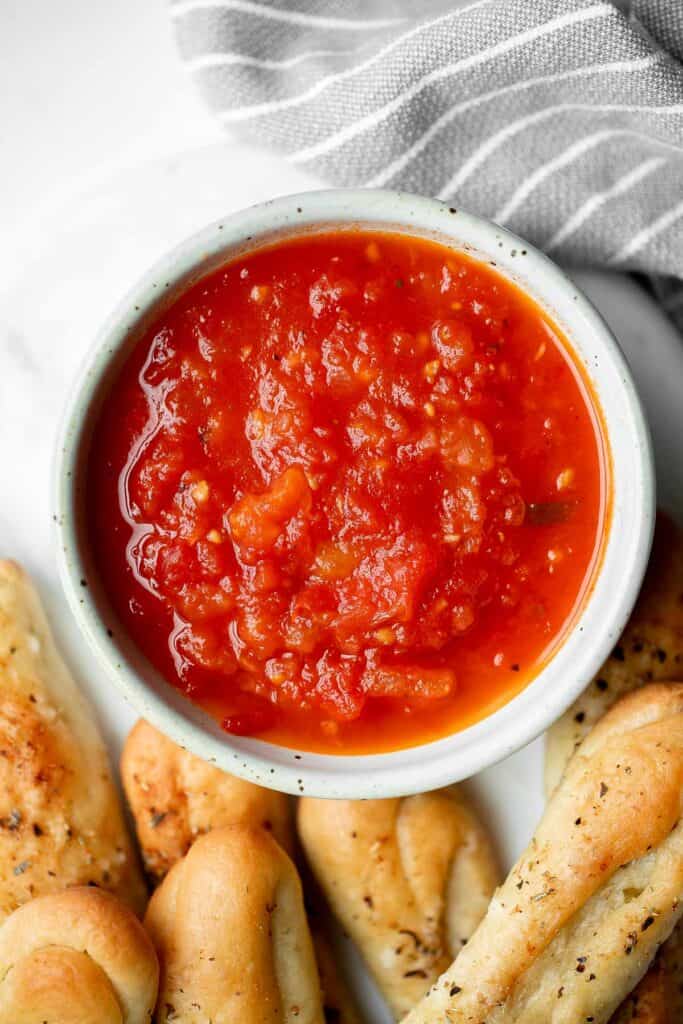
Olive tapenade is a delicious, flavorful, easy dip that comes together in minutes, made with the perfect combination of sharp, tangy, salty, and savory.
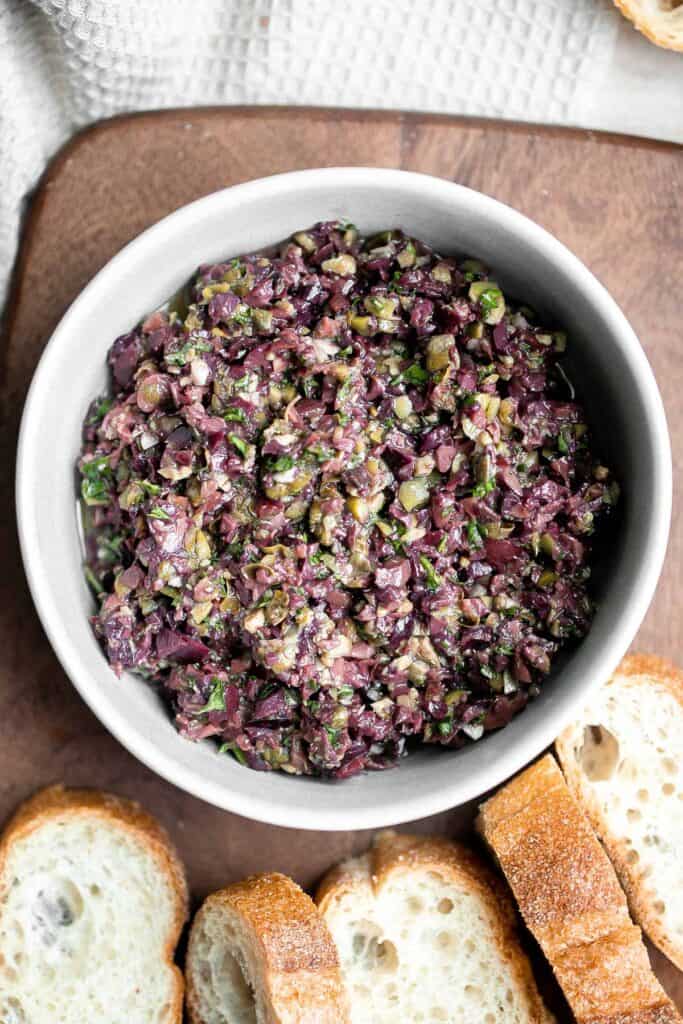
Smooth and creamy pesto hummus is a healthy, delicious and flavourful dip that is easy to make in just 5 minutes. It's vegan and gluten-free.
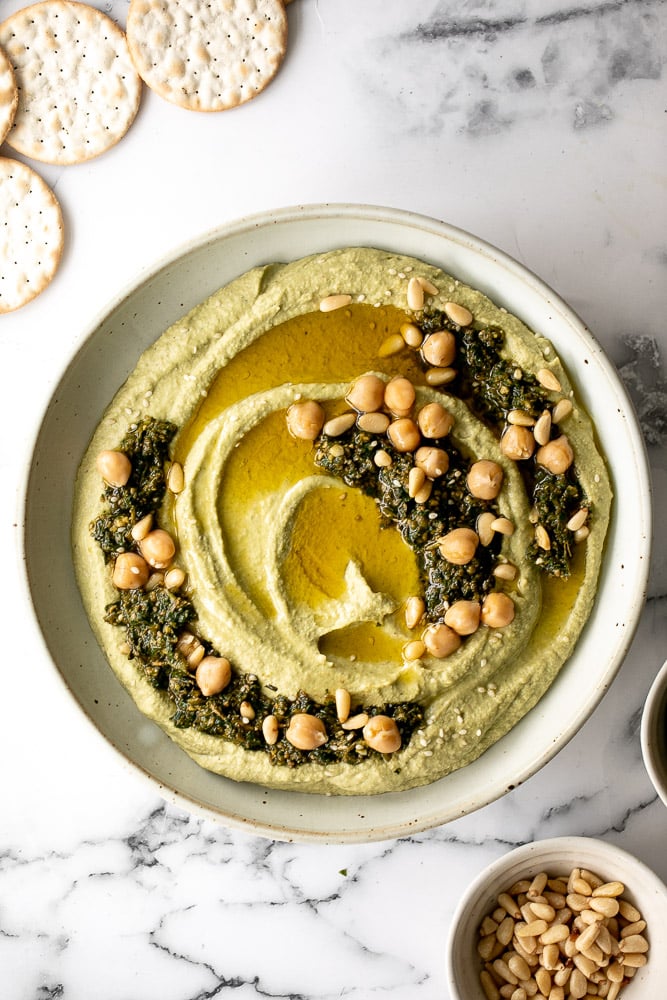
Fresh mango salsa is sweet, tangy, and delicious. It's a quick and easy recipe that you can whip up with just 6 ingredients and in under 10 minutes.
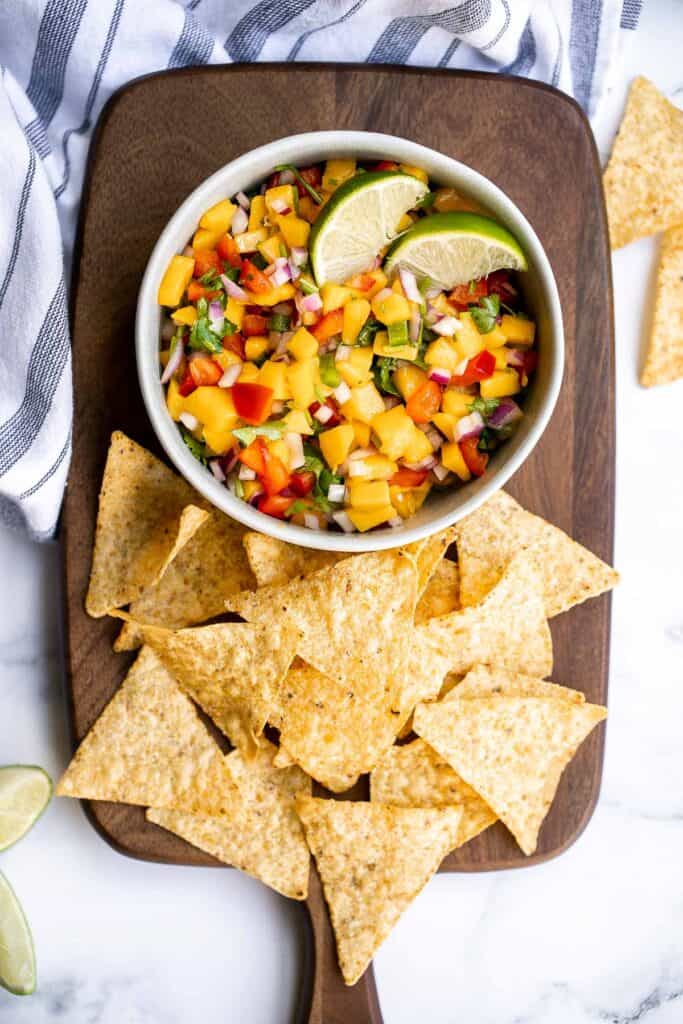
Whipped feta is light, airy, and fluffy. It's an easy yet impressive recipe that takes only 5 minutes to make in a blender with 3 simple ingredients.
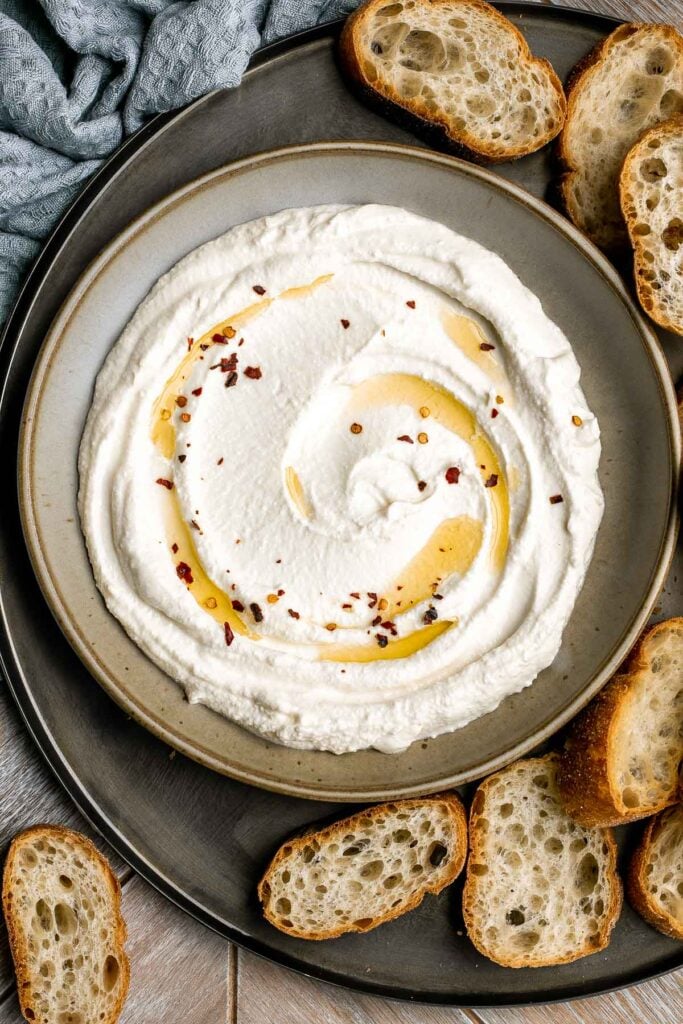
Healthy Baked Goods and Bread
Healthy banana bread is delicious and moist and contains no refined sugar or butter. Quick and easy to make with 10 minutes prep and few pantry staples.
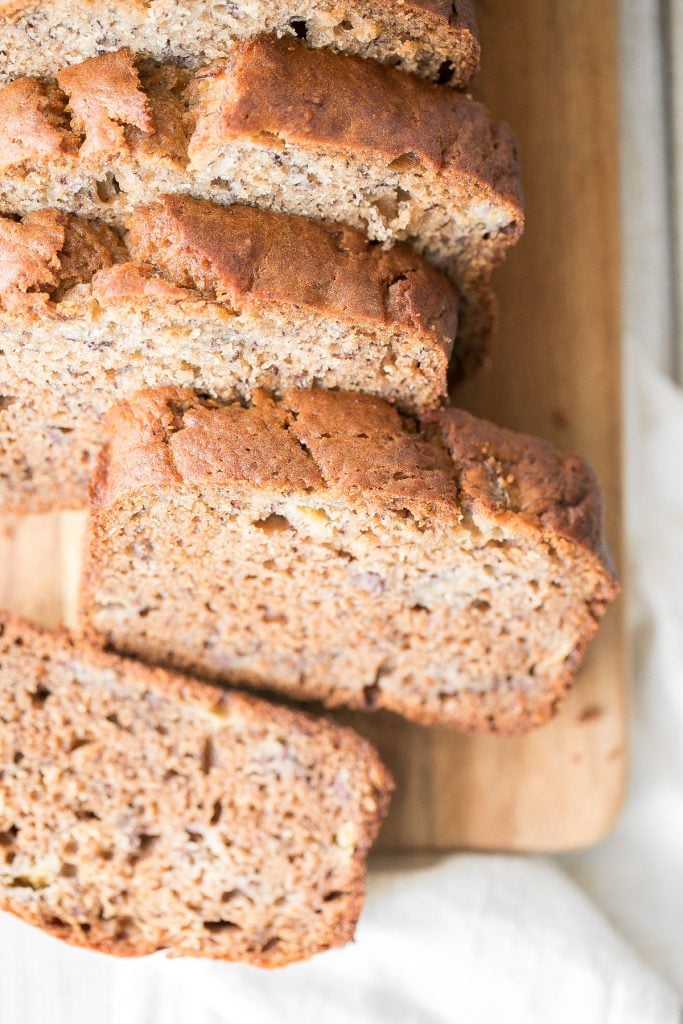
The best quick and easy salted soft pretzels are buttery, salty, and so delicious. They are golden brown and chewy on the outside, yet warm and soft inside.

Glazed lemon blueberry scones are total breakfast goals. Blueberries and lemon partner together in a light, tender and flakey scone, drizzled with a sweet lemon glaze that is nothing short of impressive.

Quick and easy zucchini muffins are loaded with fresh zucchini which makes them fluffy, moist, delicious, and full of nutrients. Freezer-friendly too!
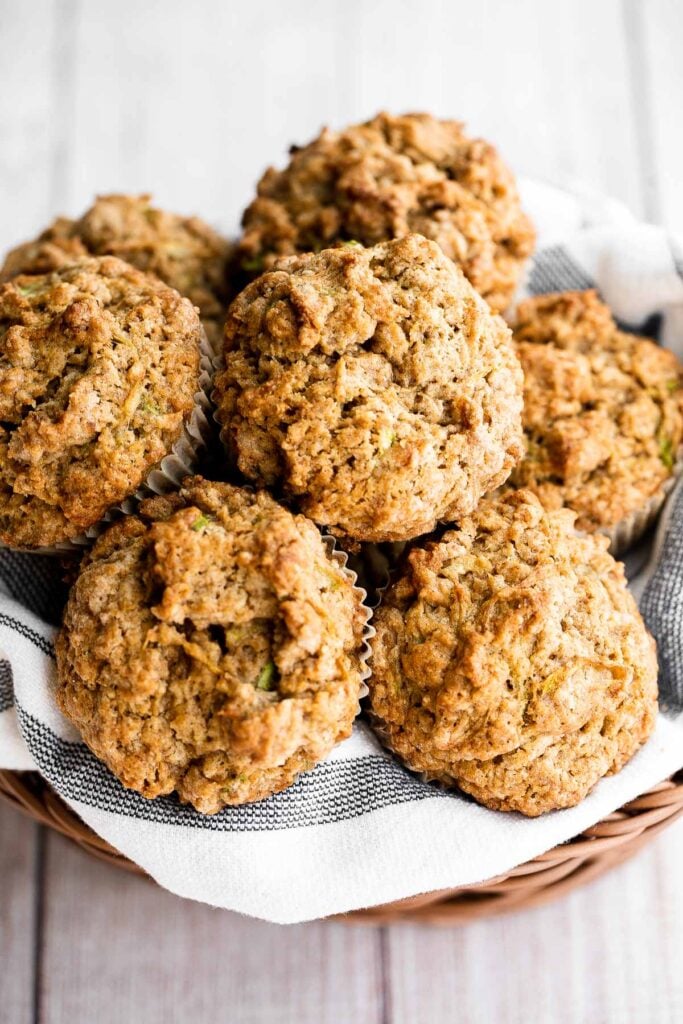
Peanut Butter Banana Toast is an incredibly simple yet healthy breakfast that's ready in a just 5 minutes. It's quick, satisfying, and protein-packed.
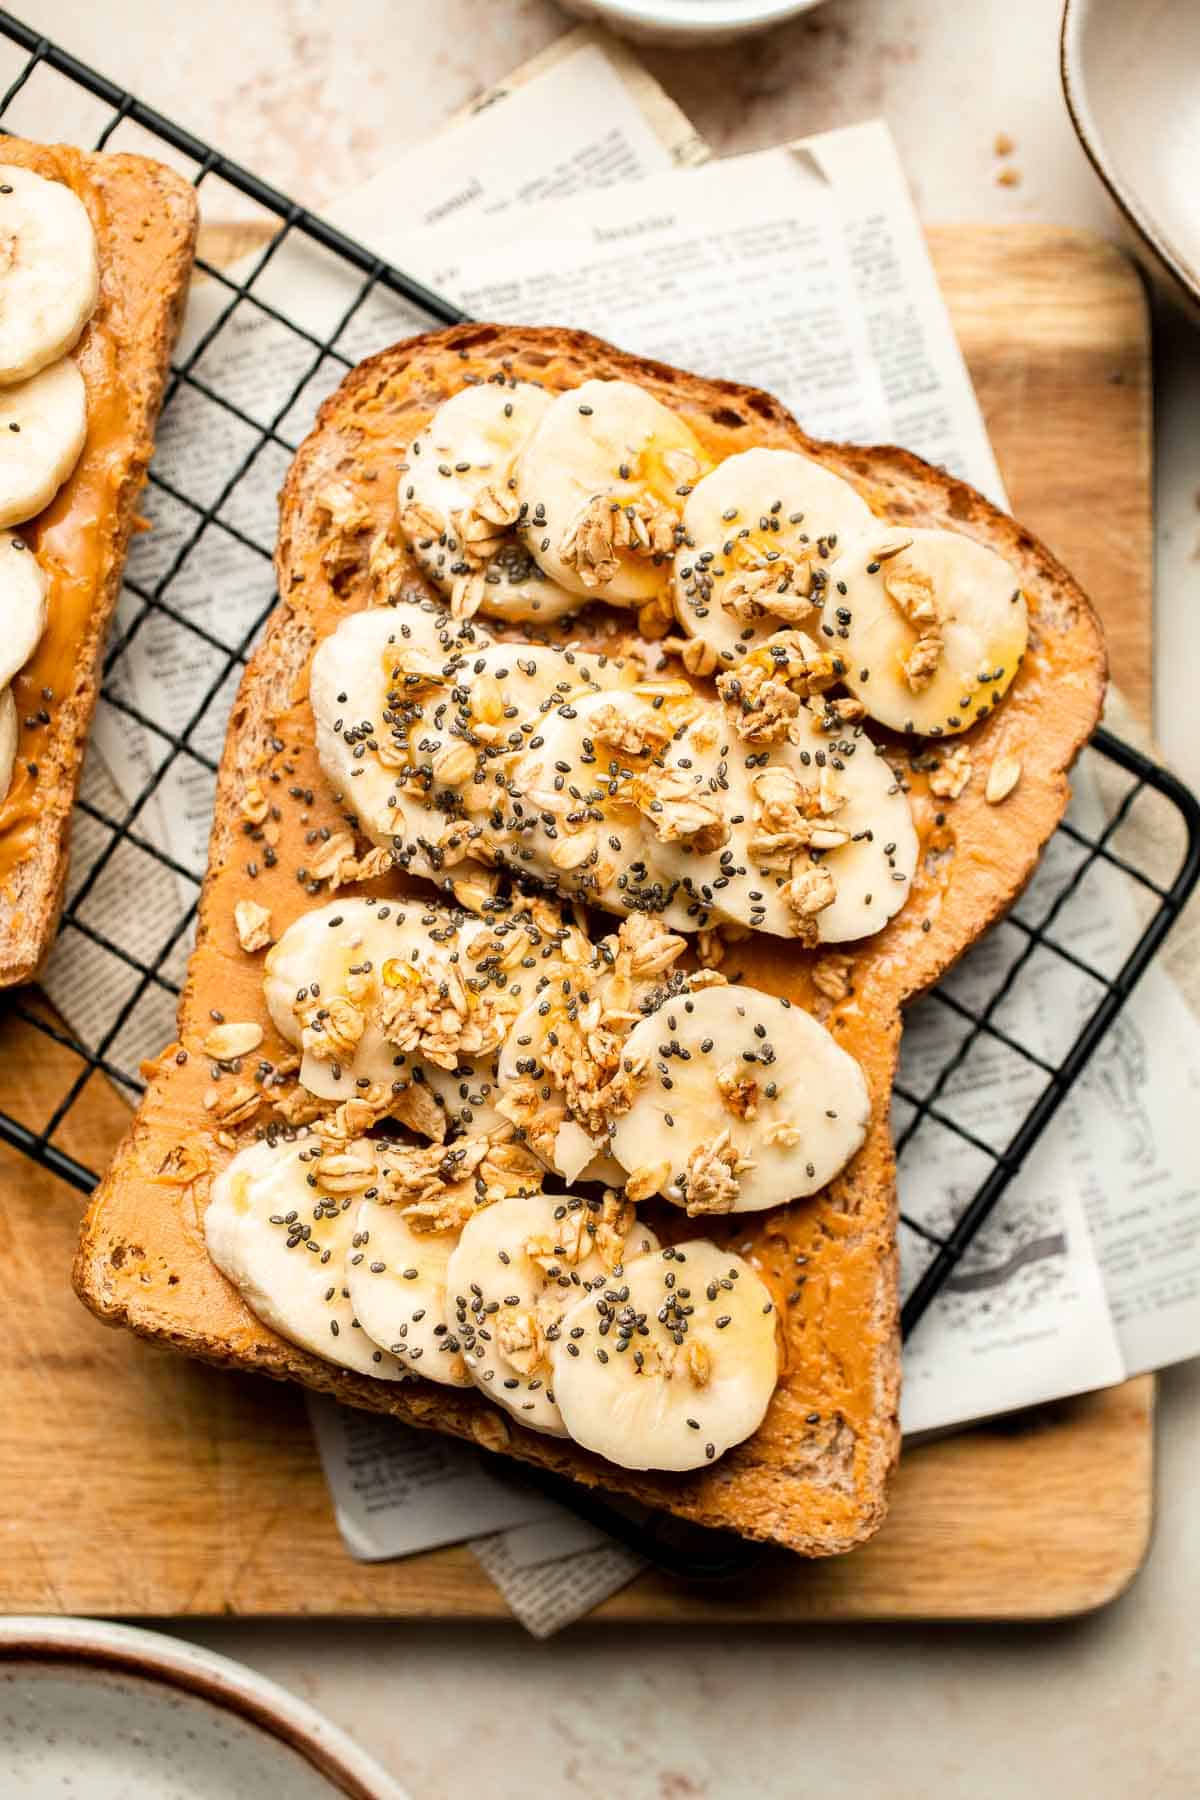
Easy Homemade Everything Bagels
Easy homemade everything bagels with a signature everything bagel seasoning blend on top are just like bakery-style bagels and so easy to make at home.
Buttery, soft and moist, cranberry yogurt muffins are packed with tarty and sweet cranberries in every single bite. This breakfast ideas is great for breakfast, snack or dessert.
Homemade applesauce bread is fluffy, moist, and delicious. Loaded with fall flavors that transforms your favorite snack into a loaf cake.
Healthy Smoothies and Fruit
Majoon Banana and Date Smoothie
Majoon banana and date smoothie is a delicious and healthy all-natural energy drink with bananas, dates and nuts. The perfect breakfast or snack.
Layer fresh fruits, creamy Greek yogurt and crunchy granola to make this fruit and yogurt parfait for a delicious and healthy breakfast or a simple snack. It's one of the easiest breakfast ideas.
Healthy mango yogurt smoothie is refreshing, delicious, and healthy. Loaded with tropical mangos and low-fat yogurt, it's the perfect breakfast on the go.
Quick and easy strawberry banana smoothie is the perfect breakfast on the go or refreshing snack. It's fruity, delicious, and packed with nutrients.

This green smoothie bowl is healthy, delicious, and nutritious. It's quick and easy to make in just minutes, for a quick energy boost to start the day.
Thick and creamy homemade yogurt is so easy to make at home with just 2 ingredients, a heavy pot, and just a few minutes of actual hands on prep work.

Add something refreshing to brunch with this Summer Fruit Salad. It's colorful, delicious, and naturally sweet (no processed sugar!). It's easy to make with fresh fruit tossed in a homemade dressing.
Healthy Apple Pie Fall Smoothie
The best way to get your "apple-a-day" daily is in a healthy apple pie fall smoothie! Ready in 5 minutes, it's got the taste of an apple pie, without all the calories.

Mango Pineapple Tropical Smoothie Bowl
Mango pineapple tropical smoothie bowl? Yes, please! Who doesn't love pineapples and mangos blended together and topped with more fruit, granola, and coconut?
Savory Healthy Snacks
Vietnamese Summer Rolls with Chicken
Vietnamese summer rolls with chicken are fresh, light, and healthy. This Asian snack is a healthy lunch idea that takes less than 20 minutes to make and way easier than you think.

Homemade falafel are delicious, golden brown and crispy on the outside, fluffy tender and soft inside. Plus, they're vegan, loaded with plant-based protein.
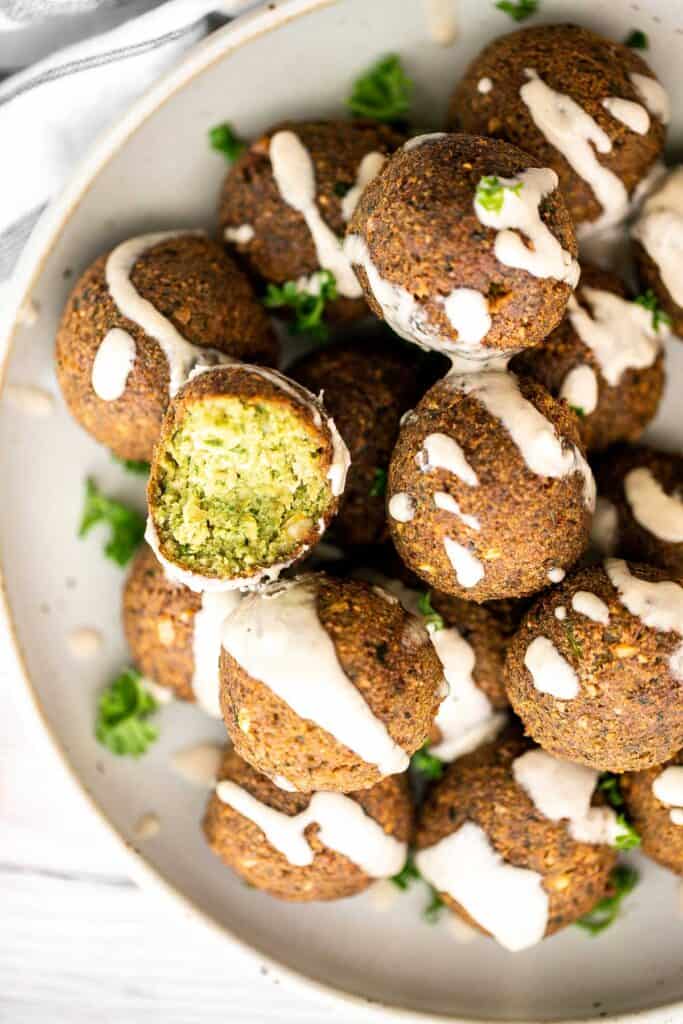
Shrimp avocado tostadas are a delicious, crunchy, quick and easy Mexican dish you can make in just 15 minutes, loaded with the best combination of toppings.

Baked Zucchini Boats with Marinara and Cheese
Cheesy Baked Zucchini with Marinara will save your weeknight dinner routine (and the kids love it too!). It's low carb, vegetarian, gluten-free, and keto.

Turkey pinwheels are bite-sized finger food perfection and will make back-to-school lunch planning for the kids a total breeze. They are fully customizable and you can wrap them up in a tortilla or in pita bread.
Easy Tomato Bruschetta with Balsamic Glaze
Tomato bruschetta with balsamic glaze is an easy Italian appetizer topped with tomatoes, onions, garlic, basil and olive oil. Delicious, fresh and simple. The perfect light Super Bowl recipe.
Mexican Tuna Cakes (Tortitas de Atun)
Mexican tuna cakes, or tortitas de atun, are quick, easy, and delicious. Made with canned tuna, these tuna patties come together in about 20 minutes.
Vietnamese Salad Rolls with Peanut Dipping Sauce
Fresh, light and healthy Vietnamese salad rolls are packed with vermicelli noodles, shrimp, fresh vegetables and herbs and dipped in homemade peanut sauce.
Healthy Snack Tips
- Make ahead and freezer-friendly. You can make some of these easy healthy snacks ahead of time and store at room temperature or in the refrigerator for a few days or in the freezer for up to 3 months. Check individual post for full make ahead and storing instructions.
- Prep in advance. You can also make things easier by prepping ingredients in advance and storing in the fridge until ready to use.
More Healthy Recipes
- 60+ Healthy Dinner Ideas
- 50+ Healthy Lunch Ideas
- 45 Best Keto Recipes
- 15 Best Salmon Recipes
- 60 Best Chicken Recipes
- 40 Best Shrimp Recipes
Did You Make Any of These Healthy Snack Recipes?
Please leave a comment and rating below, and let me know what you thought of this round up of the best healthy snacks we have to offer. Be sure to snap a picture and tag me on Instagram @aheadofthyme or share it on the Pinterest pin so that I can follow along.
HUNGRY FOR MORE? Don't forget to sign up for my email newsletter so that you don't miss any recipes. You can also follow along on Instagram and Pinterest for more recipe updates.
Chocolate and Vanilla Marble Cake
Chocolate and vanilla marble cake is delicious, moist, and fluffy with the perfect golden brown crust. With two classic cake flavors, this marble loaf cake has the best of both worlds - chocolate and vanilla. Plus, it's easy to make with the quick batter coming together in just 10 minutes before ready to pop into the oven. Serve this treat when you are entertaining friends over alongside a cup of coffee or tea, part of an epic brunch spread, or after dinner when you are craving a late night sugar fix.
Why You'll Love Chocolate and Vanilla Marble Cake
- Two flavors in one. The best part about a marble cake is that we get two cake flavors in one cake. Chocolate and vanilla. But the best part is that we use real chocolate in here (not cocoa powder) for a cake that delivers a rich and true flavor in every bite.
- Perfect marble swirls. Most marble cakes require you to pour in the vanilla batter, then the chocolate, and top with more vanilla before you swirl it all together. For the best swirls, we use a dollop method where we create a checkerboard pattern before swirling together. This ensures you get both flavors in every slice with the perfect marbled effect.
- The best texture. This marble loaf cake has the perfect soft, tender, and fluffy center, with a crunchy golden brown crust. It has the best of both words, like all cakes should be. You can serve it as is or top with buttercream icing, a chocolate ganache, or a simple dusting of confectioners' sugar.
Ingredients and Substitutions
To make this delicious chocolate and vanilla marble cake, you will need the following ingredients (full quantities in recipe card below):
- all-purpose flour
- baking powder + soda
- salt
- semi-sweet chocolate
- butter
- granulated sugar
- eggs
- vanilla extract
- milk - you can substitute this with buttermilk. You can also add an additional ¾ cup plain yogurt for an extra moist cake.
You will also need measuring cups and spoons, mixing bowls, hand mixer (or stand mixer), and standard 1.5 lb. loaf pan.
How to Make the Best Vanilla and Chocolate Marble Cake
- Prep ingredients. In a medium mixing bowl, sift together flour, baking powder, baking soda, and salt. Set aside. Melt the chocolate in a small bowl. You can melt it by placing the bowl on a steamer basket, over a small pot of boiling water, or melt in the microwave in 30 second increments, stirring between each increment until melted and smooth. Set aside.
- Make the vanilla cake batter. In a large mixing bowl, use a hand mixer (or stand mixer) to beat the butter and sugar together until light and fluffy, about 2 minutes. Add eggs, one at a time, and beat until each is incorporated. Add vanilla extract and beat until incorporated. Turn the mixer to low speed and add half the flour mixture, and beat until combined. Add the milk and beat until combined. Finally add the remaining flour, and beat until combined.
- Make the chocolate cake batter. Remove 2 cups of the cake batter and transfer to another bowl. Stir in the melted chocolate.
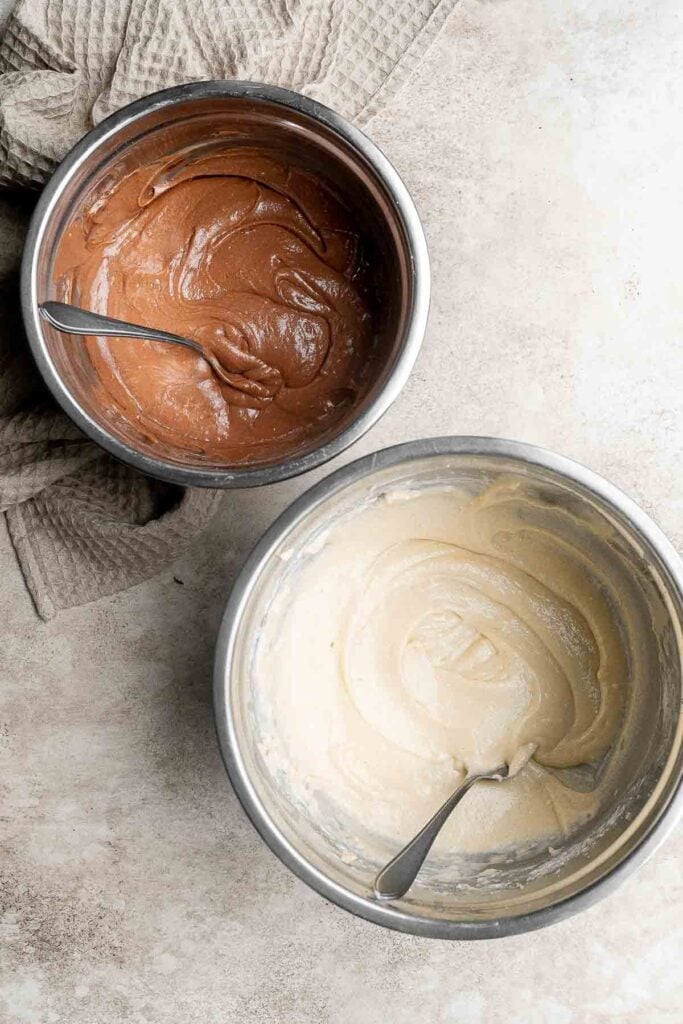
- Assemble the marble cake. Spray a 1.5 lb. loaf pan with cooking spray and line it with parchment paper, leaving an overhang on the sides. Use a large spoon and drop alternating dollops of vanilla and chocolate batter into the prepared loaf pan in a checkerboard pattern. After you have completed one layer, use a toothpick or skewer to lightly swirl into each other.
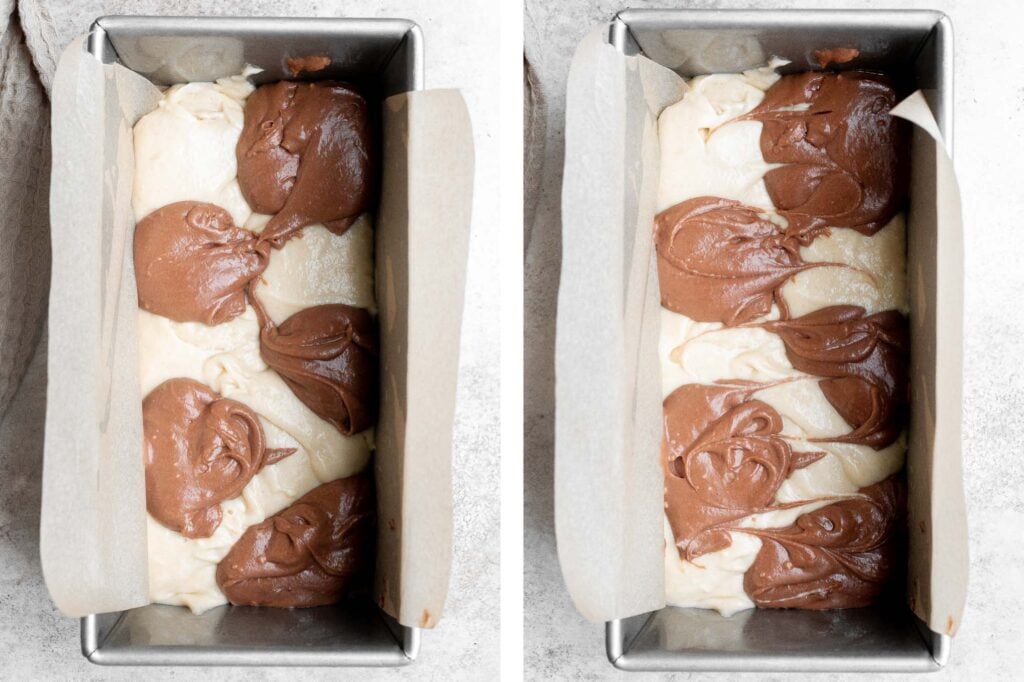
- Repeat. Repeat with alternating dollops until you have used up all the batter. Take a toothpick and do a final swirl to create the marble effect, but be careful not to overdo it. Just a few swirls will do the trick.
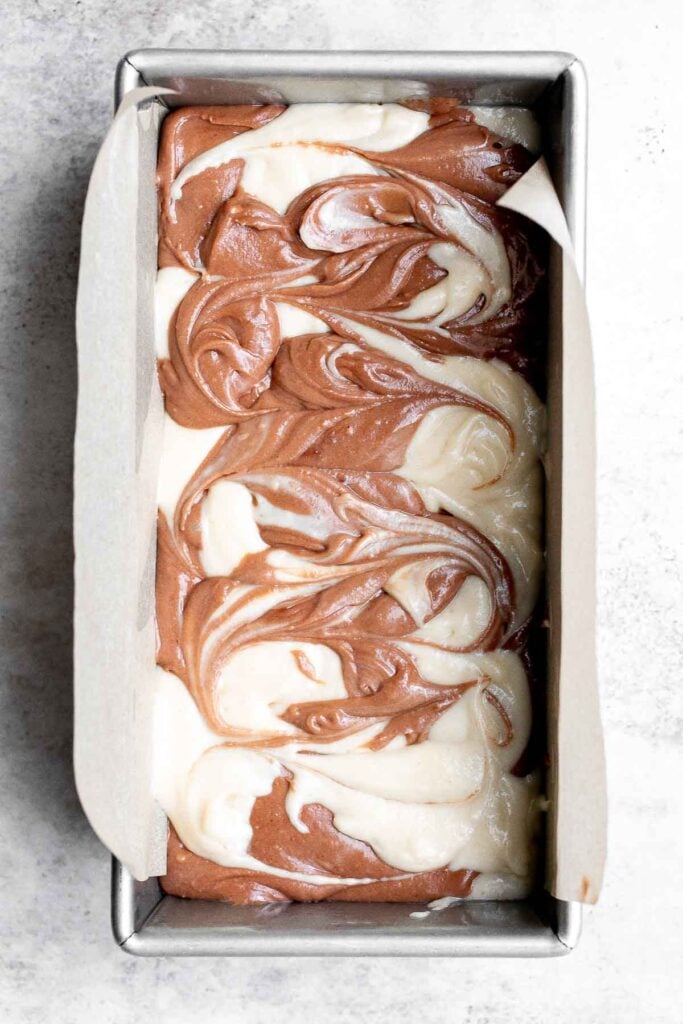
- Bake. Bake in a 350F preheated oven for 1 hour 20 minutes, or when the tops are golden brown and a toothpick inserted into the center comes out clean. Allow the cake to chill in the pan for 15 minutes, then use the parchment paper overhang to lift it from the pan and place onto a wire cooling rack to cool completely.
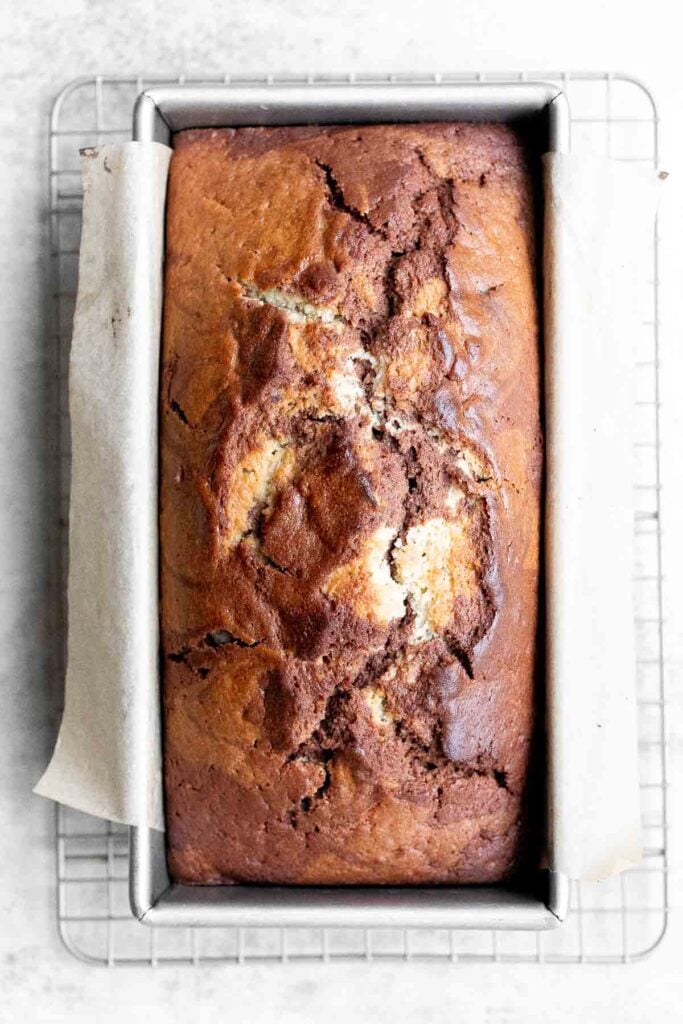
Recipe Tips and Tricks
- Do not overbake. If you overbake, the cake will get too dry. The best way to test that your cake is done is to check it with a toothpick. Once the toothpick comes out completely clean, it's time to take out the cake.
- Use real chocolate. With real chocolate (vs. cocoa powder), you will get the rich, true flavour of chocolate that just cannot be replicated with cocoa powder.
- How to store: Store this marble loaf cake at room temperature for a few days or keep it in the fridge for up to five days. Either way, ensure it's in an airtight container, so it doesn't get stale.
- How to freeze: This vanilla and chocolate marble cake freezes well too. Wrap the entire cake or individual slices tightly with plastic cling wrap and then store in a freezer bag or airtight container. Freeze for up to 3 months. Allow the cake to thaw in the refrigerator overnight before serving, or place or on the kitchen counter for a few hours until defrosted.
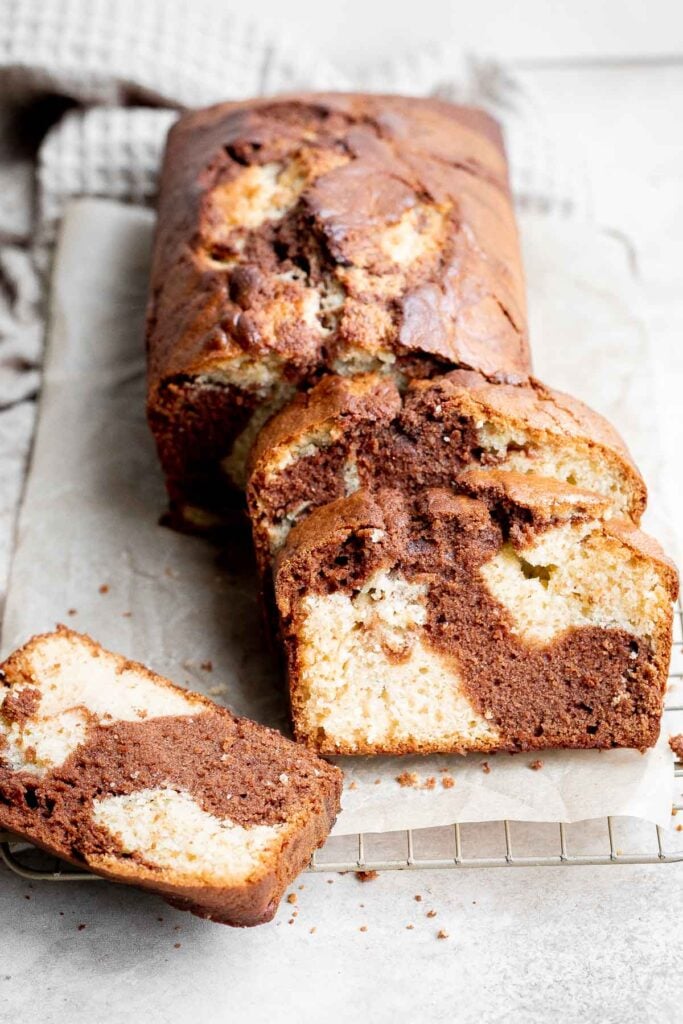
More Cake Recipes
- 50 Best Cake Recipes
- Carrot Bundt Cake
- Chocolate Zucchini Cake
- Moist Chocolate Cupcakes
- Moist Vanilla Cupcakes
- Lemon Loaf with Lemon Glaze
Tried this recipe?
I'd love to hear what you think! Leave a comment and rating below to share your feedback. Your reviews help others discover this recipe and help me keep creating more free recipes for you. Snap a photo and tag me on social media @aheadofthyme too.
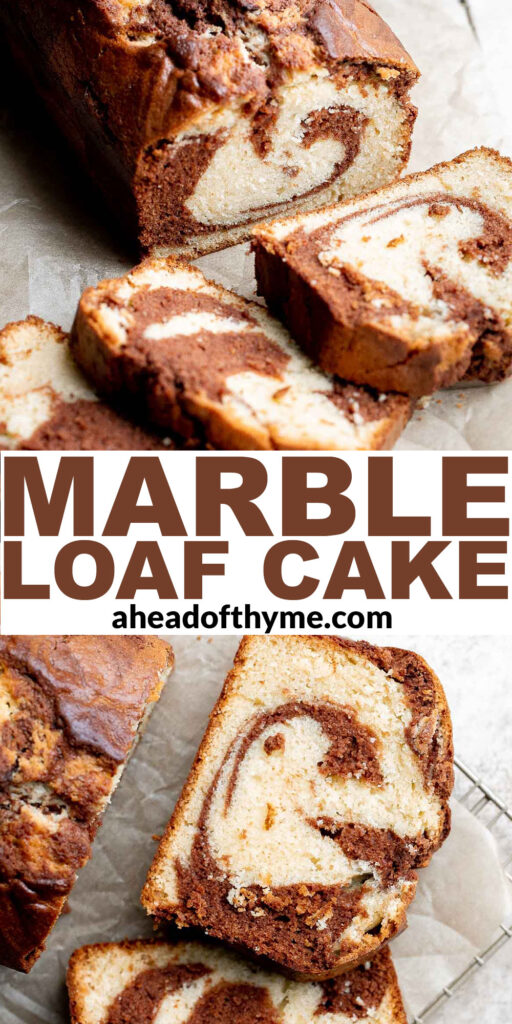
25 Side Dishes for Steak
Looking for a delicious side dish to serve with that juicy steak that you are making for dinner tonight? Steak is one of the most popular meat to cook and can easily be taking to a new level with the perfect steak side dishes. So if you are wondering "what to serve with steak", then you are in the right place. We are sharing over 25 of the most popular and best side dishes for steak including all the potato side dishes, roasted veggies, air fryer side dishes, side salads, bread rolls, and more steak sides.

Best Steak Side Dishes
Quick and easy, 90-minute cheesy garlic dinner rolls are soft and fluffy, buttery and garlicky, and full of cheese inside. The perfect side for a steak dinner.
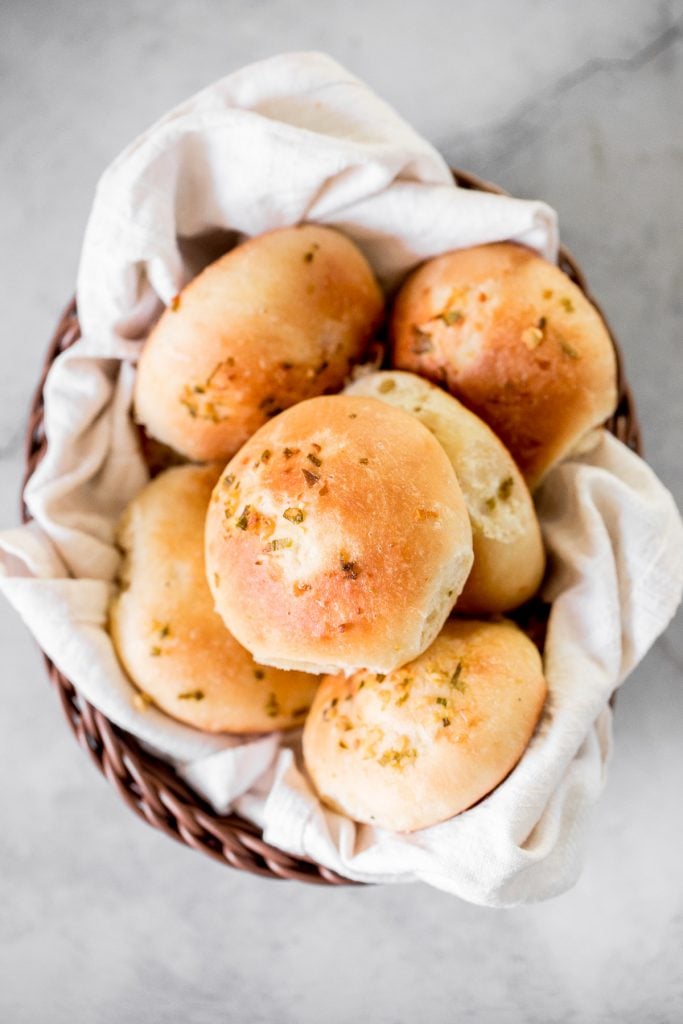
Baked Sweet Potato Wedges are crispy, delicious, flavorful. Serve as an appetizer or side dish. They are salty, savory, and sweet, with a hint of spice.
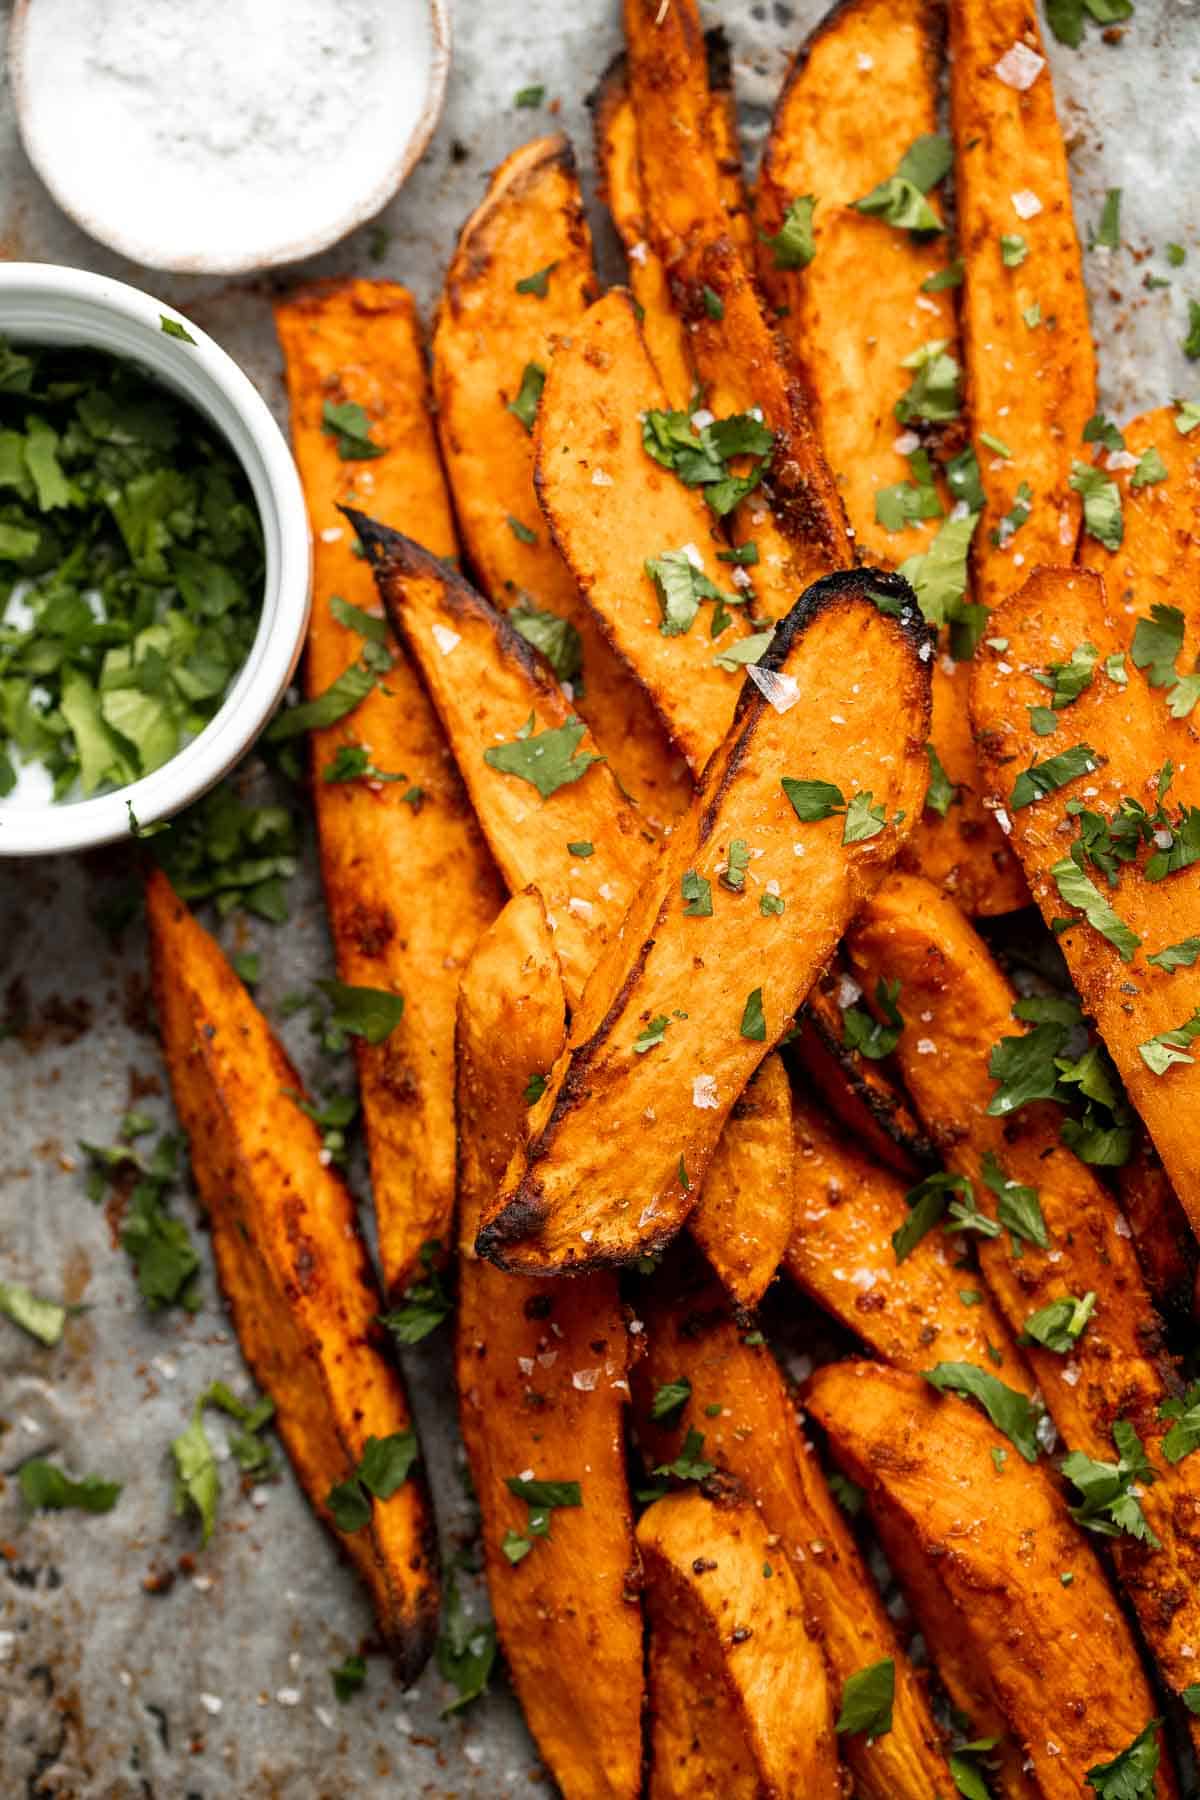
Garlic Mashed Potatoes with Sour Cream
Velvety and smooth, garlic mashed potatoes with sour cream are the best, flavourful make-ahead side dish ever. Garlicky, buttery, creamy, and pure comfort.
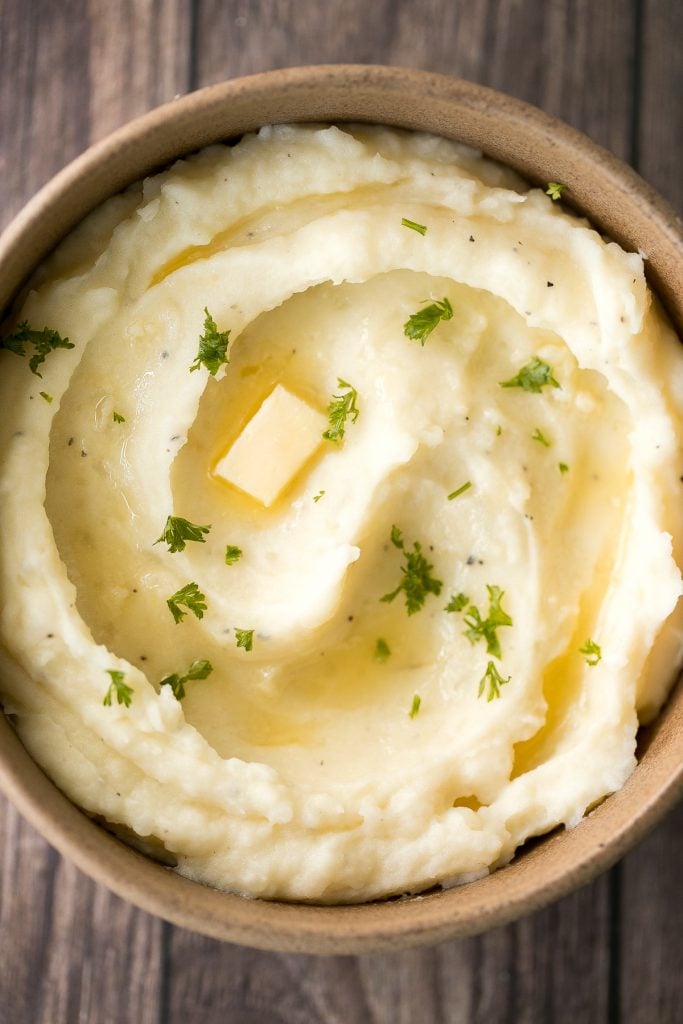
Mediterranean Chickpea Wedge Salad
Mediterranean chickpea wedge salad combines chickpeas, crunchy vegetable toppings, and hummus dressing for a delicious deconstructed falafel flavour.
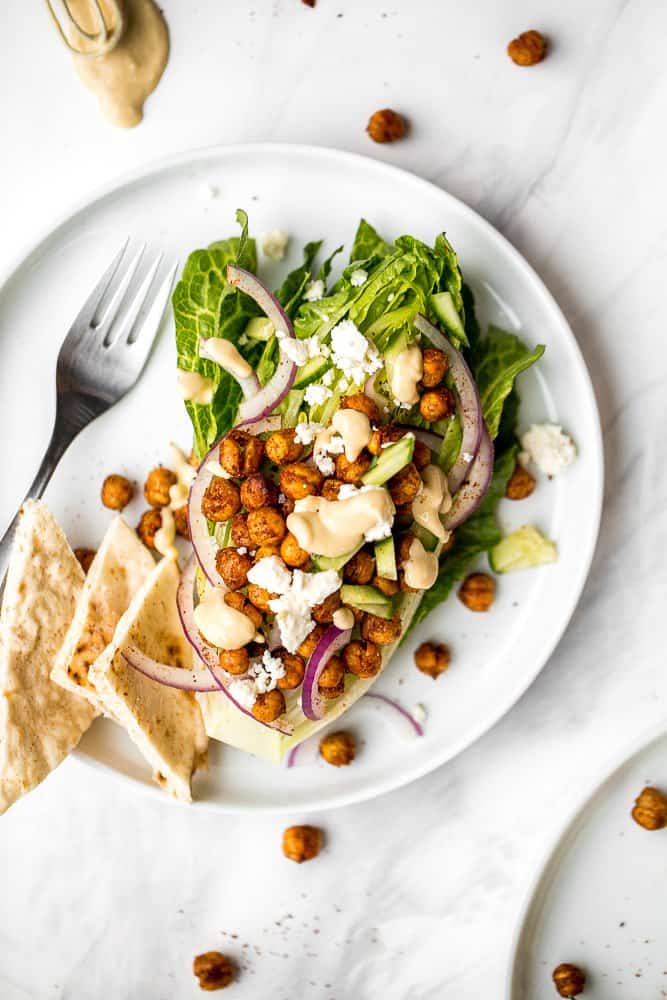
Roasted Garlic Parmesan Baby Potatoes
Quick and easy roasted garlic Parmesan baby potatoes are crispy on the edges and tender inside. They are delicious, flavourful and bakes in just 30 minutes.
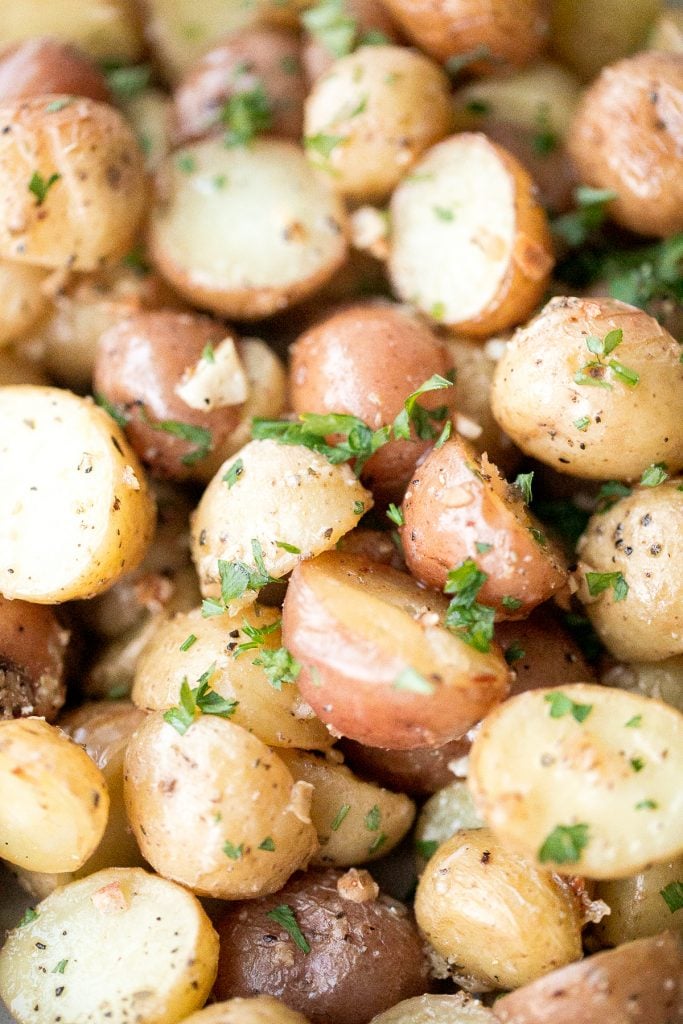
Quick and easy Sautéed Asparagus is a simple, savory side dish that goes well with almost any main dish. It's healthy, flavourful, and seasoned simply.
Rich and creamy potatoes au gratin is the ultimate comfort food made with sliced potatoes, cheese, and milk. It's the perfect side dish for the holidays.
Stovetop Mac and Cheese with White Cheddar
Quick and easy, creamy stovetop mac and cheese with white cheddar is a delicious and comforting one pot 20-minute meal packed with three types of cheese.
Buttery sautéed garlic mushrooms are silky smooth with an incredible caramelization and earthy rich flavour. A simple side dish in under 15 minutes.
Fresh, crisp, classic coleslaw salad is a must-have recipe for a summer barbecue or picnic, or as an easy make-ahead lunch. Make it in less than 10 minutes.
Buttery sautéed garlic green beans is a simple side dish that is quick, easy and delicious. Make these vibrant, crispy and tender green beans in 10 minutes.
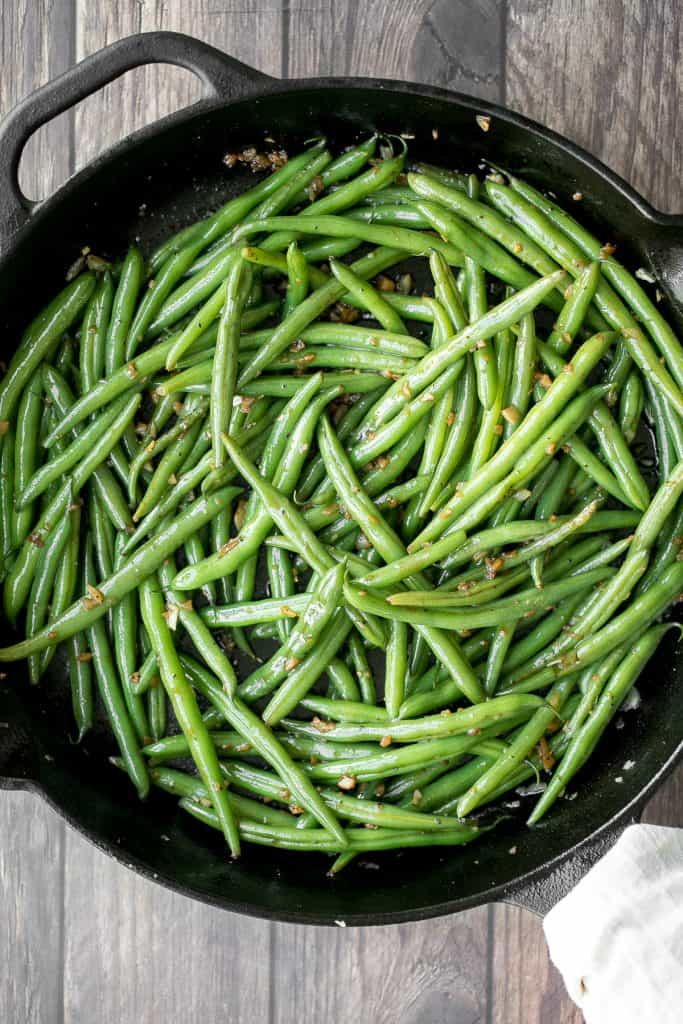
Oven-roasted corn on the cob with homemade garlic butter is buttery, juicy, crunchy, and perfectly charred on the outside - without a grill.

Super crispy air fryer french fries are tender and fluffy on the inside and crunchy on the outside. Make this healthier french fry in just 12 minutes!
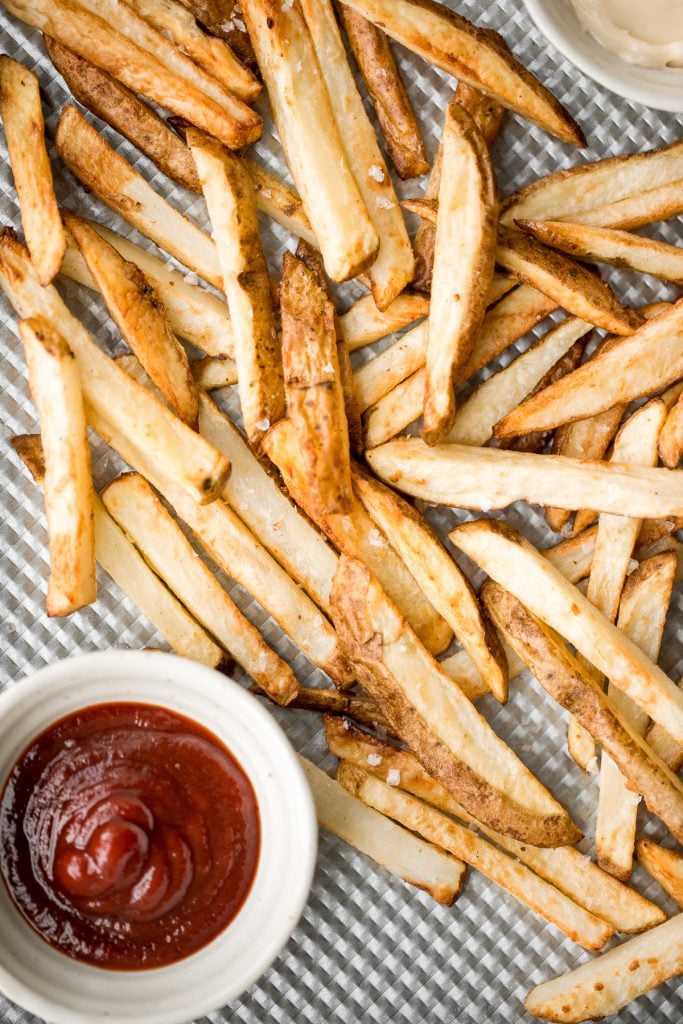
Vegetarian mushroom gravy is creamy, savory and thick, easy to make, loaded with flavor, and pairs well with everything! Make it vegan and dairy-free too.
Roasted spring vegetables are an easy sheet pan side dish packed with all our favourite veggies of the season. Plus, it's so easy to prep and make.
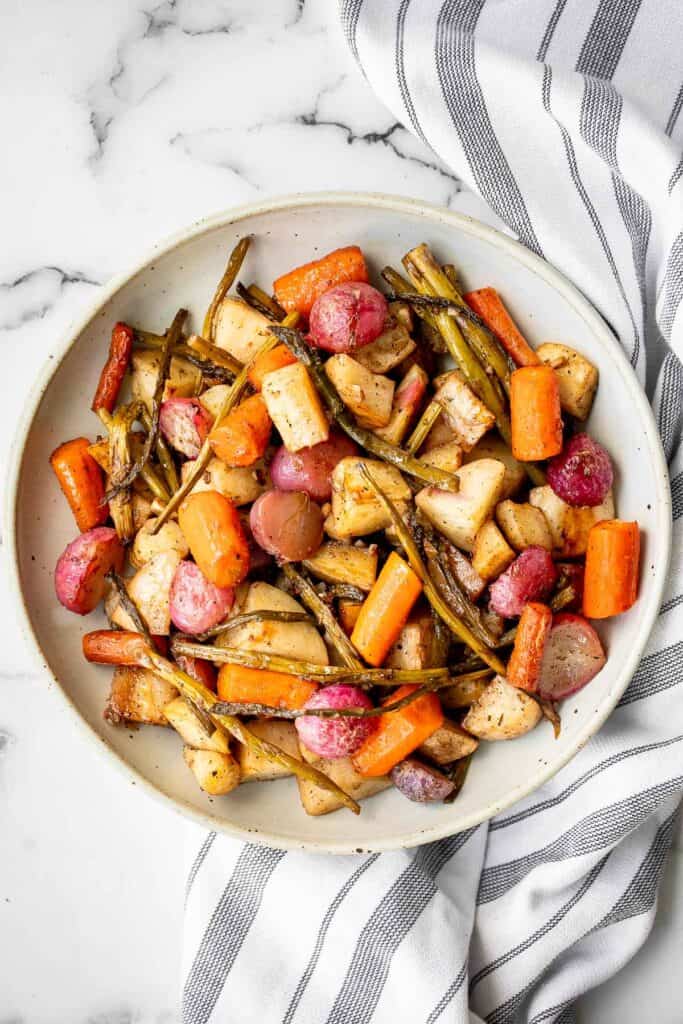
Delicious, garlicky, cheesy and creamy brussels sprouts bake is the ultimate comfort food side dish. So flavourful and the best way to eat brussels sprouts.
Arugula and Roasted Carrot Salad
Arugula and roasted carrot salad is one of the best spring salads, packed with a delicious combination of sweet and sour flavours, plus easy to make.
These crispy smashed potatoes are the perfect side dish. They're easy to make, crispy on the outside, tender and fluffy on the inside, and so flavorful.
Honey roasted carrots are a sweet, savoury, and salty side dish that pairs well with almost any entree. With these flavours, everyone will want seconds.
Crispy leaf potatoes are a delicious potato side dish made with layers of buttery, sliced potatoes that crisp up when baked. The perfect side dish.
Take fresh-off-the-grill corn on the cob and turn it into a light, flavourful summer corn salad, topped with cherry tomatoes, fresh basil and cheese.
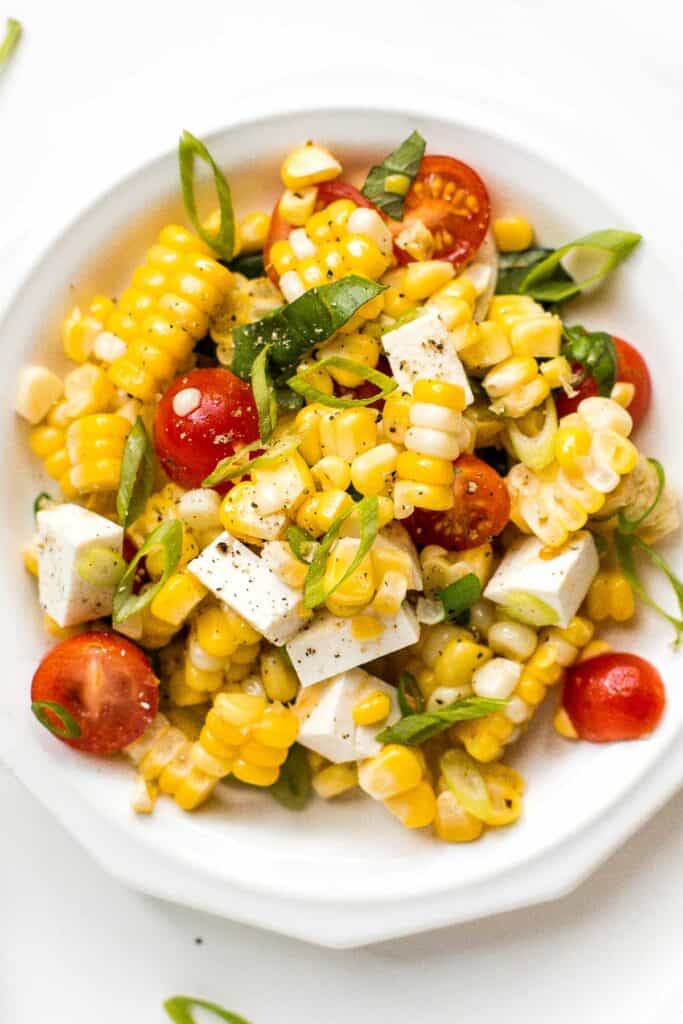
Baked Potato Wedges are crispy outside and soft inside - exactly what you want from a potato wedge but without frying! Cook in the oven or air fryer.
Air fryer vegetables are healthy, flavorful, and delicious. This vegan side dish is quick and easy to make in the air fryer in under 15 minutes.
Creamy Garlic Mashed Cauliflower
Craving a big serving of mashed potatoes but with a quarter of the calories? Now you can with creamy garlic mashed cauliflower. Ready in just 20 minutes.
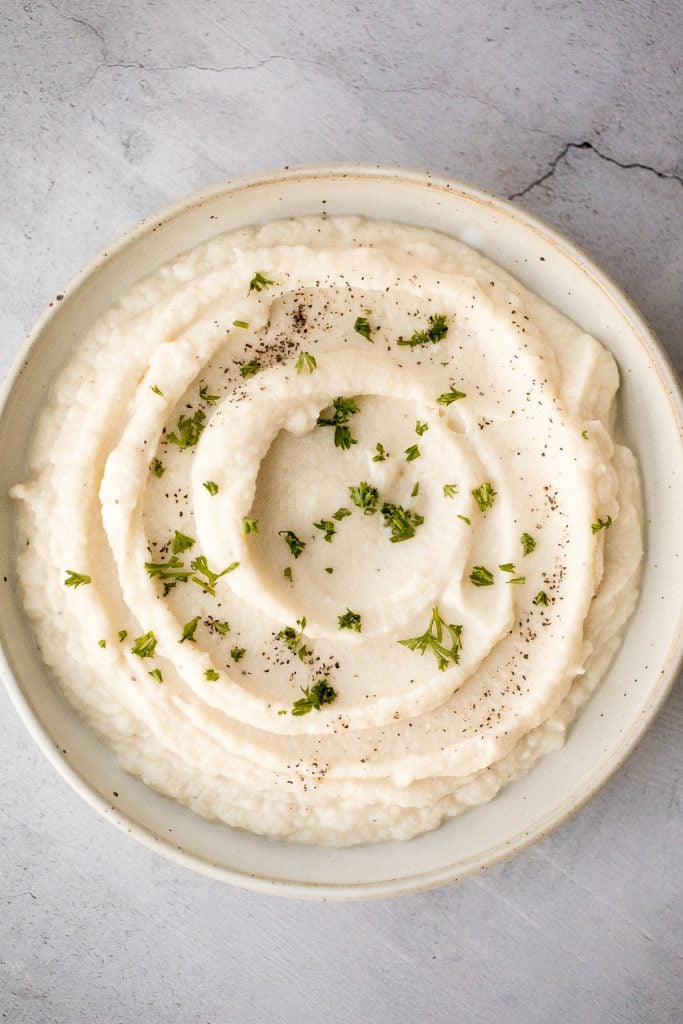
Roasted Asparagus and Mushrooms
Roasted garlic asparagus and mushrooms is a simple vegan sheet pan side dish that's easy to make, flavorful and delicious. Serve with your favorite protein.
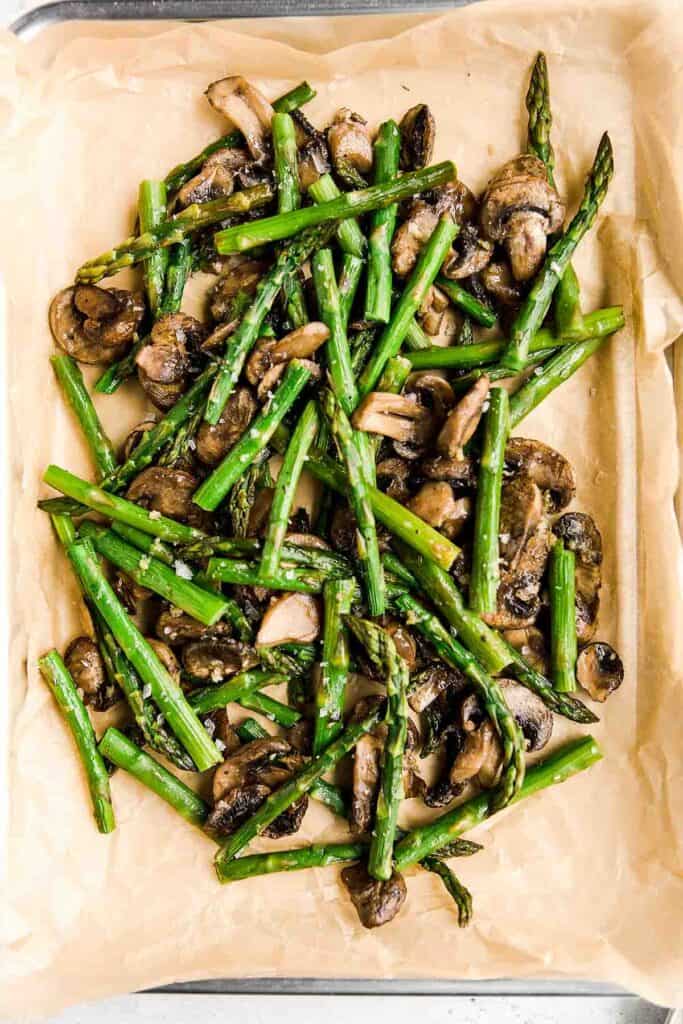
Hasselback Potatoes are infused with garlic butter and feature signature cuts that make these potatoes crispy on the outside and tender on the inside.
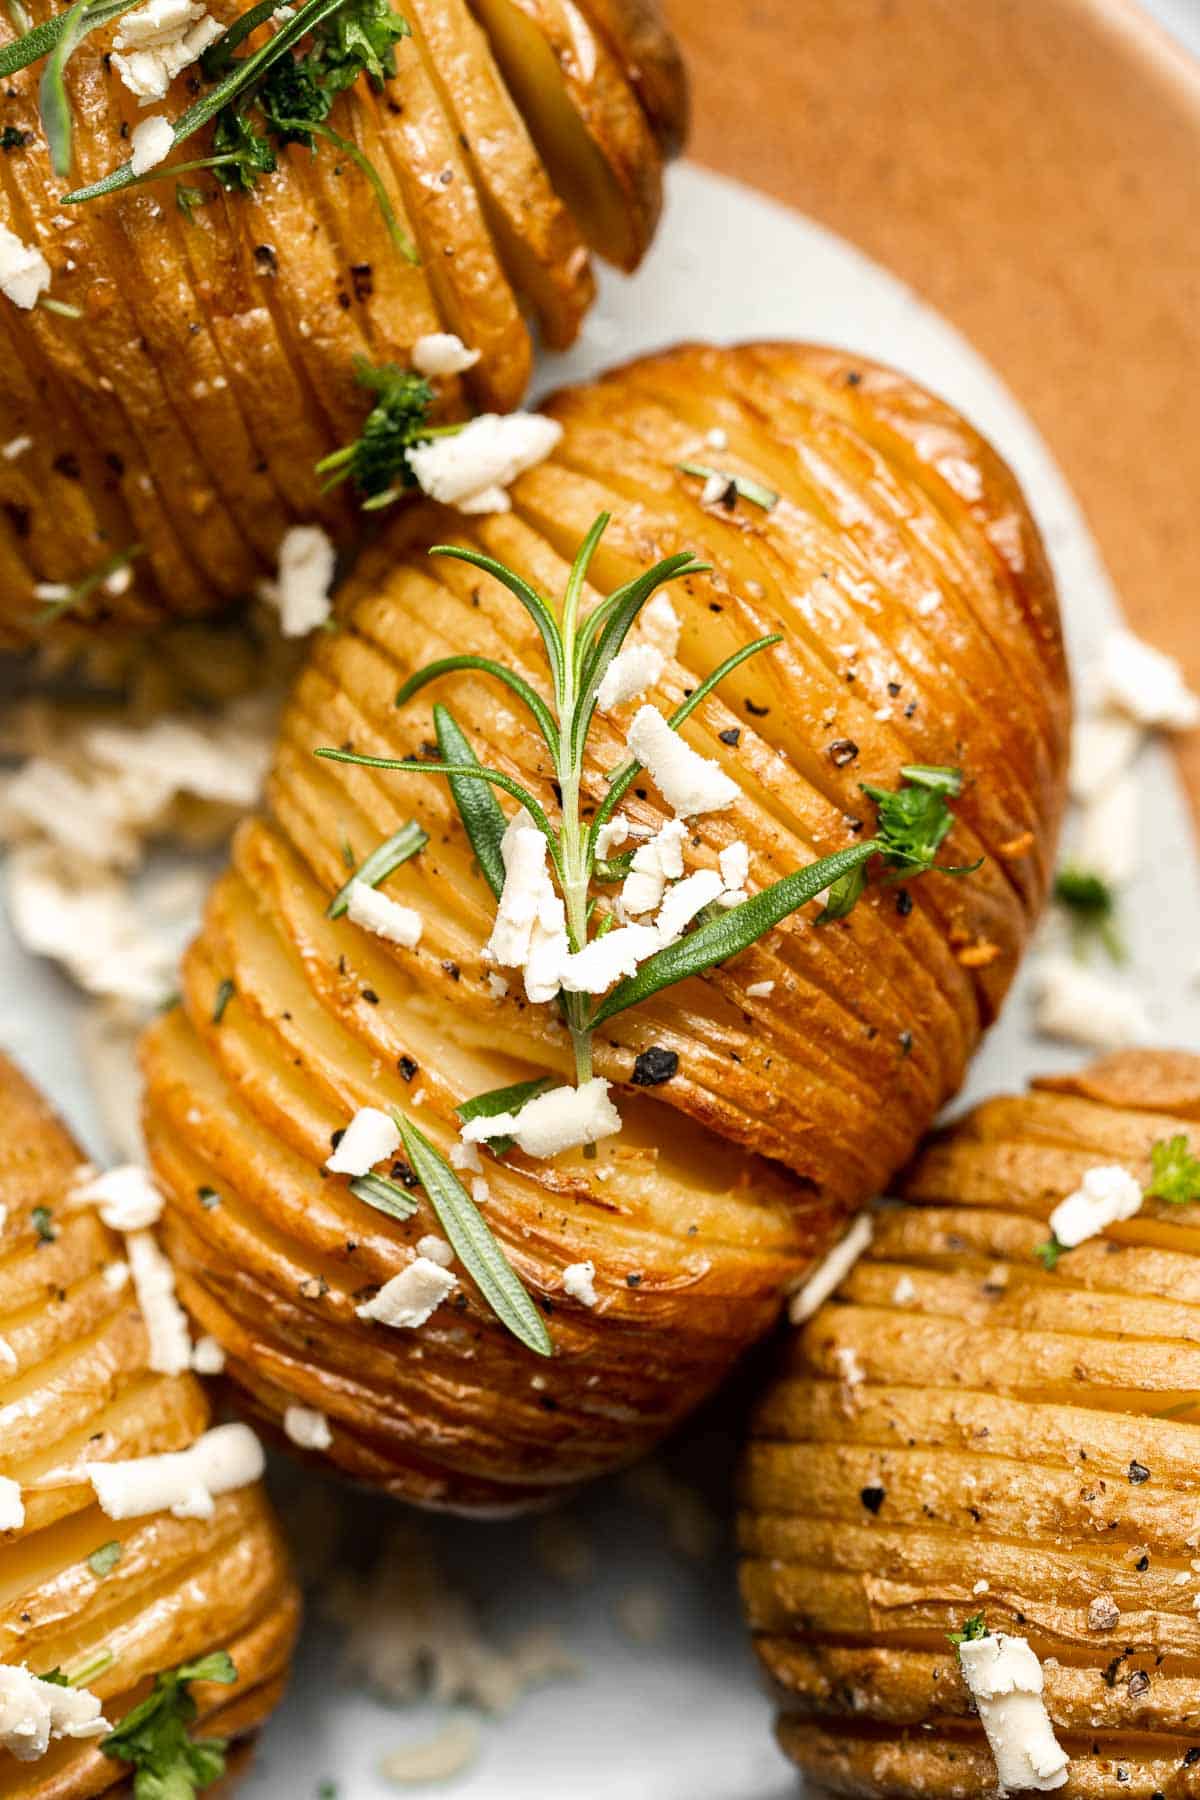
Bright and colorful caprese pasta salad is the ultimate summer side dish. It's fresh, light, and loaded with vibrant summer flavors. Quick and easy too!
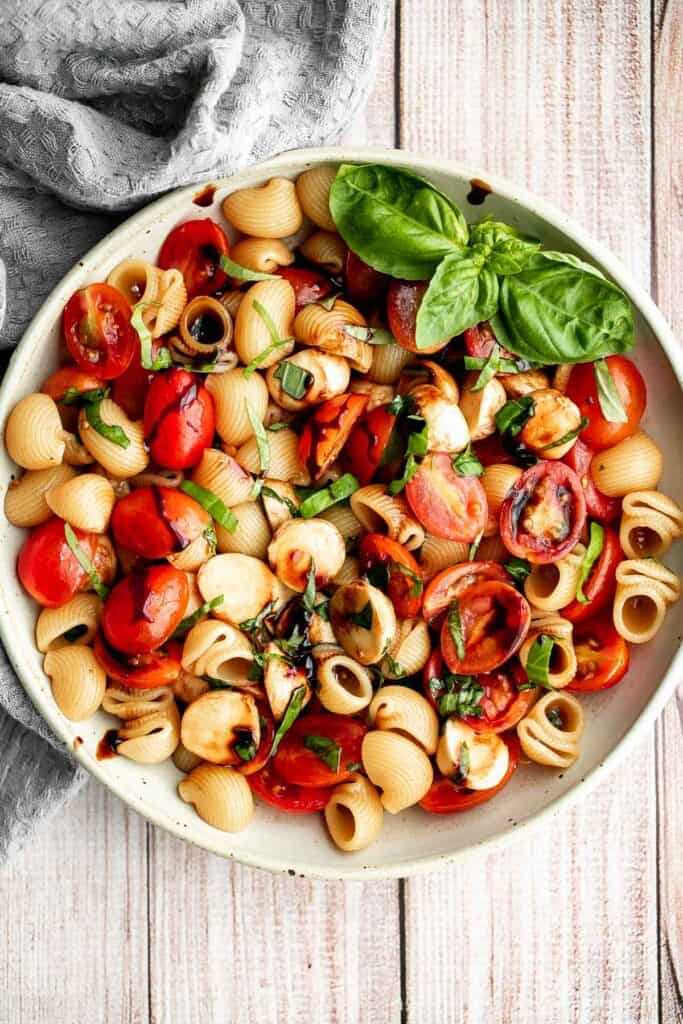
Herb Roasted Sweet Potatoes are a quick easy side dish that's healthy, delicious, and flavorful. A perfect side for your holiday table or weeknight dinner.
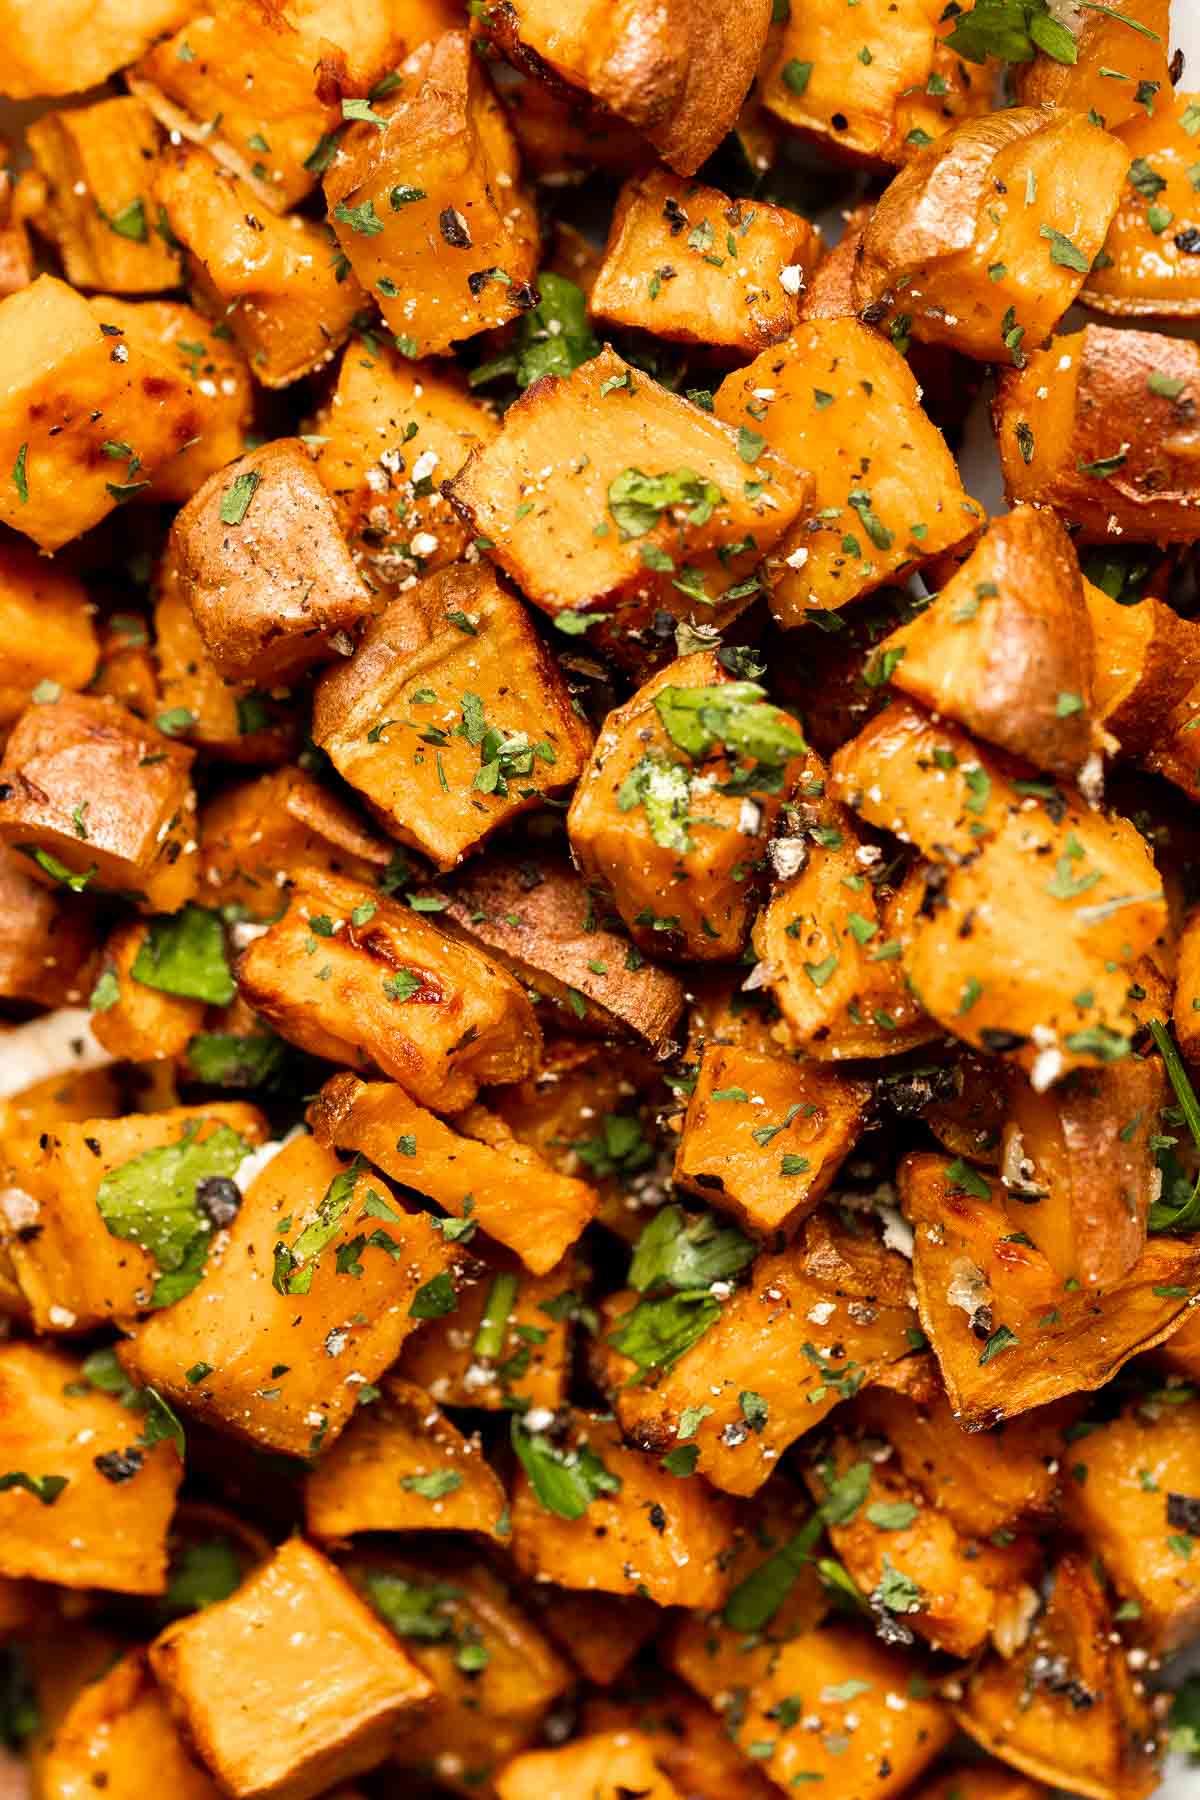
Creamy broccoli slaw salad is healthy, delicious, and flavourful. It's packed with crunchy vegetables, salty feta, sweet raisins, and a creamy dressing.
How to Make Ahead and Store
You can make many of these steak side dish recipes ahead of time and store in the refrigerator for a few days or even in the freezer for up to 3 months. Otherwise, you can prepare the ingredients and store in the refrigerator until ready to assemble and/or cook. Check the individual recipes for full make ahead and storing instructions.
To reheat, place any leftovers in the air fryer or the oven at 300F for 10-15 minutes until warmed through, or on the stovetop over medium-low heat (depending on the recipe). If heating from frozen, let it thaw first and then reheat.
More Side Dish Recipes
- 25 Side Dishes for Chicken
- 25 Side Dishes for Salmon
- 40 Vegetable Side Dishes
- 30 Potato Side Dishes
- 15 Green Bean Recipes
- 15 Brussels Sprouts Recipes
Did You Make Any of These Side Dishes for Steak?
Please leave a comment and rating below, and let me know what you thought of this round up of side dish recipes to serve with steak. Be sure to snap a picture and tag me on Instagram @aheadofthyme or share it on the Pinterest pin so that I can follow along.
HUNGRY FOR MORE? Don't forget to sign up for my email newsletter so that you don't miss any recipes. You can also follow along on Instagram and Pinterest for more recipe updates.
Pork Dumplings

Homemade pork dumplings are restaurant-quality potstickers that you can make quick and easy in your own kitchen. They have the perfect crispy bottoms with a tender and juicy pork filling inside. This popular flavorful Asian appetizer is much easier to make at home that you think - you'll never need to buy pre-made frozen dumplings again! Plus, they freeze really well making it the perfect quick meal to enjoy on a busy day.
Why You'll Love Pork Dumplings (Gyoza)
- They're so easy to make. When you eat a dumpling, you might think that it looked really complicated and hard to make. Well, you'll be surprised just how easy pork dumplings actually are to make. Just mix the filling, fold the dumplings, and fry or freeze them. Once you fold a couple, you will get the hang of it and the rest are a breeze.
- Dumplings are quicker to make than you think. These pork potstickers take jusy 30 minutes to make. Quick meals are the best kind when you need convenience. You only need half an hour to make these pork dumplings from start to finish. And, if you're freezing them for later, that time cuts down to about 20 minutes.
- They'll save you money. It's so much cheaper to make homemade dumplings than purchasing them frozen at the grocery store or from a restaurant.
- You can freeze them for later. I can't emphasize this enough. Meal prepping gyoza is the best decision you can make because it's a quick and easy meal that can feed you for weeks or months. You put in the work now and enjoy later.

Ingredients and Substitutions
To make these delicious Chinese pork dumplings, you will need the following ingredients (full quantities in the recipe card below):
- ground pork - you could also turn this into beef gyoza by using ground beef, or other flavors by using ground turkey or beef.
- egg - helps to bind the filling together.
- ginger
- soy sauce - or substitute with oyster sauce.
- Shaoxing cooking wine
- sesame oil
- salt
- pepper - feel free to use ground black pepper or white pepper for a more authentic flavor.
- Chinese chives
- round dumpling wrappers - we love making our own Homemade Dumpling Wrappers, but feel free to use store-bought for convenience.
- vegetable oil and water - for "steam-frying".
- white sesame seeds - for garnish.
- green onions - for garnish.
- vinegar dipping sauce - black vinegar, soy sauce, sesame oil, and green onions.
You will also need measuring cups and spoons, mixing bowls, and a 10-inch skillet.
How to Make the Best Pork Dumplings
In a large mixing bowl, add ground pork, egg, soy sauce, Shaoxing wine, ginger, sesame oil, salt and pepper. Stir with a spatula until well combined. Cover the bowl with plastic cling wrap and let it marinate for at least 20 minutes (or overnight in the refrigerator) to soak in all the flavours. Then, stir in the chives until evenly mixed.
How to Wrap Dumplings or Gyoza
- Prepare a small bowl of water for dipping your fingers into. Take one dumpling wrapper at a time and place it in your palm. Dip your finger into water and smear it along the edge of the wrapper.
- Transfer a tablespoon of filling into the centre. Fold the wrapper over into a half-moon shape, and enclose the filling inside. Press the edges together to seal, or pleat the edges together with your finger. Place the dumpling on a parchment-lined baking tray.
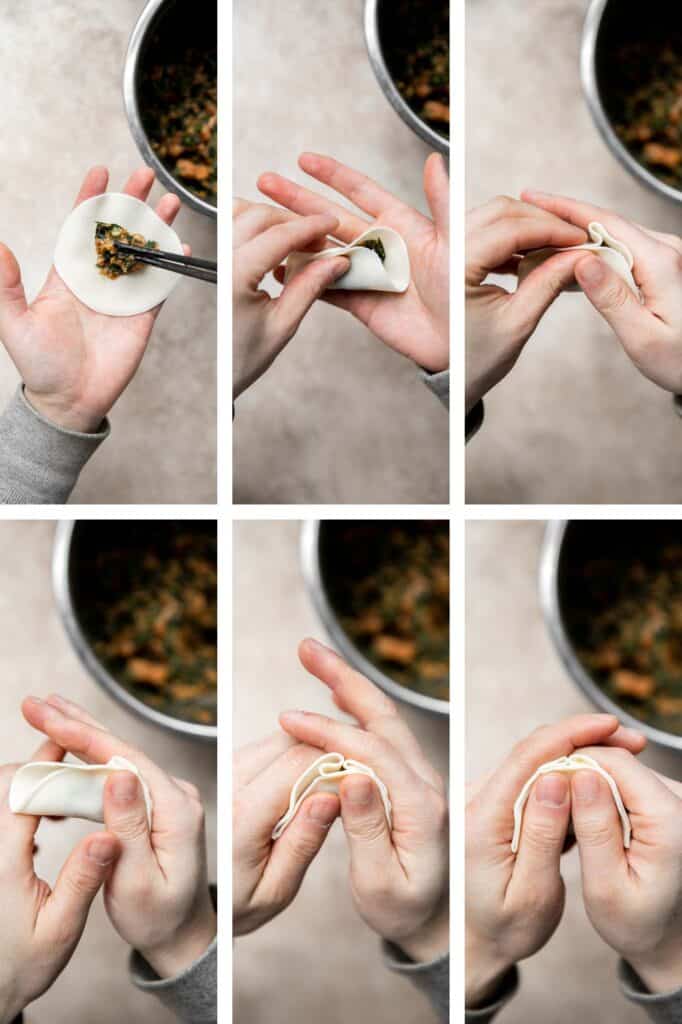
- Repeat with all dumplings. Cover with a tea towel to prevent the wrappers from drying out.

How to Pan-Fry Pork Dumplings
- Fry the bottoms. Heat vegetable oil over medium-high heat in a large non-stick frying pan (I used a 10-inch skillet) until hot, about 3 minutes. Place a batch of 15 dumplings on the pan and place them approximately ½-inch apart to make sure that they don't stick together. Cook for 3 minutes until the bottom turns golden brown. (To get all sides crispy rather than just the bottom like we did, then cook on both sides until golden and crispy).
- Add water to steam. Add water into the pan to cover half of the dumplings' height (½-inch deep). The water should start sizzling and boiling immediately. Cover with the lid and cook for 7-8 minutes until almost all the water has evaporated.
- Absorb water. Remove the lid and lower the temperature to medium heat. Cook for another 2 minutes until all water has been absorbed. The bottom of the dumplings should be crispy.
- Repeat. Repeat the same steps for another batch of 15 dumplings.
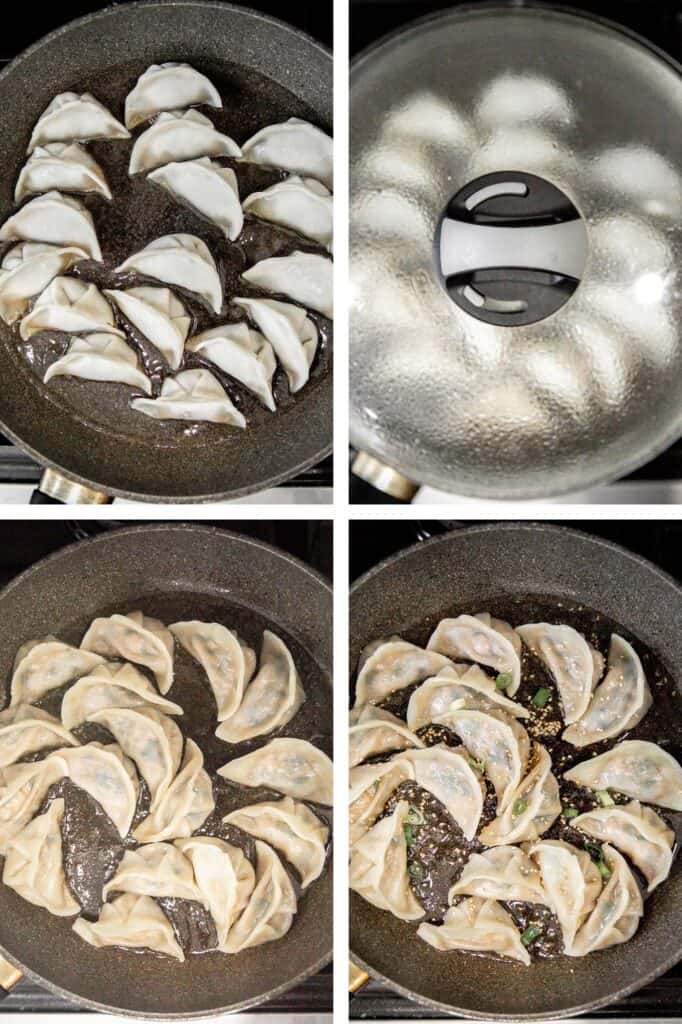
How to Serve Pork Dumplings
Serve pork dumplings with a vinegar dipping sauce. To make the sauce, combine black vinegar, soy sauce, sesame oil and green onions in a small mixing bowl. You can also add some Sriracha for a spicy kick. Then, transfer the crispy dumplings onto a plate and sprinkle some sesame seeds and green onions on top.
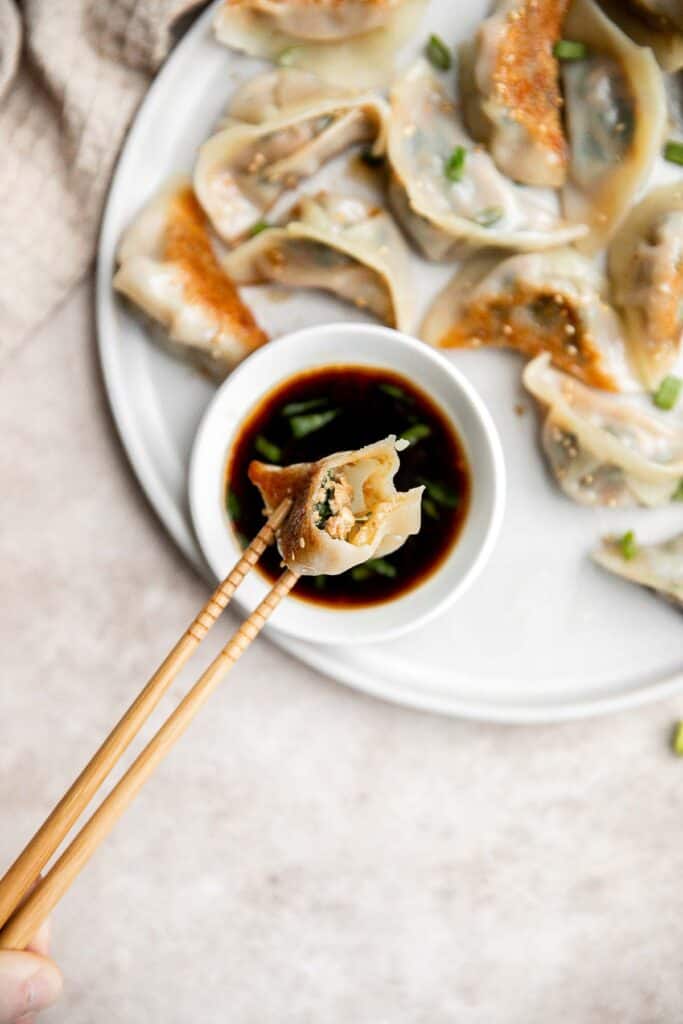
Make Ahead and Storing Instructions
- How to make ahead/meal prep frozen dumplings: You'll love these pork dumplings the day you make them and weeks after - if you freeze them. But don't cook the dumplings. Instead, place dumplings in a single layer on a large half sheet baking pan lined with parchment paper with enough space between them so that none of the dumplings are touching. Freeze them for an hour up to overnight, then transfer the frozen dumplings to a freezer bag or freezer-safe container. Eat within 3-4 months.
- How to make steamed dumplings: To make steamed dumplings instead of potstickers, simply place the uncooked dumplings on a steamer basket over a pot of boiling water. Steam for 15-20 minutes until tender.
- How to store fried dumplings: Allow the fried potstickers to cool to room temperature before storing in an airtight container for 4-5 days in the refrigerator.
- How to reheat dumplings: If cooked, reheat dumplings in a pan with just a splash of water. If uncooked or frozen, cook dumplings according to recipe instructions.
- How to cook from frozen: You can cook these gyoza straight from the freezer. Follow the same steps in this recipe, but when you cover and cook until the water has evaporated, then add another ¼ cup of water and cover. Keep cooking until water almost evaporates, about 5 more minutes.
More Dumpling Recipes
- 25 Best Dim Sum Recipes
- Beef Potstickers (Dumplings)
- Egg and Chive Vegetarian Dumplings
- Chicken and Cilantro Wontons
- Beef Dumplings with Celery
- Chicken and Shrimp Dumplings
Tried this recipe?
I'd love to hear what you think! Leave a comment and rating below to share your feedback. Your reviews help others discover this recipe and help me keep creating more free recipes for you. Snap a photo and tag me on social media @aheadofthyme too.

Beef Stroganoff
Beef stroganoff is a delicious and flavorful pasta dish that is ready in under 25 minutes. This Russian recipe has gained wide popularity all over the world for obvious reasons - it's delicious comfort food at it's finest. Tender, bite-sized chunks of beef are tossed with buttery egg noodles in a thick, creamy sauce with mushrooms that add an extra earthy flavor to the mix. Beef stroganoff is a great comforting weeknight dinner, especially in the cozy winter months. Packed with protein from quality beef and egg noodles, this beef stroganoff is the satisfying meal you're looking to feed your family.
Why You'll Love Beef Stroganoff
- The beef. For this beef stroganoff, you'll need either beef flank steak or top sirloin, which are both tender and lean cuts of meat. They deliver great flavor and texture without the added fat. Or use leftover roast beef.
- The sauce. The creamy sauce is another essential aspect of beef stroganoff. It's made from butter, beef broth, heavy cream, sour cream, and more. Flavored with ingredients like onion, mushroom, garlic, and Dijon mustard, the beef stroganoff cream sauce is salty, savory, and delicious.
- The noodles. You can serve beef stroganoff over rice, potatoes, or noodles. My favorite are noodles and you want to use quality egg noodles - the wide kind. This traditional noodle picks up the optimal amount of sauce for a creamy and indulgent pasta dish.
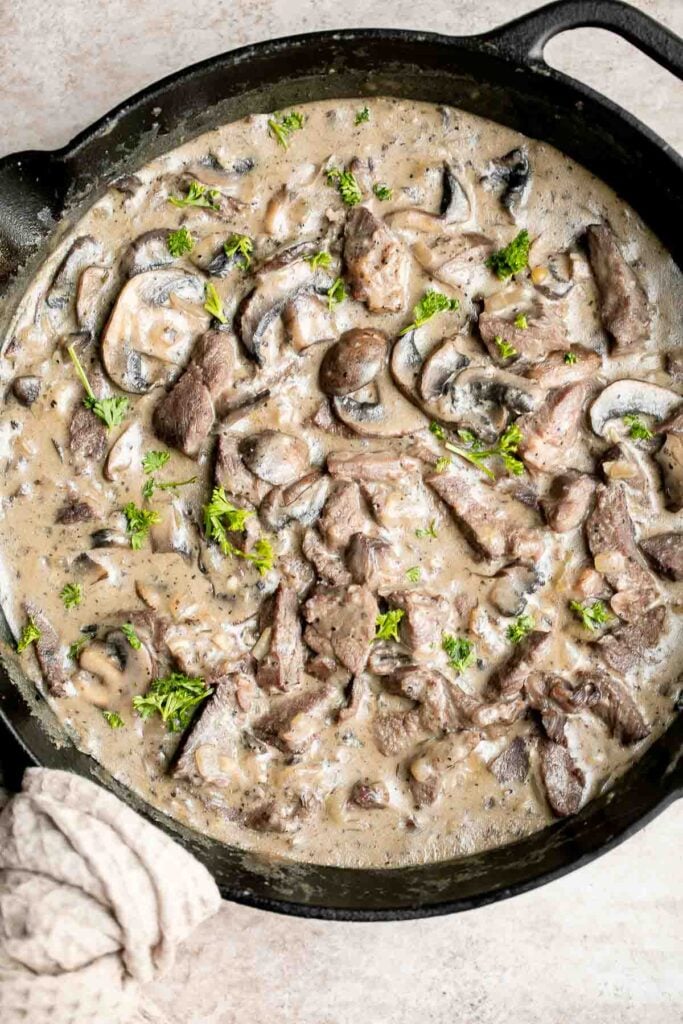
Ingredients and Substitutions
To make this delicious beef stroganoff, you will need the following ingredients (full quantities in the recipe card below):
- vegetable oil
- beef - I recommend using beef flank steak or top sirloin for this stir fry. You can also use leftover roast beef for a great way to use up holiday leftovers.
- butter
- brown mushrooms
- onion
- garlic
- all-purpose flour
- beef broth - I sometimes have a batch of Slow Cooker Bone Broth in the fridge that is perfect to use in this recipe.
- heavy cream - or substitute with half and half cream.
- sour cream
- dijon mustard - or substitute with ketchup.
- salt and pepper
- dried wide egg noodles - optional, for serving.
- fresh parsley - optional, for serving.
You will also need measuring cups and spoons and a large skillet (I used my cast-iron skillet).
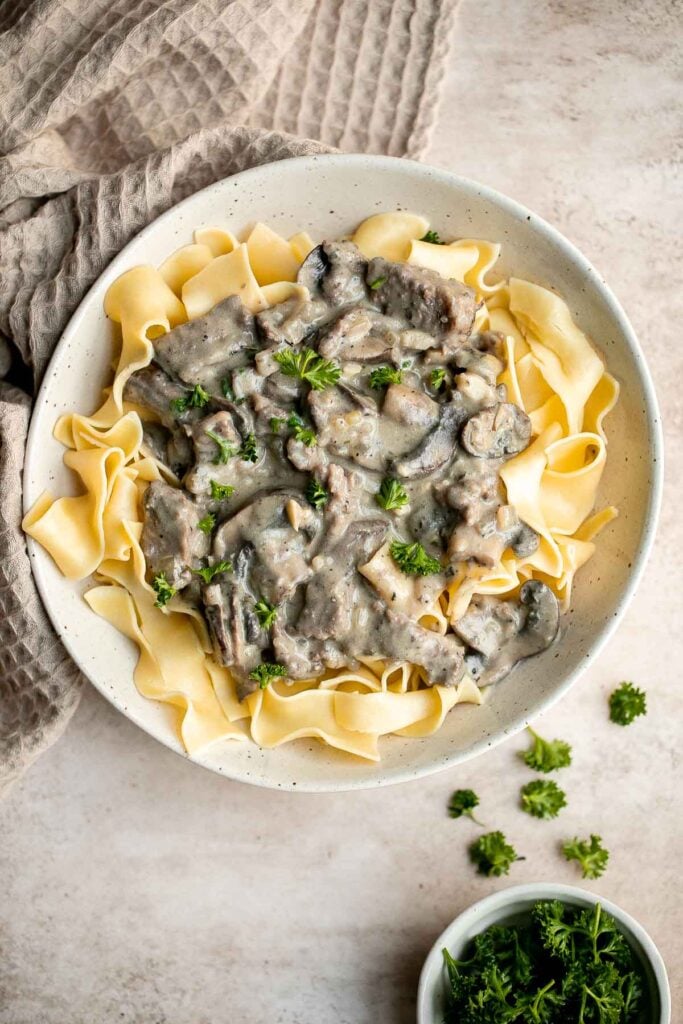
How to Make the Best Beef Stroganoff
- Sear beef. Heat oil in a large skillet over medium-high heat until sizzling hot, about 1 minute. Add beef and sauté until browned on all sides, about 3-4 minutes. (If using leftover roast beef, add it in and cook for 1-2 minutes instead, until starting to warm). Set aside on a plate.
- Sauté aromatics. In the same skillet, add butter and melt over medium-high heat until it starts to bubble, about 1 minute. Add mushrooms, onion, and garlic and sauté until golden brown and tender, about 3-4 minutes. Then, add flour and mix until well combined, about 1 minute.
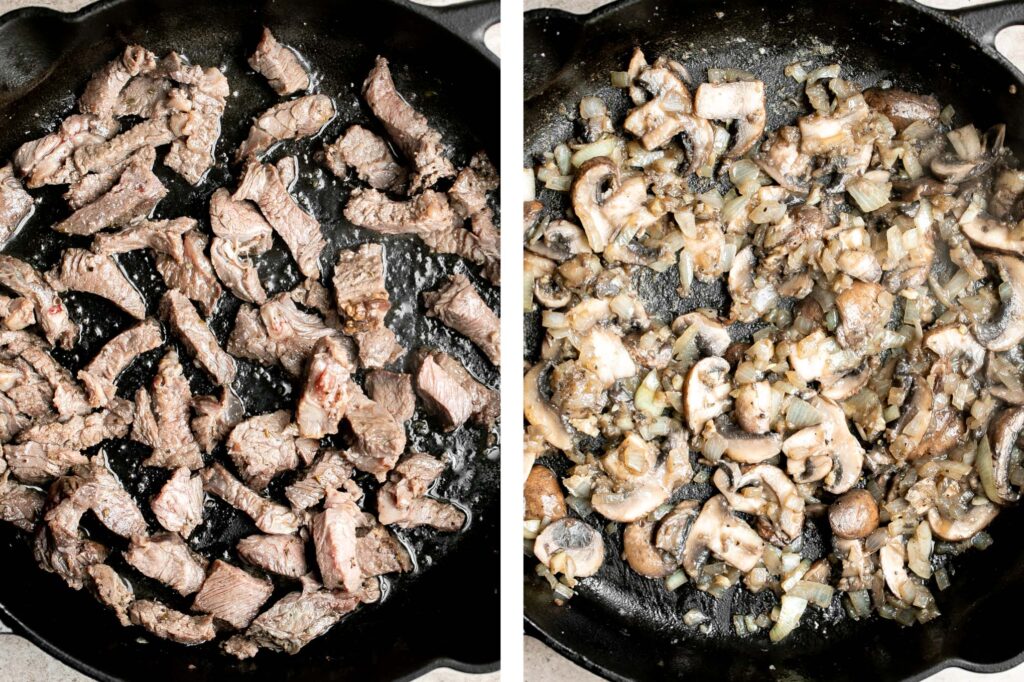
- Add sauce. Add beef broth, heavy cream, sour cream, and mustard. Mix well until smooth and bring the mixture to a simmer, about 2-3 minutes.
- Toss. Return the cooked beef to the pan and season with salt and pepper. Stir well and let it simmer over medium heat until heated through and the sauce thickens to a desired consistency, about 3-4 minutes.
- Serve. Garnish with parsley and serve warm with pasta (I like to serve with egg noodles). To cook the egg noodles, bring a large pot of salted water to a boil over medium-high heat. Add egg noodles and cook according to package directions, about 6 minutes. Drain well and set aside.
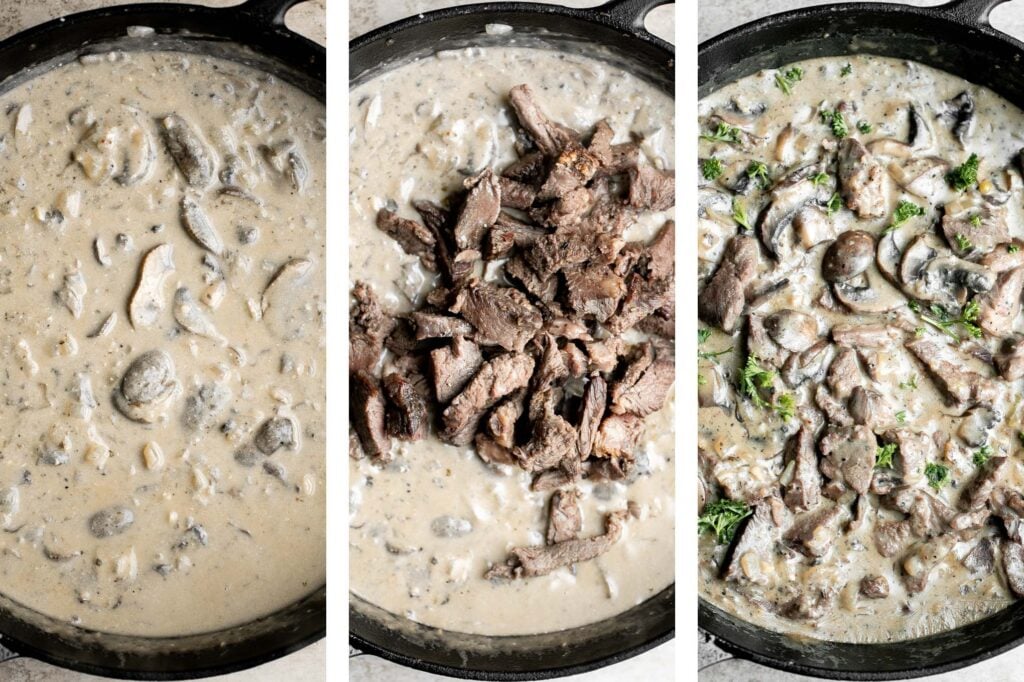
Storing Instructions
- How to store: Leftover beef stroganoff should be kept in an airtight container in the fridge for up to 3-4 days.
- How to freeze: You can freeze leftover beef stroganoff for up to three months. Be sure to separate it into portion sized meal prep containers before freezing for easy thawing. When ready to reheat, thaw overnight in the refrigerator.
- How to reheat: Reheat beef stroganoff on the stove over medium-low heat until warmed through. Add a splash of water if the sauce has thickened out too much. in the fridge. You can also reheat in the microwave on medium-low heat in 30-second intervals until warmed through, stirring between each interval.
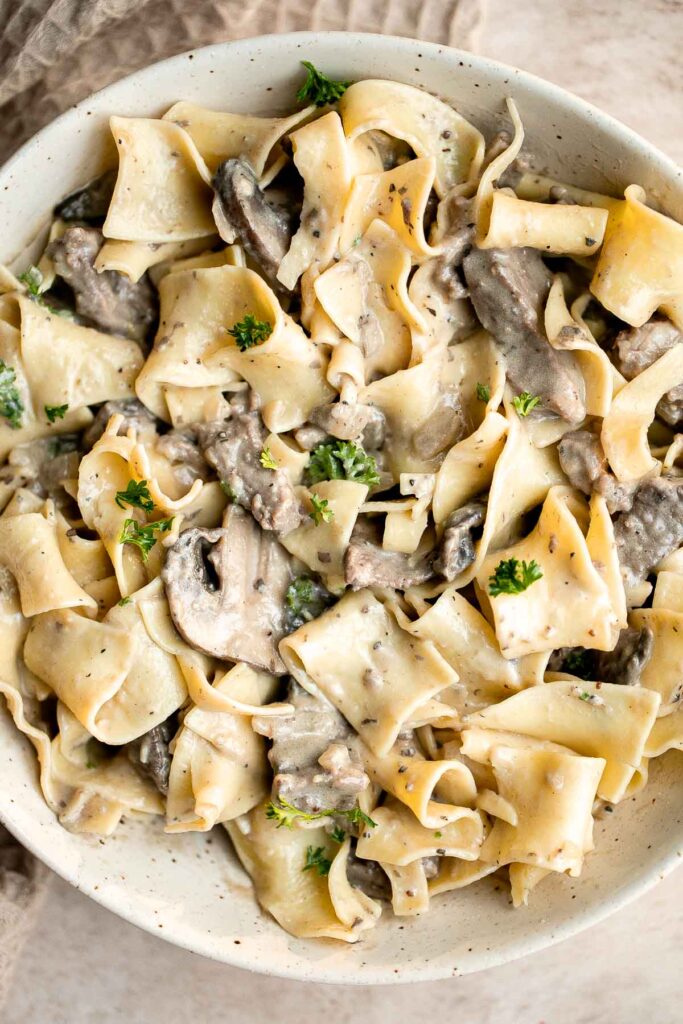
More Beef Recipes
- 25 Ground Beef Recipes
- Beef Wild Rice Soup
- Roast Beef
- Homemade Hamburger Helper
- Spaghetti Bolognese
- Instant Pot Beef Curry
Tried this recipe?
I'd love to hear what you think! Leave a comment and rating below to share your feedback. Your reviews help others discover this recipe and help me keep creating more free recipes for you. Snap a photo and tag me on social media @aheadofthyme too.

Baba Ganoush Eggplant Dip

Baba ganoush eggplant dip is a delicious, flavorful, and vegan Mediterranean dip. Loaded with roasted eggplants, olive oil and tahini, and fresh flavors of lemon and garlic, this healthy creamy dip is a must-try. Plus, it's easy to prepare in just a few simple steps, can be made ahead, and stores well (some say it tastes better the next day or two!). Serve this eggplant dip as an appetizer on game day or a last minute snack.
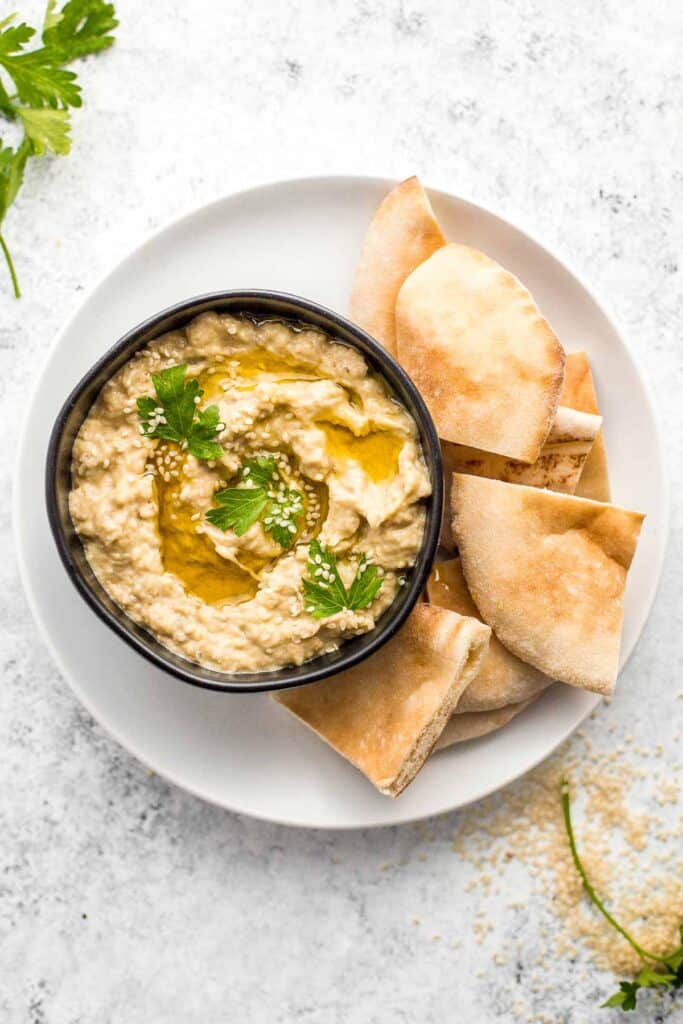
What is Baba Ganoush?
Baba ganoush is a creamy eggplant dip. Most versions use roasted eggplant but we are grilling ours whole until crispy on the outside and creamy in the middle, and are then mixed with garlic and tahini. It's an absolute explosion of flavor!
This is not at all like baking or roasting eggplant. The vegetable takes on a smokey flavour that is perfect served with pita bread, crudité, or even as an alternative to a spread on sandwiches. So much flavor!
Why You'll Love Baba Ganoush
- Loaded with Mediterranean flavors. Whenever I am craving a good dip, I seem to always go for Mediterranean. With fresh flavors like lemon, garlic, and tahini, you can't go wrong. Some of my other favorites are: hummus, tzatziki, and tahini sauce.
- You only need 6 simple ingredients. When you hear the words baba ganoush, you might think it's a fancy recipe that sounds really complicated. Well, it's not. For this recipe, all you need are eggplants, lemon juice, garlic, tahini, olive oil, and salt.
- It's vegan and gluten-free. This delicious dip will satisfy all dietary restrictions. It's vegan, gluten-free, and dairy-free.
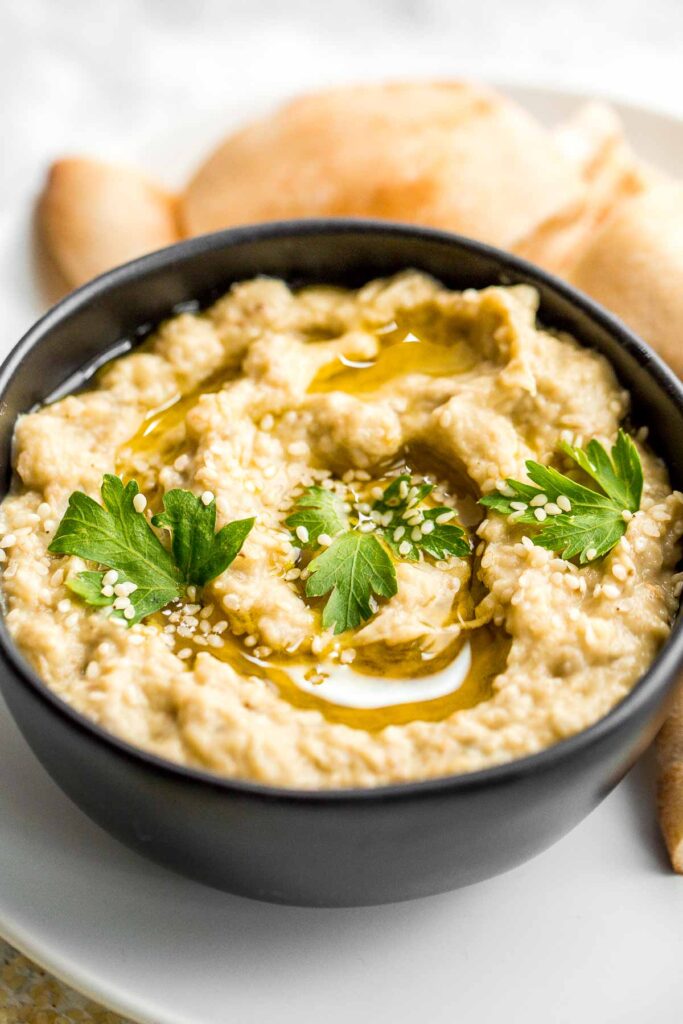
Ingredients in Baba Ganoush
Baba ganoush is really simple to make with just a handful of ingredients. Here's what you will need (full list of quantities in recipe card below):
- Italian eggplants
- lemon juice - I recommend using fresh lemon juice for the best flavor.
- garlic - this dip requires some raw garlic, so if you're not a fan of eating raw garlic, I suggest roasting 1 or 2 cloves instead. You'll still get that desirable garlic flavour, it will just be more mild and a bit sweeter.
- tahini
- olive oil - I use extra virgin olive oil.
- salt
- sesame seeds and parsley - optional, for garnish.
If you think you don't like eggplant, you HAVE to give this recipe a try. It'll change your mind for sure!
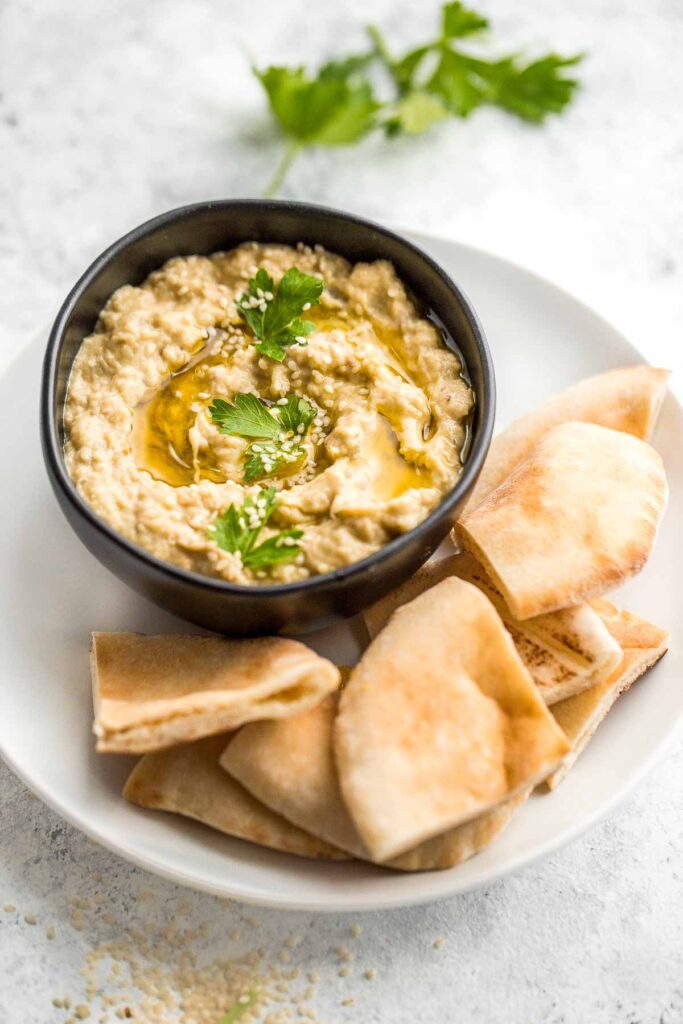
How to Make Baba Ganoush
- Prepare the eggplant. Grill for 30-35 minutes, until creamy inside and thin and crispy outside. Then slice in half and scoop out the flesh into a large bowl. Place in a strainer to remove excess liquid, and place into a clean bowl.
- Add remaining ingredients. Add lemon juice and garlic and stir until smooth and creamy. Slowly add tahini and olive oil. Taste and add salt as needed.
- Serve the baba ganoush. Top with a drizzle of olive oil, some sesame seeds, and parsley for garnish. Serve warm or at room temperature with pita bread, crackers, or crudité.
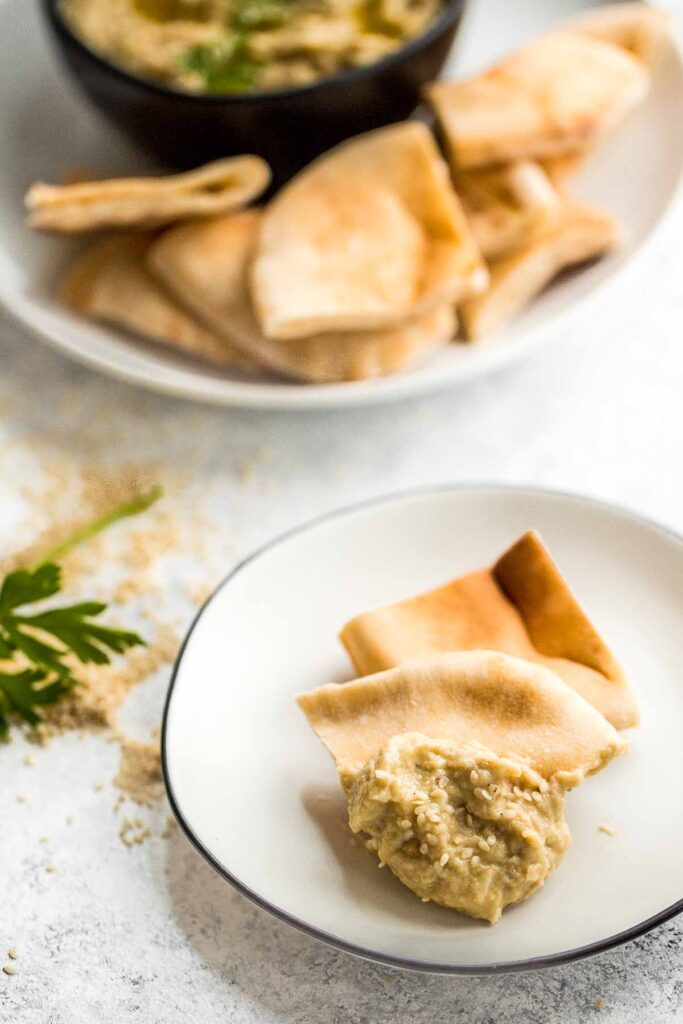
Recipe Tips and Tricks
- How to serve: Serve warm or at room temperature with pita bread, crackers, or crudité (veggies). You can also serve it as a spread in sandwiches on your favorite bread.
- How to store: Store leftover baba ganoush in an airtight container for up to 4 days in the refrigerator. Allow it to come to room temperature before serving.
- How to get the perfect texture: Baba ganoush has a thick and chunky texture. For the best results, use a fork or whisk to mash the baba ganoush. You can also use a food processor to make this eggplant dip smoother.
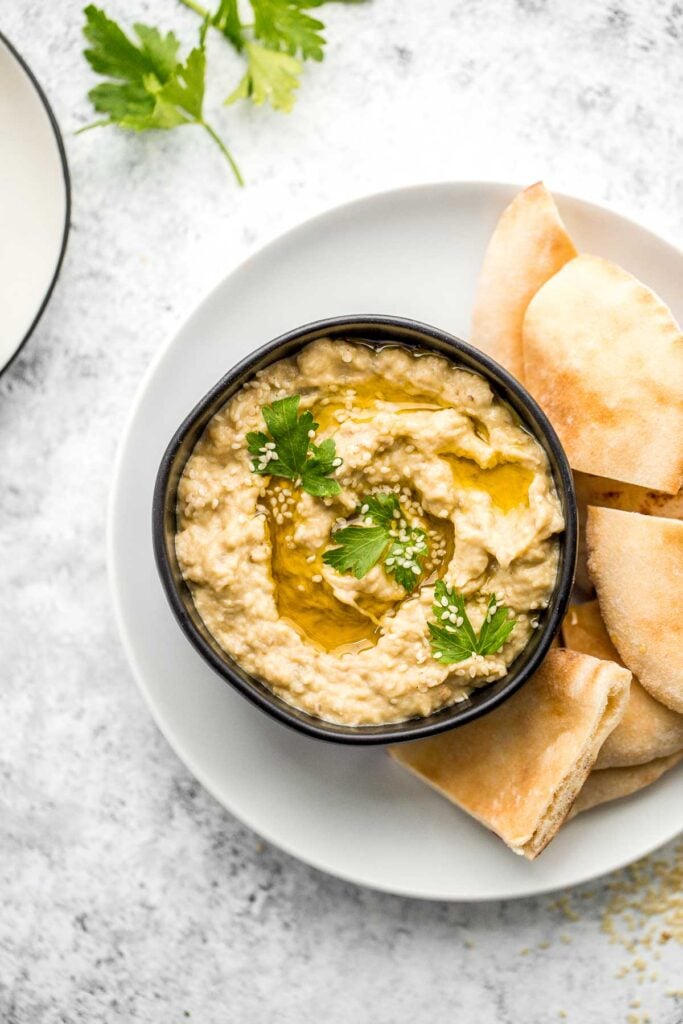
More Dip Recipes
- 20 Best Dip Recipes
- Classic Hummus
- Easy Tzatziki Sauce (Yogurt Cucumber Dip)
- Baked Spinach Dip
- Olive Tapenade
- Roasted Red Pepper Hummus
Tried this recipe?
I'd love to hear what you think! Leave a comment and rating below to share your feedback. Your reviews help others discover this recipe and help me keep creating more free recipes for you. Snap a photo and tag me on social media @aheadofthyme too.
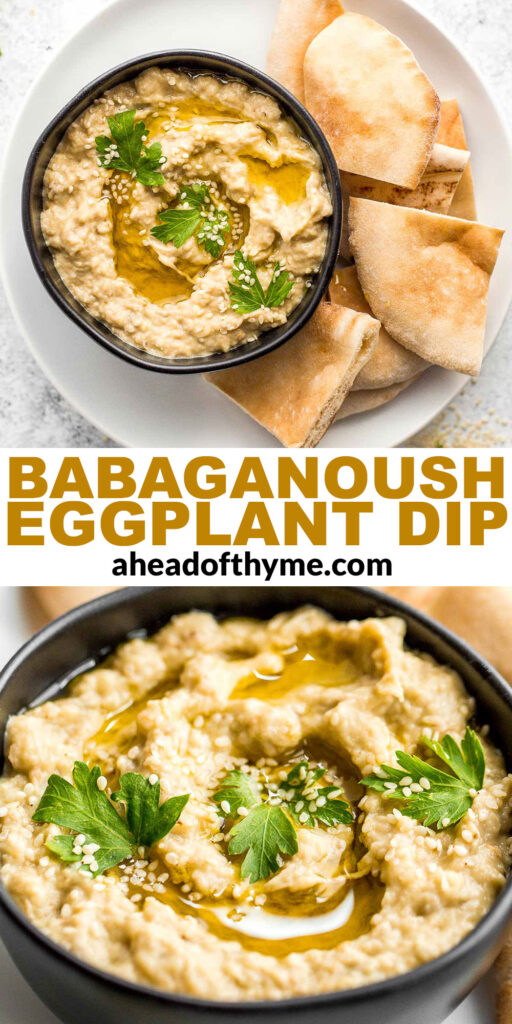
40 Valentine's Day Dinner Ideas

When it comes to Valentine's Day dinner recipes, only the most delicious, special, and romantic meals will suffice. So if you are wondering, "what to make for Valentine's Day dinner", then you, my friend, are in the right place. We are sharing over 40 of the best romantic Valentine's Day dinner ideas that you can cook for your significant other or for your best friends on Galentine's Day. I am talking about fresh seafood, tender chicken dinner, comforting creamy pasta, and more!

Best Valentine's Day Dinner Ideas
Surf and Turf Steak and Lobster Tails
Fancy, restaurant-quality surf and turf is super easy to make with fresh lobster tail and tender rib-eye steak with a delicious garlic butter sauce. One of my favorite Valentine's Day dinner ideas.
Quick and easy, creamy lemon chicken piccata is a simple and delicious 30-minute meal made with tender chicken breast in a light lemon sauce with capers. One of my favorite summer dinner ideas. You can also try Creamy Lemon Parmesan Chicken.
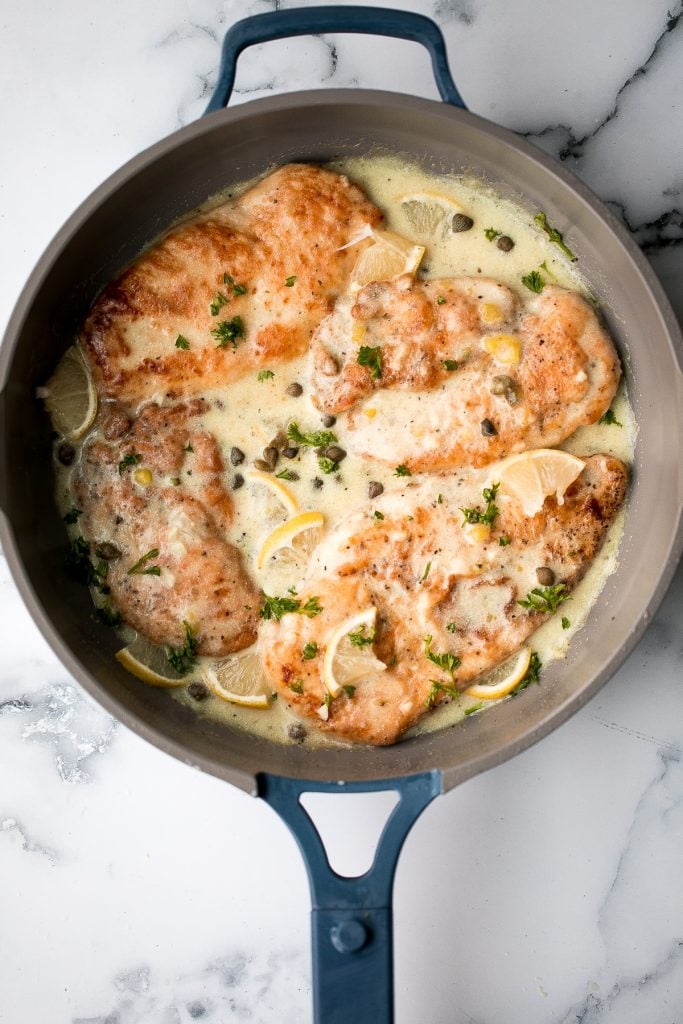
Garlicky, buttery, and perfectly seared scallops take less than 10 minutes to prep and cook. It's the easiest fancy, restaurant-grade meal to make at home. A perfect Valentine's Day dinner recipe.
Easy Chicken Parmesan (Parmigiana)
Easy chicken parmesan (parmigiana) with crispy breaded chicken, tomato sauce, and melted mozzarella and parmesan cheese. The best comfort chicken dinner for Valentine's Day.
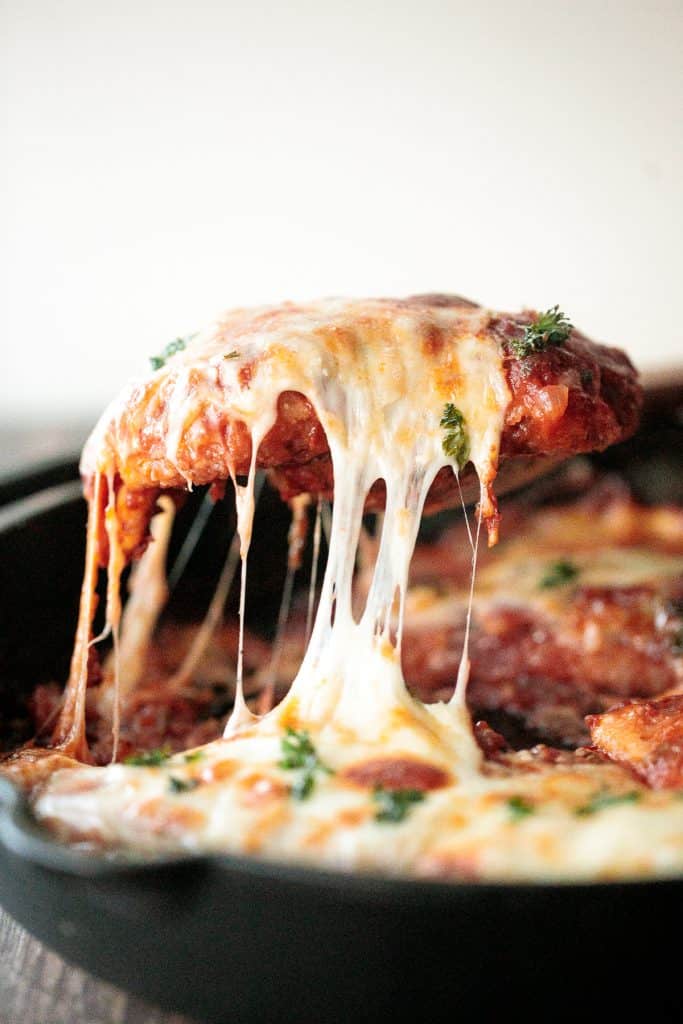
Chicken Parmesan Stuffed Peppers
Chicken parmesan stuffed peppers are delicious, flavorful, healthy, and filling, and combines two all-time favorites. Great for meal prep and freezes well.
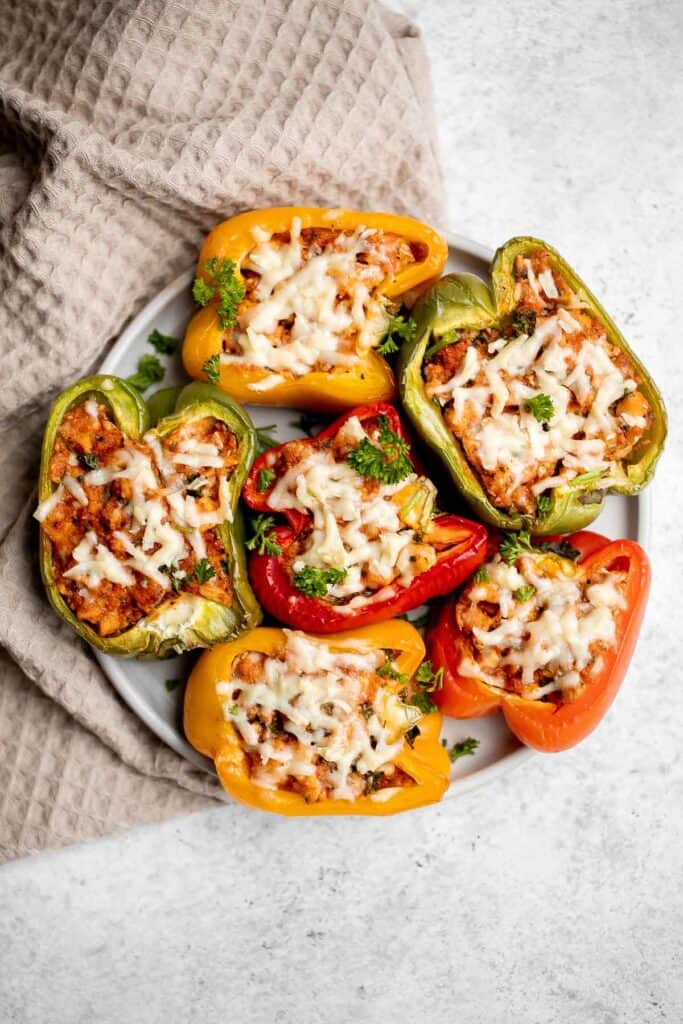
Shrimp Fettuccine Alfredo Pasta Bake
Creamy shrimp fettuccine alfredo pasta bake is garlicky, buttery, cheesy, loaded with shrimp + parsley and topped with mozzarella. Easy comfort food goals.
Steamed Mussels in Tomato Sauce
Steamed mussels in tomato sauce is an impressive restaurant-quality dish that is so quick and easy to make at home in less than 25 minutes.
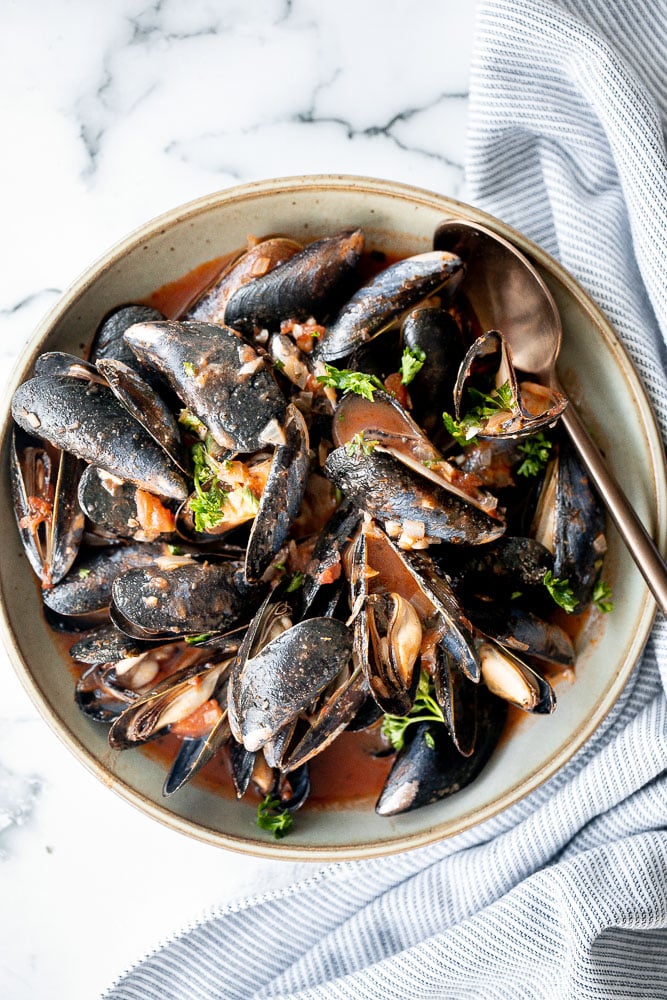
Creamy Parmesan (No Wine) Risotto
Creamy Parmesan (No Wine) Risotto is a rich, creamy, and comforting classic Italian dish that may be intimidating but is actually quick and easy to make.
Tender, flaky, flavorful garlic butter salmon is well-seasoned, seared to perfection, and basted until juicy. Quick and easy to make in 20 minutes.
Thai Turkey Meatballs in Coconut Curry
Thai turkey meatballs in coconut curry are the perfect weeknight dinner when you want something delicious, healthy, flavorful, and satisfying.
White Chicken and Spinach Lasagna
Creamy white chicken and spinach lasagna with tender shredded chicken is the most comforting creamiest cheesiest white lasagna. Easy to make ahead & freeze.
Lemon Asparagus Soup with Parmesan
Lemon asparagus soup with parmesan is the perfect spring soup -- smooth, light, fresh, and flavourful. It's customizable and can be served hot or cold.

Creamy Tuscan shrimp packed with sun-dried tomatoes, spinach, and garlic, is creamy, rich, and delicious. Make it in just 15 minutes, including prep!
Creamy spaghetti carbonara (Spaghetti a la Carbonara) is a simple classic Italian pasta with pancetta that's quick and easy to make in minutes.
Creamy garlic mushrooms are a simple, delicious, and easy side dish. This comforting family favorite that is quick and easy to make in just 15 minutes.
Quick easy teriyaki salmon is tender, flaky, and flavorful, with bold flavors from the delicious teriyaki marinade. Great for dinner or meal prep lunches.

Shrimp Scampi with Zucchini Noodles
Shrimp scampi with zucchini noodles is a low-carb, keto, and gluten-free version of a classic pasta dish. It is healthy, garlicky, flavorful, and delicious.
Better than take-out, flavourful and authentic Shanghai fried noodles with chicken, mushrooms, and bok choy is made in just 10 minutes - the easiest dinner!
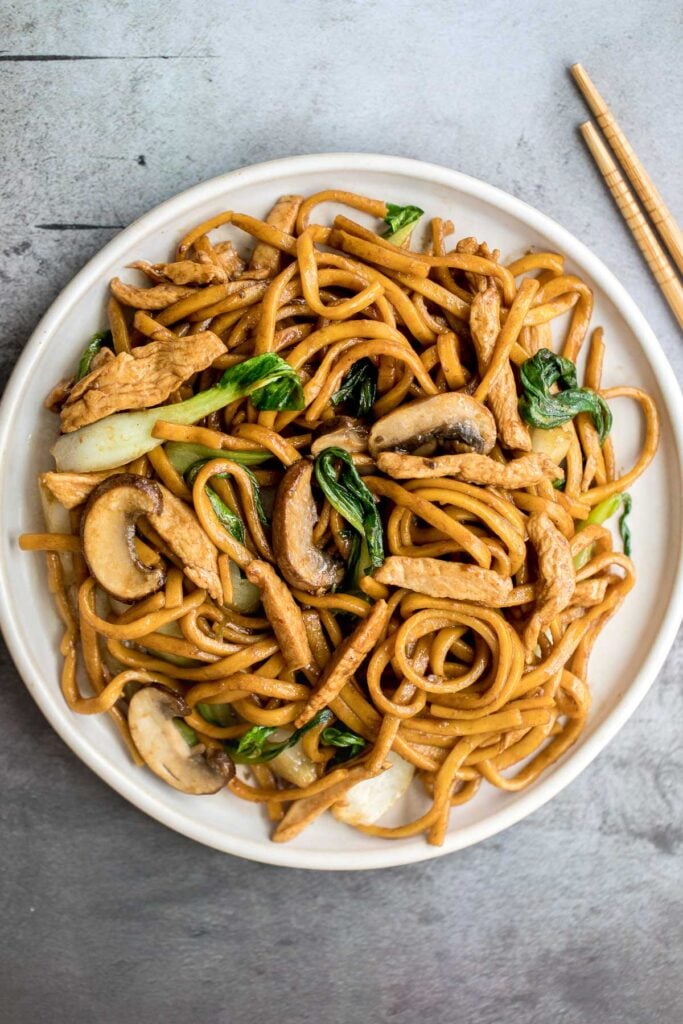
Creamy Chicken Roulade with Spinach and Mushrooms
Give your chicken breasts an upgrade by stuffing them to make fancy, juicy chicken roulade with spinach and mushrooms topped with a creamy alfredo sauce. Serve it over spaghetti alfredo with spinach and mushrooms.

Chicken marsala in creamy mushroom sauce is a quick and easy 30-minute chicken dinner that is pure comfort food goals. A total crowd favourite.
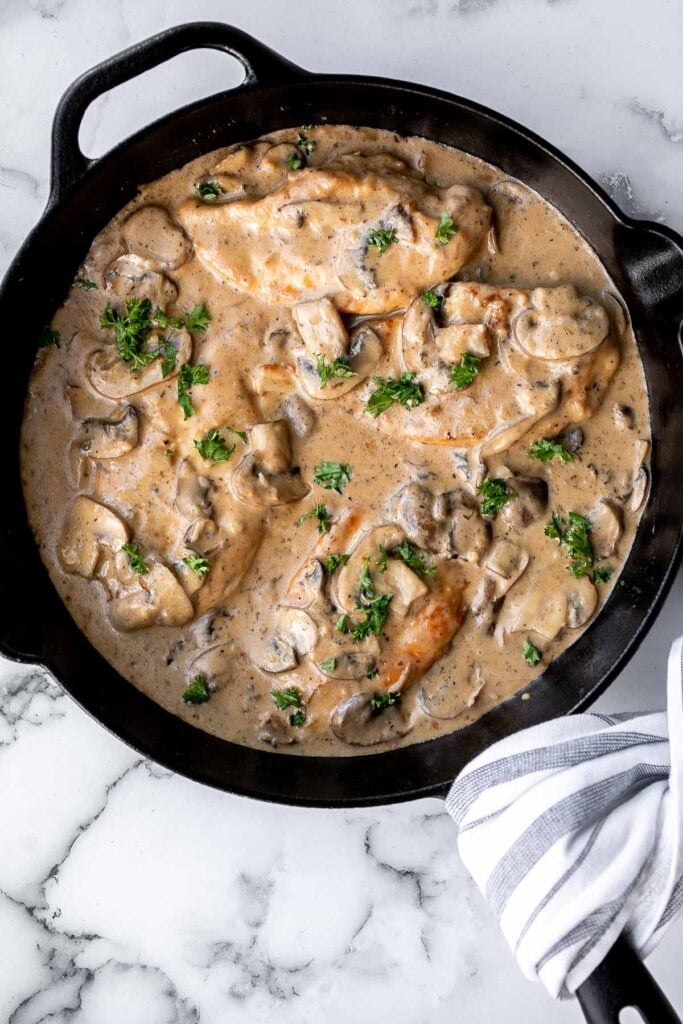
Better than the steakhouse, the best tender and juicy ribeye steak with a perfect seared crust is garlicky, buttery and packed with so much flavour. Serve with a side of Air Fryer Asparagus or Mascarpone Mashed Potatoes.
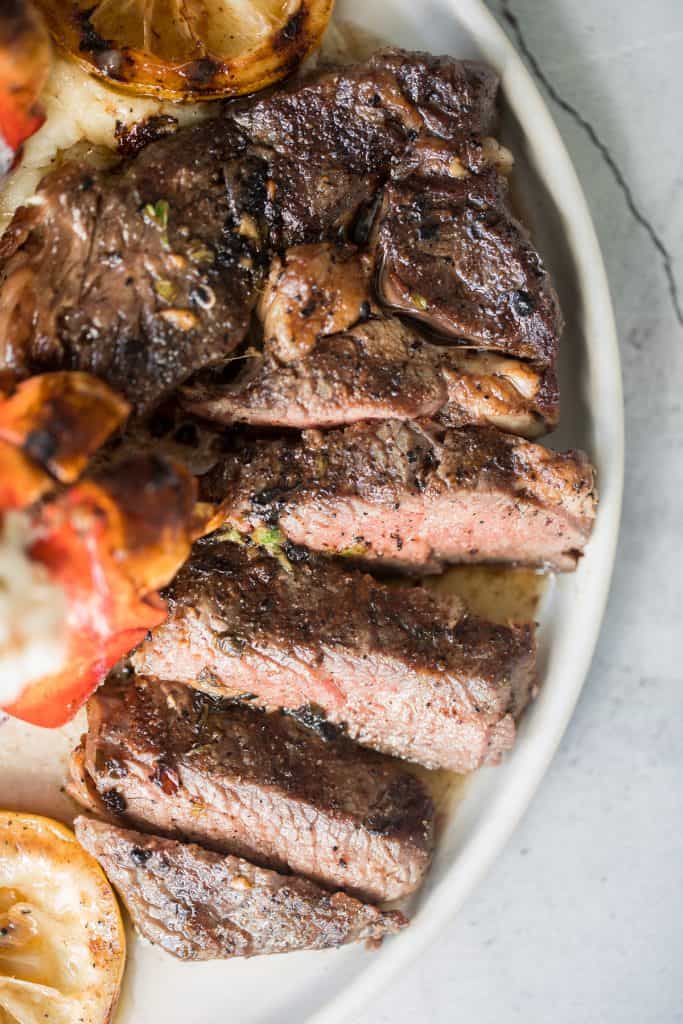
Fettuccine alfredo is a classic Italian pasta dish that is rich, creamy, and delicious. Plus, it comes together in less than 15 minutes! Perfect for Valentine's Day dinner.
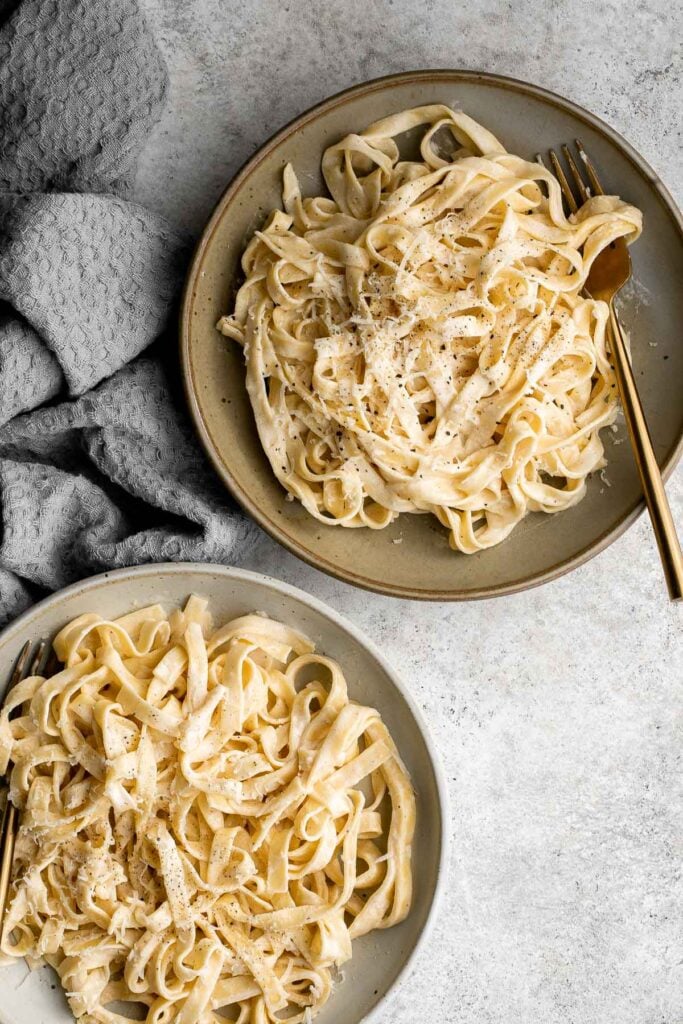
Baked parmesan crusted chicken is breaded in a herby parmesan breadcrumb mixture and baked until crispy perfection. So flavourful and delicious.
Flaky, oily, and tender, miso black cod (or sablefish) packed with delicious Asian flavours is an indulgent meal that's as healthy as it is delicious.
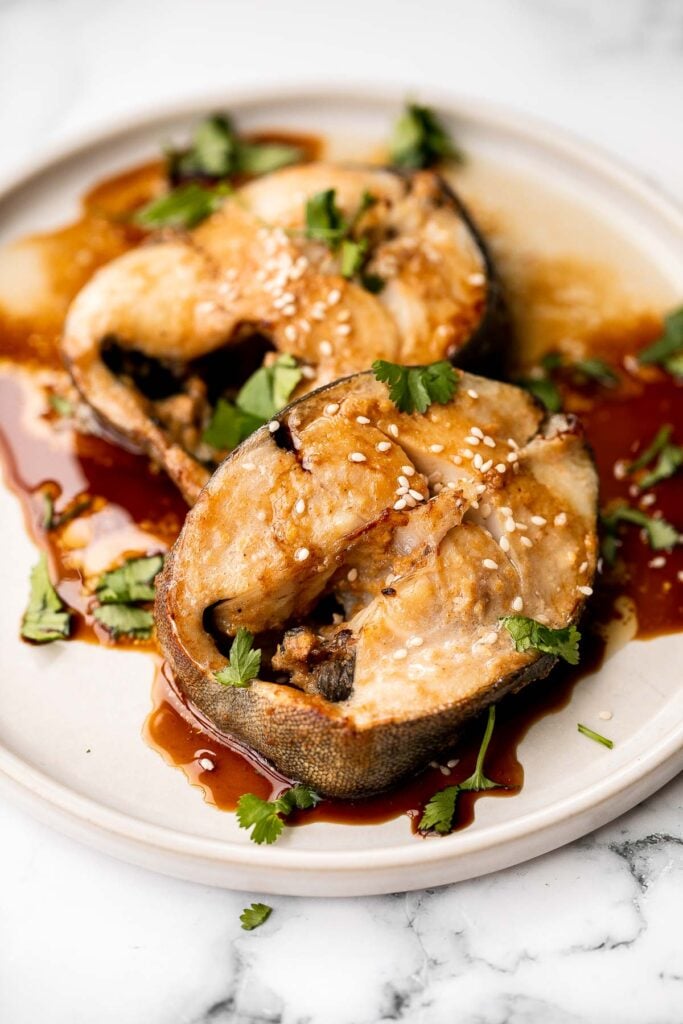
Greek salmon is delicious, flaky, and tender. This healthy oven-baked salmon is packed with Mediterranean flavors and is ready in just 20 minutes.
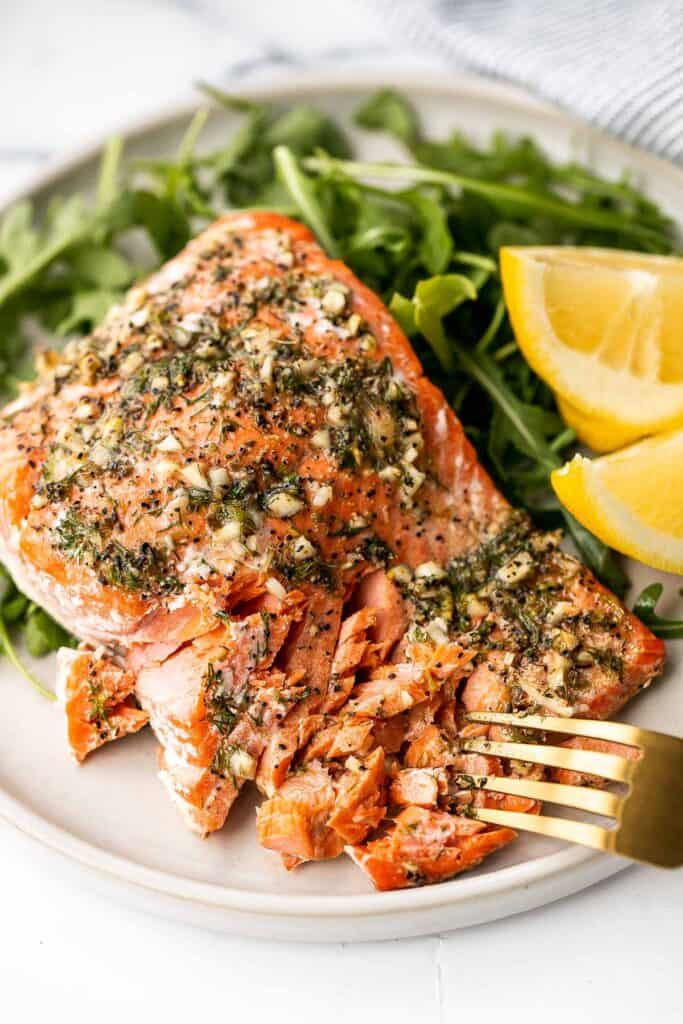
Creamy turkey gnocchi soup is the ultimate comfort food - creamy, rich, and delicious, made with good carbs, clean protein, and veggies in 25 minutes. You can also substitute the turkey for rotisserie chicken.
This beef noodle stir fry is the 20-minute dinner that you have been looking for - quick and easy, delicious and flavorful, and so much better than takeout.
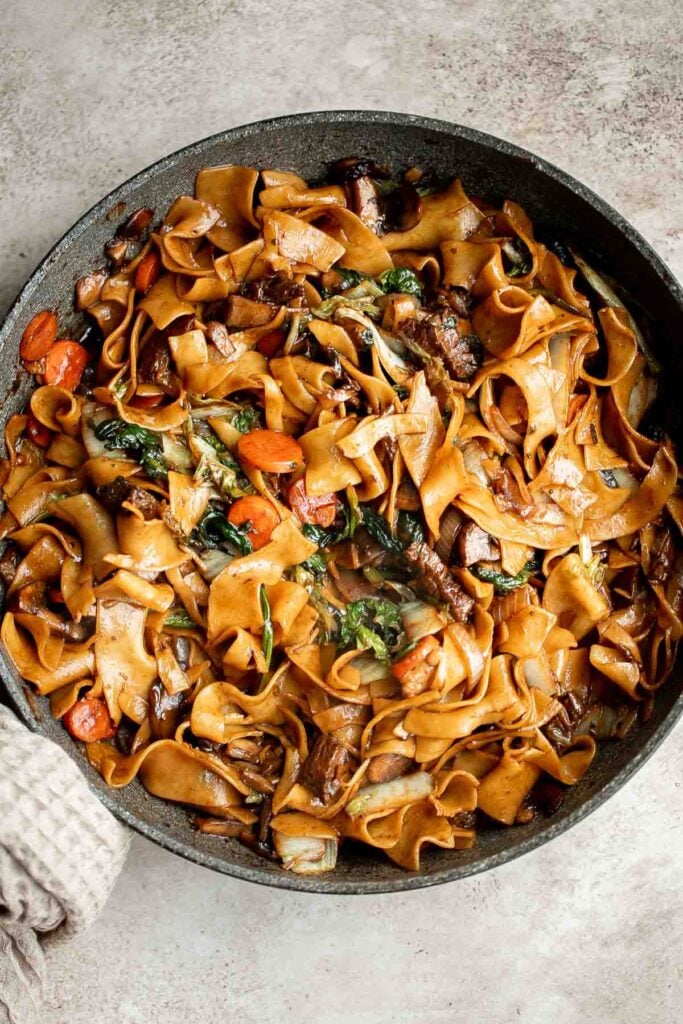
Baked caprese chicken is tender, juicy, and delicious, topped with burst tomatoes, mozzarella cheese, fresh basil, and a drizzle of balsamic glaze.

Quick easy spaghetti bolognese with a rich, thick, delicious and flavourful meat sauce is a family favourite ready in 30 minutes. Best weeknight dinner.
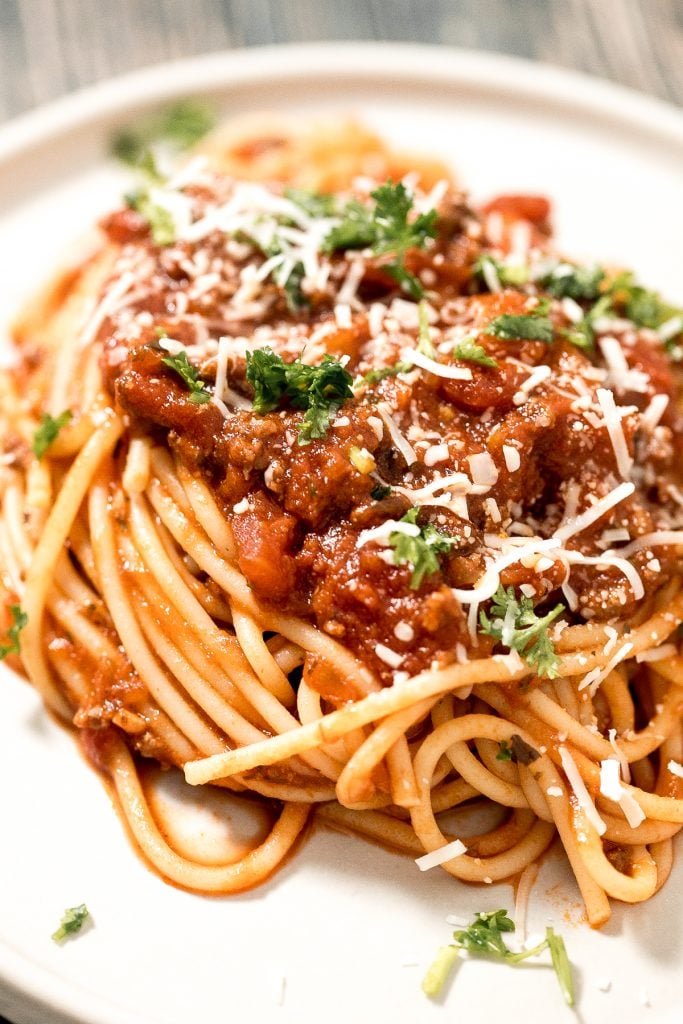
Creamy Tuscan chicken with sun-dried tomatoes and spinach is a quick and easy 30 minute Italian chicken dinner that is delicious, flavorful, and comforting. Easy instant pot instructions in the recipe tips.
This delicious garlic and herb-crusted rack of lamb is tender, juicy, and flavourful. It is surprisingly quick and easy to make at home in about 30 minutes.
Creamy Shrimp Pasta with Sun-dried Tomatoes
Creamy shrimp pasta with sun-dried tomatoes is a delicious, quick and easy meal that takes just 20 minutes to prep and make. The perfect weeknight dinner. | aheadofthyme.com
You won't believe how easy it is to make fresh, flavourful and delicious almond-crusted halibut with lemon garlic butter this season.
Greek Lemon Garlic Whole Roast Chicken
Easy Greek lemon garlic whole roast chicken is tender, juicy and succulent with the crispiest skin. Prep this flavourful one pan meal in just 15 minutes.
Skillet Chicken with Lemon Garlic Sauce
Delicious creamy skillet chicken with lemon garlic sauce is a one-skillet meal that is ready in 30 minutes. It's garlicky, saucy, creamy, and so flavourful. Bread is a must to dip into this delicious sauce. Try pull apart garlic bread or easy no yeast biscuits.
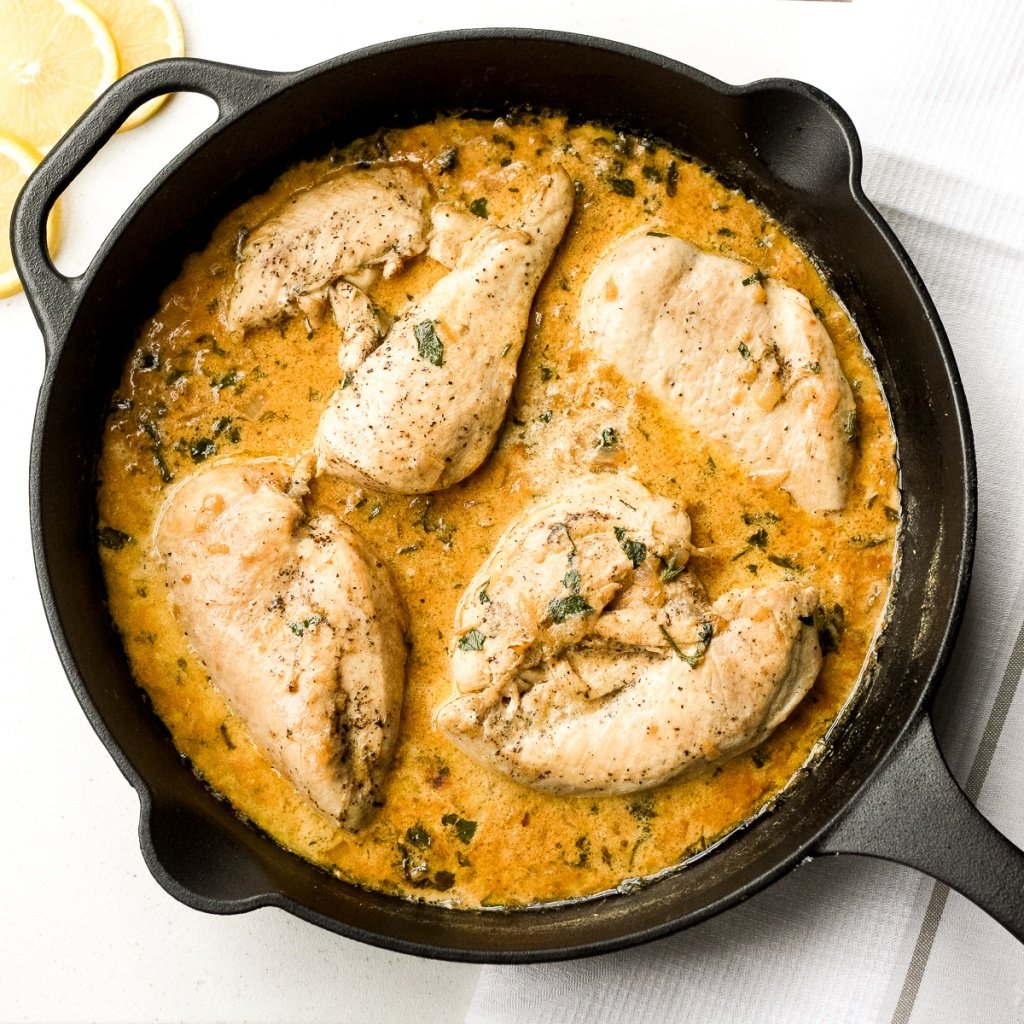
Quick and easy mascarpone pesto pasta is the tastiest creamy pasta dish you'll ever make in under 15 minutes. It's the best weeknight dinner.
Juicy, tender, and moist, baked chicken breast with the best Greek souvlaki marinade is the most flavorful and delicious chicken dinner in under 30 minutes.
Valentine's Day Dinner Tips
- Plan your menu ahead of time. You can prepare some of these delicious recipes in advance, and store them in an airtight container for a few days at room temperature or longer in the refrigerator. Some can even be made further ahead and frozen, according to recipe directions.
- Prep your ingredients. If you aren't able to make something ahead, then prepare as much as you can in advance - whether that means chopping ingredients for a salad, making a sauce, or assembling a casserole and storing in the refrigerator until it's ready for the oven.
- Set the table. Set the table early with fancy plates, flatware, glasses, placemats, and napkins to make Valentine's Day dinner even more special.
More Romantic Recipes
- 40 Valentine's Day Dessert Recipes
- 50 Date Night Dinner Ideas
- 45 Best Chocolate Desserts
- 40 Best Shrimp Recipes
- 40 Best Pasta Recipes
- 60 Best Chicken Recipes
- 60+ Easy Dinner Ideas
Did You Make Any of These Romantic Valentine's Day Dinner Recipes?
Please leave a comment and rating below, and let me know what you thought of this round up of the best Valentine's Day dinner recipes we have to offer. Be sure to snap a picture and tag me on Instagram @aheadofthyme or share it on the Pinterest pin so that I can follow along.
HUNGRY FOR MORE? Don't forget to sign up for my email newsletter so that you don't miss any recipes. You can also follow along on Instagram and Pinterest for more recipe updates.
Greek Fries
Homemade Greek fries bring a Mediterranean twist on a classic side dish. Made with delicious russet potatoes that are fluffy and tender inside with a crispy golden brown crunch on the outside, these Greek-style french fries are topped with crumbled feta cheese and fresh parsley. Squeeze fresh lemon juice over these sheet pan fries before dipping them into a creamy tzatziki sauce, and you'll see why these Greek fries are much better than the classic version with ketchup.
Why You'll Love Greek Fries
- You'll never want regular fries again. This recipe for Greek fries is incredibly simple, but it is seriously a game-changer! A homemade crispy fry is one thing. But when you add feta cheese, fresh garnishes, a creamy dipping sauce, and fresh lemon juice, it just hits differently.
- Healthier than deep-fried. One of the best parts of this Greek fry recipe is that they're oven-baked. Since they are not deep-fried, it means no grease, fewer fats, and fries that can actually fit into a healthy diet. Oven baking fresh fries is so simple, you'll wonder why you ever bought frozen fries.
- The balance of Mediterranean flavors. Greek anything is pretty good - and Greek fries are no exception. Enjoy the classic Mediterranean flavors of feta cheese, fresh parsley, lemon, and tzatziki over perfect fries that are crispy on the outside and soft on the inside. Enjoy it guilt-free on your Mediterranean Diet.

Ingredients and Substitutions
To make this easy Greek Fries, you will need the following ingredients (full quantities in the recipe card below):
- russet potatoes - you can also use Yukon Gold potatoes. When picking your potatoes, watch for greek skin or flesh, and spuds. Easily cut them off to safely consume the rest of your potatoes.
- olive oil
- salt
- dried oregano
- toppings - we topped these Greek fries with fresh parsley, feta cheese, and lemon wedges for drizzling lemon juice on top.
- tzatziki sauce - serve these Greek fries with tzatziki sauce (optional) for dipping. You can also serve them with ketchup or tahini sauce.
You will also need measuring spoons, mixing bowl, and a large half sheet baking pan.
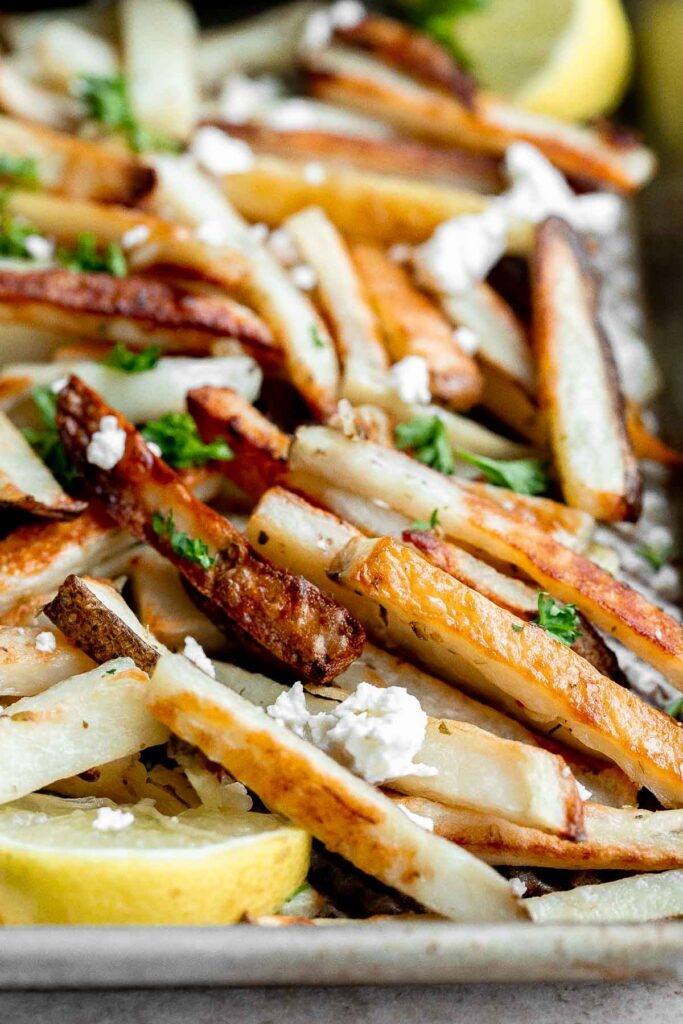
How to Make the Best Greek Fries
- Prepare potatoes. Wash and slice potatoes into long french fry strips. You can choose to leave the skin on or peel the skin. Transfer the sliced potatoes into a large mixing bowl and fill with water. Soak the potatoes for 20 minutes. Then, drain and pat completely dry with a dish towel. Place potatoes in a dry mixing bowl and add olive oil, salt, and dried oregano. Toss well to coat.
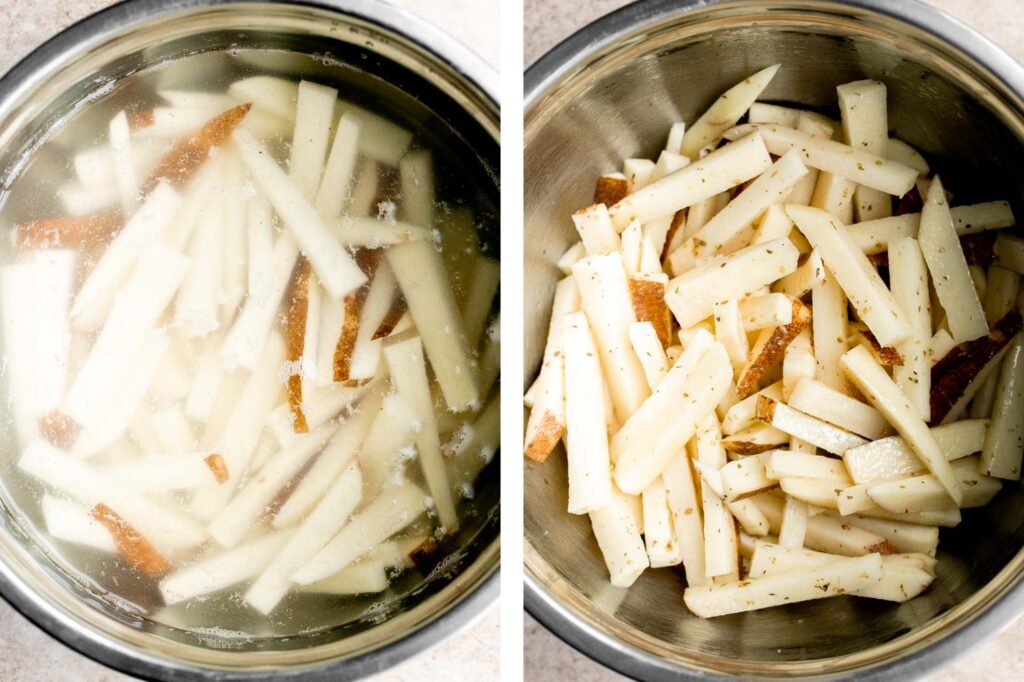
- Bake. Transfer potatoes to a large half sheet baking pan in an even layer. Bake in a preheated 425F oven for 35-40 minutes until the bottom is crispy brown. Turn on the broiler to high and broil for 2-3 minutes until the top is brown and crispy too.
- Add toppings. Use a turner to carefully transfer the french fries to a serving dish. Top with chopped parsley, crumbled feta cheese, and lemon wedges. Serve with tzatziki sauce on the side for dipping.
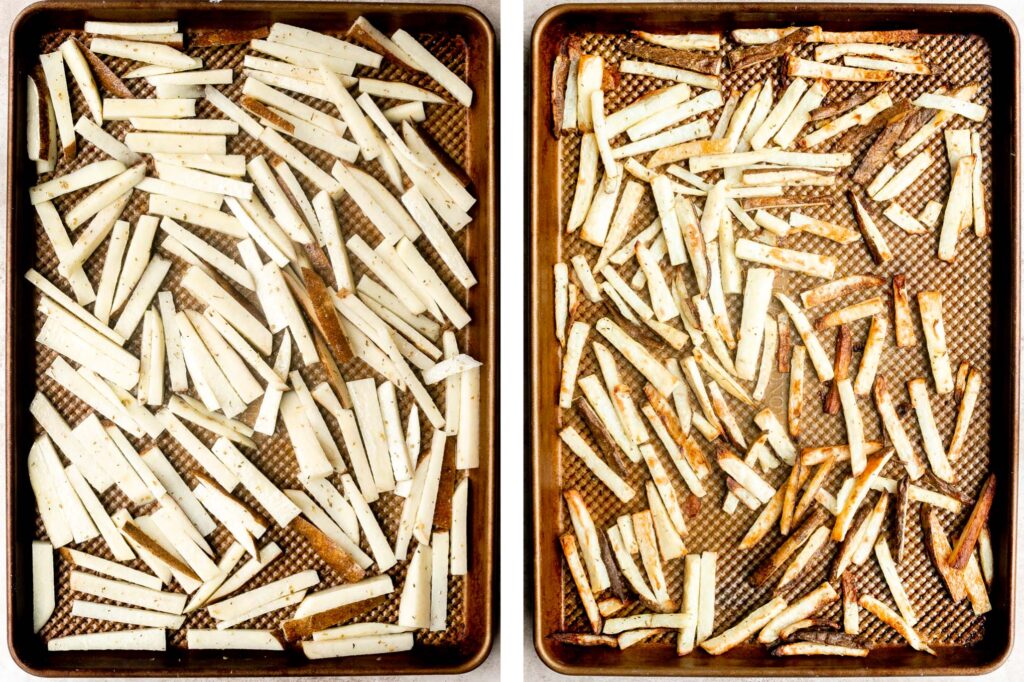
Storing Instructions
- How to store fries: Allow the fries to cool completely before storing. Line a container with a paper towel (to absorb any excess oil) and store cooled Greek fries in the fridge for 4-5 days. For the best flavor, wait to garnish the fries if you know there will be any leftovers. However, fries garnished with cheese, parsley, and/or lemon will still keep well.
- How to reheat: Spread fries on a baking sheet. Then, reheat in a 425F preheated oven for 10-20 minutes until warm and crispy.
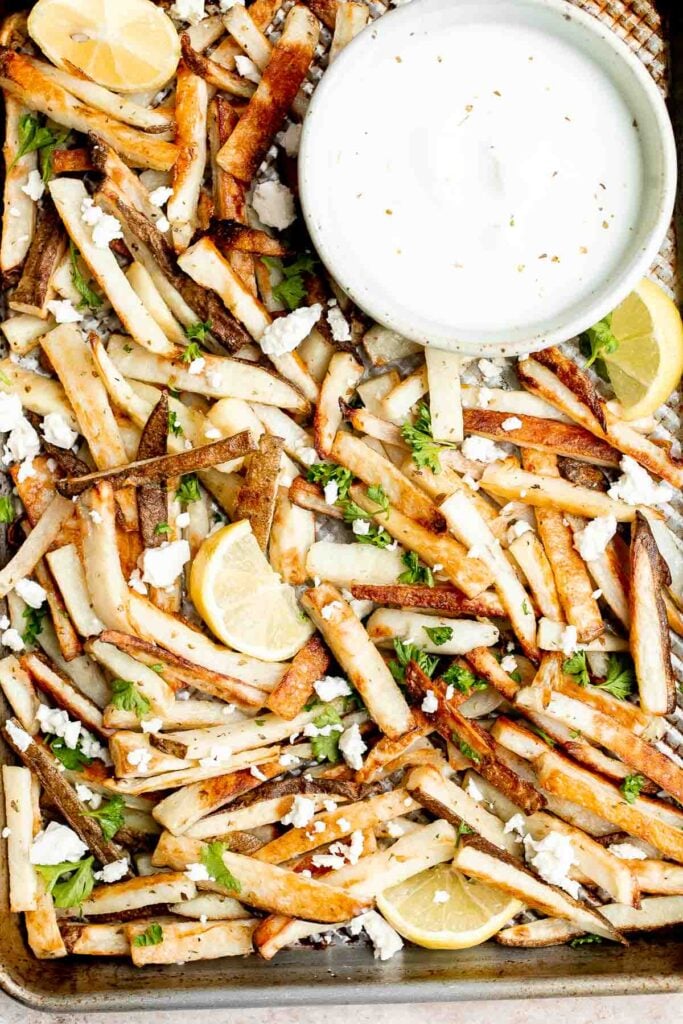
More Potato Recipes
- 40 Best Potato Recipes
- Air Fryer French Fries
- Crispy Smashed Potatoes
- Crispy Leaf Potatoes
- Hasselback Potatoes
- Mashed Potato Balls
Tried this recipe?
I'd love to hear what you think! Leave a comment and rating below to share your feedback. Your reviews help others discover this recipe and help me keep creating more free recipes for you. Snap a photo and tag me on social media @aheadofthyme too.

Beef Noodle Stir Fry
This beef noodle stir fry is the dinner that you have been looking for - quick and easy, delicious and flavorful, and so much better than takeout. It's ready to eat in just 20 minutes (including prep!), and is packed with vegetables like mushrooms, cabbage, spinach, and carrot. Plus, this Chinese beef noodle stir fry is fully customizable with whatever veggies that you have on hand and you can even use leftover roast beef.
Why You'll Love Beef Noodle Stir Fry
- It's a quick 20-minute meal. That's right. A whole meal in just 20 minutes. This delicious Asian beef noodles is perfect when you're in a rush on busy weeknights because it's ready quickly, and there's little clean-up. If you're someone who doesn't have a lot of time to cook, this homemade beef noodle stir fry is a must-have recipe in your back pocket.
- It's so easy to make. Easy recipes are my favorite. A complex recipe can be fun, but easy staples are what keep things running smoothly in our kitchen. This beef noodle stir fry from scratch only has a few simple steps, and it's pretty hard to go wrong.
- It's a full and complete meal. You don't need any extra side dishes to complete this meal. Beef noodle stir fry has everything you need: healthy carbs, protein, and veggies!
- It's completely customizable. This quick Chinese stir fry noodle recipe is fully customizable. You can use leftover roast beef or any meat that you like. You can add in and substitute the veggies for any that you have on hand. Try adding in bok choy, broccoli, or cauliflower.
Ingredients and Substitutions
To make this quick and easy beef noodle stir fry, you will need the following ingredients (full quantities in the recipe card below):
- egg noodles - I prefer the texture on egg noodles for this stir fry, but really any kind of Asian noodles will work. Just pick your favorite.
- vegetable oil
- beef - I recommend using beef flank steak or top sirloin for this stir fry. You can also use leftover roast beef for a great way to use up holiday leftovers.
- vegetables - I used onion, carrot, brown mushrooms, Chinese cabbage, and spinach. You can feel free to substitute with any veggies that you have on hand.
- sauce - for the sauce, you will need soy sauce, oyster sauce or hoisin sauce, rice vinegar or mirin (optional), sesame oil, ground cumin, and ground black pepper or white pepper.
One of my favorite things about this stir fry is that it's customizable so you can use up any veggies that are in your fridge. Consider adding:
- broccoli
- celery
- cauliflower
- brussels sprouts
- leafy greens like bok choy or kale

How to Make the Best Beef Noodle Stir Fry
- Cook noodles. Bring a large cooking pot of water to a boil over medium-high heat. Add egg noodles and a little bit of salt and cook according to package directions, about 6 minutes. Drain well and set aside.
- Cook beef. Heat oil in a large wok or pan over high heat until sizzling hot, about 1 minute. Add beef and sauté until browned on all sides, about 3-4 minutes. If using leftover roast beef, add it in and cook for 1-2 minutes instead, until starting to warm.
- Add vegetables. Add onion, carrot, mushrooms, cabbage, and spinach. Stir well and cook until tender, about 3-4 minutes.
- Add noodles. Stir in noodles and add all the sauce ingredients (soy sauce, oyster sauce, rice vinegar, sesame oil, cumin, and pepper). Toss well and cook for another 2-3 minutes until evenly coated.
- Serve. Garnish with white sesame seeds and serve immediately.

Storing Instructions
- How to store: Noodles are best served fresh. If you have leftovers, allow them to cool to room temperature first. Then, transfer the Asian beef noodle stir fry to an airtight container and store in the fridge for 3-4 days.
- How to reheat: Reheat these Chinese beef noodles the same way you cooked it - on the stovetop over medium heat, stirring frequently until warmed through. You can also pop it in the microwave on medium heat in 30-second intervals.
More Stir Fry Recipes
- 60 Chinese Takeout Recipes
- Beef and Broccoli Stir Fry
- Healthy Lemon Chicken
- Spicy Cumin Lamb Noodles
- Vegetarian Chow Mein
- Stir-Fried Rice Noodle Rolls
Tried this recipe?
I'd love to hear what you think! Leave a comment and rating below to share your feedback. Your reviews help others discover this recipe and help me keep creating more free recipes for you. Snap a photo and tag me on social media @aheadofthyme too.
50 Best Italian Recipes
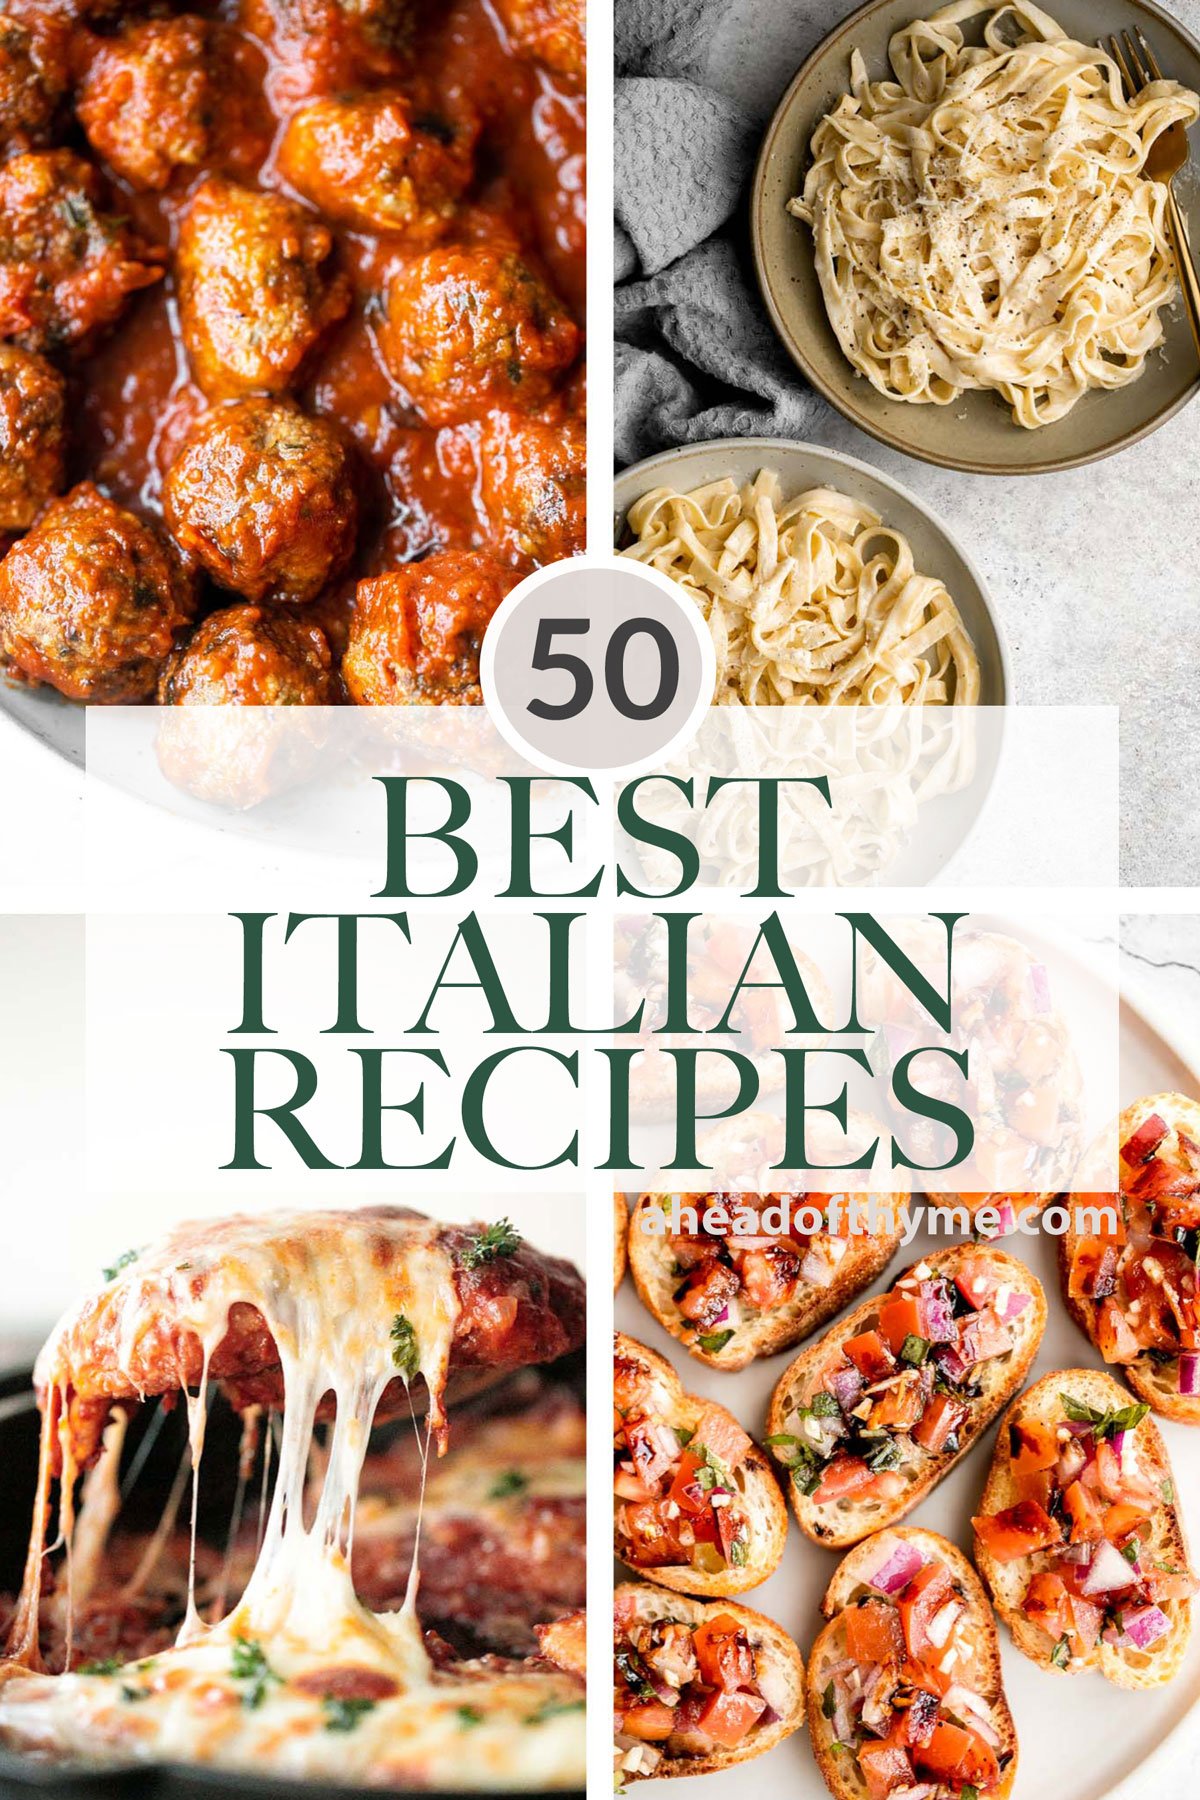
Italian food is one of the most well known cuisines on the planet, and for good reason too. It's comforting, delicious, and so satisfying. Whether you are craving a plate of pasta from Italy, a slice of Neapolitan pizza, a bite of creamy chicken, or a bowl of warm and cozy soup, you will find it in the Italian kitchen. So if you are wondering how to make Italian food at home for dinner, we have got you covered. We are sharing over 50 of our most popular and best Italian recipes including pasta, pizza, soup, salad, chicken, beef, appetizers, bread, and more!

Best Italian Recipes
Easy chicken parmesan (parmigiana) with crispy breaded chicken, tomato sauce, and melted mozzarella and parmesan cheese. The best comfort chicken dinner.
Pasta Bake with Sausage (Baked Ziti)
Pasta bake with sausage (baked ziti) is a lazy day lasagna with layers of pasta tossed in a rich meat sauce, layered with mozzarella, and baked.
Meatballs are probably my favorite of all ground beef recipes. These quick, easy homemade Italian meatballs are juicy, flavourful, and delicious, simmered in a rich and savoury tomato sauce. Make them in just 30 minutes.
Creamy Tortellini Soup with Sausage
Hearty and creamy tortellini soup with sausage, spinach and kale is total comfort food in a bowl. Make this flavourful one pot meal in under 30 minutes.
Classic easy meat lasagna is the ultimate Italian comfort food with layers of tender lasagna, meaty tomato sauce, cheese filling and melted cheese on top.
Quick and easy, creamy lemon chicken piccata is a simple and delicious 30-minute meal made with tender chicken breast in a light lemon sauce with capers.
Fettuccine alfredo is a classic Italian pasta dish that is rich, creamy, and delicious. Plus, it comes together in less than 15 minutes!
Easy Rosemary Garlic Focaccia Bread
No knead, easy rosemary garlic focaccia bread is thick with a perfect golden and crispy texture on the outside, but soft, fluffy and tender inside.
Minestrone soup is a hearty, healthy, nourishing, and delicious classic Italian soup, packed with vegetables and pasta simmered in a rich tomato broth.
Creamy Parmesan (No Wine) Risotto
Creamy Parmesan (No Wine) Risotto is a rich, creamy, and comforting classic Italian dish that may be intimidating but is actually quick and easy to make.
Italian pasta salad is delicious, wholesome, and easy to make. Make it up to three days ahead for your summer picnics and cookouts. You can't get more classic than Italian Salad on Memorial Day!
This Creamy Tomato Pasta is a simple and delicious meal made from scratch in 25 minutes with a cream and tomato based sauce that is rich and silky smooth.

Homemade calzones are delicious little pizza pockets filled with cheese and toppings and baked until golden. This Italian favourite is easy to make at home.

Creamy Tuscan shrimp packed with sun-dried tomatoes, spinach, and garlic, is creamy, rich, and delicious. Make it in just 15 minutes, including prep!
Creamy Polenta is simple, warm, and comforting side dish, made with a handful of simple ingredients and about 30 minutes of time. It's gluten-free too!
Eggplant Parmesan is a vegetarian Italian dish made featuring tender eggplant slices coated in crispy breadcrumbs, melty cheese, and baked in tomato sauce.
Quick and easy pesto penne pasta is a simple and light Italian pasta dish made with just five ingredients in under 15 minutes. The easiest dinner.

Chicken marsala in creamy mushroom sauce is a quick and easy 30-minute chicken dinner that is pure comfort food goals. A total crowd favourite.
Skillet Neapolitan Margherita Pizza
Quick and easy skillet Neapolitan margherita pizza has an iconic thin and soft crust with a perfectly crisp exterior, and simple and fresh toppings.

This simple Ravioli Soup is a quick, cozy meal with plump pillows of ravioli simmered in a hearty homemade tomato soup. Ready in just 20 minutes!
Caprese Skewers are a quick and fresh appetizer made with bite-sized mozzarella, juicy tomatoes, and basil leaves with a drizzle of balsamic glaze.
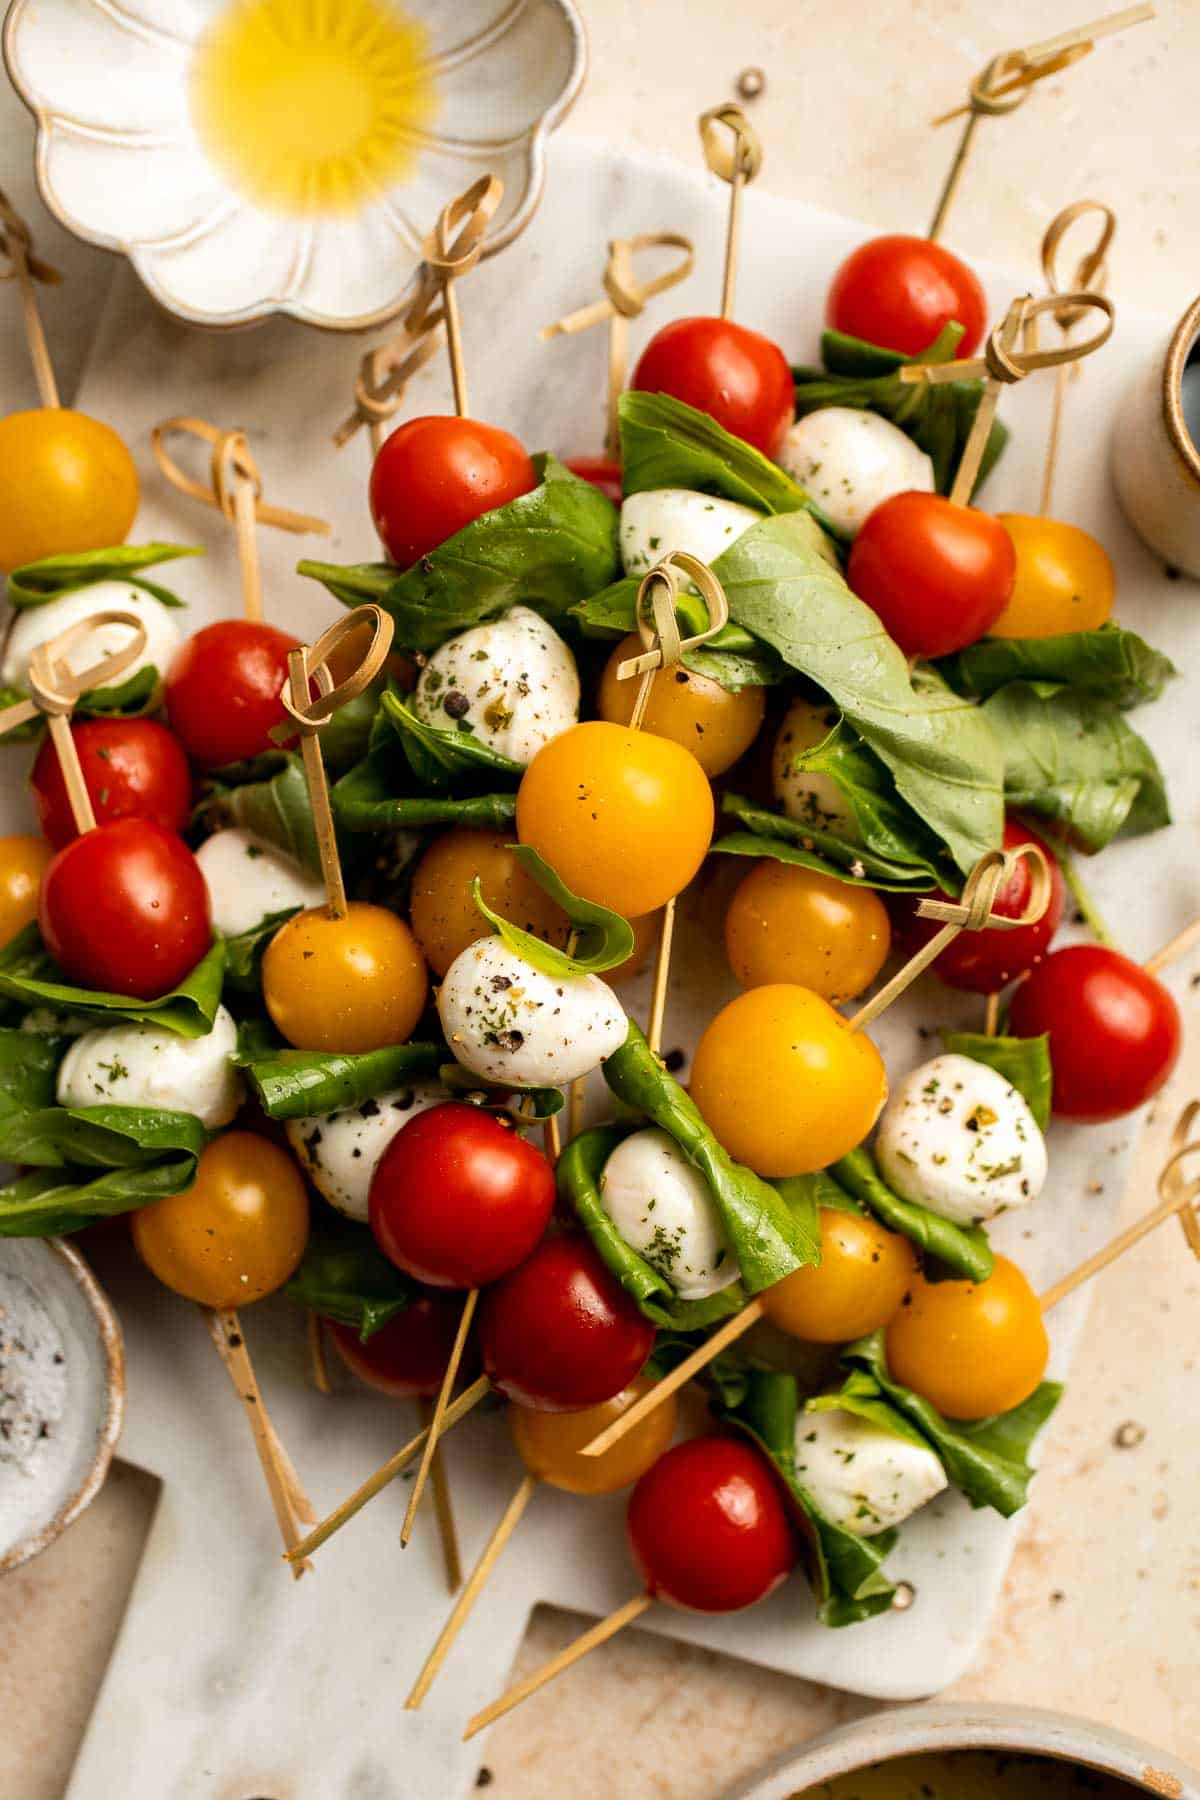
Cheesy Baked Gnocchi is quick and easy comfort food made all in one pot with chewy bites of gnocchi, a simple tomato-based sauce, and gooey melty cheese.
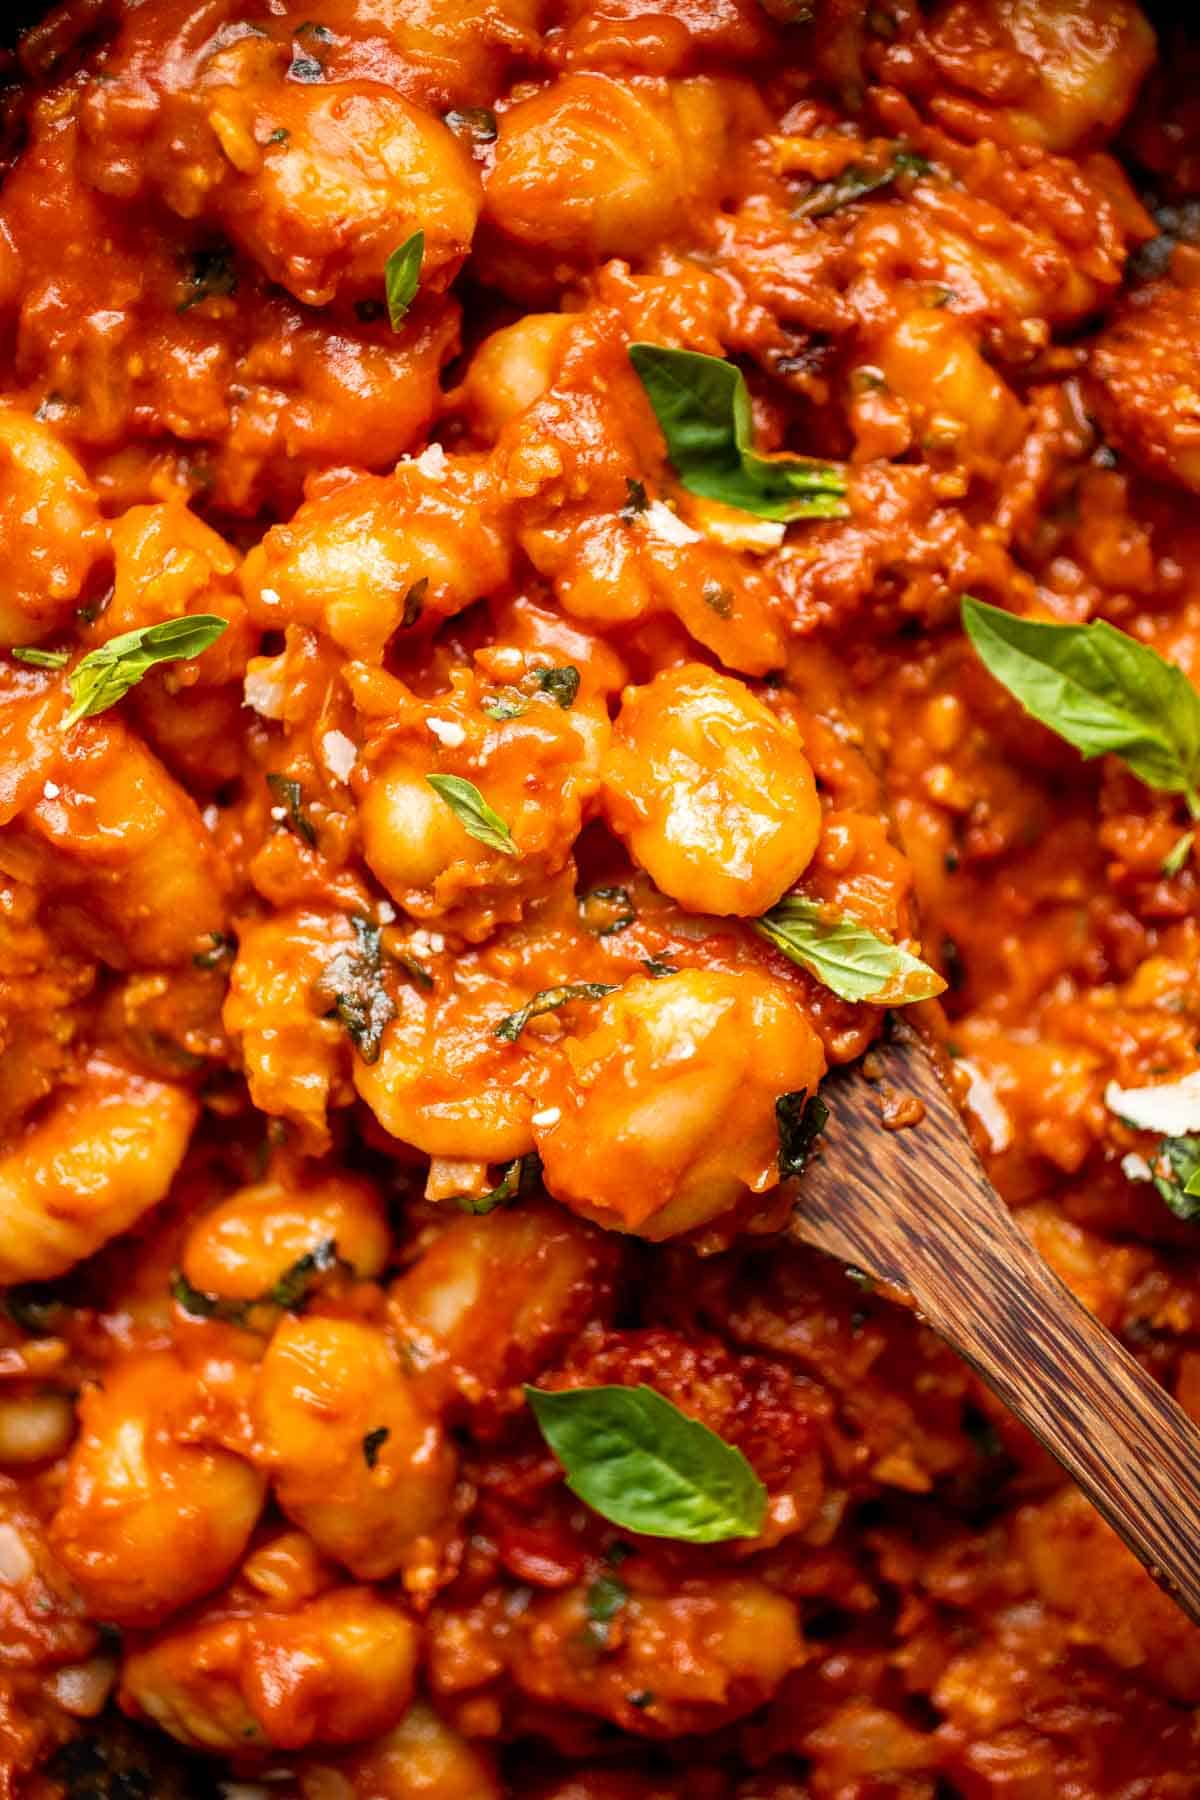
Quick easy spaghetti bolognese with a rich, thick, delicious and flavourful meat sauce is a family favourite ready in 30 minutes. Best weeknight dinner.
Instant pot osso buco is a delicious, classic Italian recipe with braised veal shanks stewed with vegetables in a thick, savory red wine and tomato sauce.
Homemade Butternut Squash Ravioli is a vegetarian dinner filled with roasted butternut squash and served with a nutty brown butter sauce with crispy sage.
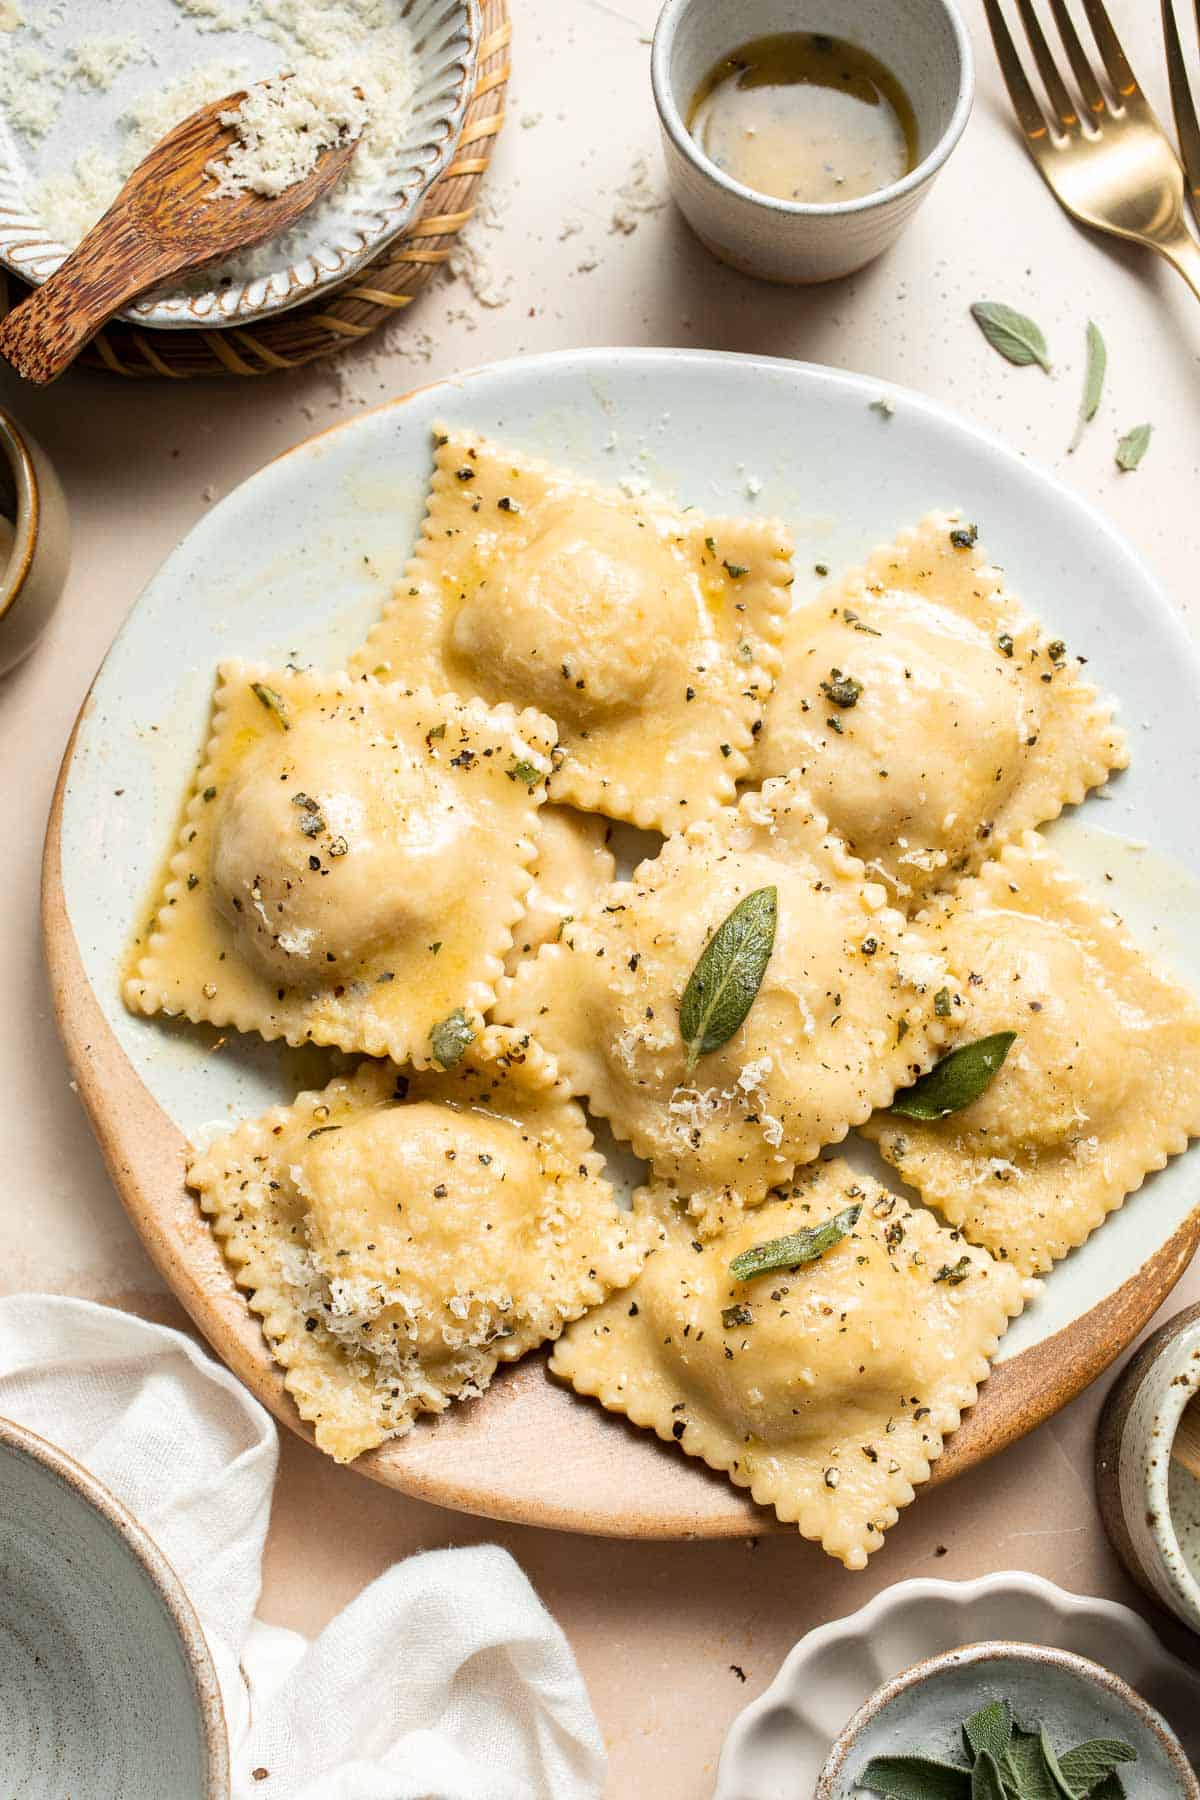
Ricotta stuffed shells are an easy, hearty, and classic Italian comfort food that can feed the whole family. Easy to make ahead and freeze for another day.
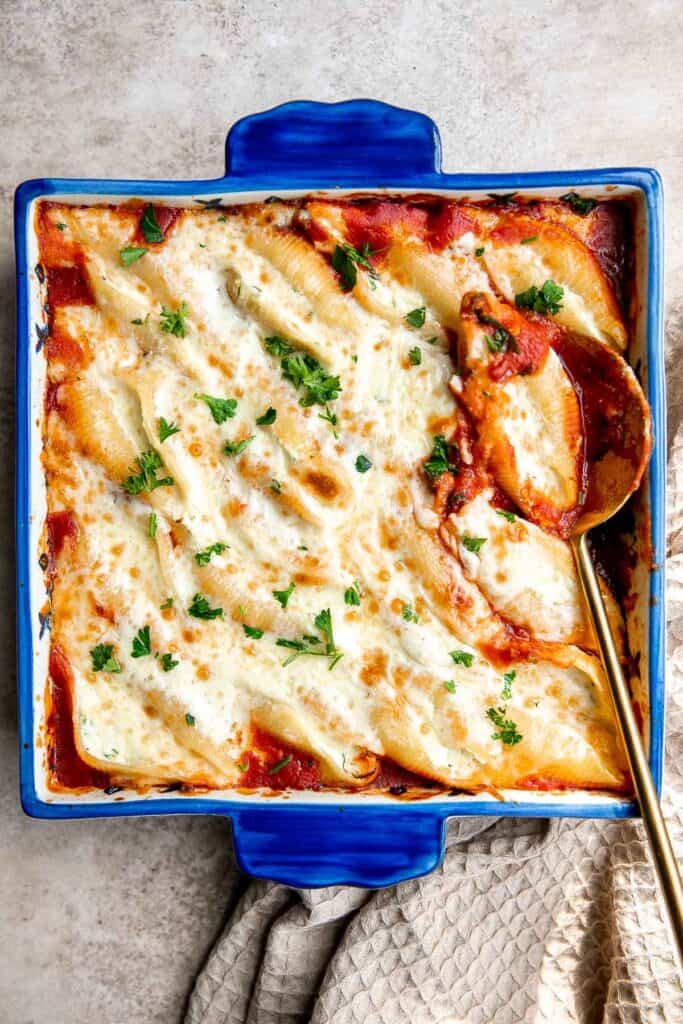
Creamy garlic salmon is a quick easy one-pan meal ready in under 30 minutes, with seared flaky tender salmon tossed in a delicious creamy garlic sauce.
Lasagna soup is a twist on a classic Italian recipe with all the same delicious comforting flavors in the form of a hearty one pot soup.
Chicken penne pasta is a quick and easy dinner that is delicious, rich, creamy, and flavorful. It's a family favorite that's ready in under 30 minutes.
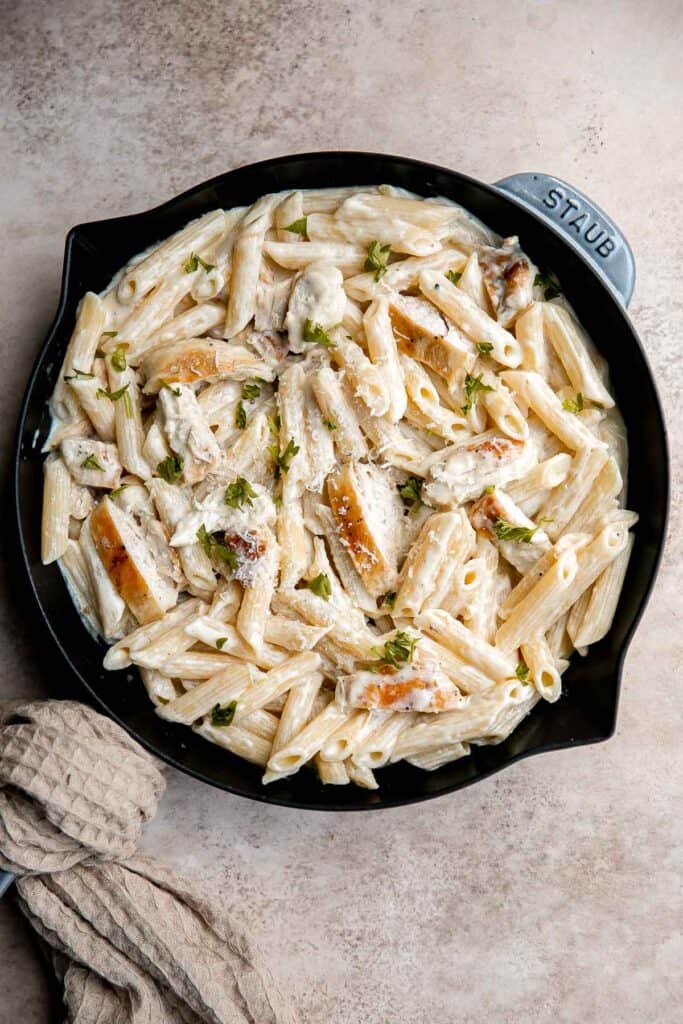
Marinara sauce is rich, vibrant, and loaded with flavor. It's easy to make with a few simple fresh ingredients. Serve as a dip or in pasta and pizza.
Easy Tomato Bruschetta with Balsamic Glaze
Tomato bruschetta with balsamic glaze is an easy Italian appetizer topped with tomatoes, onions, garlic, basil and olive oil. Delicious, fresh and simple. The perfect light Super Bowl recipe.
Shrimp Alfredo is creamy, garlicky, and delicious! This quick and easy, under 30-minute recipe is a go-to for busy nights and a year-round family favorite.
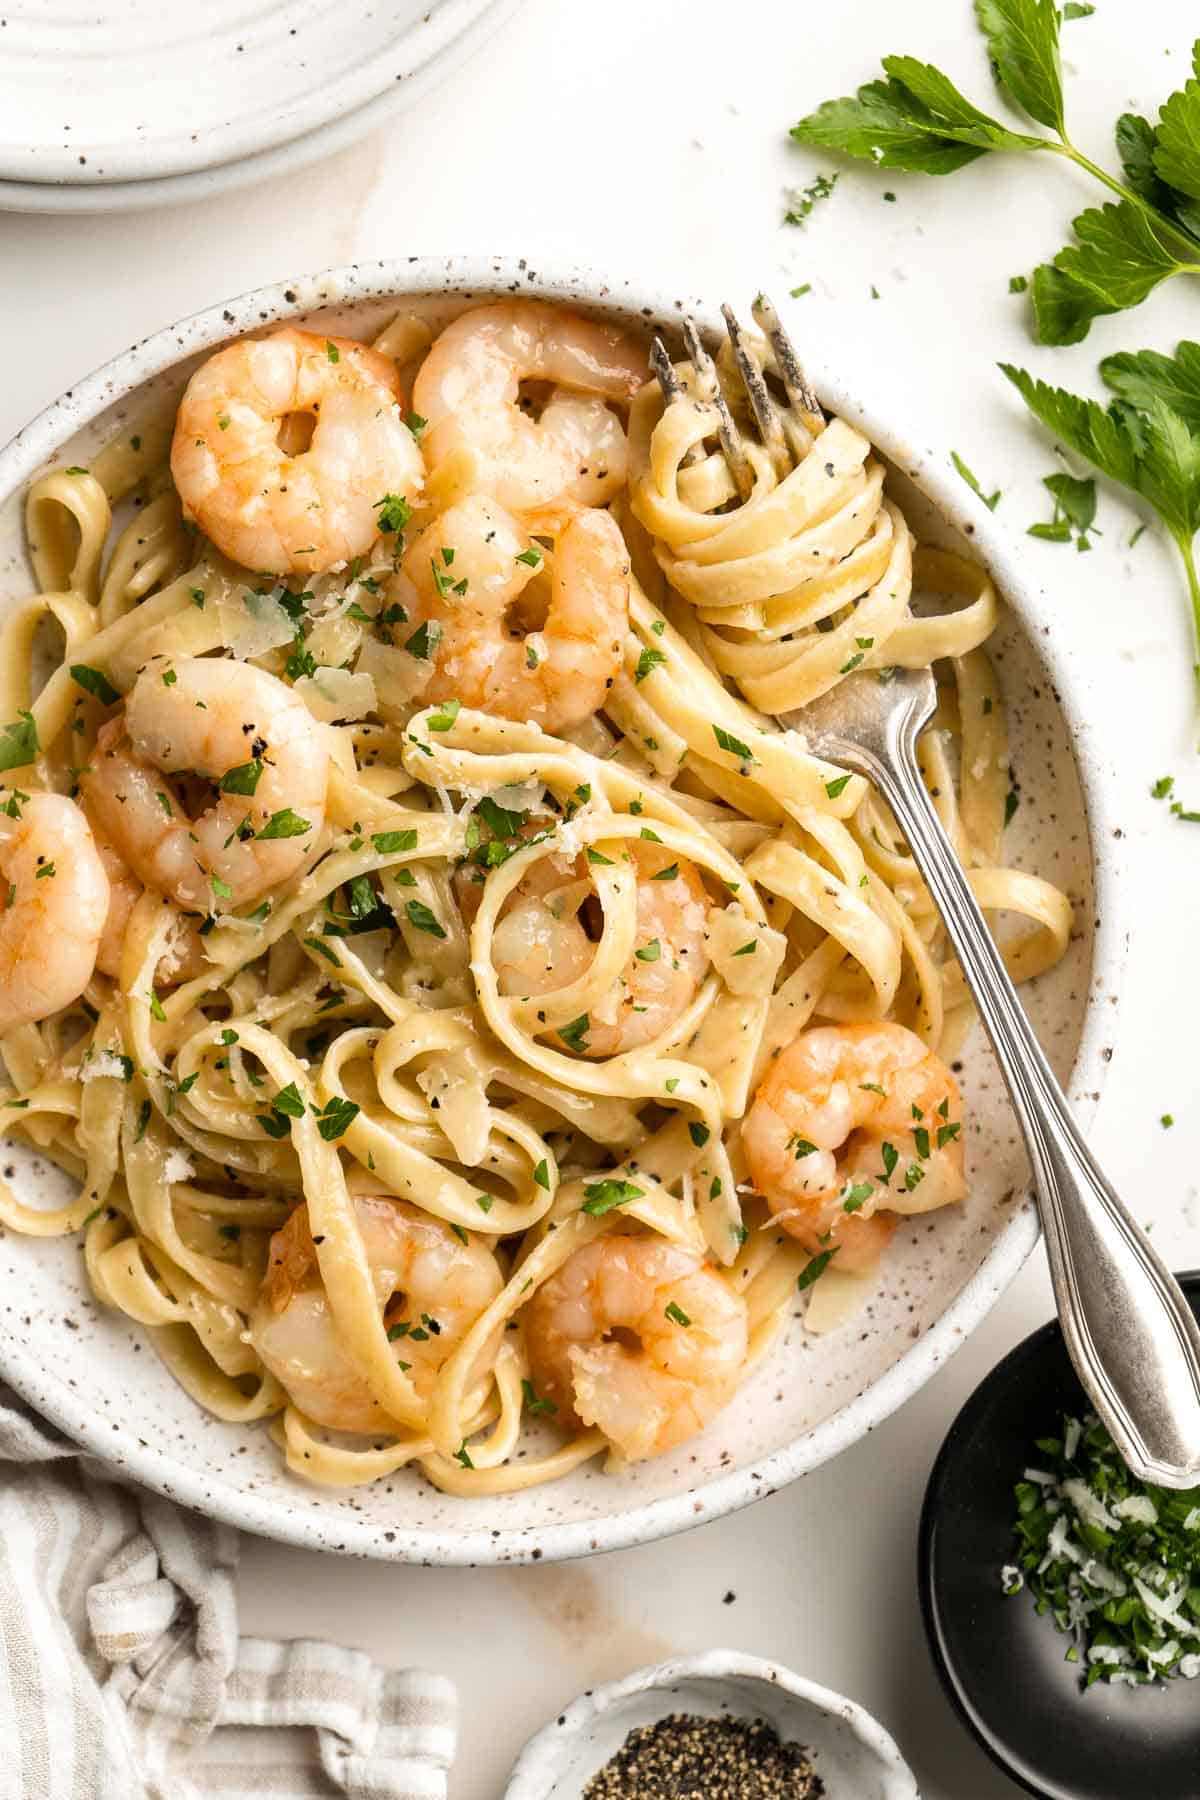
Creamy Tuscan chicken with sun-dried tomatoes and spinach is a quick and easy 30 minute Italian chicken dinner that is delicious, flavorful, and comforting.
Creamy White Chicken and Spinach Lasagna
Creamy white chicken and spinach lasagna with tender shredded chicken is the most comforting creamiest cheesiest white lasagna. Easy to make ahead & freeze.
This Tuscan White Bean Soup is comforting, nourishing, and delicious, packed with creamy cannellini beans, fresh veggies, and herbs. Ready in 30 minutes!
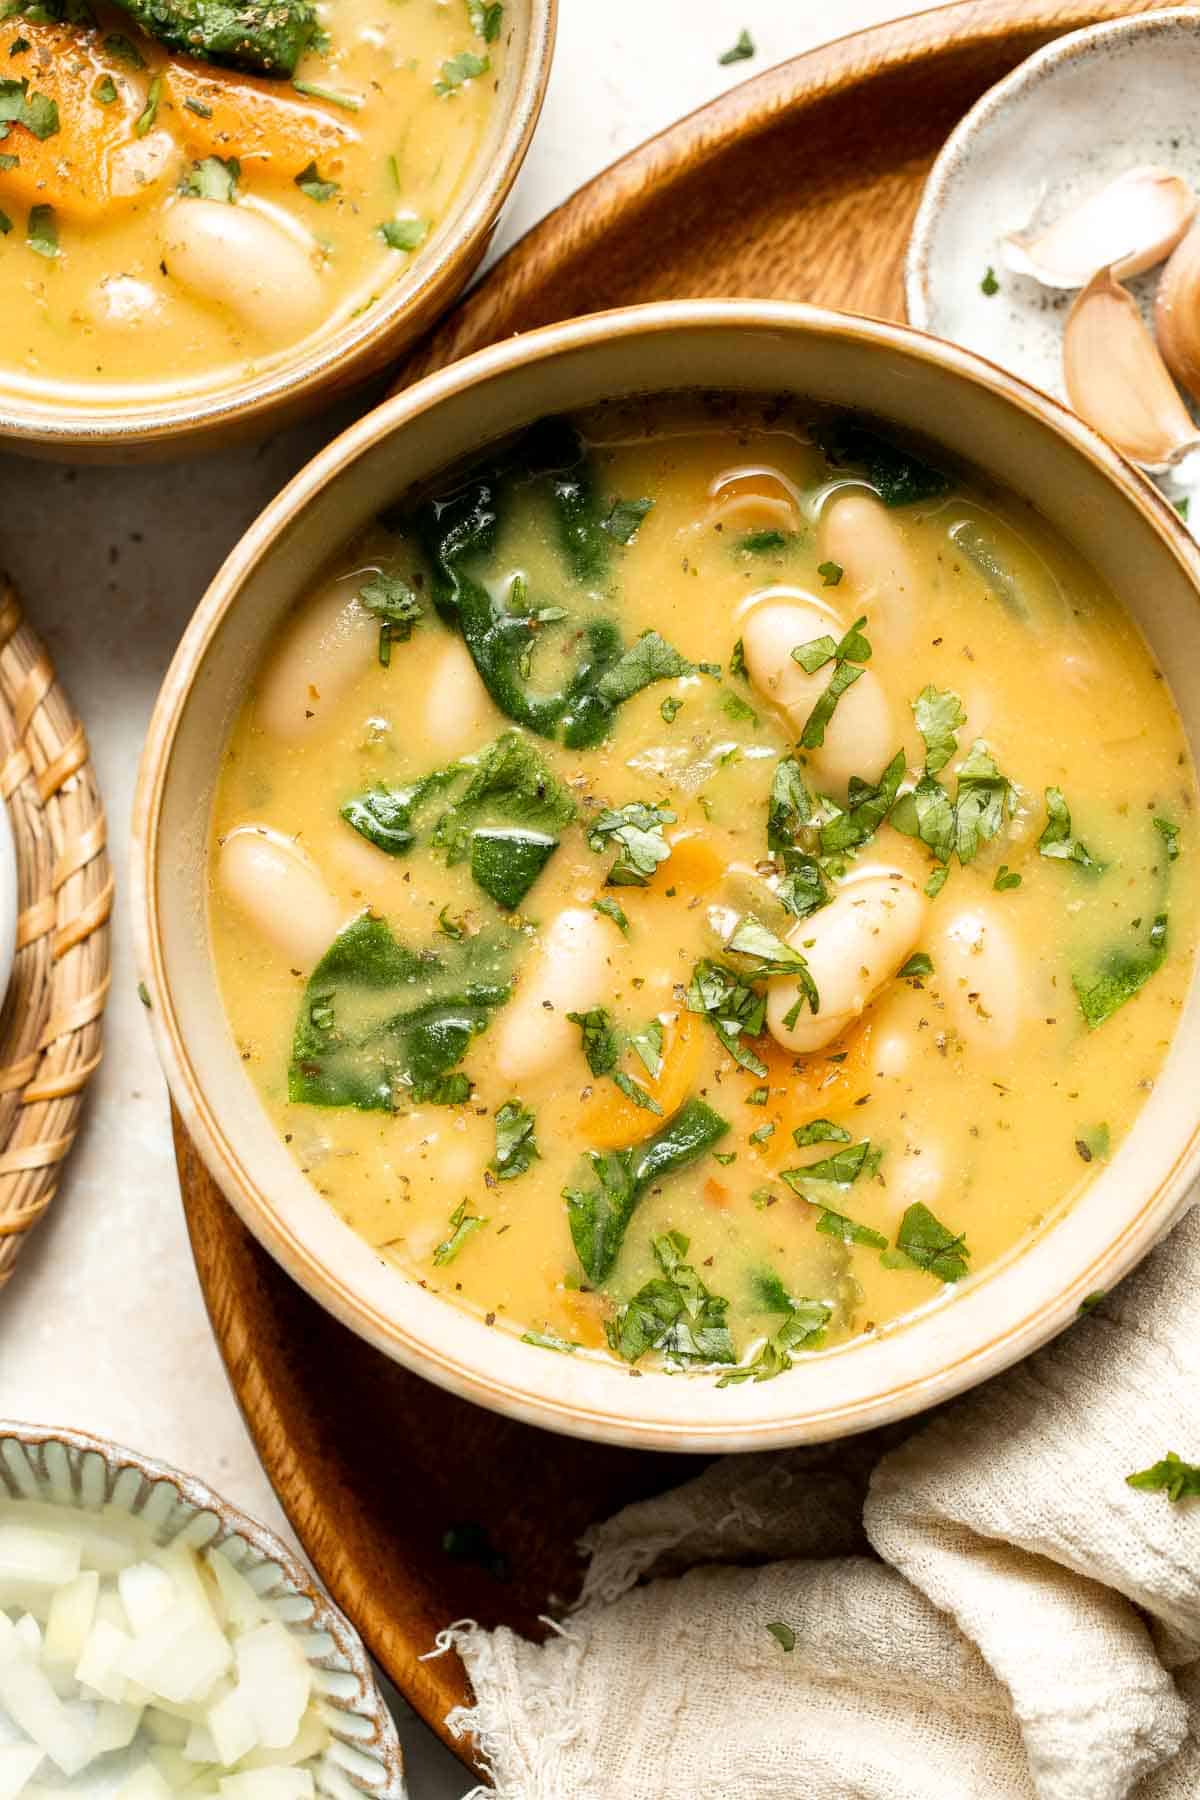
Soft garlic breadsticks are fluffy, airy, buttery, and delicious. They're an easy recipe that is perfect for beginners at baking bread.
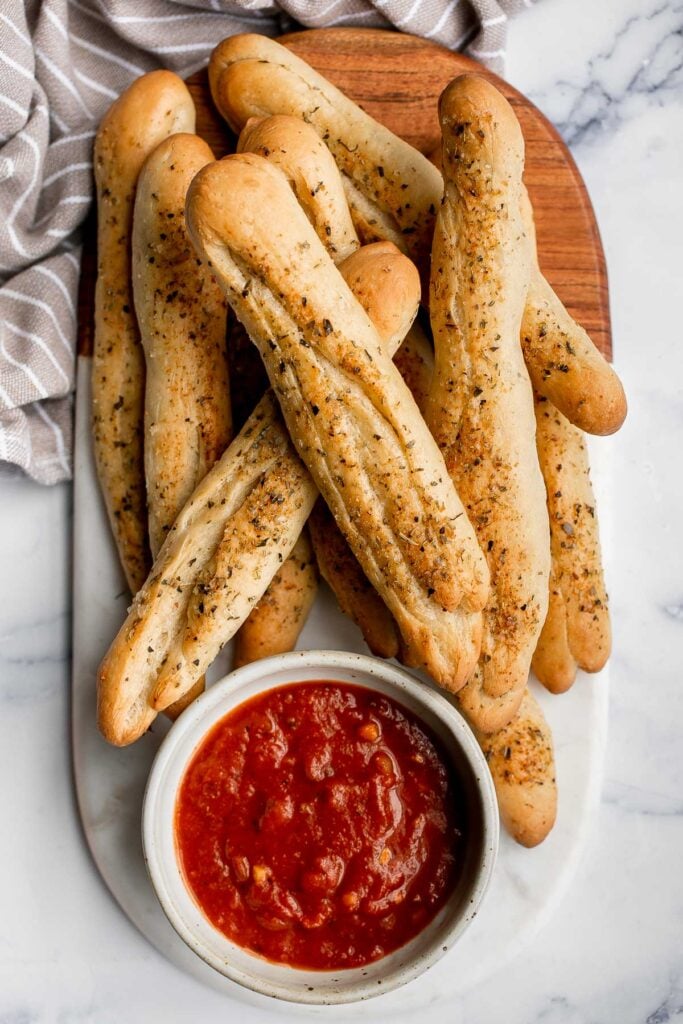
Eggplant Rollatini features roasted eggplant stuffed with creamy ricotta, baked in marinara, and topped with cheese - the best vegetarian comfort food!
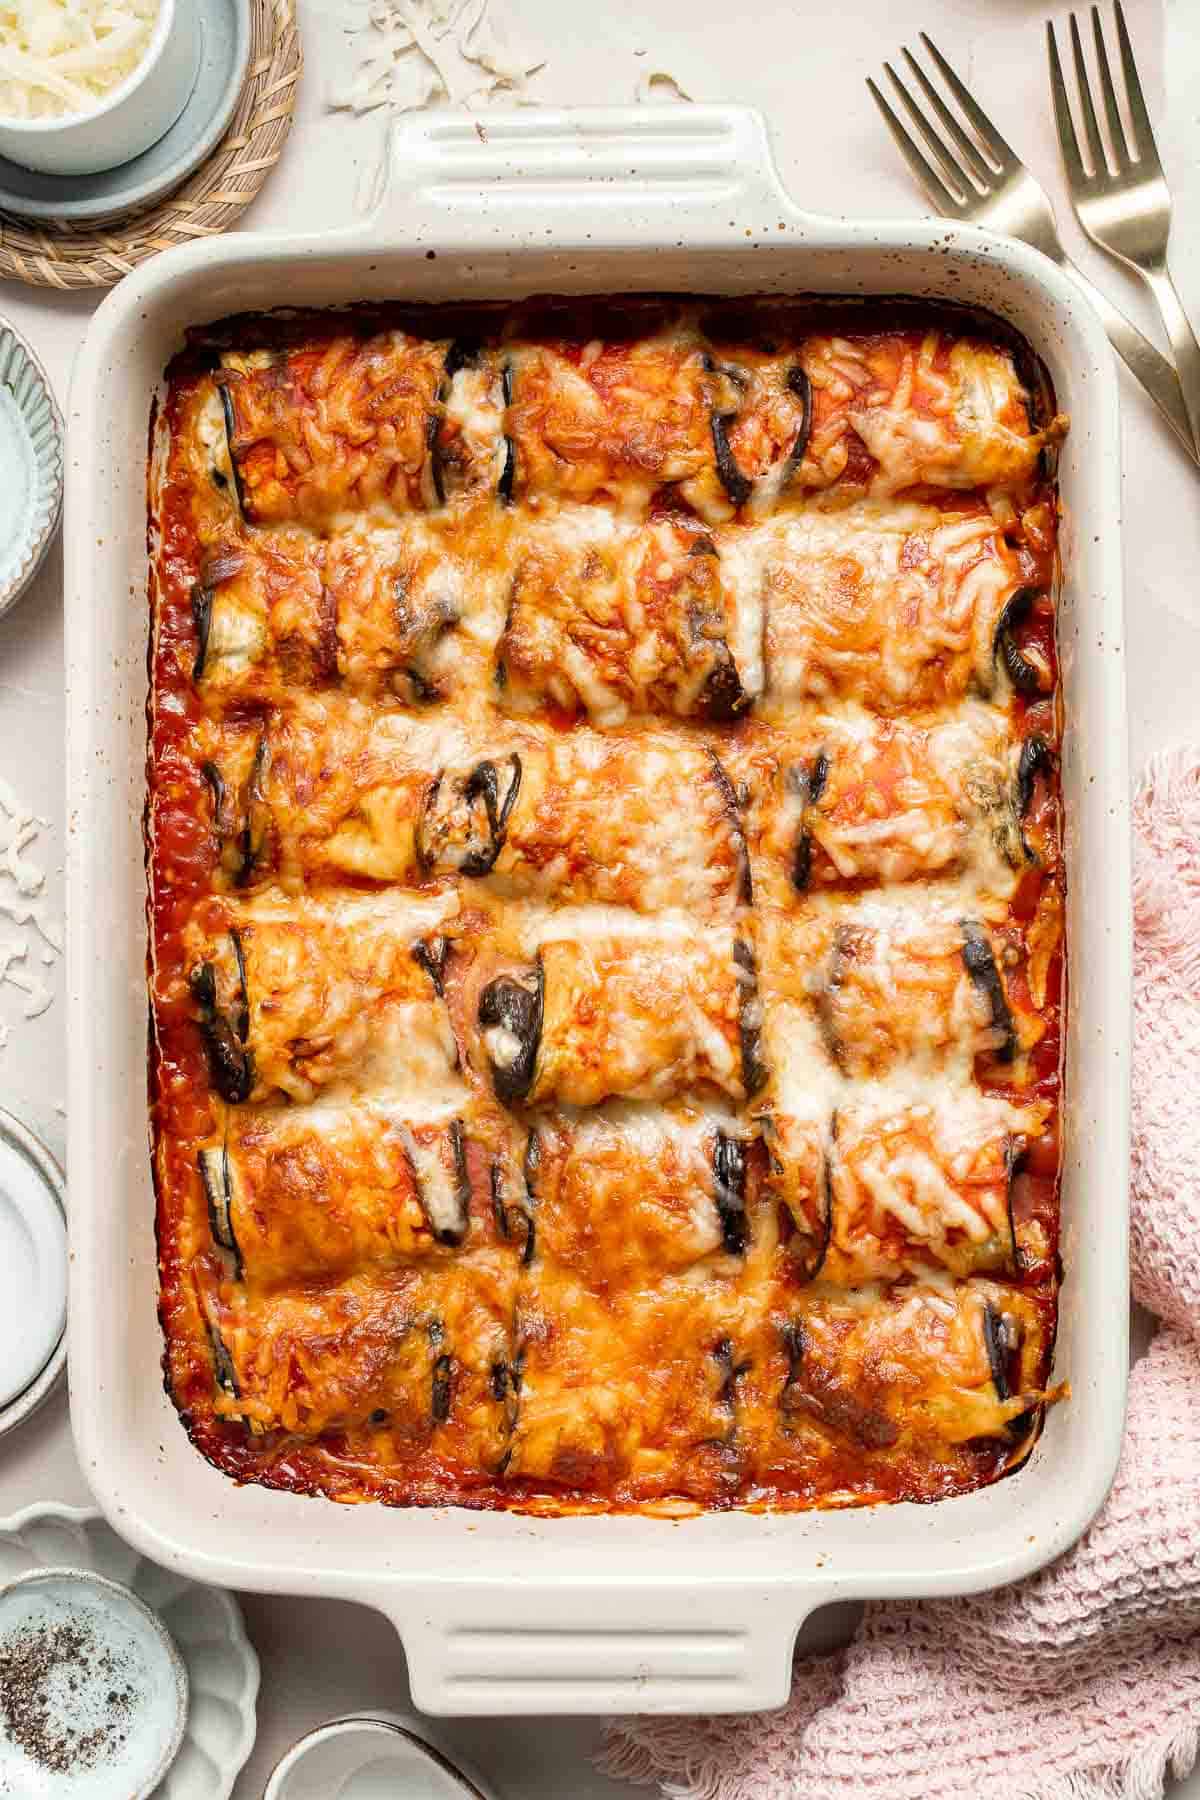
Farfalle Pasta with Mushroom Rose Sauce
Farfalle pasta with mushroom rose sauce is creamy yet light, delicious and flavorful, and quick and easy to make in 20 minutes. Best comfort food dinner!
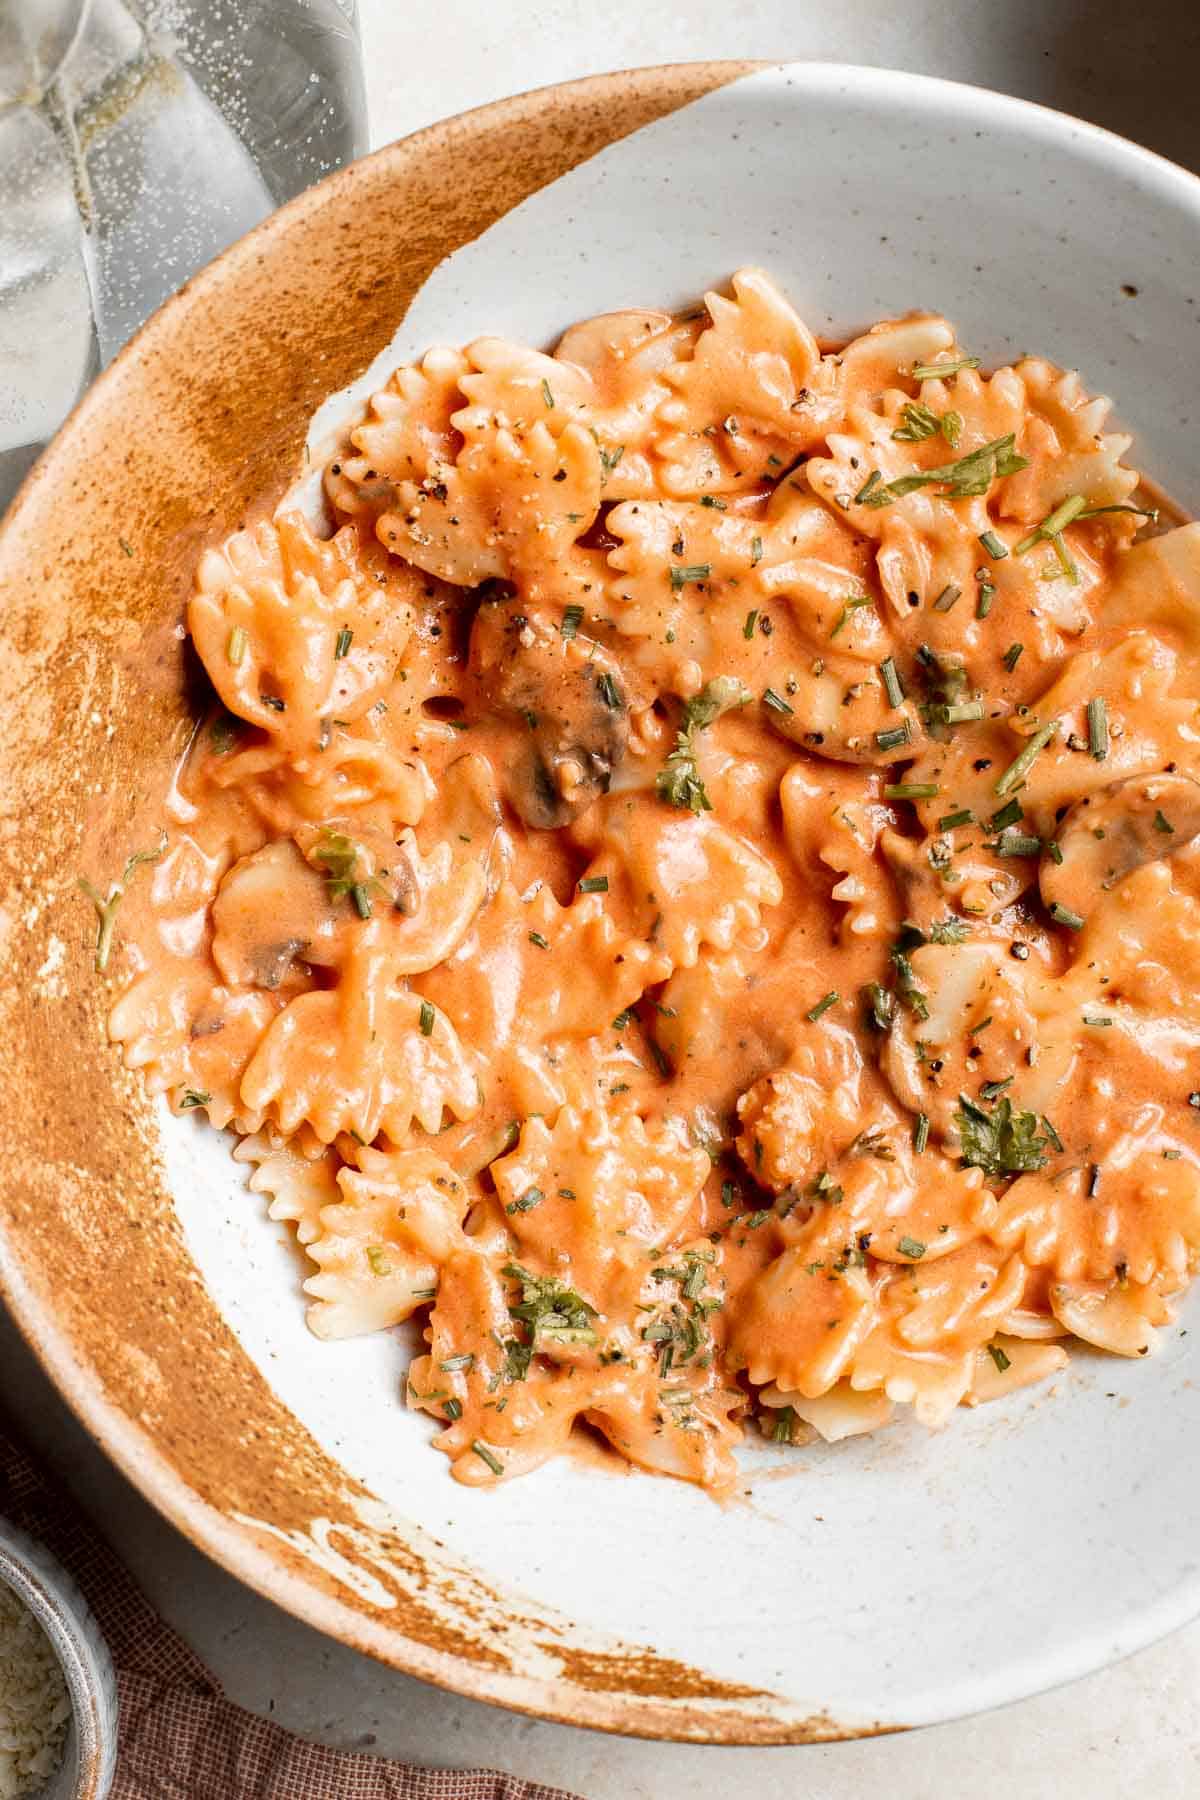
Light and airy, whipped ricotta dip is so easy to make in just 5 minutes with a few fresh ingredients including fresh herbs, olive oil, garlic, and honey.
Classic Manicotti is everything you love about Italian comfort food - creamy ricotta, tender pasta, and a rich, savory marinara sauce baked until bubbly.
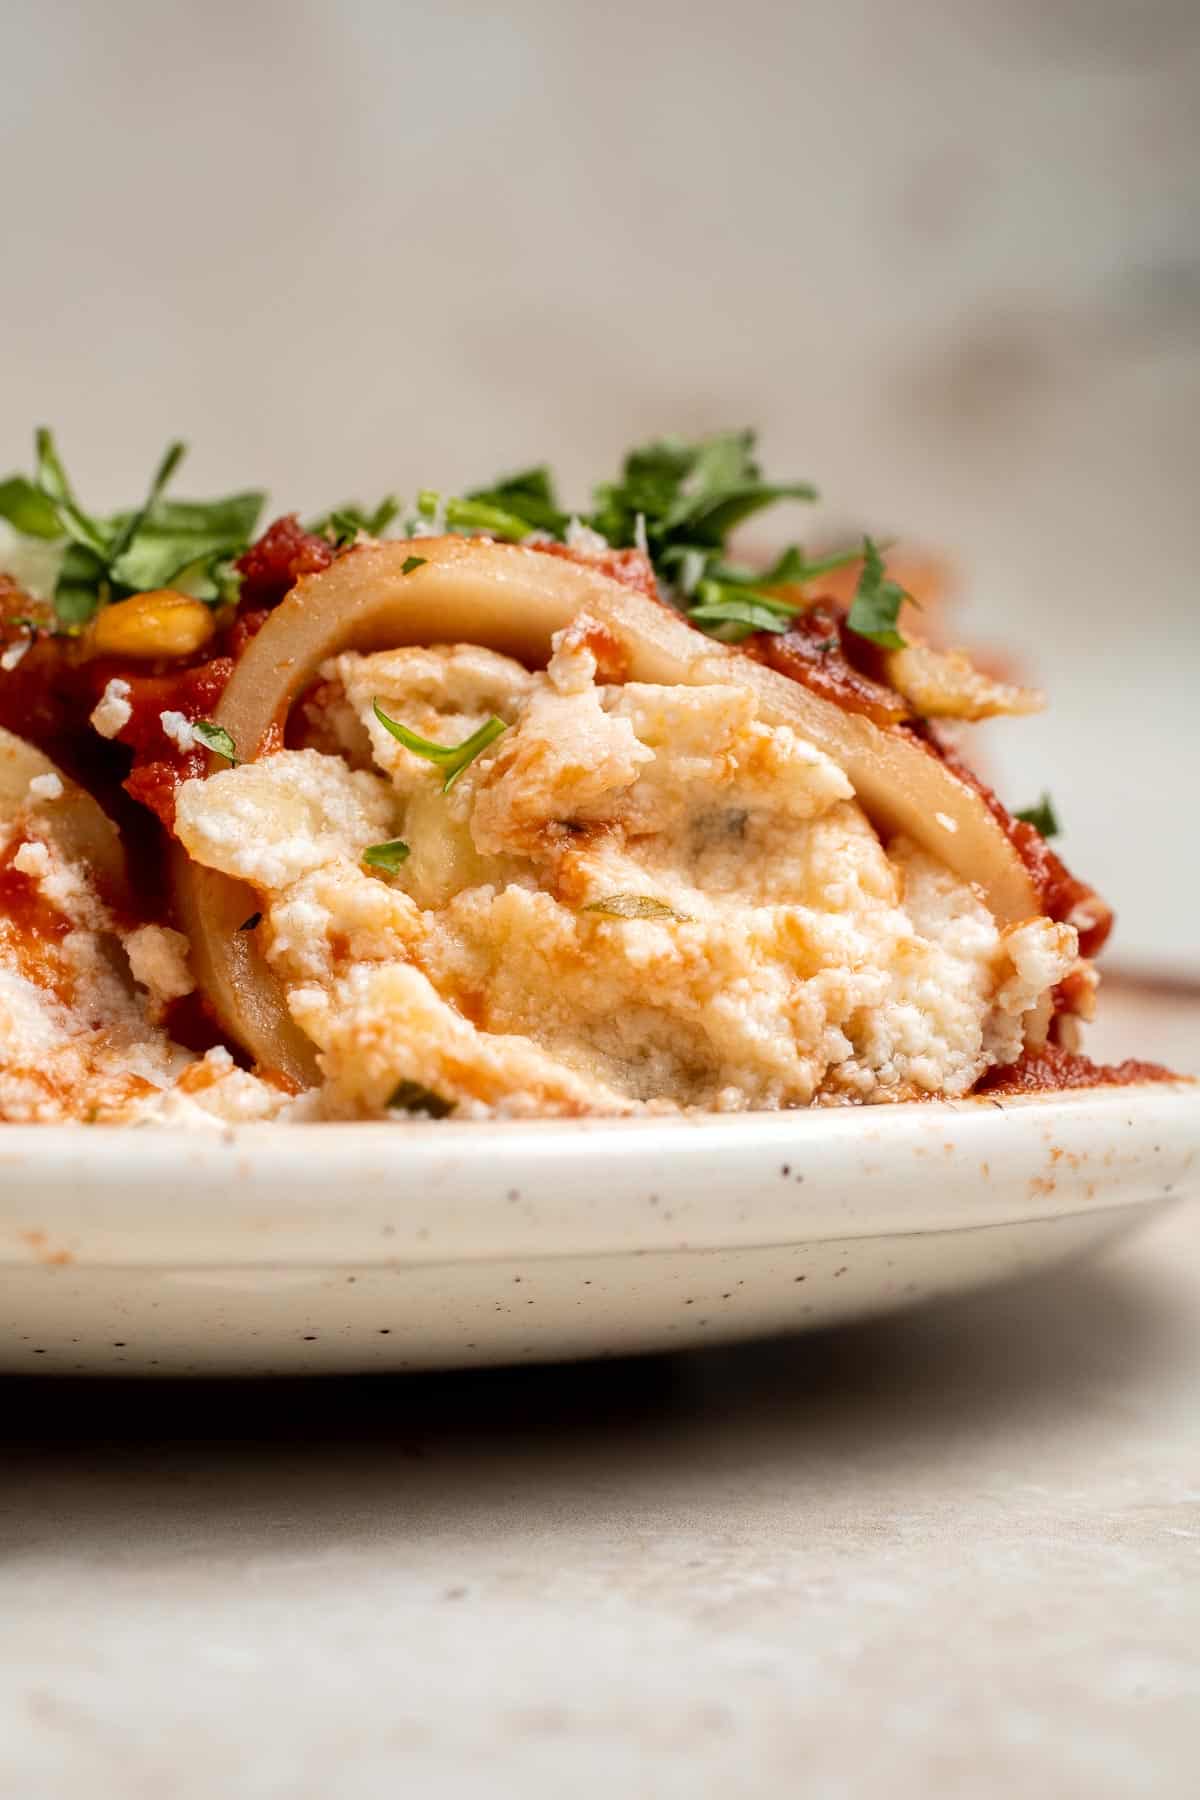
Homemade tomato basil soup is comforting, rich, and smooth. This cozy soup is easy, flavourful, and nourishing, making it so much better than canned.
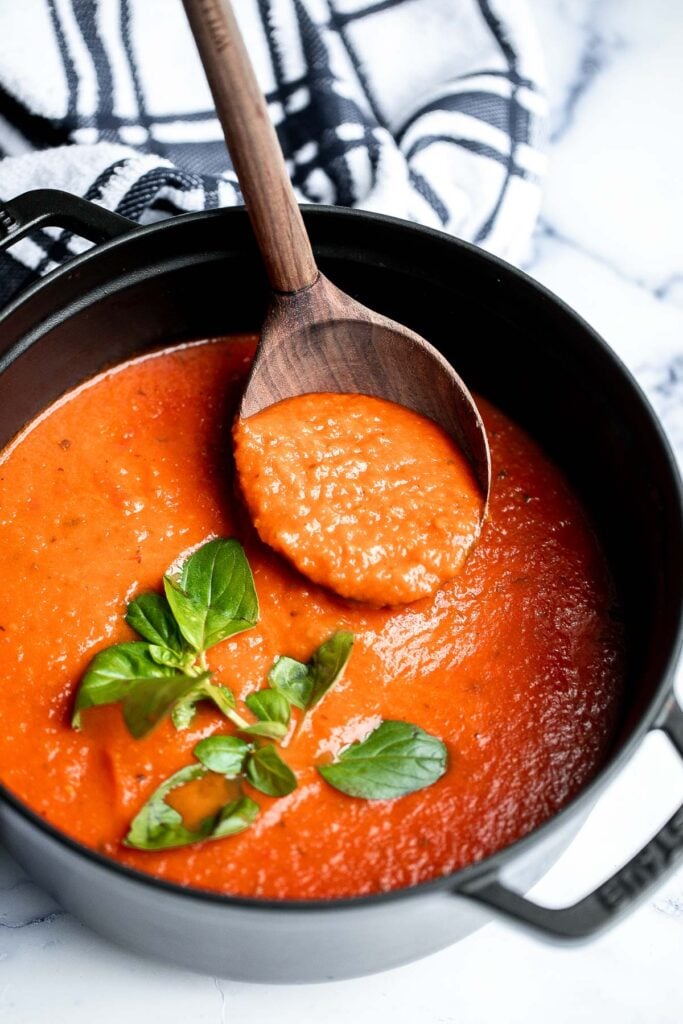
Creamy Chicken Pesto Pasta is a delicious 30 minute recipe that is packed with flavor, quick and easy to make, and will satisfy the whole family.
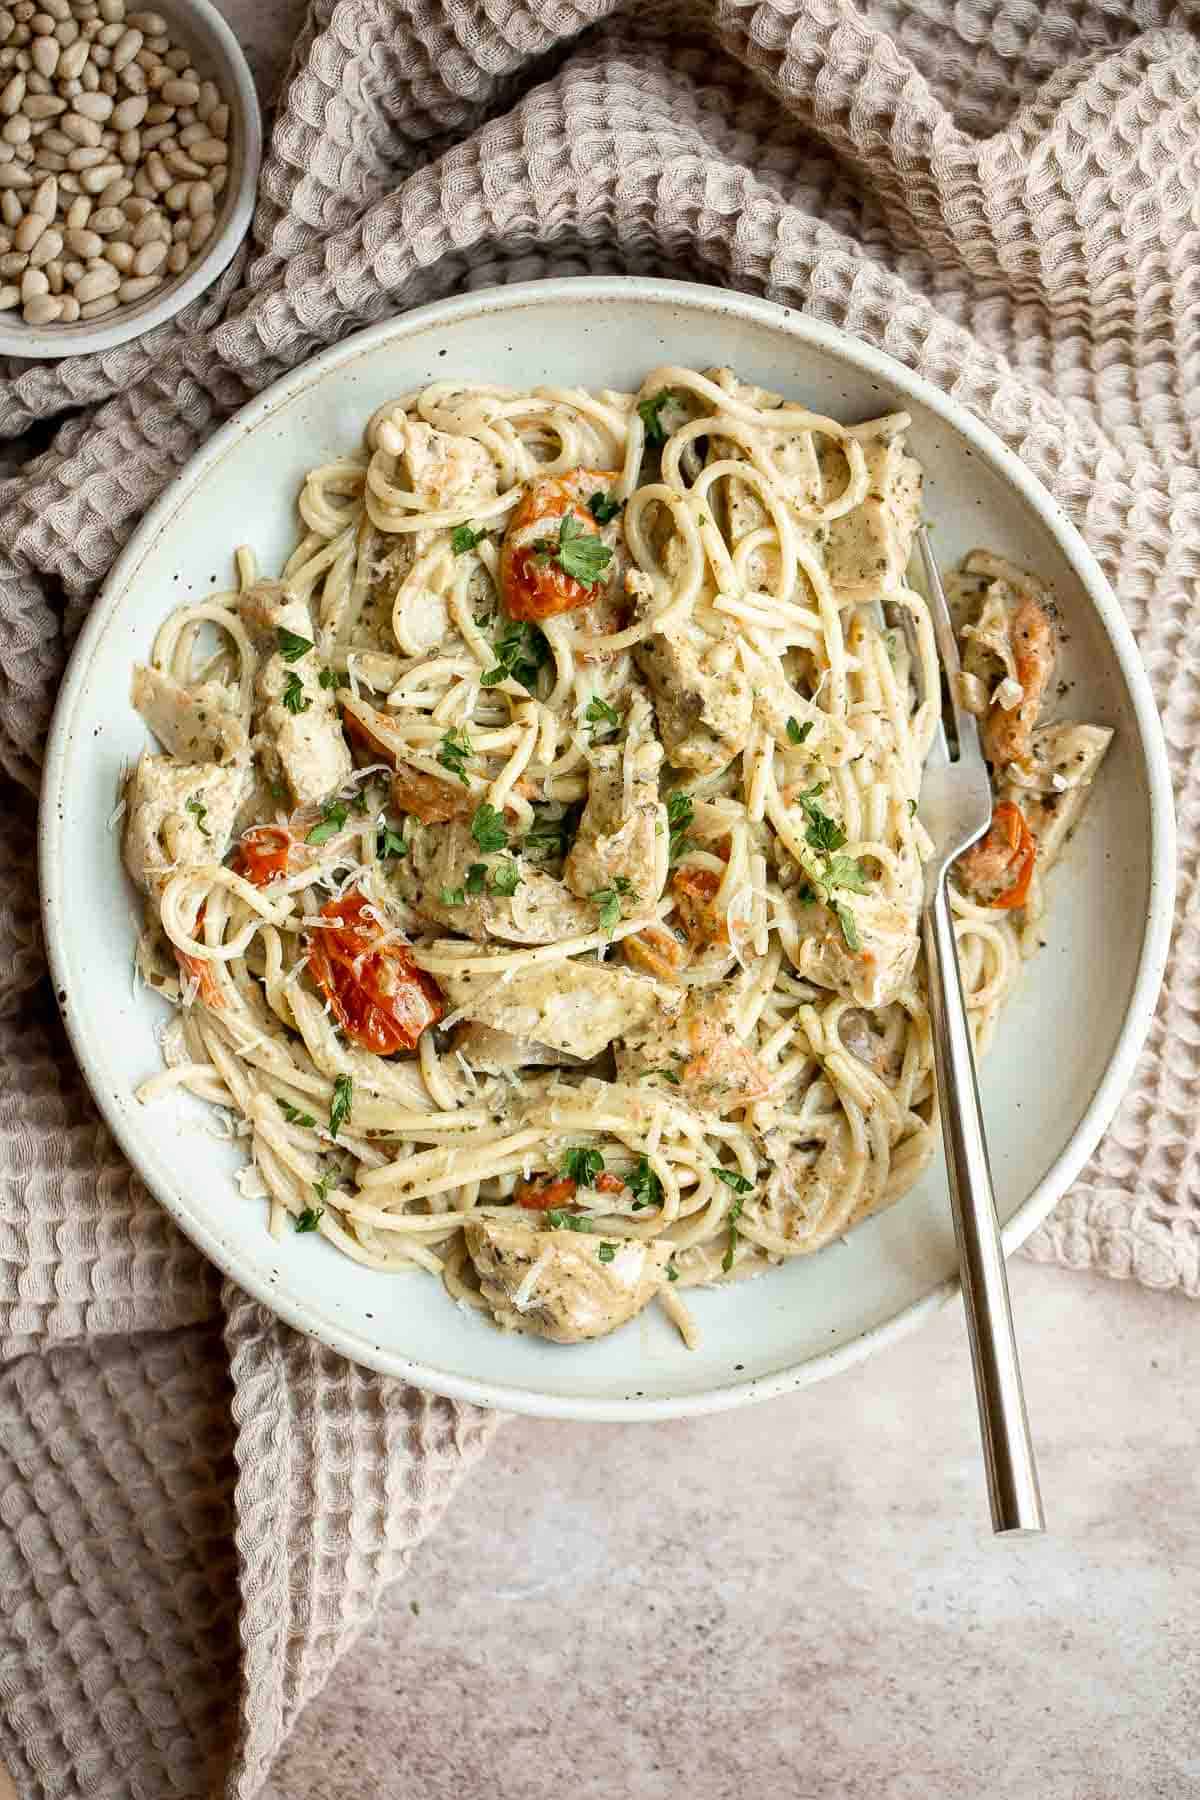
Toasted Ravioli is a classic Italian appetizer that is crispy and golden on the outside, and tender and gooey on the inside. Ready in less than 30 minutes!

Cacio e pepe is a simple, authentic Italian pasta dish made with just four ingredients in 20 minutes. It's delicious, flavourful and easy to make.

Tomato and Mozzarella Caprese Salad
Quick and easy tomato and mozzarella caprese salad is a fresh, light, and delicious summer salad, made with just a few simple ingredients in 10 minutes.
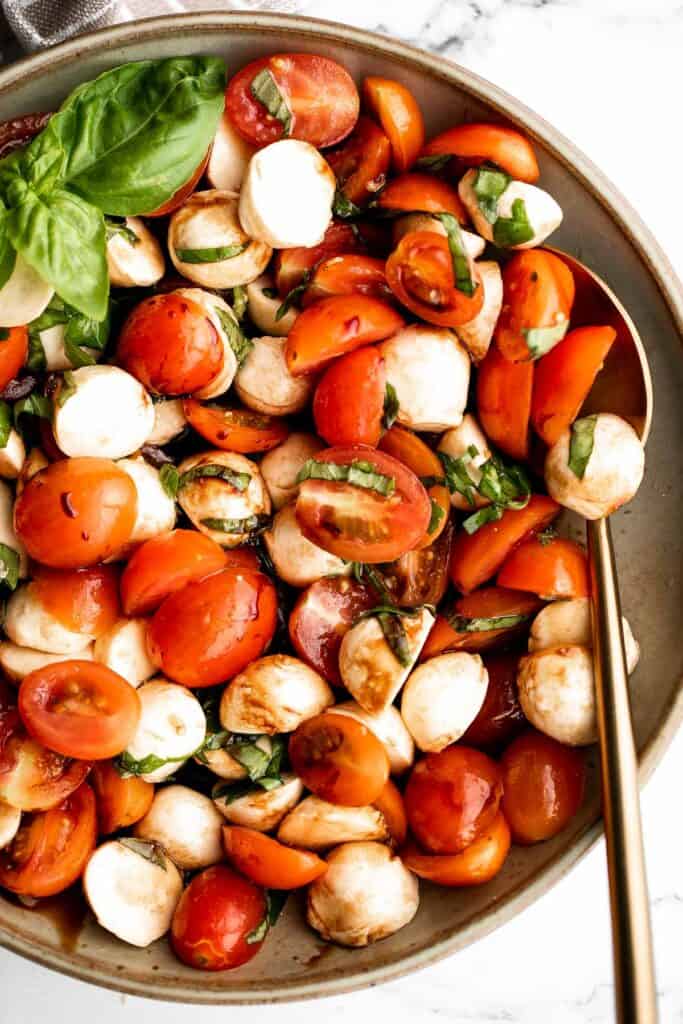
Salami and Mushroom Skillet Pizza
Easy salami and mushroom skillet pizza with a crispy pizza crust, mushrooms, salami, and fresh mozzarella is ready on the skillet in about 10 minutes.

Creamy Chicken Roulade with Spinach and Mushrooms
Give your chicken breasts an upgrade by stuffing them to make fancy, juicy chicken roulade with spinach and mushrooms topped with a creamy alfredo sauce. Serve it over spaghetti alfredo with spinach and mushrooms.
Creamy spaghetti carbonara (Spaghetti a la Carbonara) is a simple classic Italian pasta with pancetta that's quick and easy to make in minutes.
Baked caprese chicken is tender, juicy, and delicious, topped with burst tomatoes, mozzarella cheese, fresh basil, and a drizzle of balsamic glaze.
Easy small batch ciabatta rolls are fluffy and airy with a perfect crunchy, crackly crust. They take only 10 minutes to prepare and require no kneading. These are the most popular bread recipe on our entire site!

Italian Lentil Soup transforms simple pantry staples (like lentils and canned tomatoes) and fresh veggies into a hearty meal to warm you up on a cold day.
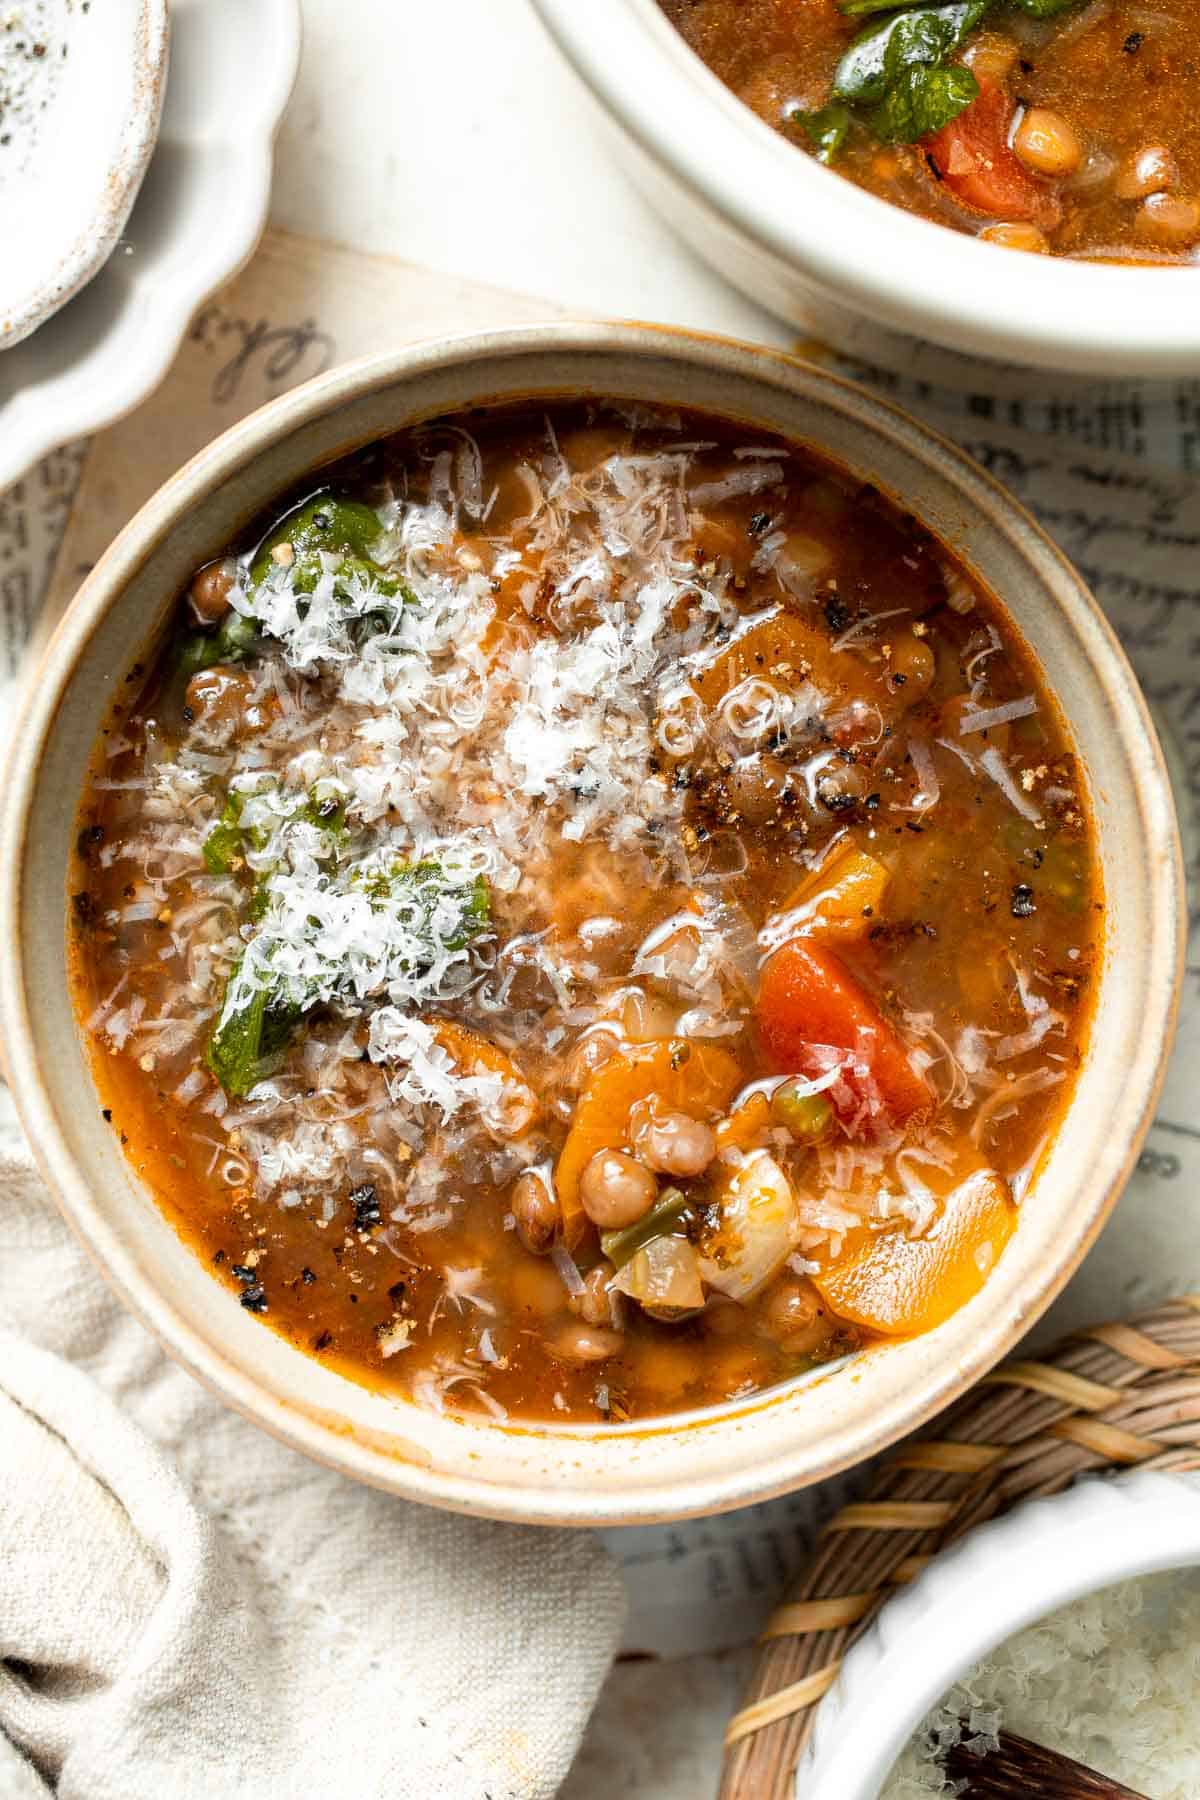
Creamy Pesto Chicken is a quick and easy 30 minute meal that needs to be on your family weeknight dinner rotation. It's rich, creamy, and delicious.
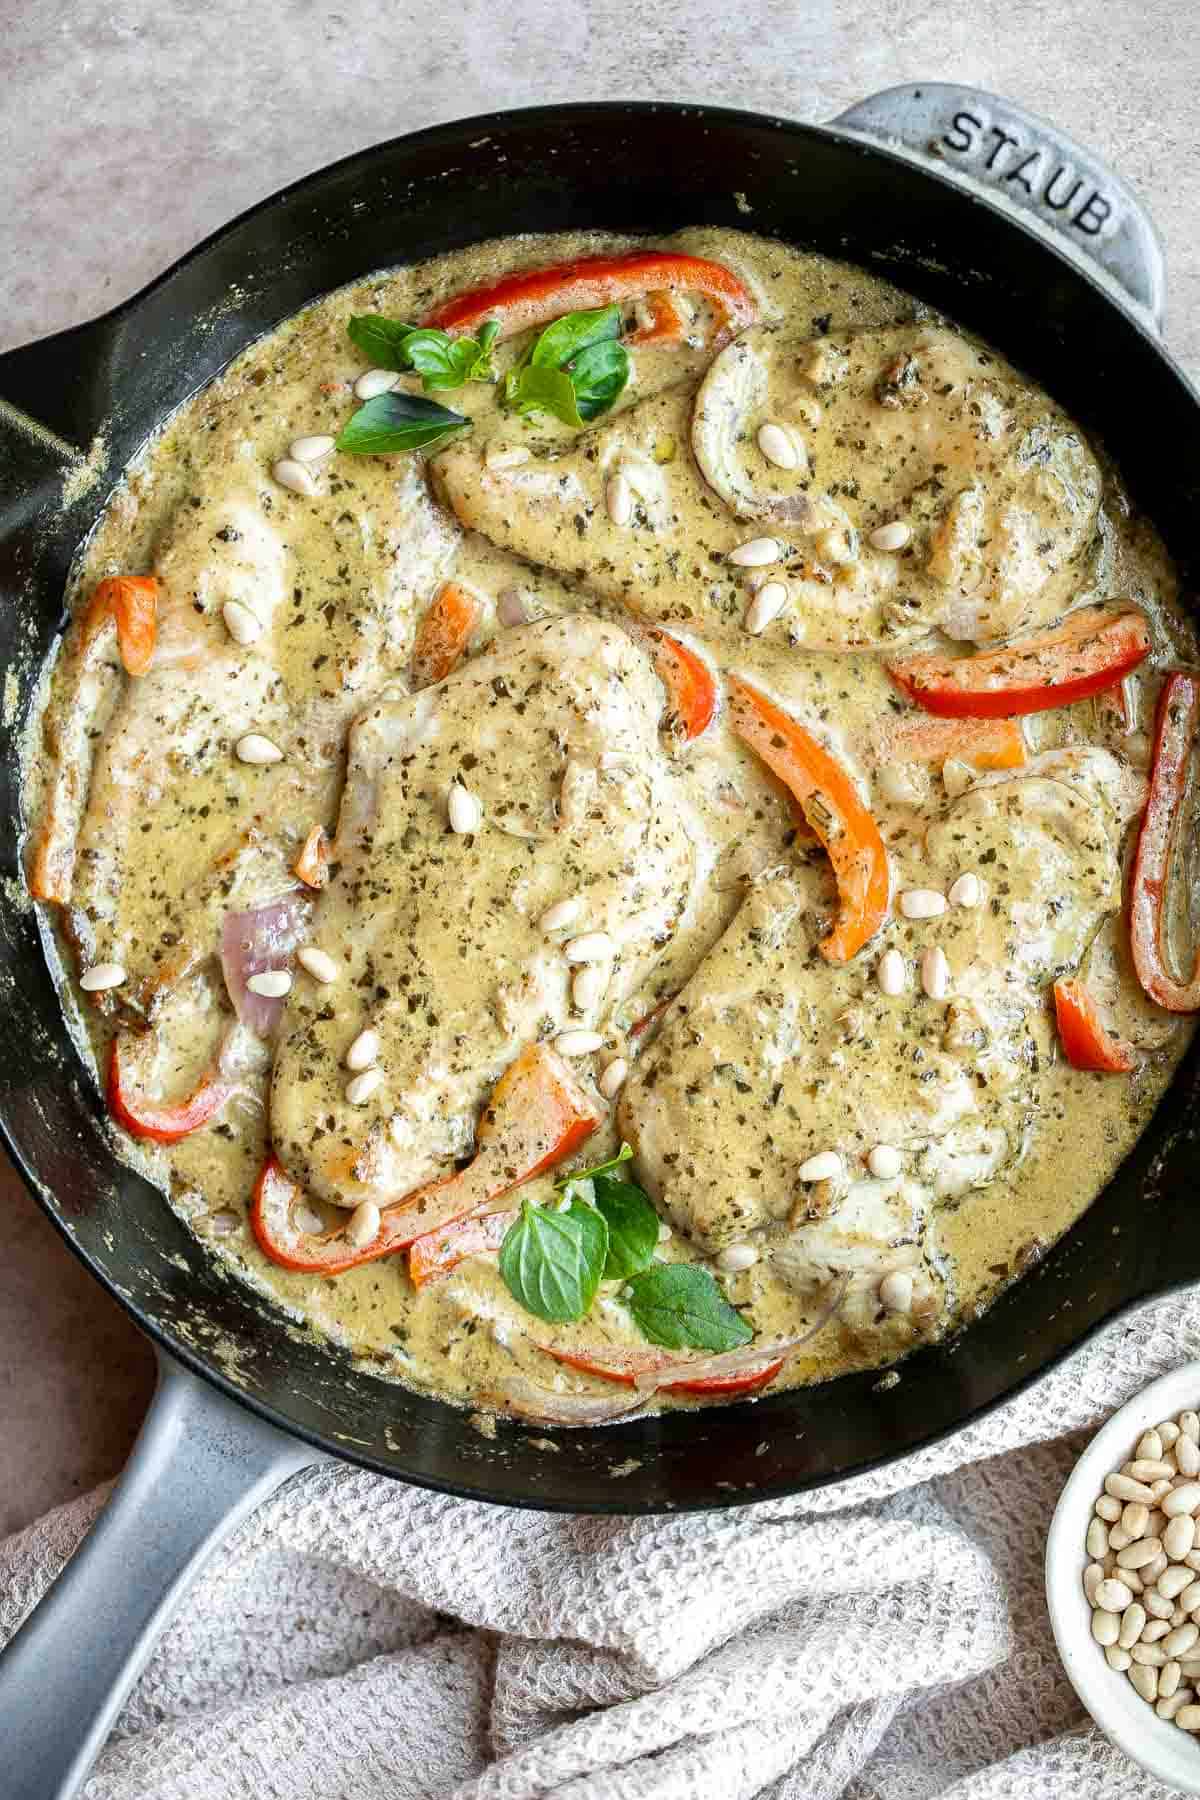
Creamy Mushroom Tagliatelle Pasta is a quick and easy, restaurant-worthy vegetarian dinner that is ready in just 30 minutes! Elevated comfort food at home.
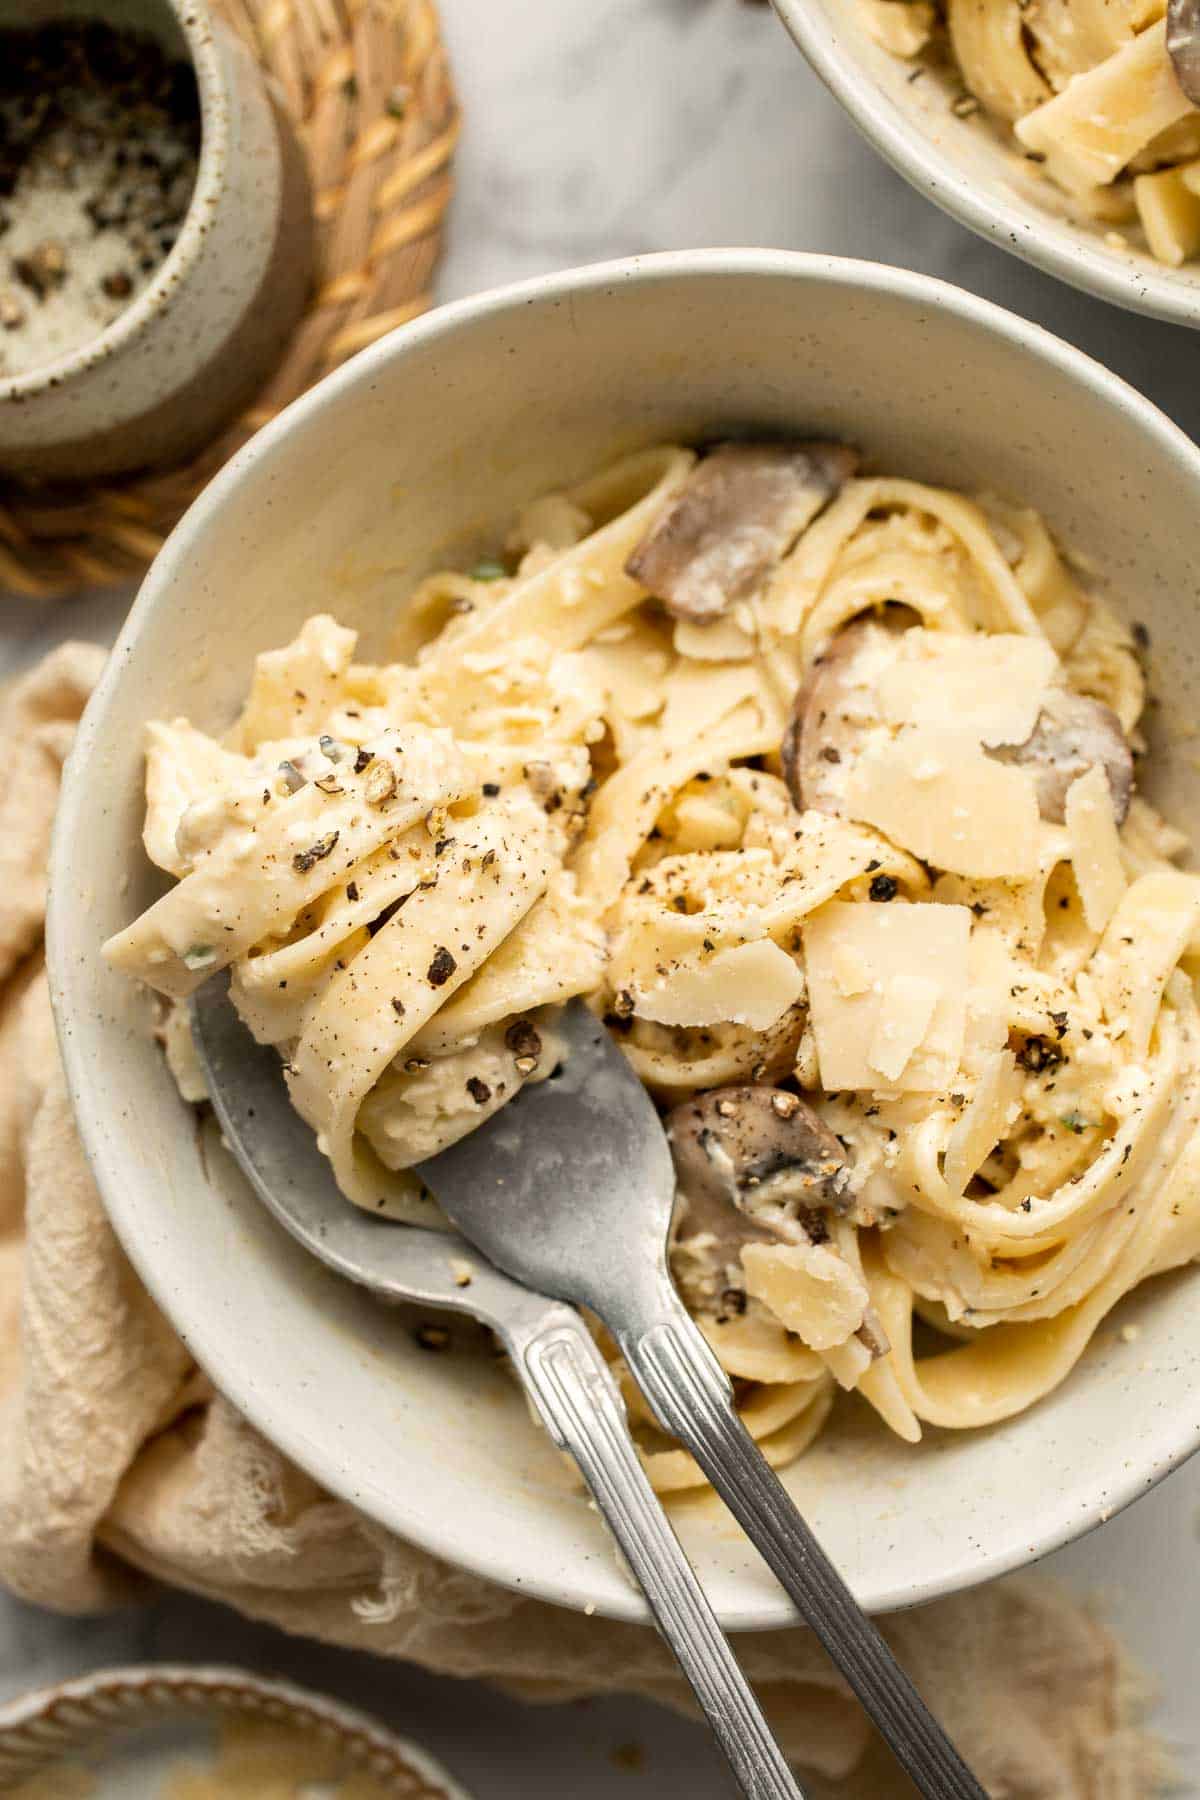
Baked Feta Pasta is a quick and easy weeknight dinner recipe that is creamy, delicious, and flavorful - the whole family will love this Tiktok pasta!
Turkey Tetrazzini with Spinach
Creamy tetrazzini with spinach is a simple, easy and delicious pasta recipe that is comforting, creamy and cheesy. The recipe used turkey, but you can easily substitute it with leftover chicken or a storebought rotisserie chicken instead.
Smooth, hearty and light, one pot lemon chicken orzo soup is pure comfort in a bowl. This family favourite is like chicken noodle soup with a major upgrade.
Classic Roman Herbed Potato Pizza
Easy and simple yet flavourful classic Roman herbed potato pizza has a crispy thin crust with layers of tender potato tossed in olive oil and herbs.
Bright and colorful caprese pasta salad is the ultimate summer side dish. It's fresh, light, and loaded with vibrant summer flavors. Quick and easy too!
Vegetarian stuffed mushrooms are a delicious, flavorful, healthy, and nutritious appetizer. Plus, quick and easy to make in under 30 minutes including prep!
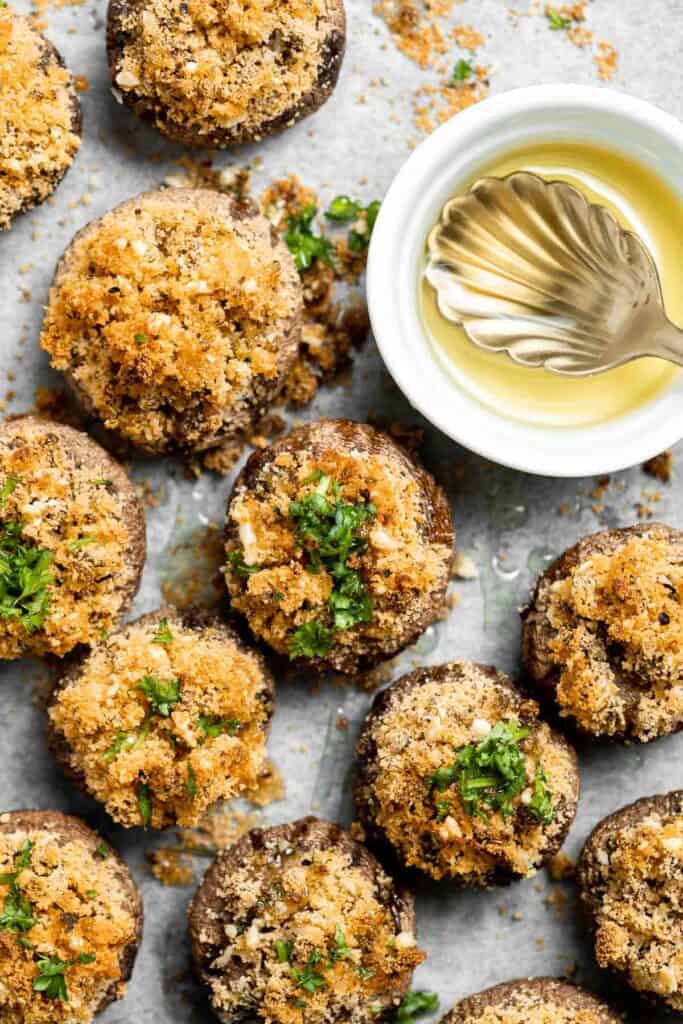
Baked parmesan crusted chicken is breaded in a herby parmesan breadcrumb mixture and baked until crispy perfection. So flavourful and delicious.
Cheesy Tortellini and Sausage Bake
Quick and easy, cheesy tortellini and sausage bake is a delicious 30-minute dinner packed with flavour. A family-favourite comfort food for busy weeknights.
Whipped ricotta crostini is a fancy easy appetizer to make in just minutes or prepare in advance and assemble before serving. A total crowd pleaser.

Mediterranean Orzo Pasta Salad
Quick and easy Mediterranean orzo pasta salad packed with fresh vegetables and herbs is tossed in a Greek lemon vinaigrette. Healthy, light and delicious.
Garlic knots are fluffy on the inside, crispy on the outside, and topped with delicious savory garlic herbed butter that will have you begging for more.
Creamy lemon parmesan chicken is a simple, quick and easy 30-minute meal that is packed with flavour. The most comforting and easiest weeknight dinner.
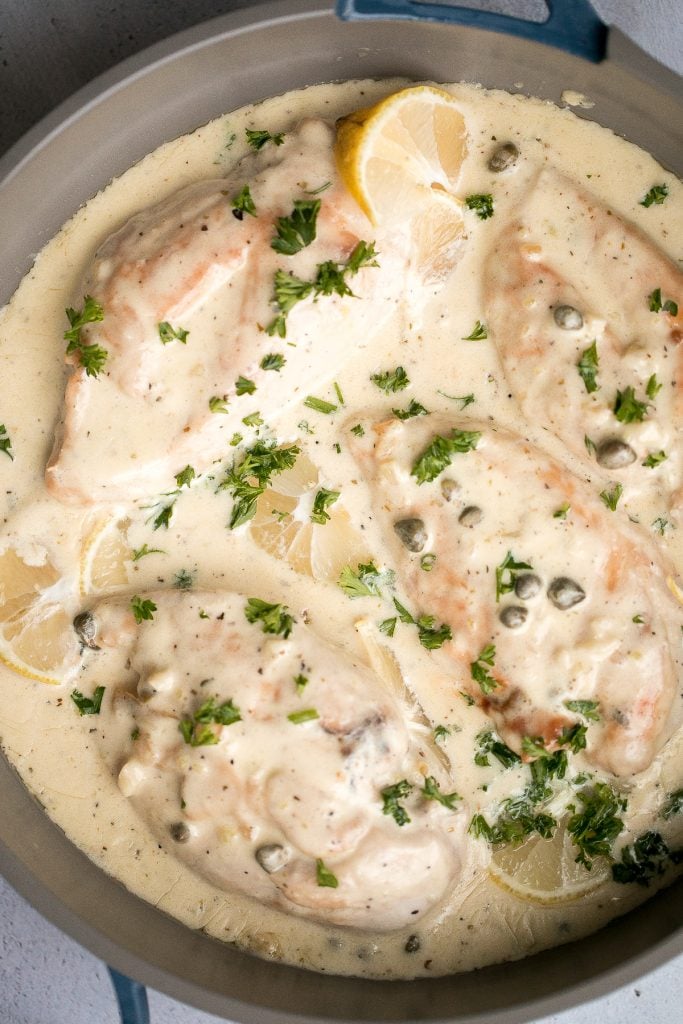
Lasagna roll ups are a twist on traditional lasagna. Lasagna noodles are filled with cheese and meat sauce and rolled up. Make ahead and freezer-friendly!
If you're a fan of spinach artichoke dip, you need to try this spinach artichoke pasta. It's quick and easy comfort food is ready in under 30 minutes.
No Knead Tomato Focaccia Bread
Easy no knead tomato focaccia is so flavourful, packed with olive oil, tomatoes and fresh herbs. It's crispy and golden outside, fluffy and pillowy inside.
Baked Ravioli is simple delicious comfort food that is perfect for a weeknight family dinner or for entertaining. It's hearty, comforting, and kid-friendly.
Quick and easy spaghetti and meatballs is delicious, rich, comforting with tender beef meatballs simmered in a savoury tomato sauce. Make it in 30 minutes.
More Popular Recipes
- 40 Best Pasta Recipes
- 60 Best Chicken Recipes
- 40 Best Salad Recipes
- 25 Best Ground Beef Recipes
- 15 Best Salmon Recipes
Did You Make Any of These Italian Recipes?
Please leave a comment and rating below, and let me know what you thought of this round up of the best Italian recipes. Be sure to snap a picture and tag me on Instagram @aheadofthyme or share it on the Pinterest pin so that I can follow along.
HUNGRY FOR MORE? Don't forget to sign up for my email newsletter so that you don't miss any recipes. You can also follow along on Instagram and Pinterest for more recipe updates.
Dark Chocolate Raspberry Truffles

Dark chocolate raspberry truffles are rich, delicious, and indulgent. With a creamy chocolate ganache and raspberry filling rolled in cocoa powder, making homemade truffles is much easier than you might think. These dark chocolate truffles are as simple as combining high quality chocolate, creamy, raspberry jam, and cocoa. Plus, they are easy to store and freezer-friendly. They are seriously something that everyone should have in their repertoire.
Why You'll Love Dark Chocolate Raspberry Truffles
- Chocolate and raspberries are a match made in heaven. There is just something about the combination of raspberries and chocolate that go so well together. I used a couple tablespoons of a good quality jam that I had on hand, but if you wanted to add a little texture to the truffles, you could easily throw in some chopped fresh raspberries before letting the mixture firm up in the fridge. Just imagine how amazingly fresh that would taste.
- They are easy to make. These no bake dark chocolate truffles are so easy to make with just 4 simple ingredients. They do take sometime to chill in the fridge, but they are pretty easy to make with minimal prep. If you get to work on these dark chocolate raspberry truffles now, they could be yours in just over 2 hours.
- These truffles are customizable. You can even mix up the flavour of these truffles completely. Add your choice of fruit preserves (try our easy homemade Strawberry Jam), a splash of your favourite extract, or chopped nuts.
- Perfect for special occasions. Dark chocolate raspberry truffles are perfect to satisfy a sweet craving, or to make on special occasions. Make them for Valentine's Day, Mother's Day, or during Christmas and include in a Holiday Cookie Box to gift to family and friends.

Ingredients and Substitutions
To make these easy dark chocolate raspberry truffles, you will need the following ingredients (full quantities in the recipe card below):
- dark chocolate - feel free to use chocolate chips or chopped chocolate. You can even also use milk chocolate or semi-sweet chocolate for a different flavor. Either way, I recommend using high-quality chocolate as it's the main ingredient that you will taste here.
- heavy cream
- raspberry preserves (jam) - you can customize these truffles by substituting with a different kind of jam that you have one hand, such as easy homemade Strawberry Jam.
- dark chocolate cocoa powder
You will also need a shallow saucepan or cooking pot, medium mixing bowl, a melon baller (or tablespoon measuring spoons), and half sheet baking pan.
How to Make the Best Dark Chocolate Raspberry Truffles
- Heat the heavy cream. Pour heavy cream into a shallow saucepan or cooking pot and heat over medium-high heat until almost boiling. Once you see it begin to steam and form small bubbles on the side, pull it off and immediately pour it over the chocolate (in a medium mixing bowl).
- Make chocolate ganache. Let sit for 5 minutes, then stir together. The mixture should be extremely smooth, with all the chocolate melted. If needed, microwave the cream and chocolate together in 15 second increments, stirring when finished, until completely smooth.
- Add raspberry and chill. Add raspberry preserves/jam and stir to combine. Place uncovered in the refrigerator for 2 hours, or until the chocolate ganache has hardened and is scoopable.
- Shape the truffles. Line a large half pan baking sheet or tray with parchment paper. Use a melon baller or a tablespoon to scoop out small portions of the ganache. Use your hands to roll them into 1-inch balls. Place on the baking sheet and freeze for 15 minutes.
- Coat the truffles. Place cocoa powder in a small bowl. Drop each truffle in the cocoa powder and roll until completely coated. Store in an airtight container in refrigerator until ready to serve.
Recipe Tips and Tricks
- Don't overheat the cream: Be wary not to overheat the heavy cream. That is the secret to getting that smooth, creamy texture, otherwise your cream will curdle. Carefully watch the cream while heating on the stove or you risk burning it and having to start over.
- How to store: Store dark chocolate raspberry truffles in an airtight container in the refrigerator for up to 2 weeks.
- How to freeze: Once coated, you can freeze these dark chocolate truffles in an airtight container or freezer bag for up to 3 months. Allow the truffles to thaw overnight in the refrigerator or for an hour or so at room temperature before serving.
More Chocolate Recipes
- Molten Chocolate Lava Cakes
- Double Chocolate Loaf Cake
- Moist Chocolate Cupcakes
- Peppermint Hot Chocolate
- Chocolate Chip Cookies
- Peppermint Chocolate Bark
Tried this recipe?
I'd love to hear what you think! Leave a comment and rating below to share your feedback. Your reviews help others discover this recipe and help me keep creating more free recipes for you. Snap a photo and tag me on social media @aheadofthyme too.

60 Best Mediterranean Diet Recipes
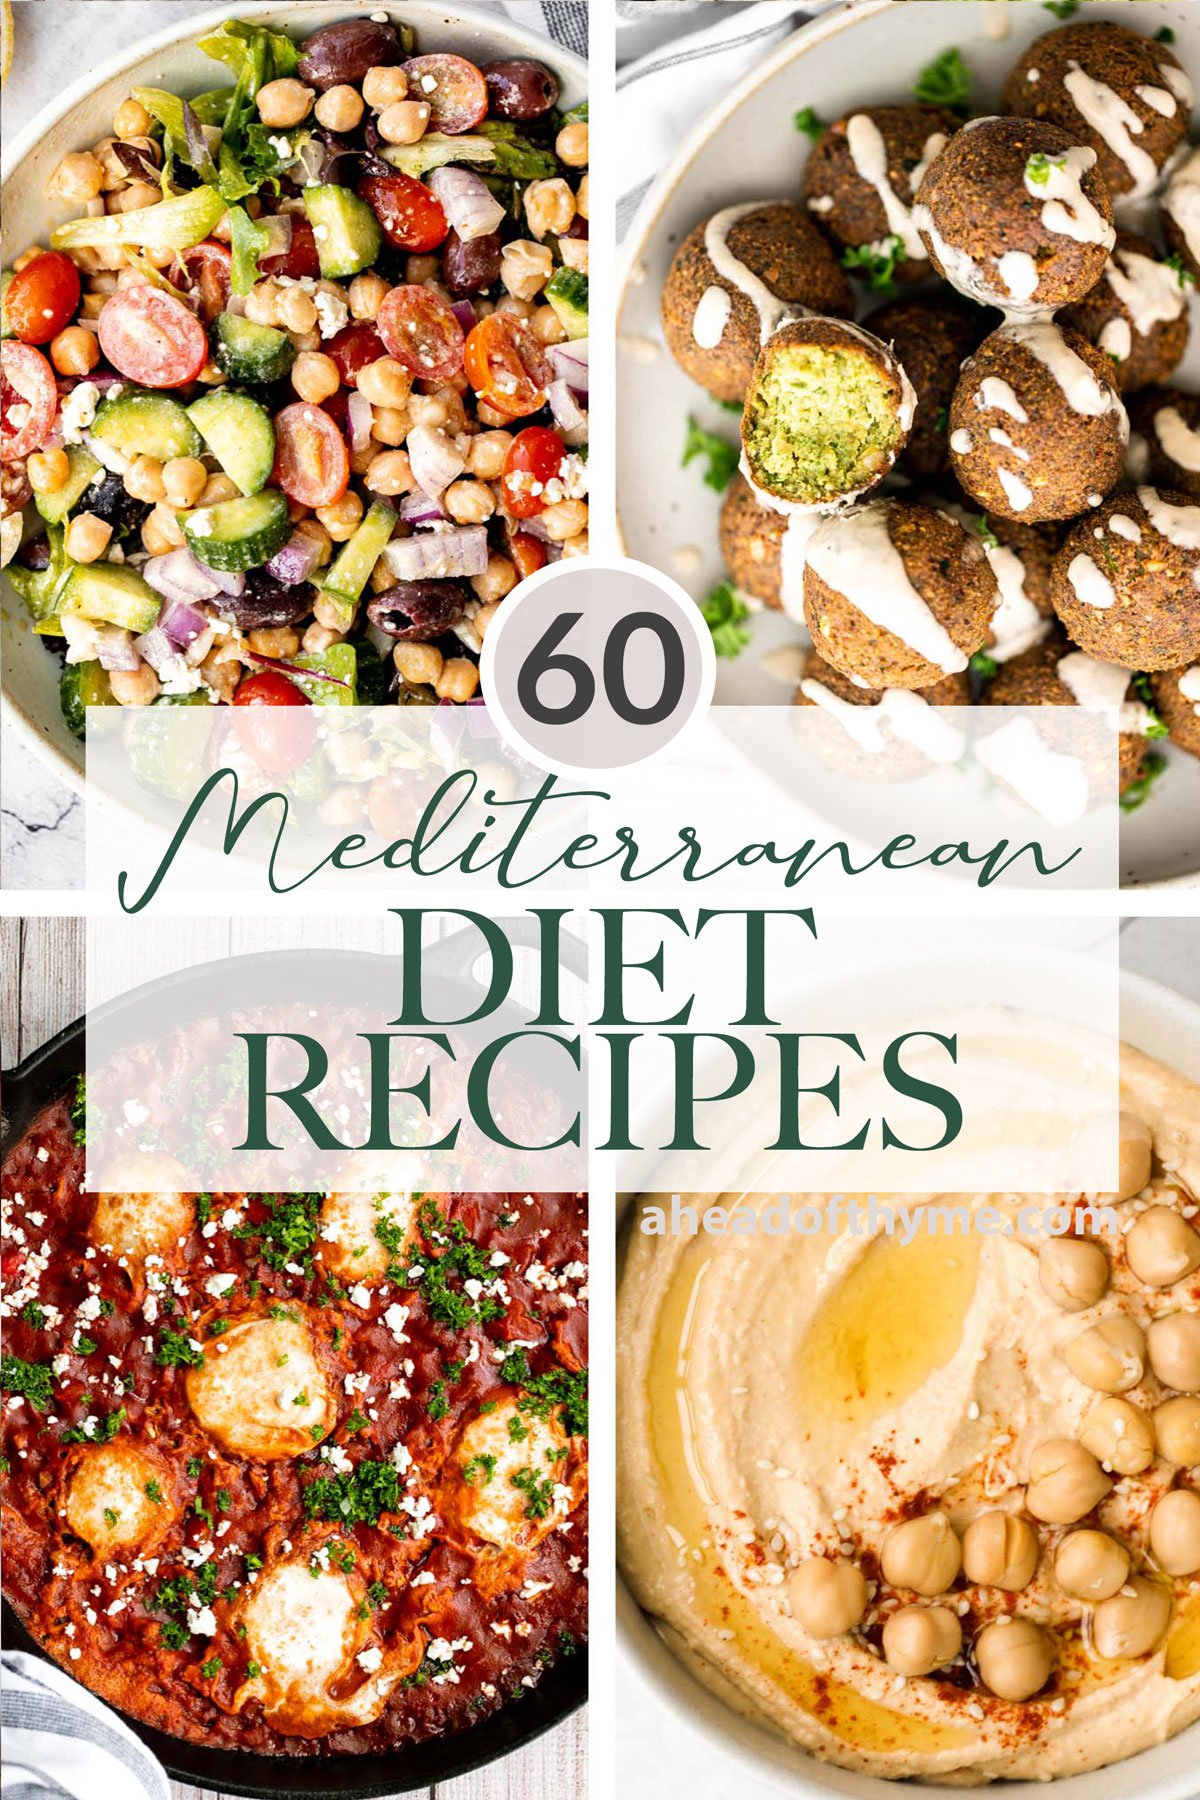
Looking to incorporate more healthy recipes into your diet? Well the Mediterranean Diet is just that - healthy with a focus on fruits, vegetables, legumes, and whole grains, and leans towards predominantly plant-based meals. Whether you are just looking for fresh Mediterranean recipes to try or are looking to switch to a Mediterranean Diet, then you are in the right place. We are sharing over 60 of our best Mediterranean Diet recipes including breakfast, salad and sides, vegetarian recipes, seafood recipes, and lighter meat recipes.

What is the Mediterranean Diet?
The Mediterranean diet is a healthy way to eating based on the traditional ingredients, flavors, cooking methods, and eating habits of the peoples of the countries along the Mediterranean Sea, including Greece, Italy, and many others. The Mediterranean Diet is a one that is predominantly plant-based and based around vegetables, whole grains, and beans.
Some key features of the Mediterranean Diet are:
- Eat more plant-based. Including whole grains, vegetables and greens, legumes (like lentils and beans), fruits, seeds, nuts, herbs, and spices.
- Eat healthy fats. The main source of added fat in the Mediterranean Diet is olive oil and fish.
- Eat seafood, dairy, and poultry in moderation. You can enjoy fish, seafood, dairy, and poultry (chicken and turkey) in moderation.
- Eat red meat occasionally.
- Eat sweets occasionally. Try fresh fruit instead. For a strict Mediterranean diet, you may want to completely remove sweets from your diet.
Mediterranean Breakfast Recipes
Shakshuka is a quick and easy, one-pan Middle Eastern classic with a savory saucy tomato-vegetable base and perfectly poached eggs on top. One of my favorite Mediterranean Diet recipes for breakfast.
Majoon Banana and Date Smoothie
Majoon banana and date smoothie is a delicious and healthy all-natural energy drink with bananas, dates and nuts. The perfect breakfast or snack.
Tex Mex egg muffins are a delicious, filling, and healthy breakfast or snack. They are light and fluffy, perfect for meal prep, and freezer-friendly.
Spring vegetable frittata is a delicious breakfast or served at any time of the day. It's a one-pan meal that starts on the stove and moves to the oven. This is one of my favorite breakfast ideas!
Thick and creamy homemade yogurt is so easy to make at home with just 2 ingredients, a heavy pot, and just a few minutes of actual hands on prep work.
Egg and Potato Breakfast Casserole
Make this easy make-ahead egg and potato breakfast casserole by simply combining all the ingredients into a casserole dish, pop it in the oven and let it do its thing.
Roasted Asparagus with Poached Eggs
Roasted asparagus with poached eggs is a match made in food heaven. Serve this topped with fresh herbs and lots of black pepper for a classy, elevated brunch dish that will leave you feeling light, but completely satisfied.
Layer fresh fruits, creamy Greek yogurt and crunchy granola to make this fruit and yogurt parfait for a delicious and healthy breakfast or a simple snack. It's one of the easiest breakfast ideas.
Mediterranean Scrambled Eggs with spinach, tomato, and feta is loaded with flavor and a quick and easy breakfast to make in under 10 minutes (with prep!). One of the easiest breakfast ideas.
Caprese Frittata is light and fluffy, laced with fresh basil and topped with melted mozzarella cheese and blistered balsamic tomatoes. Ready in 10 minutes!
Mediterranean Diet Salads
Mediterranean Orzo Pasta Salad
Quick and easy Mediterranean orzo pasta salad packed with fresh vegetables and herbs is tossed in a Greek lemon vinaigrette. Healthy, light and delicious. A light and fresh Mediterranean Diet recipe.
Mediterranean Chickpea Wedge Salad
Mediterranean chickpea wedge salad combines chickpeas, crunchy vegetable toppings, and hummus dressing for a delicious deconstructed falafel flavour.
The perfect Greek salad with fresh tomatoes, cucumbers, red onions, green peppers, romaine lettuce, olives and feta cheese tossed in a lemon vinaigrette.
Watermelon feta salad with cucumbers and mint is a simple and delicious refreshing summer salad that you can toss together in 5 minutes.
Mediterranean Buckwheat Salad is quick, easy, and delicious. Loaded with superfood buckwheat, this salad is healthy, naturally gluten-free, and vegetarian.
Tomato and Mozzarella Caprese Salad
Quick and easy tomato and mozzarella caprese salad is a fresh, light, and delicious summer salad, made with just a few simple ingredients in 10 minutes.
Take a bite into this refreshing, gluten-free quinoa and spinach salad bursting with colourful tomatoes, cucumbers and raisins.
Grilled shrimp salad is a quick and easy, healthy summer meal that is loaded with fresh, flavorful ingredients, all tossed in an easy homemade dressing.
Simple tomato cucumber avocado salad with a delicious lemon vinaigrette is a light and refreshing salad that comes together in literally 5 minutes.
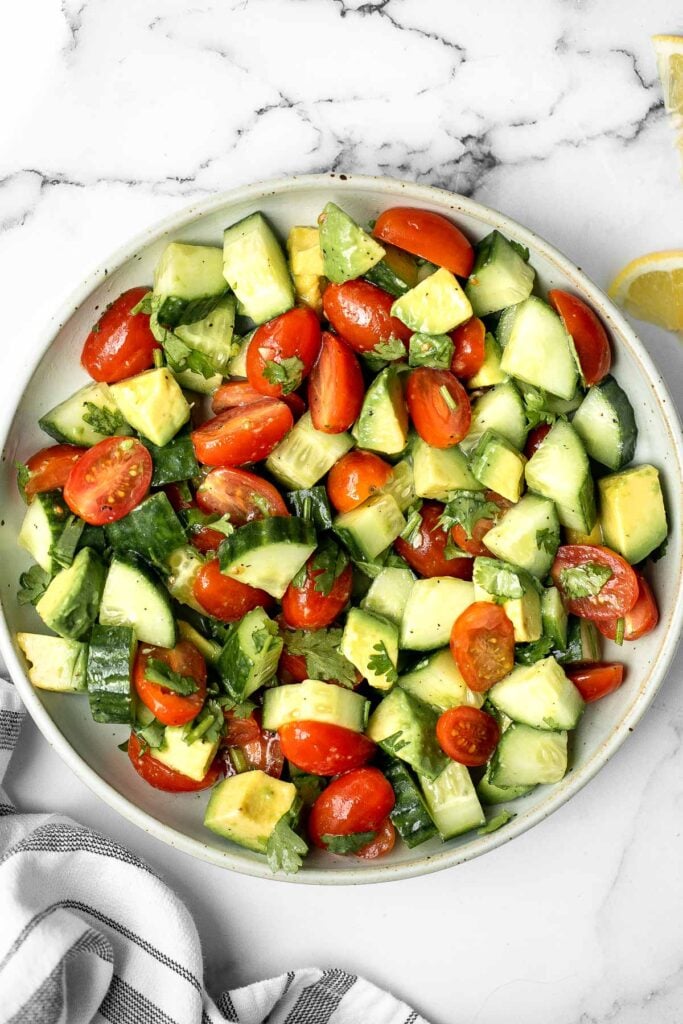
Persian Shirazi Salad with Cucumber and Tomato
Healthy, light and refreshing Persian Shirazi salad with cucumber and tomato is a simple salad packed with herbs and tossed in an olive oil and lime dressing.
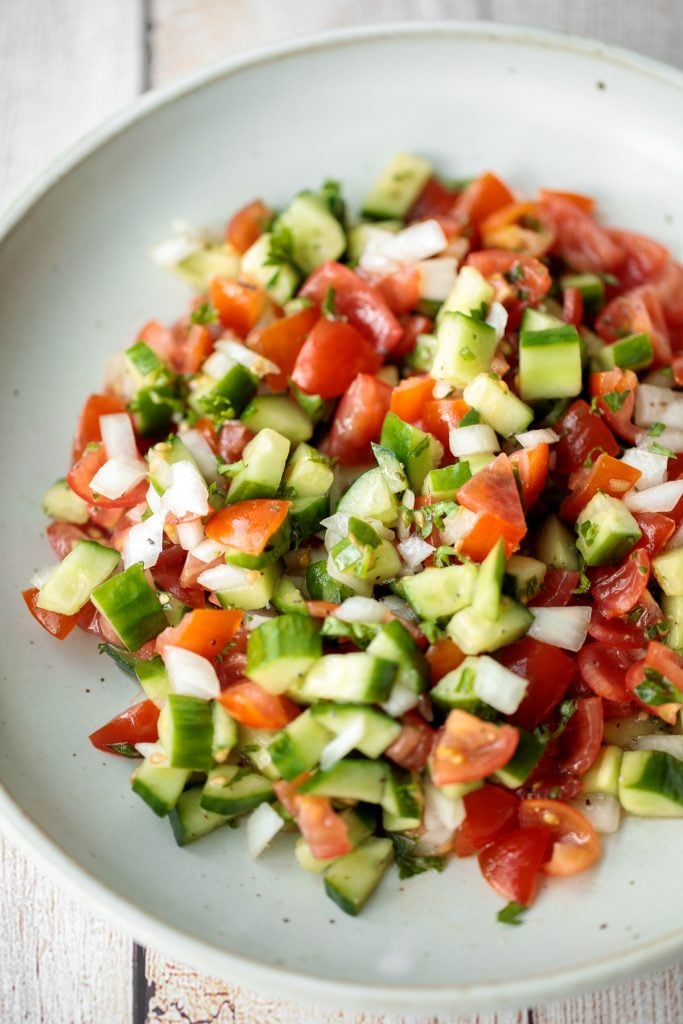
Plant-Based Mediterranean Diet Recipes
Homemade falafel are delicious, golden brown and crispy on the outside, fluffy tender and soft inside. Plus, they're vegan, loaded with plant-based protein. A classic Mediterranean Diet recipe.
Chickpea Greek salad is a fresh, healthy, vibrant, and colorful salad, packed with traditional Mediterranean ingredients, superfoods, and nutrients.
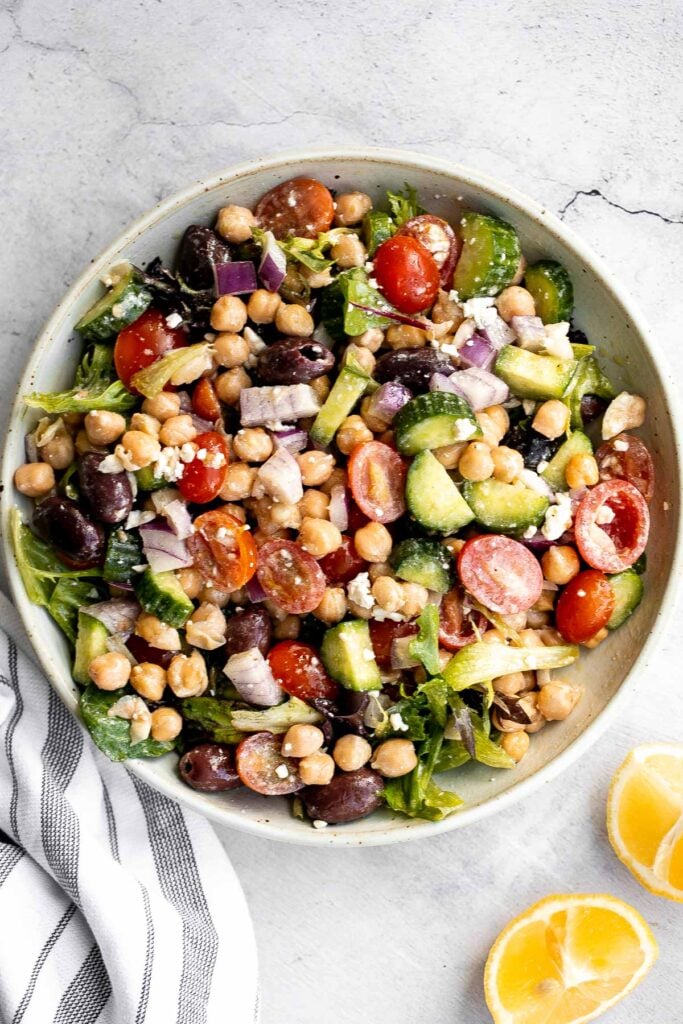
Whip up smooth and creamy classic hummus dip at home in just 5 minutes, by combining chickpeas, tahini, olive oil, lemon juice and garlic in the blender. Serve it with veggies or crackers, or use it in a vegan hummus wrap.
Baked Mediterranean pasta is simple, flavorful, and vibrant, loaded with fresh tomatoes, artichoke hearts, and olives, and topped with mozzarella cheese.
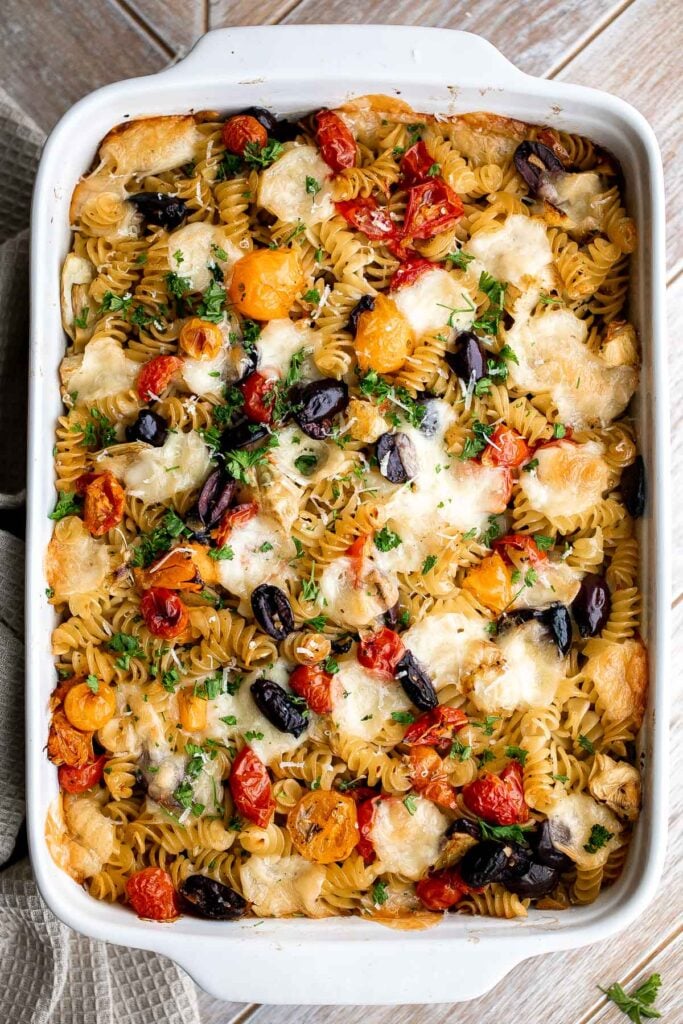
Easy 20-Minute One Pot Lentils are a healthy, nourishing, and delicious vegan meal that is easy to make in a few simple steps. Make a big batch and freeze!
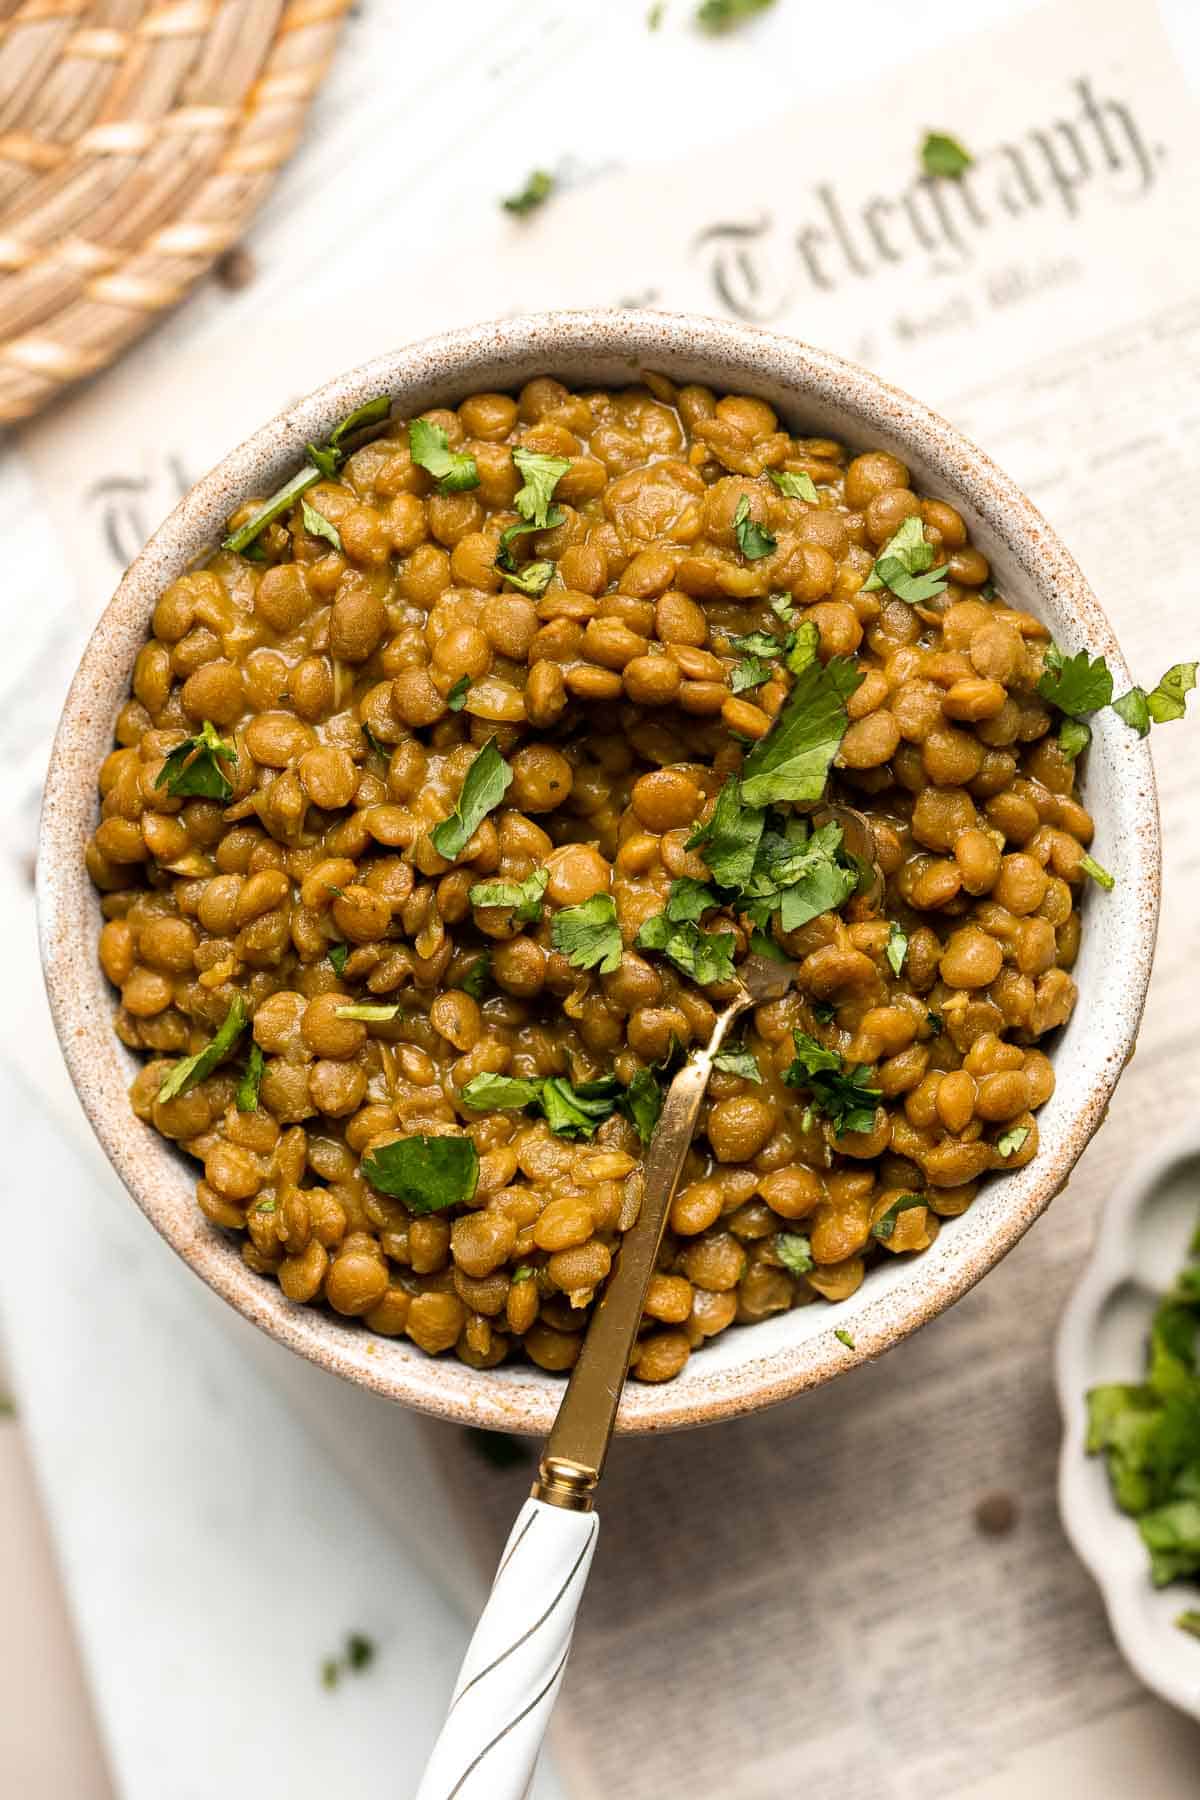
Quick and easy pesto penne pasta is a simple and light Italian pasta dish made with just five ingredients in under 15 minutes. The easiest summer dinner recipe. If you like this recipe, try Mascarpone Pesto Pasta.
Baba ganoush is a creamy, roasted eggplant dip mixed with garlic and tahini for an explosion of flavour! It is perfect served with pita chips or veggies.
Minestrone soup is a hearty, healthy, nourishing, and delicious classic Italian soup, packed with vegetables and pasta simmered in a rich tomato broth.
Easy Tomato Bruschetta with Balsamic Glaze
Tomato bruschetta with balsamic glaze is an easy Italian appetizer topped with tomatoes, onions, garlic, basil and olive oil. Delicious, fresh and simple. The perfect light Super Bowl recipe.
Easy vegan stuffed bell peppers are filled with brown rice, mushrooms, veggies, and seasonings, then baked for 40 minutes. It's a perfect summer weeknight dinner. Serve it with a Classic Coleslaw on the side.
One Pot Red Kidney Beans are vegan, healthy, hearty, nourishing, and packed with plant-based protein. The perfect recipe for your dried kidney bean stash!
Smooth creamy roasted red pepper hummus is a delicious, flavourful, vegan + gluten-free dip. This healthy appetizer is easy to make with a few ingredients.
Indian-inspired, vegan, creamy coconut curry lentil soup is an easy and simple 30-minute pantry meal that is packed with spices for maximum flavour. Serve it as a soup or as a curry over some coconut rice.
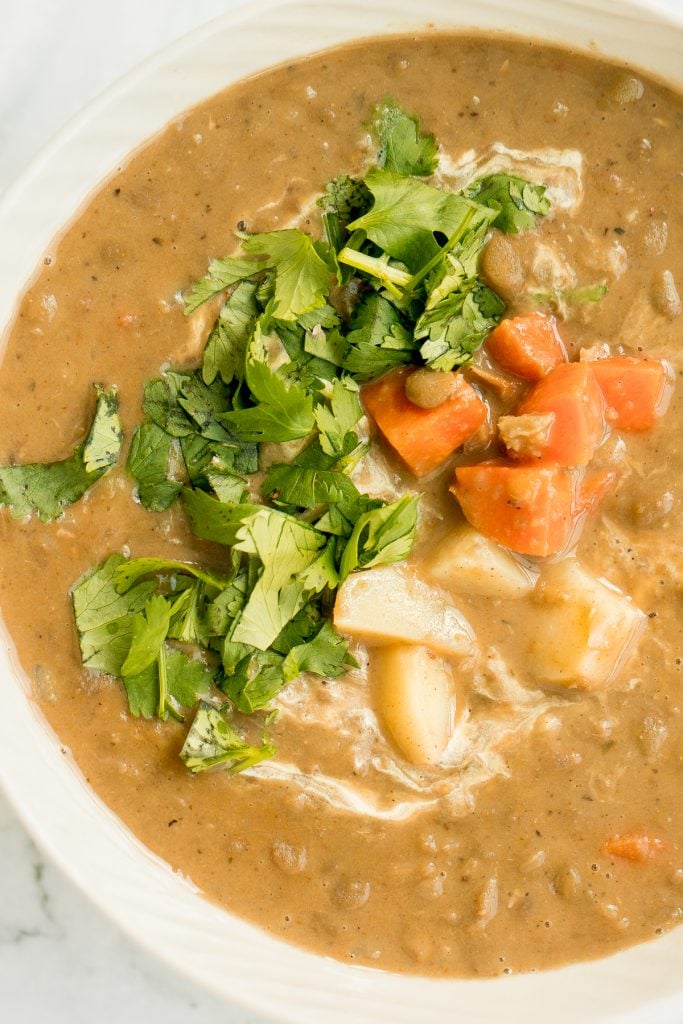
This bright and colourful Greek salad hummus flatbread is perfect as an appetizer or a healthy lunch or snack.
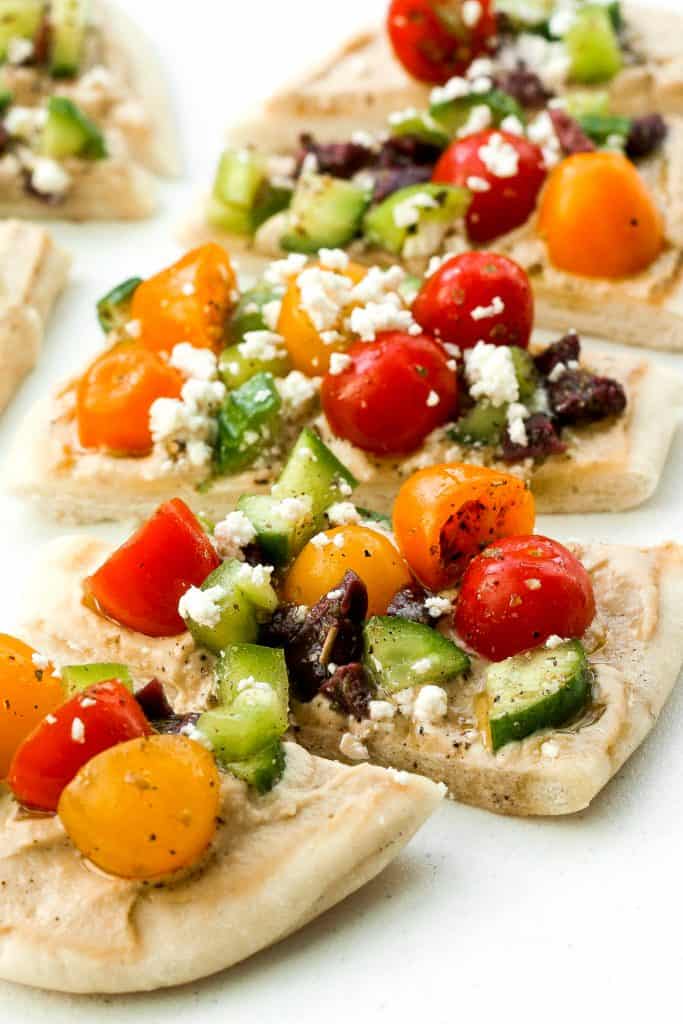
Mediterranean Seafood Recipes
Greek salmon is delicious, flaky, and tender. This healthy oven-baked salmon is packed with Mediterranean flavors and is ready in just 20 minutes.
Mediterranean Baked Shrimp Orzo
Mediterranean baked shrimp orzo is a complete wholesome one pot meal with delicious sautéed vegetables, juicy shrimp, and orzo pasta. Make it in 30 minutes.
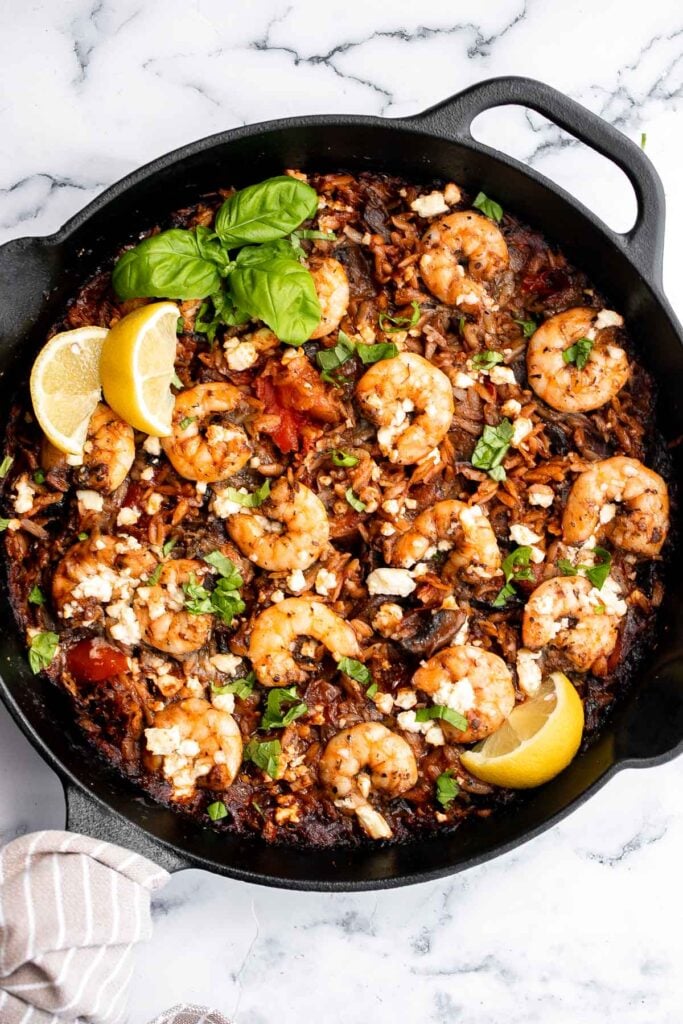
Garlic shrimp skewers are delicious and full of fresh flavor. These quick and easy kabobs can be grilled, baked or air fried for an easy summer dinner.
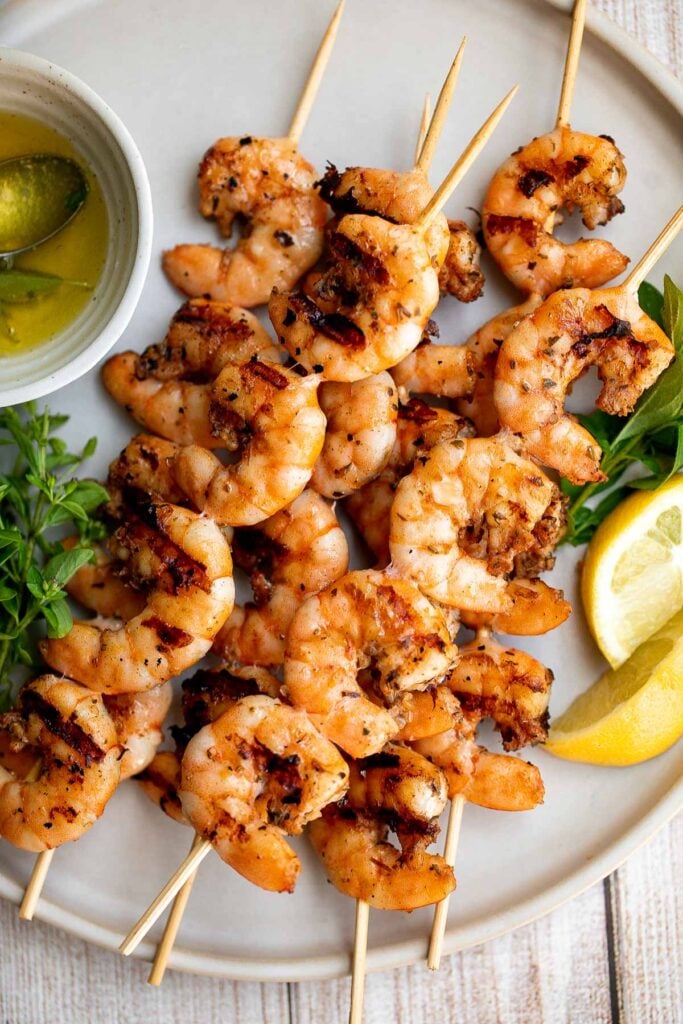
Tender, flaky, flavorful garlic butter salmon is well-seasoned, seared to perfection, and basted until juicy. Quick and easy to make in 20 minutes.
Flaky, oily, and tender, miso black cod (or sablefish) packed with delicious Asian flavours is an indulgent meal that's as healthy as it is delicious.
Shrimp Scampi with Zucchini Noodles
Shrimp scampi with zucchini noodles is filling, yet surprisingly light! Since we are using fresh zucchini noodles, you will feel no guilt in sopping up the sauce with an extra crusty piece of bread!
Pistachio-crusted salmon is a gourmet dinner without the gourmet skills! Prepare this with a handful of ingredients in less than 20 minutes!
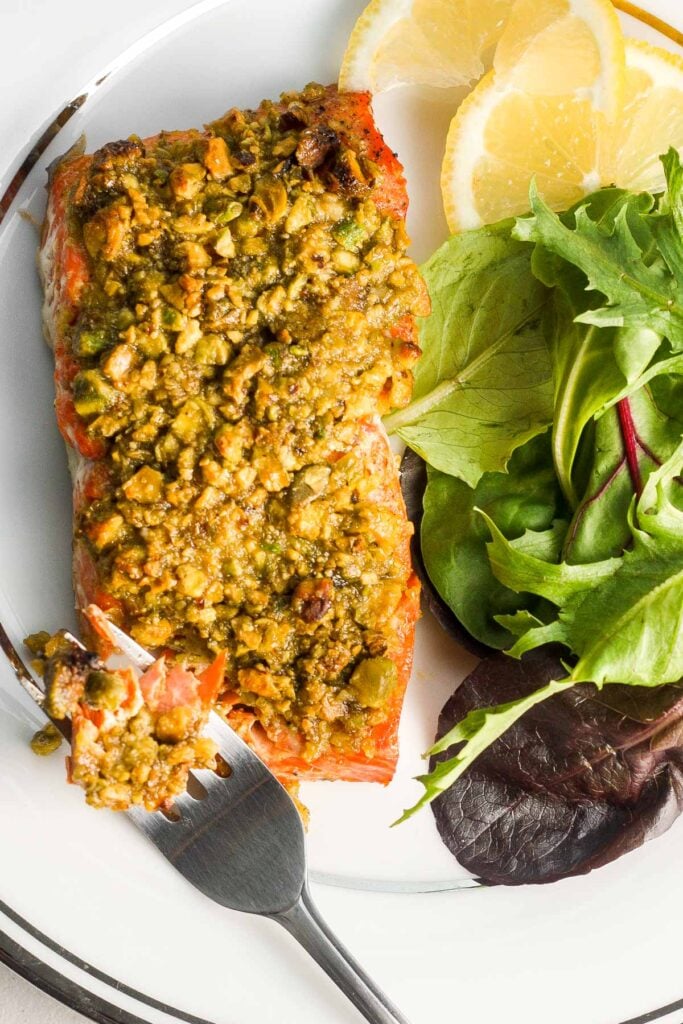
Garlicky, buttery, and perfectly seared scallops take less than 10 minutes to prep and cook. It's the easiest fancy, restaurant-grade meal to make at home.
Mediterranean Recipes with Meat
Delicious, moist and juicy Mediterranean chicken patties have everything you want in one bite: protein, veggies, herbs, and they're quick and easy to make. Serve it on it's own, with hamburger buns, or a side of Basmati rice.
Homemade chicken shawarma (donair) with juicy tender chicken marinated in Middle Eastern spices and wrapped in pita bread is easy to make at home. Serve it with a Persian Shirazi Salad on the side.

Easy Greek Chicken Souvlaki Skewers
Easy Greek chicken souvlaki skewers marinated in garlic, fresh herbs, lemon and bay leaves for that classic Mediterranean flavour. Grill in under 15 minutes. Serve alongside some easy Homemade Tzatziki Sauce. One of my favorite summer dinner recipes!
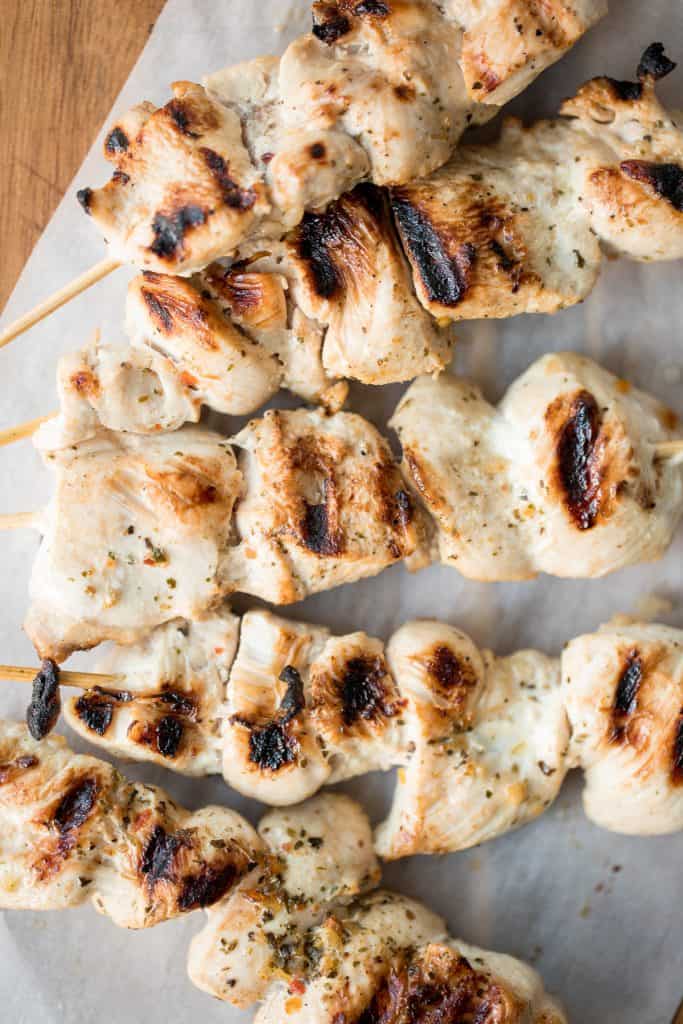
Easy Greek Chicken Gyros with Tzatziki
This refreshing and light, easy Greek chicken gyros is packed with tender souvlaki chicken, Greek salad, and homemade tzatziki sauce, all wrapped in a pita.
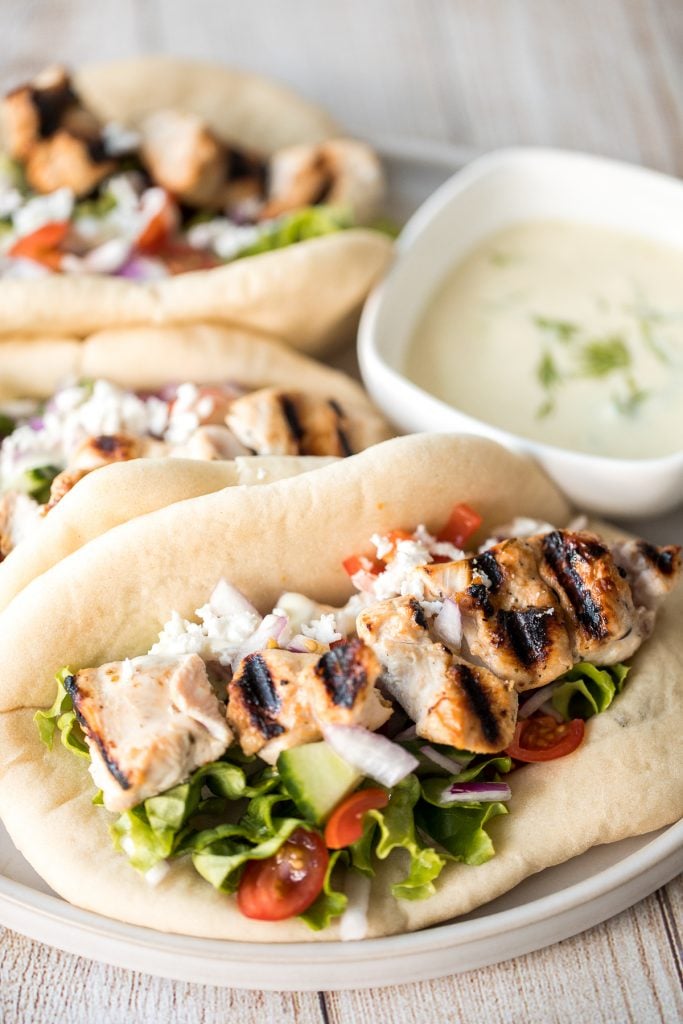
Quick and easy, grilled Greek lamb souvlaki skewers are marinated in a simple Mediterranean marinade for just 30 minutes. Serve with some tzatziki sauce. Serve over top of Rice Pilaf and Greek Salad on the side. So delicious.
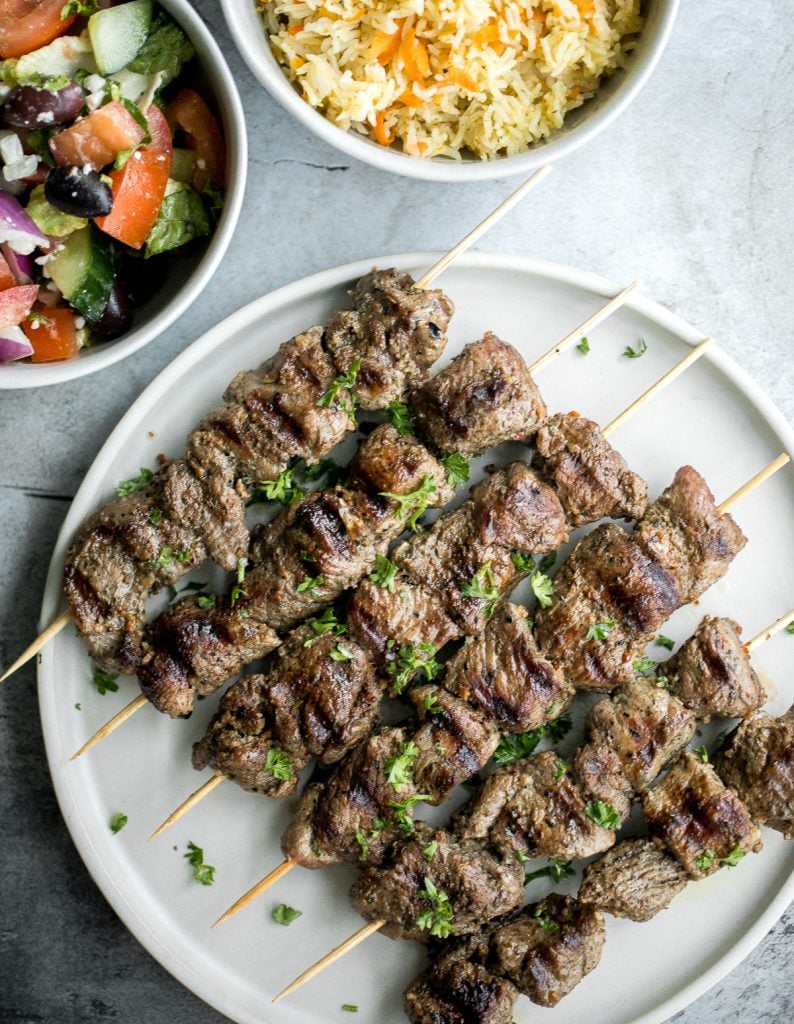
Baked caprese chicken is tender, juicy, and delicious, topped with burst tomatoes, mozzarella cheese, fresh basil, and a drizzle of balsamic glaze.
Mediterranean turkey burgers are tender, juicy, and delicious, loaded with garlic, fresh dill, and lemon juice. The perfect summer weeknight meal.
Easy Greek souvlaki beef shish kebabs are marinated in a garlicky lemony olive oil marinade and threaded with fresh vegetables. Cook on the grill or oven. Serve them wrapped inside some Homemade Pita Bread.
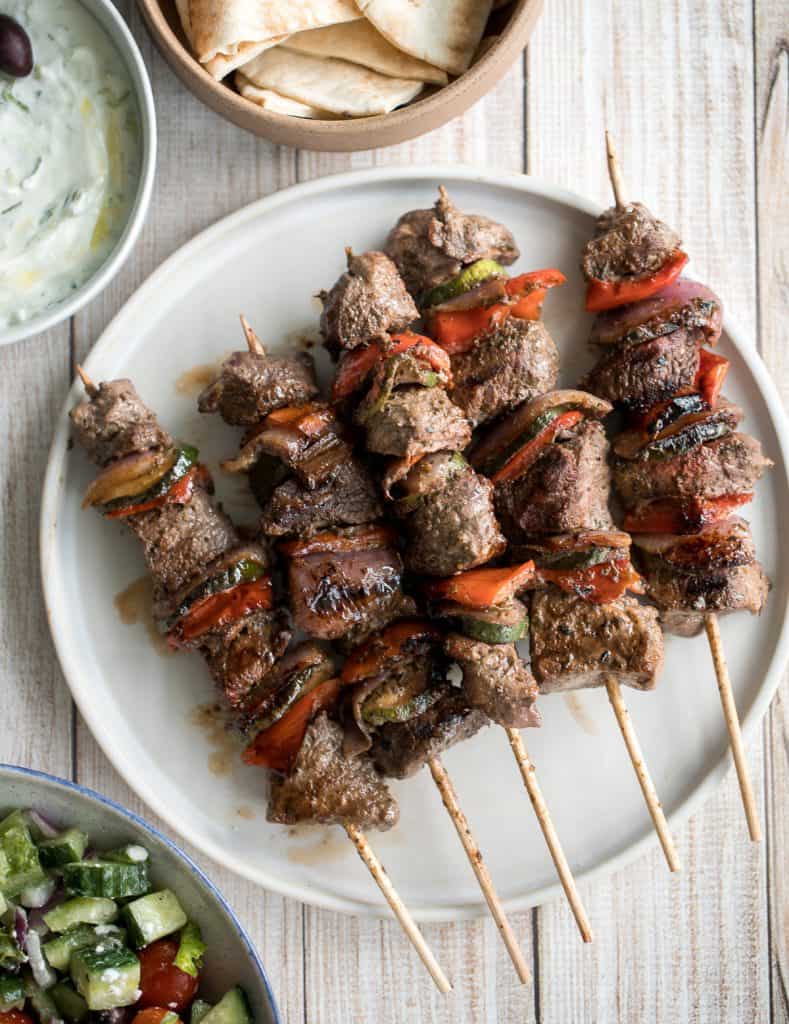
More Healthy Recipes
- 60+ Healthy Dinner Ideas
- 50+ Healthy Lunch Ideas
- 50+ Best Healthy Snacks
- 45 Best Keto Recipes
- 15 Best Salmon Recipes
- 40 Best Shrimp Recipes
Did You Make Any of These Mediterranean Diet Recipes?
Please leave a comment and rating below, and let me know what you thought of this round up of the best Mediterranean Diet we have to offer. Be sure to snap a picture and tag me on Instagram @aheadofthyme or share it on the Pinterest pin so that I can follow along.
HUNGRY FOR MORE? Don't forget to sign up for my email newsletter so that you don't miss any recipes. You can also follow along on Instagram and Pinterest for more recipe updates.
Homemade Hamburger Helper

Homemade hamburger helper is a family favorite but you can make a cheaper, healthier, and way tastier version at home. This flavorful pasta dinner features tender elbow macaroni, juicy lean ground beef, and plenty of cheddar cheese to create a delicious cheesy sauce. It's a quick and easy dinner ready in just 30 minutes, making it perfect for busy weeknights or when you are feeling lazy. Try this cheeseburger macaroni pasta tonight!
Why You'll Love This Homemade Hamburger Helper
- It's quick and easy. Why buy store-bought when you can make it fast at home with real ingredients? This easy cheeseburger macaroni pasta dinner is ready in about 30 minutes, making it perfect for busy weeknights. Plus, it's kid-friendly so you likely won't be left with any leftovers.
- It's healthier than store-bought. Homemade hamburger helper is healthier than it's store-bought alternative. We all know that processed and packaged food isn't as good for us as fresh, whole foods. Since this homemade hamburger helper is made with lean ground beef, macaroni, and real cheese, you can feel good about what you're eating and feeding your family.
- It's delicious and flavorful. Don't get me wrong. Hamburger helper from the grocery store is good, but this homemade version is so delicious. You'll love the creamy cheesy sauce, tender macaroni, and lean ground beef. It's why we make this homemade hamburger helper recipe on repeat ever week. It tastes so good!
- A one pot meal. One pot meals are our favorite to make on busy weeknights because it means less mess in the kitchen, less dishes to clean, and easy to throw together. One pot dinners typically contain something starchy, a proten, and veggies all combined together in a delicious cozy meal.
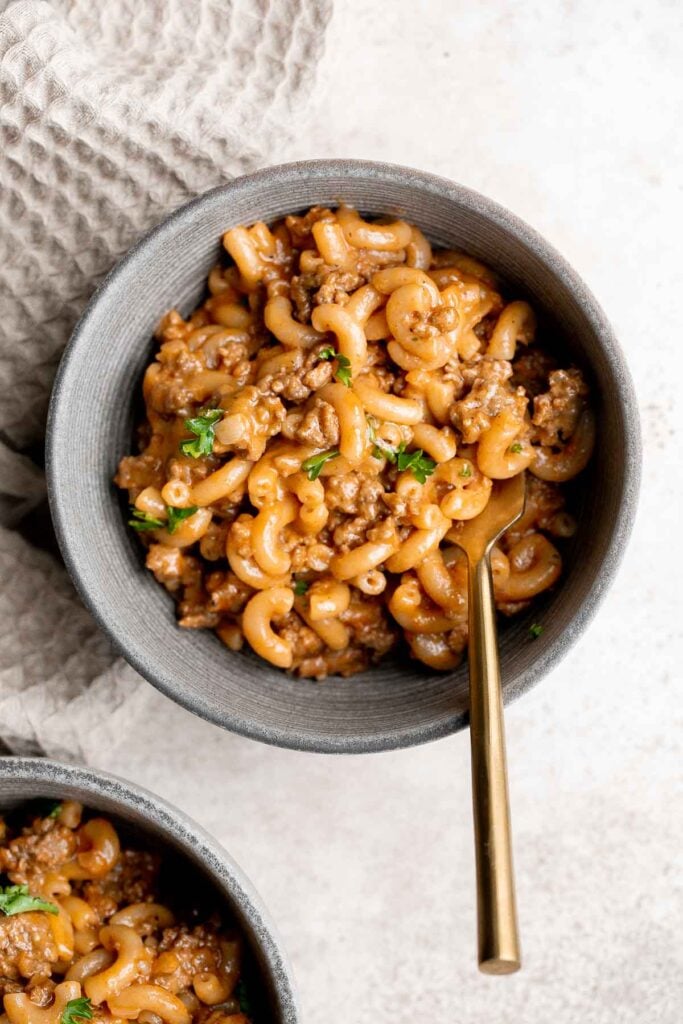
Ingredients and Substitutions
To make this easy homemade hamburger helper from scratch, you will need the following ingredients (full quantities in the recipe card below):
- vegetable oil
- ground beef - traditional hamburger helpers are made with ground beef, but you could easily substitute with any ground meat that you want. Try it with ground turkey, ground chicken, or ground pork - of course the flavor will change based on the meat you are using.
- onion - I recommend fresh onion for the best flavor. If you don't have any on hand, you could substitute the small onion with 1-2 teaspoons of onion powder or 1-2 tablespoons of dried onion flakes.
- garlic - we prefer the potent flavor of freshly minced garlic, but you can easily substitute it with ¾ teaspoon of garlic powder if that's what you have on hand.
- tomato paste
- seasoning - seasoned with paprika, salt, and pepper.
- milk - you can substitute the milk with 1:1 cream for a richer and creamier dish. You can also substitute with sour cream which will also add creaminess and add a tangy flavor. You can substitute it 1:1 or think out the sour cream with a little water.
- beef broth - I recommend homemade beef broth or low-sodium broth for added flavor while controlling the salt content. You could also substitute with vegetable broth or just use water.
- elbow macaroni pasta - although traditionally made with elbow macaroni, you can substitute with any other small pasta noodles that you like such as penne, rotini, or bowtie pasta.
- cheddar cheese - for a cheesier sauce, feel free to add an extra cup of cheese. You can also play around with different types of cheese. Try a Tex Mex cheese blend for a Mexican twist.
- fresh parsley - optional for serving and adds a little fiber.
You will also need measuring cups and spoons and a large skillet or shallow saucepan.
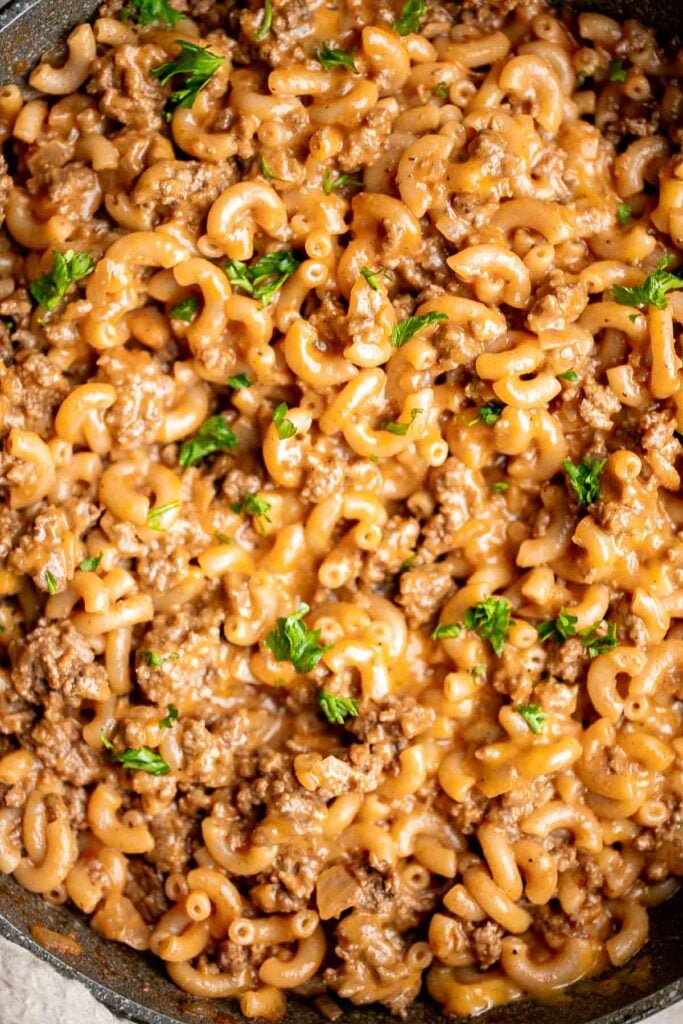
How to Make the Best Homemade Hamburger Helper
- Cook ground beef. Heat oil in a large skillet or Dutch oven over medium-high heat until the oil is sizzling hot, about 1 minute. Add ground beef and cook until browned on all sides, about 6-8 minutes. Break up beef into small pieces to help even browning.
- Sauté aromatics. Add onion and garlic and sauté until tender, about 2 minutes. Add tomato paste and mix until well incorporated and season with salt, pepper and paprika.
- Cook macaroni. Add milk, beef broth, and uncooked macaroni. Stir well and bring to a boil. Cover the lid and simmer over medium heat for 8-10 minutes until the pasta is tender. Make sure to stir occasionally to prevent the pasta from sticking to the bottom of the pan.
- Add cheese. Add cheddar cheese and stir until melted and well combined. Sprinkle parsley on top and serve immediately.
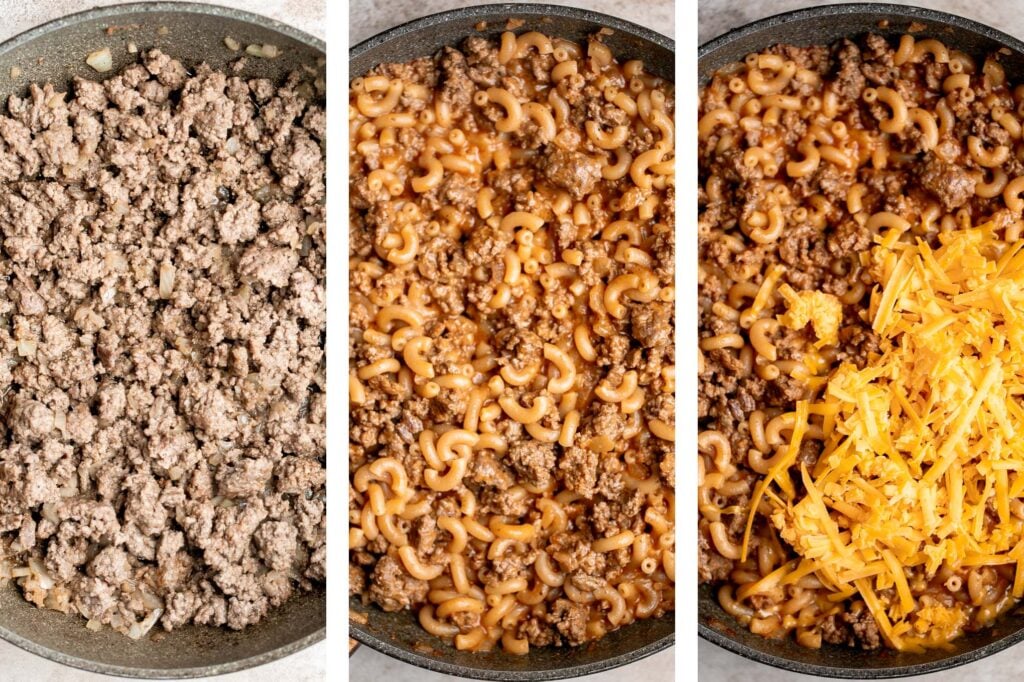
How to Serve
Homemade hamburger helper is a delicious and filling meal packed with carbs and proteins - but it's pairs really nice with some veggies in there too. I like to add some on the side or right on top, such as:
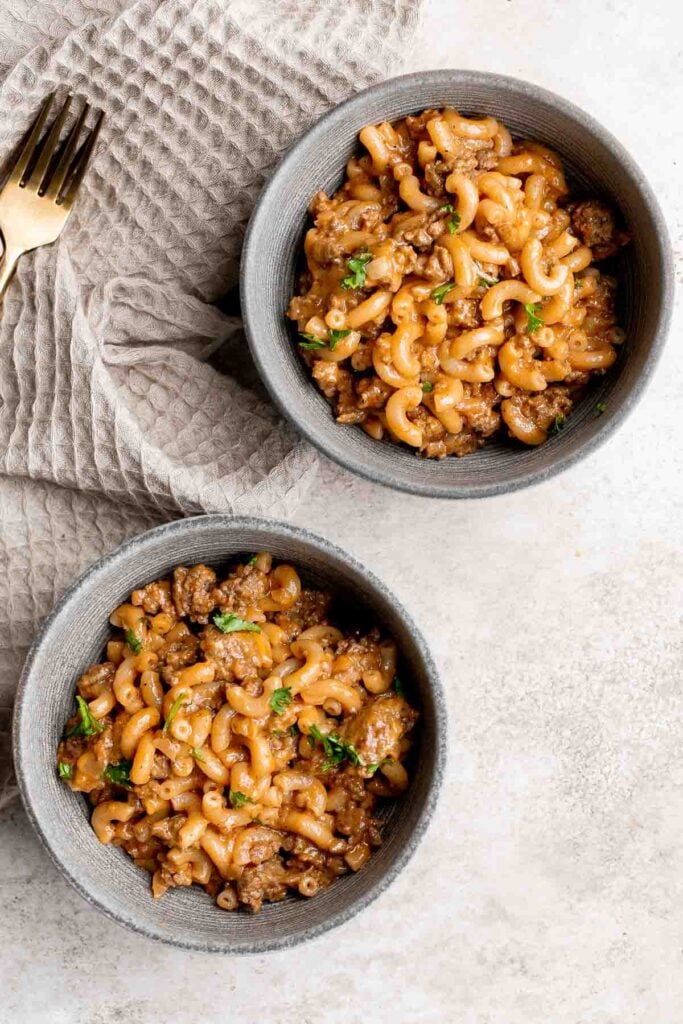
Storing Instructions
- How to store: Keep leftover cheeseburger macaroni in an airtight container in the fridge for up to 3-4 days.
- How to reheat: Reheat leftover hamburger helper over the stove on medium-low heat until warmed through. Add a splash of water if the sauce has thickened up too much in the fridge. You can also reheat in a covered microwave-safe dish on medium heat until warmed through, about 1-3 minutes.
- How to freeze: This homemade hamburger helper recipe freezes well too. Once cooled to room temperature, store any leftovers in a freezer-safe airtight container and store in the freezer for up to 3 months. To serve, allow it to thaw overnight in the refrigerator before reheating.
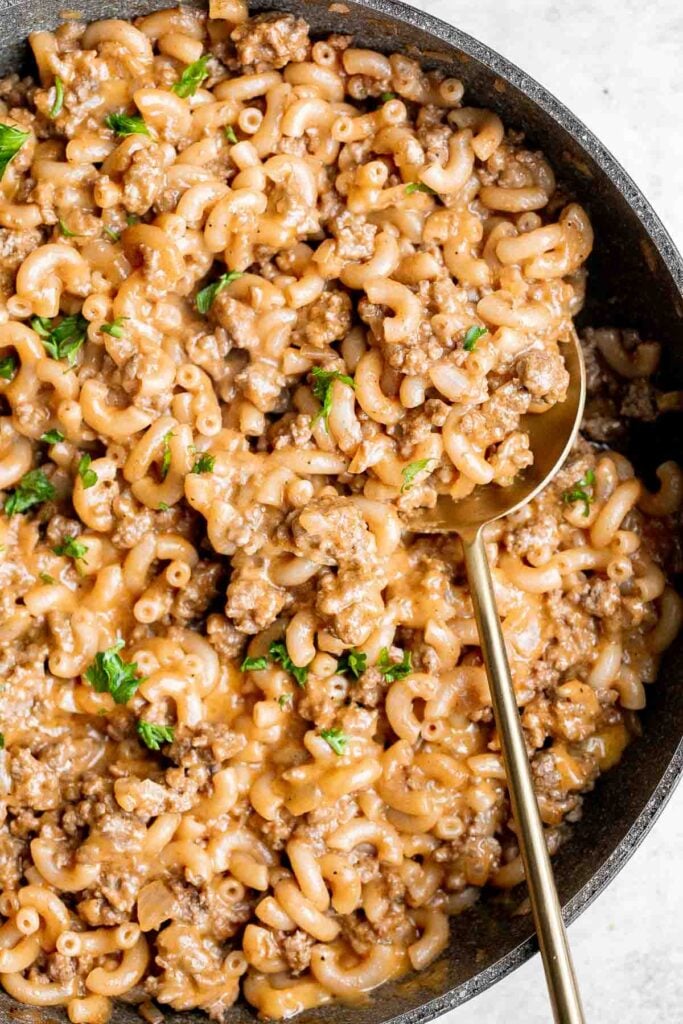
More Pasta Recipes
- 40 Best Pasta Recipes
- Stovetop Mac and Cheese with White Cheddar
- Baked Mac and Cheese
- Spaghetti Bolognese
- Ground Turkey Pasta Bake
- Italian Meatballs
- Beef Stroganoff
Tried this recipe?
I'd love to hear what you think! Leave a comment and rating below to share your feedback. Your reviews help others discover this recipe and help me keep creating more free recipes for you. Snap a photo and tag me on social media @aheadofthyme too.

Marinara Sauce

Marinara sauce is rich, vibrant, and loaded with flavor. It's an easy recipe to make with just a few simple ingredients -whole tomatoes are simmered with sautéed onions and garlic, fresh basil, and seasoning. This tomato sauce is delicious served on it's own as a dip with a side of Garlic Breadsticks, but it also forms an essential ingredient for so many dishes-from pasta and pizzas to stuffed peppers and chicken dinners. If you want to skip the store-bought sauce, save money, and make your own homemade marinara sauce with real ingredients, this recipe is exactly what you need.
Why You'll Love Marinara Sauce
- Quick and easy. From start to finish, you'll be done with this homemade marinara in just 25 minutes, and most of that time is spent allowing the tomatoes to simmer. It's really convenient to make while waiting for other meals to bake in the oven. I recommend baking some Garlic Breadsticks or other crust bread for dipping!
- Tastes way better than store-bought. Store-bought sauce is good, but it's typically also loaded with preservatives and filler ingredients, and lacks the freshness of a homemade marinara sauce. When you taste this marinara (which is seasoned with fresh ingredients like basil, garlic, onion, and more), you'll see what I mean. It is bursting with flavor.
- It will save you money. Although this recipe won't save you the time or convenience of buying pre-made marinara sauce, it will save you money. Canned tomatoes cost about a third the price (or less!) than store-bought sauce. In the long run, those dollars will add up.
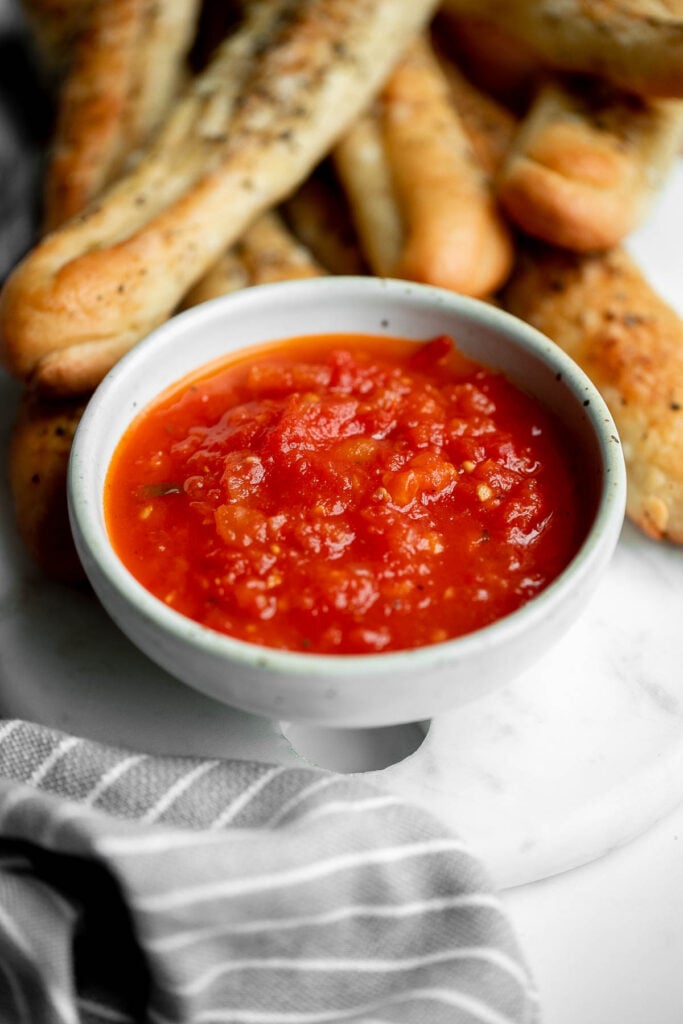
Ingredients and Substitutions
To make this easy homemade marinara sauce, you will need the following ingredients (full quantities in the recipe card below):
- olive oil
- onion
- garlic
- dried oregano - you can also substitute this for Italian seasoning.
- red pepper flakes - this is optional, for a kick.
- tomatoes
- basil
- salt and pepper
- sugar - a little sugar helps to balance out the acidity in the tomatoes. You can leave this out if you prefer.
You will also need measuring spoons and a medium pot (I used my 4 qt. Dutch oven).
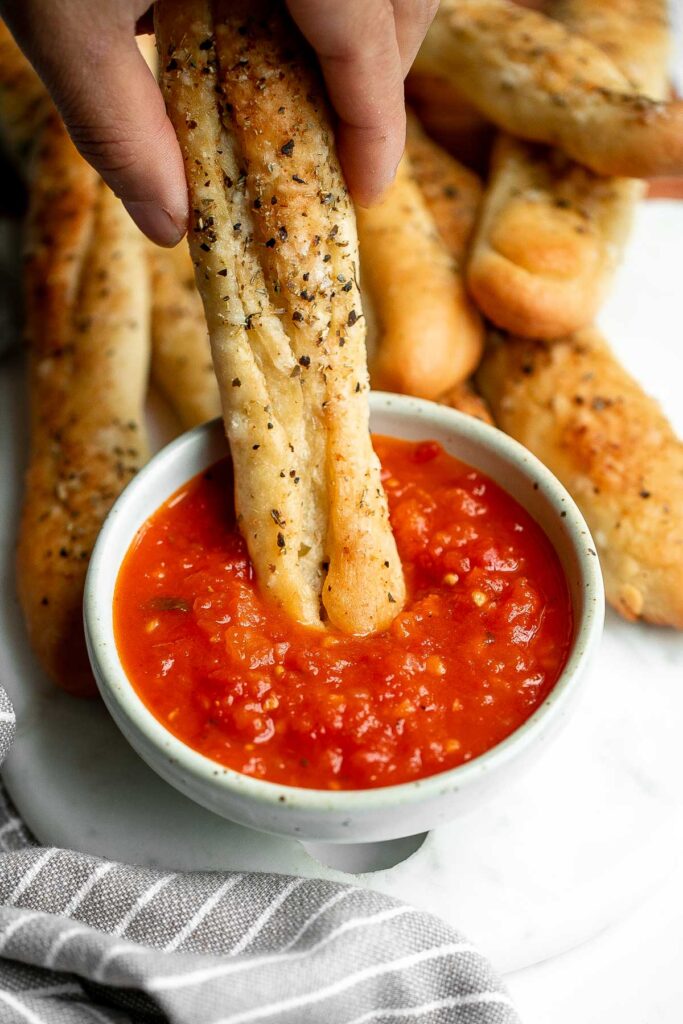
How to Make the Best Marinara Sauce
- Sauté aromatics. Heat oil in a medium pot or 4 qt. Dutch oven for 2 minutes over medium high heat until the hot oil sizzles. Add onion and garlic. Sauté until tender, about 3-4 minutes. Season with oregano and red pepper flakes (if using) and stir well to combine.
- Add tomatoes and simmer. Add whole tomatoes and use a spatula to gently break them apart. Stir in basil, salt, pepper, and sugar. Cover the lid and bring the mixture to a simmer over low heat. Stir occasionally and let it simmer until thickened to a desired consistency, about 15-20 minutes.
- Puree (optional). Optionally, you can use a potato masher, immersion blender, or food processor to puree the marinara to a smoother texture.
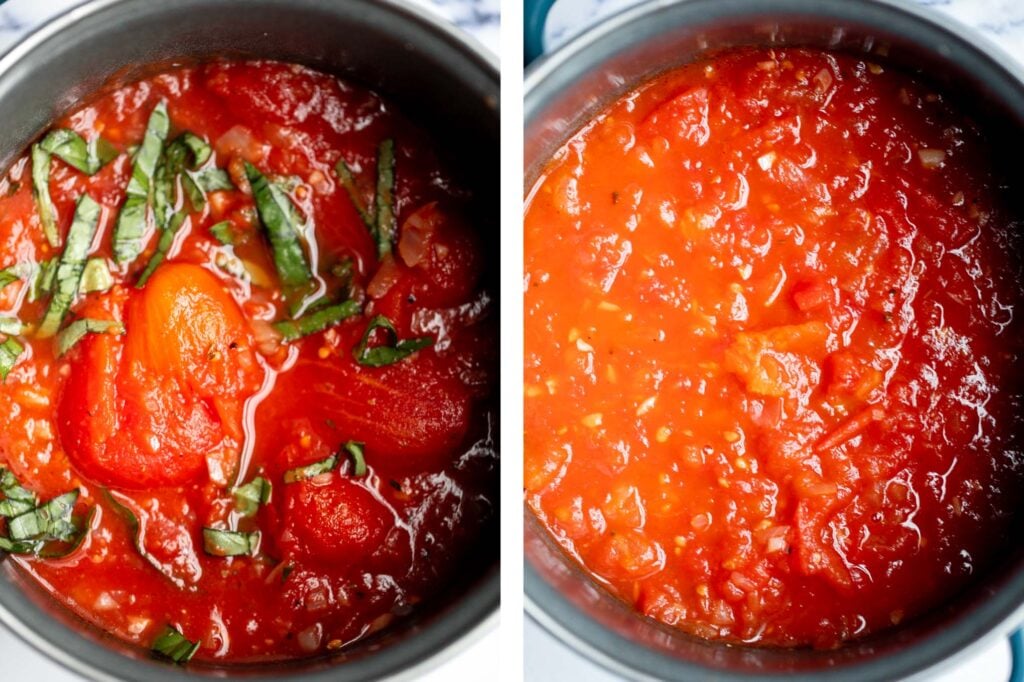
Storing Instructions
- How to store: Leftover marinara sauce will keep for up to 3-4 days in the fridge in an airtight container.
- How to freeze: Freeze leftover marinara sauce for up to six months in an airtight container or freezer bag. I recommend portioning it into serving sizes before freezing.
- How to thaw: Thaw pasta sauce in the refrigerator overnight. If you're in a rush, you can heat it in a covered pan over medium-low heat until thawed.
- How to reheat: Reheat marinara over medium-low heat in a covered pan on the stovetop until warmed through, about 5 minutes. You can also microwave it in 20-30 second intervals on medium heat in the microwave. It will splatter if microwaved, so don't forget to cover it.
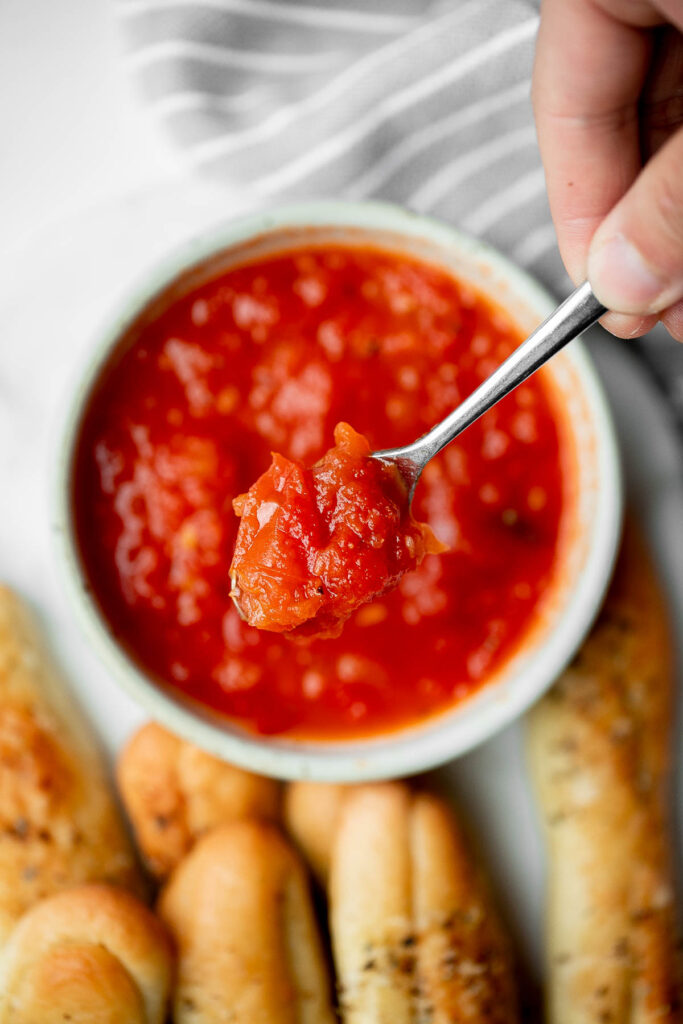
More Sauce Recipes
- Tahini Sauce
- Buffalo Sauce
- Slow Cooker Applesauce
- Salted Caramel Sauce
- Homemade Enchilada Sauce
- Cranberry Sauce
Tried this recipe?
I'd love to hear what you think! Leave a comment and rating below to share your feedback. Your reviews help others discover this recipe and help me keep creating more free recipes for you. Snap a photo and tag me on social media @aheadofthyme too.
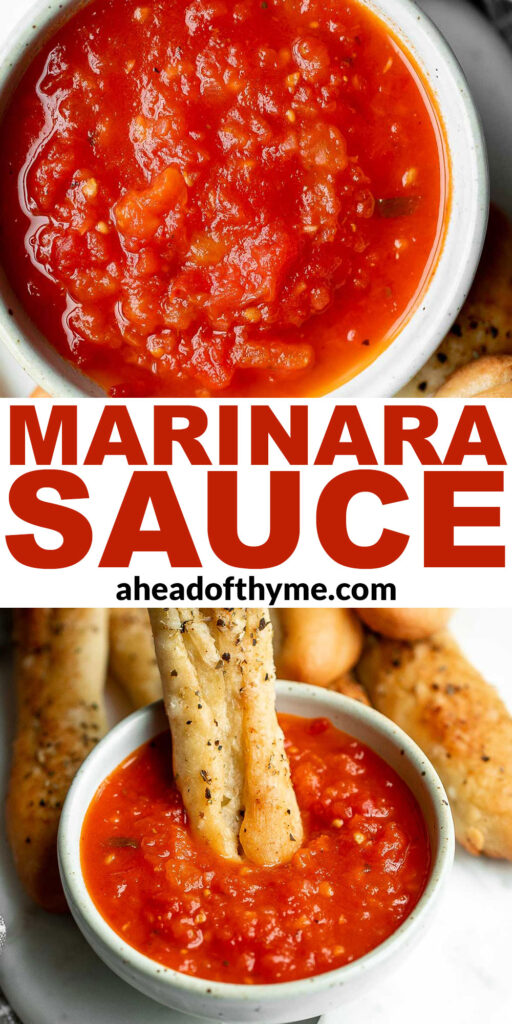
Chili Nachos

Homemade chili nachos are crispy, cheesy, delicious, and flavorful. This modern twist on a Mexican classic features tortilla chips layered with cheddar cheese, chili, fresh cilantro, and sour cream for an indulgent, satisfying, and filling experience. They are my favorite way to use up any leftover chili in the fridge (but store-bought chili works too!). Serve this crowd-pleaser on Game Day or on Mexican Fiesta night and watch everyone immediately reach for seconds after their first bite.

Why You'll Love Chili Nachos
- The best use of leftover chili. I love this chili nacho recipe because it works with any chili. Whether you like your chili with a lot of beans and beef (like in Slow Cooker Beef Chili or One Pot Chili) or with ground turkey and veggies, you can have these chili nachos your way. You can even make them vegetarian with Vegetarian Chili!
- Cheesy nachos with a classic cheese pull. This chili nacho recipe is really a guideline that can be easily modified. I think two cups of shredded cheese for one 12 ounce bag of tortilla chips is perfect - but you can add or subtract to your liking. If you want more cheese, then add more cheese. Less cheese? Go for it.
- Who doesn't love quick and easy nachos? Seriously. Just like our popular Sheet Pan Nachos, these sheet pan chili nachos are ready in just 25 minutes. They are a quick meal that you can fit into your work-from-home lunch break, on busy weeknights on Fiesta night, or a classic on Game Day.

Ingredients and Substitutions
To make this easy homemade teriyaki sauce, you will need the following ingredients (full quantities in the recipe card below):
- tortilla chips - for the best results, you want sturdy, thick restaurant-style tortilla chips for these chili nachos. They'll hold up better when it's time to deliver the chili to your mouth!
- cheddar cheese - use any kind of cheddar that you like, whether that's white cheddar, yellow cheddar, or Monterey Jack. You can also use a Tex Mex cheese blend.
- leftover chili - this is a great recipe to use up any leftover chili like Slow Cooker Beef Chili, Vegetarian Chili, or One Pot Chili. You can also use store-bought chili for convenience.
- cilantro
- sour cream
- lime wedges - optional, for serving.
You don't need to stop here. Get creative with your own toppings and consider adding your own favorite toppings, like:
- Queso Mexican Cheese
- Guacamole or avocados
- Pico de Gallo Salsa or tomatoes
- Mango Salsa
- corn
- jalapeños
- black or pinto beans

How to Make the Best Chili Nachos
- Arrange chips and cheese. Arrange tortilla chips evenly in a single layer on a quarter sheet baking pan. Top with 1 cup of cheese. Repeat with another layer of chips and the remaining cheese.
- Bake. Bake in a 375F preheated oven for 12-15 minutes until the melted cheese turns golden brown and bubbly.
- Add chili. Remove the sheet pan from the oven and spread chili evenly on top. Return the sheet pan to the oven and continue baking for another 6-8 minutes until the chili is warmed through. If your chili is already warm, then you can skip this step.
- Add cold toppings. Top with cilantro, sour cream, and lime wedges (if desired) and serve immediately.
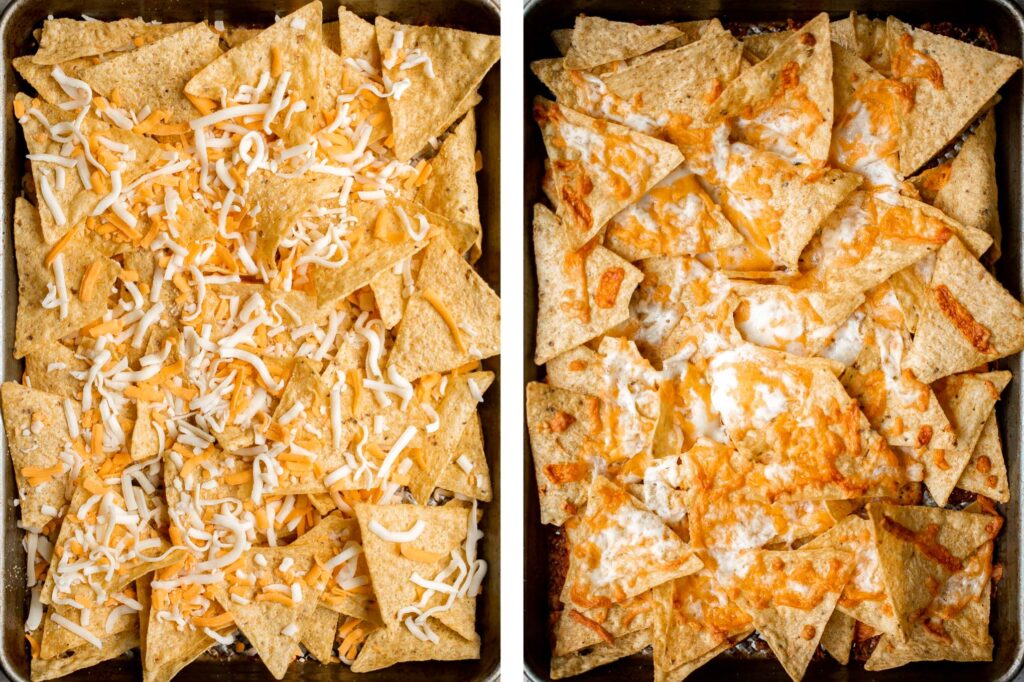
Recipe Tips and Tricks
- Line your pan: Use aluminum foil to line your sheet pan for easy clean-up. This trick never disappoints.
- How to store: Store nachos in a ziploc bag and press out all the air from the bag, and in the refrigerator for up to a day or two.
- How to reheat: Remove the cold toppings (sour cream and lime wedges) and place nachos on a quarter sheet baking pan. Cover loosely with aluminum foil and reheat in a preheated 300F oven for 5-10 minutes, or until cheese it melted and nachos are crispy. You can also reheat a small batch in the air fryer at 300 F for 5 minutes.

More Tortilla Recipes
- Sheet Pan Nachos
- White Chicken Chili
- Beef Taco Salad
- Chicken Tortilla Soup
- Shrimp Taco Salad
- Beef Taco Soup
Tried this recipe?
I'd love to hear what you think! Leave a comment and rating below to share your feedback. Your reviews help others discover this recipe and help me keep creating more free recipes for you. Snap a photo and tag me on social media @aheadofthyme too.

Instant Pot Beef Curry

Instant pot beef curry with potatoes and carrots is delicious, hearty, and comforting. This Indian stew is made quick and easy in the instant pot, giving you all the flavor, nutrition, and goodness of a stovetop curry but with less time and effort. It's made with yogurt to add creaminess, and is well-seasoned for incredible layers of flavors like garlic, ginger, garam masala, turmeric, and cumin. The best part? You can make this pressure cooker curry ahead of time and store it easily in the fridge or freezer. It's perfect for meal prep, and leftovers might actually taste better the next day!
Why You'll Love Instant Pot Beef Curry
- A classic curry sauce meets quality beef. This instant pot beef curry is a match made in heaven. Stewing beef, such as chuck or round, is a quality beef that isn't too expensive. Paired with a classic homemade curry sauce made with yogurt, this beef reaches new heights.
- Quick cooking in the instant pot. Pressure cookers speed up the cooking process (this cooks in just 25 minutes with a 15-minute release time) and tenderizes the beef to absolute perfection. You'll never cook curry any other way!
- It's packed with protein. One serving of this pressure cooker beef curry contains a whopping 40 grams of protein, which is a excellent source of protein.
- So flavorful. The stewing beef does more than just add protein to your meal. It also lends delicious savory notes that you can't get anywhere else. Plus, it's well-seasoned with an assortment of curry spices that you don't want to skip on.
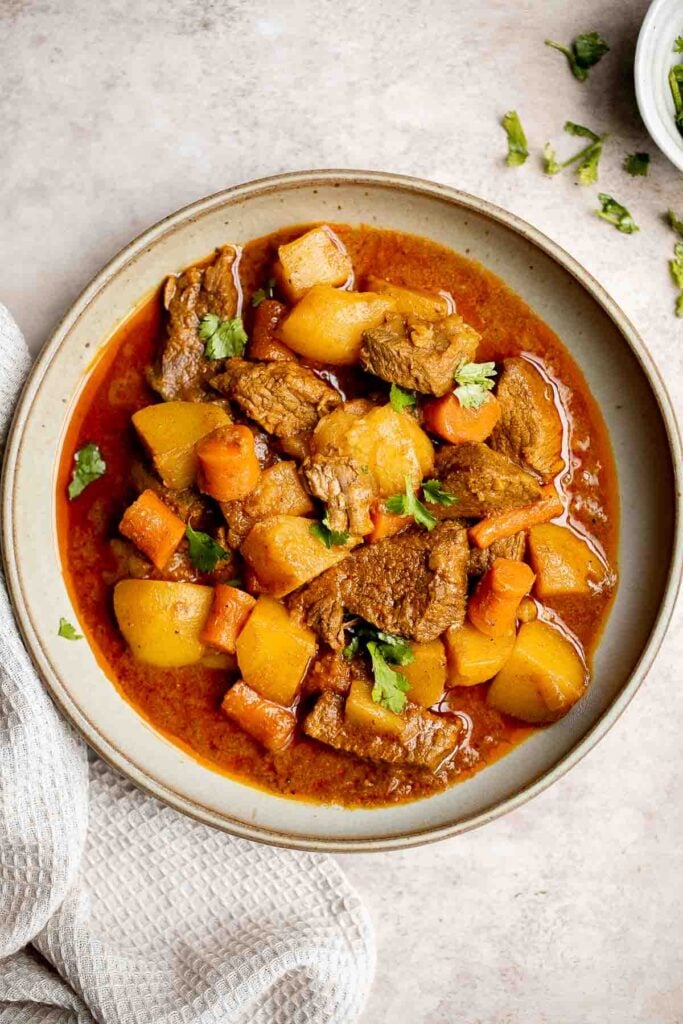
Ingredient Notes
To make delicious and easy Instant Pot Beef Curry, you will need the following ingredients (full quantities in the recipe card below):
- vegetable oil - I typically use avocado oil. Coconut oil is a good option too.
- onion
- garlic + ginger
- stewing beef
- seasoning - salt, ground turmeric, cumin powder, garam masala, and bay leaves (optional).
- tomato paste
- plain yogurt - we love using our Homemade Yogurt in this recipe. You will be surprised to find out how easy it is to make at home.
- vegetables - we used some classic filling veggies like carrots and potatoes. I recommend using Yukon Gold or Russet potatoes in this recipe. Some other vegetables that you could throw in here are cauliflower or sweet potatoes.
- water
You will also need measuring cups and spoons and a pressure cooker like an instant pot.
The secret to good curry is to spice it up! Don't be shy when it comes to the seasoning, and feel free to add in your own favorite spicy ingredients.
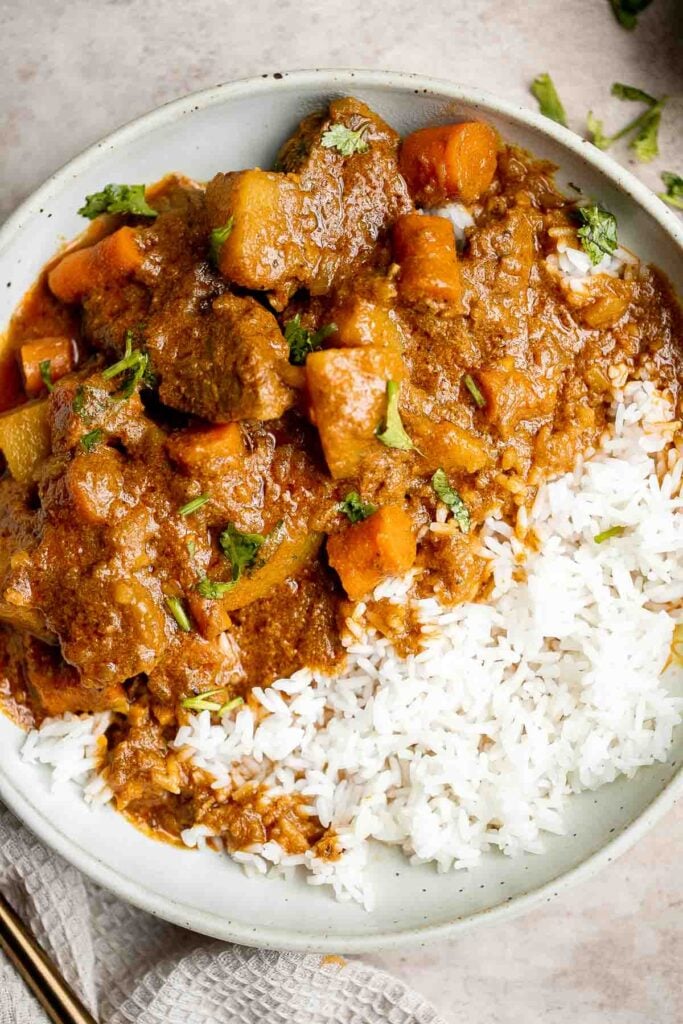
How to Make the Best Instant Pot Beef Curry
- Sauté aromatics.Turn on the Sauté function on high on the instant pot. Add oil and heat until the hot oil sizzles, about 1 minute. Add onion, garlic, and ginger and sauté until fragrant, about 1 minute.
- Sear beef. Add cubed beef and sear until browned on all sides, about 5 minutes. The beef shanks don't need to be fully cooked at this point.
- Add remaining ingredients. Add salt, turmeric, garam masala, and bay leaves. Stir well. Stir in tomato paste and yogurt until evenly mixed. Add carrots, potatoes and water. Mix until well combined.
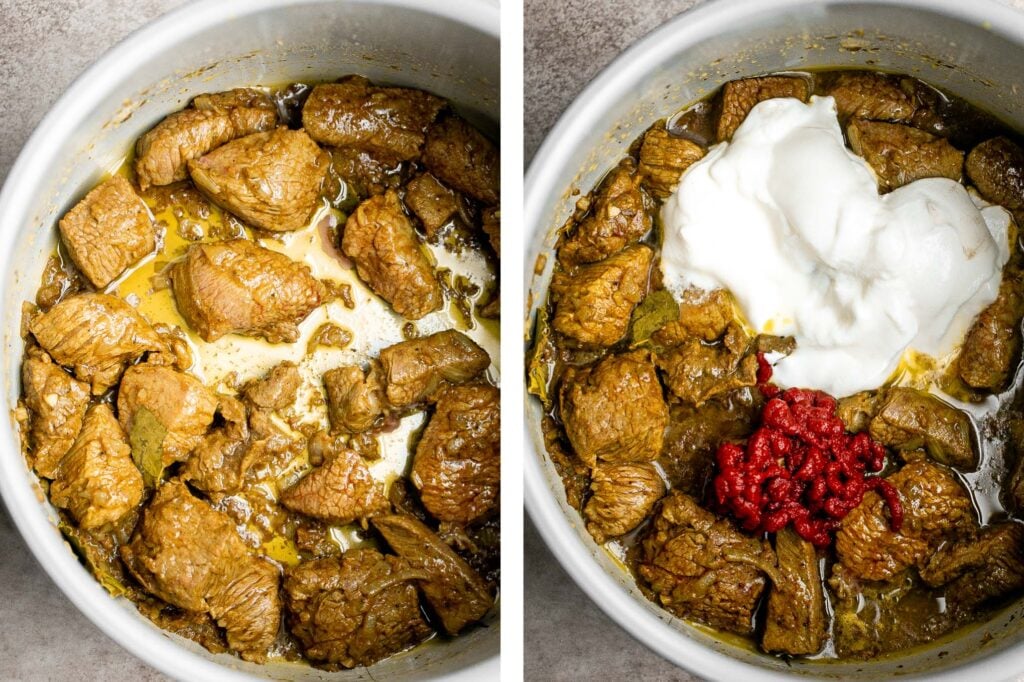
- Pressure cook. Put the lid on and switch to pressure cooking mode on manual High. Seal the lid (the steam release knob must be turned to the sealed position) and let the beef curry pressure cook until tender, about 20 minutes. Once the time is up, you can let the instant pot slowly release the pressure, about 15 minutes or quick release the remaining pressure by turning the steam release valve to the venting position. Season with more salt to taste and serve.
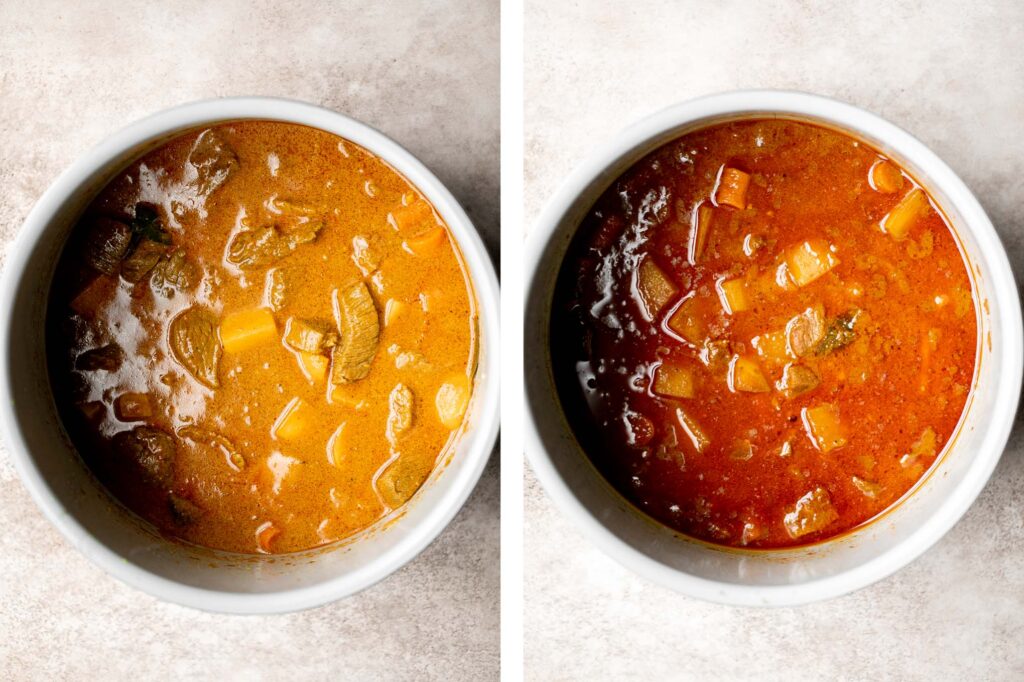
How to Serve
You typically need a starchy side to serve along a Beef Curry like this so that it can soak up all that delicious sauce. Some of my favorite sides to serve with this are:
Storing and Freezing Instructions
- How to store: Leftover instant pot beef curry can be kept in the fridge in an airtight container for up to 3-4 days.
- How to freeze: To lengthen its life, once cooled, transfer the beef curry to an airtight container or freezer bag and freeze for up to 3 months. I'd recommend portioning it out into separate meal prep containers for easy reheating. When ready to eat, allow it to thaw overnight in the refrigerator before reheating.
- How to reheat: Instant pot beef curry tastes best when you reheat over the stovetop on medium heat, stirring frequently. If the curry becomes too thick, stir in some water.
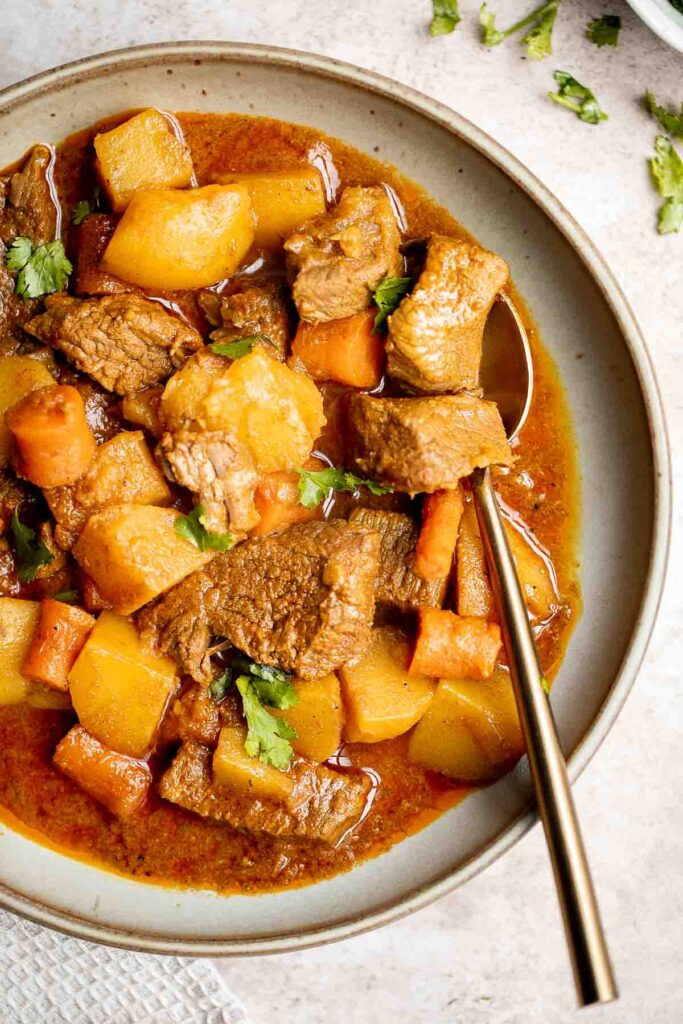
More Instant Pot Recipes
- Instant Pot Cranberry Chicken
- Butternut Squash Soup in the Instant Pot
- Instant Pot Whole Chicken
- Instant Pot Chicken Fried Rice
- Pressure Cooker Mashed Potatoes
- Instant Pot Turkey Breast
Tried this recipe?
I'd love to hear what you think! Leave a comment and rating below to share your feedback. Your reviews help others discover this recipe and help me keep creating more free recipes for you. Snap a photo and tag me on social media @aheadofthyme too.

Egg Muffins

Egg muffins are a quick and easy way to meal prep breakfast on-the-go throughout the week. Loaded with cheddar cheese, salami or bacon bits, and green onions, these breakfast egg bites are delicious, flavourful, and provide enough energy to keep you going all morning. The best part? It only takes 30 minutes to make 12 of them. They are perfect for meal prep and are completely customizable so you can switch up the flavors based on what you have on hand.

Why You'll Love Egg Muffins
- Quick and easy meal prep. These egg muffins are one of the easiest breakfast meal preps you'll ever make. Made with a dozen eggs and a few other simple ingredients (that are totally customizable!), you can make breakfast or snacks for the whole week in just thirty minutes. If you love this, you will also love our Tex Mex Egg Muffins.
- Eggs are a nutritious and healthy. The opinions on eggs are varied, but the bottom line is that eggs are good in moderation - and moderation is less than three a day (which might seem like a lot). With tons of protein and essential vitamins, these crustless mini quiches will keep you feeling full and energized well past the morning. Plus, they are keto and gluten-free too. You can also leave out the salami to make it vegetarian.
- Bacon and cheese makes everything better. The bacon and cheese bring a lot of delicious, savory, and salty flavor to these egg bites. Just be careful not to oversalt them though.

Ingredients and Substitutions
To make easy egg muffins, you will need the following ingredients (full quantities in the recipe card below):
- eggs
- cheddar cheese - can substitute with your favorite cheese. Try Parmesan, gouda, guyere, Monterey Jack, or mozzarella.
- salami - can substitute with cooked bacon bits or chopped ham. Or you can leave it out or add in more vegetables for a vegetarian version.
- green onions
- salt and pepper
You will also need a 12-cup silicone muffin pan and mixing bowl.

How To Make the Best Egg Muffins
- Prep. Prepare a 12-cup silicone muffin pan by spraying generously with cooking spray oil. Add and divide cheddar cheese, salami, and green onion evenly into each cup.
- Add egg mixture. In a large measuring cup or mixing bowl, whisk together eggs, salt, and pepper until smooth. Pour egg mixture ¾ full into each cup and gently stir the mixture with a spoon to help disperse the cheese and salami evenly.
- Bake. Bake in a 350F preheated oven for 20 minutes until fully set.
- Serve. Serve immediately. You can store the egg muffins in an airtight container in the refrigerator for up to 5 days.

Recipe Tips and Tricks
- Easy cleanup tip: Use a 12-cup silicone muffin pan or paper cupcake liners (or reusable silicone liners) for easy cleanup and takeout.
- How to store: Store leftover egg muffins in the fridge for up to 4-5 days. Allow them to cool to room temperature before storing in an airtight container or wrapping individually in plastic cling wrap.
- How to freeze: Allow these egg muffins to cool completely, then wrap individually in plastic wrap and store in an airtight container or freezer bag. Freeze for up to 3 months. To eat, allow them to thaw in the fridge or at room temperature for a few hours. They're a super easy breakfast to meal prep for the next few months!
- How to reheat: You can eat these egg bites warm or cold (no need to reheat!). To reheat, pop them into a 350F preheated oven for 10 minutes, or air fryer for 5 minutes. You can also reheat in the microwave, covered, on a low heat setting for 15-second intervals.
More Egg Recipes
- Tex Mex Egg Muffins
- Spring Vegetable Frittata
- Shakshuka
- Poached Eggs
- Egg and Potato Breakfast Casserole
- Caprese Frittata
Tried this recipe?
I'd love to hear what you think! Leave a comment and rating below to share your feedback. Your reviews help others discover this recipe and help me keep creating more free recipes for you. Snap a photo and tag me on social media @aheadofthyme too.

- « Previous Page
- 1
- …
- 21
- 22
- 23
- 24
- 25
- …
- 40
- Next Page »