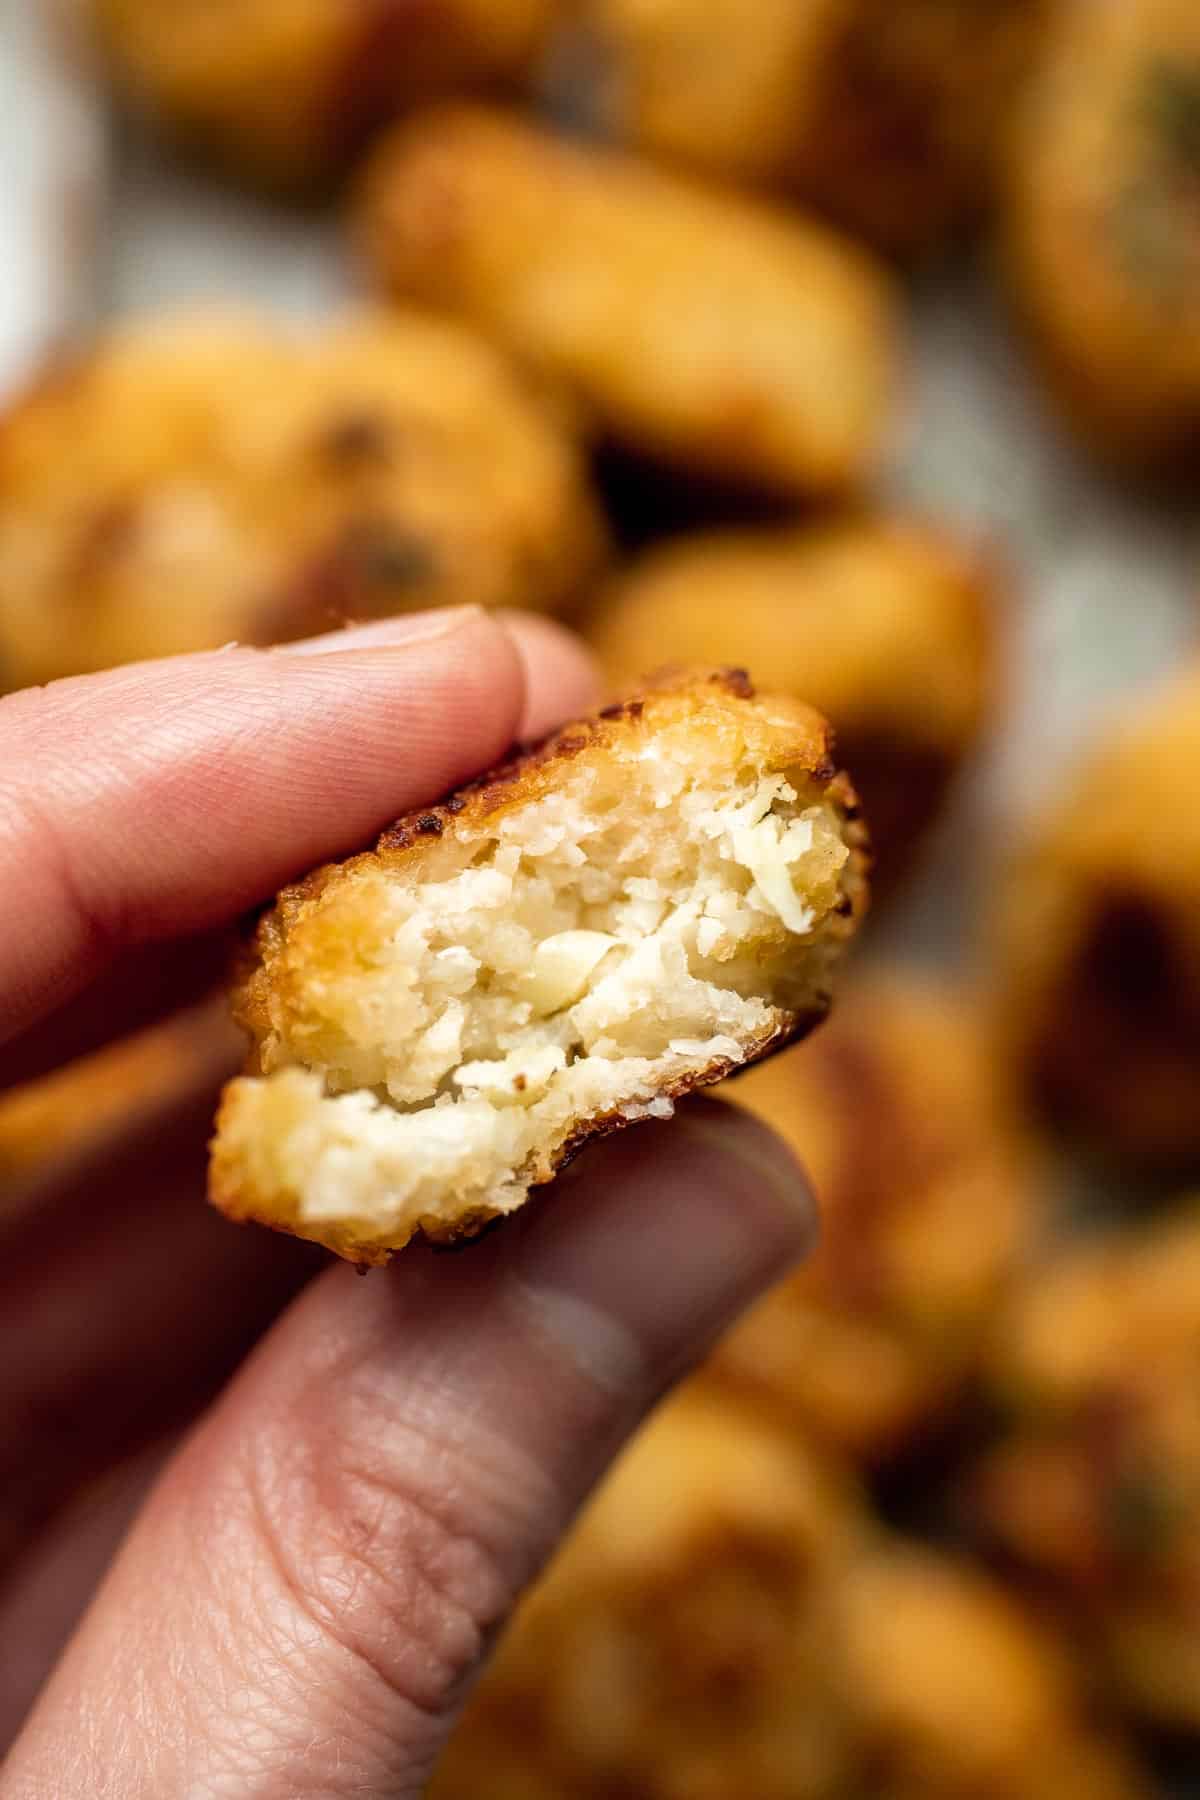
These Cauliflower Tots are everything you want in a tater tot - but better! They have the same crunchy, golden outside and soft and tender middle that we all know and love but they are higher in fiber (thanks cauliflower!) and get a cheesy upgrade with shredded mozzarella.

Plus, you can make this delicious and flavorful tater tot recipe in the oven, air fryer, or deep fryer. After making these cheesy cauliflower tots and realizing you can make them from scratch easily at home, you'll never again look twice at a bag of freezer aisle tater tots!
Why You'll Love these Cauliflower Tots
- They're crispy and cheesy. Even better than regular tots, these cauliflower tots are crispy on the outside with melty cheese baked into every bite - a much-needed upgrade that holds the tots together and gives them another layer of flavor and texture.
- Easy way to eat veggies. These cauliflower tots are a great way to introduce this high-fiber vegetable to picky eaters and sneak in an extra serving of vegetables where they least expect it. This also makes them healthier than traditional potato tots, since cauliflower is packed with vitamins, minerals, and fiber.
- Great keto side or low carb option. These low-carb cauliflower tots are a delicious side and contain fewer carbs than traditional tater tots do. Plus, you can bake or air fry them to make them even healthier.
- Delicious and flavorful. These cauliflower tater tots are seasoned with herbs and spices, and incorporate cheese, giving them the best flavor.

Ingredient Notes
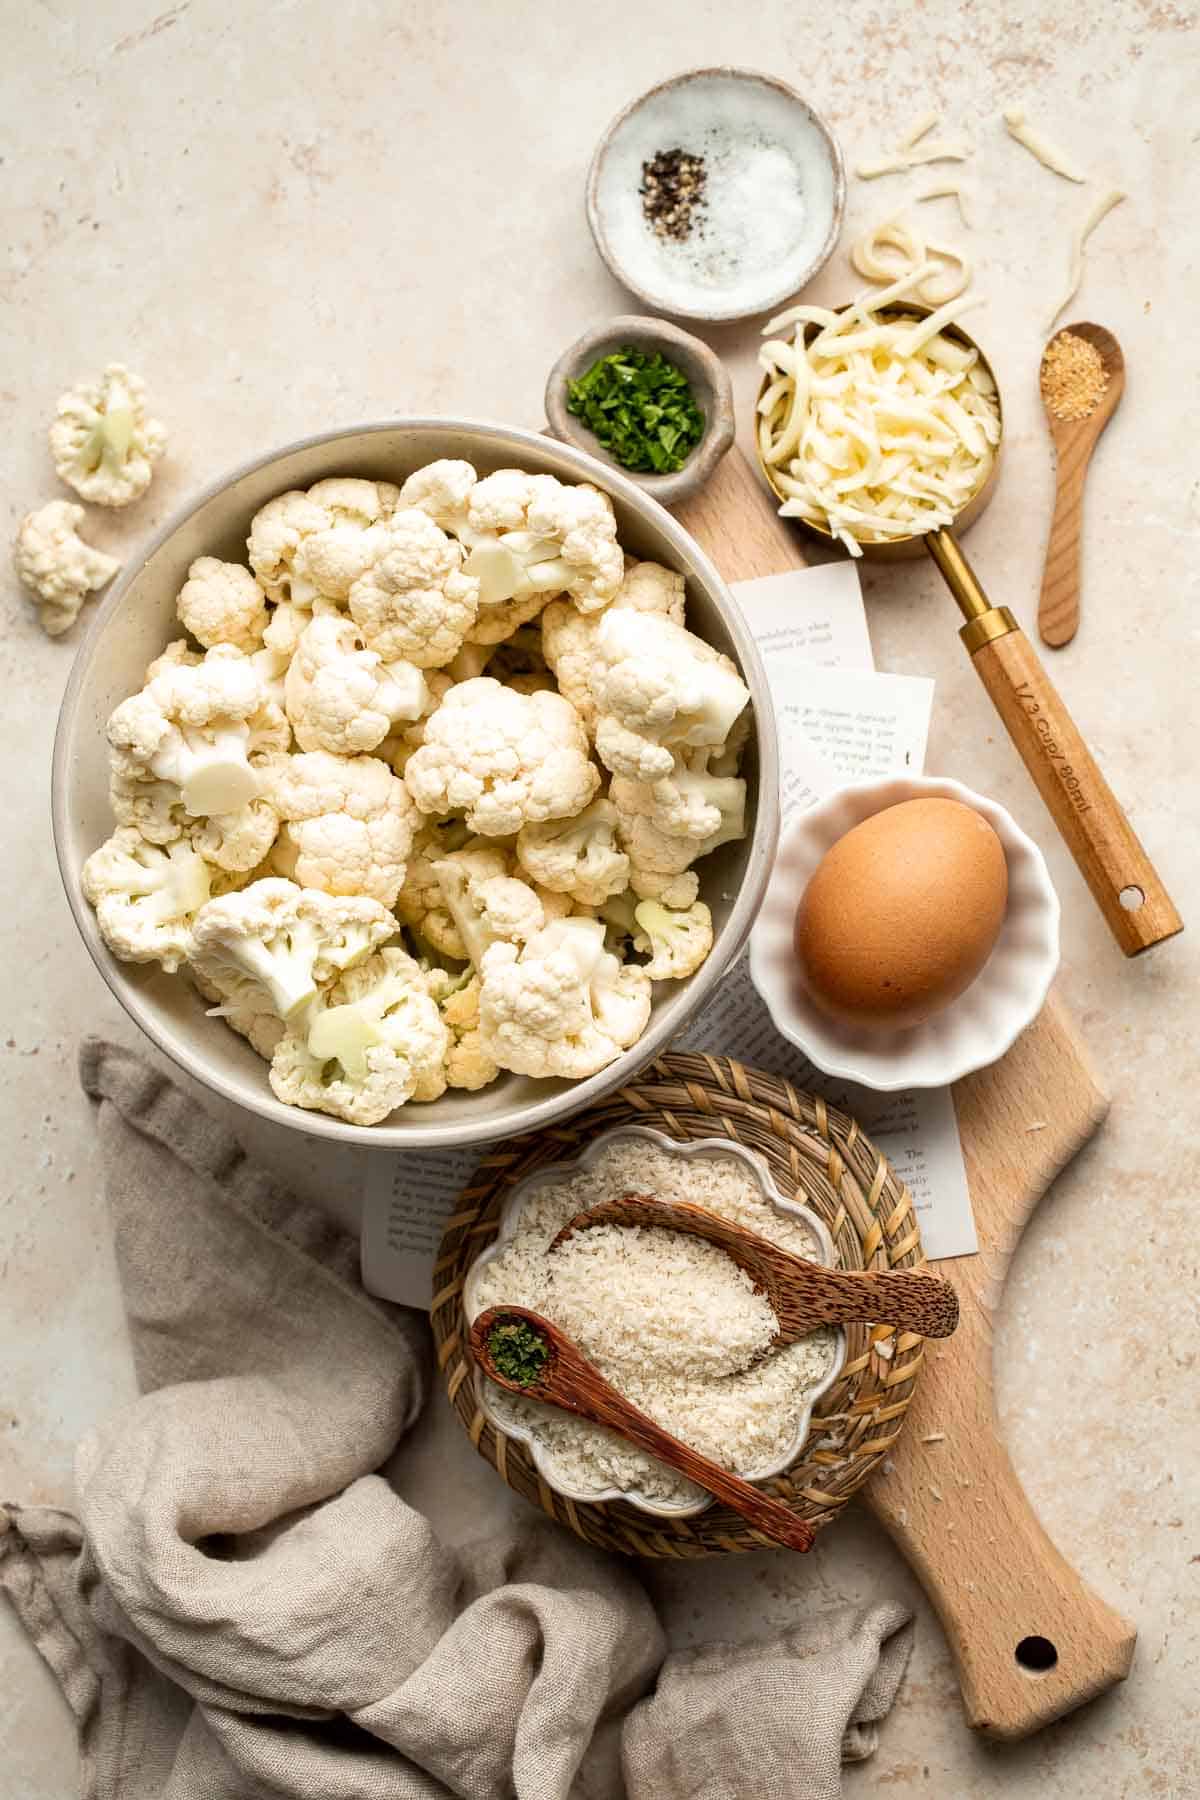
To make these delicious Cauliflower Tots, you will need the following ingredients (full measurements in recipe card below):
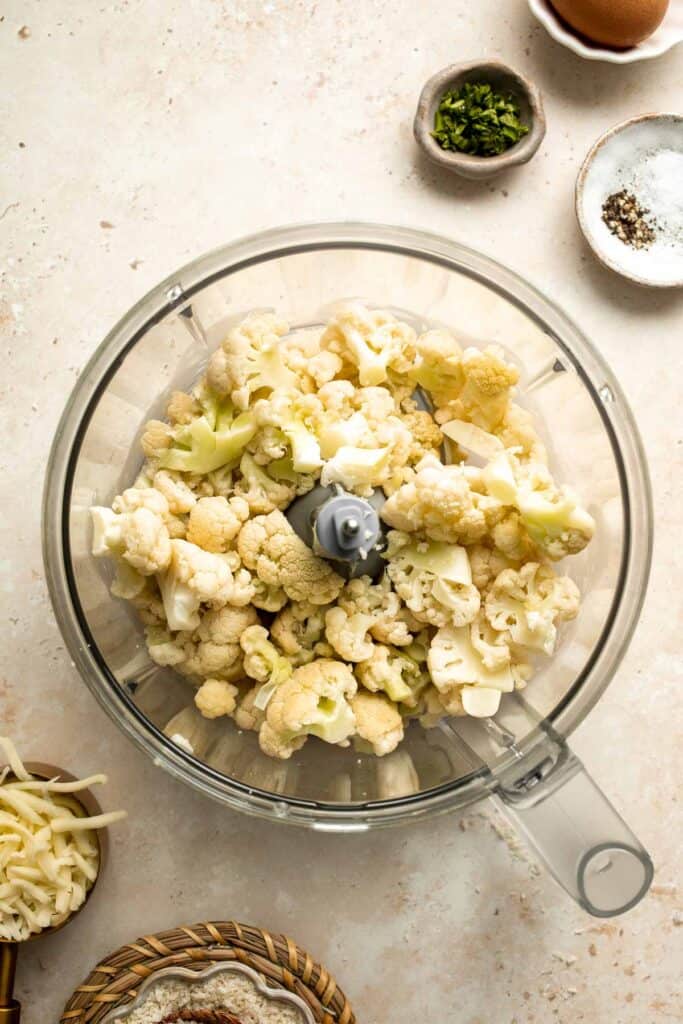
- cauliflower - you can use a pre-cut cauliflower or riced cauliflower to speed up the process if necessary.
- egg - if you want to make these vegetarian or vegan-friendly, omit the egg and use a mixture of 1 tablespoon of flaxseed meal and 3 tablespoons of water to help bind the ingredients together.
- Panko crumbs - regular or gluten-free Panko breadcrumbs are both okay to use, depending on your dietary preference.
- garlic powder - you can also use garlic granules, but the texture of the tots will be affected slightly.
- Italian seasoning - you can use a store-bought Italian seasoning blend or your own homemade seasoning. You can also use a different flavor of seasoning if you prefer!
- mozzarella cheese - if you're not a fan of mozzarella, you can use cheddar or provolone cheese. Try a vegan mozzarella-style cheese substitute if you want to make the recipe vegan.
- parsley - these tots are garnished with parsley but it's completley optional. Feel free to use whatever soft herbs you have on hand.
- salt and pepper
You will also need measuring cups and spoons, a food processor, and a large baking sheet (if baking), large pot (if deep frying), or air fryer (if air frying).
How to Make the Best Cauliflower Tots
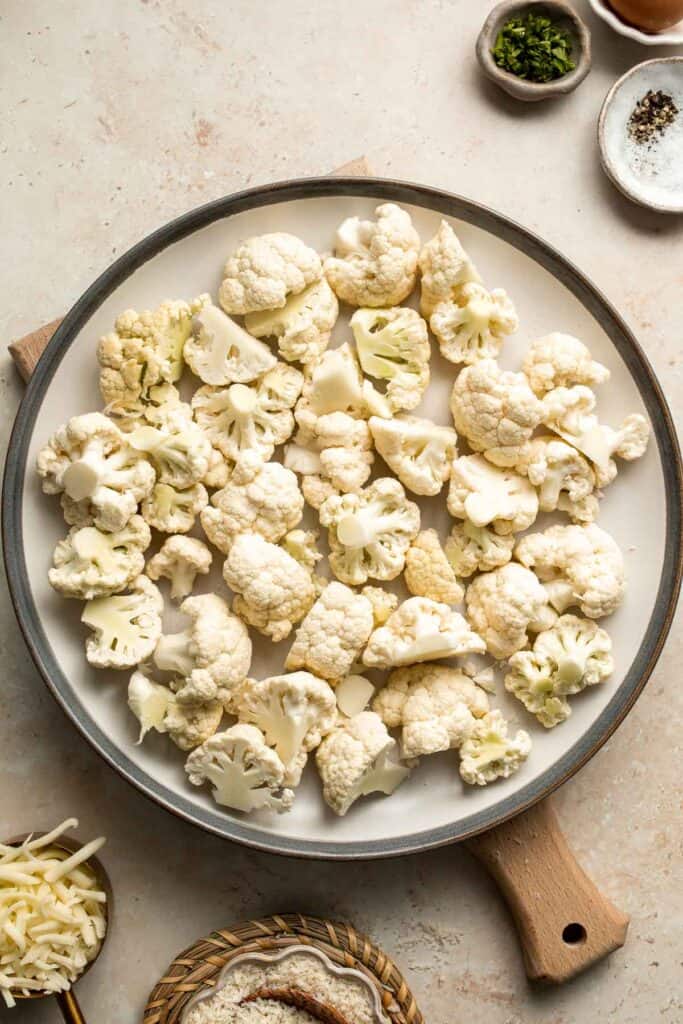
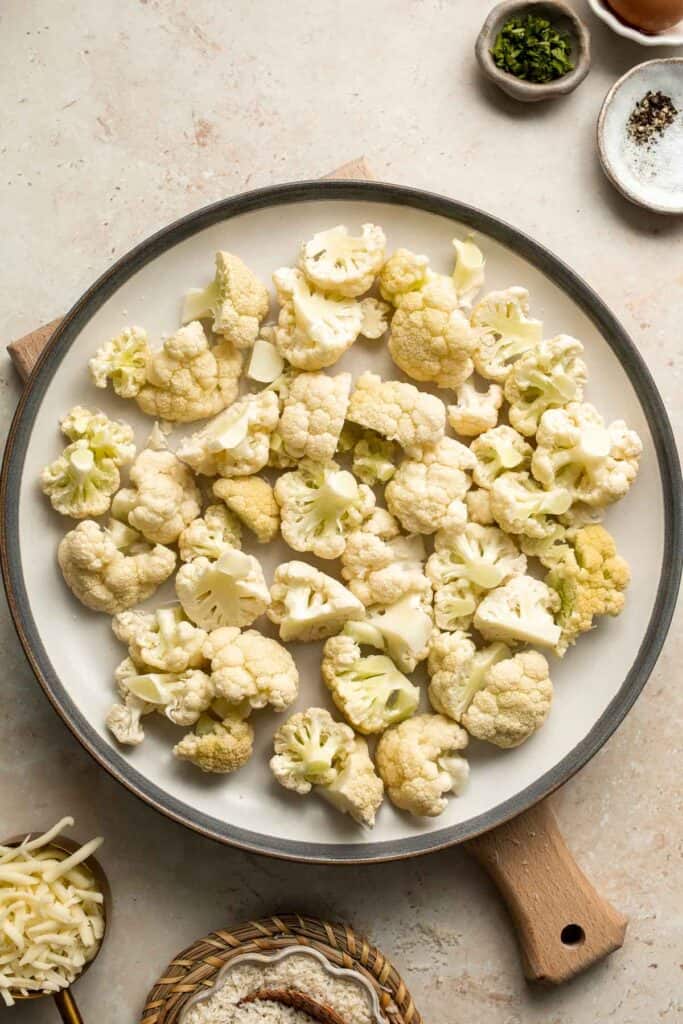
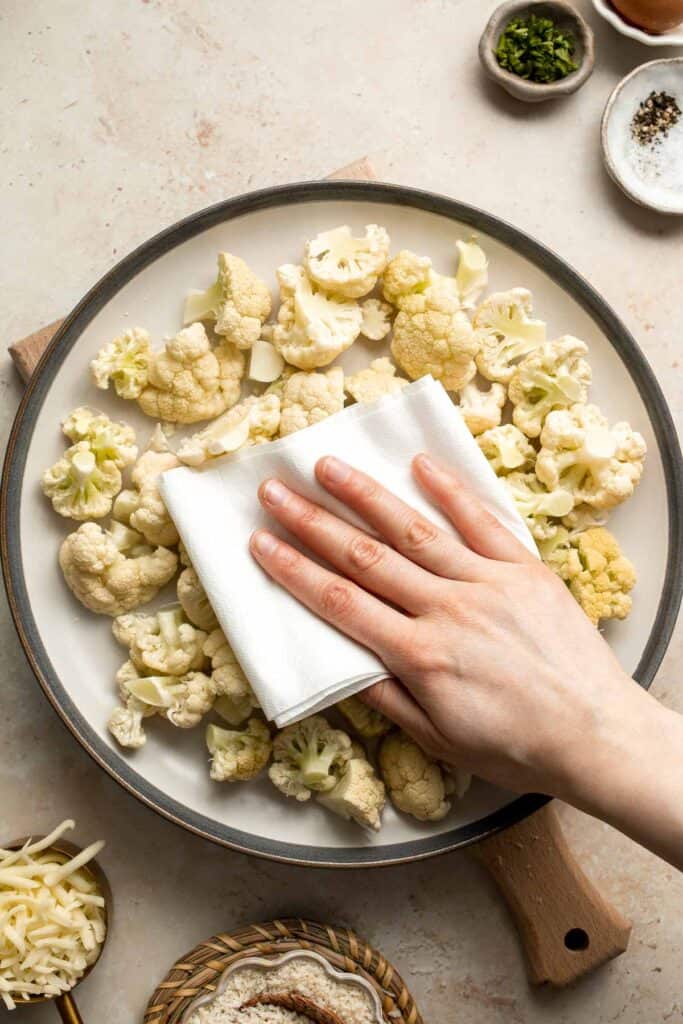
- Cook cauliflower. Place the cauliflower florets in a large microwave-safe plate and cook in the microwave until tender, about 3-4 minutes. You can also steam cook or boil the cauliflower for 5 minutes until tender. Drain well and let cool completely, about 10-15 minutes. Use a paper towel to pat the cauliflower completely dry.
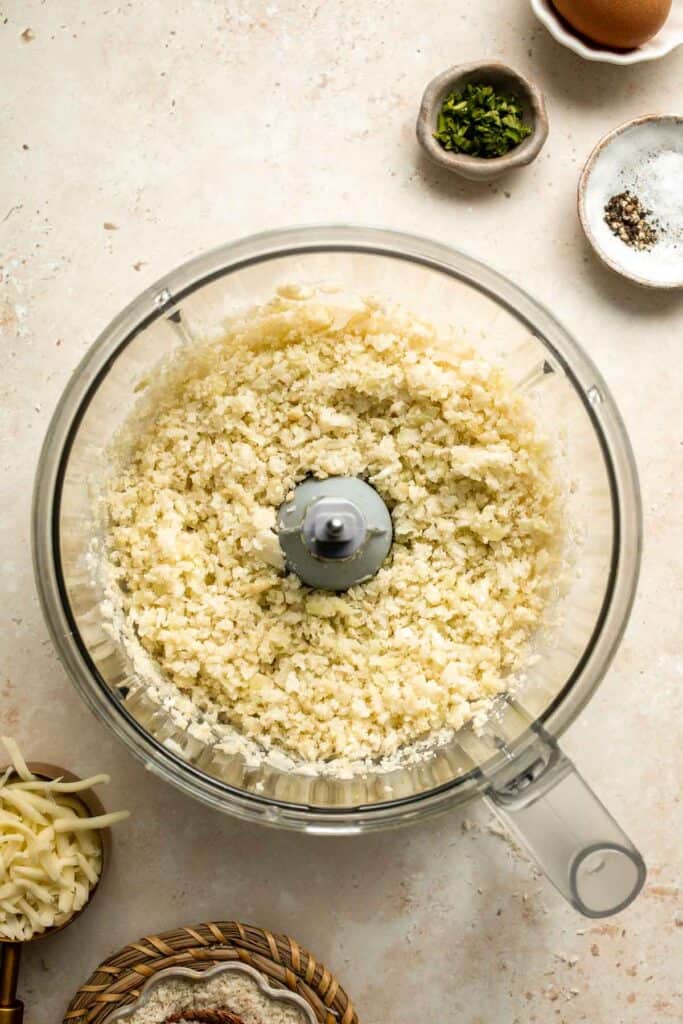
- Process. In a food processor, add the cooked cauliflower and pulse mix on and off for 1 minute until finely chopped (or you can also finely chop the cauliflower florets by hand).
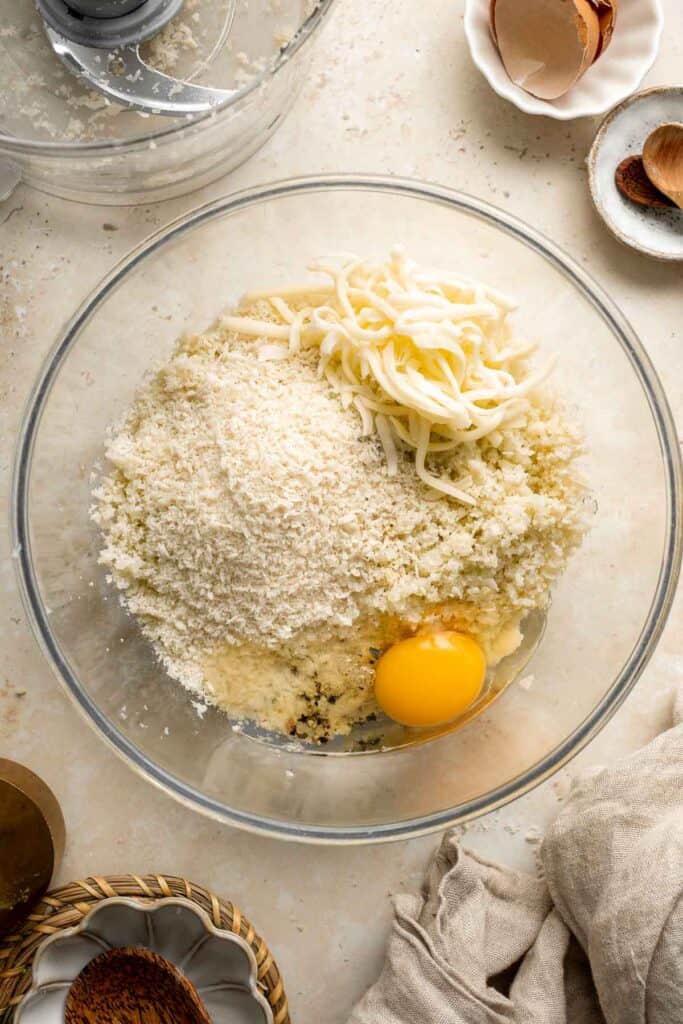
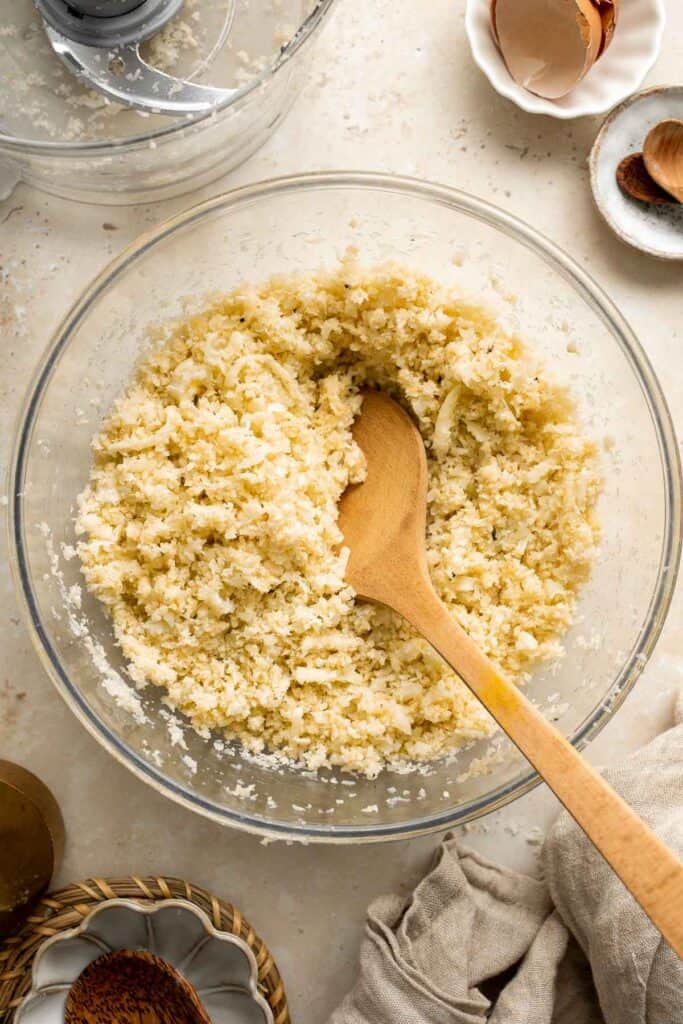
- Combine ingredients. Squeeze out as much liquid as you can using a cheese cloth or your hands. Transfer the cauliflower bits to a large mixing bowl. Add in egg, breadcrumbs, cheese, Italian seasoning, garlic powder, salt, and pepper. Use a wooden spoon or spatula to mix until well combined.
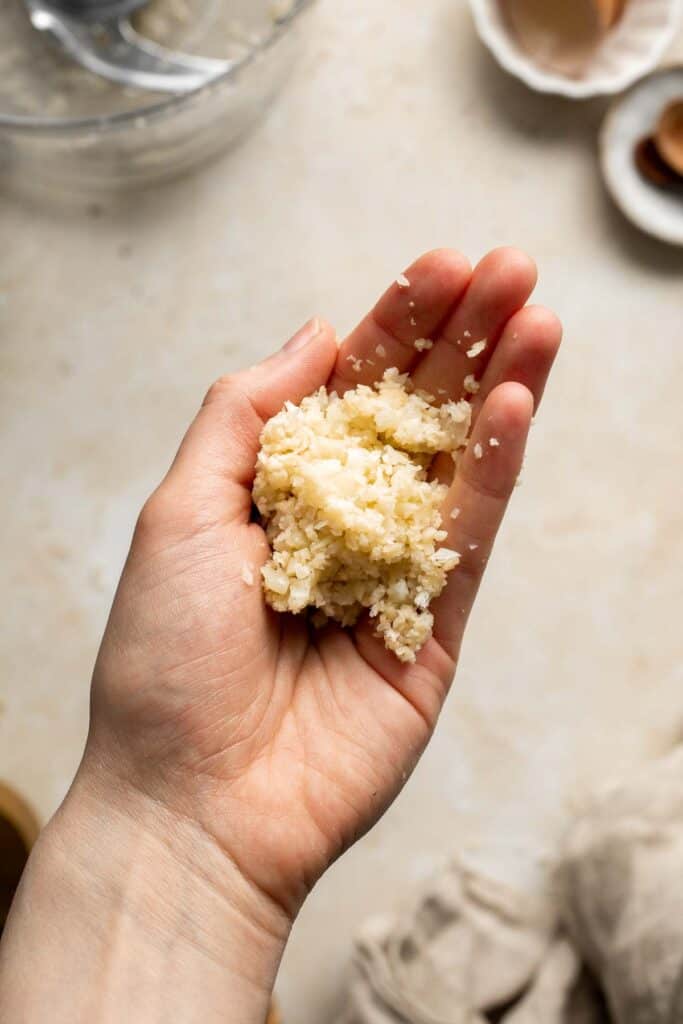
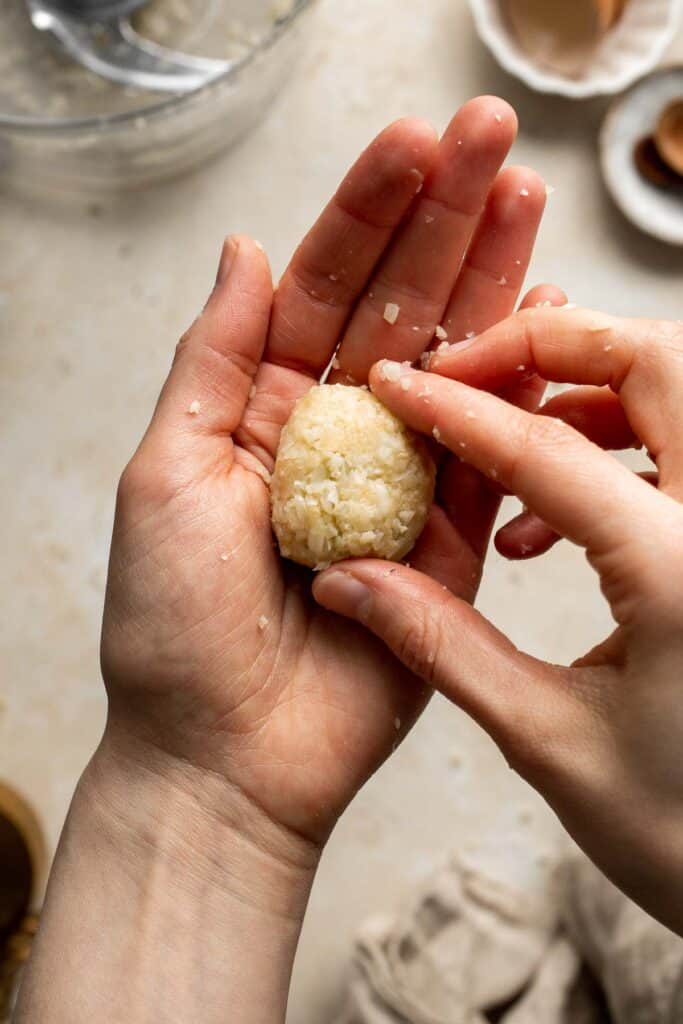
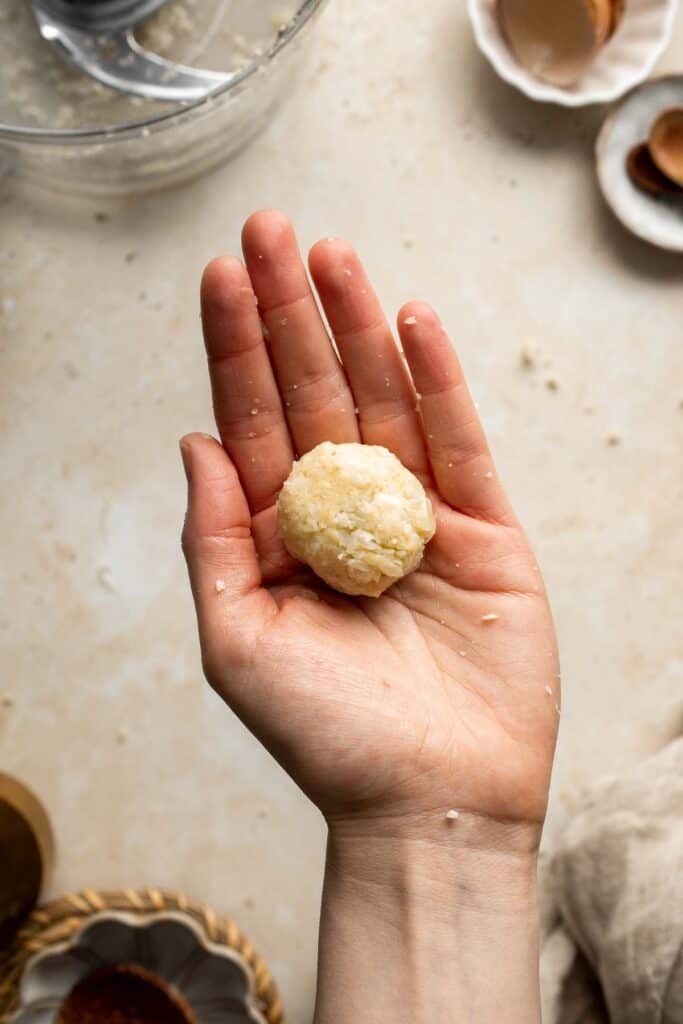
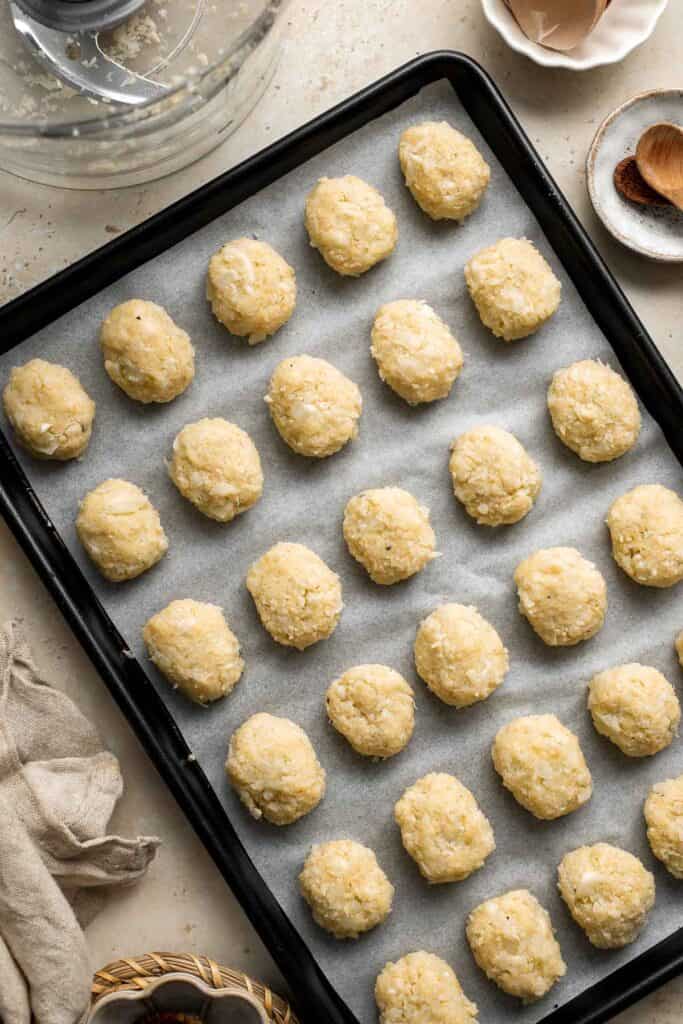
- Shape the tots. Use your hands to shape the cauliflower mixture into tater tots and place them on a large baking sheet lined with parchment paper.
- Cook the tots. You can bake, deep fry, or air fry the cauliflower tots.
- To bake: Apply cooking oil spray evenly over the tots and bake in a 400F preheated oven for 25 minutes until golden brown, turning the tots over halfway through baking. Broil on HI for additional 4-5 minutes to achieve extra crispy brown tater tots, if desired.
- For deep fry: Add oil to a large pot filling it up 2-inches deep. Heat for 3-4 minutes until the oil it hot. Add cauliflower tots in batches and cook until golden brown and crispy, about 3-4 minutes.
- For air fry: Add cauliflower tots in the air fryer basket and spray with cooking oil spray. Air fry at at 375F for 12-15 minutes until golden brown and crispy, shaking the basket halfway during cooking to achieve even color.


- Serve. Serve immediately with your favorite dipping sauce.
Recipe Variations
- Make them spicy. Give these cauli tots a kick with some cayenne pepper or chili flakes mixed into the cauliflower mixture. If making spicy cauliflower tots, serve with a cooling dipping sauce like Ranch Dip or Yogurt.
- Add herbs. We flavored these cauliflower tots with Italian seasoning, but turn it up a notch with fresh herbs like parsley, basil, dill, rosemary, or thyme.
- Switch up the cheese. Instead of mozzarella cheese, play around with different flavors by switching up the cheese with grated cheddar or Parmesan.
- Add bacon. Crumble in some cooked bacon into the cauliflower mixture before shaping into tots. Bake them until crispy and enjoy the smoky flavor.
- Give them a Mediterranean twist. Add in some chopped kalamata olives, sun-dried tomatoes, feta cheese, and oregano to the cauliflower mixture for a mediterranean twist. Serve it with Tzatziki Sauce.
- Make buffalo cauliflower tots. For a spicy and tangy twist, toss the cooked cauliflower tots in buffalo sauce before serving. Serve them with a side of Ranch or blue cheese dressing for a classic flavor combination.
How to Serve
Serve these Cauliflower Tots while they are still warm and crispy as an appetizer, snack, or side dish at dinner or even breakfast (they are great alongside Scrambled Eggs, Avocado Toast, and Mini Pancakes!). They also make a great salad topping and adds some crunch and flavor to your salads.
If serving as a side dish for dinner or lunch, consider pairing it with some of these entrees:
- Balsamic Chicken Kabobs
- Miso Black Cod (Sablefish)
- Black Bean Burgers
- Slow Cooker BBQ Ribs
- Oven Roasted Vegetables
- Lobster Rolls
- Grilled Steak
Recipe Tips and Tricks
- The drier, the better. Excess liquid in the cauliflower is a major factor in tot troubleshooting. Allow the cauliflower plenty of time to drain to make sure the tots don't turn out too soggy. You can even squeeze excess water out by hand or use a cheese cloth.
- Line the baking sheet. To prevent the cauliflower tots from sticking to the baking sheet, line it with parchment paper or a silicone baking mat. This makes cleanup easier and ensures the tots don't stick to the pan.
- Flip halfway through. For even browning, flip the cauliflower tots halfway through the baking process. This promotes a golden and crispy exterior on all sides.
- Use them anywhere you would use tater tots. Whether you're serving them as a side for lunch or making a hot dish or casserole, these cauliflower tots are a great substitute for tater tots! We love them in Tater Tot Casserole.
- Serve with plenty of dipping sauce! What are tots without a sauce to dip them in? A good quality ketchup or a homemade sauce will pair perfectly with these tots and make them disappear quickly.
Storing and Freezing Instructions
Make Ahead
Shape the cauliflower tots and line them on your baking pan. Then cover with plastic cling wrap and store in the refrigerator for up to one day in advance. When ready to make them, set the tray out on the counter for about 20 minutes to bring the tots to room temperature. Then cook as per recipe instructions.
How to Store
Once the cauliflower tots cool completely, transfer them to an airtight container and refrigerate for up to 1 week.
How to Reheat
Reheat in a 350F preheated oven or air fryer for 5-10 minutes until warmed through and crispy.
How to Freeze
To freeze, allow the tots to cool completely to room temperature, then place them on a lined baking sheet and freeze for 1-2 hours until hard. Then, transfer to a freezer bag and release any excess air. Seal and freeze for up to 3 months. Reheat straight from frozen in a 350℉ oven for 15-20 minutes or until the tots are heated through and crisp.
More Cauliflower Recipes
- Air Fryer Cauliflower Bites
- Cauliflower Tacos
- Creamy Garlic Cauliflower Soup
- Baked Cauliflower Nuggets
- Mashed Cauliflower
- Spinach and Feta Quiche with Cauliflower Crust
Tried this recipe?
I'd love to hear what you think! Leave a comment and rating below to share your feedback. Your reviews help others discover this recipe and help me keep creating more free recipes for you. Snap a photo and tag me on social media @aheadofthyme too.

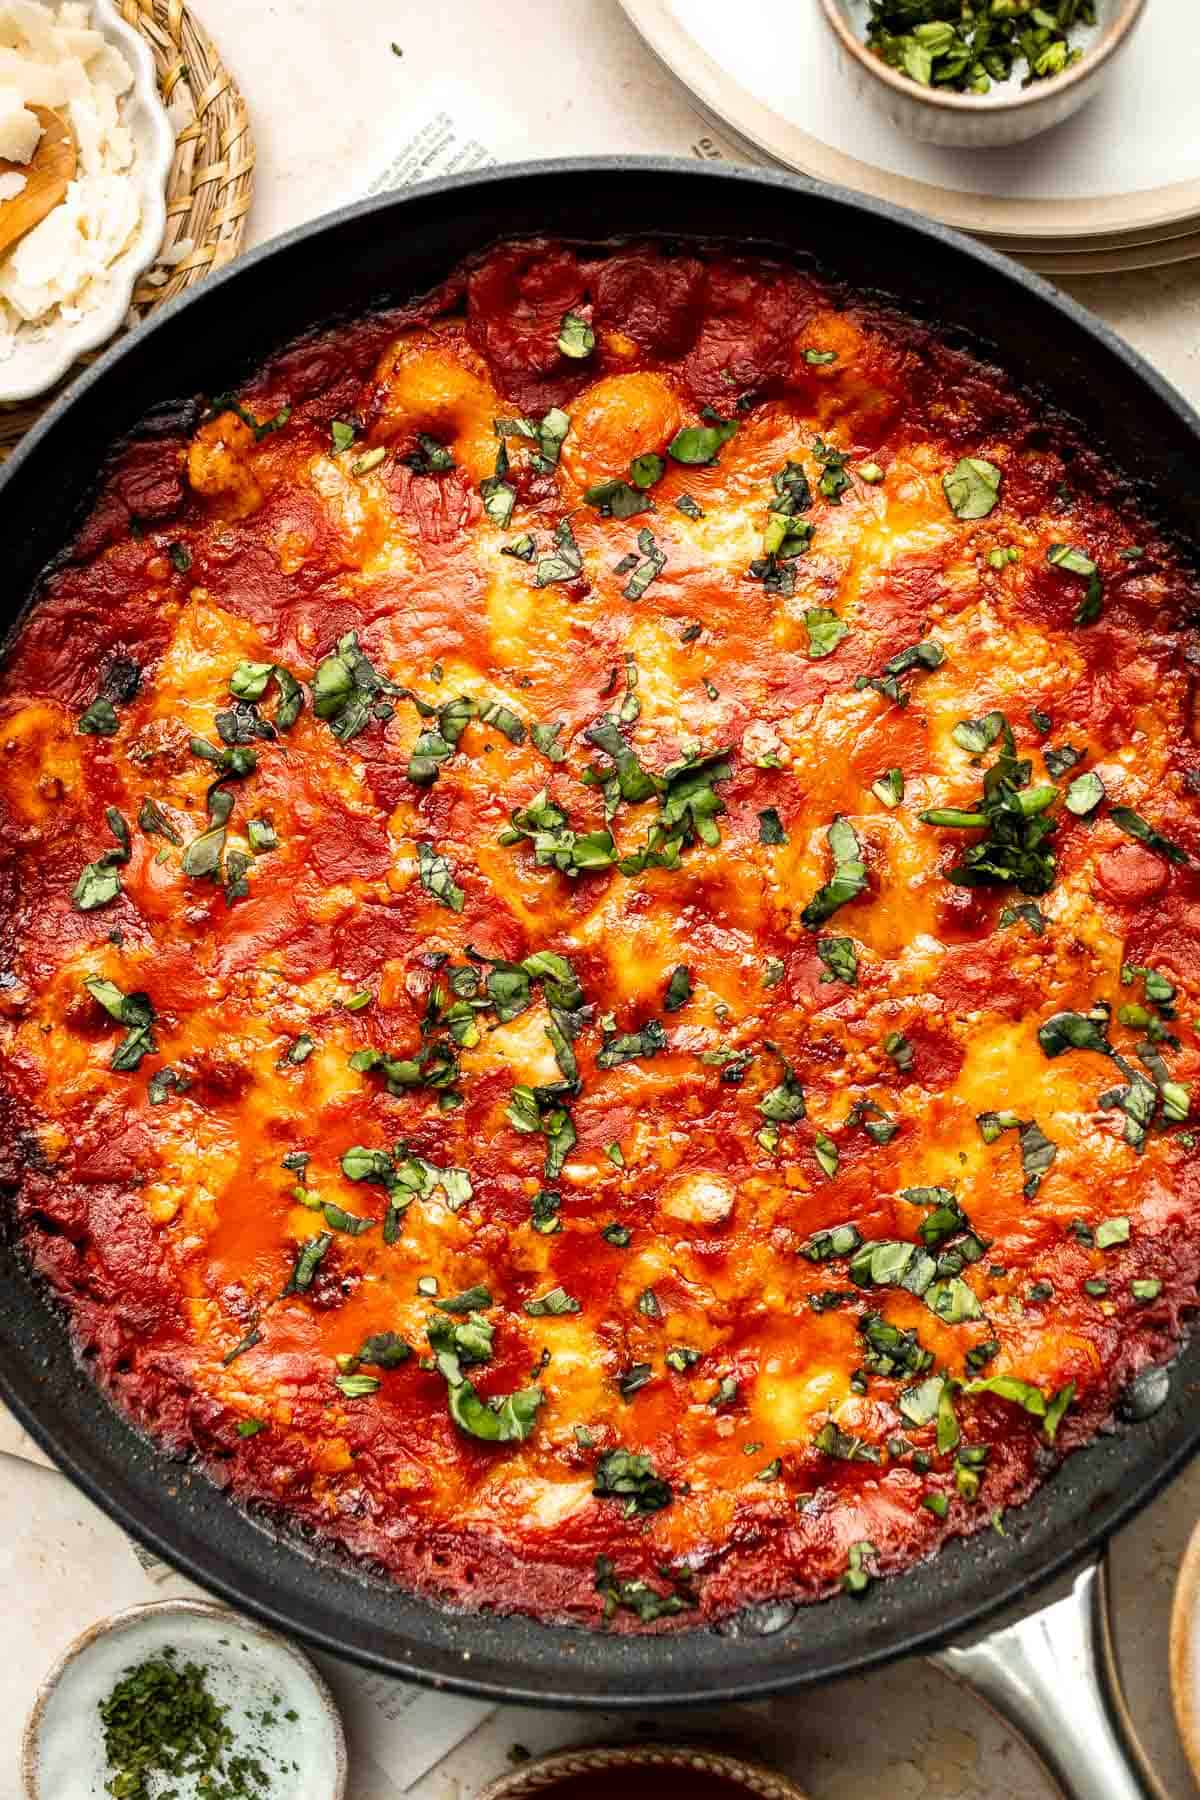
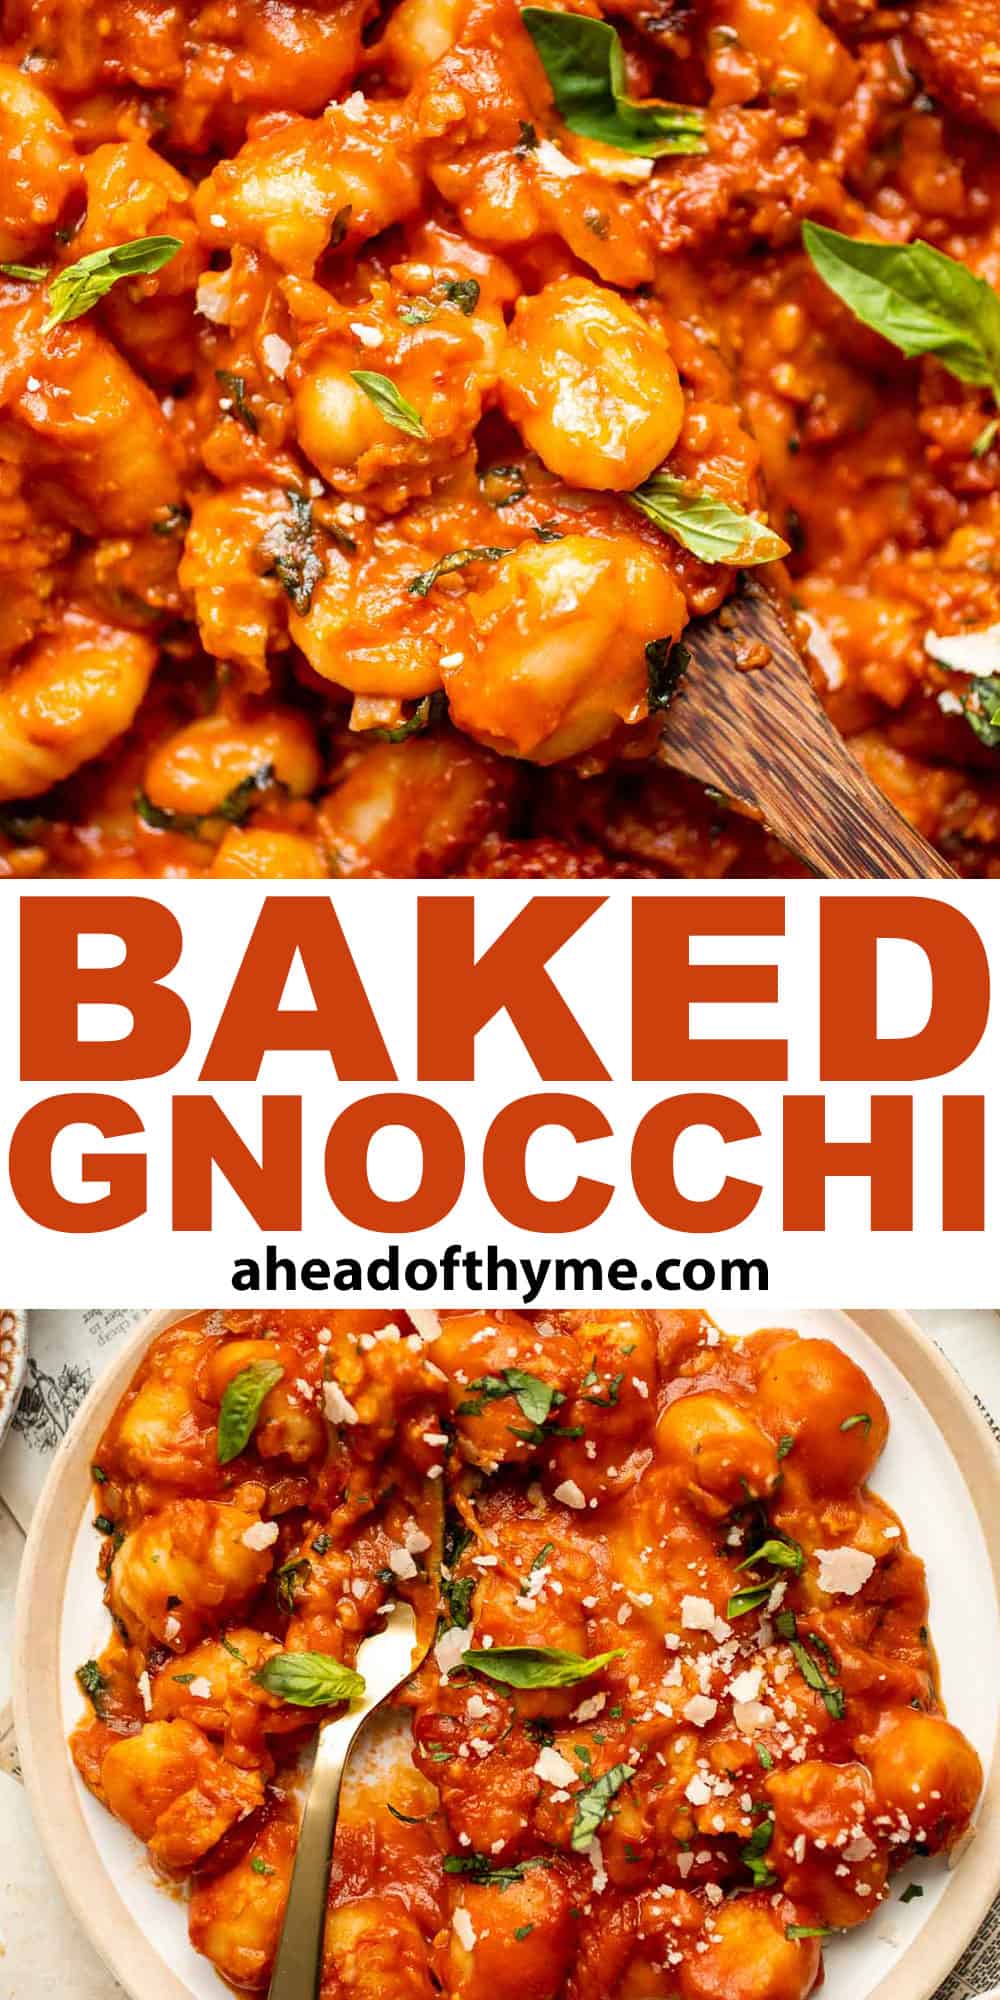
Baked Gnocchi
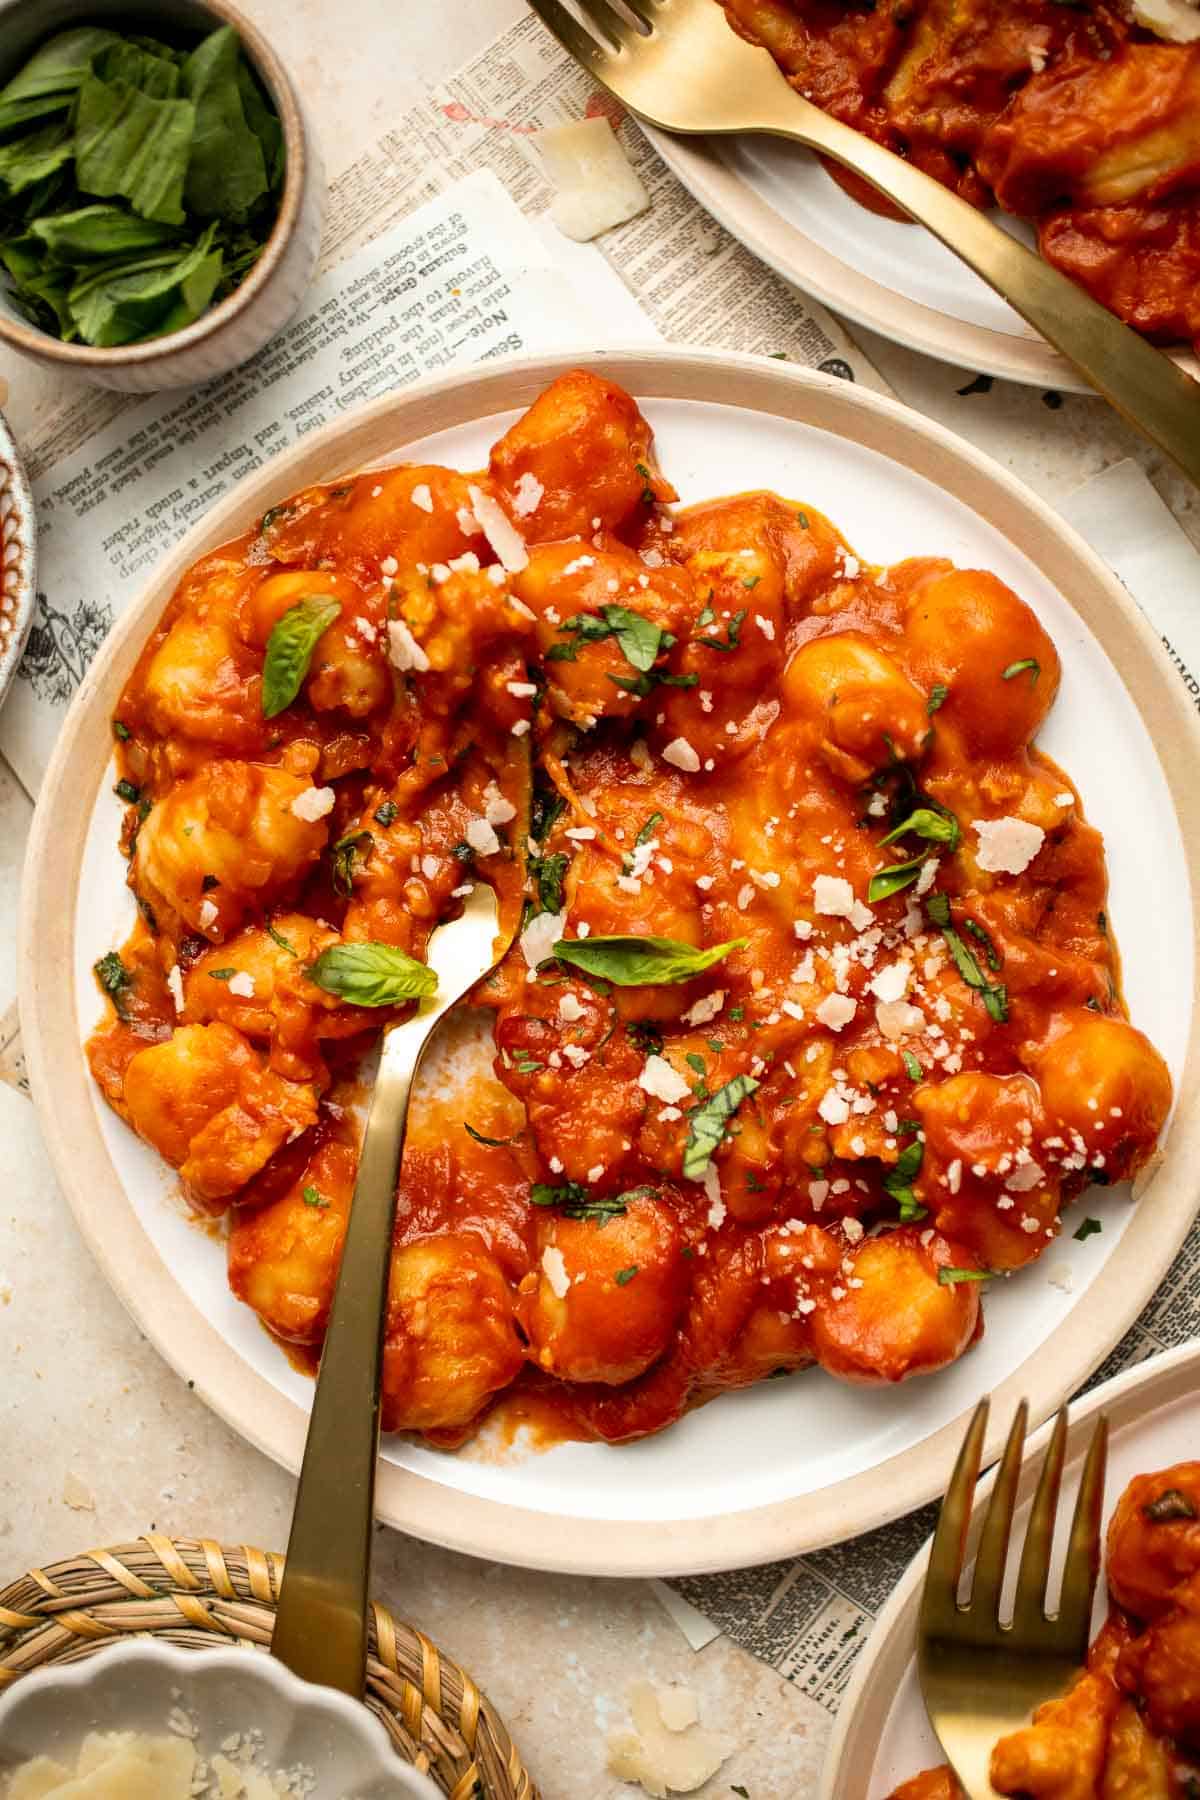
Cheesy Baked Gnocchi is quick and easy comfort food that is made all in one pot. Made with chewy bites of gnocchi smothered in a simple tomato-based sauce and topped with gooey melty cheese, this hot skillet dinner couldn't be any more delicious or flavorful. With minimal prep, this recipe is perfect for a busy weeknight meal or heart-warming weekend dinners.
When it comes to comforting dinners, it's all about finding a recipe that the whole family (even picky eaters) will love. Think baked casseroles, saucy pastas, and cheesy meals - and this vegetarian gnocchi checks off all the boxes! The best part? Prep it in under 10 minutes before popping into the oven for 30 minutes to bake. It can't get any easier!
Why You'll Love this Baked Gnocchi Recipe
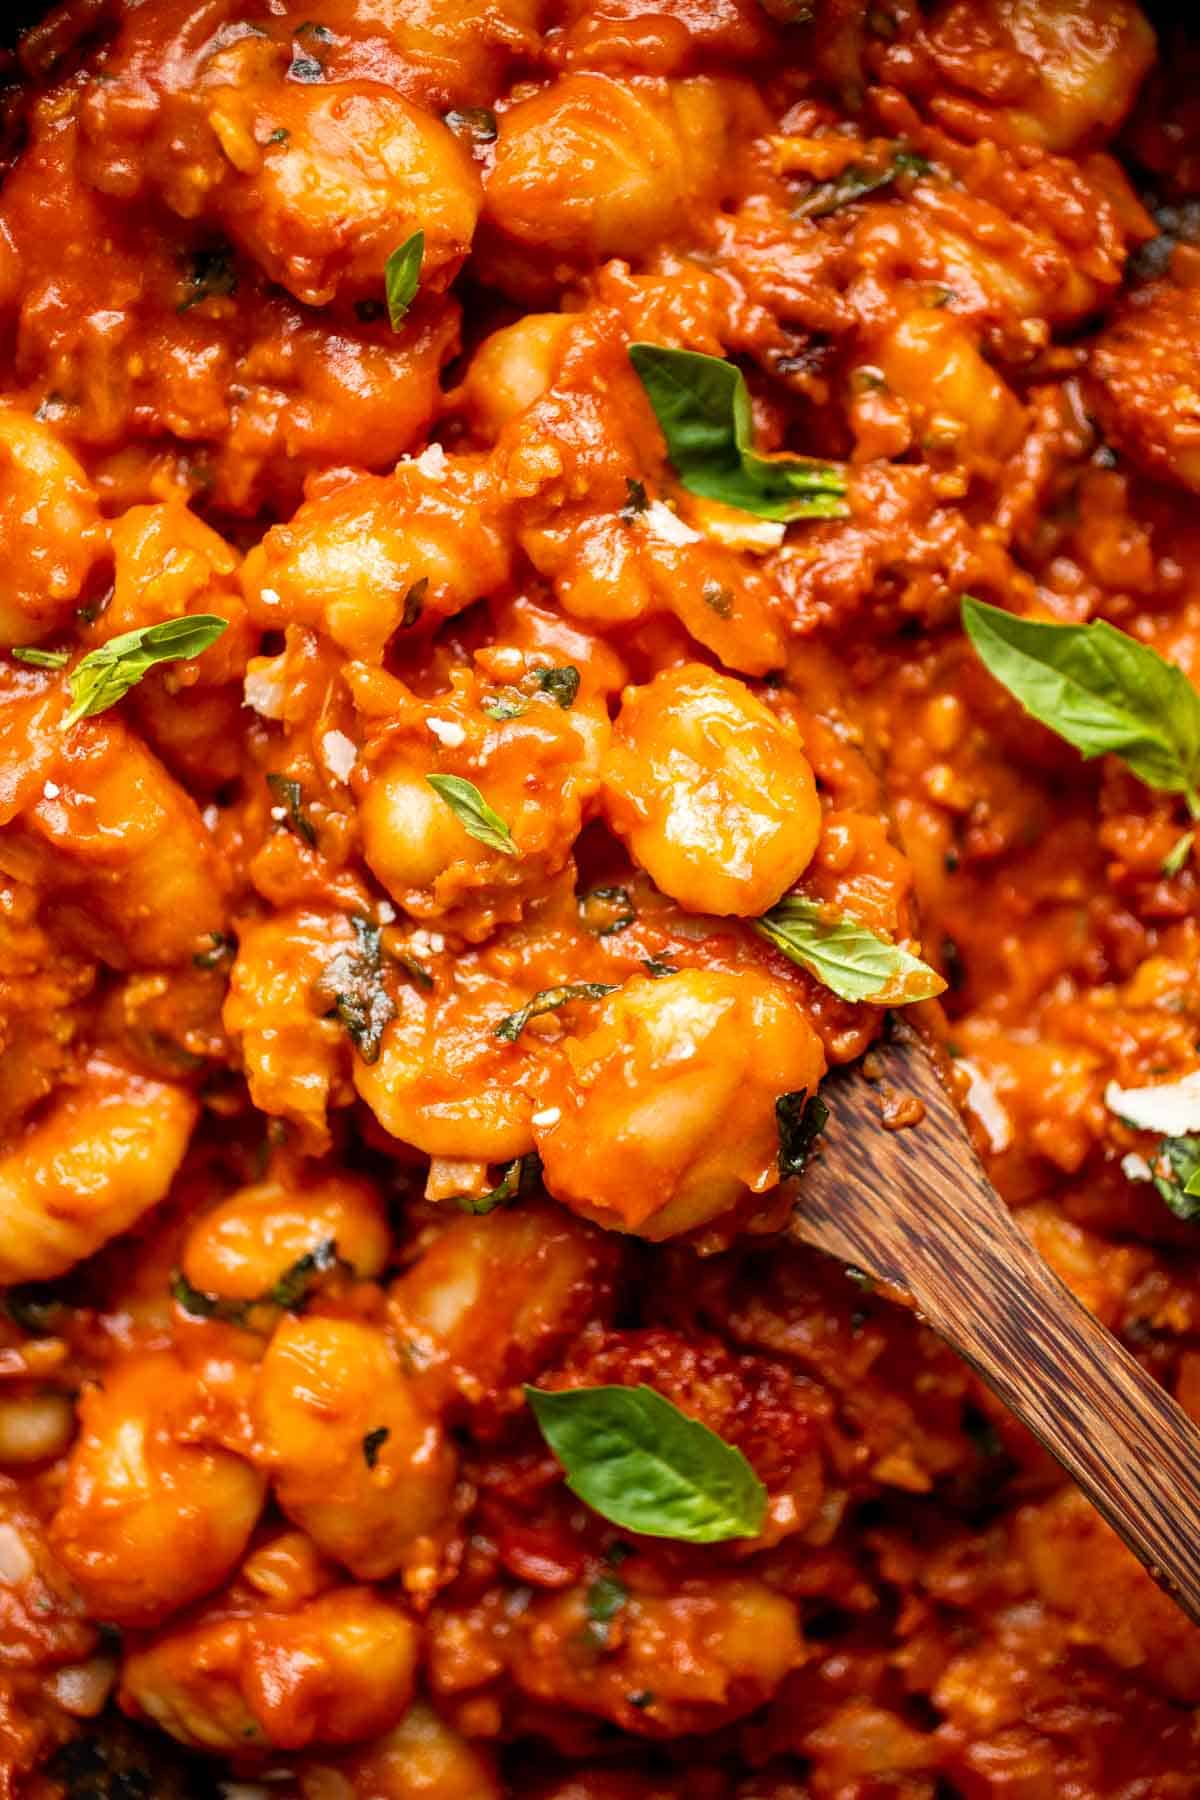
- Soft, pillowy gnocchi. Gnocchi is highly underrated - each little dumpling-shaped piece of these pasta-like bites becomes so doughy and pillowy. Combined with our homemade tomato sauce and topped with melty cheese, this baked gnocchi is unbelievably cozy and comforting.
- Easy one-pot meal. This cheesy baked gnocchi comes together quickly in just one cast-iron skillet (or can be made in a casserole pan)! You'll simply sauté, add sauce, and bake the ingredients all in the same dish, which means cleanup is just as simple as making the recipe itself.
- Ready in less than an hour. It only takes 40 minutes to get this cheesy baked gnocchi ready to serve, and only ten minutes of that is actual active prep work! This means you only have to put in minimal effort for maximum flavor. It's a perfect vegetarian dinner for busy weeknights!
- Comfort food at its best. With its saucy, cheesy, and flavorful combination, this vegetarian c gnocchi offers the ultimate comfort food experience. It warms your soul and provides a cozy and satisfying meal that is perfect for any time of the year.
Ingredient Notes
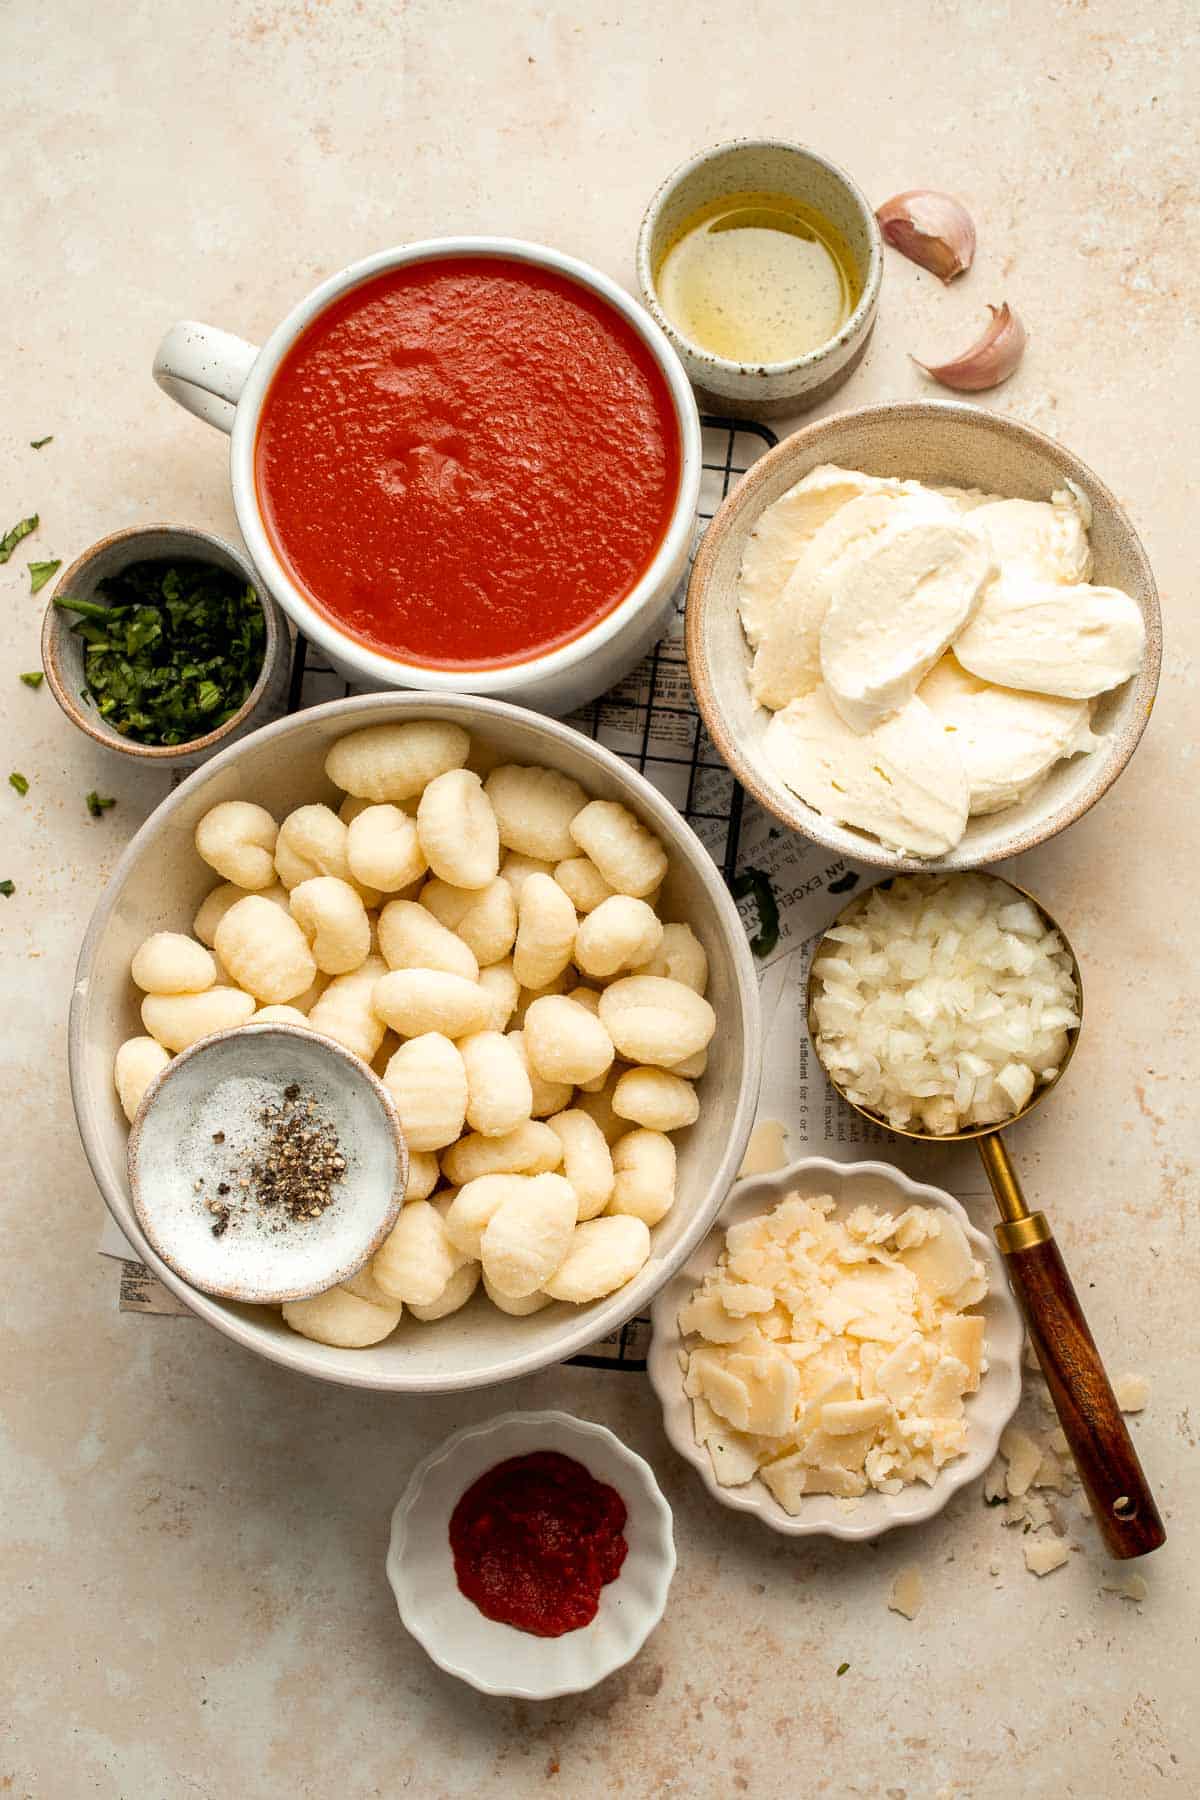
To make this easy Baked Gnocchi, you will need the following ingredients (full measurements in recipe card below):
- olive oil - any vegetable oil will work such as avocado oil or grapeseed oil.
- onions - white onion, yellow onion, or even shallots would work best in this recipe.
- garlic - aim to use fresh garlic if you can, but you can also use pre-minced garlic if necessary.
- tomato sauce - you can use marinara sauce if you don't have tomato sauce on hand. Then, just add salt and pepper to taste as you may not need it.
- tomato paste - if you don't have tomato paste, you can use a little more tomato sauce or tomato puree instead.
- gnocchi - you can make your own gnocchi or use store-bought uncooked gnocchi.
- mozzarella - if you don't like mozzarella, you can substitute provolone, Swiss cheese, or feta instead.
- parmesan - freshly-grated parmesan works best, but you can use pre-grated parmesan or parmesan crumbles if that's what you have.
- fresh basil - you can also use dried basil or another soft herb of your choice such as parsley.
- salt and pepper
You will also need measuring cups and spoons and a large oven-safe skillet. Otherwise, you can make everything in a regular skillet and transfer to a casserole dish for baking.
How to Make the Best Baked Gnocchi
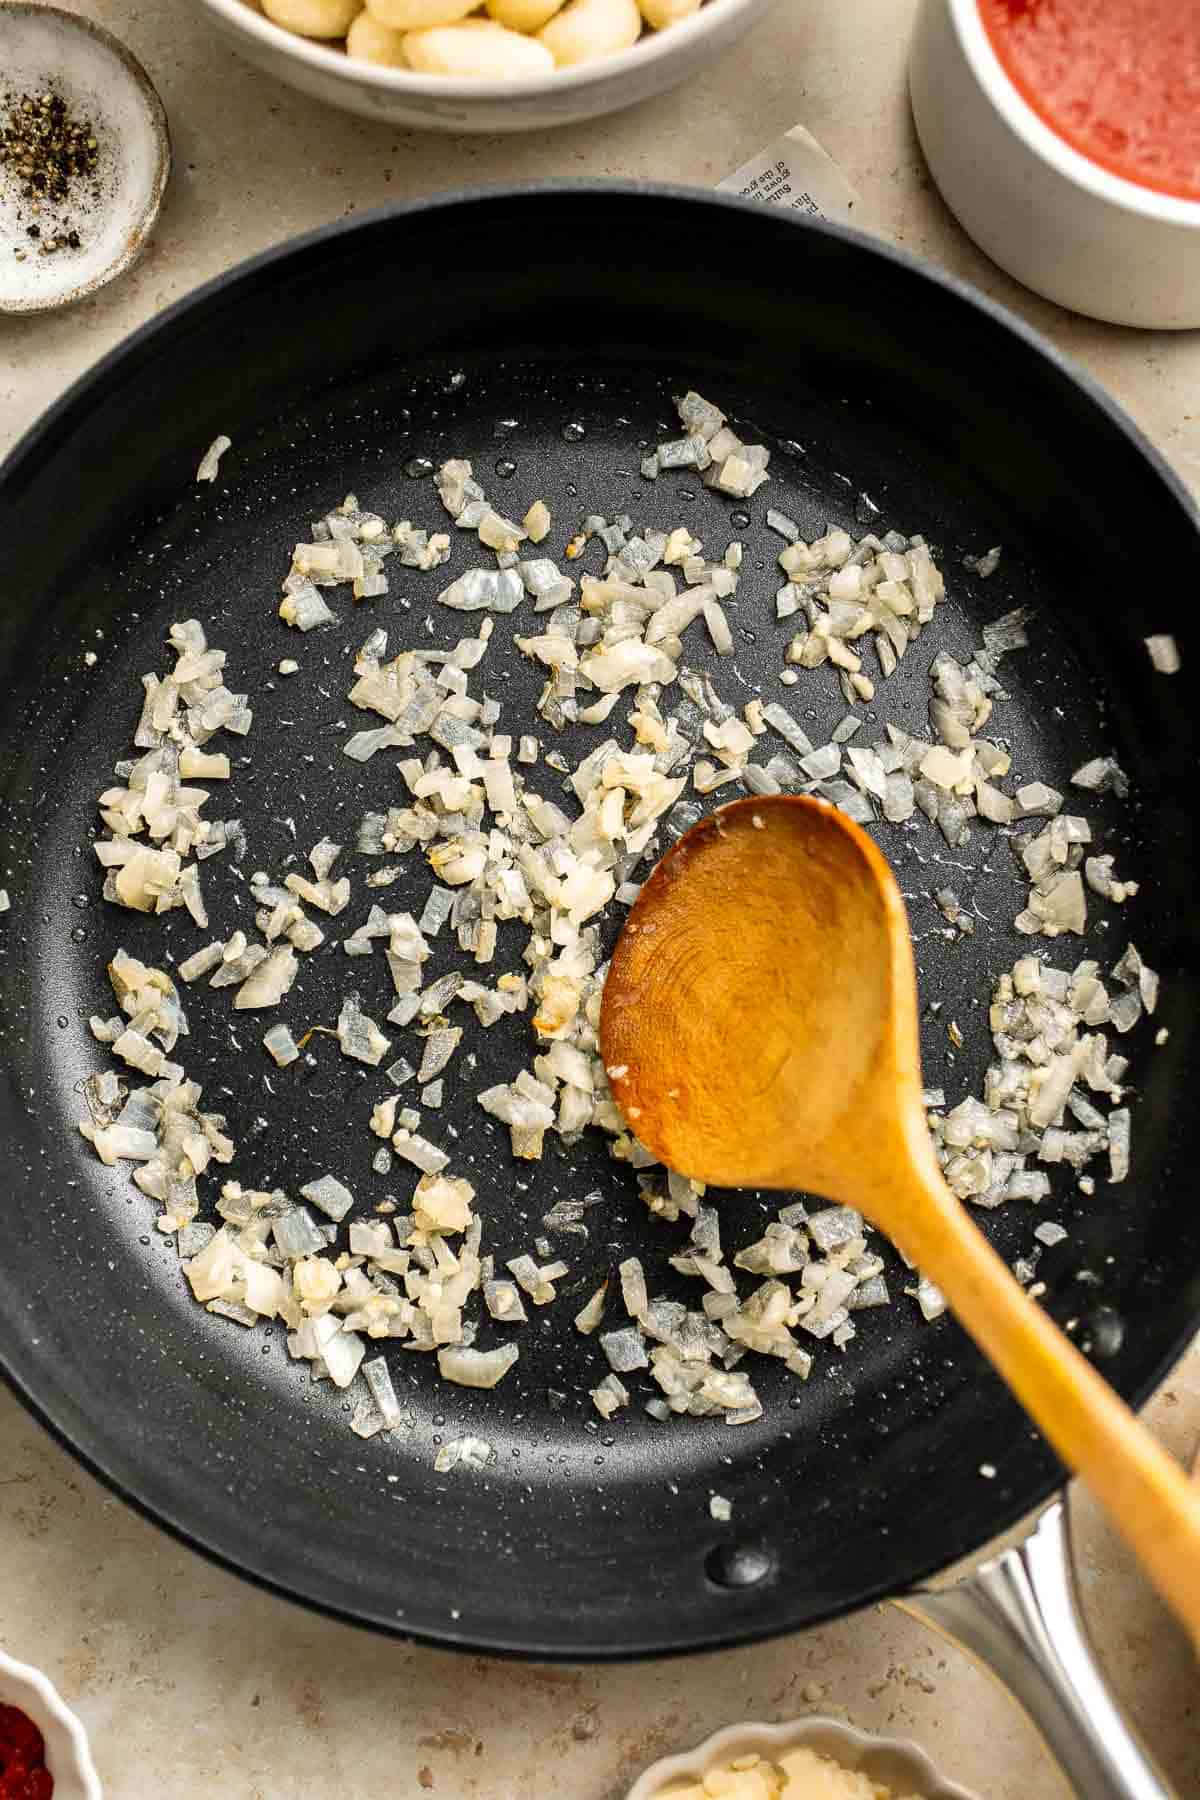
- Sauté aromatics. Heat oil in a large cast-iron skillet (or oven safe skillet) for 2 minutes over medium-high heat until the hot oil sizzles and shimmers. Add onions and garlic and sauté until tender, about 2-3 minutes. Stir well to combine.
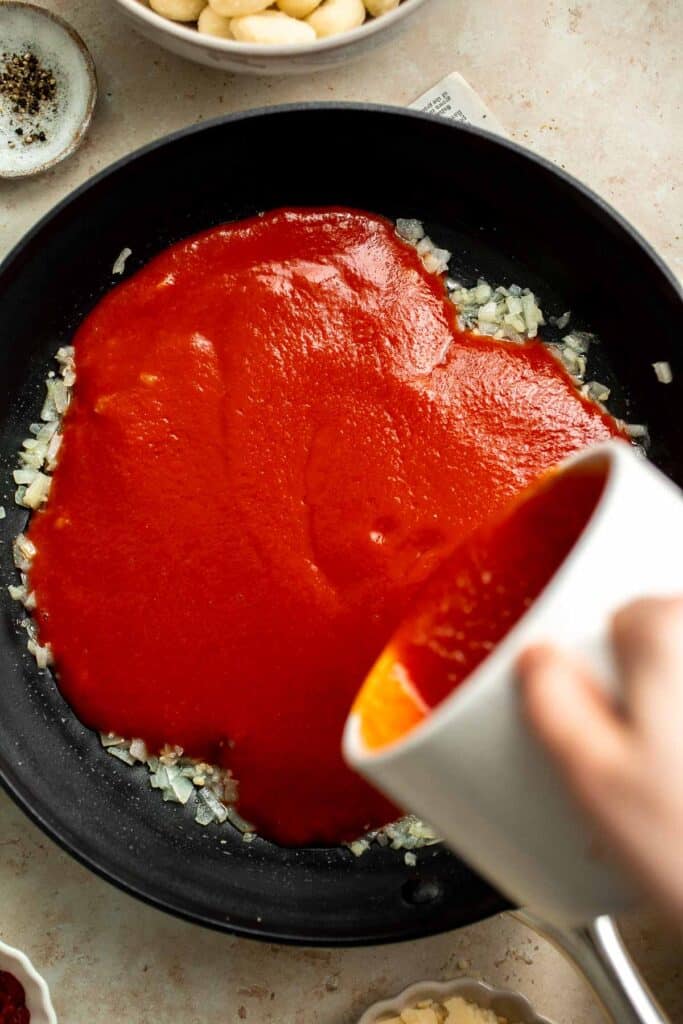
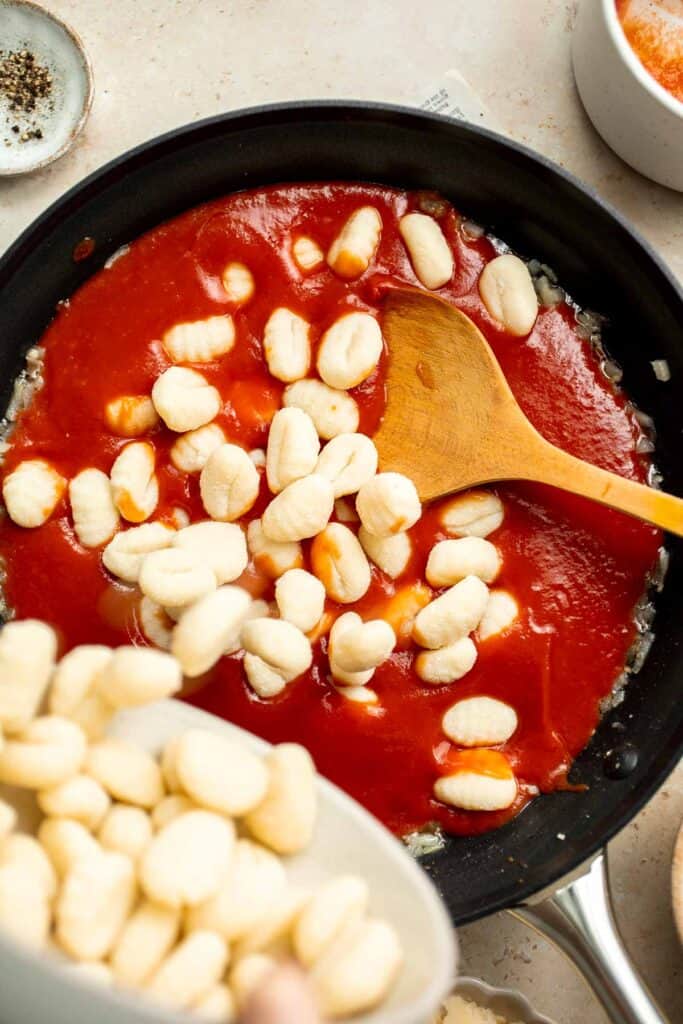
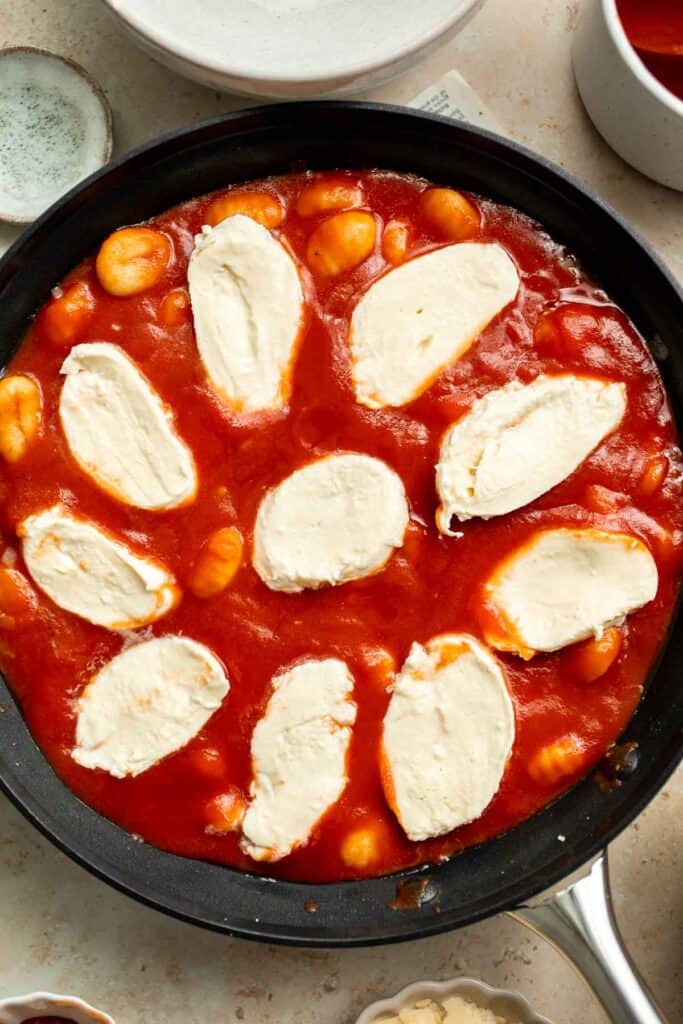
- Add remaining ingredients. Add in tomato sauce, tomato paste, gnocchi, salt, and pepper. Mix well until evenly combined.
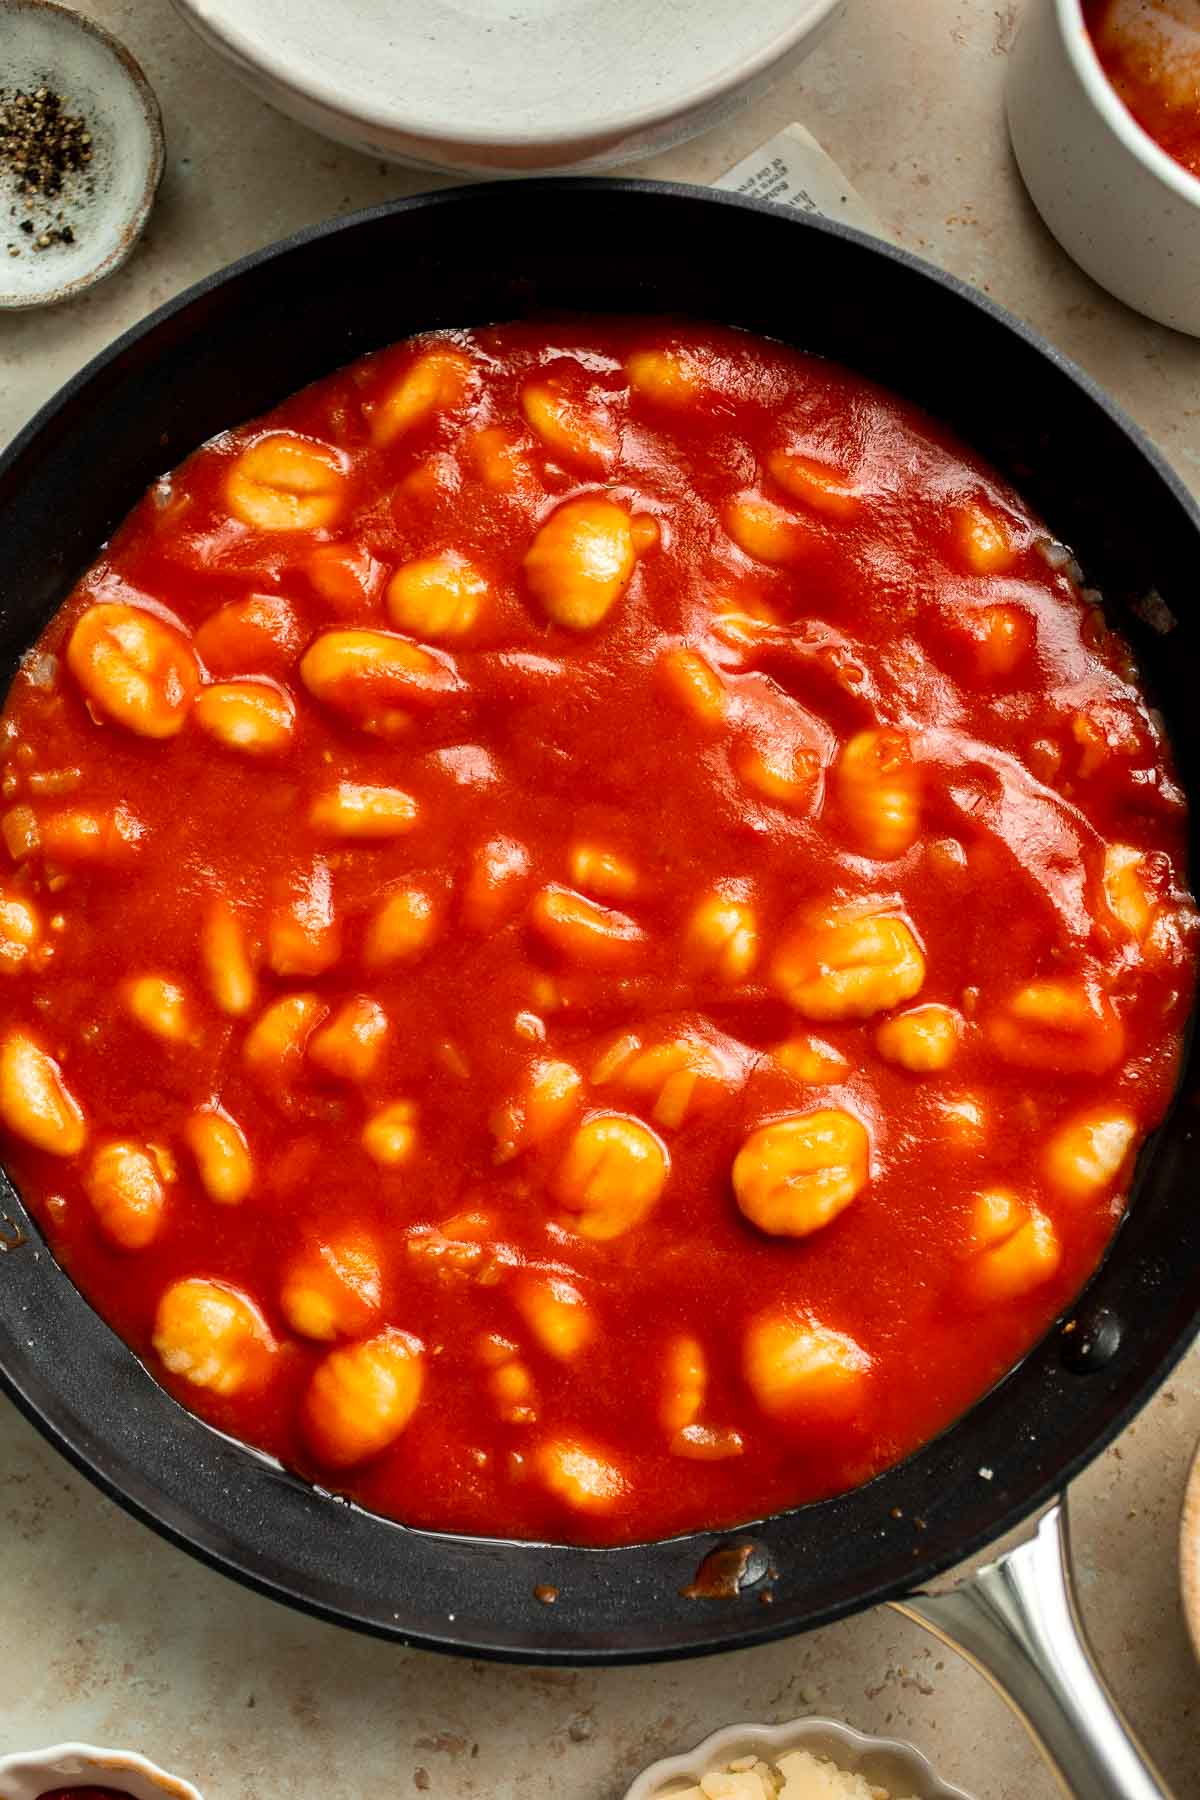
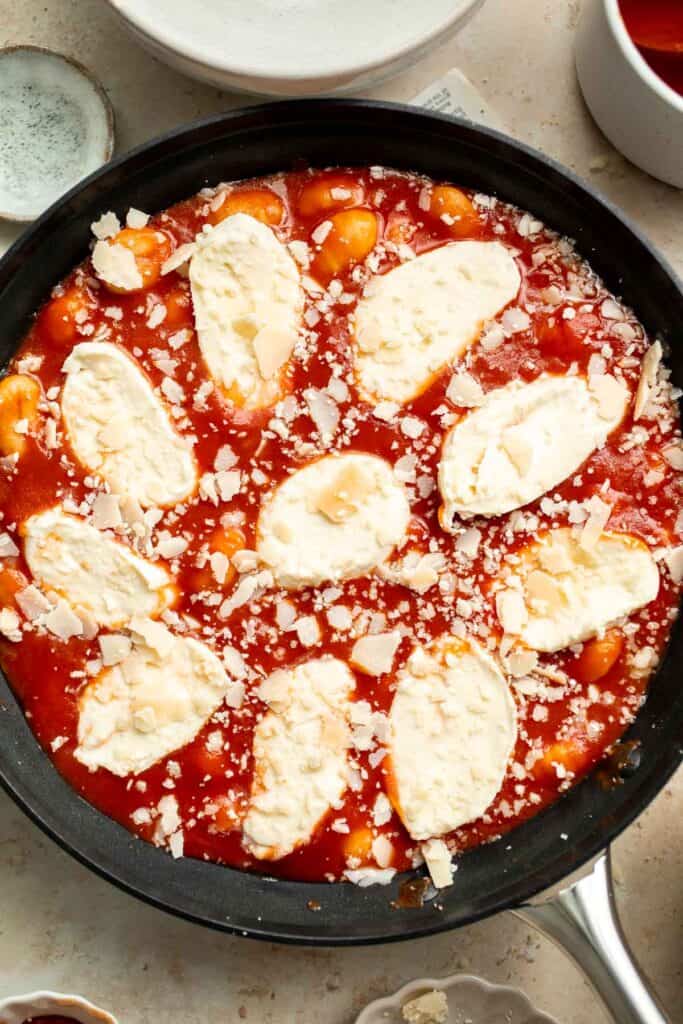
- Top with cheese. Remove from heat and top with mozzarella cheese slices and a sprinkle of parmesan cheese.
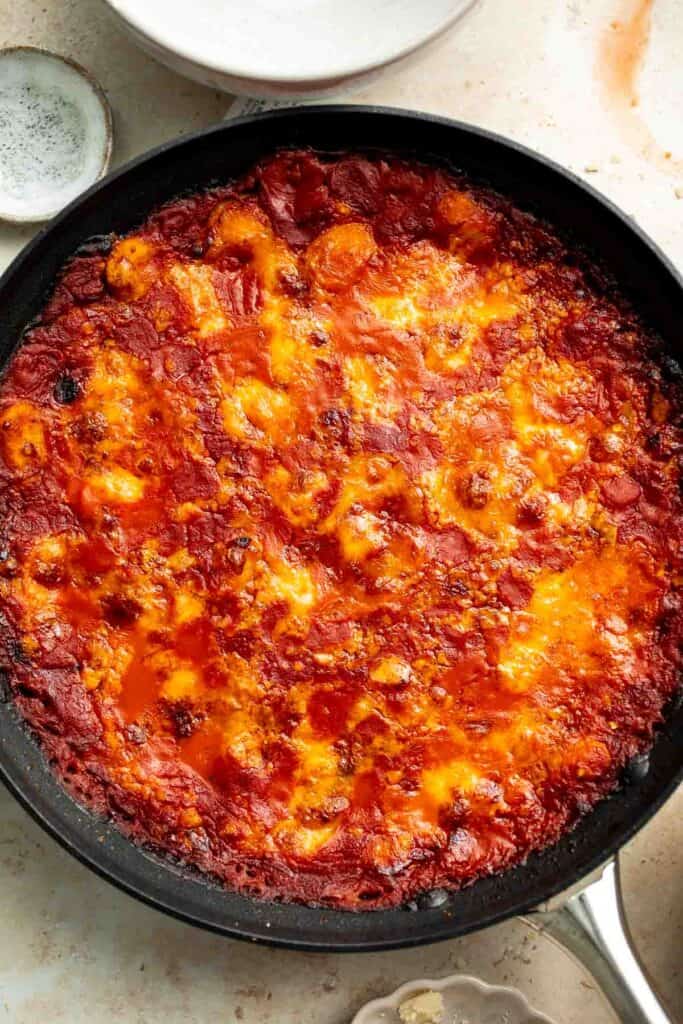
- Bake. Transfer the skillet into the oven and bake in a 375F preheated oven until the gnocchi is tender and the cheese melts and turns golden brown, about 28-30 minutes.
- Serve. Remove from the oven and let cool for 5 minutes before serving. Garnish with basil and serve.

Recipe Variations
- Add sausage. Add ½ pound Italian sausage first and cook for 5-7 minutes until browned. Use a spatula to break the sausage into small pieces. Then, add in the onions and garlic and continue with the recipe instructions as written.
- Add veggies. Bulk up this baked vegetarian gnocchi with even more veggies. After sautéing the onions and garlic, add in some chopped veggies and saute for 5 minutes before adding the tomato sauce. Some of our favorite vegetables to throw in here are zucchini, broccoli, cauliflower, and spinach.
- Add mushrooms. Give this dish an earthy taste by sautéing mushrooms with the onions and garlic for 5-7 minutes before adding the sauce.
- Spice it up. Add some heat to your baked gnocchi by incorporating some cayenne pepper or crushed red pepper flakes into the tomato sauce or adding some crushed red pepper flakes to taste after your baked gnocchi comes out of the oven.
- A Mediterranean twist. Add in a mixture of diced artichoke hearts, kalamata olives, sun-dried tomatoes, and feta cheese into the gnocchi before baking.
- Add bacon. Another popular meat to incorporate into this gnocchi dish is some crumbled bacon for a smoky flavor.
How to Serve
You can serve this cheesy baked gnocchi as a side to accompany an array of protein options or as a stand-alone meal. Either way, it's sure to please. Pair it with other Italian-inspired dishes for a cohesive theme.
We love pairing this baked gnocchi with salads, bread, and veggies. Some of our favorite sides include:
- Caesar Salad
- Garlic Breadsticks
- Oven Roasted Vegetables
- Tomato Cucumber Avocado Salad
- Cheesy Garlic Bread
- Green Bean Fries
For more inspo, see our 30 Side Dishes for Pasta.
Recipe Tips and Tricks
- Prepare ahead for an easy future meal. This freezer-friendly gnocchi is good for up to 2 months, so you can make it during your next meal prep session! Just prepare it as directed here, toss it in the freezer, and then quickly reheat it in the oven for a low-effort dinner or a last-minute potluck dish.
- Customize the flavor. Baked gnocchi can easily be adjusted to suit your tastes. Swap out the cheeses, use a different sauce, or add your favorite seasoning blend to mix things up - you can enjoy this dish any number of ways and you'll never get bored!
- Allow to cool slightly before serving. Let the baked gnocchi cool for a few minutes after removing them from the oven. This will help the dish set and make it easier to serve without losing its shape.
Storing and Freezing Instructions
How to Store
Allow the baked gnocchi to cool completely before transferring it to an airtight container and refrigerating it for up to 3 days.
How to Reheat
Reheat leftover gnocchi in the oven at 350℉ for 10-15 minutes. You can also reheat a batch on the stovetop over medium-low heat until warmed through and the cheese is melty.
How to Freeze
Transfer the baked gnocchi into a freezer-safe container or wrap the pan tightly in plastic cling wrap and double wrap in aluminum foil. If planning to freeze the entire casserole, I recommend making it in a disposable 9x13-inch casserole pan for easy storing. Freeze for up to 2 months. Reheat straight from frozen in a 350℉ oven for 15-20 minutes or until heated through.
More Comfort Food Recipes
- 50 Best Comfort Food Recipes
- Eggplant Parmesan
- Creamy Gnocchi Soup
- Vegetarian Lasagna with Spinach
- Cheesy Tortellini and Sausage Bake
- Baked Ravioli
Tried this recipe?
I'd love to hear what you think! Leave a comment and rating below to share your feedback. Your reviews help others discover this recipe and help me keep creating more free recipes for you. Snap a photo and tag me on social media @aheadofthyme too.
25 Side Dishes for Shrimp

Are you looking for a delicious side dish to serve with the shrimp recipe that you are planning to make for dinner. We love making shrimp because it's a versatile and flavorful seafood option that is not only delicious but also super quick and easy to make - hello busy weeknights! So if you are wondering "what to serve with shrimp", then you are in the right place. We are sharing over 25 of the most popular and best side dishes for shrimp including everything from veggie sides, creamy pastas, starchy sides like rice and potatoes, fresh salads, and so much more.
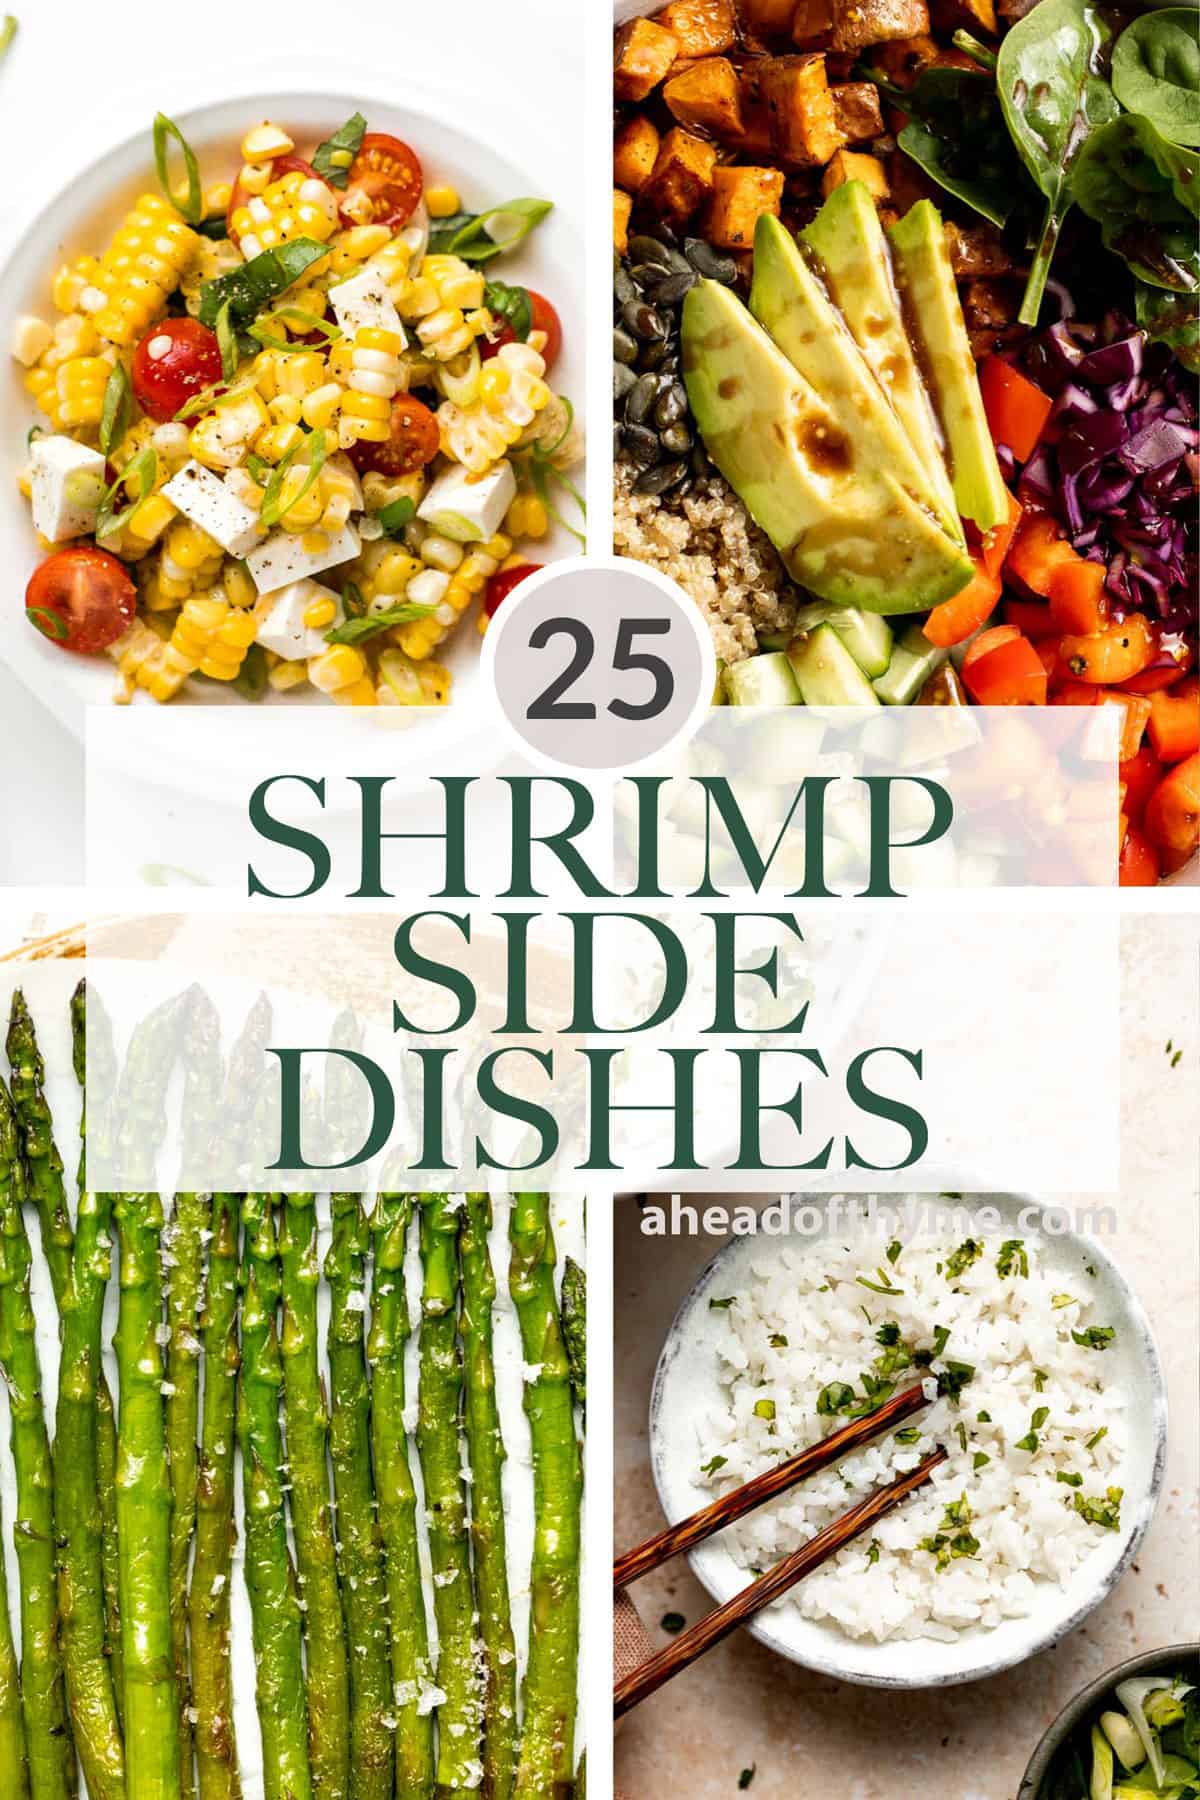
Best Side Dishes for Shrimp
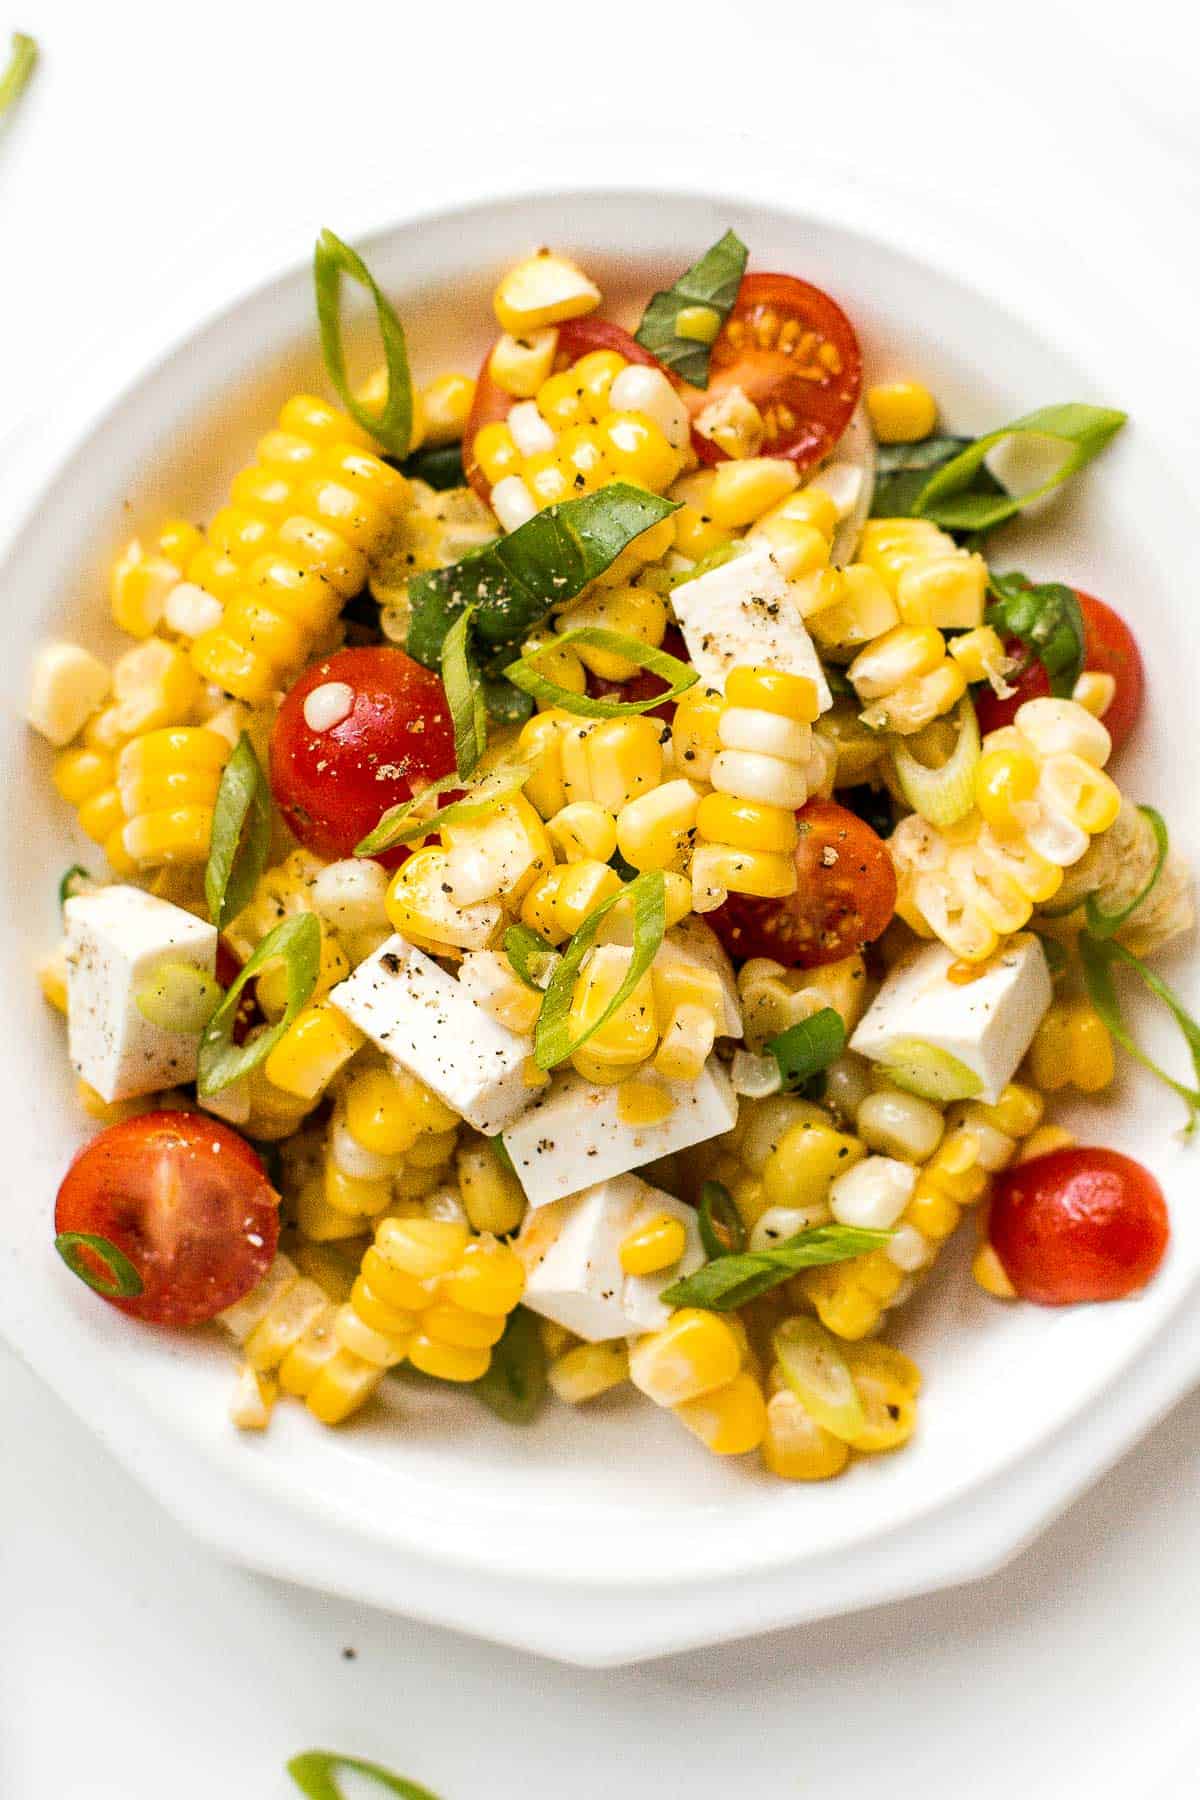
Take fresh-off-the-grill corn on the cob and turn it into a light, flavourful summer corn salad, topped with cherry tomatoes, fresh basil and cheese.
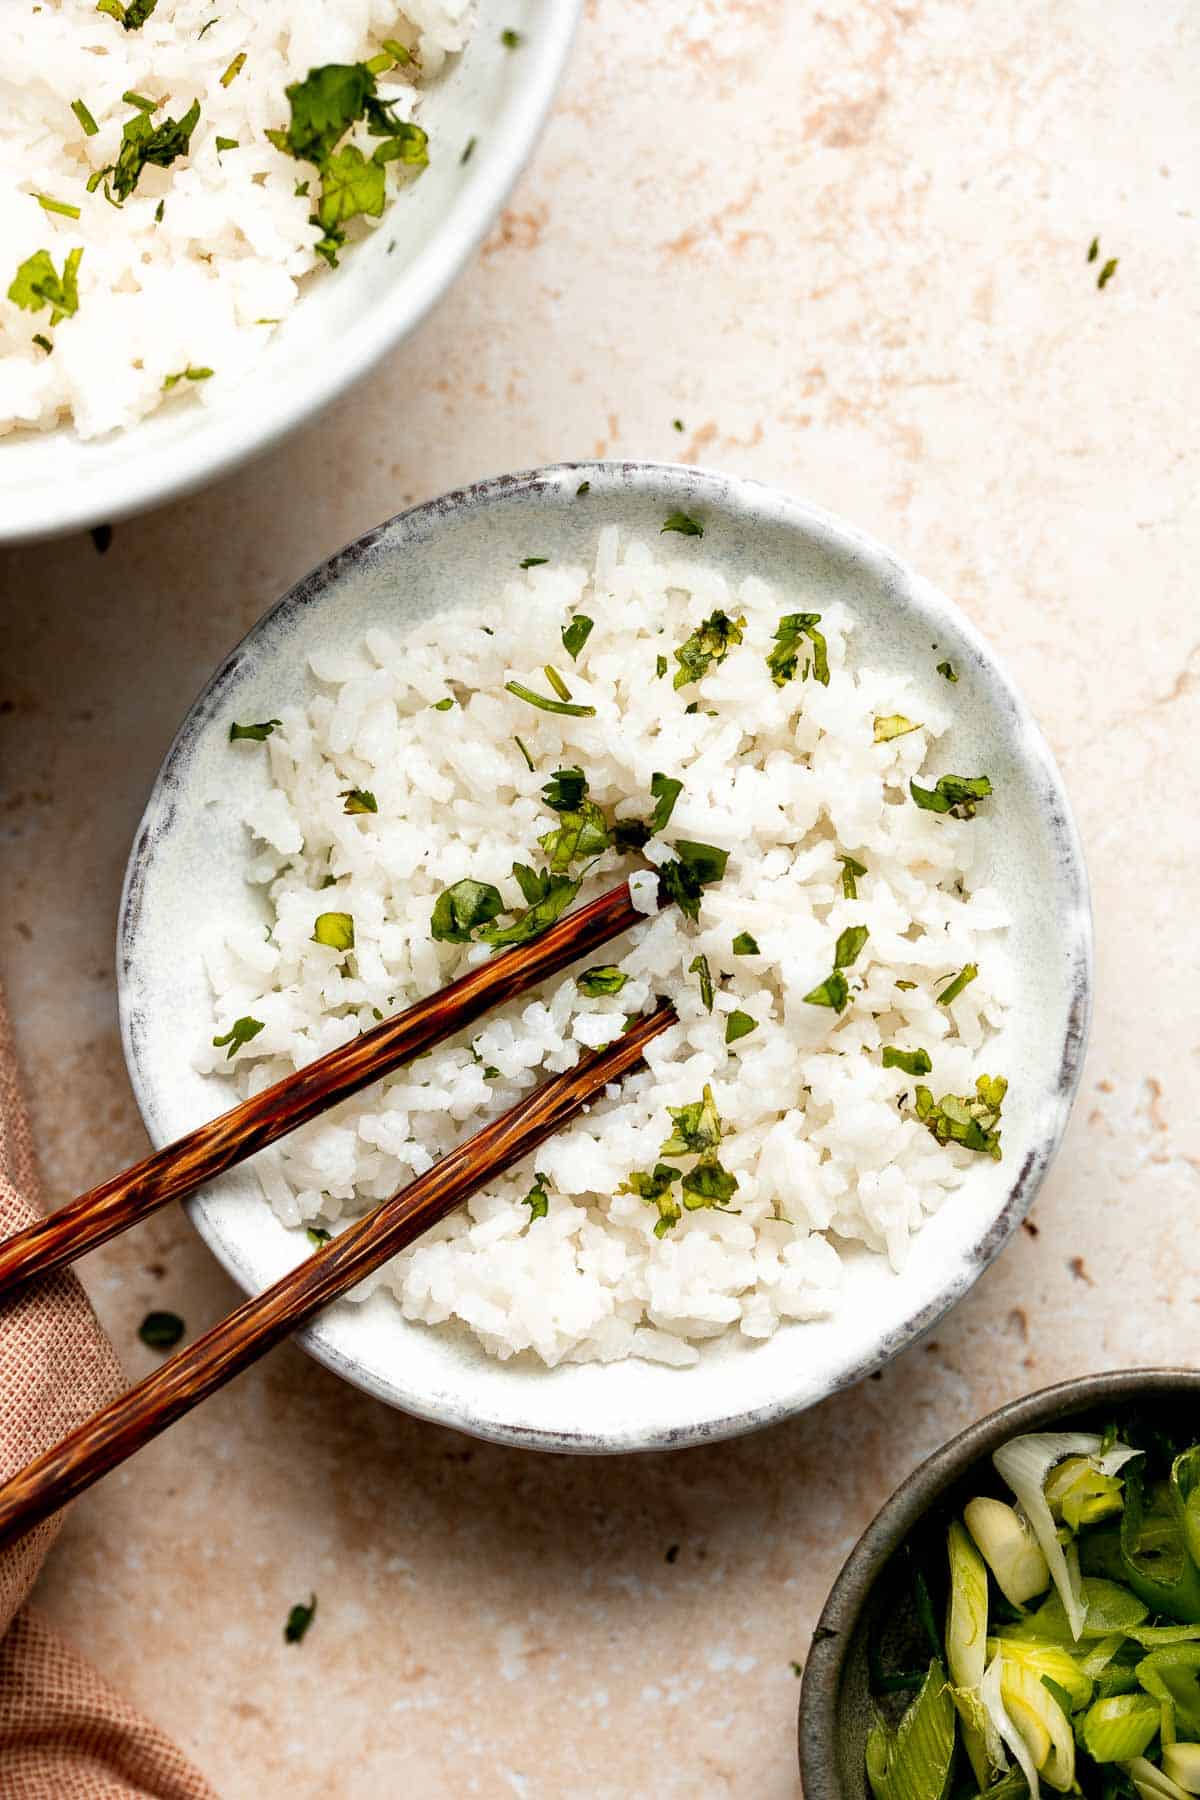
Easy coconut rice is light, fluffy, delicious, and flavorful. It's a quick and easy side dish that compliments all Thai, South Asian, and tropical dishes.
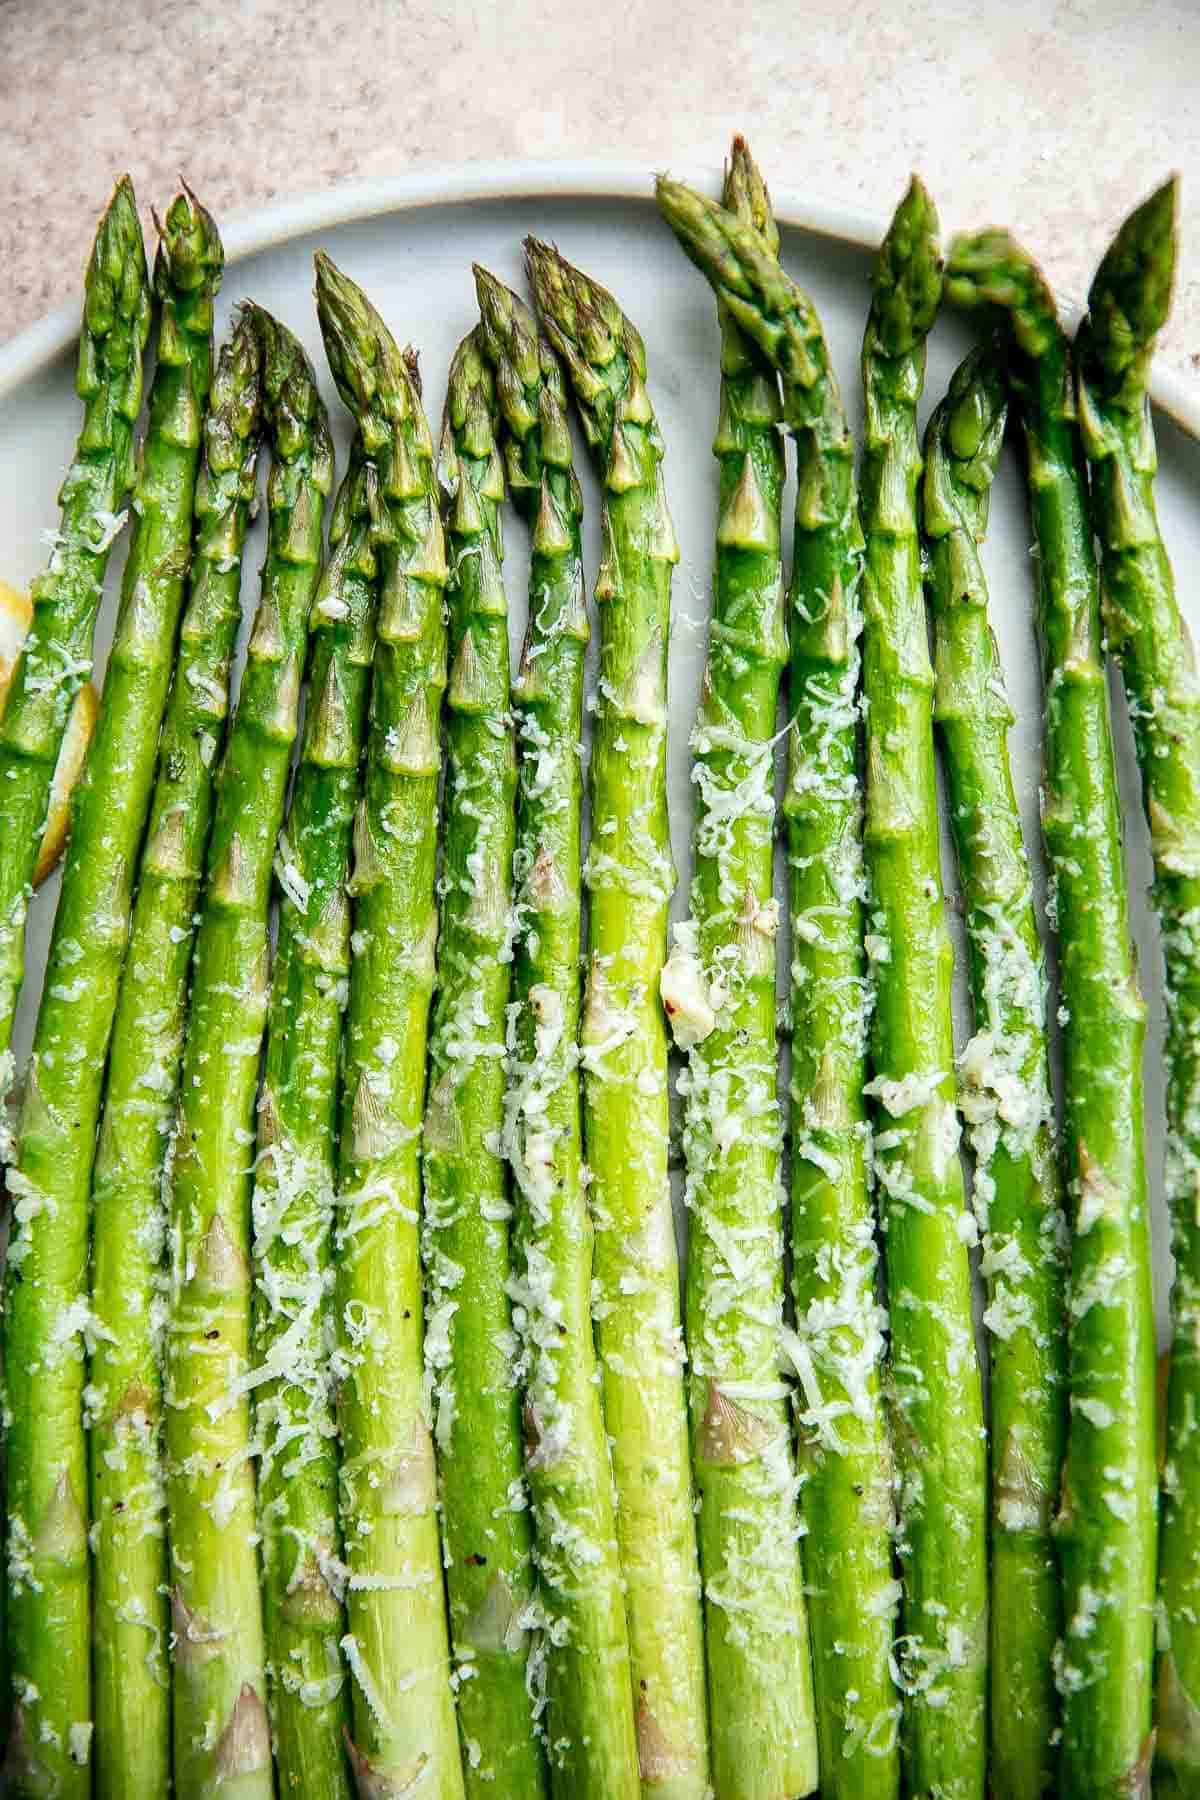
Lemon parmesan asparagus is a delicious way to serve a classic spring vegetable. This side dish is quick and easy to make in less than 20 minutes.
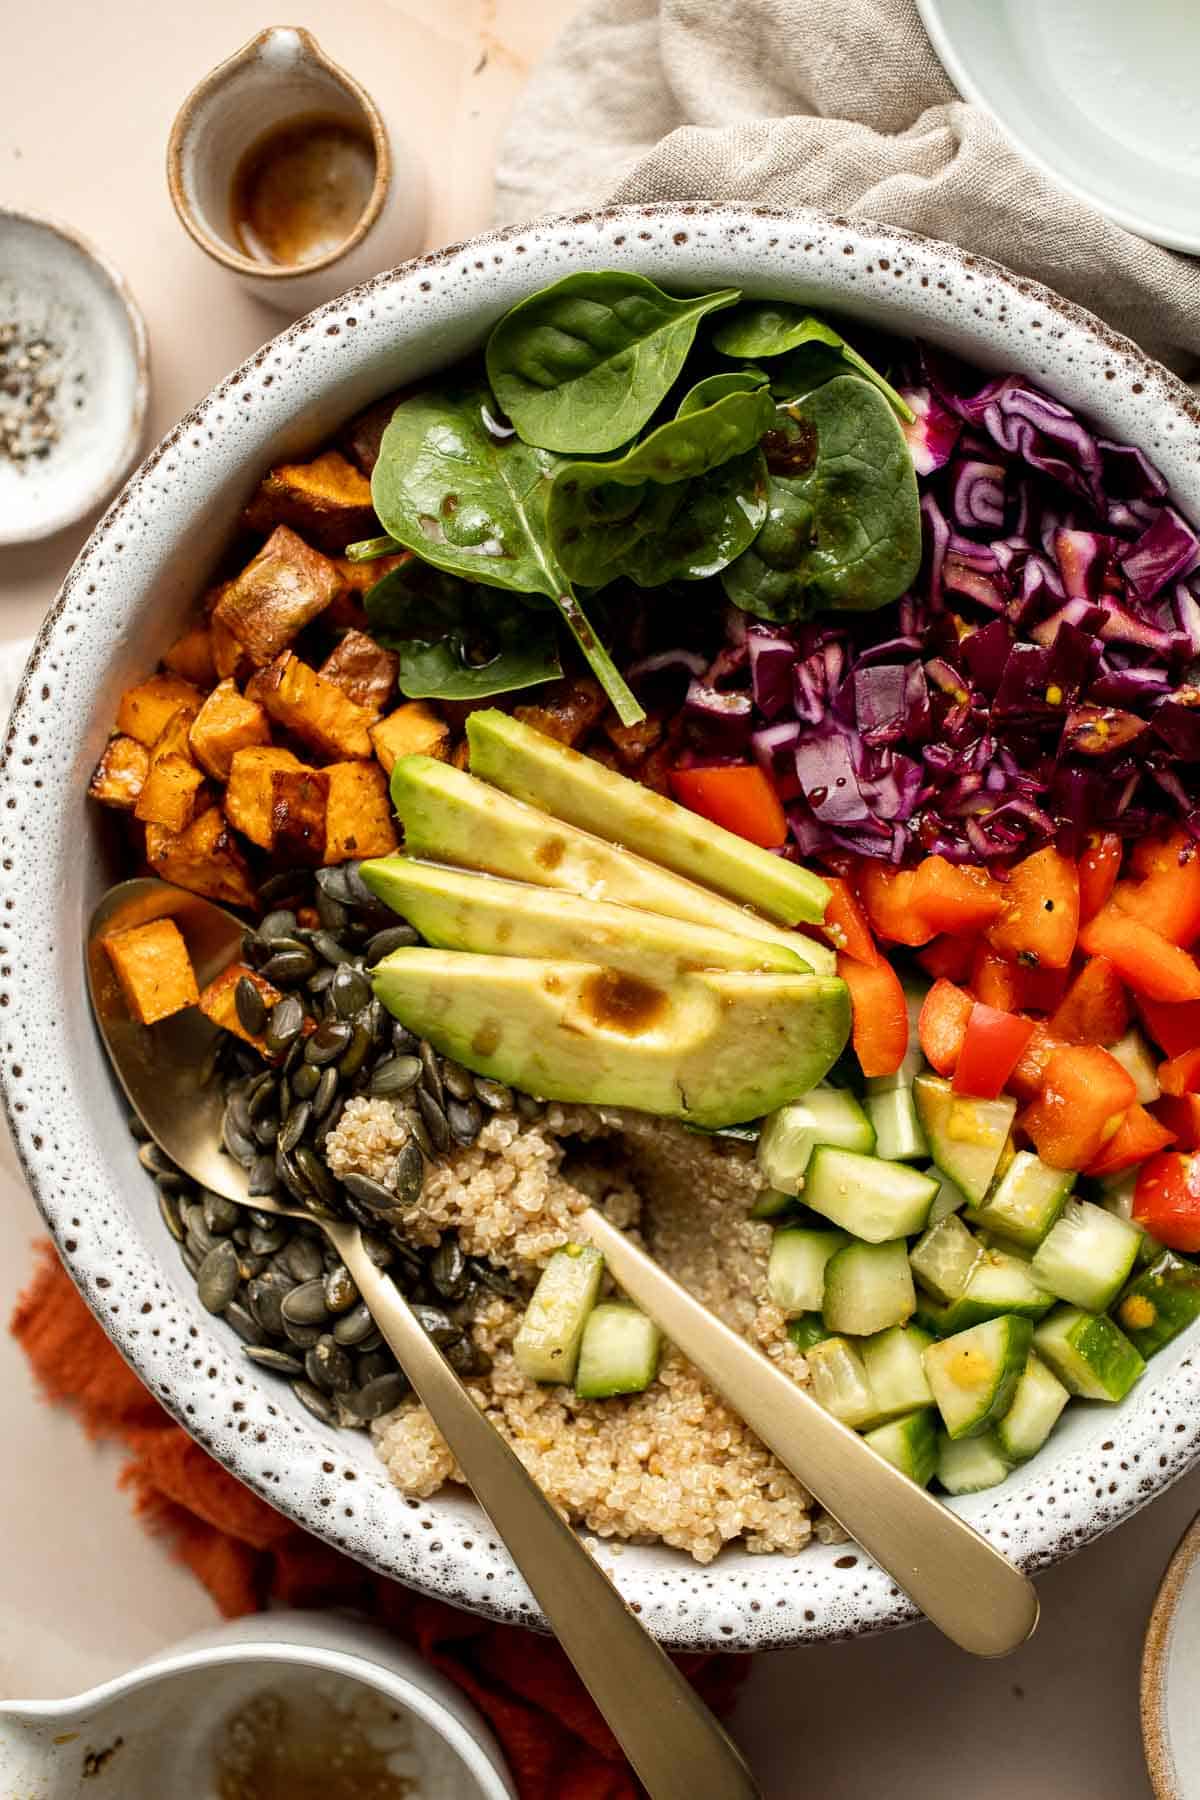
This vegan Buddha Bowl is the perfect hybrid of a salad and grain bowl that is packed with nutritious ingredients like grains, vegetables, and protein.
Quick and easy pesto penne pasta is a simple and light Italian pasta dish made with just five ingredients in under 15 minutes. The easiest dinner.

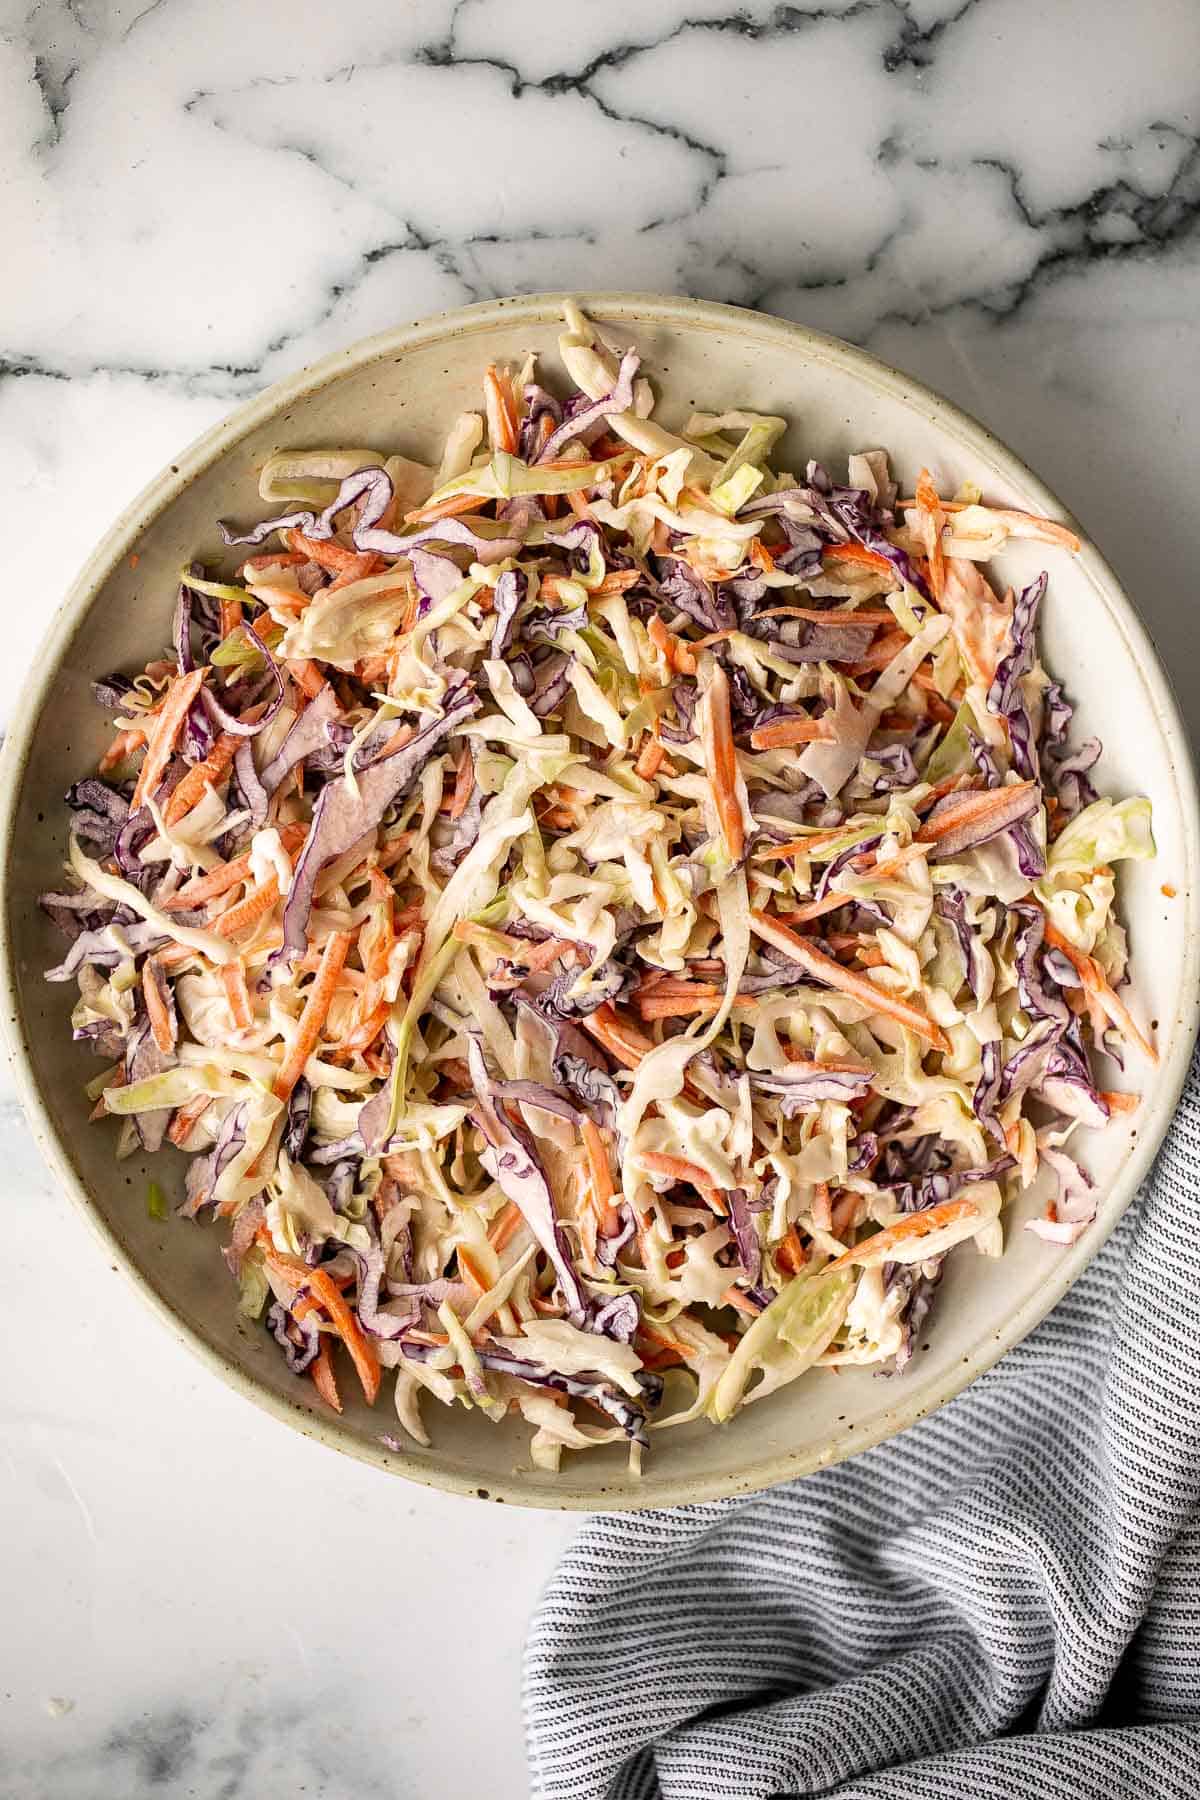
Fresh, crisp, classic coleslaw salad is a must-have recipe for a summer barbecue or picnic, or as an easy make-ahead lunch. Make it in less than 10 minutes.
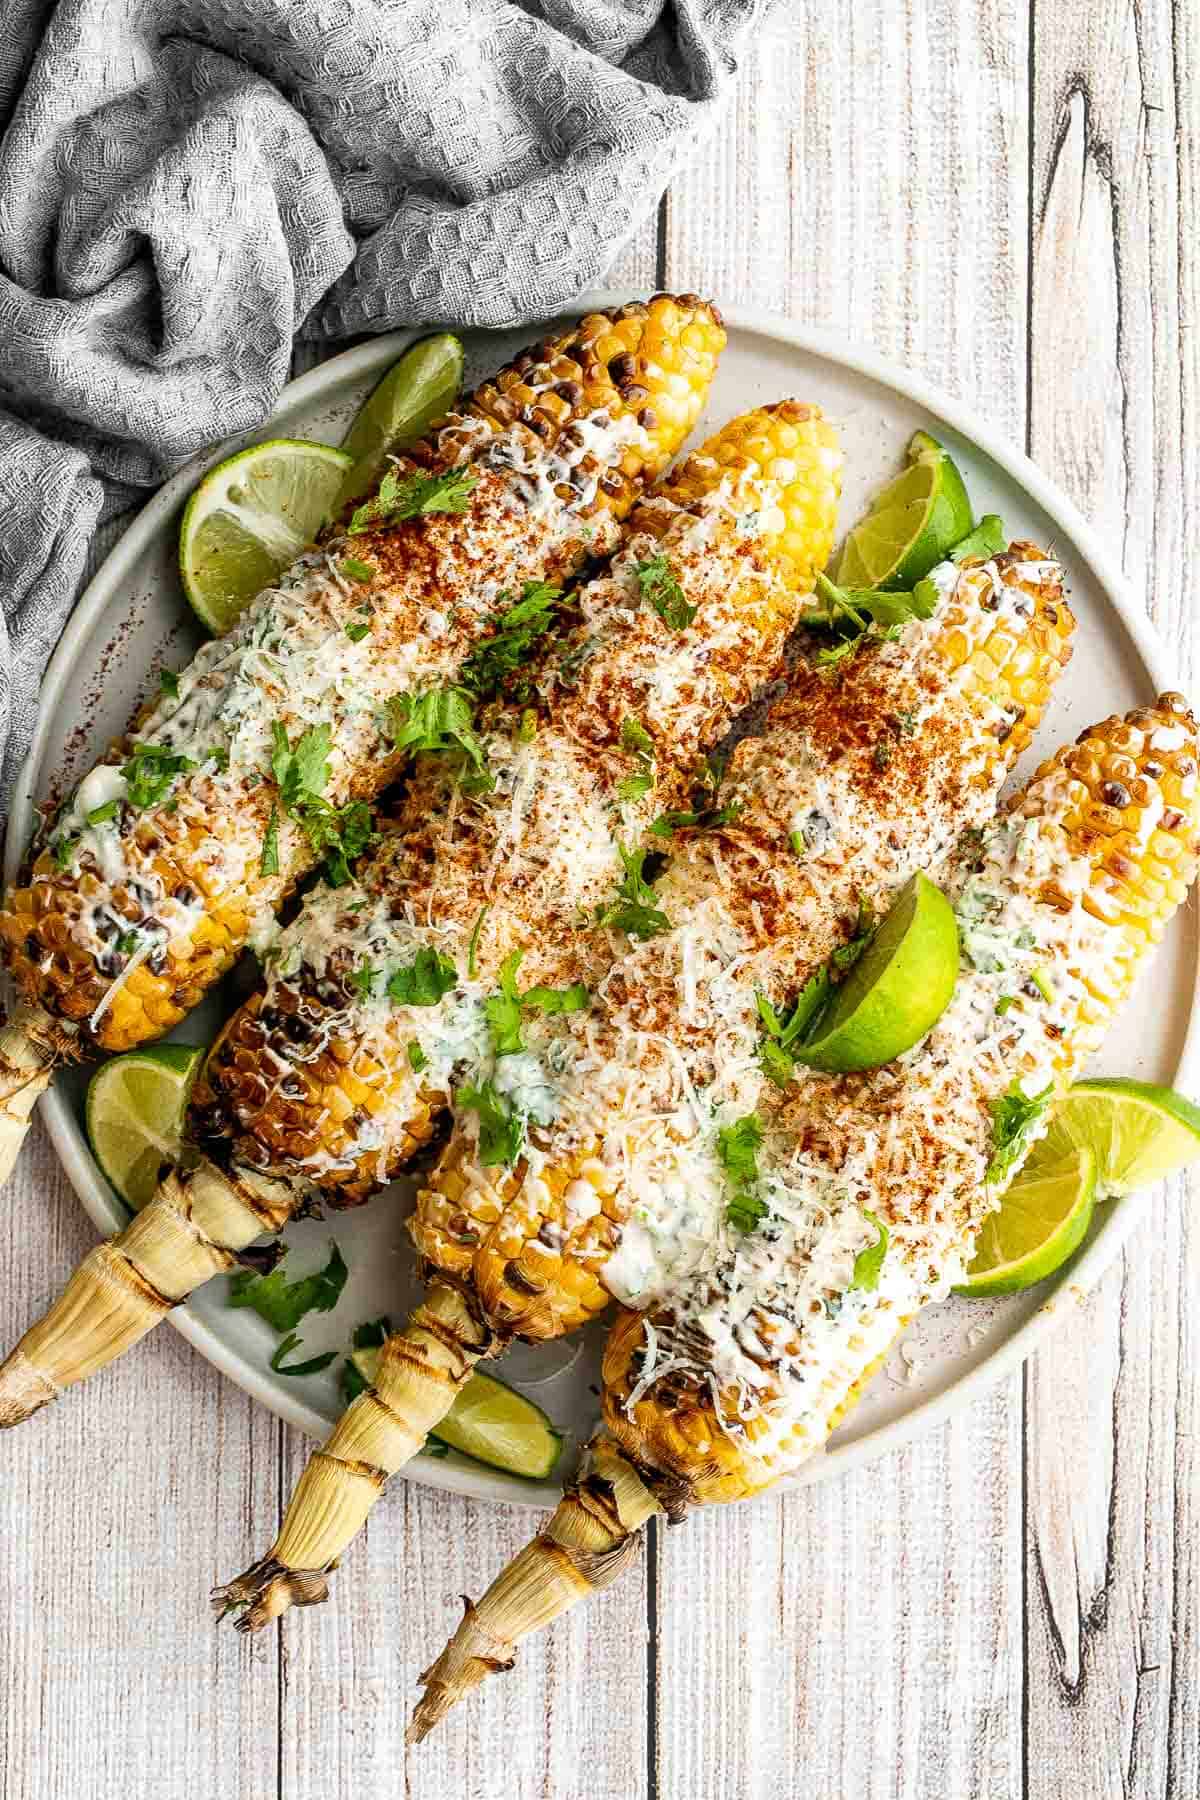
Mexican street corn (elote) is a delicious corn on the cob loaded with a cheesy sauce elevated with cilantro and lime. Creamy, cheesy, spicy, and flavorful.
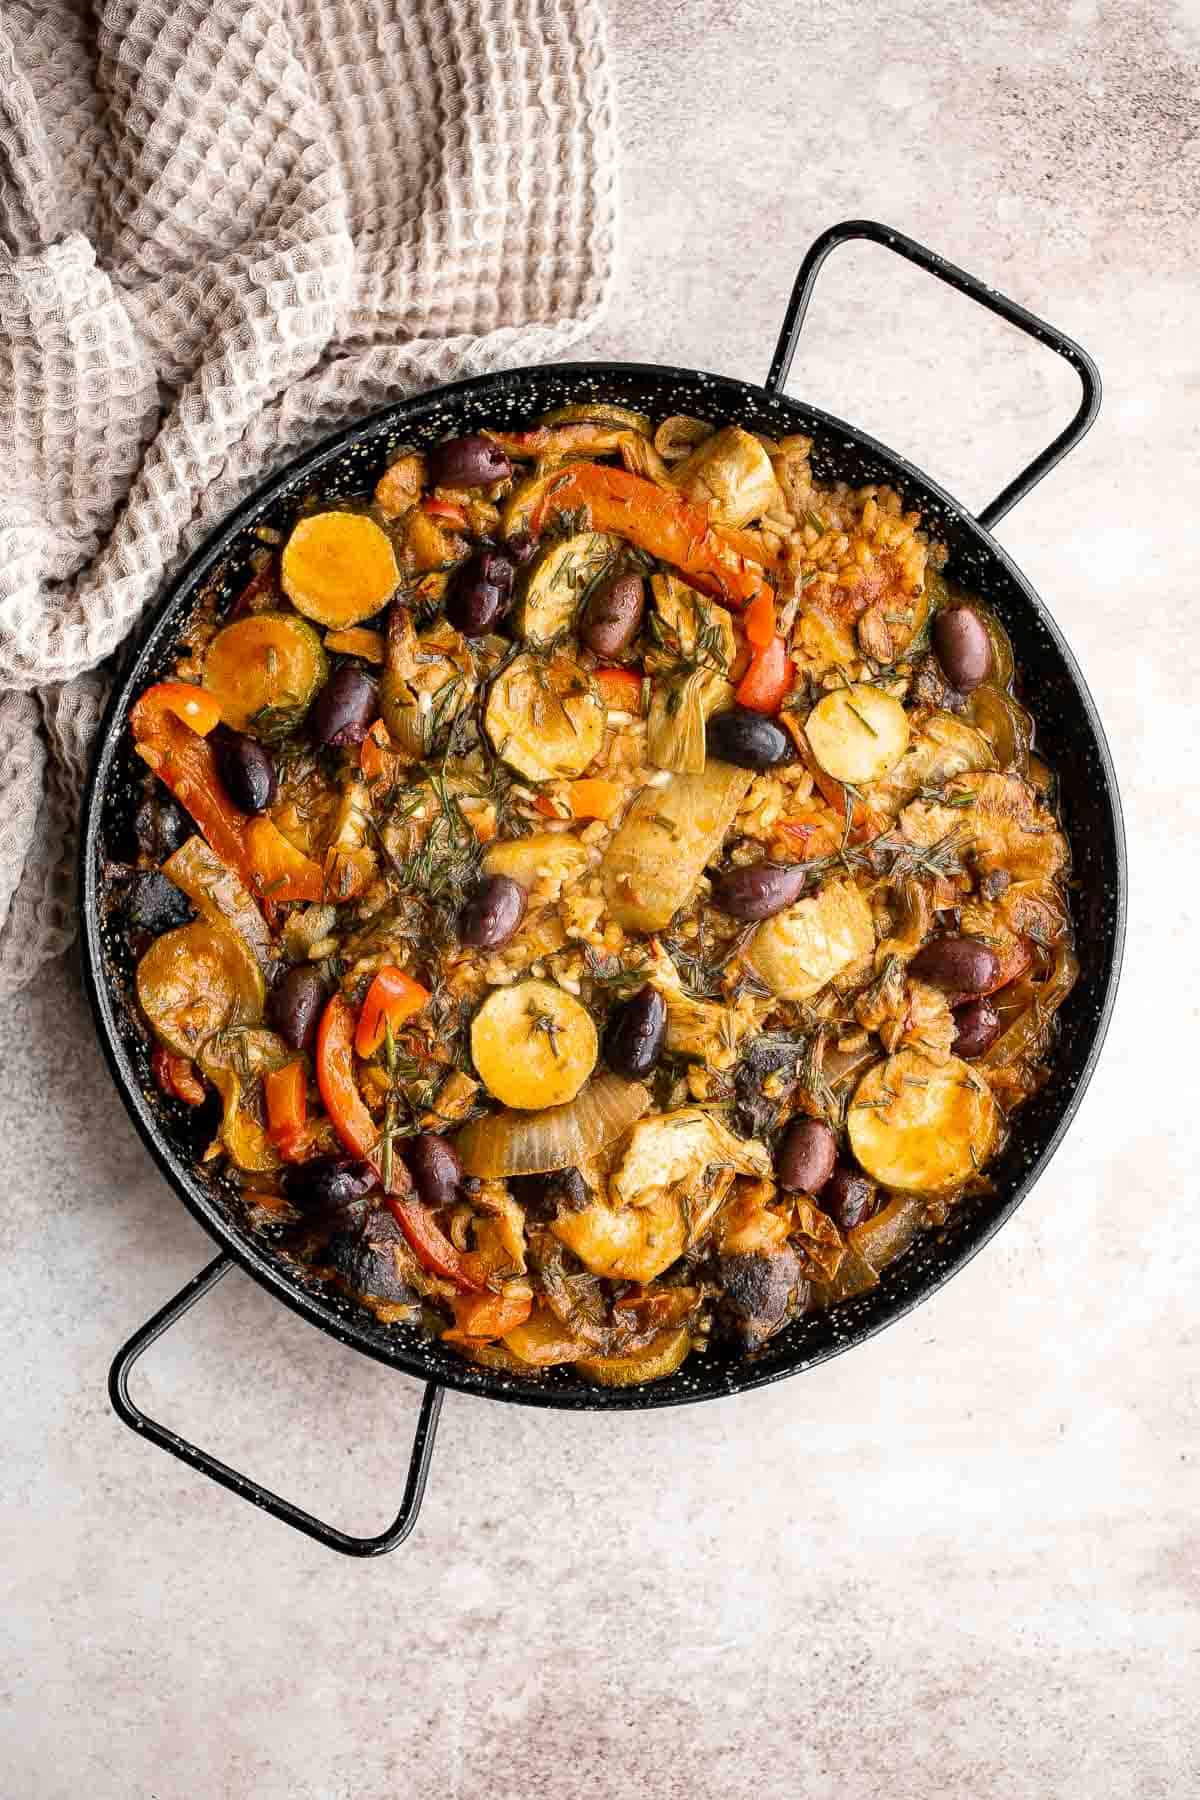
Vegetarian Paella is a delicious flavorful classic Spanish rice dish that is hearty and filling - perfectly cooked rice with saffron and vegetables.
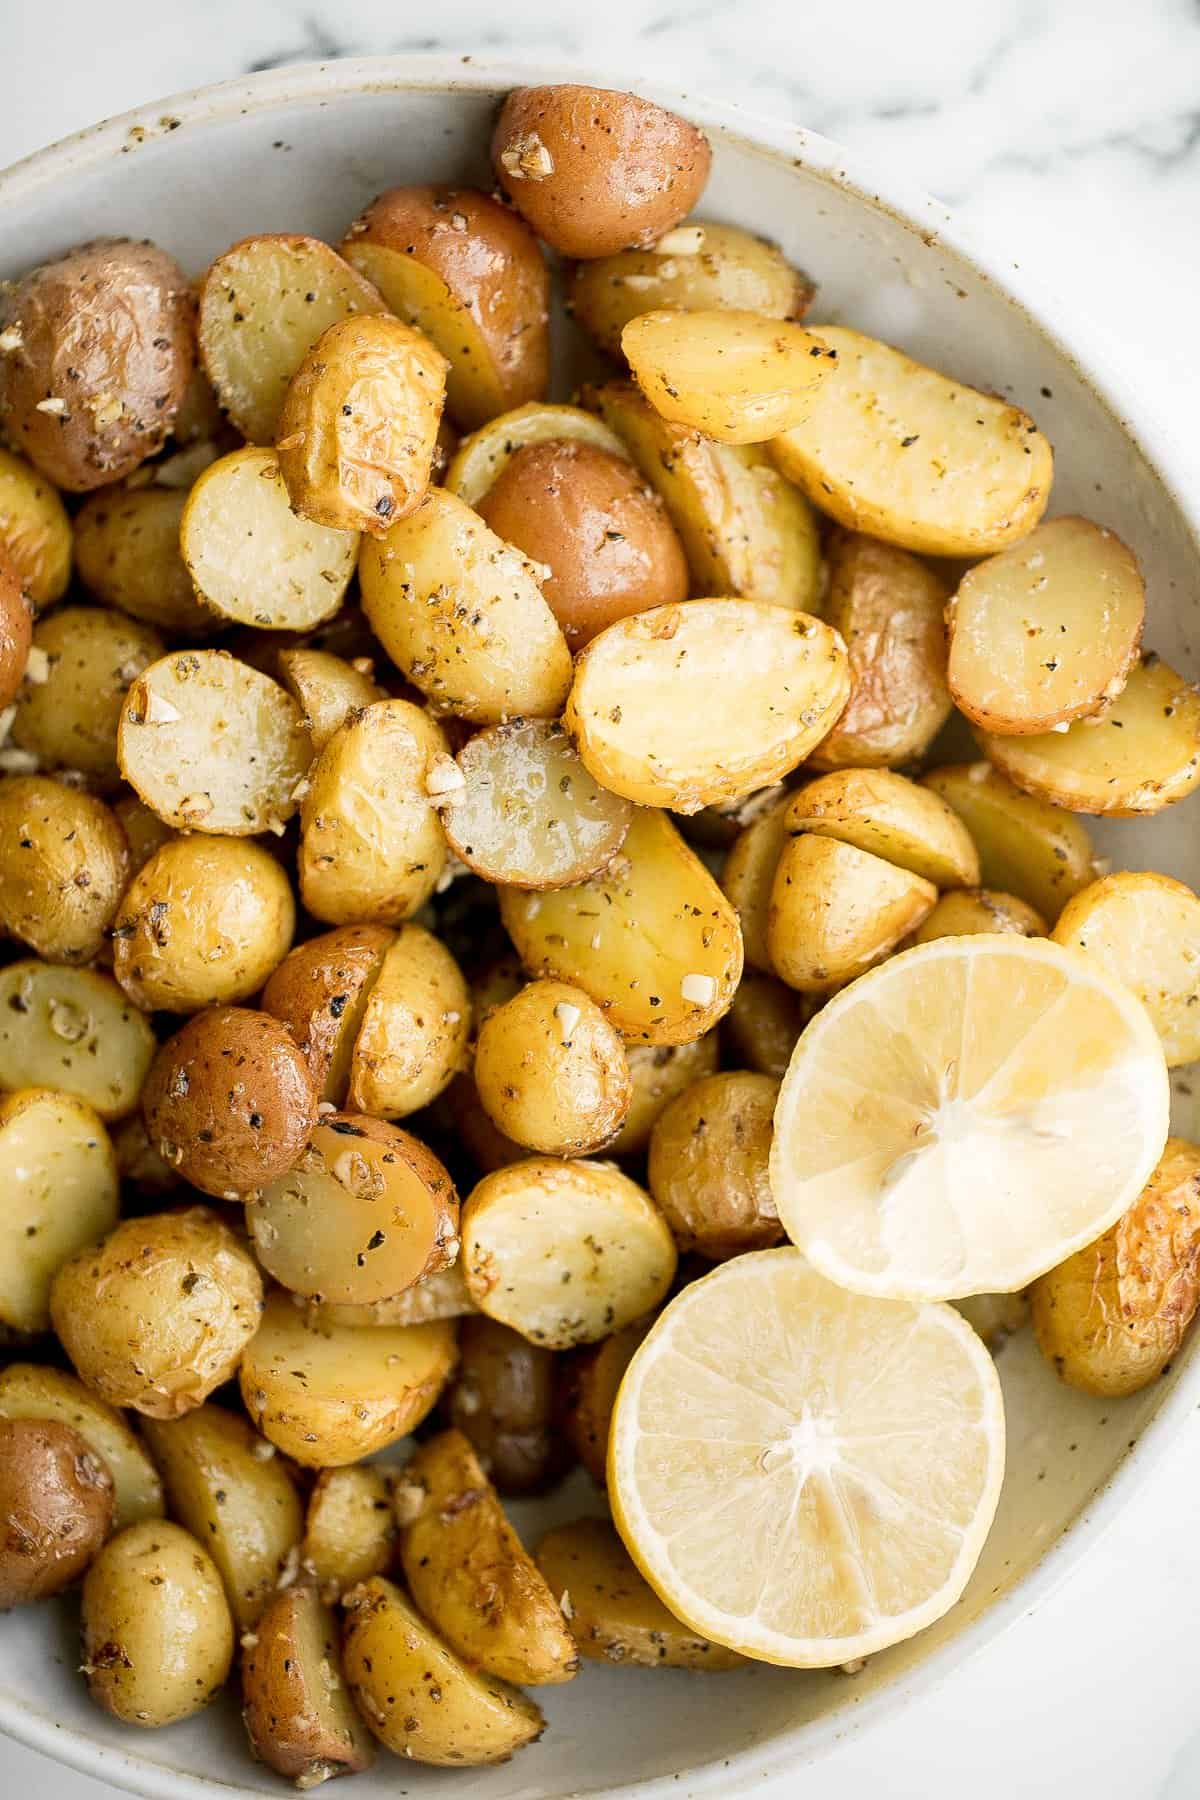
Greek Lemon Roasted Baby Potatoes
Quick and easy Greek lemon roasted baby potatoes are crispy on the outside and tender inside, packed with a Greek flavour blend of lemon, garlic and herbs.
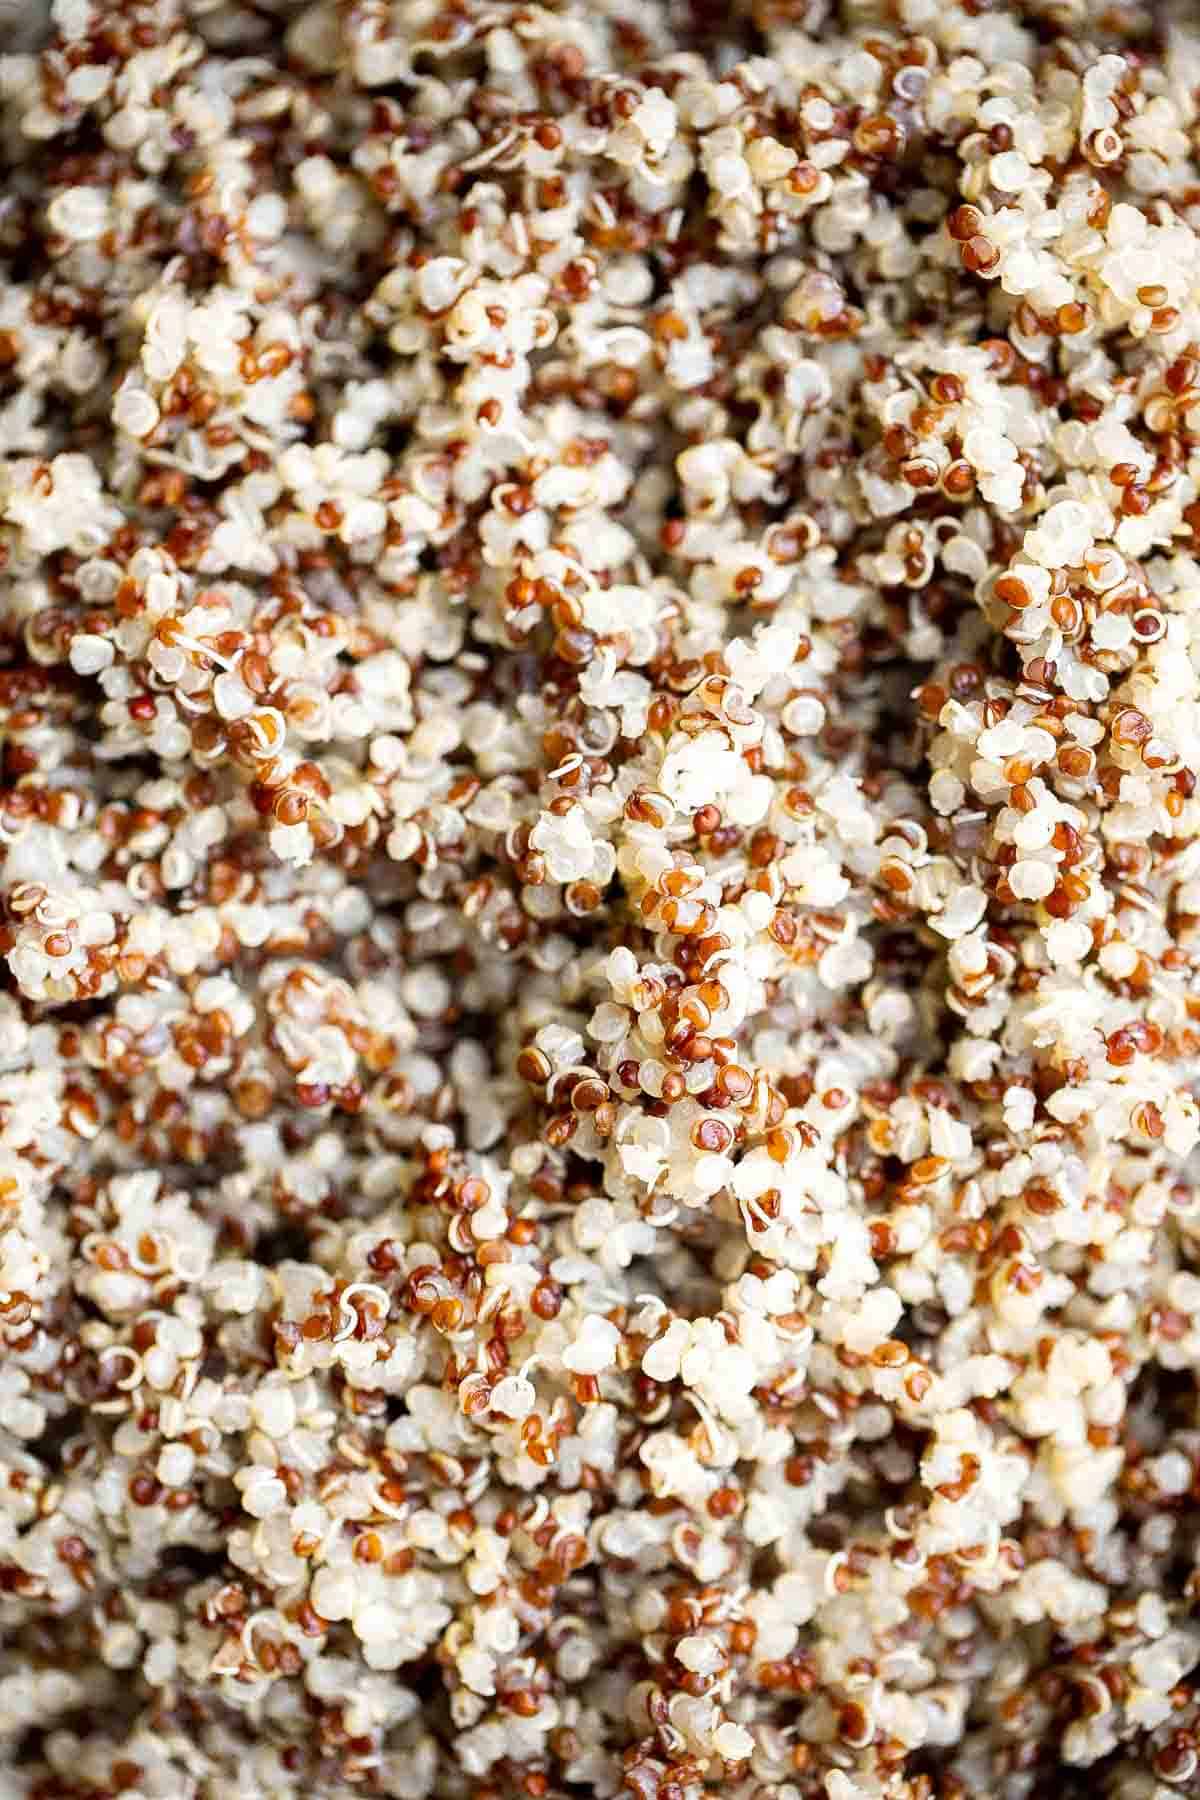
Making perfect fluffy quinoa at home is quick and a lot easier than you think! Learn how to cook quinoa perfectly every time using our simple recipe.
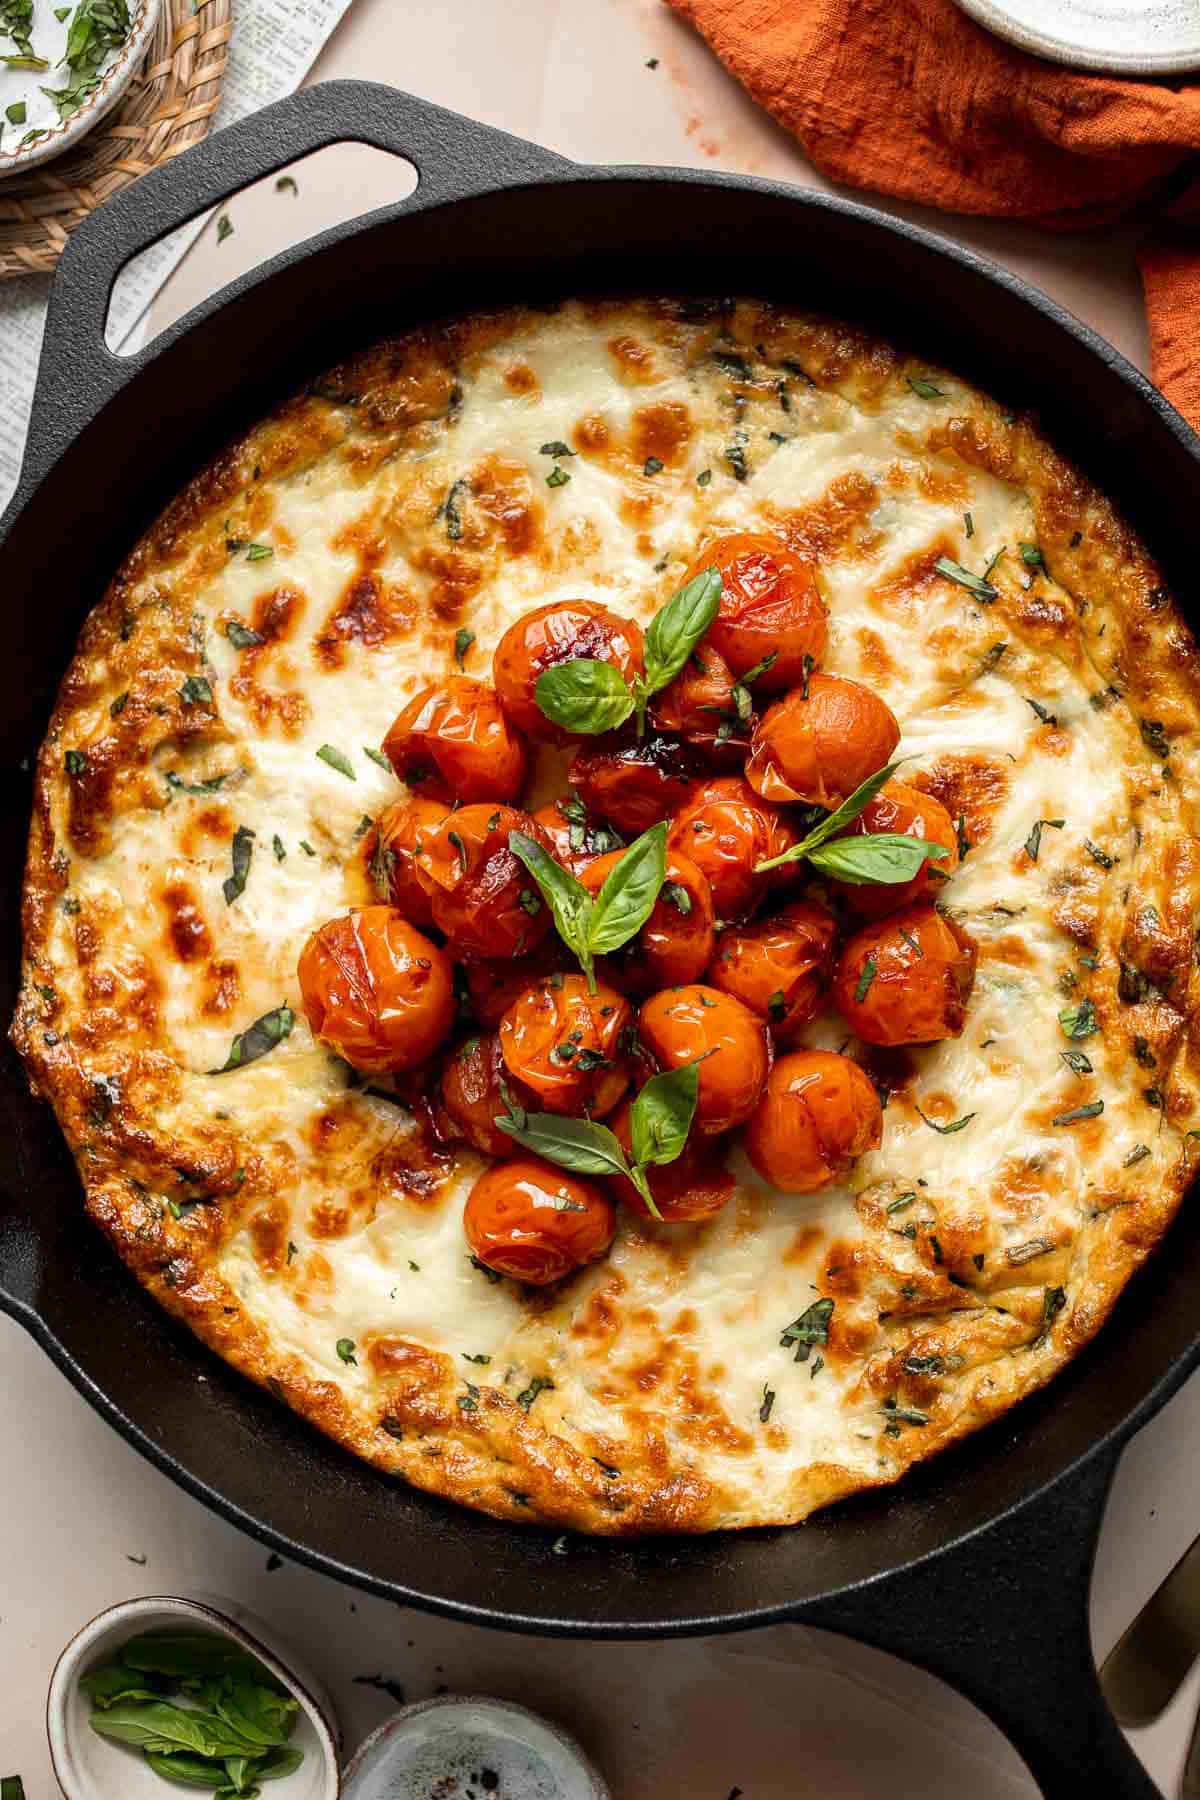
Caprese Frittata is light and fluffy, laced with fresh basil and topped with melted mozzarella cheese and blistered balsamic tomatoes. Ready in 10 minutes!
Cheesy Baked Gnocchi is quick and easy comfort food made all in one pot with chewy bites of gnocchi, a simple tomato-based sauce, and gooey melty cheese.
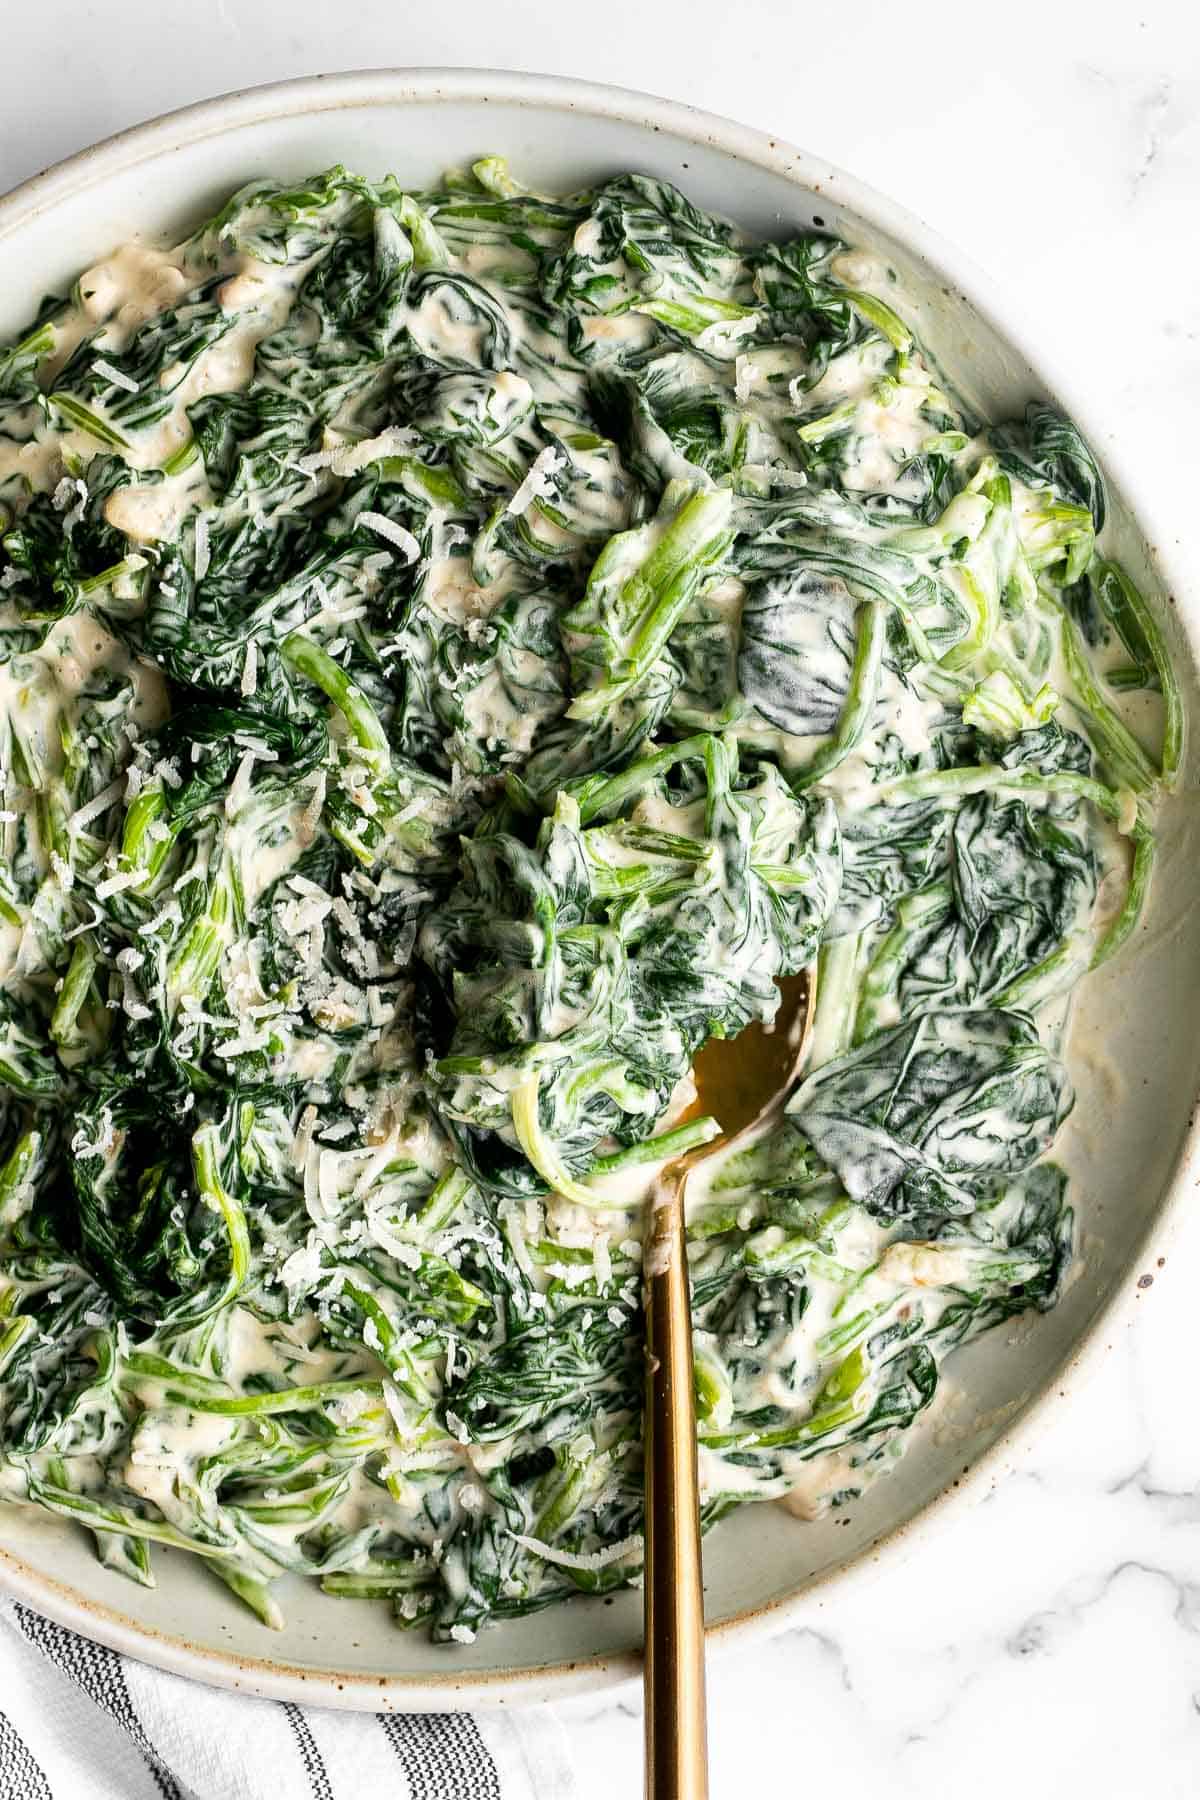
Creamed spinach is a rich, creamy, and delicious side dish to make this fall. Easy to make ahead and reheats well - perfect for Thanksgiving holiday dinner.
Mediterranean Couscous Salad is healthy, flavorful, and easy to make. It's packed with classic ingredients including couscous, fresh veggies, and feta.

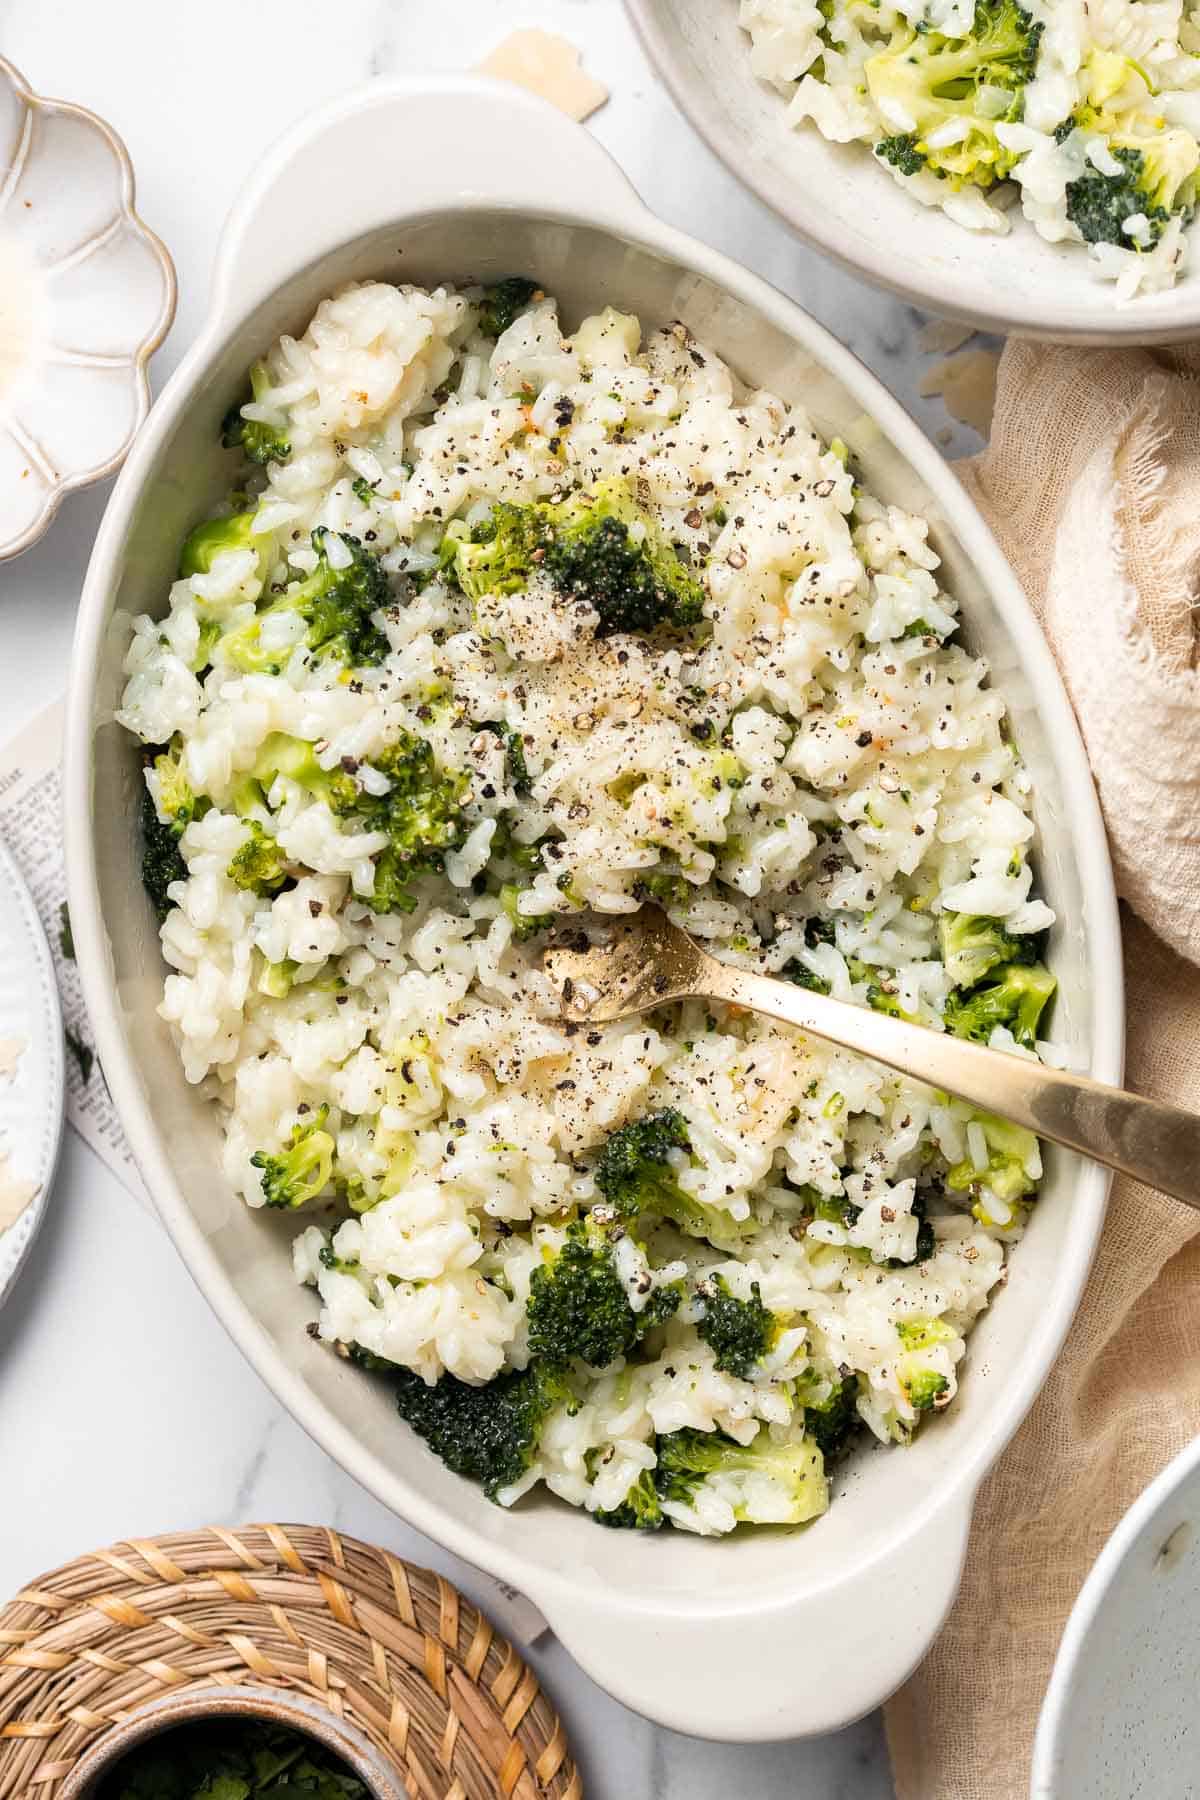
Broccoli Rice is the perfect side dish: creamy, cheesy, healthy, and filling. Plus, it's quick and easy and all made in one pot in just over 30 minutes.
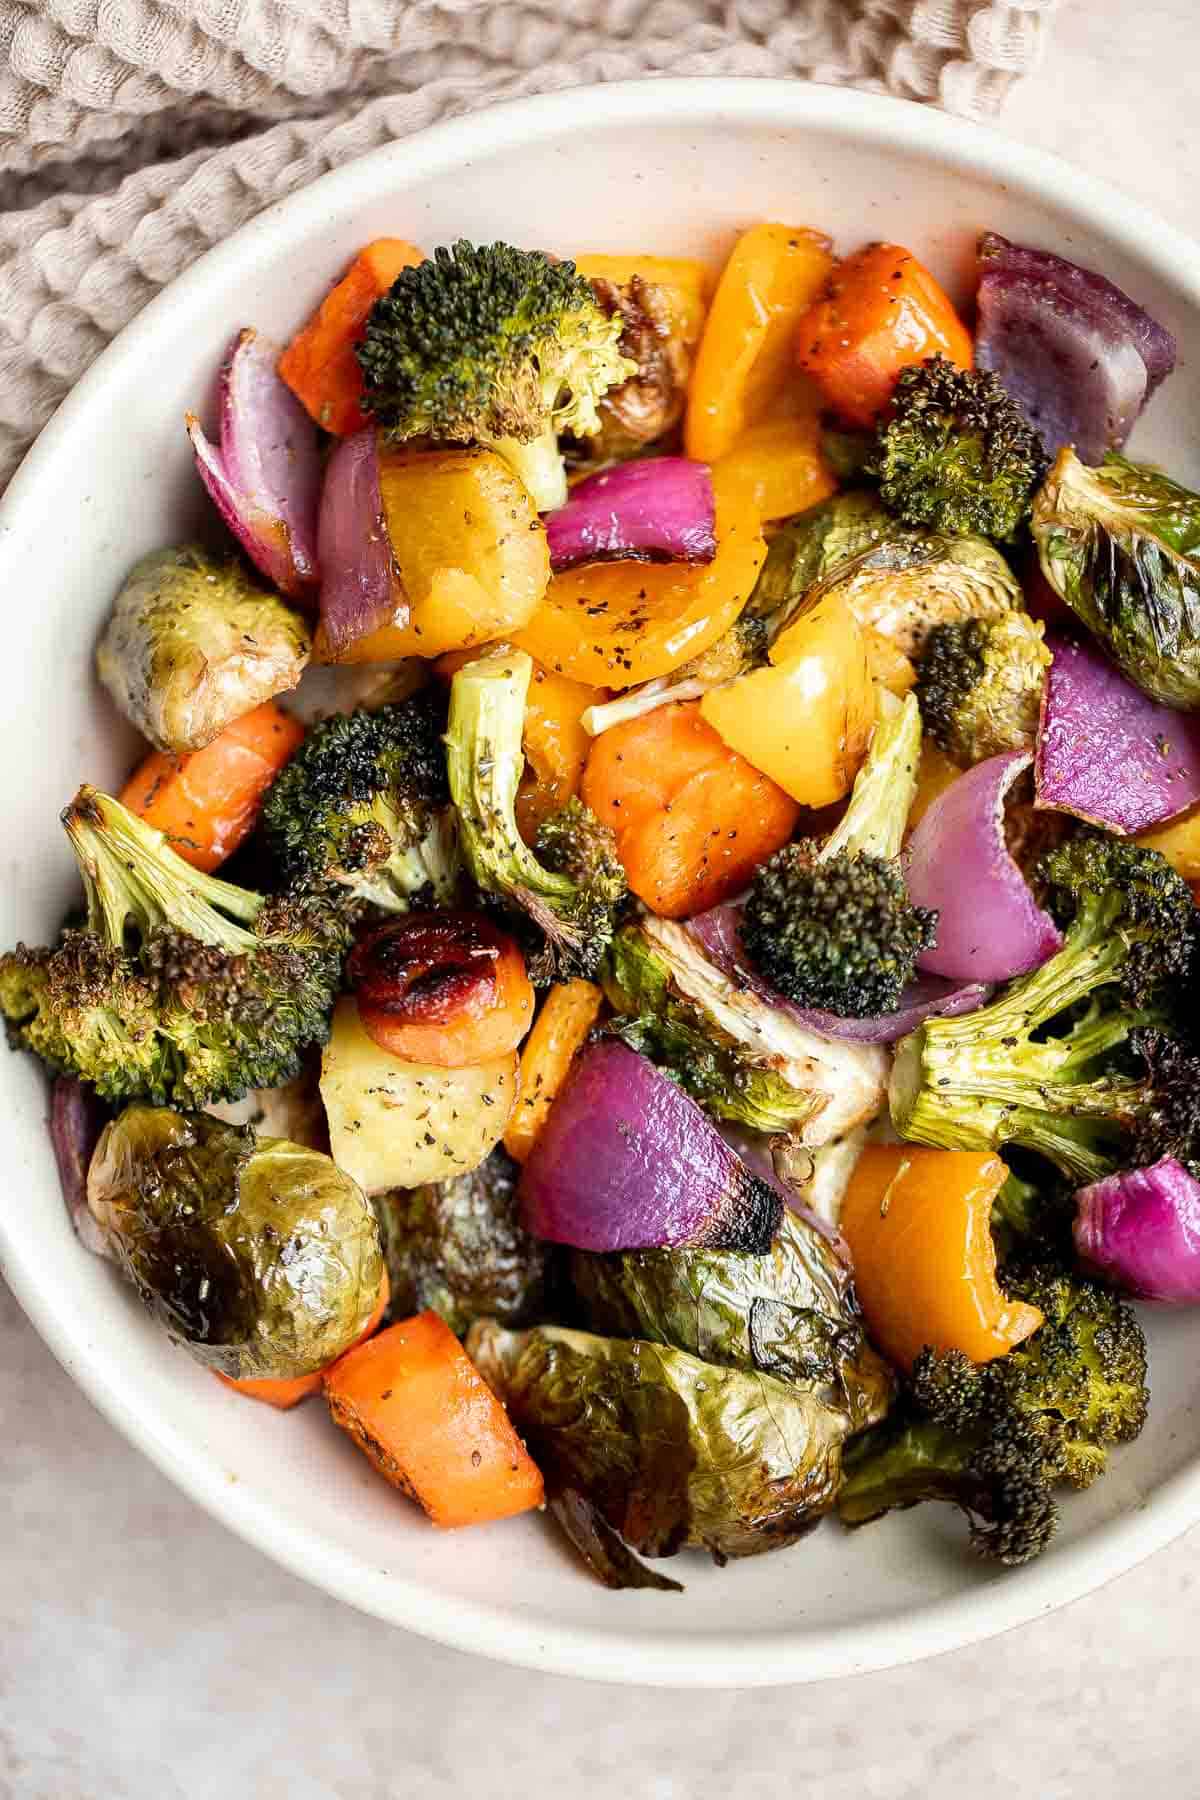
Oven Roasted Vegetables are a delicious flavorful side dish that goes well with almost any dinner main. Customize it with whatever veggies you have on hand.
Lemon butter pasta is quick and easy to make, light yet filling, and loaded with flavor. A delicious twist on classic buttered noodles ready in 15 minutes.

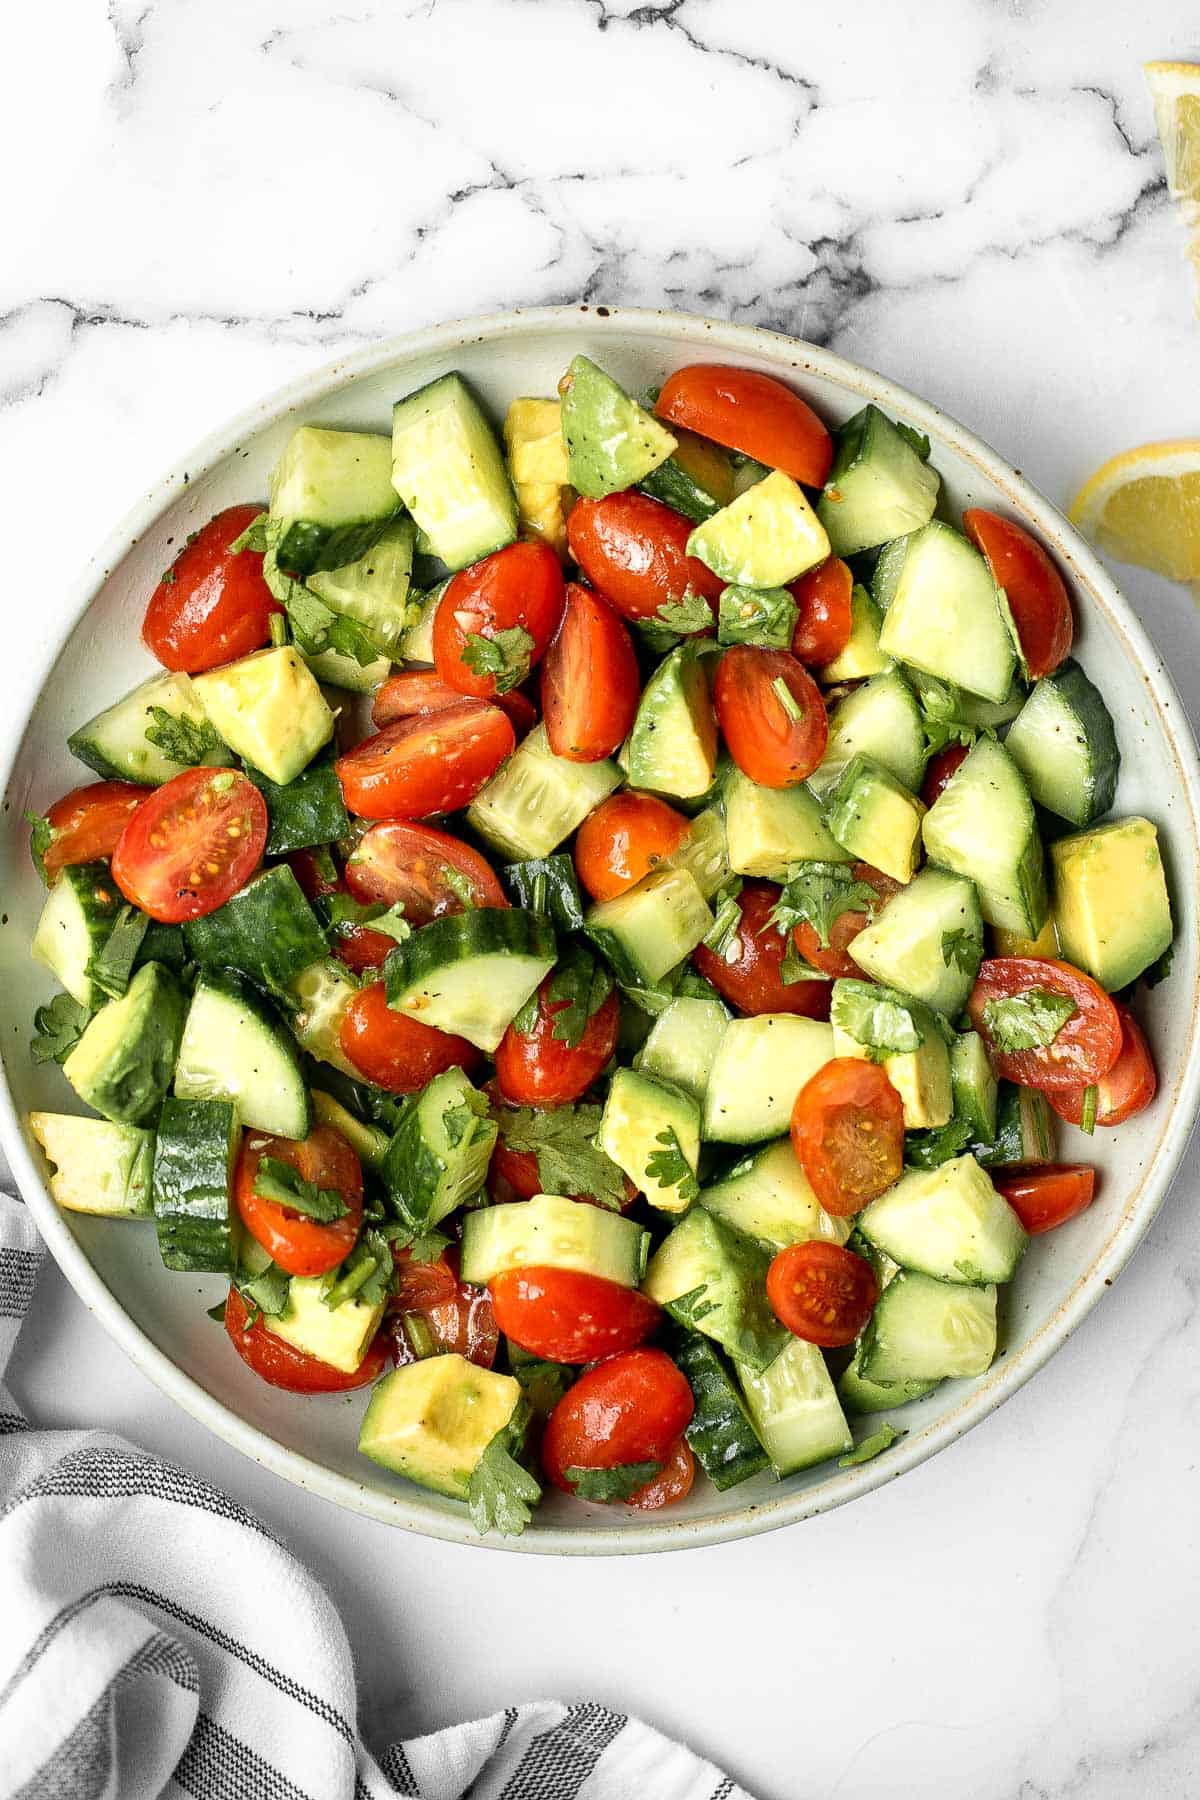
Simple tomato cucumber avocado salad with a delicious lemon vinaigrette is a light and refreshing salad that comes together in literally 5 minutes.
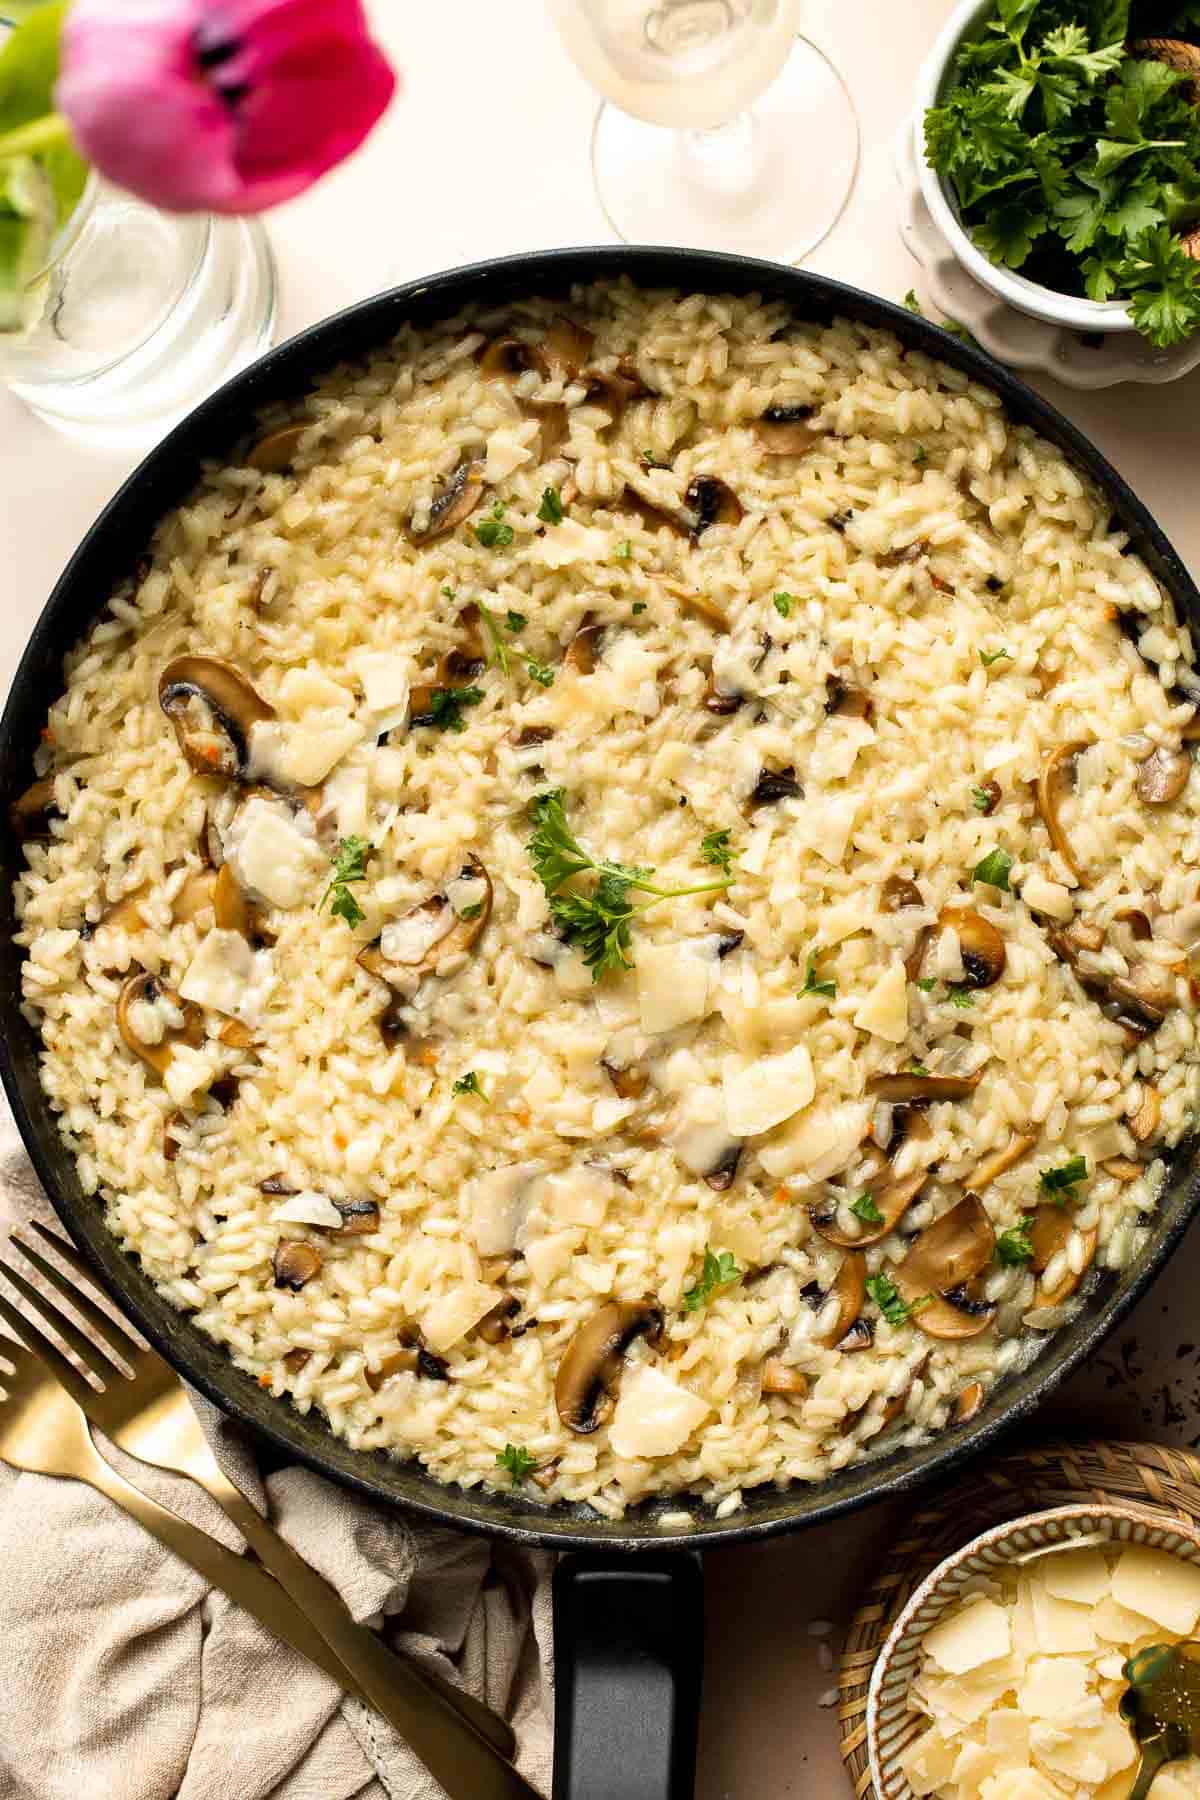
Mushroom Risotto is a rich creamy one pot rice dish made with simple ingredients that deliver bold flavors. Making homemade risotto from scratch is easy!
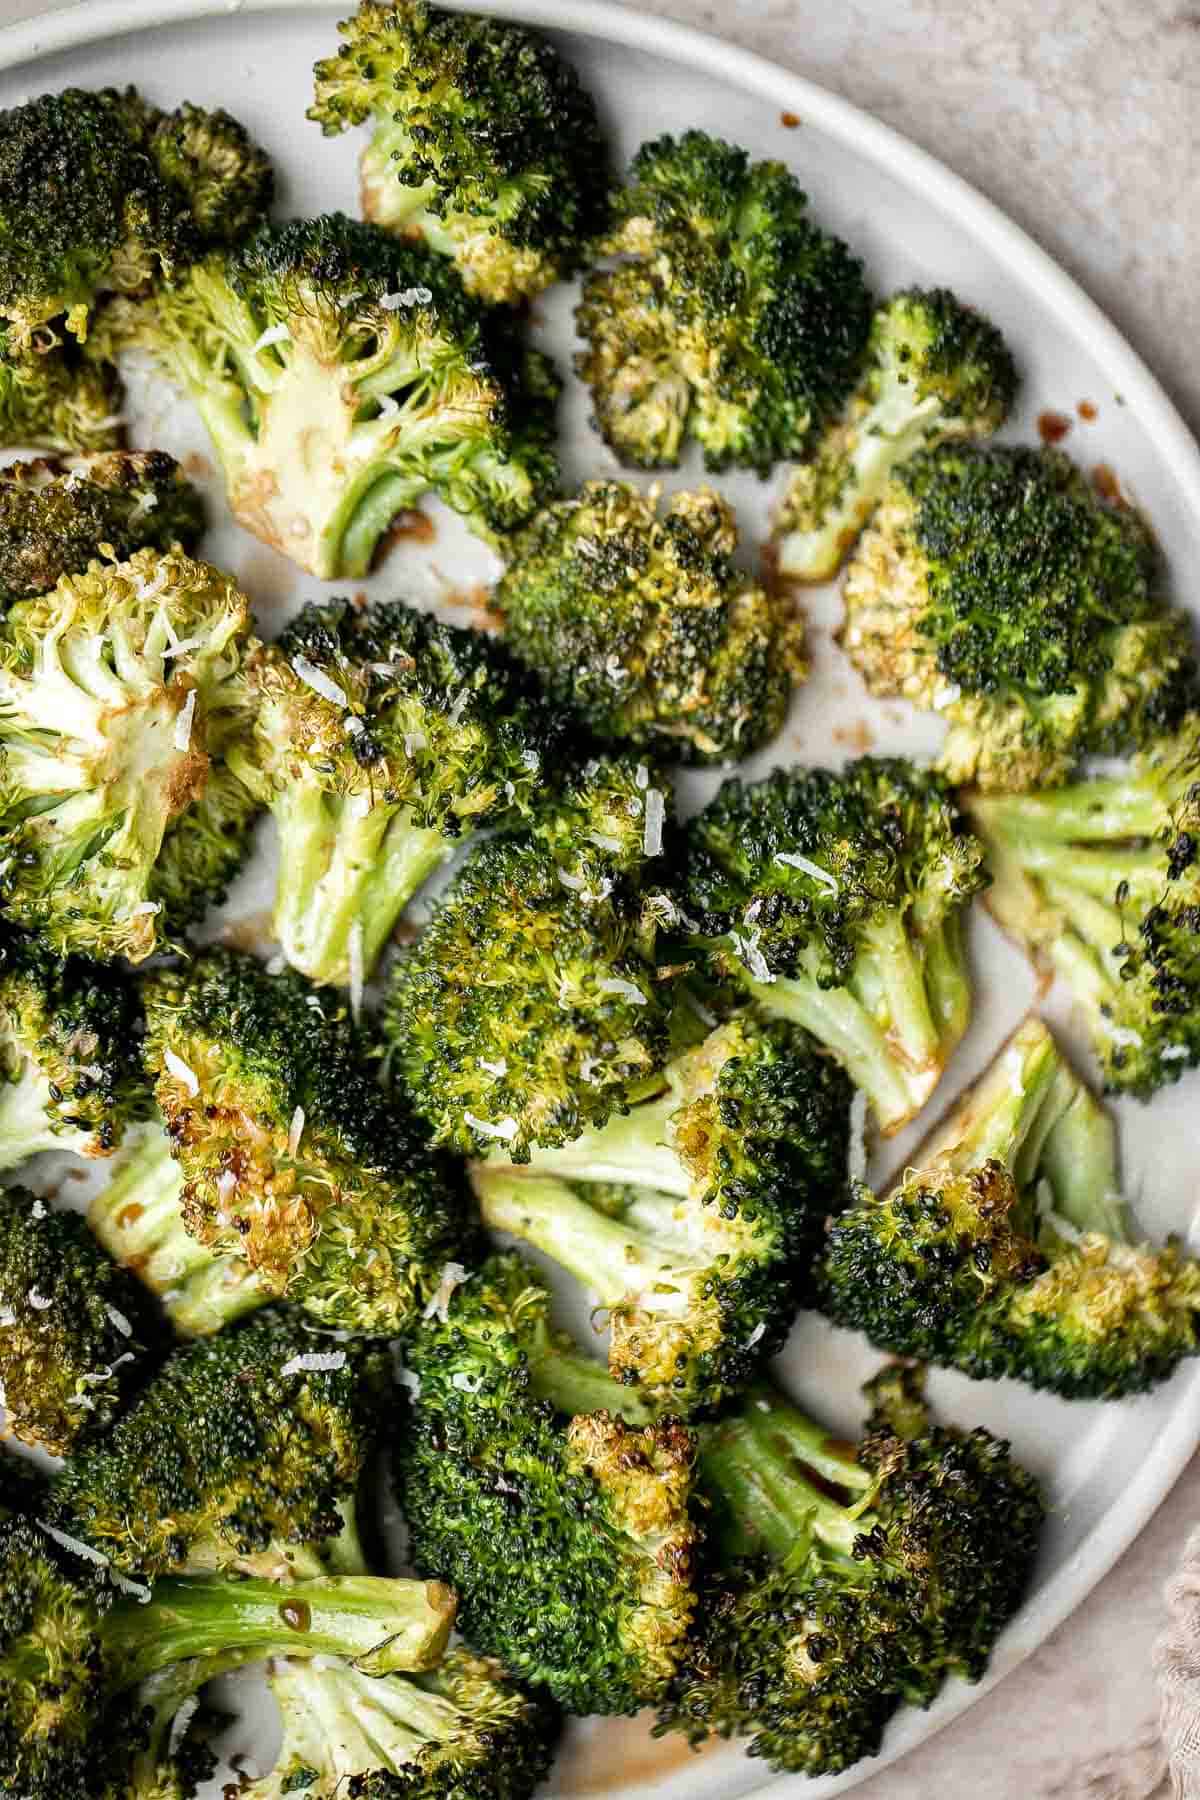
Balsamic Roasted Broccoli is a quick easy side dish made with tender, crispy broccoli tossed in a flavorful 5-ingredient glaze and is ready in 25 minutes.
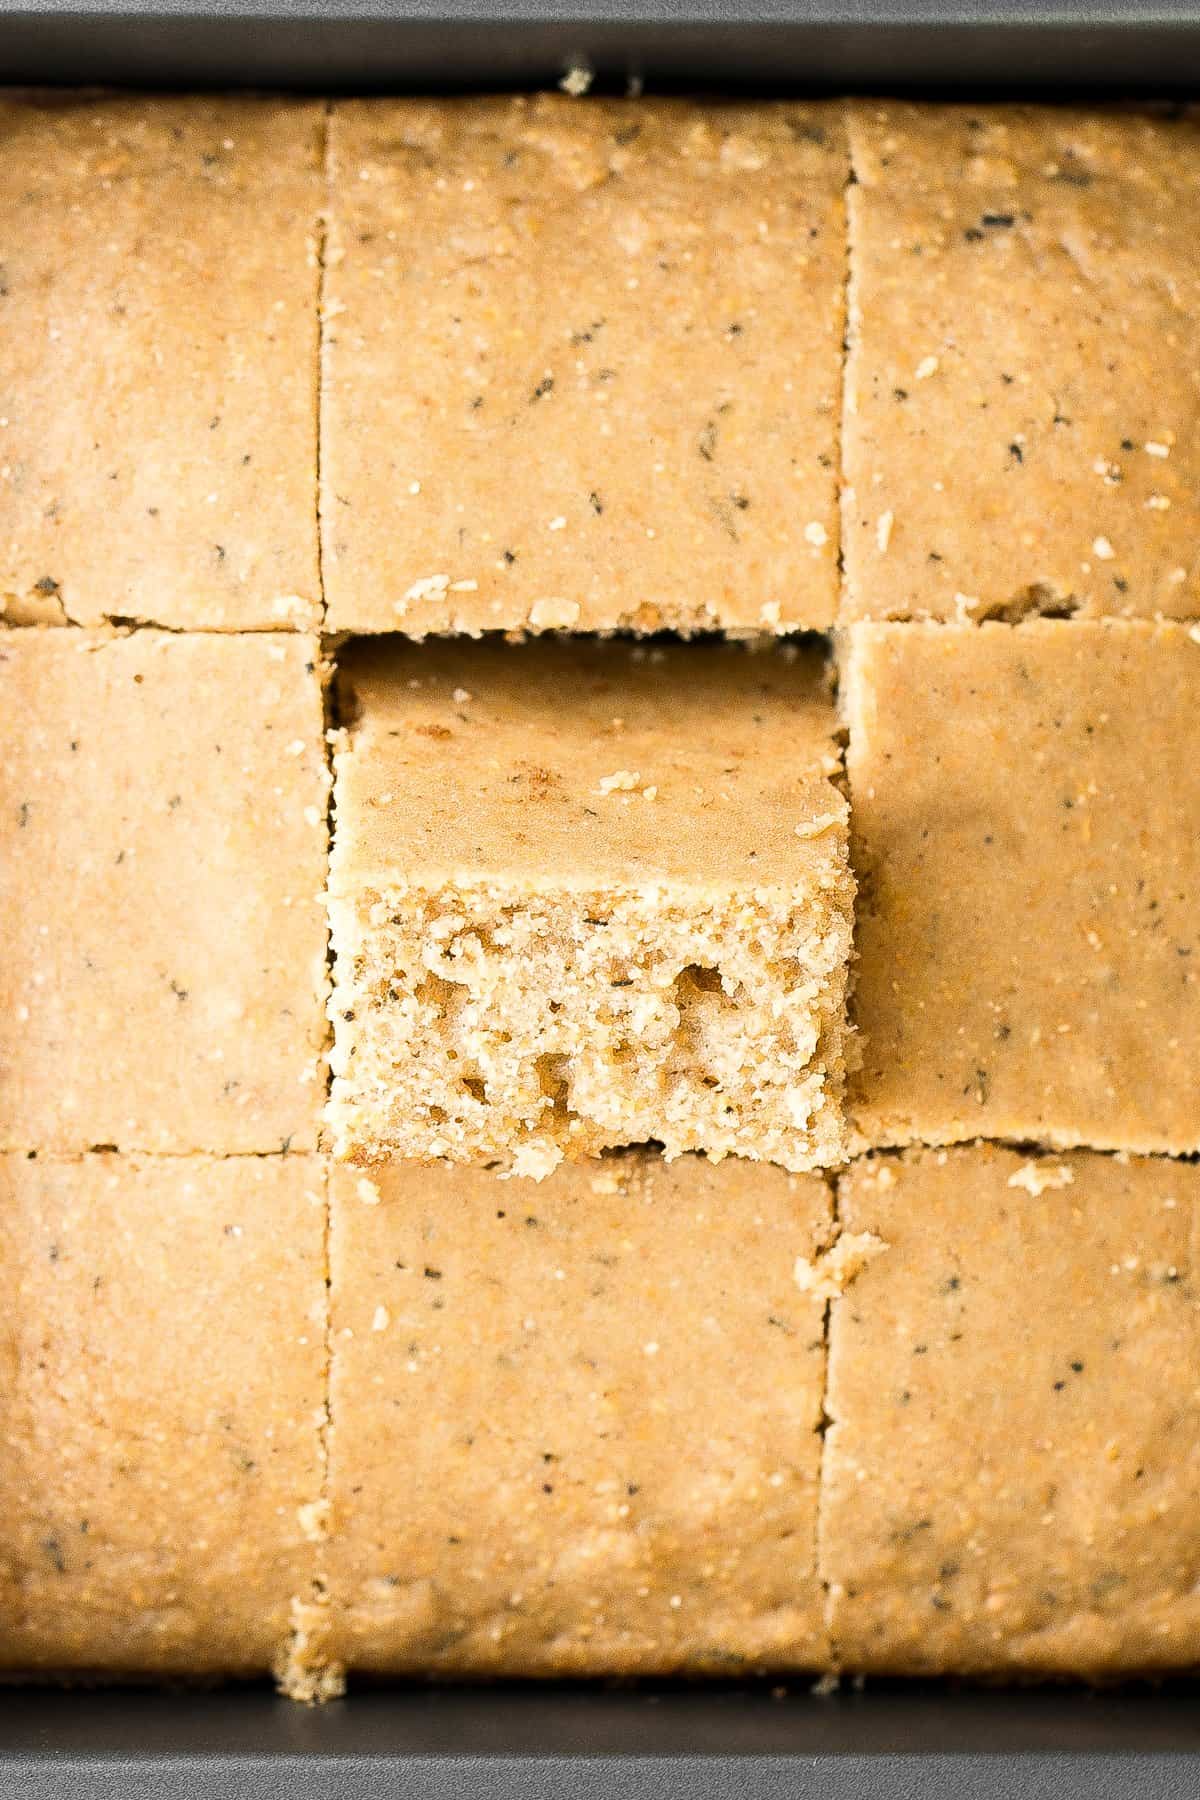
Sweet and savoury, buttery rosemary cornbread is soft and moist with golden crispy edges, flavourful and delicious, and so easy to make this holiday season.
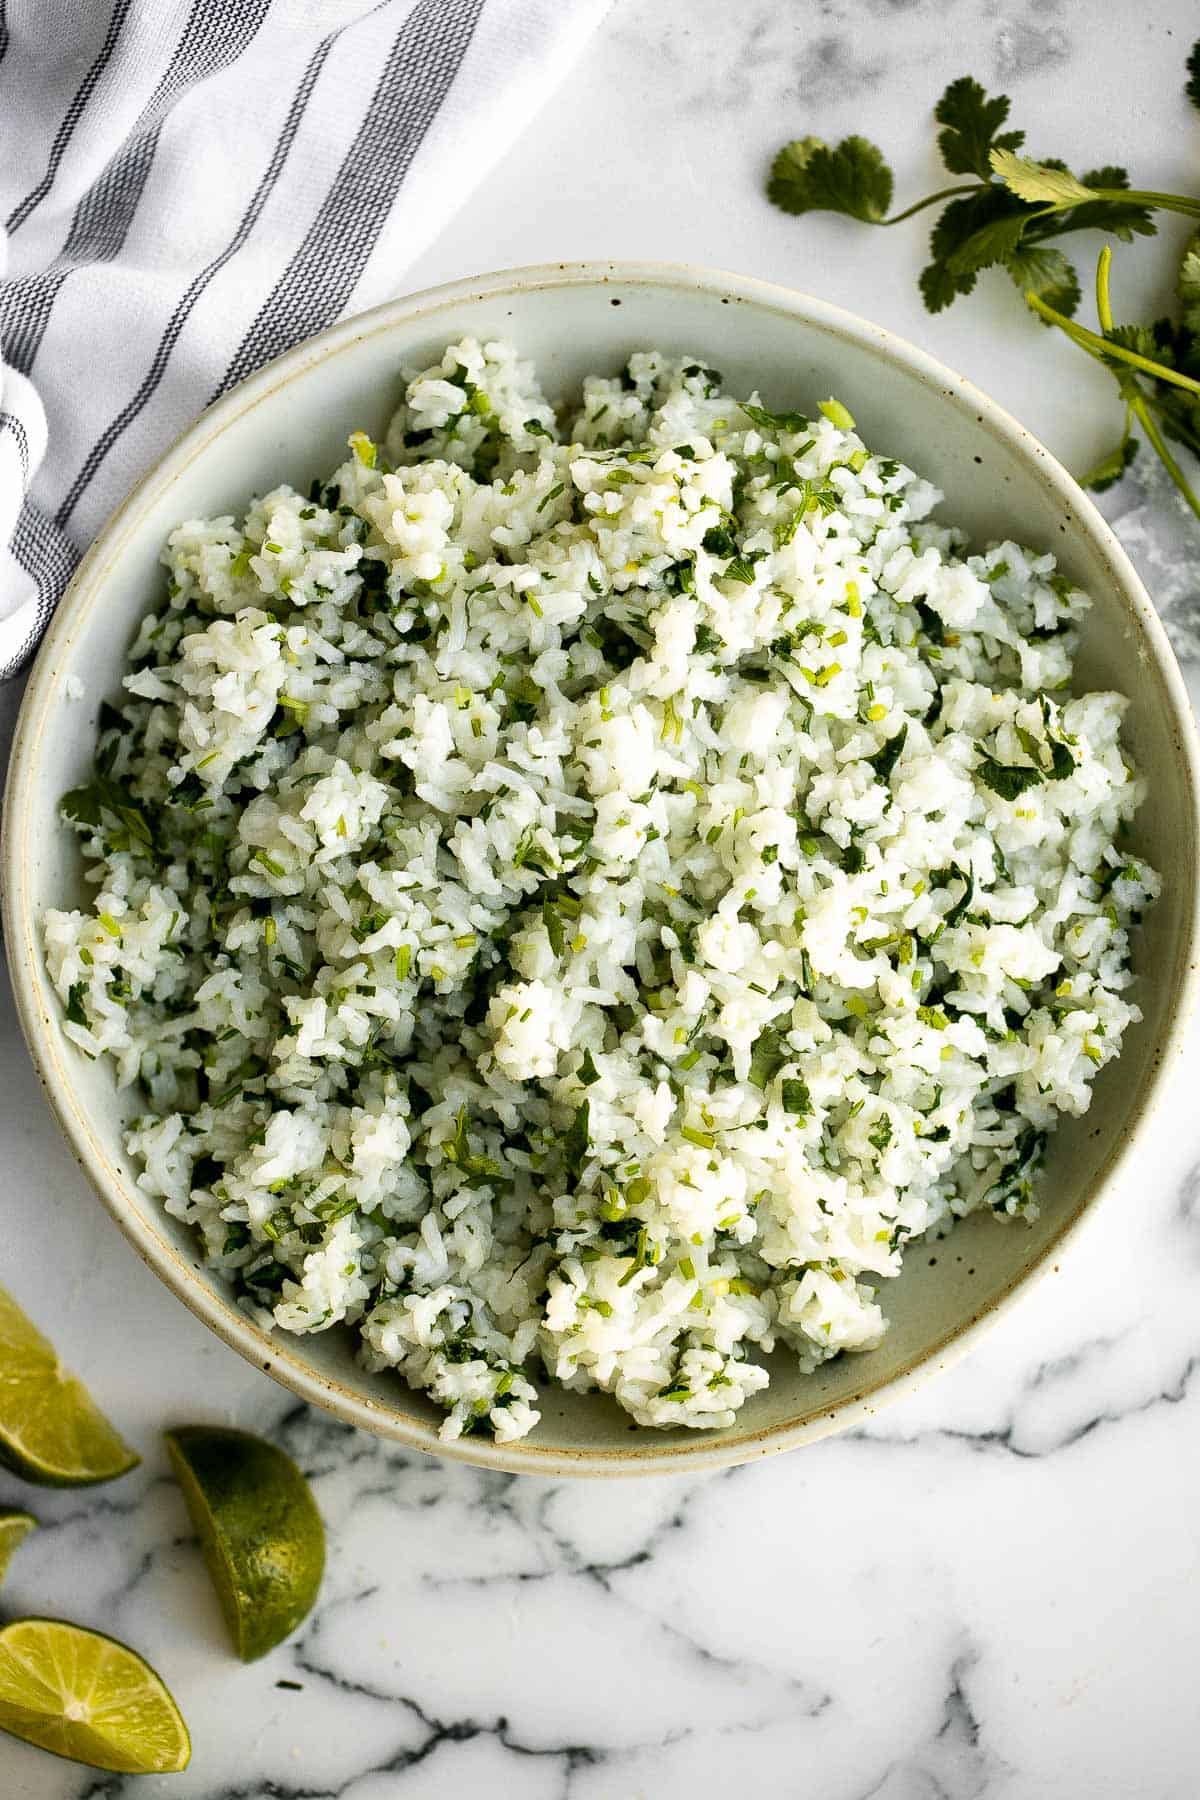
Cilantro lime rice is a fresh, bright and vibrant side dish that will add extra flavour to any meal you serve it with. It's a quick, easy, one pot recipe.
Fresh mango salsa is sweet, tangy, and delicious. It's a quick and easy recipe that you can whip up with just 6 ingredients and in under 10 minutes.

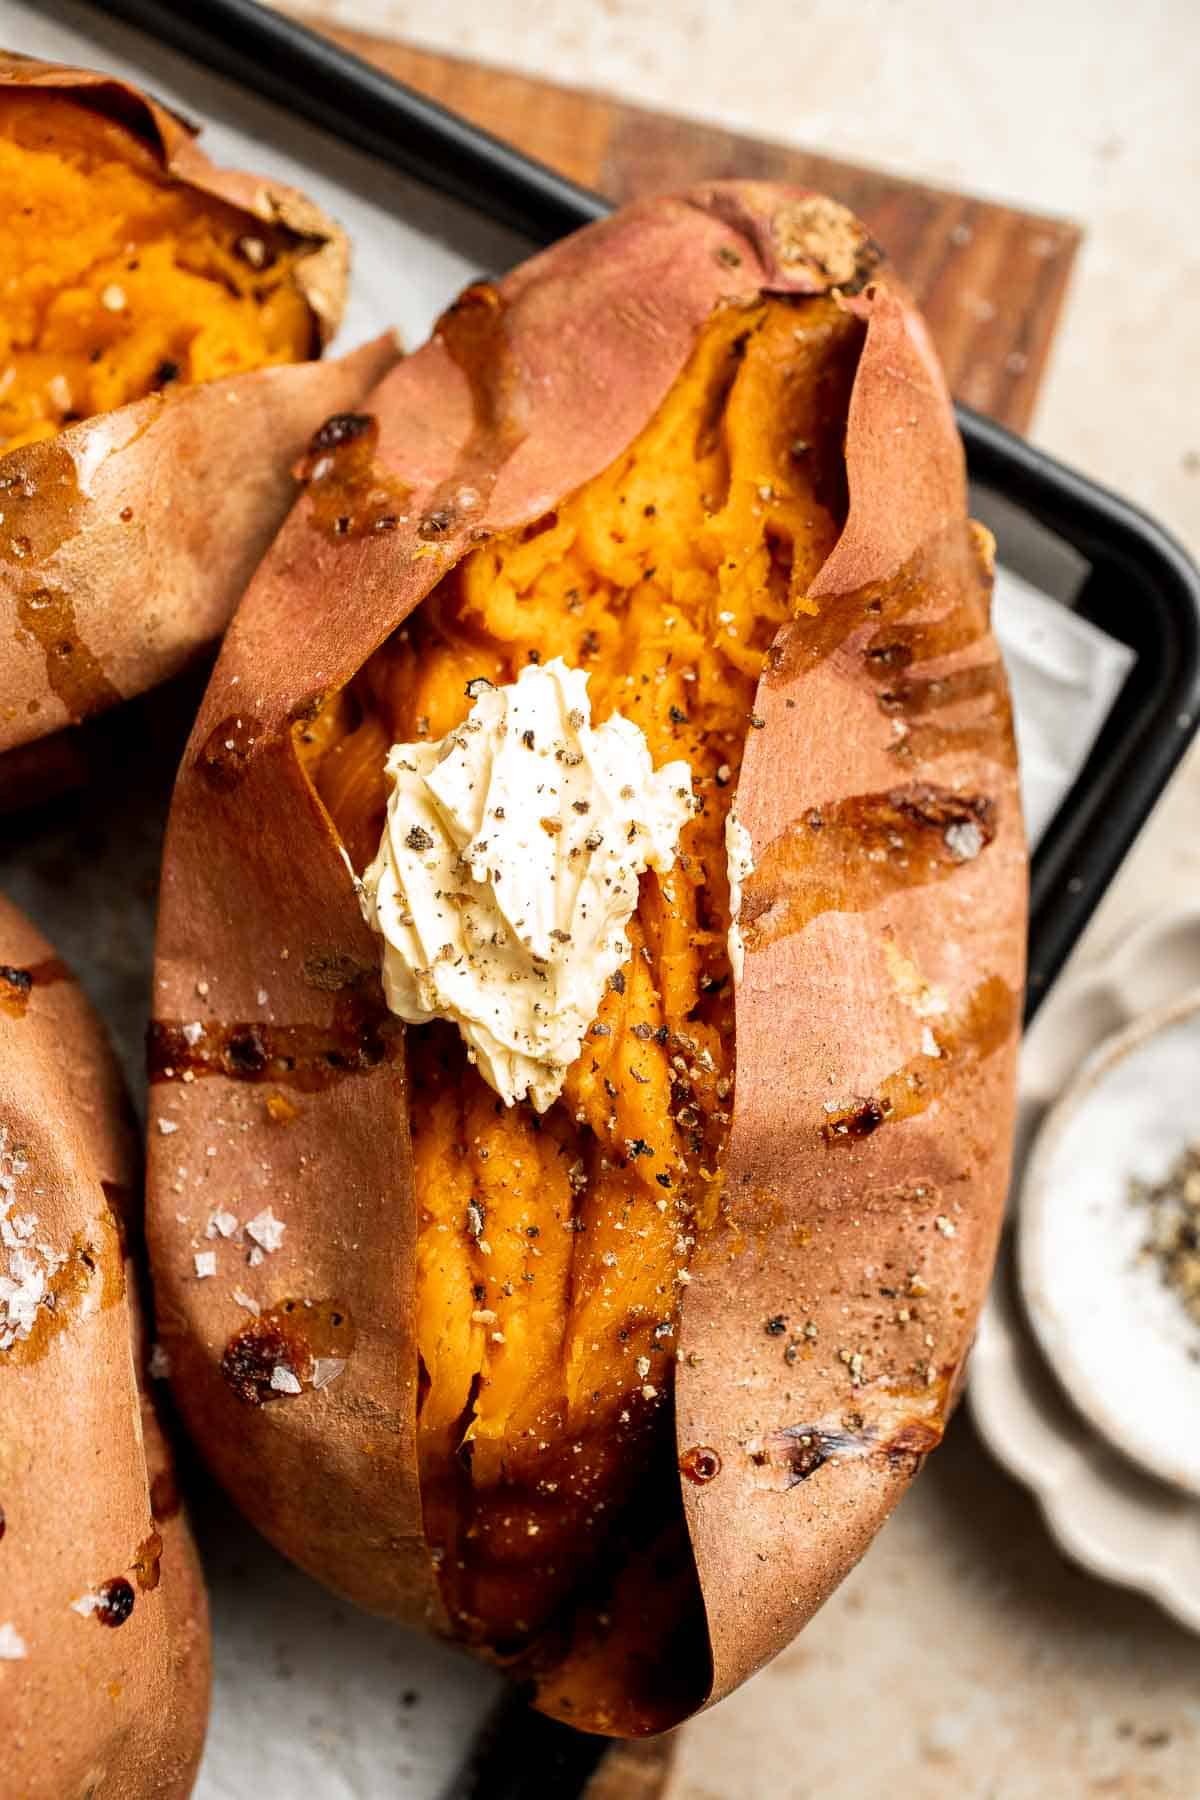
Baked Sweet Potato takes almost no effort to make (in the oven or grill) and always taste amazing. They're soft and tender, naturally sweet, and delicious!
Potato Onion Pierogi is a flavorful delicious dumpling recipe made from scratch with simple ingredients, filled potatoes, caramelized onions, and cheese.

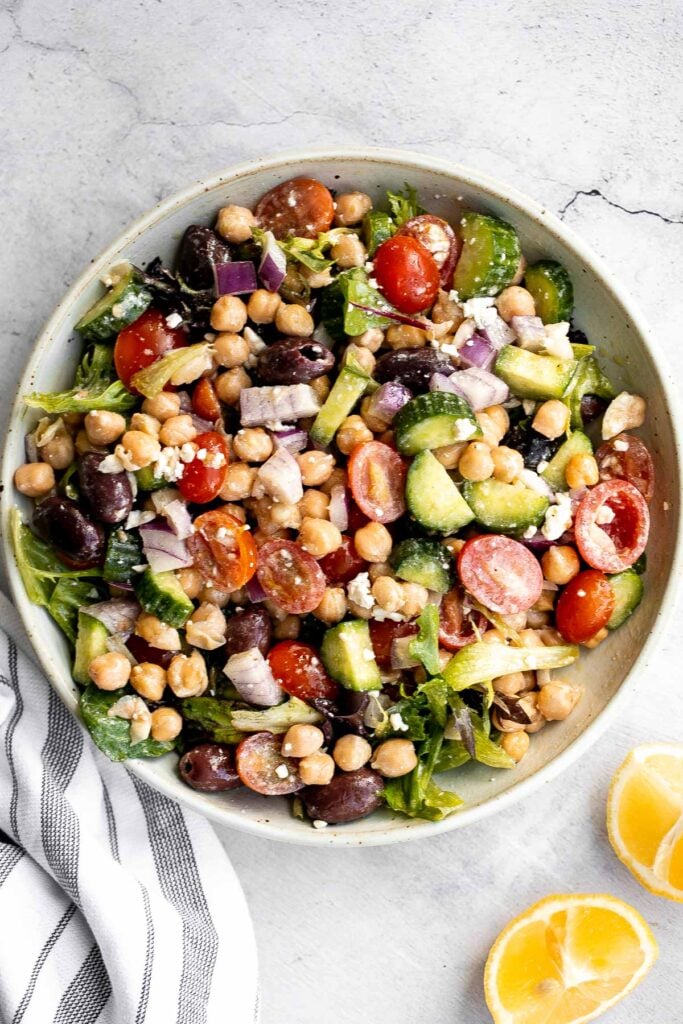
Chickpea Greek salad is a fresh, healthy, vibrant, and colorful salad, packed with traditional Mediterranean ingredients, superfoods, and nutrients.
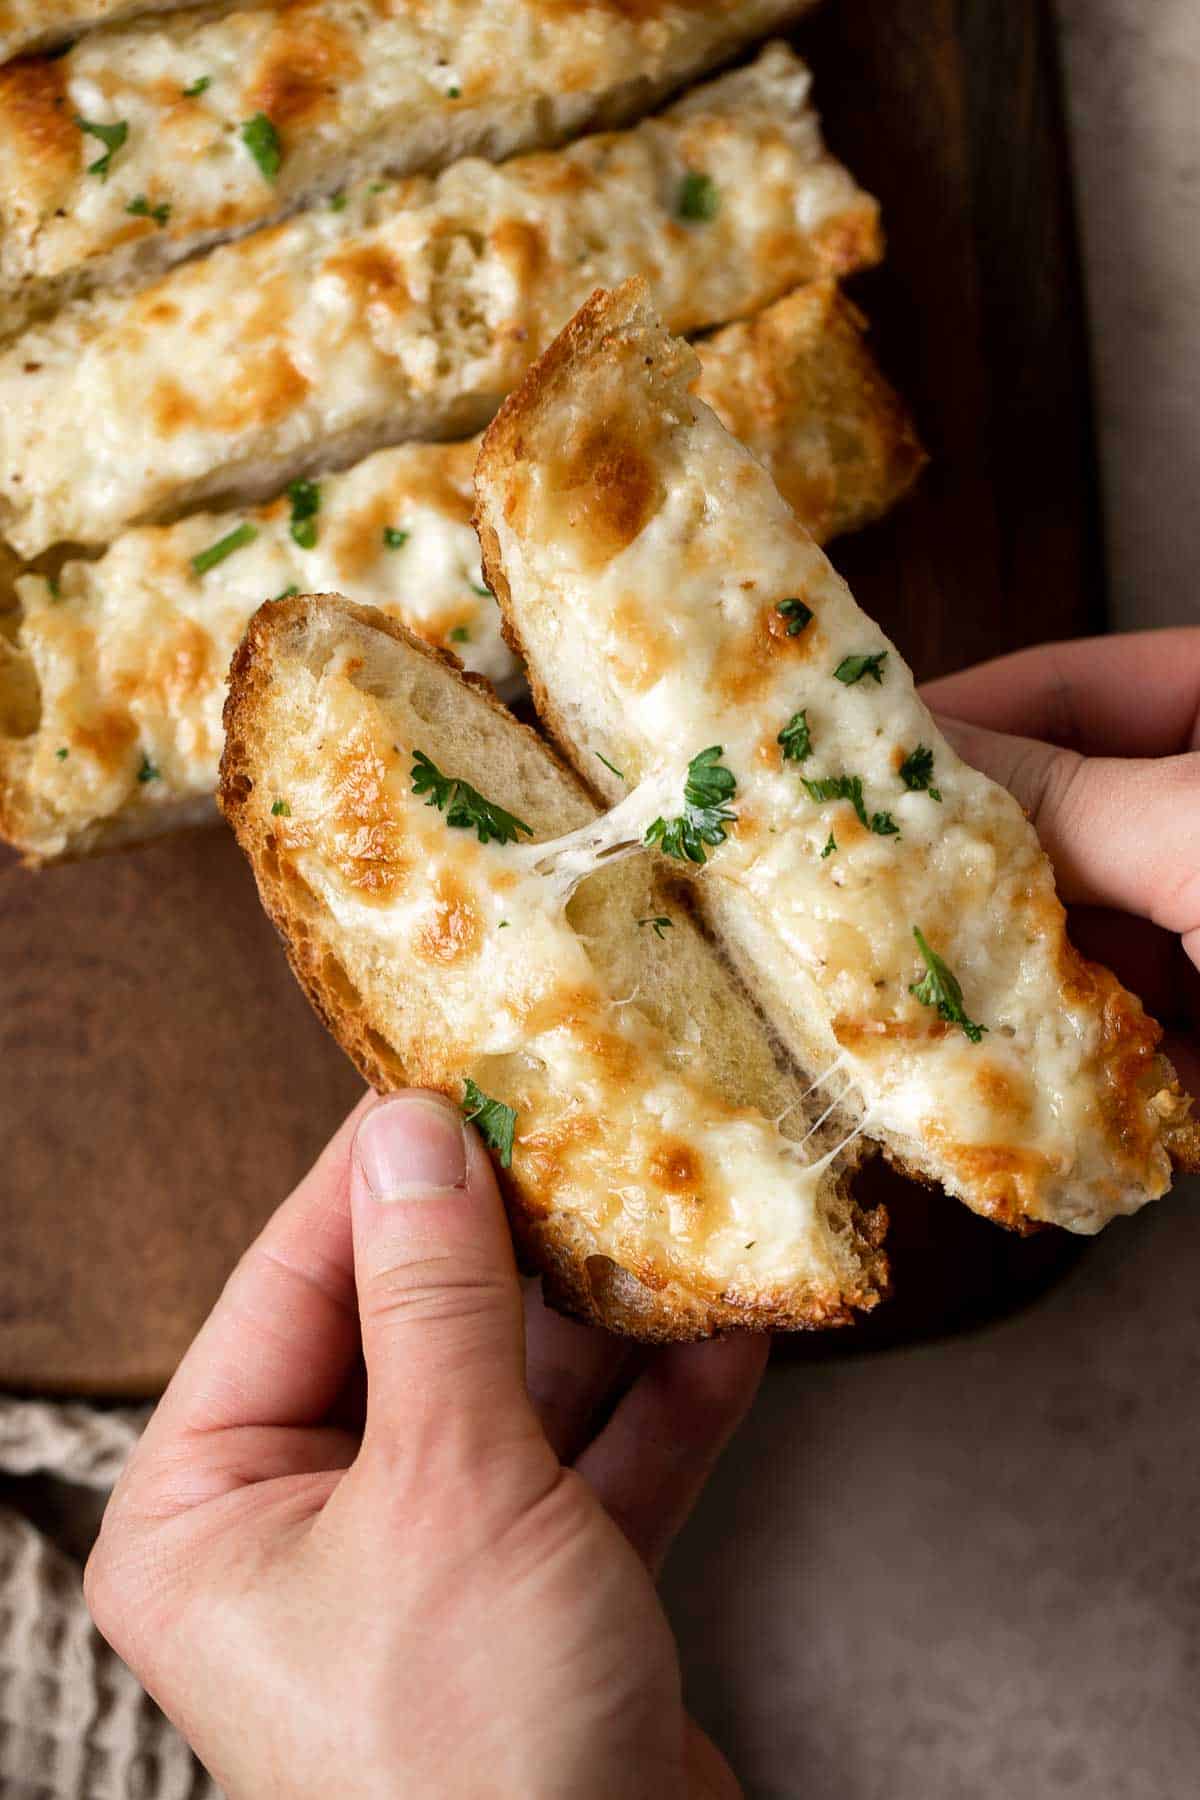
Cheesy Garlic Bread is toasty and crispy on the outside, tender and soft inside with a garlic butter and melty cheese on top. Make in under 20 minutes!
Our Favorite Shrimp Recipes
Need some extra inspo on shrimp dishes to make for dinner. Here are some of our favorites!
- Creamy Garlic Shrimp
- Garlic Butter Shrimp
- Honey Garlic Shrimp Skewers
- Shrimp Scampi
- Shrimp Alfredo
- Garlic Shrimp Skewers
For more, see our 30 Best Shrimp Recipes.
How to Make Ahead and Store Side Dishes
You can make many of these shrimp side dish recipes ahead of time and store in the refrigerator for a few days or even in the freezer for up to 3 months. Otherwise, you can prepare the ingredients and store in the refrigerator until ready to assemble and/or cook. Check the individual recipes for full make ahead and storing instructions.
To reheat, place any leftovers in the air fryer or the oven at 300F for 10-15 minutes until warmed through, or on the stovetop over medium-low heat (depending on the recipe). If heating from frozen, let it thaw first and then reheat.
More Side Dish Recipes
- 25 Side Dishes for Salmon
- 25+ Best BBQ Side Dishes
- 30 Potato Side Dishes
- 40 Vegetable Side Dishes
- 25 Side Dishes for Pork Chops
- 25 Mexican Side Dishes
Did You Make Any of These Side Dishes for Shrimp?
Please leave a comment and rating below, and let me know what you thought of this round up of side dish recipes to serve with shrimp. Be sure to snap a picture and tag me on Instagram @aheadofthyme or share it on the Pinterest pin so that I can follow along.
HUNGRY FOR MORE? Don't forget to sign up for my email newsletter so that you don't miss any recipes. You can also follow along on Instagram and Pinterest for more recipe updates.
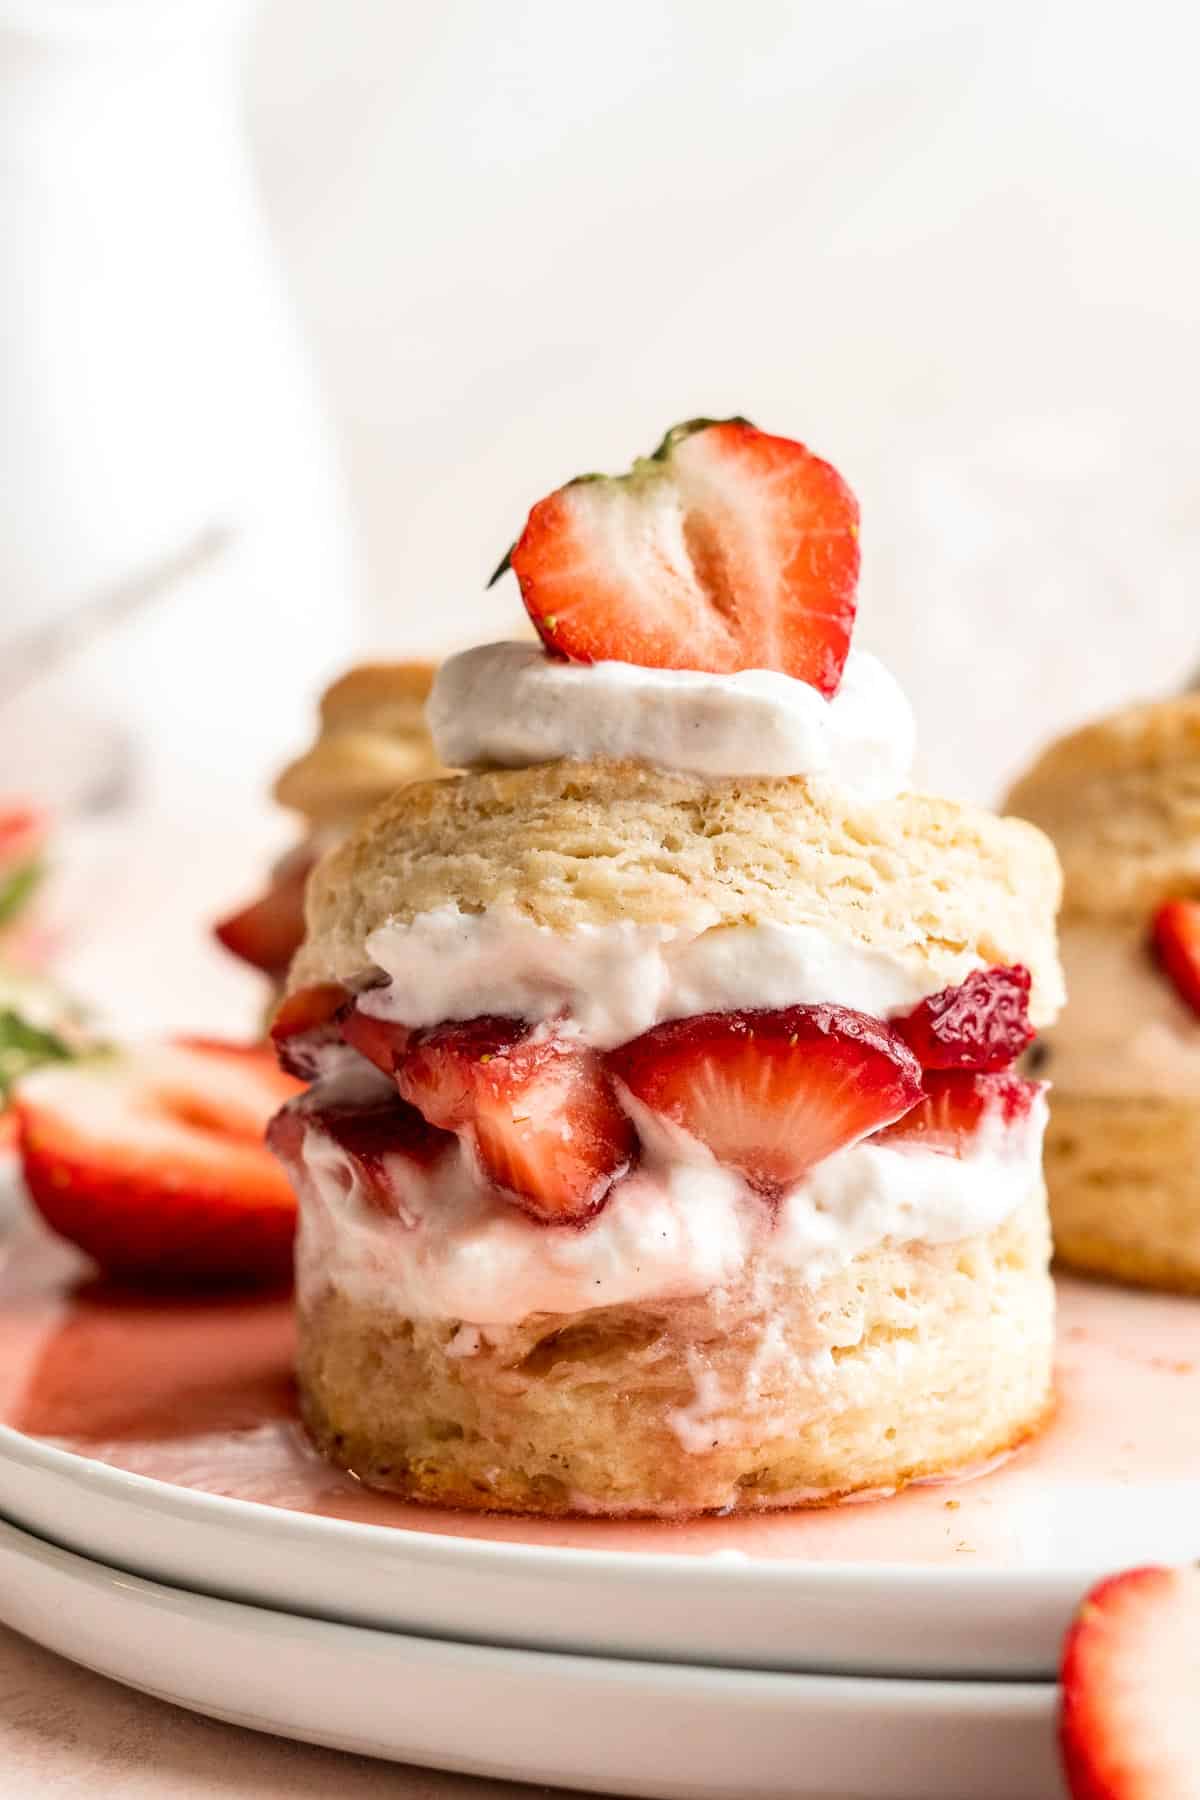
Strawberry Shortcake
Classic Strawberry Shortcake is a small, layered cake featuring fluffy crumbly biscuits, a fresh strawberry filling, and homemade whipped cream. It tastes as good as it looks. Plus, it's a lot easier to make than you think!

If you're looking for the perfect cake to mark a celebration or impress your dinner party guests, look no further. With its perfect balance of flavors and textures and gorgeous presentation, this strawberry shortcake is a classic dessert that is loved by all. Serve it as a sweet ending to a family dinner, a refreshing dessert at a summer picnic, or a fancy treat on date night.
Why You'll Love this Strawberry Shortcake
- Triple layered cake. Shortcake is all about the layers and this strawberry version is no exception. Homemade biscuits are layered with a sweet strawberry mixture and luxurious whipped cream made from scratch topped with a drizzle of strawberry sauce. It tastes as good as it looks!
- Tender and fluffy biscuits. A shortcake is not the same as a regular cake - even though it might look the same. It's a bit denser and more like a biscuit than a traditional cake. The homemade biscuits used in this classic strawberry shortcake recipe checks all the right boxes - soft, tender, and fluffy with a perfect crumble. Plus, they are super easy to make!
- Homemade whipped cream. It's impossible not to love the homemade whipped cream frosting in this strawberry shortcake. Made with heavy whipping cream, powdered sugar, and vanilla extract - it's ridiculously easy to make from scratch at home.
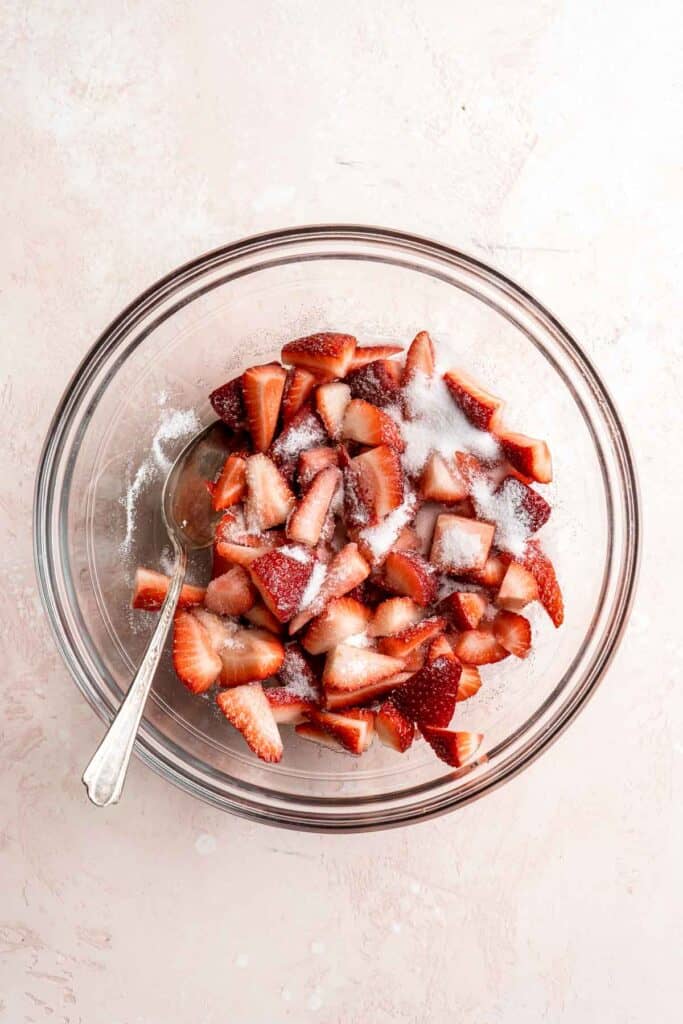
- Macerated strawberries. This summer dessert features juicy, ripe strawberries that brings a burst of fresh flavor to every bite. The strawberries are macerated (mixed with sugar) to make them extra sweet and delicious. To prepare, all you need to do is add sugar to fresh strawberries and wait.
- Quick and easy to make. This classic strawberry cake is surprisingly easy to make with just a few simple steps. You can whip up the biscuits in under 15 minutes and slice and macerate the strawberries while they bake. Plus, you can make the components ahead of time for even quicker assembly.
Ingredient Notes
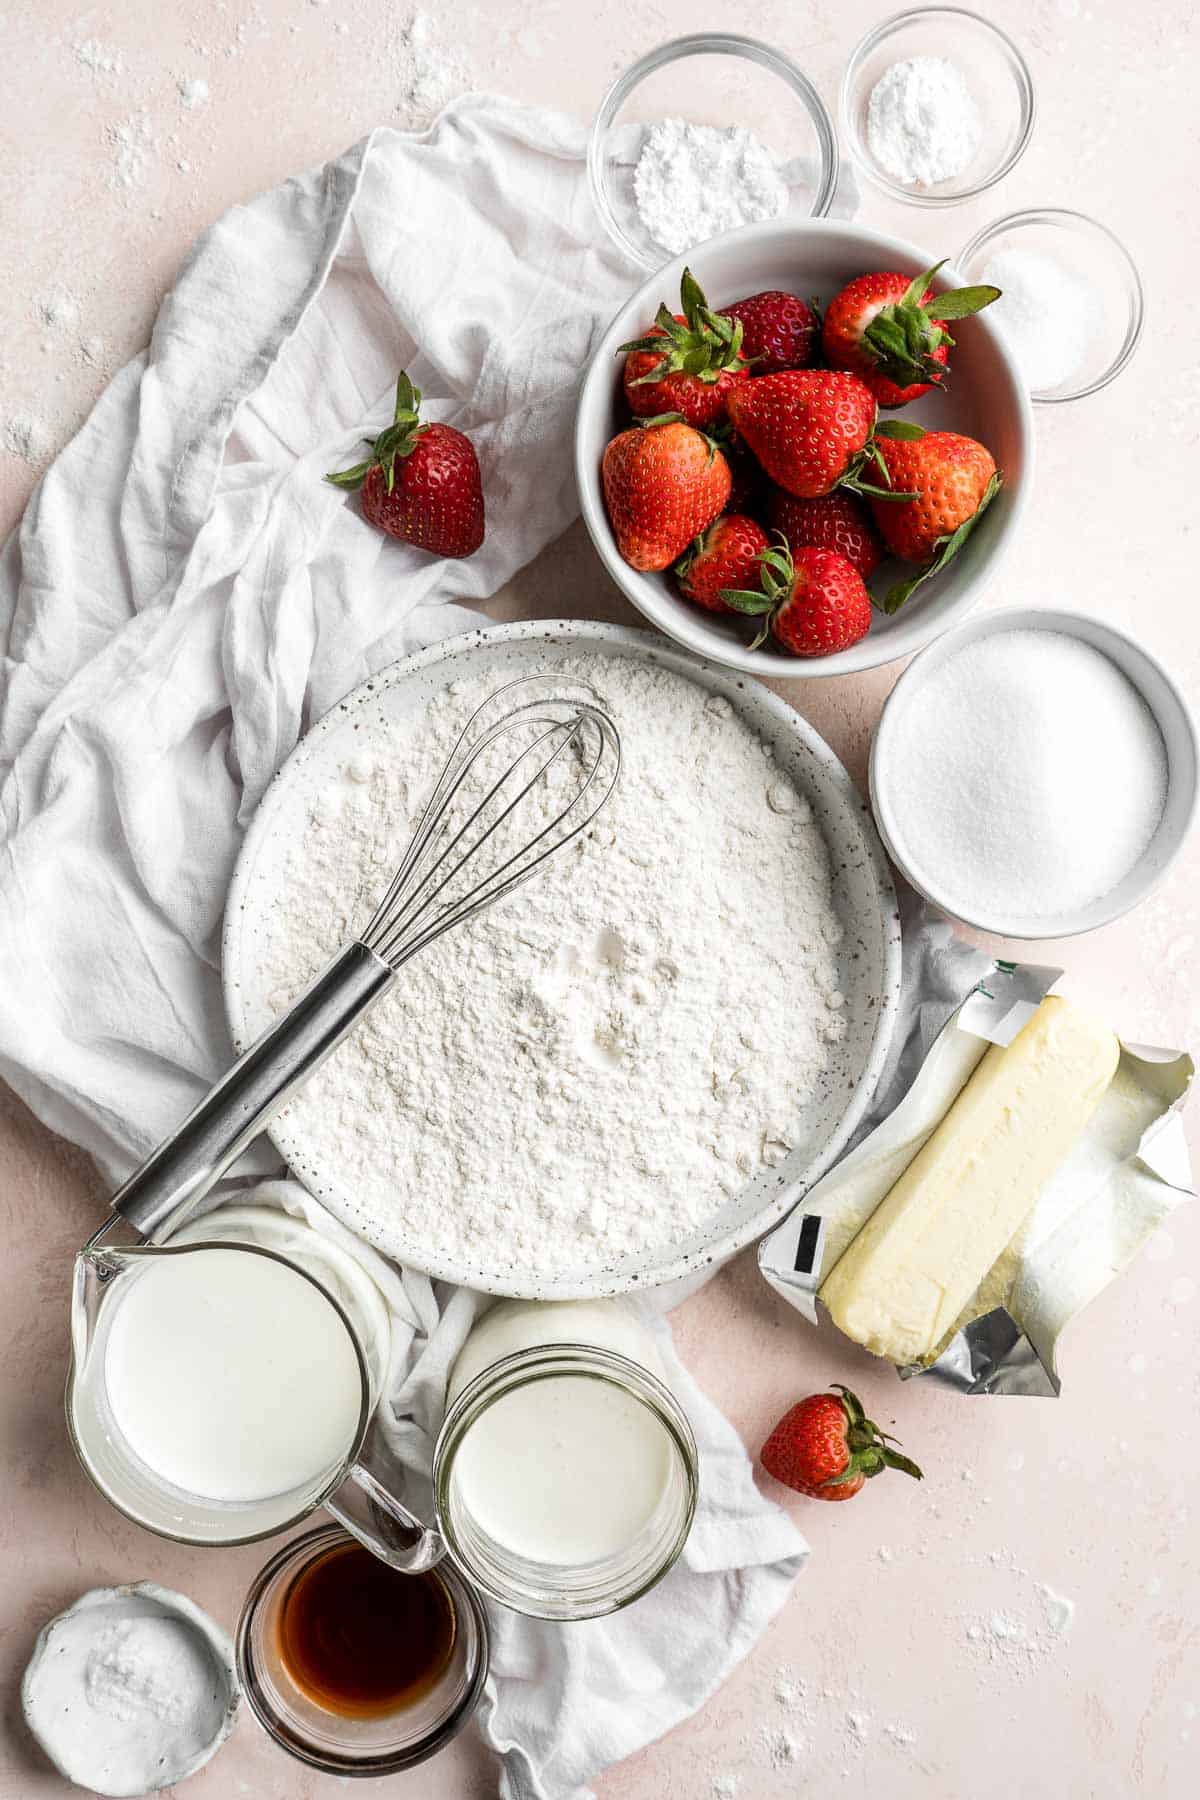
To make this delicious Strawberry Shortcake, you will need the following ingredients (full measurements in recipe card below):
- flour - all-purpose flour is perfect for making biscuits as it results in a light and fluffy texture. You can substitute it with gluten-free flour if needed.
- sugar - we use white granulated sugar for the sweetness in this recipe. You can substitute with coconut sugar or brown sugar as well.
- baking powder + baking soda - these leavening agents help the biscuits rise and become light and fluffy.
- salt
- unsalted butter - it is very important to use cold butter when it comes to making flaky biscuits. And shredding the butter makes it easier to incorporate into the dough.
- buttermilk - buttermilk adds tanginess and tenderness to the biscuits. You can substitute it with regular milk or a non-dairy alternative.
- vanilla - this adds a subtle vanilla flavor to the biscuits. You can use other extracts like almond or lemon for a different flavor.
- heavy cream - we brush some heavy cream onto the biscuits before baking to help it develop a golden crust. We also use cream to make homemade whipped cream.
- coarse sugar - this is optional for sprinkling on top of the biscuits to add extra sweetness and a crunchy texture.
- strawberries - fresh, ripe strawberries are the star of this dessert. Look for bright red berries that are firm and plump.
- whipped cream - we make homemade whipped cream using heavy cream, confectioners' sugar, and vanilla. You can also use store-bought whipped cream - whatever is more convenient!
Baking Tools and Equipment
You will also need the following tools and equipment:
- measuring cups and spoons
- food processor (if using)
- mixing bowls
- box grater (if using)
- rolling pin
- 3-inch round cookie cutter
- large baking sheet
- parchment paper
How to Make the Best Strawberry Shortcake
First, make the shortcakes.
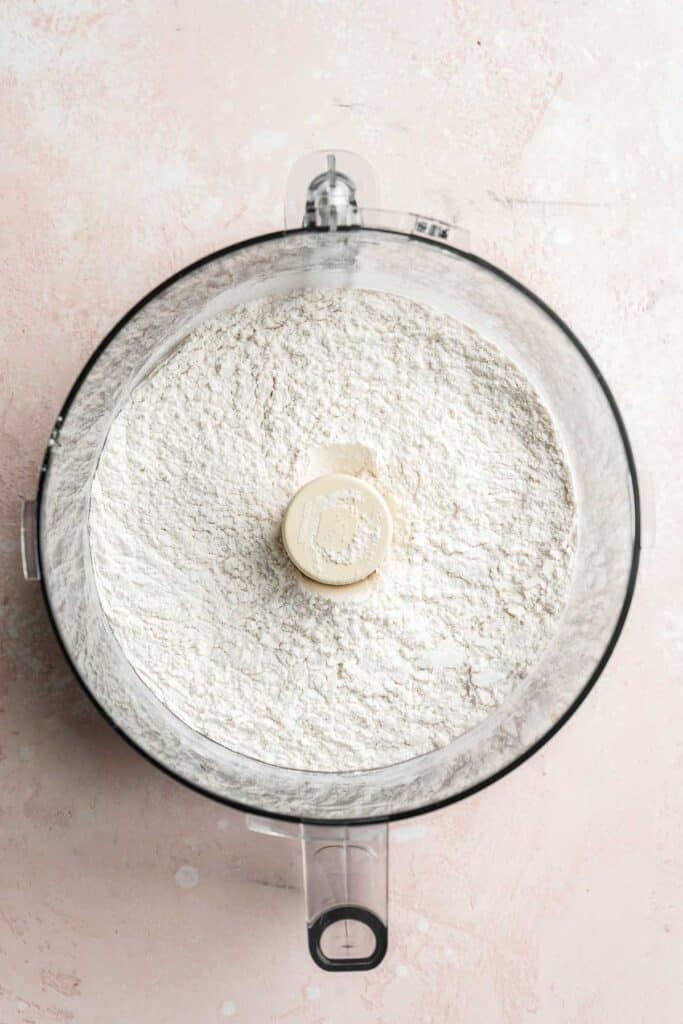
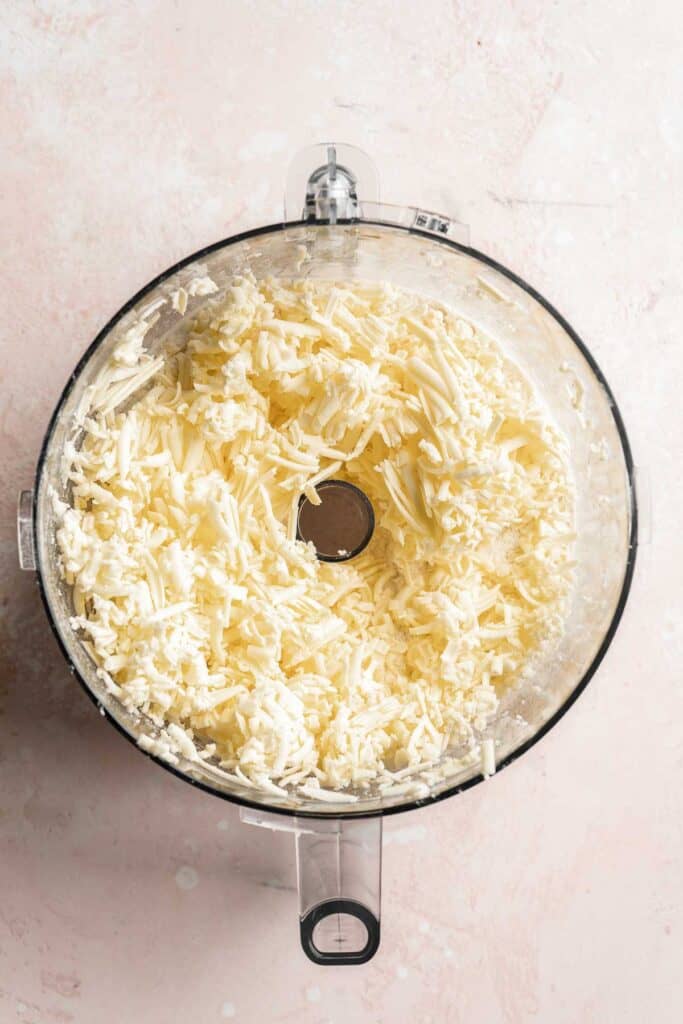
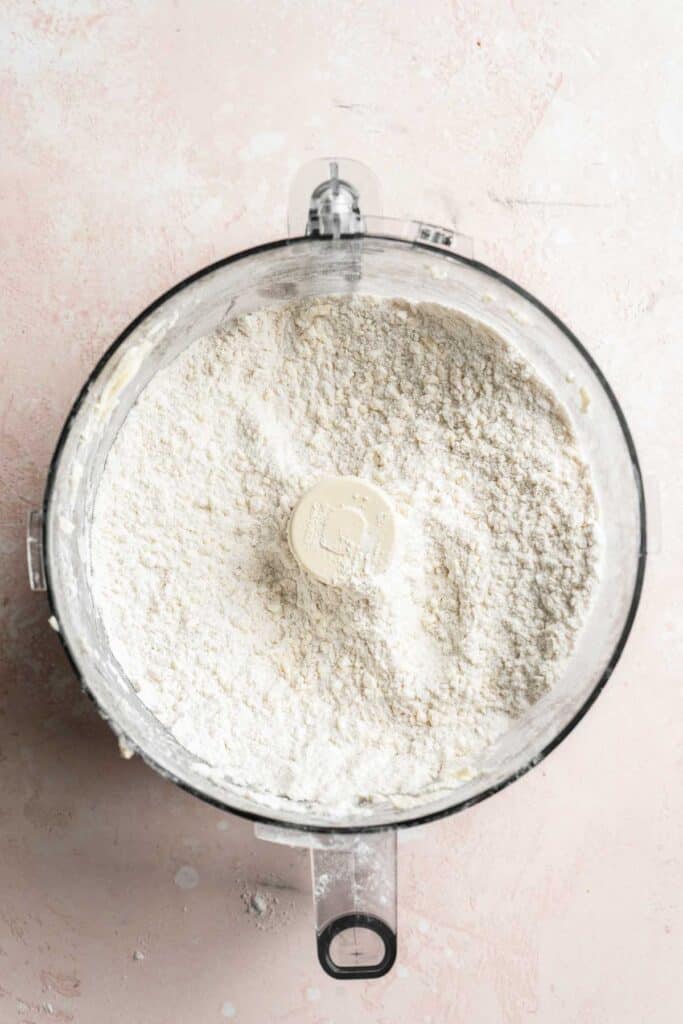
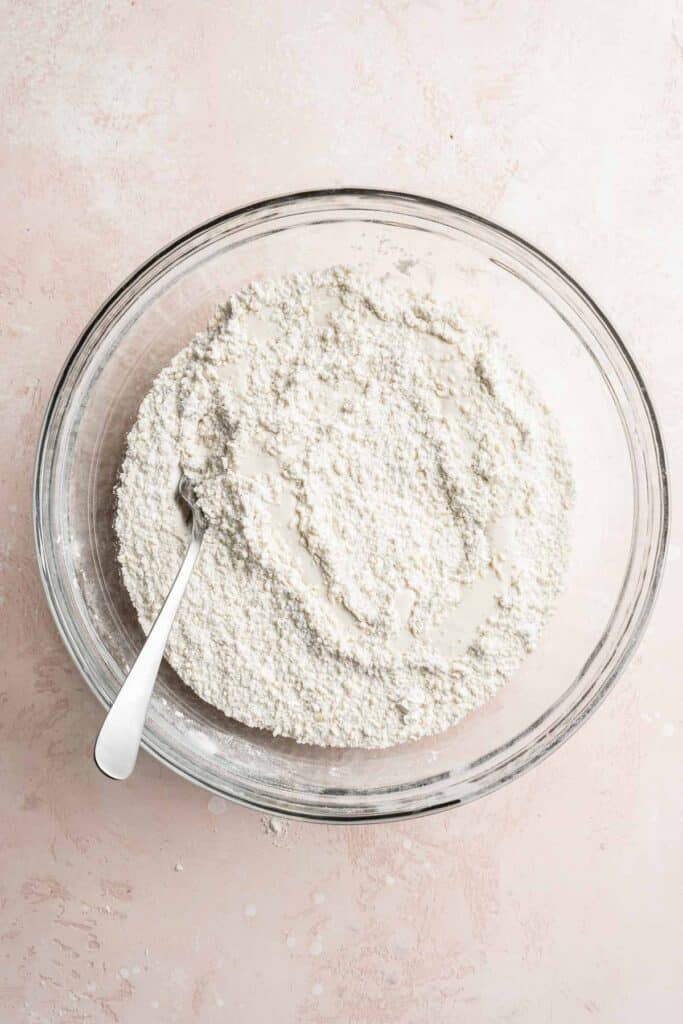
- Make the dough. In a food processor, add flour, sugar, baking powder, salt, and baking soda, then pulse multiple times to combine well. Remove the blade and add the grating or shredding attachment to the food processor, then shred the butter into the bowl. Remove the grating attachment and replace with the blade, then pulse again a few times to mix butter shreds into the dry ingredients. Transfer to a large mixing bowl.
- Alternatively, in a large mixing bowl, add flour, sugar, baking powder, salt, and baking soda. Whisk to combine. Then, use a box grater to shred the butter, then toss it into the dry ingredients to combine.
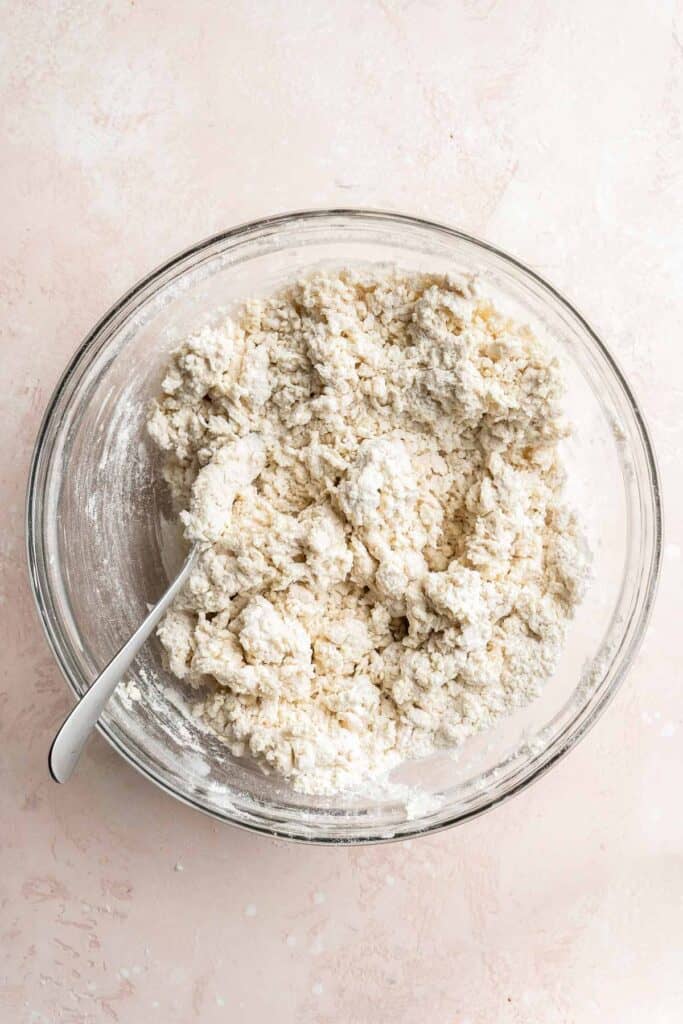
- Add wet ingredients. Place the buttermilk into a liquid measuring cup or small mixing bowl. Stir the vanilla into the buttermilk, then slowly drizzle the mixture into the mixing bowl of combined ingredients, while simultaneously tossing with a fork to combine.
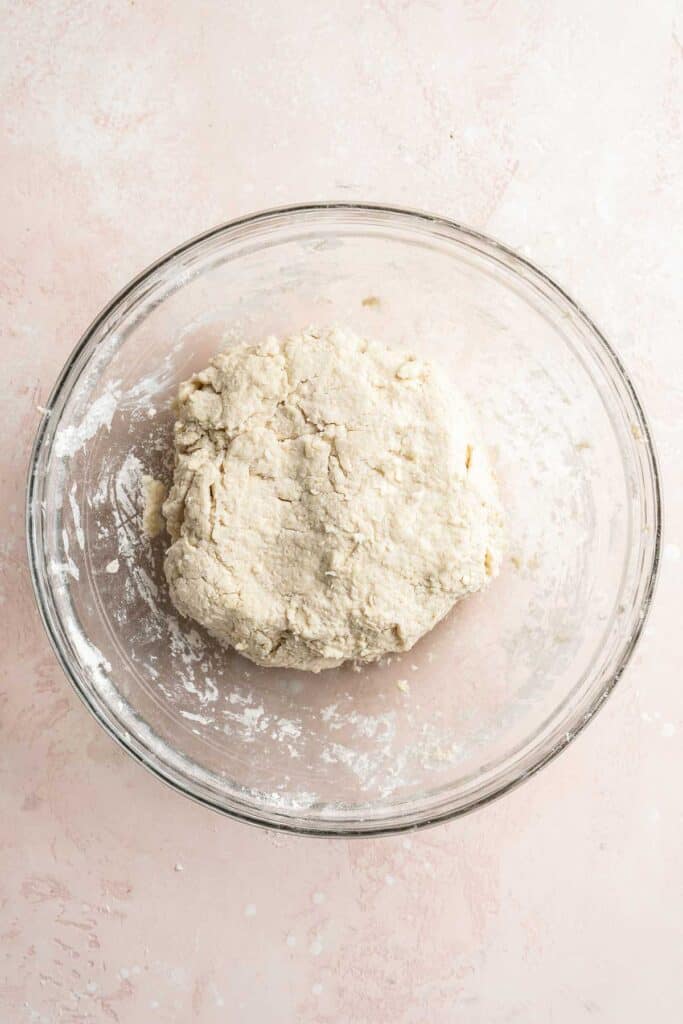
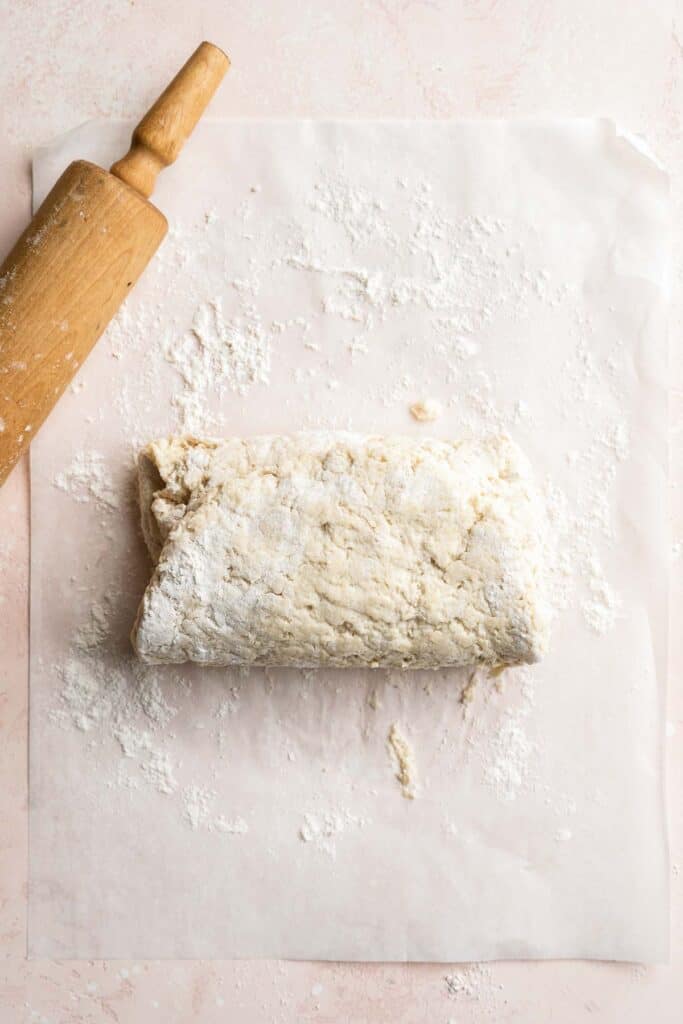
- Form dough. After all the buttermilk has been added, use your hands to knead the dough a few times inside the bowl until a shaggy, but-holding-together dough forms.
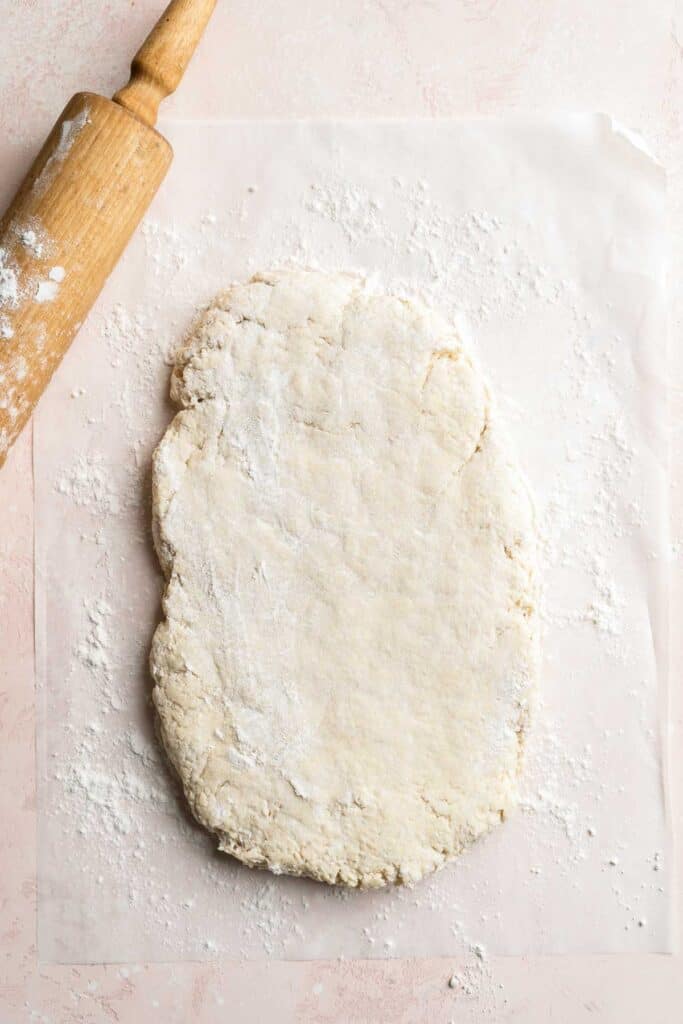
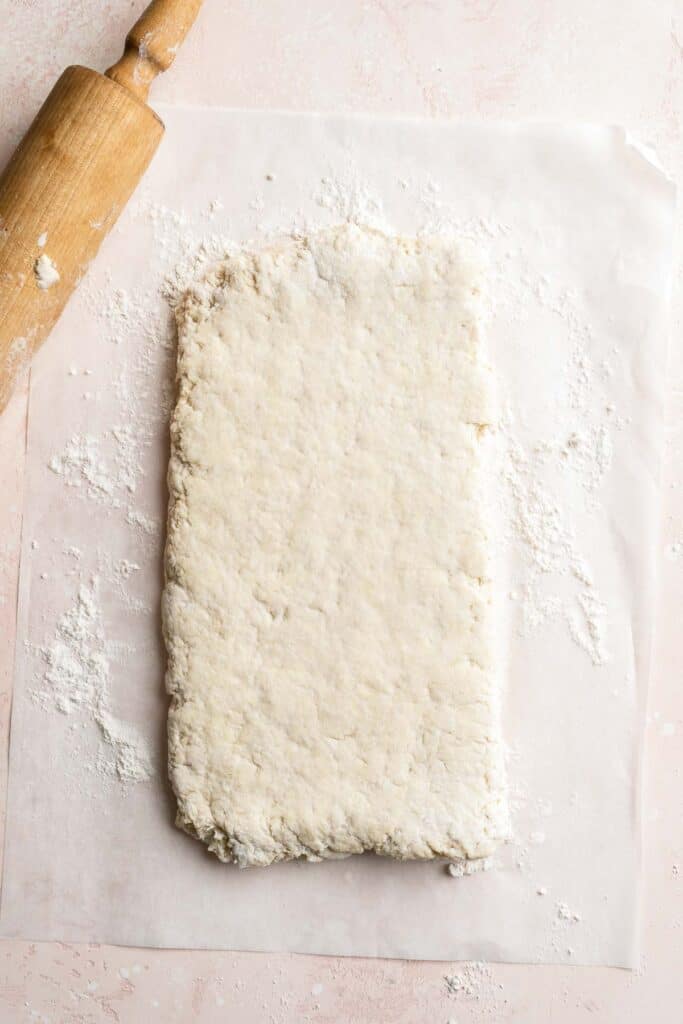
- Roll and pat dough. Turn the dough out onto a floured work surface and roll and pat into a long rectangle, about 1-inch thick. Fold the dough into thirds, then roll and pat out again to be about 1-inch thick.
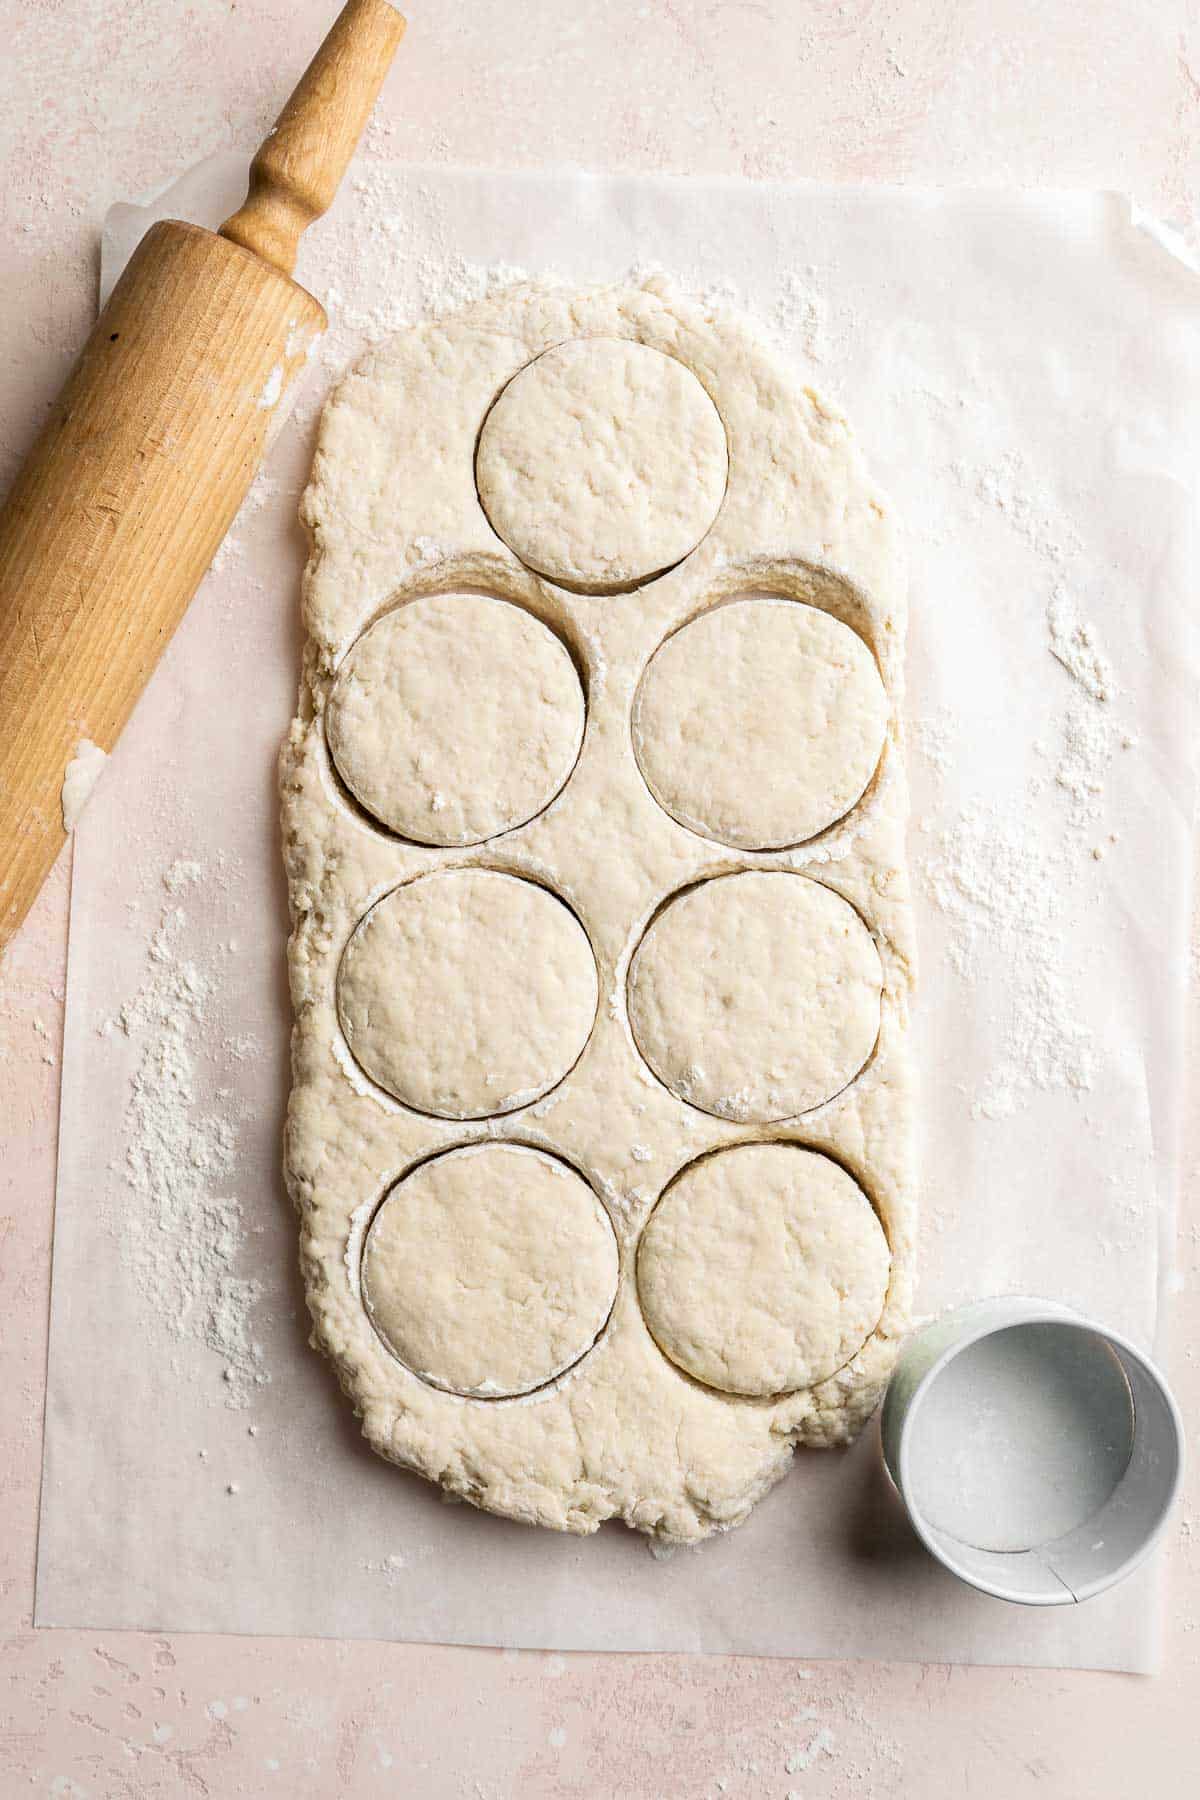
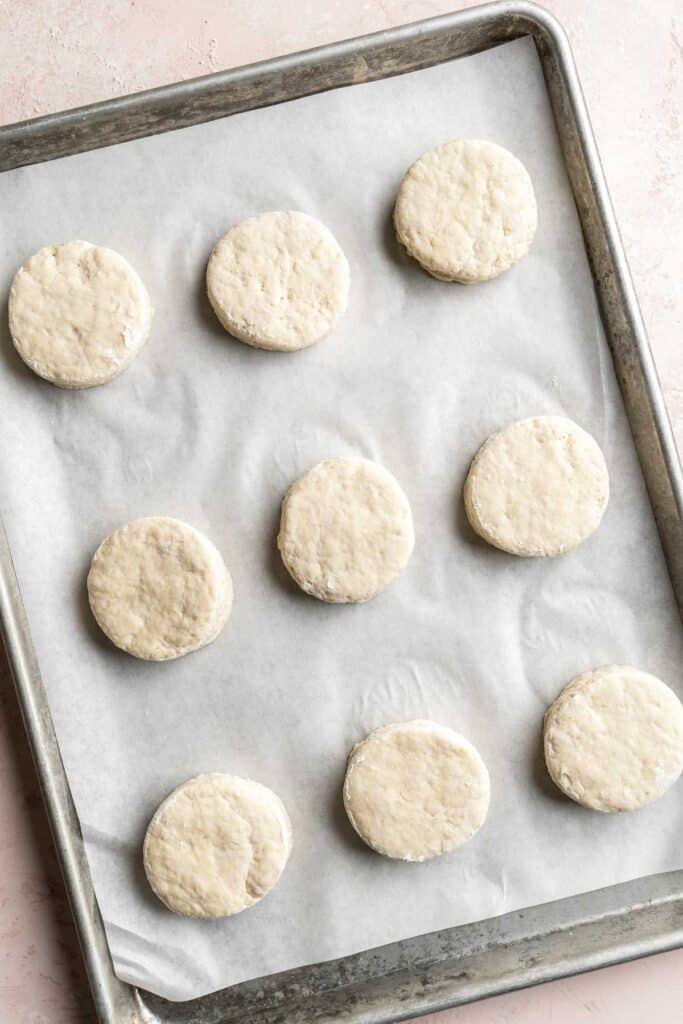
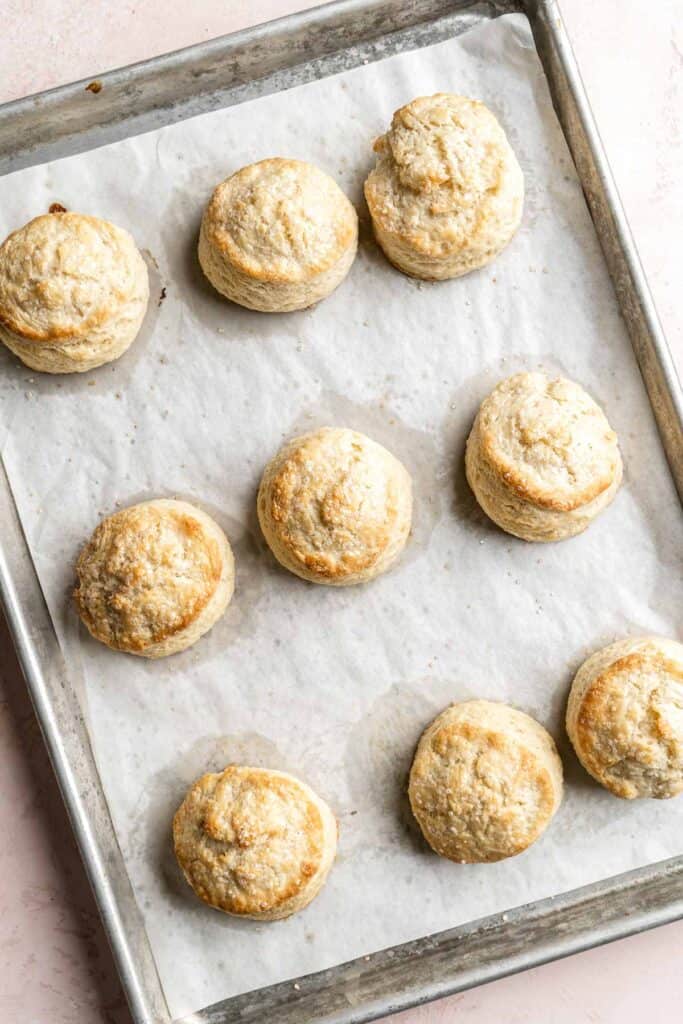
- Cut out shortcakes. Cut the shortcakes out using a 3-inch round cookie cutter and transfer the shortcakes onto a large baking sheet lined with parchment paper. Repeat with any leftover scraps to make more shortcakes (repeating from step 7). Place the baking sheet into the fridge for 30 minutes.
- Bake. Remove the shortcakes from the fridge. Brush the tops with heavy cream and sprinkle with coarse sugar. Place into the oven and bake in a 400F preheated oven for about 20-22 minutes, or until the tops begin to turn golden and the bottoms look golden brown.
Next, prepare the strawberries and cream filling.
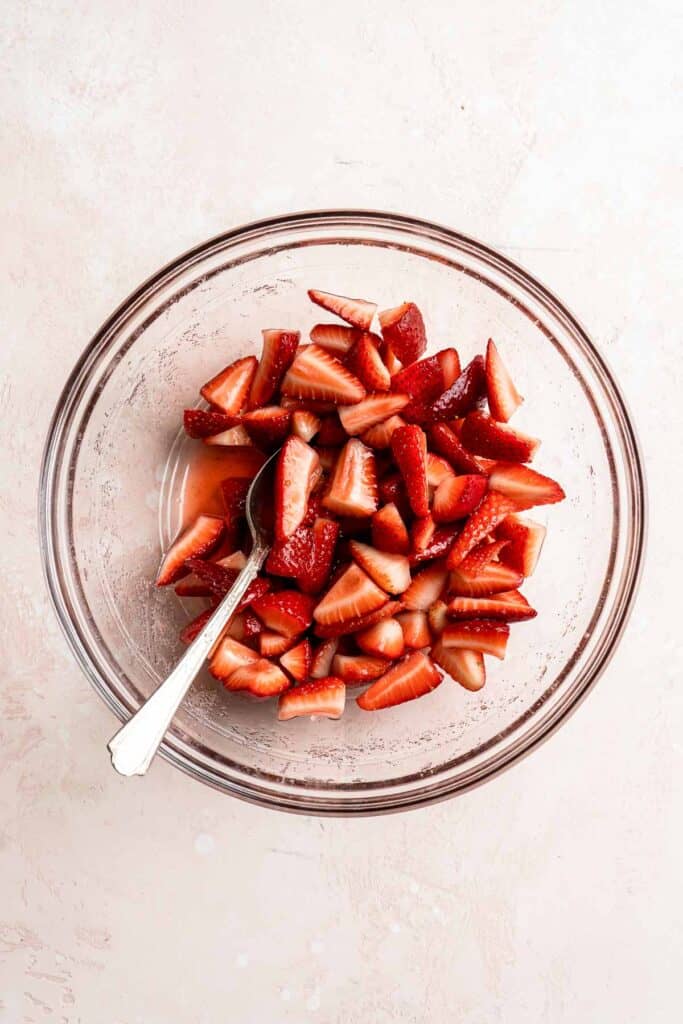
- Prepare strawberry filling. In a large mixing bowl, add strawberries and sugar, and toss well to coat. Allow the strawberries to macerate in the fridge for 30 minutes.
- Prepare whipped cream layer. In another large mixing bowl, prepare the whipped cream by adding the heavy cream, confectioners sugar, and vanilla. Beat with a whisk or electric hand mixer until medium-peaks are achieved. Keep cold in the refrigerator until ready to serve.

Finally, assemble the strawberry shortcakes.
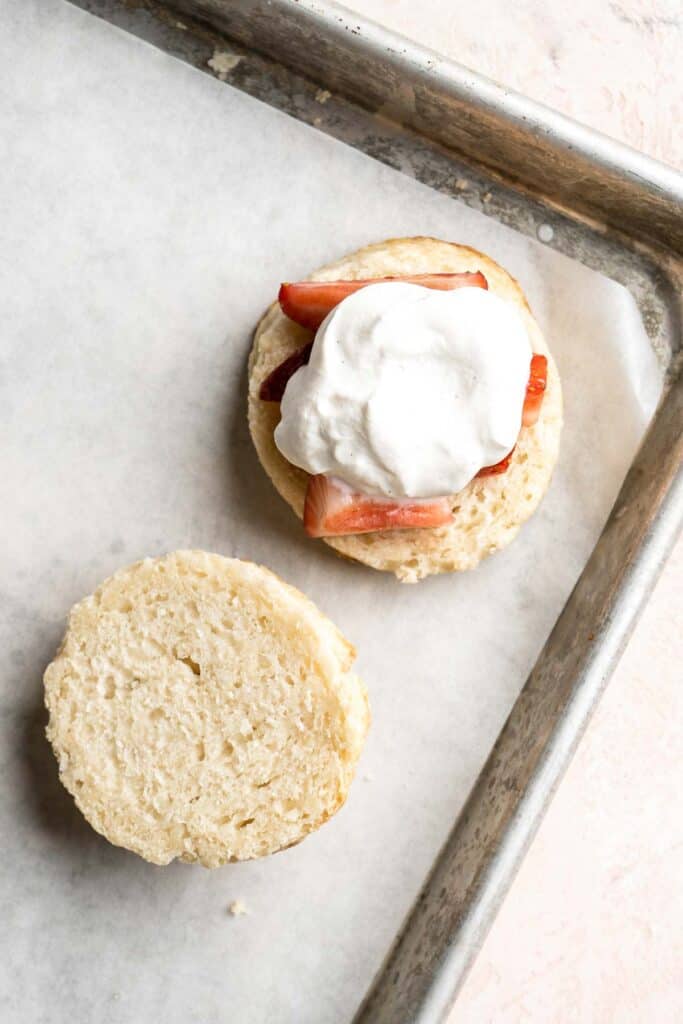
While the shortcakes are still warm, split them apart at their centres, or alternatively use a knife to cut them in half.
Layer in the strawberries and whipped cream. You can scoop up some of the sauce that forms at the bottom of the bowl of macerated strawberries and pour on top. Serve immediately.

Recipe Variations
- Chocolate strawberry shortcake. Add 1-2 tablespoons of cocoa powder to the biscuit dough for a chocolate twist. You can also add chocolate chips to the dough or sprinkle them on top of the whipped cream.
- Add lemon. Give the shortcake a lemon twist by adding zest from one lemon to the biscuit dough and add 1-2 tablespoons of lemon juice to the strawberries before letting them macerate.
- Change the fruit. You can make these shortcakes with any fruit filling. Instead of strawberries try blueberries, peaches, mangoes, or raspberries.
- Make it nutty. Add a teaspoon of almond extract to the biscuit dough and top the shortcakes with a dollop of whipped cream topped with sliced almonds.
- A coconut twist. Layer the shortcakes with coconut whipped cream instead and top them with shredded coconut.
How to Serve
We love serving Strawberry Shortcake in the classic way - like a biscuit sandwich layered with strawberries and whipped cream, and topped with a dollop of whipped cream and a fresh strawberry on top. But there are other ways to serve these layers!
Here are some creative ways to serve strawberry shortcake:
- On skewers. Cut the biscuits into bite-sized pieces and thread them onto skewers with the macerated strawberries or use fresh strawberries. Serve with a side of whipped cream for dipping.
- As an ice cream sandwich. Cut the biscuit in half and place a scoop of vanilla ice cream on top. Add the macerated strawberries and whipped cream on top of and finish with the top half of the biscuit. This is just like the classic style just with a scoop of ice cream added.
- In a trifle. Cut the biscuits into bite-sized pieces and layer them in a trifle dish with the macerated strawberries and whipped cream. Repeat the layers until you have used all the ingredients. Finish with a dollop of whipped cream and a fresh strawberries on top.
We also like to pair this strawberry cake with an ice cold drink in the summer months. Some of our favorites are:
- Strawberry Lemonade
- Peach Iced Tea
- Iced Latte
- Homemade Lemonade
- Cold Brew Coffee
- Blackberry Milkshake

Recipe Tips and Tricks
- Slice the strawberries evenly. To keep this dessert looking beautiful, slice the strawberries into similar sizes.
- Don't overmix the batter. When making the cake portion of the strawberry shortcake, be careful not to overmix the batter. Overmixing can cause the cake to become tough and dense.
- Serve immediately. Strawberry shortcake is best eaten fresh since the whipped cream will begin to soften the shortcake and the strawberry syrup will make it soggy. If possible, it's best to enjoy it within an hour of assembling.
- Serve them deconstructed. Serve the biscuit, strawberries, and whipped cream separately on a platter or in individual bowls and let your guests assemble their own strawberry shortcakes.
Storing and Freezing Instructions
Make Ahead
You can make the different parts of the strawberry shortcake in advance and store separately in airtight containers. The strawberry shortcake will last for one day in an airtight container in the fridge, and the whipped cream and cake will last separately in the fridge for up to four days. The macerated strawberries are best enjoyed within one day.
Assemble just before serving to prevent the cake from getting soggy if made too far ahead of time.
How to Store
It is best to enjoy strawberry shortcake immediately or up to 4 hours after preparing it. If you have leftovers that you can to store, transfer to an airtight container and refrigerate for up to one day. Note that the longer you store it, the more the texture will change and get soggy from the strawberry juices. If you are planning to have leftovers, I recommend storing the components separately and just assembling what you will eat.
How to Freeze
You can freeze the biscuit portion of the strawberry shortcake, wrapped tightly in plastic cling wrap and then placed in an airtight container or freezer bag for up to 3 months. I do not recommend freezing the strawberry filling or whipped cream as the texture will change.
More Strawberry Recipes
- 25 Best Strawberry Recipes
- Fresh Strawberry Pie
- No Bake Strawberry Cheesecake
- Strawberry Galette
- Strawberry Sorbet
- Small Batch Strawberry Jam
Tried this recipe?
I'd love to hear what you think! Leave a comment and rating below to share your feedback. Your reviews help others discover this recipe and help me keep creating more free recipes for you. Snap a photo and tag me on social media @aheadofthyme too.

Chicken a la King
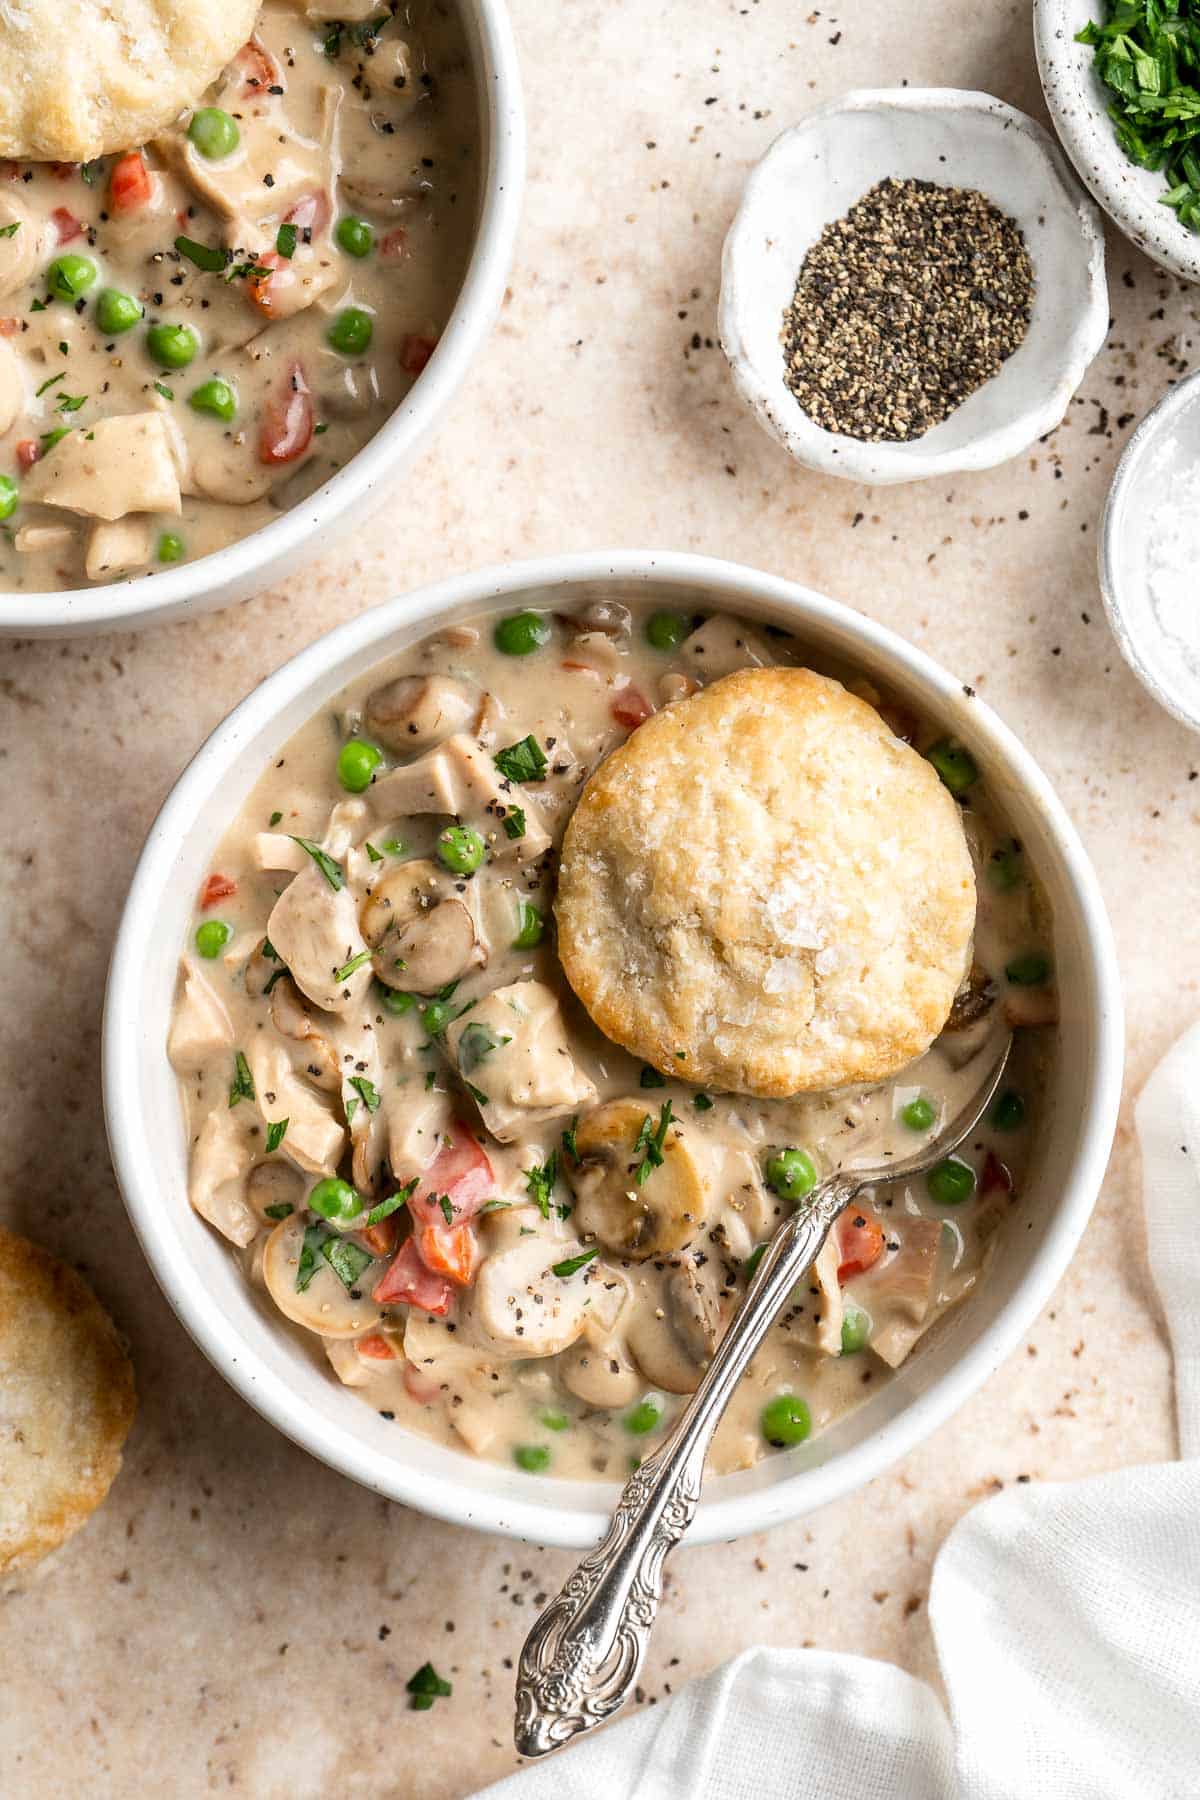
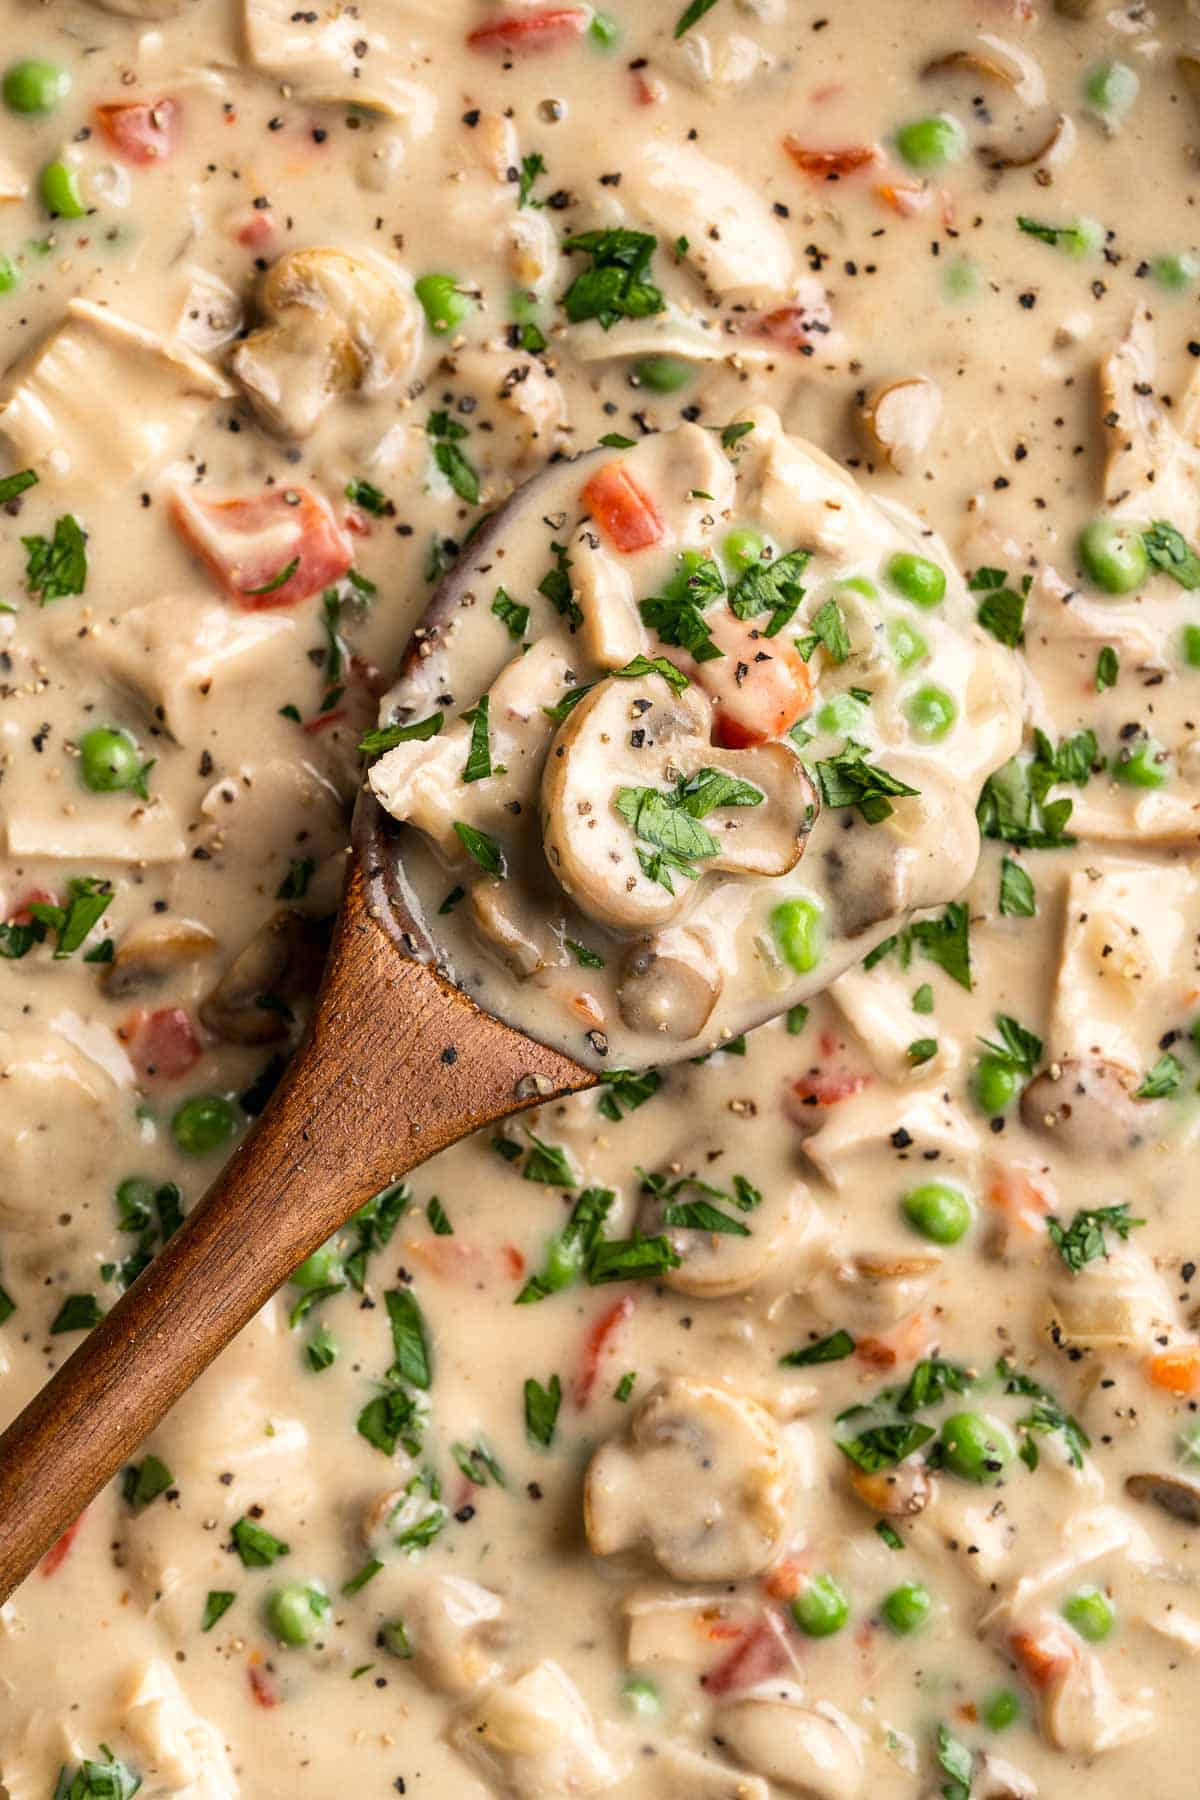
Chicken a la King is rich, creamy, and hearty comfort food that is packed with flavor. This quick and easy 30-minute dinner recipe is loaded with chicken, mushrooms, and veggies that is smothered in a white cream sauce made from scratch. Serve it warm topped with biscuits or serve over pasta, rice, or potatoes.

Also known as king-style chicken or king's chicken, this dish may sound like it's a big ordeal, but it's actually really easy to make. Call on this recipe for everything from busy weeknight dinners to fancy date night and reap the rewards of big flavor with little effort. Your family will thank you for this one!
Why You'll Love this Chicken a la King Recipe
- Rich, creamy flavor. This chicken a la king is truly fit for royalty. The sauce gets its rich creaminess thanks to butter and heavy cream, making every bite of chicken, mushrooms and vegetables heavenly. Plus, it's so easy to make homemade (no canned soup here!).
- A one pot meal. If you know me, you know I love one pot meals. It means that all the ingredients in this king style chicken recipe come together step-by-step in one skillet, making prep, serving, and clean-up fast and efficient without sacrificing flavor!
- Quick and easy. One of my favorite parts of creamy chicken a la king is that it comes together so quickly and easily in just 30 minutes - including prep! Using cooked chicken (or shredded chicken) and frozen peas saves you a little bit of prep time without sacrificing flavor.
- Serve it for any occasion. This creamy chicken and mushrooms dish is so delicious and fit to be served for special occasions like dinner parties and holidays, but it's also easy enough for speedy weeknight dinners.

Ingredient Notes
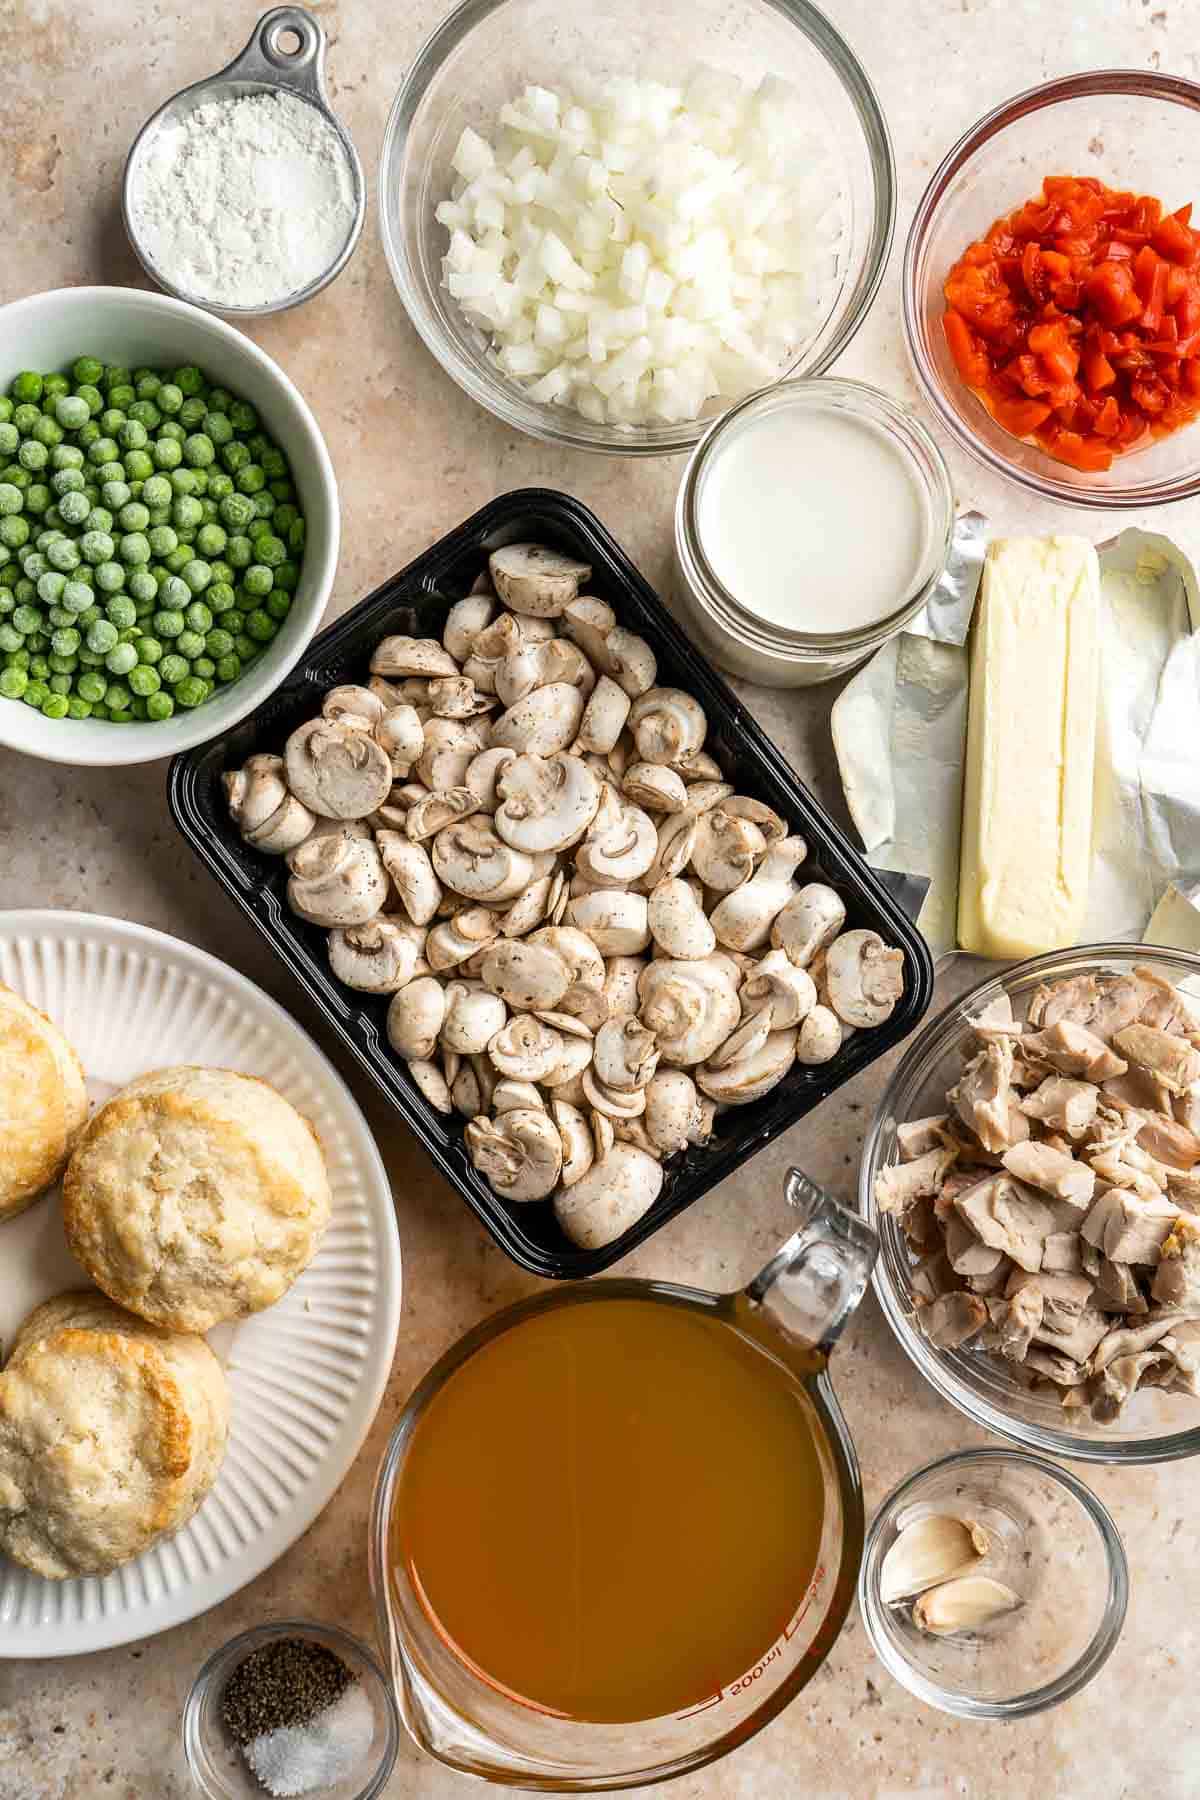
To make this quick and easy Chicken a la King, you will need the following ingredients (full measurements in recipe card below):
- butter - use unsalted butter for the most control over the flavor of the recipe. If you only have salted butter, adjust or omit the amount of added salt in the recipe to balance it.
- mushrooms - white or brown cremini mushrooms both work well.
- yellow onion - if you need to make a substitution, use white onion or shallot instead.
- garlic - aim to use fresh garlic if you can, but pre-minced garlic is okay to use if that's all you have. Just make sure to use 1 teaspoon per clove of garlic in the recipe.
- all-purpose flour - make this recipe gluten free by using a measure-for-measure gluten free flour instead.
- chicken broth - homemade or store-bought are both okay to use, or you can substitute it for vegetable broth.
- heavy cream - if you don't have heavy cream on hand, use half-and-half or a dollop of cream cheese to create a creamy consistency.
- frozen peas - fresh or canned peas will also work, but frozen peas will retain their texture better in this recipe. If using canned peas, make sure to drain and rinse them first.
- pimentos - use jarred or canned pimentos. You could also substitute with diced red bell peppers if you can't get your hand on pimentos.
- cooked chicken - you can use your any leftover cooked chicken that you have or shred a rotisserie chicken - whatever is more convenient! Try our Oven Baked Chicken Breast or Shredded Chicken.
- salt and pepper
- biscuits - we love topping these with our Homemade Biscuits but it's totally optional.
You will also need measuring cups and spoons and a large skillet.
How to Make the Best Chicken a la King
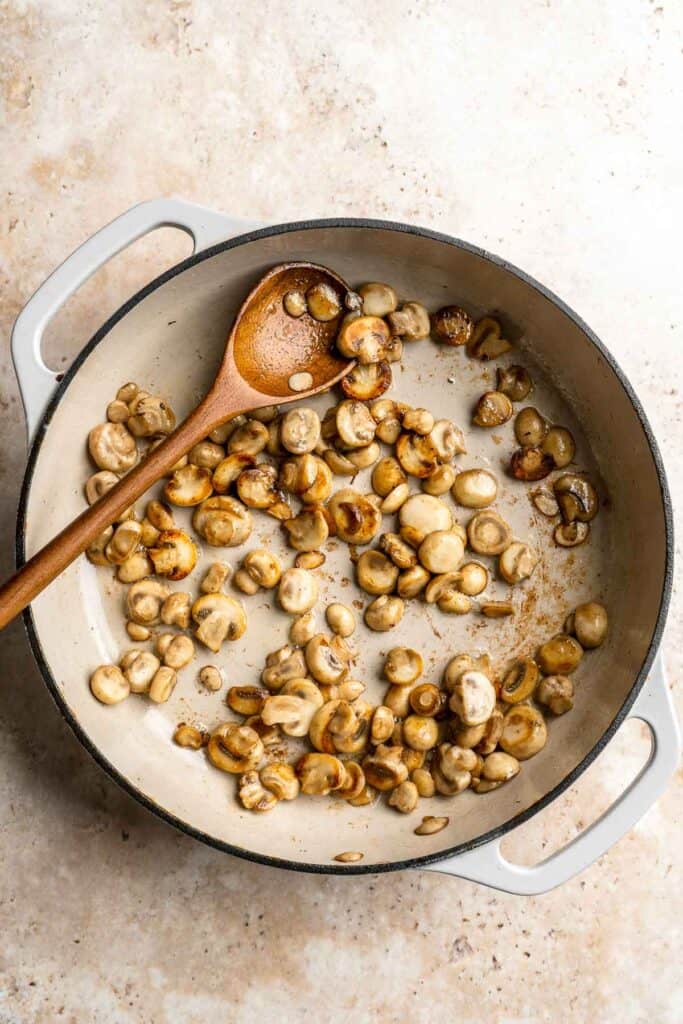
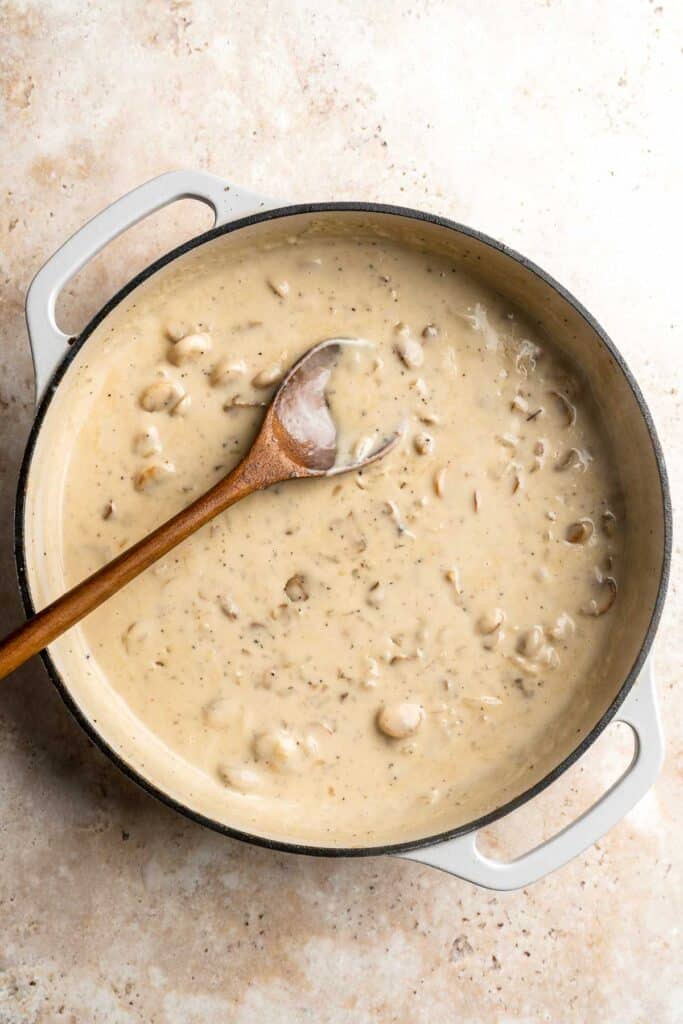
- Sauté mushrooms. Add butter to a large skillet and melt over medium-high heat until it starts to bubble, about 1 minute. Add mushrooms and sauté until golden brown on both sides, about 5 minutes. Stir in onion, garlic, salt, and pepper. Cook for another 2-3 minutes until the color turns nicely brown (salt will further extract more water from the mushrooms, giving them a nice brown color).
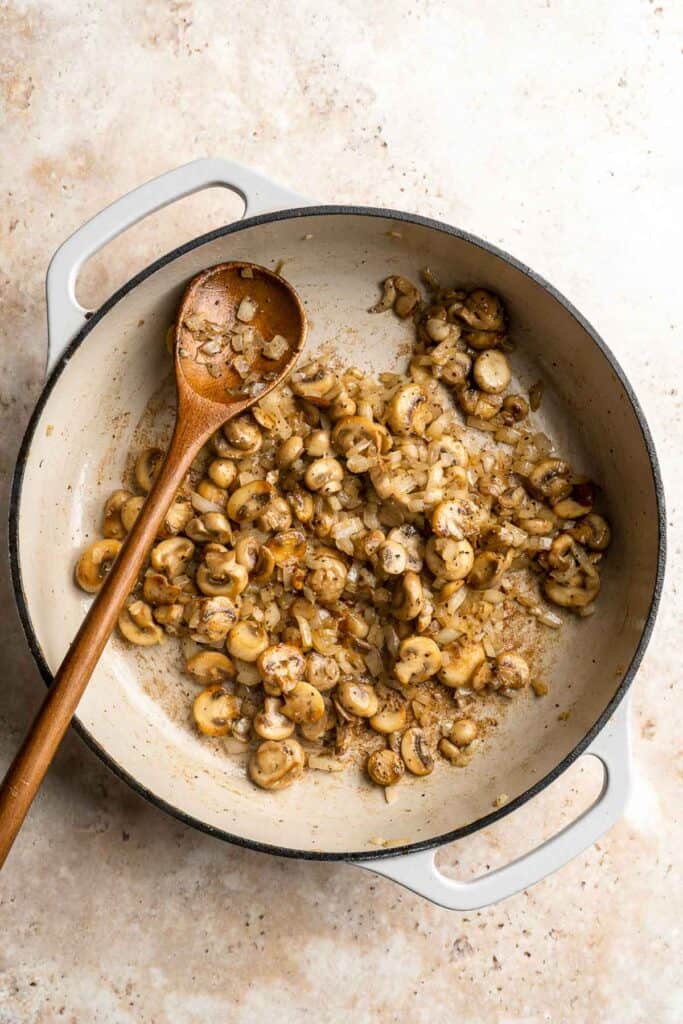
- Add flour. Add flour and stir well until thickened into a paste, about 1 minute.

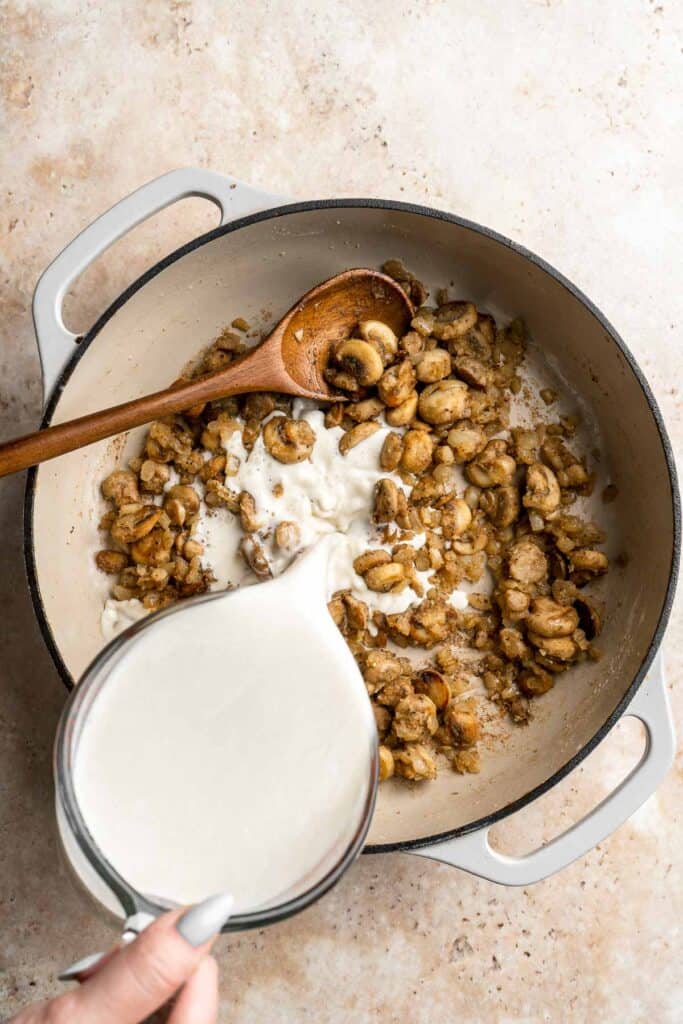
- Add liquids and simmer. Slowly pour in chicken broth and heavy cream. Stir constantly until smooth and bring the mixture to a simmer. Let it simmer over medium-low heat until thickened to a desired consistency, about 2-3 minutes, stirring often. If the sauce gets too thick, thin it out with more chicken broth.
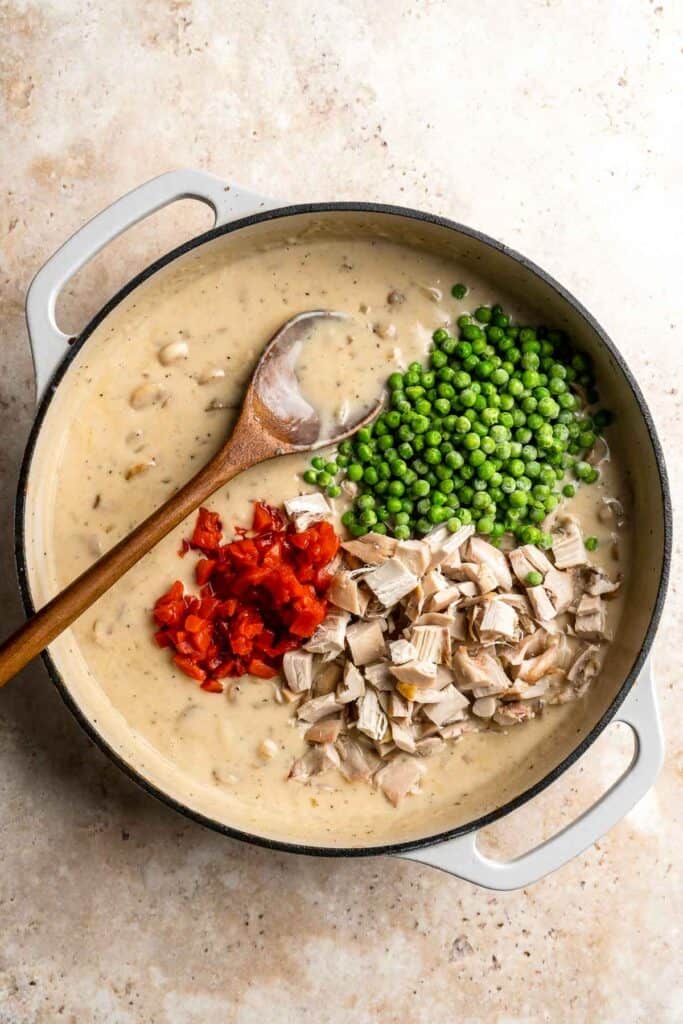
- Add chicken and veggies. Add peas, pimentos, and chicken. Mix well and cook until heated through, about 2-3 minutes.
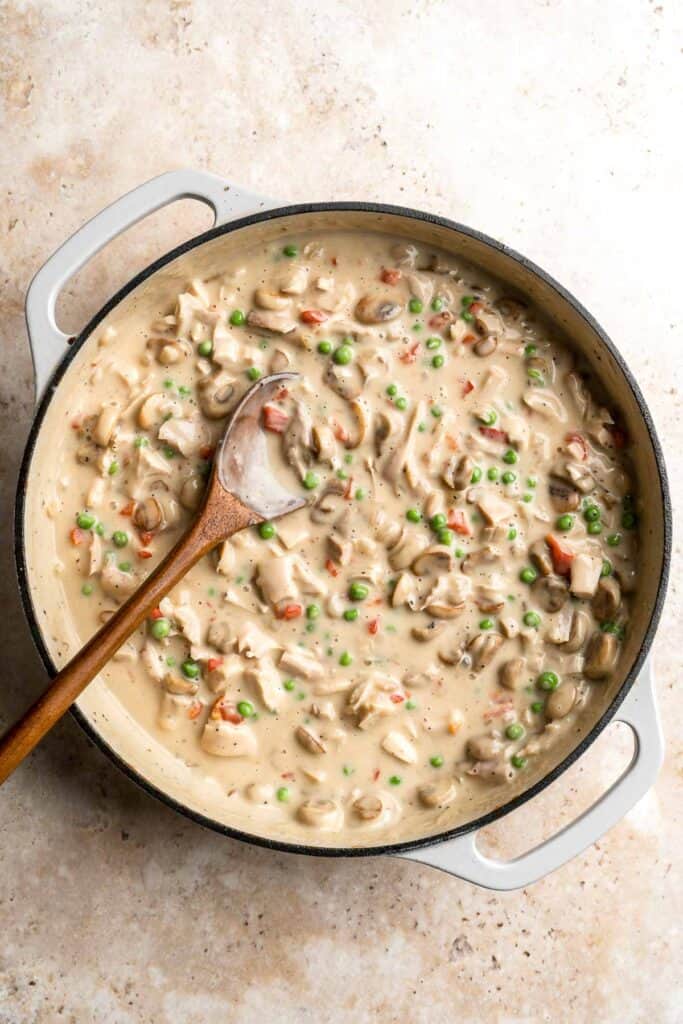
- Serve. Serve immediately in serving bowls with a sprinkle of chopped parsley (if desired) and topped with biscuits or serve over pasta or rice.
Recipe Variations
- Make it cheesy. Enhance the richness of your chicken a la king by stirring in a generous amount of grated Parmesan or Gruyere cheese.
- Spice it up. Give this king-style chicken a touch of smoky flavor with a sprinkle paprika. Or you could turn up the heat even more with a dash of hot sauce.
- Substitute with tuna. Get creative with a new dish for seafood lovers using tuna instead of chicken. Use 3 cups of canned tuna for a seafood twist on this classic dish.
- Add a splash of sherry. Elevate the flavors by deglazing the pan with a splash of dry sherry or white wine. As the alcohol cooks off it leaves behind a subtle depth of flavor that enhances the taste of the dish.
- Go Mediterranean. Give your creamy chicken a la king a Mediterranean twist by adding a handful of pitted kalamata olives and some chopped sun-dried tomatoes.
How to Serve
Chicken a la king is typically served over bread, biscuits, or rice to soak up every last bit of the creamy sauce, but you can serve it with just about any starchy side for the same effect! Some of our favorite sides to serve with this are:
- Biscuits. Try Classic Biscuits, Garlic Cheddar Biscuits, or Cornmeal Cheddar Biscuits.
- Rice. Try Steamed White Rice, Coconut Rice, or Broccoli Rice.
- Pasta. Try a simple plain pasta like Fettuccine Alfredo, Lemon Butter Pasta, or Cacio e Pepe,
- Potatoes. Try Creamy Mashed Potatoes, Roasted Garlic Parmesan Baby Potatoes, or Herb Roasted Sweet Potatoes.
- Toast or Crostini. Try toasted Green Olive Sourdough Bread, Crostini, or Sunflower Seed Bread.
Recipe Tips and Tricks
- Stir the sauce constantly. When making the creamy sauce add the liquids (chicken broth and cream) gradually while stirring constantly. This helps achieve the desired consistency and prevents lumps from forming.
- Options for cooked chicken. You can use any leftover chicken that you have in your fridge for this recipe. If you are making chicken for this recipe, I recommend my Oven Baked Chicken Breast or Shredded Chicken.
- Adjust the sauce texture. Sauce getting a little too runny or a little to thick? You can easily fix each of these issues by reducing or adding more chicken broth to even things out! If the sauce is too runny, you simmer until it thickens up or you can also add a tablespoon of cornstarch or flour to thicken things up more.
- Freeze for a rainy day. This chicken a la king freezes beautifully and can be added to your freezer stash for a later date when you're running short on time or energy. Just make sure you freeze it on its own without bread sides for the best results.
- Adjust the seasoning at the end. Taste the sauce before serving and adjust the seasoning if needed. Add more salt, pepper, or other spices to enhance the flavor according to your preference.
Storing and Freezing Instructions
How to Store
Transfer leftover chicken a la king to an airtight container and refrigerate for up to 4 days.
How to Reheat
Reheat leftovers on the stovetop over medium-high heat until warmed to the desired temperature. You may need to add a splash of water to thin out the sauce if it has thickened too much for your liking.
How to Freeze
Transfer leftover creamy chicken a la king to a freezer-safe container and freeze for up to 3 months. Allow it to thaw in the refrigerator overnight before reheating and serving.
More Creamy Chicken Recipes
- 25 Quick Chicken Recipes
- Creamy Pesto Chicken
- Creamy Lemon Chicken Piccata
- Chicken Marsala
- Creamy Tuscan Chicken
- Creamy Lemon Garlic Chicken
Tried this recipe?
I'd love to hear what you think! Leave a comment and rating below to share your feedback. Your reviews help others discover this recipe and help me keep creating more free recipes for you. Snap a photo and tag me on social media @aheadofthyme too.

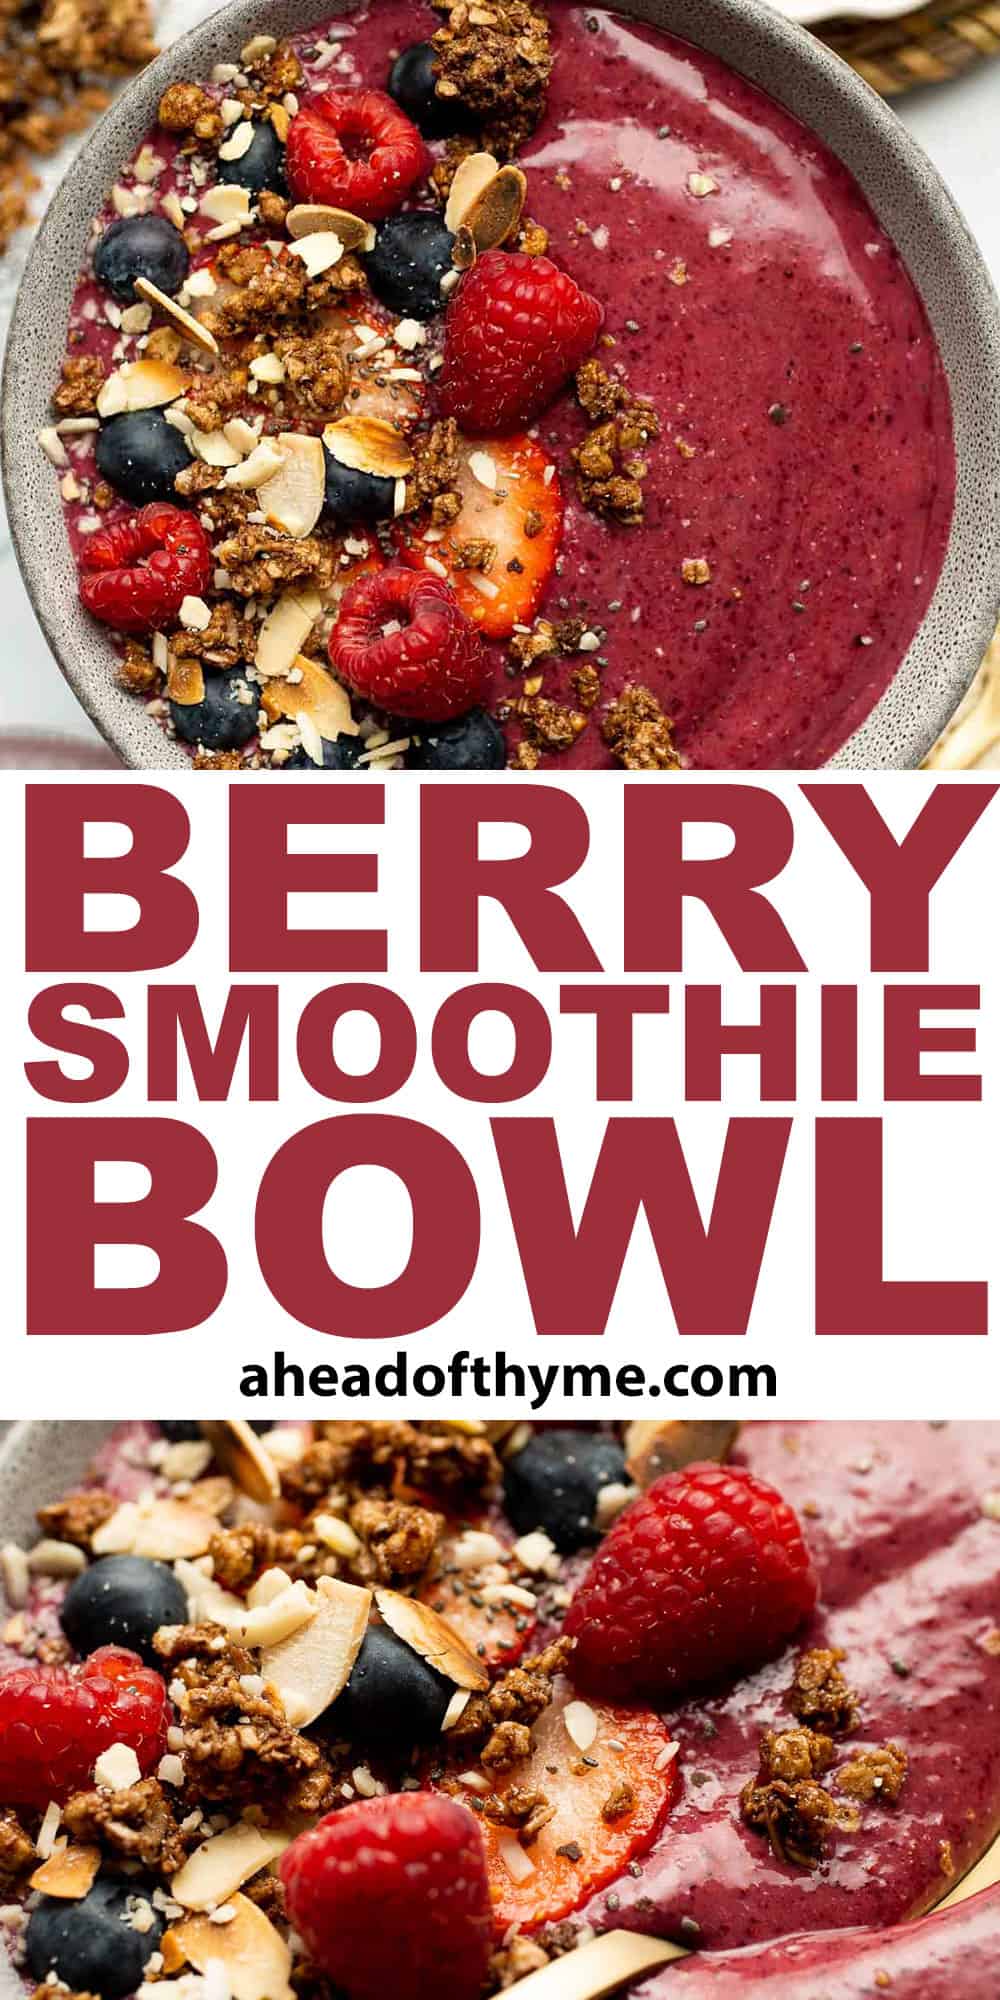
Berry Smoothie Bowl
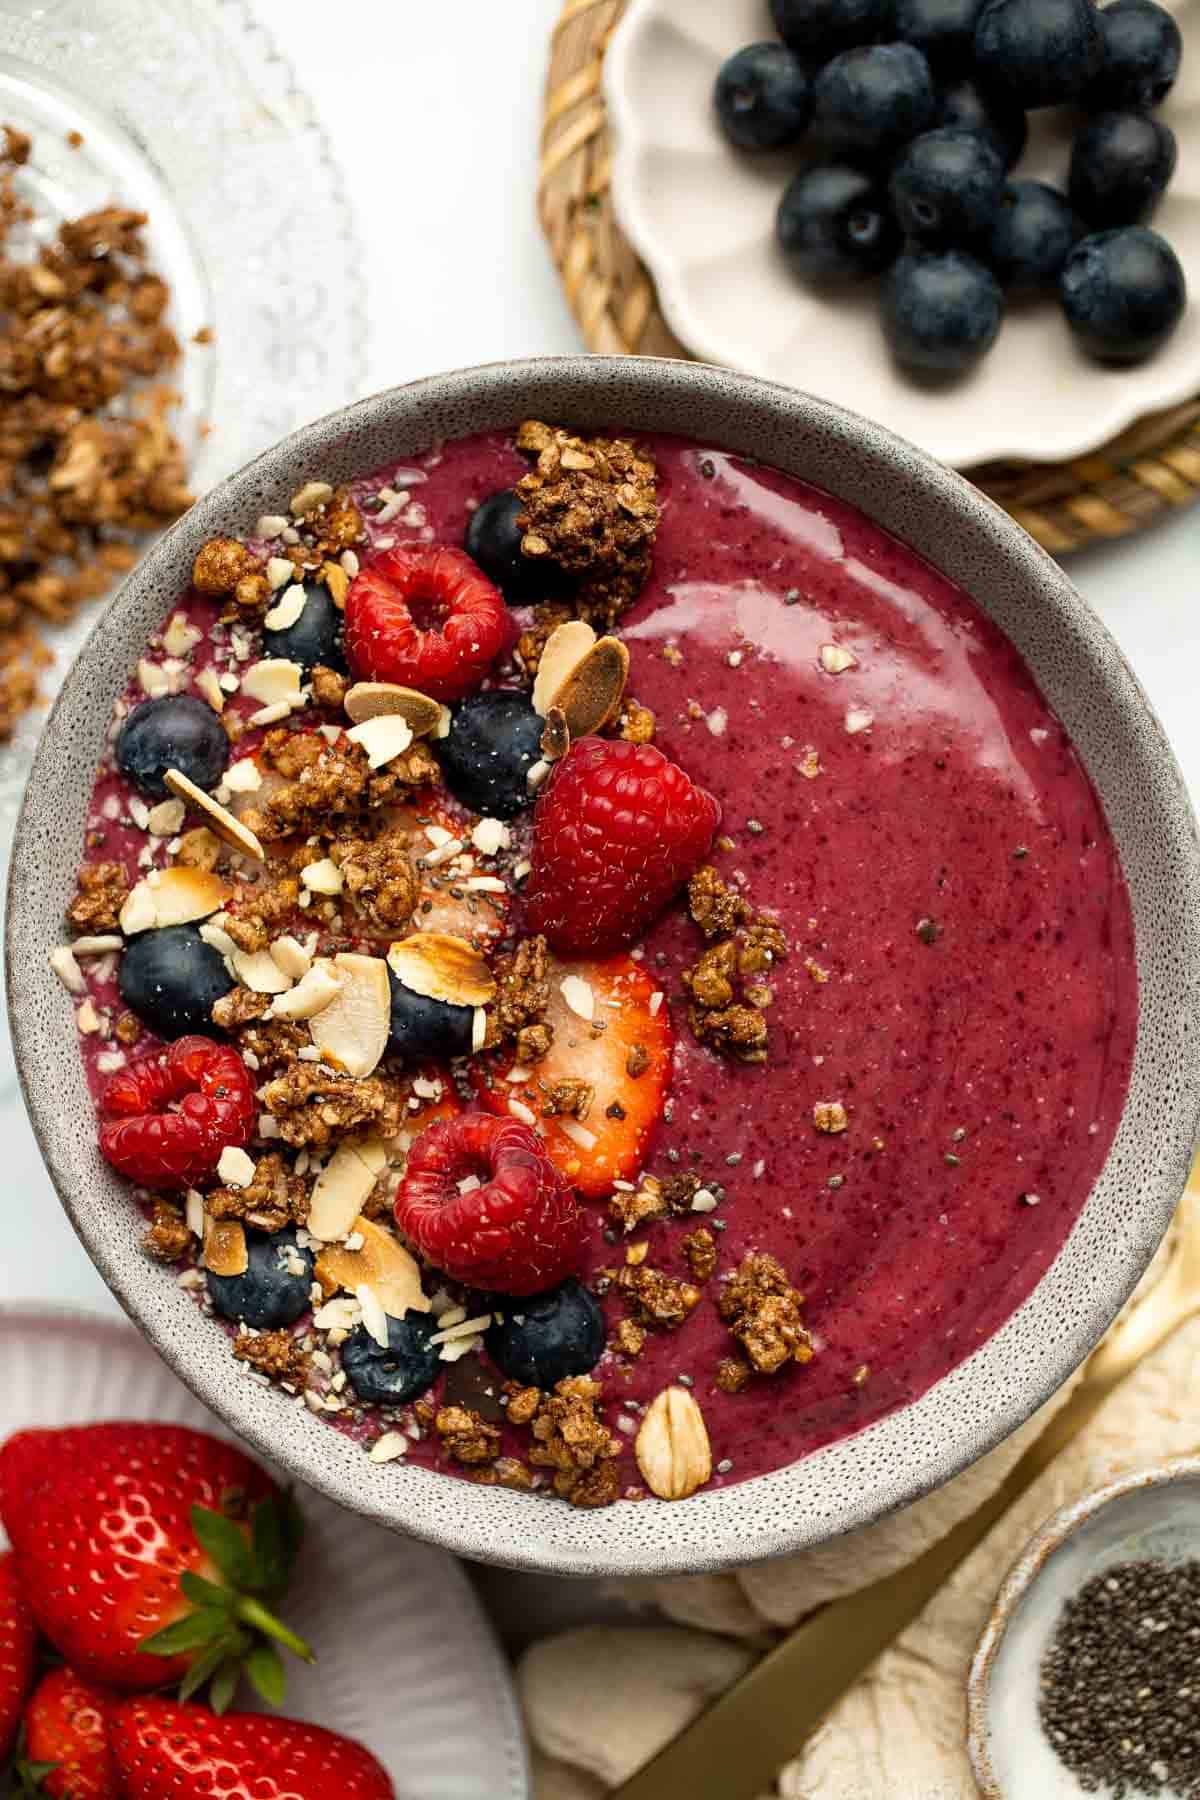
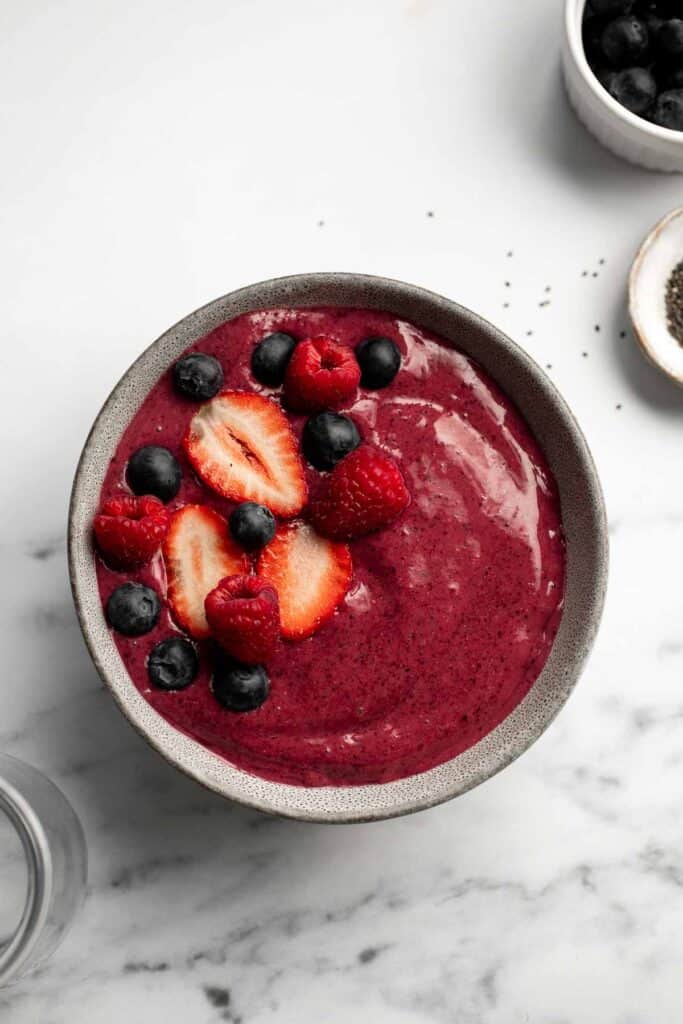
This Berry Smoothie Bowl is one of the best ways to start the day. It's quick and easy to make, healthy and delicious, and packed with nutrients. This 5-minute snack is loaded with banana, spinach, and mixed berries, and topped with fully customizable toppings including granola, sliced fruit and nuts. Breakfast never looked so good!
So what you waiting for? Make this thick and creamy smoothie bowl from scratch in just minutes using a handful of simple ingredients that are customizable with what you have on hand. Then, just add your favorite toppings, grab a spoon, and enjoy it for breakfast, as a snack, or even as a healthy dessert!
What is a Smoothie Bowl?
A smoothie bowl is essentially the same thing as as a smoothie except it's thicker, creamier, and eaten out of a bowl using a spoon. That's right, you don't drink it, you eat it! Plus, you can top it with your favorite toppings such as fruits, nuts, and seeds to add a variety of textures.
The base of a smoothie bowl is typically made with a combination of frozen fruits and a liquid component like milk, coconut water, or yogurt. The mixture is blended until smooth and creamy, resulting in a luscious, spoonable texture.
Why You'll Love this Berry Smoothie Bowl
- Quick and easy to make. This super berry smoothie bowl takes a total of 5 minutes to make by simply throwing the ingredients into the blender - which means that you can enjoy this bowl anytime you want. Crunched for time in the morning? Need a healthy work snack? Need a filling but low-carb lunch option? How about a dessert that is actually healthy? Make a berry smoothie bowl!
- It contains no added sugar. This homemade purple smoothie bowl contains only fruit, veggies, milk, and seeds (if using). It has no added sugar or sweeteners, unlike many store-bought smoothie bowls which typically contains added sugar and possibly artificial flavors.
- A healthy start to the day. This berry smoothie bowl is a nutritious way to start your day. It's packed with vibrant berries, that offers delicious flavor and a boost of vitamins and antioxidants. Now go blend up a batch, it will keep you full and satisfied for hours, without the extra calories. Plus, it's vegan and gluten-free too.
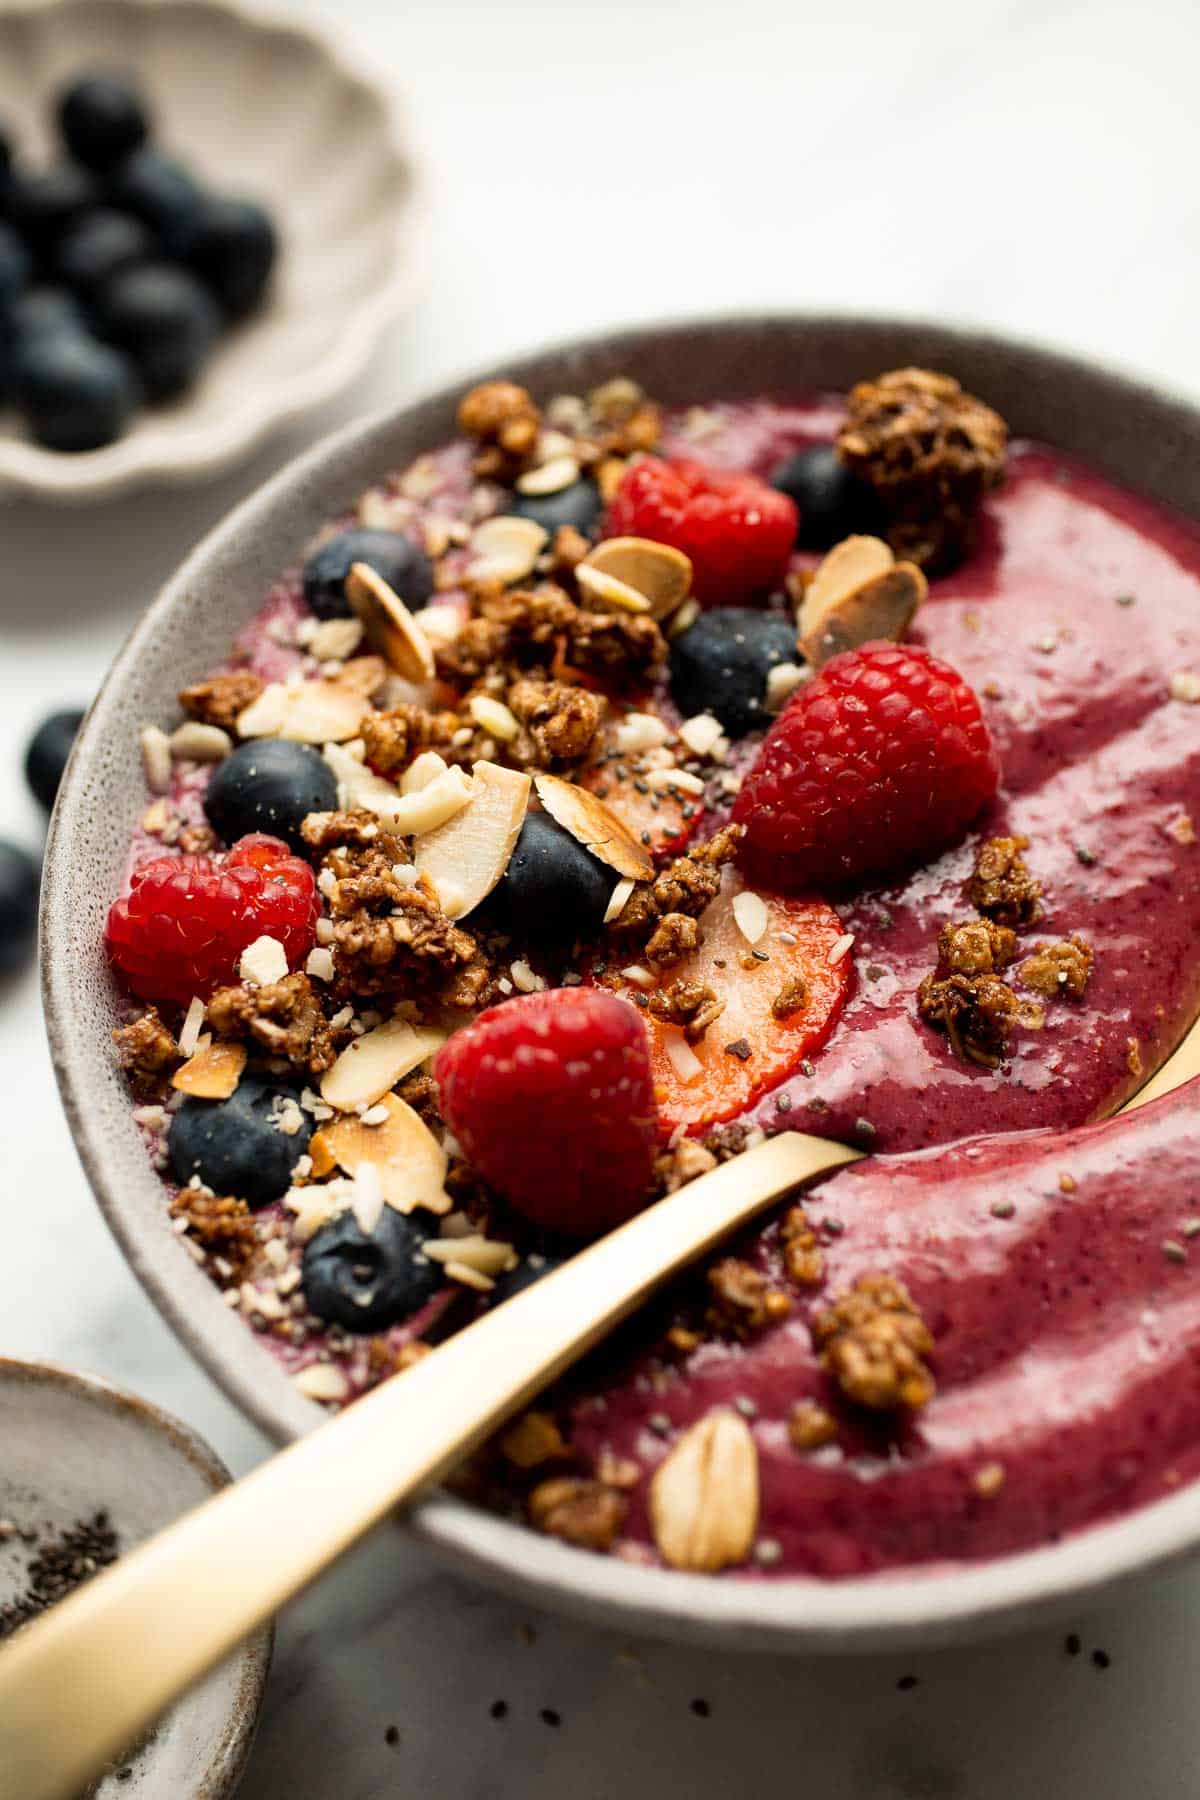
- It's customizable. Switch up the fruit in the smoothie bowl or play around with the toppings. From sliced fresh fruits like bananas and kiwi to crunchy granola, chia seeds, or shredded coconut, you have the freedom to add your favorite toppings for added texture and variety.
- Enjoy it whenever you want. But breakfast is not the only time of day you can enjoy this vegan smoothie bowl. It's also great as a filling post-workout snack or a healthy dessert.
Ingredients Notes
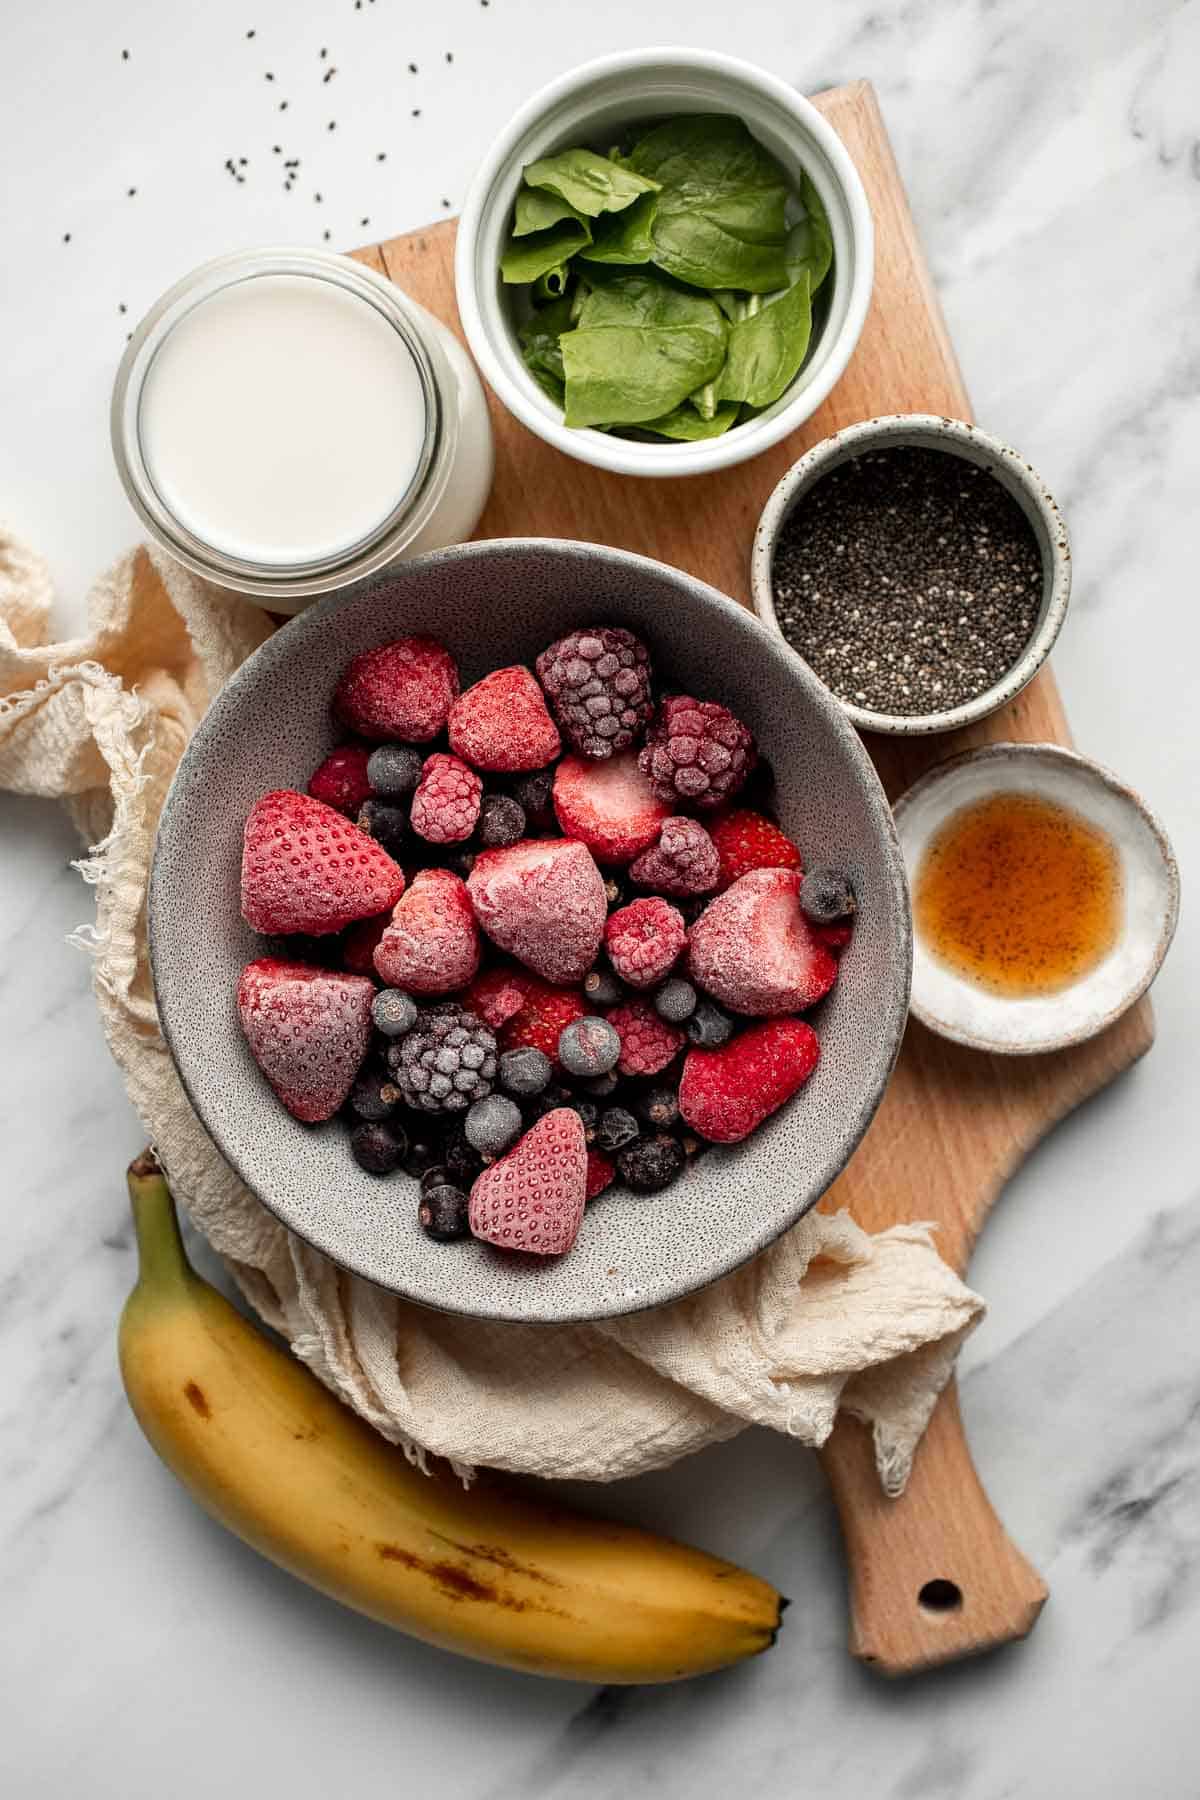
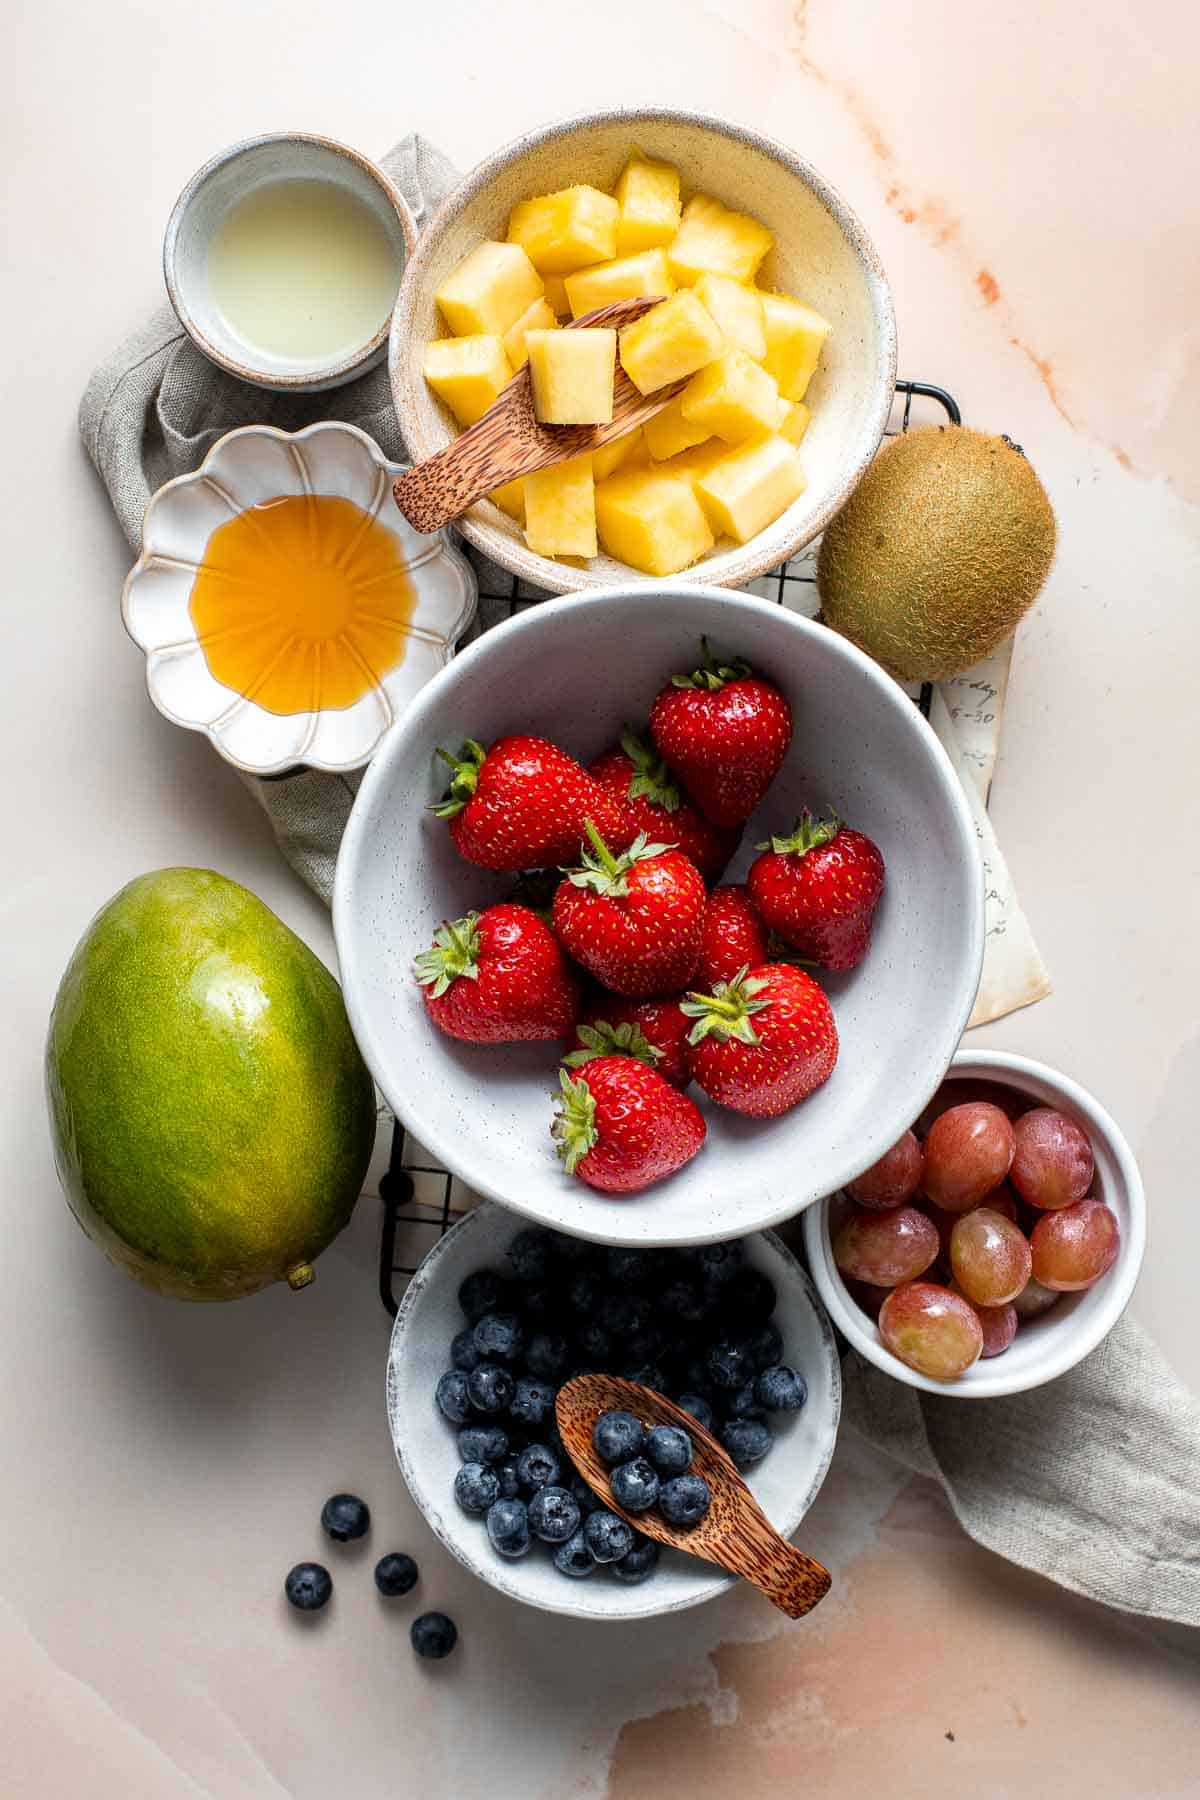
To make this quick and easy Super Berry Smoothie Bowl, you will need the following 4 basic ingredients (full measurements in recipe card below):
- milk - I used almond milk to keep the recipe vegan, but any kind of milk works. Try dairy milk, oat milk, or cashew milk.
- mixed berries - use a combination of strawberries, blueberries, and raspberries, and make sure that they are frozen. Frozen berries to ensure that your smoothie bowl will be the right consistency.
- banana - use a ripe banana for the best flavour and sweetness.
- spinach - spinach creeps its way into this smoothie and you never would have guessed it from its gorgeous, vibrant colour. The colour from the berries overshadow the green spinach.
- vanilla extract - vanilla is optional to add a hint of flavor. In no bake recipes like this, I recommend using vanilla that does not contain alcohol.
- flax or chia seeds - this is also optional to add extra nutrients to your smoothie bowl.
For extra protein, you can also add protein powder.
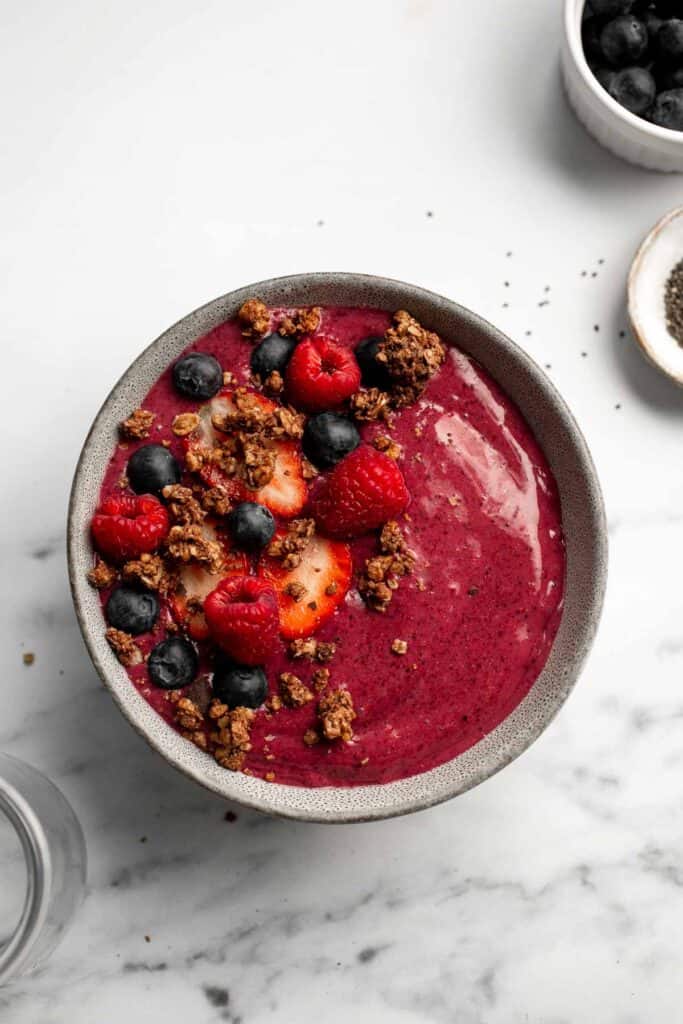
Smoothie Bowl Toppings
The toppings are my favorite part when it comes to making a smoothie bowl. They are of course optional but they adds that much more to the dish - including more nutrients and protein. Plus, they make it pretty too. Some of my favorite toppings to add are:
- chopped fruit - try strawberry, banana, or blueberries.
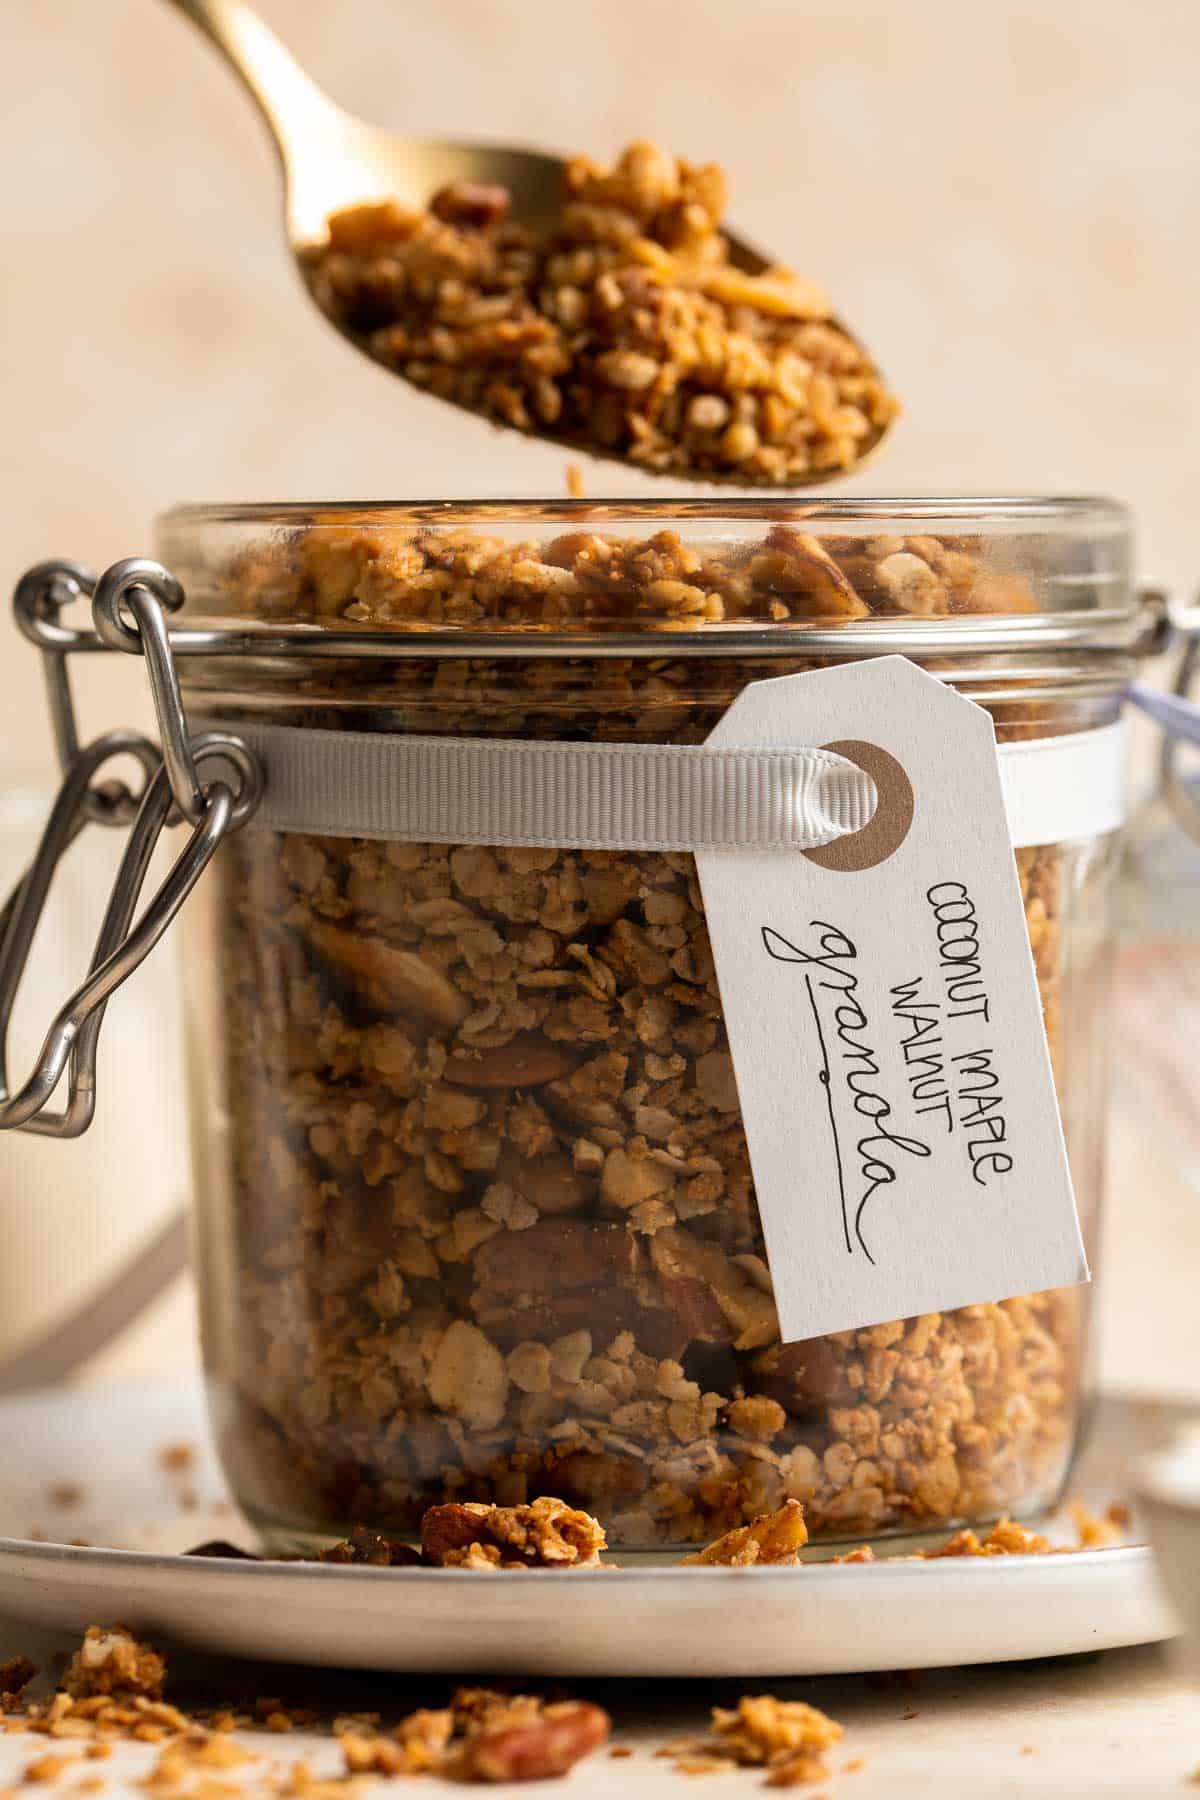
- granola - any store-bought or homemade granola works. Try Coconut Maple Walnut Granola, Cinnamon Apple Granola, or Gingerbread Granola.
- seeds - sprinkle with pumpkin seeds, chia seeds, or flax seeds.
- nuts - add slivered almonds or chopped nuts.
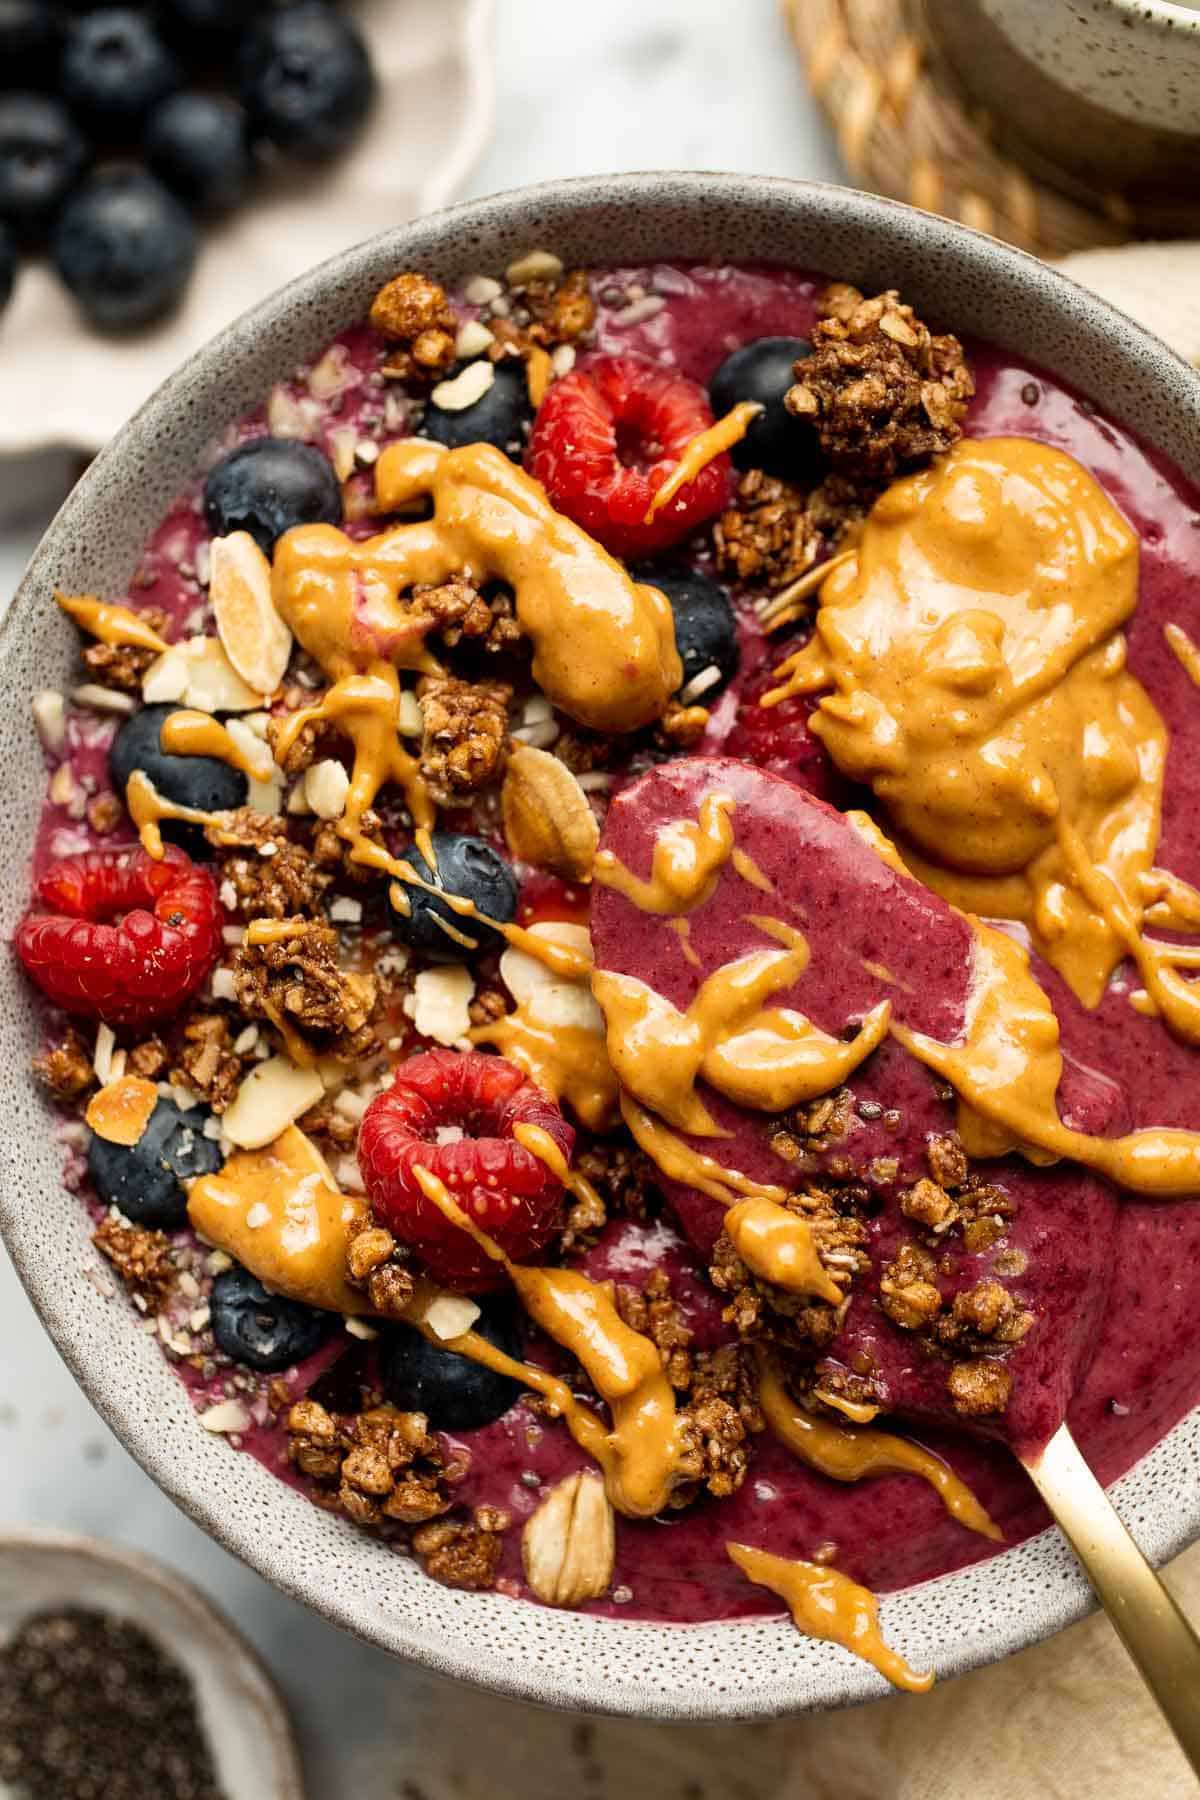
- nut butters - add a drizzle of almond butter or peanut butter.
- shredded coconut
- honey or maple syrup - add a drizzle of honey or maple syrup for extra sweetness if desired.
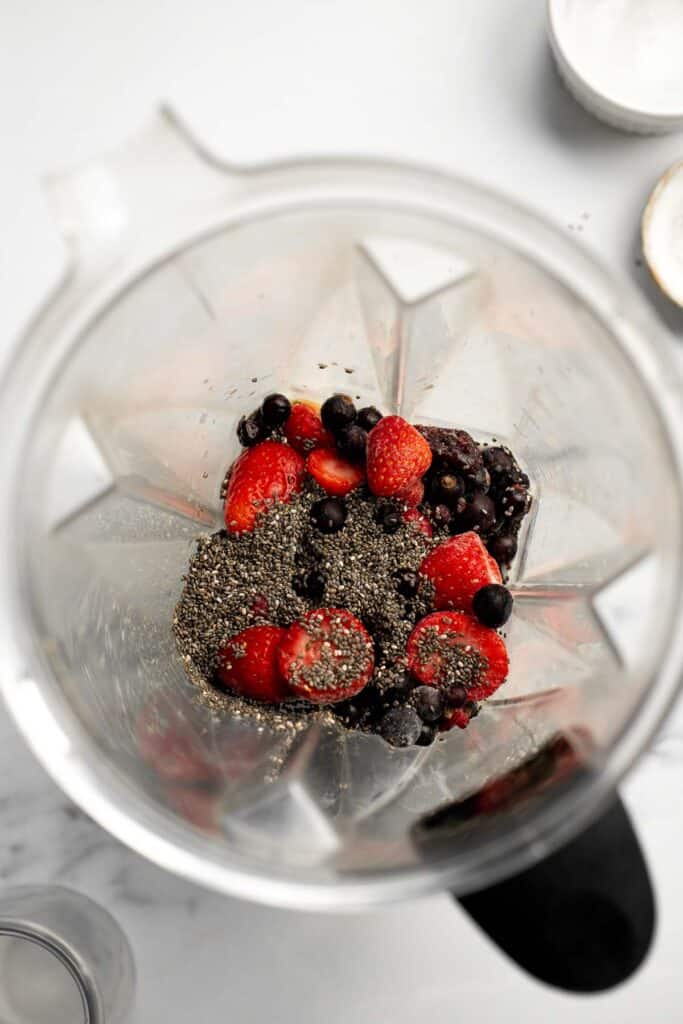
How to Make the Best Berry Smoothie Bowl
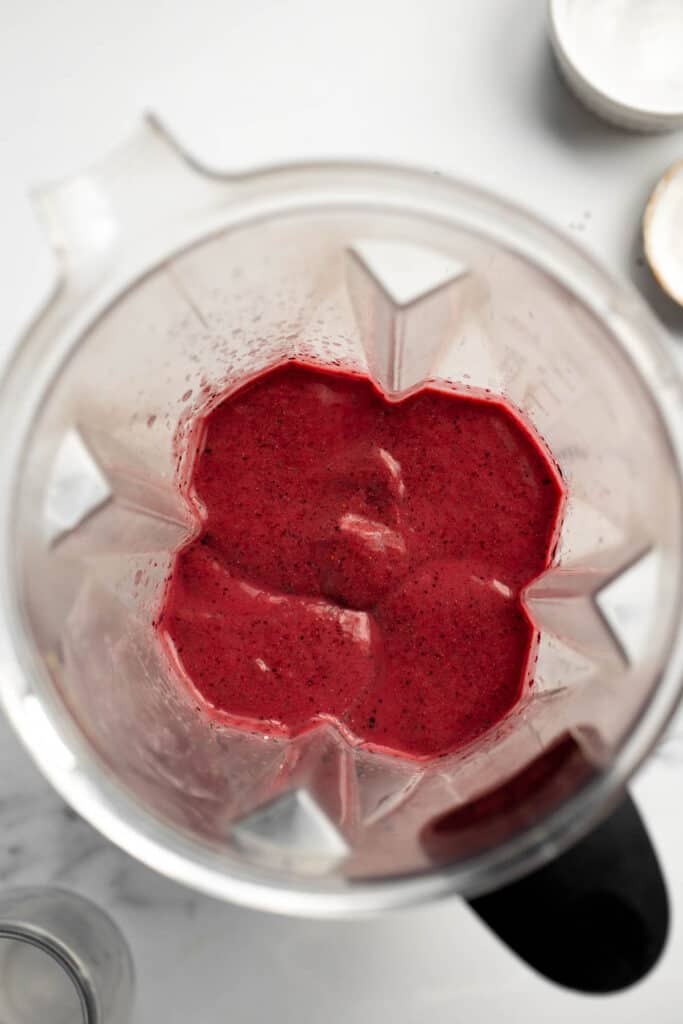
Once you have gathered your ingredients, the rest is so easy. Simply combine the smoothie ingredients (with half of the milk) into a blender, puree, add more milk until desired consistency is reached, and pour into a bowl.
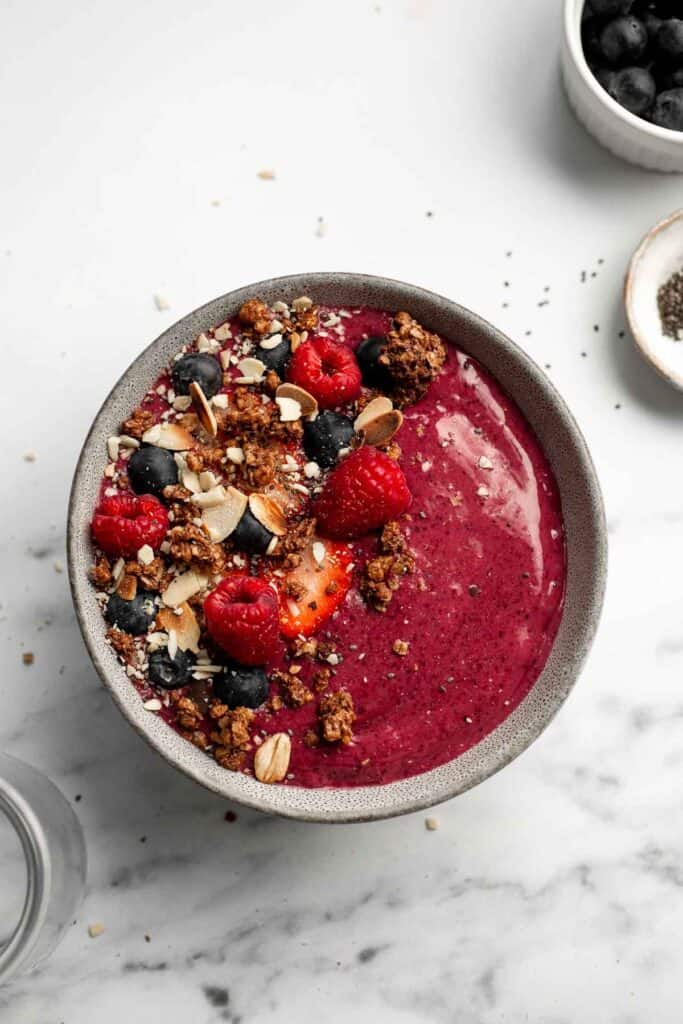
Next (and my favourite part!), add the toppings and decorate the smoothie bowl. I topped my bowl with berries, granola, and sliced almonds.
Recipe Variations
- Add a tropical twist. Add in some chopped pineapple and substitute the milk with coconut milk or coconut water to give the smoothie bowl a tropical flavor.
- Pack it with protein. For a more filling smoothie bowl, add a scoop of your favorite protein powder. This not only enhances the nutritional content but also helps to keep you energized for longer.
- Make it nutty. Add a spoonful of nut butter (such as almond butter, peanut butter, or cashew butter) to the smoothie blend. This adds a creamy texture and nutty flavor.
- Add superfoods. Include some superfoods such as chia seeds, flaxseeds, or acai powder to amp up the nutritional value of your smoothie bowl. These superfoods provide an extra boost of antioxidants, omega-3 fatty acids, and other beneficial nutrients.
How to Serve
This Berry Smoothie Bowl is delicious served on its own for breakfast, a snack, or even a light lunch. For a more filling breakfast meal, pair it some of our recommended dishes including:
- Avocado Toast with Poached Egg
- Egg Muffins
- Blueberry Pancakes
- French Toast
- Caprese Frittata
- Banana Toast
For more recipes, see our 50 Best Breakfast Ideas.
Recipe Tips and Tricks
- Use an assortment of frozen berries. Opt for frozen berries to achieve the best thick and creamy texture in your smoothie bowl. Choose a mix of berries like strawberries, blueberries, raspberries, or blackberries for a vibrant and delicious combination - or keep things simple with 1 or 2 varieties.
- Add a liquid gradually. When blending your smoothie ingredients, start with a smaller amount of milk. Add more liquid gradually until you reach your desired thickness. This will help you achieve a thick and spoonable consistency.
- Customize your smoothie bowl. You can customize this smoothie by using different kinds of fruit, adding in nuts, or sweetening it with maple syrup or honey, if desired. You can also customize it by changing the toppings you add. Refer to the "Smoothie Bowl Toppings" section above for more ideas.
- Serve immediately. Smoothie bowls are best enjoyed right after preparation to maintain their creamy texture and prevent them from becoming too runny. Serve your smoothie bowl immediately after topping it with your desired ingredients.
Storing and Freezing Instructions
How to Store
Smoothie bowls are best served immediately. If you have leftovers, store it an airtight container in the refrigerator for up to 1 day for the best flavor and texture. It may lose some of its thickness and get watery, but then you can enjoy it as a smoothie with a straw.
How to Freeze
Another way to store is to freeze them. Transfer the smoothie bowl to an airtight container and freeze for up to 3 months. When ready to eat, take it out of the freezer and allow it to defrost slightly on the counter for about 10 minutes. You should be able to easily eat it with a spoon.
More Smoothie Recipes
- Tropical Smoothie Bowl
- Green Smoothie Bowl
- Strawberry Banana Smoothie
- Majoon Banana and Date Smoothie
- Green Detox Smoothie
- Healthy Mango Yogurt Smoothie
Tried this recipe?
I'd love to hear what you think! Leave a comment and rating below to share your feedback. Your reviews help others discover this recipe and help me keep creating more free recipes for you. Snap a photo and tag me on social media @aheadofthyme too.
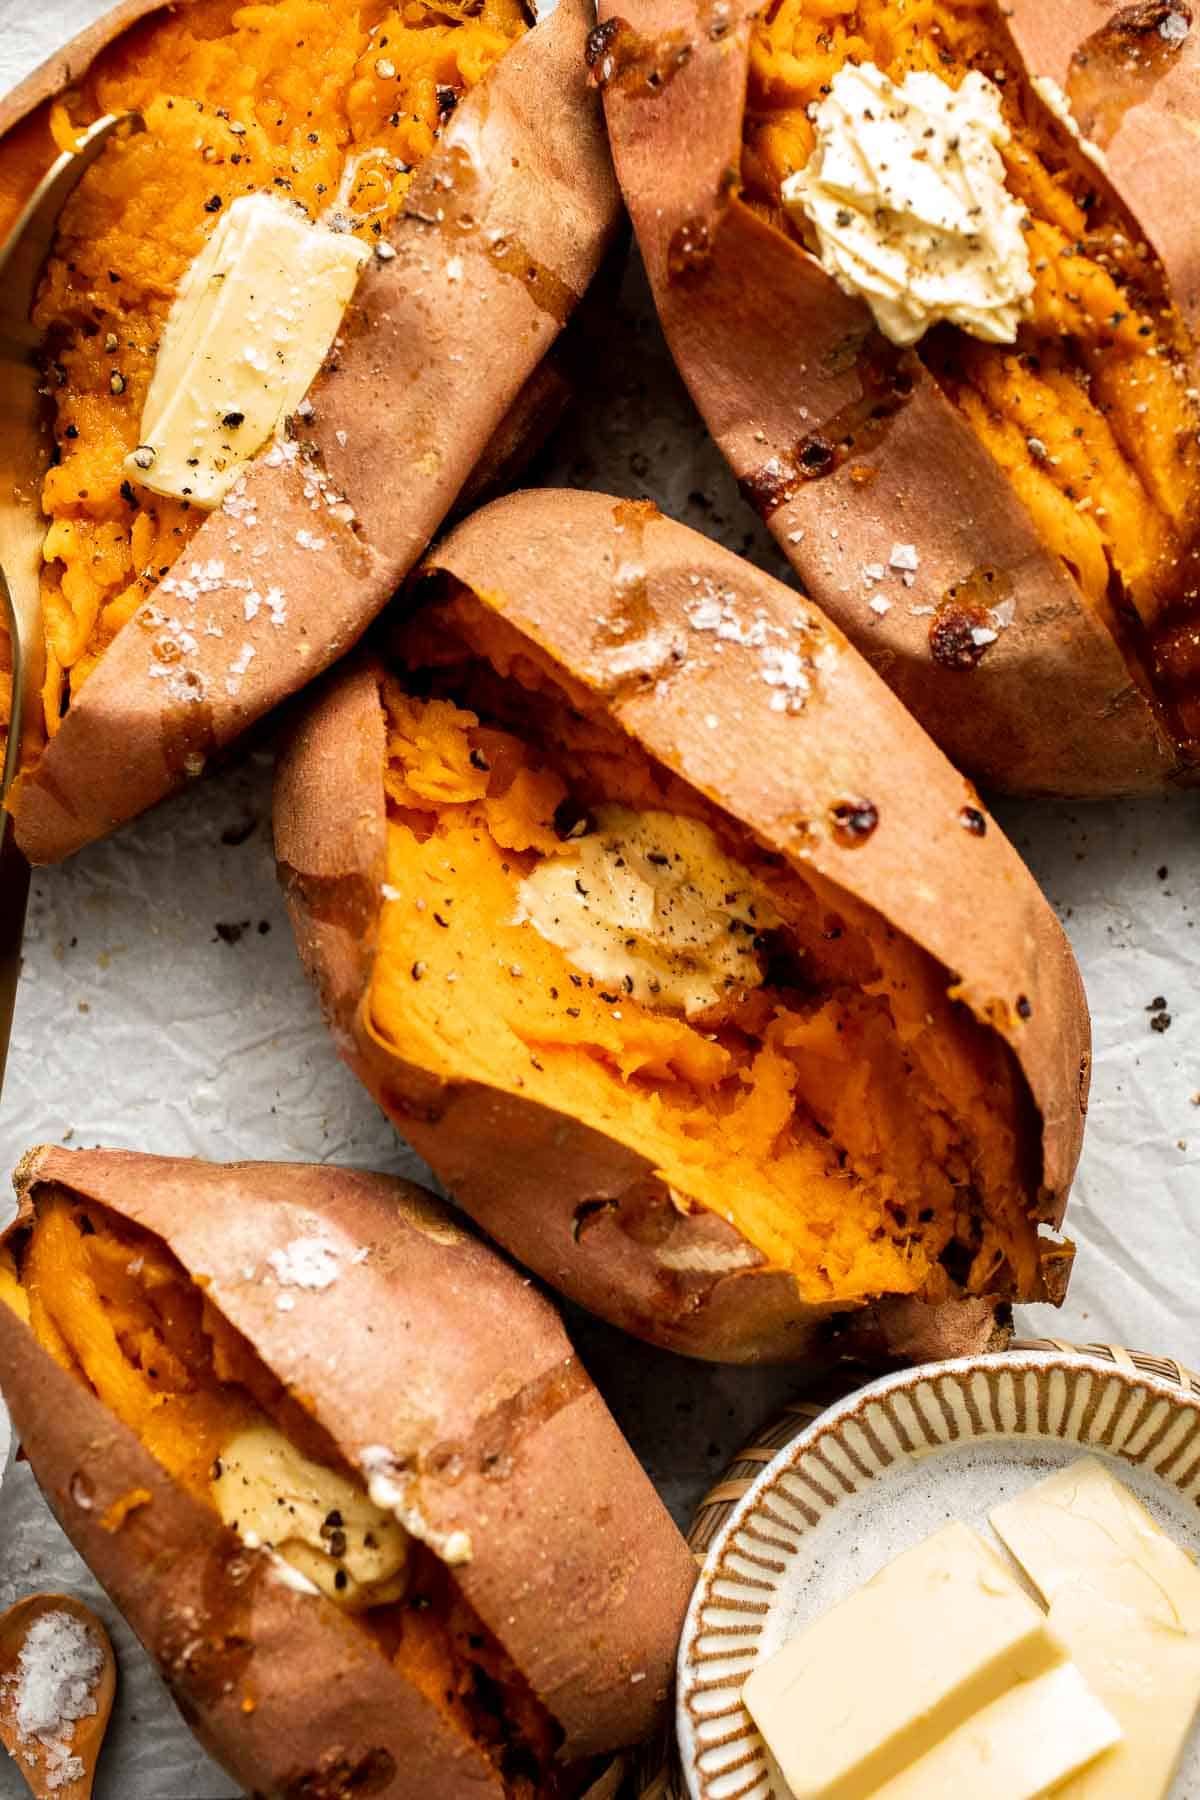
Baked Sweet Potato
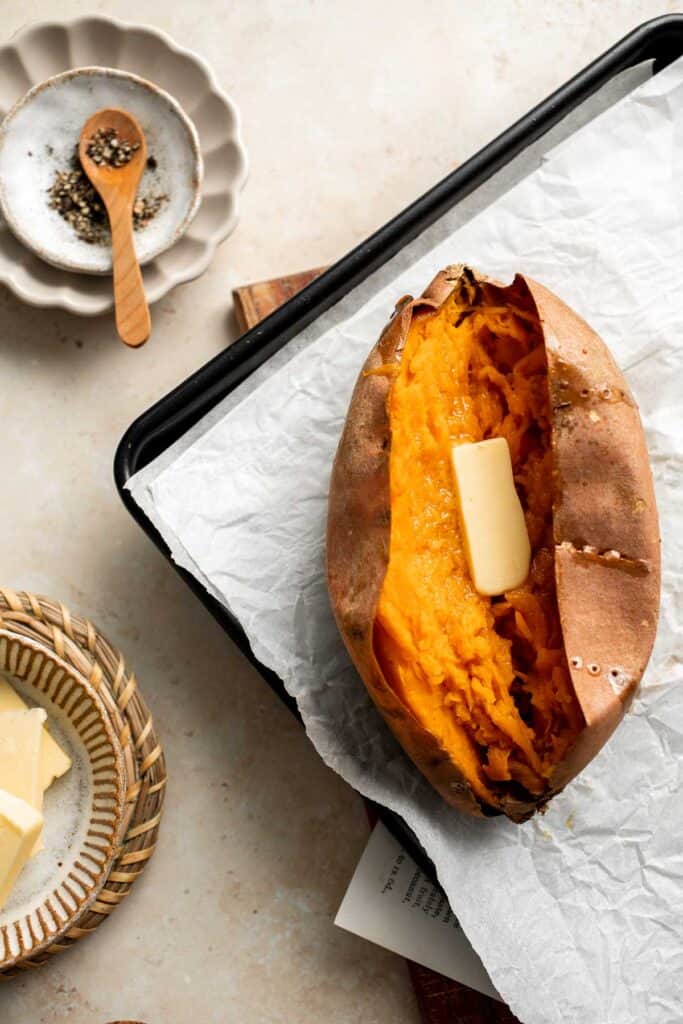
Baked Sweet Potato is everything you could want in a side dish: nutritious and healthy, takes almost no effort to make, and always tastes amazing! Served hot, the soft, naturally sweet interior requires no more than butter, salt, and pepper to bring out its delicious flavor (but you can add whatever toppings you like!).
These baked sweet potatoes are ready for the table in about an hour (whether you bake them or thrown them on the grill), so you'll have plenty of time to work on the rest of the meal while you're waiting. Because they're soft - so soft they're practically mashed - they're an ideal side to serve to young kids and adults alike!
Why You'll Love this Baked Sweet Potato Recipe
- Best flavor and texture. Baking sweet potatoes accentuates their natural sweetness and creates a tender, melt-in-your-mouth texture. Get creative by experimenting with various toppings or keep it classic with butter and a sprinkle of salt and pepper.
- Easy to make. These baked sweet potatoes don't require any special skills - just poke them with a fork, arrange them on a baking sheet, and bake! The hardest part is waiting for them to cool down before digging in.
- Only five minutes of active prep. These healthy baked sweet potatoes take only five minutes of your time to prepare before baking, so you can spend the remainder of the time preparing the main dish or other sides. It's a low-effort side that you'll want to make over and over.
- Healthy side for any meal. These simple sweet potatoes work well with tons of different dishes, so you can reach for this recipe any time you want a healthy, no-nonsense, delicious side that diners of all ages will love. Sweet potatoes are a nutritional powerhouse, loaded with essential vitamins and minerals such as folate, potassium, and vitamin C.
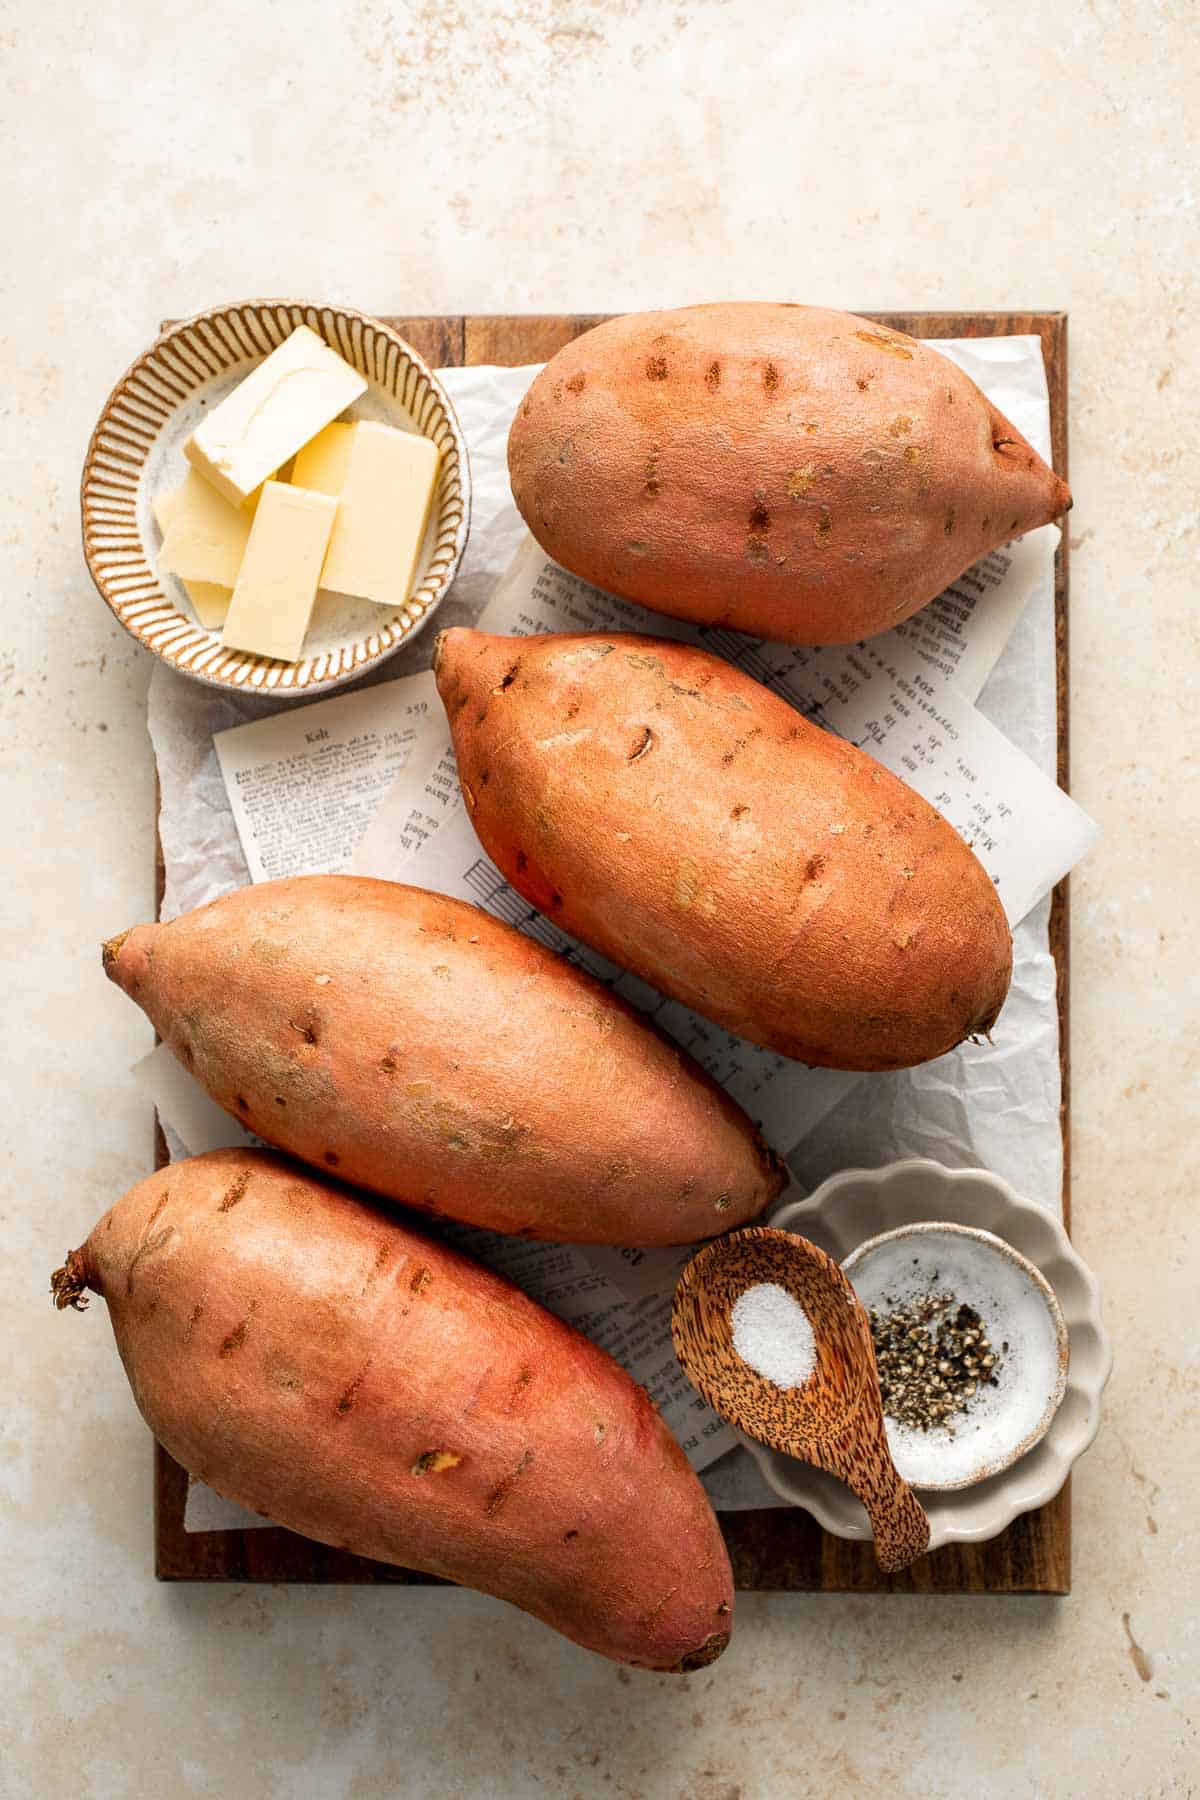
Ingredient Notes
To make this delicious Baked Sweet Potato, you will need the following ingredients (full measurements in recipe card below):
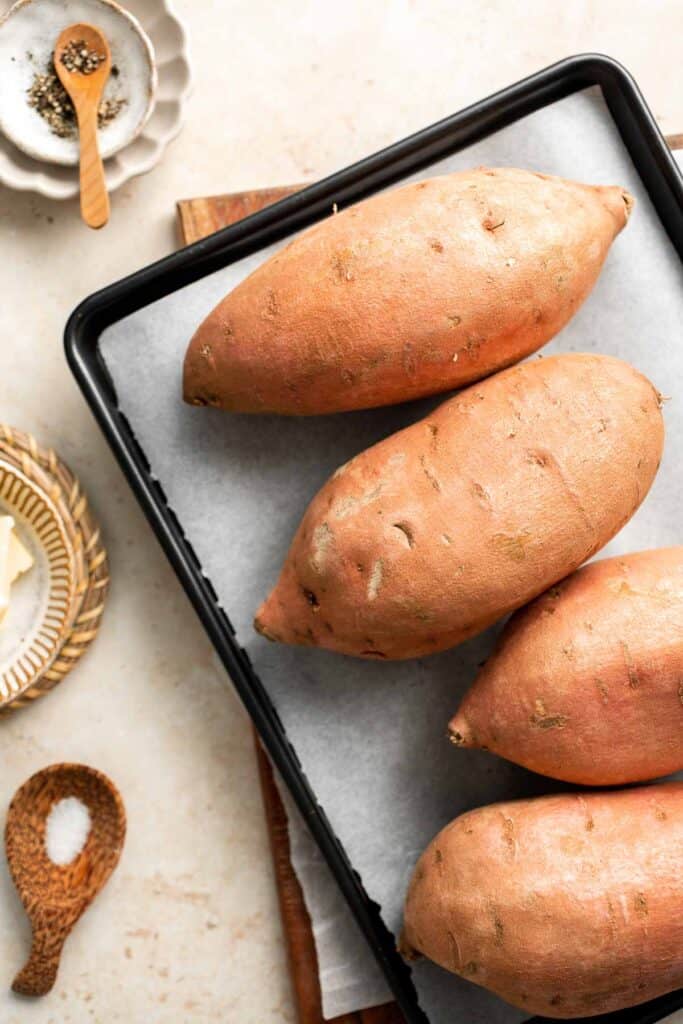
- sweet potatoes - choose sweet potatoes that are all roughly the same size for even cooking. Make sure to thoroughly scrub and dry them before cooking!
- butter - sour cream or your preferred sweet potato topping will also work. You can also keep the recipe vegan by substituting with a vegan butter or leaving it out.
- salt and pepper
You will also need a fork and baking sheet.
How to Make the Best Baked Sweet Potato
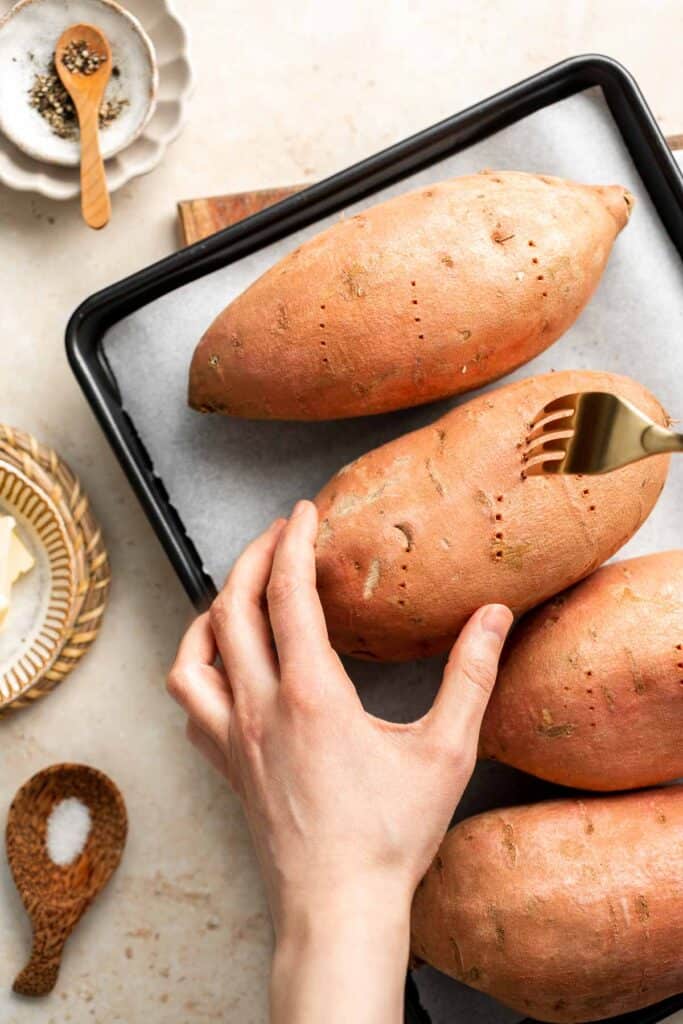
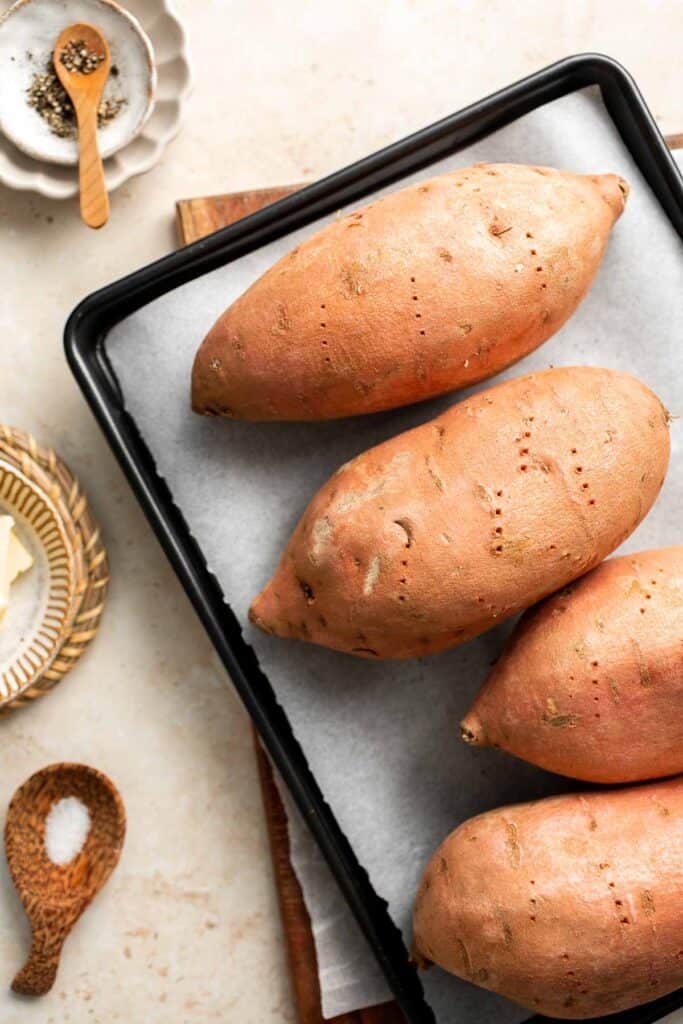
- Prick. Place potatoes on a lined baking sheet and poke a fork into them to make a few vents.
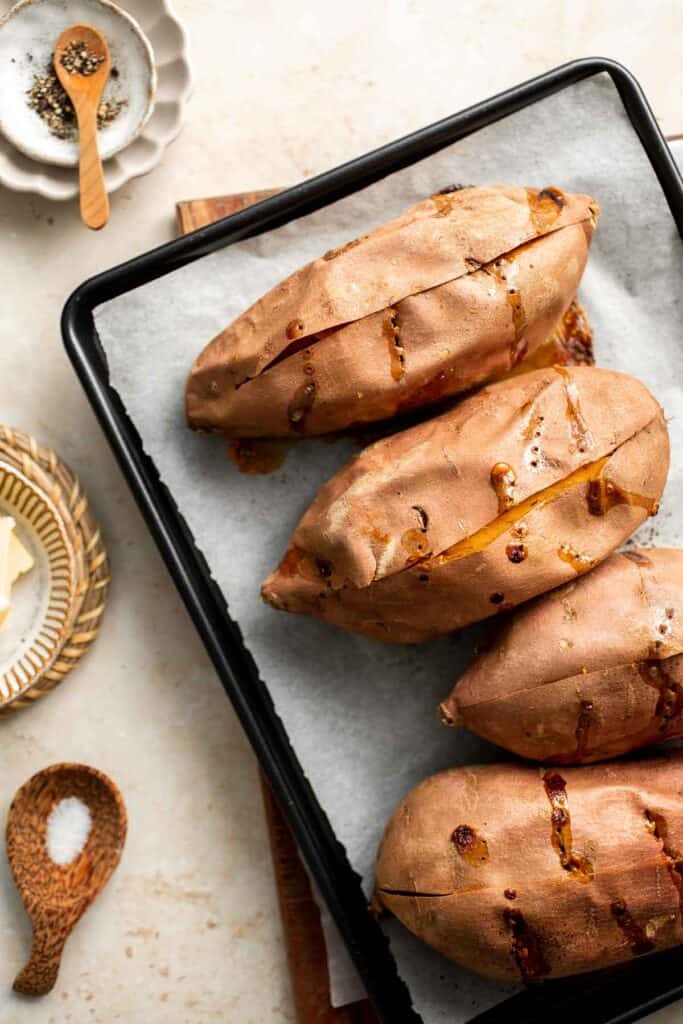
- Bake. Bake in a 400F preheated oven for 50-55 minutes until they are completely soft inside, and fork tender. If you can insert a fork easily into the flesh, then it is fork tender.
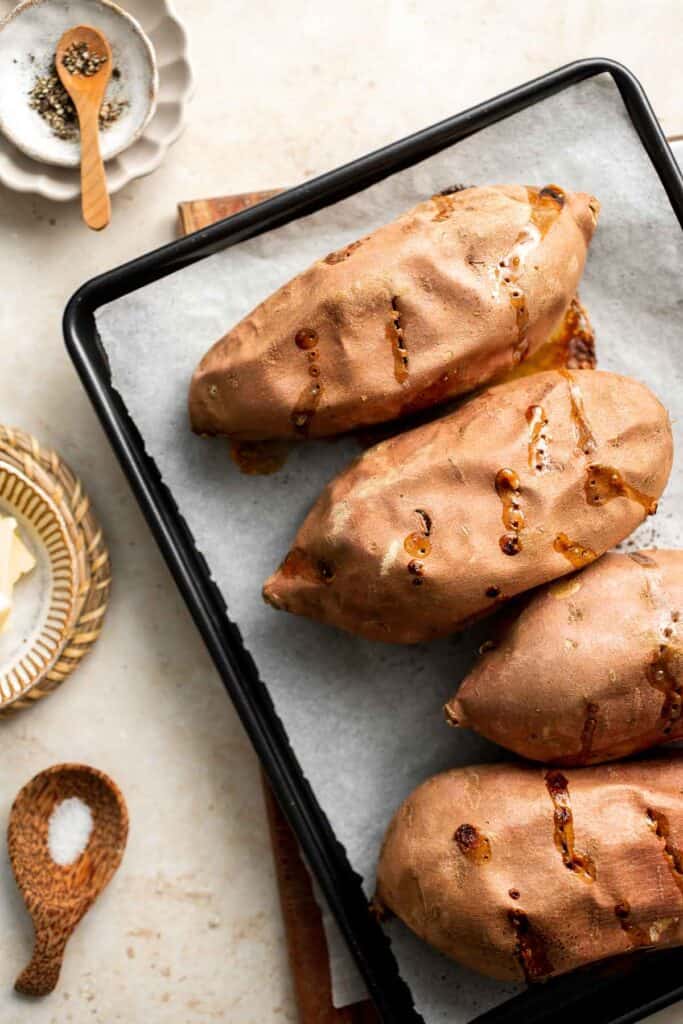
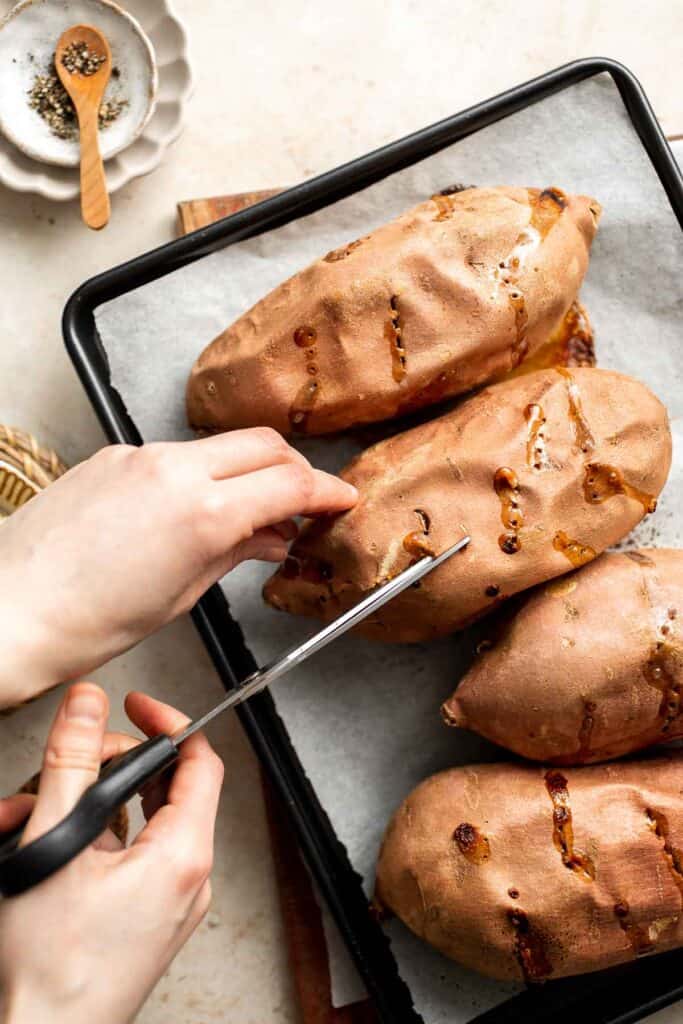
- Cut. Let cool for 10 minutes and cut the skin with scissors.
- Serve. Top with butter and season with salt and pepper to taste. Serve immediately.

How to Make a Baked Sweet Potato on the Grill
Once the potatoes have been pricked with a fork. Wrap them in aluminum foil and place on the grill under indirect heat. Grill for 40-50 minutes until fork tender.
Recipe Variations
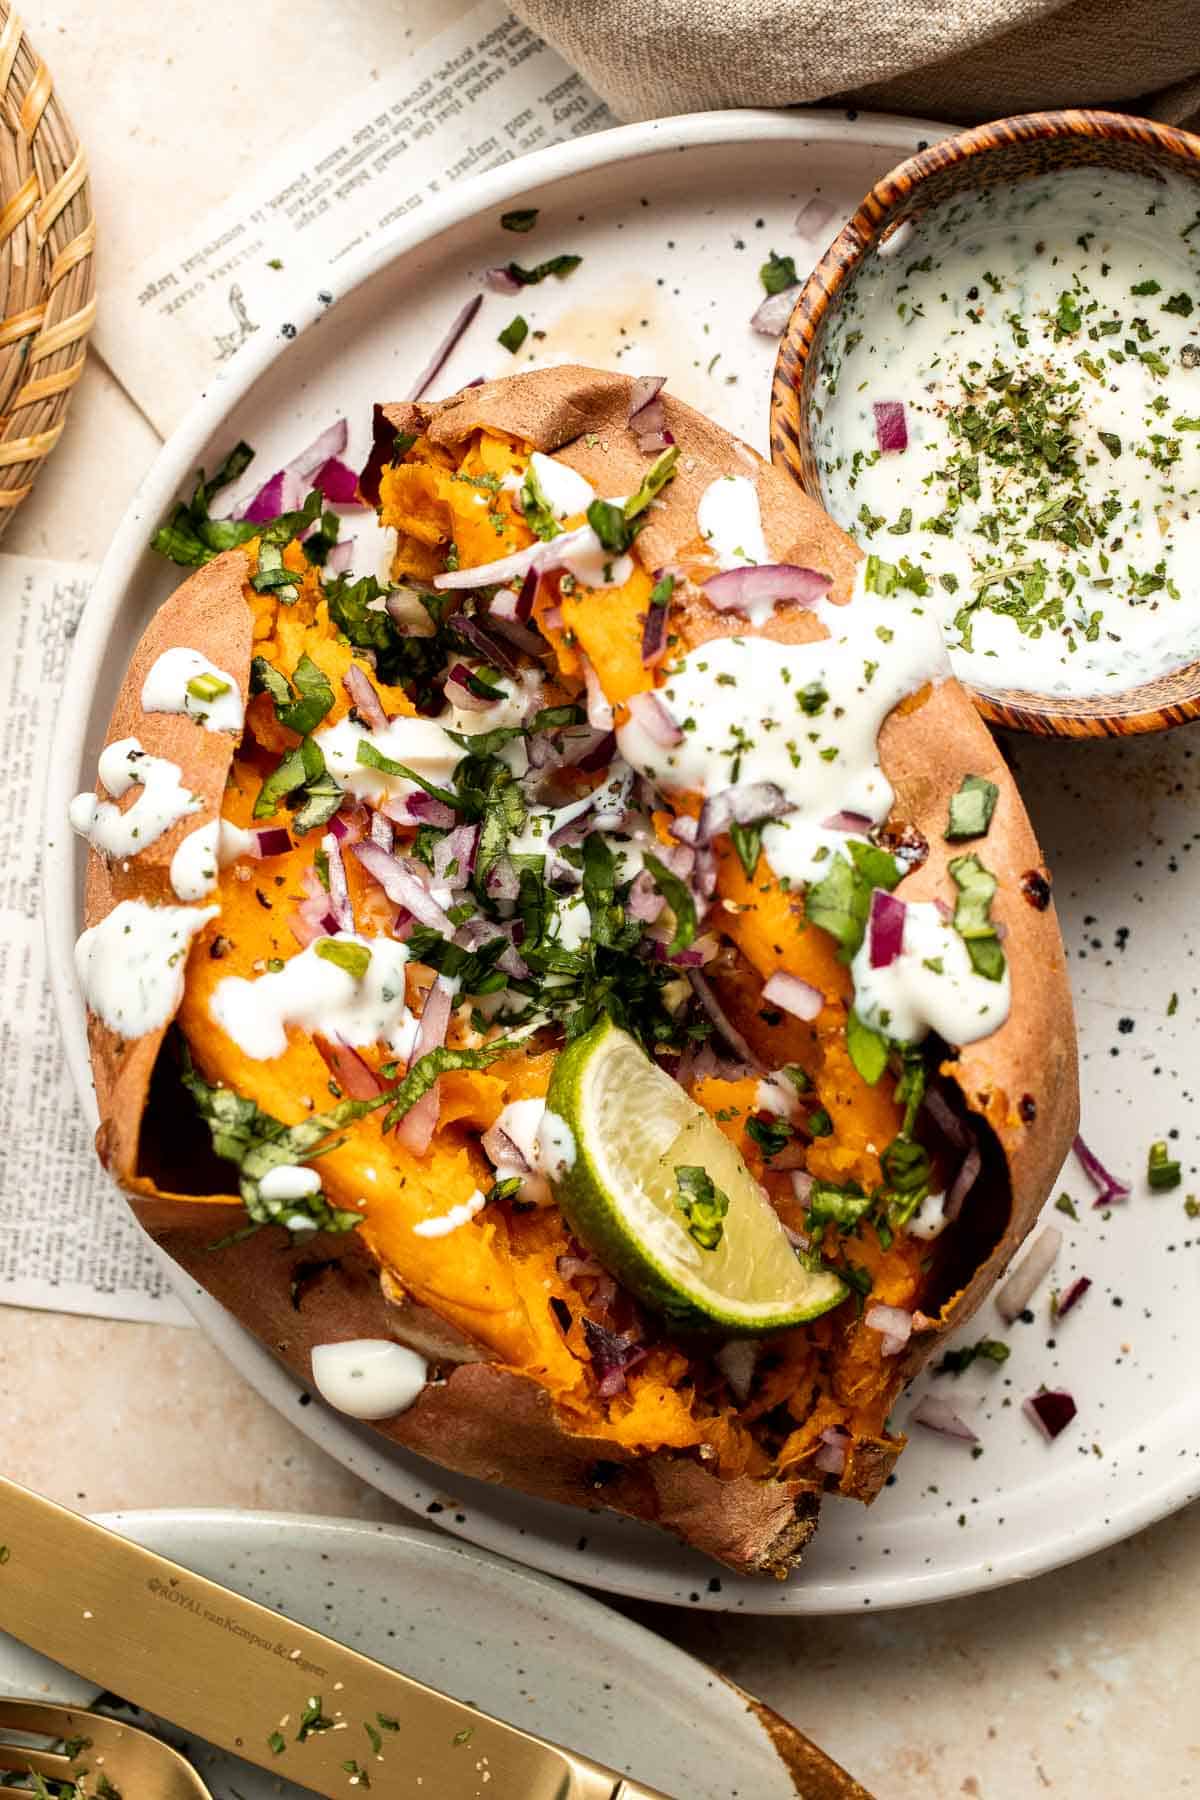
We kept our baked sweet potato simple with a classic combination of butter, salt, and pepper. But there are so many ways to customize it using your favorite toppings like butter, sour cream, chives, bacon, or cheese. Some of our favorite recipe variations are:
- Make it cheesy. Sprinkle grated Cheddar or Monterey Jack cheese over your baked sweet potato. You can even pop the potatoes back into the oven to help the cheese melt.
- Spice it up. Kick up the heat by generously adding a sprinkle of chili powder or a dash of hot sauce to the baked sweet potato after cooking. Pair it with a dollop of cool sour cream or tangy salsa to balance the spiciness.
- Mediterranean style. Top your sweet potato with a dollop of creamy Tzatziki Sauce, chopped fresh herbs like dill or parsley, and a squeeze of fresh lemon juice.
- Add bacon. Top your baked potato with crispy crumbled bacon, a drizzle of maple syrup, and a pinch of salt. This combination of flavors is so good.
- Keep it classic. Add a dollop of sour cream, shredded cheese, and chopped green onions for a classic baked potato flavor.
How to Serve
A Baked Sweet Potato goes well with just about any dish. Pork, chicken, beef, fish, steamed or roasted vegetables, salads, and pastas are all perfect companions for these versatile baked sweet potatoes.
Some of our favorite dishes to serve with baked sweet potatoes are:
- Grilled meats. Try Balsamic Chicken Kabobs, Ribeye Steak, or Dijon Garlic Lamb Chops.
- Salad. Try Mediterranean Couscous Salad, Caesar Salad, or Sweet Kale Salad.
- Vegetables. Try Balsamic Roasted Broccoli, Vegan Stuffed Peppers, or Roasted Eggplant.
- Pasta. Try Shrimp Alfredo, Creamy Tomato Pasta, or Spaghetti Bolognese.
- Chili or stews. Try Vegetarian Chili, Lentil Stew, or Slow Cooker Beef Chili.
- Seafood. Try Salmon Burgers, Garlic Butter Shrimp, or Seared Scallops.
Recipe Tips and Tricks
- Ensure even cooking. To yield baked potatoes that are consistent in texture, choose ones of similar size to ensure even cooking time.
- Wash the sweet potatoes well. The biggest key to making these baked sweet potatoes (or any potatoes, really) is in the washing. Use your hands or a vegetable brush to scrub the skin under running water and then dry them completely with paper towels or a clean kitchen towel before you get started.
- Pierce the skin. Before baking, use a fork or knife to pierce the skin of the potatoes a few times. This allows steam to escape and prevents the potatoes from bursting.
- Wrap in foil (optional). For a softer skin, you can wrap the potatoes in foil before baking. This helps to retain moisture and create a steaming effect.
- Fluff the flesh. Once baked, use a fork to fluff the potato flesh, creating a light and fluffy texture.
- Make a topping bar. Everyone has their own preferences when it comes to topping sweet potatoes, so you can cater to everyone's tastes by offering a variety of toppings. We suggest butter here, but some people may prefer a drizzle of honey and red pepper flakes or a dollop of sour cream, shredded cheese, and green onions.
Storing and Freezing Instructions
How to Store
Place the cooled baked sweet potatoes in a single layer in an airtight container or Ziploc bag and refrigerate for up to 5 days. You can also wrap them individually in plastic cling wrap.
How to Reheat
Reheat in the oven at 350℉ for 15 minutes or in the air fryer for 10 minutes. You can also reheat in the microwave on a covered, microwave-safe dish on high power for 2-3 minutes until warm.
How to Freeze
Wrap each baked sweet potato in aluminum foil and place them in a sealed freezer bag. Freeze for up to 3 months.
More Sweet Potato Recipes
- Baked Sweet Potato Wedges
- Herb Roasted Sweet Potatoes
- Thai Sweet Potato Yellow Curry
- Sweet Potato Croquettes
- Mashed Sweet Potato
- Sweet Potato Soup
Tried this recipe?
I'd love to hear what you think! Leave a comment and rating below to share your feedback. Your reviews help others discover this recipe and help me keep creating more free recipes for you. Snap a photo and tag me on social media @aheadofthyme too.

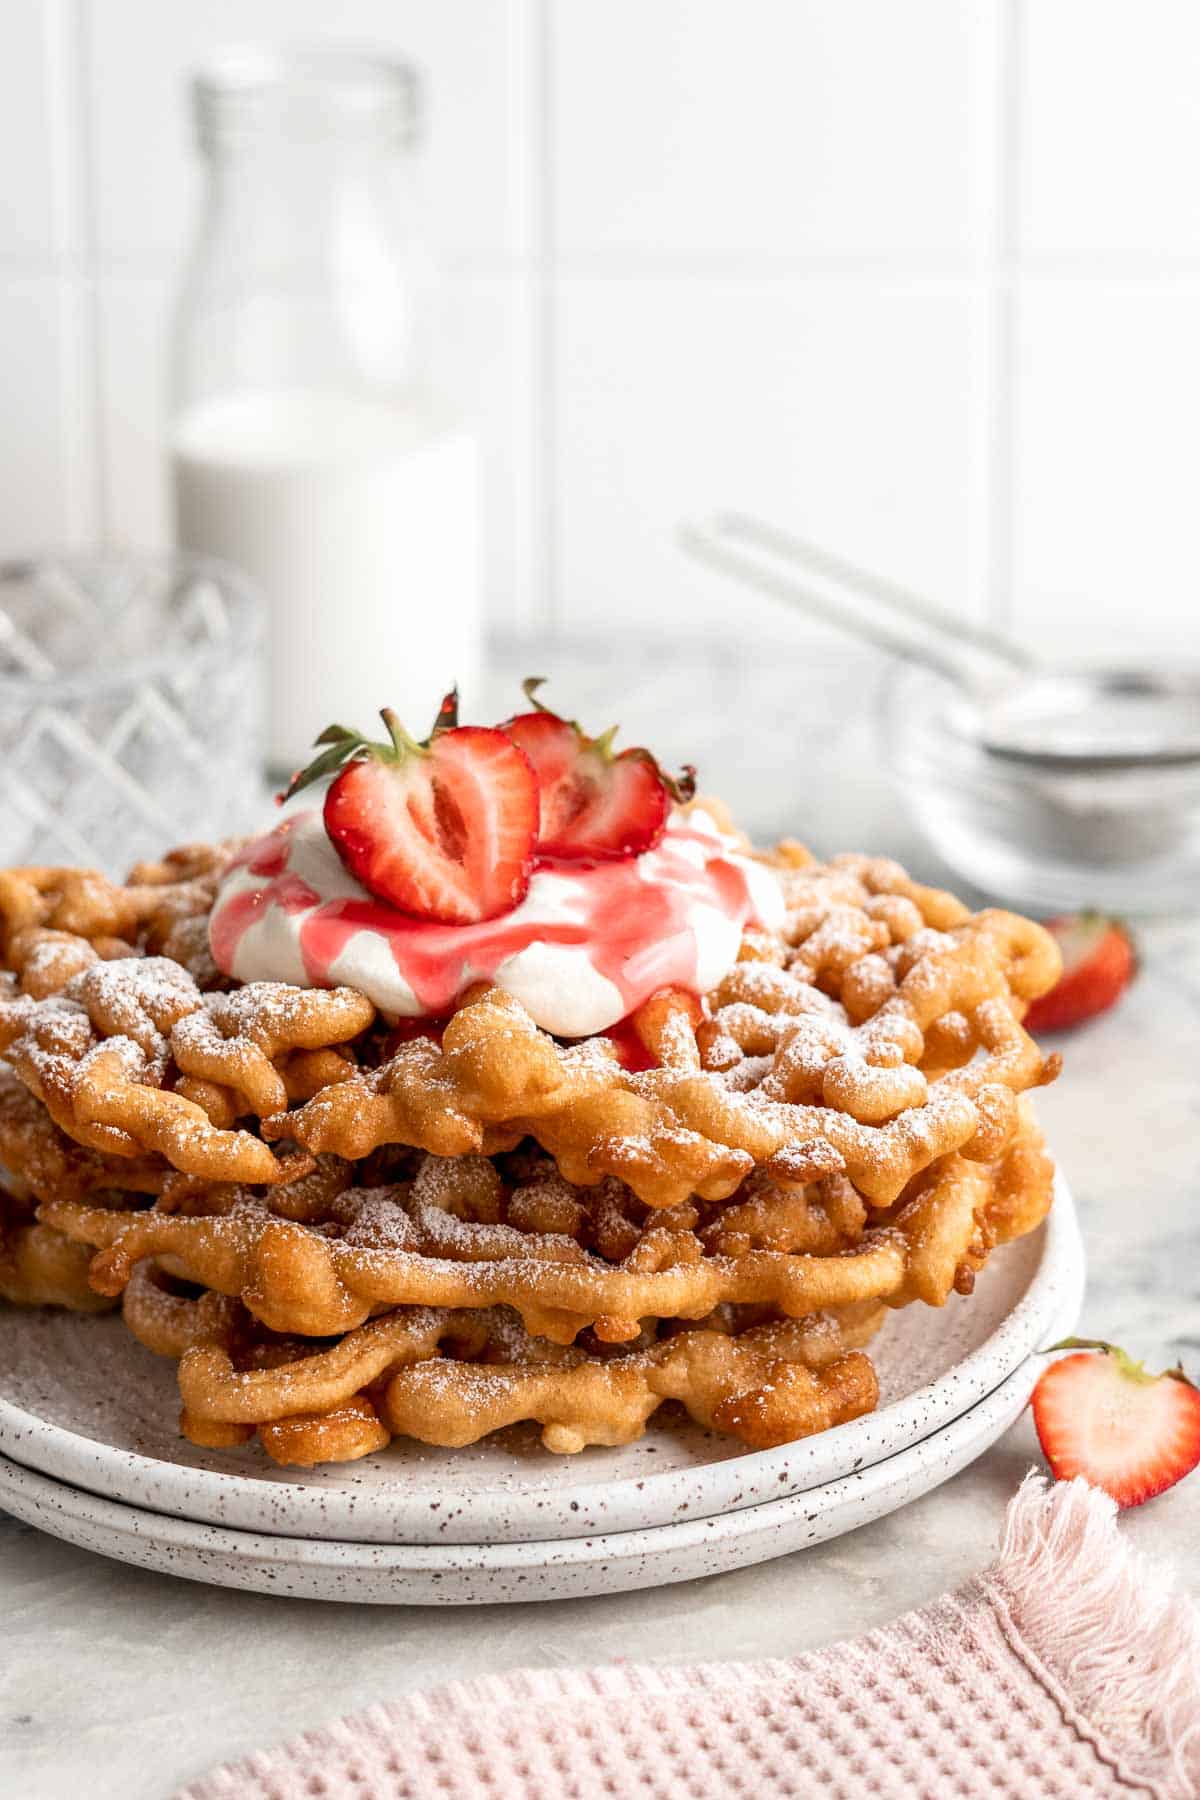
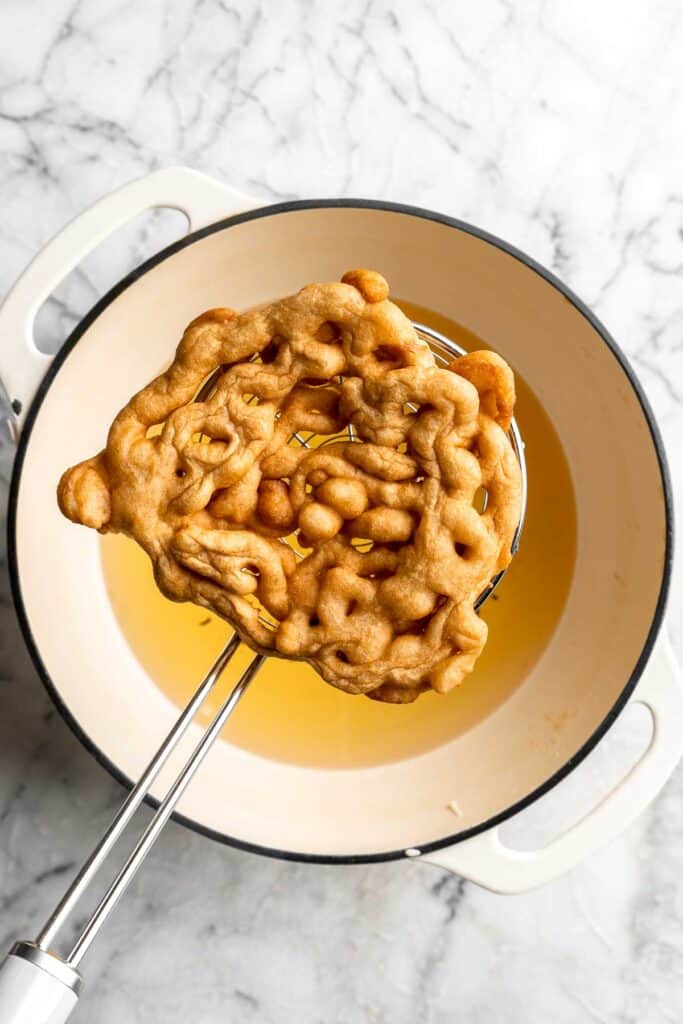
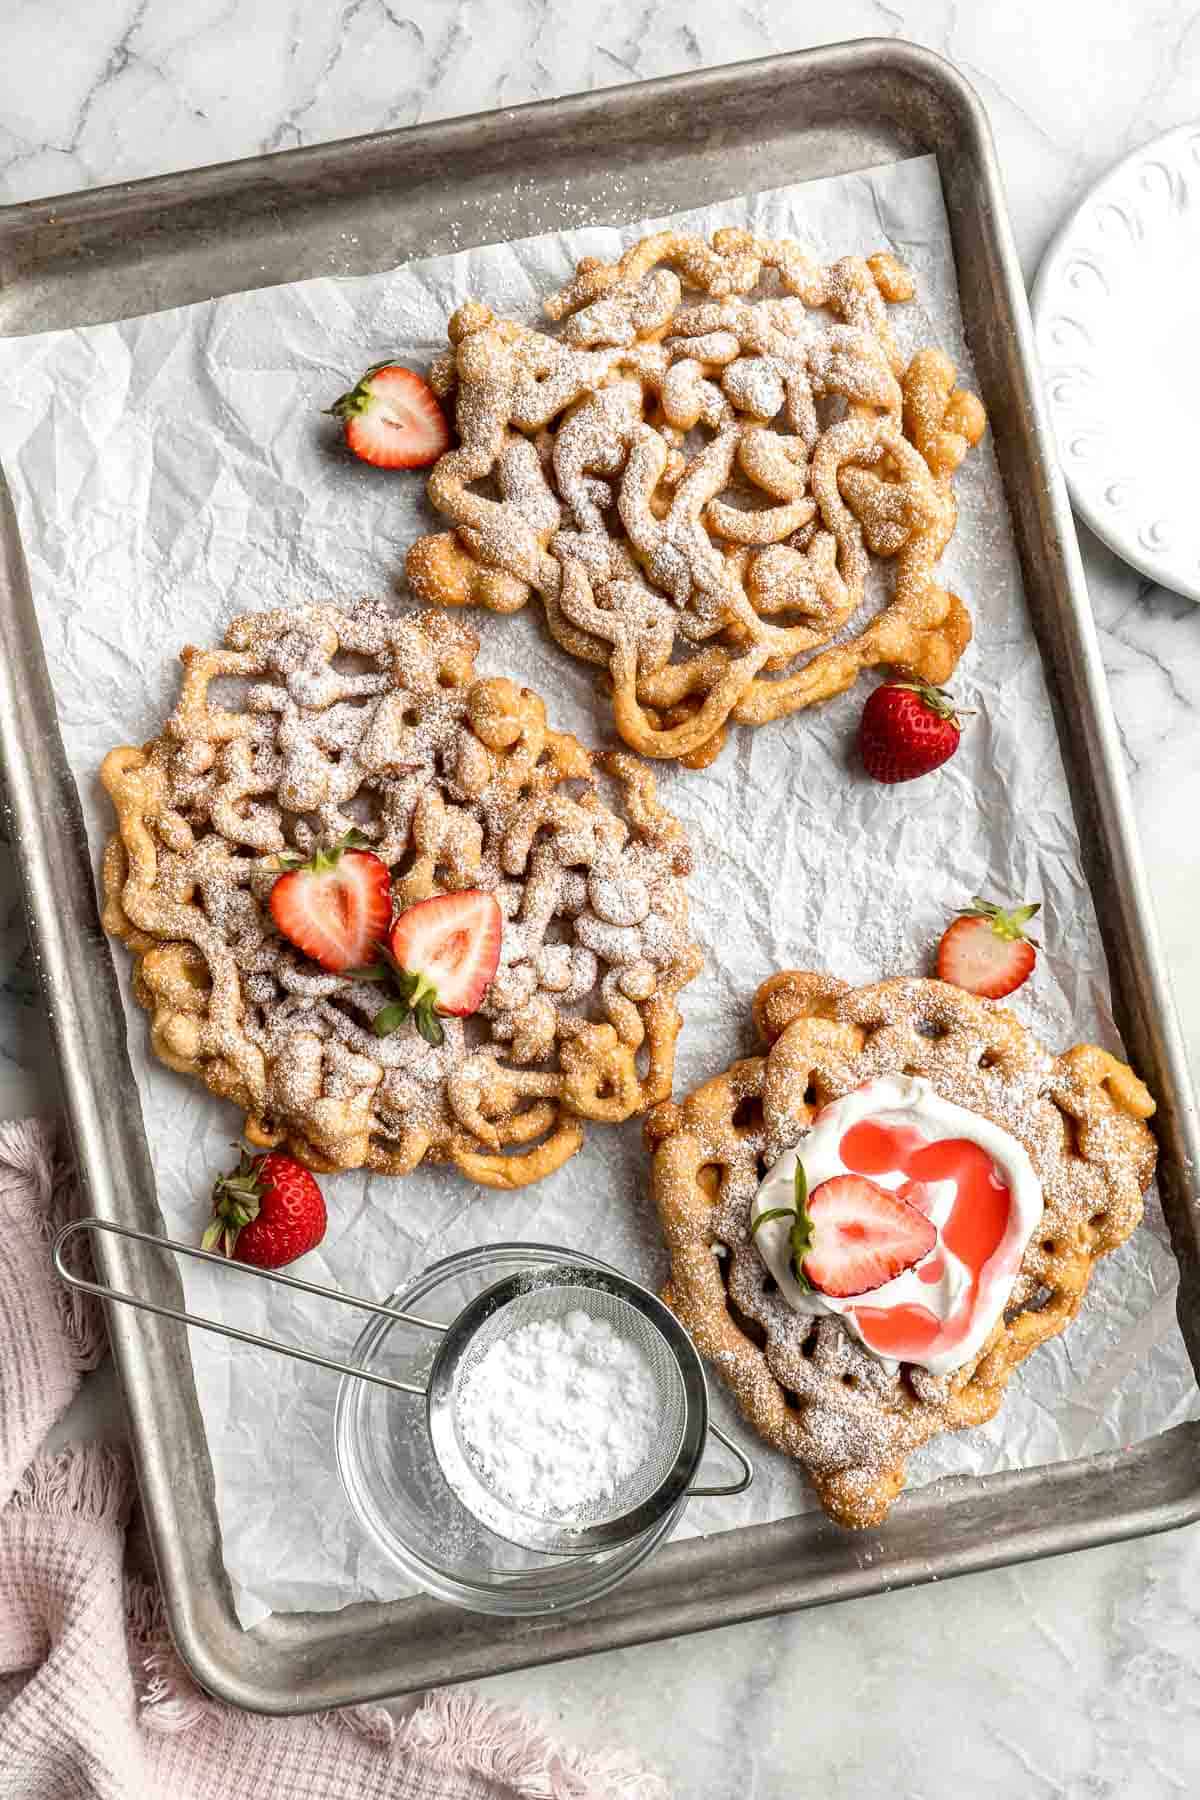
Funnel Cake
Bring fair food home with this easy, classic Funnel Cake recipe. There's truly nothing like a homemade funnel cake: a crispy jumble of vanilla-tinged batter that is deep fried until crisp and golden-brown yet fluffy and airy inside, topped with a generous sprinkle of powdered sugar, and served warm with your favorite toppings.
You'll love making this summertime treat from scratch. It only takes a few pantry staples and 10 minutes of your time to make - even beginners can master this easy recipe! Amaze your family and friends this summer with fresh funnel cake made in the comfort of your own home. It's a perfect dessert option for summer cookouts, barbecues, birthdays, or casual get-togethers.
Why You'll Love this Funnel Cake
- Crispy and soft texture. Funnel cakes combine the best of both worlds with their crispy, golden-brown exterior and soft, cake-like interior. With a dusting of powdered sugar, these funnel cakes check all the right boxes when it comes to the perfect texture.
- It's beginner-friendly. Funnel cake might seem intimidating to make, but this recipe is actually beginner-friendly! Just whip up the batter in a few steps, transfer to a piping bag, heat the oil, and pour. See the Recipe Tips and Tricks below to make it even easier to nail these on the first try.
- Perfect snack or dessert for summer. Summertime isn't just for cold treats! Breezy afternoons are the ideal time to savor the subtly sweet flavor of a fresh, fried funnel cake made from scratch at home. One bite of these treats will transport you to summer days at the fair or at festivals. It's perfect for Memorial Day!
- Serve it however you like. Serve homemade funnel cake the traditional way with a sprinkling of powdered sugar on top or get creative with toppings. Try fresh fruit, caramel sauce, cinnamon sugar, chocolate sauce, or nutella! The options are endless. See our Recipe Variations below for more inspo.
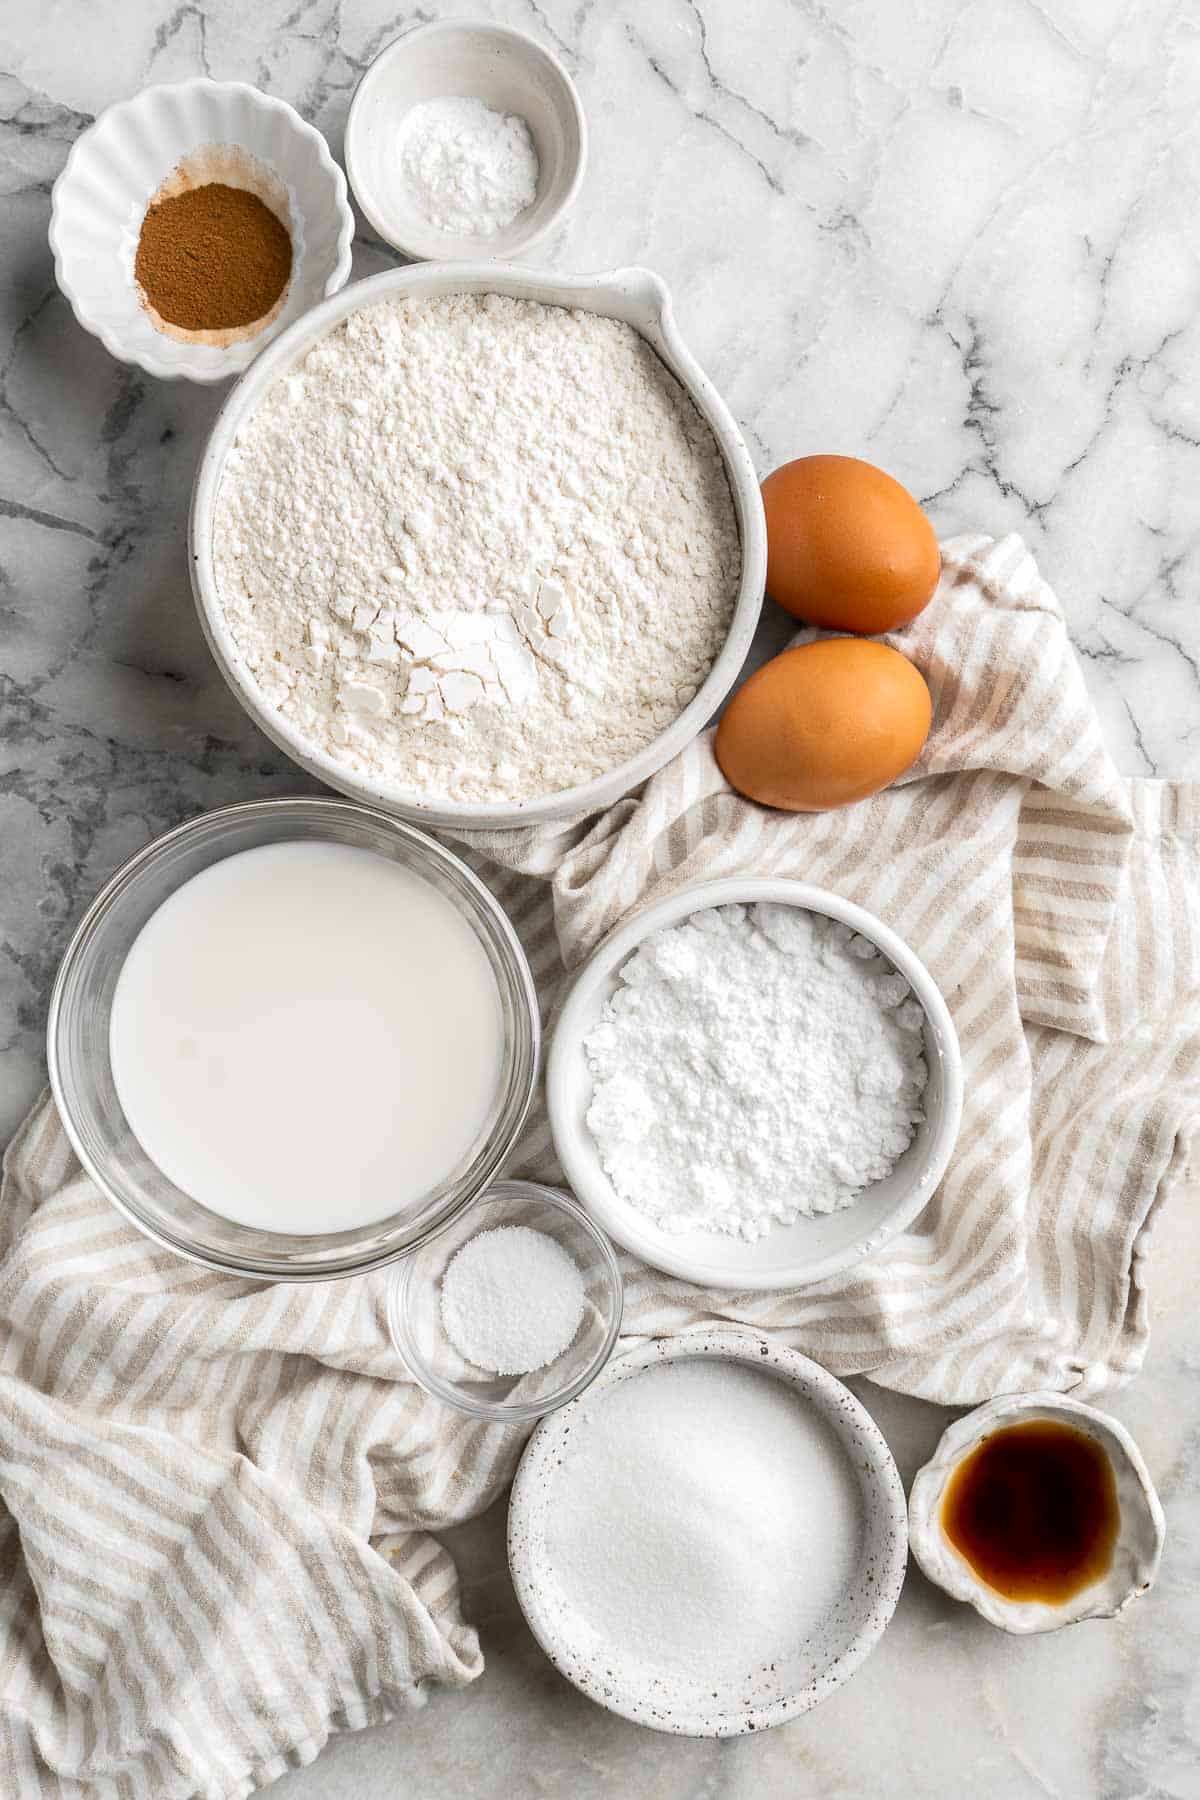
Ingredient Notes
To make this delicious Funnel Cake, you will need the following ingredients (full measurements in recipe card below):
- all-purpose flour - you can try to make these gluten-free by replacing the all-purpose flour with a measure-for-measure gluten-free flour substitute.
- sugar - use your favorite granulated sugar or sugar alternative like coconut sugar, stevia, monk fruit, or Swerve.
- baking powder
- salt
- cinnamon - feel free to leave this out if you prefer.
- milk - if you or someone in your family has a dairy sensitivity, you can use a plant-based milk instead.
- eggs - if you need to omit the egg, add one tablespoon of lemon juice and increase the amount of baking powder in this recipe to 1 tablespoon to help the funnel cake rise and stay fluffy.
- water
- vanilla - you can also use a 1:1 substitute of vanilla bean paste for even more intense vanilla flavor.
- salt
- powdered sugar - regular powdered sugar or a powdered sugar substitute are both fine to use here, just know that the taste will be affected by the type of sweetener you choose!
- vegetable oil - you will need vegetable oil for deep frying the funnel cakes. We used avocado oil but any vegetable oil will work.
You will also need measuring cups and spoons, mixing bowl, piping bag, and a large pot.
How to Make the Best Funnel Cake
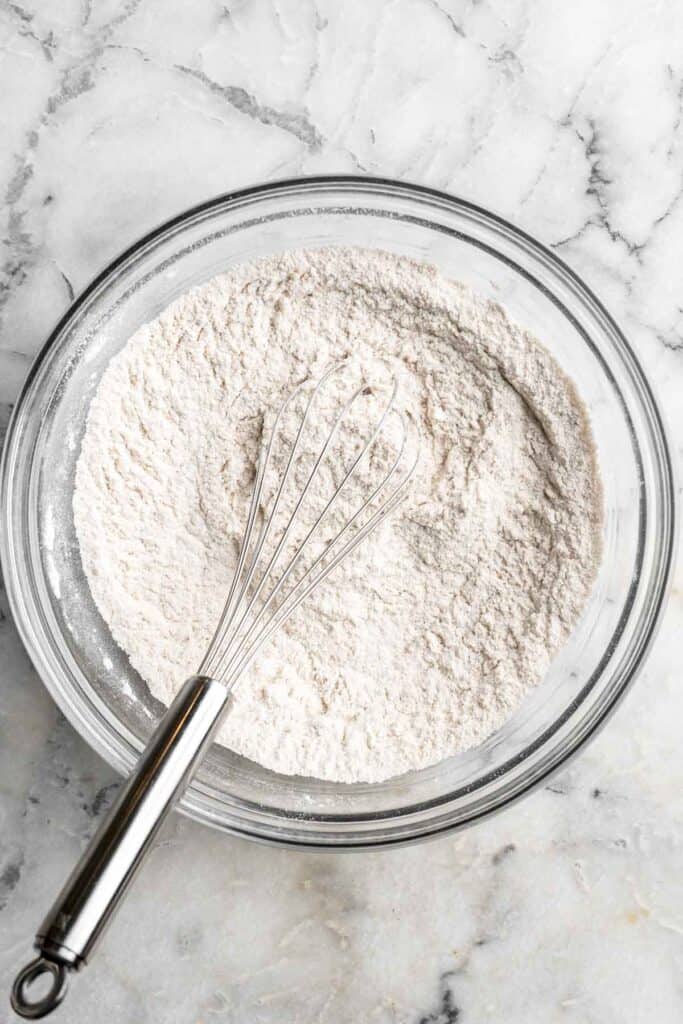
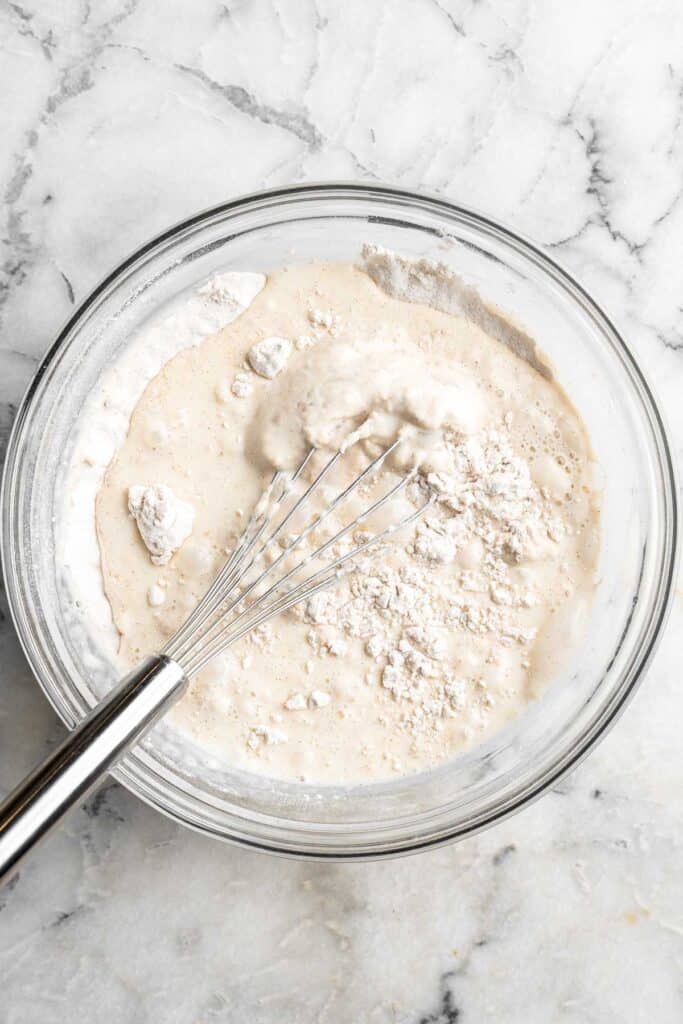
- Combine dry ingredients. In a large mixing bowl, whisk together the flour, sugar, baking powder, salt, and cinnamon until well combined.
- Combine wet ingredients. In a separate medium mixing bowl, whisk together the milk, eggs, and vanilla, until smooth and well combined.
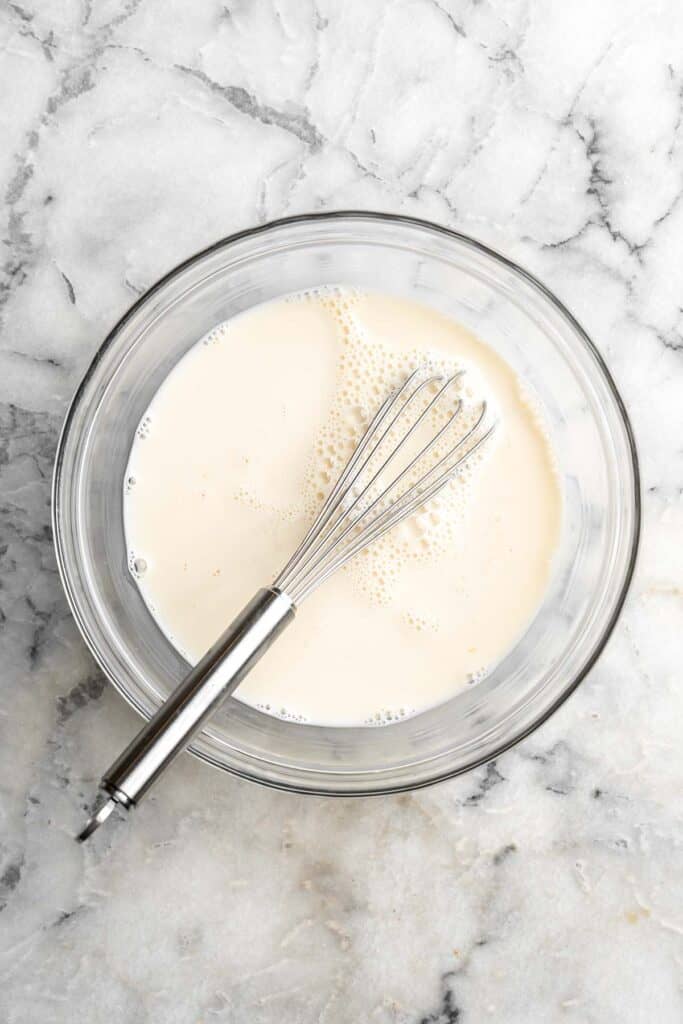
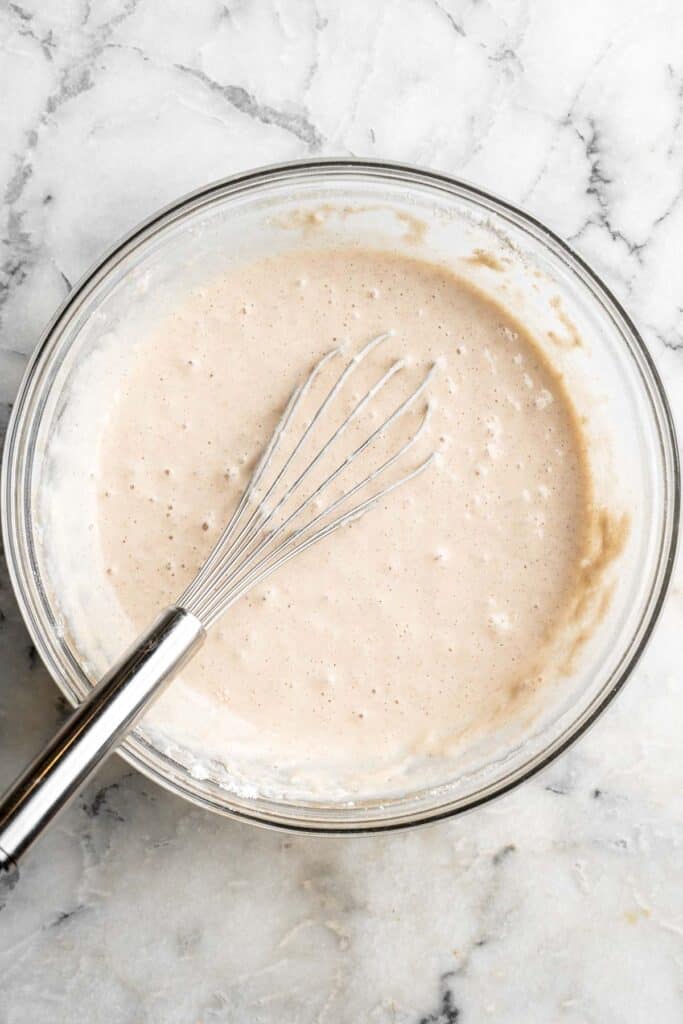
- Combine wet and dry ingredients. Pour the wet mixture into the dry, then whisk until smooth.
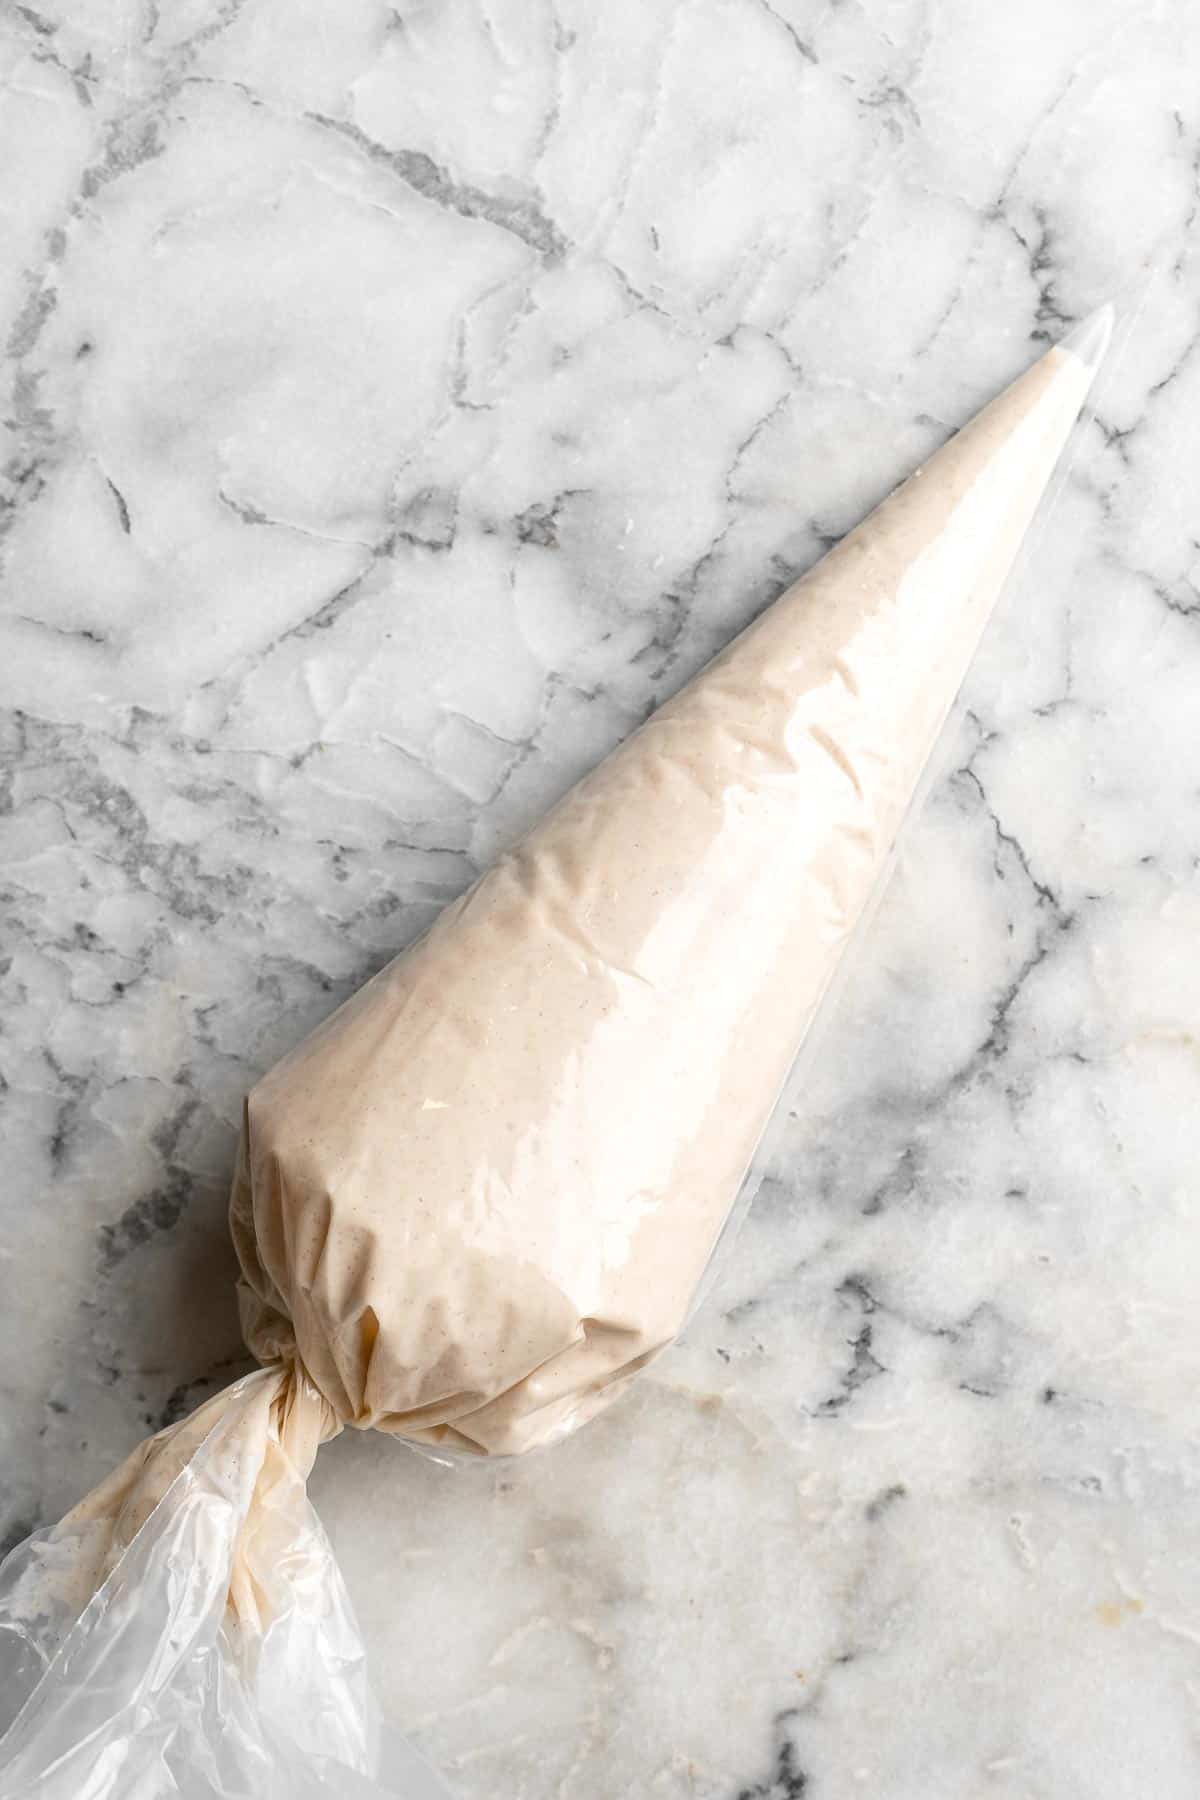
- Transfer batter. Transfer the batter into a large piping bag.
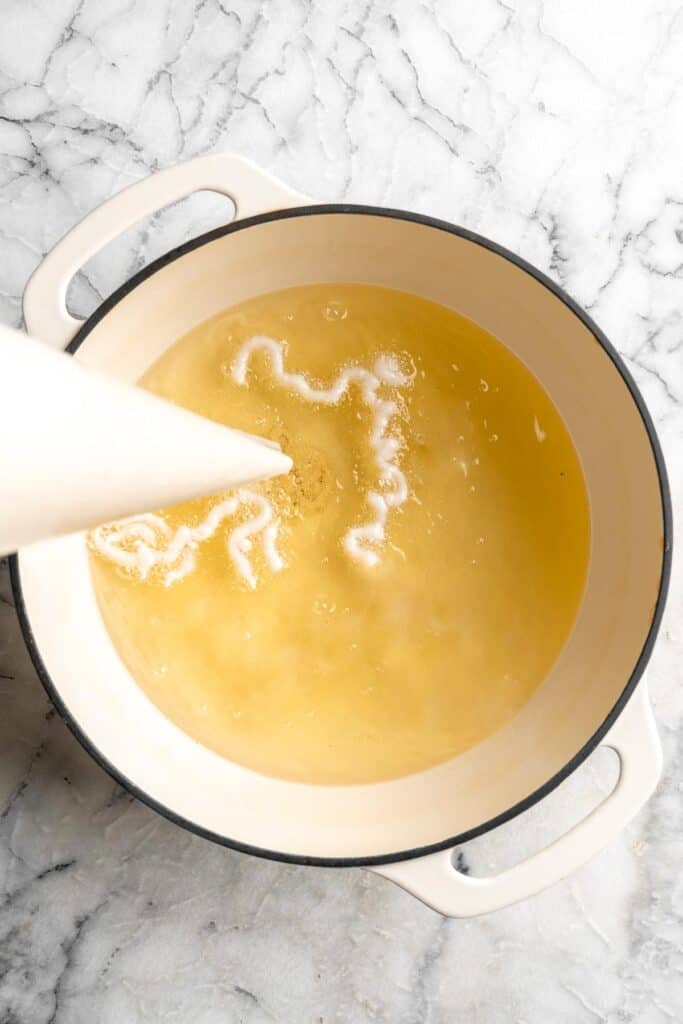
- Heat oil. Fill a large dutch oven or pot with 2-3-inches deep of oil. Heat over medium-high, bringing the oil temperature up to 375°F on a candy thermometer, about 3-4 minutes (the oil will be shimmering hot). Meanwhile, prepare a large baking sheet by lining with paper towels.
- Fry the funnel cakes. When the oil is hot, snip the tip of the piping bag off, then drizzle about ⅓ cup of the batter into the hot oil, in a swirling and criss-crossing motion. Fry for about 90 seconds, or until the cake looks golden, then carefully flip with tongs and fry the other side until golden. Transfer to the paper-towel lined baking sheet.
- Repeat. Continue with remaining batter, ensuring the oil temperature stays within the 350-375°F range.
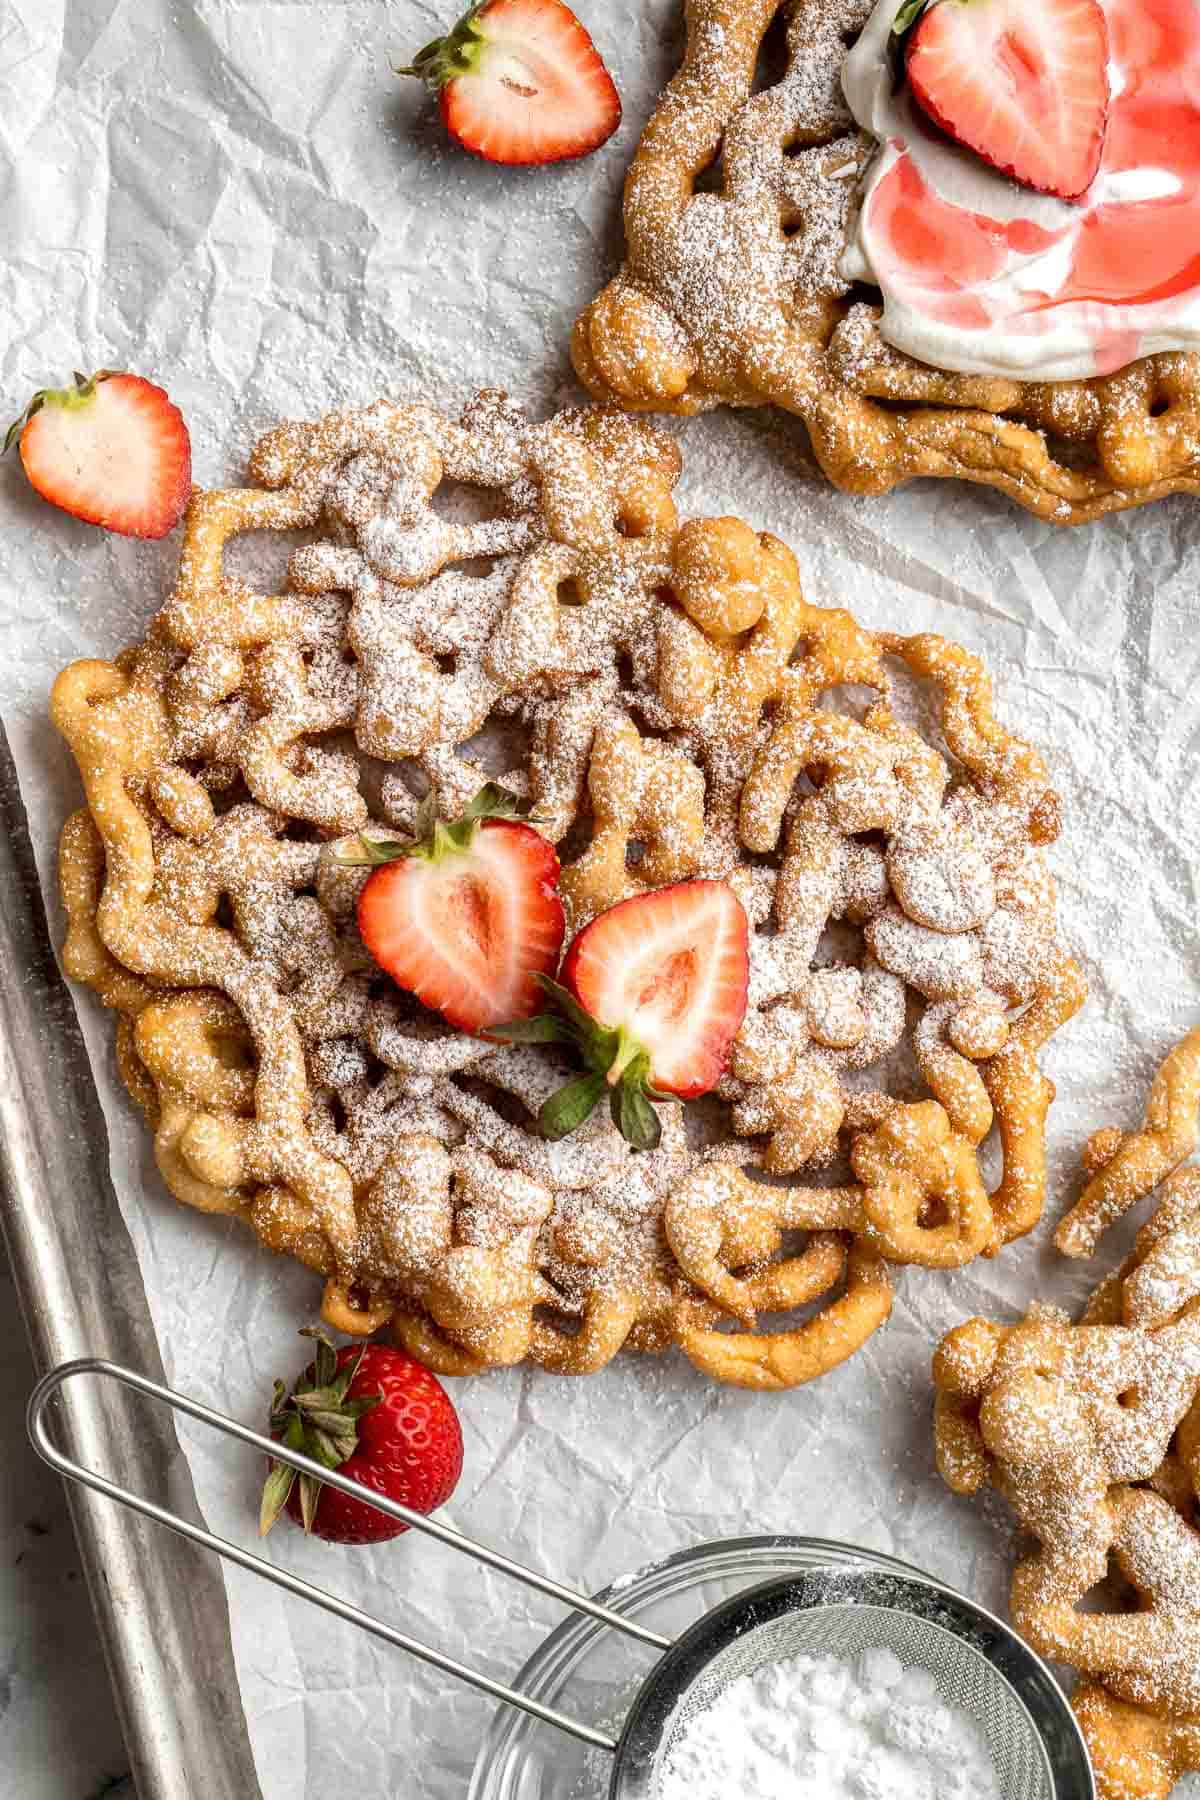
- Serve. Dust the warm funnel cakes with confectioners sugar and serve warm!
Recipe Variations
- Make chocolate funnel cakes. Add 2 tablespoons cocoa powder to the batter for a rich chocolate twist. Top with chocolate syrup, whipped cream, and sprinkles to make it extra fun.
- Add fruit. Top your funnel cakes with fresh fruit. Try sliced strawberries, bananas, or peaches and serve with a dollop of whipped cream or a scoop of your favorite ice cream on the side.
- Cinnamon sugar flavor. Instead of dusting your funnel cake with confectioners' sugar, mix cinnamon and sugar together and generously sprinkle it over the freshly fried funnel cake.
- Add matcha. Add 1-2 tablespoons of matcha green tea powder to the batter for a vibrant color and earthy flavor. Top with a dusting of powdered sugar or a drizzle of white chocolate to make it even better.
- Citrus flavor. Incorporate the zest of oranges, lemons, or limes into the batter for a refreshing and tangy flavor. Squeeze some fresh citrus juice over the fried funnel cake and dust it with powdered sugar for a burst of citrusy goodness.
How to Serve
Enjoy immediately. Funnel cake is best enjoyed fresh and hot. Serve it immediately after frying for the ultimate crispy and indulgent experience.
Funnel Cake is delicious serve fresh and hot with a sprinkle of powdered sugar on top. Serve it as a fun dessert as is, or pair it with some of our favorites such as:
- No Churn Vanilla Ice Cream
- Summer Fruit Salad
- Blackberry Milkshake
- Whipped Cream
- Salted Caramel Sauce or Chocolate Sauce
- White Hot Chocolate
Recipe Tips and Tricks
- Dress them up. You can customize this homemade funnel cake by adding whatever toppings you want! Nutella, ice cream, fresh fruit, flavored syurps - there's no wrong way to eat a funnel cake.
- Proper oil depth. Make sure the oil depth is sufficient for the funnel cake to float and cook evenly. A depth of at least 2 inches (5 cm) allows the batter to expand and ensures the funnel cake cooks through without becoming greasy.
- Be patient. Patience is key when making funnel cakes. It's absolutely essential that you wait until the oil is heated up to the right temperature before adding the batter, and allowing the batter to turn golden brown before flipping or removing the cakes.
- Use an oil thermometer. Speaking of temperature, using an oil thermometer (or candy thermometer) to make sure your oil stays at the right temperature can make or break your funnel cakes! Prevent them from falling apart by keeping the temperature around 375℉.
- Consistent pouring technique. When pouring the funnel cake batter into the hot oil, maintain a steady and consistent flow to create even and uniform spirals. This ensures that the funnel cake cooks evenly and achieves the desired crispy texture.
- Drain excess oil. After frying, place the funnel cake on a paper towel lined baking sheet or plate to drain excess oil. This helps to maintain the desired crispiness and prevents the funnel cake from becoming soggy.
Storing and Freezing Instructions
How to Store
Transfer the completely cooled funnel cake into an airtight container with a layer of parchment paper between the cakes and store at room temperature for up to 2 days.
How to Reheat
Reheat in the oven at 350℉ for 10-15 minutes, or in the air fryer for 5-10 minutes until heated through and crisp.
How to Freeze
Transfer individual funnel cakes into freezer bags or wrap them individually in plastic cling wrap and freeze for up to 3 months.
More Dessert Recipes
- 40 Best Summer Desserts
- Banana Pudding
- Rice Krispies Treats
- Blueberry Pie
- Peach Cobbler
- Fresh Strawberry Pie
Tried this recipe?
I'd love to hear what you think! Leave a comment and rating below to share your feedback. Your reviews help others discover this recipe and help me keep creating more free recipes for you. Snap a photo and tag me on social media @aheadofthyme too.

50 Easy Summer Appetizers
Looking to elevate your summer gatherings with delicious appetizers? Well, you're in the right place! We are sharing over 50 of our best easy summer appetizers to snack on including cool and refreshing dips, simple baked appetizers, easy-to-assemble crostini and snack platters, and more.
Plus, this recipe collection offers something for everything - including healthy, vegetarian, gluten-free, and kid-friendly options too. Whether you're preparing appetizers for a soirée by the pool, organizing a backyard barbecue, or simply enjoying a sunny day with loved ones, there is a summer appetizer recipe here for you.

Easy Summer Appetizers
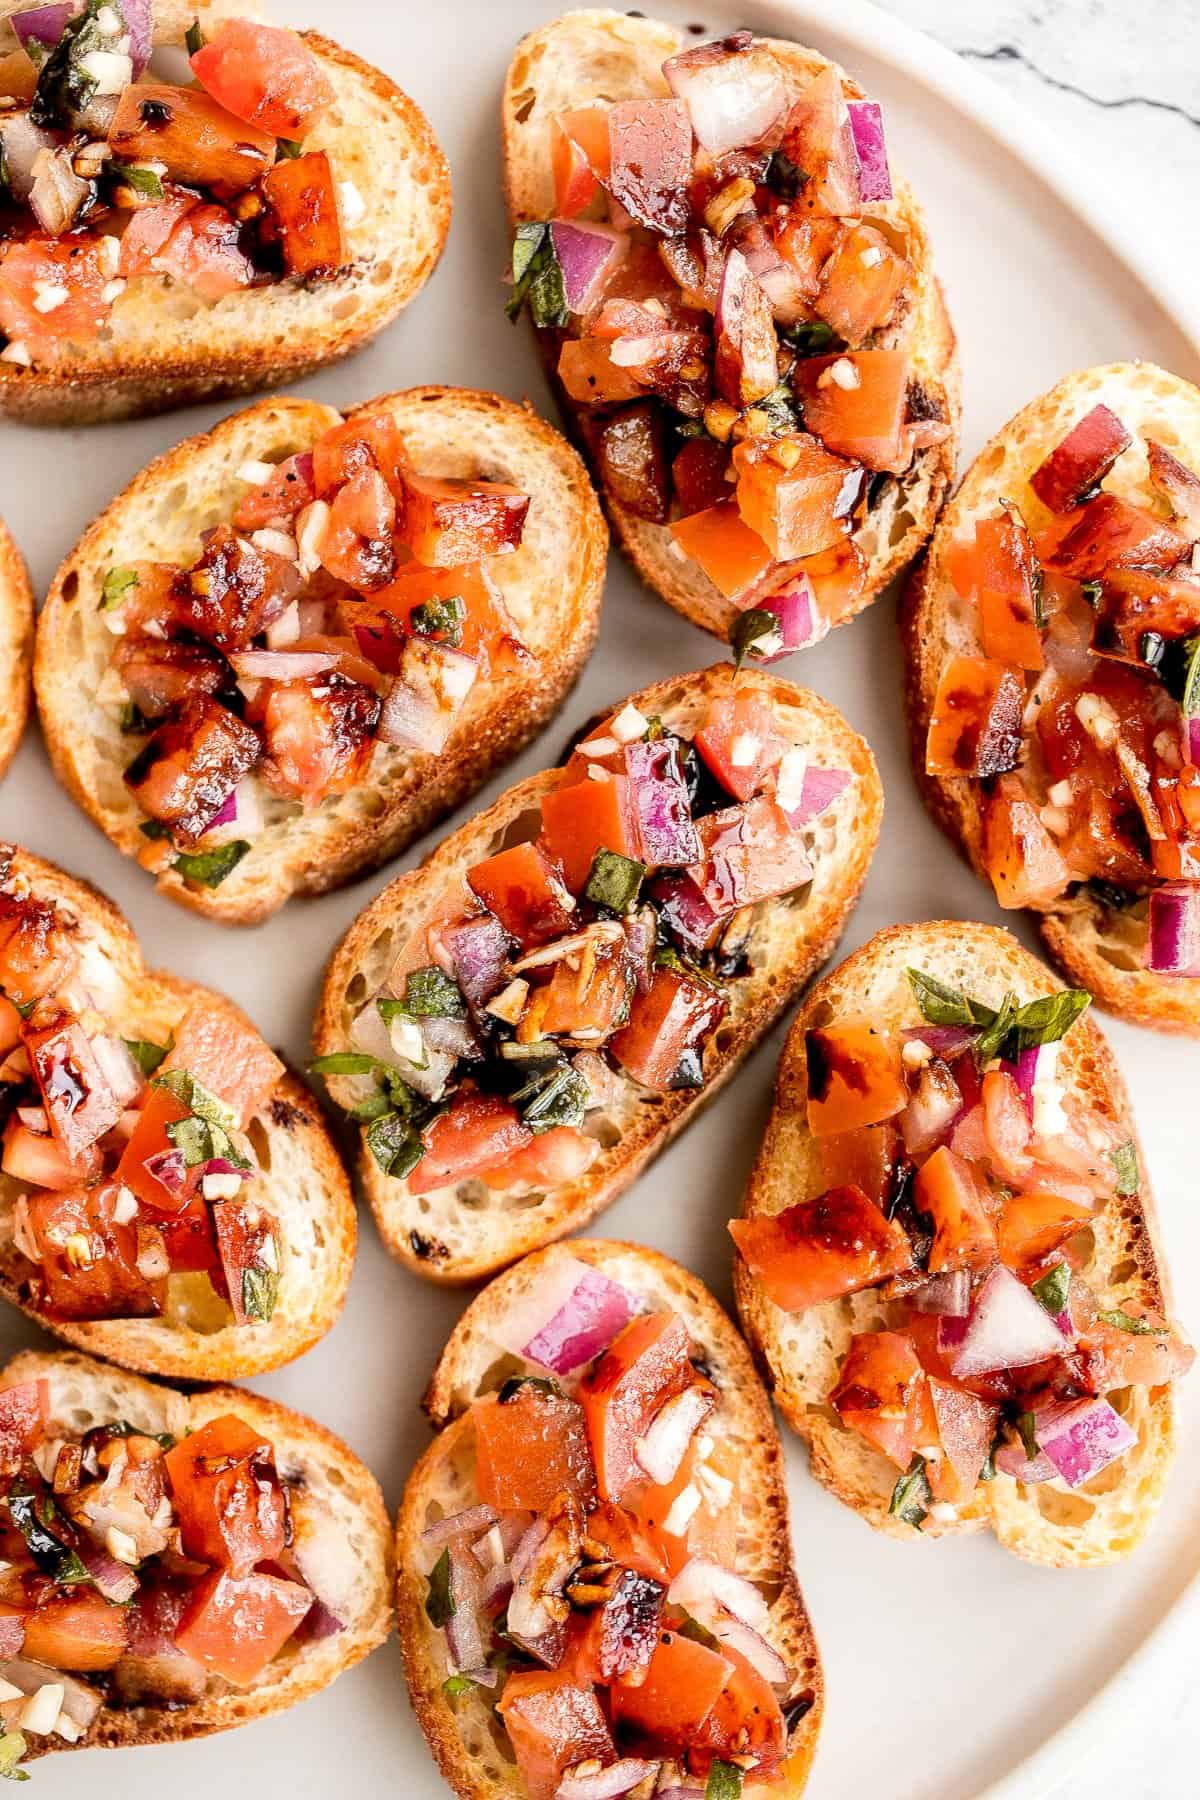
Tomato Bruschetta with Balsamic Glaze
Tomato bruschetta with balsamic glaze is an easy Italian appetizer topped with tomatoes, onions, garlic, basil and olive oil. Delicious, fresh and simple.
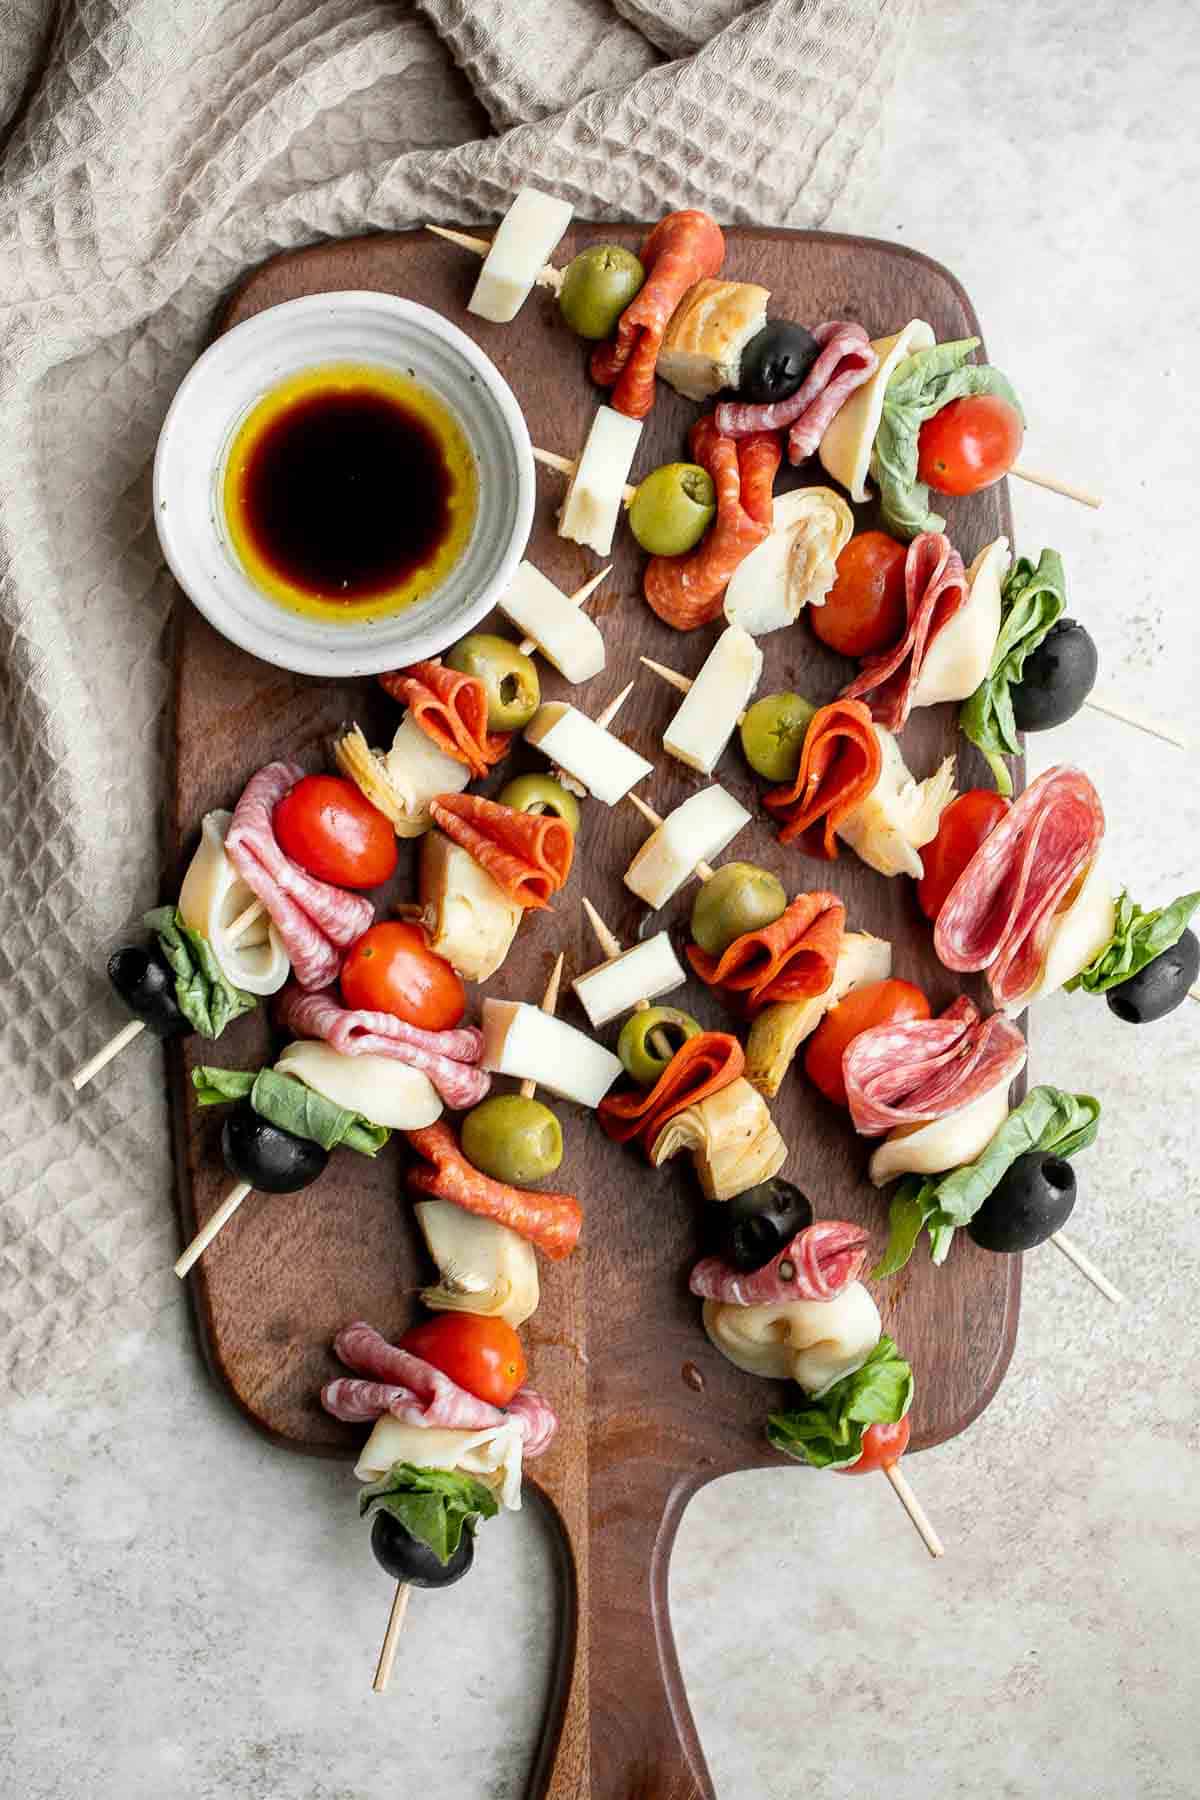
Antipasto skewers with tortellini are a quick, easy, and delicious appetizer with the best parts of a traditional antipasto platter but easier to eat.
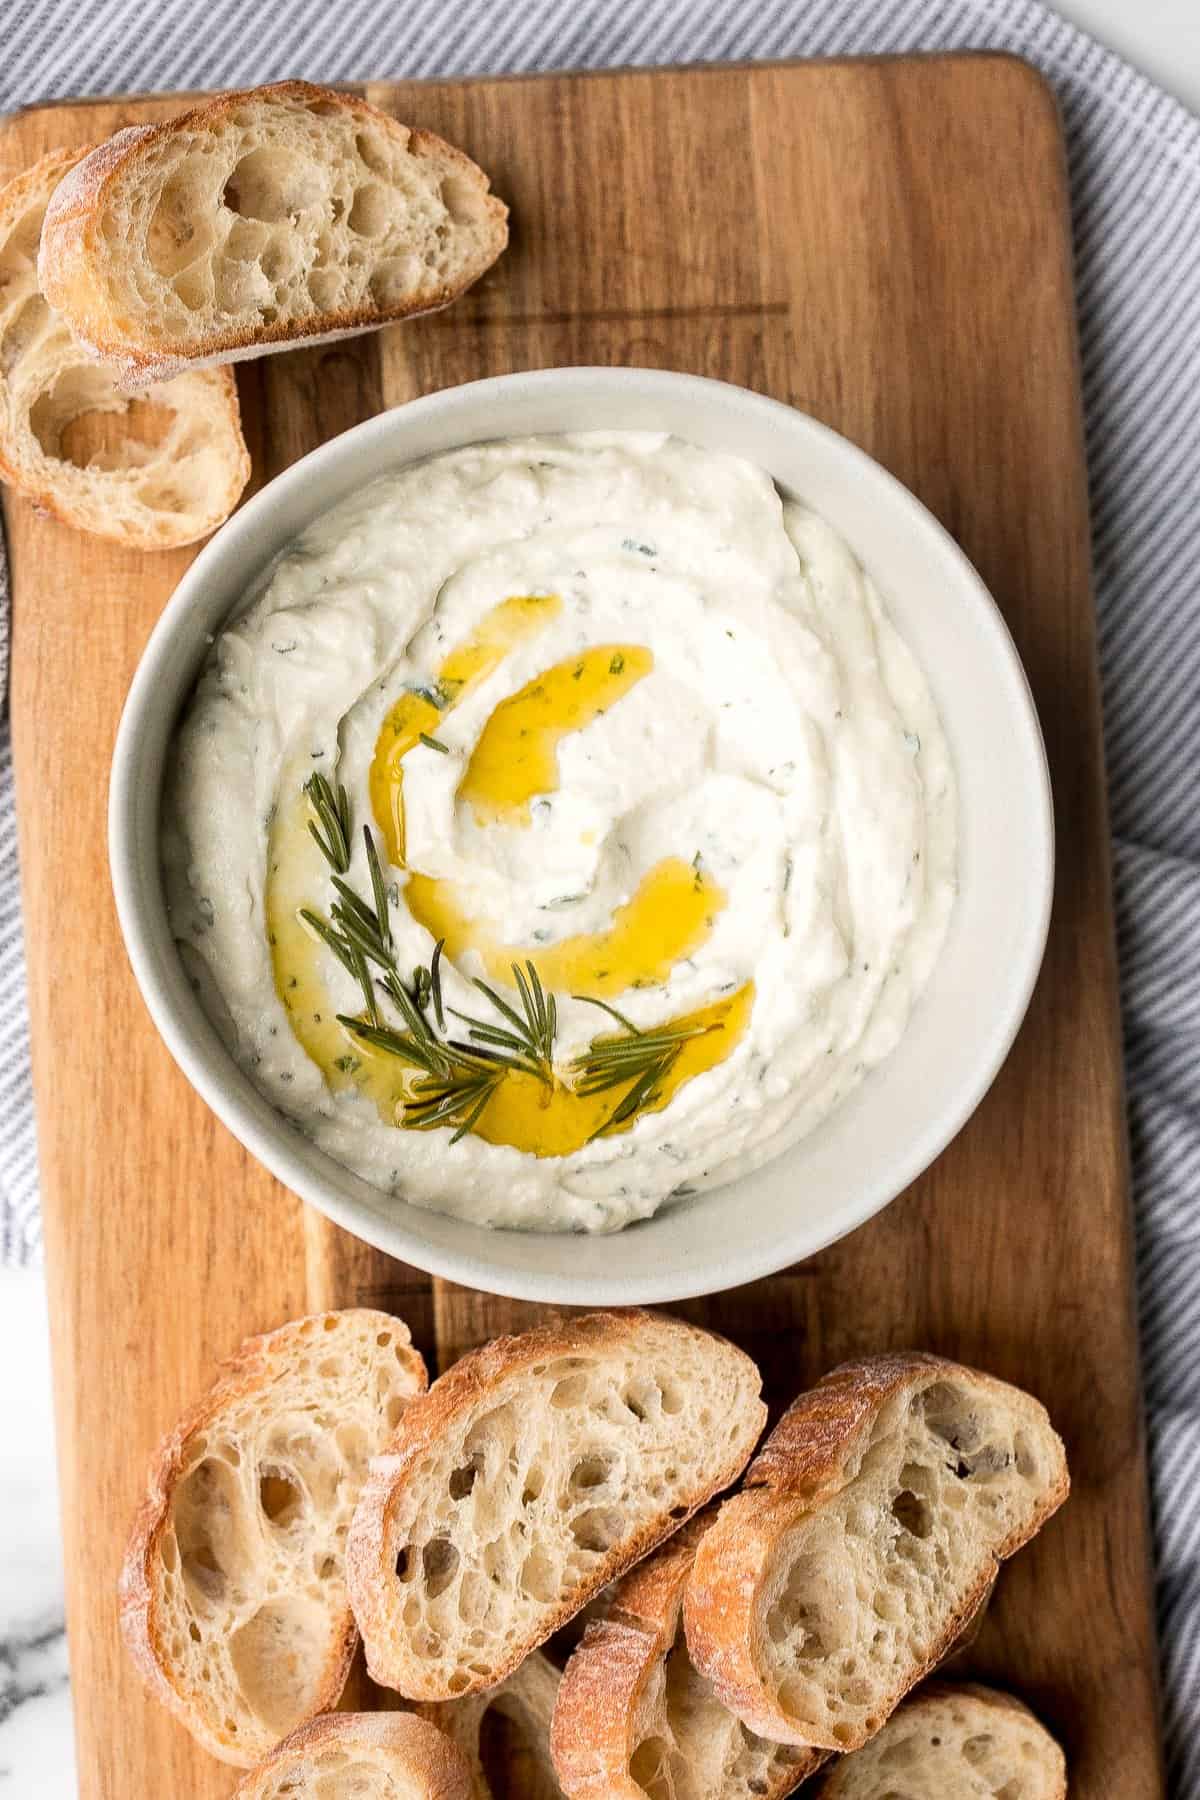
Light and airy, whipped ricotta dip is so easy to make in just 5 minutes with a few fresh ingredients including fresh herbs, olive oil, garlic, and honey.
These Cauliflower Tots are everything you want in a tater tot - but better! They are crunchy on the outside, tender inside, higher in fiber, and cheesy.
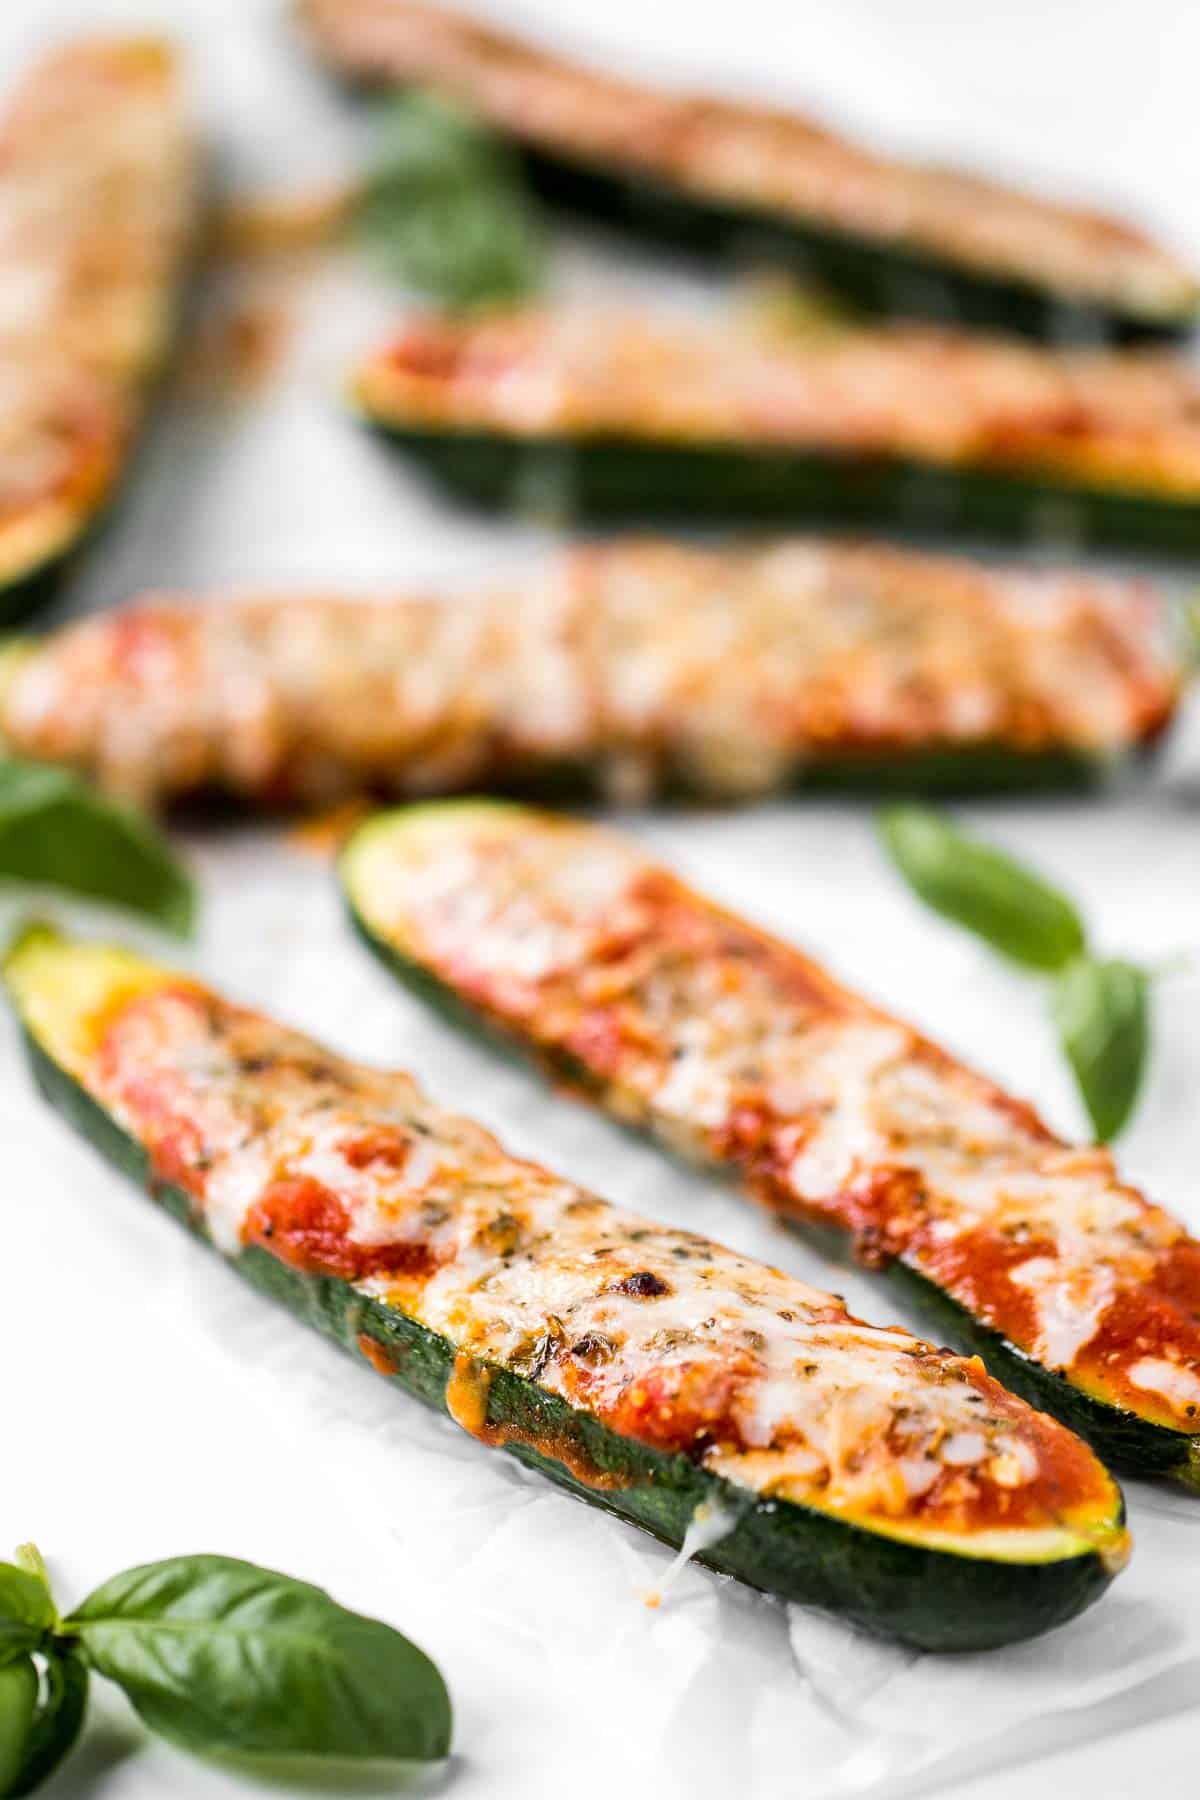
Cheesy Baked Zucchini with Marinara
Cheesy Baked Zucchini with Marinara will save your weeknight dinner routine (and the kids love it too!). It's low carb, vegetarian, gluten-free, and keto.
Sticky crispy baked sweet chili chicken bites is better than takeout and so easy to make healthier at home. An easy dinner or game day appy.

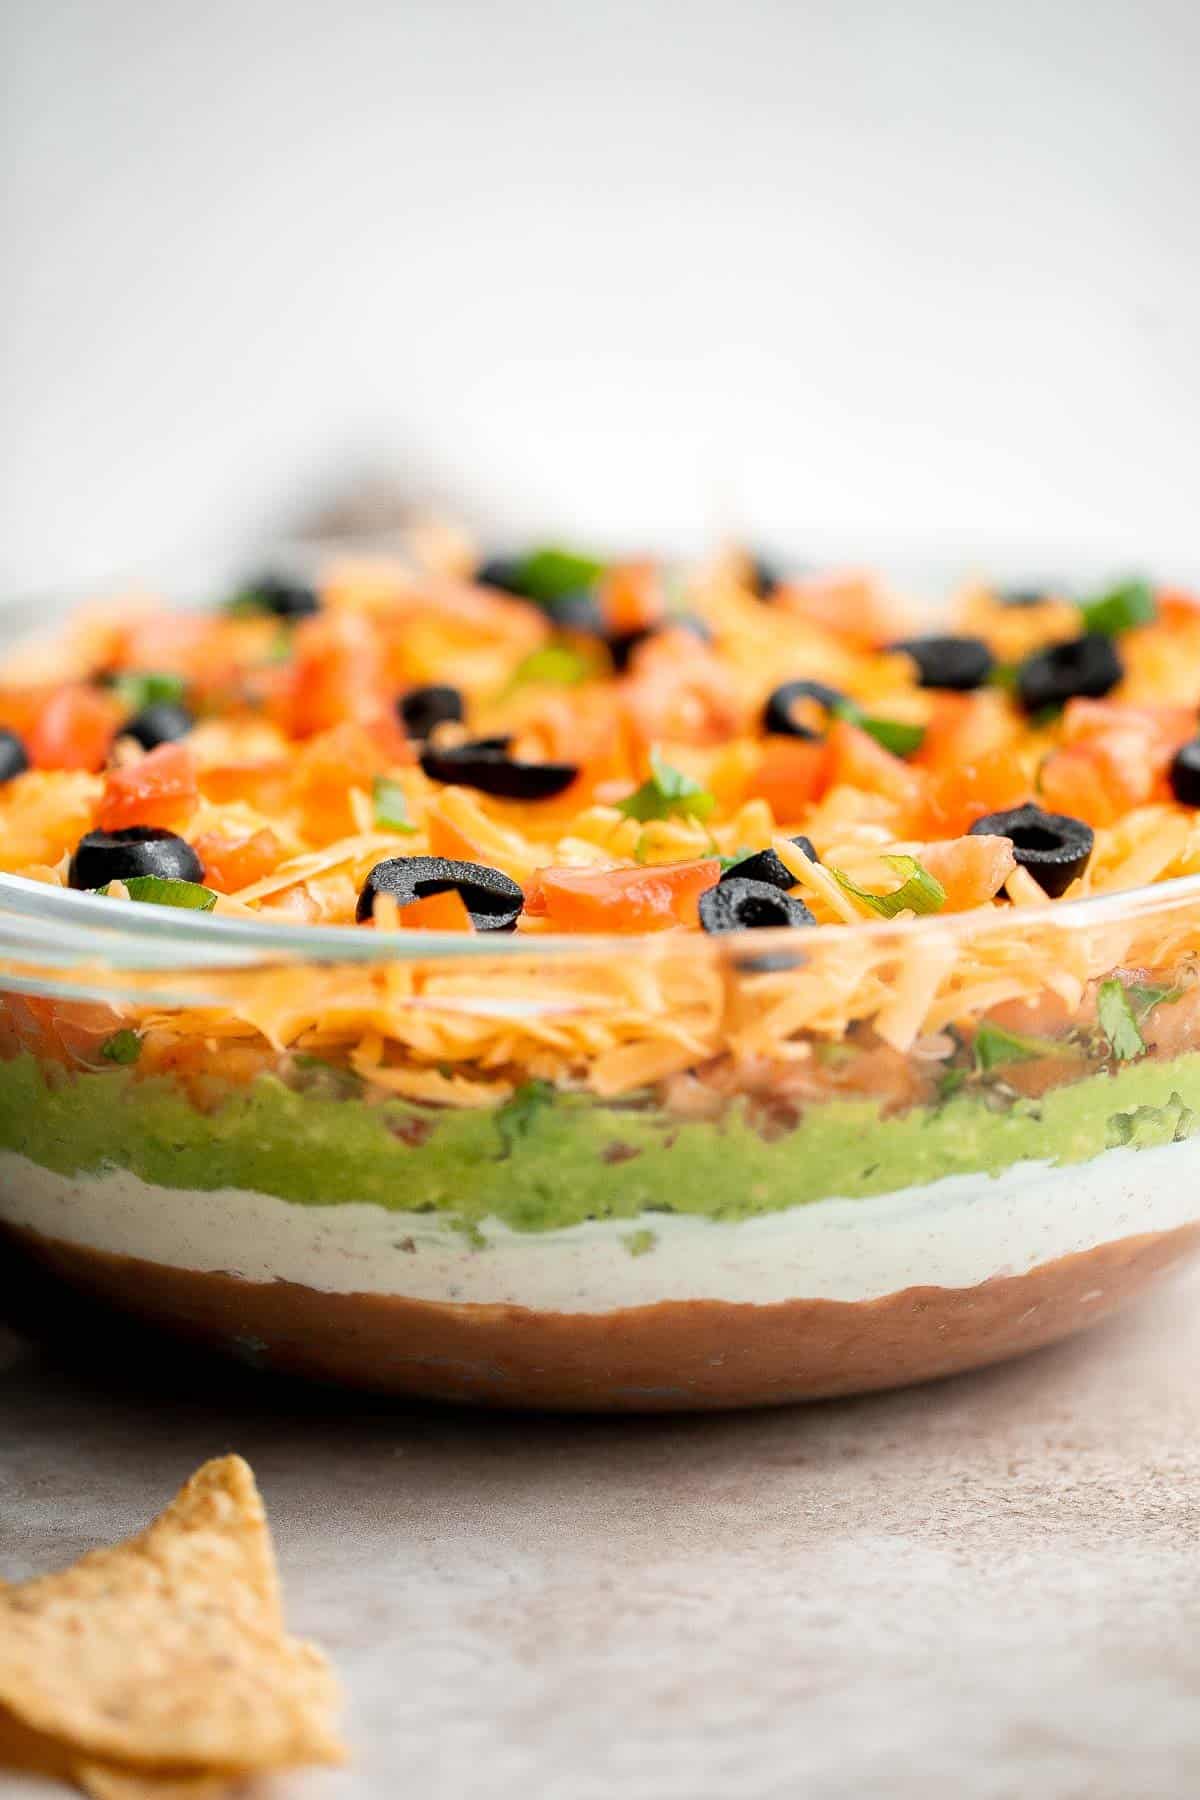
This easy and delicious 7 layer dip is the perfect dip to serve at your next party, made with layers of beans, guacamole, salsa, cheese, and more.
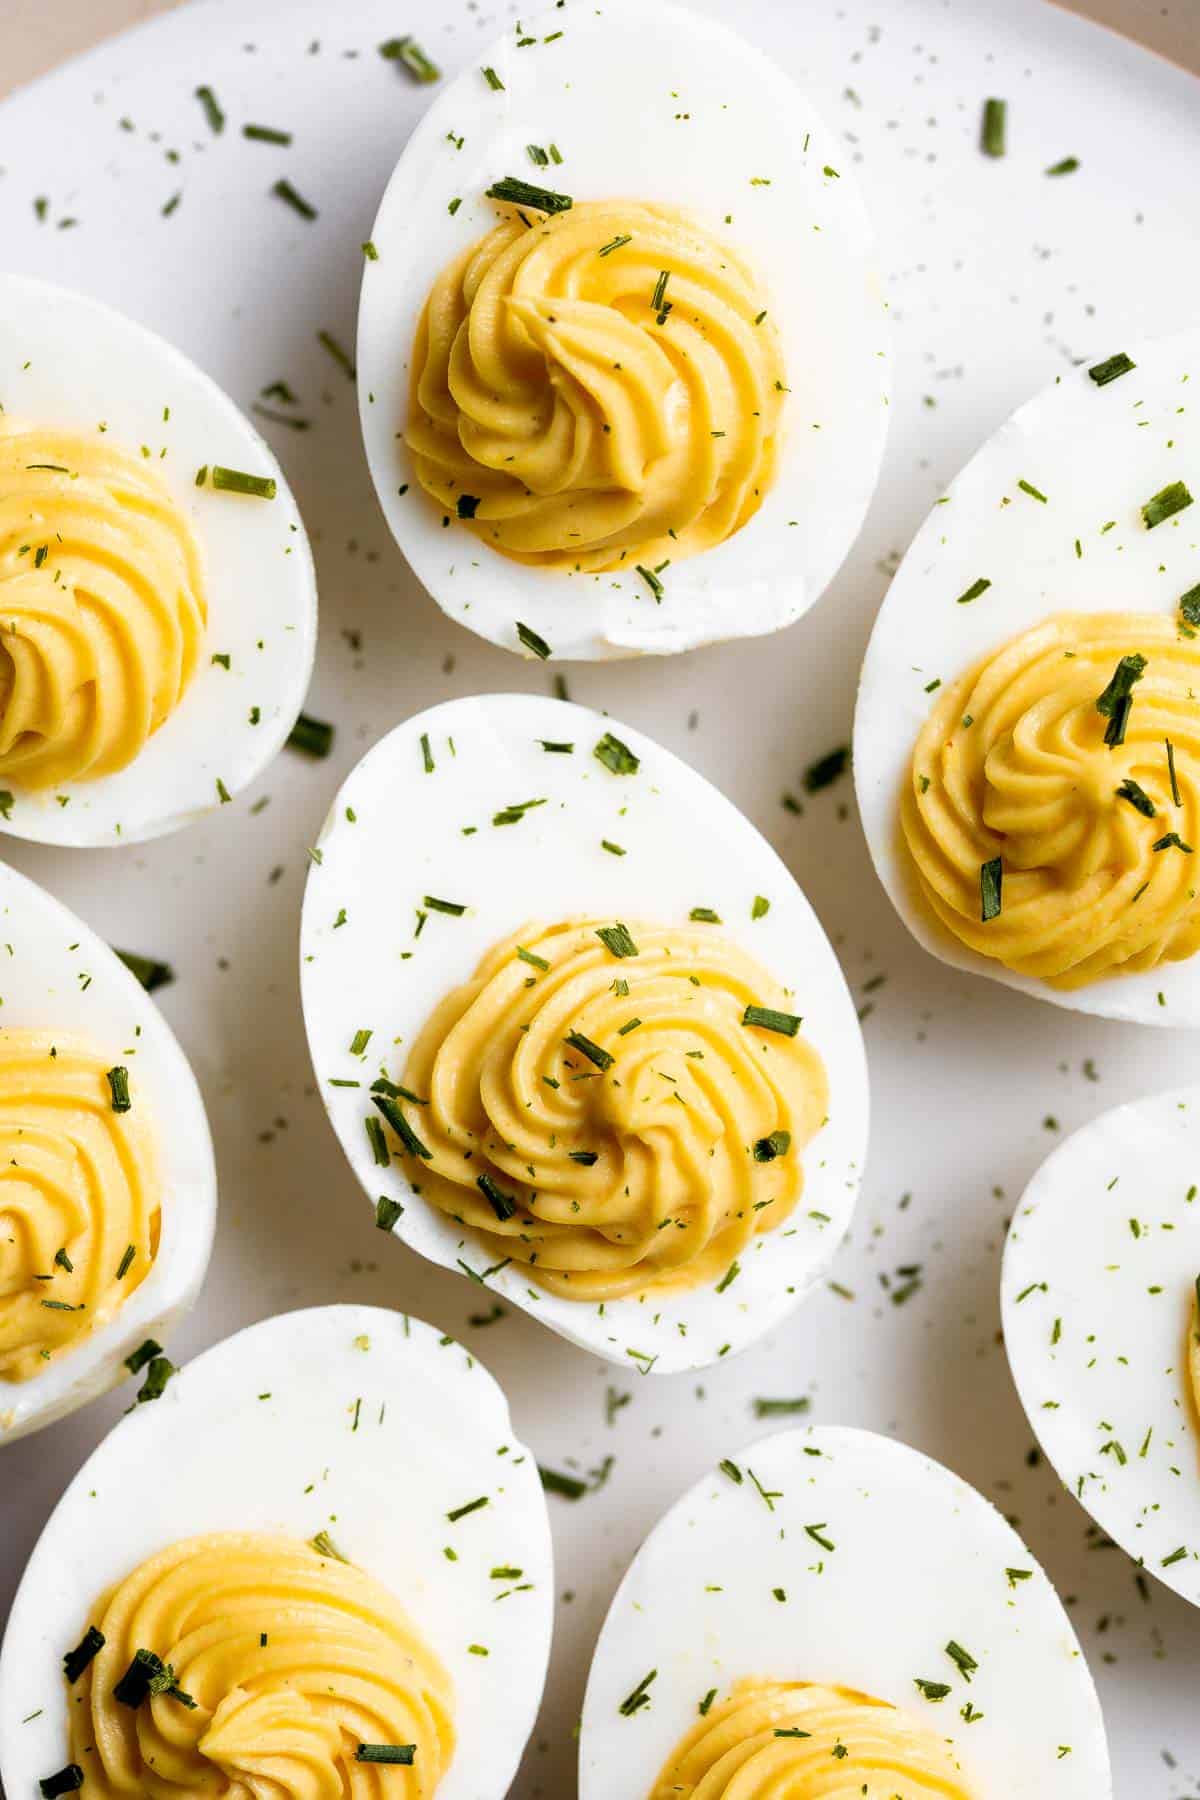
Classic deviled eggs are a simple, easy, and healthy appetizer to make when you need something quick for brunch, picnics, barbecues, potlucks, or Easter.
Homemade Taquitos are crispy, delicious and flavorful. These rolled tacos are filled with seasoned ground beef and melty cheese - and can be fried or baked!

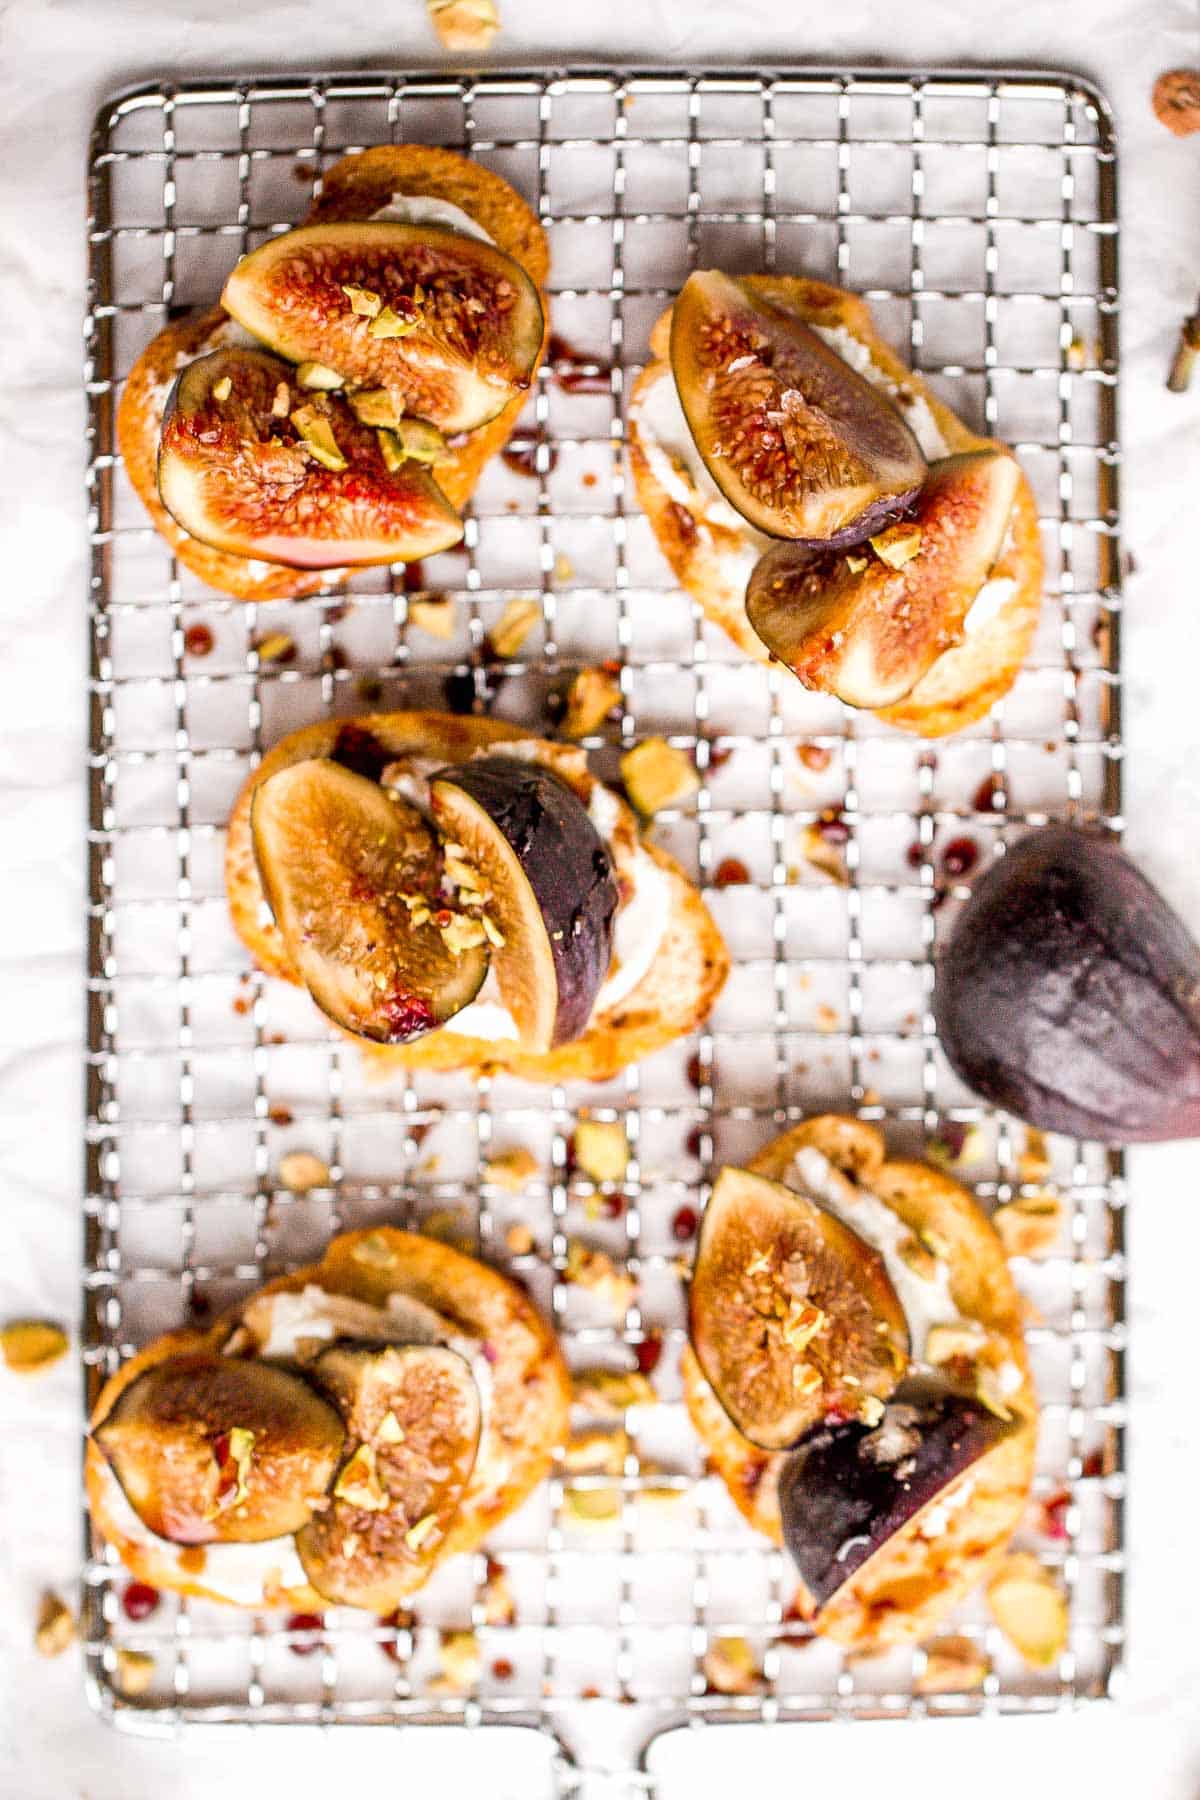
Fig crostini topped sweet, juicy figs, tangy goat cheese and crunchy pistachios is flavourful, delicious, and perfect for snacking on or entertaining.
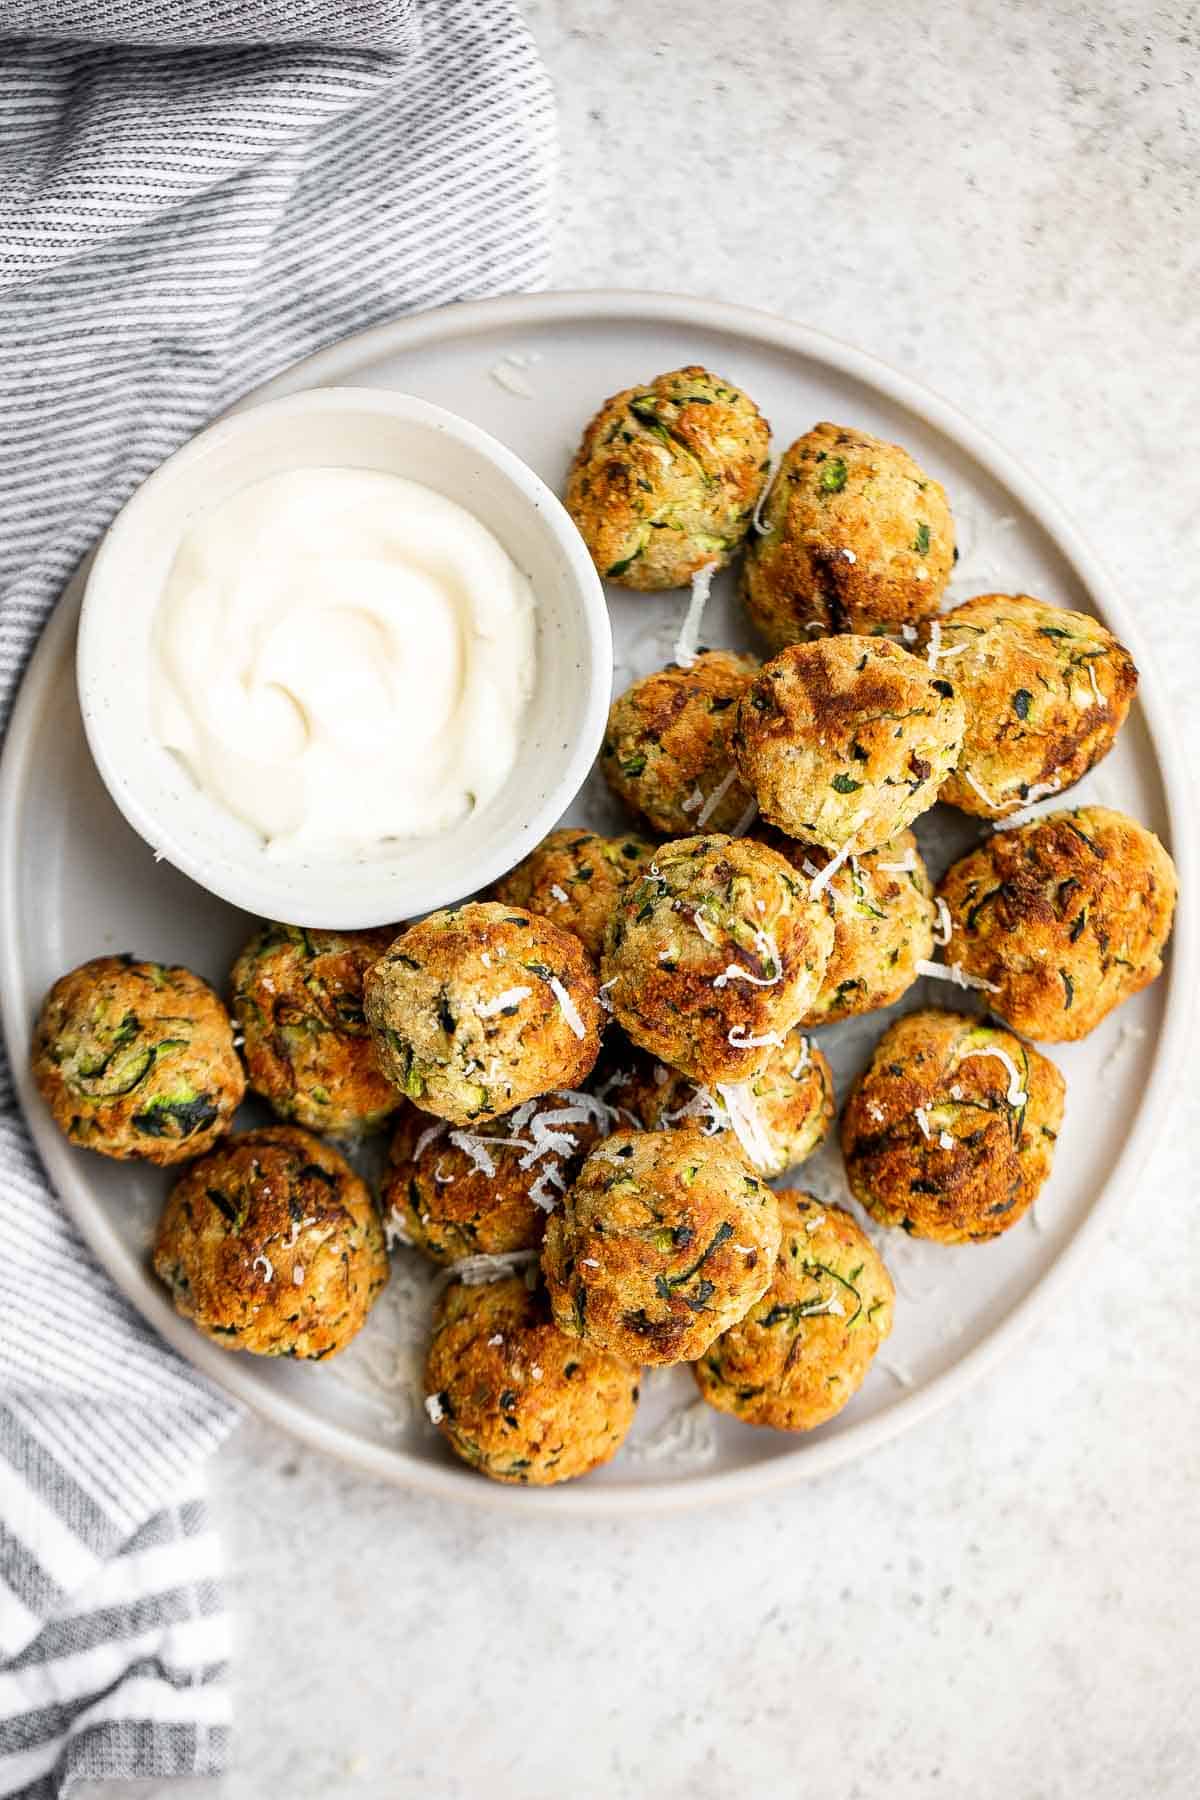
Zucchini Bites are savory balls that are loaded with fresh zucchini. They're quick and easy to make in under 30 minutes in the air fryer or oven.
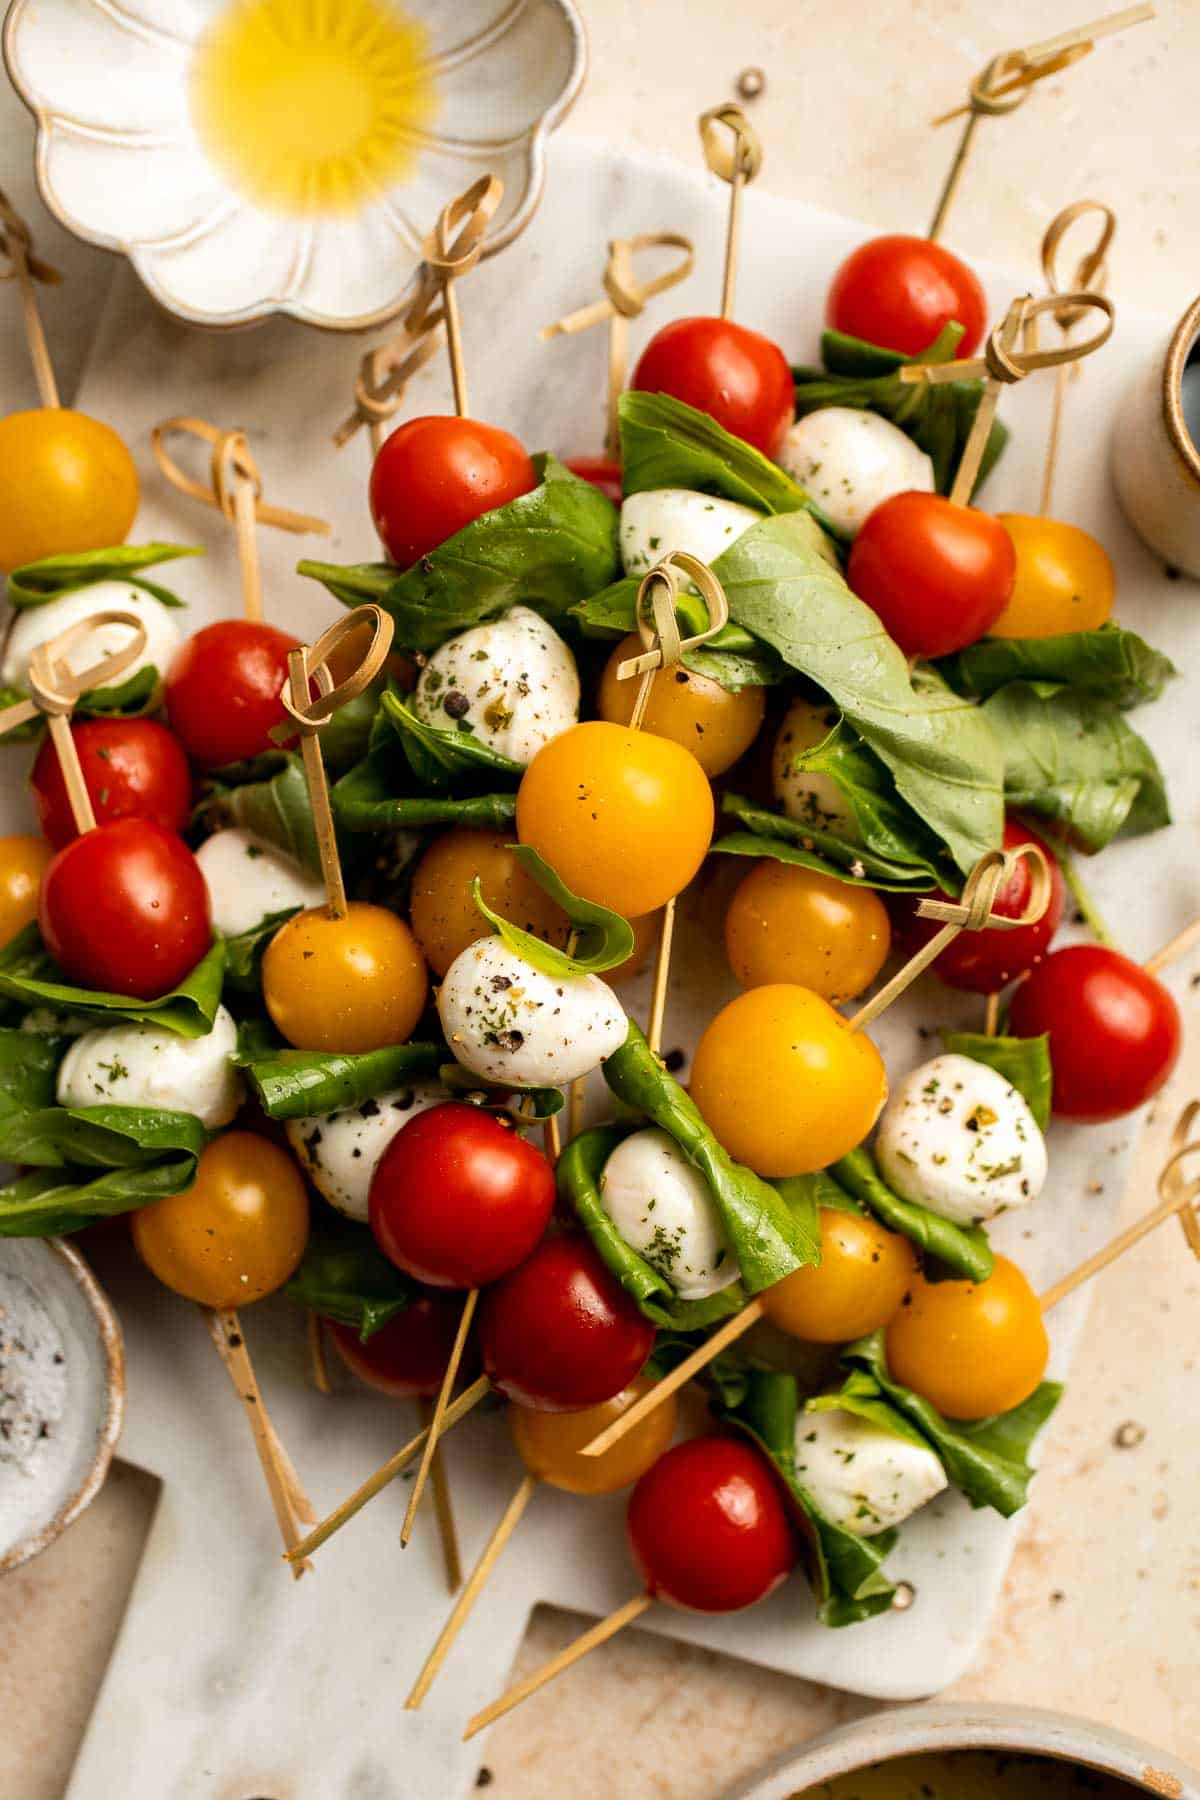
Caprese Skewers are a quick and fresh appetizer made with bite-sized mozzarella, juicy tomatoes, and basil leaves with a drizzle of balsamic glaze.
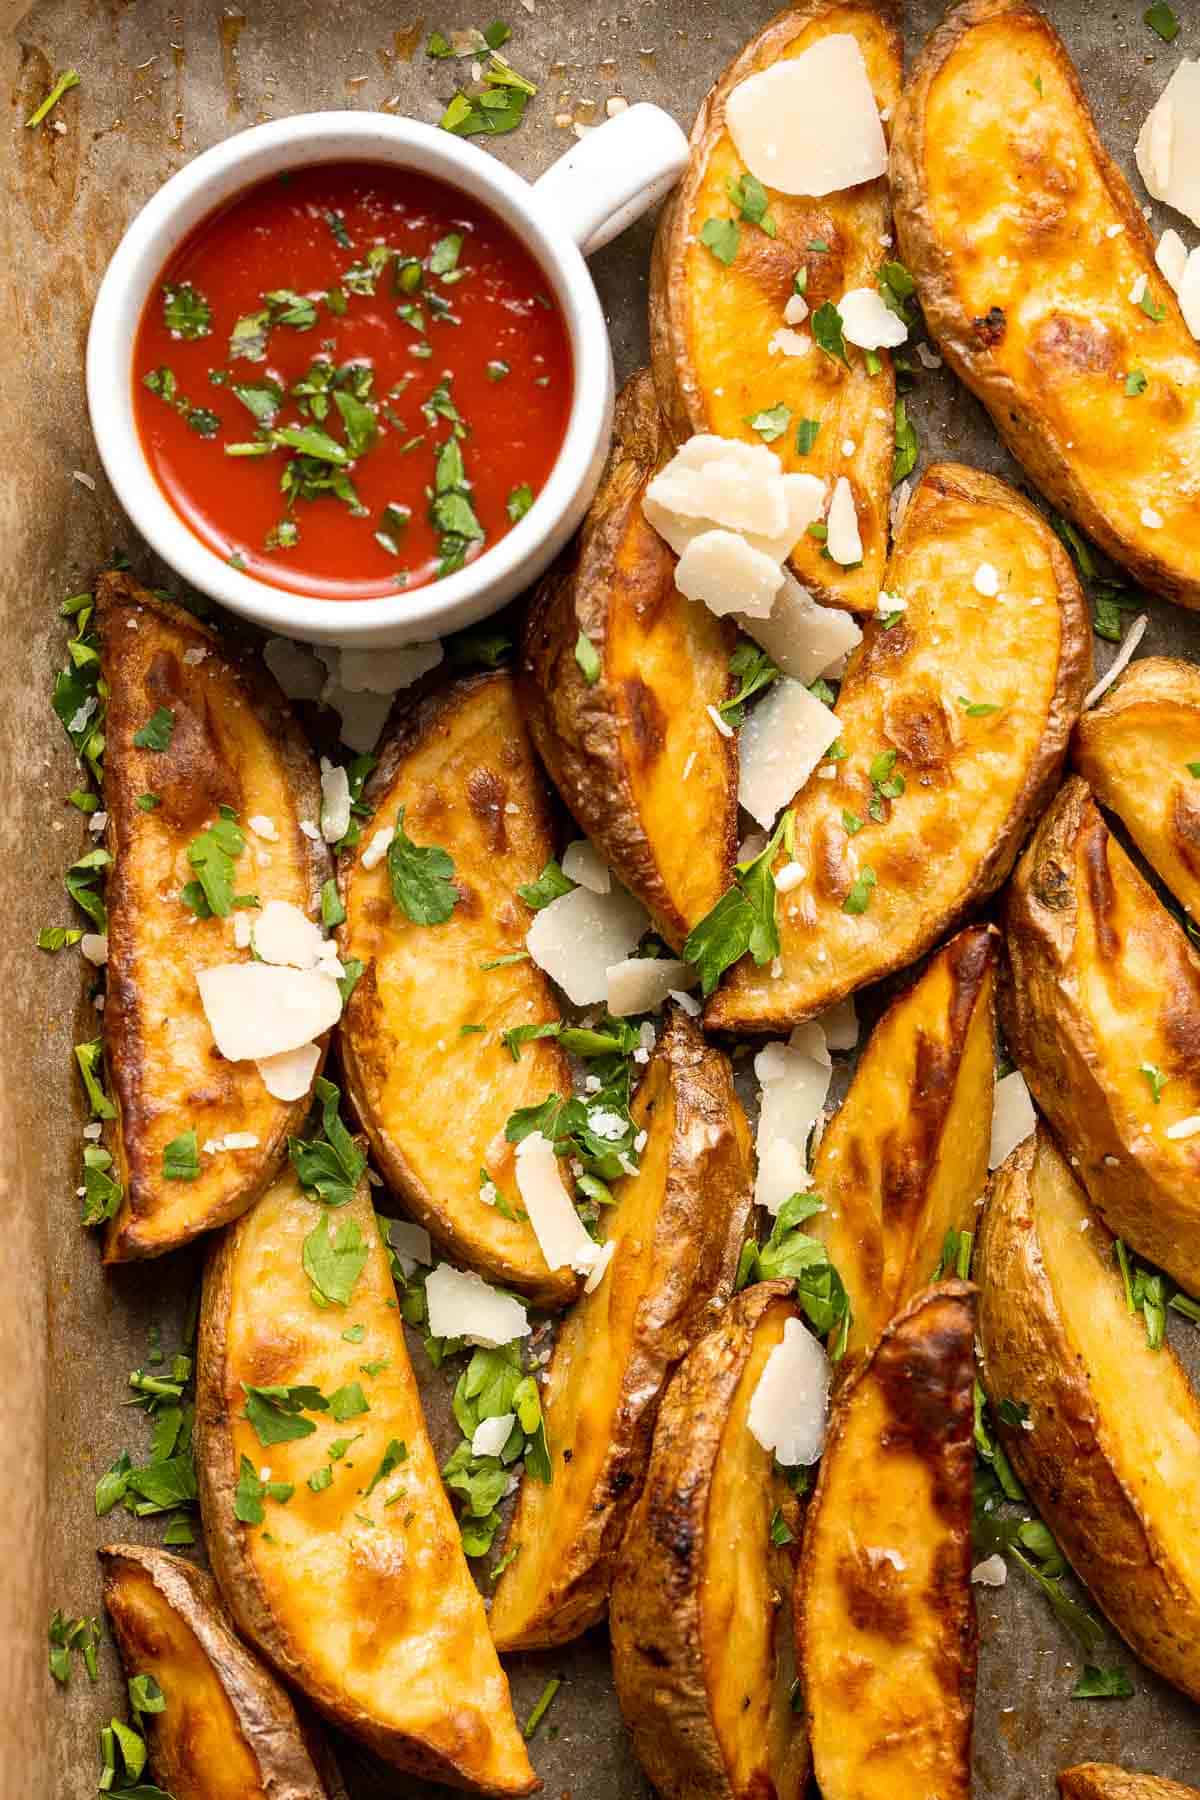
Baked Potato Wedges are crispy outside and soft inside - exactly what you want from a potato wedge but without frying! Cook in the oven or air fryer.
Chicken Satay Skewers with Peanut Sauce
Better than takeout, easy to make tender chicken satay skewers with coconut marinade and homemade peanut dipping sauce is savoury, sweet, tangy, and nutty.

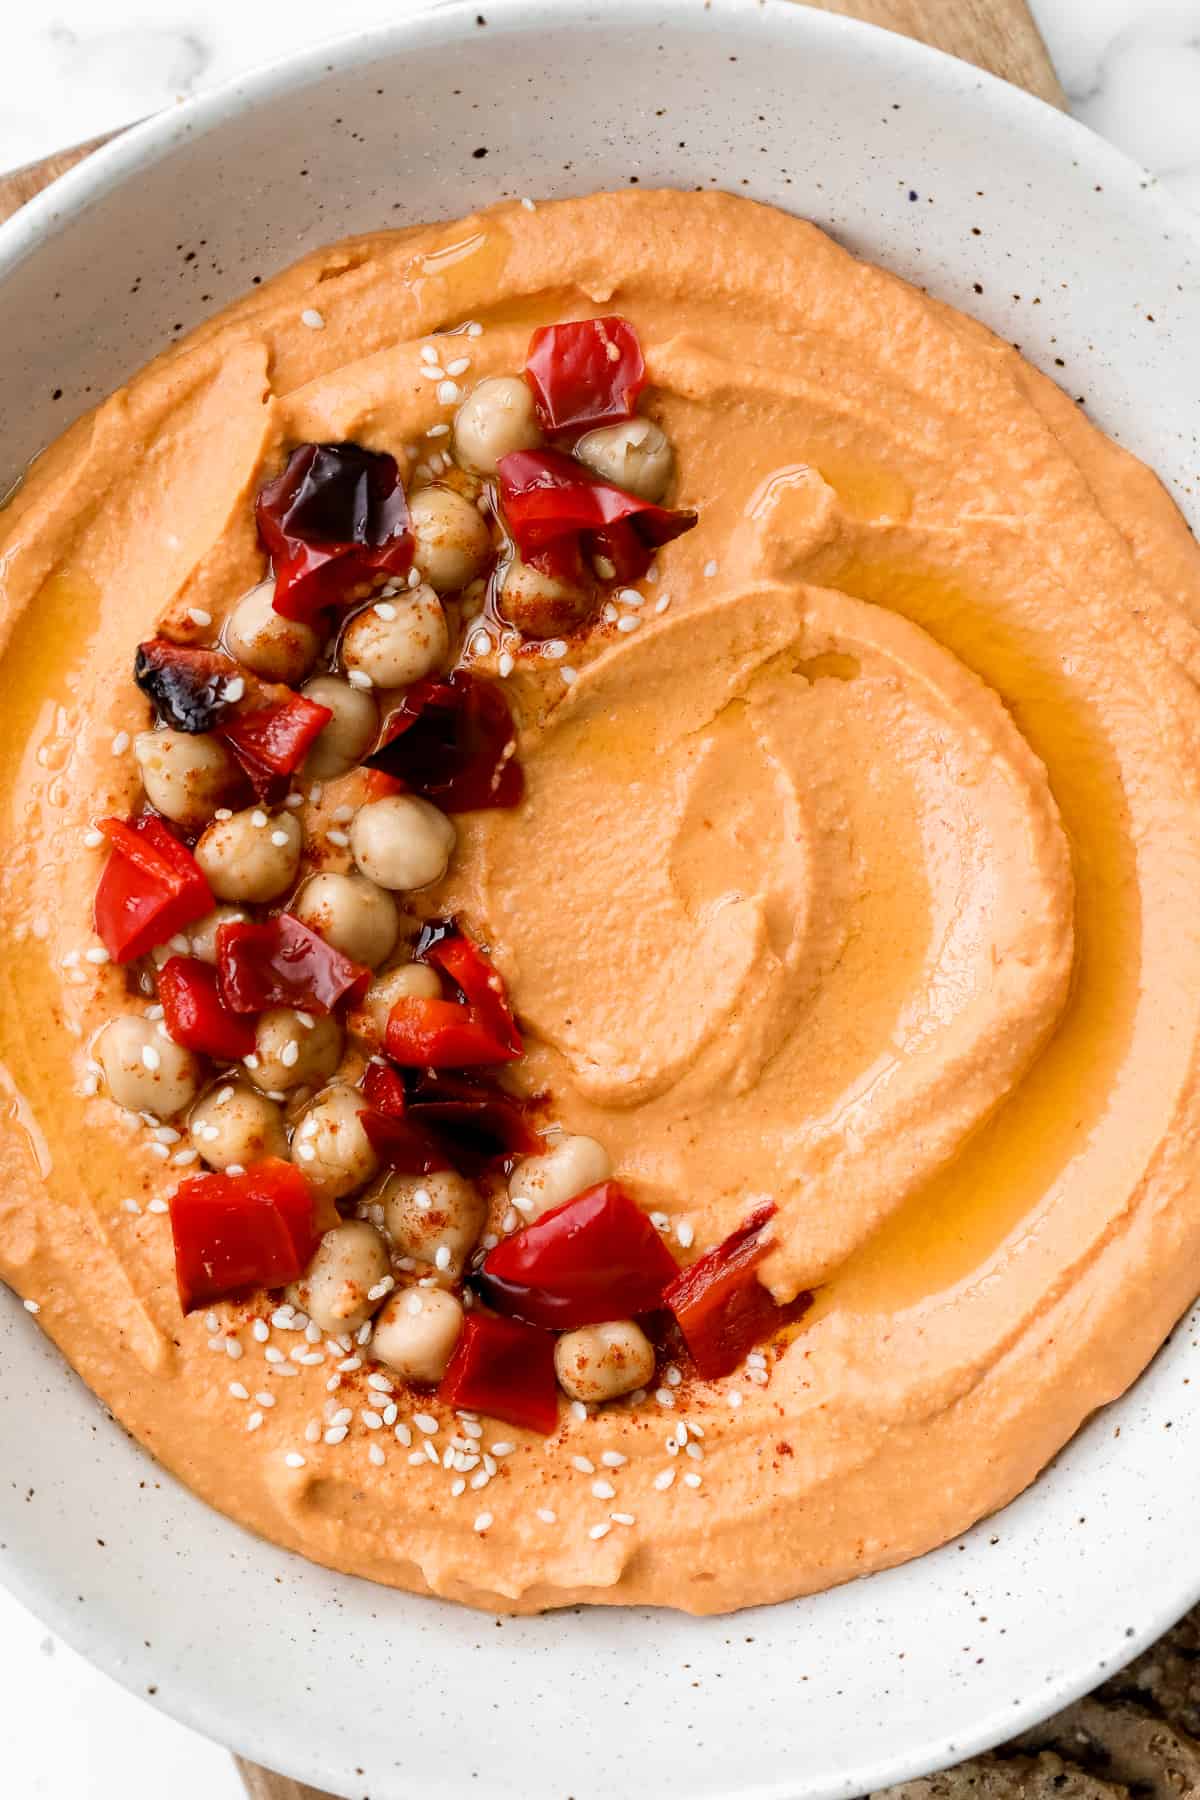
Smooth creamy roasted red pepper hummus is a delicious, flavourful, vegan + gluten-free dip. This healthy appetizer is easy to make with a few ingredients.
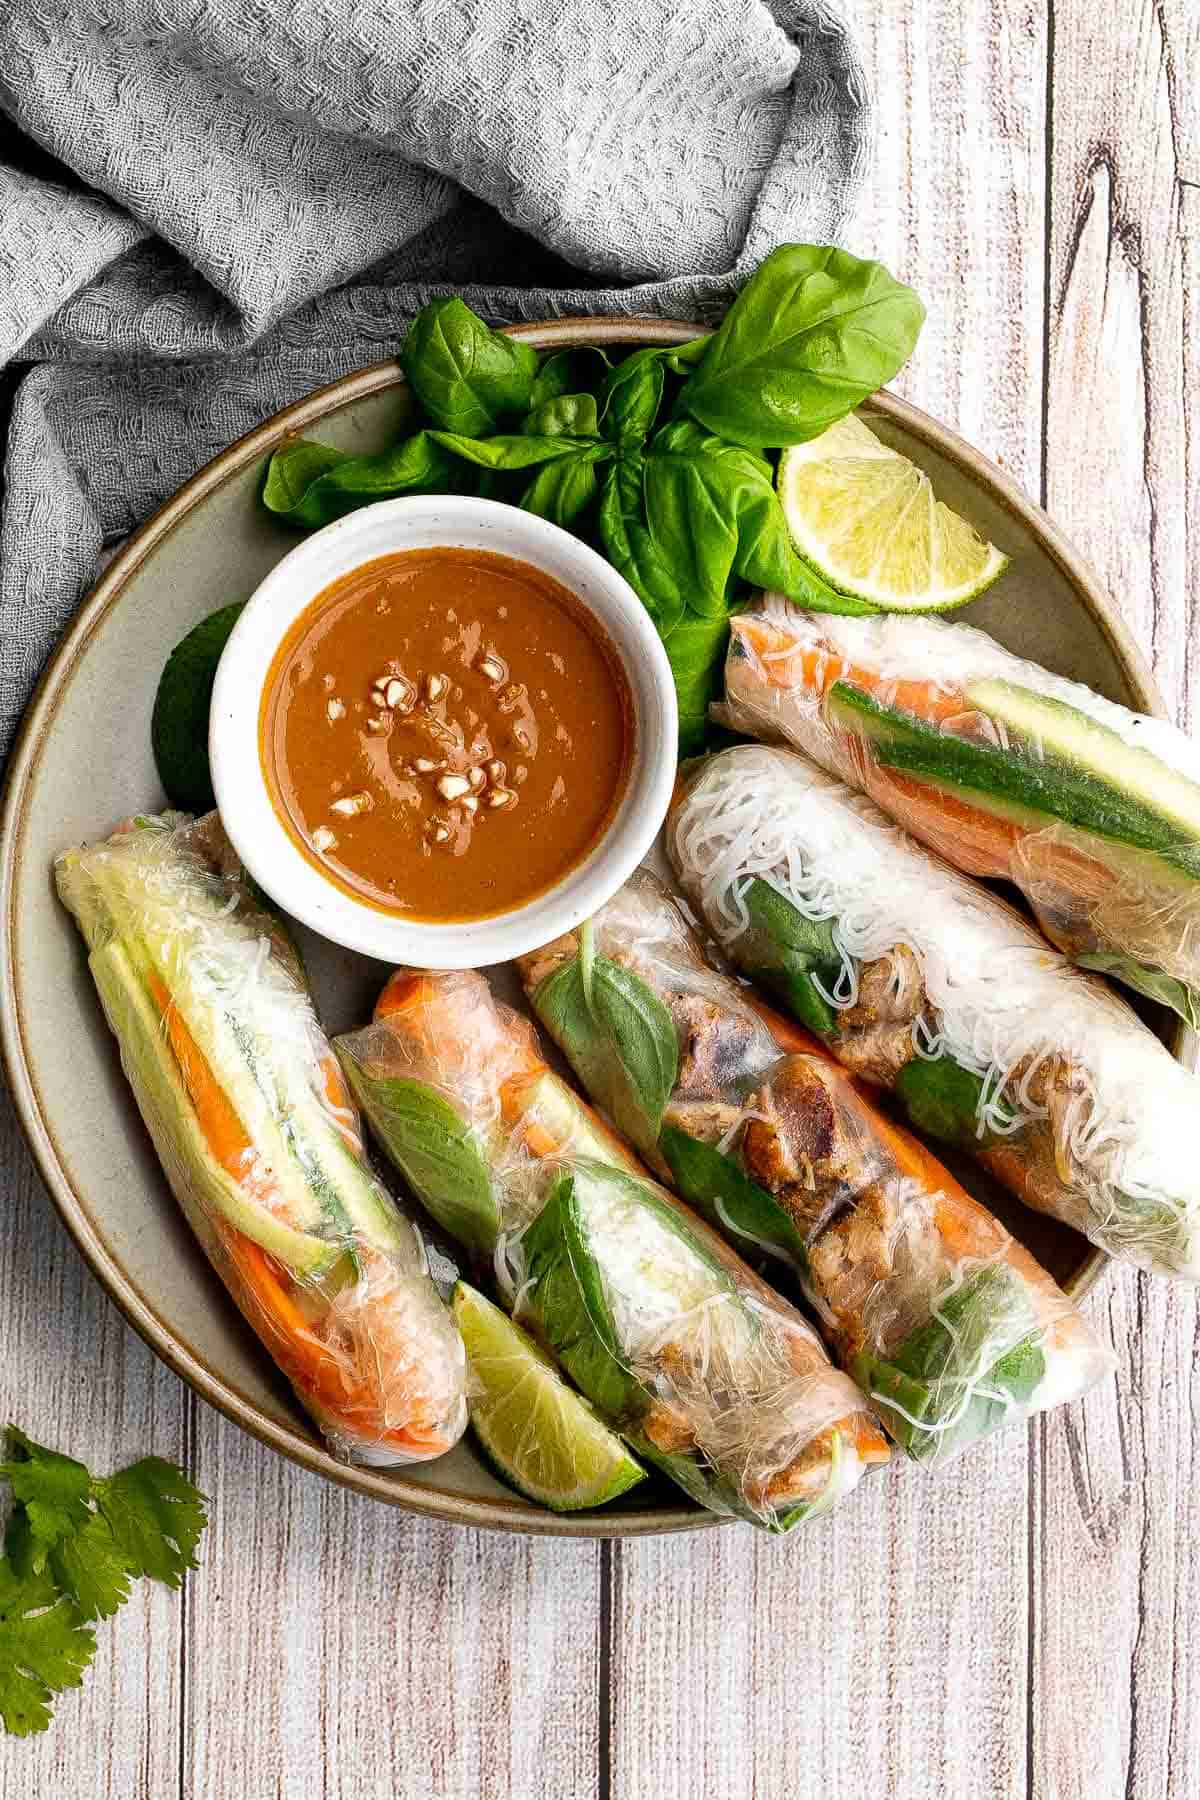
Vietnamese Summer Rolls with Chicken
Vietnamese summer rolls with chicken are fresh, light, and healthy. This Asian summer snack takes less than 20 minutes to make and easier than you think.
Baked Chicken Meatballs are tender, juicy, and flavorful (no dry meatballs here!). Made in just 45 minutes using simple ingredients. So quick and easy!

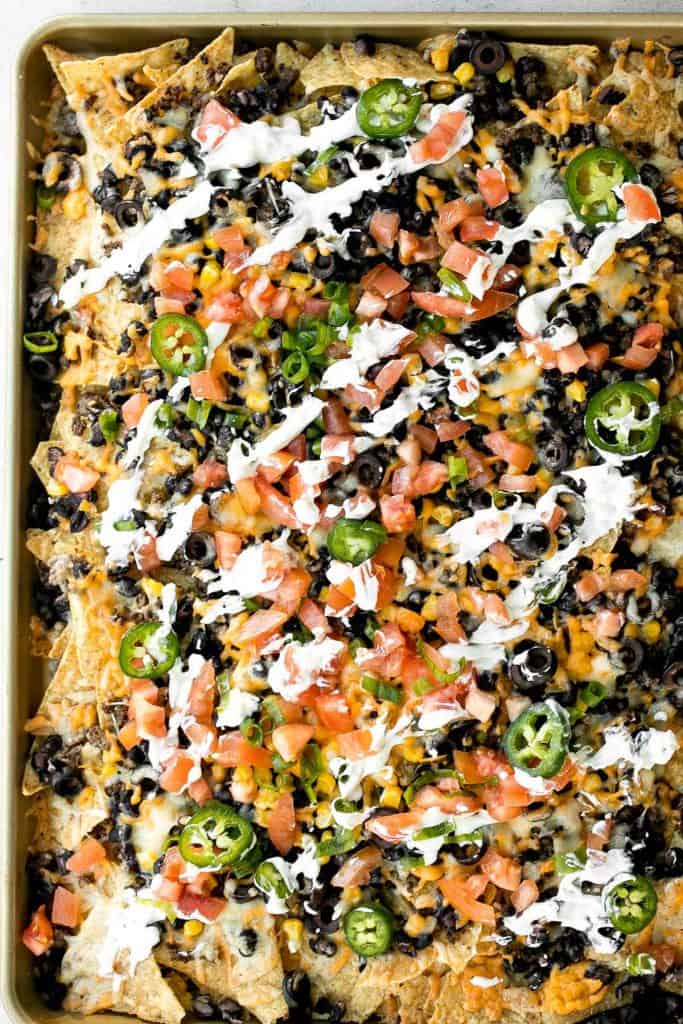
Oven-baked loaded sheet pan nachos are a crowd pleaser for an easy weeknight dinner or a crave-worthy appetizer to serve on game day.
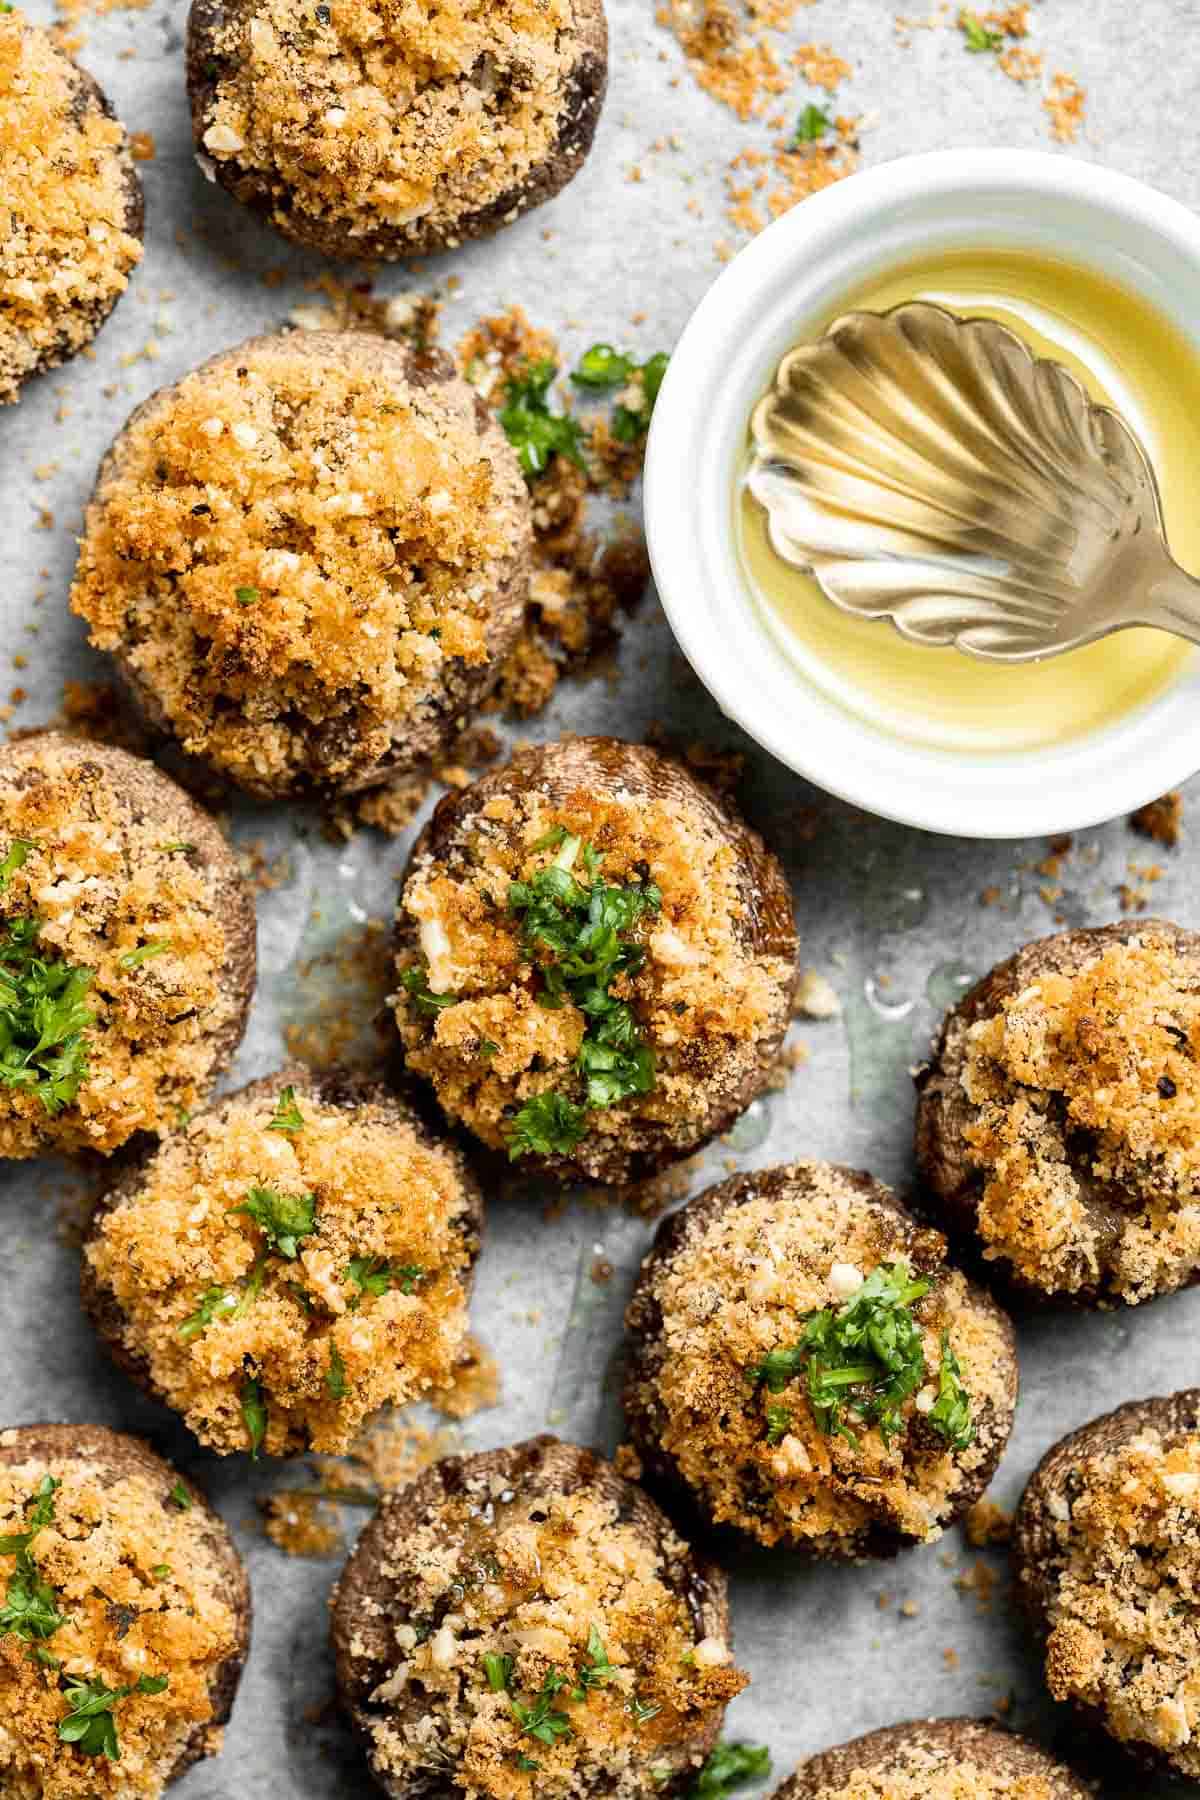
Vegetarian stuffed mushrooms are a delicious, flavorful, healthy, and nutritious appetizer. Plus, quick and easy to make in under 30 minutes including prep!
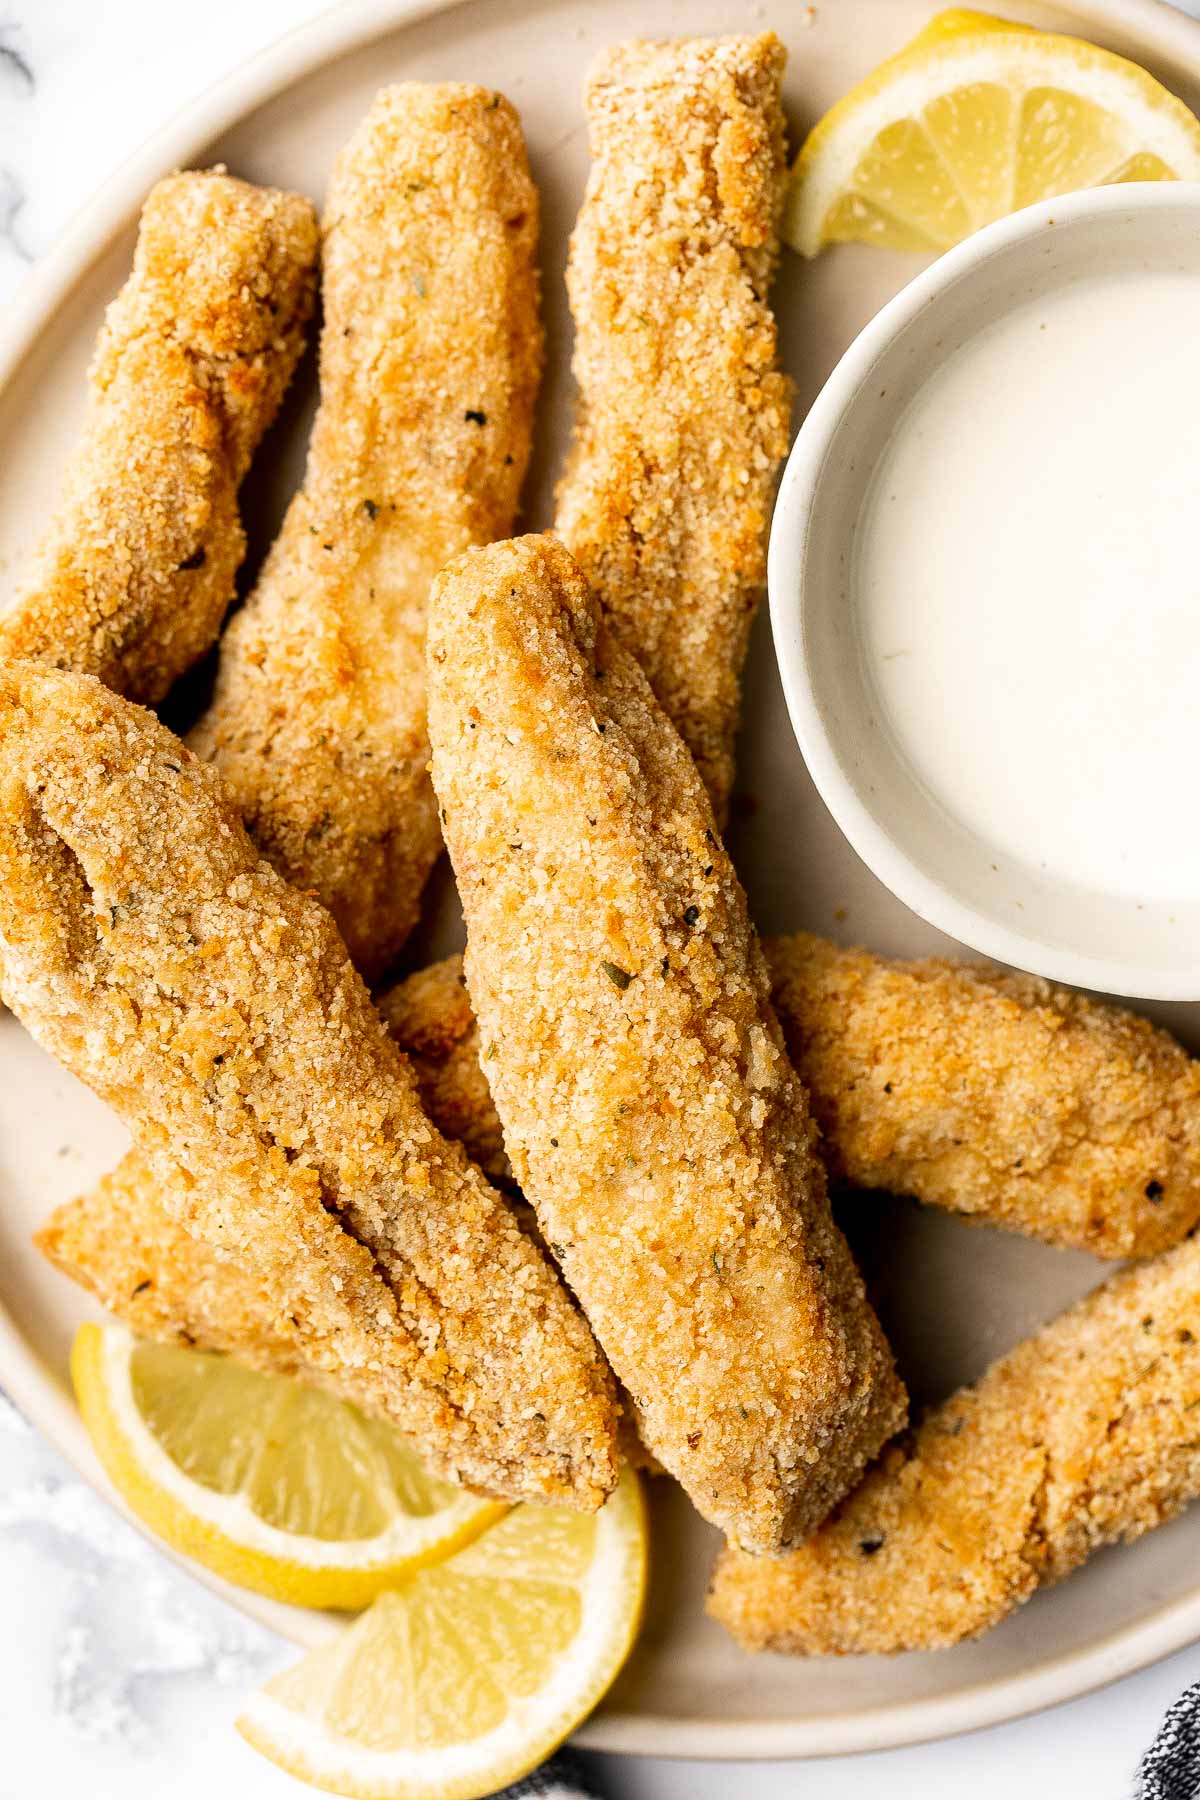
Quick easy baked homemade fish sticks are crispy on the outside, tender and flaky on the inside, and packed with flavor. Kid-friendly + freezer-friendly.
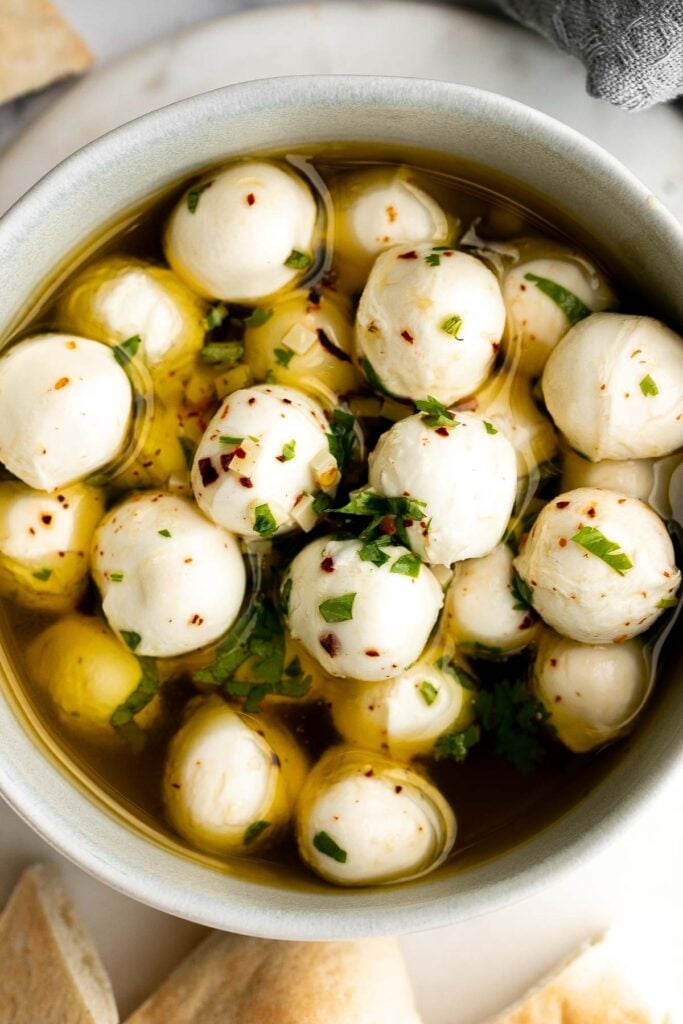
Marinated mozzarella balls is a delicious and simple yet stunning appetizer, made with fresh bocconcini soaked in olive oil, garlic, and fresh herbs.
Forget delivery and make sweet, tangy, and smoky BBQ chicken pizza from the comfort of your own home in under 30 minutes. The easiest weeknight dinner.

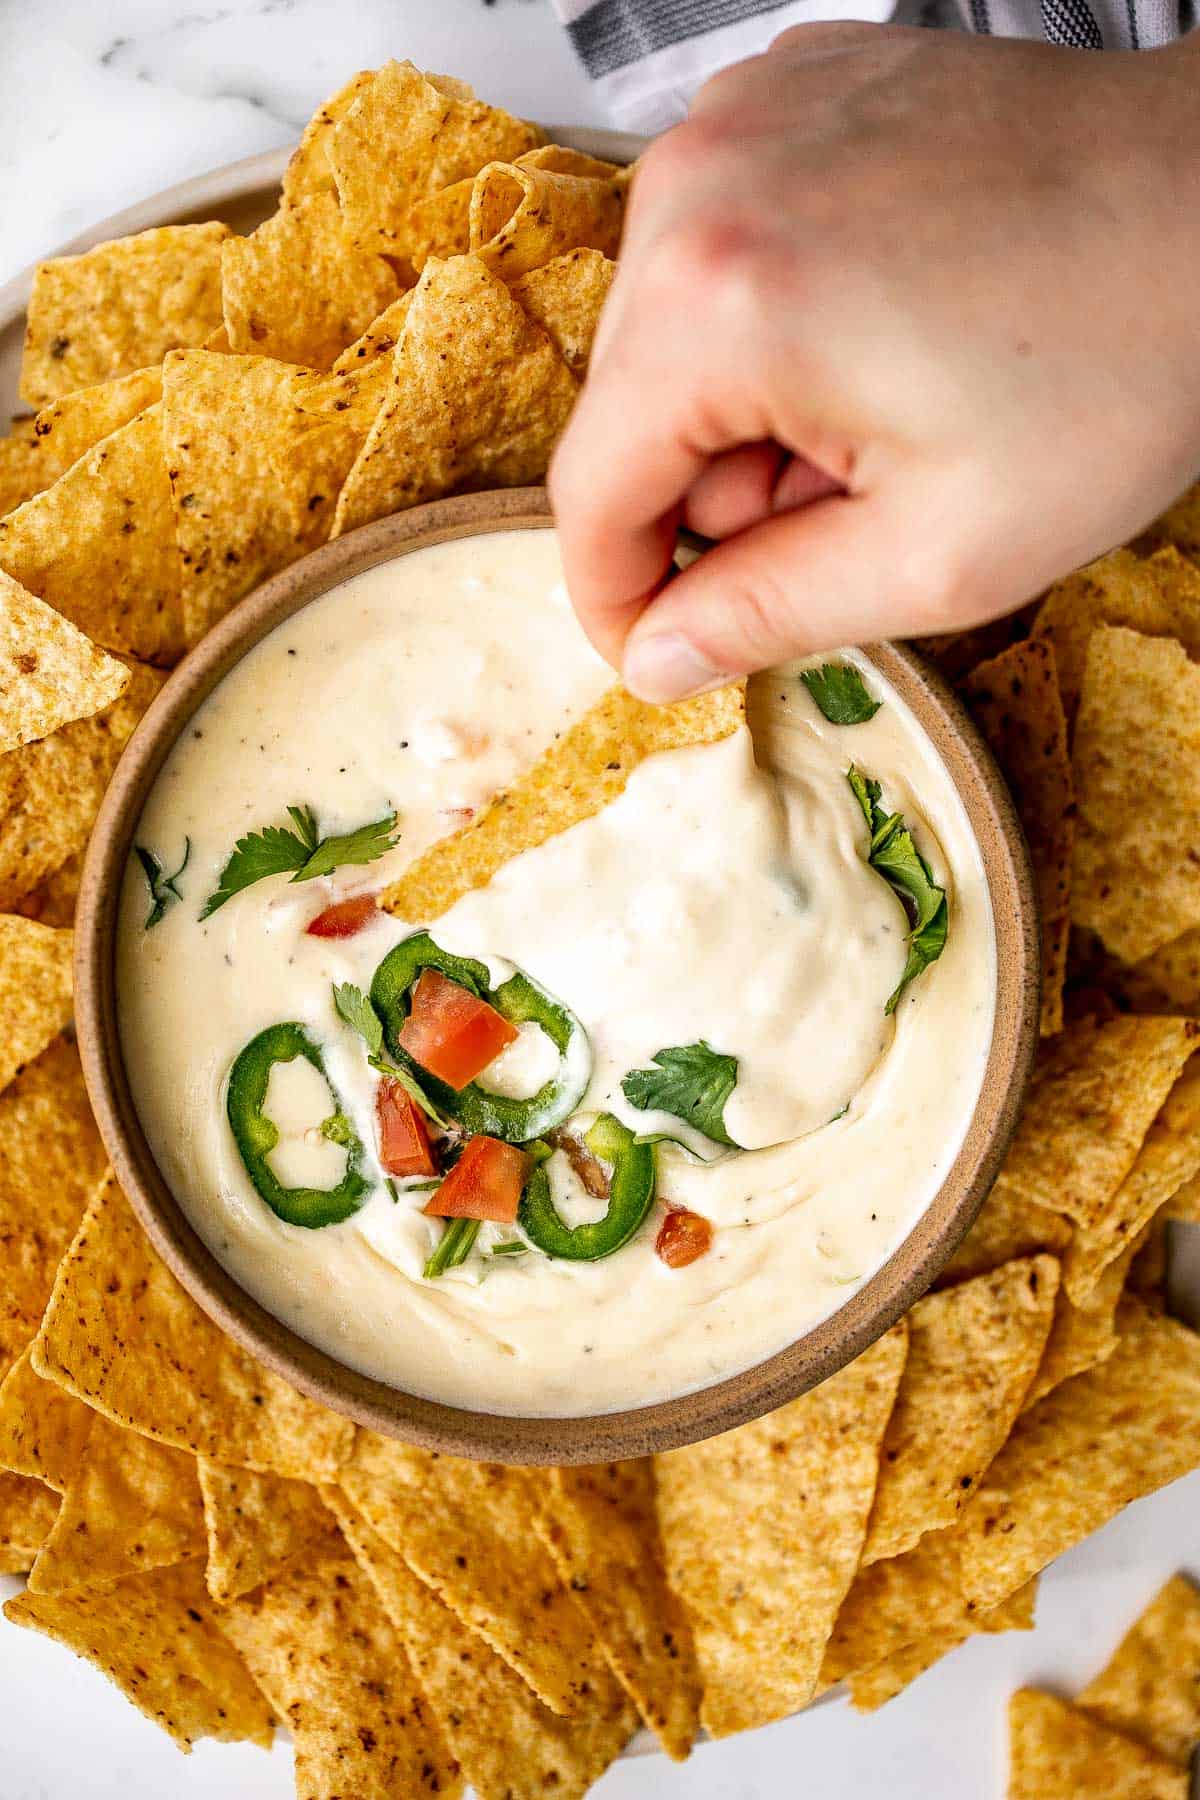
Homemade queso Mexican cheese dip is smooth, creamy, delicious, flavorful, and so easy to make. It's so much better than store-bought in every way.
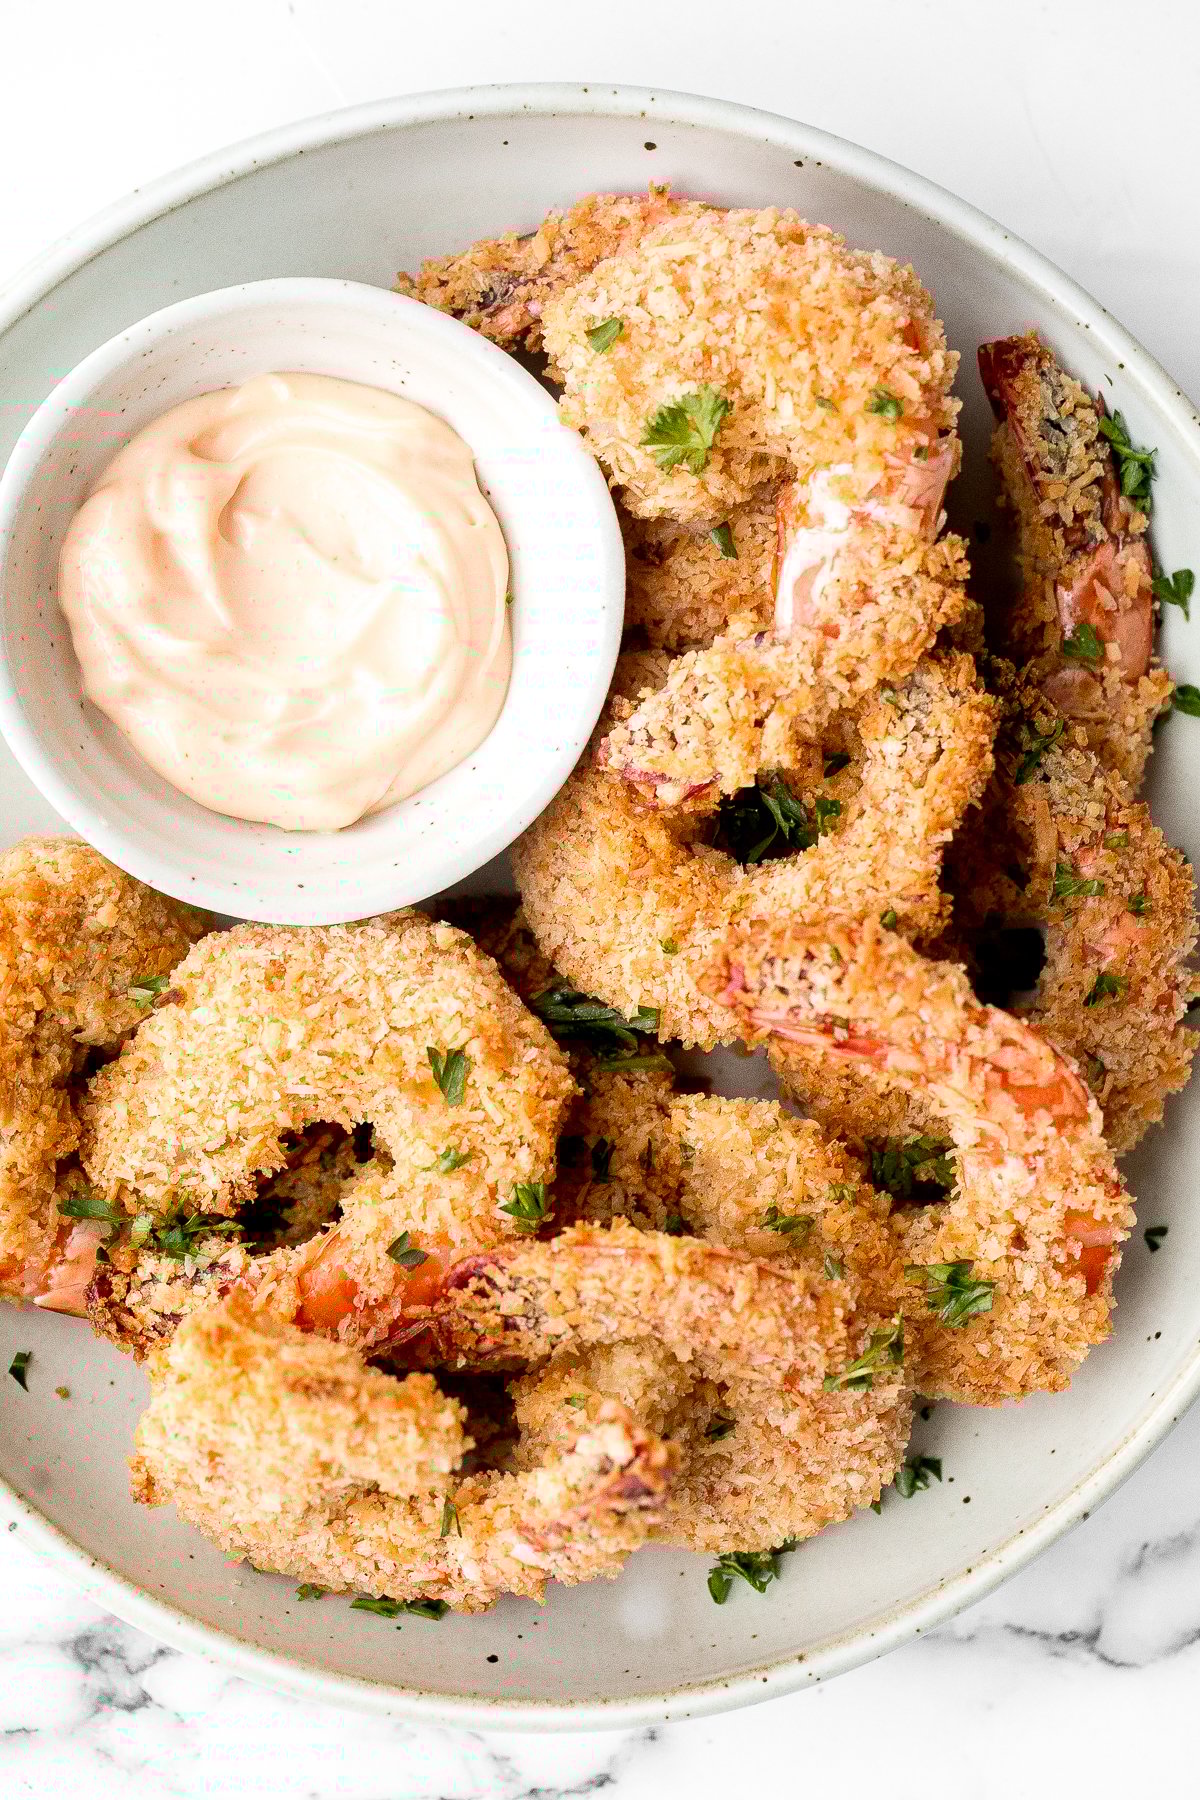
Crispy baked coconut shrimp is a delicious appetizer that is easy to make in 30 minutes. They are more flavourful, tastier and healthier than takeout. One of my favorite finger foods!
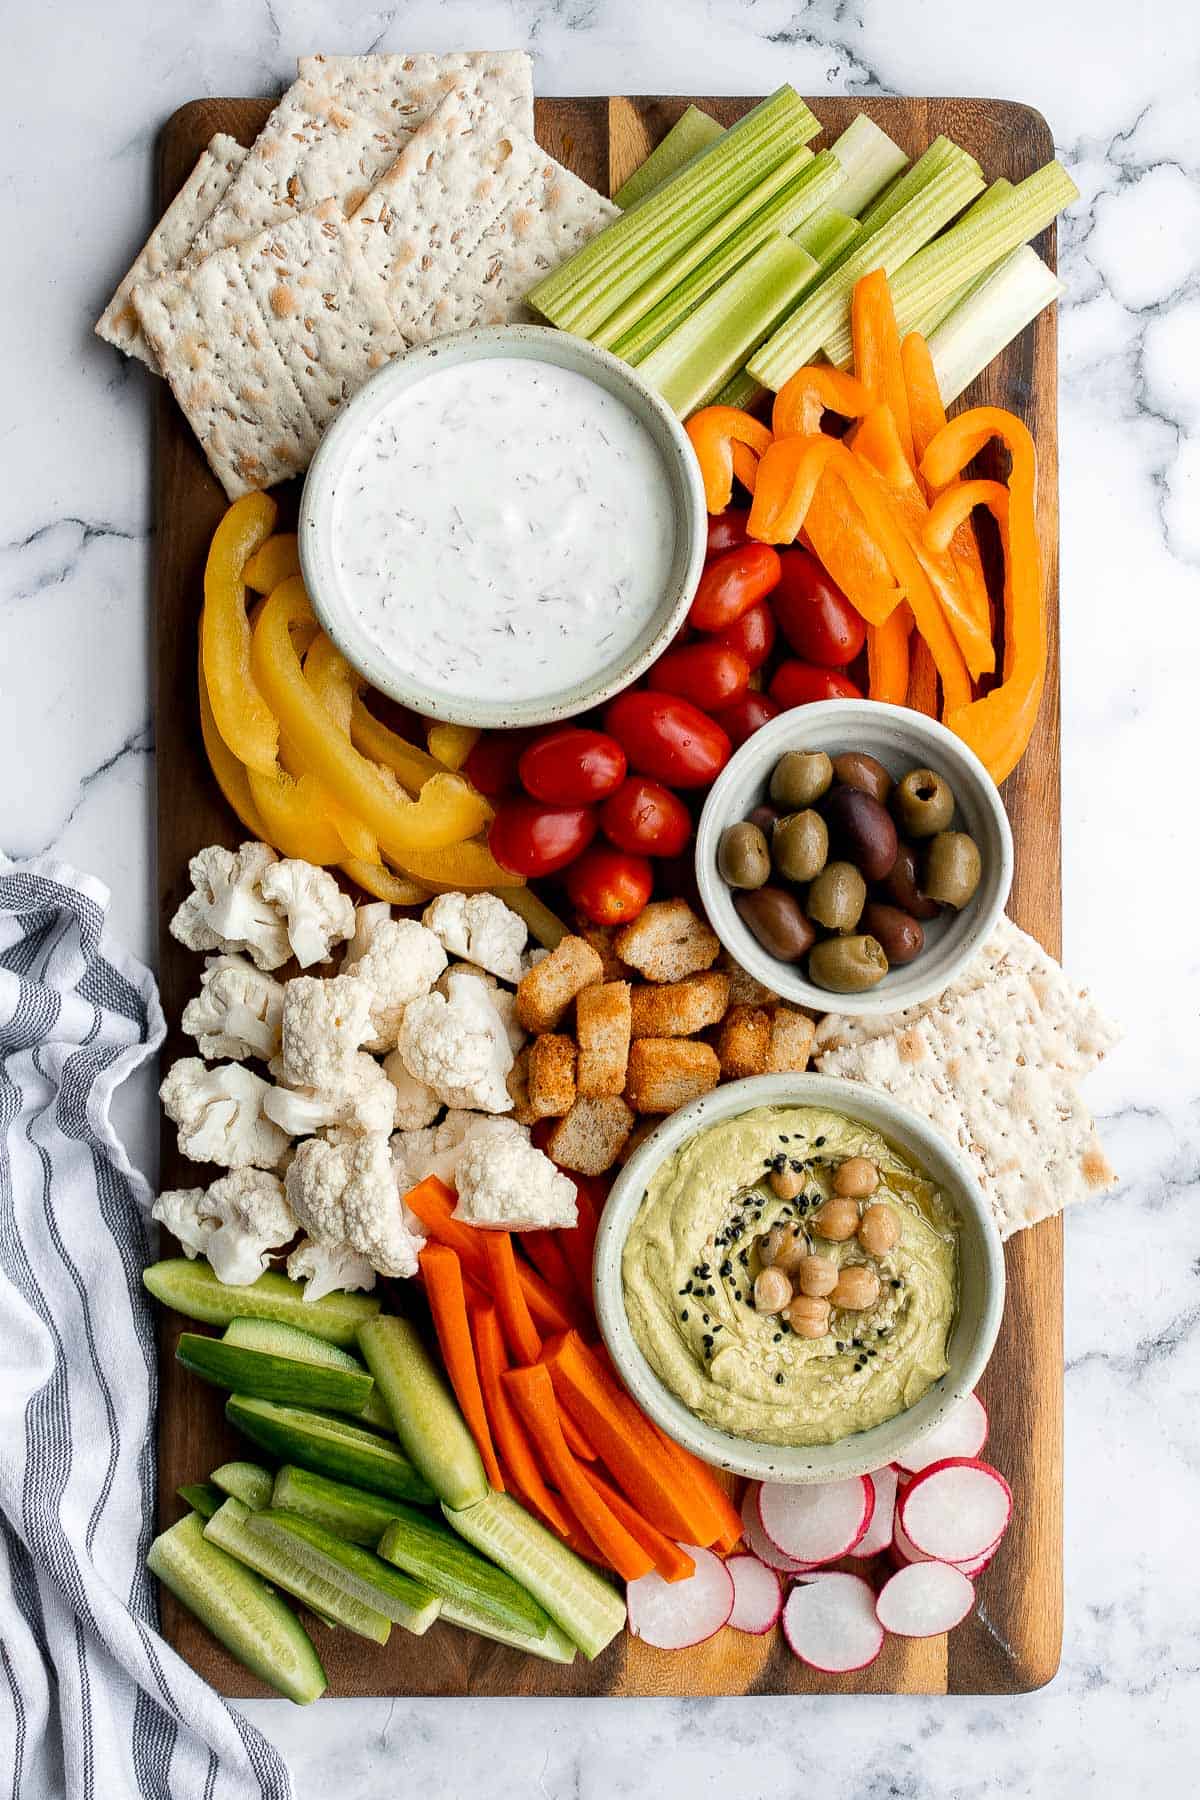
This homemade veggie tray is a quick easy healthy snack or appetizer to make for your next party, with a variety of colorful vegetables and delicious dips.
Jalapeño poppers are the perfect appetizer - spicy, crispy, cheesy, and creamy, toasted to golden brown perfection. Plus easy to make ahead and freeze well.

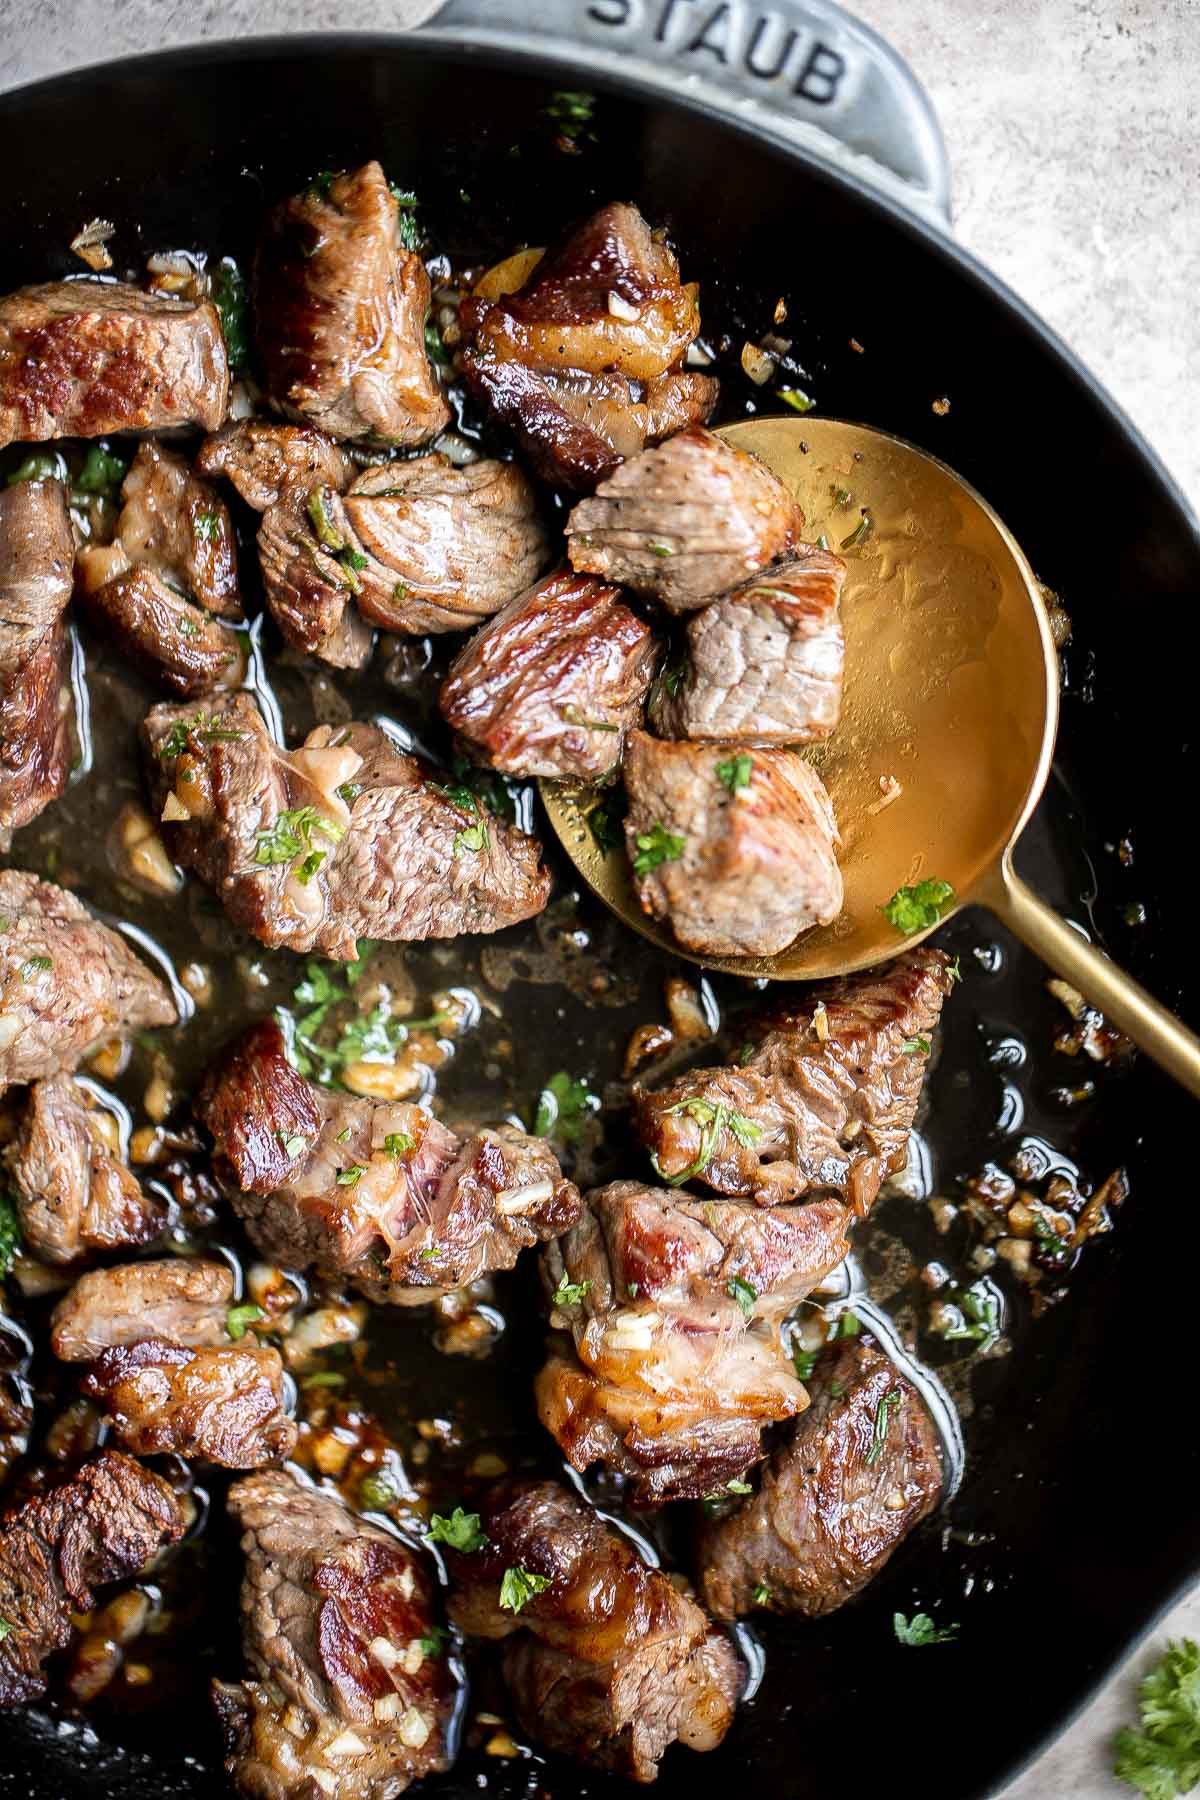
Garlic Butter Steak Bites are tender, juicy, and flavorful. This quick and easy appetizer or weeknight dinner takes just 15 minutes to make in one skillet. Serve with toothpicks for an easy finger food idea.
Cheesy Garlic Bread is toasty and crispy on the outside, tender and soft inside with a garlic butter and melty cheese on top. Make in under 20 minutes!

Baked Chicken Quesadillas are cheesy, crispy, flavorful, and delicious. This family-friendly recipe is quick and easy to make in just 30 minutes!

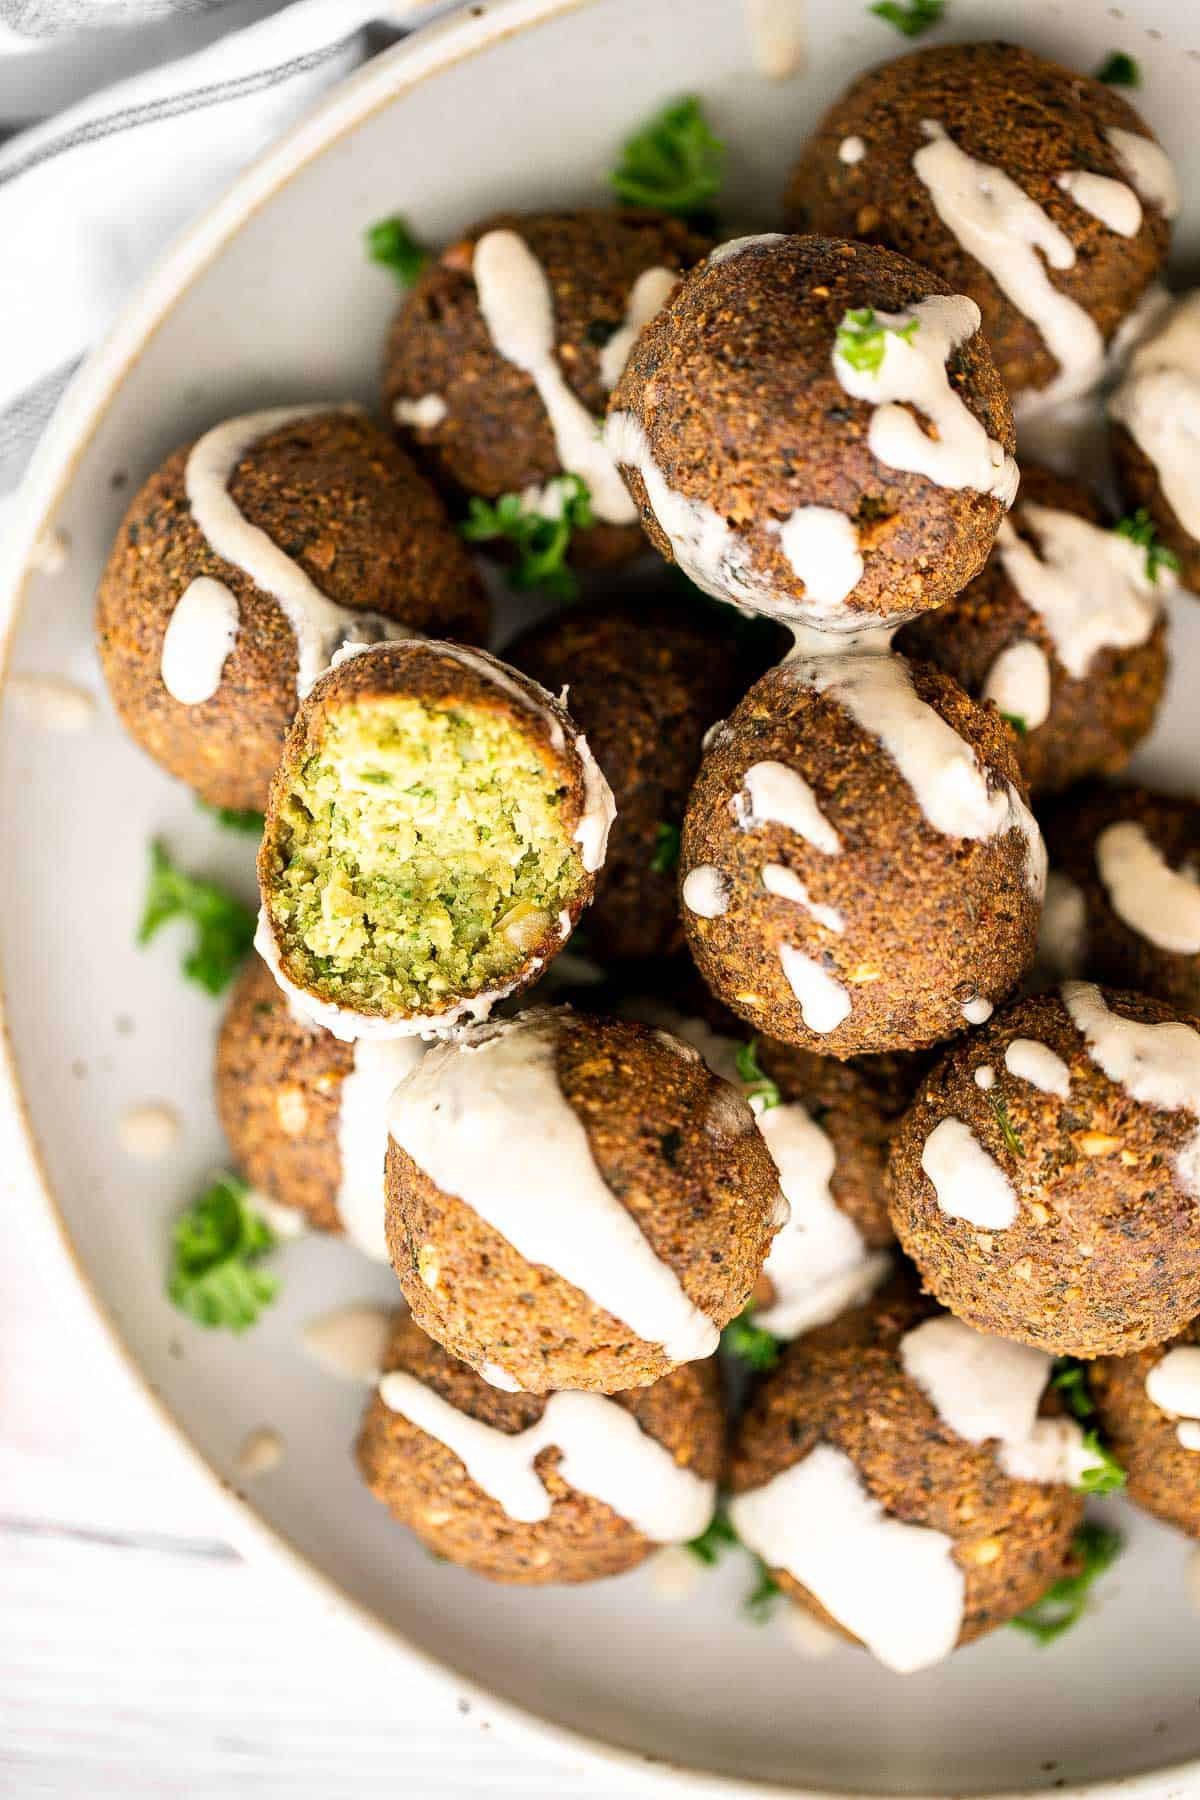
Homemade falafel are delicious, golden brown and crispy on the outside, fluffy tender and soft inside. Plus, they're vegan, loaded with plant-based protein.
Black Bean Salsa - recipe coming soon
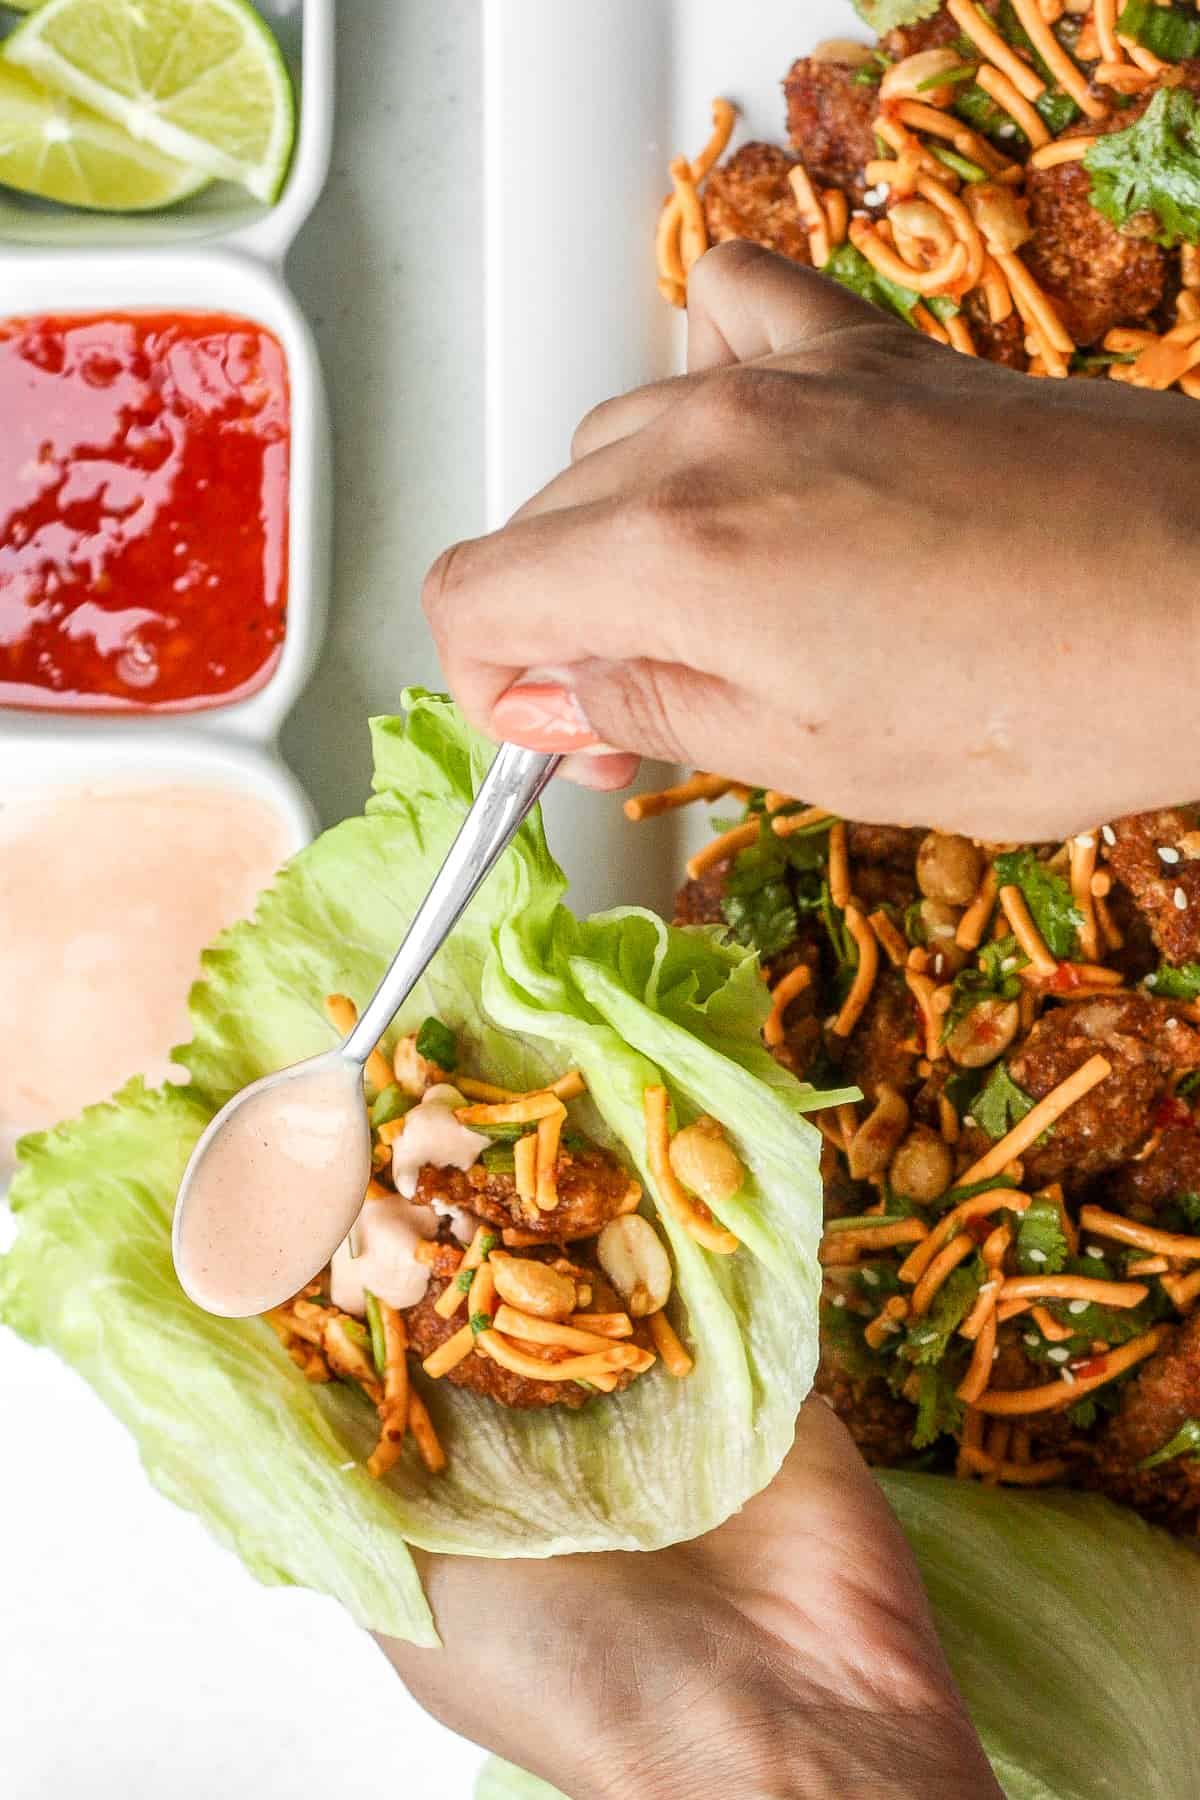
Spice it up and make copycat Szechuan chicken lettuce wraps with spicy mayo from the comfort of your own home with this easy to follow recipe. Plus, it is healthier than the original!
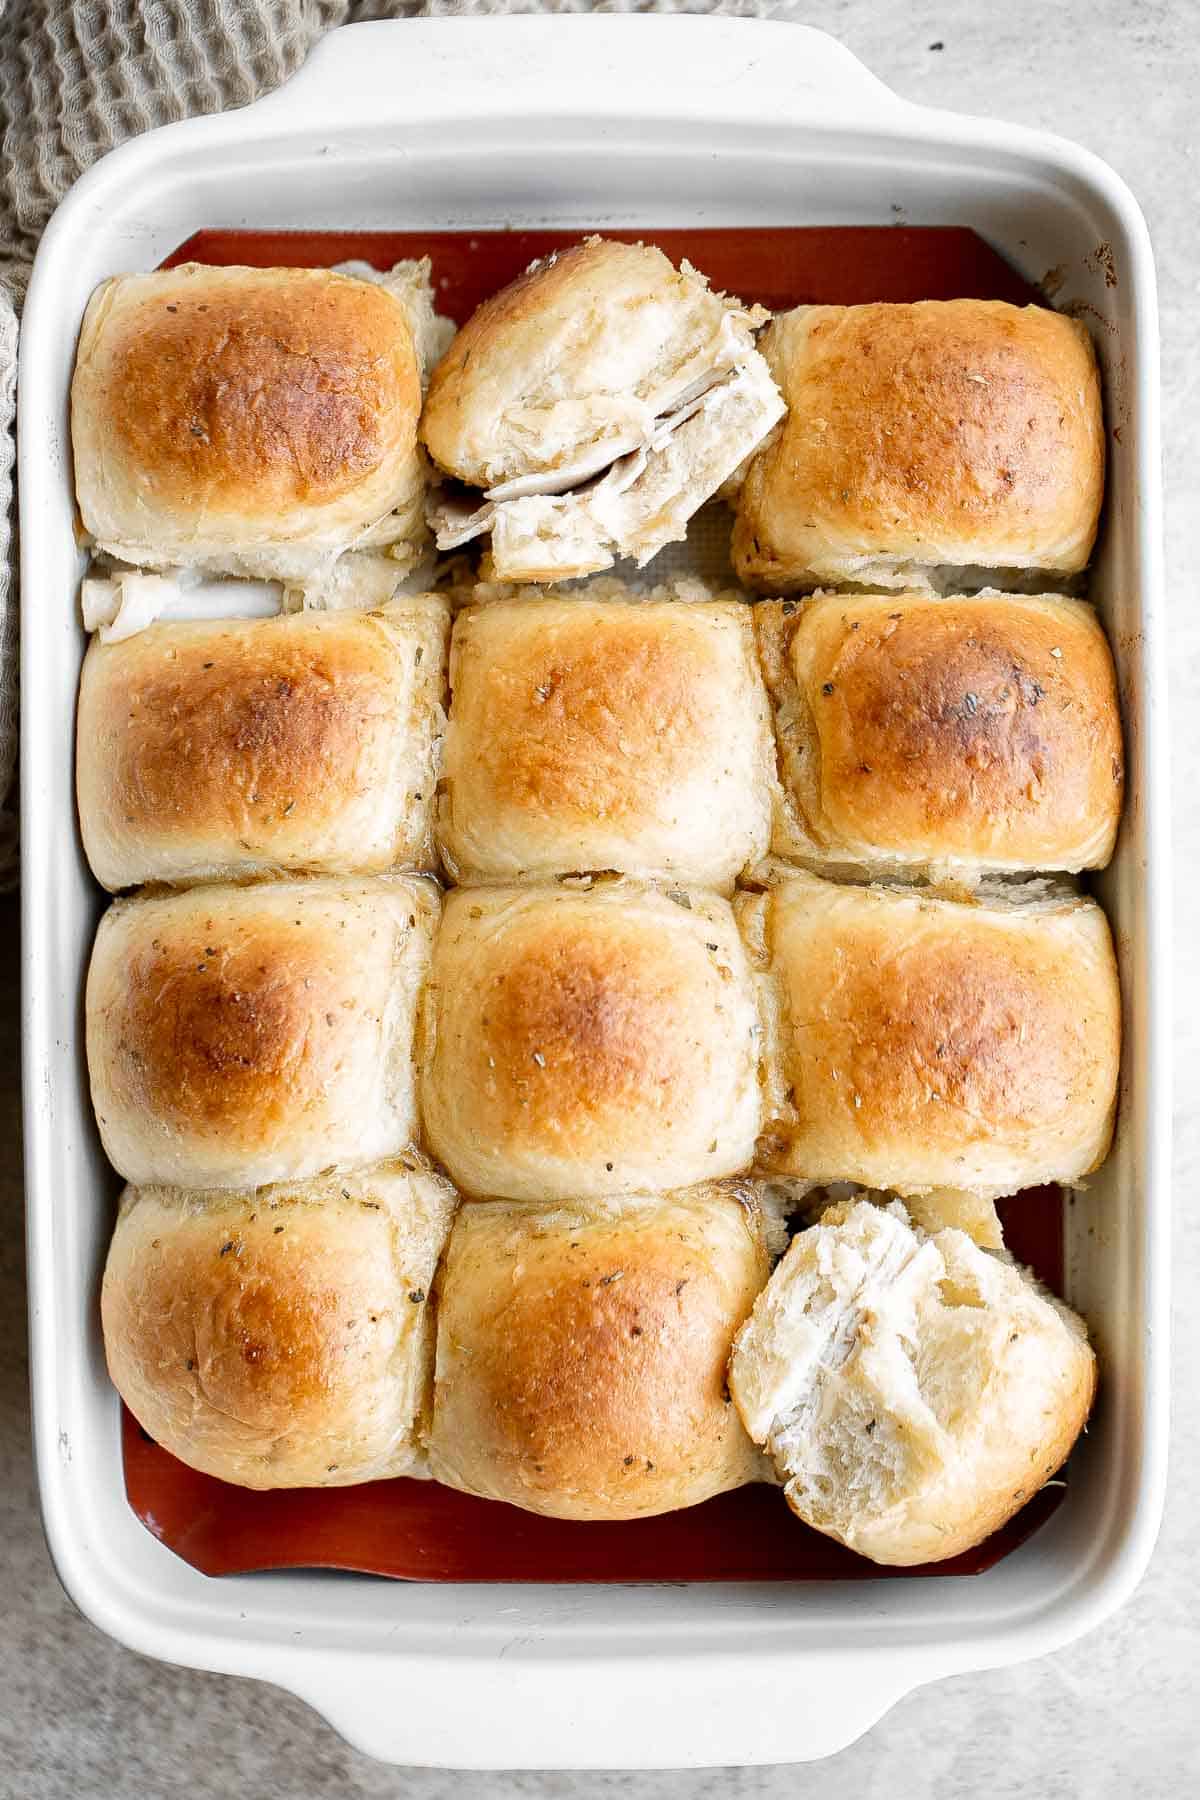
Turkey and Cheese Sliders are quick and easy, made with deli meat and Swiss cheese filled inside soft Hawaiian dinner rolls topped with a buttery sauce.
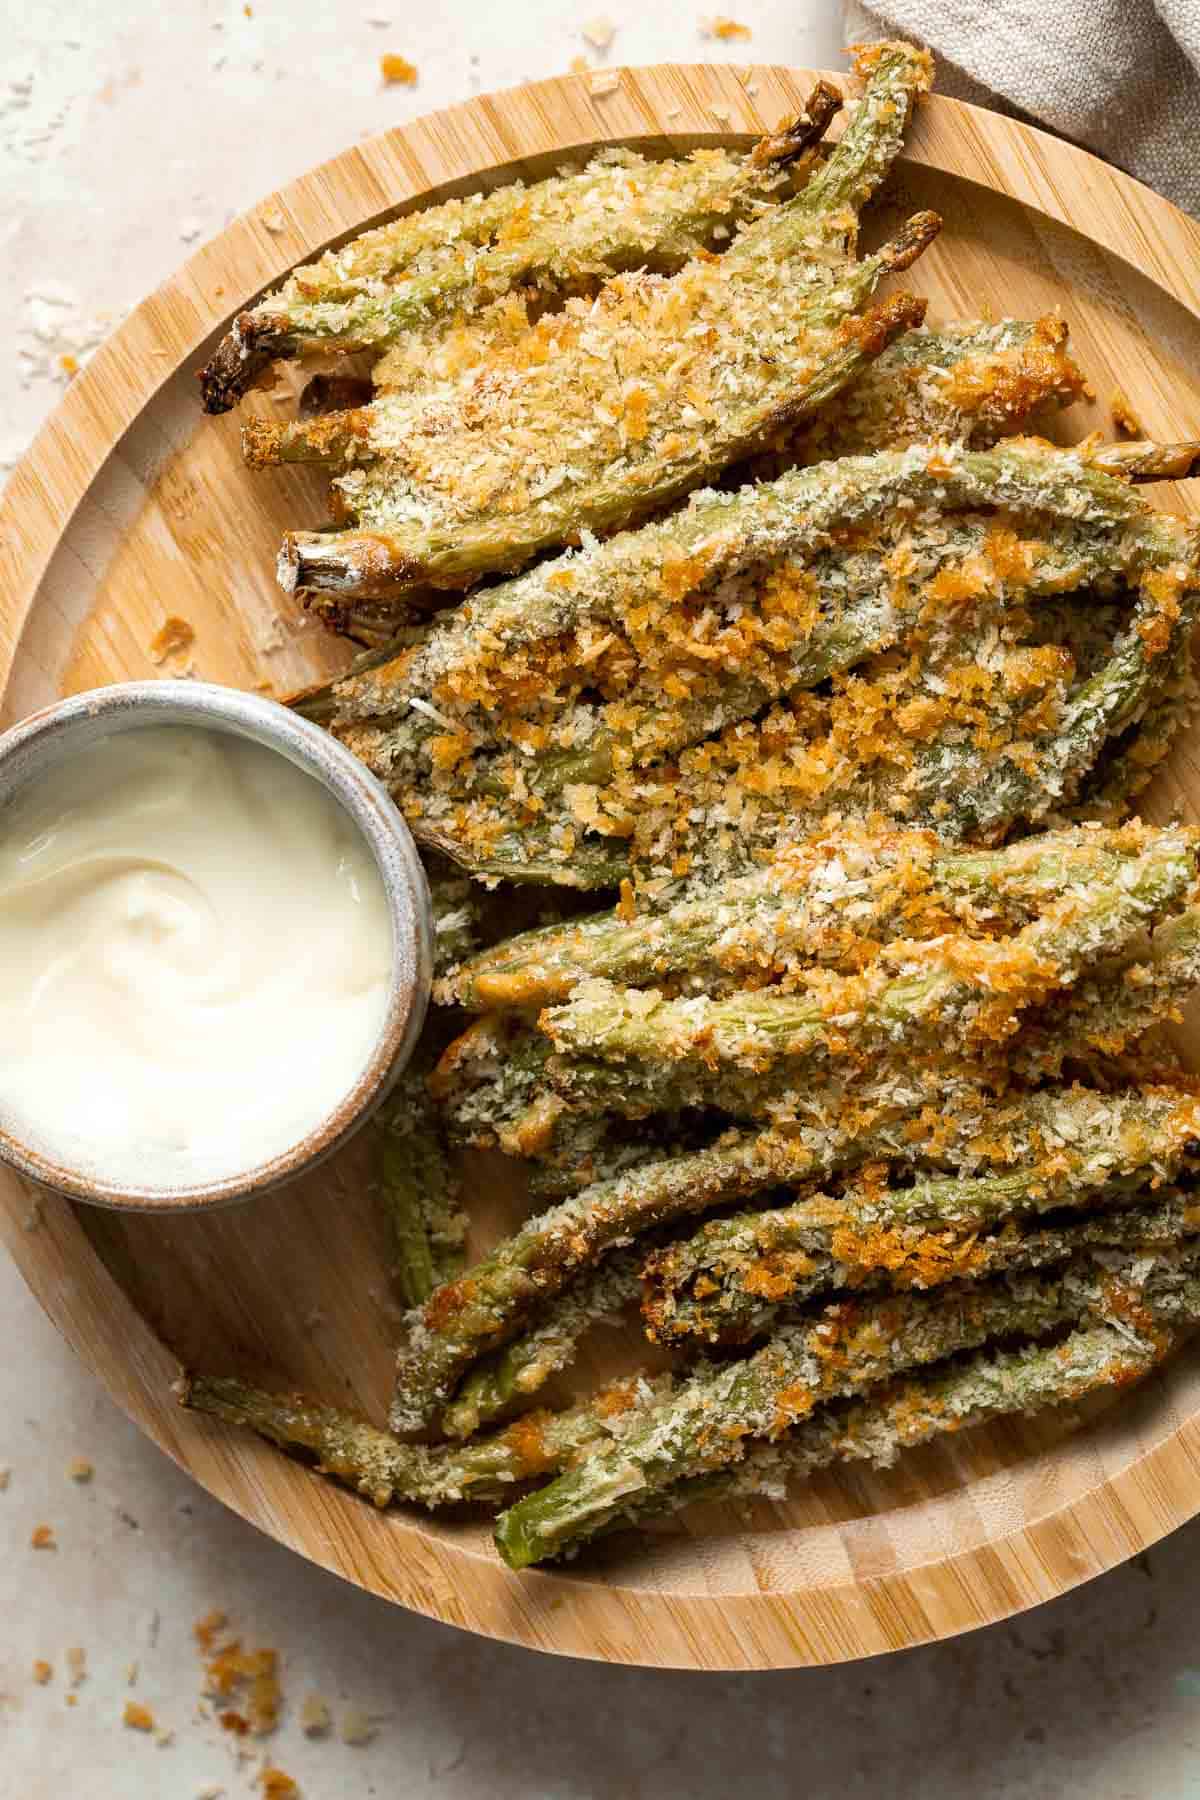
Baked green bean fries are flavorful, crispy, and nutritious. These veggies are quick and easy to make as a healthy appetizer, snack, or side dish.
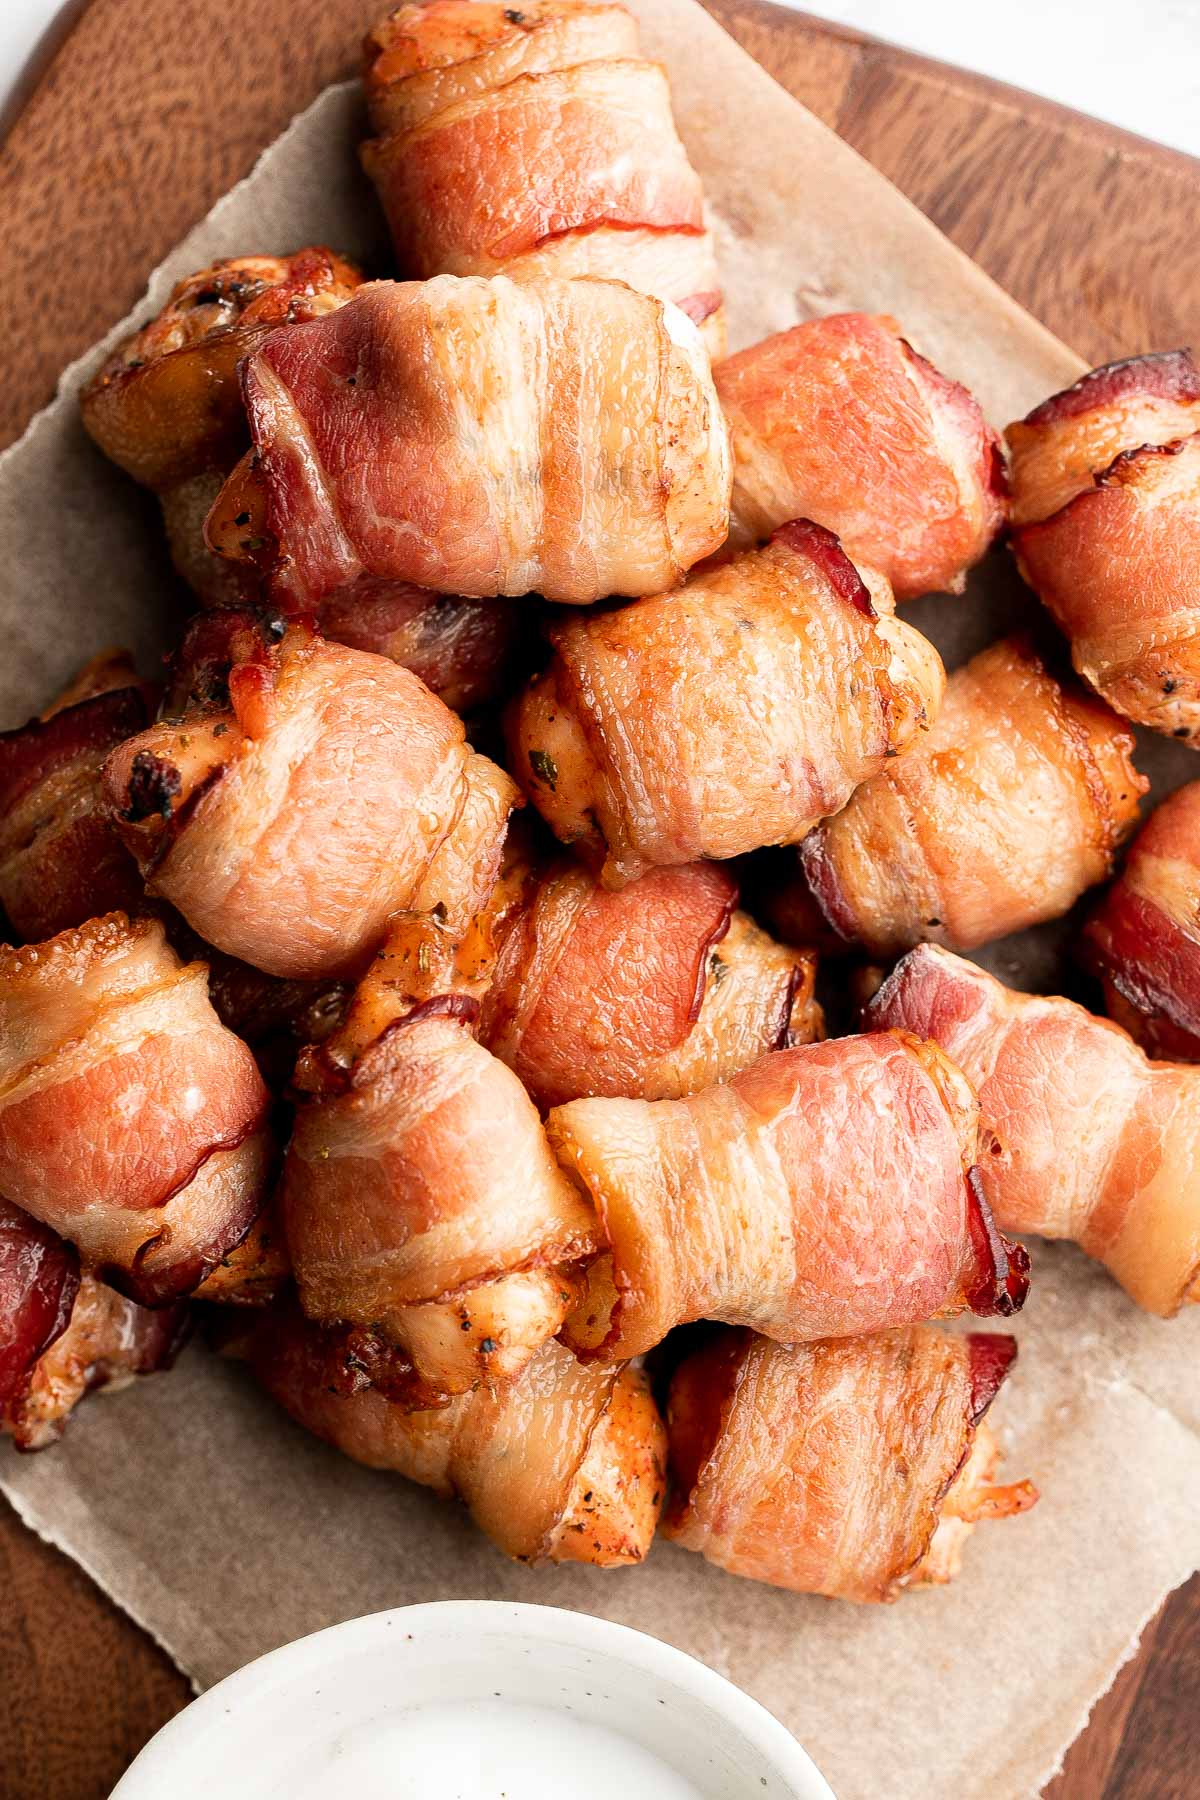
Bacon wrapped chicken bites are one of the best appys ever - well seasoned tender juicy chicken is wrapped in bacon and oven-baked to crisp perfection.
Toasted Ravioli is a classic Italian appetizer that is crispy and golden on the outside, and tender and gooey on the inside. Ready in less than 30 minutes!

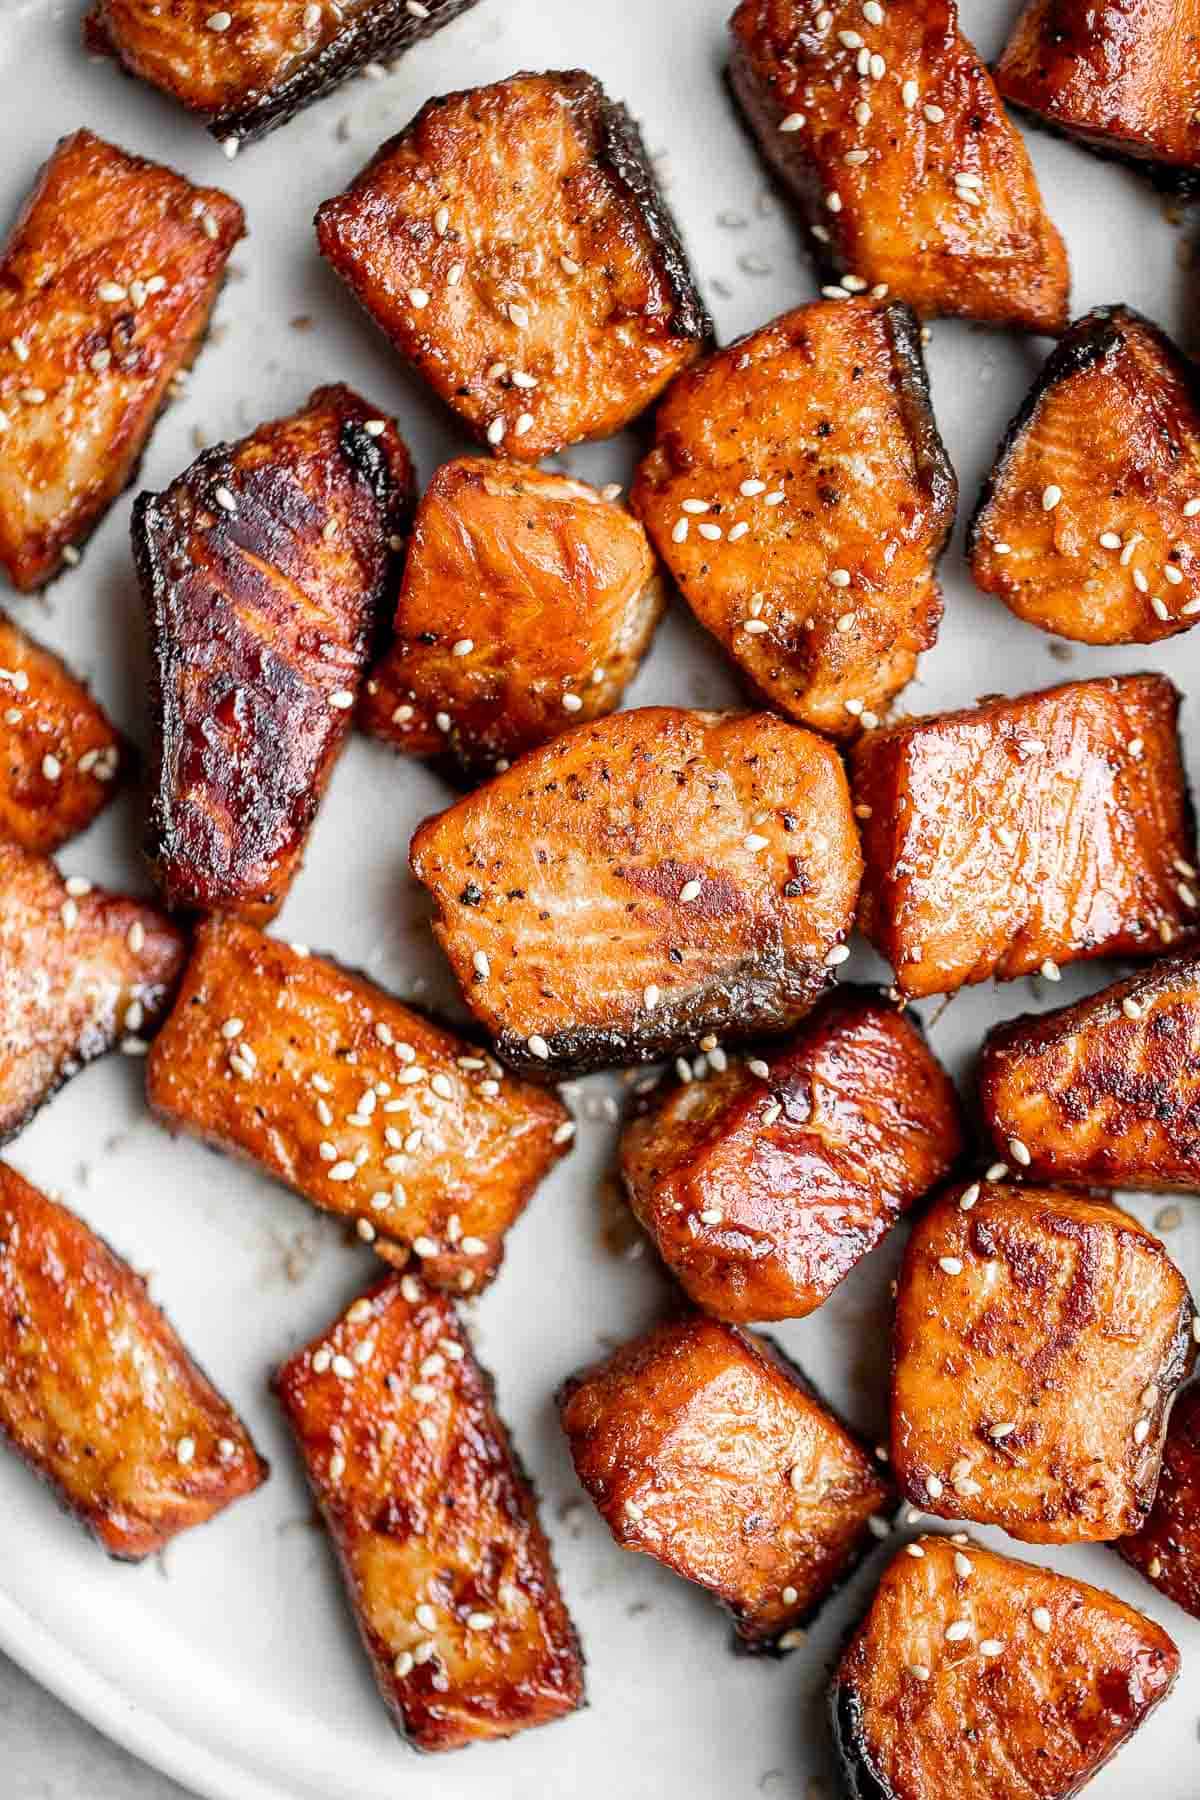
Salmon Bites are flavorful and delicious bite-sized pieces of salmon cooked until tender with crispy, golden edges and coated with an homemade sticky glaze.
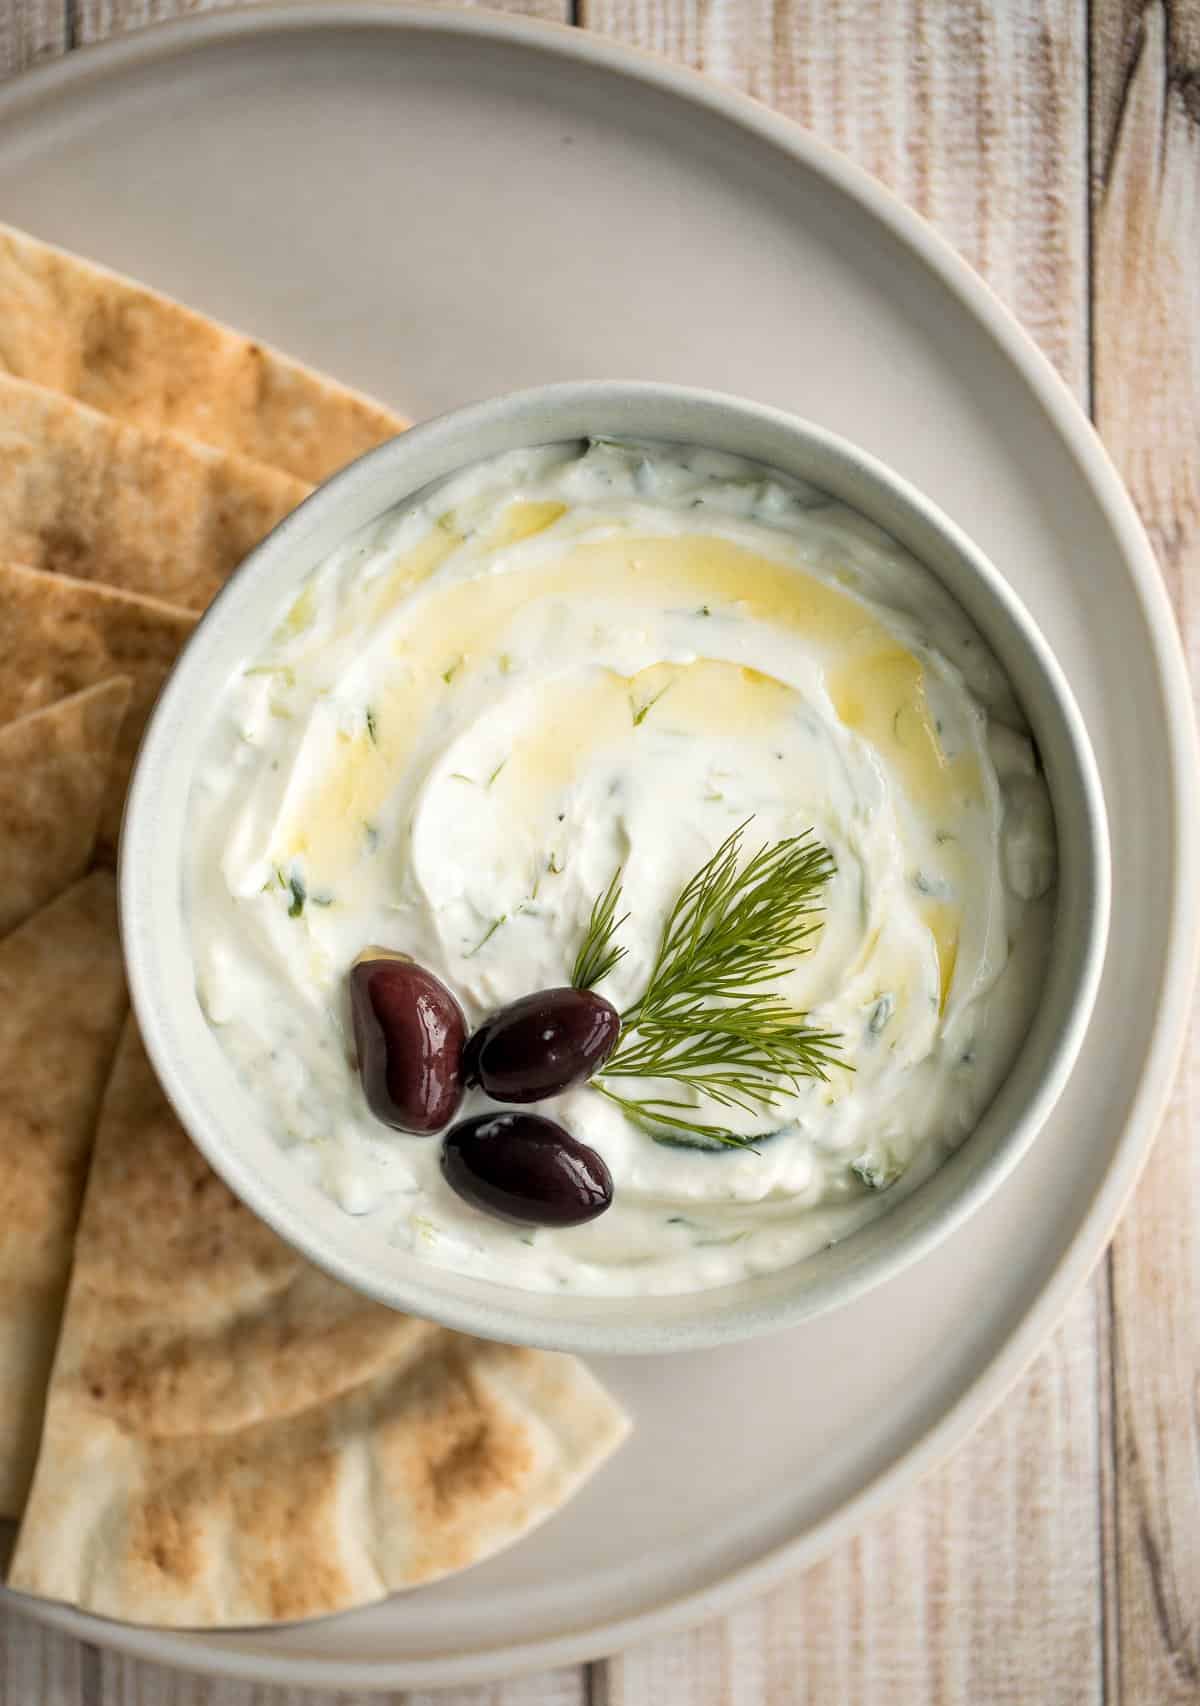
Light and fresh, easy tzatziki sauce is a creamy yogurt cucumber dip packed with fresh cucumbers, garlic, dill, lemon juice and olive oil. So easy to make.
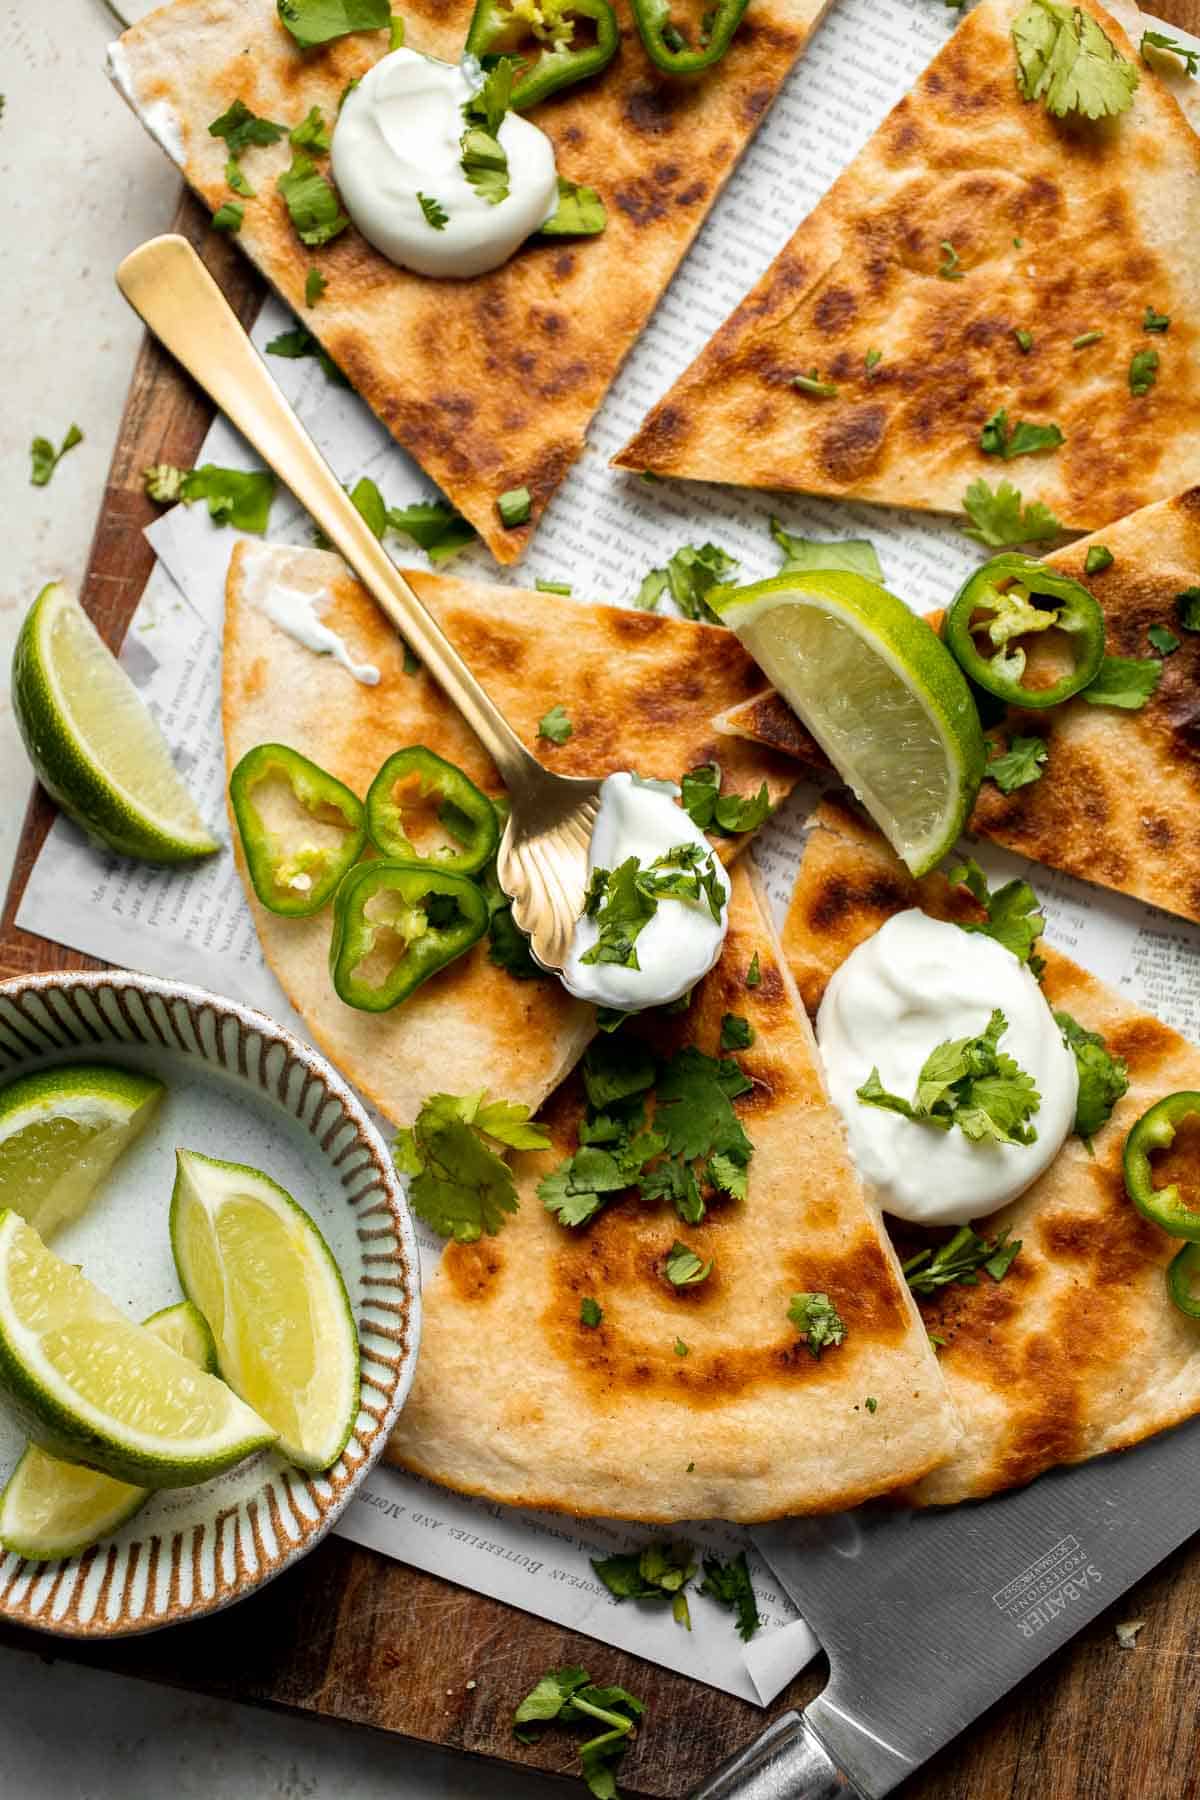
This Cheese Quesadilla has the perfect combination of crispy, cheesy, and flavorful. Ready to serve in just a few minutes with your favorite toppings.
Air fryer short ribs are crispy, flavorful, and delicious. The easy marinade ensures they're tender and juicy inside, while the air fryer makes them crispy.

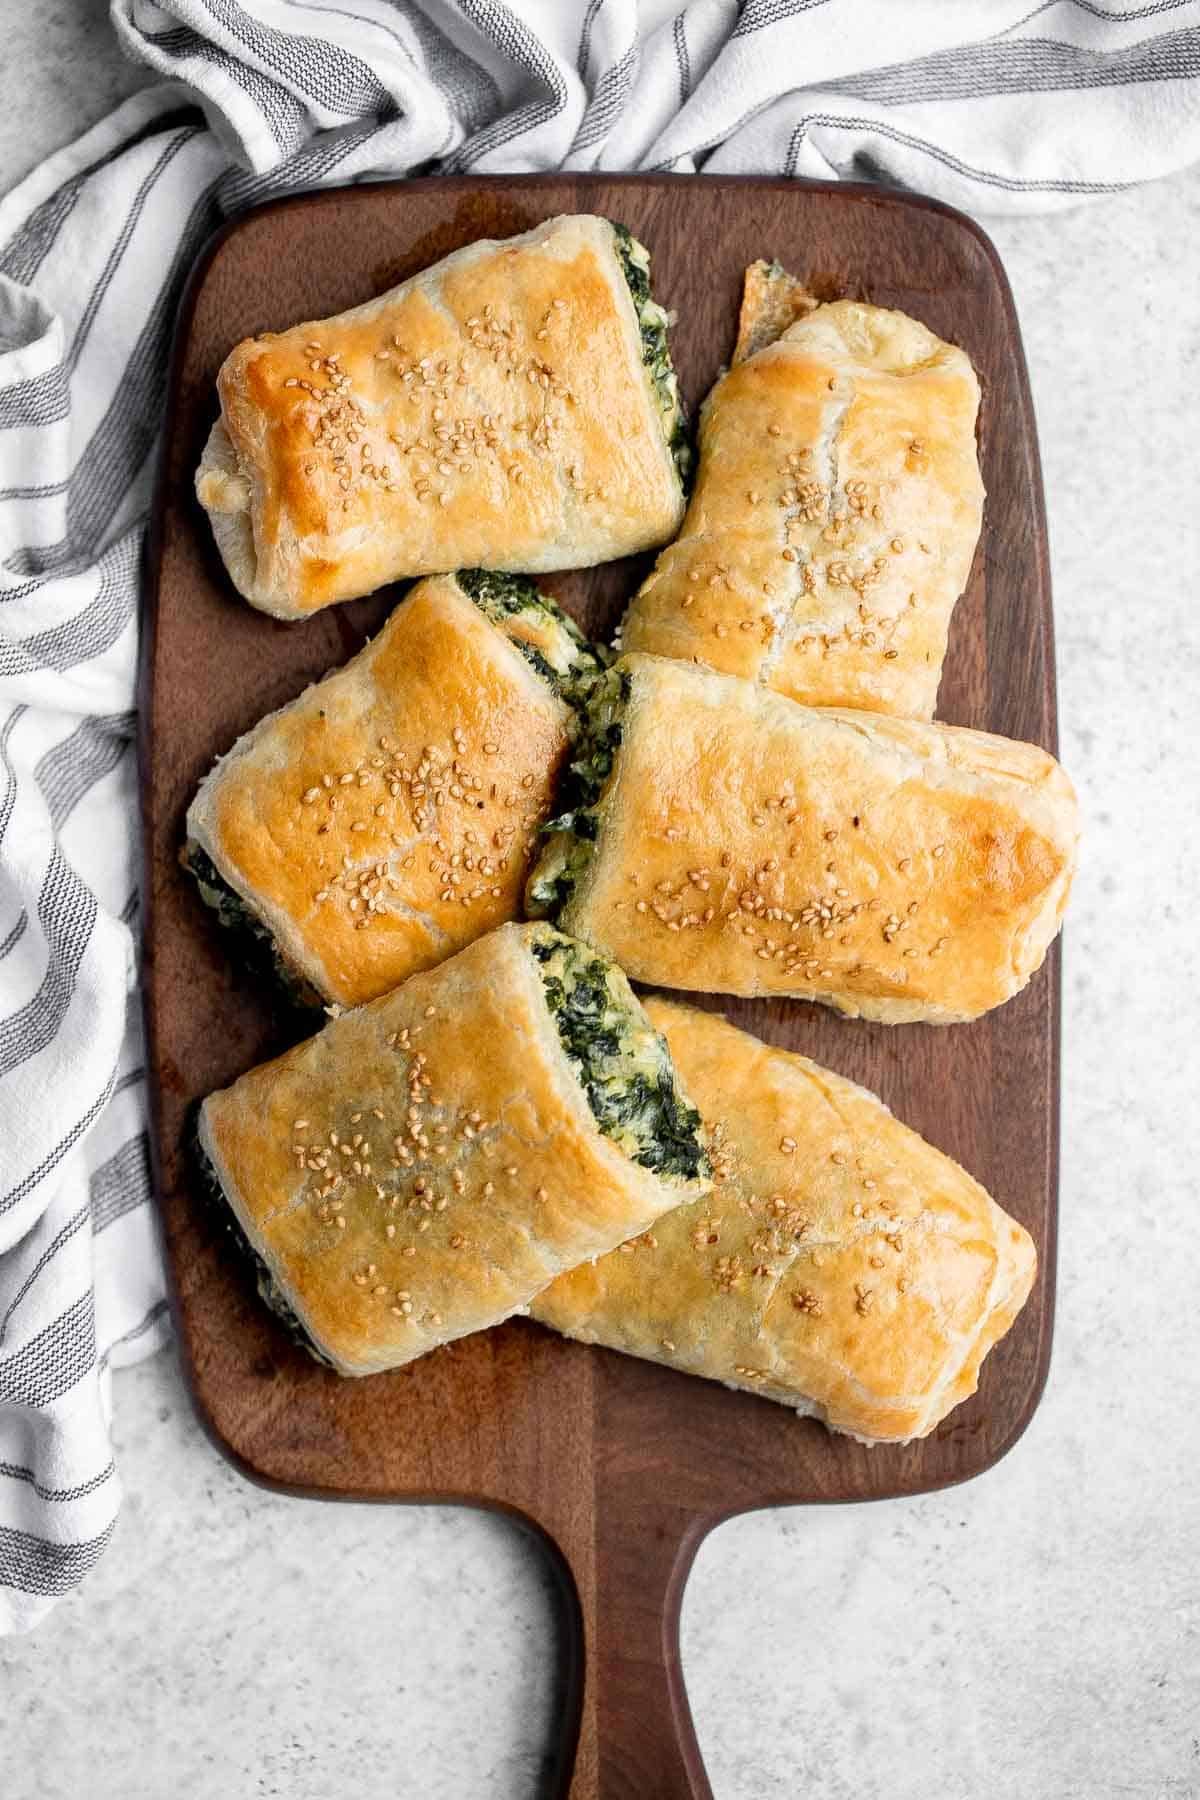
Spinach cheese rolls are an easy appetizer that's creamy, cheesy, comforting, and delicious. Serve as an appy at parties, for a school lunch, or snack.
Pigs in a blanket from scratch are a delicious and easy appetizer or snack to make for your next party or gathering - juicy, cheesy, flaky, and buttery.

Quick and easy shrimp cakes are juicy, tender, delicious, and flavorful. They're made simple with a food processor and your choice of three cooking methods.

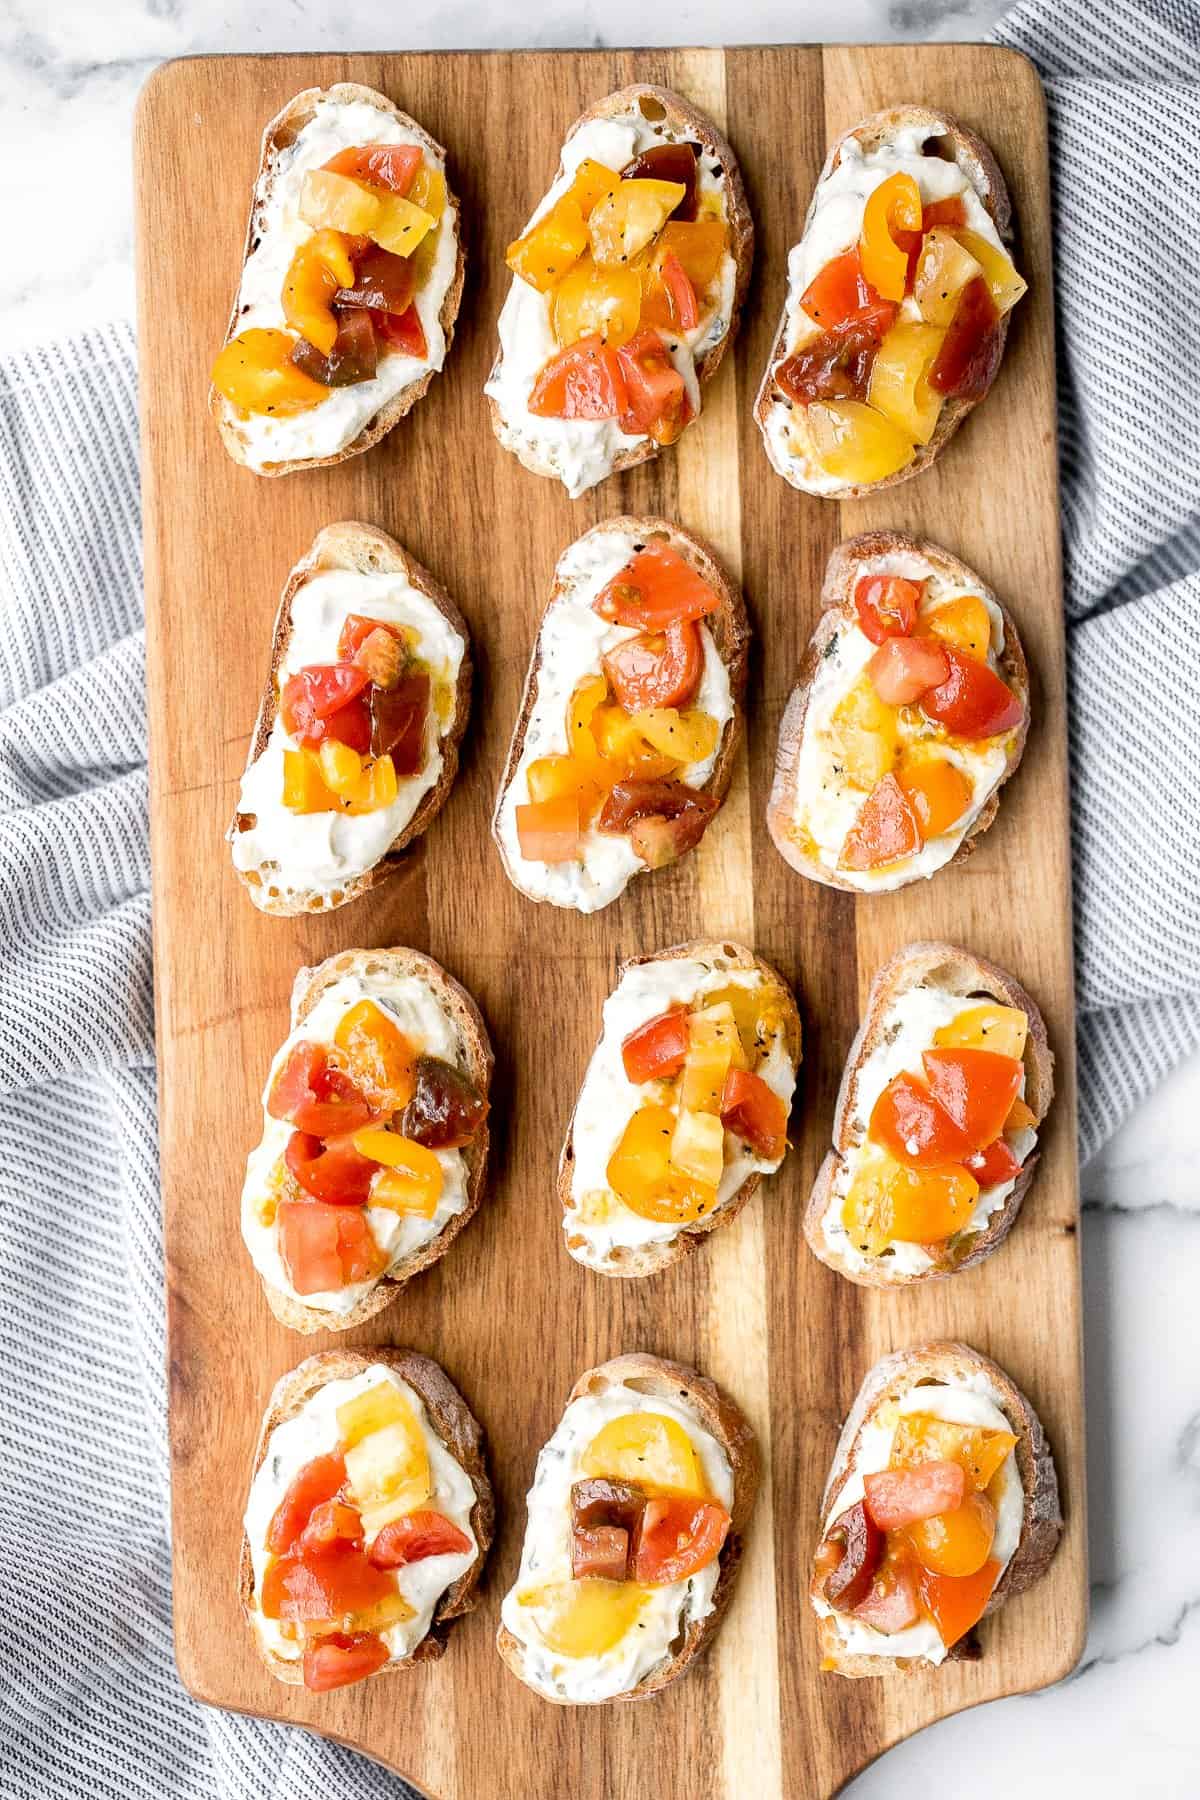
Whipped ricotta crostini is a fancy easy appetizer to make in just minutes or prepare in advance and assemble before serving. A total crowd pleaser.
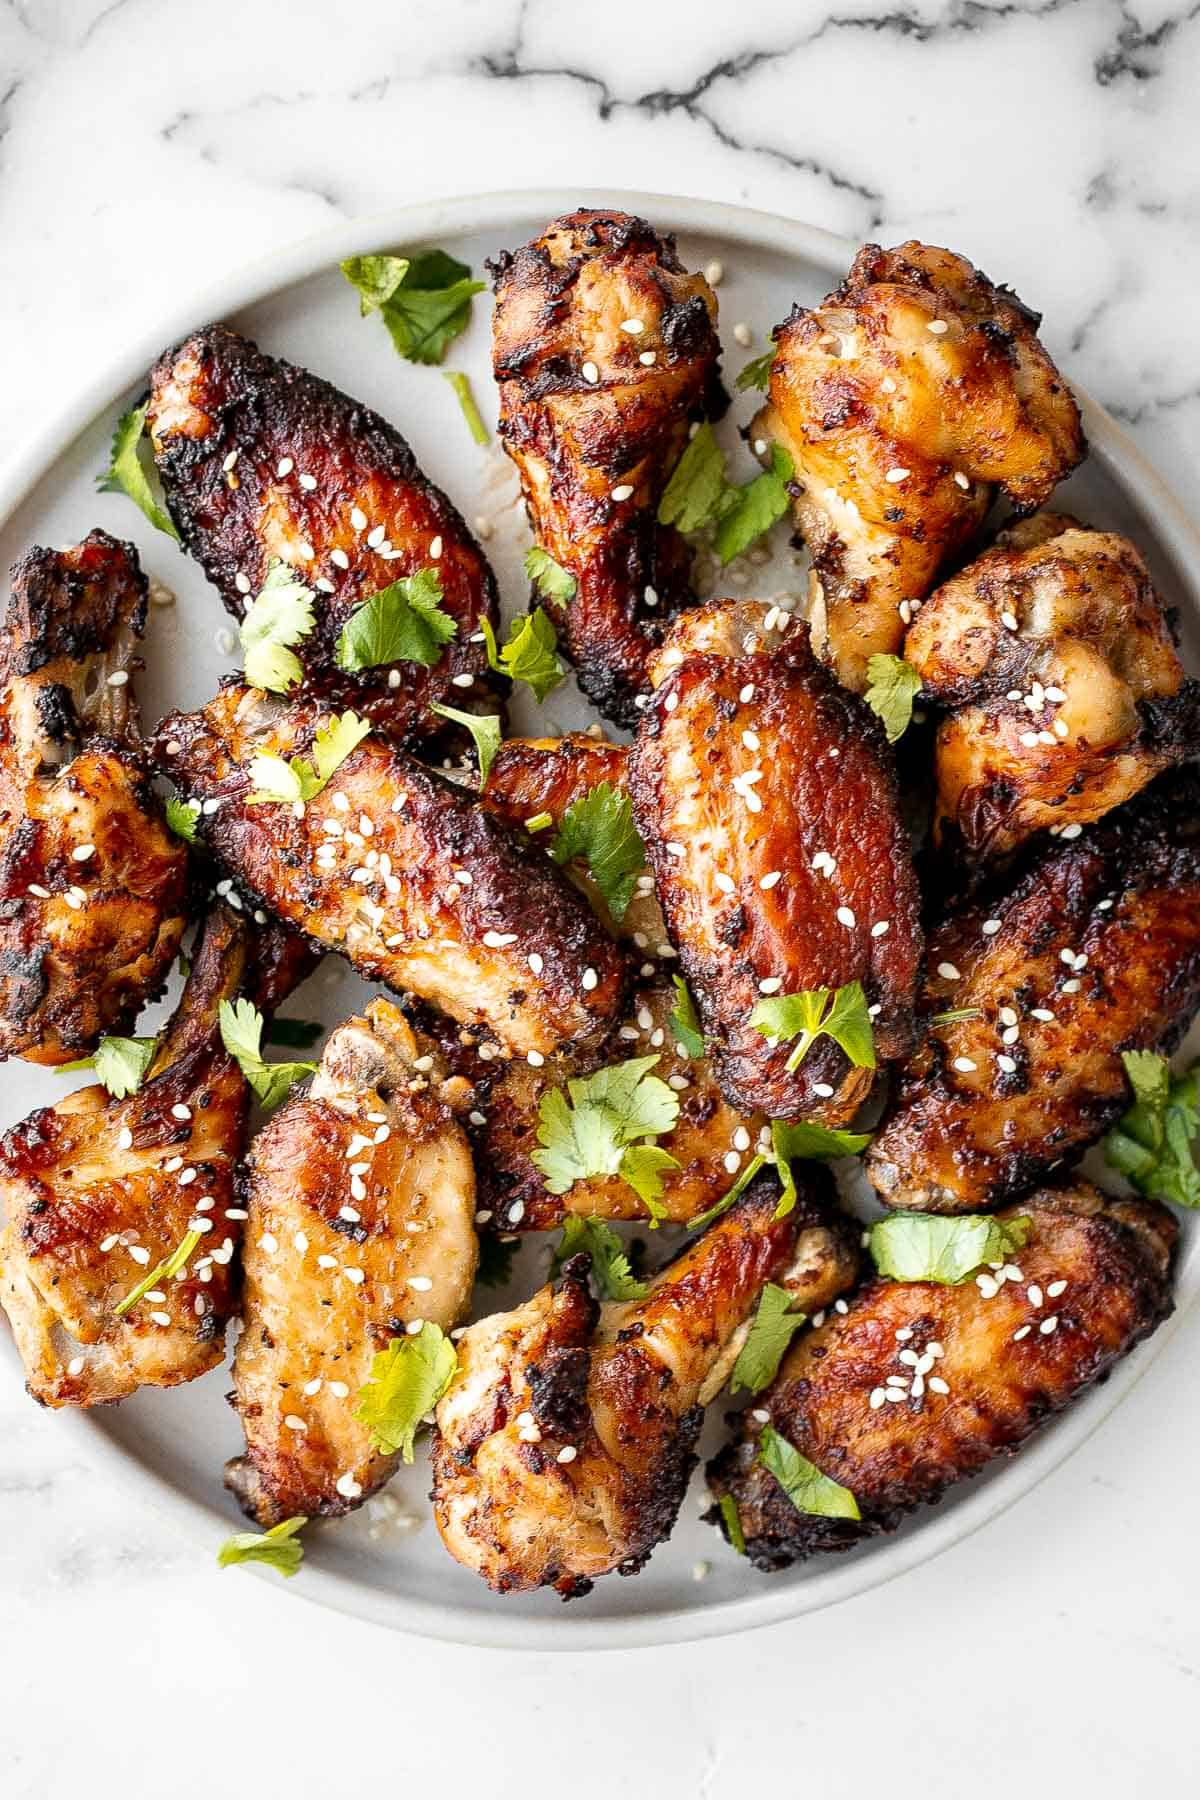
Baked miso garlic chicken wings are crispy, delicious, and easy to make. They're marinated in a savoury Asian marinade, and cooked in the oven or air fryer.
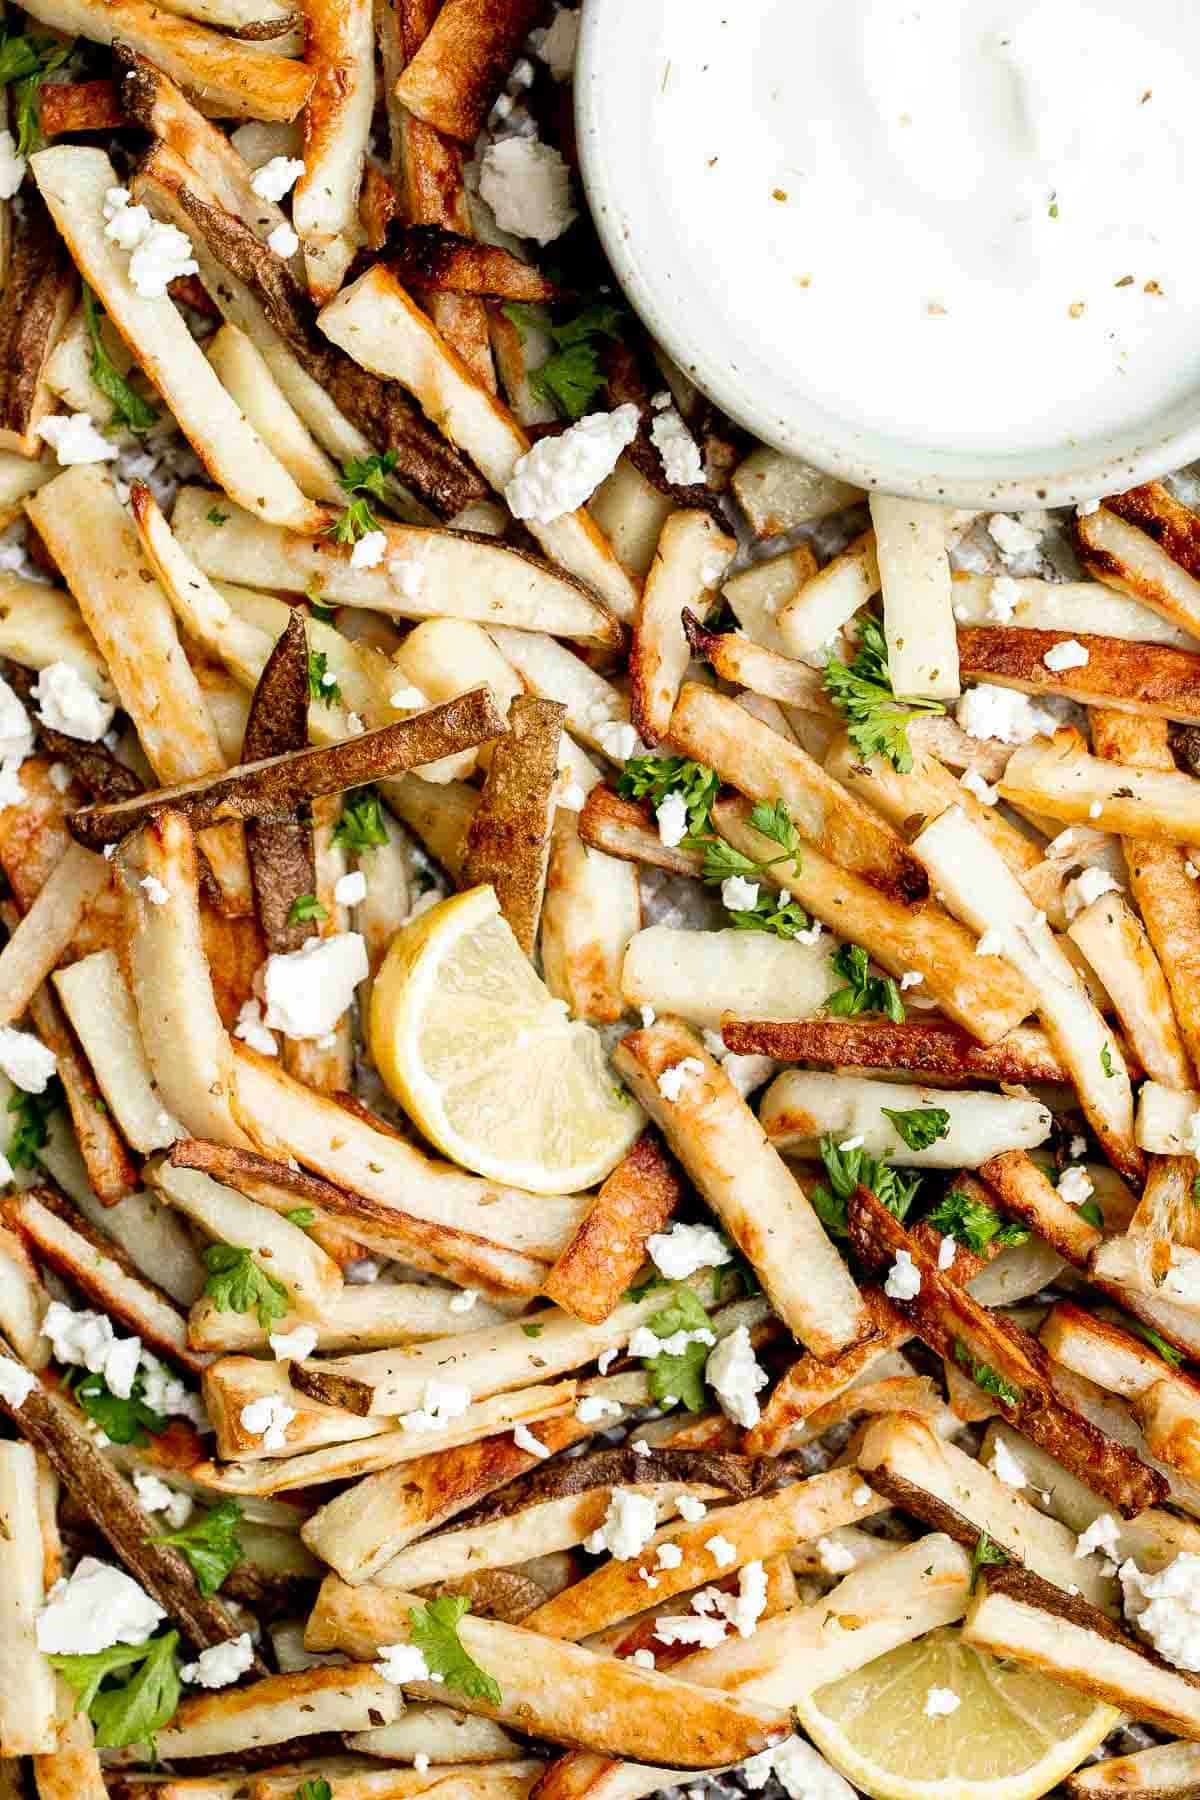
Homemade Greek fries bring a Mediterranean twist on a classic side dish, crispy fries are topped with crumbled feta cheese, fresh parsley, and lime juice.
Easy pepperoni pizza rolls are crispy on the bottom, tender and chewy inside, packed with pepperoni and cheese, and baked until bubbly. One of my favorite finger foods!

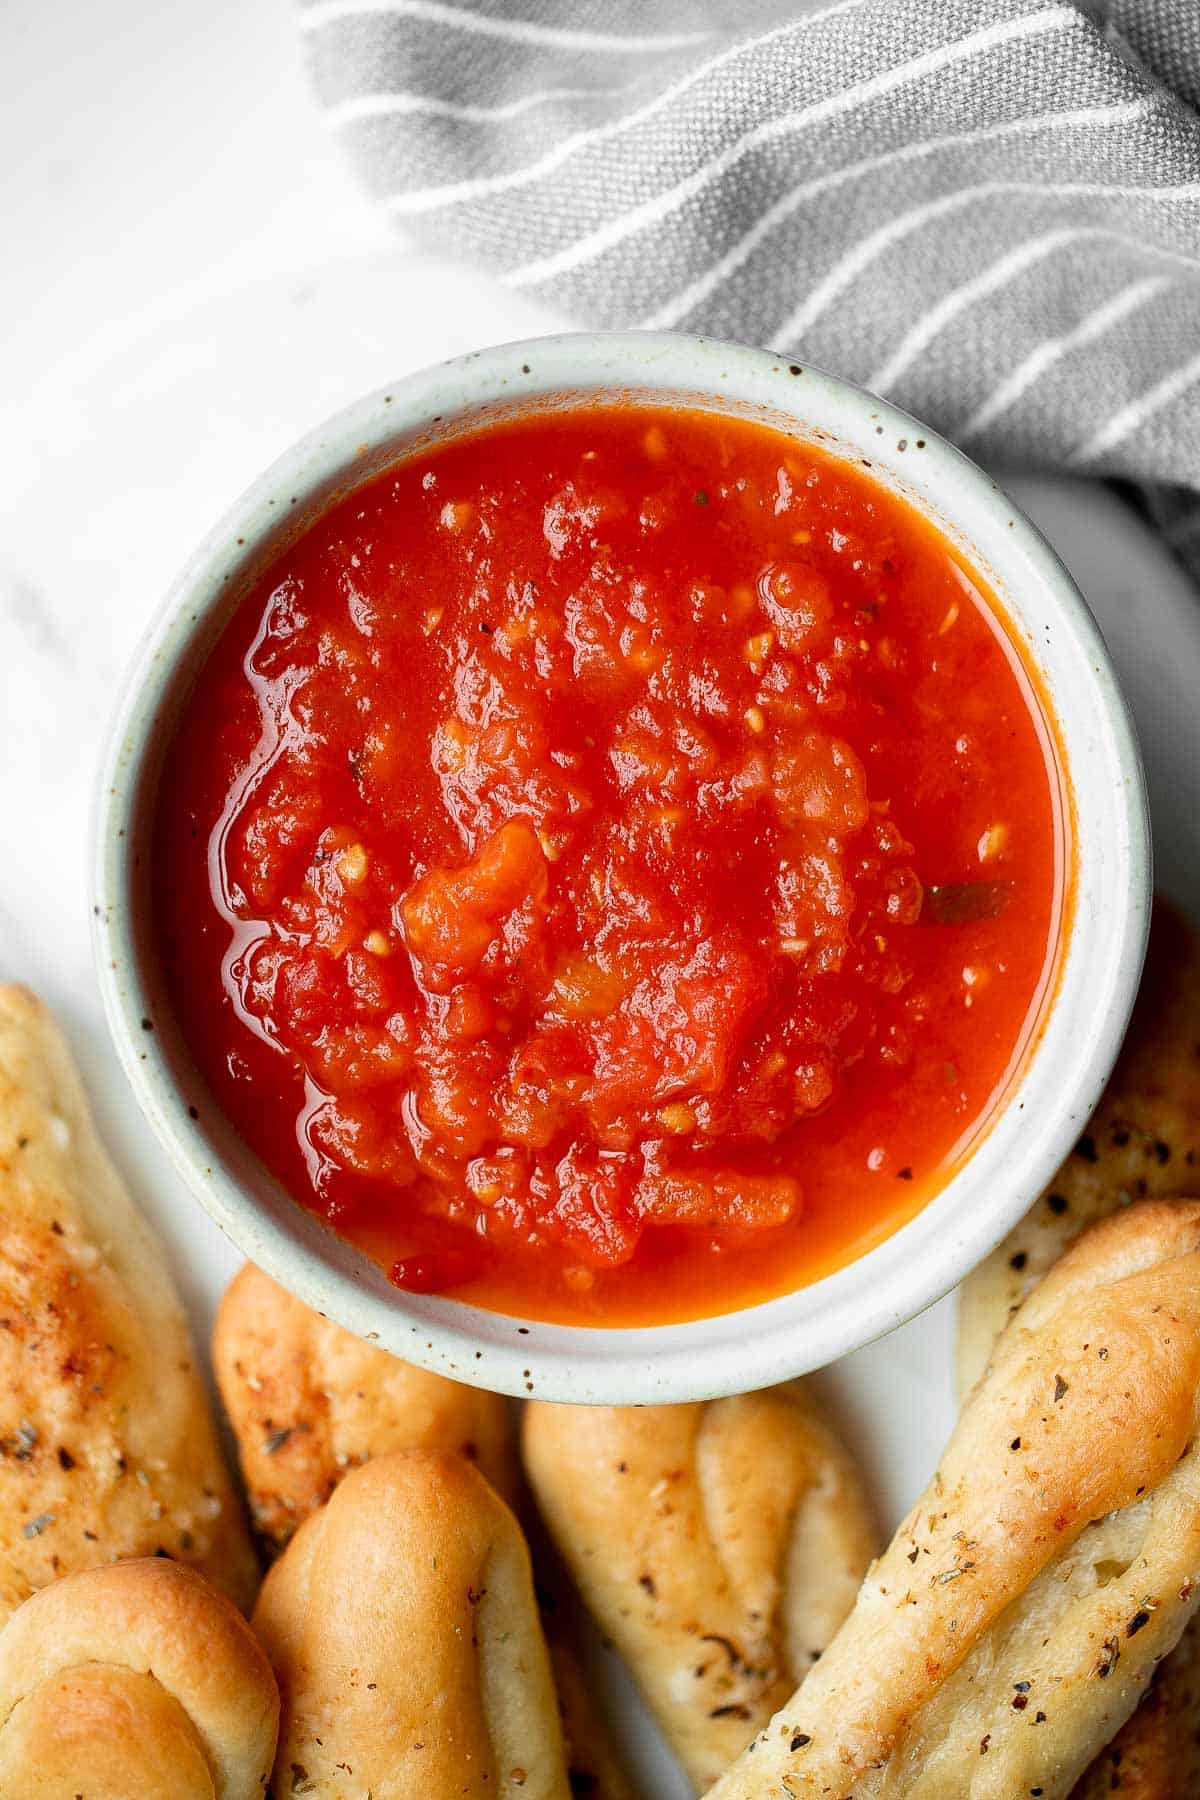
Marinara sauce is rich, vibrant, and loaded with flavor. It's easy to make with a few simple fresh ingredients. Serve as a dip or in pasta and pizza.
Zucchini fritters are crispy outside, tender inside, and loaded with zucchini. These healthy bites are one of my favorite ways to use up summer zucchini.

More Recipes
- Easy Summer Grilling Recipes
- 60+ Summer Dinner Ideas
- 40 Best Summer Desserts
- 20 Best Dip Recipes
- 40 Best Salad Recipes
- 50 Best Finger Foods
Did You Make Any of These Easy Summer Appetizer Recipes?
Please leave a comment and rating below, and let me know what you thought of this round up of easy summer appetizers. Be sure to snap a picture and tag me on Instagram @aheadofthyme or share it on the Pinterest pin so that I can follow along.
HUNGRY FOR MORE? Don't forget to sign up for my email newsletter so that you don't miss any recipes. You can also follow along on Instagram and Pinterest for more recipe updates.
Homemade Lemonade
Warm weather is on its way and lemons are in season, making it the perfect time to make some Homemade Lemonade! This fresh, perfectly sweetened summer drink is as simple as it gets with only 3 ingredients. With the perfect balance of tart and sweet, you'll want to sip on it all summer long.
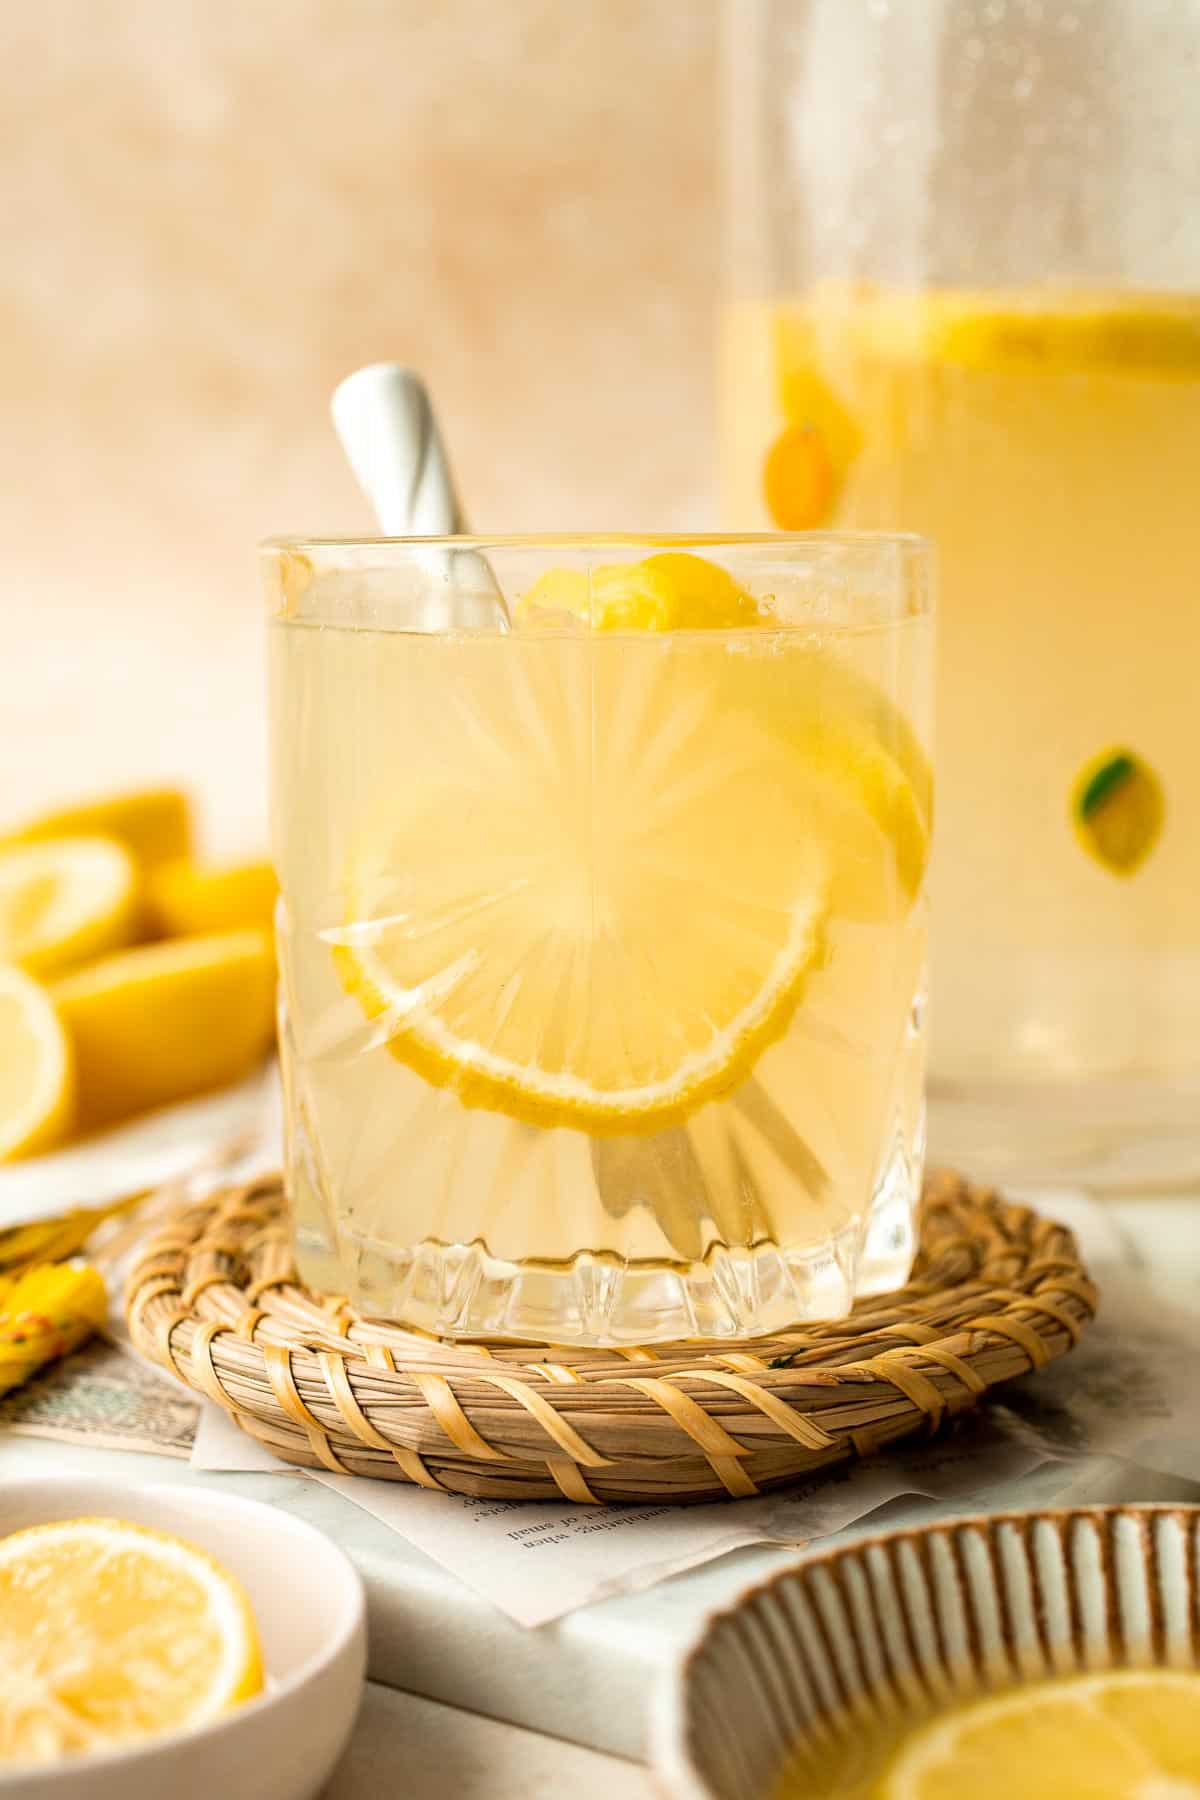
The best part of this lemonade recipe is how easy it is to make! If you can juice lemons and dissolve sugar, you can easily whip up this tasty lemonade in a matter of minutes and serve it over ice at a picnic, party, or with lunch at home on a sunny afternoon. It's also easy to customize - just scroll to the tips at the end for details!
Why You'll Love this Lemonade Recipe
- Fresh, simple ingredients. There are only three ingredients in this homemade lemonade: lemons, sugar, and water. That's it! Plus, you can control the sweetness level and dilute it to your liking. No artificial flavors, colors, or preservatives here, so you can feel good about sipping on this.
- Better than concentrate. Nothing beats the real thing! This incredibly fresh homemade lemonade is loaded with tangy, sweey, and citrusy goodness. It is perfectly balanced and refreshing - and tastes better than lemonade from concentrate but doesn't require a lot of effort or labor.
- Ready in 10 minutes. This homemade lemonade recipe is so quick and easy to make in just a few simple steps. It takes only 10 minutes total to make from scratch: making simple syrup, juicing the lemons, and combining them for the perfect warm weather drink.
- Ideal for any occasion. Whether you're hosting a backyard barbecue, enjoying a picnic in the park, or simply craving a refreshing drink on a hot day, homemade lemonade is a versatile beverage that suits any occasion. Serve it in tall glasses over ice, garnished with lemon slices, for a thirst-quenching treat.

Ingredient Notes
To make this delicious Homemade Lemonade, you will need the following ingredients (full measurements in recipe card below):
- fresh lemon juice - if you're really pressed for time or don't have access to fresh lemons, lemon juice from concentrate will also work, but it won't taste as fresh as the real thing.
- granulated sugar - you can also use your favorite granulated sugar alternative like Swerve, stevia, or monk fruit, but note that the type you choose will affect the overall flavor of the final product.
- water
You can also gather up some extra lemon slices and ice for serving.
You will also need measuring cups, a saucepan, and a pitcher for serving.
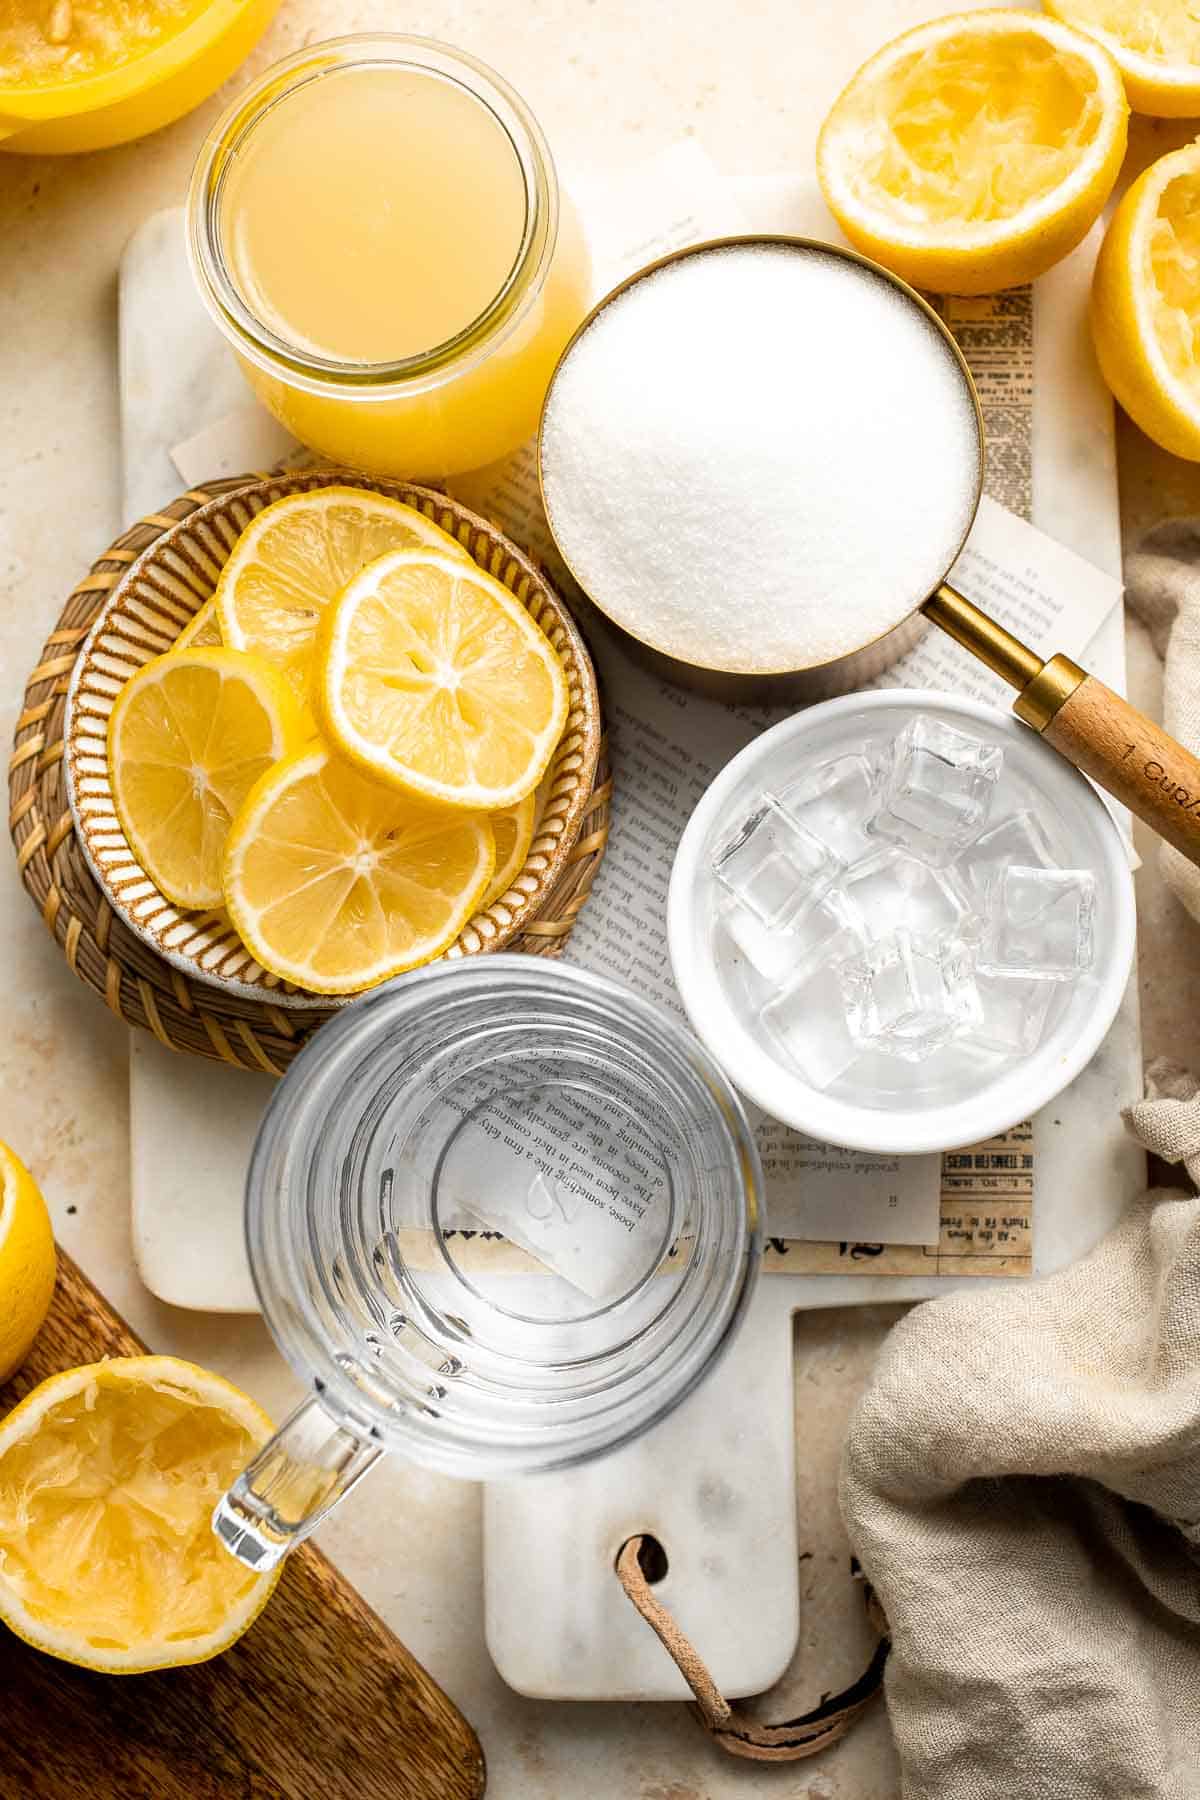
How to Make the Best Homemade Lemonade
- Make the lemonade concentrate. In a medium saucepan, bring 1 cup of water to a boil over medium-high heat. Add sugar and stir until dissolved. Stir in lemon juice and remove from heat.
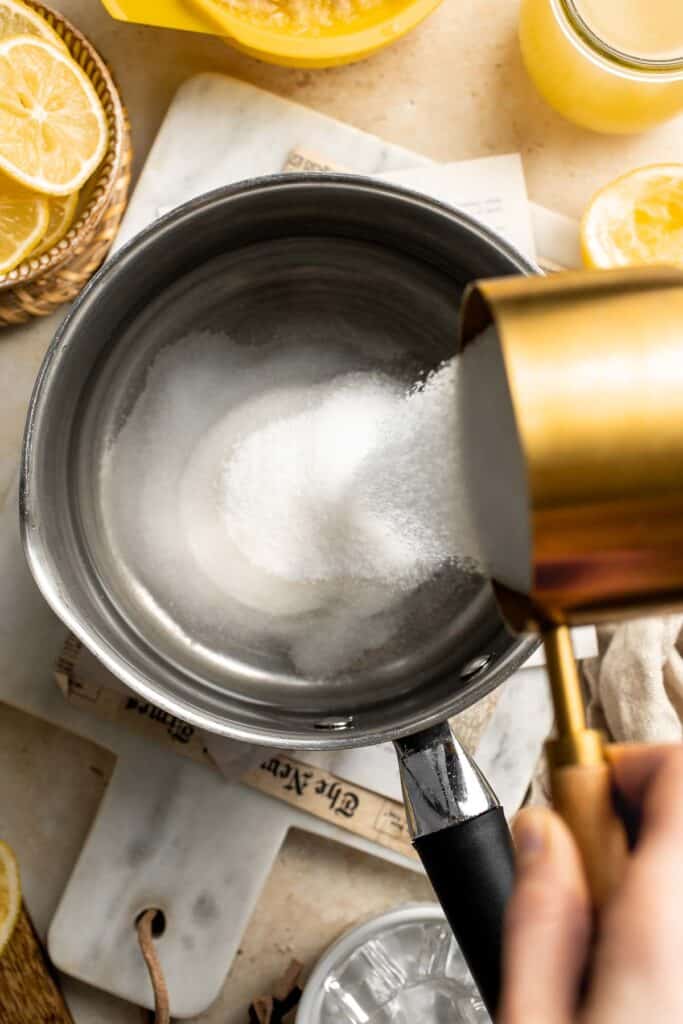
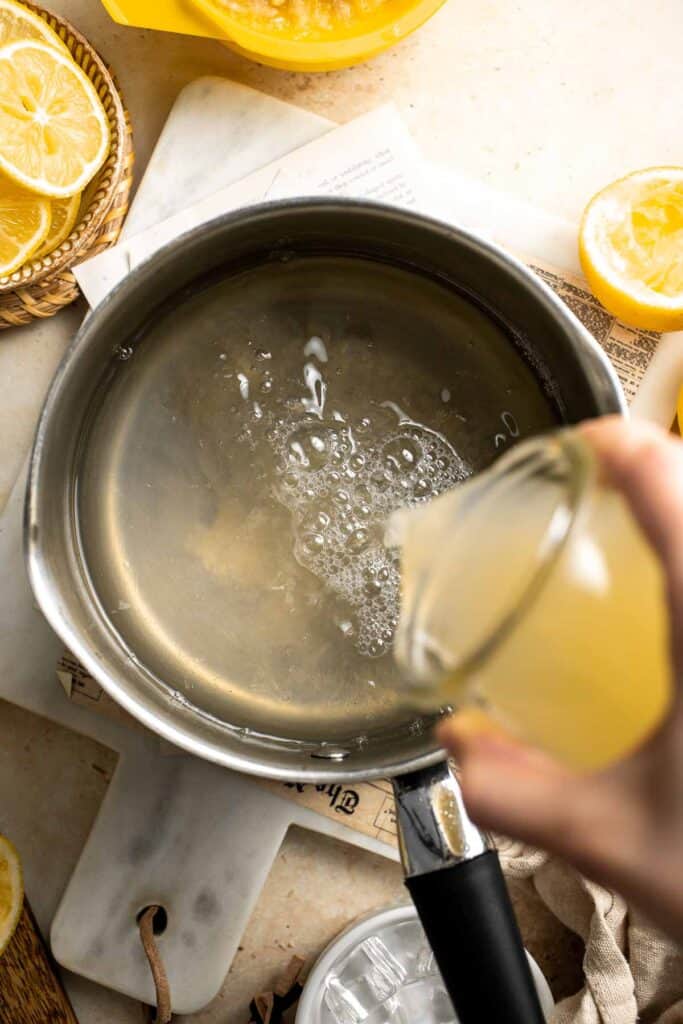
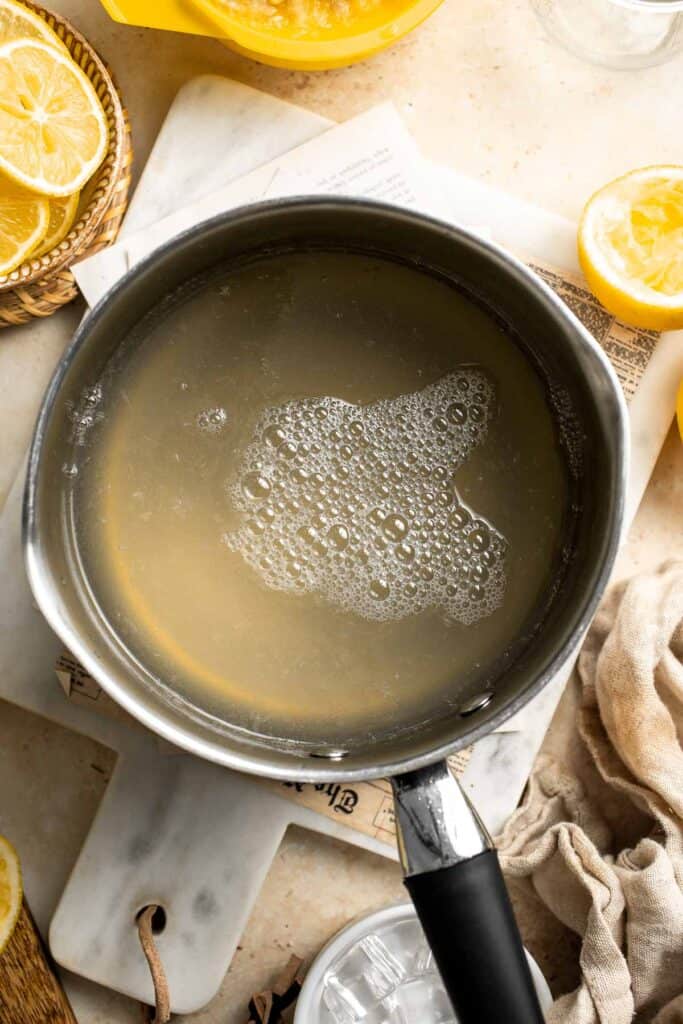
- Dilute with water. Transfer the mixture into a large pitcher and add 2 to 4 cups of cold water to your desired taste.
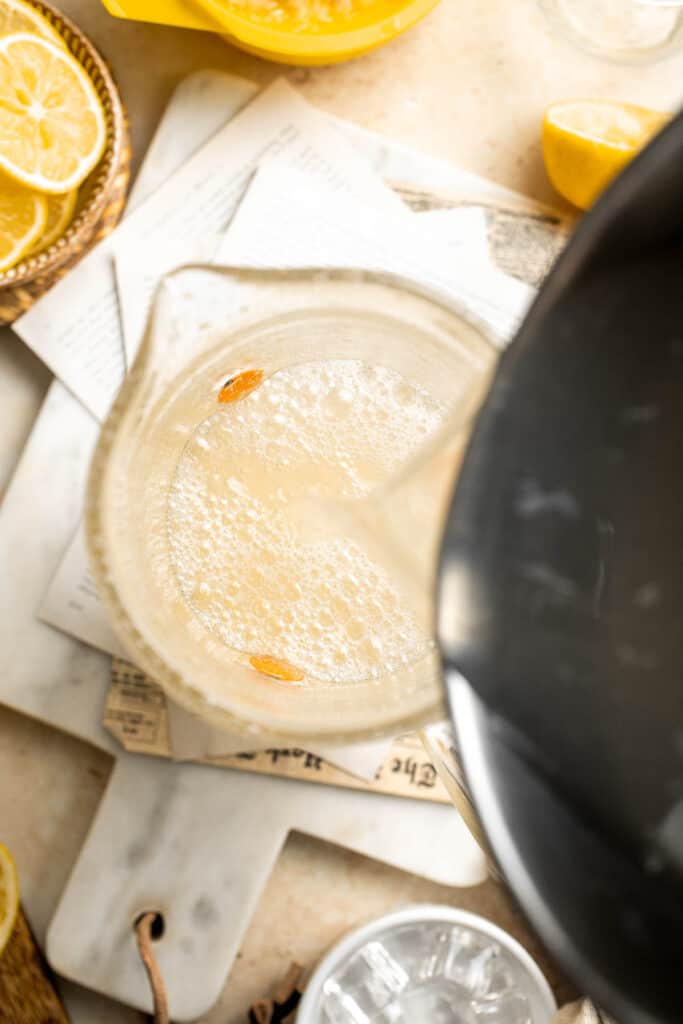
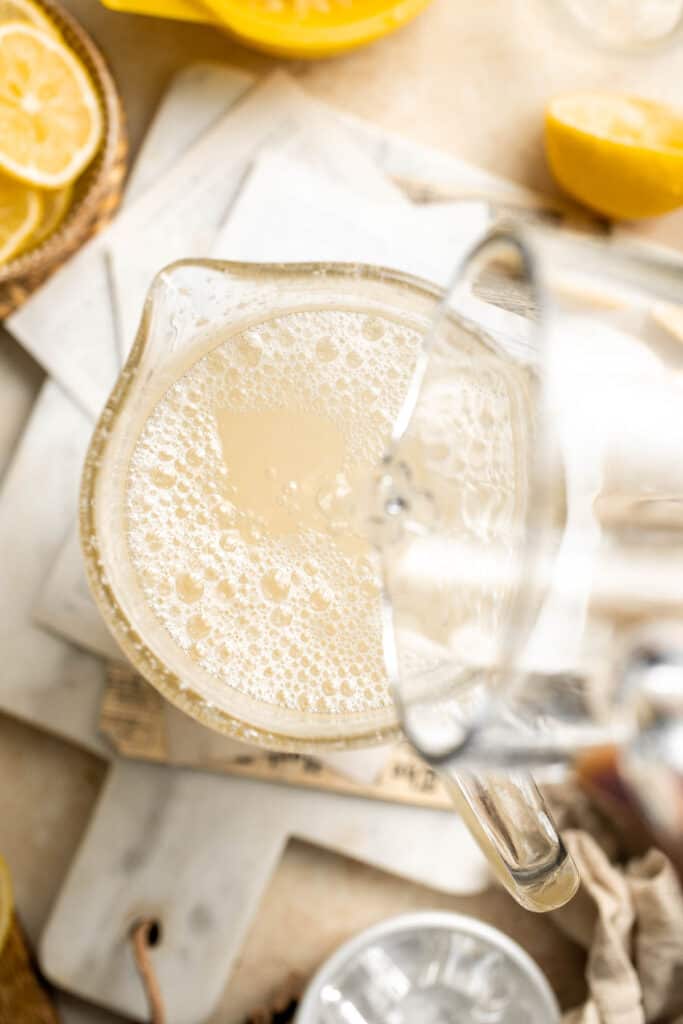
- Chill. Refrigerate until the lemonade cools completely, about 30 minutes.
- Serve. Serve with lemon slices and ice, if desired.

Recipe Variations
While classic lemonade is delightful on its own, you can easily customize it with various additions:
- Make it sparkling. For special occasions (or whenever the mood strikes!) you can elevate this lemonade by swapping the water for sparkling water to make a fizzy, champagne-like lemonade that's perfect for making toasts.
- Add more citrus. Enhance the refreshing citrus flavor of your lemonade by adding a splash of orange juice. It adds a delightful twist and complements the lemons well.
- Give it a fruity twist. Give your lemonade a burst of fruity goodness by muddling fresh berries into the mixture (try strawberries, raspberries, or blackberries!). The vibrant colors and flavors will take your lemonade to the next level.
- Infuse with herbs. Infuse your lemonade with fresh herbs like mint, basil, or lavender. Simply muddle the herbs with the lemon and sugar before adding water,
- Make it tropical. Add a splash of coconut water or pineapple juice to give this homemade lemonade a tropical twist.
How to Serve
Homemade Lemonade is a delicious drink to serve whenever you are craving something delicious to quench your thirst. It also goes well with almost any summer meal. Some of our favorites include:
- Turkey and Cheese Sliders
- Baked Caprese Chicken
- Buddha Bowl
- Shrimp Alfredo
- Balsamic Chicken Kabobs
- Strawberry Avocado Salad
- Juicy Hamburgers
For more summer meal inspo, see our 60+ Summer Dinner Ideas.

Recipe Tips and Tricks
- Use high-quality ingredients. Because this homemade lemonade has so few ingredients, it's incredibly important to choose your ingredients carefully, as everything you add will have a huge impact on the flavor. Go for the highest quality ingredients that you can find for the best results!
- Squeeze fresh lemons. For the best flavor, use freshly squeezed lemons rather than bottled lemon juice. The natural acidity and bright citrus flavor will elevate your homemade lemonade.
- Customize the flavor. This simple lemonade is delicious as-is, but it can also be used as a canvas for flavors and textures! Get creative with mix-ins like fresh fruits, berries, and herbs, to change the flavor and give your lemonade a boost. Try different combinations to find your favorite!
- Chill before serving. Allow your lemonade to chill in the refrigerator for at least 30 minutes before serving. The flavors will meld together better, and the cold temperature will make the drink even more refreshing.
Storing and Freezing Instructions
How to Store
Store homemade lemonade in an airtight container and refrigerate for up to 1 week. Serve cold with or without added ice.
How to Freeze
Store leftover lemonade in a large freezer bag or freezer-safe airtight container, leaving enough space for it to expand in the freezer. Freeze for up to 3 months. Allow it to slowly thaw in the refrigerator overnight before serving, or thaw in the container in a warm water bath.
If planning to make a batch to freeze, I recommend freezing just the lemonade concentrate before diluting it with water (to take up less space!). Dilute it with water once thawed.
More Drink Recipes
- Strawberry Lemonade
- Peach Iced Tea
- Three Ways to Make Bubble Tea
- Blackberry Milkshake
- Cold Brew Coffee
- Iced Latte
Tried this recipe?
I'd love to hear what you think! Leave a comment and rating below to share your feedback. Your reviews help others discover this recipe and help me keep creating more free recipes for you. Snap a photo and tag me on social media @aheadofthyme too.

Mushroom Risotto
Mushroom Risotto is a rich and creamy one pot rice dish made with simple ingredients that deliver bold flavors. Perfectly fluffy rice, savory and earthy mushrooms, nutty Parmesan cheese, and a rich broth makes this dish comforting, flavorful, and delicious.
Making homemade risotto from scratch takes some time, but the recipe is easy to follow (even for beginners), and it's well worth the time! Serve this fancy Italian dish on its own as a vegetarian entree or as a gluten-free side dish alongside dinner. However you serve it, it is sure to satisfy.
Why You'll Love this Mushroom Risotto
- Creamy and delicious. Mushroom risotto is famous for its out-of-this-world creaminess and comforting savory flavors. The combination of tender arborio rice and earthy mushrooms creates a delightful umami experience that your taste buds will thank you for!
- Easy to make. This mushroom risotto is a one pot recipe that is easy to make, requiring simple ingredients and just a few steps. With some stirring and patience, you'll have a comforting and satisfying dish that is sure to impress.
- Perfect for special occasions. For romantic date nights, dinner parties, and other upscale get-togethers, you can't go wrong with this impressive-yet-easy mushroom risotto. It's also a great option for vegetarians or people who are following a gluten-free diet.
- Doubles as an entree or a side dish. If you're looking for a dish that can pull double duty, this is it! Served by itself or used to complete a several-course meal, this mushroom risotto will be your new go-to.
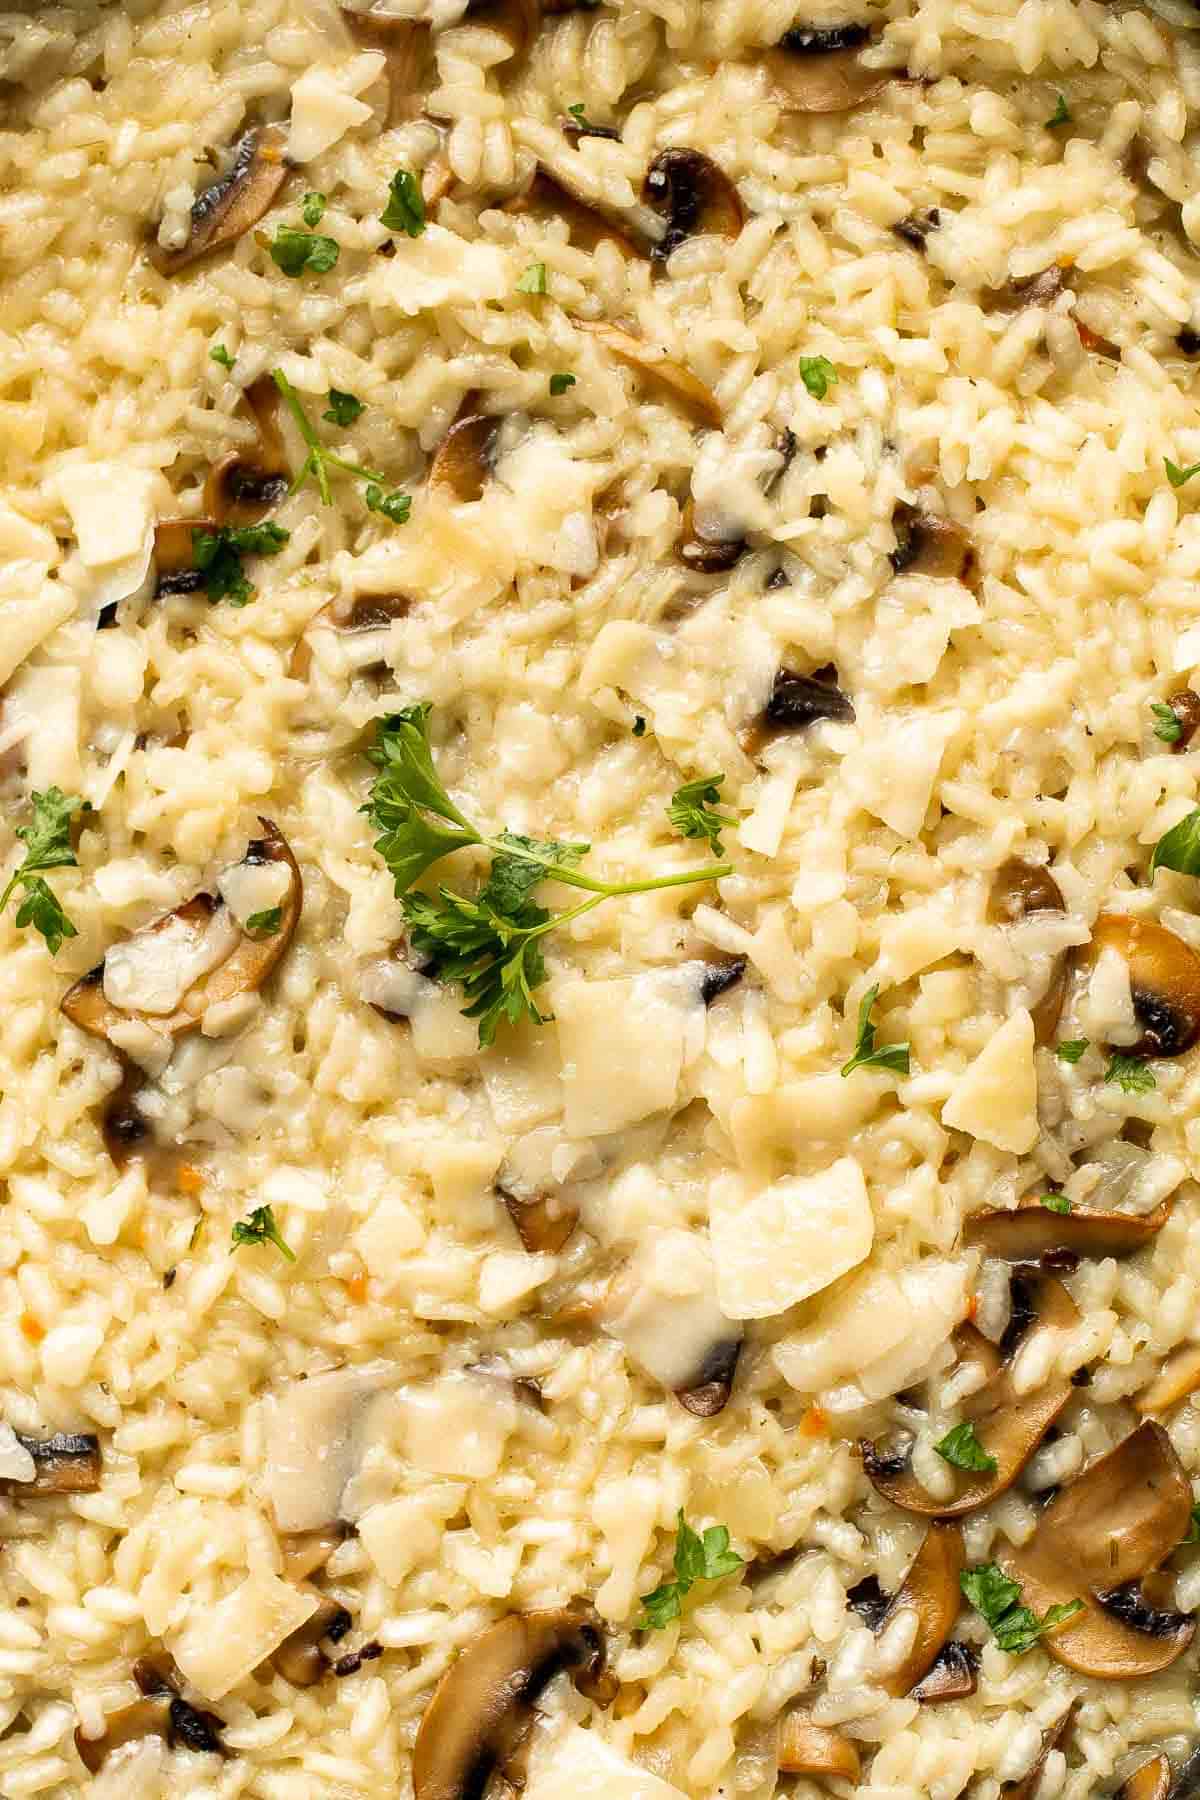
Ingredient Notes
To make this easy and delicious Mushroom Risotto, you will need the following ingredients (full measurements in recipe card below):
- butter - mushrooms sautéed in butter is on another level. However, if you're low on butter, you can use an equal amount of olive oil instead.
- mushrooms - feel free to use shiitake mushrooms or white button mushrooms. You can also experiment with other mushroom varieties if you choose. Adjust cooking time as needed.
- Italian seasoning - Italian seasoning consists of a blend of dried oregano, basil, thyme, marjoram, and rosemary, so if you have dried or fresh versions of some or most of these herbs, you can make your own blend.
- onion - white or yellow onions work best for this risotto, but you can also use shallots or red onions if you have them.
- arborio rice - arborio rice is what is traditionally used in Italian risotto. You can substitute with carnaroli rice or even with Spanish paella rice (bomba rice). Just be sure to closely monitor the texture of the grain while cooking and adjust the cooking time as needed.
- white wine - if you don't have white wine on hand, you can substitute white wine vinegar or regular white vinegar instead.
- broth - traditionally, chicken broth is used in risotto. However, you can substitute with vegetable if you want to make the recipe a vegetarian-friendly.
- Parmesan cheese - out of parmesan? Try similar cheeses like Asiago or Pecorino Romano.
- parsley - you can swap this for another soft herb like basil, dill, or tarragon.
- salt and pepper
You will also need measuring cups and spoons and a large skillet.
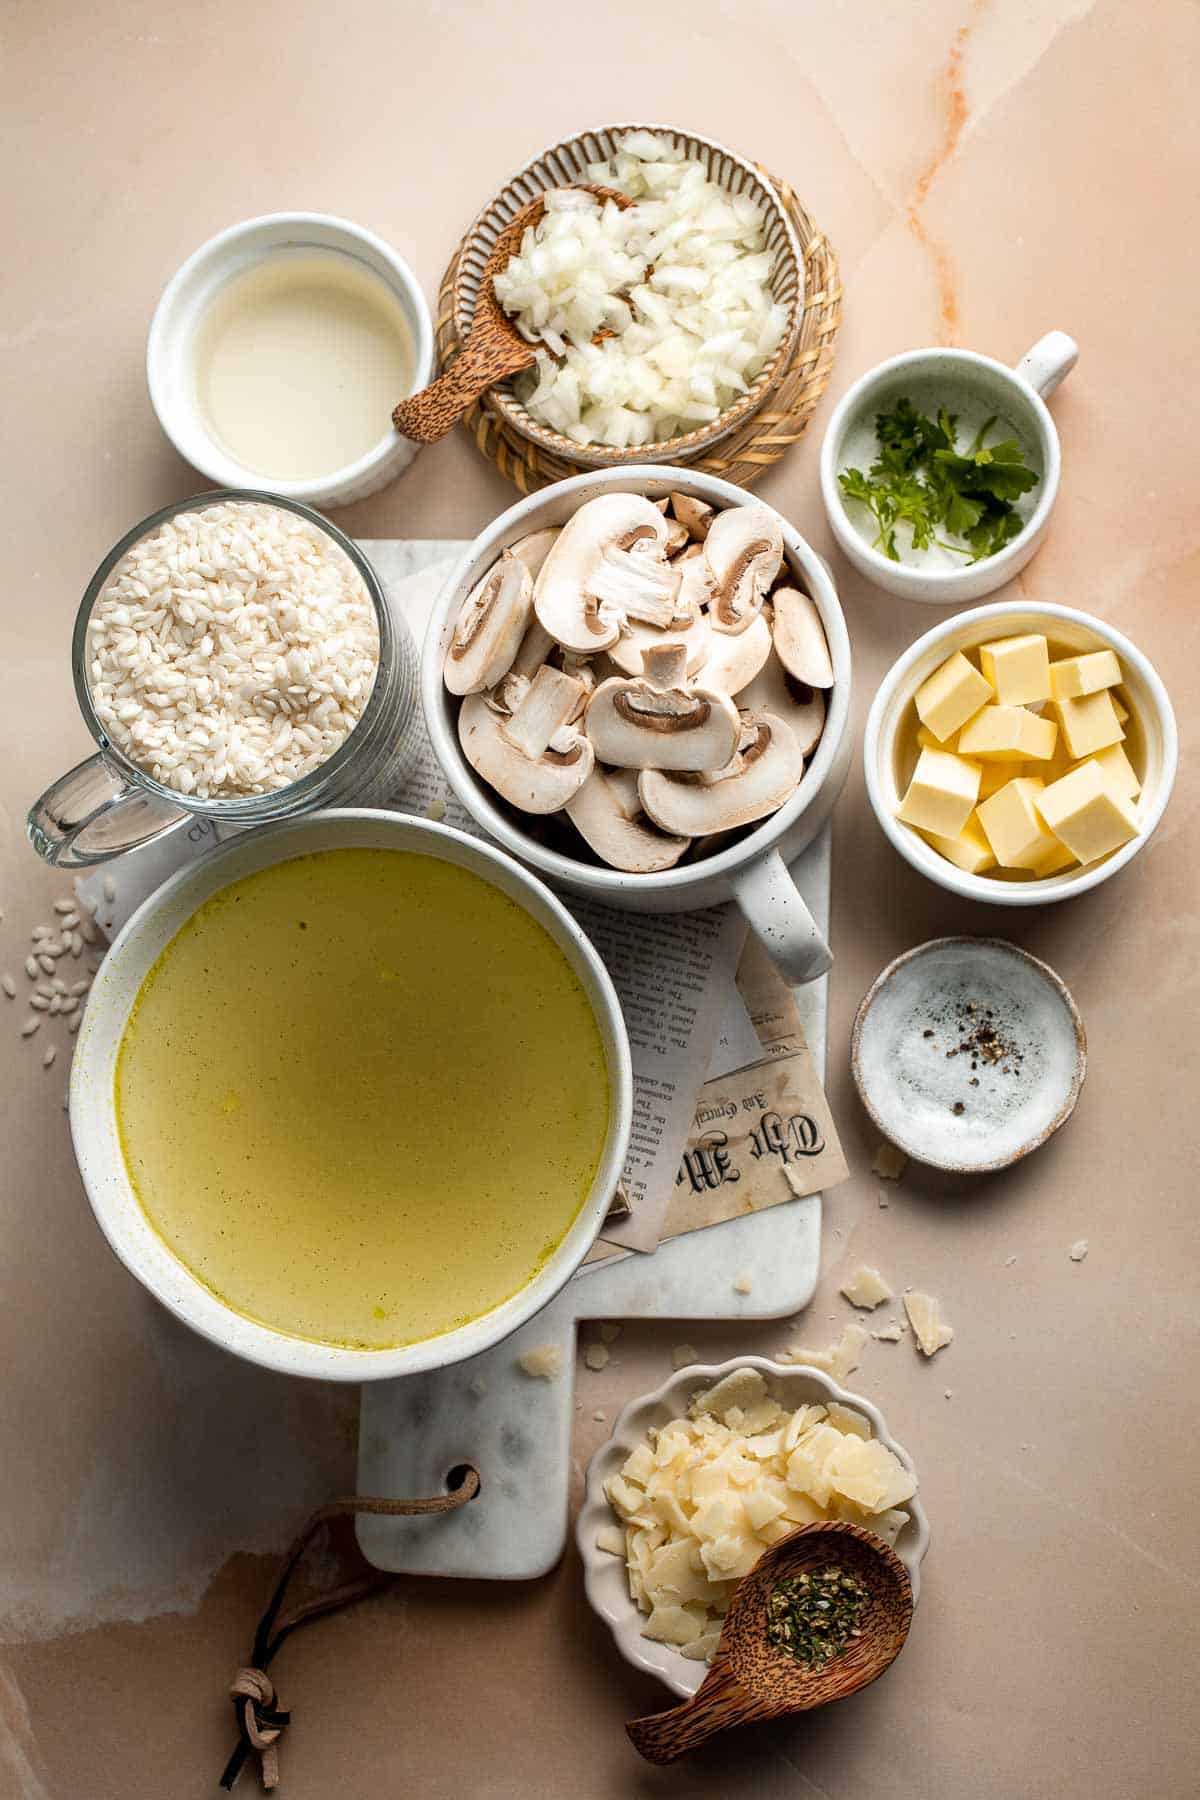
How to Make the Best Mushroom Risotto
- Heat butter. Melt butter in a large skillet over medium-high heat until it starts to bubble, about 1 minute.
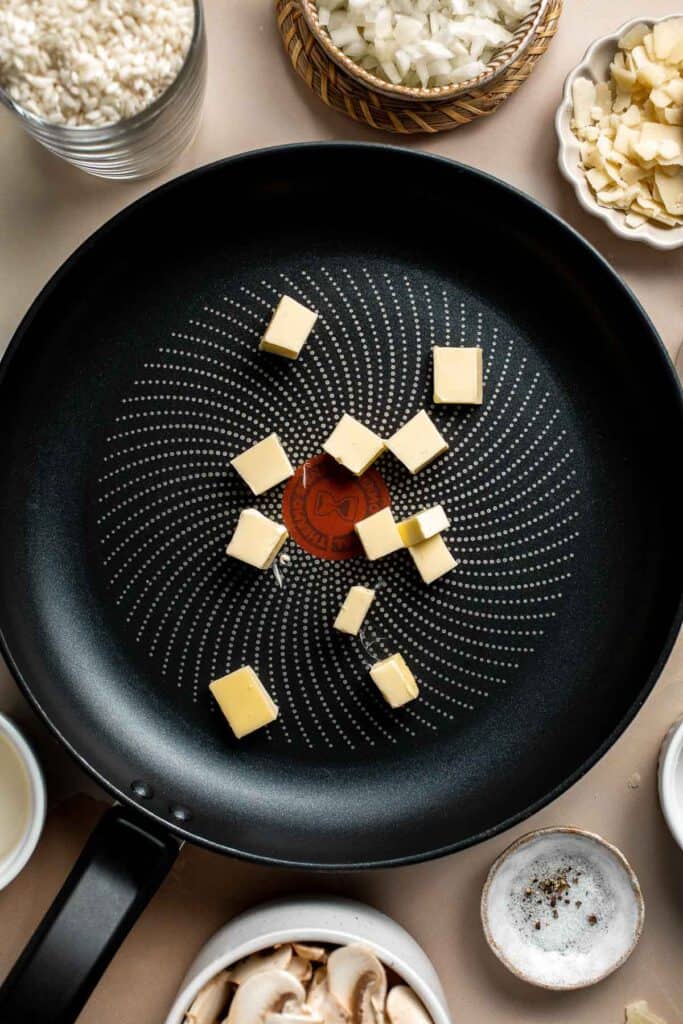
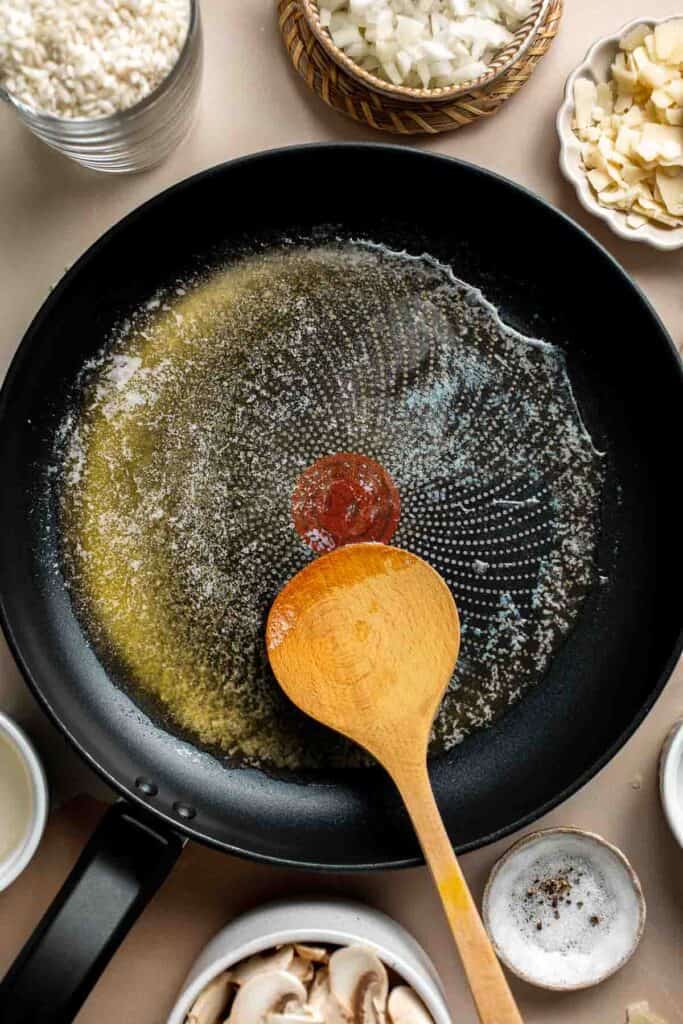
- Sauté mushrooms. Add mushrooms and sauté until the moisture evaporates, about 5 minutes. Season with Italian seasoning, salt and pepper and continue cooking for another 2-3 minutes until the color of the mushrooms turns golden brown. (Note that salt will further extract more water from the mushrooms, giving them a nice brown color).
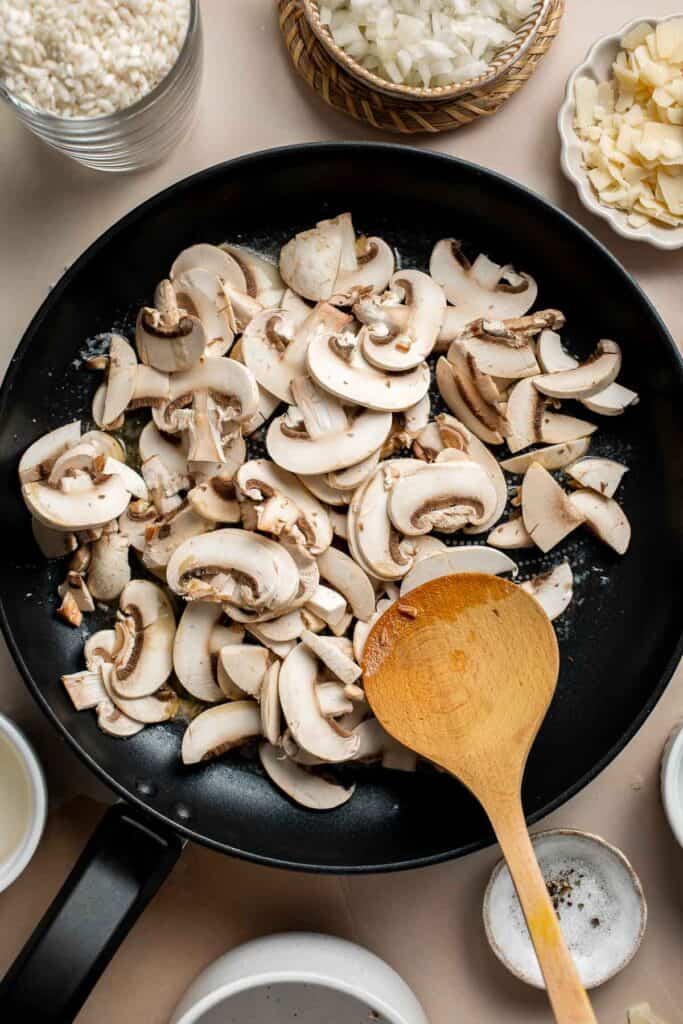
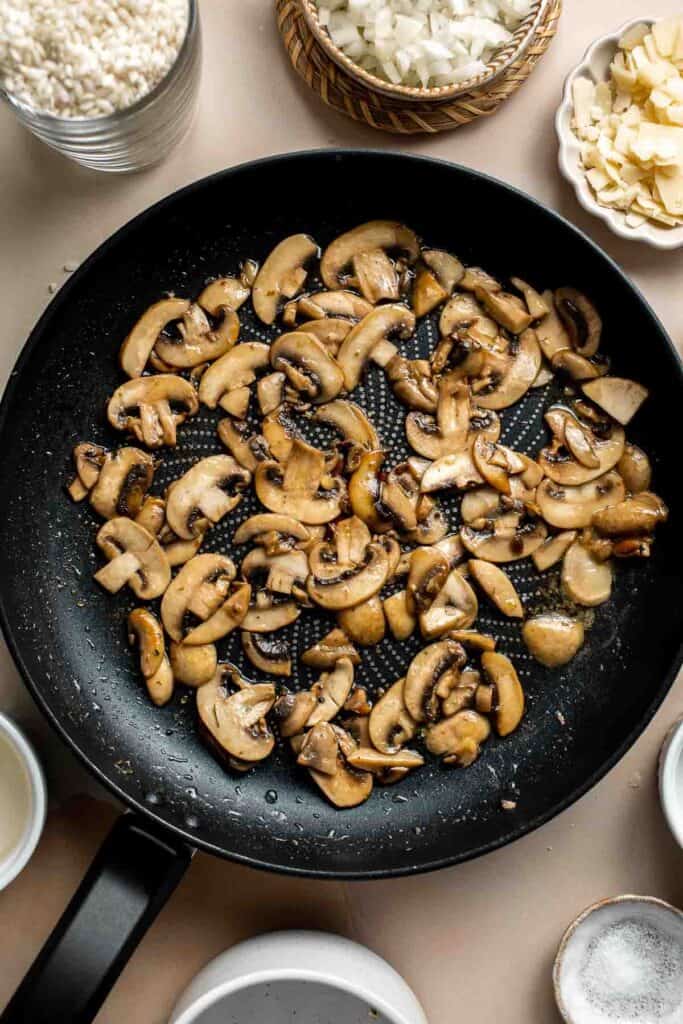
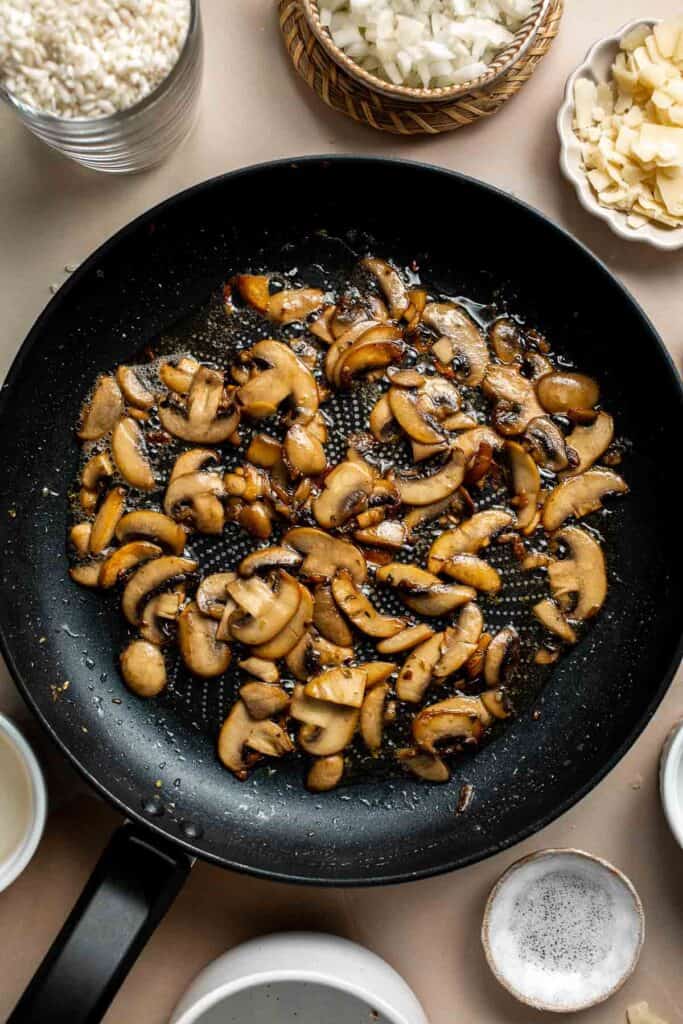
- Add onions. Add onions and cook until tender, about 1 minute.
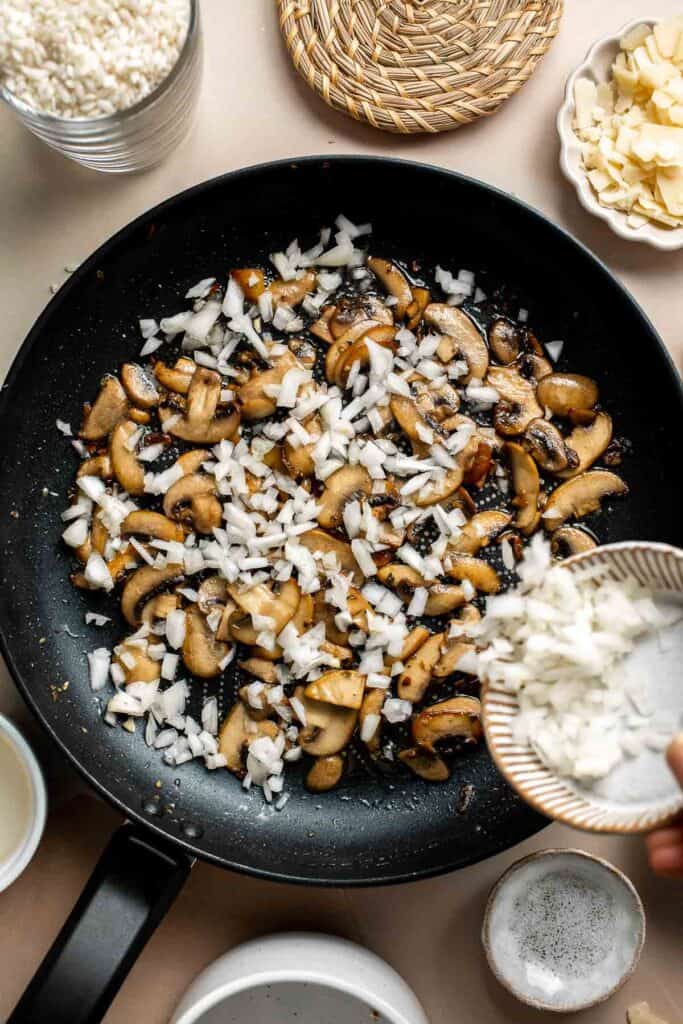
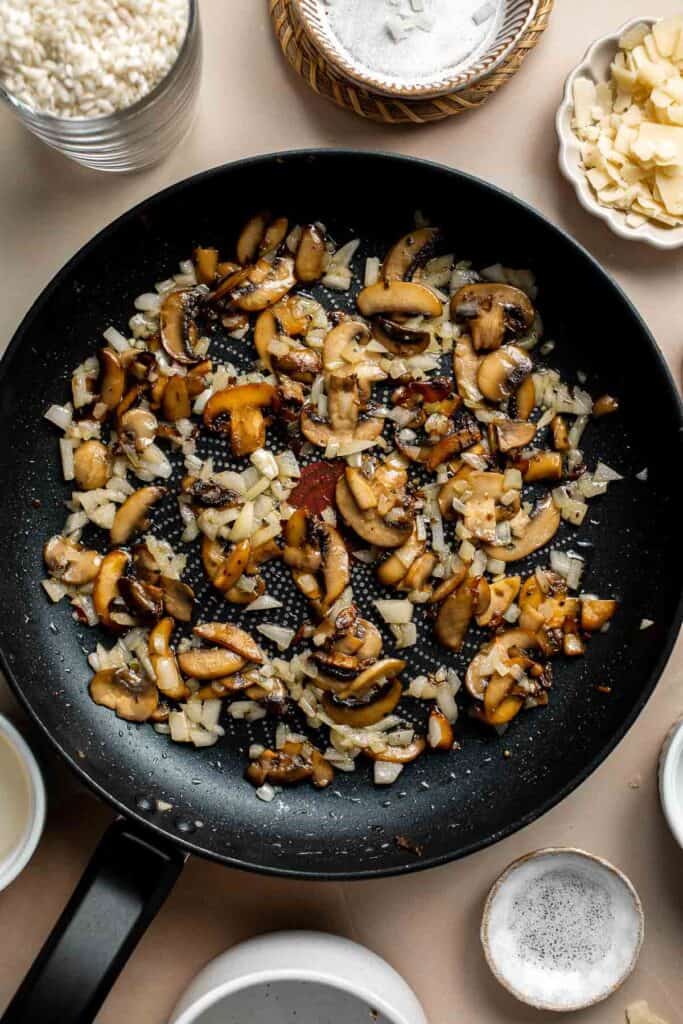
- Add rice. Stir in rice and cook for 1 minute, mixing well.
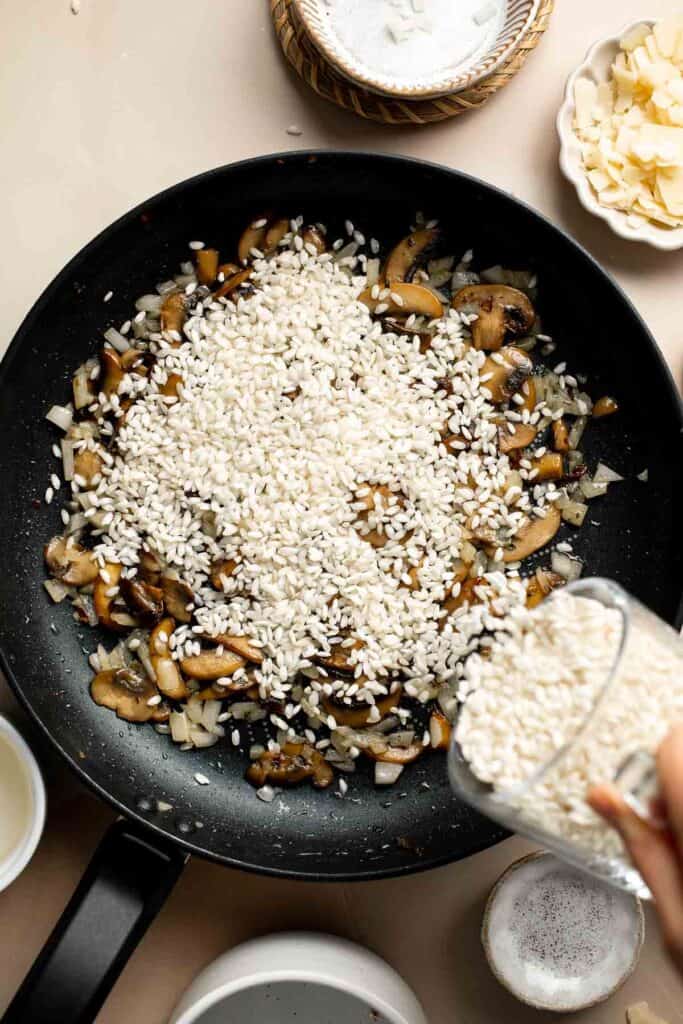
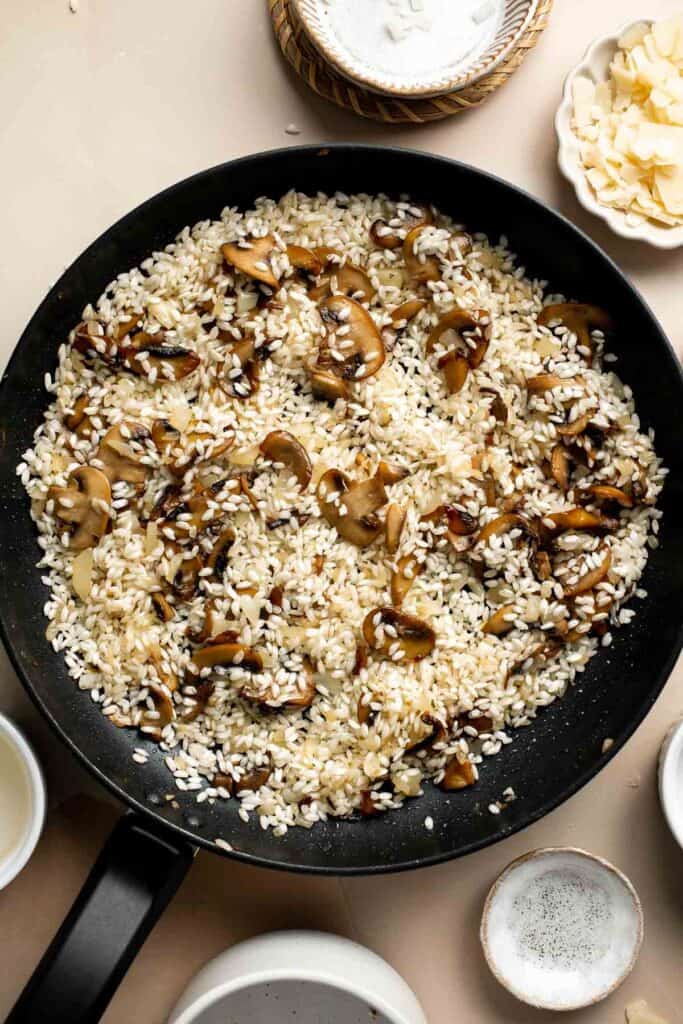
- Add wine. Add wine, stirring every 10-20 seconds until almost all the liquid has absorbed, about 3-4 minutes.
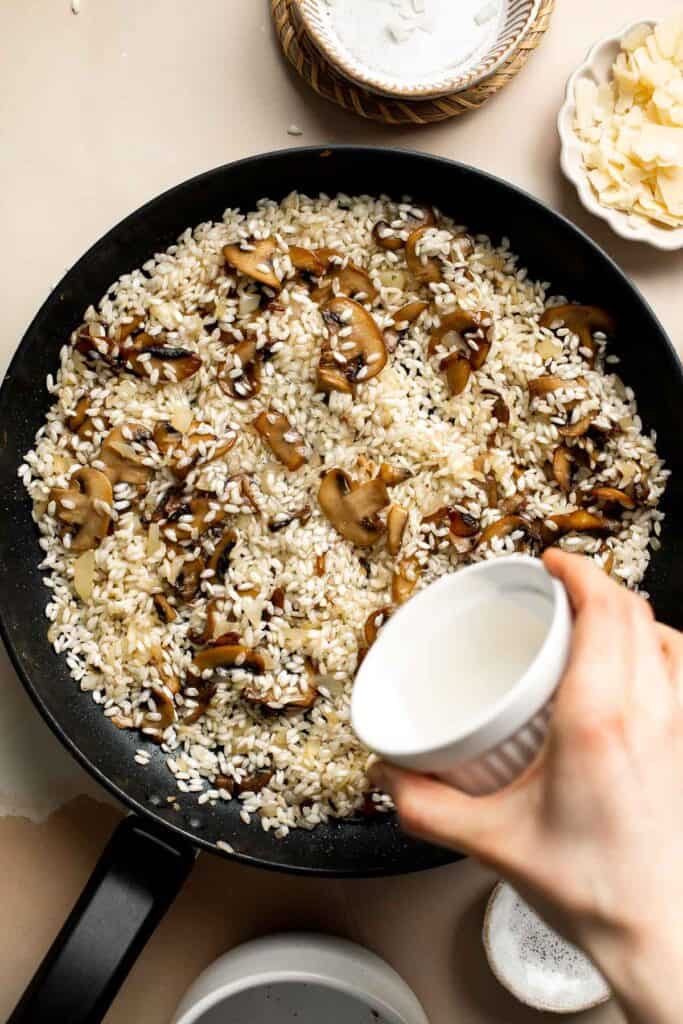
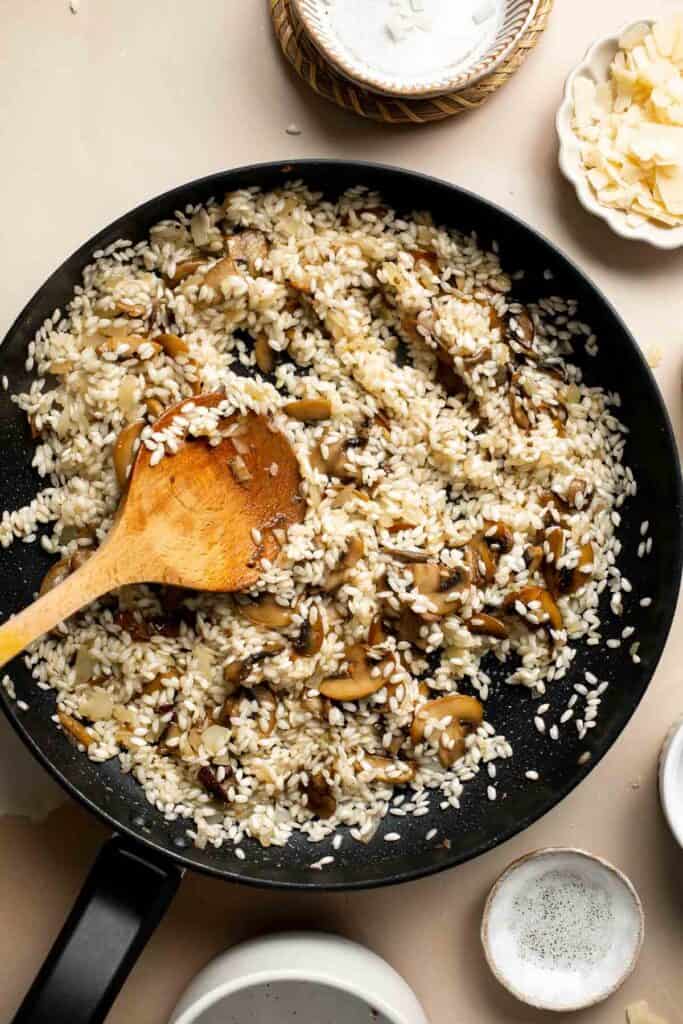
- Stir in broth. Add one cup of broth and stir every 10-20 seconds so that the rice doesn't stick to the pan, while avoiding over-stirring. Cook until the liquid is completely absorbed.
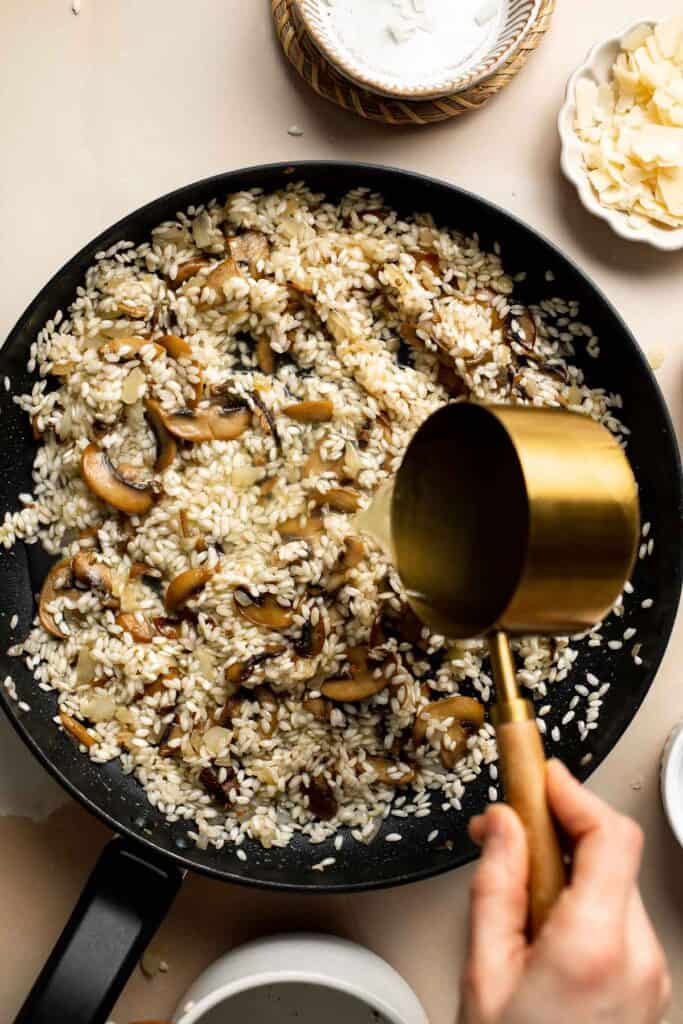
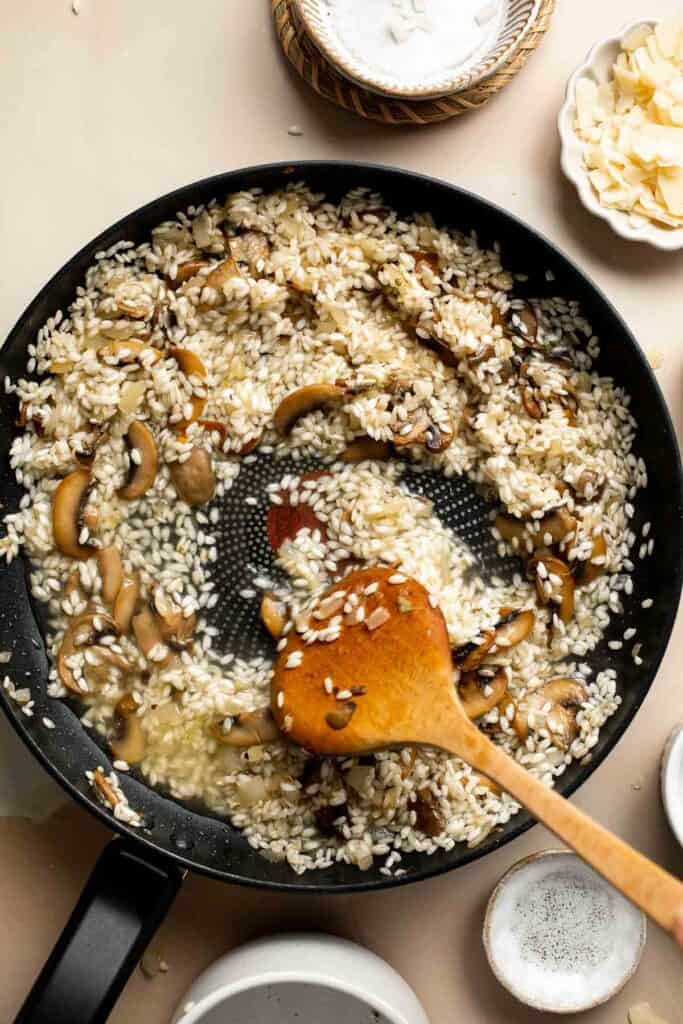
- Repeat. Repeat adding broth, one cup at a time, until all the broth has been added and absorbed, about 22-25 minutes. The rice should be cooked al dente. Repeat with more broth if needed (if the risotto is too dry).
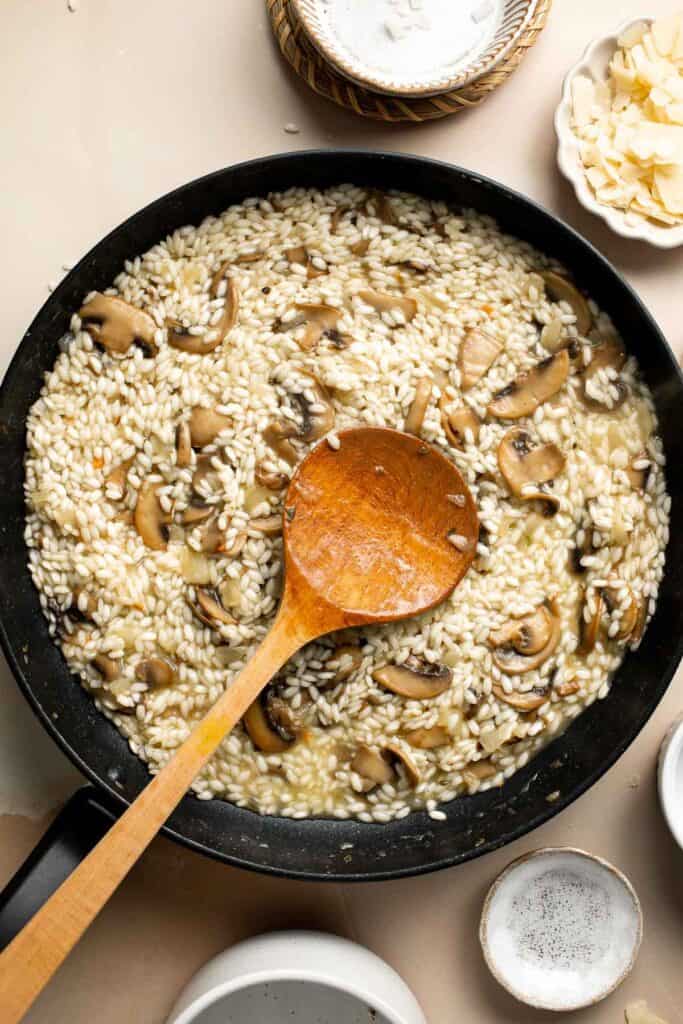
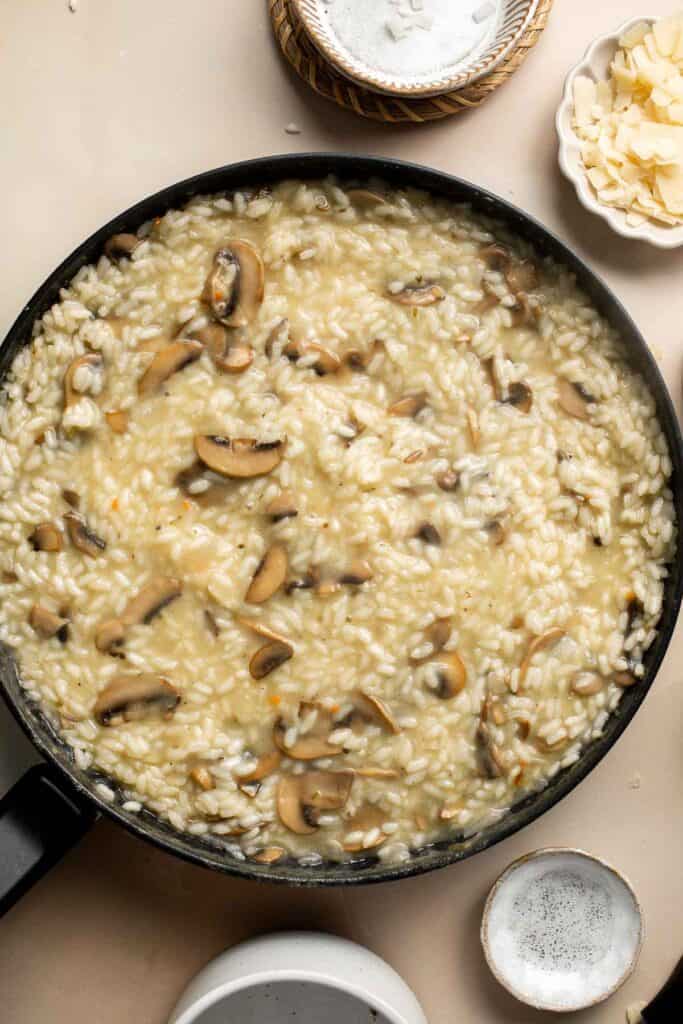
- Add cheese. Turn off the heat and stir in parmesan cheese.
- Serve. Garnish with parsley (if desired) and serve immediately.
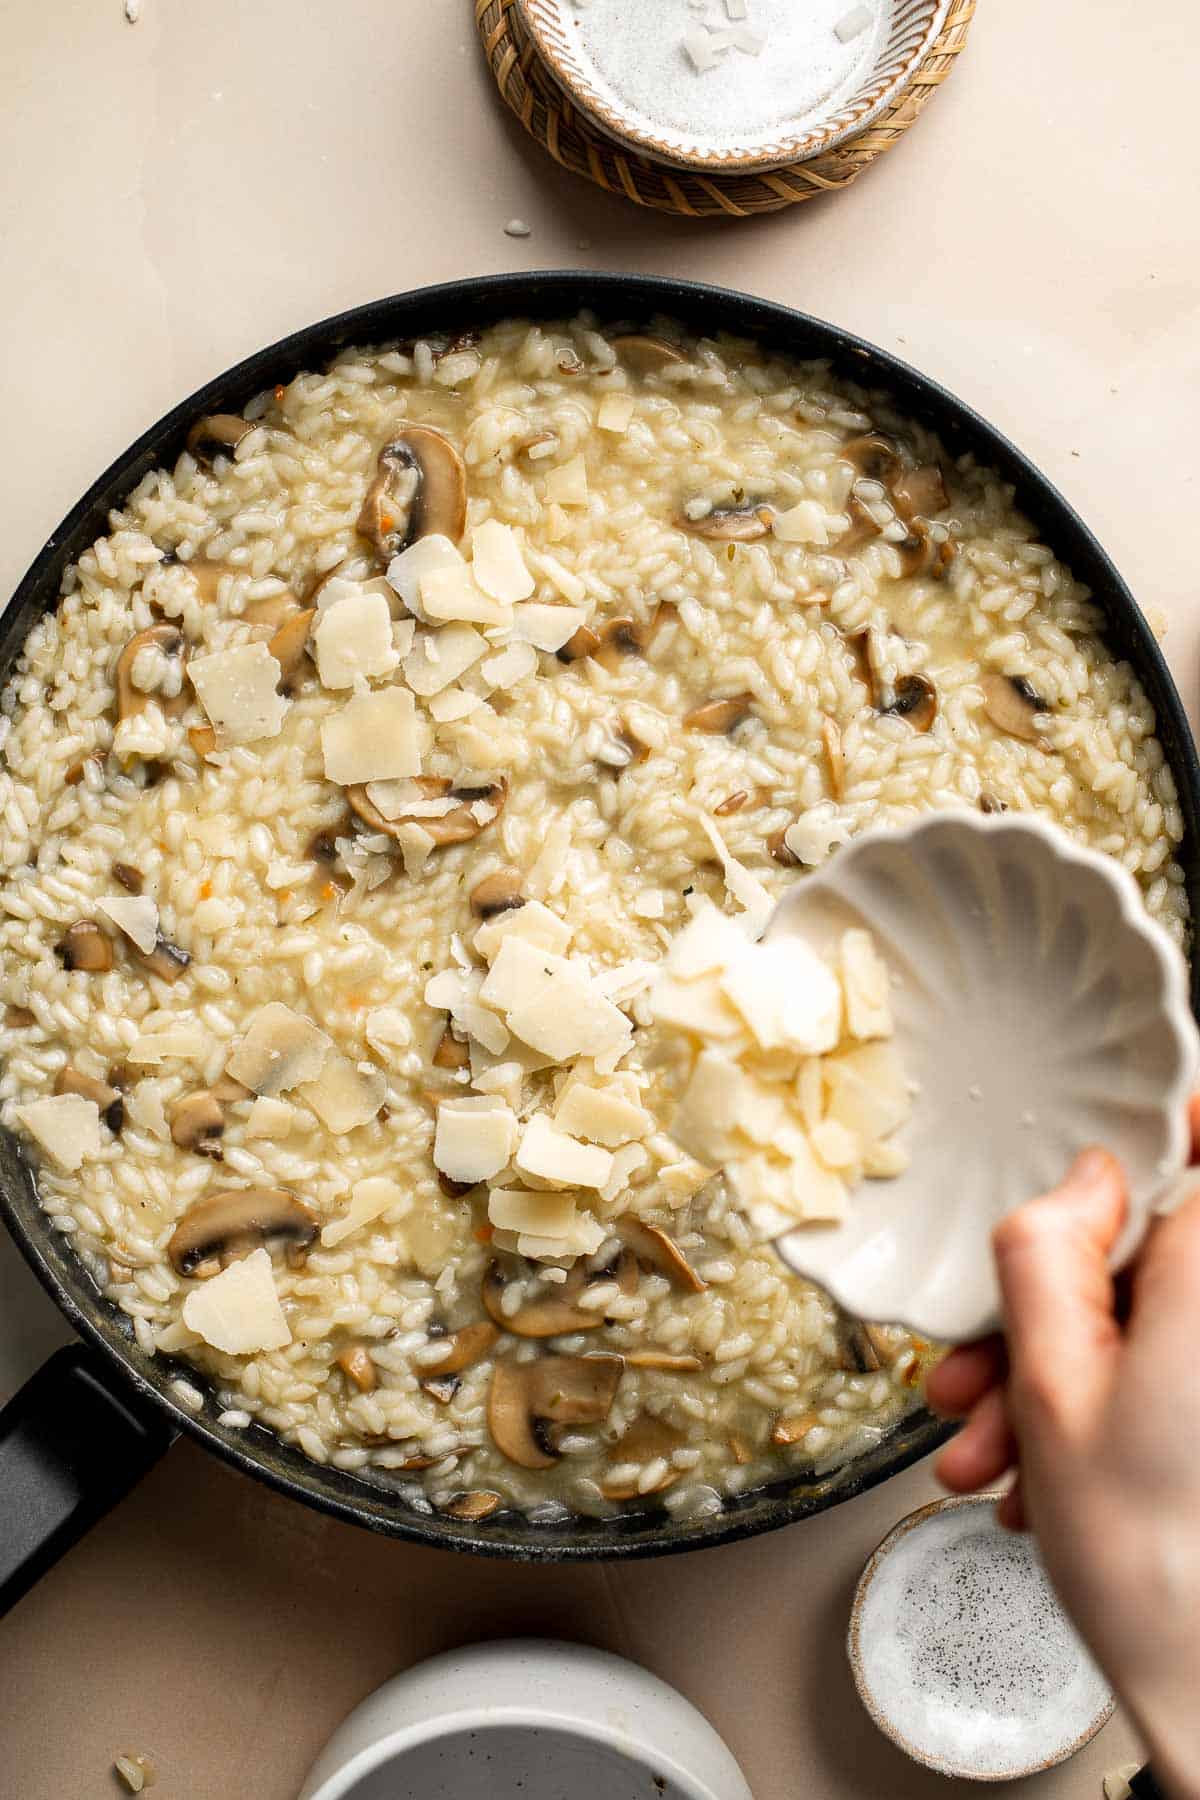
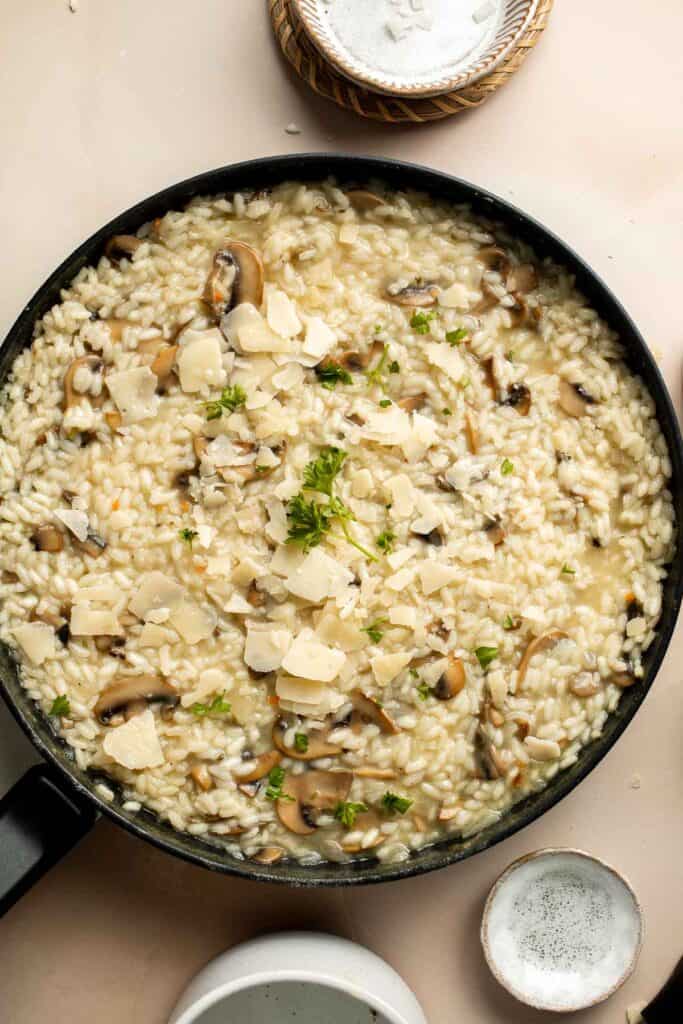
Recipe Variations
- Use different mushrooms. Experiment with different mushroom varieties such as shiitake, cremini, or oyster mushrooms to create a medley of flavors and textures in this risotto.
- Make it cheesier. We stir in some Parmesan at the end, but make it even creamier and cheesier with more grated Parmesan cheese or Gruyere cheese.
- Give it a spicy kick. If you enjoy a bit of heat, add a dash of red pepper flakes or a pinch of cayenne pepper to your risotto while cooking.
- Add fresh herbs. Elevate the taste of this mushroom risotto by incorporating fresh herbs such as thyme, sage, or rosemary into the risotto and not just sprinkling on top. Finely chop the herbs and add them during the cooking process.
- Add roasted garlic. Roast a few cloves of garlic and mash them into a paste. Stir the roasted garlic paste into the mushroom risotto to add a sweet, caramelized flavor to it.
- Make it for meat lovers. Not a vegetarian? No problem. Add a smoky touch by crisping up some Pancetta or bacon and crumbling it over the risotto before serving.
How to Serve
Garnish this risotto with some freshly chopped herbs like parsley, thyme, or chives on top for a pop of flavor and freshness. You can also drizzle a small amount of high-quality extra virgin olive oil on top for added flavor.
This Mushroom Risotto is a delicious vegetarian meal served on its own as a main course paired with crusty bread, or served as a side dish with a roasted protein and a salad. Some of our favorite dishes to pair with this are:
- Cheesy Garlic Bread
- Instant Pot Short Ribs
- Oven Roasted Vegetables
- Spring Salad
- Stuffed Eggplant
- Garlic Breadsticks
- Instant Pot Whole Chicken
- Sheet Pan Lamb Chops
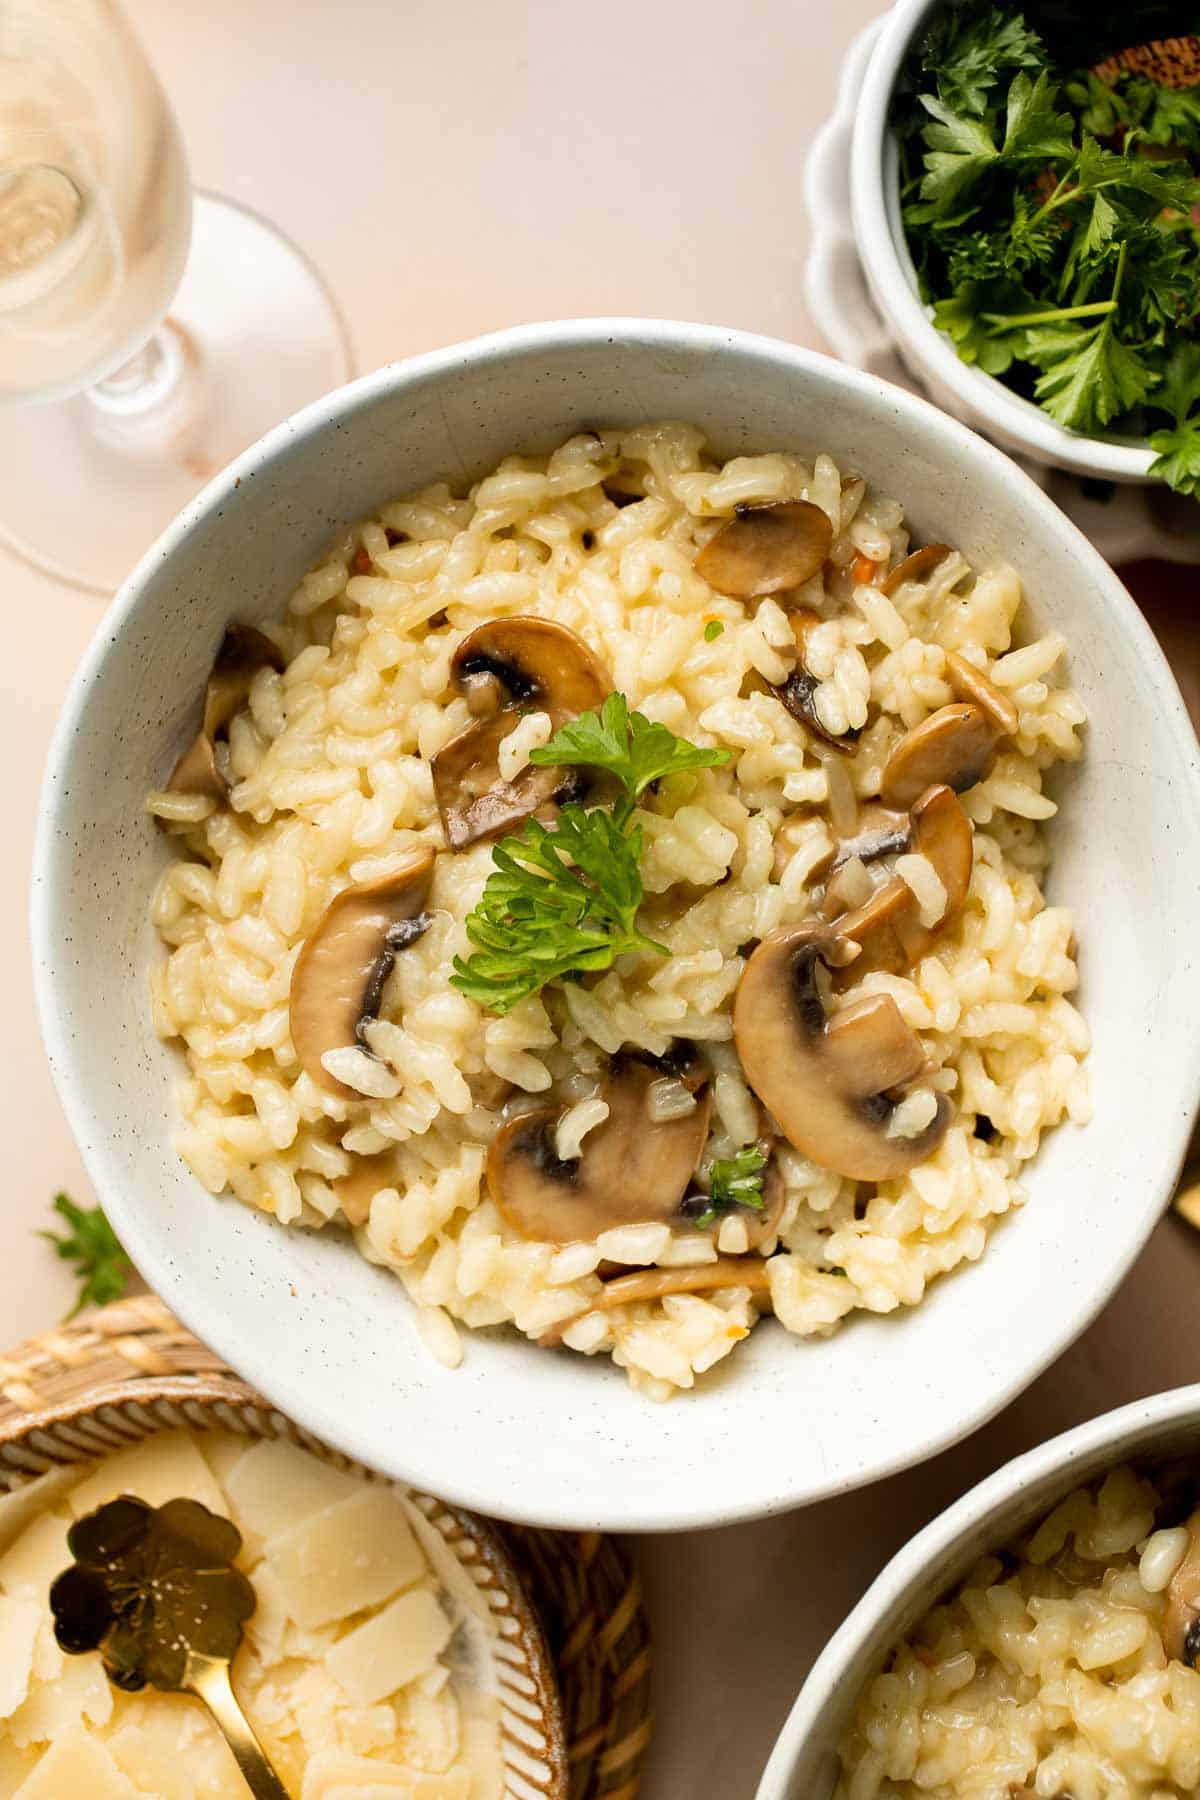
Recipe Tips and Tricks
- Use uniform-sized mushrooms. To ensure even cooking, slice or chop the mushrooms into similar sizes. This helps maintain consistent texture and prevents some pieces from being overcooked while others remain undercooked.
- Choose the right rice. Arborio or Carnaroli rice varieties are best for making risotto due to their high starch content, which creates a creamy texture. Avoid using long-grain rice as it doesn't release enough starch.
- Don't over-stir. Over-stirring the risotto can result in a gluey mess, so exercise caution when stirring. Stir gently using a wooden spoon or spatula every 10-20 seconds to prevent the rice from sticking to the bottom.
- Gradually add the broth. When adding the broth to the risotto, do it gradually, about 1 cup at a time. Stir the rice constantly, allowing it to absorb the liquid before adding more. This gradual process helps achieve a creamy consistency.
- Modify the broth. Is your risotto turning out too soupy or paste-like? You'll need to adjust the liquid. Reduce the broth or add a bit more to fix these issues.
- Adjust seasoning. Taste the risotto before serving and adjust the seasoning if needed. Add salt, pepper, or any desired herbs or spices to enhance the flavors.
- Serve hot and fresh. Mushroom risotto is best enjoyed immediately after cooking while it's still hot and creamy. The flavors and textures are at their peak when served right away.
- Use leftovers creatively. Use leftover mushroom risotto to make delicious risotto cakes. Form the risotto into patties, coat them with breadcrumbs, and pan-fry until golden and crispy. Serve as an appetizer or main dish with a dipping sauce.
Storing and Freezing Instructions
How to Store
Transfer leftover mushroom risotto into an airtight container and refrigerate for up to 4 days.
How to Reheat
Reheat risotto on the stovetop over medium-low heat until heated to the desired temperature. You may need to add a splash of broth or water to thin it out if it has thickened too much when stored in the fridge.
How to Freeze
Transfer leftover risotto to a freezer-safe container or freezer bag and freeze for up to 3 months. Allow it to thaw in the refrigerator overnight before reheating and serving. Note that the texture will not be the same as freshly made risotto.
More Rice Recipes
- 30 Best Rice Recipes
- Creamy Parmesan (No Wine) Risotto
- Broccoli Rice
- Vegetarian Paella
- Pineapple Fried Rice
- Cilantro Lime Rice
Tried this recipe?
I'd love to hear what you think! Leave a comment and rating below to share your feedback. Your reviews help others discover this recipe and help me keep creating more free recipes for you. Snap a photo and tag me on social media @aheadofthyme too.
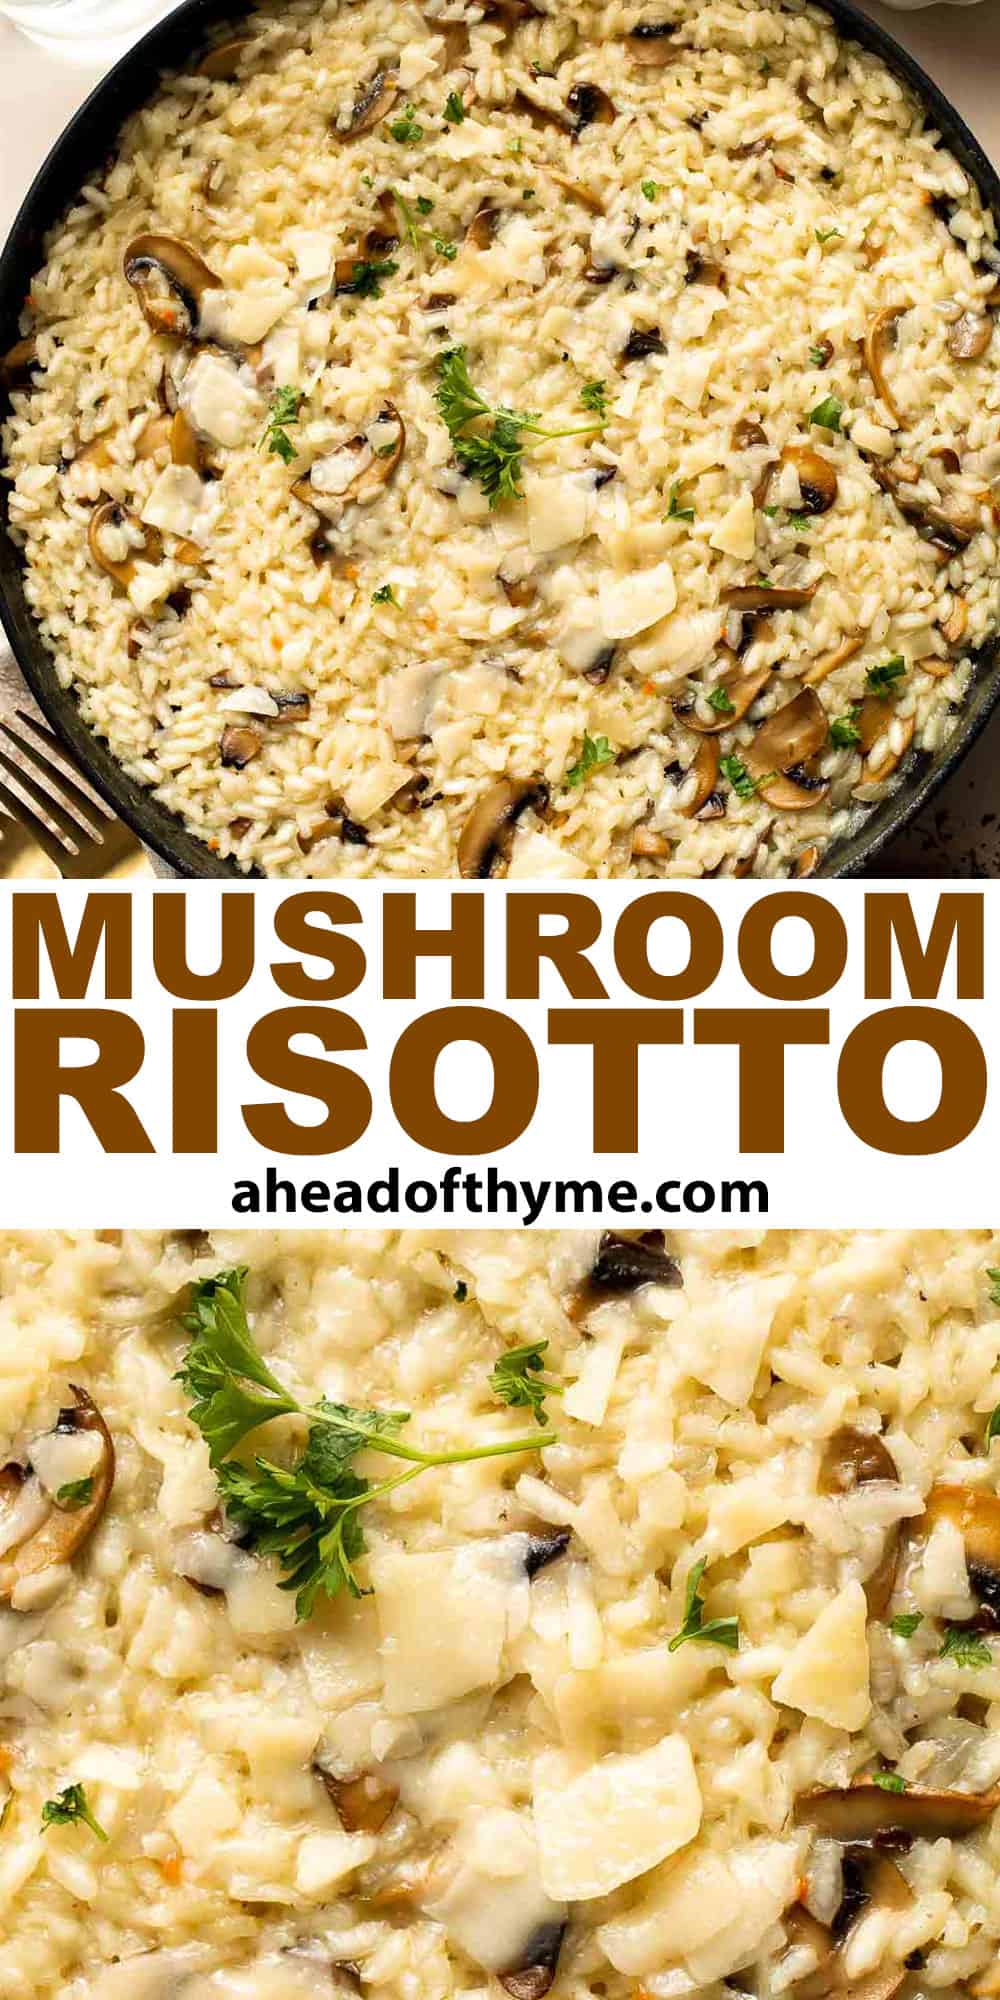
30 Mother's Day Dinner Ideas
Mother's Day is all about showing love and appreciation for the amazing mothers in our lives. And what better way to do that than by treating them to a delicious homemade dinner? Whether you're planning a fancy feast or a cozy family meal, we've got you covered with our collection of over 30 Mother's Day Dinner Ideas.
From classic comfort foods like roast chicken and creamy pastas, to more sophisticated dishes like scallops and lamb chops, to vegetarian and vegan options for plant-based diets - there is something for every taste and dietary preference. So put on your apron and get ready to impress the special mom in your life with these delicious Mother's Day dinner recipes.

Best Mother's Day Dinner Ideas
Dutch Oven Whole Roast Chicken
Easy Dutch oven whole roast chicken with the crispiest golden skin is juicy, tender and succulent and packed with flavour. Just takes 15 minutes to prep. Serve with creamy potatoes au gratin on the side.
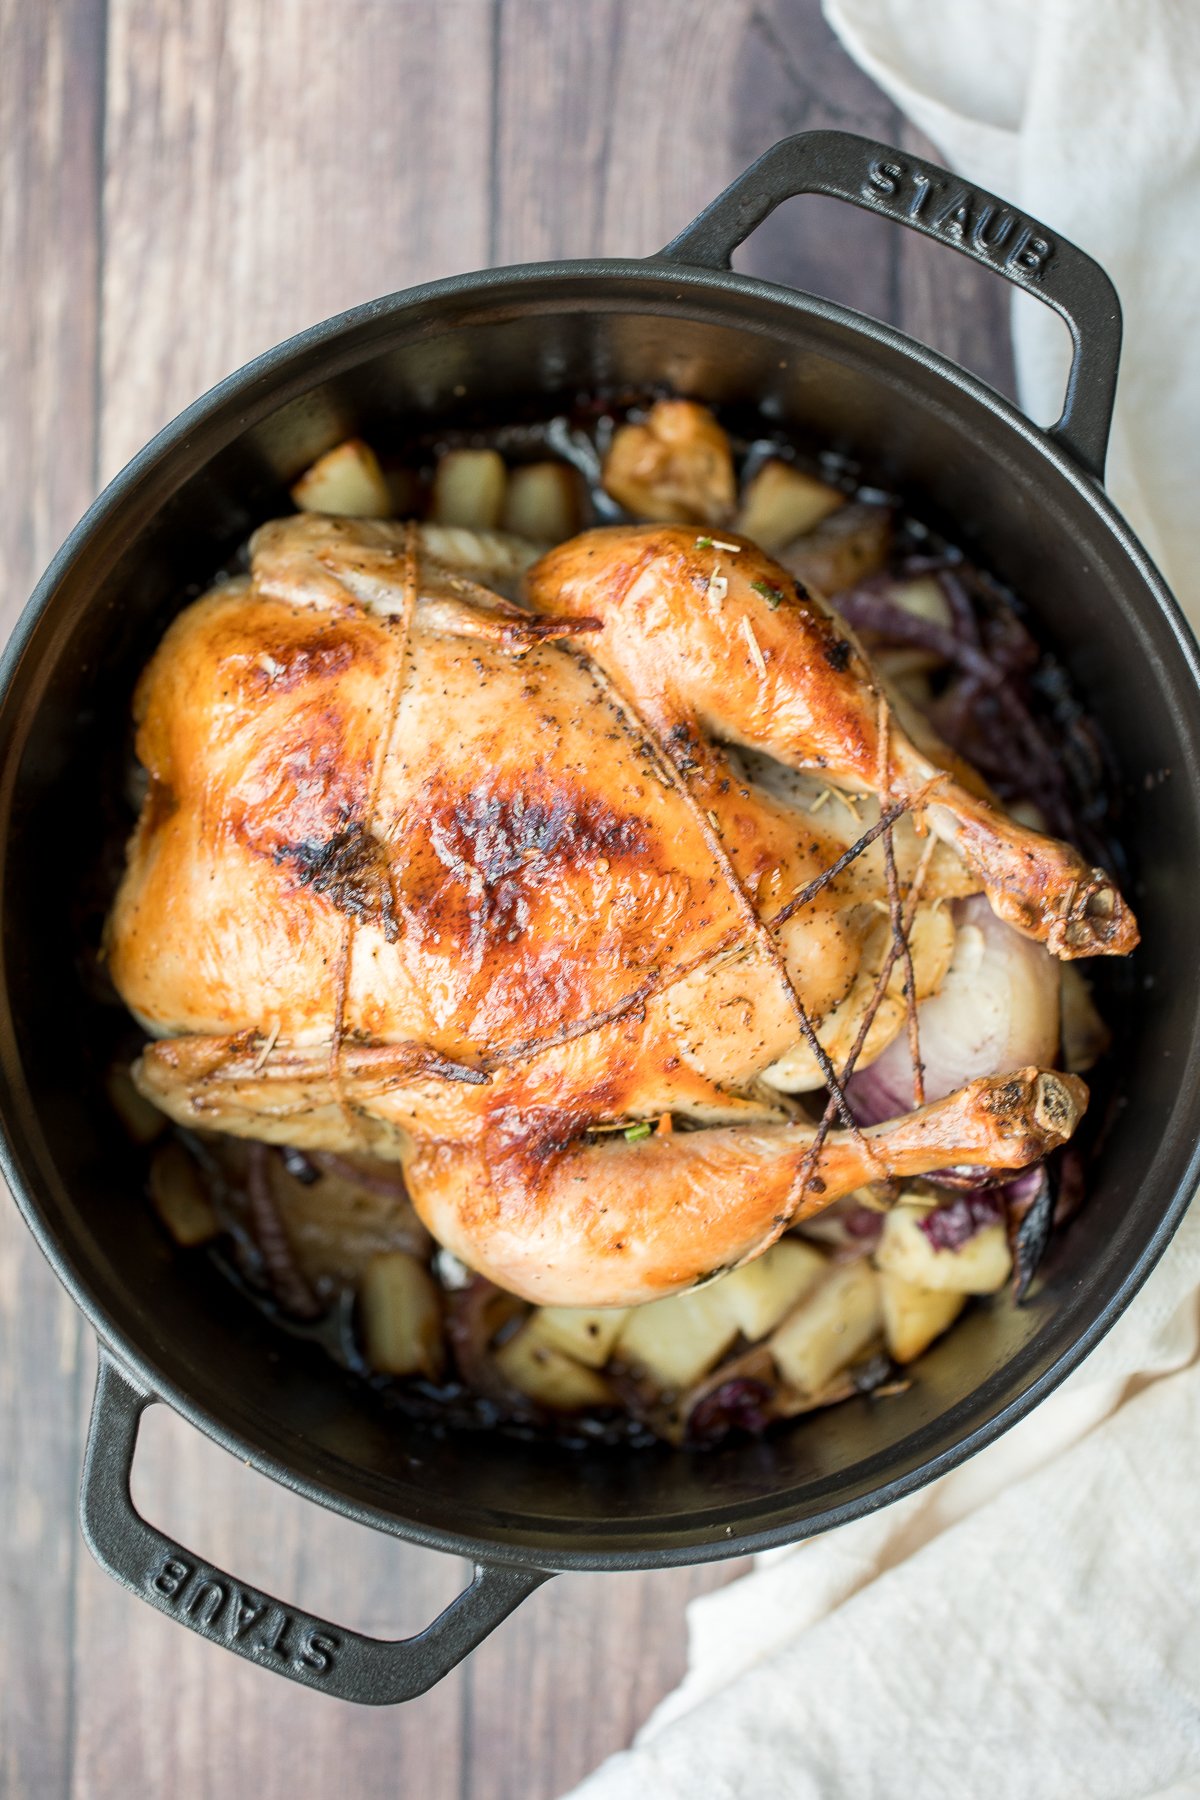
This Spring Salad is light, fresh, and vibrant. It is packed with fresh seasonal vegetables and chickpeas tossed in a homemade honey balsamic dressing.
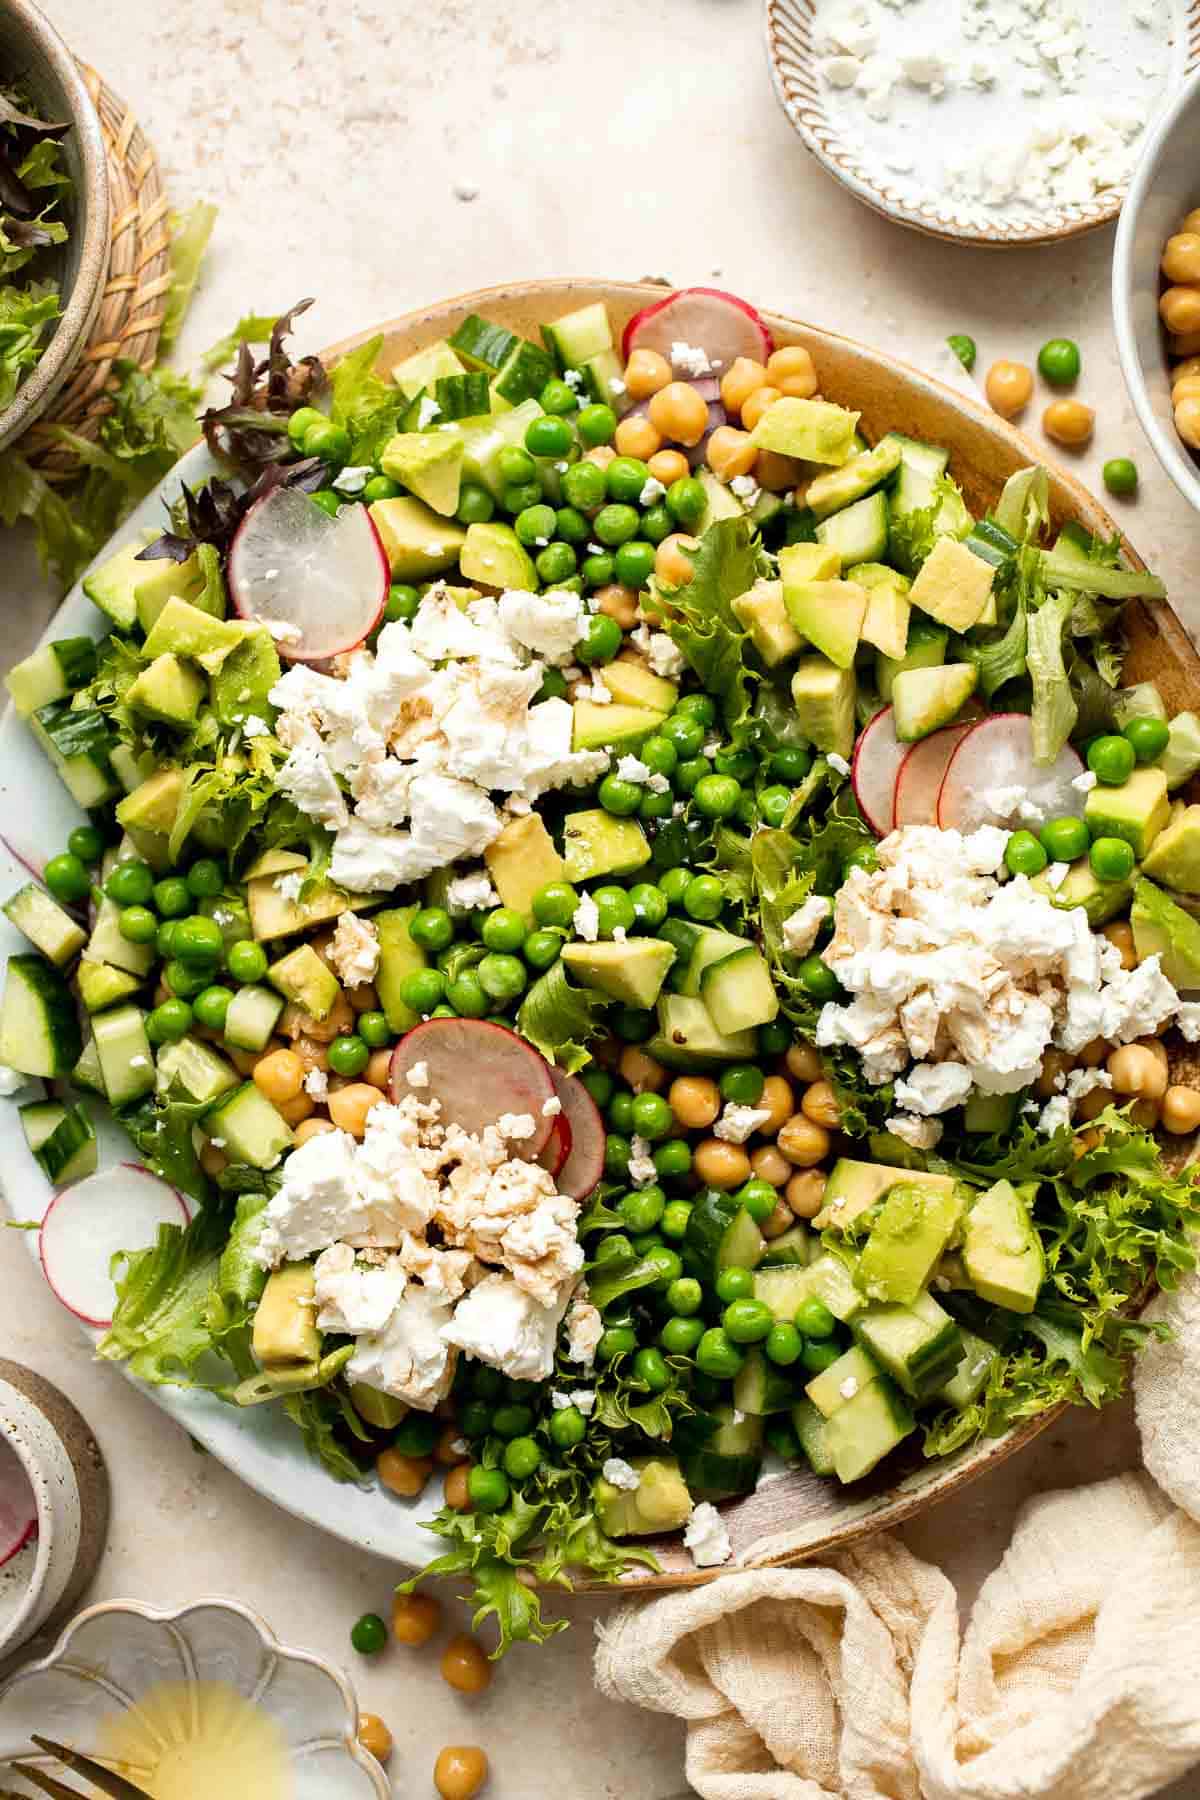
Shrimp Alfredo is creamy, garlicky, and delicious! This quick and easy, under 30-minute recipe is a go-to for busy nights and a year-round family favorite.
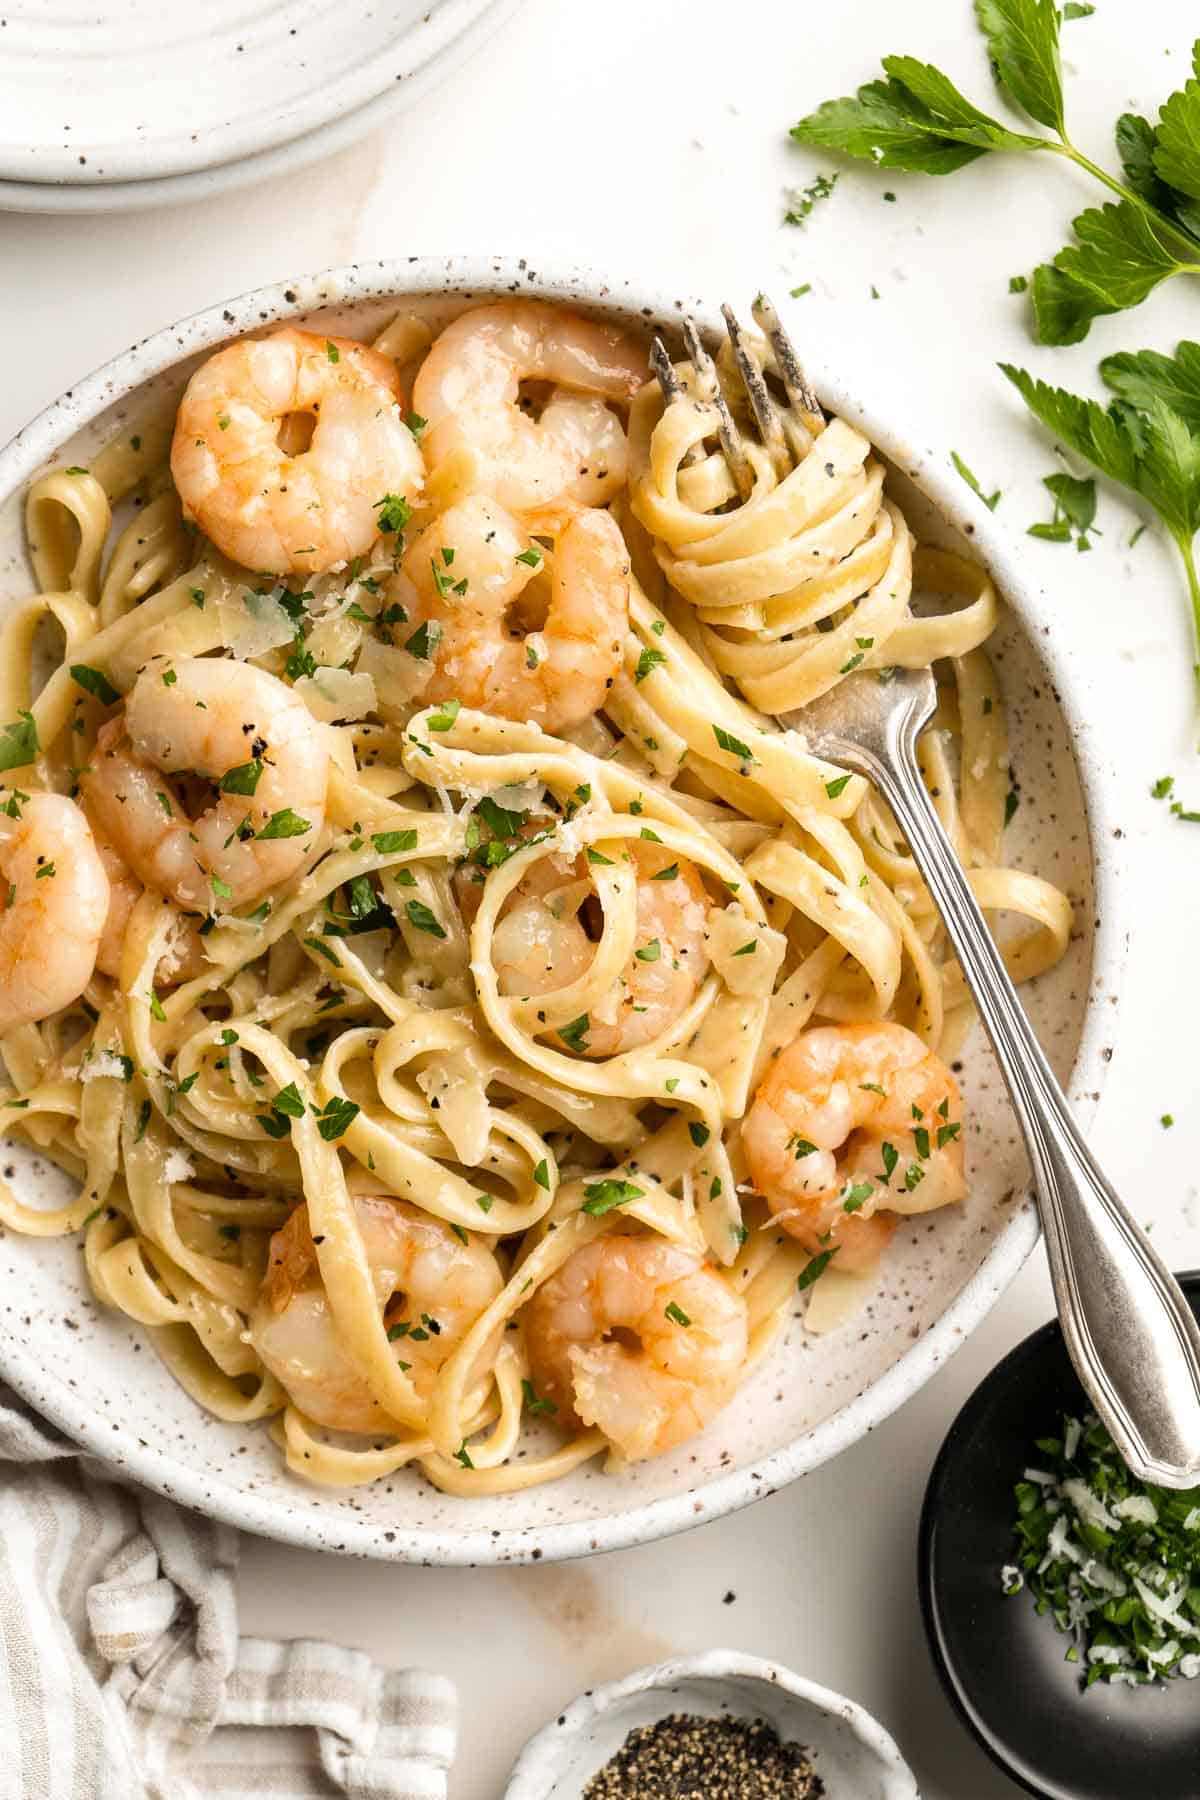
Quick and easy, creamy lemon chicken piccata is a simple and delicious 30-minute meal made with tender chicken breast in a light lemon sauce with capers.
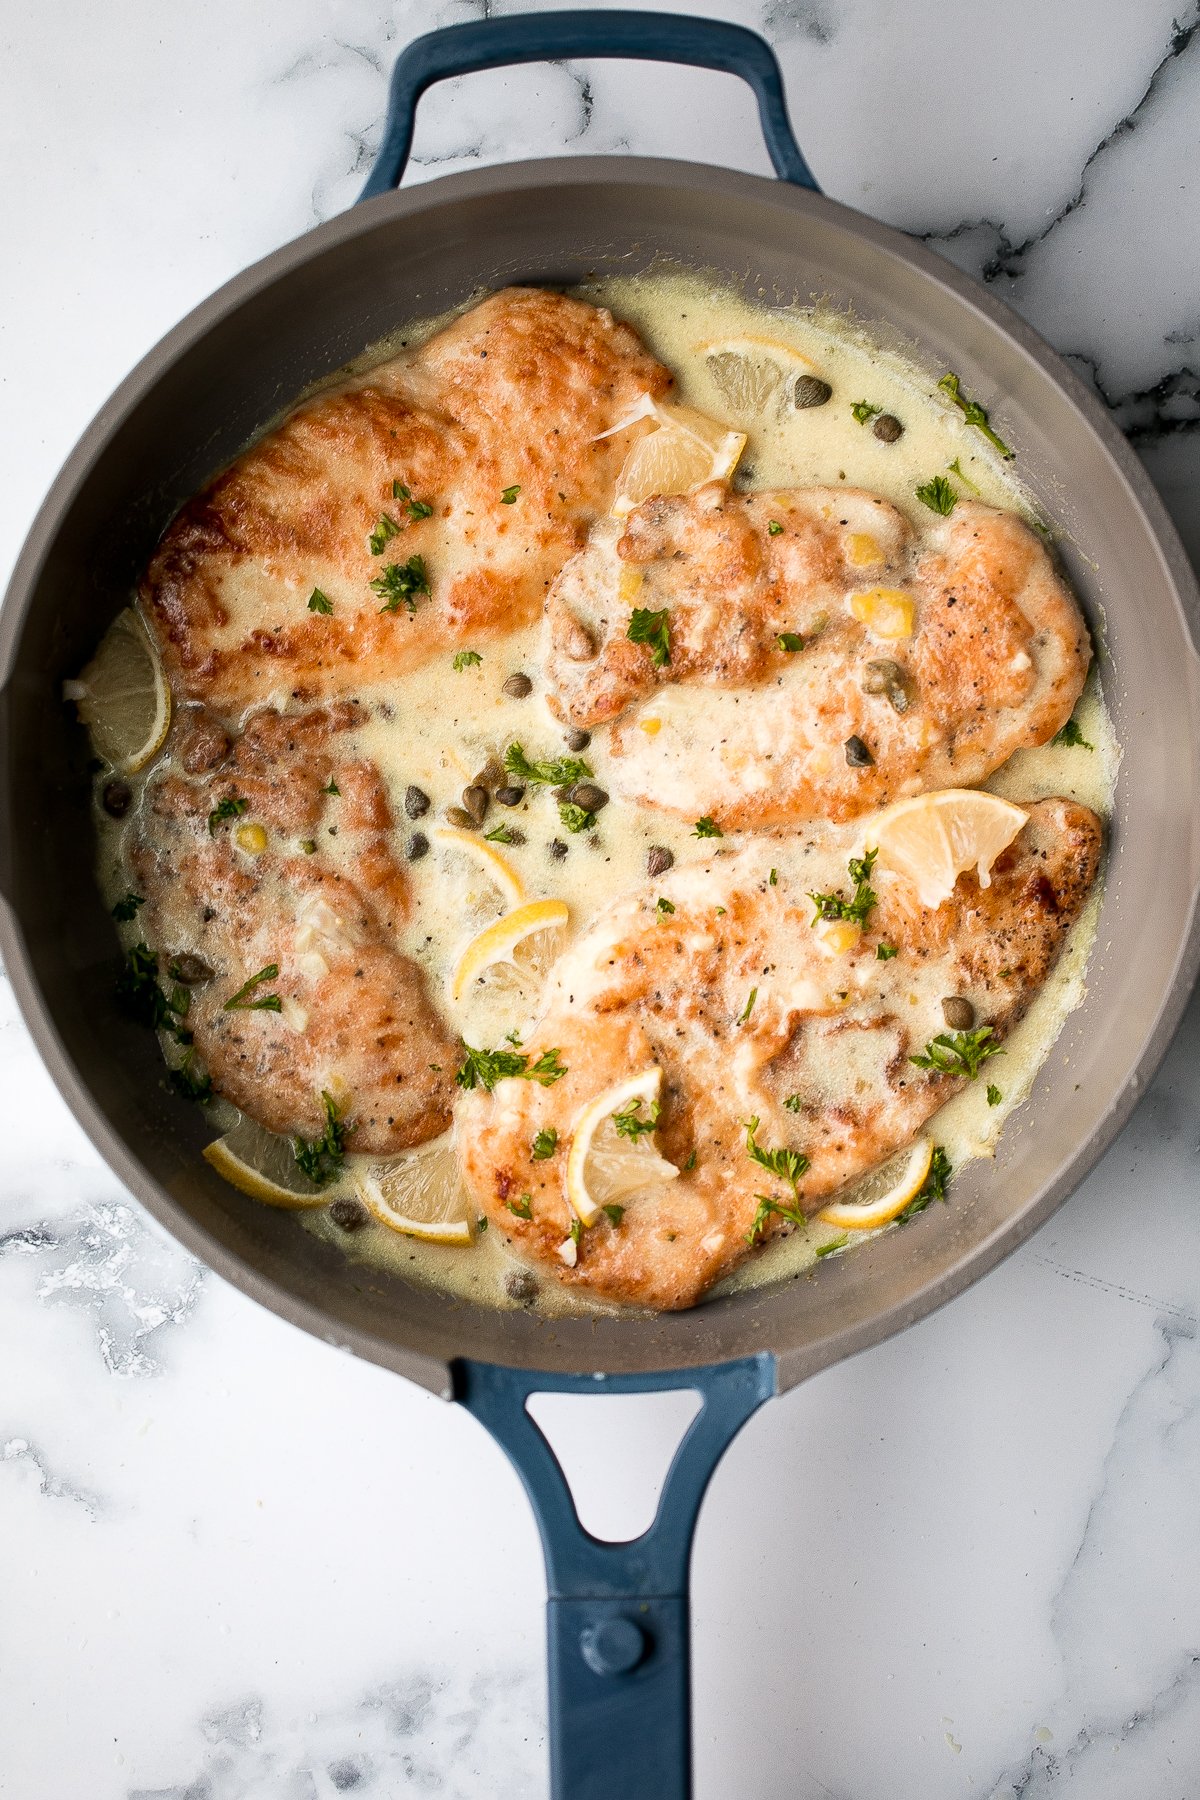
Classic easy meat lasagna is the ultimate Italian comfort food with layers of tender lasagna, meaty tomato sauce, cheese filling and melted cheese on top.
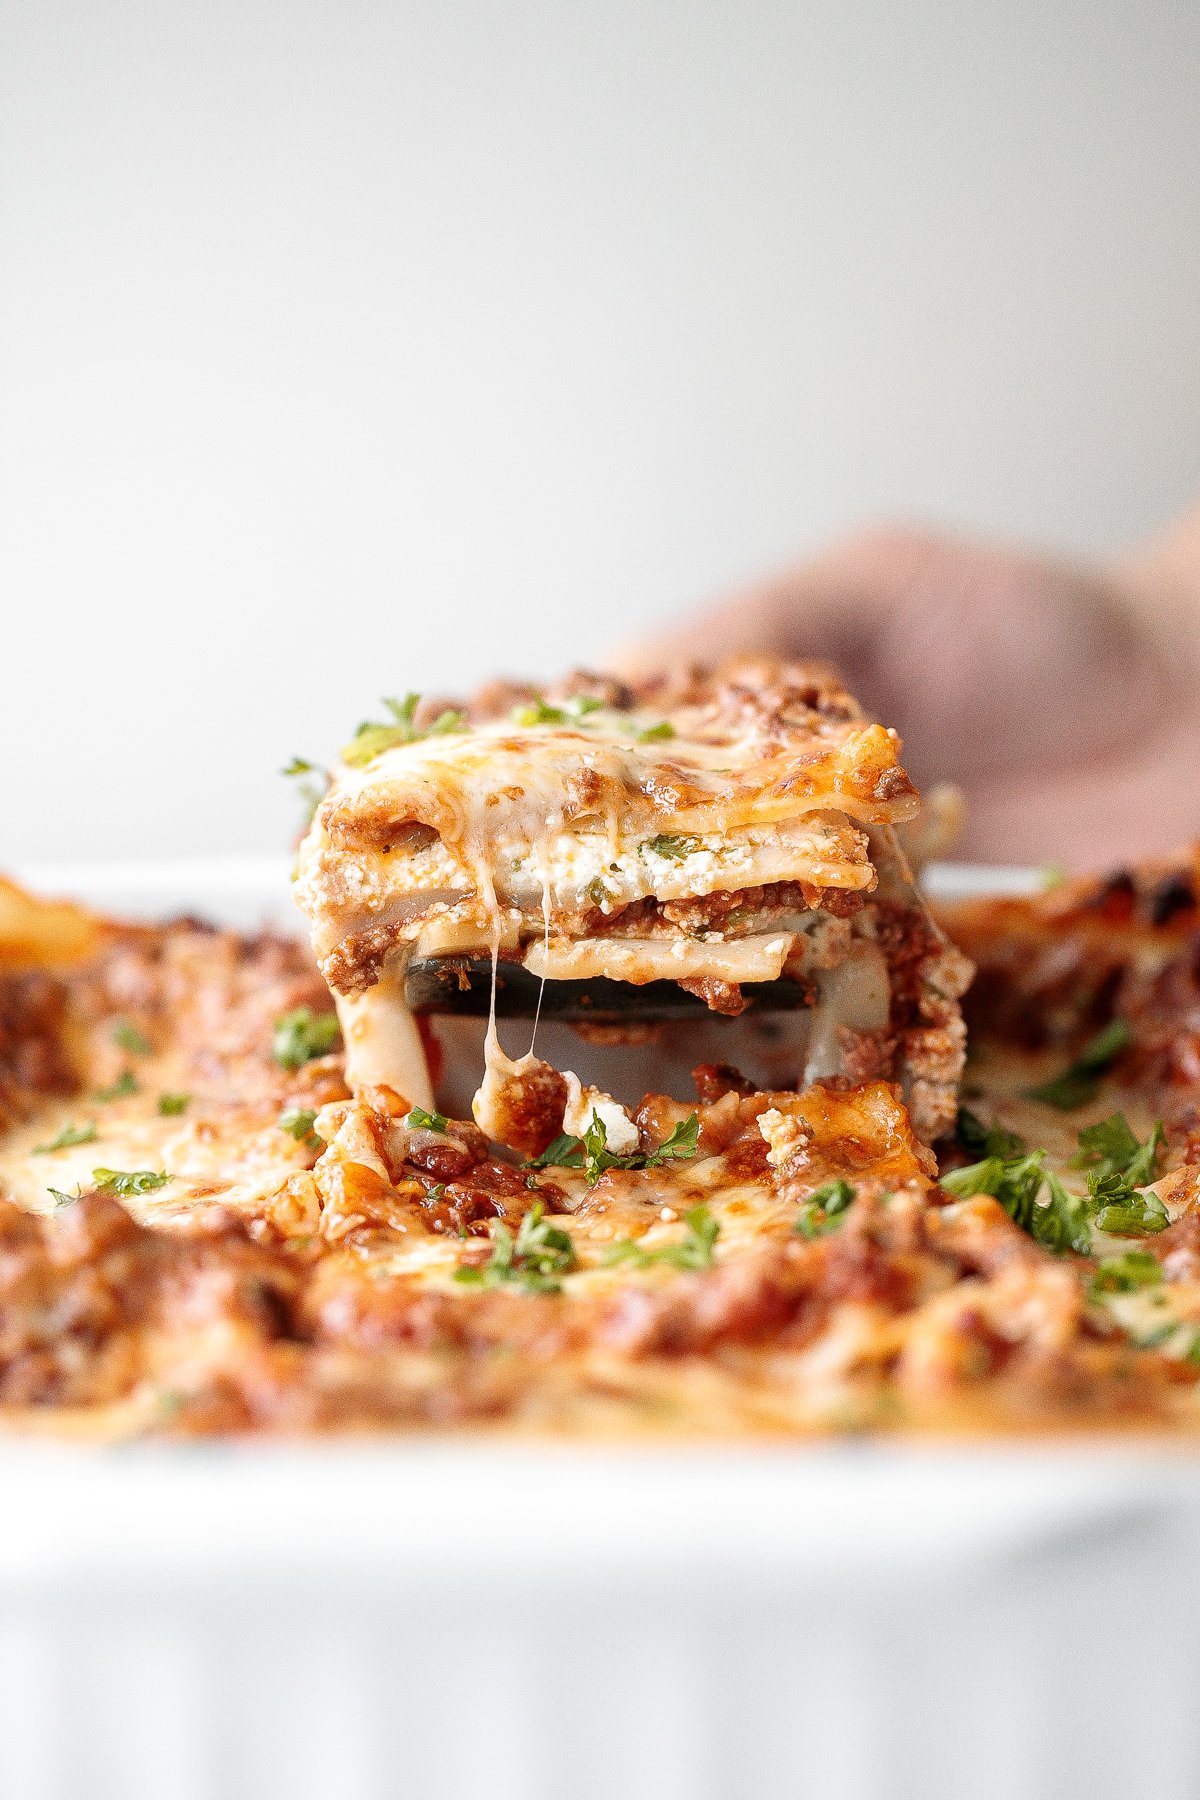
Tender, flaky, flavorful garlic butter salmon is well-seasoned, seared to perfection, and basted until juicy. Quick and easy to make in 20 minutes.
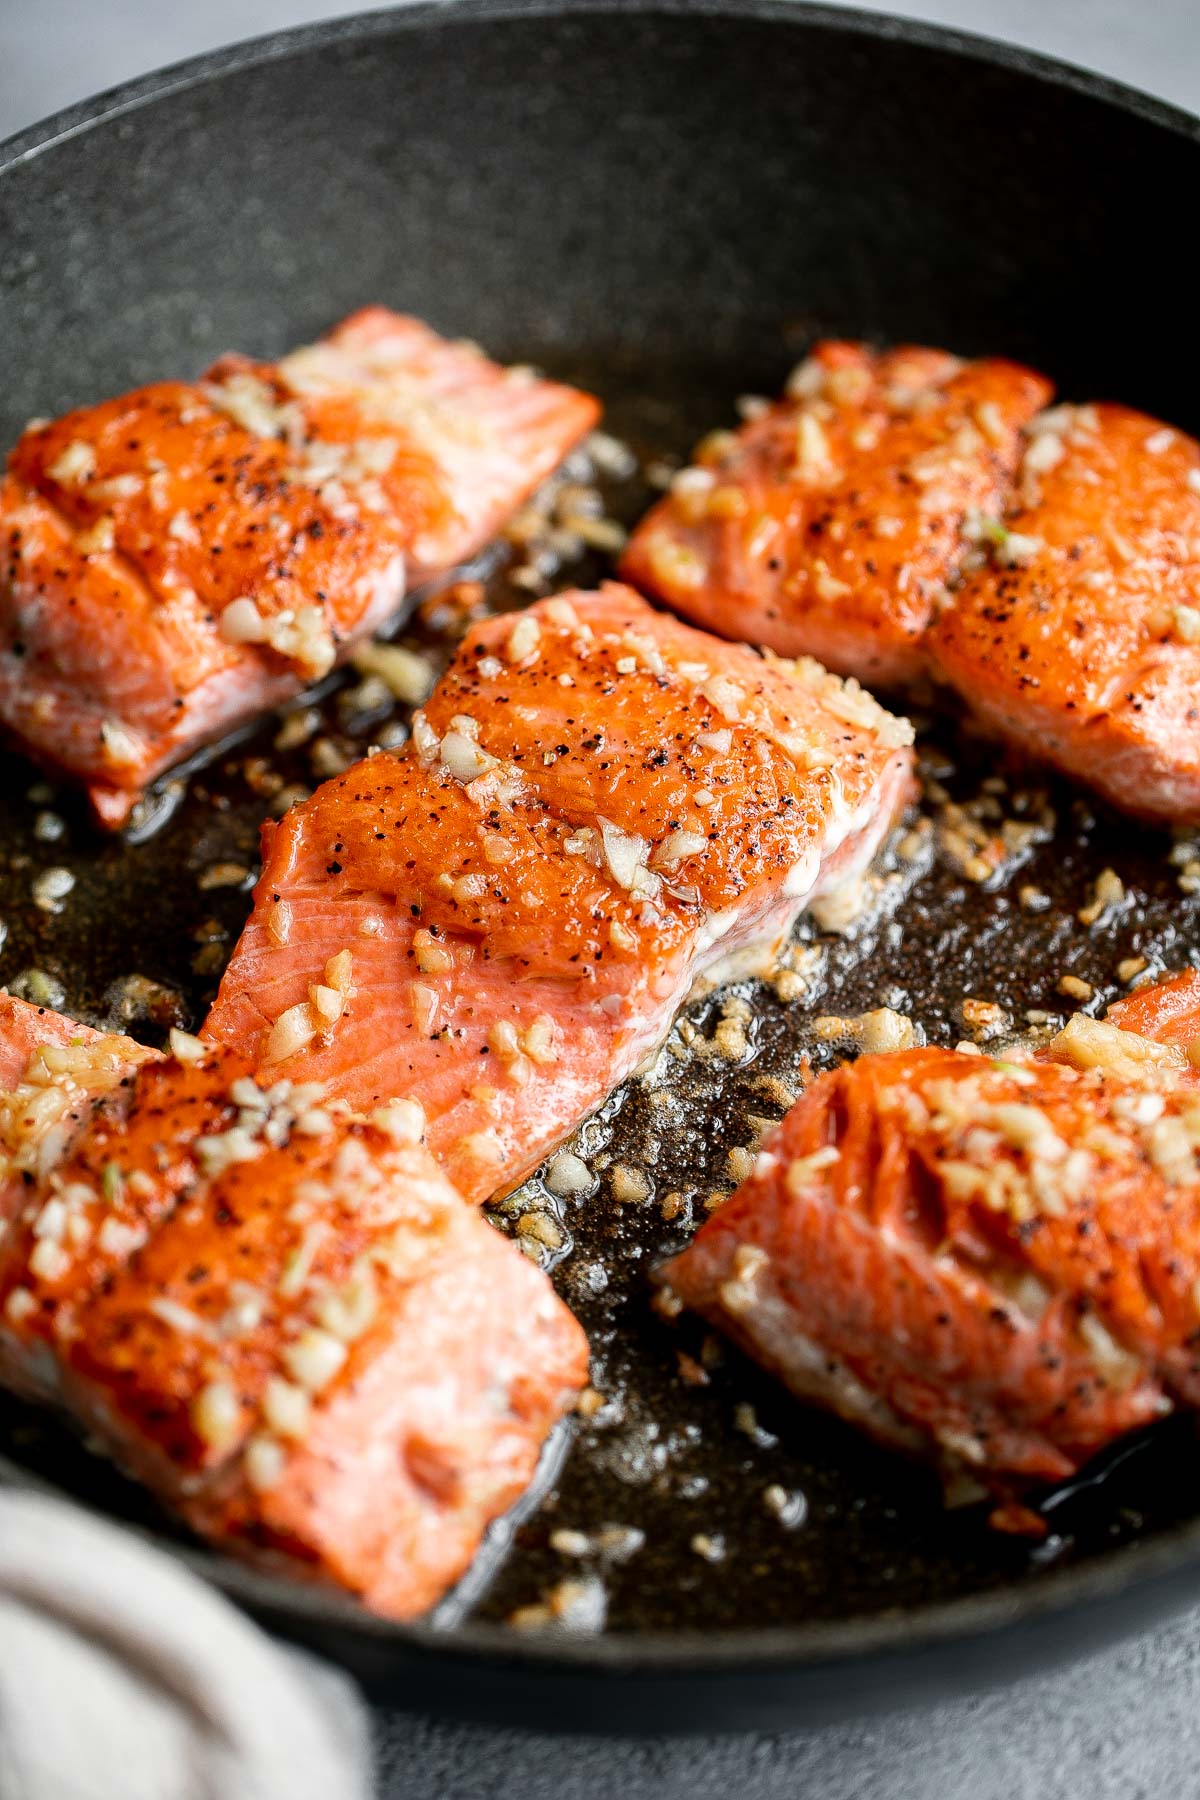
Whipped ricotta crostini is a fancy easy appetizer to make in just minutes or prepare in advance and assemble before serving. A total crowd pleaser.
Creamy Tuscan shrimp packed with sun-dried tomatoes, spinach, and garlic, is creamy, rich, and delicious. Make it in just 15 minutes, including prep!

There's nothing better than a classic Pot Roast for Sunday Dinner. It's hearty, wholesome, and filling comfort food that can feed the whole family.
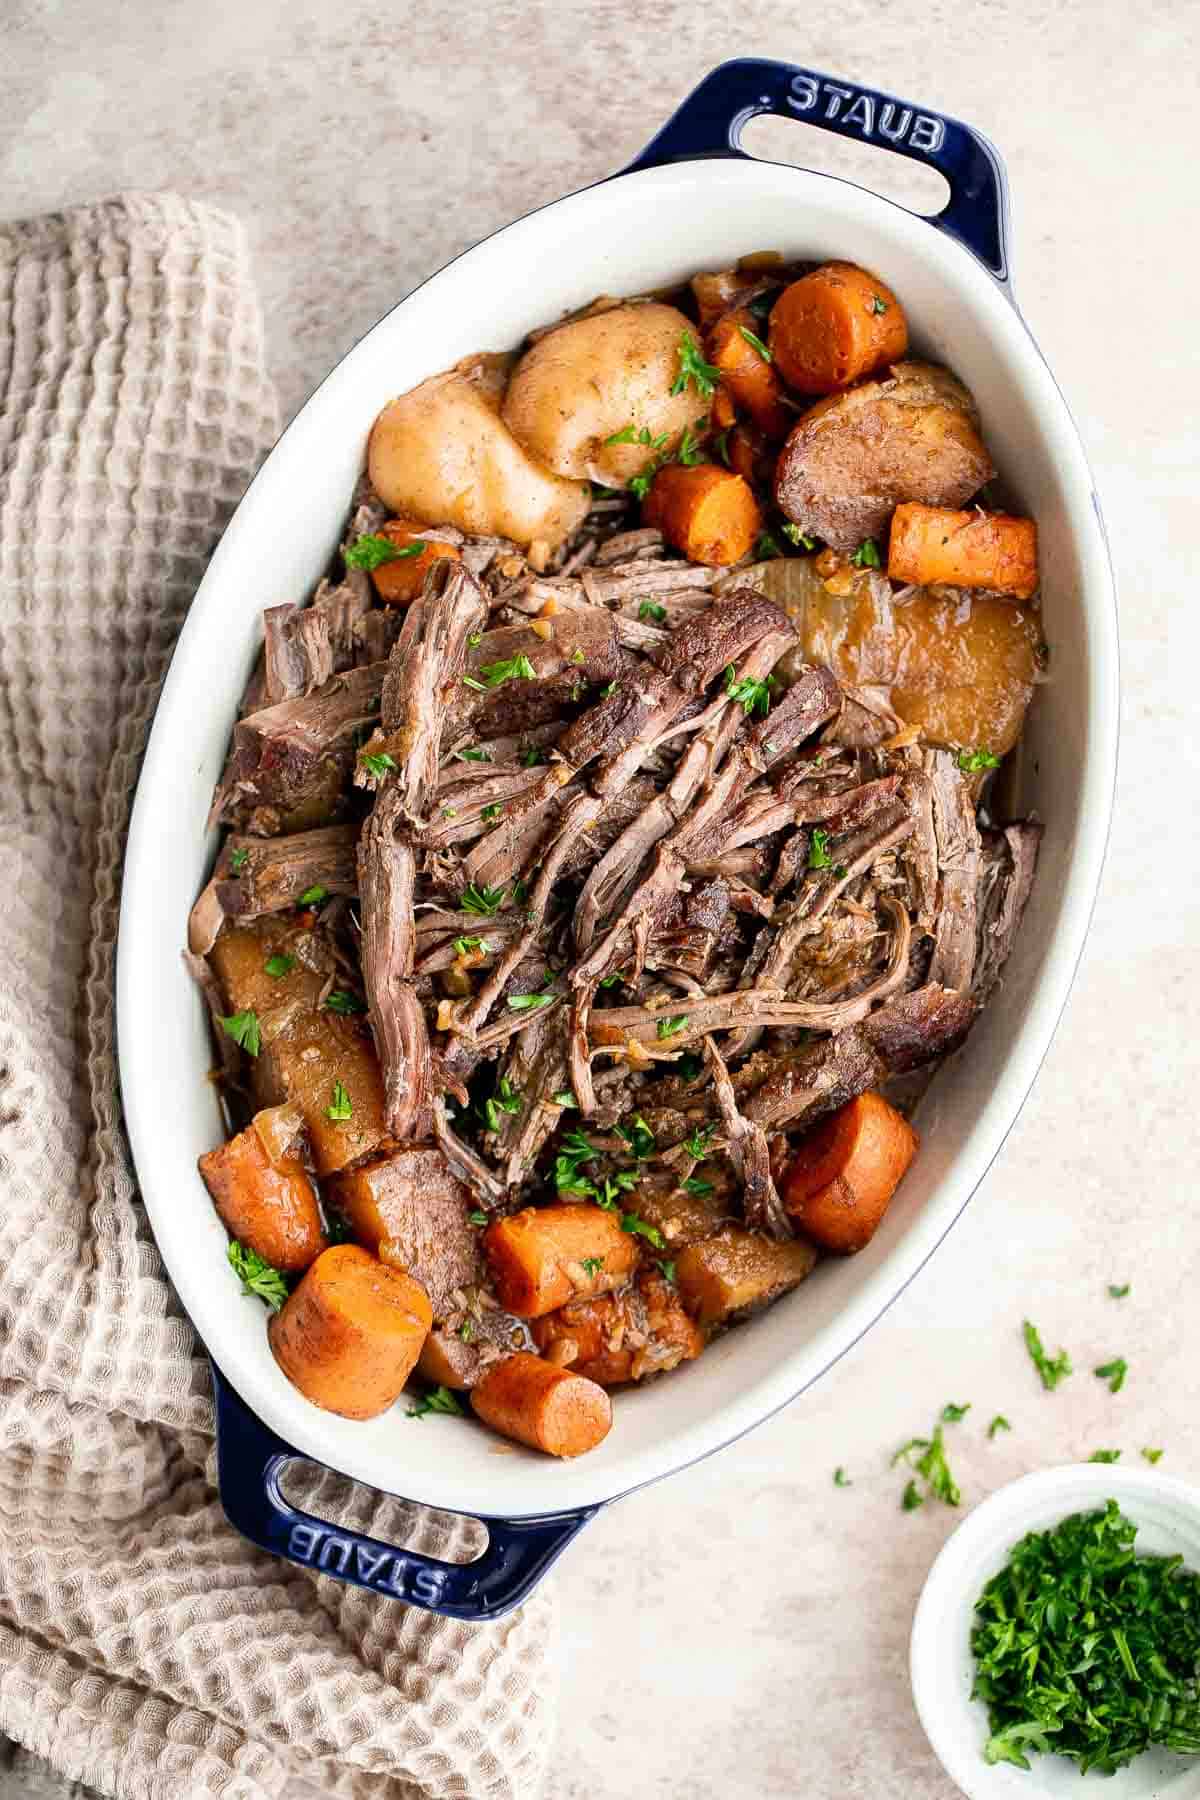
Garlicky, buttery, and perfectly seared scallops take less than 10 minutes to prep and cook. It's the easiest fancy, restaurant-grade meal to make at home.
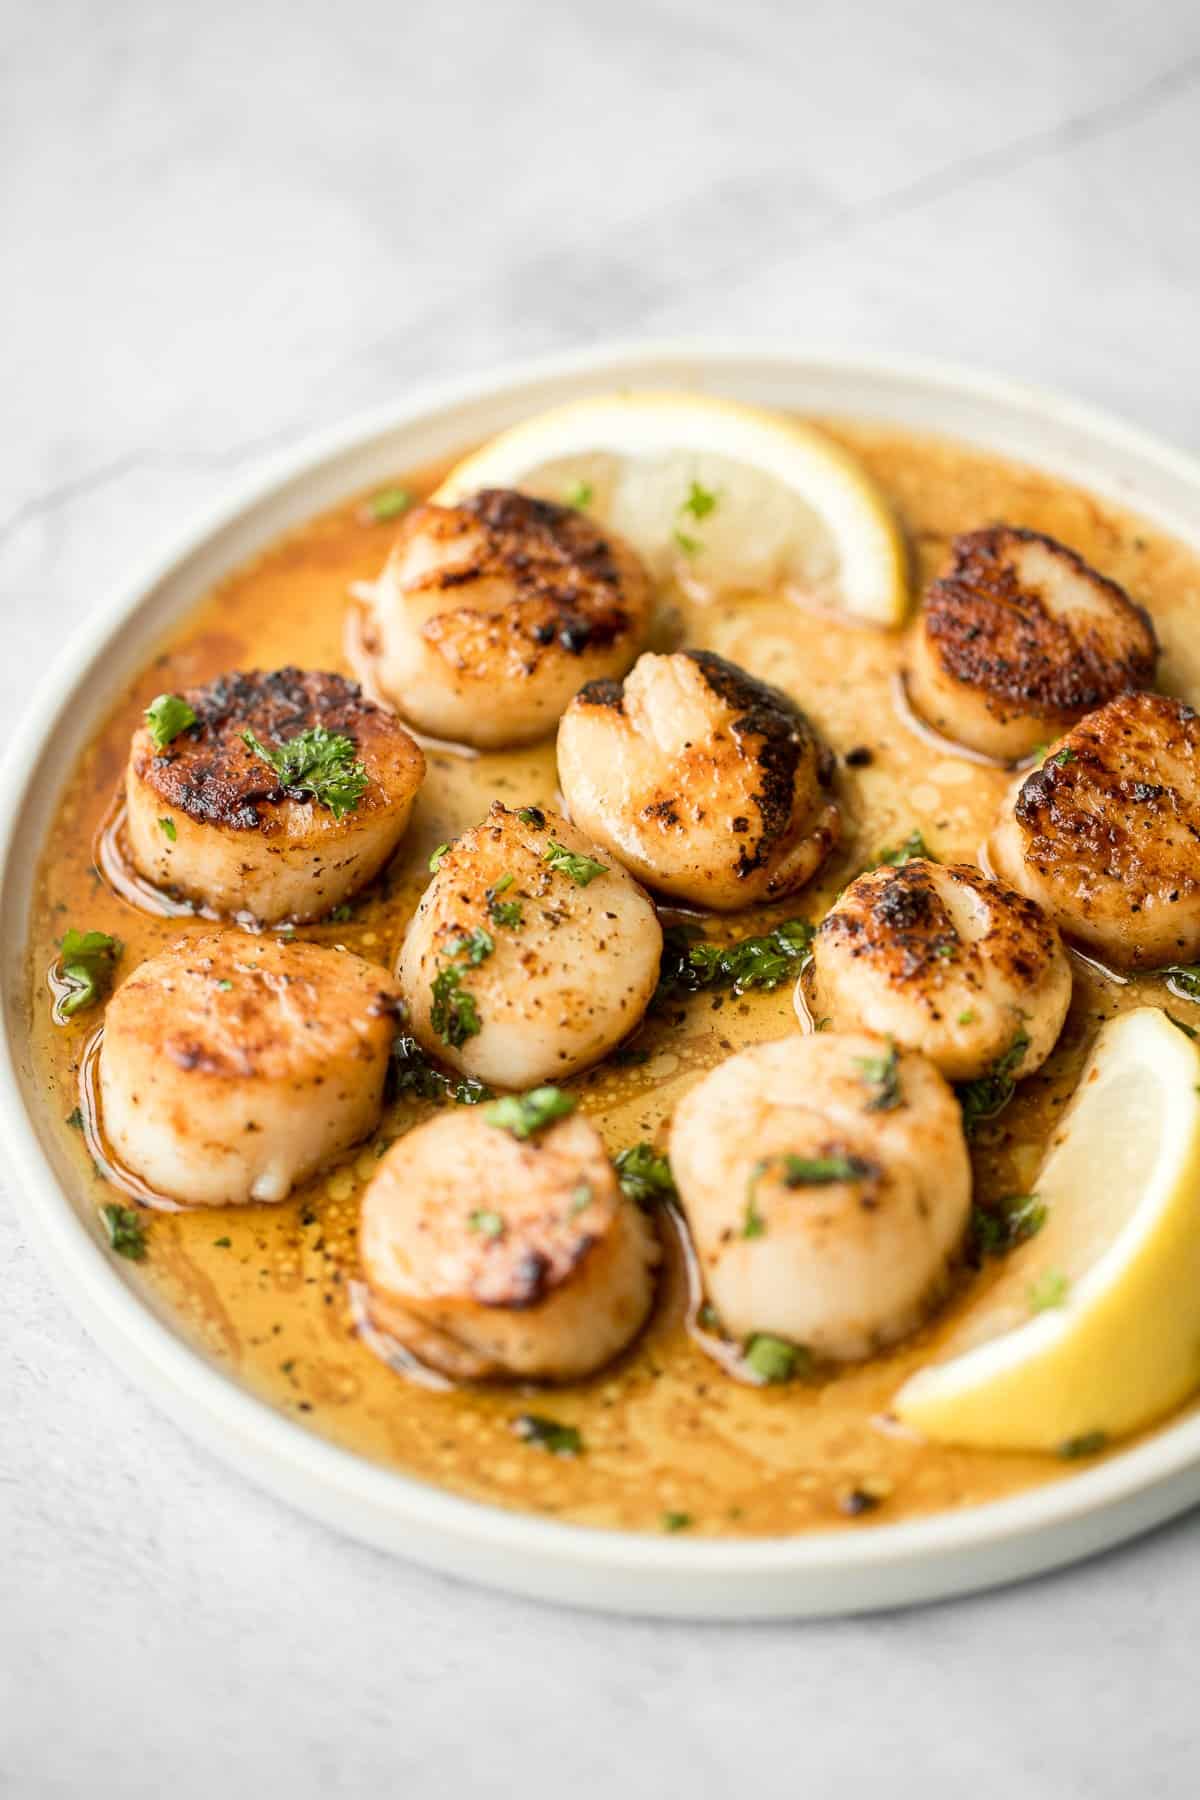
This Creamy Tomato Pasta is a simple and delicious meal made from scratch in 25 minutes with a cream and tomato based sauce that is rich and silky smooth.

Chicken Madeira with sautéed mushrooms and tender crisp asparagus is topped with melty mozzarella cheese. Cheaper and better than the Cheesecake Factory!
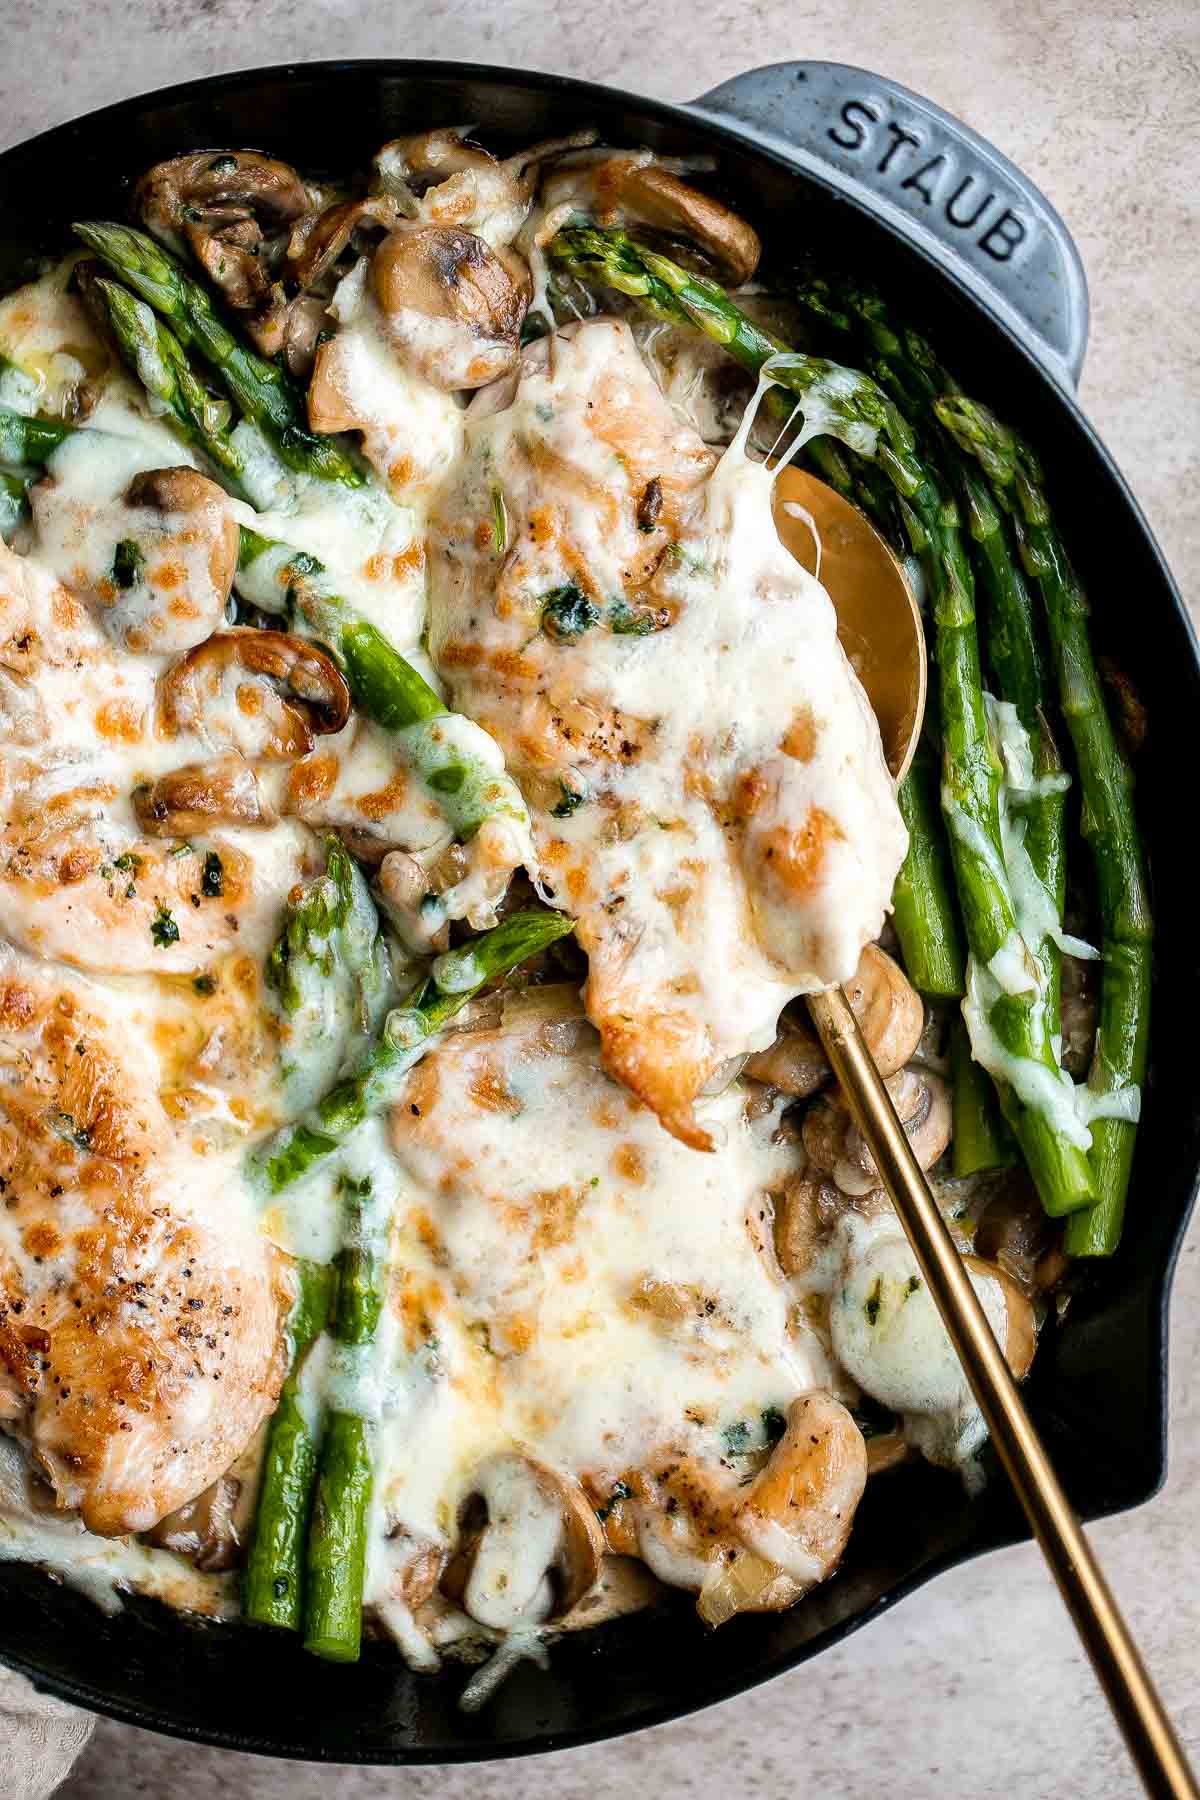
This vegan Buddha Bowl is the perfect hybrid of a salad and grain bowl that is packed with nutritious ingredients like grains, vegetables, and protein.
This Mediterranean Stuffed Eggplant is delicious, filling, and healthy. This vegetarian dinner is loaded with veggies and topped with bubbly cheese.
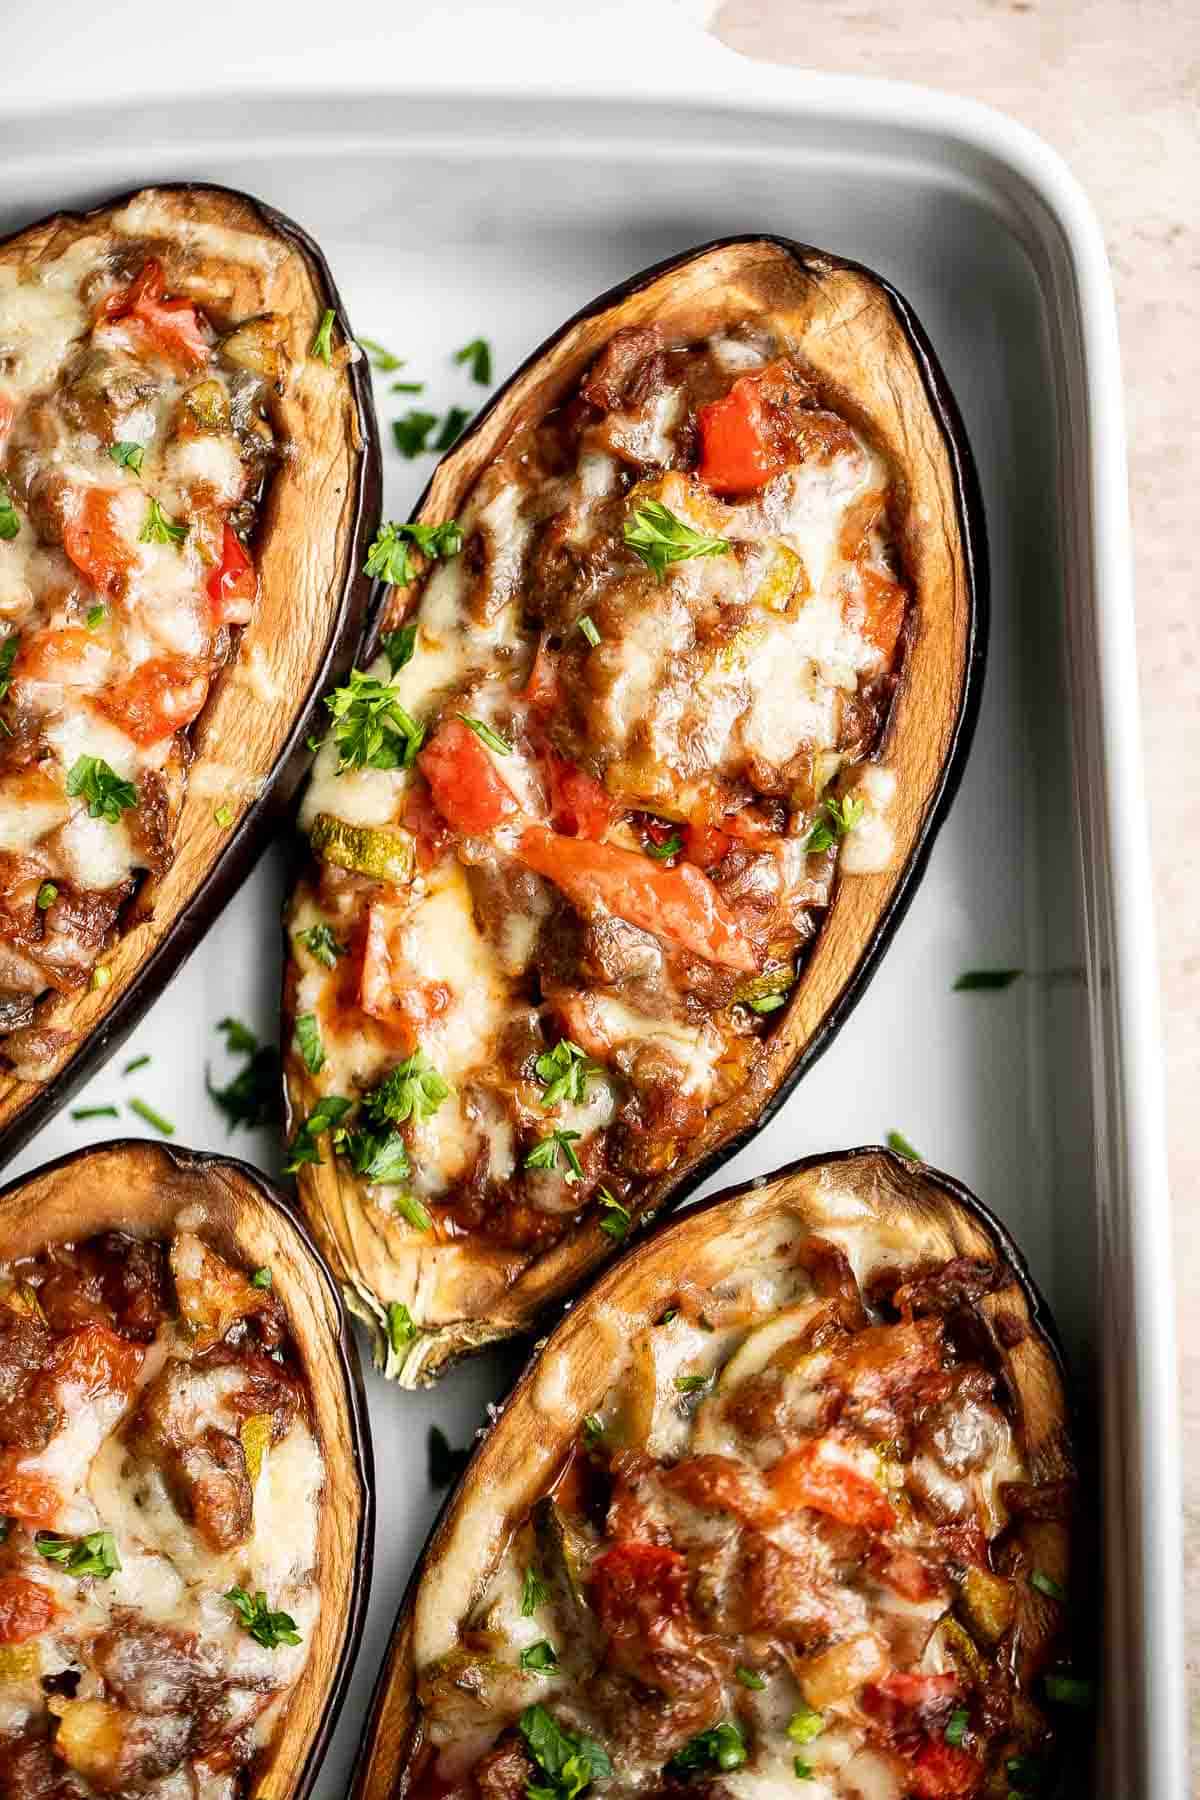
Garlic Butter Steak Bites are tender, juicy, and flavorful. This quick and easy appetizer or weeknight dinner takes just 15 minutes to make in one skillet.
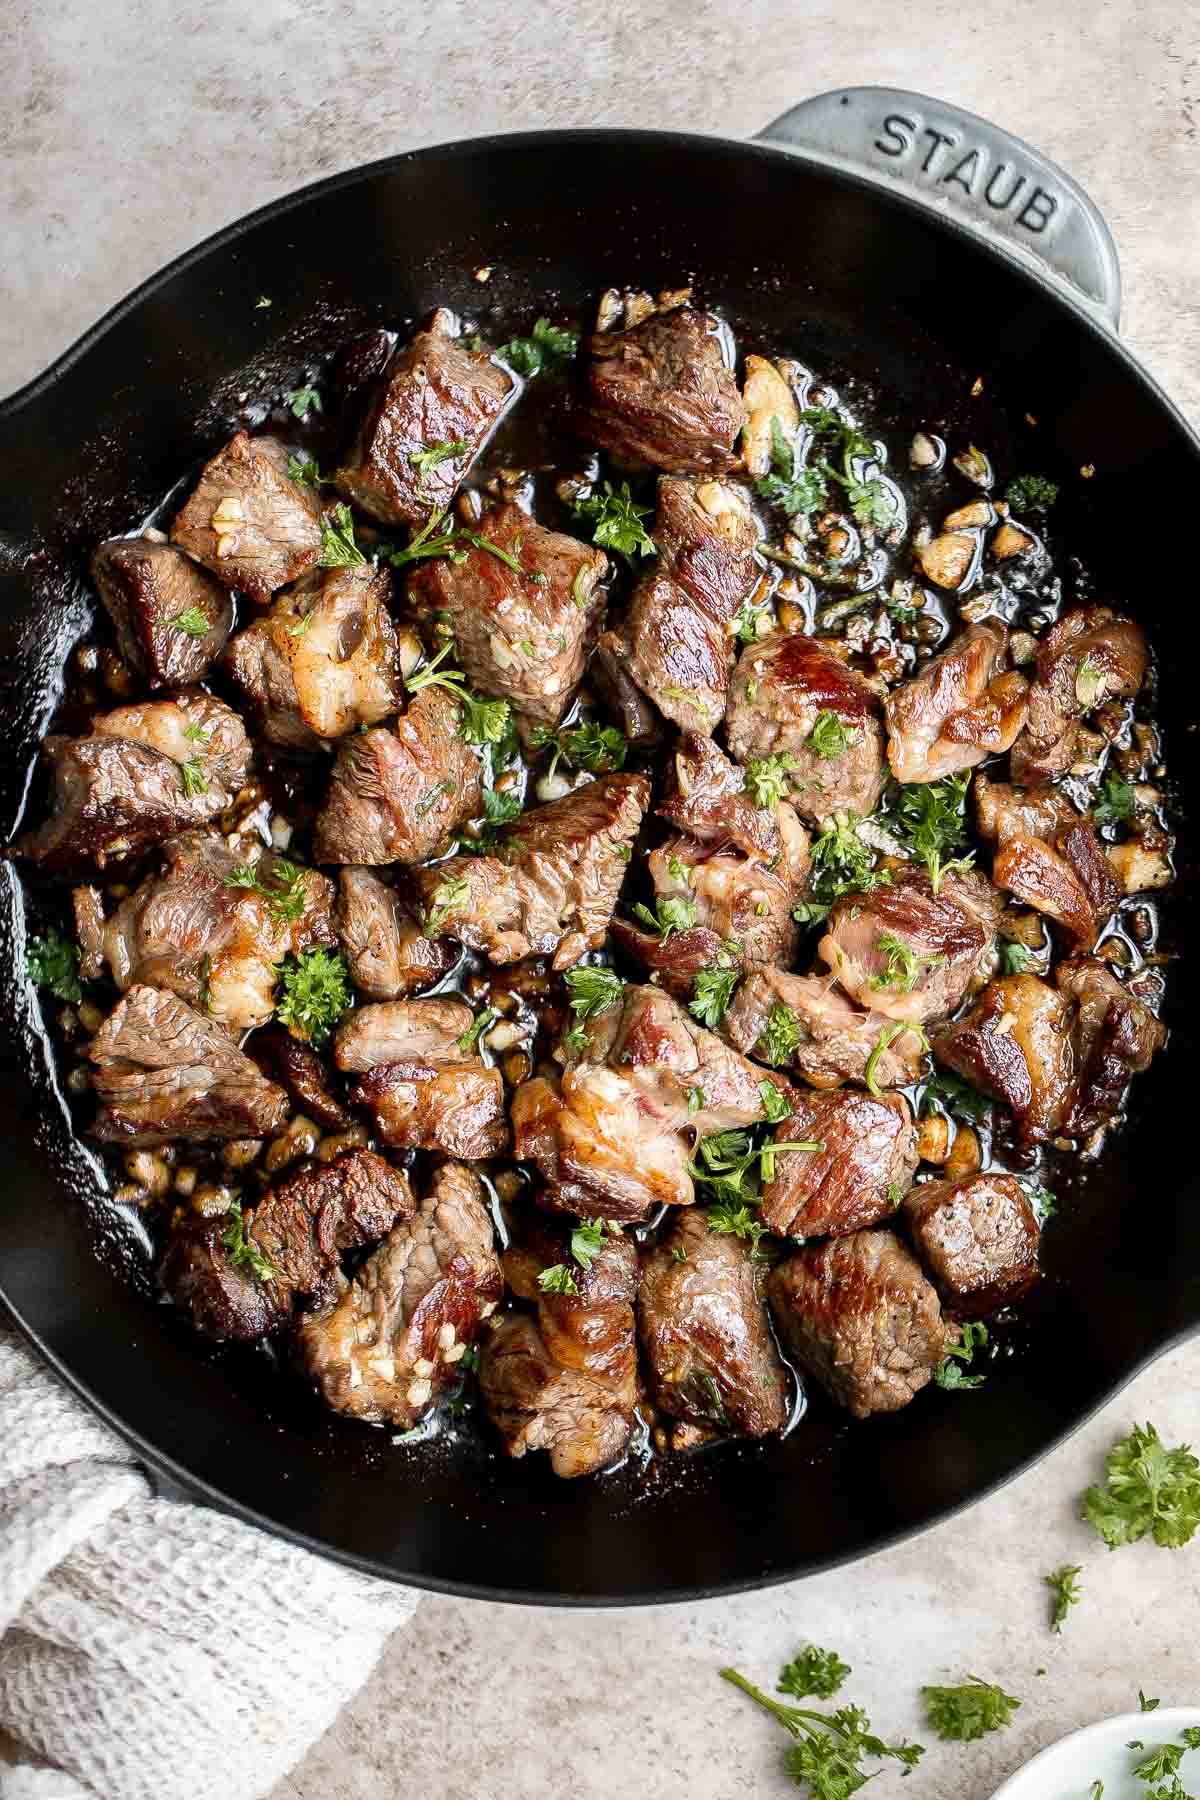
Mushroom Risotto is a rich creamy one pot rice dish made with simple ingredients that deliver bold flavors. Making homemade risotto from scratch is easy!
Chicken Chow Mein is a classic Chinese noodle dish that is quick and easy to make at home in 20 minutes - faster, healthier, and better than takeout.
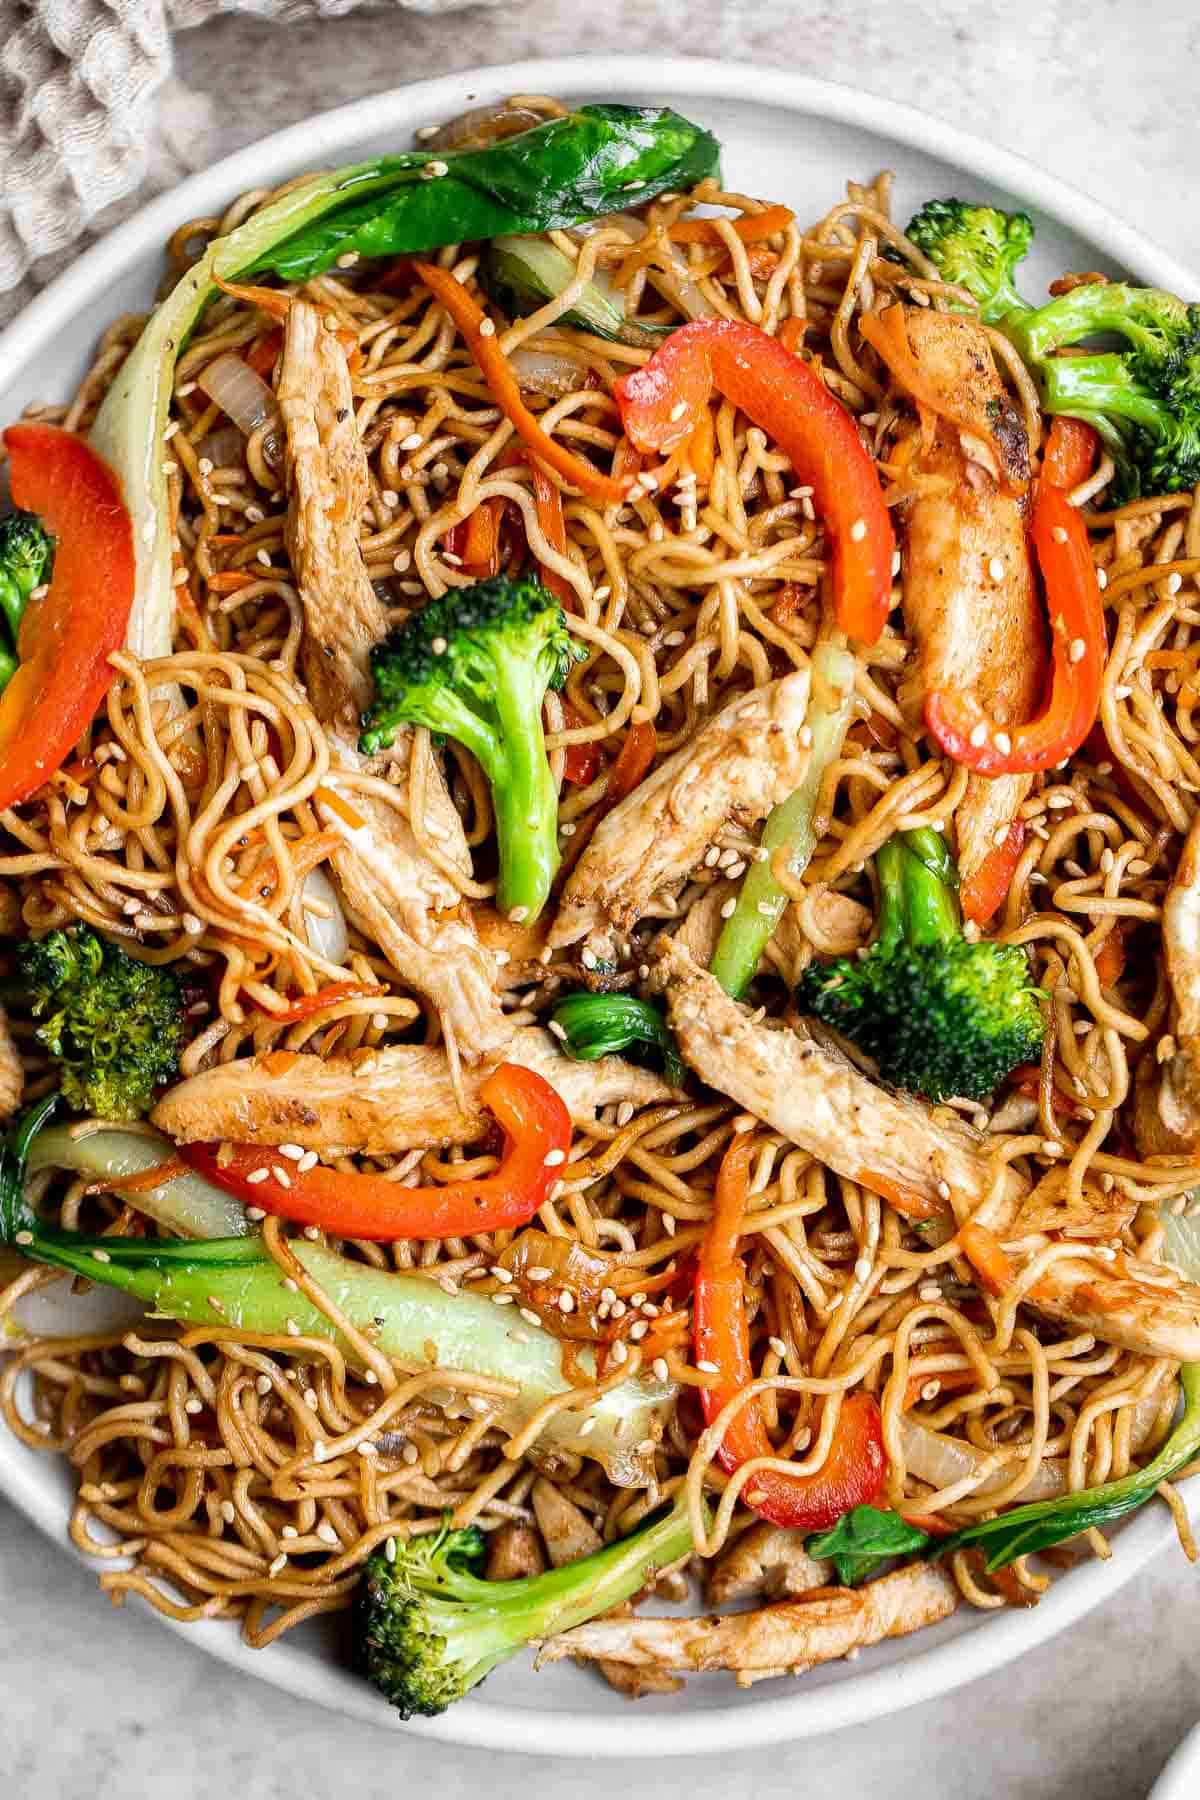
Surf and Turf Steak and Lobster Tails
Fancy, restaurant-quality surf and turf is super easy to make with fresh lobster tail and tender rib-eye steak with a delicious garlic butter sauce.
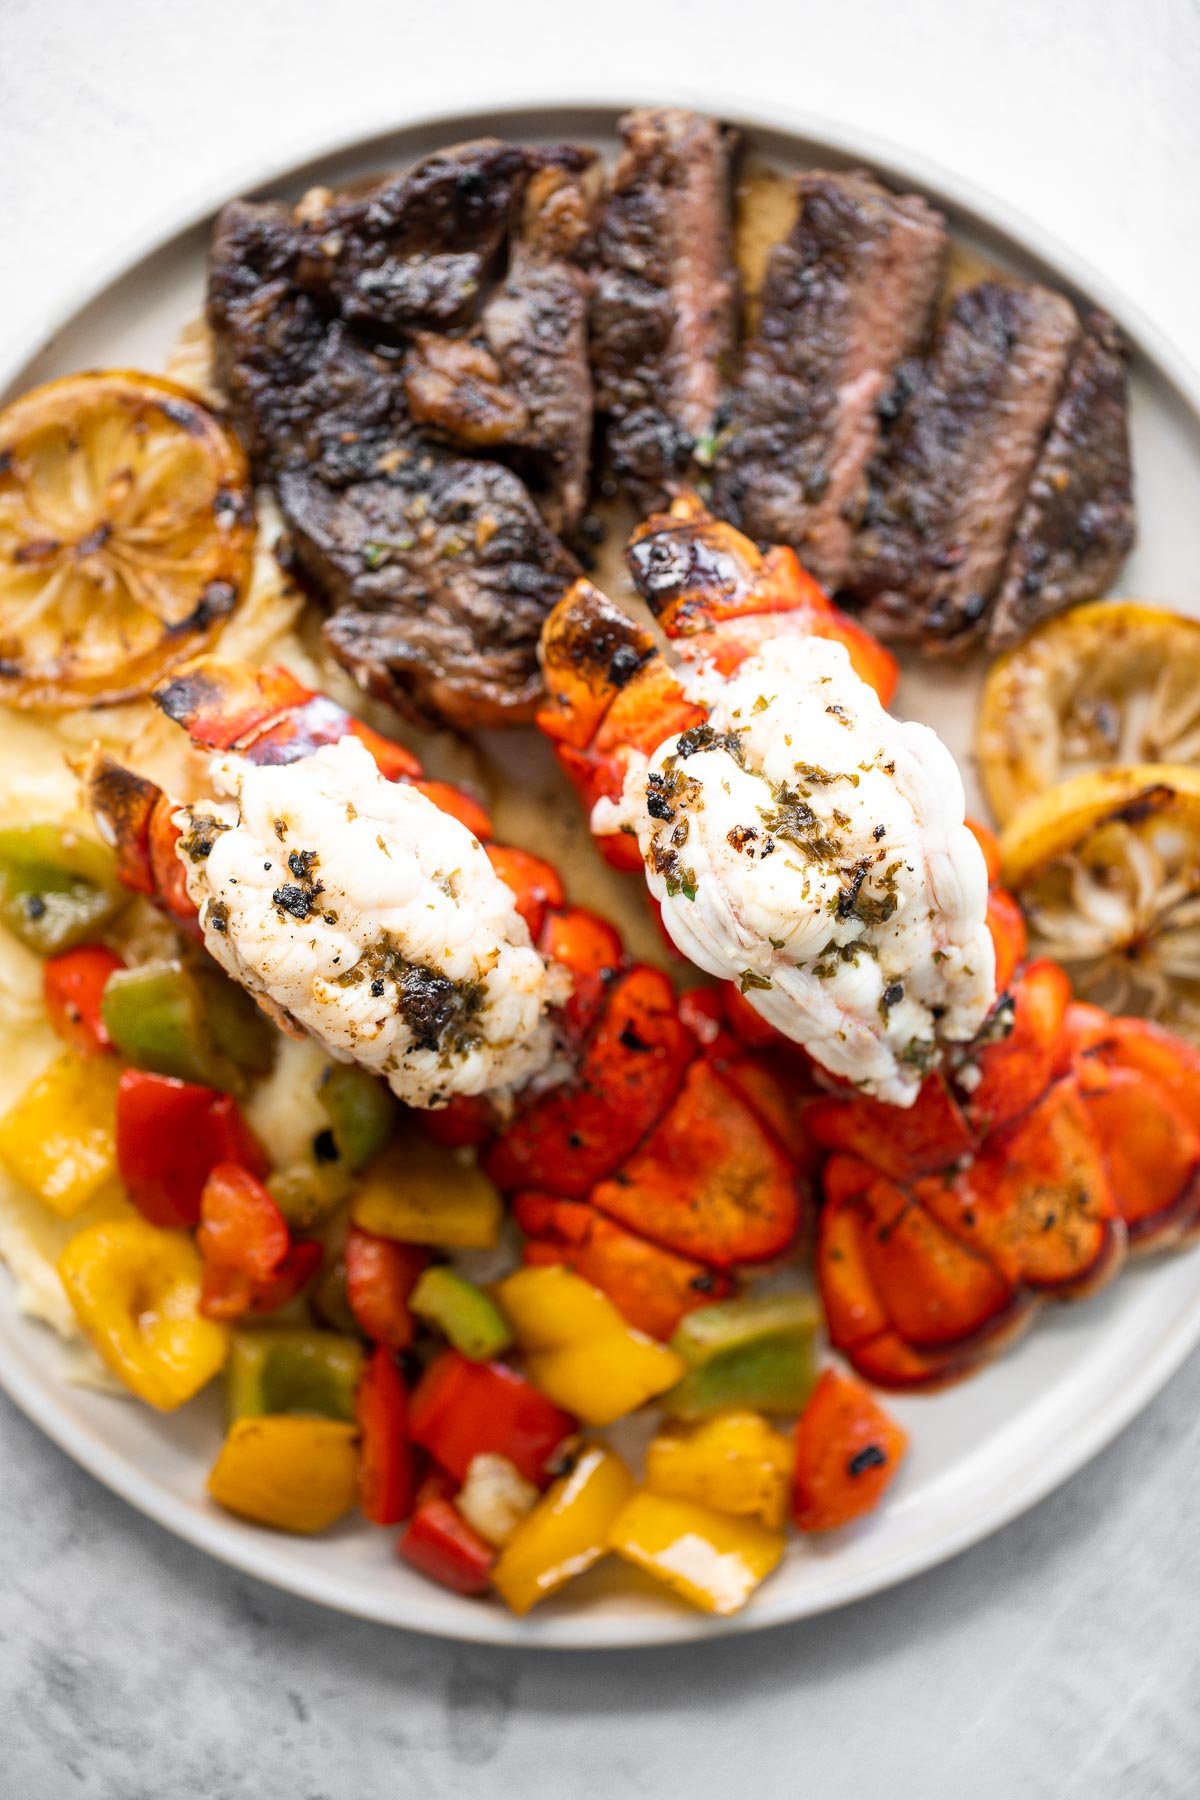
Sheet pan lamb chops with vegetables are healthy and delicious, easy to make, and easier to clean up. Perfect for busy weeknights or a holiday dinner.
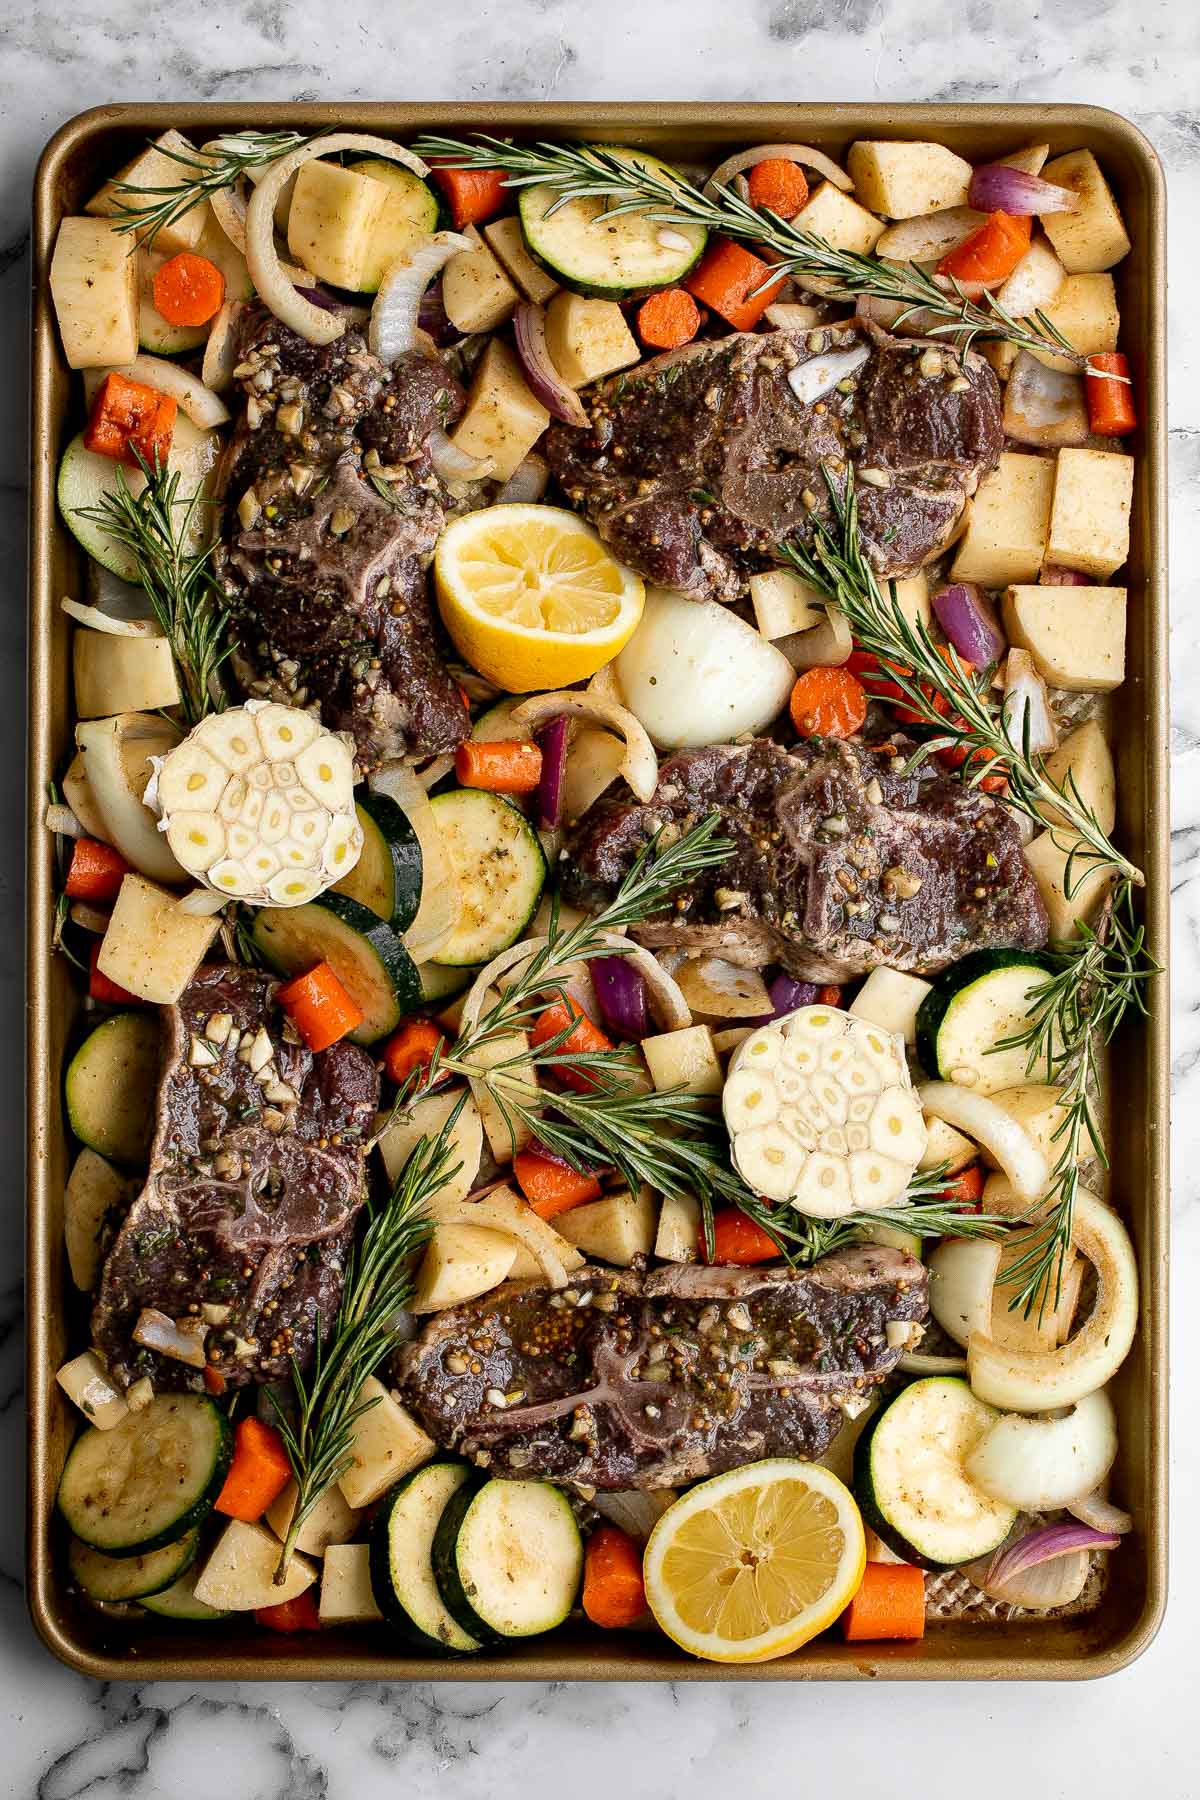
Delicious, comforting homemade Swedish meatballs are seared and smothered in a creamy gravy sauce and taste so much better than IKEA meatballs. One of my go to dinner ideas.
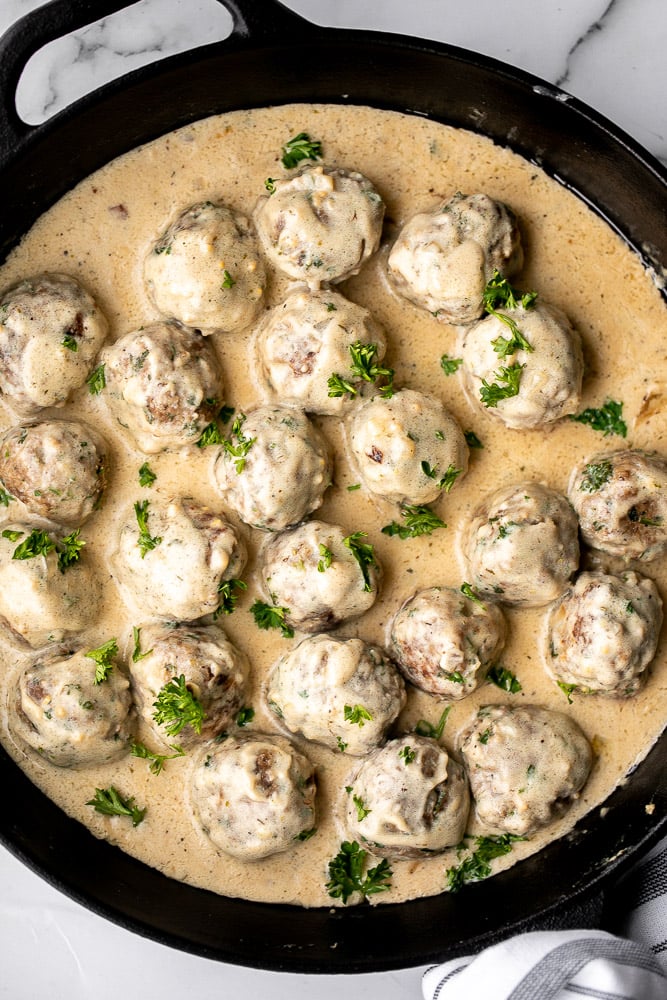
Baked Chicken Quesadillas are cheesy, crispy, flavorful, and delicious. This family-friendly recipe is quick and easy to make in just 30 minutes!
Yellow curry mussels are the epitome of delicious seafood - creamy, spicy, and savory. This flavourful one pot dish is quick + easy to make in 25 minutes.
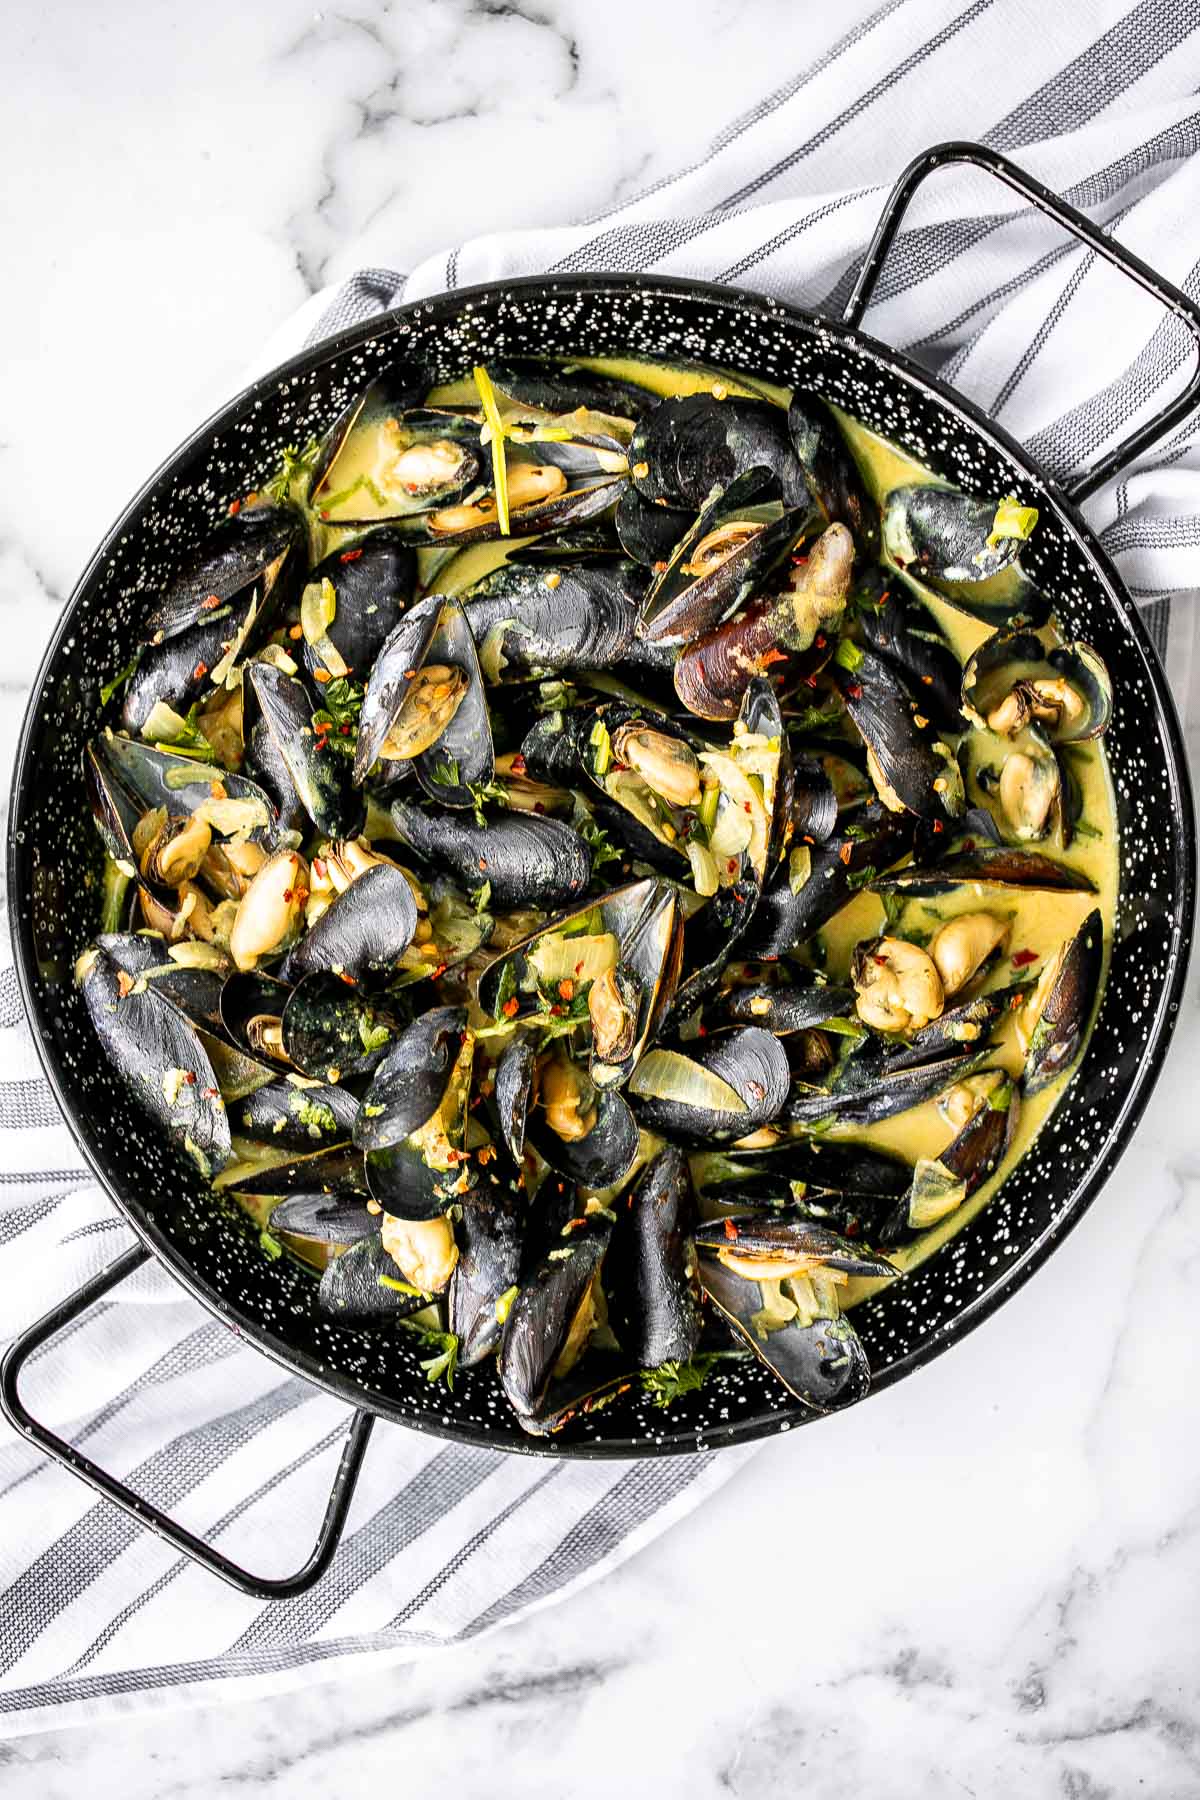
Creamy Chicken Pesto Pasta is a delicious 30 minute recipe that is packed with flavor, quick and easy to make, and will satisfy the whole family.
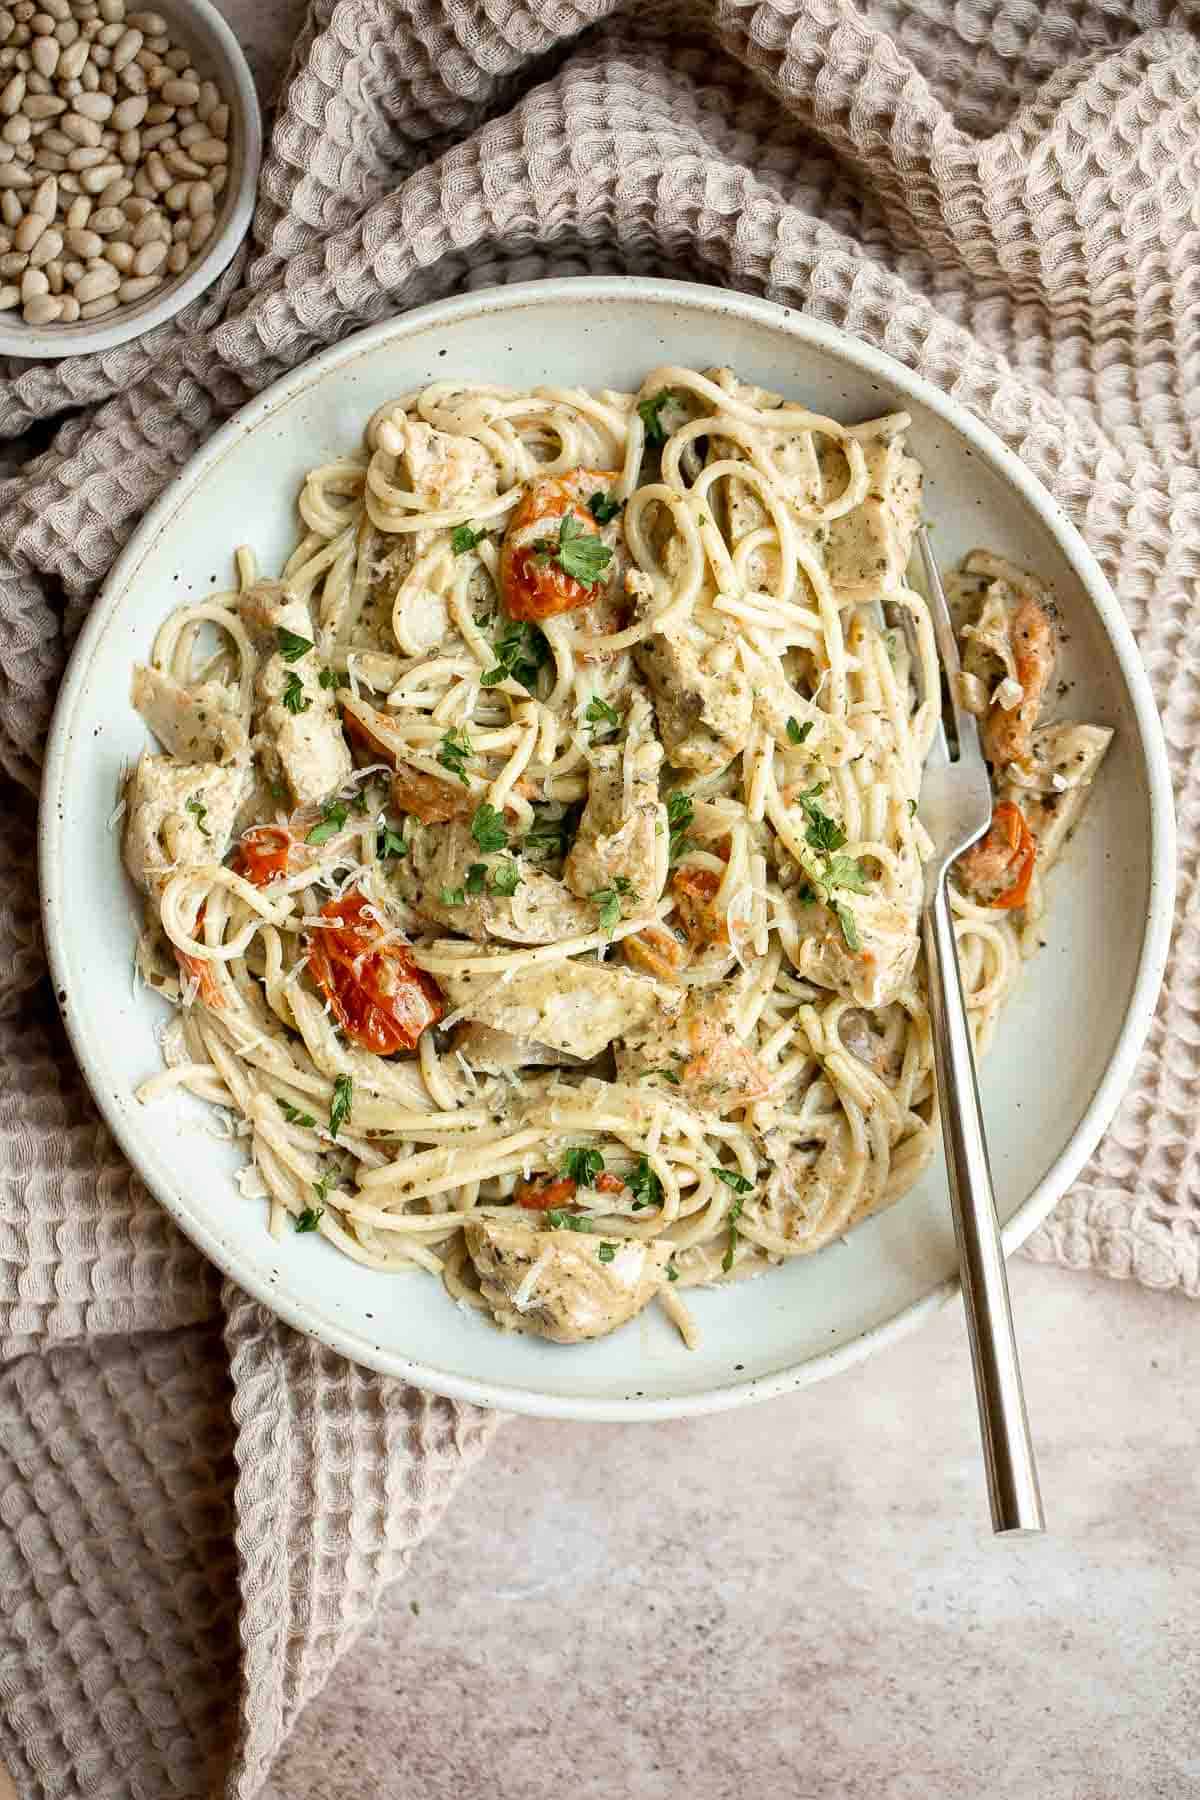
Potato Onion Pierogi is a flavorful delicious dumpling recipe made from scratch with simple ingredients, filled potatoes, caramelized onions, and cheese.
Eggplant Parmesan is a vegetarian Italian dish made featuring tender eggplant slices coated in crispy breadcrumbs, melty cheese, and baked in tomato sauce.
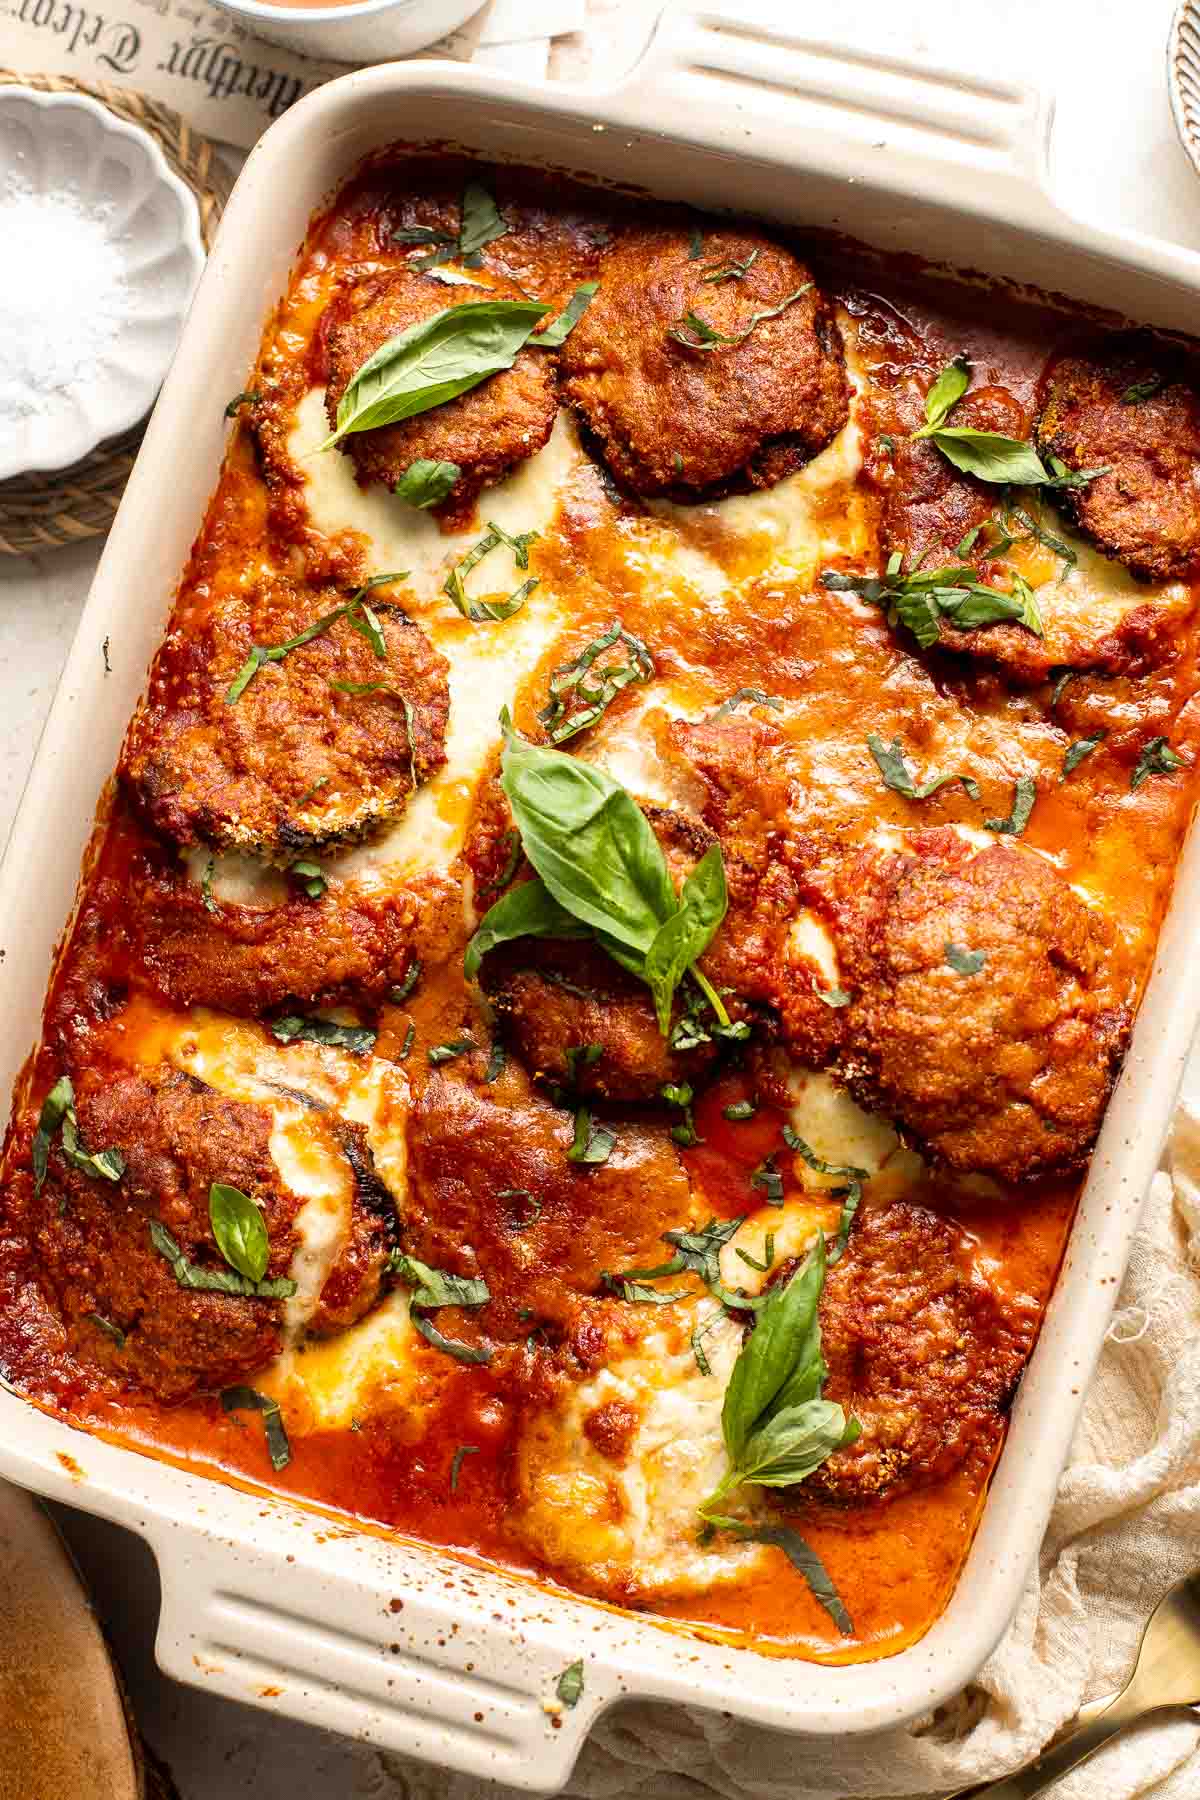
Phyllo Meat Pie (Egyptian Goulash)
Phyllo meat pie (Egyptian goulash) is a savory pie made of well-seasoned ground beef that lies between layers of flaky, crispy, golden phyllo pastry dough.
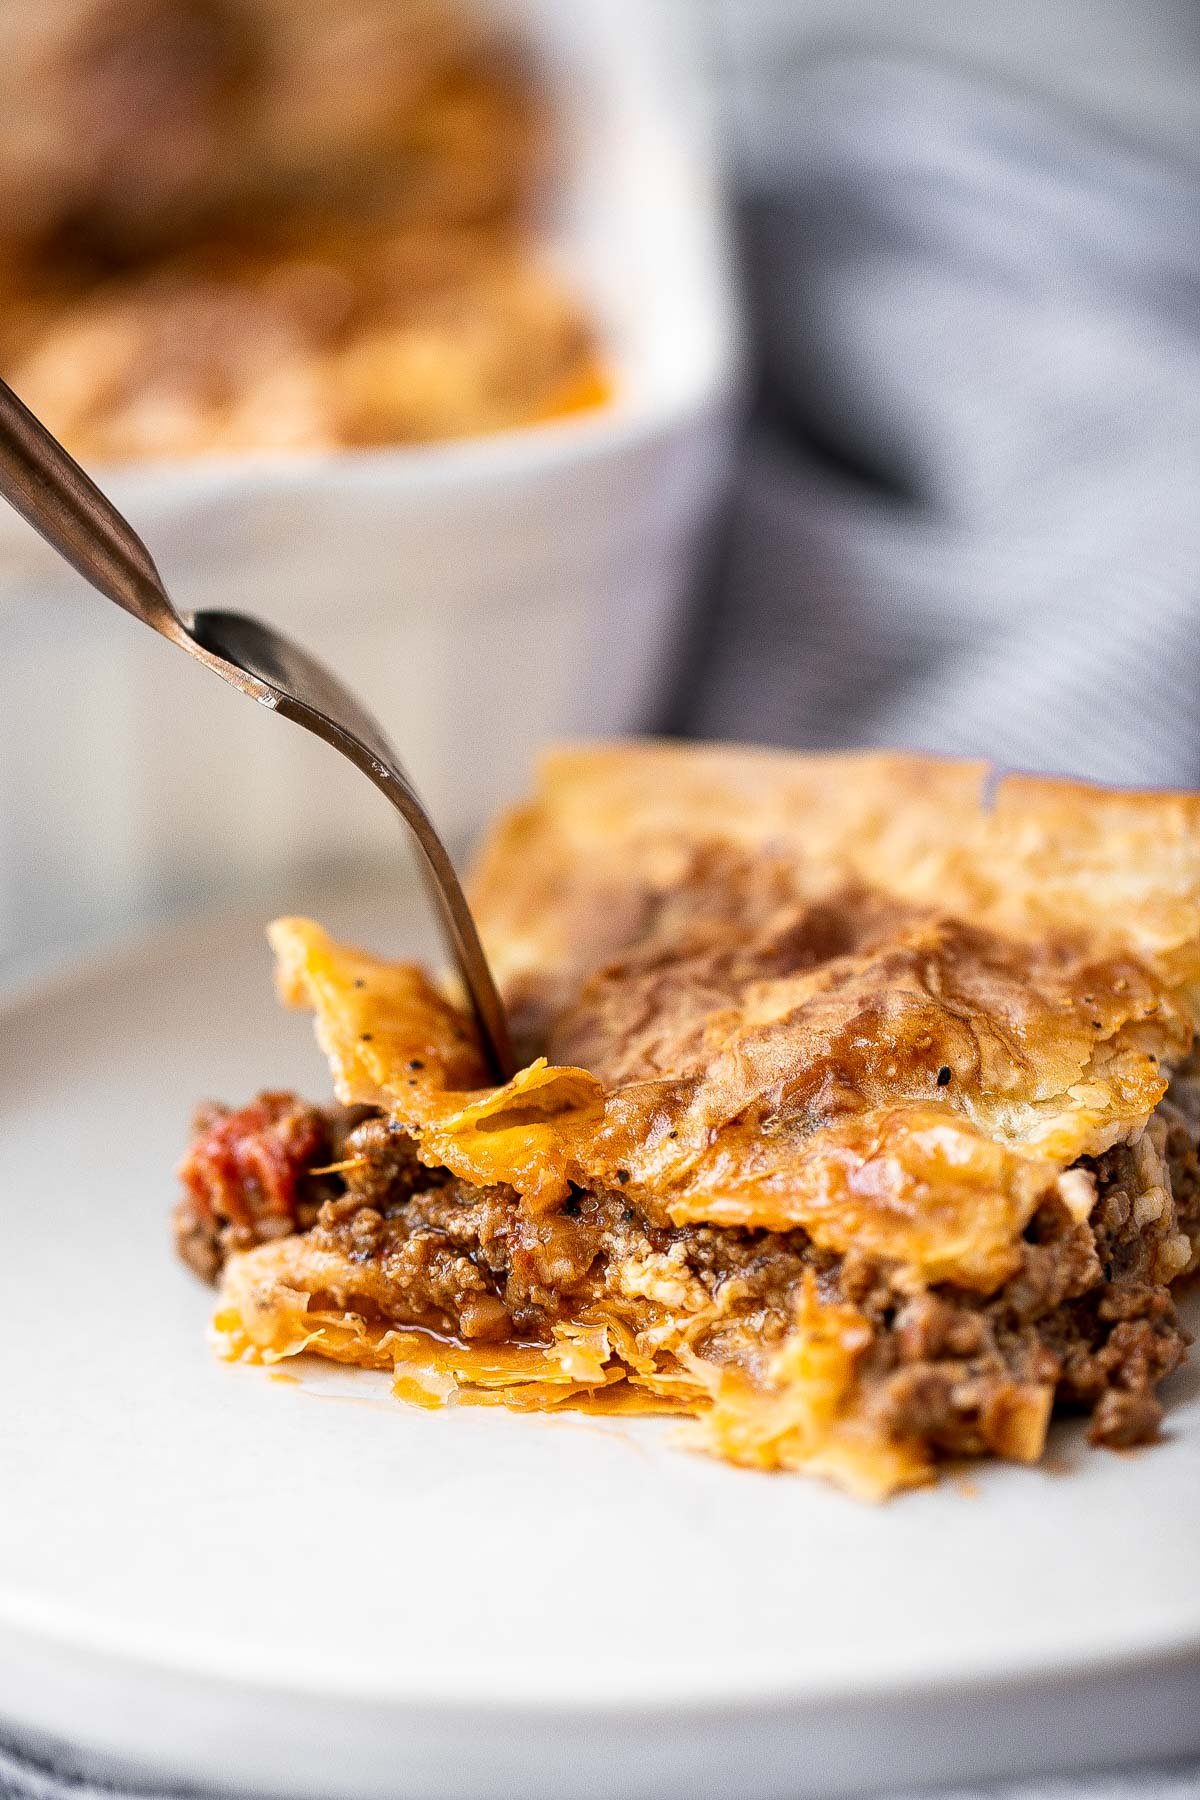
Chicken marsala in creamy mushroom sauce is a quick and easy 30-minute chicken dinner that is pure comfort food goals. A total crowd favourite.
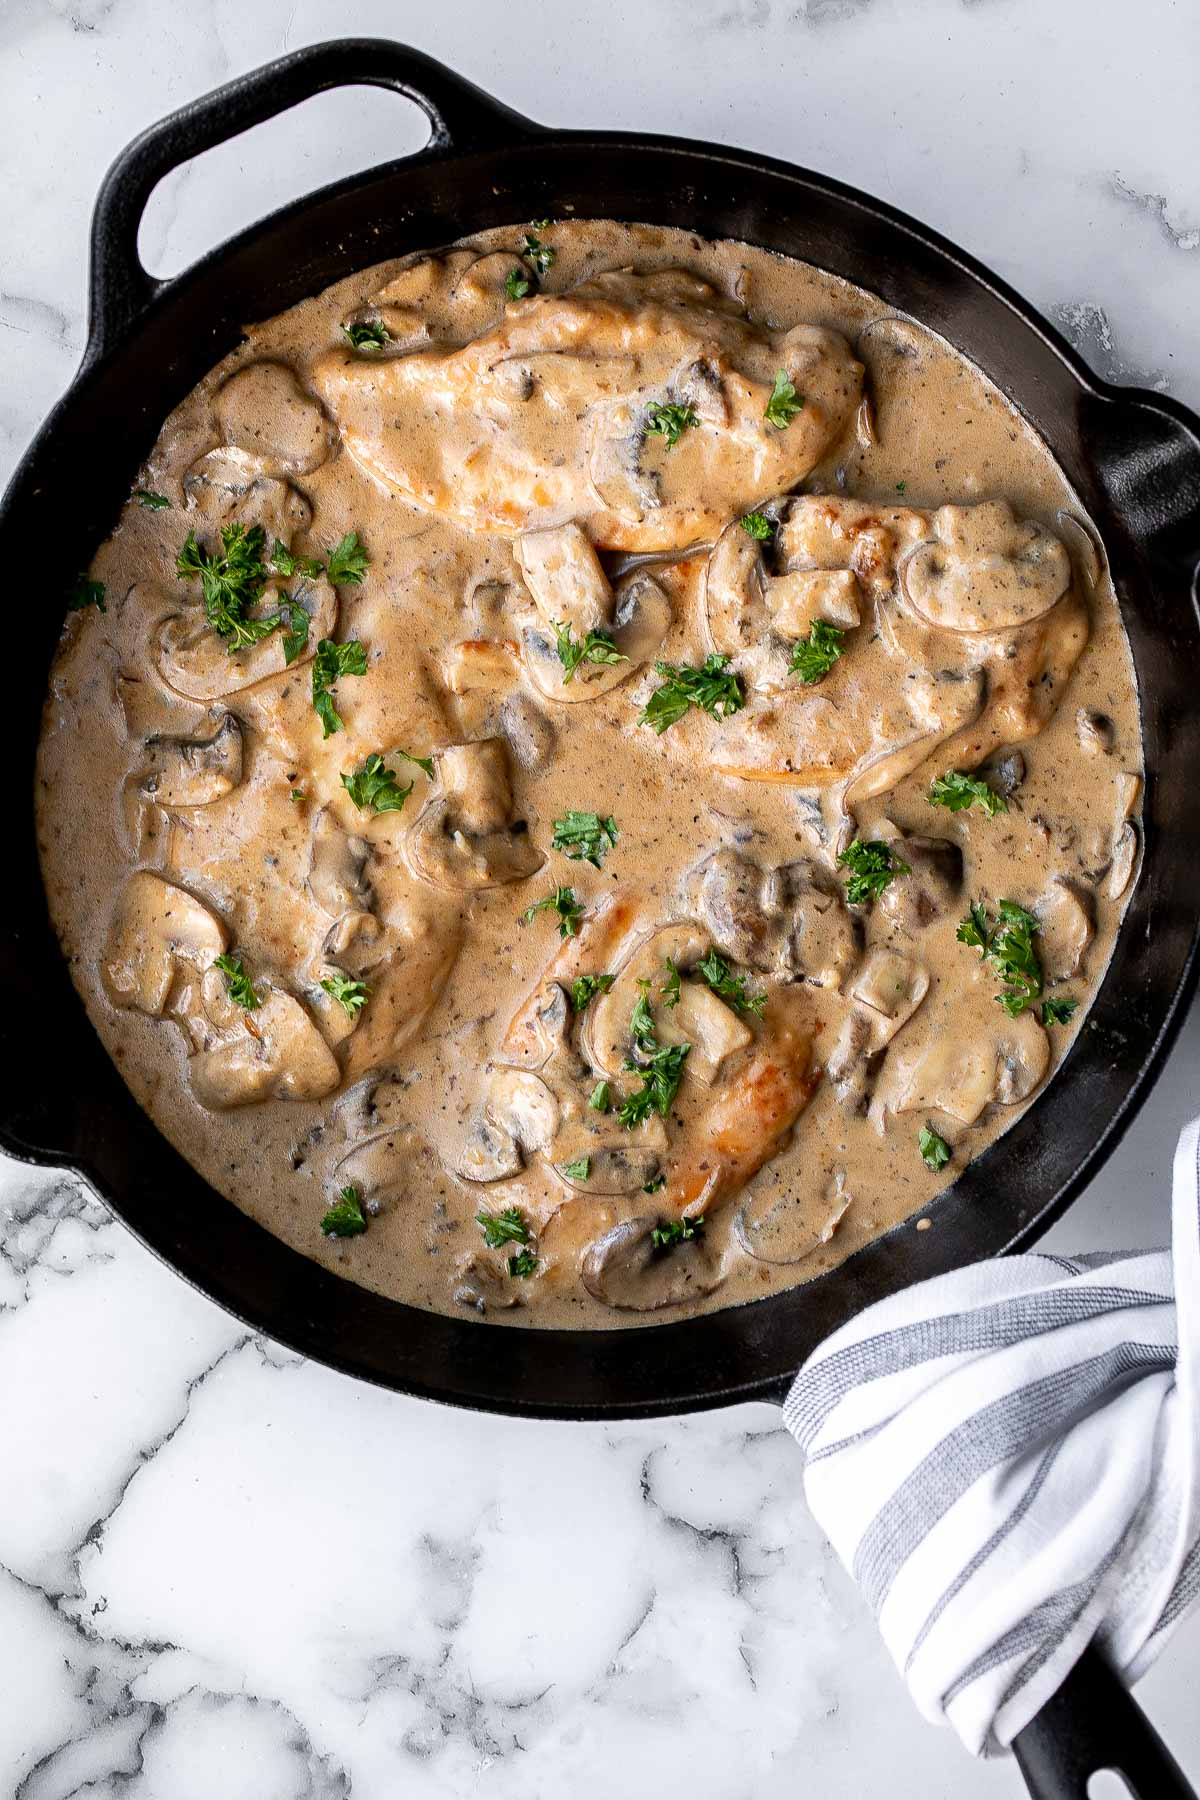
Glazed Honey Balsamic Pork Chops
Quick and easy, glazed honey balsamic pork chops are tender and juicy, seared in thyme and coated with a honey balsamic sauce. Make it in under 30 minutes.
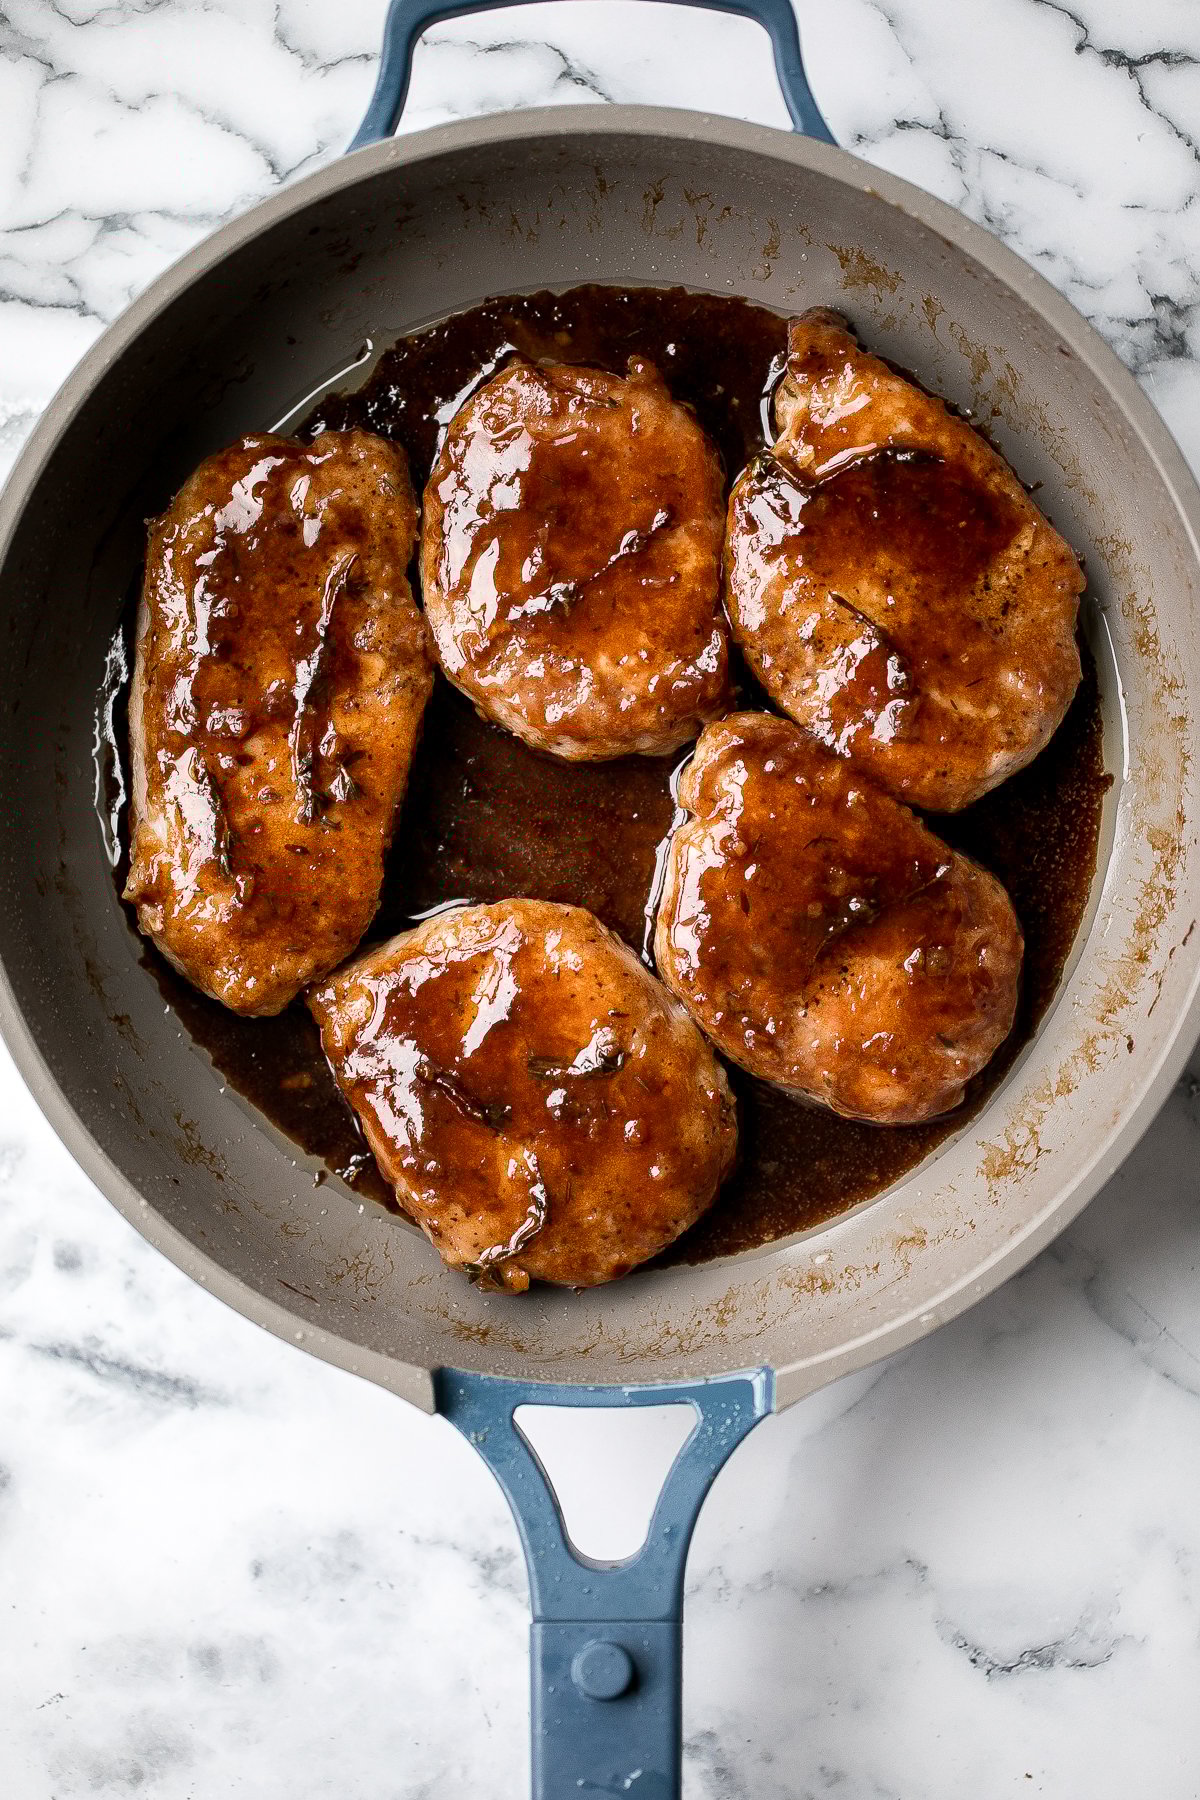
Baked parmesan crusted chicken is breaded in a herby parmesan breadcrumb mixture and baked until crispy perfection. So flavourful and delicious.
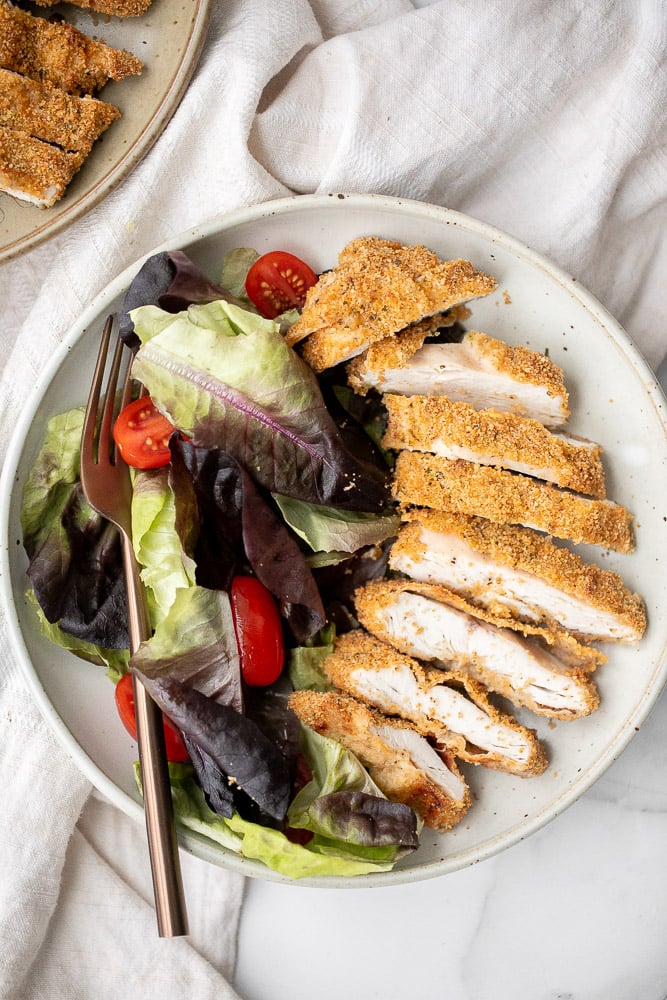
Chicken penne pasta is a quick and easy dinner that is delicious, rich, creamy, and flavorful. It's a family favorite that's ready in under 30 minutes.

This hearty classic meatloaf with a caramelized glaze will nourish your body and soul. Feed the whole family with a simple yet flavourful classic.
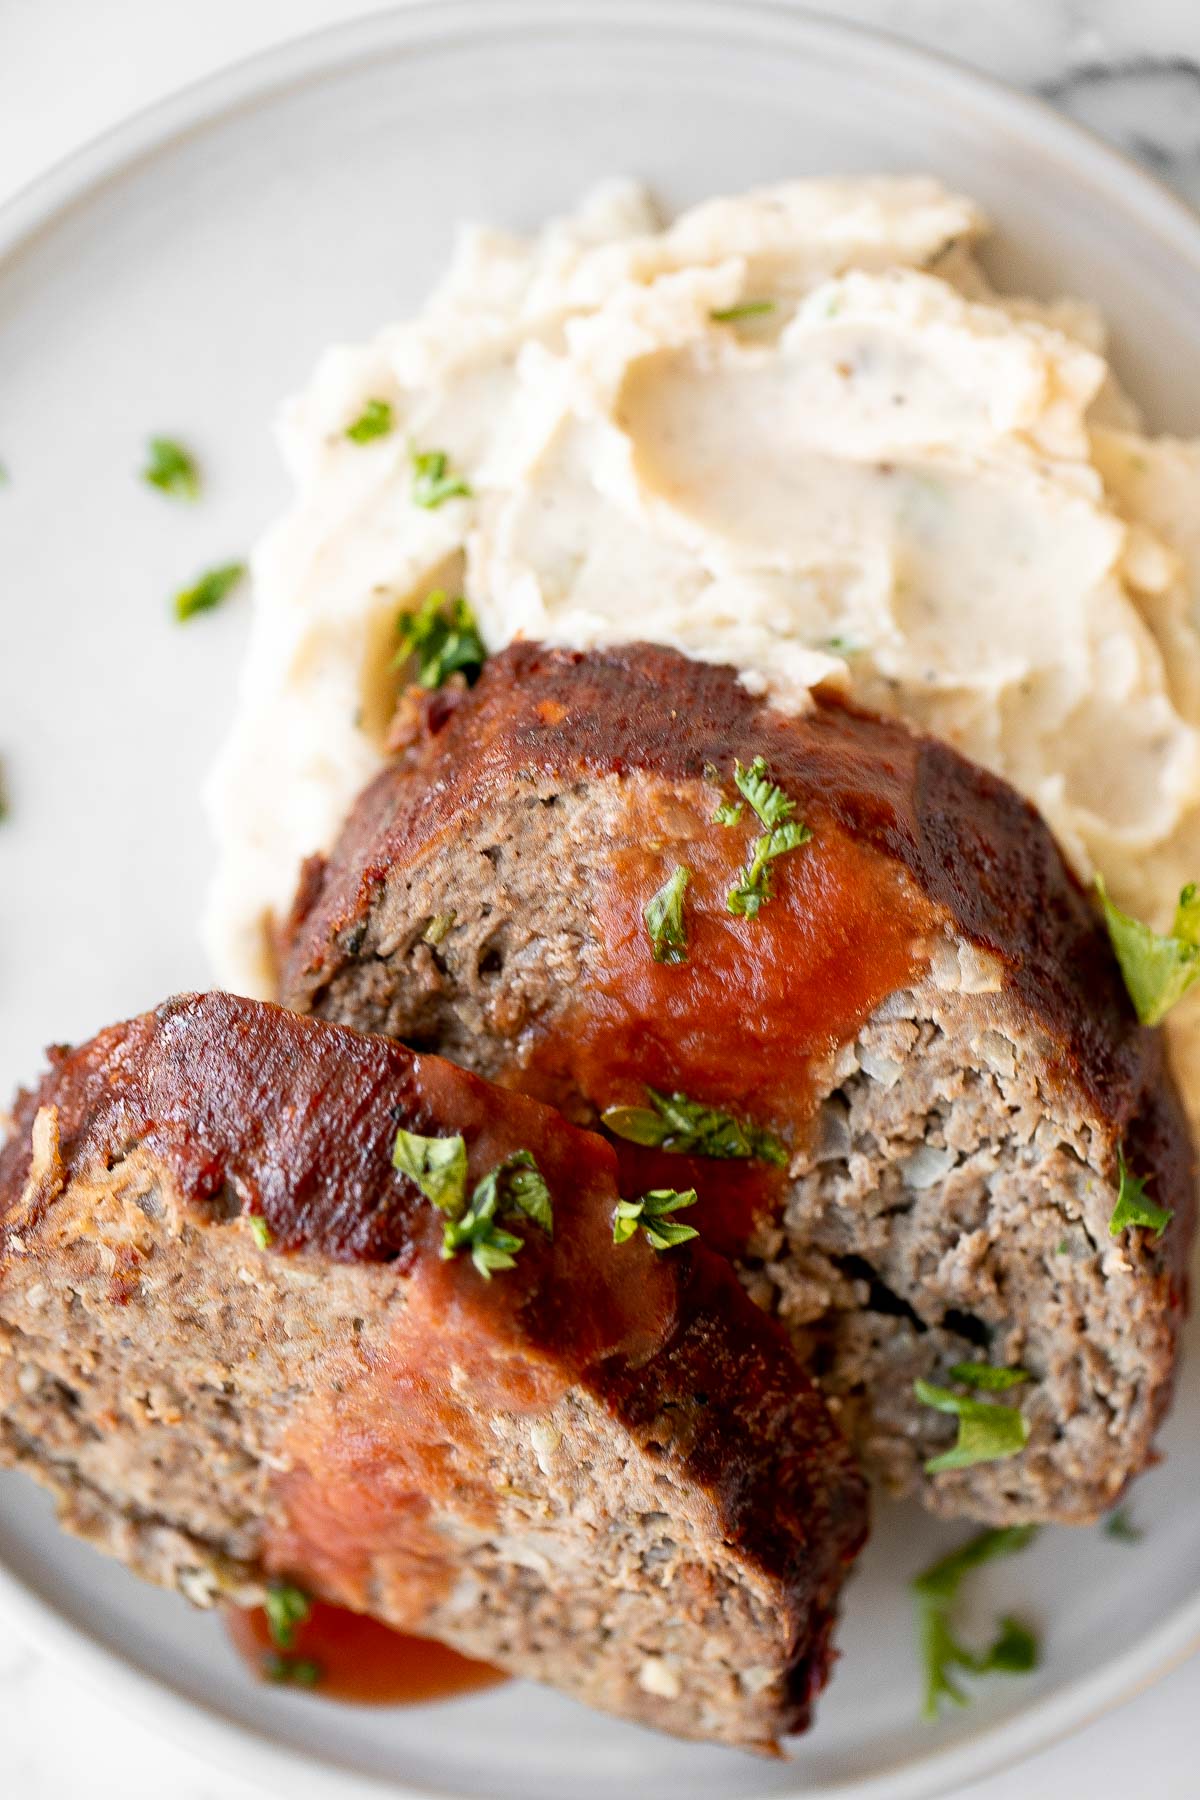
Vegetarian Paella is a delicious flavorful classic Spanish rice dish that is hearty and filling - perfectly cooked rice with saffron and vegetables.
These Indian Rice Bowls are flavorful, delicious, and easy to assemble. These wholesome, filling rice bowls have it all - grains, protein, and veggies.
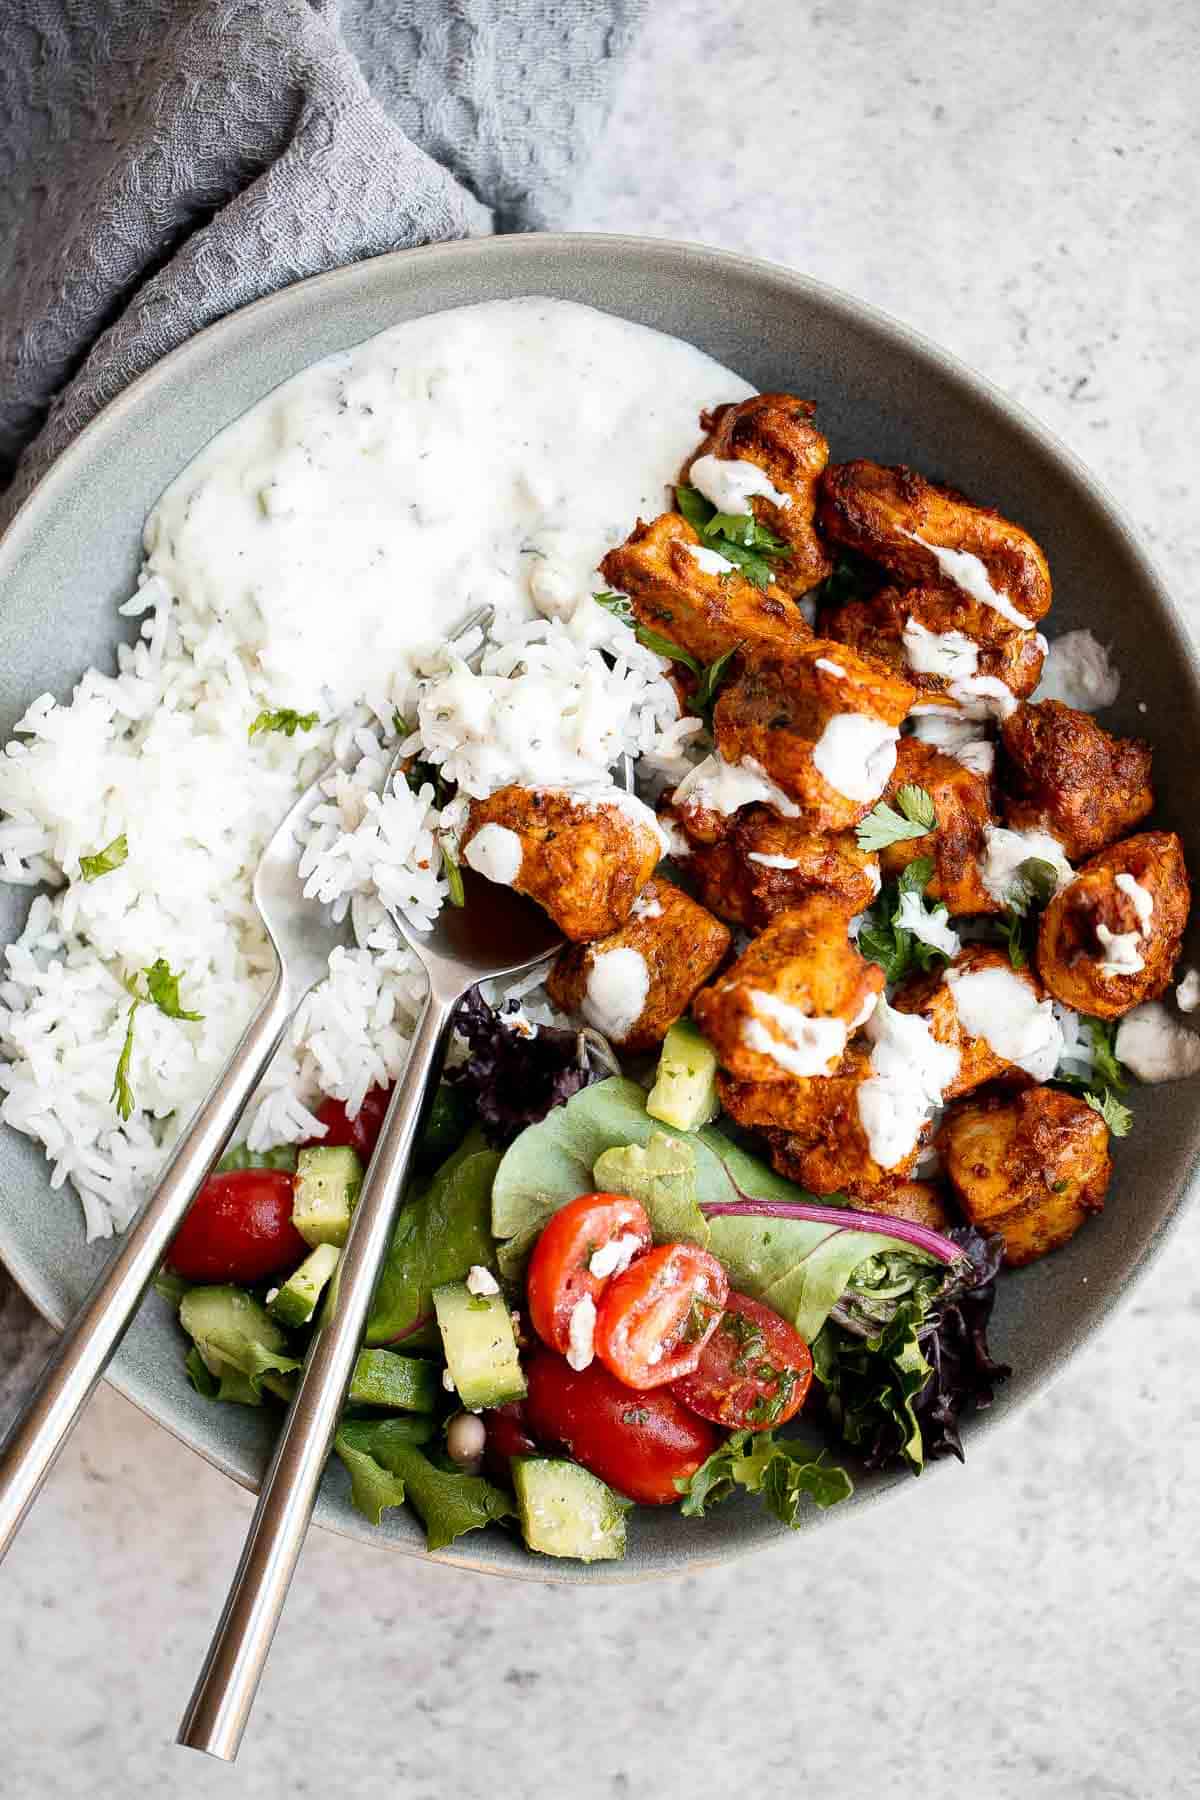
One Pan Garlic Roasted Chicken and Baby Potatoes
One pan garlic roasted chicken and baby potatoes is an easy to make, delicious, and wholesome meal for the entire family including the kids. Prep this sheet pan in 10 minutes.
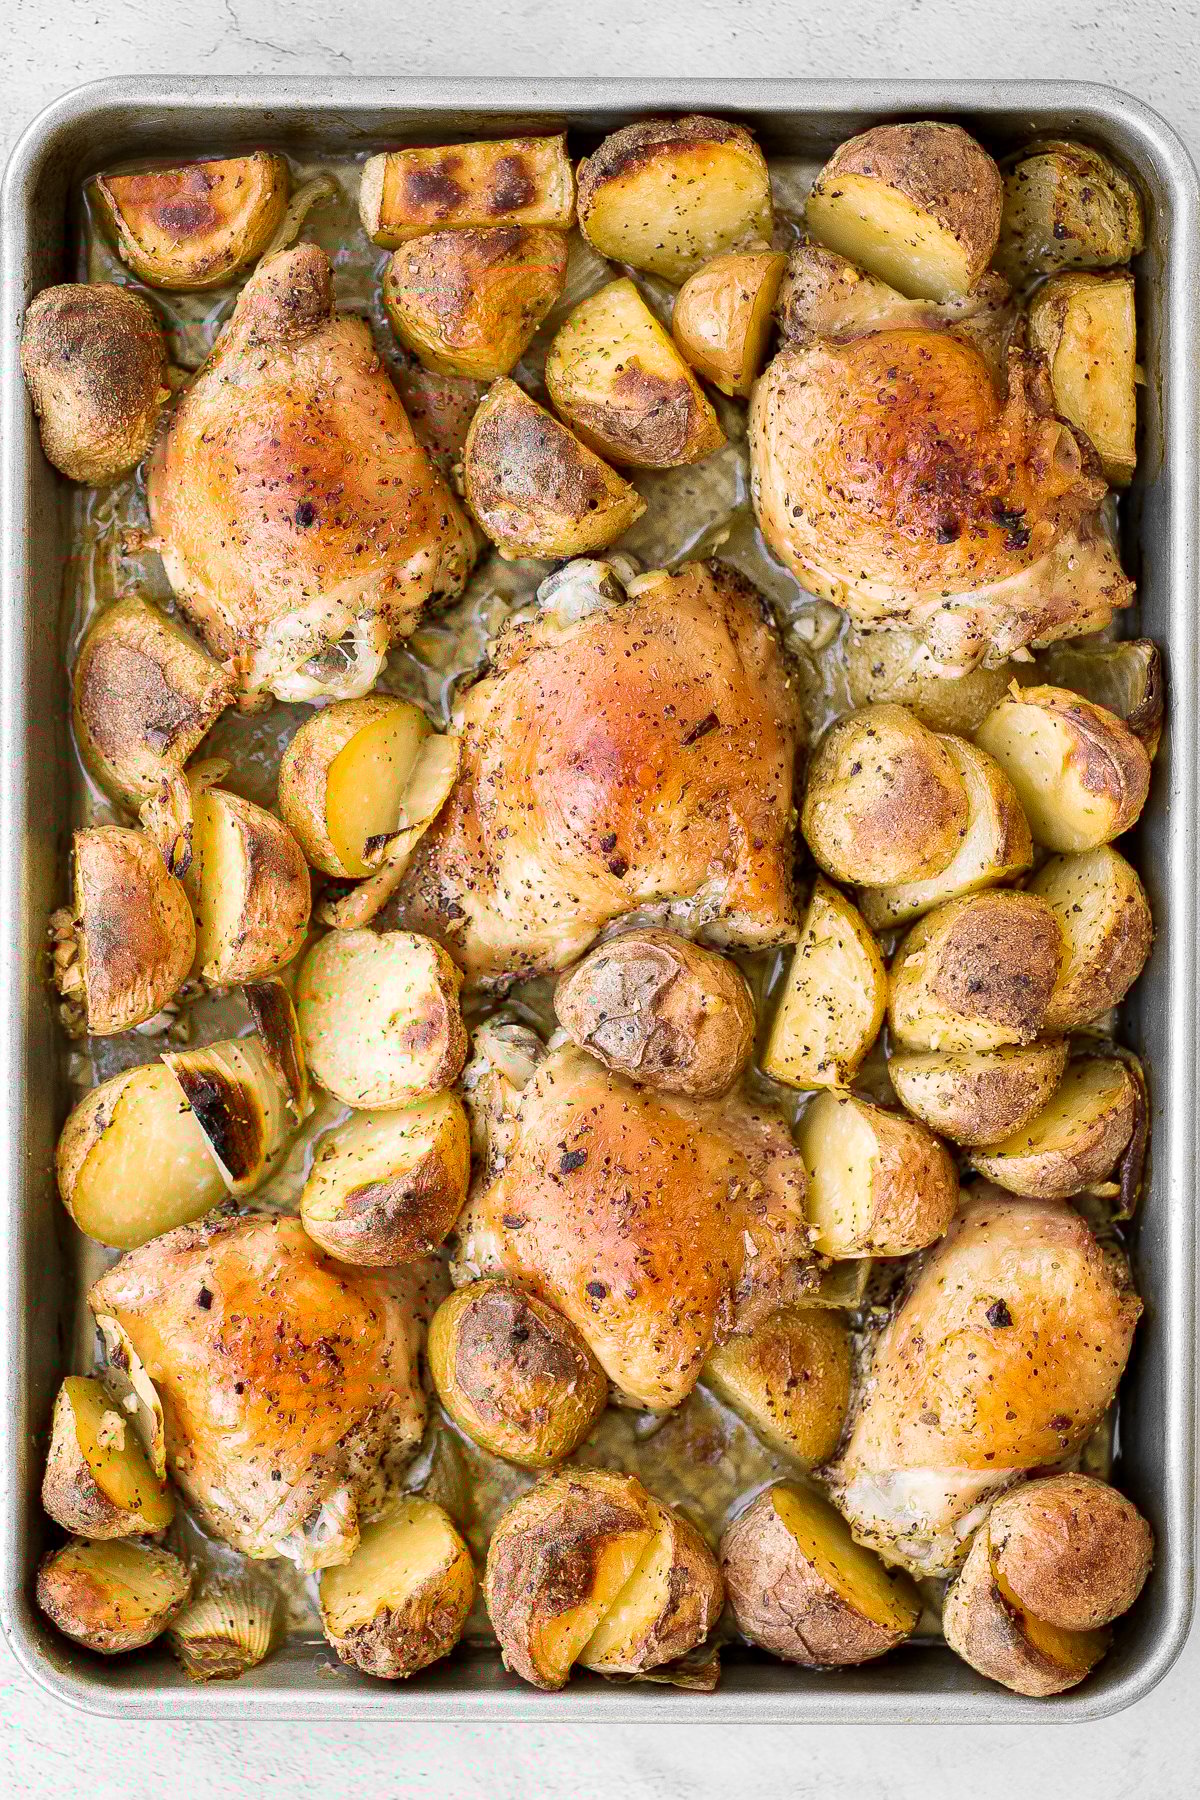
Ground beef meat pie with a flaky puff pastry double crust pie is filled with ground beef cooked with vegetables and seasonings. The ultimate comfort food.
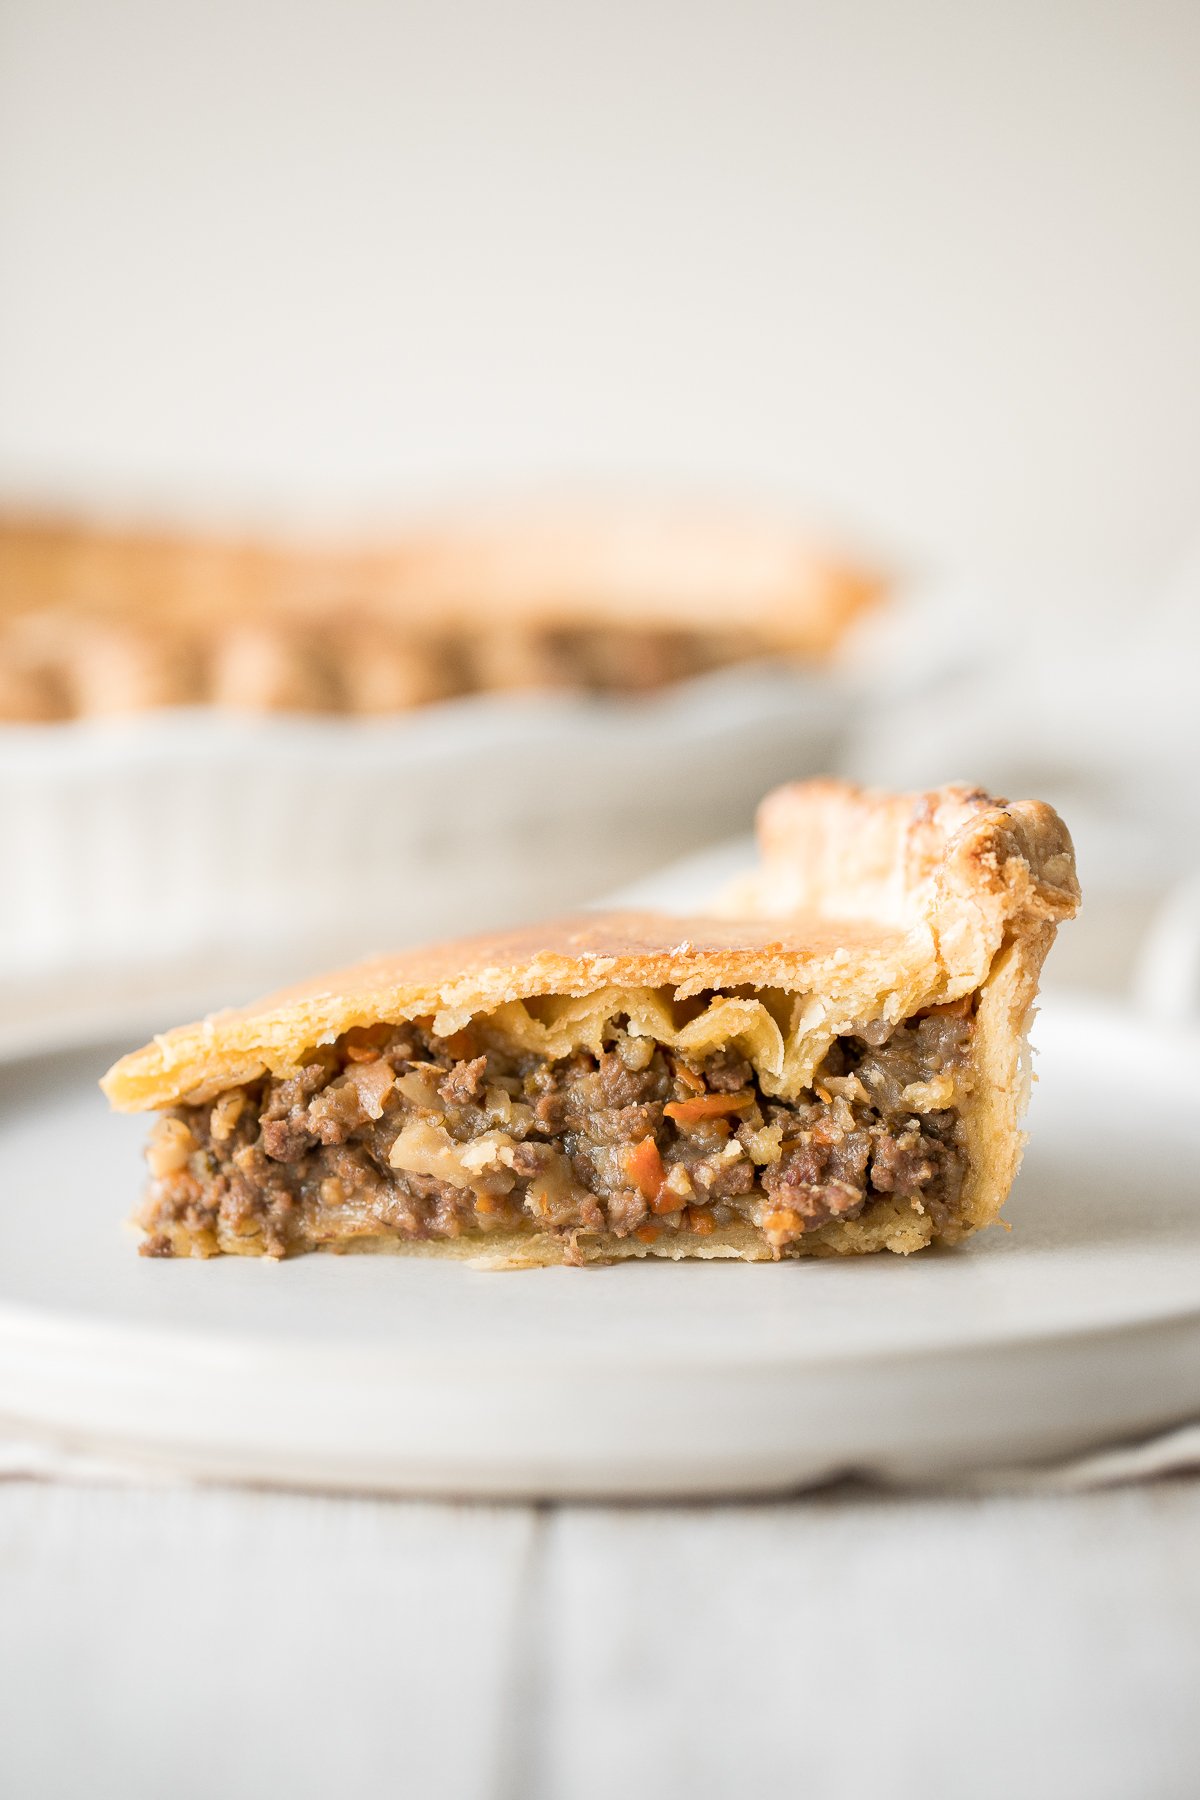
More Mother's Day Recipes
- Mother's Day Brunch Menu
- 40 Mother's Day Dessert Recipes
- 60+ Spring Dinner Ideas
- 75+ Easy Appetizer Recipes
- 50 Best Comfort Food Recipes
Did You Make Any of These Mother's Day Dinner Recipes?
Please leave a comment and rating below, and let me know what you thought of this round up of best Mother's Day dinner ideas. Be sure to snap a picture and tag me on Instagram @aheadofthyme or share it on the Pinterest pin so that I can follow along.
HUNGRY FOR MORE? Don't forget to sign up for my email newsletter so that you don't miss any recipes. You can also follow along on Instagram and Pinterest for more recipe updates.
Buddha Bowl
This vegan Buddha Bowl is the perfect hybrid of a salad and grain bowl that is packed with nutrients. Roasted veggies, warm quinoa, and fresh vegetables are coated in a homemade dijon vinaigrette and topped with crunchy pumpkin seeds for the perfect balance between flavors and textures.
Buddha Bowls are the perfect way to enjoy a healthy and hearty meal in one bowl - packed with a variety of nutritious ingredients like whole grains, fresh vegetables, and protein, and is customizable. Plus, it's also really easy to make this vibrant and colorful vegan quinoa bowl. Just prepare the ingredients, assemble, and top with dressing.
What is a Buddha Bowl?
A Buddha Bowl is a well-rounded vegetarian meal that typically includes grains, veggies, and sometimes plant-based protein like tofu, tempeh, or chickpeas. It is named after the Buddha for the balanced and abundant nature of the bowl. A Buddha Bowl is also often referred to as a "nourish bowl," "glow bowl," or "macro bowl."
Buddha bowls are not only delicious but also incredibly versatile. Whether you're looking for a quick and easy lunch or a filling dinner, Buddha Bowls are the perfect choice. Plus, you can customize them with your favorite ingredients and dressings to create a meal that's tailored to your taste preferences.
Why You'll Love this Buddha Bowl
- 100% vegan. This nourishing Buddha bowl is made with zero animal-based ingredients whatsoever - you'll find no dairy, eggs, or meat here, making it perfect for Meatless Mondays or dinner for plant-based guests.
- Bursting with wholesome ingredients. These Buddha bowls are filled to the brim with real, whole foods, including root vegetables, grains, greens, vegetables, and seeds, for a well-balanced bowl that is flavorful and delicious.
- Incredibly versatile. Buddha bowls are a one-size-fits-all type of dish! Serve them for breakfast, lunch, or dinner, for casual or formal affairs, and as a complete meal or as a side to compliment an entree. Plus, customize this vegan quinoa bowl with whatever ingredients you have on hand.
- Easy to make. There is a little prep work when it comes to making a vegan grain bowl - you have to cook the grains and roast some veggies. Other than that, the assemble is really easy. Just prep the ingredients, assemble into a serving bowl, add dressing, and serve.
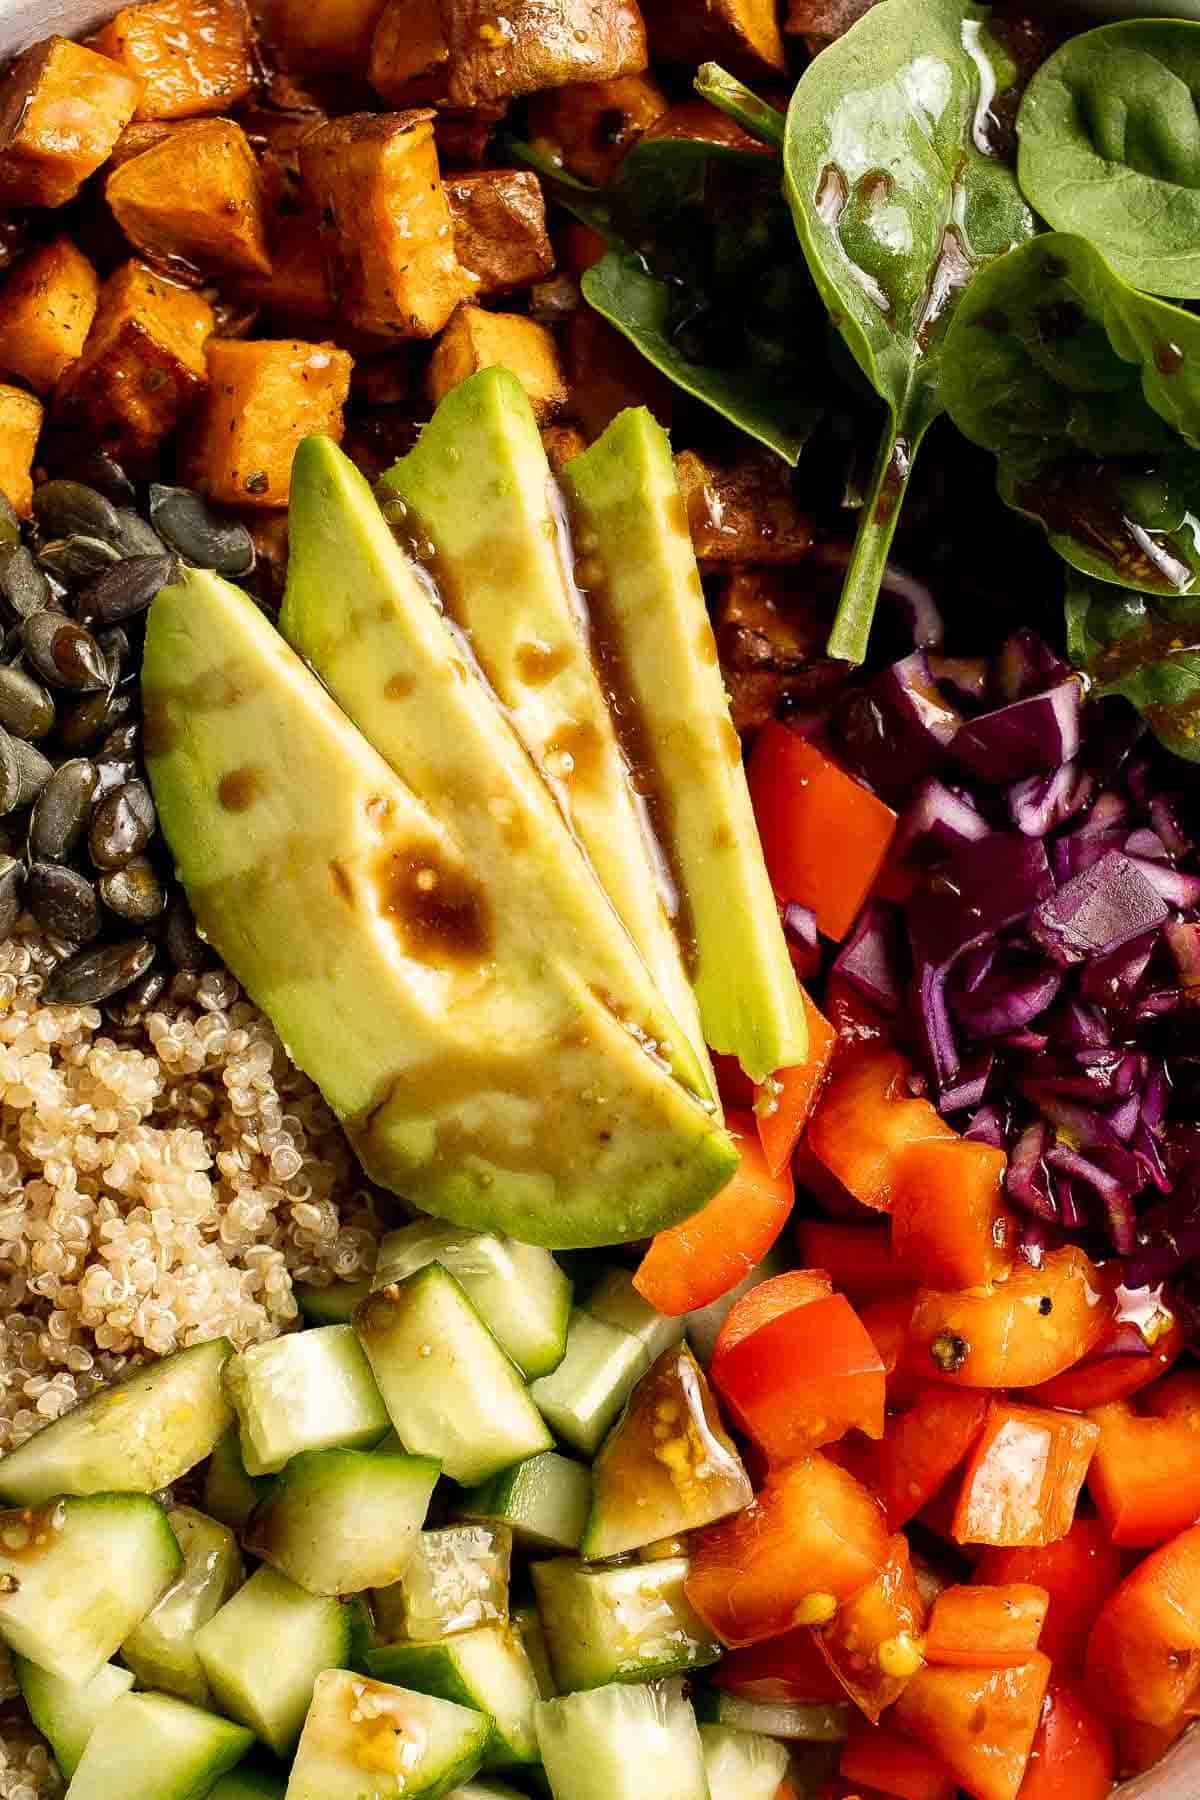
Ingredient Notes
To make this delicious vegan Buddha Bowl, you will need the following ingredients (full measurements in recipe card below):
- quinoa - we provide instructions for cooking the quinoa from scratch, but you can make things faster if you have 1.5 cups of cooked quinoa on hand. You can also try this recipe with couscous, barley, or rice - just adjust the cooking time to make sure whichever grain you choose is cooked properly.
- sweet potatoes - you can use regular orange sweet potatoes, purple sweet potatoes, or Japanese sweet potatoes in this recipe. You can also substitute it with other root vegetables like potatoes or beets. You will also need olive oil, Italian seasoning, salt, and pepper for seasoning and roasting the sweet potatoes.
- arugula - feel free to substitute with other greens such as baby spinach or baby kale.
- red bell pepper - yellow or orange bell pepper will produce a similar flavor.
- English cucumber - if you can't find english cucumbers, use whatever kind of cucumber you have on hand.
- purple cabbage - you can use green cabbage or radicchio in place of the purple cabbage.
- avocado - for a perfectly ripe avocado, look for one with a little bit of give when pressed - not too soft, not too hard.
- pumpkin seeds - use unshelled pumpkin seeds (also called pepitas), or swap them with sunflower seeds, chopped walnuts, or chopped pecans.
- vinaigrette dressing - quick and easy to make using balsamic vinegar (or substitute for red wine vinegar), dijon mustard (or substitute with a brown or stone ground mustard), maple syrup (to keep it vegan, or substitute with honey), salt, and pepper.
You will also need measuring cups and spoons, a sheet pan, a medium cooking pot, small mixing bowl, and a serving bowl.
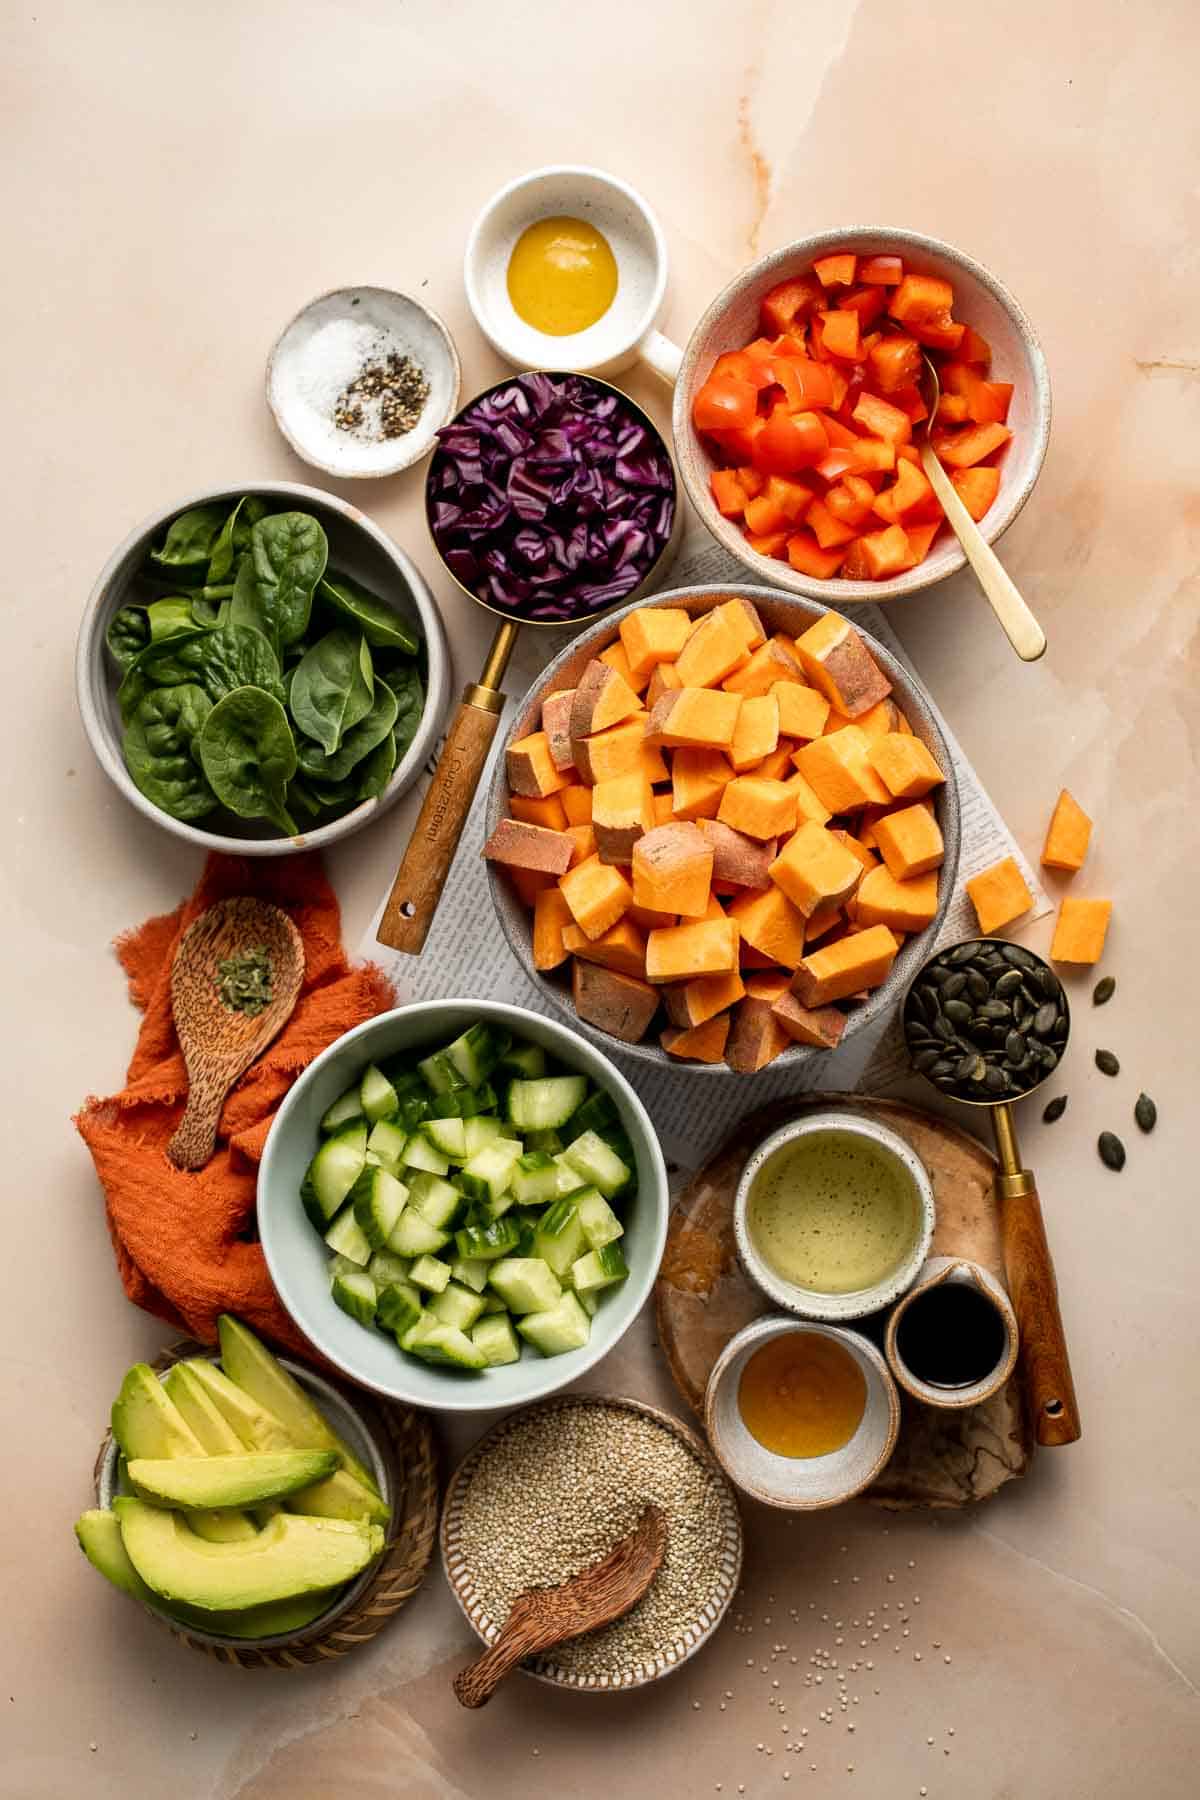
How to Make the Best Buddha Bowl
First, roast the sweet potatoes.
- Season. Add the chopped sweet potatoes to a large half sheet baking pan. Drizzle with olive oil and add Italian seasoning, salt, and pepper. Toss to combine.
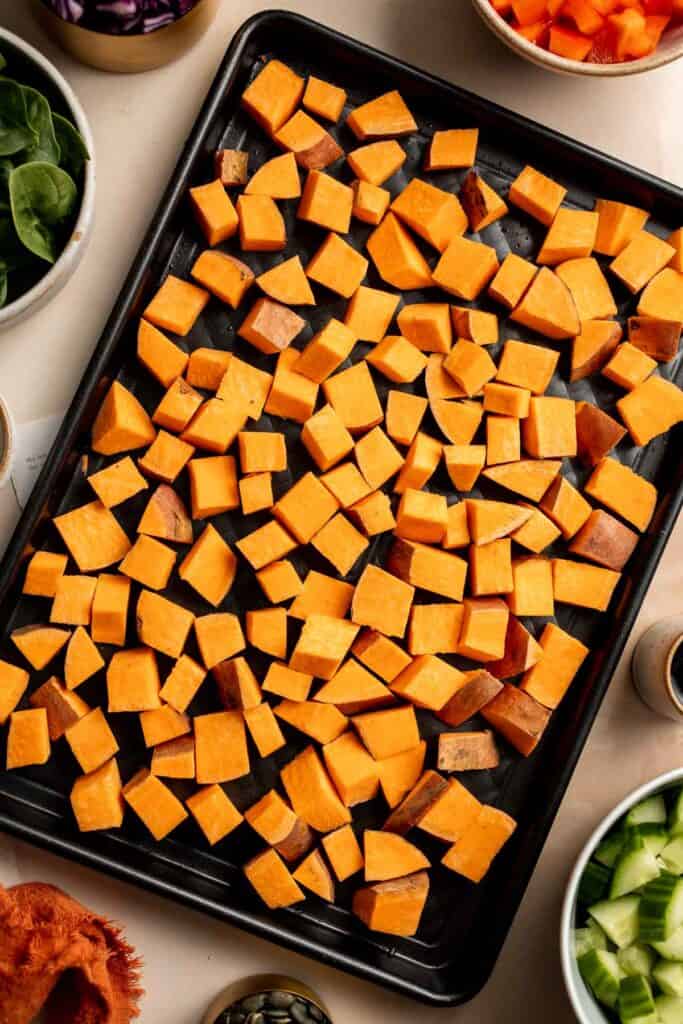

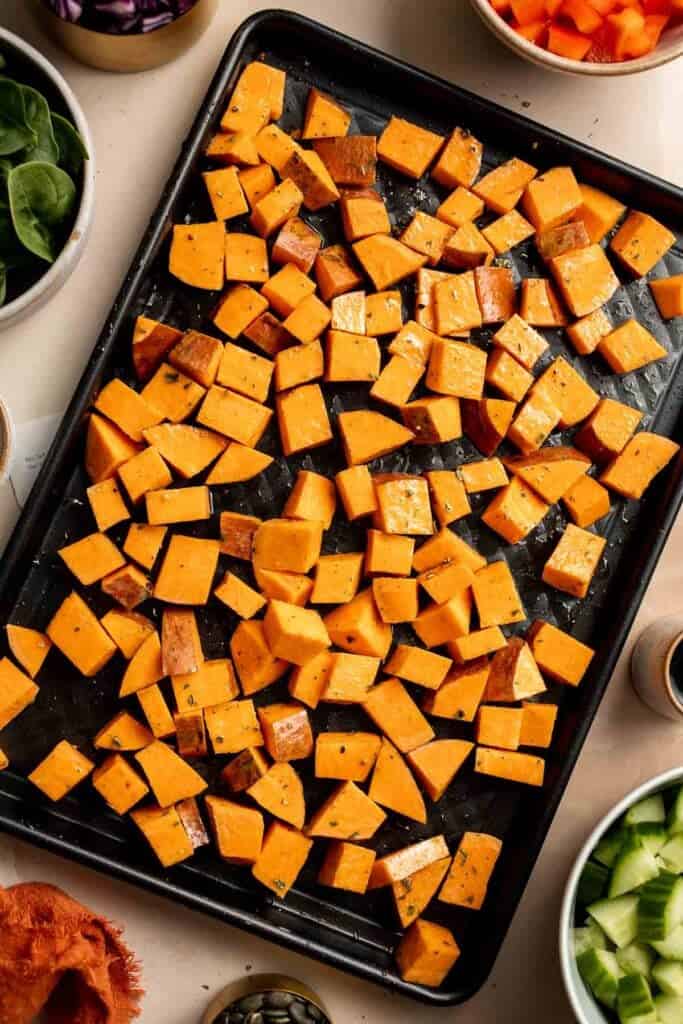
- Roast. Spread out the sweet potatoes evenly in a single layer and roast in a 400F preheated oven for 35-40 minutes until tender and golden brown, giving it a quick stir halfway through baking. For extra crispy sweet potatoes, broil on high for 2-3 minutes at the end. Set aside.
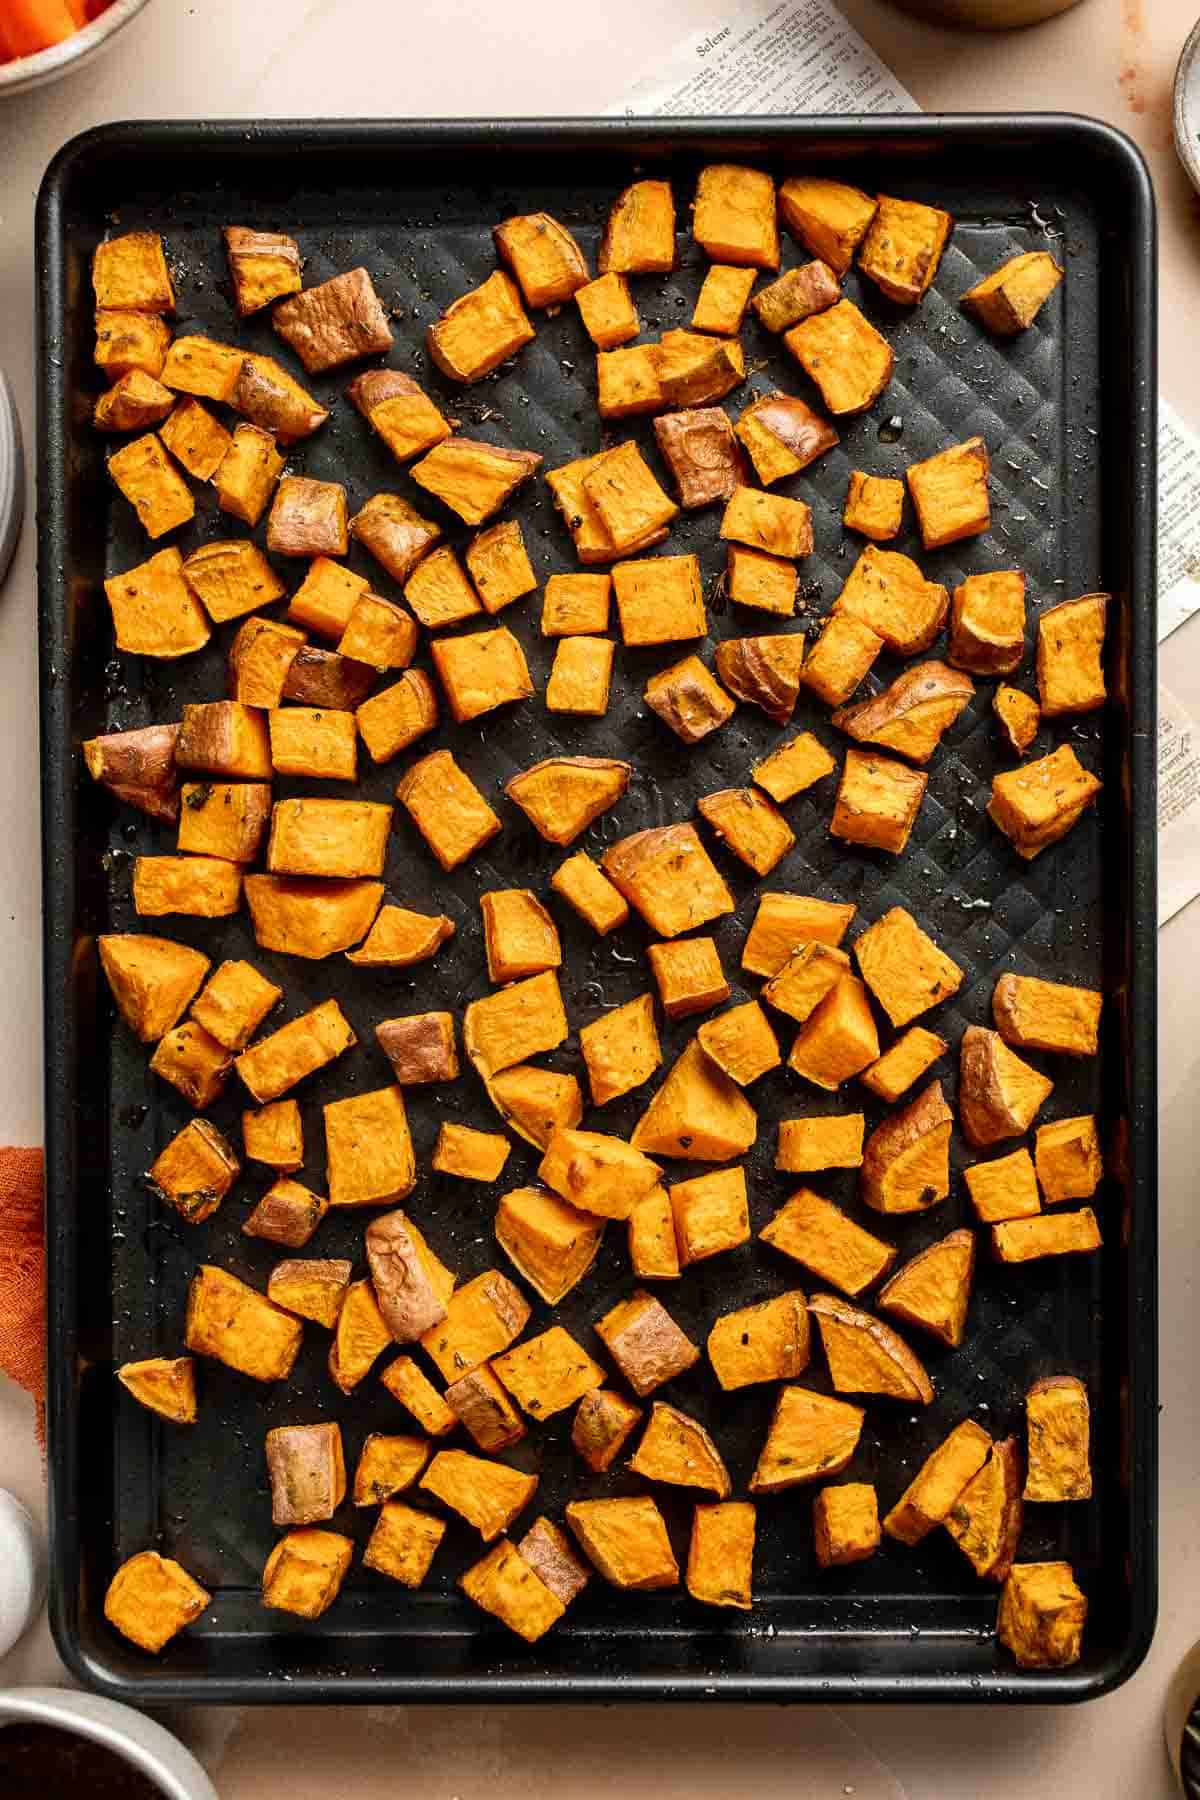
Next, cook the quinoa.
- Rinse. Rinse the quinoa thoroughly under cold running water in a large fine-mesh colander for 1 minute and drain well. (This helps remove the bitter taste in quinoa).
- Cook. Transfer the rinsed and drained quinoa to a medium cooking pot and add water and olive oil. Bring it to boil over medium heat, about 5 minutes. Close the lid and reduce the heat to low. Let the quinoa simmer for 15 minutes until tender and the water is absorbed.
- Rest. Remove from heat and let the cooked quinoa rest for another 5 minutes. You will notice the grains have popped open. Fluff with a fork and set aside.
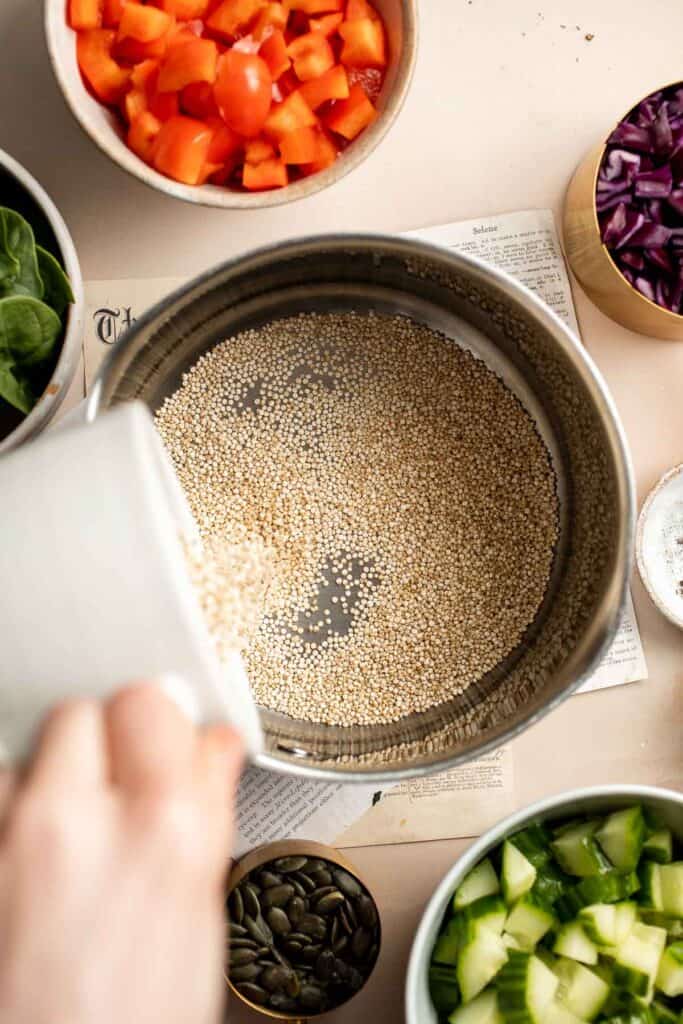
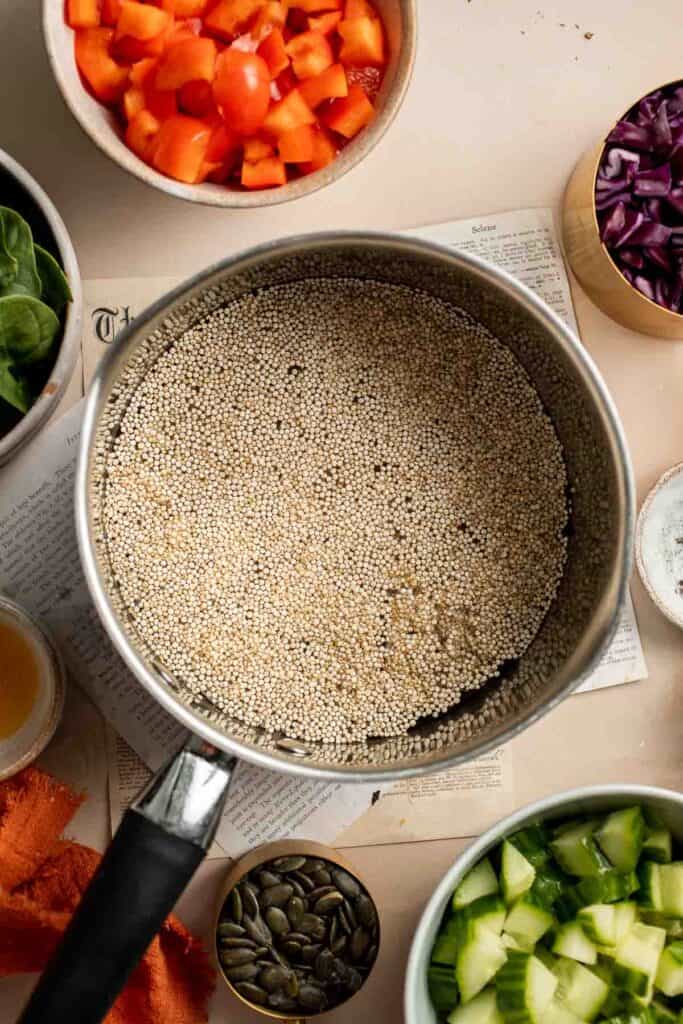
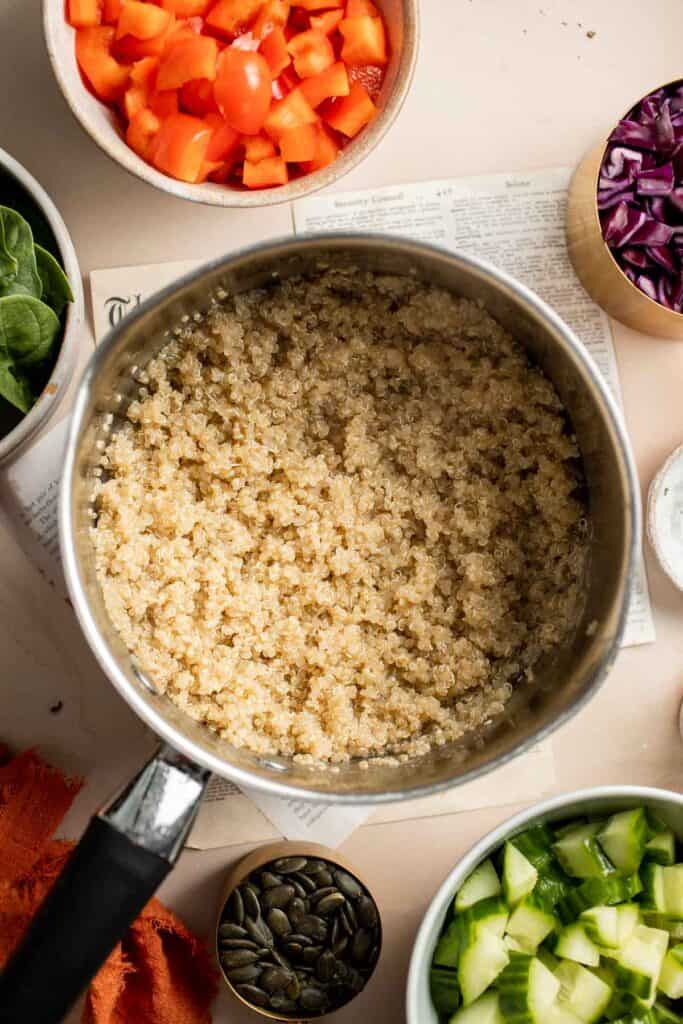
Assemble the buddha bowl.
Arrange the cooked quinoa, sweet potatoes, arugula, bell pepper, cucumber, cabbage, avocado, and pumpkin seeds in a large serving bowl.
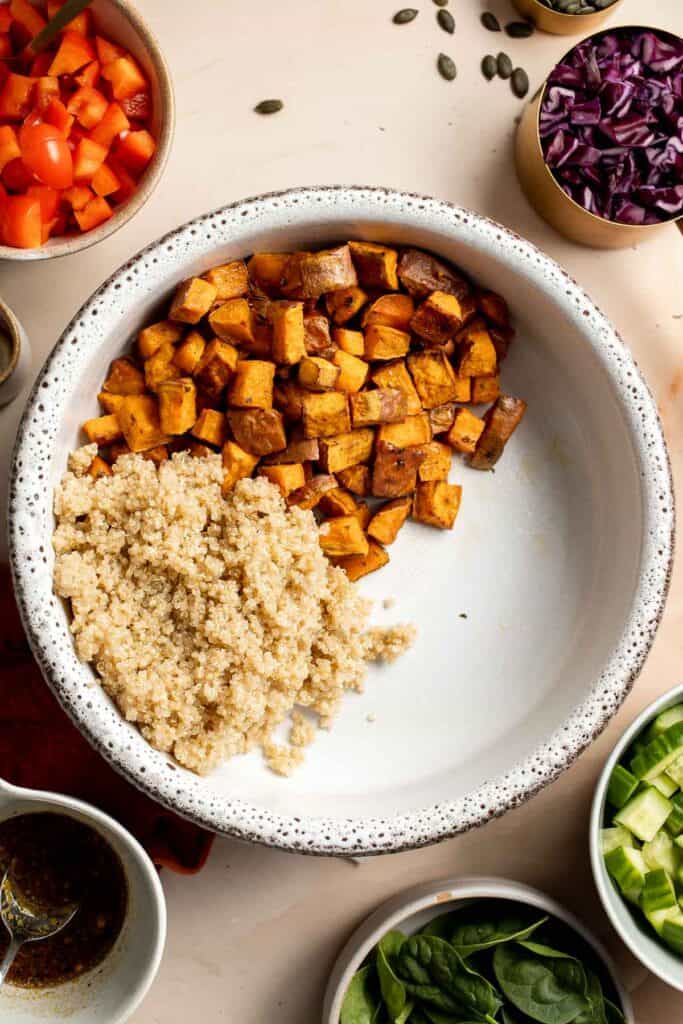
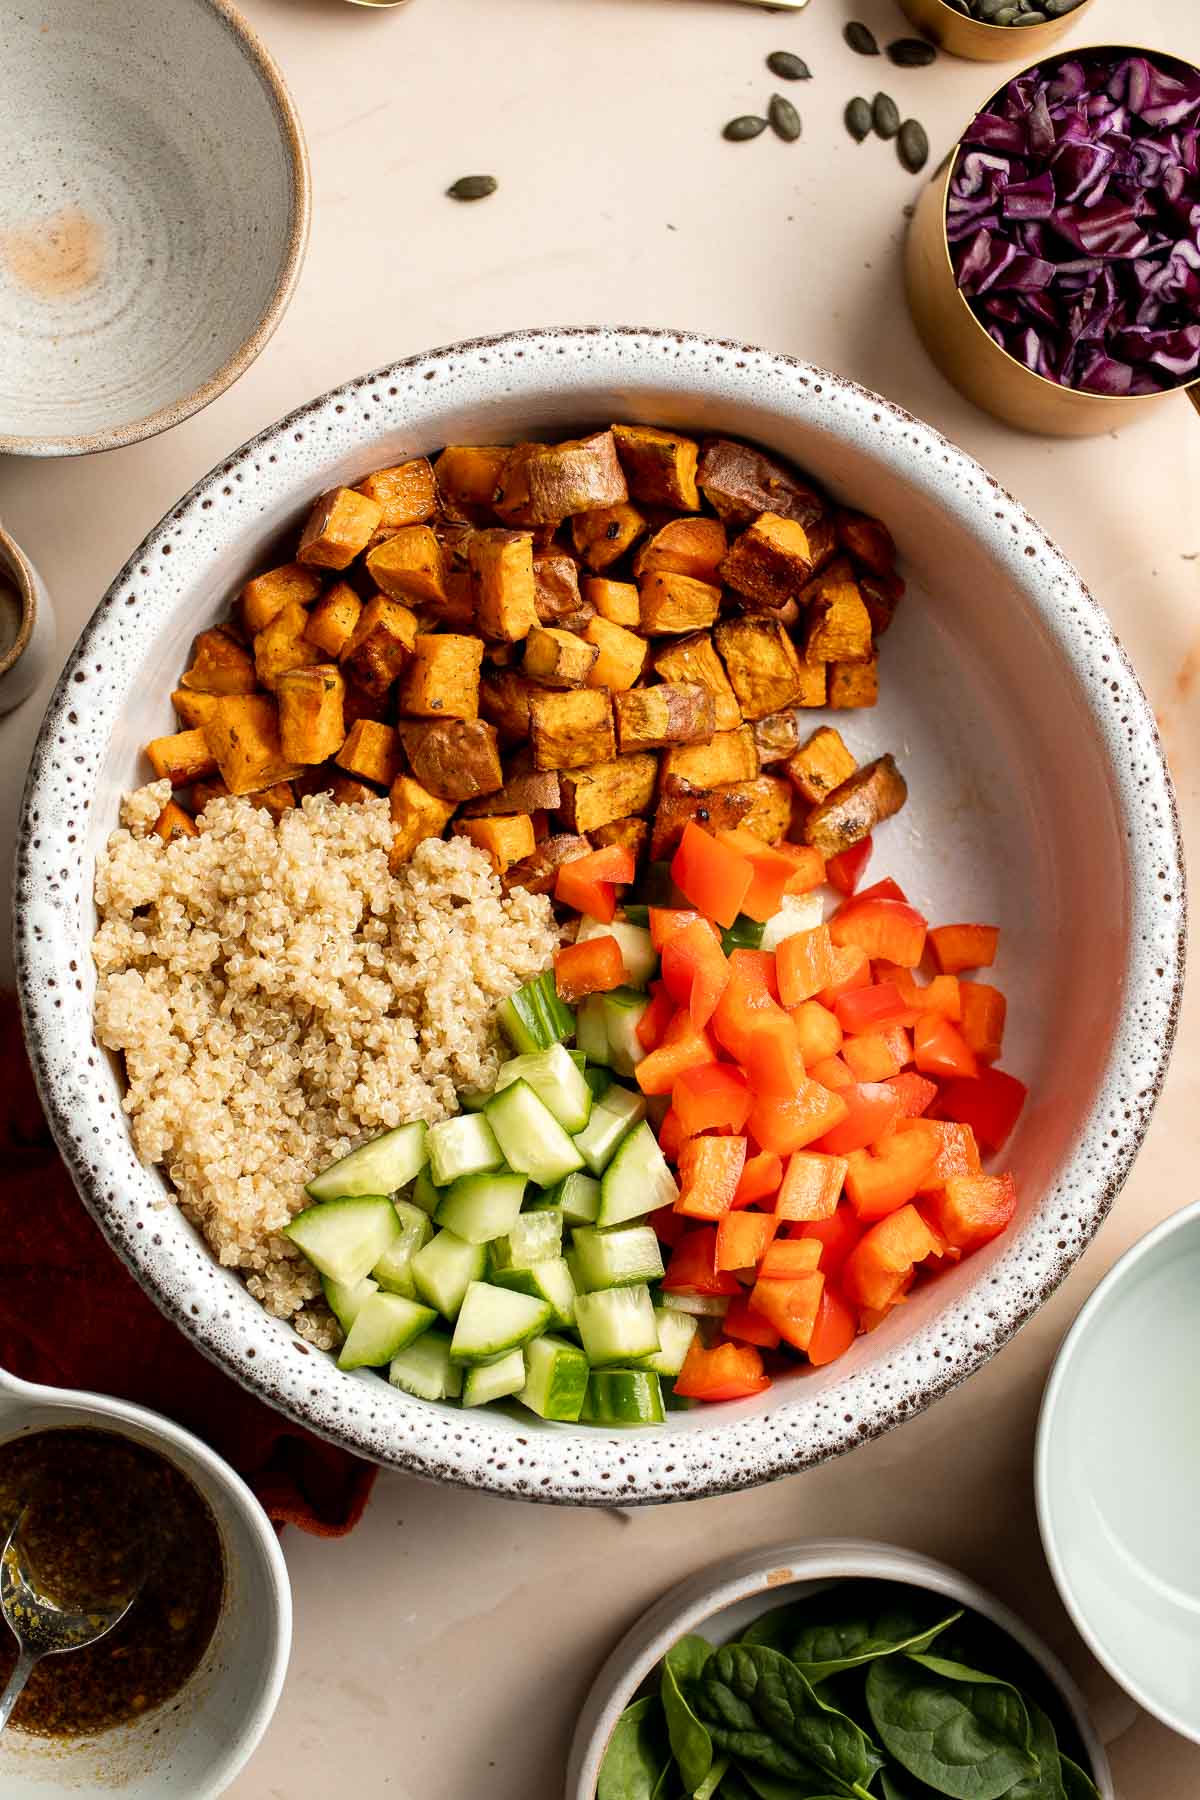
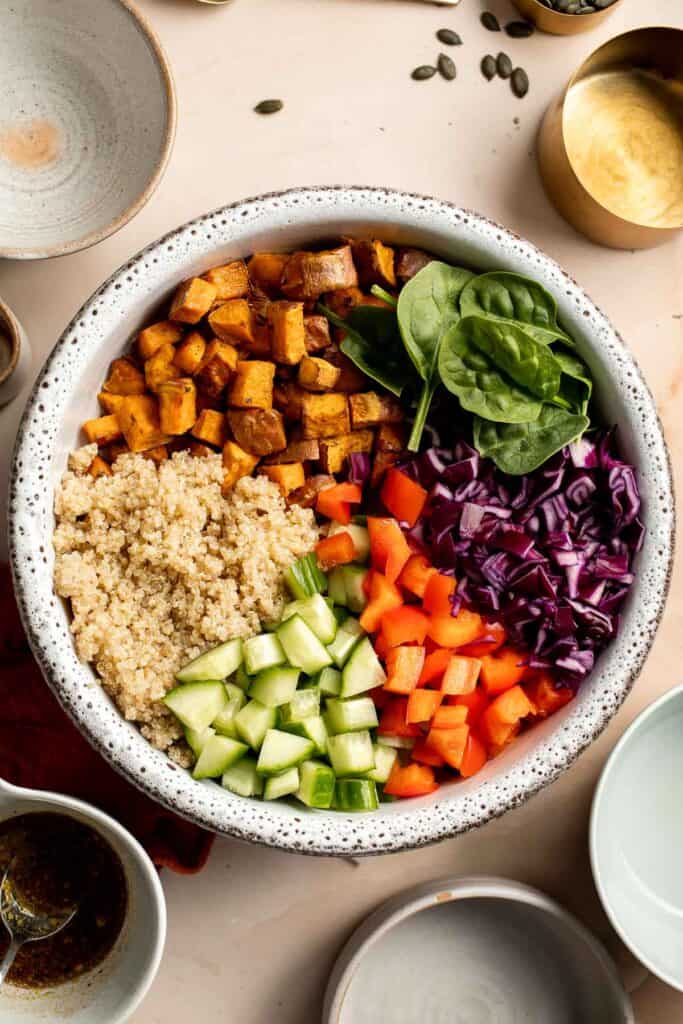
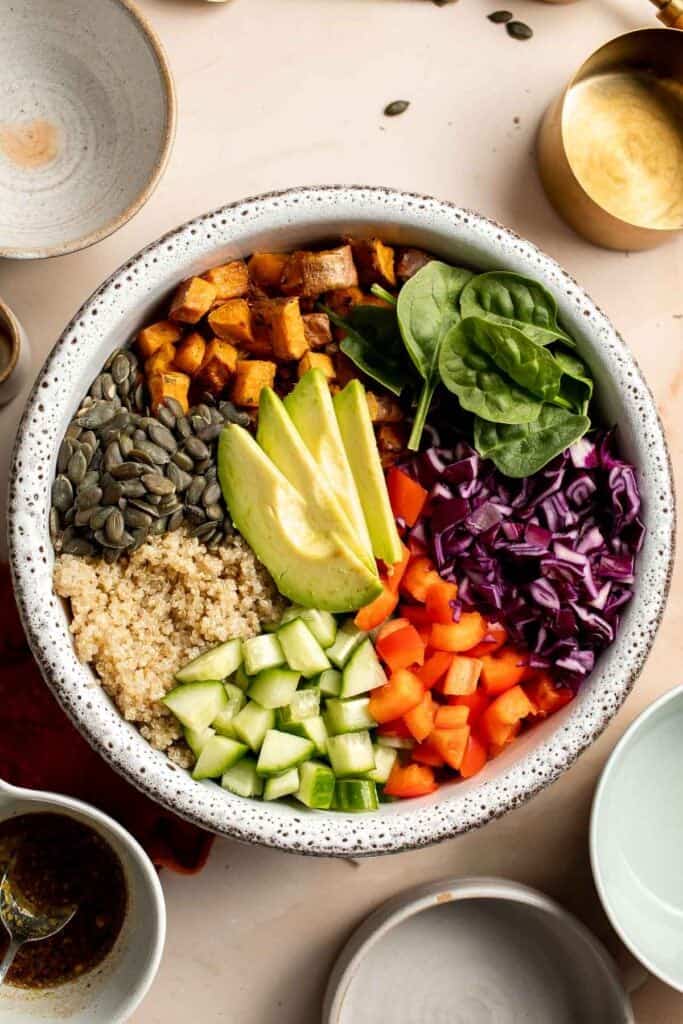
Finally, add dressing.
- Make the vinaigrette. In a small mixing bowl, whisk together balsamic vinegar, olive oil, dijon mustard, honey (or maple syrup), salt, and pepper until smooth.

- Drizzle. Drizzle the buddha bowl with the vinaigrette dressing and serve immediately.
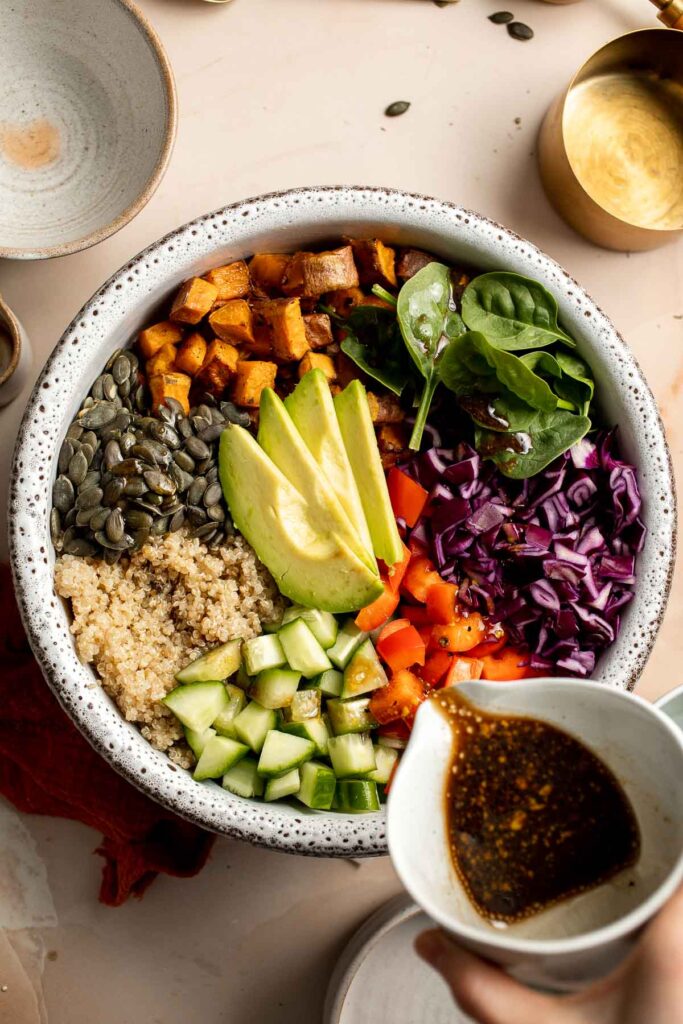
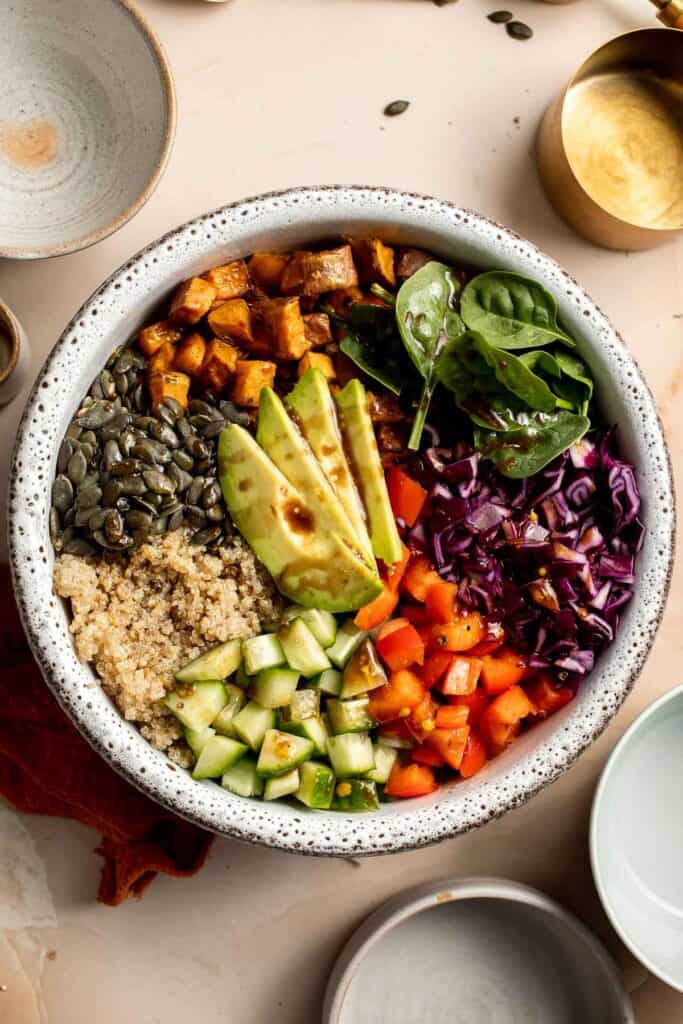
Recipe Variations
- Add more protein. Our main source of protein in these vegan buddha bowls are the quinoa and pumpkin seeds. You can take it up a notch by adding in another protein of your choice. Keep things vegan by topping them with tofu, tempeh, or edamame, or if you don't care to stick to plant based ingredients, you can use your favorite animal protein instead such as grilled chicken, beef, or salmon.
- Spice it up. Add a spicy kick to your Buddha Bowl by adding sliced jalapeños or a drizzle of hot sauce or spicy mayo.
- Change the grains. Buddha bowls are traditionally served with rice or noodles. But for a grain-free option, use cauliflower rice or quinoa instead.
- Add a crunchy element. Adding something crunchy like roasted nuts or seeds, crispy tofu, or crunchy veggies will give your bowl a complimentary texture.
- Change the dressing. We used a basic lemon vinaigrette. Try switching things up with a creamy tahini dressing, peanut sauce, or sesame dressing to add extra flavor.
- Mediterranean style. Give your Buddha Bowl a Mediterranean twist by adding chickpeas, cucumbers, tomatoes, kalamata olives, feta cheese, and a dollop of homemade tzatziki sauce or hummus.
- Asian style. Make an Asian-inspired Buddha Bowl by adding edamame, sliced avocado, carrots, cabbage, and a homemade peanut sauce.
How to Serve
This Buddha Bowl is a well-rounded meal containing grains, veggies, and protein. So, you can serve it on its own, or pair it with some complimentary side dishes including:
- Teriyaki Salmon
- Classic Hummus
- Sautéed Garlic Mushrooms
- Edamame
- Tofu and Mushroom Stir Fry
- Garlic Butter Shrimp
This recipe also doubles as a delicious side salad instead of individual entree grain bowls. Just toss all the ingredients in your favorite salad serving dish and serve with tongs.

Recipe Tips and Tricks
- Batch prep the ingredients. Want to get ahead? Batch prep ingredients ahead of time to make assembly easy when you're ready to eat. You can make the dressing and prepare the vegetables a few days ahead of time and refrigerate. You can also roast the sweet potatoes ahead of time and reheat before serving, or add them in cold.
- Use leftover ingredients. This recipe is a great one to use up any leftovers. If you have cooked quinoa on hand or leftover roasted sweet potatoes, use them instead of making from scratch!
- Experiment with different flavors. Don't be afraid to mix and match ingredients and flavors to find your perfect Buddha Bowl combination. Just try to choose a balance of ingredients - a mix of protein, grains, veggies, and healthy fats. This will give your bowl a variety of flavors, textures, and nutrients.
- Don't overcrowd your bowl. Be mindful of how much you're putting into your buddha bowl. Overcrowding can make it difficult to mix and enjoy all of the flavors and textures together.
Storing and Freezing Instructions
How to Store
Transfer Buddha Bowl leftovers to an airtight container and refrigerate for up to 5 days. Eat cold as a salad or reheat the sweet potato and quinoa separately in the microwave for 15-30 seconds before adding them to the other ingredients.
How to Freeze
It's not recommended to freeze the entire buddha bowl because some of the ingredients will lose structural integrity in the process, but you can freeze some of the ingredients separately (like the cooked sweet potato, the quinoa, and the dressing) for up to 3 months in individual airtight containers.
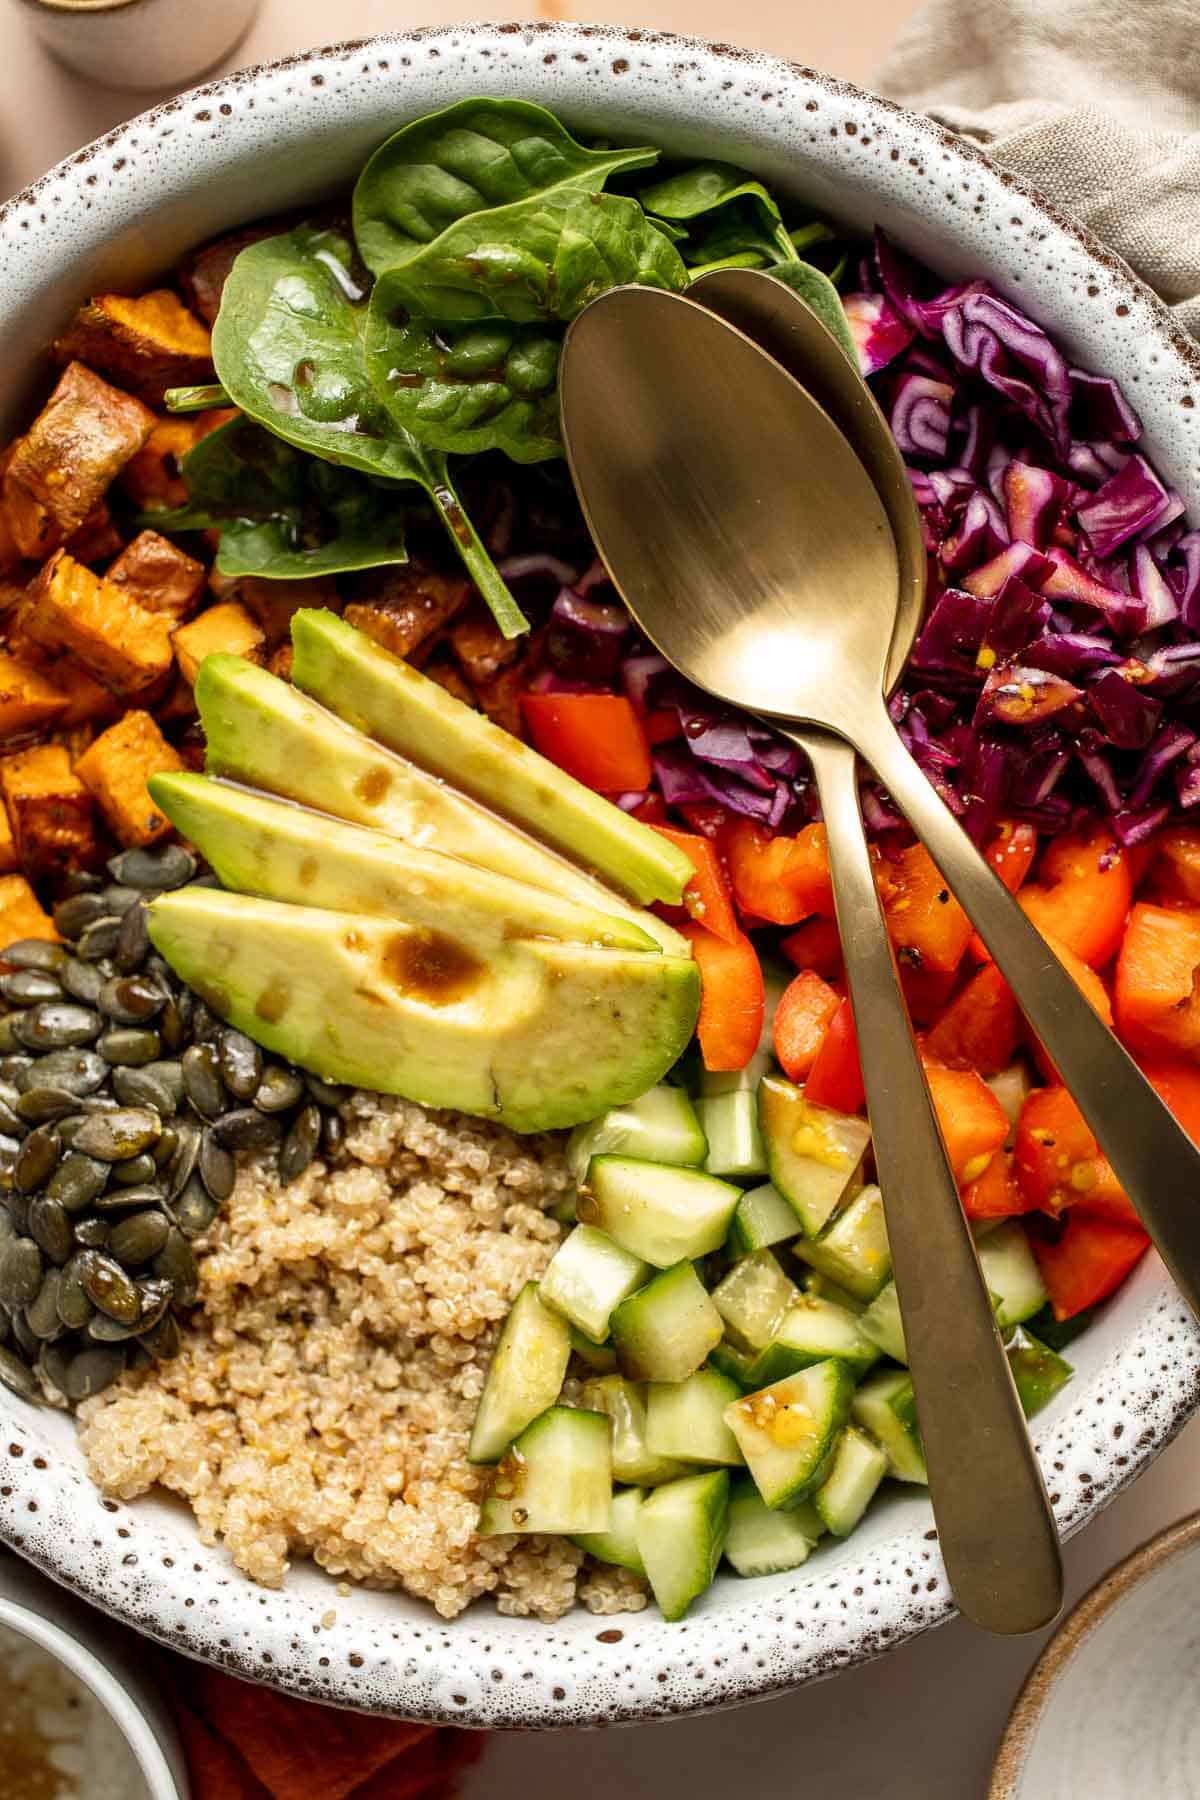
More Vegetarian Recipes
- 40 Easy Vegetarian Dinner Recipes
- Butternut Squash Quinoa Salad
- Vegetarian Bolognese (with Quinoa)
- Vegan Stuffed Peppers
- Chickpea Greek Salad
- Vegetarian Enchiladas
Tried this recipe?
I'd love to hear what you think! Leave a comment and rating below to share your feedback. Your reviews help others discover this recipe and help me keep creating more free recipes for you. Snap a photo and tag me on social media @aheadofthyme too.
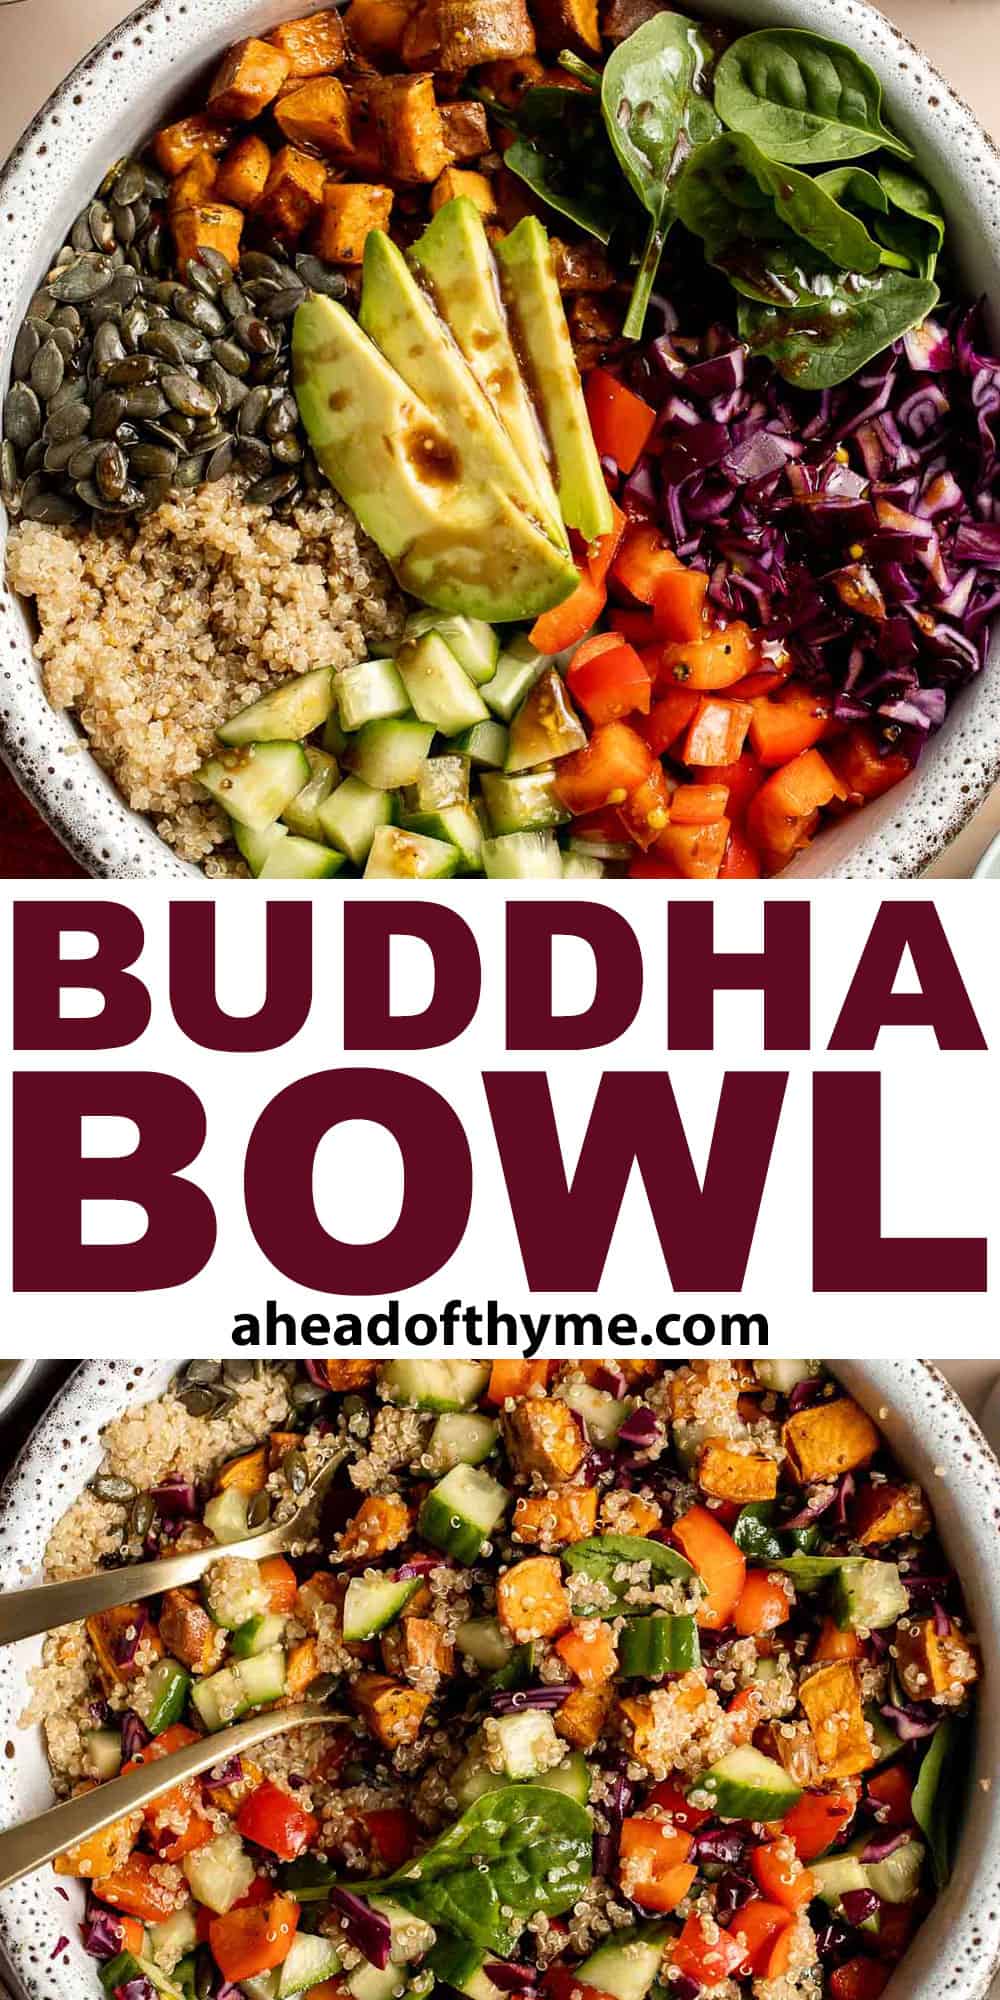
Homemade Taquitos
These Homemade Taquitos are crispy, delicious, and flavorful. Tender corn tortillas are filled with savory, well-seasoned ground beef and cheese and cooked until crisp on the outside, and gooey on the inside. These rolled tacos are easy to make at home right in your own kitchen - and can be fried or baked!

Serve these beef taquitos warm as an appetizer or as a main dish alongside some fresh guacamole or salsa for lunch or dinner. Your whole family will love them and you'll love how simple they are to prepare. With a recipe like this, you'll never want to order takeout taquitos again!
Why You'll Love these Homemade Taquitos
- Real ingredients. No artificial ingredients or preservatives in these cheesy taquitos. Just beef, hearty spices, real corn tortillas, cheese, and a handful of other wholesome ingredients are all you need to make these delicious beef taquitos.
- Quick and easy to make. This rolled taco recipe is easy to make with just a few simple steps. Cook the beef, season, fill the tortillas, and fry (or bake!). It takes about 10-15 minutes of prep time before they are ready to fry for about 10 minutes total (1-2 minutes per batch).
- The best texture and flavor. These homemade taquitos have the perfect balance of crispy and chewy texture with a tasty beef filling. Plus, they are seasoned with a variety of spices which gives them the best flavor. But you can totally customize the flavor by switching up the ingredients. See all our recipe variations below.
- Freezer-friendly. These homemade beef taquitos are perfect for making ahead for meal prep! They freeze and reheat well and they're healthier than store-bought freezer taquitos, so you can save time and effort on dinner on a later day by reheating a batch of these from your freezer stash.
- Restaurant quality. These beef taquitos are a perfect dupe for takeout! You'll never want to buy them from the freezer aisle or order out again once you try this foolproof recipe for restaurant-quality taquitos at home.

Ingredient Notes
To make these delicious Homemade Taquitos, you will need the following ingredients (full measurements in recipe card below):
Tortillas
- corn tortillas - corn tortillas are the traditional option for taquitos as they hold their shape well and become crispy when fried. If you don't have small ones available, you can cut large ones in half or just make larger taquitos.
Filling
- vegetable oil - you will need vegetable oil for cooking the beef and for deep frying the taquitos. We used avocado oil but any vegetable oil will work.
- ground beef - if you don't like red meat, you can also use ground turkey or ground chicken instead of beef.
- onion - white or yellow onion will work best for this recipe, but you can use whatever kind of onion you have on hand.
- garlic - fresh garlic is always the best choice for flavor, but you can also use pre-minced garlic, garlic paste, or garlic granules at a ratio of 1 teaspoon per clove called for in the recipe.
- cheddar cheese - you can also use Monterey jack cheese or a Tex Mex cheese blend that is pre-shredded or freshly grated at home - whatever is more convenient.
Seasoning
- tomato paste - tomato sauce or tomato puree can be used instead at a 1:1 ratio.
- ground cumin - if you don't have cumin on hand, use a taco seasoning mix.
- chili powder - chili powder can be substituted for a pinch of cayenne.
- paprika - if you need a swap for paprika, increase the amount of chili powder in the recipe.
- oregano - you can use fresh oregano for a stronger flavor or swap it with dried basil or parsley.
- salt and pepper
Toppings
- optional toppings - serve with your favorite toppings and sides such as sour cream, pico de gallo, guacamole, and cilantro.
You will also need measuring cups and spoons, a skillet, toothpicks, and a cooking pot (if frying) or sheet pan (if baking).
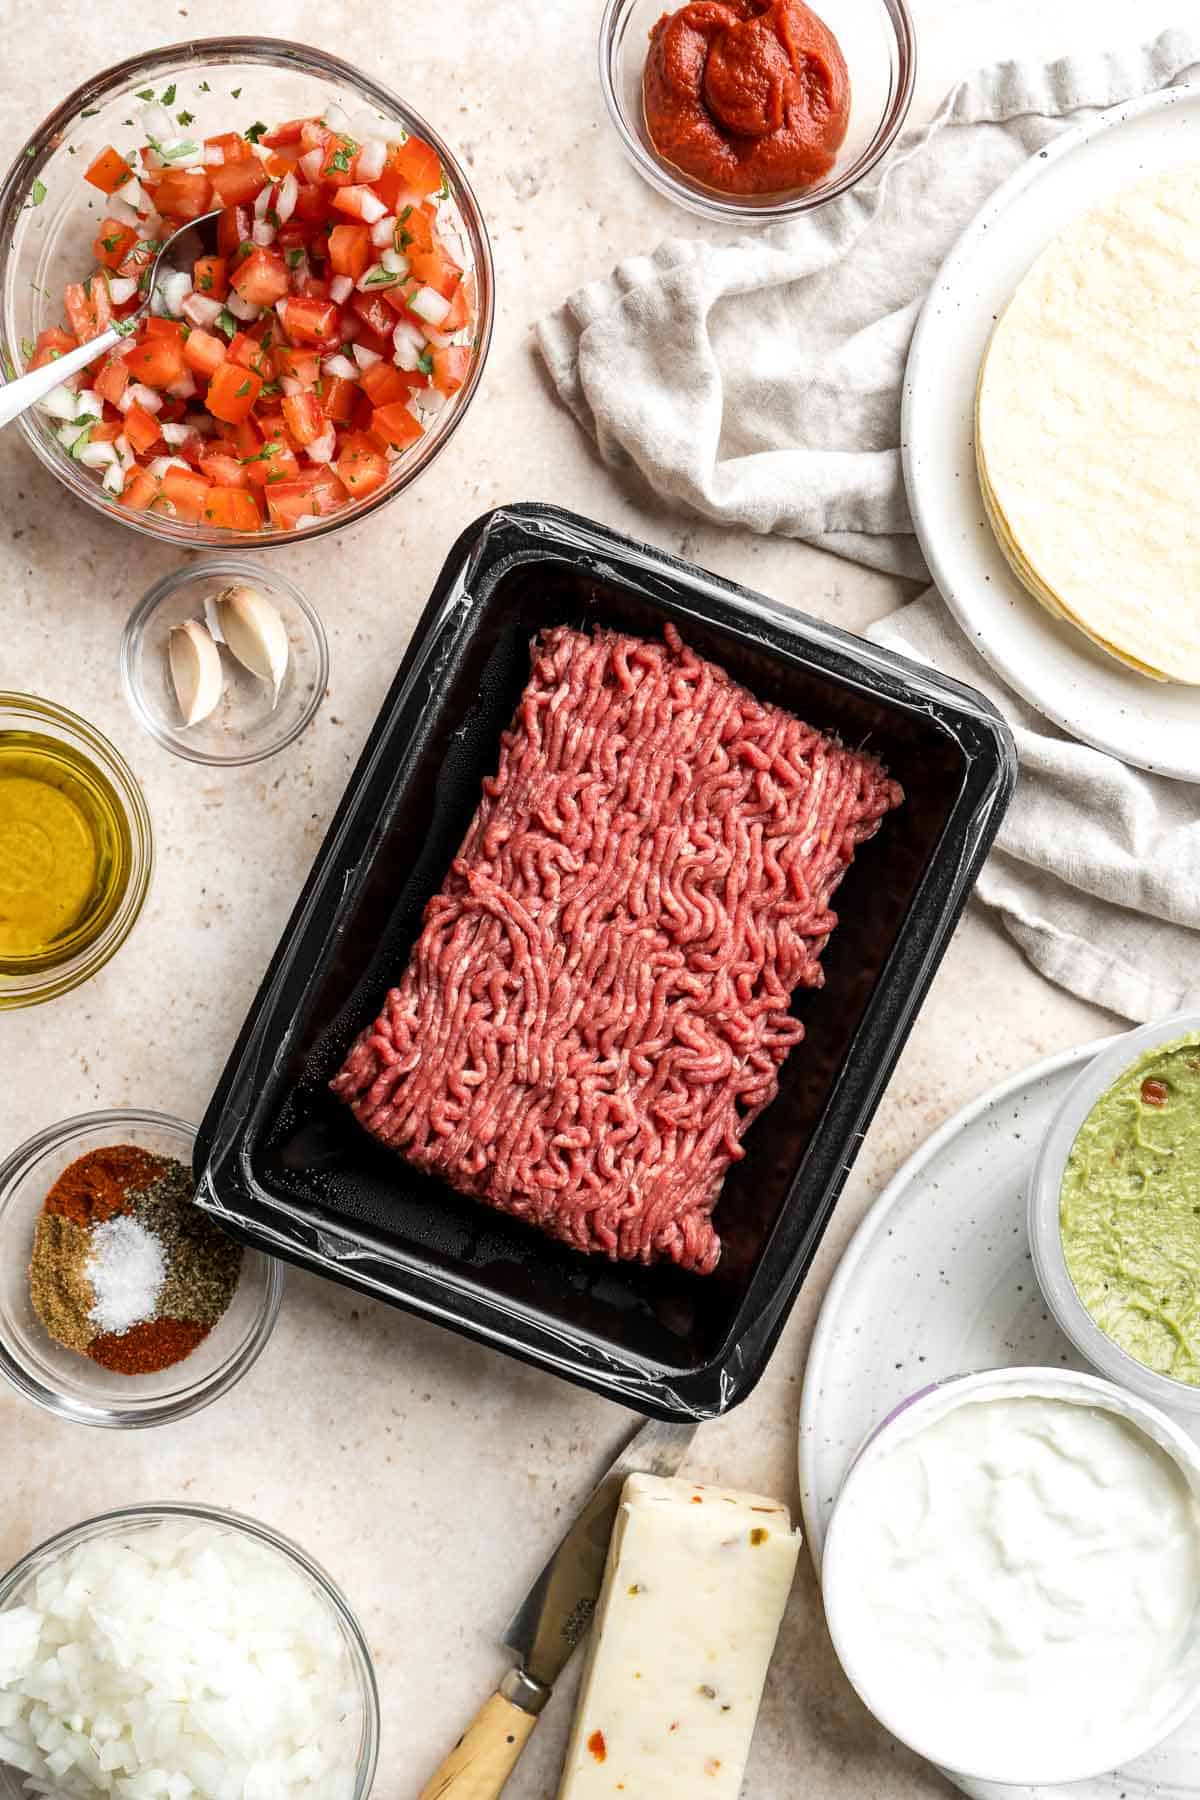
How to Make the Best Homemade Taquitos
First, make the cheesy beef filling.
- Cook beef. Heat oil in a large skillet over medium-high heat until hot, about 1 minute. Add ground beef and stir well to cook until browned evenly, about 6-8 minutes. Use a spatula to break up the beef into small pieces to help even browning.
- Add aromatics. Add onion and garlic and sauté until tender, about 2 minutes.

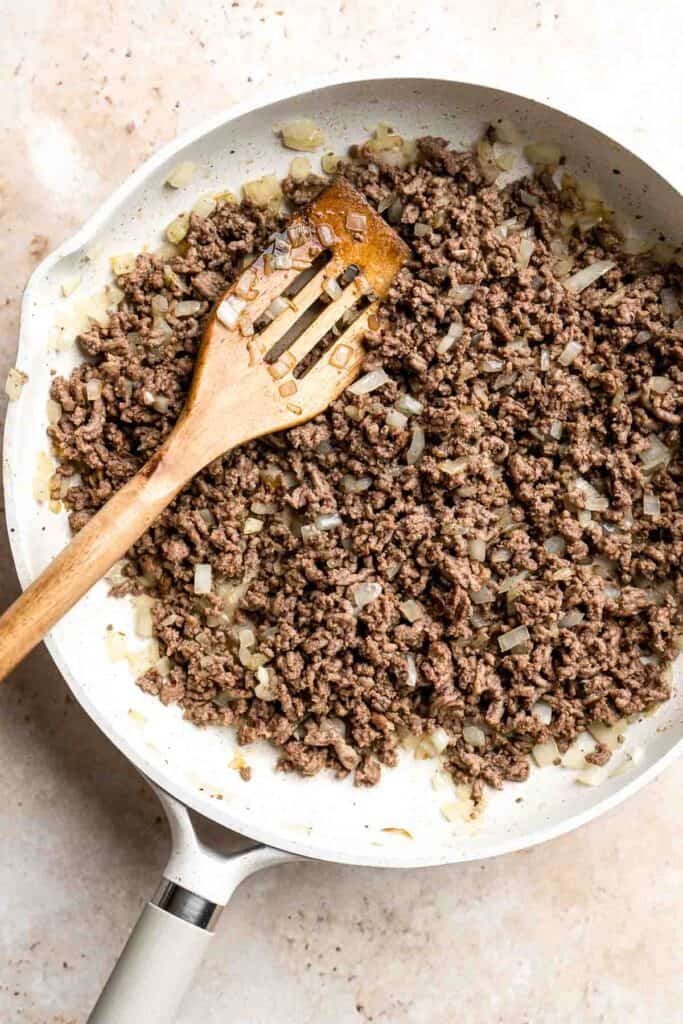
- Add seasoning. Stir in tomato paste, cumin, chili powder, paprika, oregano, salt, and pepper. Mix well until evenly distributed and combined.
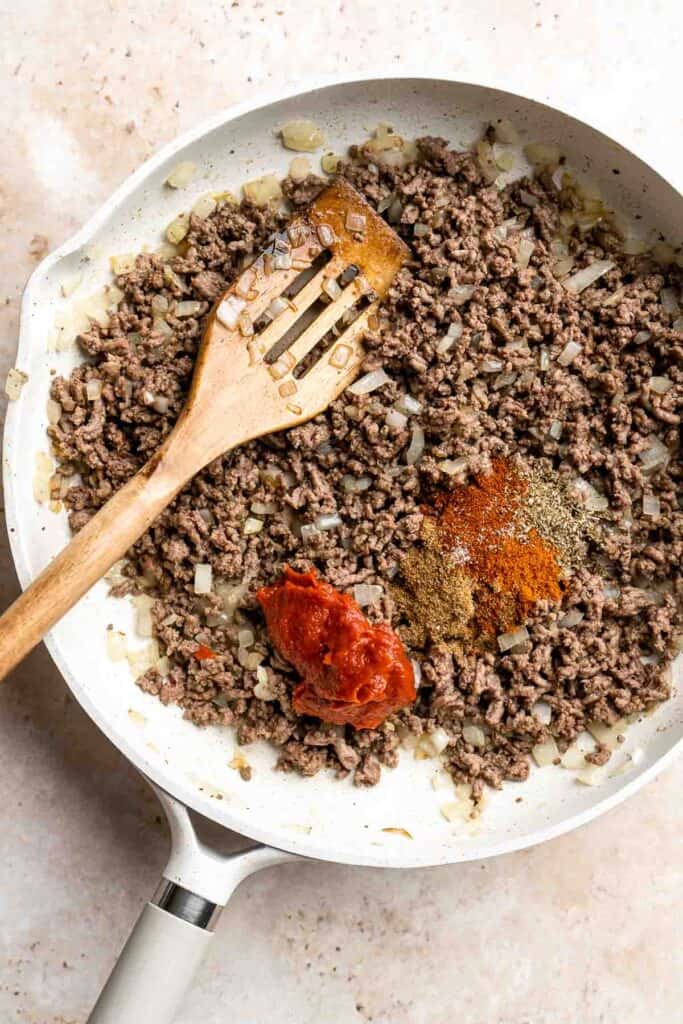
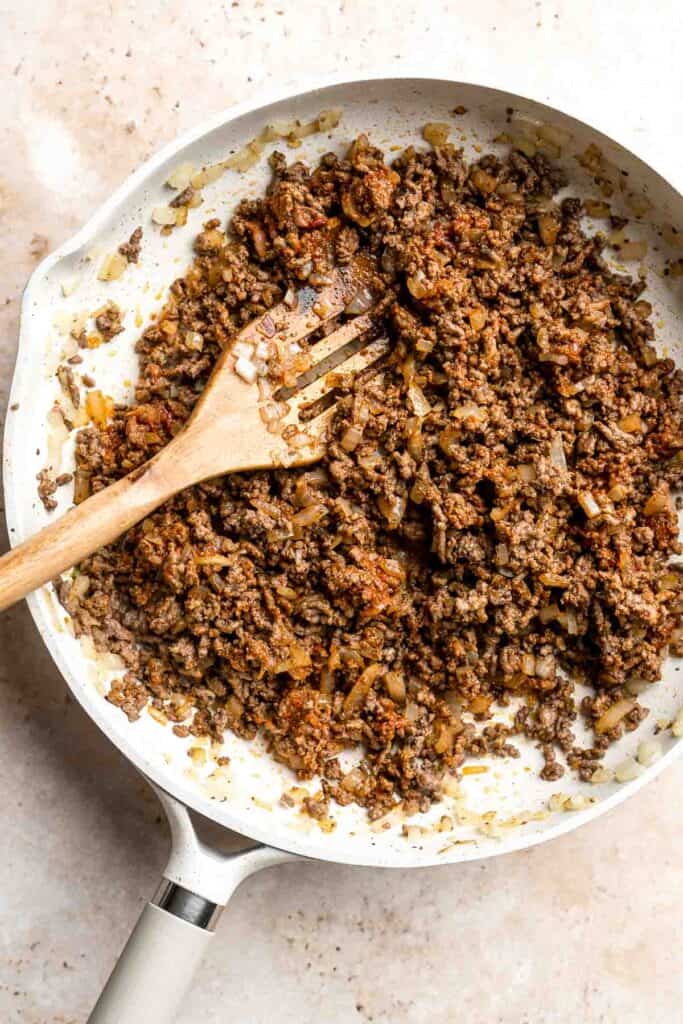
- Add cheese. Turn off the heat and stir in cheese. Mix well until the cheese has melted.
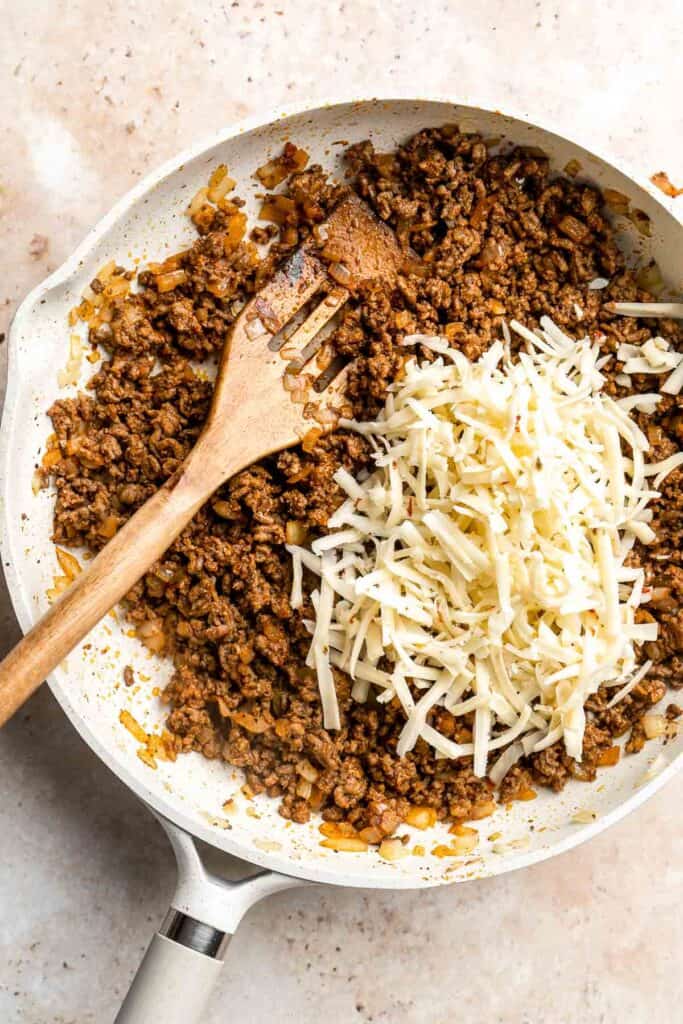
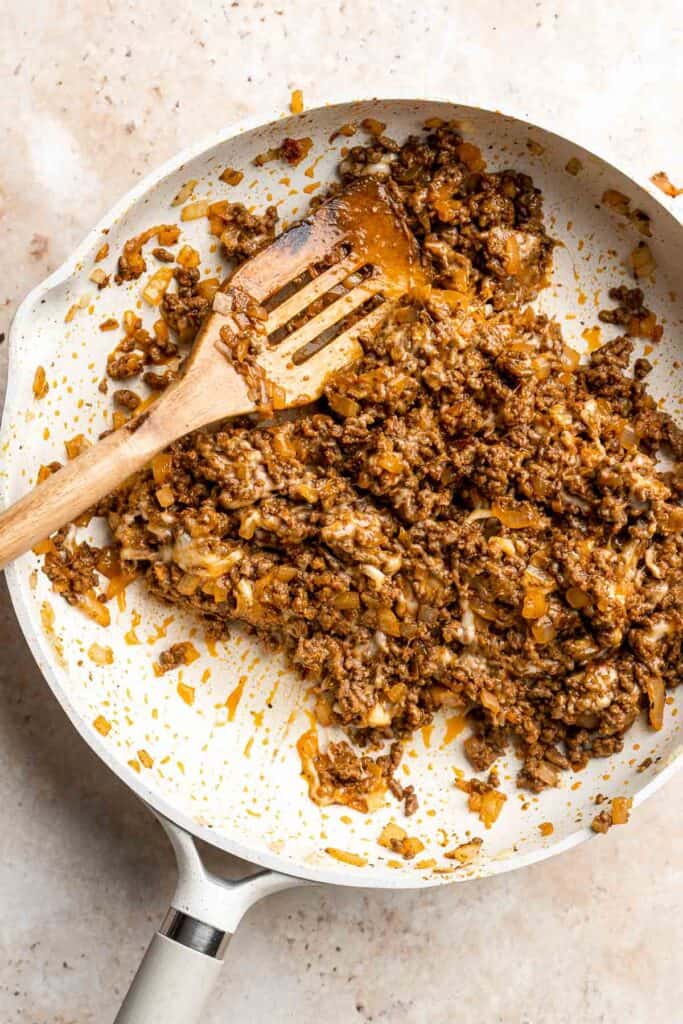
Next, assemble the taquitos.
- Warm the tortillas. Microwave the corn tortillas for 30 seconds until softened (this will make them pliable and more easy to work with). You can also warm the tortillas on a large skillet over medium heat for 30 seconds on each side.
- Assemble. Add 2-3 tablespoons of the beef mixture down the centre of each tortilla and tightly roll it up.
- Secure. Secure it tightly by threading a toothpick lengthwise along the seam in the middle of the rolled taquitos.
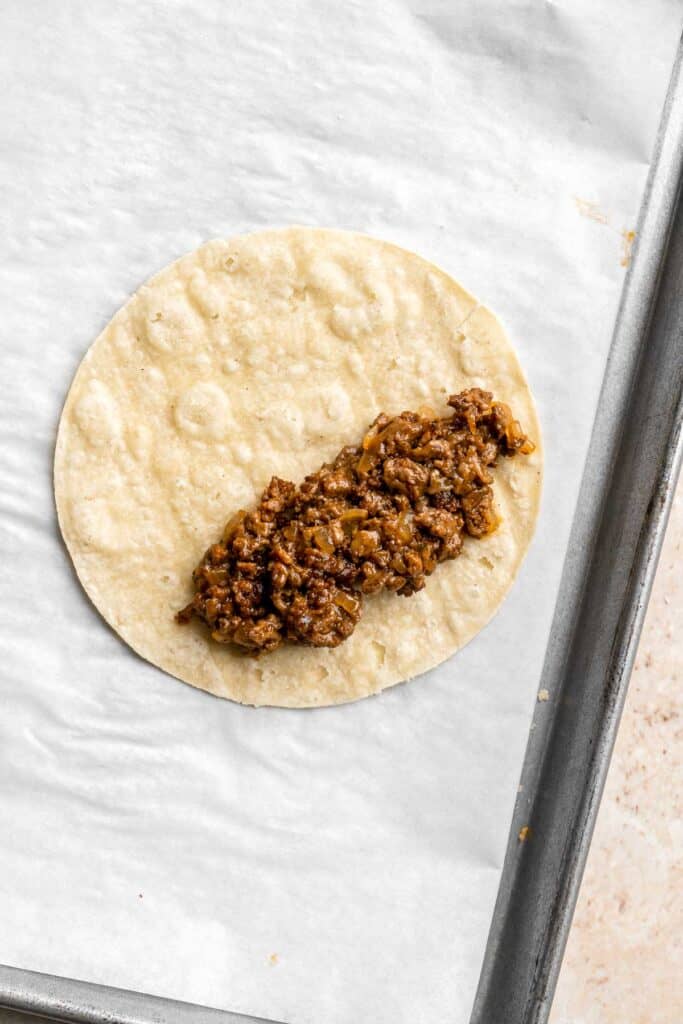
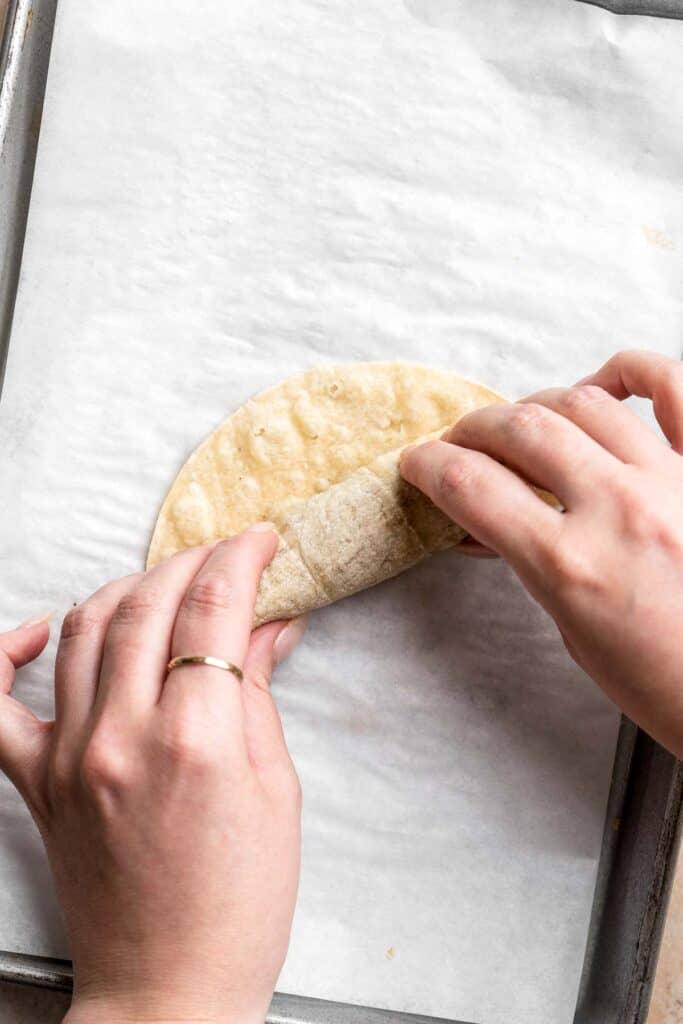
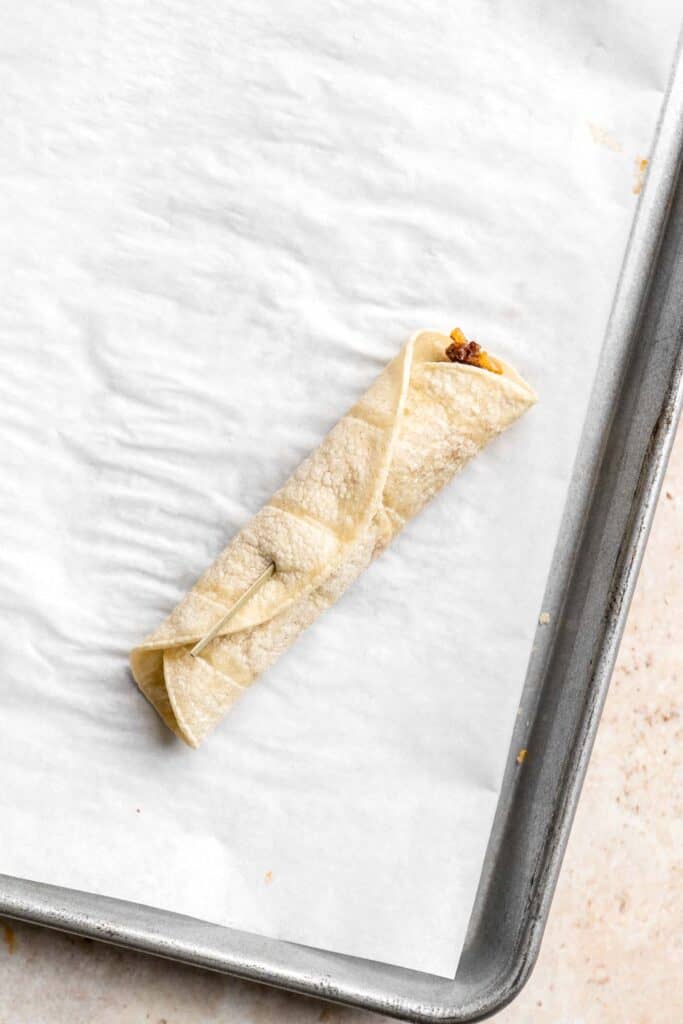
Finally, cook the taquitos.
You can cook the taquitos by frying them or baking in the oven.
How to Fry Taquitos
- Heat the oil. In a medium cooking pot, add enough oil to cover it at least 2-inches deep. Heat the oil over medium-high heat for 3-4 minutes until the oil is shimmering hot. You can test if the oil is hot enough by placing a small piece of tortilla in the hot oil. If it sizzles, it is ready.
- Fry. Deep fry the sealed taquitos in batches (about 2-3 pieces each time) until golden brown on all sides, about 1-2 minutes. Rotate the taquitos during cooking to get an even golden crust on all sides.
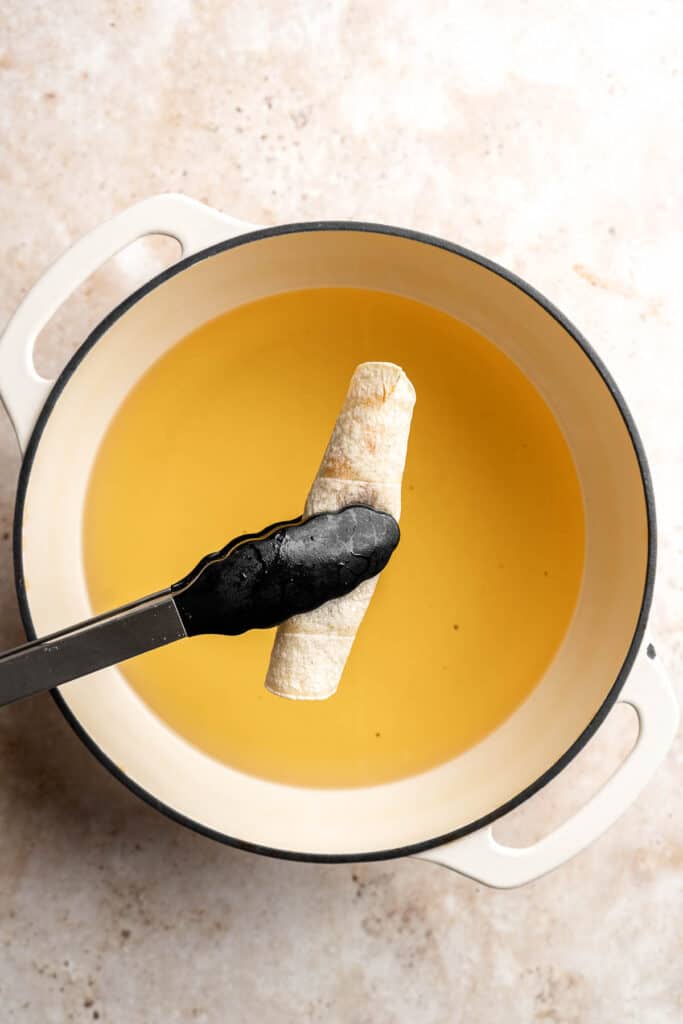
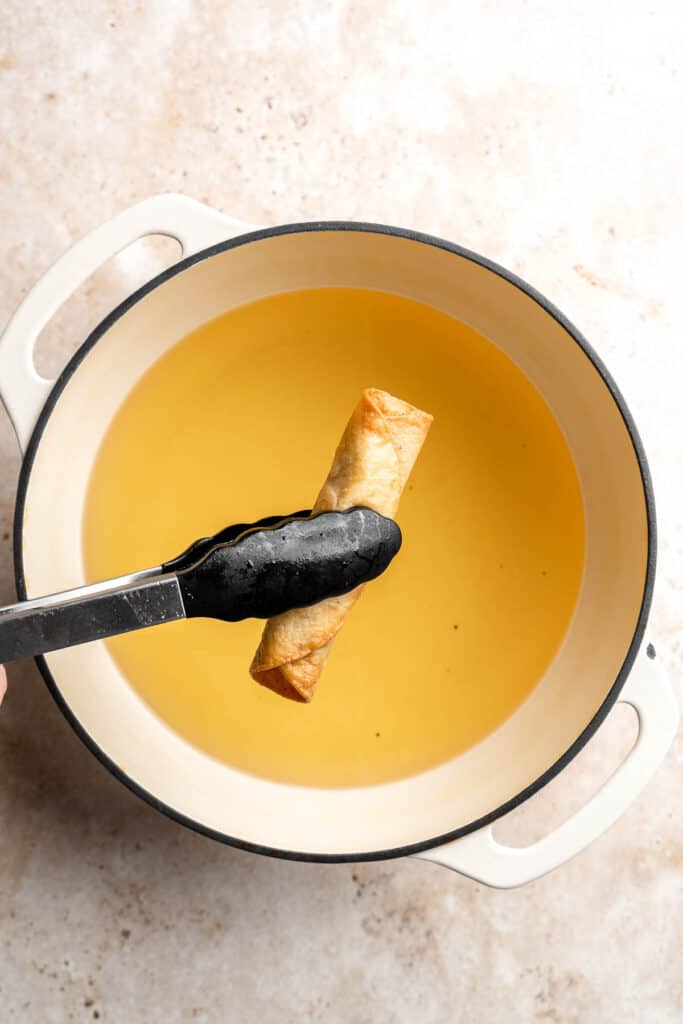
- Cool. Transfer the taquitos onto a paper towel lined plate to drain any excess oil. Let them cool for 5 minutes before serving.
How to Bake Taquitos in the Oven
To bake the taquitos instead, preheat the oven to 425F. Spray cooking oil evenly over a large baking sheet and arrange the taquitos (seam side down) spaced evenly apart. Spray more cooking oil on top of the taquitos. Bake for 15-18 minutes, or until golden brown and crispy.
Serve the taquitos with your favorite toppings such as a drizzle of sour cream, chopped tomatoes, cilantro, and cotija cheese. It also pairs well with pico de gallo and guacamole on the side.
Recipe Variations
- Change the protein. Instead of ground beef, use leftover shredded beef, shredded chicken, or pulled pork. You can also use ground turkey or chicken.
- Make it vegetarian. Swap out the beef filling for a mixture of black beans, sautéed veggies like bell peppers, onions, and zucchini for a delicious vegetarian alternative.
- Spice it up. Add some heat to your taquitos by mixing in some diced jalapeños or adding extra chili powder to the beef filling.
- Add beans. Add a can of black or pinto beans to the beef filling to add some extra protein and fiber.
- Get creative with toppings. Add some toppings to your taquitos such as shredded cheese, diced tomatoes, onions, jalapeños, or cilantro for extra flavor and texture.
How to Serve
Beef Taquitos are delicious served on their own as an appetizer with a dipping sauce like guacamole, queso, or mango salsa, or pair them with some delicious Mexican side dishes including:
- Mexican Street Corn Salad
- Refried Beans
- Cilantro Lime Rice
- Chicken Tortilla Soup
- Sheet Pan Nachos
- Grilled Corn on the Cob
For more, see our collection of 25 Mexican Side Dishes.

Recipe Tips and Tricks
- Warm the tortillas. You may be tempted to skip warming the tortillas, but without this important step, cold tortillas will break as you roll them and the filling will spill out. After warming them in a microwave or skillet, cover them with a clean kitchen towel and work quickly to make sure they're still warm and pliable when you wrap them up.
- Seal the taquitos. Make sure to seal the taquitos tightly with a toothpick along the seams to prevent them from falling apart during frying. If you are baking the taquitos (and don't have toothpicks handy, then place them seam-side down on the baking sheet so that the weight of the filling can keep the edges sealed!
- Use enough oil. Make sure the taquitos are completely submerged in hot oil to ensure they cook evenly and become crispy. We recommend to fill your cooking pot with oil at least 2-inches deep.
- Serve with dipping sauces. Guacamole, homemade salsa, hot sauce, or even ketchup can make these delectable taquitos even more appealing to younger diners that are inclined to treat them like finger food.
Storing and Freezing Instructions
How to Store
Store leftover taquitos in an airtight container and refrigerate for up to 5 days.
How to Reheat
Reheat taquitos in a 350F preheated oven for 10-12 minutes, or in the air fryer at 350F for 3-5 minutes until warm and crispy. Make sure to check the taquitos while reheating to avoid burning or overcooking them.
How to Freeze
Arrange the taquitos on a large baking sheet lined with parchment paper and freeze for 1-2 hours or until frozen solid. Transfer the frozen taquitos to an airtight container or freezer bag and freeze for up to 3 months. Reheat straight from frozen in the oven at 400℉ for 12-15 minutes, or in the air fryer at 400F for 8-10 minutes.
More Mexican Recipes with Tortillas
- 30 Mexican Recipes
- Baked Chicken Quesadillas
- Ground Beef Tacos
- Shrimp Fajitas
- Cheese Quesadilla
- Tortilla Strips
Tried this recipe?
I'd love to hear what you think! Leave a comment and rating below to share your feedback. Your reviews help others discover this recipe and help me keep creating more free recipes for you. Snap a photo and tag me on social media @aheadofthyme too.

40+ Best Brunch Ideas

An epic brunch spread is my favorite way to start the day on a slow weekend morning. So if you are looking for some delicious brunch recipes to make in your home, then you are in luck! We are sharing over 40 best brunch ideas from classic breakfast staples like pancakes and eggs, to more modern recipes like avocado toast and buddha bowls, to sweet treats like French toast and cinnamon rolls, and more!

Whether you're feeding a crowd or just looking for something special to make for yourself, we've got you covered with these mouth-watering brunch recipes. And if you're looking for vegetarian, gluten-free, or kid-friendly options, we've got you covered too. So put on your comfy clothes and get ready to create a brunch menu that's just right.
Best Brunch Ideas
Classic deviled eggs are a simple and easy to whip up, a delicious Easter brunch recipe, or a go-to appetizer for lunch. It's perfect for a party or picnic too.
There's nothing better in the morning than thick, soft, fluffy blueberry pancakes, loaded with fresh berries, topped with butter, and soaked in maple syrup.
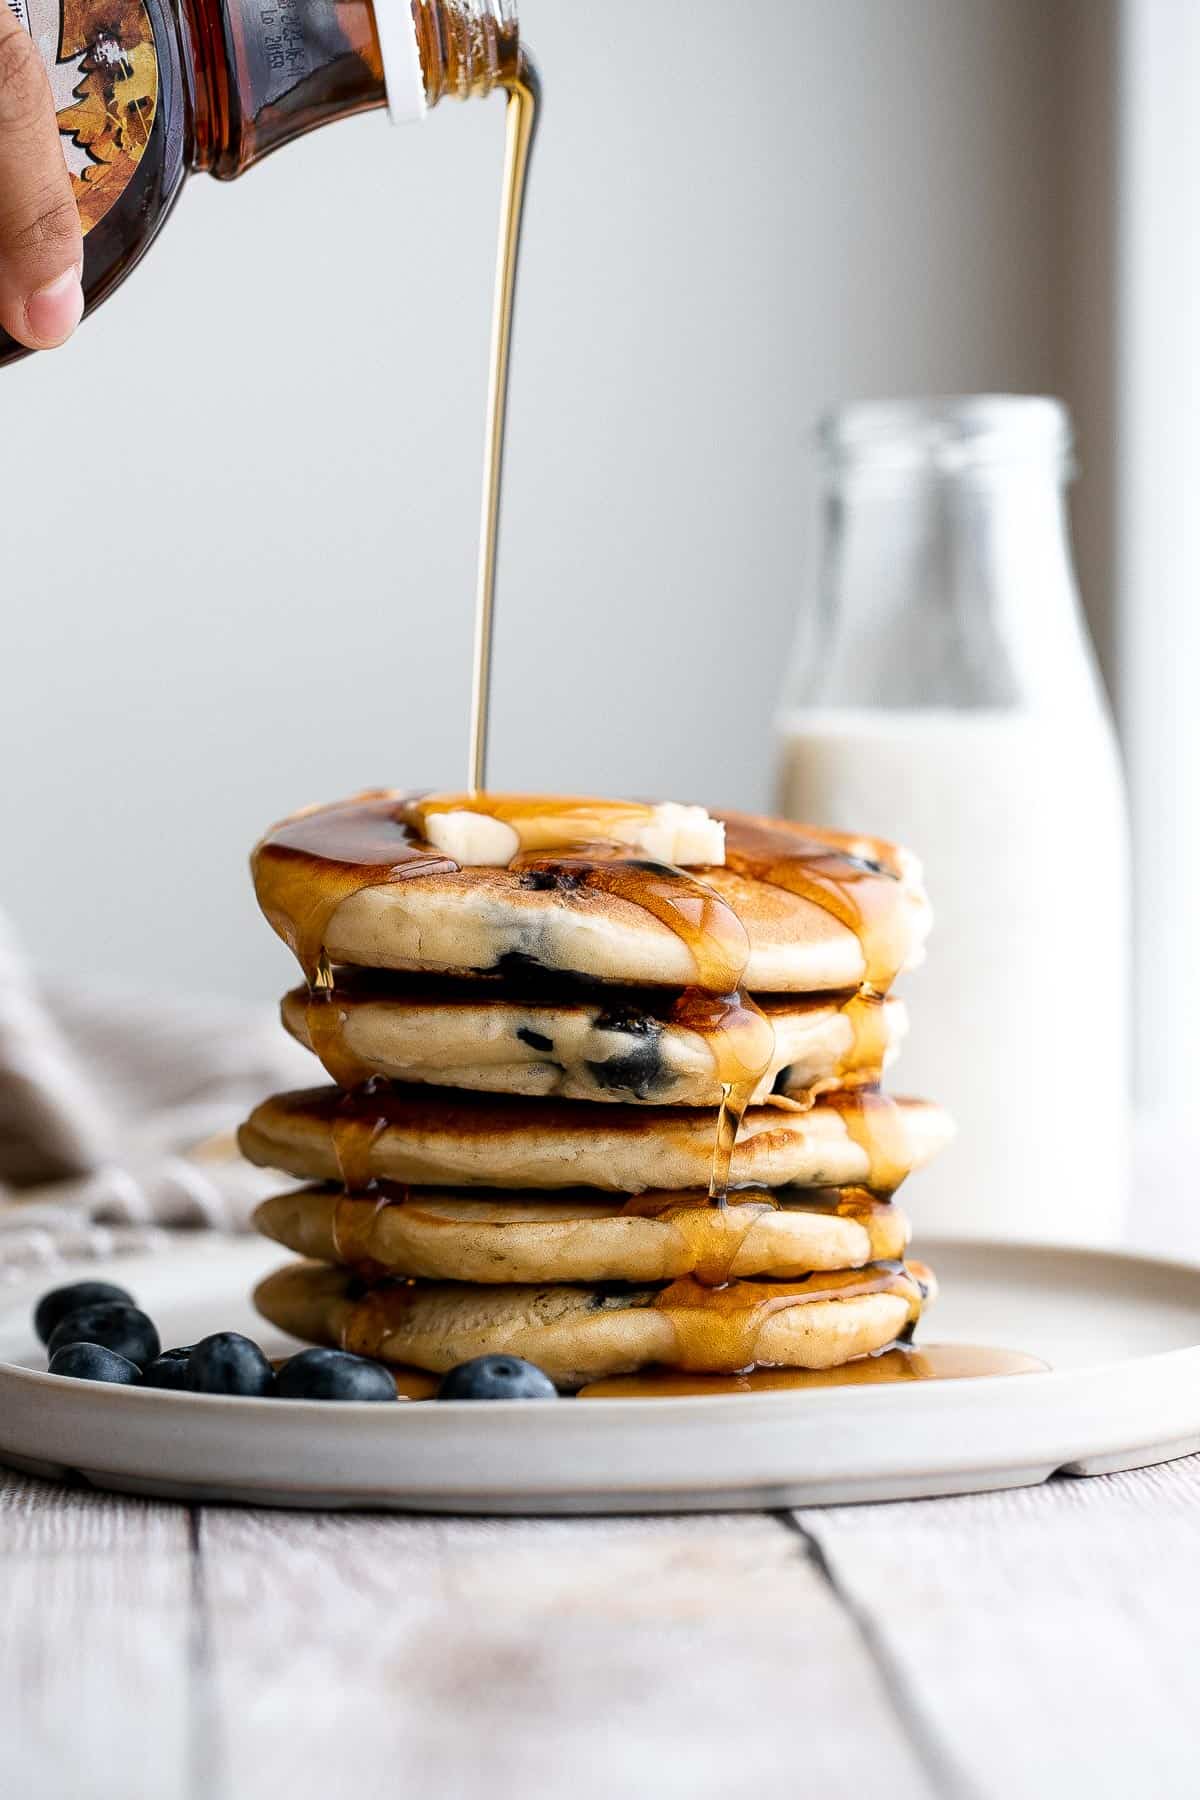
Breakfast Potatoes are crispy on the outside while soft and tender inside. These skillet potatoes are delicious, flavorful, and ready in 30 minutes.
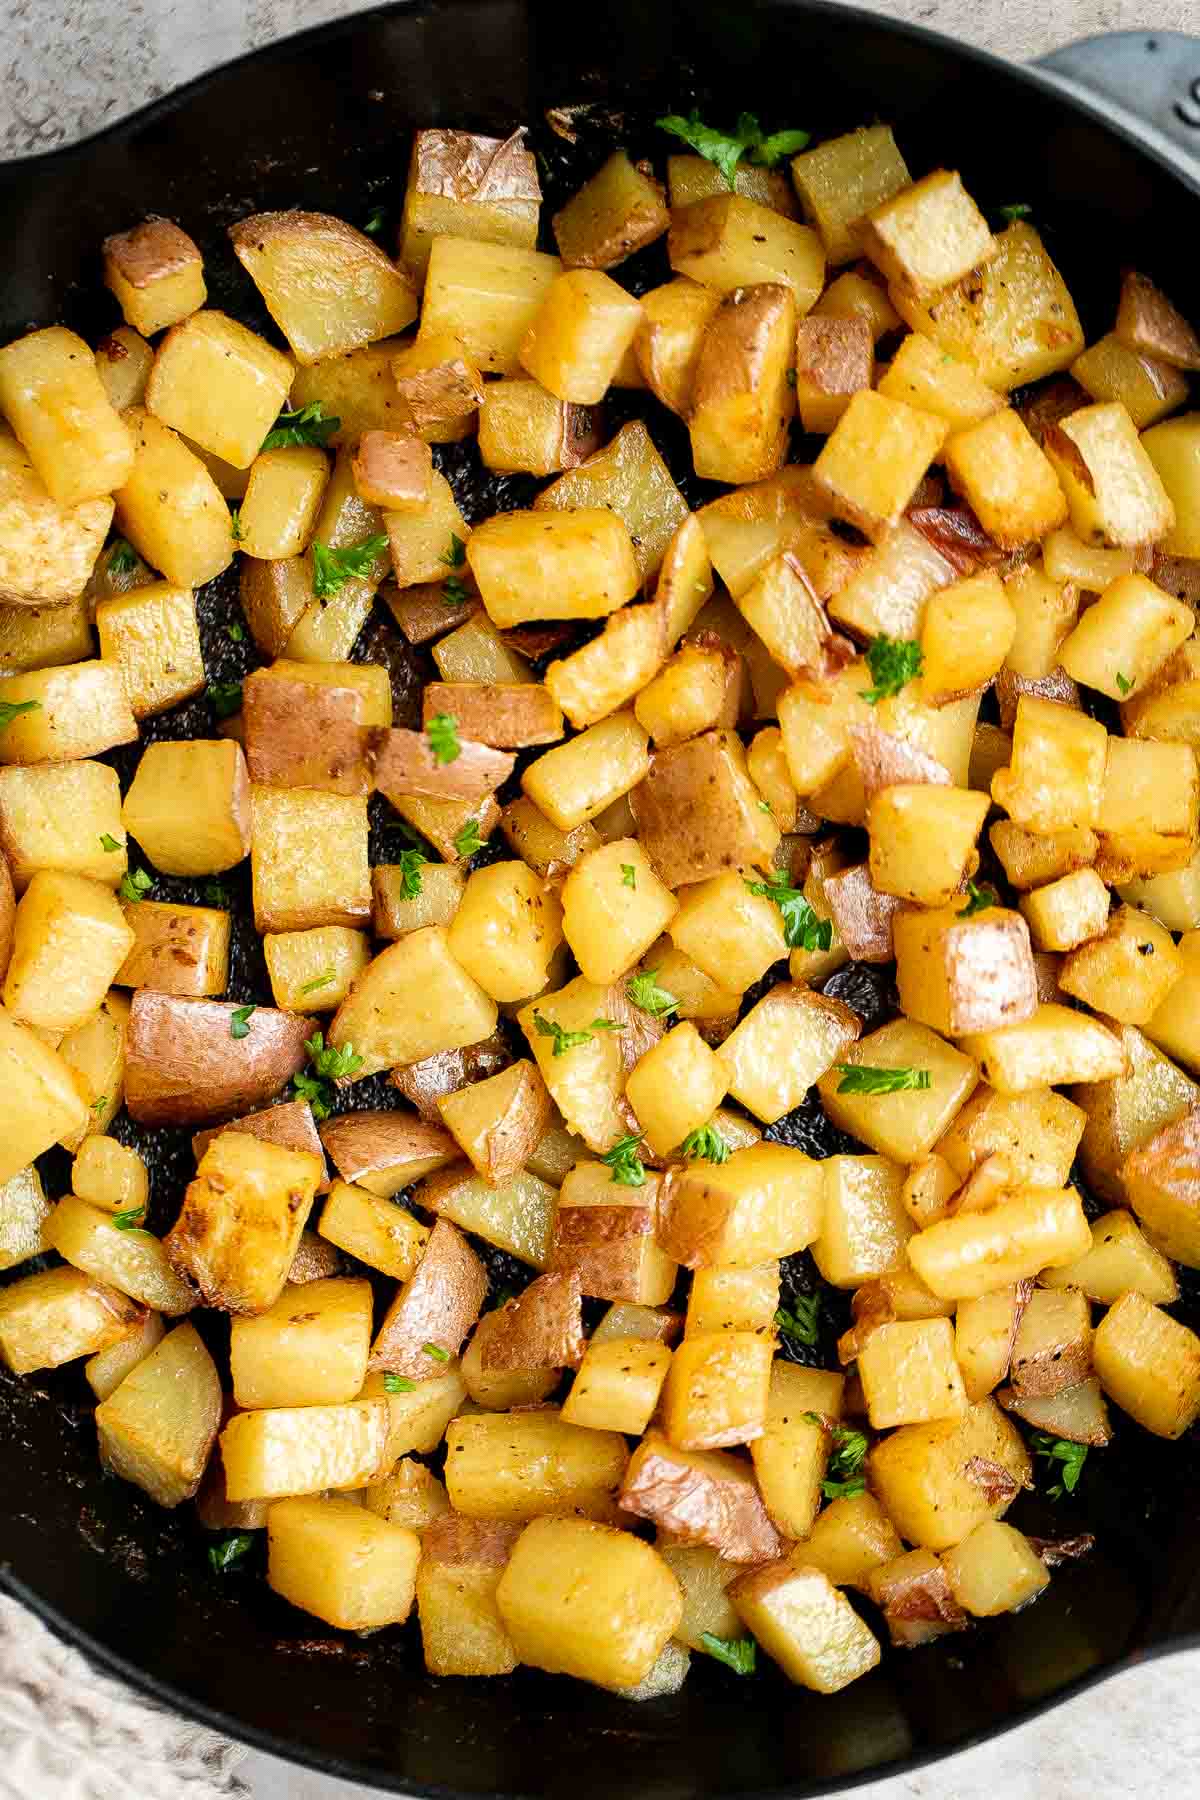
Breakfast Strata is a hearty baked casserole dish loaded with bread, eggs, ham, cheese, and veggies that will keep you full until lunchtime.
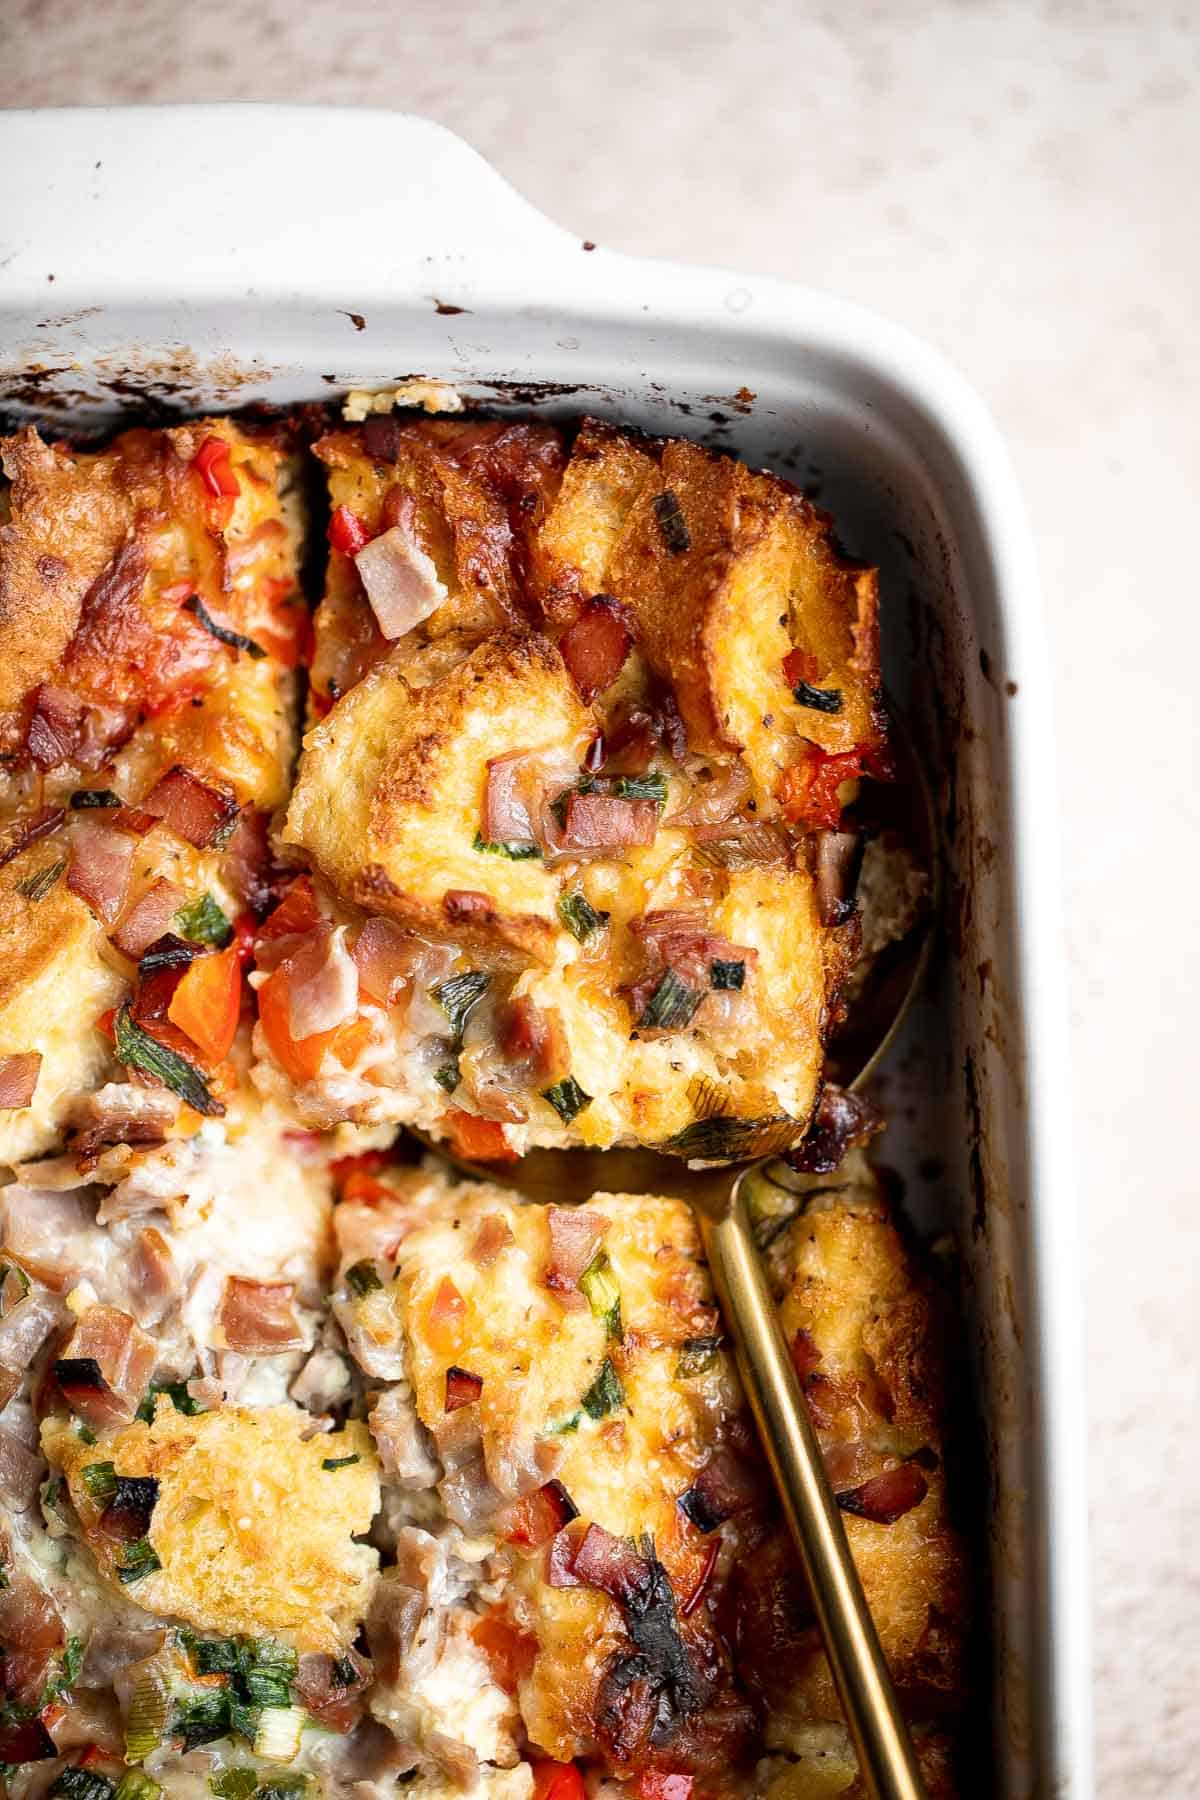
Huevos Rancheros is a classic Mexican breakfast dish that features fried eggs perched atop a bed of warm tortillas and beans and topped with salsa.
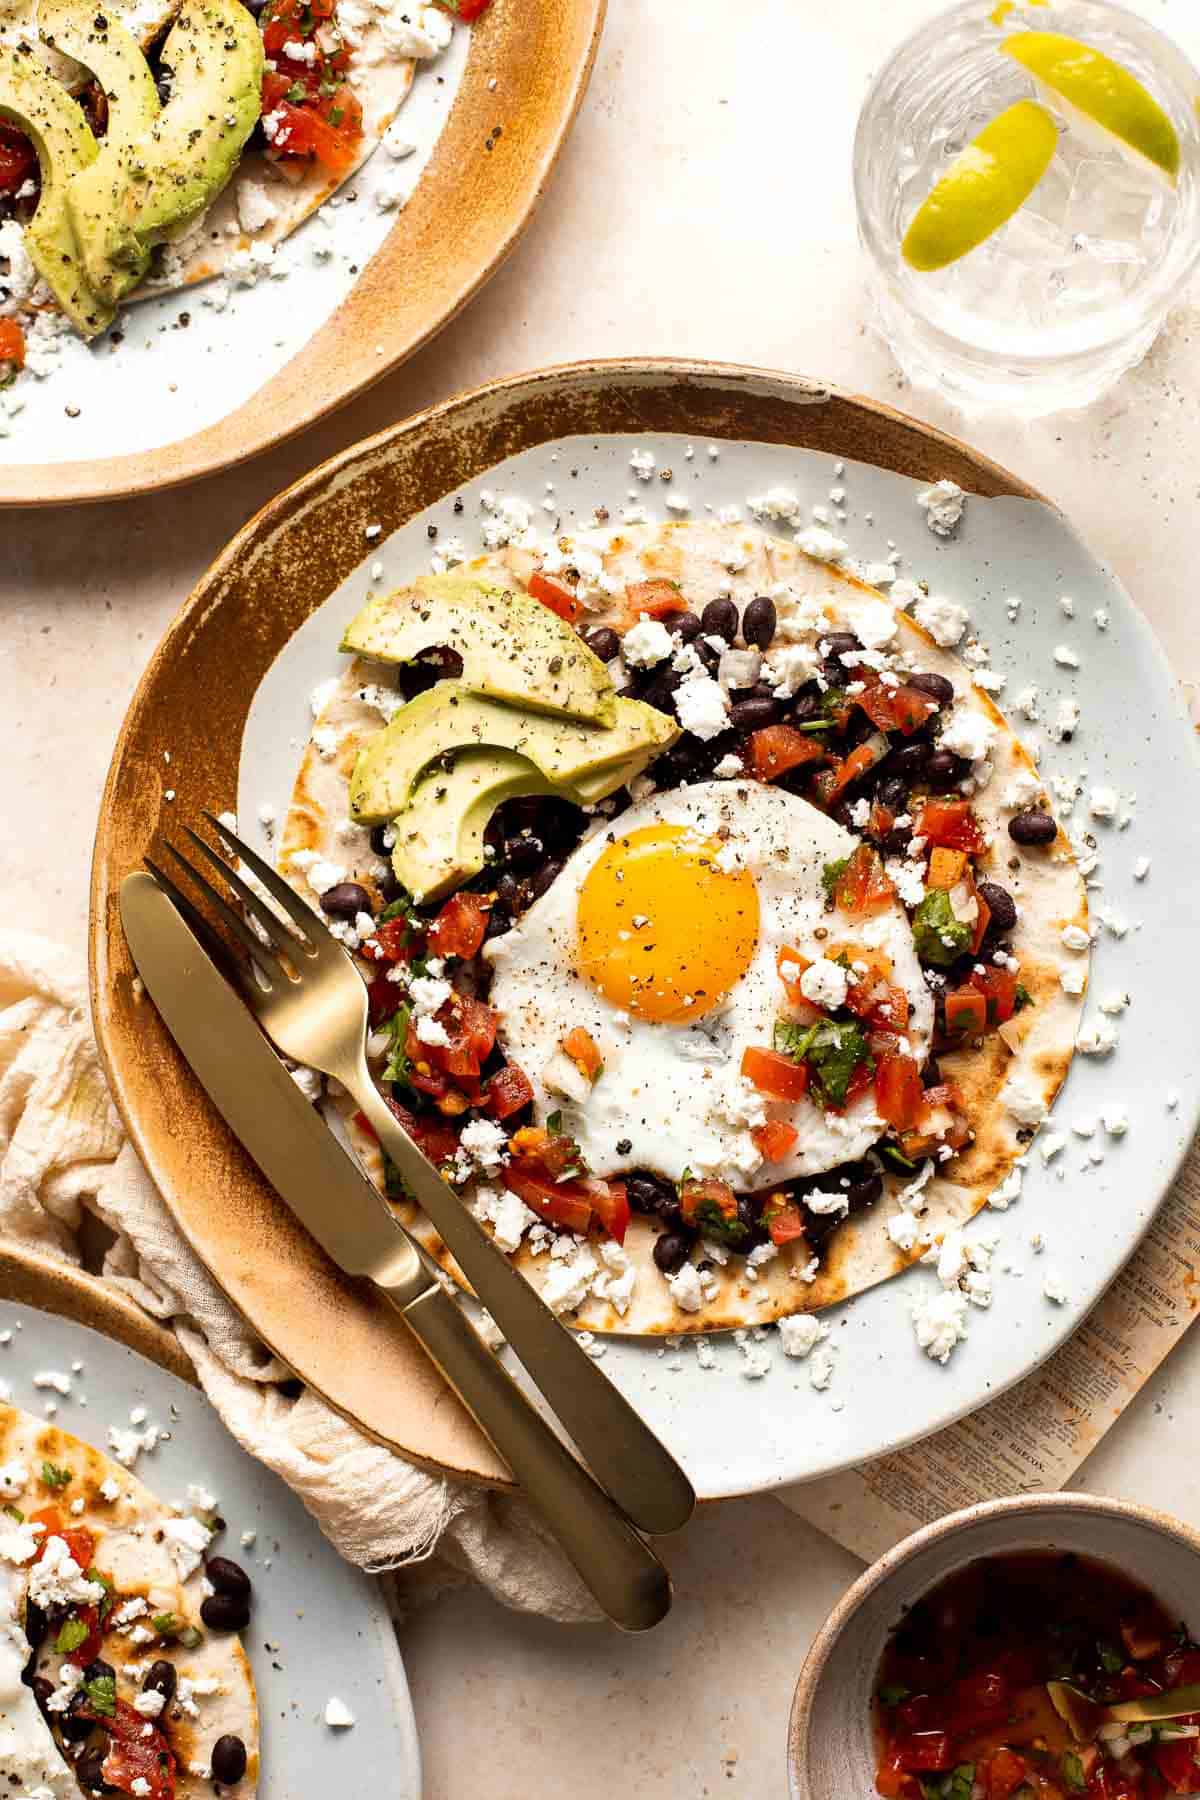
Chia Seed Pudding is creamy, delicious, and healthy, loaded with protein, fiber, antioxidants, and healthy fats. Plus, it's easy to make with 3 ingredients.

Soft and fluffy skillet cinnamon rolls are filled with classic cinnamon sugar and topped with homemade cream cheese icing. Sweet, buttery, and delicious.
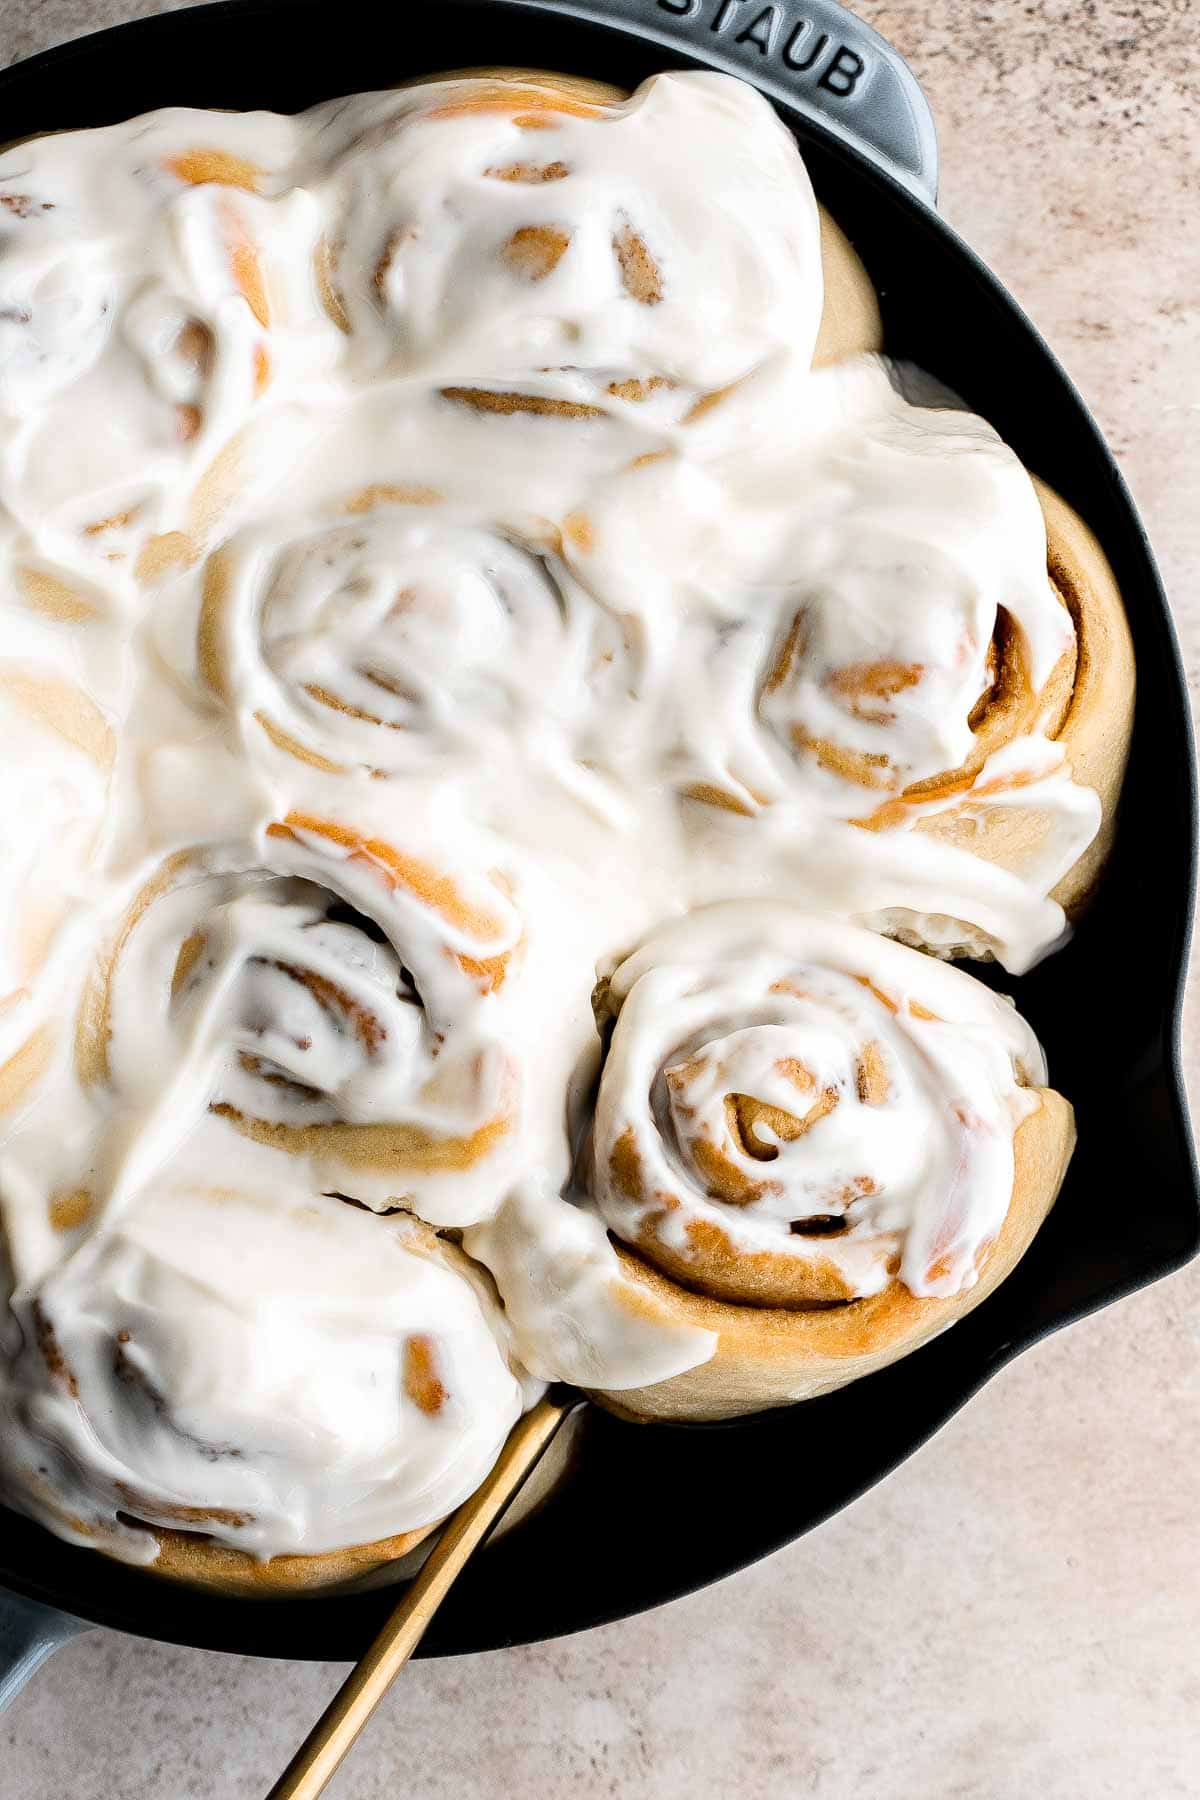
Spinach Quiche is a golden, savory classic with a tender flaky crust and a rich, creamy egg filling that's packed with flavor. Surprisingly easy to make!
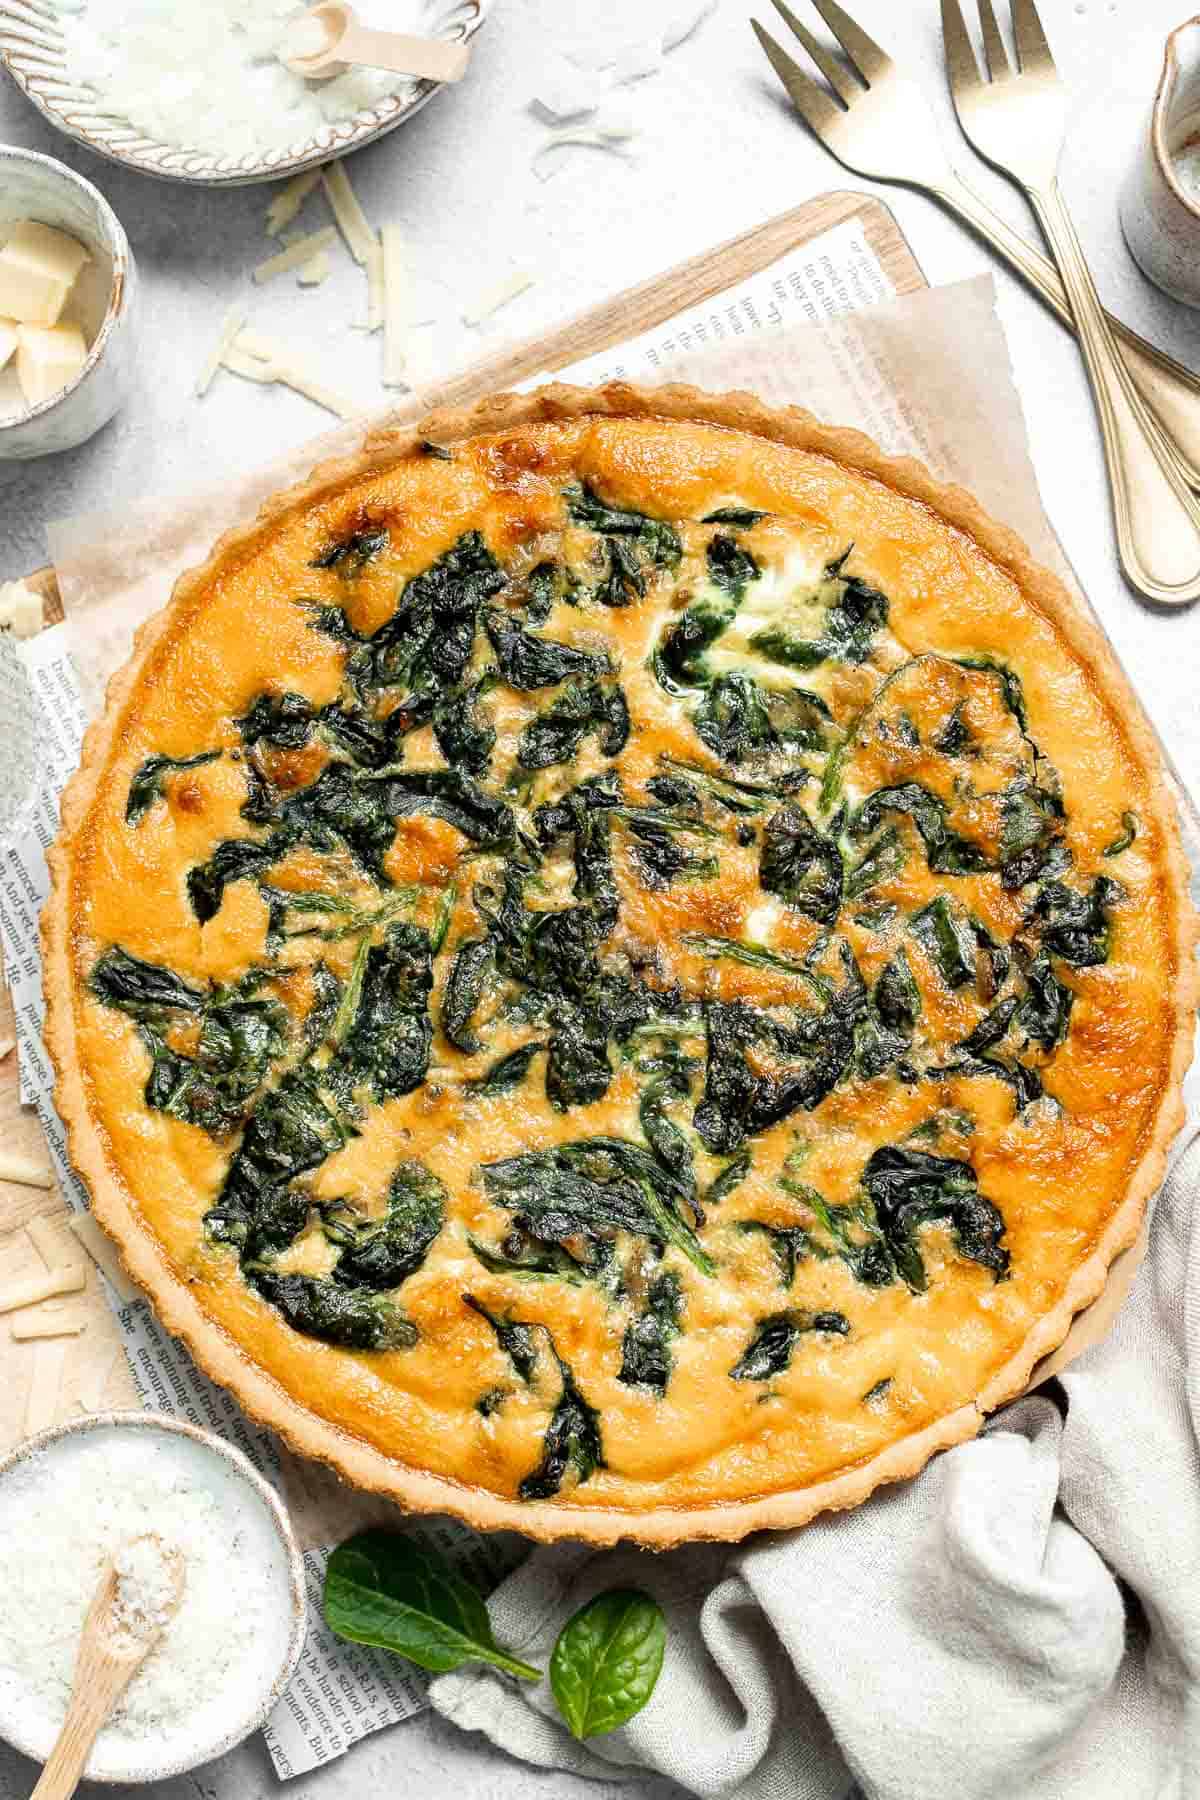
Quick and Easy Butter Croissants
Quick and easy butter croissants are flaky, buttery, airy, and authentic, and are made in the fraction of the time using a special simplified technique. One of my favorite Easter breakfast recipes.

Caprese Frittata is light and fluffy, laced with fresh basil and topped with melted mozzarella cheese and blistered balsamic tomatoes. Ready in 10 minutes!
Potato Galette with Arugula and Creme Fraîche
Potato galette with arugula and crème fraîche is a rich, light, and delicious savoury tart to serve for breakfast, lunch, or dinner. A total crowd-pleaser at your Easter brunch.
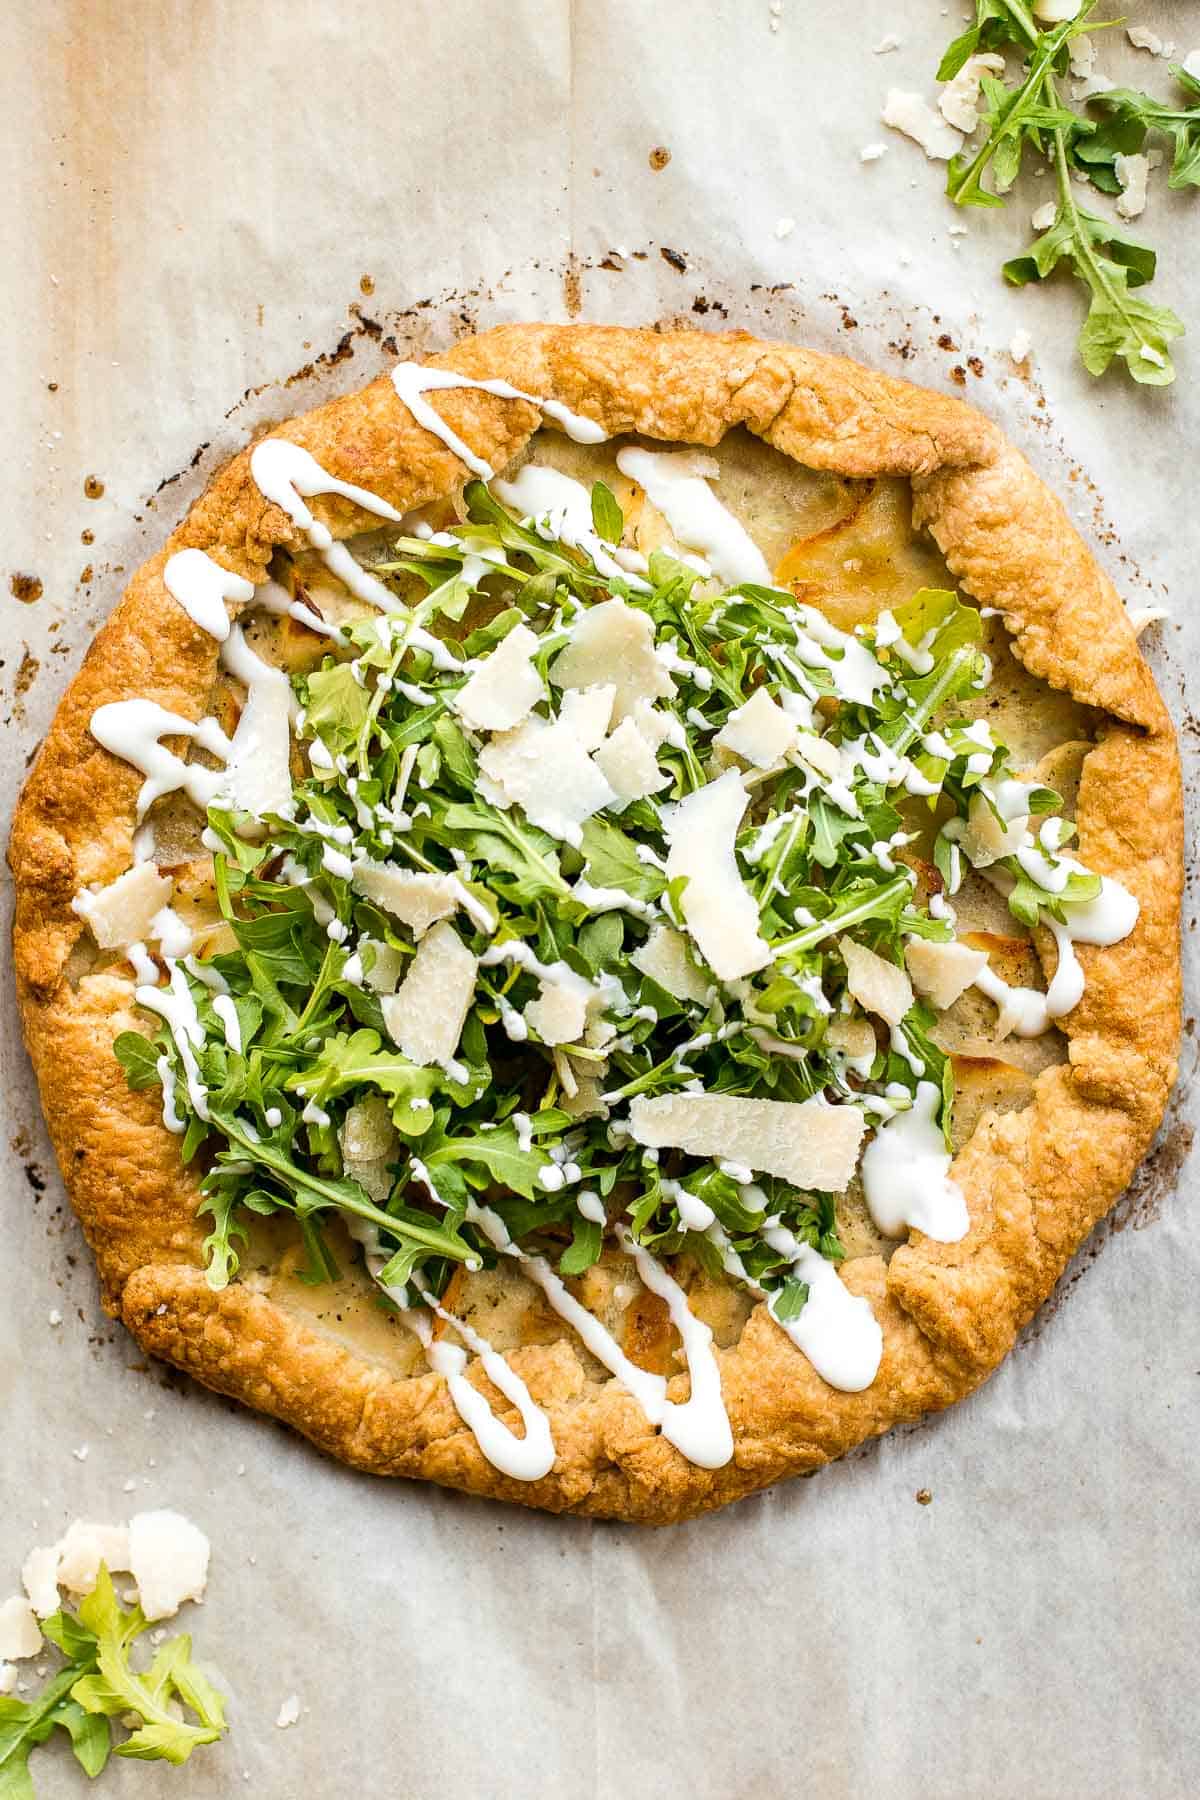
This Classic French Toast is light and fluffy, crisp and browned on the edges, and so delicious. The best part? Breakfast is ready in under 15 minutes.

Cinnamon Apple Baked Oatmeal is a delicious, filling make-ahead breakfast for fall - loaded with chewy oats, tender apples, crunchy walnuts, and cinnamon.
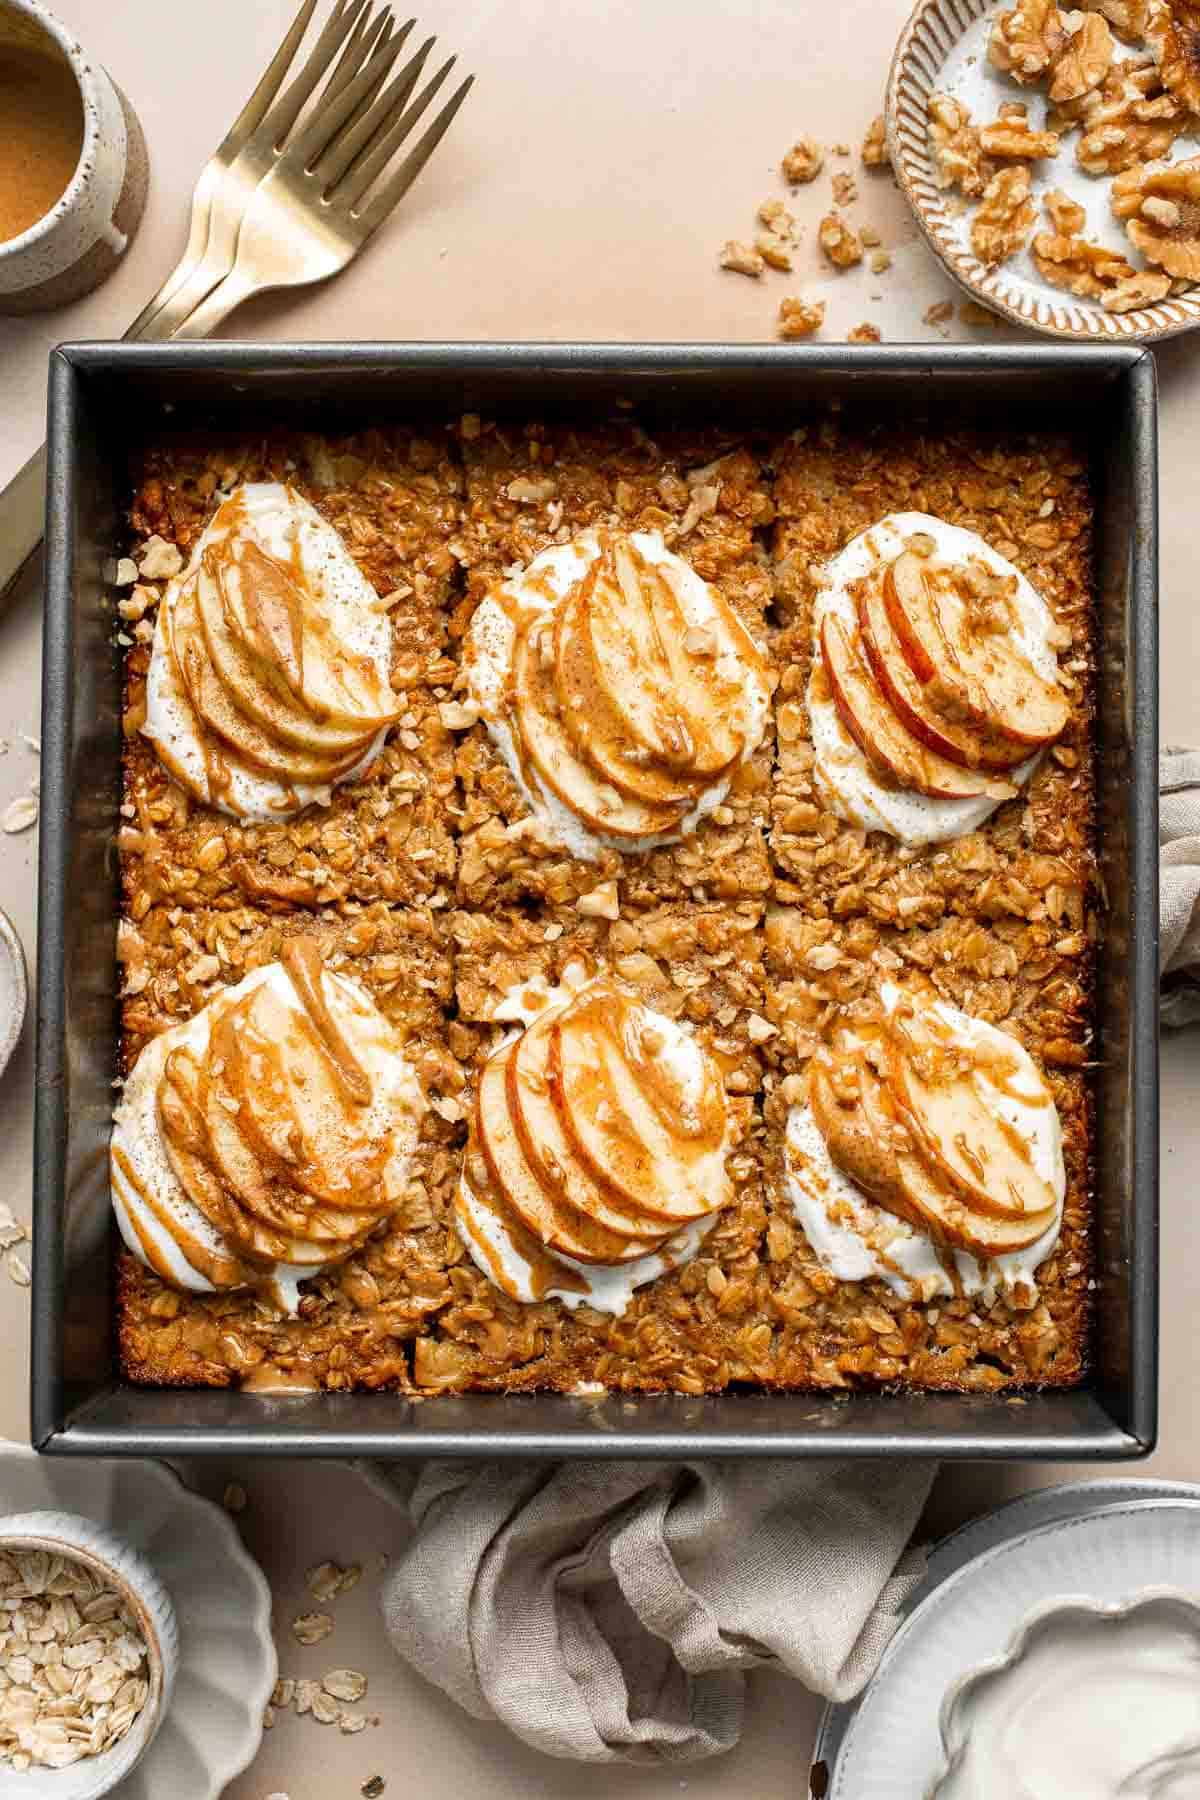
This vegan Buddha Bowl is the perfect hybrid of a salad and grain bowl that is packed with nutritious ingredients like grains, vegetables, and protein.
Egg and Potato Breakfast Casserole
Egg and Potato Breakfast Casserole is an easy vegetarian breakfast bake loaded with veggies. It is completely customizable and can be made ahead of time. The perfect Easter brunch recipe.
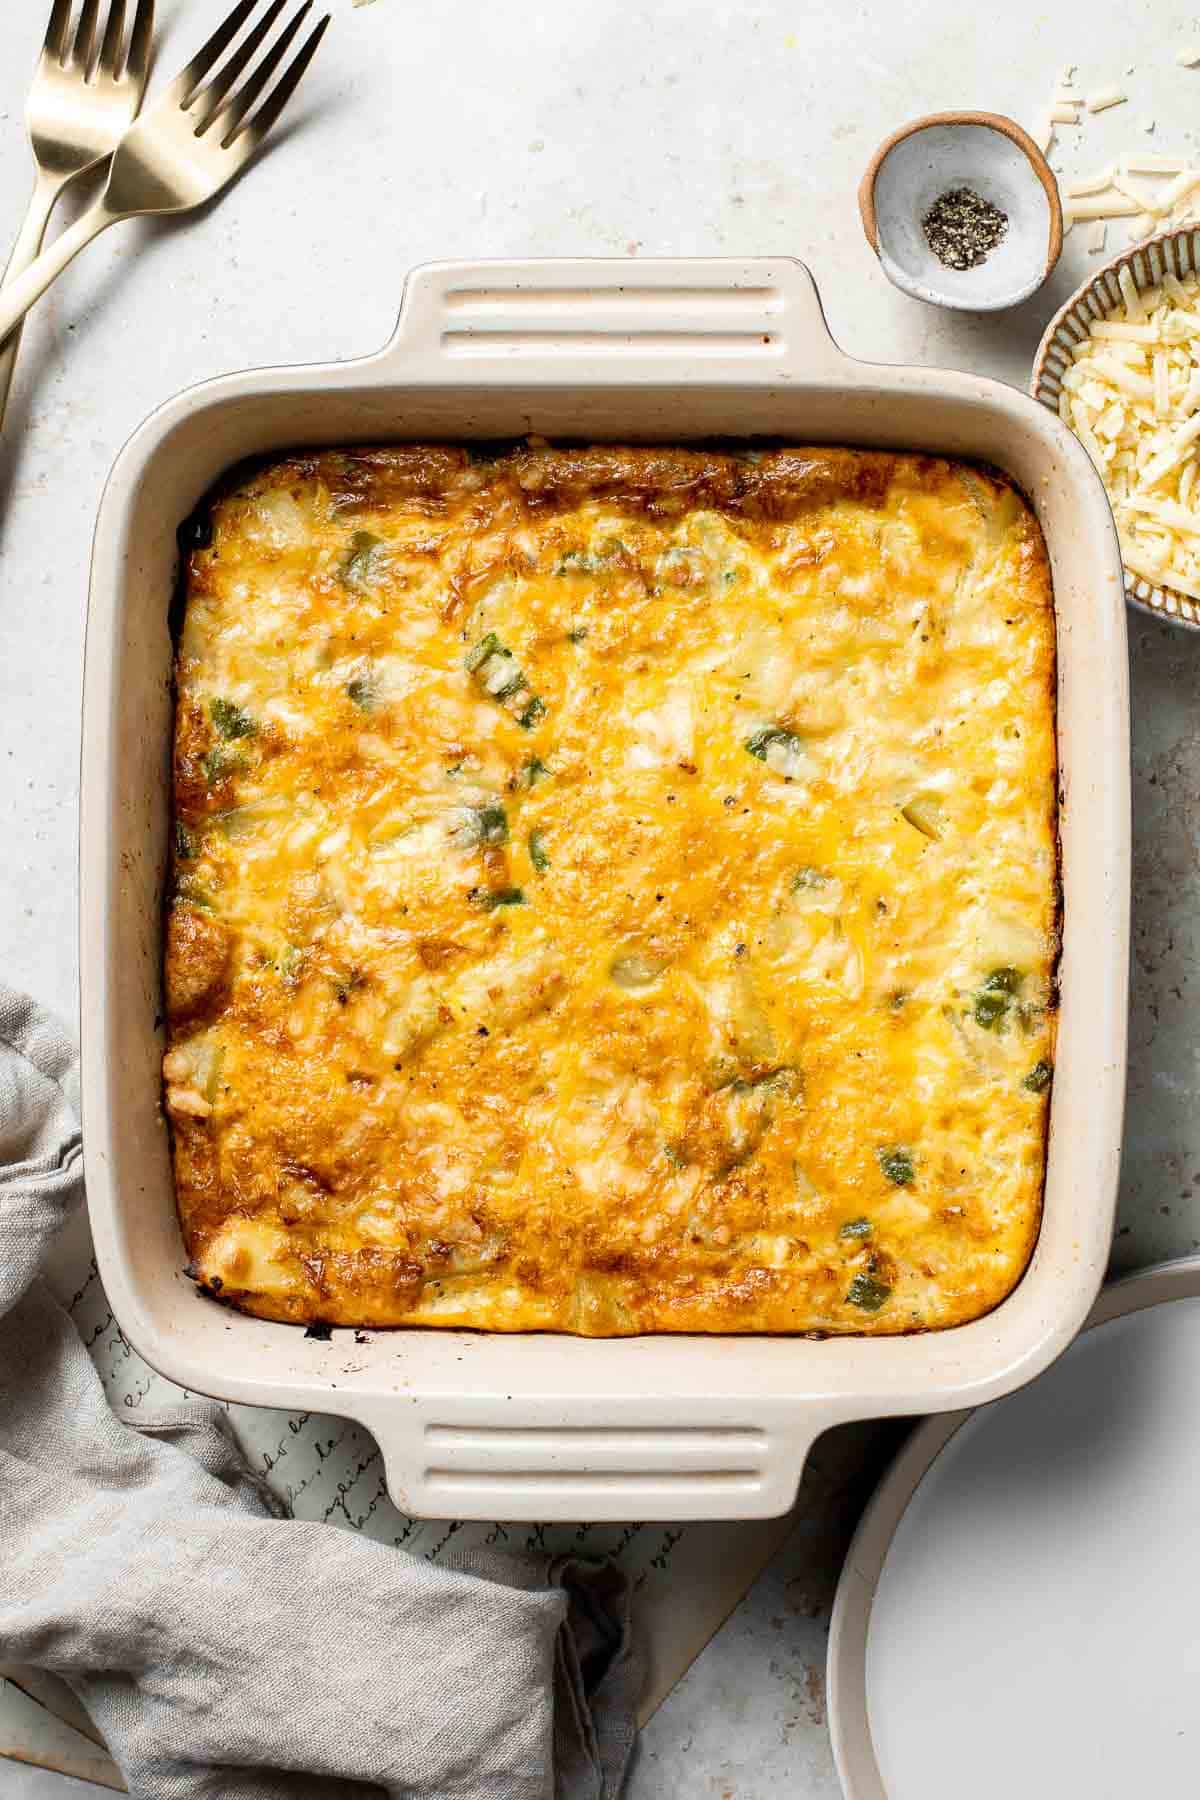
These crispy Hash Browns have a crisp, golden exterior and are soft inside - the defining features of a good hash brown. Make in just 20 minutes!

This Berry Smoothie Bowl is the best way to start the day. It's quick and easy to make, healthy, and packed with nutrients. Customize it with toppings!
When you combine walnuts, raisins and dried fruit in a nutty banana bread, the result is a tender and moist loaf that is truly irresistible.
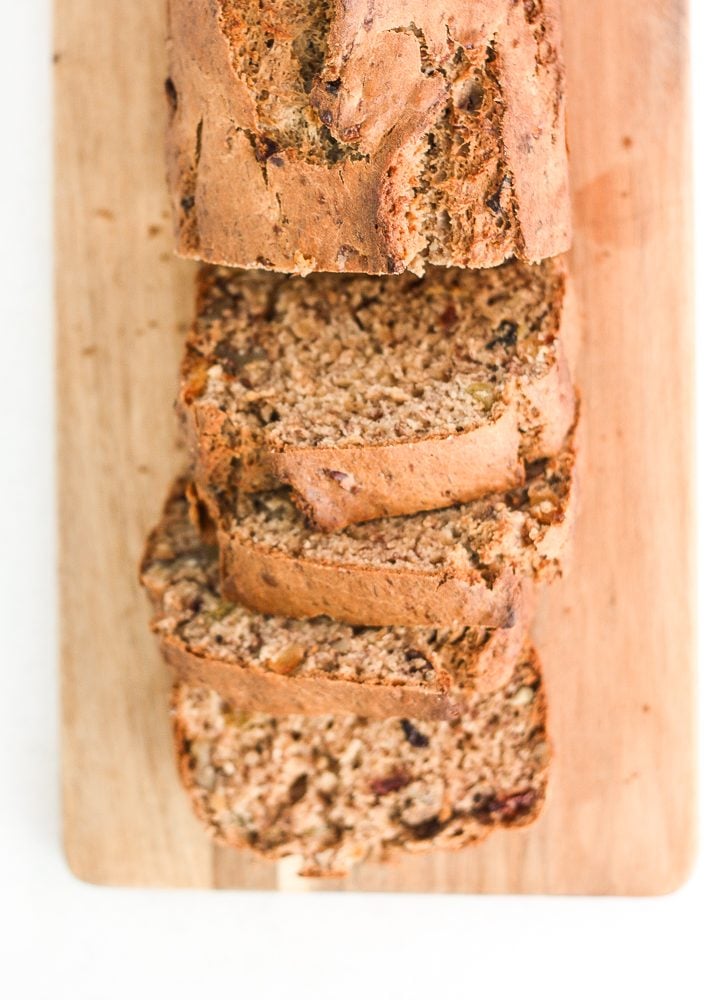
Layer fresh fruits, creamy Greek yogurt and crunchy granola to make this fruit and yogurt parfait for a delicious and healthy breakfast or a simple snack.
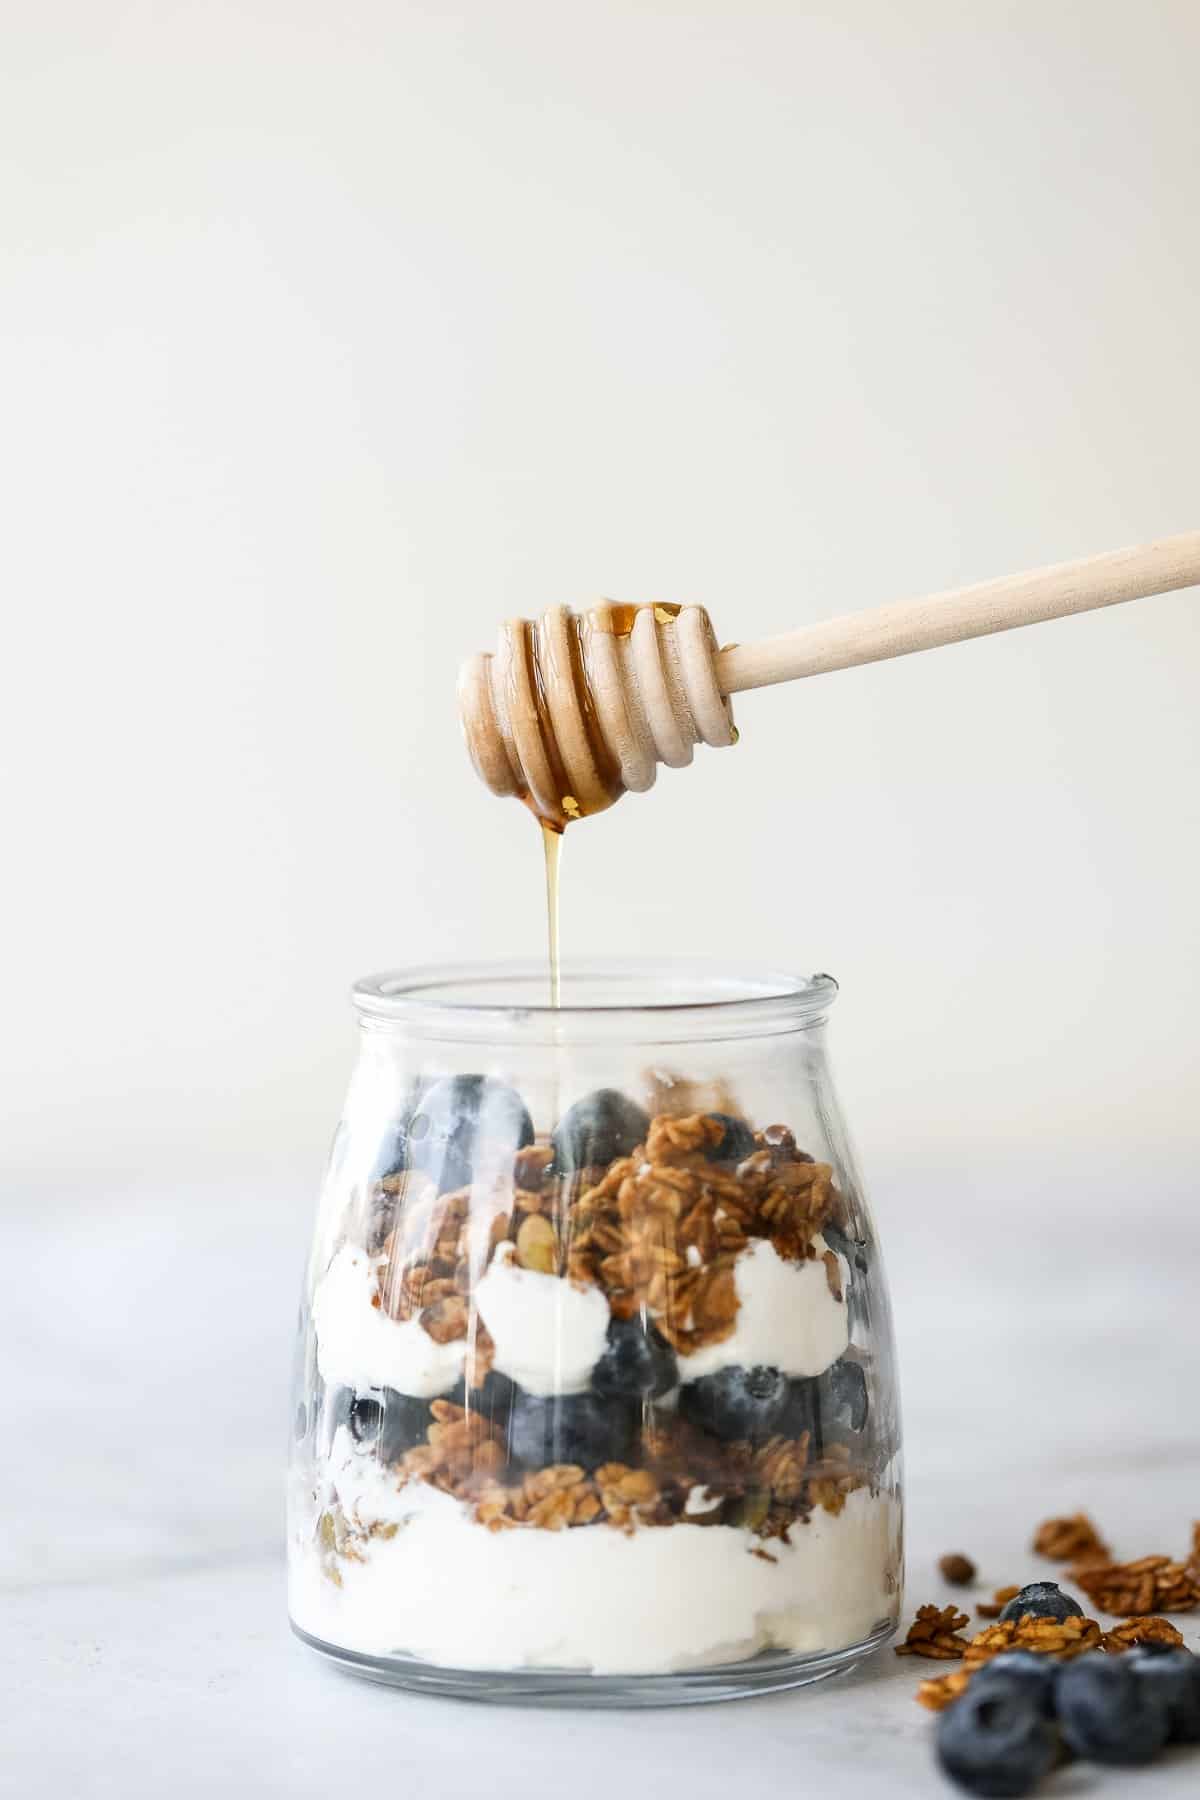
Turkish Eggs, or Çılbır, are a rich and comforting combination of poached eggs nestled over garlicky, herbed yogurt and drizzled with a spiced chili oil.
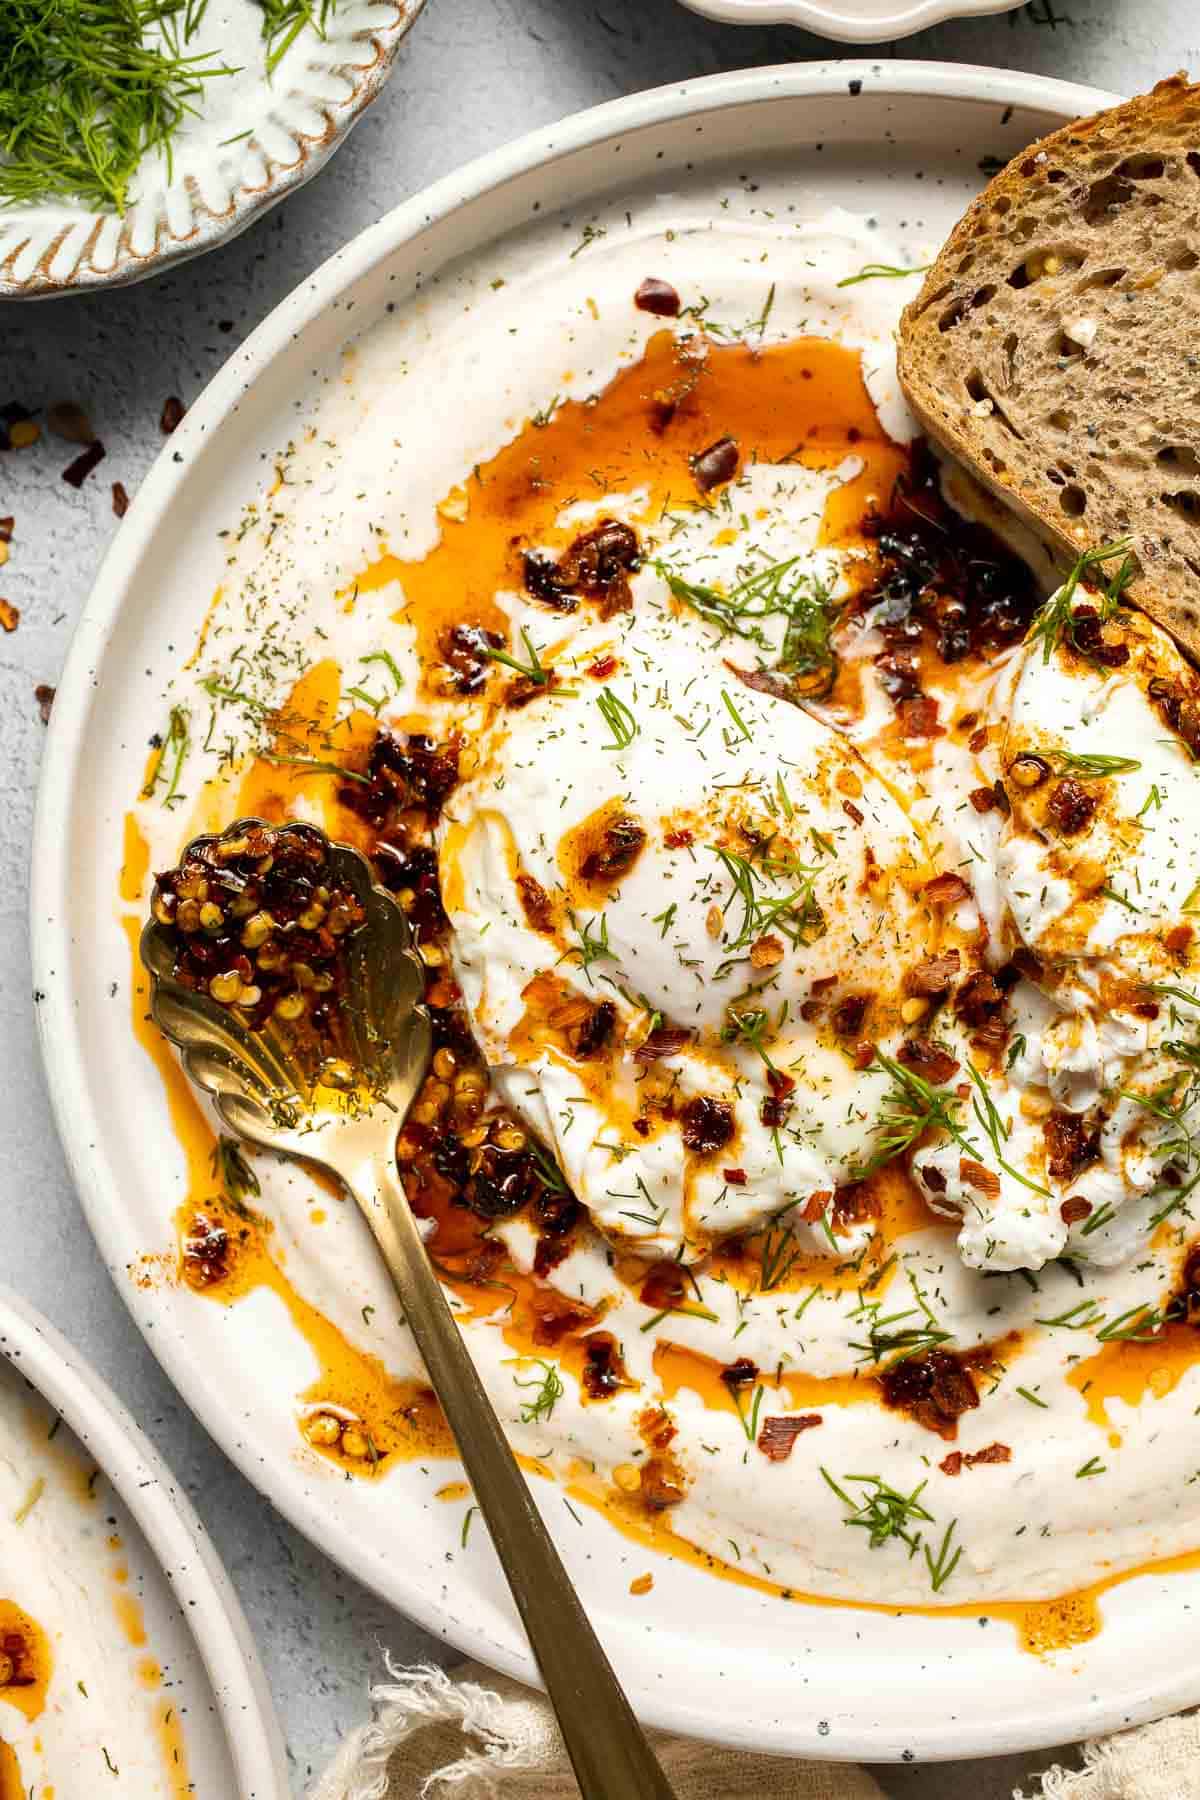
Zucchini fritters are crispy outside, tender inside, and loaded with zucchini. These healthy bites are one of my favorite ways to use up summer zucchini.
Beautiful three-strand braided loaves of easy challah bread are light, soft and fluffy, with a golden brown crust. Rich in flavour and slightly sweet.
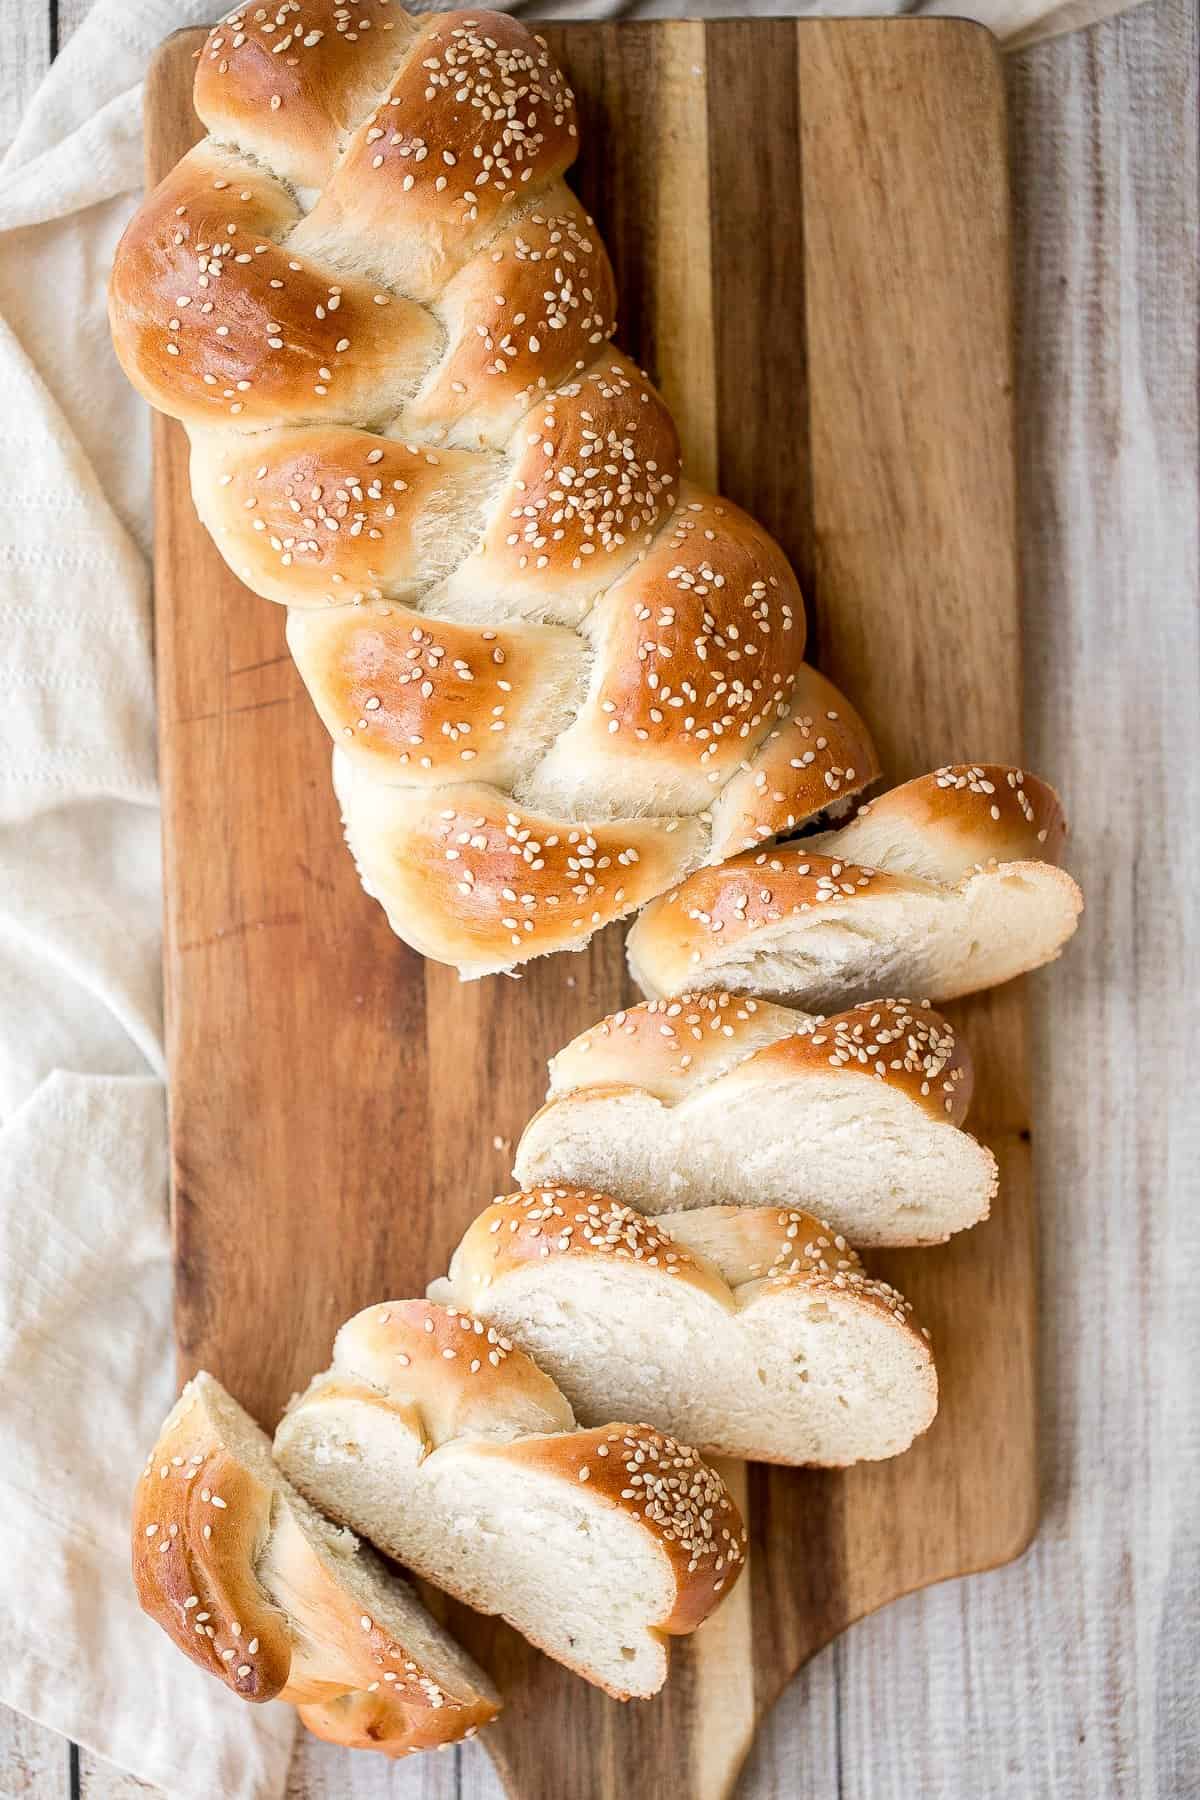
Nutella crepes with berries are sweet and indulgent. These French pancakes are an easy to make blender recipe that will have you craving breakfast all day.
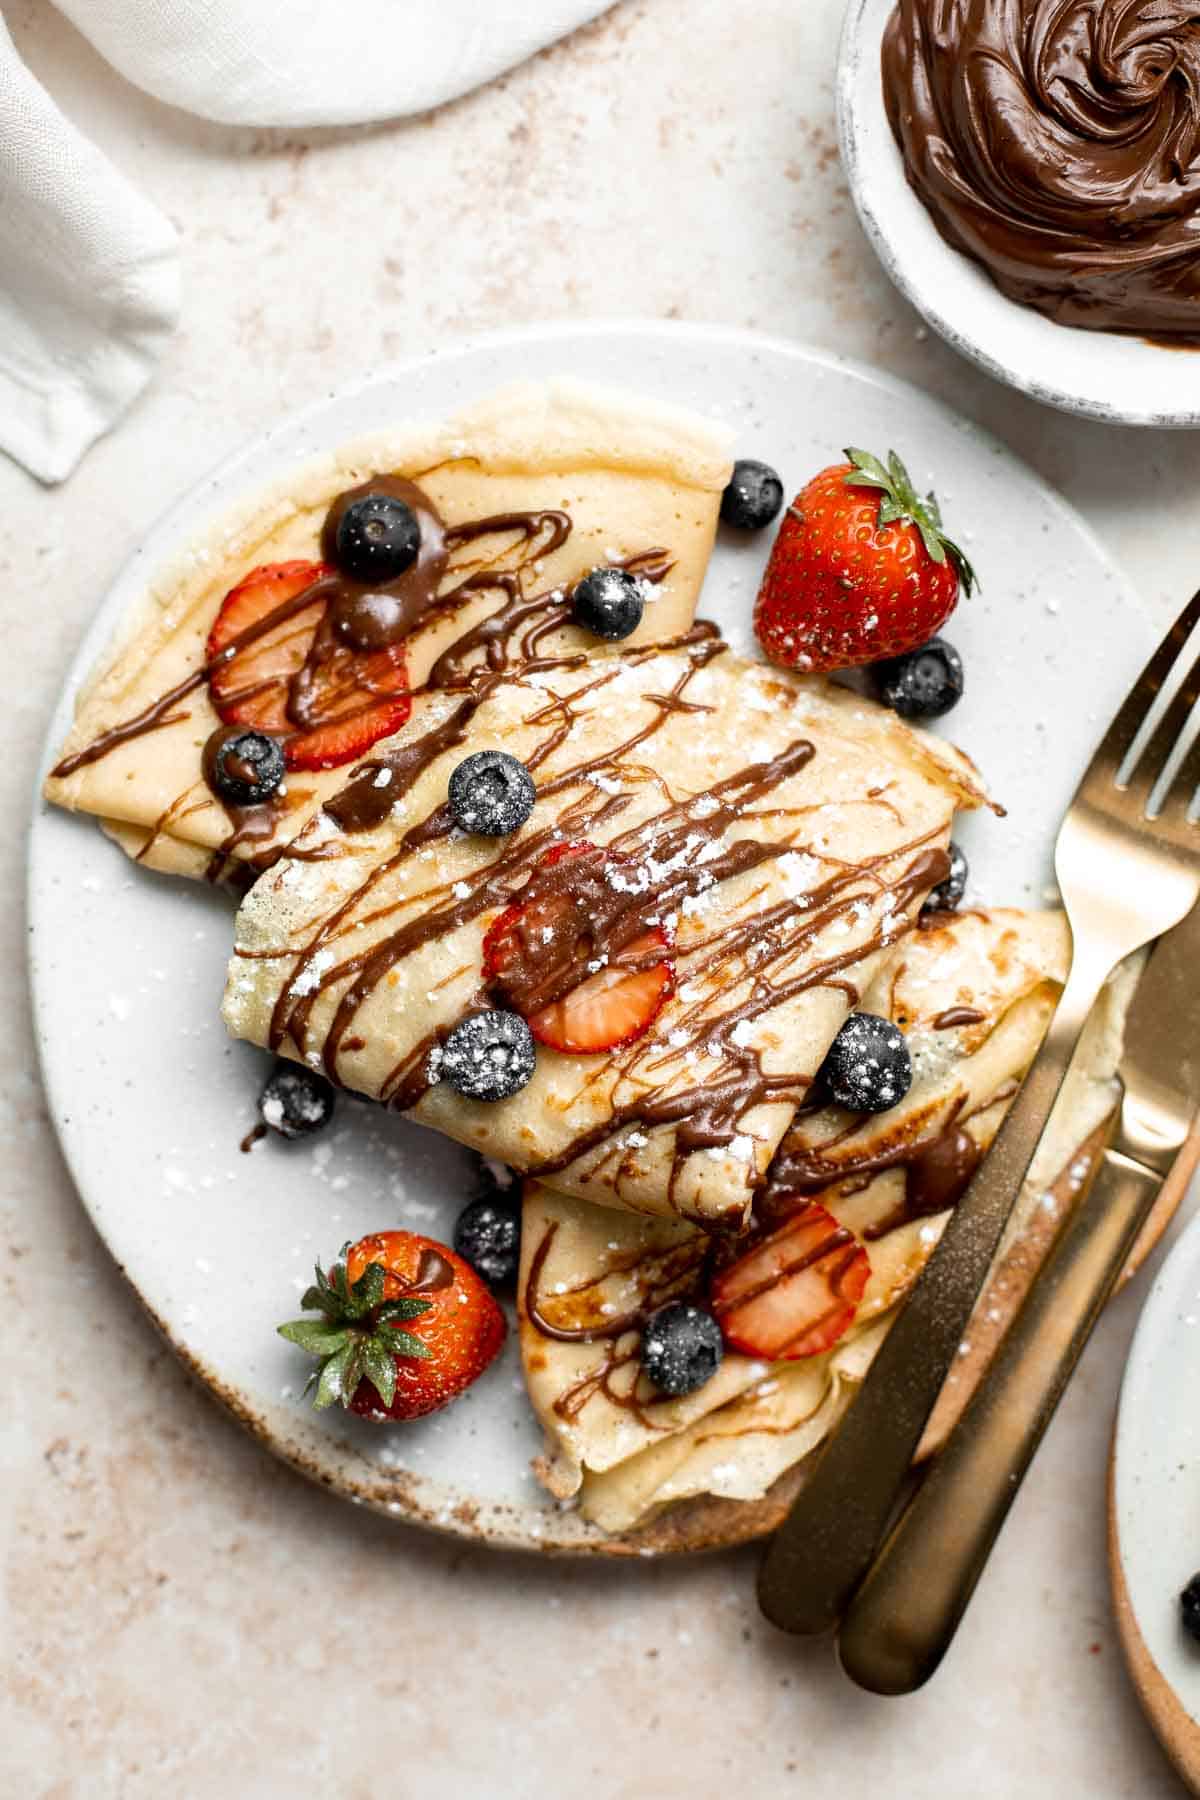
Mediterranean Scrambled Eggs with spinach, tomato, and feta is loaded with flavor and a quick and easy breakfast to make in under 10 minutes (with prep!).
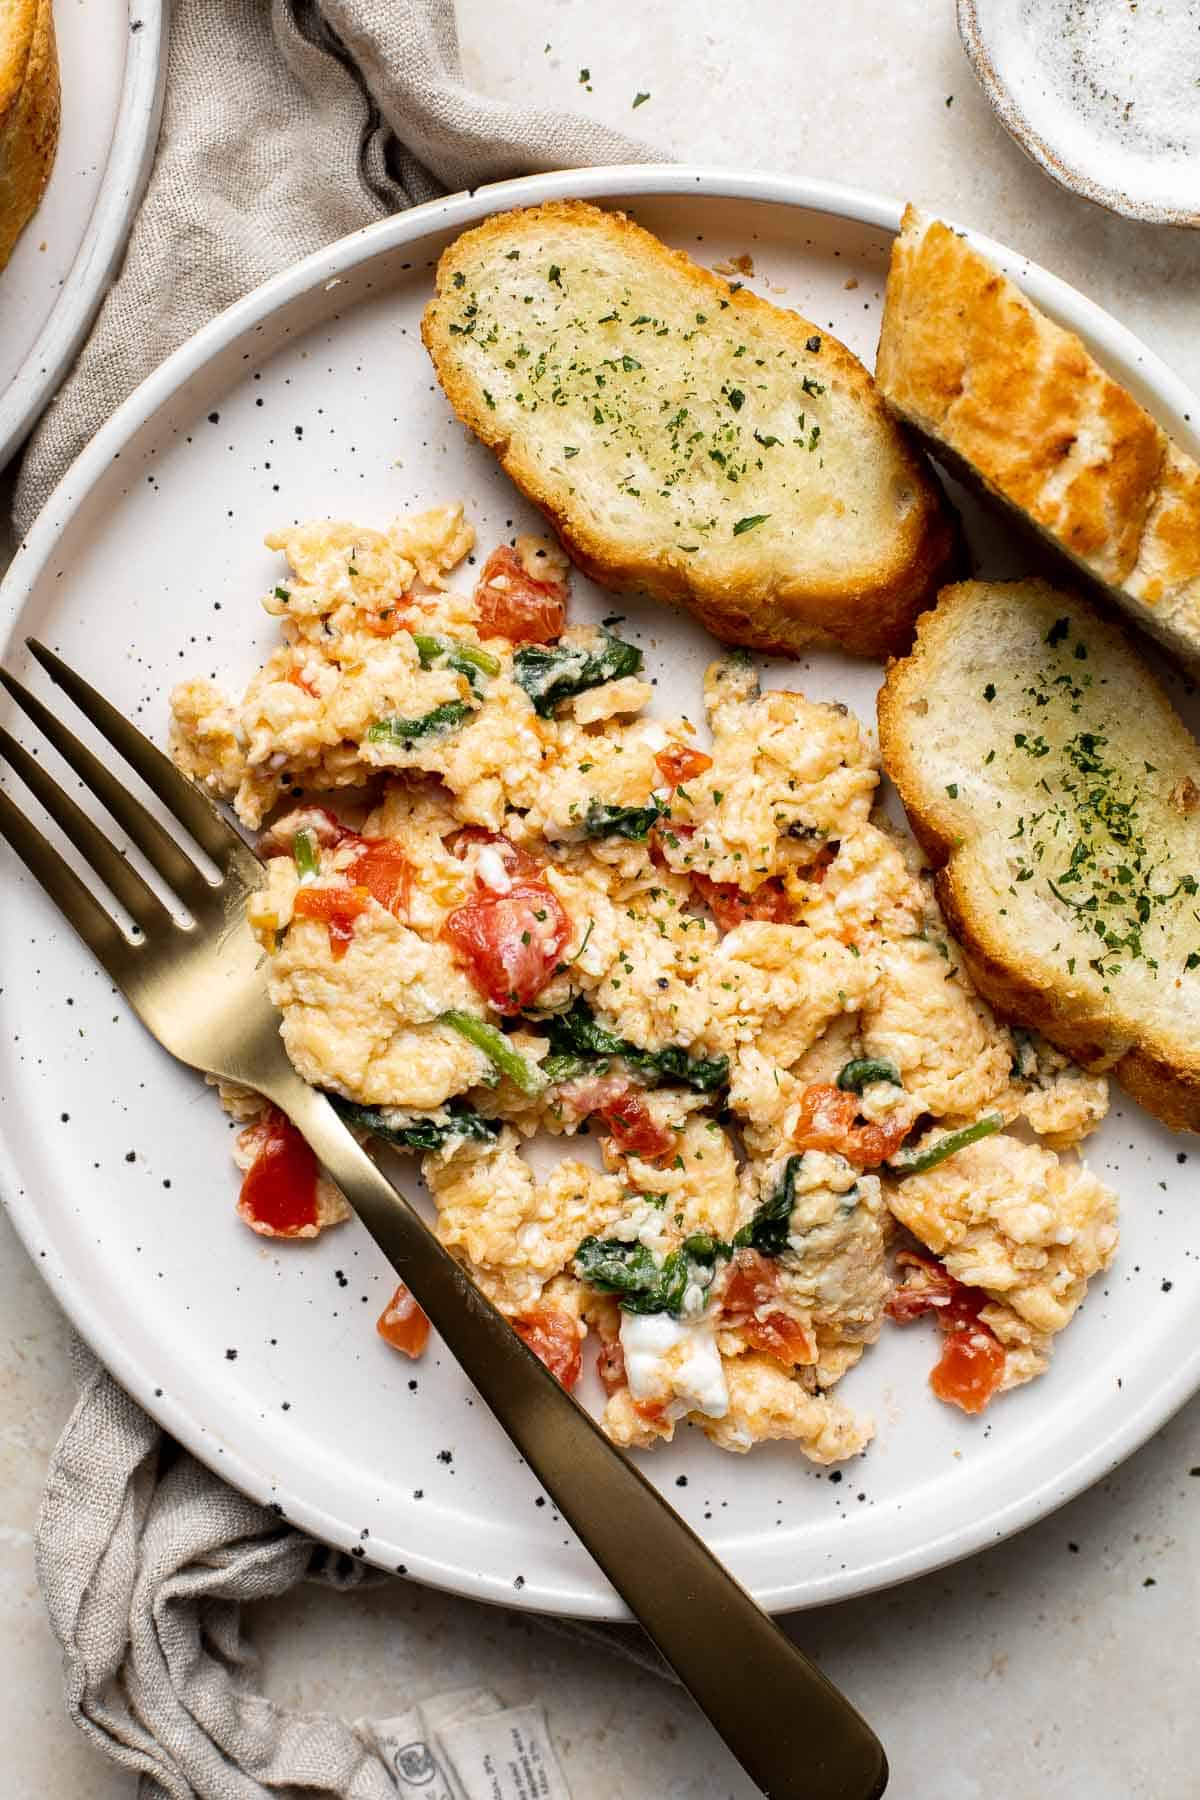
Duchess Potatoes (Pommes Duchesse) are rich, creamy whipped bites of potatoes with crispy edges and a soft fluffy mashed potato centre. A fancy side dish!

Turkey and Cheese Sliders are quick and easy, made with deli meat and Swiss cheese filled inside soft Hawaiian dinner rolls topped with a buttery sauce.
Mini Pancakes (Silver Dollar Pancakes)
Mini Pancakes (Silver Dollar Pancakes) are the fluffy, fun-sized version of classic pancakes. They're easy to make using a handful of everyday ingredients.
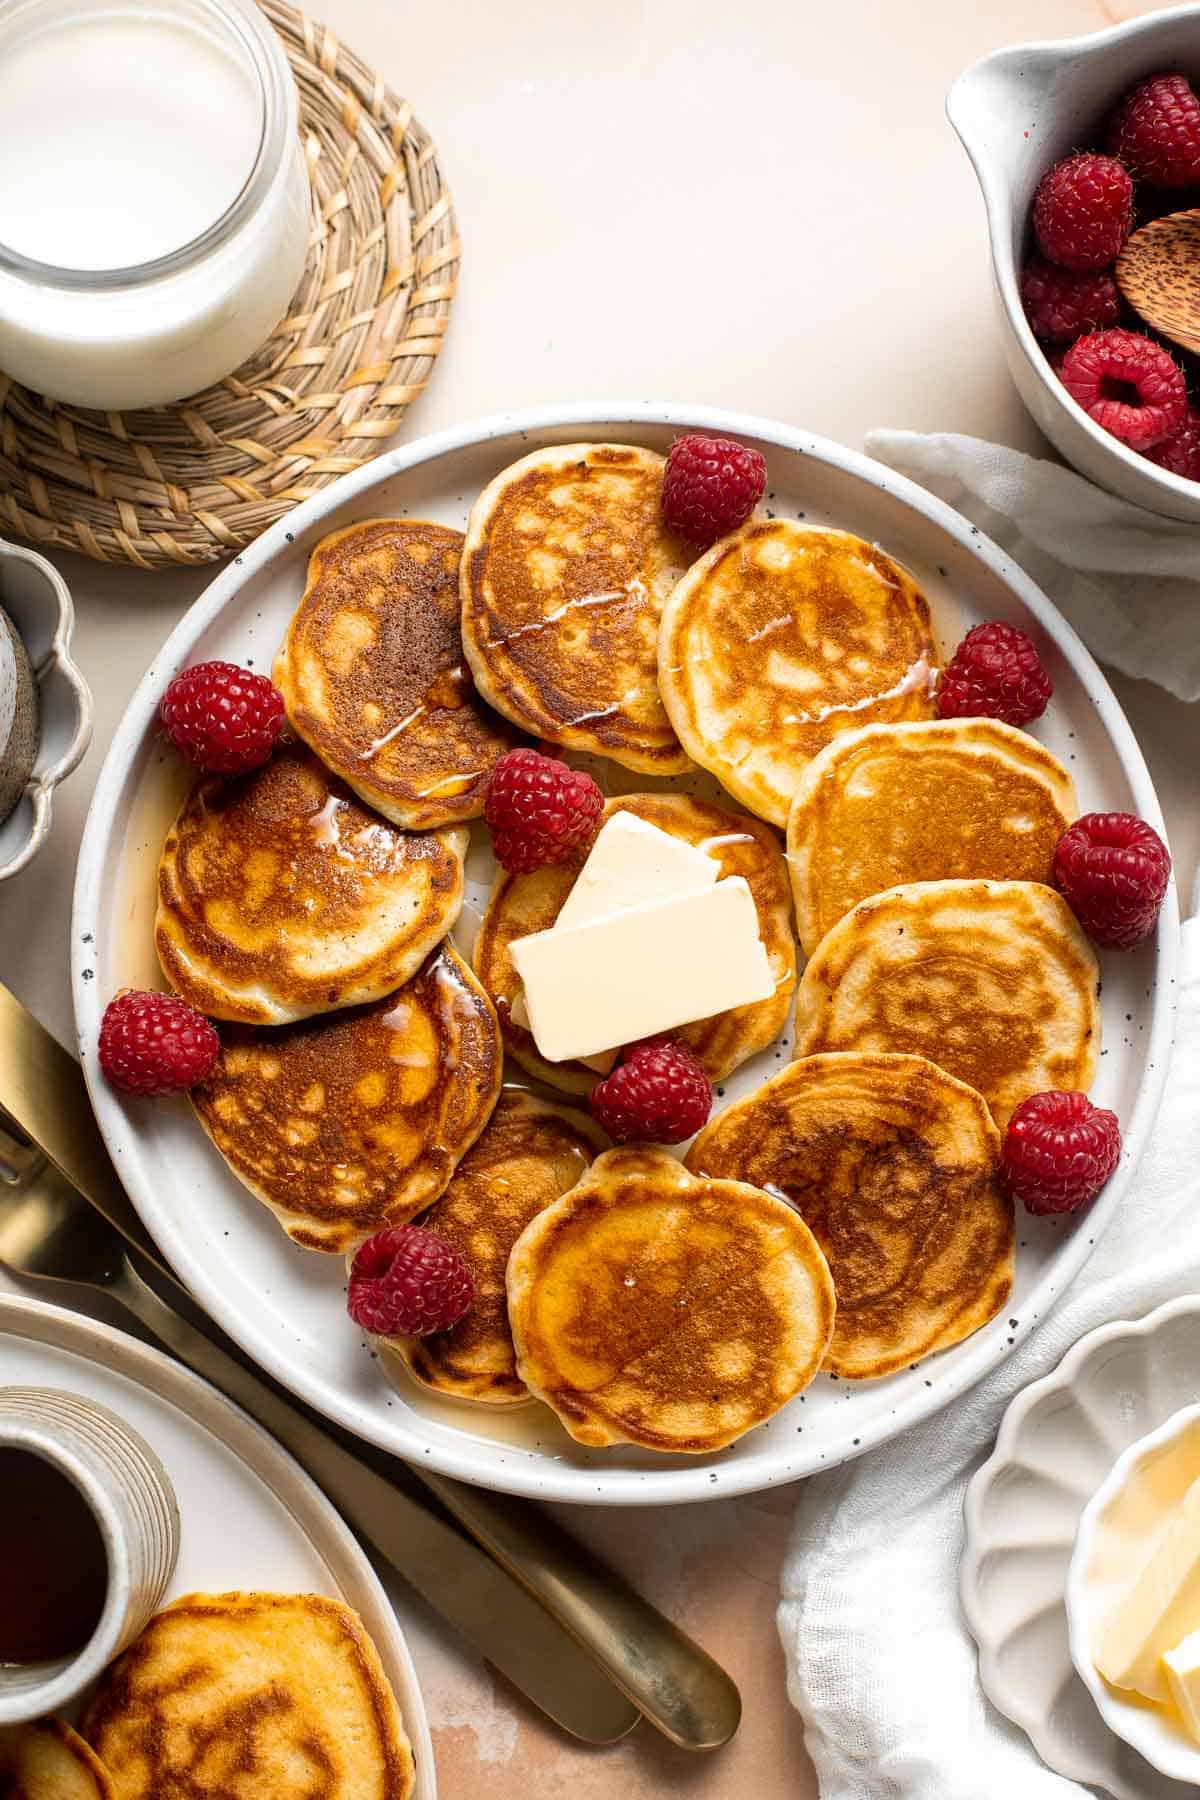
Oat Porridge is a healthy, delicious breakfast that's warm, comforting, cozy, and great for all ages. A quick easy recipe to warm you up.
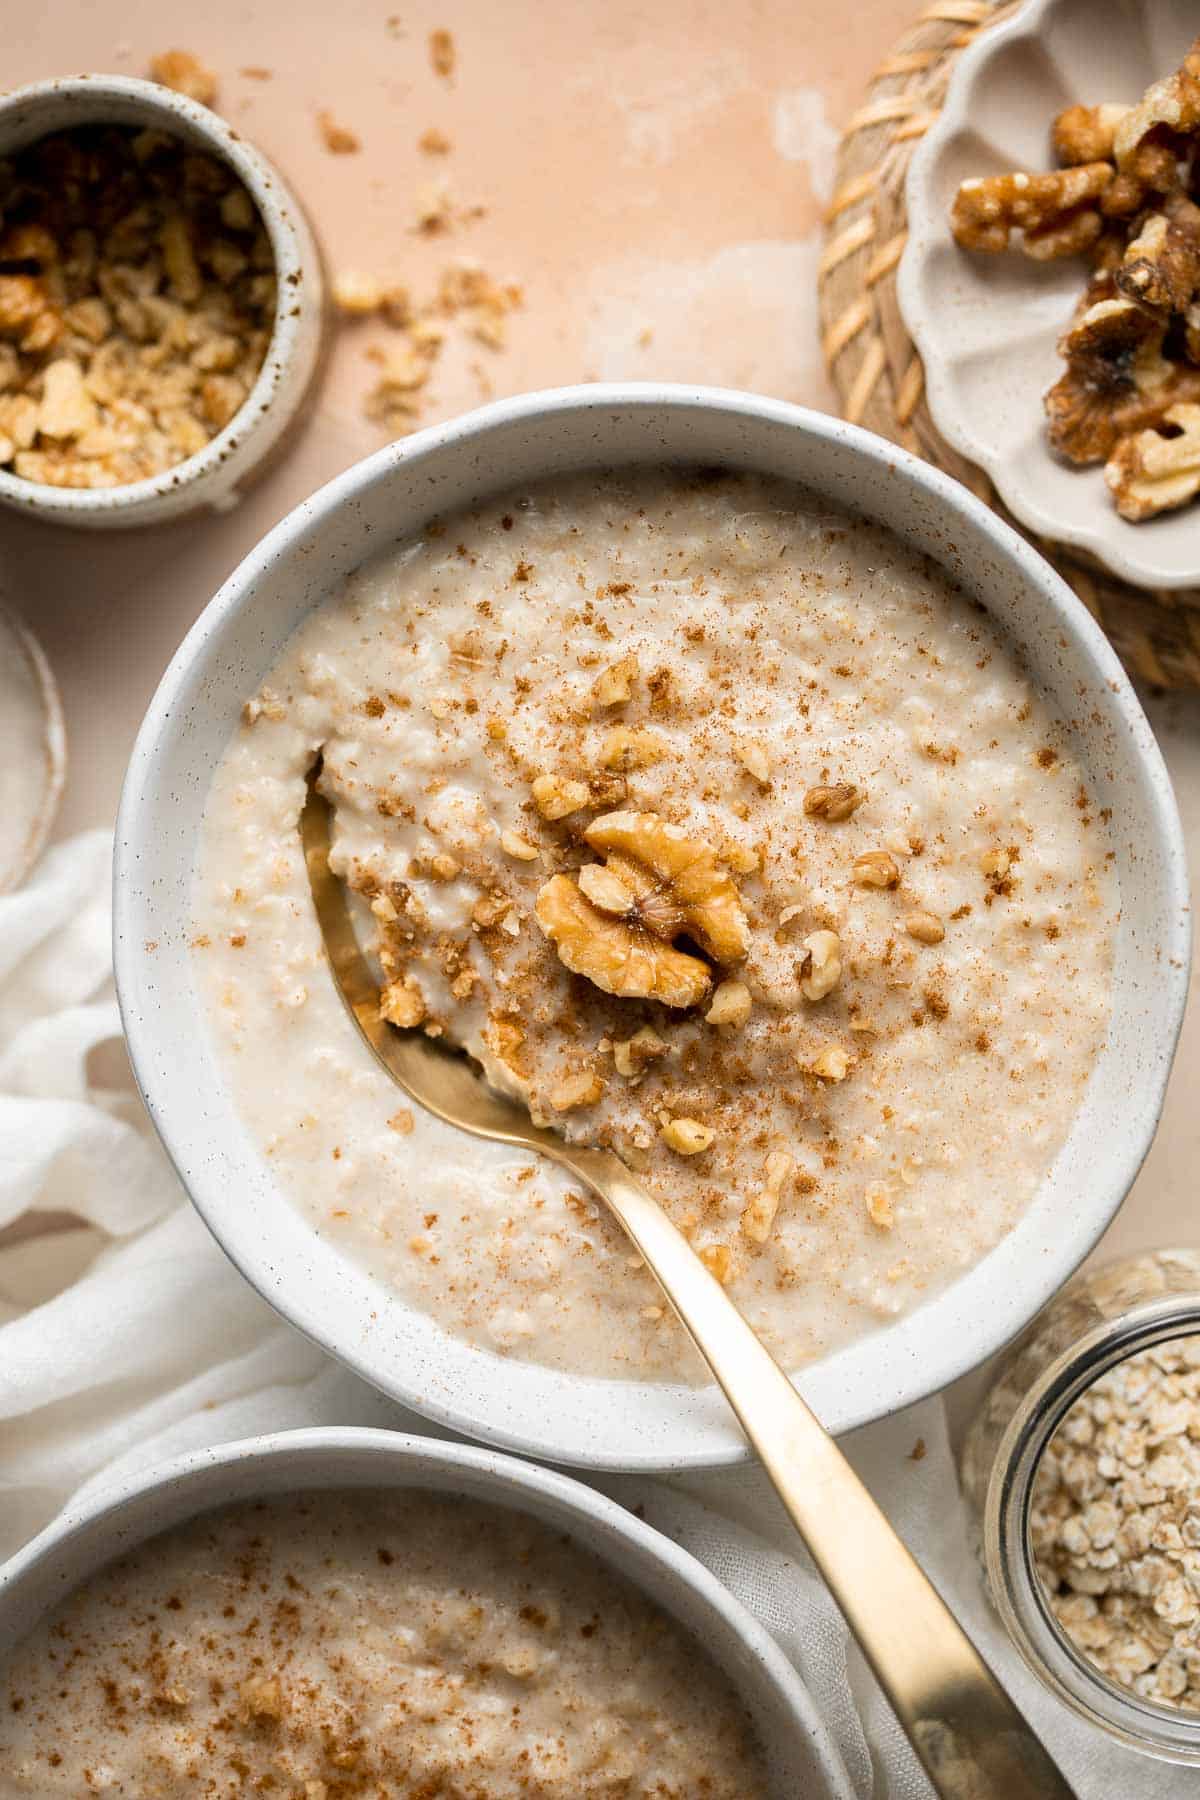
This Cheese Quesadilla has the perfect combination of crispy, cheesy, and flavorful. Ready to serve in just a few minutes with your favorite toppings.
Cinnamon Apple Oatmeal Muffins
Cinnamon Apple Oatmeal Muffins are fast, easy and delicious- loaded with apples, oats, and fall spices. A quick nutritious bite for breakfast or snack time.
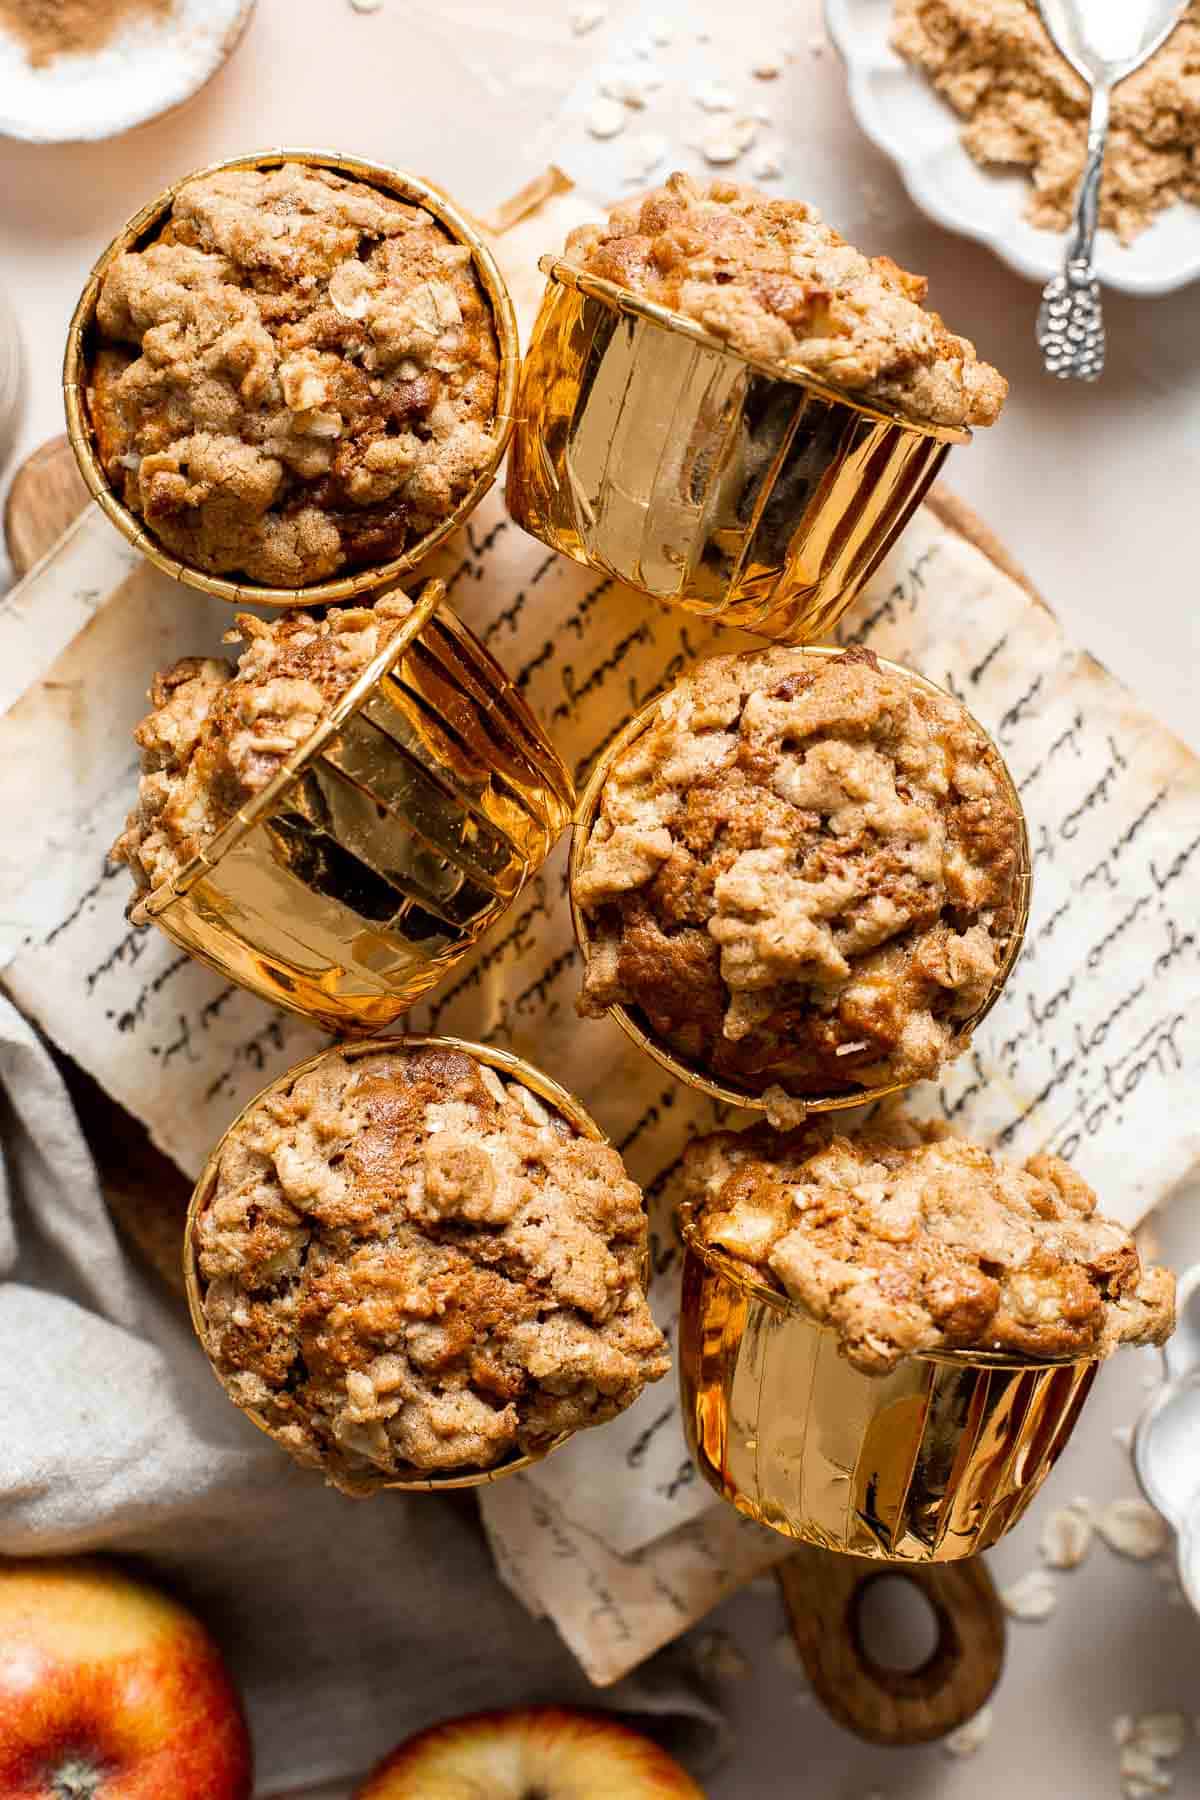
Deviled Egg Salad is the perfect spring side dish! It has the signature tang and smokiness of deviled eggs with the pillowy texture of egg salad.
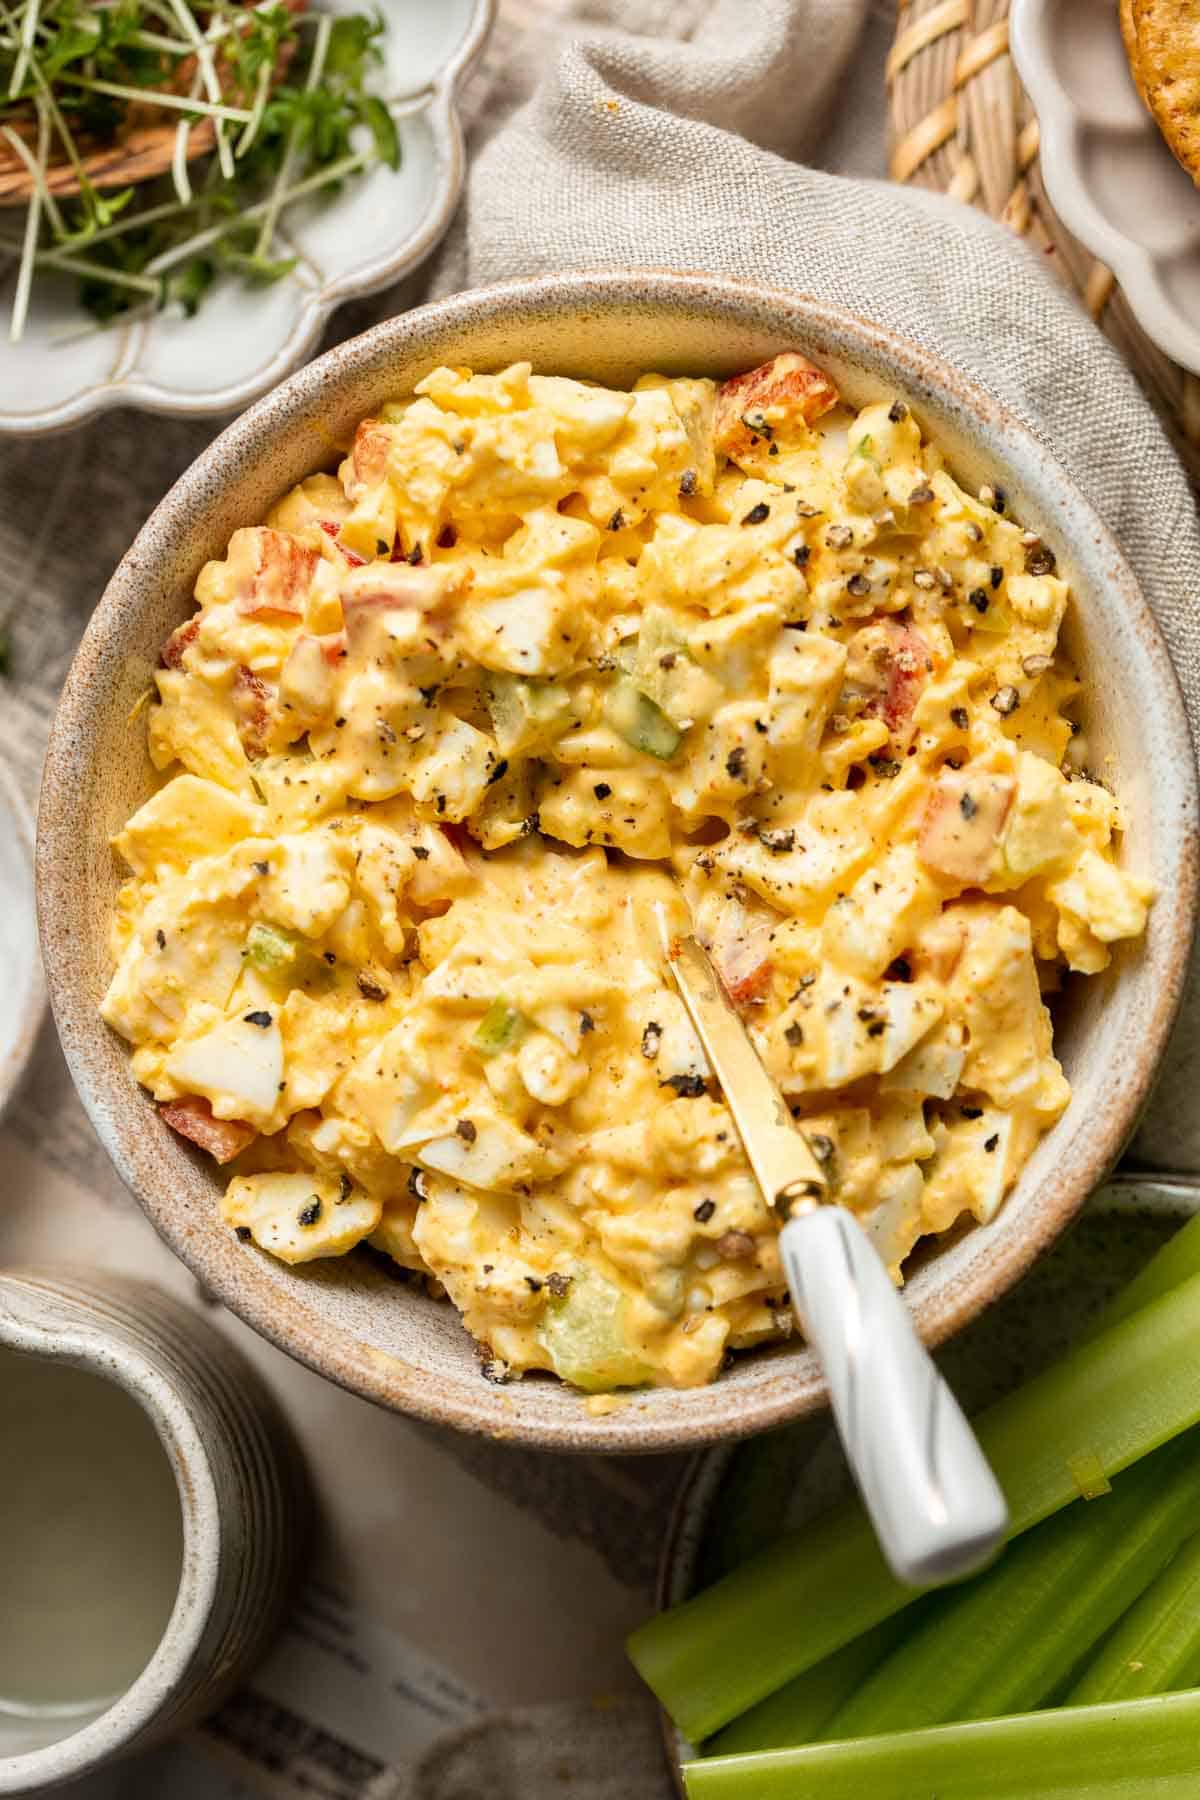
Thick and creamy homemade yogurt is so easy to make at home with just 2 ingredients, a heavy pot, and just a few minutes of actual hands on prep work.
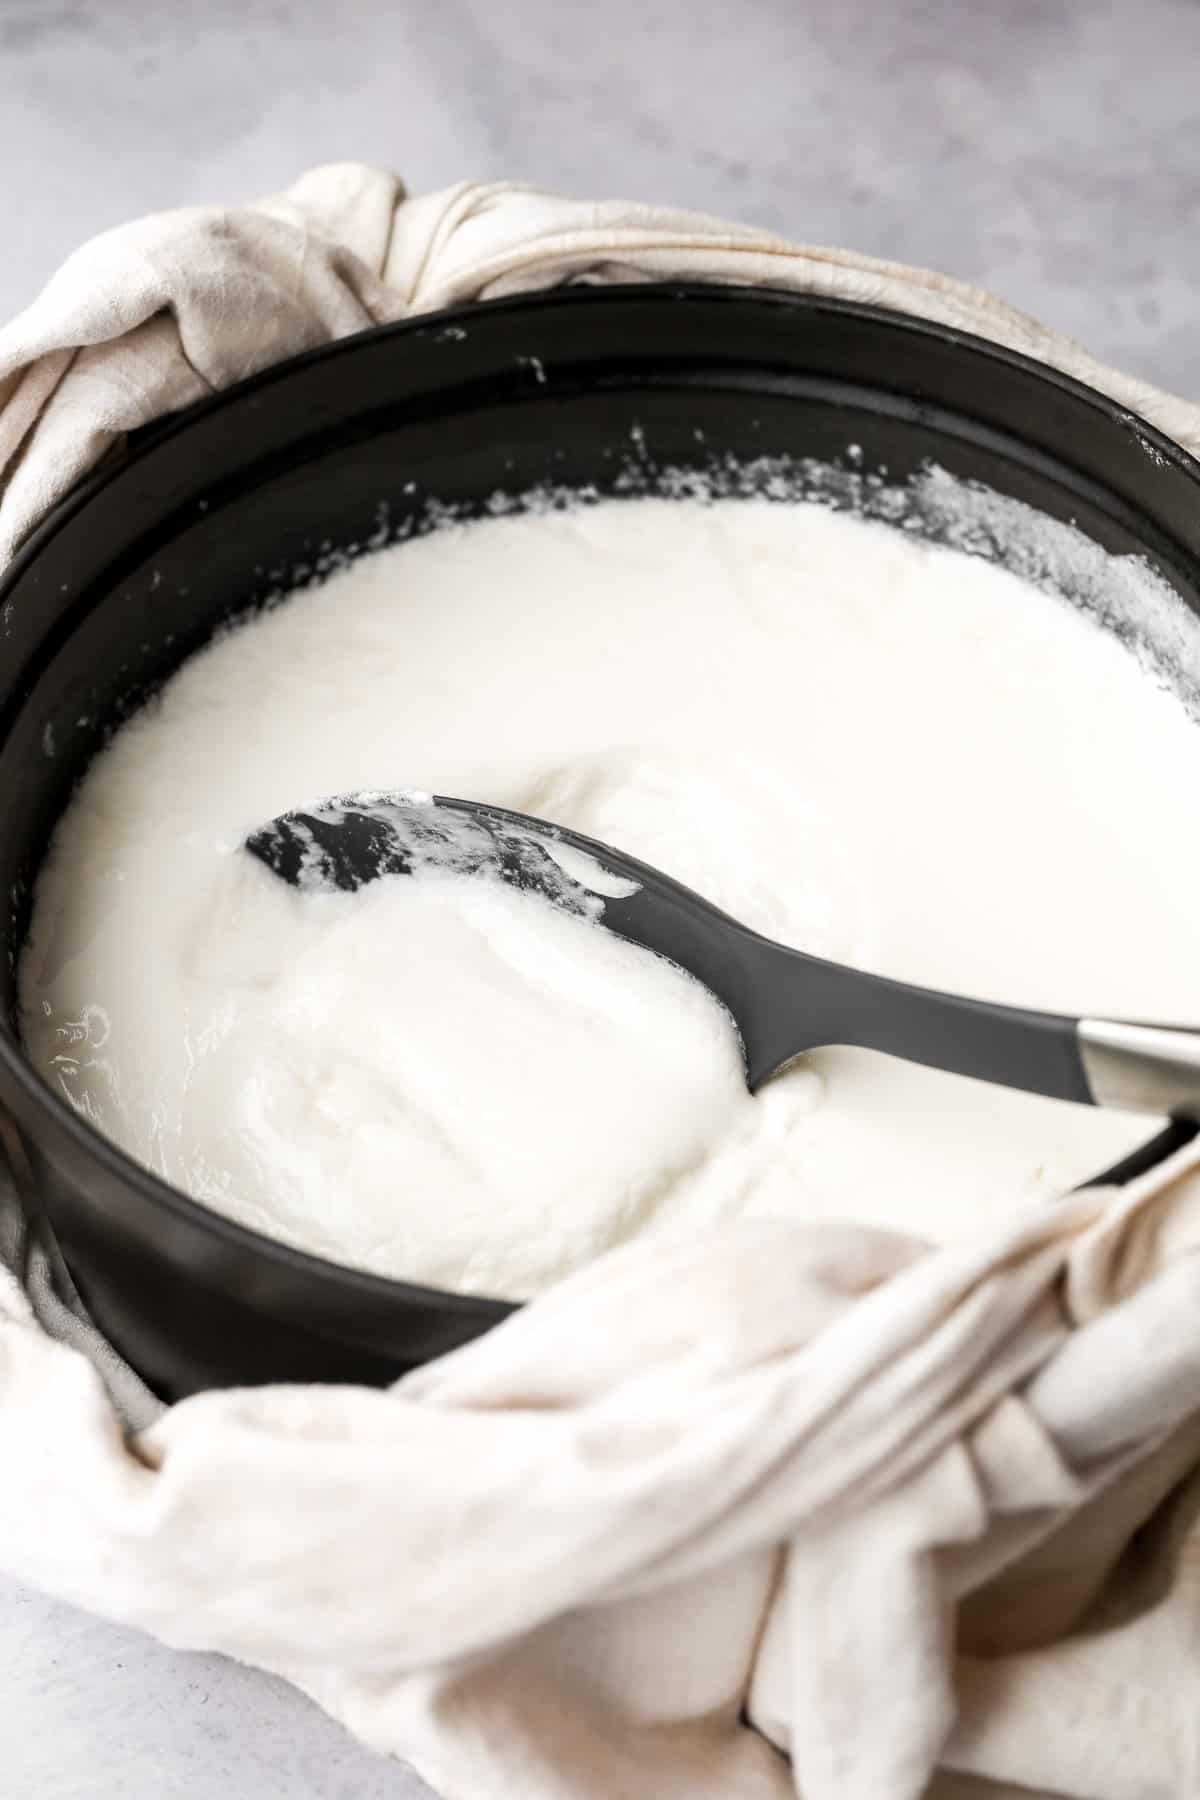
Monkey Bread is a delicious pull apart breakfast pastry made with a super soft dough coated in cinnamon sugar and topped with homemade caramel sauce.
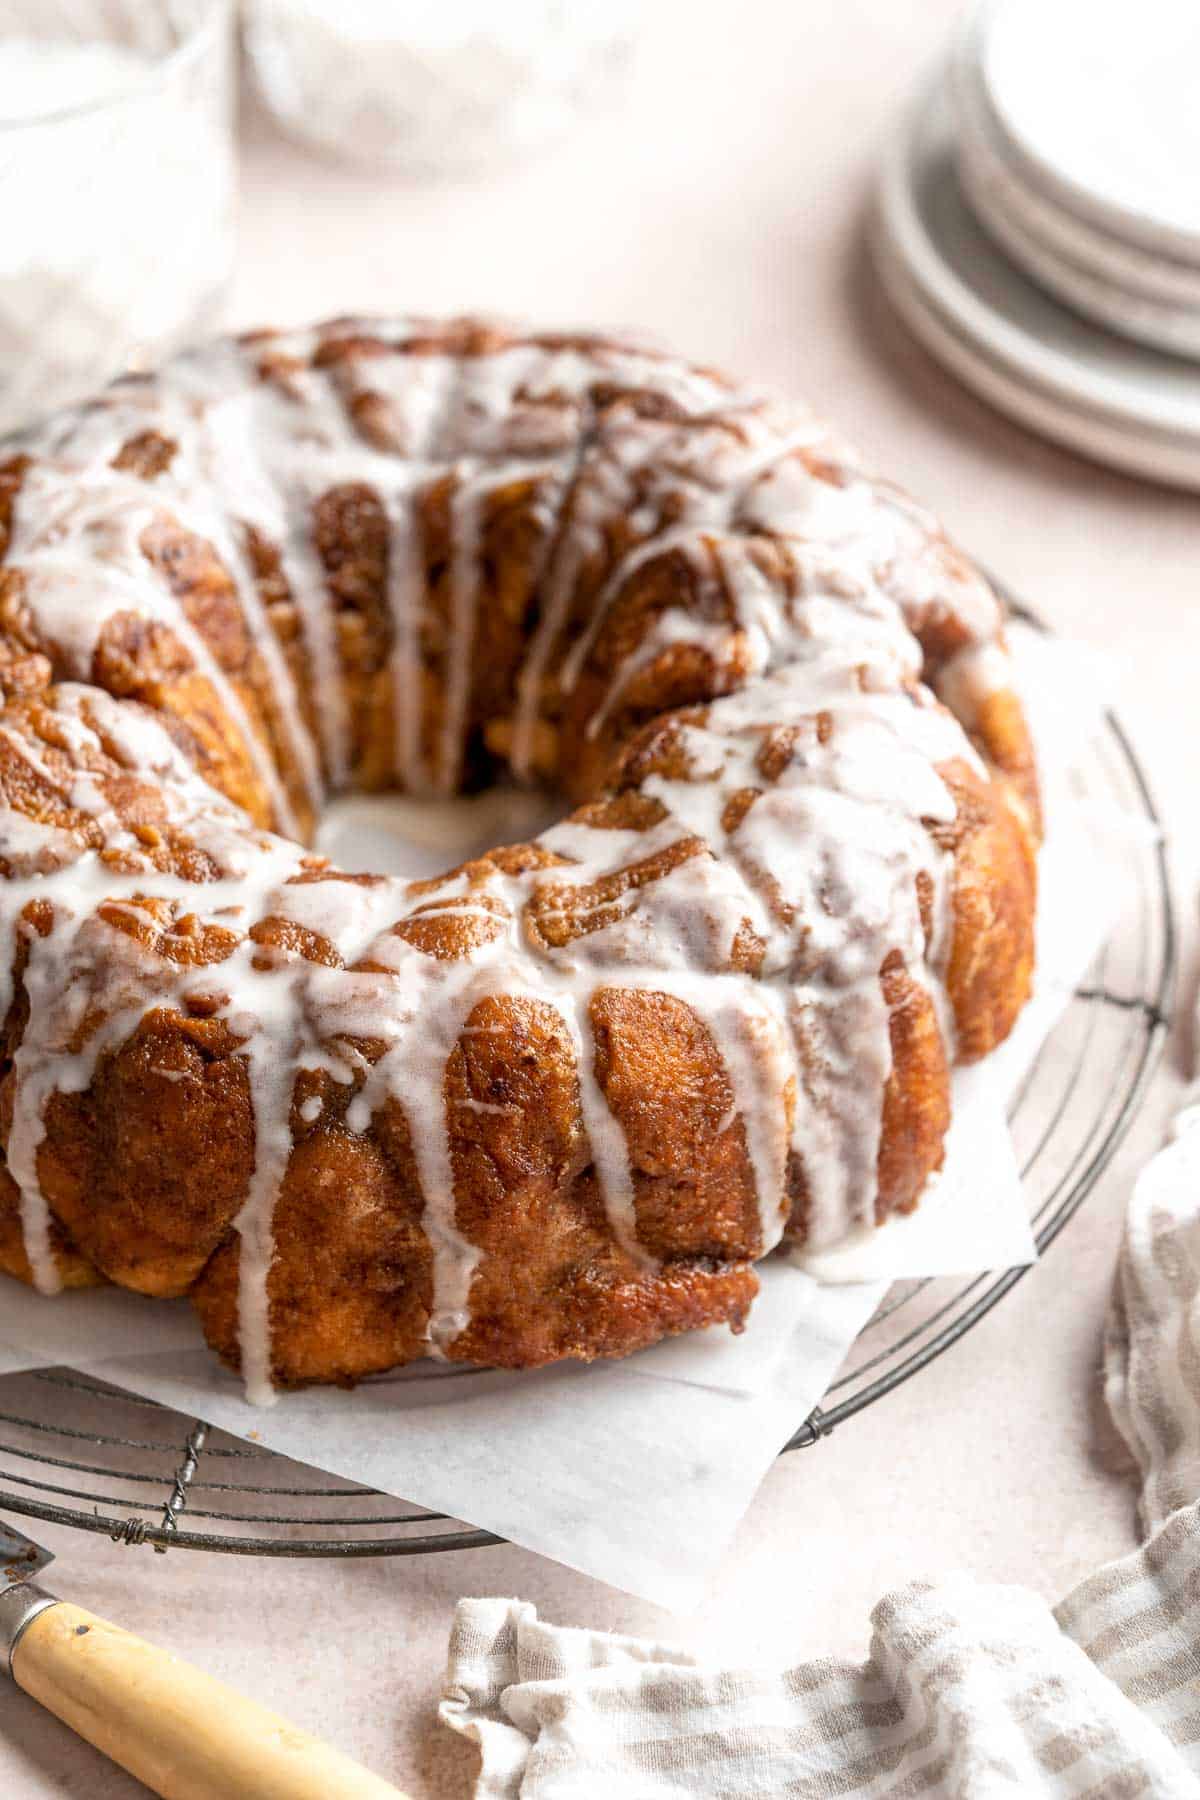
Spinach and Feta Quiche with Cauliflower Crust
Spinach and feta quiche is healthy and gluten-free with a keto cauliflower crust and savoury vegetarian filling.
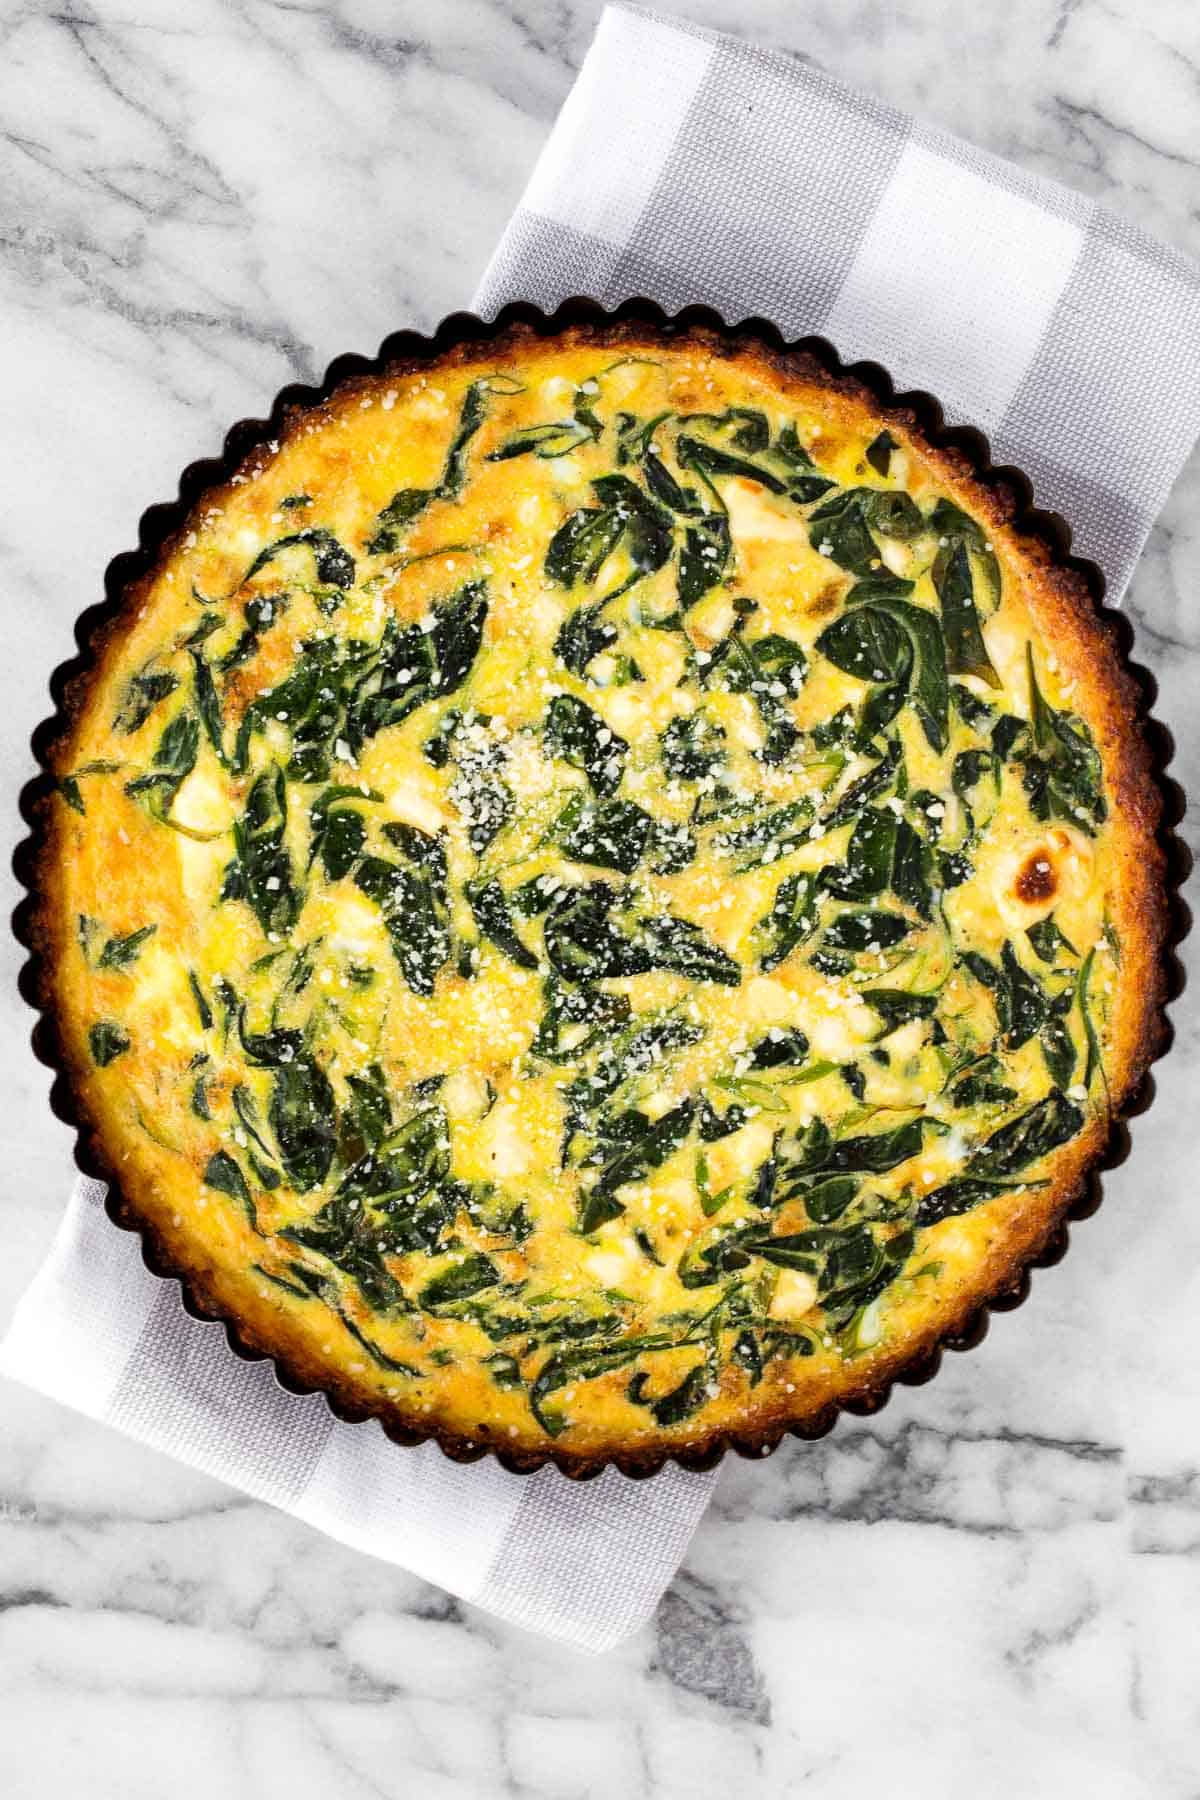
Easy Homemade Everything Bagels
Easy homemade everything bagels with a signature everything bagel seasoning blend on top are just like bakery-style bagels and so easy to make at home.
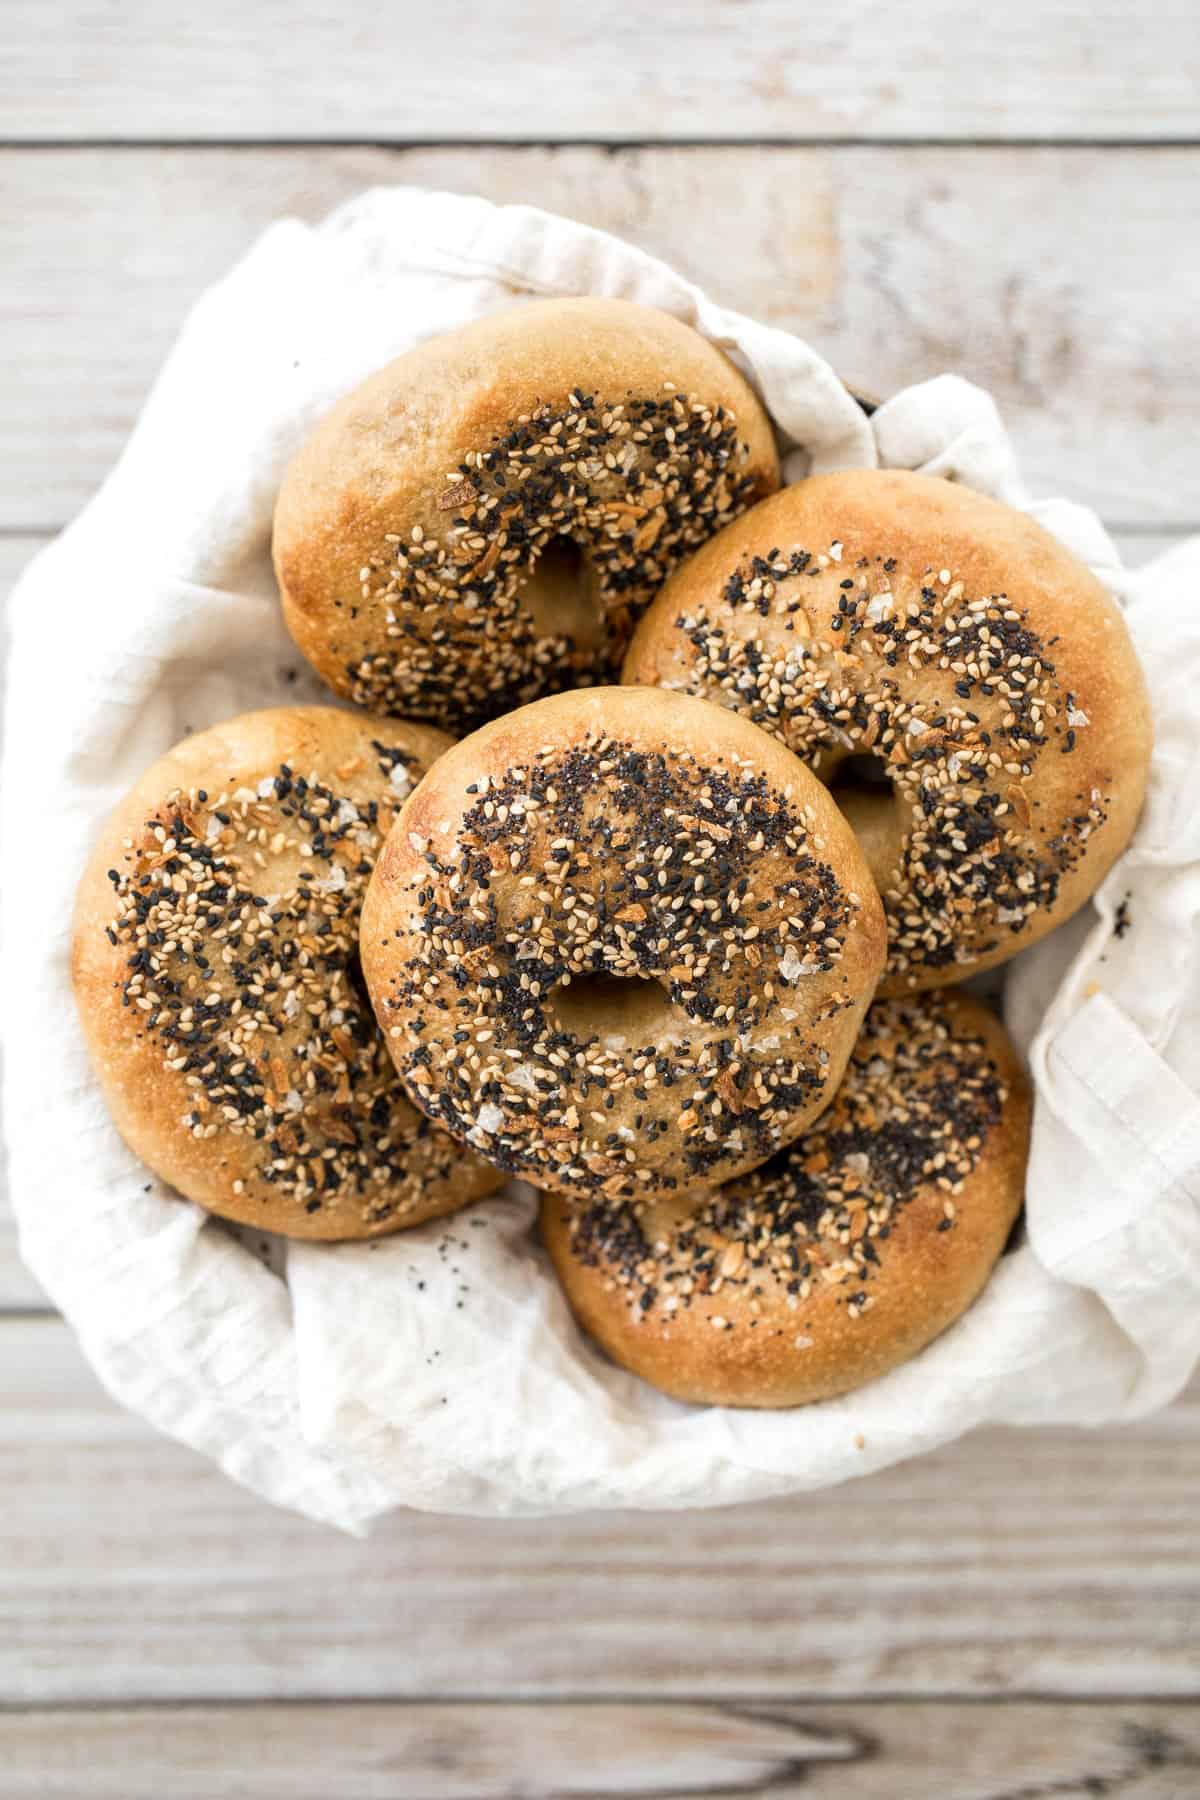
This Mediterranean Stuffed Eggplant is delicious, filling, and healthy. This vegetarian dinner is loaded with veggies and topped with bubbly cheese.
Fruit Salad with Honey Lemon Dressing
Add something refreshing to brunch with this go to, simple and colourful fruit salad. Just toss a handful of fruits together in a honey lemon dressing and dig in.
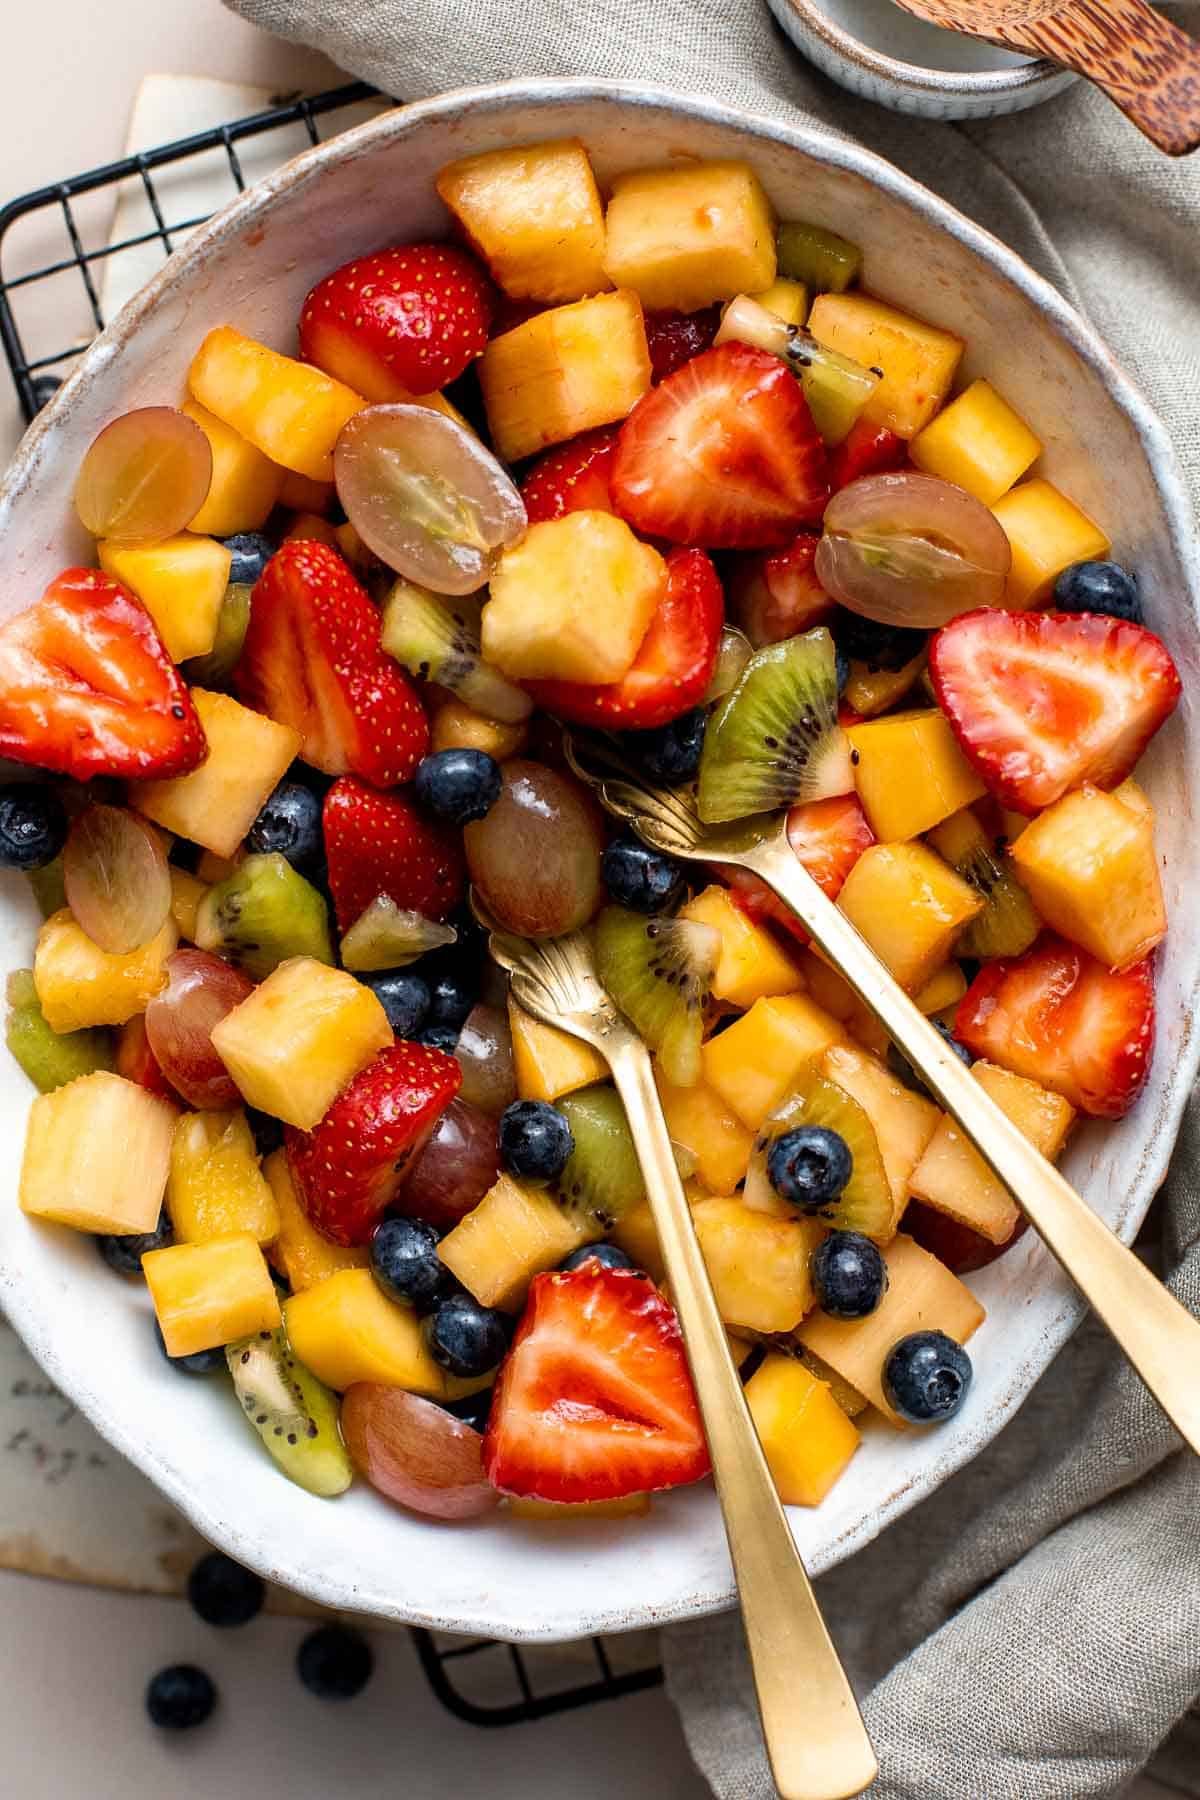
This pull-apart star bread is a beautiful, buttery, sugary, and delicious holiday bread that tastes as good as it looks and is actually easy to make.
Egg muffins are a quick and easy way to meal prep breakfast on-the-go, loaded with cheddar cheese, bacon or salami, and green onions. Make 12 in 30 minutes.

Herb Roasted Sweet Potatoes are a quick easy side dish that's healthy, delicious, and flavorful. A perfect side for your holiday table or weeknight dinner.
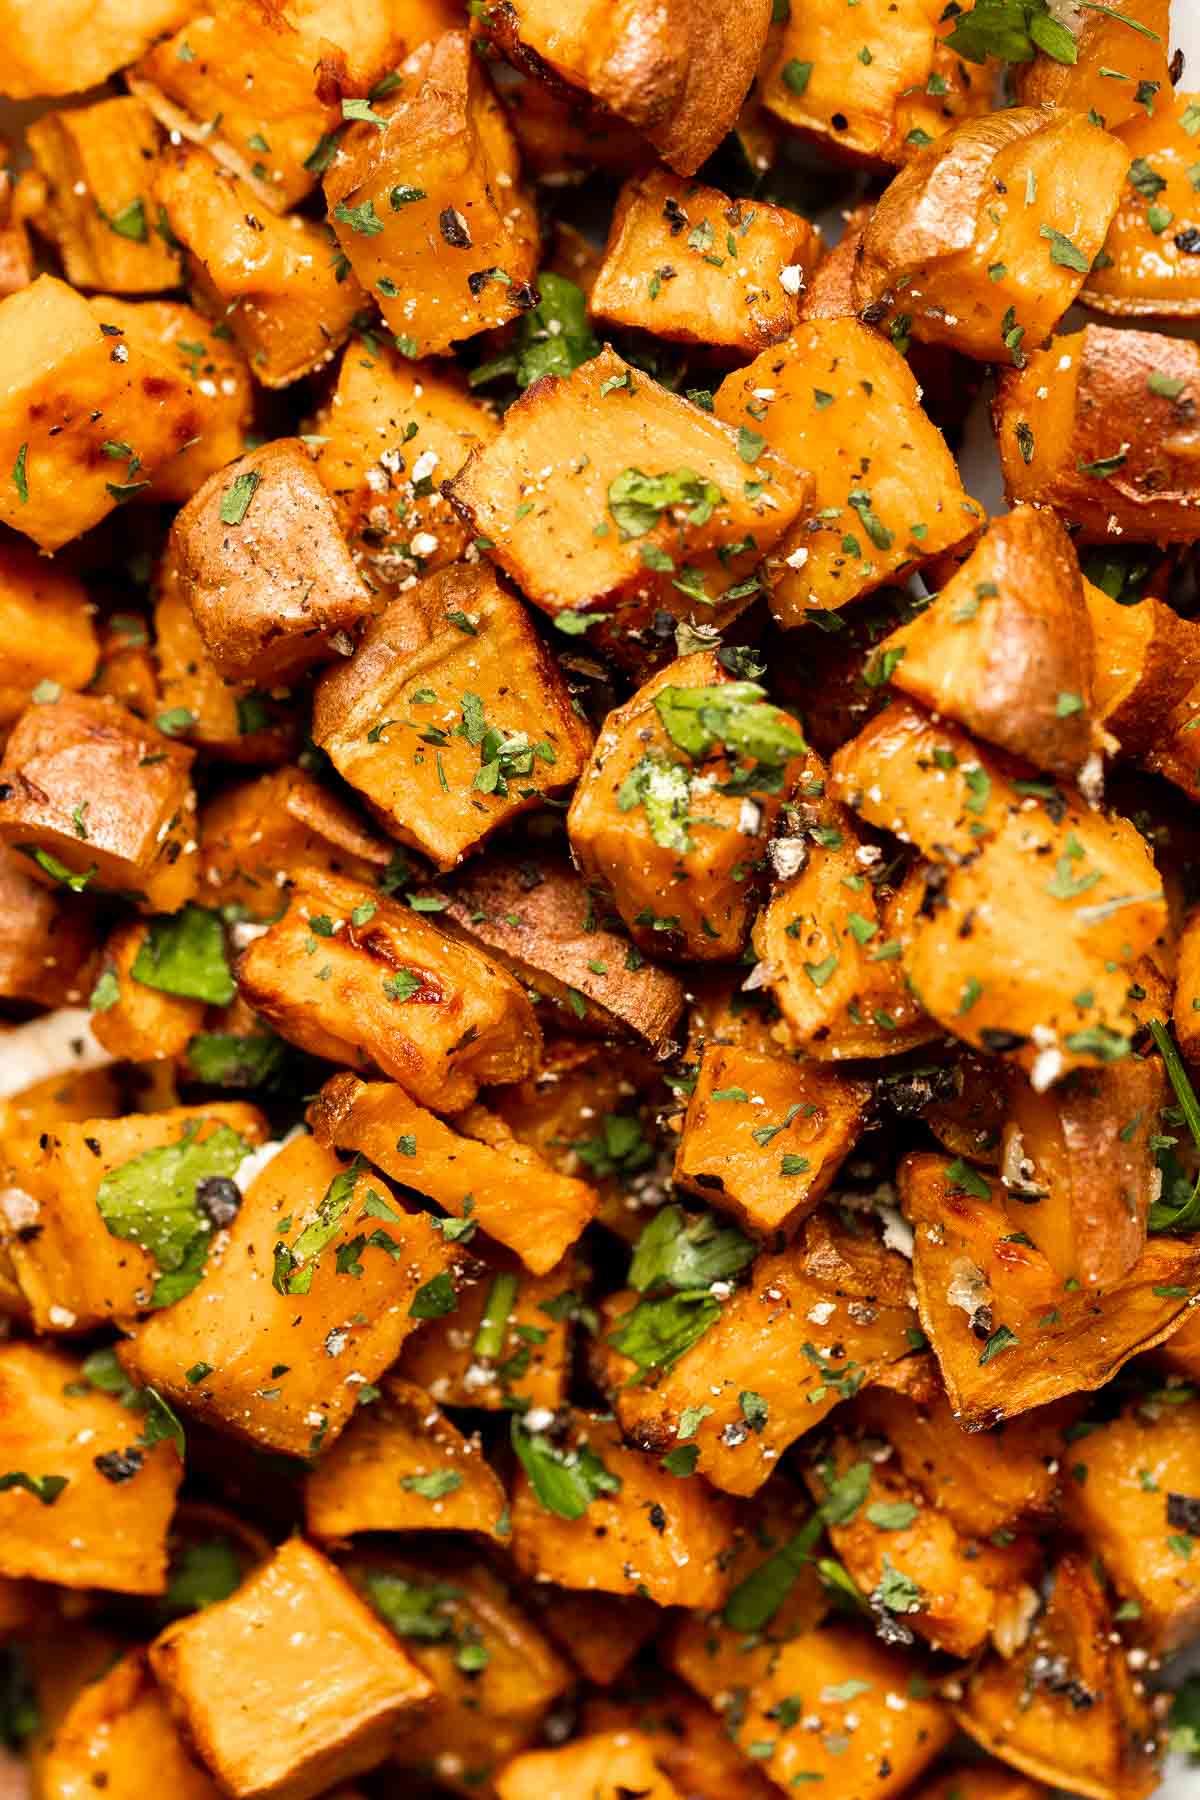
Glazed lemon blueberry scones are total breakfast goals. Blueberries and lemon partner together in a light, tender and flakey scone, drizzled with a sweet lemon glaze that is nothing short of impressive for Easter brunch.
Avocado Toast with Poached Egg
Avocado Toast with Egg is the perfect recipe to make for breakfast when you are short on time but looking for something delicious, healthy, and nutritious.
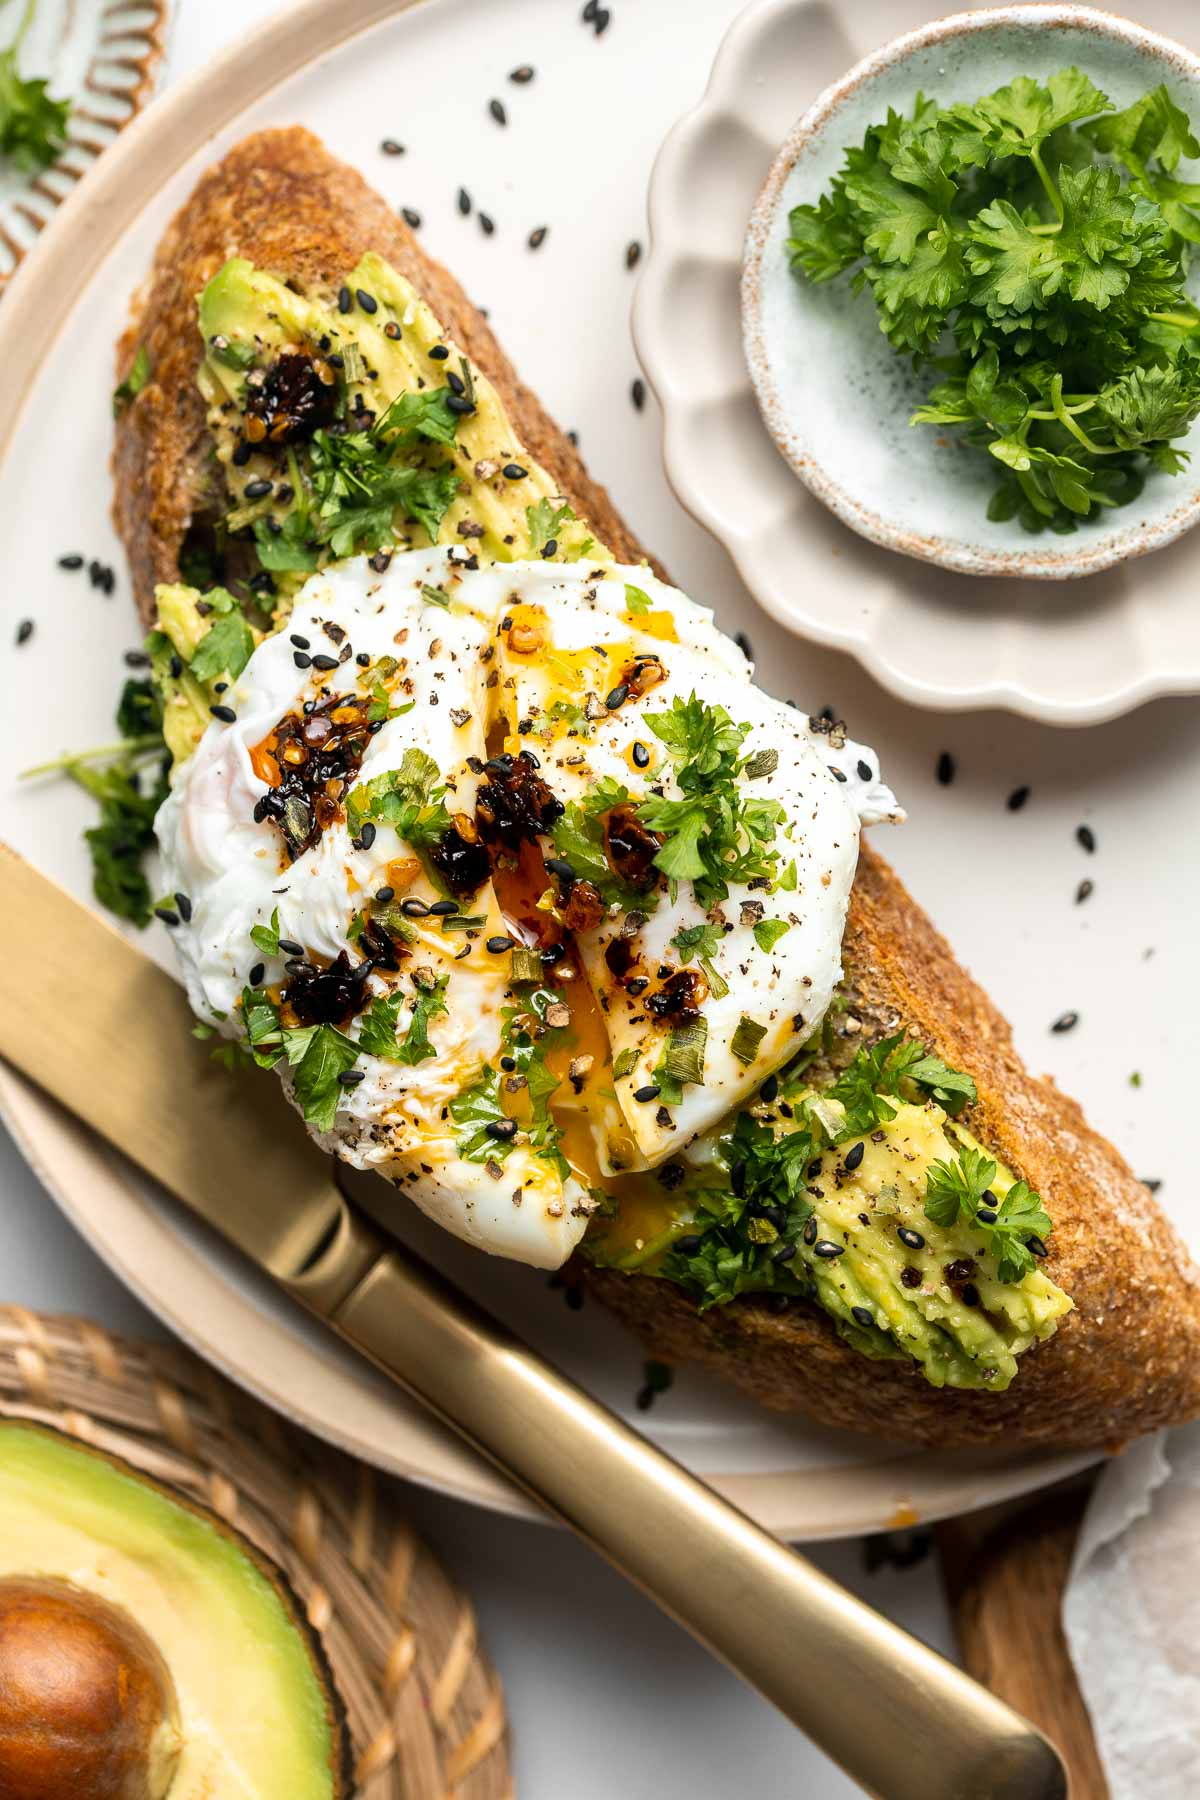
Chilaquiles Verdes feature crispy baked tortilla chips smothered in a homemade sauce loaded with salsa verde and features classic Mexican toppings.

Chocolate and Vanilla Marble Cake
Chocolate and vanilla marble cake is delicious, moist, fluffy with the perfect golden brown crust. With two classic cake flavors, this loaf cake has it all.
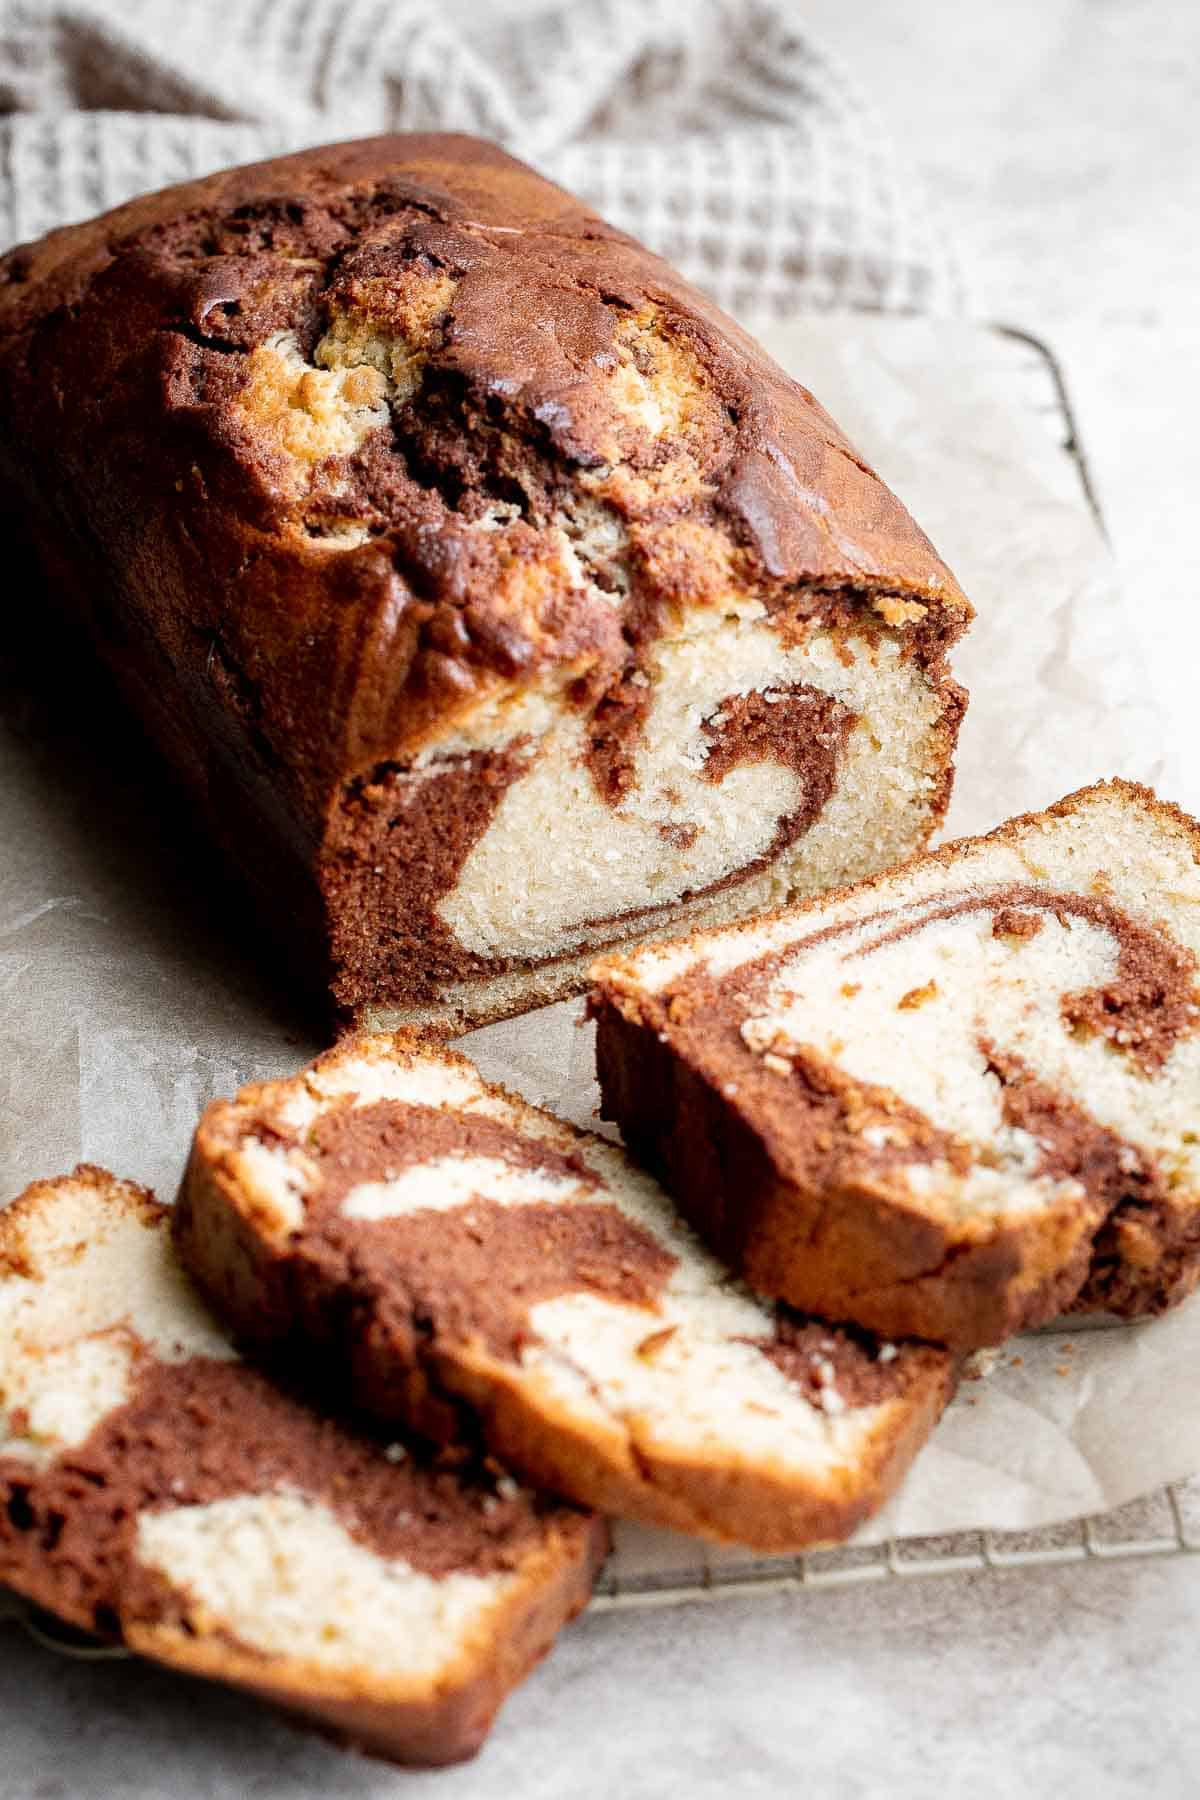
Spring vegetable frittata is a delicious breakfast or served at any time of the day. It's a one-pan meal that starts on the stove and moves to the oven. A perfect Easter breakfast and brunch idea!
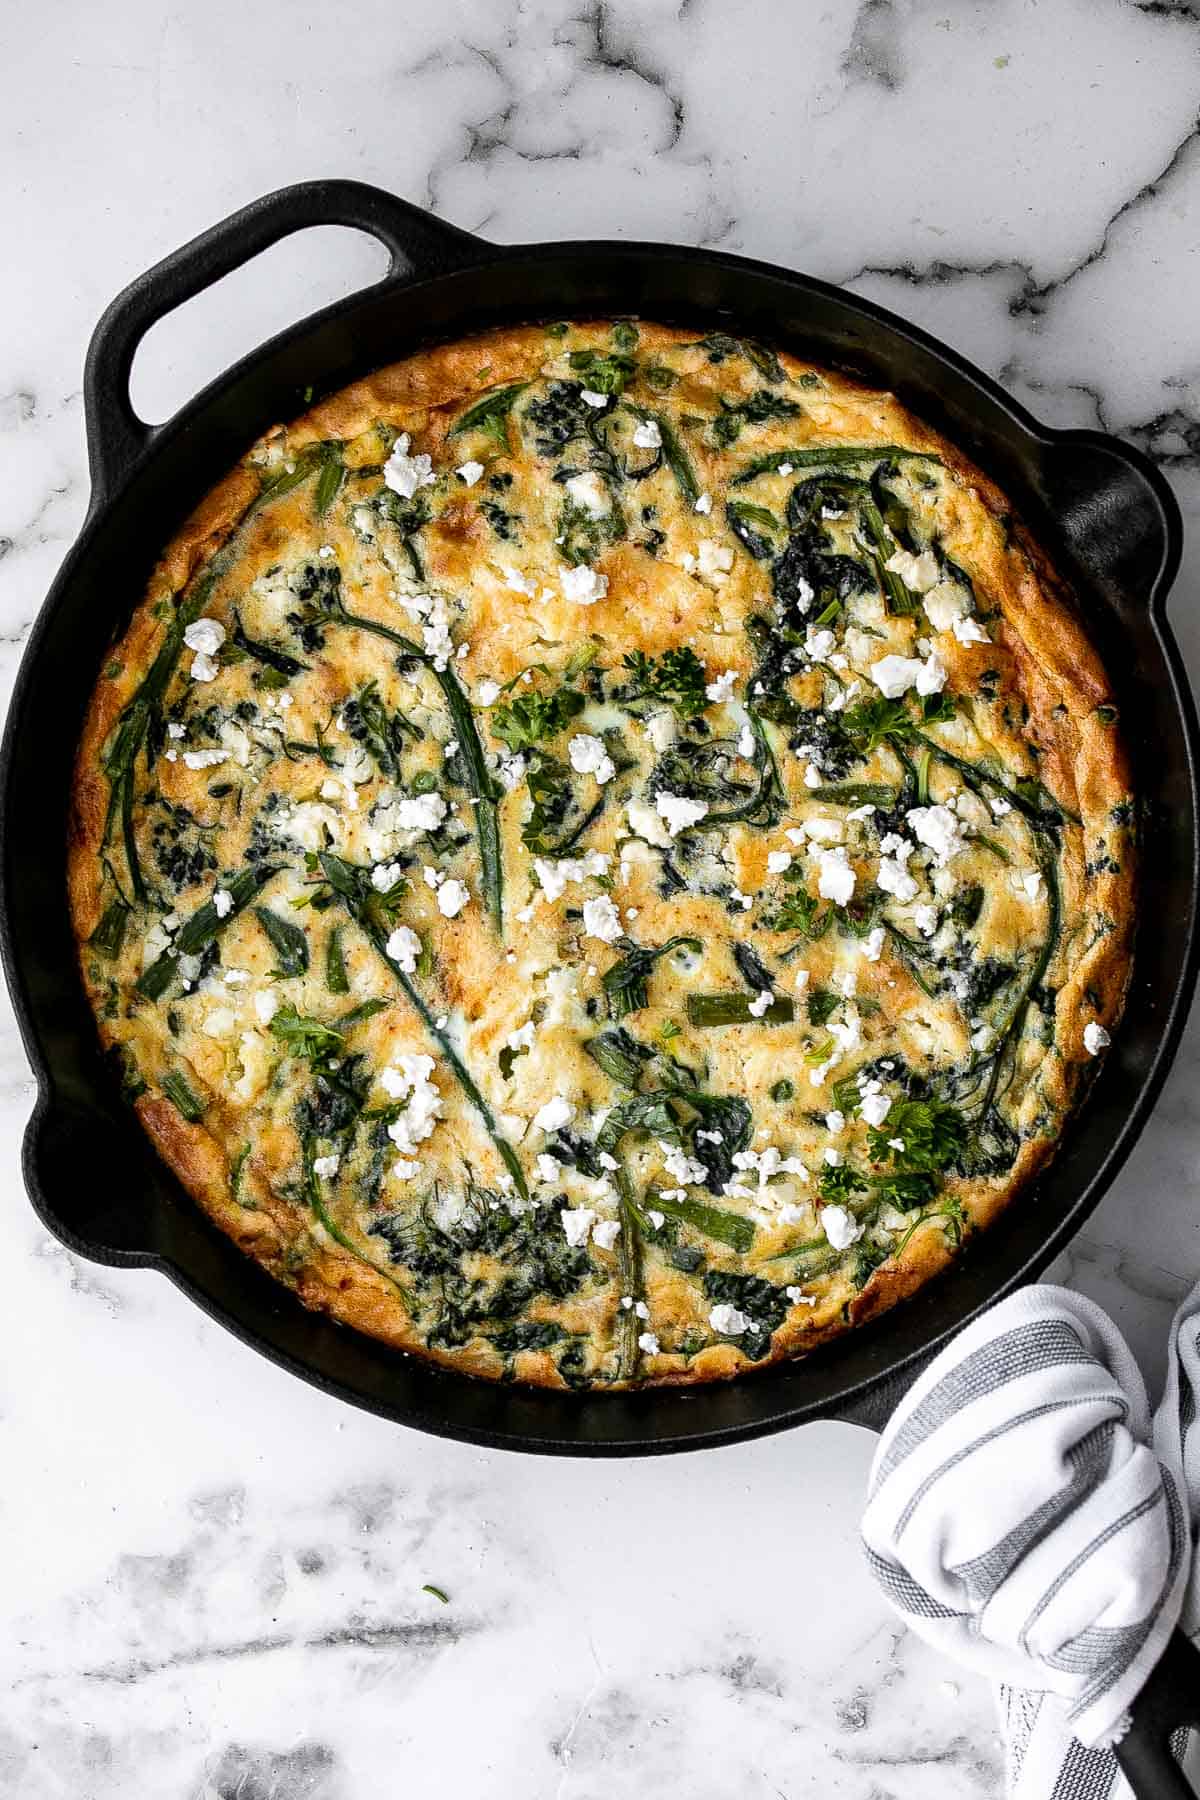
Flaky, fluffy, buttery, and soft, these easy homemade biscuits come together with only a handful of ingredients you already have at home.
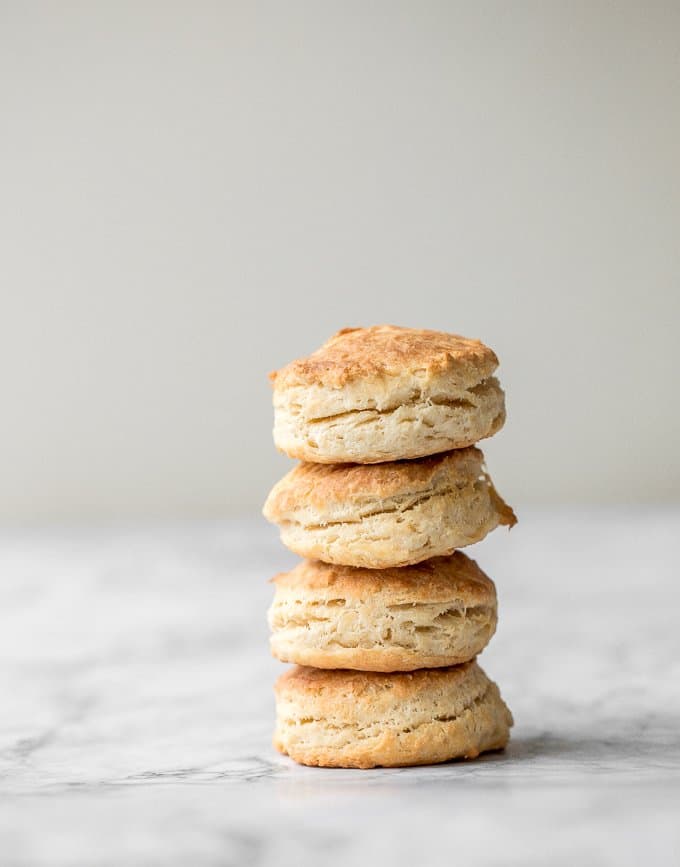
Shakshuka is a quick and easy, one-pan Middle Eastern classic with a savory saucy tomato-vegetable base and perfectly poached eggs on top.

Easy lemon blueberry bread with lemon glaze is soft, moist, and delicious. This quick bread with fresh blueberries and lemon is the perfect summer dessert.
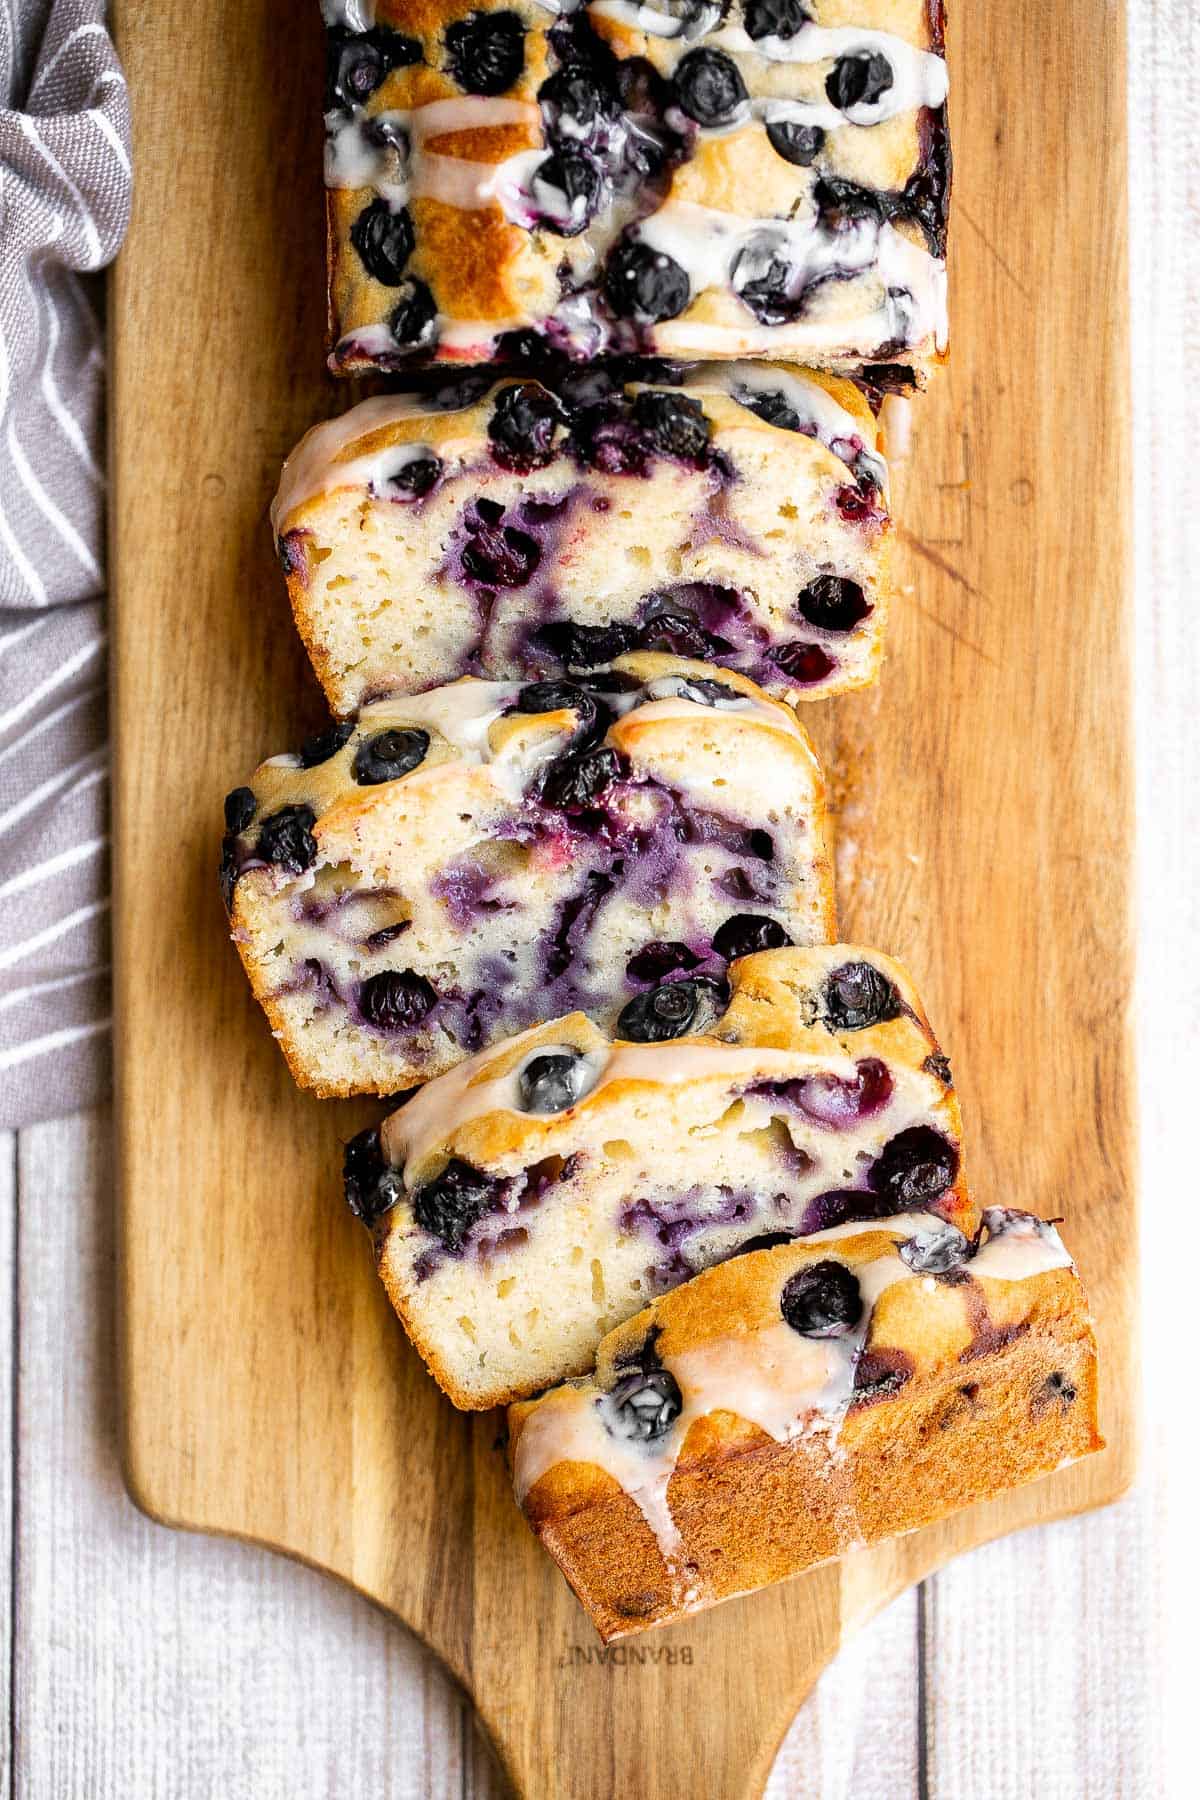
Baked Chicken Quesadillas are cheesy, crispy, flavorful, and delicious. This family-friendly recipe is quick and easy to make in just 30 minutes!
Sourdough Cinnamon Roll Twist Bread
Soft and fluffy sourdough cinnamon roll twist bread is buttery and layered with cinnamon sugar. Prep it the night before and freshly bake it for breakfast.
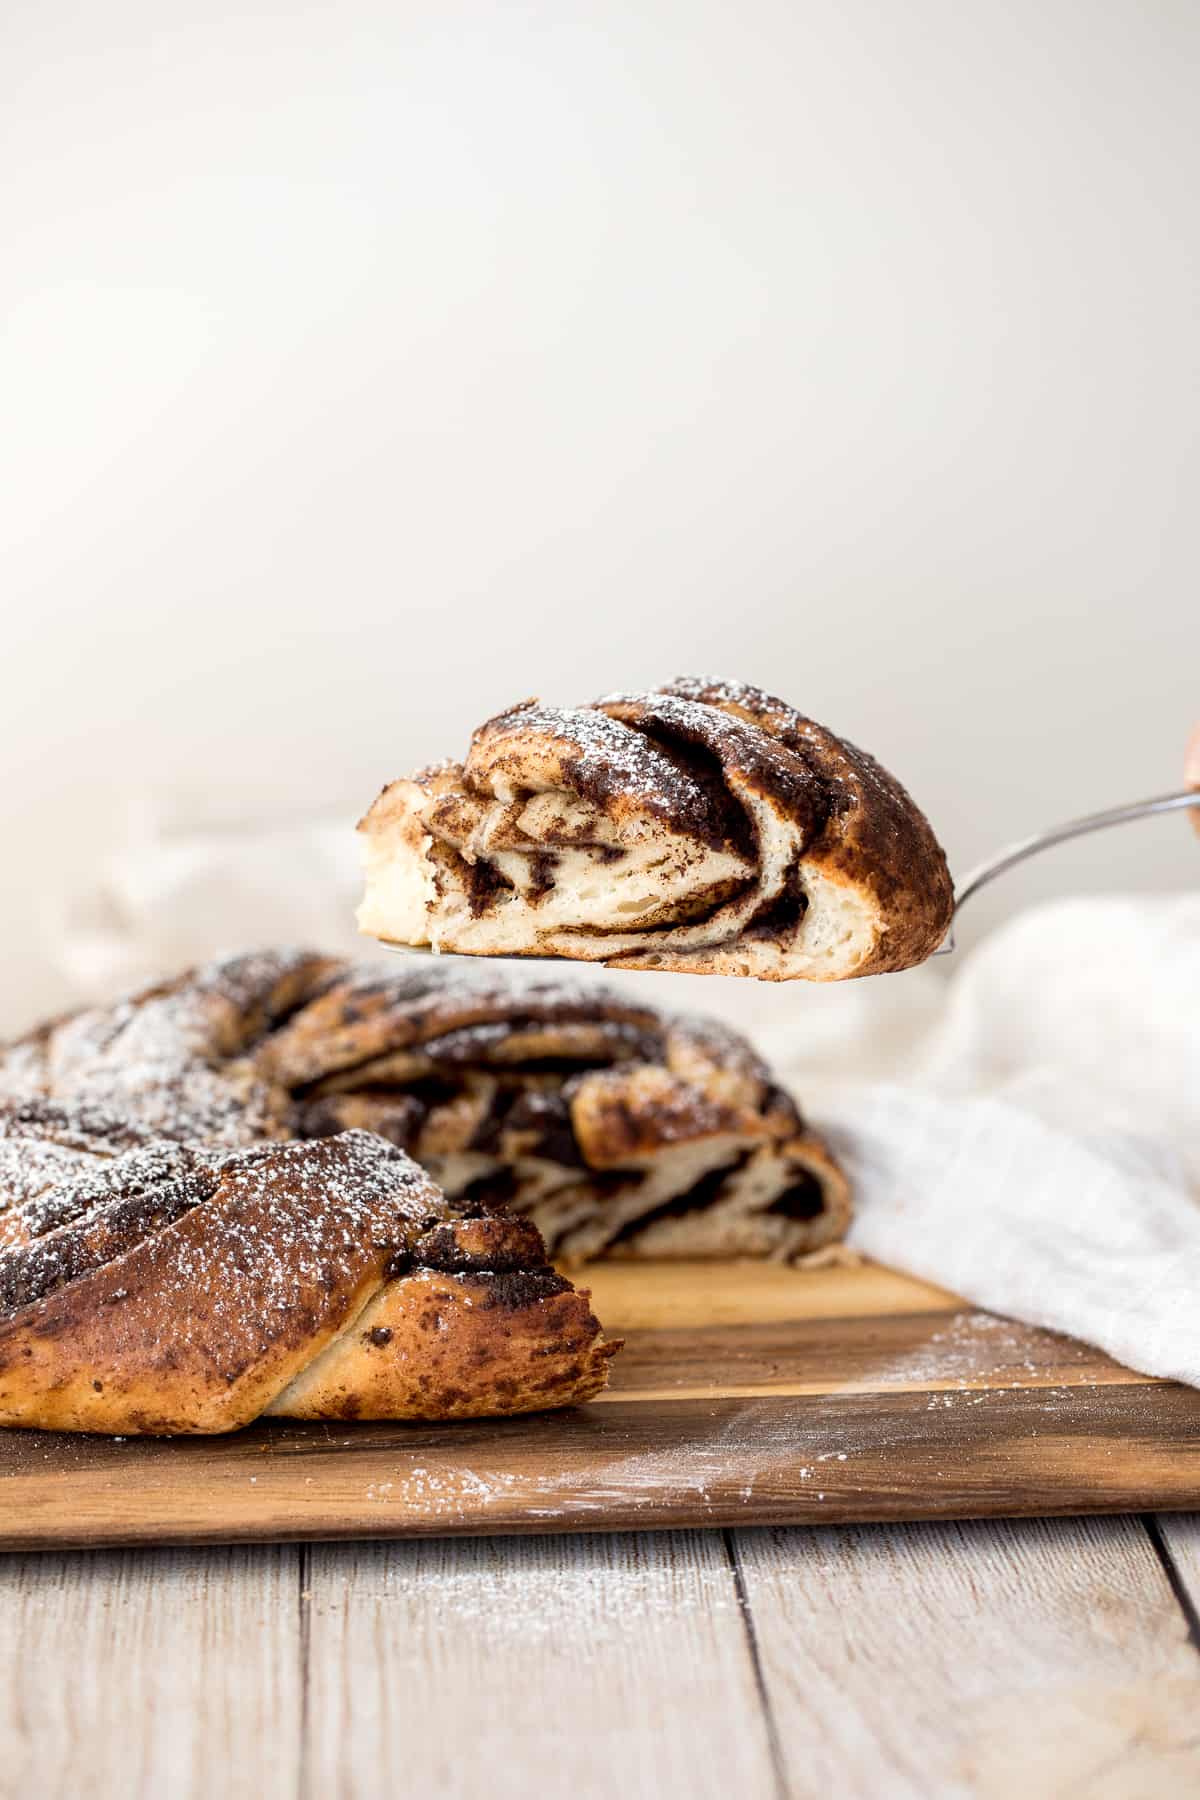
Majoon Banana and Date Smoothie
Majoon banana and date smoothie is a delicious and healthy all-natural energy drink with bananas, dates and nuts. The perfect breakfast or snack.
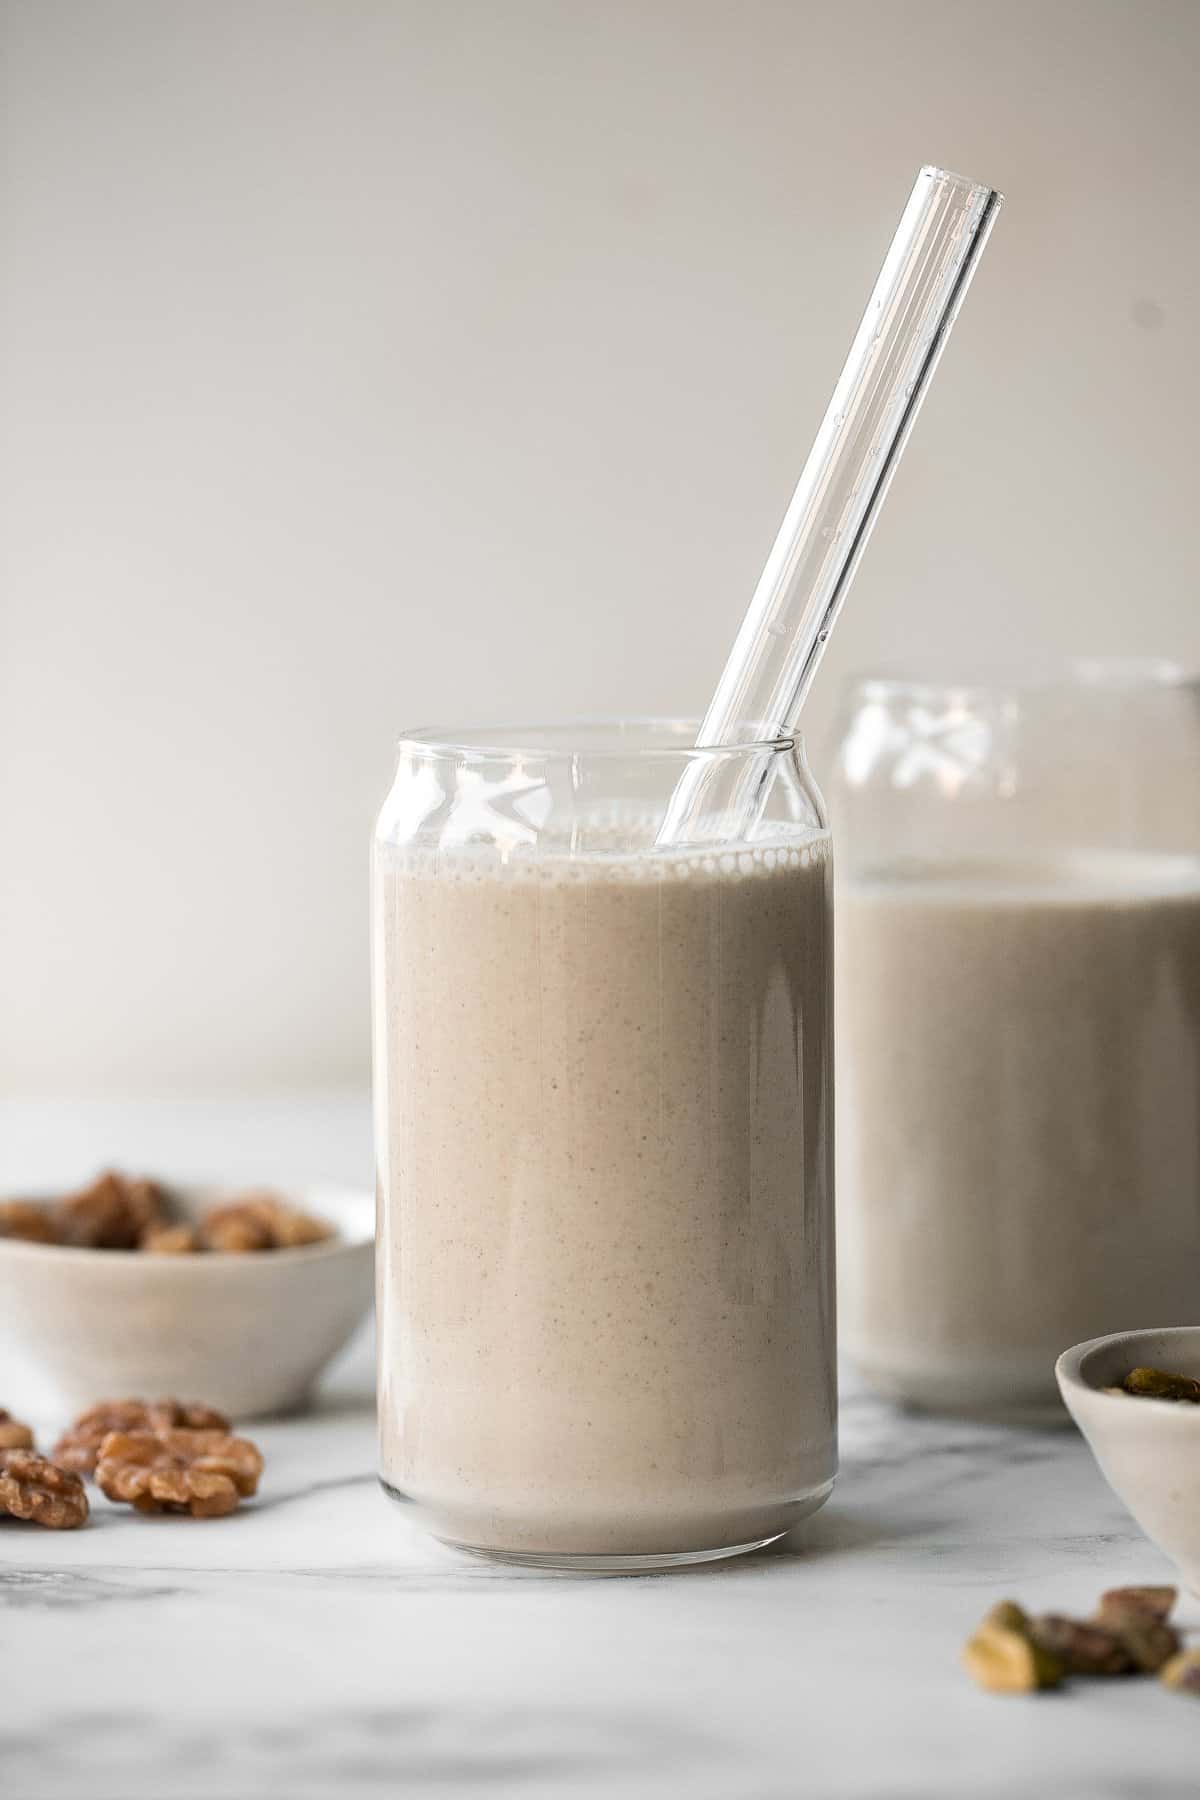
Coconut Maple Walnut Granola is easy to make from scratch with simple ingredients including 3 types of nuts. It's gluten-free, vegan and refined sugar-free!
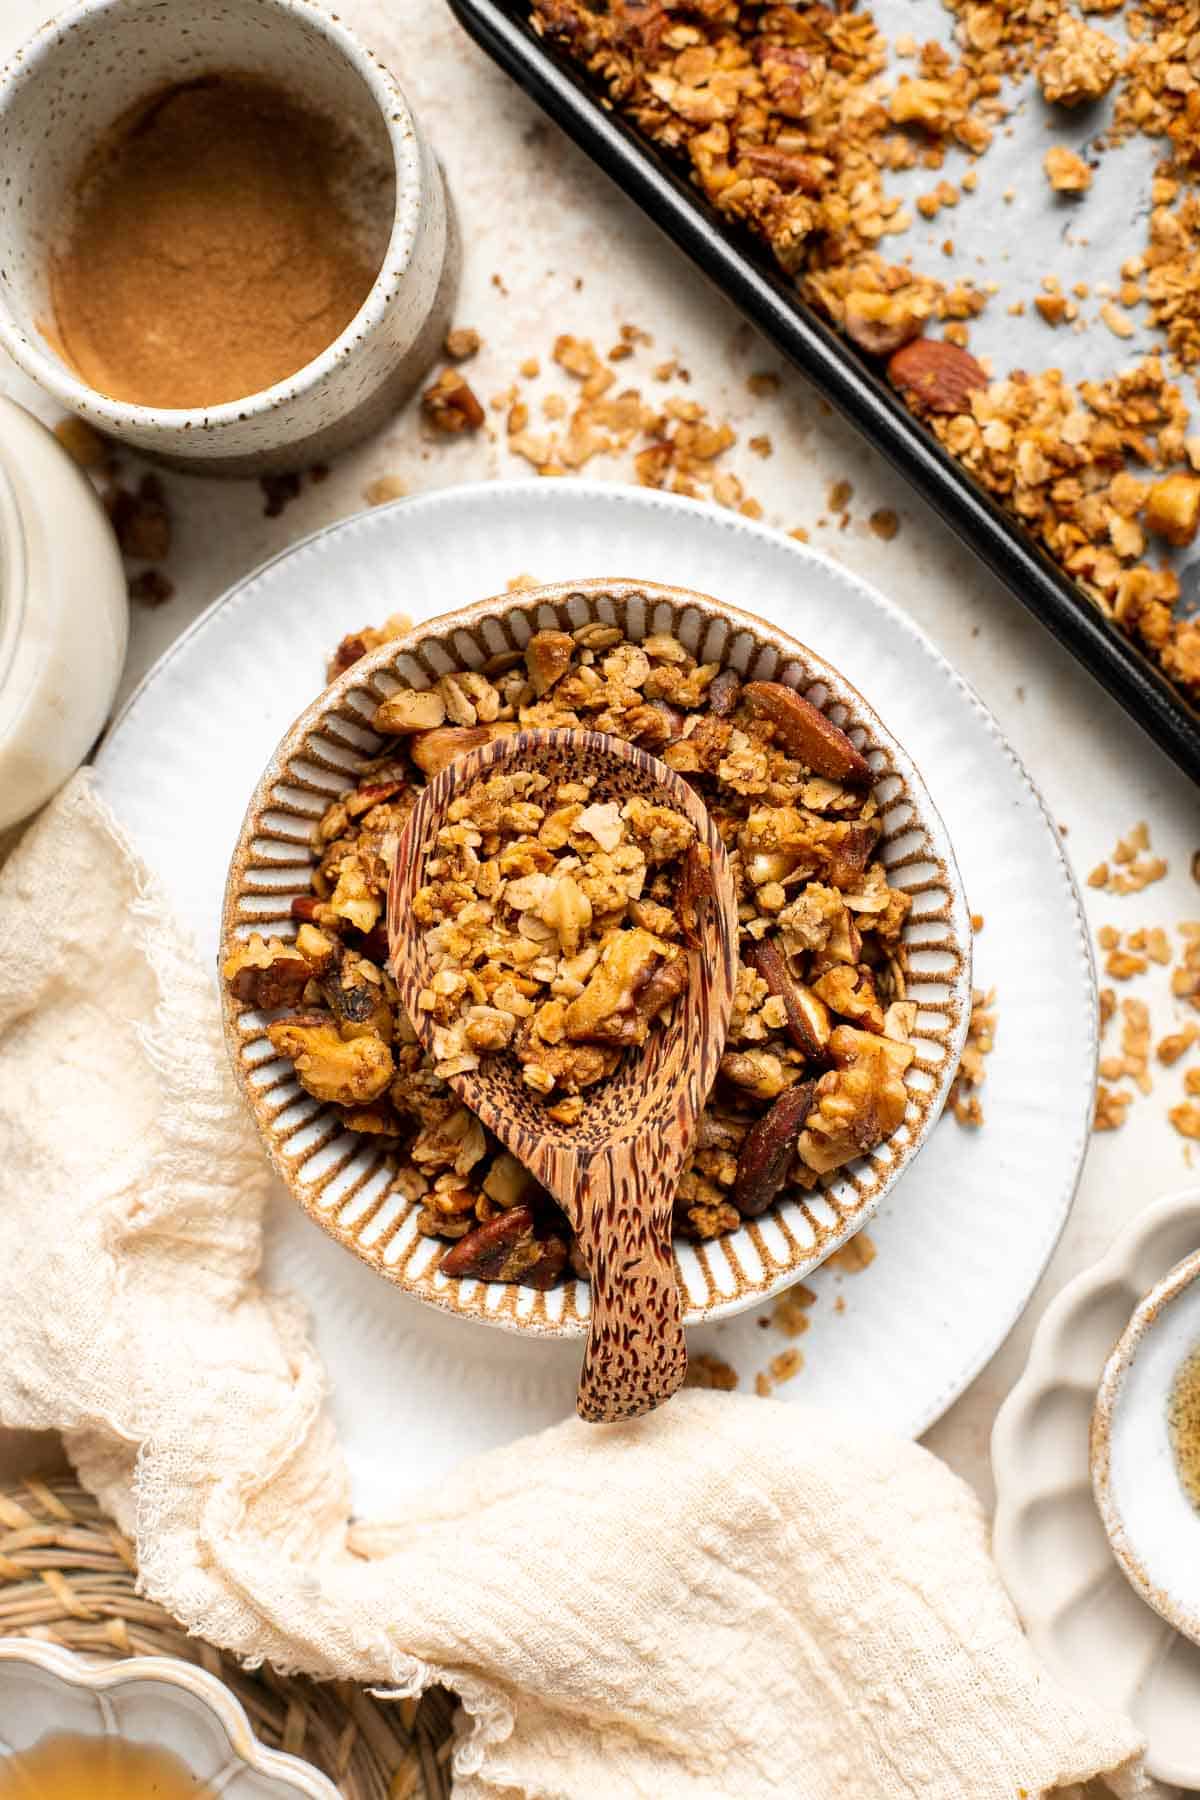
Soft and fluffy lemon sweet rolls are filled with a lemon vanilla sugar and topped with homemade lemon cream cheese icing. They're sweet, citrusy, and tart.
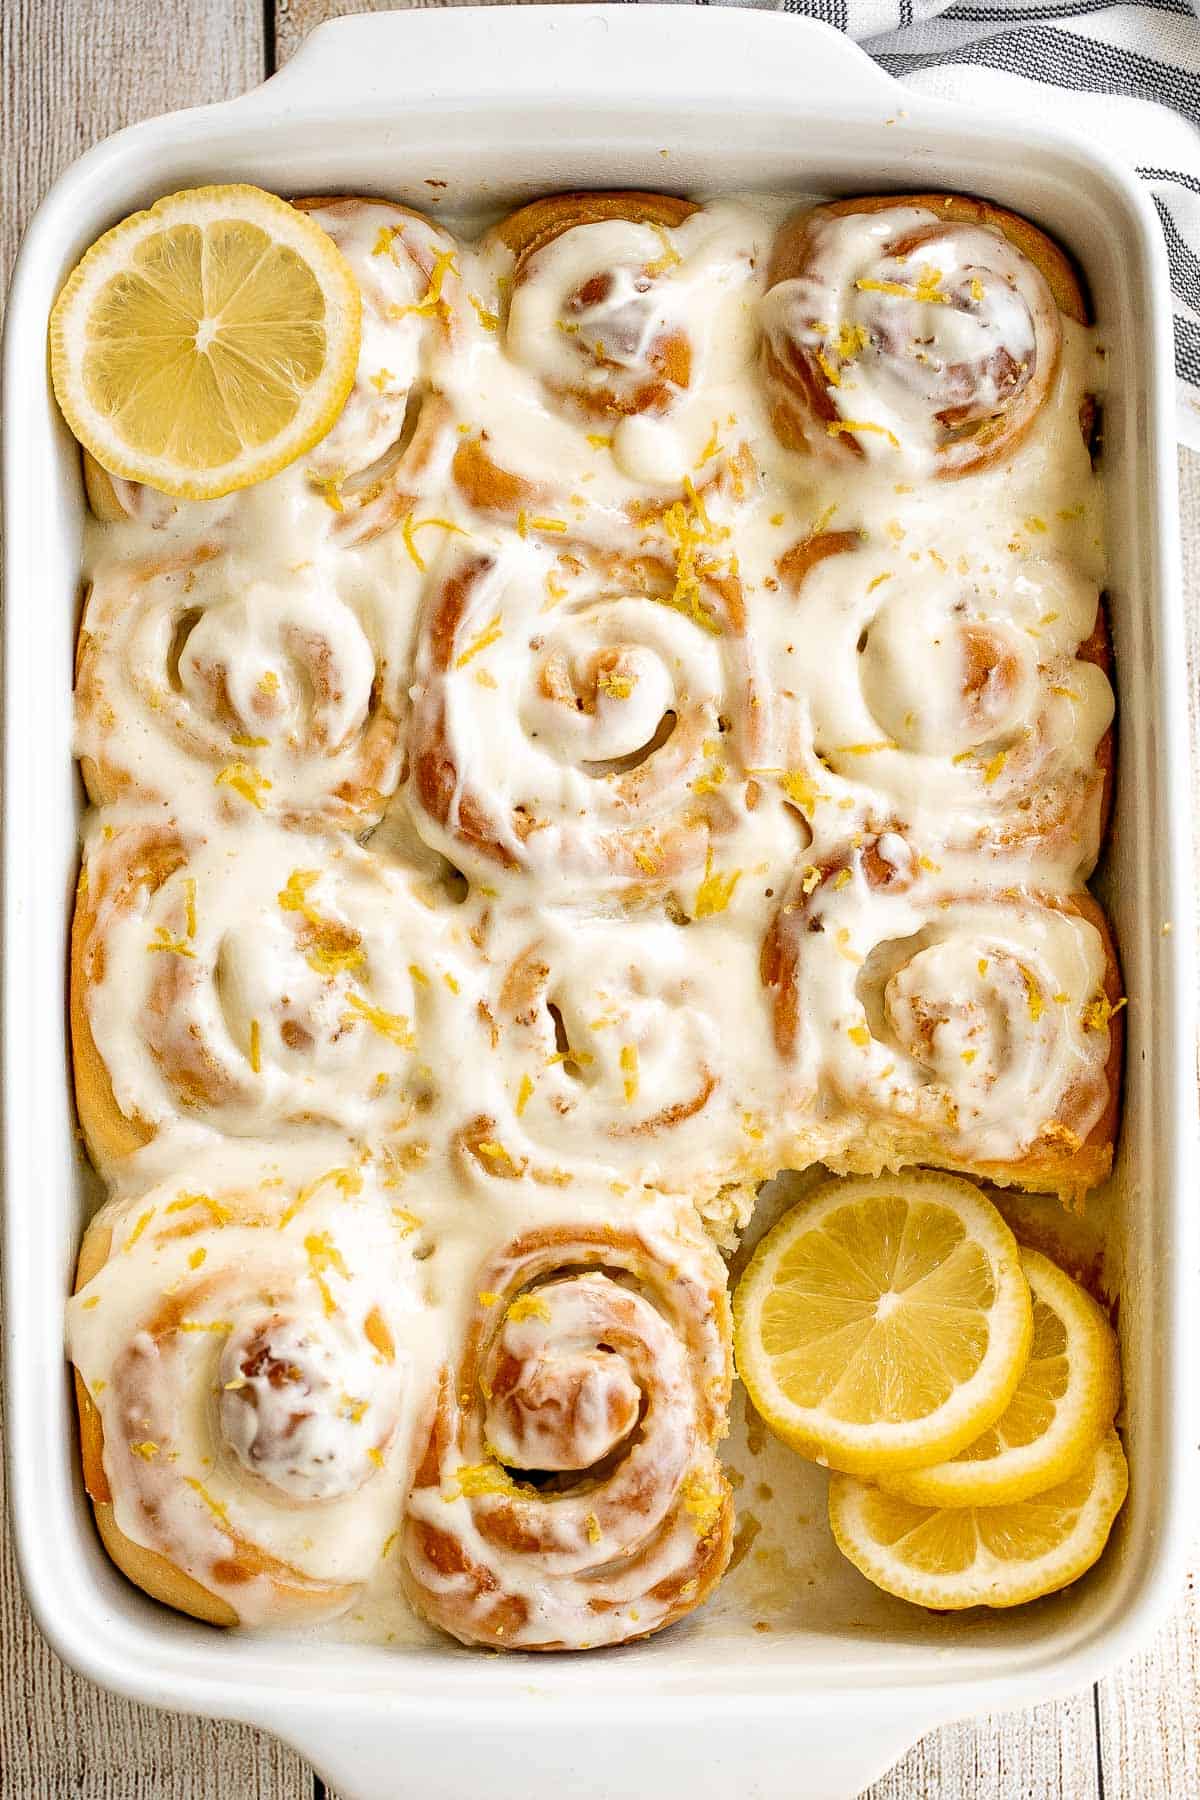
More Daily Recipes
- 50 Best Breakfast Ideas
- 40 Meal Prep Ideas
- 50+ Healthy Lunch Ideas
- 40 Hot Lunch Ideas
- 60+ Easy Dinner Ideas
- 50 Easy Baking Recipes
Did You Make Any of These Brunch Recipes?
Please leave a comment and rating below, and let me know what you thought of this round up of best brunch ideas. Be sure to snap a picture and tag me on Instagram @aheadofthyme or share it on the Pinterest pin so that I can follow along.
HUNGRY FOR MORE? Don't forget to sign up for my email newsletter so that you don't miss any recipes. You can also follow along on Instagram and Pinterest for more recipe updates.
Caprese Frittata
This Caprese Frittata is light and fluffy, laced with ribbons of fresh basil and topped with melted mozzarella cheese and blistered balsamic tomatoes. It's a great meal to serve any time of the day. The best part? Caprese eggs are ready to serve in about 10 minutes.
I'm going to let you in on a little secret. This 10-minute caprese frittata is the breakfast you've been waiting for! After a quick 3 minutes on the stove, this finishes up in 2-3 minutes flat under a broiler. Which means this can also sub in as a crave-worthy dinner for busy weeknights when you get home late from work. I could eat eggs any time of day, so if you are like me, this is the perfect dish for you!
Why You'll Love this Caprese Frittata
- Classic caprese ingredients. Craving fresh Italian flavors? Channel one of Italy's most iconic pairings in this caprese frittata. This dish combines all the ingredients in a classic summery Caprese Salad mixed with light and fluffy eggs. I am talking tomatoes, mozzarella, and fresh basil.
- Quick and easy to make. This frittata recipe doesn't require a seasoned chef to make it successful! All it takes is a few moments of patience (2 minutes worth, to be exact) while you carefully unstick the eggs from the side of the pan. Then pop it into the broiler for a couple minutes and prepare the burst tomato topping. That's as complicated as it gets!
- The burst tomato topping. My personal favourite part of this dish are the gorgeous, cooked tomatoes on top of the frittata. They are cooked quickly and at a high heat so that they pop just a little bit. Finish them off with a drizzle of sweet, tangy balsamic vinegar and I swear you'll think it's summer already! Grab a fork (or 4) because breakfast is served, and you're going to love it!
- A summer meal. I don't know about you, but I am seriously longing for summer, so thank goodness it is right around the corner. These caprese eggs are everything you love most about warm weather eating - fresh ingredients, bold flavors, and light. Serve it for breakfast, lunch, and everything in between - breakfast for dinner anyone?
- It's freezer-friendly. Unlike most egg-heavy dishes, this caprese frittata is freezable, thanks to some stabilizing help from full-fat dairy. Save leftovers for later or add a full frittata to your rainy day stash for easy cooking at a later date!
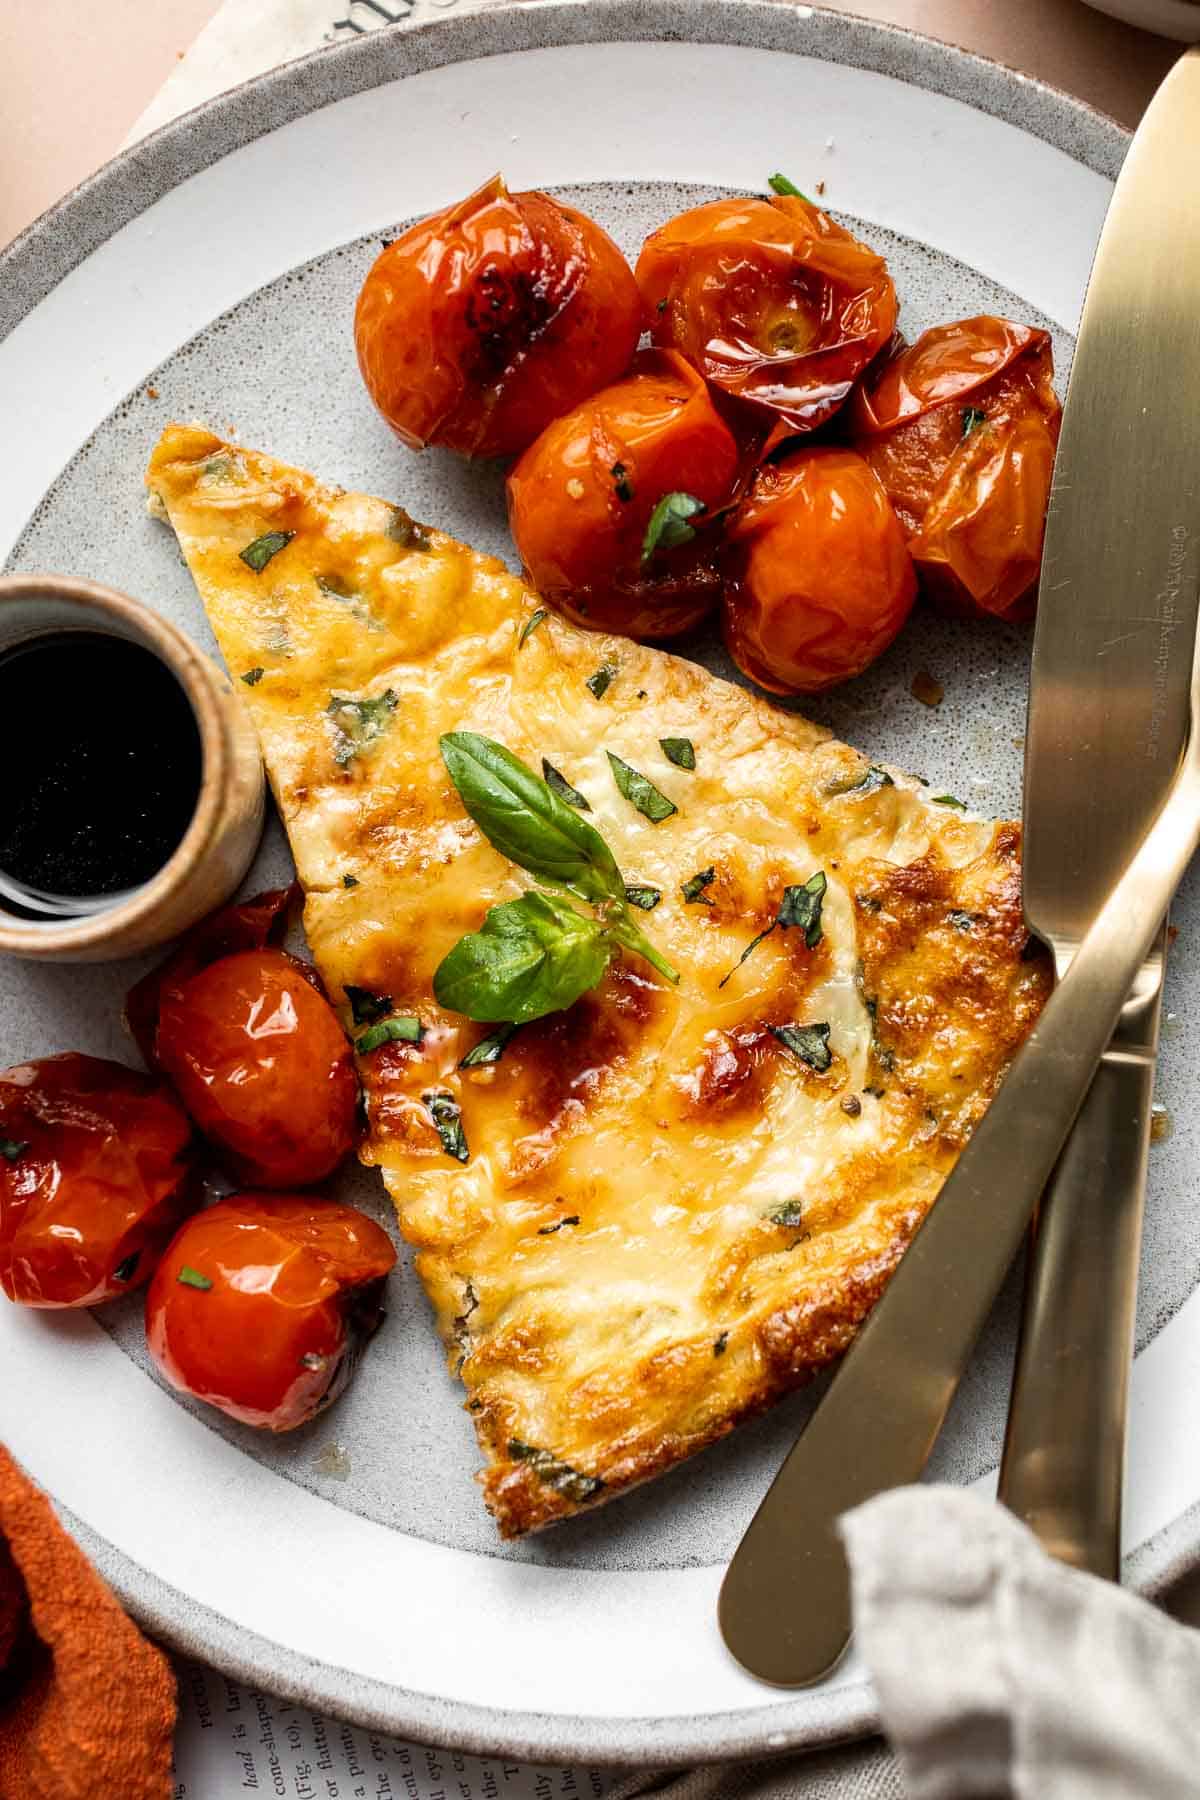
Ingredient Notes
To make this delicious and easy Caprese Frittata, you will need the following ingredients (full measurements in recipe card below):
- eggs - set your eggs out on the kitchen counter for at least 20 minutes to bring them up to room temperature before using them. If you need to warm them up quickly, add them to a bowl of warm (but not hot) water for a few minutes.
- milk - you can also use heavy cream or a high-fat plant based milk like coconut milk in its place.
- basil - fresh basil is essential to the recipe, but you can use dried basil if you're all out. Just be aware that the flavor and texture will change slightly.
- avocado oil - vegetable oil or olive oil will also work.
- mozzarella cheese - mozzarella is traditionally used in caprese recipes, but you can swap it with burrata, paneer, or halloumi if necessary.
- olive oil - if you don't have olive oil, use avocado oil in its place.
- cherry tomatoes - grape or plum tomatoes are also okay to use.
- balsamic vinegar - if you don't have balsamic vinegar, replace it with red wine vinegar instead.
- salt and pepper
You will also need measuring cups and spoons, mixing bowl, cast-iron skillet (or oven-safe skillet), and small saucepan.
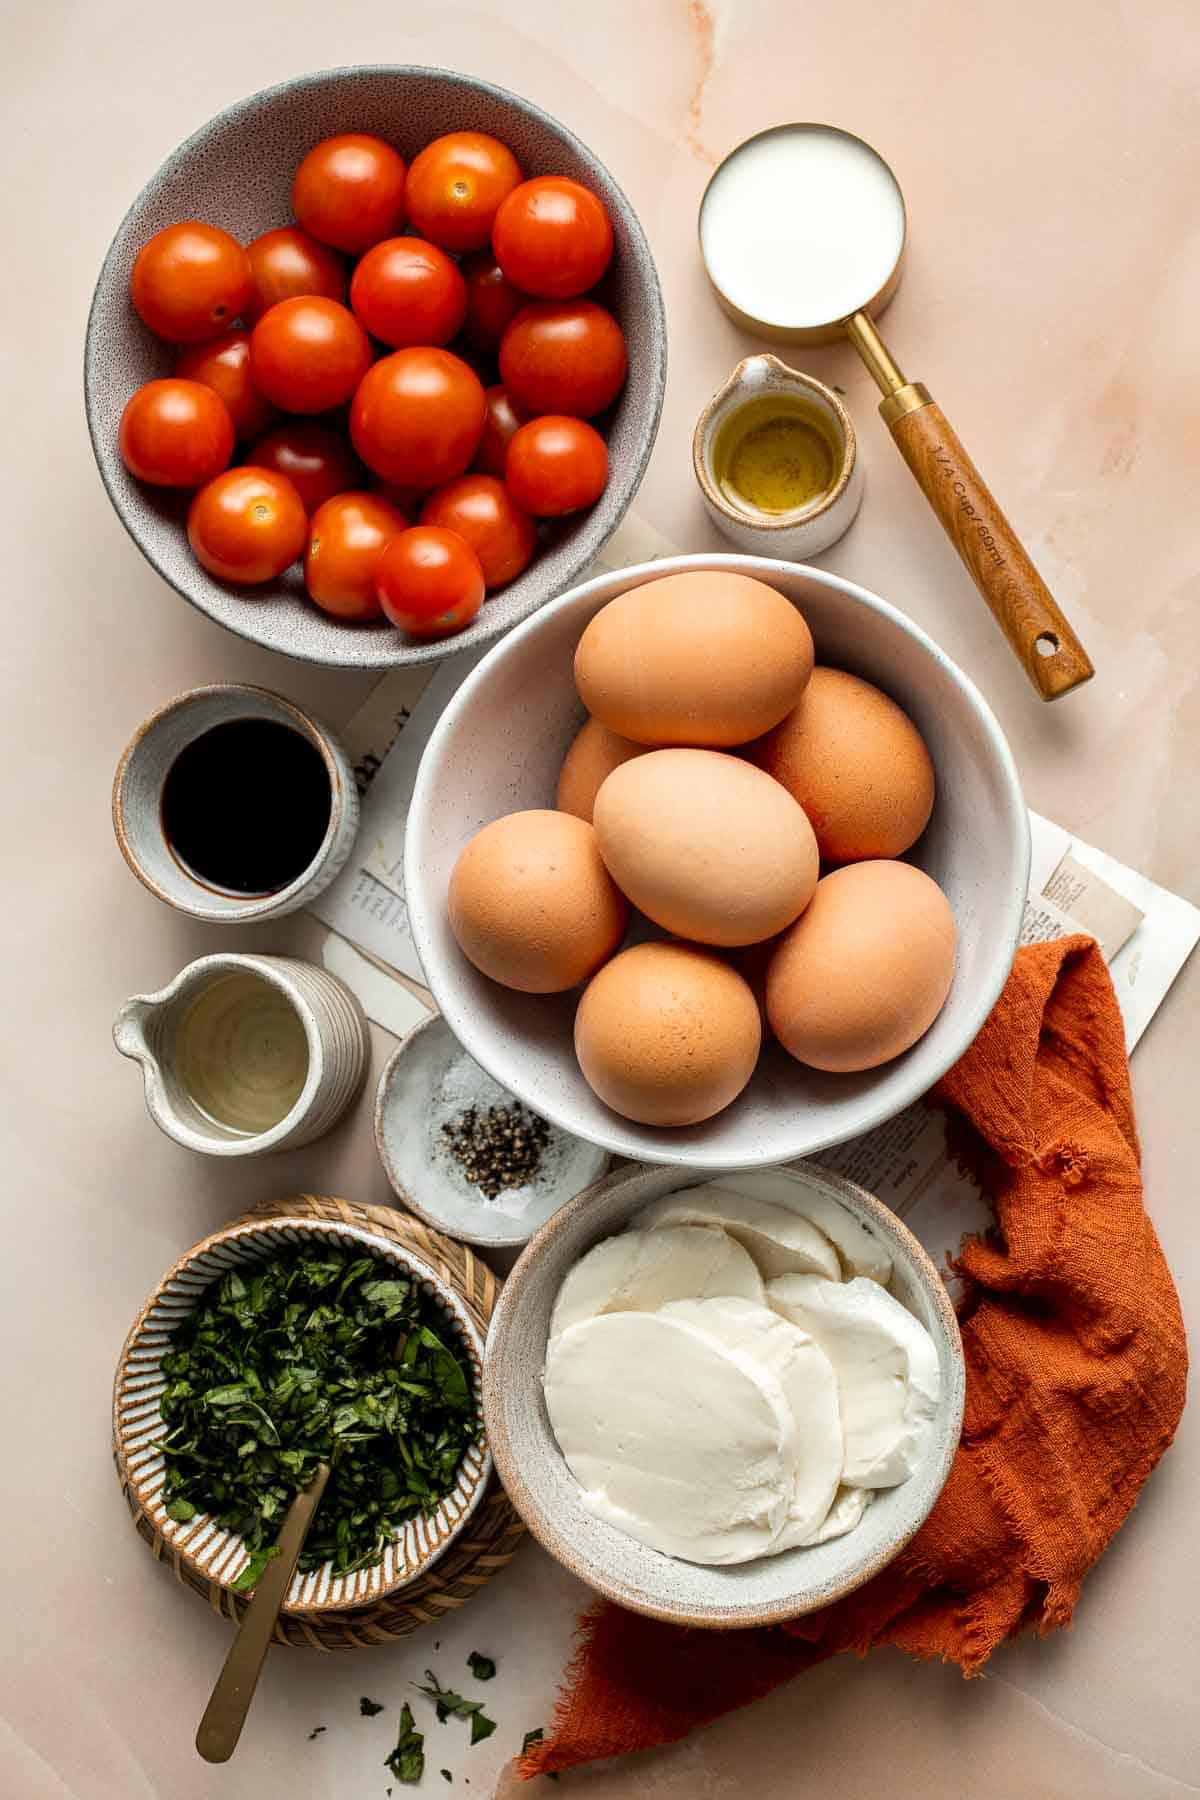
How to Make the Best Caprese Frittata
- Make egg mixture. Combine eggs, milk, basil, ½ teaspoon salt, and pepper in a large mixing bowl. Whisk to combine.
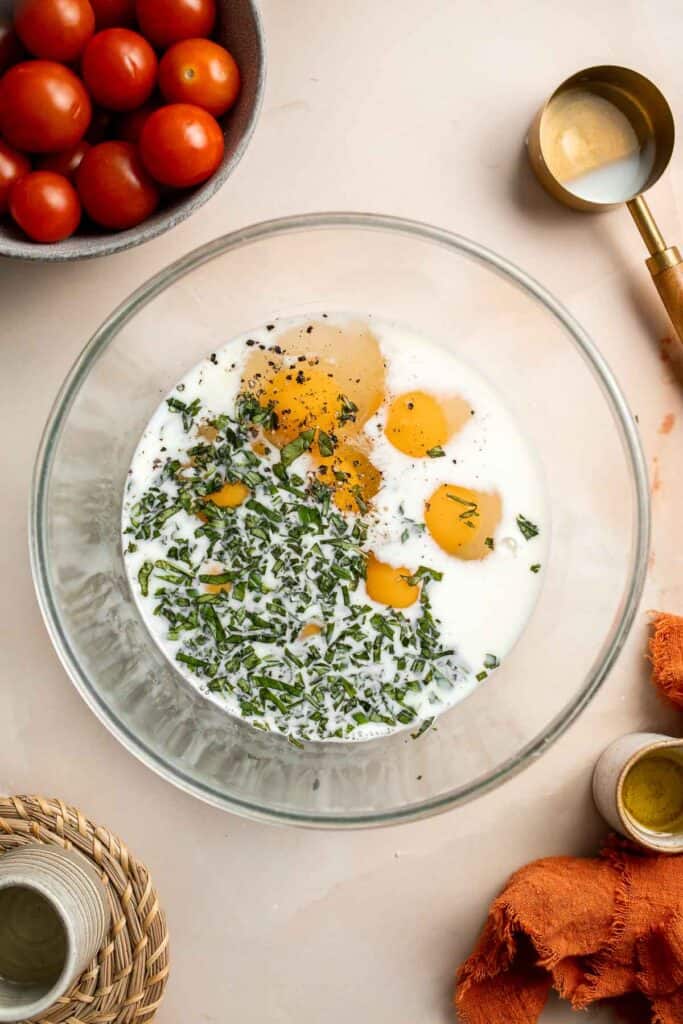
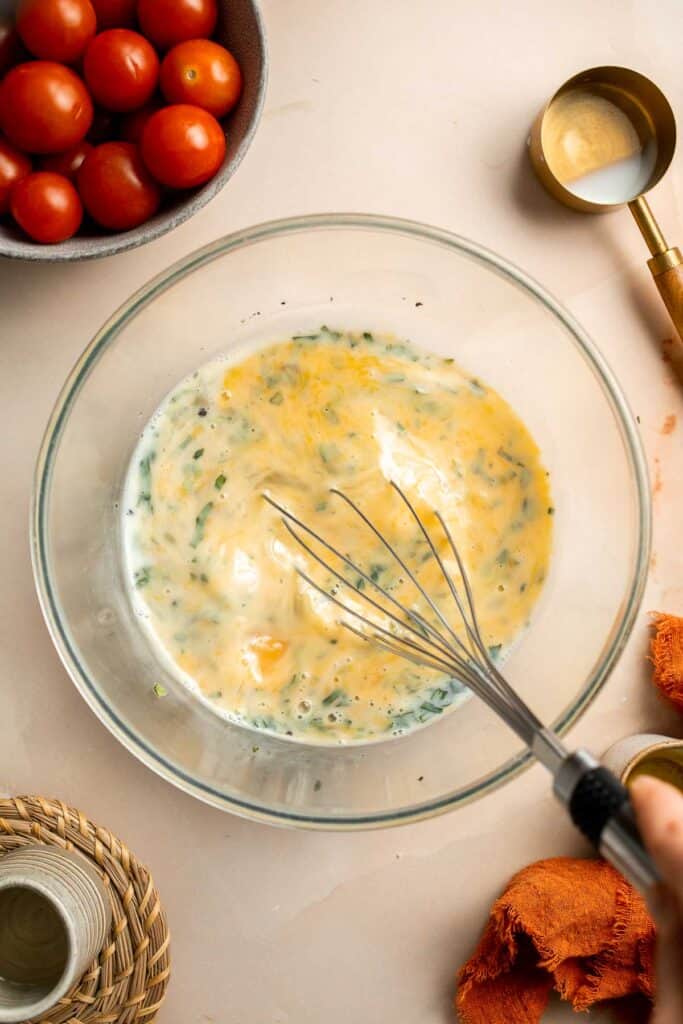
- Prep oven. Place an oven rack about 2-3 inches from the top and set broiler to high.
- Slightly cook eggs. Heat oil in a large cast-iron (or oven-safe) skillet over medium-high heat. When hot, add egg mixture and cook for 2 minutes, using a spatula to pull back and loosen the eggs slightly from the sides, allowing more raw egg to coat the pan. Remove from heat and let it rest for one minute.
- Add cheese and broil. Place sliced mozzarella rounds on top of the eggs and place skillet in the oven. Broil on high for 2-3 minutes, or until eggs are just set. Remove from oven and set aside to cool slightly.
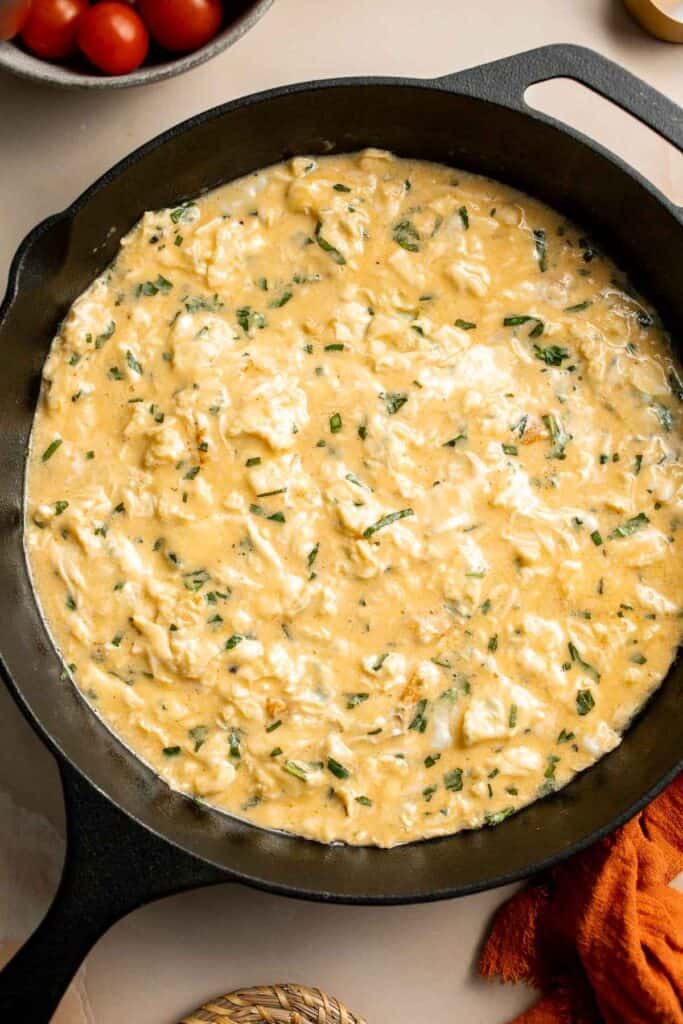
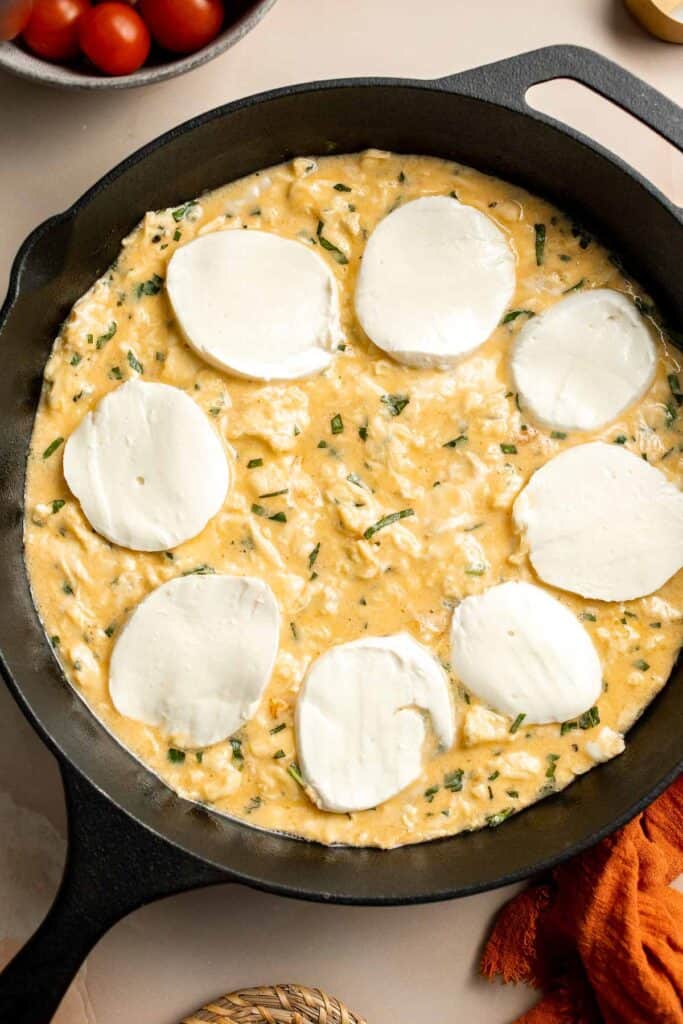
- Cook tomatoes. While the frittata is cooling, heat olive oil in a small pan over high heat. Add tomatoes and cook, gently swirling the pan often, for 5-7 minutes, until tomatoes are browned and beginning to burst. Season with remaining salt and balsamic vinegar.
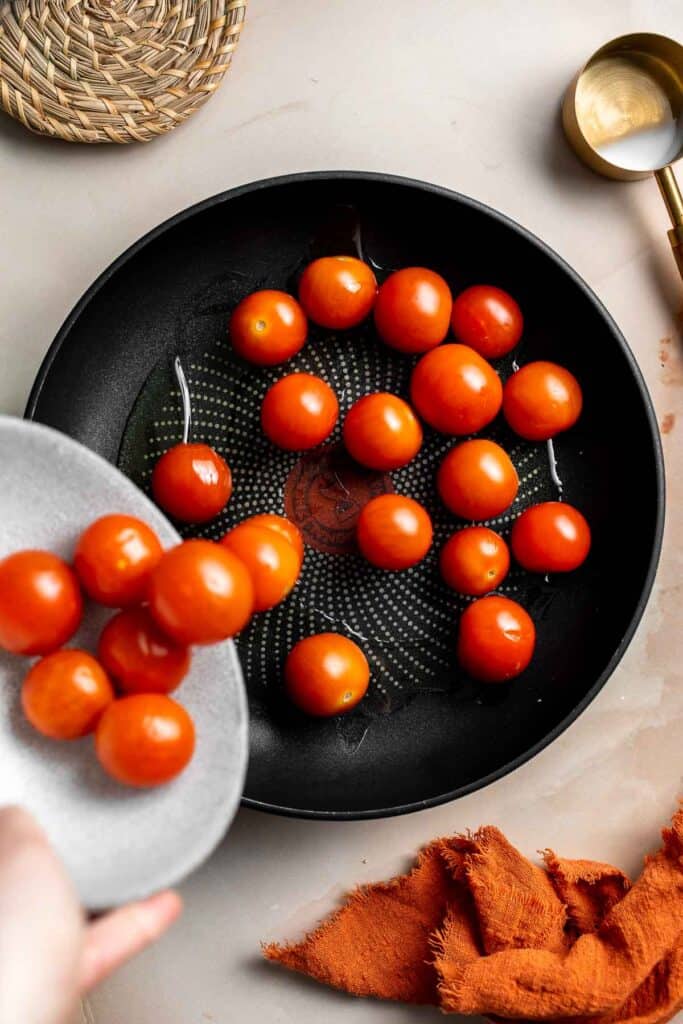
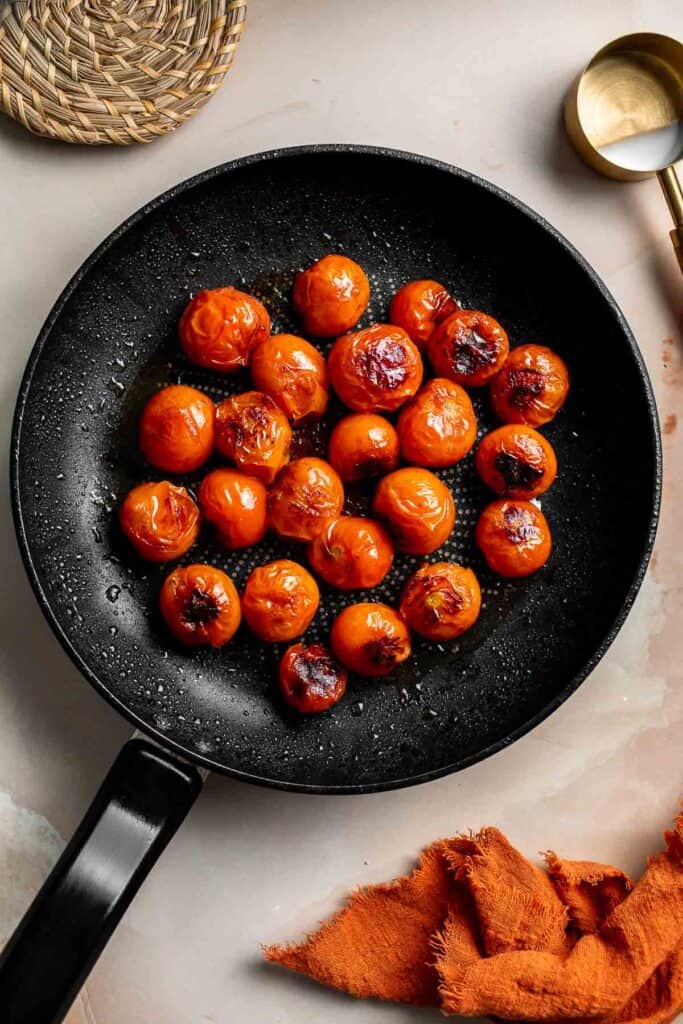
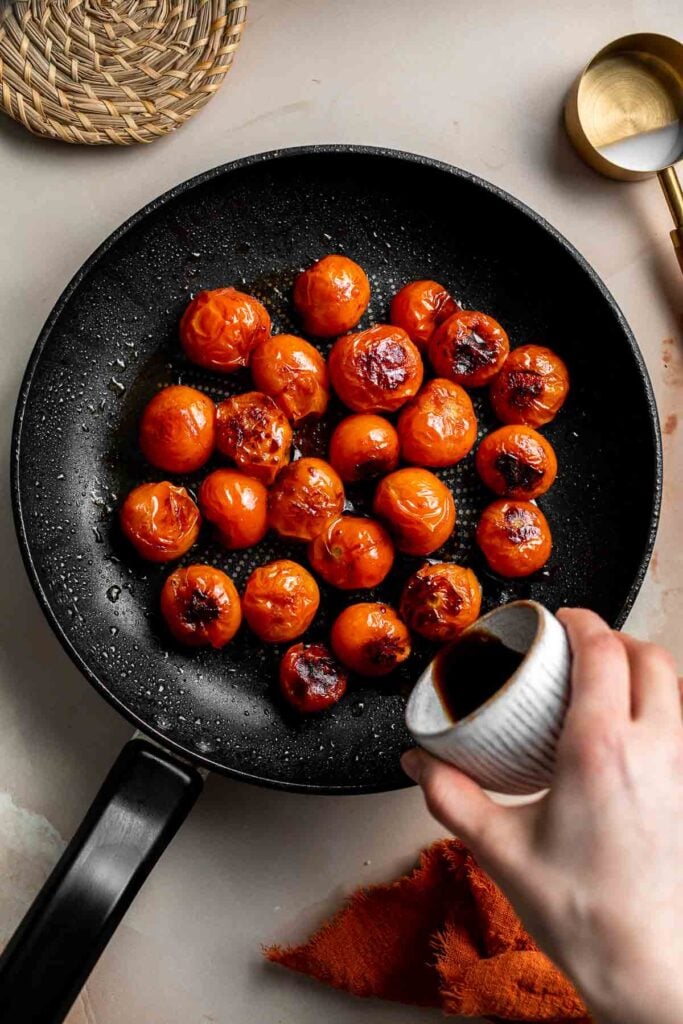
- Serve. Spoon the tomatoes on top of frittata and serve immediately or at room temperature.
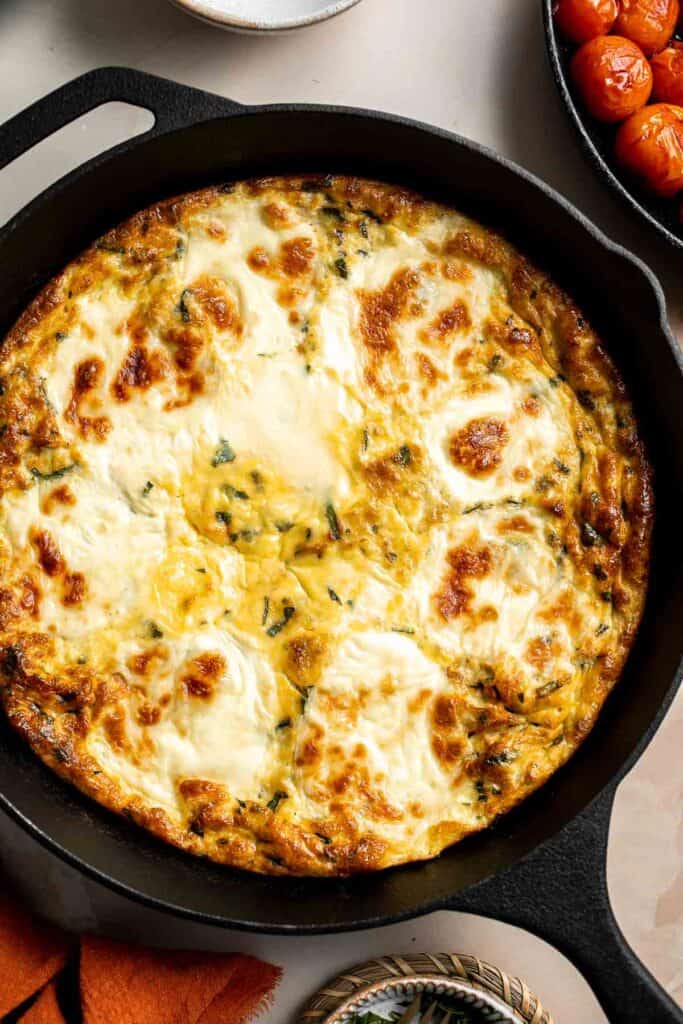
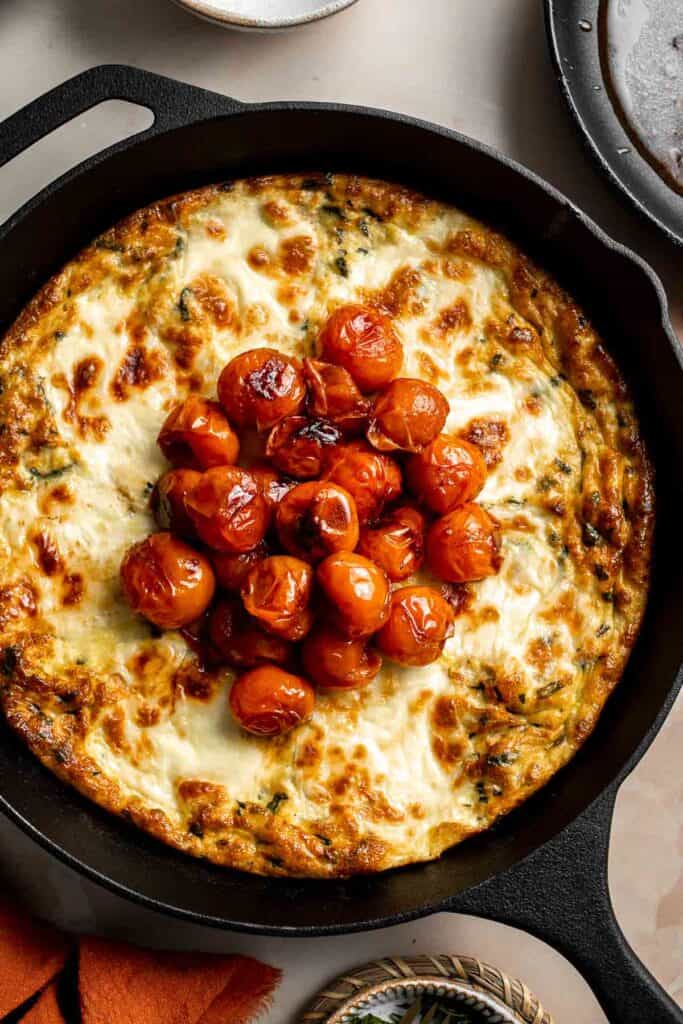
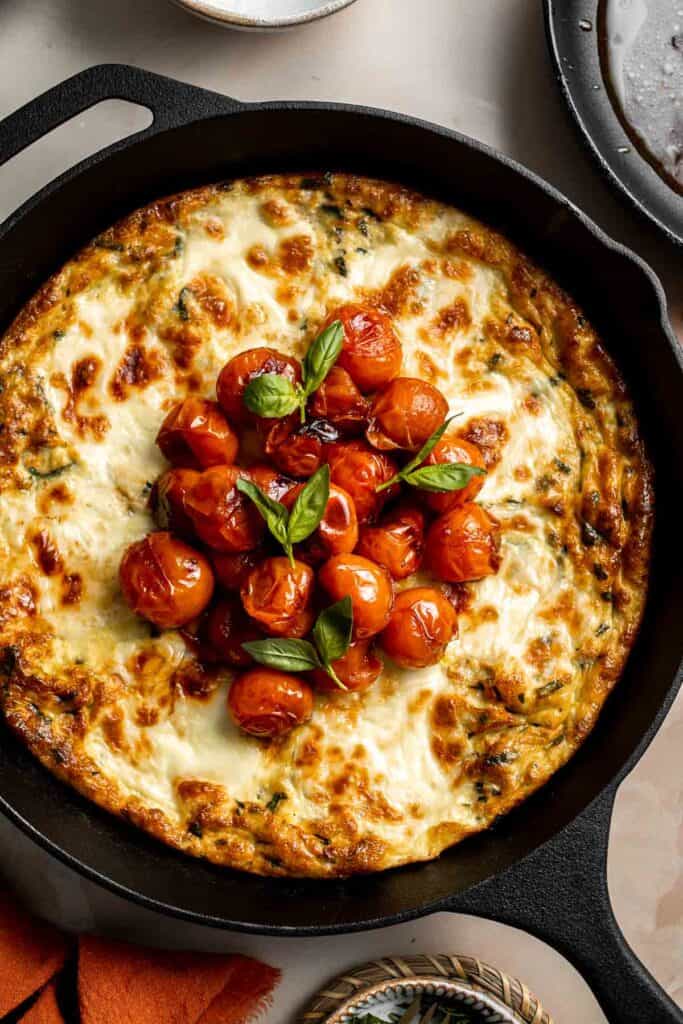
Recipe Variations
- Make it meaty. Add some protein such as cooked and crumbled sausage or bacon, or diced chorizo for added flavor.
- Add veggies. Load up the frittata with your favorite vegetables like sautéed mushrooms, roasted bell peppers, or chopped spinach for added flavor and nutrition.
- Change up the herbs. We added a heaping ¼ cup of fresh basil. If you are not a fan of basil, switch it up with your favorite herb such as dill, parsley, or thyme.
- Make it spicy. Add some heat by adding in a pinch of chili powder. You can also add a smoky flavor by adding in some paprika.
- Add pesto. Add a dollop of pesto on top of the frittata before baking for a burst of added Italian flavor.
How to Serve
This Caprese Frittata is a delicious breakfast or lunch option (or breakfast for dinner!). Serve it on its own as is, or pair them with some of our favorite sides including:
- Ciabatta Rolls
- Breakfast Potatoes
- Spring Salad
- Green Detox Smoothie
- Banana Chocolate Chip Oatmeal Muffins
- Herb Roasted Sweet Potatoes
For more, see our 50 Best Breakfast Ideas.

Recipe Tips and Tricks
- Don't over-mix your eggs. Want to keep your frittata fluffy? Don't beat the eggs too much - whisk them just until they're fully incorporated with the other ingredients to prevent them from becoming rubbery after they're cooked.
- Use a non-stick pan. To prevent the frittata from sticking to the pan, use a non-stick skillet or cast iron pan that has been greased with cooking spray or butter.
- Keep an eye on the broiler. Once you put the frittata under the broiler, things move quickly, and you can easily burn the cheese or eggs past the point of perfection if you're not paying attention. Hold off on the multitasking during this step so you can be ready to remove the frittata at the exact right moment!
- Don't overcook. Remove the frittata from the oven once the edges are set but the center is still slightly jiggly. Overcooking can result in a dry and tough frittata.
- Let it rest. Allow the caprese frittata to rest for a few minutes before slicing and serving. This will help it set and make it easier to slice.
Storing and Freezing Instructions
How to Store
Store leftover caprese frittata slices in between layers of parchment paper in an airtight container in the refrigerator for up to 4 days.
How to Reheat
Reheat in the microwave for 30-45 seconds until heated through or in the oven at 350℉ for 10 minutes.
How to Freeze
Allow the frittata to cool to room temperature first. Then, wrap the entire frittata (or slices) tightly in plastic cling wrap and place in a freezer-safe container or freezer bag. Freeze for up to 3 months. Reheat directly from frozen in the oven at 300℉ for 15 minutes, or until warmed through. You can also allow it to thaw in the fridge overnight before reheating according to instructions above.
More Egg Recipes
- 20 Best Egg Recipes
- Spring Vegetable Frittata
- Shakshuka
- Egg and Potato Breakfast Casserole
- Egg Muffins
- Deviled Eggs
Tried this recipe?
I'd love to hear what you think! Leave a comment and rating below to share your feedback. Your reviews help others discover this recipe and help me keep creating more free recipes for you. Snap a photo and tag me on social media @aheadofthyme too.
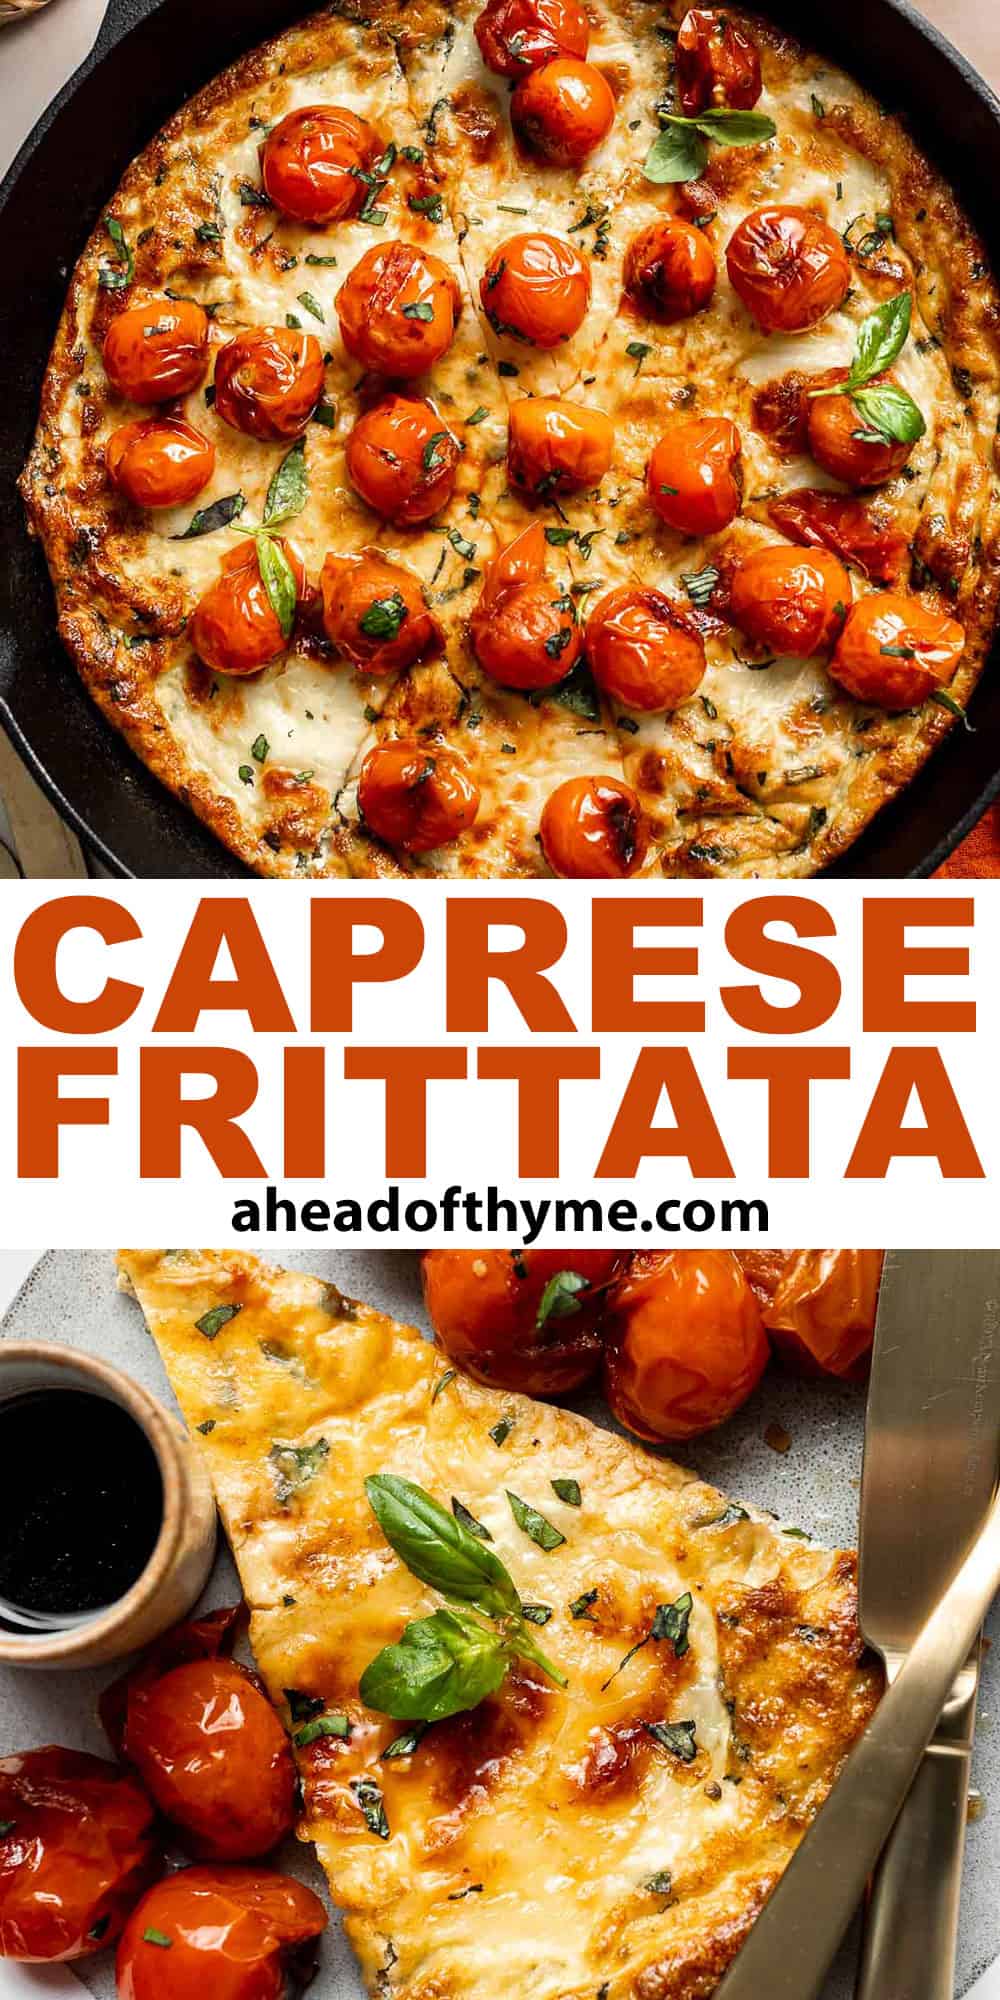
Classic New York Cheesecake
Classic New York Cheesecake is a delicious, indulgent dessert that is surprisingly easy to make from scratch. With a crunchy graham cracker crust, a rich and creamy vanilla cheesecake filling, and a sweet strawberry sauce on top, this cheesecake is as delicious as it is stunning. A total crowd favorite!
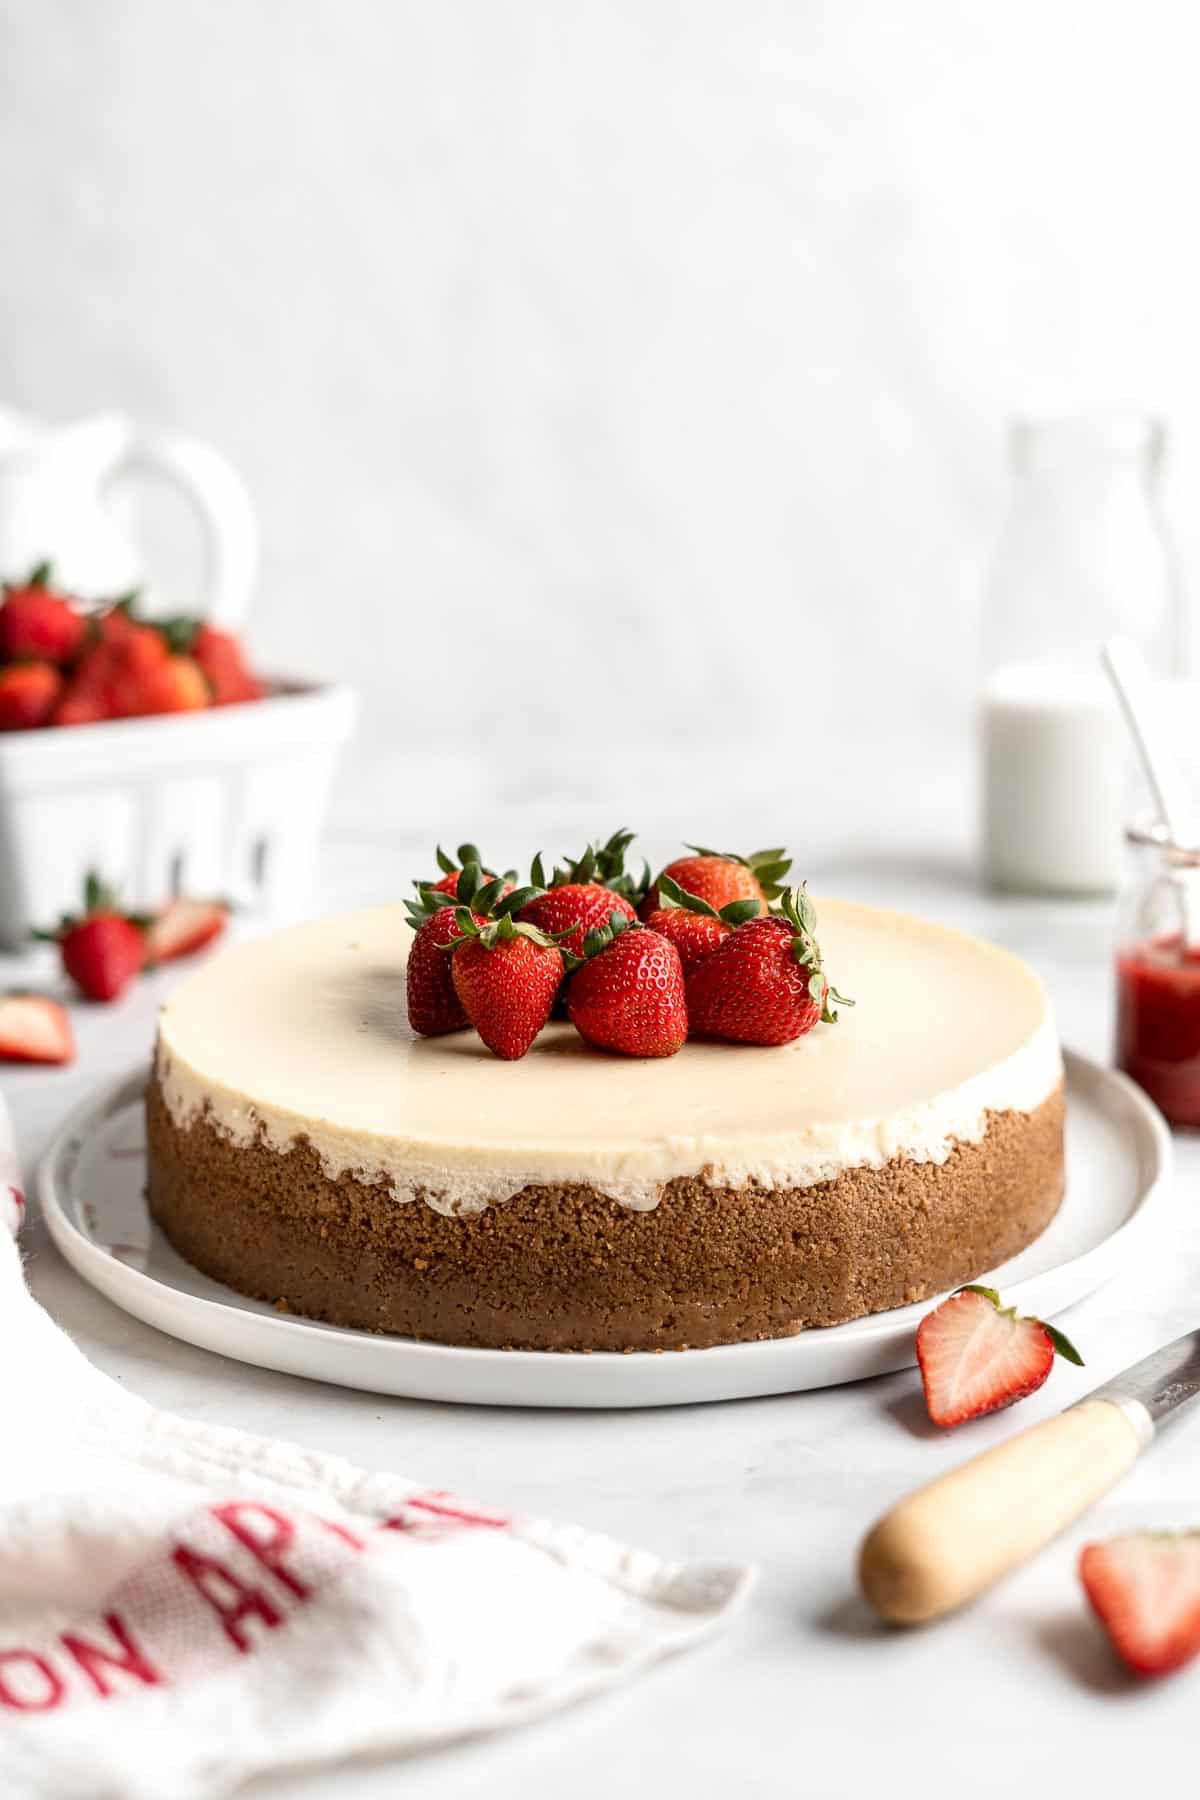
Although you'll have to wait overnight for this creamy vanilla cheesecake to set, it's well worth the wait - especially since there is only 30 minutes of active preparation involved. All you have to do is make the crust and filling, bake the cheesecake, make the sauce, and wait! This decadent New York cheesecake is special occasion worthy (think: Date Night in) but easy enough to make just because you feel like it.
Why You'll Love This New York Cheesecake
- Velvety vanilla cheesecake. New York cheesecake is famous for its smooth, creamy, melt-in-your-mouth filling, made possible here with three different kinds of dairy and vanilla extract to add just the right touch of flavor. It's thick and indulgent!
- Buttery Graham cracker crust. You'll never need to buy pre-made cheesecake crusts again after mastering this easy and delicious homemade Graham cracker crust. It's made with just three ingredients: butter, sugar, and cookie crumbs!
- Homemade strawberry sauce. What takes this New York style cheesecake to the next level is the 3-ingredient homemade strawberry sauce to add bright berry notes to every slice of cheesecake. But it's totally optional - whatever you prefer!
- Easy to make. This New York cheesecake is actually a lot easier to make than it seems! Whether you are a novice baker or super experienced, it doesn't matter because anyone can make this creamy vanilla cheesecake at home without any cracks using this easy to follow recipe.
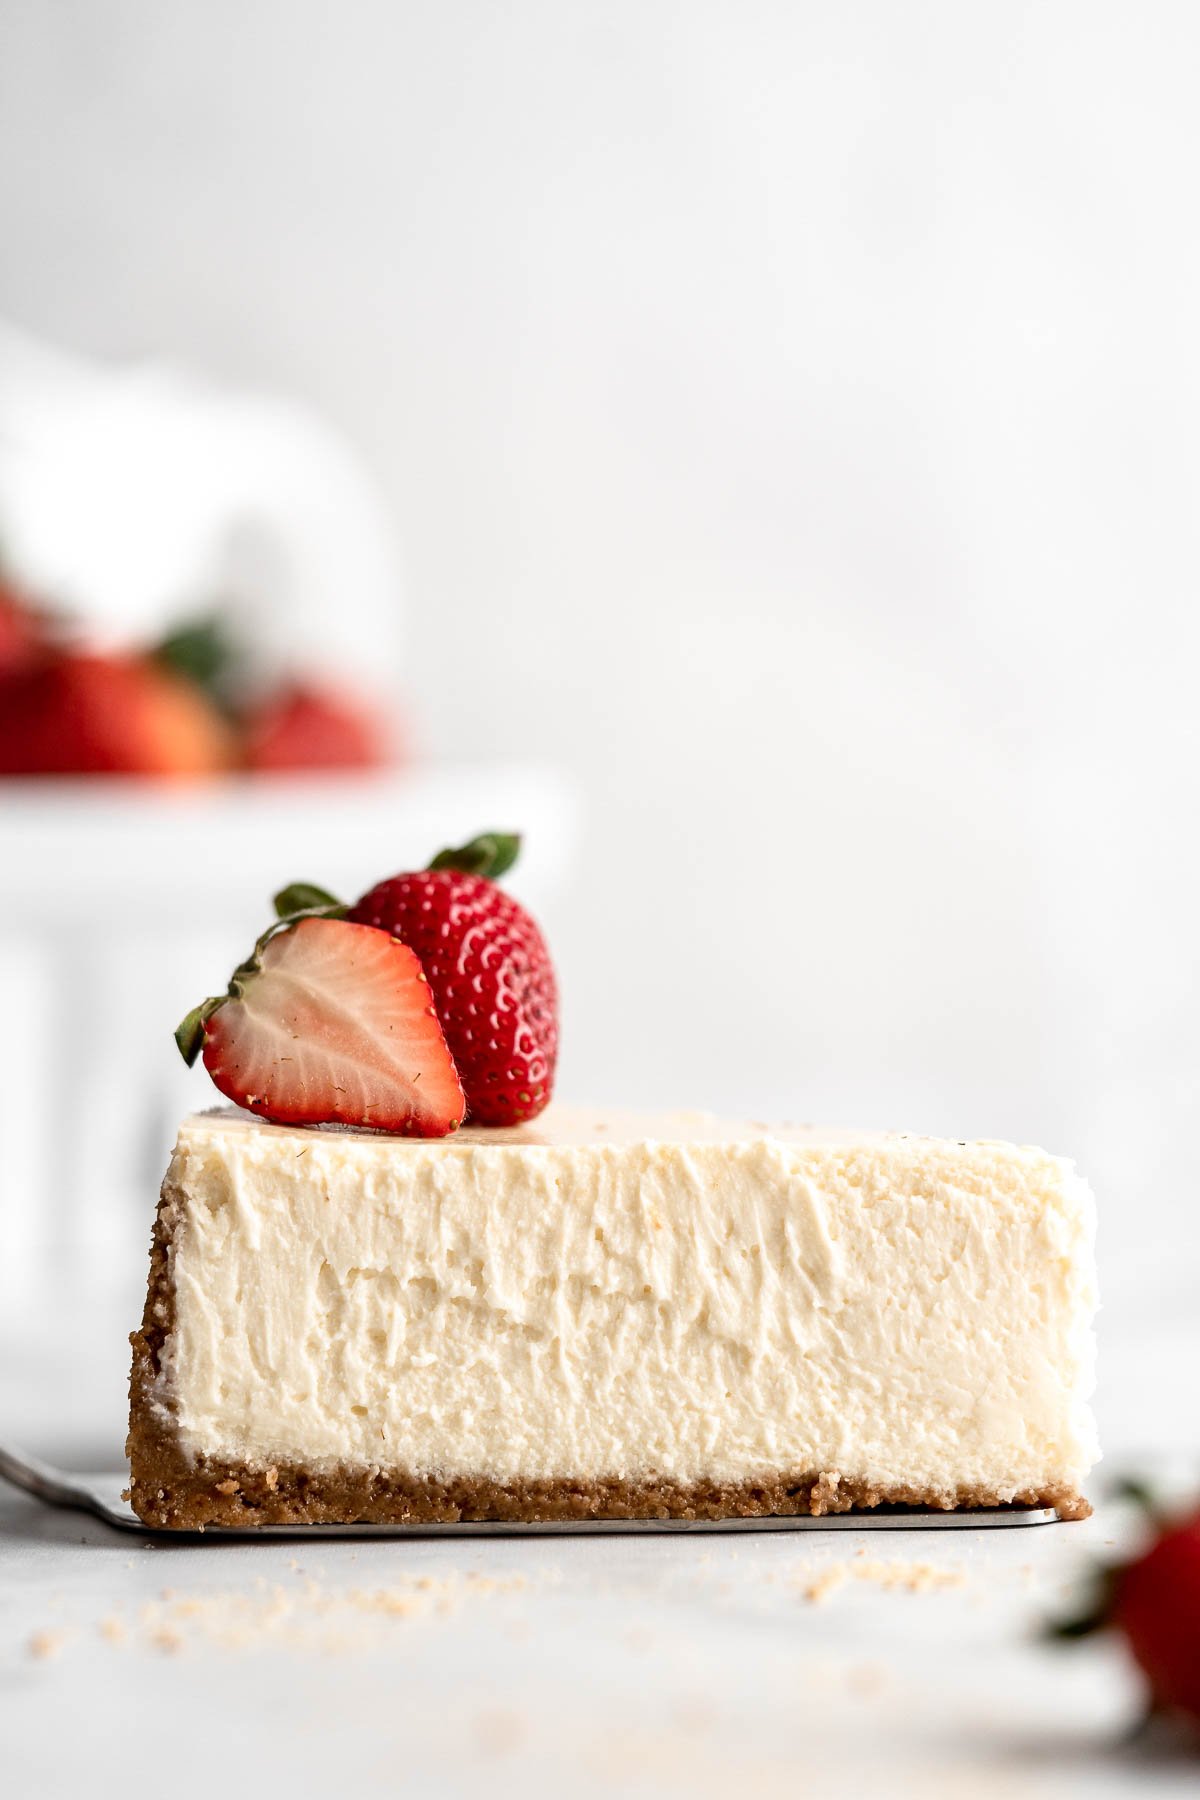
Ingredient Notes
To make this delicious Classic New York Cheesecake, you will need the following ingredients (full measurements in recipe card below):
- Graham cracker crumbs - feel free to switch up the flavor by using crushed Gingersnaps or Oreo cookies instead. You can also make this recipe gluten-free by using gluten-free Graham crackers for the crust.
- white sugar - you can substitute this with coconut sugar or your favorite granulated sugar alternative like Swerve or stevia.
- butter - use unsalted butter for the best results! You can control the flavor of the cheesecake more easily and it has a lower water content than its salted counterpart.
- cream cheese - out of cream cheese? You can blend cottage cheese to a smooth consistency and use it instead, or go for Marscapone cheese or blended silken tofu instead.
- sour cream - greek yogurt will also work.
- heavy cream - heavy cream works best, but if you're short, you can use an equal amount of half-n-half or whole milk.
- vanilla extract - you can substitute vanilla bean paste at a 1:1 ratio for a richer vanilla flavor.
- eggs
Strawberry Sauce Topping (optional)
You can leave the cheesecake as is, or top with our delicious homemade strawberry sauce. To make the sauce, you will need:
- strawberries - slice them thickly for the traditional chunks in the cheesecake's strawberry sauce. Use fresh strawberries if possible, or thaw some frozen strawberries and slice them.
- granulated sugar
- orange juice - fresh squeezed is best, but you can use a natural orange juice concentrate if you need. You can also leave it out and just use water.
You will also need measuring cups and spoons, mixing bowls, electric mixer (hand mixer or stand mixer), and a 9-inch springform pan.
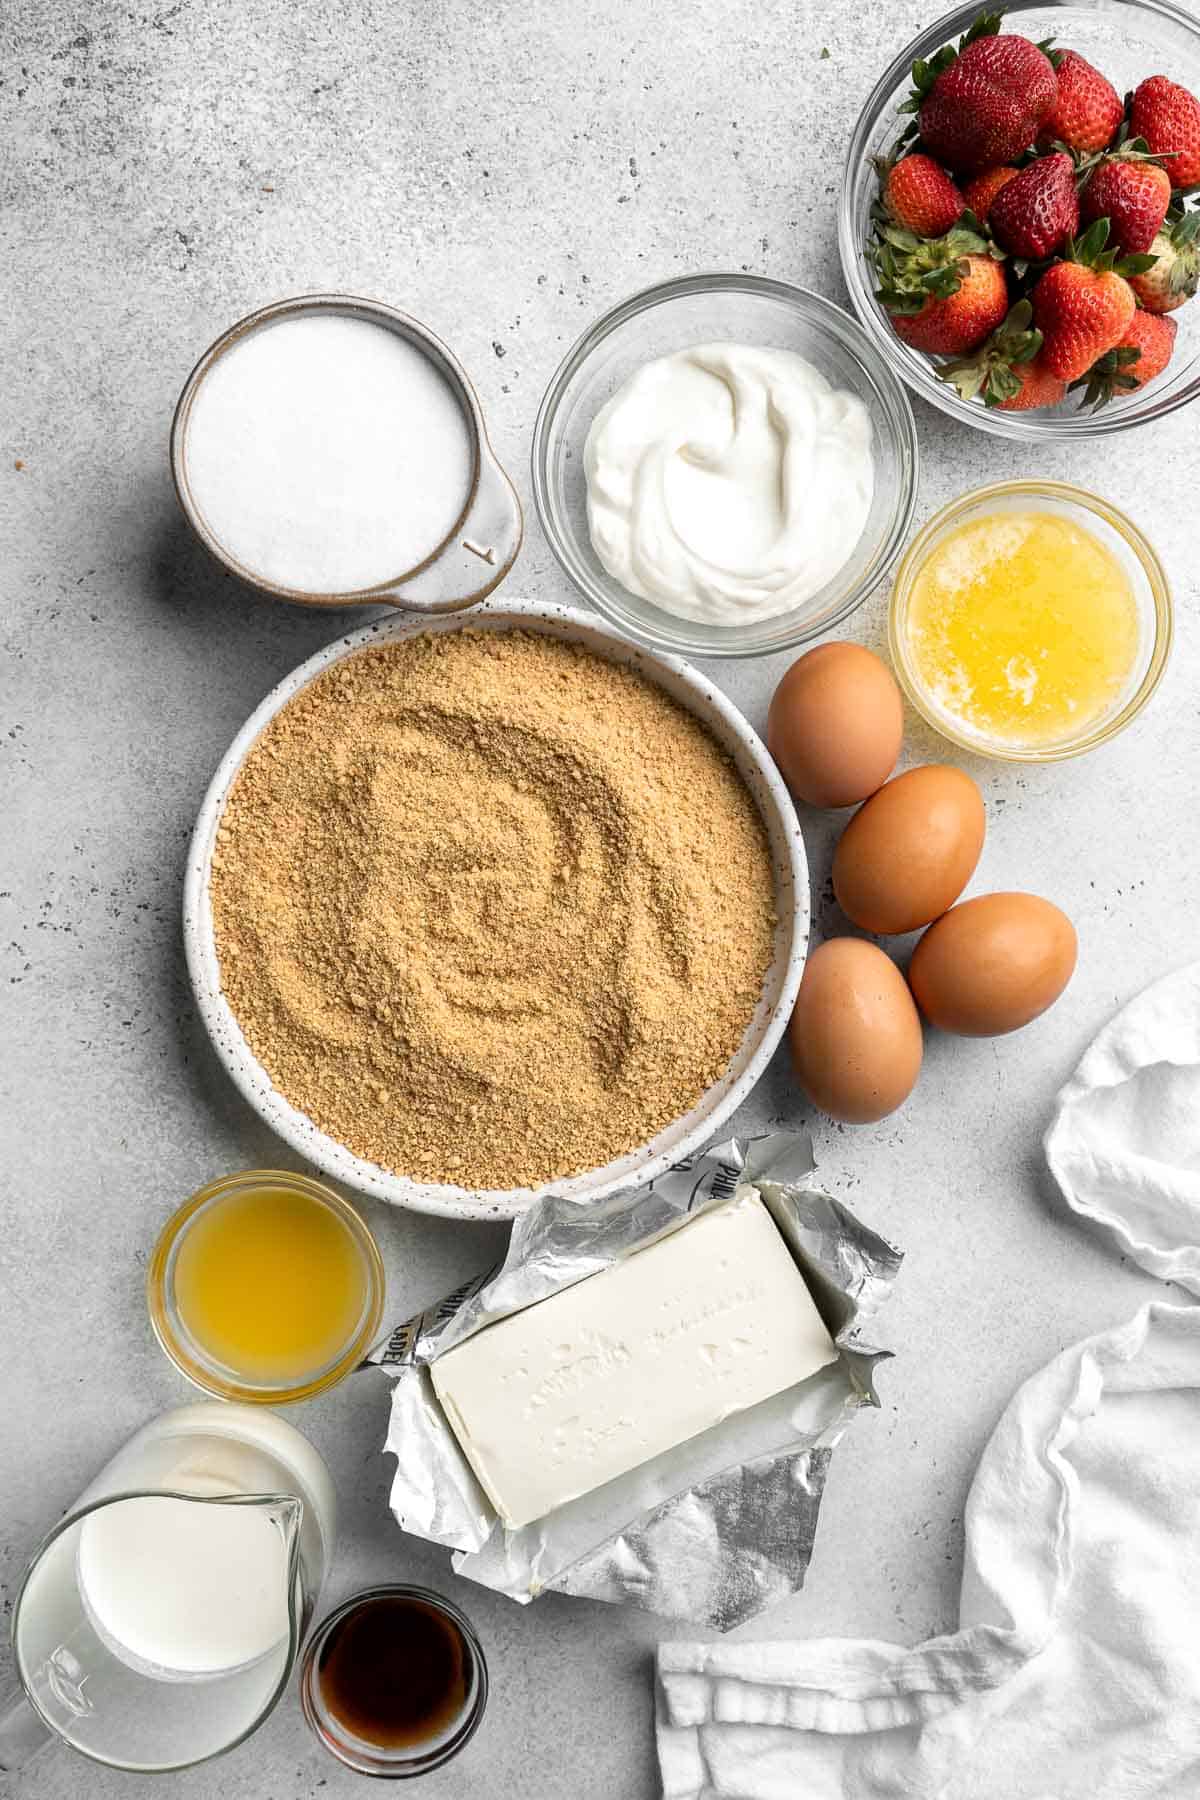
How to Make the Best New York Cheesecake
First, make the crust.
- Combine ingredients. In a medium mixing bowl, stir Graham cracker crumbs and sugar together. Gradually pour in melted butter, continuing to stir until well mixed.
- Bake. Press the crumbs firmly into a 9-inch round springform pan. Bake in a 350F preheated oven for 10 minutes. Allow the crust to cool completely to room temperature, about 1 hour.
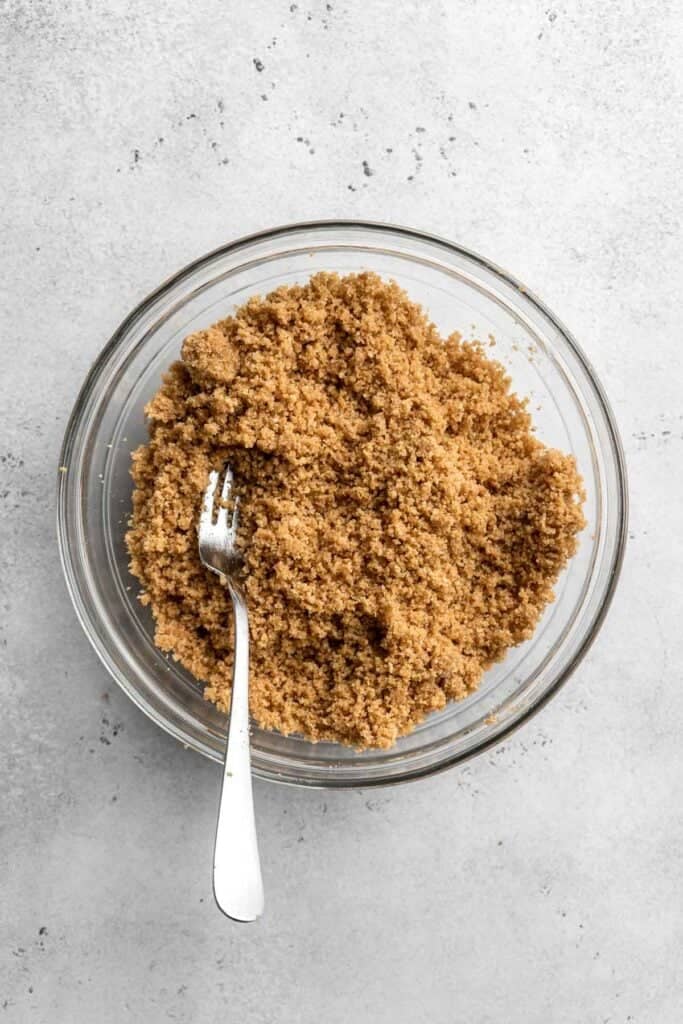
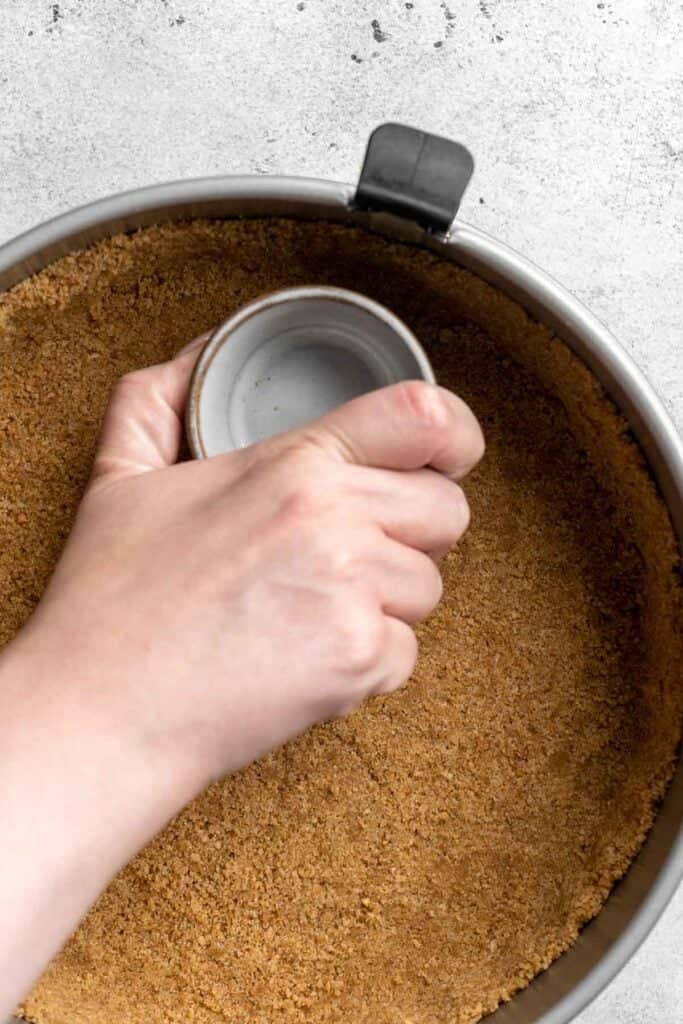
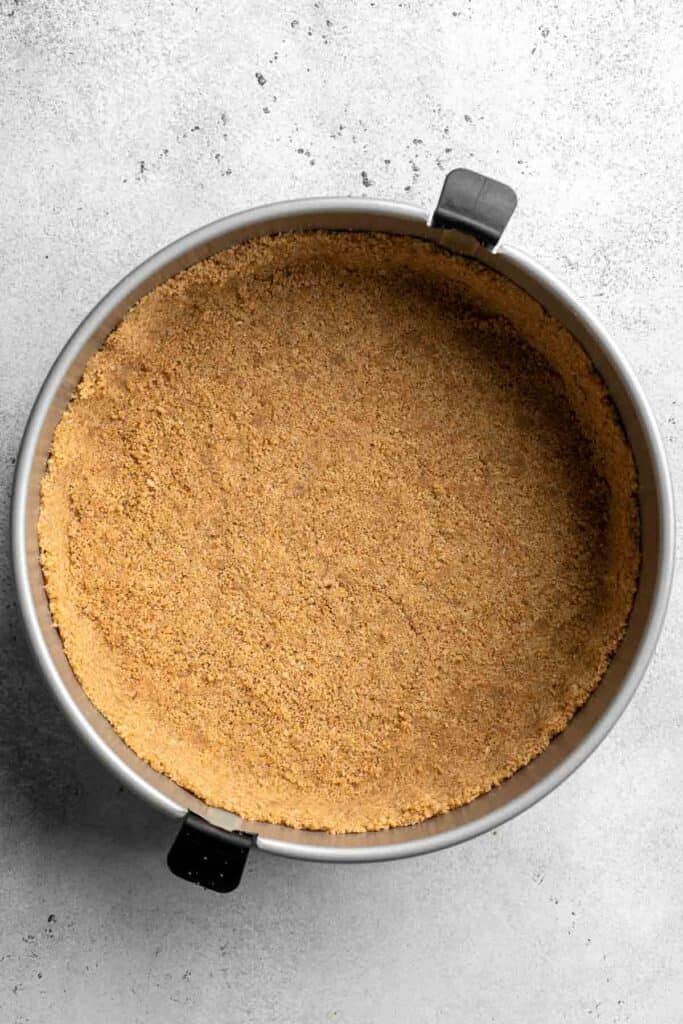
Next, make the cheesecake filling.
In a large mixing bowl, use an electric mixer to mix cream cheese, yogurt, sugar, and vanilla extract together until well blended. Add eggs, one at a time, and beat on low speed until just blended. Repeat until all eggs are added and blended (Do not overmix to avoid cracking during baking).
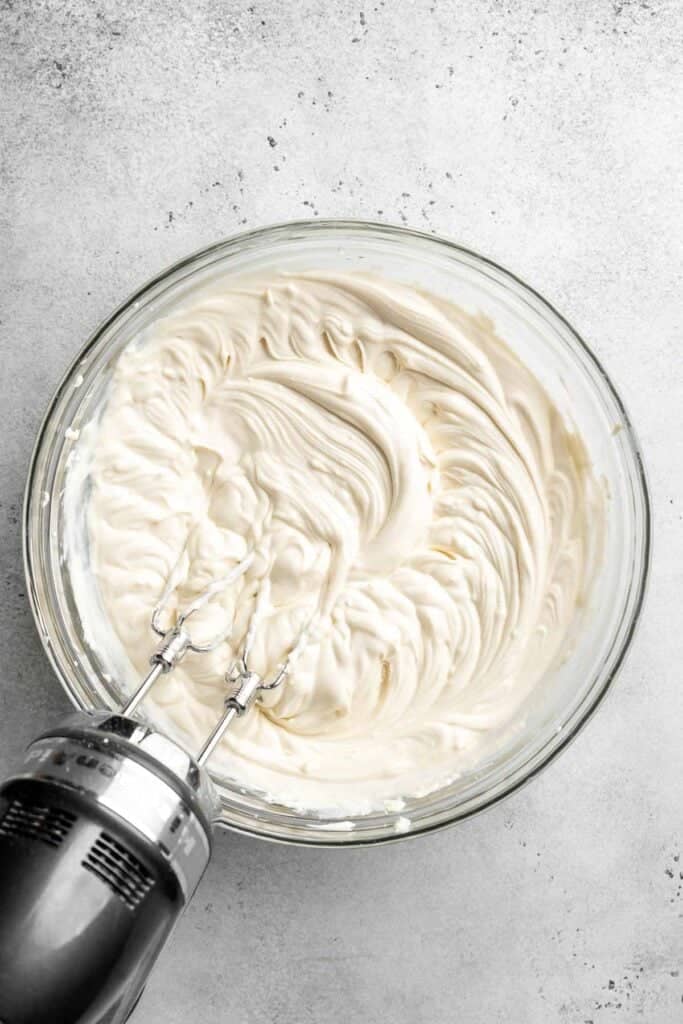
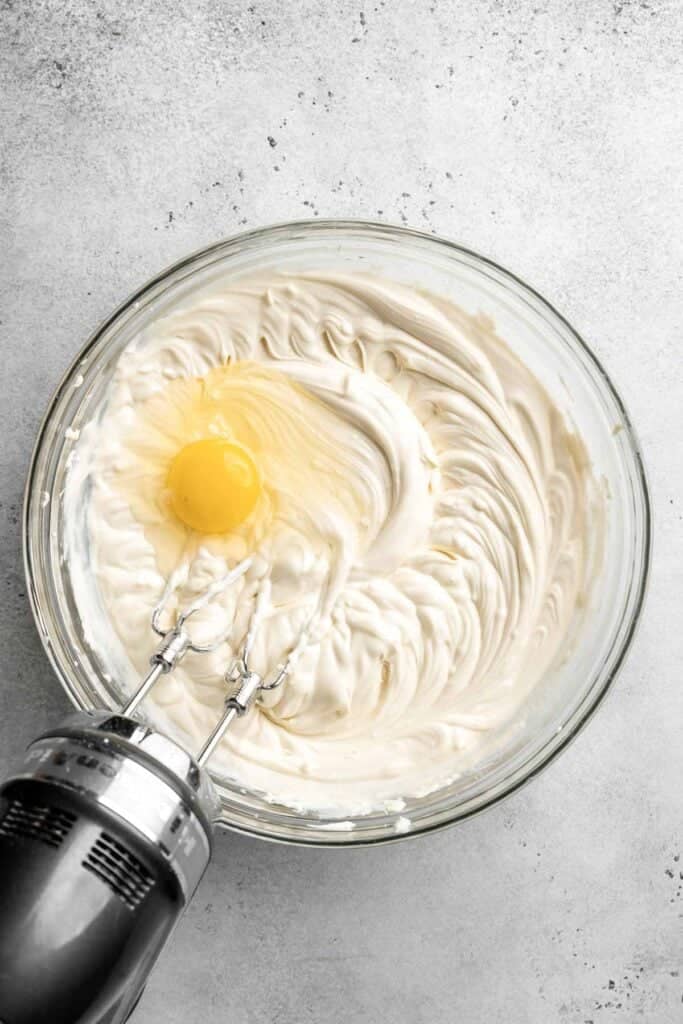
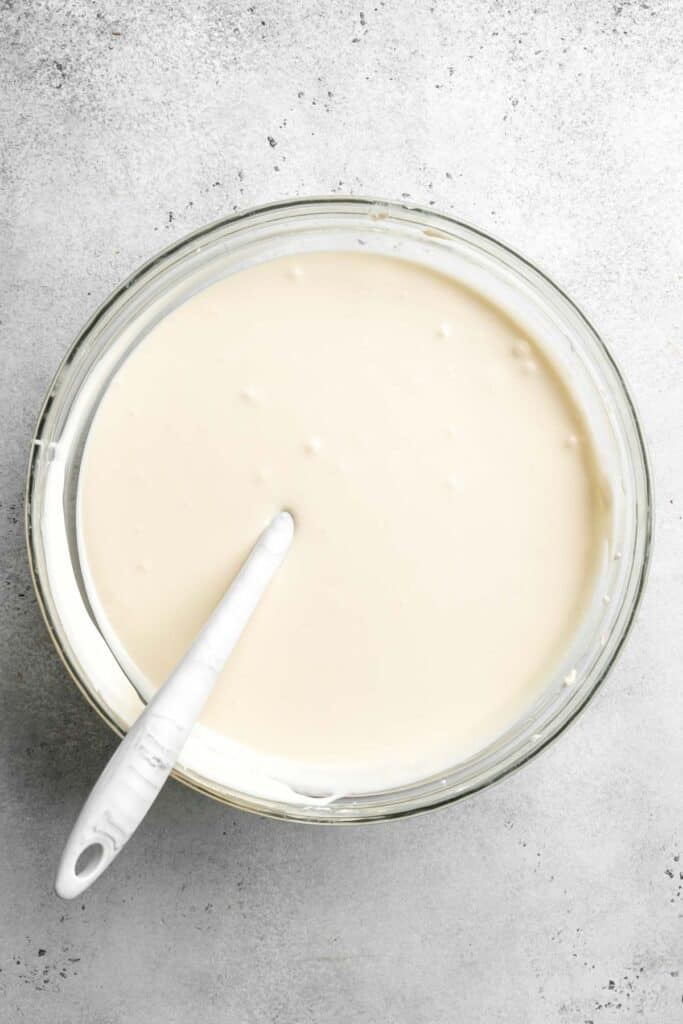
Finally, assemble and bake.
- Assemble. Pour the filling into the cooled crust and smooth out the surface.
- Prepare boiling water bath. Wrap the outside of the springform pan tightly with aluminum foil and place the pan in a large baking dish. Fill the dish with 1 inch (2 cm) deep of boiling water.
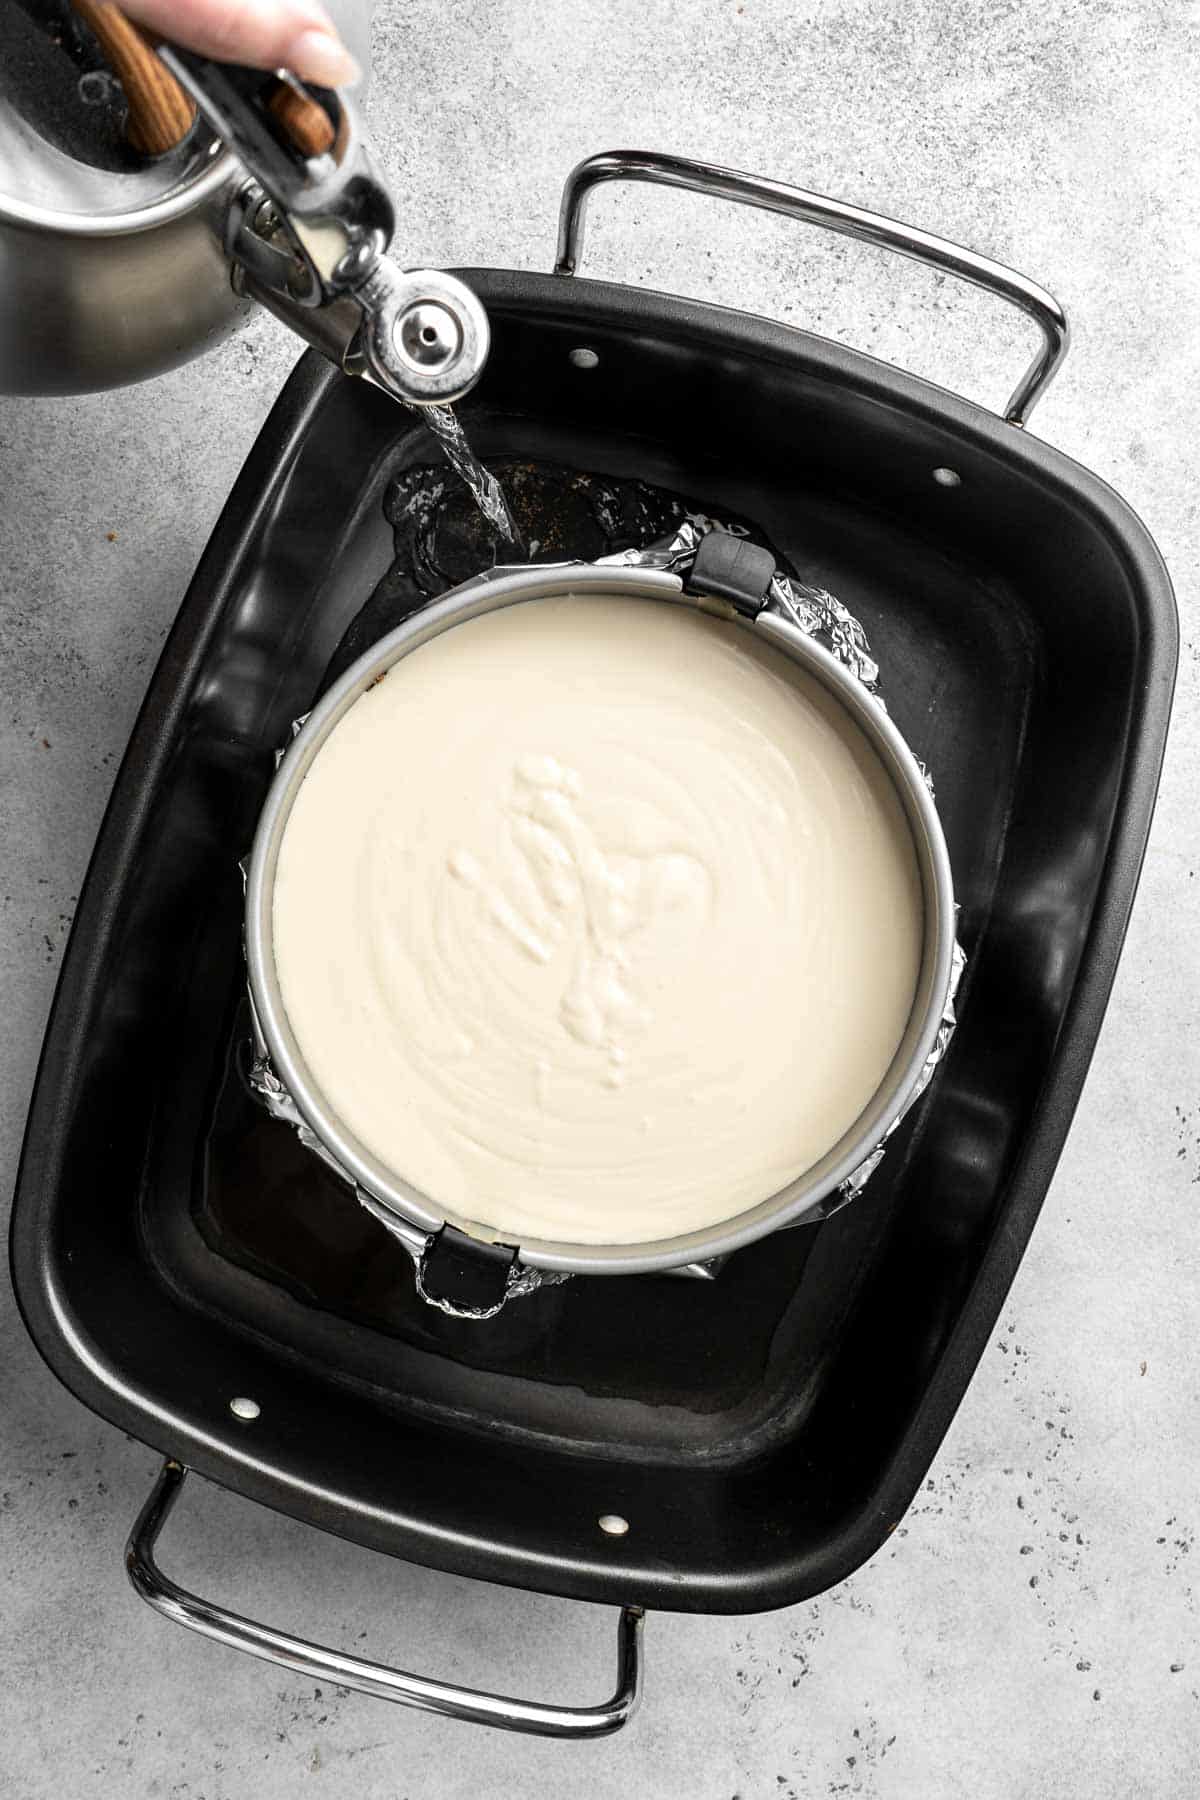
- Bake. Move the baking dish to the oven and bake for 1.5 hours in the boiling water bath (This helps prevent sudden temperature drop and cracking).
- Turn off heat. Turn off the heat and leave the cheesecake in the oven for an hour, allowing it to continue baking slowly and cool down slowly.
- Loosen edges.. Take the pan out of the oven and run a paring knife gently around the outside of the cheesecake to loosen it from the sides of the pan.
- Chill. Cover the pan with plastic cling wrap and transfer to the refrigerator overnight (or for at least 8 hours) to cool down and solidify.
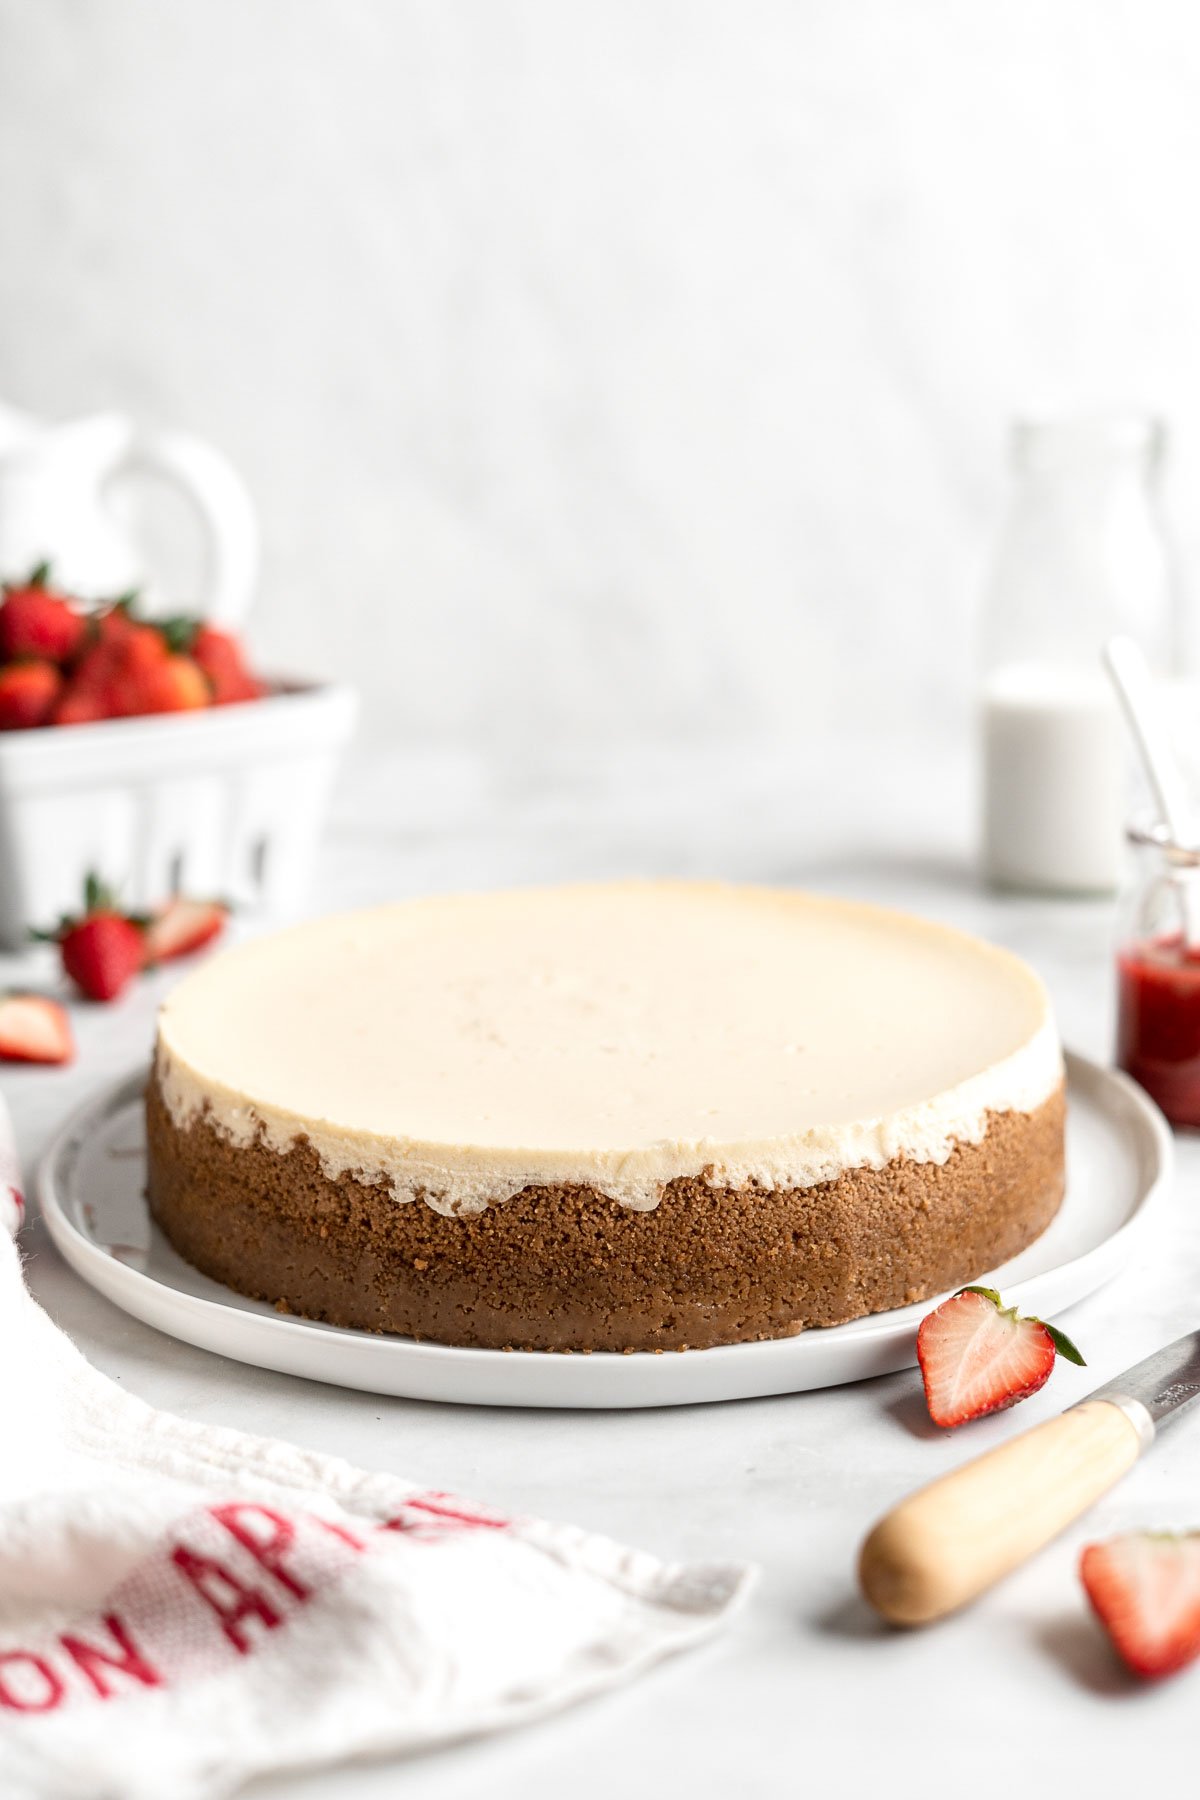
Serve the cheesecake.
Remove the sides of the springform pan and transfer the cheesecake to a serving dish. Cut into slices and pour homemade strawberry sauce on top, if desired.
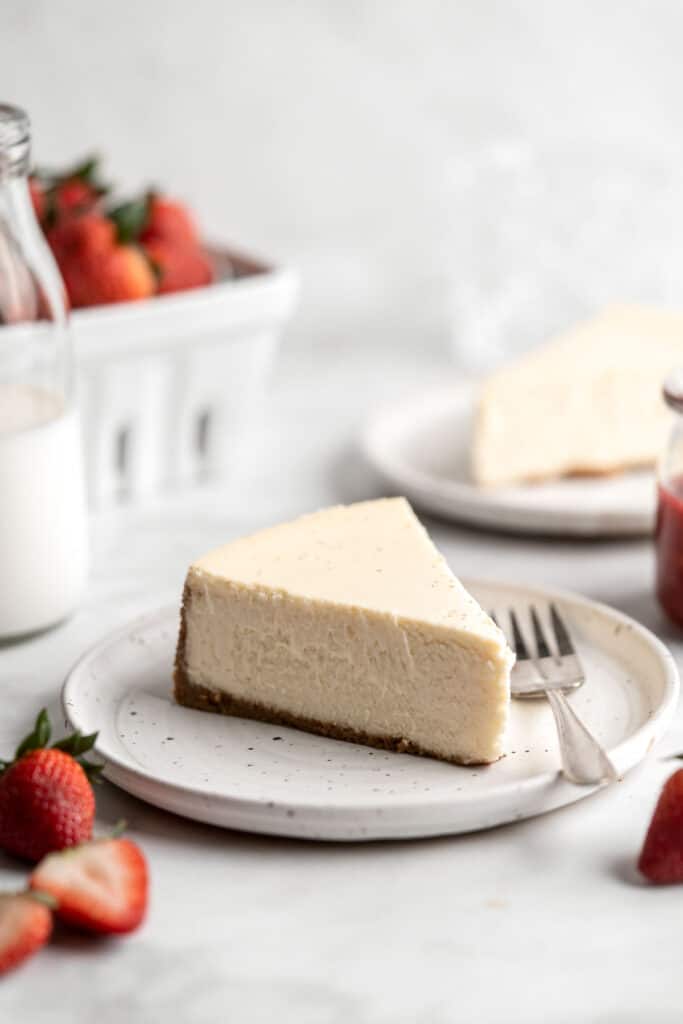
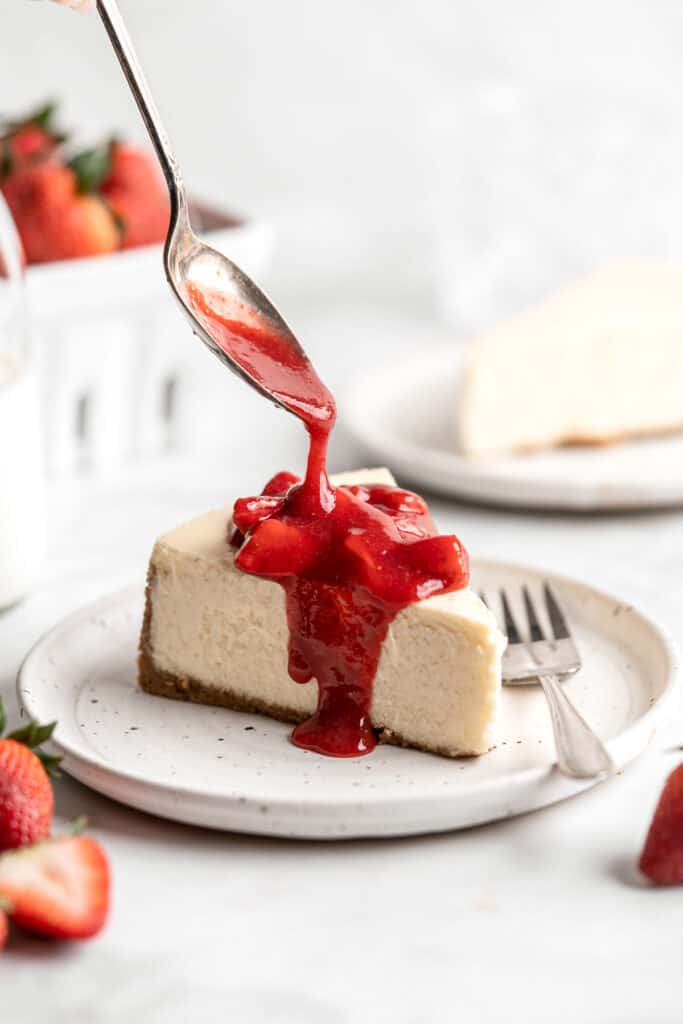
How to Make Strawberry Sauce for Cheesecake
- Cook. In a small saucepan, add ¾ of the sliced strawberries, sugar, and orange juice and stir to combine. Heat over medium-high heat and bring to a gentle boil. Continue to cook, stirring occasionally, until the strawberries are syrupy and the juices begin to release, approximately 5 minutes.
- Simmer. Turn the heat down to medium and continue to cook until the sauce thickens, about 15 minutes. Stir occasionally.
- Blend. Transfer the strawberry sauce to a blender and puree until smooth.
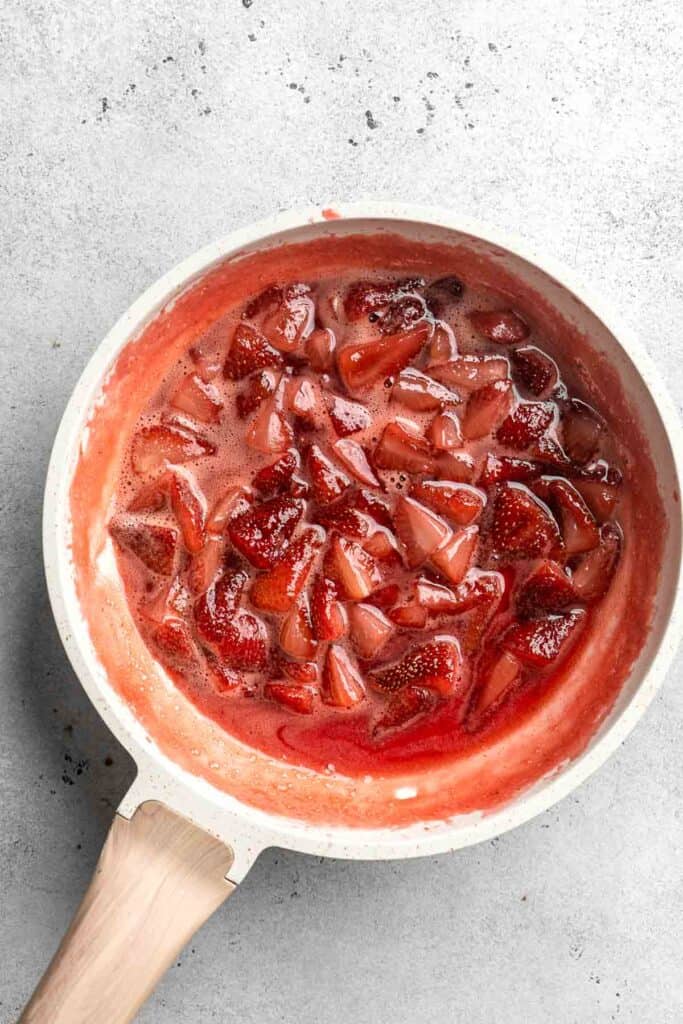
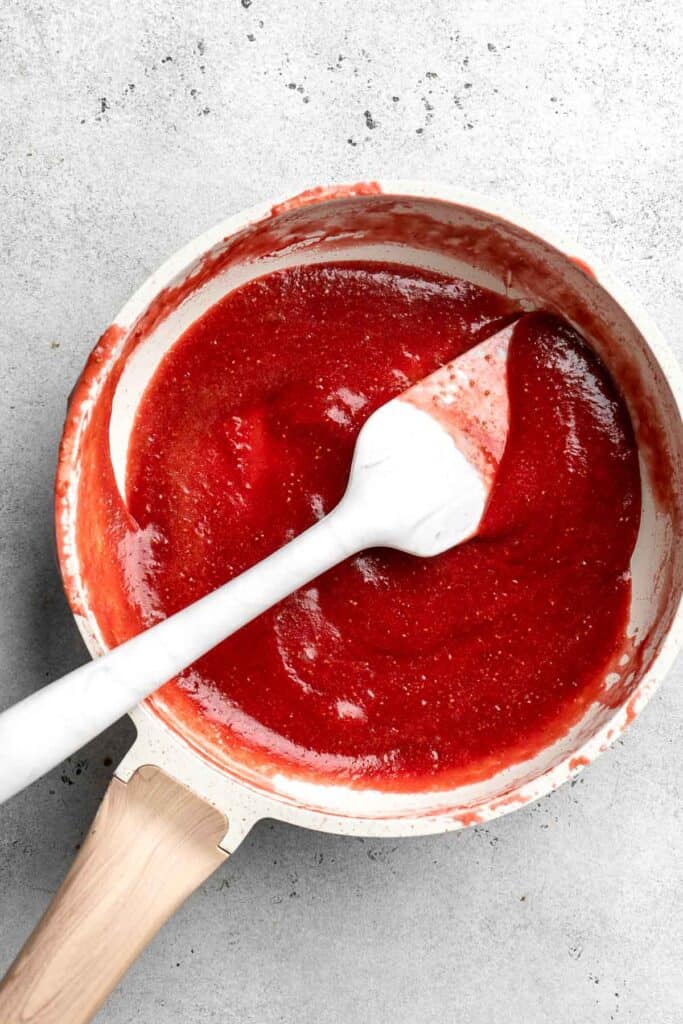
- Add more strawberries .Transfer the pureed sauce back to the saucepan. Add the remaining ¼ fresh strawberry slices and stir to combine. Continue to cook on medium for another 5 minutes.
- Cool. Remove from heat and allow the sauce to cool to room temperature (or refrigerate until cool) before pouring on the cheesecake.
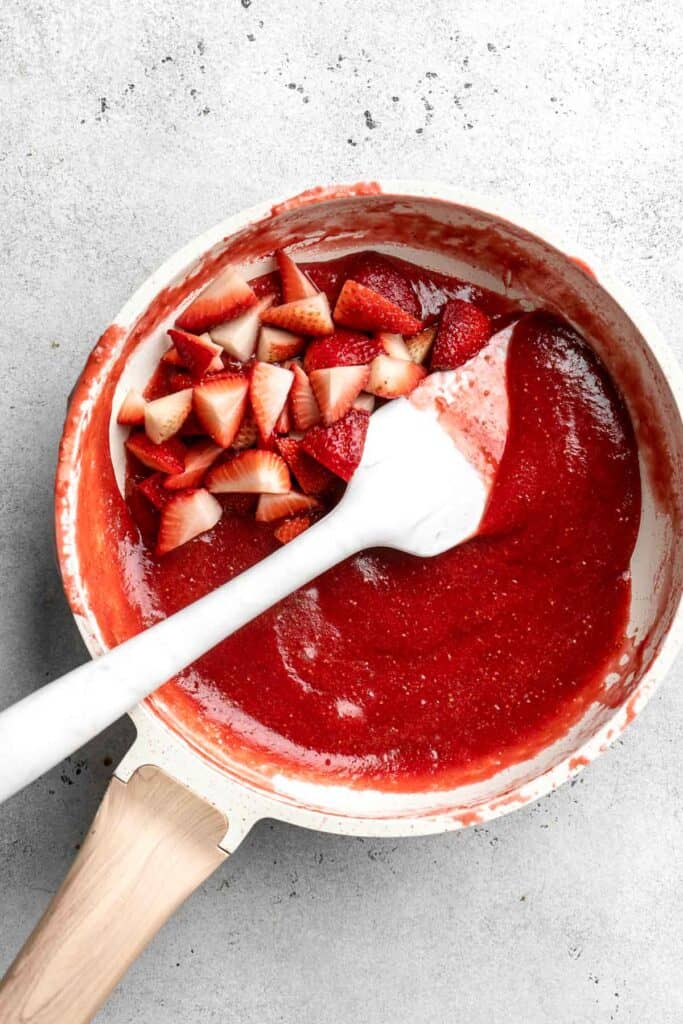
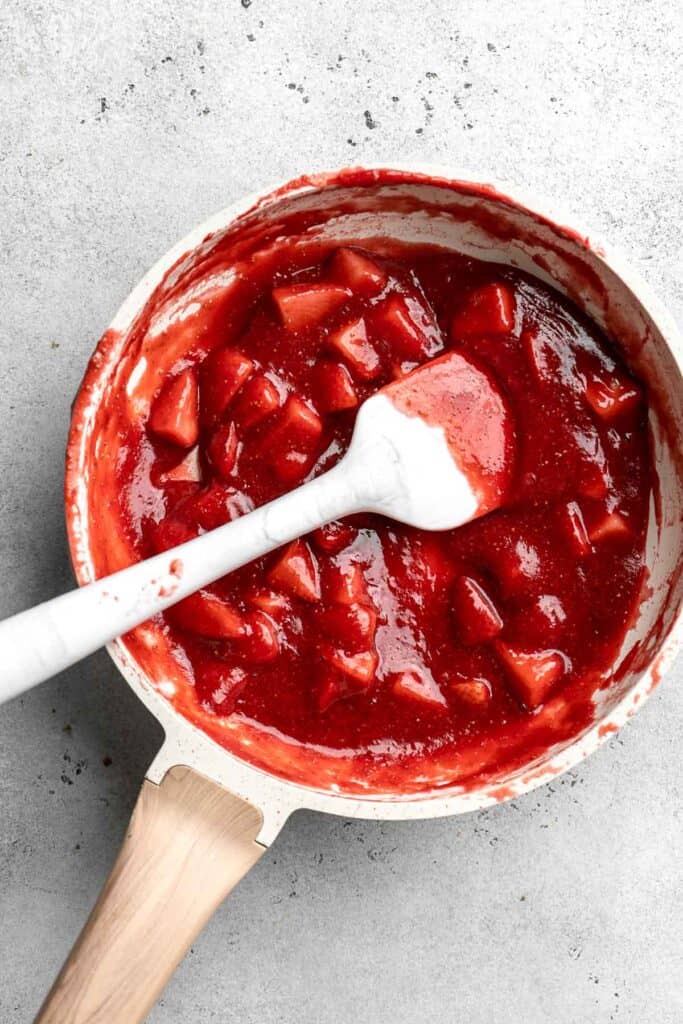
Recipe Variations
- Add chocolate. This cheesecake is typically served with strawberry sauce, but you can shave a bar of dark chocolate over the top or drizzle melted chocolate on top for a chocolatey twist. You can even mix in some melted chocolate into the cream cheese filling to turn it into chocolate cheesecake.
- Top with fruit. Top the cheesecake with fresh berries, peaches, mangoes, or other fruit of your choice. The tartness of the fruit helps to balance out the richness of the cheesecake.
- Add caramel. Drizzle some caramel sauce over the cheesecake for delicious sweetness. Try our homemade Salted Caramel Sauce. I recommend adding a sprinkle of chopped nuts too for a perfect combination of flavors.
- Customize the crust. We made a classic cheesecake crust using graham cracker crumbs. You can switch up the flavor by using crushed Gingersnaps or Oreo cookies.
- Top with whipped cream. Top the cheesecake with a dollop of light and airy whipped cream.
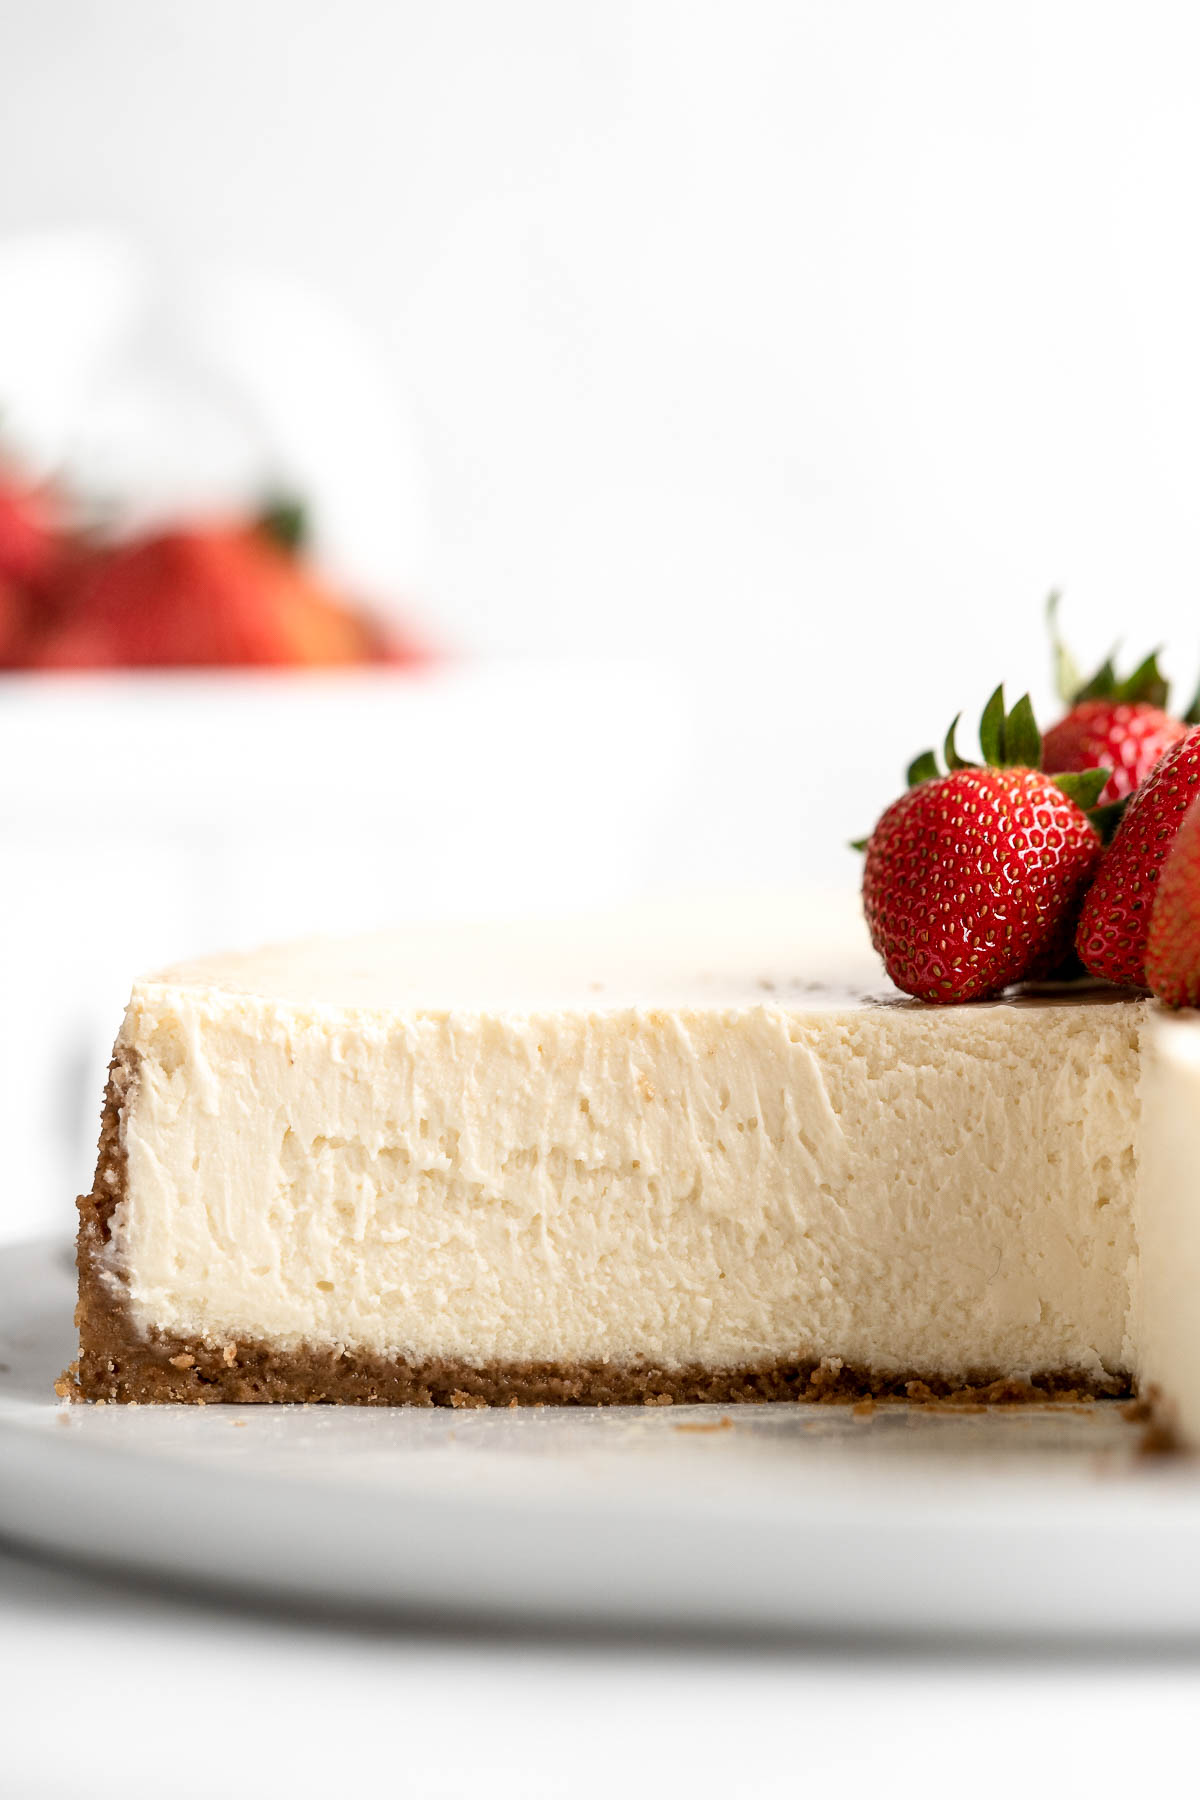
How to Serve
Serve this Classic New York Cheesecake on it's own or with some complimentary desserts and drinks. Some of our favorites are:
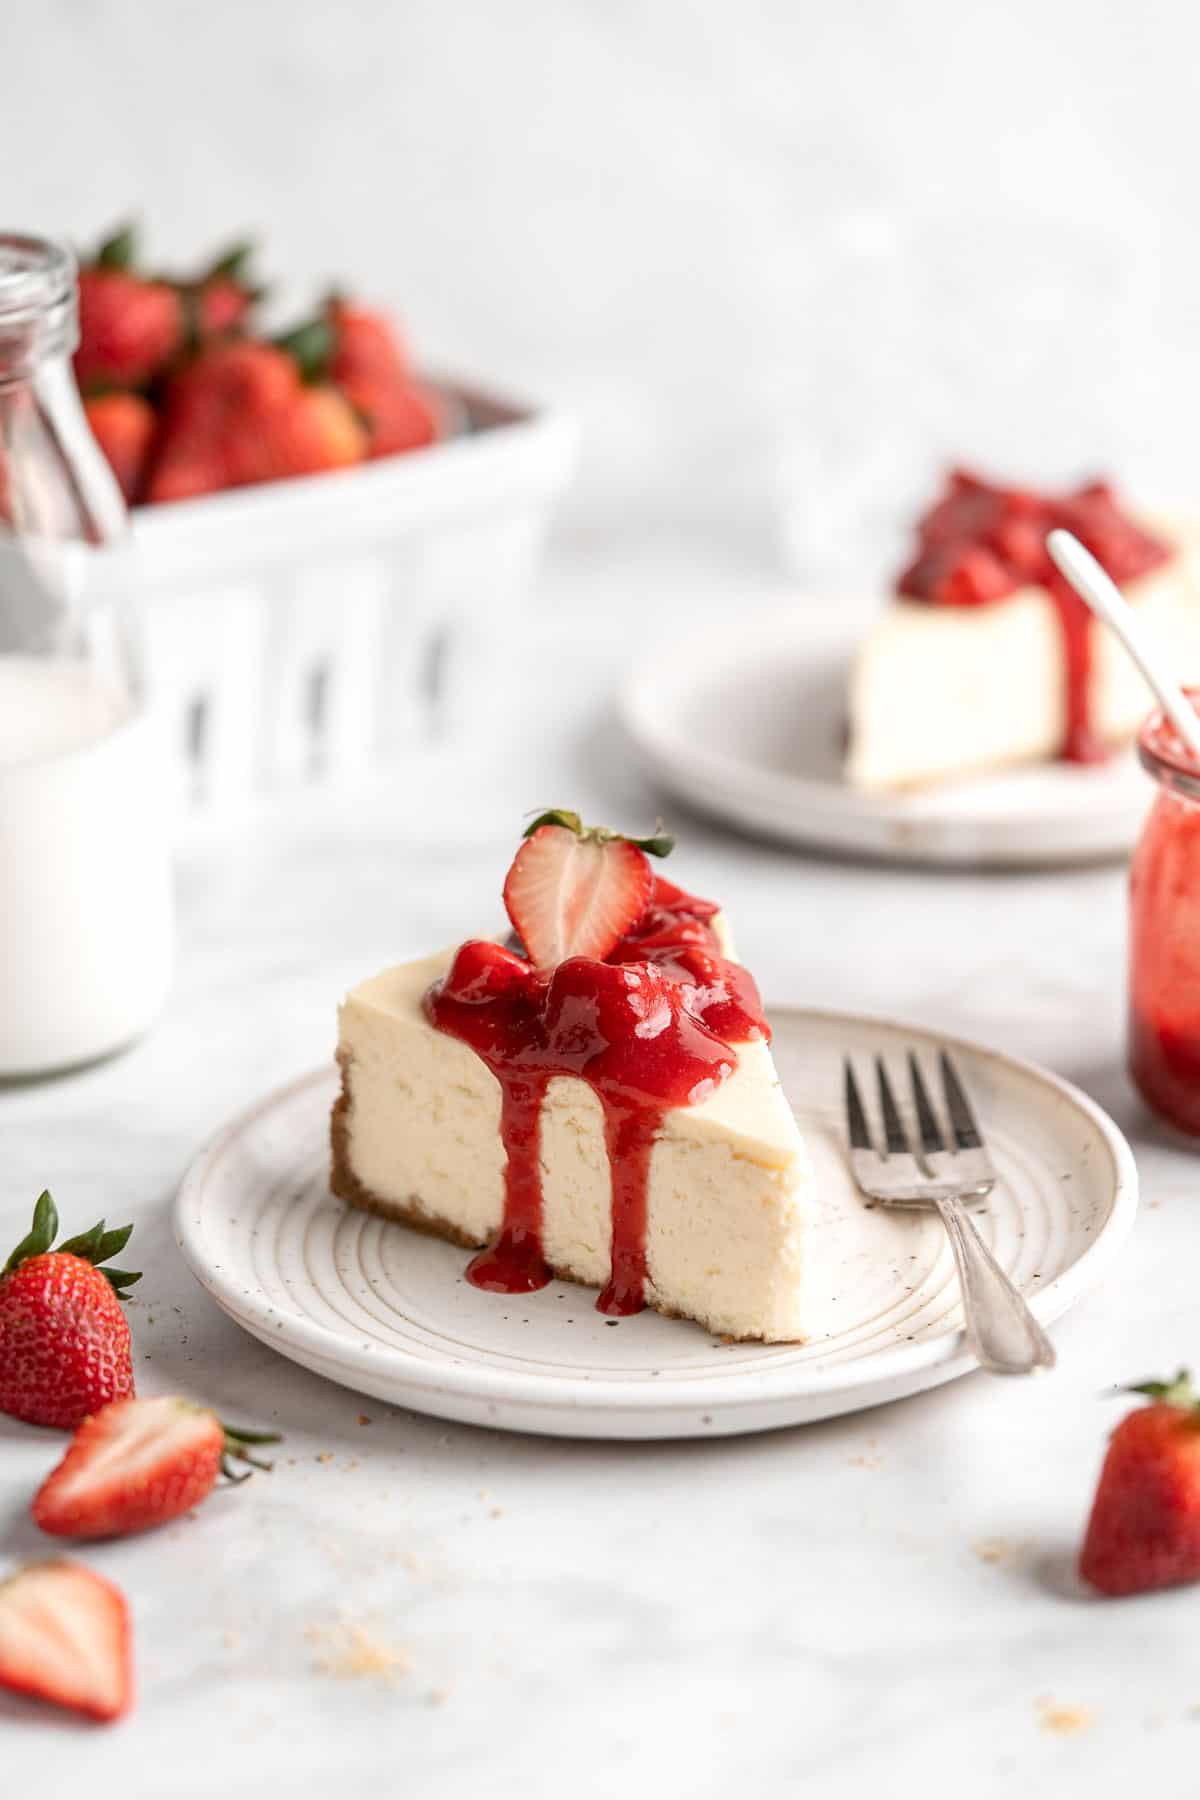
Recipe Tips and Tricks
- Use room temperature ingredients. Make sure that all the ingredients (including cream cheese, eggs, and sour cream) are at room temperature before mixing. This will ensure that the cheesecake batter mixes together smoothly and without any lumps.
- Mix on low speed. When mixing the ingredients together, be sure to mix on low speed. Over-mixing can lead to air pockets in the cheesecake, which can cause it to crack.
- Don't skip the springform pan. Springform pans were made just for this purpose. Releasing the cheesecake from a regular round pan is incredibly tricky and may result in the cheesecake falling apart. Stick with a springform for the best results.
- Use an oven thermometer. Check your oven temperature using an oven thermometer. Precision matters when making a cheesecake, and the temperature on the display may not be the actual temperature in your oven, which could result in some baking mishaps if you're not aware.
- Use a boiling water bath. Baking the cheesecake in a water bath helps to regulate the temperature and prevent cracking. To do this, wrap the bottom of the cheesecake pan with aluminum foil and place it in a larger pan. Add hot water to the larger pan, making sure the water level comes halfway up the cheesecake pan.
- Don't overbake. Overbaking can cause the cheesecake to dry out and crack. To avoid this, check the cheesecake at the minimum baking time suggested in the recipe and look for signs that it's done, such as a slightly jiggly center.
- Let it cool slowly. After the cheesecake is done baking, turn off the oven and let it cool slowly inside the oven. This will help prevent cracking due to sudden changes in temperature.
- Serve chilled. New York Cheesecake is best serve chilled. It's important to refrigerate it overnight to help the cheesecake set and develop its signature creamy texture.
- Cut into small slices. Because New York Cheesecake is so rich, it's usually served in small slices. This 9-inch cheesecake can typically yield around 12-16 slices.
Storing and Freezing Instructions
How to Store
Store the entire cheesecake in an airtight container or wrap as tightly as possible in plastic cling wrap and refrigerate for up to 5 days.
How to Freeze
Wrap the entire cheesecake in plastic cling wrap or cut the cheesecake into individual servings and wrap each one. Then, wrap in a layer of aluminum foil to prevent freezer burn. Freeze for up to 2 months. Thaw overnight in the refrigerator before serving.
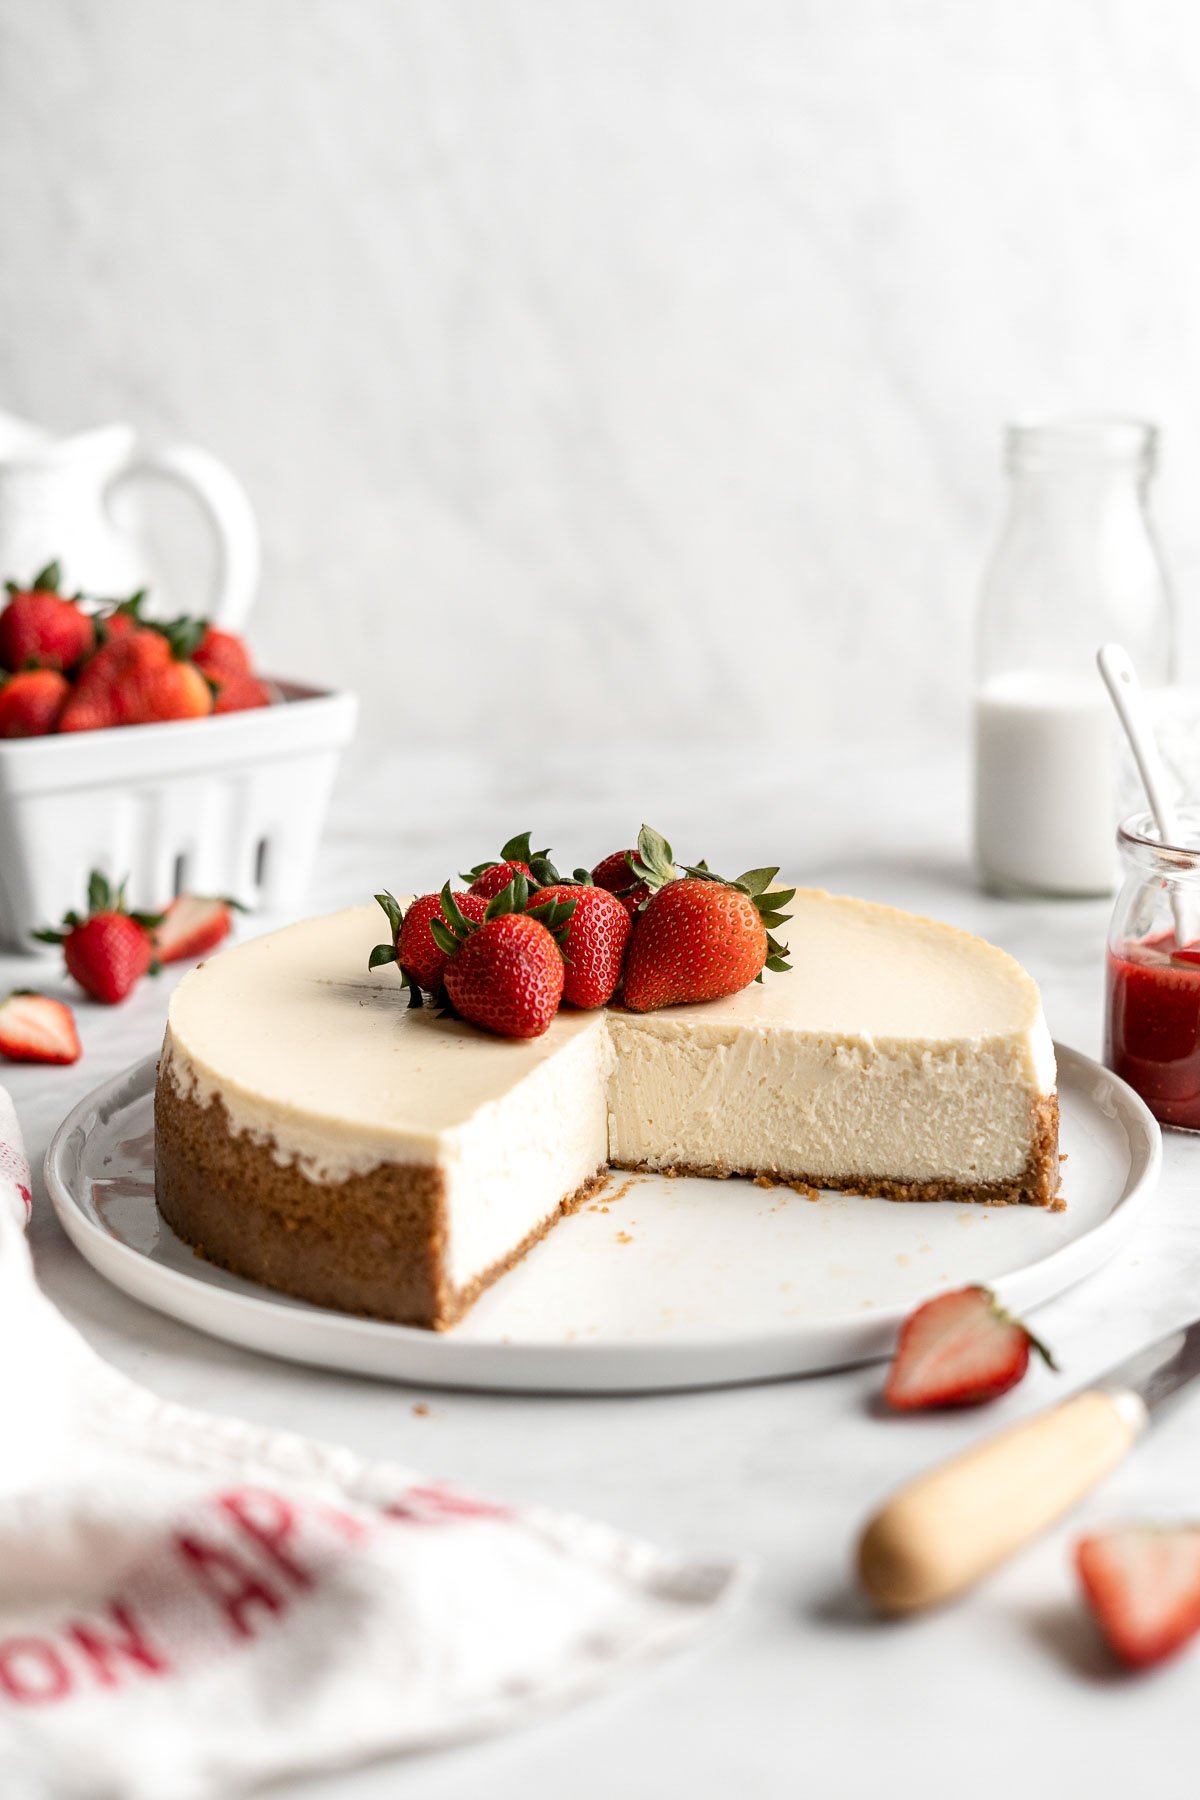
More Cheesecake Recipes
- Blueberry Cheesecake
- No Bake Blackberry Cheesecake
- Caramel Pecan Pie Cheesecake Bars
- No Crust Burnt Basque Cheesecake
- Creamy Mango Cheesecake
- No Bake Strawberry Cheesecake
Tried this recipe?
I'd love to hear what you think! Leave a comment and rating below to share your feedback. Your reviews help others discover this recipe and help me keep creating more free recipes for you. Snap a photo and tag me on social media @aheadofthyme too.
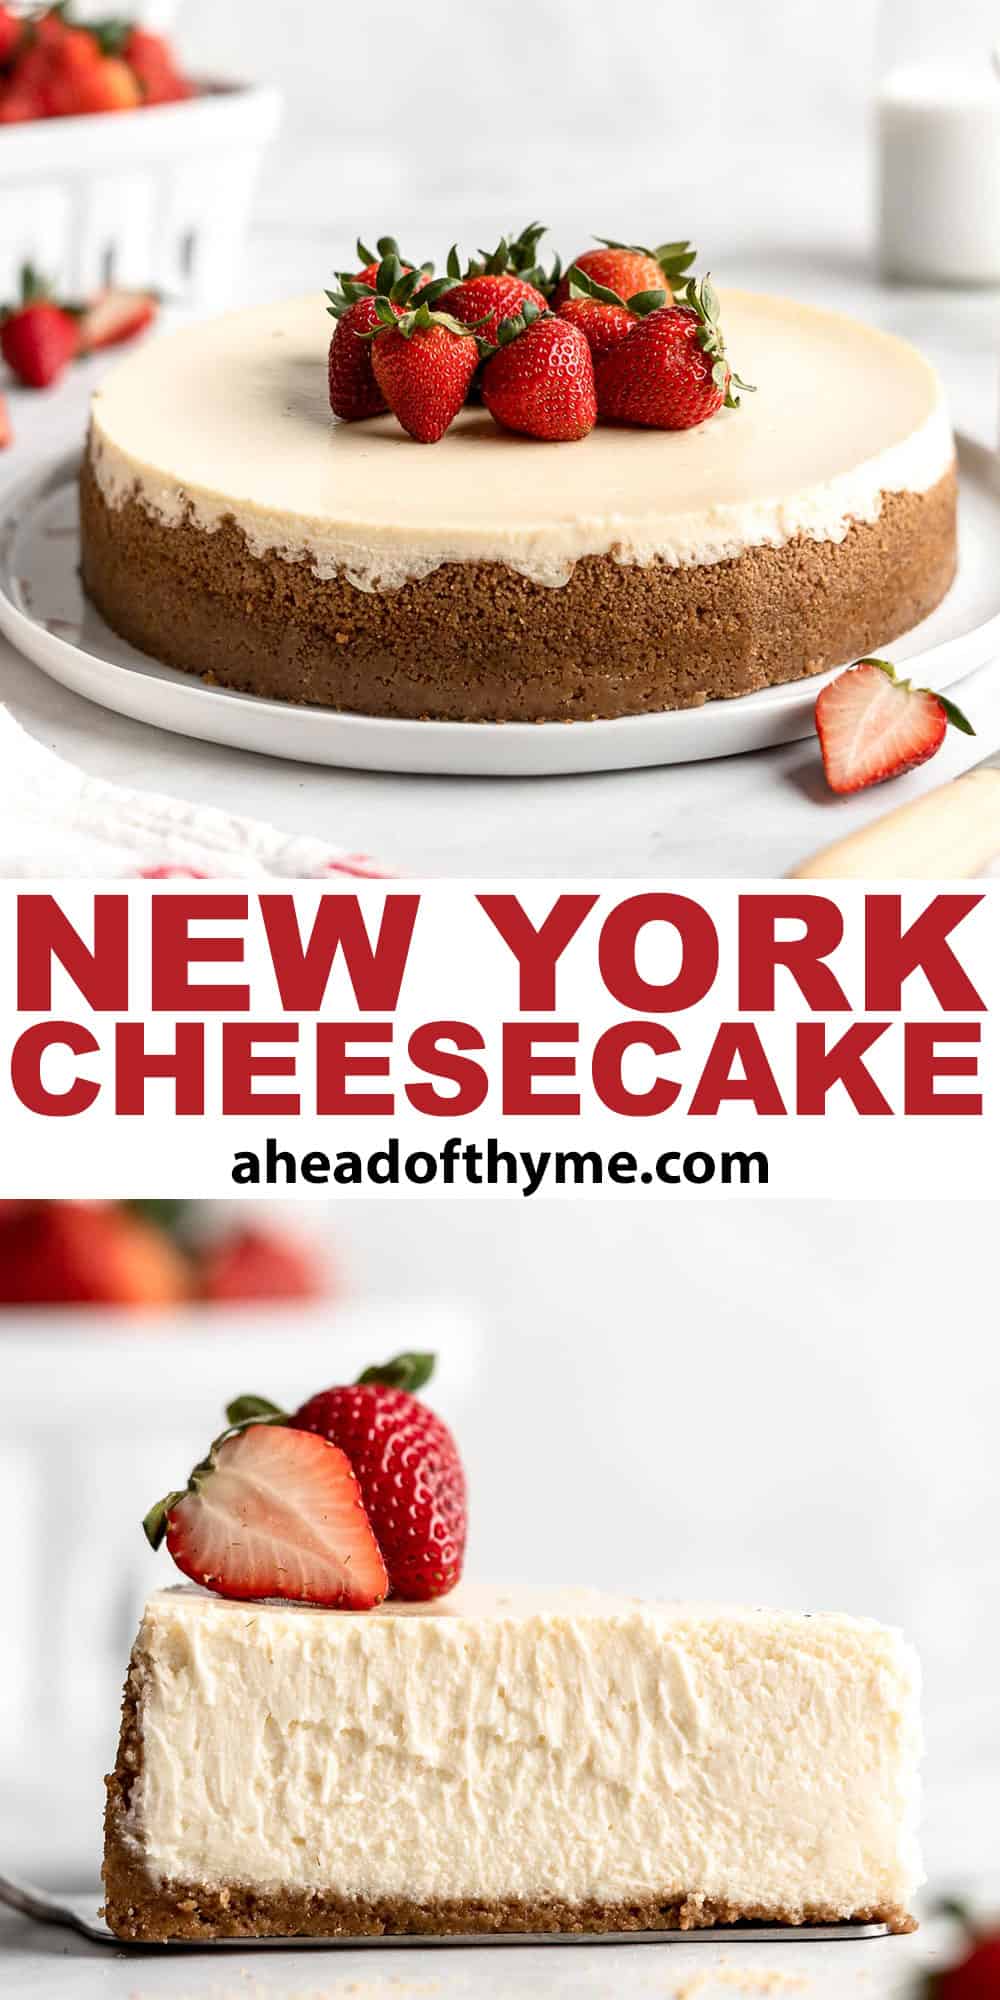
Cheese Quesadilla
This Cheese Quesadilla has the perfect combination of crispy, cheesy, and flavorful. Filled with ooey-gooey melted cheese and customized with your favorite toppings, these vegetarian quesadillas are a crowd favorite. Plus, ready to serve in just a few minutes!
Whether you're looking for a quick and easy lunch, a tasty snack, or a satisfying dinner, cheesy quesadillas are a go-to option that will never disappoint. Serve them with your favorite toppings and sides, such as guacamole, salsa, or sour cream, for a delicious and customizable meal that's loved by all!
Why You'll Love this Cheese Quesadilla
- Quick and easy to make. This chicken quesadilla recipe is simple and can be made in about 5 minutes following just a few easy steps. They are perfect for busy days when you're short on time.
- Cheesy and delicious. This cheesy quesadilla is the perfect combination of crispy, cheesy, and flavorful. Plus, you can customize the flavor by adding your favorite toppings.
- A kid-friendly meal. Cheese quesadillas are one of those meals that will satisfy any crowd - especially the kids. It's quick lunch or dinner option for families. Load them up with toppings for the adults or leave them plain for any picky eaters.
- It's customizable. This vegetarian quesadilla is a great option for vegetarians or those looking for a meat-free meal. Plus, you can customize it by adding your favorite veggies or beans for an extra boost of flavor. Meat lovers can also add in a meaty protein.
- Serve with homemade dipping sauce. Take your cheese quesadilla to the next level by serving it with a homemade dipping sauce. Whether it's salsa, guacamole, or sour cream, a good dipping sauce can make all the difference.

Ingredient Notes
To make this easy Cheese Quesadilla, you will need the following ingredients (full measurements in recipe card below):
- butter - feel free to use salted or unsalted butter in this recipe - whatever your taste preference is. You can also use margarine or any other cooking fat instead of butter such as olive oil, coconut oil, or any other cooking oil.
- flour tortillas - quesadillas are traditionally made with flour tortillas. For a gluten-free option, you can use corn tortillas.
- cheese - we use cheddar cheese but you can use any type of shredded cheese that you prefer, such as Monterey Jack, Pepper Jack, or a Mexican blend.
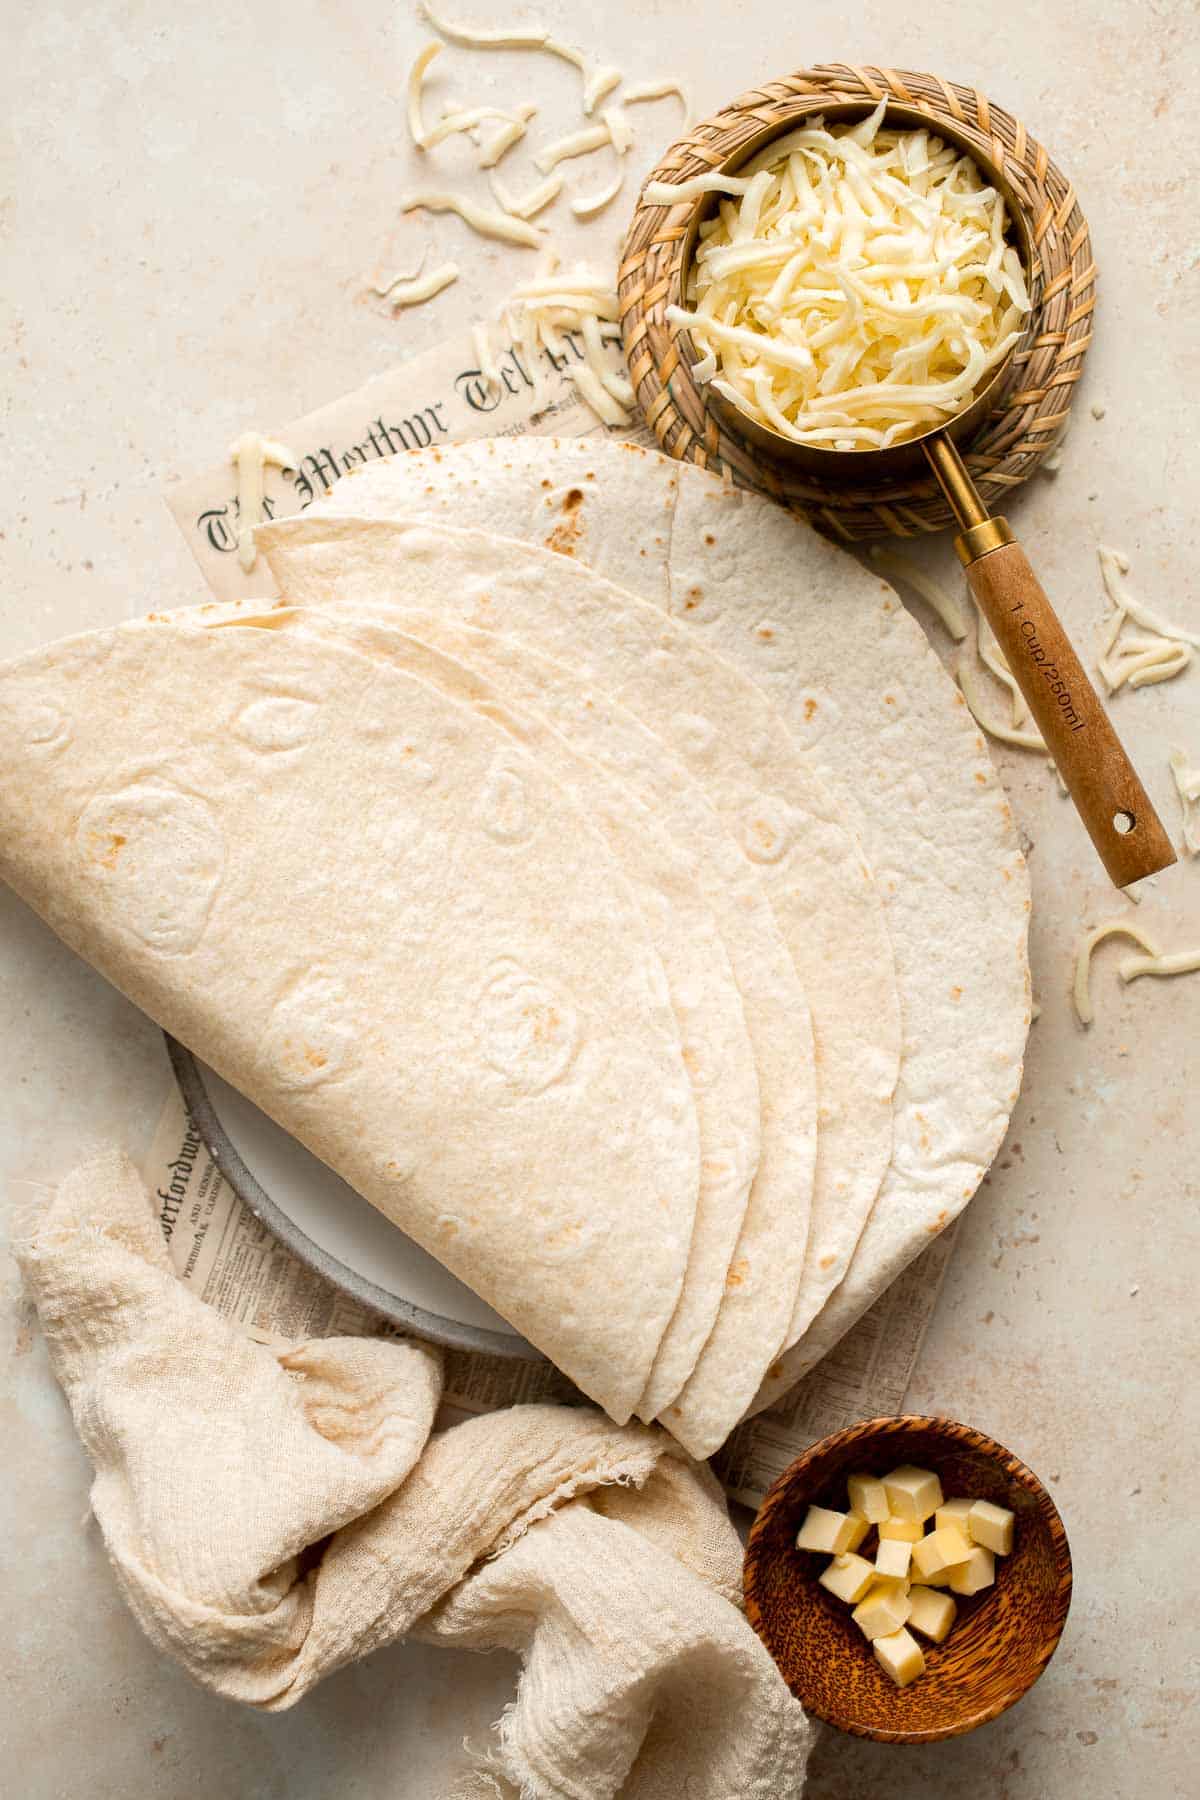
Optional Toppings
- cilantro - fresh herbs adds a great flavor to the quesadilla. If you don't like cilantro, you can skip it or use fresh parsley or basil instead.
- sour cream - use regular or light sour cream, or substitute with Greek yogurt or crema.
- jalapeño pepper - adds a bit of heat. If you prefer spicier, you can use hotter peppers like serrano or habanero.
- lime wedges - a squeeze of fresh lime juice adds a tangy flavor that complements the cheesy quesadilla so well.
- guacamole - make homemade guacamole in just minutes or use store-bought. You can also substitute with sliced or mashed avocado.
- pico de gallo - You can make homemade pico de gallo salsa very easily as well or use store-bought.
You will also need measuring cups and spoons and a skillet.
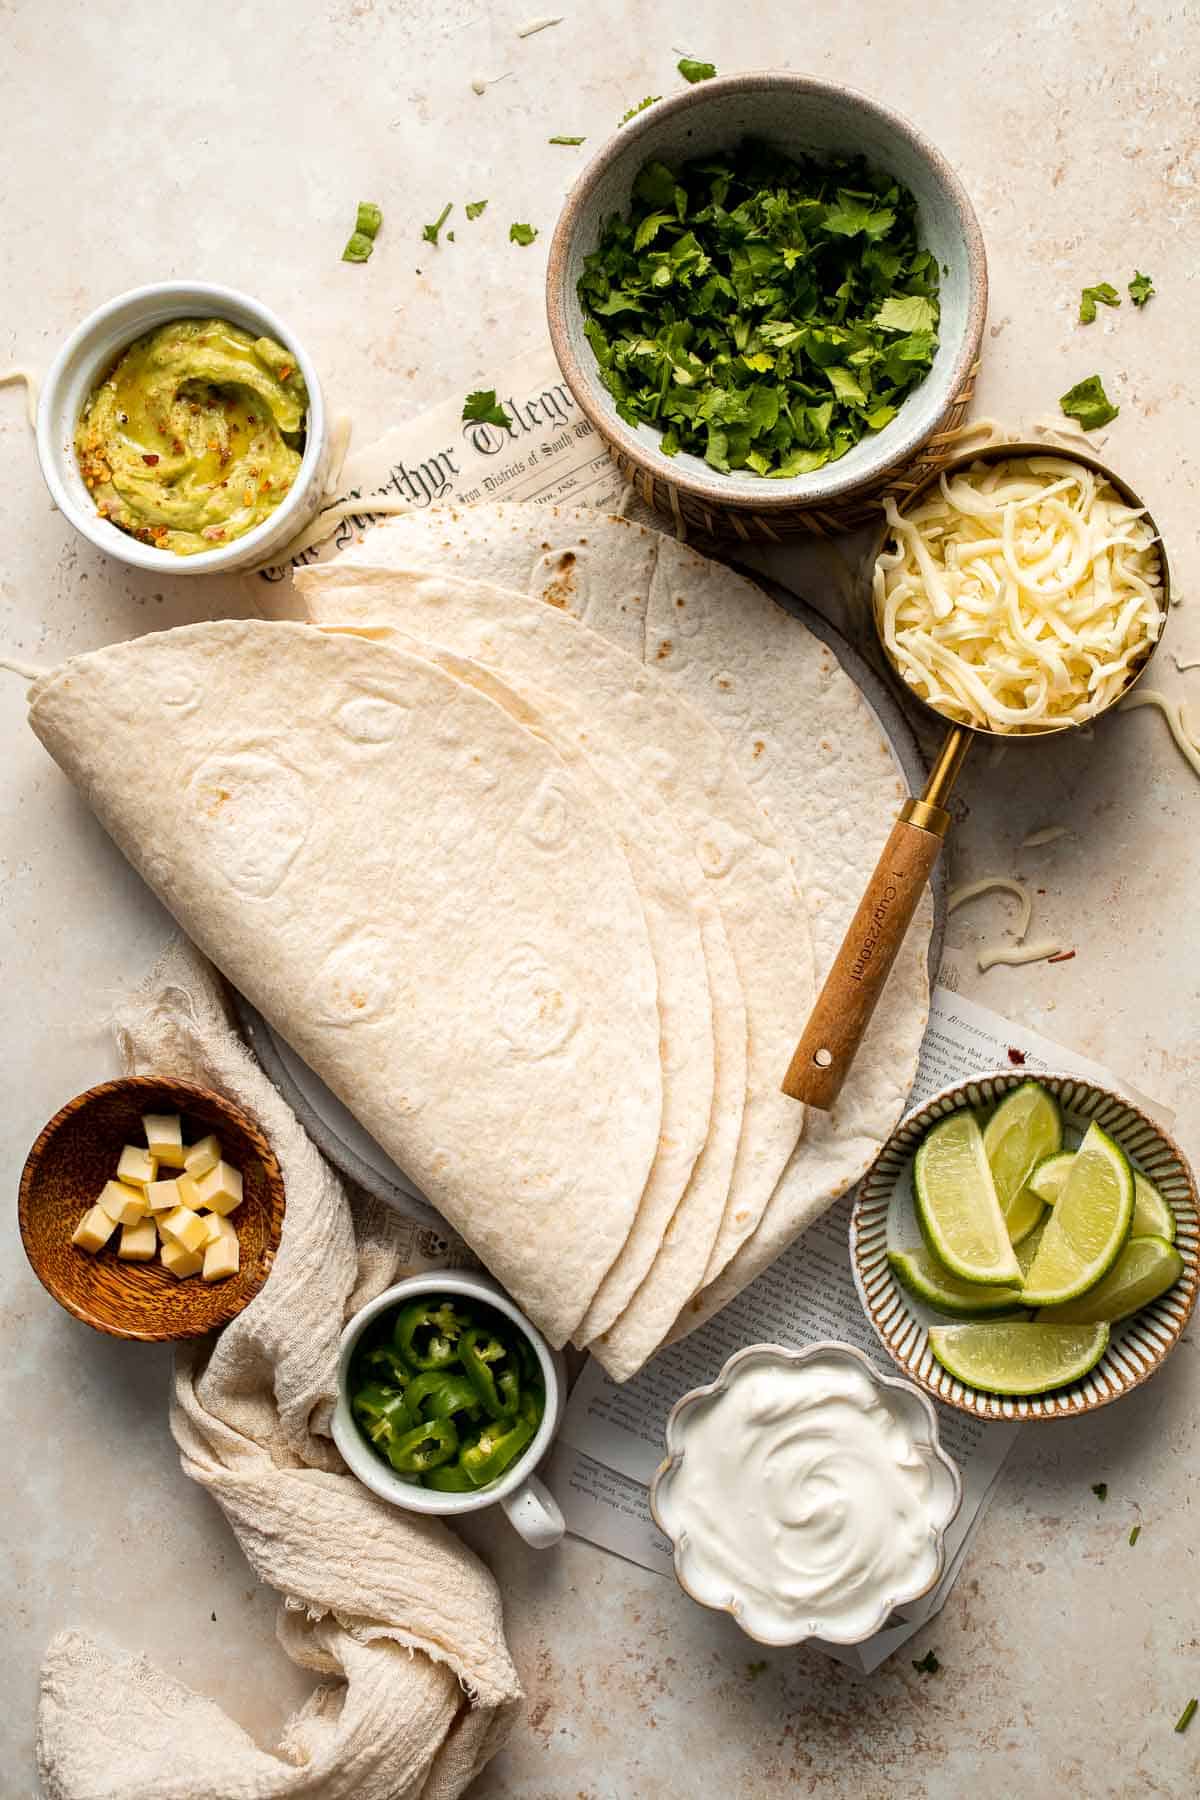
How to Make the Best Cheese Quesadilla
- Assemble. Heat the butter on a large skillet over medium heat for 1 minute until it starts to bubble. Place one tortilla in the pan and evenly sprinkle with cheddar cheese. Top with remaining tortilla.
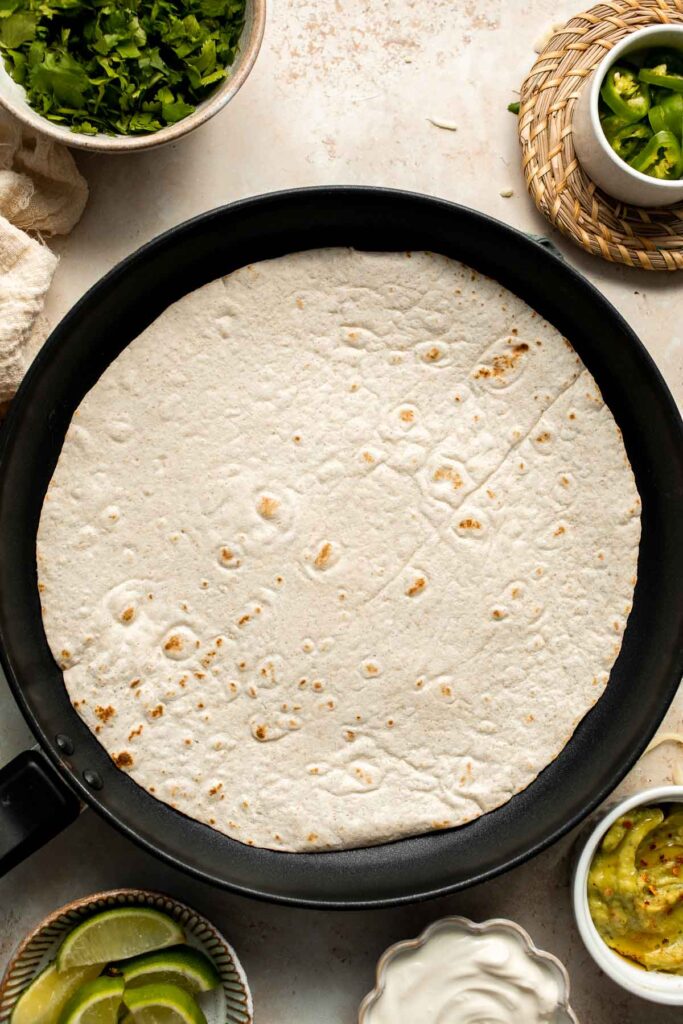
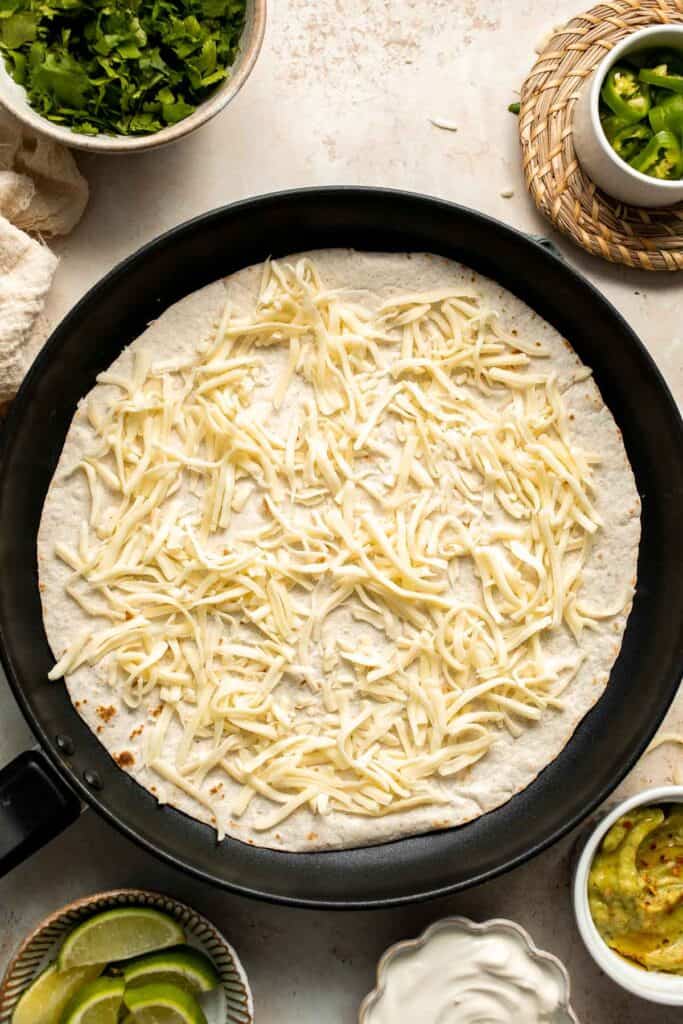
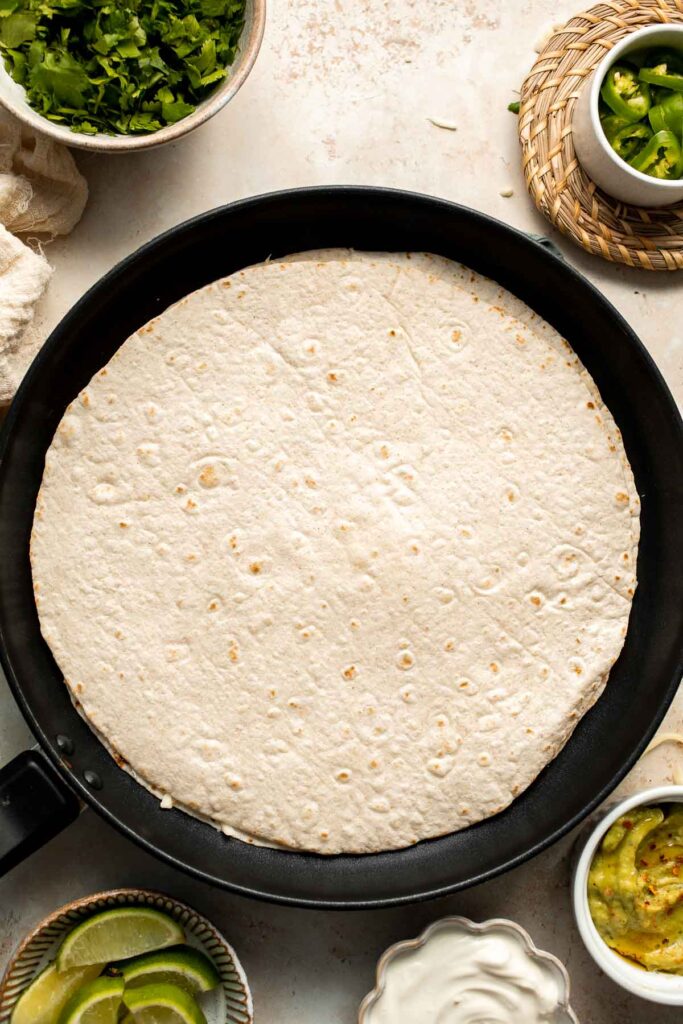
- Cook. Cook until the bottom tortilla is crispy and golden brown and the cheese melts, about 2 minutes. Flip over and cook until the other side is crispy and golden brown too, about 2 minutes.
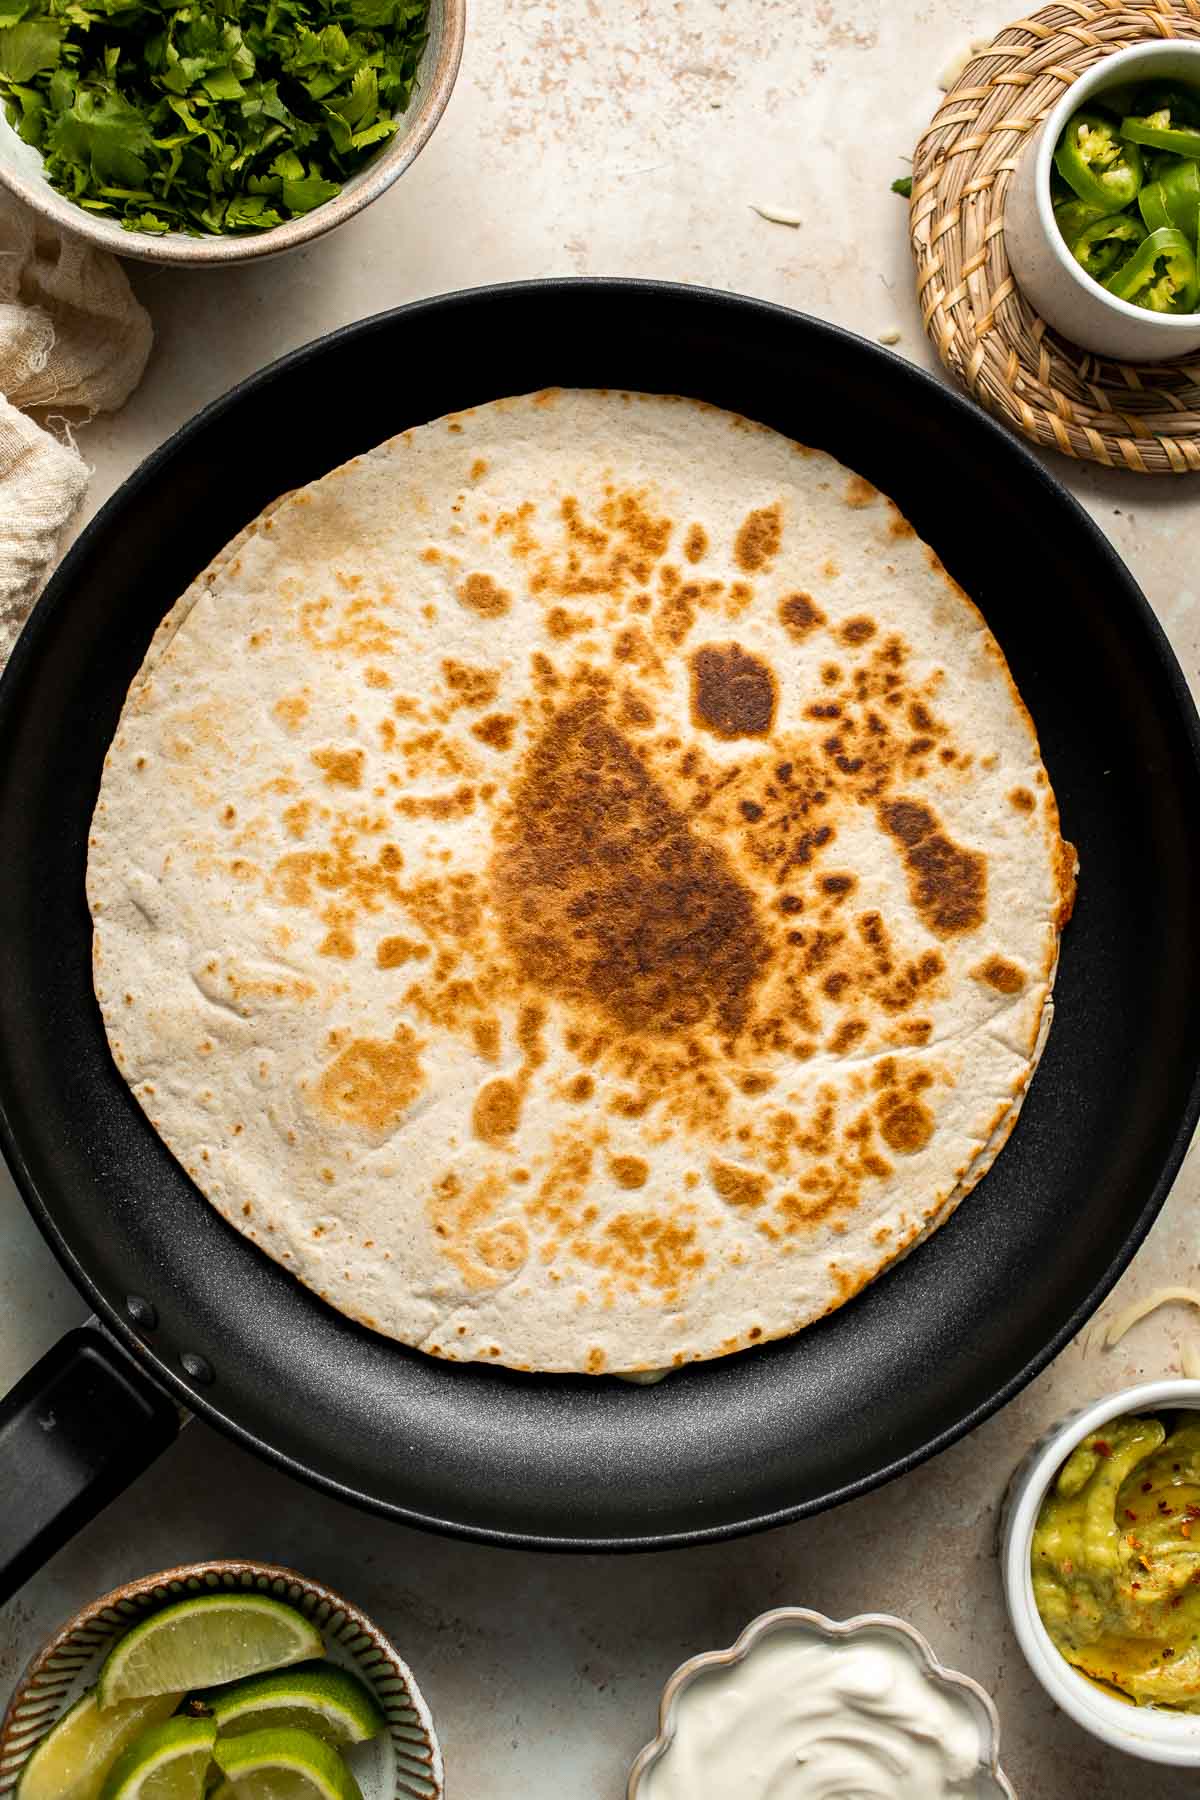
- Slice. Remove quesadilla from the pan and transfer onto a plate. Slice into 6 even triangles.
- Serve. Serve with your favorite toppings (such as sour cream, sliced jalapeños, and lime wedges) and your favorite dips (guacamole and/or salsa) on the side, if desired.
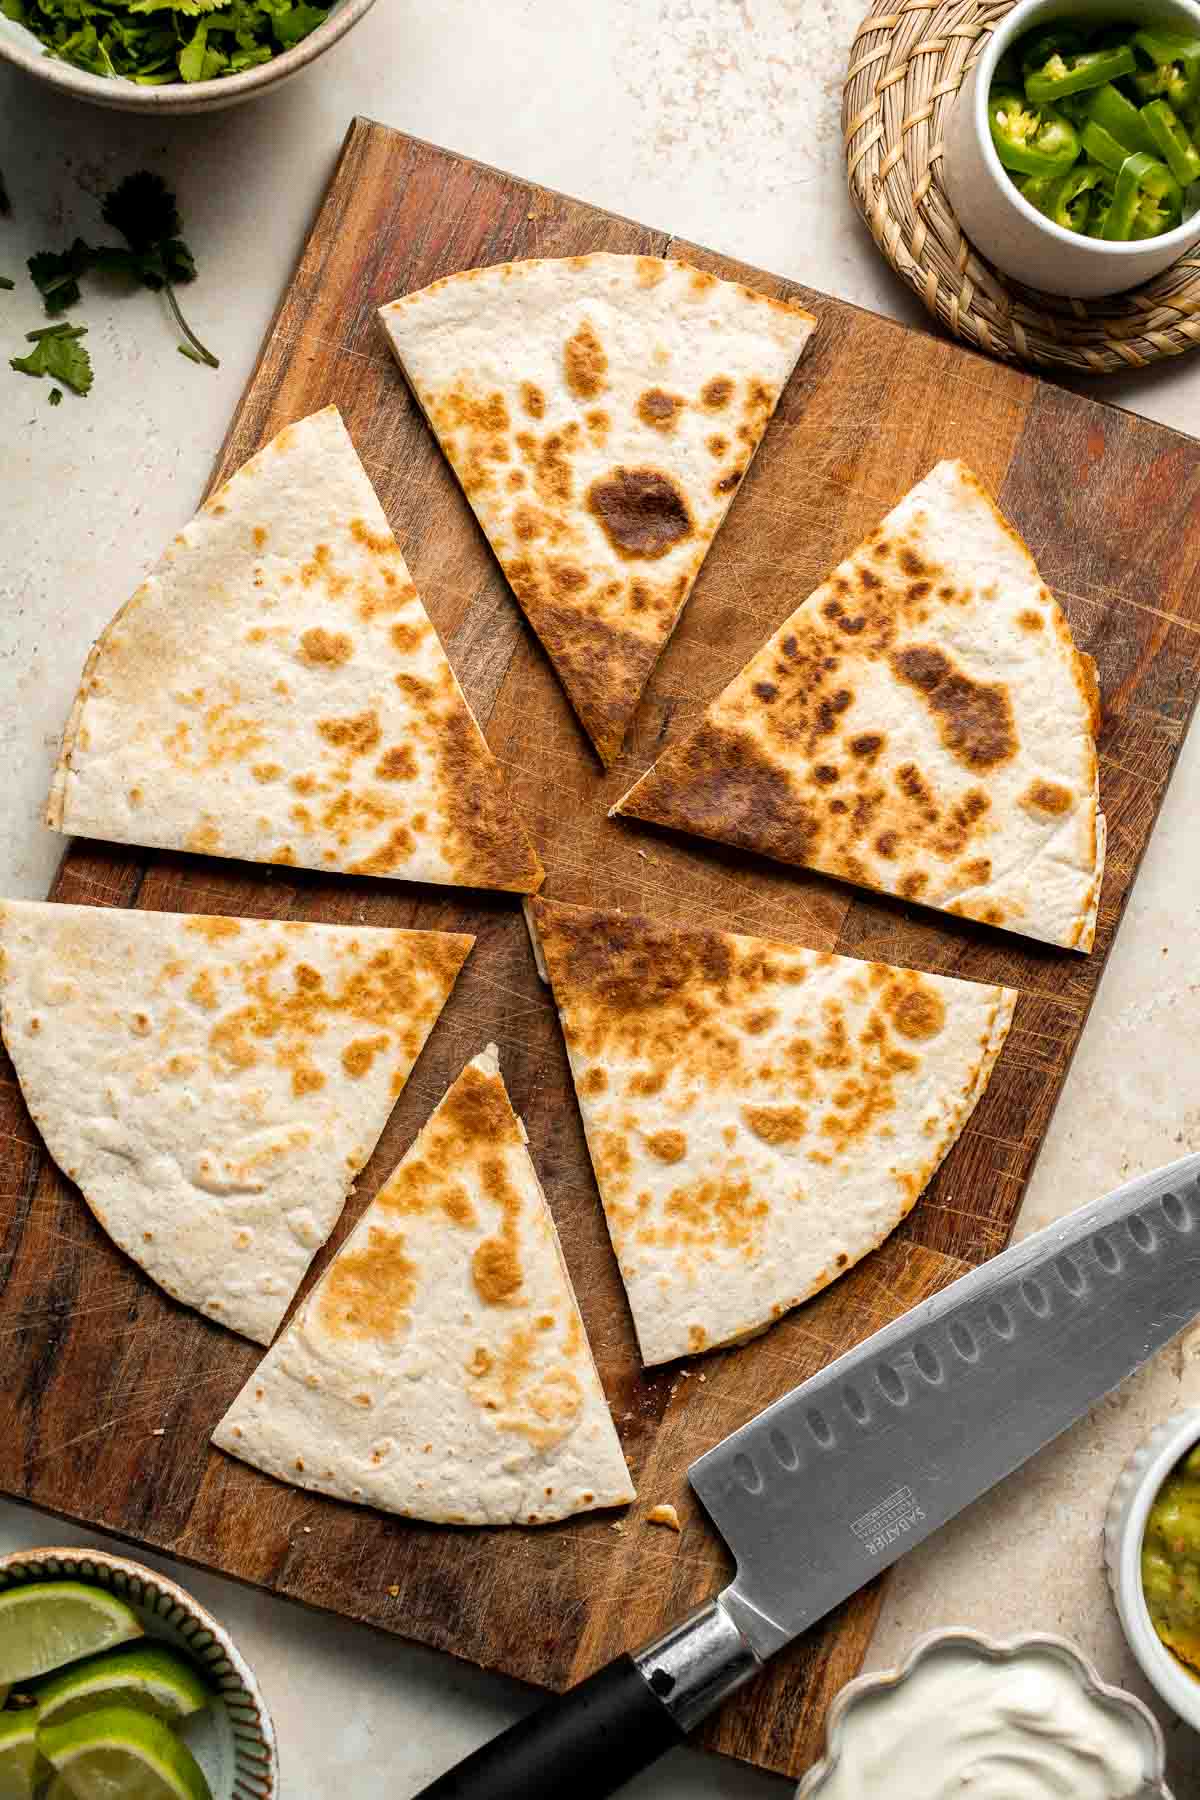
Recipe Variations
- Add a protein: For added protein, add in some black beans or pinto beans. If you are not sticking to a vegetarian diet, add in some meat such as cooked chicken, beef, pork, or shrimp for a heartier option.
- Load it with veggies: Add in veggies such as mushrooms, spinach, zucchini, or tomatoes.
- Make it spicy. Add sliced jalapenos, hot sauce, or chili flakes to give your quesadilla a spicy kick.
- Switch up the cheese. Experiment with different cheeses and combinations such as pepper jack, mozzarella, or Monterey Jack to give your quesadilla a different flavor.
- Add fresh herbs. Top your quesadilla with fresh cilantro, parsley, or basil to add a pop of freshness and flavor.
- Make a breakfast quesadilla: Make a breakfast quesadilla by adding a layer of scrambled eggs when you are assembling these.
How to Serve
Serve these easy Cheese Quesadillas on their own or with your favorite toppings and sauces for dipping. They also pair well with our favorite Mexican sides including:
- Guacamole
- Sheet Pan Nachos
- Mexican Street Corn (Elote)
- Pinto Bean Soup (Sopa Tarasca)
- Pico de Gallo Salsa
- Mexican Caesar Salad
For more, see our collection of 25 Mexican Side Dishes.
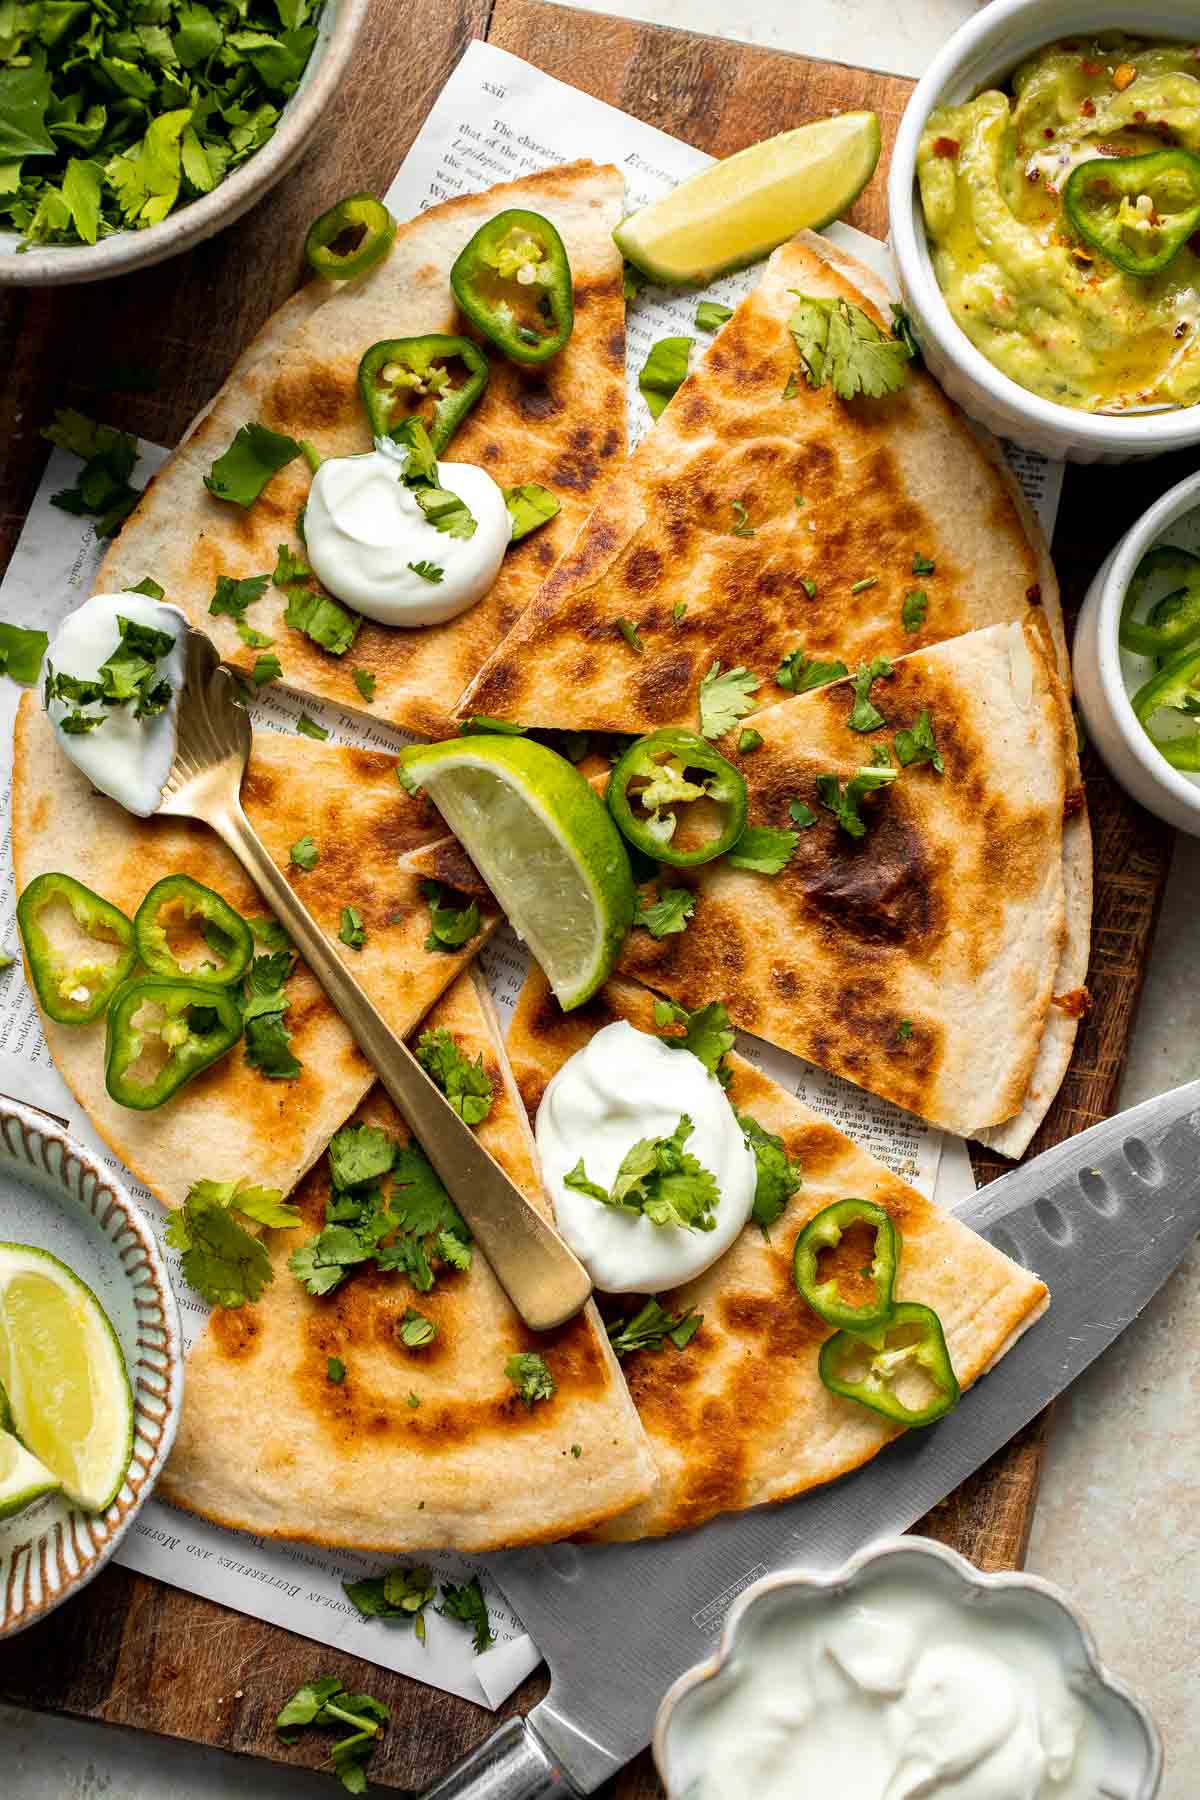
Recipe Tips and Tricks
- Don't overfill the quesadilla. Overfilling the quesadilla can cause it to break apart or become soggy. Use a moderate amount of filling and spread it evenly.
- Add toppings after cooking. To prevent soggy toppings, add fresh ingredients like chopped cilantro, diced tomatoes, or sliced avocado after cooking.
- Slicing tips. Cutting the quesadilla into smaller wedges or squares makes it easier to share and serve as an appetizer. Use a sharp knife or pizza cutter to slice the quesadilla into equal portions.
Storing and Freezing Instructions
How to Store
Once the cheese quesadillas have cooled to room temperature, transfer them into an airtight container in between layers of parchment paper to divide them, if necessary.
How to Reheat
Reheat leftover quesadillas in an ungreased skillet over medium-low heat until the cheese is melty and gooey and the tortillas are crispy. You can also reheat in a 425F preheated oven for about 5-10 minutes until warmed through, or in the air fryer at 400F for about 3-5 minutes until hot and crispy.
How to Freeze
Divide the quesadillas into your preferred serving sizes and seal in freezer bags or an airtight container. You can reheat directly from frozen by baking at 400℉ for 25-30 minutes until heated through and crisp.
More Recipes with Tortillas
- 30 Best Mexican Recipes
- Sheet Pan Quesadillas
- Baked Chicken Quesadillas
- Vegetarian Quesadillas
- Cauliflower Tacos
- Huevos Rancheros
Tried this recipe?
I'd love to hear what you think! Leave a comment and rating below to share your feedback. Your reviews help others discover this recipe and help me keep creating more free recipes for you. Snap a photo and tag me on social media @aheadofthyme too.

50 Meal Prep Ideas
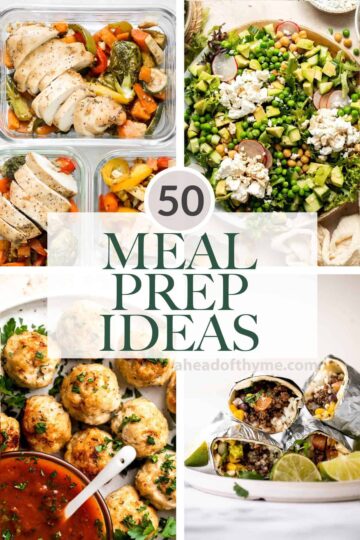
Whether you're a busy professional, a parent, a student, or just someone looking to simplify their life, meal prepping is a great way to save time and eat healthy throughout the week. To make your life even easier, we have put together a collection of over 50 Meal Prep Ideas to help you get started.
With recipes for breakfast, hot lunches and dinner, cold lunches including sandwiches and salads, soups, as well as snacks and sides, there's something for everyone. Plus, many of these meal prep recipes are customizable to fit dietary restrictions and preferences, so you can meal prep with ease and enjoy delicious and nutritious meals all week long.
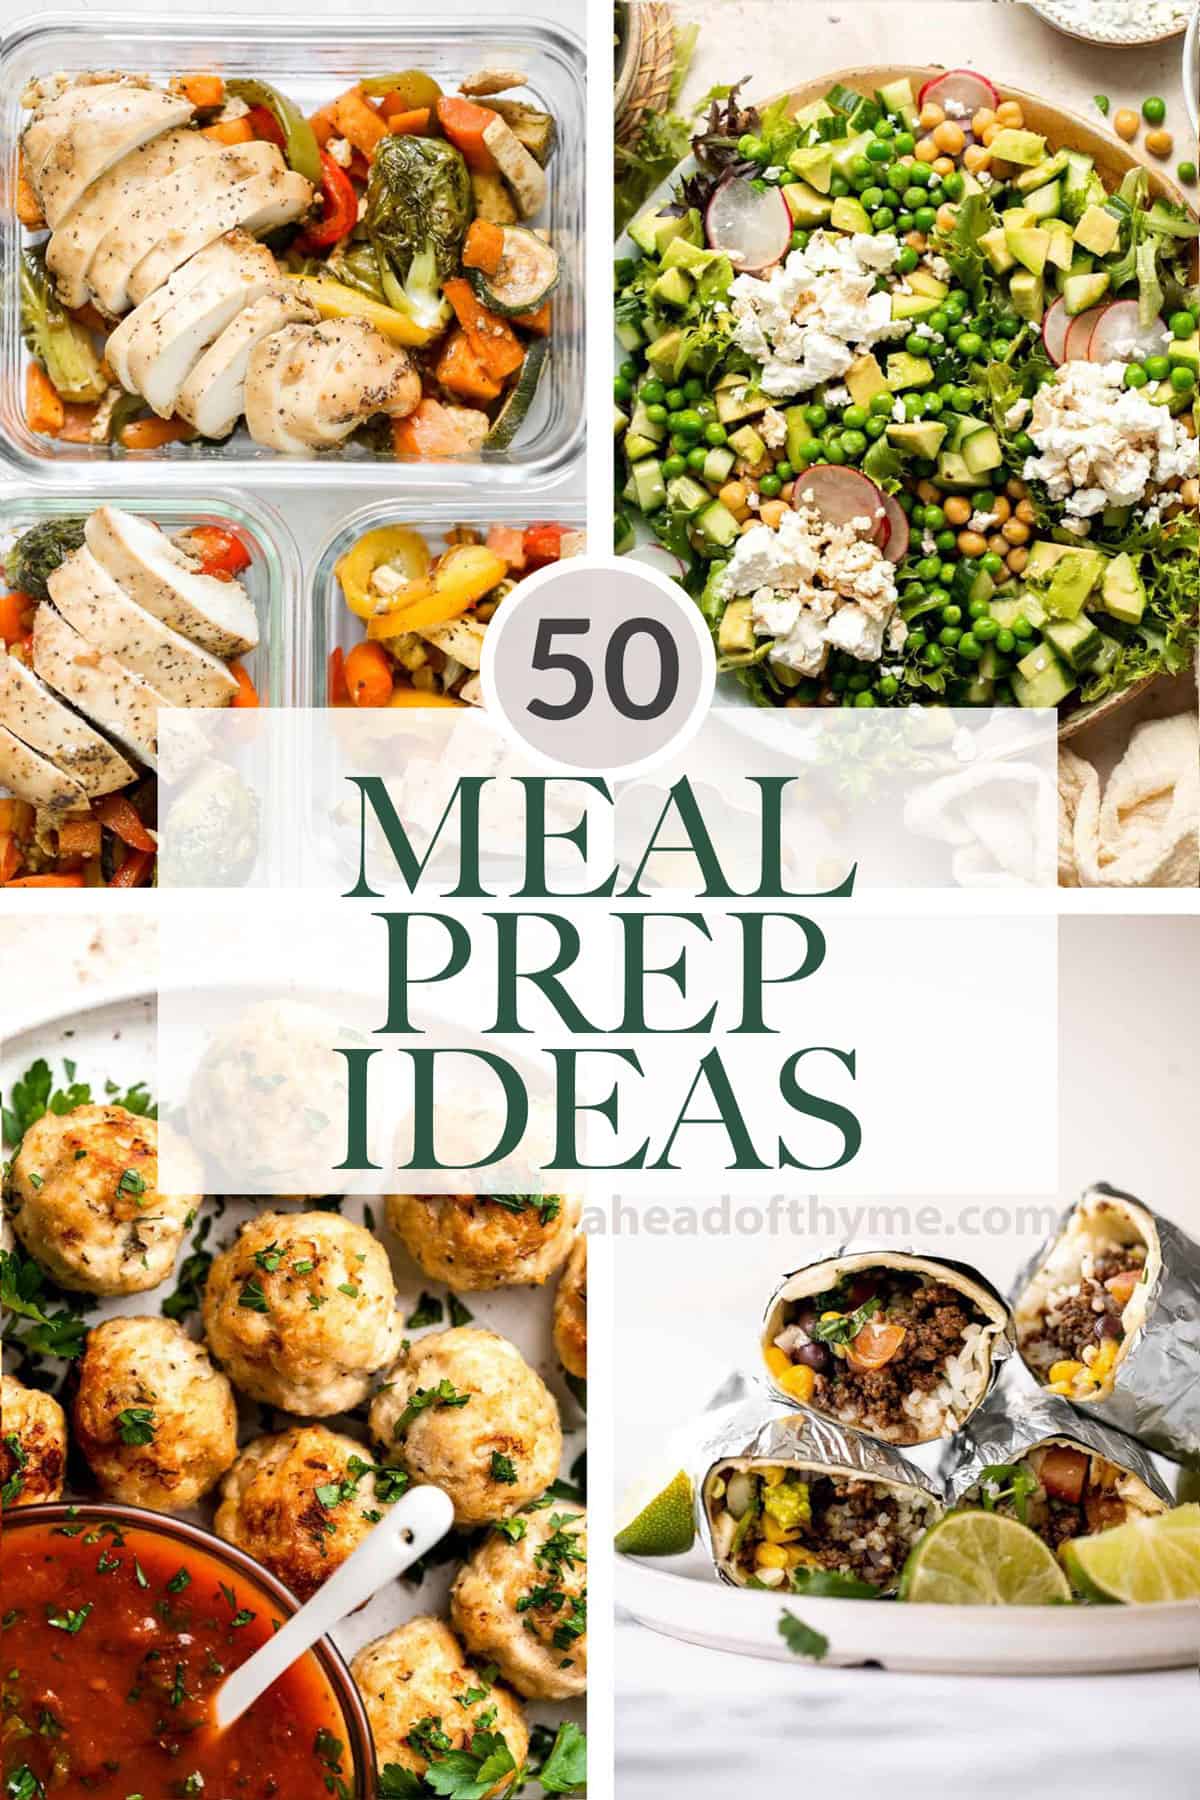
Why Meal Prep?
There are so many benefits to meal prep that makes your life easier. Some of my favorite reasons are:
- Saves time. By prepping your meals in advance, you can save time throughout the week by not having to cook every meal from scratch. This is especially helpful on busy days or when you just don't feel like cooking.
- Helps with portion control. Meal prepping means that you can make sure that each meal is appropriately portioned. This can help you stay on track with your nutritional goals and avoid overeating.
- Promotes healthy eating. Meal prepping allows you to plan out healthy meals and snacks in advance. Plus, when you have meals prepared ahead of time, it's lot easier to resist the urge to indulge in fast food and takeout.
- Saves money. By planning out meals and buying ingredients in bulk, you can save money by buying groceries instead of takeout, and reduce the amount of food waste.
- Reduces stress. Meal prep eliminates the daily stress of figuring out what to make for your next meal. Knowing that your meals are already prepared is good feeling.
Tips for Getting Started with Meal Prep
- Start with a plan. Wondering how to meal prep? First, spend some time to plan out your meals for the week. Decide on what dishes you want to prepare, how many servings you need, and what ingredients you'll need to buy. Check your inventory and make a shopping list of ingredients that you will need so that you don't have to make any last minute grocery runs for missed items.
- Make a schedule. To make meal prep work, you need to set aside a dedicated time each week to prepare your meals. This might be a few hours on a Sunday afternoon, or it could be spread out over a few weeknights. Whatever works for you, just make sure you stick to your schedule.
- Keep it simple. Don't try to meal prep overly complicated dishes right from the start. Instead, start with simple recipes that are easy to make and require few ingredients. As you get more comfortable with the process, you can start experimenting with more complex recipes.
- Invest in quality storage containers. One of the keys to successful meal prep is having good quality storage containers. Invest in some sturdy, airtight containers that are easy to clean and can be used in both the fridge and the freezer.
- Feel free to customize. Meal prep is all about making your life easier, so don't be afraid to customize your meals to suit your tastes and preferences. Add extra veggies to your stir-fry, swap out a protein source for something else, or experiment with different flavor combinations to keep things interesting.

Best Meal Prep Containers
- Glass containers. These glass containers are my favorite meal prep containers because they are durable, dishwasher safe, and can be used in the oven or microwave. They also do not hold any odor or stains from the food, so they are easy to clean and maintain.
- Stainless steel containers. Stainless steel containers are also a great option for meal prep as they are eco-friendly, non-toxic, and keep the food fresh and hot for hours. They are also lightweight, easy to carry around and come in different sizes and shapes to fit different types of meals.
- Bento boxes. Bento boxes are perfect for meal prepping as they have multiple compartments to store different types of food. They are also great for portion control and can help you to keep track of your daily calorie intake. Bento boxes come in various materials like plastic, glass, or stainless steel, making them a versatile and convenient option for meal prep.
- Plastic containers. Plastic containers are great for meal prepping. They are dishwasher safe and freezer-friendly. These are great to use for freezer meals.
Best Meal Prep Ideas
Breakfast Meal Prep
Egg muffins are a quick and easy way to meal prep breakfast on-the-go, loaded with cheddar cheese, bacon or salami, and green onions. Make 12 in 30 minutes. One of my favorite meal prep ideas!
Chia Seed Pudding is creamy, delicious, and healthy, loaded with protein, fiber, antioxidants, and healthy fats. Plus, it's easy to make with 3 ingredients.
Vegetarian Breakfast Quesadillas
Make-ahead, freezer-friendly vegetarian breakfast quesadillas stuffed with eggs, onions, green peppers, mushrooms, and sharp white cheddar, are grilled to crispy perfection. Eat them now or freeze for a later day.
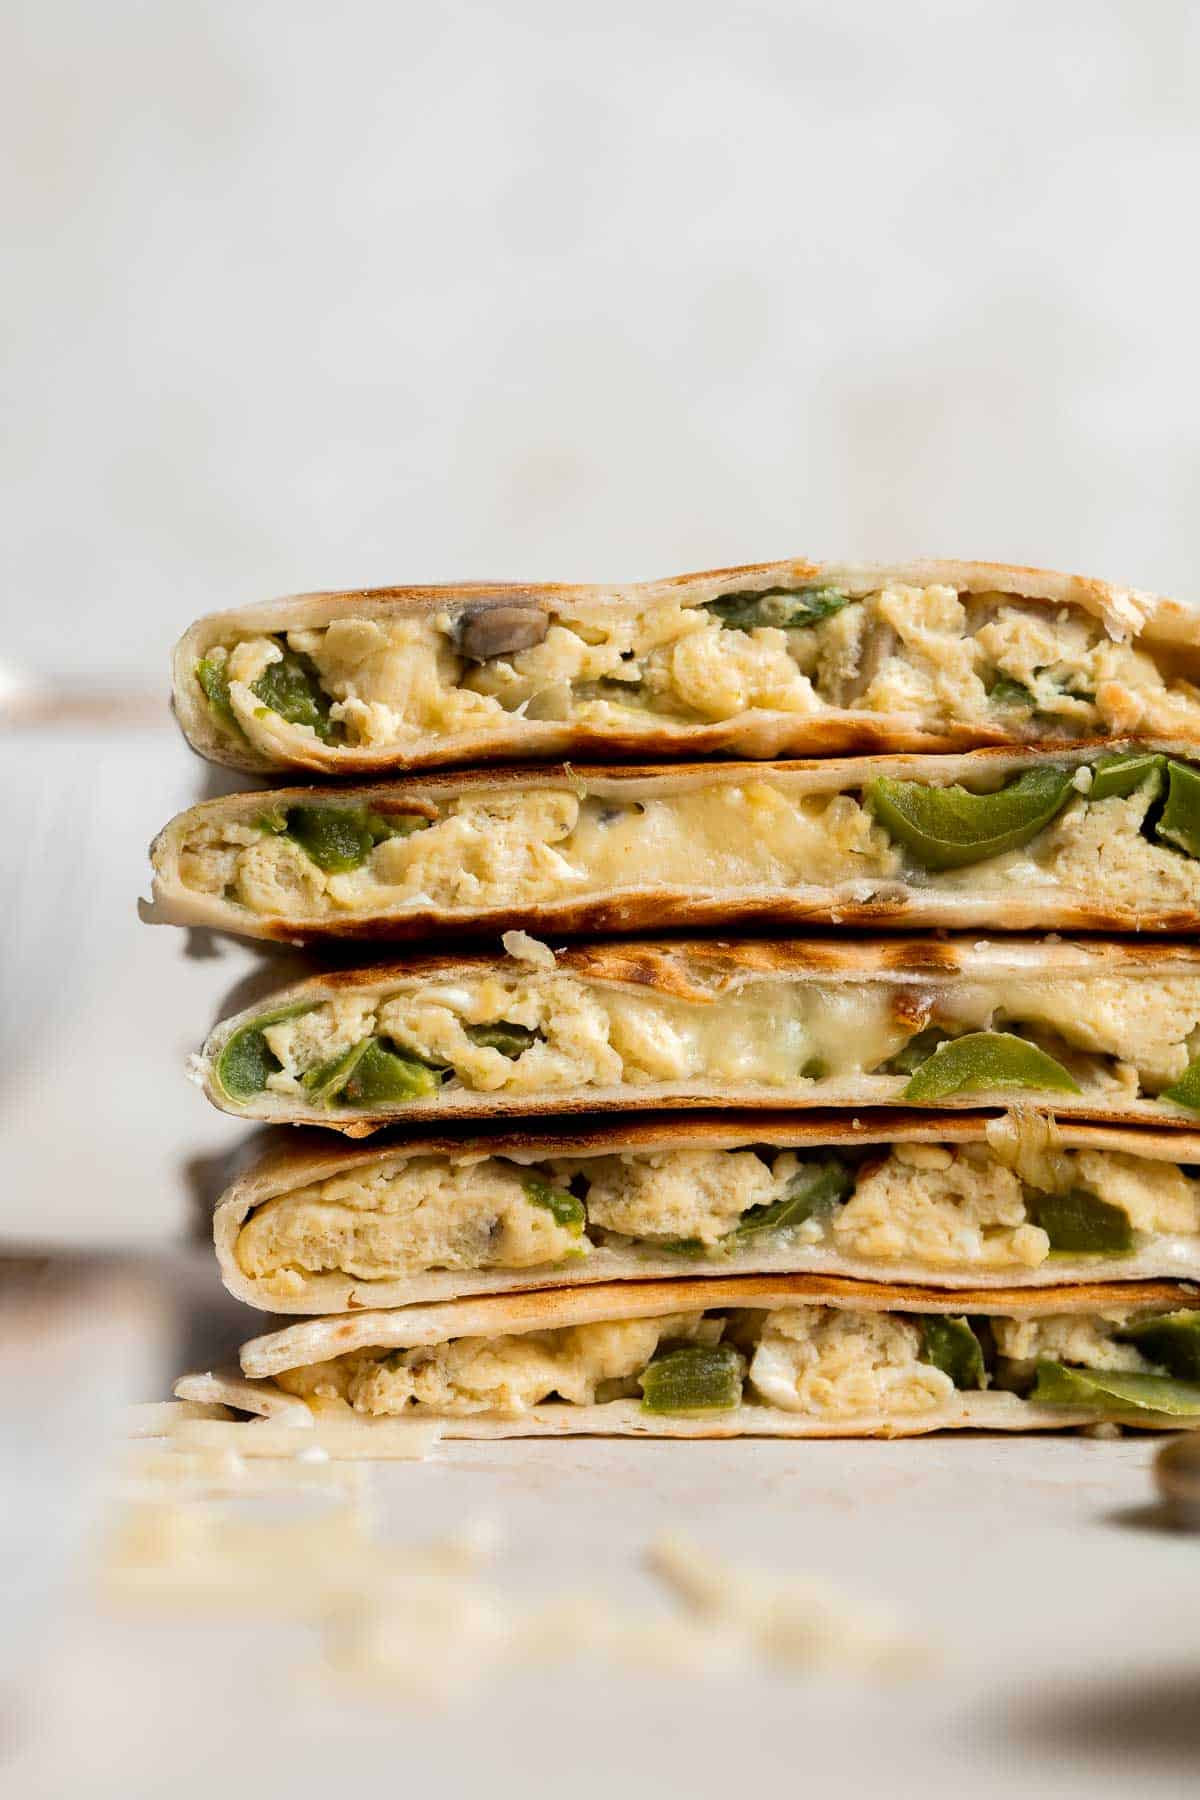
Layer fresh fruits, creamy Greek yogurt and crunchy granola to make this fruit and yogurt parfait for a delicious and healthy breakfast or a simple snack.
No Bake Protein-Packed Energy Bites
No bake protein-packed breakfast energy bites are chewy, easy to make, delicious, and loaded with healthy nutrients. Perfect for breakfast or as a snack.
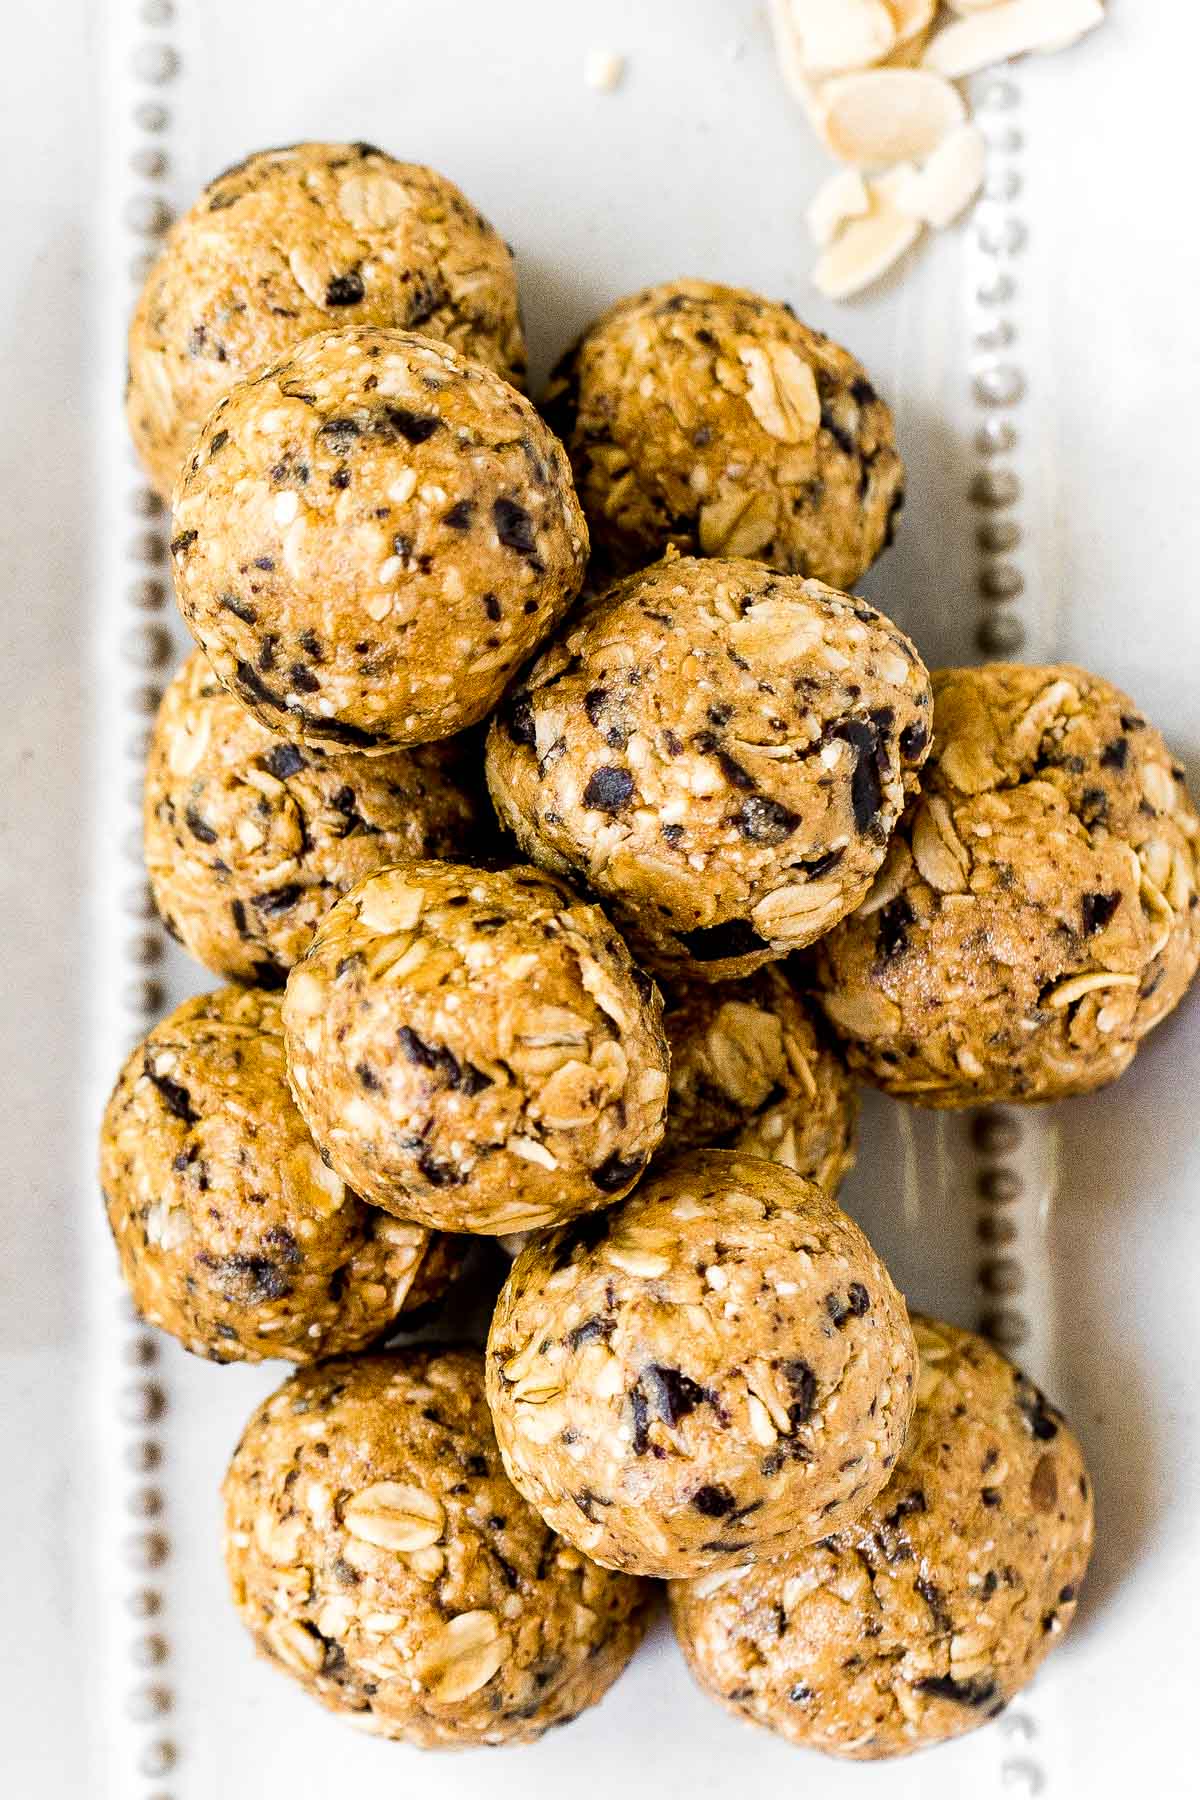
Coconut Maple Walnut Granola is easy to make from scratch with simple ingredients including 3 types of nuts. It's gluten-free, vegan and refined sugar-free!
Meal Prep Hot Lunches and Dinners
Meal Prep Sheet Pan Balsamic Chicken and Vegetables
Quick and easy, throw everything into one pan, Asian-style meal prep sheet pan sesame balsamic chicken and vegetables is flavourful, juicy and tender. One of the easiest meal prep ideas!
Easy Baked Meatballs are juicy, tender, loaded with flavor, and kid-friendly. Enjoy delicious homemade meatballs in under an hour using simple ingredients.
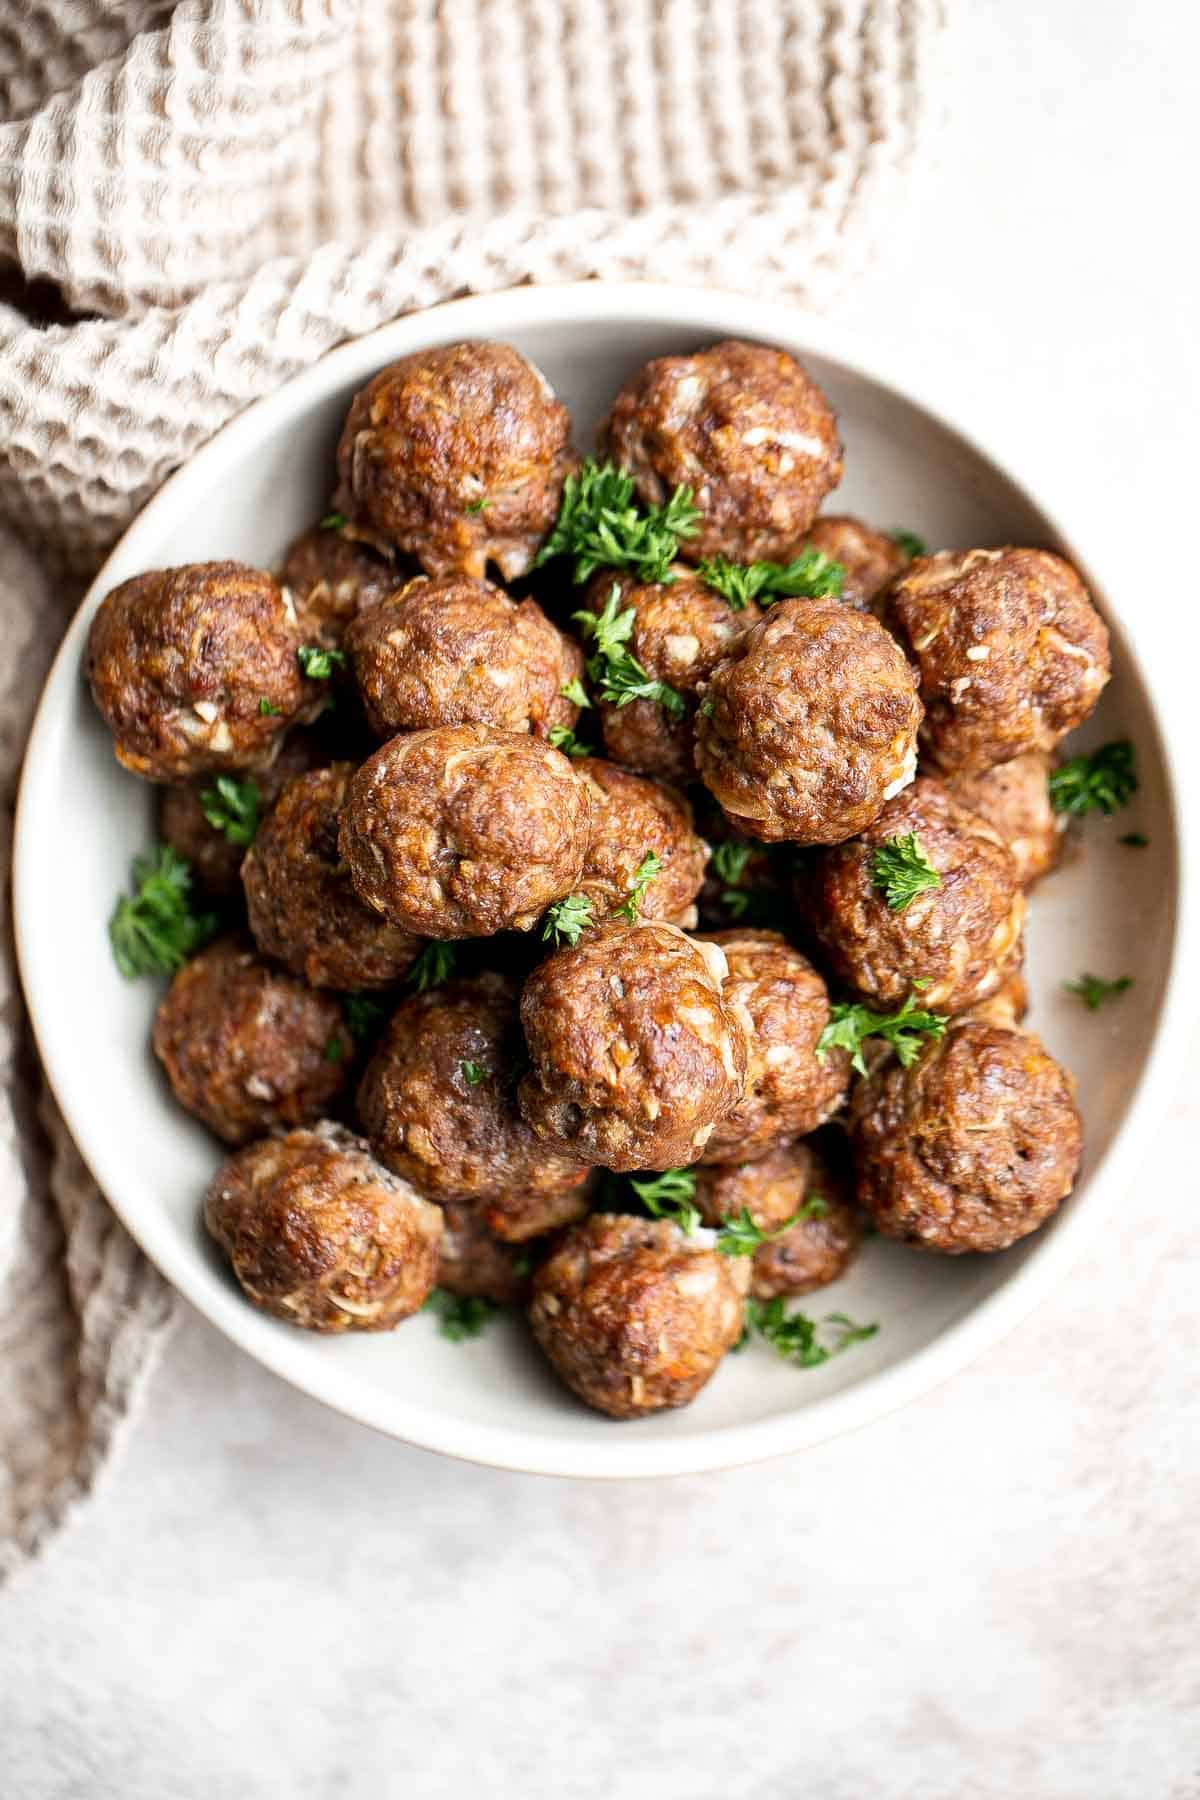
Beef and broccoli stir fry is a classic Chinese-American dish that is delicious, savory, hearty, and saucy. Better than takeout and ready in 25 minutes.
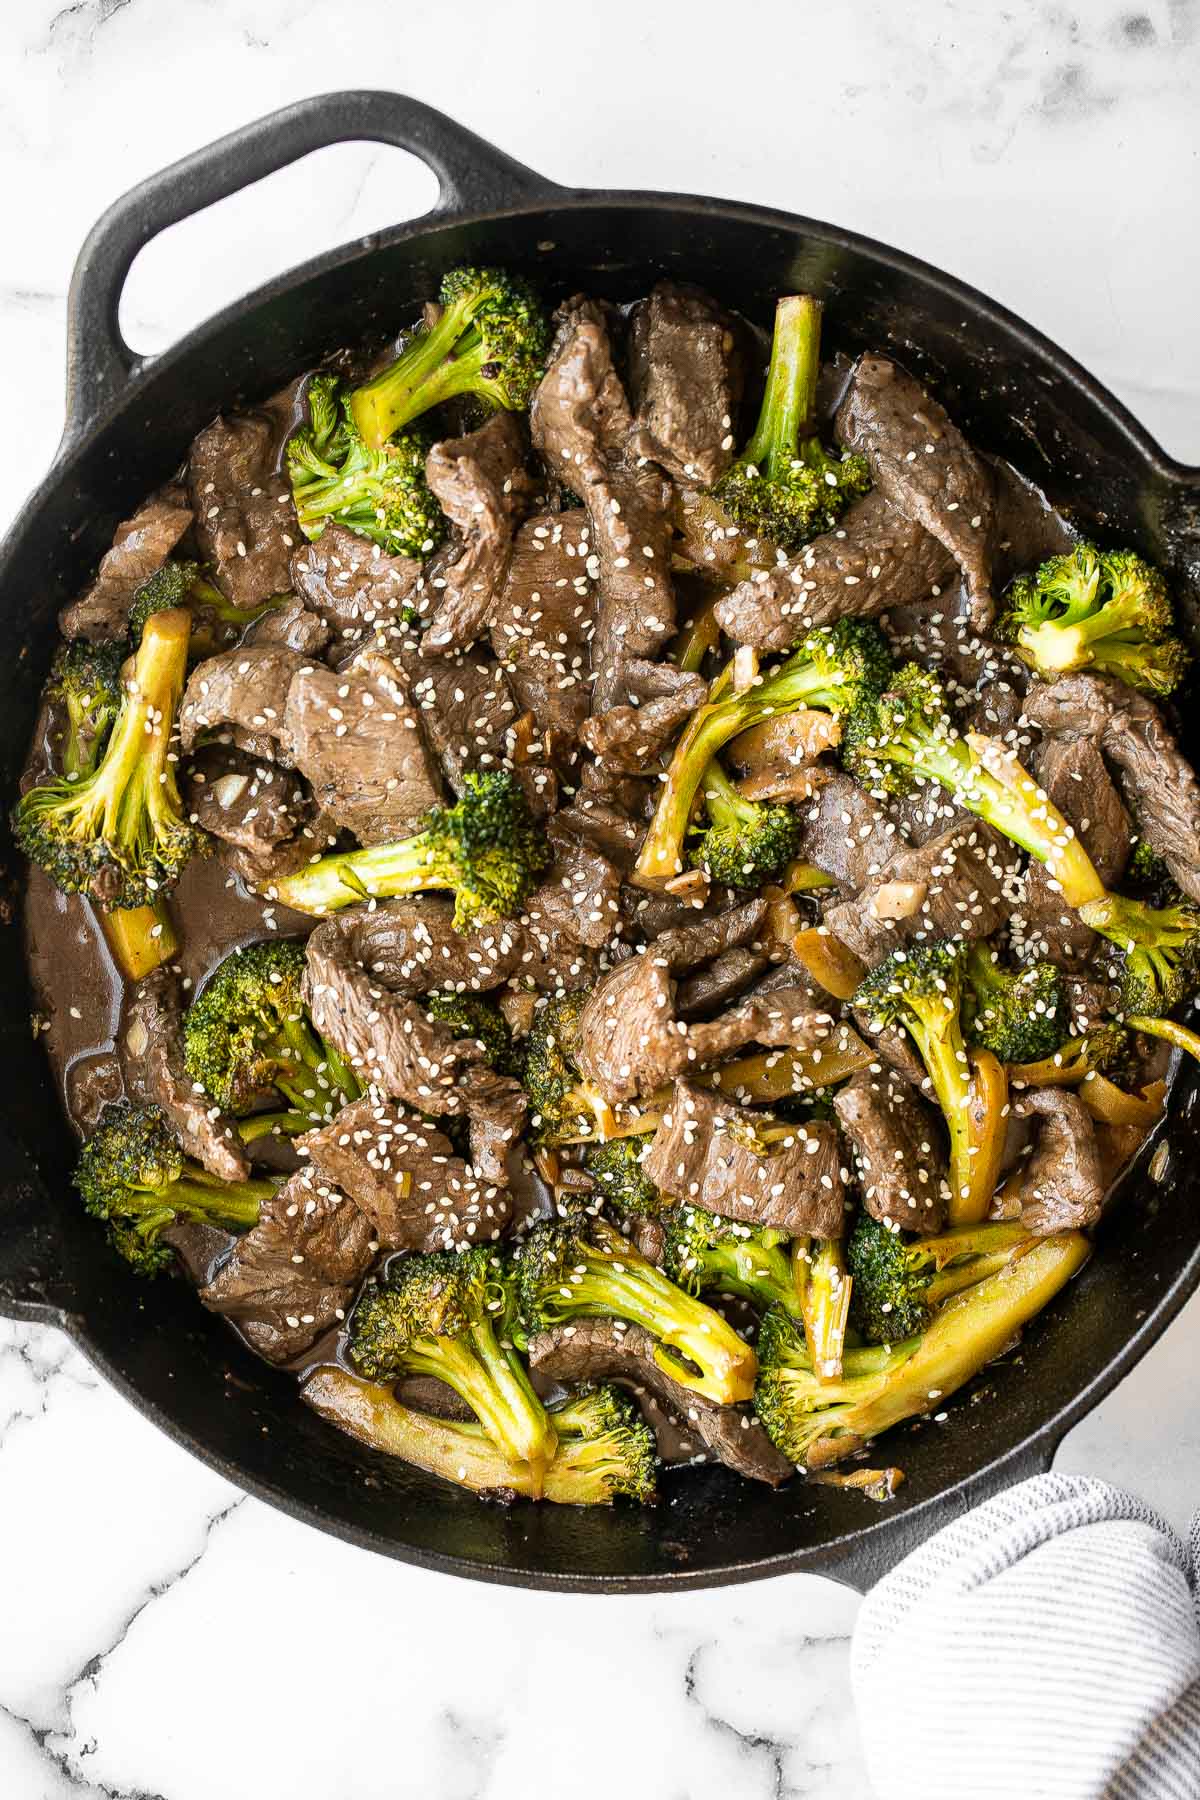
Easy 20-Minute One Pot Lentils are a healthy, nourishing, and delicious vegan meal that is easy to make in a few simple steps. Make a big batch and freeze!
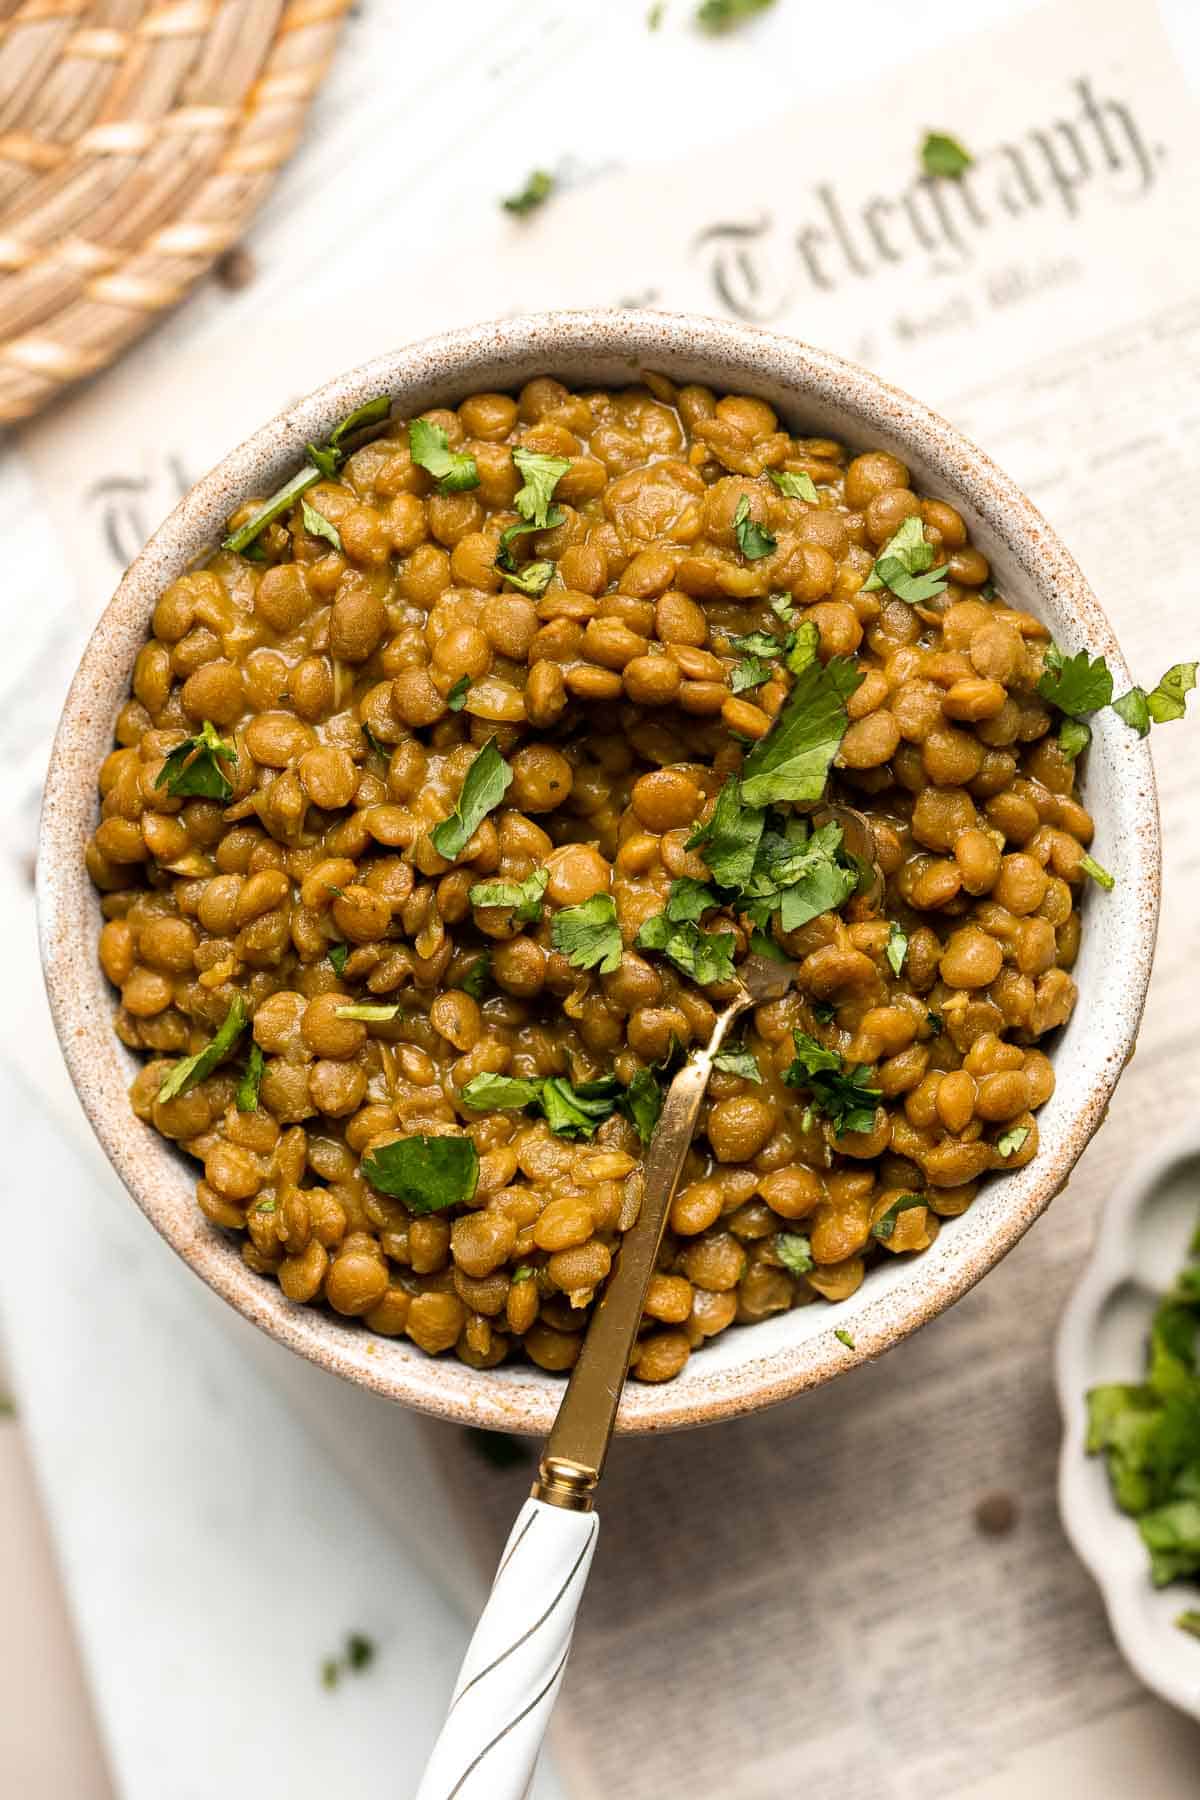
Mexican chicken breast is juicy, tender, and flavorful. It's easy to prep with a quick marinade before cooking on the stove, air fryer, or oven.
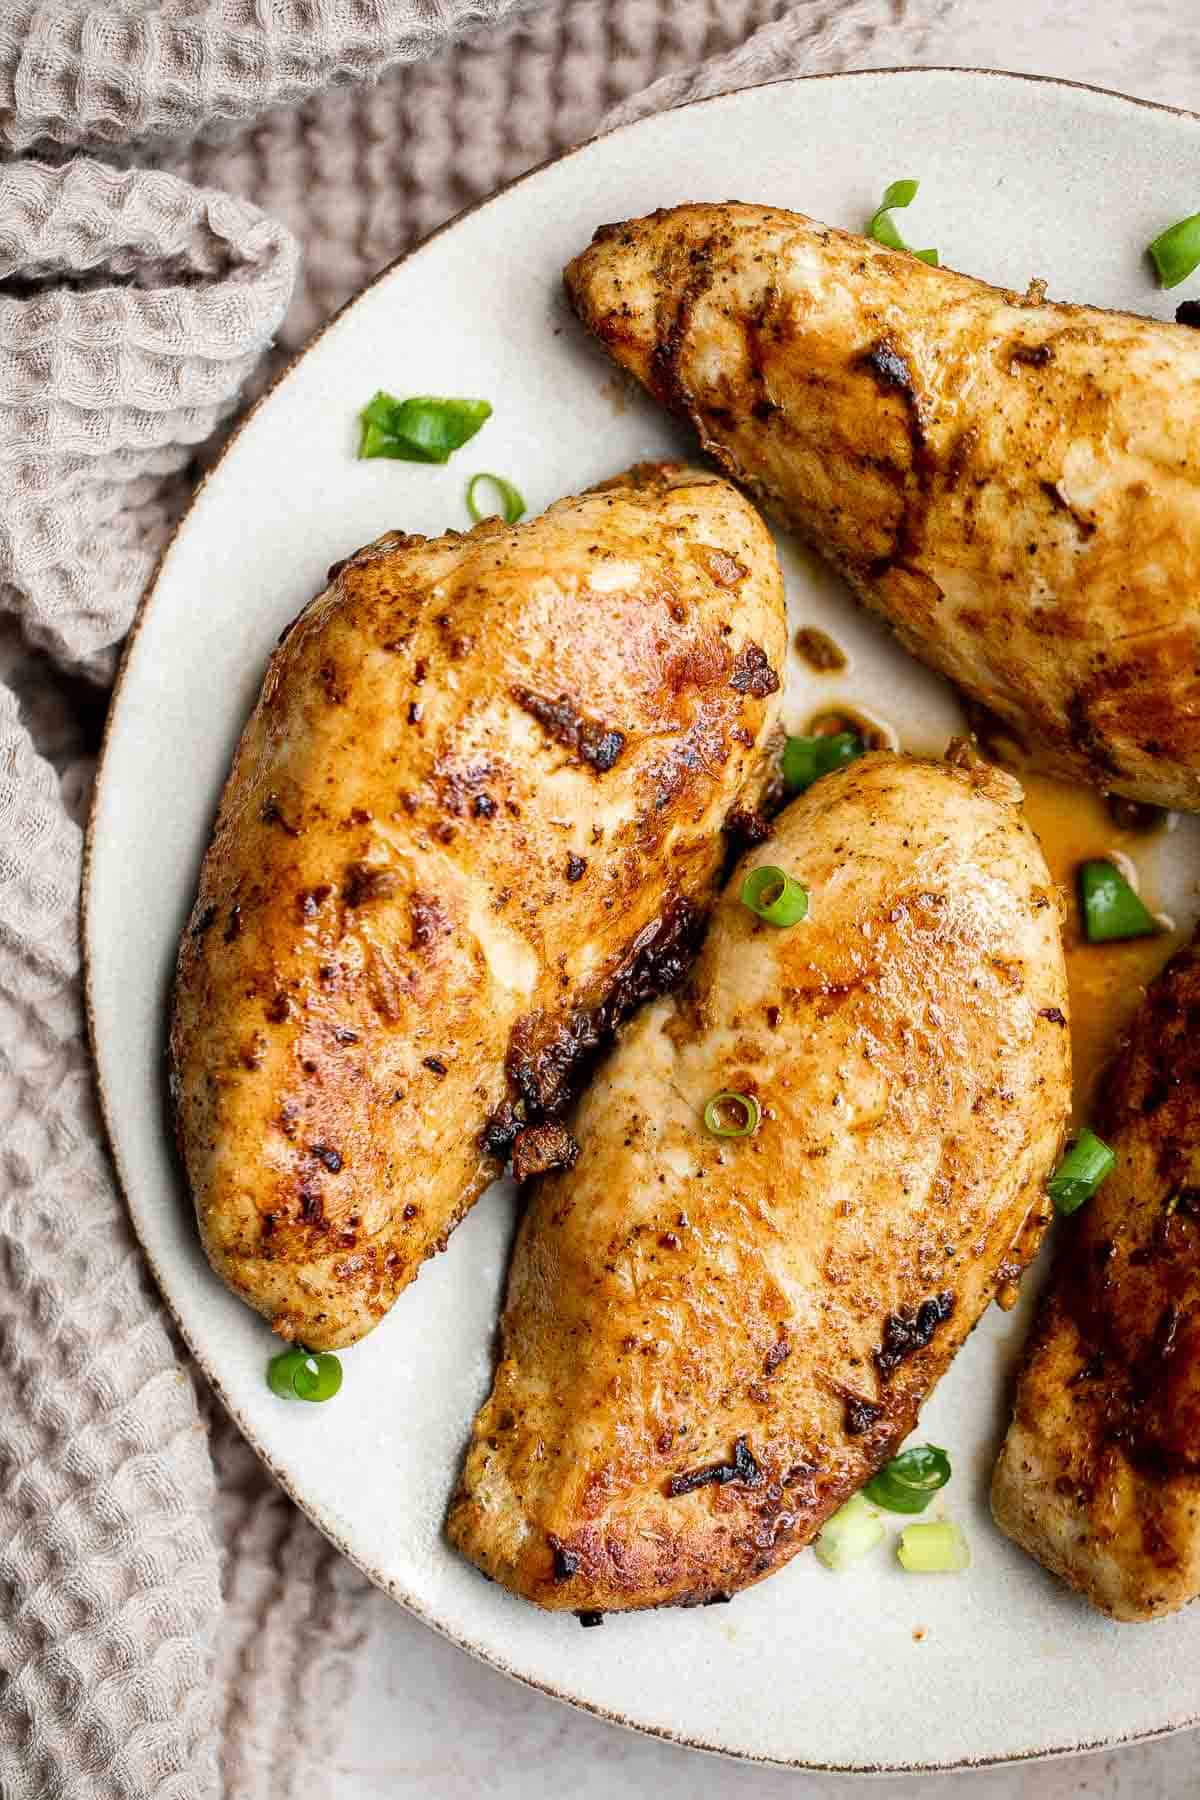
One Pot Spanish Chicken and Rice
Packed with flavour, real ingredients and vibrant colours, one pot Spanish chicken and rice is the perfect no fuss, no clean up weeknight meal.
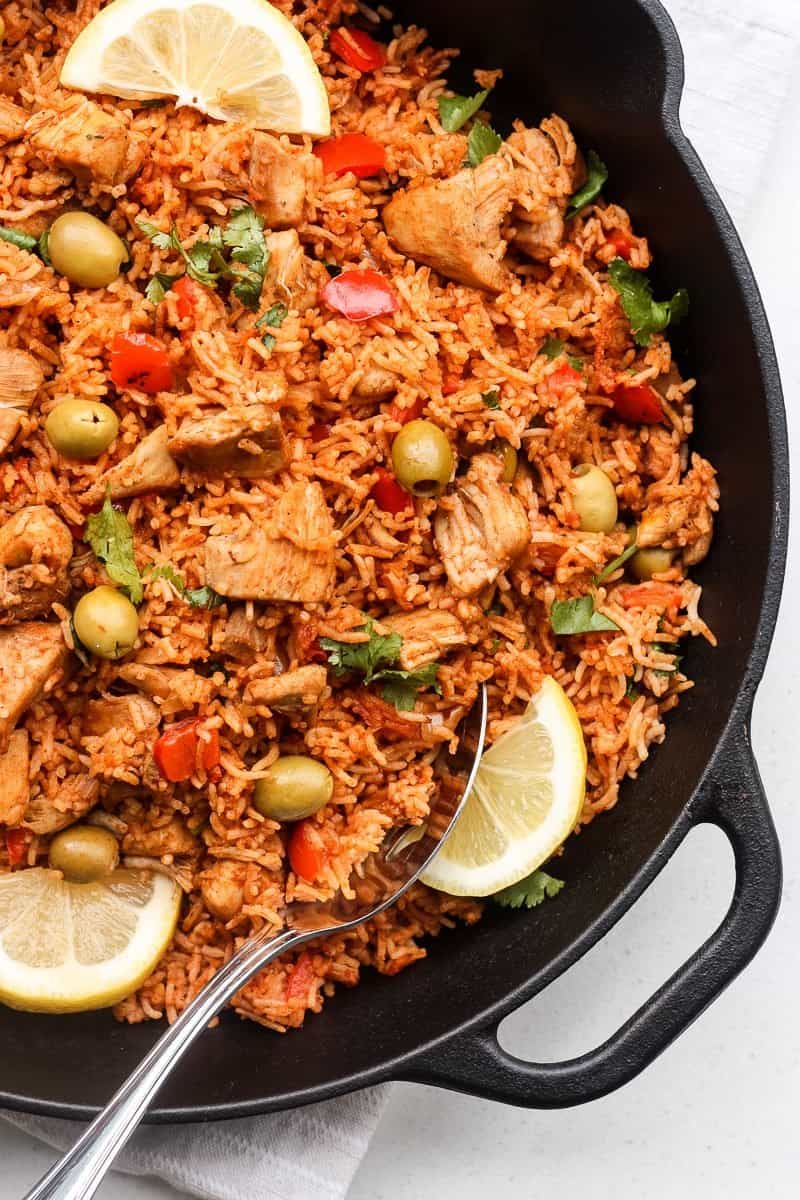
Baked Chicken Quesadillas are cheesy, crispy, flavorful, and delicious. This family-friendly recipe is quick and easy to make in just 30 minutes!
Shrimp Scampi with Zucchini Noodles
Shrimp scampi with zucchini noodles is a low-carb, keto, and gluten-free version of a classic pasta dish. It is healthy, garlicky, flavorful, and delicious.
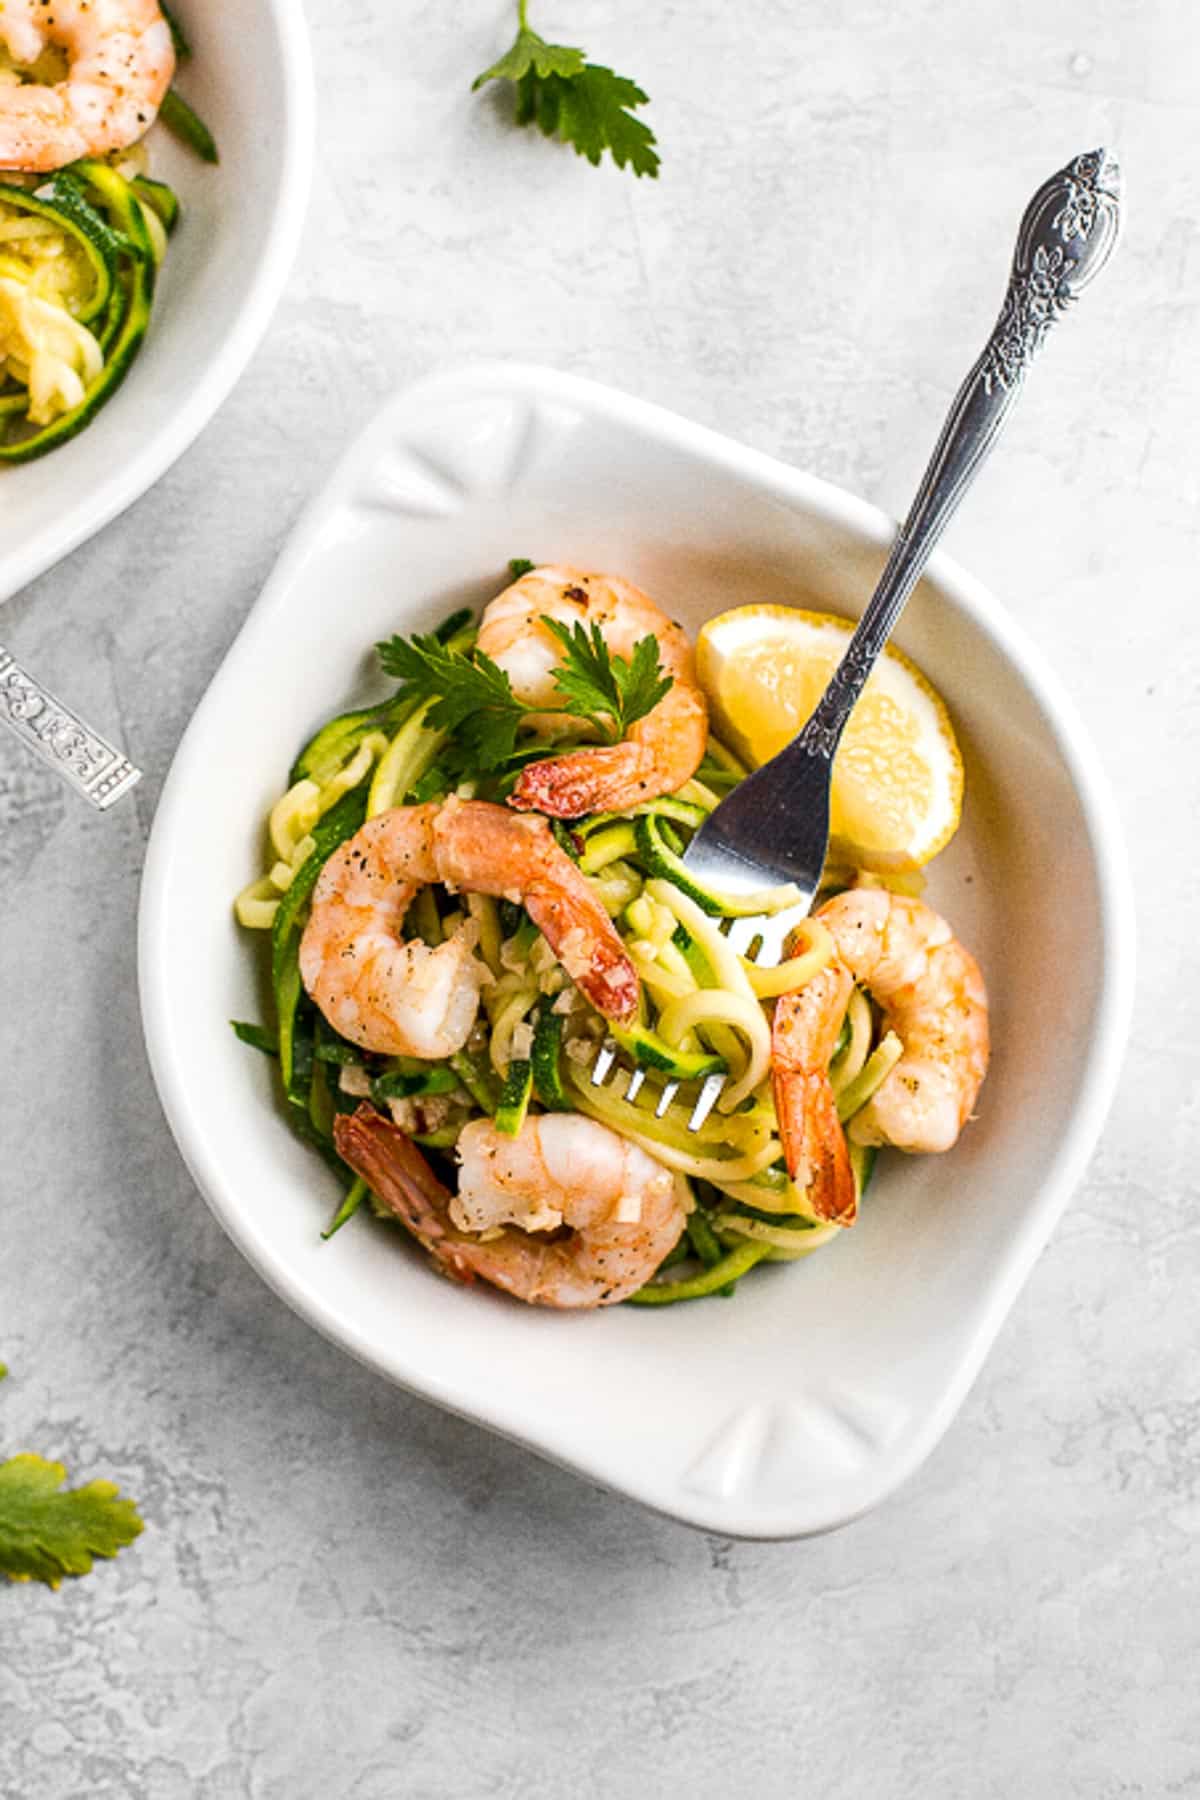
Teriyaki chicken is a quick easy chicken stir fry that is delicious, flavorful, healthy, and better and faster than takeout. Perfect meal prep idea.

Hearty slow cooker beef chili is an easy, comforting, low-maintenance dinner in fall and winter months. It's a family favourite crockpot chili.
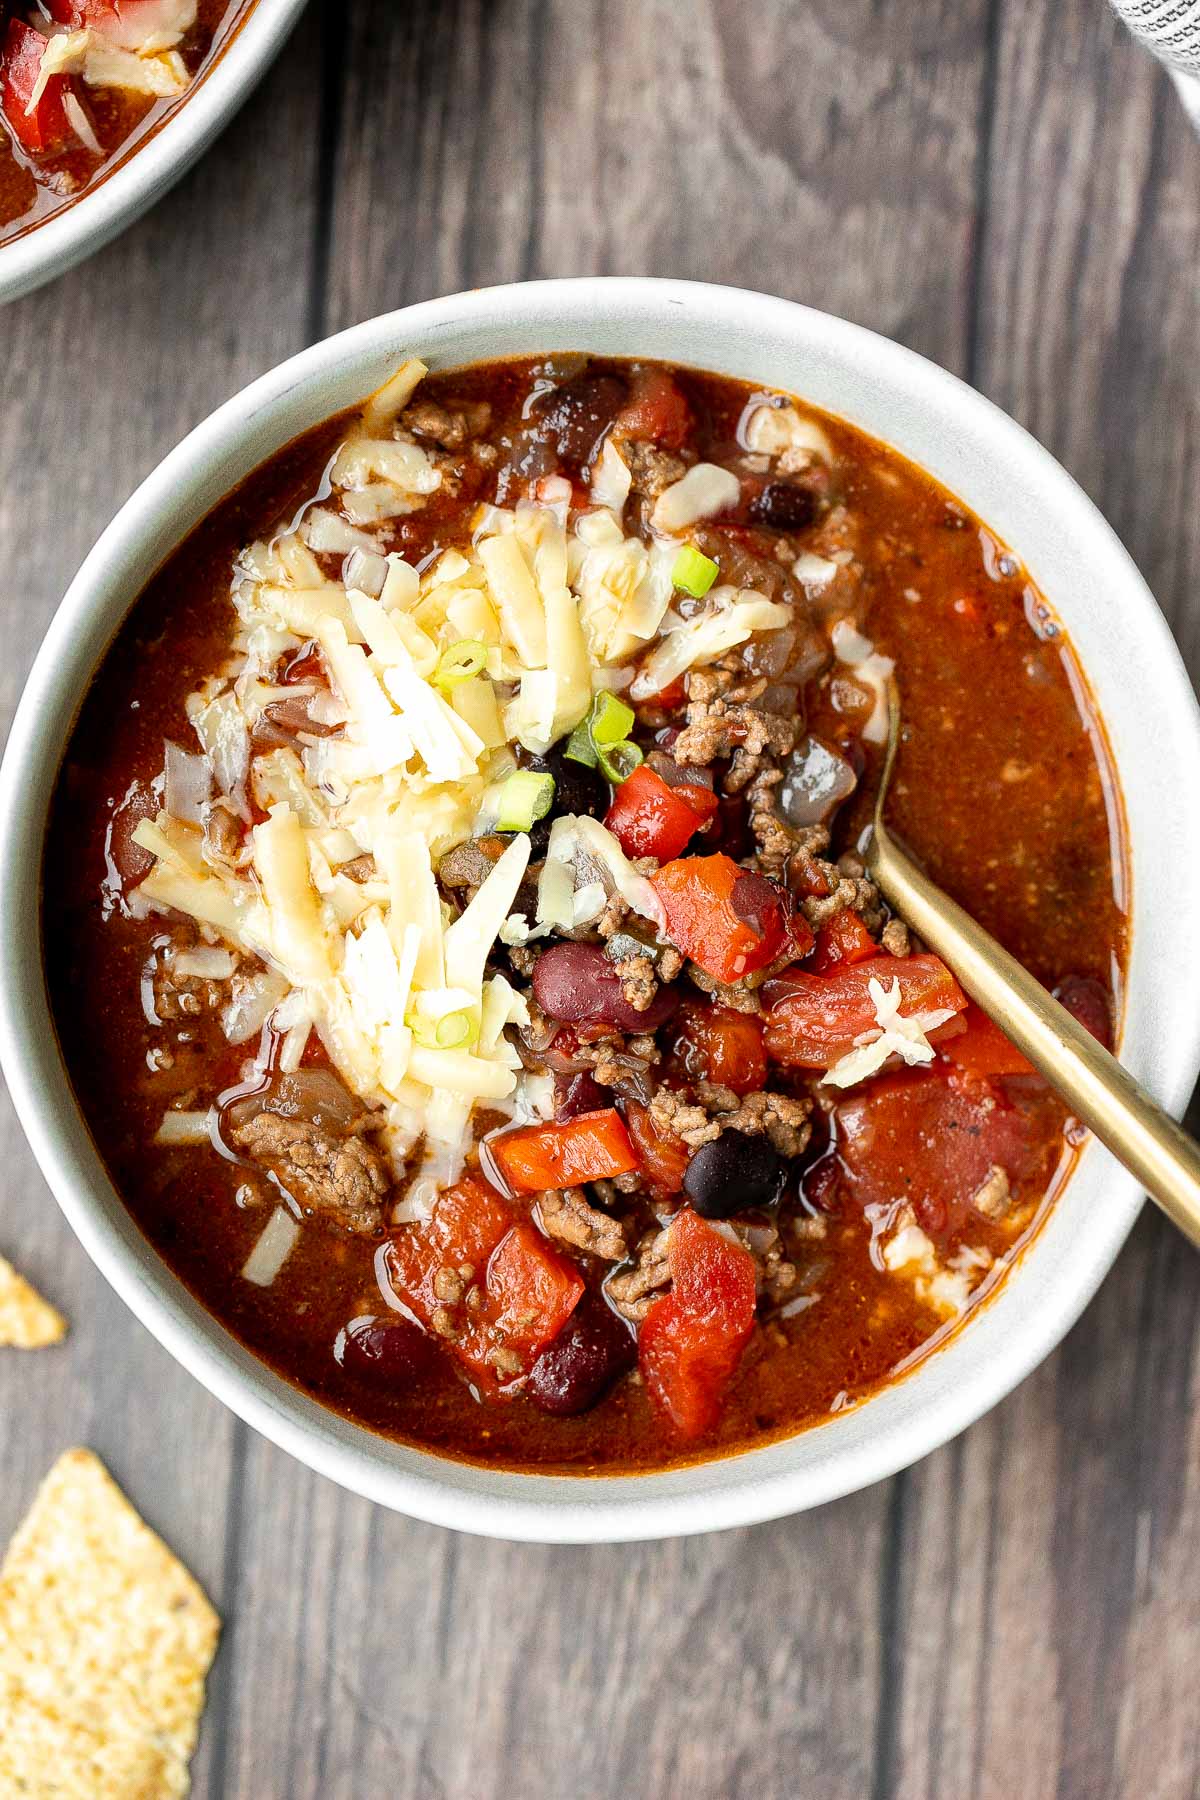
Delicious, moist and juicy Mediterranean chicken patties have everything you want in one bite: protein, veggies, herbs, and they're quick and easy to make. Serve it on it's own, with hamburger buns, or a side of Basmati rice. We love this meal prep recipe idea!
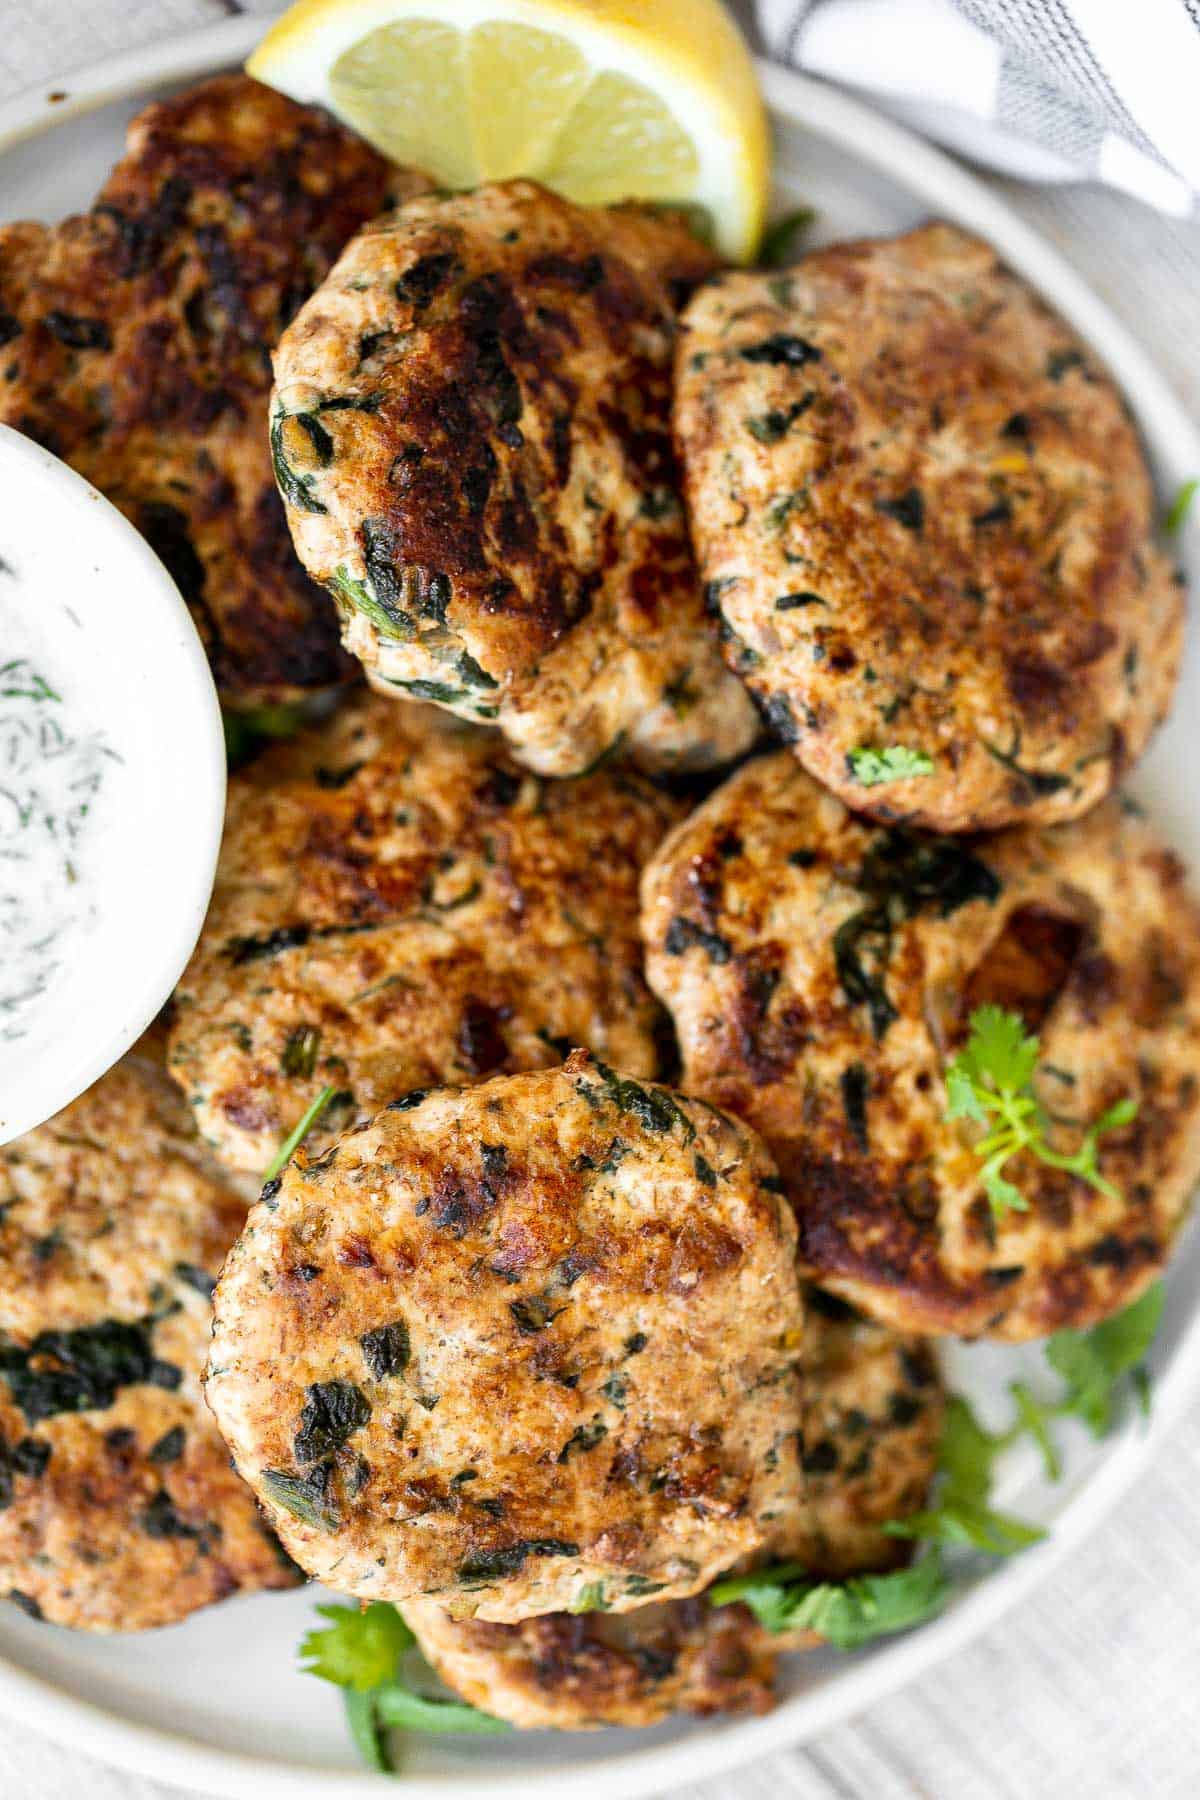
Phyllo Meat Pie (Egyptian Goulash)
Phyllo meat pie (Egyptian goulash) is a savory pie made of well-seasoned ground beef that lies between layers of flaky, crispy, golden phyllo pastry dough.
Korean ground turkey is flavorful, saucy, and delicious. It's quick and easy to make in just 20 minutes, great for meal prep and freezes well.
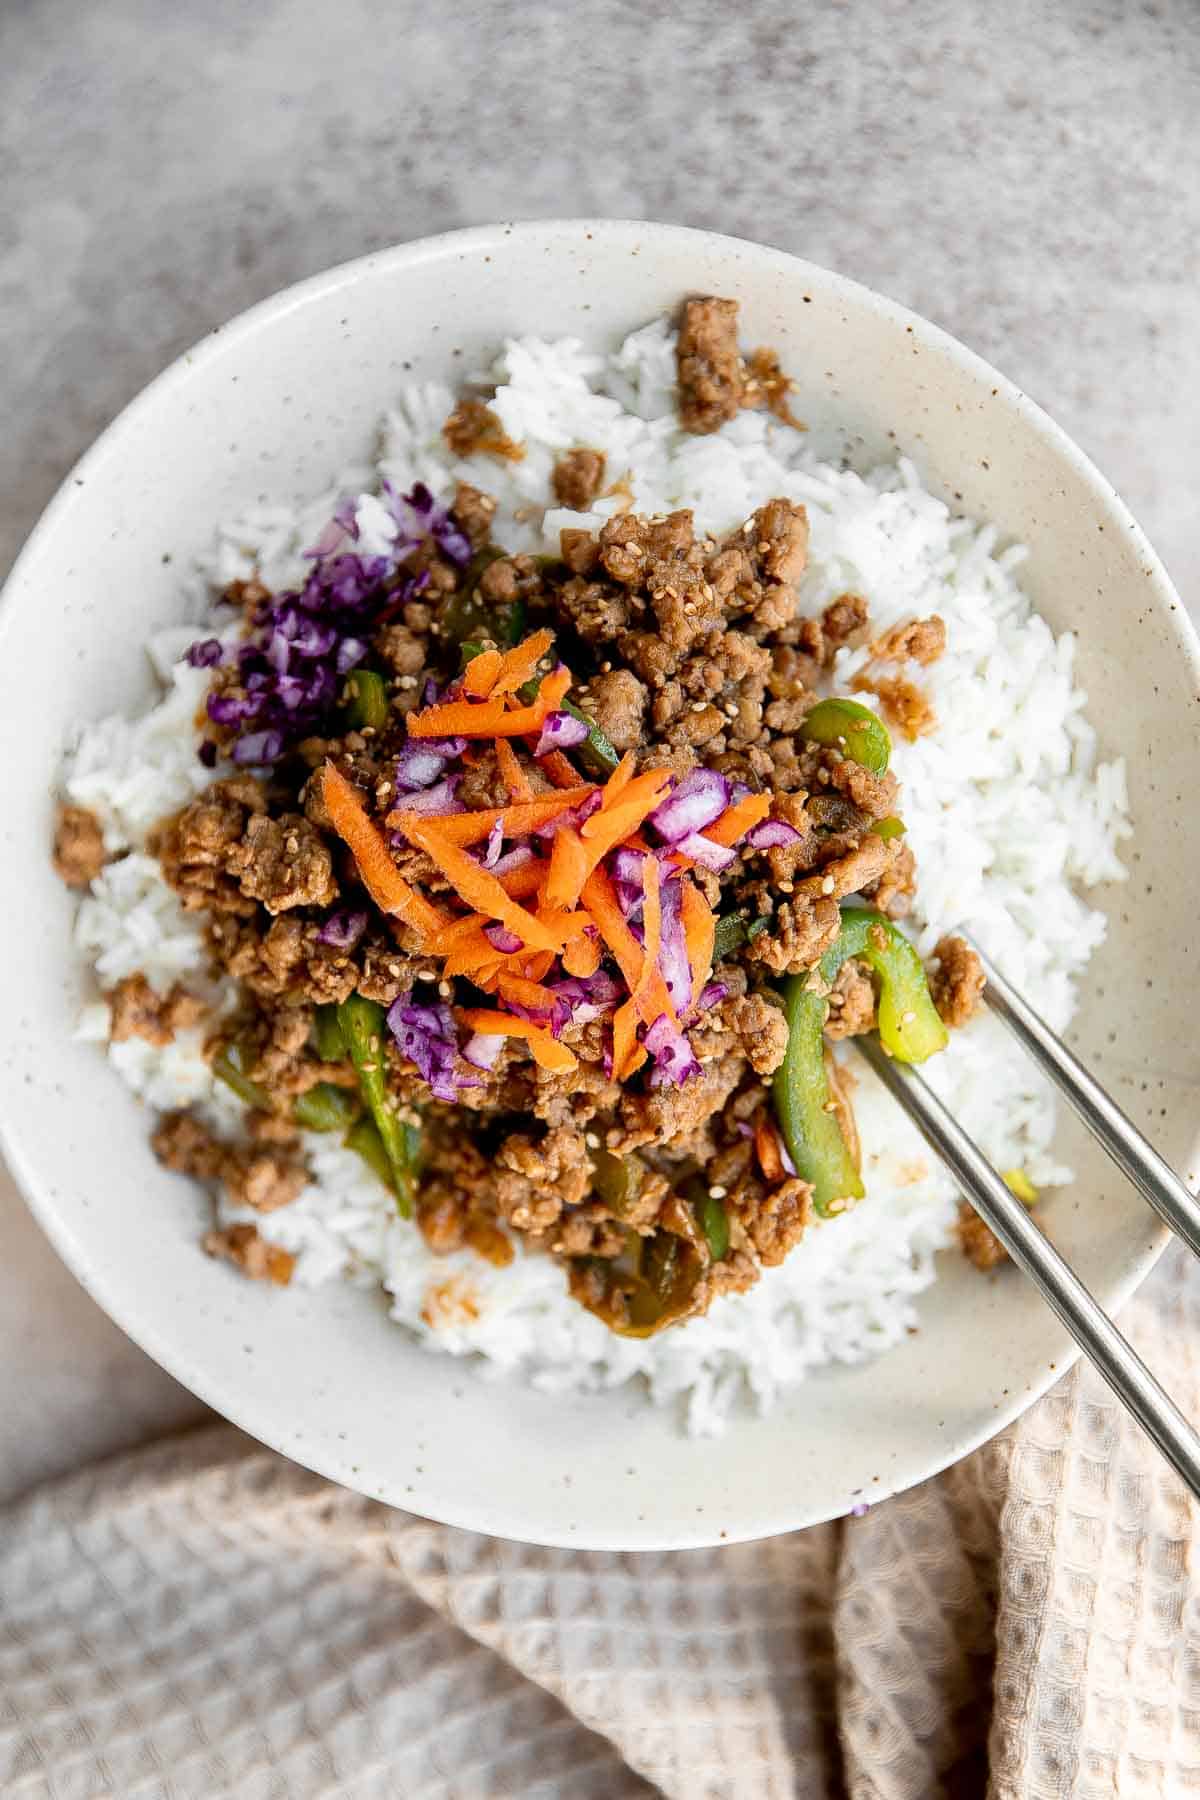
Baked Chicken Breast with Greek Souvlaki Marinade
Juicy, tender, and moist, baked chicken breast with the best Greek souvlaki marinade is the most flavorful and delicious chicken dinner in under 30 minutes. A classic meal prep idea!
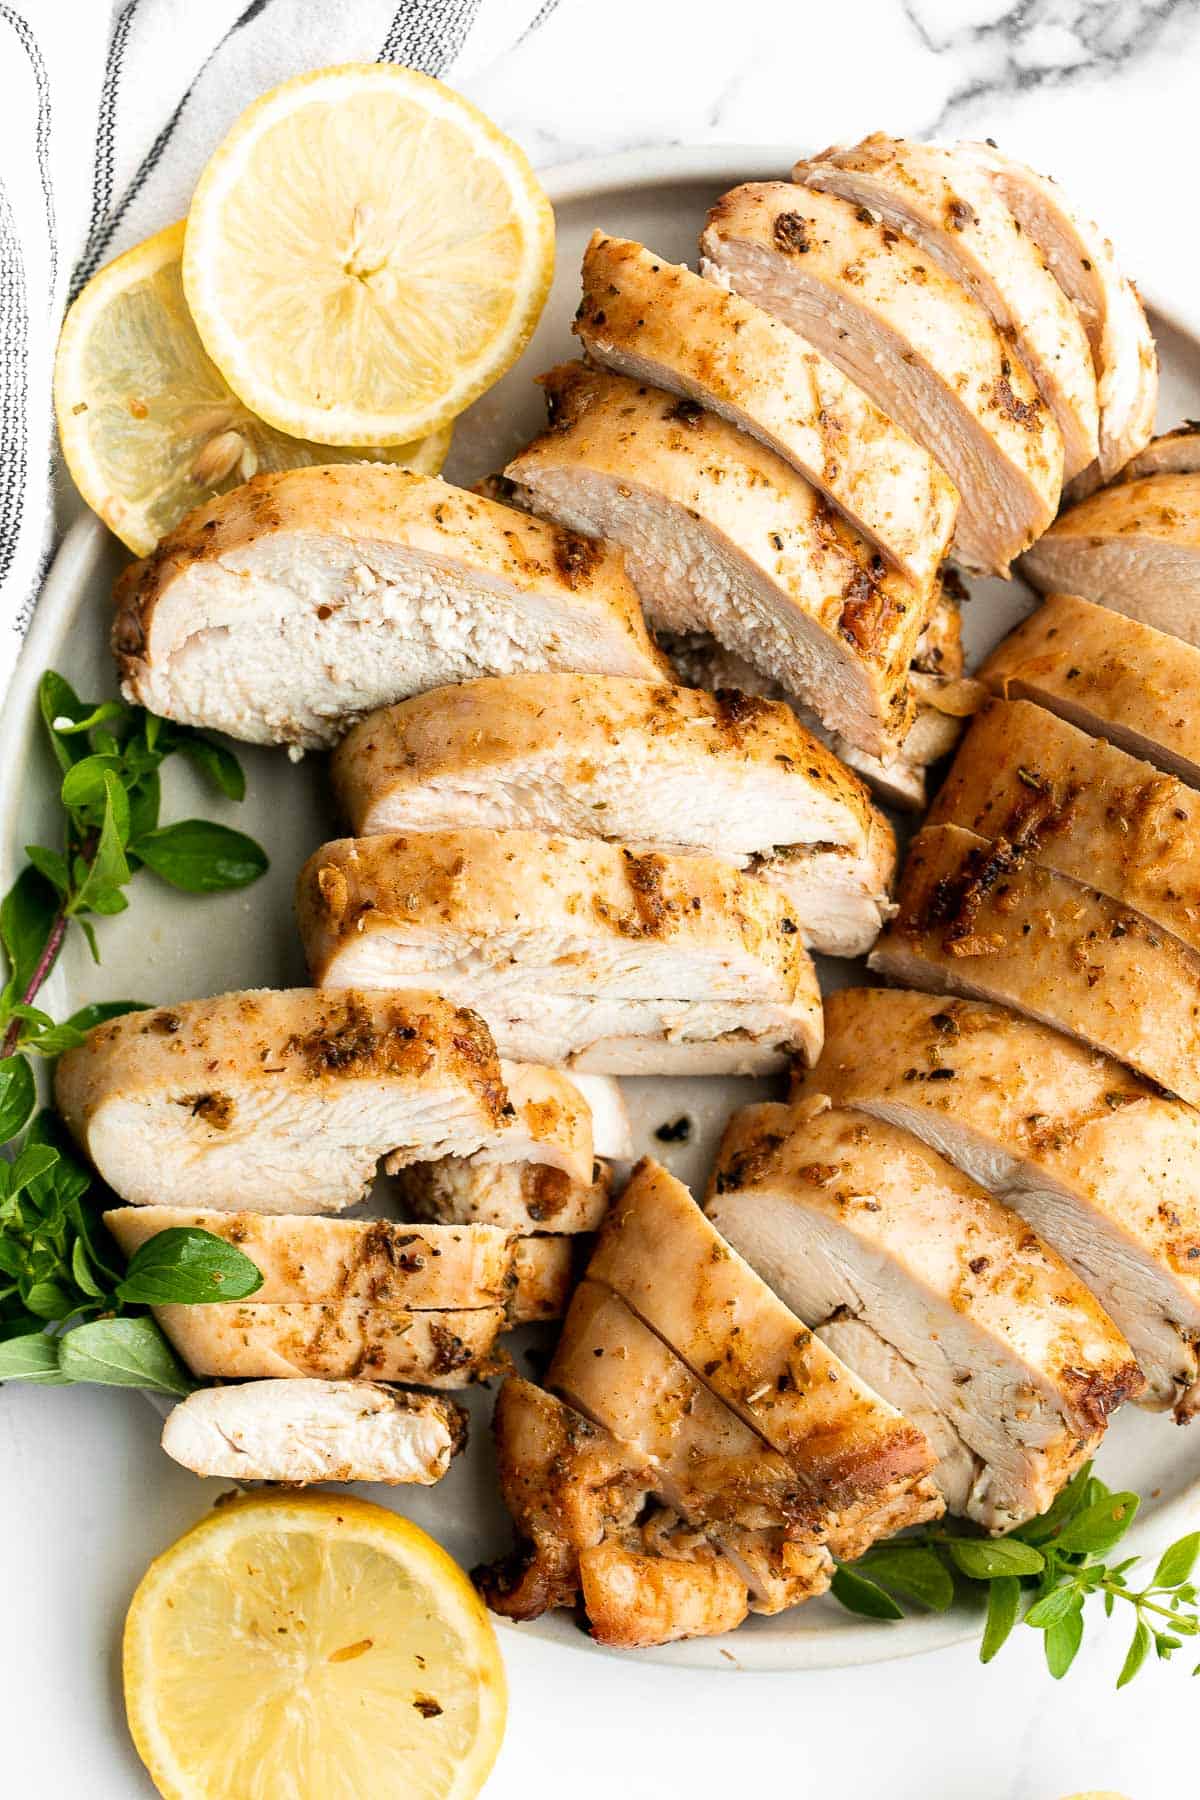
Ground beef stuffed peppers are delicious, healthy, and filling. Stuffed with beef rice and veggies, they're easy to make ahead and freezer-friendly.
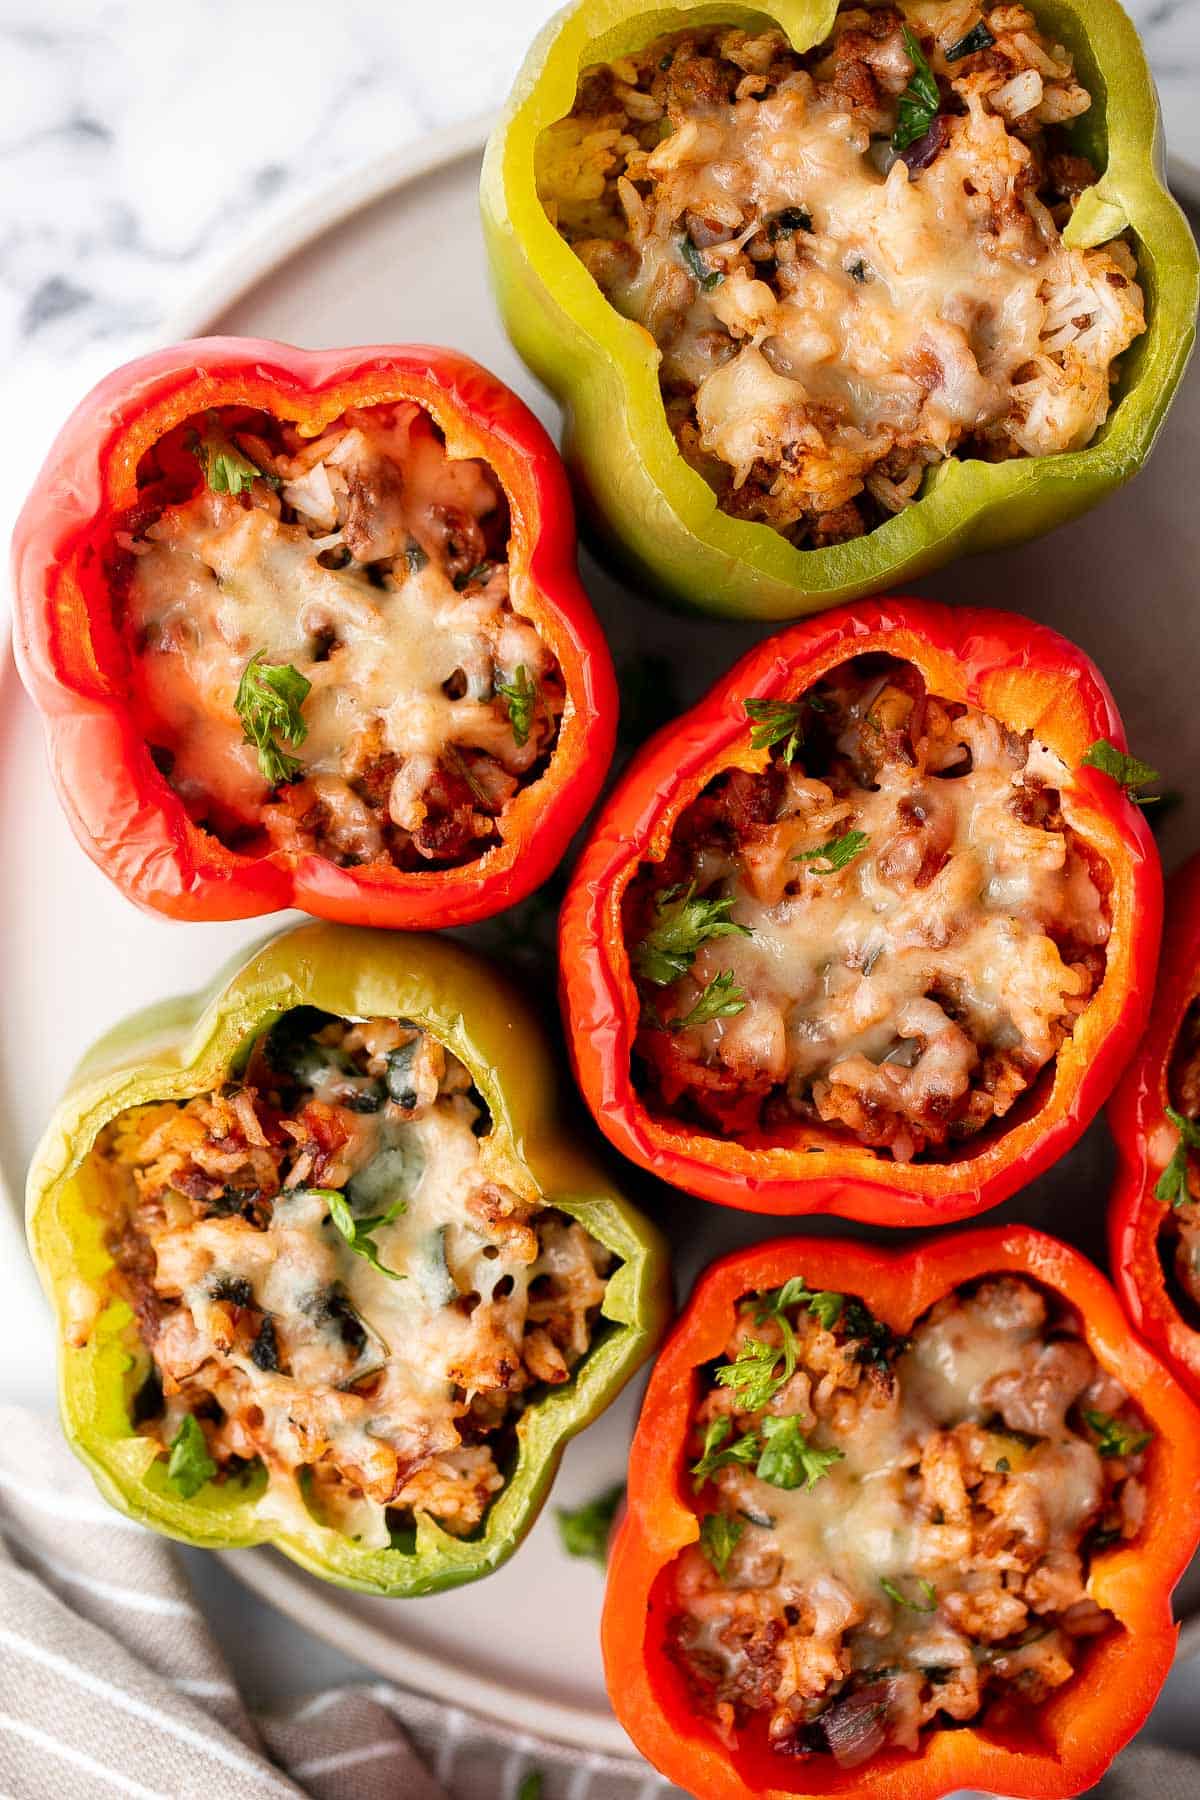
Zucchini fritters are crispy outside, tender inside, and loaded with zucchini. These healthy bites are one of my favorite ways to use up summer zucchini.
Mongolian chicken is a quick and easy chicken stir fry dish that you can make at home in just 30 minutes. Healthier, faster, and better than takeout.
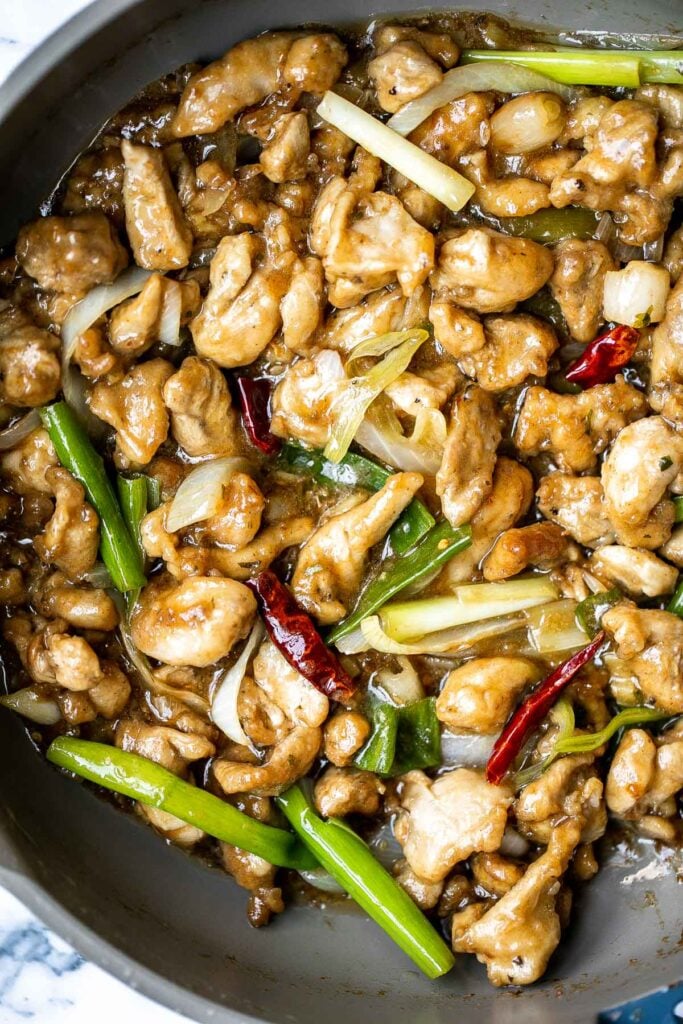
Hearty and filling beef and bean burritos are easy to make ahead, freezer-friendly, and take just 30 minutes for restaurant-quality Mexican food at home.
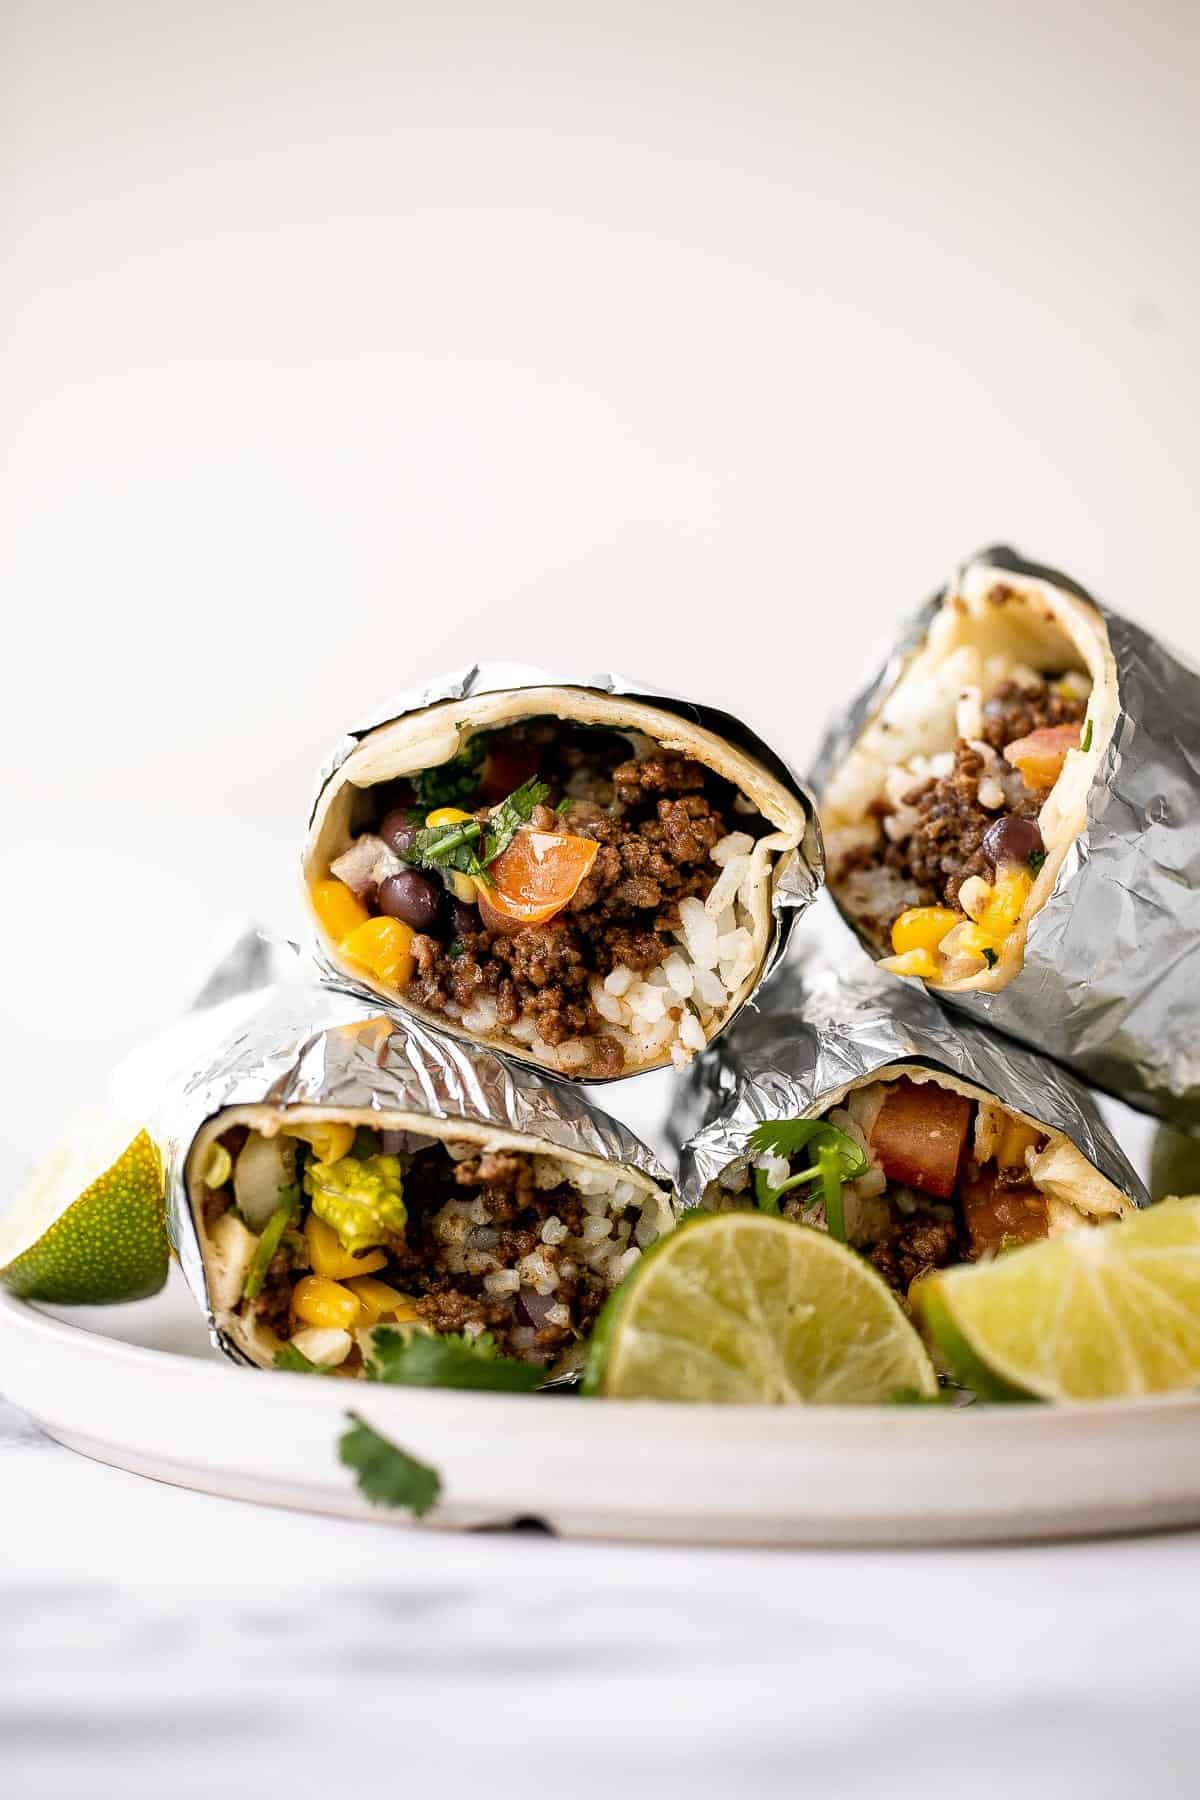
Baked Chicken Meatballs are tender, juicy, and flavorful (no dry meatballs here!). Made in just 45 minutes using simple ingredients. So quick and easy!
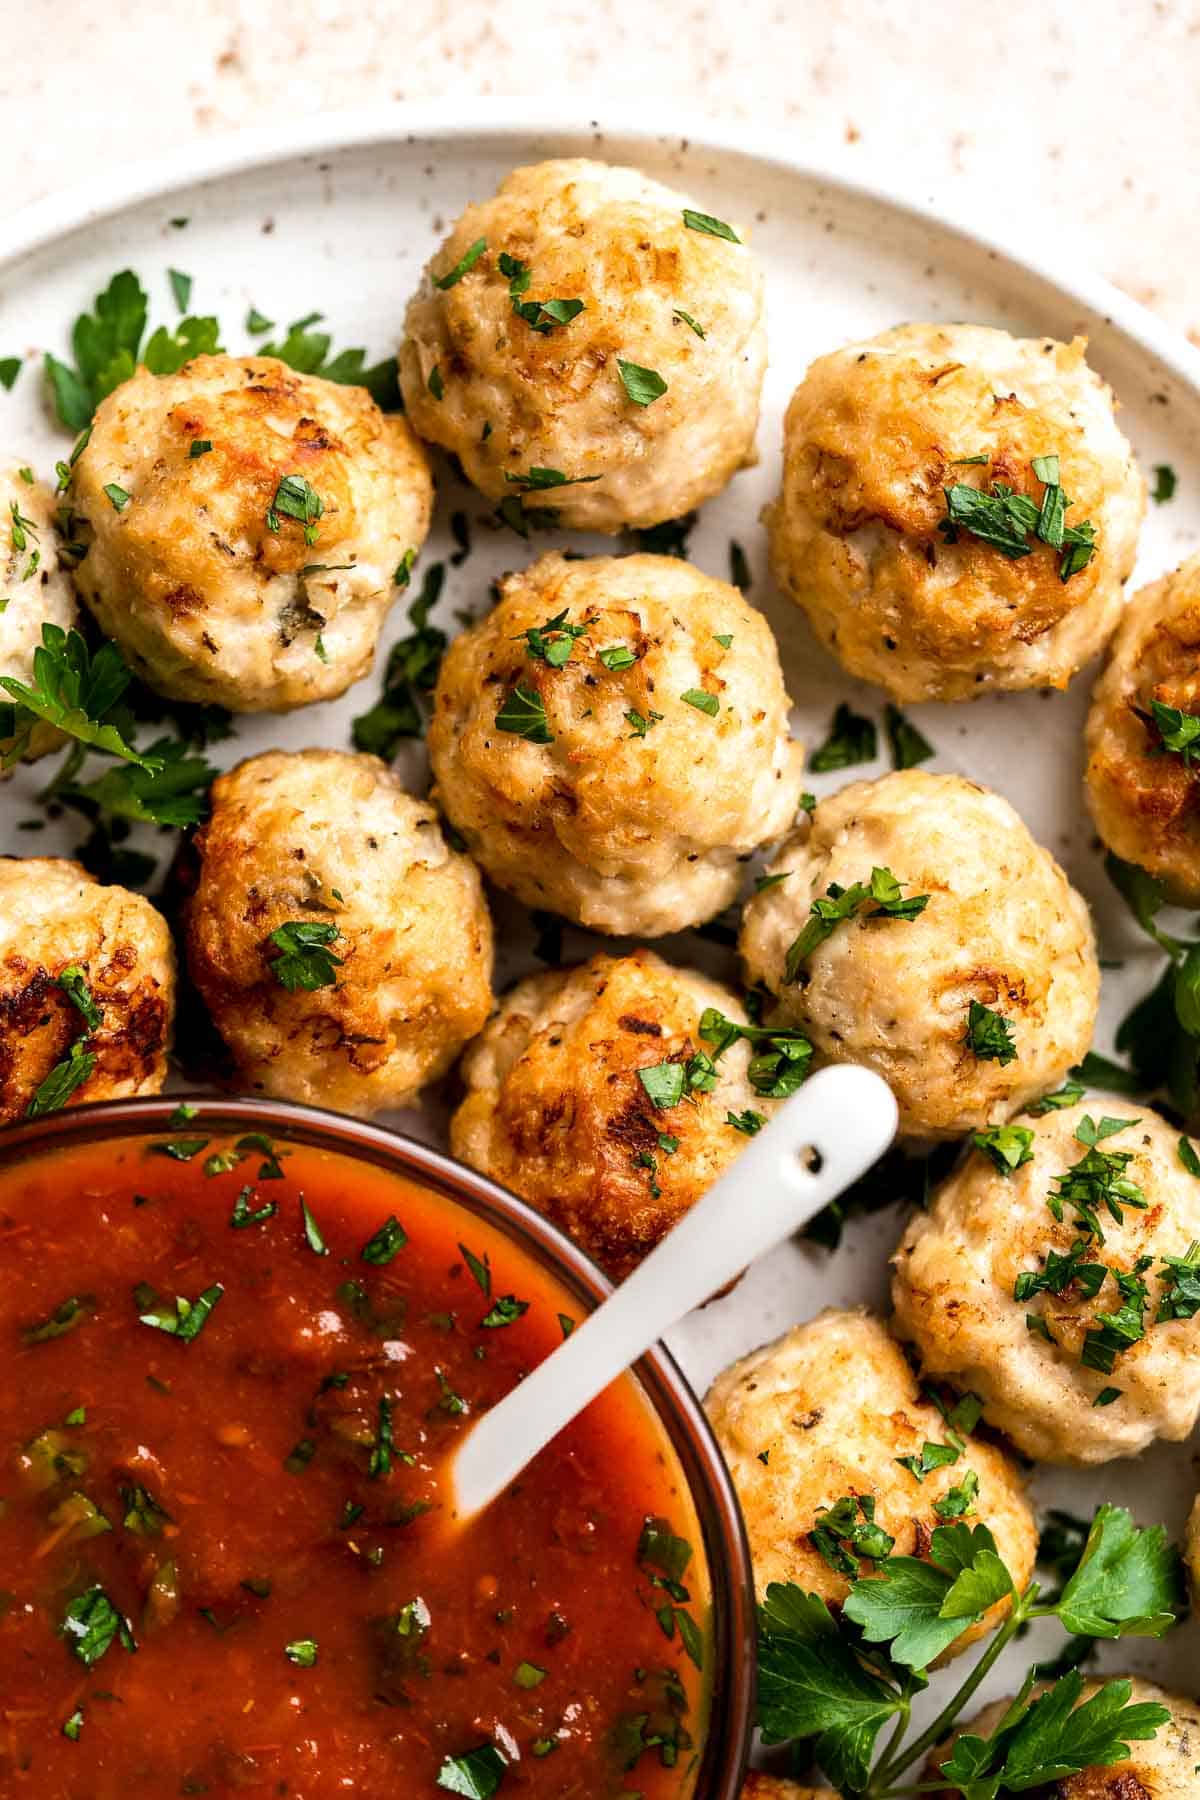
Sheet pan chicken fajitas are quick and easy to make, loaded with flavor, delicious, and ready in less than 30 minutes. Great for meal prep too.
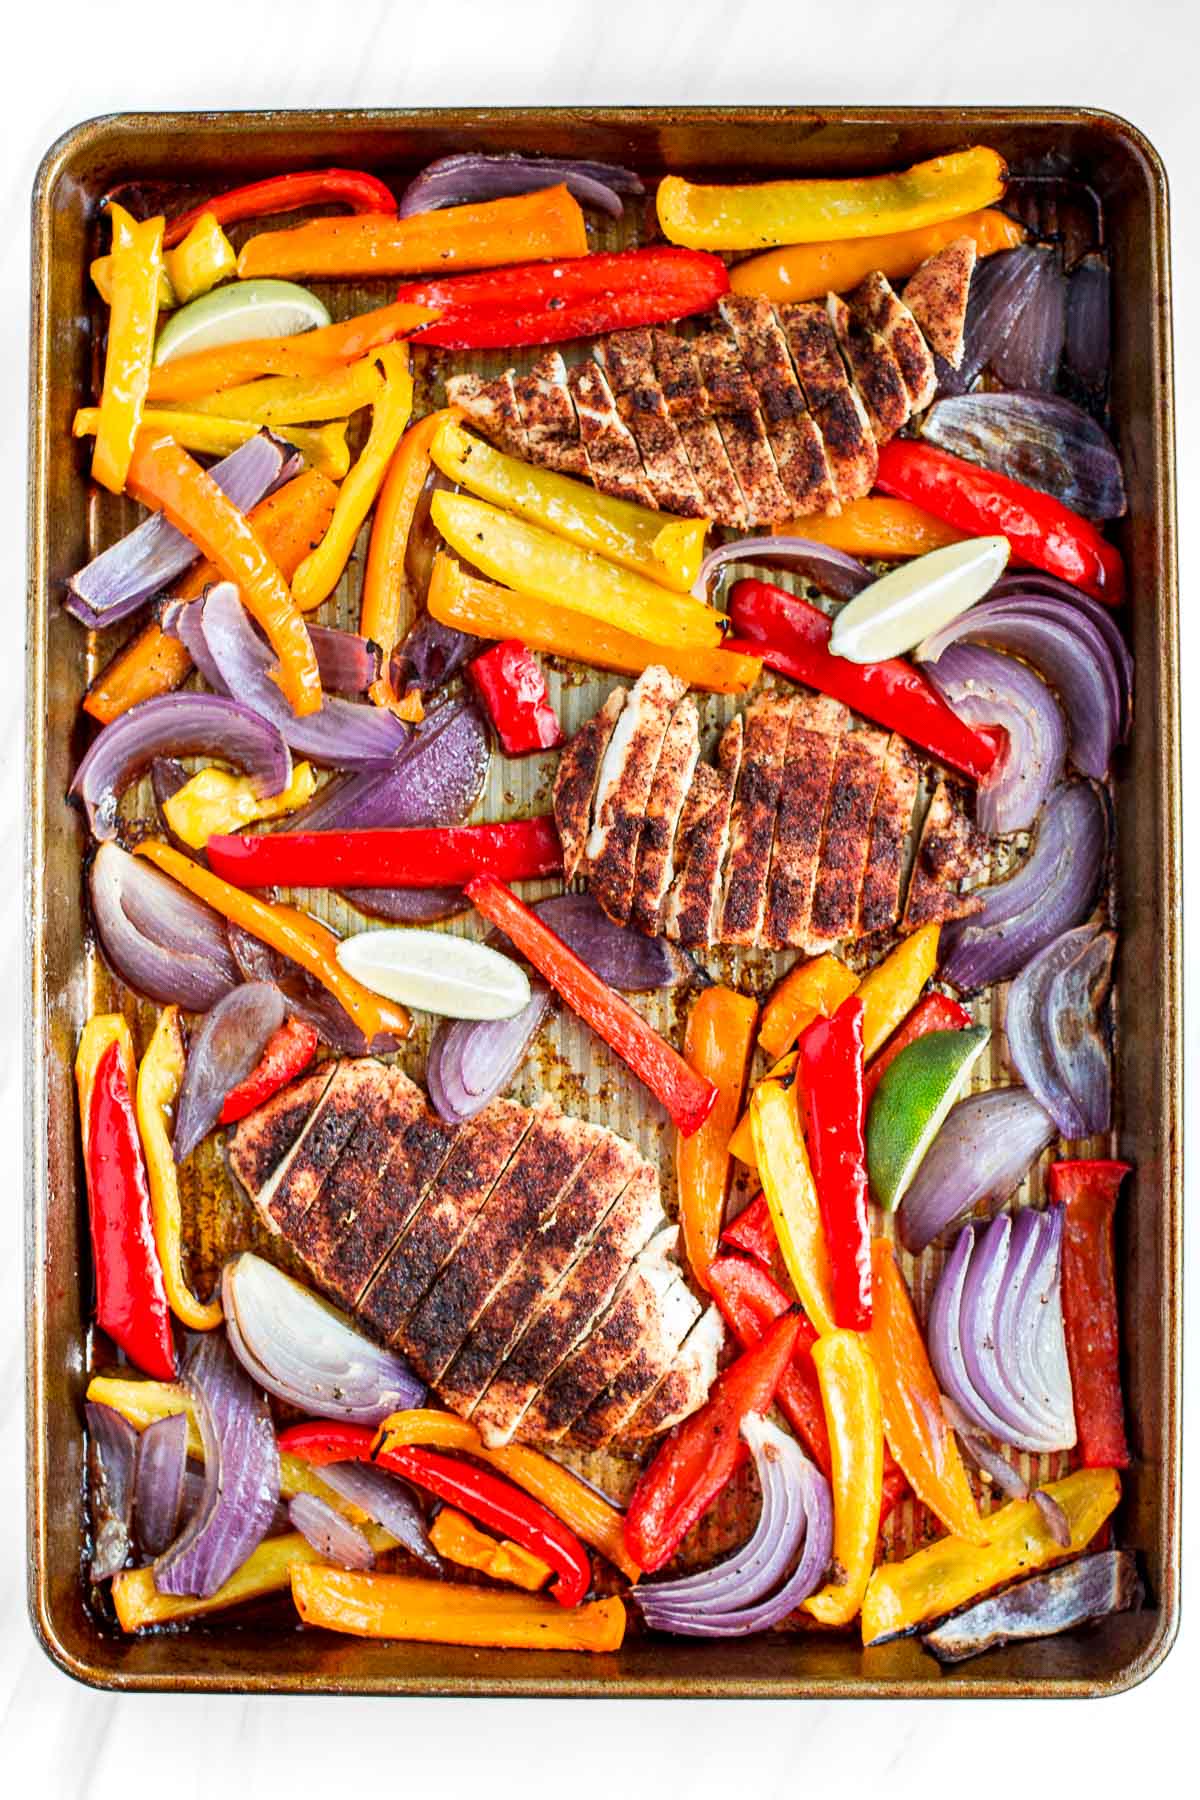
Hearty coconut lamb curry is an easy one pot meal that is packed with flavour. Make it on the stovetop or in the slow cooker and freeze leftovers for later.
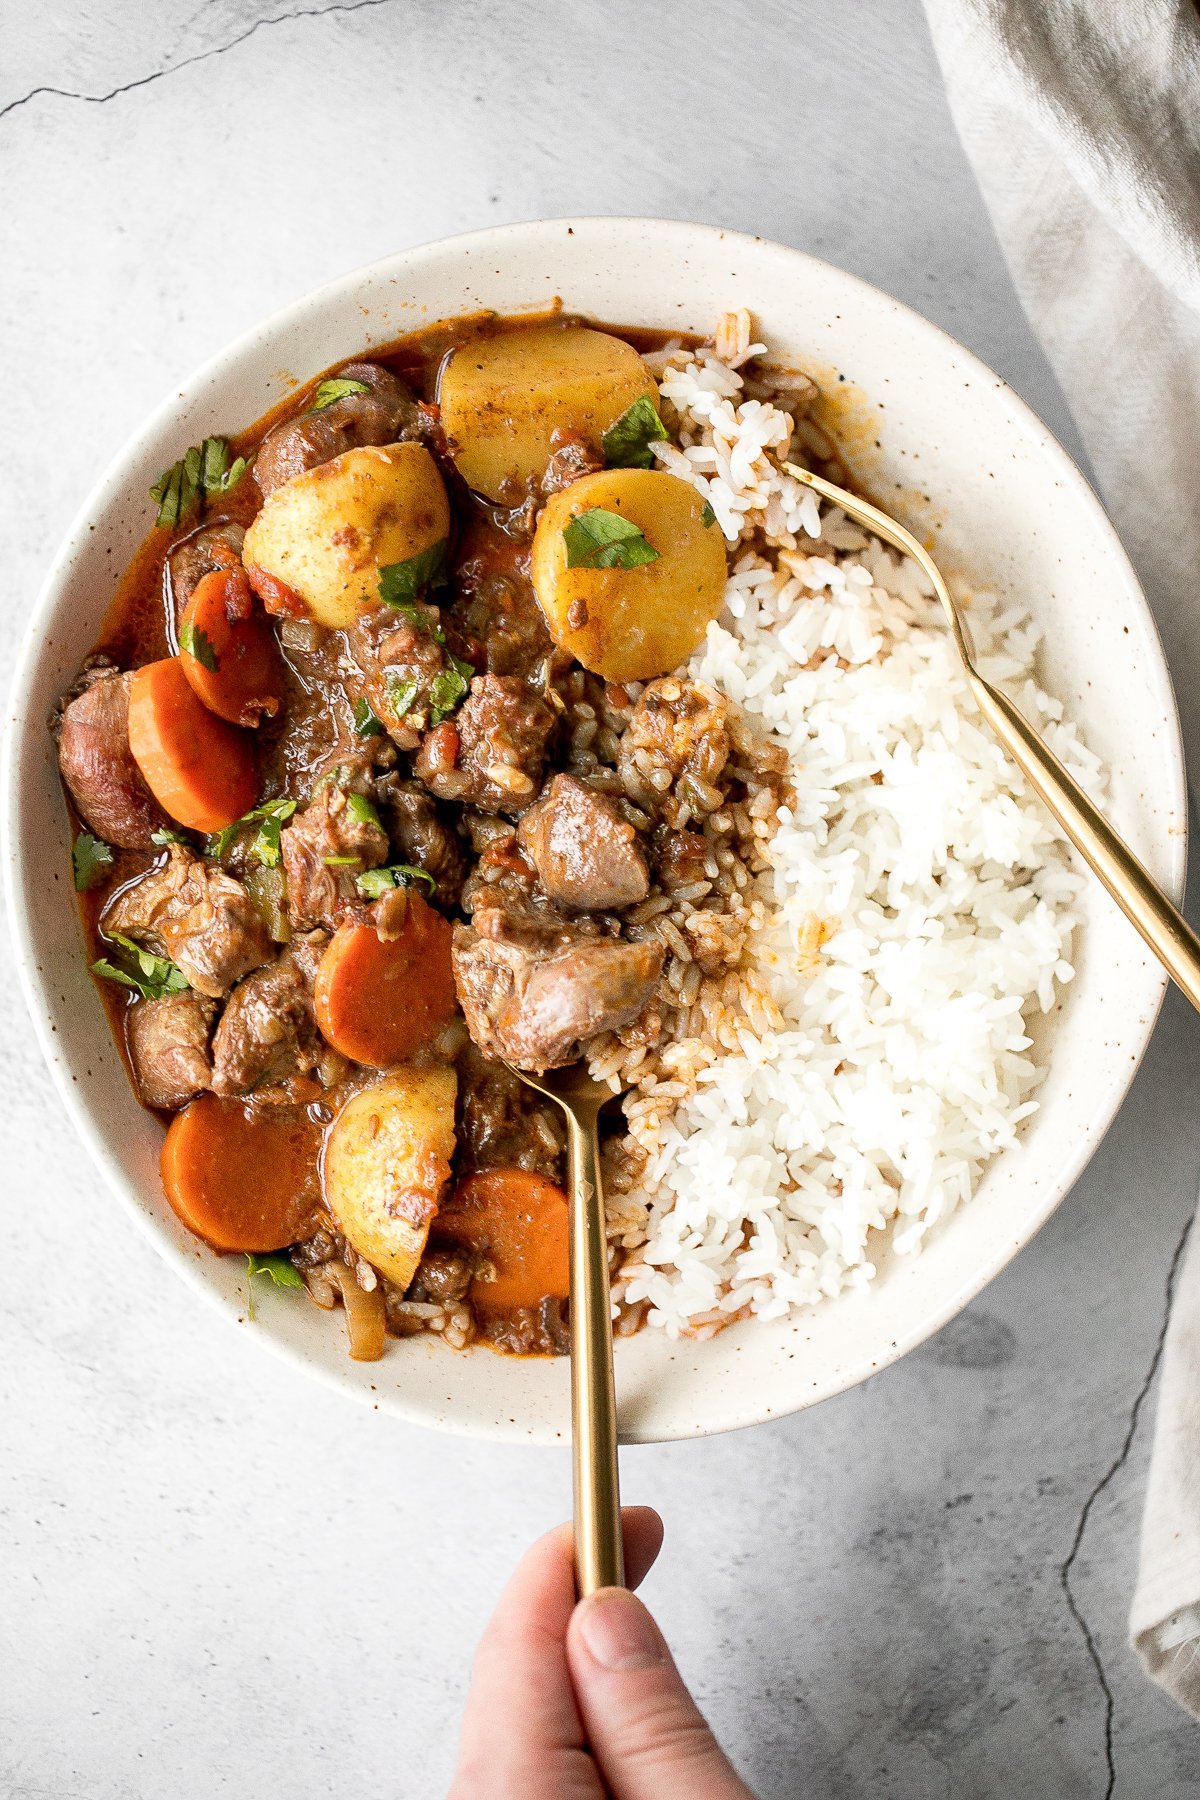
Homemade falafel are delicious, golden brown and crispy on the outside, fluffy tender and soft inside. Plus, they're vegan, loaded with plant-based protein.
Classic easy meat lasagna is the ultimate Italian comfort food with layers of tender lasagna, meaty tomato sauce, cheese filling and melted cheese on top.
Meal Prep Cold Lunches
Deviled Egg Salad is the perfect spring side dish! It has the signature tang and smokiness of deviled eggs with the pillowy texture of egg salad.
Vegan hummus wrap is a quick easy lunch made in minutes with a handful of fresh ingredients. This delicious veggie wrap is healthy, fresh, nutritious.

Italian pasta salad is delicious, wholesome, and easy to make. Make it up to three days ahead for your summer picnics and cookouts. You can't get more classic than Italian Salad for lunch. It's such an easy meal prep idea too!
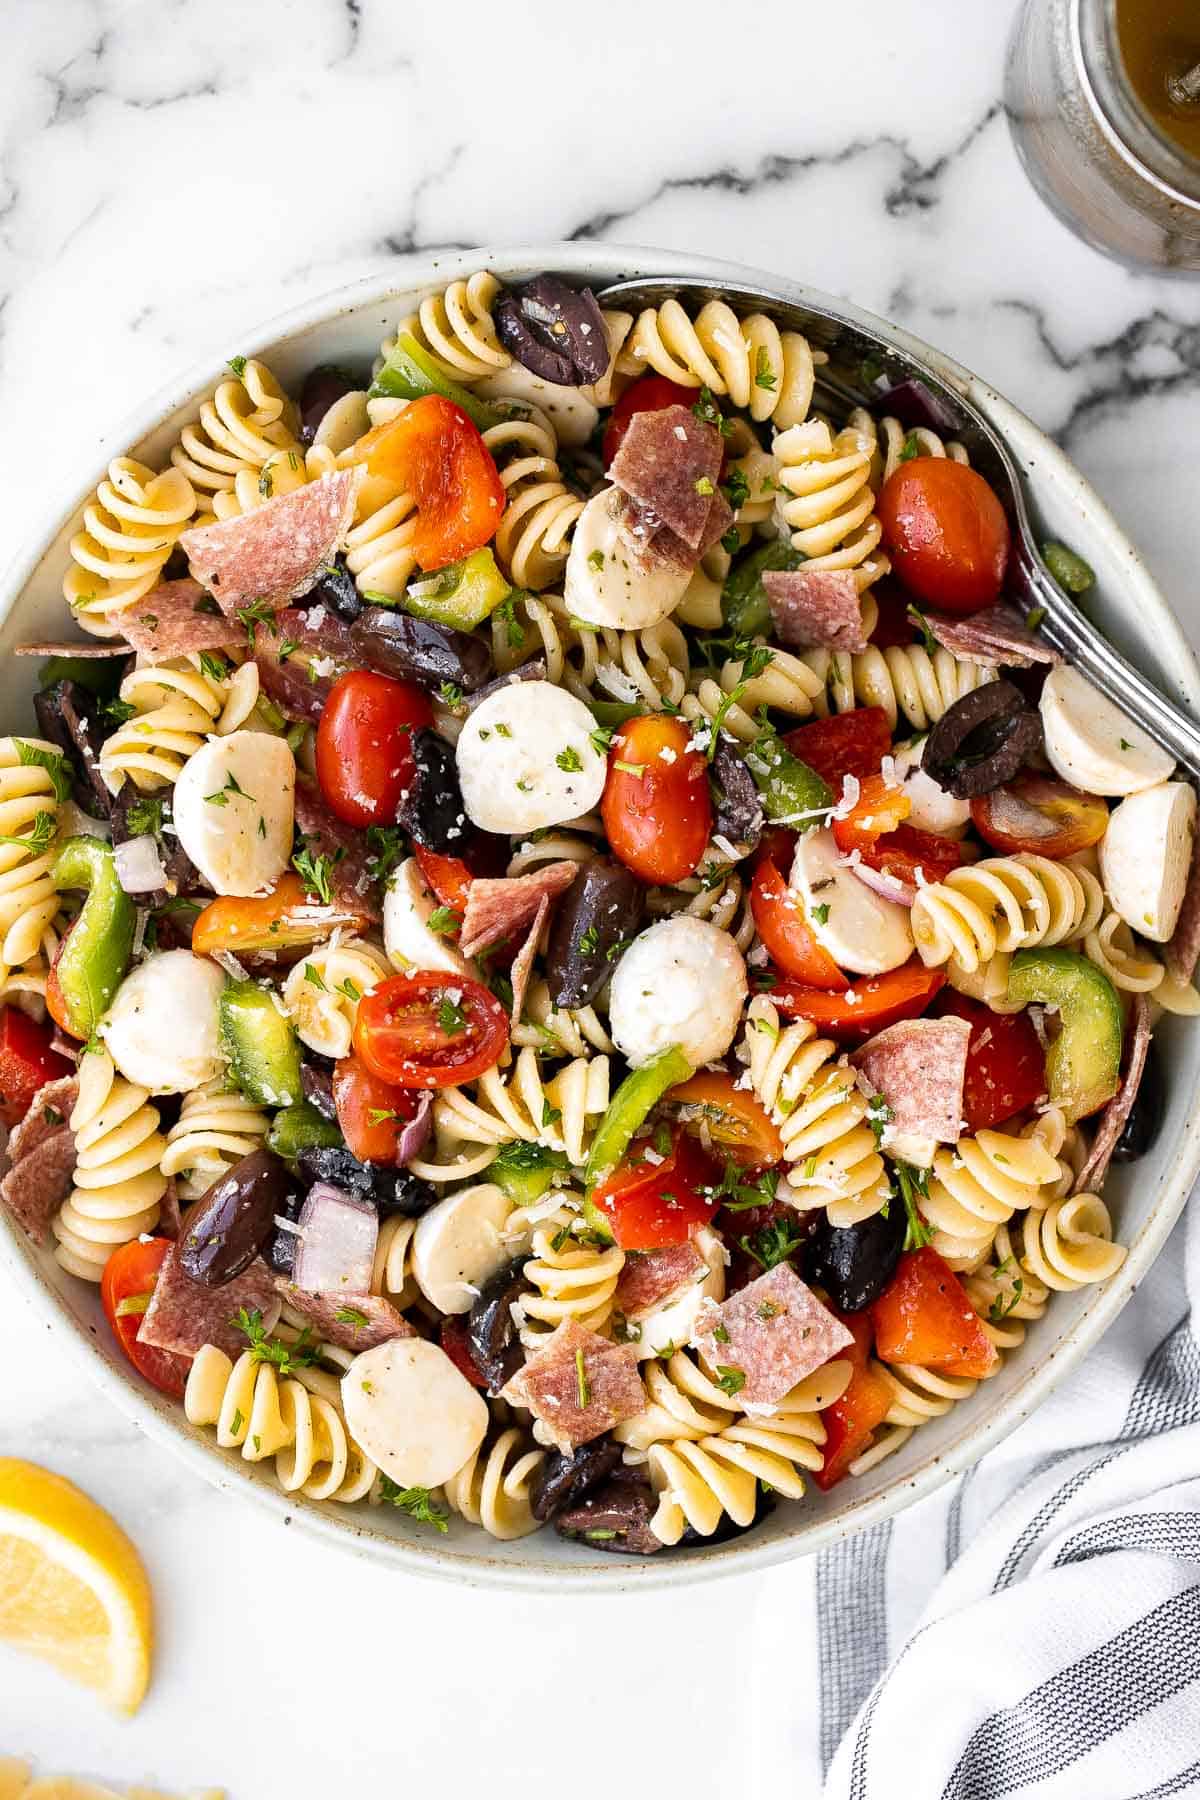
Vietnamese Summer Rolls with Chicken
Vietnamese summer rolls with chicken are fresh, light, and healthy. This Asian snack is a healthy lunch idea that takes less than 20 minutes to make and way easier than you think.
Mediterranean Couscous Salad is healthy, flavorful, and easy to make. It's packed with classic ingredients including couscous, fresh veggies, and feta.
Turkey pinwheels are bite-sized finger food perfection and will make back-to-school lunch meal planning for the kids a total breeze. They are fully customizable and you can wrap them up in a tortilla or in pita bread.
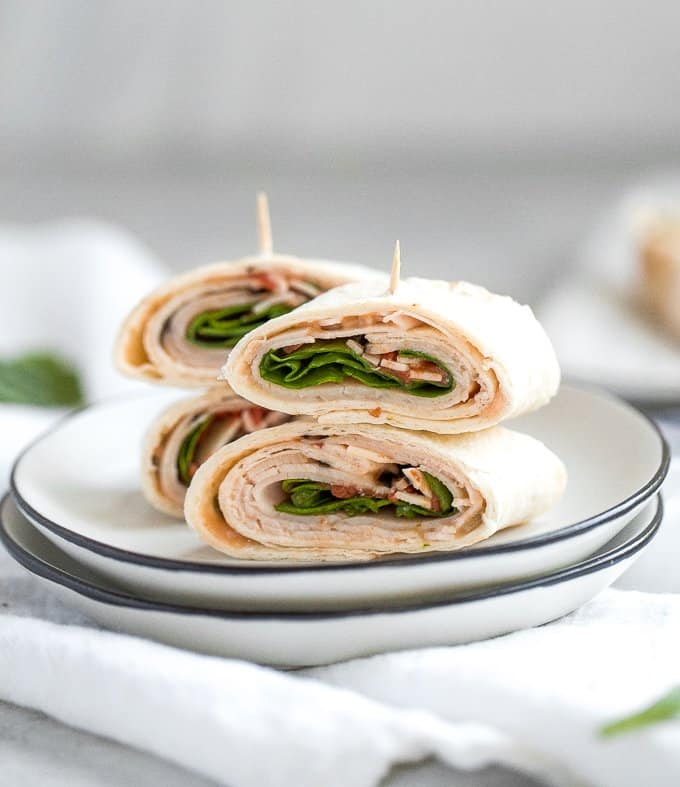
This Spring Salad is light, fresh, and vibrant. It is packed with fresh seasonal vegetables and chickpeas tossed in a homemade honey balsamic dressing.
Classic chicken salad is a creamy delicious salad that is easy to throw together. It's the perfect side salad for a summer BBQ, potluck, or healthy lunch. One of my favorite meal prep ideas!
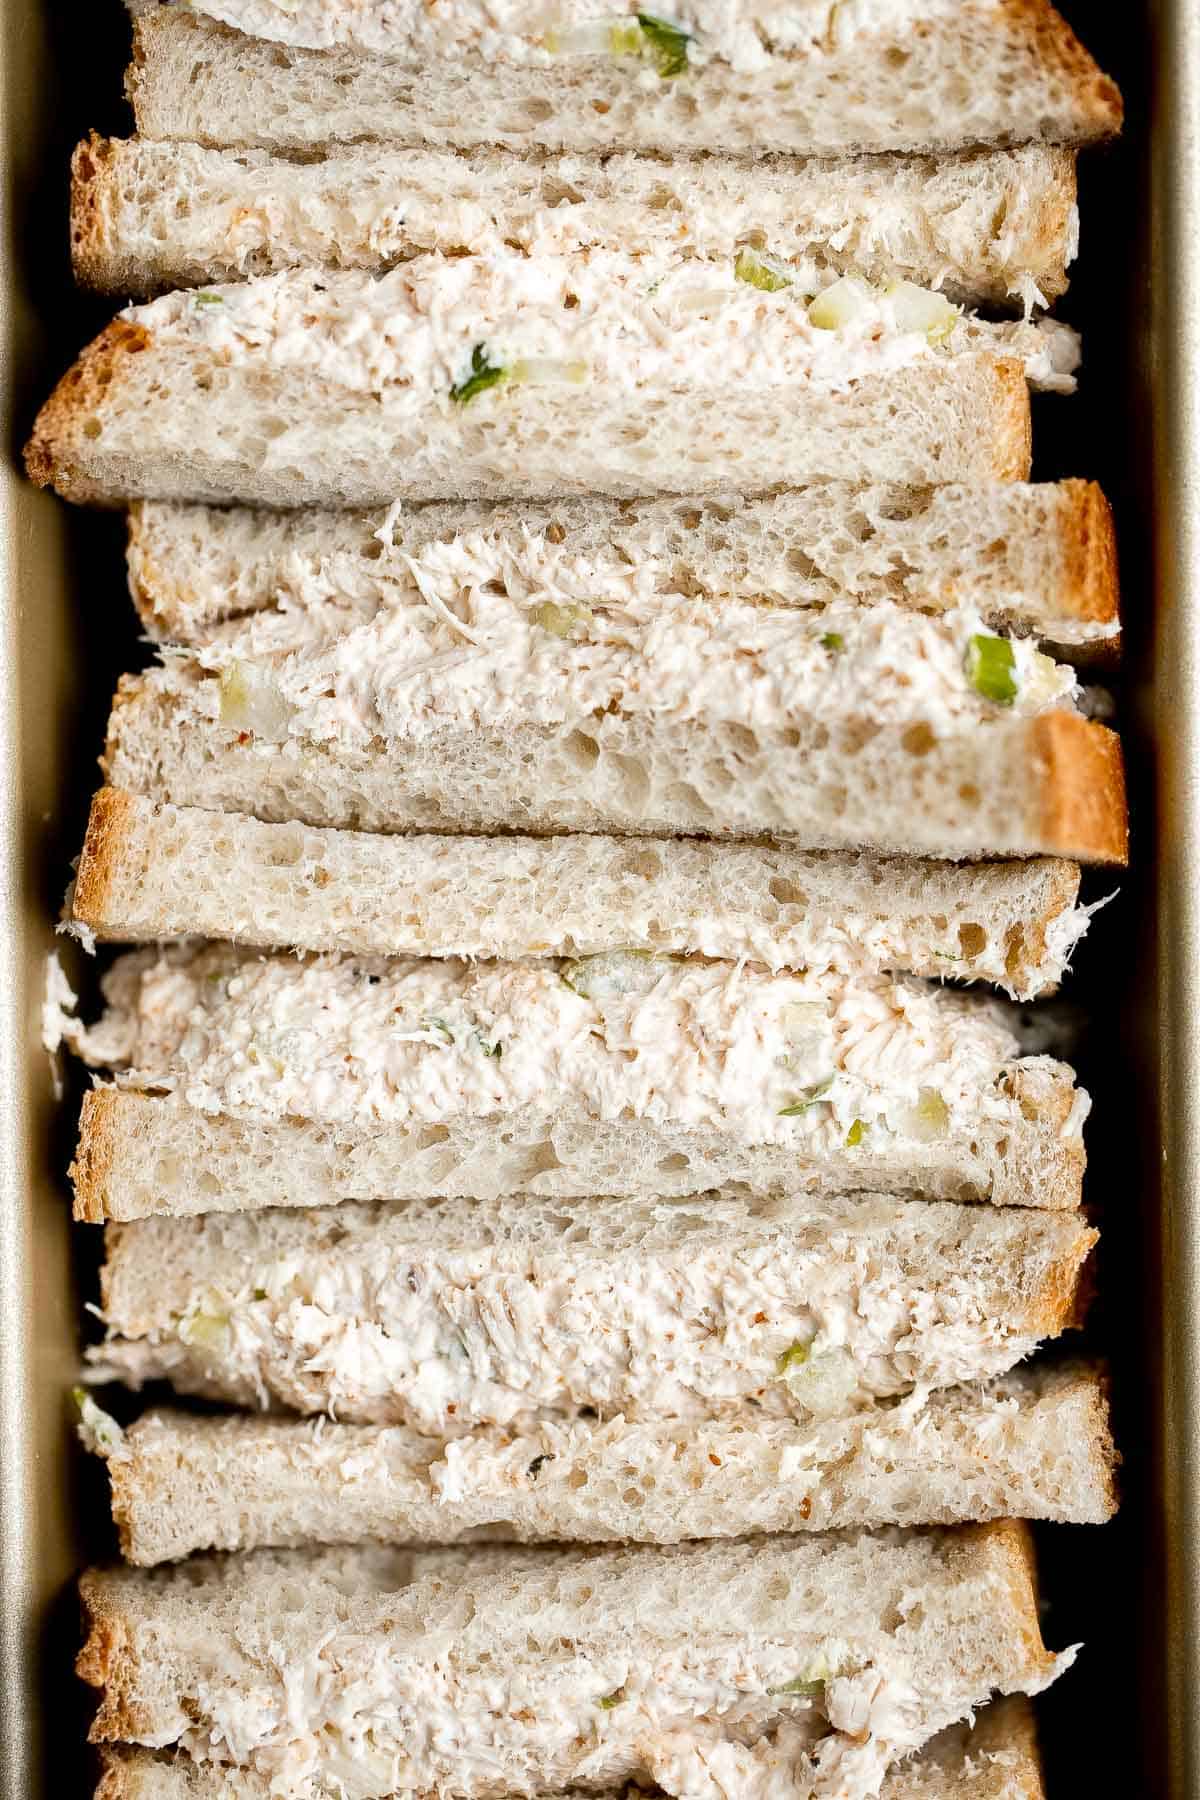
There's nothing better on a hot day than a cold and refreshing vegan soba noodle salad, tossed with fresh vegetables and a delicious saucy dressing.
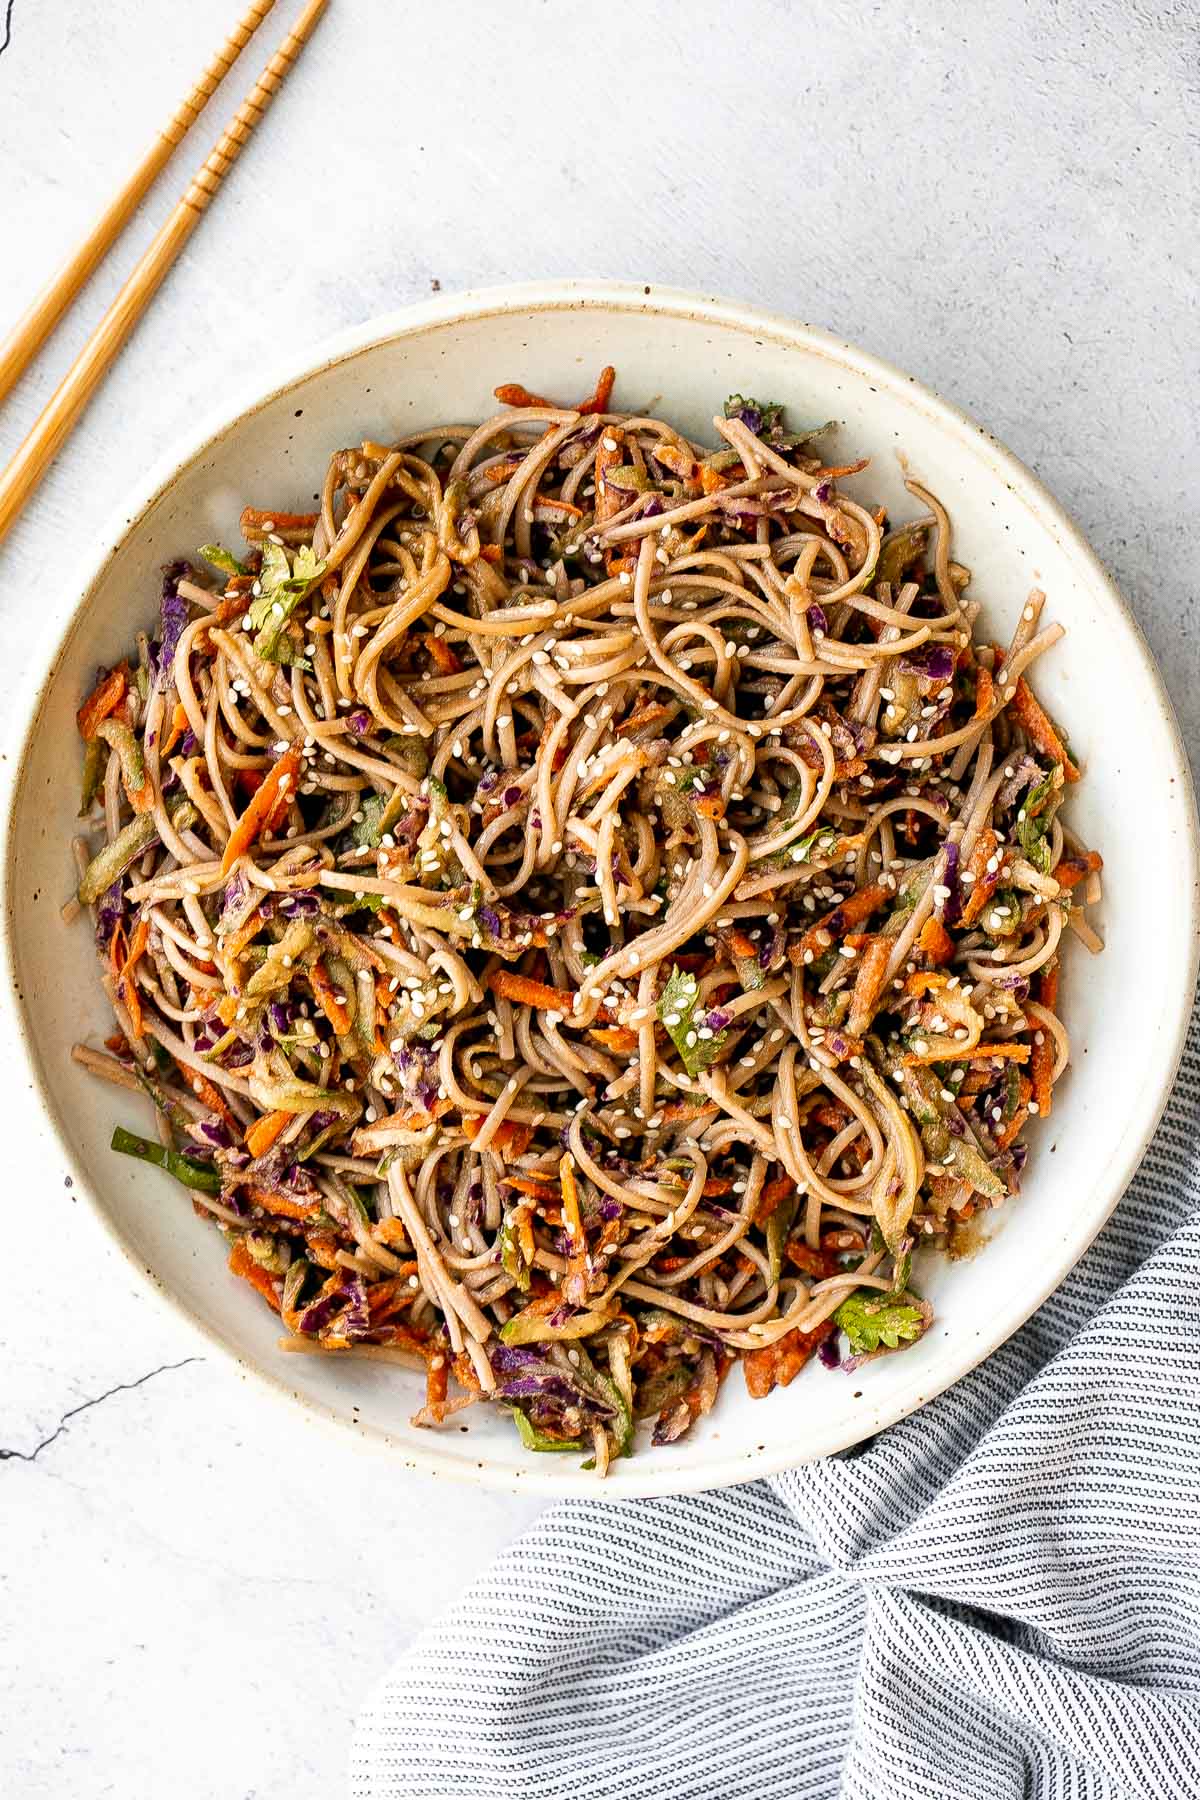
Quick easy buffalo turkey wraps with homemade buffalo sauce are flavorful, spicy, and delicious. A healthy lunch that will keep you full until dinner.
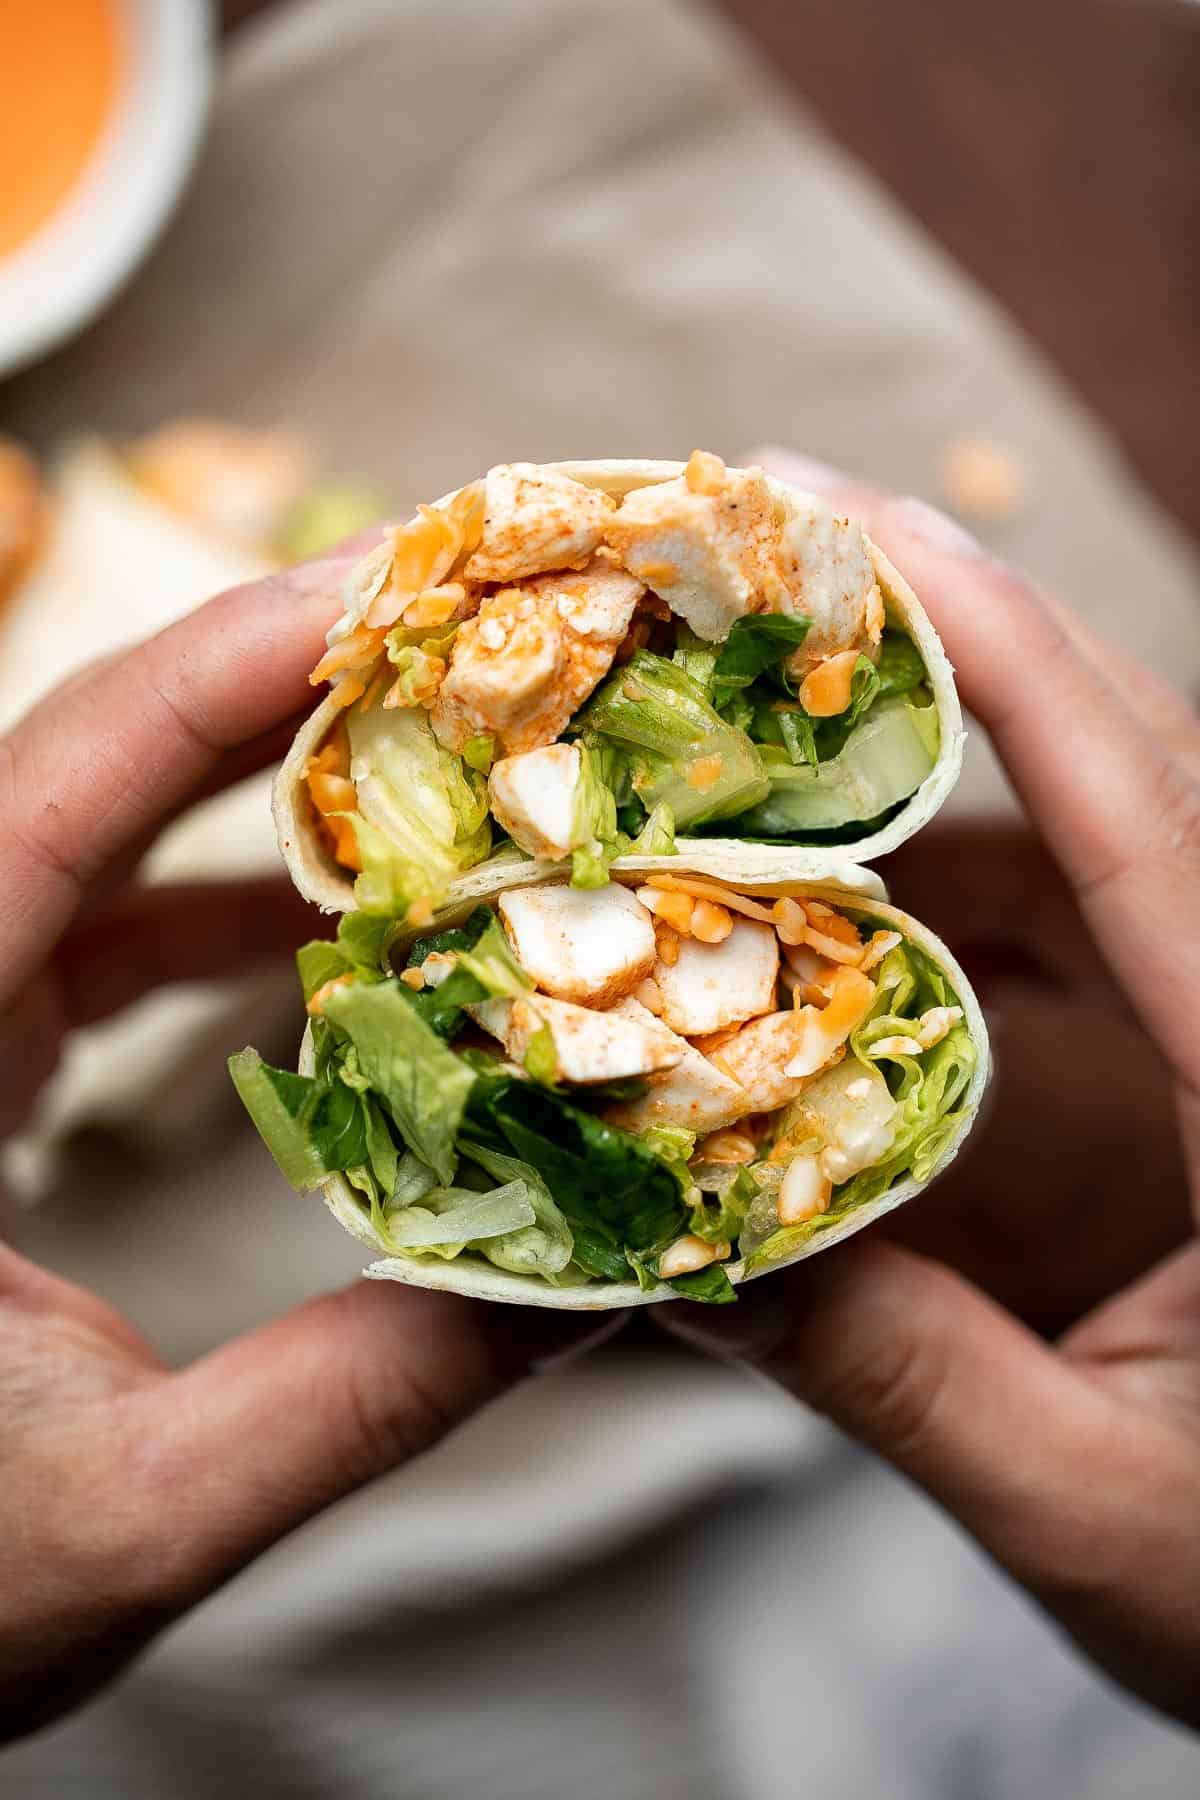
Take a bite into this refreshing, gluten-free quinoa and spinach salad bursting with colourful tomatoes, cucumbers and raisins.
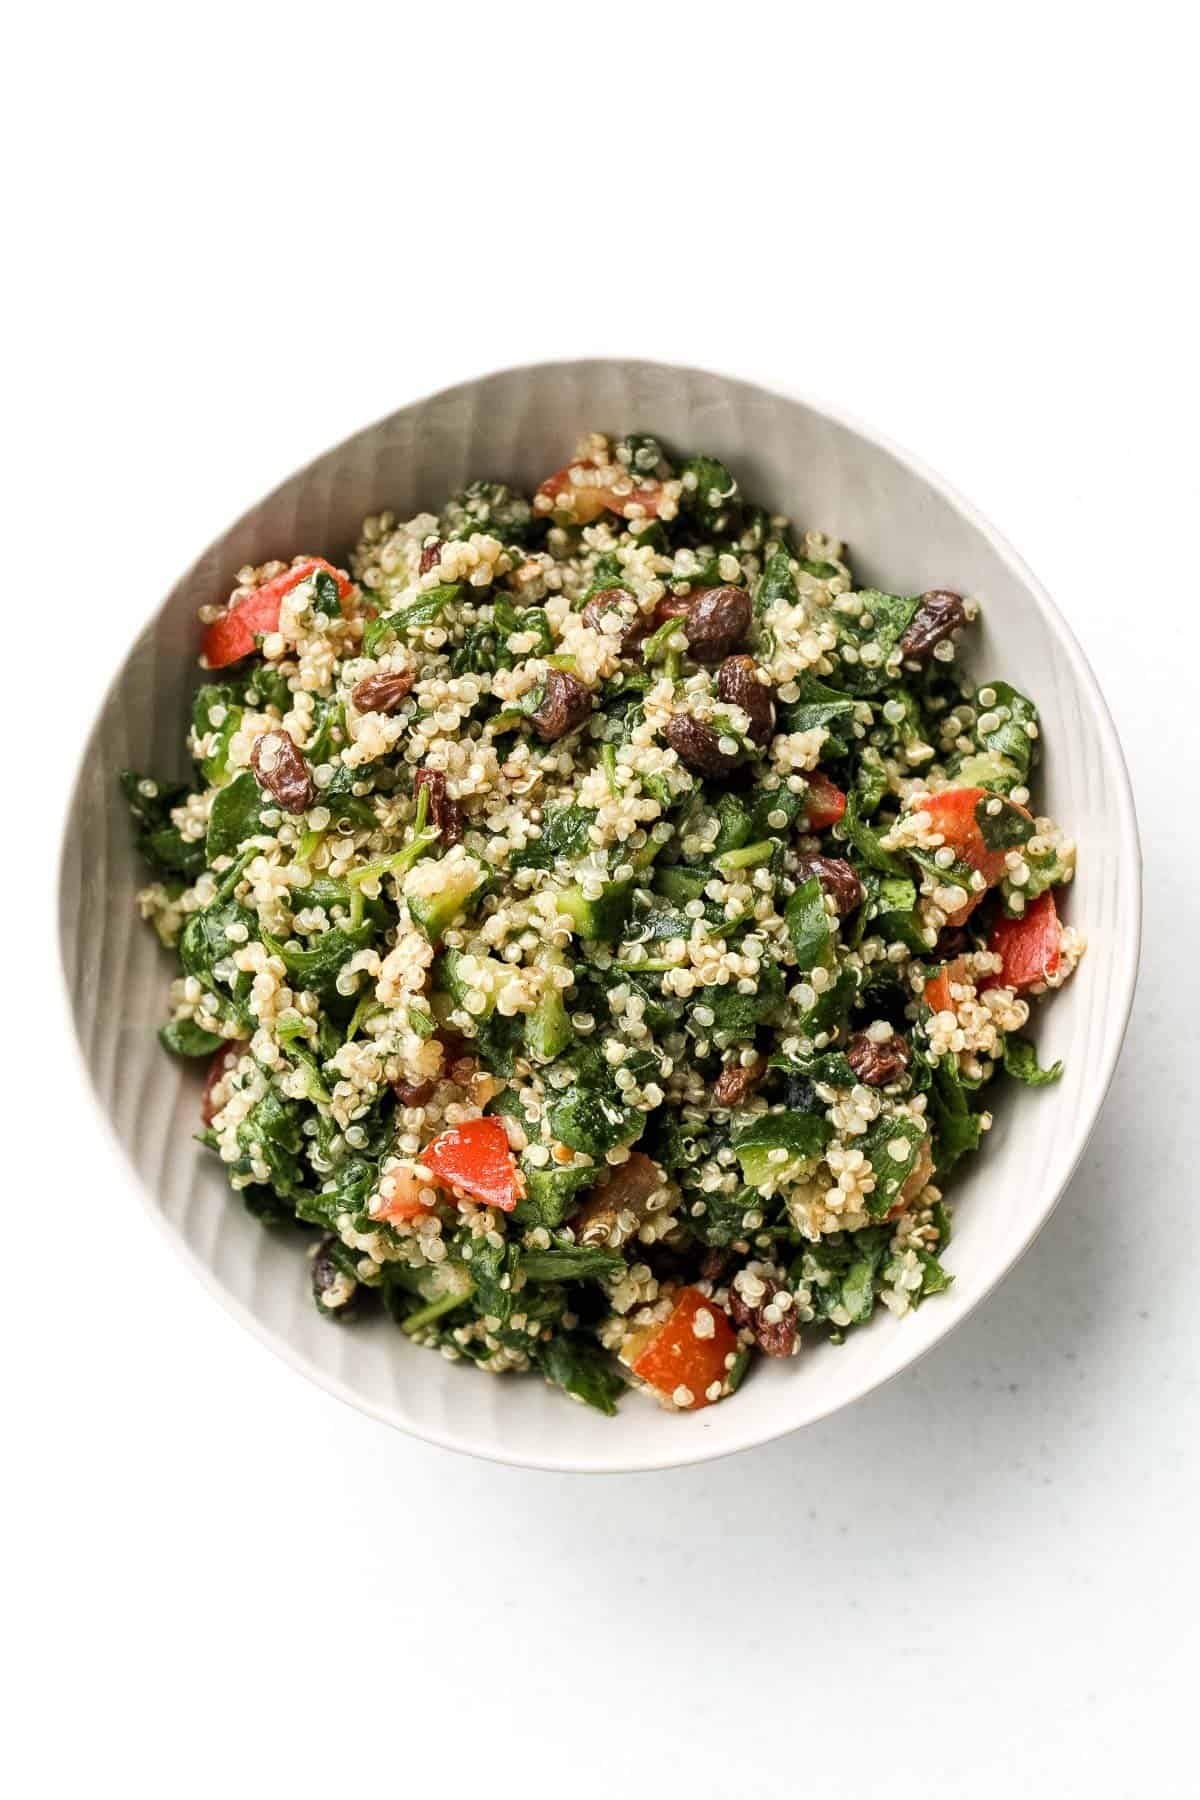
Soups for Meal Prep
Vegetable Soup is a hearty, vegan soup that is delicious, flavorful, and easy to make. It's loaded with all kinds of veggies in a savory broth.
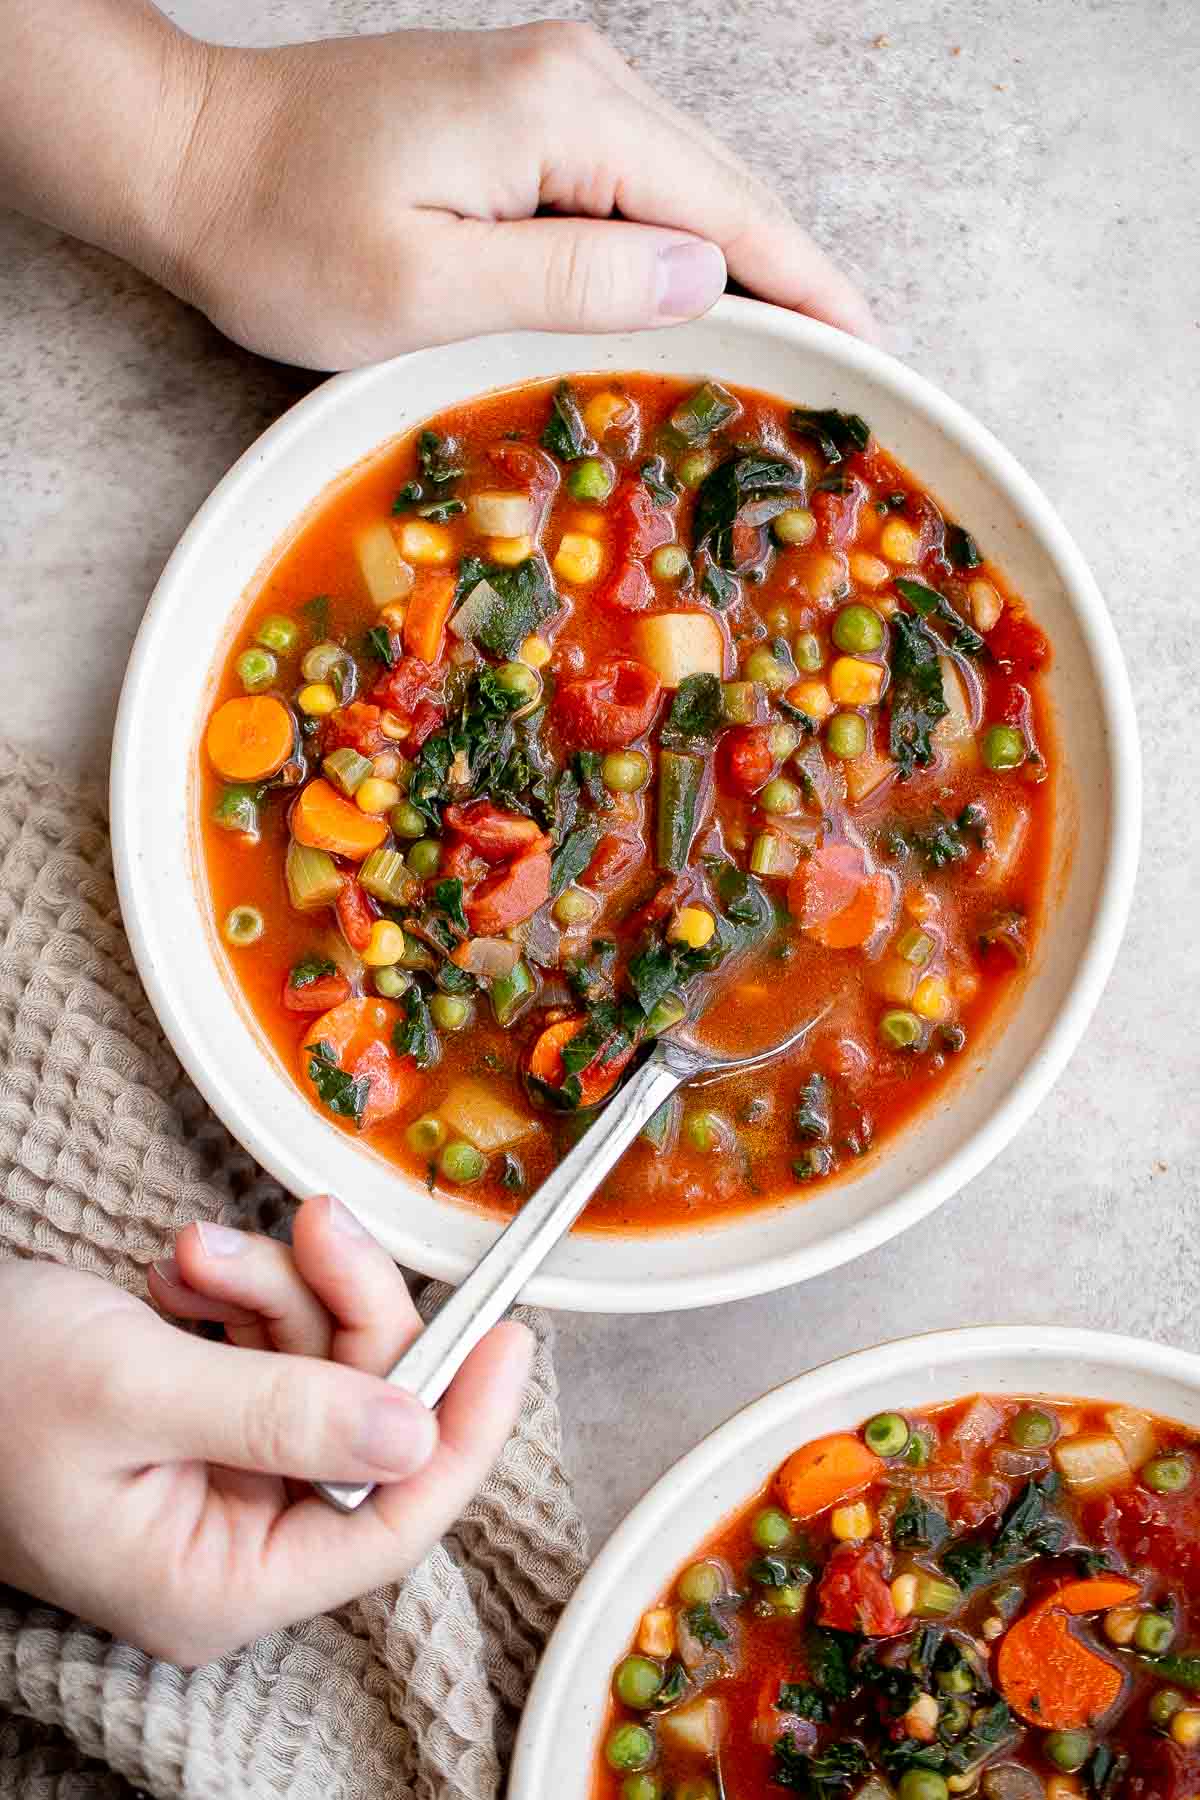
White Bean Soup with Kale is a hearty and nourishing one-pot meal that is flavorful and easy. Make this healthy soup in 30 minutes using simple ingredients.
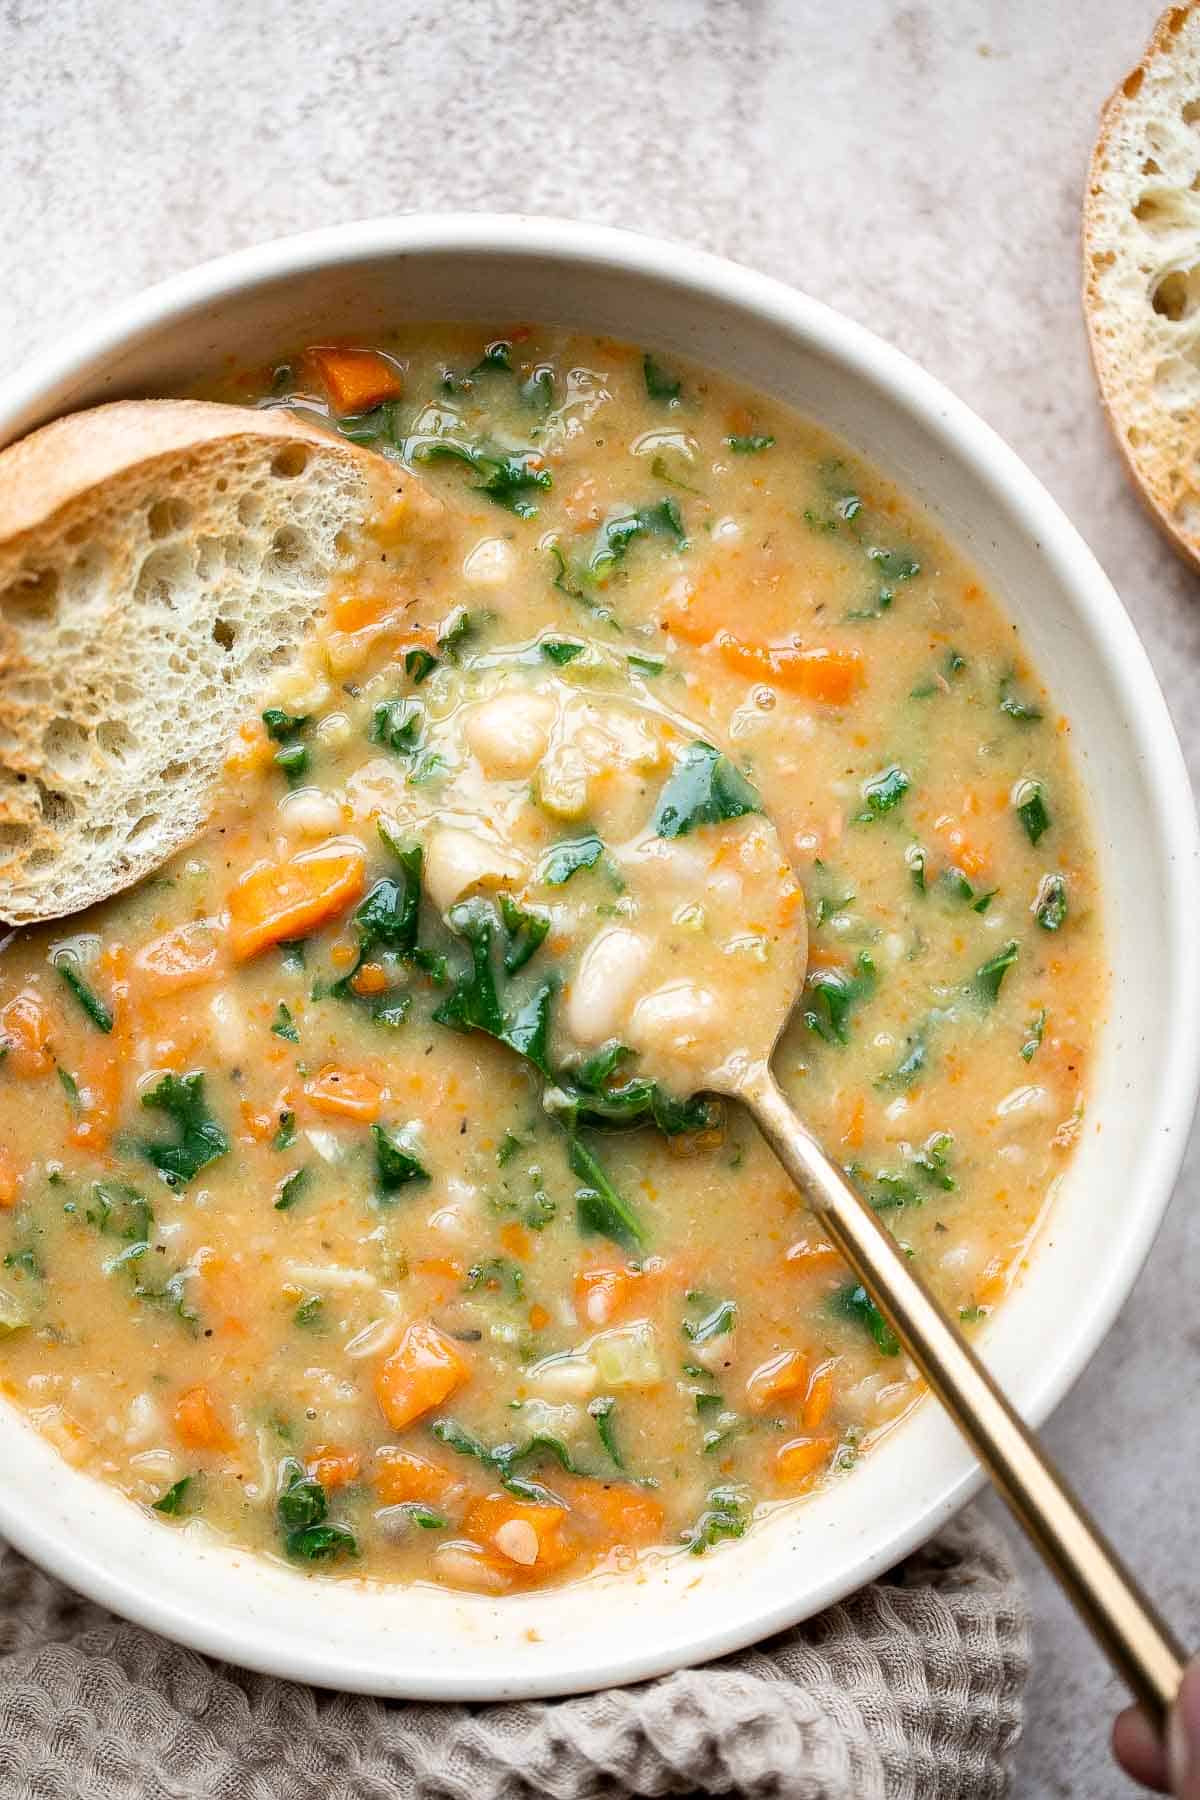
Vegetarian Mushroom Barley Soup
Wholesome hearty vegetarian mushroom barley soup is healthy, filling, and so delicious. This one pot meal is easy to make with just 10 minutes of prep.
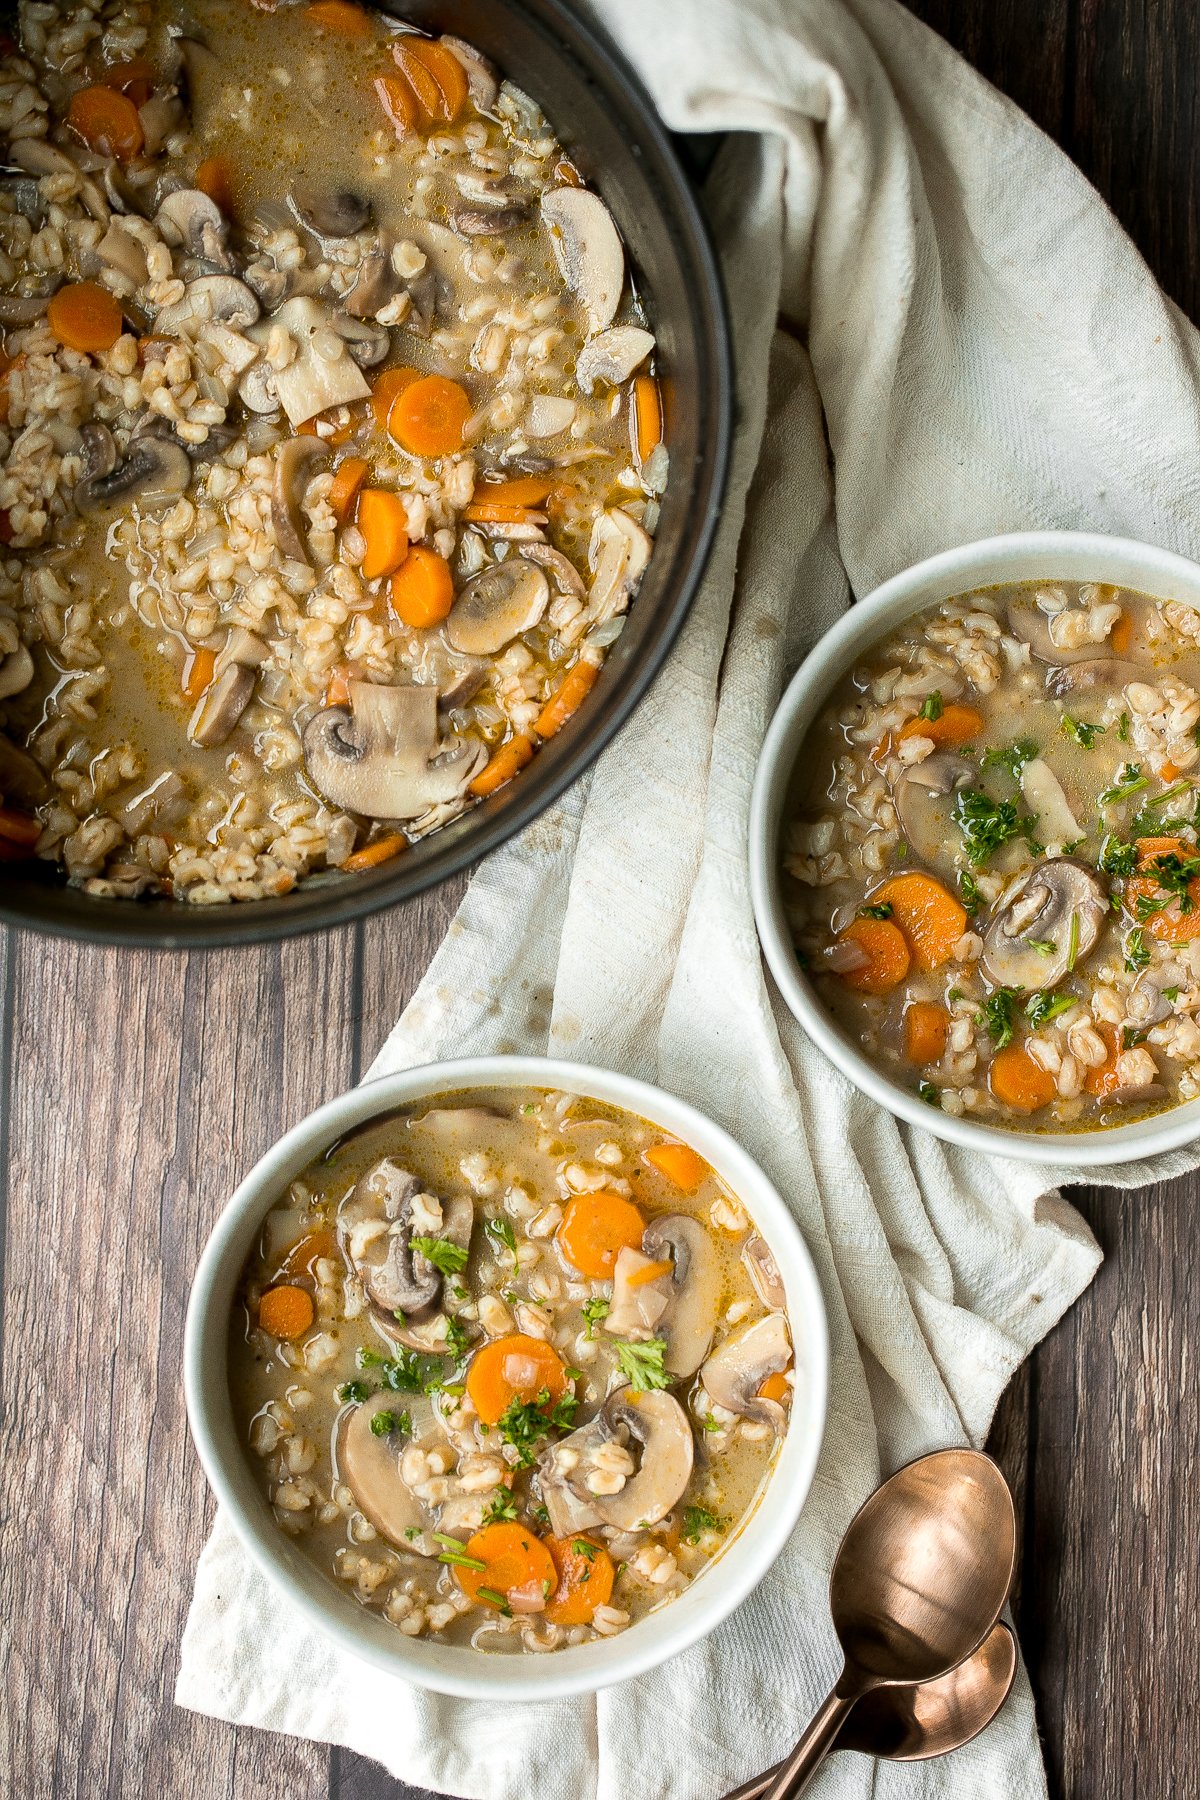
Beef taco soup is a delicious take on tacos, transforming it into a hearty, wholesome, filling soup topped with all the taco fixings. Ready in 30 minutes.
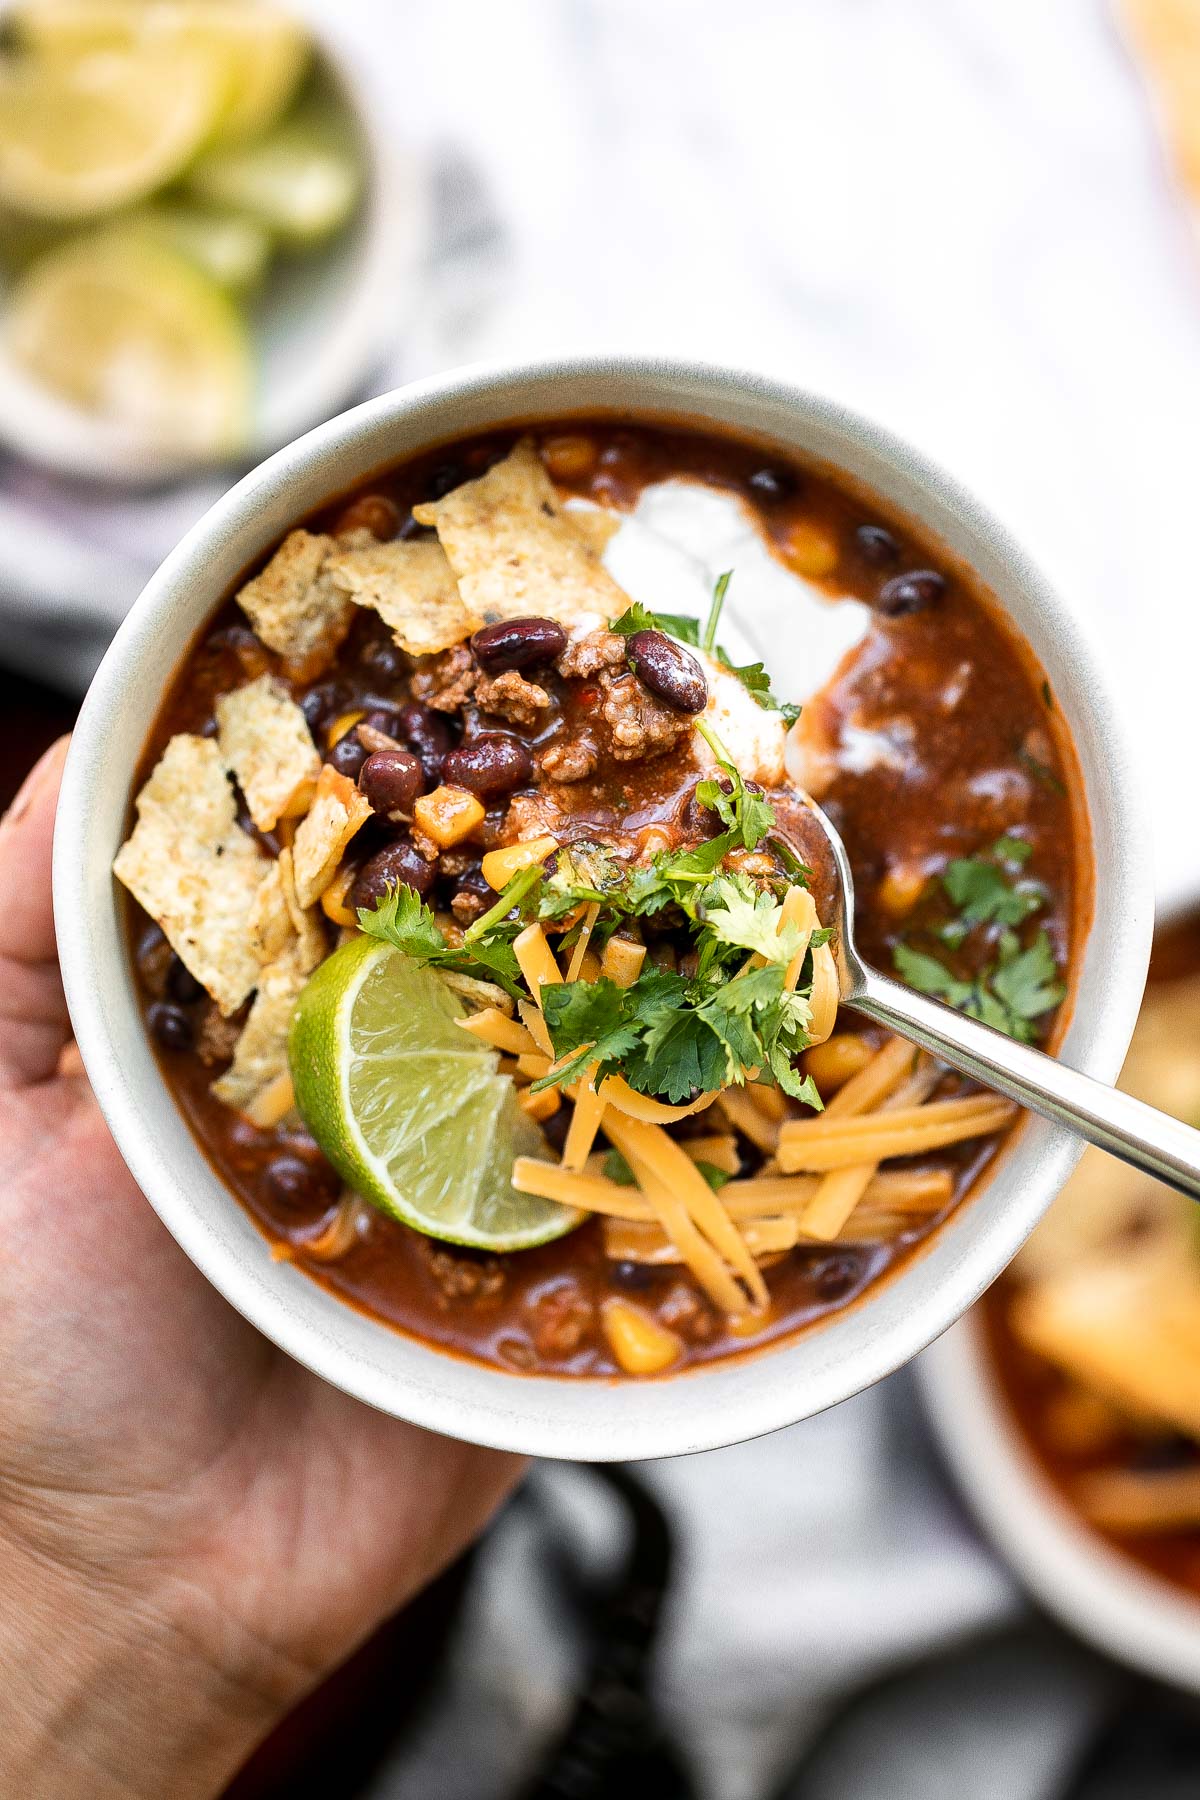
This Persian Lentil Soup is a quick and easy vegan soup that is flavorful, delicious, and healthy. Make this thick and hearty meal in just 45 minutes!
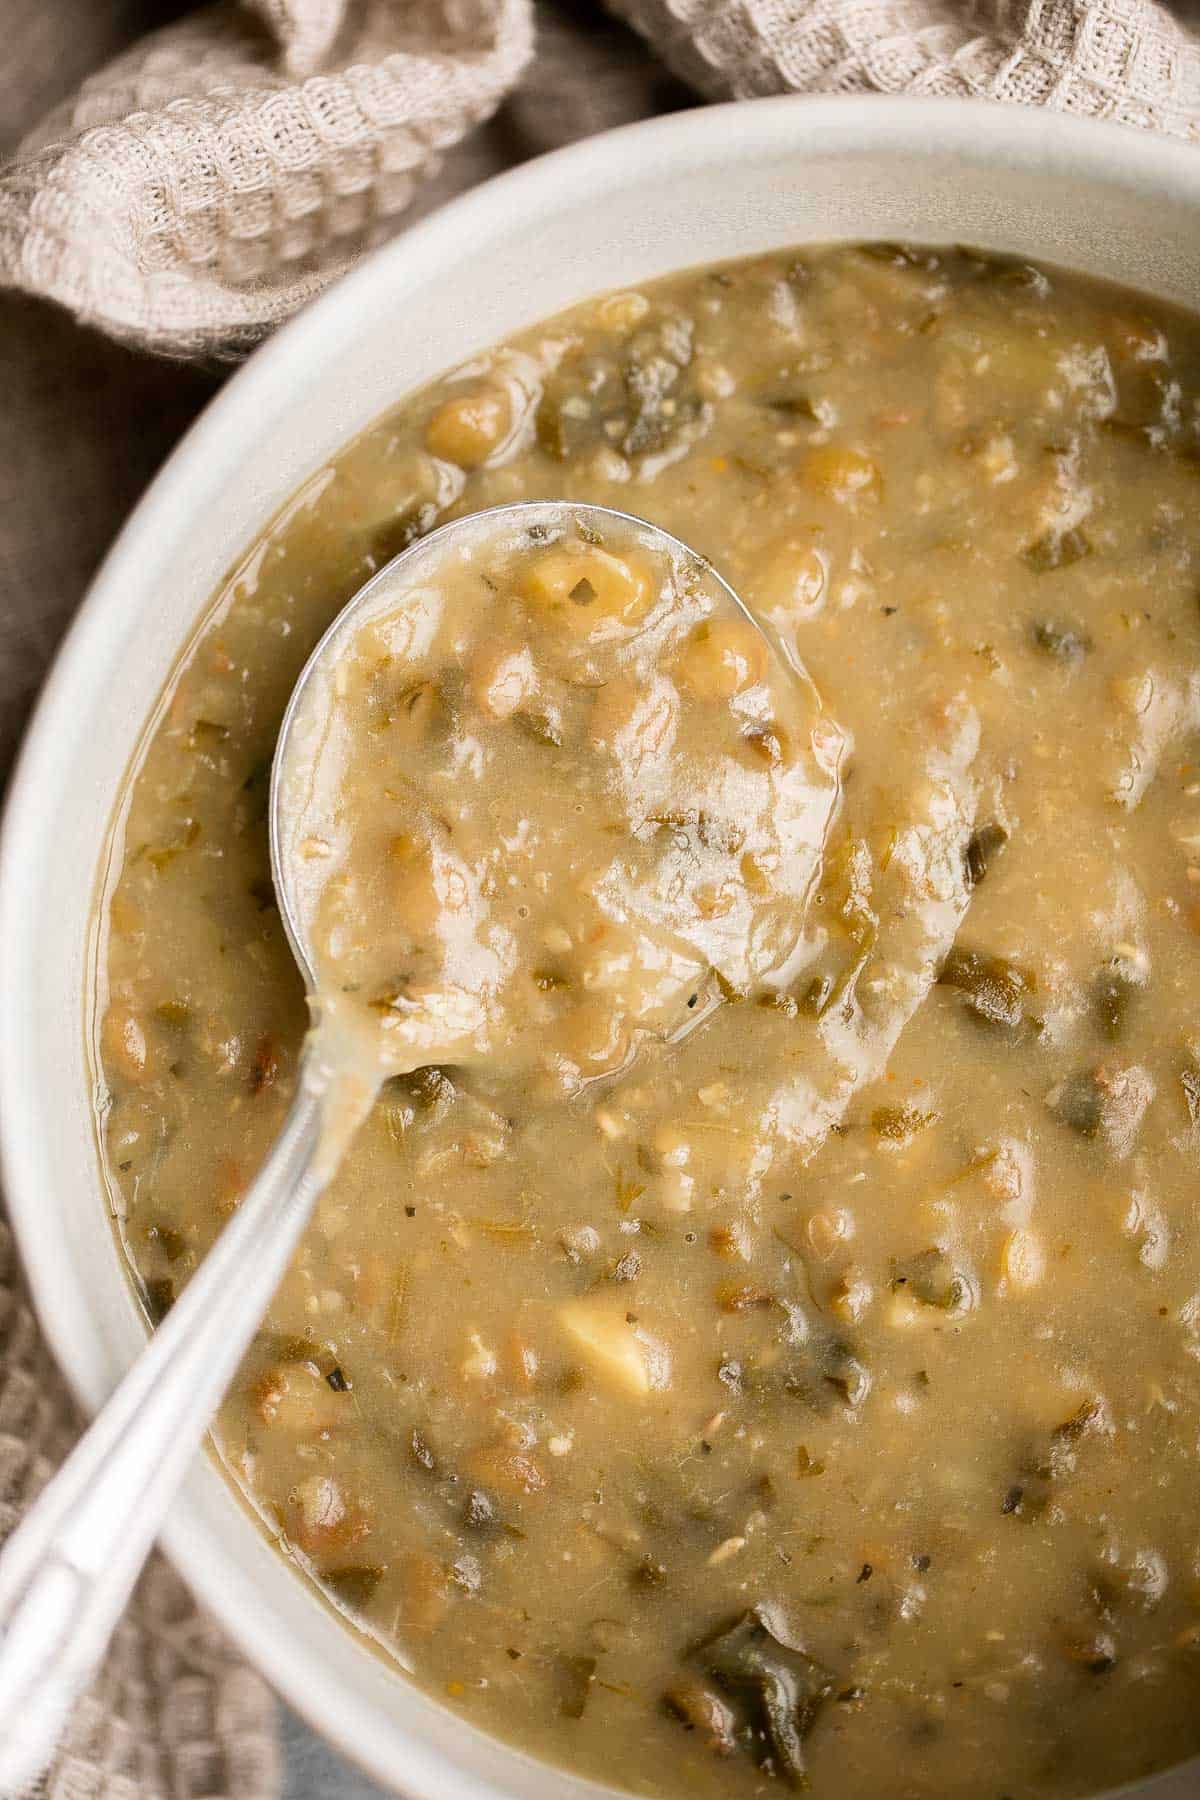
Roasted Acorn Squash Soup is smooth and velvety, packed with veggies, and loaded with fall flavor. Serve for a cozy lunch, dinner, or on Thanksgiving.
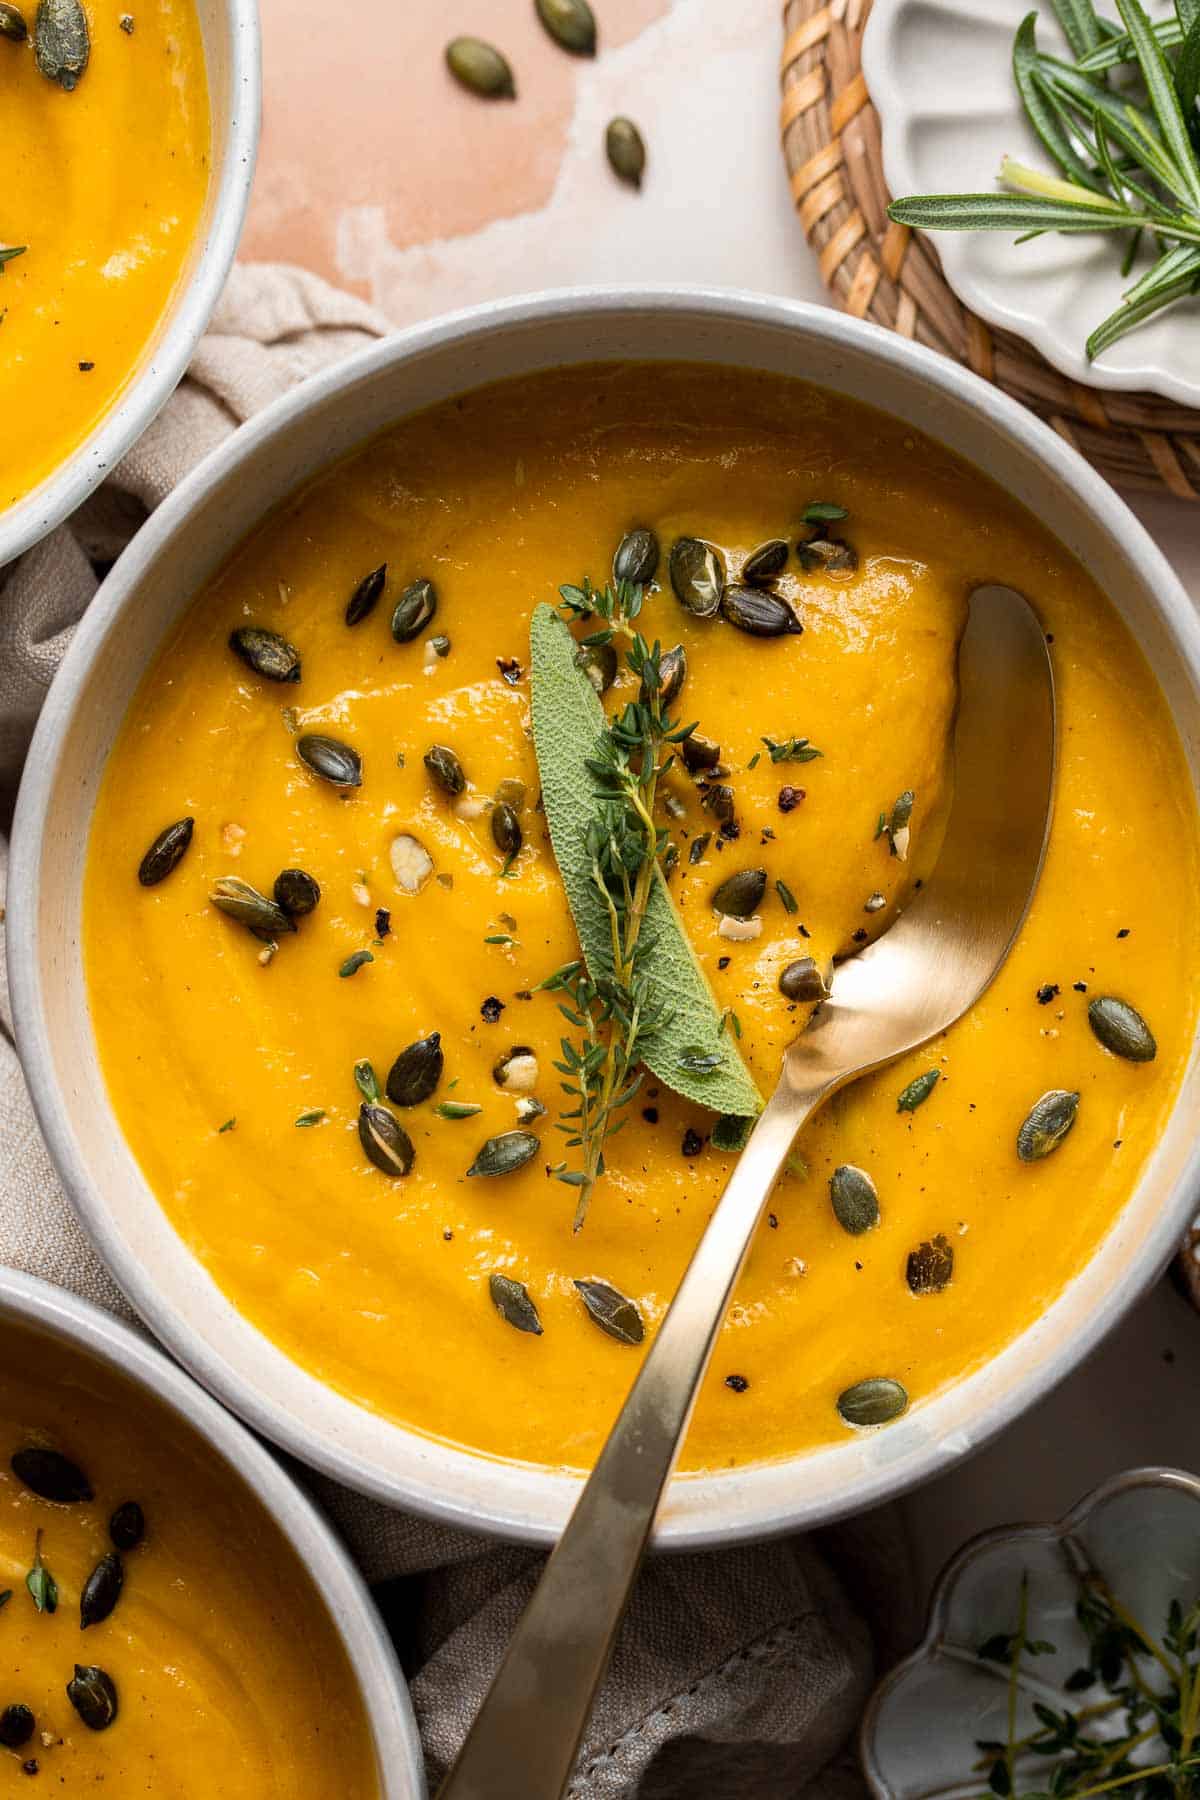
Meal Prep Snacks
These almond cranberry chocolate chip granola bars are chewy and delicious, contain real dried fruit, and made healthier with less processed sugar. A great meal prep idea when you are looking for snack options.
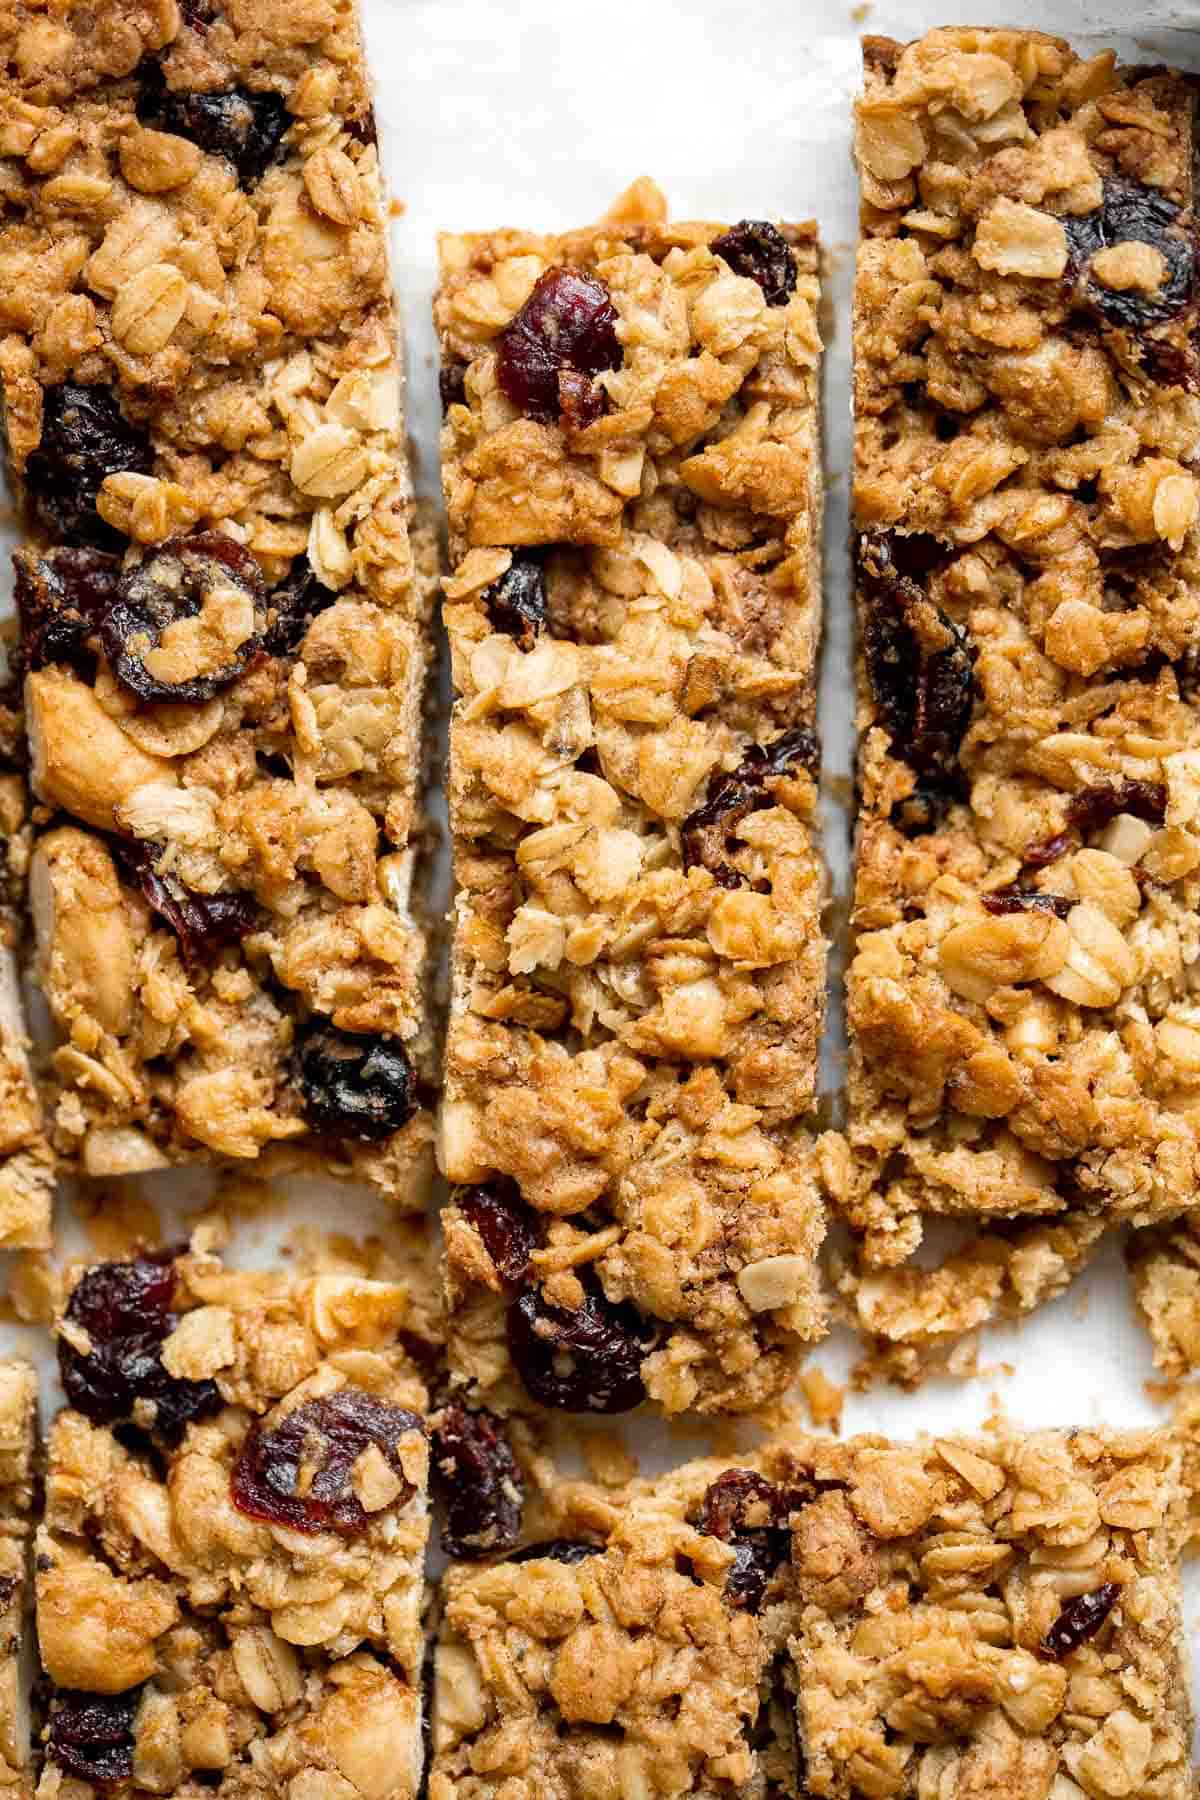
You'll never want to buy chips after trying these incredibly light and crispy homemade Kale Chips! They're completely vegan, easy to make, and healthy.

Homemade popcorn from scratch is quick and easy to make, a delicious and healthy snack, and is completely customizable with your favorite seasonings.
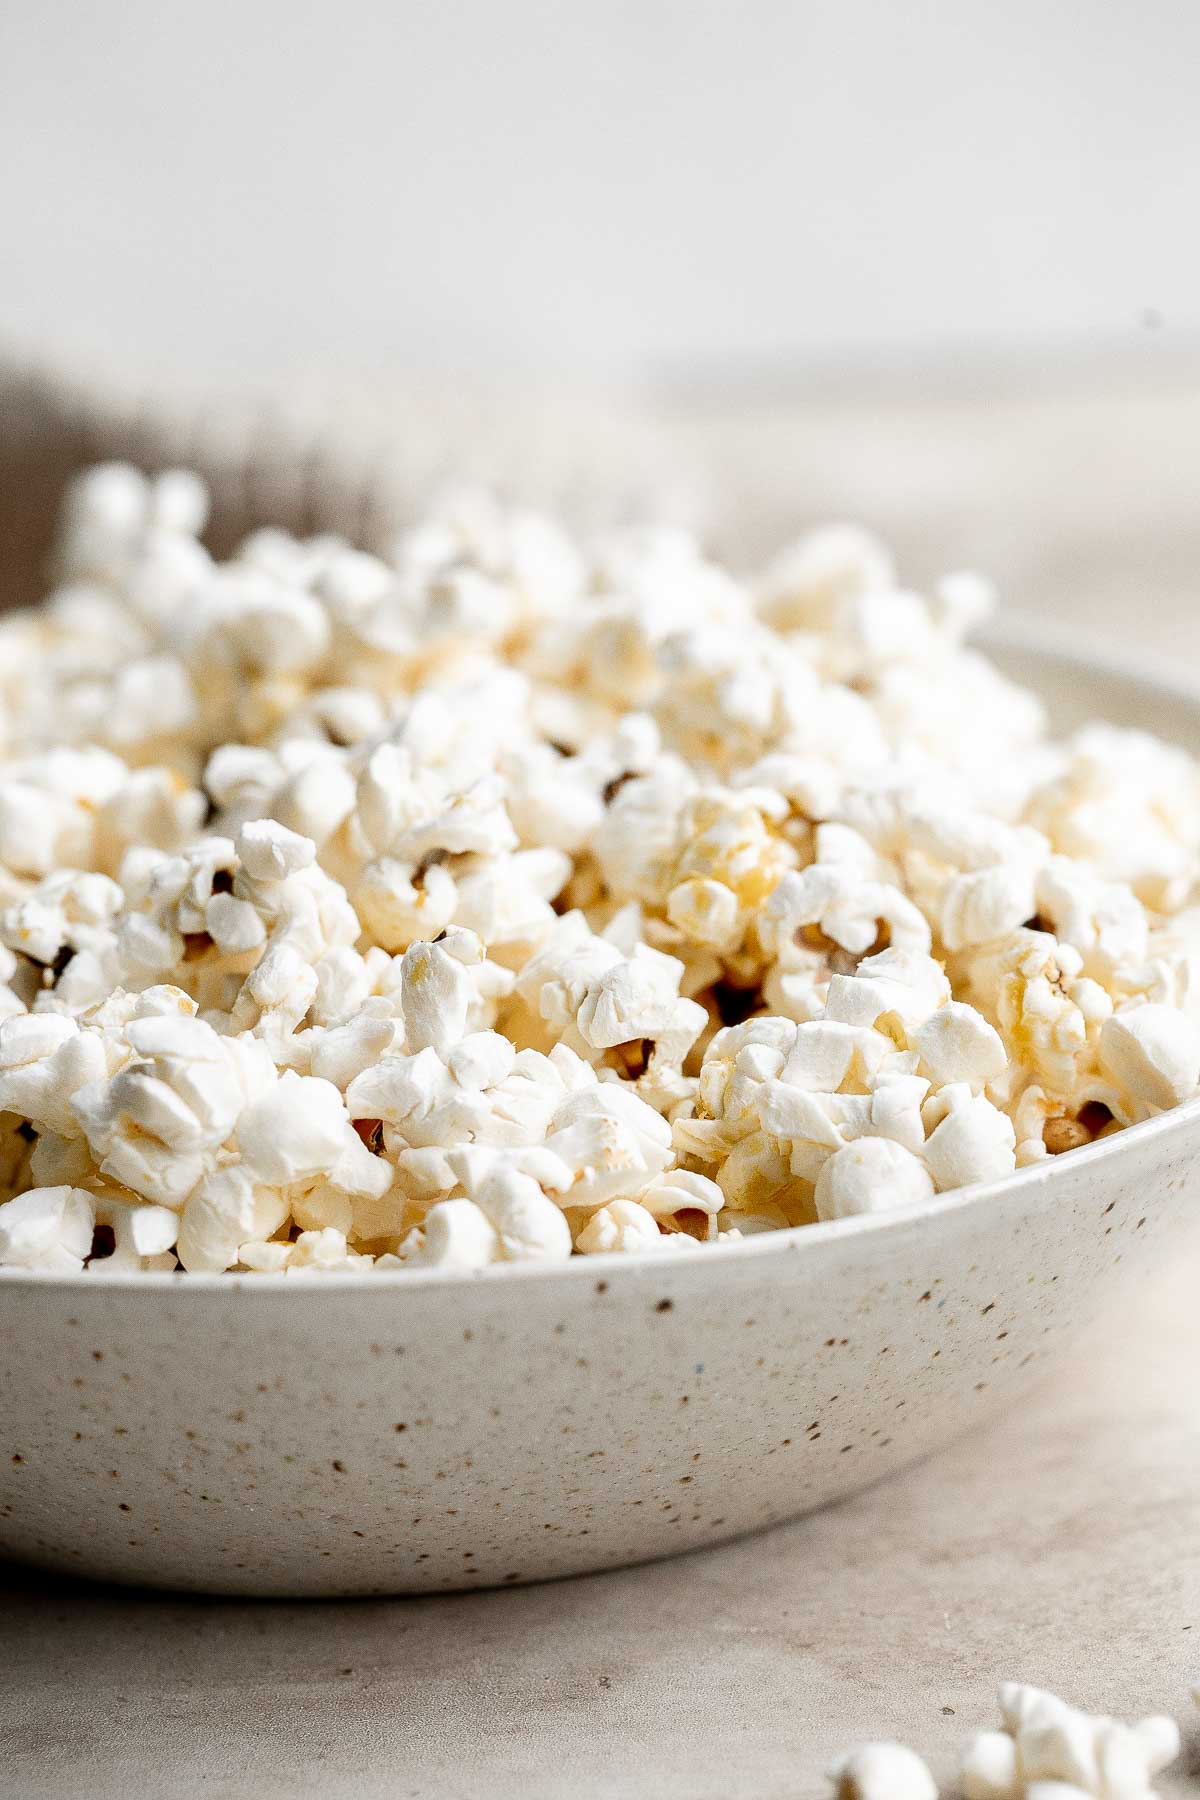
Blueberry yogurt muffins are buttery, moist, soft, and cakey and bursting with blueberries in every single bite. They are super quick and easy to make.
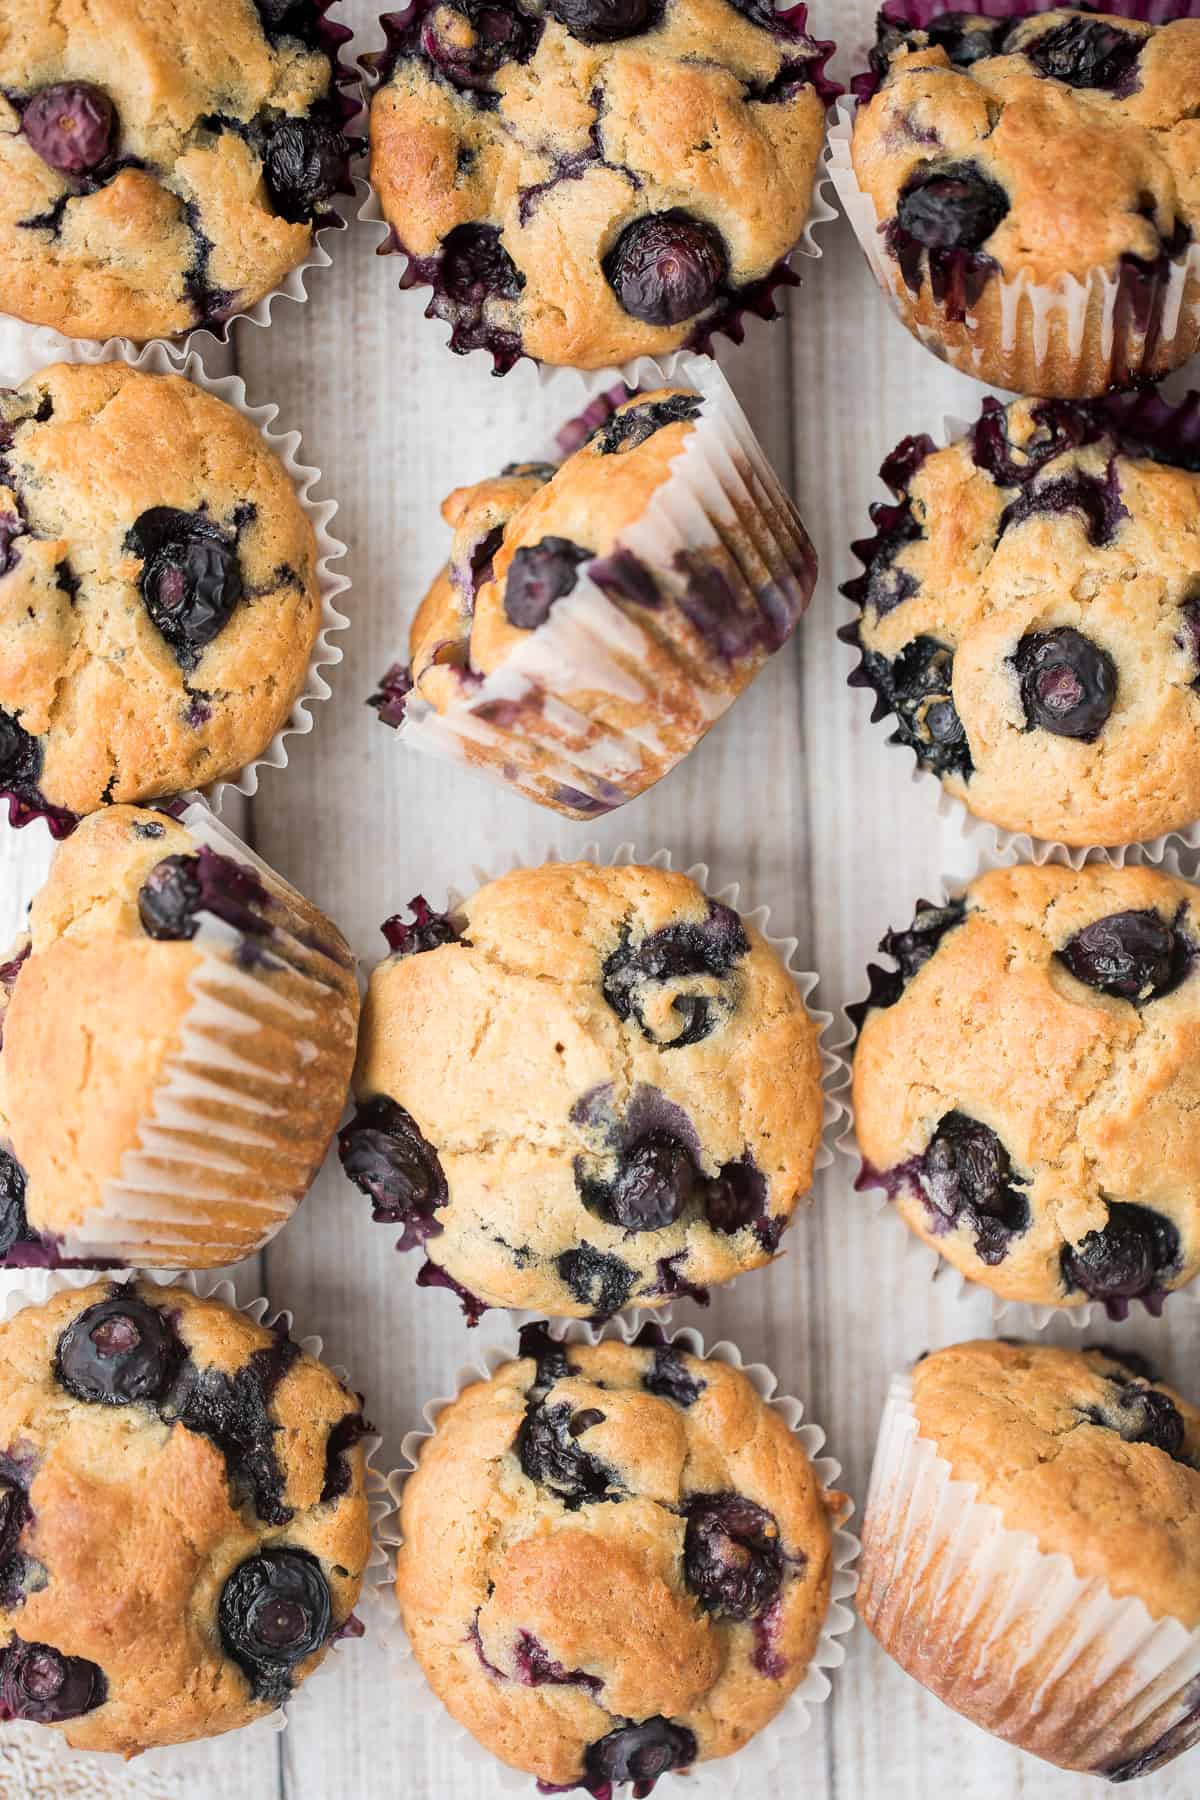
Classic Meal Prep Sides
- Steamed Rice
- Quinoa
- Herb Roasted Sweet Potatoes
- Balsamic Roasted Broccoli
- Roasted Cauliflower
- Sauteed Brussels Sprouts
- Oven Roasted Vegetables
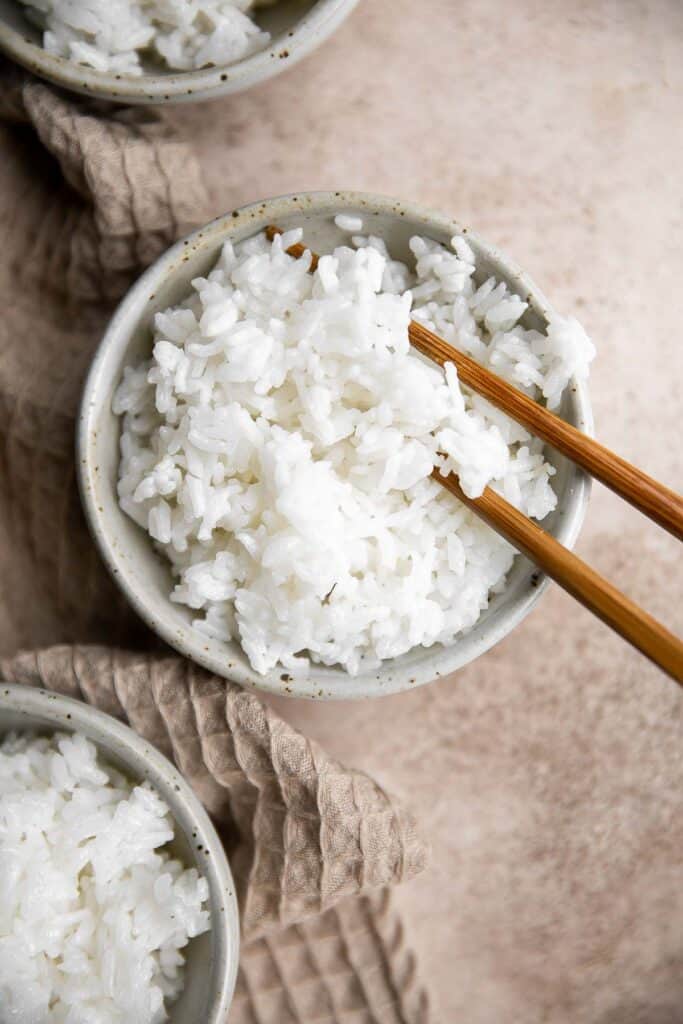
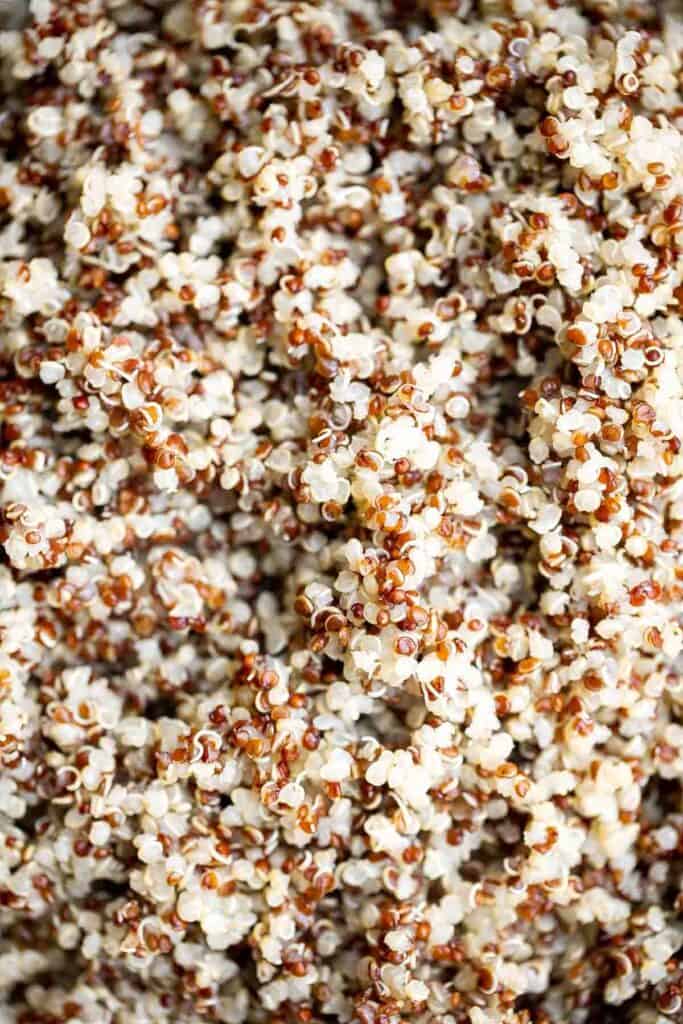
More Easy Recipes
- 60+ Easy Dinner Ideas
- 40 Hot Lunch Ideas
- 40 Best Salad Recipes
- 60 Best Soup Recipes
- 50 Best Healthy Snacks
- 50 Easy Baking Recipes
Did You Make Any of These Meal Prep Recipes?
Please leave a comment and rating below, and let me know what you thought of this round up of easy meal prep ideas. Be sure to snap a picture and tag me on Instagram @aheadofthyme or share it on the Pinterest pin so that I can follow along.
HUNGRY FOR MORE? Don't forget to sign up for my email newsletter so that you d
Spring Salad
This Spring Salad is light, fresh, and vibrant. It is packed with fresh seasonal vegetables, briny feta cheese, and protein-packed chickpeas, all tossed together in a tangy homemade honey balsamic dressing. This salad is the perfect companion to just about any entree you'll make this season.
This spring salad recipe is simple but delivers incredible flavor. Chop the veggies, make the dressing, toss the ingredients, and serve! This salad is great for a healthy lunch or potluck, or as a side dish for dinner this spring. You'll likely make this salad on repeat over and over!
Why You'll Love this Spring Salad
- Packed with vegetables. This healthy spring salad is loaded with in-season ingredients like radishes, red onion, peas, and cucumber for a crisp, fresh feel and wholesome meal. It's packed with vitamins, minerals, and fiber, and is low in calories and fat.
- Delicious and flavorful. This spring salad is bursting with fresh, bright flavors and textures. The combination of crisp greens, crunchy veggies, and tangy dressing is simply irresistible. Plus, you can customize it with your favorite ingredients to make it even more delicious.
- Less than 15 minute prep. When you're short on time, count on this spring salad to save the day! Even though it's packed with fresh ingredients, it takes less than 15 minutes from start to finish to get this salad tableside - and even faster if you chop up the veggies quickly.
- Tangy homemade dressing. What makes this salad especially tasty is the honey balsamic dressing that you'll make from scratch with just 5 ingredients (plus salt and pepper). You can use this simple-yet-delicious dressing beyond this salad, too!
- Perfect for any occasion. Whether you're hosting a dinner party, bringing a dish to a potluck, or just need a quick and easy lunch or dinner, this spring salad is the perfect choice. It's versatile, colorful, and always a crowd-pleaser.
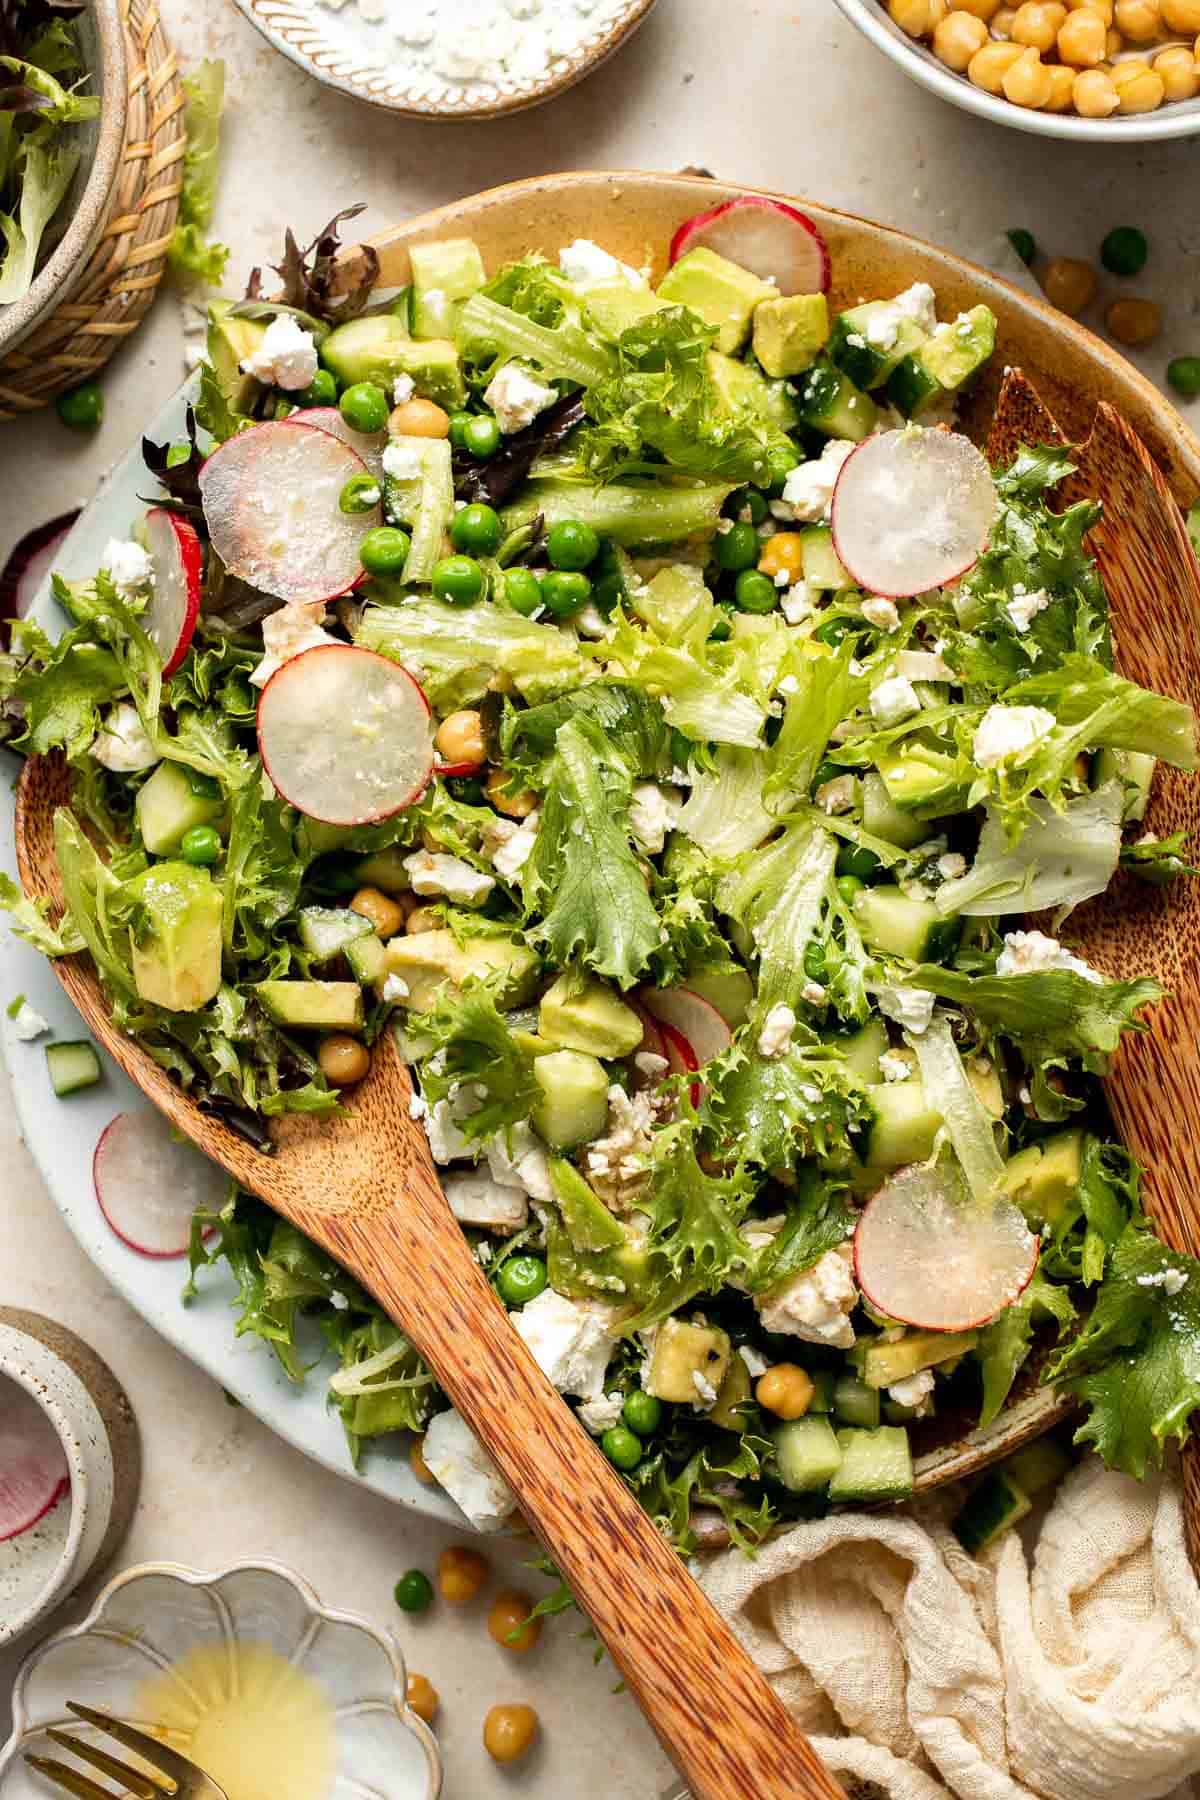
Ingredient Notes
To make this quick and easy Spring Salad, you will need the following ingredients (full measurements in recipe card below):
- balsamic vinegar - if you don't have balsamic, use the next best thing, like red wine vinegar or apple cider vinegar.
- olive oil
- lemon juice - fresh squeezed lemon juice is the best for flavor, but you can use lemon juice from concentrate if that's what you have on hand.
- honey - you can also use an equal measure of maple syrup or agave nectar in place of the honey.
- spring mix - spring mix has the perfect texture and earthy flavor for this salad, but you can use whatever salad greens you have. Try arugula, romaine lettuce, spinach, or kale.
- English cucumber - Persian cucumbers or greenhouse cucumbers are also a good swap.
- radishes - this recipe calls for regular red radishes, but you can use your favorite variety.
- red onion - if you don't have red onion, you can use thinly sliced shallots or yellow onion.
- avocado - if you're not a fan of avocados, you can omit them from the salad.
- canned chickpeas - you can also cook your own chickpeas. Use ¾ cup dry chickpeas if making your own. Note that you will need to soak them overnight before cooking, so plan ahead.
- green peas - you can use cooked fresh peas, drained canned peas, or thawed frozen peas.
- feta cheese - if you're not a fan of feta, you can use crumbled goat cheese, crumbled blue cheese, or your favorite shredded cheese instead.
- salt and pepper
You will also need measuring cups and spoons, mixing bowl, and a large serving plate.
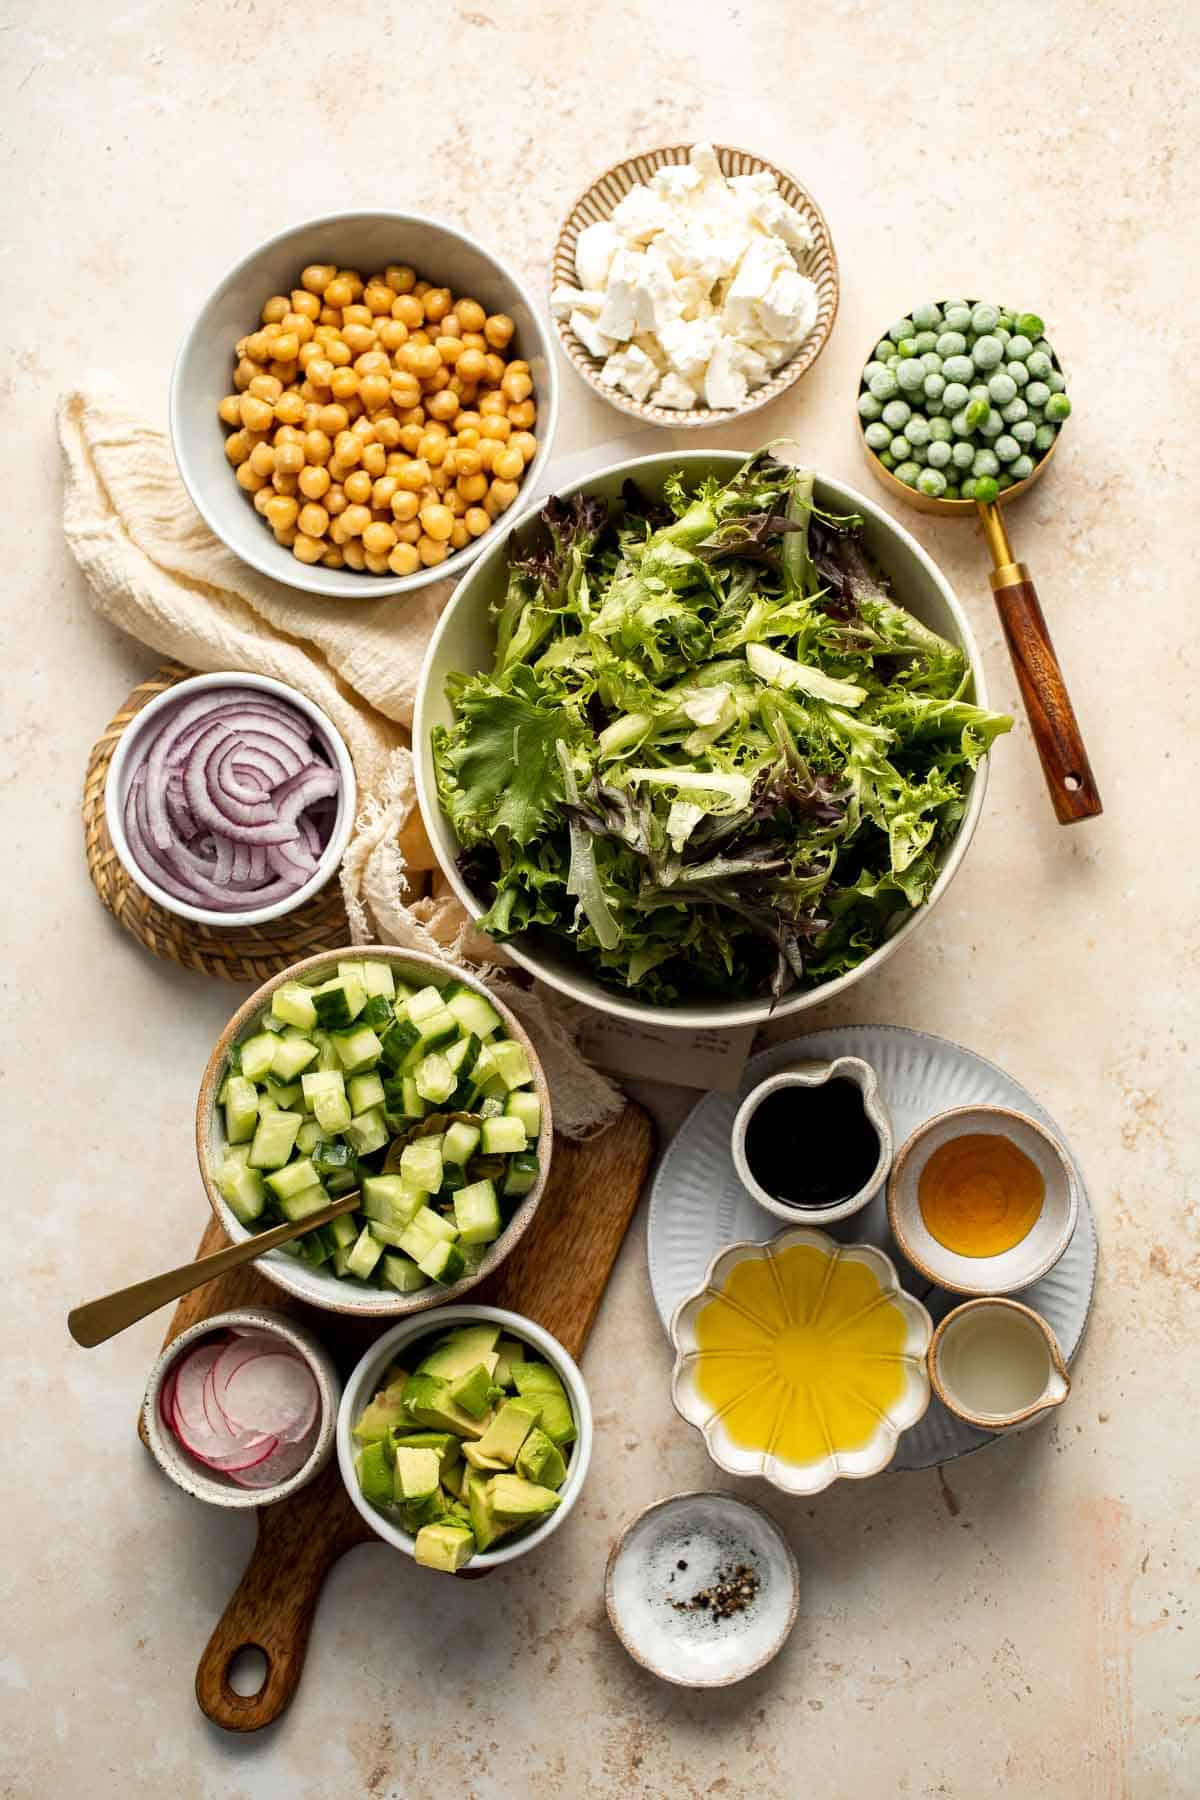
How to Make the Best Spring Salad
- Assemble the salad. Combine the spring mix greens, cucumber, radishes, onion, avocado, chickpeas, and green peas in a large serving plate. Top with feta cheese.
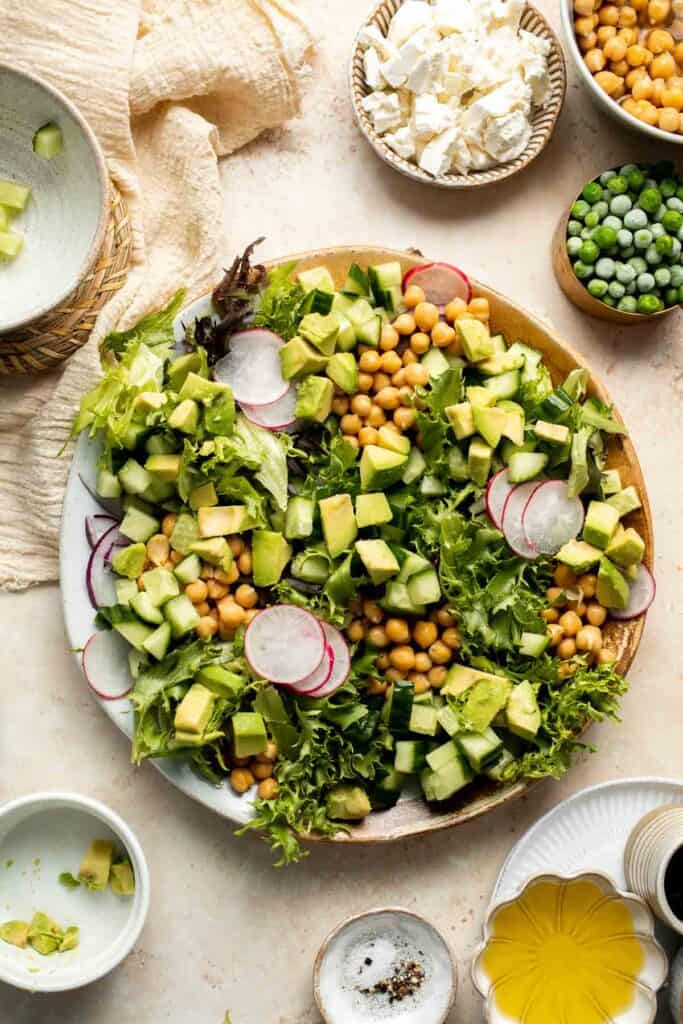
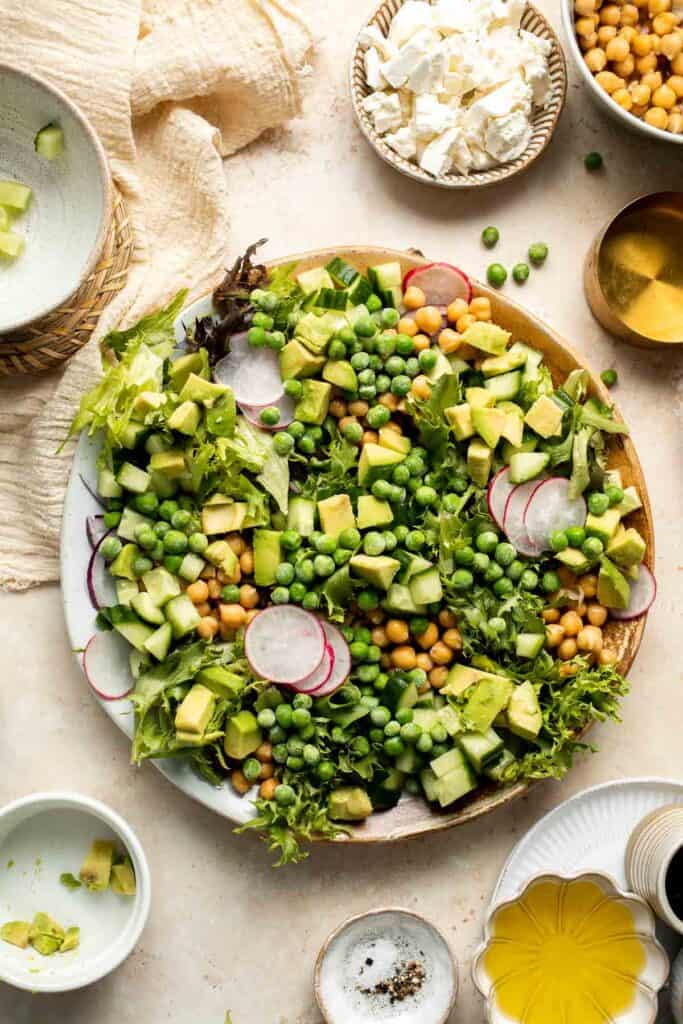
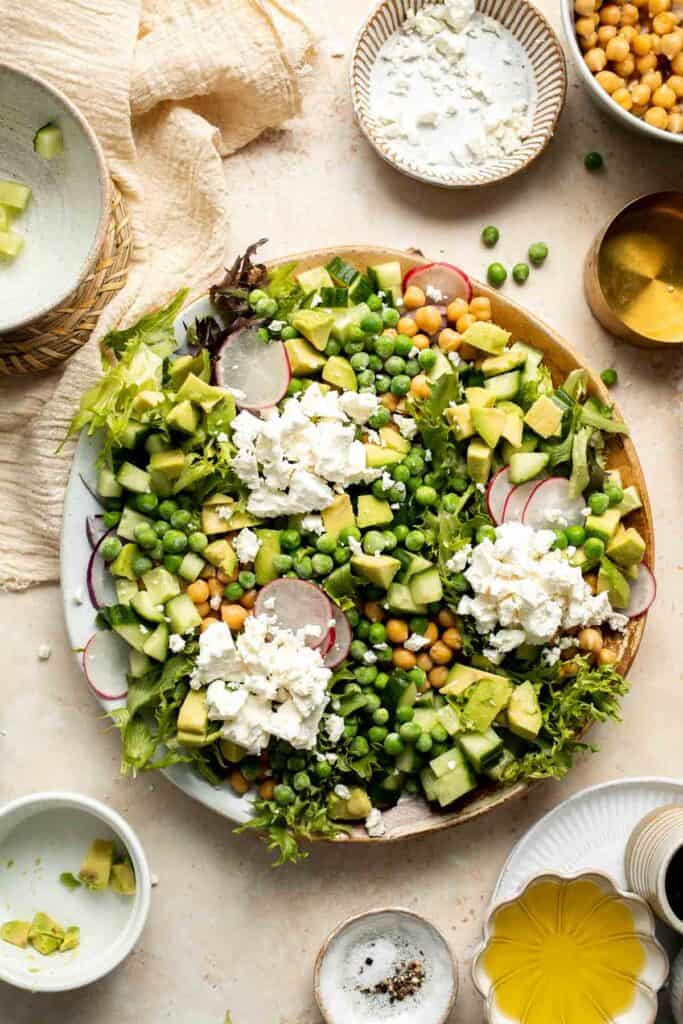
- Make the vinaigrette dressing. In a small mixing bowl, whisk together olive oil, balsamic vinegar, lemon juice, honey, salt, and pepper until smooth.
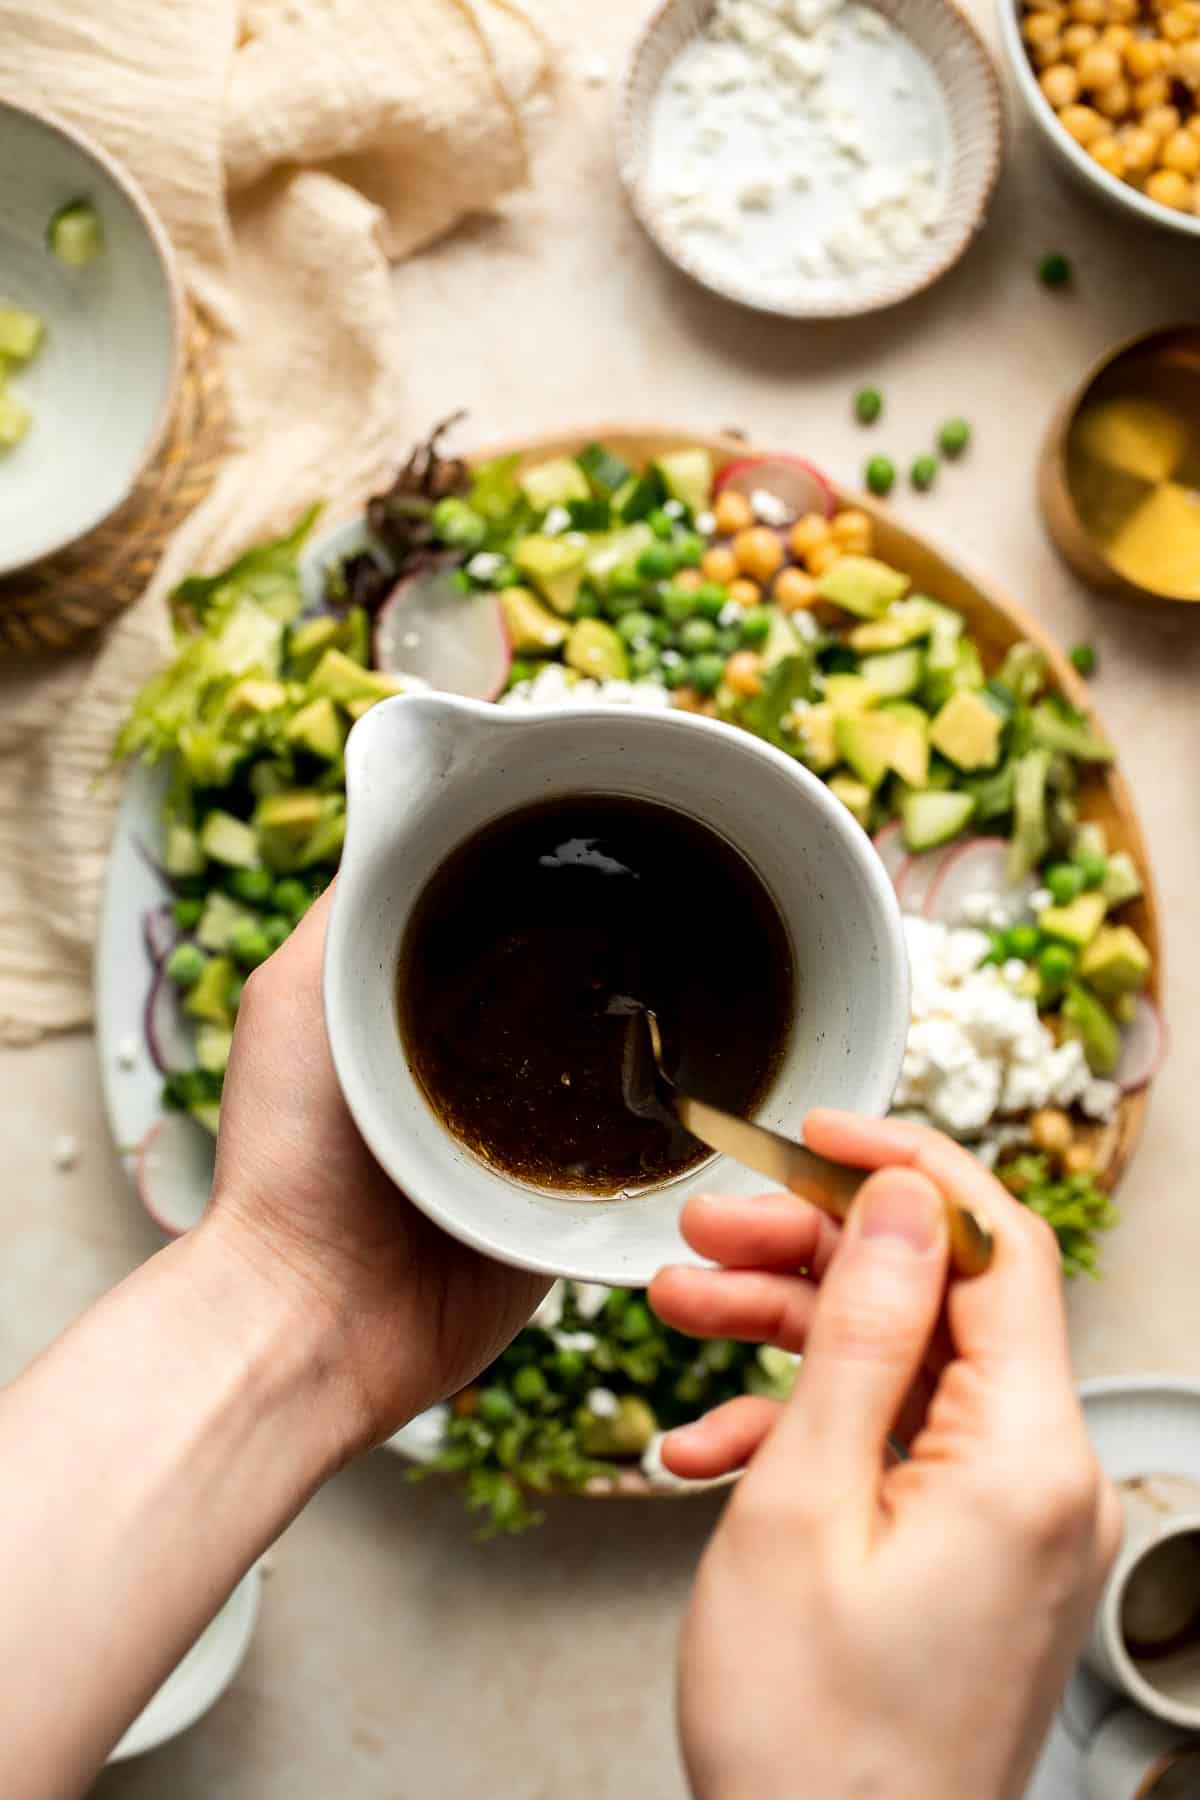
- Serve. Serve with the dressing on the side or drizzle over the salad and toss well. Serve immediately.
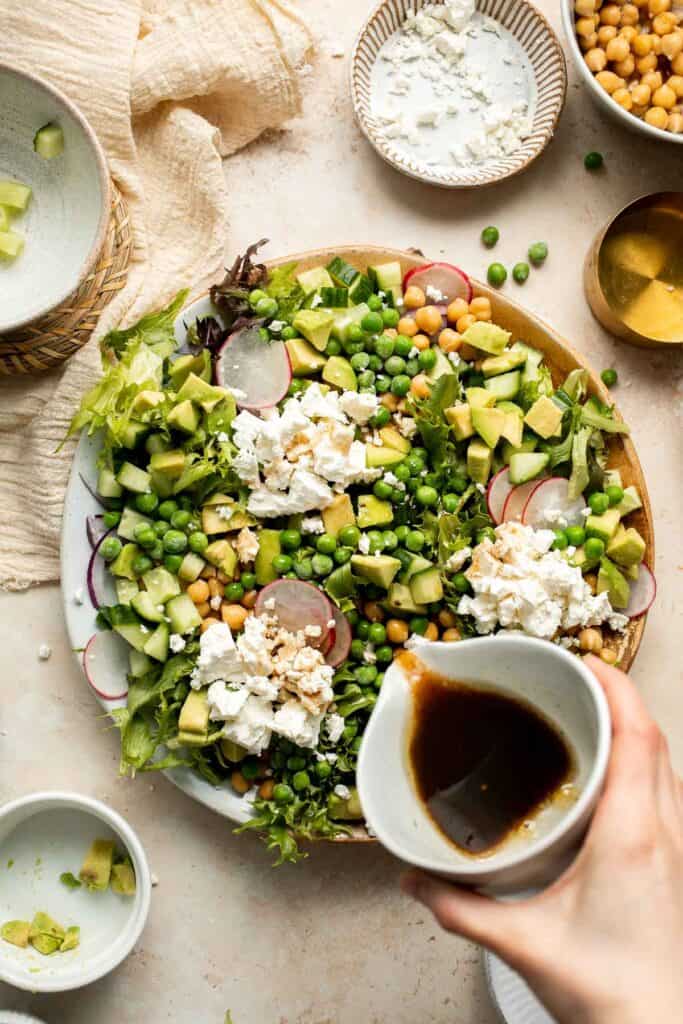
Recipe Variations
- Add a protein. Round out the meal and make this salad go even farther by adding a seared, grilled, or roasted protein! This salad pairs especially well with chicken, steak, tofu, shrimp, or salmon.
- Spice it up. Add some heat to your salad by tossing in sliced jalapenos or adding a pinch of red pepper flakes to the dressing. The cool cucumbers and avocado will balance out the heat.
- Get creative with toppings. Add some texture and crunch to your salad by sprinkling it with nuts, seeds, or crispy bacon bits.
- Add fruit. Add some sweetness to your salad by adding fresh fruits like strawberries, blueberries, or mandarin oranges. It's a perfect balance of sweet and tangy.
- Change the dressing. Toss the salad in your favorite dressing instead. Try it with Honey Mustard Dressing, Italian Dressing, or Creamy Sesame Dressing. You can also keep it simple by using just a drizzle of olive oil and lemon juice for the dressing, and letting the fresh flavors of the veggies shine through.
How to Serve
This spring salad is the perfect side to serve at gatherings as the weather warms up. Serve it at a picnic or cookout alongside usual fair-weather favorites like pasta salad, grilled veggie skewers, and your usual entree.
Some of our favorite recipes to serve with this salad are:
- Parmesan Crusted Chicken
- Pesto Penne Pasta
- Chicken Salad Sandwich
- Spinach and Feta Quiche with Cauliflower Crust
- Salmon Burgers
- Shrimp Alfredo
- Pita Grilled Cheese
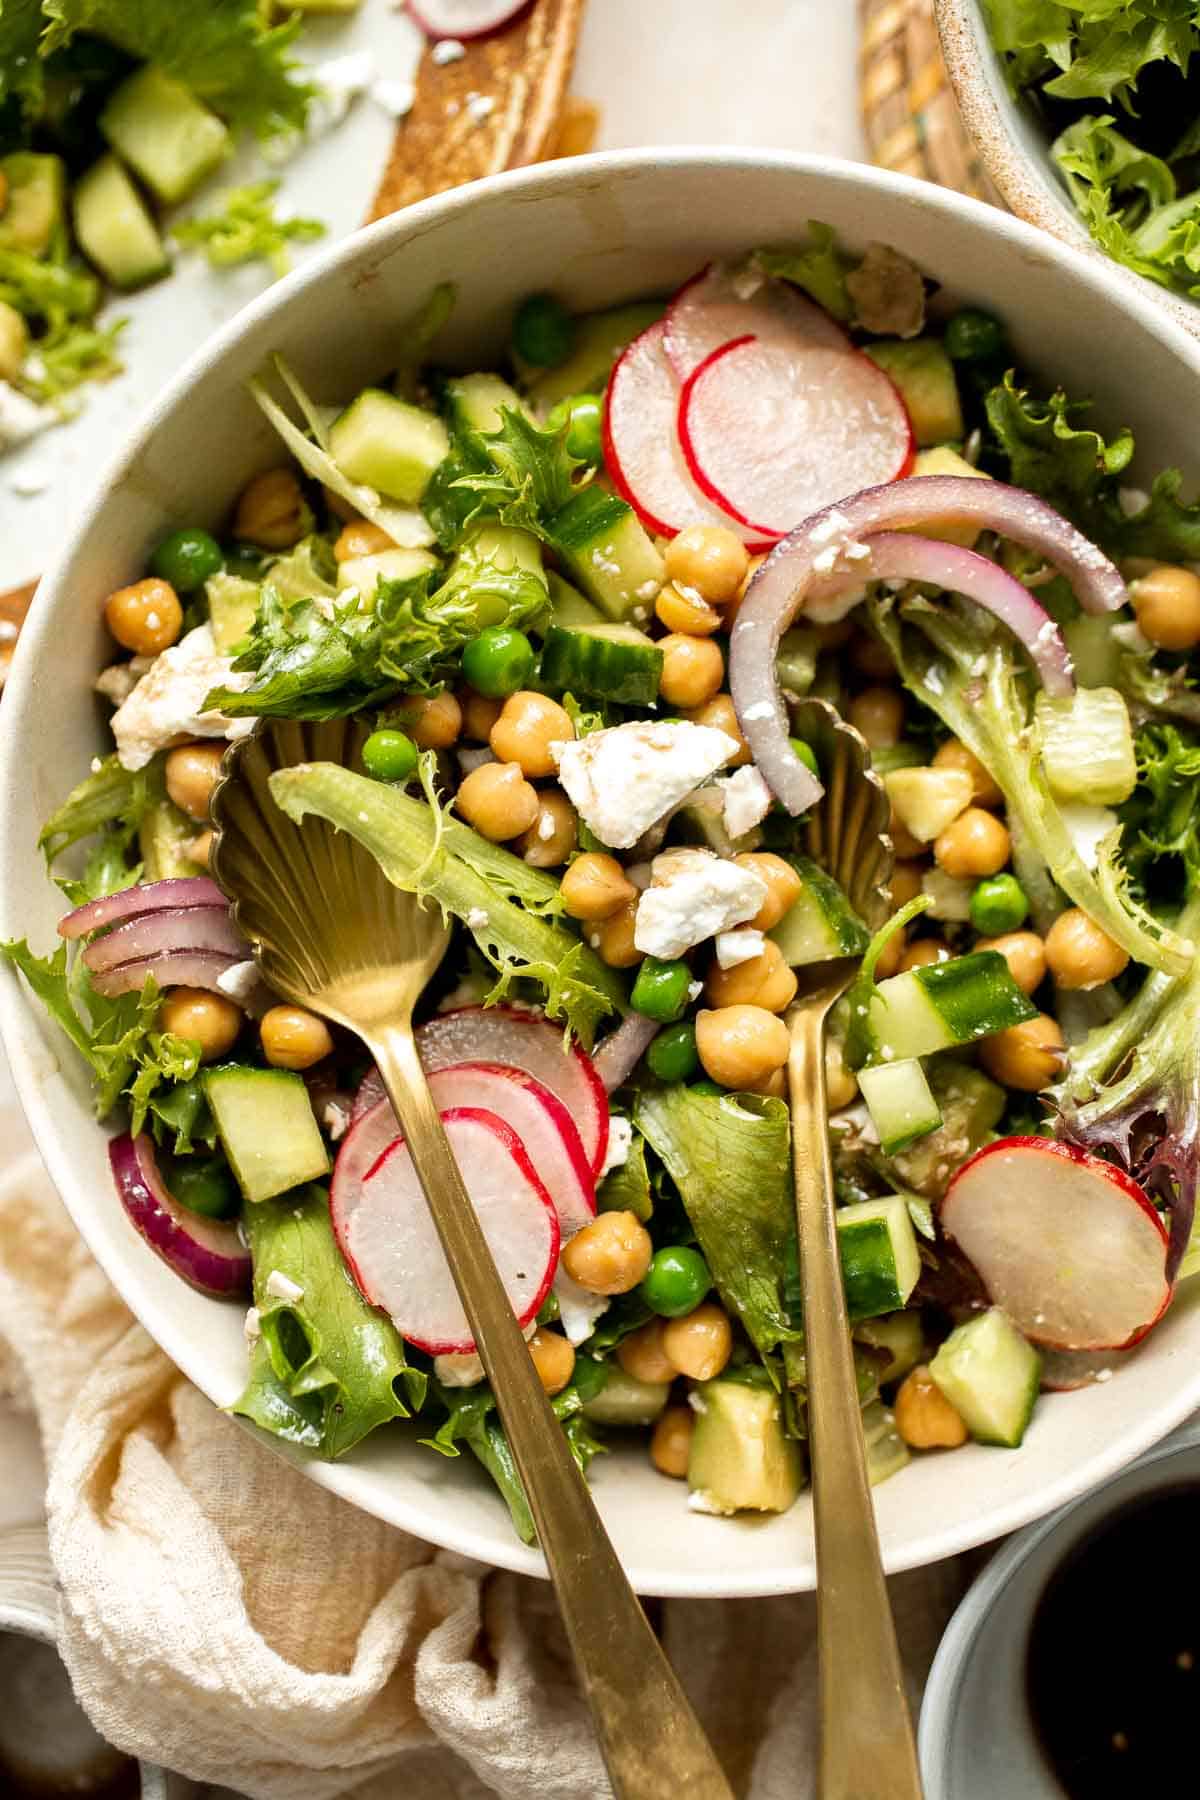
Recipe Tips and Tricks
- Prep your veggies ahead of time. To save time, you can chop your vegetables ahead of time and store them in an airtight container in the refrigerator until ready to use.
- Use a mandolin slicer. For a more professional-looking salad, use a mandolin slicer to thinly slice your vegetables like carrots and cucumbers.
- Serve chilled. To keep your salad crisp and refreshing, store it in the refrigerator until ready to serve. Then add the dressing and toss just before serving.
- Use for weekly meal prep. This salad is a great candidate for batch-preparing lunch or dinner for the week! Toss the ingredients together (but leave the dressing on the side) and store in individual portions for a week of easy, grab-n-go meals.
Storing and Freezing Instructions
How to Store
Transfer leftover spring salad to an airtight container and refrigerate for up to 5 days. You can store the dry salad and dressing separately to prevent the leftovers from getting soggy.
How to Freeze
It's not recommended to freeze salad because the texture of the greens and some of the toppings won't fare well when thawed, but you can freeze the dressing in an airtight container (with some room to expand) for up to 3 months.
More Salad Recipes
- 40 Best Salad Recipes
- Kale Caesar Salad
- Chickpea Greek Salad
- Strawberry Avocado Salad
- Garden Salad
- White Bean Salad
Tried this recipe?
I'd love to hear what you think! Leave a comment and rating below to share your feedback. Your reviews help others discover this recipe and help me keep creating more free recipes for you. Snap a photo and tag me on social media @aheadofthyme too.
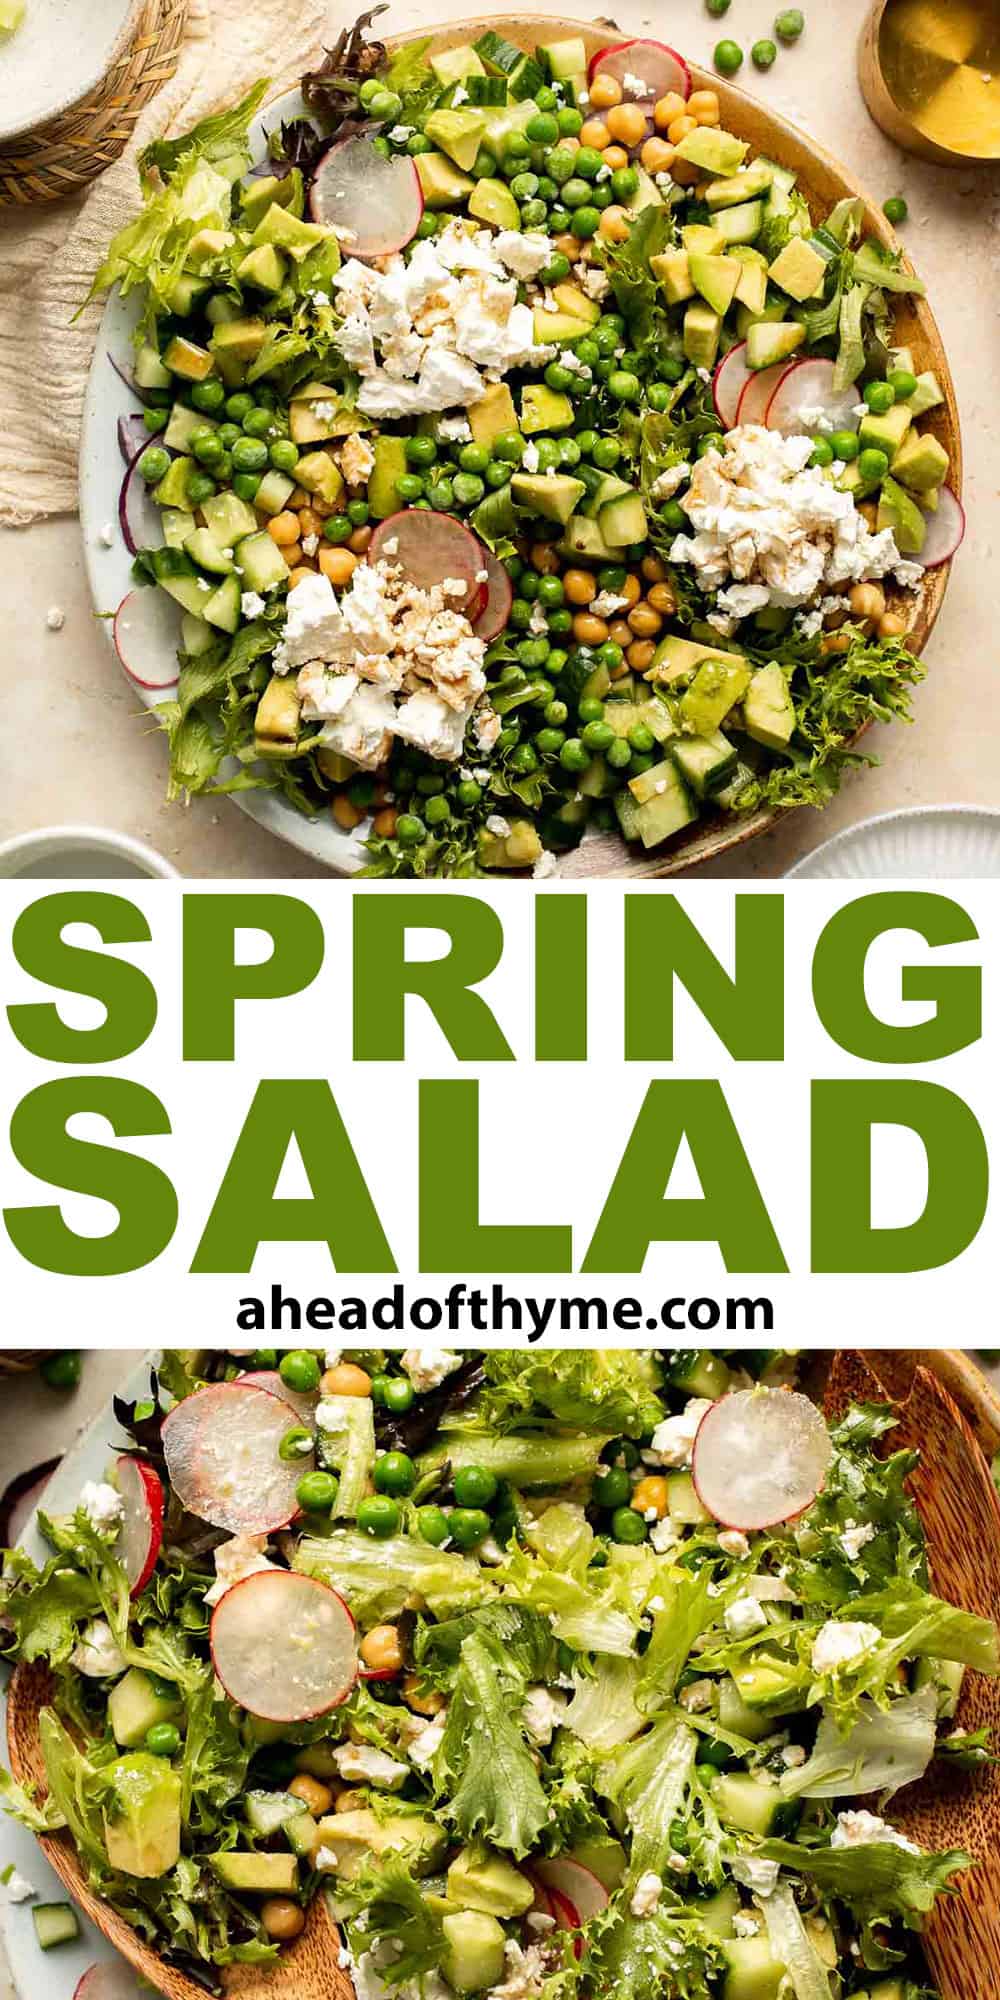
Huevos Rancheros
Huevos Rancheros is a classic Mexican breakfast dish that features fried eggs perched atop a bed of warm tortillas and beans and smothered with delicious pico de gallo salsa. These vegetarian ranch style eggs are hearty, flavorful, and easy to make!
If you're a savory breakfast lover, huevos rancheros is the dish for you! It only takes a handful of ingredients and around half an hour to whip up from scratch. Served thees breakfast tacos hot and topped with crumbly Cotija cheese and slices of avocado - or customize it with your favorite toppings. These Mexican eggs are sure to be your new go-to breakfast or quick lunch recipe.
Why You'll Love these Huevos Rancheros
- Hearty and balanced breakfast. These huevos rancheros are ideal for breakfast or brunch! Packed with veggies, fried eggs, black beans, and optionally topped with avocado and cheese, this dish will satisfy your hunger and sustain you through the day, whether you eat it for breakfast, lunch, or somewhere in between.
- Vegetarian-friendly. Huevos rancheros are a great breakfast or lunch entree for those who don't eat meat or anyone who wants to switch up their morning meal! Plus, it's packed with protein from the beans and eggs.
- Ready in 30 minutes. In addition to being delicious, these breakfast tacos come together quickly. It takes just over half an hour to make and a few simple steps: make the pico de gallo, warm the tortillas, heat up the beans, fry the eggs, and assemble!
- Flavorful and delicious. Huevos Rancheros are bursting with flavor from the salsa, spices, and runny egg yolk. Plus, you can customize it by switching up the toppings or adding in your favorite ingredients to make it your own.
- Serve it for weekend brunch. These Mexican eggs are a great dish to serve for brunch with friends and family. It's easy to make in large batches and can be served family-style - a total crowd-pleaser!
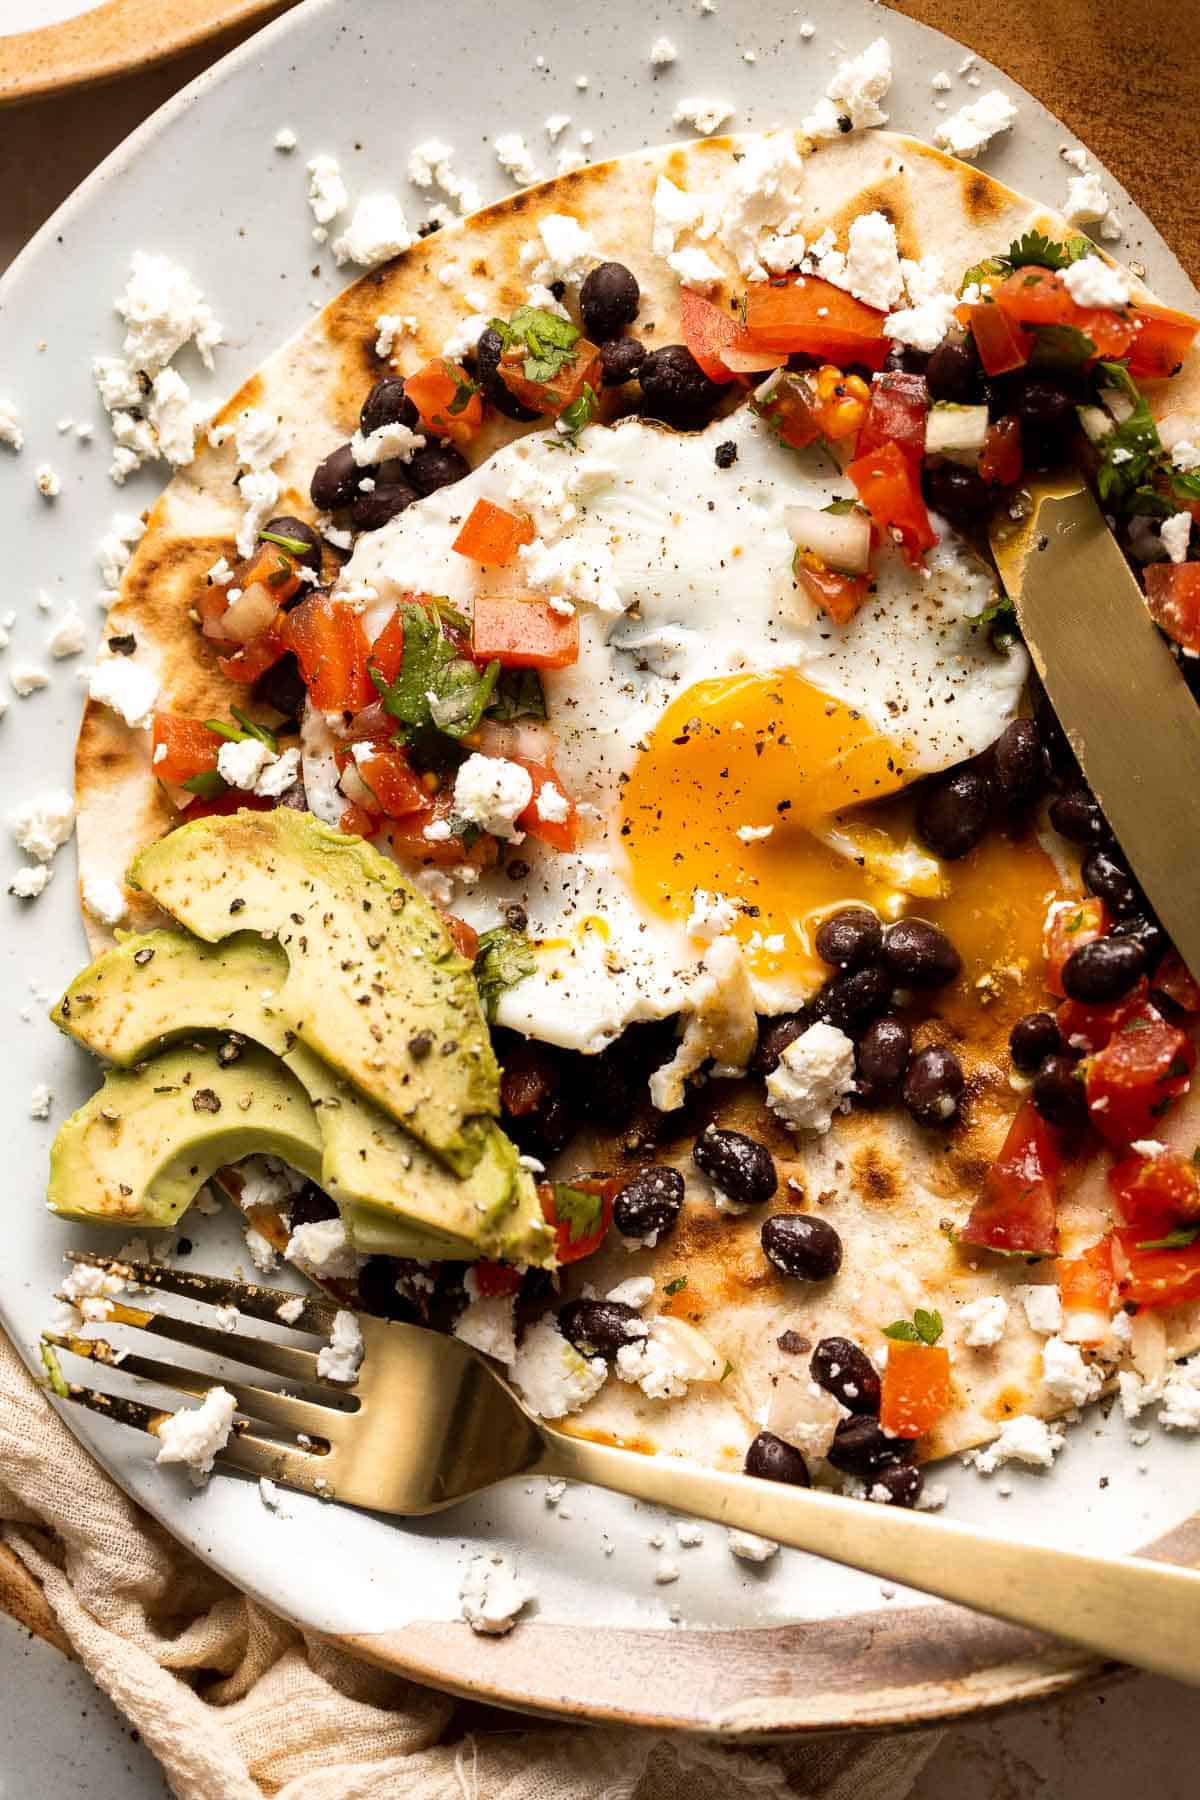
Ingredient Notes
To make these delicious Huevos Rancheros, you will need the following ingredients (full measurements in recipe card below):
Pico de gallo: Make your own pico de gallo using the ingredients below, or use store-bought for convenience. Whichever you prefer!
- tomatoes - plum or Roma tomatoes are the go-to choice for this recipe, but you can also use cherry tomatoes or beefsteak tomatoes if necessary.
- onion - white or yellow onions work best, but you can use whatever kind of onion you have on hand.
- cilantro - not a fan of cilantro? Swap it for another soft herb like basil or parsley, or omit it altogether.
- lime juice - fresh squeezed lime juice is the most flavorful, but you can use lime juice concentrate if it's faster and easier for you!
- salt
Black beans: pinto beans will also work for the huevos rancheros. You can also replace the black beans with Refried Beans. Just warm them up and spread it on the tortillas.
Tortillas: the type of tortillas you use are completely up to you, whether you prefer corn or flour tortillas and store-bought or homemade. Use corn tortillas to keep the dish gluten-free.
Eggs - fry the eggs in olive oil or swap for avocado oil or another neutral oil with a high smoke point. You can use whole eggs (as is traditional in this recipe) or use egg whites only if you prefer them yolk-less.
Optional Toppings
- cotija cheese - you can also use feta, goat cheese, or a vegan cheese substitute.
- avocado - you can also serve with store-bought or homemade guacamole for a similar flavor.
- dressing - feel free to top the tacos with sour cream, chipotle mayo or cilantro lime dressing.
You will also need measuring cups and spoons, mixing bowl, saucepan, and skillet.
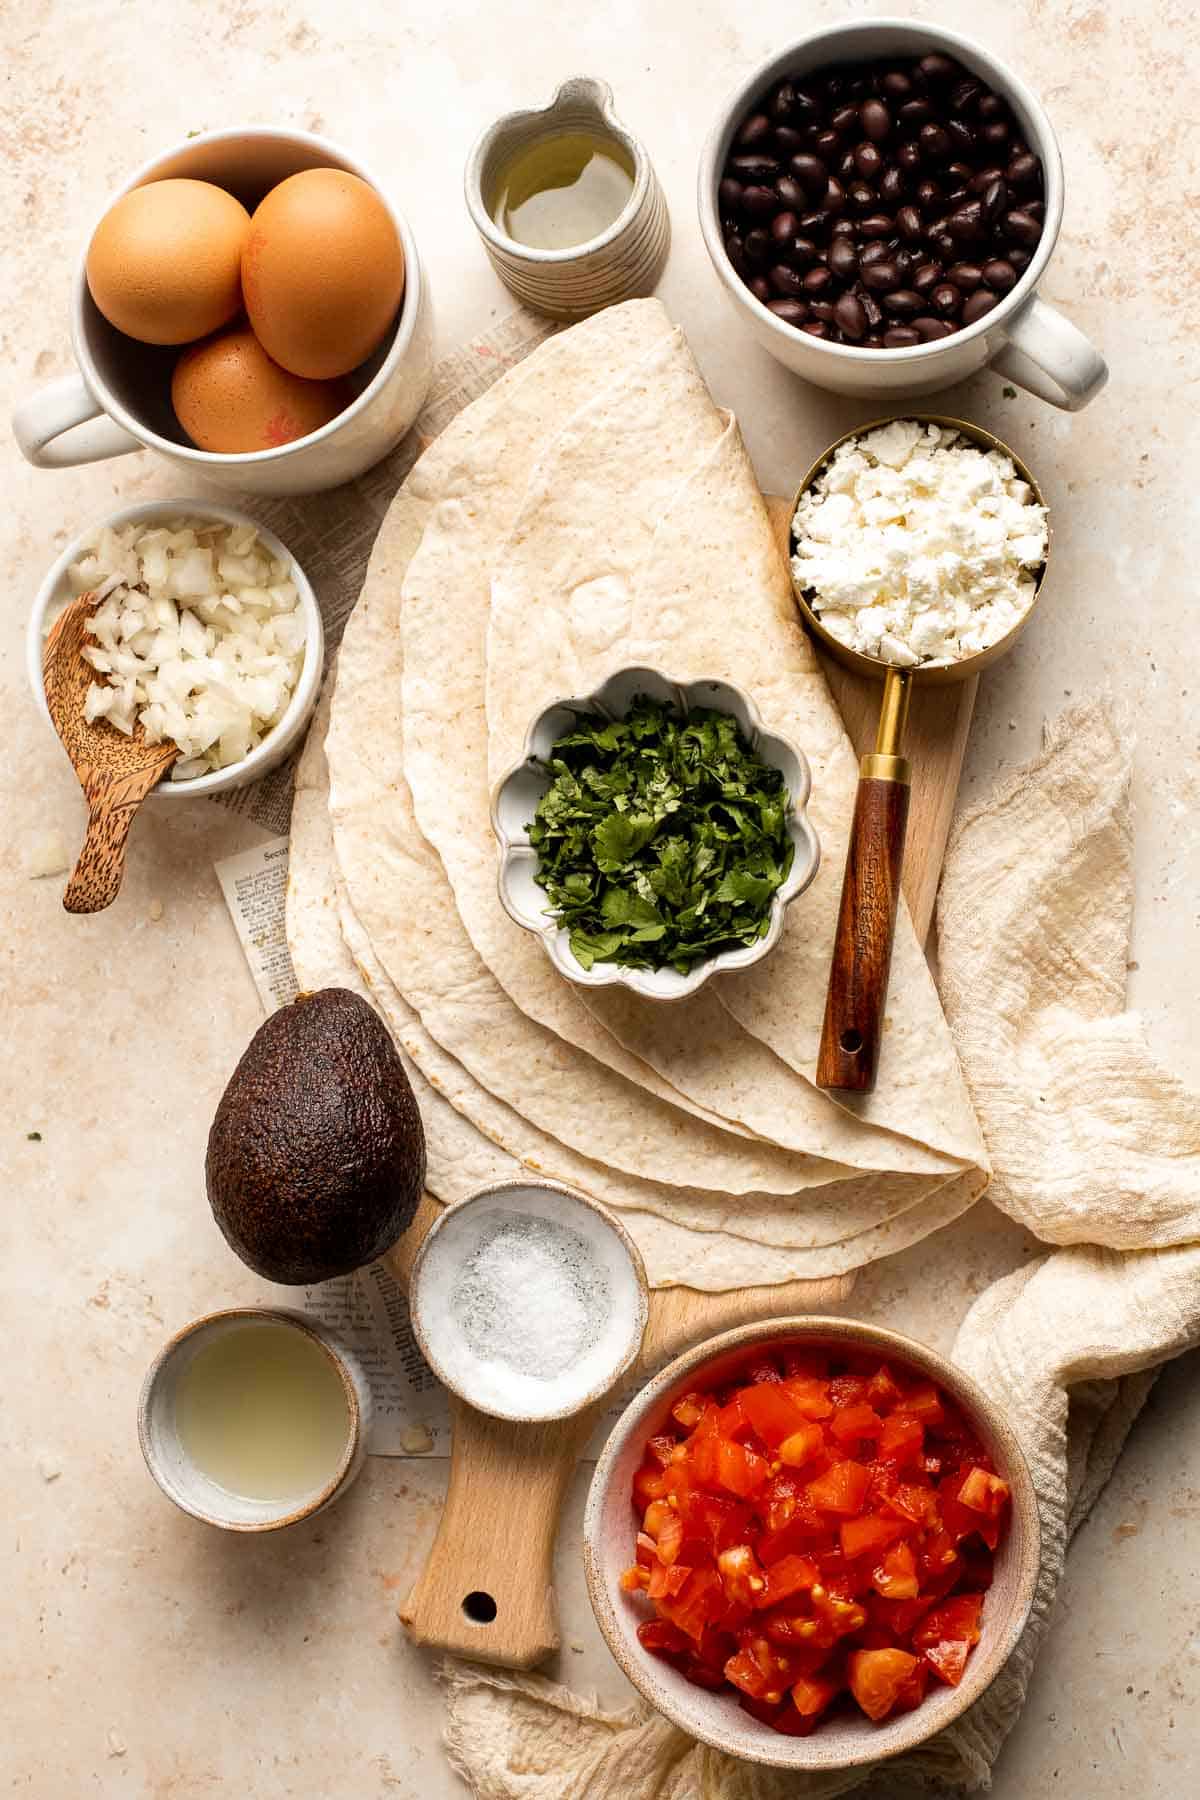
How to Make the Best Huevos Rancheros
- Make the pico de gallo. In a large mixing bowl, add tomatoes, onion, cilantro, lime juice, and salt. Mix well and set aside.
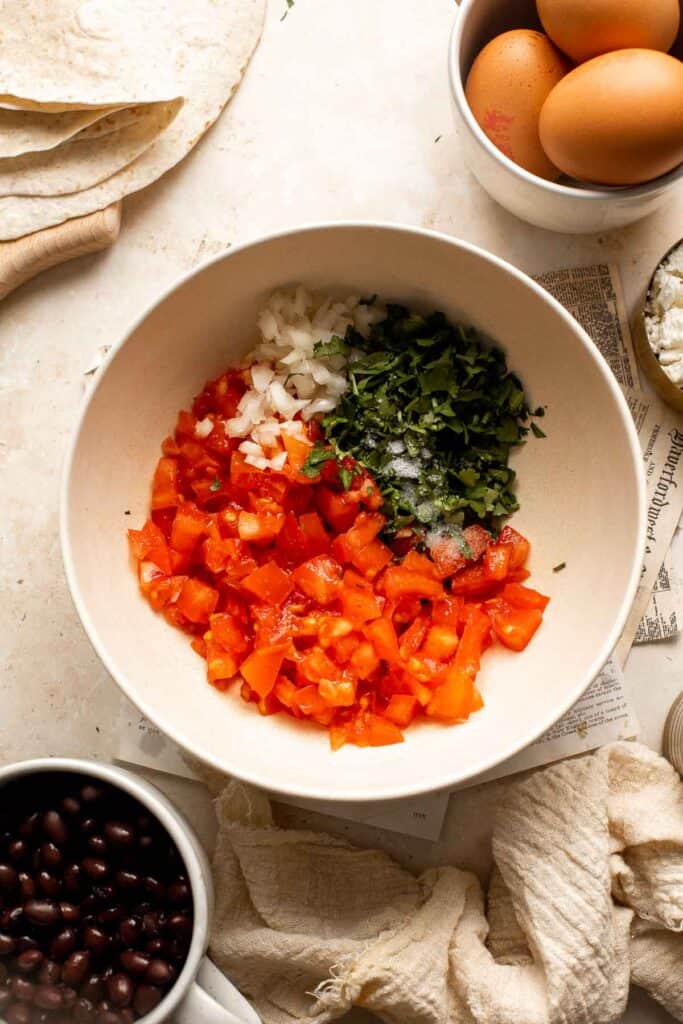
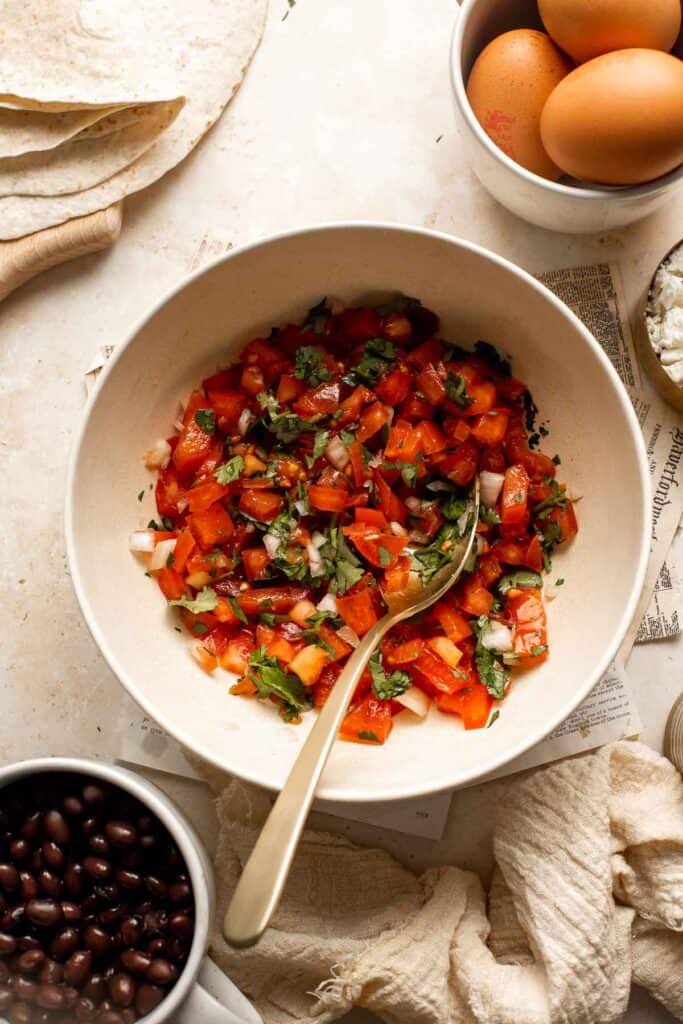
- Heat the black beans. Add the black beans into a pot and heat them on low heat until warmed through, about 5 minutes, stirring constantly. If the beans get too dry, add a tablespoon of water at a time until you reach the right consistency. Set aside.
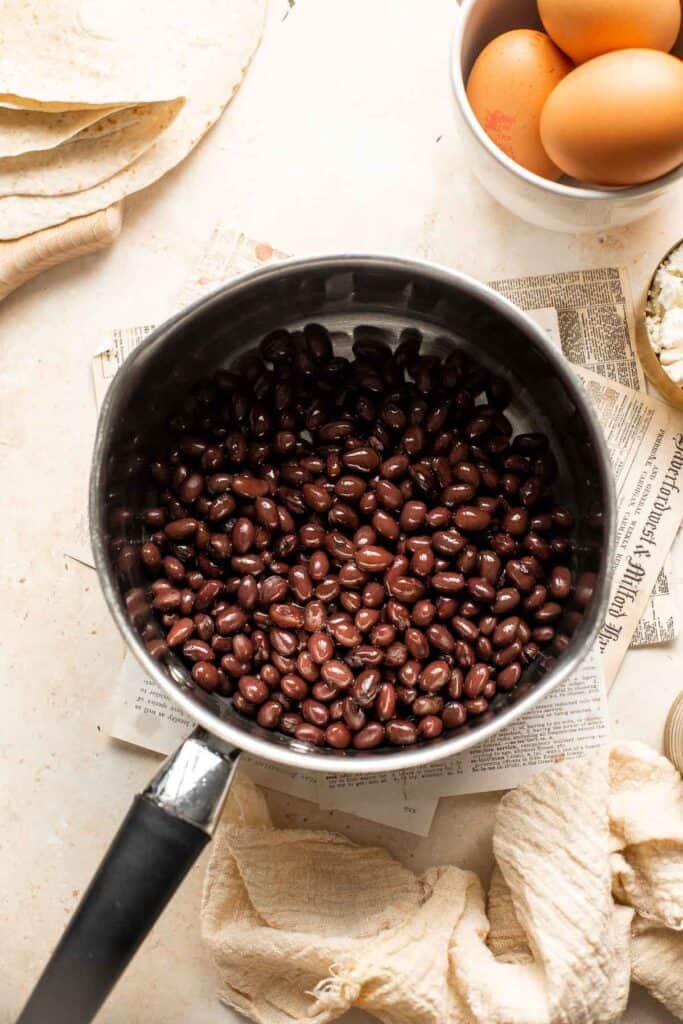
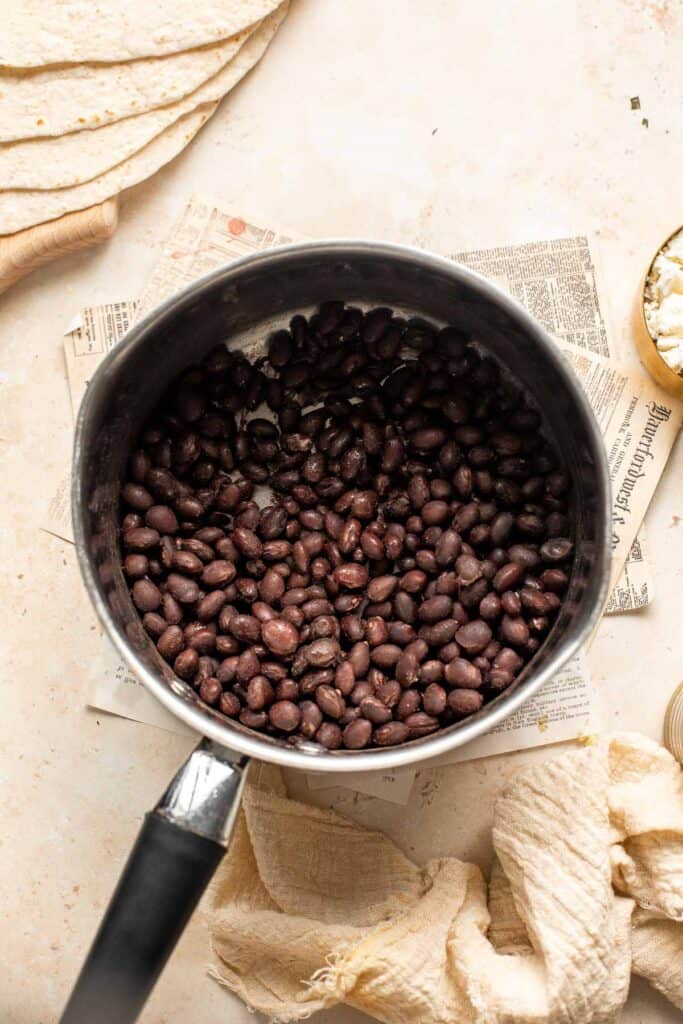
- Warm the tortillas. Heat the tortillas according to the package instructions, or heat in an ungreased cast-iron skillet over medium-high heat for 30 seconds per side. You can also heat it directly on a gas burner for a few seconds to get char marks on the edges. Repeat with all tortillas.
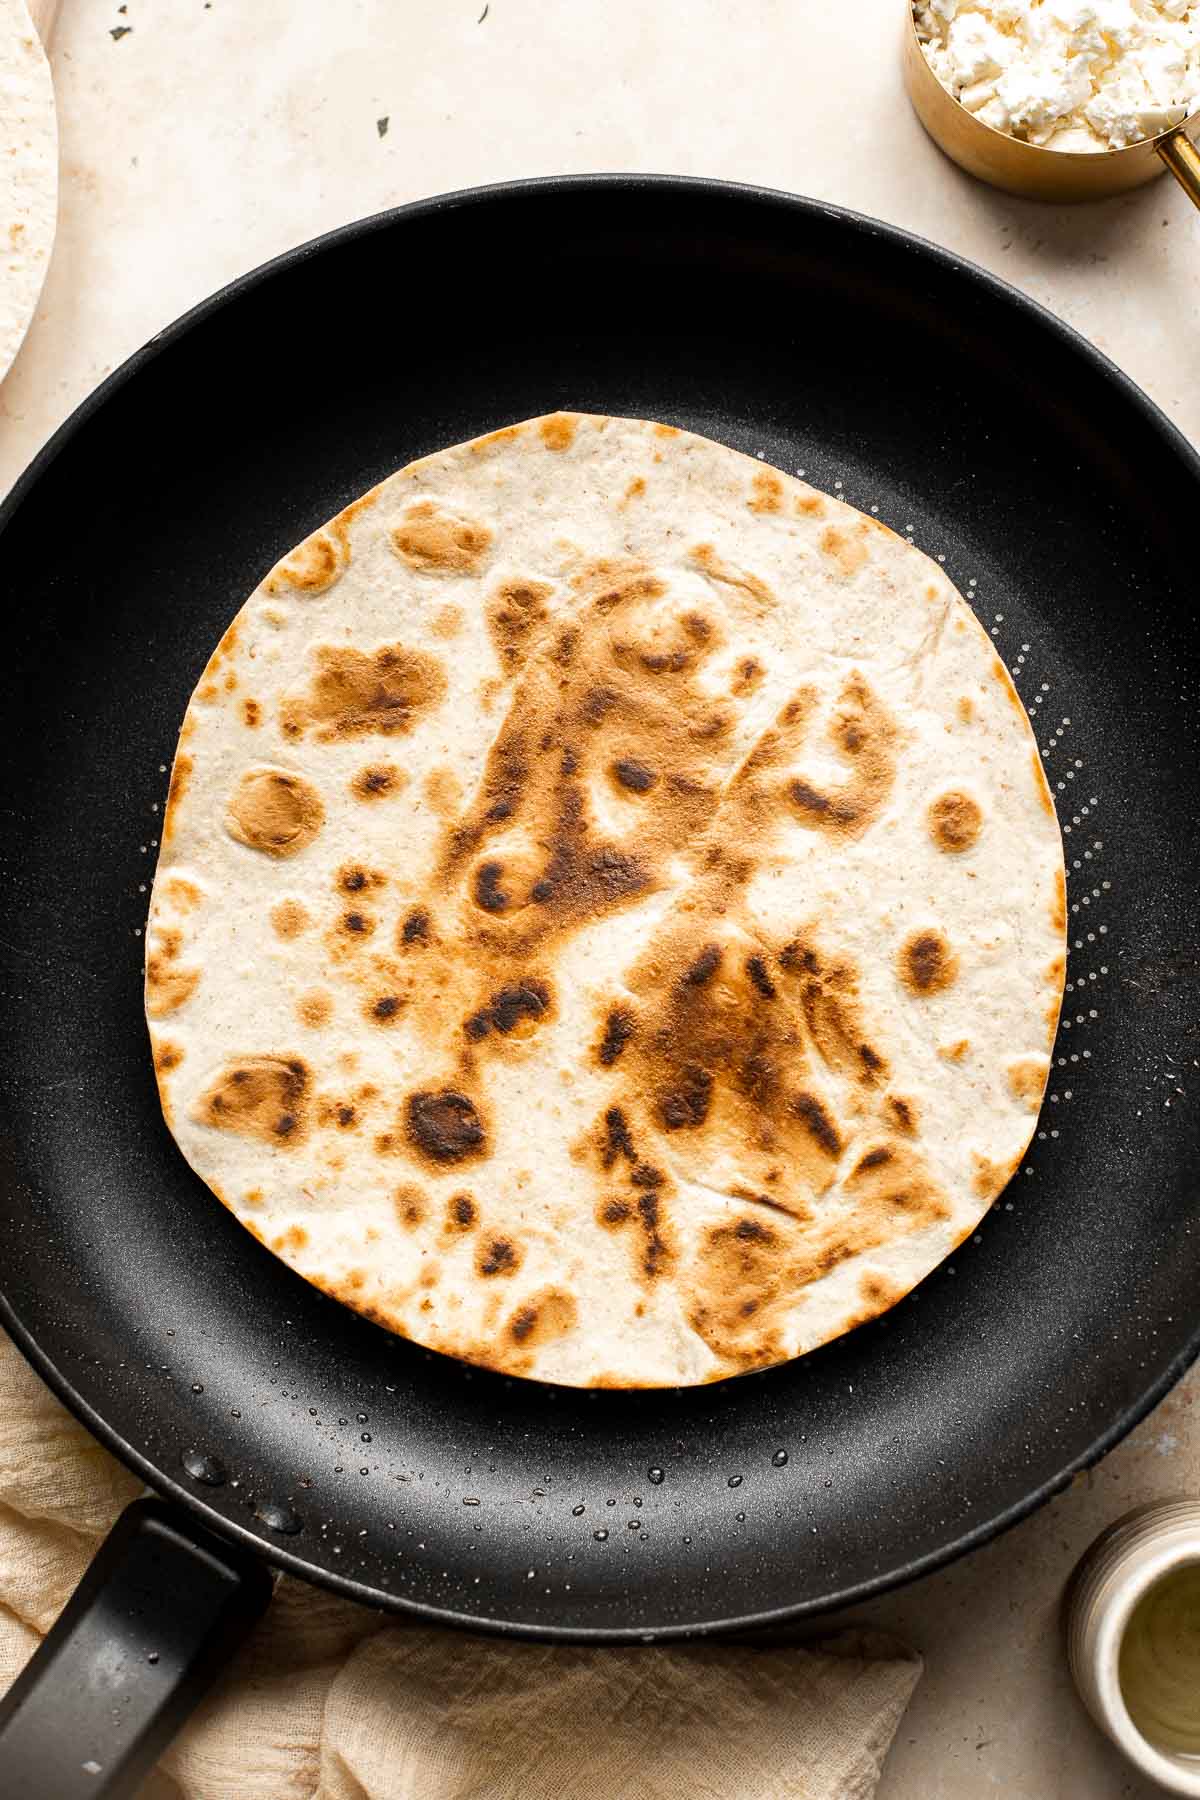
- Fry the eggs. In the same skillet, heat oil over medium heat until the hot oil sizzles, about 1 minute. Carefully crack the eggs spaced evenly apart onto the skillet without breaking the yolk. Fry the eggs until the whites are set and the yolk reaches desired doneness, about 3-5 minutes.
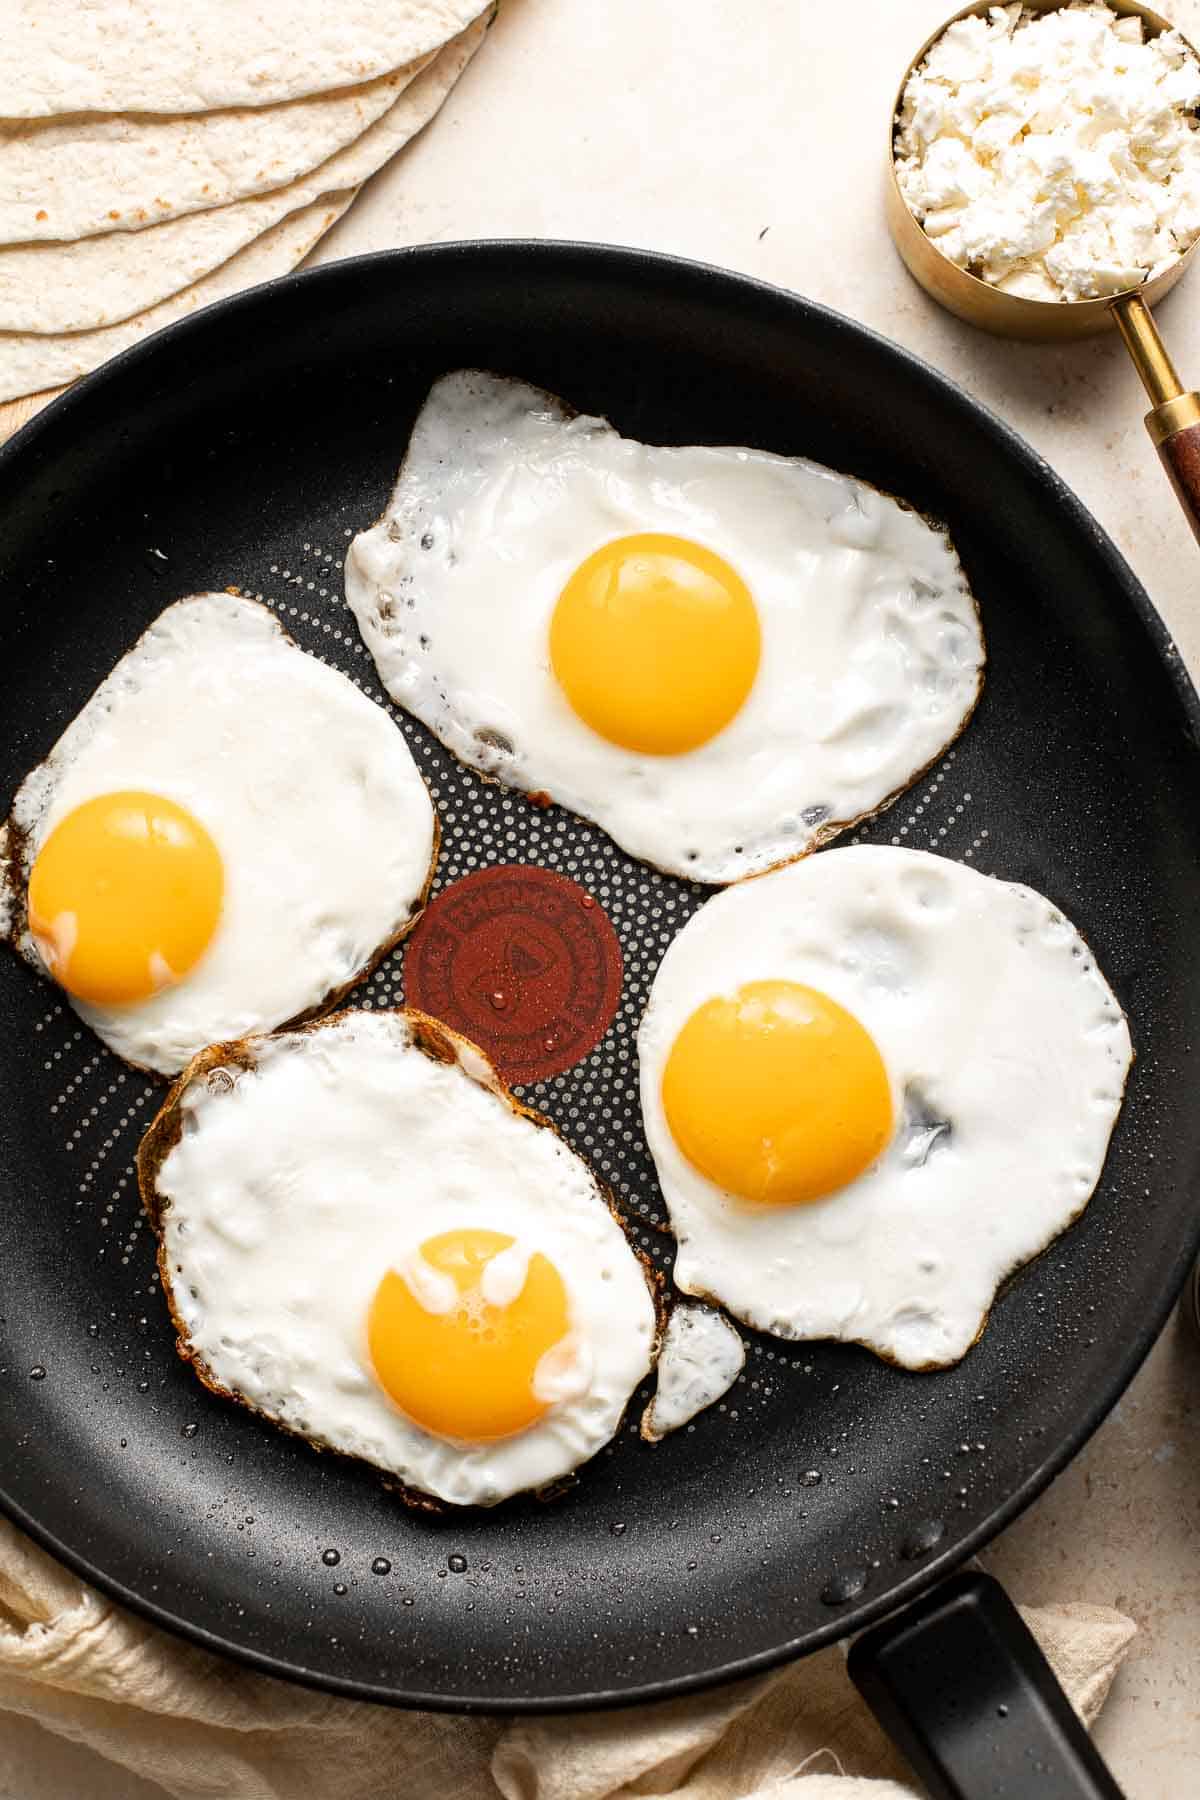
- Assemble. Spoon ¼ of the warm fried beans and spread evenly onto each tortilla, top with a fried egg, pico de gallo and sprinkle of cheese.

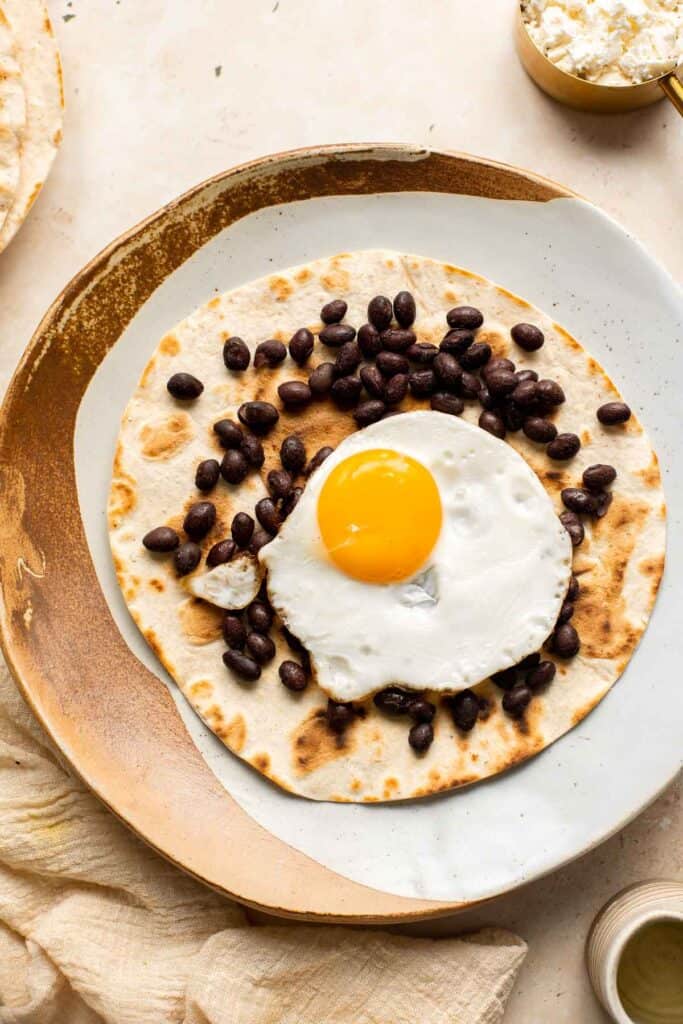
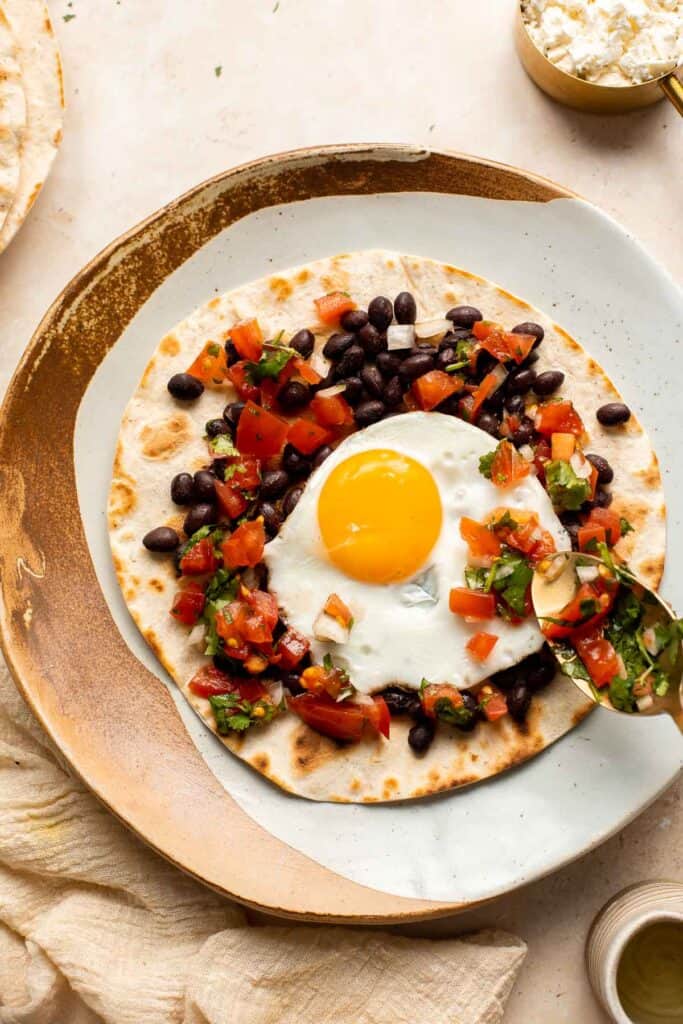

- Serve. Serve on a platter with your favorite toppings such as sliced avocados, sour cream, or cilantro.
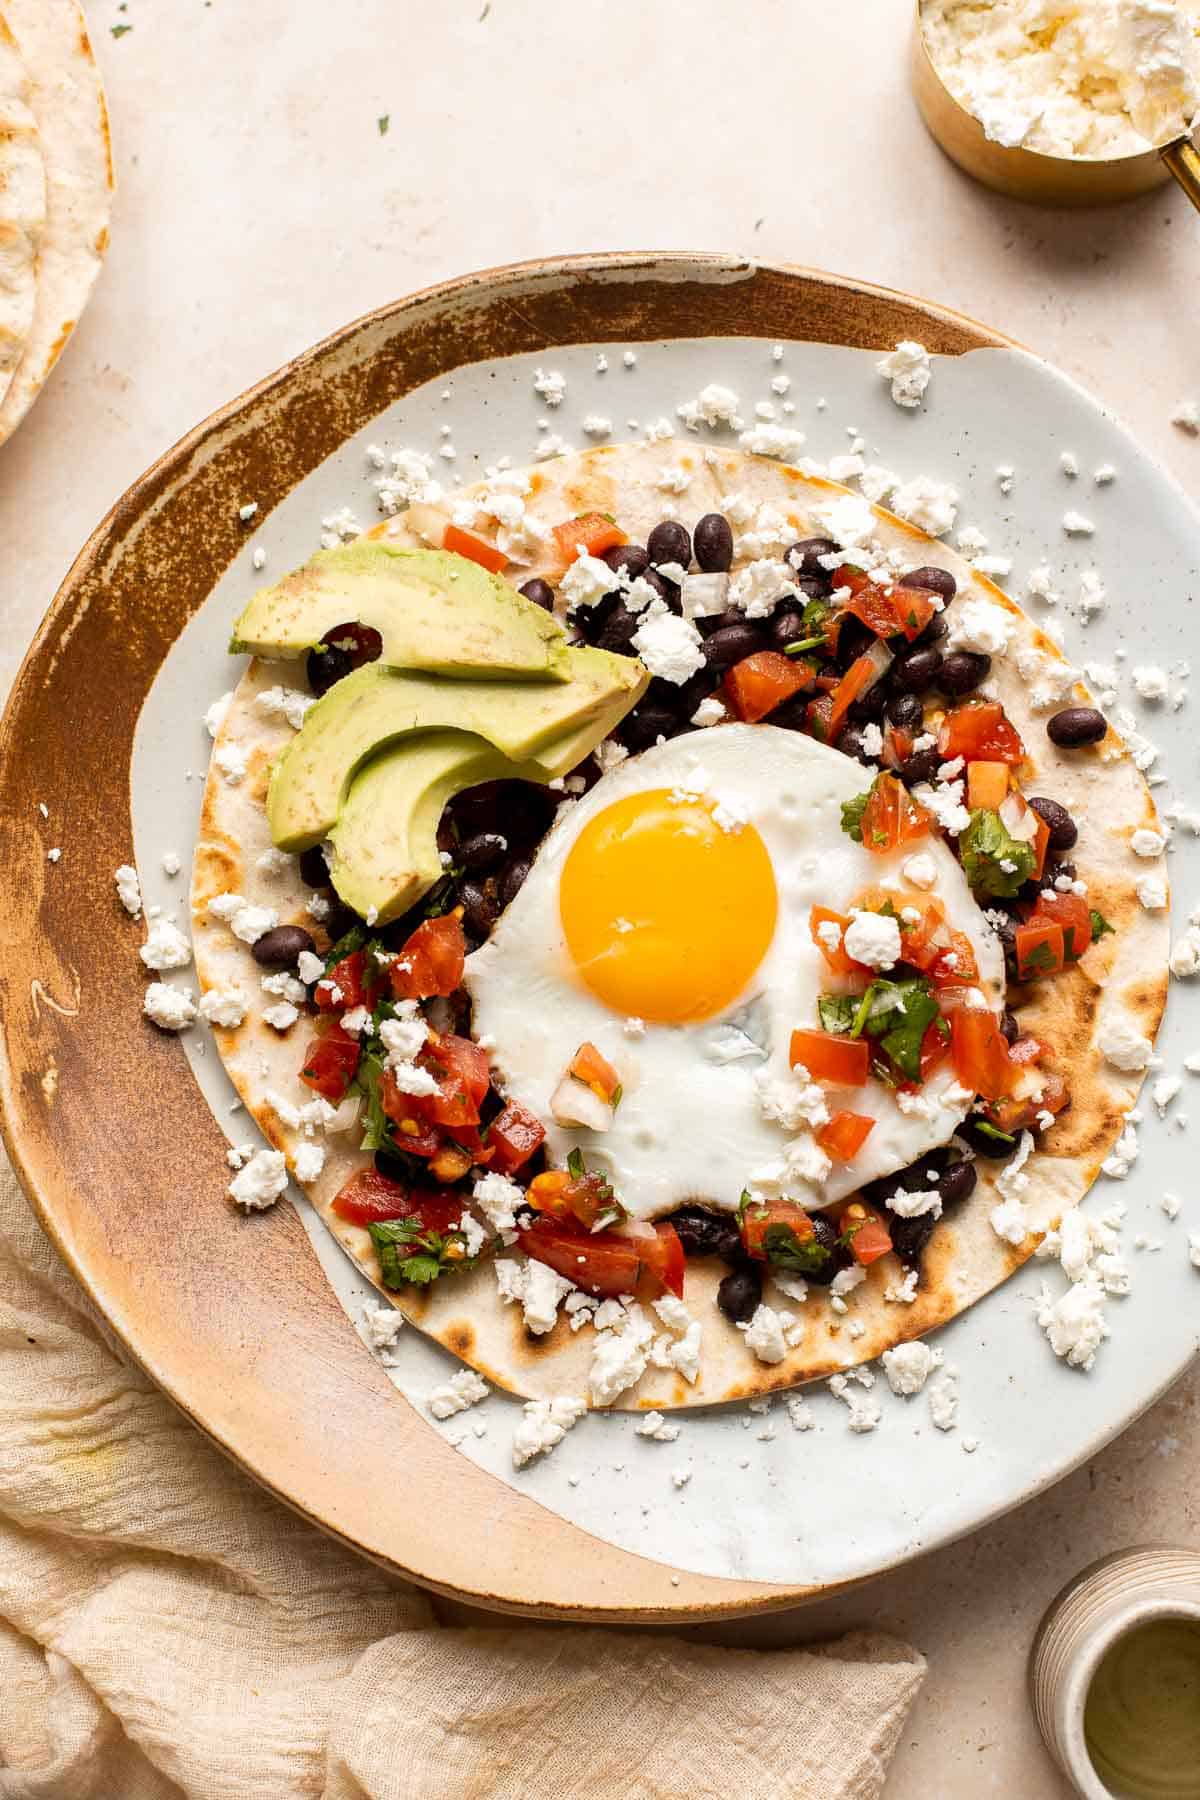
Recipe Variations
- Spice it up. For those who like it hot, add some sliced jalapeño peppers or red pepper flakes to your huevos rancheros for a spicy kick.
- Add protein. Add in some cooked chorizo, ground beef (cooked in some onions and spices), carne asada, carnitas (pulled pork), or chicken. Try shredded chicken or chop up some Mexican chicken breast for the best flavor.
- Make it vegan with tofu. To make this recipe vegan, use crumbled tofu instead of eggs. Scramble some crumbled tofu with onions, bell peppers, and spices like cumin and chili powder. You will also need to substitute the cheese with a vegan cheese substitute or leave it out completely.
- Add veggies. Some great veggies that you can add to these are cooked corn, sweet potatoes, bell peppers, or mushrooms. Try replacing the black beans with sweet potato hash. Simply, sauté diced sweet potatoes with onion, garlic, and spices like paprika and cumin until they are tender and caramelized.
- Top with avocado. Slice up some fresh avocado and add it on top of your Huevos Rancheros for a creamy and healthy addition. It's a great way to get in some healthy fats.
How to Serve
Huevos Rancheros is a delicious meal served on its own with your favorite toppings such as avocado, sour cream, and chipotle mayo. Or pair these Mexican eggs with some classic Mexican side dishes including:
- Refried Beans
- Guacamole
- Lime Cilantro Rice
- Mexican Street Corn Salad
- Fried Plantains
- Vegetarian Chili
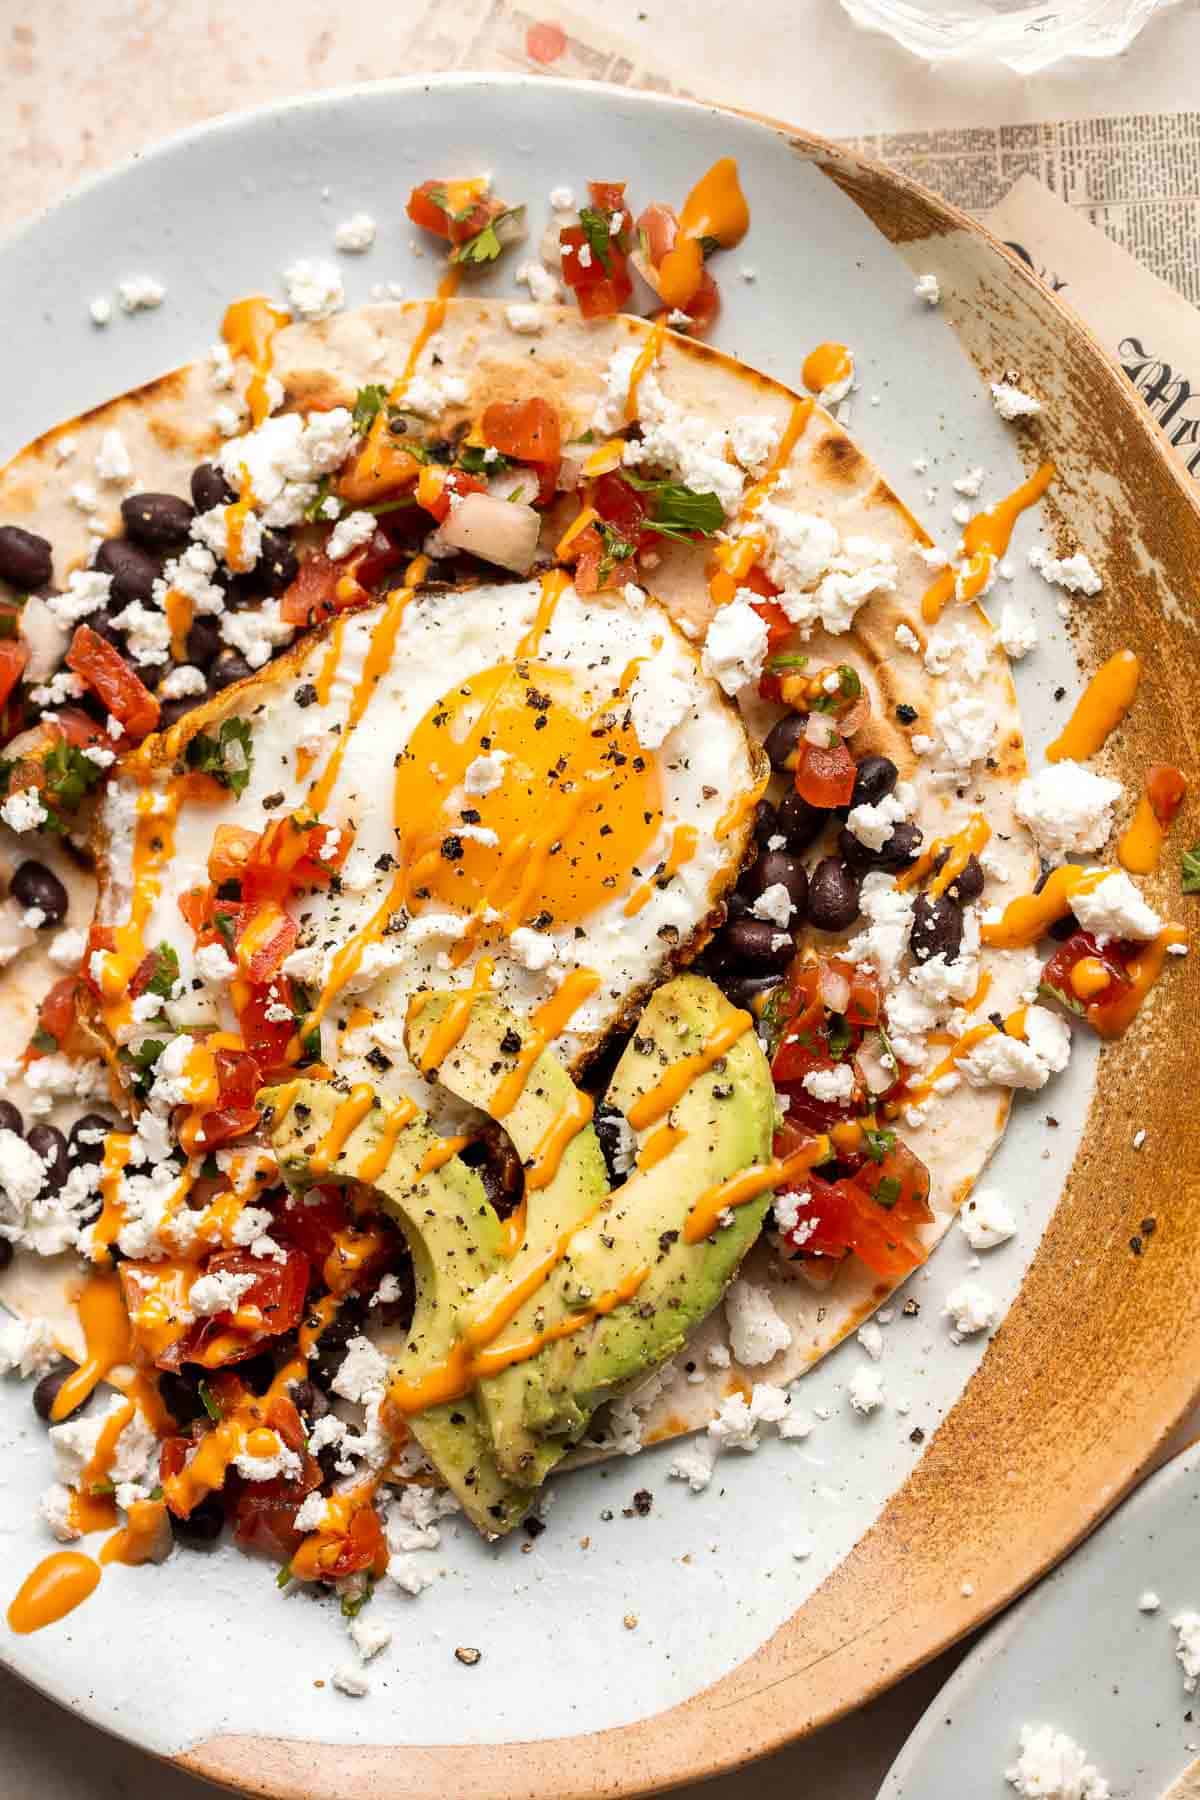
Recipe Tips and Tricks
- Toast the tortillas. Make sure to heat up the tortillas before serving, either by toasting them on a dry skillet or grilling them. This step will make the tortillas more pliable and flavorful.
- Don't overcook the eggs. For the perfect huevos rancheros, the eggs should be cooked just until the whites are set but the yolks are still runny. This will give the dish a creamy texture and allow the yolk to mix with the other ingredients when eating.
- Make the pico de gallo ahead of time. Whether you want to save yourself even more time, or you're eating this breakfast tacos on repeat, you can make a batch of the pico de gallo up to 4 days ahead of time to make the recipe even easier on yourself.
- Batch prep for large crowds. One of the beauties of this recipe is that it's easy to make for 4, 8, or even 12 people - just start an assembly line and batch prep the appropriate quantity of the components. Once everything is ready, you can build the dish and serve it to everyone at once!
- Experiment with toppings. Though there are some standard versions of huevos rancheros, there's no one right way to do it, so you can get creative and adjust the dish to your preferences! Add red or green salsa, try different herbs, or poach the eggs instead of frying them - it's all up to you.
- Serve immediately. Like most breakfast dishes, huevos rancheros is best served immediately after cooking. Serve hot with your favorite toppings and enjoy!
Storing Instructions
Make Ahead Instructions
You can make the pico de gallo up to 4 days in advance and store in an airtight container in the refrigerator. If you are making beans from scratch (rather than using canned beans), you can also make it several days in advance and store in an airtight container in the fridge. You can also prepare any of the toppings and store in airtight containers in the fridge until ready to serve.
How to Store
Huevos rancheros are best served fresh. If you must, you can refrigerate huevos rancheros in an airtight container for up to 2 days.
How to Reheat
Reheat in a microwave on high for 30-60 seconds or in a skillet over medium-low heat until warmed through. Note that the tortillas will soften and the eggs will be cooked fully (won't be runny.
More Recipes
- 20 Best Egg Recipes
- Tex Mex Egg Muffins
- Vegetarian Breakfast Quesadillas
- Avocado Toast with Poached Egg
- Mediterranean Scrambled Eggs
- Deviled Eggs
Tried this recipe?
I'd love to hear what you think! Leave a comment and rating below to share your feedback. Your reviews help others discover this recipe and help me keep creating more free recipes for you. Snap a photo and tag me on social media @aheadofthyme too.

Chicken Meatballs
Baked Chicken Meatballs are tender, juicy, and flavorful (no dry meatballs here!). Made in just 45 minutes using simple ingredients, these chicken bites are great for a quick and easy lunch, dinner, and anything in between. The whole family will love them!
These chicken meatballs really couldn't be any easier to make: just combine the ingredients, shape, and bake! You can also cook them even faster in the air fryer. They're freezer-friendly and can be served just for any occasion. Pair them with marinara sauce for dipping or serve alongside pasta or roasted vegetables for a healthy and satisfying meal.
Why You'll Love these Chicken Meatballs
- Quick and easy to make. In a time crunch? These chicken meatballs are easy to make following a few simple steps. They take only 20 minutes to prep from scratch and then another 25 minutes in the oven!
- Loaded with flavor. These chicken meatballs are juicy and bursting with flavor from the simple combination of herbs and spices in this recipe. Plus, you can easily customize the flavor by switching with your favorite seasonings.
- Better than store-bought. Once you make these chicken meatballs, you'll never be tempted to buy them from the freezer aisle again. The superior, wholesome ingredients and easy preparation makes them the better choice every time. No artificial ingredients or flavors here!
- Super versatile. These tasty chicken meatballs can pull triple duty - acting as an entree, side, or appetizer depending on the occasion and what you choose to serve with them!
- Great for meal prep. You can make a big batch of these baked chicken meatballs and store them in the fridge or freezer for easy meal prep throughout the week. Store them in meal prep containers along with Broccoli Rice and Oven Roasted Vegetables for easy to heat work lunches.
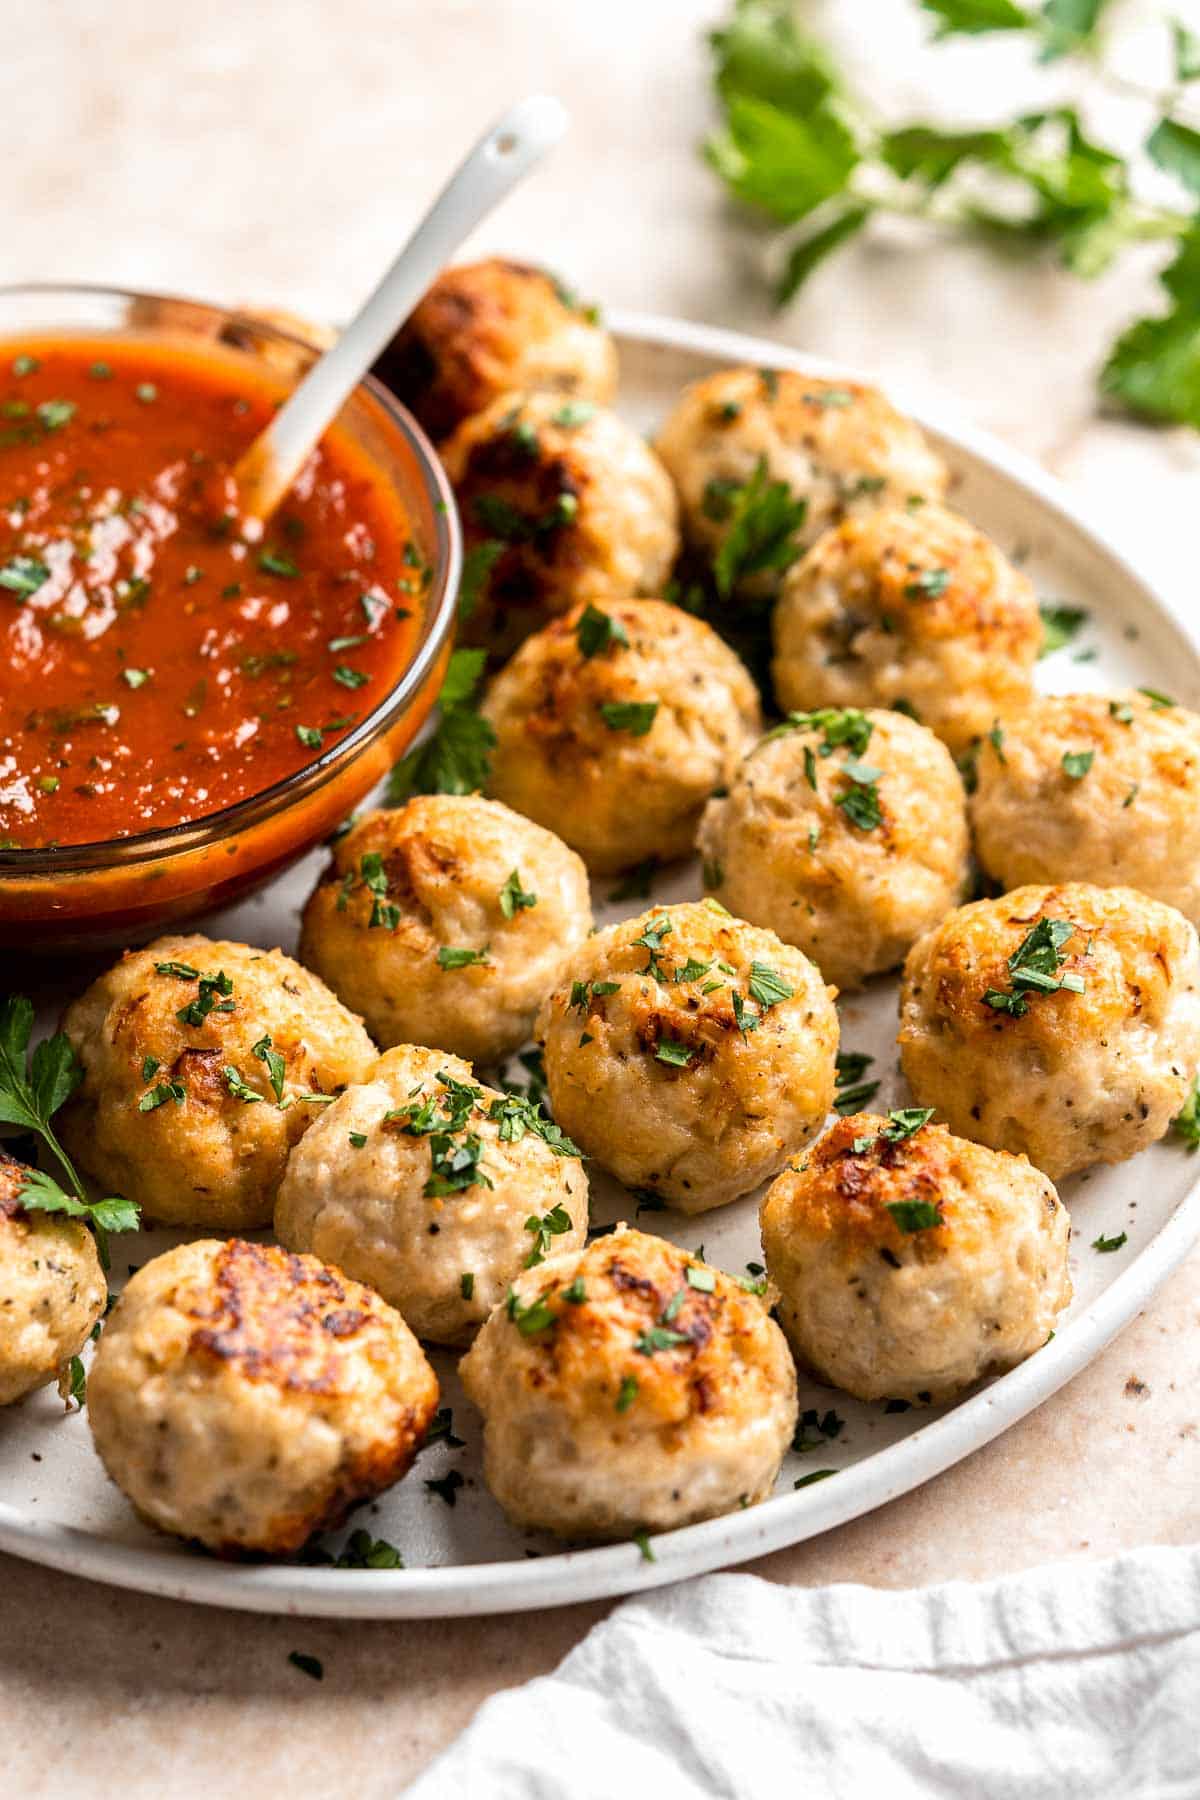
Ingredient Notes
To make these easy Chicken Meatballs, you will need the following ingredients (full measurements in recipe card below):
- ground chicken - if you don't have chicken on hand, you can use ground turkey or ground beef and make different kind of meatballs.
- garlic - you can save a few minutes by using pre-minced garlic. Just substitute 1 teaspoon per clove.
- onion - white or yellow onions work best for this recipe, but you can use whatever kind of onion you have on hand.
- breadcrumbs - homemade or store-bought breadcrumbs will both work. If you use seasoned breadcrumbs, adjust the amount of seasoning you add to the meatballs.
- egg - out of eggs? Whisk 3 tablespoons of aquafaba (the liquid from a can of chickpeas) and use it in place of each egg.
- oil - you can use your favorite cooking oil here, whether it's olive, avocado, or vegetable oil.
- Italian seasoning - you can make your own Italian seasoning by blending rosemary, basil, thyme, oregano, and marjoram, or use a combination of whichever ones you have on hand.
- salt and pepper
- parsley - if you don't have fresh parsley on hand, you can swap it for a similar soft herb like cilantro, basil, dill, or fennel. The flavor will differ based on what you choose.
- marinara sauce - you can use homemade marinara sauce or store-bought, or substitute it altogether for your favorite dipping sauce.
You will also need measuring cups and spoons, mixing bowl, and quarter sheet baking pan (sheet pan).
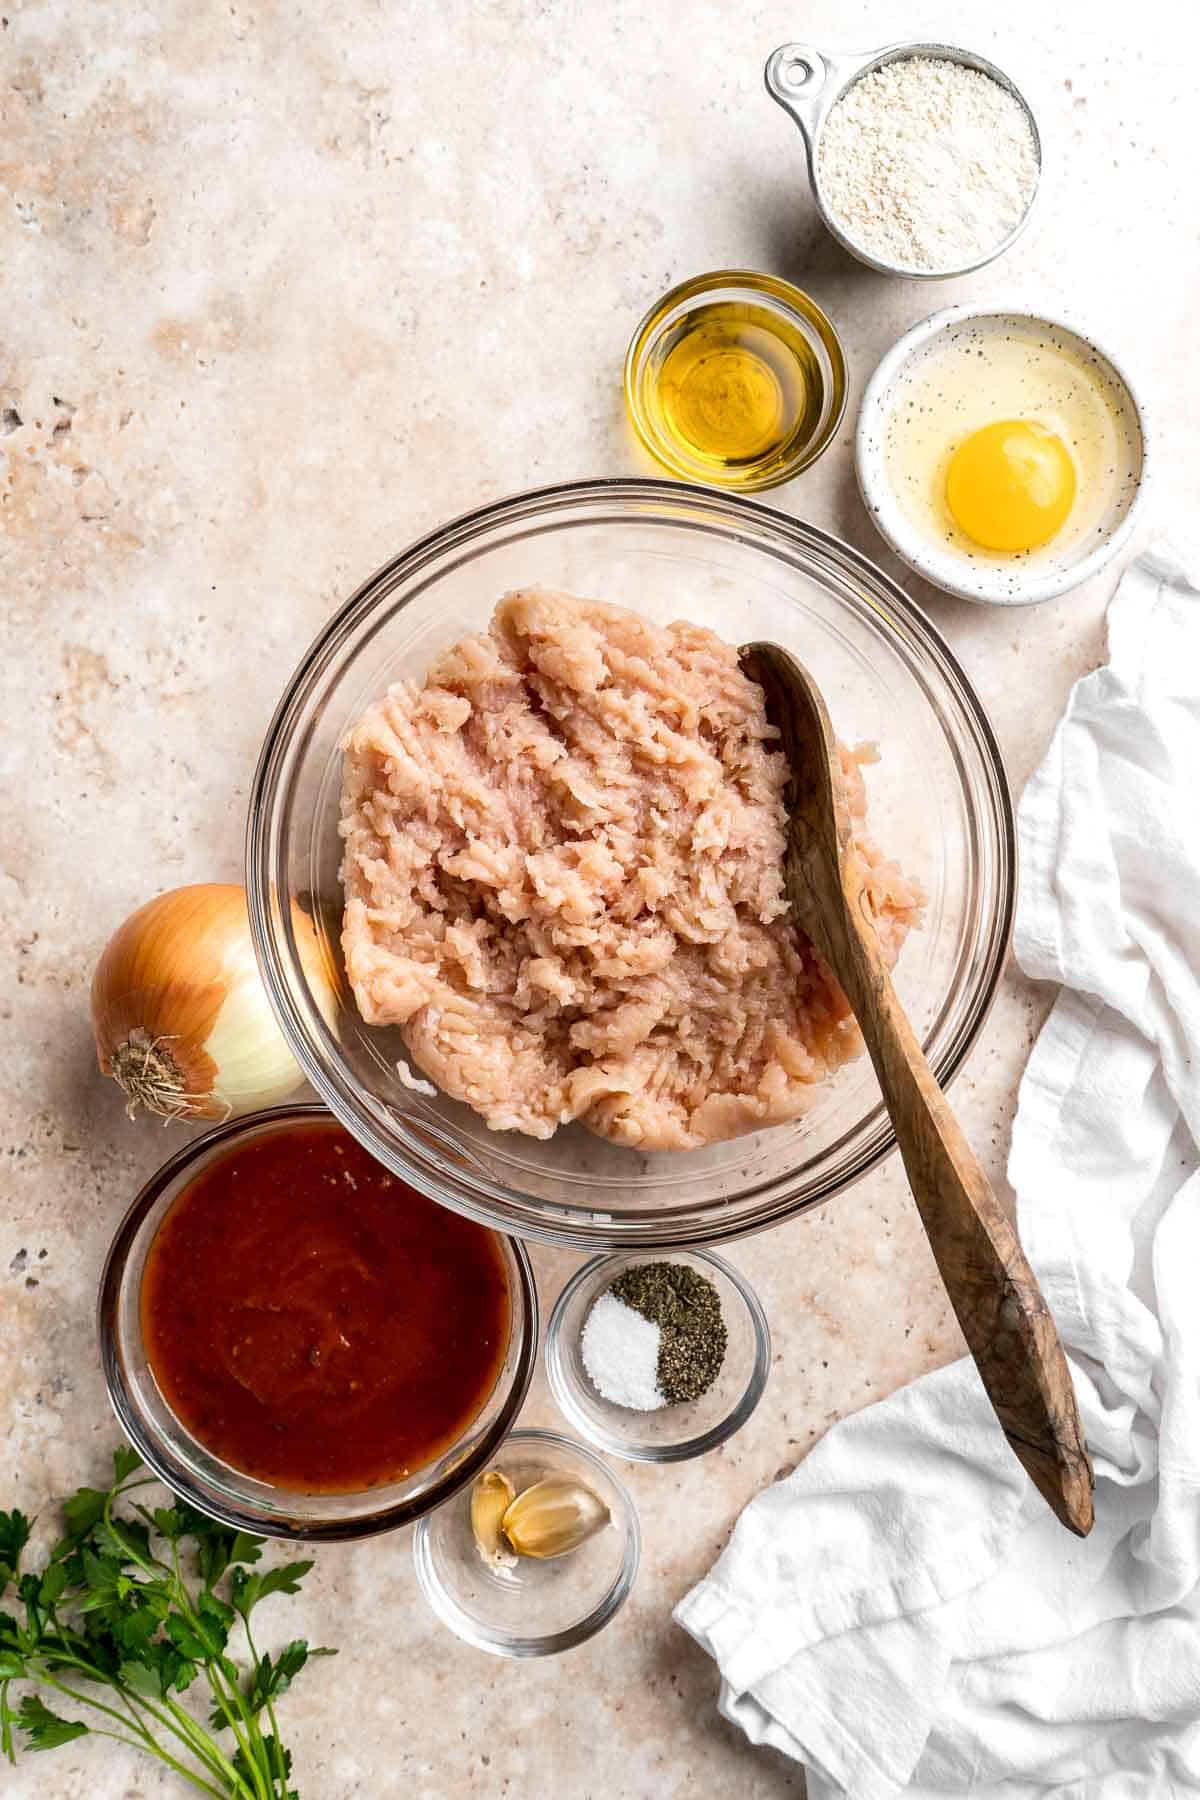
How to Make the Best Chicken Meatballs
- Marinate chicken. In a large mixing bowl, combine ground chicken with garlic, onion, ginger, breadcrumbs, egg, oil, Italian seasoning, salt, and pepper. Mix well to form into a uniform consistency. Set aside for at least 15 minutes or refrigerate overnight to allow all the flavors to infuse into the meat.
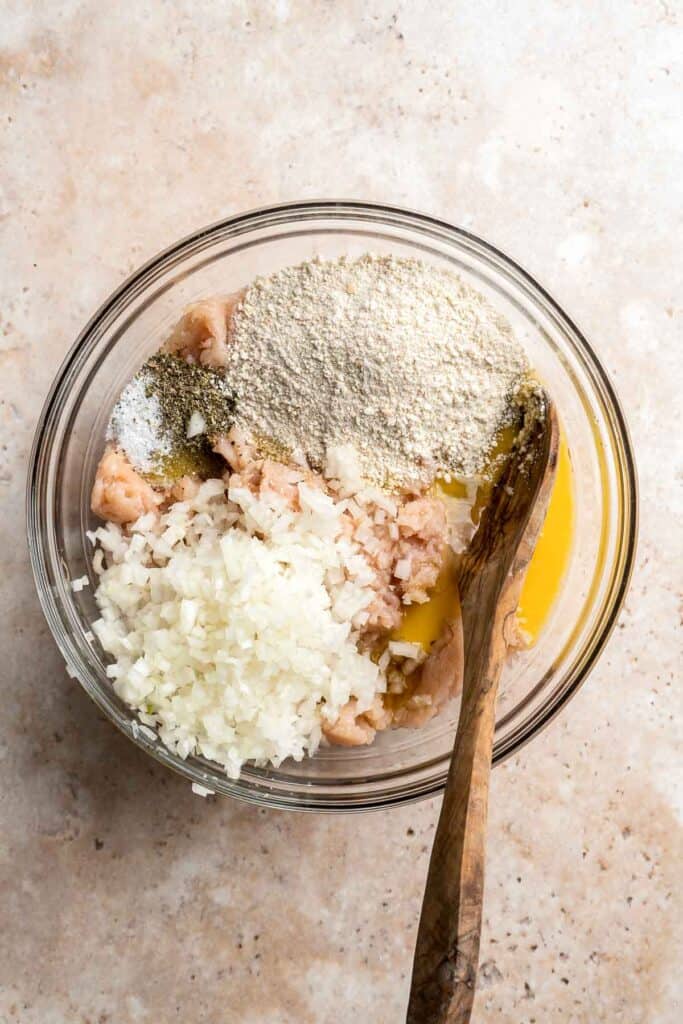
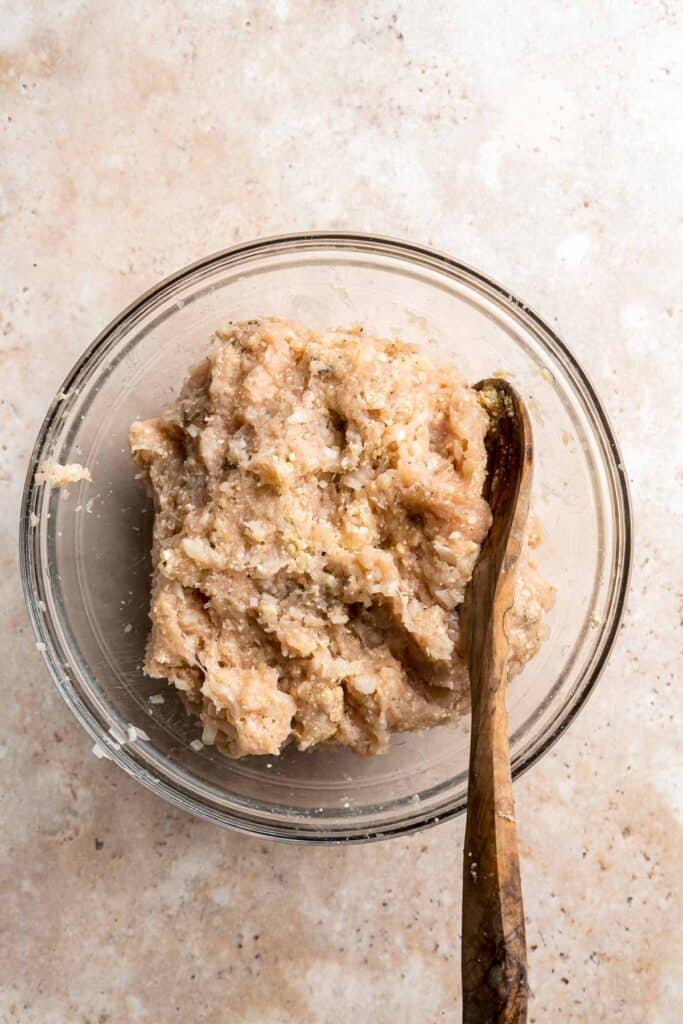
- Shape meatballs. Line a quarter sheet baking pan with parchment paper. Take 2 spoonfuls of chicken mixture at a time and roll into meatballs. Transfer meatballs onto the lined baking sheet. Lightly coat with some cooking oil spray to keep them from sticking, if needed.
- Bake. Bake in a 400F preheated oven until fully cooked through (when internal temperature reaches 165F), about 25 minutes.
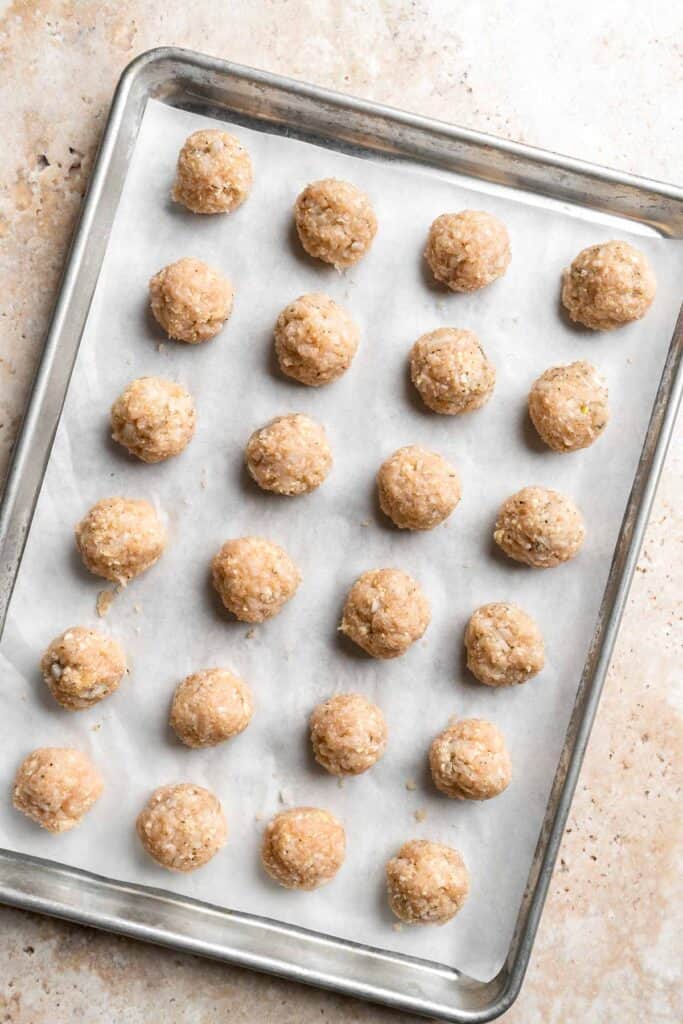
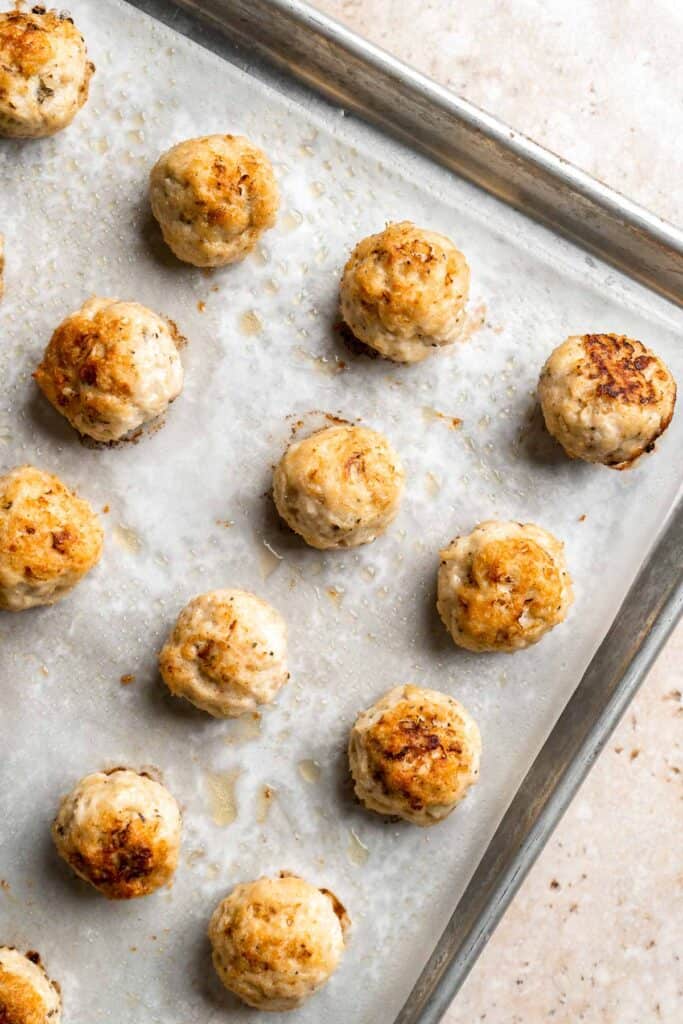
- Serve. Serve immediately with a sprinkle of fresh parsley and a side of marinara sauce, if desired.
How to Cook Chicken Meatballs in the Air Fryer
Place the chicken meatballs in a single layer into the air fryer basket and lightly coat with some cooking oil spray to keep them from sticking. Air fry the meatballs at 350F for 10-13 minutes until browned nicely and fully cooked through, gently shaking the basket halfway during cooking to brown evenly. The internal temperature for the chicken should reach 165F as read on a meat thermometer. You will have to cook in multiple batches, depending on the size of your air fryer.
Recipe Variations
- Spice it up. Add some heat to your chicken meatballs by adding red pepper flakes or chopped jalapeños to the ground chicken mixture. Then, serve the meatballs with a side of cooling Tzatziki Sauce or Ranch Dip to balance the heat.
- Add cheese. Stuff your chicken meatballs with mozzarella or feta cheese before cooking for an extra gooey and savory surprise.
- Asian-style. Give your chicken meatballs an Asian twist by adding ginger, garlic, and soy sauce to your mixture. See our Sesame Chicken Meatballs for instructions. Serve with a side of Steamed Rice or in lettuce wraps with crunchy veggies like shredded carrots and cucumber.
- Mediterranean-style. Season your chicken meatballs with herbs like thyme, rosemary, and lemon zest for a fresh and bright flavor. Drizzle with Tahini Sauce and serve with a side of Greek Salad or Oven Roasted Vegetables drizzled with olive oil.
How to Serve
Chicken meatballs are a great entree that can be paired well with a variety of sides such as roasted vegetables, salads, pasta, or grains. Some our favorites include:
- Balsamic Roasted Broccoli
- Tomato Cucumber Avocado Salad
- Duchess Potatoes
- Quinoa
- Green Beans Almondine
- Mascarpone Mashed Potatoes
- Broccoli Rice
Some other ways to serve these baked chicken meatballs include:
- As an appetizer. Serve chicken meatballs as a delicious appetizer with your favorite dipping sauce such as Marinara Sauce or Tzatziki Sauce. Consider serving them on a platter with toothpicks for easy serving.
- Over pasta. Chicken meatballs pair well with spaghetti or other pasta and can be served with your favorite tomato-based sauce or a creamy alfredo sauce. Try it with our Creamy Tomato Pasta or Fettuccine Alfredo.
- In a sandwich. Make a delicious meatball sub or sandwich by placing chicken meatballs on a crusty roll with tomato sauce and mozzarella cheese. We love it in our French Baguettes or Ciabatta Rolls.
- In a grain bowl. Serve chicken meatballs in a grain bowl with rice or quinoa and your favorite vegetables. Drizzle with sauce or a dressing for added flavor.
- On top of salad. Top a bed of greens with chicken meatballs for a healthy, protein-packed salad. Add your favorite salad dressing and toppings like croutons or Parmesan cheese. Try with Caesar Salad or Mediterranean Couscous Salad.
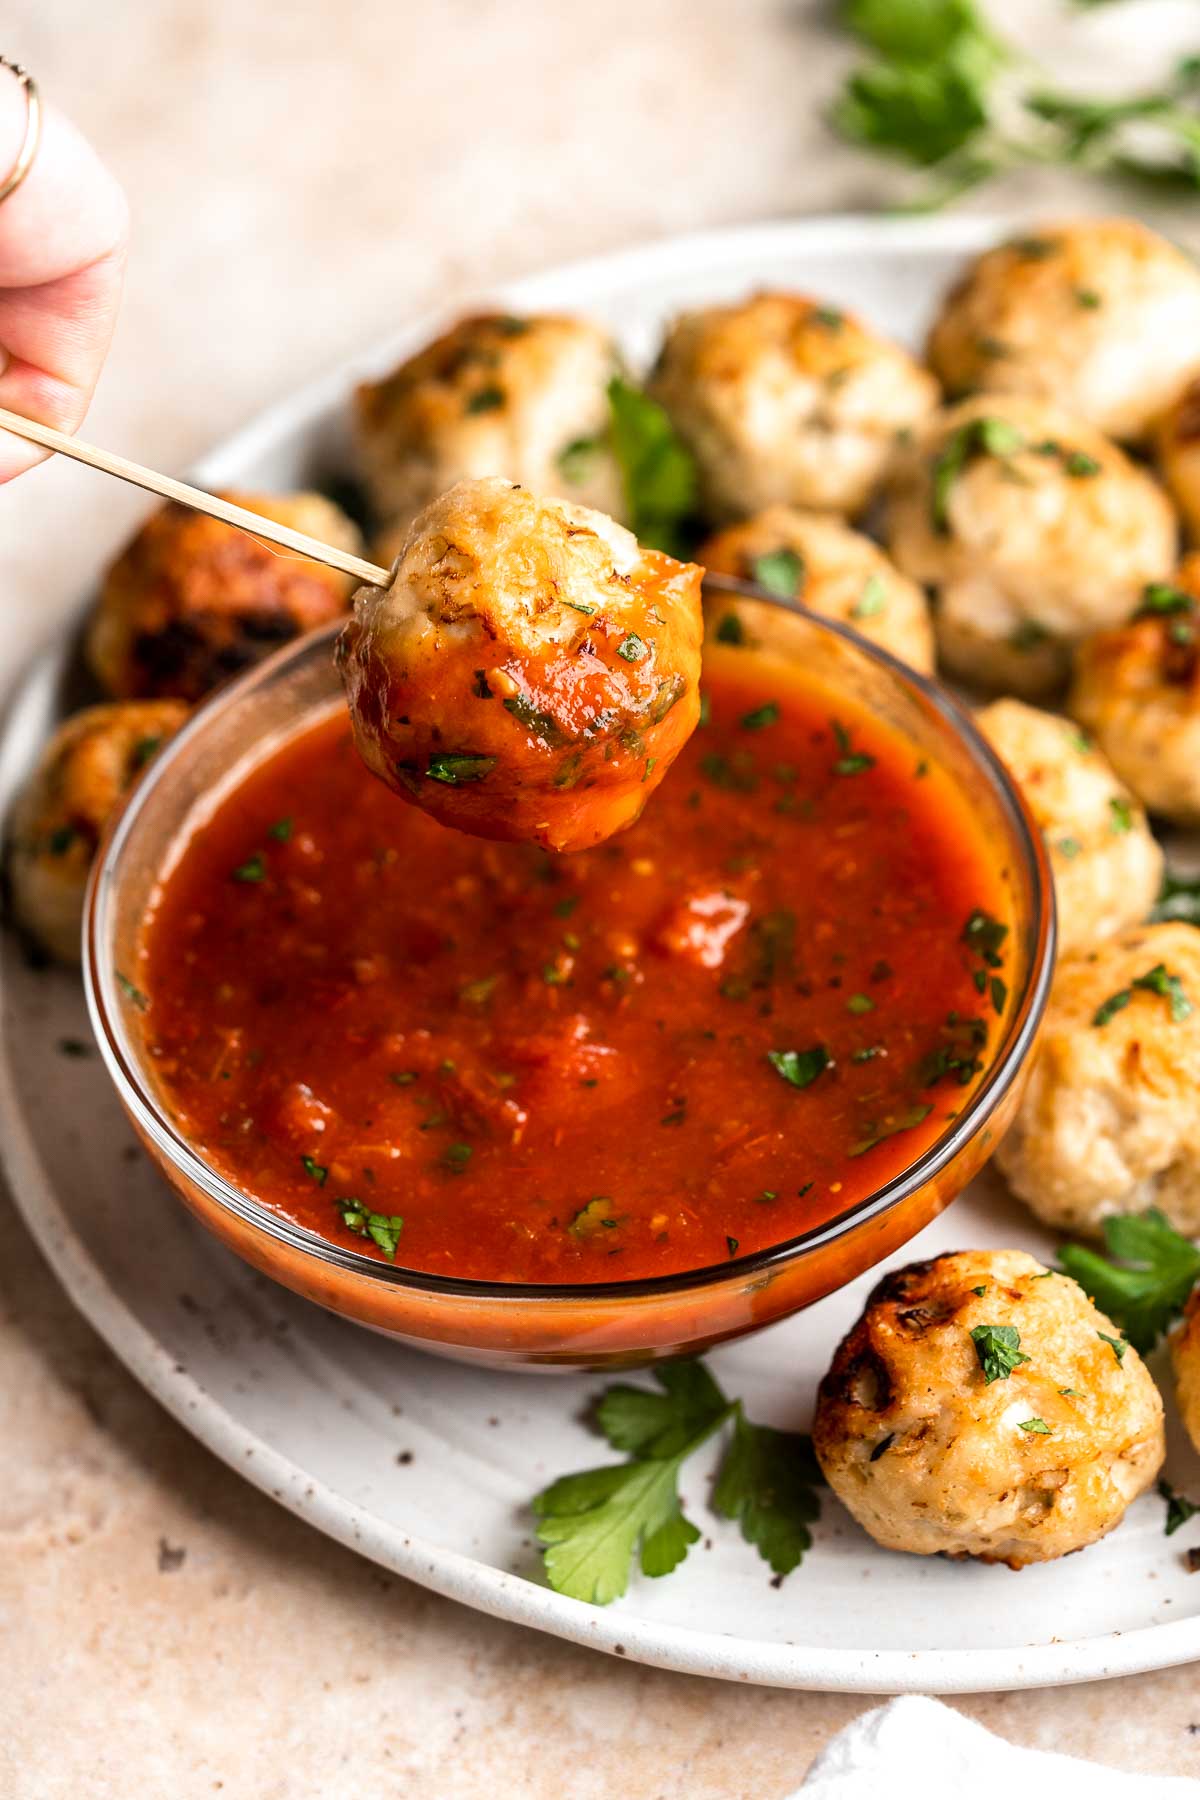
Recipe Tips and Tricks
- Use cold ingredients. Keeping your ground chicken and other ingredients cold will help to prevent the mixture from becoming too soft and sticky. This makes it easier to form the meatballs and helps them hold their shape while cooking.
- Mix the ingredients gently. Overmixing can lead to tough meatballs. Use a light touch and mix the ingredients until just combined.
- Use a cookie scoop. A cookie scoop or ice cream scoop can help you form evenly sized meatballs quickly and easily.
- Customize the flavor. You can add different spices and mix-ins to adjust the flavor of these chicken meatballs to your liking! Play with different seasonings to get exactly what you want, whether it's a dumpling-inspired meatball or a sweet-n-savory one. See our Recipe Variations above for more ideas.
- Smooth things out. Some people aren't a fan of chunks in their meatballs, which is totally understandable. If you're in that camp, you can get the same flavor with a smoother, chunk-less texture by swapping the minced onion and garlic for powder form, and using a powdered Italian seasoning blend instead of dried herbs.
- Don't overcrowd the pan. Overcrowding the pan can cause the meatballs to steam instead of brown. Leave some space between each meatball to ensure even cooking.
- Check for doneness. Chicken meatballs should reach an internal temperature of 165°F to be safe to eat. Use an meat thermometer to check for doneness.
- Make ahead and freeze for later. These chicken meatballs are great for meal prep! They last for up to 3 months, so you can reheat them and pack them for lunch, use them as an easy appetizer, or heat them up for a quick dinner entree.
Storing and Freezing Instructions
How to Store
Refrigerate cooked meatballs in an airtight container for up to 5 days.
How to Reheat
You can reheat leftover meatballs in the oven, air fryer, stovetop, or microwave.
- Oven: Reheat in the oven 350F for 10-15 minutes.
- Air fryer: Reheat in the air fryer at 350F for 5-10 minutes.
- Stovetop: Heat a small amount of oil in a non-stick skillet over medium heat. Add the chicken meatballs and cook for 2-3 minutes, stirring occasionally, until heated through.
- Microwave: Reheat in the microwave on medium power for 30-60 seconds until heated through.
Note: Always make sure the internal temperature of the chicken meatballs reaches 165°F when reheating to ensure they are safe to eat.
How to Freeze
Allow the meatballs to cool completely and then transfer them to a lined baking sheet. Freeze for one hour uncovered or until completely frozen, then transfer the frozen meatballs to a freezer bag. Reheat straight from frozen in the oven or air fryer at 350F for about 15 minutes (oven) or 10 minutes (air fryer).
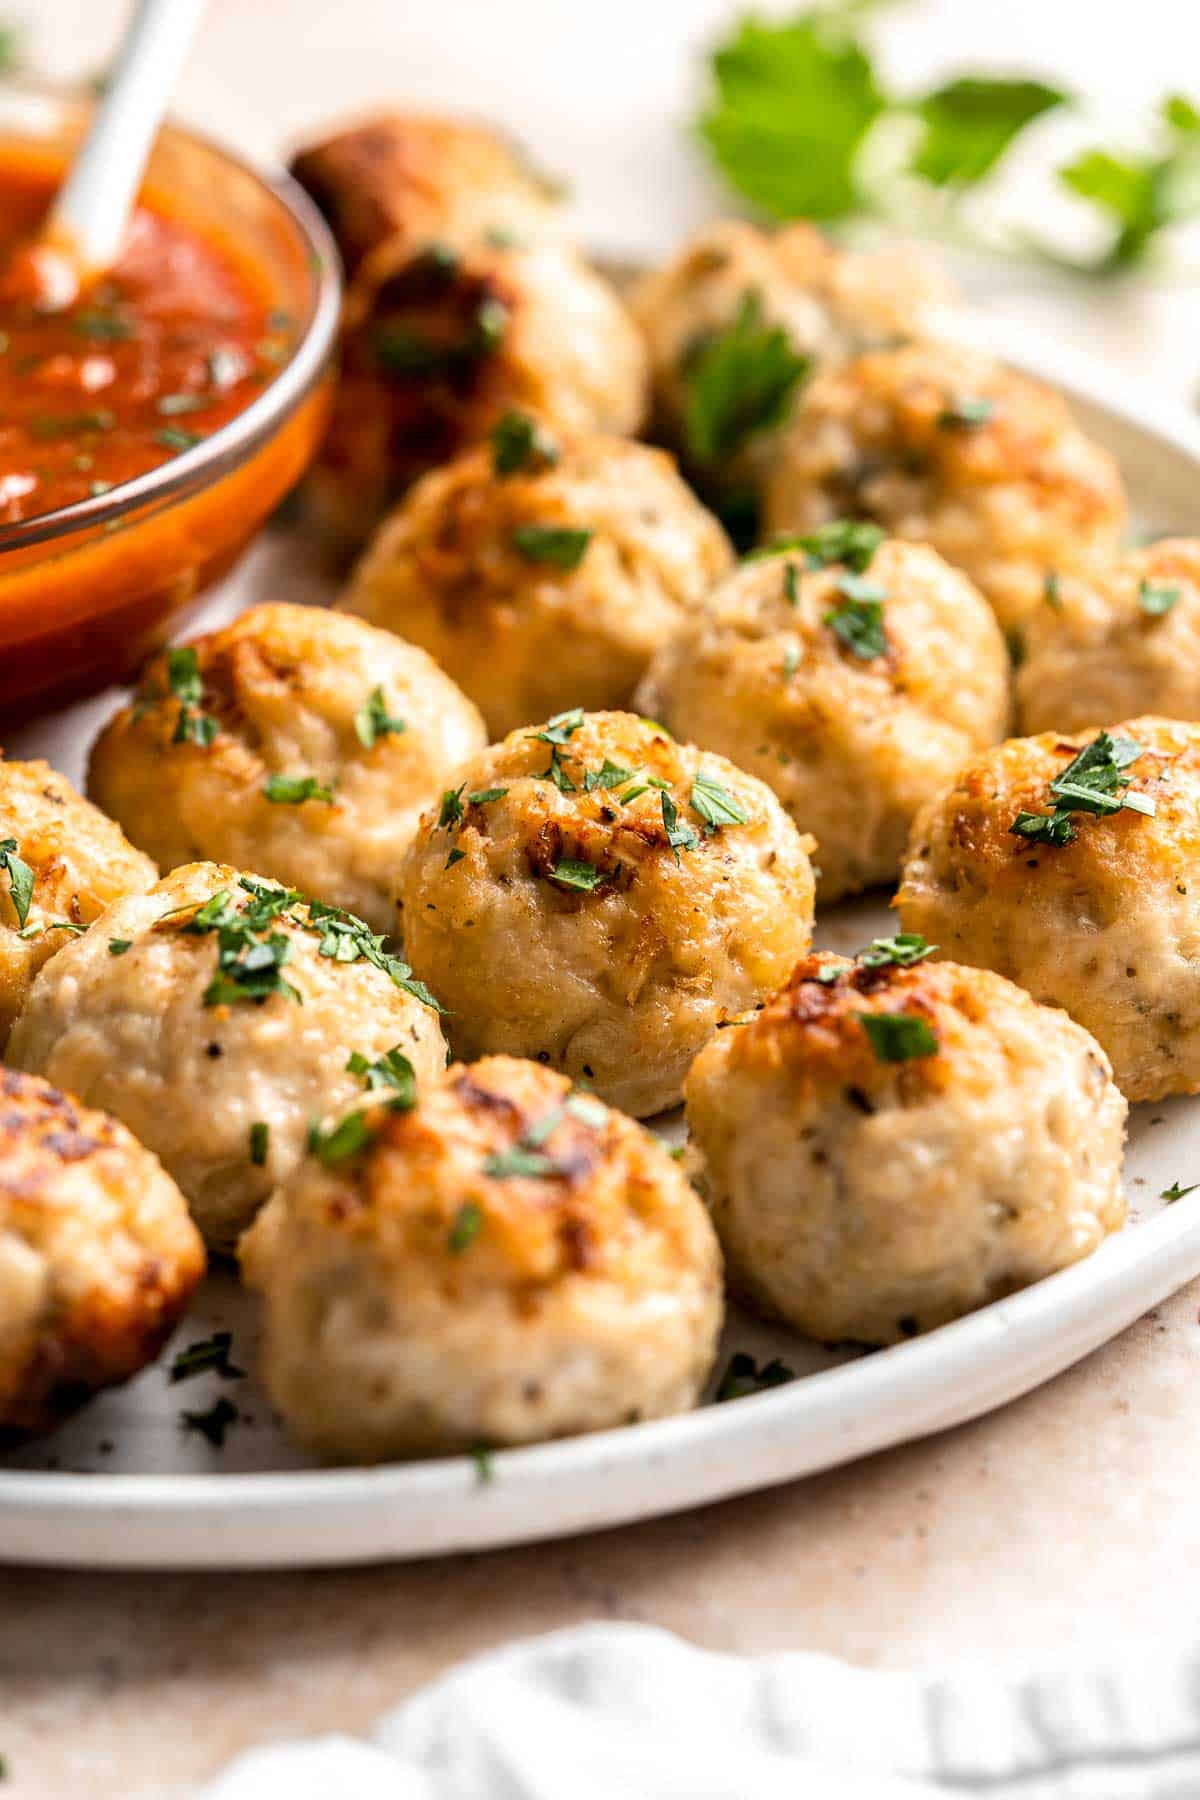
More Ground Poultry Recipes
- 15 Best Ground Turkey Recipes
- Sesame Chicken Meatballs
- Mediterranean Chicken Patties
- Thai Turkey Meatballs in Coconut Curry
- Ground Turkey Pasta Bake
- Sweet Chili Turkey Meatballs
Tried this recipe?
I'd love to hear what you think! Leave a comment and rating below to share your feedback. Your reviews help others discover this recipe and help me keep creating more free recipes for you. Snap a photo and tag me on social media @aheadofthyme too.

15 Best Ground Turkey Recipes
Wondering what to cook with ground turkey for dinner tonight? Ground turkey is a healthy and versatile protein that takes on flavors across different cuisines really well - which results in so many delicious recipes to make using ground turkey. We are sharing over 15 of our best ground turkey recipes including meatballs, burgers, soup, pasta, and more!
Whether you're looking for a quick and easy weeknight meal or a crowd-pleasing dish for a special occasion, we've got you covered. So, let's dive in and find a delicious ground turkey recipe for you!
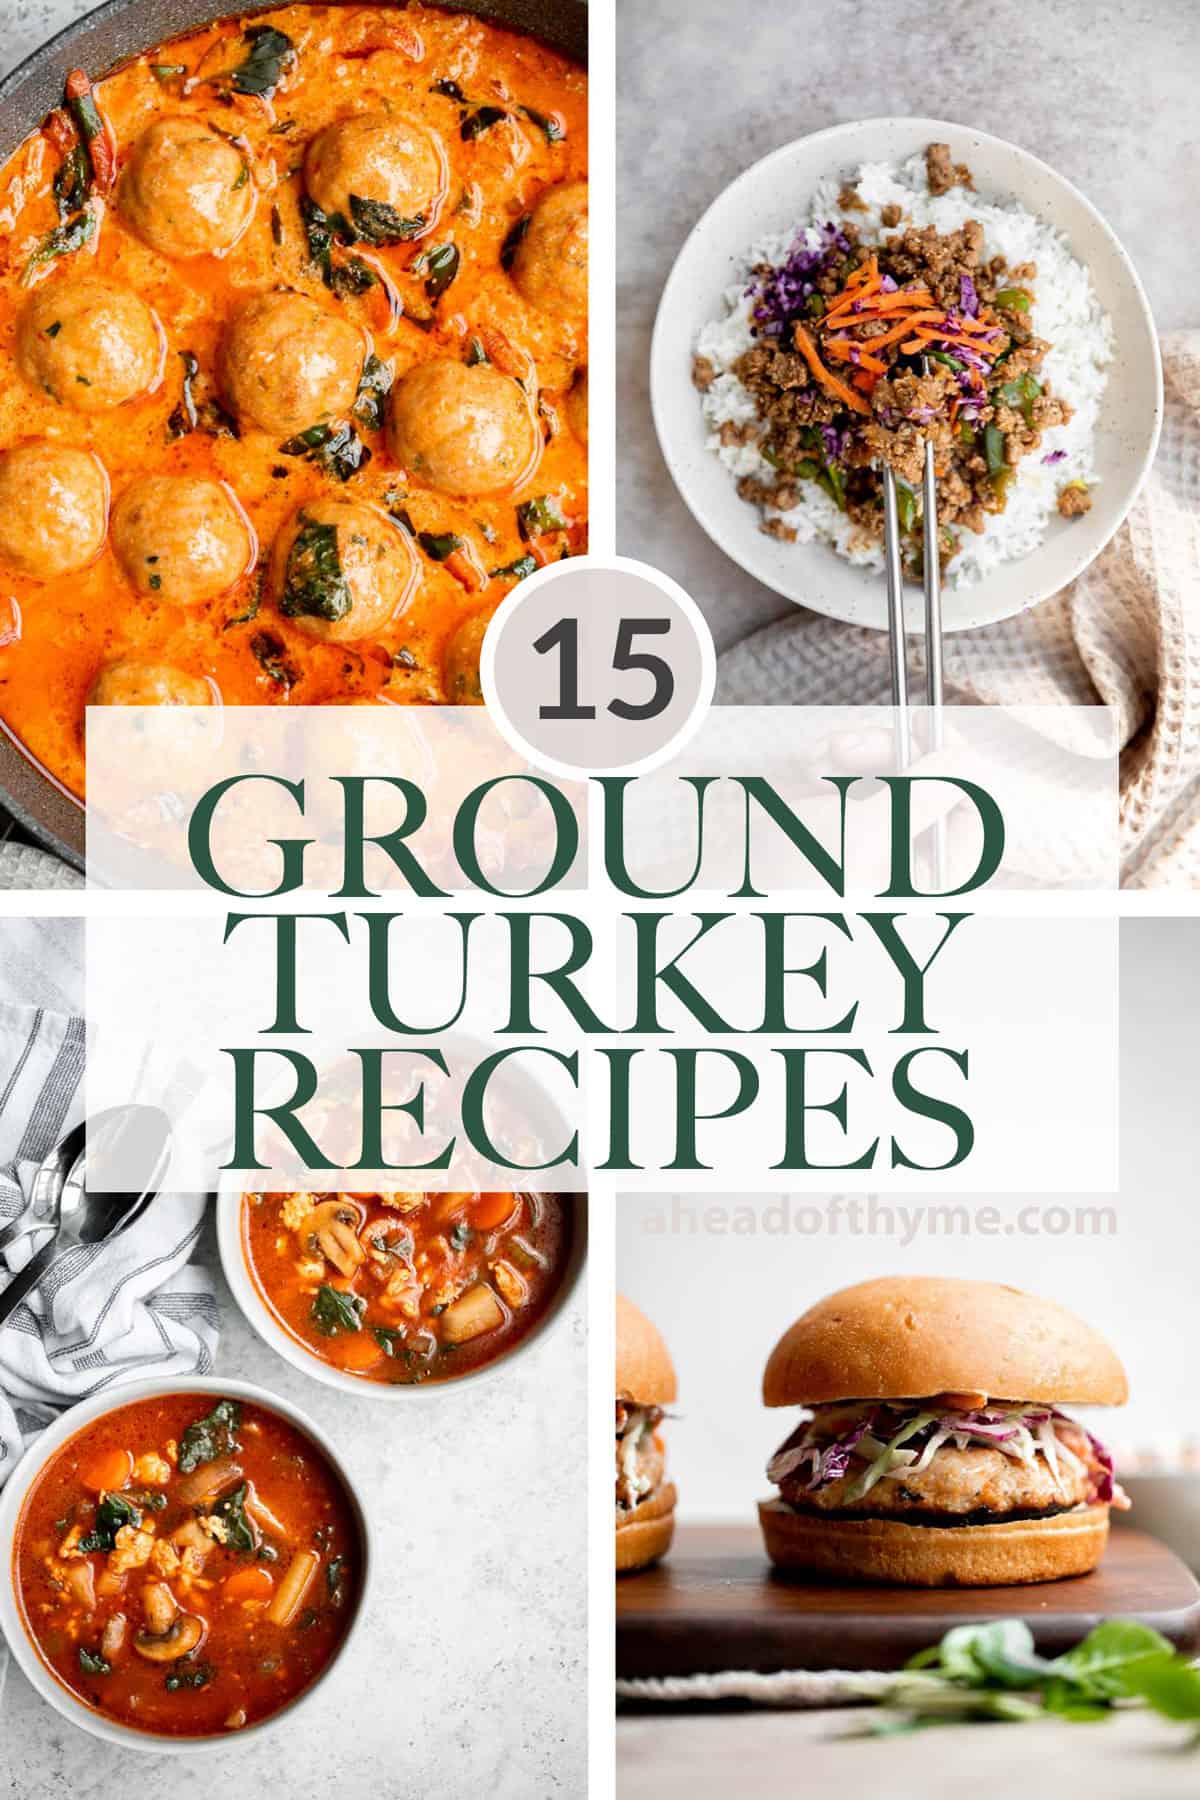
Best Ground Turkey Recipes
Thai Turkey Meatballs in Coconut Curry
Thai turkey meatballs in coconut curry are the perfect weeknight dinner when you want something delicious, healthy, flavorful, and satisfying.

Mediterranean turkey burgers are tender, juicy, and delicious, loaded with garlic, fresh dill, and lemon juice. The perfect summer weeknight meal.
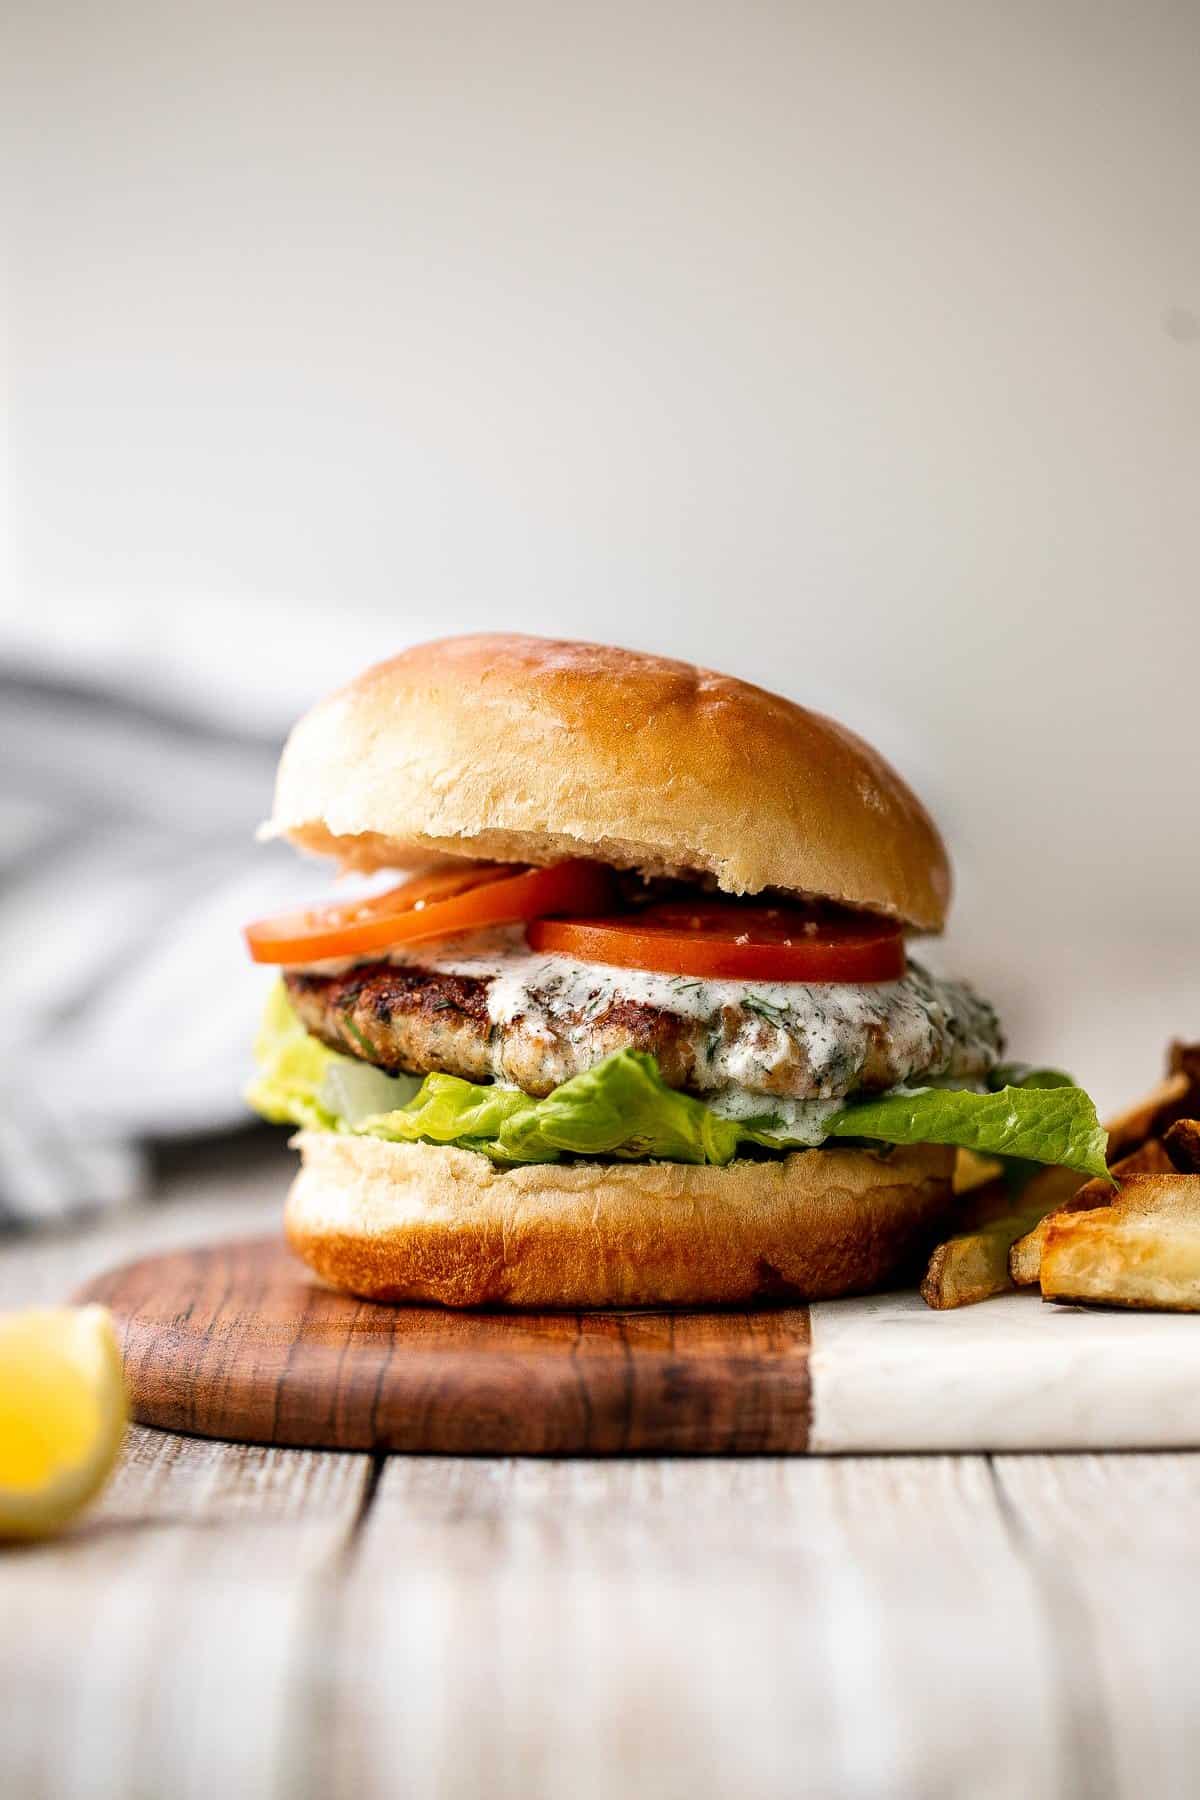
Ground Turkey Soup is hearty, nourishing, and healthy. Loaded with protein and veggies, this Italian soup is packed with flavor and is super filling.
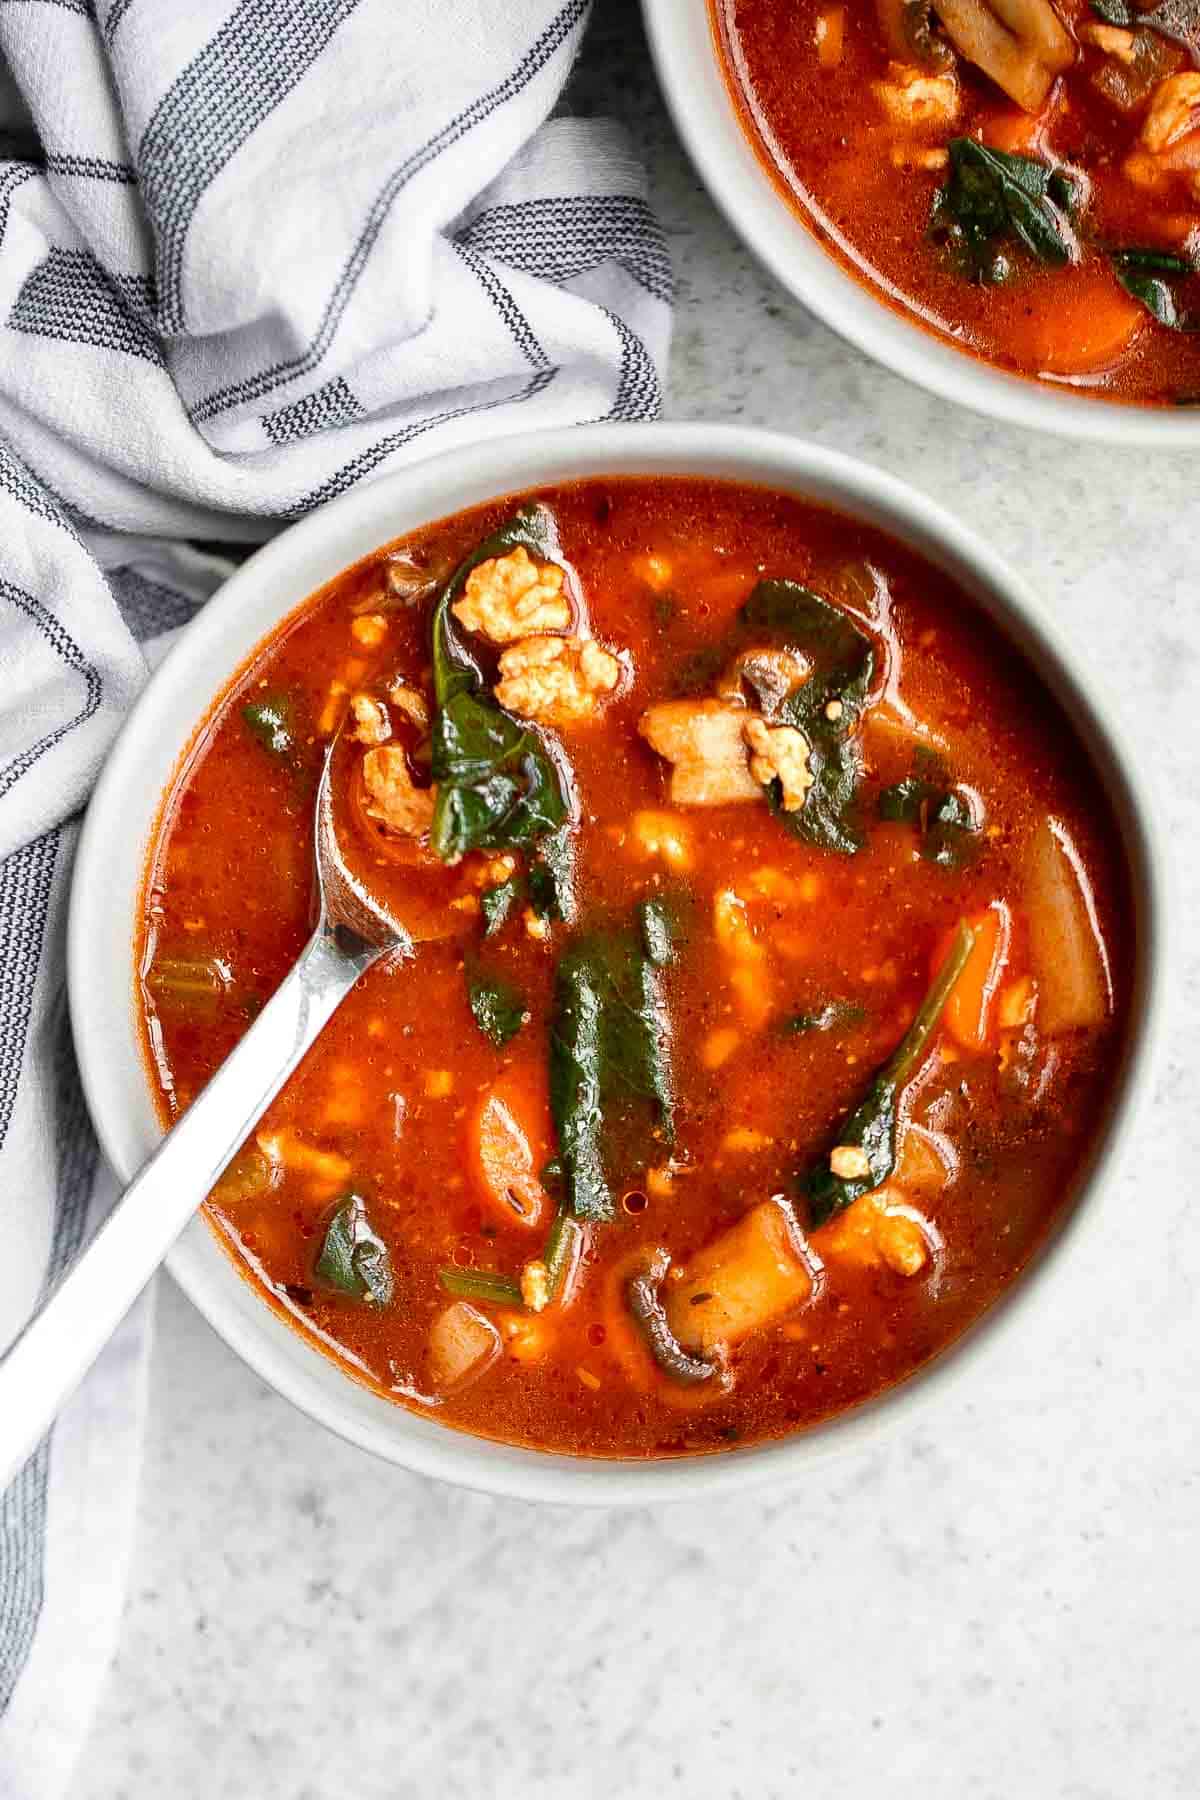
Ground turkey pasta bake is an easy yet impressive meal that is cozy, comforting, and satisfying. A family-friendly casserole dinner ready in 45 minutes.
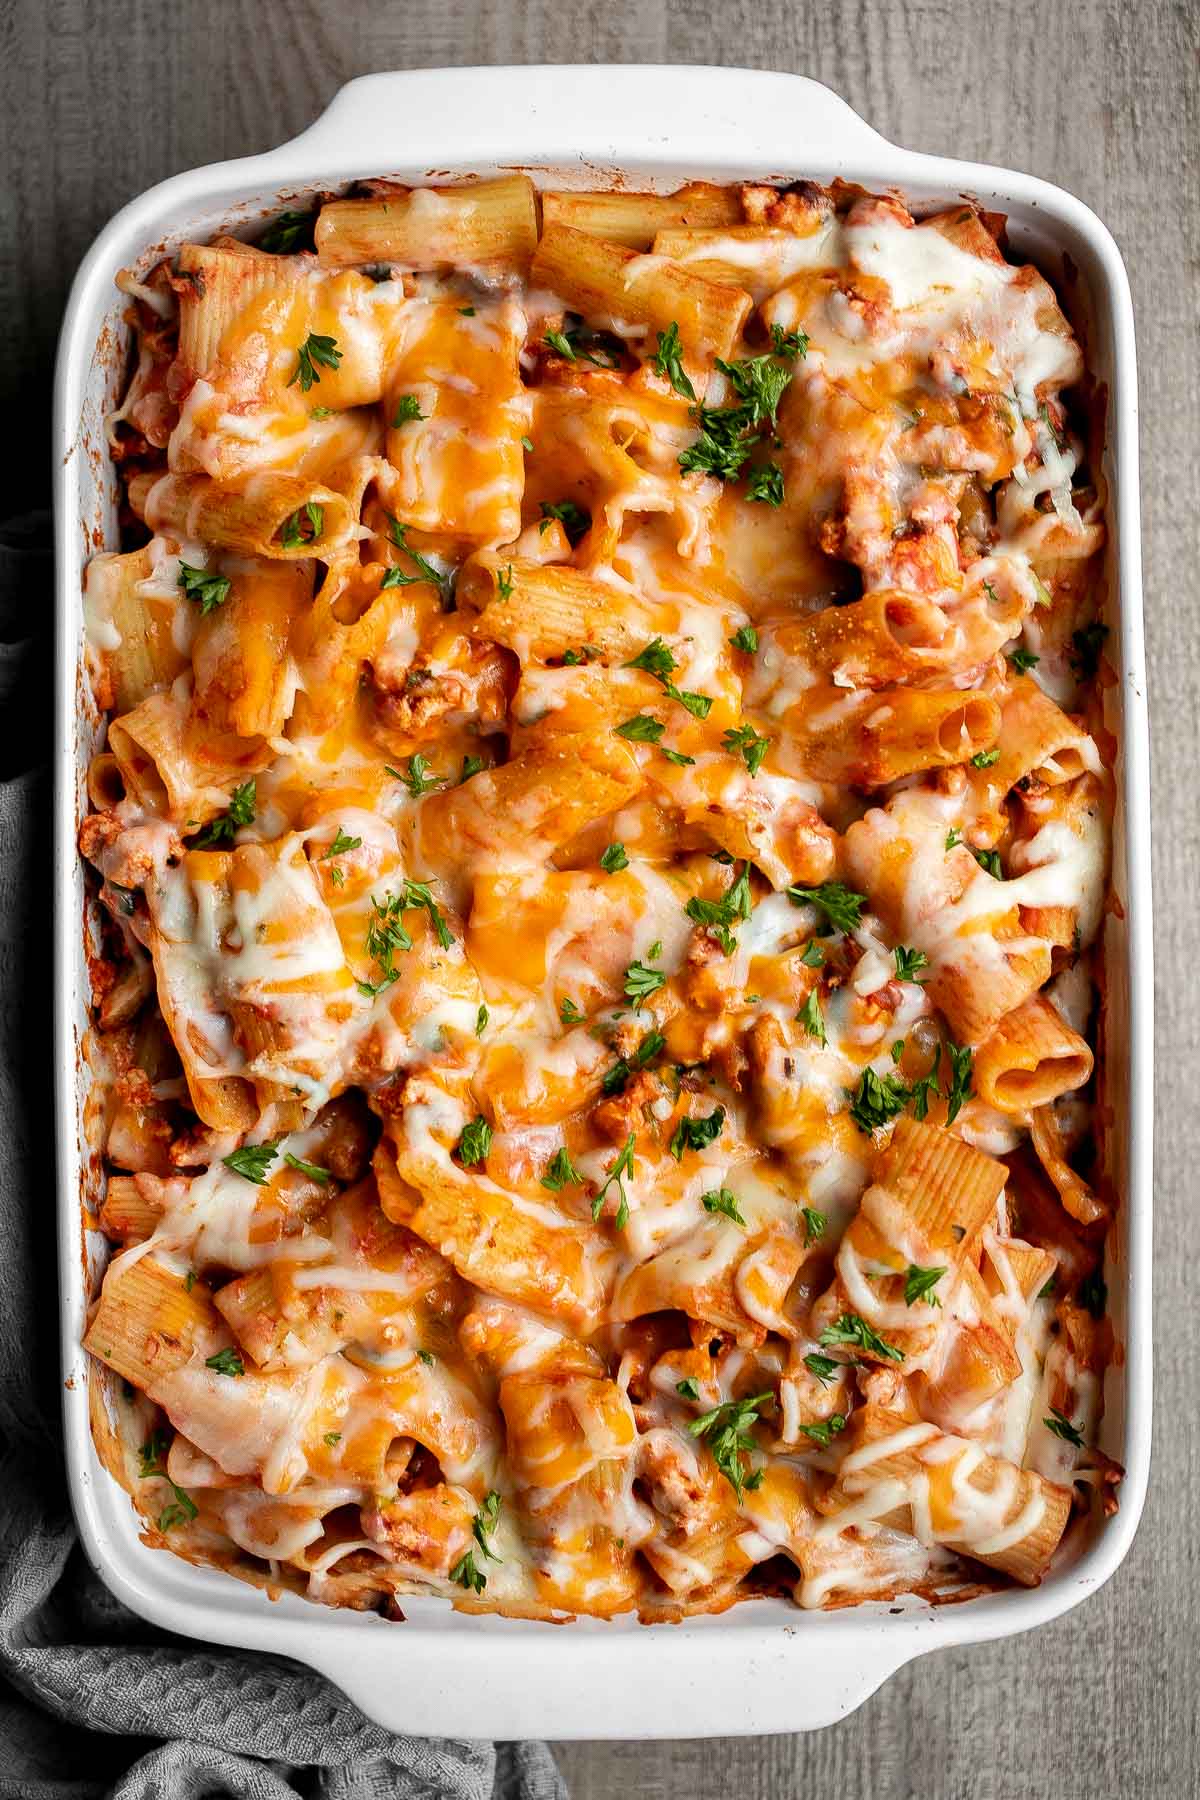
Sweet chili turkey meatballs are delicious, tender and juicy, loaded with classic Thai flavors, and quick and easy to make. Savory, sweet, and tangy.
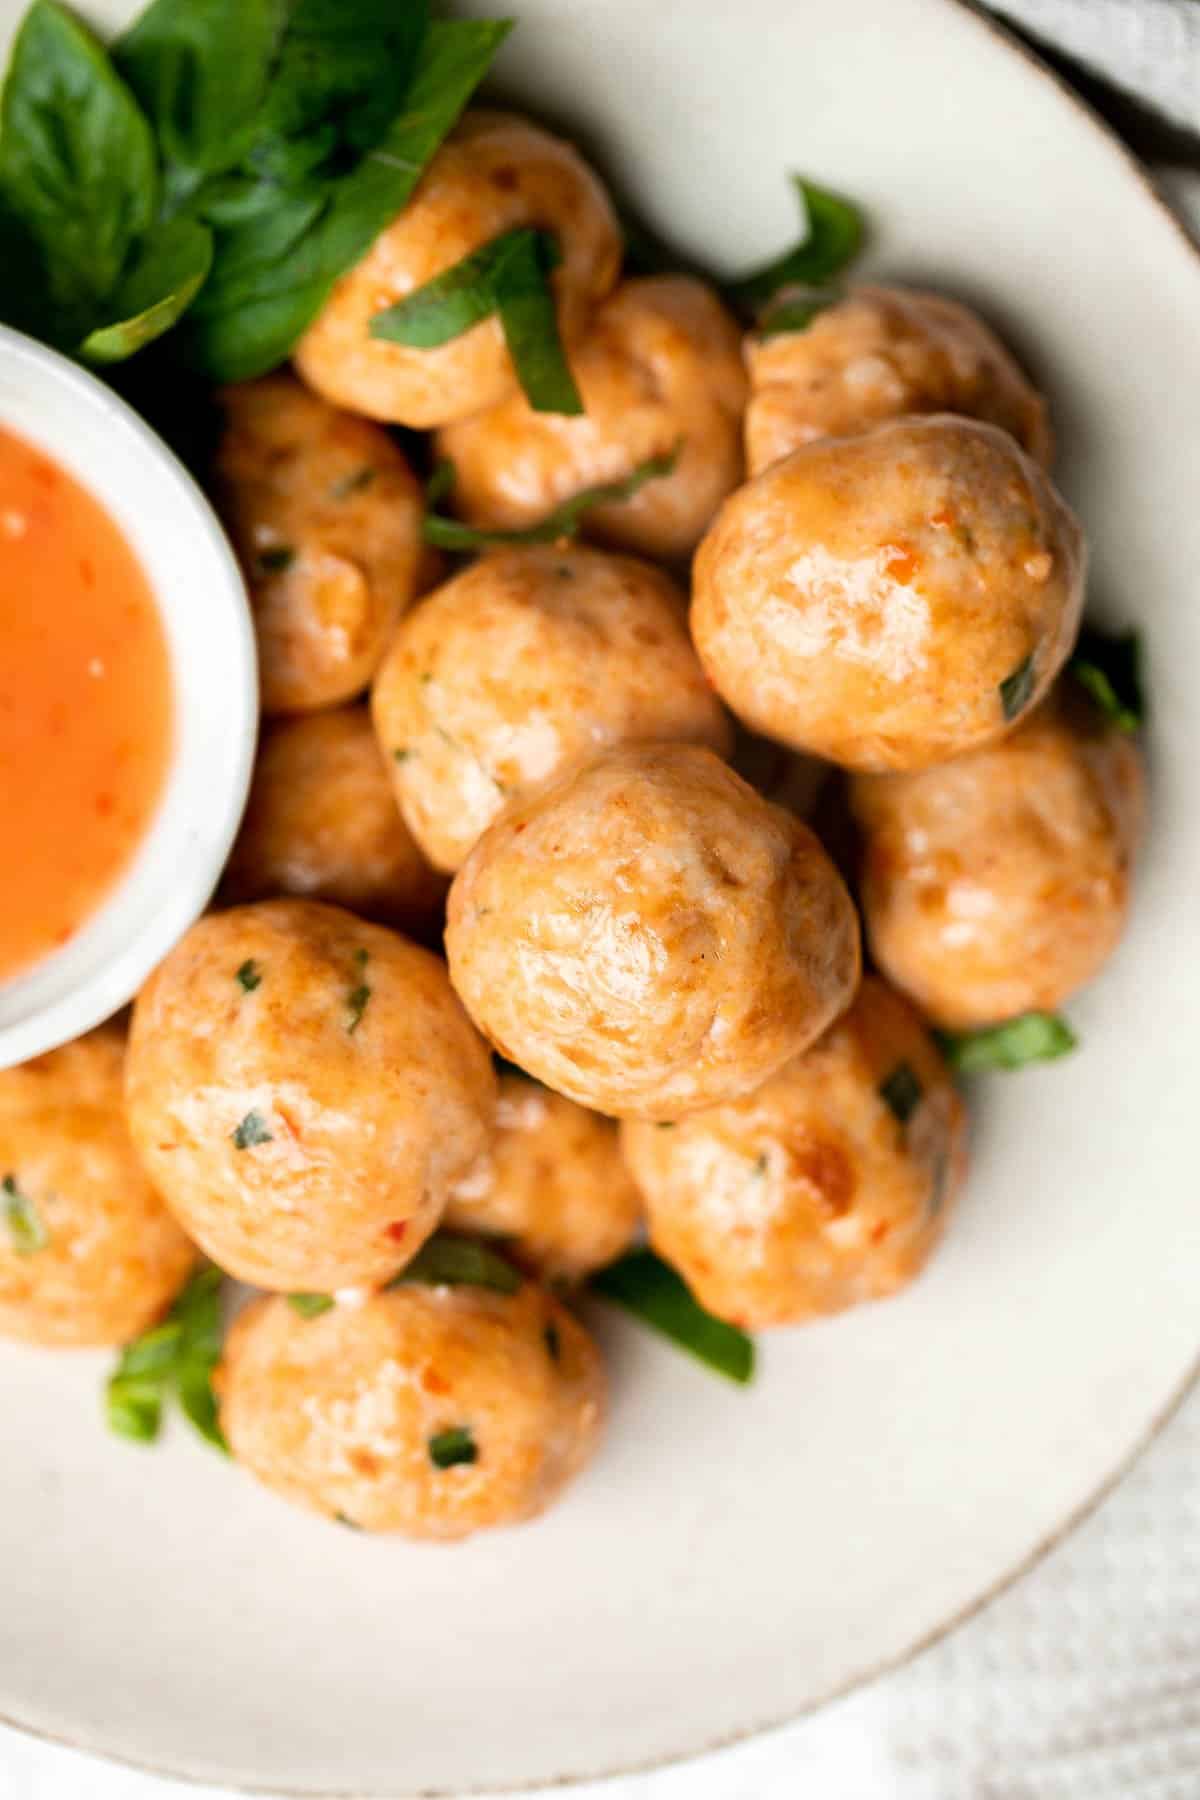
Turkey chili is hearty, filling, flavorful, and delicious. It's warm and cozy, quick and easy to make in one pot, and can be made faster in the instant pot.

Korean ground turkey is flavorful, saucy, and delicious. It's quick and easy to make in just 20 minutes, great for meal prep and freezes well.
These Thai Turkey Burgers topped with a crisp and creamy slaw are loaded with fresh and bright flavors, healthy and delicious, and quick and easy to make.
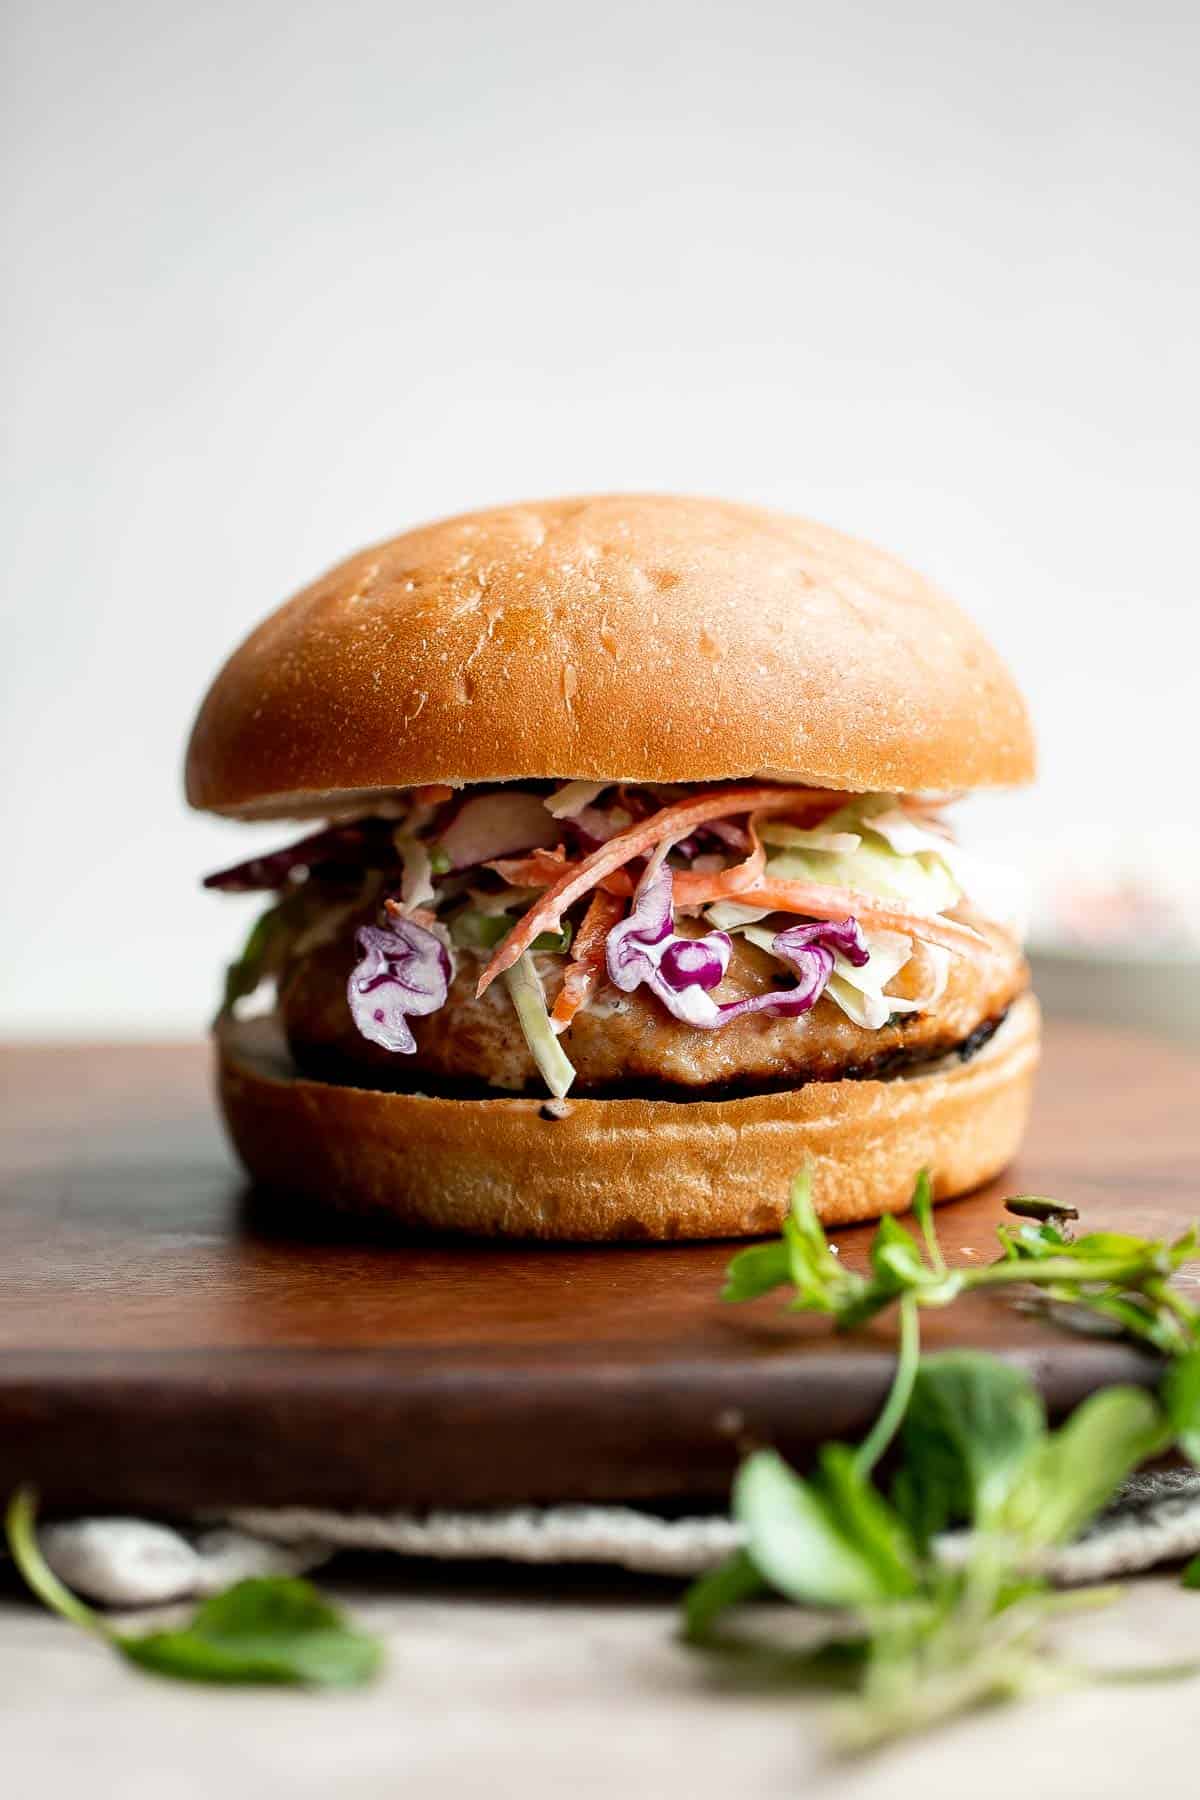
Delicious, moist and juicy Mediterranean chicken patties have everything you want in one bite: protein, veggies, herbs, and they're quick and easy to make. Made with ground chicken, but you can easily substitute with ground turkey.
When it comes to weeknight menu planning, baked turkey meatballs reign supreme. Say hello to dinner ready in under 20 minutes from prep to table!
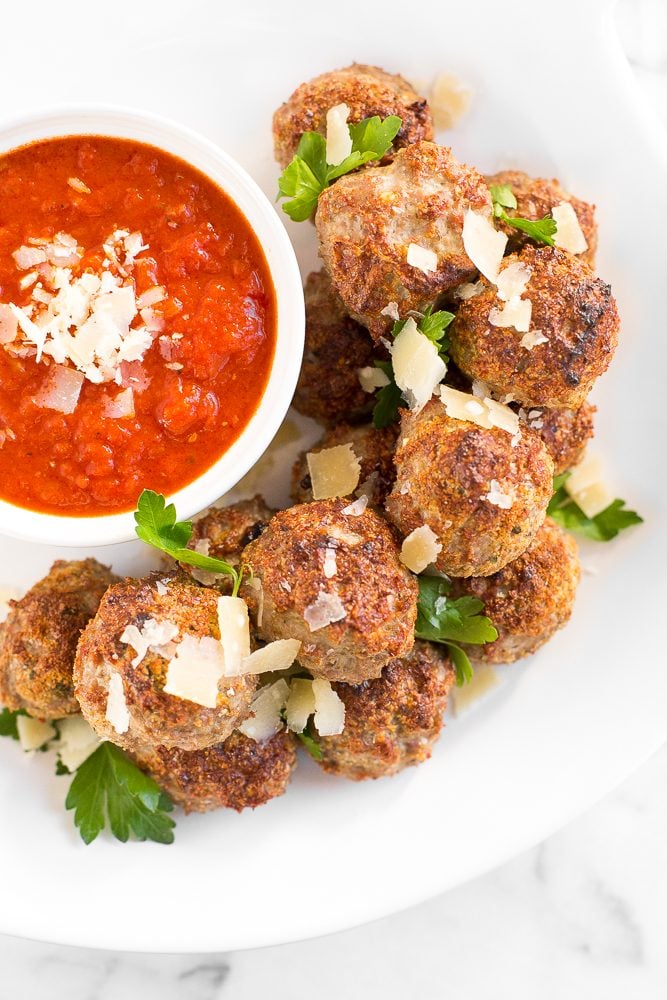
Spinach and Feta Turkey Burgers
Greek-style spinach and feta turkey burgers are tender, juicy, and flavourful, loaded with spinach, feta and fresh Mediterranean herbs + so easy to prep.
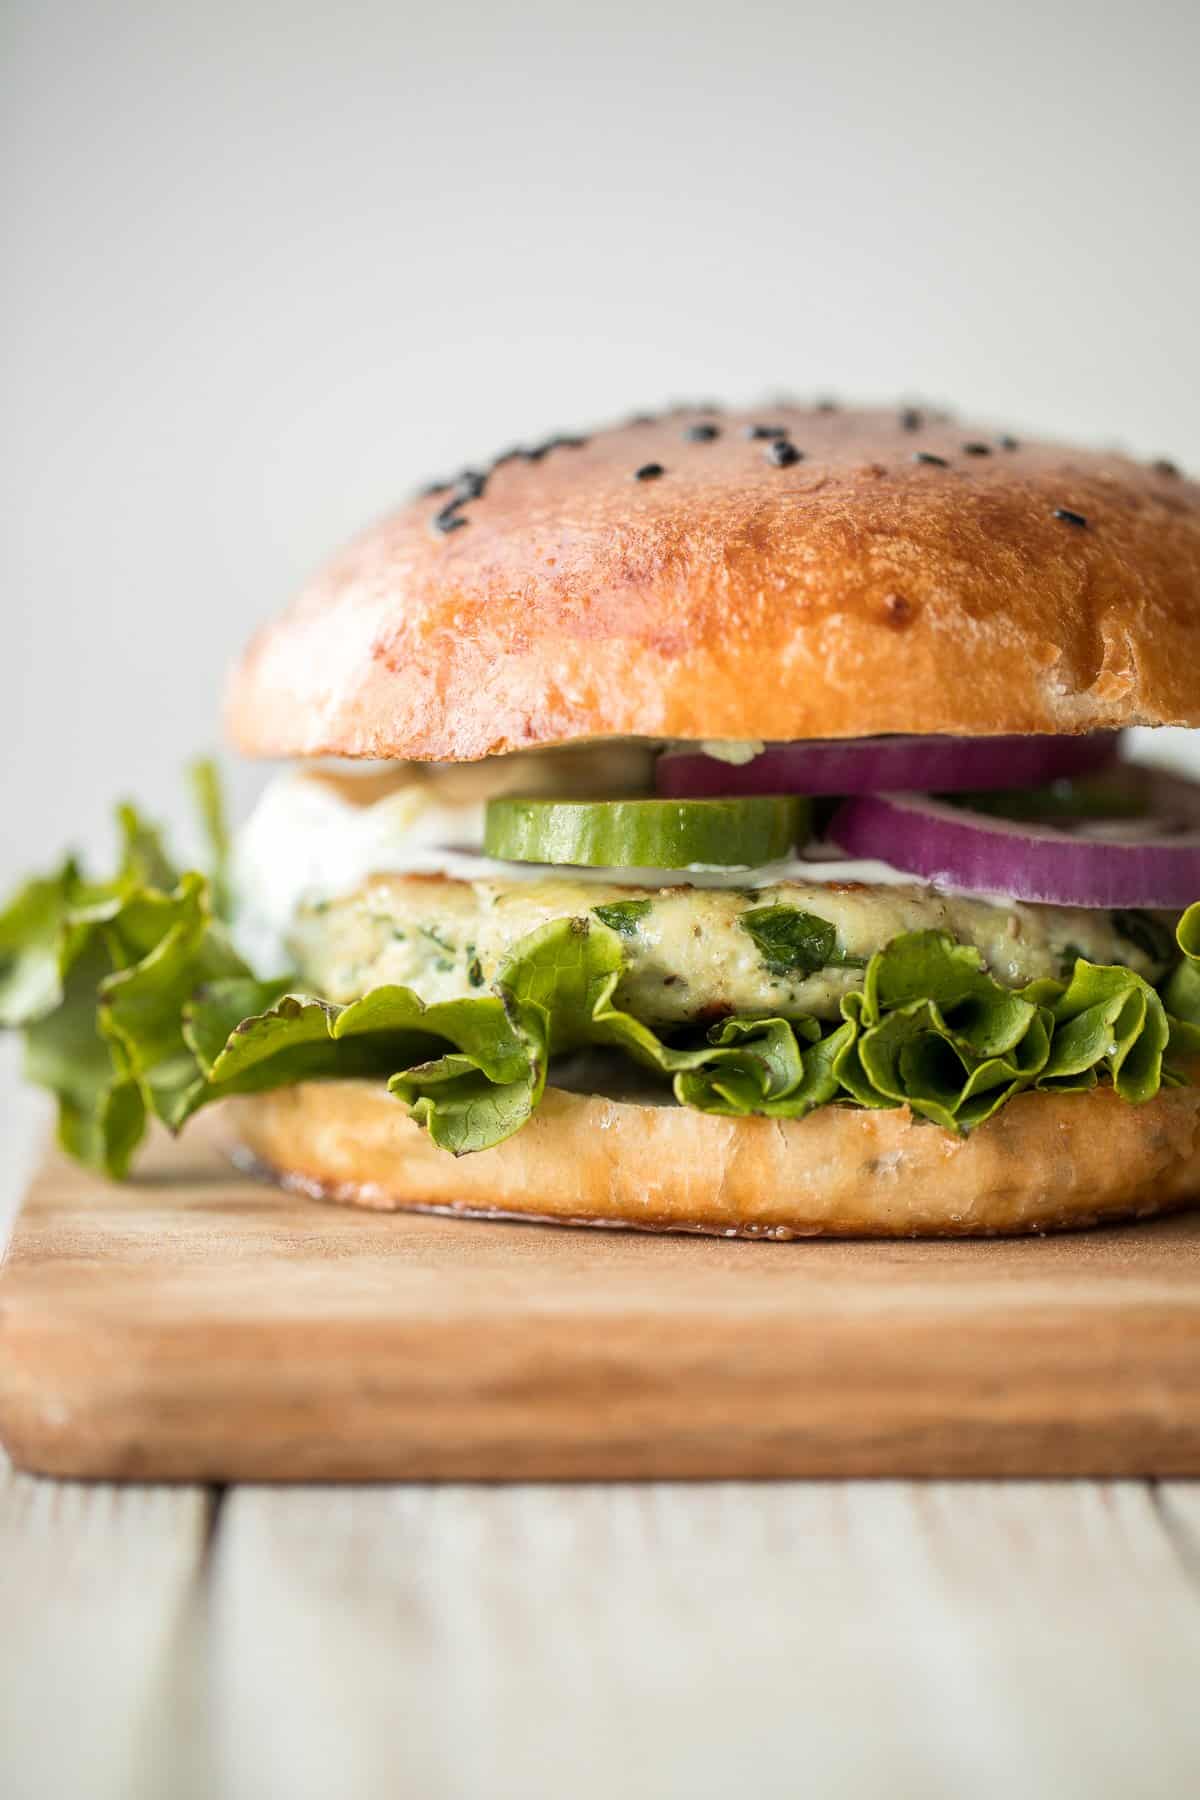
Sesame chicken meatballs are quick, easy, delicious, and loaded with Asian flavor, cooked in a homemade stir fry sauce and customizable with easy veggies! Made with ground chicken, but you can easily substitute with ground turkey.

Can you Substitute Ground Turkey for Ground Beef?
You can also substitute any ground beef recipe with ground turkey for a leaner option. The color will be paler and the flavor will vary but it will still be just as delicious. See our 25 Best Ground Beef Recipes for ideas!
How to Store Ground Turkey
Store leftover ground turkey from any of these easy ground turkey recipes in an airtight container and place in the refrigerator for up to 3 days. Most of these recipes are also freezer-friendly and can also be stored in the freezer for up to 3 months. See full storing instructions in the specific recipe that you are interested in making.
Depending on the recipe, you can reheat in the air fryer at 300F for 5-10 minutes, in the oven at 300F for 10 minutes, or on the stove over medium heat until fully warmed through. To reheat from frozen, let it thaw first overnight in the refrigerator before reheating.
Did You Make Any of These Ground Turkey Recipes?
Please leave a comment and rating below, and let me know what you thought of this round up of the best ground turkey recipes. Be sure to snap a picture and tag me on Instagram @aheadofthyme or share it on the Pinterest pin so that I can follow along.
HUNGRY FOR MORE? Don't forget to sign up for my email newsletter so that you don't miss any recipes. You can also follow along on Instagram and Pinterest for more recipe updates.
Vegetarian Enchiladas
Vegetarian Enchiladas are a delicious and flavorful meal that is quick and easy to make in 40 minutes. They are packed with hearty and nutritious vegetables, well-seasoned with a blend of spices and saucy red enchilada sauce, and topped with gooey melty cheese.

These veggie enchiladas are a meat-less version of classic red enchiladas, but they're no less hearty than the originals! Serve them with a garnish of sour cream, cilantro, and lime as a main dish with a side of rice and beans or as an appetizer with fresh guacamole and salsa. They're a viable option for weeknight dinners, long lunches, and any time you want a hot, easy, all-in-one dish. Whether you are a vegetarian or not, you will love the bold flavors and textures of these enchiladas!
Why You'll Love these Vegetarian Enchiladas
- Delicious vegetarian entree. Add vegetarian enchiladas to your meatless meal rotation! Loaded with vegetables like black beans, bell pepper, and corn, it's perfect for nights when you're a vegetarian or you're simply taking a break from meat. It's also super easy to make this recipe vegan-friendly with just one ingredient swap (see ingredient notes for details!).
- Delicious and flavorful. These veggie enchiladas have the perfect balance of flavors and textures - tender tortillas, hearty filling, flavorful enchilada sauce, and gooey cheese. They are smoky, spicy, and savory. Plus, you can customize the flavor by switching up the filling or toppings. See all our recipe variations below.
- Quick and easy to make. This enchilada recipe is easy to make with just a few simple steps. Just sauté your veggies, assemble the enchiladas, and bake in the oven. It takes about 15 minutes of prep time before they are ready to pop into the oven for about 25 minutes.
- Family-style enchiladas. If you're feeding a crowd, these vegetarian enchiladas are ideal! You'll prep the ingredients and assemble the enchiladas in a casserole dish before baking and serving hot - a perfect homecooked meal for a family without a ton of extra effort.
- Freezer-friendly. These vegetarian enchiladas freeze beautifully and can be frozen (cooked or uncooked) and saved for a later date, so all you'll have to do is thaw and bake!

Ingredient Notes
To make these delicious Vegetarian Enchiladas, you will need the following ingredients (full measurements in recipe card below):
Tortillas
- flour tortillas - use soft, fresh tortillas that are pliable and won't tear easily when rolled. Try our homemade Flour Tortillas! You can use corn tortillas if you want, but they tend to fall apart a lot easier with lots of liquid ingredients.
Sauce
- red enchilada sauce - this recipe calls for red enchilada sauce, but you can use green enchilada sauce if you prefer. You can use store-bought or homemade enchilada sauce.
Filling
- avocado oil - olive oil or vegetable oil will also work.
- onion - white or yellow onion is preferred, but you can use red onions or even shallots if necessary.
- garlic - fresh minced garlic is always best flavor-wise, but you can use 1 teaspoon of pre-minced garlic for each clove of garlic in the recipe to save yourself some time.
- red bell pepper - if you don't have red bell pepper, orange or yellow bell pepper is fine.
- frozen corn - canned corn will also work, just rinse and drain it.
- black beans - canned black beans are the most convenient, but if you have leftover dry (but cooked) black beans, you can use those instead.
- smoked paprika - regular paprika, chili powder, or a dash of cayenne pepper will work in a pinch.
- ground cumin - if you don't have cumin on hand, you can use a bit of taco seasoning blend or ground coriander instead.
- chili powder - you can swap chili powder for a little more paprika, taco seasoning, or cayenne powder.
Toppings
- mozzarella cheese - you can also use Monterey Jack, pre-shredded or shredded at home. You can also use a mozzarella-style vegan cheese to make it more vegan-friendly.
- cilantro - if you don't like cilantro or can't find it, use a similar soft herb like basil or parsley, or omit it altogether.
You will also need measuring cups and spoons, a large skillet, and a 9x13-inch casserole pan.
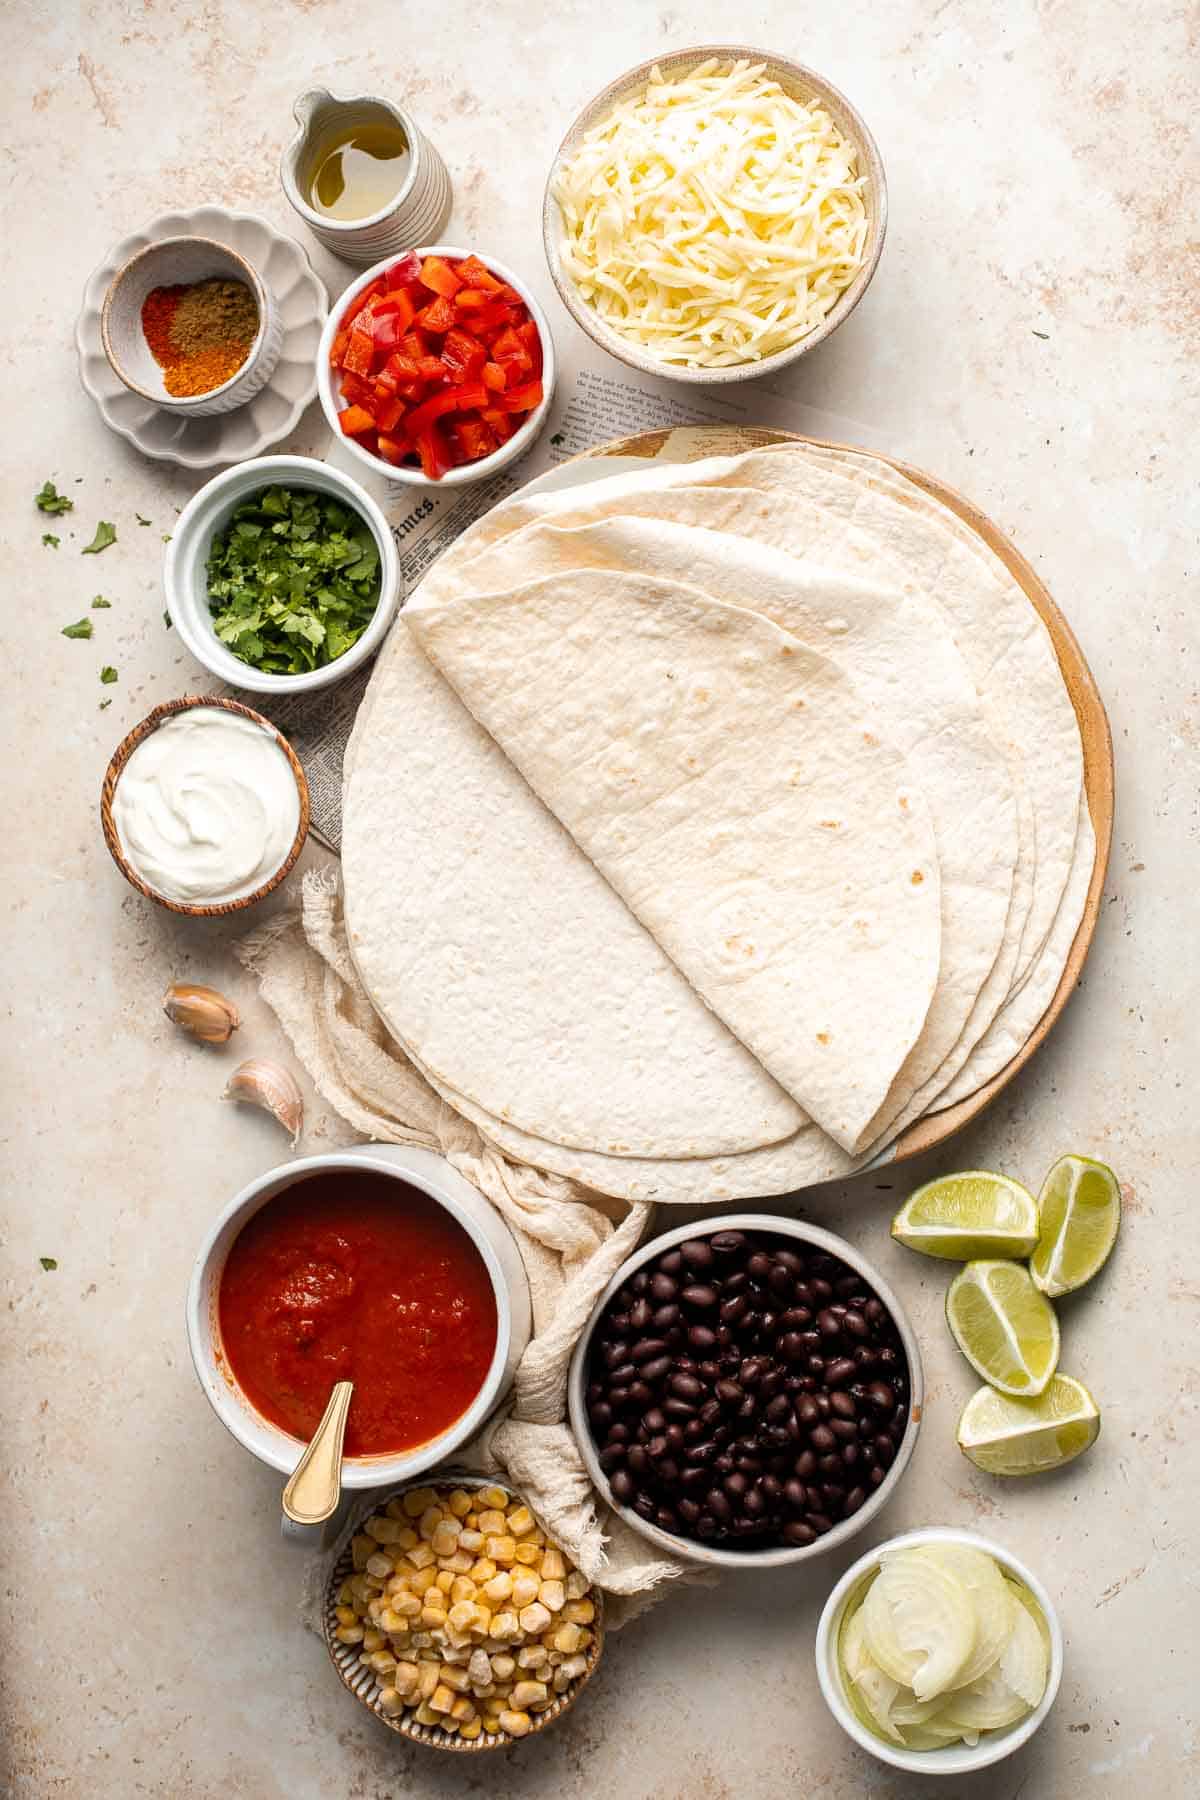
How to Make the Best Vegetarian Enchiladas
- Sauté veggies. Heat oil in a large skillet over medium-high heat until the hot oil is sizzling hot, about 1 minute. Add onion, garlic, and bell pepper and sauté until tender, about 2-3 minutes.
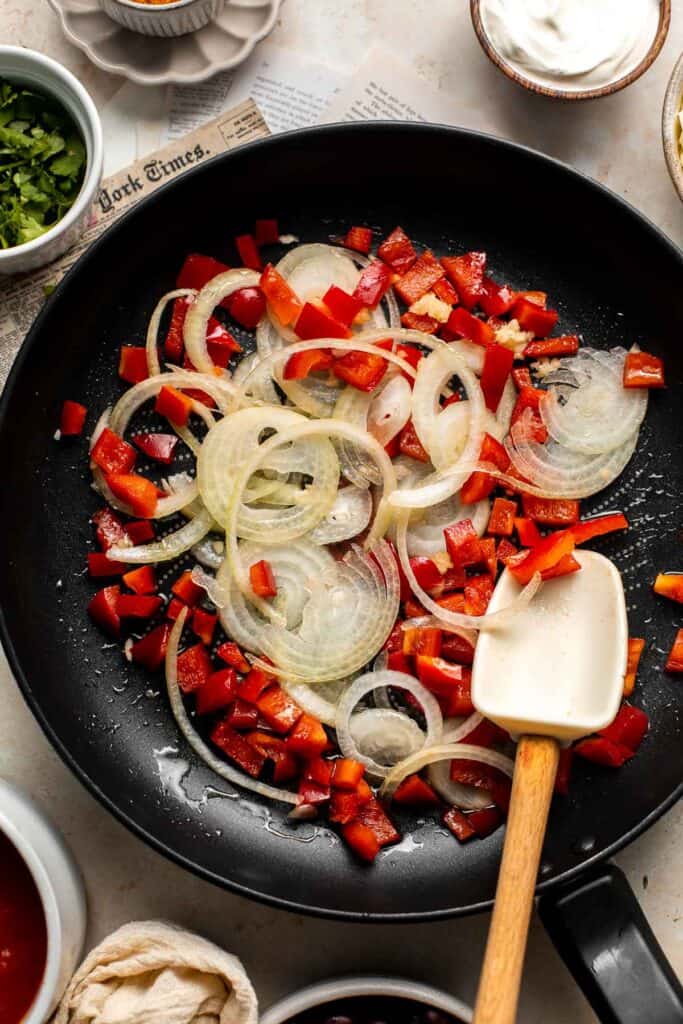
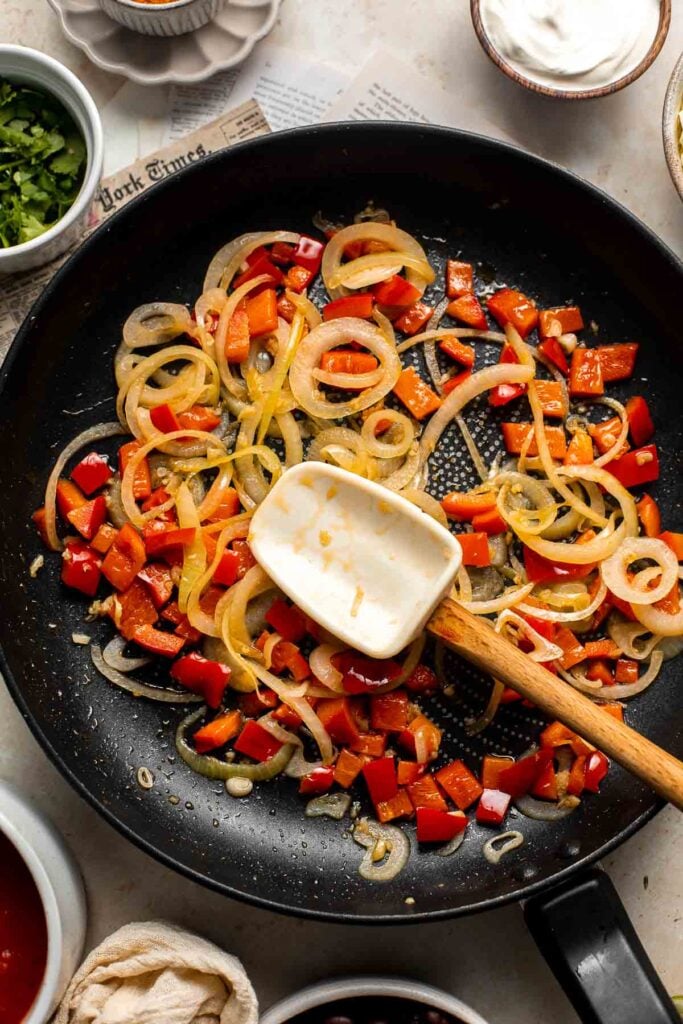
- Add remaining filling ingredients. Add corn, black beans, paprika, cumin, chili powder, 1 cup of cheese, and cilantro. Stir well and cook for 1 minute until evenly combined. Turn off the heat and set aside.
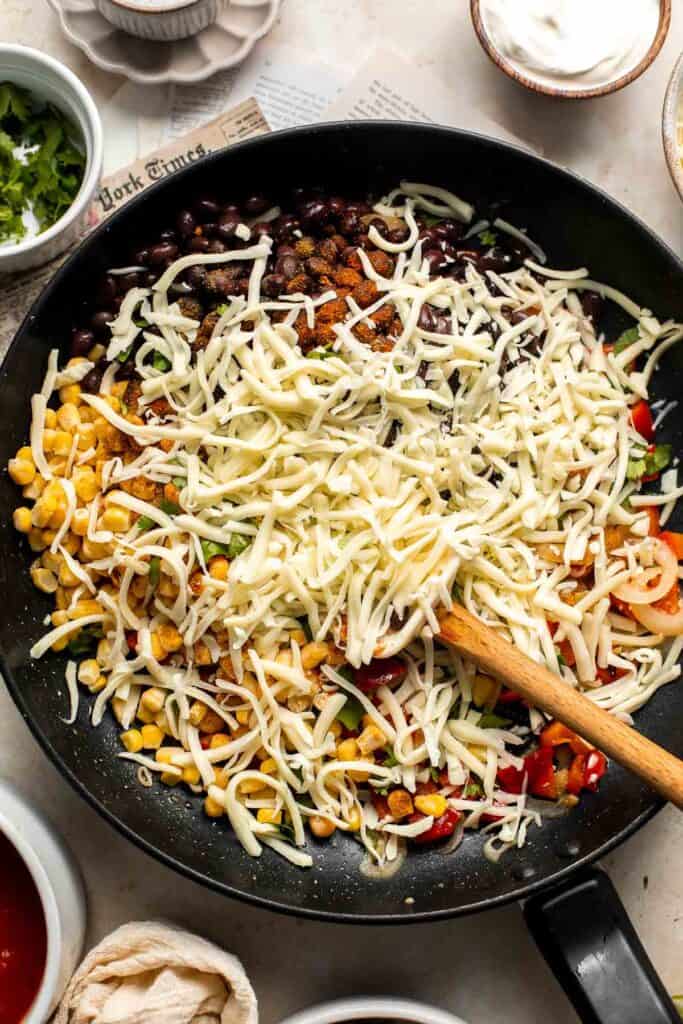
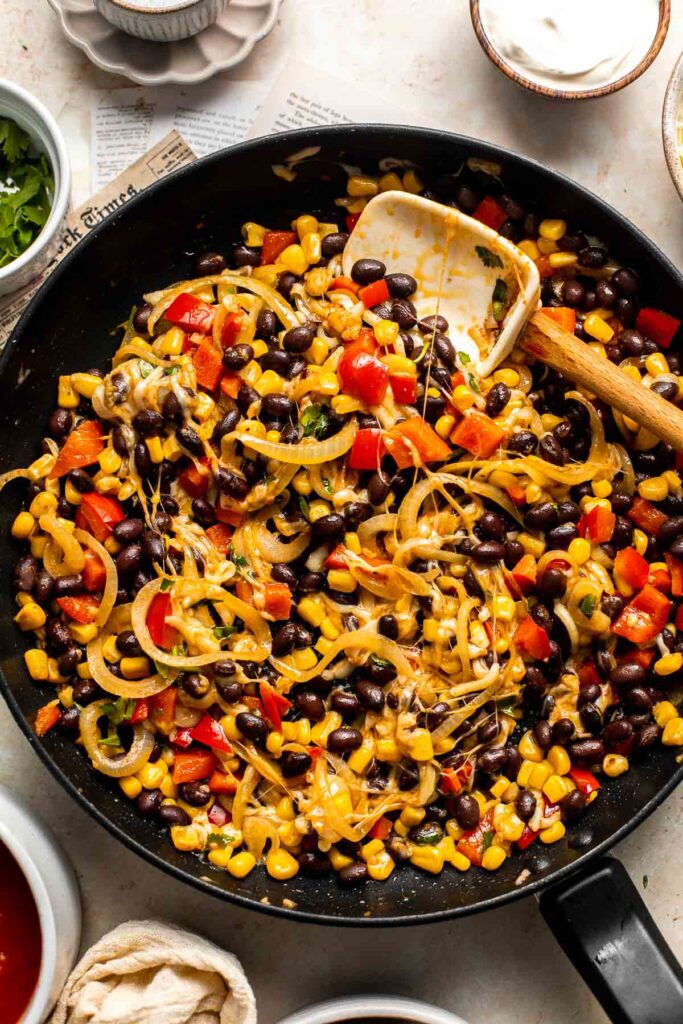
- Spread sauce. Spread ½ cup enchilada sauce onto a 9x13-inch casserole pan.
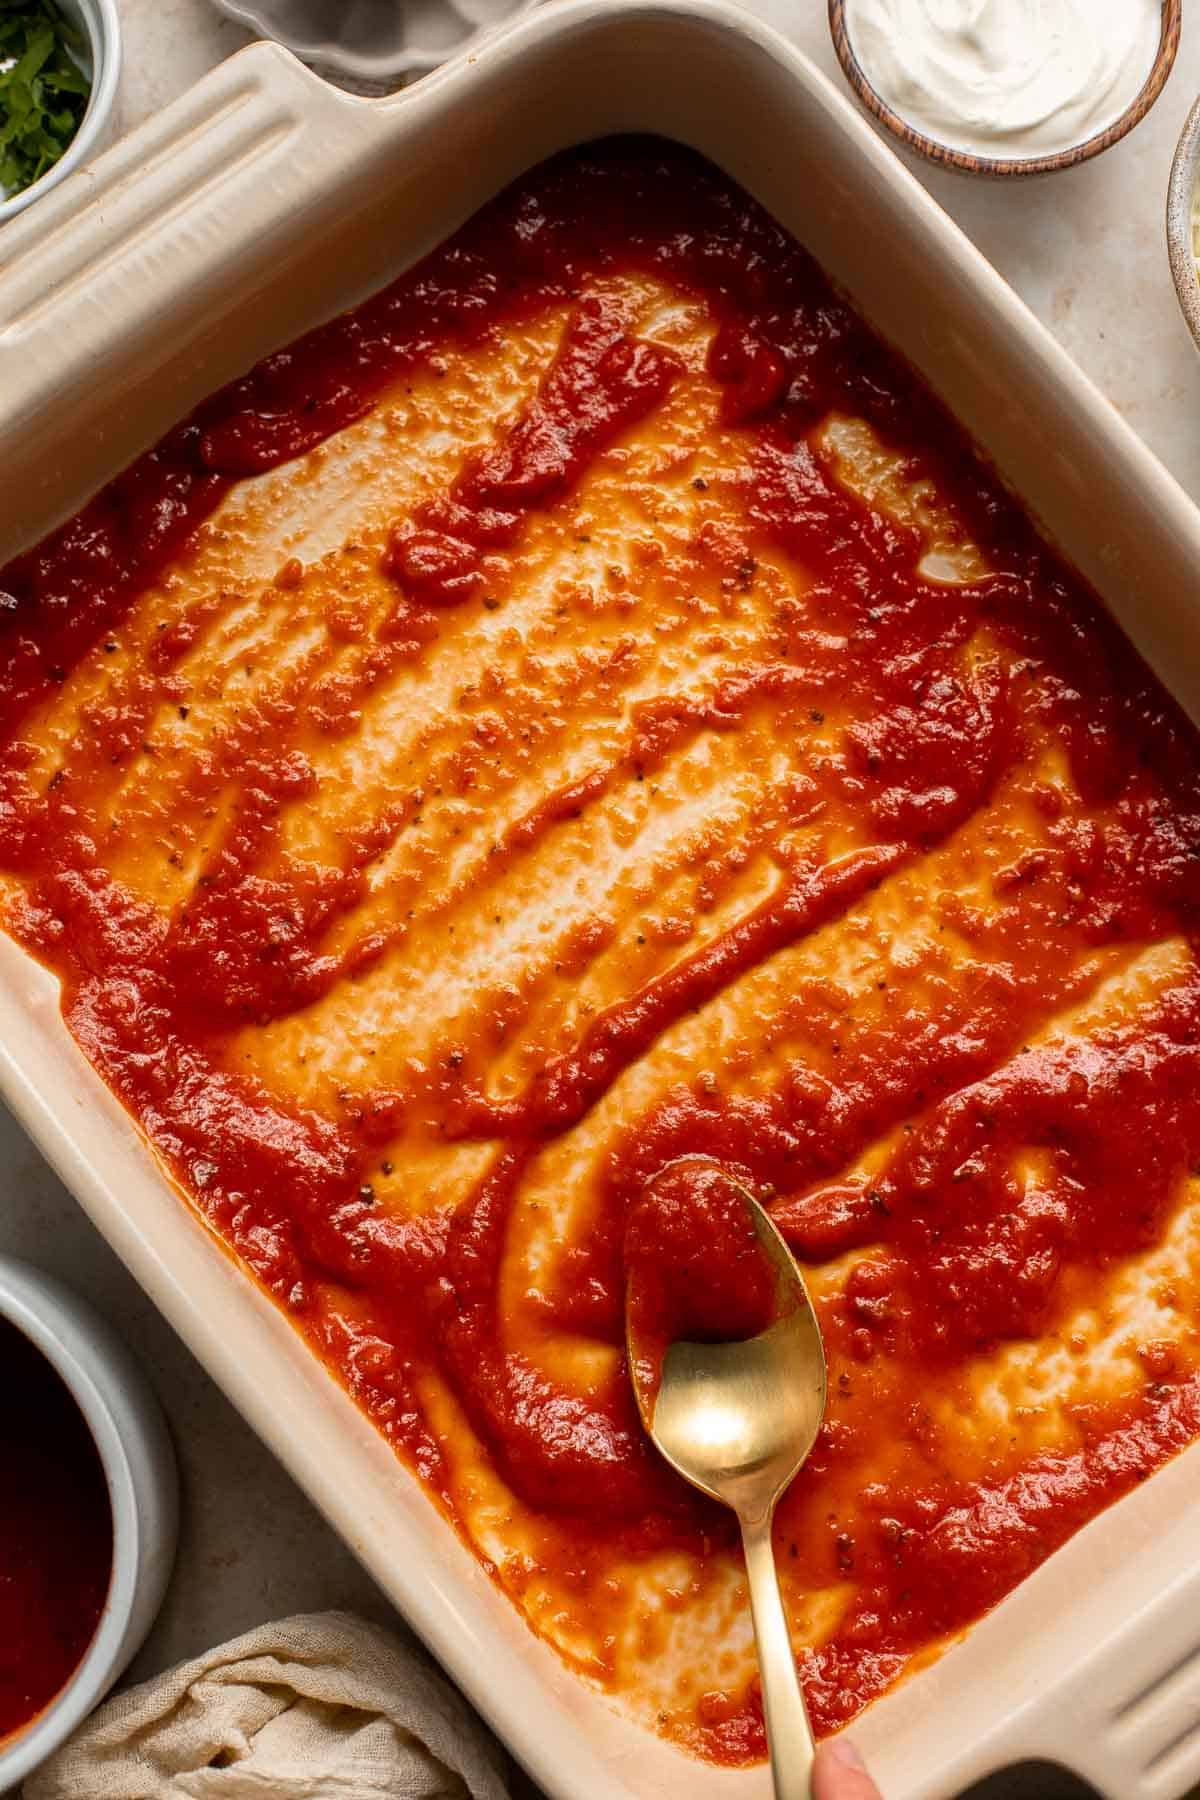
- Assemble enchiladas. Add about ⅓ cup of the filling mixture across the centre of each tortilla.
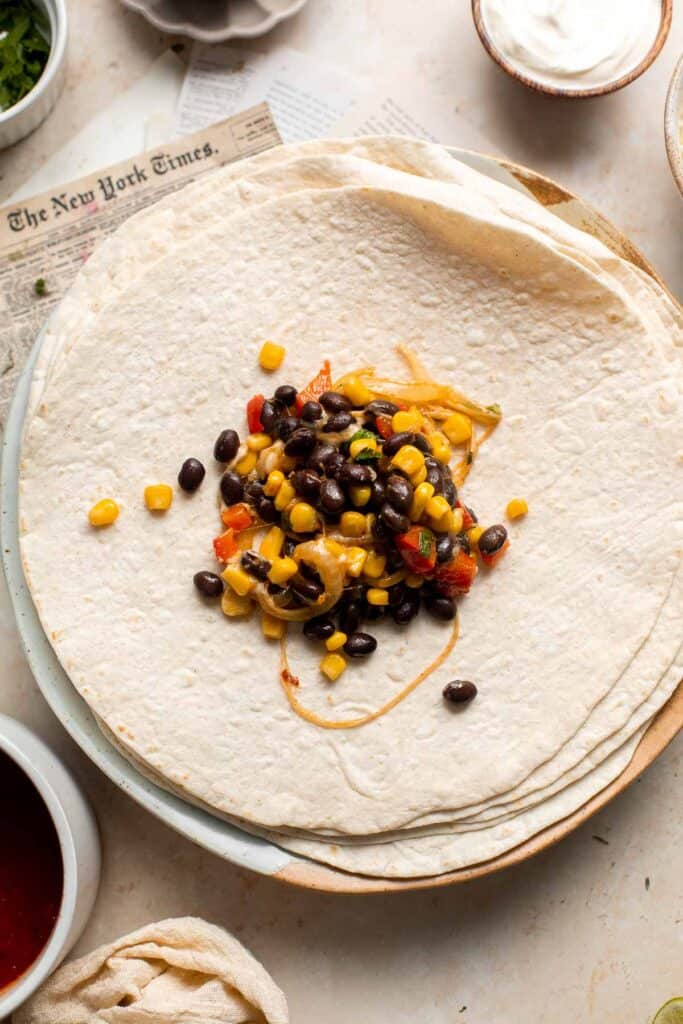

- Add enchiladas to pan. Carefully roll them up and arrange them seam side down on the casserole pan. Repeat with the remaining filling and tortillas.
- Add toppings. Spread the remaining sauce evenly on top and sprinkle with the remaining 1 cup of cheese.
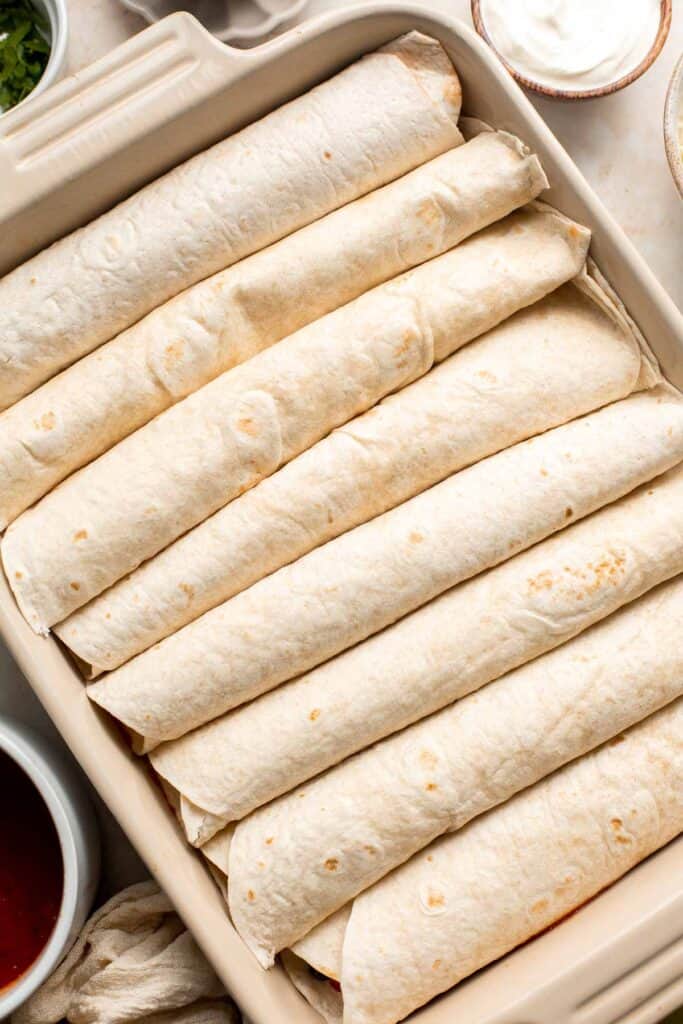

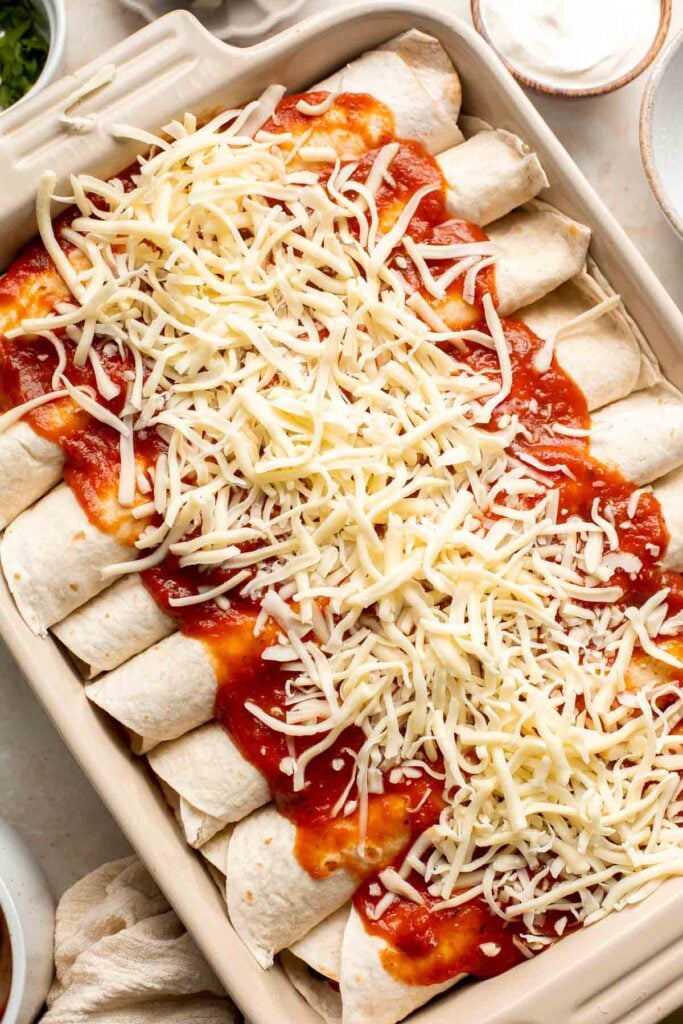
- Bake. Cover the pan with aluminum foil and bake in a 350F preheated oven for 15 minutes. Remove the foil and bake uncovered for another 8-10 minutes until the melted cheese turns golden brown. Let rest for 5 minutes.
- Serve. Serve warm with a sprinkle of fresh cilantro on top, dollops of sour cream, and lime wedges, if desired.


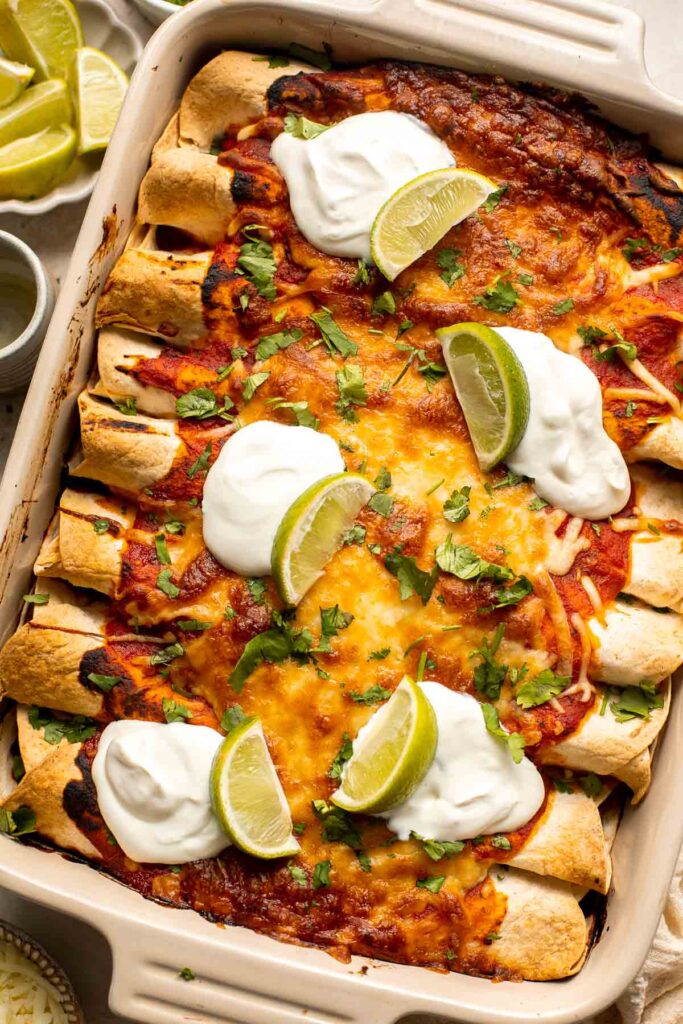
Recipe Variations
- Make them spicy. Want to kick up the heat? Add a teaspoon or two of hot sauce to the red enchilada sauce or add sliced jalapeños to the filling to give these vegetarian enchiladas a bit of bite!
- Add protein. Add some cooked chicken (try leftover rotisserie chicken or shredded chicken) to the filling, or your favorite protein such as beef or shrimp.
- Change the veggies. You can customize these enchiladas by filling them with different veggies such as roasted vegetables like zucchini, mushrooms, or sweet potatoes.
- Add greens. Give them a nutritional boost by adding fresh spinach or kale to your filling. It's a great way to sneak in some greens and adds a fresh flavor.
- Swap the sauce. Change up the flavor by using a different sauce, like green salsa or enchilada sauce with mole or chipotle flavors. It adds a unique twist to these veggie enchiladas.
How to Serve
These vegetarian enchiladas are filling on their own, but you can make them go even further by serving them with some of our favorite Mexican inspired sides including:
- Cilantro Lime Rice
- Elote Mexican Street Corn
- Sopa Tarasca (Pinto Bean Soup)
- Cilantro Lime Slaw
- Mexican Stuffed Peppers
- Guacamole
- Refried Beans
For more, see our 25 Mexican Side Dishes.
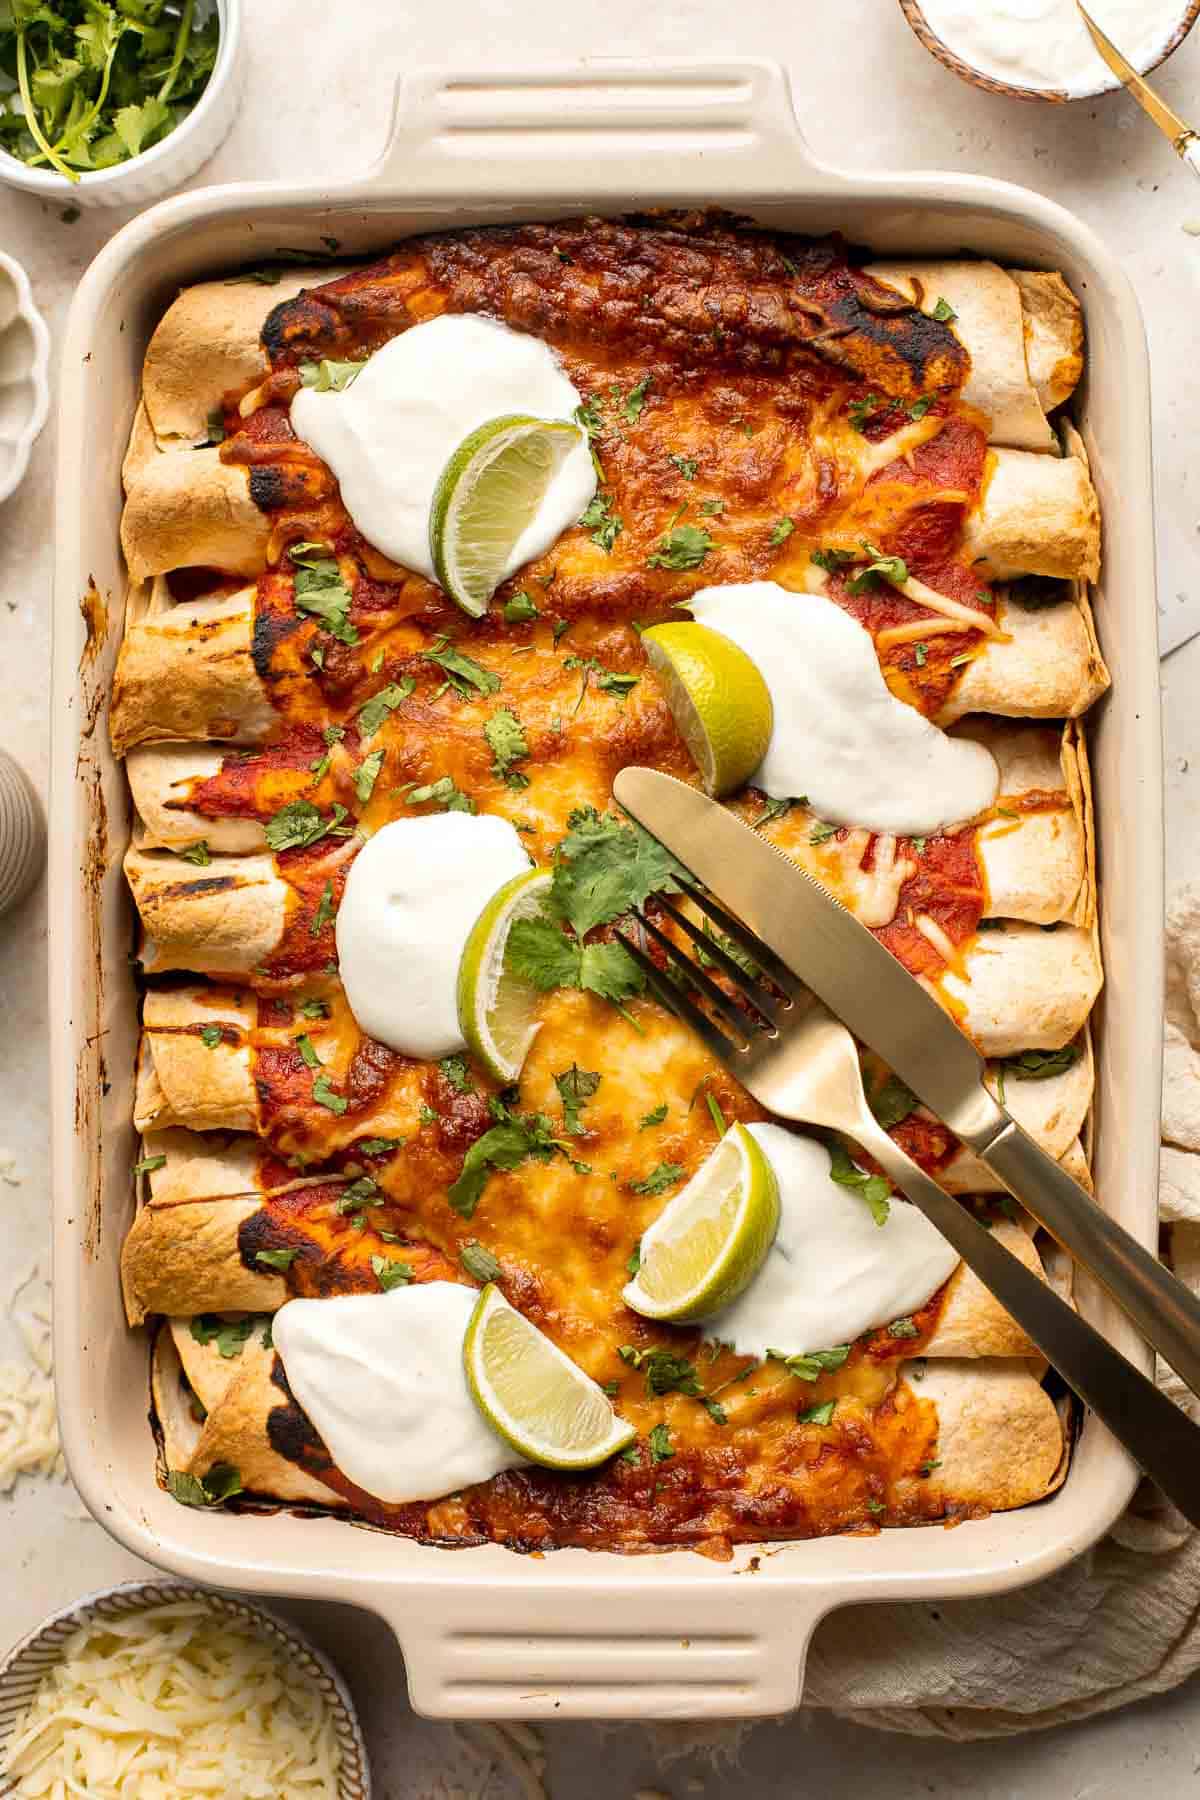
Recipe Tips and Tricks
- Heat the tortillas. If you find your tortillas too dry to work with, try heating them. Heating the tortillas before rolling them will make them easier to work with and prevent them from cracking.
- Let them rest before serving. Letting the enchiladas rest for a few minutes before serving will allow the sauce to thicken and the flavors to meld together more.
- Add toppings. Top your enchiladas with your favorite taco fixings such as extra shredded cheese, diced tomatoes, sliced jalapeños, or fresh cilantro. It adds flavor and color to your meal.
- Set up a DIY enchilada bar. Set up a DIY enchilada bar with a variety of toppings and sides such as guacamole, salsa, sour cream, shredded lettuce, and chopped onions. It's a fun and interactive way to serve your enchiladas and lets everyone customize their own dish.
Storing and Freezing Instructions
How to Store
Place cooled vegetarian enchiladas in an airtight container and refrigerate for up to 5 days.
How to Reheat
Reheat leftover enchiladas in the microwave on high in 10 second increments for 60 seconds or until heated through. You can also reheat them in the oven at 350℉ for 15-20 minutes.
How to Freeze
Transfer the enchiladas into a freezer-safe container and freeze for up to 3 months. Allow them to thaw overnight in the refrigerator before reheating them.
More Mexican Recipes
- 30 Mexican Recipes for Cinco de Mayo
- Chicken Enchiladas
- Cauliflower Tacos
- Shrimp Fajitas
- Baked Chicken Quesadillas
- Beef Taco Salad
- Chicken Tortilla Soup
Tried this recipe?
I'd love to hear what you think! Leave a comment and rating below to share your feedback. Your reviews help others discover this recipe and help me keep creating more free recipes for you. Snap a photo and tag me on social media @aheadofthyme too.

Soy Sauce Eggs (Ramen Eggs)
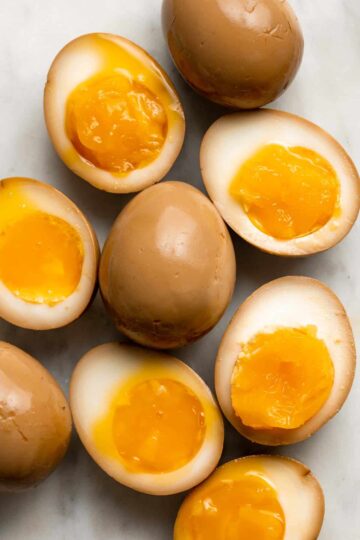
Soy Sauce Eggs (also known as Ramen Eggs or Shoyu Tamago) are incredibly umami, with a firm white and a jammy center. The salty, savory flavor (and the name) are thanks to a 12-hour marinade in a soy sauce-based stock that permeates the whites and makes these eggs so delicious.

Great for snacking or for adding to ramen bowls (as the name suggests), these soy sauce eggs are easy to make and even easier to eat - having any left over is a rare occasion! Just soak boiled eggs in a 4-ingredient marinade and enjoy. You'll love how easy and delicious these Asian eggs are!
Why You'll Love these Ramen Eggs
- Classic ramen egg. If you've had restaurant-style ramen, you've likely fallen head over heels for the jammy, umami, soy-soaked egg that typically rests on top of the noodles. They're one of the best parts of ramen, and now you can easily make them at home!
- Unbelievably easy. The hardest part of making these soy sauce eggs is waiting patiently for them to soak in all the delicious soy sauce flavor. Otherwise, it couldn't be easier to make them. Boil the eggs, make the marinade, and soak. Then, enjoy!
- Incredibly versatile. These soy sauce eggs can be used anywhere you'd use boiled eggs - in salads, on sandwiches or toast, with noodles, in soup, your imagination is your only limit! Plus, you can customize the flavor by adding different ingredients into the marinade. See our Recipe Variations below for some ideas.
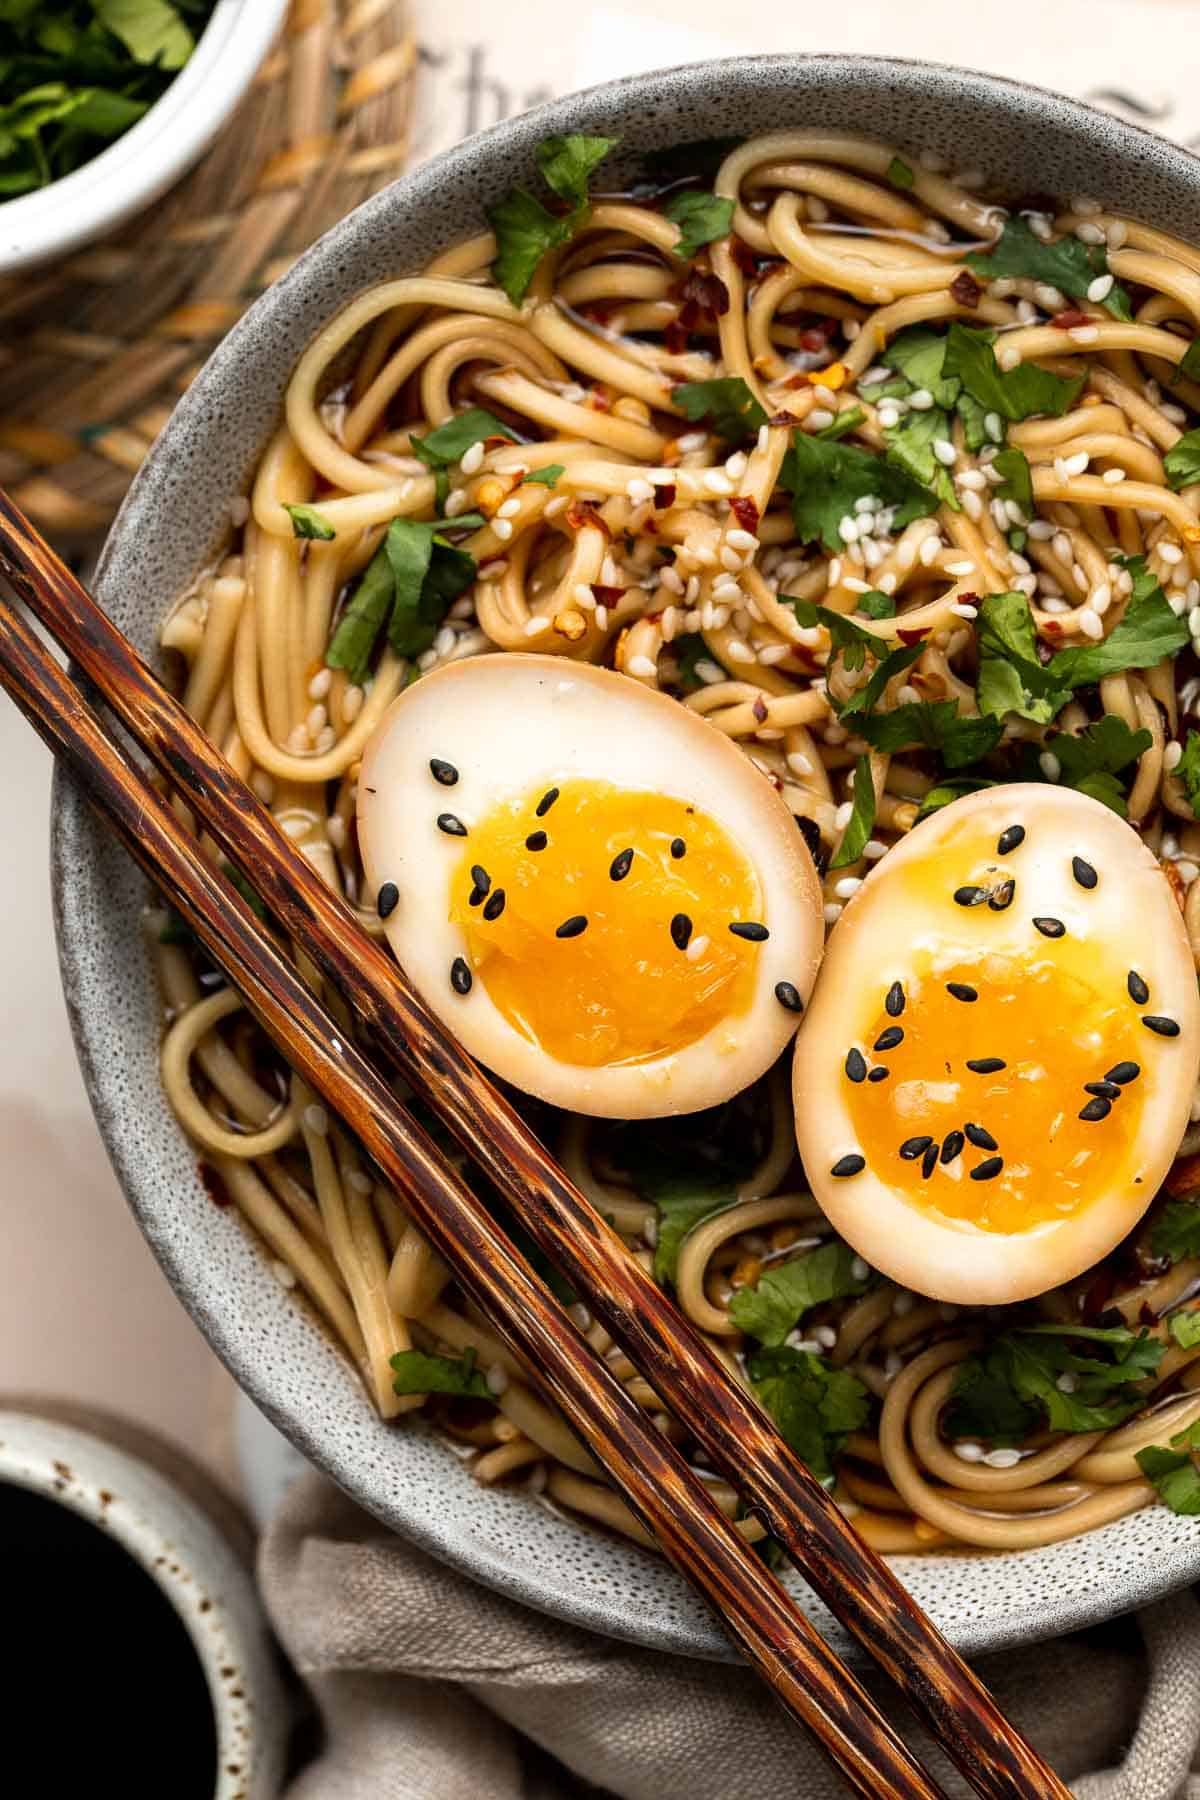
Ingredient Notes
To make these easy Soy Sauce Eggs (Ramen Eggs), you will need the following ingredients (full measurements in recipe card below):
- eggs - soy sauce eggs are typically soft boiled before marinating, but you can do a medium or hard boil to suit your texture preferences.
- water
- soy sauce - regular soy sauce works best, but you can use gluten free or reduced sodium soy sauce. Coconut aminos are also an acceptable substitute for soy sauce.
- dark soy sauce - if you can't find dark soy sauce, you can use more regular soy sauce or add a bit of oyster sauce, teriyaki sauce, or hoisin sauce for a similar effect.
- sugar - this recipe calls for granulated sugar, but you can substitute the same measure of honey, agave, or your preferred sugar alternative.
You will also need measuring cups and spoons, large pot, and mixing bowls (or Ziploc bag).
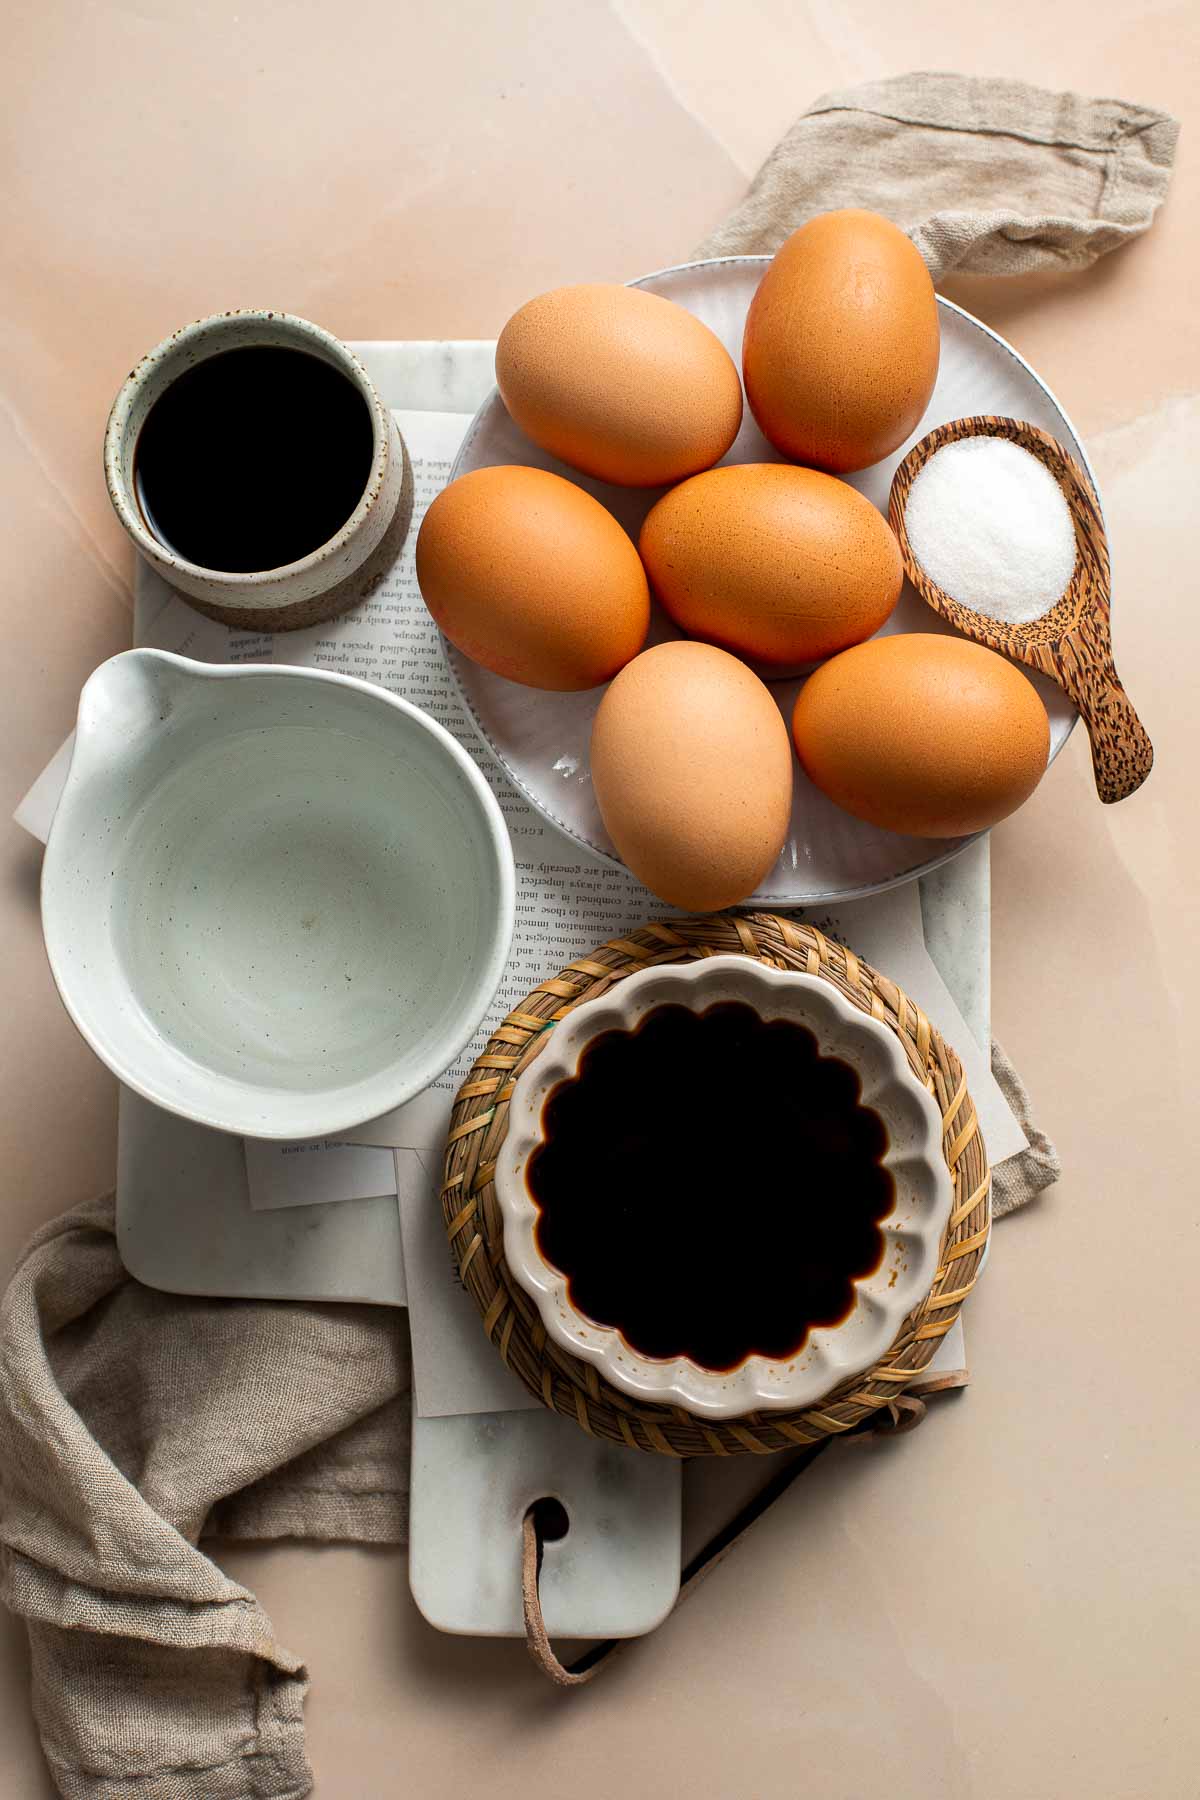
How to Make the Best Soy Sauce Eggs (Ramen Eggs)
- Boil eggs. Bring a large pot of water to a boil. Carefully lower the eggs, one at a time into the boiling water and cook for 6 minutes, while continuously stirring the eggs clockwise for the first minute so that the egg yolk sits right in the centre. For a slightly firmer texture, cook for 7 minutes.

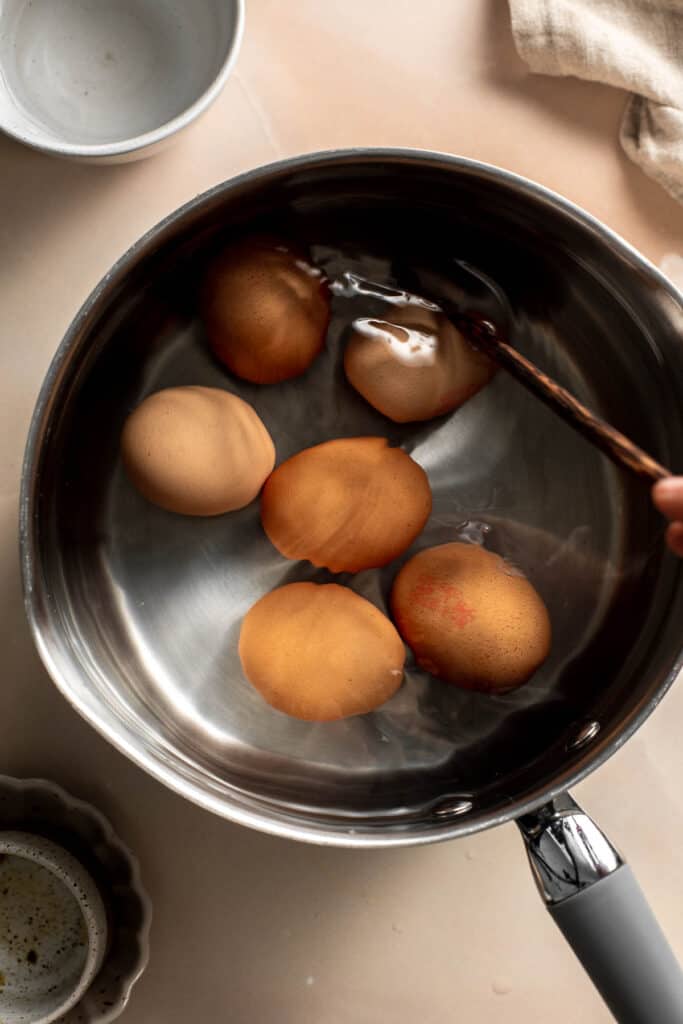
- Cool and peel. When the time is up, remove the eggs and immediately place them in an ice water bath for a few minutes. Once cooled down completely, crack and peel the shells carefully.
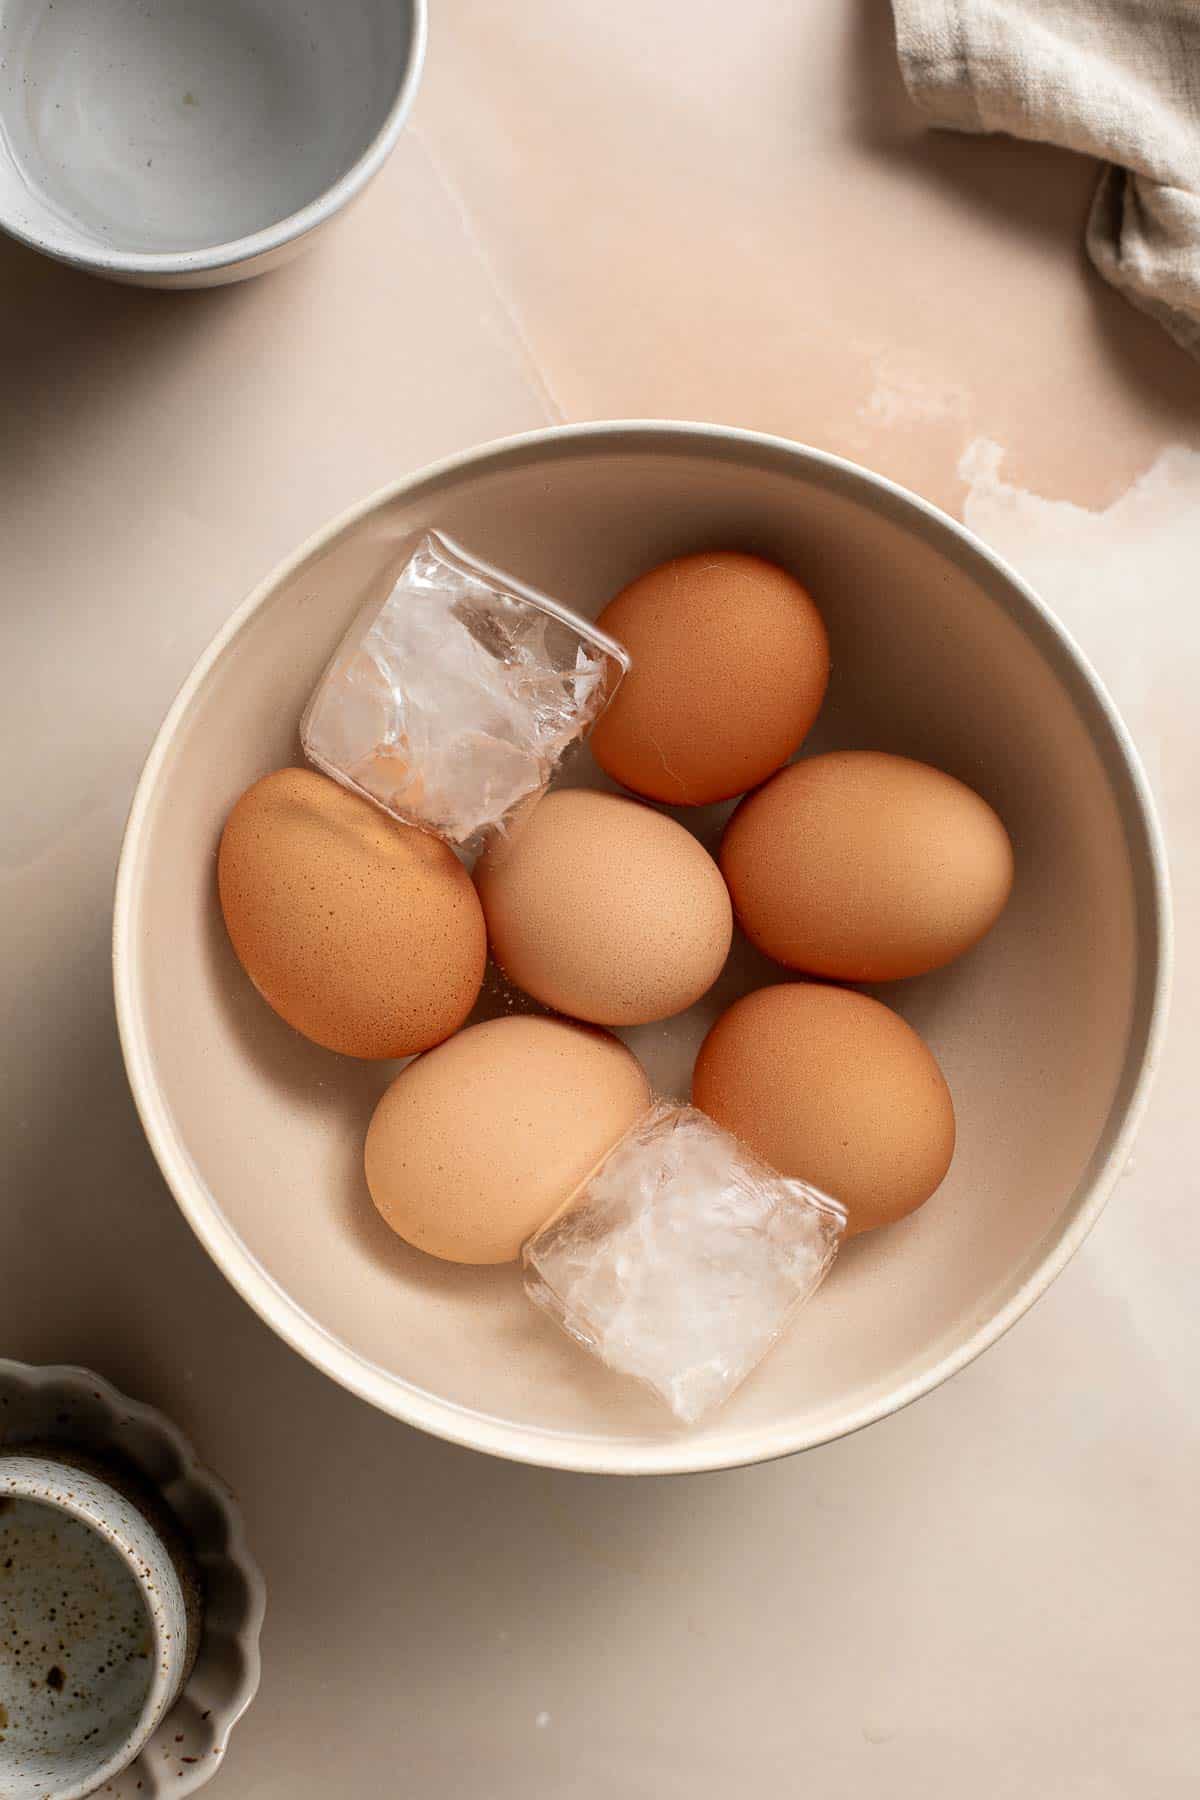
- Make marinade. In a mixing bowl or ziploc bag, add water, soy sauce, dark soy sauce, and sugar. Mix well until combined.
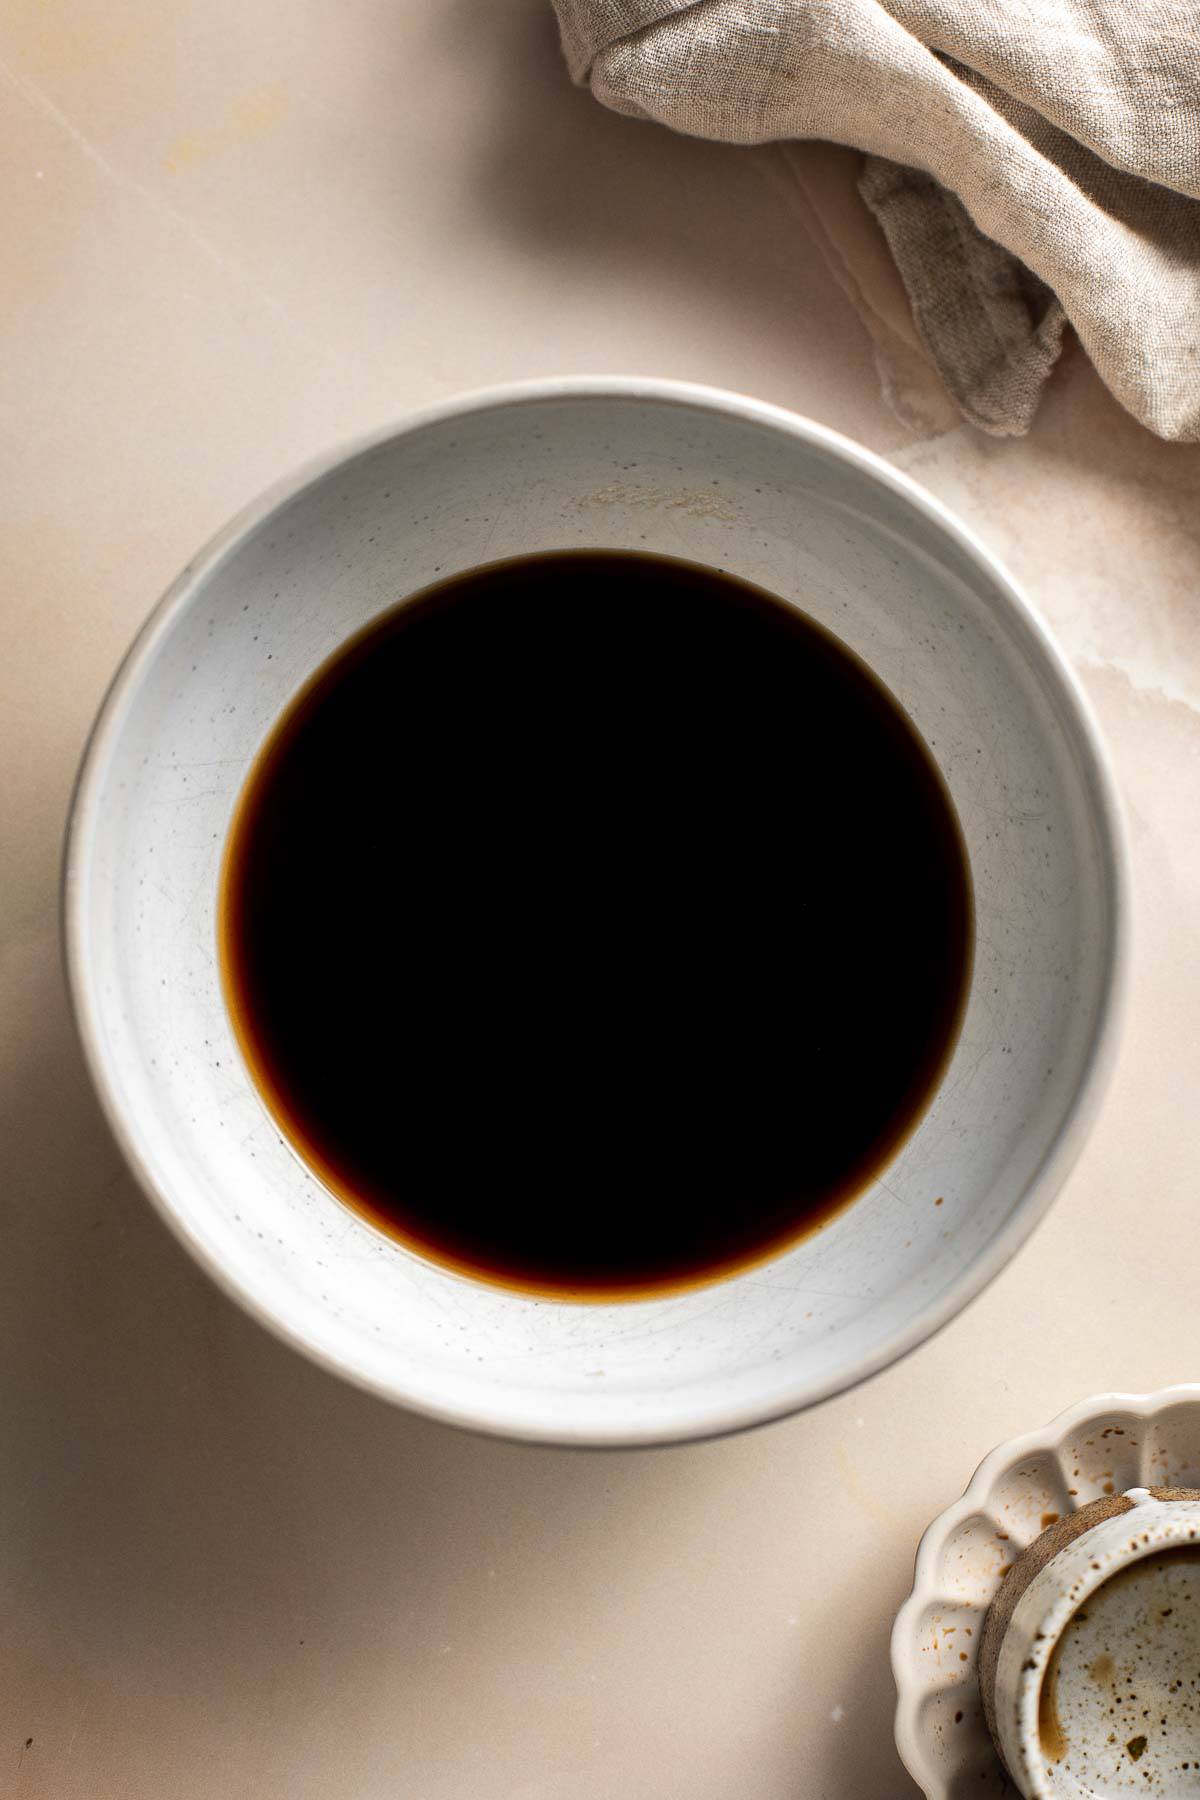
- Marinate eggs. Fully submerge the eggs into the sauce mixture. Cover and/or seal and refrigerate for 12-24 hours (or up to 3 days for a saltier flavor). Rotate the container or bag rotate the bag occasionally to ensure even marination.
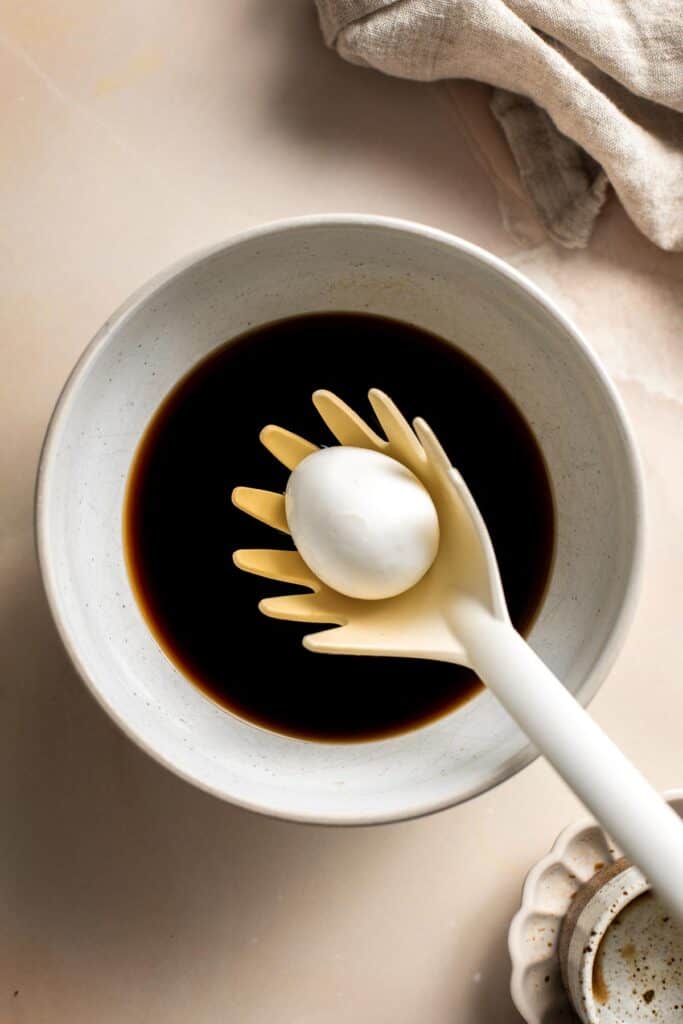
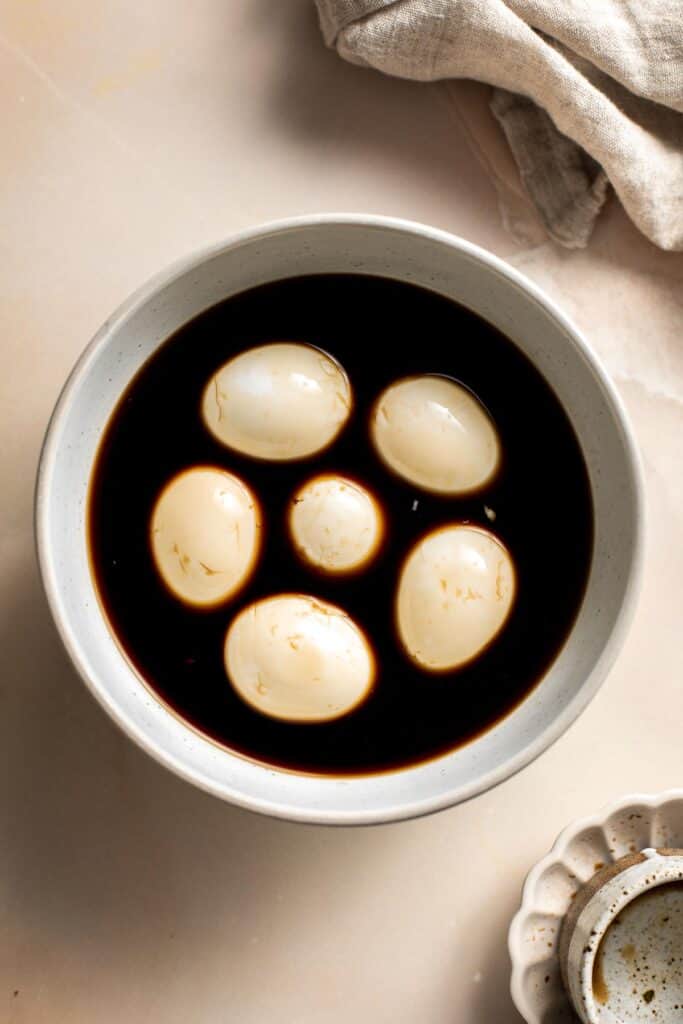
- Serve. Slice in half and serve on their own as a snack or as aopping in ramen or rice bowls.
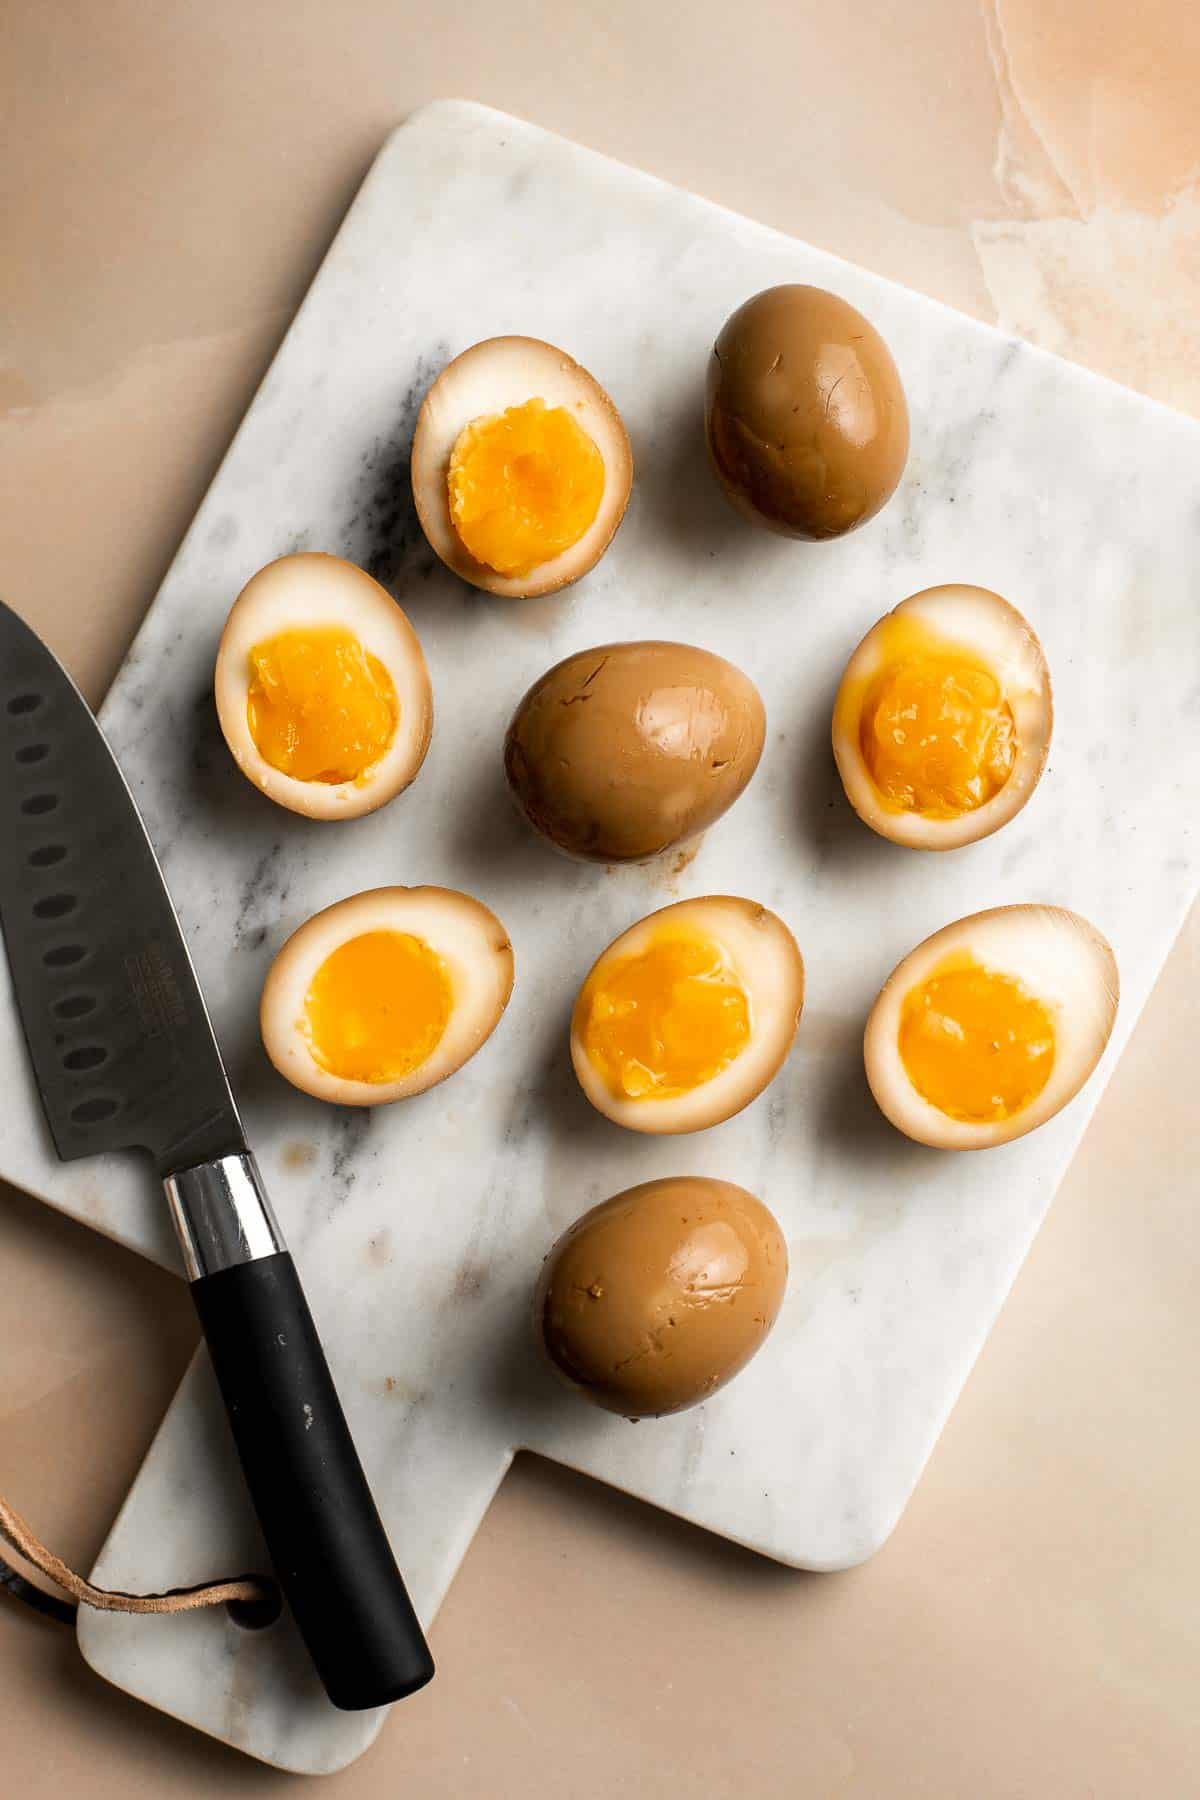
Recipe Variations
- Add miso. Add a spoonful of miso paste to the marinade mixture to give the eggs a richer and more savory flavor.
- Spice it up. Add a pinch of cayenne pepper or red pepper flakes or a small amount of wasabi paste to the marinade for a kick of heat.
- Make it sweeter. Add a little more sugar or honey to the marinade mixture to create a sweeter taste.
- Add sesame. Mix in some toasted sesame oil or sprinkle sesame seeds over the eggs to give them a nutty flavor and texture.
- Make it garlicky. Add minced garlic or garlic powder to the marinade mixture for a flavorful and aromatic twist.
How to Serve
Soy Sauce Eggs can be served on their own as a snack or appetizer, or used as a topping for ramen, sobal bowls, rice bowls, toast, or salads. To add some extra flavor and texture, try garnishing the eggs with sliced green onions, toasted sesame seeds, or chili flakes.
Asian dishes can be improved just by adding a soy sauce egg or two! As a topping or a side, these ramen eggs pair well with just about any similar dish. Try it with:
- Creamy Vegan Ramen
- Korean Beef Steak Rice Bowls
- Soba Noodle Salad
- Coconut Curry Ramen
- Teriyaki Salmon Rice Bowl
- Avocado Toast with Poached Egg (use ramen eggs instead of poached egg in this recipe!)
- Miso Ramen with Chicken
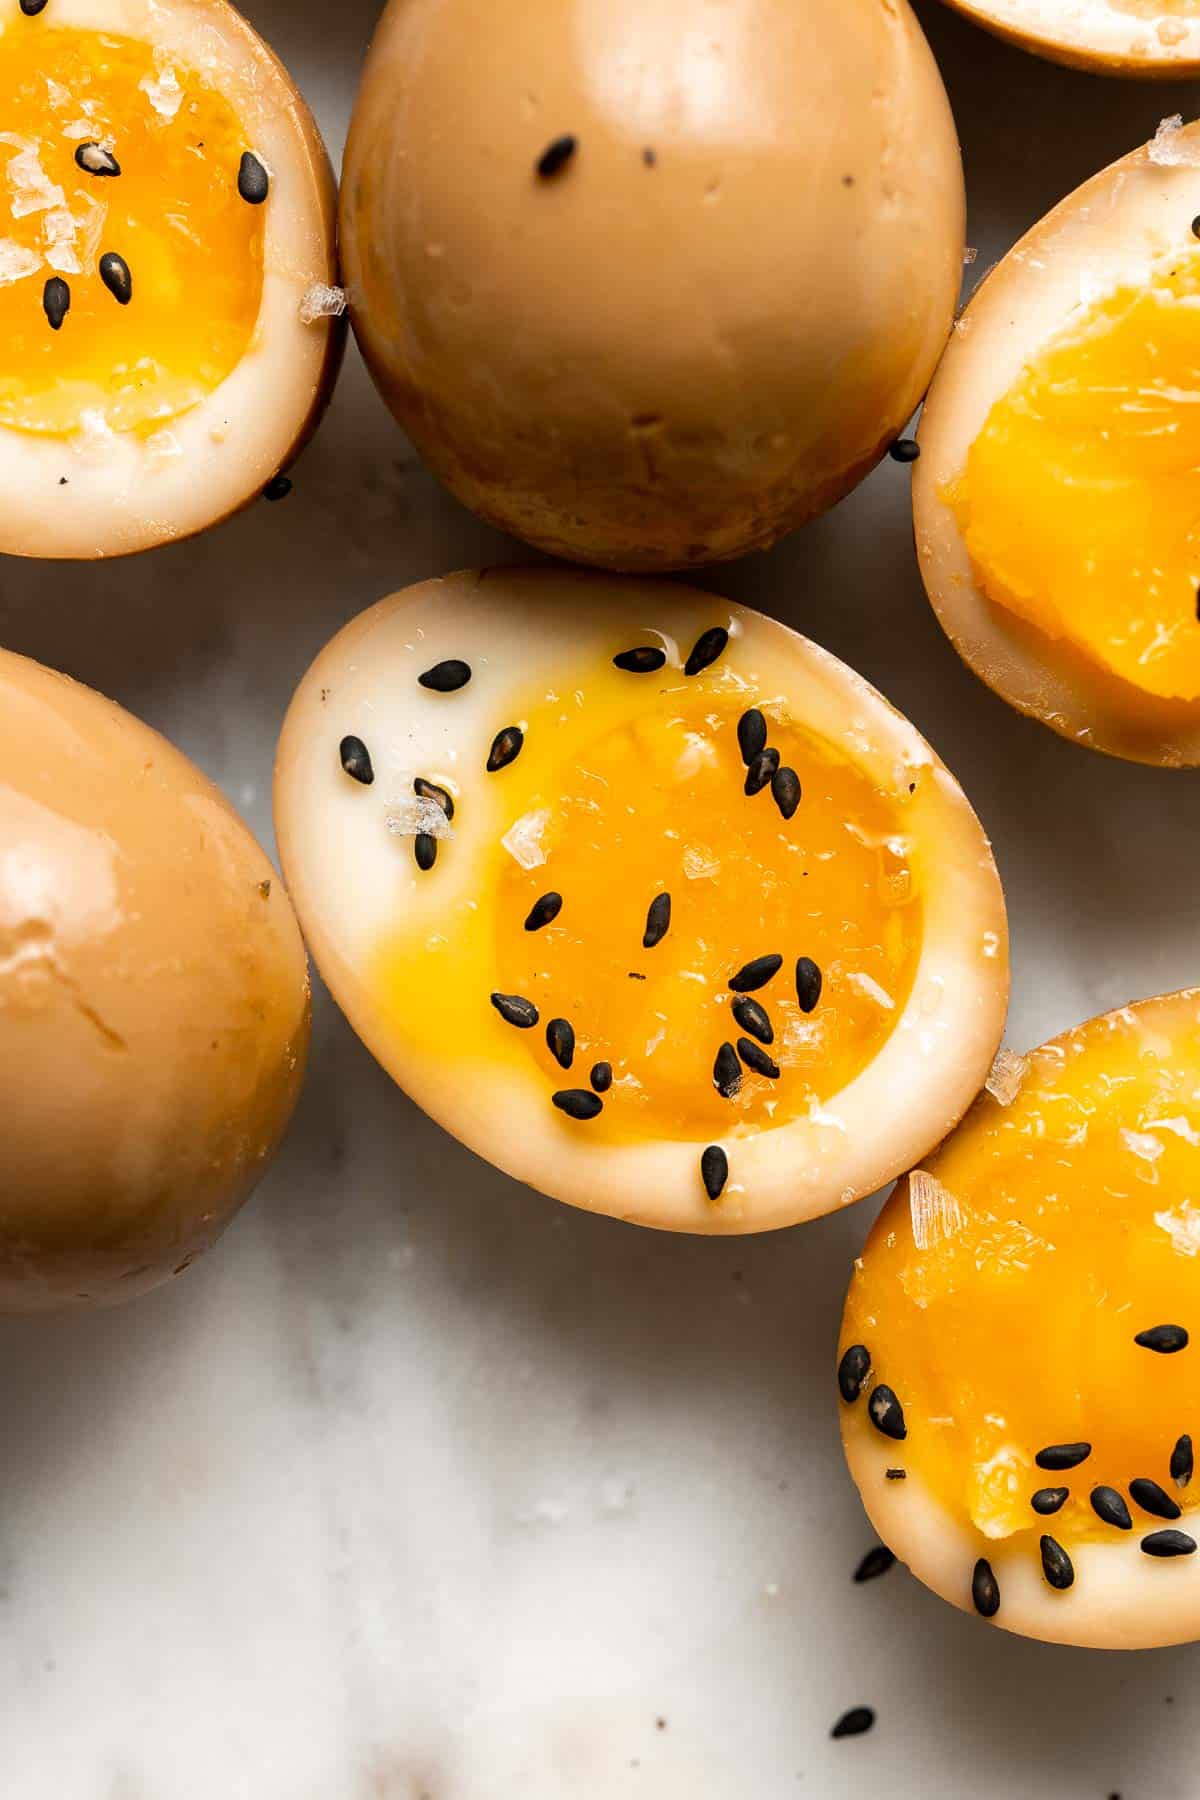
Recipe Tips and Tricks
- Use high-quality eggs. The flavor and texture of your soy sauce eggs will largely depend on the quality of the eggs you use. Try to use fresh, organic eggs for the best results.
- Don't overcook the eggs. Overcooked eggs can become tough and rubbery, so it's important to keep an eye on them as they cook. If you're not sure when they're done, you can use a timer.
- Marinate the eggs for at least a few hours. To infuse the eggs with the flavor of the soy sauce mixture, it's important to let them marinate for at least a few hours (preferably overnight). This will ensure that the flavor penetrates the egg white and yolk.
- Serve the eggs at room temperature. Soy sauce eggs are best served at room temperature, so make sure to take them out of the fridge at least 30 minutes before serving.
- Add them to a snack plate. Level up your charcuterie plates with these addictive soy sauce eggs - you'll never go back! Pair with crunchy crackers and crisp vegetables for optimal snacking.
Storing and Freezing Instructions
How to Store
Store soy sauce eggs in an airtight container in the marinade mixture for up to 3 days, or remove from the marinade and store for 3 days total (including marinating time) for milder flavor.
How to Freeze
It's not recommended to freeze soy sauce eggs because the texture of the eggs will be tough when thawed, but you can freeze leftover marinade to use in dressings, stir fries, and more for up to 3 months. Transfer the stock to an airtight container or freezer bag, leaving room for the liquid to expand, and freeze. Thaw in the refrigerator before using.
More Recipes
- 20 Best Egg Recipes
- Deviled Eggs
- Mediterranean Scrambled Eggs
- Egg Muffins
- Shakshuka
- Egg Salad Sandwich
Tried this recipe?
I'd love to hear what you think! Leave a comment and rating below to share your feedback. Your reviews help others discover this recipe and help me keep creating more free recipes for you. Snap a photo and tag me on social media @aheadofthyme too.
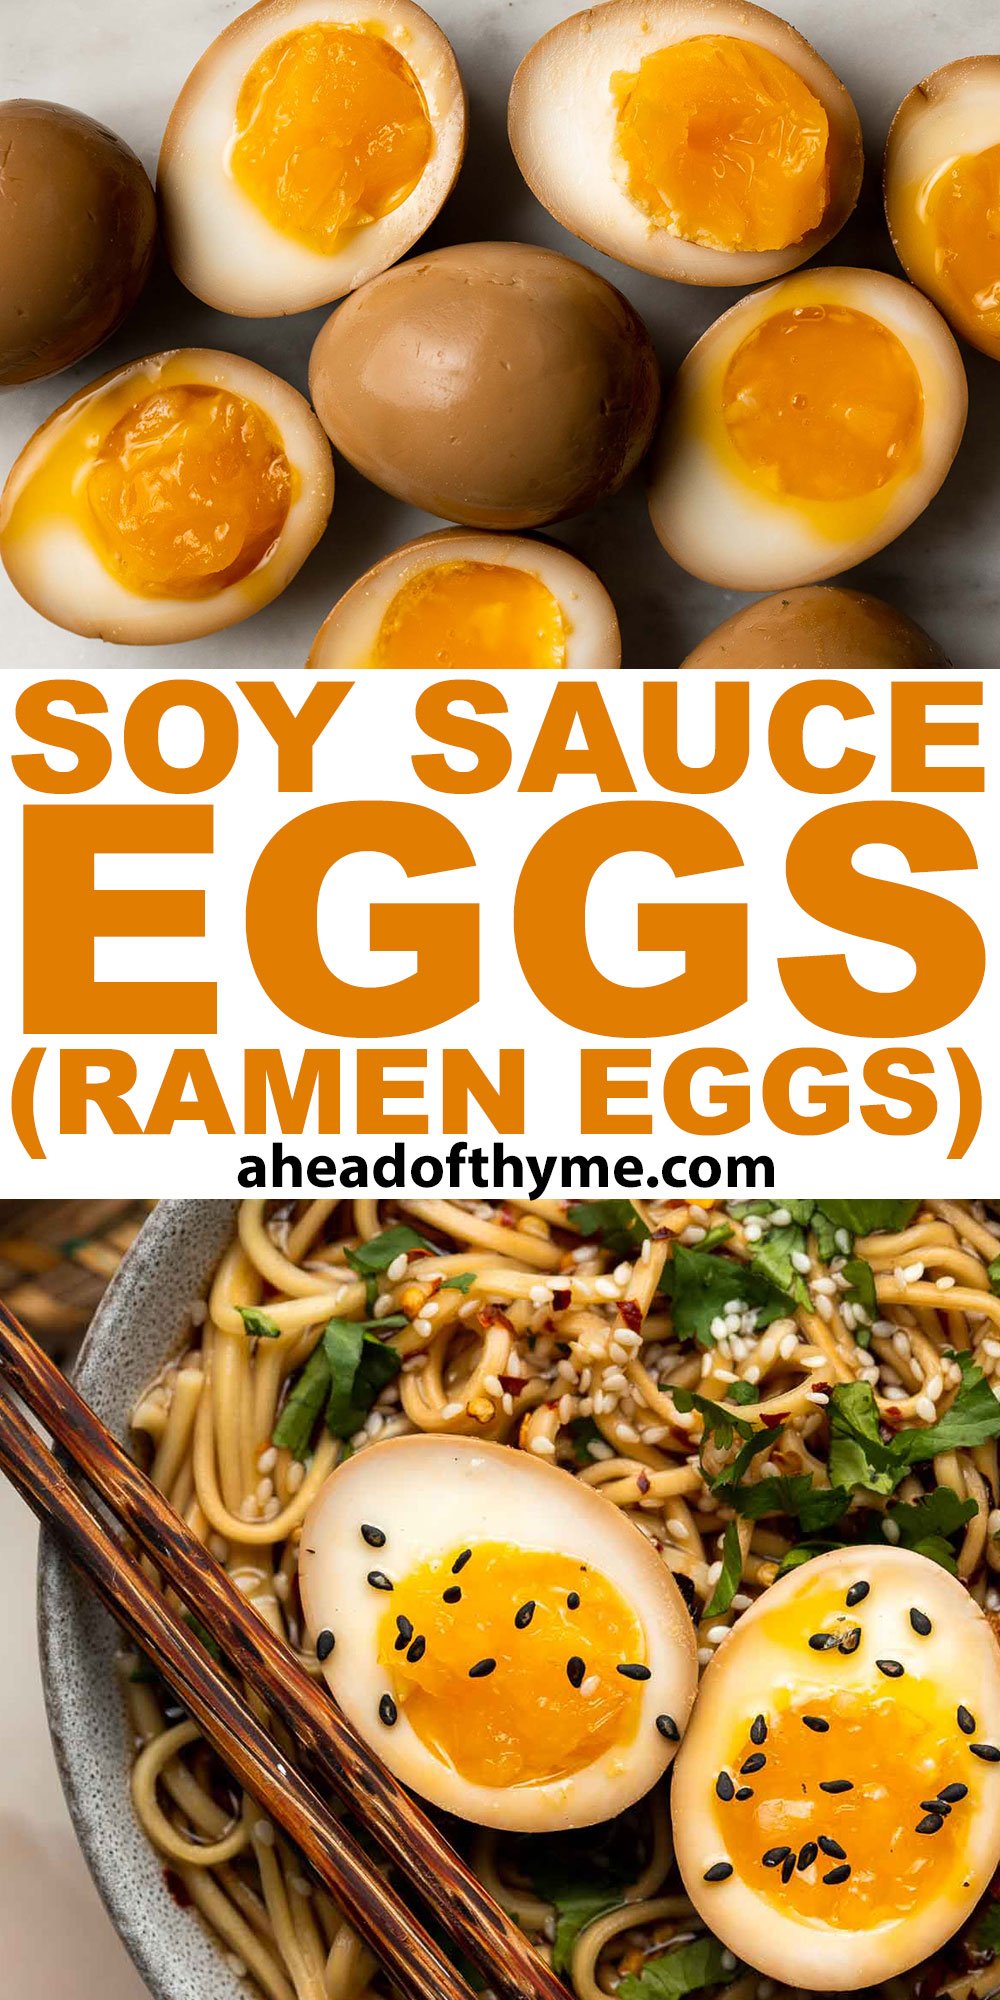
Rice Krispies Treats
Rice Krispies Treats are a classic dessert that is loved by kids and adults alike. These chewy, crunchy, sticky-sweet treats are easy to make from scratch in just a few simple steps using only 3 ingredients! They're bursting with buttery marshmallow flavor and the crackle of the popped rice makes them perfectly irresistible.
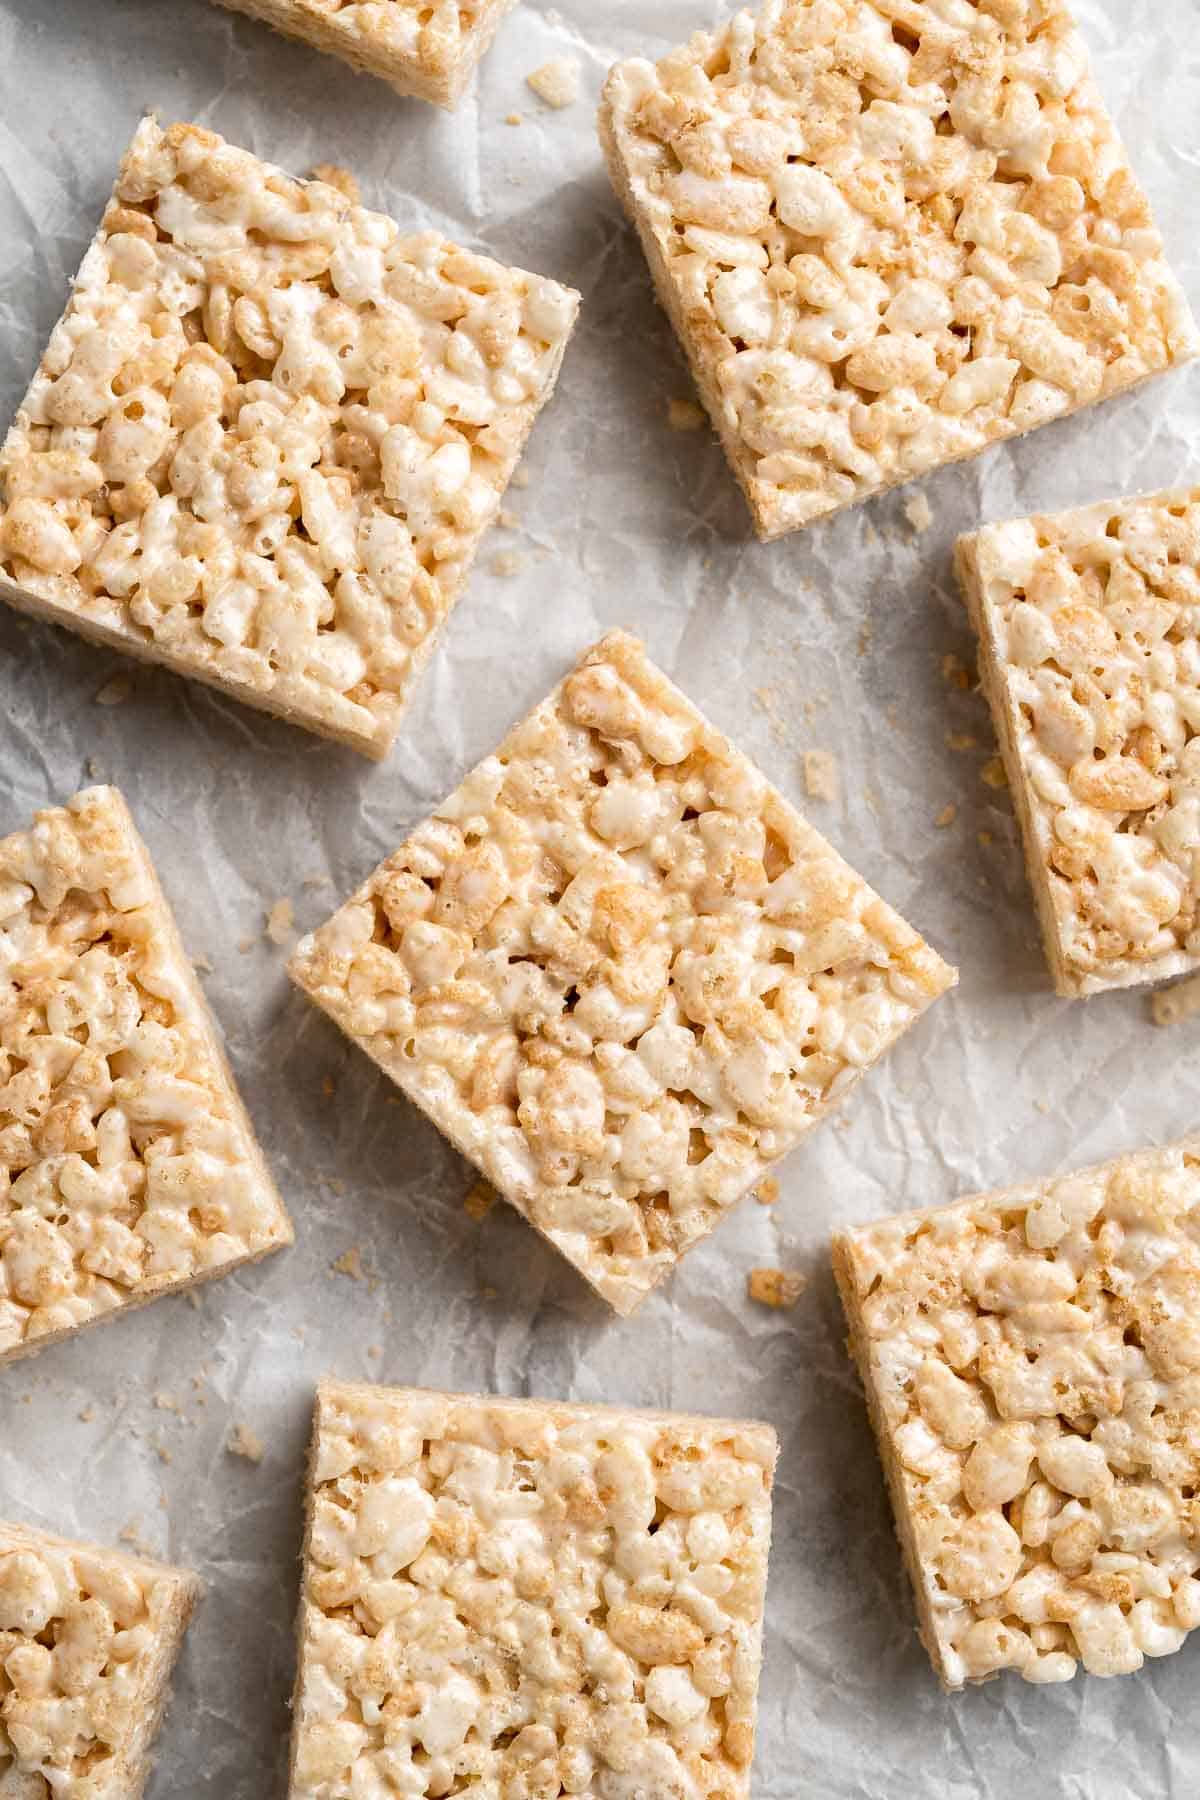
It takes just 15 minutes to prep and an hour to let them set, but these rice crispy squares are totally worth it. They are perfect to serve for any occasion. Whether you are hosting a party, looking for an after-school snack, or craving something sweet, rice crispy treats are a delicious and nostalgic choice.
Why You'll Love these Rice Krispies Treats
- Easy to make. It only takes 3 ingredients, 15 minutes of effort, and an hour of patience to make these classic rice krispies treats from scratch! No filler ingredients or pastry-school techniques necessary.
- Quick no bake dessert. You don't even need an oven to make these. Just melt butter, mix in the marshmallows, coat the cereal, and press it into the pan to set! It couldn't be easier to make rice crispy treats from scratch, and your whole family can get involved with the process.
- Endlessly customizable. These rice crispy treats are the perfect blank canvas for your imagination to run wild. You can add as much or as little mix-ins to them as you like, or leave them plain to savor the buttery marshmallow flavor!
- Serve them any time. Rice crispy squares are so tasty you'll want to break them out for every special occasion - but they're easy and simple enough that you can make them for after school treats, just because!
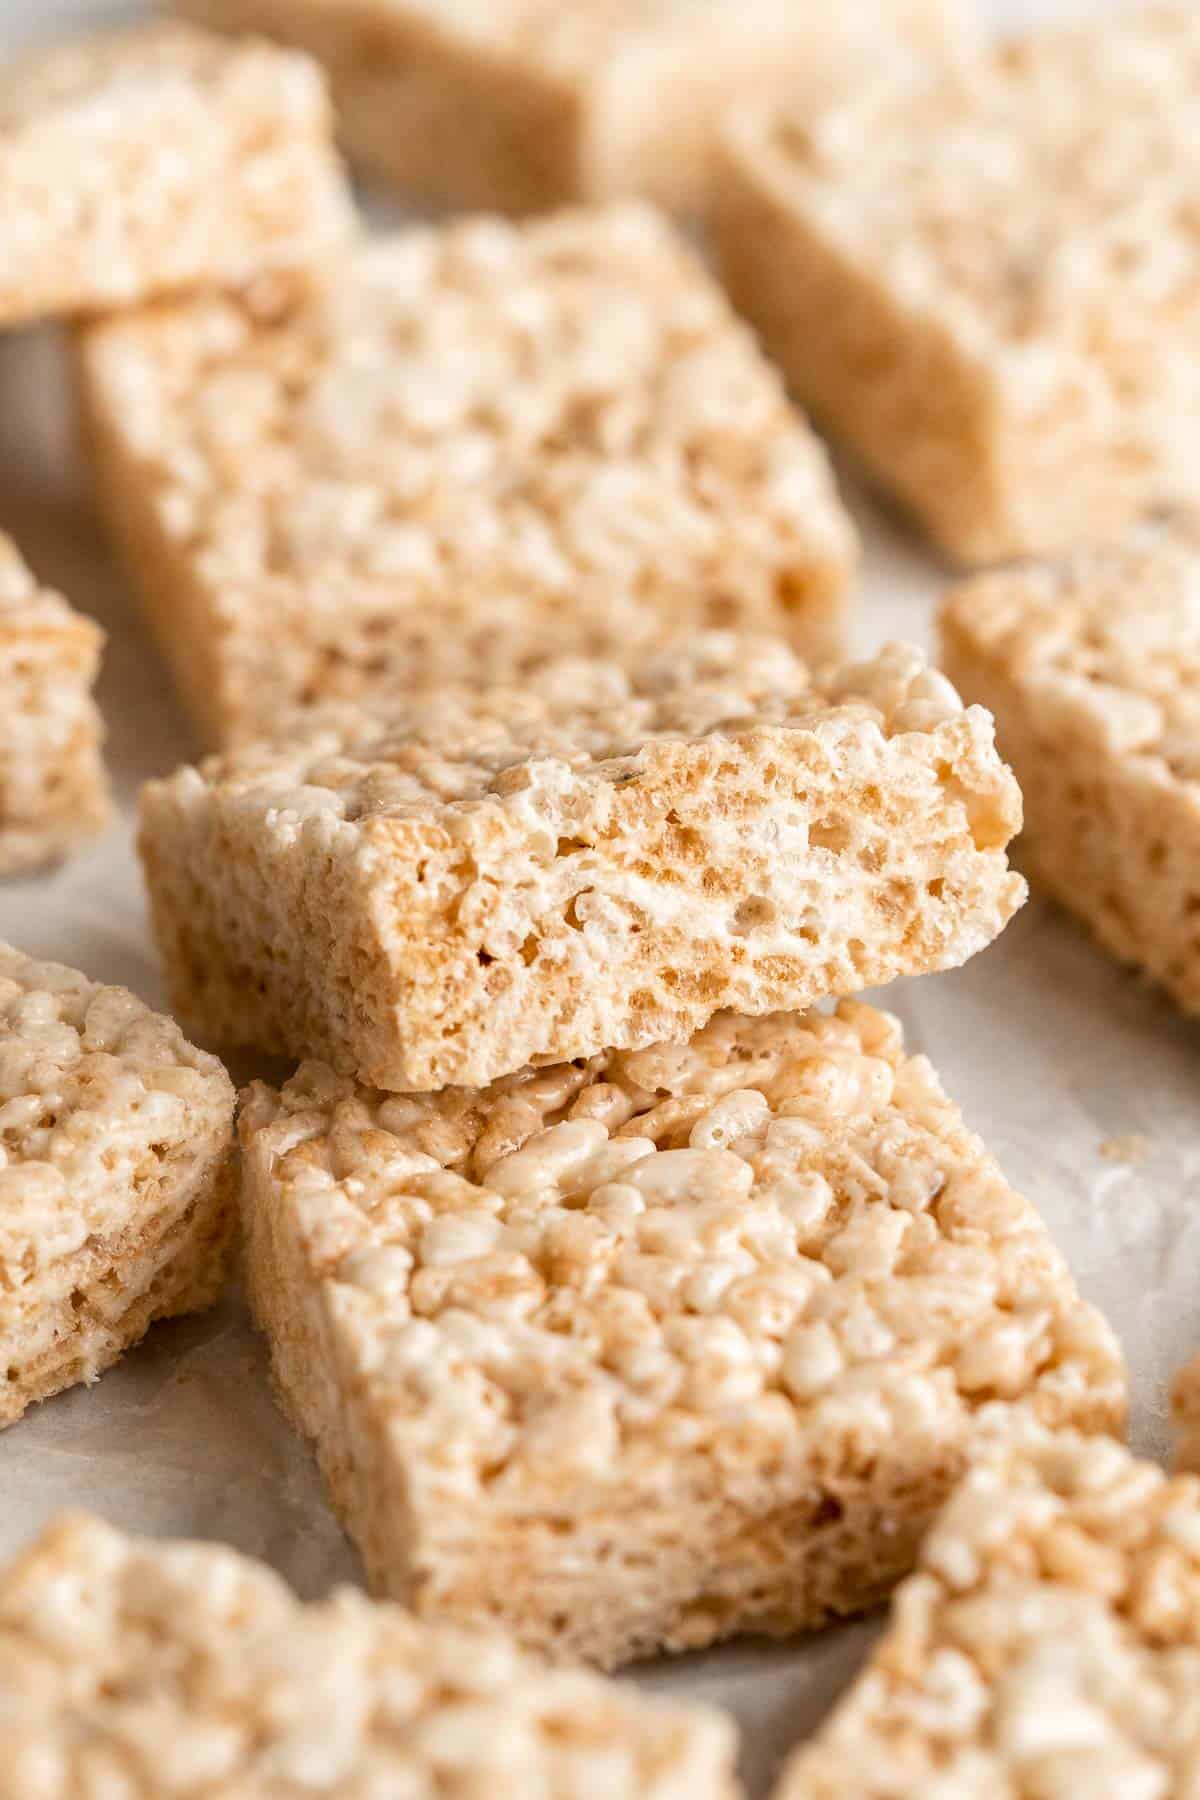
Ingredient Notes
To make these easy Rice Krispies Treats, you will need the following ingredients (full measurements in recipe card below):
- cooking oil spray - use a flavor-less cooking spray if possible, as pure olive oil sprays will likely change the flavor. You can also use butter to grease the pan.
- butter - use unsalted butter if you can. Otherwise, you can use salted butter, but the resulting rice crispy treats will be a little saltier than normal.
- mini marshmallows - you can use full-size marshmallows if you need to, but try to cut them in quarters to help them melt evenly.
- Rice KrispiesⓇ cereal - the original flavor of the cereal is classic to making homemade rice crispy treats, but you can use Cocoa Krispies or Cinnamon Sugar Krispies if you prefer those flavors.
You will also need a large saucepan and 9x13-inch baking pan.
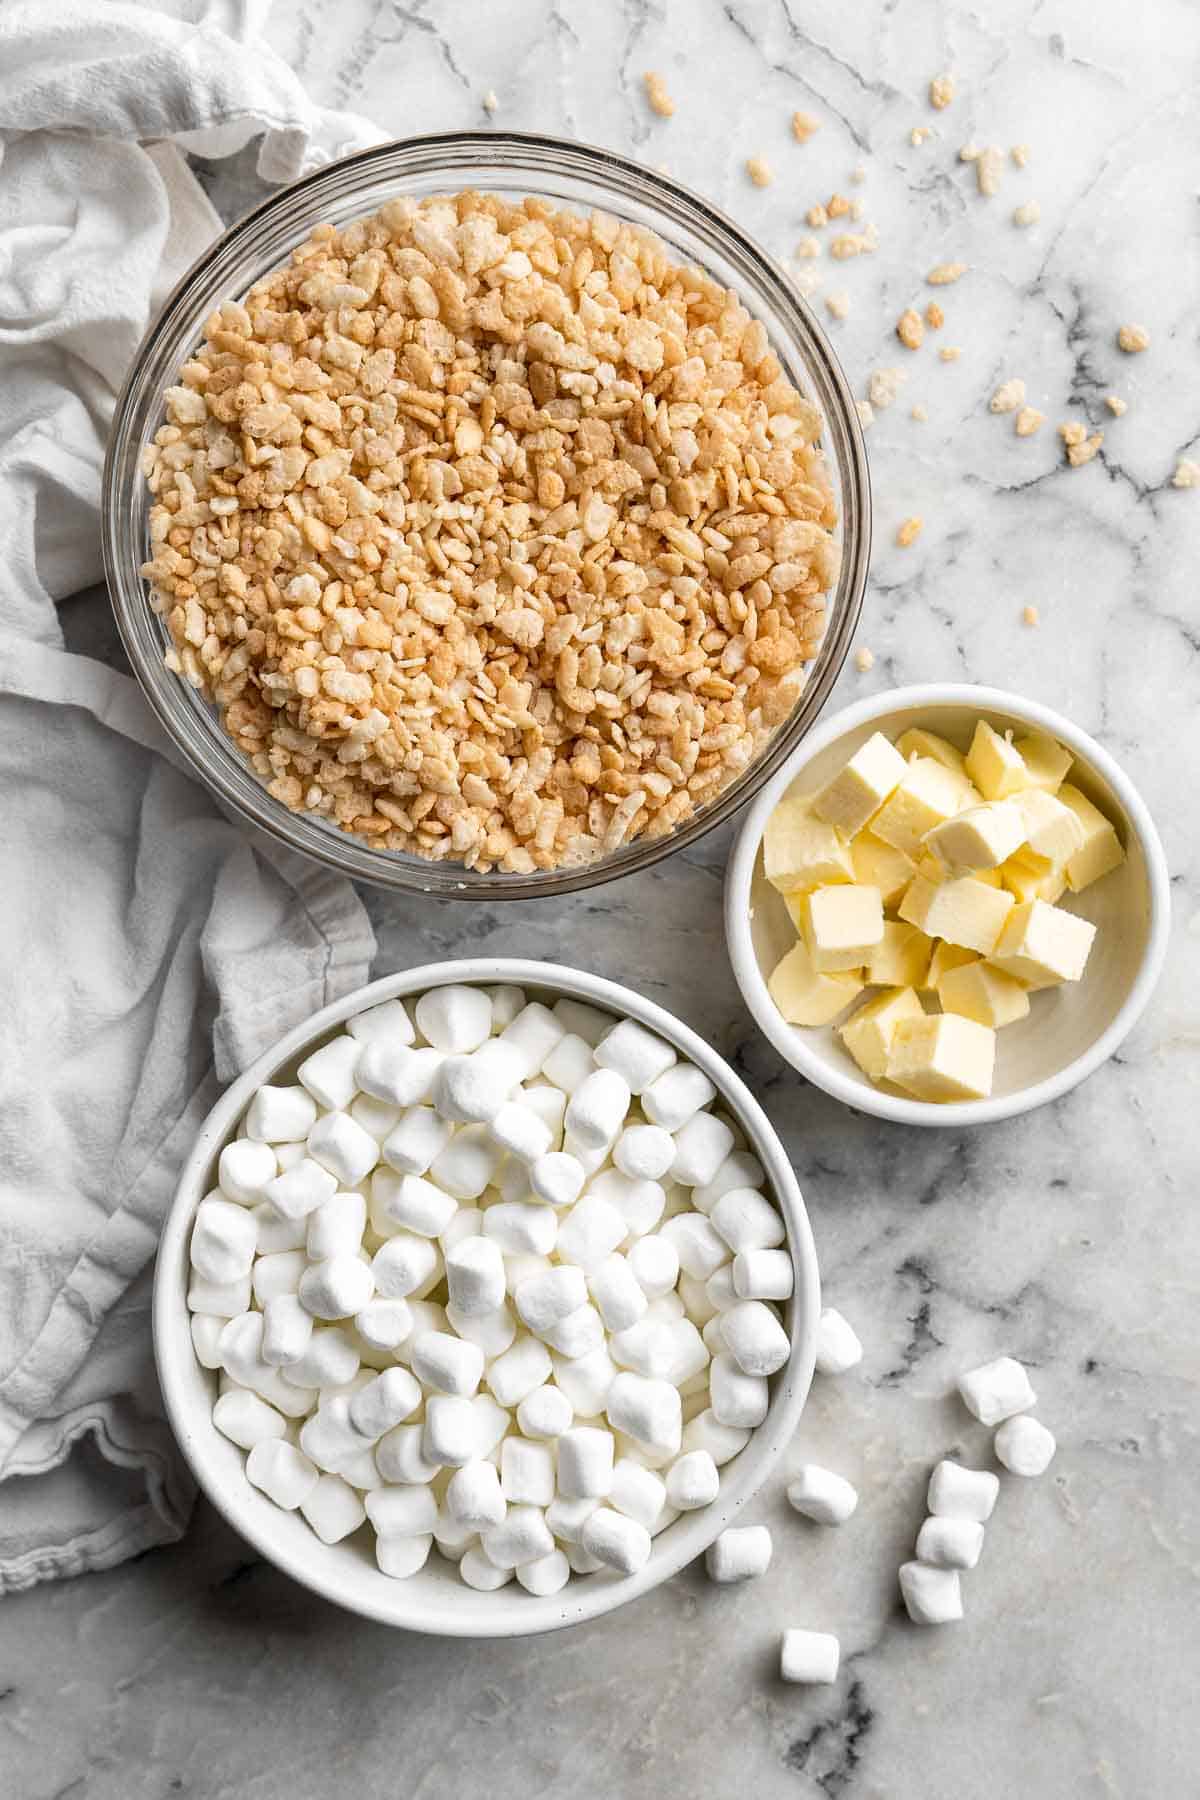
How to Make the Best Rice Krispies Treats
- Prepare pan. Grease a 9x13-inch baking pan with cooking oil spray and set aside.
- Melt marshmallows. In a large saucepan, melt butter over low heat. Add the marshmallows and stir until completely melted. Remove the saucepan from heat.
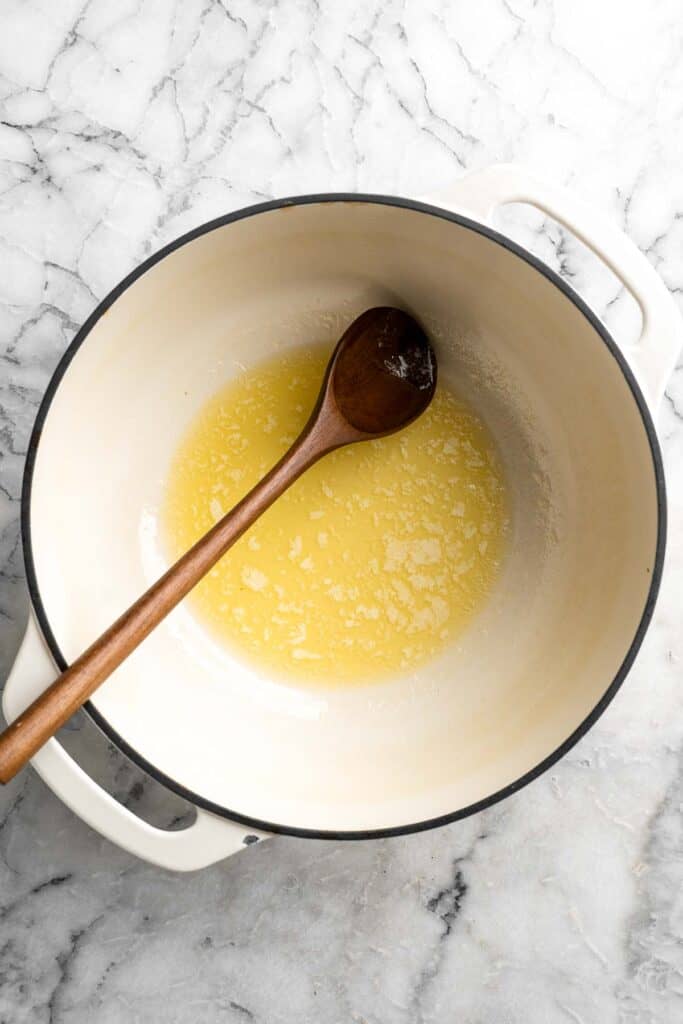
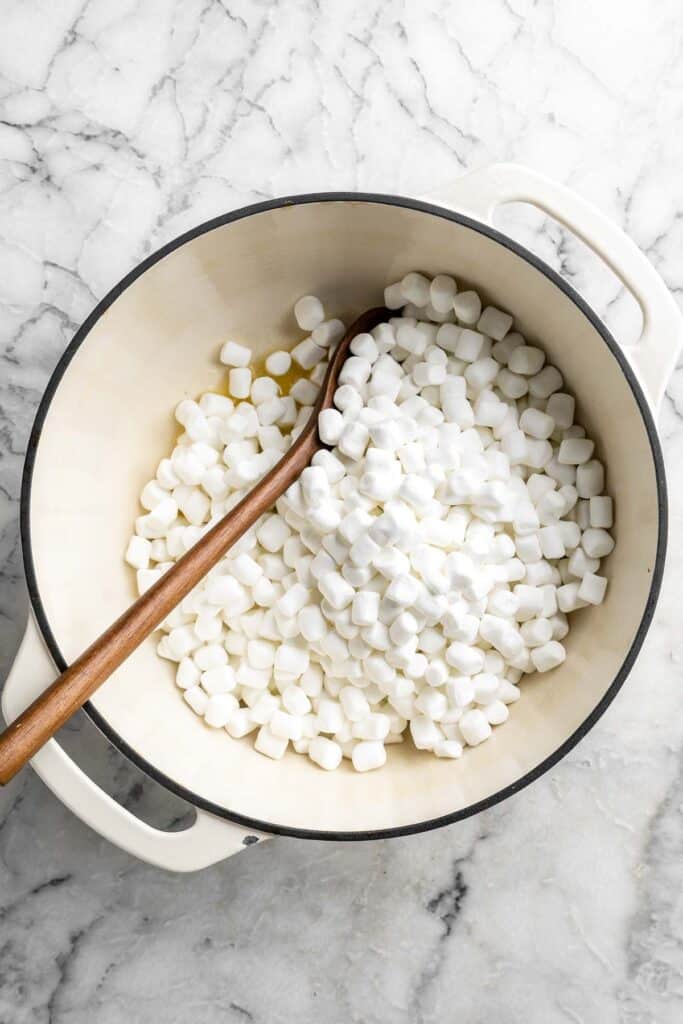
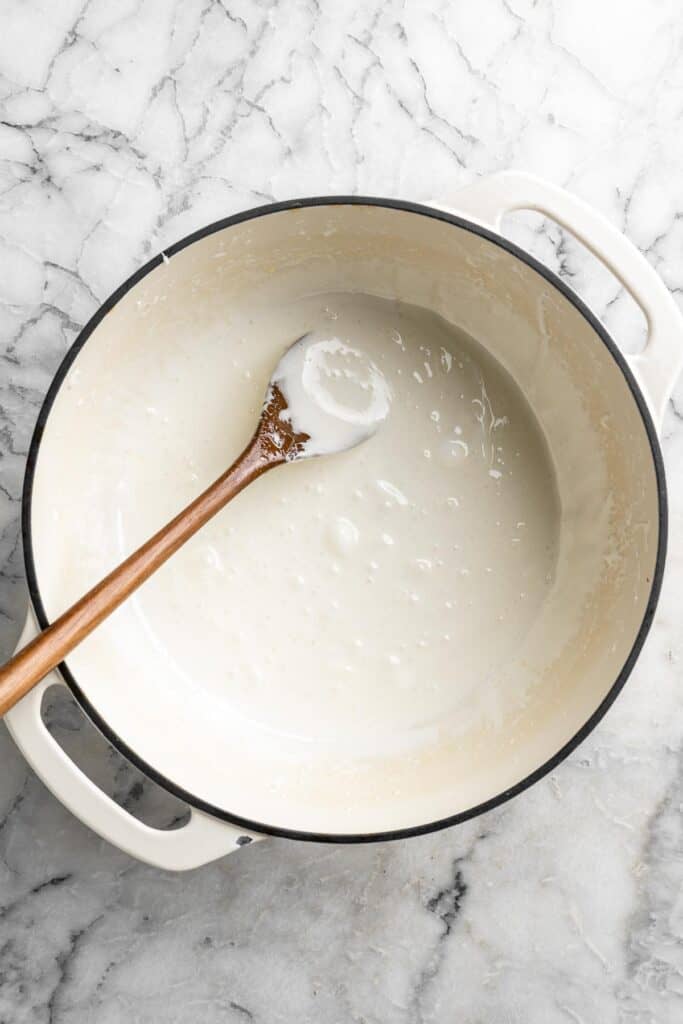
- Stir in cereal. Add in the Rice Krispies cereal. Stir until completely combined and well coated.
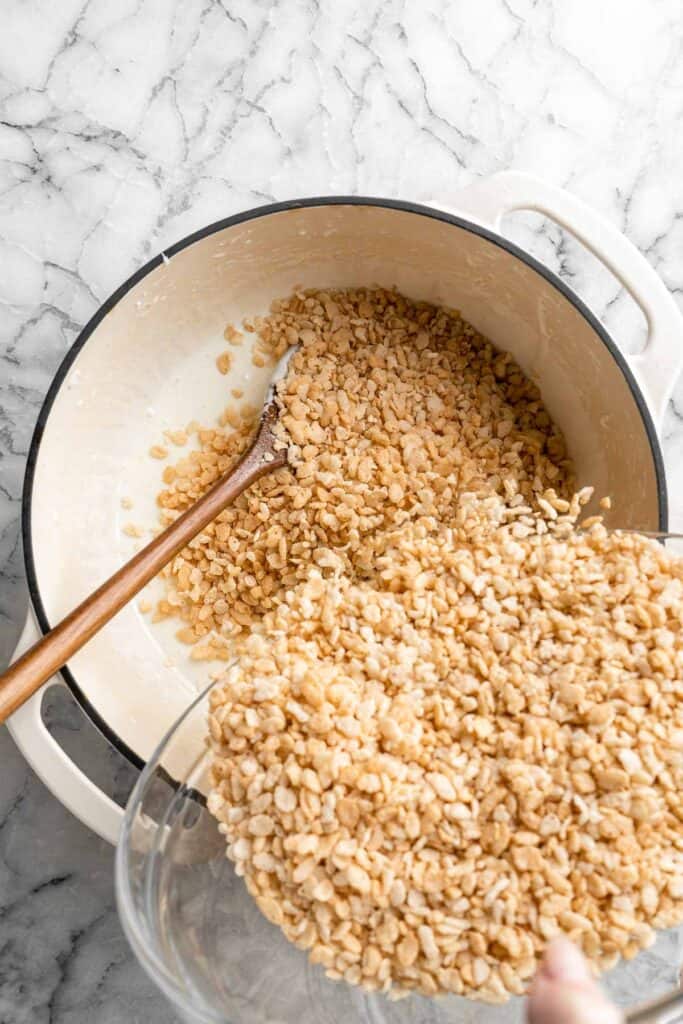
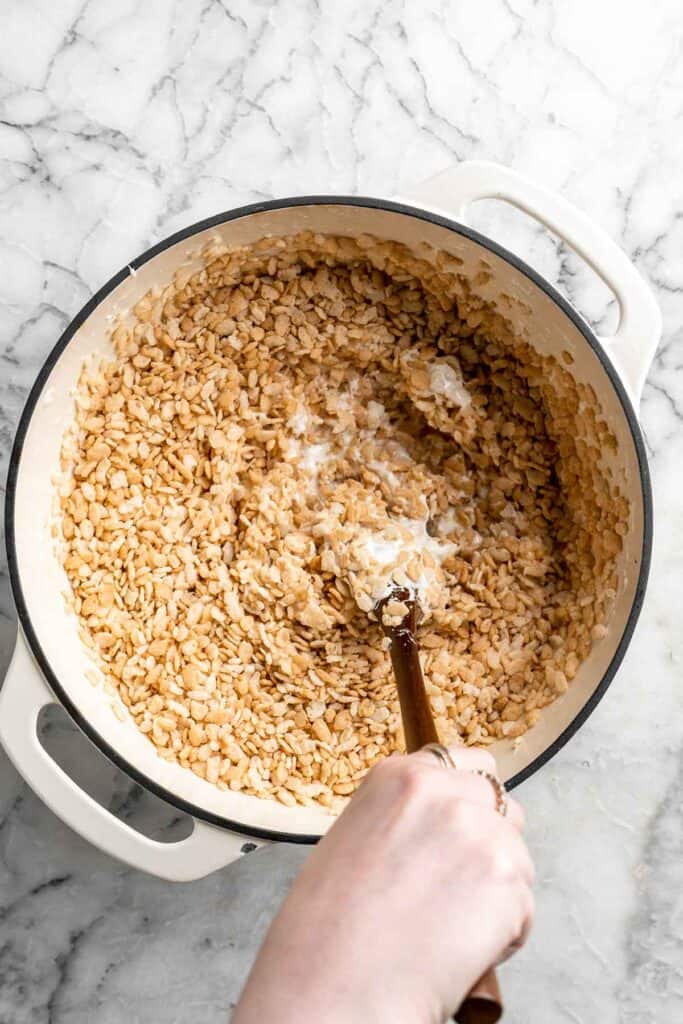
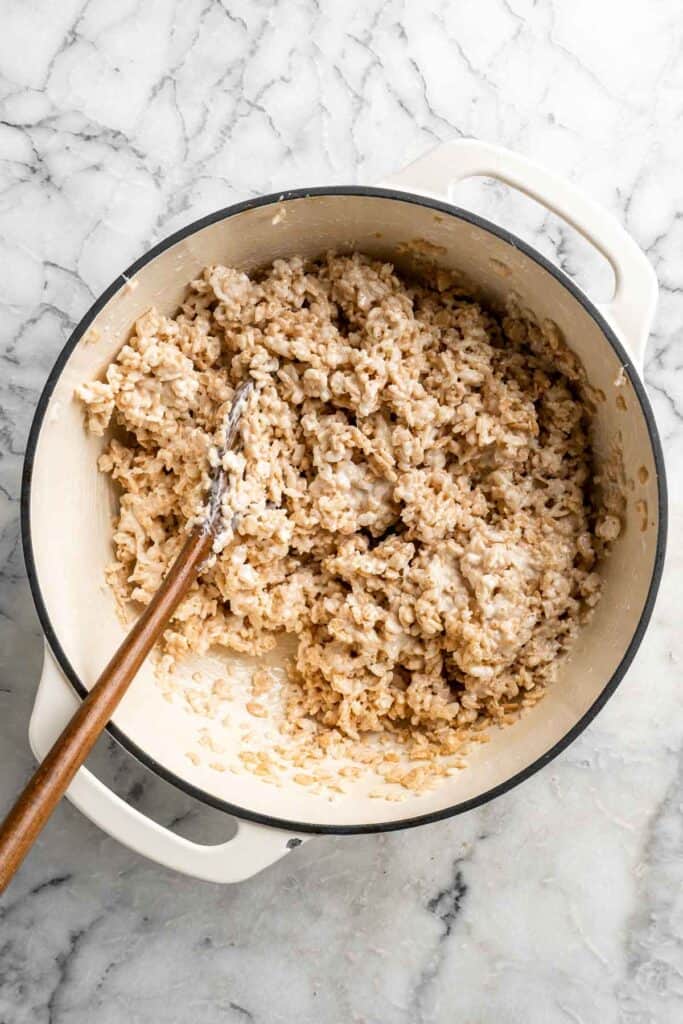
- Spread mixture. Using a greased spatula, evenly press the mixture into the prepared baking dish. You can also stick your hands into a Ziploc bag and press the mixture that way.

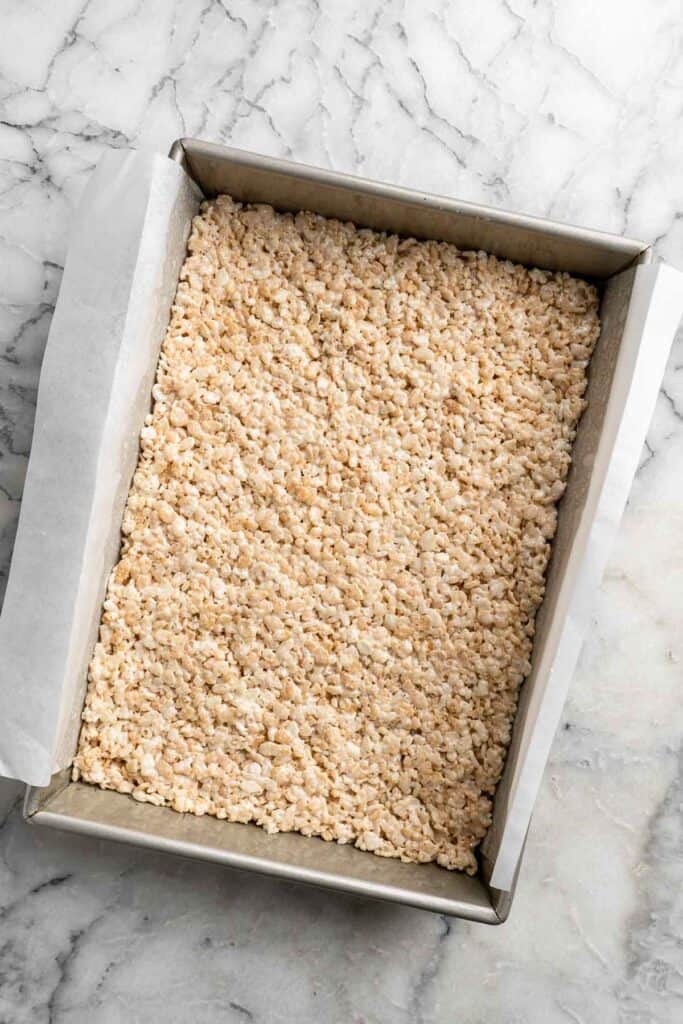
- Cool. Let it cool completely before slicing, about 1 hour.
- Serve. Cut into 2-inch squares (15 squares) and serve.
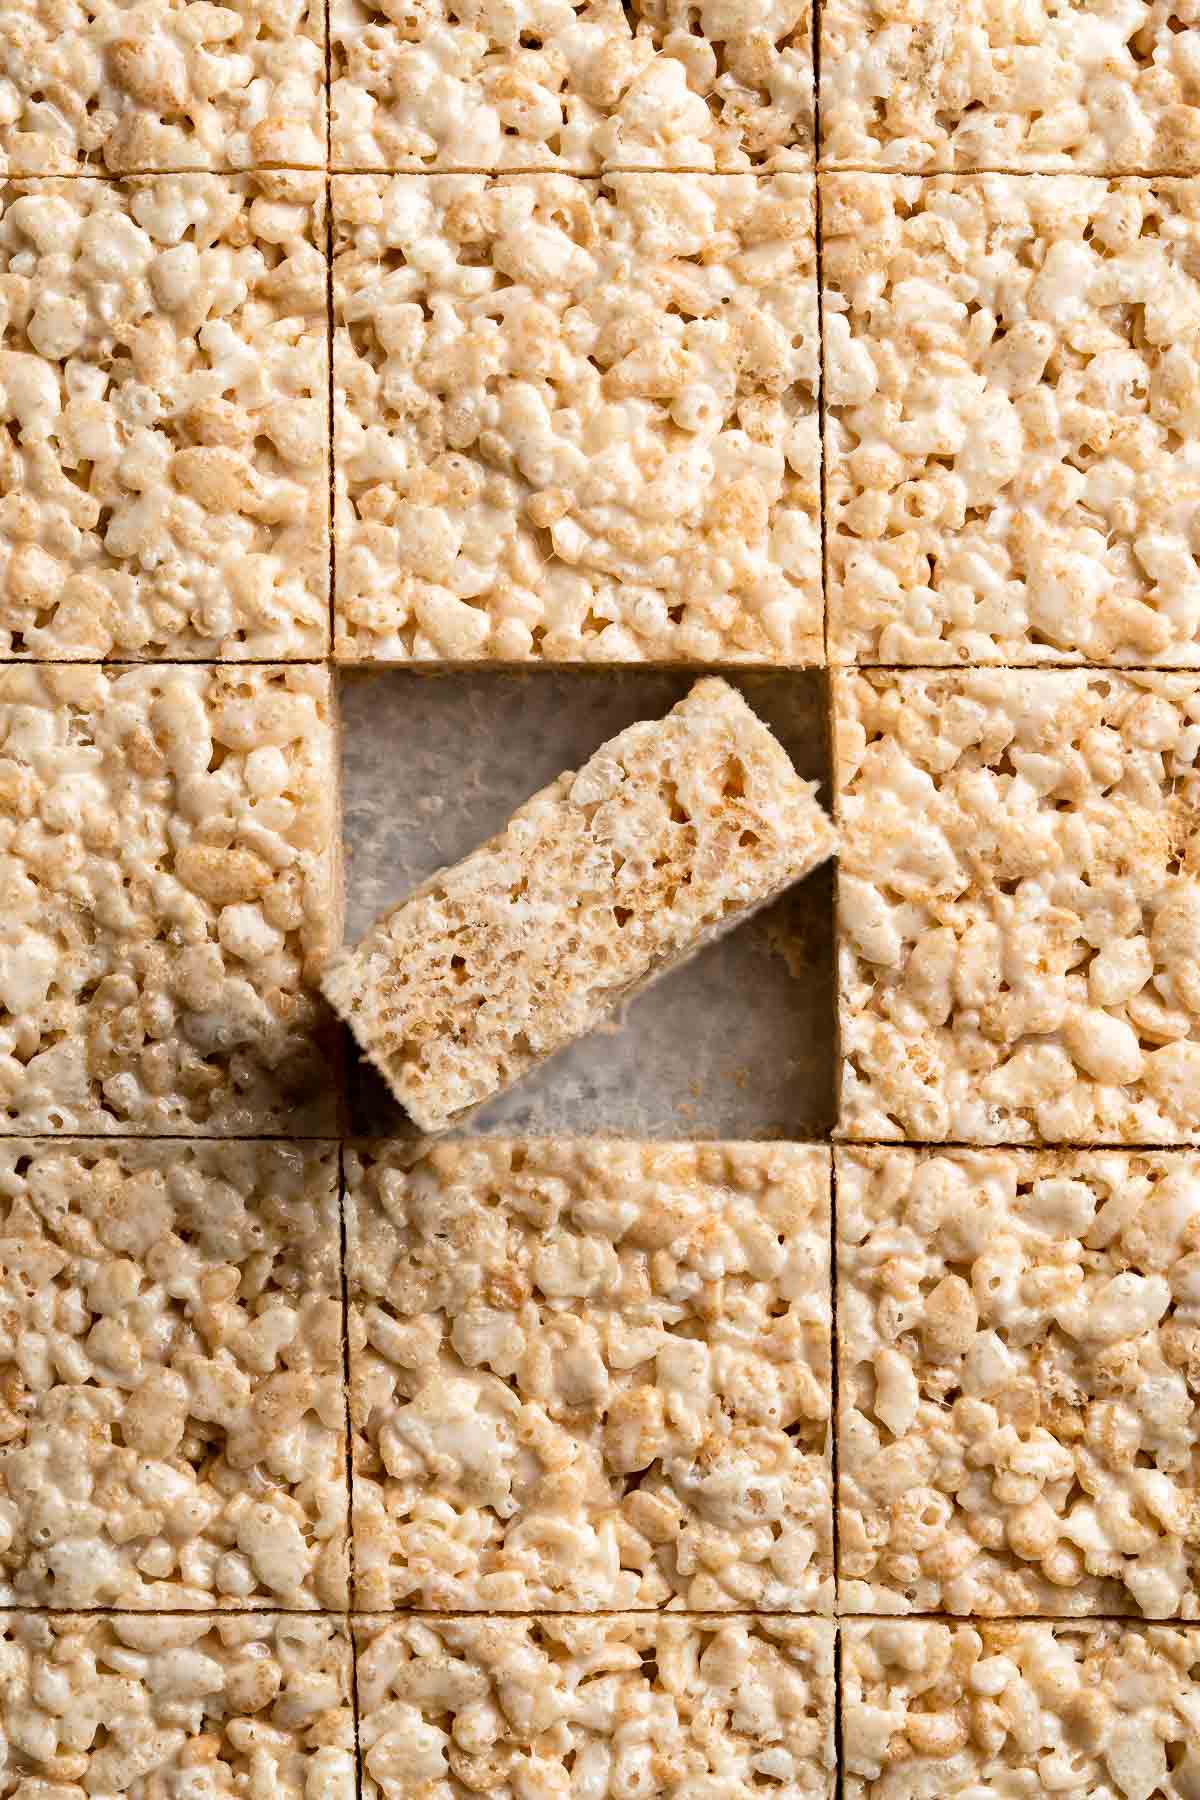
Recipe Variations
When it comes to Rice Krispies Treats, you can experiment with different add-ins, toppings, and flavors to make your squares unique. The options are endless! Here are some of our favorites:
- Make them more gooey. Add in an extra 2 ounces (or 1 cup) of marshmallows to make the filling extra gooey.
- Chocolate Rice Krispies treats. Melt some chocolate chips into your marshmallow mixture before adding the Rice Krispies cereal for a chocolatey twist. Top with additional melted chocolate and sprinkles for a festive touch, if desired.
- Add peanut butter. Add a dollop of peanut butter to your melted marshmallow mixture before mixing in the cereal. Top with chopped peanuts for extra crunch.
- Add dried fruits. Stir in your favorite dried fruit, such as cranberries, apricots, or cherries, to the Rice Krispies mixture before pressing into a pan. Sprinkle with a little sea salt for the perfect balance between sweet and salty flavors.
- S'mores version. Mix in some crushed graham crackers and mini chocolate chips to your Rice Krispies mixture. Top with mini marshmallows and broil in the oven for a few minutes until golden brown for the perfect S'mores Rice Krispies treats. Love S'mores? Try our S'mores Cookies!
- Add caramel and nuts. Drizzle caramel sauce over your finished Rice Krispies Treats (try our Salted Caramel Sauce!) and sprinkle with chopped pecans or walnuts. It's perfect for fall!
- Dip in chocolate. Melt some chocolate and dip one end of the Rice Krispies Treats into the chocolate. Place them on a baking sheet lined with parchment paper and allow the chocolate to harden before serving.
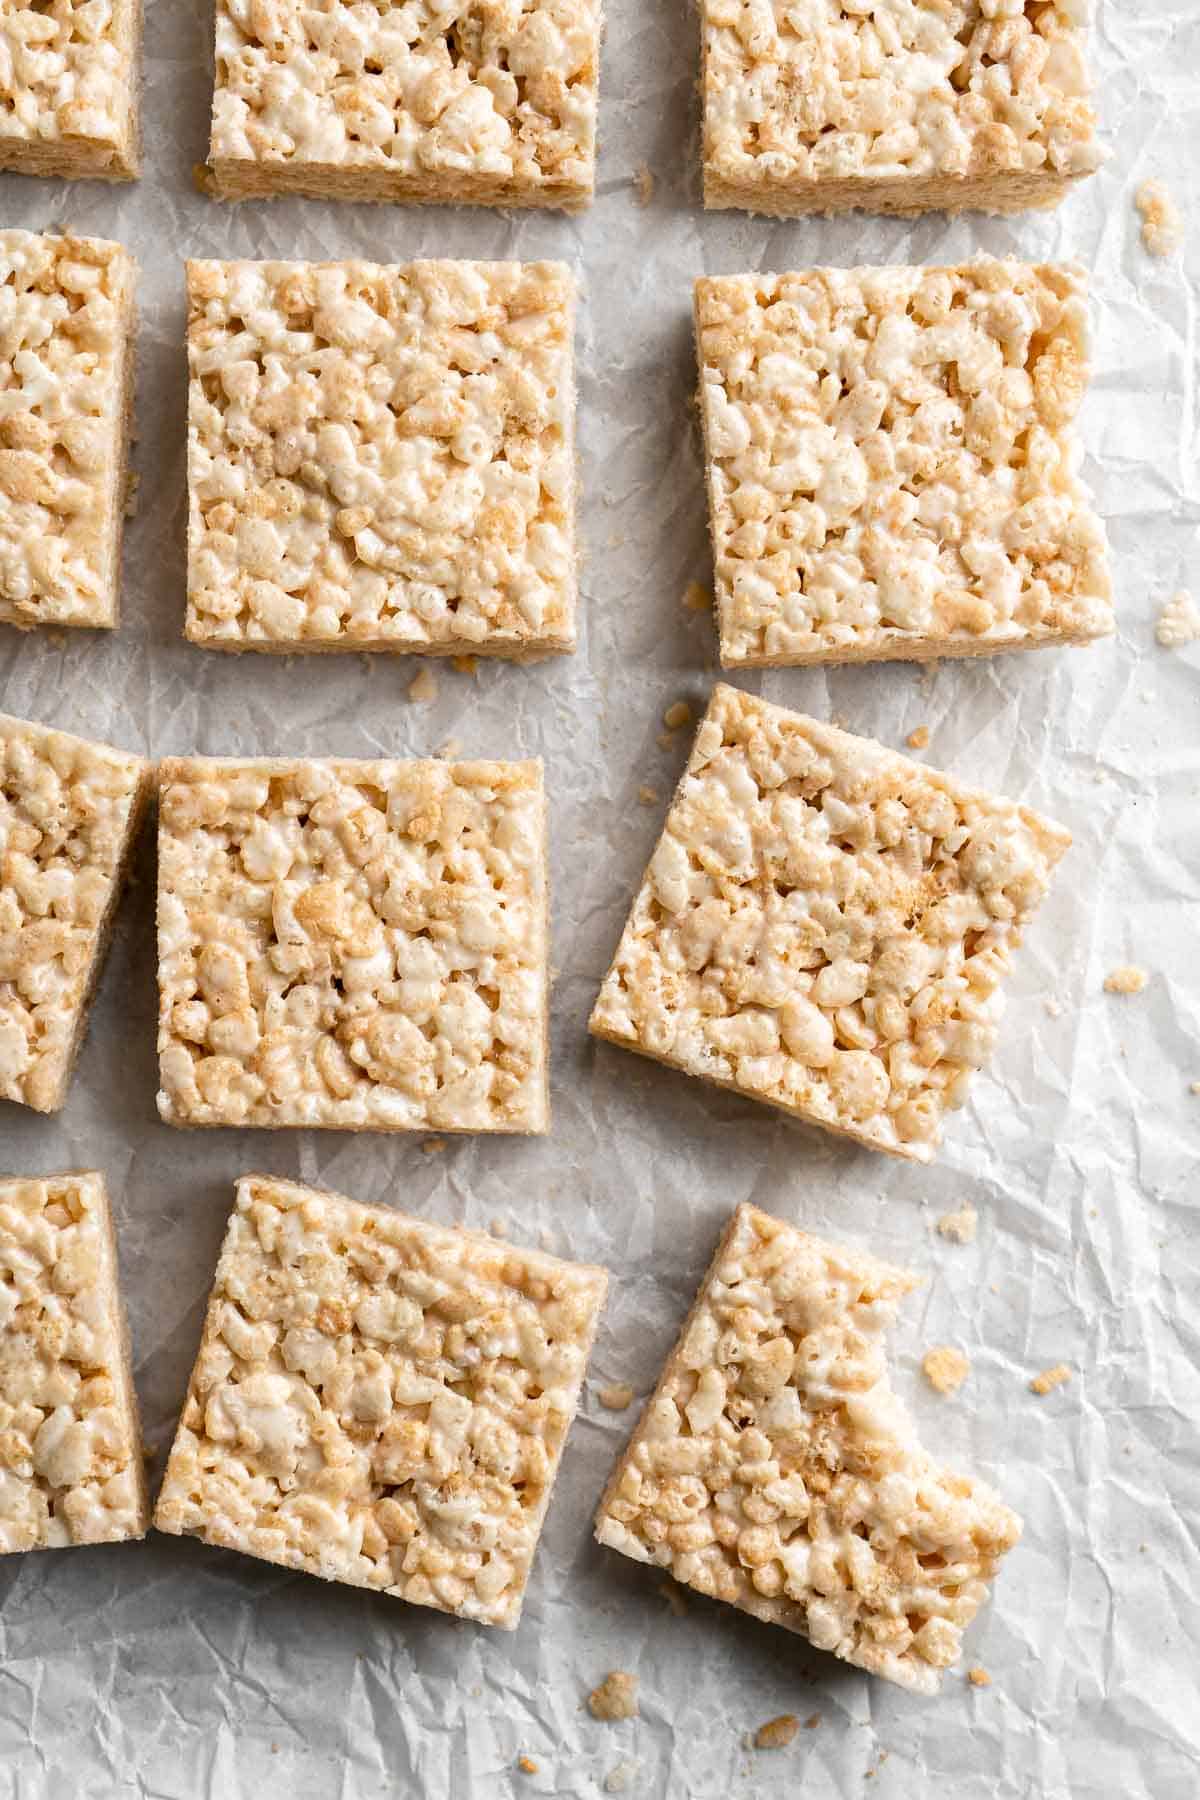
How to Serve
Rice Krispies Treats are a sweet bite that can be served on their own or paired with other delicious treats. Here are some ideas for what to serve them with:
- Ice cream. Serve Rice Krispies Treats alongside a scoop of Vanilla Ice Cream (or your favorite flavor).
- Fruit. Pair Rice Krispies Treats with fresh fruit such as strawberries, raspberries, or blueberries for a refreshing and healthy snack. Try our Fruit Salad.
- Hot chocolate. Enjoy Rice Krispies Treats with a warm cup of Peppermint Hot Chocolate on a cold winter's day for the ultimate cozy treat.
- Milk. Serve Rice Krispies Treats with a tall glass of cold milk for a classic and comforting snack.
- Coffee. Enjoy Rice Krispies Treats with a cup of coffee for an energizing breakfast or snack.
Recipe Tips and Tricks
- Have fun with extras. There are infinite possibilities for toppings and mix-ins depending on the occasion and what you have on hand. Add sprinkles, M&M's, drizzles of melted chocolate, or whole mini marshmallows - your imagination is your only limit! See our Recipe Variations above for ideas.
- Cut into squares or make festive shapes. The most traditional way to serve Rice Krispies Treats is to cut them into squares and serve them on a plate or platter. But you aren't limited to simply cutting squares. You can use cookie cutters to make these rice crispy treats as festive as you like! Stick to holiday themes like eggs and bunnies for Easter or snowflakes and trees for Christmas - or explore different shapes just for fun!
- Grease your knife. Cutting rice krispy treats can sometimes be a sticky situation. Apply grease or butter to your knife to keep it clean and help it glide through the bars without making a huge mess.
- Serve as an ice cream topping. Crumble some Rice Krispies Treats on top of your favorite ice cream flavors for a delicious and crunchy topping.
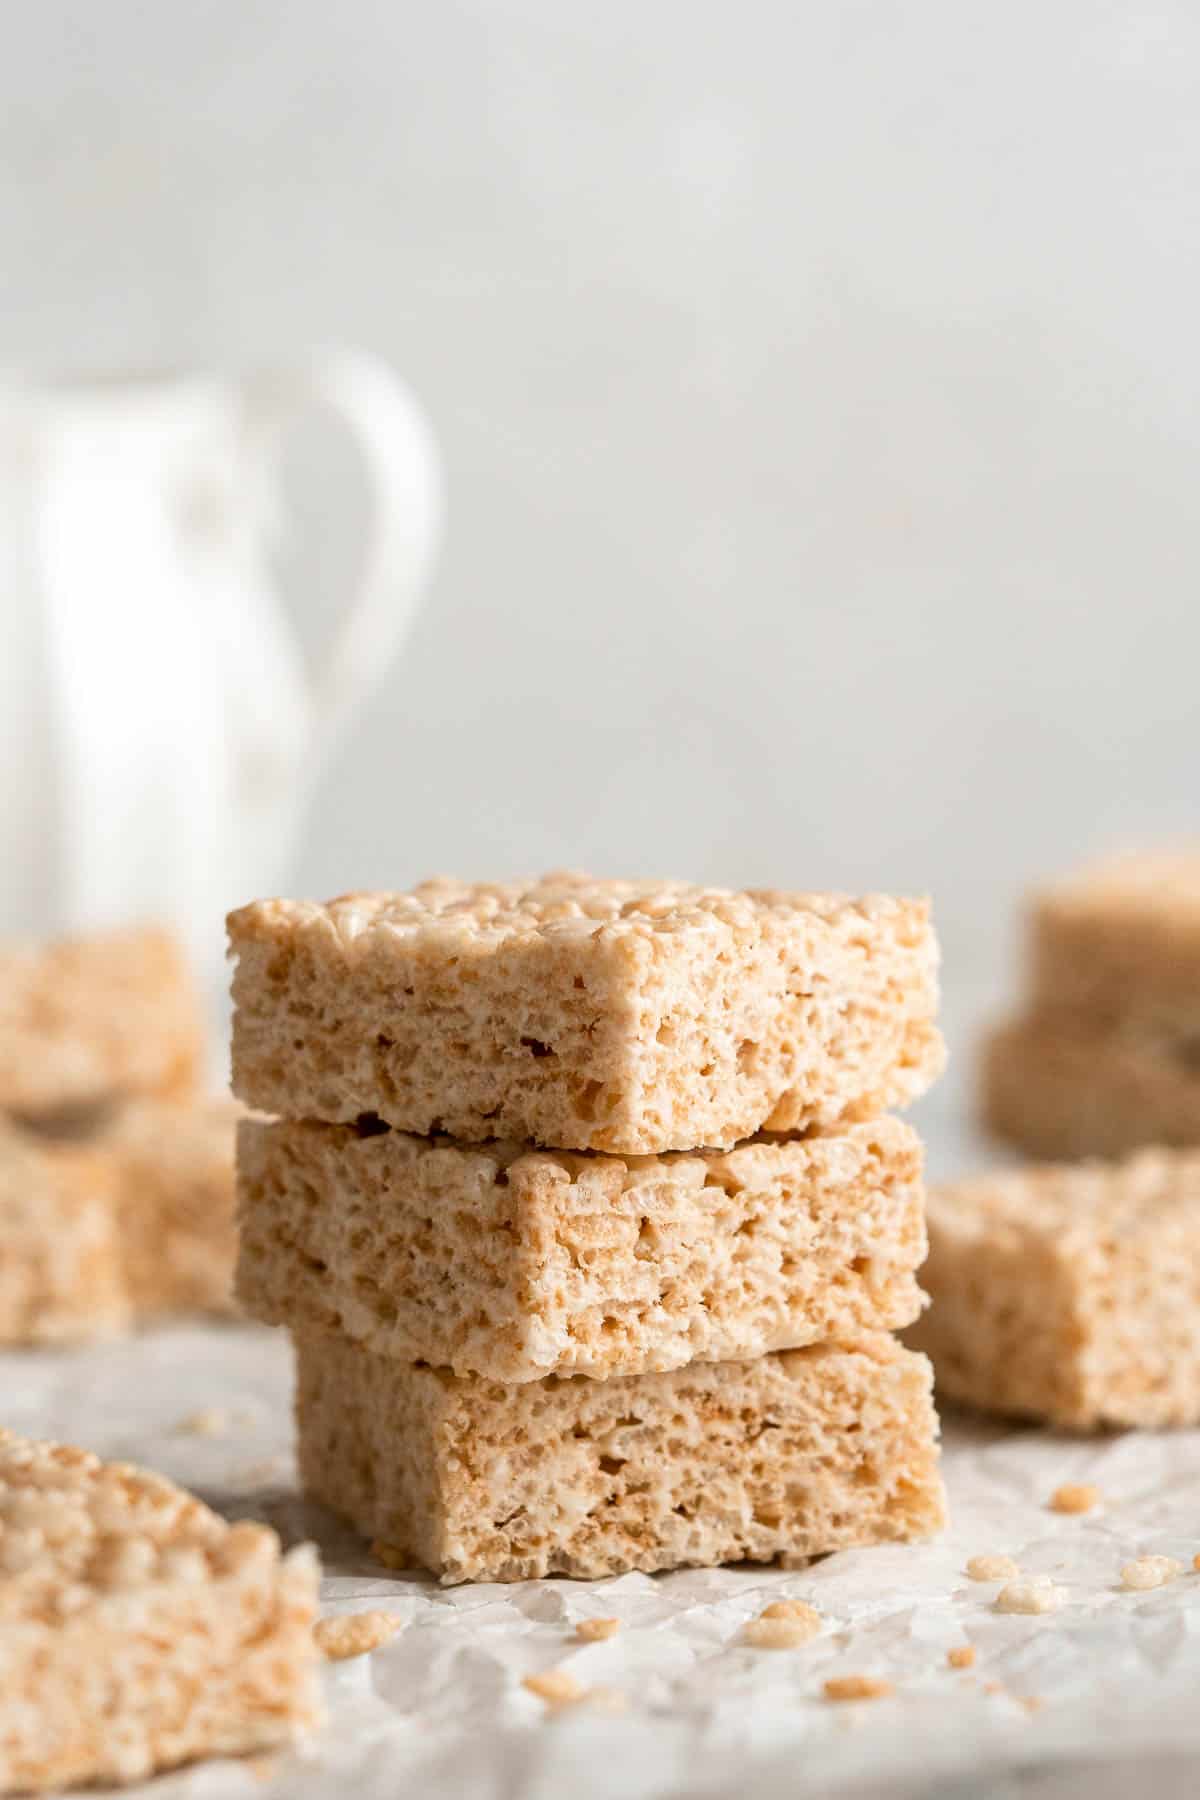
Storing and Freezing Instructions
How to Store
Once completely cooled, you can store rice krispies treats in an airtight container or Ziploc bag for up to 2 days at room temperature or 7 days in the refrigerator.
How to Freeze
Wrap each rice crispy treat individually in parchment paper to prevent them from sticking together, then layer them in a freezer-safe container or Ziploc bag and freeze for up to 3 months. Allow them to thaw overnight and then warm to room temperature for a few hours before eating.
More Treat Recipes
- Almond Cranberry Granola Bars
- Homemade Kettle Corn
- S'mores Cookies
- Oreo Brownies
- Jello Jigglers
- Coconut Maple Walnut Granola
Tried this recipe?
I'd love to hear what you think! Leave a comment and rating below to share your feedback. Your reviews help others discover this recipe and help me keep creating more free recipes for you. Snap a photo and tag me on social media @aheadofthyme too.
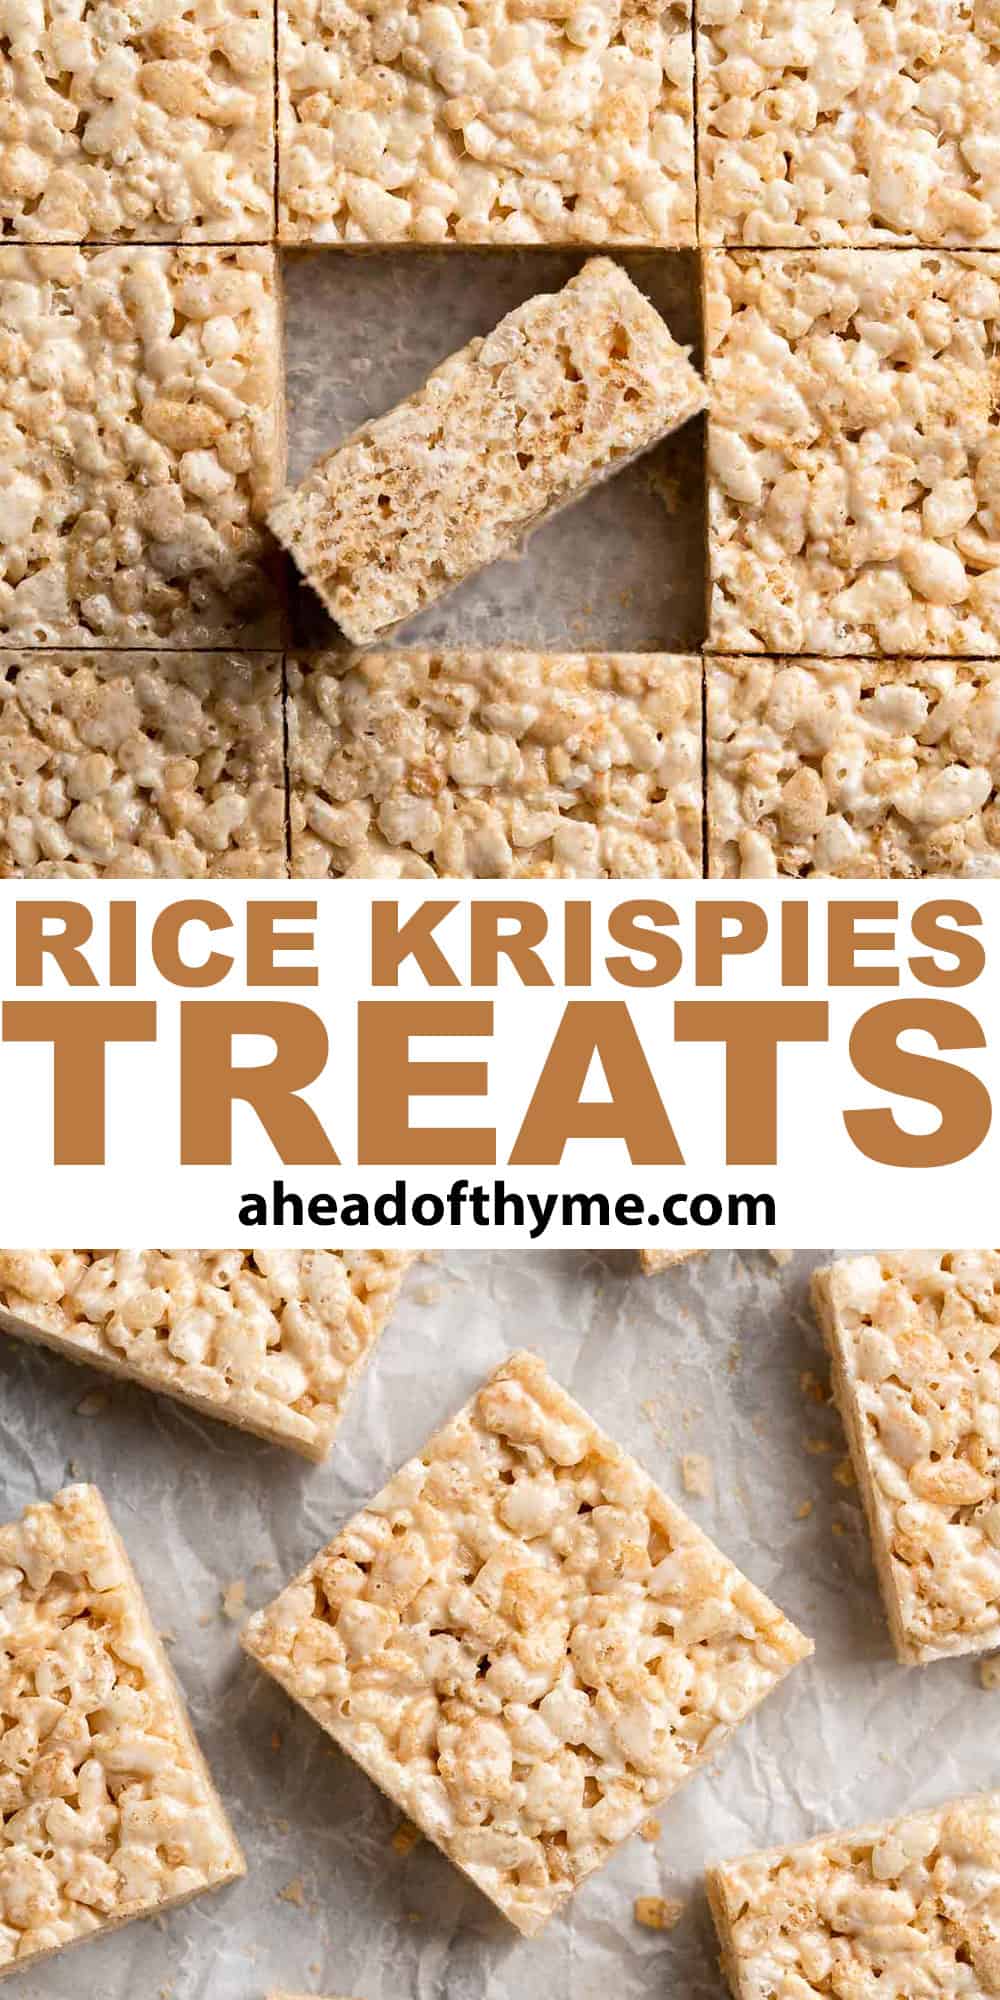
40 Friday Night Dinner Ideas
Friday nights are all about relaxing, unwinding, and enjoying good food with family and friends. Whether you're looking for a quick and easy dinner after a long week at work or something a bit more indulgent to kick off the weekend, we've got you covered. We are sharing over 40 Friday Night Dinner Ideas from classic comfort foods and pastas, to stir fries and rice bowls, and everything in between. So grab a glass of wine, put on your favorite music, and get ready to indulge in some delicious Friday night dinners.

Best Friday Night Dinner Ideas
These Sheet Pan Quesadillas are loaded with veggies and gooey cheese, baked in the oven until crispy, and made to feed a crowd in just 30 minutes. One of our favorite Friday night dinners!
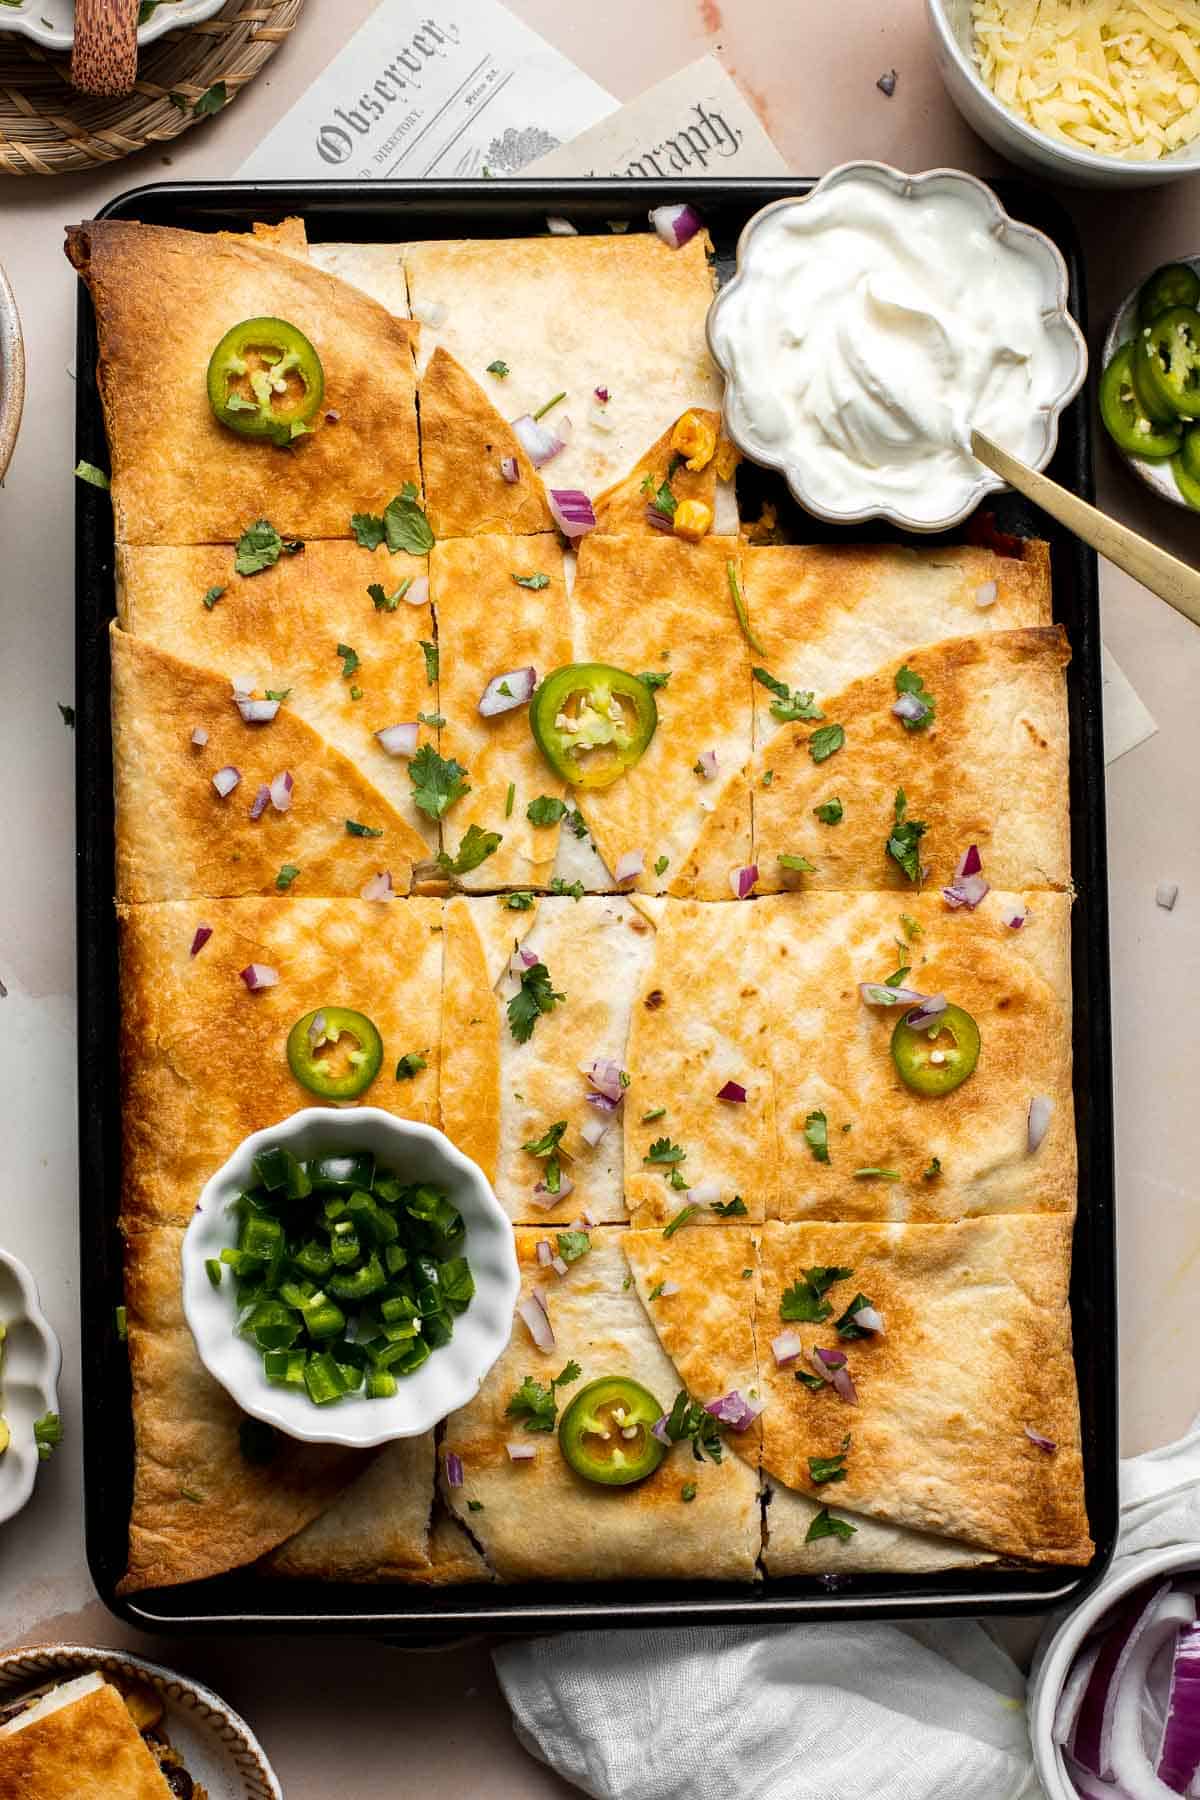
This Creamy Tomato Pasta is a simple and delicious meal made from scratch in 25 minutes with a cream and tomato based sauce that is rich and silky smooth. A quick and easy recipe for Friday night dinner!
Chicken Chow Mein is a classic Chinese noodle dish that is quick and easy to make at home in 20 minutes - faster, healthier, and better than takeout.
Salmon Bites are flavorful and delicious bite-sized pieces of salmon cooked until tender with crispy, golden edges and coated with an homemade sticky glaze.
Homemade hamburger helper is a family favorite but you can make a cheaper, healthier, and way tastier version at home, ready in just 30 minutes.
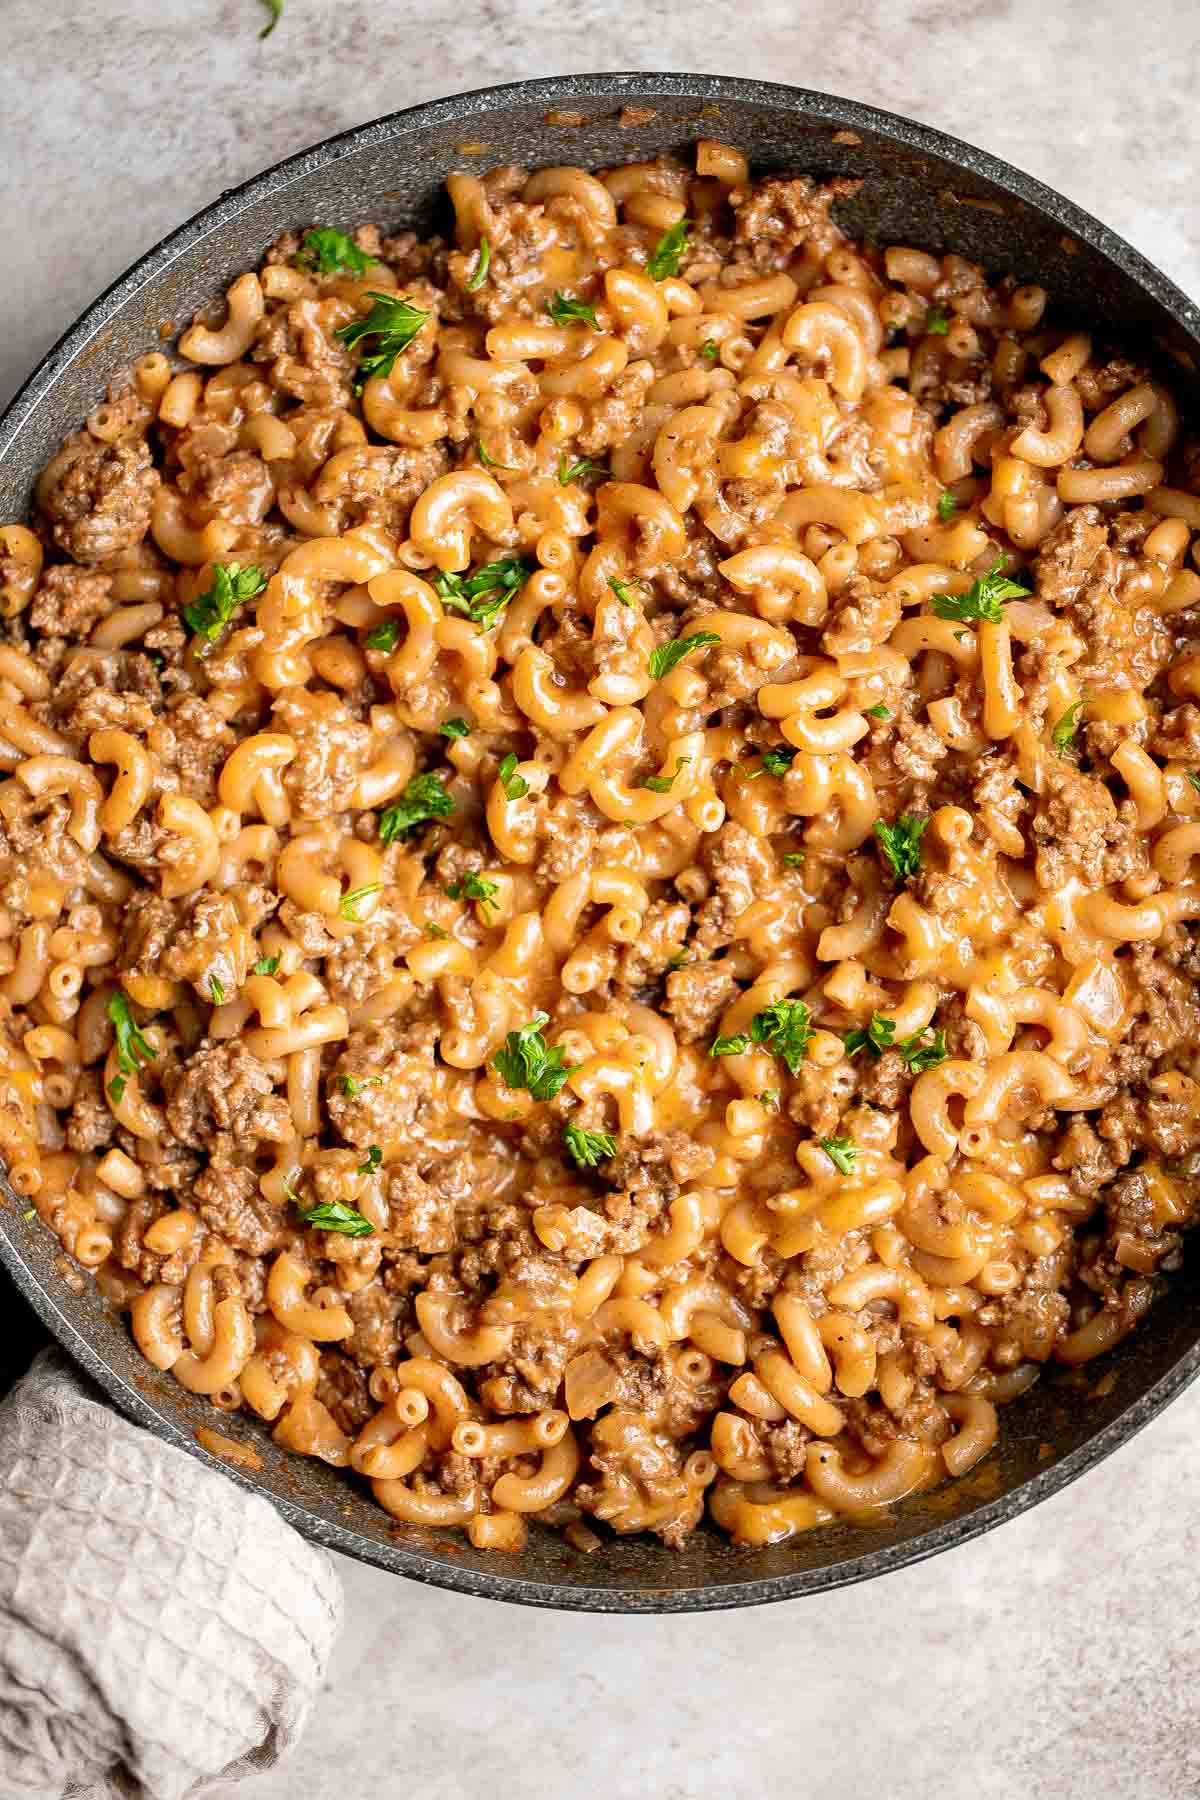
Cashew chicken is a quick and easy chicken stir fry ready in under 30 minutes. It's flavorful, delicious, and so much better and faster than takeout.
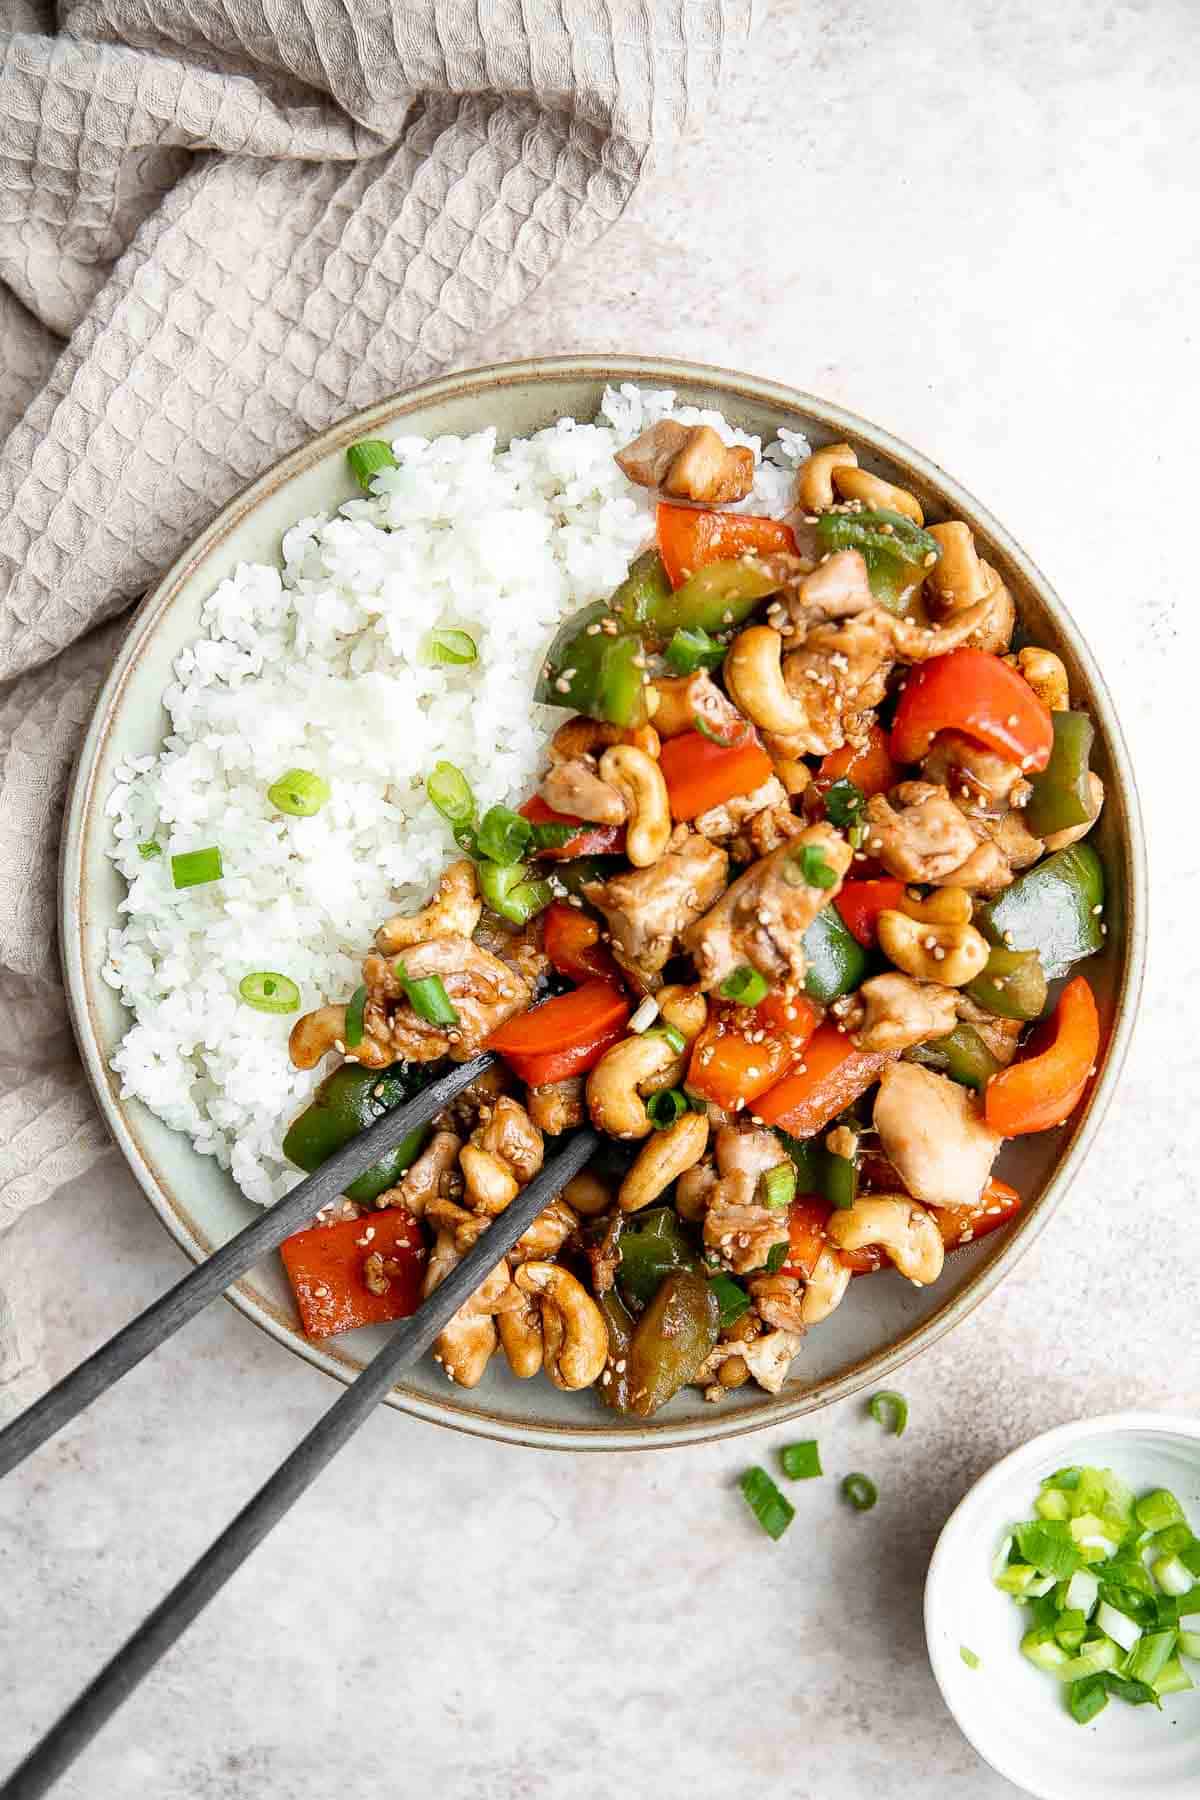
Turkey and Cheese Sliders are quick and easy, made with deli meat and Swiss cheese filled inside soft Hawaiian dinner rolls topped with a buttery sauce.
These Indian Rice Bowls are flavorful, delicious, and easy to assemble. These wholesome, filling rice bowls have it all - grains, protein, and veggies.
Baked Feta Pasta is a quick and easy weeknight dinner recipe that is creamy, delicious, and flavorful - the whole family will love this Tiktok pasta! One of our favorite Friday night dinner recipes!
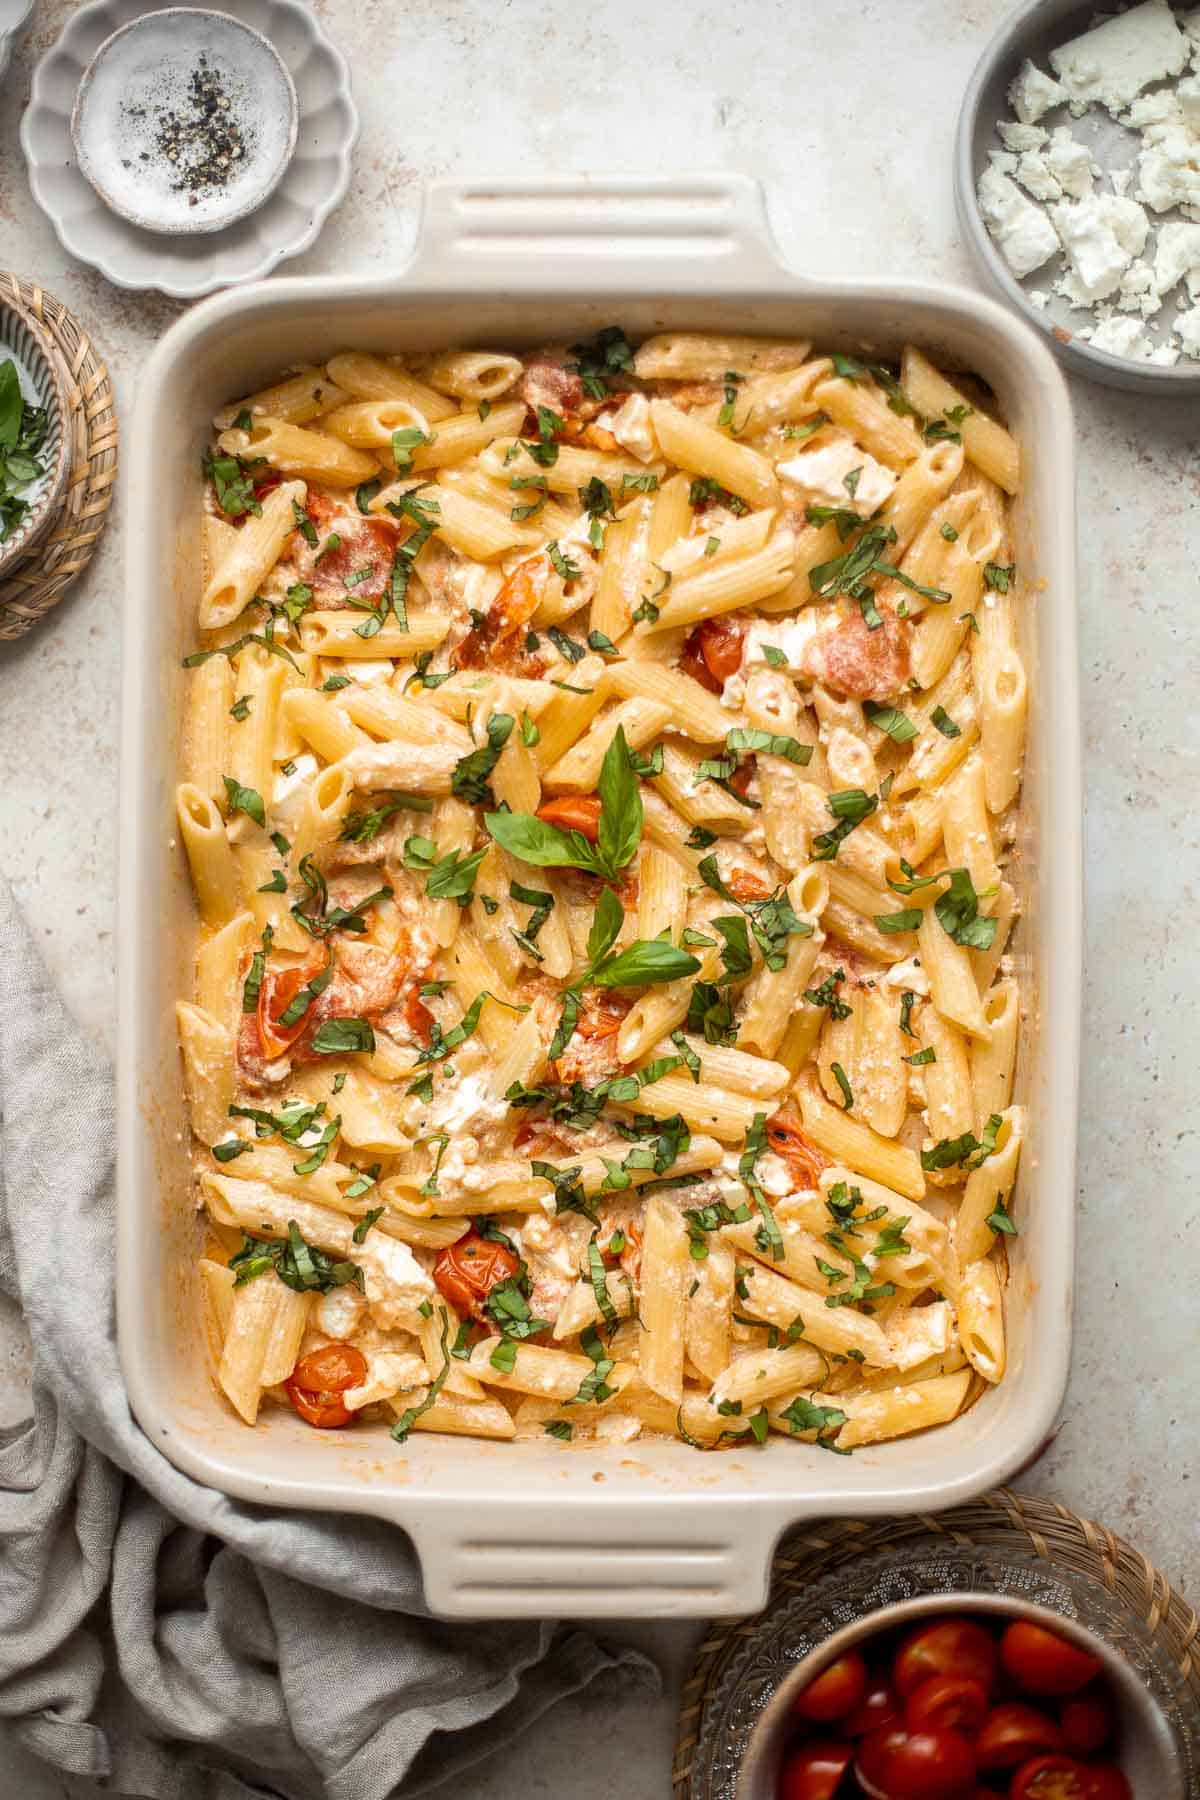
Garlic butter shrimp is a quick and easy dinner ready in just 10 minutes! It's loaded with flavor and perfect for busy weeknights and special occasions.
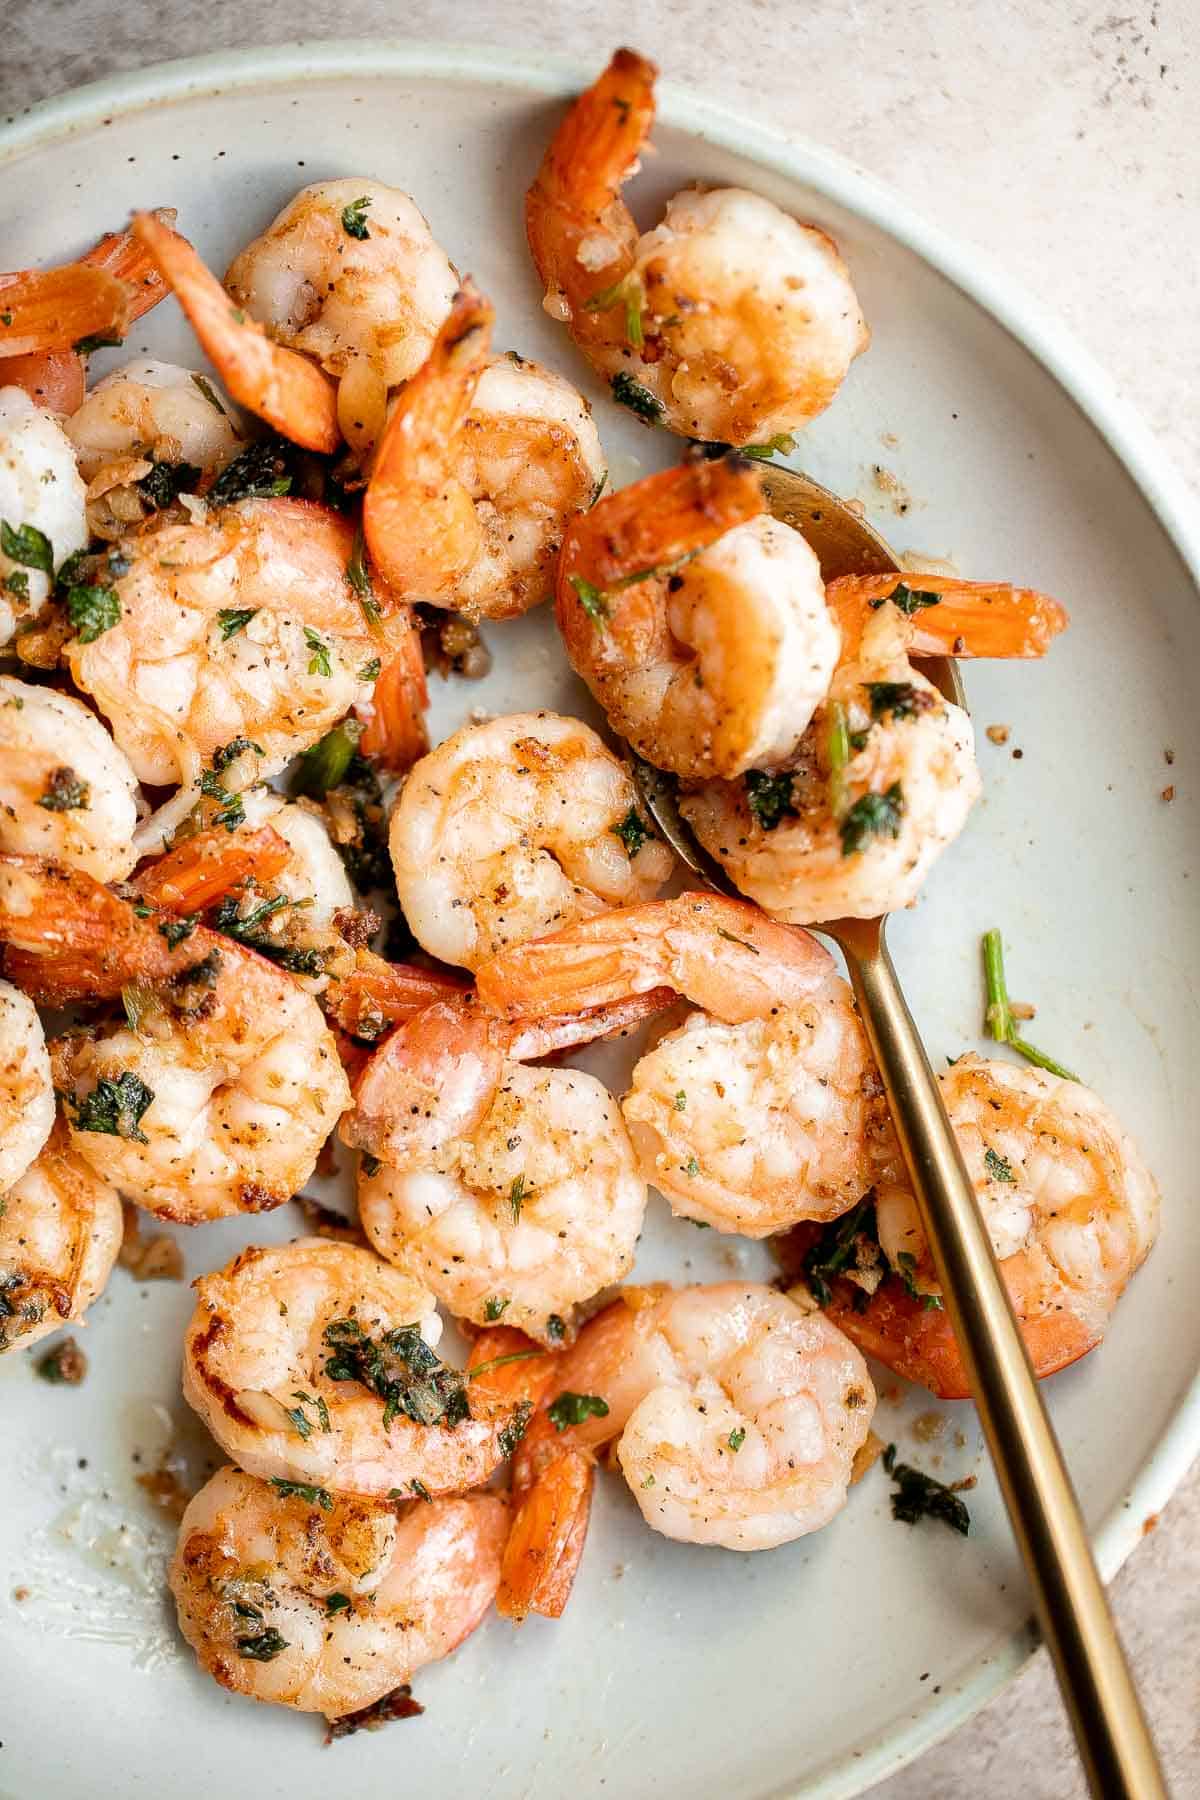
Vegetarian cauliflower tacos are loaded with air-fried or baked cauliflower, a delicious seasoning blend, and creamy lime cilantro slaw inside a tortilla.

Easy Baked Meatballs are juicy, tender, loaded with flavor, and kid-friendly. Enjoy delicious homemade meatballs in under an hour using simple ingredients.

Quick and easy, creamy lemon chicken piccata is a simple and delicious 30-minute meal made with tender chicken breast in a light lemon sauce with capers. We love this Friday night dinner idea!
Peanut noodles are creamy, nutty, and delicious. This quick and easy, vegan homemade takeout recipe is loaded with flavor and is ready in 15 minutes.
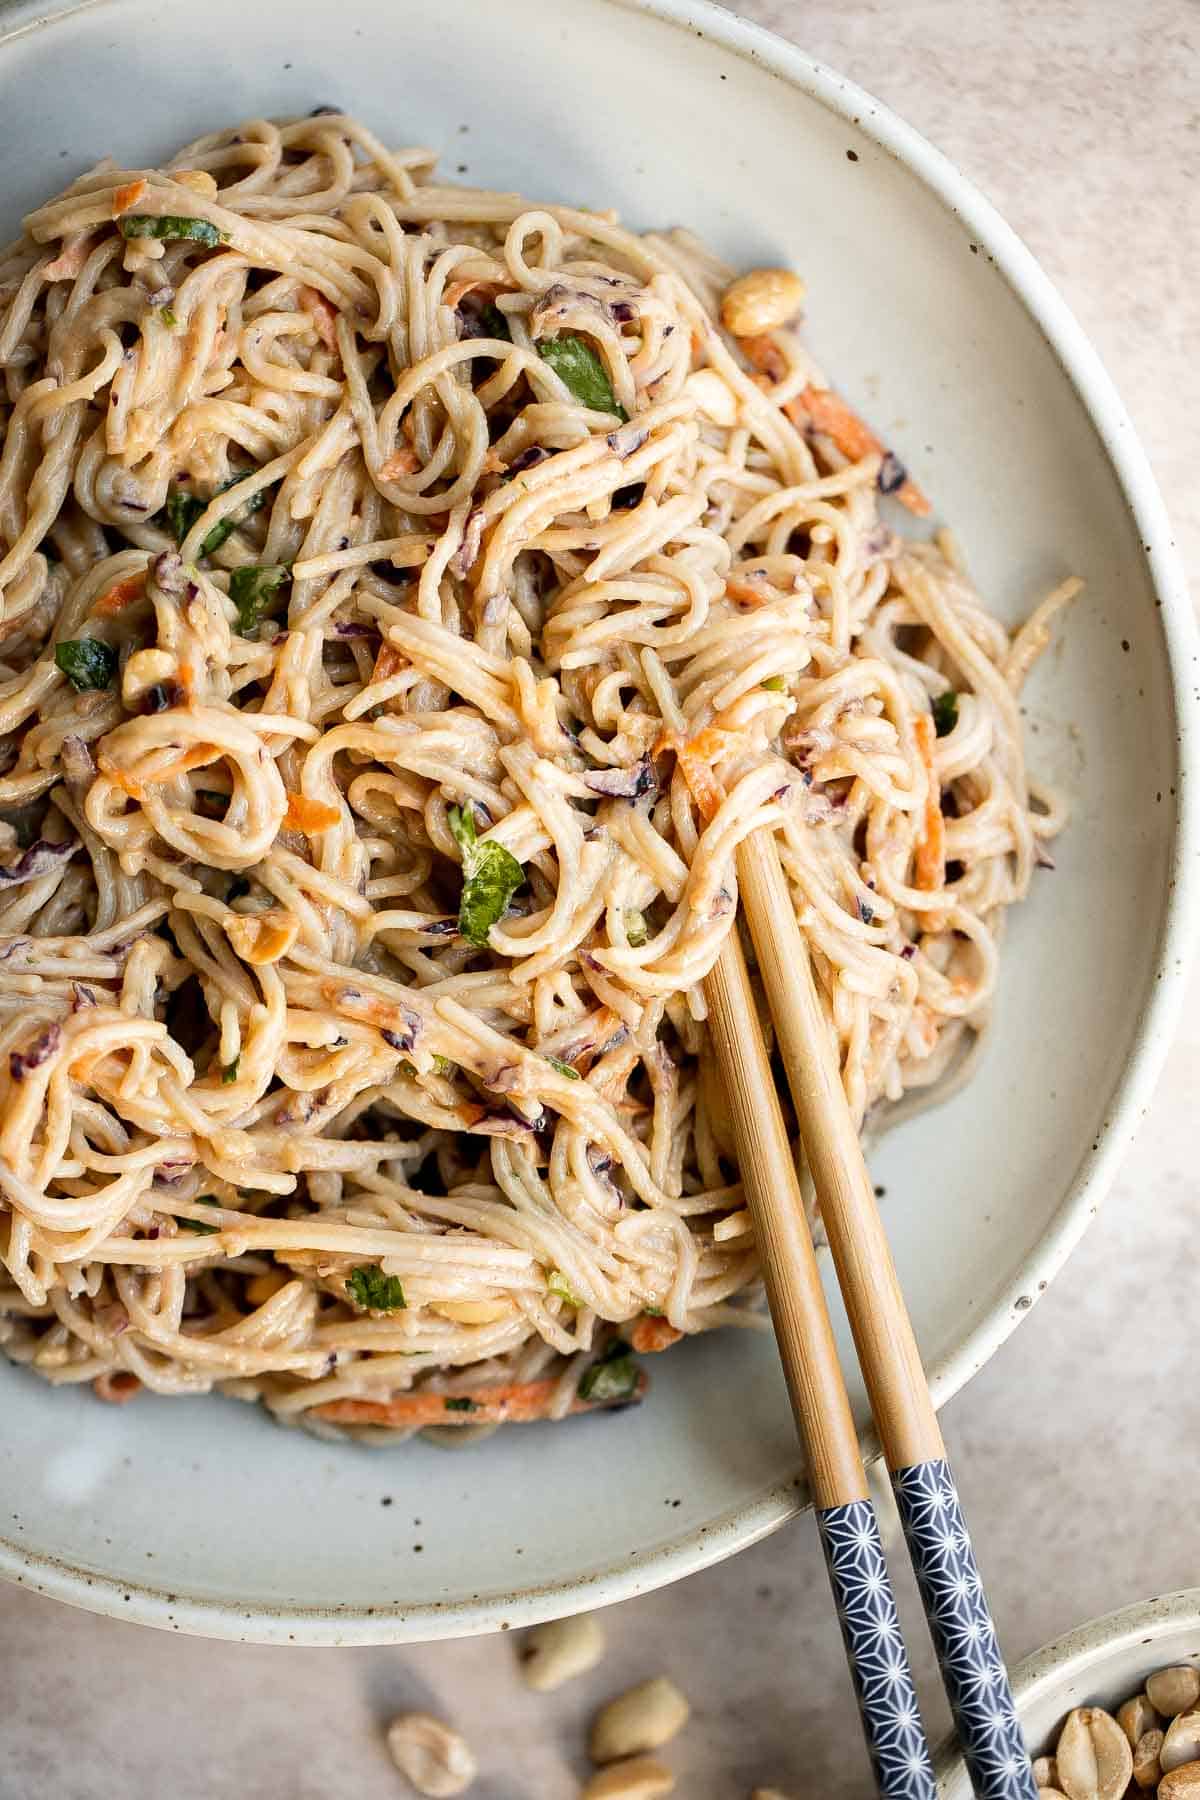
Italian pasta salad is delicious, wholesome, and easy to make. Make it up to three days ahead for your summer picnics and cookouts. You can't get more classic than Italian Salad on Memorial Day!
Chicken Parmesan Stuffed Peppers
Chicken parmesan stuffed peppers are delicious, flavorful, healthy, and filling, and combines two all-time favorites. Great for meal prep and freezes well.
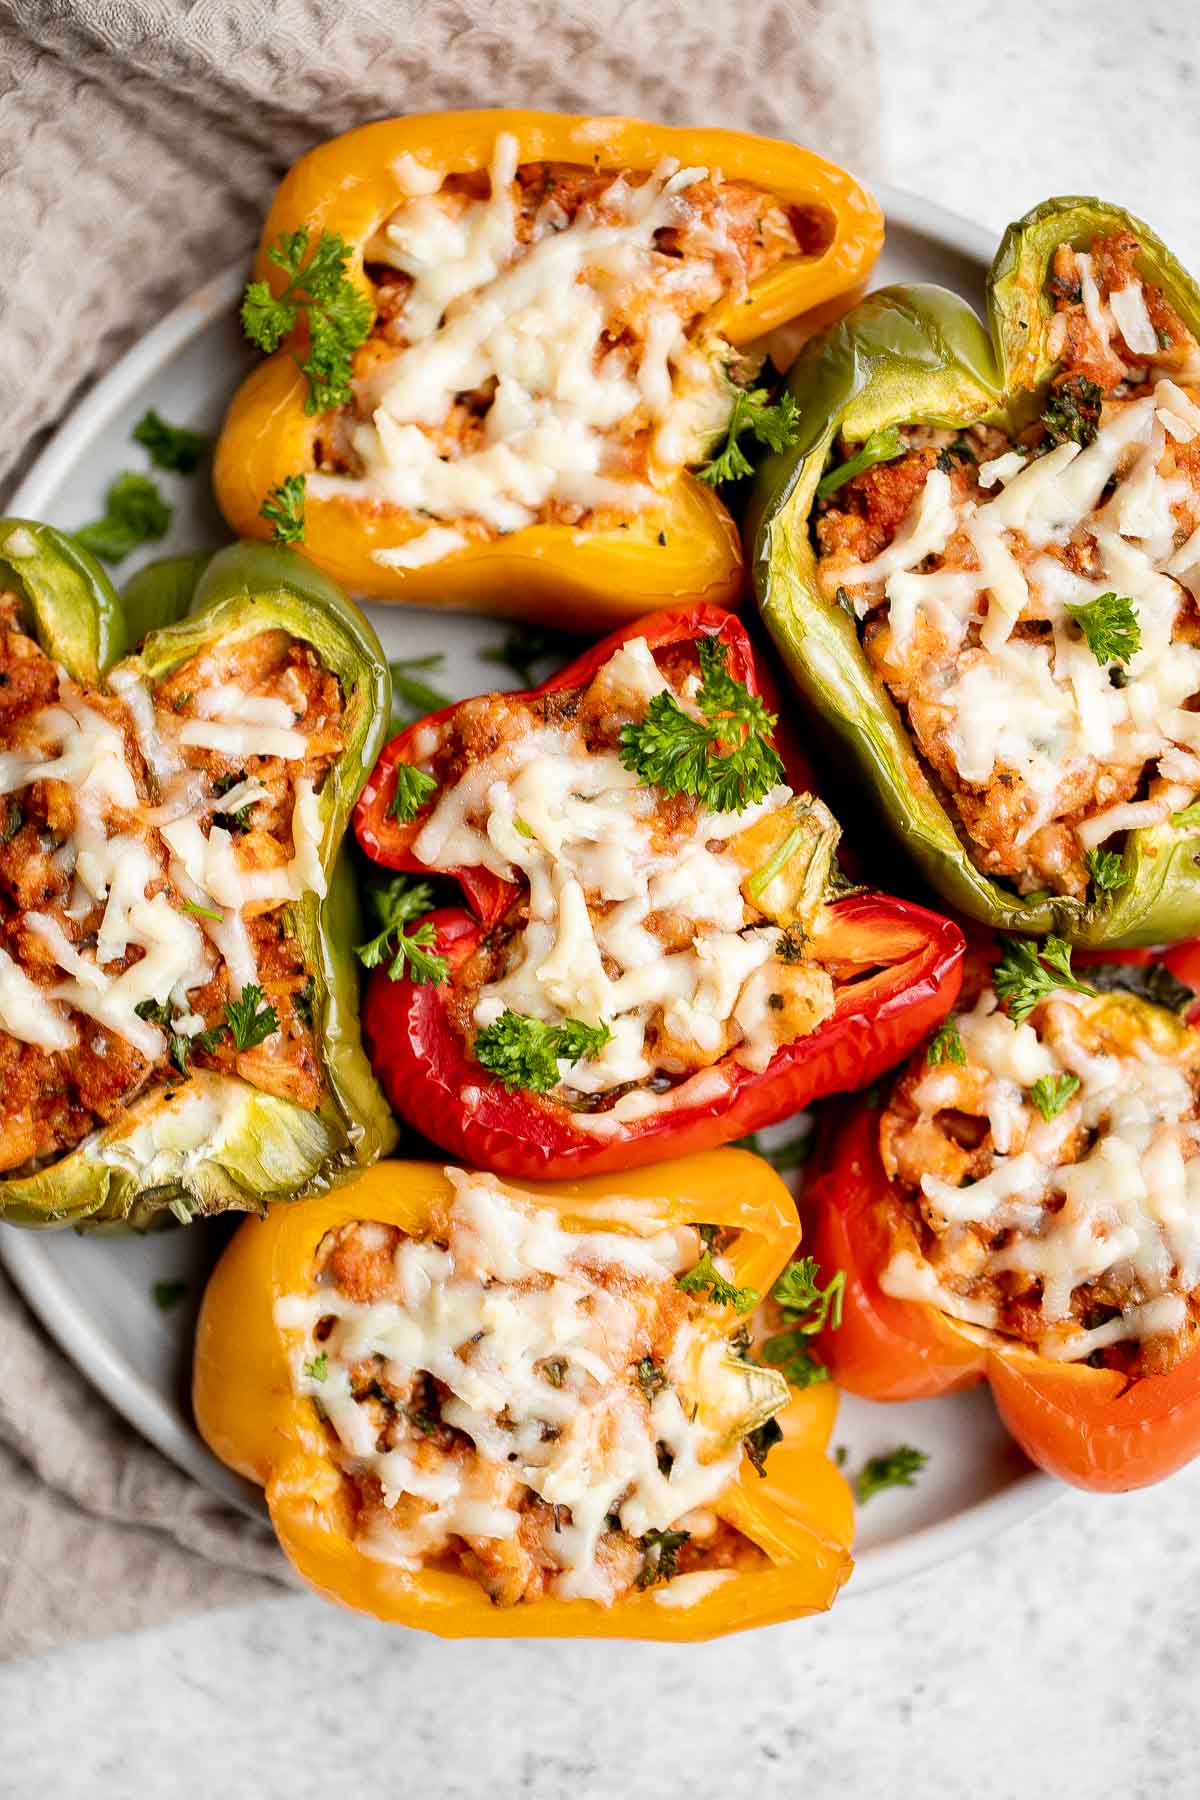
Shrimp Alfredo is creamy, garlicky, and delicious! This quick and easy, under 30-minute recipe is a go-to for busy nights and a year-round family favorite.
Vegetarian Paella is a delicious flavorful classic Spanish rice dish that is hearty and filling - perfectly cooked rice with saffron and vegetables.
Korean Beef Bulgogi is a tasty, quick and easy 30-minute meal made with thinly sliced beef marinated in a delicious sweet and savory garlic soy sauce.
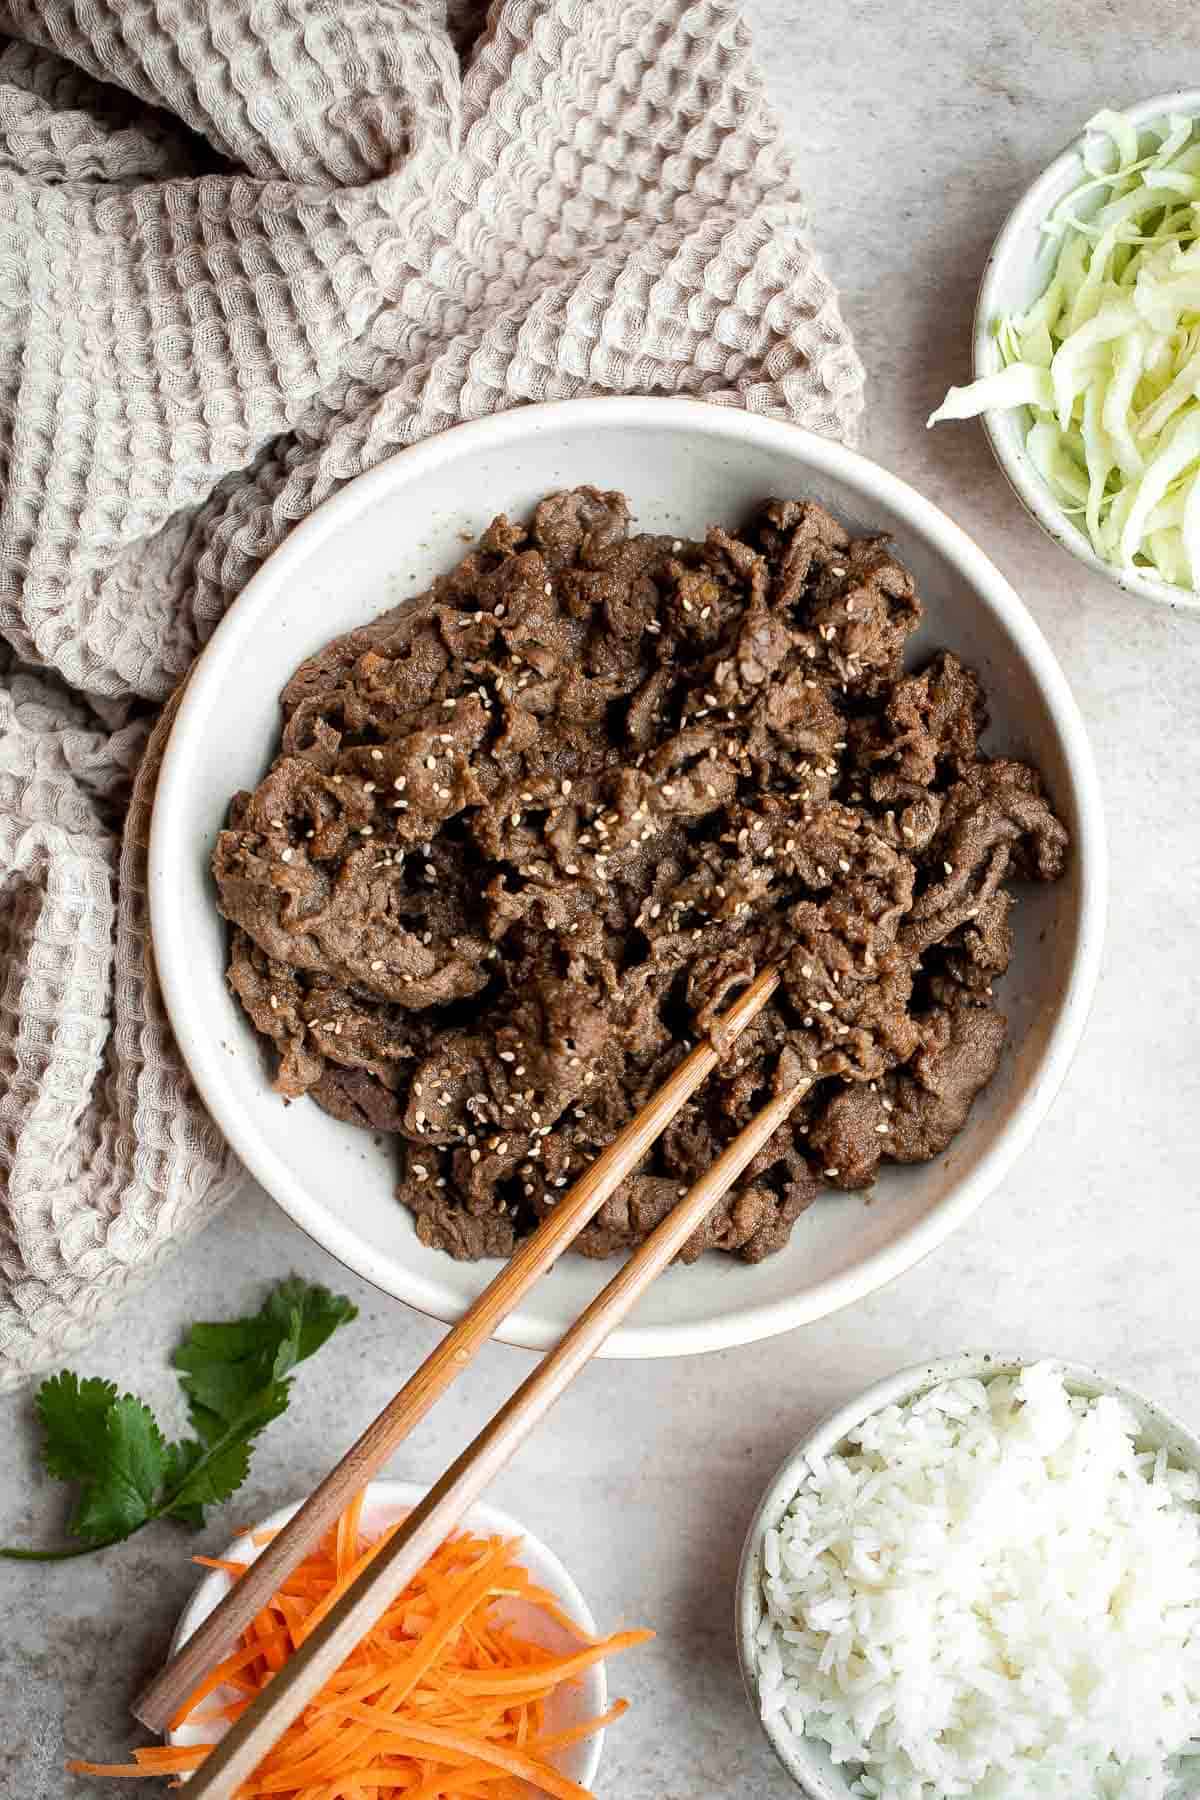
Sesame chicken meatballs are quick, easy, delicious, and loaded with Asian flavor, cooked in a homemade stir fry sauce and customizable with easy veggies!
Homemade hamburger helper is a family favorite but you can make a cheaper, healthier, and way tastier version at home, ready in just 30 minutes.
Garlic Butter Steak Bites are tender, juicy, and flavorful. This quick and easy appetizer or weeknight dinner takes just 15 minutes to make in one skillet.
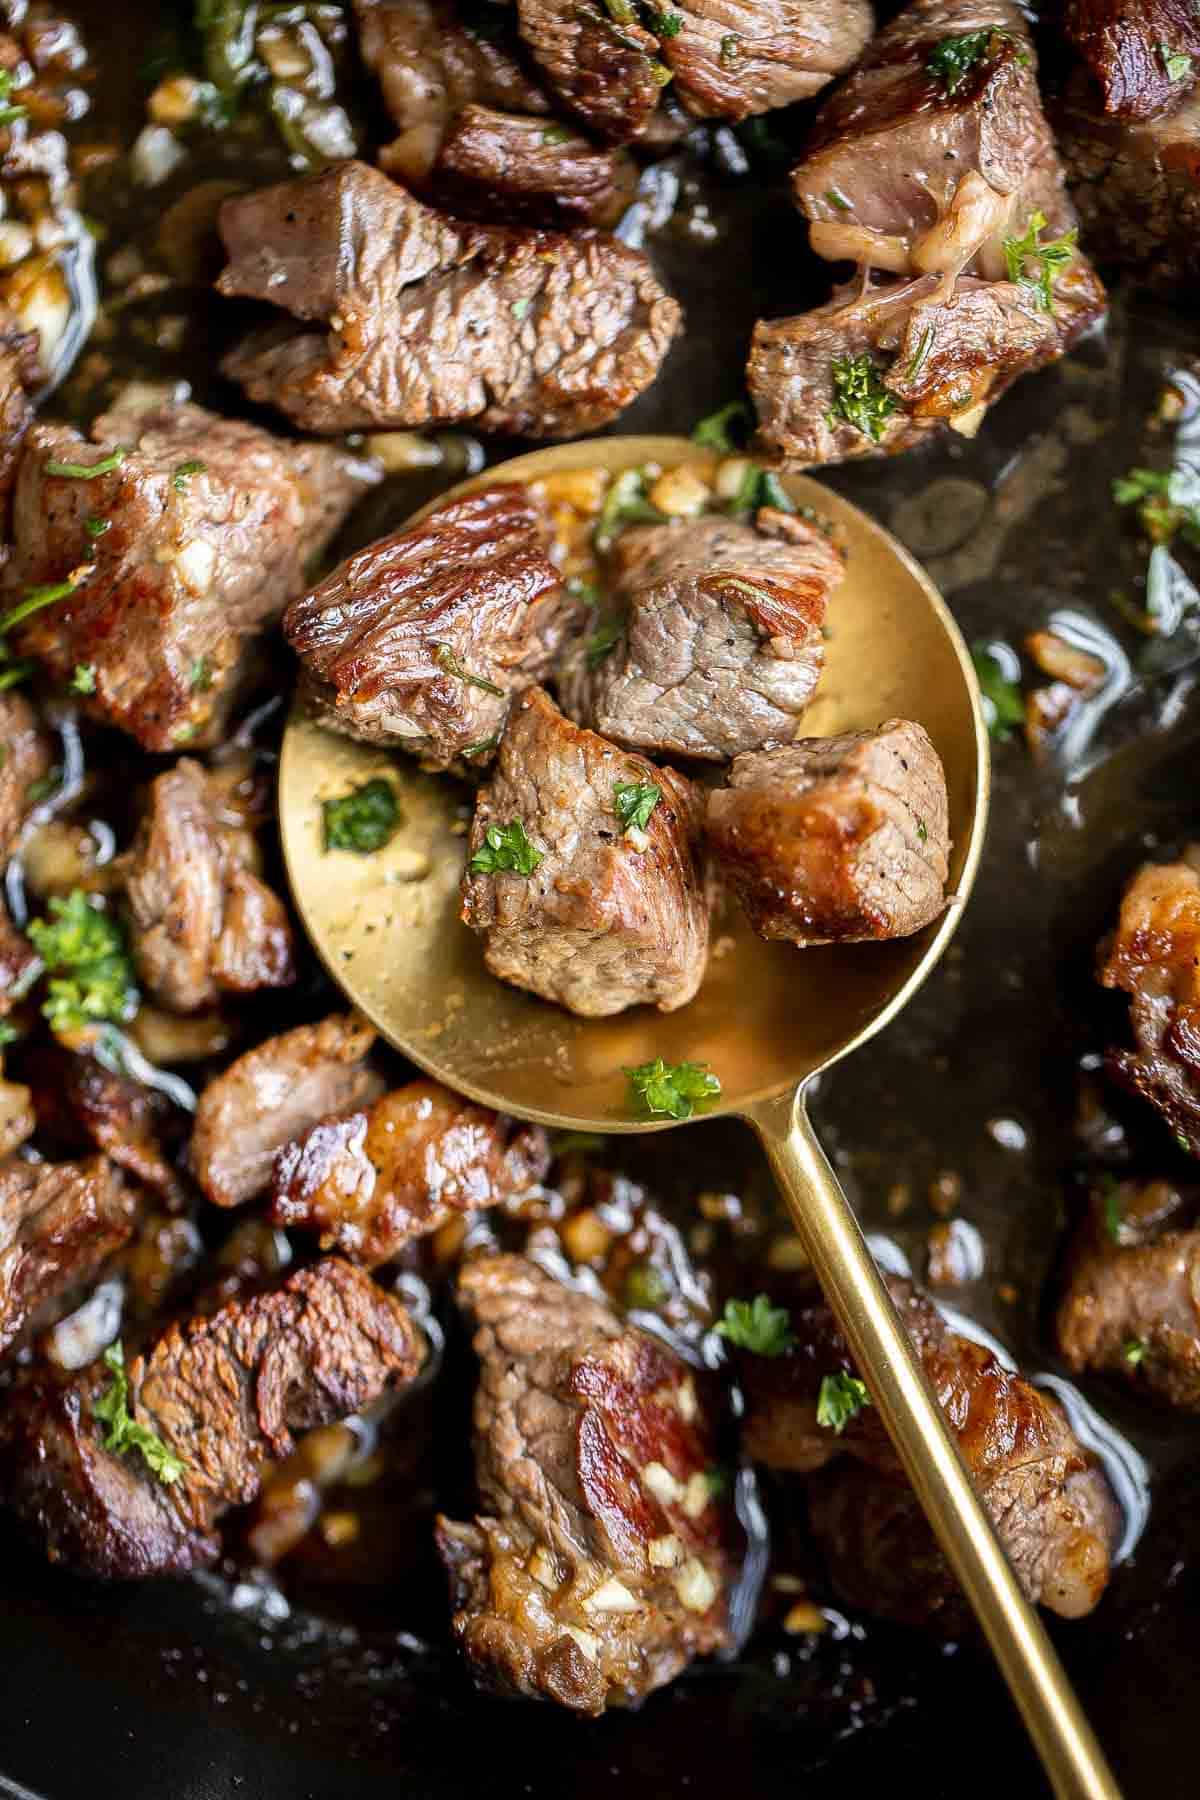
These Thai Turkey Burgers topped with a crisp and creamy slaw are loaded with fresh and bright flavors, healthy and delicious, and quick and easy to make.
Instant Pot Chicken Fried Rice
Instant pot chicken fried rice is easy to throw together, packed with flavor, and delicious. It's perfect for a weeknight family dinner or meal prep.
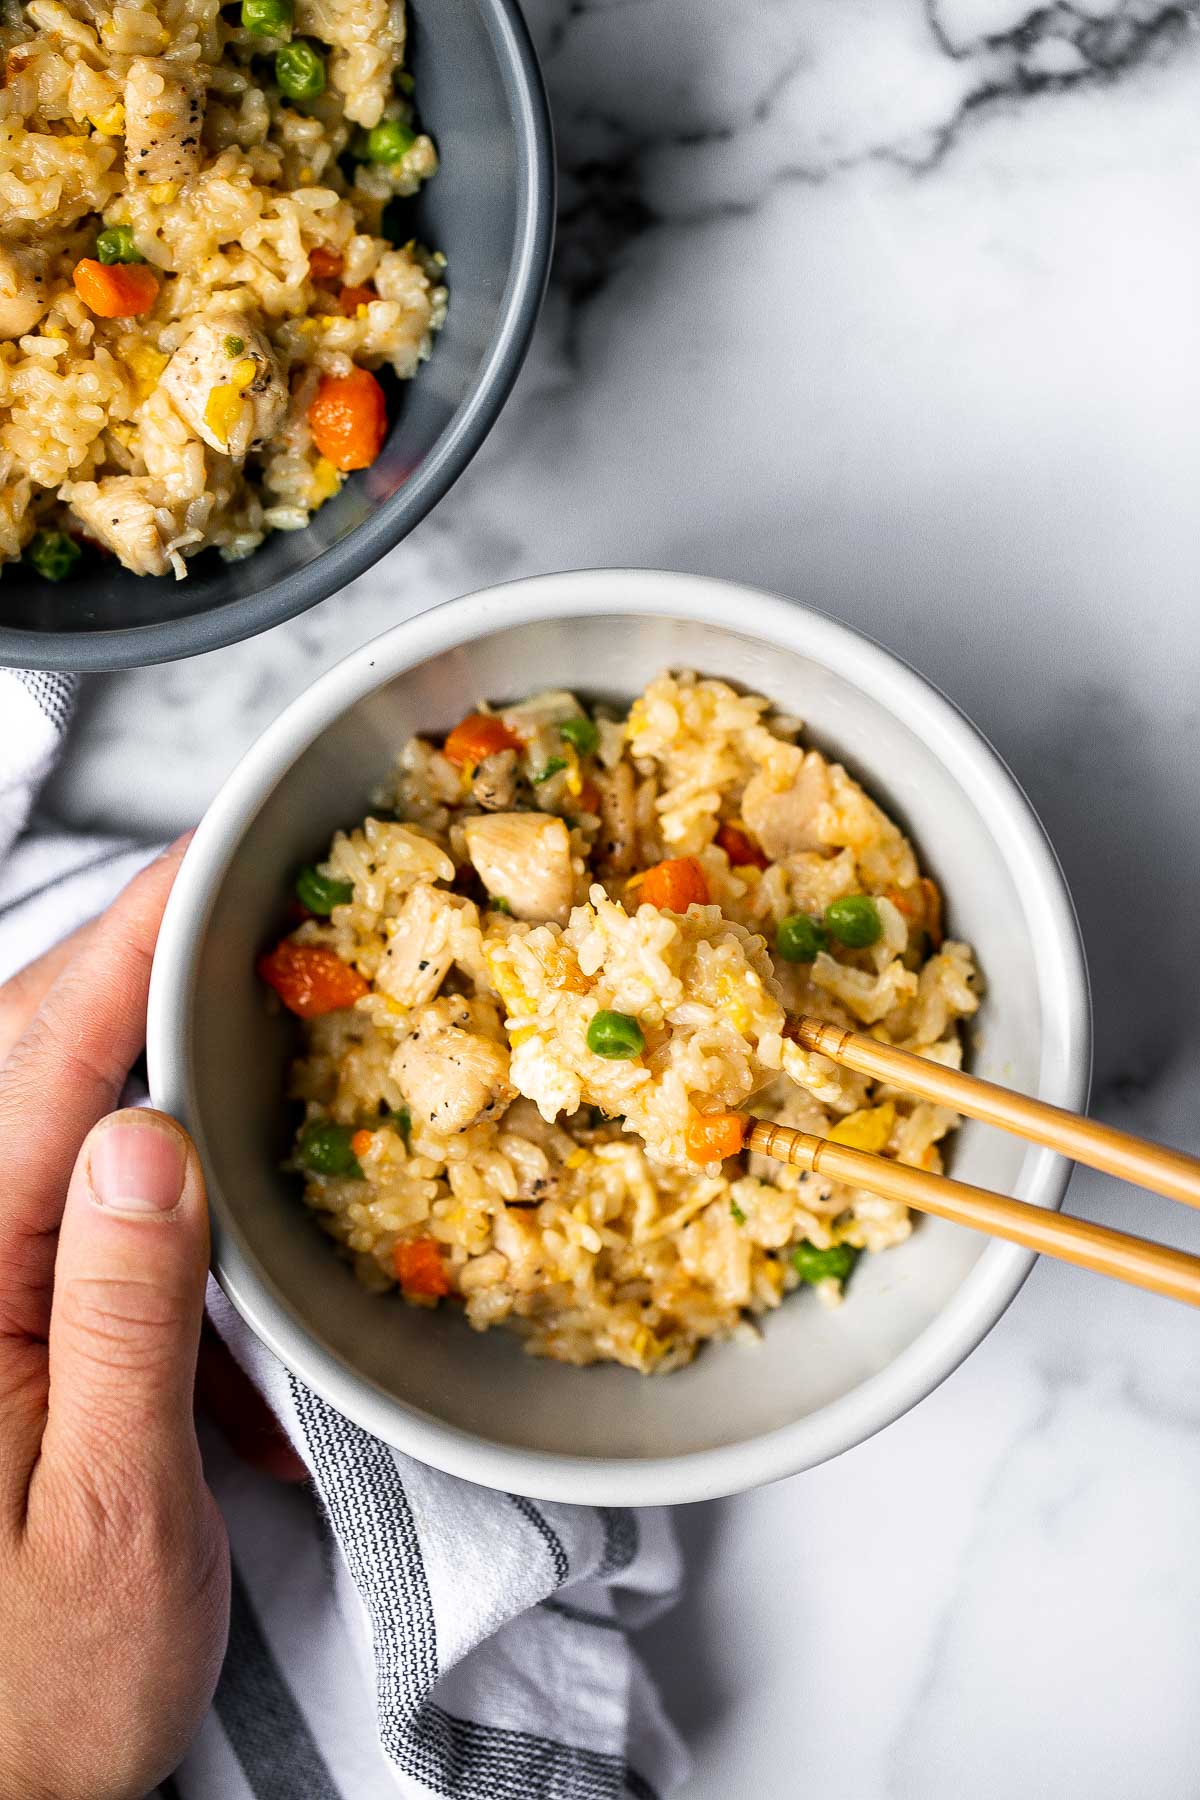
Juicy, tender, and moist, baked chicken breast with the best Greek souvlaki marinade is the most flavorful and delicious chicken dinner in under 30 minutes.
Beef and broccoli stir fry is a classic Chinese-American dish that is delicious, savory, hearty, and saucy. Better than takeout and ready in 25 minutes.
Creamy Parmesan (No Wine) Risotto is a rich, creamy, and comforting classic Italian dish that may be intimidating but is actually quick and easy to make.
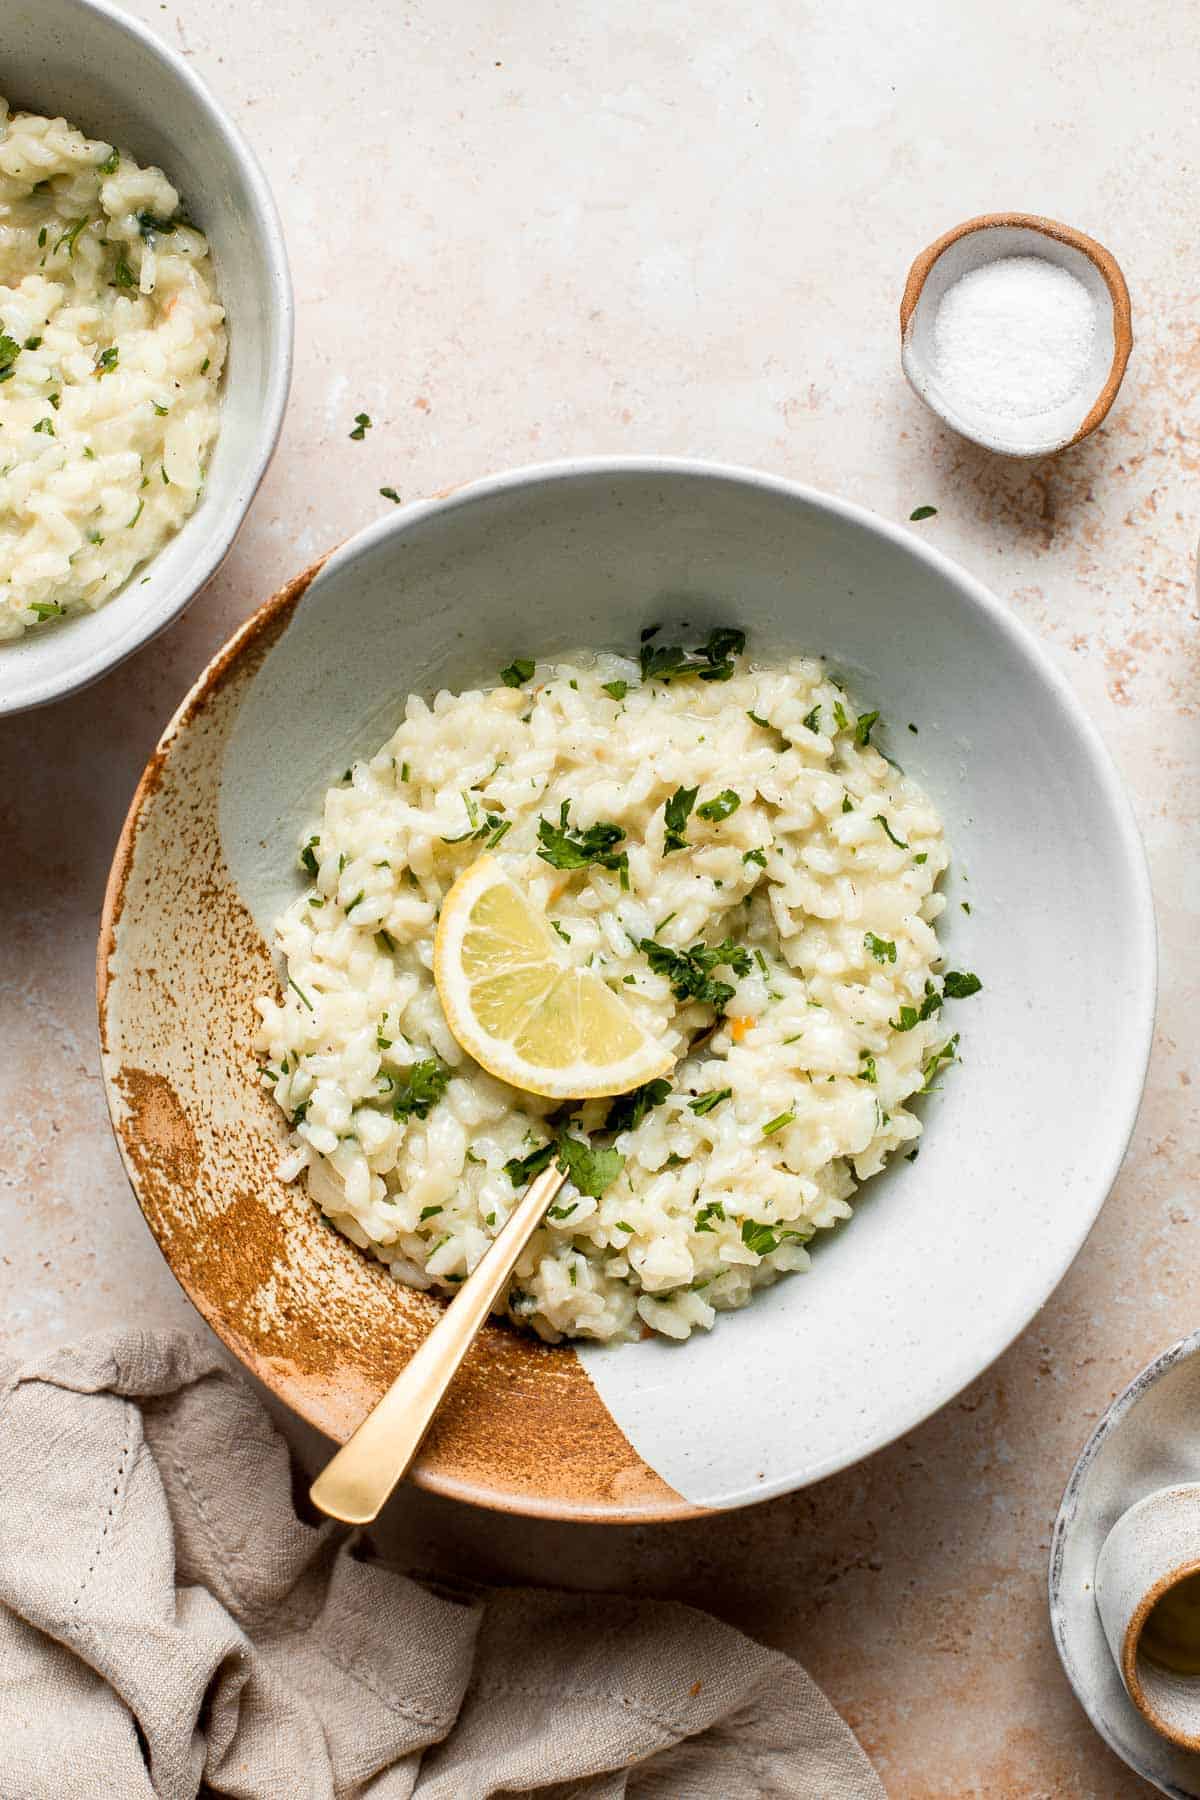
Hamburger soup with macaroni is a quick and easy weeknight dinner that's wholesome, filling, comforting and nutritious. Prep, cook and serve under an hour.
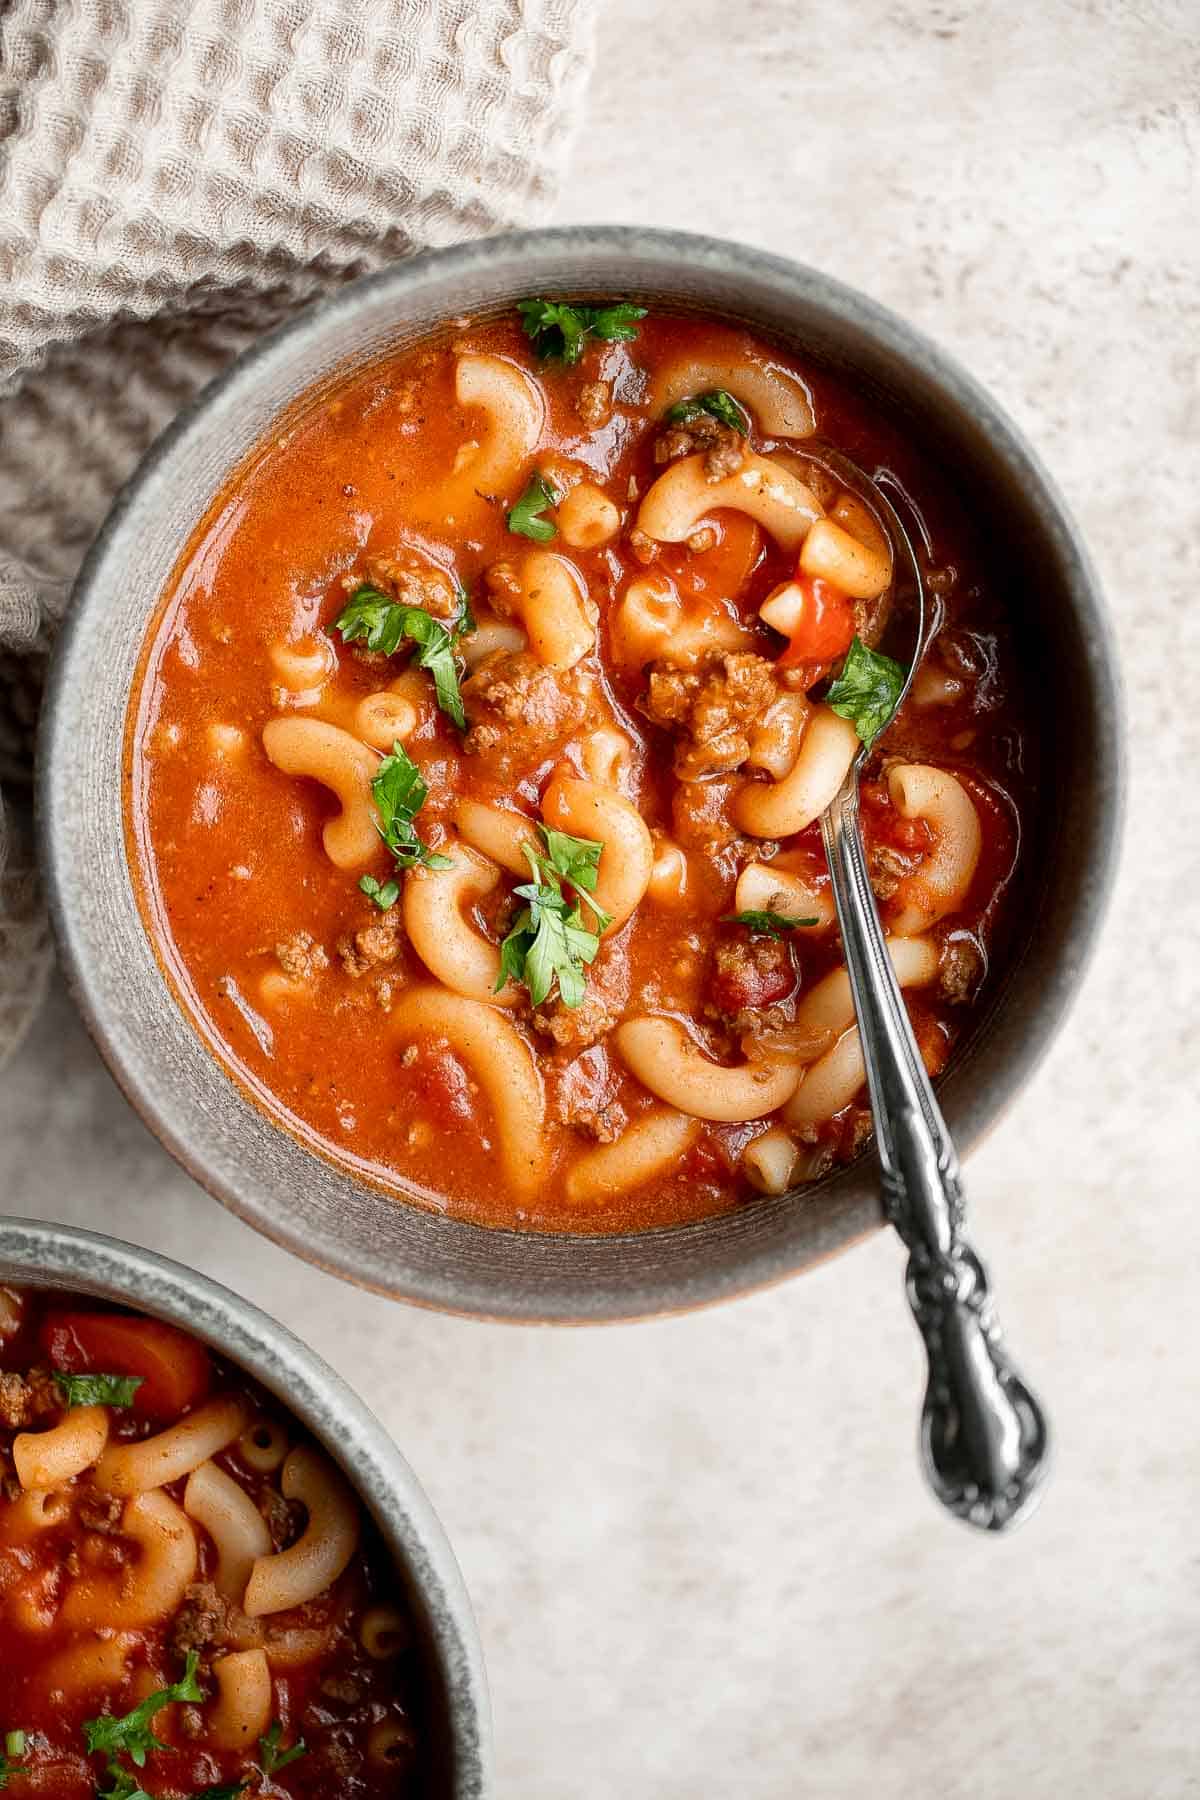
Mediterranean Beef Kofta Kebabs are juicy, tender, flavorful, and well seasoned . These grilled ground beef skewers are quick and easy to make in 30 minutes.

Coconut curry salmon is a delicious, flavorful, and healthy weeknight dinner. It's 30-minute dinner that is a game changer on busy weeknights.
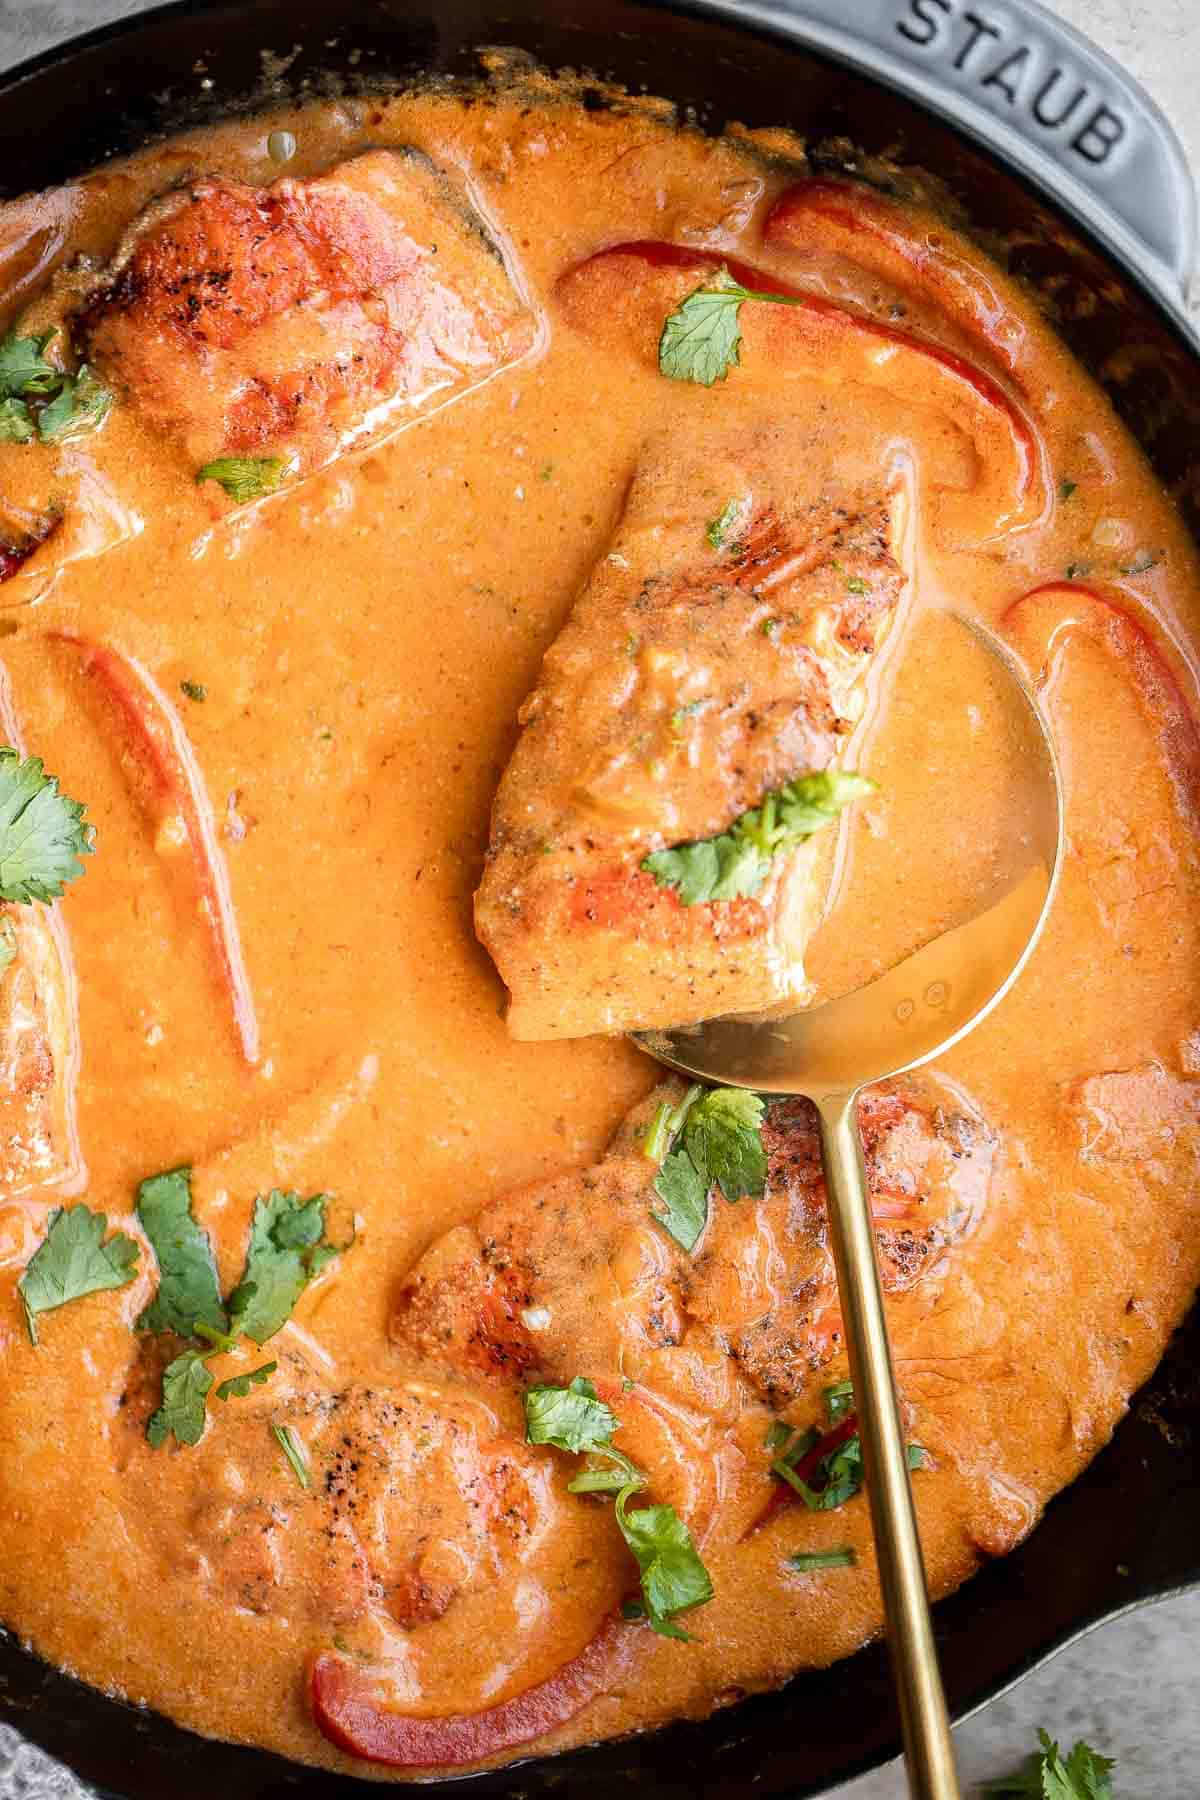
Creamy Chicken Pesto Pasta is a delicious 30 minute recipe that is packed with flavor, quick and easy to make, and will satisfy the whole family.
Sheet pan chicken fajitas are quick and easy to make, loaded with flavor, delicious, and ready in less than 30 minutes. Great for meal prep too.
Instant pot beef curry with potatoes and carrots is delicious, hearty, comforting, and flavorful. It's made quick and easy in the pressure cooker.

Air fryer chicken tenders are juicy and moist inside while crispy and golden brown outside. A healthy, delicious, and quick kid-friendly recipe.

Tiktok ramen is savory, sweet and loaded with umami flavor. It's a quick and easy viral ramen hack with instant noodles, eggs, butter, garlic and soy sauce.
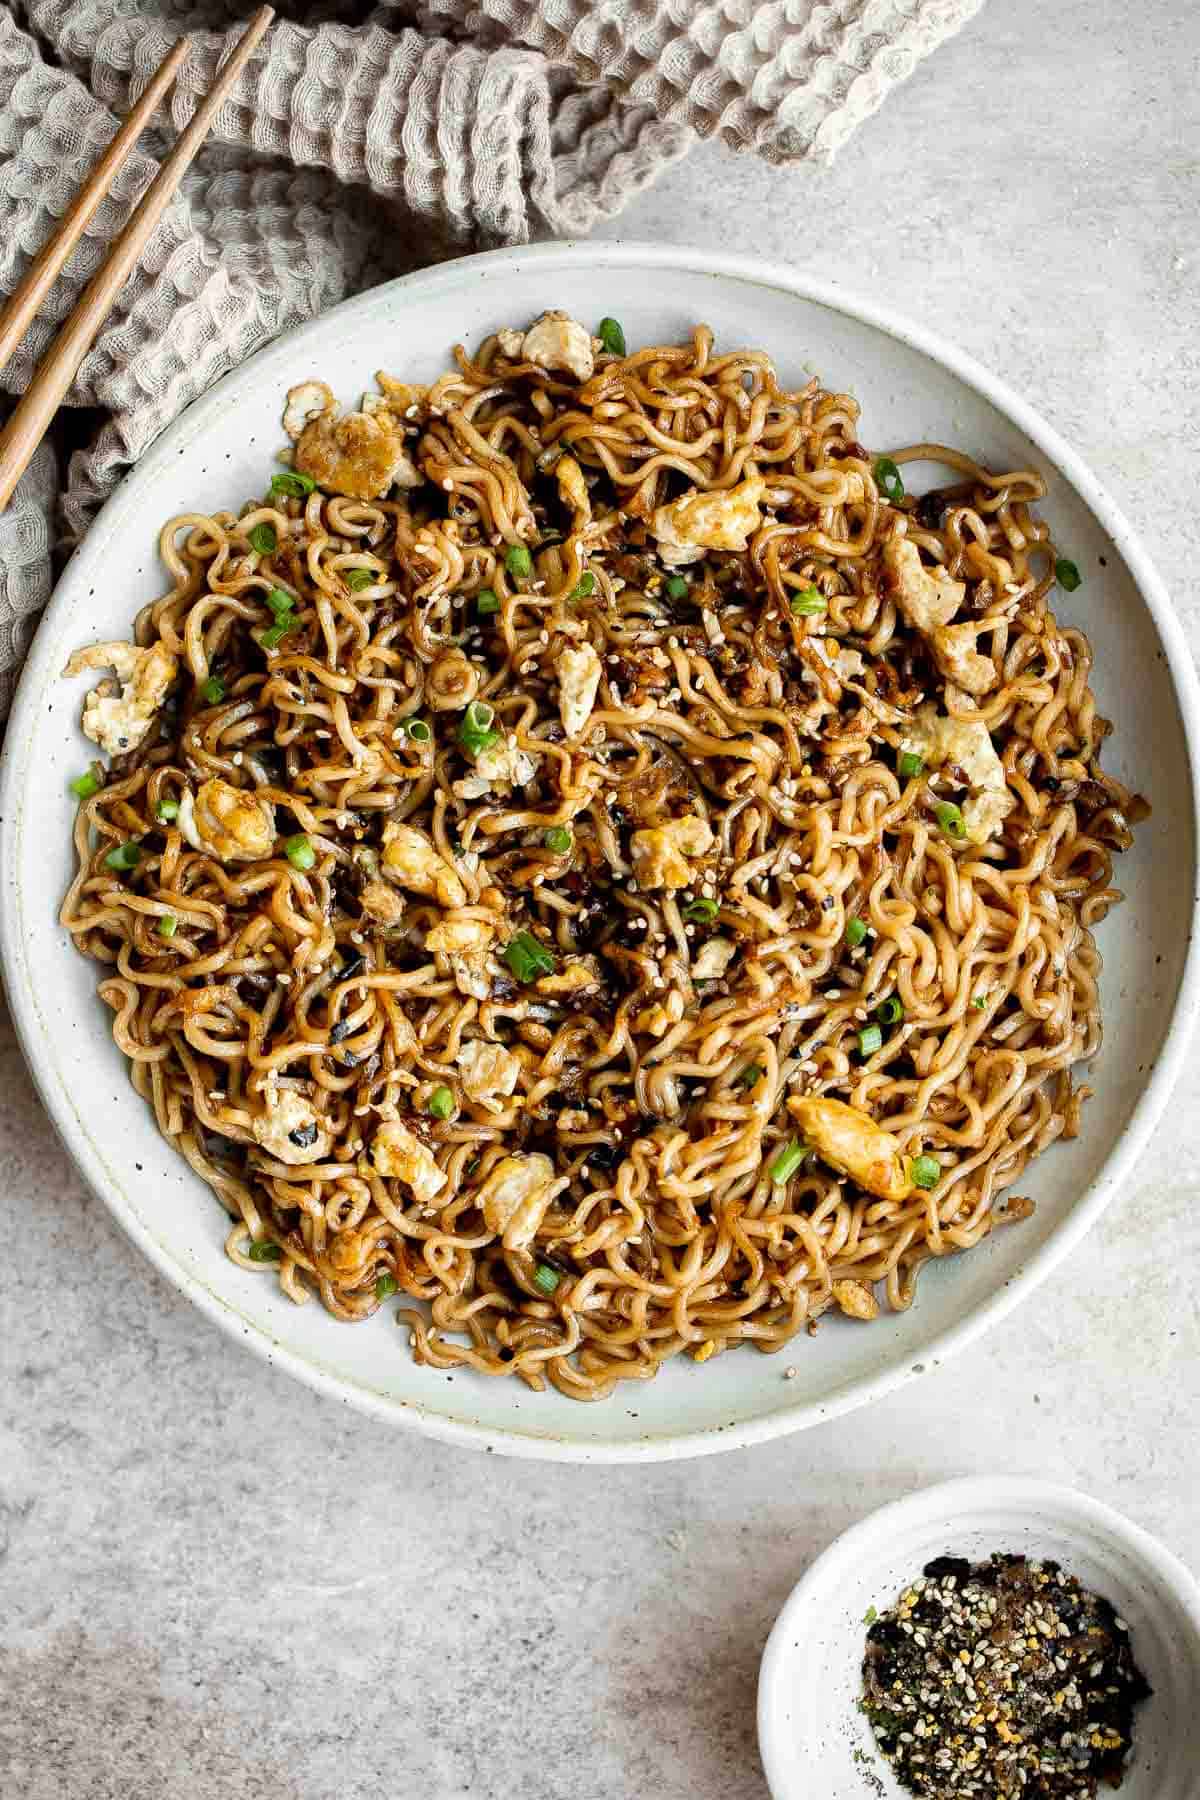
Vietnamese Noodle Bowl with Chicken
Vietnamese noodle bowl with lemongrass chicken, fresh vegetables and herbs, tossed in a homemade Vietnamese sauce is healthy, delicious, light, and filling.
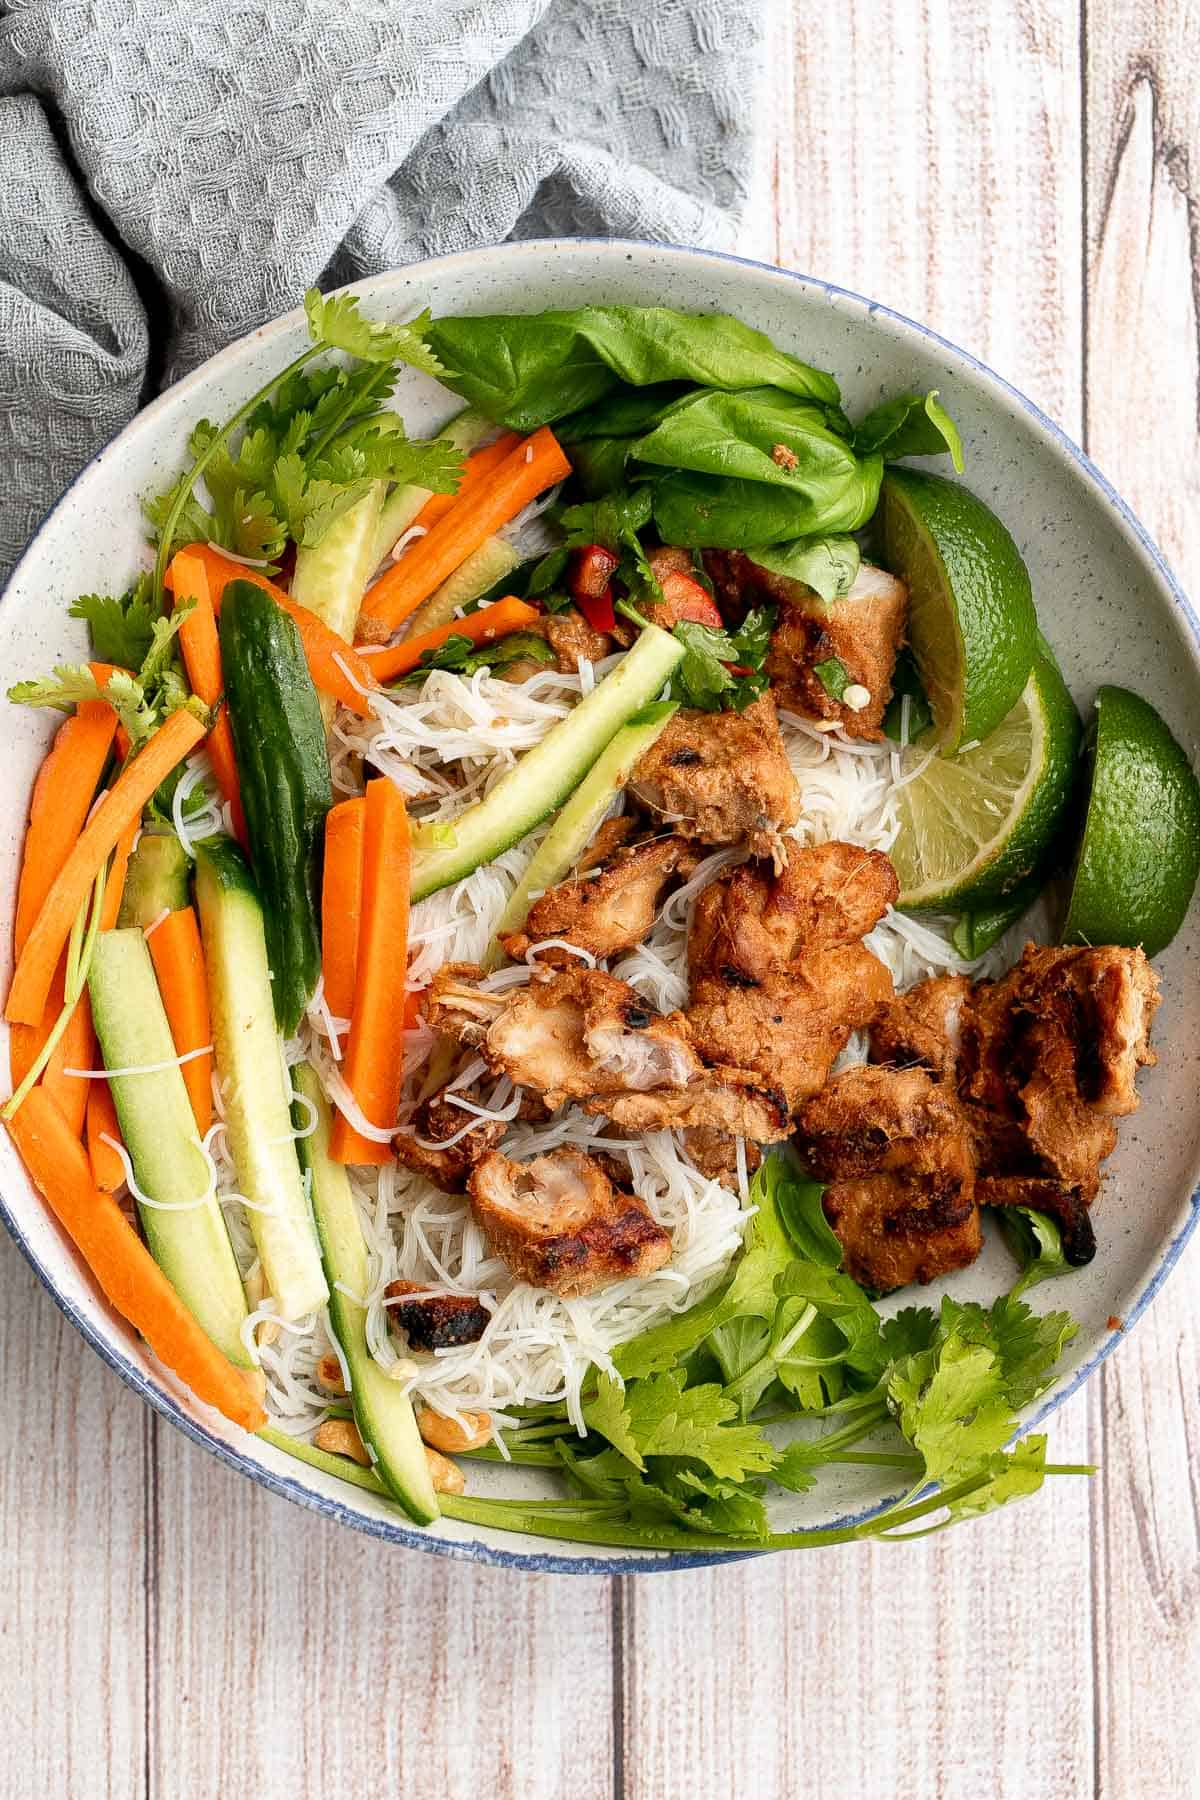
White Bean Soup with Kale is a hearty and nourishing one-pot meal that is flavorful and easy. Make this healthy soup in 30 minutes using simple ingredients.
This one pan Skillet Lasagna has all the same ingredients and flavors as a traditional meat lasagna but with minimal prep and is ready in just 40 minutes.
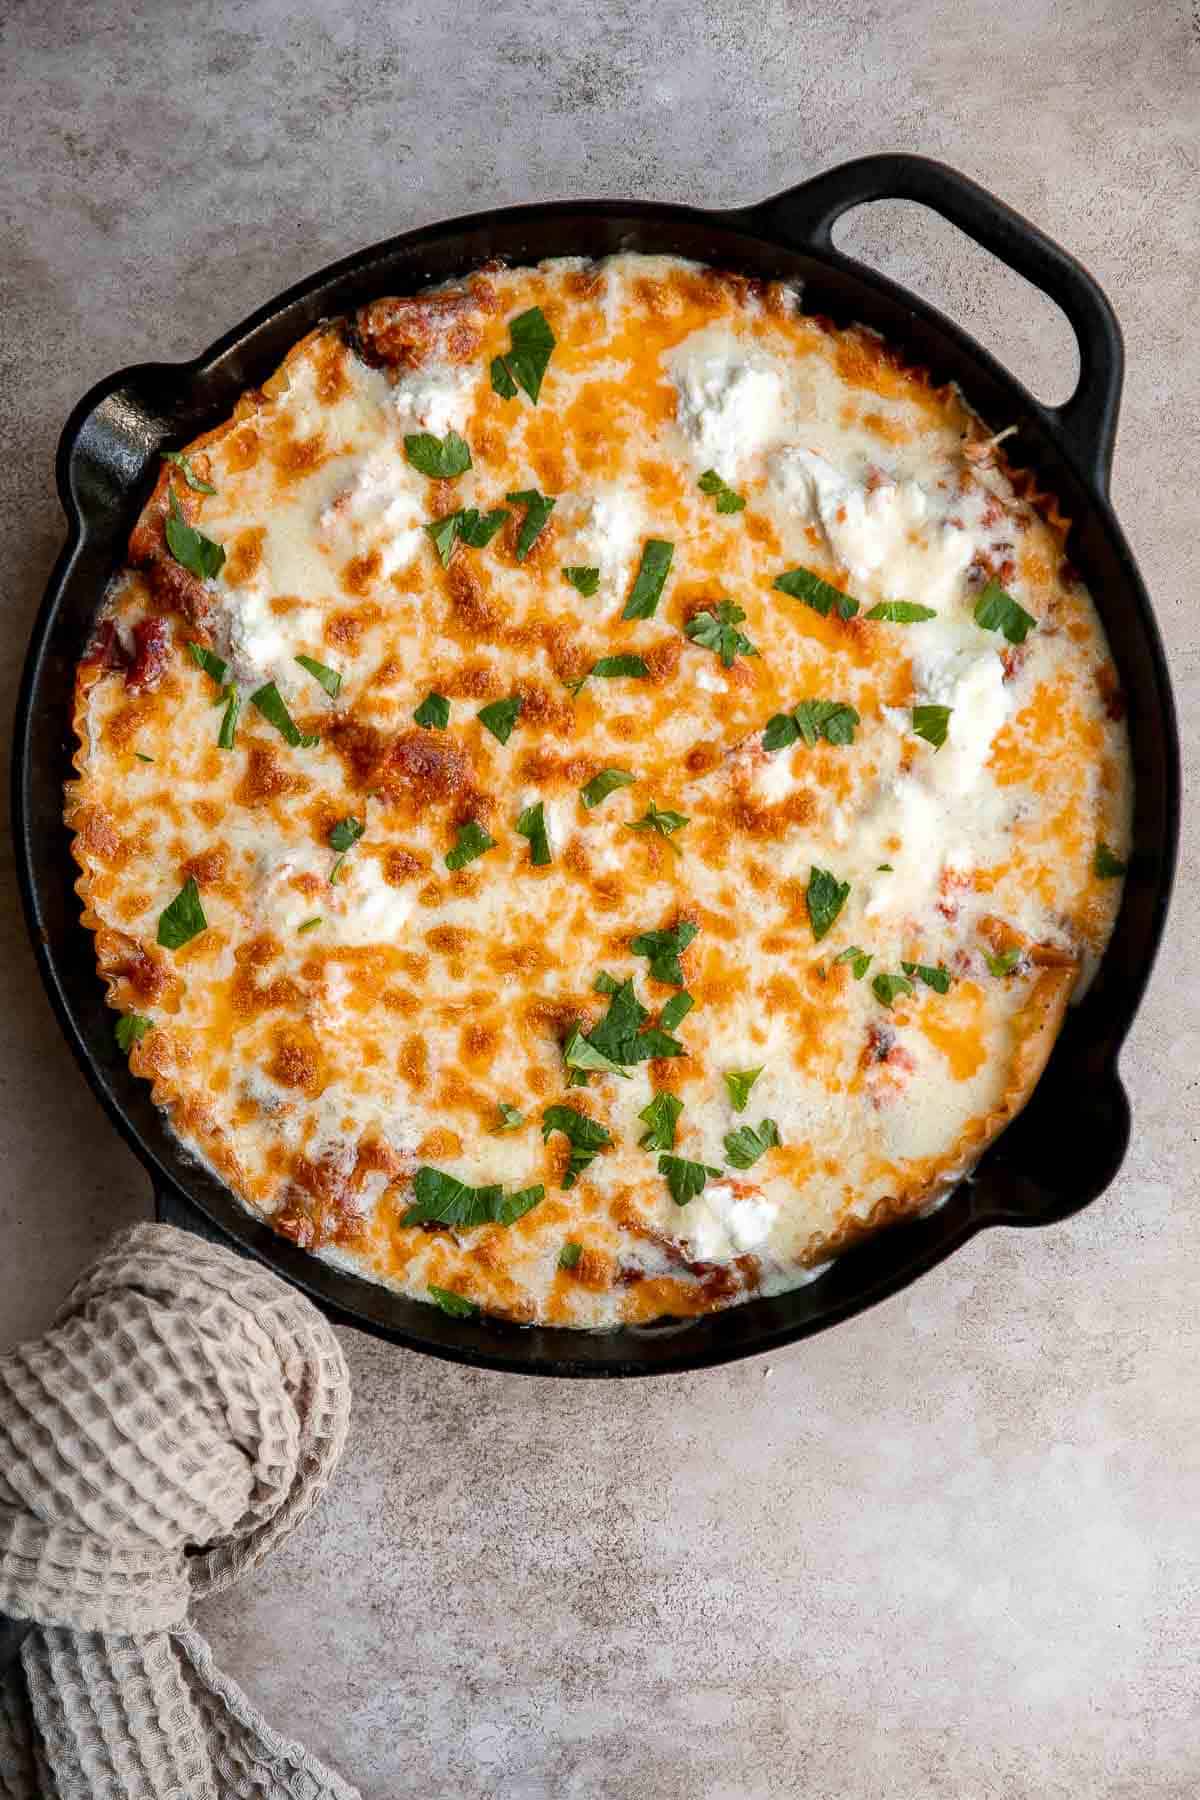
These Salmon Burgers made with real fresh salmon, are crispy on the outside and flaky inside, juicy and thick, and healthy and packed with protein.

Delicious, moist and juicy Mediterranean chicken patties have everything you want in one bite: protein, veggies, herbs, and they're quick and easy to make.
Mexican Chicken Caesar Salad is a delicious, flavorful twist on a classic Caesar salad with Mexican flavors and ingredients tossed in Caesar dressing.
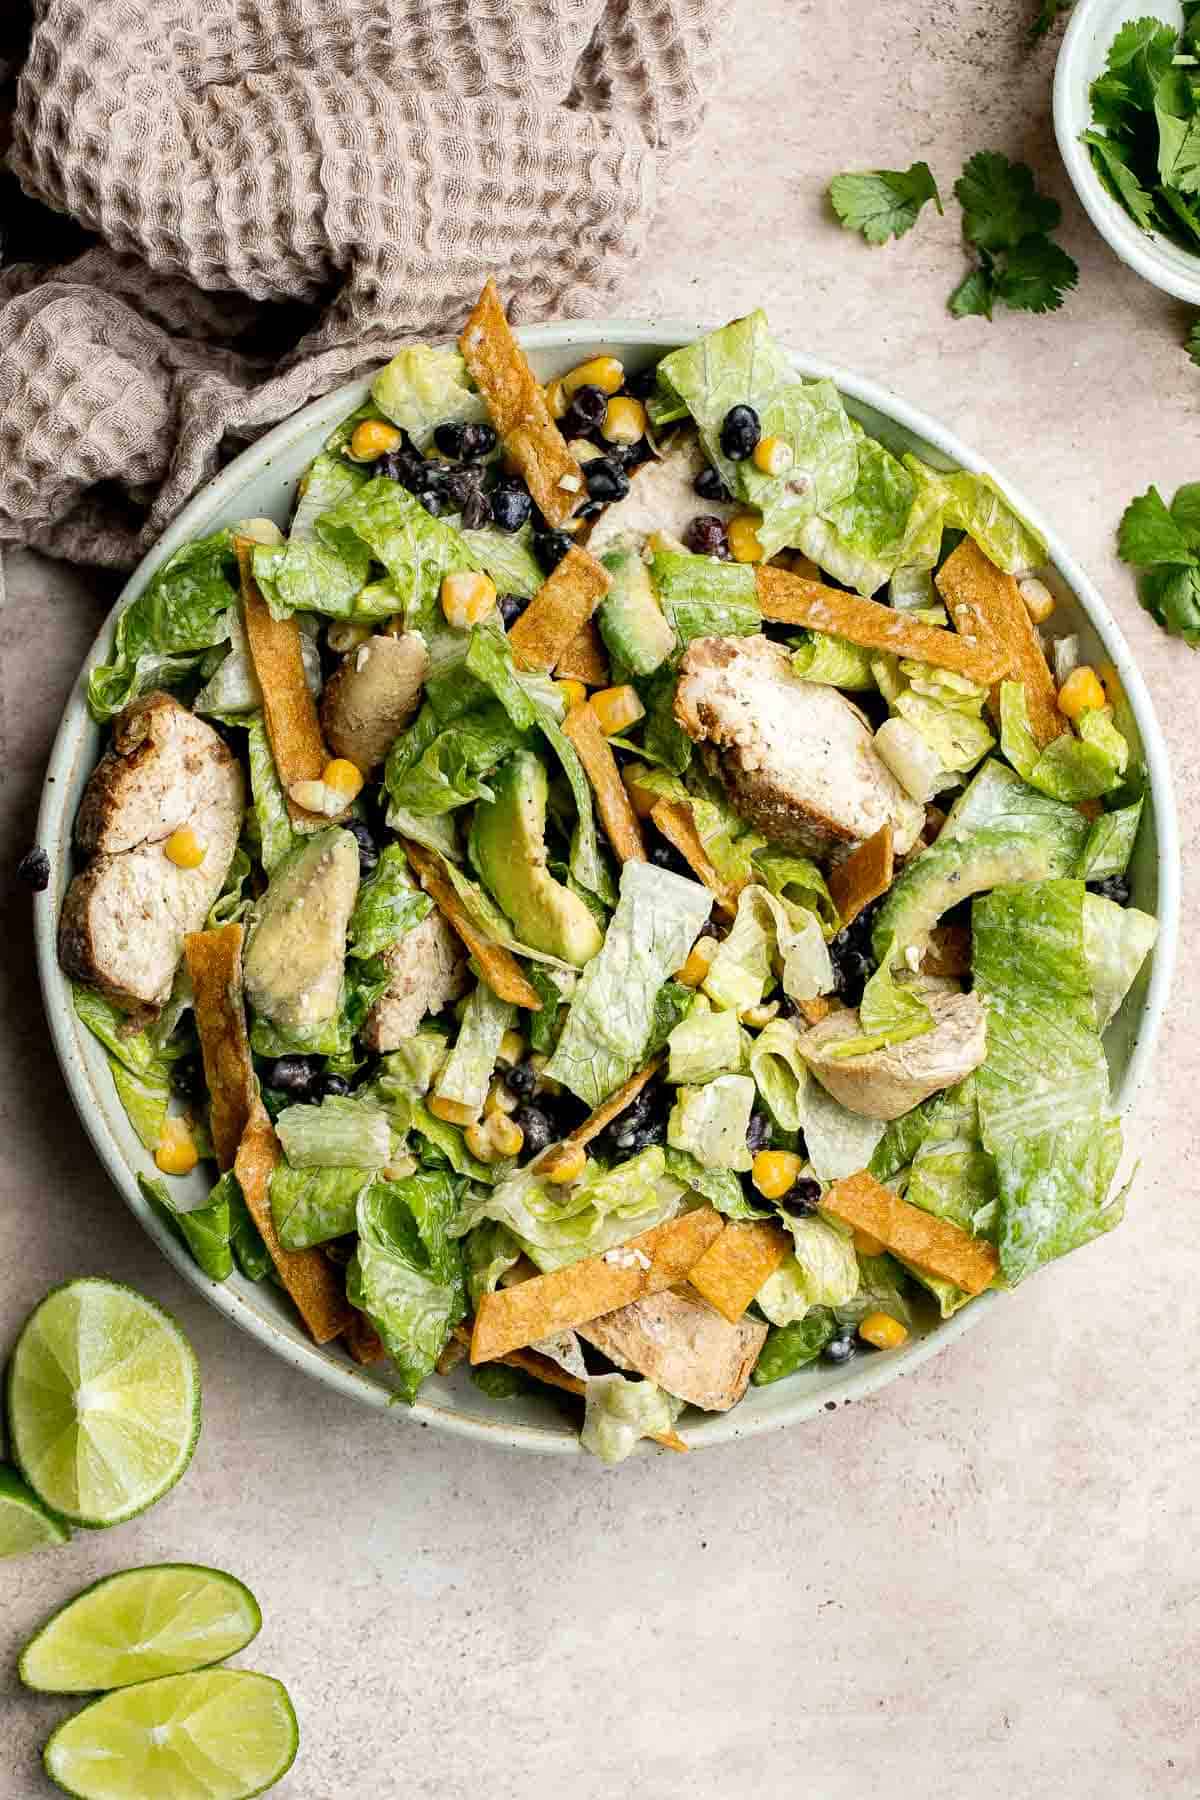
Better than takeout garlic shrimp stir fry is saucy, sticky, flavorful, and delicious. It's quick and easy to make in 15 minutes and great for meal prep.
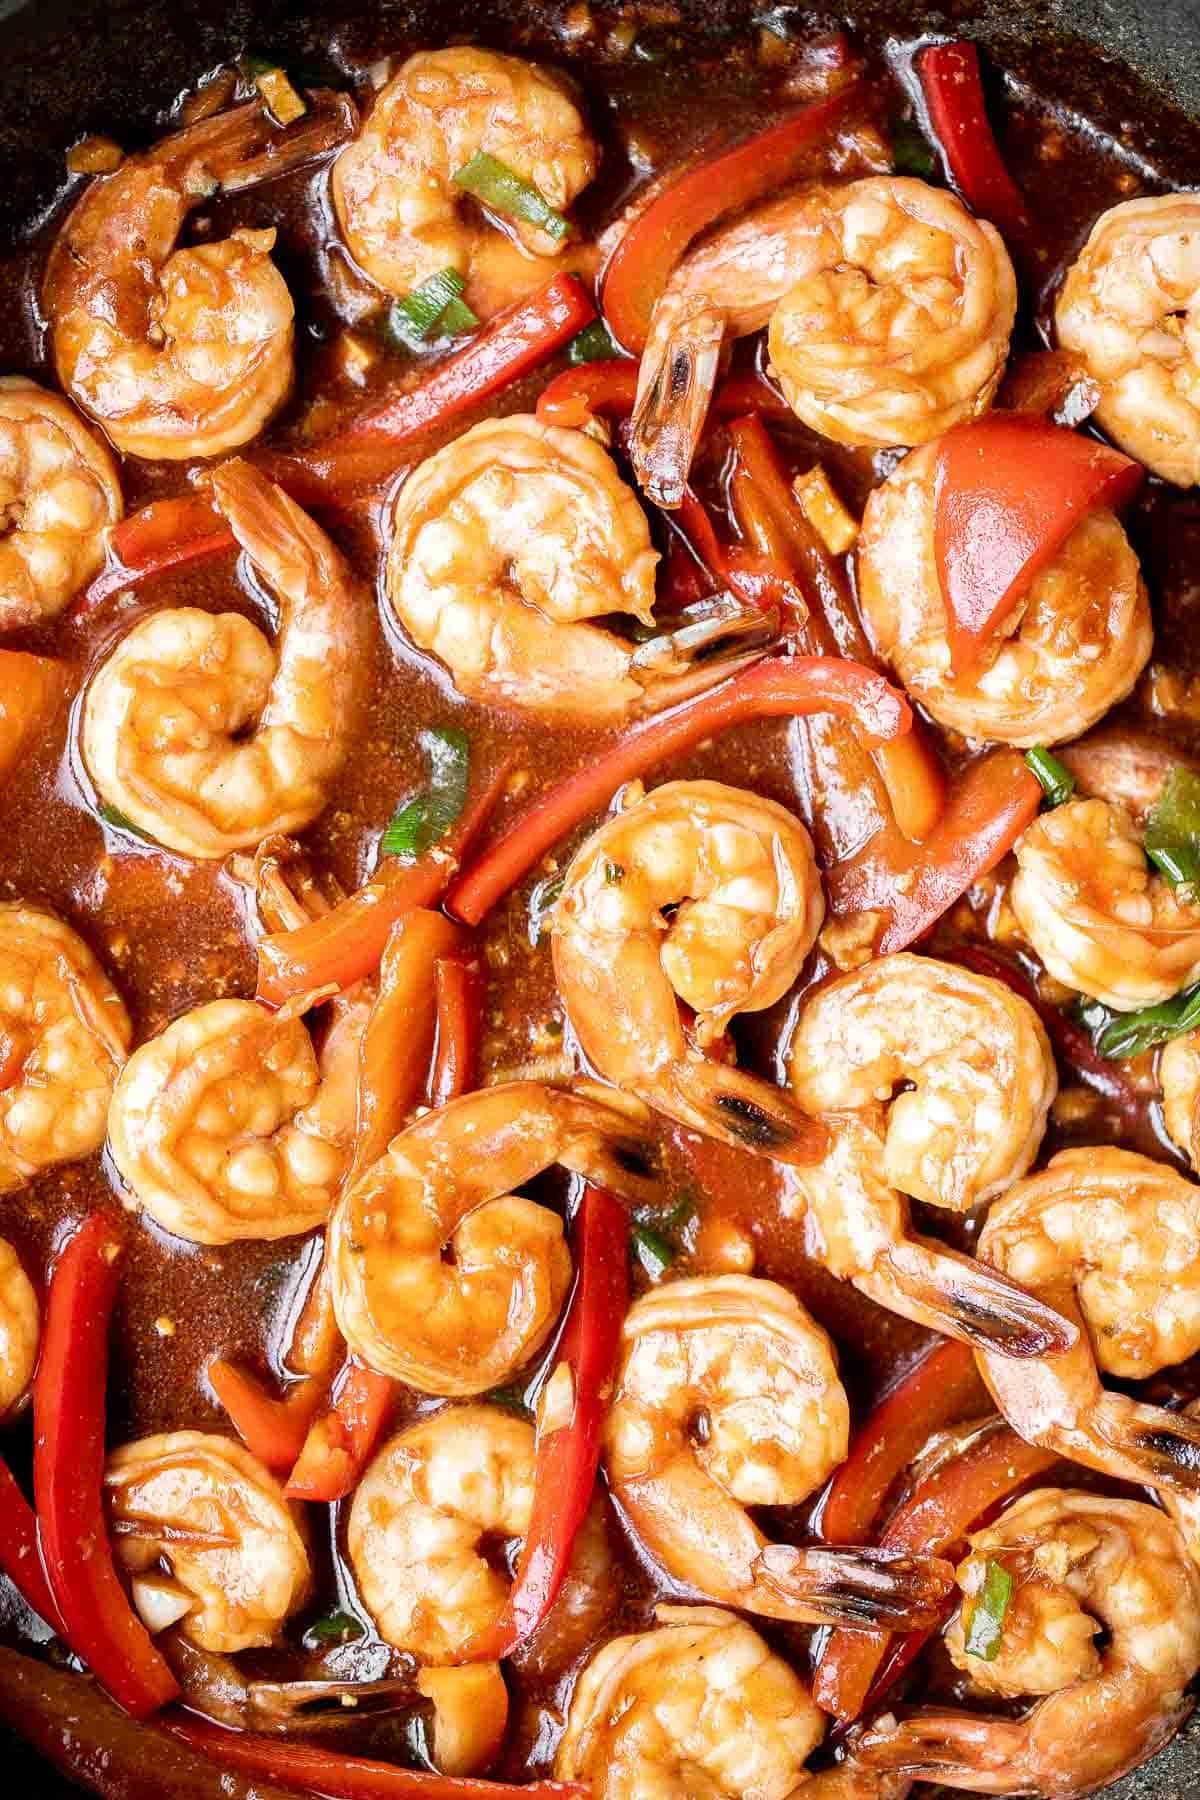
Chicken and Dumplings is a classic chicken soup that is hearty, comforting, and nourishing. Plus, it is quick and easy to make in one pot in 40 minutes.

More Dinner Recipes
- 50 Sunday Dinner Ideas
- 60+ Easy Dinner Ideas
- 50 Date Night Dinner Ideas
- 60 Vegetarian Dinner Recipes
- 60 Best Chicken Recipes
- 40 Best Pasta Recipes
Did You Make Any of These Friday Night Dinner Recipes?
Please leave a comment and rating below, and let me know what you thought of this round up of easy Friday night dinner ideas. Be sure to snap a picture and tag me on Instagram @aheadofthyme or share it on the Pinterest pin so that I can follow along.
HUNGRY FOR MORE? Don't forget to sign up for my email newsletter so that you don't miss any recipes. You can also follow along on Instagram and Pinterest for more recipe updates.
Duchess Potatoes
Duchess Potatoes are rich, creamy, whipped bites of potatoes with crispy edges and a soft delicate middle. Fluffy and creamy mashed potatoes are piped into beautiful shapes and baked until golden brown. Known as "Pommes Duchesse" in French, these whipped potatoes are an elegant side dish that's perfect for special occasions but easy enough for simple dinner parties.

Plus, duchess potatoes are a lot easier to make than they seem. Using only 6 staple ingredients, you can make duchess potatoes ready to serve in just 40 minutes. Easter brunch is a great meal to debut this upscale cousin of mashed potato, or you can save them for your next dinner party to impress your friends and family! The rich and buttery flavor of these potatoes will have your guests begging for seconds.
Why You'll Love the Duchess Potatoes
- Creamy, buttery potato bites. These duchess potatoes are silky smooth on the inside and packed with flavor, thanks to butter, heavy cream, Parmesan and parsley. They are piped into beautiful shapes and baked until golden brown. Your guests will be impressed by their elegant presentation.
- Quick to make. Though they look incredibly fancy, these duchess potatoes take less than an hour to prepare, and most of that time is spent waiting on the potatoes to bake in the oven. Perfect for prepping other dishes or cleaning up!
- A special occasion side or appetizer. Duchess potatoes are as exceptional as their name suggests. They're a great side dish or starter for special occasions like holiday parties and romantic evenings. They also pair well with just about any entree!
- Easy to customizable. You can easily customize the flavor of these pommes duchesse potatoes by adding your favorite herbs and spices. Try adding garlic, rosemary, or Parmesan cheese to give them an extra burst of flavor.
Ingredient Notes
To make these delicious Duchess Potatoes, you will need the following ingredients (full measurements in recipe card below):
- Russet potatoes - if you don't have Russet potatoes, you can easily substitute with Yukon gold potatoes.
- unsalted butter - unsalted butter gives you the most control over the flavor, but you can use salted butter if necessary. Just be sure to adjust the amount of additional salt in the recipe.
- heavy cream - if you don't have heavy cream, use half-and-half or whole milk and add more butter to increase the fat content.
- salt and pepper
- egg yolks - egg yolks are essential to making the potatoes creamy and binding them together.
- parsley - this is optional, for serving. You can also try other soft herbs like dill, basil, or thyme.
- Parmesan cheese - you can also use Pecorino Romano, Asiago cheese, or nutritional yeast flakes as substitutes for Parmesan.
You will also need measuring cups and spoons, large pot, potato masher (or fork), whisk, and large baking sheets.

How to Make the Best Duchess Potatoes
- Boil potatoes. Place potatoes in a large pot and fill with water to cover the potatoes by about one inch. Bring to a boil over high heat, then turn down to low, cover and simmer for 15-20 minutes until potatoes are tender.
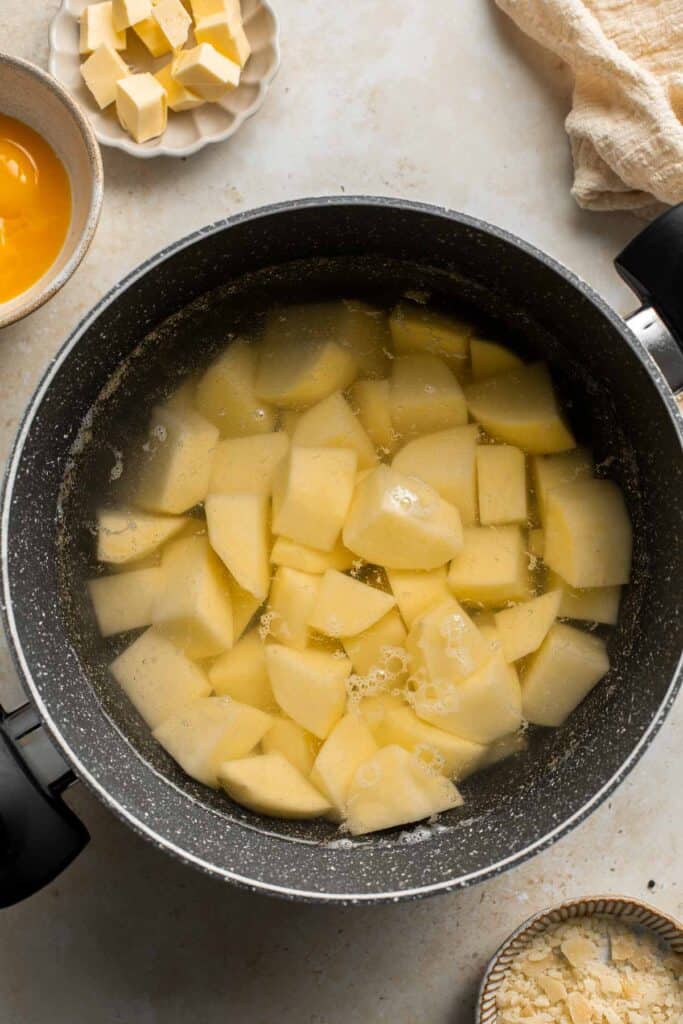
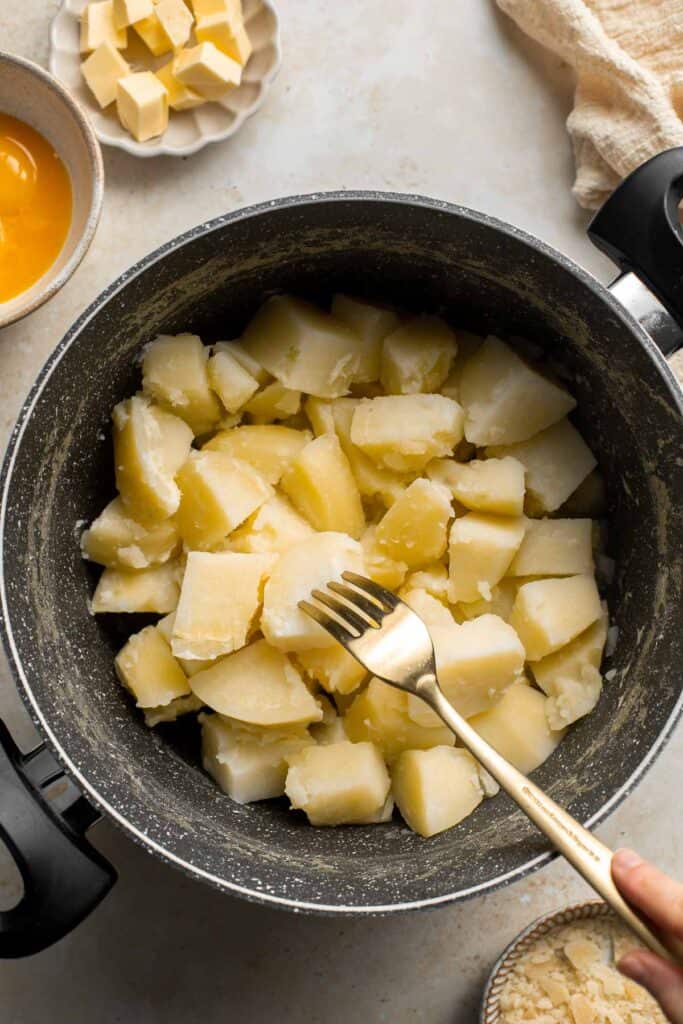
- Mash potatoes. Drain and place the potatoes back in the pot or into a mixing bowl. Use a potato masher or forks to mash the potatoes.
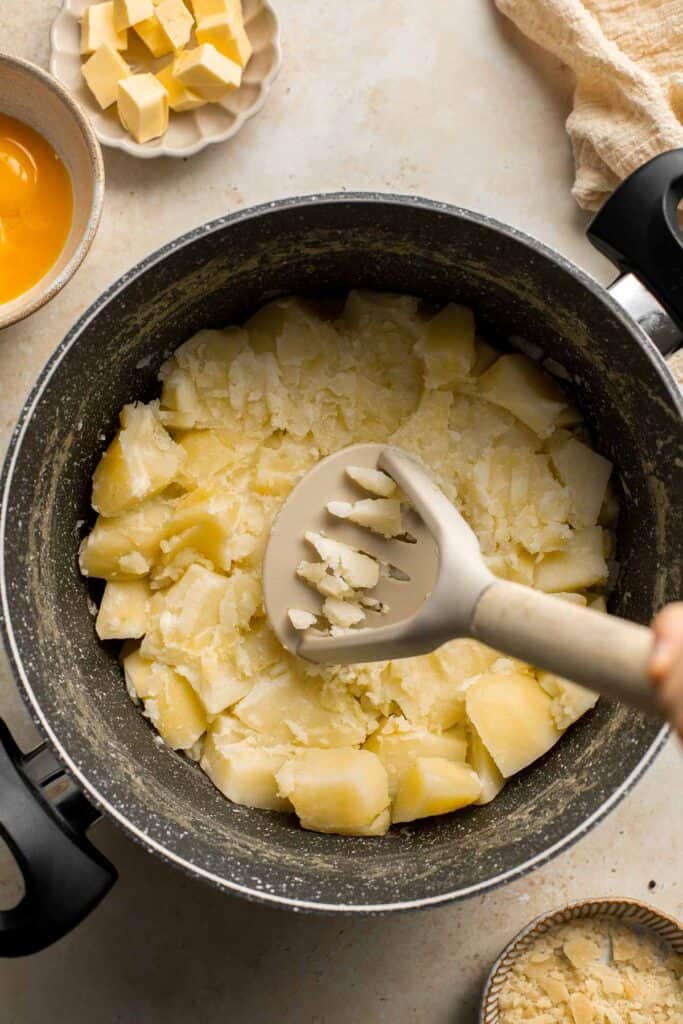

- Add remaining ingredients. Add butter, heavy cream, egg yolks, salt, and pepper. Whisk until smooth, about 1-2 minutes.
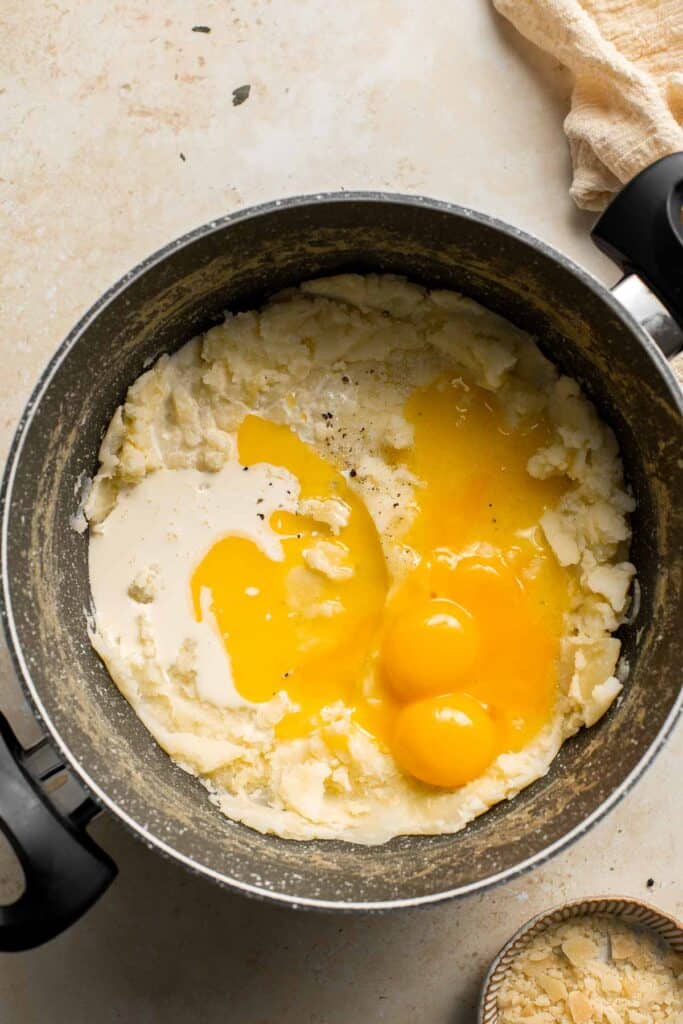
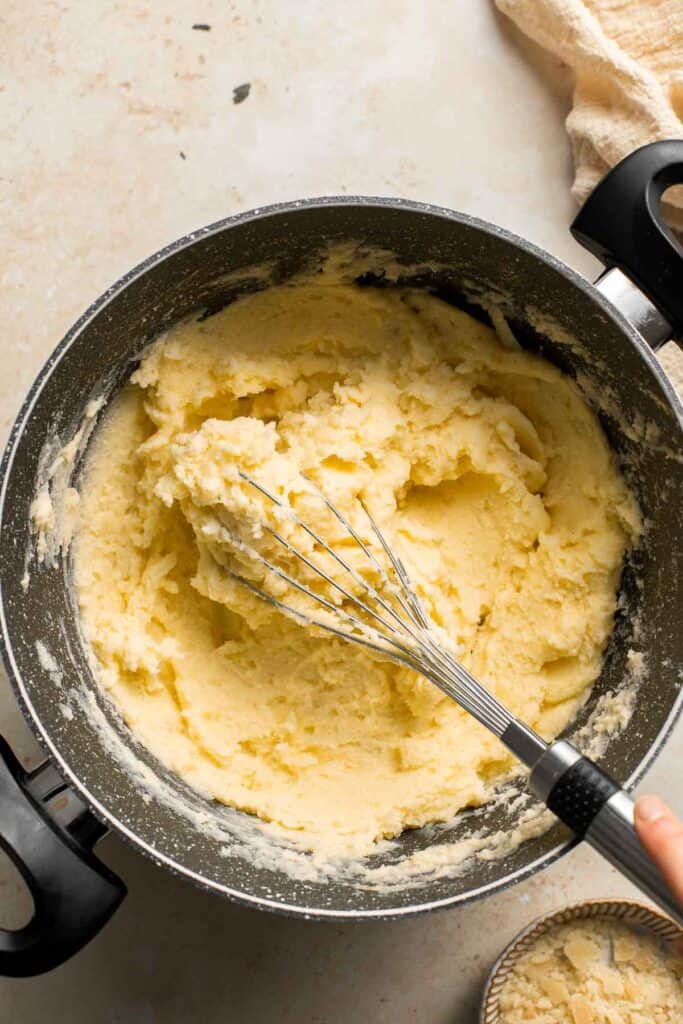
- Transfer to piping bag. Transfer the mashed potatoes, in batches, to a pastry bag fitted with a large star tip.

- Pipe swirls. Line a 2 large baking sheet with parchment paper. Pipe the potatoes into 2-3 inches wide swirls evenly onto the lined baking sheets.
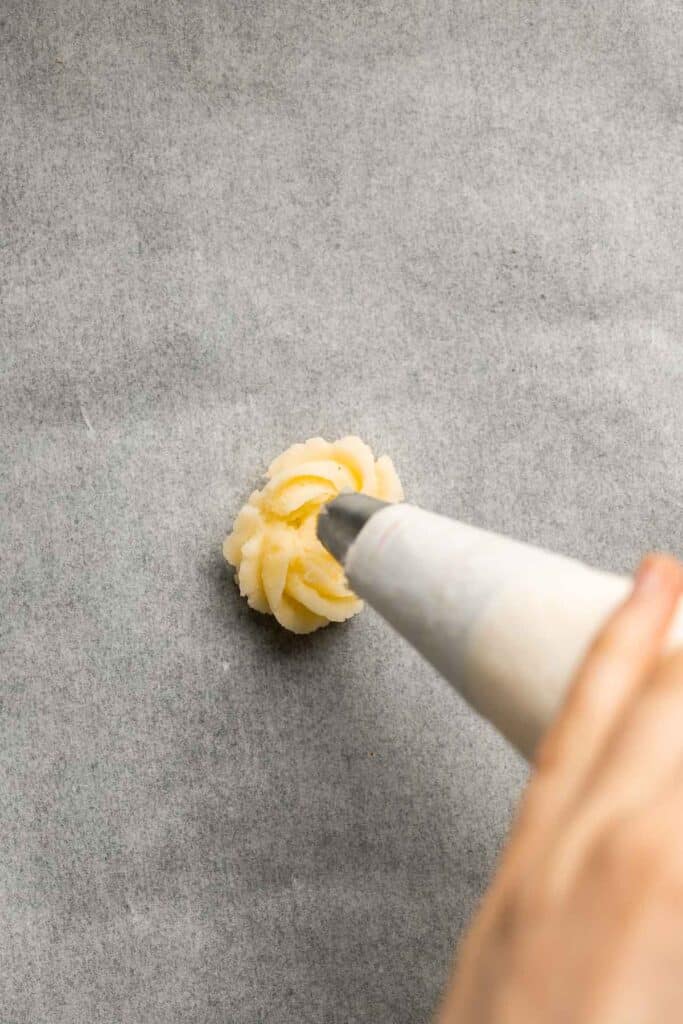
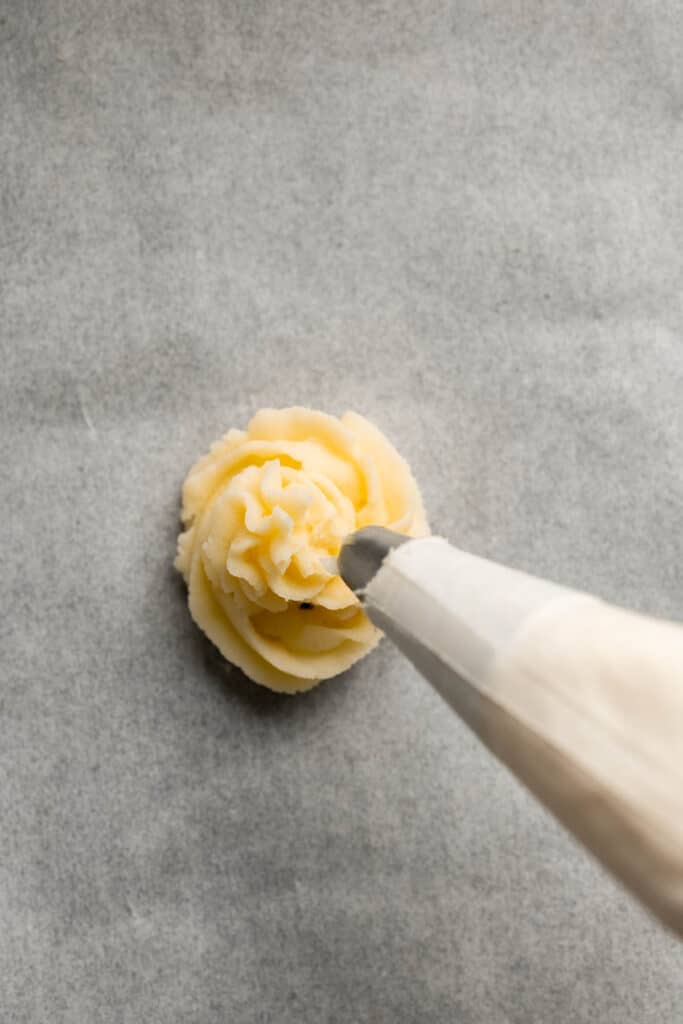
- Brush with oil. Lightly brush the tops with melted butter or spray with cooking oil spray.
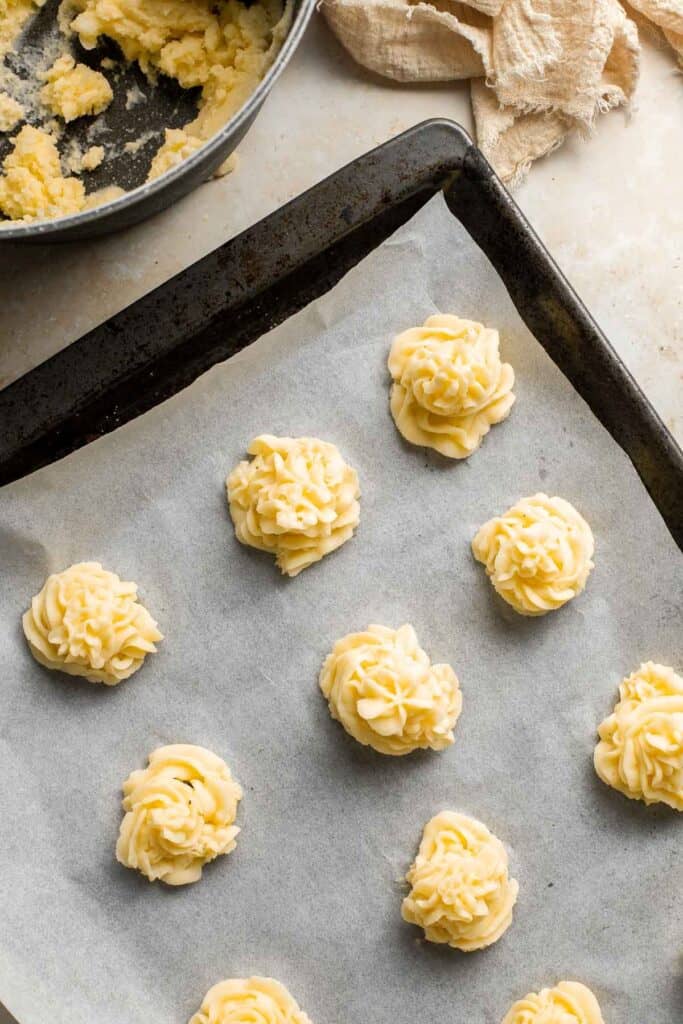
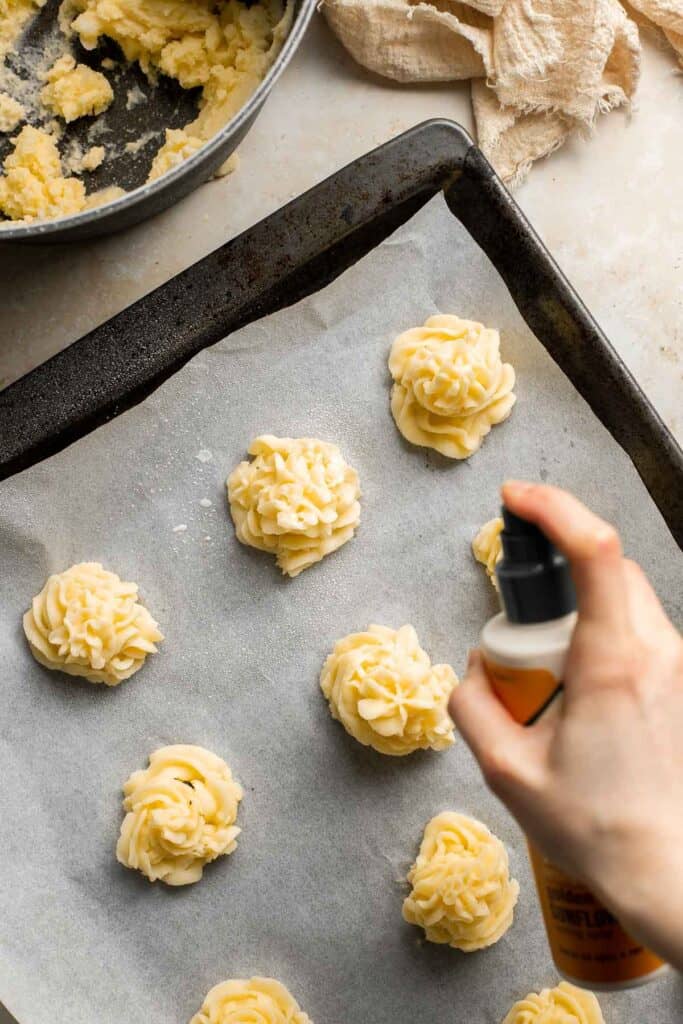
- Bake. Bake in a 375F preheated oven on the middle rack until golden brown, about 20-25 minutes.
- Serve. Garnish with parsley and finely grated parmesan and serve immediately.

Recipe Variations
- Give them a cheesy twist. Take your Duchess Potatoes to the next level by adding a generous amount of shredded cheddar cheese or gruyere cheese to the potato mixture. It's a perfect blend of creamy and cheesy goodness.
- Make them spicy. For a bit of heat, add some red pepper flakes or chopped jalapeño peppers to the potato mixture before baking. Serve with a side of cooling sour cream or Greek yogurt for a balanced flavor.
- Change the seasoning. We season these duchess potatoes simply with salt and pepper. You can change it up by experimenting with different flavors. Try adding garlic powder, ground cumin, or paprika.
- Add bacon. For a smoky and savory flavor, mix in some crispy bacon bits to the potato mixture before piping it onto your baking sheet. Serve with a side of caramelized onions for a delicious pairing.
- Top with herbs. We topped these potatoes with fresh parsley but you can switch it up other fresh herbs such as dill, thyme, or rosemary.
How to Serve
You can serve Duchess Potatoes on their own as an appetizer, or as a fancy side dish along with your favorite entrees. Some of our favorite meals to serve with these potatoes are:
- Dutch Oven Whole Roast Chicken
- Ribeye Steak
- Garlic Butter Salmon
- Oven Roasted Vegetables
- Glazed Honey Balsamic Pork Chops
- Roasted Turkey Breast
Duchess Potatoes also pair perfectly with homemade sauces, such as a rich Mushroom Gravy or a tangy Cranberry Sauce. You can get creative and experiment with different sauces to find your perfect pairing.

Recipe Tips and Tricks
- Don't overprocess the potatoes. Make sure your potatoes turn out creamy by manually whipping them until creamy. You can also blend them by ricing or pulsing them in a food processor until they're just broken down - if you mash, mix, or blend them too much, the consistency will change and they can become gummy.
- Make them ahead for busy occasions. These duchess potatoes are prep-friendly! If you're hosting a big event like a dinner party or holiday gathering, you can make it easier on yourself by making them a day or two ahead of time and simply reheating them when you're ready. No one will know the difference!
- Make a DIY pastry bag. A pastry bag is essential to making these duchess potatoes, but if you don't have one on hand, you're not completely out of luck. You can make a simple substitution by spooning the potatoes into a Ziploc bag and snipping one of the corners off. It won't have the same signature ridges, but it will create the same overall shape!
Storing and Freezing Instructions
How to Store
Allow the duchess potatoes to cool to room temperature, then store in an airtight container in a single layer. Refrigerate for up to 4 days.
How to Reheat
Reheat duchess potatoes in a 375℉ preheated oven for 10-15 minutes or by microwaving on high for 15-30 seconds.
How to Freeze
You can freeze unbaked duchess potatoes for up to 3 months. Once piped onto the baking sheet, freeze them uncovered for 1-2 hours until they become solid, then transfer them to a freezer bag or airtight container and freeze. You can bake directly from frozen, adding a few minutes to the baking time.
More Potato Recipes
- 40 Best Potato Side Dishes
- Crispy Smashed Potatoes
- Hasselback Potatoes
- Creamy Mashed Potatoes
- Baked Potato Wedges
- Patatas Bravas
Tried this recipe?
I'd love to hear what you think! Leave a comment and rating below to share your feedback. Your reviews help others discover this recipe and help me keep creating more free recipes for you. Snap a photo and tag me on social media @aheadofthyme too.

Roasted Beets
Roasted Beets are a healthy and nutritious side dish that is easy to make and bursting with flavor. This earthy vegetable is simply seasoned which brings out the delicious natural flavor of the beets. Serve this vegan side dish as a healthy appetizer with a drizzle of balsamic glaze, or as a side dish alongside roasted or grilled meats.
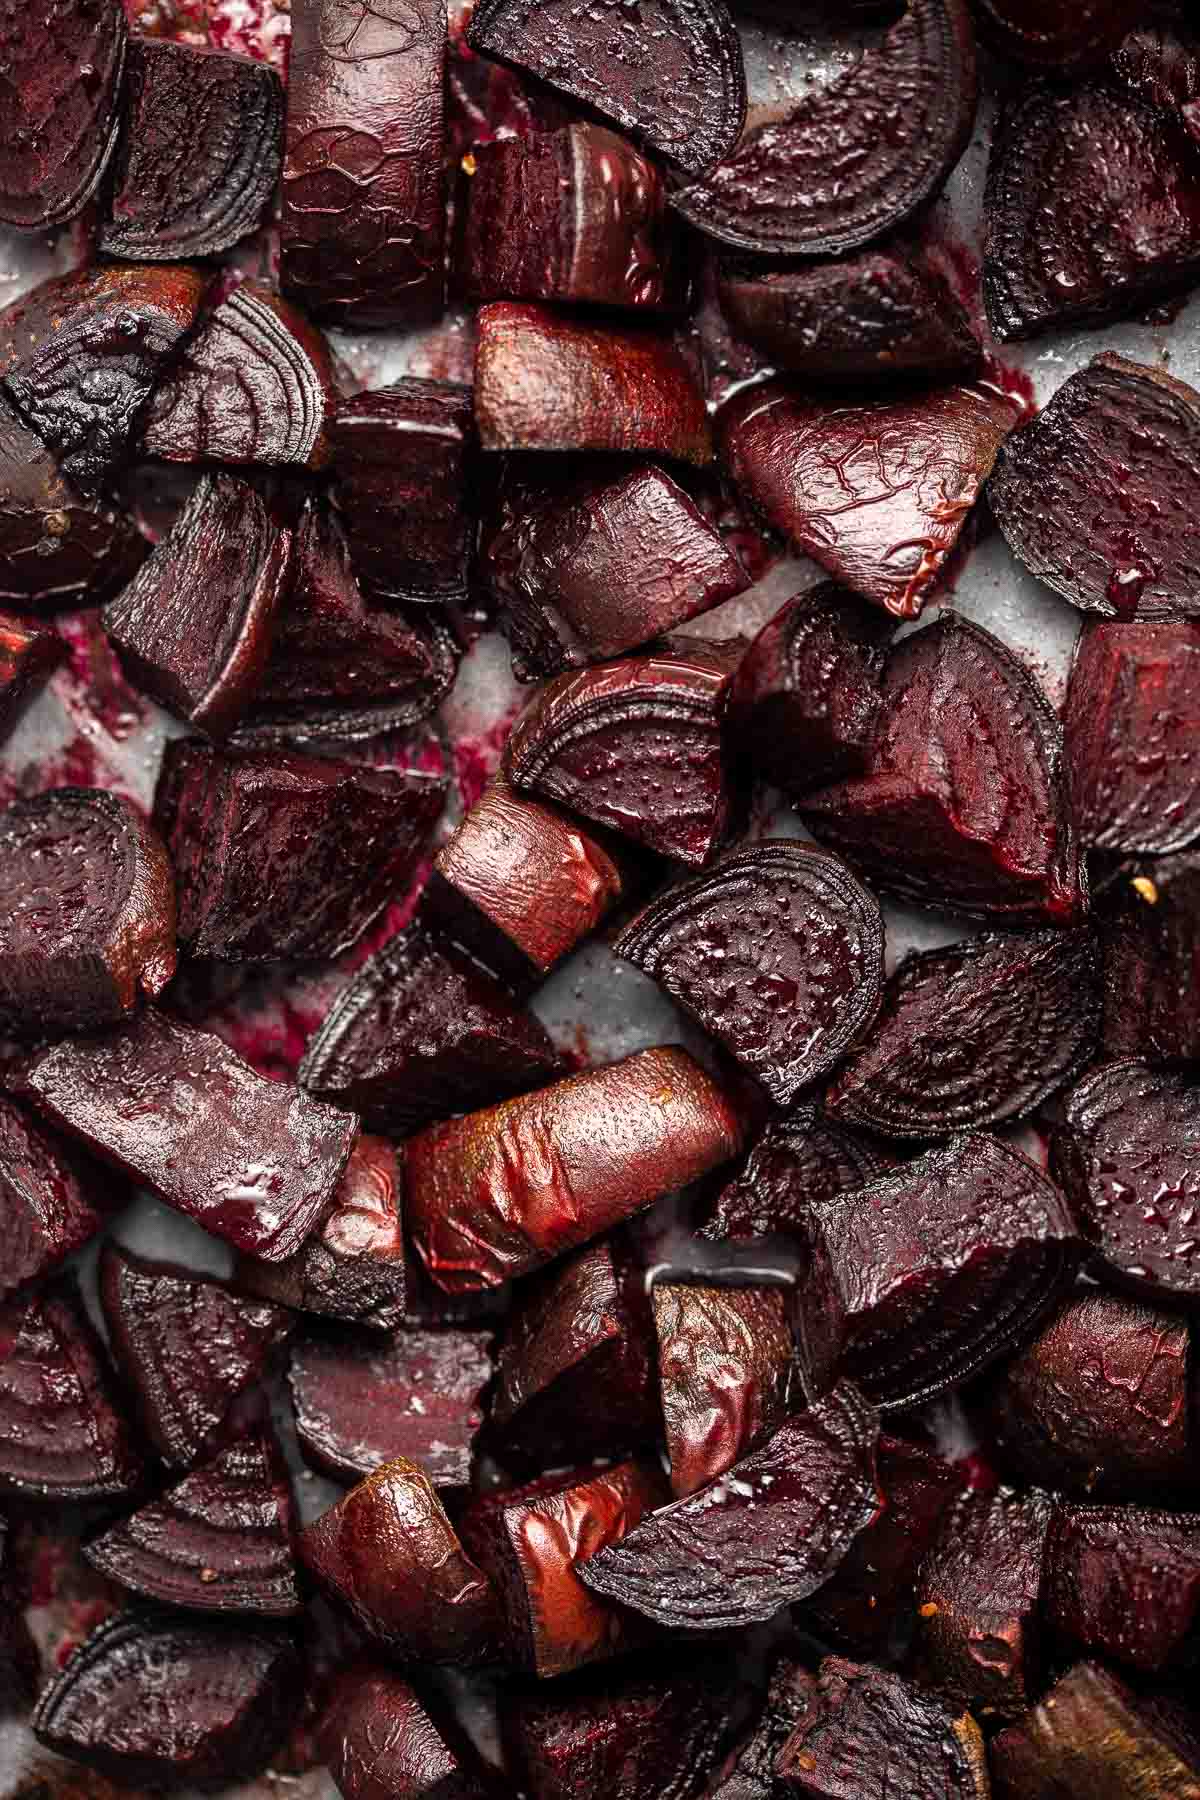
With just 4 ingredients and few simple steps, these roasted beets are a quick and easy way to add some color and variety to your dinner while keeping your meal nutritious and tasty. Plus, they are a great source of fiber, folate, and potassium, making them a healthy addition to any diet.
Why You'll Love these Roasted Beets
- Quick and easy to make. Roasted beets are a simple side dish that can be made with minimal prep time. Just wash and chop the beets (no peeling required!), season, and roast in the oven for about 35-40 minutes.
- Delicious and flavorful. Roasting beets brings out their natural sweetness and gives them a tender, melt-in-your-mouth texture. Plus, you can experiment with different seasonings to create a variety of flavors. Keep it simple with salt and pepper or try adding herbs like thyme or rosemary for extra depth of flavor.
- A healthy vegetarian side dish. Roasted beets are a great vegetarian option that is both delicious and satisfying. They are also naturally gluten-free and vegan-friendly, making them a great option for anyone with dietary restrictions.
- Nutritiously packed with health benefits. Beets are packed with essential vitamins and minerals, including folate, potassium, and vitamin C. Roasting them is a healthy way to cook them as it retains most of their nutrients while enhancing their natural sweetness.
- Pairs well with many entrees. Serve roasted beets as a delicious side dish to complement almost any meal. They pair well with roasted meats, grilled vegetables, or can be added to salads for a pop of color and flavor.
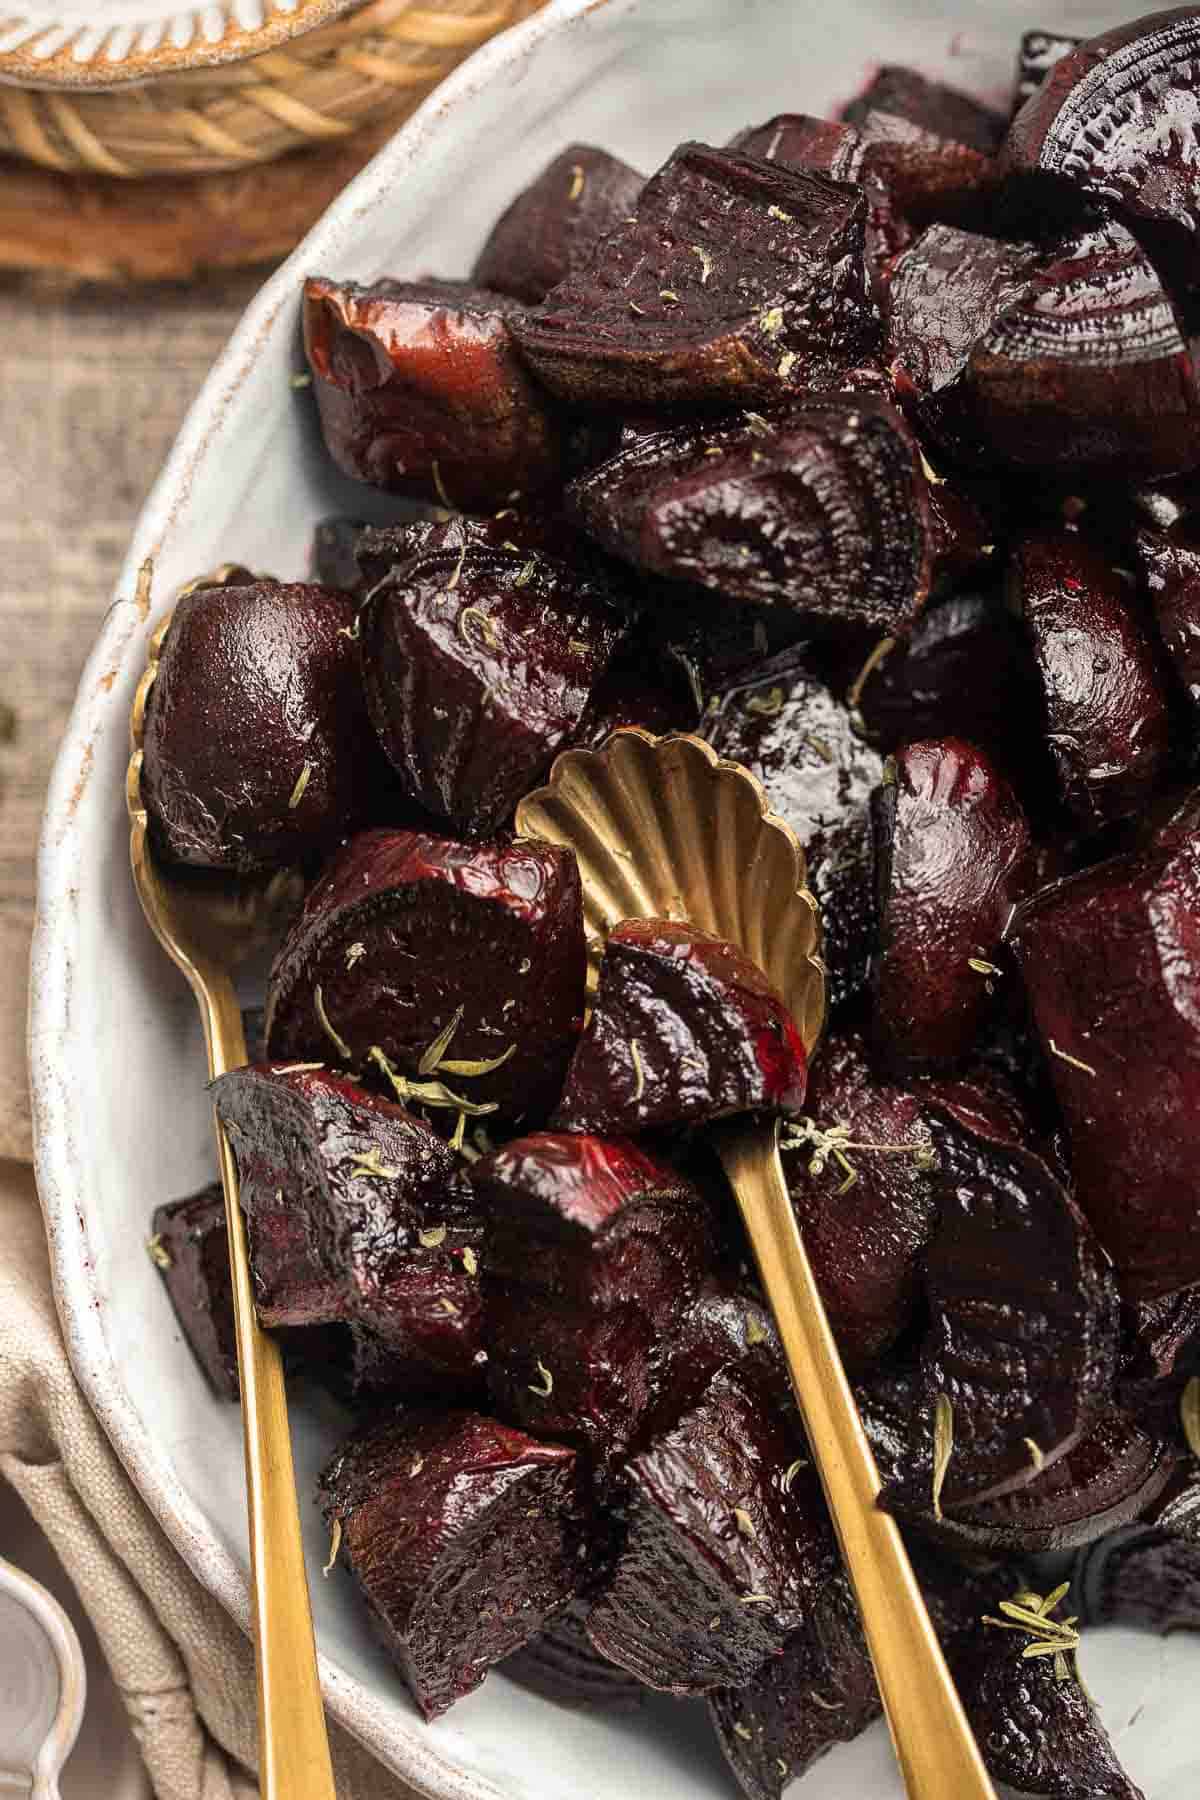
Ingredient Notes
To make this delicious Roasted Beets, you will need the following ingredients (full measurements in recipe card below):
- beets - we used medium beets because they tend to be more tender and sweeter than larger beets. When picking out beets, look for firm, unblemished beets that are relatively similar in size so that they cook evenly. You can use your favorite variety of beets such as red beets (as we did here) , golden beets, or even striped Chioggia beets.
- olive oil - use a good quality extra-virgin olive oil for the best flavor. Make sure to toss the beets well so that they are compleltey coated with oil so that they roast evenly and don't dry out.
- salt - a little bit of salt goes a long way in bringing out the natural sweetness of the beets. You can use table salt, kosher salt, or sea salt in this recipe.
- black pepper - freshly ground black pepper adds a subtle heat and depth of flavor to the roasted beets. Use already ground pepper or grind the pepper with a pepper mill right before roasting for the best flavor.
You will also need measuring spoons, a mixing bowl, and large baking sheet.
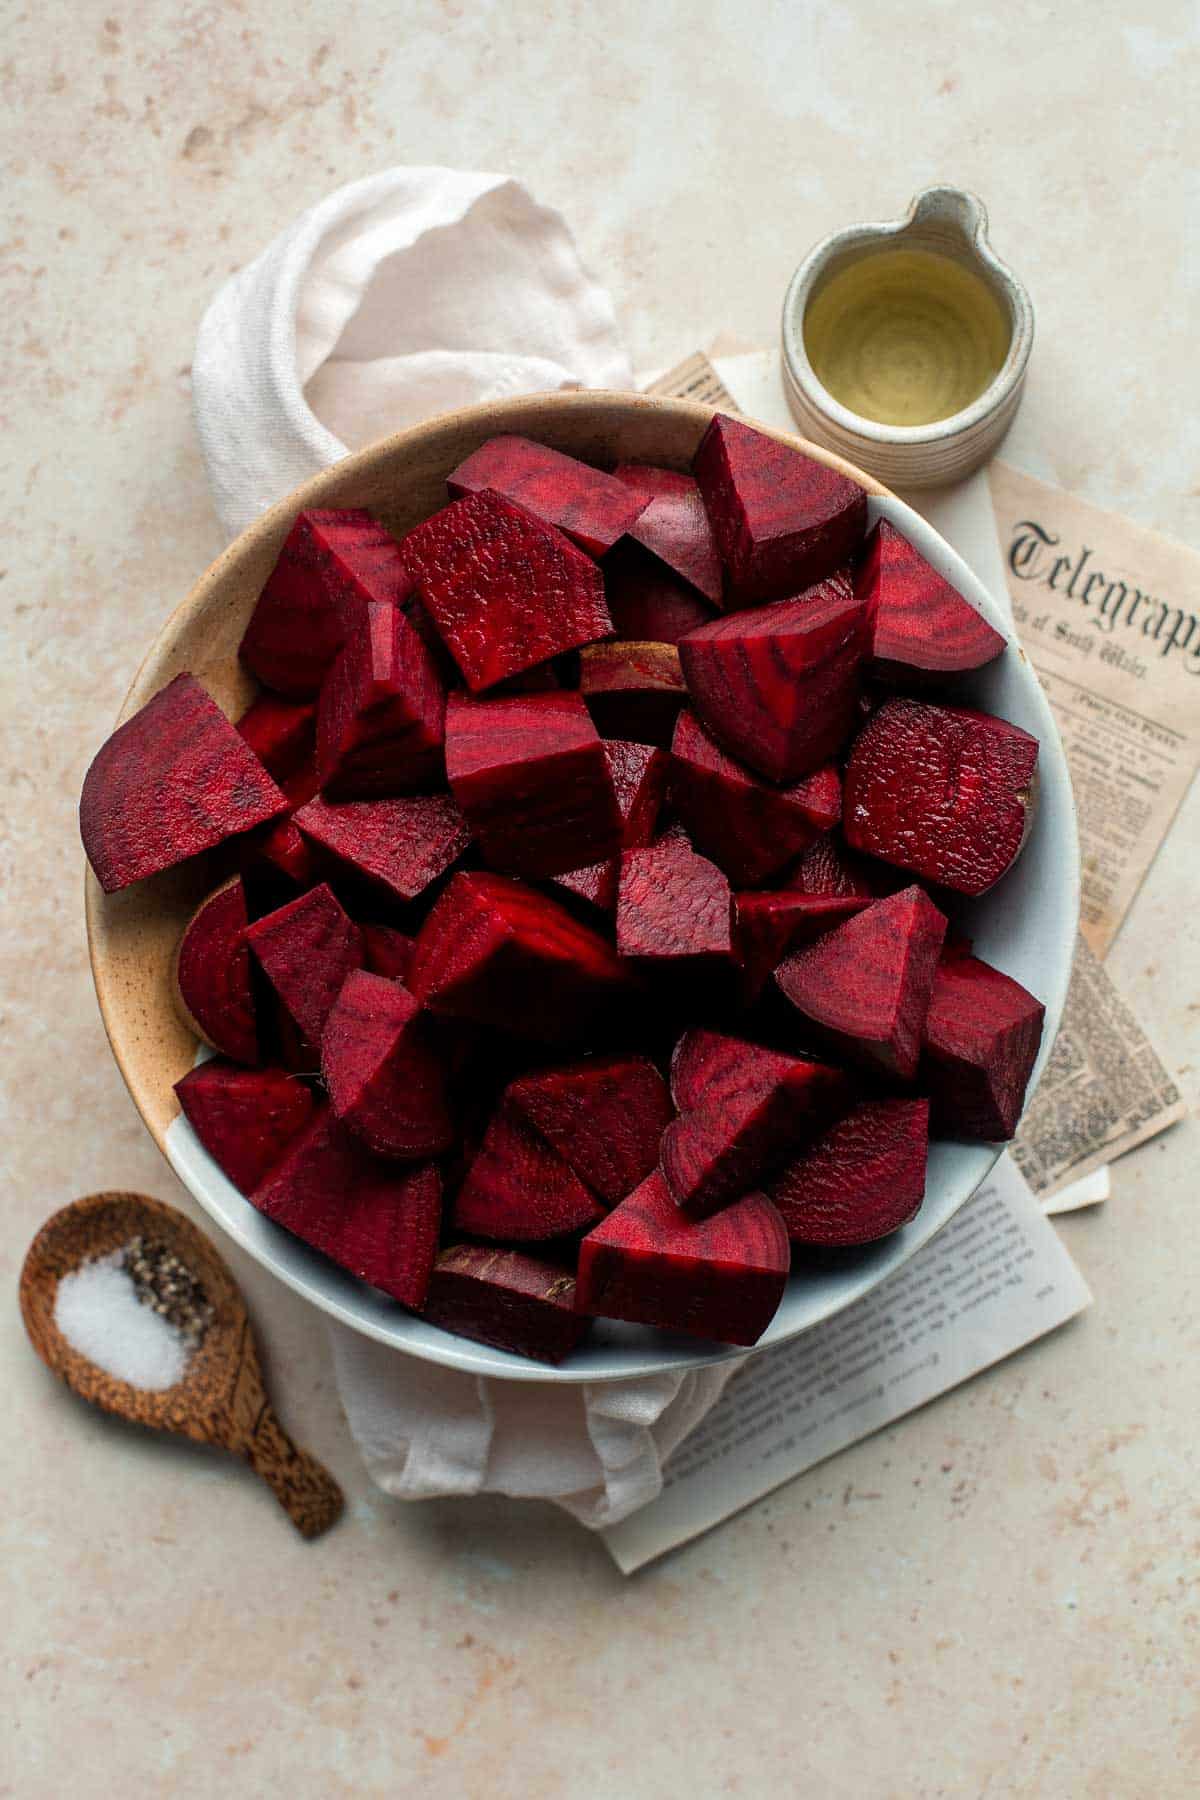
How to Make the Best Roasted Beets
- Chop beets. Cut the ends of the beets and chop into 1 ½-inch pieces (no peeling required!).
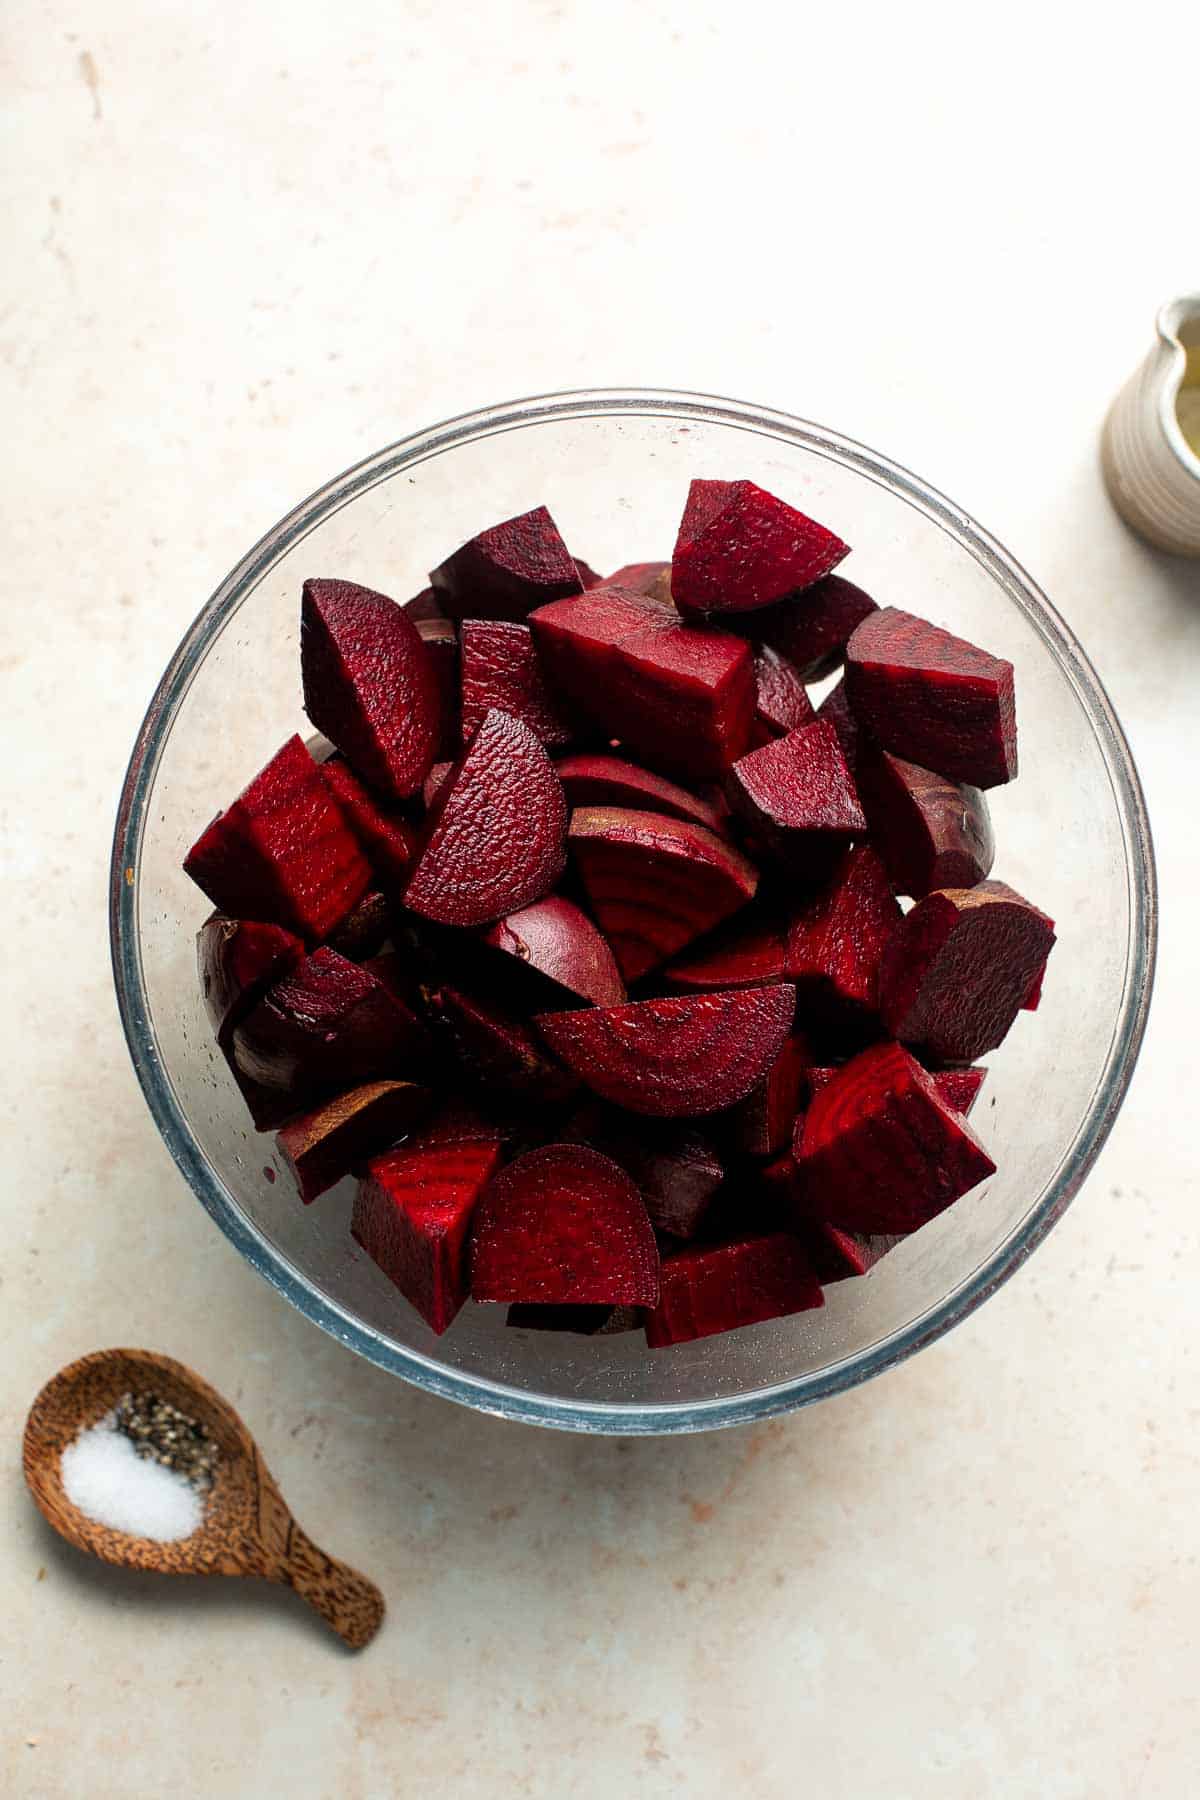
- Season beets. In a large mixing bowl, add beets, oil, salt, and pepper and toss well to coat.
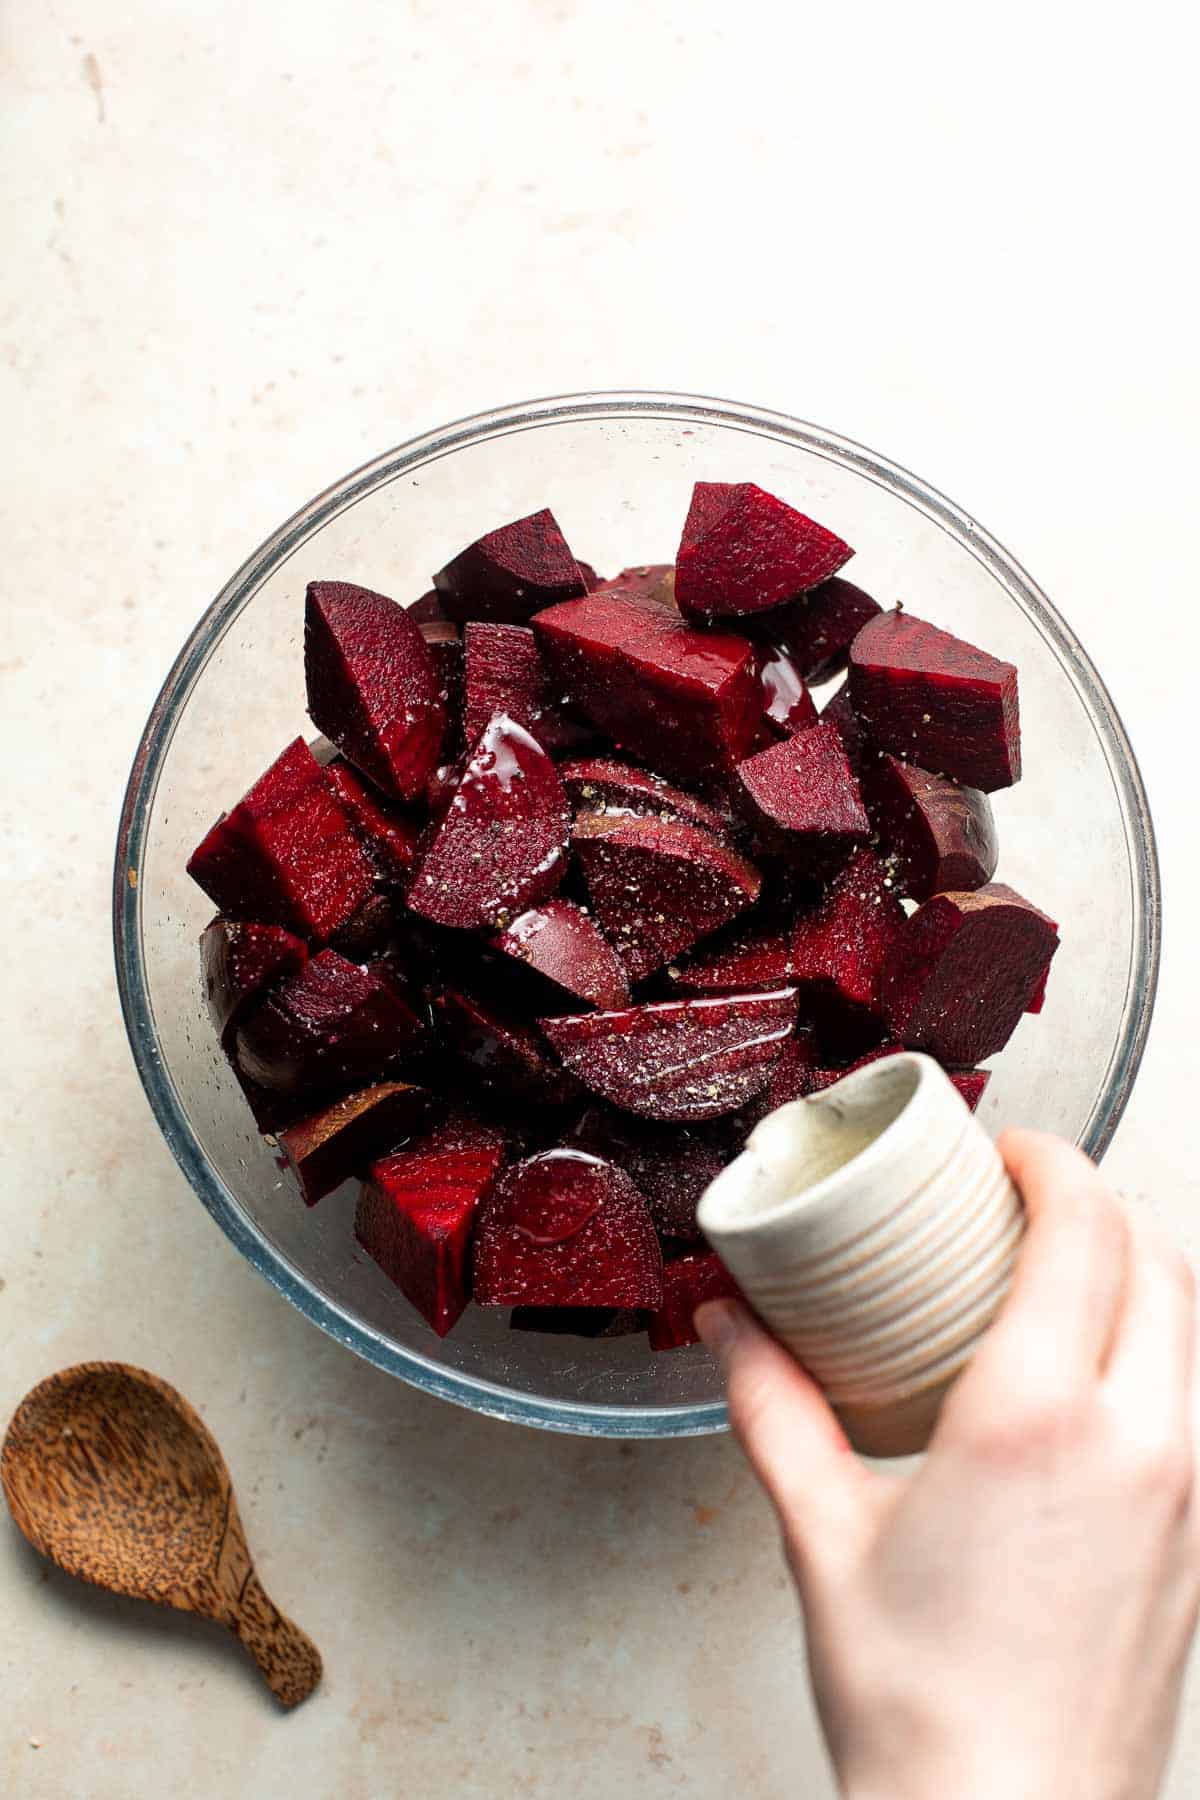

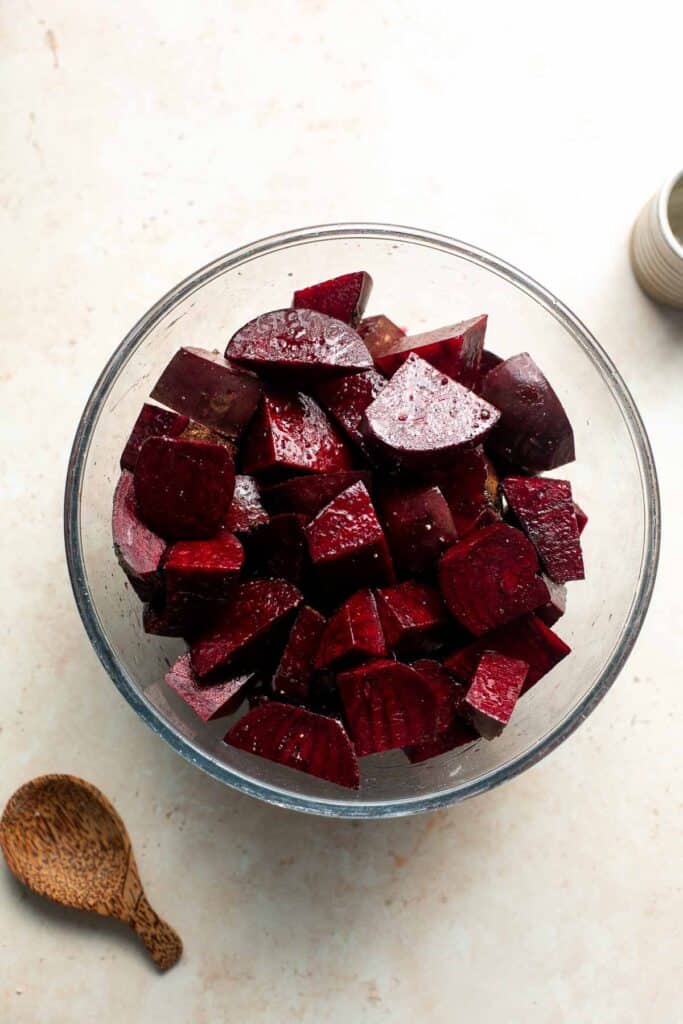
- Bake. Line a large baking sheet with parchment paper. Spread beets in the lined baking sheet and bake until fork tender, about 35 to 40 minutes.
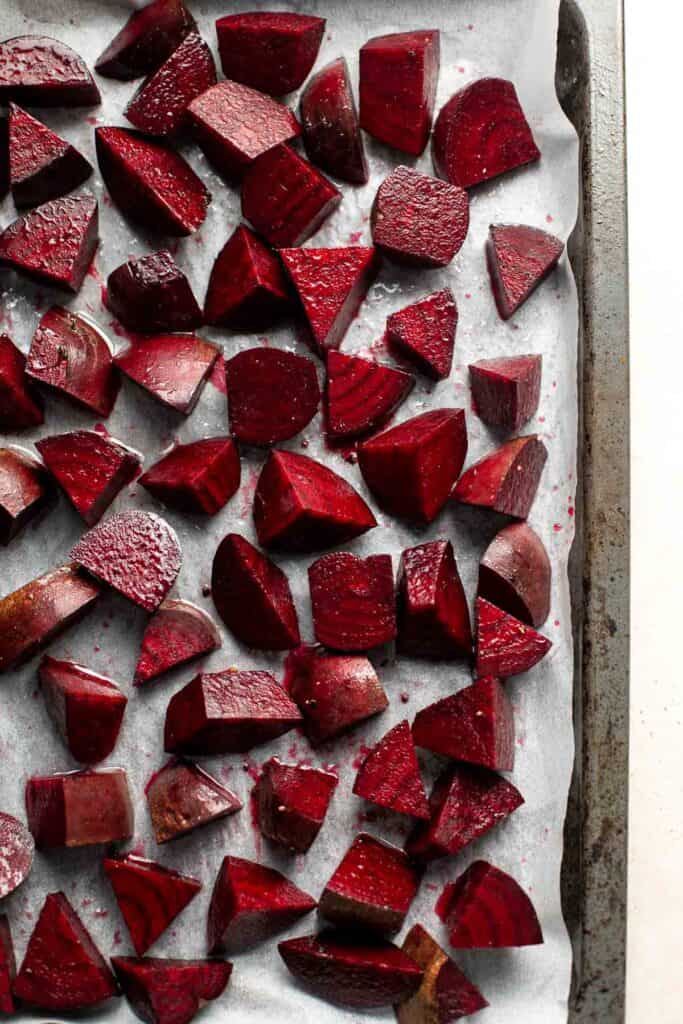
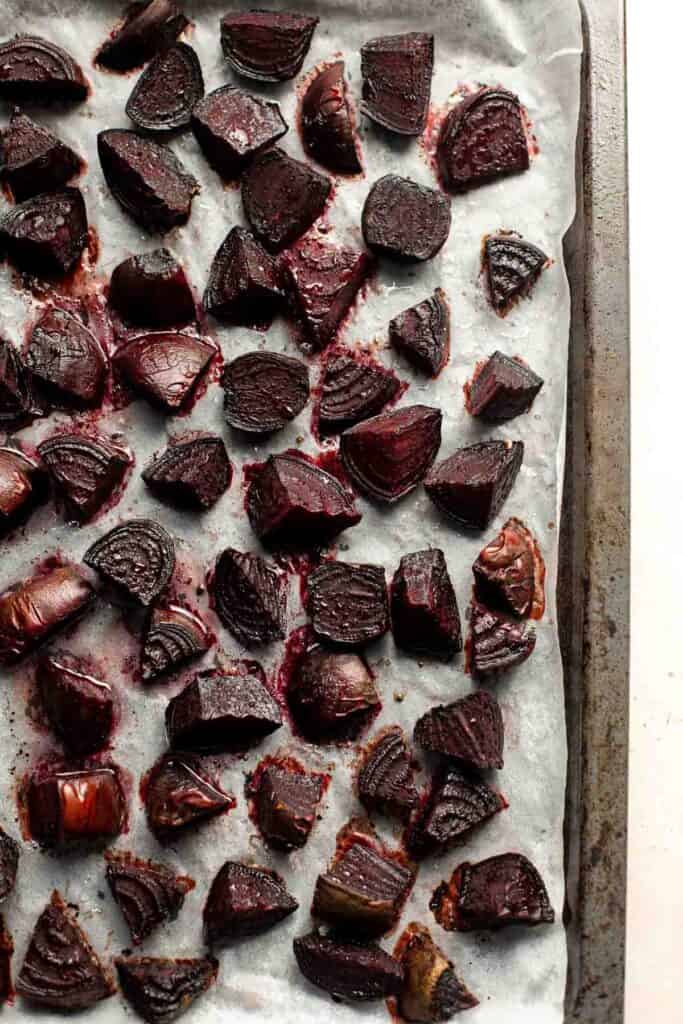
- Serve. Serve warm or cold.
Recipe Variations
- Drizzle with balsamic glaze. Give these beets a sweet and tangy flavor with a drizzle of balsamic glaze. You can use store-bought balsamic reduction or make your own by simmering balsamic vinegar until thickened. See our Tomato Bruschetta with Balsamic Glaze for full instructions.
- Top with fresh herbs. Serve these roasted beets with your favorite chopped herbs. Try it with chopped parsley, dill, or mint.
- Add extra sweetness. Toss your beets with honey, olive oil, and thyme before roasting for a sweet and savory flavor. Finish with a sprinkle of flaky sea salt for extra texture.
- Mediterranean style. Add some Mediterranean flair to your roasted beets by seasoning them with olive oil, garlic, oregano, and lemon zest. Top with crumbled feta cheese and fresh parsley for a bright and zesty finish.
- Add goat cheese and walnuts. Crumble some creamy goat cheese (or feta) on top of your roasted beets and sprinkle with chopped walnuts for a rich and nutty flavor.
How to Serve
Roasted Beets are a delicious side dish that you can serve alongside your main course entree at dinner. There are also a variety of different ways that you can serve these roasted beets including:
- As an appetizer. Serve roasted beets as an appetizer with a drizzle of balsamic glaze or a sprinkle of goat cheese. You can also serve it with a dipping sauce of your choice. Try it with Tzatziki Sauce, Whipped Feta, or a Spicy Mayo.
- In a salad. Add roasted beets to your favorite salad for a sweet and earthy flavor. They are delicious in our Peach Arugula Salad, Goat Cheese and Tangelo Salad, and Sweet Kale Salad.
- Make a dip. Use roasted beets as a base for a delicious and healthy dip. Use it to make delicious Beet Hummus.
- As a toast topping. Top your favorite toast with roasted beets and goat cheese for a tasty breakfast or snack. Try it on Avocado Toast with Poached Egg.
- In a bowl. Add roasted beets to a grain bowl or Buddha bowl for a colorful and nutritious addition.
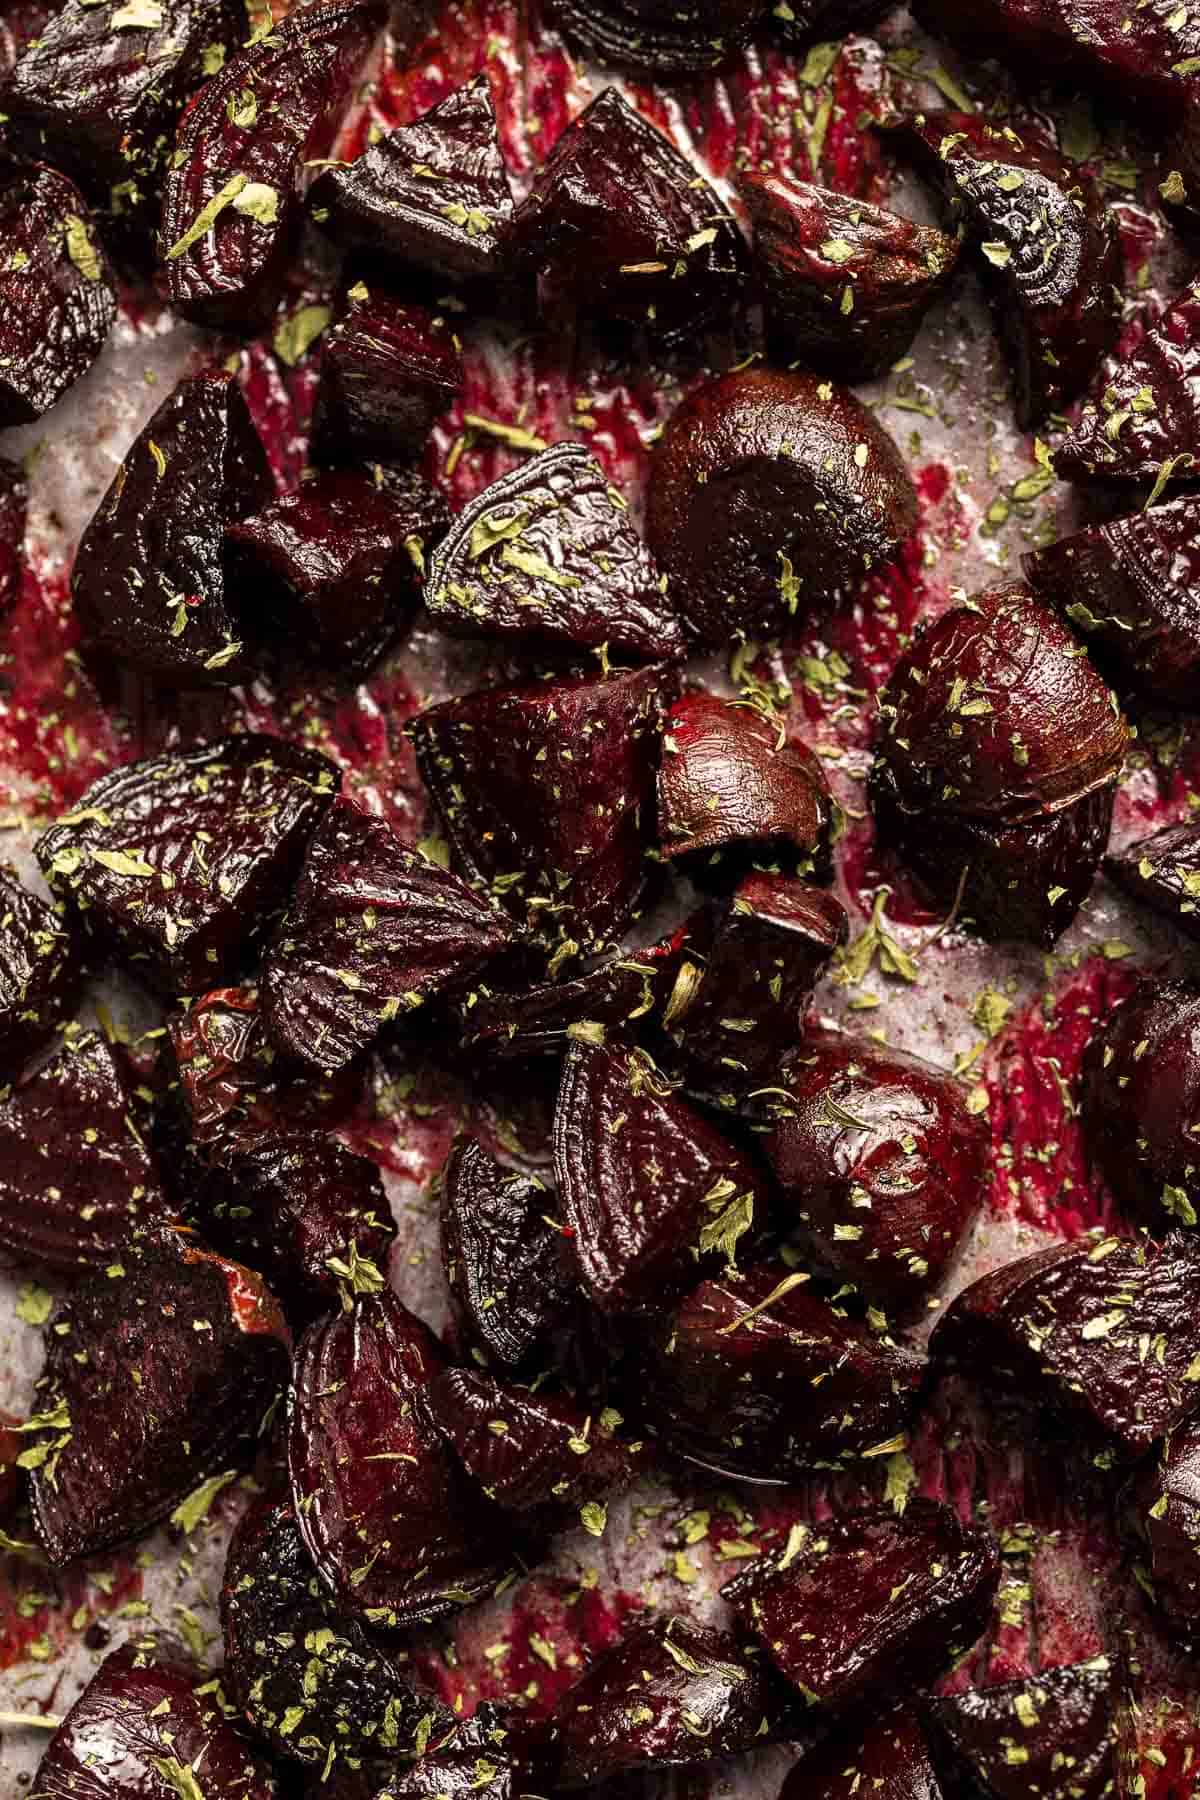
Recipe Tips and Tricks
- Cut the beets evenly. To ensure that your roasted beets cook evenly, it's important to cut them into similar sizes.
- Use parchment paper. To prevent the beets from sticking to the baking sheet, line it with parchment paper or a silicone baking mat.
- Cover with foil if needed. If you find that your beets are getting too dark on top but aren't cooked through yet, cover them with aluminum foil and continue roasting until tender.
- Serve warm or cold. Roasted beets can be served warm or cold, depending on your preference. If serving cold, allow the beets to cool completely before tossing with your desired toppings or dressing.
- Turn leftovers into a beet and citrus salad. Allow the beets to cool completelty to room temperature or refrigerator until chill. Then, toss with mixed greens, segments of juicy citrus, and a citrusy vinaigrette.
Storing and Freezing Instructions
How to Store
Allow the roasted beets to cool down to room temperature. Then, transfer them to an airtight container and store in the refrigerator for up to 5 days.
How to Reheat
Reheat leftover beets in a 350F preheated oven for 10-15 minutes, covered loosely with aluminum foil. You can also reheat roasted beets in the microwave. Transfer them to a microwave-safe dish, cover with a damp paper towel, and heat for 30-60 seconds until warmed through.
How to Freeze
Allow the roasted beets to cool down to room temperature. Then transfer them to a freezer-safe airtight container or a freezer bag. Store in the freezer for up to 3 months. I recommend labelling the container or bag with the date and contents for easy reference. Allow the beets to thaw overnight in the refrigerator before serving or reheating.
More Roasted Vegetable Recipes
- 40 Best Vegetable Sides
- Roasted Carrots
- Oven Roasted Vegetables
- Balsamic Roasted Broccoli
- Roasted Corn on the Cob
- Roasted Asparagus and Mushrooms
Tried this recipe?
I'd love to hear what you think! Leave a comment and rating below to share your feedback. Your reviews help others discover this recipe and help me keep creating more free recipes for you. Snap a photo and tag me on social media @aheadofthyme too.
Eggplant Parmesan
Eggplant Parmesan is a classic Italian dish that features tender eggplant slices coated in crispy breadcrumbs, loads of melty cheese, and baked in a rich and savory homemade tomato sauce. Served hot on its own or with other Italian sides, this vegetarian recipe is perfect for date night or dinner at home!
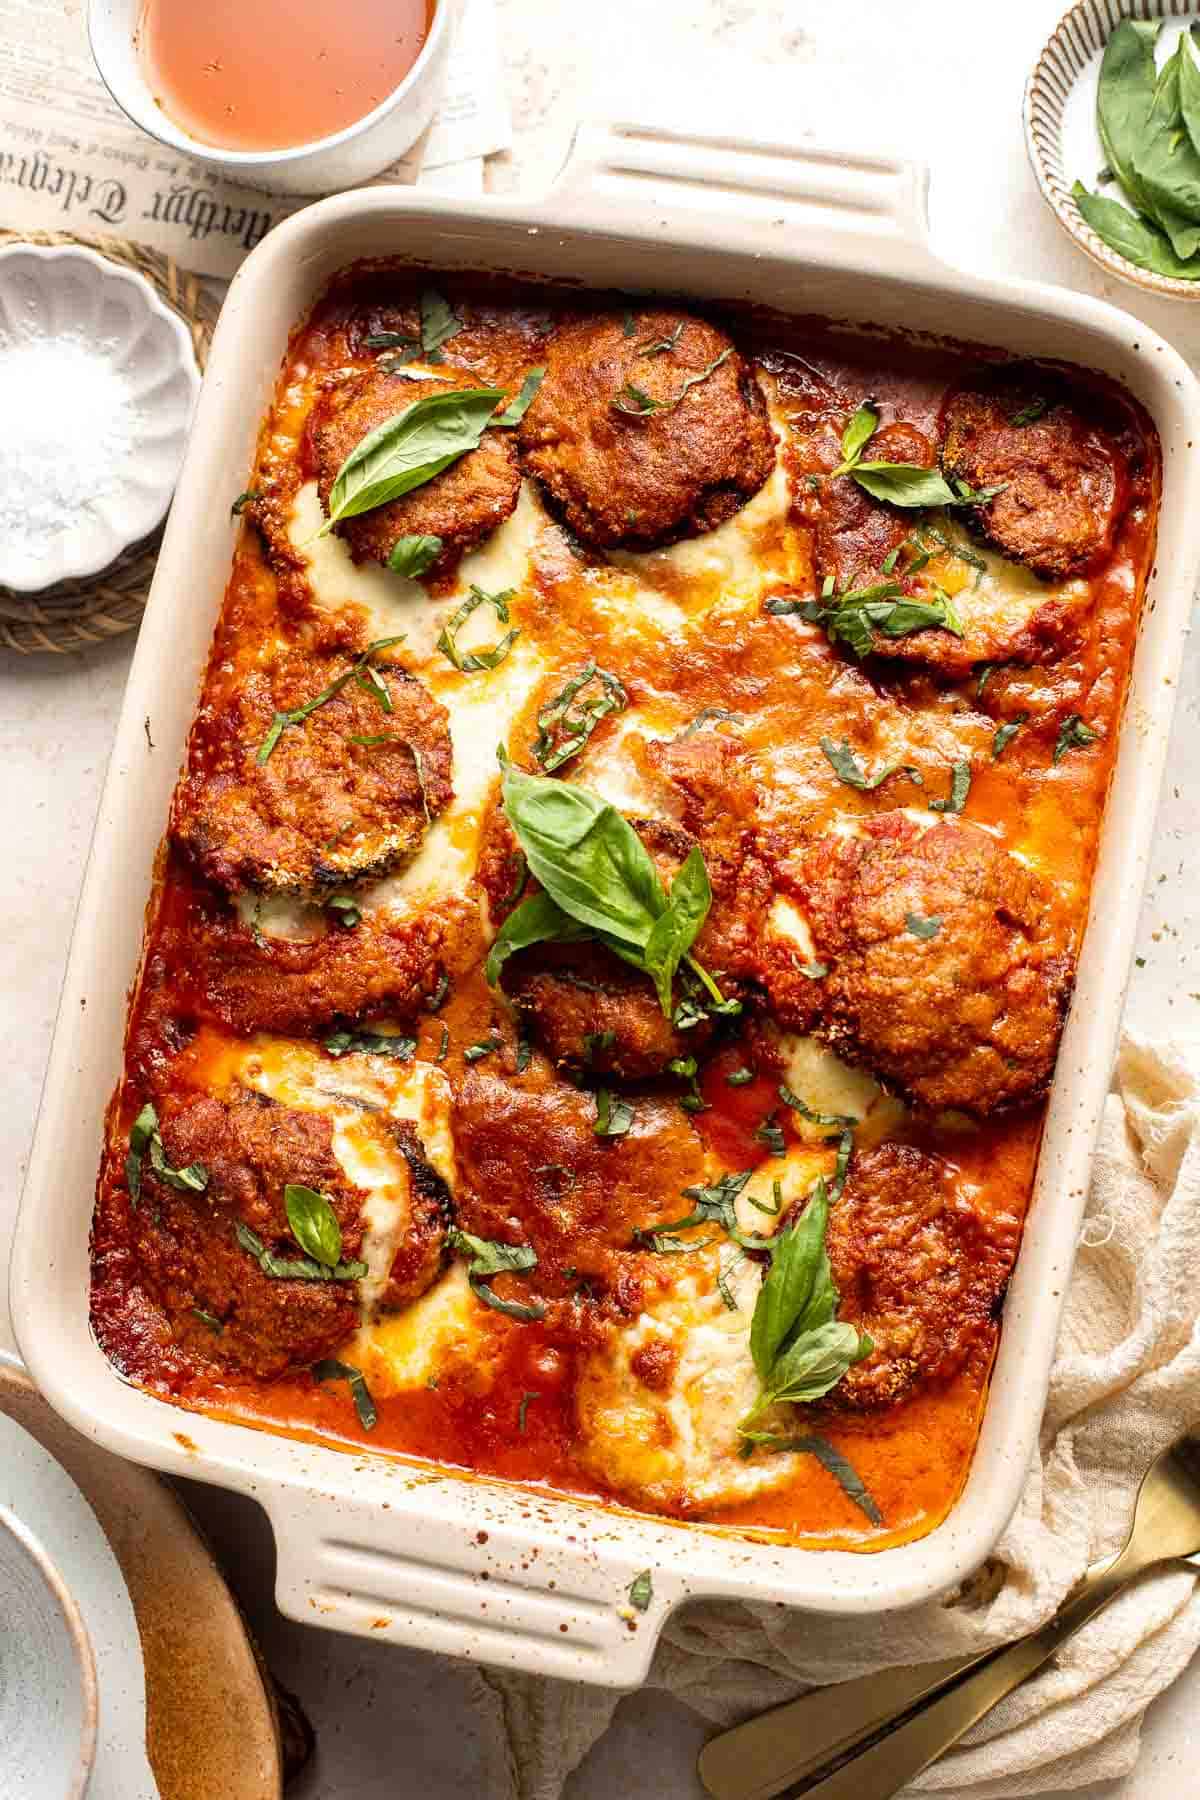
This cheesy baked eggplant is easier to make than it seems: coat the sliced eggplants, prepare the sauce while they crisp up, and then layer them together with cheese for a final turn in the oven to melt the cheese and let the sauce soak in a bit. All in all, it takes just over two hours (with half that time is letting the eggplants rest), but the end result is well worth it!
Why You'll Love this Eggplant Parmesan
- It's vegetarian. Craving Italian food but looking for a meatless option? This eggplant parmesan fits the bill perfectly. It's completely vegetarian-friendly and can even be made vegan with a few simple ingredient swaps (see Recipe Variations below for details).
- Delicious and flavorful. This eggplant parmesan is a burst of flavors in your mouth, from the crispy breadcrumb coating and gooey center to the rich tomato sauce, and the melted cheese on top. Plus, you can customize the seasoning and seasoning level to your liking.
- Incredibly cheesy. This hearty Italian eggplant is loaded up with two kinds of cheese, Parmesan and mozzarella, creating gooey and cheesy goodness in every bite. And like classic Parmesan dishes, the chewiness of the cheese is offset by the breadcrumb crust for the perfect balance of textures.
- The homemade tomato sauce. The homemade tomato sauce is one of the stars of this baked eggplant, made with fresh ingredients like onions, garlic, and basil, and seasoned with Italian spices. It's healthier and tastier than store-bought sauces - no preservatives or filler ingredients here!
- Great for all occasions. Fancy dinner parties, romantic date nights, or weeknight dinners are all perfect opportunities to serve this baked eggplant parmesan. It's elegant enough for special occasions but easy enough for every day.
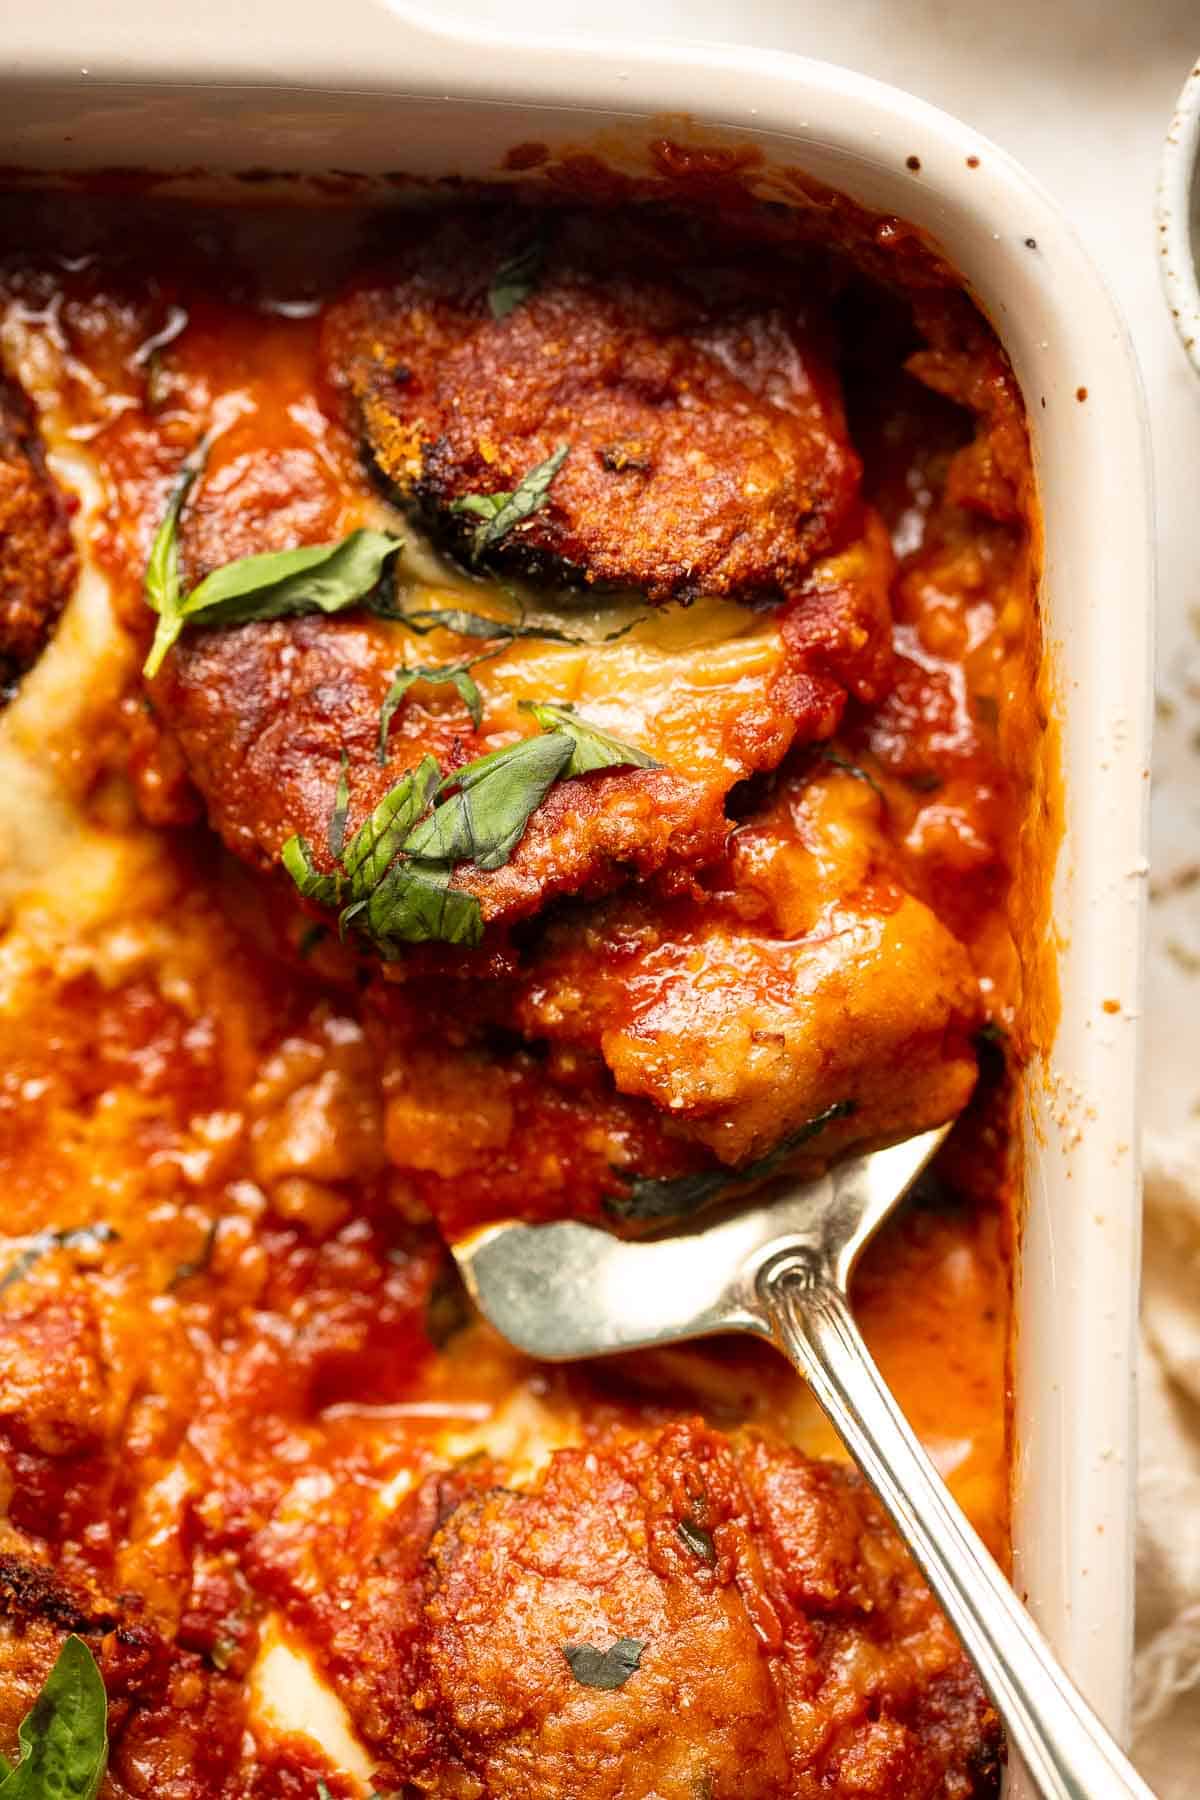
Ingredient Notes
To make this delicious vegetarian Eggplant Parmesan, you will need the following ingredients (full measurements in recipe card below):
Eggplant:
- eggplants - Choose eggplants that are firm and shiny with smooth, unblemished skin. Look for eggplants that feel heavy for their size, as they tend to be meatier.
- salt - used to sprinkle over the sliced eggplants to draw out excess moisture, and it also seasons the eggplant.
- breadcrumb mixture - we use Panko breadcrumbs for this recipe as they provide a crispy texture. You can also substitute with regular breadcrumbs (or gluten-free breadcrumbs) for a slightly different texture. We also add Parmesan cheese and garlic powder for extra flavor.
- eggs - used to create an egg wash for the breading to stick to the eggplant slices. For a vegan option, you can use 3 tablespoons of whisked aquafaba in place of each egg in this recipe to bind the ingredients together.
- cooking oil spray - used to coat the baking sheet and the eggplant slices for even browning and to prevent sticking.
Tomato sauce:
- olive oil - use high-quality extra virgin olive oil for the sauce. Avocado oil or another neutral-flavored oil with a high smoke point will work as a substitute for olive oil.
- onion + garlic - if you don't have fresh garlic, you can swap 1 teaspoon of pre-minced garlic per clove. You can also use ½ teaspoon of garlic powder per clove instead.
- tomato sauce + paste - used to create the base of the sauce. Use high-quality canned tomato sauce and paste for best flavor.
- Italian seasoning - Italian seasoning is added to the sauce for flavor, but you can also use a combination of dried basil, oregano, and thyme instead.
- basil - fresh basil is the best for flavor and texture, but you can also use dried basil if that's all you have. It will mellow the flavor and change the texture a bit.
- salt
Cheese:
- mozzarella cheese - provolone is similar to mozzarella if you need to make a swap! Additionally, you can make this more vegan-friendly by using a plant-based mozzarella substitute.
- Parmesan cheese - if you don't have Parmesan, try Asiago, Pecorino Romano, or a vegan Parmesan-style cheese.
- fresh basil - optional, for garnish and flavor. Fresh basil adds a pop of freshness and color. You can also top with fresh parsley instead.
You will also need measuring cups and spoons, large baking sheet, shallow plates, large pot, and 9x13-inch casserole pan.
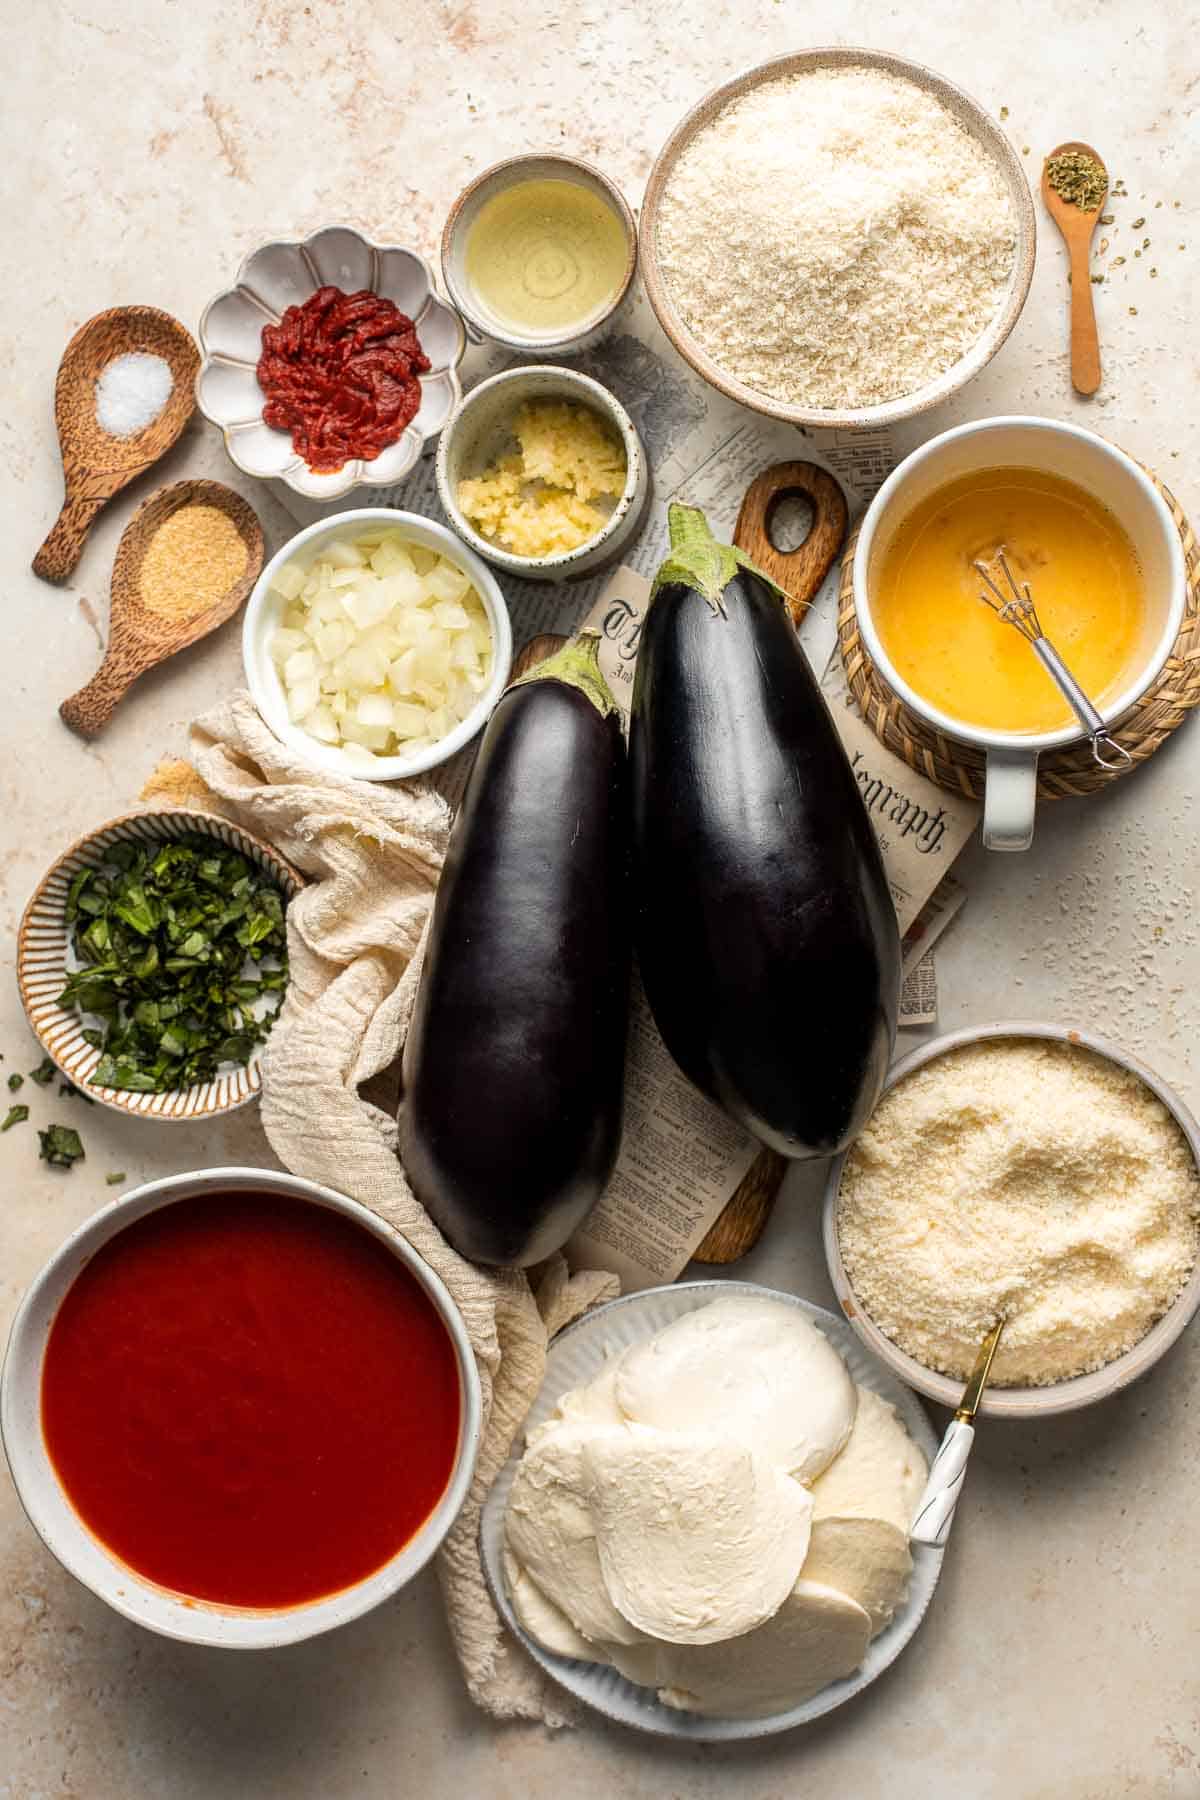
How to Make the Best Eggplant Parmesan
First, salt the eggplant.
Line a large baking sheet with paper towel. Cut the eggplants into ¼-inch thick rounds and place them on the lined baking sheet.
Season both sides of the eggplant rounds with salt and use your hands to rub them all over. Let the eggplant rounds sit and release moisture for 1 hour.
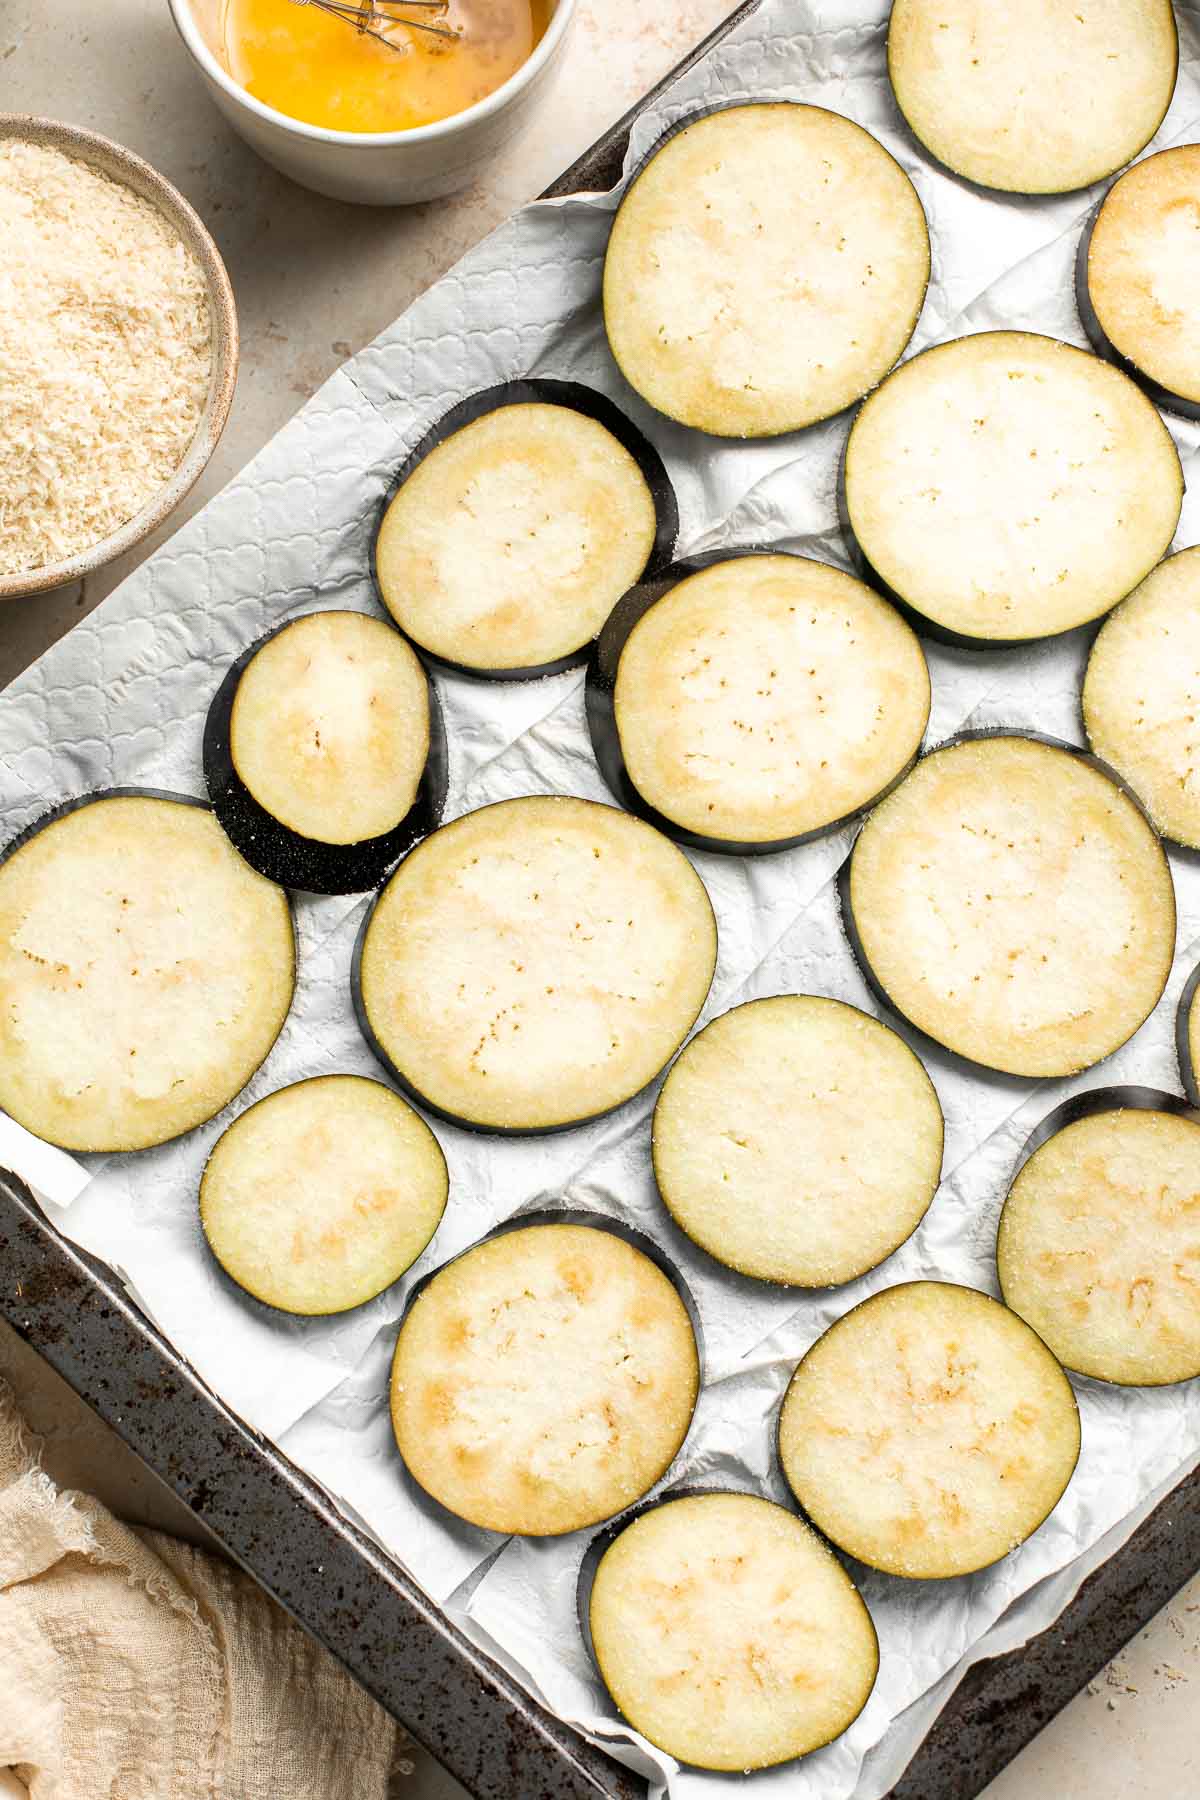
Next, bake the eggplant.
- Dry eggplant. Use a paper towel to pat each eggplant round completely dry.
- Prep for dredging. In a shallow plate, whisk together Panko breadcrumbs, Parmesan cheese, and garlic powder. In another shallow plate, add beaten eggs.
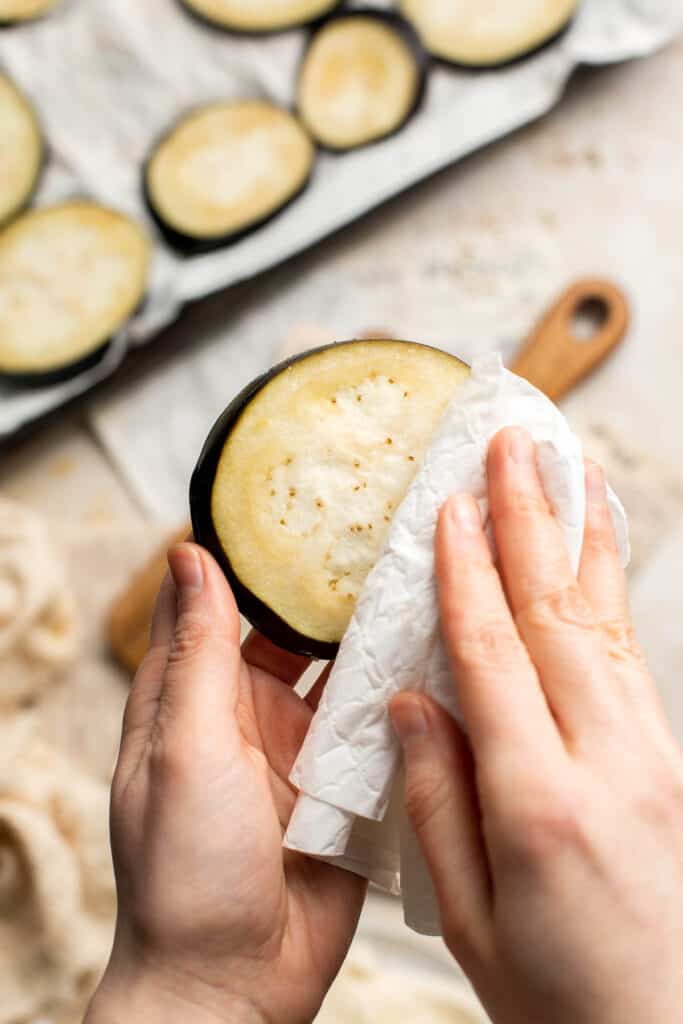
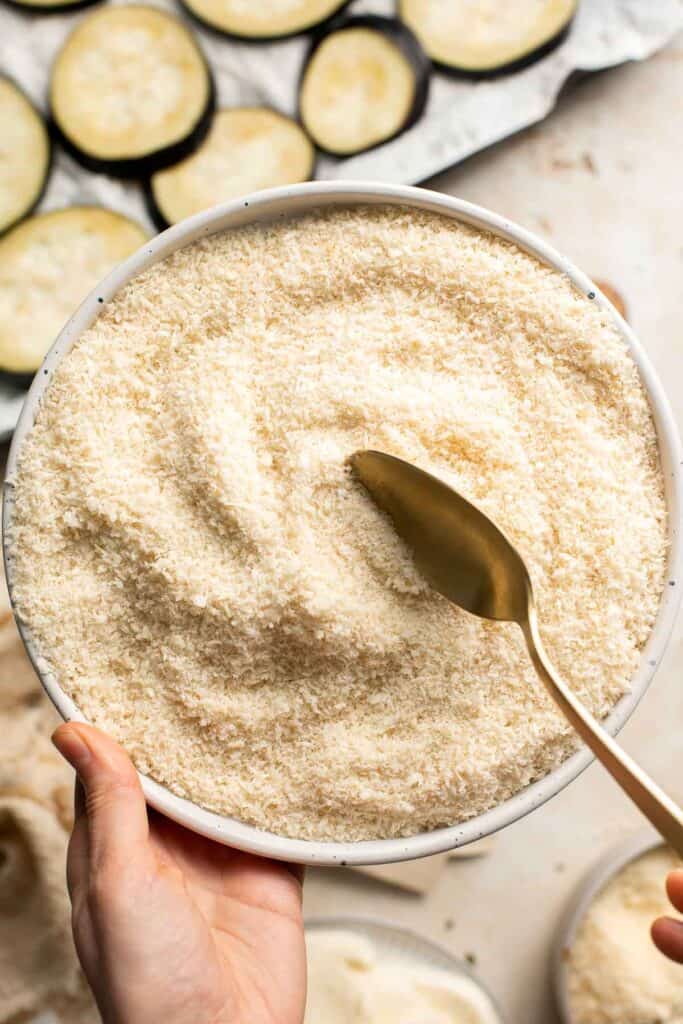
- Dip the eggplant. Dip both sides of each eggplant round into the eggs to evenly coat them. Then dip into the breadcrumb mixture. (The breadcrumbs will stick to the egg wash).
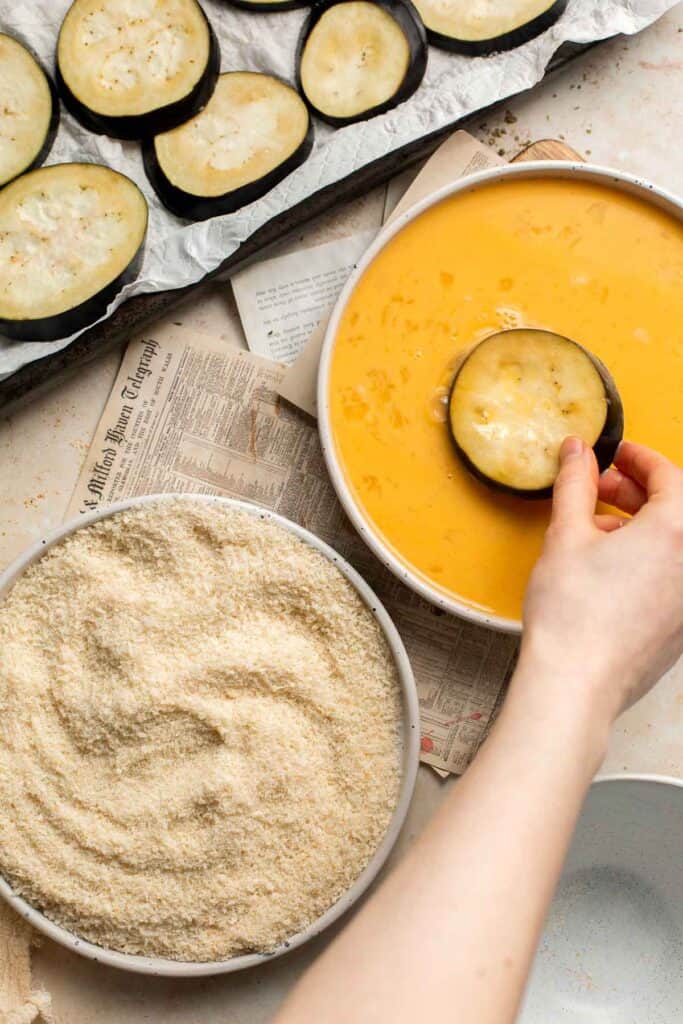
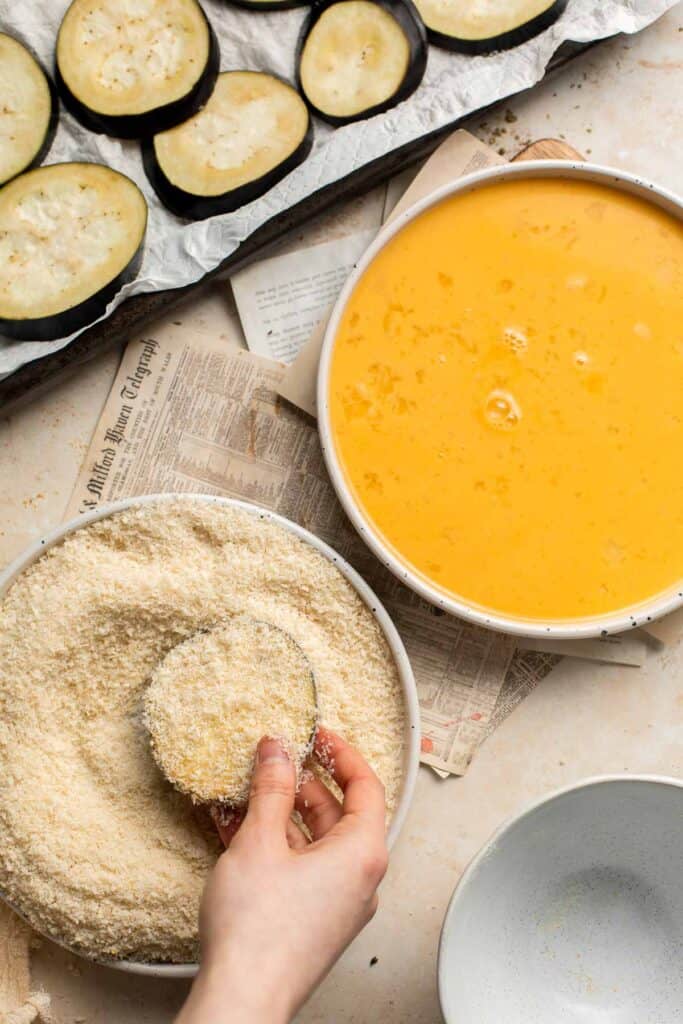
- Bake. Place the breaded eggplant rounds in a single layer on a large baking sheet and spray evenly with cooking oil spray. Bake in a 425F preheated oven for 10 minutes, then flip them halfway and bake until golden brown and fork tender, approximately 10 more minutes.
- Cool. Set aside and let the eggplant cool for 15 minutes.
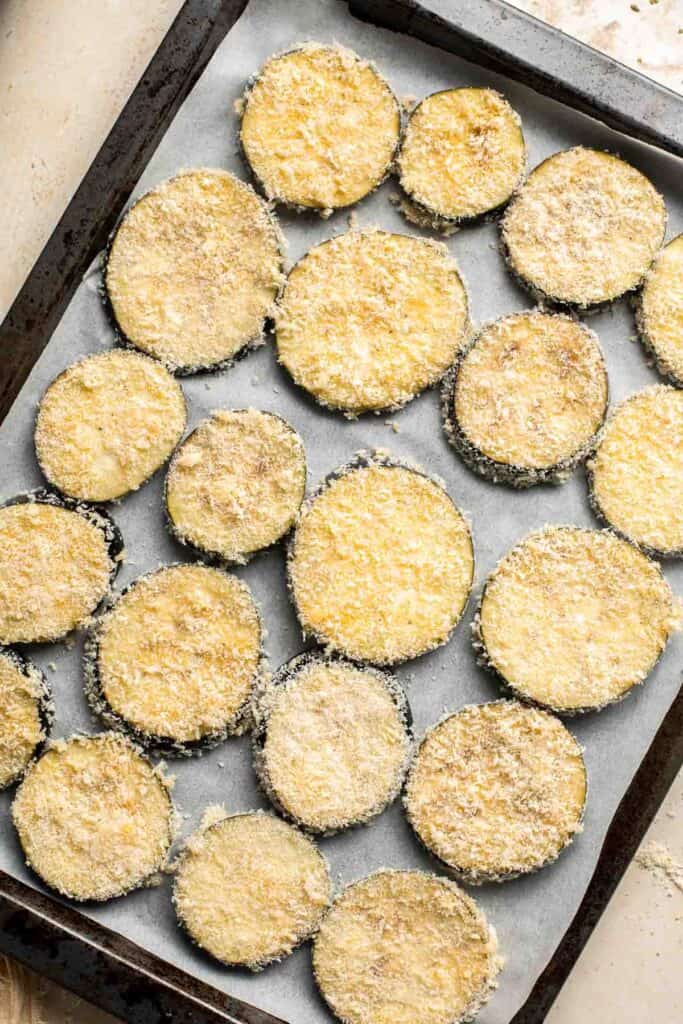
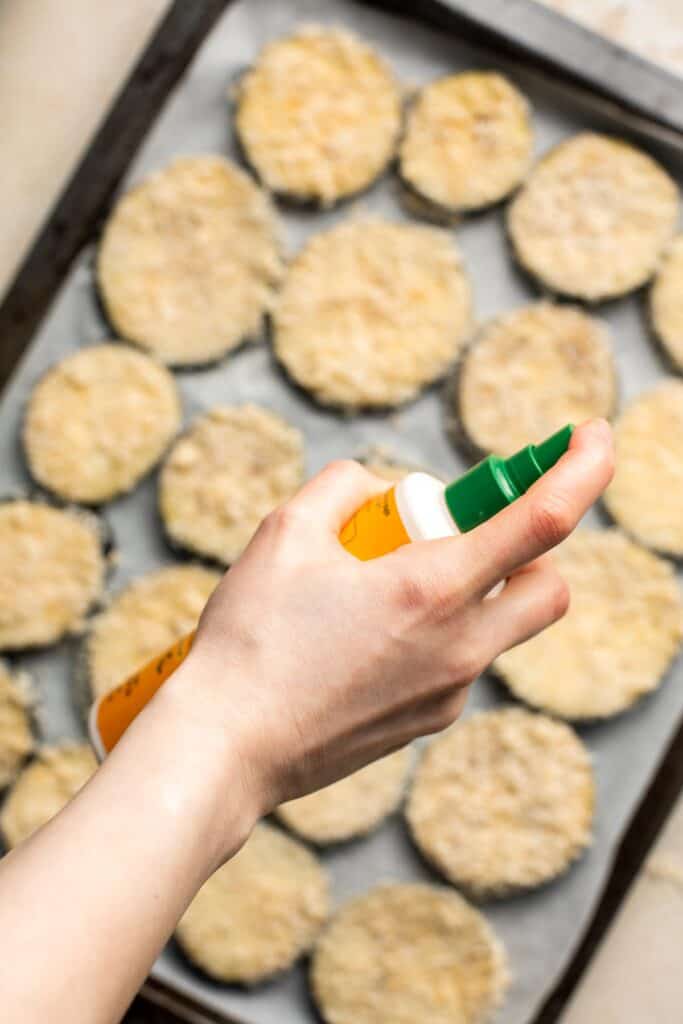
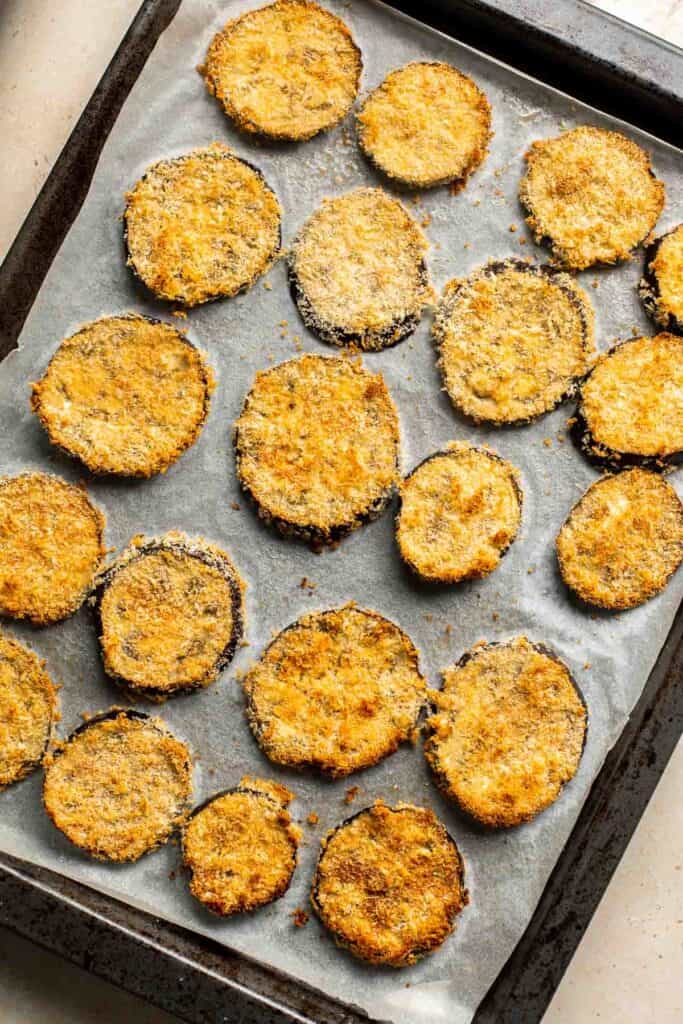
Meanwhile, make the sauce.
- Sauté aromatics. Heat oil in a large pot over medium-high heat until the hot oil starts to sizzle, about 1 minute. Add onions and garlic and sauté until tender, about 1 minute.
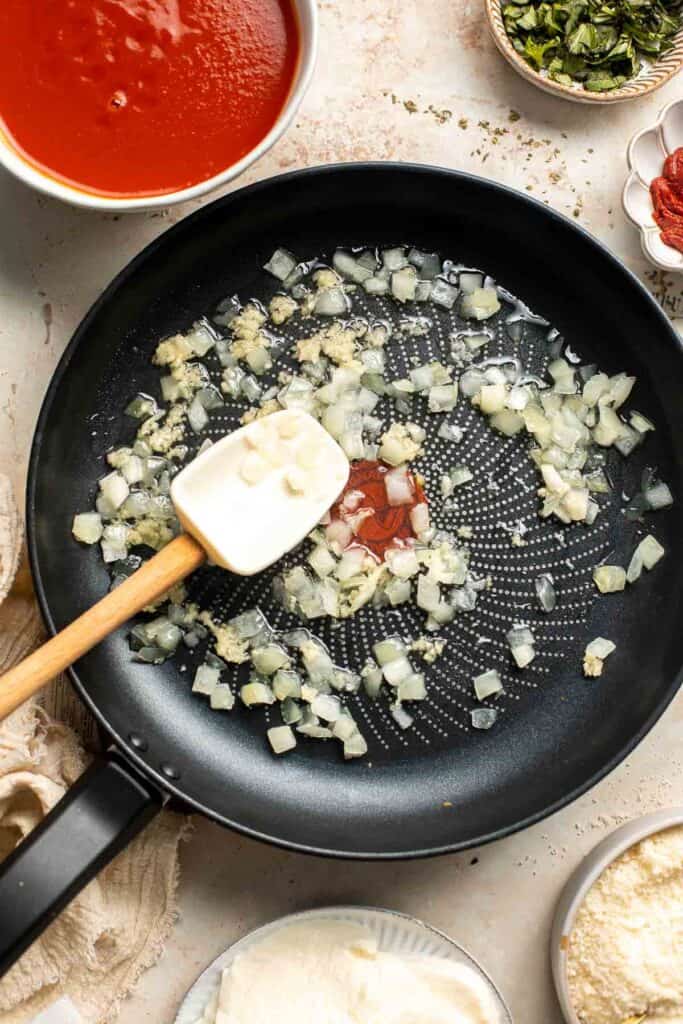
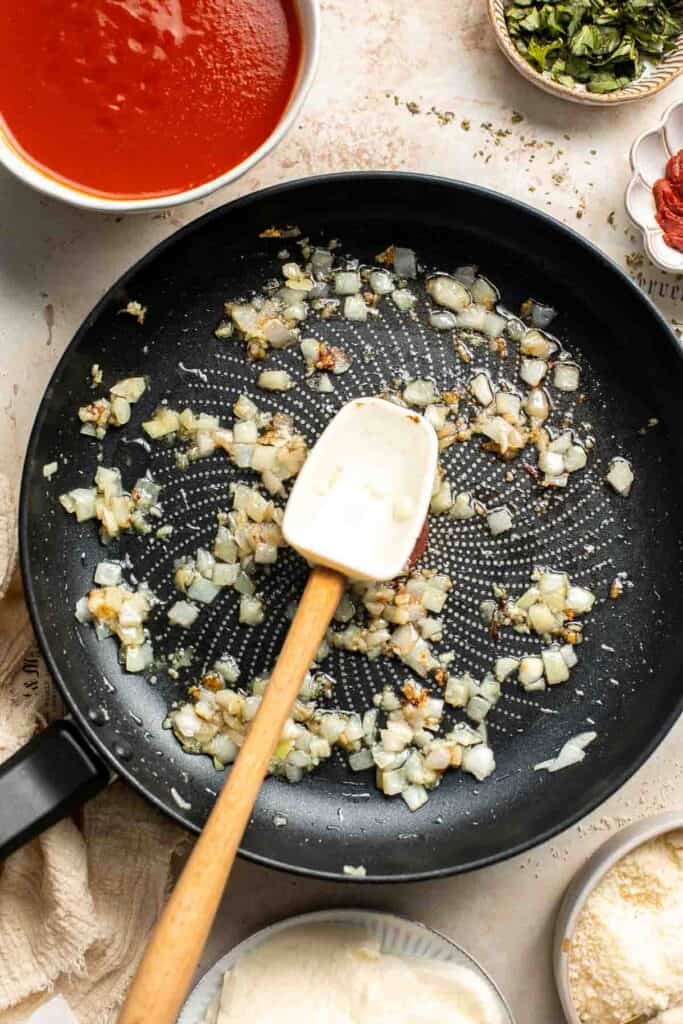
- Add remaining ingredients. Add tomato sauce, tomato paste, Italian seasoning, basil, and salt. Stir well to combine and bring the sauce to a simmer.
- Simmer. Turn the heat down to low and continue to simmer for 5 minutes. Remove from heat and transfer sauce into a bowl.
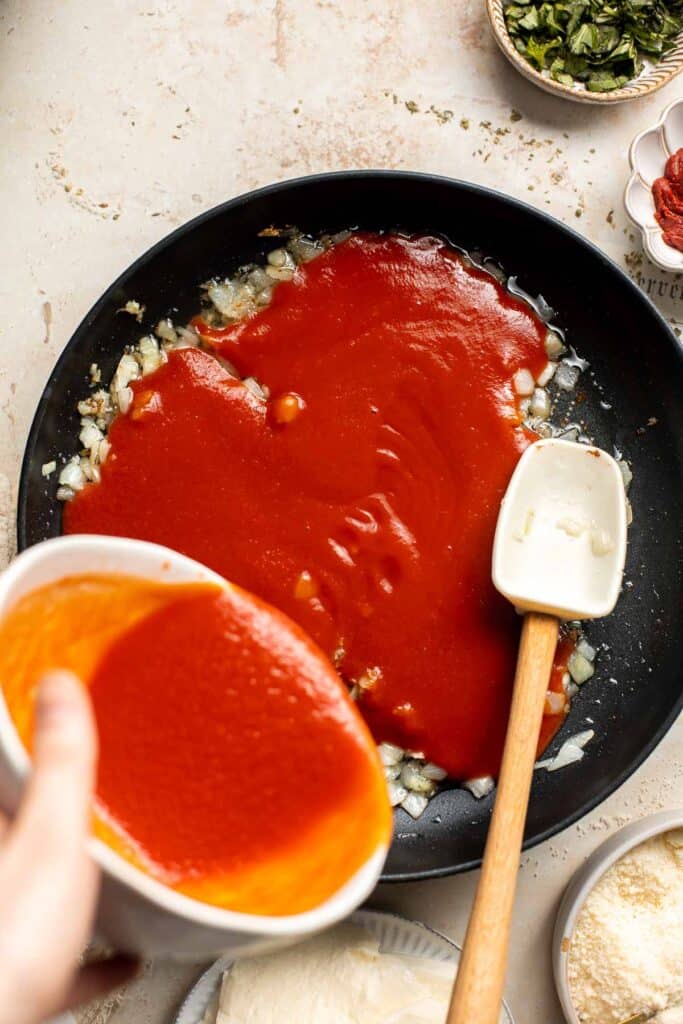
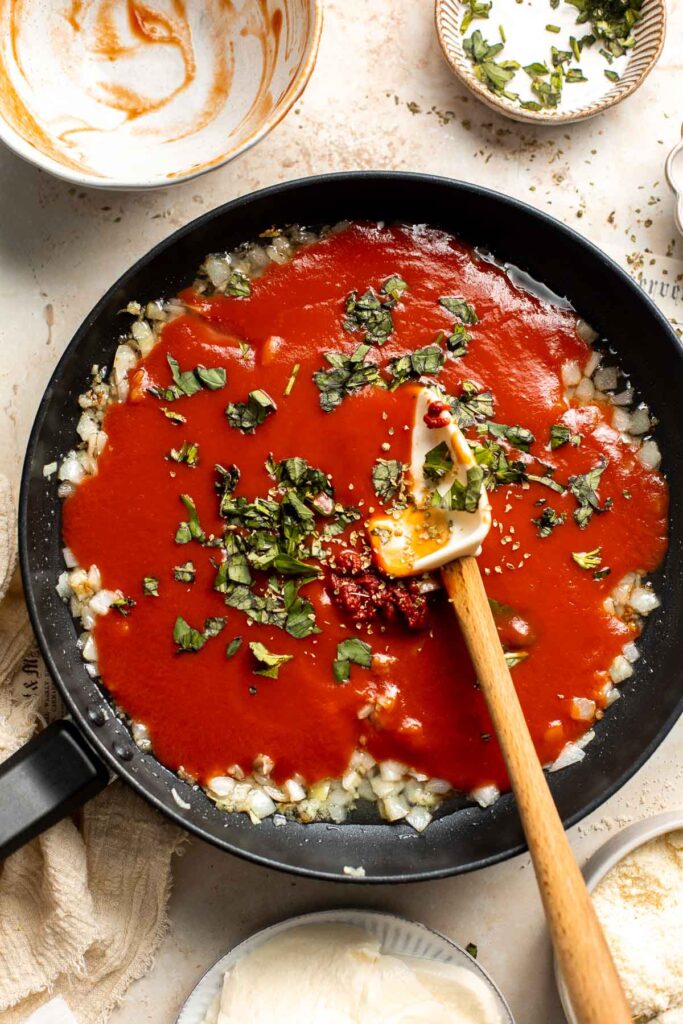
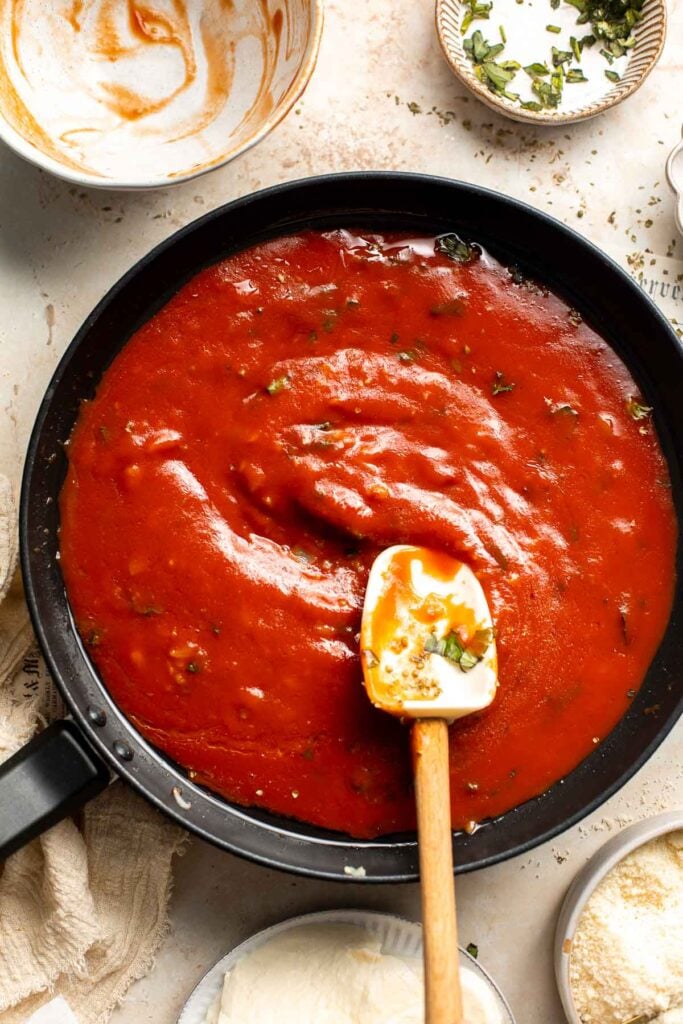
Finally, assemble the eggplant parmesan.
- Add sauce. In a 9x13-inch casserole pan, add ⅓ of the sauce (about 1 cup) and evenly spread it on the bottom.
- Add eggplant. Place ⅓ of the eggplant rounds evenly apart over the sauce.
- Add cheese. Spread ½ of the sliced mozzarella cheese (¾ pound) over the eggplants and sprinkle with ⅓ cup of the Parmesan cheese.
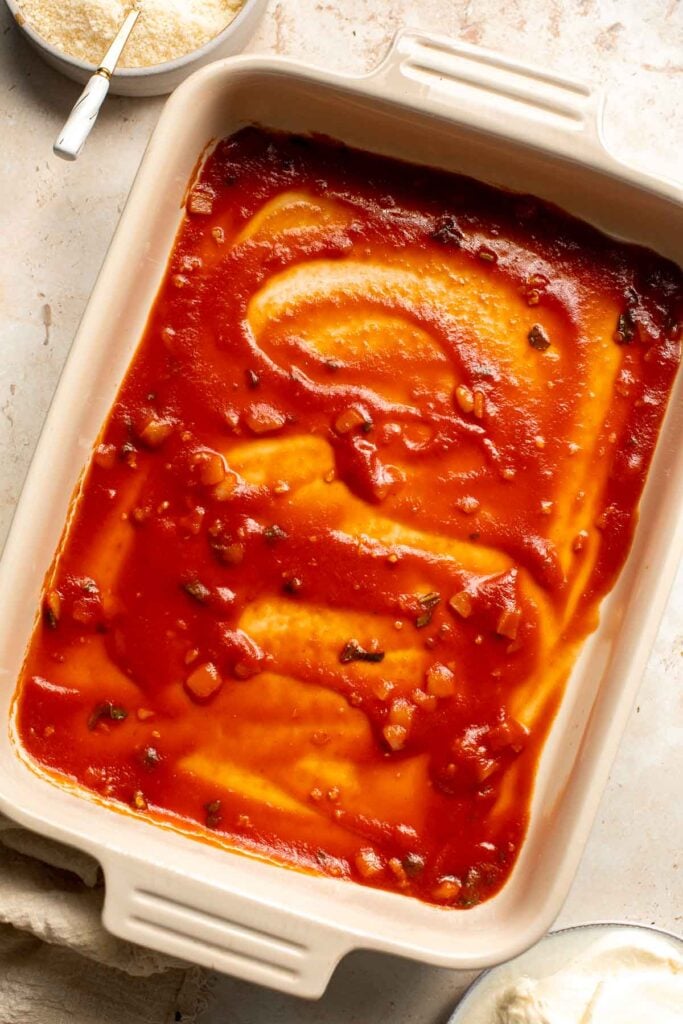
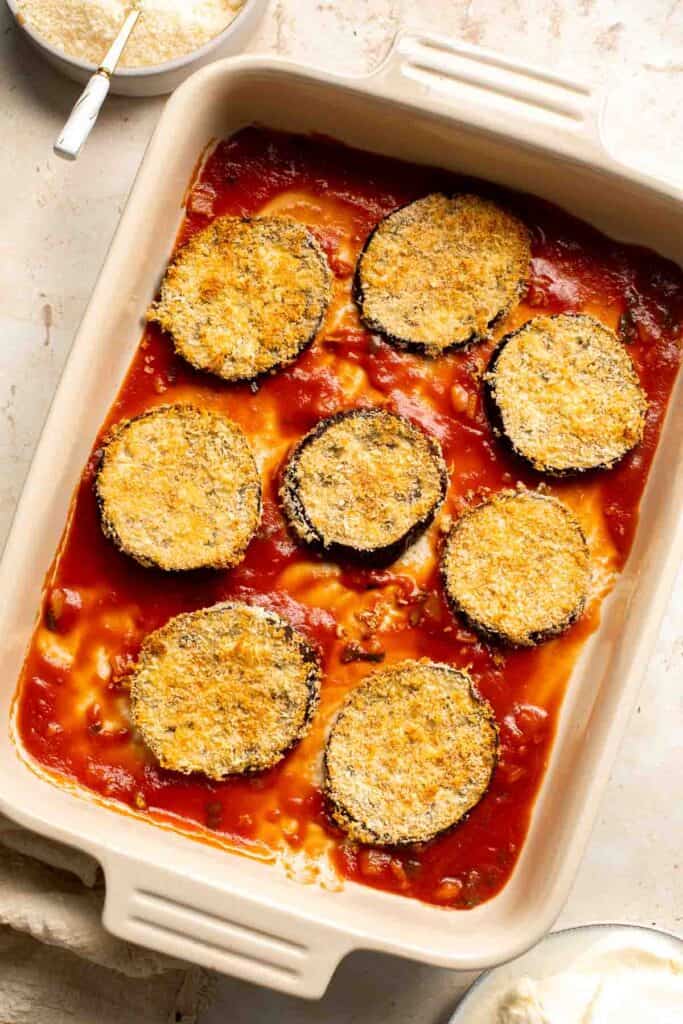
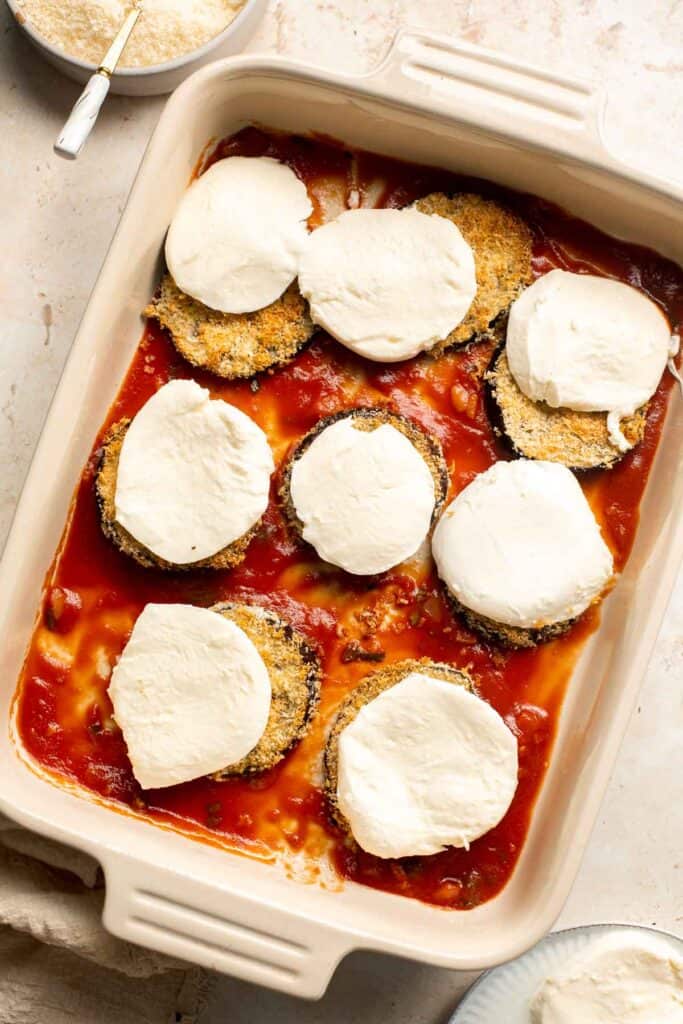
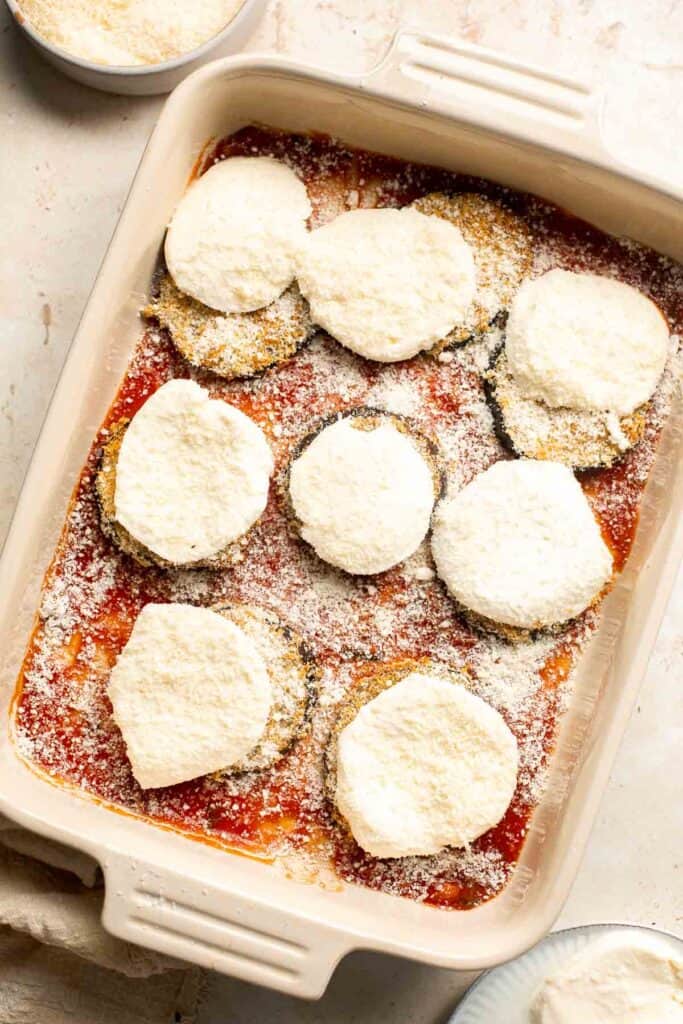
- Add second layer. Add ⅓ eggplants, ⅓ of sauce, remaining ½ of mozzarella, and ⅓ Parmesan.
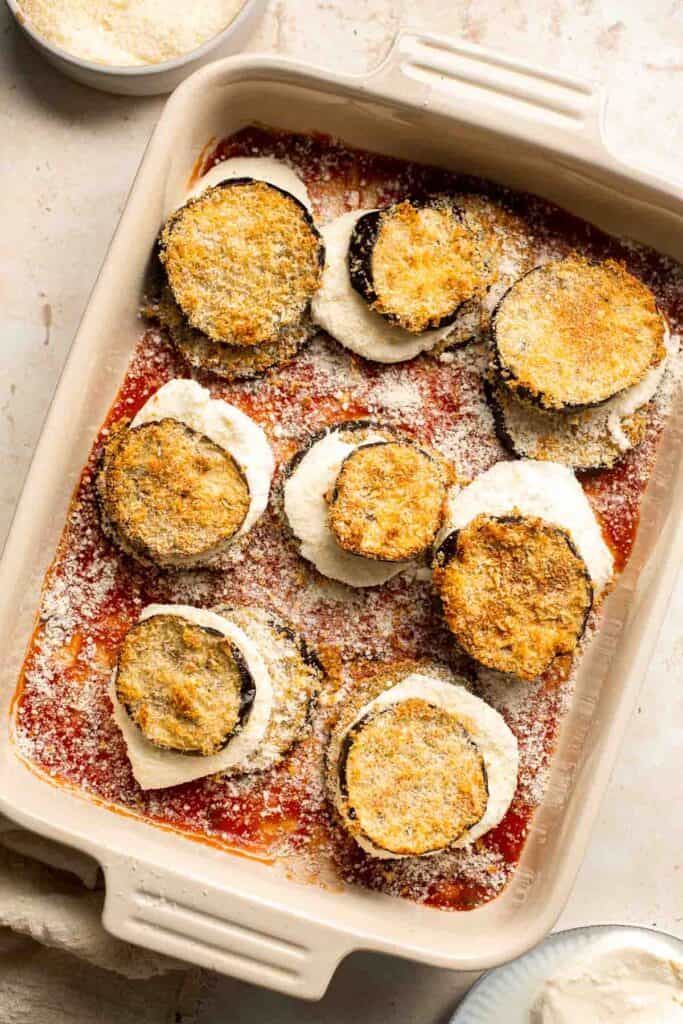
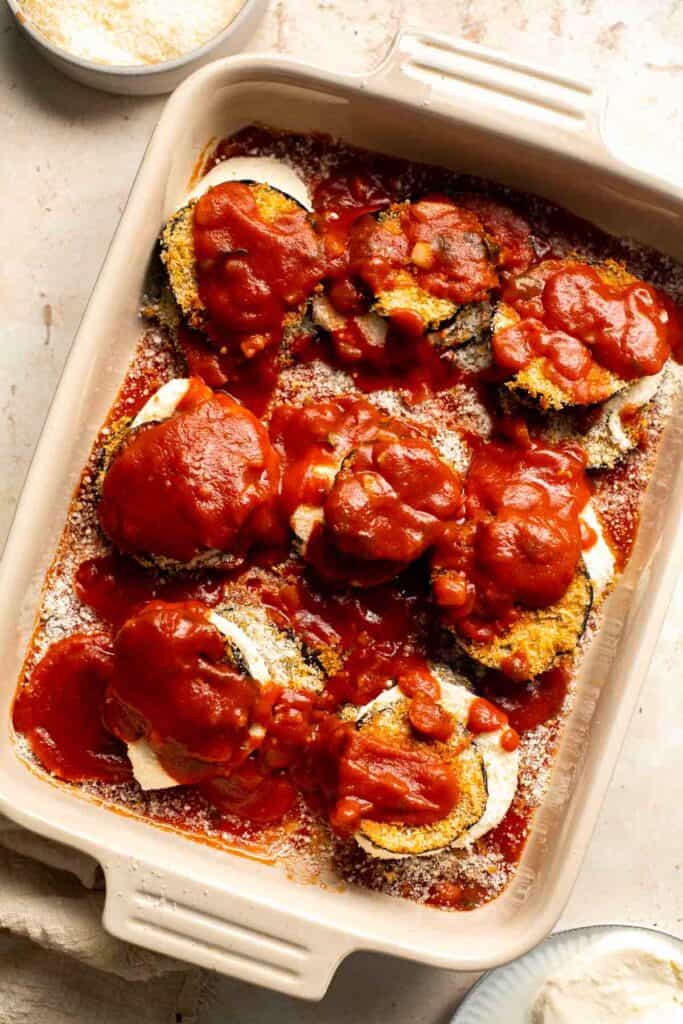
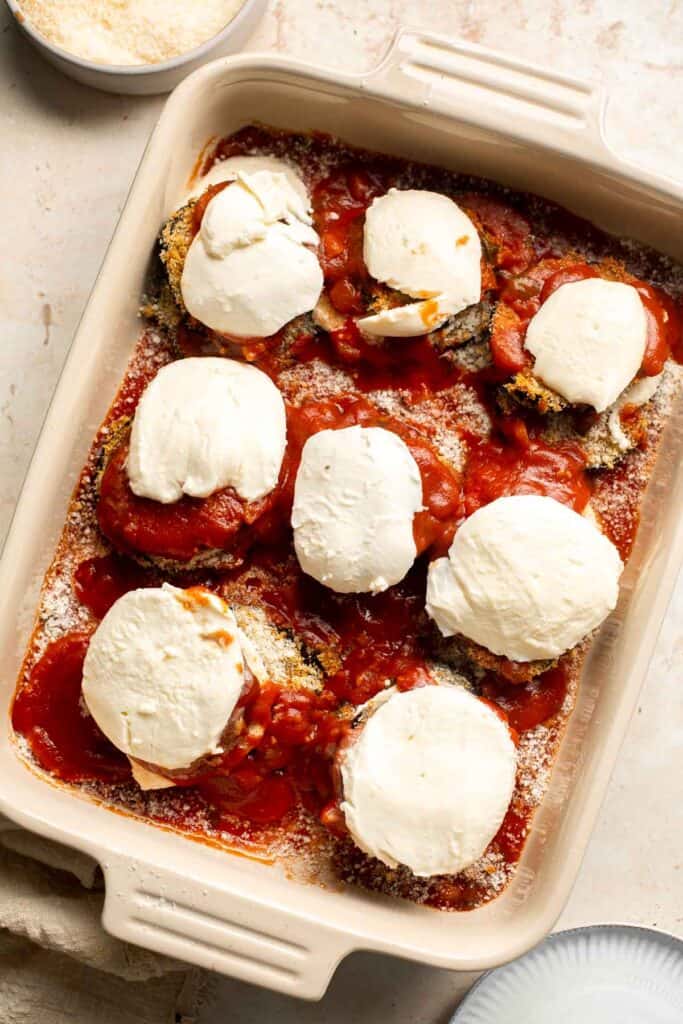
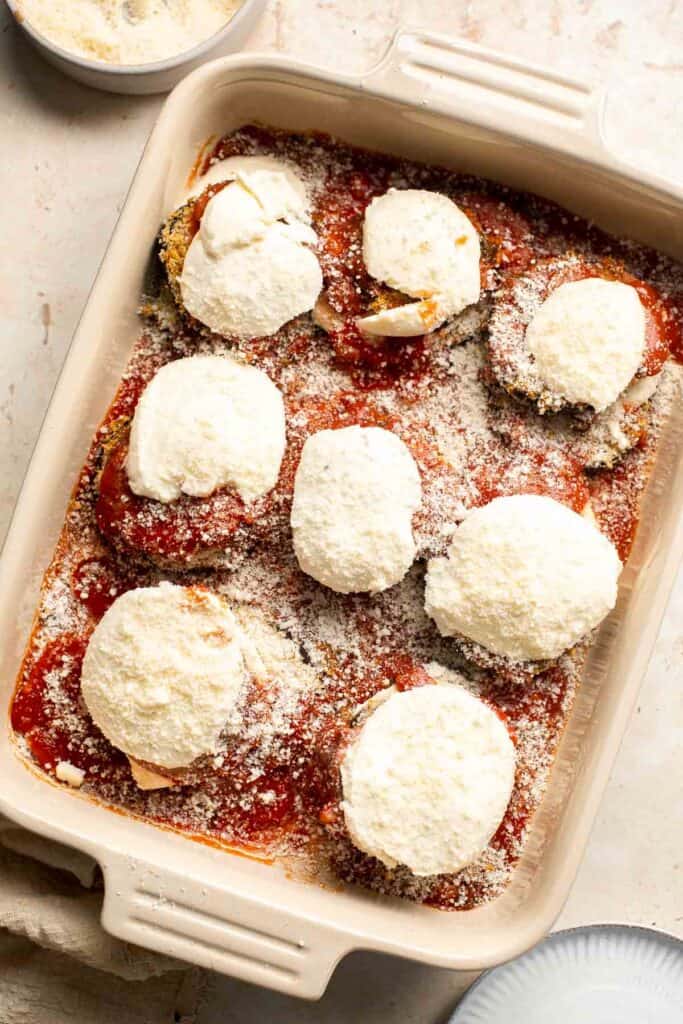
- Add final layer. Repeat with the remaining ⅓ eggplant, remaining ⅓ sauce, and remaining ⅓ Parmesan.
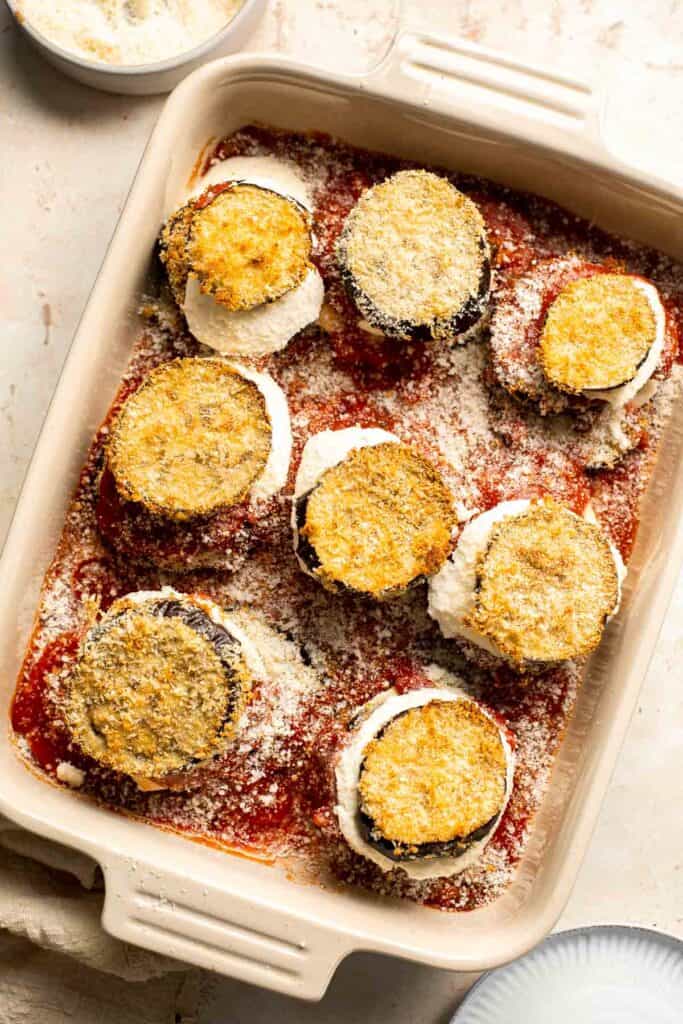

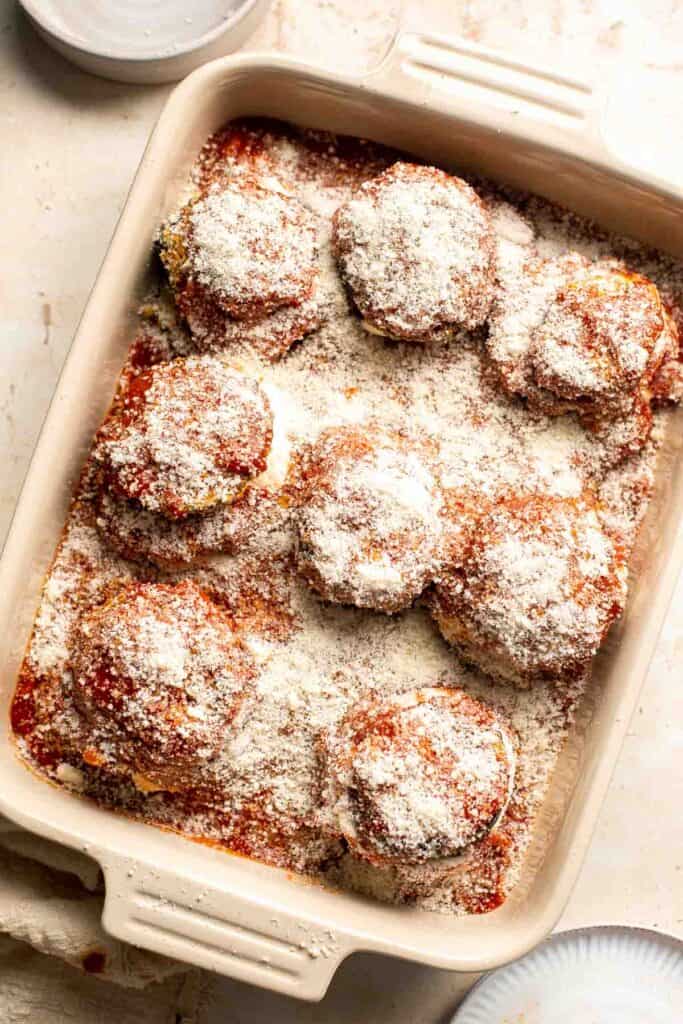
How to Layer Eggplant Parmesan
The layering order should be as follows:
- sauce, eggplants, mozzarella, parmesan
- eggplants, sauce, mozzarella, parmesan
- eggplants, sauce and parmesan.
How to Bake Eggplant Parmesan
Transfer the casserole dish into a 425 F preheated oven and bake for 30 minutes until the cheese melts and turns golden brown. Let rest for 10 minutes before slicing.
Garnish with chopped basil and serve hot.

Recipe Variations
- Make it meaty. Add a layer of cooked ground beef or Italian sausage between the layers of eggplant and sauce for a heartier, more filling dish.
- Go vegan. Skip the cheese and use a vegan cheese substitute or nutritional yeast to make this dish vegan-friendly. You can also swap out the eggs for a flax egg to make the breading vegan as well.
- Spice it up. Add some red pepper flakes or diced jalapeños to the tomato sauce for a little kick of heat.
- Add mushrooms. Sauté some sliced mushrooms and add them between the layers of eggplant for an earthy, meaty flavor. Try our favorite Sautéed Garlic Mushrooms.
- Make it lighter. Skip the breading and simply grill or roast the eggplant slices. Top with a fresh tomato salsa and a sprinkle of feta cheese for a lighter, fresher take on this classic dish.
How to Serve
Serve this Eggplant Parmesan with fresh basil leaves or parsley for a pop of color and added flavor. You can also sprinkle some extra grated parmesan or mozzarella cheese on top before serving for an extra cheesy and gooey finish.
Eggplant Parmesan is super satisfying on its own, but if you're serving a crowd, you can make it go even farther by serving it alongside some Italian-inspired sides such as garlic bread, salad, or veggies. Some of our favorite sides to serve with this are:
- Chopped Asparagus Salad
- Garlic Breadsticks (to soak up all the extra sauce!)
- Balsamic Roasted Broccoli
- Caesar Salad
- Creamy Parmesan Risotto
- Herb Roasted Sweet Potatoes
- Rosemary Garlic Focaccia Bread
- Caprese Salad
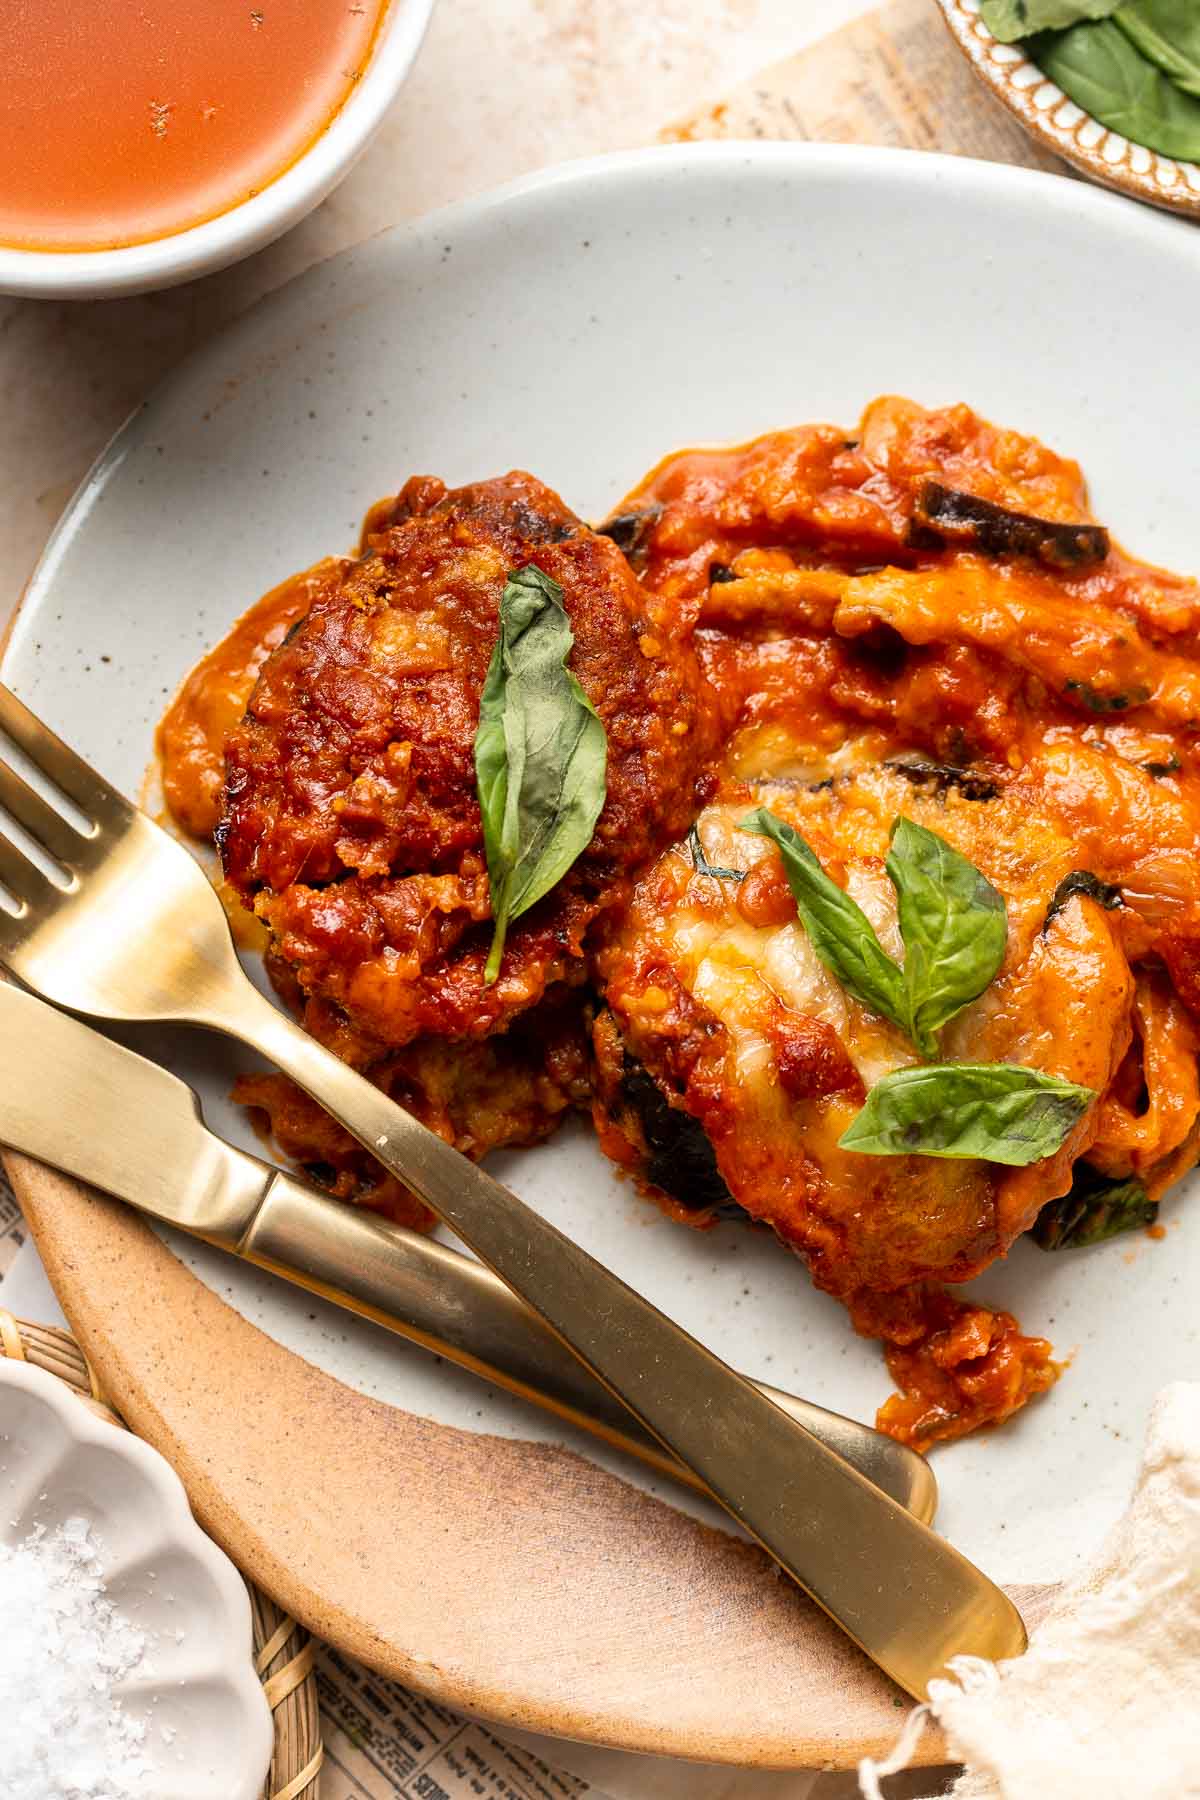
Recipe Tips and Tricks
- Slice the eggplant evenly. To ensure that your eggplant slices cook evenly, it's important to cut them into similar sizes. Try to cut them into even slices that are roughly the same thickness.
- Salt the eggplant slices. Don't skip this step! Salting the eggplant before cooking draws out excess moisture and bitterness, resulting in a better texture and flavor.
- Let it rest. Let the cheesy baked eggplant rest for at least 10-15 minutes before serving. This allows the cheese topping to set and the flavors to meld together.
- Make ahead for busy days. Eggplant parmesan freezes beautifully - see the freezing instructions below for easy instructions. Making it in advance is a great way to save yourself time on busy days, whether you're hosting a dinner party or just needing a low-effort meal.
Storing and Freezing Instructions
How to Store
Once the eggplant parmesan has cooled to room temperature, transfer it to an airtight container and refrigerate for up to 5 days.
How to Reheat
Reheat in an oven-safe dish at 350℉ for 15-20 minutes until the center is heated to the desired temperature.
How to Freeze
Freeze cooked or uncooked eggplant parmesan in an airtight, freezer-safe container for up to 3 months. Thaw in the refrigerator overnight and follow the baking instructions or reheat as outlined above.
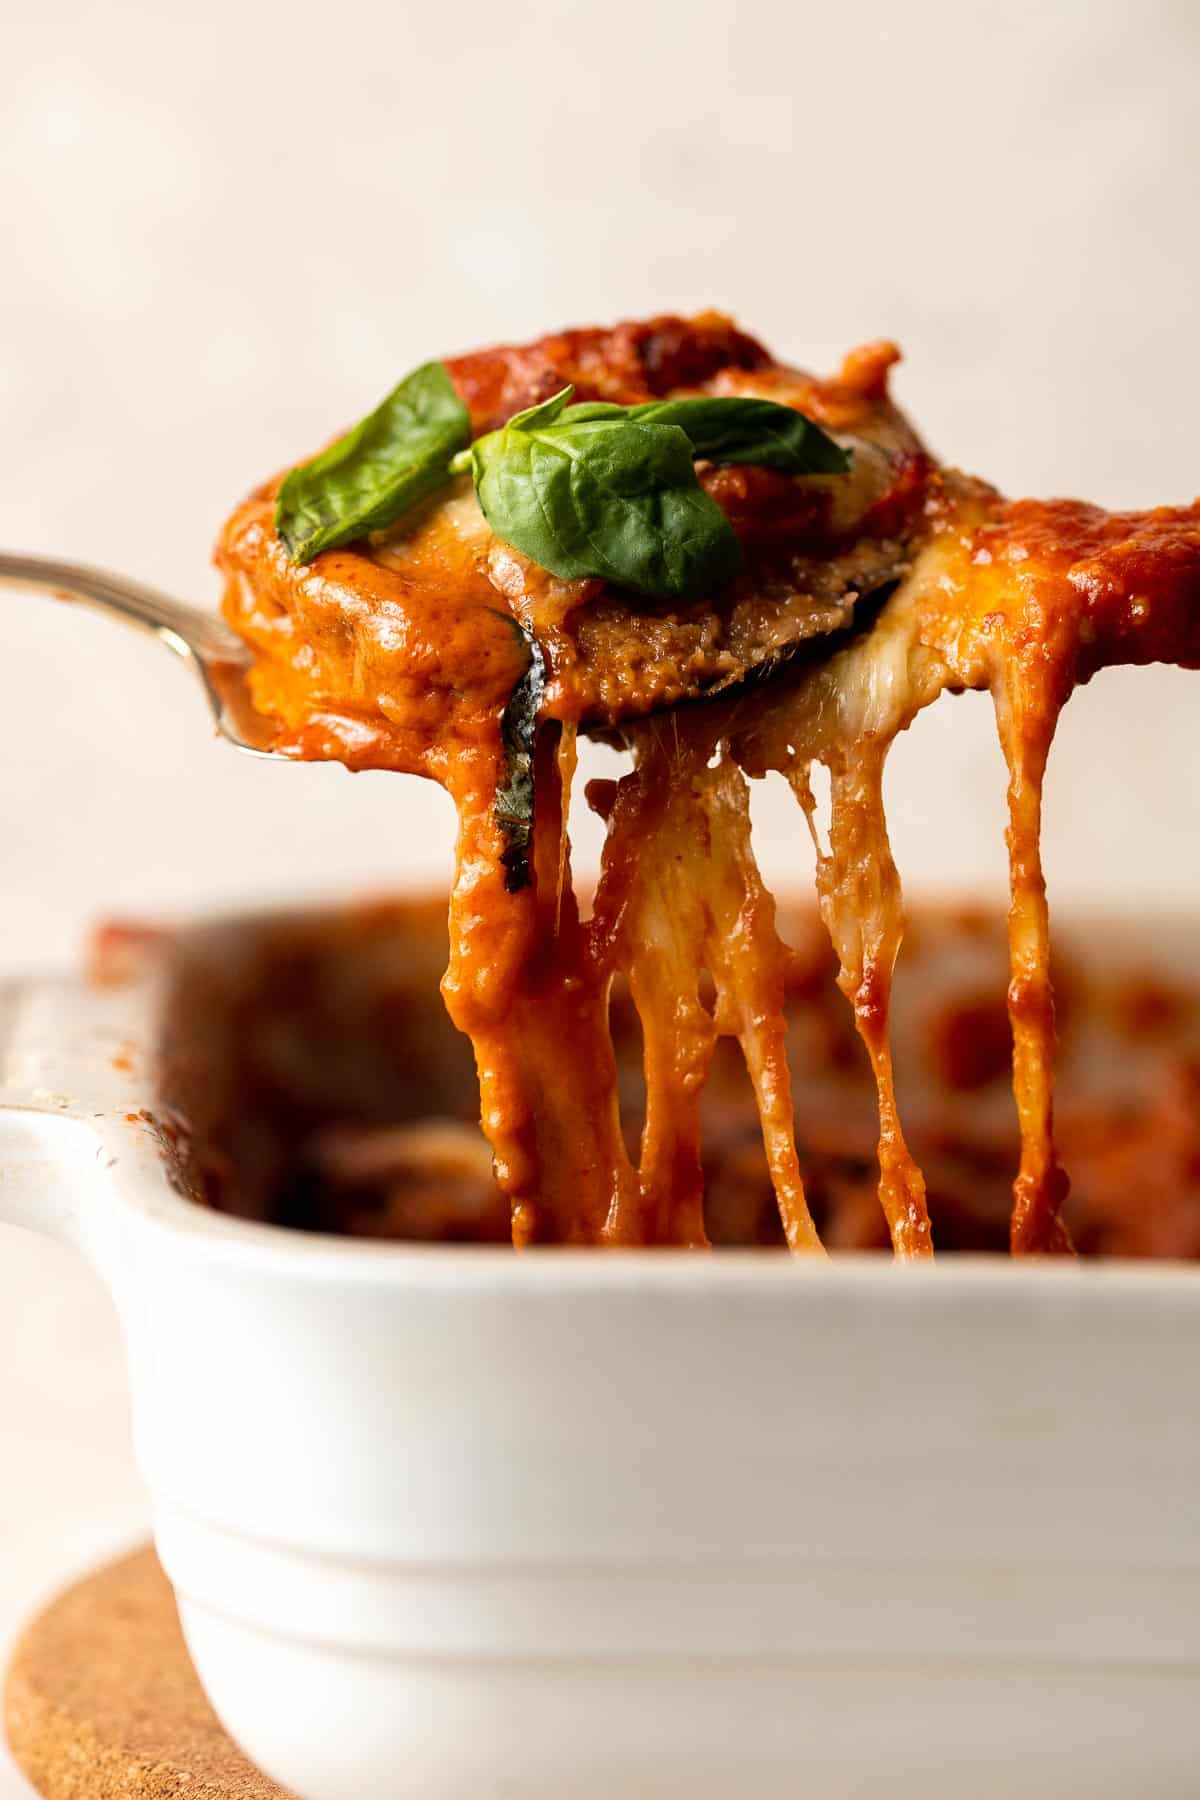
More Vegetarian Recipes
- 60 Easy Vegetarian Dinner Ideas
- Stuffed Eggplant
- Creamy Tomato Pasta
- Sheet Pan Quesadillas
- Vegan Stuffed Peppers
- Vegetarian Bolognese
Tried this recipe?
I'd love to hear what you think! Leave a comment and rating below to share your feedback. Your reviews help others discover this recipe and help me keep creating more free recipes for you. Snap a photo and tag me on social media @aheadofthyme too.

Roasted Carrots
These Roasted Carrots are the ideal side dish: they're healthy, easy to make, and taste so good that you might even forget you're eating a vegetable! They are sweet and tender with a slightly crispy interior, and seasoned well with simple balsamic herb glaze that adds just the perfect balance to naturally sweet carrots.
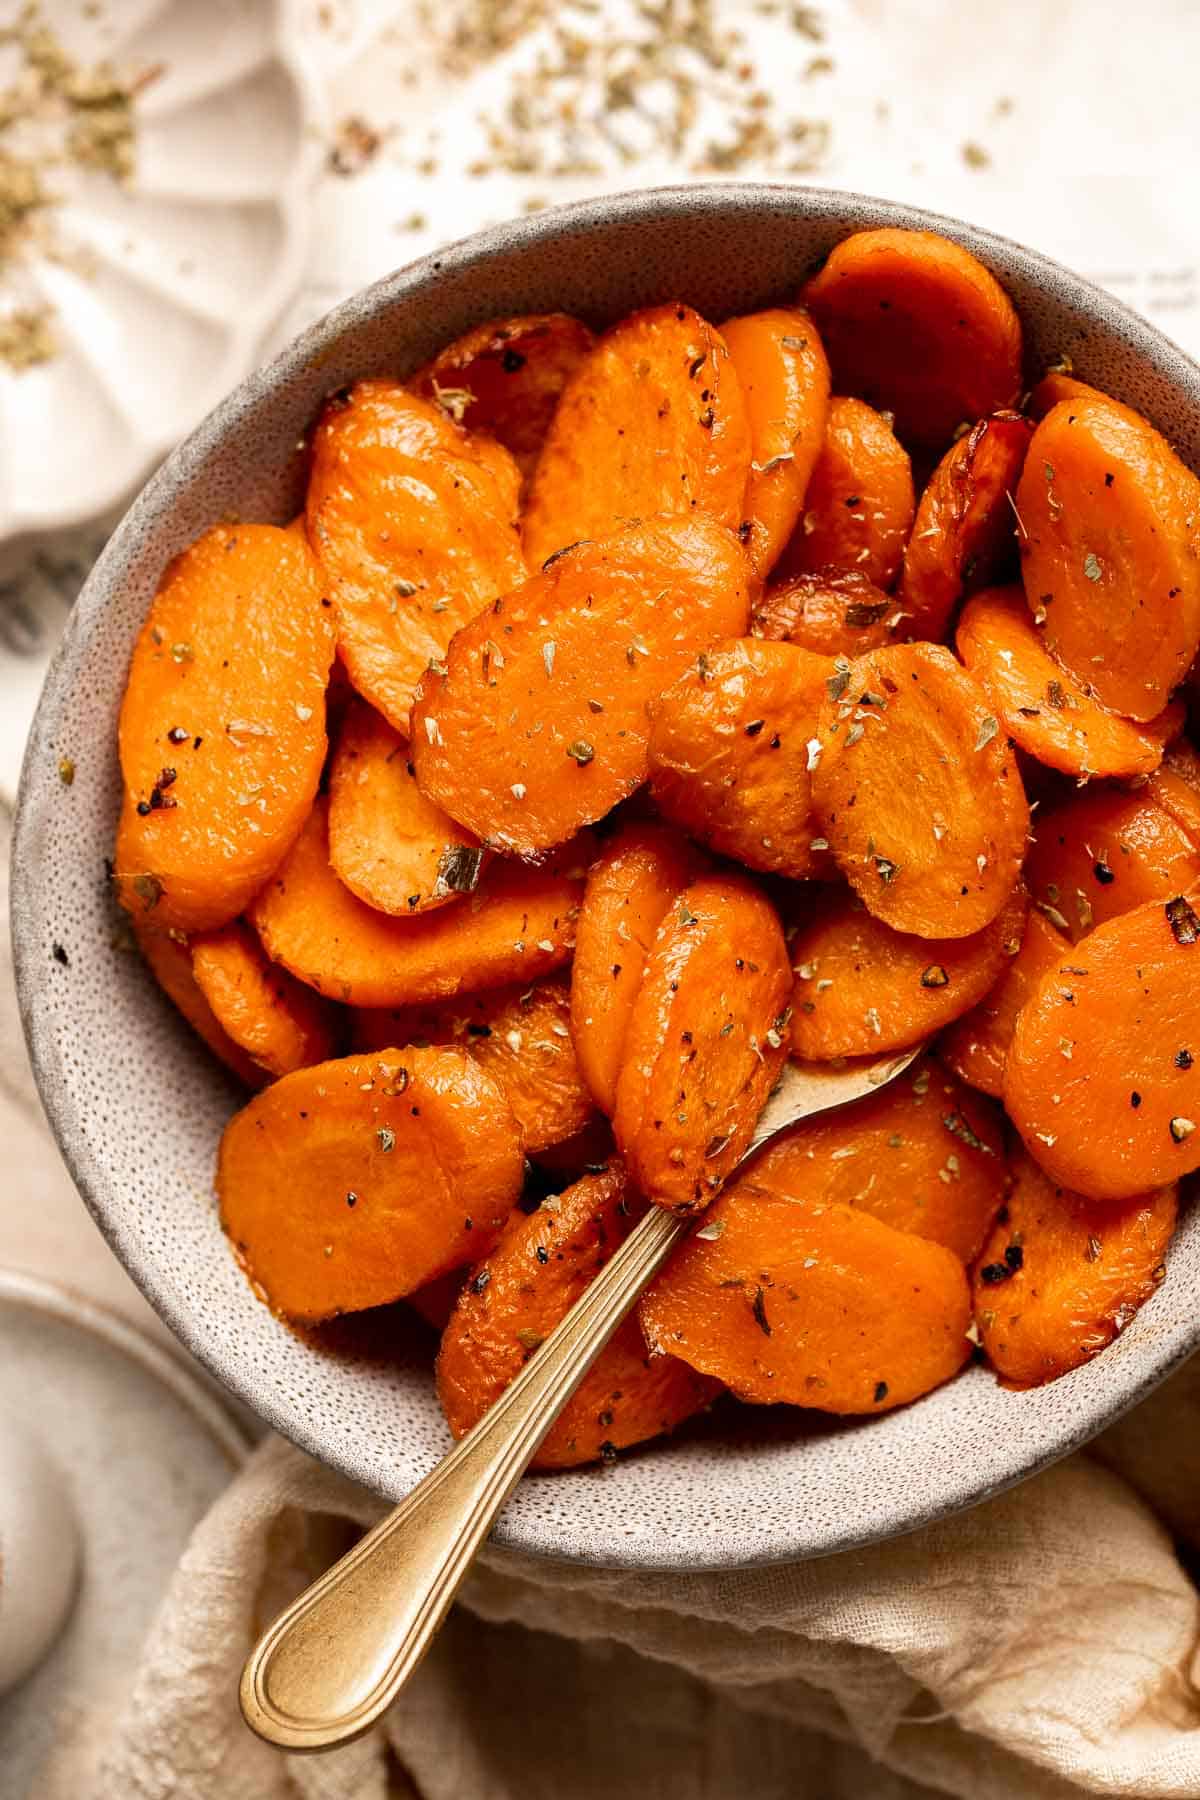
The best part? It takes just ten minutes to prep this year-round roasted carrot recipe, so you can work on the main dish or other sides while they roast in the oven! Plus, because they're so simple, they pair well with just about anything! So whether you're serving red meat, chicken, fish, pork, or vegetarian mains, they will compliment your entree perfectly. Serve them as a side for a cozy family dinner or a sophisticated dinner party.
Why You'll Love these Roasted Carrots
- Simple ingredients. This incredibly simple side is made with only 4 common ingredients (plus salt and pepper) - perfect for times when you're running low on groceries or want a low-effort veggie side!
- Quick and easy to make. Roasted carrots are a simple and easy dish that can be made with just a few simple steps. It takes about 5-10 minutes of prep time before they are ready to roast in the oven for about 30 minutes.
- Healthy side dish. No ready-made sauces with artificial ingredients or preservatives here! Just carrots, olive oil, balsamic, seasoning blend of spices, salt, and pepper. These roasted carrots are just as good for you as they are delicious. This side dish is vegan and gluten-free too.
- Perfect for Easter! Looking for the perfect vegetable side to serve with your Easter ham or roast? Look no further - these simple honey roasted carrots pair beautifully with all the classic Easter dishes, and they're perfectly festive for spring.
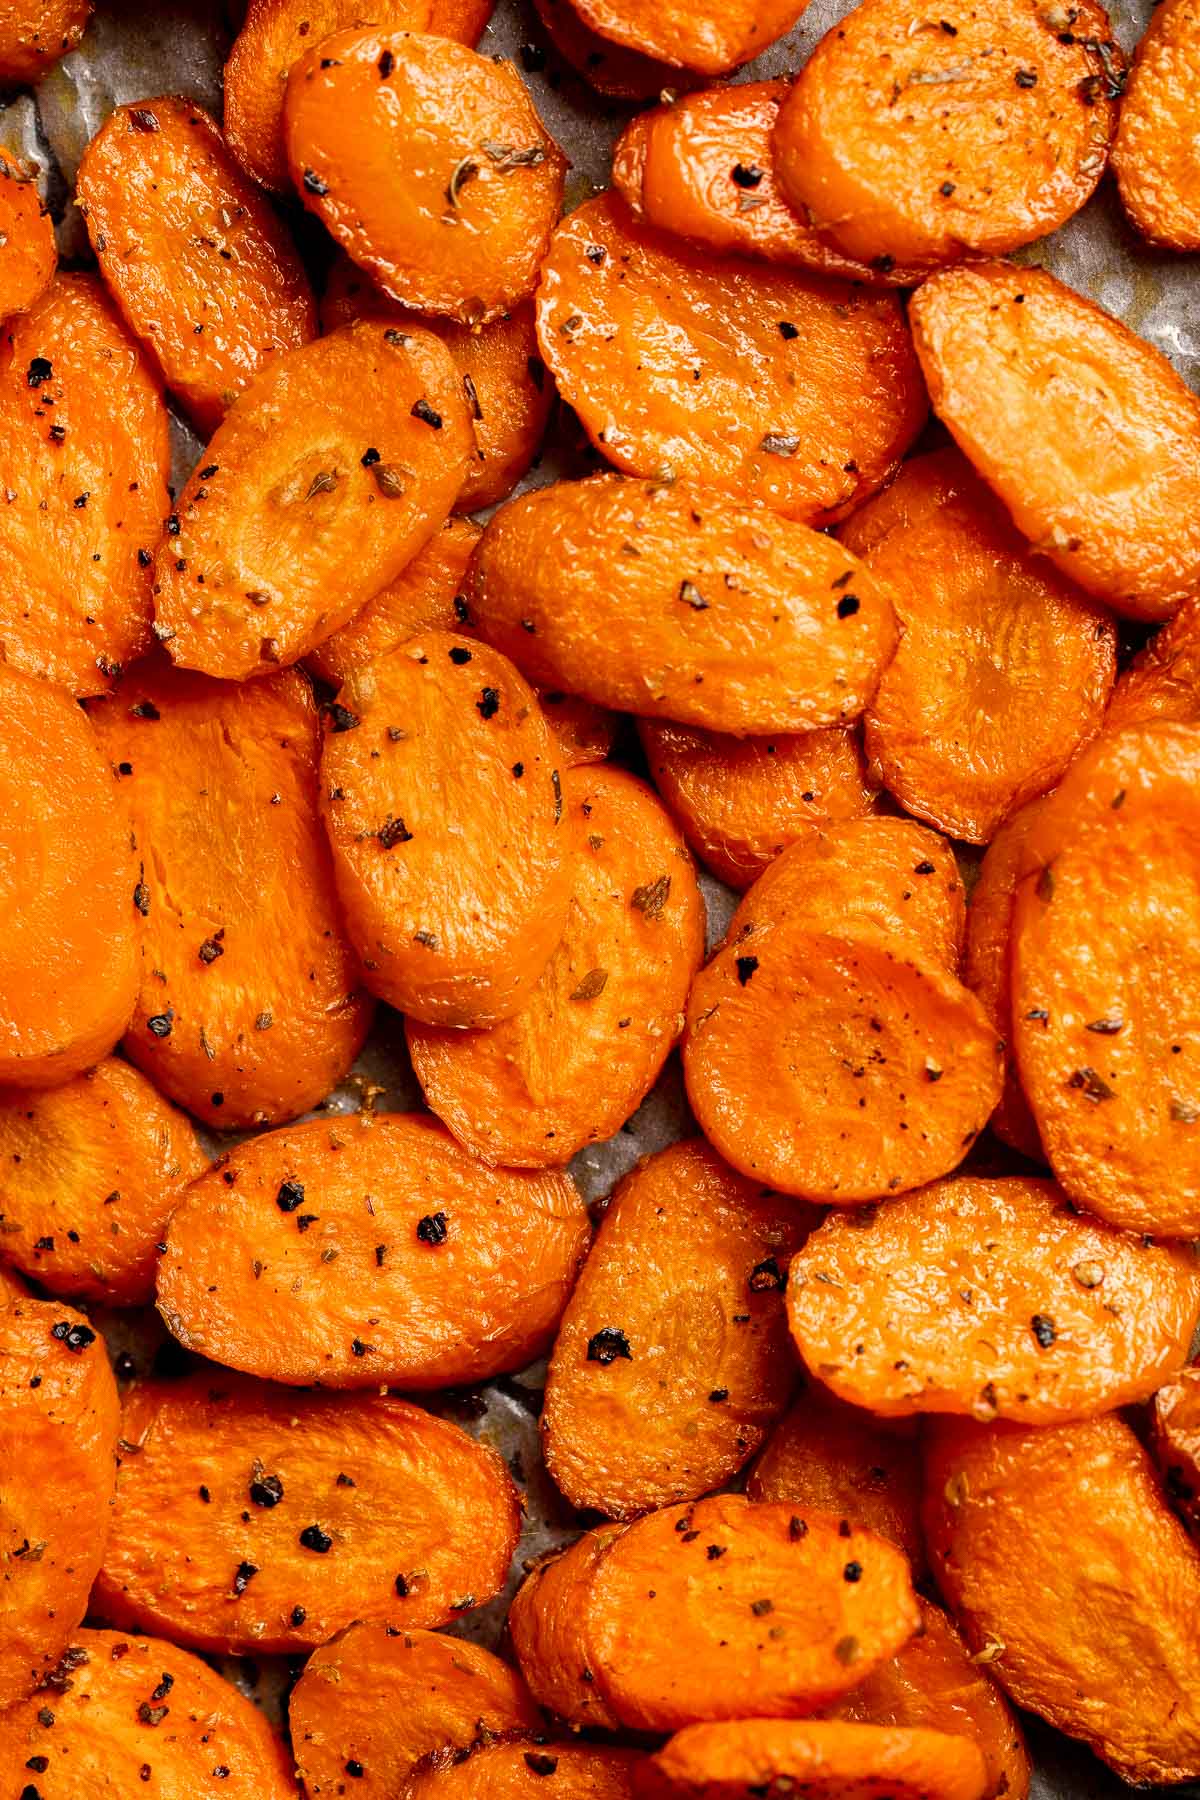
Ingredient Notes
To make these easy Roasted Carrots, you will need the following ingredients (full measurements in recipe card below):
- carrots - use your favorite variety, but look for fresh, firm, and unblemished carrots with bright orange color for the best flavor and texture. This recipe will also work with parsnips, just make sure they're scrubbed clean and shaved or cut down to carrot-size.
- olive oil - use high-quality extra-virgin olive oil for the best flavor. It's important to coat the carrots evenly with the oil to ensure they roast evenly and don't dry out. You can also use avocado oil as a good substitute.
- balsamic vinegar - look for a good quality balsamic vinegar with a slightly sweet and tangy taste. Aged balsamic vinegar works particularly well in this recipe, as it adds a rich and complex flavor to the carrots.
- Italian seasoning - Italian seasoning is a blend of dried herbs such as basil, oregano, thyme, and rosemary. You can use store-bought Italian seasoning or make your own by combining these herbs in equal parts.
- salt and pepper
You will also need measuring spoons, mixing bowls, and a large baking sheet.
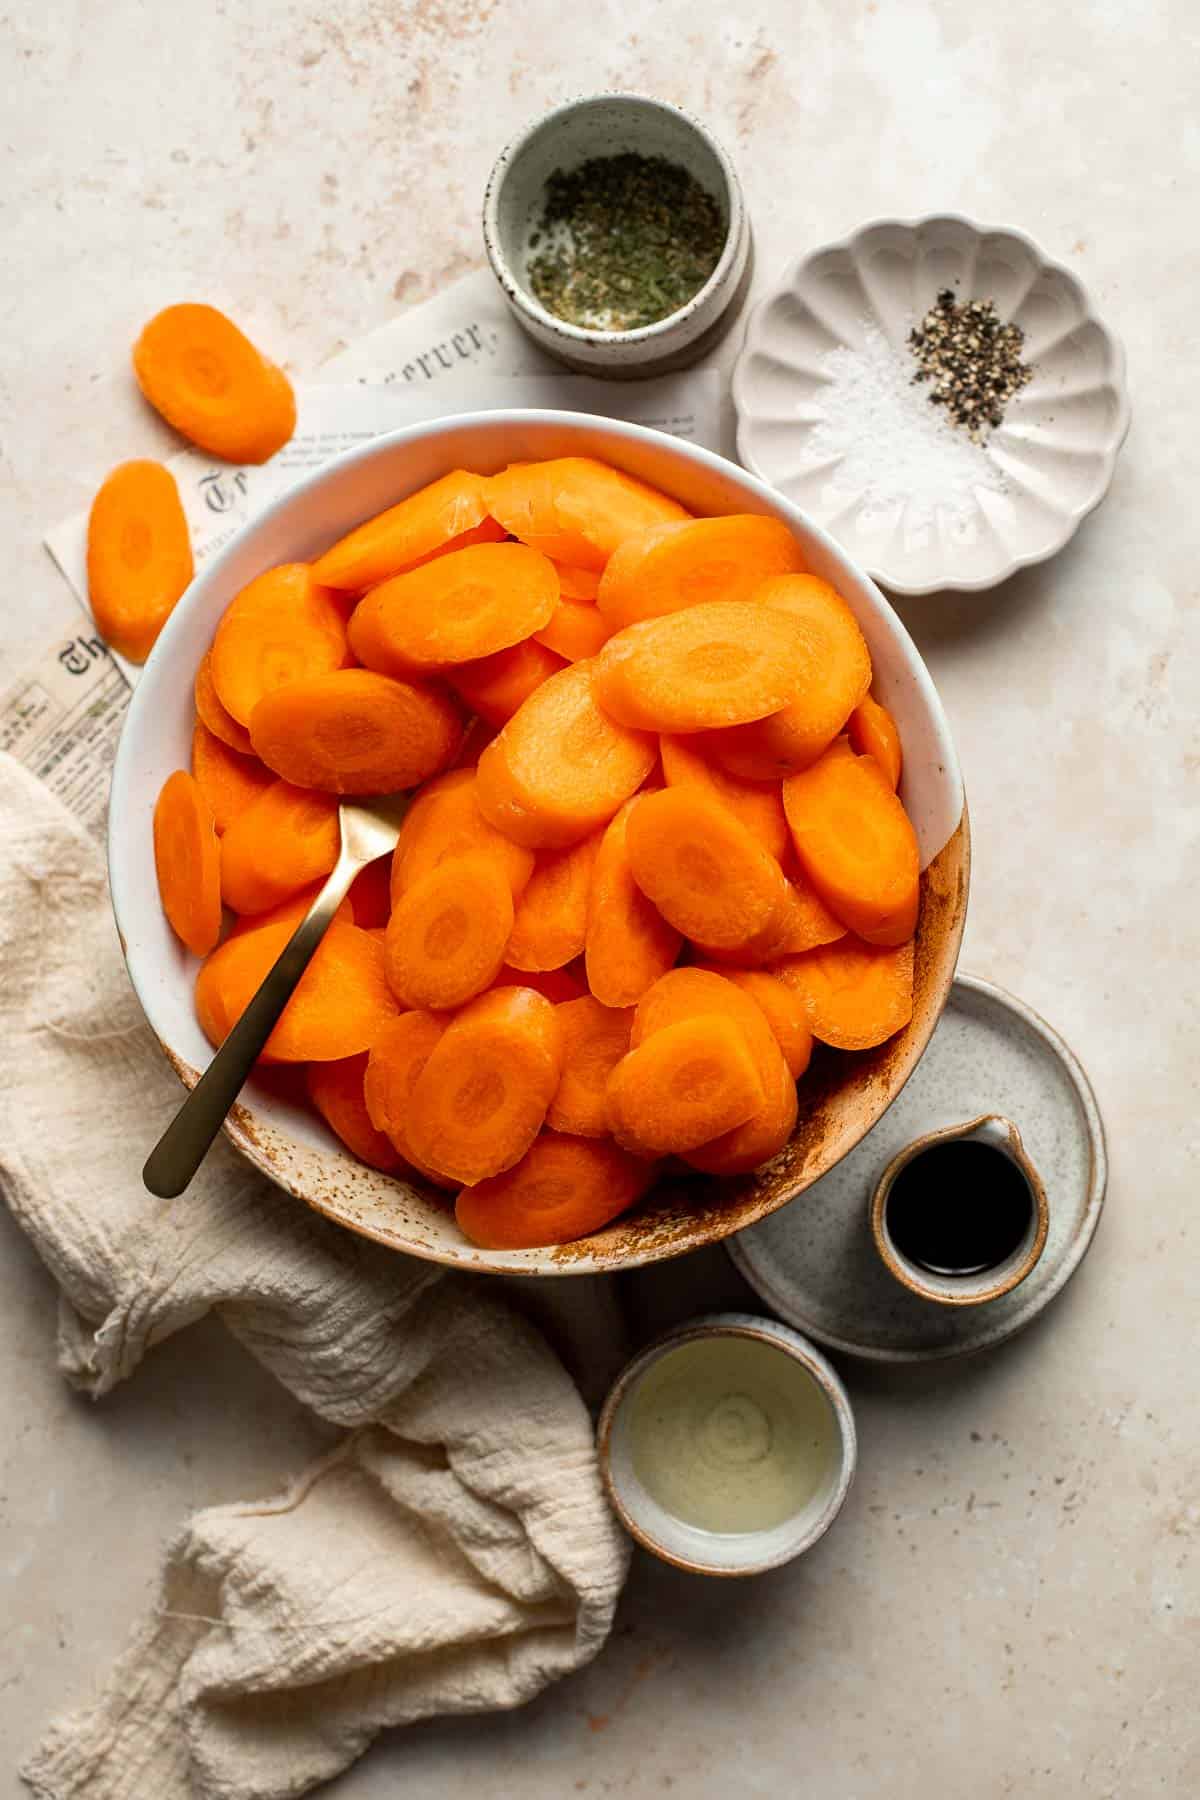
How to Make the Best Roasted Carrots
- Slice carrots. Slice carrots into 1 ½-inch pieces, cut on an angle. Place the carrots into a large mixing bowl.
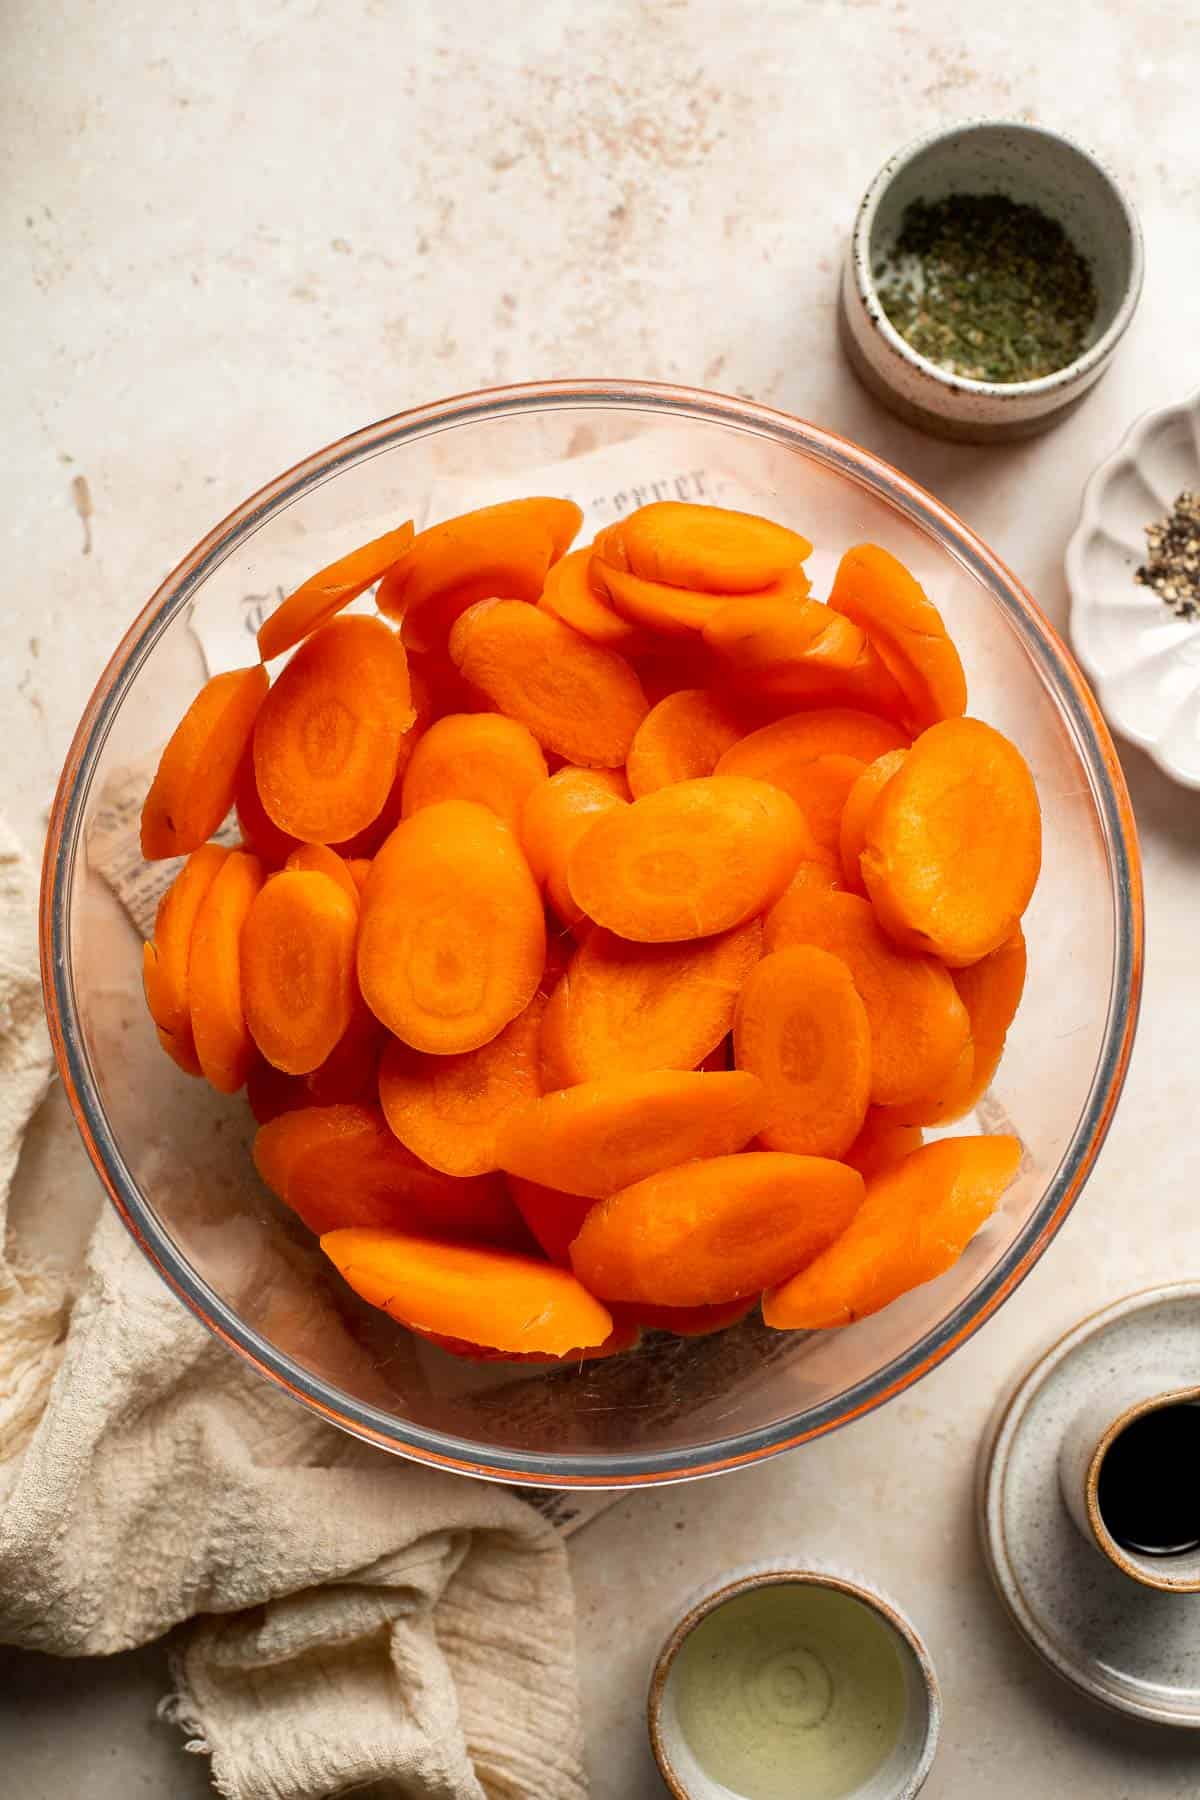
- Toss with seasoning. In a small mixing bowl, stir together olive oil, balsamic vinegar, Italian seasoning, salt, and pepper until well combined. Pour over the carrots and toss to combine.
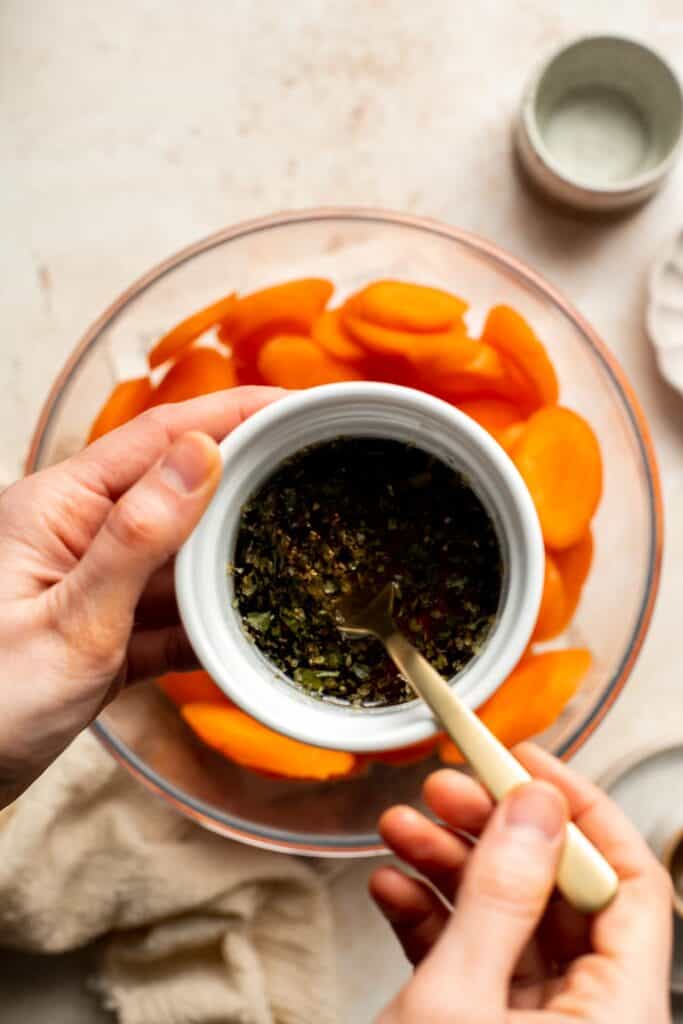
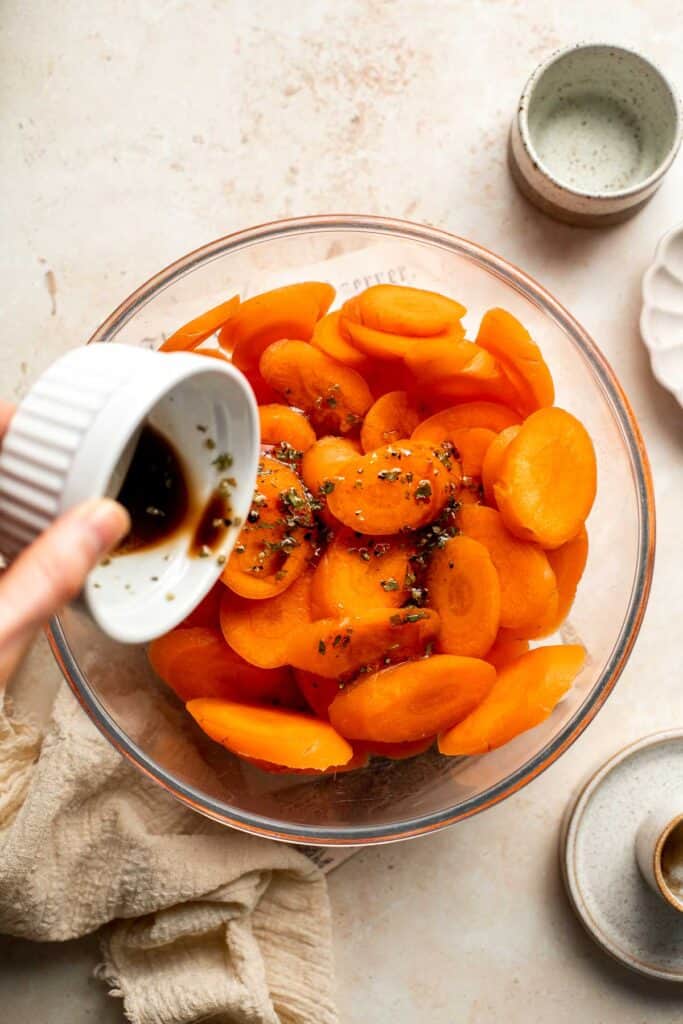
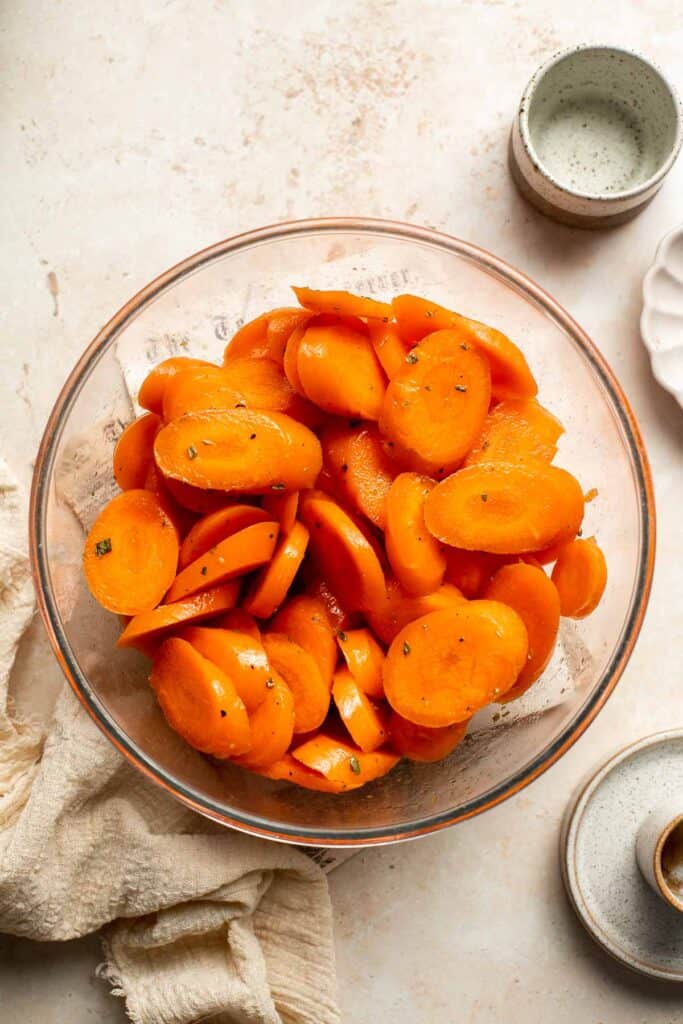
- Bake. Arrange the carrots in a single layer on a large baking sheet and place into the oven. Bake in a 400 F preheated oven for 30-35 minutes until tender. (Note that depending on how thick your carrots are, the roasting time may vary. Thicker carrots will need more time). Serve warm.
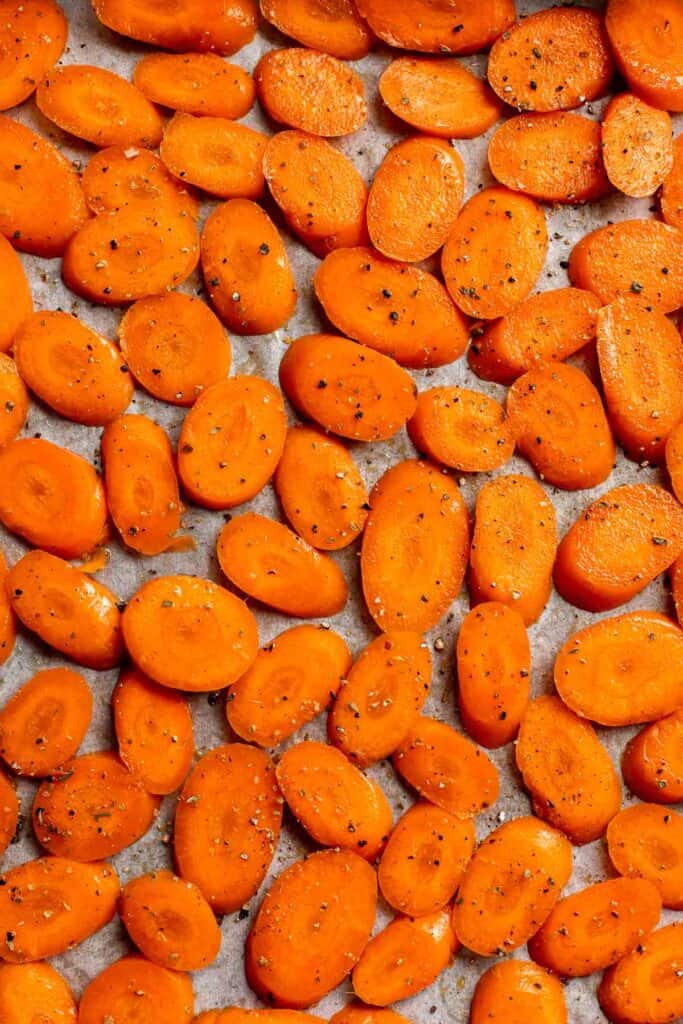
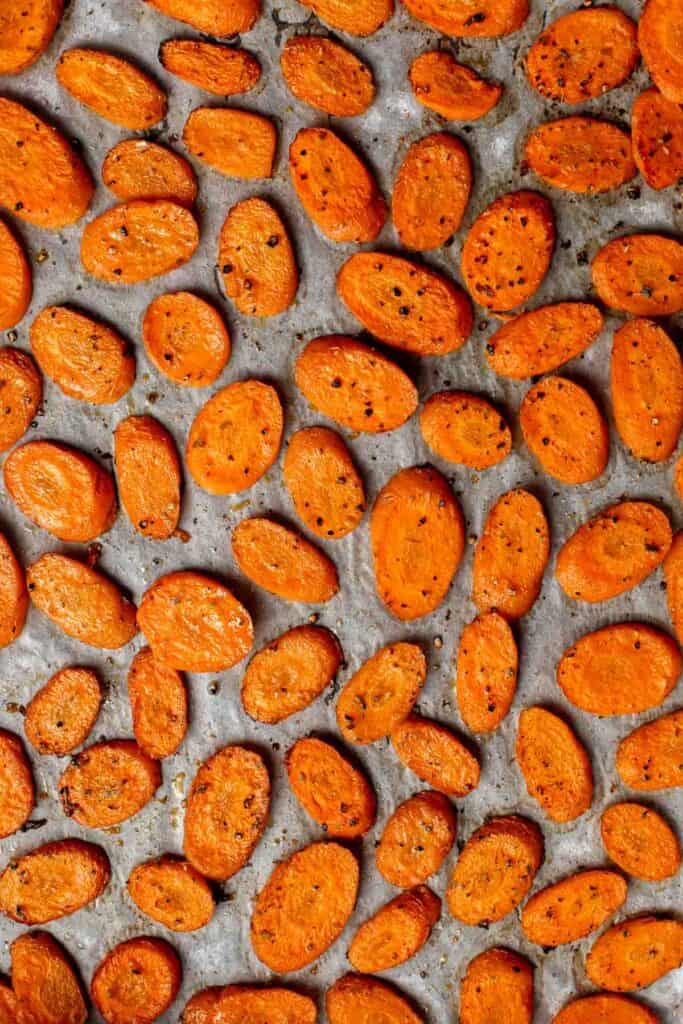
Recipe Variations
- Spice things up. The flavor of these stunningly simple roasted carrots can easily be customized by tossing them in your favorite spice or spice blend before roasting them. Try adding some cumin, chili powder, or paprika to your seasoning blend and serve with a dollop of sour cream or Greek yogurt for balance.
- Make it tangy. Sprinkle some crumbled feta cheese or goat cheese over your roasted carrots before serving for a tangy and salty twist.
- Sweeten it. You can sweeten your roasted carrots by drizzling them with honey or maple syrup before roasting. The result is a caramelized, sweet and savory flavor.
- Herb it up. Add some fresh herbs like thyme, rosemary, or parsley when serving your roasted carrots for an aromatic and fragrant taste.
- Add crunch. Add some crunch to your roasted carrots by topping them with crispy toasted nuts like almonds, walnuts or pistachios. The nuts add a contrasting texture and depth of flavor.
- Finish with a drizzle. Give your roasted carrots a final touch of flavor by drizzling them with honey, balsamic glaze, or a squeeze of lemon juice before serving.
How to Serve
The most common way to serve these Roasted Carrots is as a healthy side dish to almost any entree or protein. Some of our favorite entrees to serve them with are:
- Pesto Whole Chicken
- Prime Rib Roast
- Greek Salmon
- Instant Pot Turkey Roast
- Garlic Butter Steak Bites
- Pecan Crusted Chicken
But, there are other creative ways to serve these roasted carrots too, such as:
- in a salad - Toss roasted carrots into a salad to add a sweet, caramelized flavor and a pop of color. Try it in this Roasted Carrot Arugula Salad.
- as a snack - Roasted carrots make a great snack on their own, especially when served with a flavorful dip like Hummus or Tzatziki Sauce.
- in soup - throw these carrots into any soup recipe that calls for carrots. Try it in Carrot Pumpkin Soup or Roasted Carrot and Ginger Soup.
- on a charcuterie board - Add roasted carrots to a Charcuterie Board for a colorful and tasty addition.
- as a topping - Use roasted carrots as a topping for grain bowls, pizzas, or tacos to add a flavorful and nutritious twist.
- mixed with other roasted vegetables - Combine roasted carrots with other roasted vegetables like broccoli, cauliflower, or Brussels sprouts for a delicious and colorful medley.
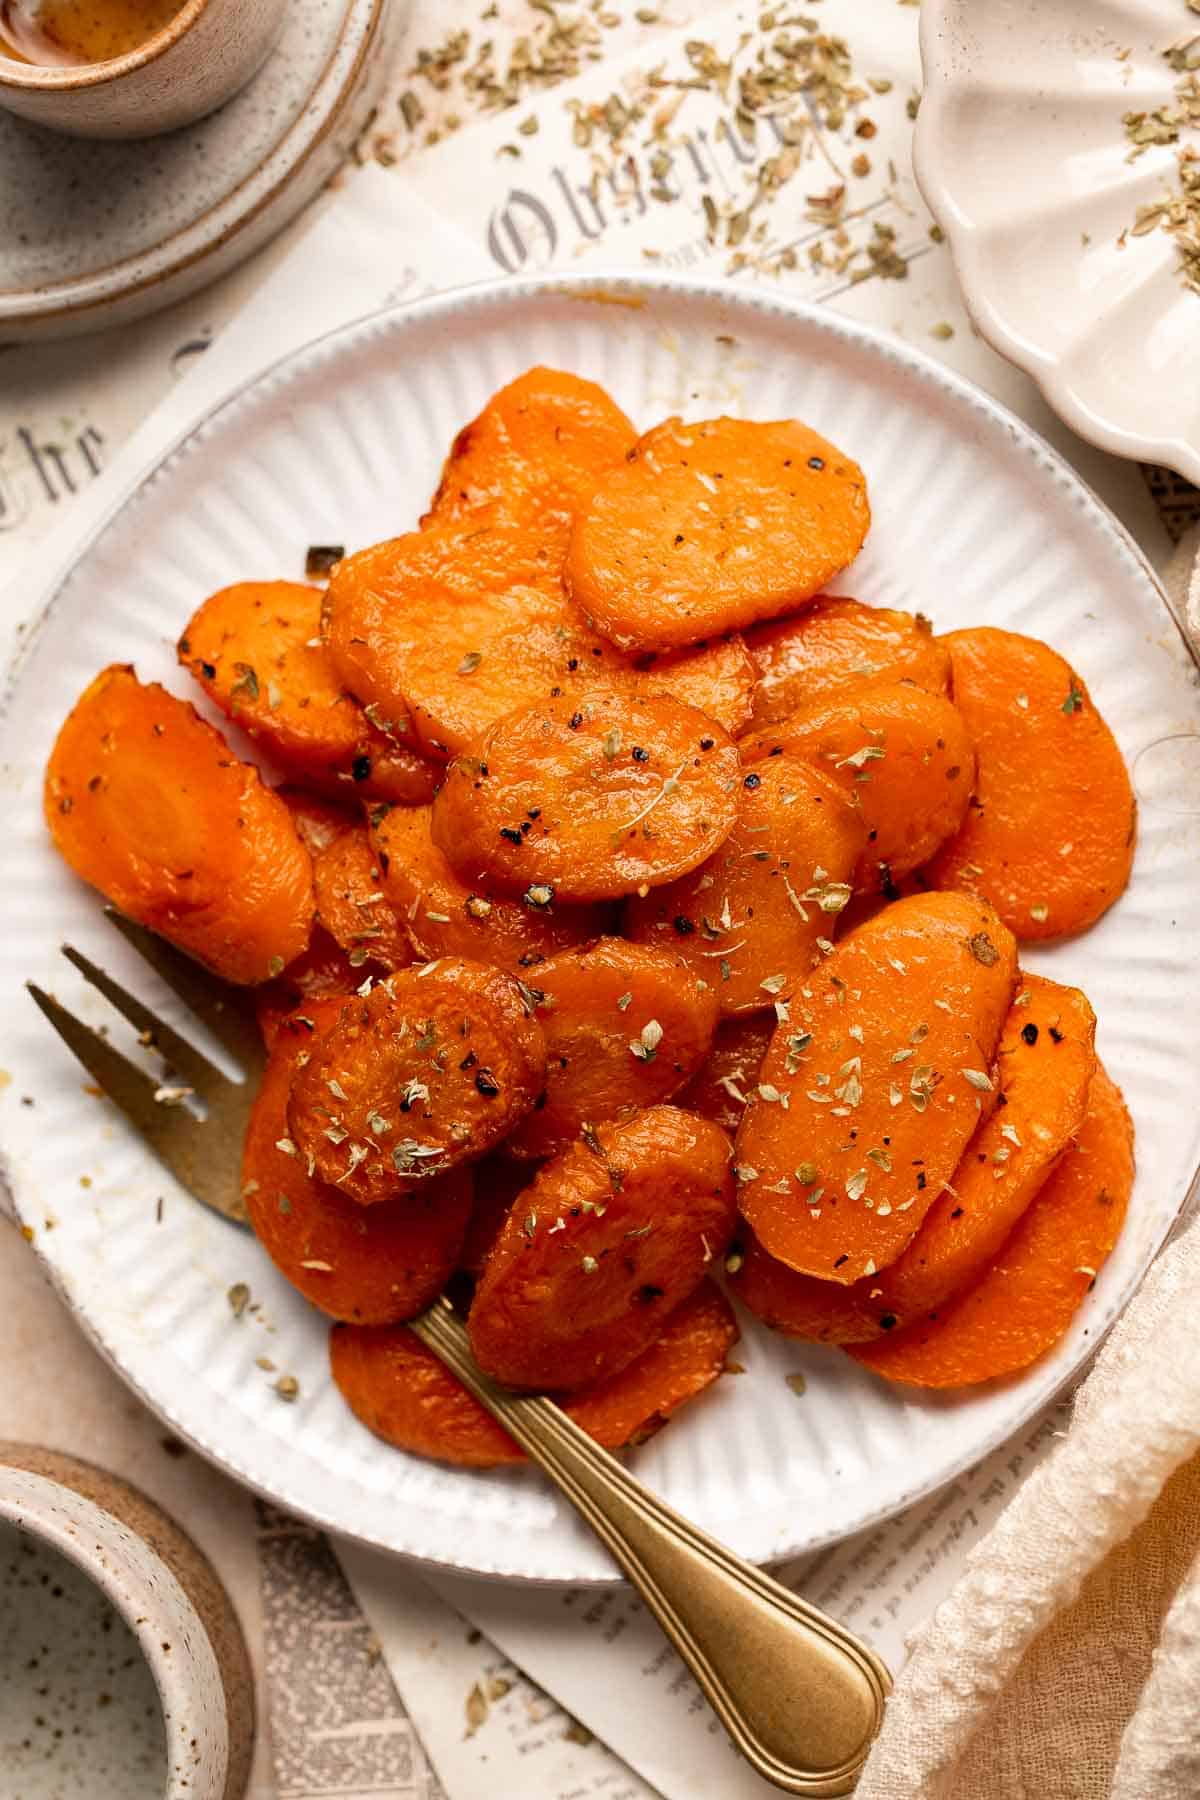
Recipe Tips and Tricks
- Cut the carrots evenly. To ensure that your roasted carrots cook evenly, it's important to cut them into similar sizes. Try to cut them into even pieces that are roughly the same thickness.
- Don't overcrowd the pan. Make sure to leave enough space between the carrots on the baking sheet or dish. Overcrowding can cause the carrots to steam instead of roast, resulting in a soft texture instead of crispy.
- Roast at a high temperature. To achieve crispy, caramelized edges, roast your carrots at a high temperature of 400°F (200°C) or above.
- Use a timer. Keep an eye on your carrots while they roast and use a timer to prevent overcooking or burning. Check for doneness by piercing with a fork - you want them to be tender but not mushy.
- Serve at gatherings and holiday parties. Roasted carrots are the perfect easy-but-fancy side dish to serve when you want to impress your friends and family. Summon this recipe for dinner parties and holidays like Christmas and Easter for maximum impact!
- Pair with a dipping sauce. Whether you have a picky eater at home or just want something a little extra, you can serve these carrots with a dipping sauce on the side. Enhance the honey flavor with a honey vinaigrette or serve it with pesto or homemade ranch dressing.
Storing and Freezing Instructions
How to Store
Place cooled roasted carrots into an airtight container or large Ziploc bag and refrigerate for up to 4 days.
How to Reheat
Reheat in the oven at 350℉ for 10-15 minutes, or in the air fryer for 5-10 minutes until heated through. You can also reheat on the stovetop over medium heat until warm, stirring continuously.
How to Freeze
Transfer the roasted carrots to a freezer-safe container or freezer bag and freeze for up to 3 months. Allow the carrots to thaw completely in the refrigerator before reheating, or add directly from frozen to dishes such as soup.
More Carrot Recipes
- 40 Best Carrot Recipes
- Honey Roasted Carrots
- Garlic and Herb Roasted Carrots
- Maple Roasted Carrots with Yogurt Sauce
- Carrot Pumpkin Soup
- Carrot Cake Pancakes
Tried this recipe?
I'd love to hear what you think! Leave a comment and rating below to share your feedback. Your reviews help others discover this recipe and help me keep creating more free recipes for you. Snap a photo and tag me on social media @aheadofthyme too.

Brownie Cookies
If you're a fan of brownies and cookies, then you're going to love these Brownie Cookies. They are the perfect combination of rich, chocolatey brownies and chewy, gooey cookies. With their crackly crust, fudgy texture, and decadent chocolate flavor, they're sure to satisfy any chocolate lover's cravings. These cookies are quick and easy to make, with no special equipment or chilling required.
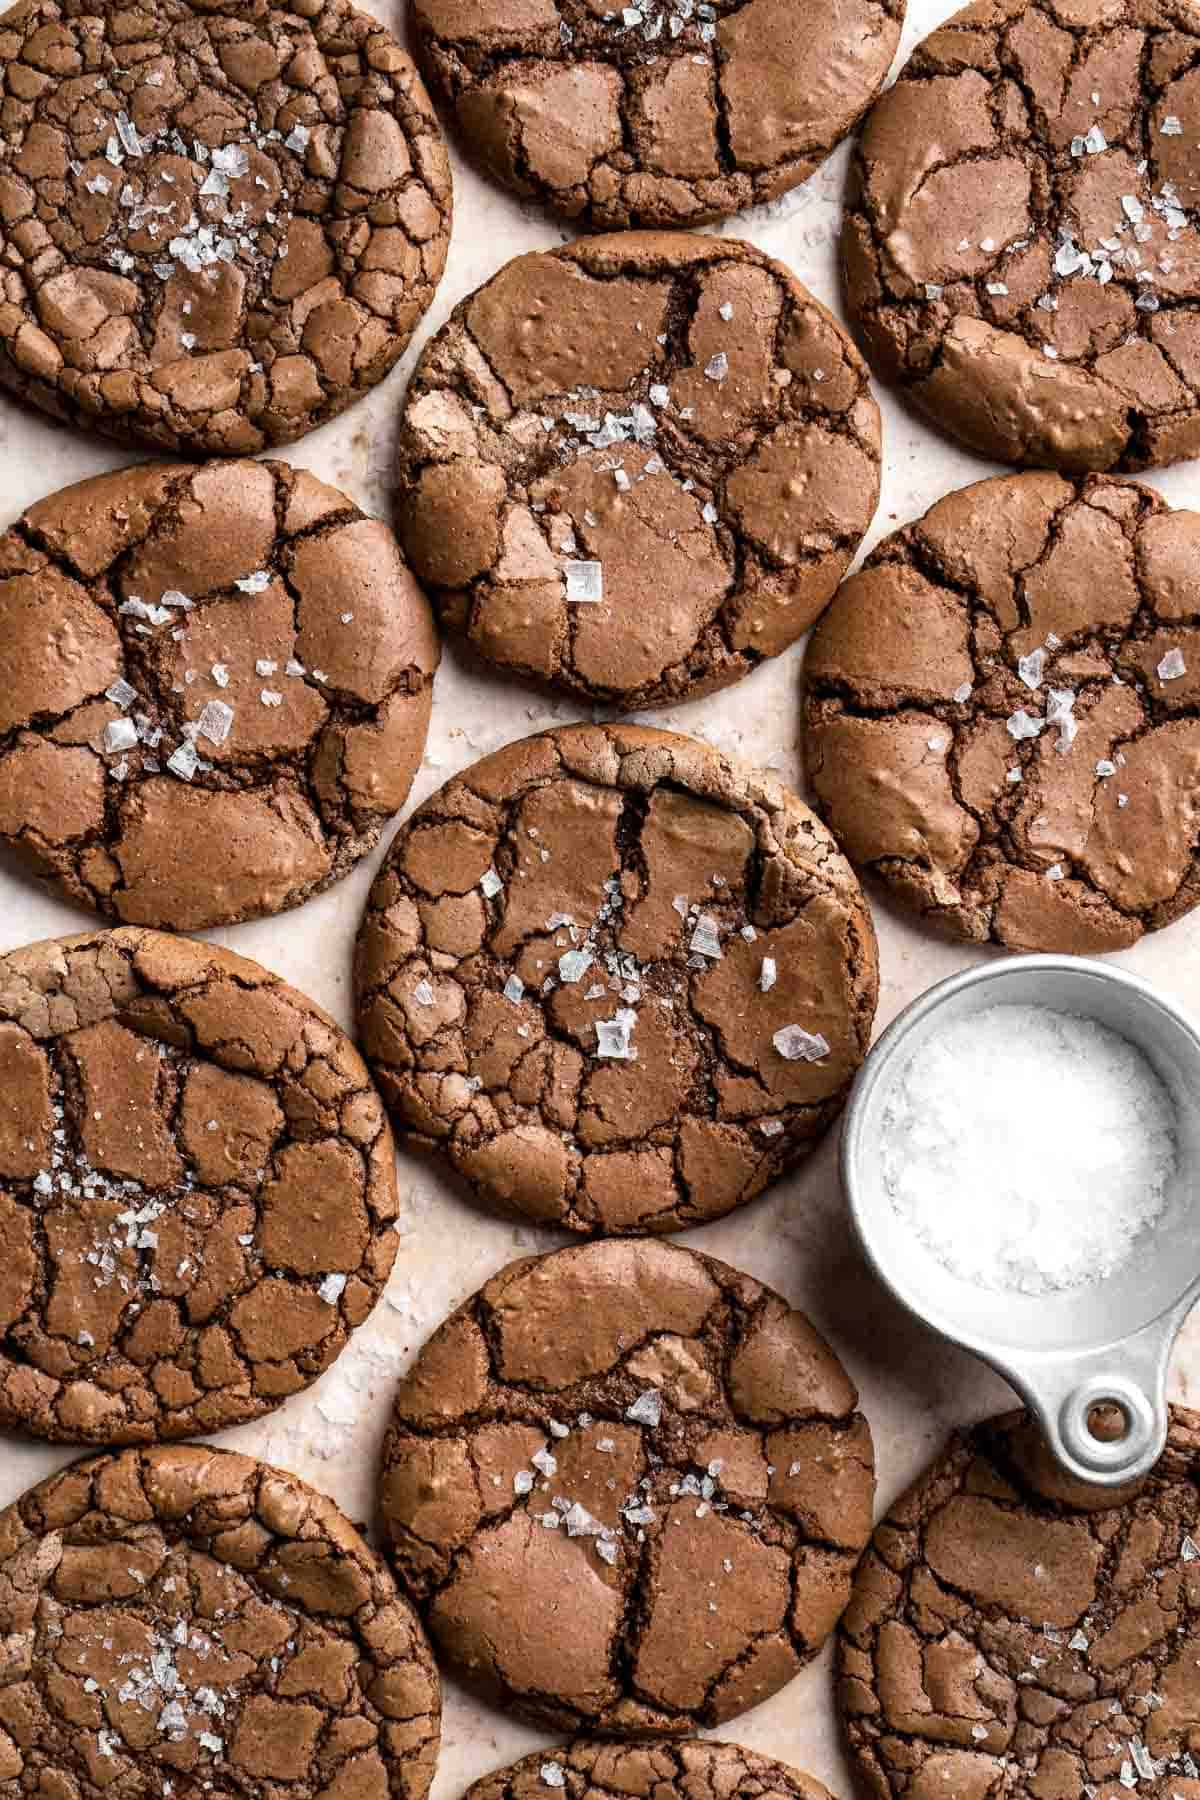
These chocolate brownie cookies are so easy to make from scratch at home. Just mix up the dough, scoop onto a baking sheet, and bake for 10-12 minutes. It's that simple! Plus, they are super easy to customize. You can add nuts, caramel, or even a sprinkle of sea salt to take these cookies to the next level. These brownies in cookie form are perfect for any occasion, from a casual afternoon snack to a fancy dessert for a dinner party.
Why You'll Love the Brownie Cookies
- Decadent chocolate flavor. These brownie cookies are loaded with double the chocolate which give it an intense chocolate flavor, making them the ultimate indulgence for any chocolate lover. The combination of fudgy brownie and chewy cookie textures is simply irresistible.
- Fudgy brownies in cookie form. These brownie cookies are basically brownies in cookie form. They have the same crackly crusy, gooey chocolate center, and delicious chewy texture. They may even be better than brownies!
- Quick and easy to make. These cookies are quick and simple to make, with no special equipment or techniques required and no chilling! You can whip up a batch in no time (25 minutes total including prep!) in just a few simple steps using pantry staple ingredients.
- It's customizable. These brownie cookies are easy to customize to your liking. You can add nuts, caramel, or even a sprinkle of sea salt to take them to the next level. See all our Recipe Variations below for more ideas.
- Perfect for any occasion. Whether you're looking for a casual afternoon snack or a fancy dessert for a dinner party, these brownie cookies are sure to impress. They're versatile and delicious, making them a crowd-pleaser every time.

Ingredient Notes
To make these delicious Chocolate Brownie Cookies, you will need the following ingredients (full measurements in recipe card below):
- semi-sweet chocolate - use good quality chocolate for the best flavor. You can also chop up a chocolate bar instead of using chocolate chips.
- butter - use unsalted butter for better control over the salt content in the cookies.
- granulated sugar - one of the sweeteners in these chocolate cookies. Be sure to measure accurately, as too much or too little sugar can affect their texture.
- light brown sugar - adds a caramel-like flavor to the cookies and helps to keep them moist. You can use dark brown sugar for a stronger molasses flavor.
- eggs - make sure the eggs are at room temperature for better incorporation into the batter. Cold eggs can cause the batter to curdle.
- vanilla extract - adds flavor to the cookies. Use pure vanilla extract for the best flavor.
- all-purpose flour - make sure to measure accurately, as too much flour can make the cookies dry and crumbly. Use a scoop and level method or a kitchen scale for the most accurate measurement.
- unsweetened cocoa powder - use a good quality cocoa powder for the best flavor. You can also use Dutch-processed cocoa powder which will give the cookies a darker color and a milder flavor.
- baking powder - helps the cookies to rise and become more cake-like in texture.
- salt - important for flavor balance. Use a fine-grain salt and measure accurately, as too much or too little salt can affect the taste of the cookies.
- flaked salt - this is optional to sprinkle on top of the cookies.
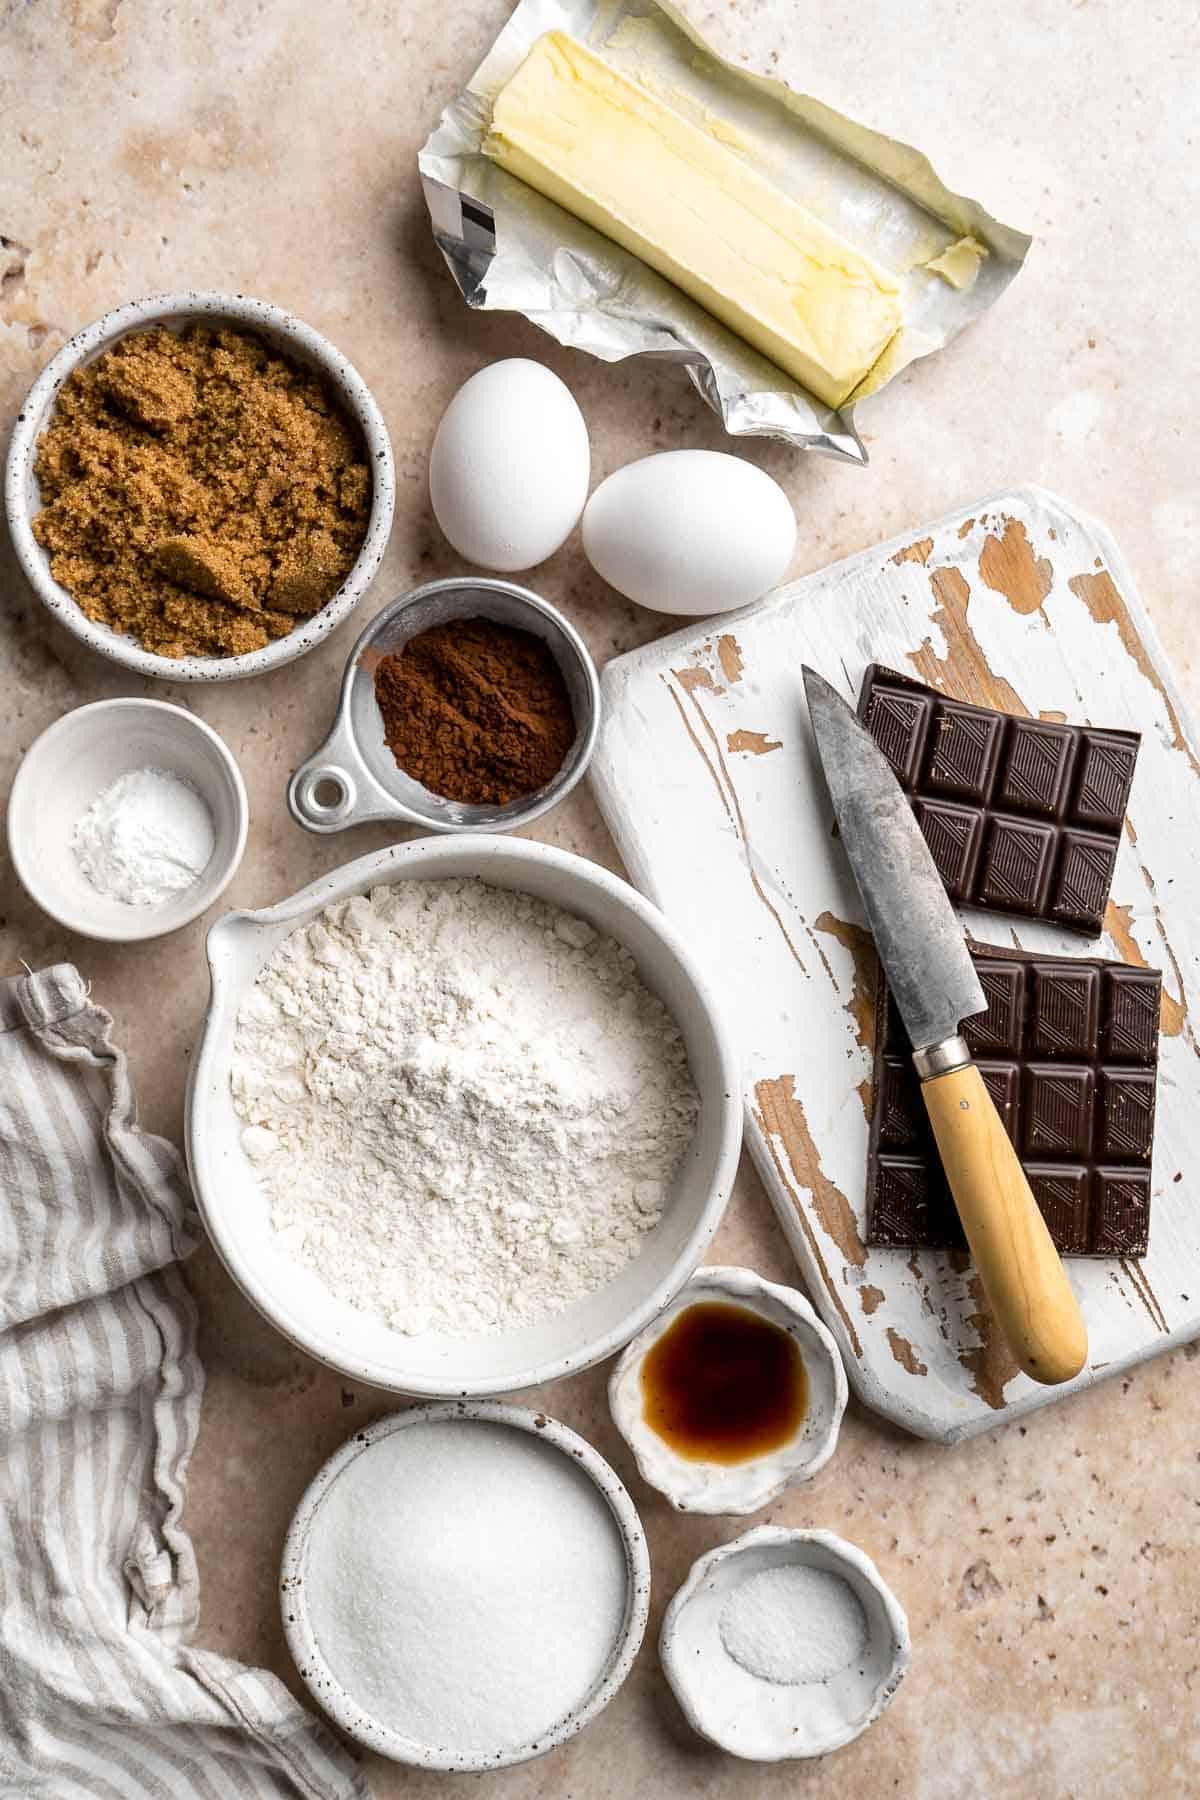
Baking Tools
You will also need the following baking tools and equipment:
- measuring cups and spoons
- mixing bowls
- hand mixer or stand mixer
- cookie scoop
- half sheet baking pan and silicone baking mat (or parchment paper)
- wire cooling rack
How to Make the Best Brownie Cookies
- Melt the chocolate. Melt the chocolate with butter in a medium heatproof bowl over a pan of simmering water. Make sure the bottom of the bowl does not touch the water, or you will burn the chocolate. Whisk until melted and smooth. Remove from heat and let it cool down for a few minutes.
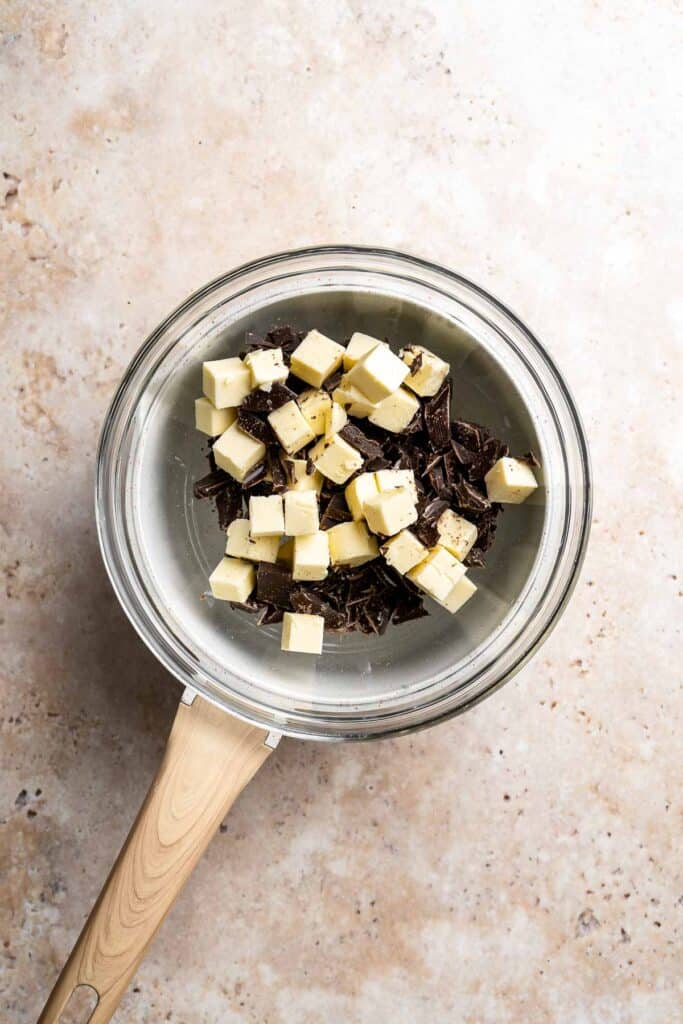
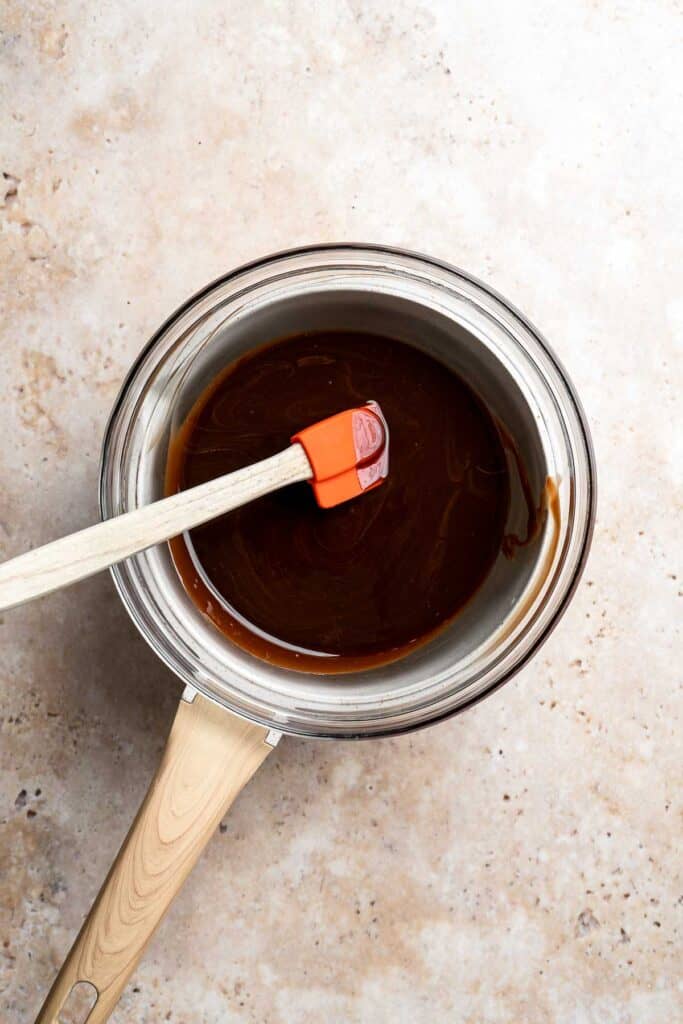
- Beat together the wet ingredients. In a large mixing bowl, combine the eggs, granulated sugar, and brown sugar. Beat with a hand mixer (or with a stand mixer fitted with the whisk attachment) on medium speed for 4-5 minutes. The mixture will the fluffy and shiny. Stir in vanilla.
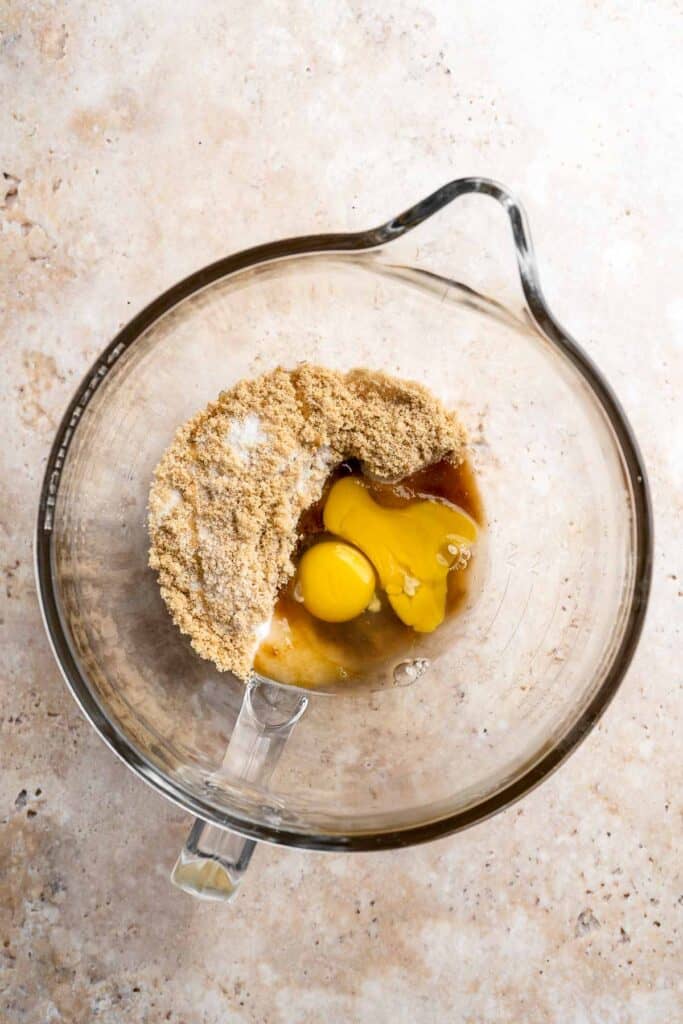
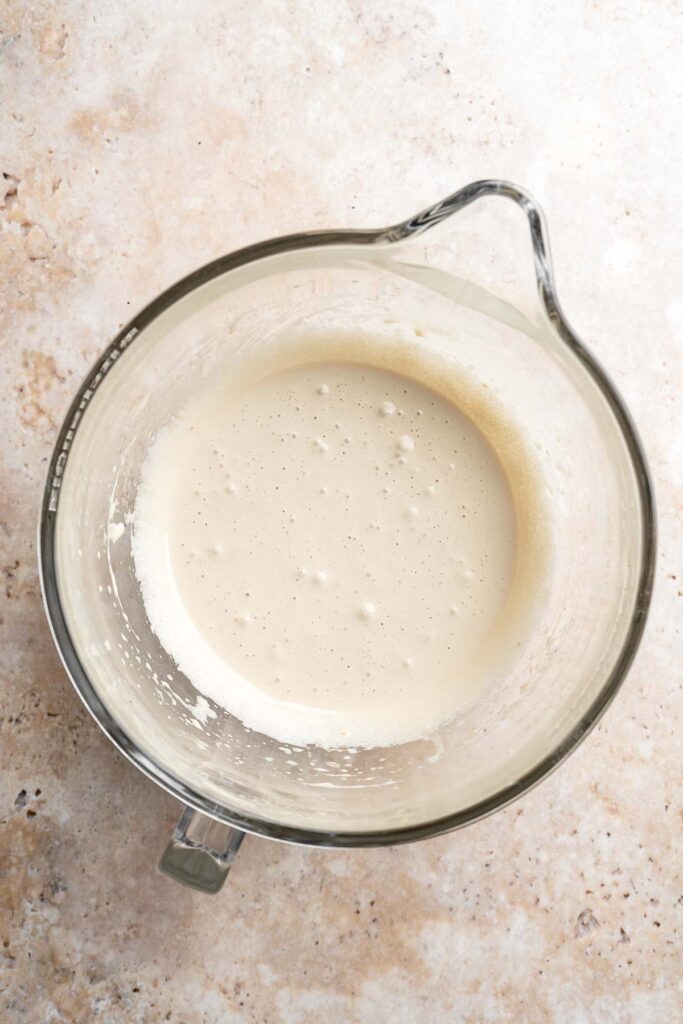
- Add chocolate. Gradually, pour the chocolate mixture into the egg mixture, and continuously whisk together until combined, about 1 minute.
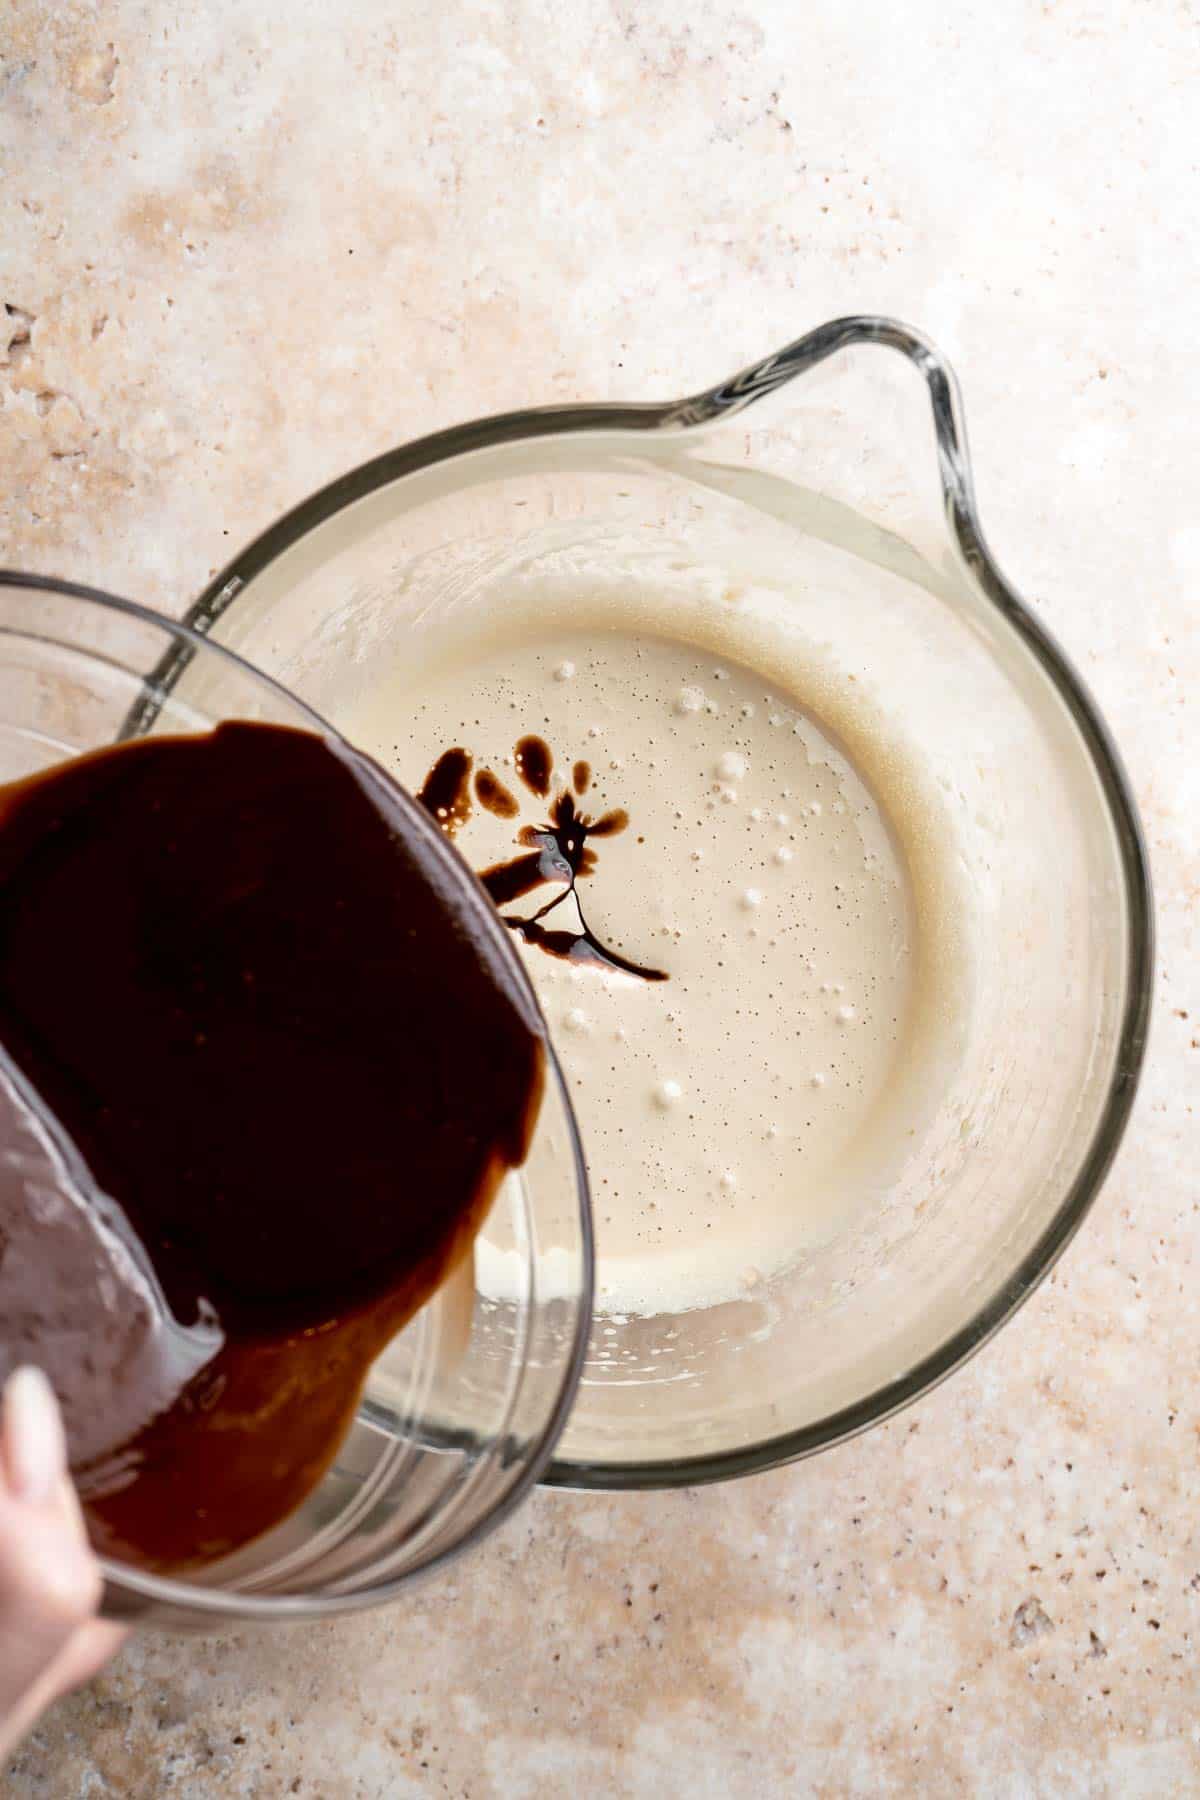
- Add dry ingredients. Whisk together the flour, cocoa powder, and salt in another mixing bowl. Add the dry ingredients to the wet ingredients and fold together using a large silicone spatula until just combined.
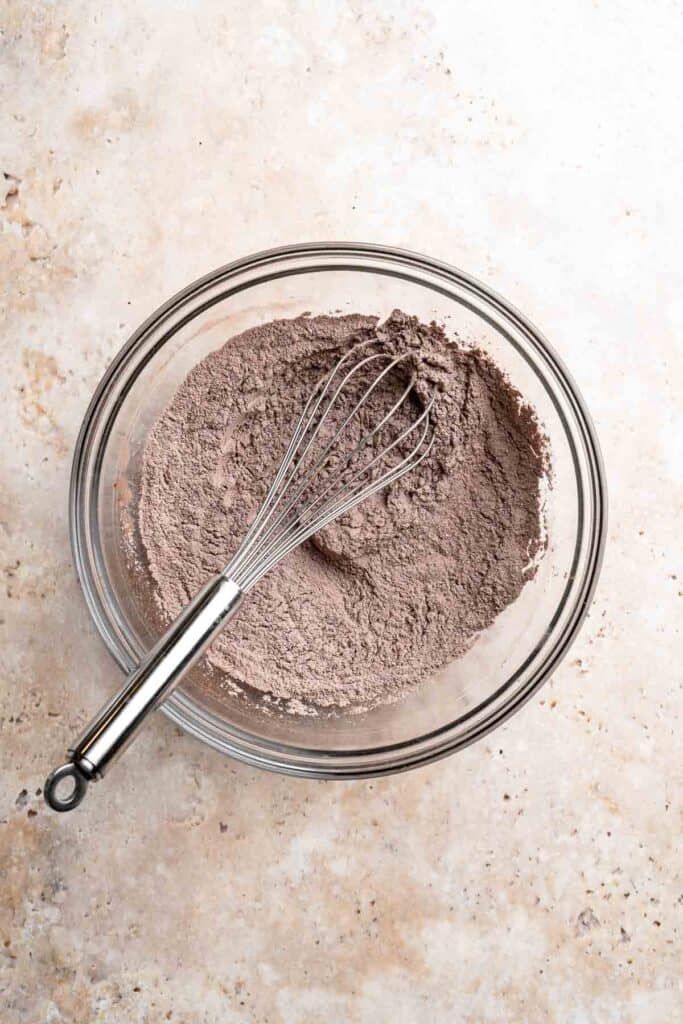
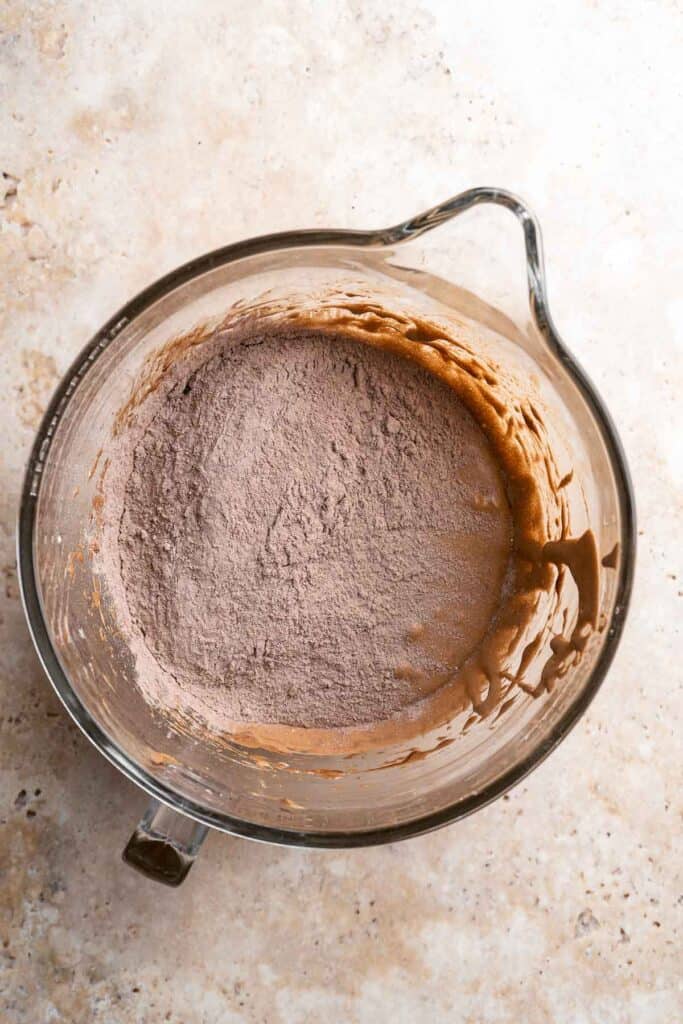
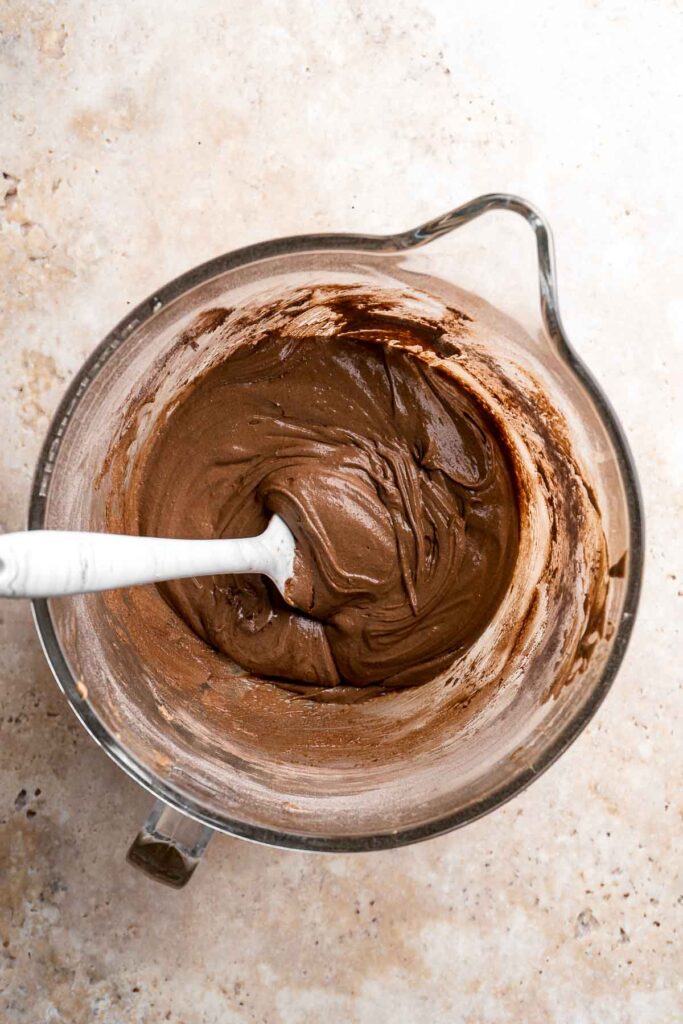
- Scoop cookies. Line two large baking trays with parchment paper or silicone baking mats. Use a medium cookie scoop to scoop out 1.5 to 2 tablespoons of cookie dough. Place the cookie balls onto the lined baking sheet, spaced at least 3 inches apart as they will spread during baking (you can fit about 6 on a large cookie sheet).
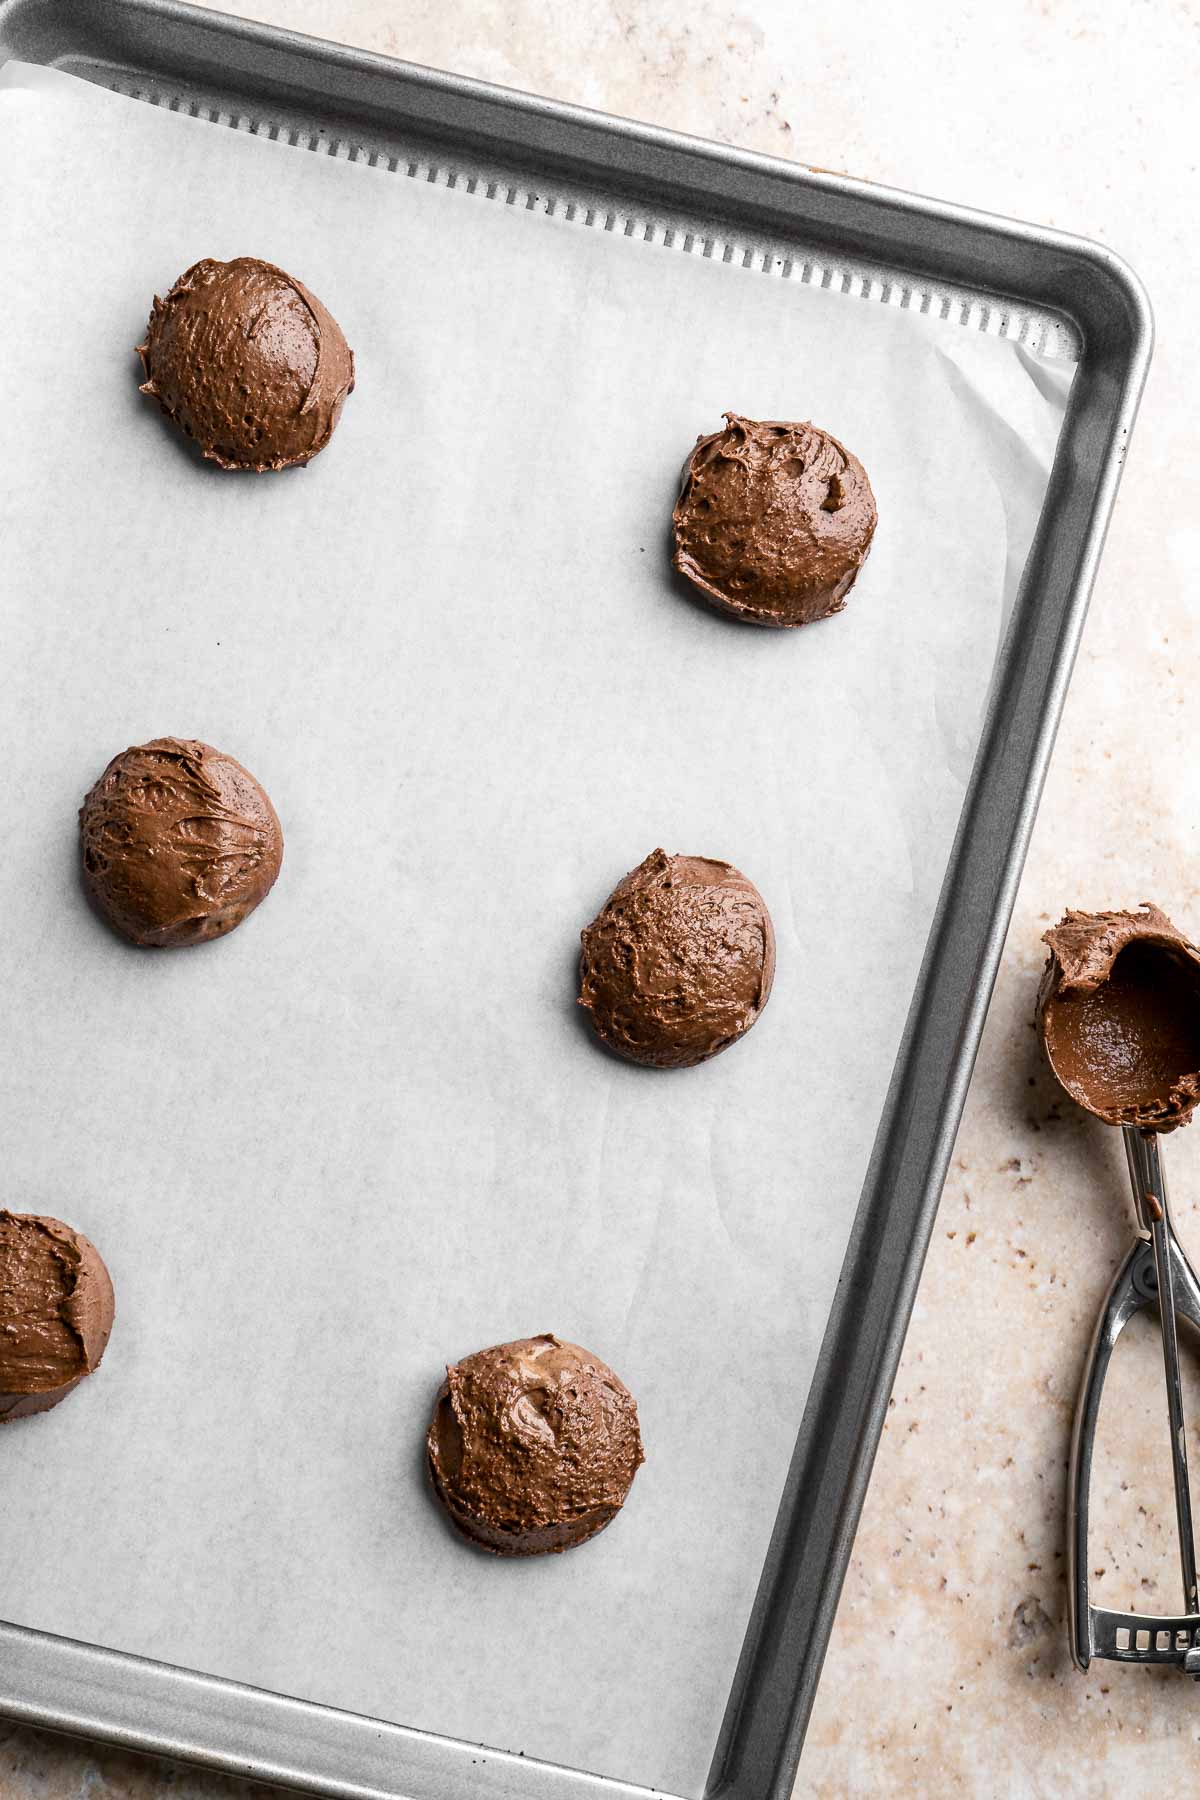
- Bake. Bake in a 350F preheated oven for 12-13 minutes, until edges look set. Do not overbake. The cookies may not look done in the middle, but they will continue to cook and set as they are cooling. Allow them to cool for 10 minutes on the baking sheet before carefully transferring to a wire cooling rack to cool completely.
- Serve. Serve with a sprinkle of flaked salt on top, if desired.
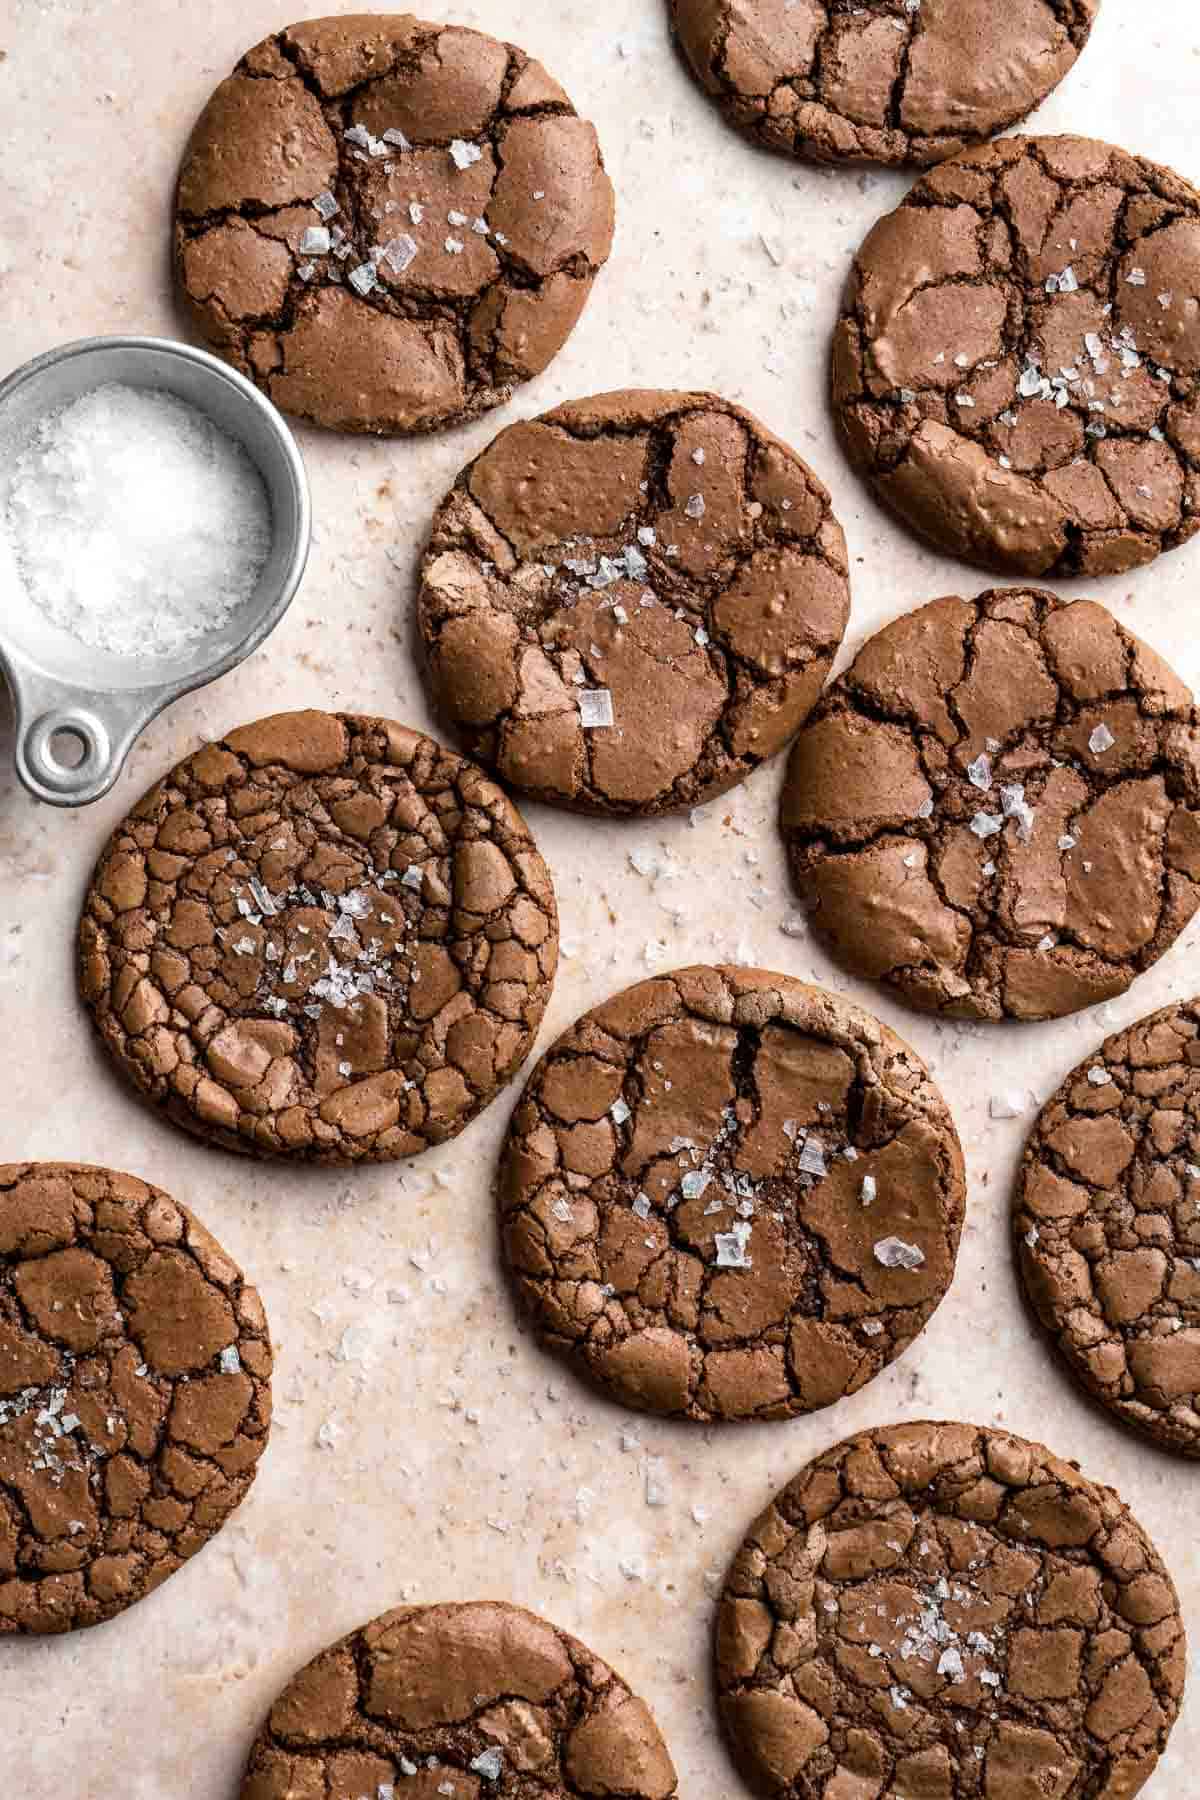
Recipe Variations
- Add nuts. For extra crunch, chop up some walnuts, pecans, or hazelnuts and add them to the cookie dough for some added crunch and nutty flavor.
- Make them minty. Add a teaspoon of peppermint extract to the cookie dough for a refreshing and festive twist on classic brownies.
- Add caramel. Top each cookie with a dollop of caramel sauce or add chopped caramel candies to the dough for a gooey and decadent treat.
- Add chocolate chips. For an extra texture, you can add additional chocolate chips to the cookie dough before baking.
- Add a chocolate drizzle. Melt some dark chocolate and drizzle it over the cookies for an elegant and sophisticated look that will impress any chocolate lover.
- Experiment with different types of chocolate. Instead of using just semi-sweet chocolate, try using a combination of dark, milk, and white chocolate to add even more depth to the chocolate flavor.
How to Serve
Here are some ideas for the many ways to serve these Brownie Cookies:
- As a dessert. The most obvious is to serve them warm or at room temperature as a dessert or snack. They are especially delicious when served warm with a scoop of Vanilla Ice Cream on top. The warm, gooey cookie paired with the cold, creamy ice cream creates a perfect balance of flavors and textures.
- With a drink. Brownie cookies pair well with coffee or tea, making them a great choice for an afternoon snack or breakfast treat. They are also really good dipped in a tall glass of milk.
- As a gift. Brownie cookies make a thoughtful and tasty gift for family and friends. You can wrap them in a festive box or tin and add a ribbon or bow for a special touch.
- On a dessert table. Chocolate brownie cookies are perfect for parties and gatherings. You can arrange them on a platter alongside other sweets and treats or display them in a decorative jar or bowl for guests to enjoy.

Recipe Tips and Tricks
- Beat the eggs well. Make sure to spend the whole 4-5 minutes beating the eggs with the sugars in step 3. This is what makes sure the cookies achieve that classic crackly top.
- Space out the cookie dough. Place the cookie dough balls at least 3 inches apart in the baking pan to give them space to spread and cook evenly.
- Do not over bake the cookies. Take out the cookies once the edges look set. The cookies may not look done in the middle, but they will continue to bake with the residual heat and set as they are cooling.
- Add a sprinkle of sea salt. For a sweet and salty flavor combination, sprinkle a little bit of sea salt on top of each cookie before baking. It will enhance the chocolate flavor and make the cookies even more delicious.
- Make ice cream sandwiches. Take your brownie cookies to the next level by using them to make ice cream sandwiches. Simply sandwich a scoop of your favorite ice cream between two cookies and enjoy!
Storing and Freezing Instructions
How to Store
Make sure that the brownie cookies are cooled to room temperature before storing them. If you store cookies while they are still warm, it will create steam and become soggy. Place cooled leftover chocolate brownie cookies in an airtight container in a cool, dry area on your counter or pantry and they will stay soft for about 3-4 days. You can also refrigerate them for a week, however, the longer they are stored the less moist they will be.
How to Freeze
Brownie cookies freeze well both baked and before baking. To freeze baked cookies, let them cool completely first, then store in an airtight container or freezer bag for up to 3 months. When ready to serve, allow them to thaw overnight in the refrigerator and then reheat or place on the counter to bring them up to room temperature (about 15-20 minutes).
How to Freeze Cookie Dough
To freeze brownie cookie dough, scoop out the cookie balls and place on a lined baking sheet. Transfer the baking sheet to the freezer and freeze for 1-2 hours until hard. Then, transfer the cookie dough balls into a freezer bag and store for up to 3 months. To bake, thaw the cookie dough balls in the refrigerator overnight. Then, bake according to recipe instructions.
More Chocolate Cookie Recipes
- 50 Best Cookie Recipes
- Double Chocolate Chip Cookies
- Chocolate Thumbprint Cookies
- Hot Chocolate Cookies
- Chocolate Crinkle Cookies
- Chocolate Shortbread Cookies
Tried this recipe?
I'd love to hear what you think! Leave a comment and rating below to share your feedback. Your reviews help others discover this recipe and help me keep creating more free recipes for you. Snap a photo and tag me on social media @aheadofthyme too.

Lentil Stew
Lentil Stew is a hearty and filling vegan meal loaded with vegetables like carrots and potatoes and seasoned well with aromatic turmeric, paprika, and Italian seasoning. This vegetarian stew comes together in just 45 minutes, making it perfect for busy weeknight dinners.
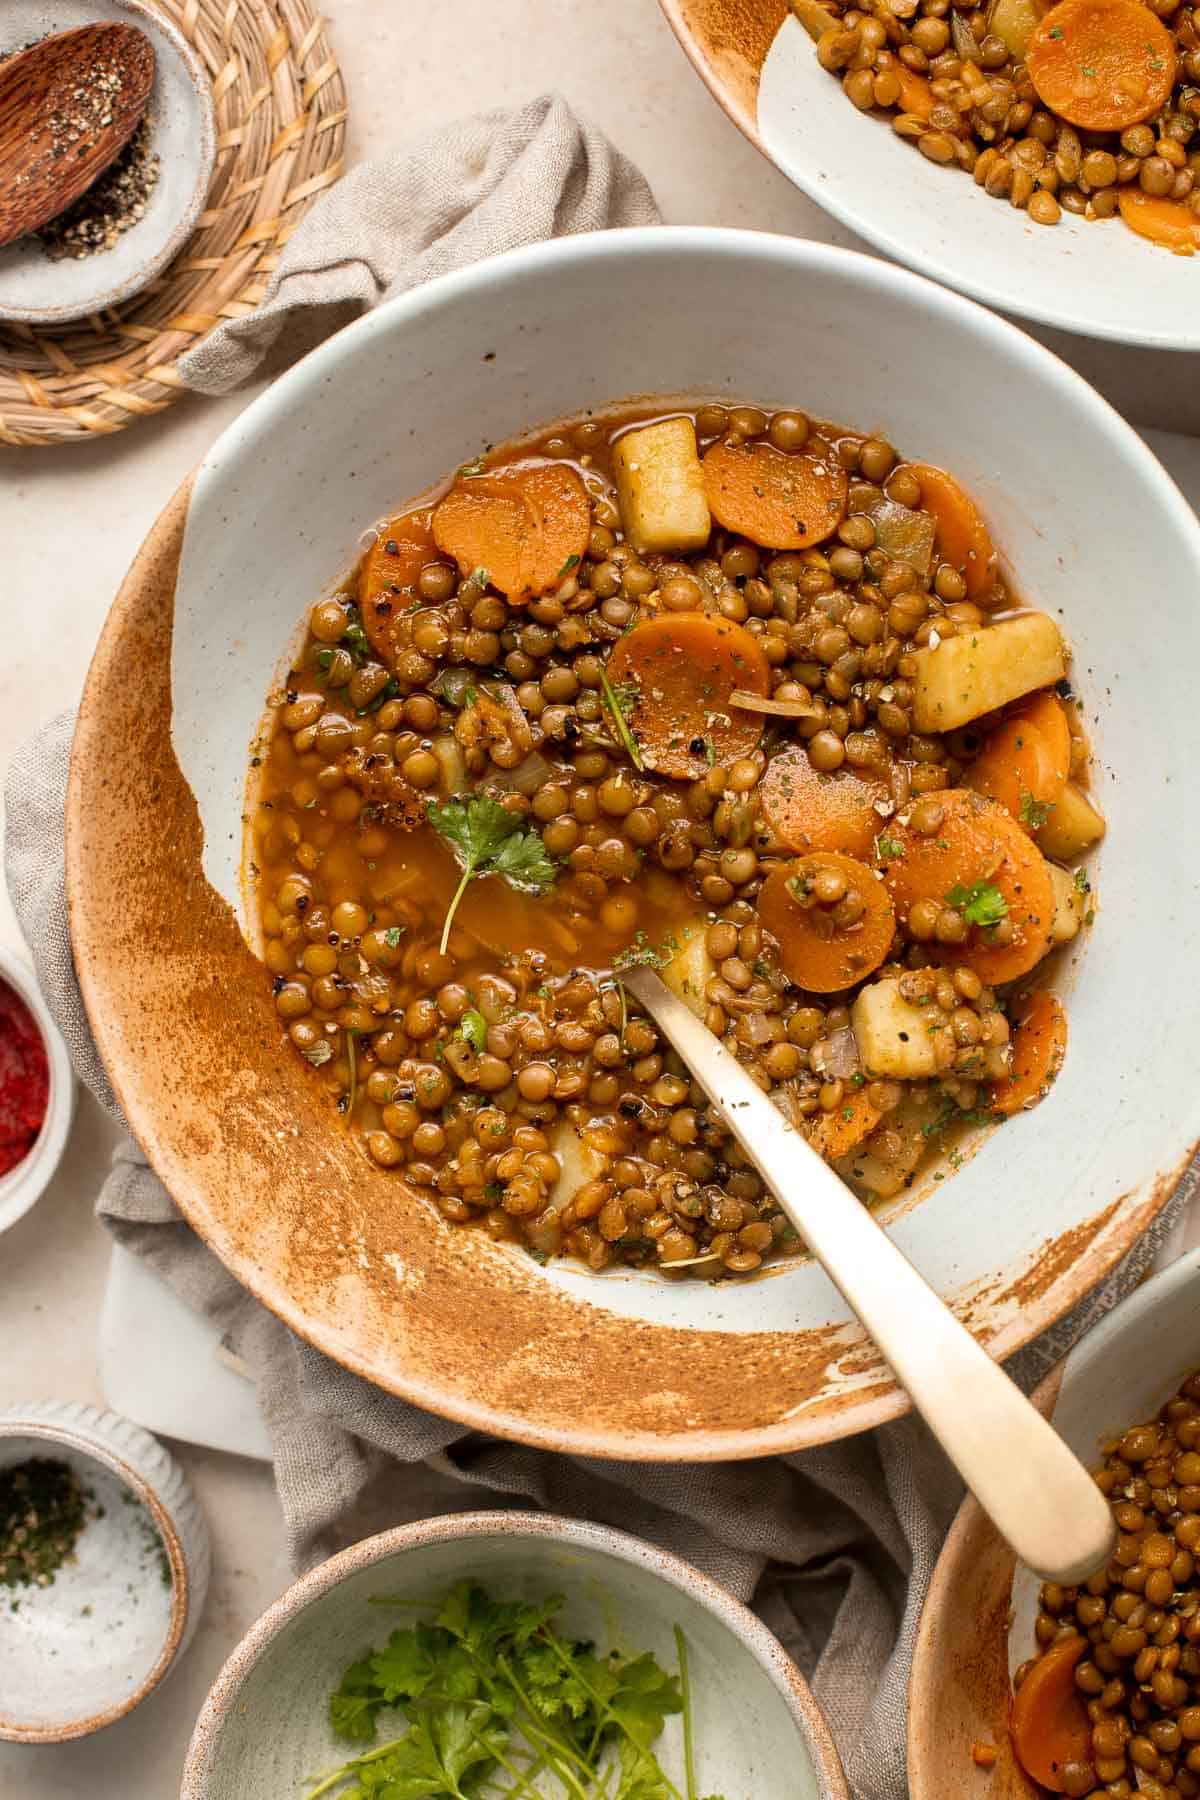
This lentil stew with potatoes actually only requires ten minutes of active preparation to get the beans ready for simmering until they become tender and the broth reduces to the perfect consistency. Chunks of soft potatoes are the perfect addition to the stew to break up the texture of the lentils and soak up lots of flavor. Serve it hot off the stove for coziest results!
Why You'll Love This Lentil Stew
- One-pot entree. Minimize dirty dishes without sacrificing flavor! This lentil stew with potatoes is made all in the same pot once you've soaked the lentils. Added in succession, the vegetables and lentils cook together with the spices to make this aromatic stew without requiring any multitasking.
- Made with common ingredients. This vegan stew relies on pantry staples and everyday ingredients - dried lentils, potatoes, onions, carrots, and common spices for substance and flavor. The perfect thing to make when you're in between grocery shopping trips.
- Easy and healthy vegan dish. Whether you're plant-based yourself, cooking for plant-based loved ones, or just looking for a meatless meal idea, this nutritious vegan and vegetarian lentil stew is a satisfying, easy-to-make dish. It's also great for gluten-free diets. It is a delicious, nutritious, and filling meal to make tonight!
- Great for meal prep. This lentil stew with potatoes and carrots also reheats very well and makes for amazing leftovers the next day (or two!) - which also makes it a great recipe to meal prep. Store in meal prep containers along with Steamed Rice for easy reheating for work lunches throughout the week.
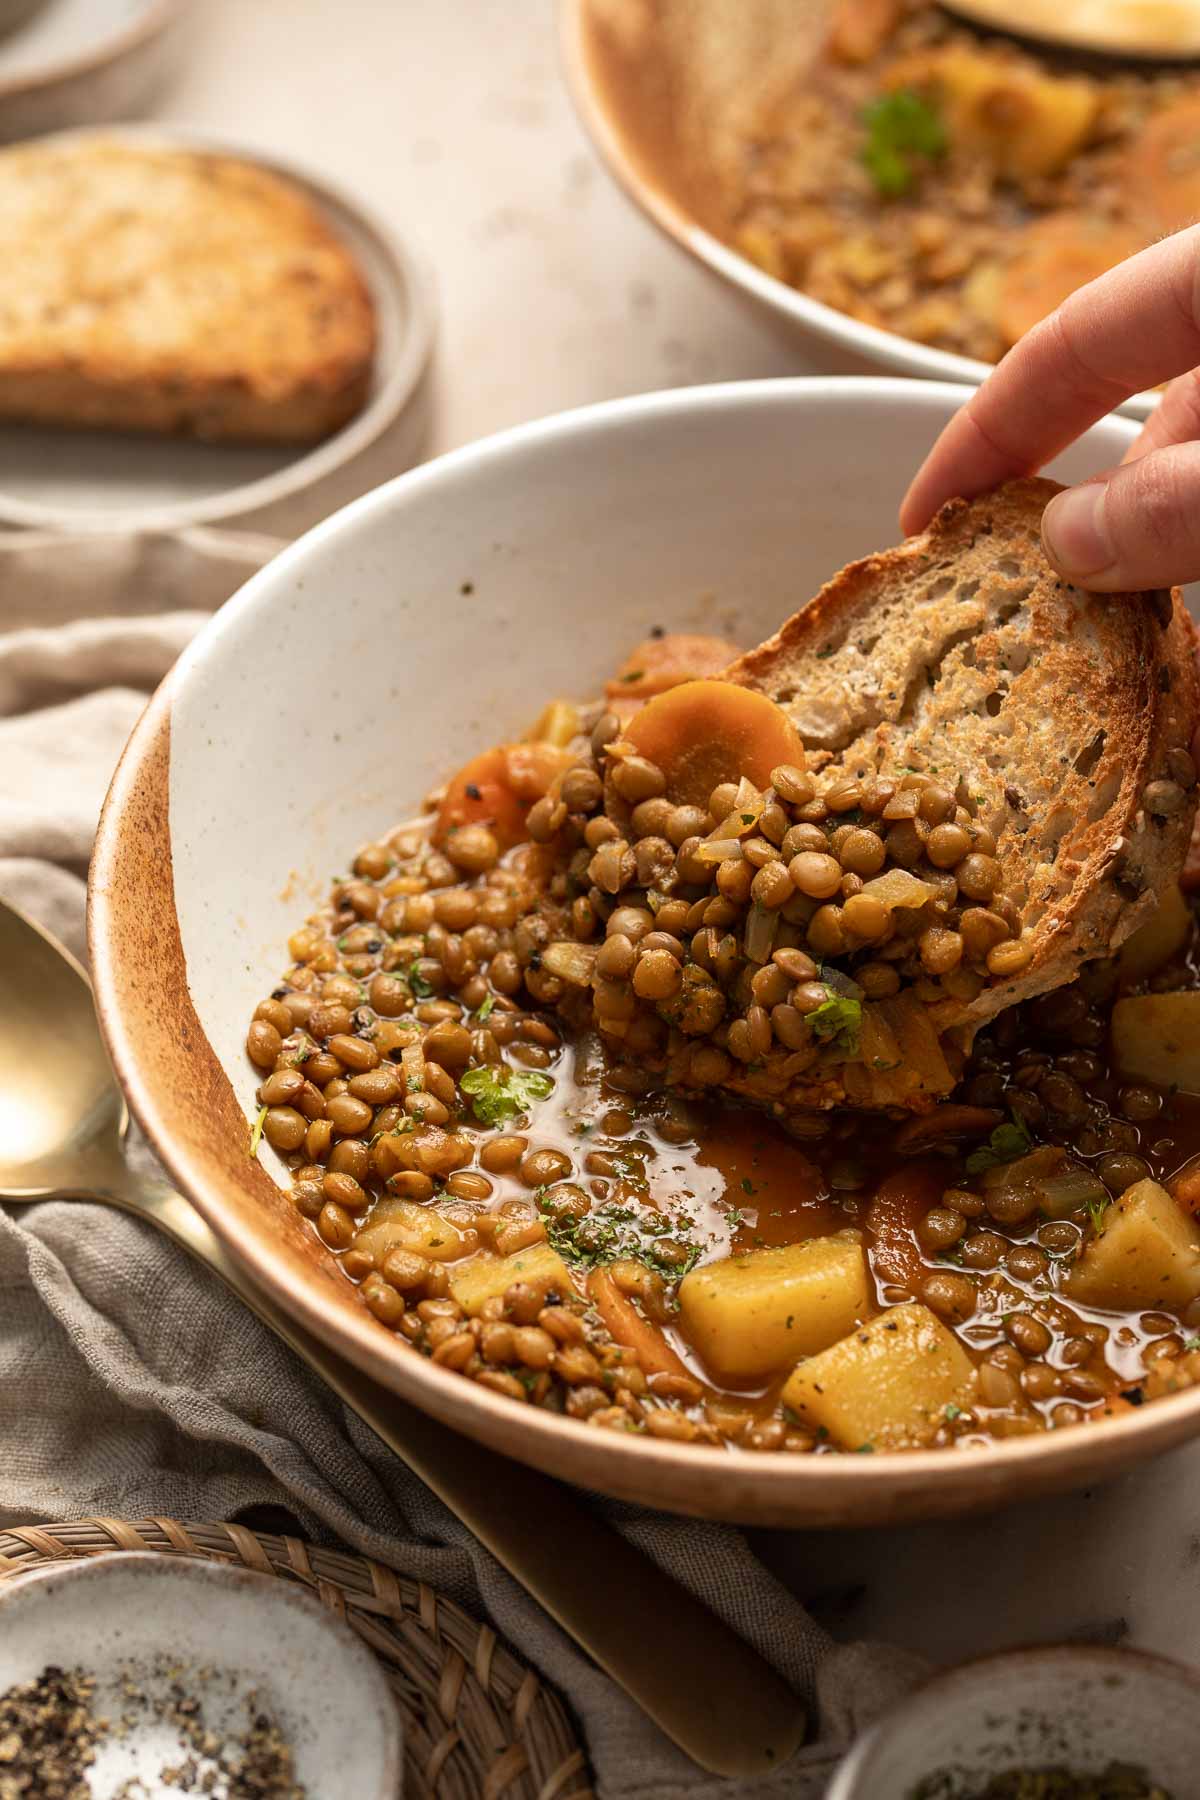
Ingredient Notes
To make this easy Lentil Stew with Potatoes, you will need the following ingredients (full measurements in recipe card below):
- brown lentils - green lentils or Puy lentils are both acceptable substitutes for the brown lentils in this recipe.
- olive oil - if you don't have olive oil, use an equal measure of avocado oil or vegetable oil.
- onion - white or yellow onions work best in soups and stews, but red onion will work if that's all you have.
- turmeric - an equal measure of ground cumin or a mild curry powder can be substituted for the turmeric. Note that the flavor will be different.
- carrots - parsnips or beets are a great substitute to use in this stew instead of carrots.
- russet potato - Yukon gold potatoes are a close substitute for russets.
- garlic - mincing fresh garlic always offers the best flavor, but you can use pre-minced garlic instead. Use 1 teaspoon of minced garlic per clove called for in the recipe.
- tomato paste - you can use tomato puree in place of tomato paste, just triple the amount!
- vegetable broth - you can opt to use chicken or beef broth instead, but it will change the nature of the dish and it will no longer be vegan or vegetarian friendly. You can also just use water but it will make it less flavorful so you may want to add more seasoning.
- Italian seasoning - if you don't have a ready-made blend, you can make your own Italian seasoning by combining rosemary, basil, thyme, oregano, and marjoram.
- paprika - cayenne or chili powder can add a bit of similar flavor, but reduce the measurement and season cautiously if using these.
- salt and pepper
You will also need measuring cups and spoons and large saucepan.
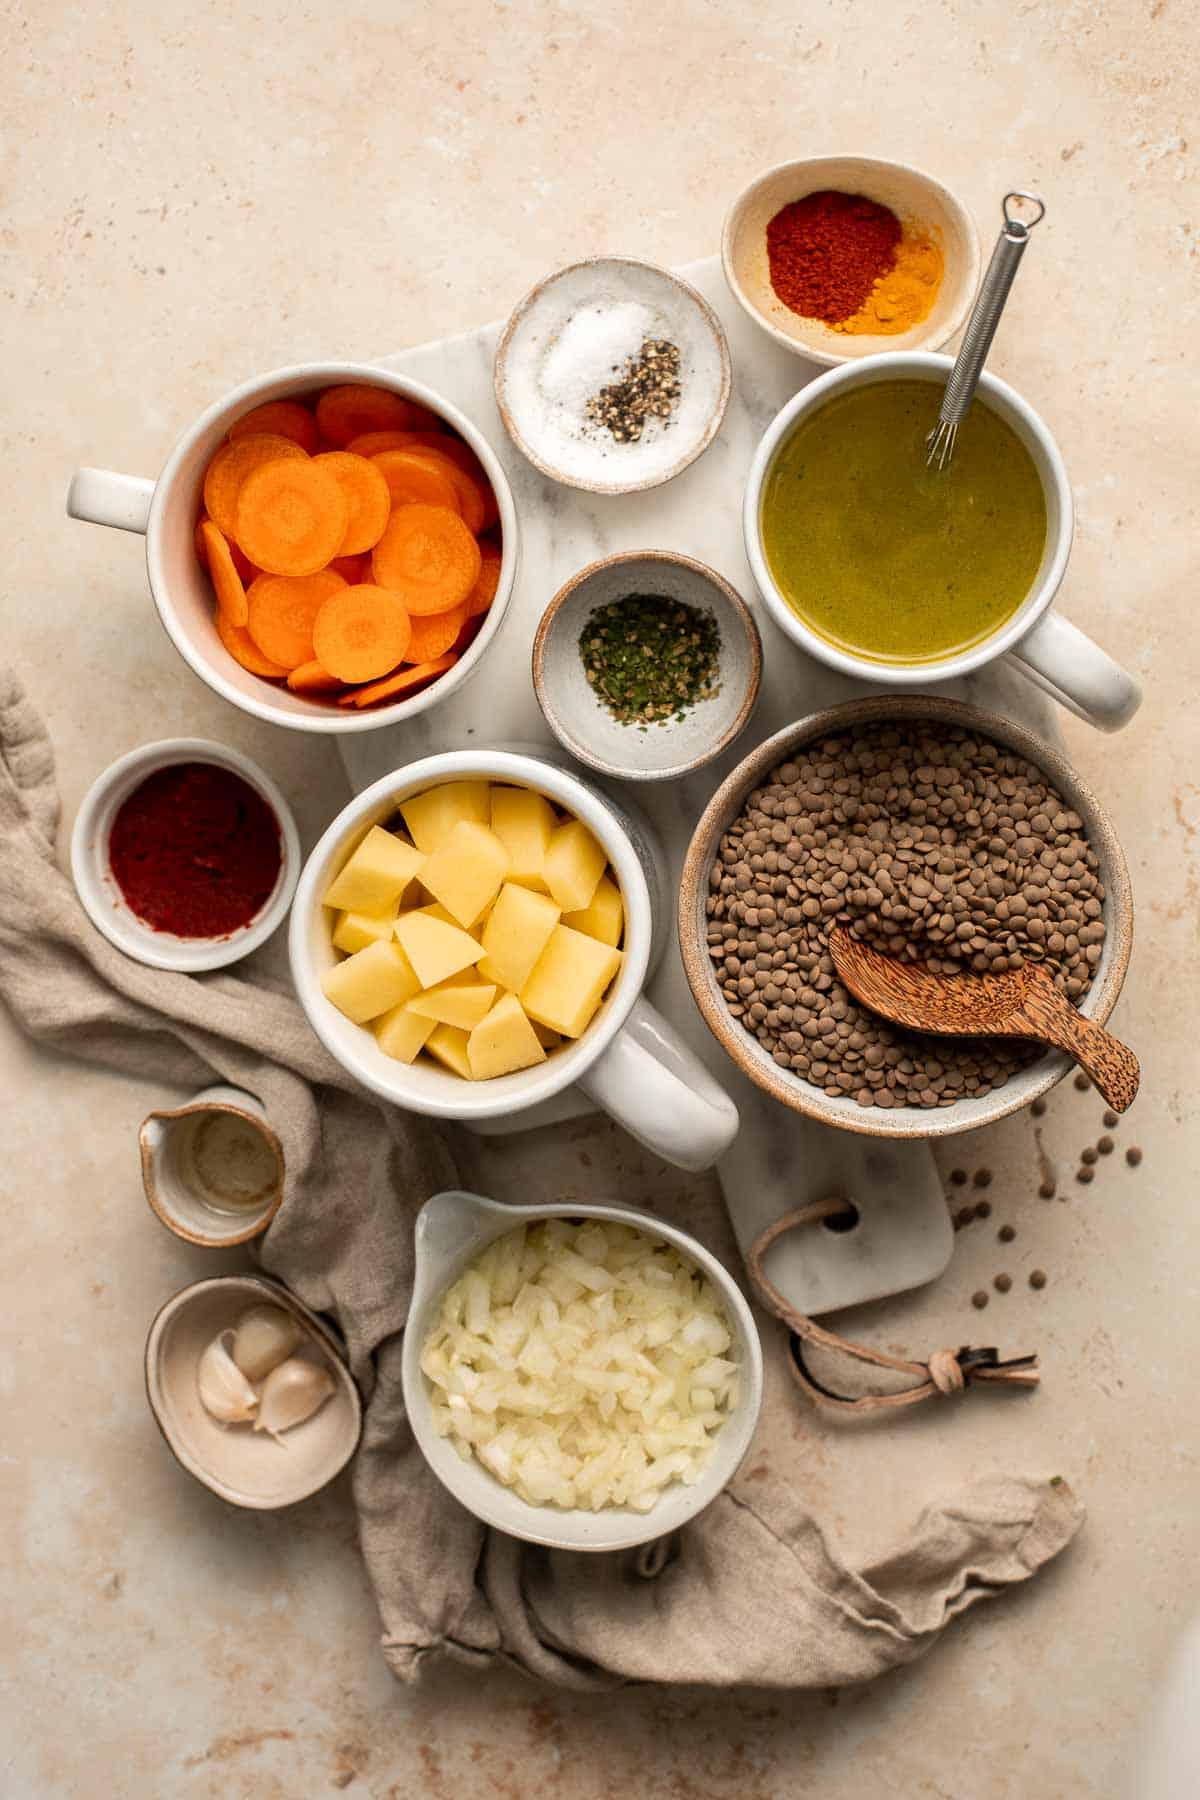
How to Make the Best Lentil Stew
- Soak lentils. Add lentils to a large mixing bowl and sort out any debris, then rinse and drain. Pour boiling water on top, enough to cover the lentils, and let it soak for 5 minutes. Drain the lentils, then rinse and drain.
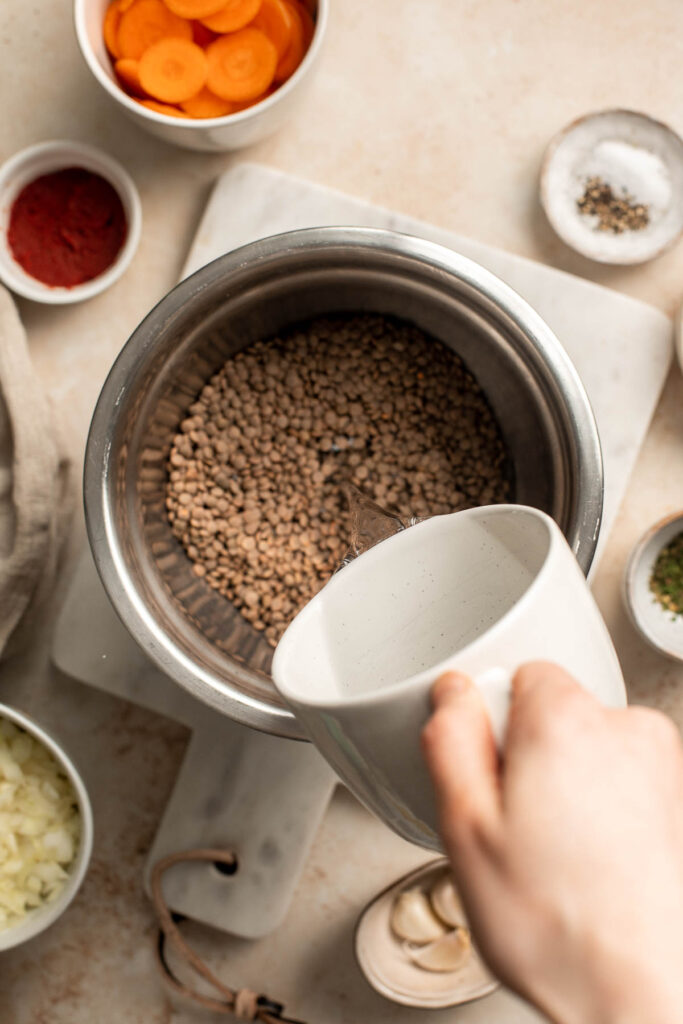
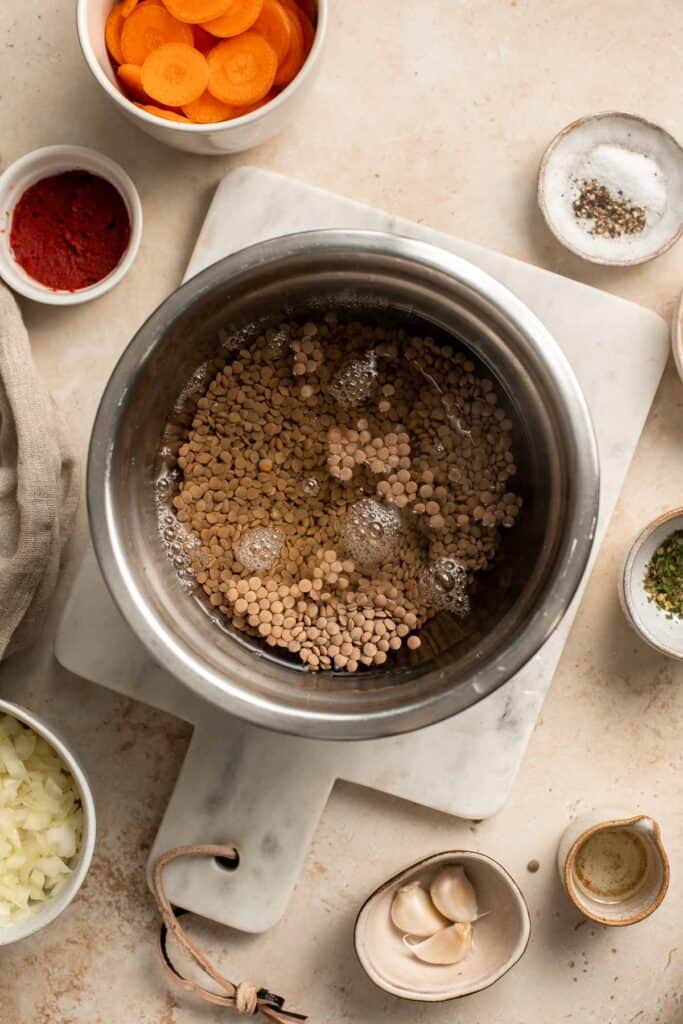
- Sauté onions. Meanwhile, in a large saucepan, heat the oil over medium heat. Add the onions and turmeric, then stir together until onions are all evenly coated yellow. Sauté the onions until soft and translucent, about 3 minutes.
- Add veggies. Stir in carrots and potatoes, and continue to cook until starting to brown, about 5 more minutes. Add the garlic and stir to cook until fragrant, about 1 minute.
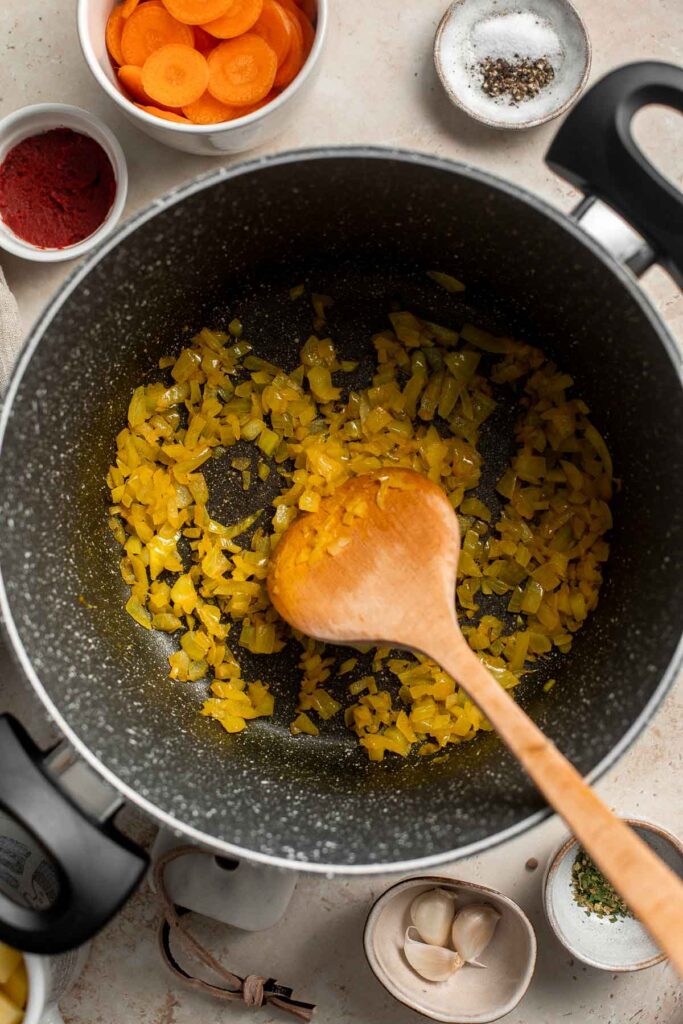
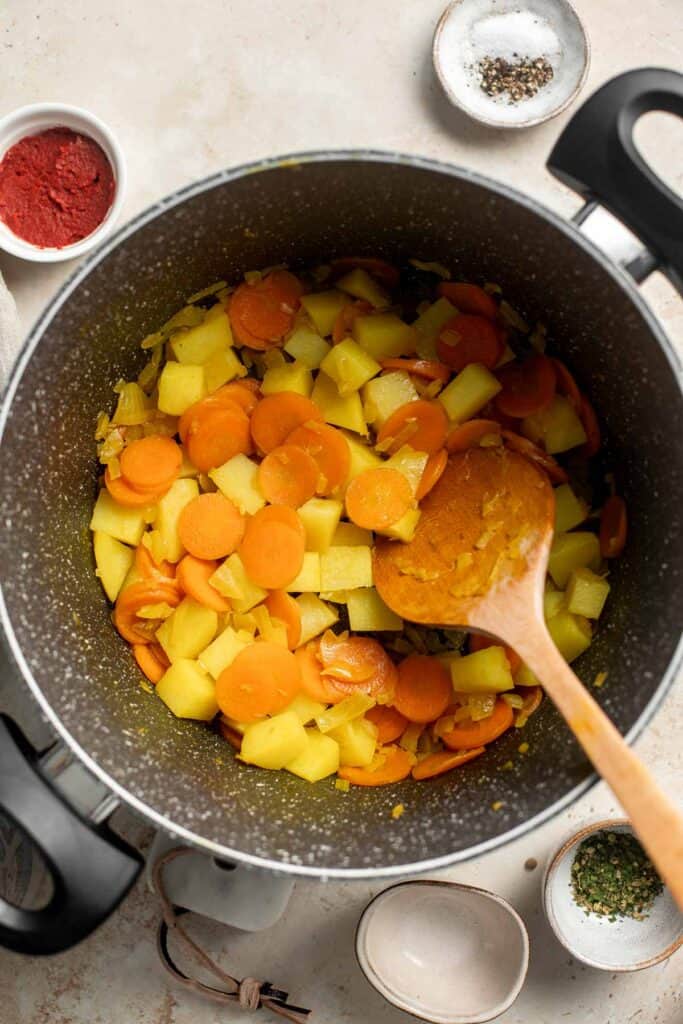
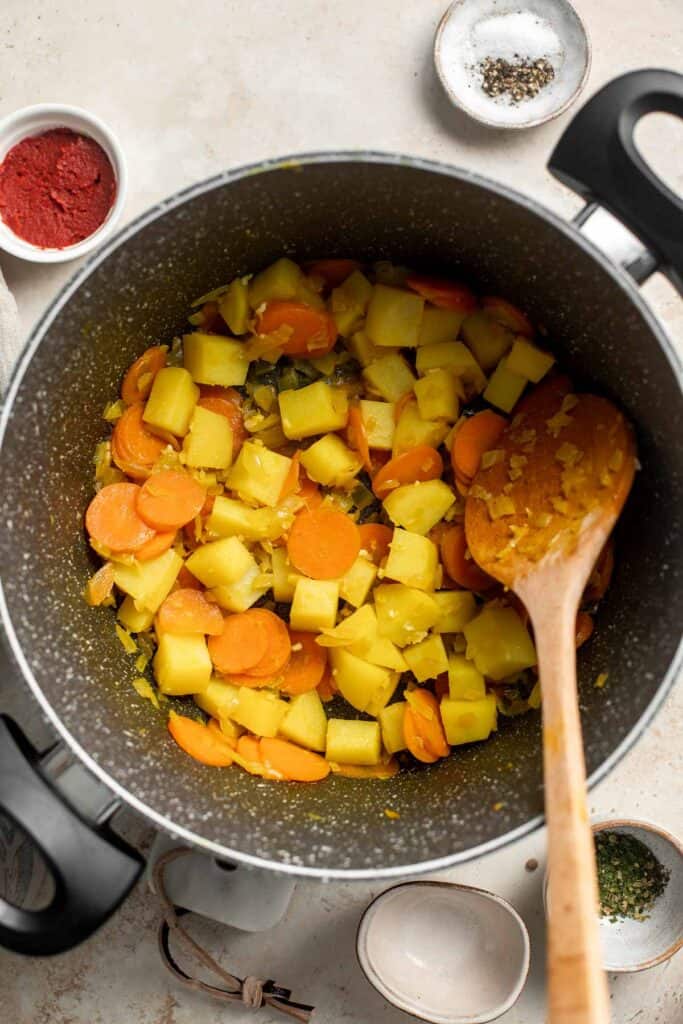
- Add lentils and base. Add the soaked lentils, tomato paste, broth, Italian seasoning, paprika, salt, and pepper, and stir to combine. Bring to a boil over high heat.


- Simmer. Turn the heat to medium-low and simmer uncovered for 30 minutes, or until the potatoes and carrots are tender. Keep an eye on the lentils. If you notice the water content is very low, add ½ cup of water at a time until you reach your desired consistency.
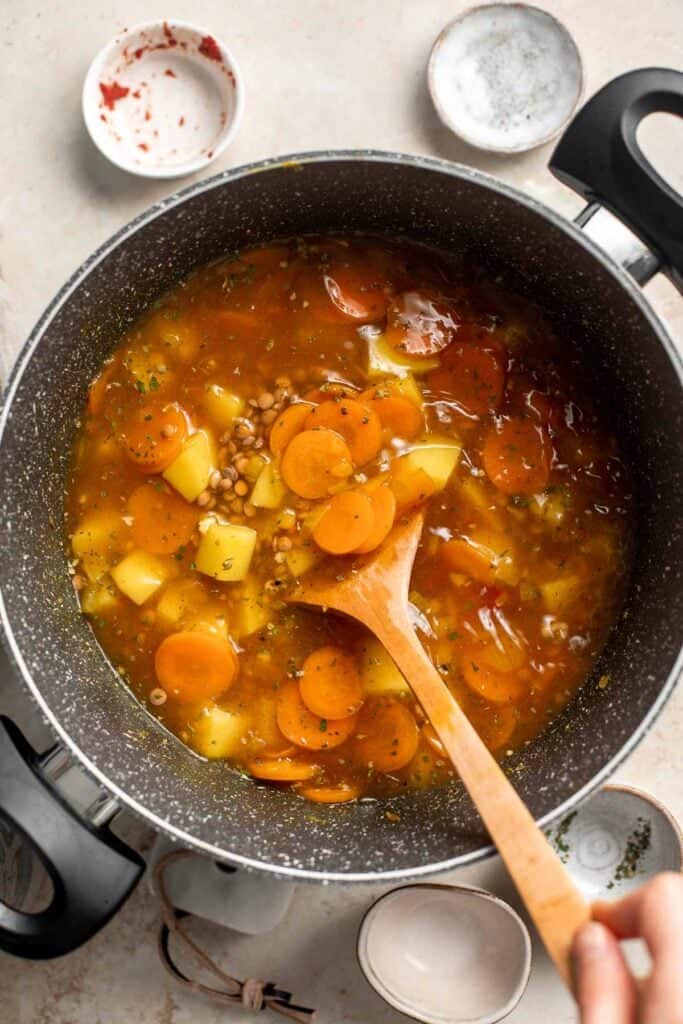
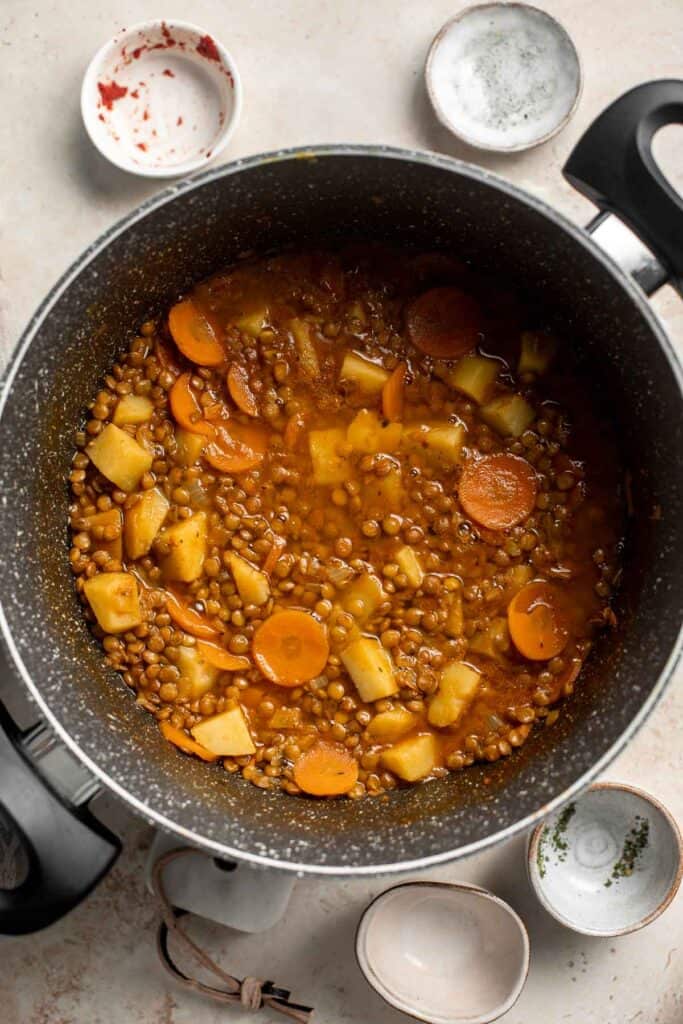
- Season. Season with extra salt and pepper to taste, if needed.
Recipe Variations
- Add more vegetables. Lentil stew can be made more nutritious by adding even more vegetables such as sweet potatoes, celery, bell peppers, zucchini, and spinach.
- Switch up the spices. Experiment with different spices when making lentil stew. Try cumin, coriander, and paprika to add a flavorful kick.
- Consider adding meat or protein. If you prefer a meaty lentil stew, you can add cooked chicken, beef, sausage, or chorizo. Alternatively, you can also add protein-rich ingredients such as tofu or tempeh.
- Make it spicy. For all spicy food lovers, give this lentil stew a kick and add in chili powder and/or cayenne powder.
- Give it an Indian twist. Instead of using Italian seasoning, season this stew with garam masala, turmeric, and cumin to give it an Indian flavor. You can also add some spinach or kale to make it more nutritious.
- Make it creamy. Add in some coconut milk to give the stew a creamy flavor.
How to Serve
We love serving this Lentil Stew in the fall and winter seasons when you are craving a hearty and filling comfort food that is healthy - but it works any time of the year. Serve it for lunch or dinner on its own with a spoon or with a side of grains for dipping. Some of our favorites are:
- Rice: Try Steamed White Rice, Coconut Rice, Broccoli Rice, or Basmati rice.
- Bread: Try Pita Bread, Garlic Naan Bread, Skillet Dinner Rolls, or Homemade Biscuits.
This lentil stew with potatoes and carrots also tastes really delicious with a small splash of vinegar or lemon juice help brighten and balance the flavors of the stew.
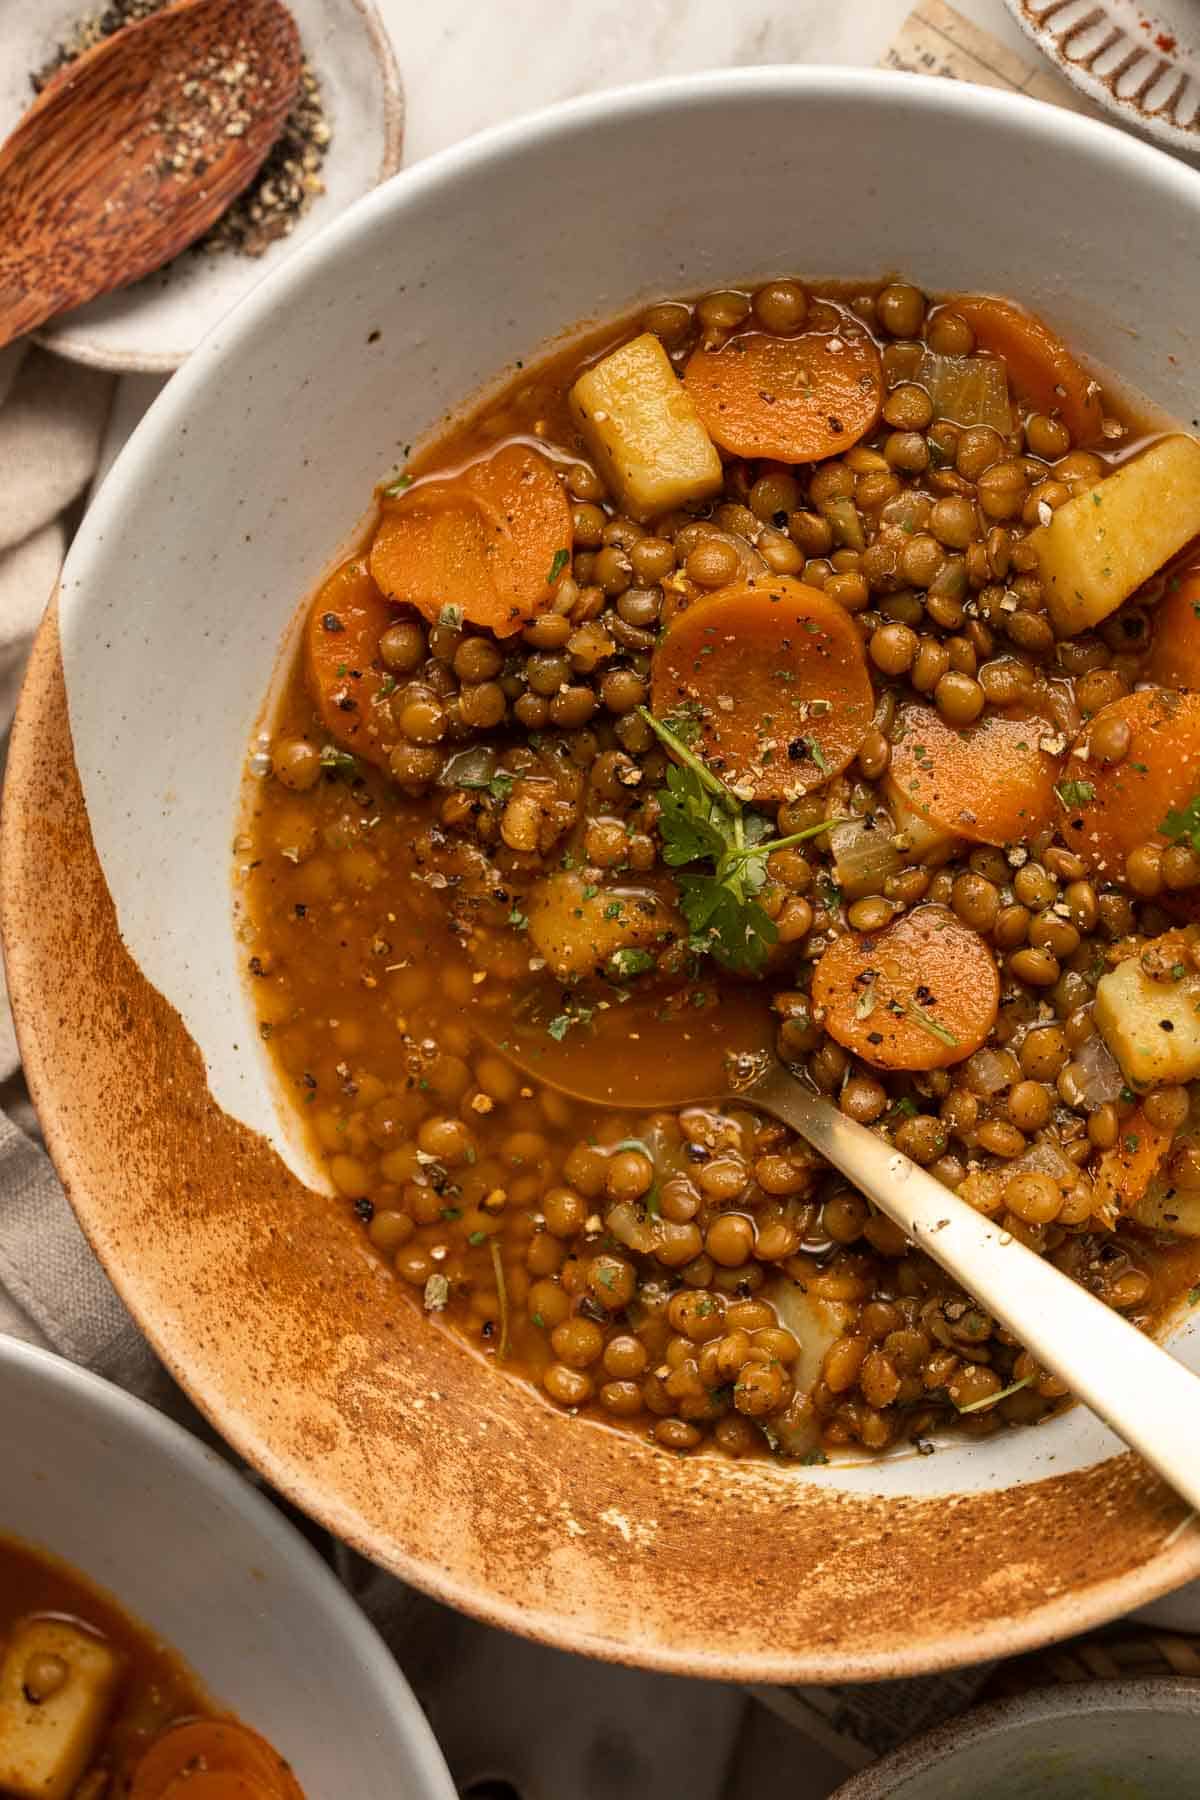
Recipe Tips and Tricks
- Soak the lentils. Soaking the lentils briefly before cooking will help reduce cooking time and improve their texture.
- Use broth. We recommend using broth in this stew instead of plain water as it can add flavor to your lentil stew. If you use just water, that is fine too - just be sure to season it well with extra salt and pepper.
- Adjust the consistency. You can adjust the consistency of the stew to your liking, but odds are that you'll want something to soak up every last bit of the aromatic, spicy broth. Steamed rice or toasted bread can do the trick.
- Serve with extra toppings. You can add some fresh herbs, grated cheese (or a plant-based alternative), sour cream, or a dollop of yogurt to add more flavor and texture to your lentil stew and to customize it to your tastes.
- Make ahead. Make a large batch, and store leftovers in the fridge or freezer and quickly thaw
Storing and Freezing Instructions
How to Store
Let the lentil stew cool completely, then transfer it to an airtight container and refrigerate for up to 5 days.
How to Reheat
Reheat on the stovetop over medium-low heat until warmed through, or microwave in short bursts until heated to desired temperature.
How to Freeze
Transfer the lentil stew into a freezer-safe container or freezer bag and freeze for up to 3 months. Allow the stew to thaw in the refrigerator overnight before reheating and serving.
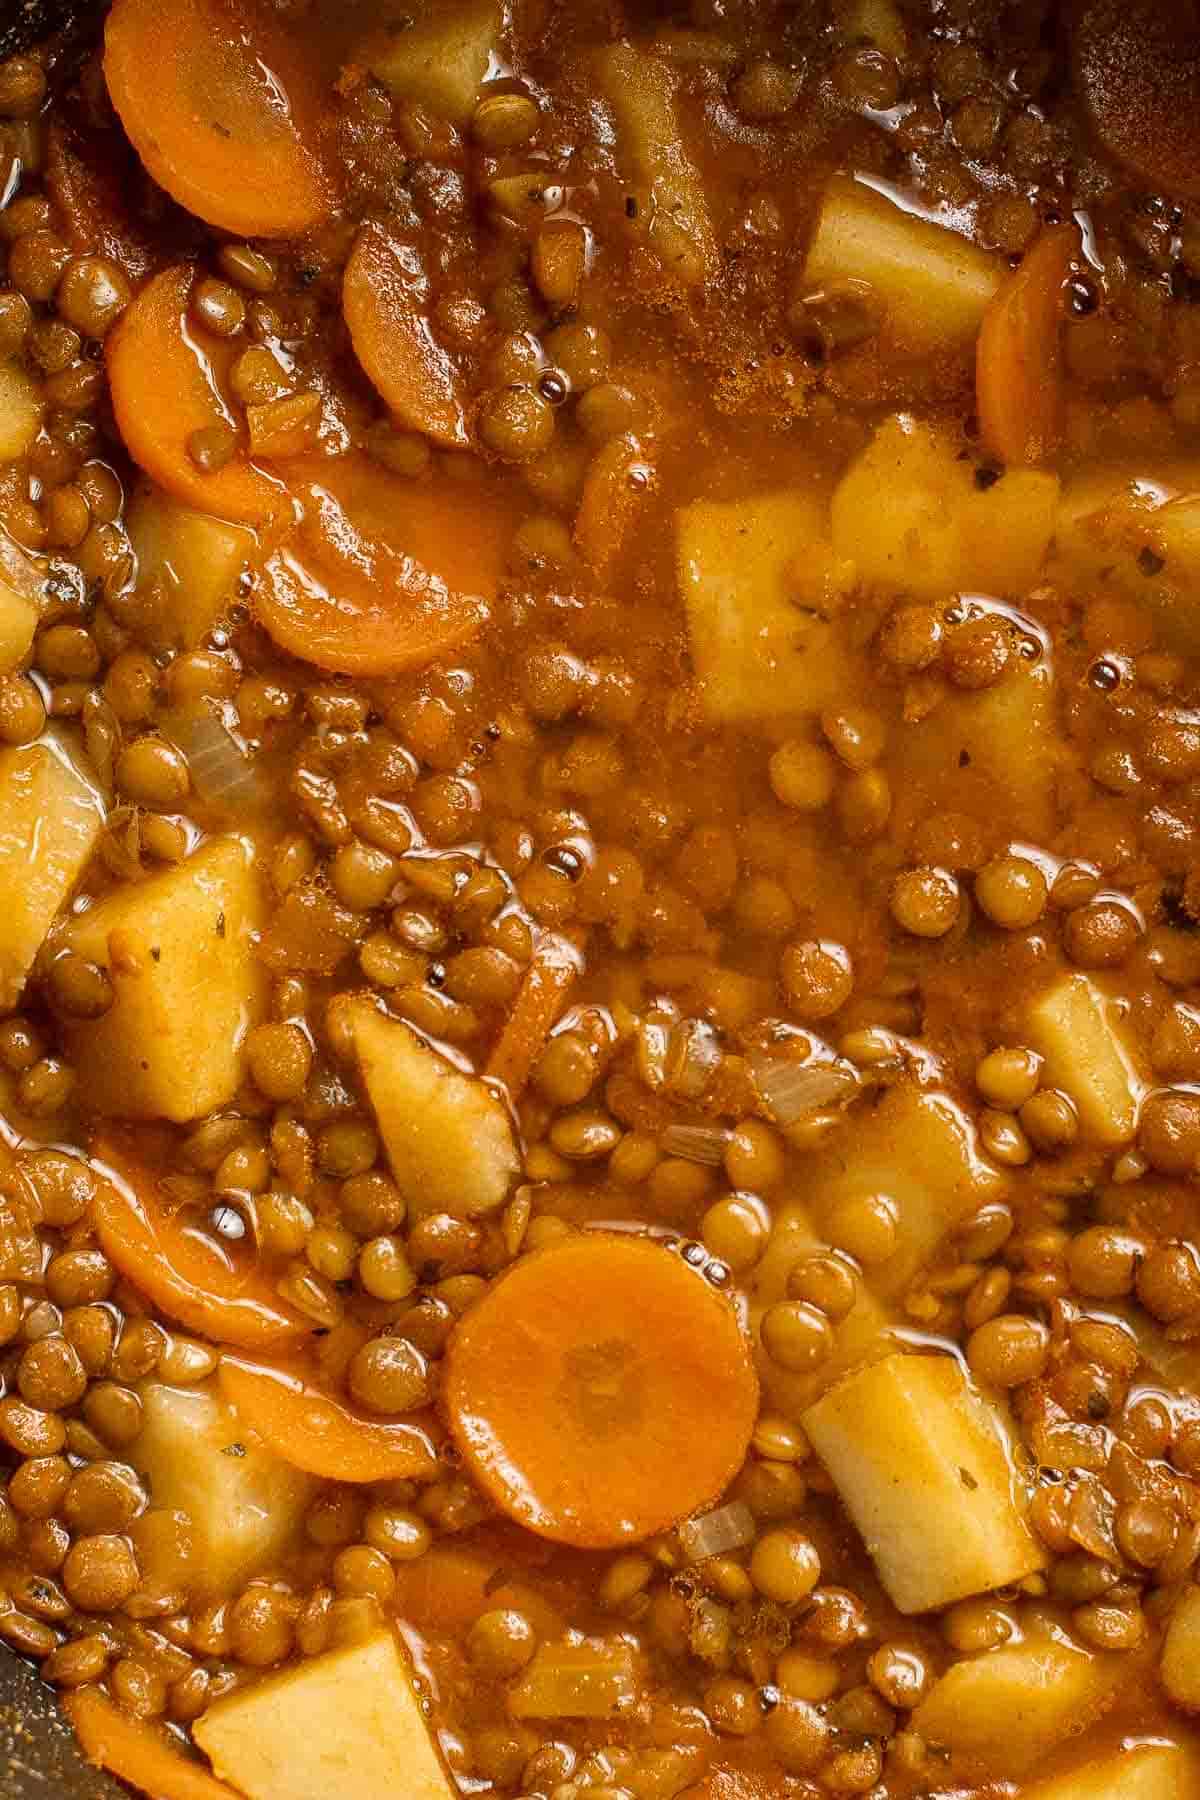
More Lentil Recipes
- How to Cook Dried Beans
- 20 Minute One Pot Lentils
- Persian Lentil Soup
- Warm Lentil Salad
- Coconut Curry Lentil Soup
Tried this recipe?
I'd love to hear what you think! Leave a comment and rating below to share your feedback. Your reviews help others discover this recipe and help me keep creating more free recipes for you. Snap a photo and tag me on social media @aheadofthyme too.

Baked Sweet Potato Wedges
Baked Sweet Potato Wedges are crispy, delicious, and flavorful. They are well-seasoned with an assortment of spices that makes them salty, savory, and sweet, with a hint of heat. Serve these sweet potatoes as an appetizer with homemade honey mustard sauce or as a side dish for any occasion.
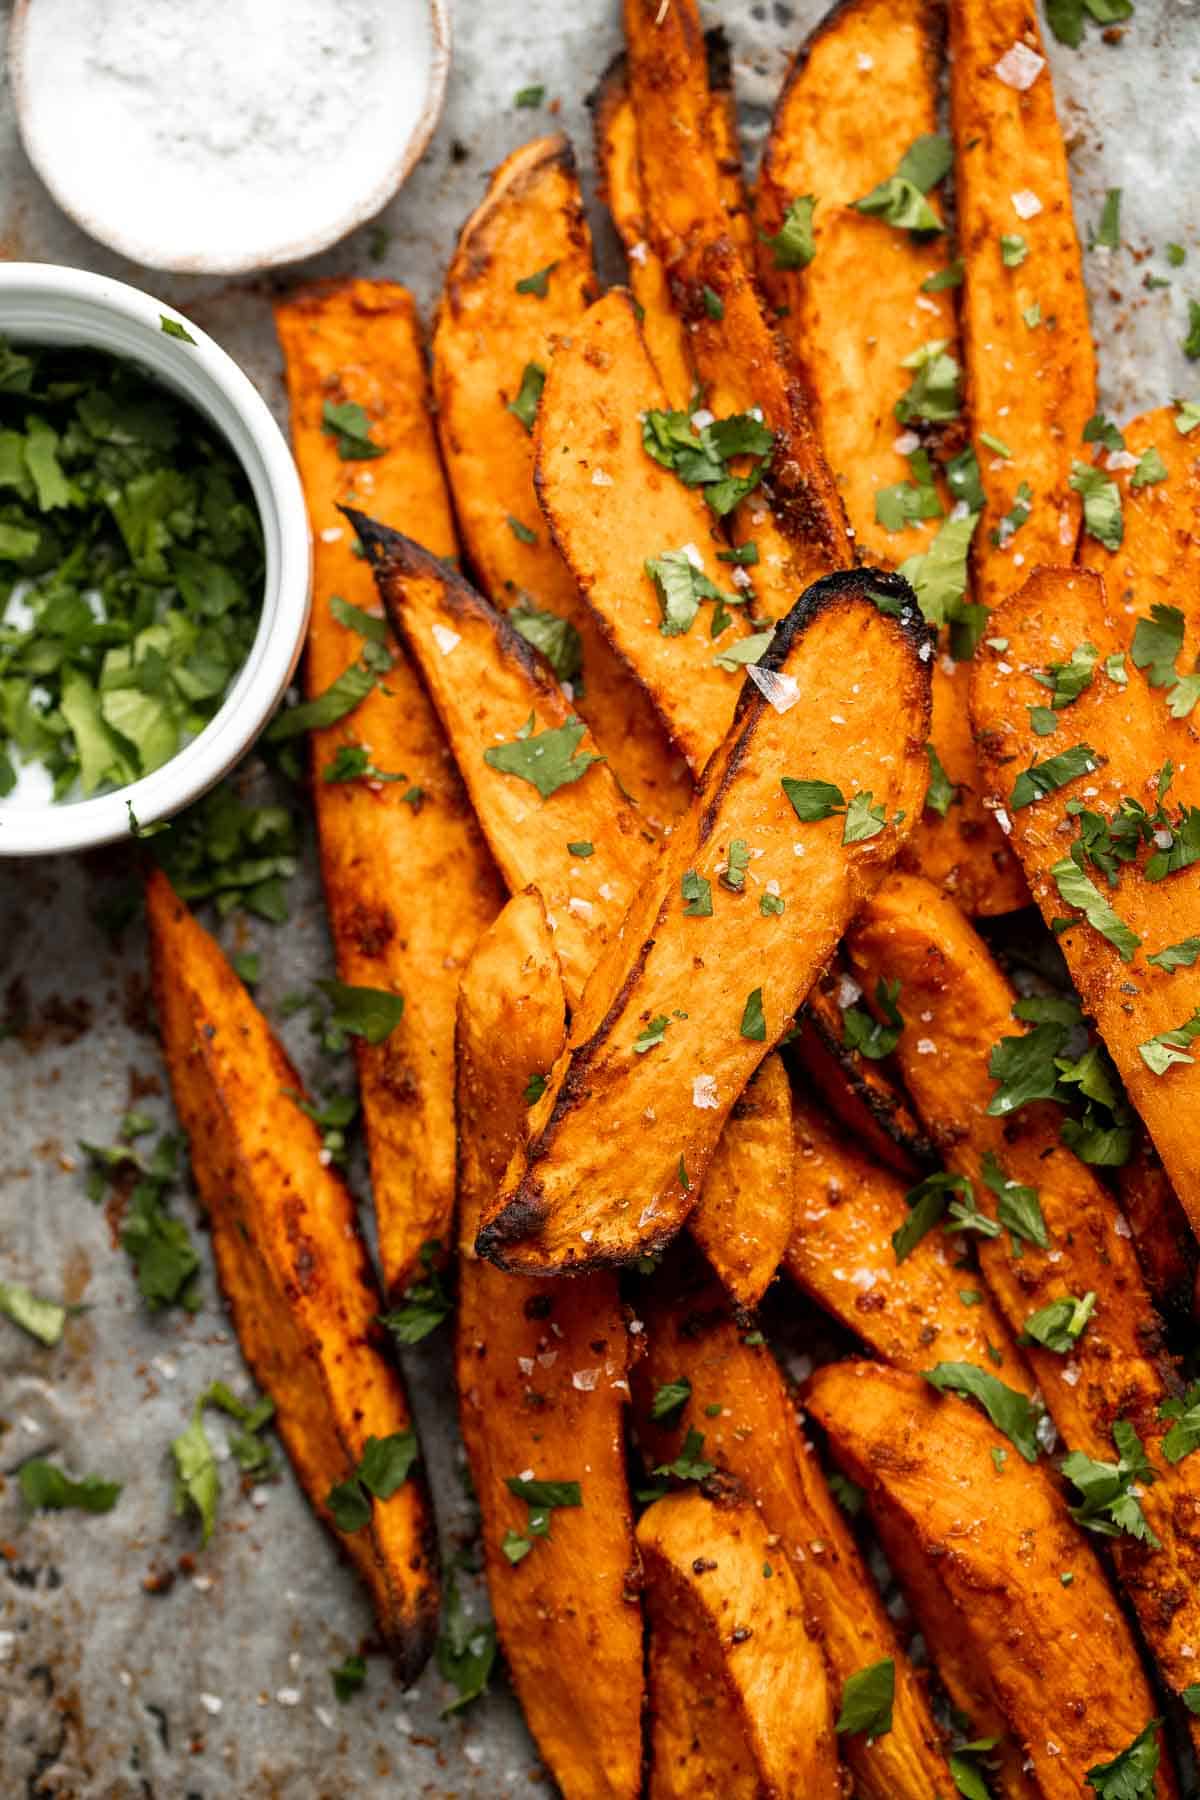
Plus, it's so easy to make roasted sweet potato wedges at home, even for beginners. You will need just 10 minutes of prep time before they are ready to pop into the oven or air fryer. I suggest you double up when feeding a crowd because these disappear so fast. They're kid-friendly and adults love them too.
Why You'll Love these Baked Sweet Potato Wedges
- Quick and easy to make. This recipe is easy to make with just a few simple steps. Just chop the sweet potatoes, season, and bake. It takes about 5-10 minutes of prep time before they are ready to pop into the oven for about 20 minutes. Plus, you can cook them even faster in the air fryer!
- Delicious and flavorful. These baked sweet potato wedges have the best texture - crispy on the outside and soft and tender inside. Plus, they are delicious and well seasoning with a variety of spices which gives them the best flavor. But you can totally customize the flavor by switching up the seasoning. Simplify it, spice it up, or make it cheesy. See all our recipe variations below.
- A vegetarian side dish. Baked sweet potato wedges are perfect when you are craving a vegetarian side dish that isn't steamed veggies. They are vegan and gluten-free too to satisfy all dietary needs.
- Homemade honey mustard dipping sauce. Everyone loves a good dipping sauce. You can serve these with a store-bought honey mustard or any other dip, but I love making my own. You can use any type of mustard you have available in your fridge, mix in lots of good honey and you've got a seriously delicious, tangy accompaniment for these wedges.
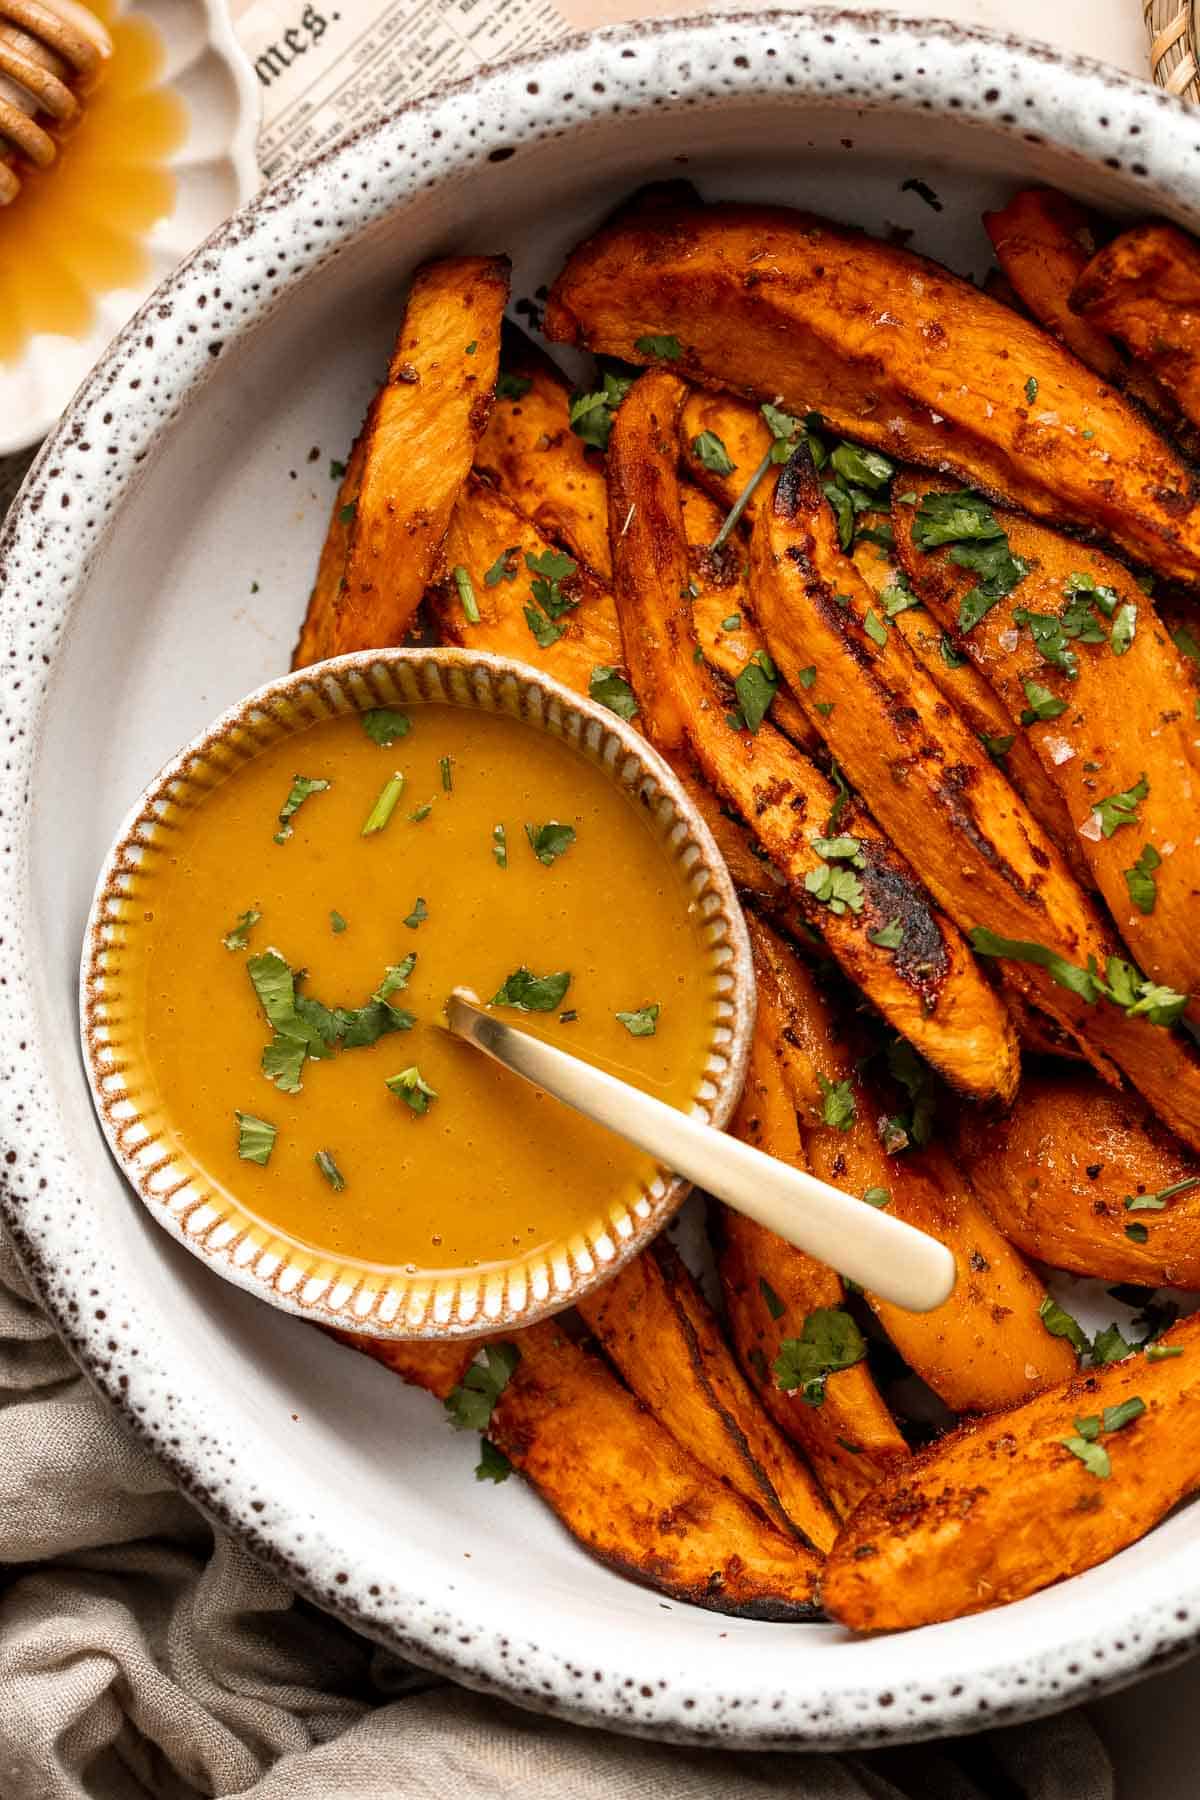
Ingredient Notes
To make these easy Baked Sweet Potato Wedges, you will need the following ingredients (full measurements in recipe card below):
- sweet potatoes - look for sweet potatoes that are firm and free of blemishes or soft spots. You can use any variety of sweet potatoes, but some popular ones are the orange-fleshed ones or the purple-skinned ones.
- vegetable oil - avocado oil or olive oil are suitable replacements for vegetable oil in this recipe.
- seasoning - we use a blend of seasoning including salt, cumin, chili powder, oregano, onion powder, garlic powder, cinnamon, and cayenne powder. You can also use this recipe as a base and experiment with different seasonings.
- cilantro - if you don't like cilantro, try a different soft herb like parsley, rosemary, basil, or dill.
You will also need measuring cups and spoons, mixing bowls, and half sheet baking pan.
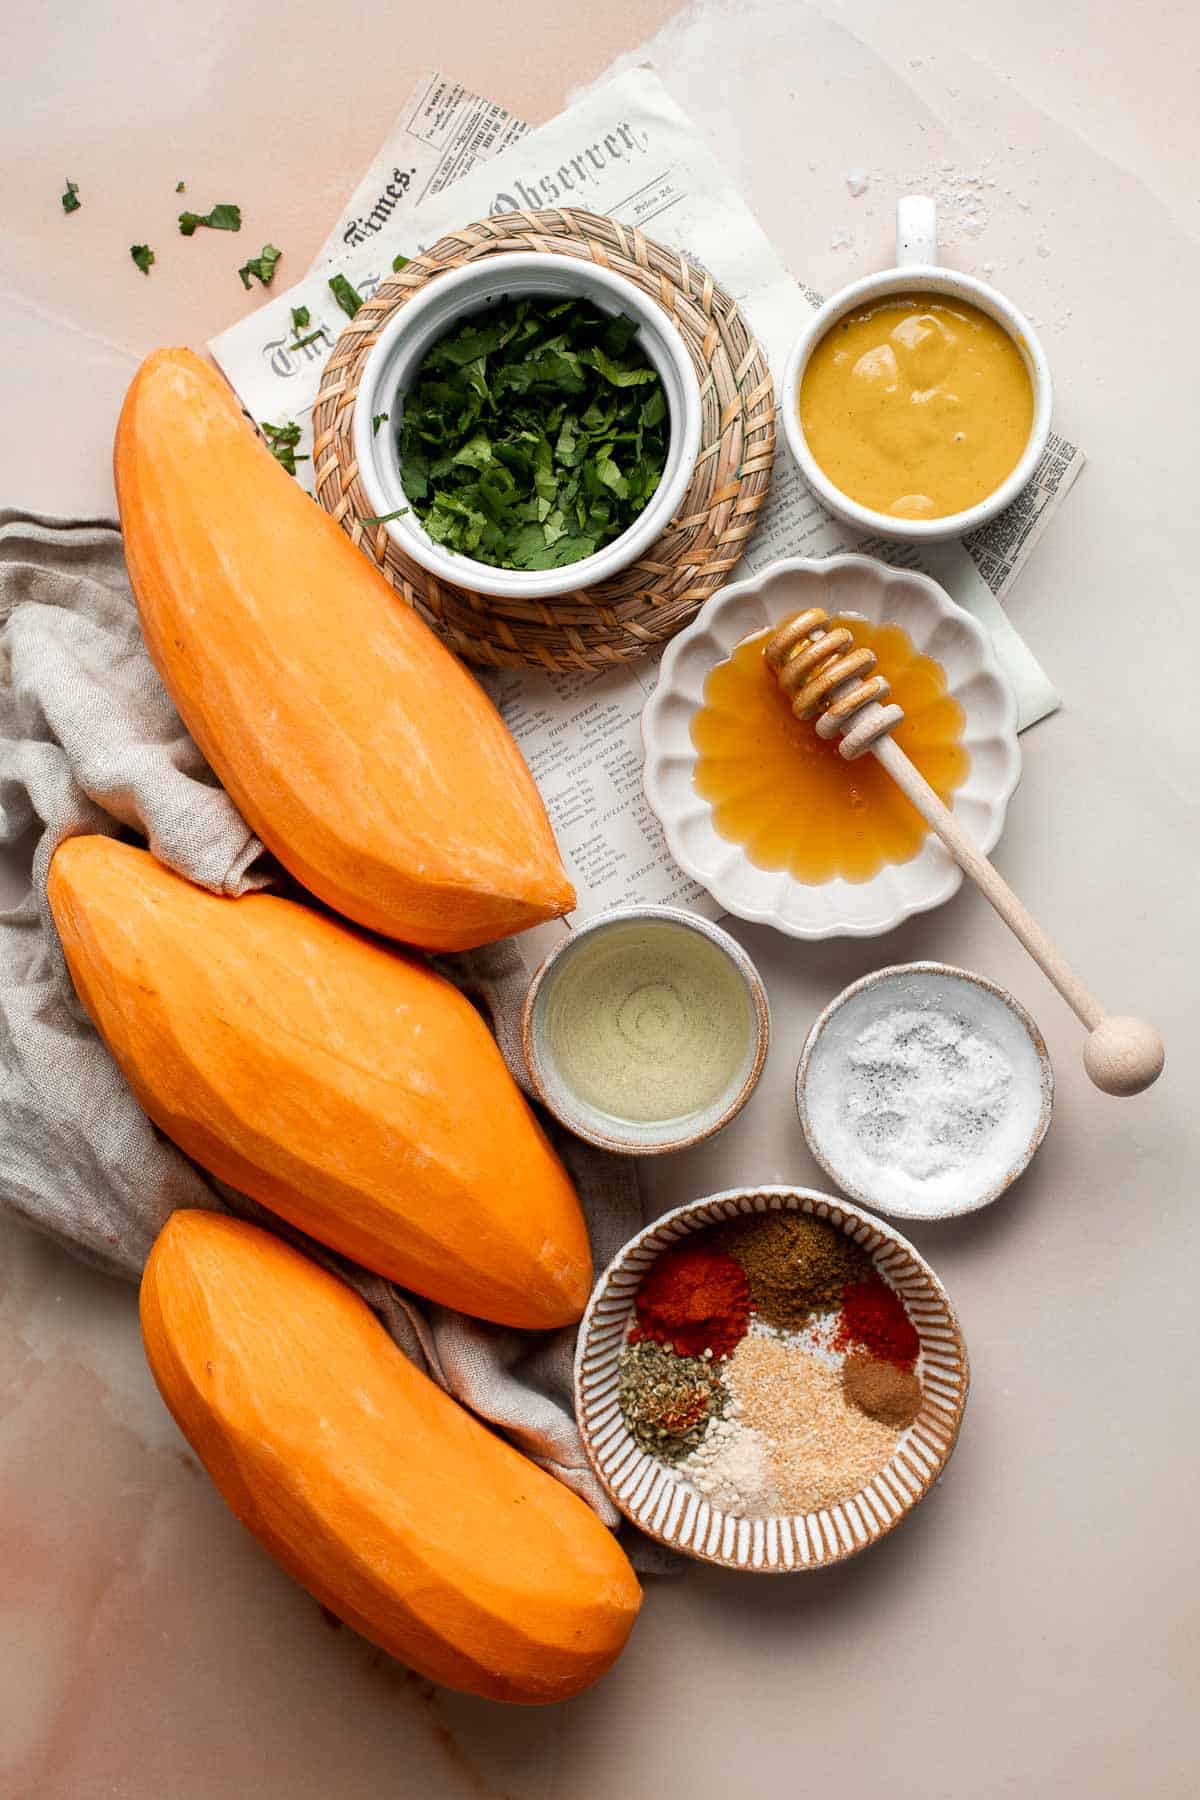
How to Make the Best Baked Sweet Potato Wedges
- Prep sweet potatoes. Slice the sweet potatoes in half lengthwise. Cut each half into 3 equal wedges, for a total of 6 wedges per potato.
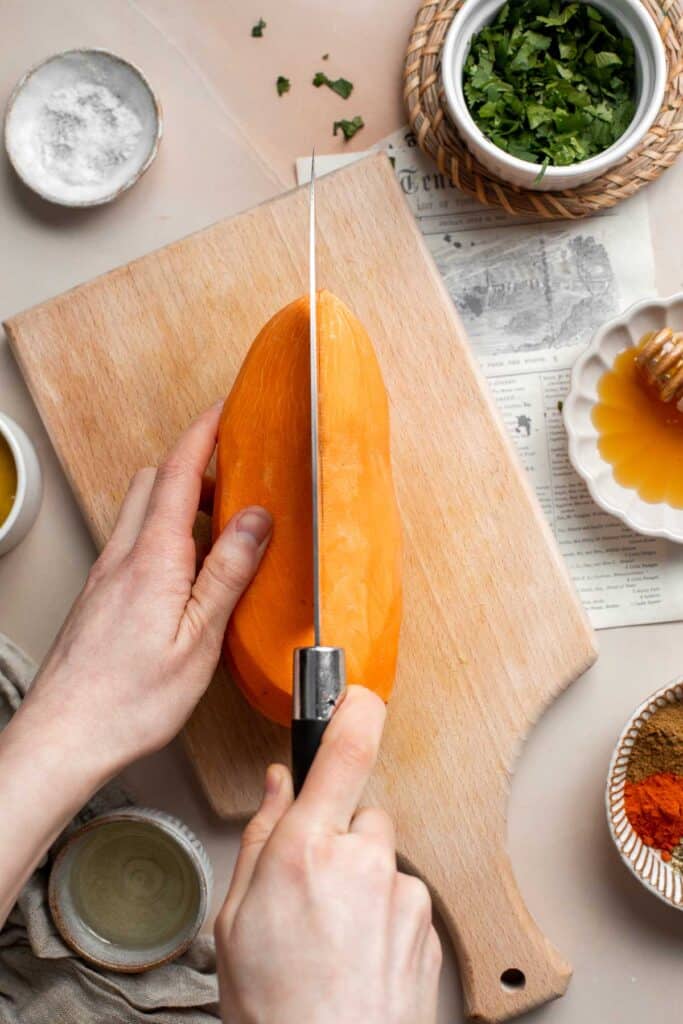
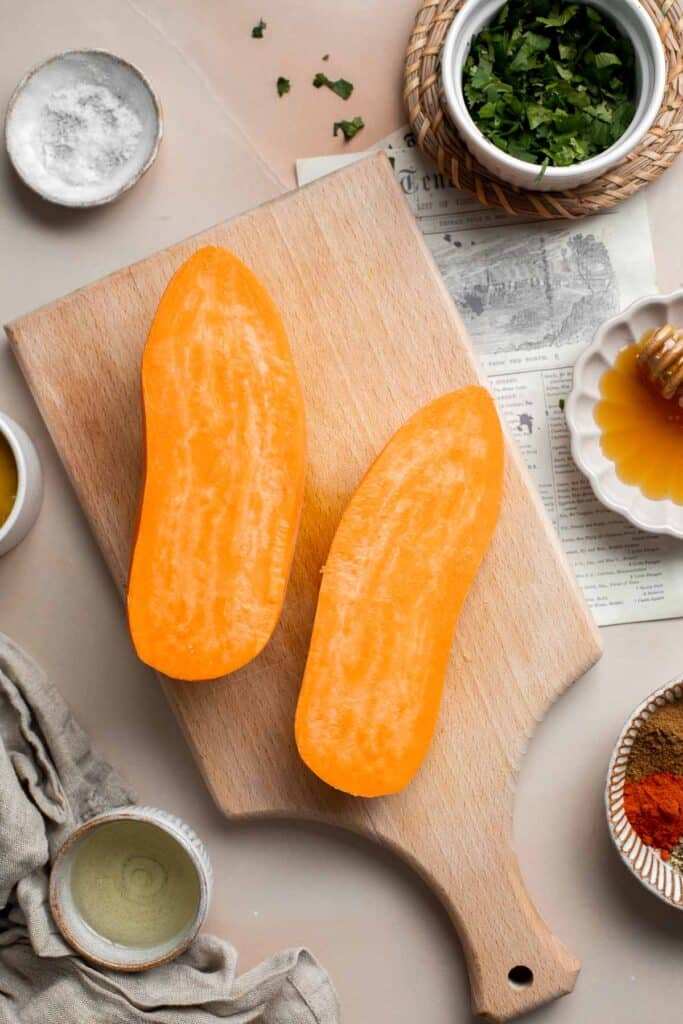
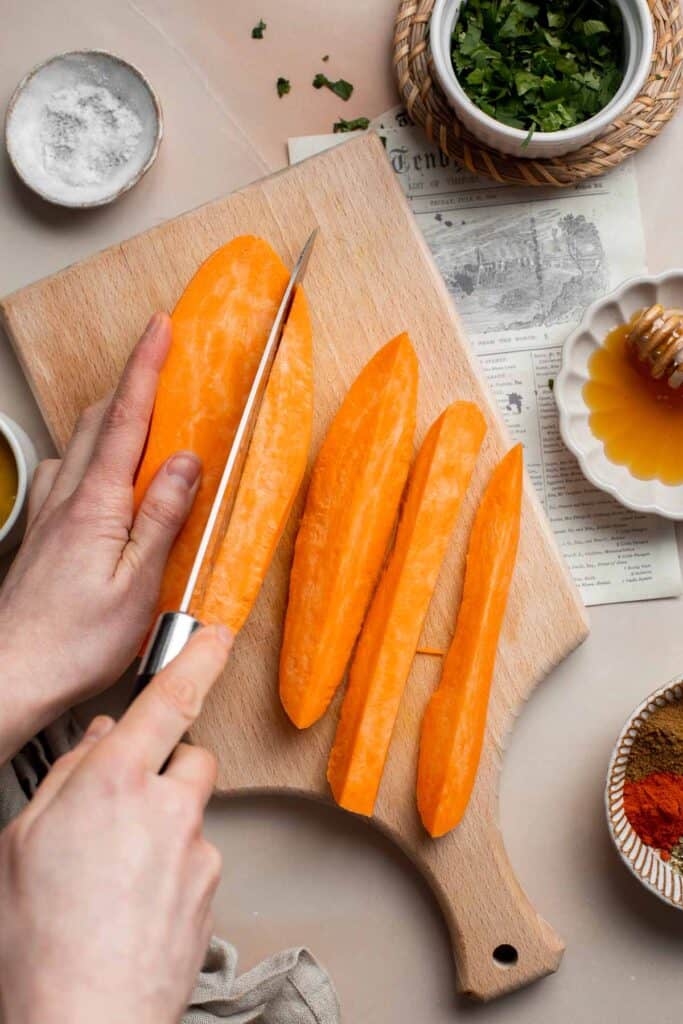
- Season. Place potatoes in a large mixing bowl. Add oil, salt, cumin, chili powder, oregano, onion powder, garlic powder, cinnamon, and cayenne powder. Toss to combine.
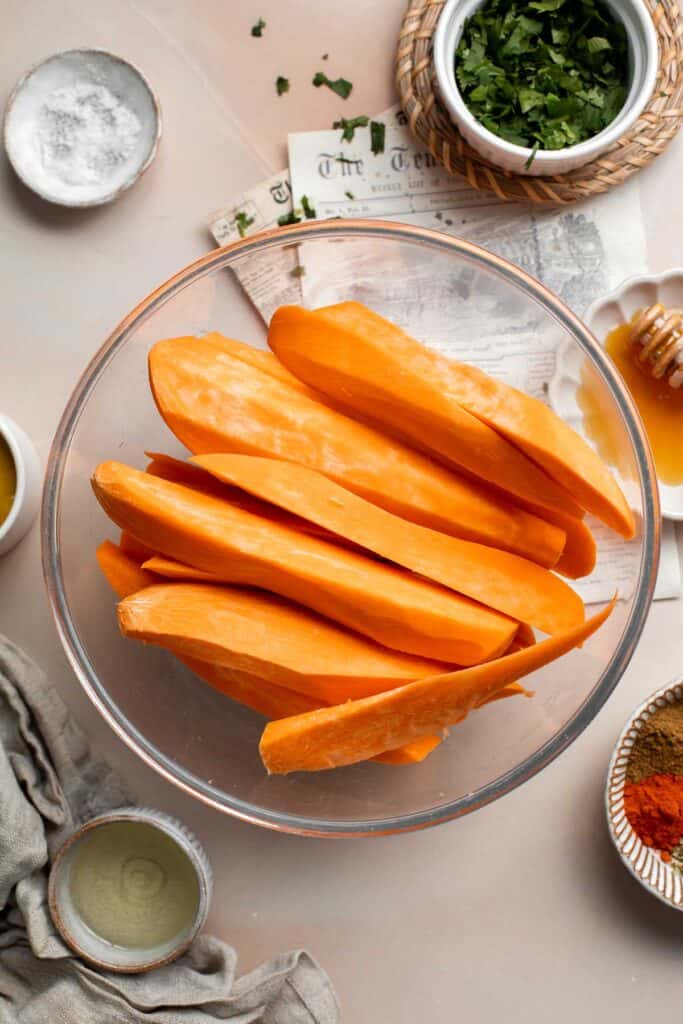
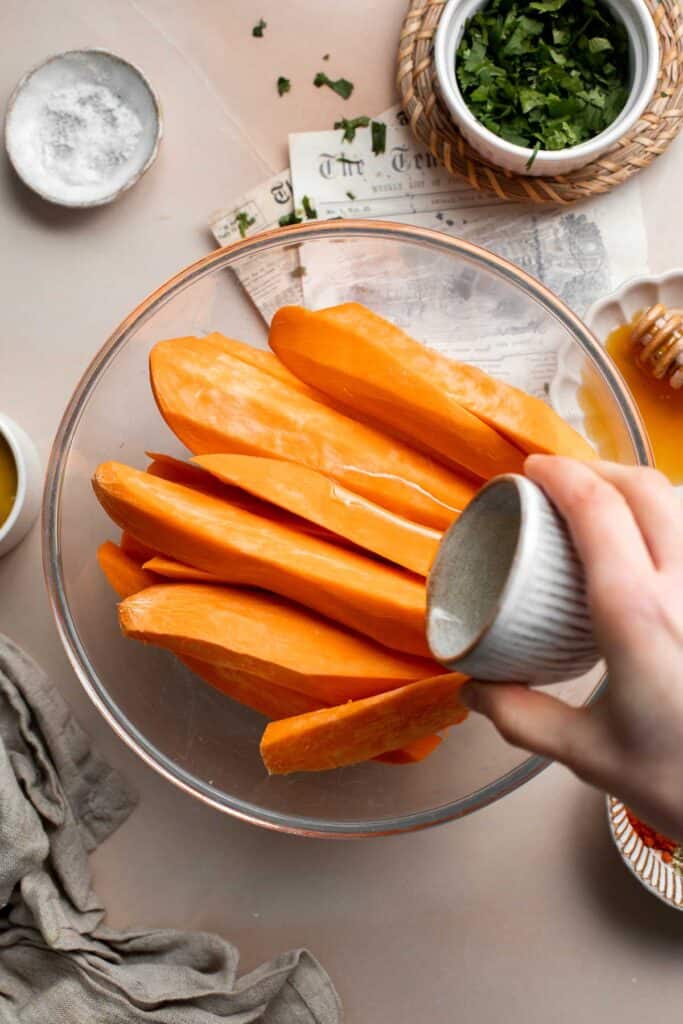
- Bake. Line a large half sheet baking pan with parchment paper. Place up the wedges in a single layer on the baking sheet. Bake in a 425 F preheated oven for 20-25 minutes, or until the largest wedges are tender.
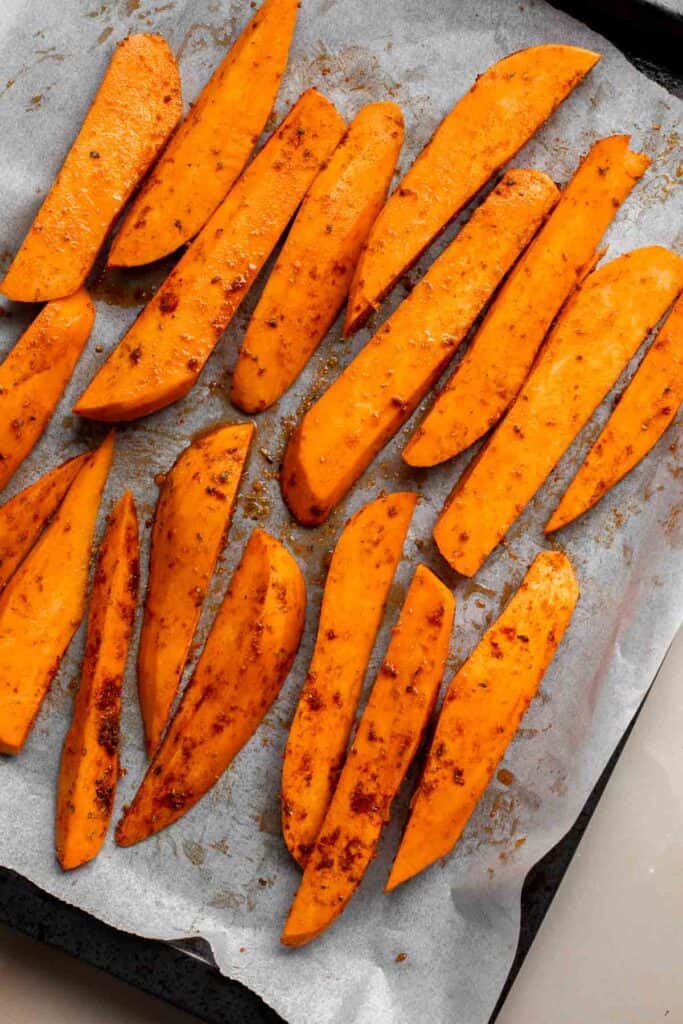
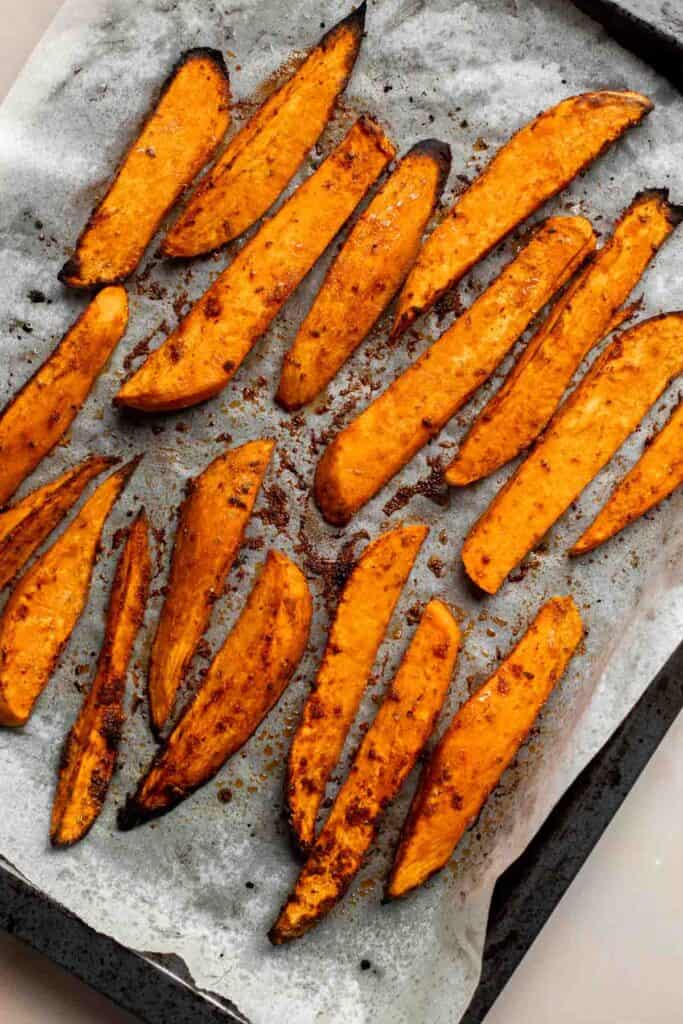
- Make dipping sauce. Meanwhile, make the honey mustard dipping sauce by mixing together dijon mustard and honey in a small mixing bowl.
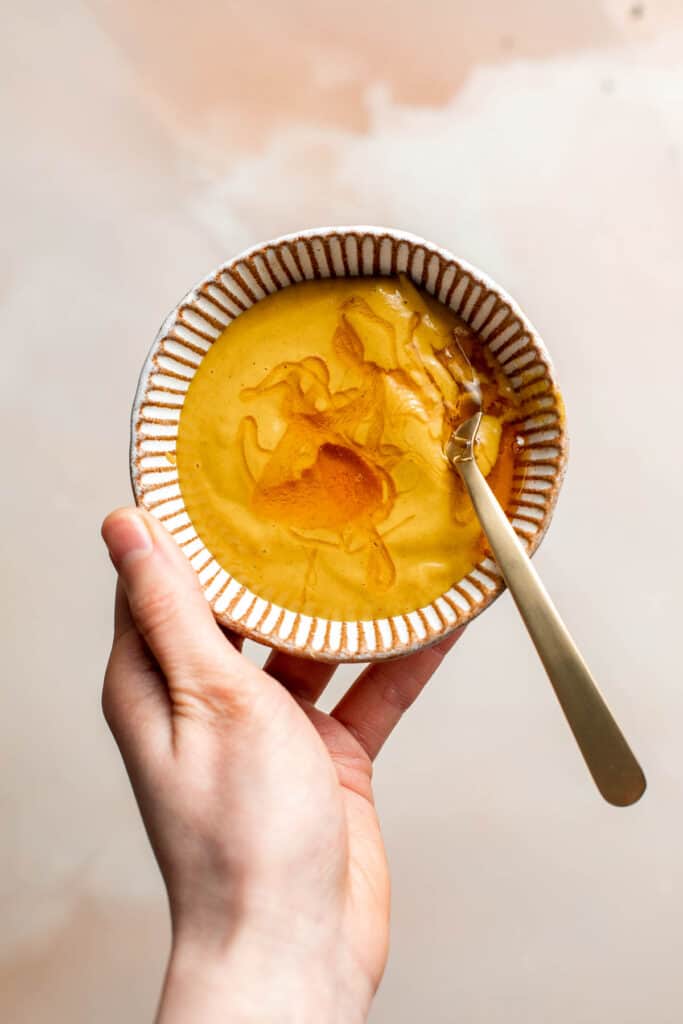
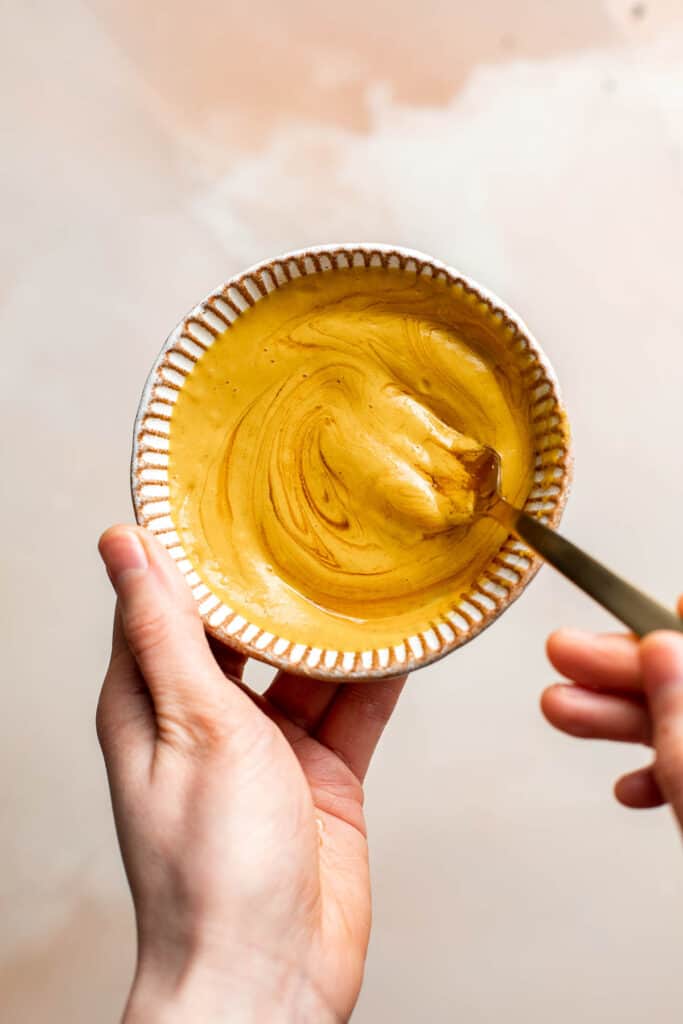
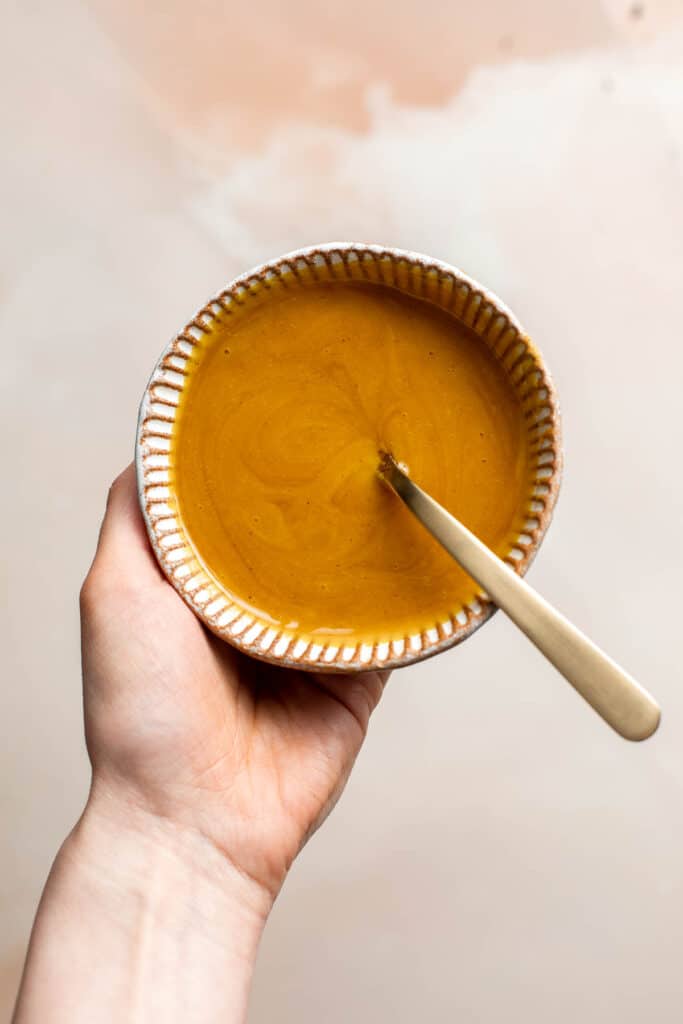
- Serve. Top the baked sweet potato wedges with chopped cilantro and serve with honey mustard dipping sauce.
Air Fryer Sweet Potato Wedges
You can also cook crispy sweet potato wedges even more quickly in the air fryer. Place the seasoned sweet potato in the air fryer basket in a single layer (you may have to cook in batches). Air fry at 375F for 15-18 minutes, until golden brown and tender. Flip the wedges halfway through cooking.
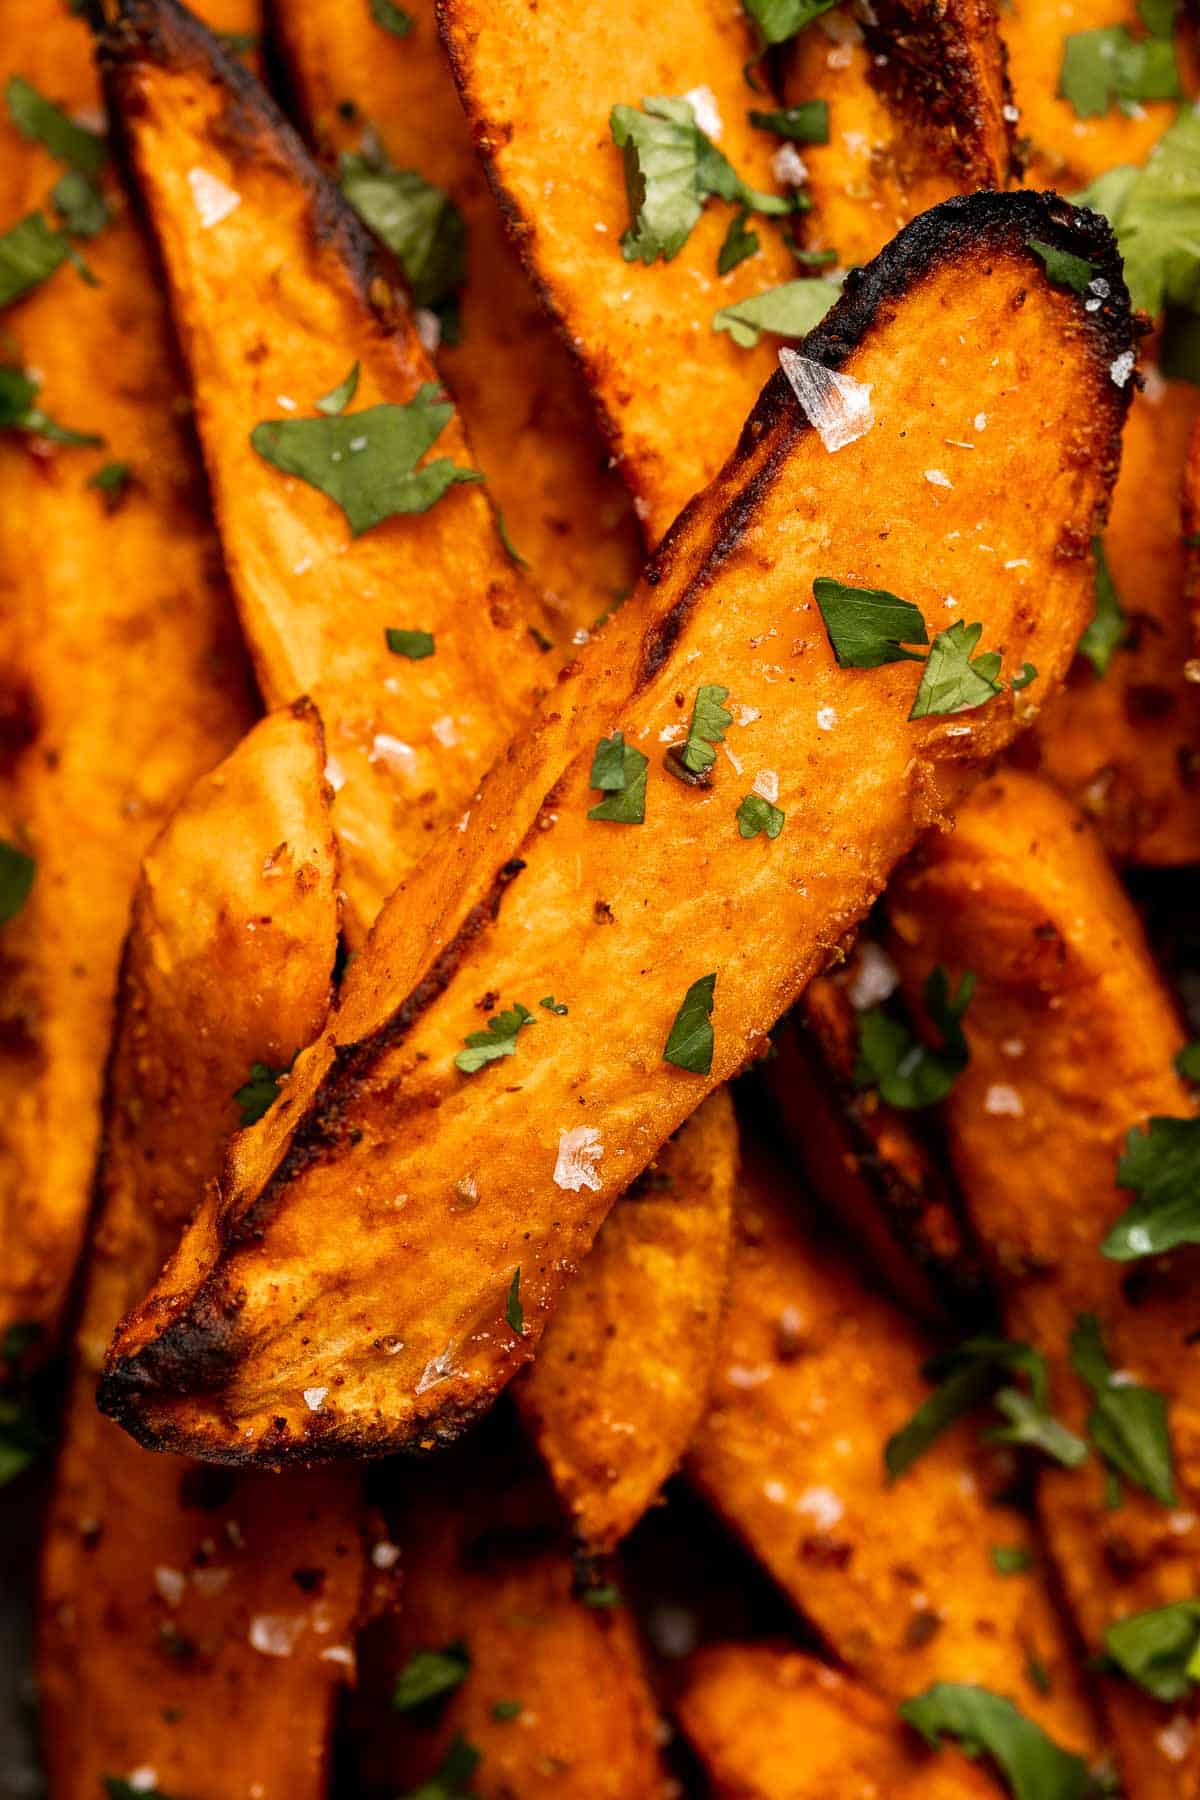
Recipe Variations
- Make it cheesy. Sprinkle grated Parmesan cheese or Asiago cheese over your sweet potato wedges before baking for a cheesy and savory flavor.
- Spice it up. Add some heat to your sweet potato wedges by adding extra cayenne pepper before baking. Serve with a side of cool sour cream or Greek yogurt for balance.
- Simplify it. You can simplify these baked sweet potatoes by seasoning them simply with olive oil, garlic, fresh rosemary, and salt. It's fragrant and savory.
- Curry style. Give it an Indian twist by adding some curry powder to your seasoning blend. Serve with a side of cooling cucumber raita or yogurt dip like Tzatziki Sauce.
- Add bacon. Add some smokiness to your sweet potato wedges by baking them with crumbled bacon, a drizzle of maple syrup, and a pinch of salt. So good!
How to Serve
We love serving these Baked Sweet Potato Wedges on their own with our homemade honey mustard dipping sauce. Alternatively, pair them with any dipping sauce that you like such as ketchup, mustard, Tzatziki Sauce, Tahini Sauce, or Ranch Dip.
They also pair well on the side of many entrees. Try it with our favorites:
- Thai Turkey Burgers
- Salmon Bites
- Chicken Nuggets
- Ribeye Steak
- Italian Chicken Skewers
- Classic Hamburgers
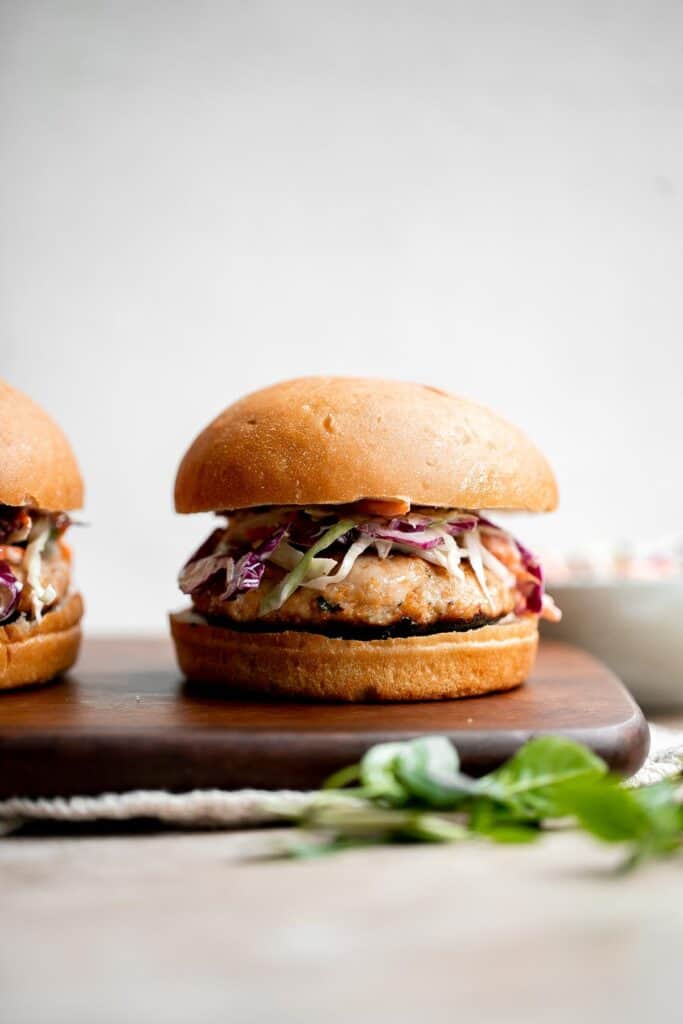
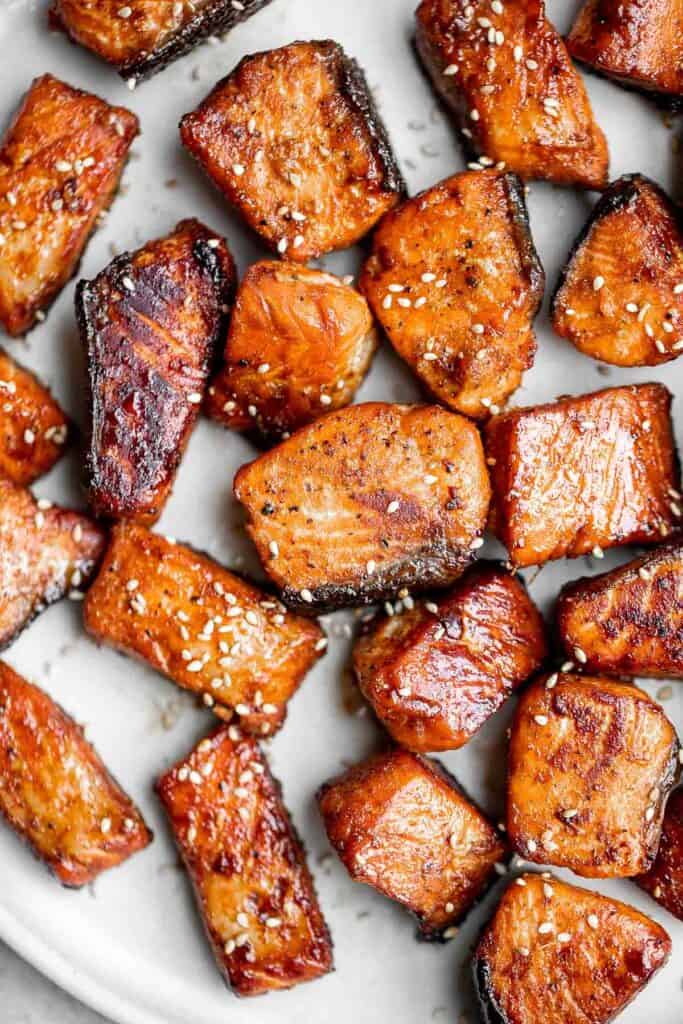
Recipe Tips and Tricks
- Cut the sweet potatoes evenly. To ensure that your sweet potato wedges cook evenly, it's important to cut them into similar sizes. Try to cut them into even wedges that are roughly the same thickness.
- Line the baking sheet. To prevent the sweet potato wedges from sticking to the baking sheet, line it with parchment paper or a silicone baking mat.
- Use an oven thermometer. Not all ovens operate at the temperature shown on the display. Make sure your oven isn't sabotaging your crispy baked potato wedges by double checking the actual temperature with an oven thermometer and adjust if necessary.
- Serve immediately. Sweet potato wedges are best served immediately, while they are still hot and crispy. Serve them as a snack or side dish with your favorite dipping sauce.
Storing and Freezing Instructions
How to Store
Once the sweet potato wedges cool to room temperature, transfer them to an airtight container and refrigerate for up to 4 days.
How to Reheat
Reheat in the oven at 375℉ for 10-15 minutes or in a 375F air fryer for 5-10 minutes until heated through and crisped up.
How to Freeze
Place the sweet potato wedges in a freezer bag or freezer-safe container and freeze for up to 3 months. Reheat them in the oven or air fryer straight from frozen to maintain the texture - adding a few extra minutes to the reheating time.
More Sweet Potato Recipes
- Herb Roasted Sweet Potatoes
- Thai Sweet Potato Yellow Curry
- Sweet Potato Croquettes
- Sweet Potato Soup
- Mashed Sweet Potatoes
- Sweet Potato Casserole with Pecans
Tried this recipe?
I'd love to hear what you think! Leave a comment and rating below to share your feedback. Your reviews help others discover this recipe and help me keep creating more free recipes for you. Snap a photo and tag me on social media @aheadofthyme too.

Shrimp Alfredo
Shrimp Alfredo is creamy, garlicky, and delicious! Tender fettuccine noodles are tossed in a homemade garlic alfredo sauce and loaded up with succulent shrimp and parmesan cheese. This quick and easy, under 30-minute recipe is a go-to for busy nights and a year-round family favorite!
With just a bit of multitasking, you can make this simple pasta entree completely from scratch. Served warm on its own or with a bread side, it makes a comforting meal after a long day at work or school without taking hours of preparation. But it's fancy enough for special occasions like anniversaries and date nights.
Why You'll Love this Shrimp Alfredo
- Homemade cheesy alfredo sauce. What makes this dish so uniquely delicious and comforting is the rich, garlicky cream sauce. Made with fresh garlic, real heavy cream, and a heap of freshly grated parmesan, this sauce is hard to beat.
- Better than store-bought or restaurant versions. You'll never be tempted to buy a freezer fettuccine alfredo again, because this restaurant-worthy pasta is good down to the last drop of sauce. The wholesome ingredients and perfectly cooked shrimp will have you coming back for seconds!
- Ready in under 30 minutes. This shrimp pasta is as speedy as it is tasty! From start to finish, the whole thing takes only 25 minutes to make, and some of the steps are as simple as boiling water for pasta - which you can totally multitask while cooking the shrimp alfredo sauce making it ready even faster!
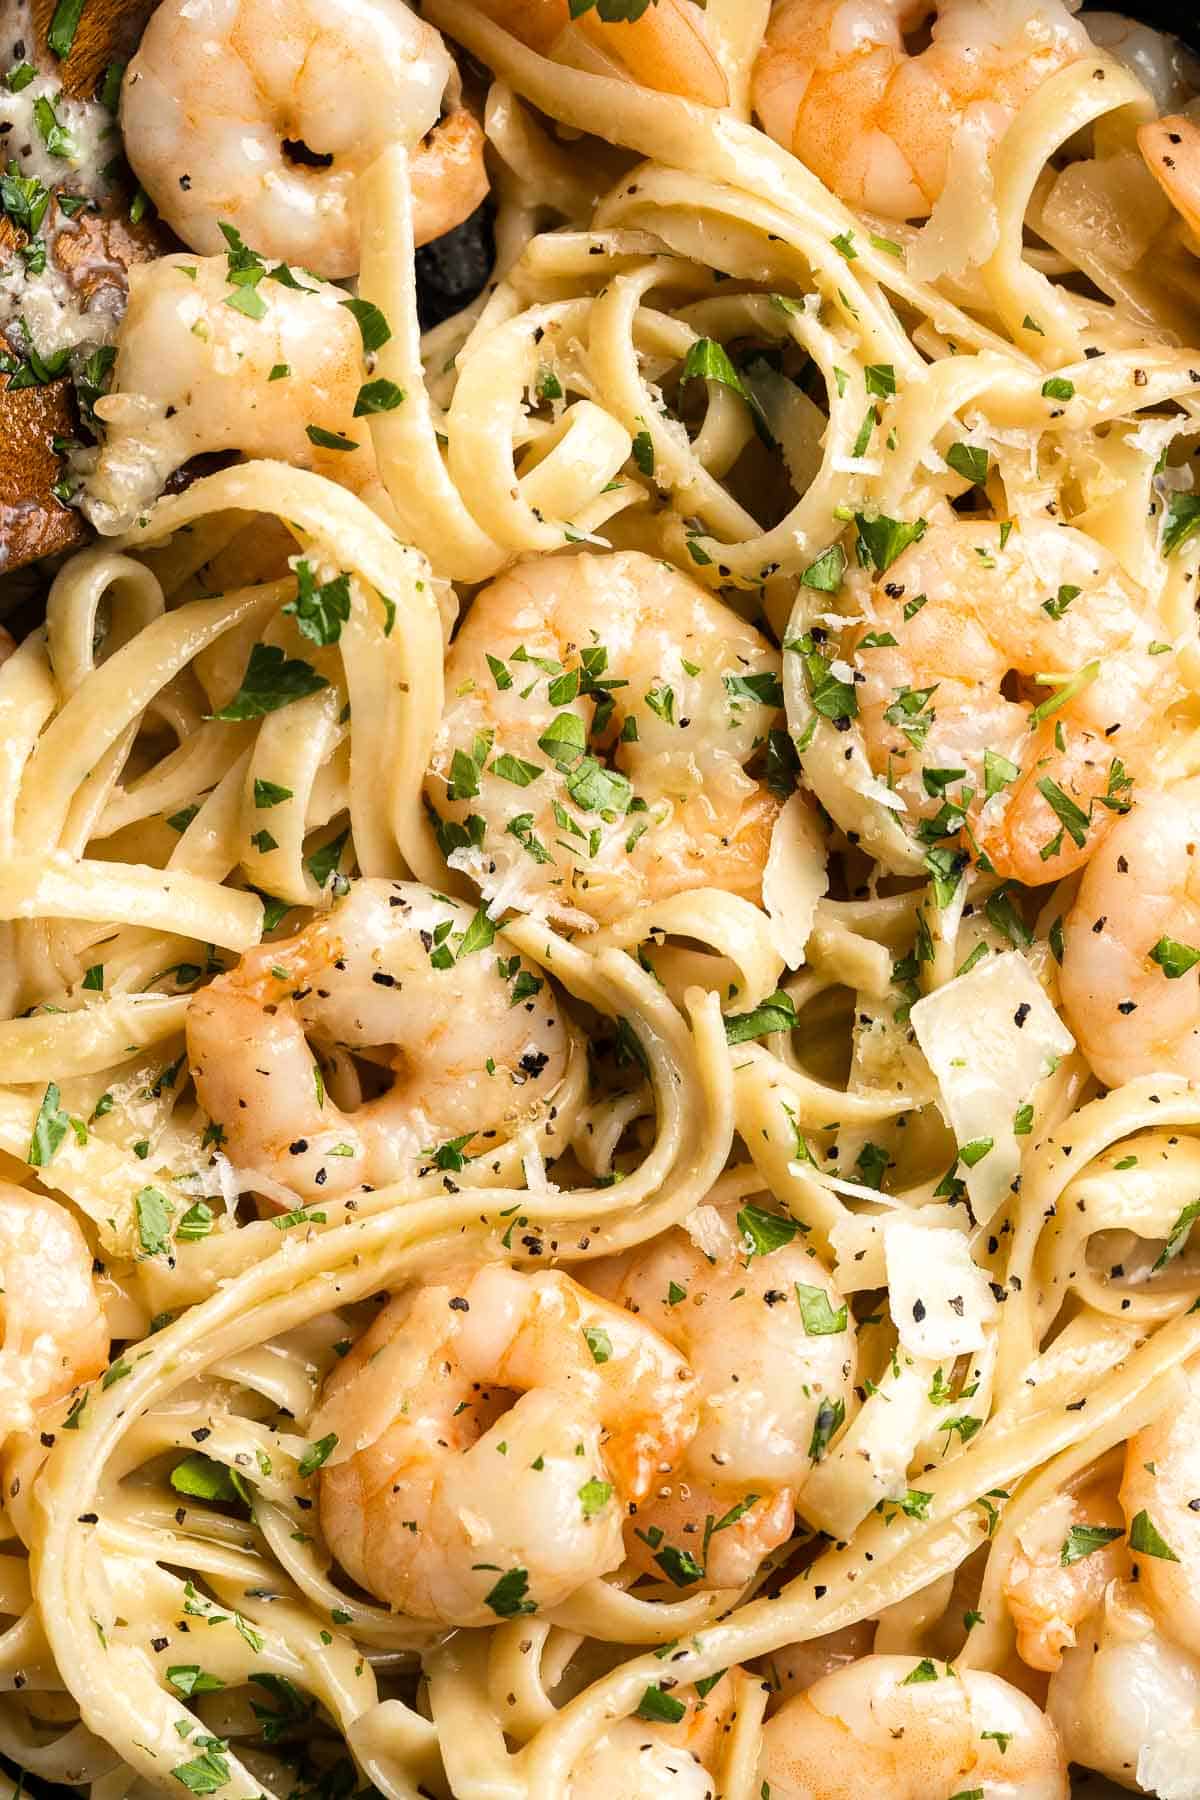
Ingredient Notes
To make this delicious and easy Shrimp Alfredo, you will need the following ingredients (full measurements in recipe card below):
- fettuccine - alfredo is traditionally made with fettuccine noodles, but you can use your favorite shape of pasta. Linguine and spaghetti noodles are both common substitutes for fettuccine - just follow the cooking time on the package.
- butter - use unsalted butter for the most control over the flavor. For a more lactose-friendly version, use a vegan butter substitute instead.
- garlic - freshly minced garlic yields the best flavor, but you can use pre-minced garlic at a ratio of ½-1 teaspoon per clove of garlic called for in this recipe.
- vegetable stock - you can use homemade or store-bought stock! You can also try seafood stock or make your own from the shells of the shrimp for a richer seafood flavor.
- heavy cream - if you don't have heavy cream on hand, use an equal amount of whole milk or half-and-half. If you or someone in your family has a dairy sensitivity, try coconut milk or cream instead.
- large shrimp - shrimp from the seafood counter or frozen shrimp are both fine to use - just make sure they're thawed, peeled, deveined, and tails removed before cooking.
- parmesan cheese - Asiago or pecorino romano would work well in place of the parmesan. You can also use a vegan parmesan-style alternative or nutritional yeast.
- parsley - out of fresh parsley? Try using dried parsley or other fresh soft herbs like dill or basil!
- salt and pepper
You will also need measuring cups and spoons, cooking pot, and large skillet.
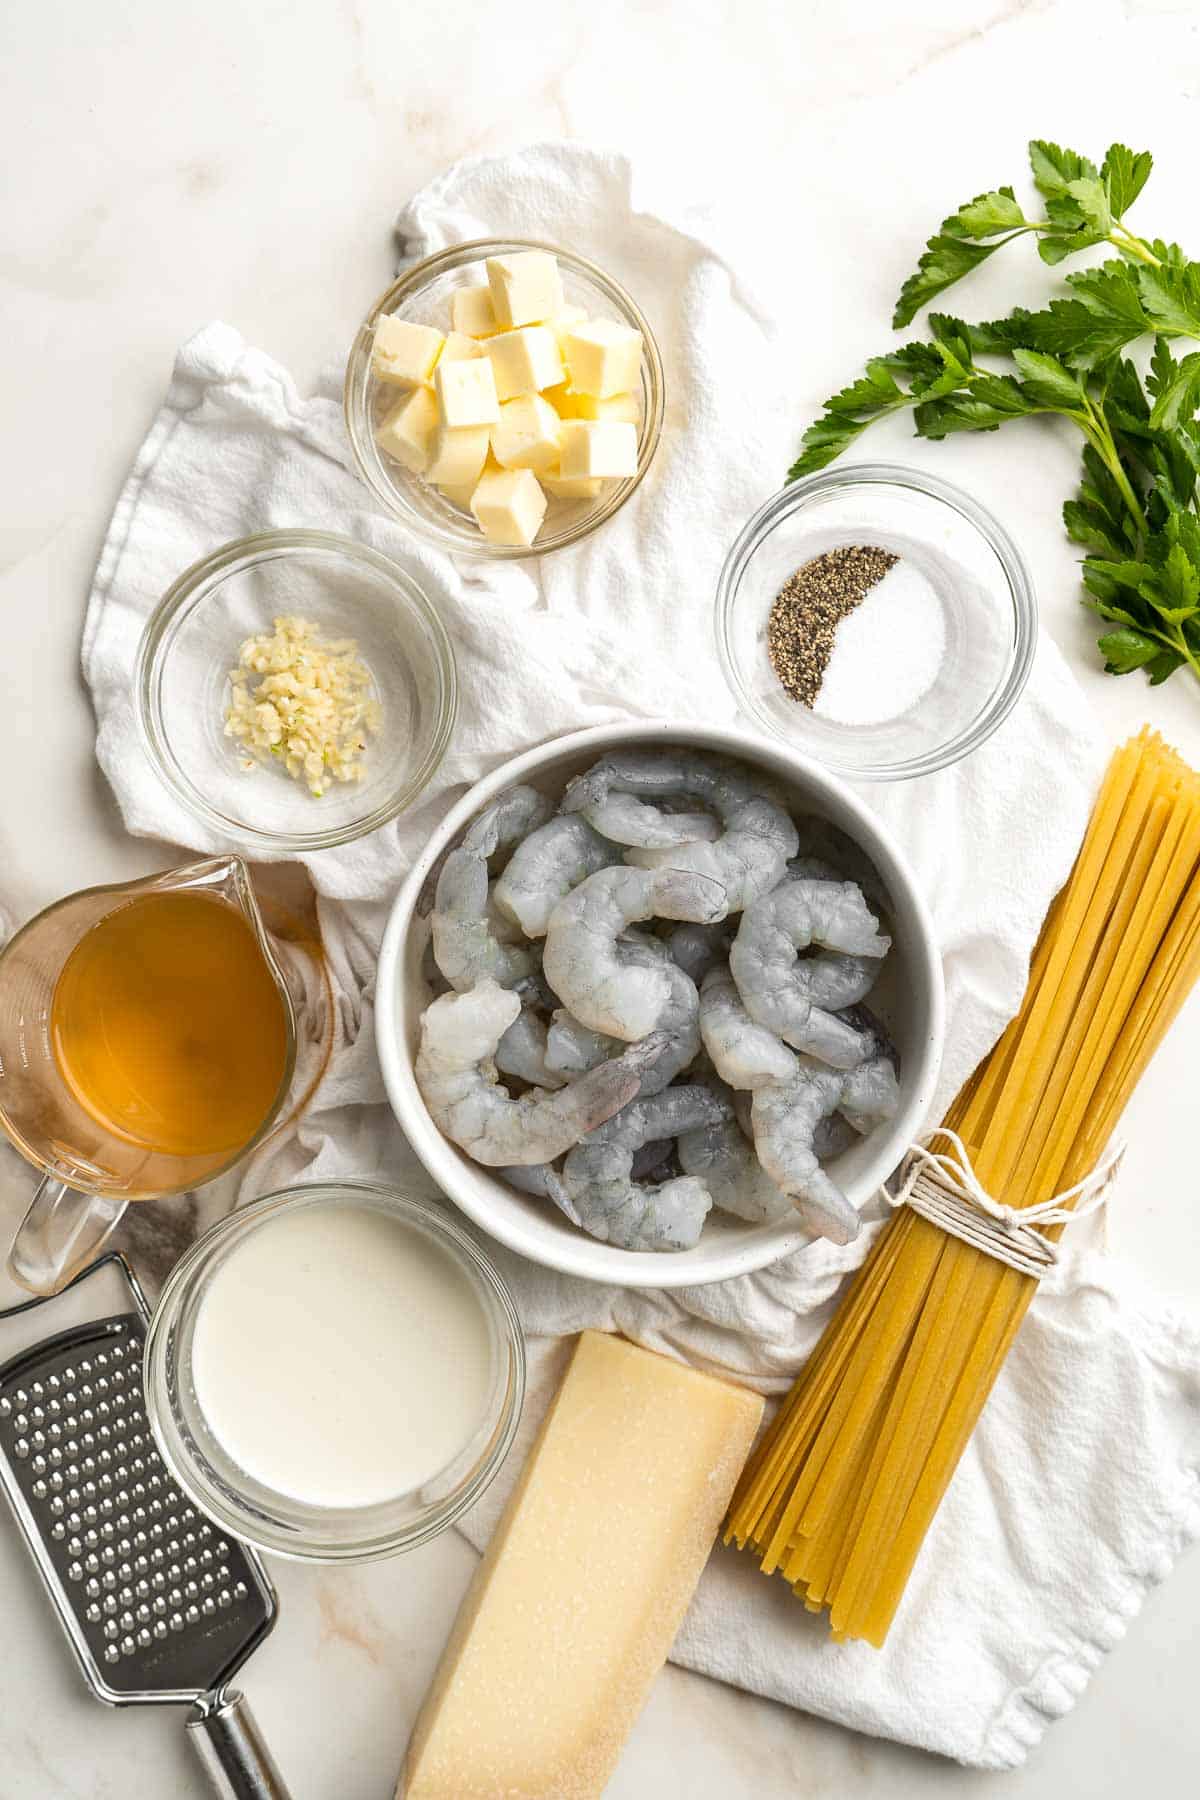
How to Make the Best Shrimp Alfredo
- Cook pasta. Bring a large pot of water to a boil over medium-high heat. Add fettuccine and a little bit of salt and cook until al dente according to package directions, about 10 minutes for dry pasta (3-5 minutes for fresh fettuccine). Drain the noodles well and set aside.
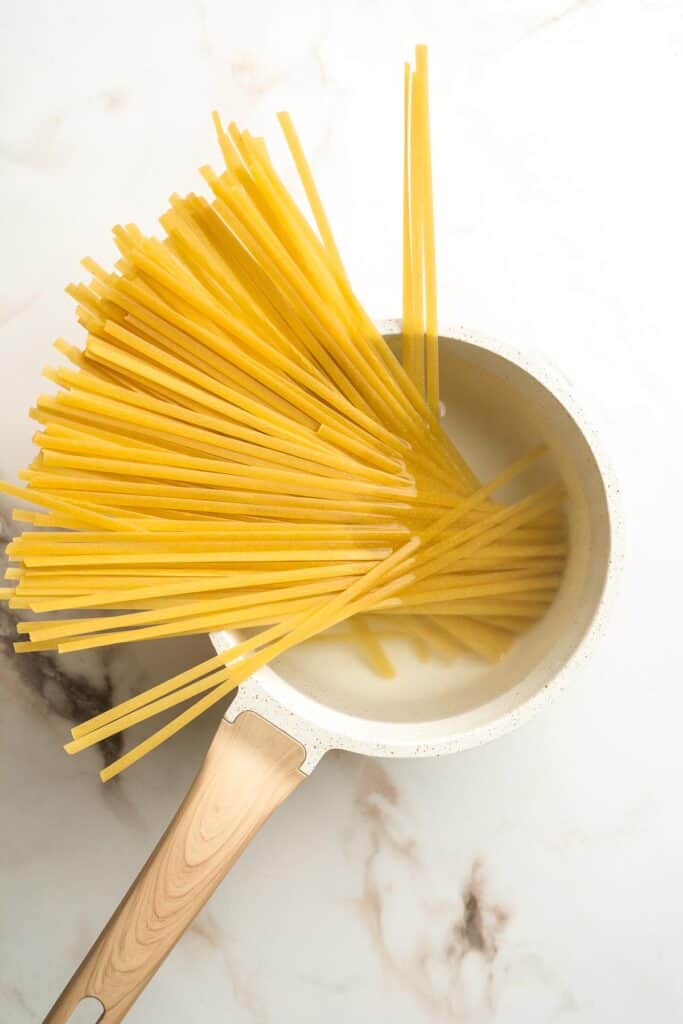
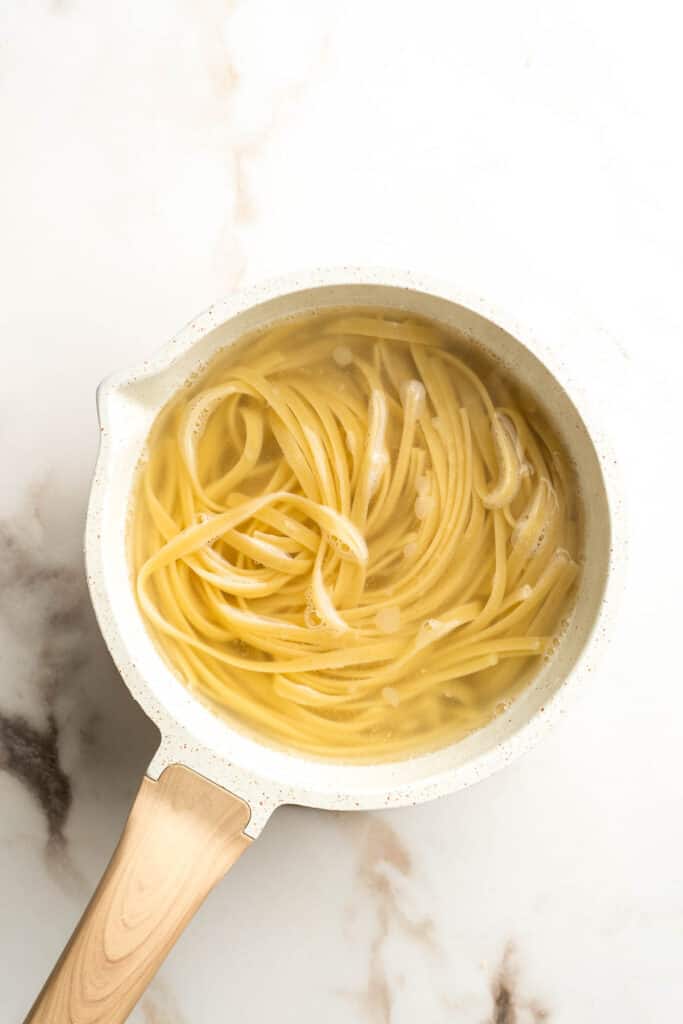
- Make sauce. While cooking the pasta, heat butter in a large skillet over medium-high heat until bubbly, about 1 minute. Add garlic and sauté until fragrant, about 1 minute. Slowly stir in chicken stock and heavy cream. Bring to a simmer, about 2-3 minutes.
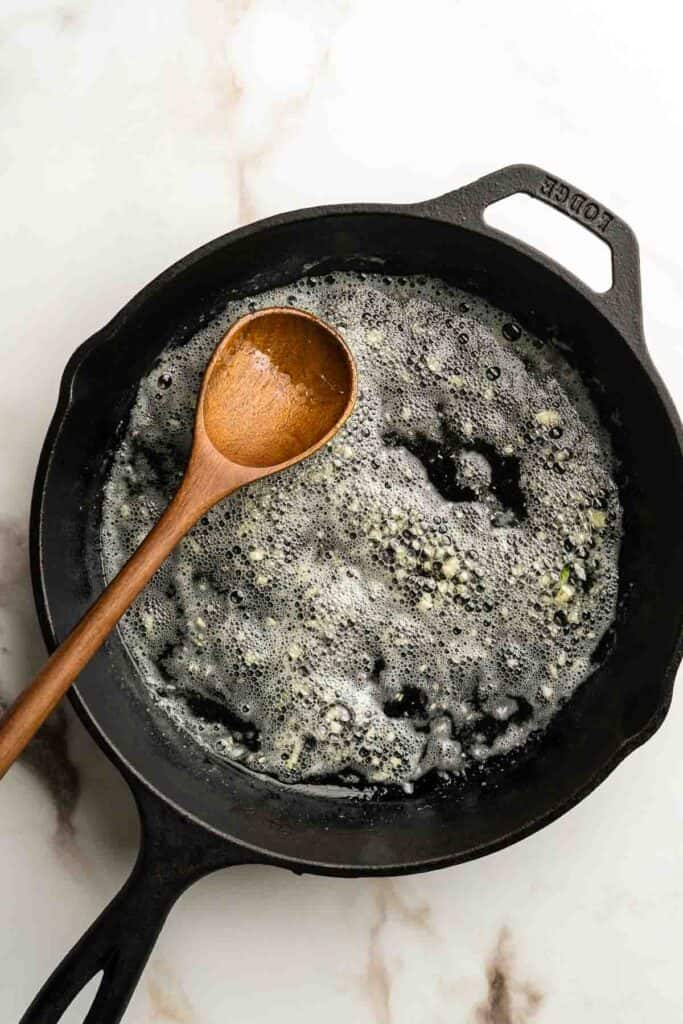
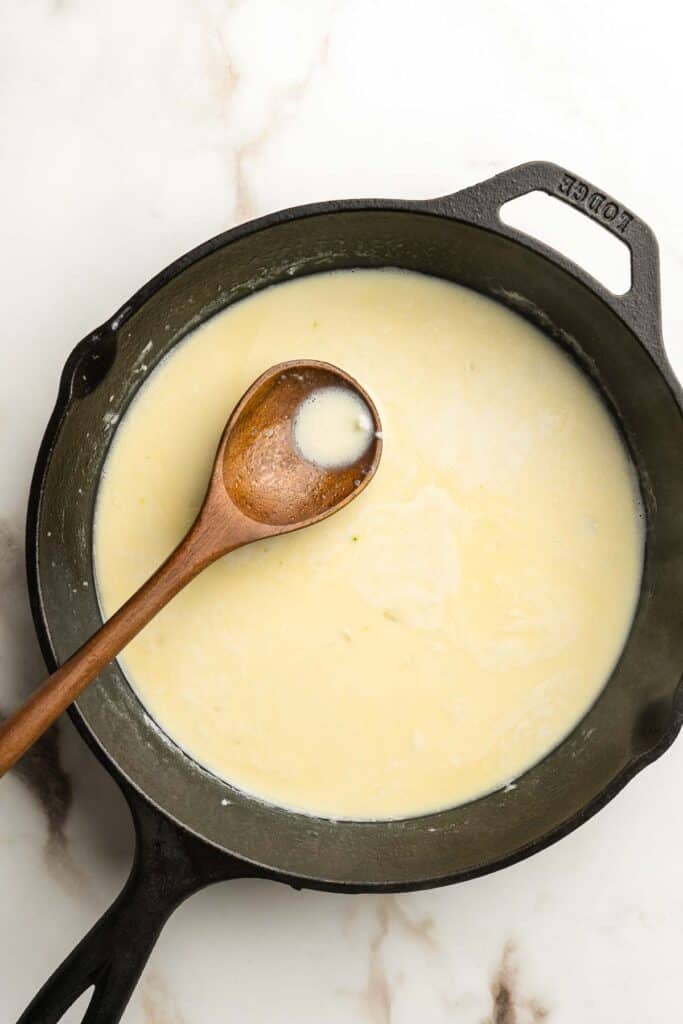
- Add shrimp. Add shrimp and cook for 2-3 minutes on each side until they turn pink.
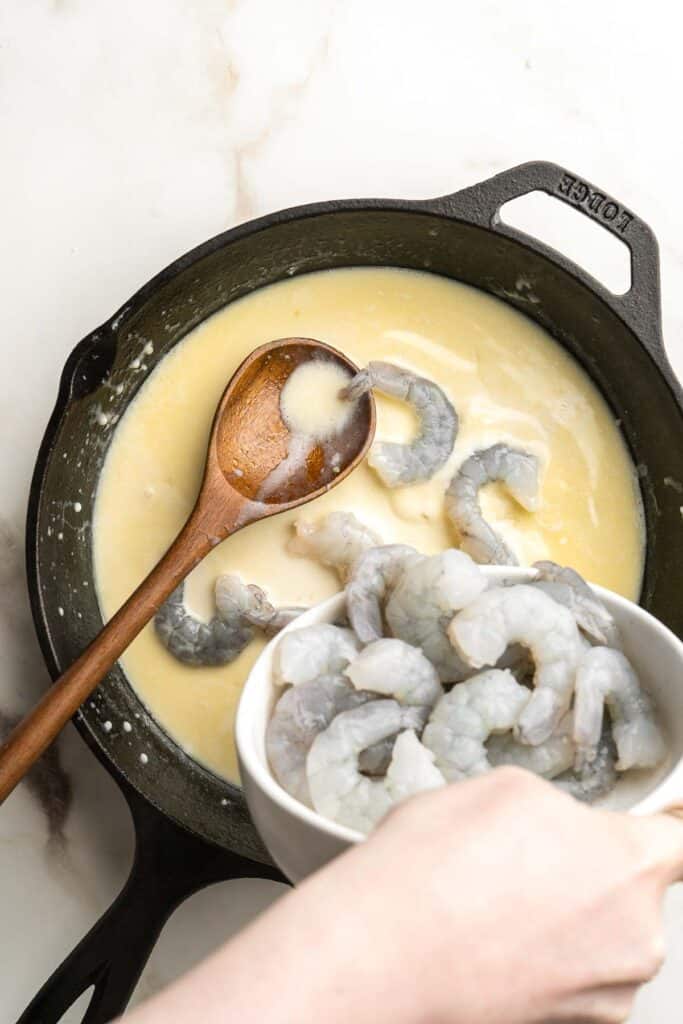
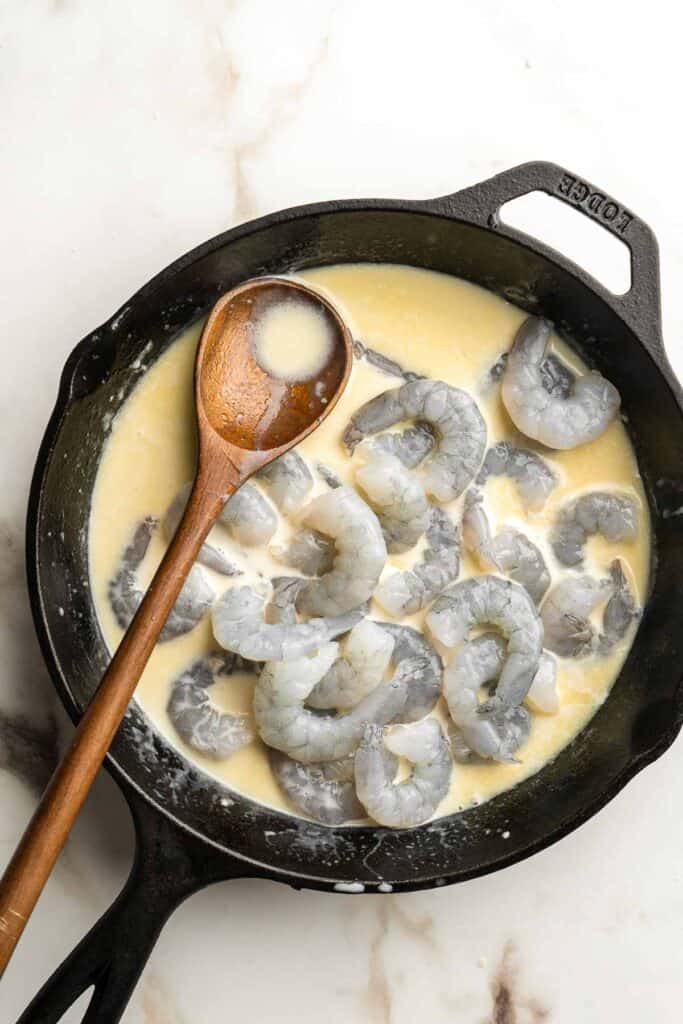
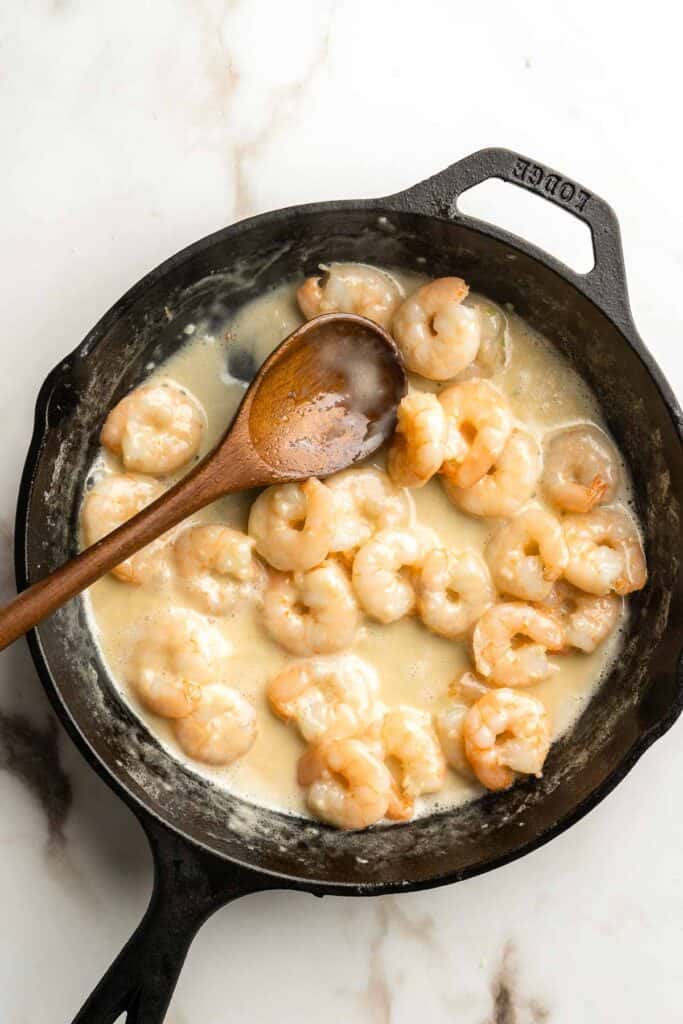
- Add cheese. Add Parmesan cheese and season with salt and pepper. Mix well until smooth and thickened to a desired consistency, about 1-2 minutes.
- Toss in pasta. Add cooked fettuccine and toss well to coat.
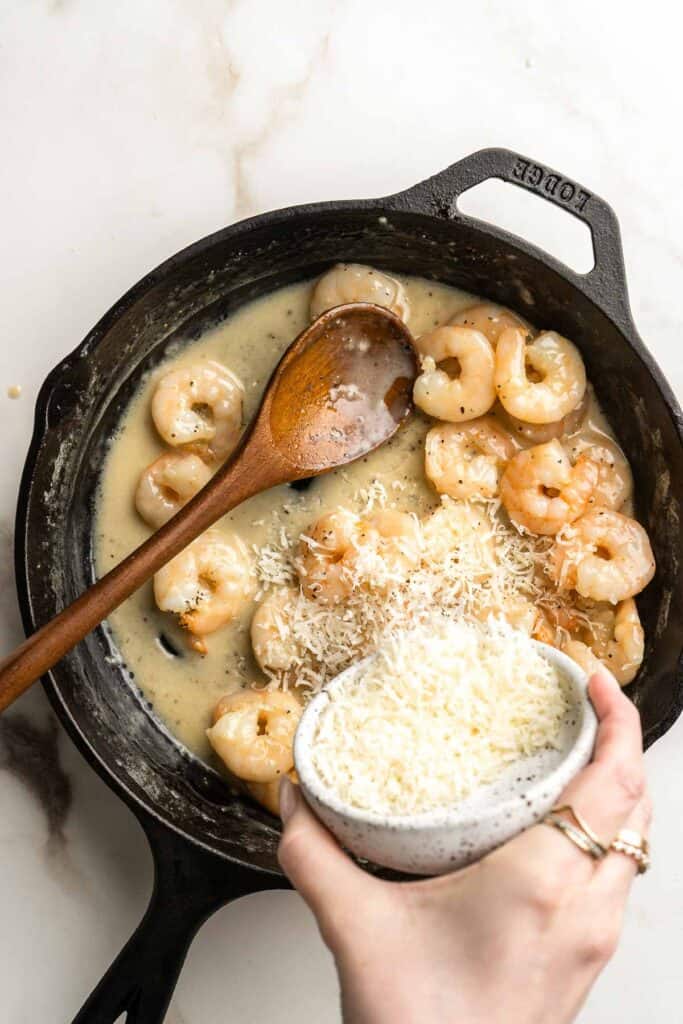
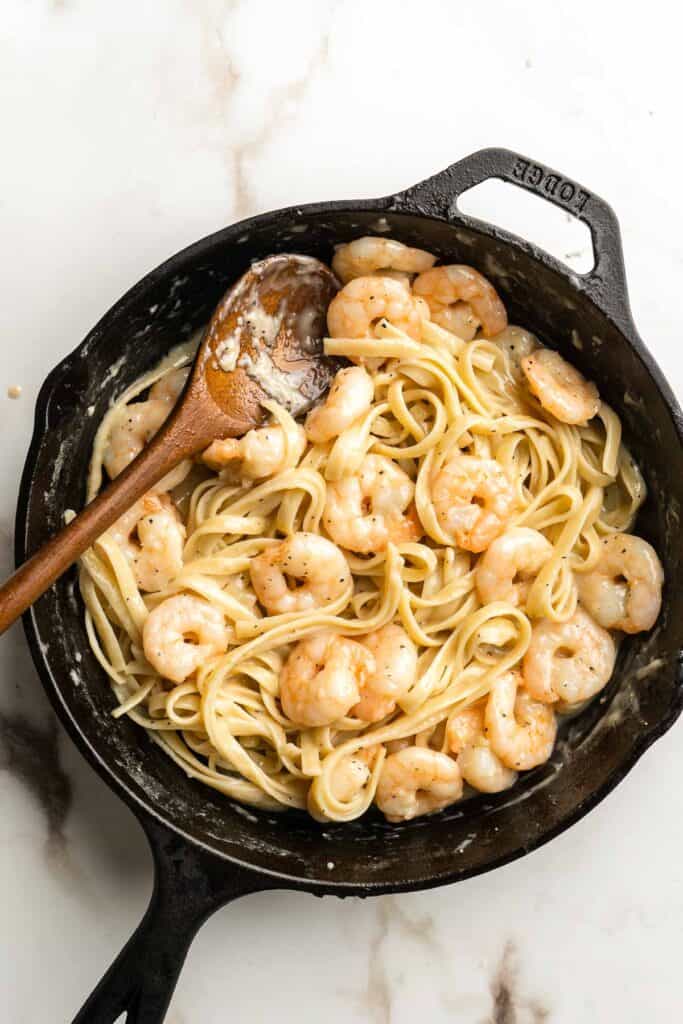
- Serve. Garnish with parsley and extra Parmesan, if desired, and serve warm.
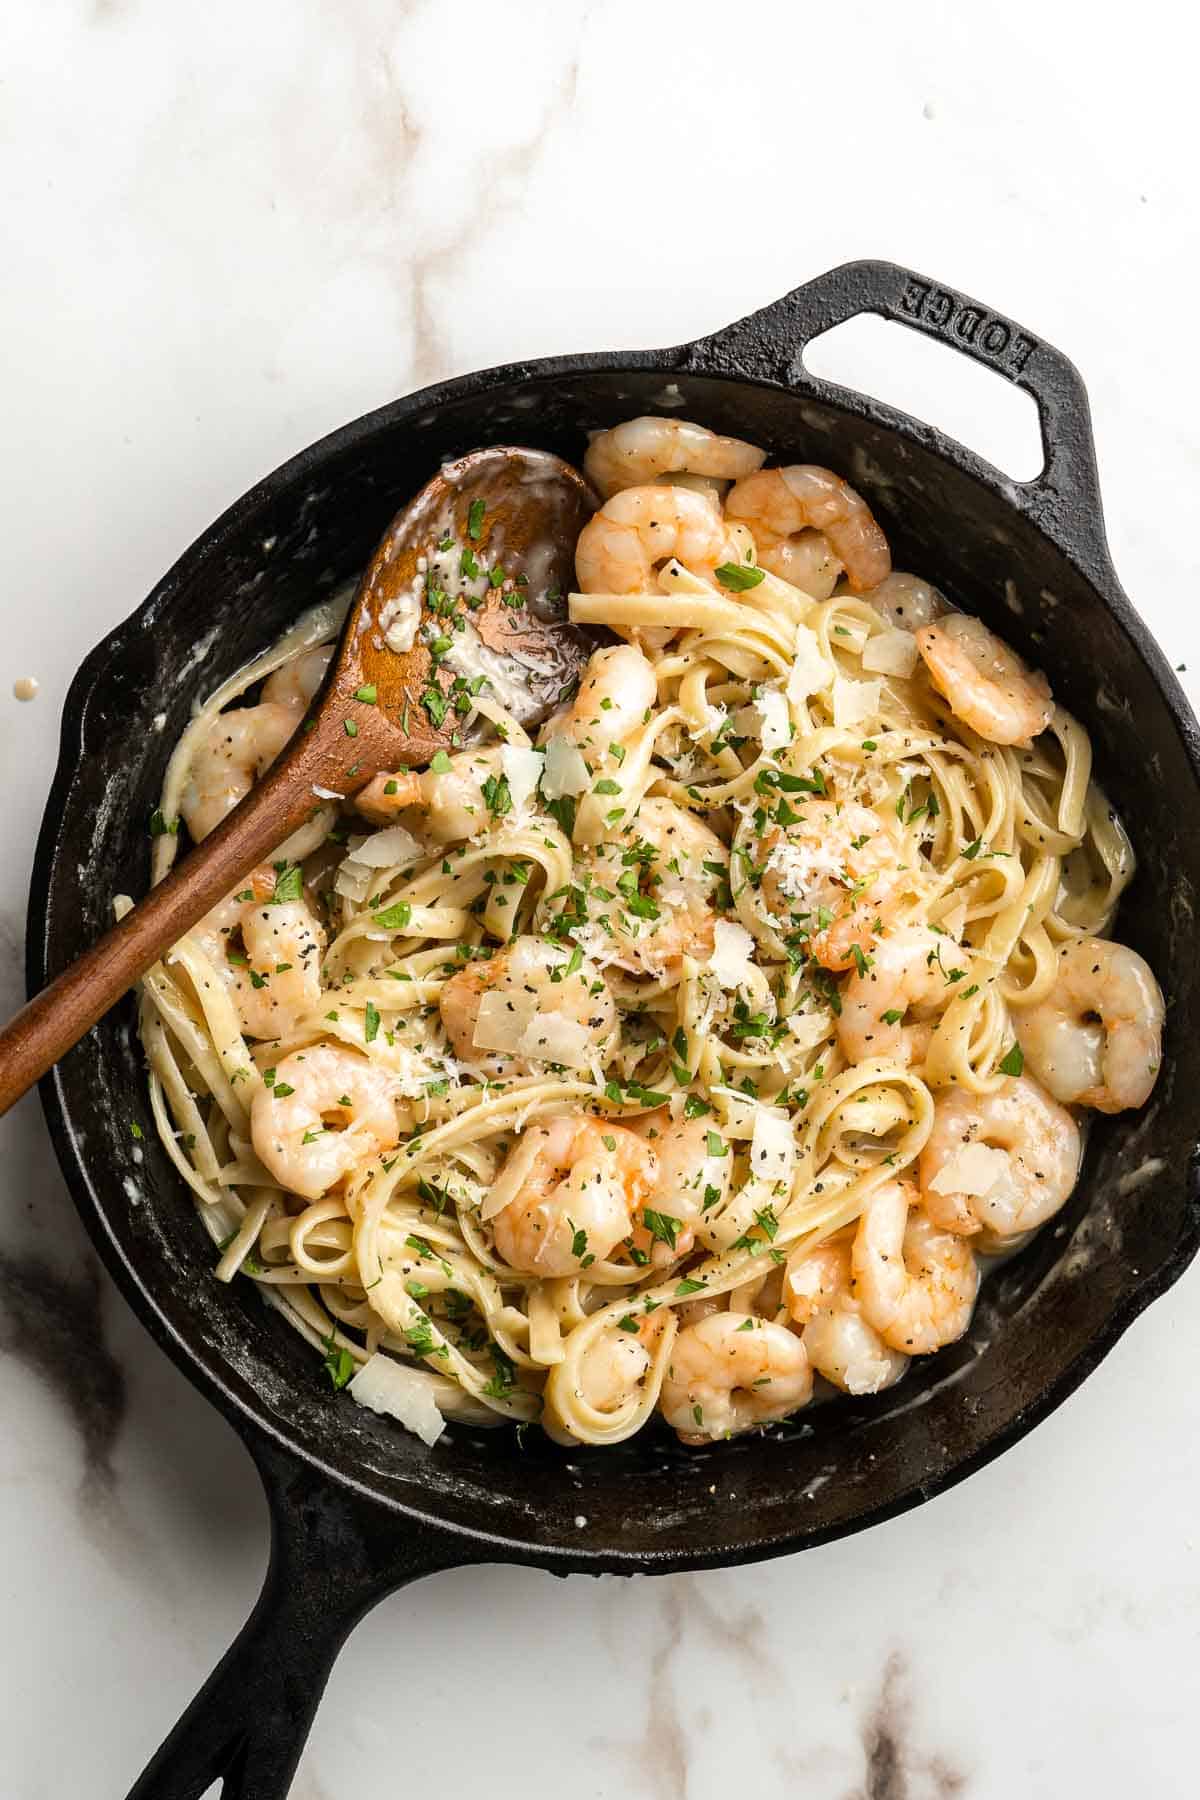
Recipe Variations
- Change the protein: Change the protein in this dish by using shredded chicken, oven baked chicken or bacon.
- Add veggies. Feel free to add some cooked veggies into the sauce for a heartier option. Some favorites are mushrooms, asparagus, or tomatoes. You can also stir in a few handfuls of spinach or baby kale at the end until wilted (in the last minute of cooking).
- Garnish with fresh herbs. We garnished with fresh parsley, but you can use other fresh herbs such as basil or oregano. Herbs add a burst of freshness and color to this pasta dish.
- Top with cheese. Add extra cheese by serving with a generous sprinkling of parmesan cheese on top.
How to Serve
This Shrimp Alfredo is delicious served on its own, or make it go a little further with some delicious sides such as steamed veggies (broccoli is a great one!) and breadsticks to scoop up every last bit of creamy sauce. Our favorites are:
For more, see our 30 Side Dishes for Pasta.
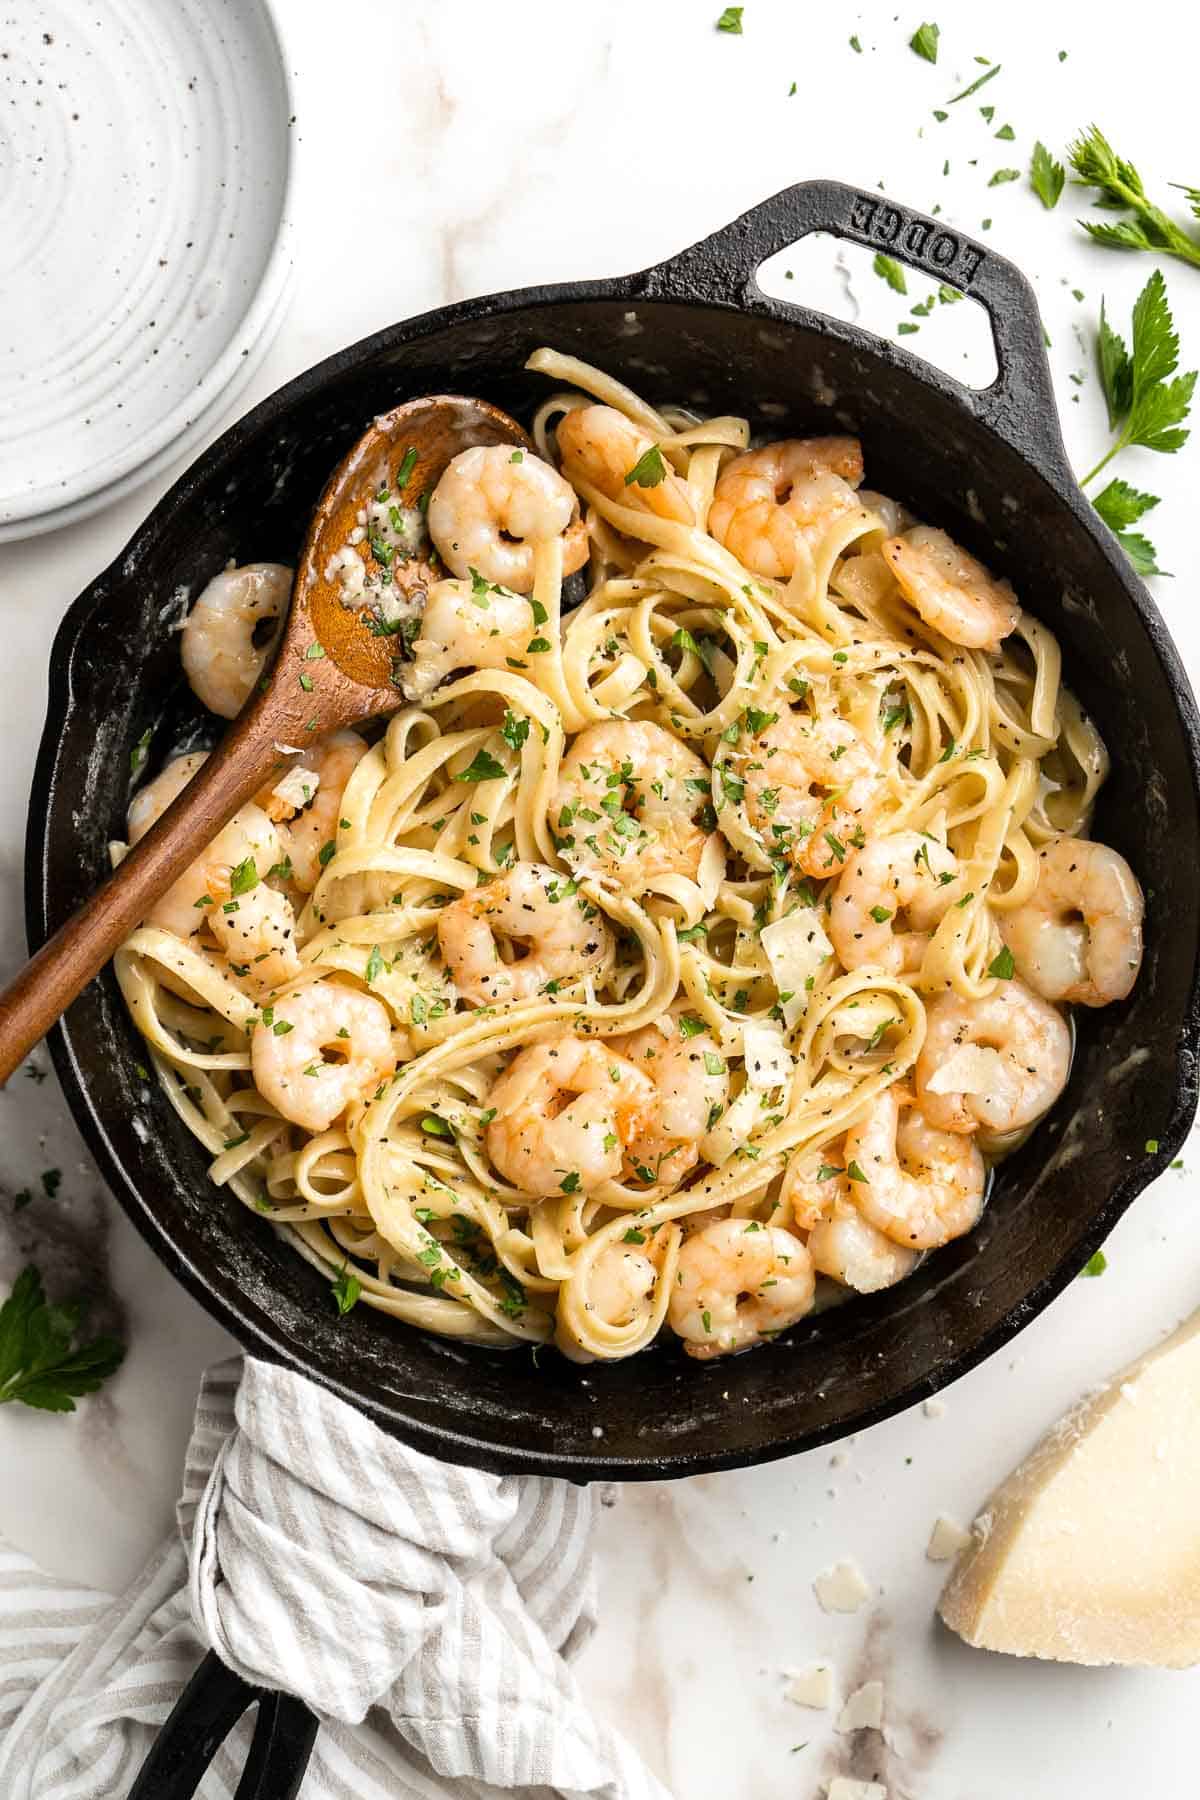
Recipe Tips and Tricks
- Cook the pasta al dente. Cook the pasta until it is just tender, but still has some bite to it. This will prevent the pasta from becoming mushy and will result in a better texture when tossed in the homemade alfredo sauce.
- Don't skimp on the shrimp. The shrimp is the star of this dish - without it, it's more of a simple pasta side. Use large or jumbo shrimp (and plenty of it) to keep diners full and satisfied! If you have to use smaller shrimp, increase the amount to beef up the pasta.
- How to prepare shrimp. To prepare the shrimp, cut through the shell along the back with kitchen scissors. Remove the shells (and tails), and rinse to remove the veins. Pat dry each shrimp completely with a paper towel.
- Make extra for a rainy day. This garlicky shrimp alfredo is really freezer friendly! Stash away leftovers or double the recipe and freeze a portion for an easy heat-and-serve meal when you don't have time or energy to cook from scratch.
Storing and Freezing Instructions
How to Store
Transfer cooled shrimp alfredo to an airtight container and refrigerate for up to four days.
How to Reheat
Reheat leftover shrimp pasta on the stovetop over medium-low heat until heated through or microwave on medium power for 60-90 seconds until warm.
How to Freeze
Transfer leftover shrimp alfredo to a freezer-safe, airtight container such as an airtight container or freezer bag and freeze for up to 3 months. When you're ready to eat it, allow it to thaw overnight in the refrigerator and then reheat as directed above.
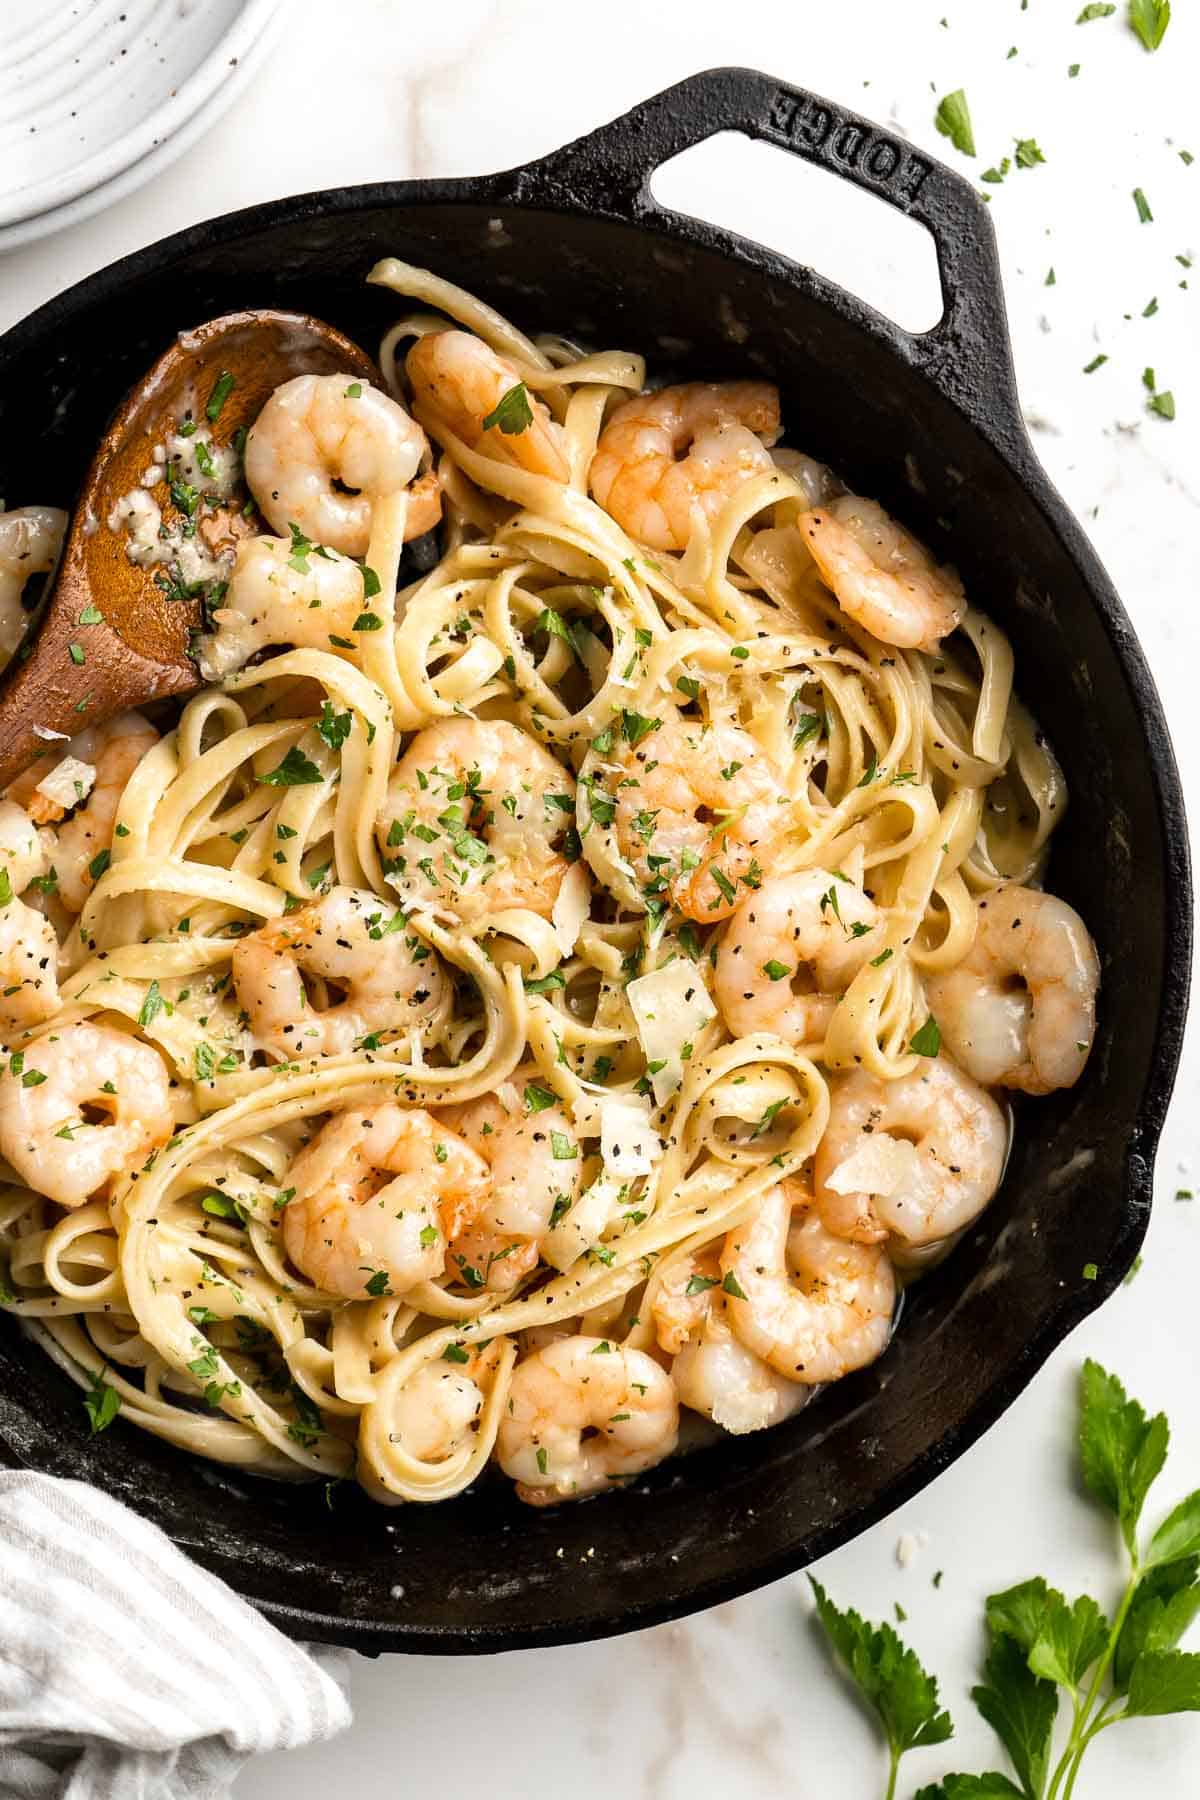
More Pasta Recipes
- 40 Best Pasta Recipes
- Shrimp Fettuccine Alfredo Pasta Bake
- Creamy Shrimp Pasta with Sun-dried Tomatoes
- Fettuccine Alfredo
- Mascarpone Pesto Pasta
- Creamy Salmon Pasta
Tried this recipe?
I'd love to hear what you think! Leave a comment and rating below to share your feedback. Your reviews help others discover this recipe and help me keep creating more free recipes for you. Snap a photo and tag me on social media @aheadofthyme too.
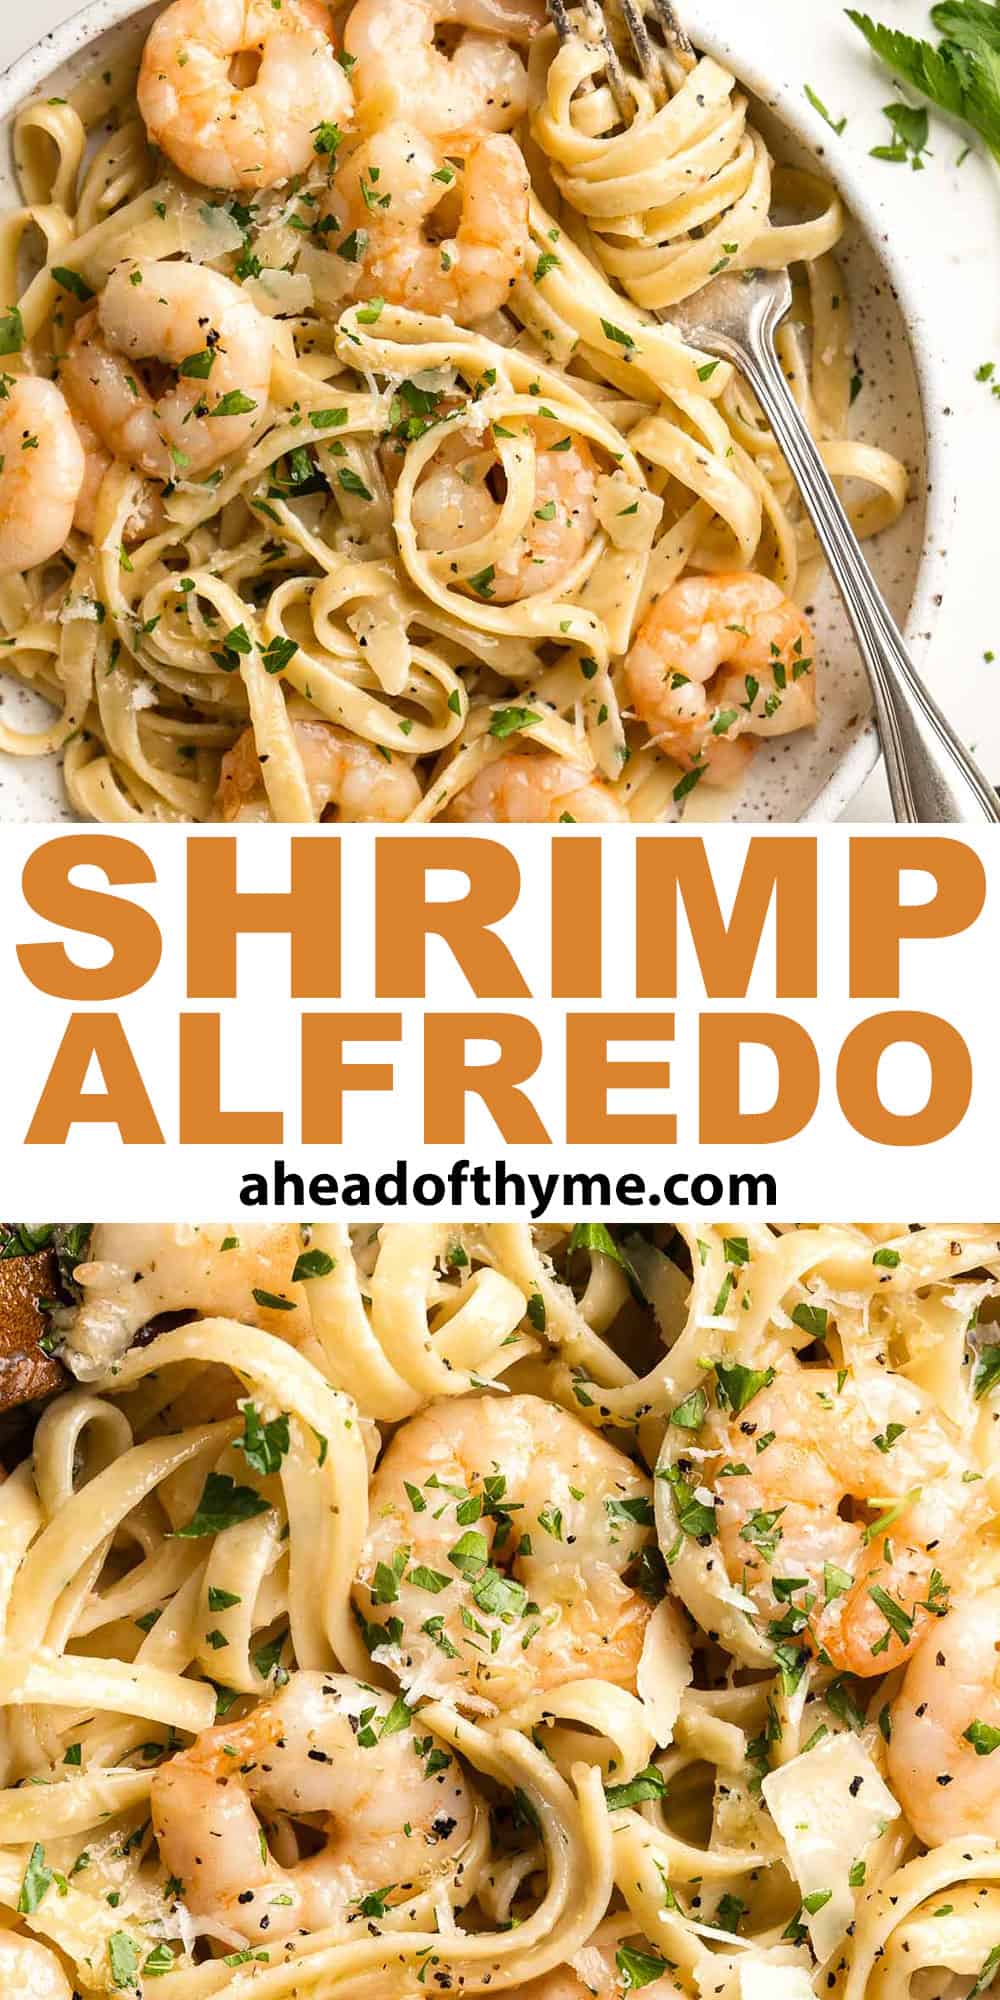
Coconut Maple Walnut Granola
Coconut Maple Walnut Granola is an easy to make snack that is packed with crunch, mildy sweet, and incredibly delicious. With a slightly coconut flavor, pure maple syrup, and three kinds of nuts, this homemade granola has a unique, all-natural flavor that can't be beat. It's also gluten-free, vegan, and refined sugar-free!
With just five minutes of active preparation (and 30 minutes of baking) you can have fragrant, toasty, nutty granola ready for snacking. Eat it on its own or use it as a topping - either way, we guarantee you'll never look at granola the same way again. Serve it warm or at room temperature for best results!
Why You'll Love this Coconut Maple Walnut Granola
- Great for on-the-go snacking! Packed with energy-boosting nuts like walnuts, almonds, and pecans, this granola is the ideal snack for days when you're rushing out the door or running from place to place. Just toss in a snack bag and go!
- So easy to make. Once you try making granola from scratch just once, you may never go back to store-bought. It's so easy and simple to make. You will need about 5-10 minutes of actual prep work before letting the oven do the rest.
- Better than store-bought granola. This homemade maple walnut granola is undeniably better than your usual store-bought granola - it's more cost-effective, customizable, and packed with nutritious ingredients.
- No artificial ingredients. All of the good stuff and none of the junk! Coconut maple walnut granola is made with ingredients you're already familiar with and no artificial flavorings or preservatives, so you can serve it guilt-free. Plus, it's vegan and refined sugar-free too!
- So many ways to eat it. I love granola. I eat it for breakfast over Homemade Yogurt or in a Fruit and Yogurt Parfait or as my morning cereal with milk. I eat it by the handful throughout the day as a snack. I simply cannot get enough.
- A quick energy boost. Granola is my snack of choice when embarking on outdoor activities and going on hikes. It gives me enough energy to make it up the mountain and take in the gorgeous views at the top. I always have a batch of these nutty clusters on hand.
Ingredient Notes
To make this delicious Coconut Maple Walnut Granola, you will need the following ingredients (full measurements in recipe card below):
- oats - use rolled oats or large flake oats for granola - not quick oats.
- walnuts - you can buy them whole and chop them yourself or buy them pre-chopped to save time and effort!
- almonds - use slivered almonds (sliced almonds).
- pecans - just like the walnuts, you can chop them yourself or use pre-chopped pecans.
- maple syrup - using processed or artificially flavored maple syrup will change the taste of the granola. You can also use pure honey instead of maple syrup, but note that the recipe will no longer be vegan.
- coconut oil - avocado oil or vegetable oil will also work.
- vanilla extract - you can substitute vanilla paste at a 1:1 ratio for a more intense flavor.
- ground cinnamon - you can omit this if you're not a fan of cinnamon.
You will also need measuring cups and spoons, mixing bowl, and a large half sheet baking pan.
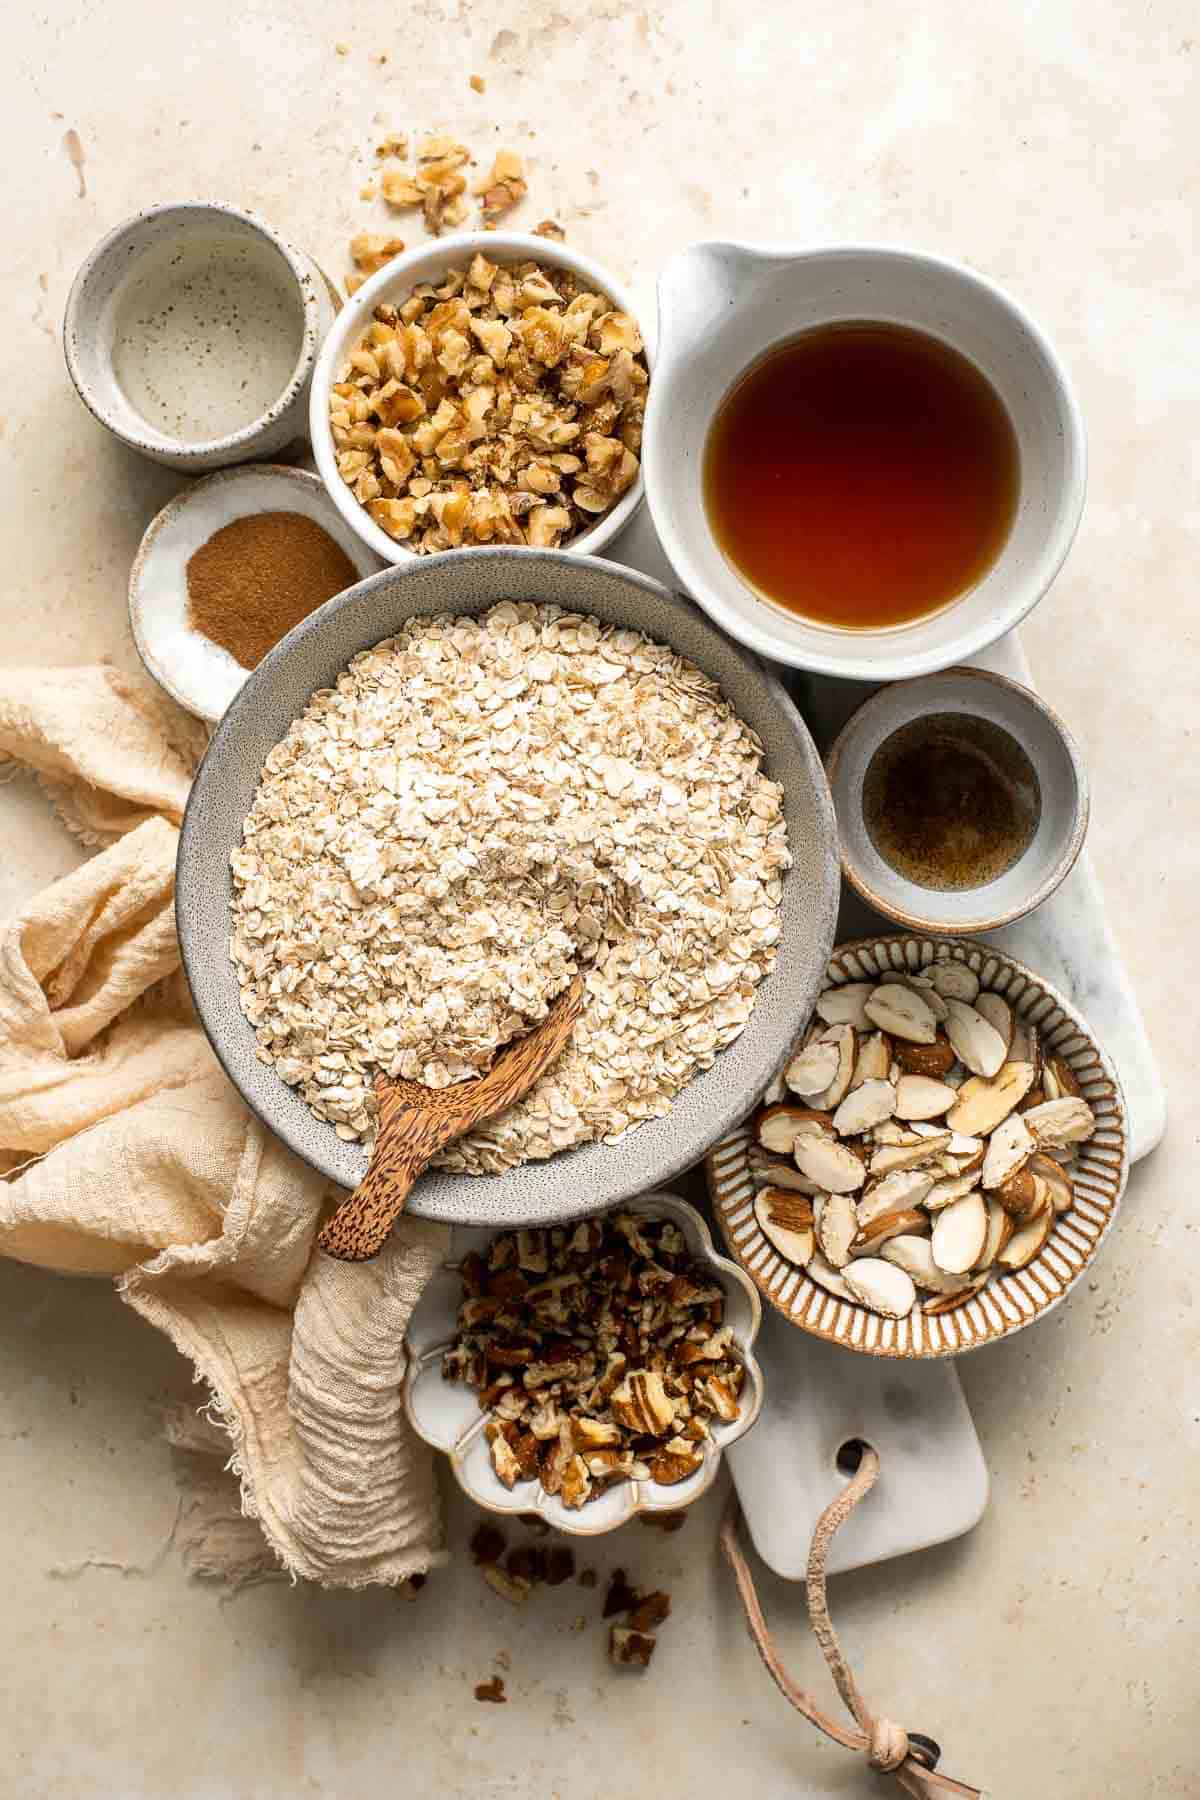
How to Make the Best Coconut Maple Walnut Granola
- Combine dry ingredients. In a large mixing bowl, add oats, walnuts, almonds, and pecans and stir to combine. Set aside.
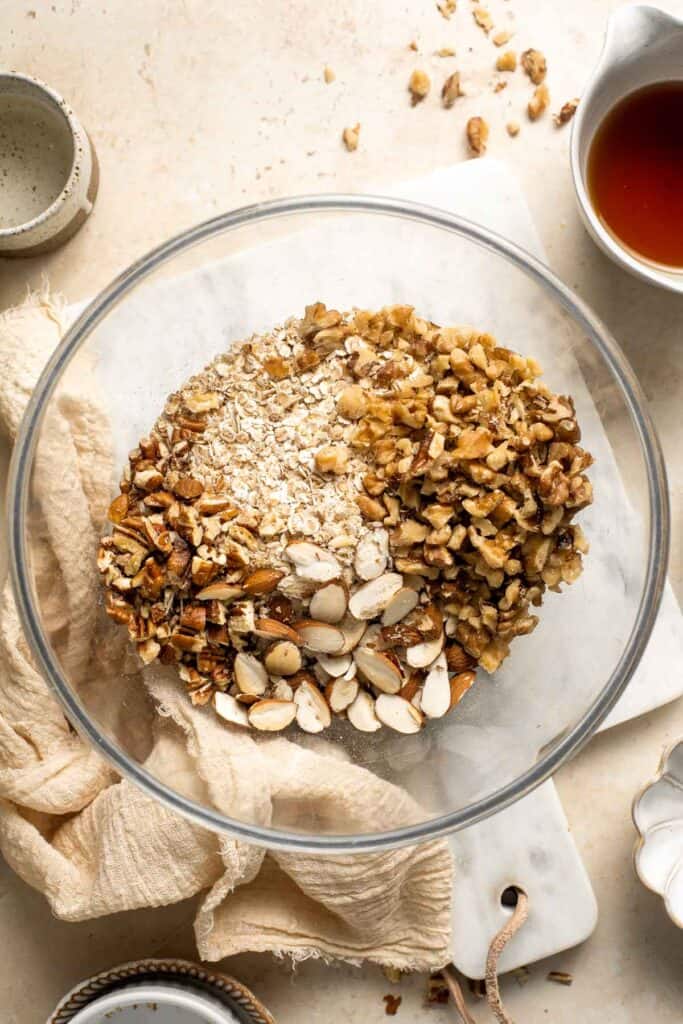
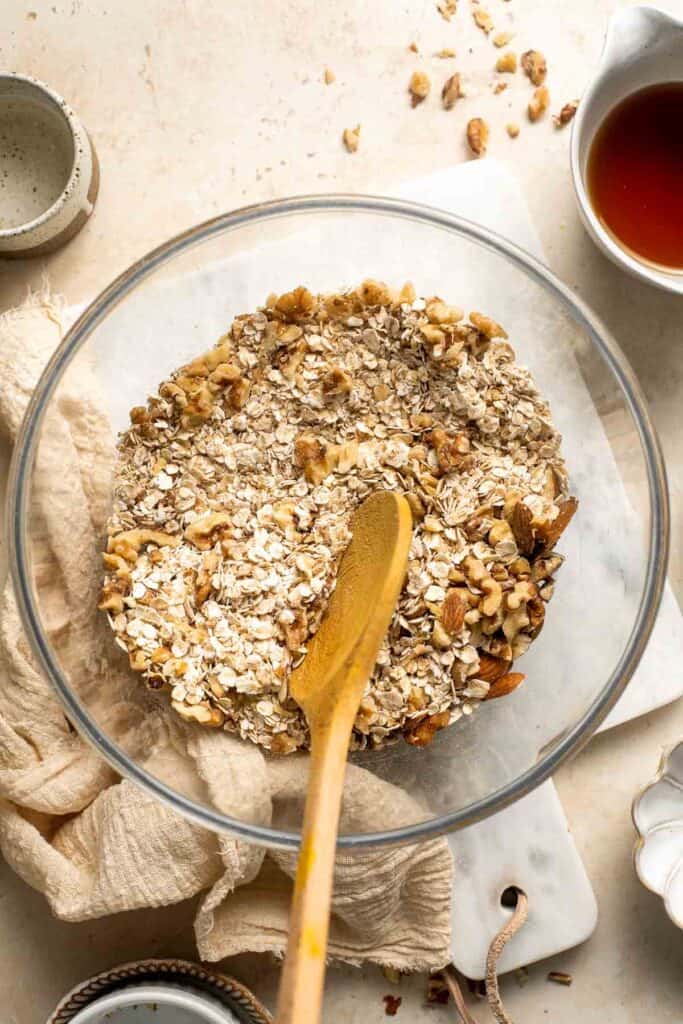
- Combine wet ingredients. In a medium mixing bowl, add maple syrup, coconut oil, vanilla and cinnamon. Stir well to combine.
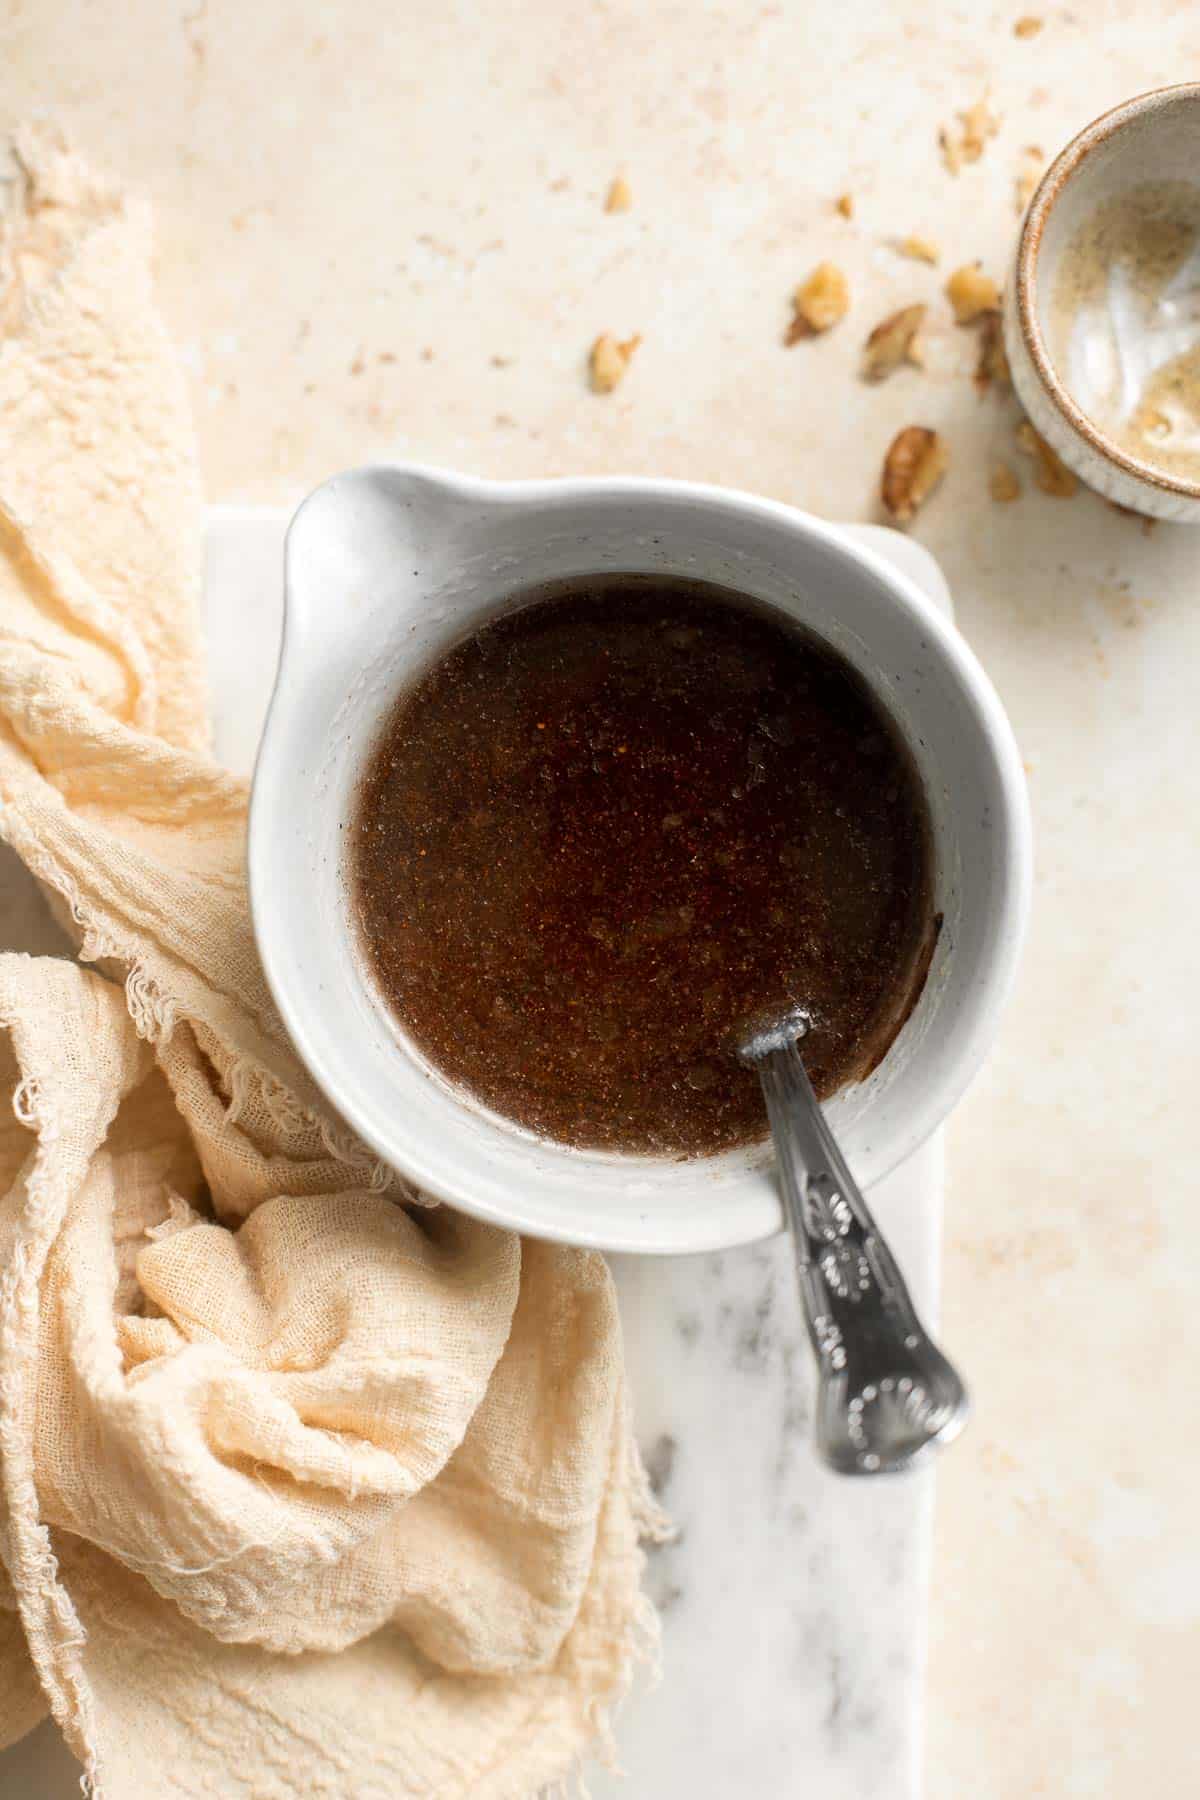
- Add wet to dry. Pour the wet mixture into the dry ingredients. Use a wooden spoon to stir well until combined.
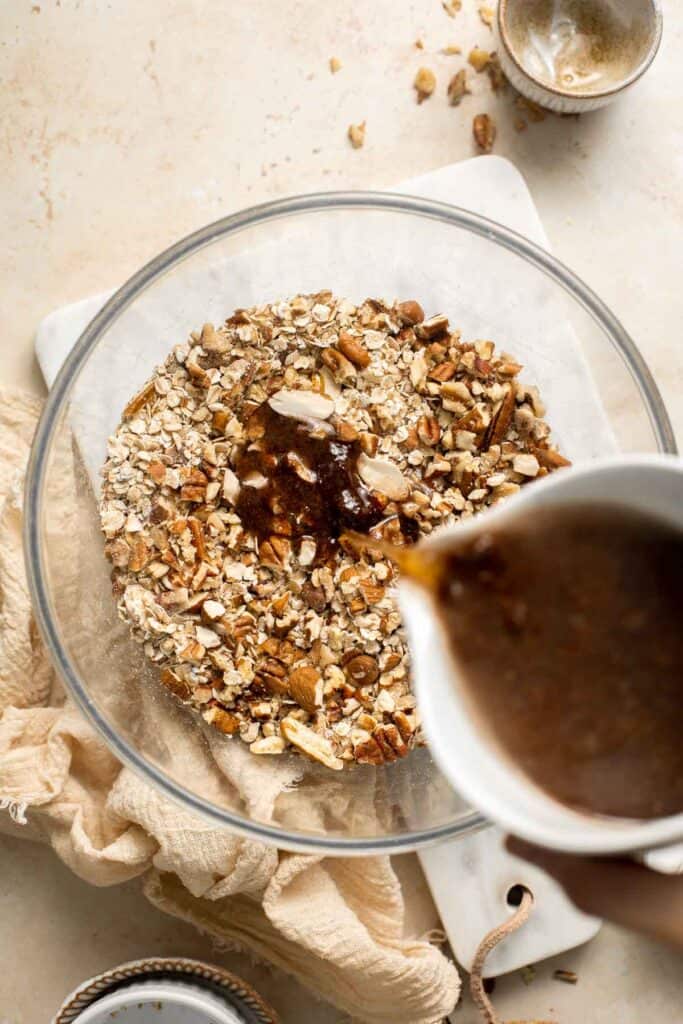

- Spread. Line a large half sheet baking pan with parchment paper, a silicone baking mat, or aluminum foil. Spread the granola mixture evenly into the prepared baking sheet.
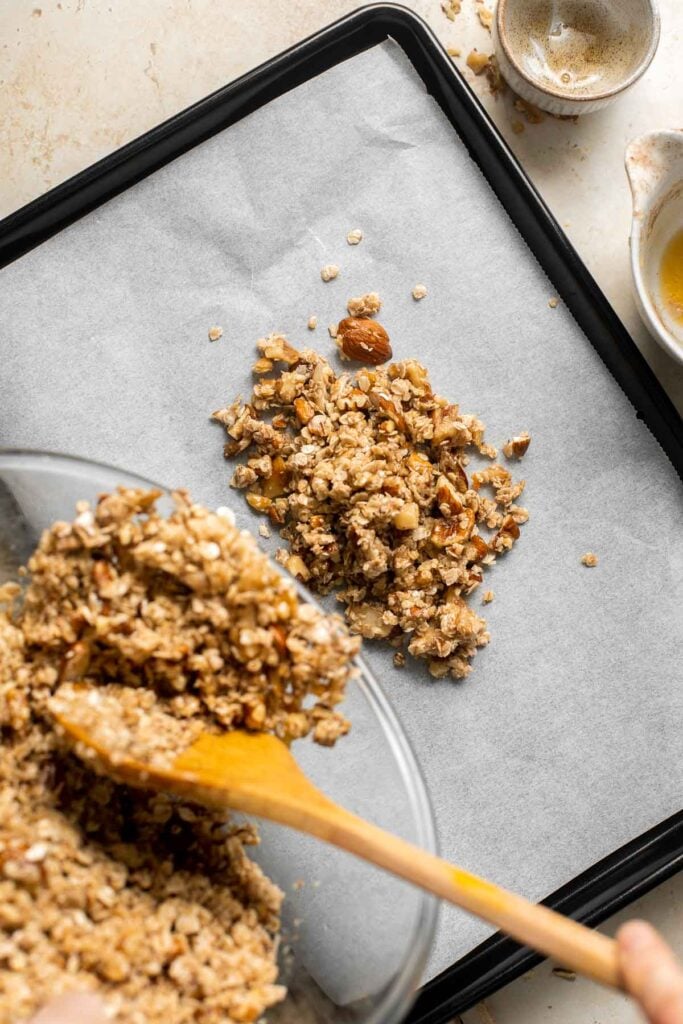
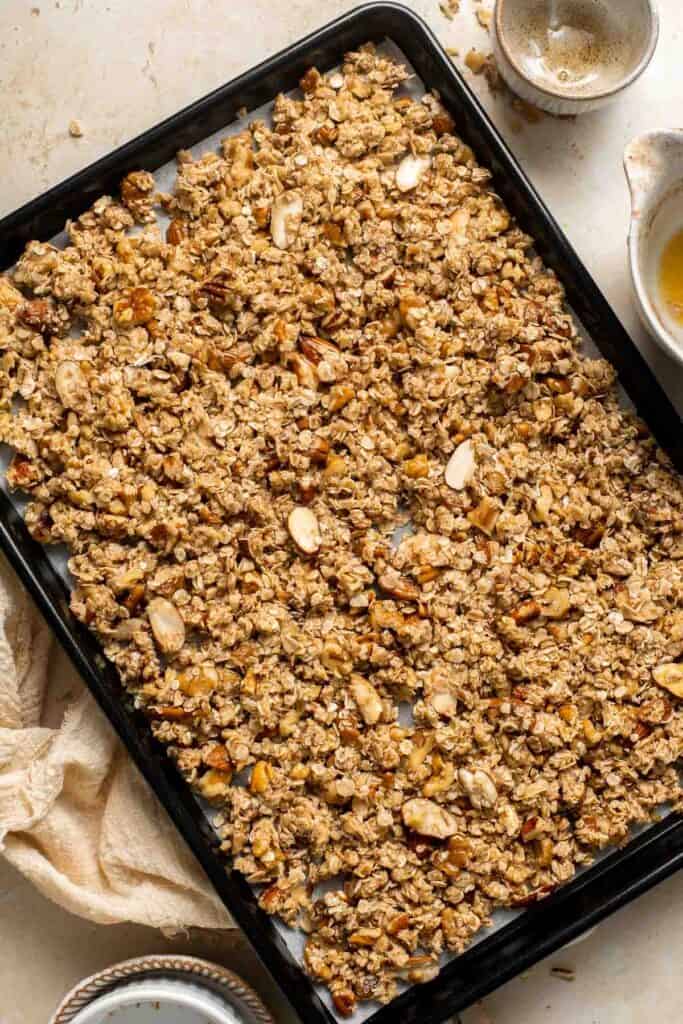
- Bake. Bake in a 300F preheated oven for 30 minutes, taking the tray out of the oven every 10 minutes and give the granola a good stir. Re-spread the granola and put it back into the oven.
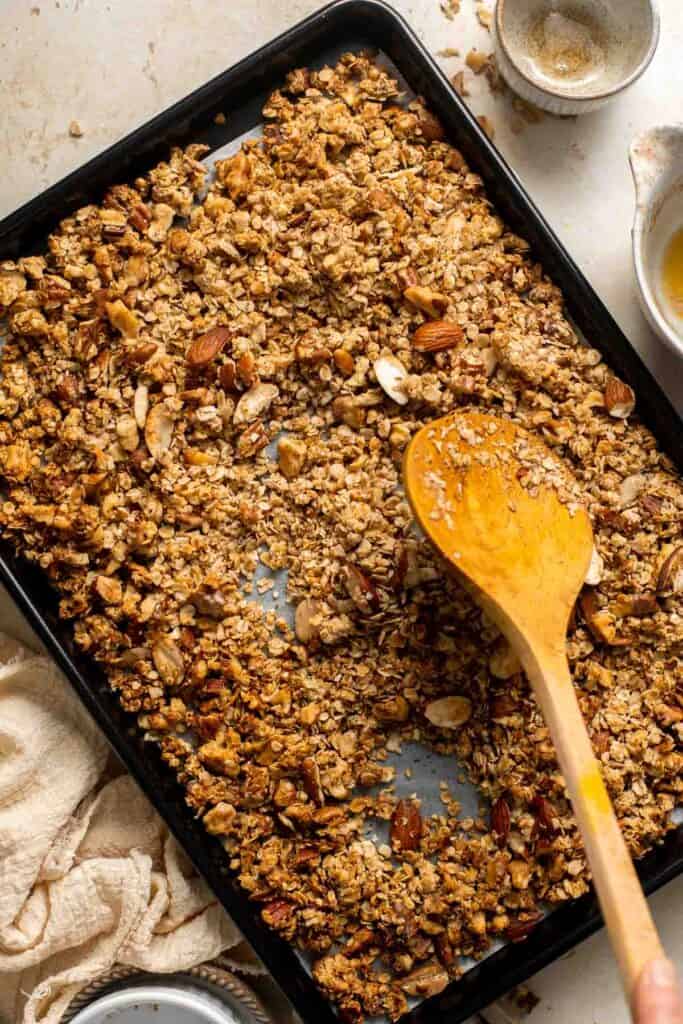

- Cool. Remove the granola from the oven and let cool completely before serving and storing.
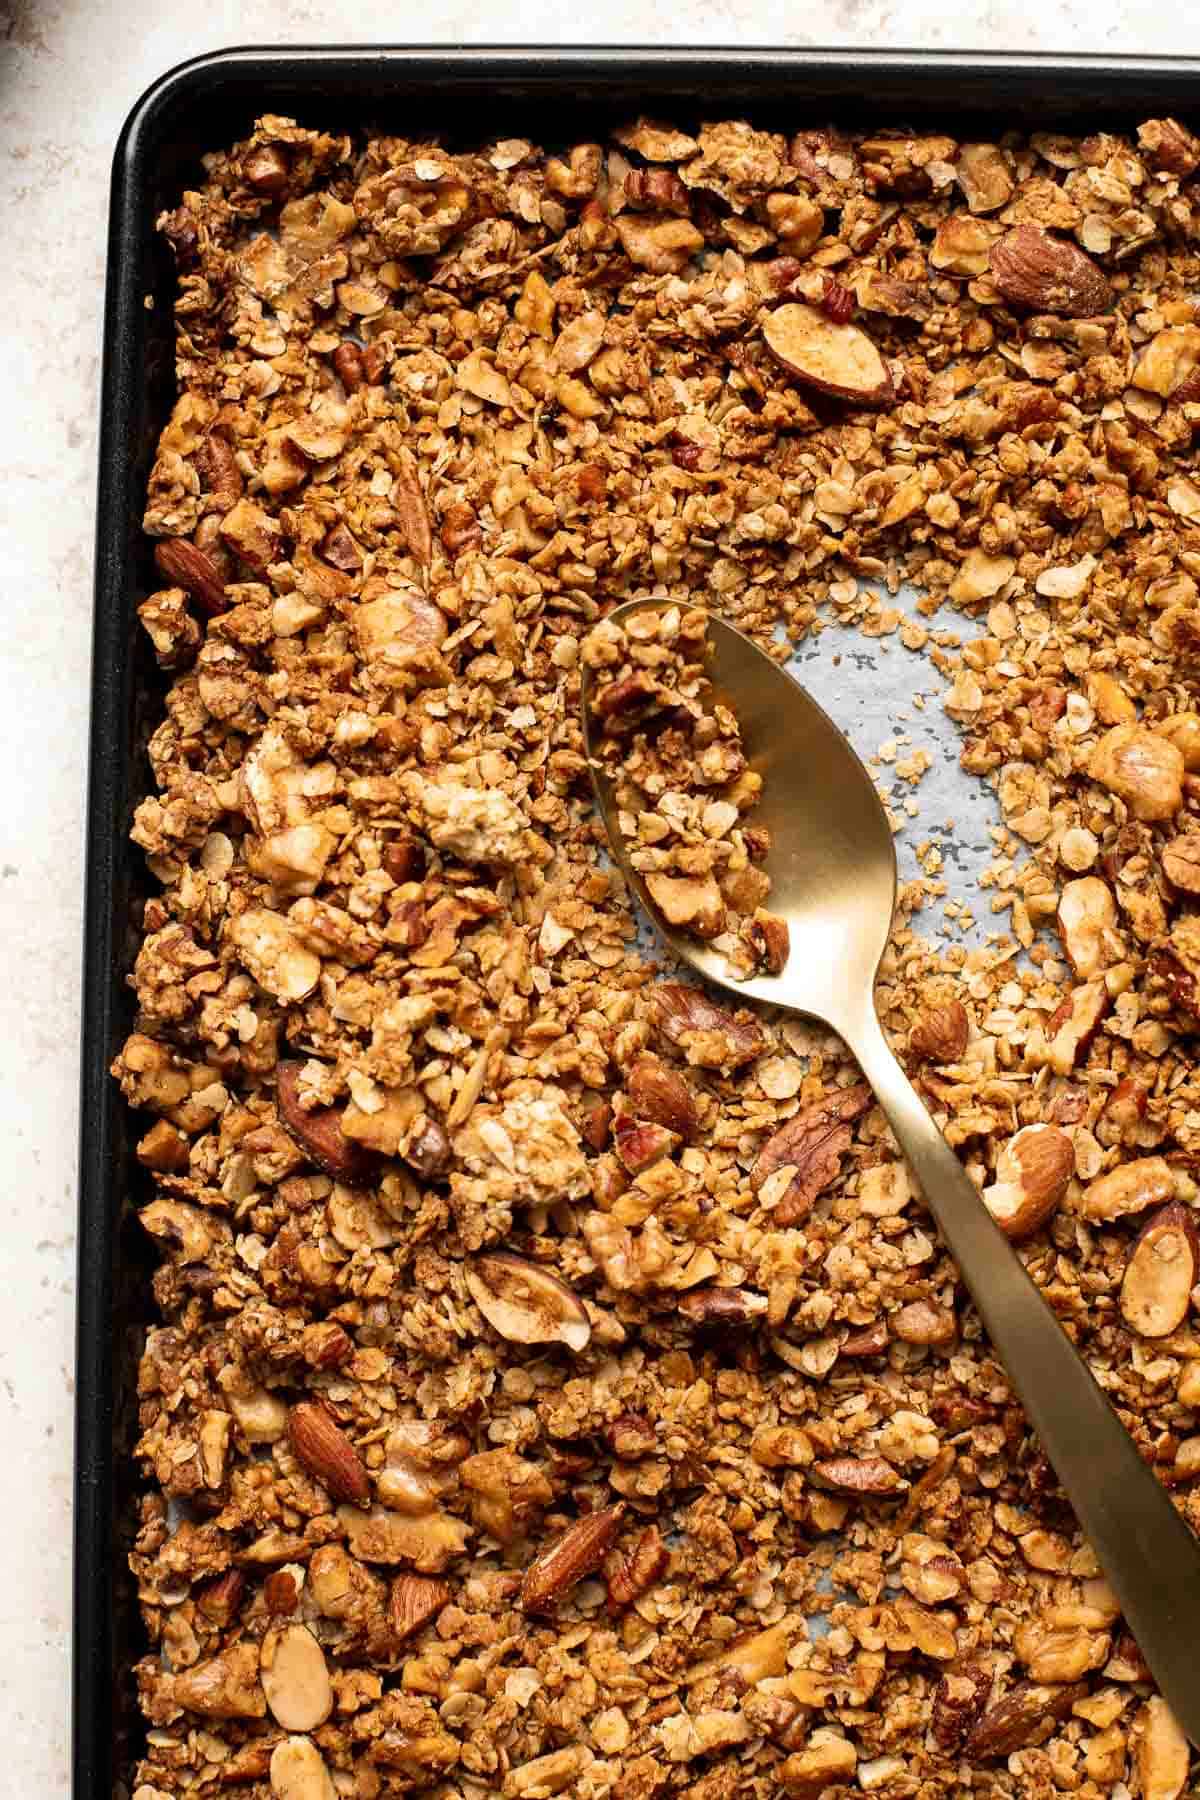
Recipe Variations
- Customize your mix-ins. This coconut maple walnut granola is delicious as is, but it can be endlessly customized to your taste! Feel free to add your favorite granola staples, like more nuts, chocolate chips, cacao nibs, dried fruit, chia or hemp seeds, or whatever you typically like in granola.
- Intensify the coconut flavor. This granola has a very subtle coconut flavour from the coconut oil. To increase the coconut taste, add ½ cup shredded, unsweetened coconut.
How to Serve
This Coconut Maple Walnut Granola is delicious served on its own as a snack by the handfuls, or in a variety of different ways:
- add it on top of milk or yogurt
- layer it in a fruit and yogurt parfait
- top it on banana toast with honey
- serve over a couple scoops of vanilla ice cream.
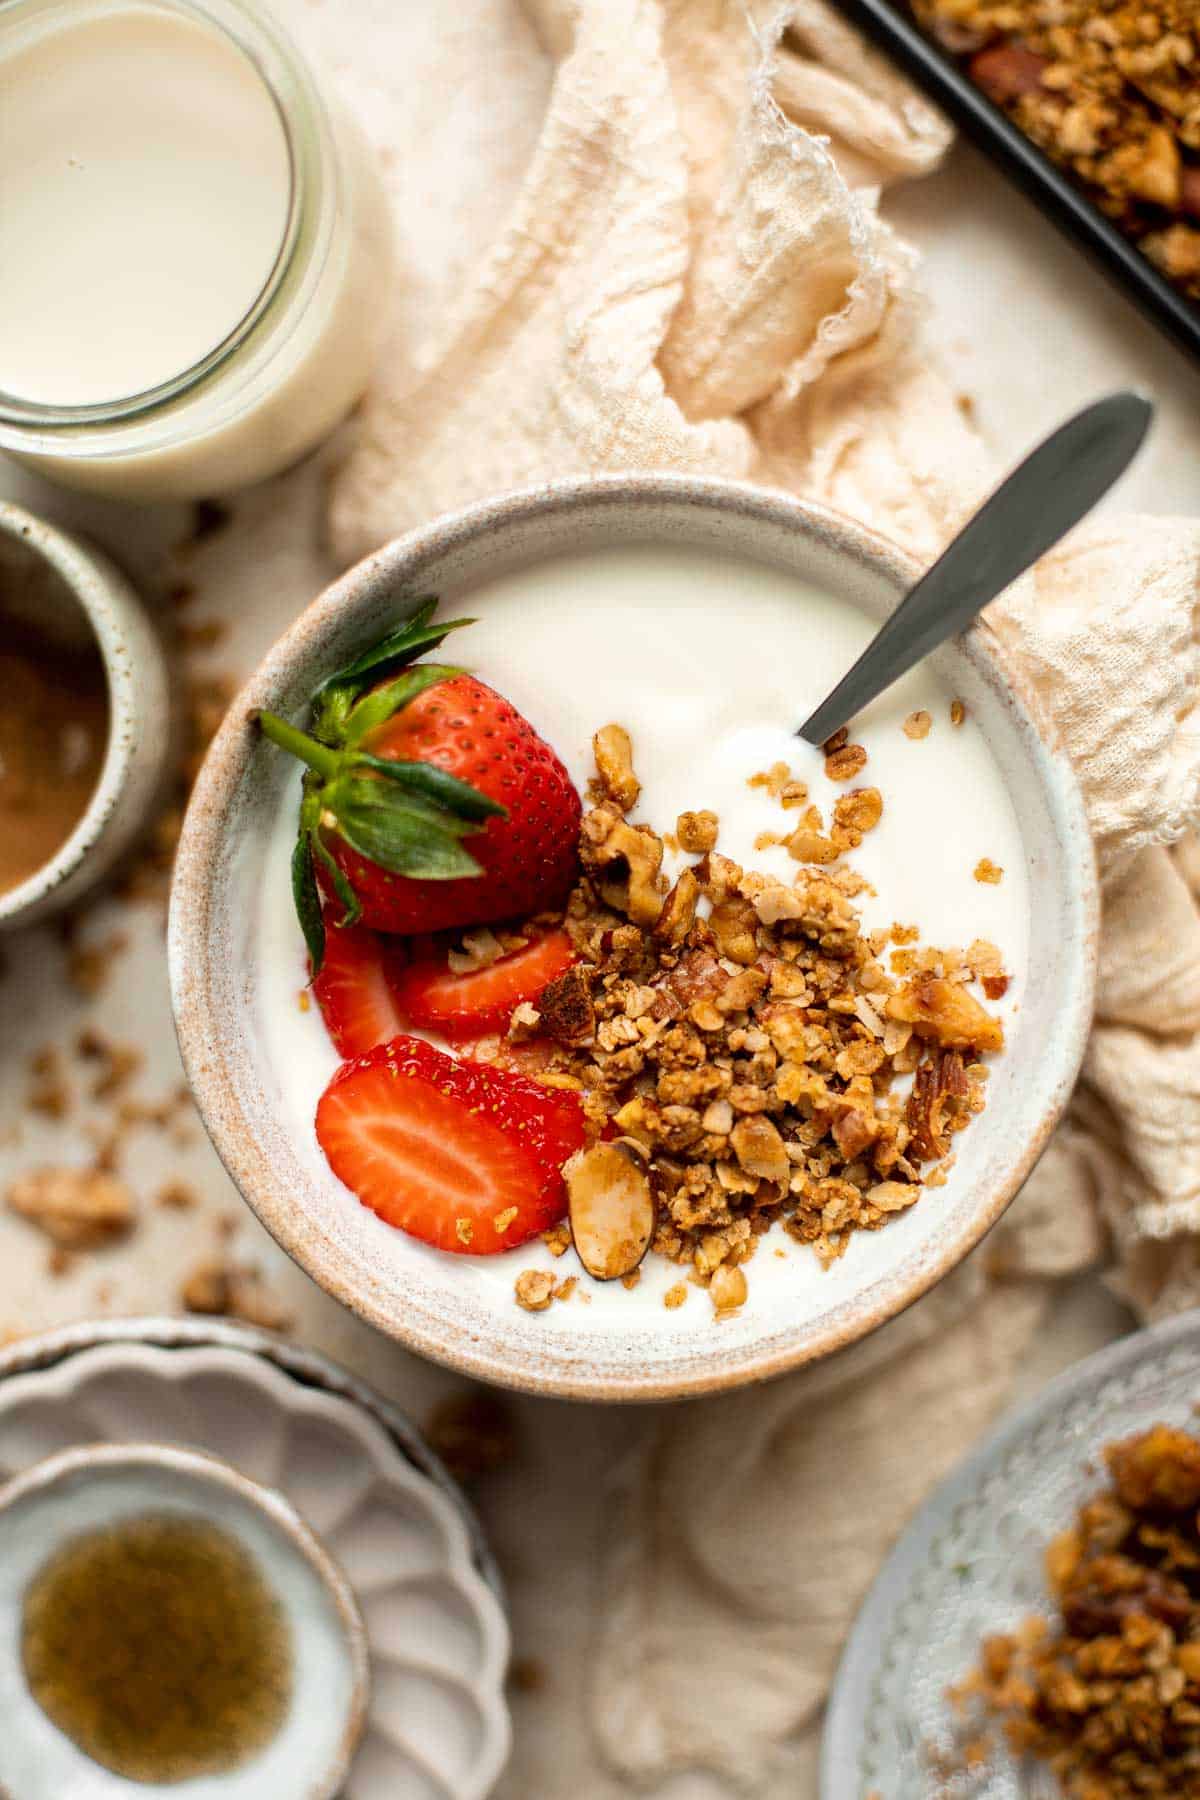
Recipe Tips and Tricks
- Don't skimp on the quality! Because this recipe has so few ingredients, the quality of the ingredients really matters. Stick to the best ingredients if you can - you'll be able to taste the difference!
- Use as a topping. Topping a bowl of yogurt, a smoothie, or ice cream with this coconut maple walnut granola adds just the right amount of crunch, making it even more craveable and versatile!
Storing and Freezing Instructions
How to Store
Allow the granola to cool completely before transferring to an airtight container or Ziploc bag. Store at room temperature out of direct sunlight and away from heat or moisture for up to 2 weeks or until stale. The shelf life of this homemade granola will depend on your climate.
How to Freeze
To freeze the granola, make sure to store it in a freezer-safe container or freezer bag and freeze it for up to 6 months.
More Granola Recipes
- 50 Best Breakfast Ideas
- Cinnamon Apple Granola
- Gingerbread Granola
- Almond Cranberry Granola Bars
- Almond Pecan Granola
- Fruit and Yogurt Parfait with Granola
Tried this recipe?
I'd love to hear what you think! Leave a comment and rating below to share your feedback. Your reviews help others discover this recipe and help me keep creating more free recipes for you. Snap a photo and tag me on social media @aheadofthyme too.
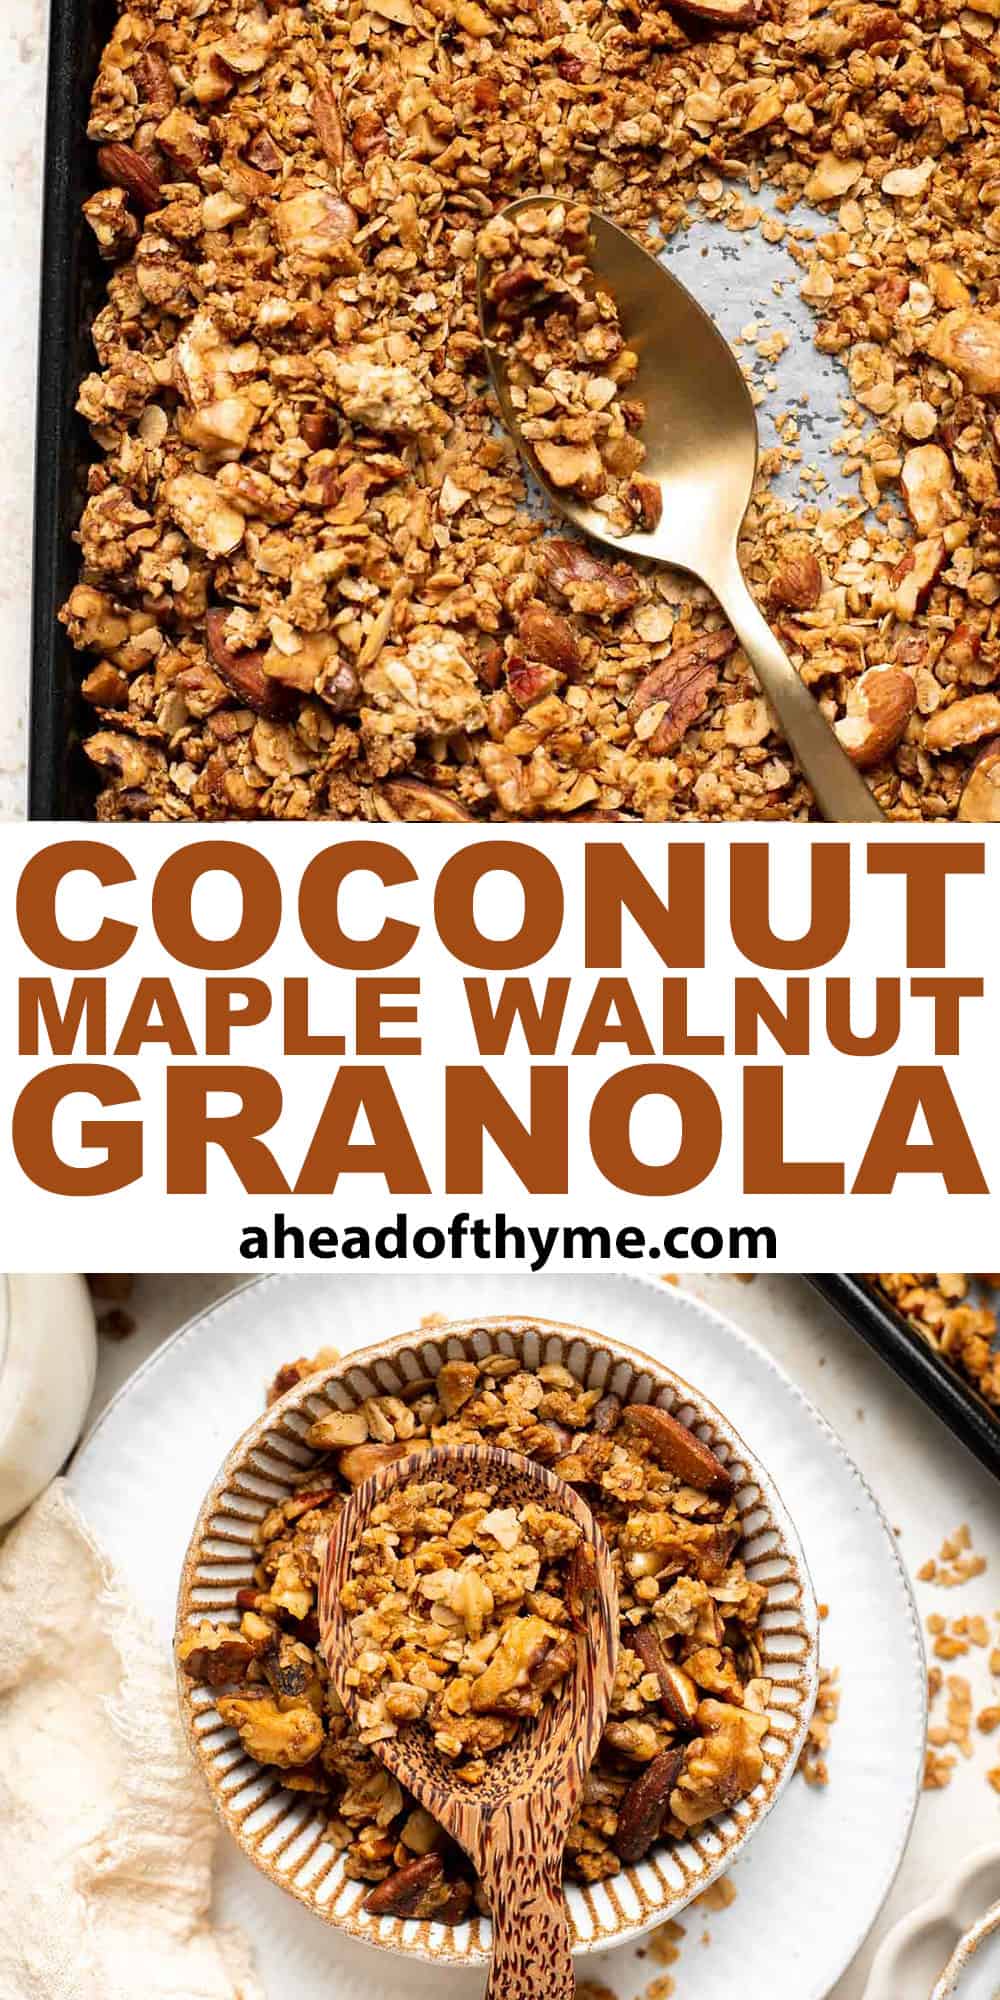
Robin's Egg Cupcakes
Robin's Egg Cupcakes are a fun and festive treat you need to try this Easter. Moist and fluffy vanilla cupcakes are topped with blue buttercream frosting, mini eggs, and speckled with chocolate. They are just as delicious as they are pretty to look at.

Follow our easy step-by-step tutorial and have fun making these Easter cupcakes in under one hour - or even faster if you get the kids to help. These cupcakes are the perfect holiday dessert to enjoy at Easter parties or to package up and gift to family and friends.
Why You'll Love these Robin's Egg Cupcakes
- A beautiful dessert. These gorgeous cupcakes are topped with pale blue, melt-in-your-mouth buttercream icing that actually tastes good and is topped with mini eggs and speckled with chocolate which makes look so cute AND taste so good.
- Easy homemade recipe. These vanilla cupcakes and the buttercream are all made from scratch - no boxed cake mixes or ready-made buttercream icing here! It is so easy to make bakery style cupcakes in your very own kitchen.
- Simple ingredients. This recipe requires a few basic pantry and refrigerator staples like flour, baking powder, butter, and eggs. No artificial ingredients here! So if you like to bake, you will likely already have most (if not all) of these ingredients already at home.
- Totally customizable. Robin's egg cupcakes are fun to decorate with icing and chocolate eggs - and you can get even more creative with other edible embellishments if you like. Change up the color of the icing, top with different candies, or add sprinkles.
- Perfect as gifts. Place these cute Easter cupcakes in a box or wrap and tie with a ribbon. They are a great thoughtful gift for family and friends.

Ingredient Notes
To make these festive Robin's Egg Cupcakes for Easter, you will need the following ingredients (full measurements in recipe card below):
- all-purpose flour - ideal for making perfectly soft and fluffy cupcakes.
- baking powder - the leavening agent used to make the batter rise as it bakes, making the cupcakes tender and crumbly.
- salt - omit the salt in the recipe if using salted butter.
- butter - if you have salted butter, make sure to omit the salt in this recipe to balance the flavors.
- white sugar
- eggs - binds the ingredients together and give the cupcakes a richer flavor, structure, and nice golden color.
- vanilla extract - use the same amount of vanilla bean paste for a slight flavor boost.
- buttermilk - you can also substitute with whole milk.
- confectioners' sugar - this powder-like sugar will give you a smooth and silky buttercream icing.
- food coloring - you will need a couple drops of blue liquid food coloring for these cupcakes. You can also use gel food coloring if that is what you have on hand.
- heavy cream - or milk to thin out the icing to the desired consistency of buttercream.
- mini eggs - we used Cadbury mini eggs but you can use any kind of chocolate eggs.
- cocoa powder - we mix this with vanilla extract to create perfect speckles.
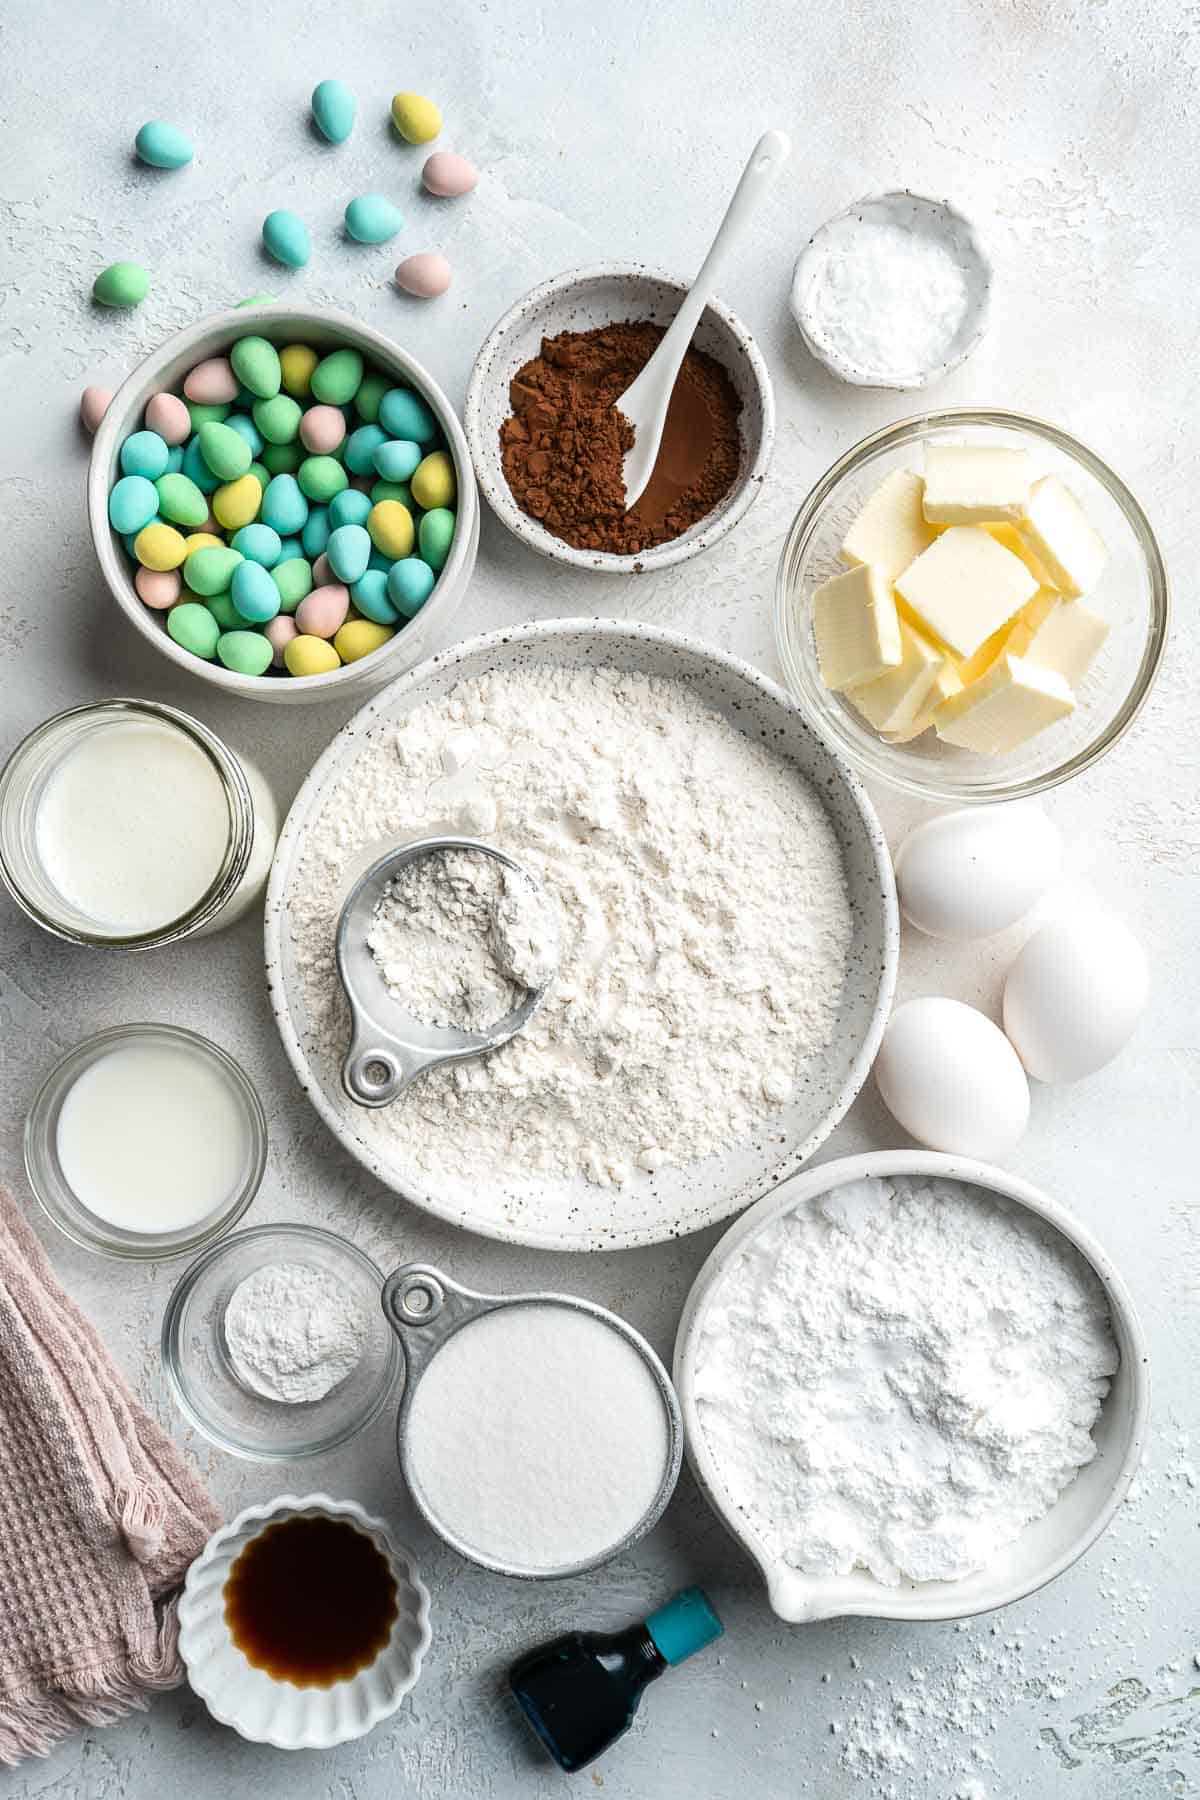
Baking Tools and Equipment
You will also need the following baking tools and equipment:
- 12-cup muffin pan
- cupcake liners
- measuring cups and spoons
- mixing bowls
- hand mixer and/or stand mixer
- wire cooling rack
- large and small piping bags
- Wilton 8B piping tip (open star tip)
- couplers (for securing the tips to the piping bags)
How to Make the Best Robin's Egg Cupcakes
First, make the vanilla cupcakes.
- Prep. Preheat oven to 350°F and prepare 2 cupcake pans with 14 cupcake liners total.
- Combine dry ingredients. In a medium mixing bowl, add flour, baking powder, and salt, and whisk well to combine. Set aside.
- Combine wet ingredients. In a large mixing bowl, add the melted butter and white sugar. Beat together using an electric hand mixer for 1-2 minutes. Add in the eggs and vanilla, and beat well with the mixer for 2-3 minutes, or until well combined and volumized.
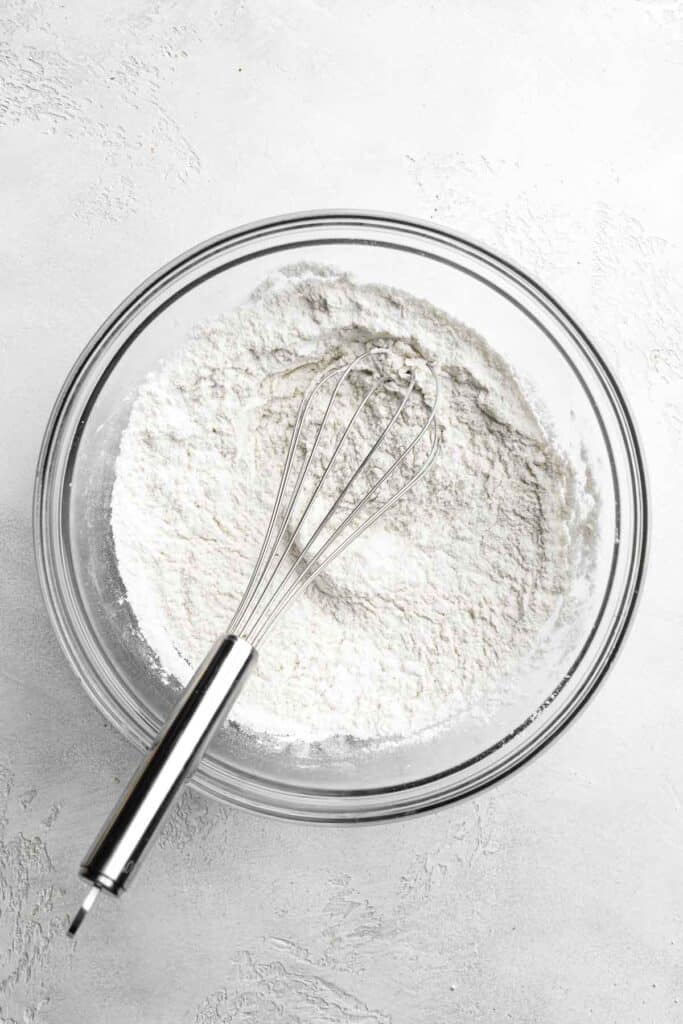
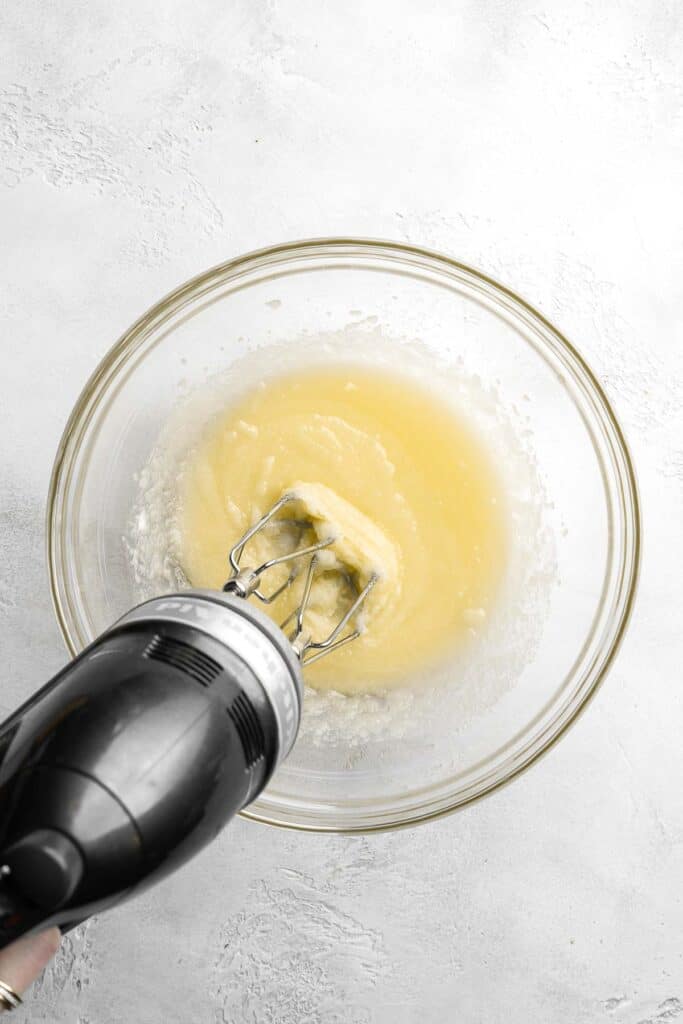
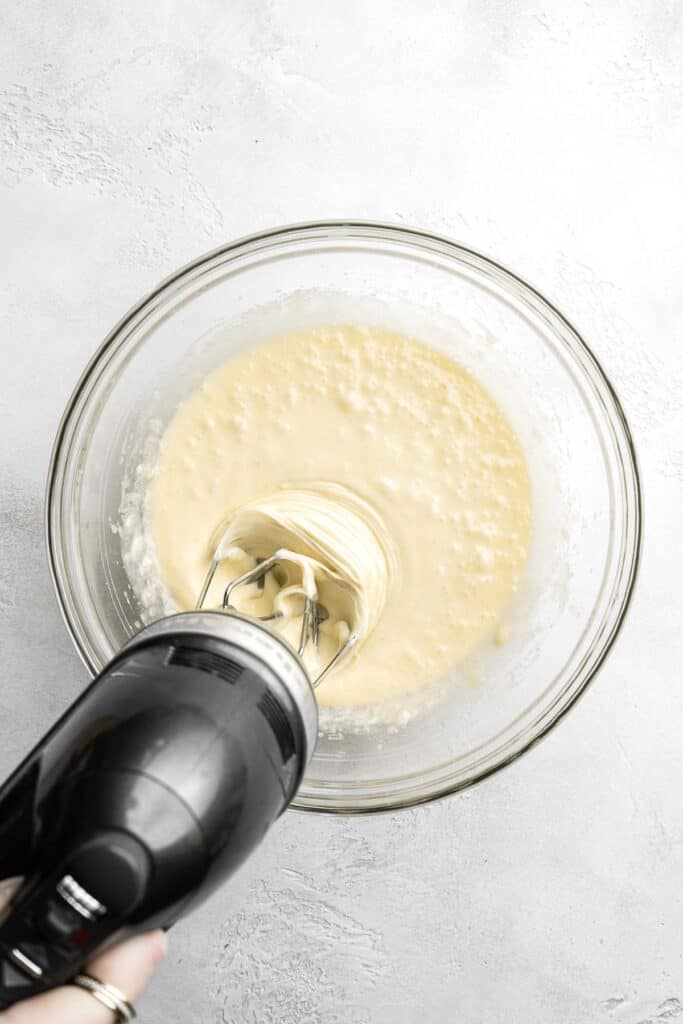
- Combine ingredients together. Add ⅓ of the dry mixture into the batter and mix on low speed until combined. Add ½ of the buttermilk and beat again on low until combined. Continue by adding and beating the dry mixture and the buttermilk, finishing with the dry mixture.
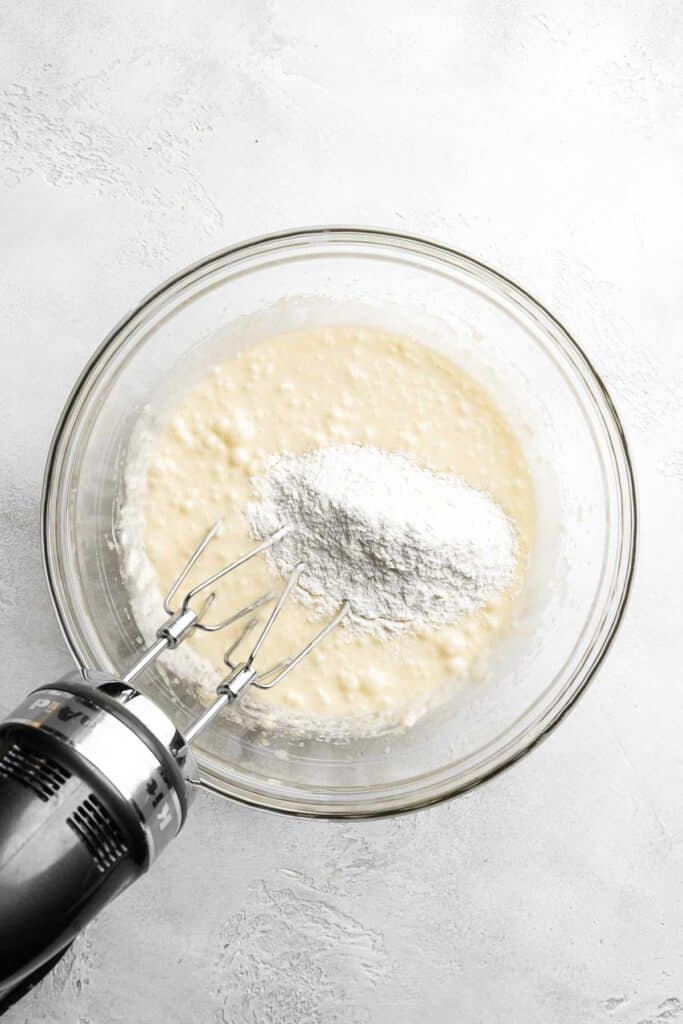
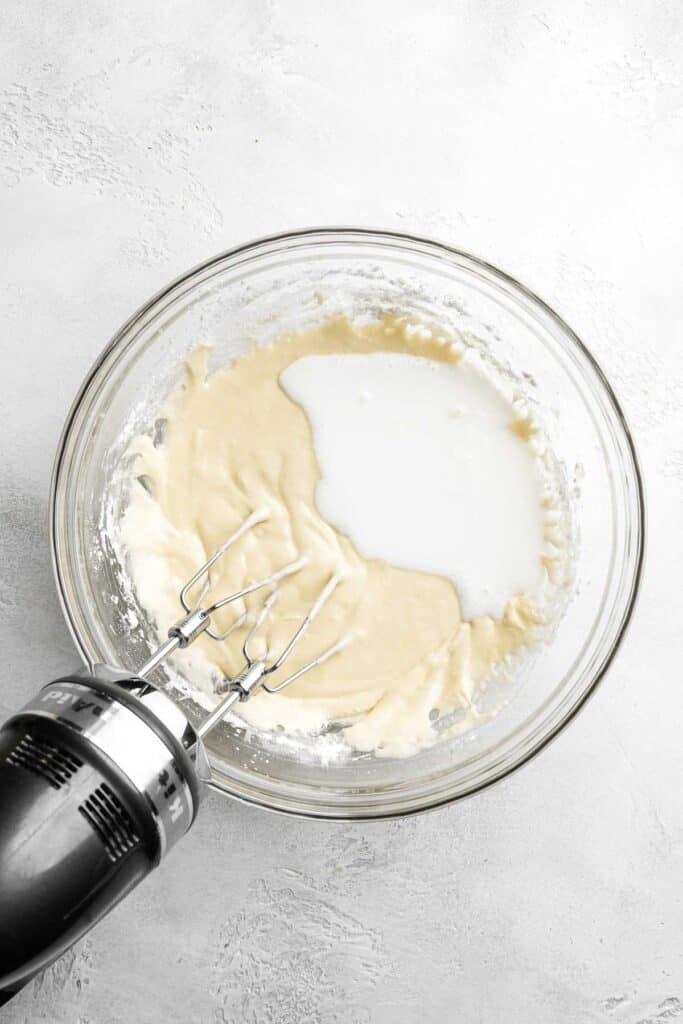
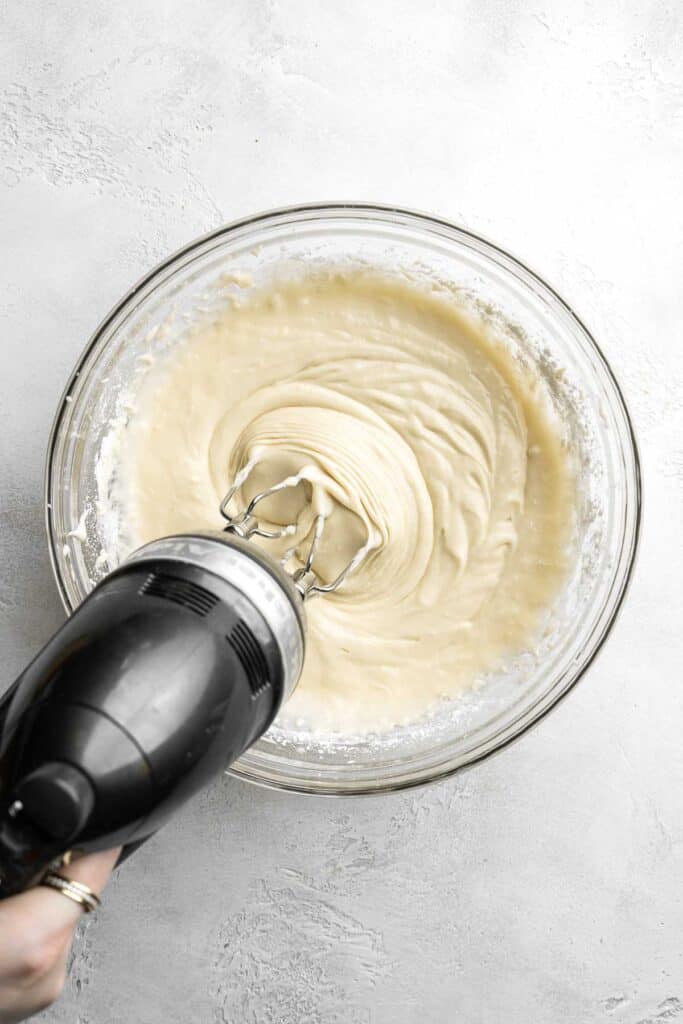
- Scoop batter. Use a cookie scoop or spoons to evenly scoop and disperse the batter into the prepared cupcake liners (14 total), filling them each ⅔ full.
- Bake. Place the pan into the oven and bake for 18-20 minutes, or until a toothpick inserted into the middle of one of the cupcakes comes out clean.
- Cool. Allow the cupcakes to cool for 5 minutes in the pan, then transfer them onto a wire cooling rack to cool completely. Allow to cool completely before frosting.
Next, make buttercream frosting.
- Make the buttercream. Add butter into a large mixing bowl (or stand mixer fitted with the whip attachment). Beat on high for 3-5 minutes, until the butter looks fluffy and pale. Sift the confectioners' sugar into the butter, and beat on low until combined.
- Color the icing. Add in the vanilla, food colouring, and 1 tablespoon of milk. Add up to 2 tablespoons more milk until you reach your desired consistency. Beat for another 1-2 minutes, or until fluffy and well combined.

Next, decorate the cupcakes.
- Transfer icing to piping bag. Place the frosting into a large piping bag fitted with a Wilton 8B tip.
- Pipe frosting. Carefully pipe one layer of frosting in a circular ring pattern onto each cupcake.
- Add mini eggs. Place 3 mini eggs onto the centre of each frosted cupcake.

Finally, add speckles.
- Combine ingredients. In a small mixing bowl, whisk together the cocoa and vanilla until smooth.
- Create speckles. Using a clean, stiff paint or pastry brush, dip the brush into the cocoa mixture, then gently shake off any excess. While holding the brush with one hand, use the other hand to pull the bristles back, point at the cupcake (aiming for the frosting and eggs), then slowly release the bristles to create the speckles.
- Dry. Repeat with remaining cupcakes. Allow speckles to dry before serving.


Recipe Variations
- Change the cupcake base. Instead of making these cupcakes with a vanilla base, you can use any cake flavor you'd like. Try making them with Funfetti Cupcakes, Chocolate Cupcakes, or Red Velvet Cupcakes.
- Add coconut. Add shredded coconut to the vanilla cupcake batter and top with blue-tinted buttercream frosting. Garnish with mini eggs and extra shredded coconut on top.
- Change the flavor of the buttercream. You can even change up the flavor of the homemade buttercream. Add some lemon zest for a lemon twist, or some almond extra for a nutty twist.
How to Serve Easter Cupcakes
These Robin's Egg Cupcakes are the star of the show on any dessert table, so why not display them in a way to make them shine? Here are a few ways on how you can serve them:
- Use cake or cupcake stands. A cupcake stand gives these Easter cupcakes some elevation to stand out and shine. Cupcake or cake stands are also a great way to save some space on. the dessert table.
- Make a dessert board. Think of a Charcuterie board - but with desserts. Use any board shape you like and place these cupcakes on top. Then arrange other delicious Easter treats around the board. Try Mini Egg Easter Fudge, Easter Egg Sugar Cookies, Chocolate Covered Strawberries, candies, and sprinkles.
- Place them in single-serve boxes. If you are planning to use them as a thoughtful party favor to takeaway, place these mini egg cupcakes in festive boxes or wrap them individually.

Recipe Tips and Tricks
- Careful with mixing. Do not overmix your batter. Mix until everything is just combined, a few small dry spots are fine. Overmixing will result in dry, chewy cupcakes.
- Do not overfill. Pour the batter only ⅔ of the way. The cupcakes will rise as they bake, so doing this ensures they have plenty of room to expand without spilling over. Plus, you want to leave enough room to add icing instead of having the cupcakes rise up too much.
- Cool before icing. The cupcakes should be cool before adding the buttercream icing, or else it will just melt into it and create a soggy mess.
- Use a Ziploc bag to ice the cupcakes. Not a professional frosting piper? That's okay! If you don't have a piping bag handy, you can still decorate the cupcakes with a simple swirl of frosting by using a Ziploc bag with a corner cut out.
Storing and Freezing Instructions
Make Ahead Instructions
If you're hosting an Easter party, you can make these cupcakes a few days ahead of time and store them at room temperature unfrosted until you're ready to decorate them the day of the party. This will keep them soft and moist.
You can also make the buttercream frosting in advance and keep it in an airtight container in the fridge for up two weeks or up to 3 months in the freezer. If frozen, allow it to thaw in the fridge overnight before using.
How to Store
Once the cupcakes have cooled, you can place them in an airtight container and store them at room temperature in a dry, cool area for up to three days. If you want to store them longer, place them in the fridge for up to 5 days. Note that they may loose some moisture and dry out when stored in the fridge.
How to Freeze
You can also freeze these Easter cupcakes. If you are planning to do this, I recommend freezing them before frosting.
- Freeze before frosting: Wrap the unfrosted cupcakes in plastic cling wrap and place them in a freezer-friendly airtight container or freezer bag and freeze for up to three months. Allow them to thaw overnight in the refrigerator before icing and serving.
- Freeze after frosting: If you've already frosted the cupcakes, you can still freeze them. Place frosted cupcakes on a baking tray and freeze until hard, about 1 hour. Then, wrap them tightly in plastic cling wrap, and then place in an airtight container and freeze for up to 3 months. Thaw in the fridge overnight before serving.

More Easter Dessert Recipes
- 30 Best Easter Desserts
- Bunny Ears Easter Cupcakes
- Mini Egg Easter Fudge
- Easter Egg Sugar Cookies
- Carrot Cake Cookies
- Mini Egg Cookies
Tried this recipe?
I'd love to hear what you think! Leave a comment and rating below to share your feedback. Your reviews help others discover this recipe and help me keep creating more free recipes for you. Snap a photo and tag me on social media @aheadofthyme too.

Lemon Parmesan Green Beans
Lemon Parmesan Green Beans are the perfect side to almost any entree dinner meal - buttery, lemony, and cheesy. This quick side dish is easy to make using 8 simple ingredients in just 20 minutes.
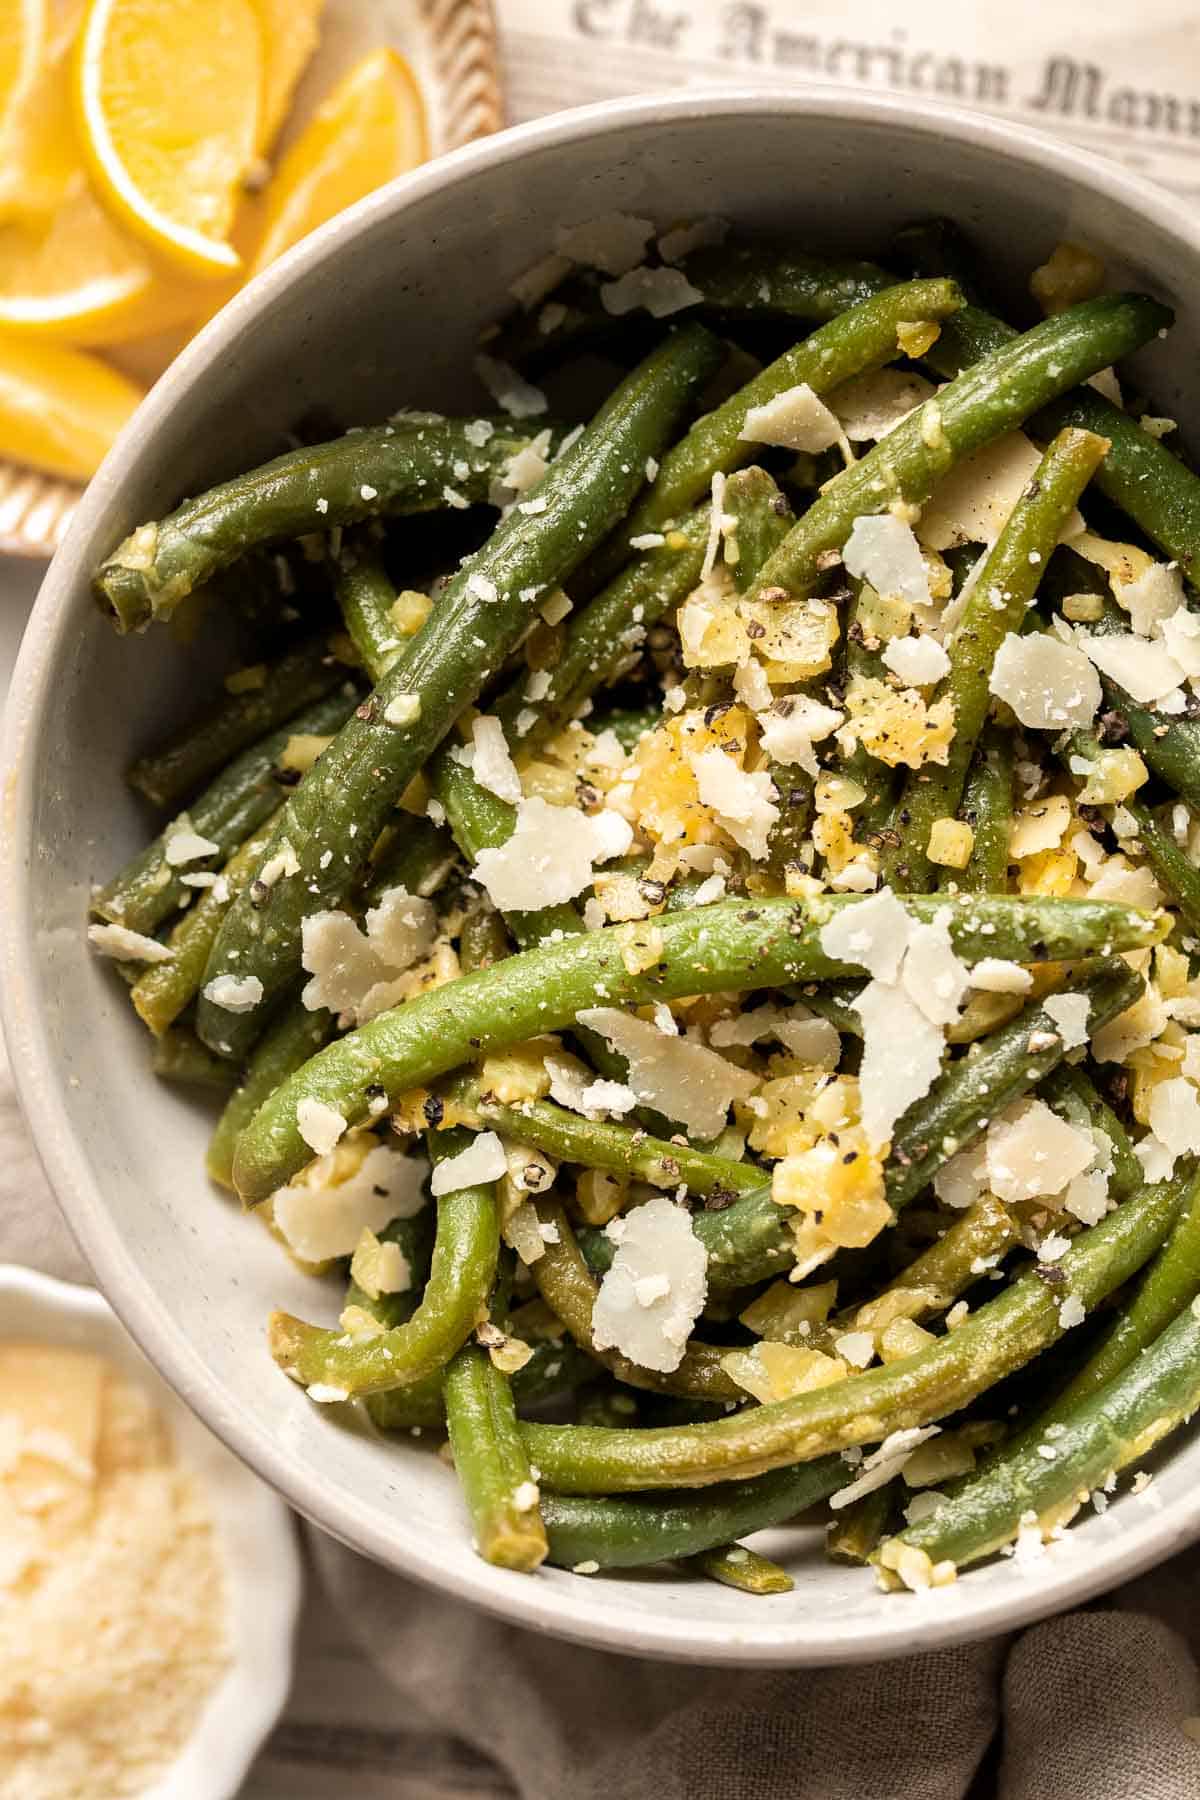
Serve these sauteed green beans whenever you need a quick side dish for dinner on busy weeknights or for fancy dinner parties too. This side is a staple in my home because fresh green beans are available all year long -and it may become a staple in yours too.
Why You'll Love these Lemon Parmesan Green Beans
- Cheesy, lemony goodness. This recipe is simple. Boil your beans, sauté them, then garnish with lemon and cheese. But trust me, you're not missing out on any flavor here. The balance between acidic lemon and fragrant parmesan are what make these lemon parmesan green beans so good.
- You just need 20 minutes. You'll need about 10 minutes to prep your ingredients and 10 to cook. These cheesy green beans are so easy to make that you can cook them quickly alongside other dishes.
- Serve them any time of the year. You can find fresh green beans at your local supermarket any time of the year - although you may find the freshest sometime between May and October. Nonetheless, there's never a bad time for green beans. So, you can enjoy this easy recipe all year long!

Ingredient Notes
To make these easy Lemon Parmesan Green Beans, you will need the following
ingredients (full measurements in recipe card below):
- green beans - fresh green beans work best. Look for fresh green beans that are bright in color and snap easily when bent. Avoid beans that are wilted or have brown spots. You could also use frozen French cut green beans. Just be sure to adjust the cooking time and cook them through to make sure the centers aren't cold.
- butter - olive oil or other neutral oil with a high smoke point would also work.
- onion
- garlic - freshly chopped garlic always adds the most flavor, but you can also use pre-minced garlic if you've got some on hand.
- lemon juice - If you're out of fresh lemons, concentrated lemon juice is fine to use, too.
- Parmesan cheese
- salt and pepper
- lemon - lemon wedges or slices are optional, for serving.
You will also need measuring cups and spoons, large cooking pot, and large skillet.
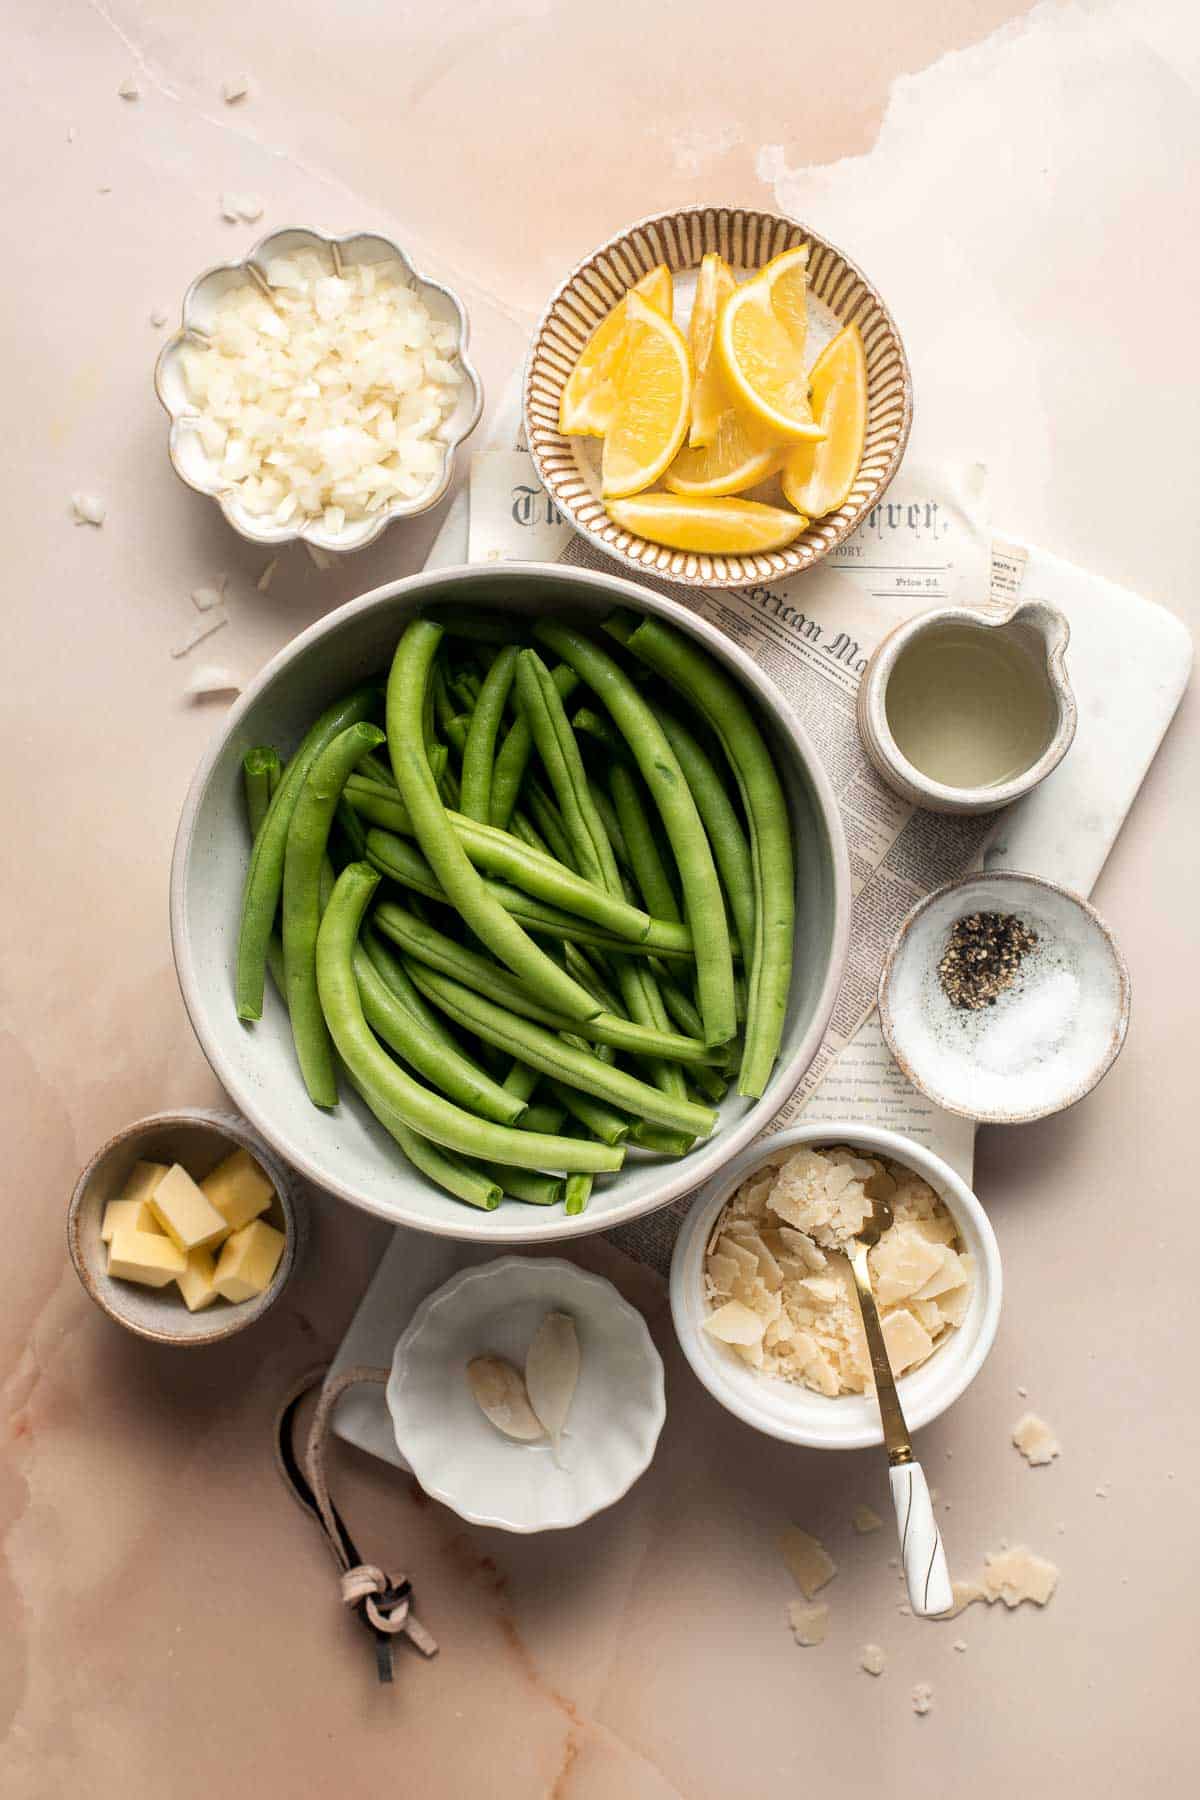
How to Make the Best Lemon Parmesan Green Beans
- Blanch cook green beans. Add green beans in a large pot of boiling water and blanch cook until tender, about 2-3 minutes. Drain under cold running water for a minute and set aside
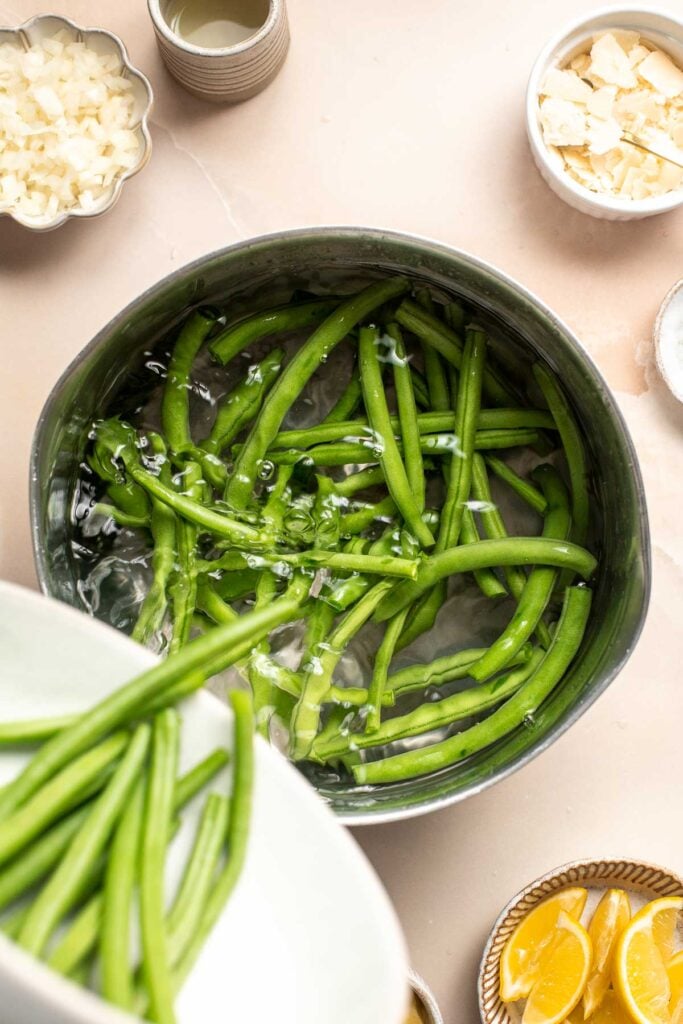
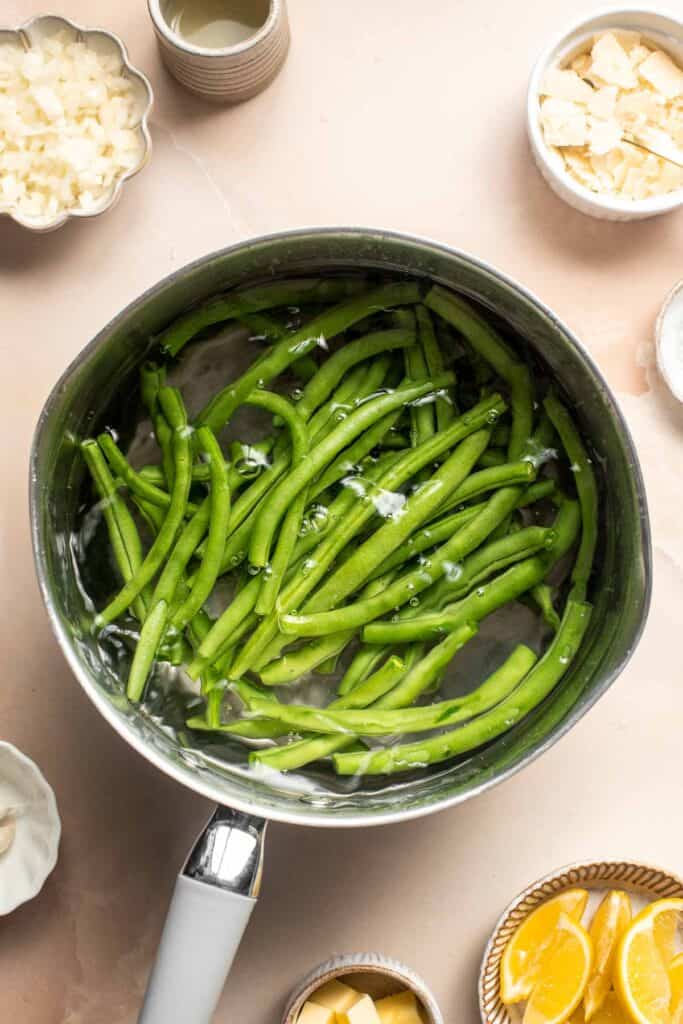
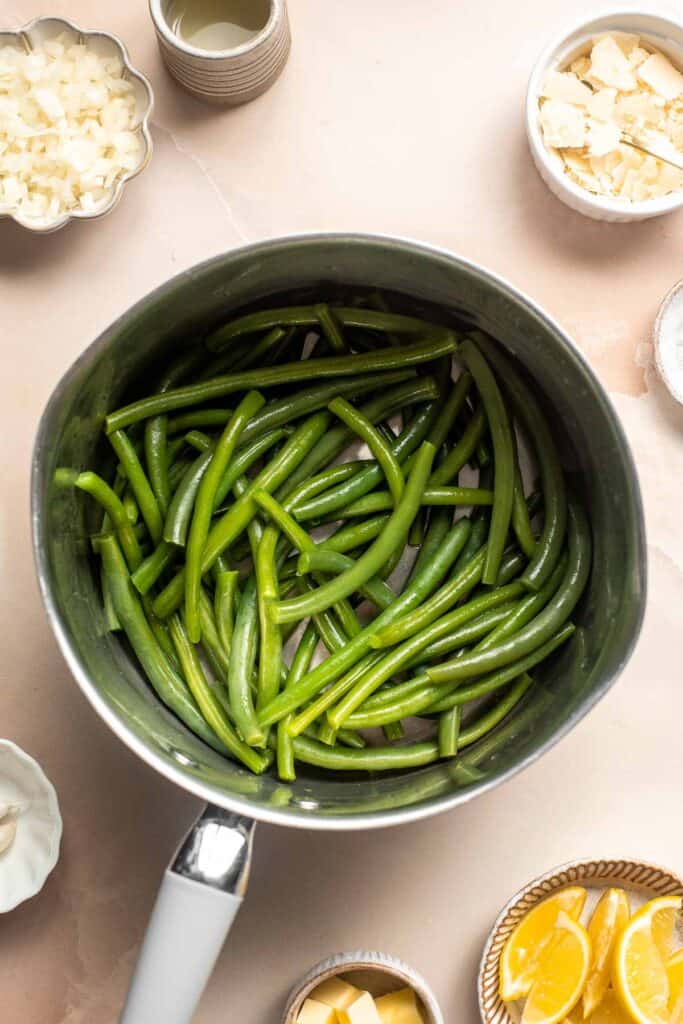
- Sauté aromatics. In a large skillet, heat butter over medium-high heat until melted and bubbling, about 2 minutes. Add onion and garlic and sauté until fragrant, about 1 minute.
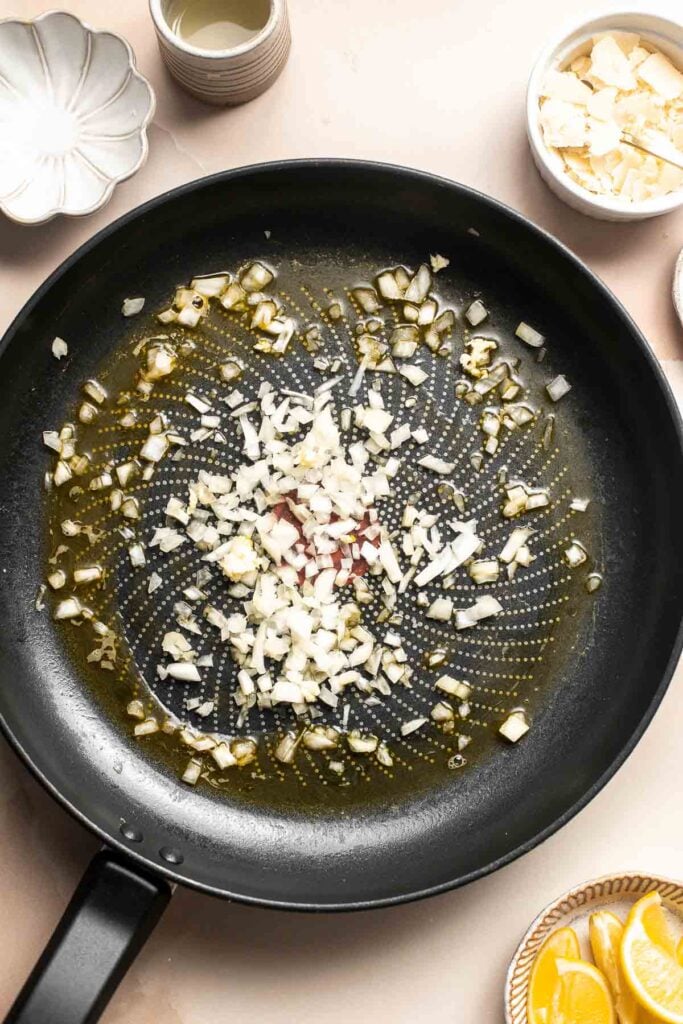
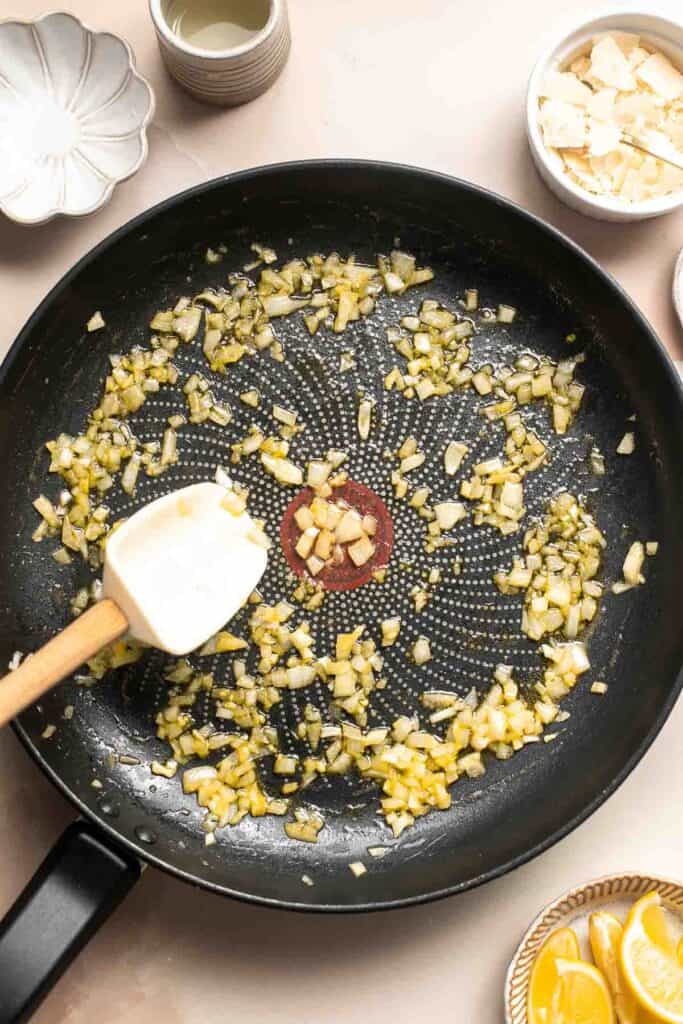
- Add green beans. Stir in the blanched green beans and cook until warmed through, about 1-2 minutes.
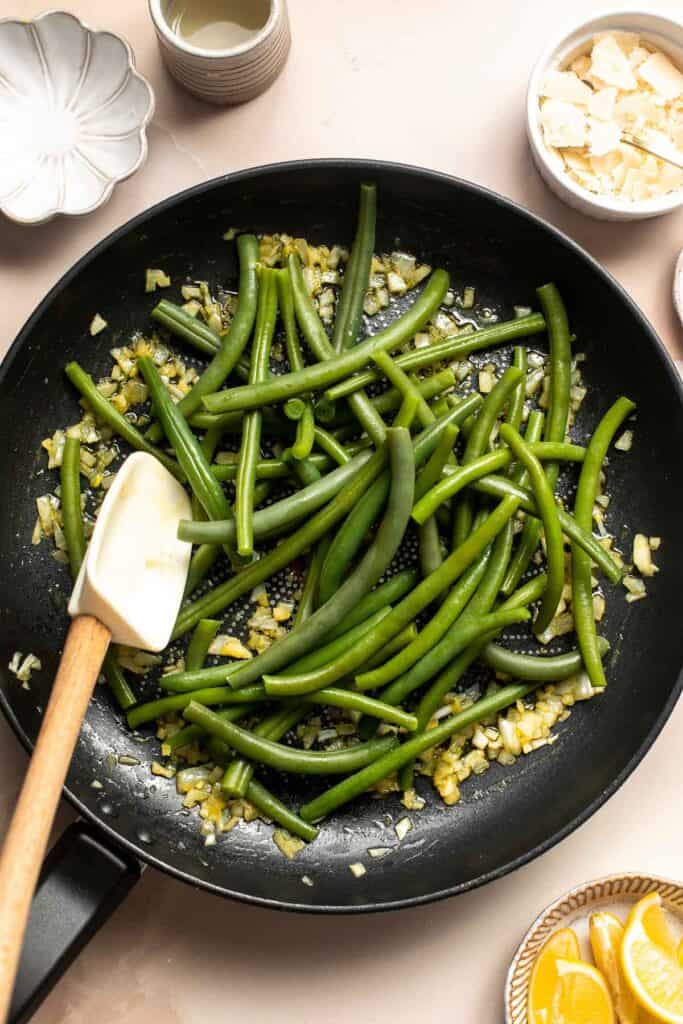
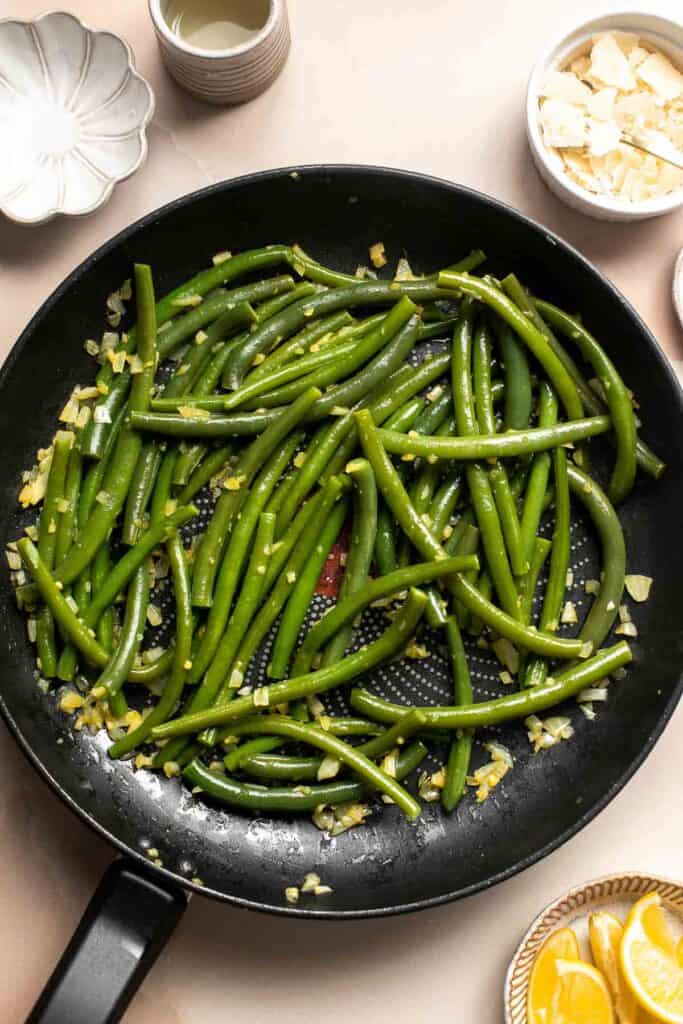
- Season. Add lemon juice, Parmesan cheese, salt, and pepper. Toss well to coat.
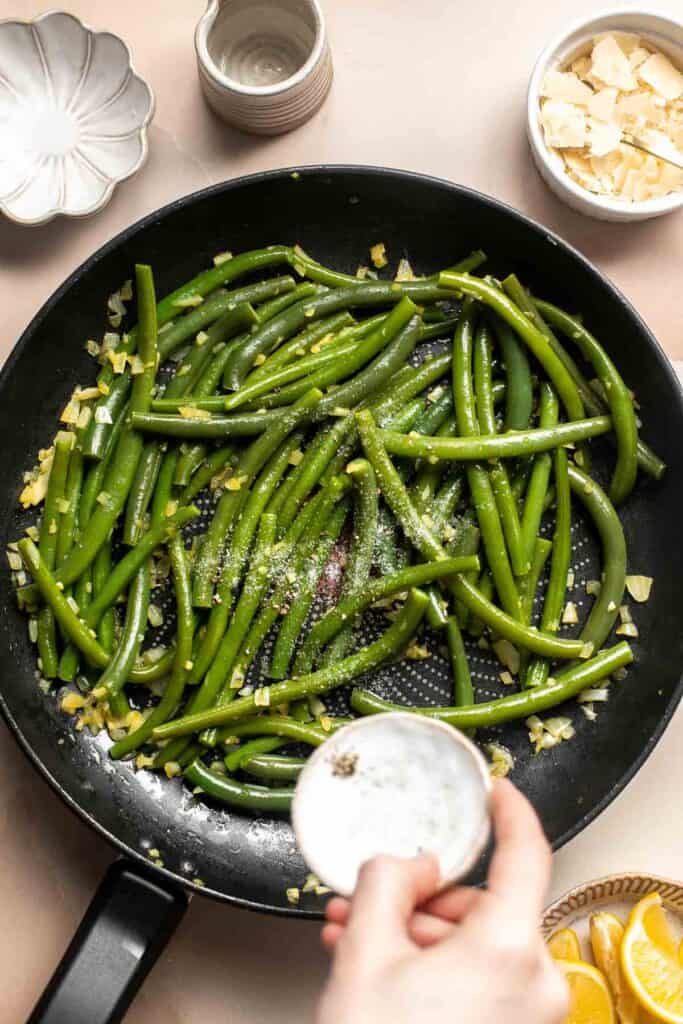
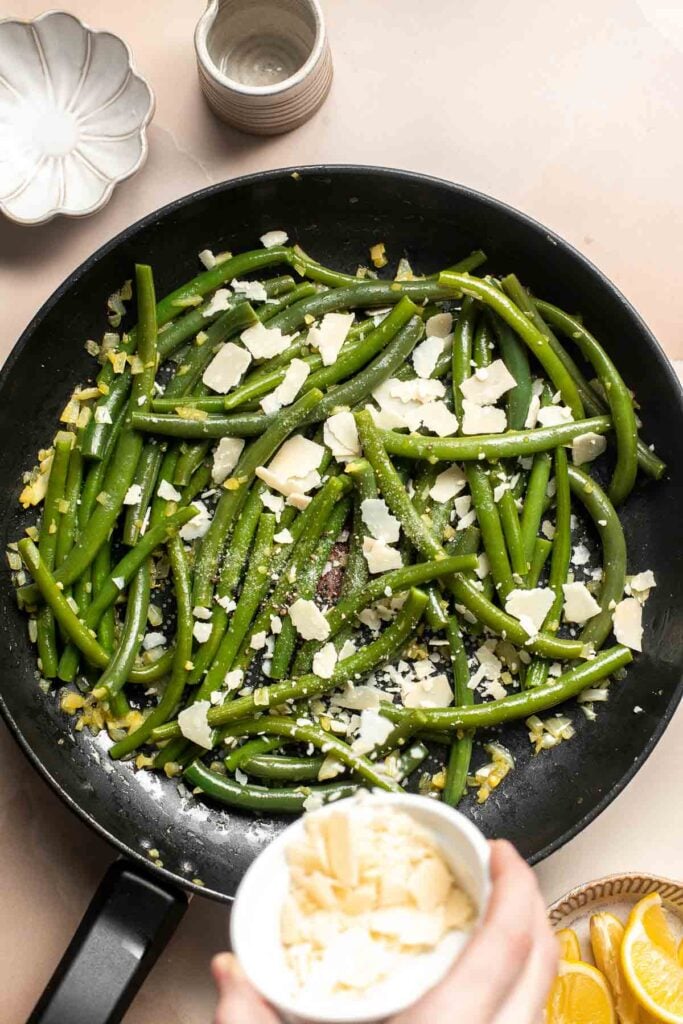
- Serve. Serve immediately with lemon wedges or slices on the side or a sprinkle of lemon zest and extra grated parmesan on top (if desired).
Recipe Variations
- Add nuts. Sprinkle some roasted nuts on top before serving such as pine nuts or almonds. Adding roasted sliced almonds basically turns it into a cheesy Green Beans Almondine.
- Add herbs. Add chopped fresh herbs, such as thyme, rosemary, or basil, to the lemon parmesan green beans for extra flavor.
- Add balsamic vinegar. Drizzle balsamic vinegar or a balsamic reduction over the green beans for a tangy and sweet flavor.
- Add bacon. Bacon always makes green beans even better. Crumble some cooked bacon on top for added smoky and savory flavor.
- Spice it up. Add a pinch of red pepper flakes to the green beans for a bit of heat.
How to Serve
These Lemon Parmesan Green Beans are best served fresh alongside almost any dinner
meal. Pair it alongside:
- Oven Baked Chicken Breast and Broccoli Rice
- Garlic Butter Salmon and Oven Roasted Vegetables
- Miso Black Cod and Mascarpone Mashed Potatoes
- Garlic Butter Steak Bites and Skillet Dinner Rolls
- Balsamic Chicken Kabobs and Roasted Potato Wedges
- Stuffed Eggplant and Homemade Pita Bread
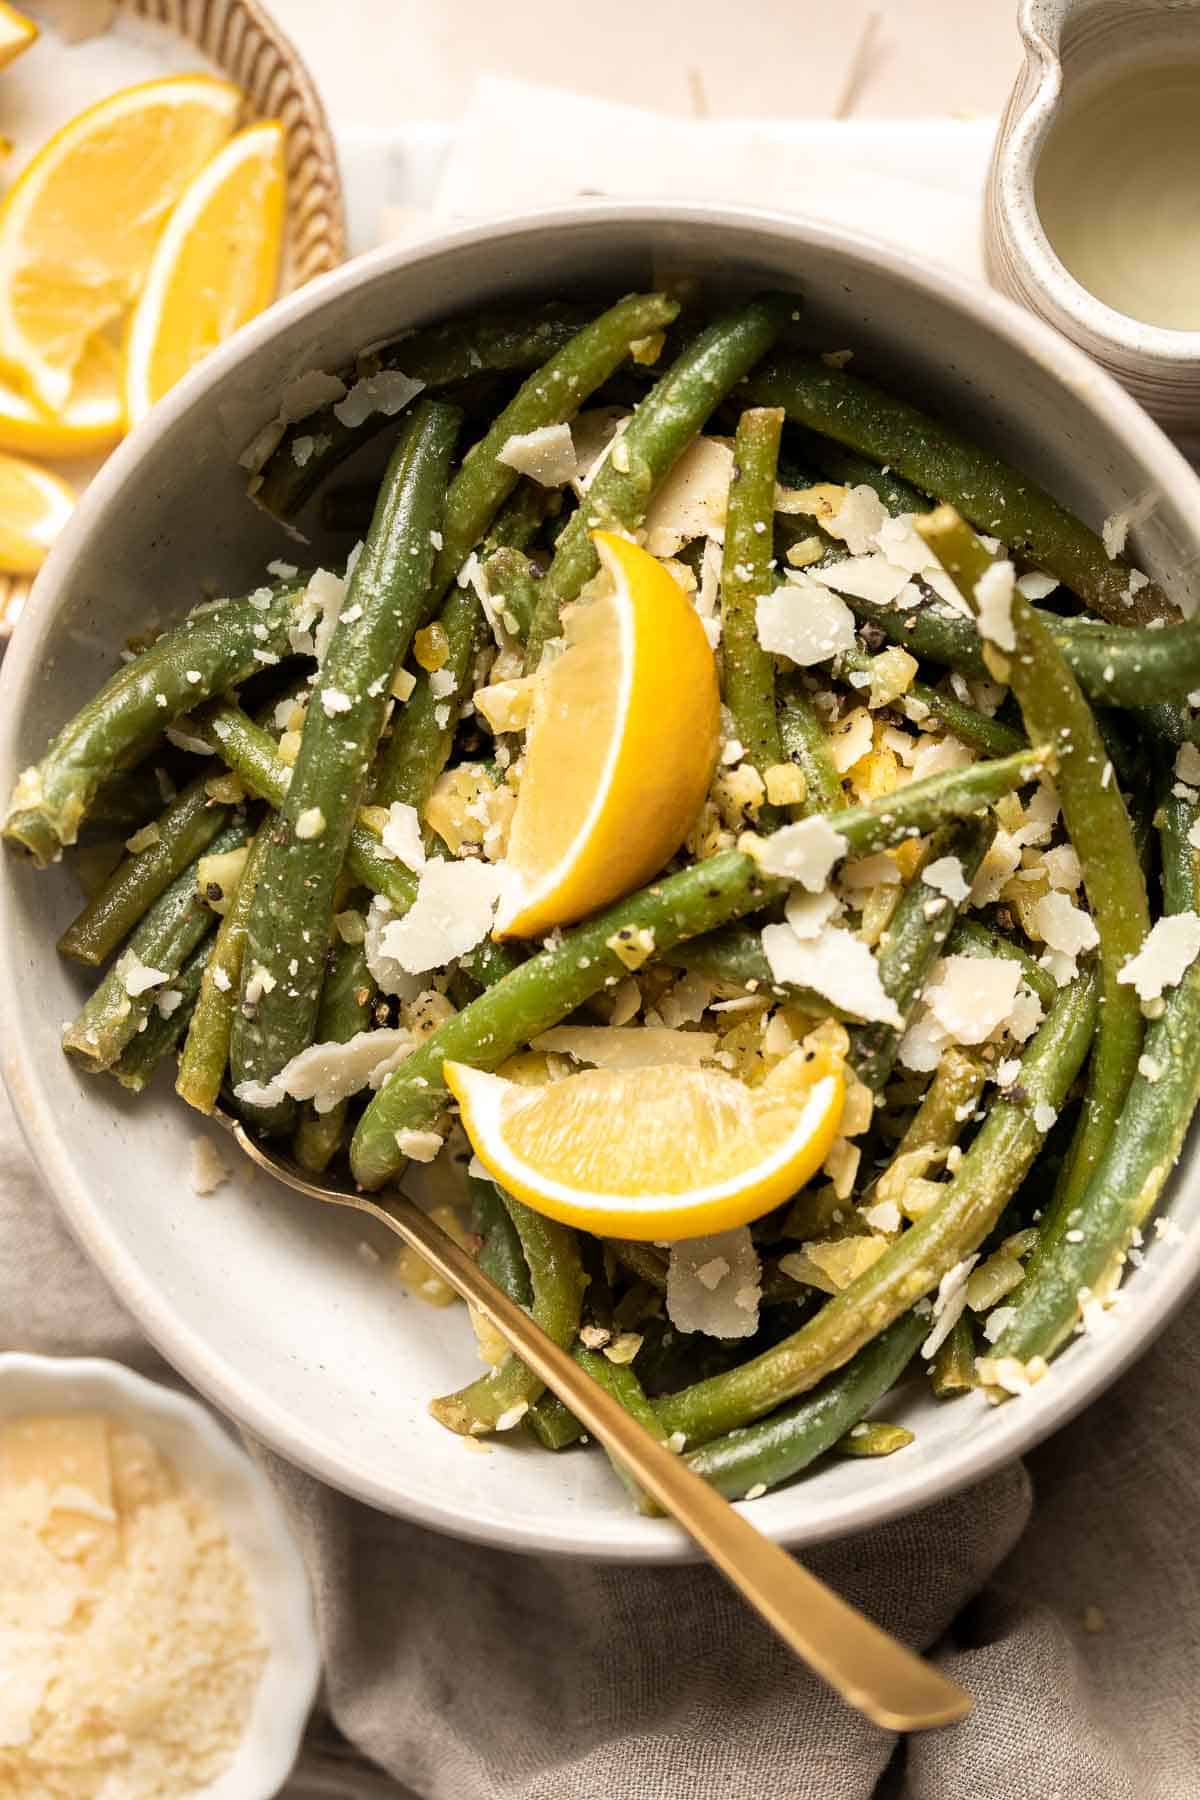
Recipe Tips and Tricks
- Blanch the green beans. Don't skip this first step of the recipe. Blanching the green beans in boiling water before cooking helps to lock in their color and nutrients.
- Use good quality Parmesan cheese. Use freshly grated parmesan cheese for the best flavor. Avoid using pre-grated cheese, which can be dry and lacking in flavor - which is especially noticed in a recipe like this with simple ingredients where the Parmesan will shine.
- Garnish with lemon zest. Finely grate some lemon zest over the top of the green beans before serving for an extra burst of flavor.
- Serve immediately. Serve the lemon parmesan green beans immediately after cooking to ensure that they are at their freshest and most flavorful.
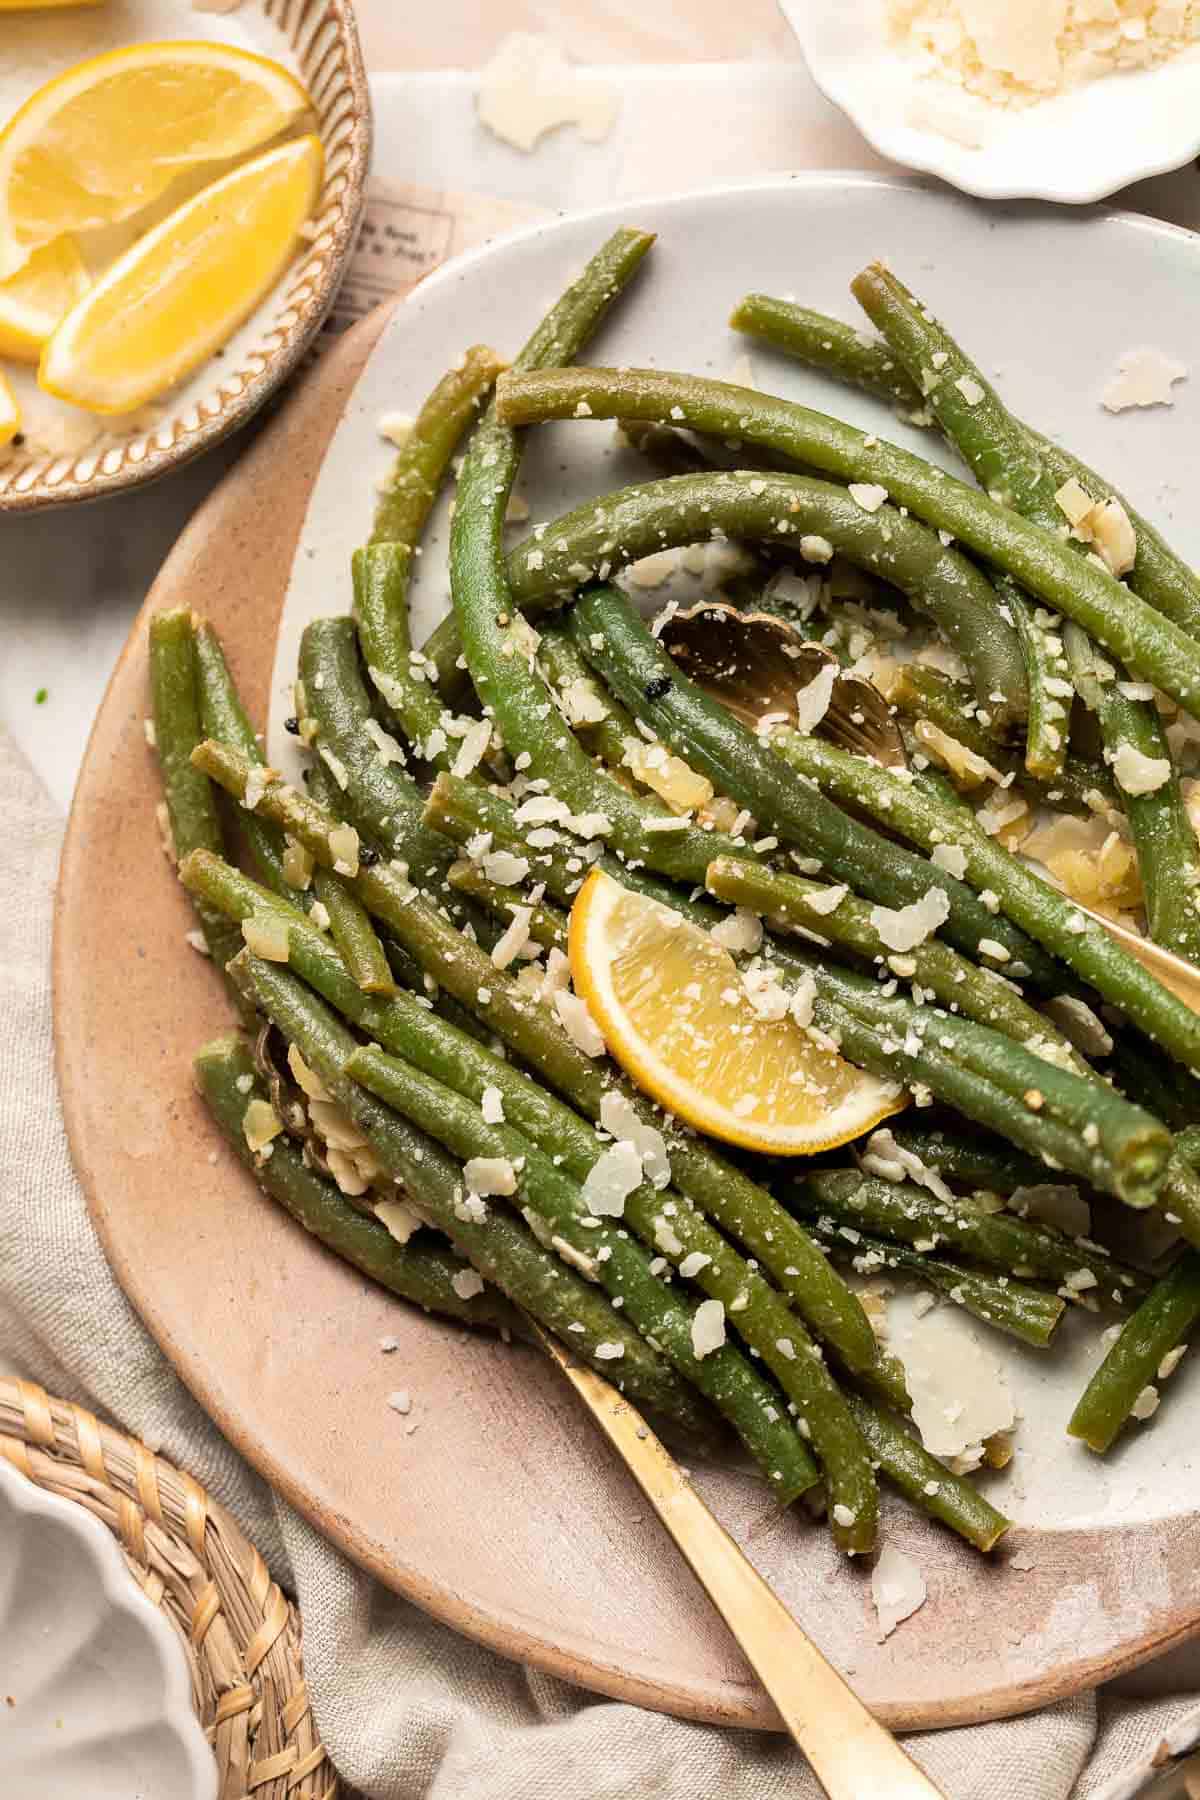
Storing and Freezing Instructions
How to Store
Allow lemon parmesan green beans to cool completely. Then, store in an airtight container in the fridge for 3-5 days.
How to Reheat
When reheating cooked green beans, you must be careful not to overcook them. I recommend heating them over medium-low heat on the stove or popping them into a conventional or toaster oven for 2-4 minutes at 350F.
How to Freeze
Place leftover green beans in a freezer bag and freeze for up to 3 months. To thaw, transfer to the fridge overnight and reheat in the microwave or on the stovetop over medium heat.
More Green Bean Recipes
- 15 Best Green Bean Recipes
- Green Beans Almondine
- Green Beans with Bacon
- Pesto Green Beans
- Green Bean Fries
- Sautéed Garlic Green Beans
Tried this recipe?
I'd love to hear what you think! Leave a comment and rating below to share your feedback. Your reviews help others discover this recipe and help me keep creating more free recipes for you. Snap a photo and tag me on social media @aheadofthyme too.
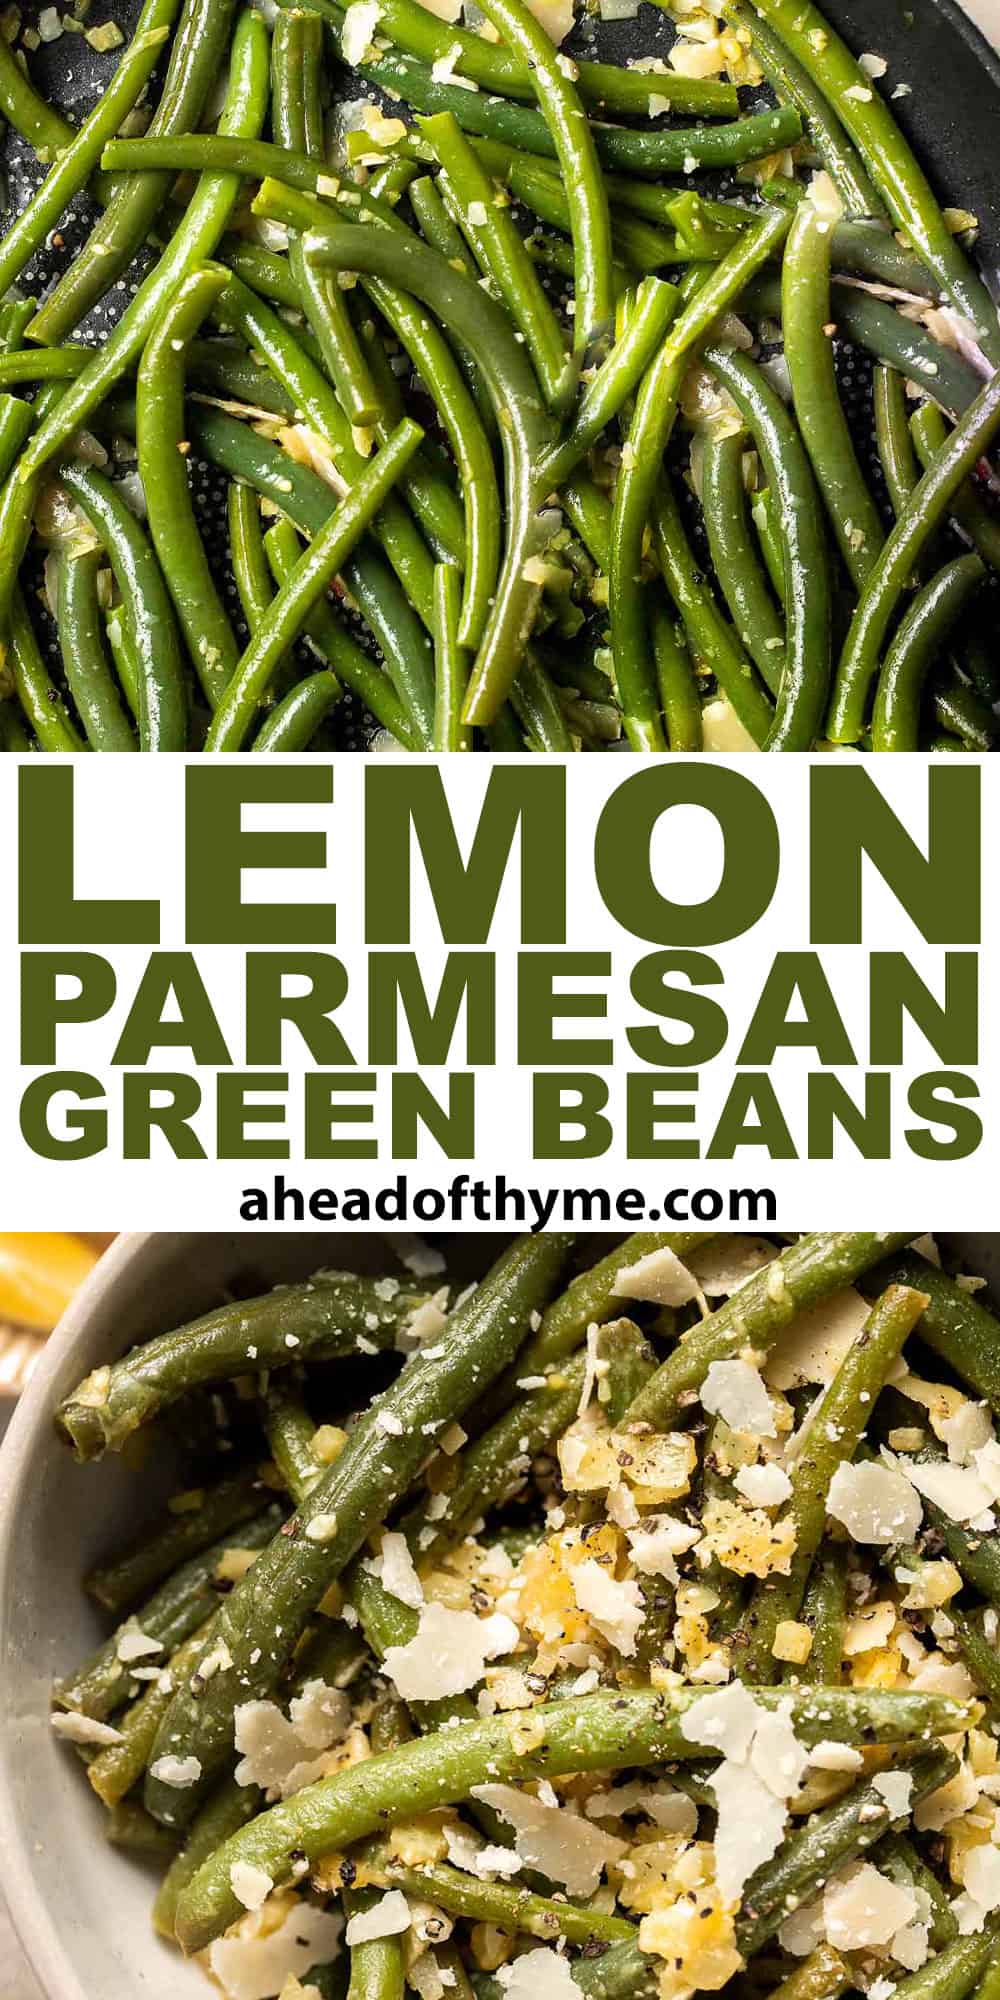
Deviled Egg Salad
Deviled Egg Salad is the perfect spring side dish! It has the signature tang and smokiness of deviled eggs with the pillowy texture of egg salad, so you no longer have to choose between the two. Packed with fresh vegetables and dressed with a creamy sauce, you'll love this take on the classic Easter dish.
In just half an hour, you can whip up and serve this deviled egg salad completely from scratch - and leftovers store really well for days to come. It's a great recipe to serve for picnics and potlucks, a simple lunch, or a fancy meal (try it alongside your Easter ham!).
Why You'll Love this Deviled Egg Salad
- Best of both dishes. This deviled egg salad combines two beloved sides and incorporates the best of both of them - the ease and texture of egg salad with all the flavor and trimmings of deviled eggs! It's the perfect combination.
- Quick and easy to make. If you can boil an egg and chop a vegetable, you can make this deviled egg salad. It takes just thirty minutes and requires almost no cooking (aside from boiling eggs). From there, it's mostly just chopping and mixing!
- Perfect Easter side dish. Deviled eggs are practically mandatory at an Easter brunch, but this egg salad will have you never looking back. It's faster and easier to make than deviled eggs but has all the classic flavors. Plus, you have more options to serve it with such as with crackers and veggies for dipping or in a sandwich.
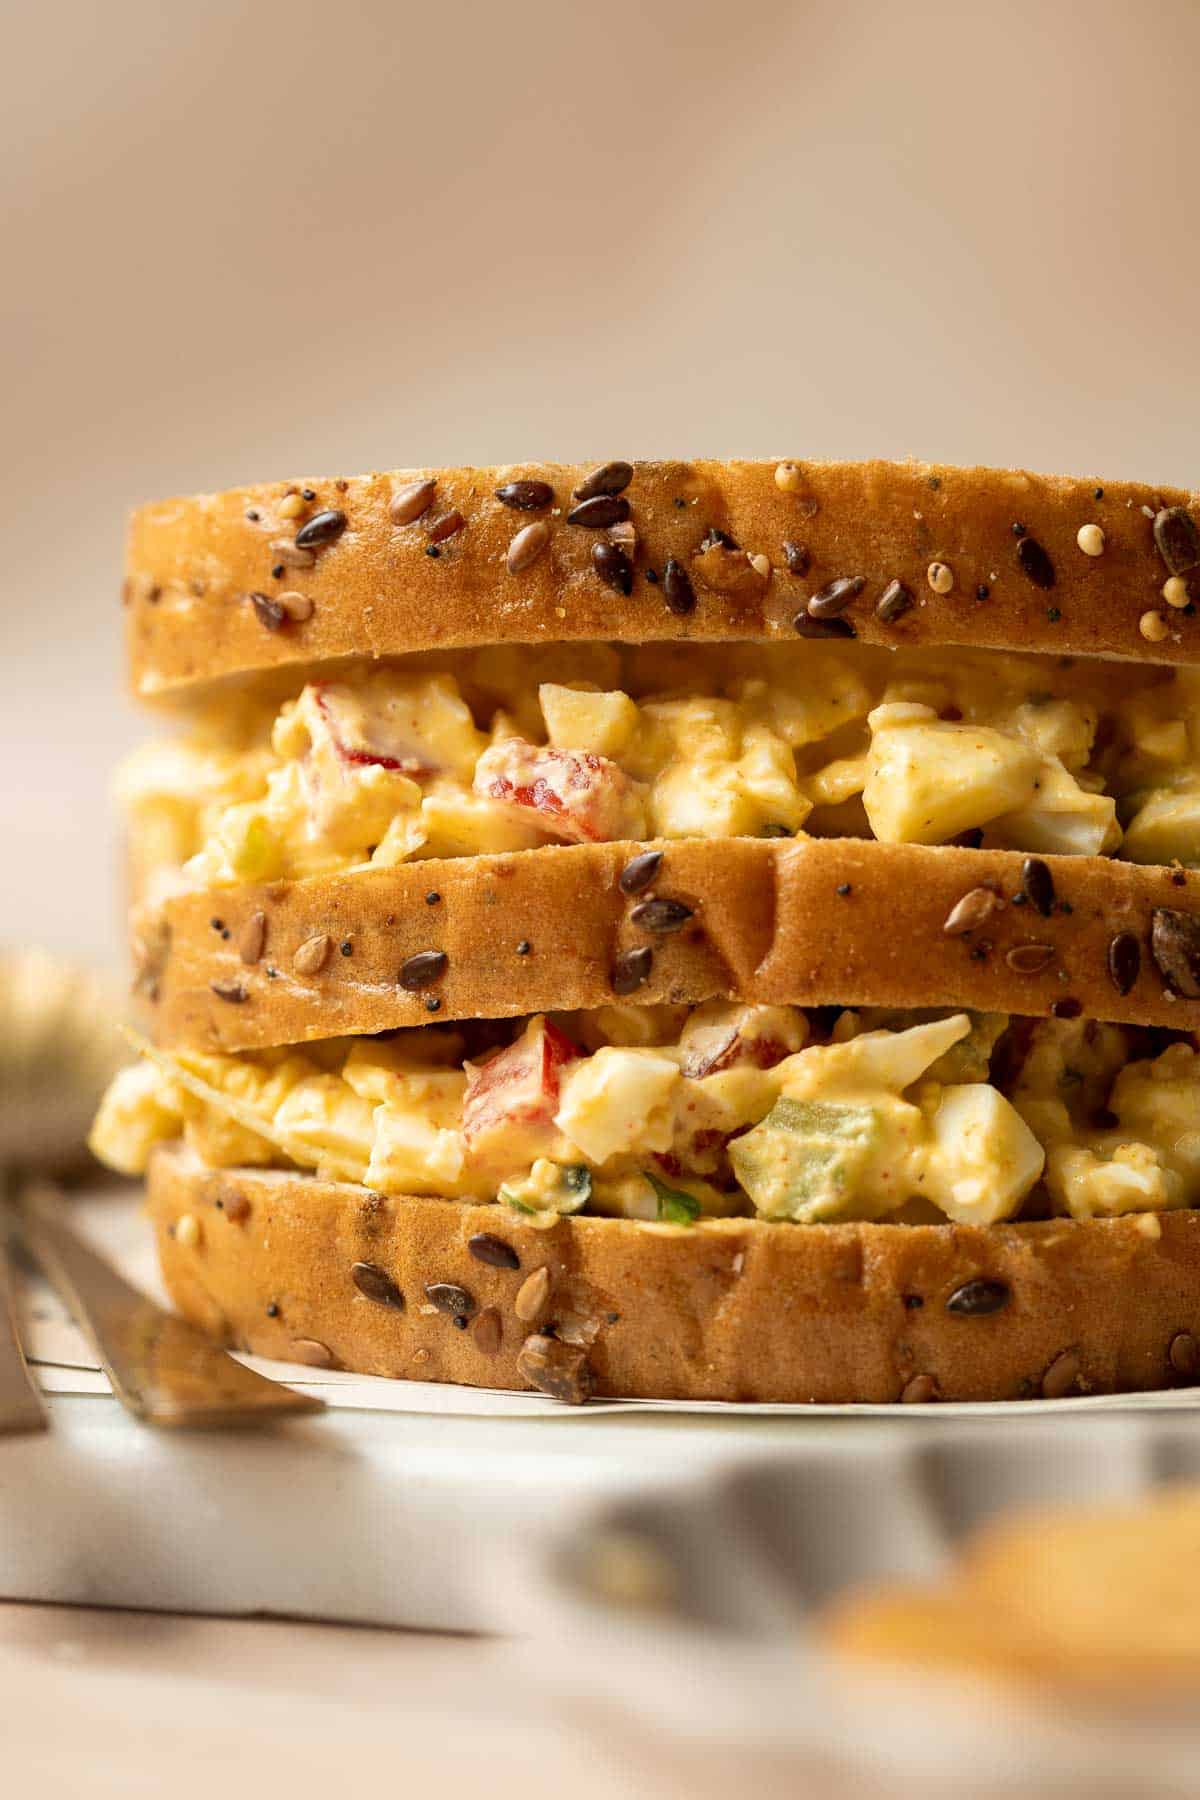
Ingredient Notes
To make this delicious and easy Deviled Egg Salad, you will need the following ingredients (full measurements in recipe card below):
- eggs
- chives - green onions will also work. Just chop them finely.
- celery
- red bell pepper - you can also use orange or yellow bell pepper if you don't have red bell pepper on hand.
- mayonnaise - homemade or store-bought mayo are both fine to use.
- Dijon mustard - stone ground mustard can be used in place of the Dijon mustard.
- lemon juice - fresh squeezed lemon juice has the best flavor and simplest ingredients, but you can use concentrate if necessary.
- paprika - you can also use chili powder or just a hint of cayenne pepper, but the taste will be altered slightly if you use a substitute.
- garlic powder - if you don't have garlic powder, you can use half to one whole clove of garlic, minced finely.
- salt and pepper
You will also need measuring cups and spoons, medium saucepan, and mixing bowls.
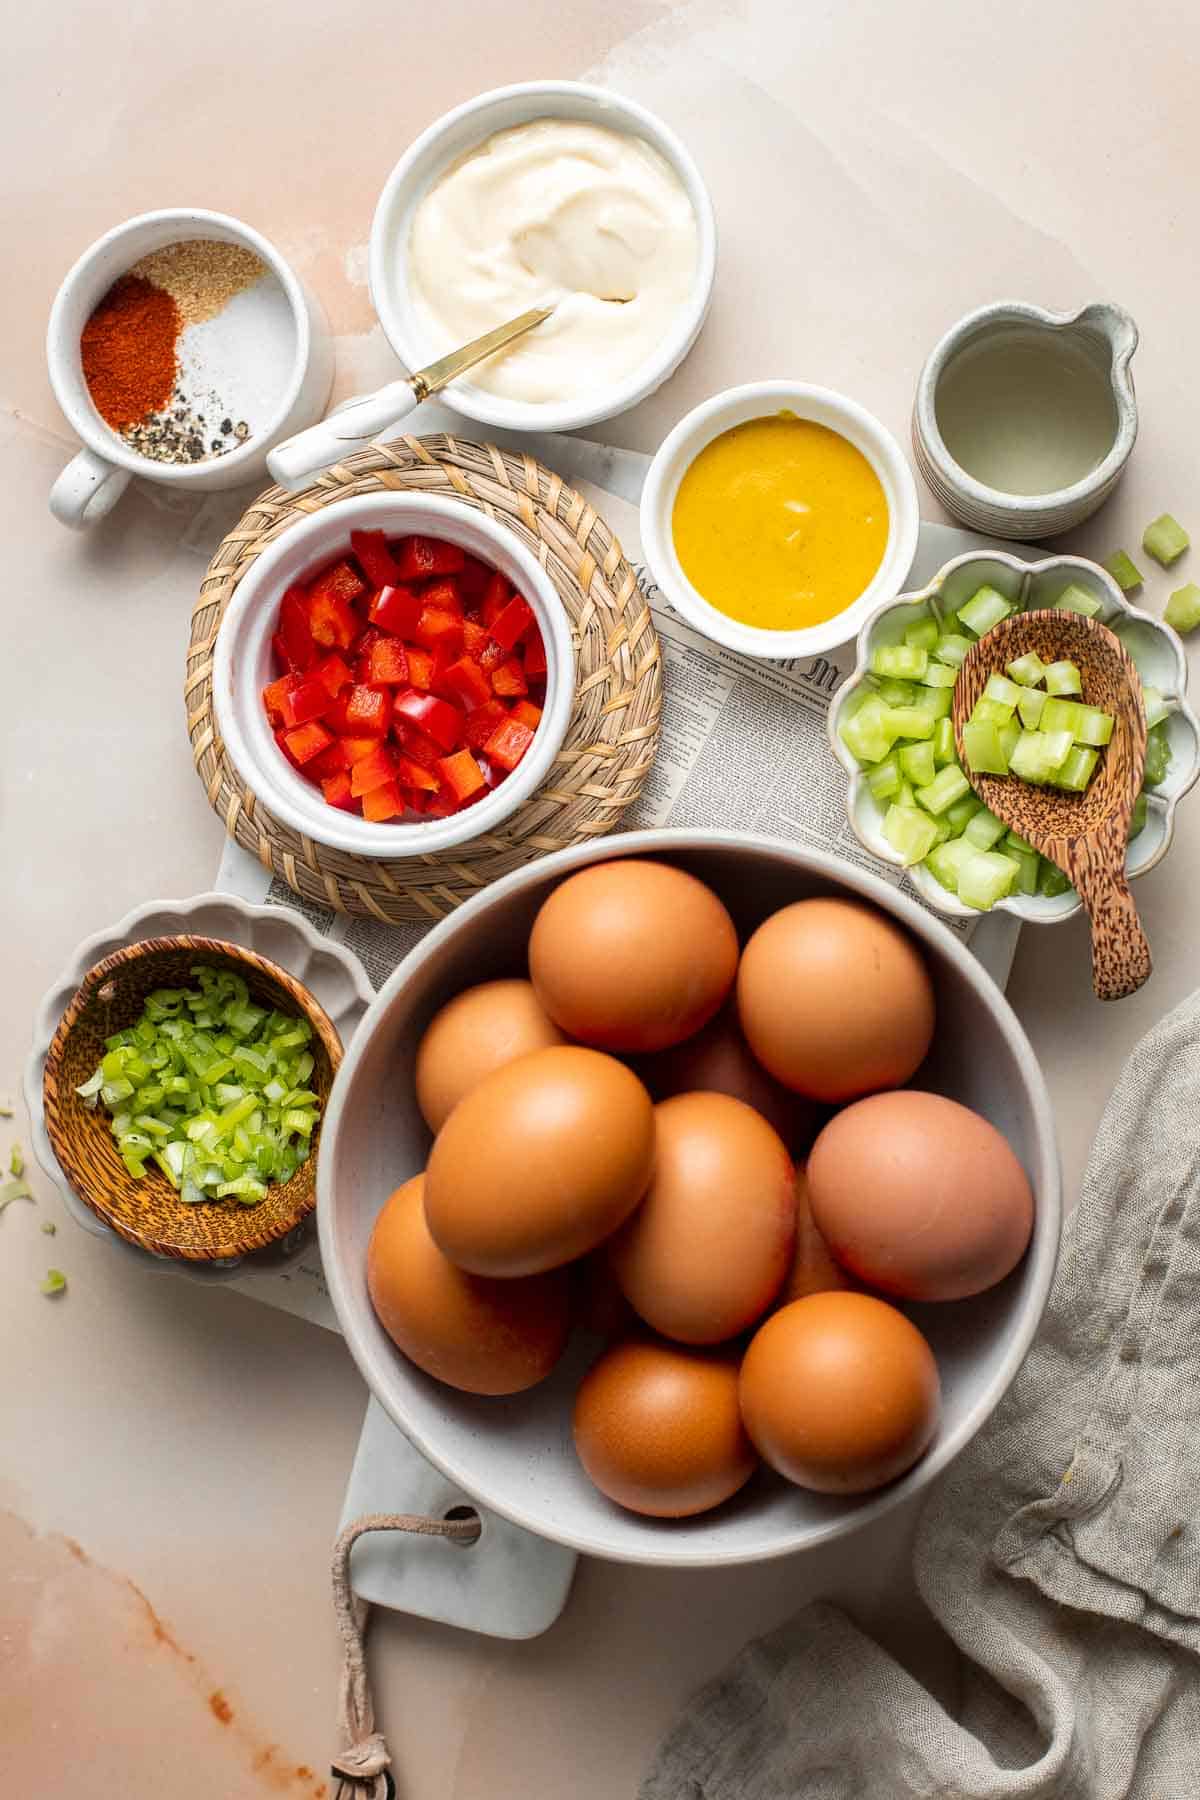
How to Make the Best Deviled Egg Salad
- Boil eggs. Place eggs into a medium saucepan and cover completely with water by an inch. Bring to a boil over high heat. Then remove from heat, cover the saucepan with the lid, and set aside for 12 minutes in the boiling water. (You can also steam cook the eggs in a steamer basket for 15 minutes). Drain the water and fill with cold water to cool down the eggs quickly.
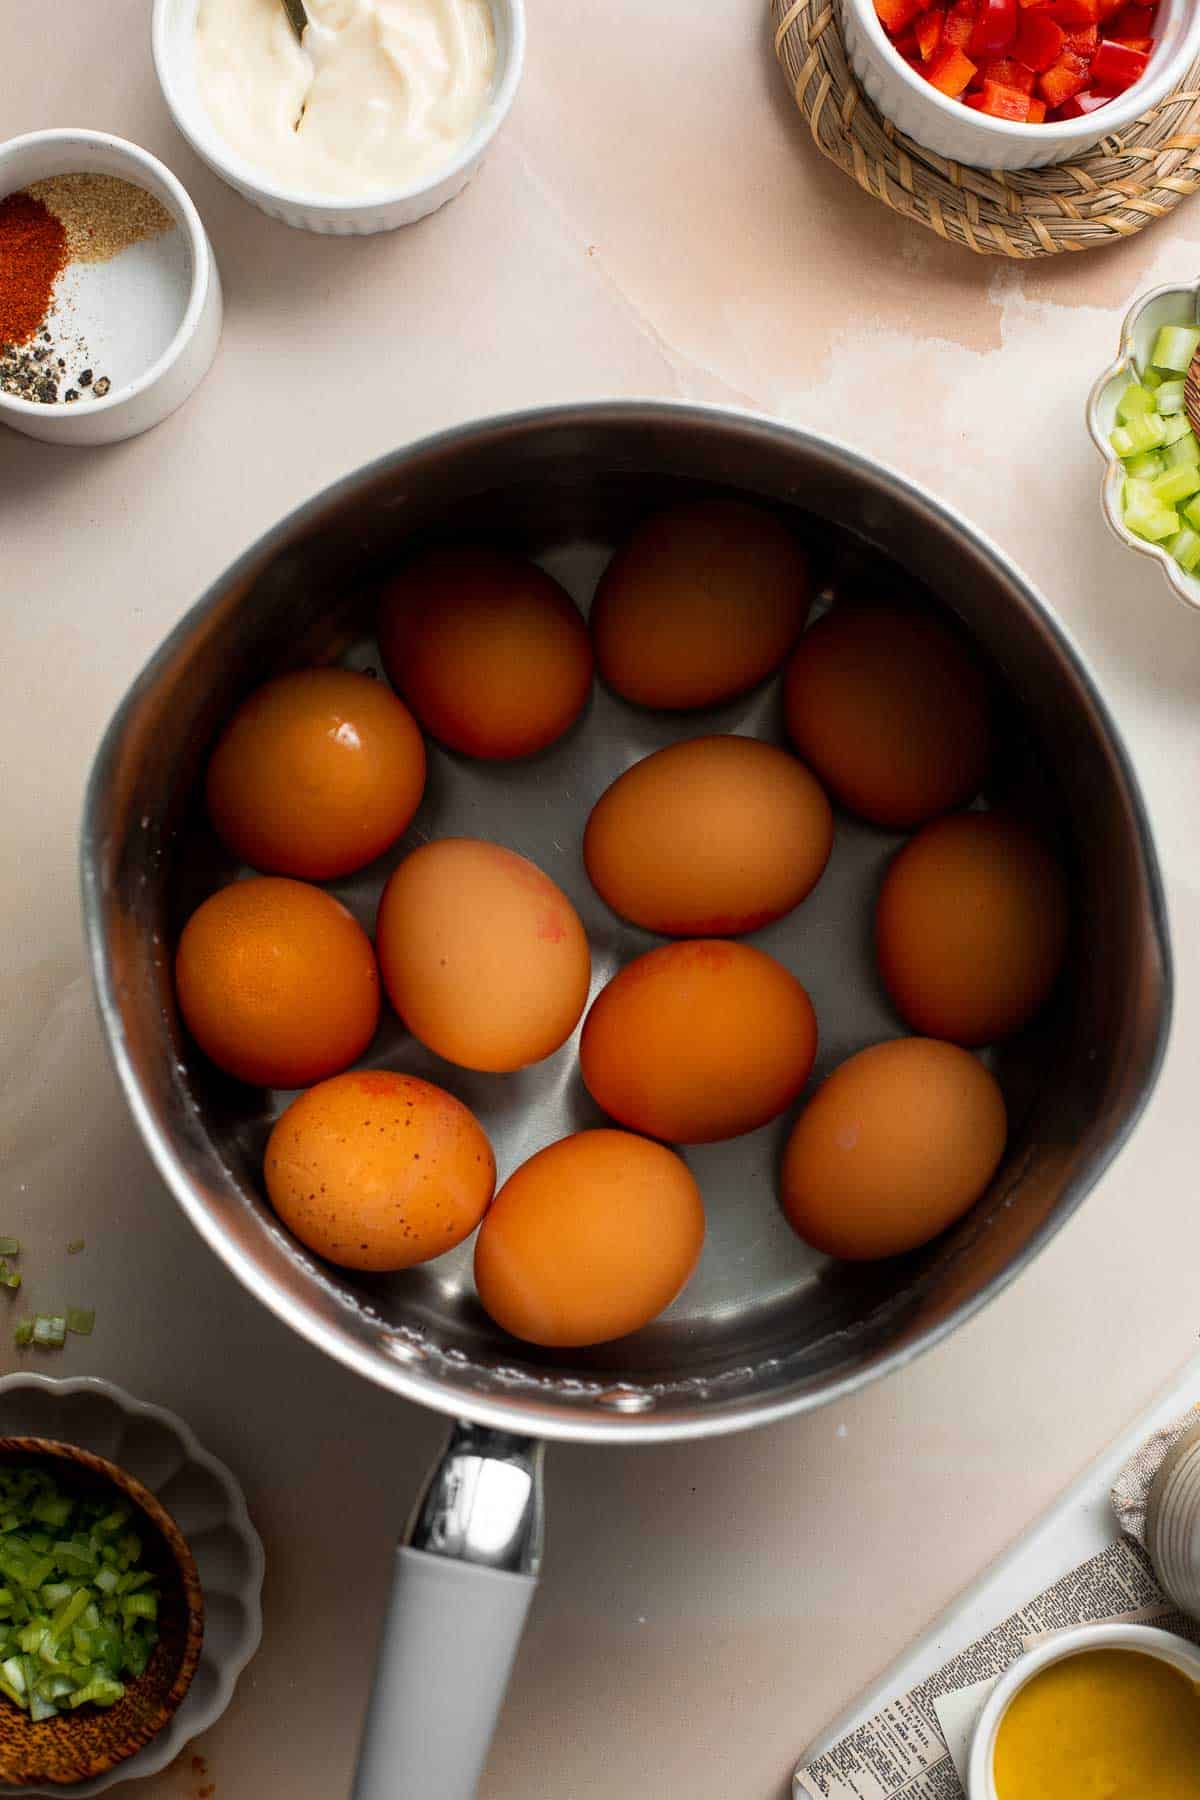
- Chop eggs and combine. Once eggs are cool, peel and finely chop them or use a grater to grate them. In a large mixing bowl, combine the chopped eggs, chives, celery, and bell pepper.
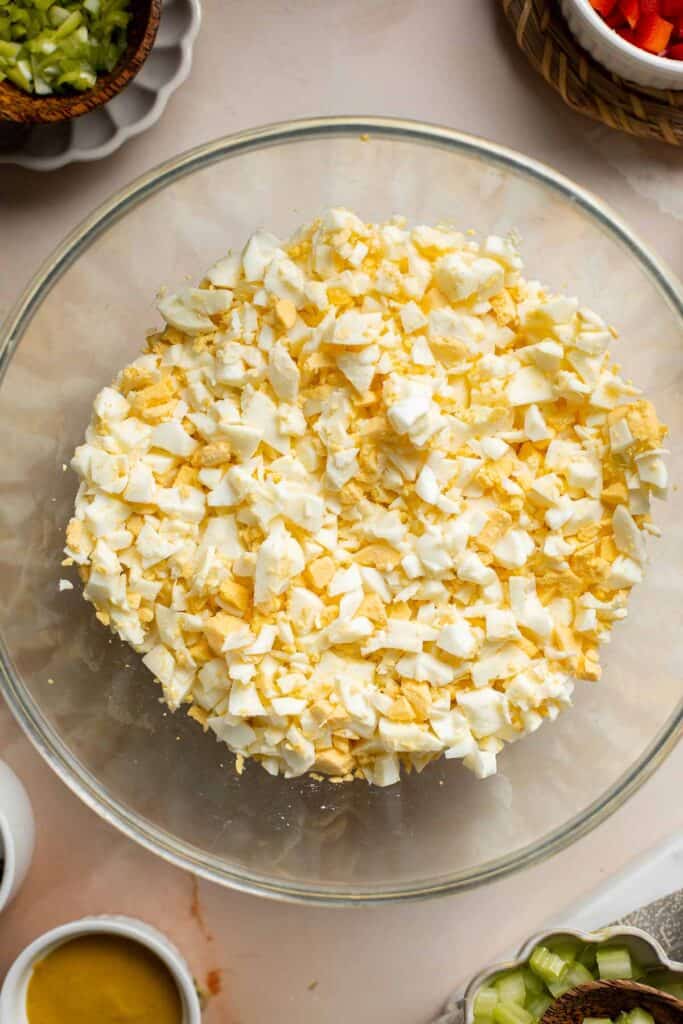
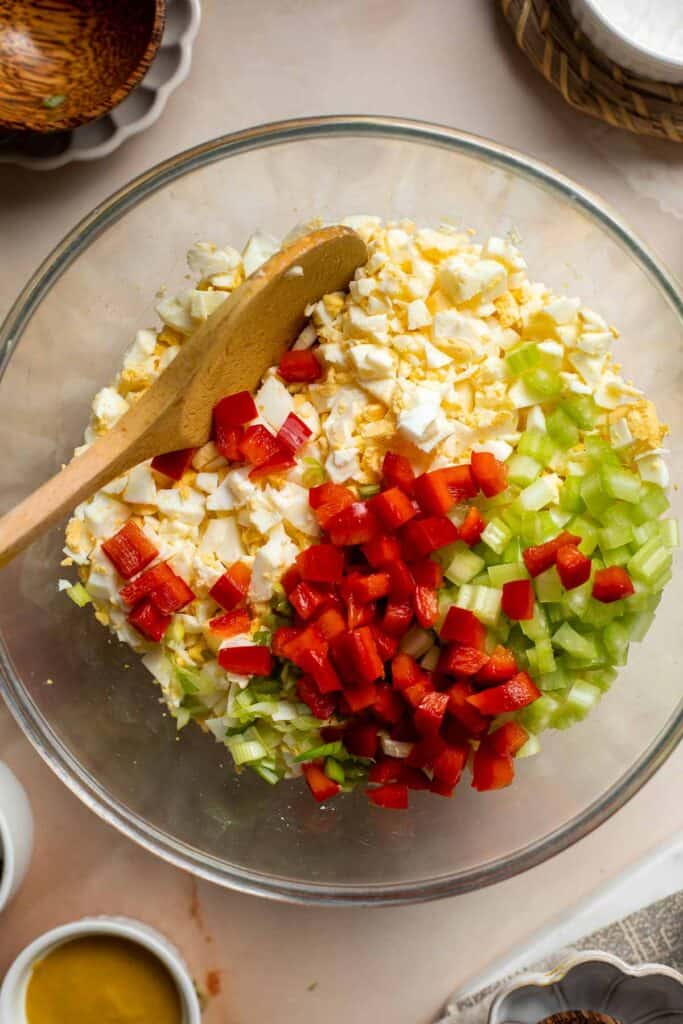
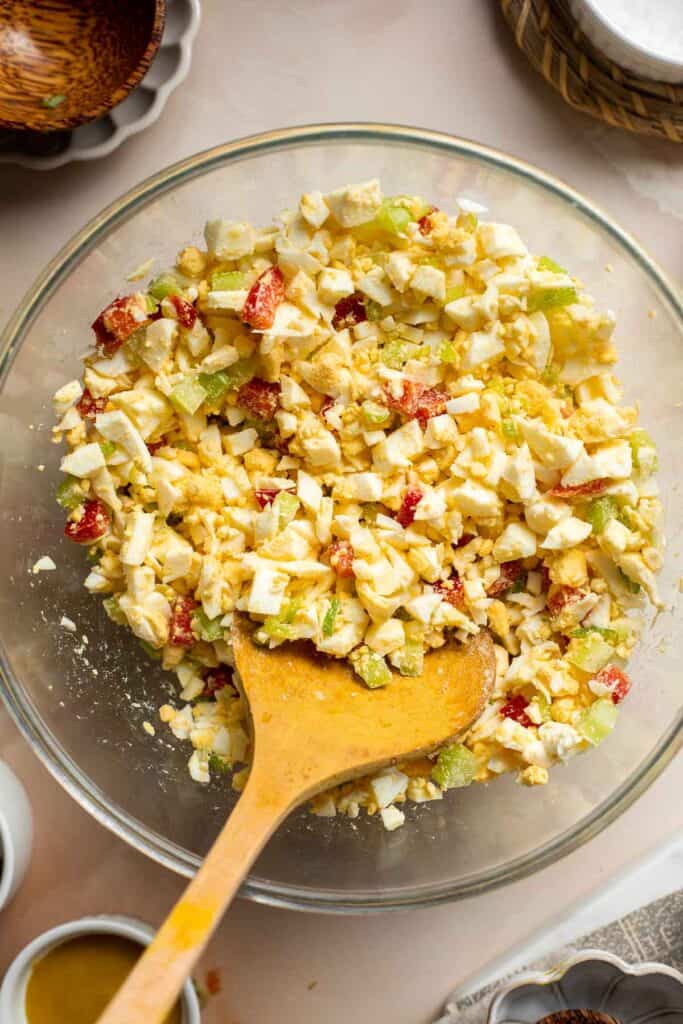
- Make sauce. In a small mixing bowl, whisk together the mayonnaise, mustard, lemon juice, paprika, and garlic powder until smooth.
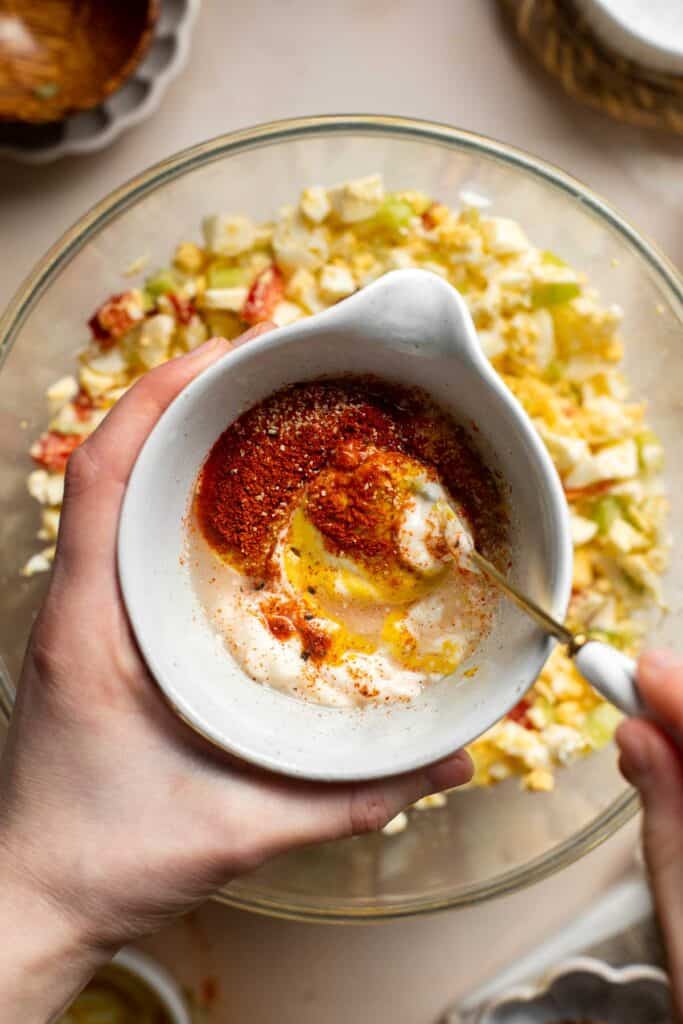
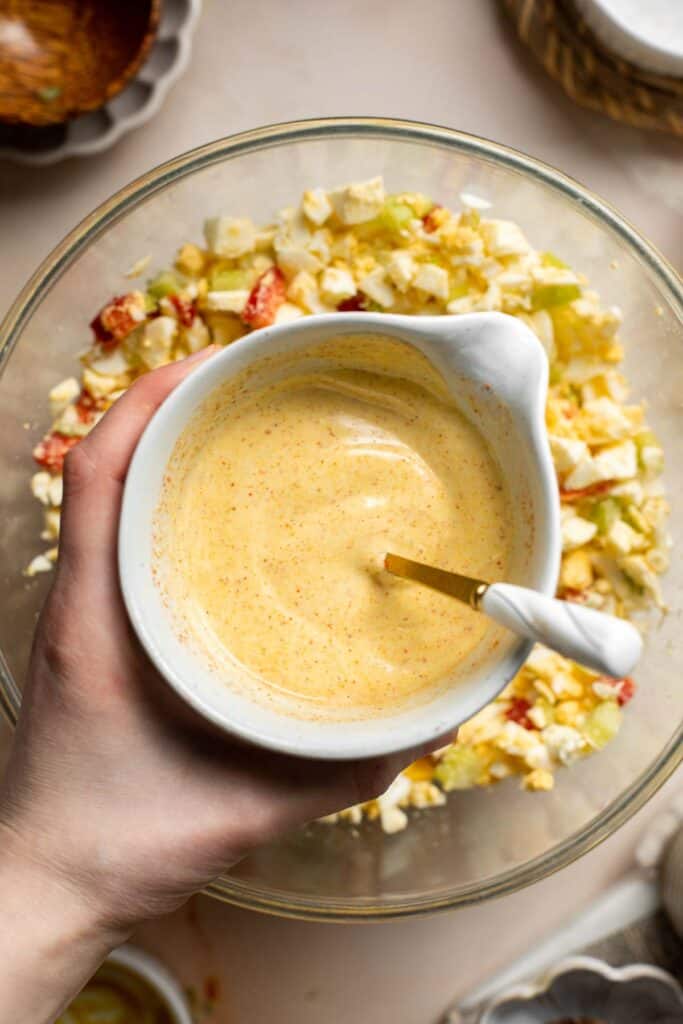
- Combine ingredients. Add the sauce to the egg mixture. Stir with a spoon to mix well. If salad seems dry, add a little more mayonnaise to reach desired consistency. Season with salt and pepper to taste.
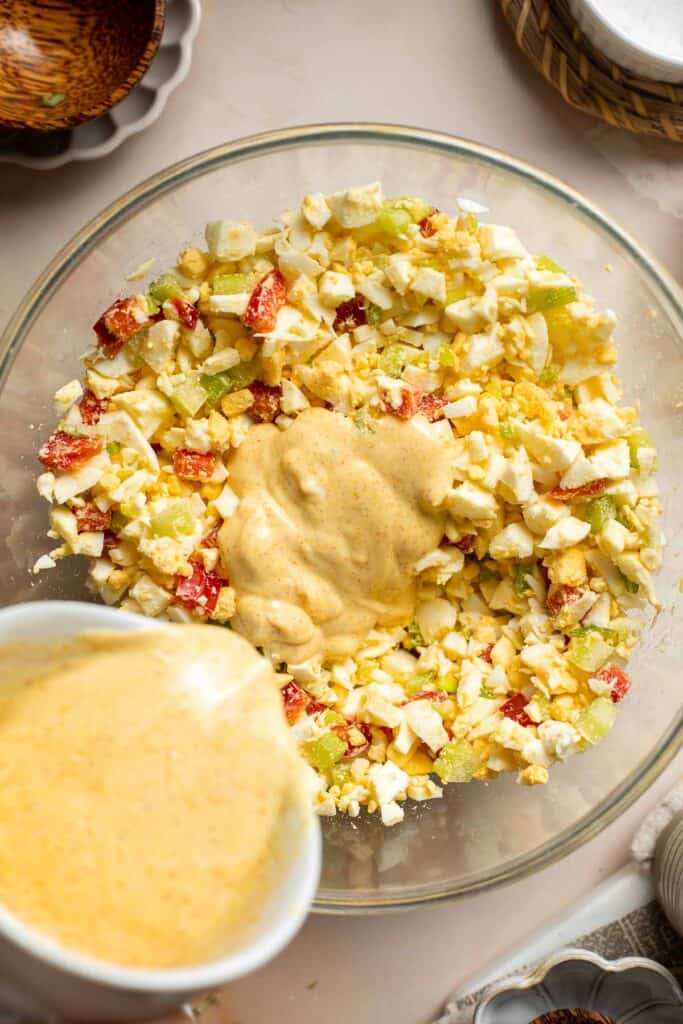
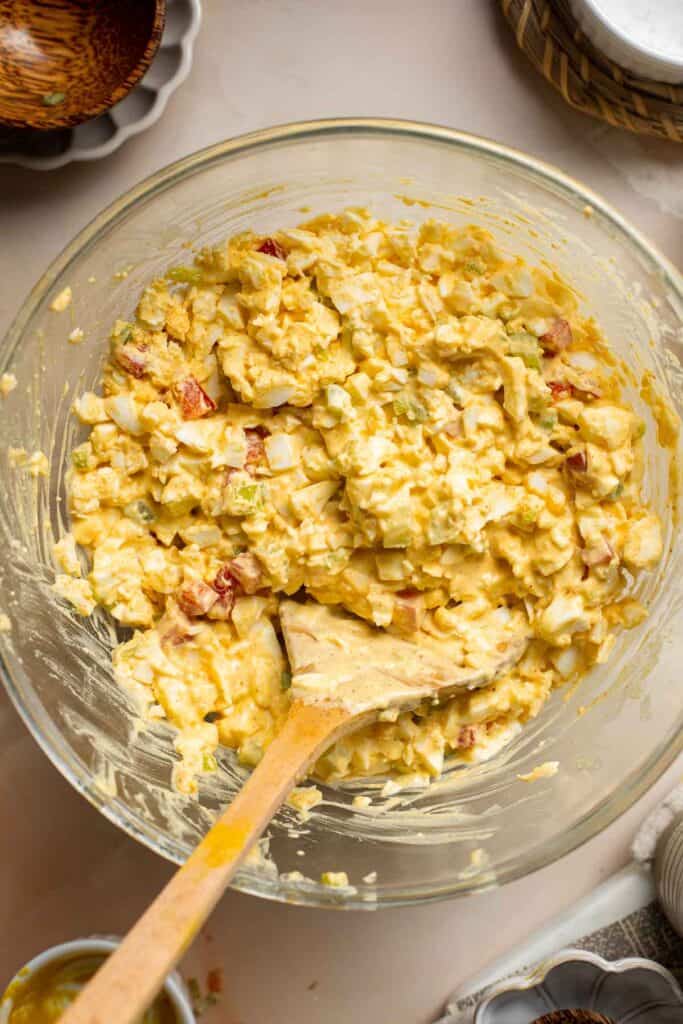
- Serve. Serve immediately or store in the refrigerator for up to 5 days.
Recipe Variations
- Make it spicy. Add some heat to your deviled egg salad by adding chopped jalapenos, hot sauce, or a sprinkle of cayenne pepper.
- Add bacon. Add crispy chopped bacon and shredded cheddar cheese for a smoky and cheesy twist.
- Add avocado. Mix in some mashed avocado to make an avocado deviled egg salad. It's creamy and healthy twist.
- Freshen with herbs. Add chopped fresh dill or parsley for a refreshing and herbaceous flavor.
- Add pickles. Add chopped pickles or pickle relish to the deviled egg salad for a tangy and crunchy twist.
How to Serve
This Deviled Egg Salad is delicious served as a dip with crackers, veggie slices, or crisp lettuce for dipping and scooping -as a crunchy vehicle for getting more of this delicious egg salad to your tastebuds quickly. You can also serve it as a sandwich spread in between a croissant or bread.
Egg Salad is a classic potluck dish that is great for taking to work parties and lunches. Some other easy to make dishes that go along with it are:
For more ideas, see our 30 Best Potluck Recipes.
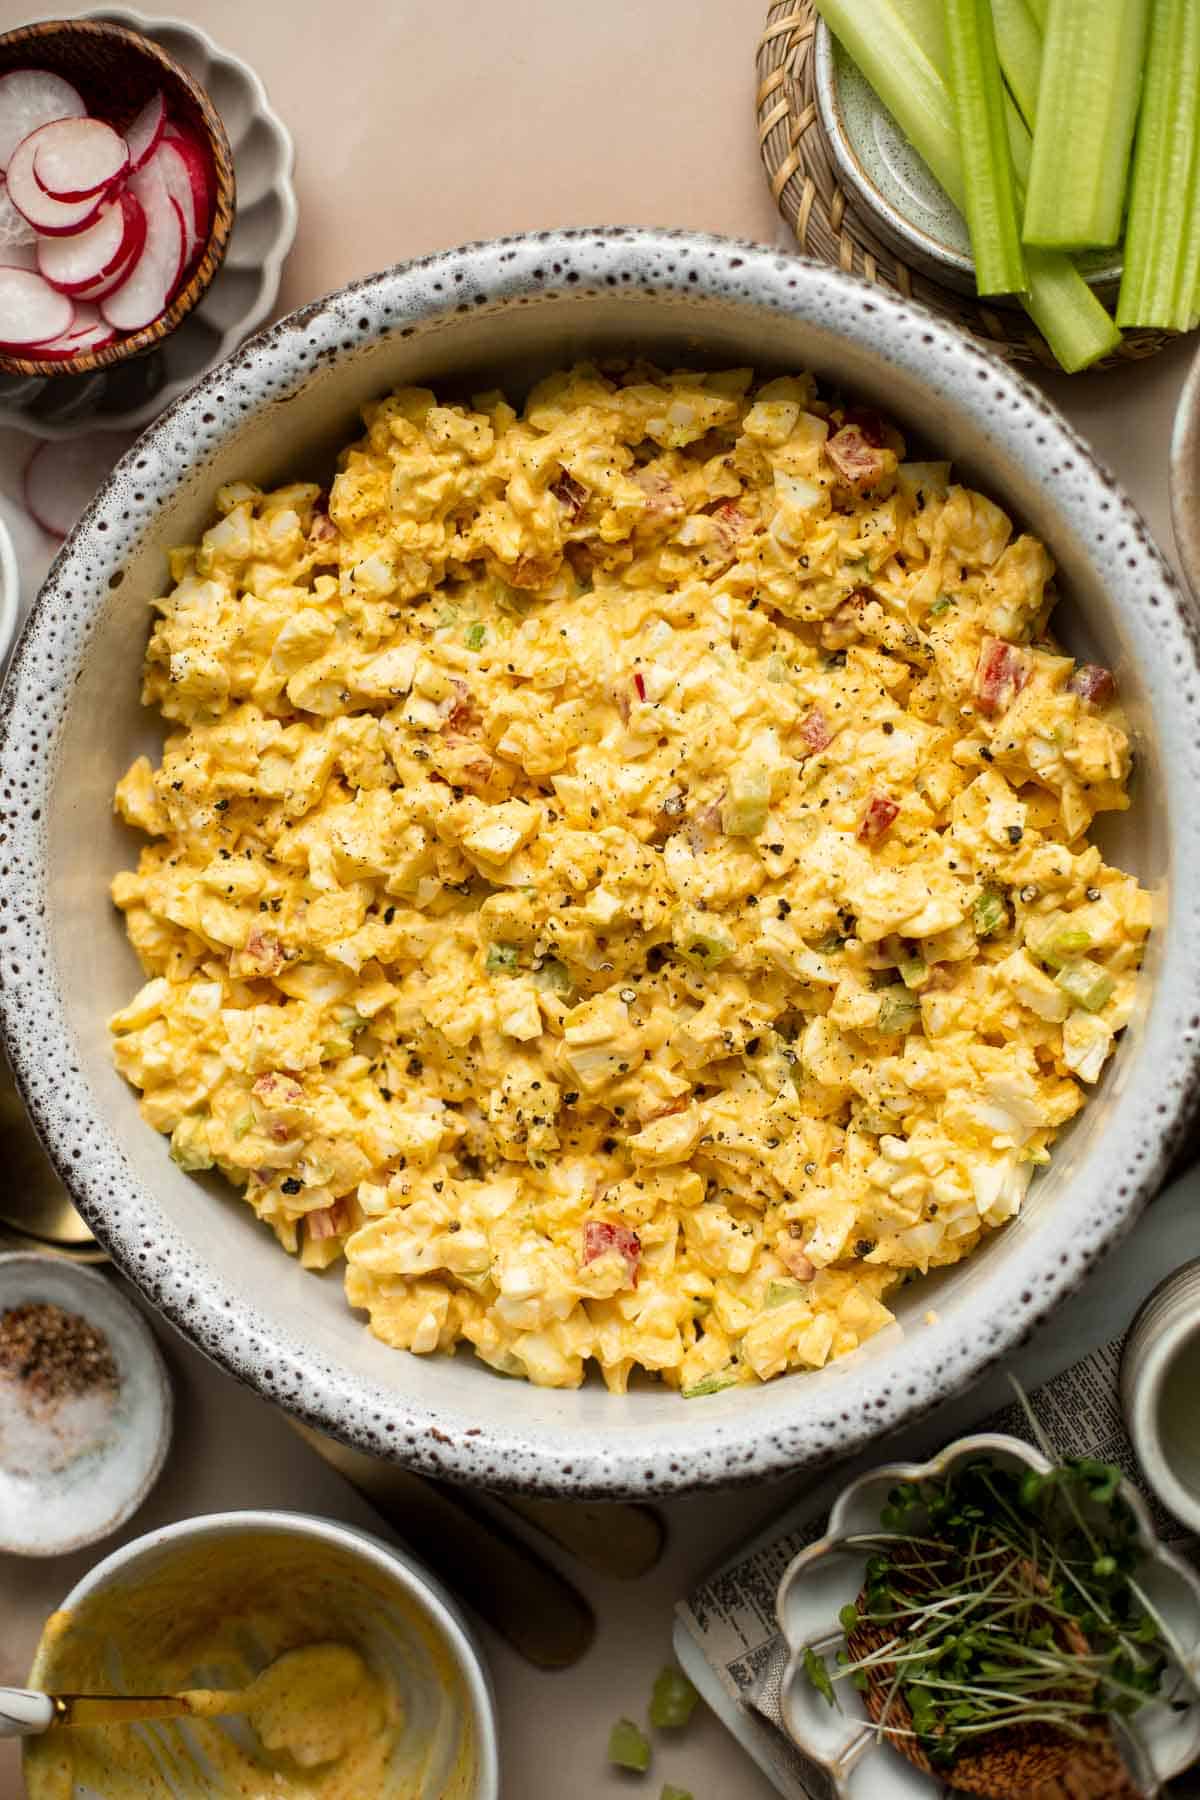
Recipe Tips and Tricks
- Prep ingredients ahead for fast assembly. Planning to host for Easter or taking a dish with you to a potluck? Boil and peel the eggs and chop the vegetables for easy preparation on the day of.
- Don't rush the eggs. It's imperative that you exercise patience and let the eggs cool down completely before preparing them for the deviled egg salad -otherwise, the final dish could become watery.
- Serve at room temperature or chilled. You can serve the salad as is at room temperature or chill before serving: I prefer chilling the deviled egg salad in the refrigerator for at least an hour before serving. This helps the flavors meld together for an ever more delicious and refreshing dish.
Storing and Freezing Instructions
How to Store
Transfer leftover deviled egg salad into an airtight container and refrigerate for up to 5 days.
How to Freeze
It's not recommended to freeze deviled egg salad because the texture will change. But if you want to freeze it, transfer it to a freezer-safe container or freezer bag and freeze for up to 4 weeks. Thaw overnight in the refrigerator before serving cold.
More Egg Recipes
- 20 Best Egg Recipes
- Deviled Eggs
- Egg Muffins
- Mediterranean Scrambled Eggs
- Spring Vegetable Frittata
- Egg Salad Sandwich
Tried this recipe?
I'd love to hear what you think! Leave a comment and rating below to share your feedback. Your reviews help others discover this recipe and help me keep creating more free recipes for you. Snap a photo and tag me on social media @aheadofthyme too.

Baked Chicken Quesadillas
Baked Chicken Quesadillas are cheesy, crispy, and delicious. Tender chicken is well seasoned and combined with vibrant bell peppers and silky onions all held together in a tortilla with cheese. Satisfy your Tex-Mex cravings and serve them warm topped with your favorite taco fixings.
Best of all, they are quick and easy to make in 30 minutes! By batch-making these quesadillas in the oven you can feed a small crowd without spending time standing over the stove. Prep the recipe in just ten minutes, sear the chicken, and then pop them in the oven to get crispy and golden for serving.
Why You'll Love these Baked Chicken Quesadillas
- Cheesy chicken and vegetables. These baked chicken quesadillas have the perfect ratio of melty, pull-apart cheese and fresh vegetables - no one minds bell peppers and onions when they're covered in cheese.
- Quick and easy for beginners. Anyone can make delicious quesadillas entrenched with savoury Mexican flavours. This chicken recipe is quick, easy and fun. For starters, you don't have to marinate the chicken. The fajita seasoning provides so much flavour that it's all that you require.
- Better than takeout. This is the perfect recipe to turn to when you're thinking about heading to a drive-thru or ordering takeout from your favorite Tex-Mex restaurant. You can make these restaurant-worthy baked chicken quesadillas faster than it would take to get them elsewhere!
- Family-friendly lunch or dinner. Quesadillas are a favorite of all ages, and this baked chicken quesadilla recipe is easy enough to make for a quick lunch but hearty enough to make for dinner. Plus, the kids will love it too!

Ingredient Notes
To make these easy Baked Chicken Quesadillas, you will need the following ingredients (full measurements in recipe card below):
- chicken breast - you can also use cubed chicken thighs, but the texture of the quesadillas may change slightly.
- fajita seasoning - if you don't have a fajita blend on hand, taco seasoning will work in a pinch! You can adjust the taste using garlic powder, onion powder, and other similar spices. You can also make your own fajita seasoning at home. See the recipe tips below for instructions.
- avocado oil - you can also use vegetable oil or even olive oil - anything neutral with a high smoke point.
- onion - yellow or white onion are best, but you can use whatever kind of onion you like.
- red bell pepper - yellow or orange bell pepper would work if you don't have red bell pepper on hand.
- green bell pepper - green bell peppers have their own distinct flavor, but you can swap them for whatever color bell pepper you have available.
- cooking oil spray - use your favorite kind or replace it with vegetable oil for a similar effect.
- flour tortillas - corn tortillas will also work, but may fall apart more easily. You can try making your own homemade flour tortillas from scratch too. They are easier to make than you think!
- cheddar cheese - Asiago or another hard cheese will work. Get it pre-shredded for convenience or grate it yourself at home!
- Monterey Jack cheese - Colby Jack cheese or more cheddar will also work.
Optional Condiments
- guacamole - homemade guacamole or store-bought are both great for serving these baked chicken quesadillas.
- pico de gallo - make your pico de gallo from scratch or buy a premade pico de gallo from your local grocery store's produce section.
- sour cream - greek yogurt is a perfect substitute for sour cream.
Tools Needed
You will also need measuring cups and spoons, a large mixing bowl, large skillet, and half sheet baking pan.
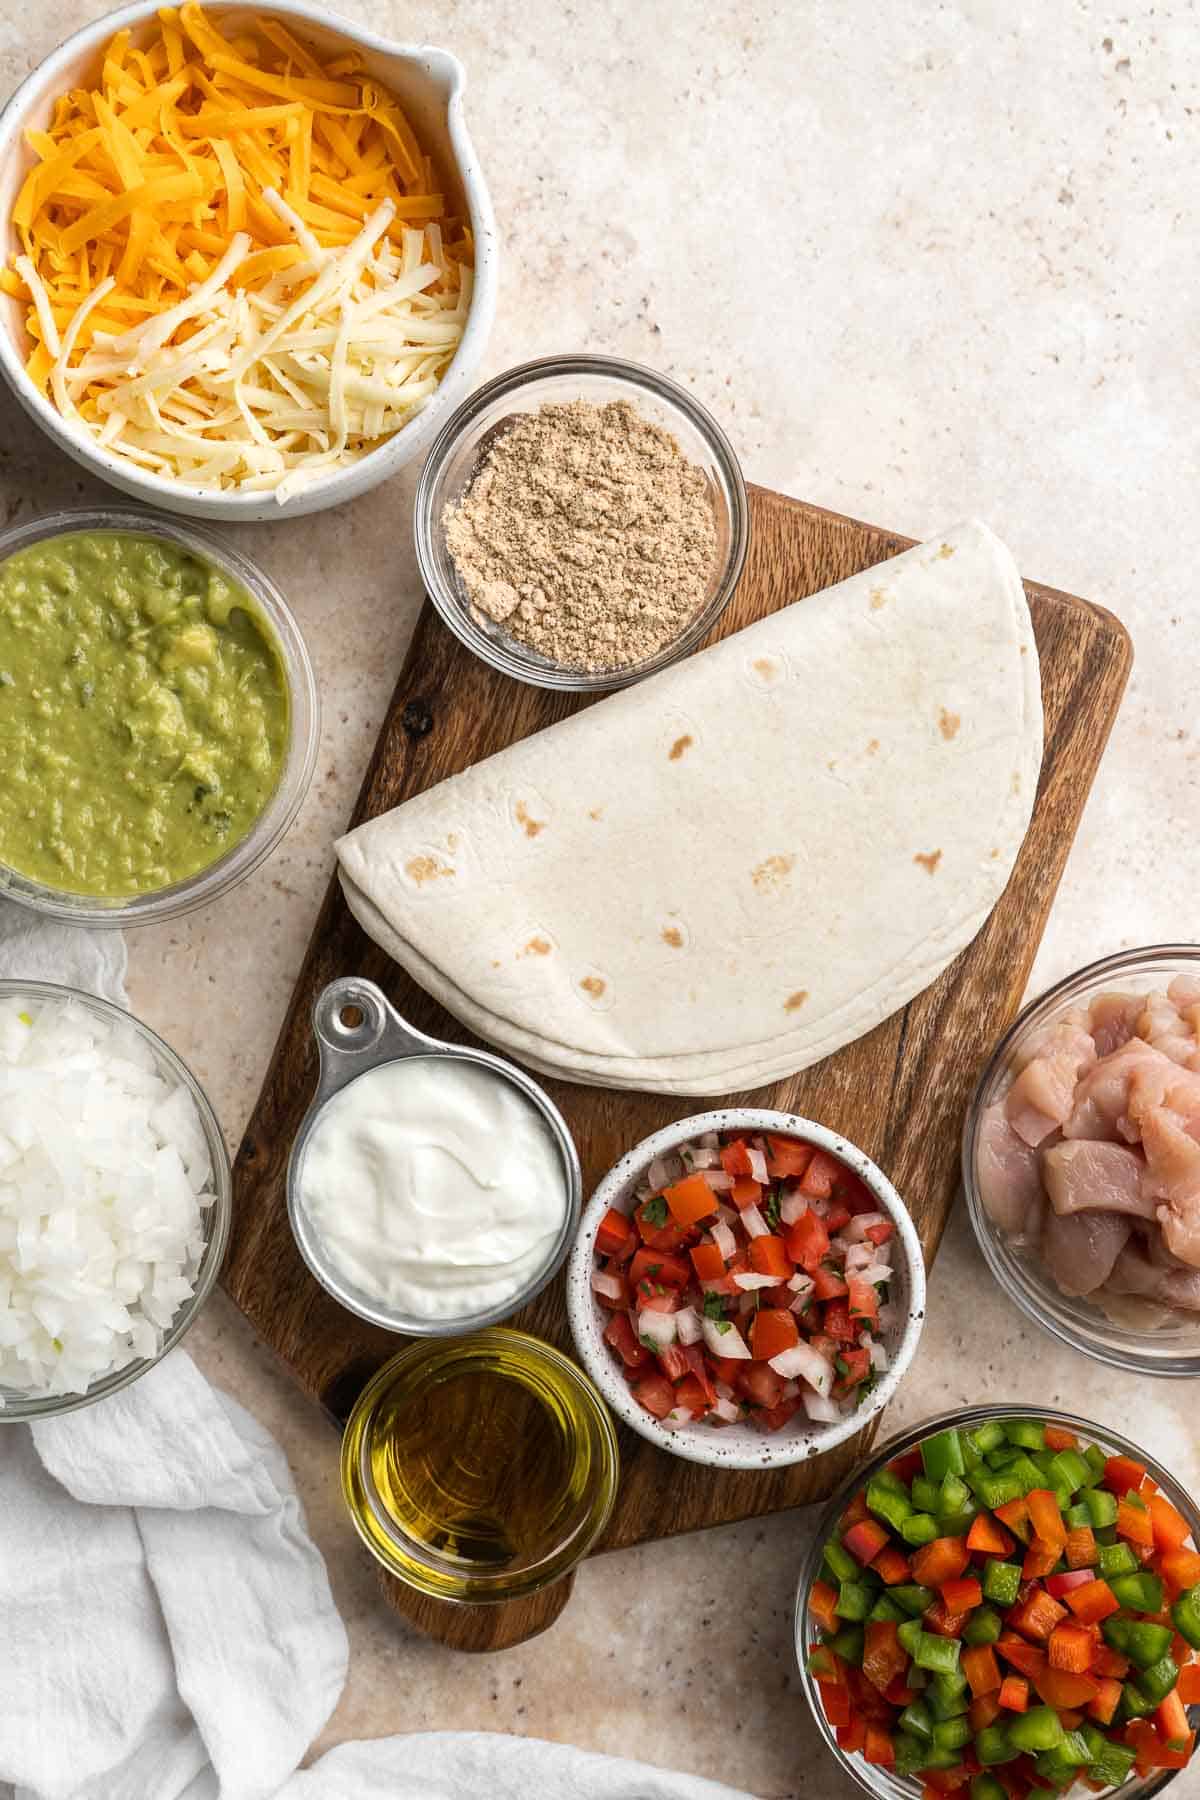
How to Make the Best Baked Chicken Quesadillas
- Prep. Preheat oven to 425F. Line a large baking sheet with parchment paper. Grease the parchment paper with cooking oil spray or brush with vegetable oil.
- Season the chicken. In a large mixing bowl, add the cubed chicken and fajita seasoning. Toss to coat chicken completely in seasoning. Set aside while oven preheats.
- Cook chicken. In a large skillet, heat oil over medium heat. Add cubed chicken and cook until browned, about 5 minutes. Transfer the cooked chicken to a plate and set aside.
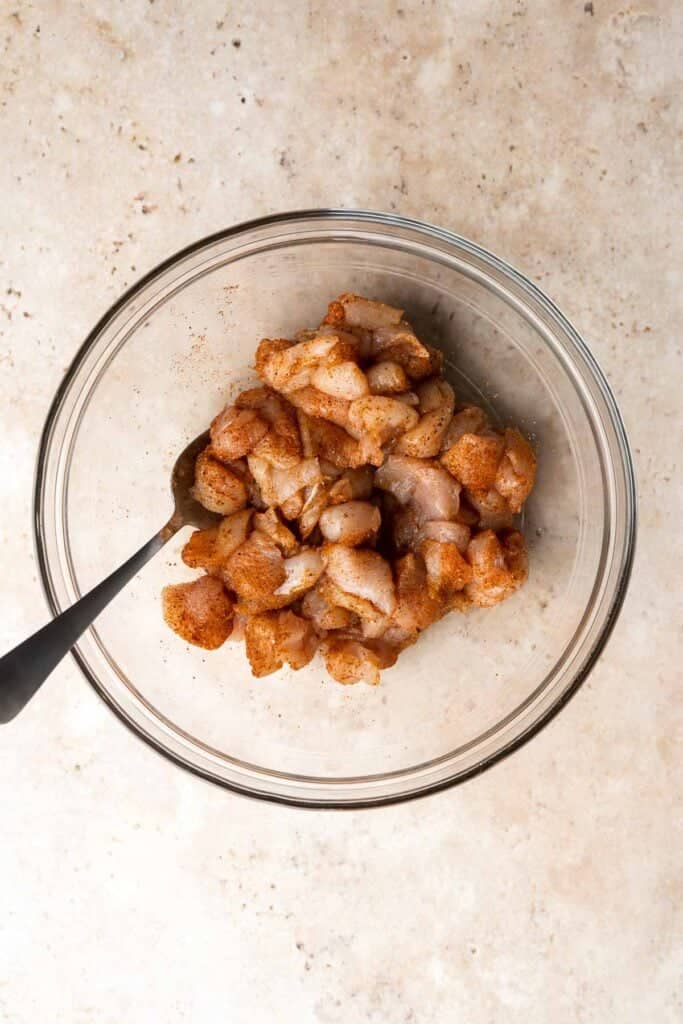

- Sauté veggies. In the same skillet, add onion, red pepper, and green pepper. Sauté until soft, about 3-4 minutes. Return the cooked chicken to the skillet and stir to combine with the veggies. Remove from heat and set aside.
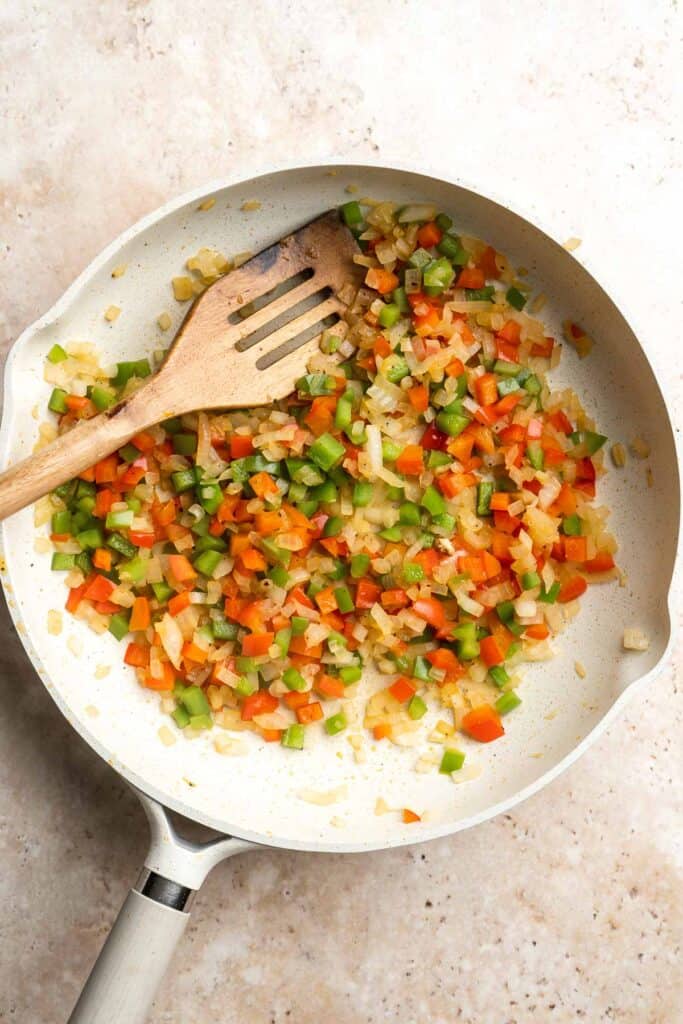
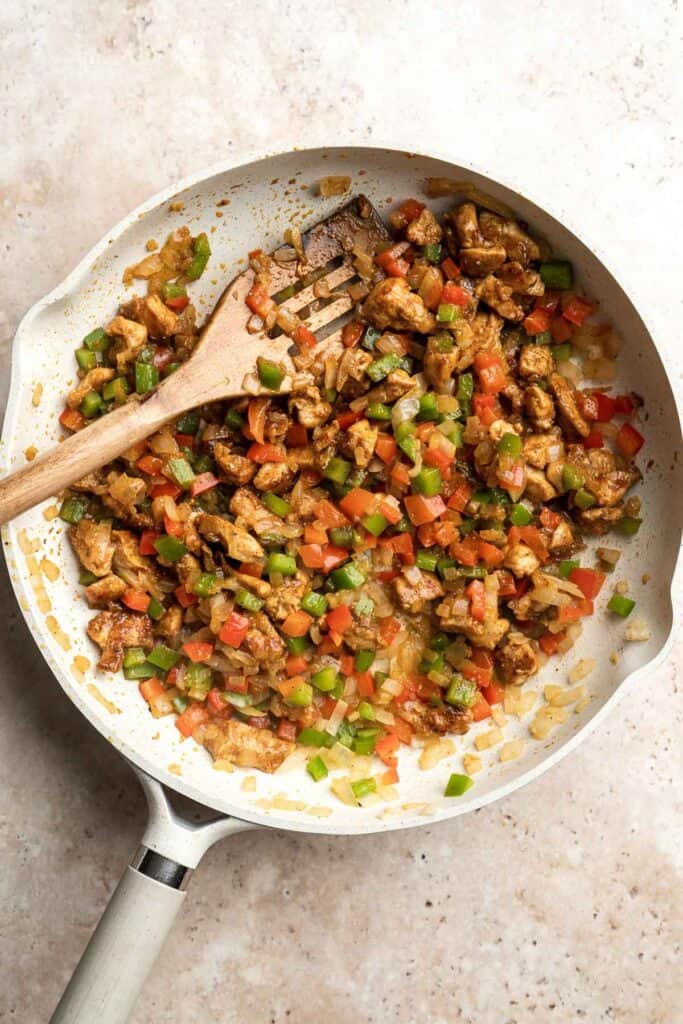
- Fill tortillas. Take one tortilla at a time and spread one-quarter of the filling into one side of the tortilla. Sprinkle with a ¼ cup of cheddar cheese and 2 tablespoons Monterey Jack cheese. Fold the tortilla wrap in half and place on the lined baking sheet. Use the back of a flat spatula to gently press the tortilla down so that the top sticks to the mixture. Repeat with the 3 remaining tortillas.
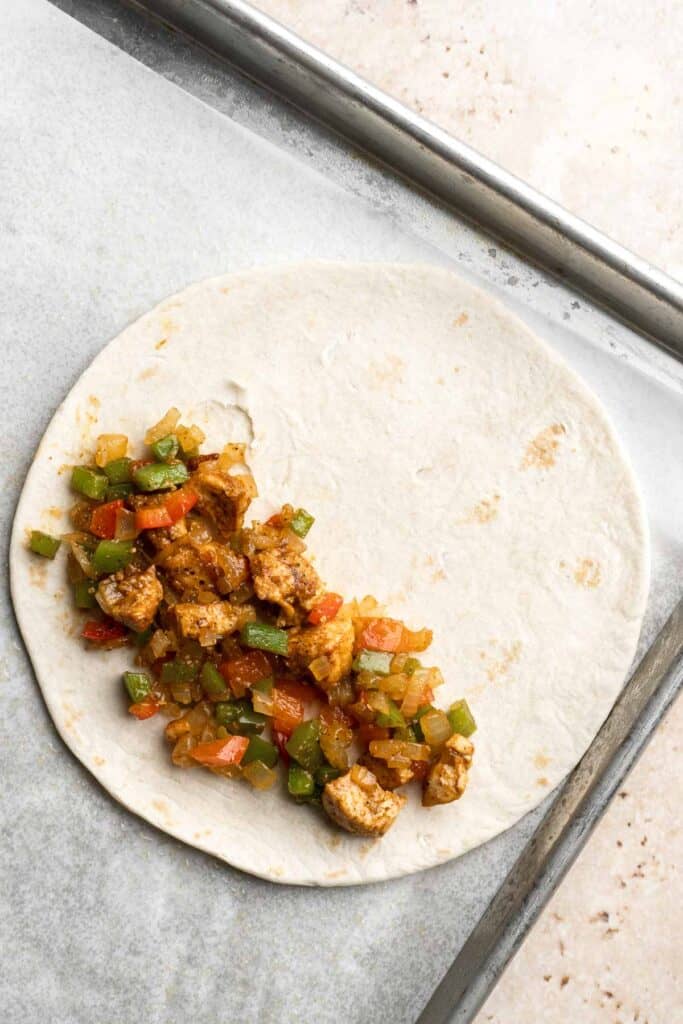
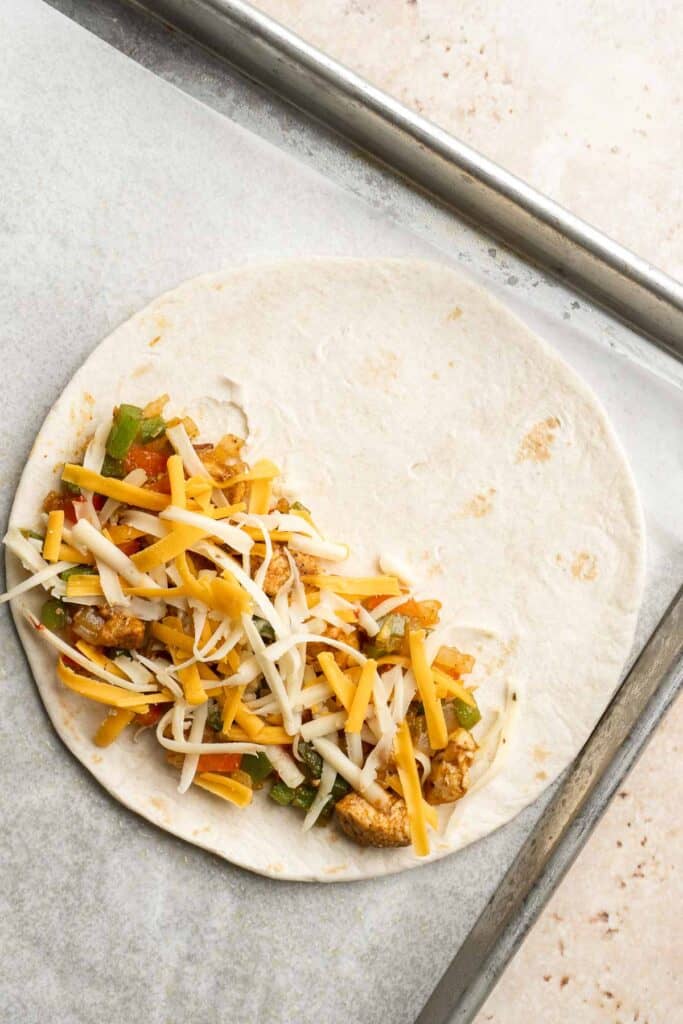
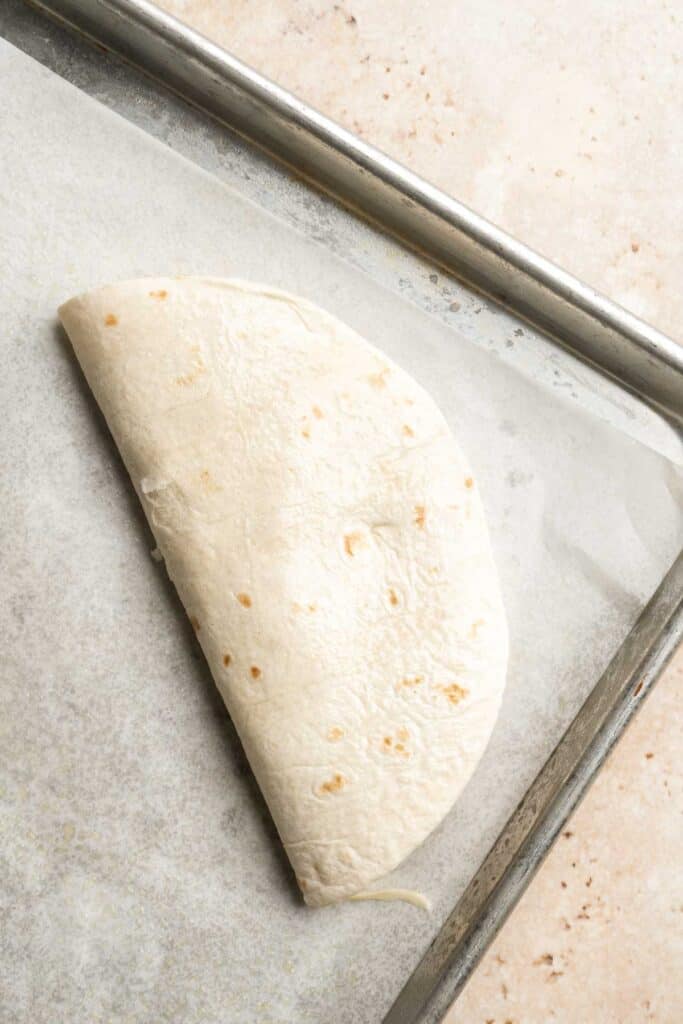
- Bake. Spray the top of the folded tortillas with more cooking spray oil or brush oil on top to help crisp up the tortillas. Place the baking sheet in the middle rack of the oven and bake for 15 minutes until golden brown and crispy and the cheese is melted. If during baking you notice that the tortilla tops and flipping up, carefully press them back down using the back of a spatula or spoon.
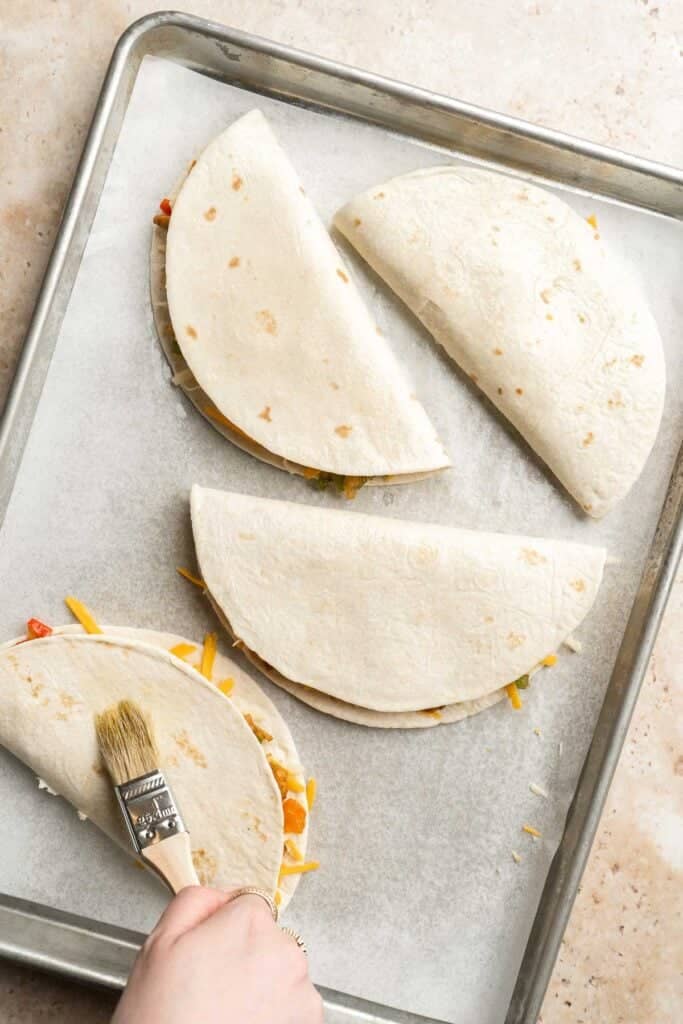

How to Cook Quesadillas on the Stove
To cook these chicken quesadillas the traditional way (on the stove), make the filling according to recipe directions. Then, heat a clean skillet over medium-low heat for 1 minute and brush with a little bit of oil. Place one tortilla on the pan. Add the filling and cheese on one half of the tortilla (amounts as directed in the recipe). Fold the empty half of the tortilla over to create a half moon. Cook until the tortilla is crispy and the cheese melts, about 2 minutes per side. Repeat with remaining tortillas.

Recipe Variations
- Switch up the veggies. Mix up the chicken-vegetable filling with other options such as mushrooms, spinach, zucchini, or tomatoes.
- Add some spice. Want to kick up the heat? Add up to one full diced jalapeño when you add the bell peppers for a spicy kick.
- Give it a BBQ twist. Toss your cooked chicken in BBQ sauce before adding it to the quesadilla for a sweet and tangy flavor. Add in some red onions and cilantro too.
- Serve for breakfast. Add scrambled eggs and chopped bacon to your quesadilla filling and serve for breakfast.
- Southwest chicken quesadillas. Add black beans, corn, and diced tomatoes to the quesadilla mixture for a southwestern flavor.
How to Serve
Serve these Baked Chicken Quesadillas with your favorite Mexican condiments such as guacamole, salsa, sour cream, lime wedges, and cilantro. You can also serve them as part of a Mexican fiesta or on Taco Tuesdays with some other classics such as:
- Fish Tacos with Lime Crema
- Shrimp Avocado Tostadas
- Beef Taco Salad
- Pinto Bean Soup (Sopa Tarasca)
- Carne Asada
- Mexican Street Corn (Elote)
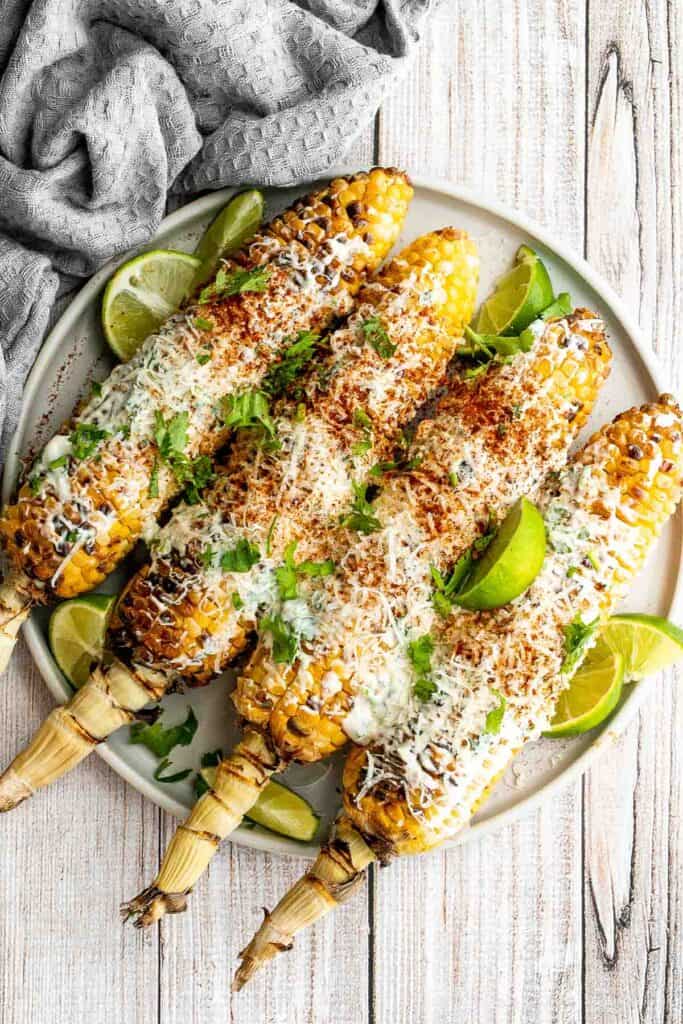

Recipe Tips and Tricks
- How to make homemade fajita seasoning: In a small mixing bowl, stir to combine 1 teaspoon cumin powder, ½ teaspoon garlic powder, ½ teaspoon onion powder, 2 teaspoons chili powder (or to taste), 1 teaspoon ground paprika, 1 teaspoon granulated sugar (optional), ½ teaspoon salt, and ¼ teaspoon ground black pepper.
- Prep ingredients ahead of time. This quick and easy chicken meal can be prepped ahead for even faster assembly. Just get all the ingredients ready up to a day before you're ready: chop veggies, measure cheeses, portion spices, and seal everything perishable in airtight containers and refrigerate. When you are ready to cook, just assemble and bake.
- Make them mini! Feeding small children, packing tiny lunchboxes, or looking for an appetizer version? Turn these baked chicken quesadillas into portable, dippable mini-quesadillas by swapping the full-size tortillas for street taco flour tortillas and reduce the bake time.
Storing and Freezing Instructions
How to Store
Store leftover quesadillas in an airtight container and refrigerate for up to 4 days.
How to Reheat
Reheat leftover chicken quesadillas in a 425F preheated oven for about 5-10 minutes until warmed through, or in the air fryer at 400F for about 3-5 minutes until hot and crispy.
How to Freeze
Wrap leftover quesadillas individually in plastic cling wrap and place in a freezer bag or other freezer-safe container. Freeze for up to 3 months. Reheat them straight from frozen in the oven or air fryer (adding in a couple of extra minutes to the reheating time). Defrosting first will result in soggy or broken tortillas - so don't do it.

More Chicken Recipes
- 25 Quick Chicken Recipes
- Chicken Tacos
- Sheet Pan Chicken Fajitas
- Mexican Chicken Breast
- Mexican Chicken Caesar Salad
- Sweet Chili Chicken Bites
Tried this recipe?
I'd love to hear what you think! Leave a comment and rating below to share your feedback. Your reviews help others discover this recipe and help me keep creating more free recipes for you. Snap a photo and tag me on social media @aheadofthyme too.

Persian Lentil Soup
This Persian Lentil Soup is a quick and easy vegan soup that is flavorful, delicious, and healthy. This thick and hearty soup is made with tender lentils and oats, fresh herbs, and a fresh squeeze of lemon juice to balance out the bold flavors.
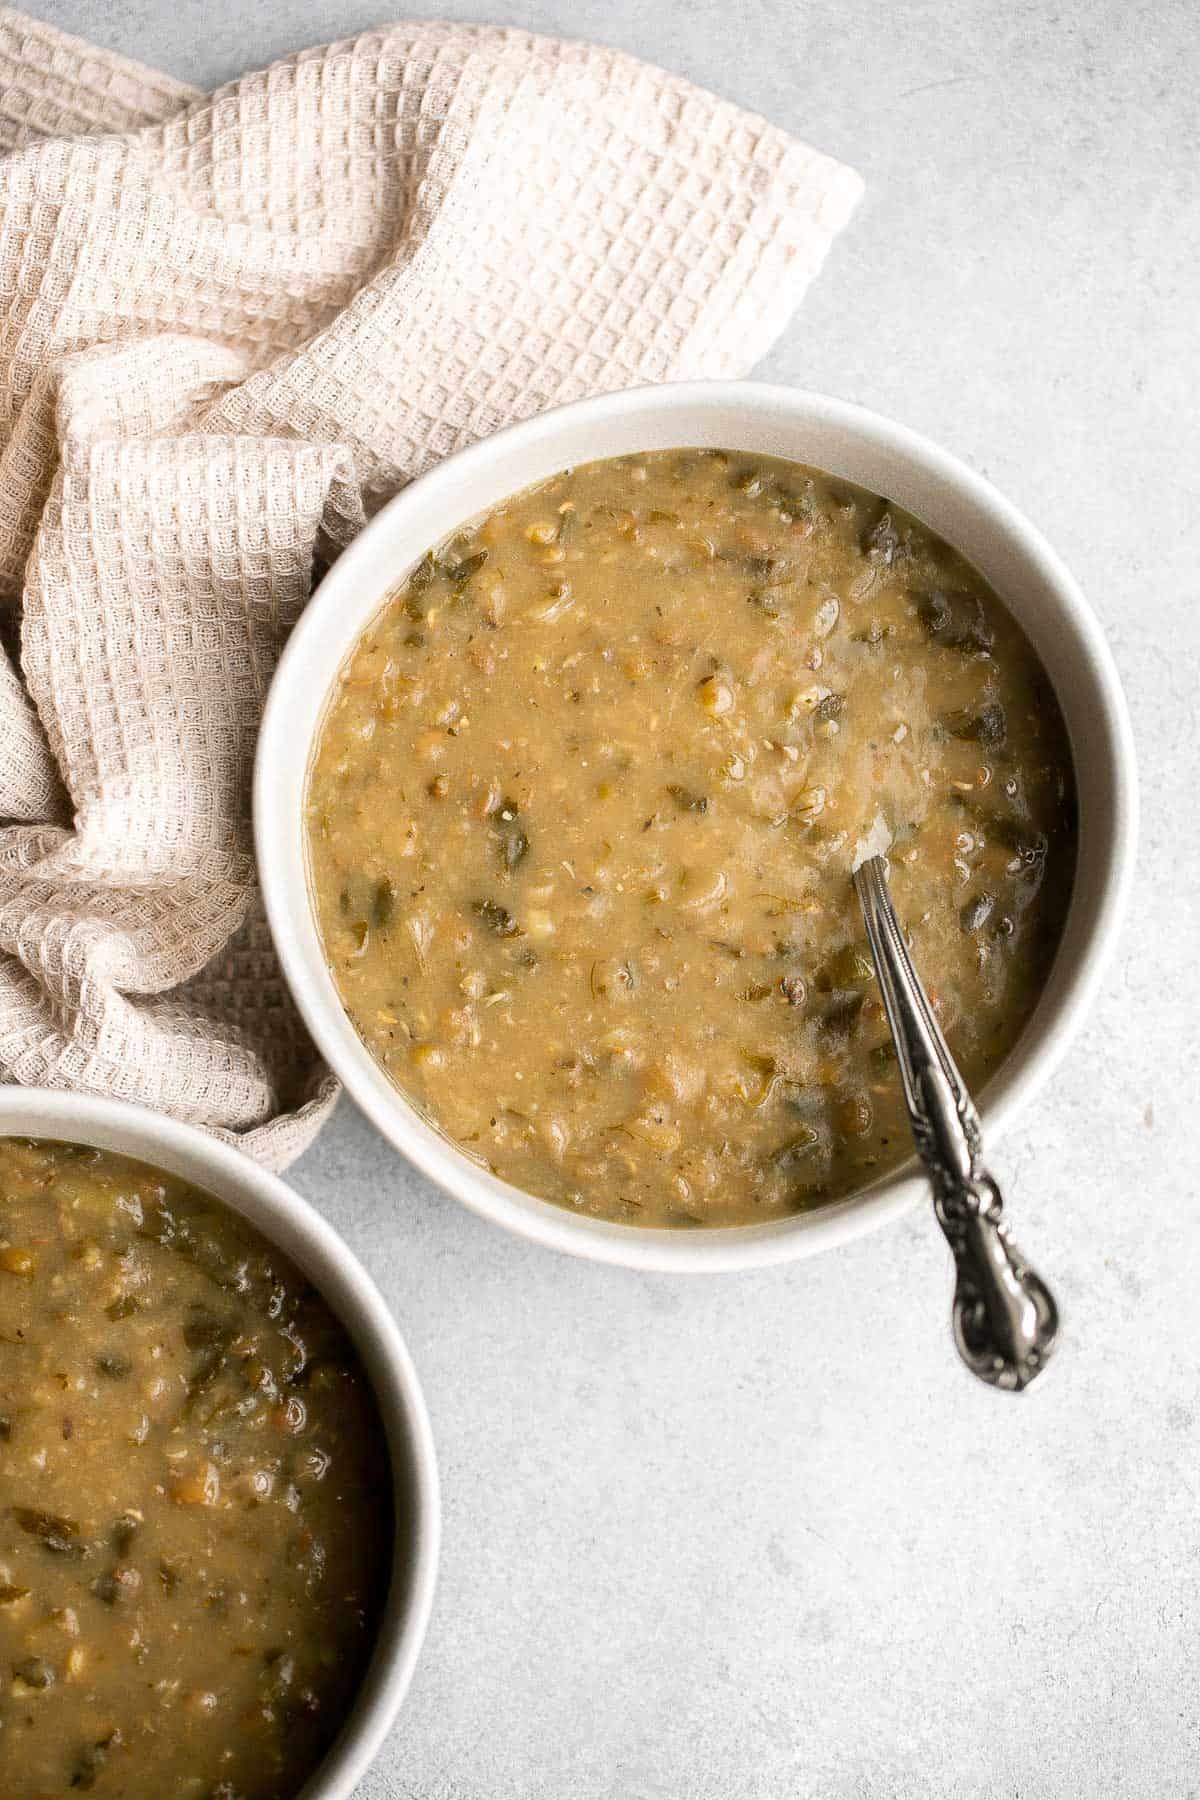
Set aside just 45 minutes to make this easy, four-step soup recipe that is naturally vegan, vegetarian, dairy-free, and gluten-free. This comforting soup is a great recipe to make anytime of the year - serve it for Persian New Year (Norouz) this spring, or in the fall and winter months when you are craving a delicious bowl of lentil soup.
Why You'll Love Persian Lentil Soup
- It's delicious and flavorful. This Persian lentil soup is seasoned with fresh herbs, seasoning, and finished with a generous squeeze of lemon juice. It contains the perfect balance between fresh and acidic flavors.
- Easy to make. This vegan lentil soup is also quick and easy to make. Just follow a few simple steps, and you'll have a hot and comforting soup ready to serve in 45 minutes - from prep to table!
- Make ahead and freezer-friendly. You can make a big batch and freeze this Persian lentil soup to enjoy for months to come. Portion it out in meal prep containers so that you can thaw individual servings at a time.
- Lentils are a superfood. Like most other beans, lentils are a powerhouse of nutrition. They are packed with plant-based protein and fiber - which are essential for a healthy diet. They're also low in fat and packed with plenty of nutrients to support your overall health.
Ingredients and Substitutions
To make this delicious Persian lentil soup, you will need the following ingredients (full quantities in the recipe card below):
- lentils - you can use any type of lentils but if you want the lentils to hold their shape, opt for brown or green lentils instead of red lentils. Brown lentils are firmer and hold their shape better in soup.
- olive oil - vegetable oil, avocado oil, or coconut oil will also work if you have either of them on hand.
- onion - yellow onion or white onions will work well here.
- garlic - fresh garlic yields the best flavor, but you can also use 1 teaspoon of garlic paste or minced garlic for each clove called for in the recipe.
- parsley - you can substitute this with fresh cilantro or even chopped spinach for a different flavor profile.
- rolled oats - you want to the oats to hold their shape slightly so I prefer using rolled oats here as opposed to quick oats. You can totally use quick oats but it will just dissolve into your soup base and help thicken it, so the texture will be different.
- vegetable stock - feel free to substitute with chicken stock if you are not sticking to a strict vegetarian or vegan diet.
- spices - we season this simply with turmeric, salt, and pepper.
- lemon - a touch of freshly squeezed lemon juice helps to balance out all the flavors in this soup and is highly recommended - but completely optional.
You will also need measuring cups and spoons and a large cooking pot.
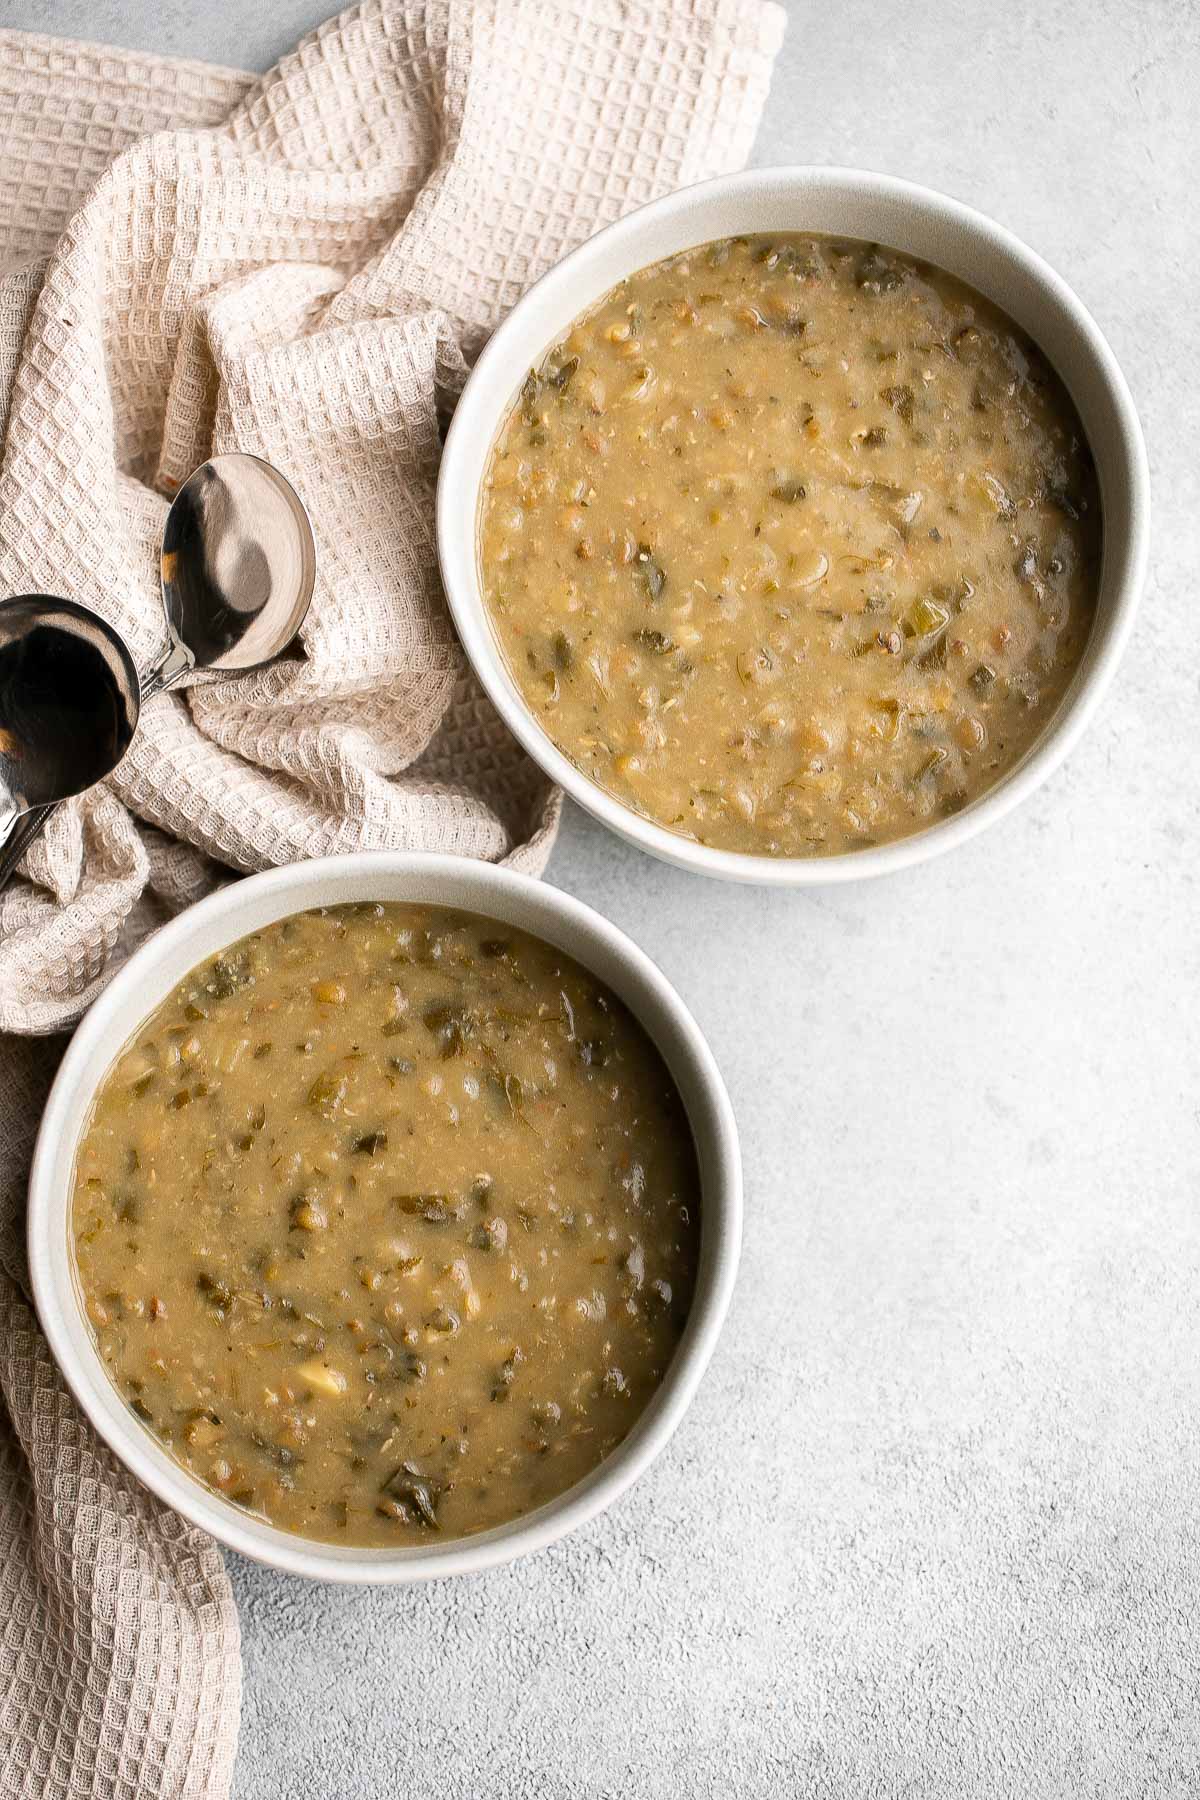
How to Make the Best Persian Lentil Soup
- Sauté aromatics. Heat oil in a large pot over medium-high until sizzling hot, about 1 minute. Add onion, garlic, and parsley and sauté until fragrant, about 2-3 minutes.
- Add lentils and oats. Stir in lentils, oats, and turmeric until well mixed.
- Add stock. Pour in vegetable stock and stir to combine. Bring to a boil, then reduce heat to low and simmer, stirring often, until the lentils and oats are fully cooked and the soup has thickened, about 20-25 minutes. Adjust the consistency by adding water or vegetable stock, as needed.
- Serve. Season with salt and pepper and a squeeze of lemon, if desired. Serve immediately.
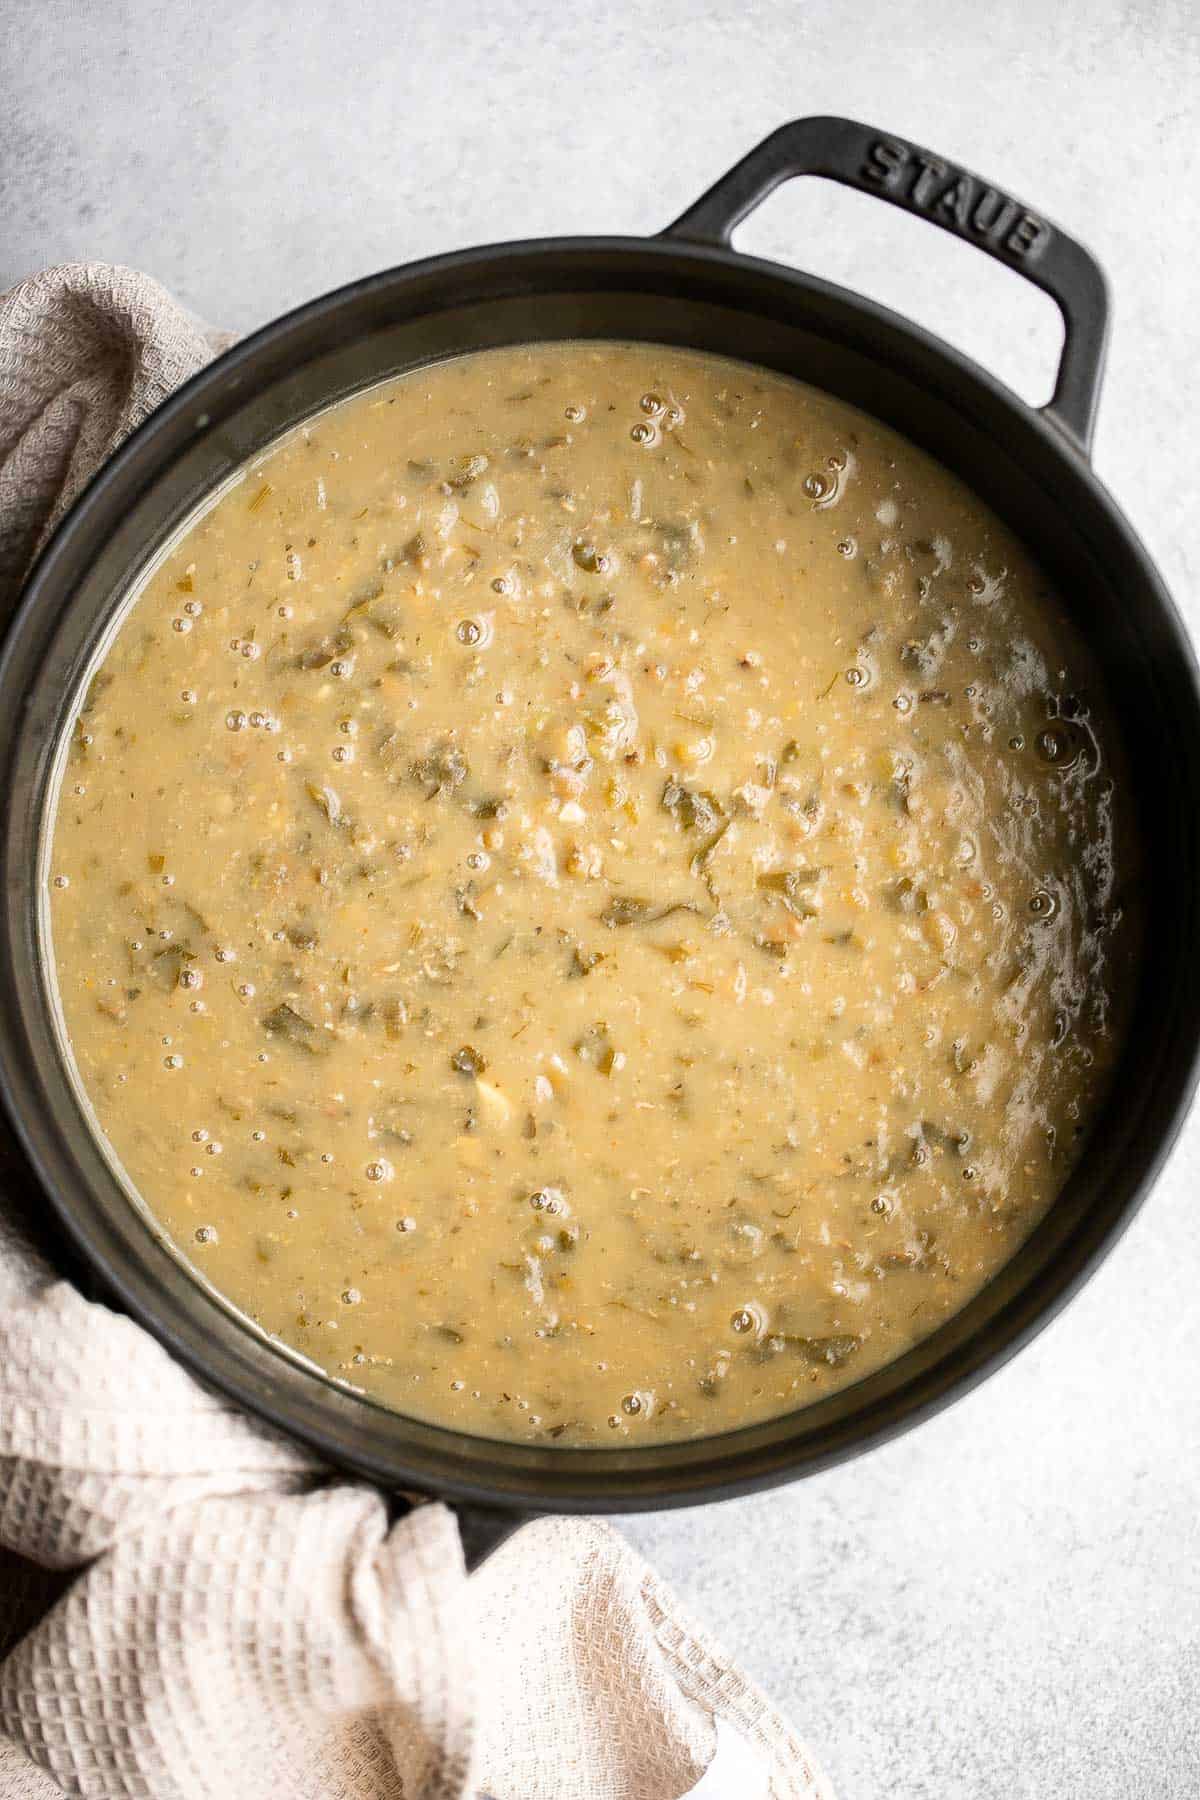
Recipe Variations
- Use different seasoning. Lentil soup is a great canvas for a variety of herbs and spices. Try adding cumin, paprika, thyme, or rosemary for extra flavor.
- Add vegetables. This soup is also great way to get your daily dose of vegetables. Add in carrots, celery, potatoes, or other vegetables to make the soup more hearty, nutritious and flavorful.
- Make it creamy. If you prefer a creamier texture, you can blend or puree some or all of this lentil soup with an immersion blender or a regular blender. This will also help to thicken the soup, if needed.
How to Serve
This Persian Lentil Soup is delicious served on its own as a filling lunch or dinner, or paired with some of my favorite sides including:
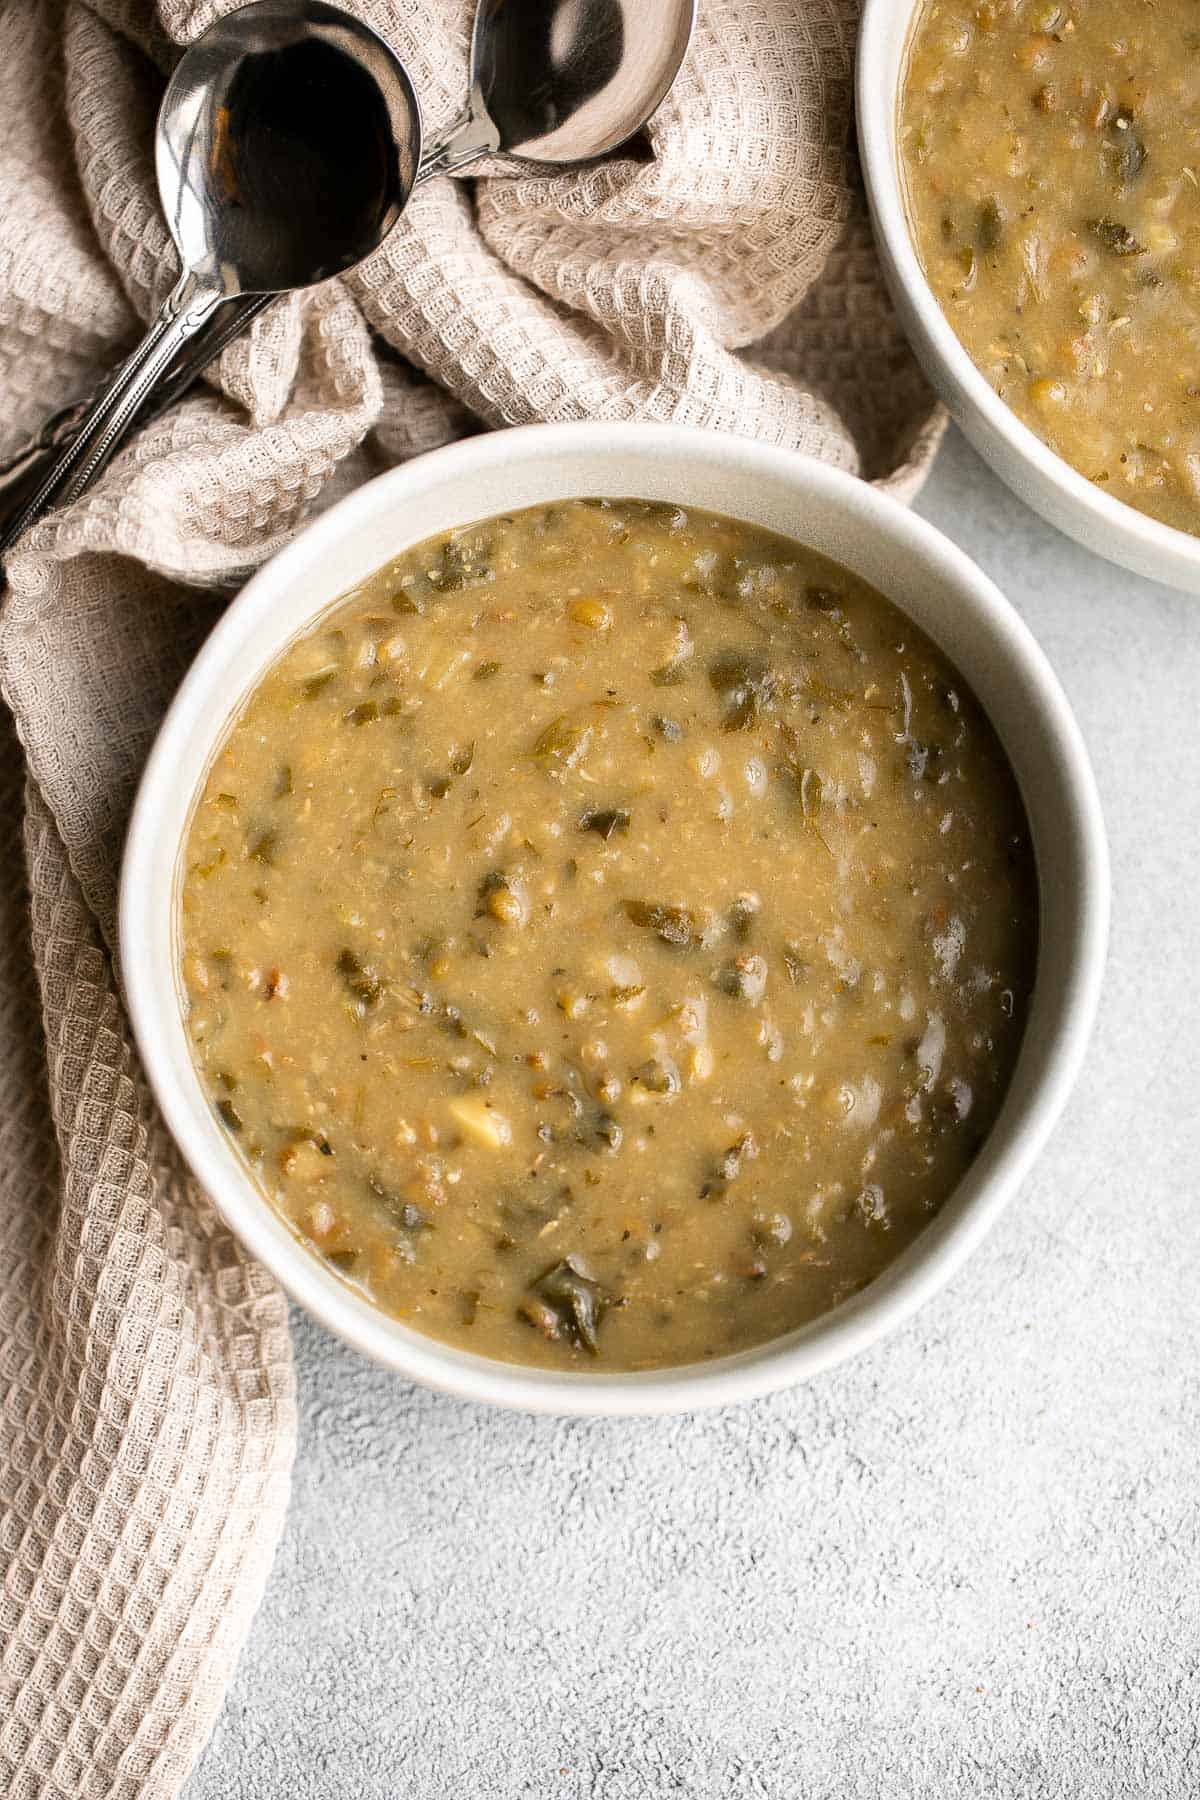
Recipe Tips and Tricks
- Use high-quality ingredients. Persian cuisine relies on high-quality ingredients to create its unique flavors. Use fresh herbs and high-quality spices for the best results.
- Adjust the seasoning. Taste the soup frequently and adjust the seasoning as needed. Add more salt, pepper, or spices to suit your taste.
- Garnish with herbs and toppings. Fresh herbs like cilantro, parsley, and scallions are great toppings for Persian lentil soup. You can also add a dollop of sour cream or yogurt, a squeeze of lemon juice, and some toasted garlic for extra flavor.
Storing and Freezing Instructions
How to Store
Keep leftover lentil soup in an airtight container for 4-5 days in the refrigerator.
How to Reheat
Reheat leftover Persian lentil soup in a pot over the stove. Warm it up over medium-low heat, stirring frequently. If the soup becomes too thick, simply thin it with some water.
How to Freeze
You can make this recipe ahead of time, batch it, and freeze it. However, not all lentils are good for freezing. If you plan on freezing this Persian lentil soup, use green lentils or brown lentils. I wouldn't recommend freezing any other type of lentil. When ready to reheat, thaw frozen soup overnight in the refrigerator.
More Soup Recipes
- 60 Best Soup Recipes
- Coconut Curry Lentil Soup
- White Bean Soup with Kale
- Vegetarian Split Pea Soup
- Minestrone Soup
- Pinto Bean Soup
Tried this recipe?
I'd love to hear what you think! Leave a comment and rating below to share your feedback. Your reviews help others discover this recipe and help me keep creating more free recipes for you. Snap a photo and tag me on social media @aheadofthyme too.

Beet Hummus
Beet Hummus is a smooth and creamy vegan dip that is made with healthy ingredients including chickpeas, garlic, sesame, and real beets. It's flavorful and delicious and boasts a deep roasted flavor. This beet dip is vibrant and colorful making it perfect for serving at parties or with springtime meals!
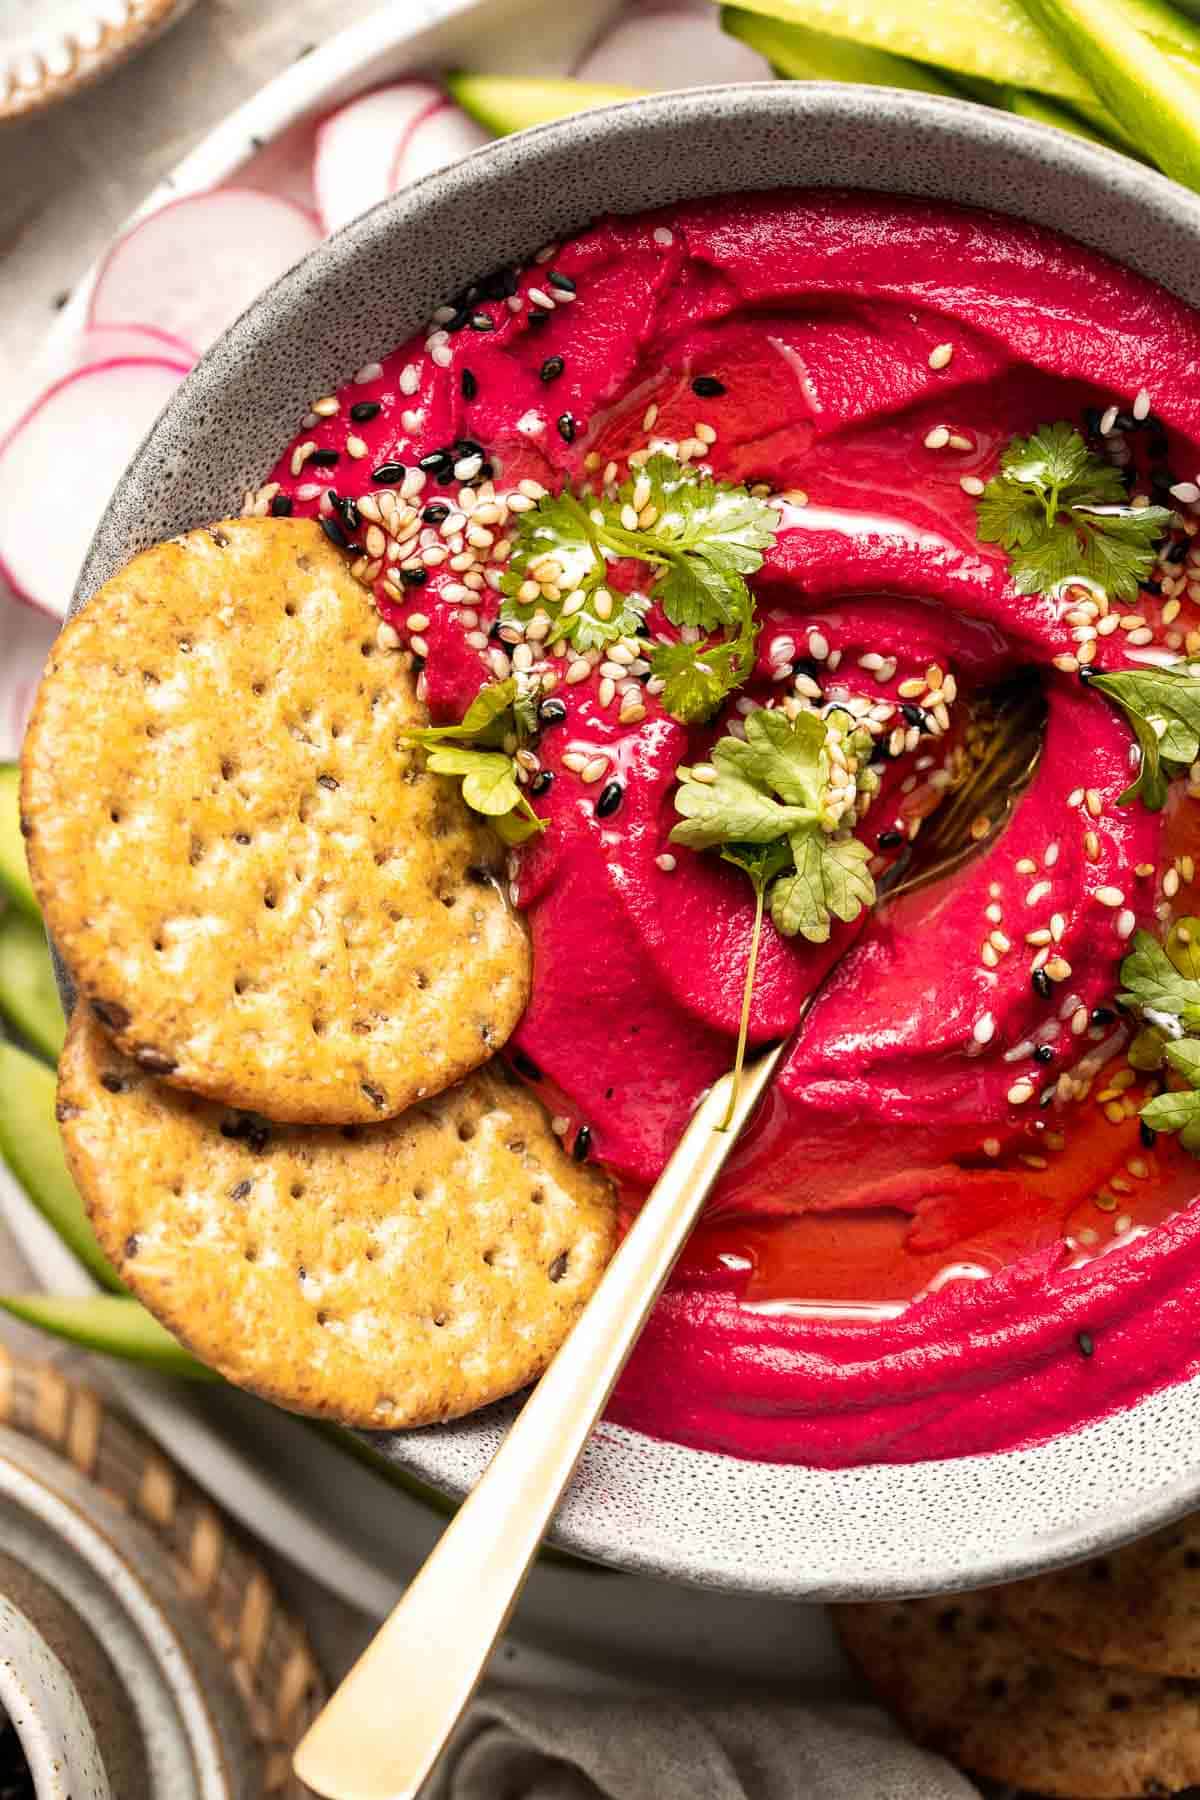
Although this roasted beet hummus takes a little longer than your typical hummus (you have to roast the beet first), it's well worth the wait. The entire cooking time is spent roasting the beet, so it's mostly hands-off until it comes time to blend the ingredients and serve.
Why You'll Love this Beet Hummus
- Fun vibrant color. The magenta hue of this beet hummus makes it an exciting, enticing dip. Both kids and adults will be mesmerized by the brilliant color - it's the easiest way to serve beets and a great way to get the kids to eat it on their own!
- Quick and easy to make. This beet dip is really quick to make once you have roasted the beet. It's perfect if you have some leftover roasted beets on hand! Then you just need to combine the ingredients in a blender and blend together in just minutes.
- Superfood boost. Adding beets to hummus makes it a little more nutritious than your classic hummus dip. It increases the fiber, vitamins, and antioxidants, so you can reap the benefits of beets in the form of a craveable snack.
- Perfect for all occasions. The dazzling presentation and simple cooking process make this roasted beet hummus perfect for serving at your fanciest holiday party, casual cookout, or as a simple snack or side for everyday meals at home.
- Vegan and gluten-free. Not many dips can boast vegan and gluten-free status. This beet hummus is perfect for all diets - vegan, gluten-free, dairy-free, vegetarian, you name it!
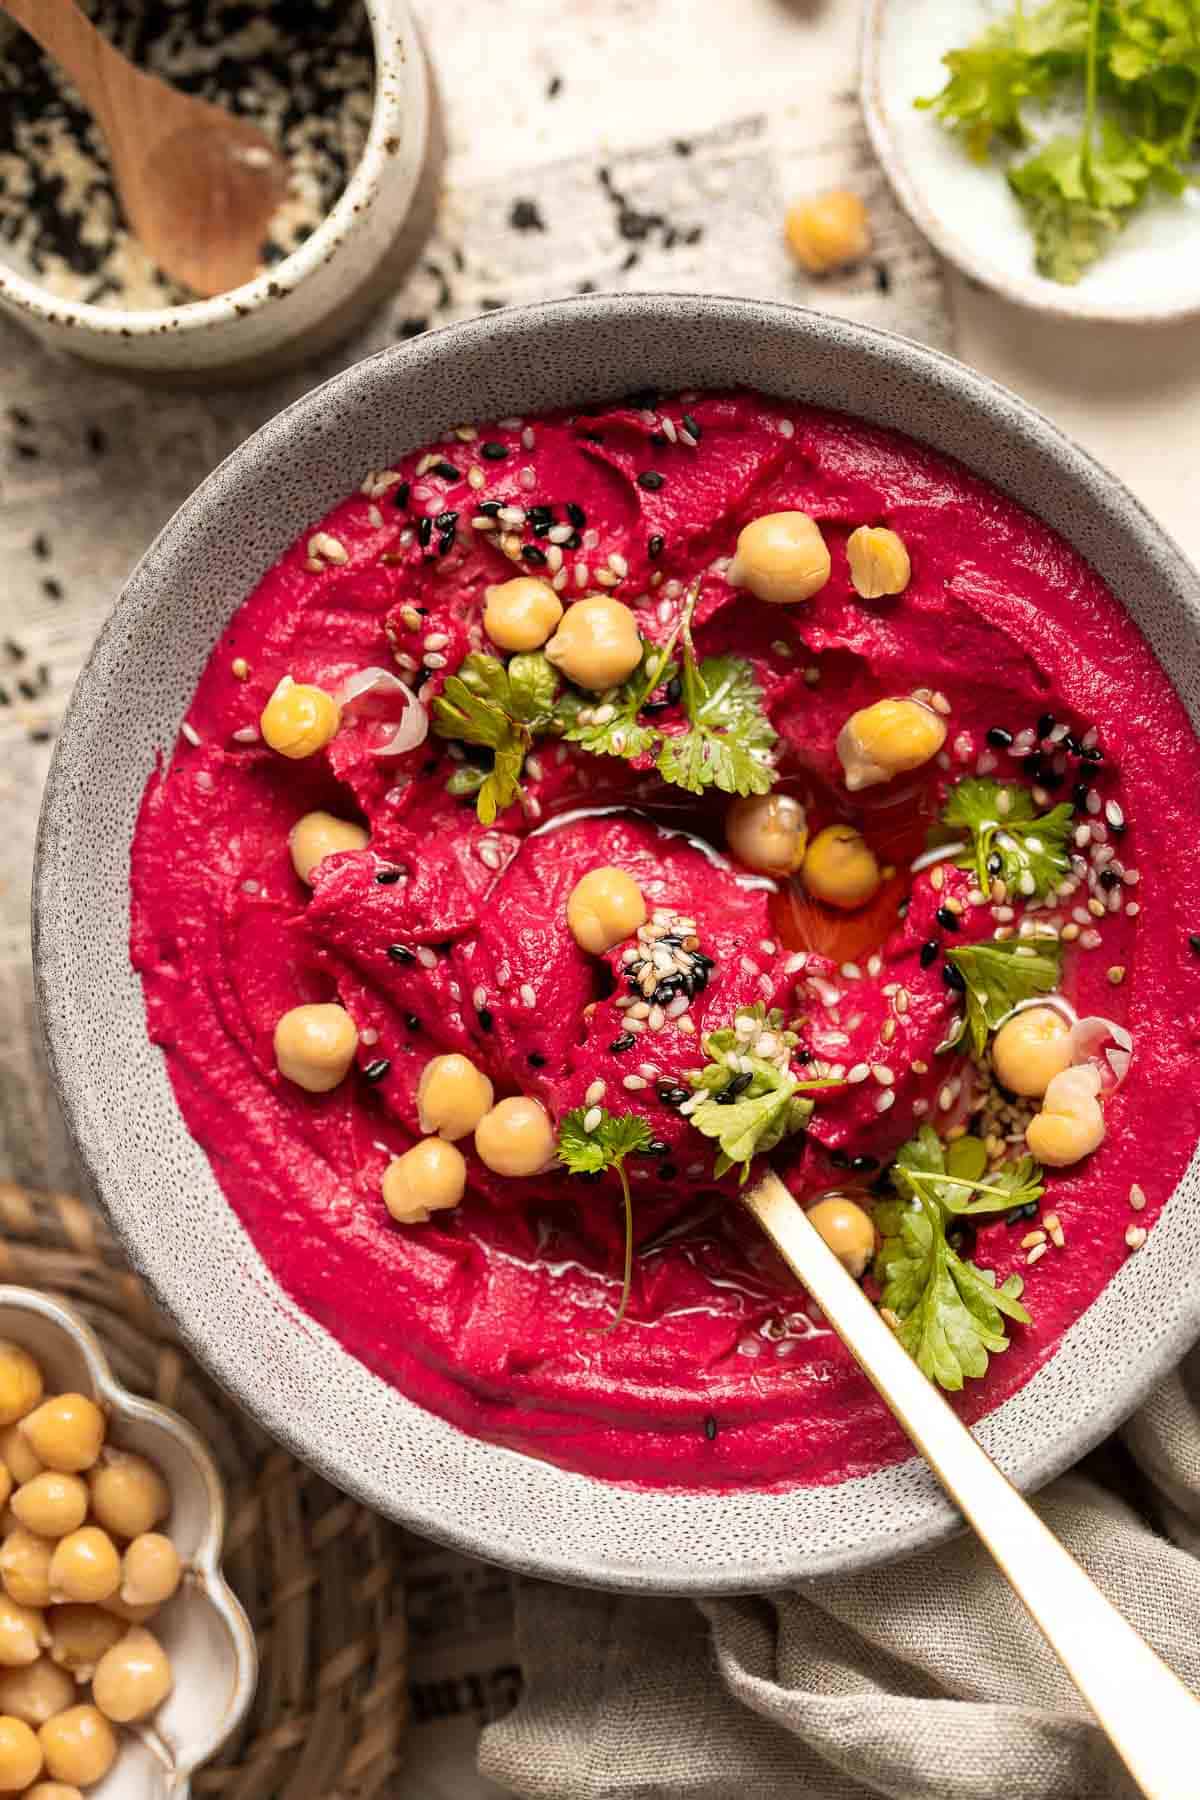
Ingredient Notes
To make this delicious and easy Beet Hummus, you will need the following ingredients (full measurements in recipe card below):
- beet - homegrown or store-bought beets are fine. You can also use golden beets or your favorite variety, but the color of the hummus will change.
- olive oil - as olive oil is a main ingredient in hummus, I recommend using a high-quality olive oil in this recipe.
- tahini sesame paste - tahini is an essential ingredient in most hummus recipes. Use store-bought or homemade tahini.
- lemon juice - fresh lemon juice has the best flavor, but you can use lemon juice concentrate if that's what you have.
- garlic - substitute canned minced garlic by using 1 teaspoon per clove.
- paprika - smoked paprika will work too.
- salt
- water
- sesame seeds - we use sesame seeds to garnish the beet hummus. You can also use toasted pine nuts, herbs, or extra chickpeas - or anything else you like.
You will also need measuring cups and spoons, aluminum foil, and a blender (or food processor).
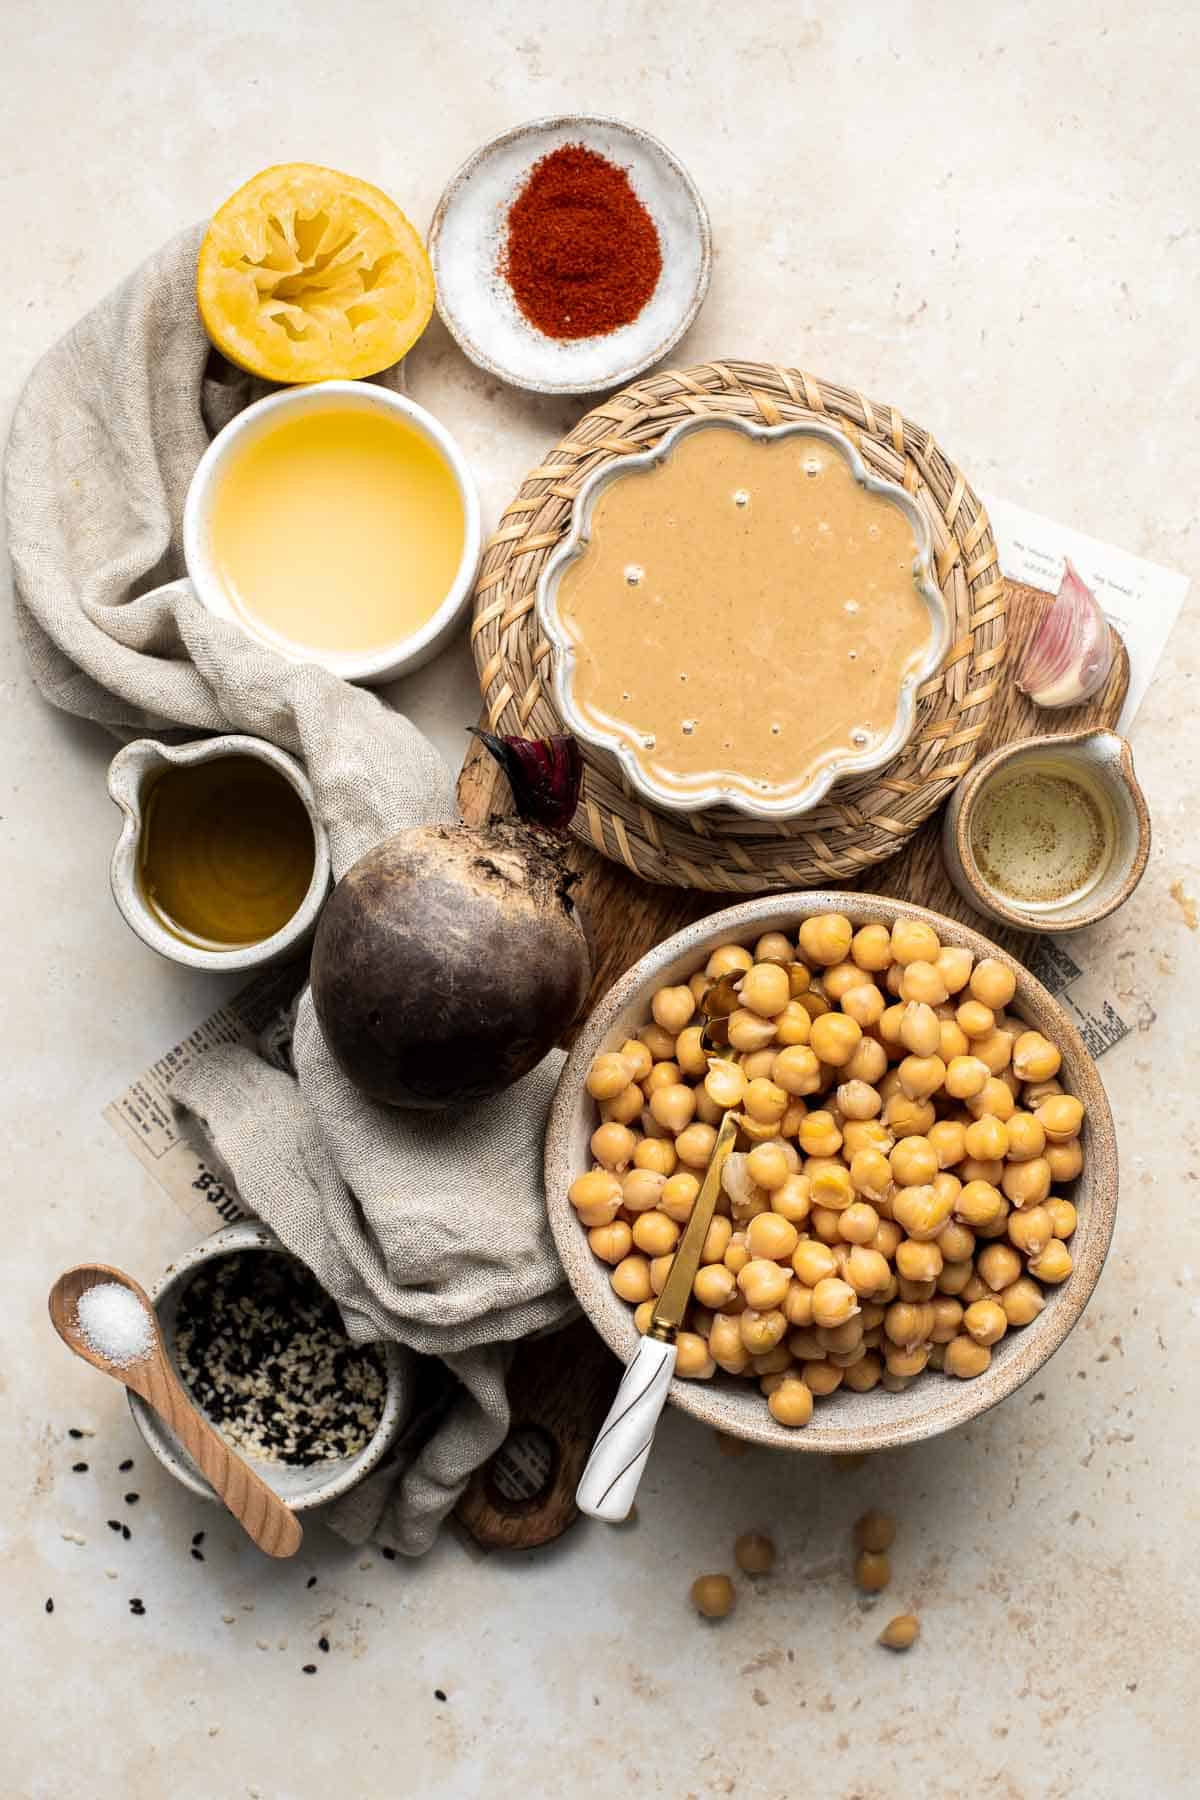
How to Make the Best Beet Hummus
- Roast the beet. Remove stem and most of the root from the beet and wash and scrub until clean. Loosely wrap the beet in aluminum foil and drizzle with ½ tablespoon olive oil. Wrap the foil and roast in a 375F preheated oven for 45 minutes to 1 hour until tender (or until a fork can easily be inserted and removed). Transfer to the fridge to cool to room temperature.
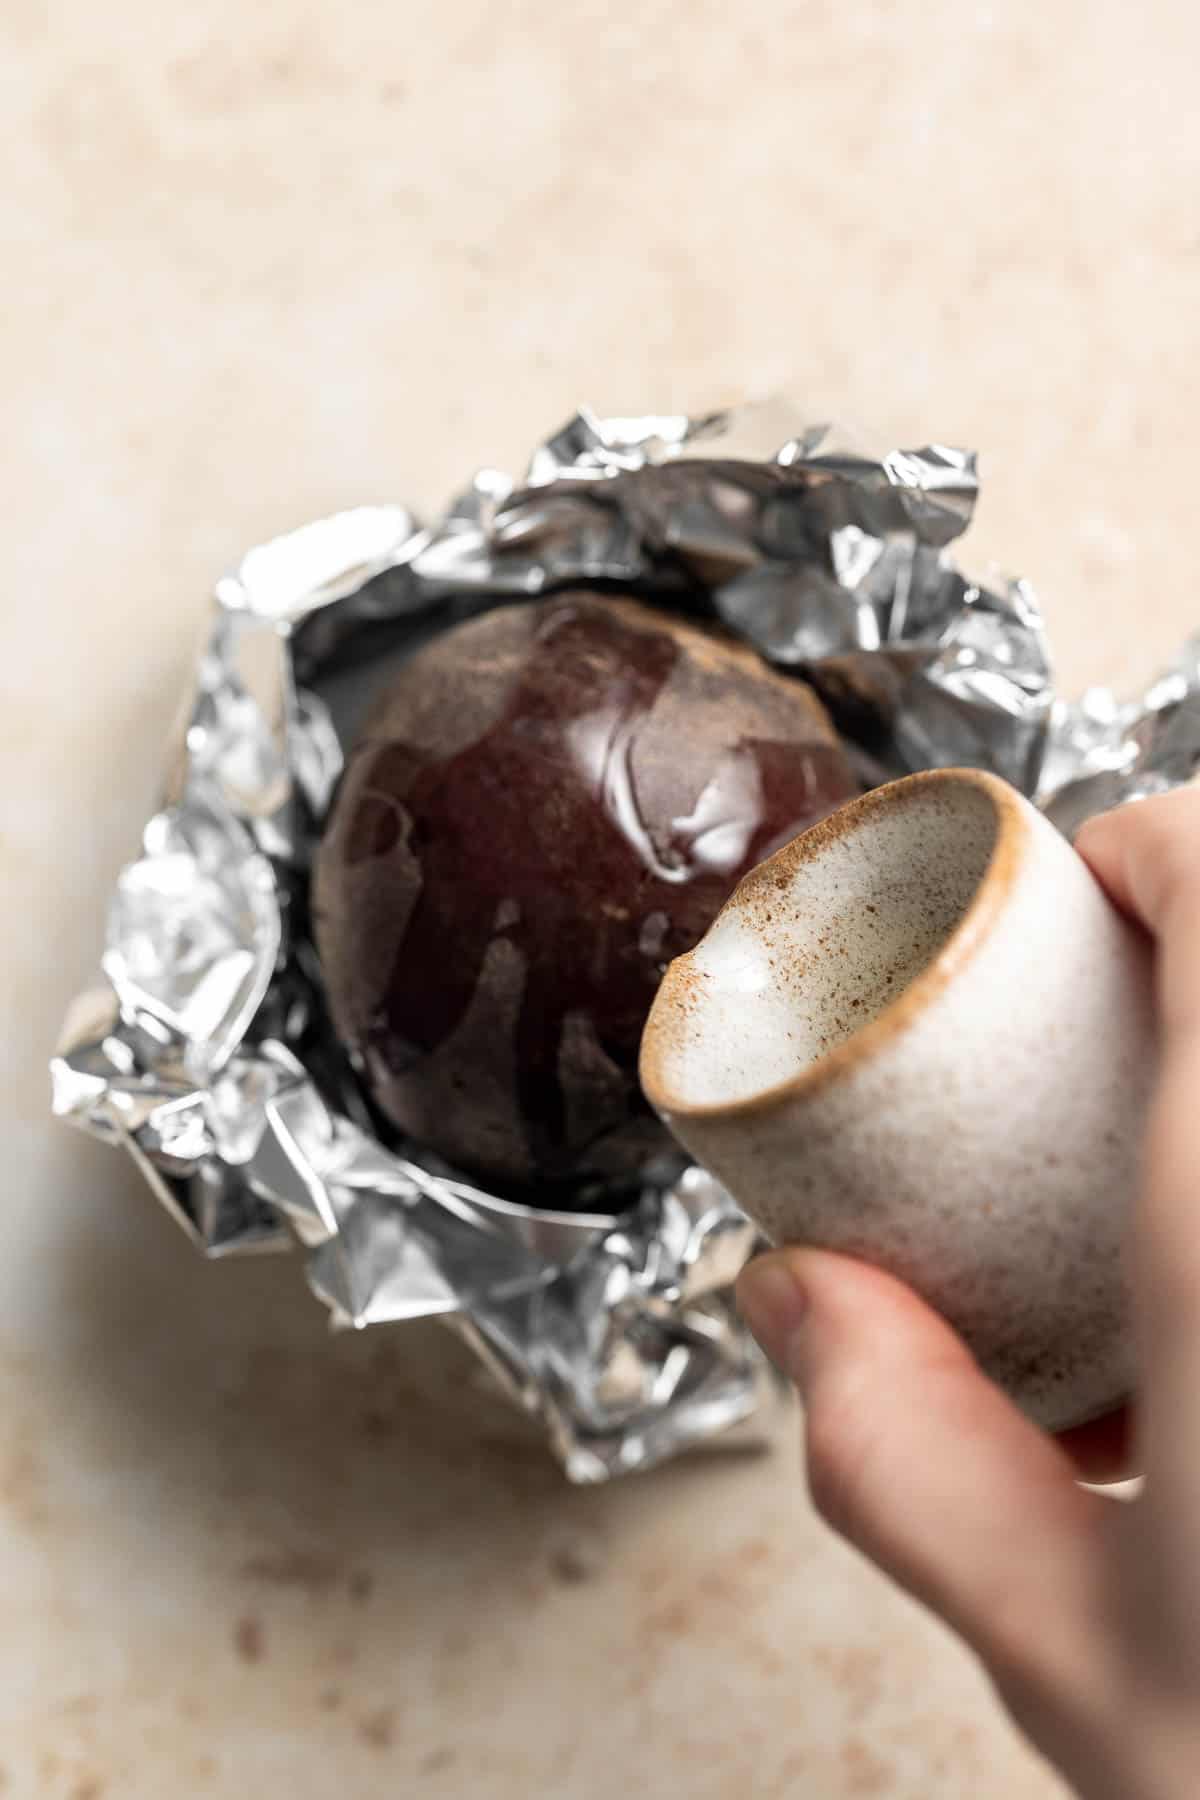
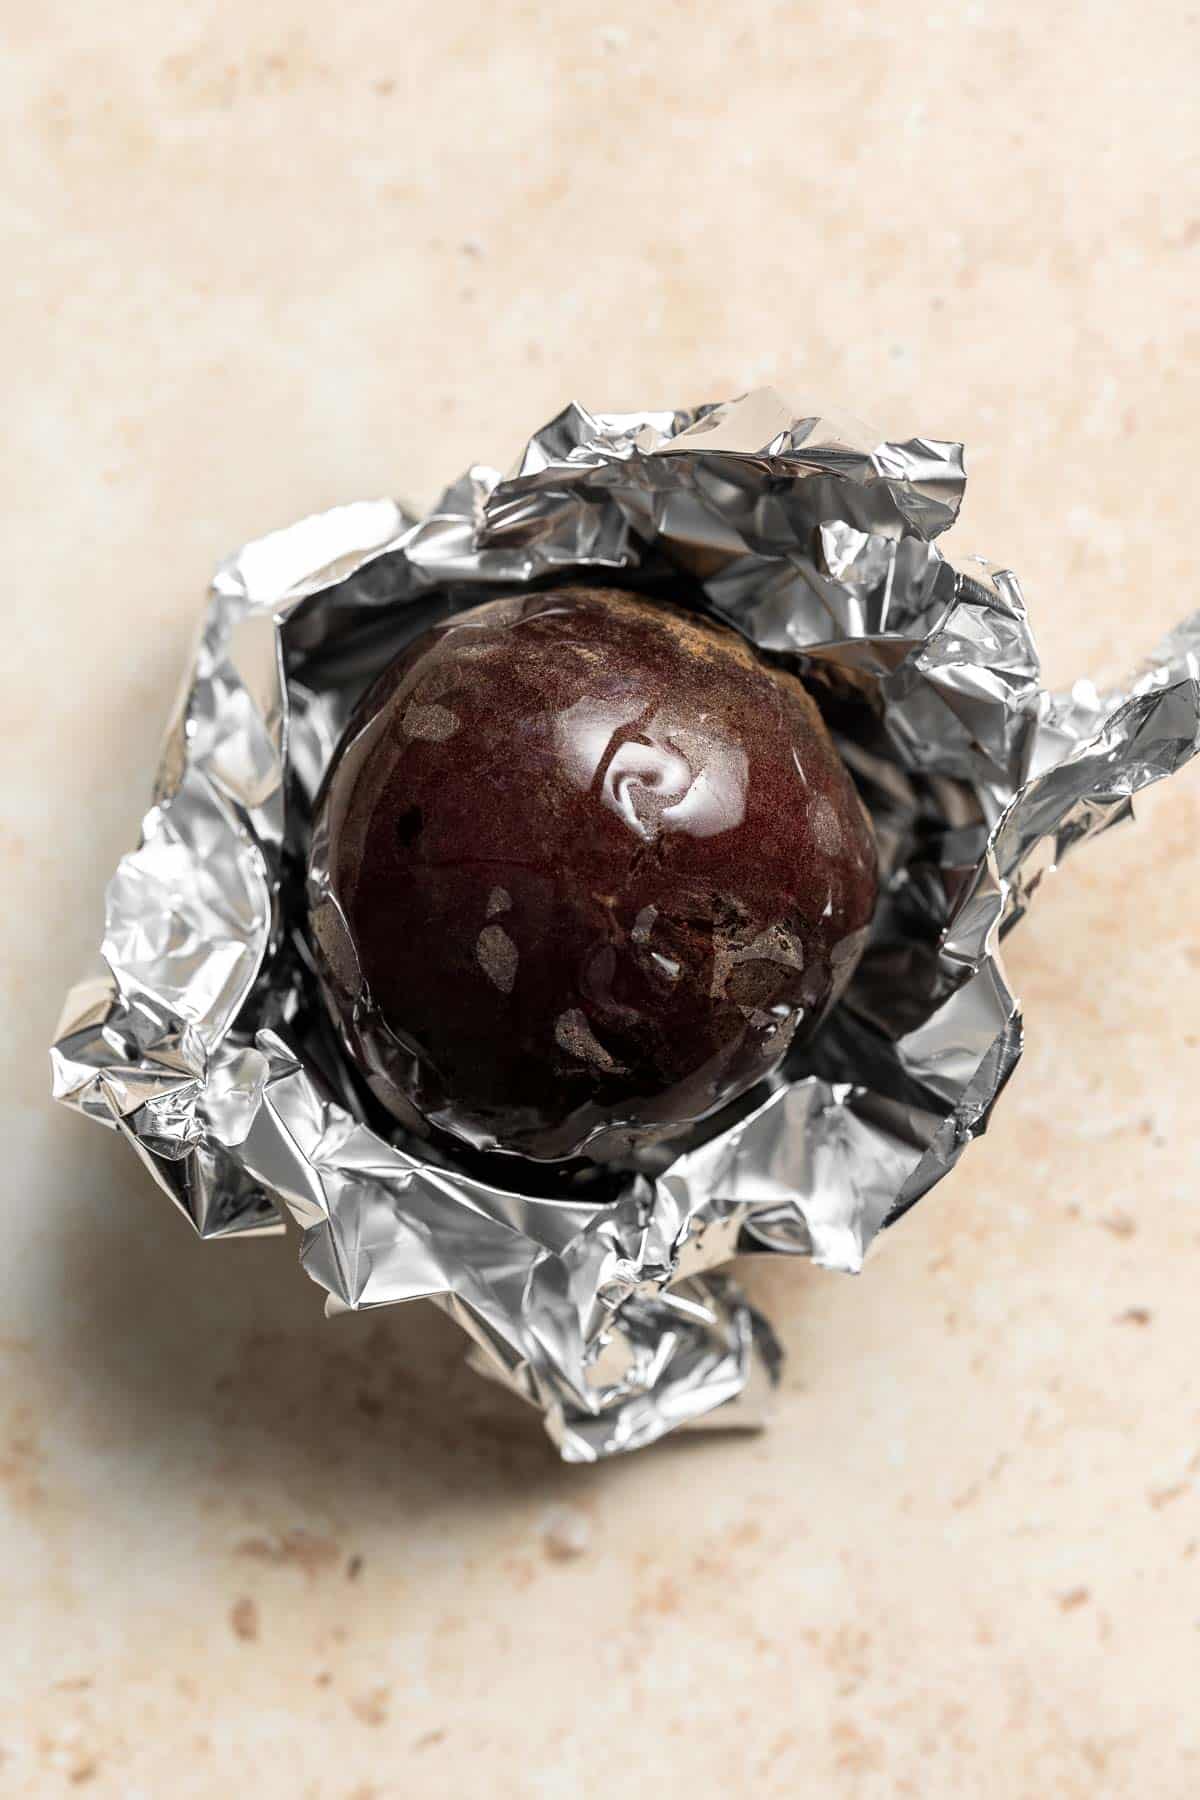
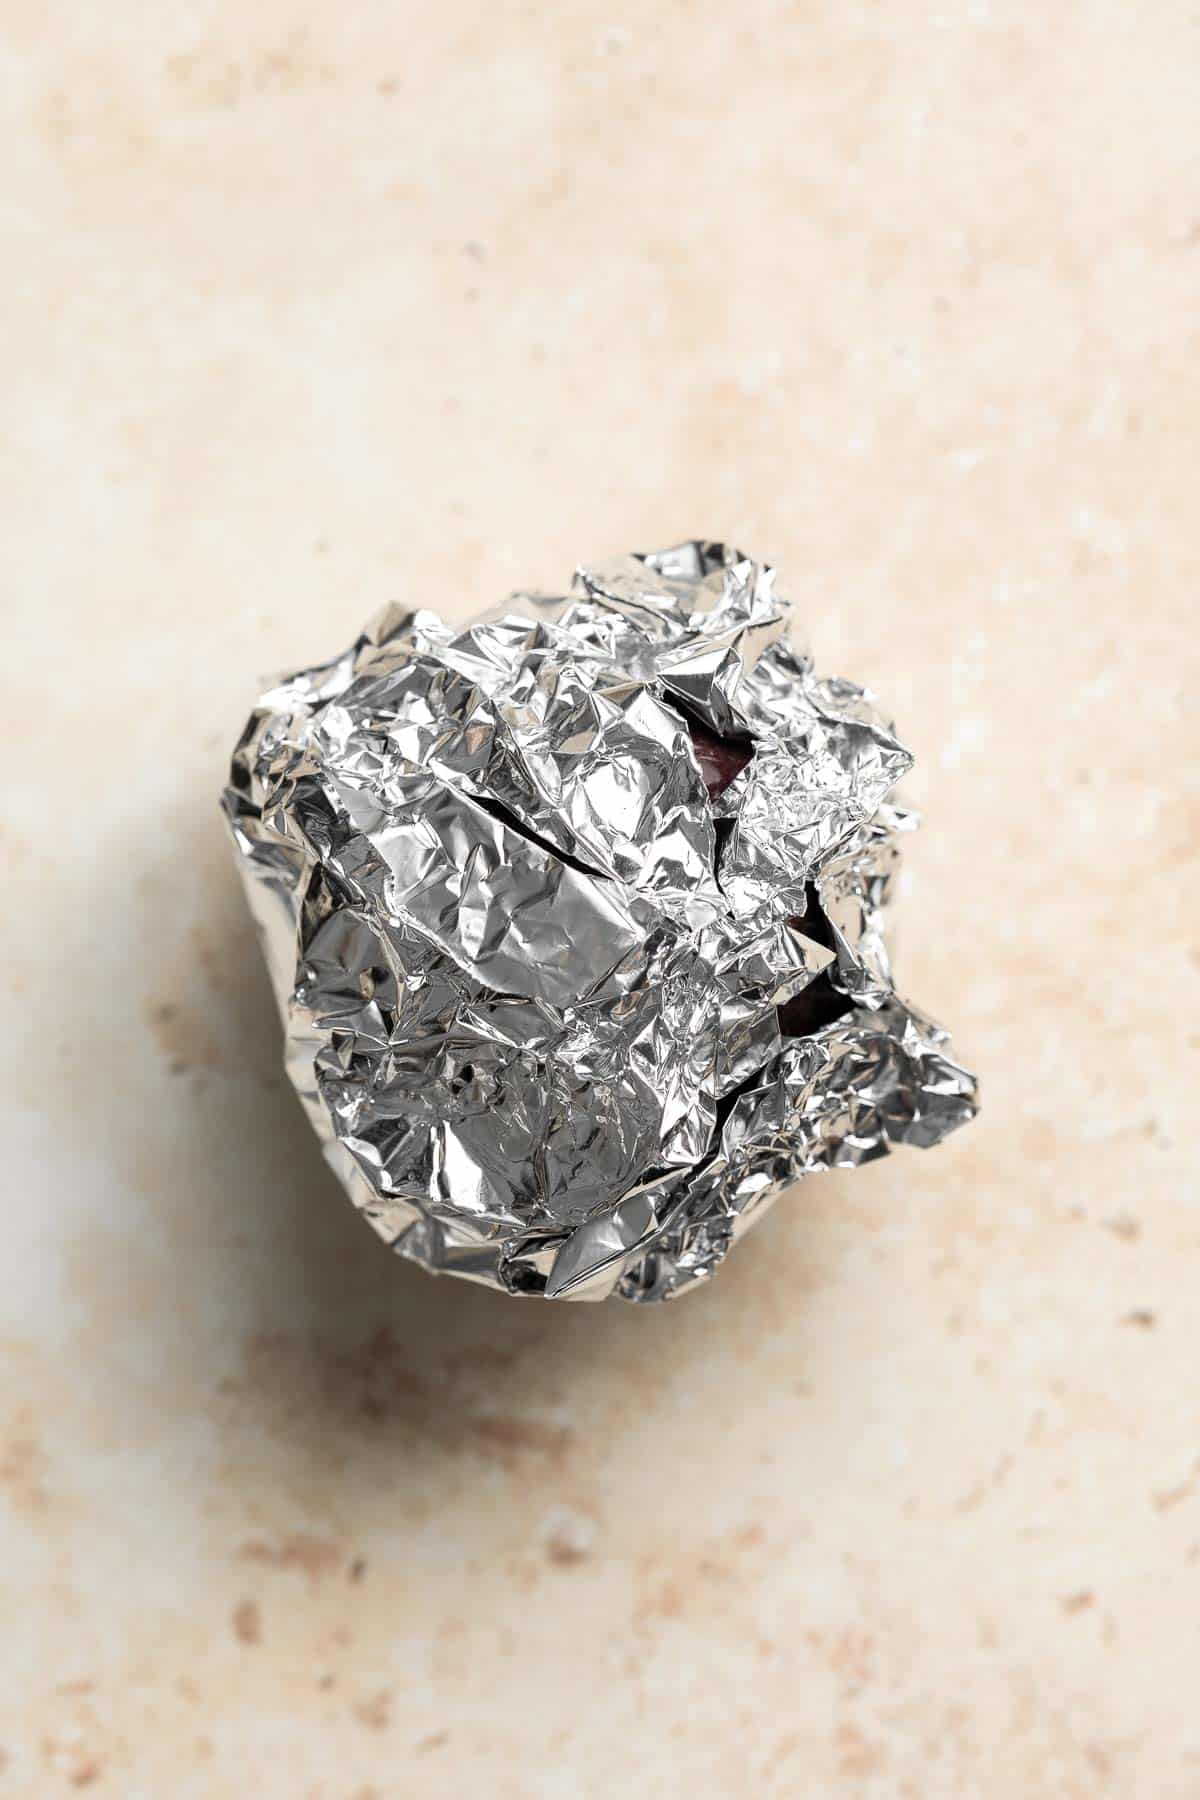
- Blend. Once cooled, peel the beet and chop into small pieces. Then, throw in the blender. Add chickpeas, tahini, ¼ cup olive oil, lemon juice, garlic, paprika, and salt. Puree until well blended and creamy. Add ¼ cup of water to make the hummus creamier. Add more if needed until desired consistency is reached.
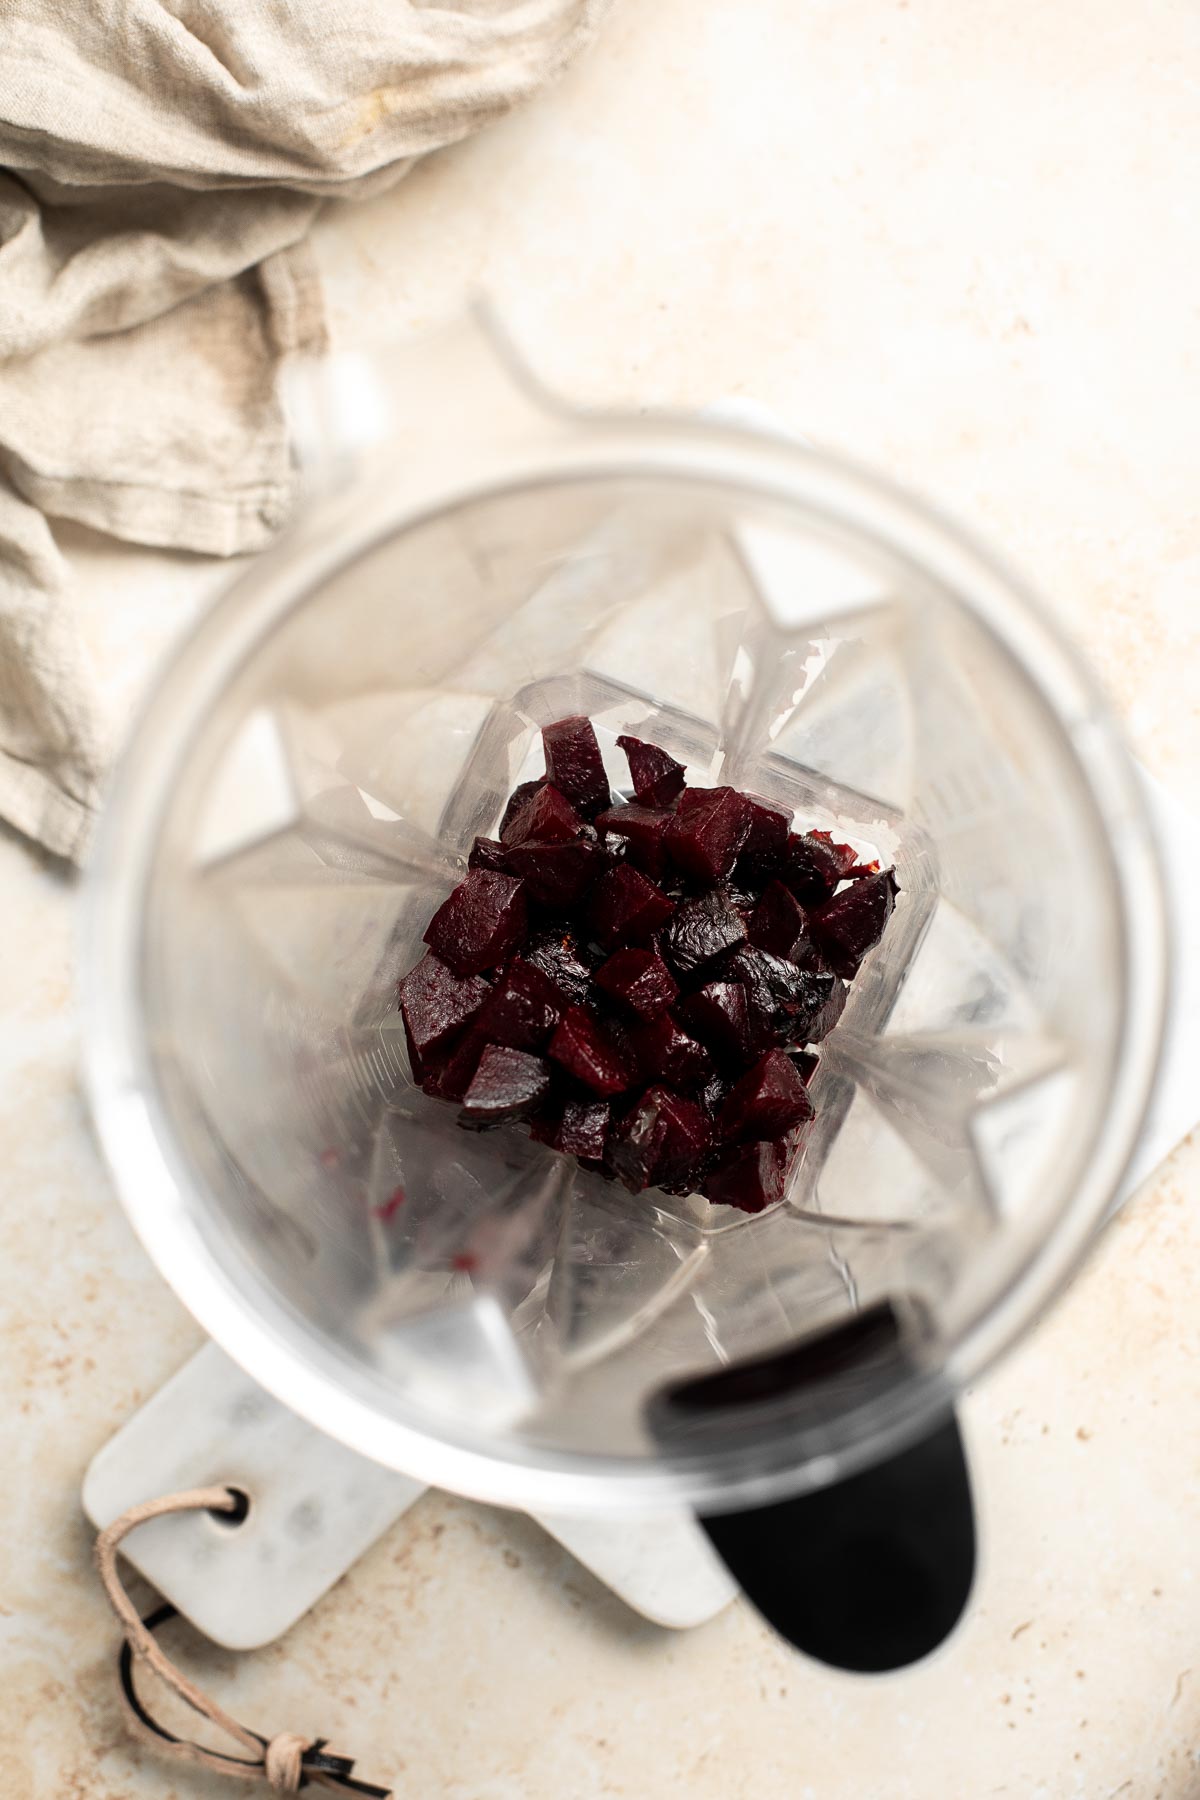

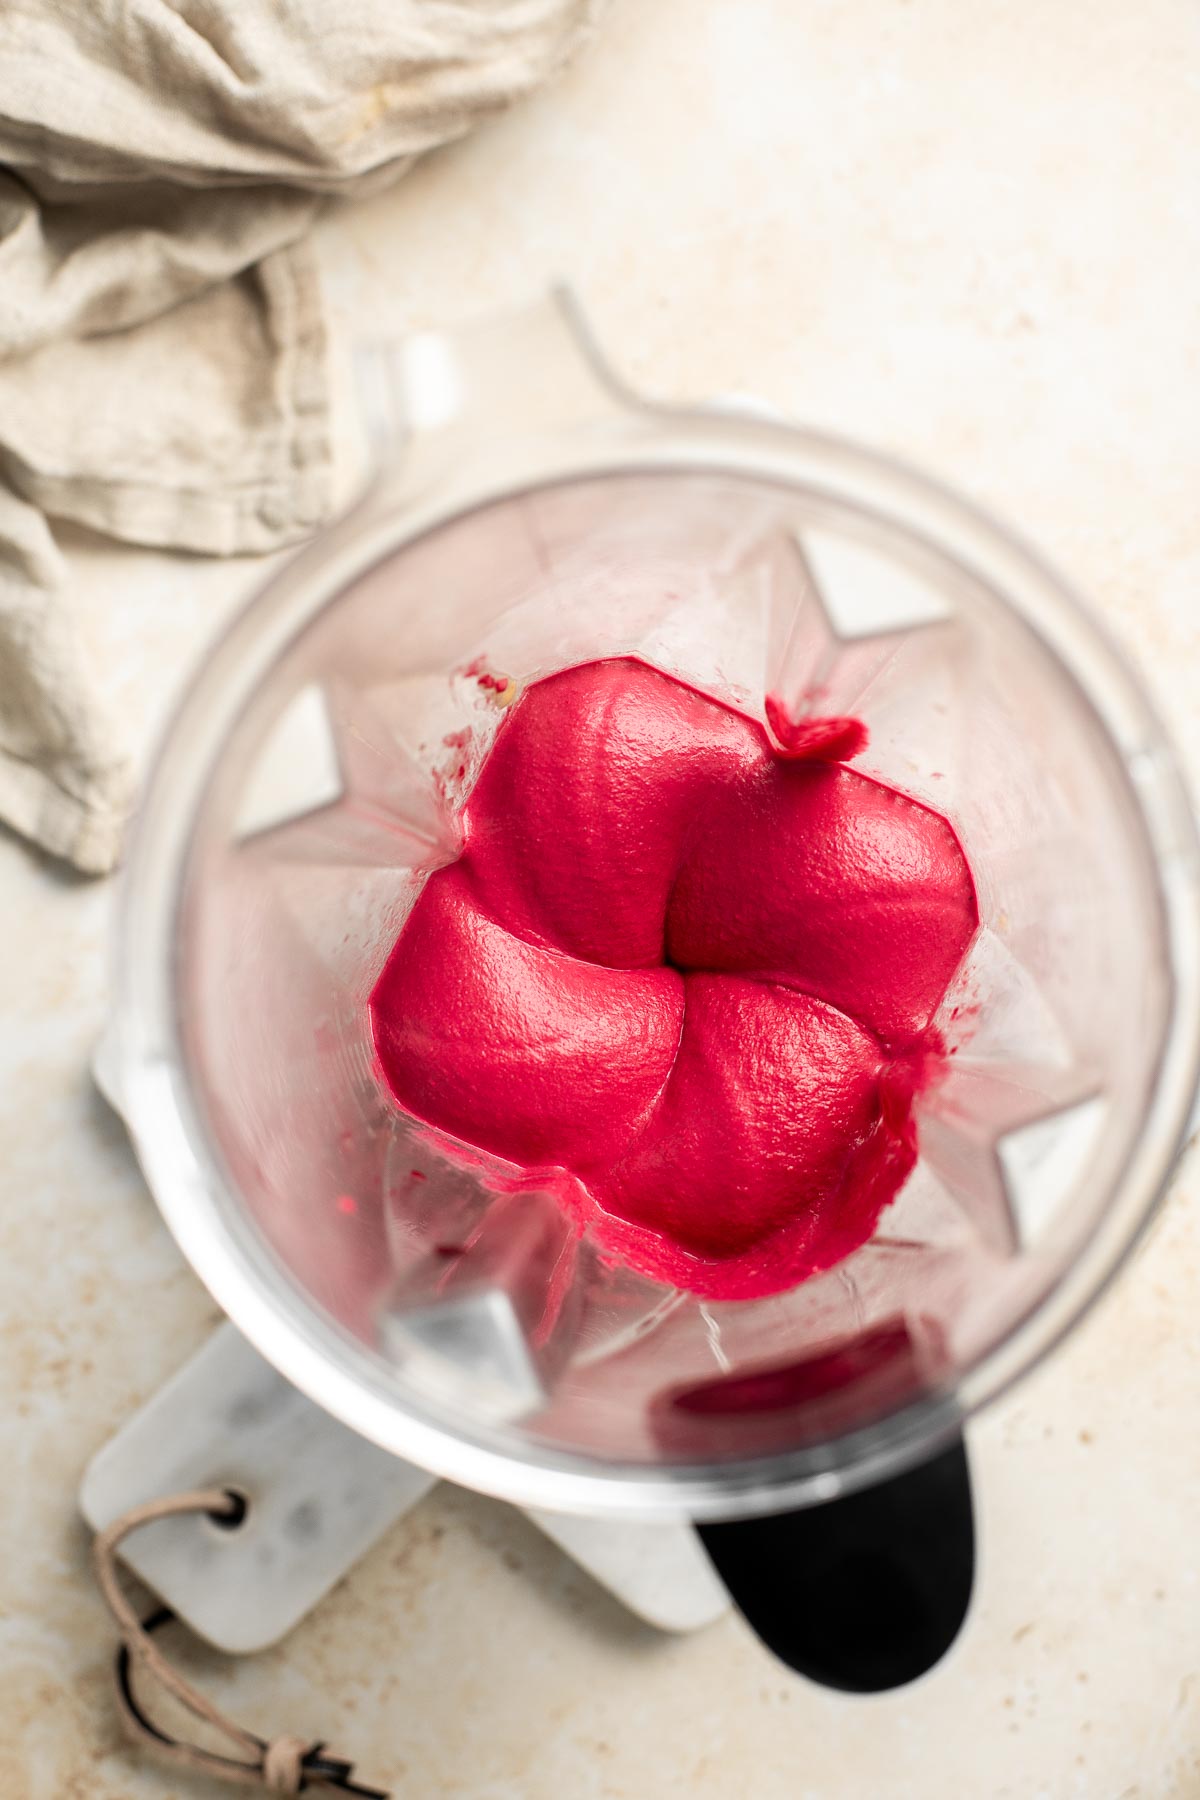
- Serve. Pour into a bowl and use the back of a spoon to create a circular spiral design. Drizzle some olive oil on top and garnish with roasted sesame seeds. Serve with crackers, toasted pita chips, and/or veggies for dipping.

Recipe Variations
- Make it spicy. Add some heat to your beet hummus by incorporating spicy ingredients such as chili flakes, jalapeño peppers, or cayenne pepper.
- Herbed beet hummus. Add chopped herbs like parsley, cilantro, or mint to the hummus for a fresh, herbaceous taste.
- A Greek twist. Add crumbled feta cheese to the hummus for a creamy, tangy flavor.
- Add other veggies. Mix in some grated carrots to the beet hummus for a colorful and slightly sweet variation to make beet and carrot hummus. Or blend in some ripe avocado for a creamy smoothie texture with added healthy fats in beet and avocado hummus.
- Garnish with toppings. Sprinkle some toasted sesame seeds, chopped herbs, or a drizzle of olive oil on top of the hummus for added flavor and texture.
How to Serve
Serve Beet Hummus as a dip for your favorite dippers such as crackers, toasted pita chips, and veggies for. Some of our favorites are:
But did you know that hummus is good for more than just dipping? It also makes a great base for salad dressings, a delicious topping on grain bowls, or a tasty spread for sandwiches or wraps. This beet hummus can do it all! Try it in our Vegan Hummus Wrap.
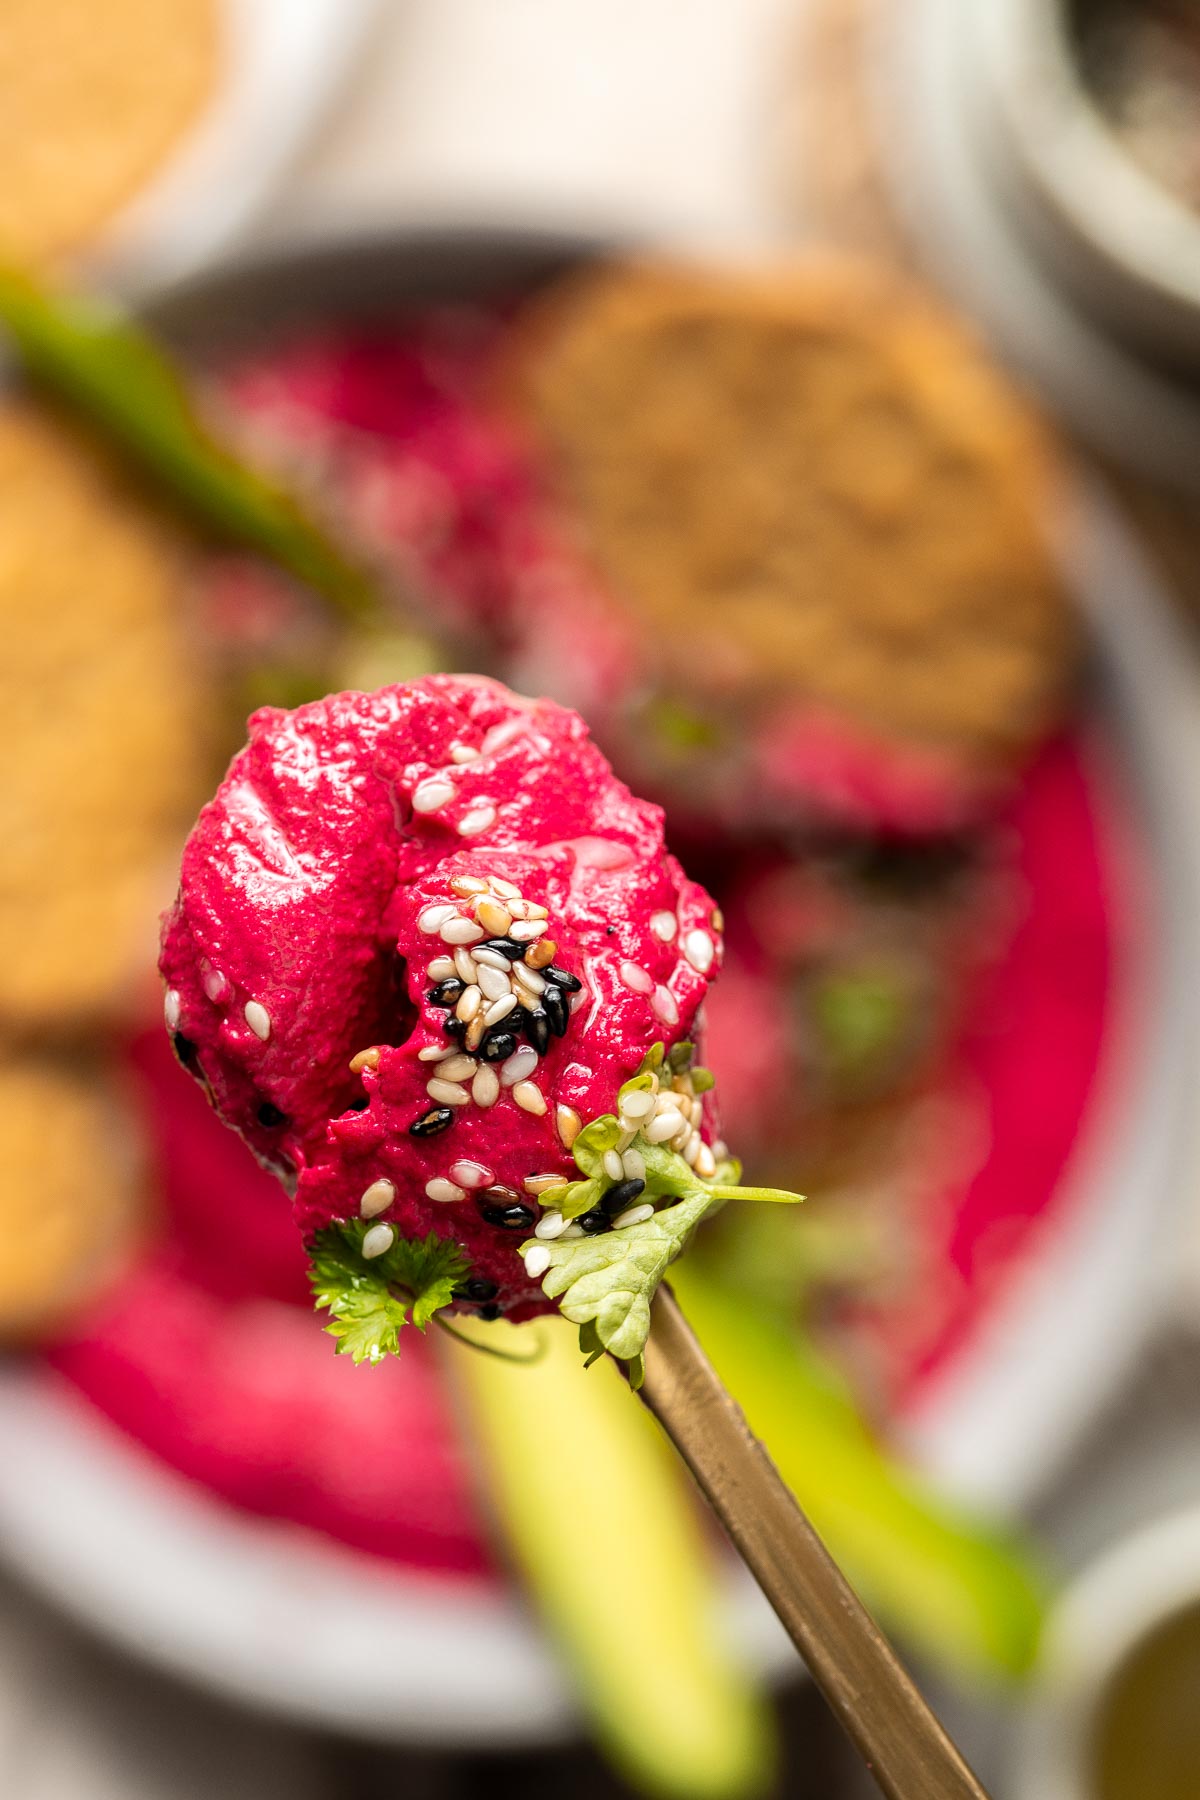
Recipe Tips and Tricks
- Use a high-quality tahini. Tahini is a key ingredient in hummus and using high-quality tahini will give your beet hummus a smoother, creamier texture and a more authentic taste. Look for a tahini brand that uses just sesame seeds, without any added oils or sweeteners.
- Use canned chickpeas or cook your own. Canned chickpeas are a convenient option and work well in this recipe. However, if you have the time, cooking your own chickpeas will yield a creamier hummus. Soak 100 grams of dried chickpeas overnight in water, then rinse and drain and boil them in water for about an hour or until tender.
- Use a food processor or high-speed blender. Want super smooth, creamy hummus? Use a high-powered processor or blender to whizz all the ingredients into a velvety dip, or pulse to your desired consistency.
Storing and Freezing Instructions
How to Store
Transfer any leftover hummus to an airtight container and refrigerate for up to one week. Serve chilled or at room temperature.
How to Freeze
Fill a freezer-safe container or freezer bag with leftover hummus, leaving enough headspace for the hummus to expand when frozen. Freeze for up to 3 months. Defrost in the refrigerator overnight before serving.
More Hummus Recipes
- 20 Best Dip Recipes
- Classic Hummus
- Avocado Hummus
- Roasted Red Pepper Hummus
- Pesto Hummus
- Creamy Pumpkin Hummus
Tried this recipe?
I'd love to hear what you think! Leave a comment and rating below to share your feedback. Your reviews help others discover this recipe and help me keep creating more free recipes for you. Snap a photo and tag me on social media @aheadofthyme too.
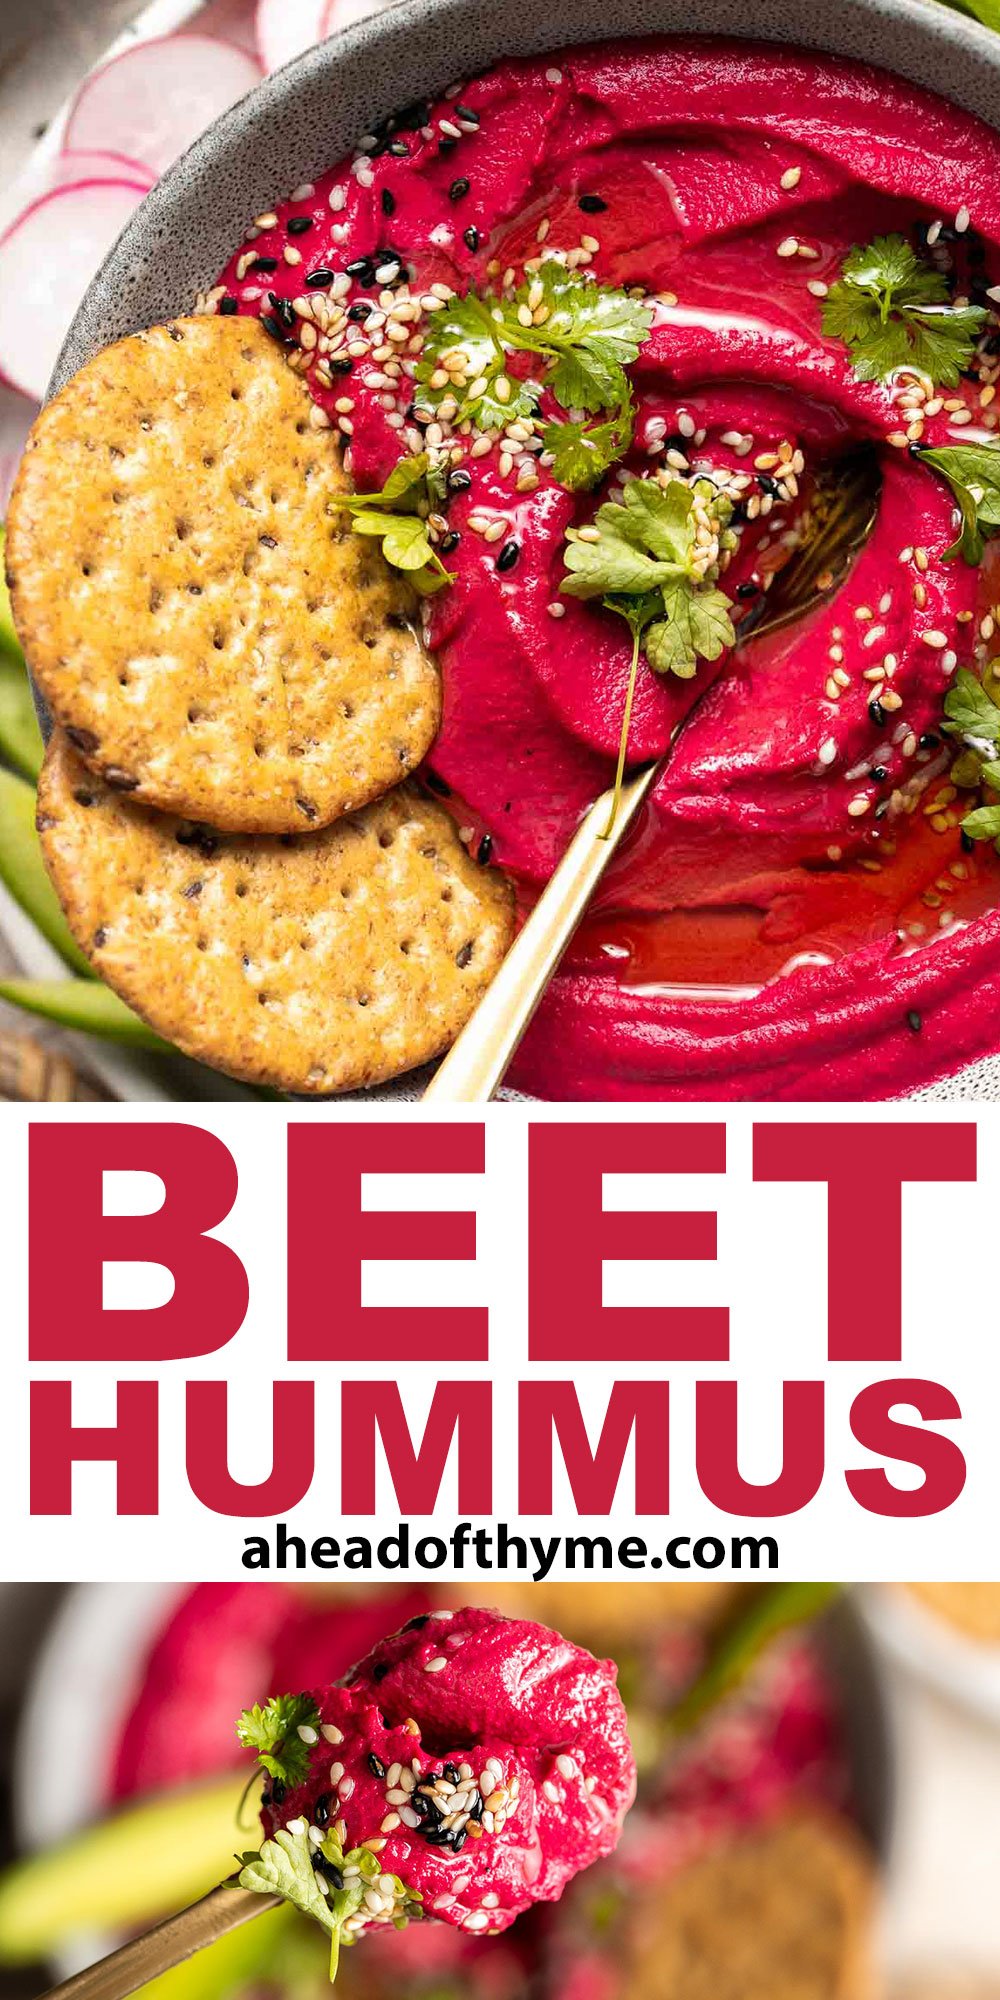
- « Previous Page
- 1
- …
- 12
- 13
- 14
- 15
- 16
- …
- 41
- Next Page »