
Chocolate Covered Oreos are a perfect last minute treat to satisfy that chocolate craving. This recipe levels up regular Oreos with a layer of semi-sweet chocolate and a drizzle of white chocolate on top. Serve this elegant but easy dessert or snack at birthday parties, tea time, or holiday parties.

They may look fancy, but these chocolate covered Oreos are so simple and require only two additional ingredients: chocolate and white chocolate (though you can always add more - see the recipe tips below for ideas!). They freeze well and can be made ahead of time too, so they're a no-brainer when it comes to hosting or taking dessert to a potluck.
Why You'll Love these Chocolate Covered Oreos
- Triple chocolate flavor. What's better than classic crunchy, chocolatey Oreos? Oreos coated in chocolate and then topped with even more chocolate. These simple handheld treats are a chocolate lover's dream and will disappear quickly.
- Ready in 30 minutes. You don't need to set aside a whole afternoon to make these chocolate covered Oreos. They take only ten minutes of active labor and then they chill out in the fridge and wait for the chocolate to set - only a half hour commitment from start to finish!
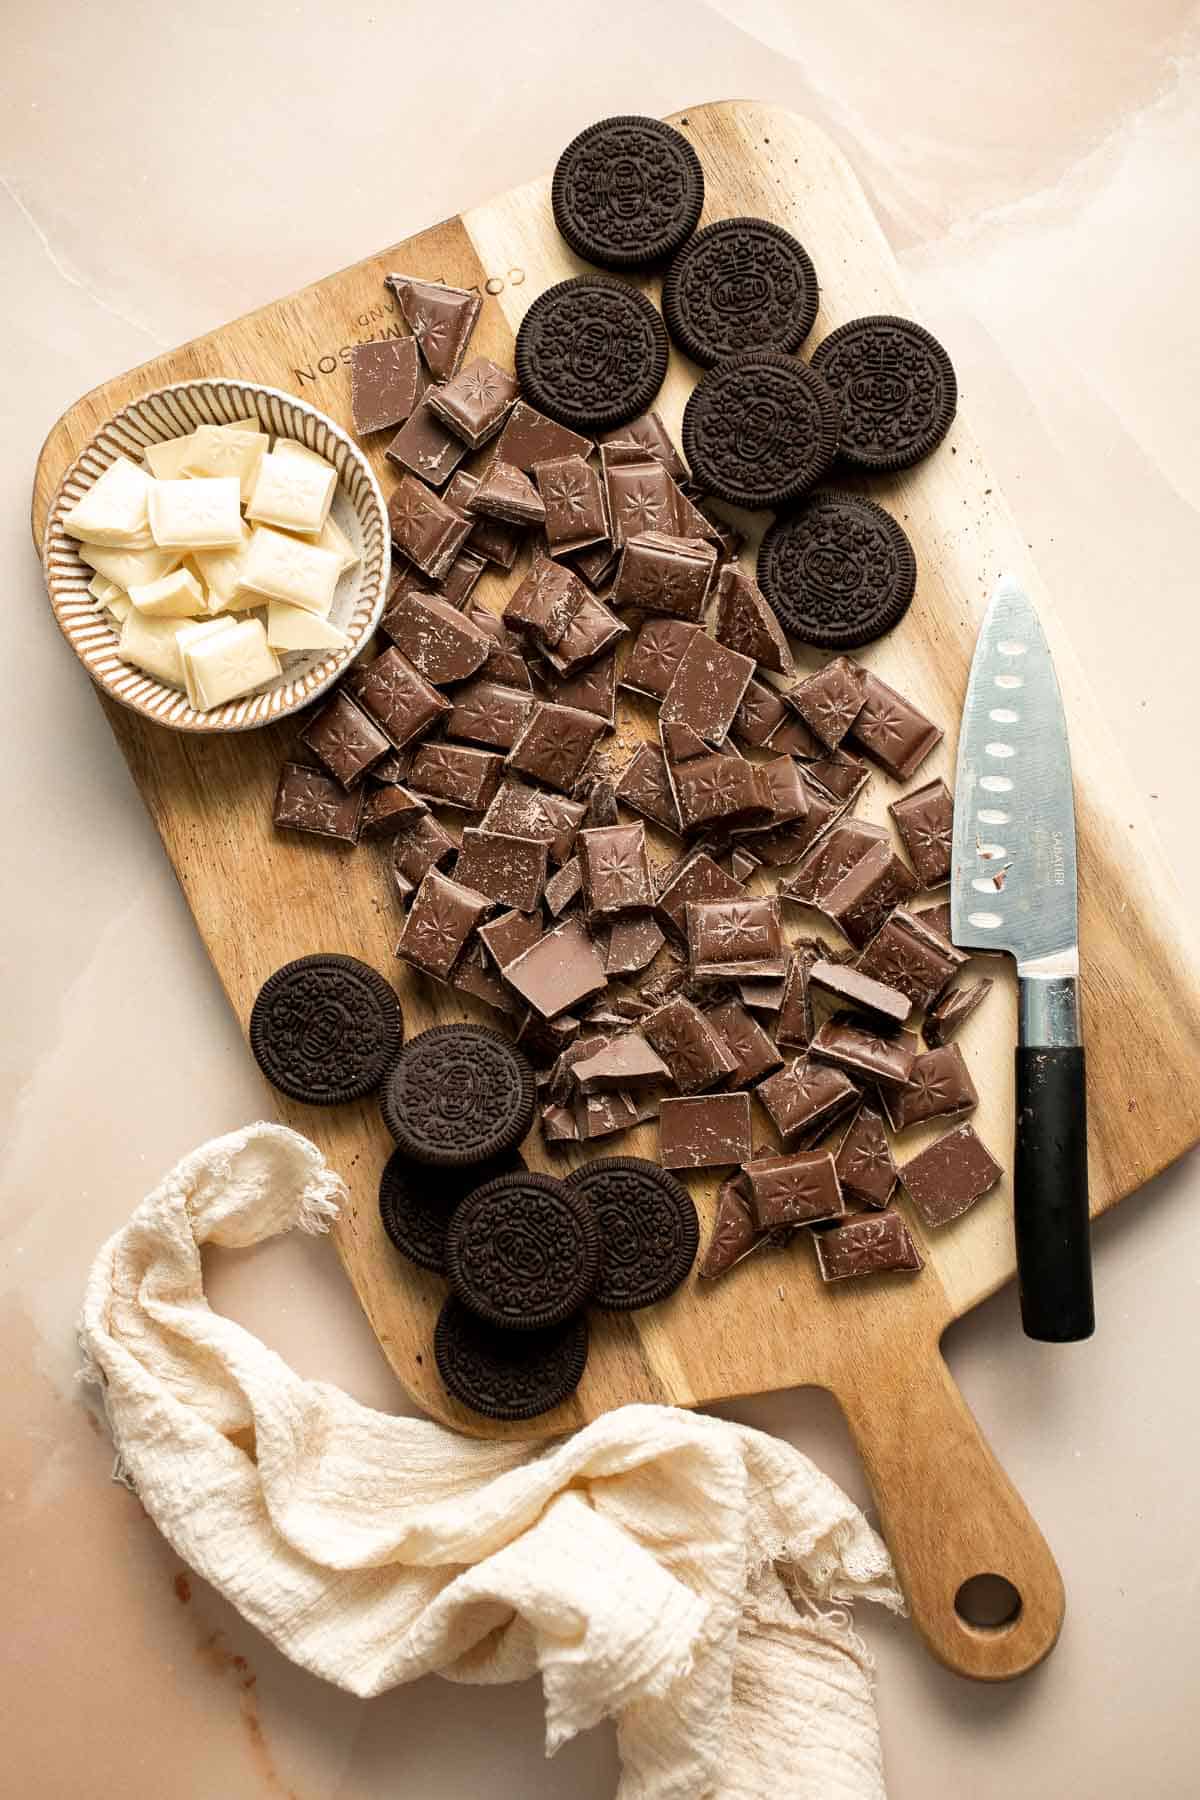
- Only 3 ingredients. The simplicity of this recipe is what makes it truly the ultimate fast and satisfying dessert. All you need is a dozen Oreo sandwich cookies, semi-sweet chocolate, and white chocolate. Plus, you can opt to leave out the white drizzle in which case you only need 2 ingredients!

Ingredient Notes
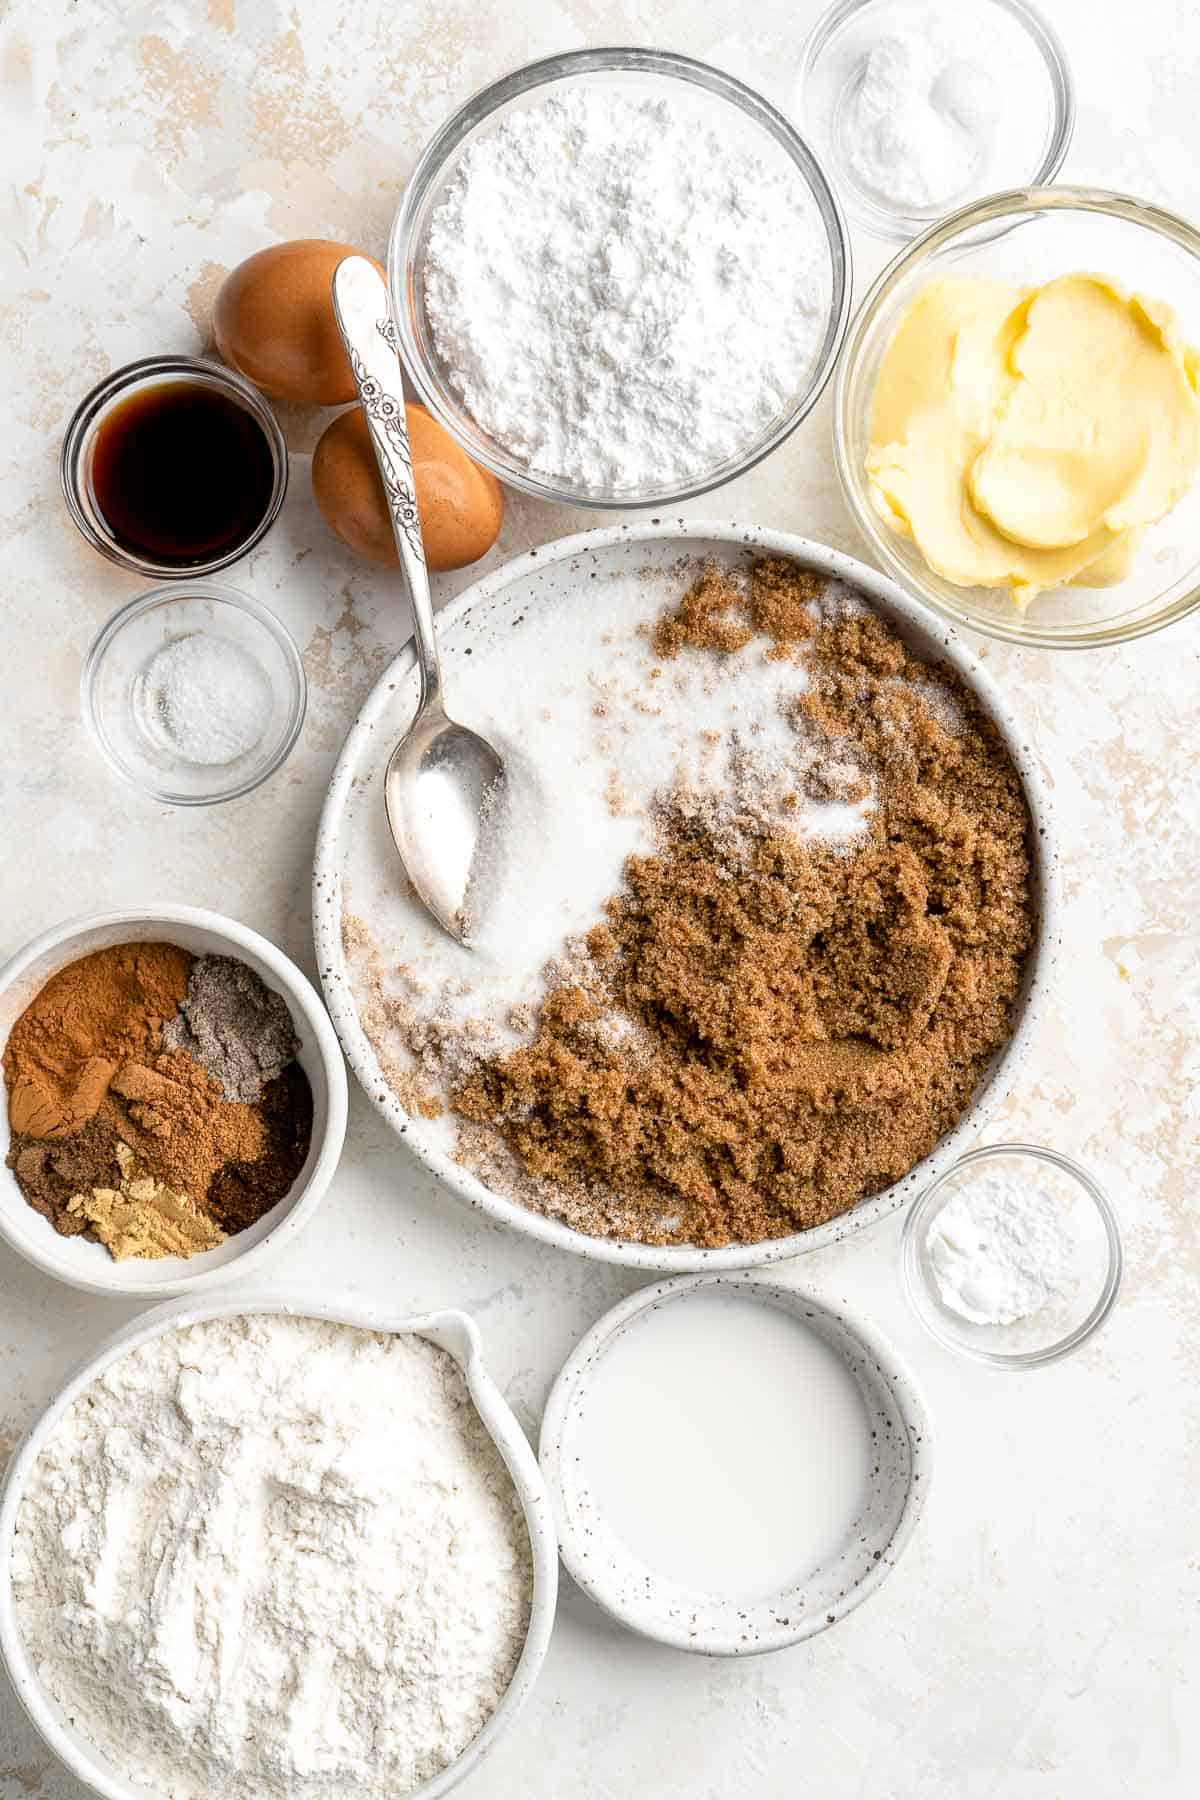
To make these easy Chocolate Covered Oreos, you will need the following ingredients (full measurements in recipe card below):
- semi-sweet chocolate - this recipe calls for semi-sweet chocolate, but you can use whatever chocolate you prefer. Milk chocolate, dark chocolate, or even white chocolate (for a double white chocolate coat) would work well for these chocolate covered Oreos.
- Oreos - if you don't have name brand Oreos on hand, you can use any similar sandwich cookie. You can also swap them out for a gluten-free version if necessary.
- white chocolate - you can swap this for a different kind of chocolate if you're not a fan of white chocolate. You can use a bar, white chocolate chips, or candy melts. You could also leave out the drizzle completely.
You will also need measuring cups, medium heatproof bowl, large baking sheet, and parchment paper.
How to Make the Best Chocolate Covered Oreos
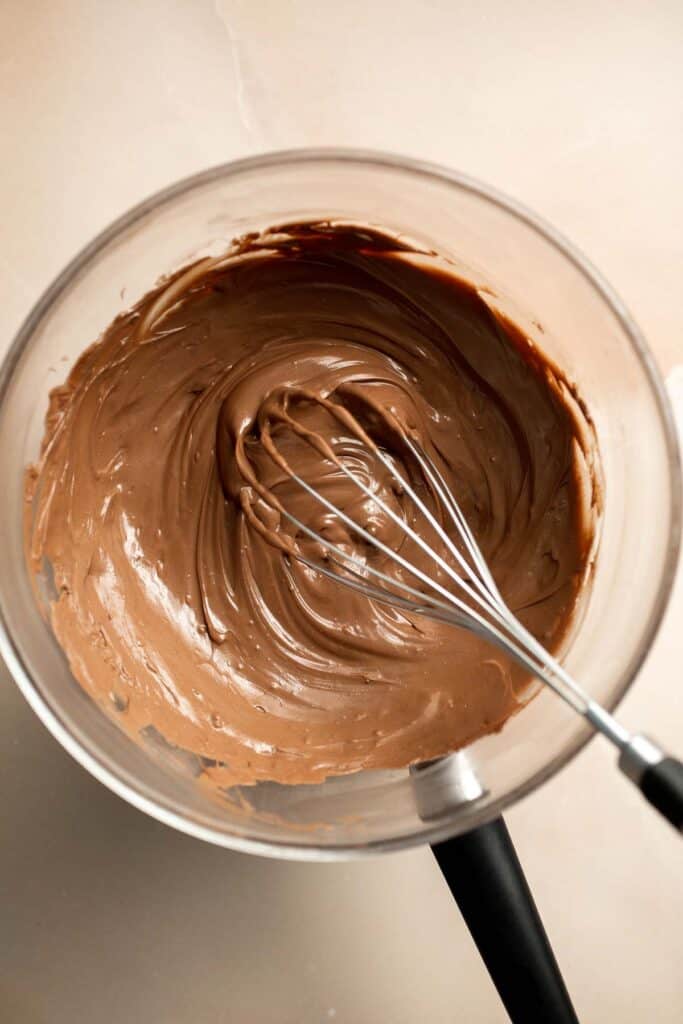
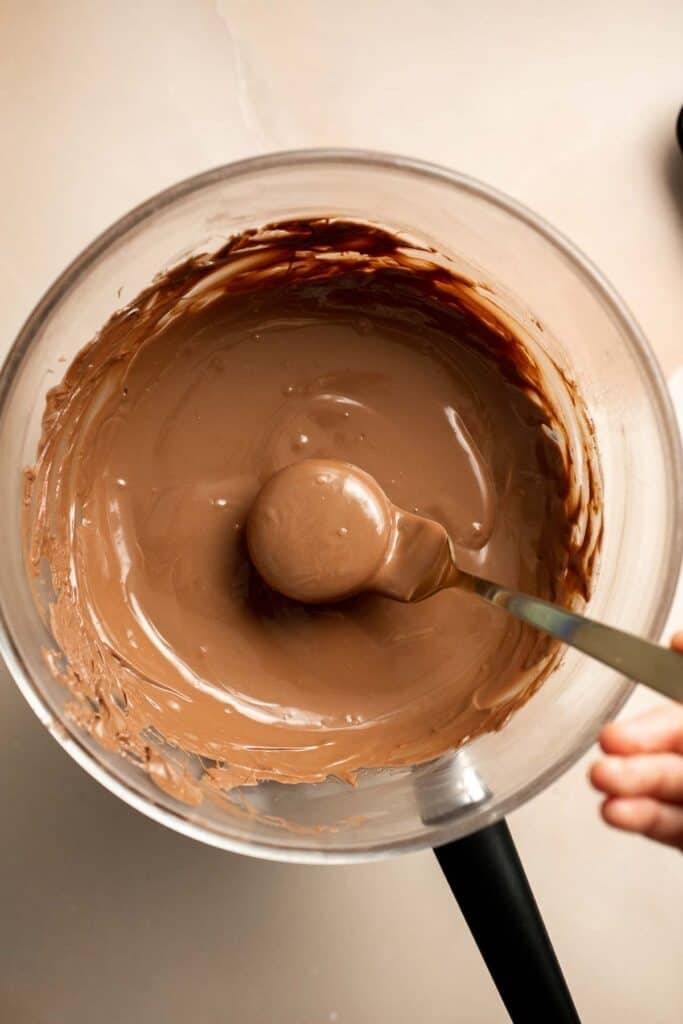
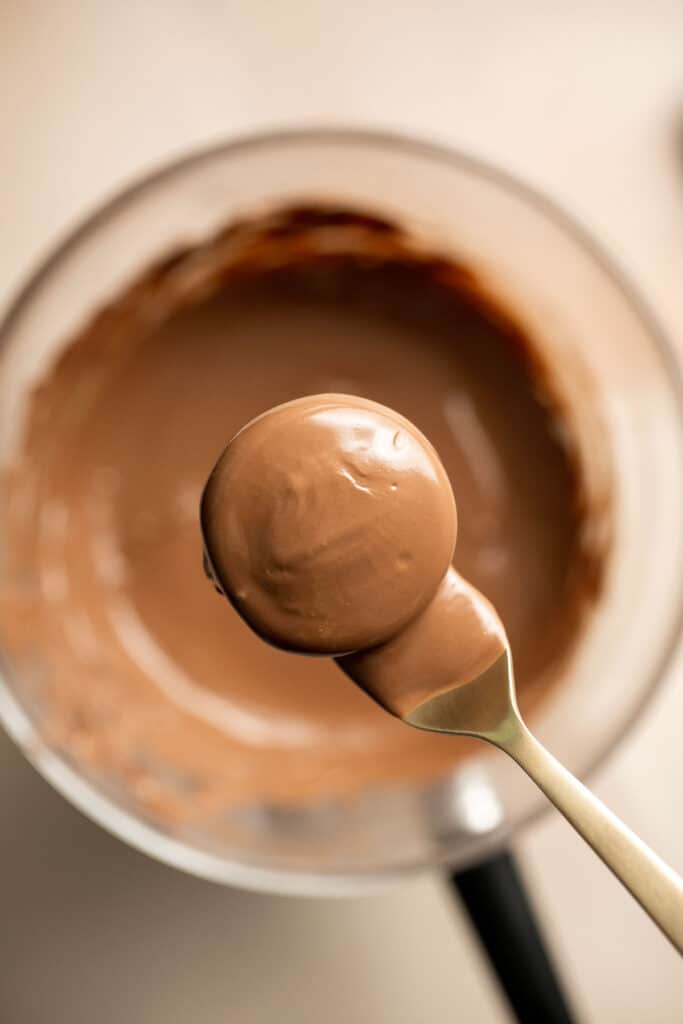
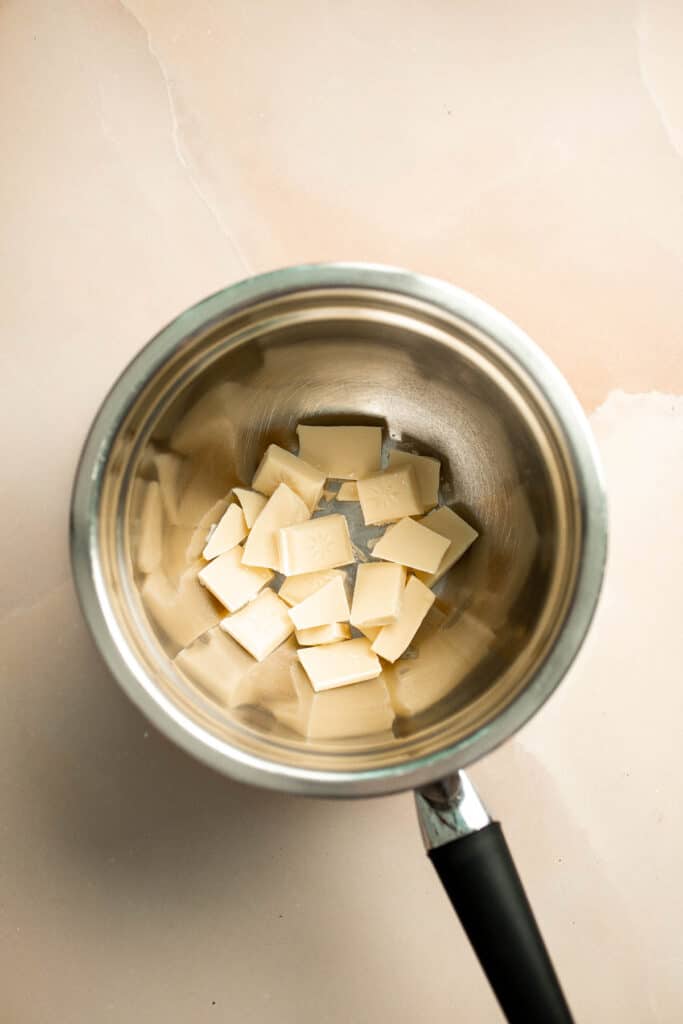
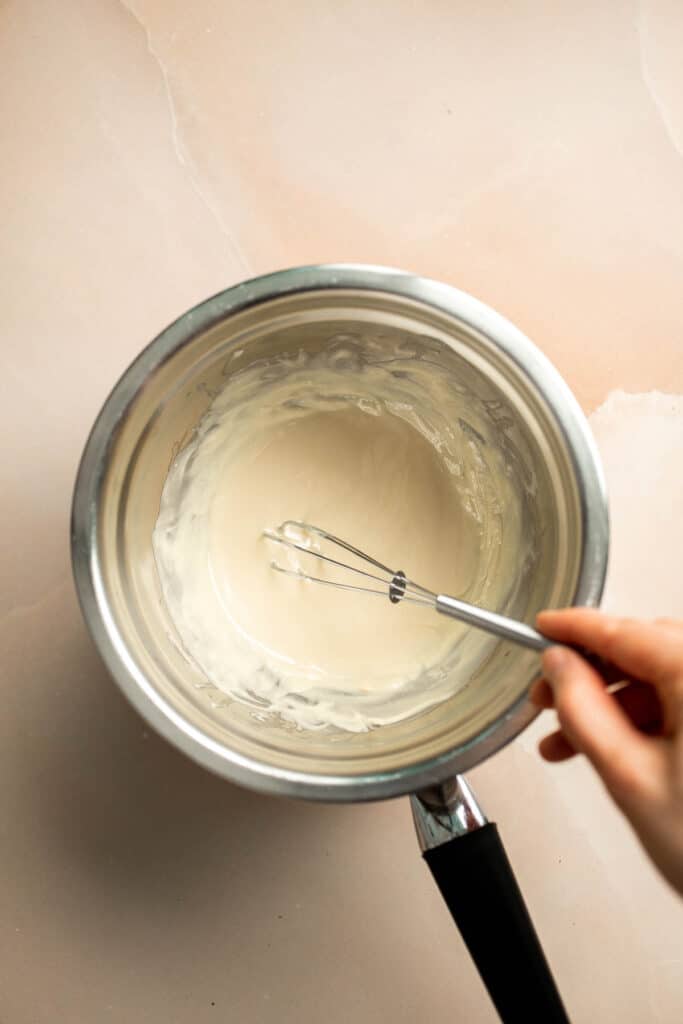
- Melt chocolate. Melt the chocolate with butter in a medium heatproof bowl over a pan of simmering water or in the microwave. Remove from heat and let it cool down for a few minutes.
How to Melt Chocolate
You can melt chocolate either on the stovetop or in the microwave.
- On the stove: Bring about 2 inches of water to a gentle simmer in a saucepan over medium-low heat. Reduce the heat to low and place a medium heatproof bowl over the saucepan, making sure the bottom of the bowl doesn't touch the water (you can also use a steamer insert). Add the chocolate and stir constantly as it melts. Continue stirring until completely smooth and gloss. This should take just a few minutes.
- In the microwave: For a quicker method, place the chopped chocolate in a heatproof bowl and microwave in 30-second intervals, stirring well after each one. Continue until the chocolate is fully melted and smooth. Be sure to stir between intervals to prevent overheating or scorching.

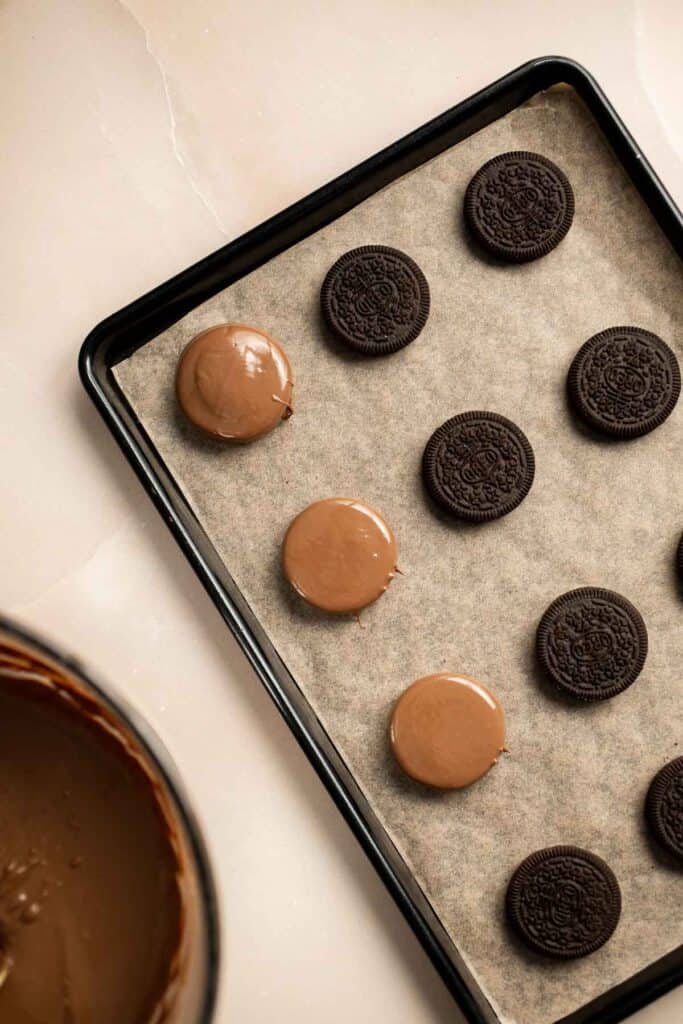
- Dip cookies. Line a baking sheet with parchment paper and set aside. Use a fork to carefully dip each oreo into the melted chocolate. Tap the edge of the bowl to remove any excess chocolate.


- Chill. Place the coated oreos back onto the lined baking sheet. Transfer the cookies to the fridge for 10 minutes to set.
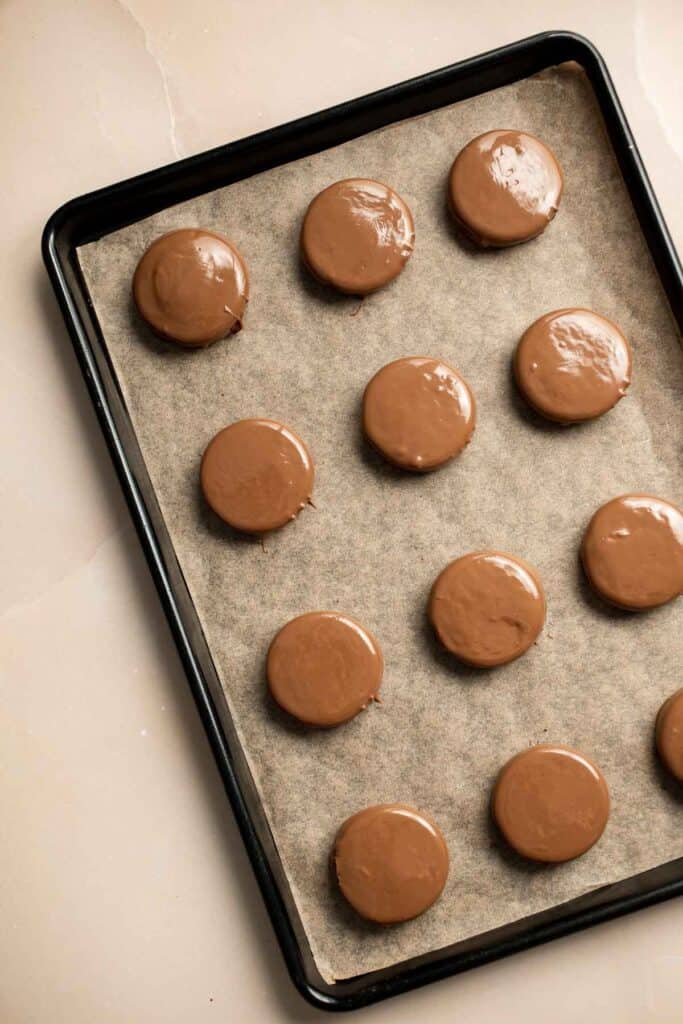
- Melt white chocolate. Meanwhile, melt the white chocolate over a double broiler or in the microwave.
- Drizzle. Remove the oreos from the fridge and drizzle the melted white chocolate on top.


- Chill. Return to fridge to let set for another 10 minutes.
Recipe Variations
- Birthday cake Oreos. Opt for Birthday Cake Oreos (or Golden Oreos), coat them in white chocolate, and press in some classic birthday sprinkles to make these a celebratory birthday treat.
- Red velvet Oreos. For Christmas, Thanksgiving, or Valentine's Day, try Red Velvet Oreos dipped in white chocolate. You can also top it with festive sprinkles. The red cookie, cream cheese frosting, and white chocolate combo practically scream winter holiday!
- Dipped chocolate Oreos. Find completely coated Oreos too rich? Tone down the decadence a bit by dipping them only halfway in chocolate, revealing the other half of the naked cookie. You can opt to still drizzle these with white chocolate on the whole Oreo or just over the chocolate dipped half.
How to Serve
Chocolate covered oreos are a delicious treat or snack served on its own, or paired with a warm drink. Try it with:

Recipe Tips and Tricks
- Get creative with decorations. You aren't limited to a white chocolate drizzle to jazz up these chocolate covered Oreos. You can tailor them to any occasion by changing up the toppings - different themed sprinkles or a generous pinch of crushed Oreos can go a long way. You can also add food coloring to the white chocolate drizzle to make them pop even more.
- Work in batches. Making them in bulk for a big event? Set up your work station ahead of time and work in batches, chilling one dozen or so while you work on coating the next batch. This will save you a ton of space in the fridge and make the process more efficient!
- Add a stick for easy serving. Skip the fork and use a cake pop stick to dip each Oreo instead. This makes them even easier to serve and eat and offers you a different way to display them.
Storing and Freezing Instructions
How to Store
Once the chocolate covered Oreos have cooled and the chocolate is completely set, transfer them to a Ziploc bag or other airtight container and store them in the refrigerator for up to 1 week.
How to Freeze
Place the chocolate covered Oreos in a single layer in an airtight container (or stack them up with pieces of parchment paper in between). Freeze for up to 3 months. Eat them straight from the freezer or let them thaw in the refrigerator overnight before serving.
Frequently Asked Questions
You can use whatever form of chocolate you want for these chocolate covered Oreos (like a chopped bar of chocolate or chocolate chips), but if you're storing or serving them at room temperature, you'll want to use a tempered chocolate to make them less likely to melt. You can temper chocolate yourself at home, or make it more convenient by using an already-tempered chocolate.
If they're left in direct sunlight or a particularly warm spot, chocolate covered Oreos can melt. That's why we recommend storing them in the refrigerator for longevity and to keep them looking uniform. It's also a good idea to keep them in a cooler if you need to transport them for long periods of time!
Like any chocolate-coated item, chocolate covered Oreos can be messy if you hang on to them too long. Thankfully, they're easy to eat in three bites or less! When in doubt, you can serve them in cupcake liners, try our stick trick (see tips and tricks above) or eat them with a fork.
More Chocolate Recipes
- 45 Best Chocolate Desserts
- Oreo Truffles (Cookie Balls)
- Oreo Brownies
- Chocolate Covered Strawberries
- Peanut Butter Eggs
- Chocolate Thumbprint Cookies
Tried this recipe?
I'd love to hear what you think! Leave a comment and rating below to share your feedback. Your reviews help others discover this recipe and help me keep creating more free recipes for you. Snap a photo and tag me on social media @aheadofthyme too.

Hungarian Mushroom Soup
This rich, hearty Hungarian Mushroom Soup features a bounty of tender, earthy mushrooms in a perfectly seasoned, creamy broth. Plus, this nostalgic Hungarian recipe comes together in almost no time at all and is the perfect way to warm up on those cool nights. You just need a little crusty bread, a dollop of sour cream, and dinner is served!
Mushroom soup is one of the most comforting types of soup. The cooking process enhances their earthy flavor and tender, meaty texture. They taste wonderful in this creamy Hungarian mushroom soup with traditional flavors like paprika, dried dill, fresh thyme, and sour cream. Once you try this delicious soup for the first time, it'll quickly become a regular part of your weekly meal plan.
Why You'll Love This Hungarian Mushroom Soup
- Easy to make. After sauteing the mushrooms and aromatics down, add the broth and the flour slurry, then let it all simmer together. It's that easy! It's fast enough to make even on a busy weeknight.
- So flavorful. Whether you're a mushroom lover or not, this Hungarian mushroom soup recipe is undeniably delicious. The mushrooms take on a meaty flavor, and the sour cream balances their earthiness to make them suitable even for the non-mushroom lovers in your life!
- Hearty and filling. This soup has so many mushrooms, making it incredibly filling and satisfying. It's a great light dinner or hearty lunch to warm you up!
Ingredient Notes
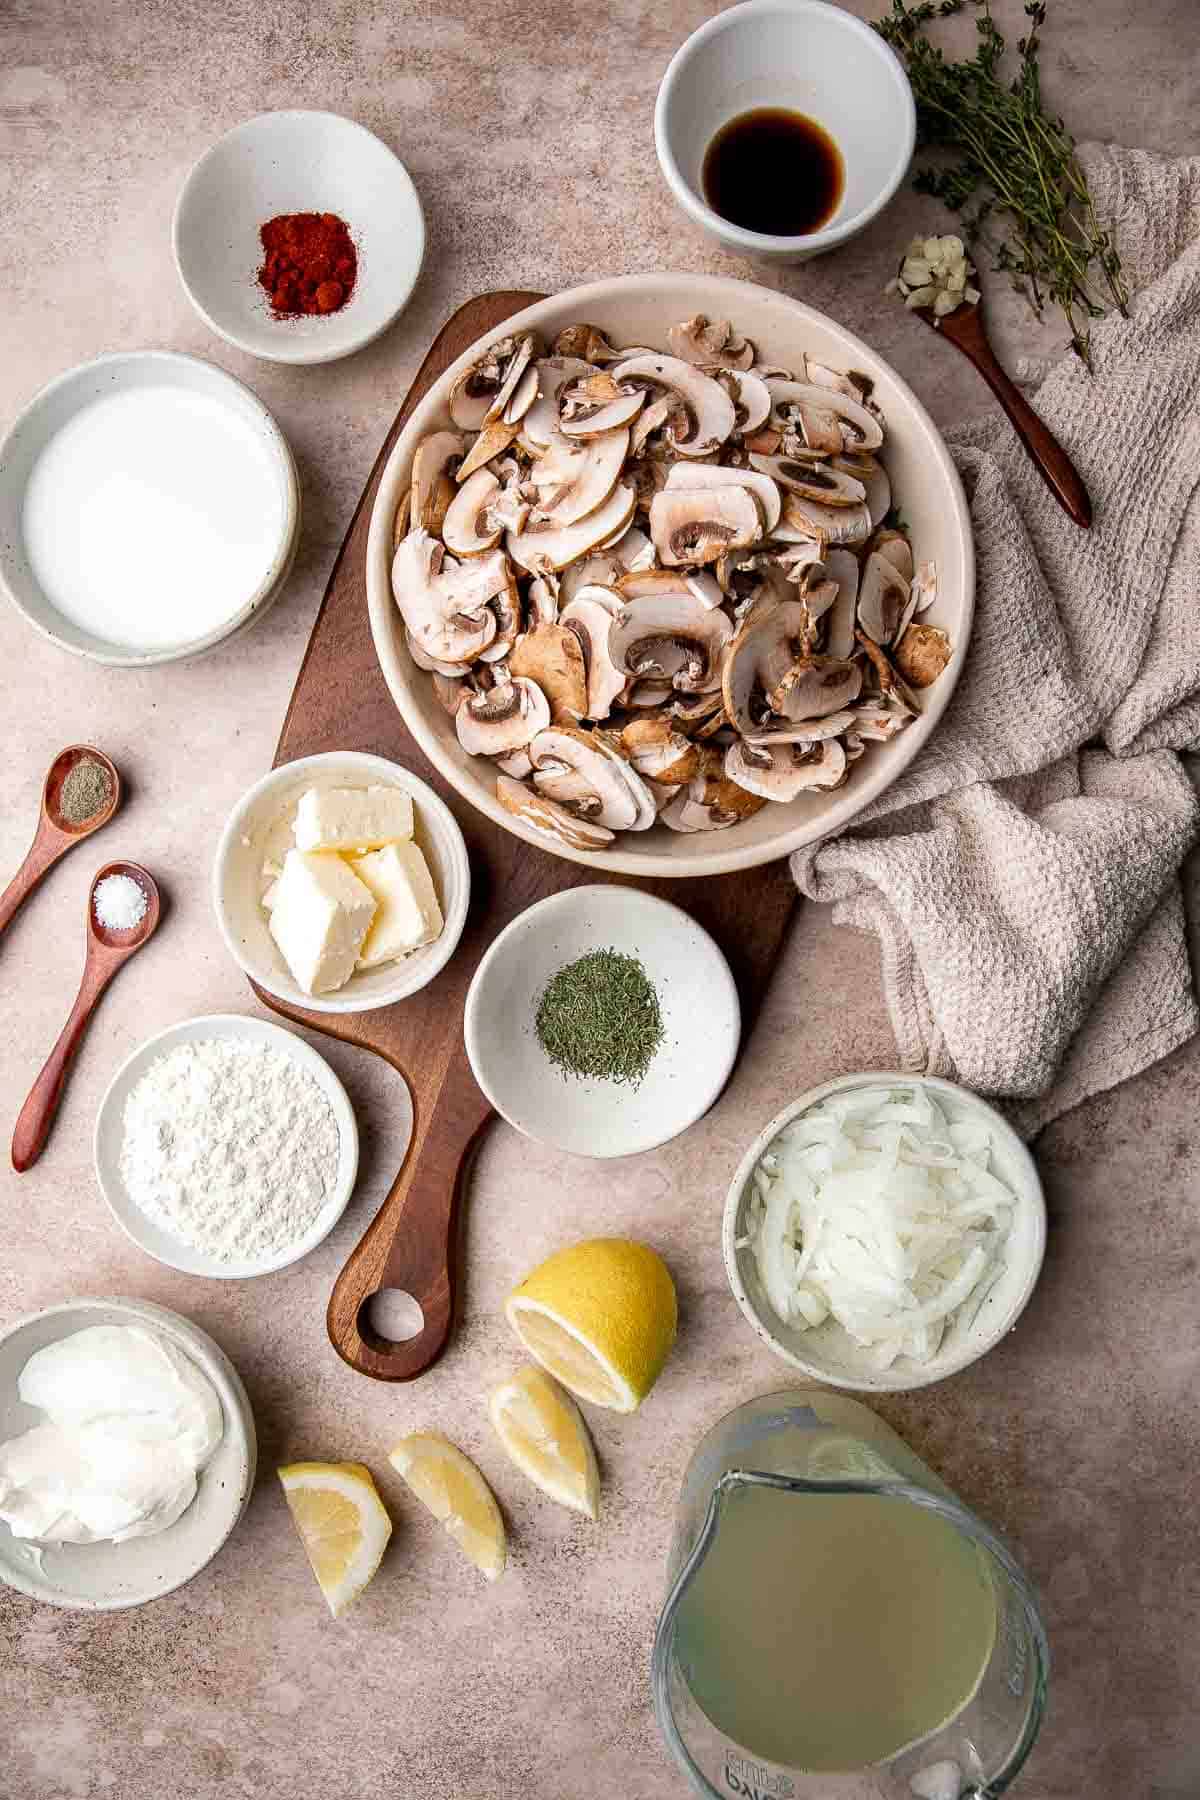
To make this delicious Hungarian mushroom soup, you will need the following ingredients (full measurements in recipe card below):
- butter - sauteeing the mushrooms in butter adds an extra layer of flavor.
- cremini mushrooms - slice the mushrooms thinly to help them cook down evenly.
- yellow onion - finely chop the onion to release the sweet, aromatic flavor.
- garlic - mince or finely chop fresh garlic cloves for the best flavor.
- seasonings - season well with salt, black pepper, paprika, and dried dill weed.
- thyme - fresh thyme adds a really lovely, fresh flavor that pairs well with earthy mushrooms.
- chicken broth - use either homemade or storebought broth.
- all-purpose flour - this will thicken the soup for a really creamy texture.
- whole milk - add whole milk for a deliciously creamy texture.
- sour cream - add this right at the end for a little extra creaminess and a slight tang.
- lemon juice - lemon juice adds a refreshing freshness.
- fresh parsley - use parsley as a garnish to contrast the rich mushroom flavor.
You will also need a large pot, small bowl, whisk, and ladle.
.
How to Make the Best Hungarian Mushroom Soup
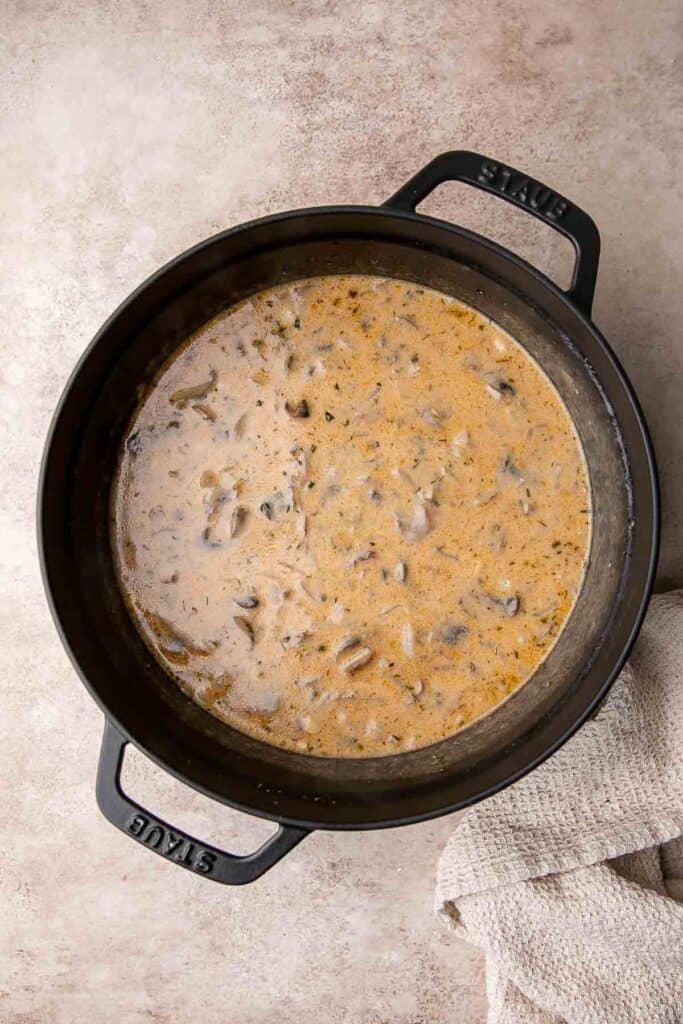
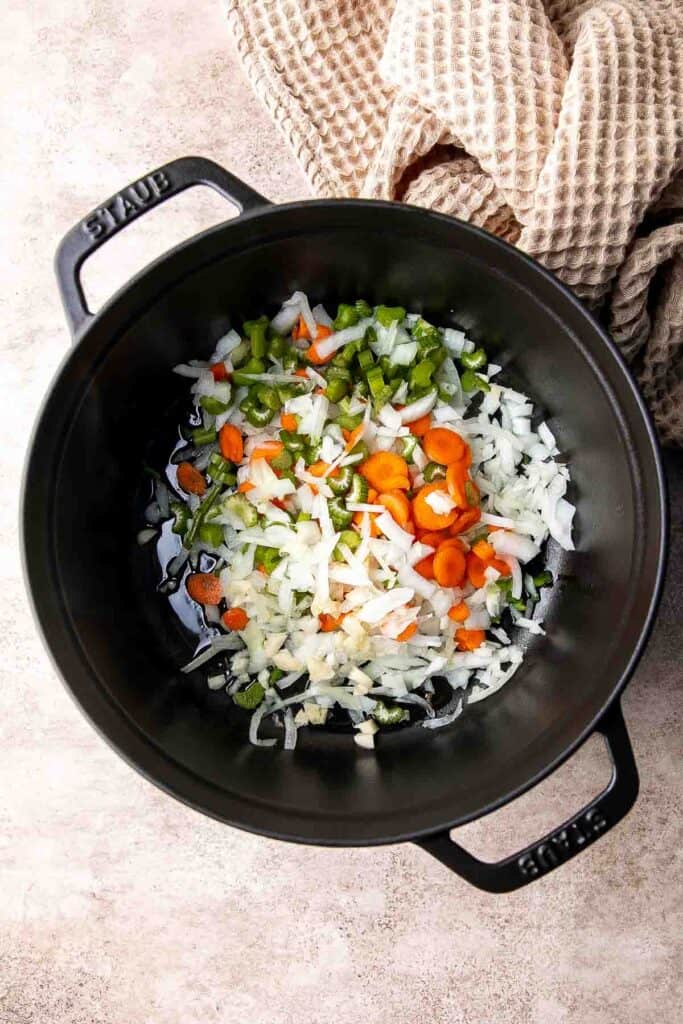
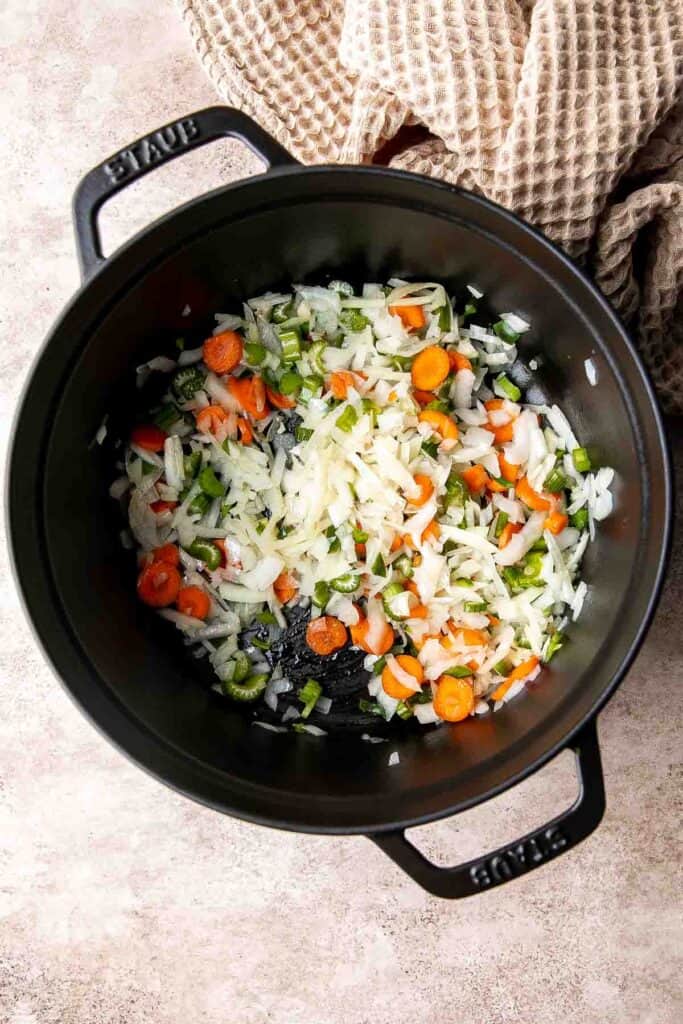
- Sauté mushrooms. Melt butter in a large pot or 4 quart Dutch oven over medium-high heat and melt until it starts to bubble, about 1 minute. Add mushrooms and cook without turning for 3-5 minutes.
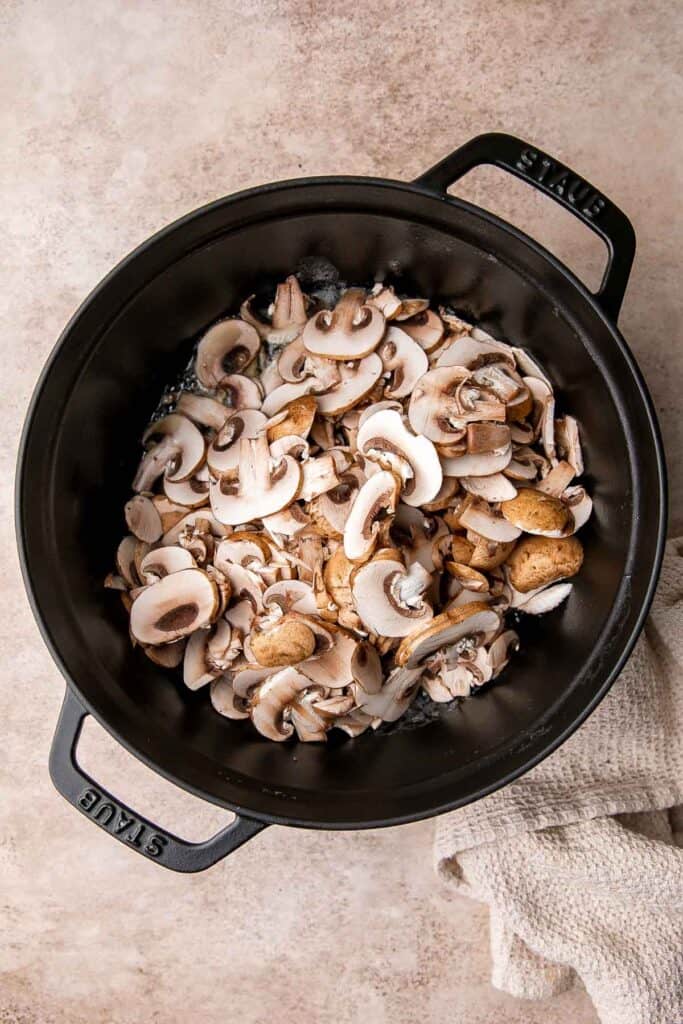
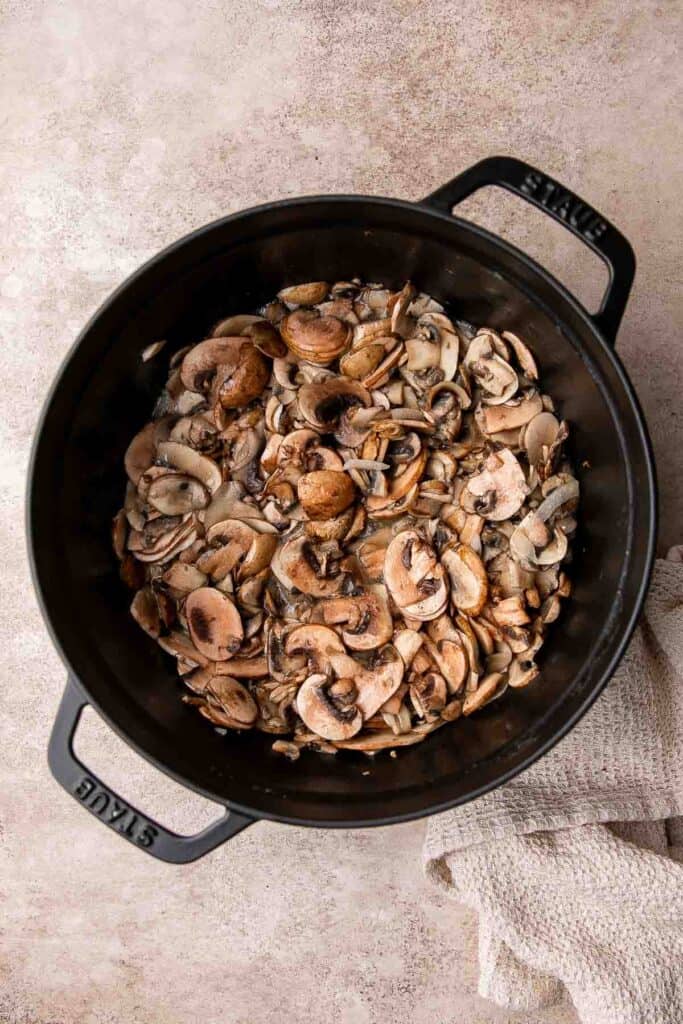
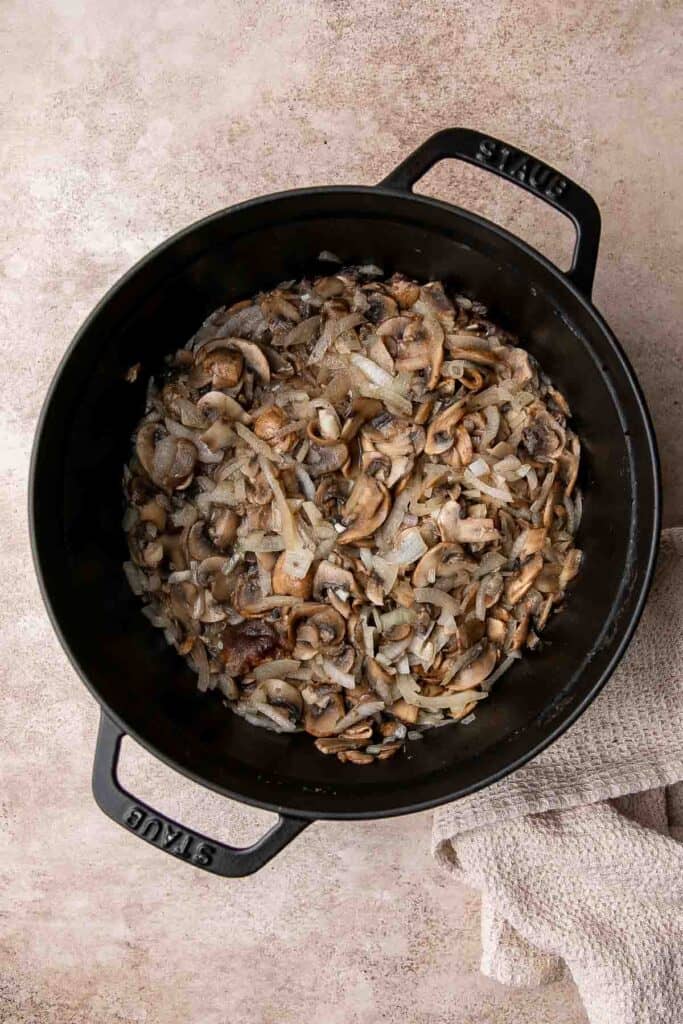
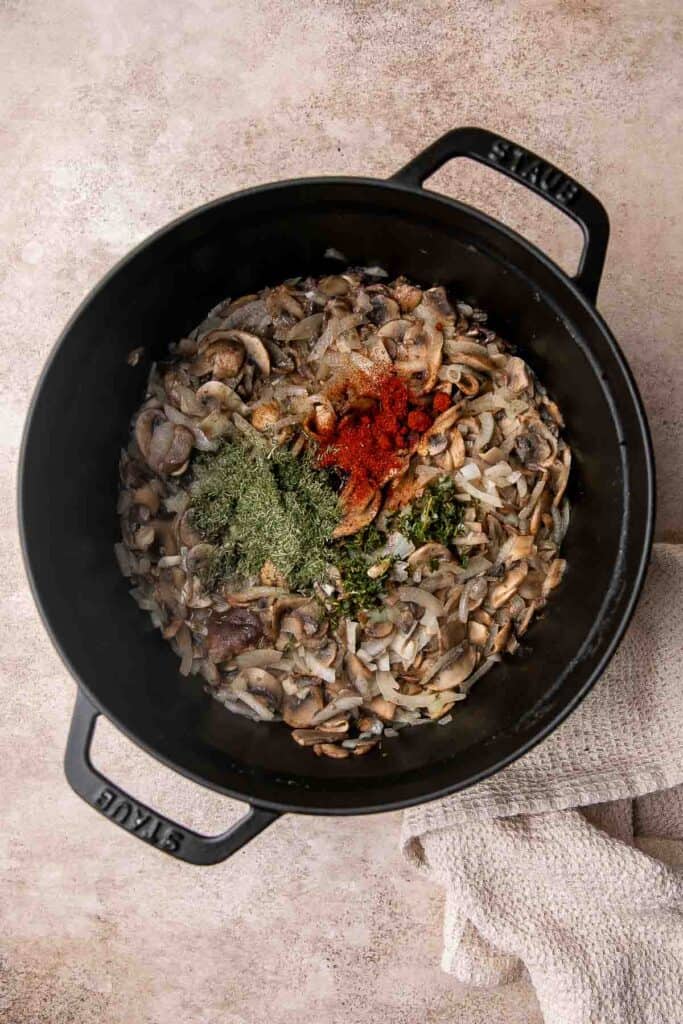
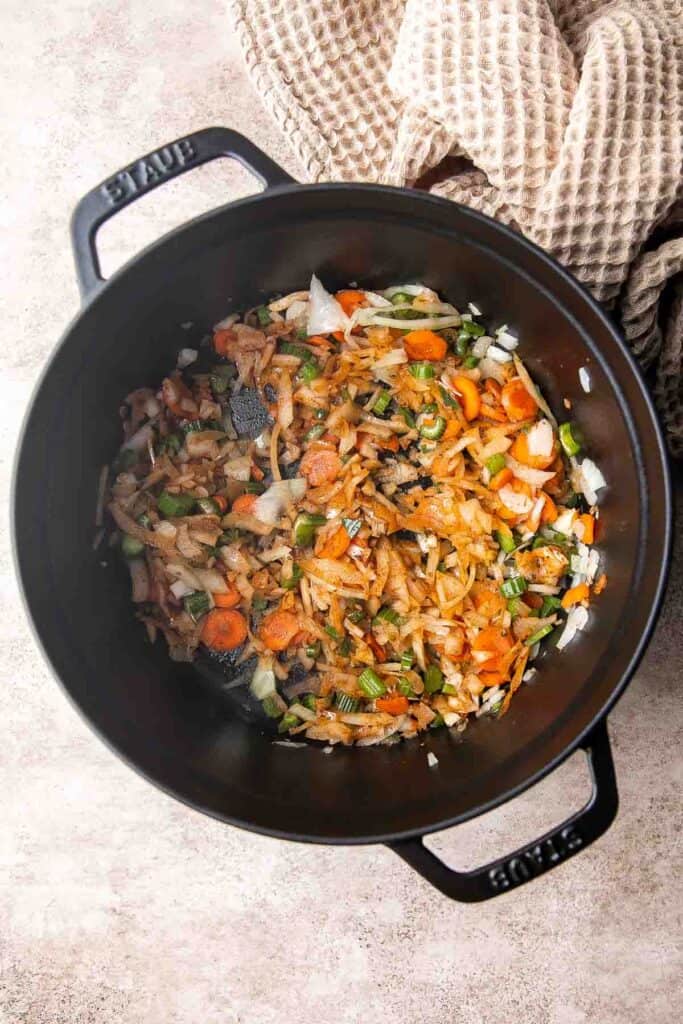
- Add aromatics. Add onion and garlic and season with salt and pepper. Cook until the mushrooms are golden brown, about 3-5 minutes. Stir in paprika, dill and thyme.
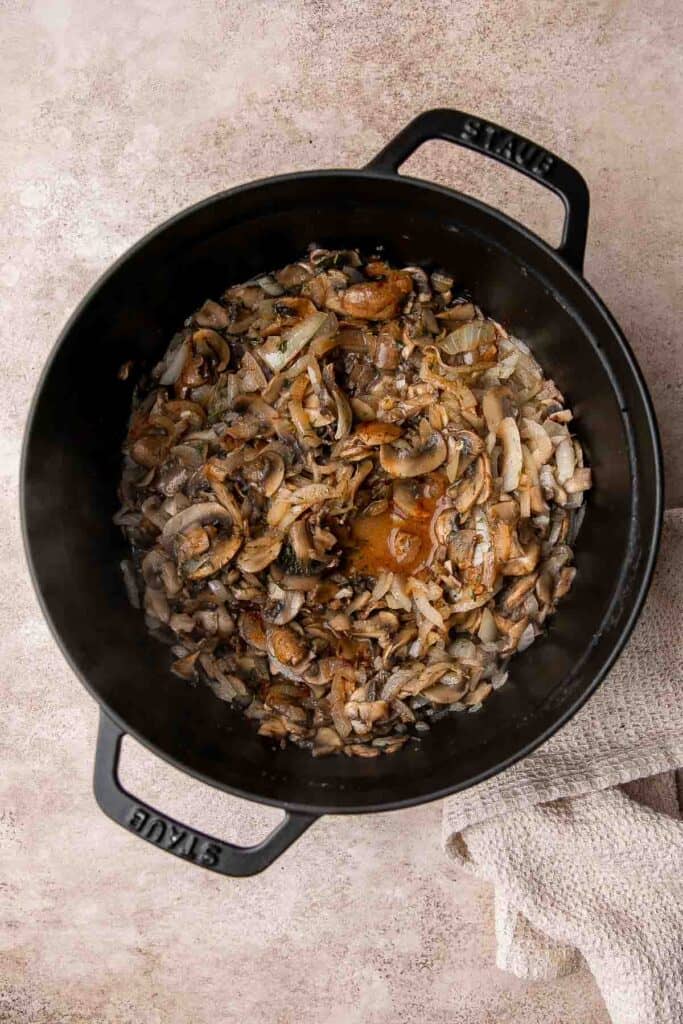
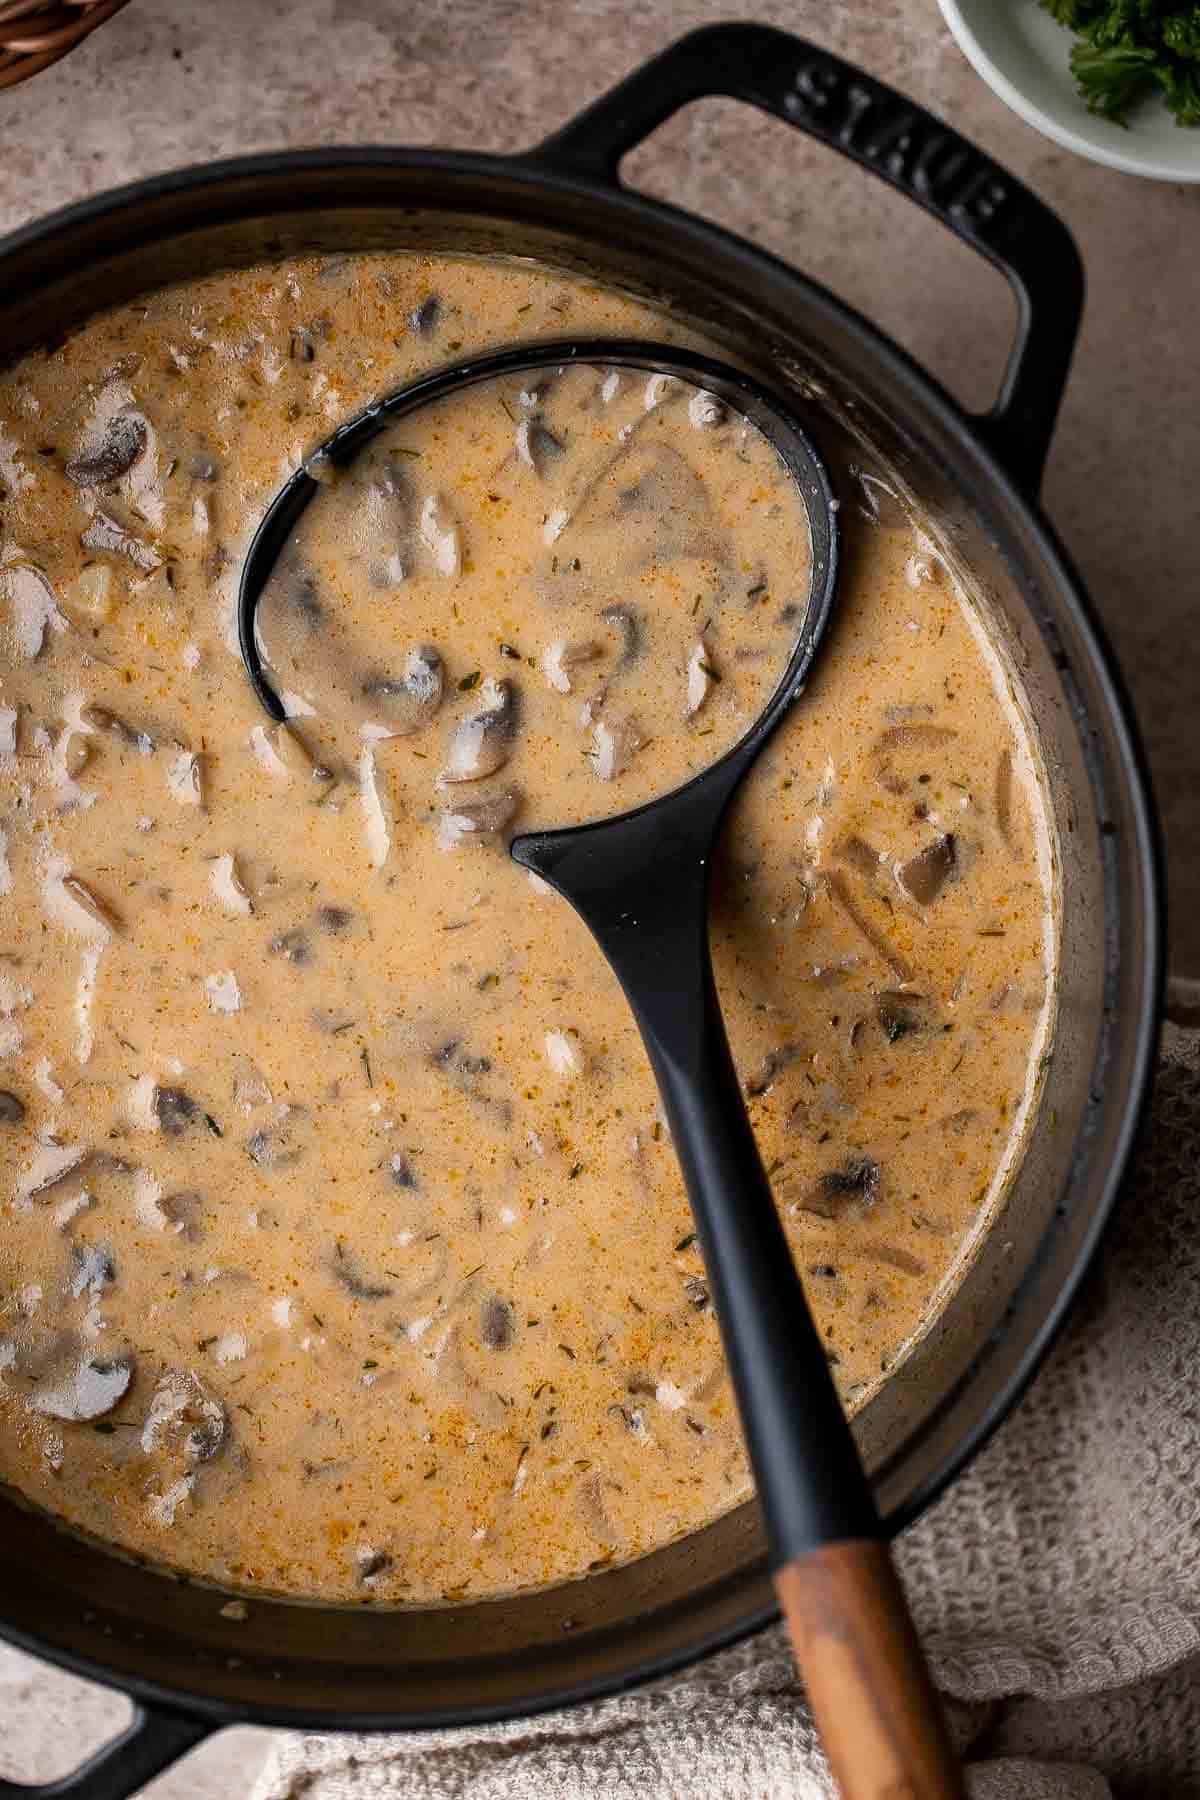
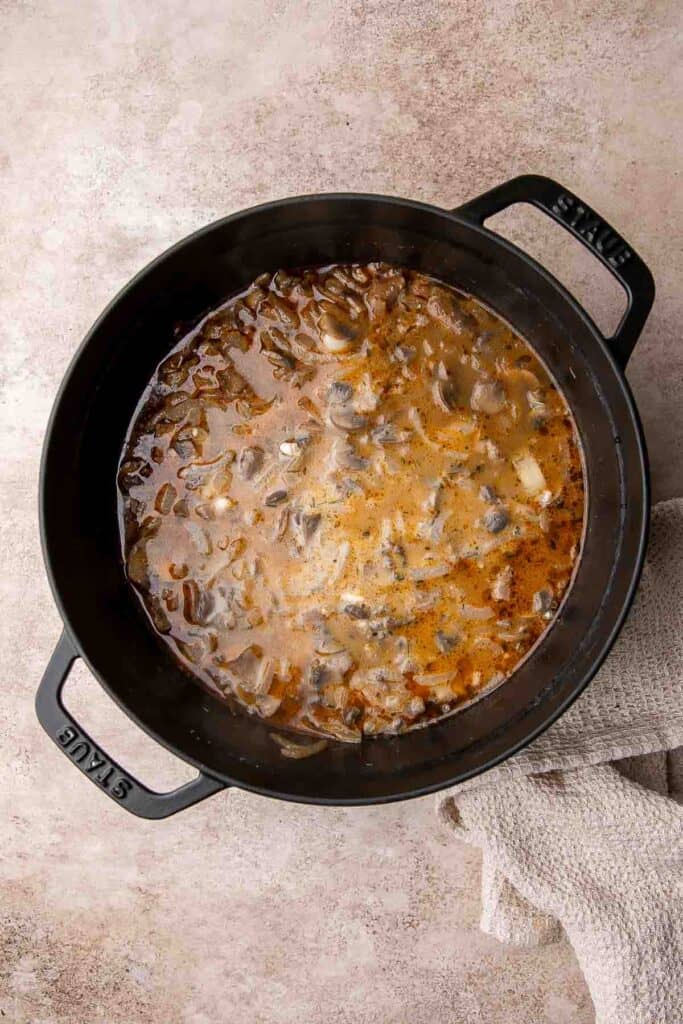
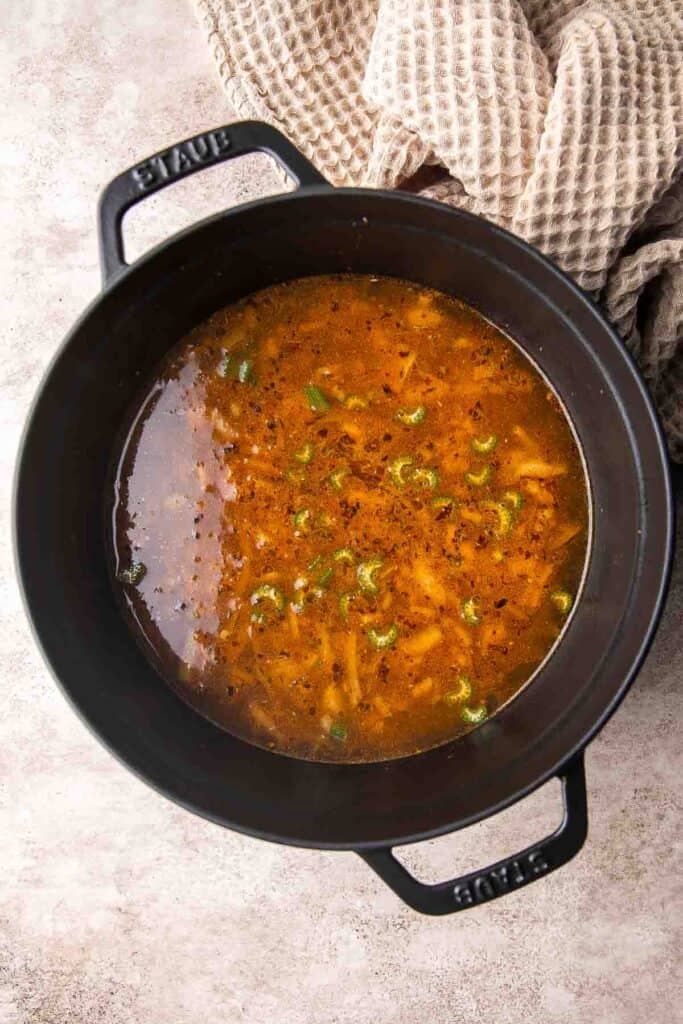
- Add broth. Add chicken broth and mix well. Bring to a boil.
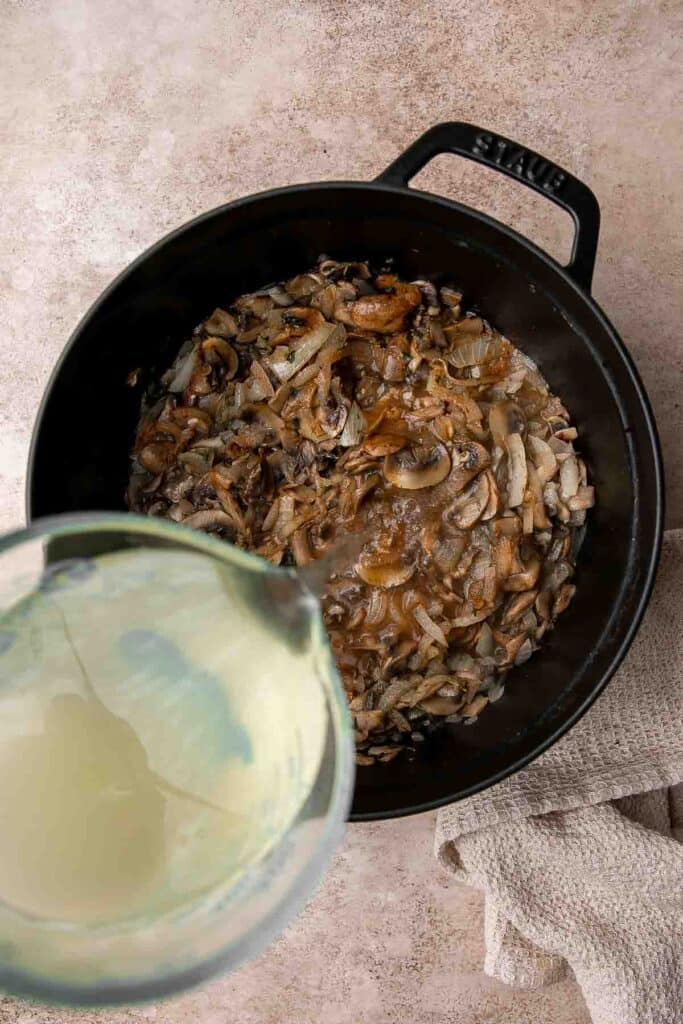

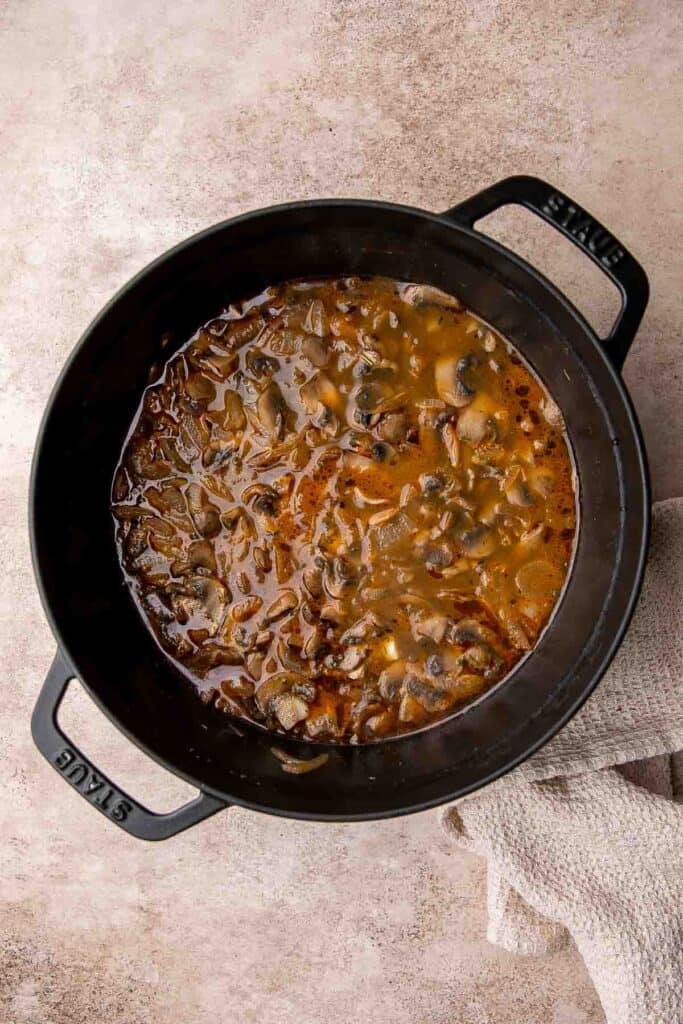
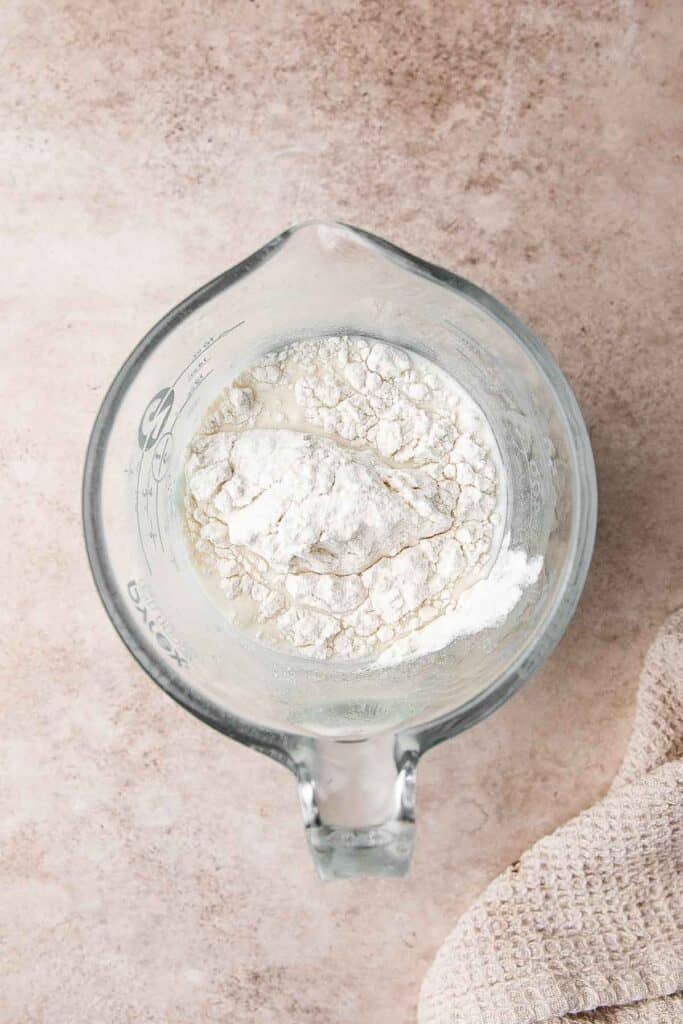
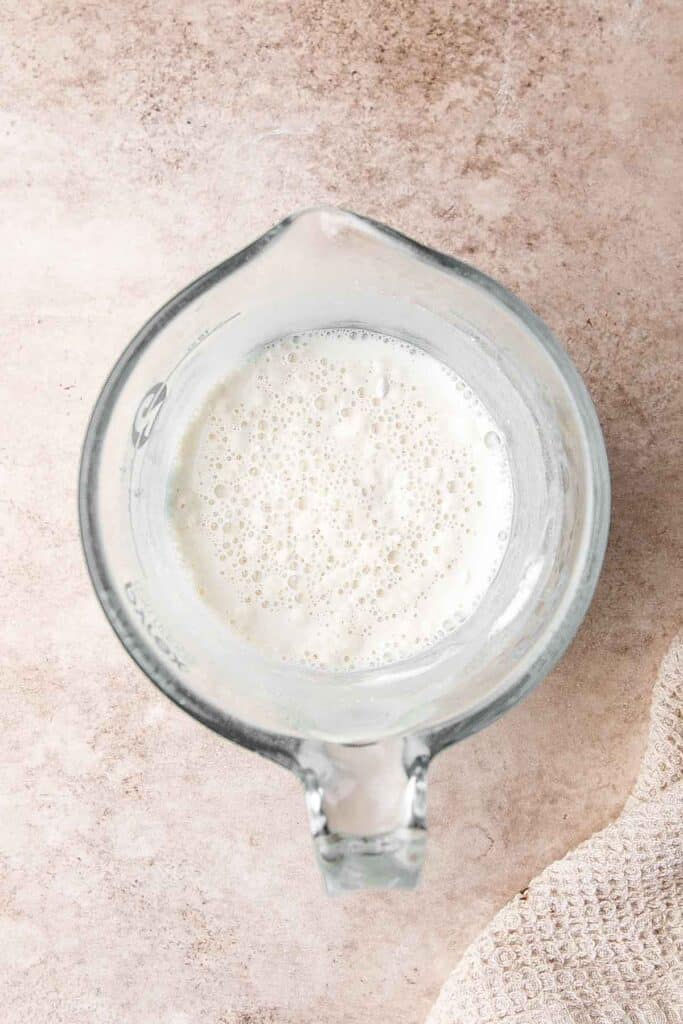
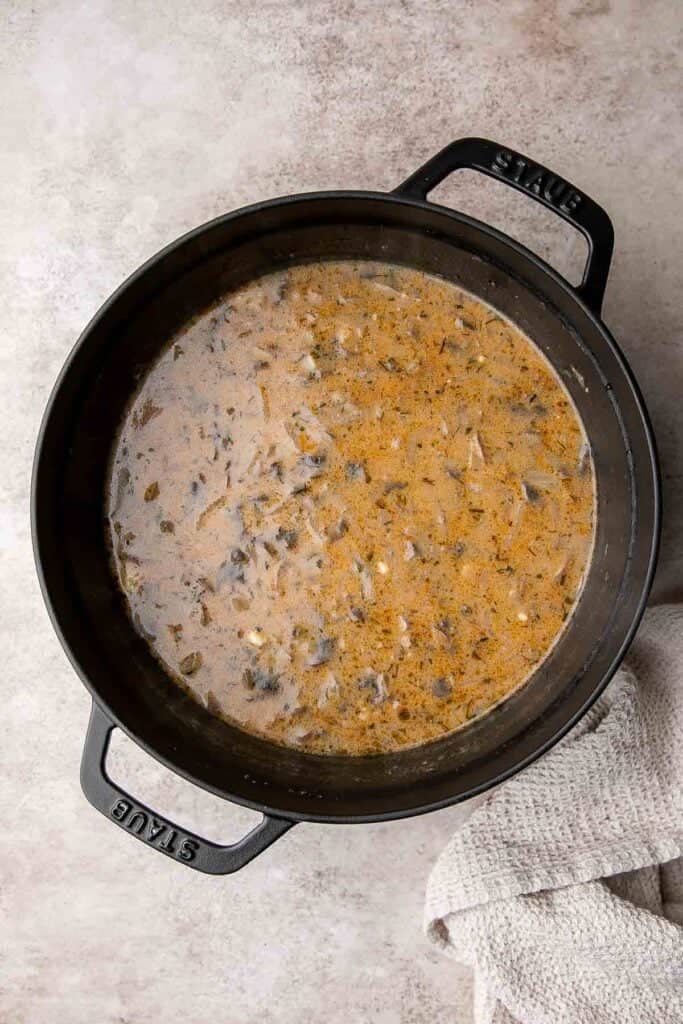
- Thicken. In a small mixing bowl, whisk together flour and milk. Add the milk mixture into the soup. Stir well and bring it to a simmer over medium heat.
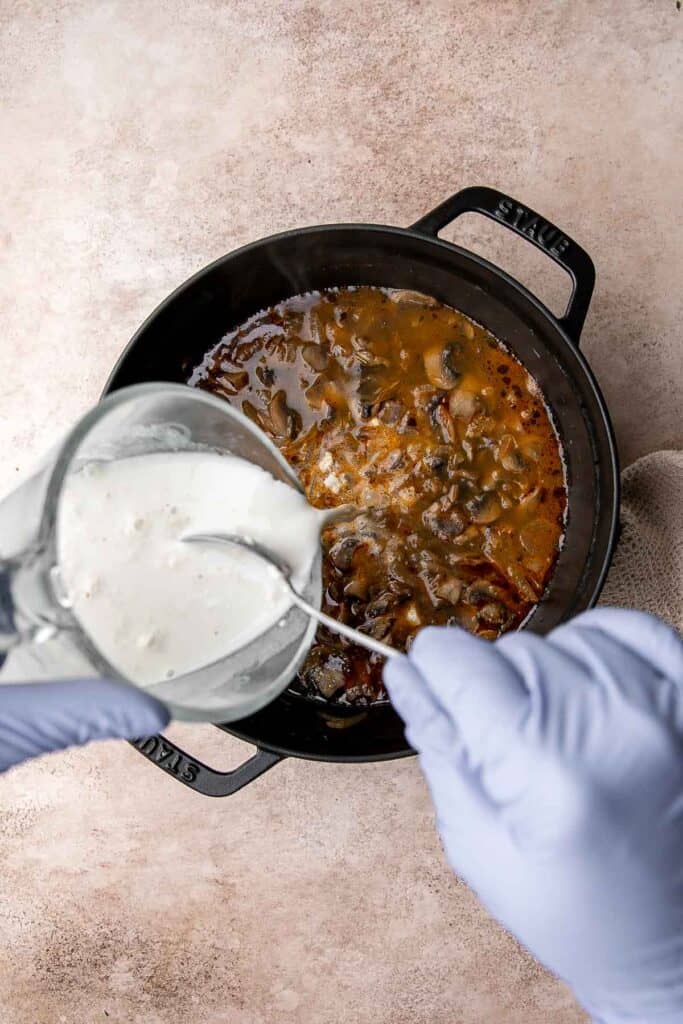
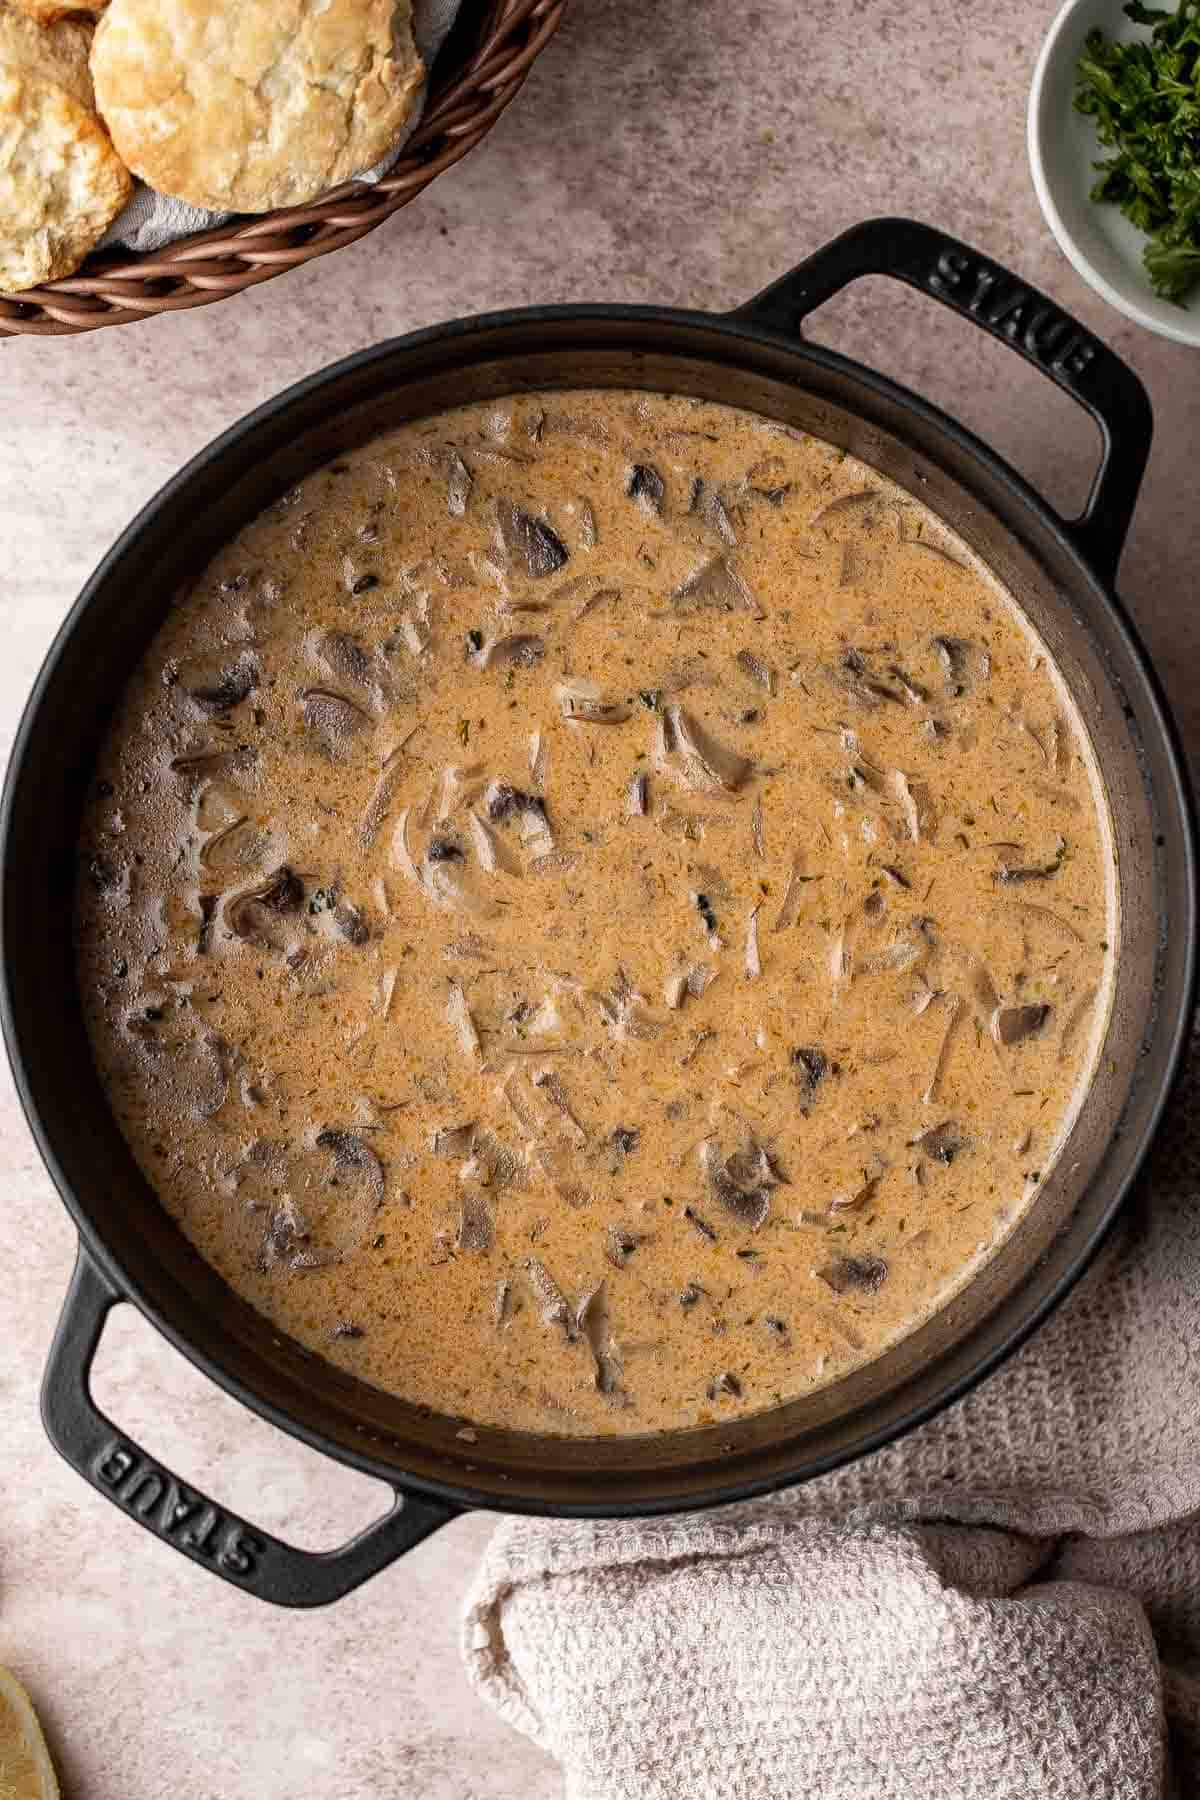
- Simmer. Simmer until the soup starts to thicken, about 5 minutes.
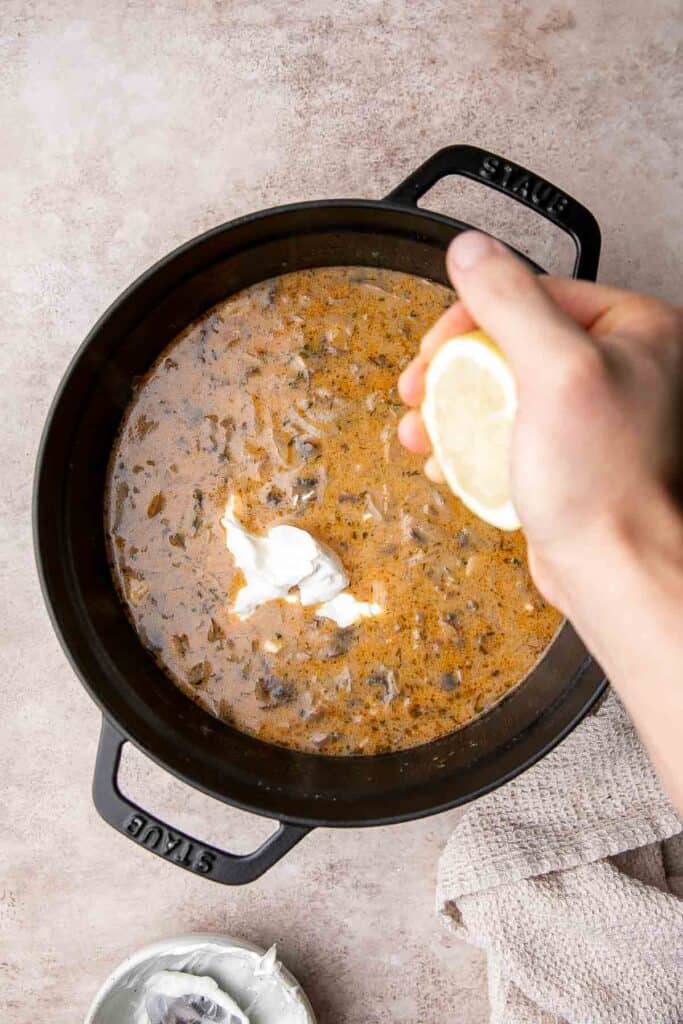
- Add sour cream. Stir in sour cream and lemon juice until evenly combined.

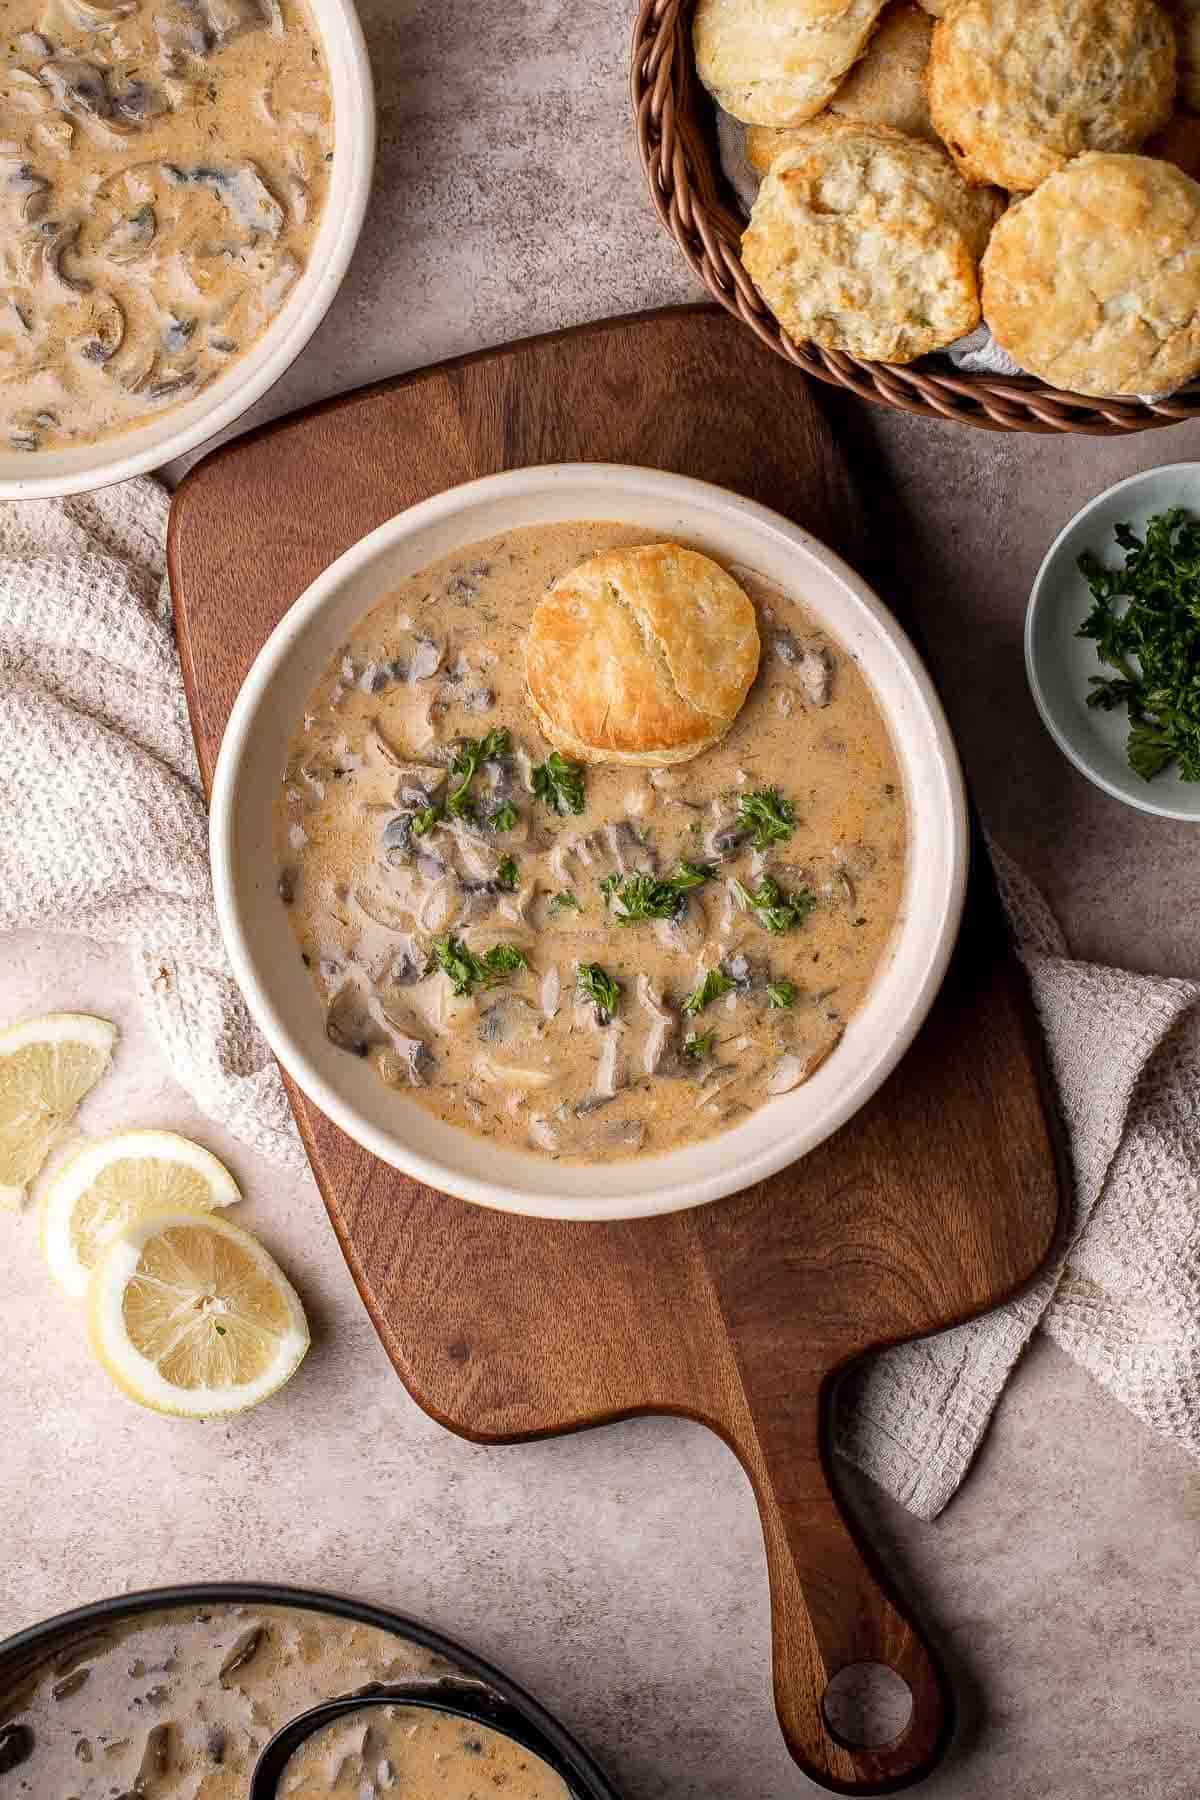
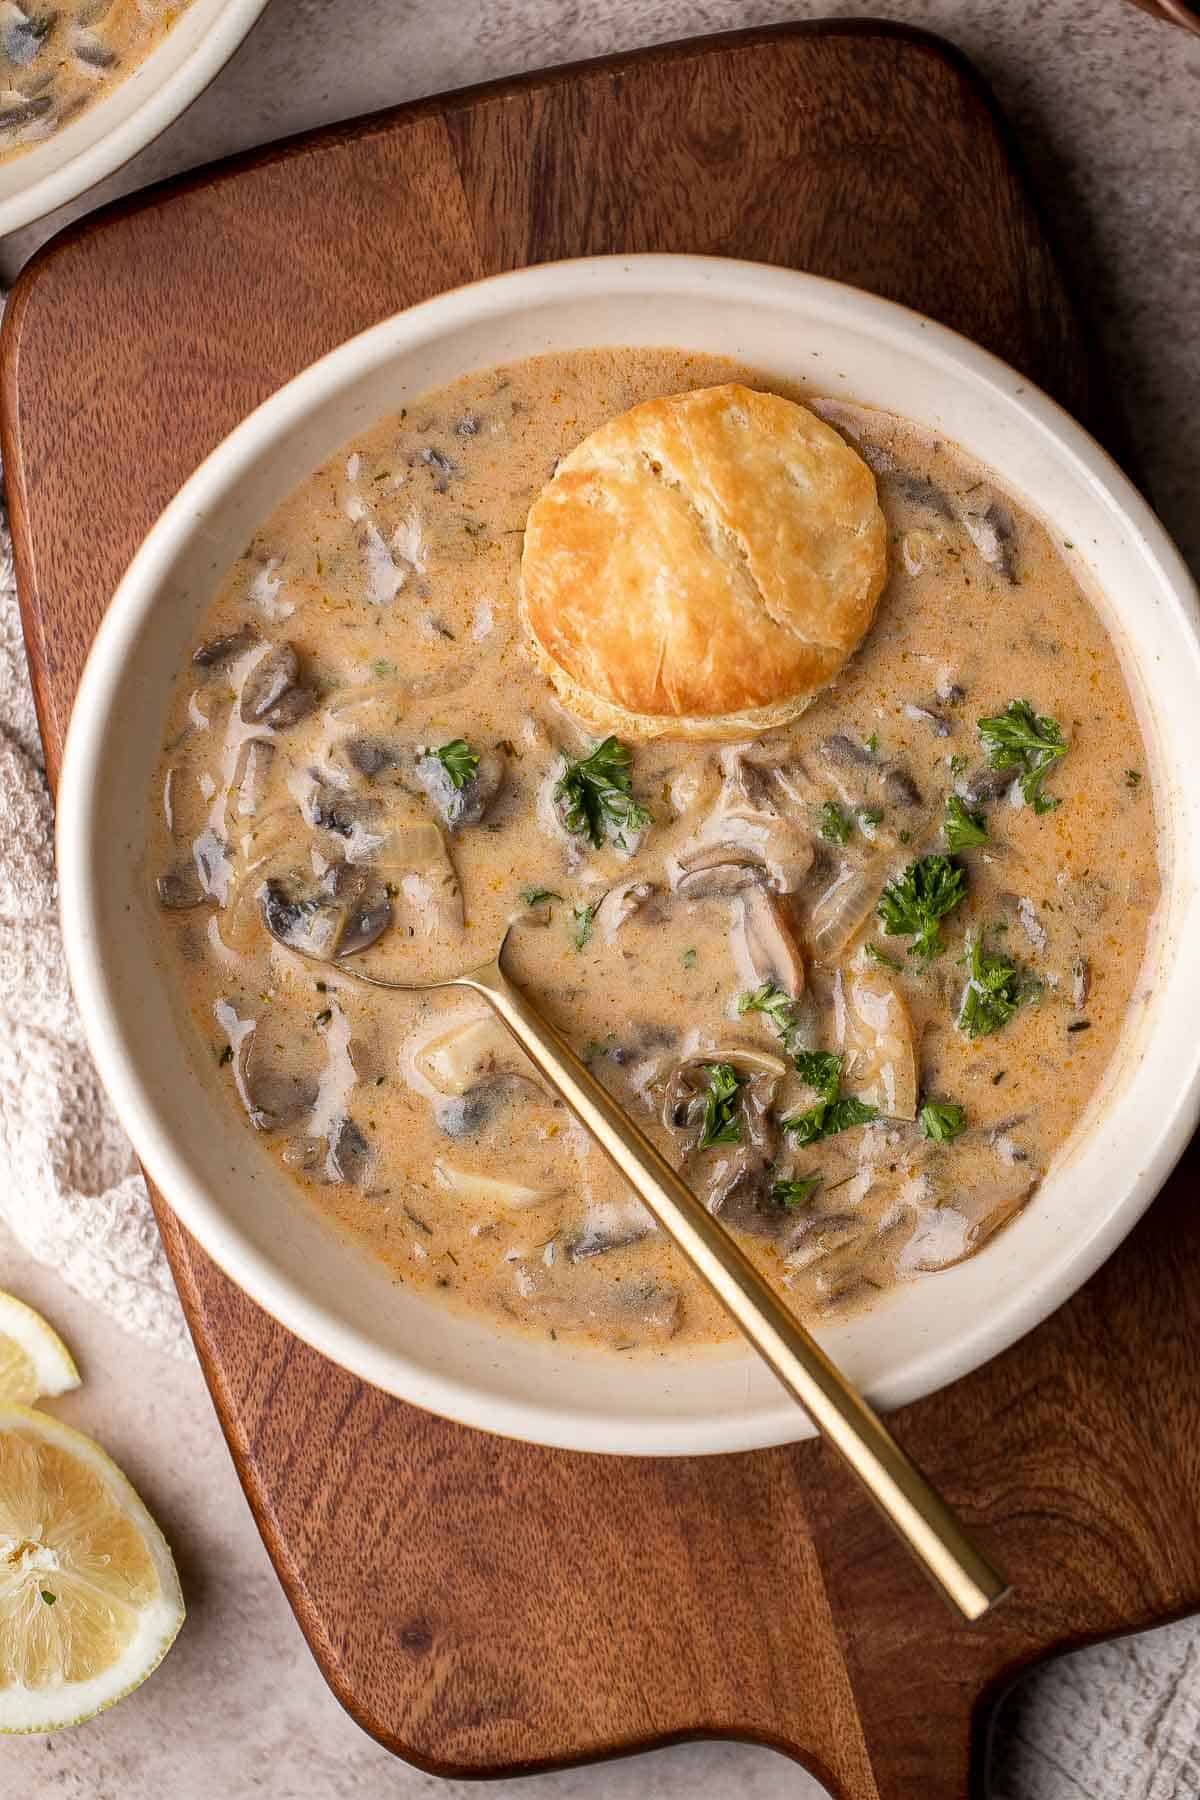
- Serve. Garnish with parsley and serve with biscuits, if desired.
Recipe Variations
- Try different mushrooms. Creminis are a fantastic option, but you can use a variety of mushrooms. White button mushrooms are a great alternative. We also like baby bella mushrooms, porcini mushrooms, or a mix of several different types.
- Make it vegetarian. This soup would be wonderful Meatless Monday recipe! Just replace the chicken stock with vegetable broth. For a vegan version, use plant-based butter, vegan sour cream, and dairy-free mmilk as well.
- Smooth or creamy. As it is, this homemade mushroom soup has lots of chunks of mushrooms. If you prefer a smooth soup, blend this rich Hungarian mushroom soup with an immersion blender.
How to Serve
This Hungarian mushroom soup is delicious served on its own, or paired with crusty bread for dipping and scooping up that soup. Some of my favorite breads to pair with soup are:
- Buttermilk Biscuits
- Easy Homemade Biscuits
- Small Batch No-Knead Bread
- Pull Apart Garlic Bread
- Easy Rosemary Garlic Focaccia Bread
- Small Batch Sourdough Ciabatta Bread
For more recipe inspiration, see our 25 Side Dishes for Soup.
Recipe Tips and Tricks
- Don't rush the mushrooms. To really get the most mushroom flavor, the mushroom mixture needs to cook down really well. Don't rush the process!
- Use Hungarian sweet paprika. Although you can use any paprika for this creamy mushroom soup, sweet Hungarian paprika has even more flavor that takes this hearty soup to the next level.
- Add the lemon juice at the end. Be careful not to add the lemon juice too early. The acid can cause the milk to separate. Add it right before serving.
Storing and Freezing Instructions
How to Store
Allow the leftover soup to cool completely in the fridge, then store it in an airtight container for 3-4 days.
How to Reheat
Either microwave the leftovers in a bowl or warm them in a small pot on the stove until fully heated.
How to Freeze
Place the chilled soup in freezer-safe containers and freeze for 2-3 months. However, the texture might not be quite as smooth after freezing and thawing.
FAQ
Classic button-style mushrooms are ideal for soup. Think cremini, baby bellas, or white button mushrooms. They're small, tender, and easy to prep, and they also have a classic iconic mushroom flavor. They're also easy to find, affordable, and absolutely delicious, perfect for this mushroom-heavy soup.
Since mushrooms don't thicken soups on their own like potatoes, you'll need to add something to thicken them. There are several great ways to do this. First, use flour or cornstarch to make a slurry. You can also add sour cream, Greek yogurt, or heavy cream. Just be sure to add these towards the end to keep the cream from splitting.
Although mushrooms have a great, earthy flavor, that flavor must be carefully developed. If you rush any of the steps, you'll find your soup isn't quite as flavorful as you'd like. Start by sauteing the mushrooms in melted butter. As they cook, they will release lots of liquid that evaporates off. This is a good thing - that excess water has minimal flavor and will dilute your soup. You also want to make sure you are developing flavor properly, so after the mushrooms cook down, saute aromatic ingredients like white onions and garlic cloves until transparent and tender. Don't forget to taste the soup often and add more salt as needed to bring out all of the rich flavors.
More Soup Recipes
- 60 Best Soup Recipes
- Cream of Mushroom Soup
- Vegetarian Mushroom Barley Soup
- French Onion Soup
- Black Bean Soup
- Chicken Pot Pie Soup
Tried this recipe?
I'd love to hear what you think! Leave a comment and rating below to share your feedback. Your reviews help others discover this recipe and help me keep creating more free recipes for you. Snap a photo and tag me on social media @aheadofthyme too.

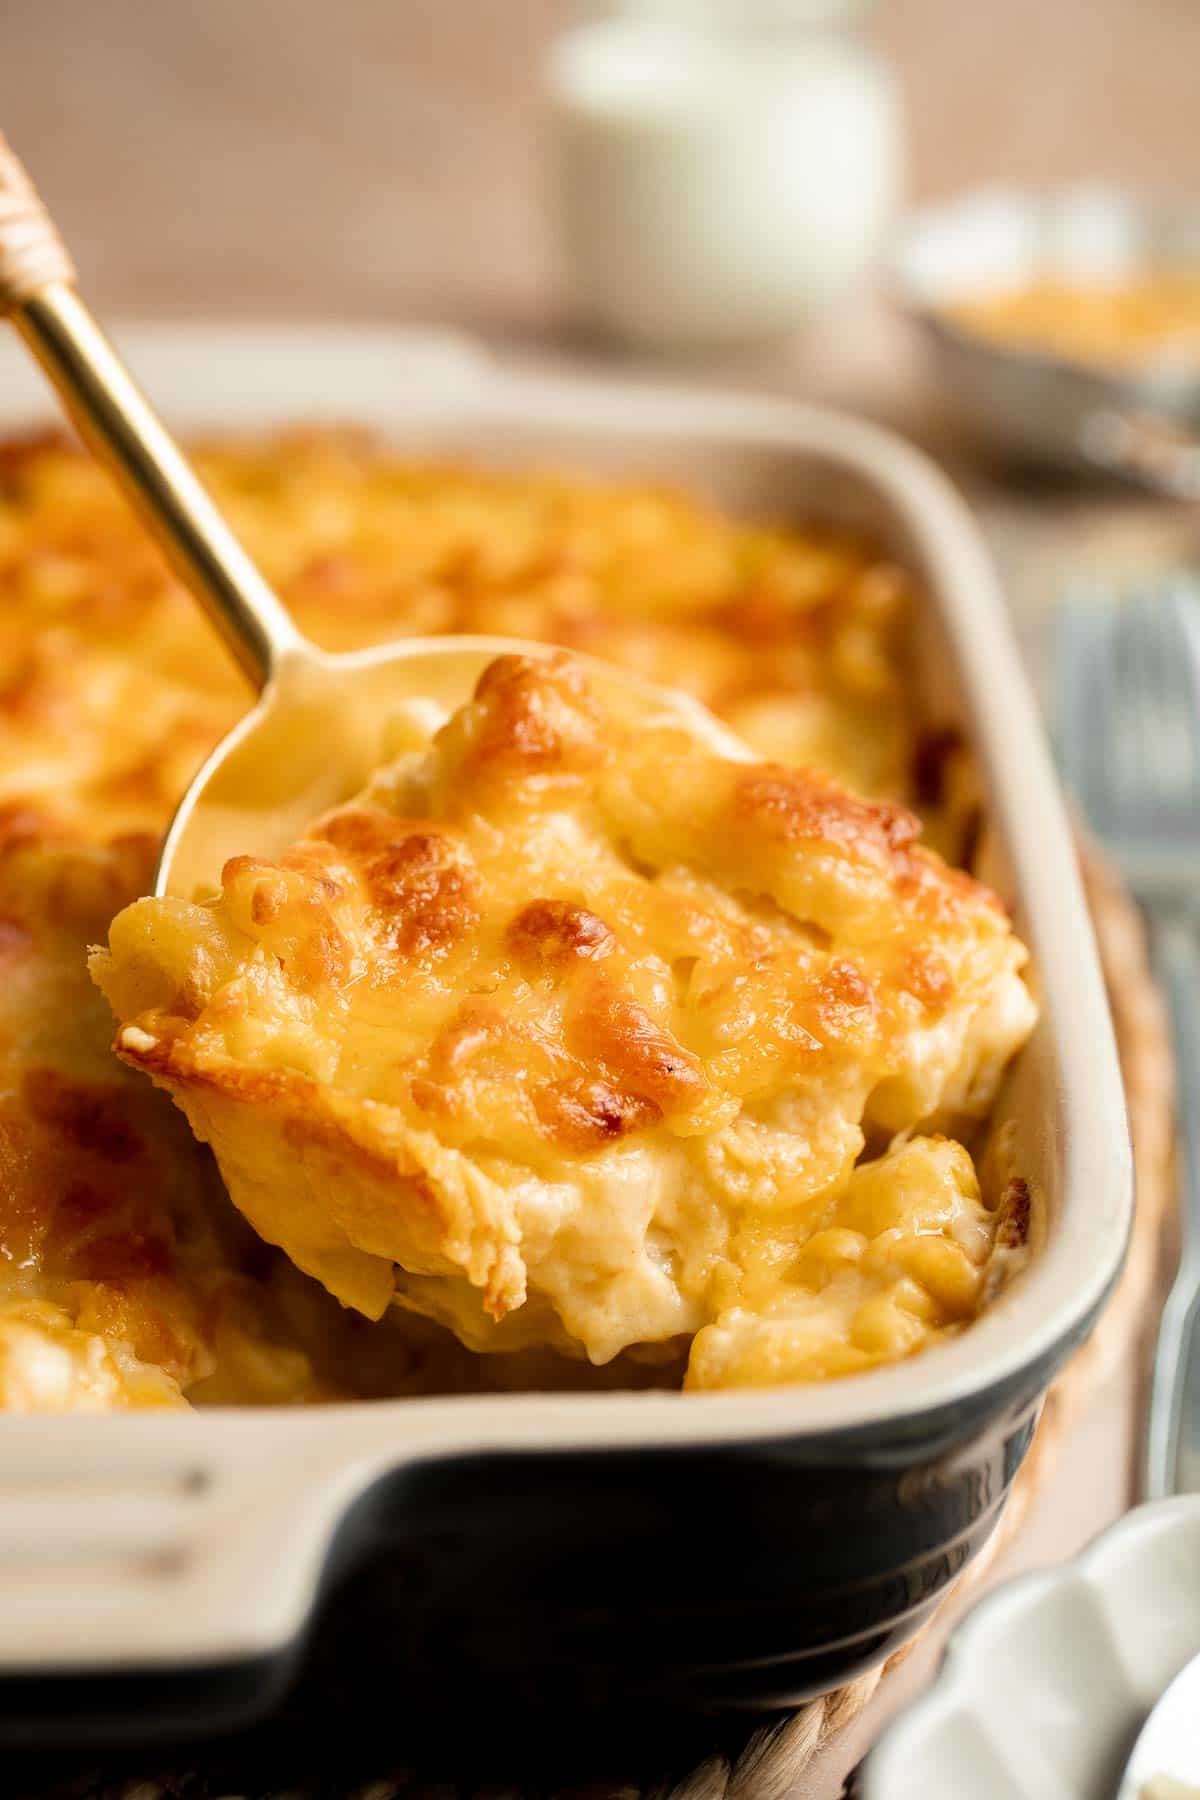
Spicy Mac and Cheese
This Spicy Mac and Cheese is a spicy version of a beloved classic that takes this cheesy pasta to the next level. It's made with tender cooked pasta in a creamy cheese sauce and seasoned with paprika, cayenne pepper, and Tabasco hot sauce for a kick. Top it off this meal with extra cheese for a creamy, cheesy pasta dish that will make you sweat!
If you love spicy food, this spicy mac and cheese is one of the very best comfort foods! The creamy noodles have a soothing flavor and texture, but that hint of spice builds and builds. You'll feel so warm and cozy! Serve it as simple dinner or a holiday side dish, and get ready for your family to ask for the recipe. It'll be a new family favorite!
Why You'll Love This Spicy Mac and Cheese
- So cheesy. The homemade cheese sauce is full of sharp cheddar cheese, which adds a creamy, cheesy flavor to every single bite. Don't forget to add extra cheese on top!
- Completely homemade. Unlike the boxed stuff, this spicy mac and cheese casserole recipe is made completely from scratch. It has just a handful of simple ingredients and spices too, so it's an easy side dish to whip up on busy weeknights.
- Ultimate comfort food. Mac and cheese is a classic comfort food favorite. Everyone loves a bowl of warm, creamy mac. The spices and hot sauce balance the cheesy sauce so well! You won't be able to stop at one serving.
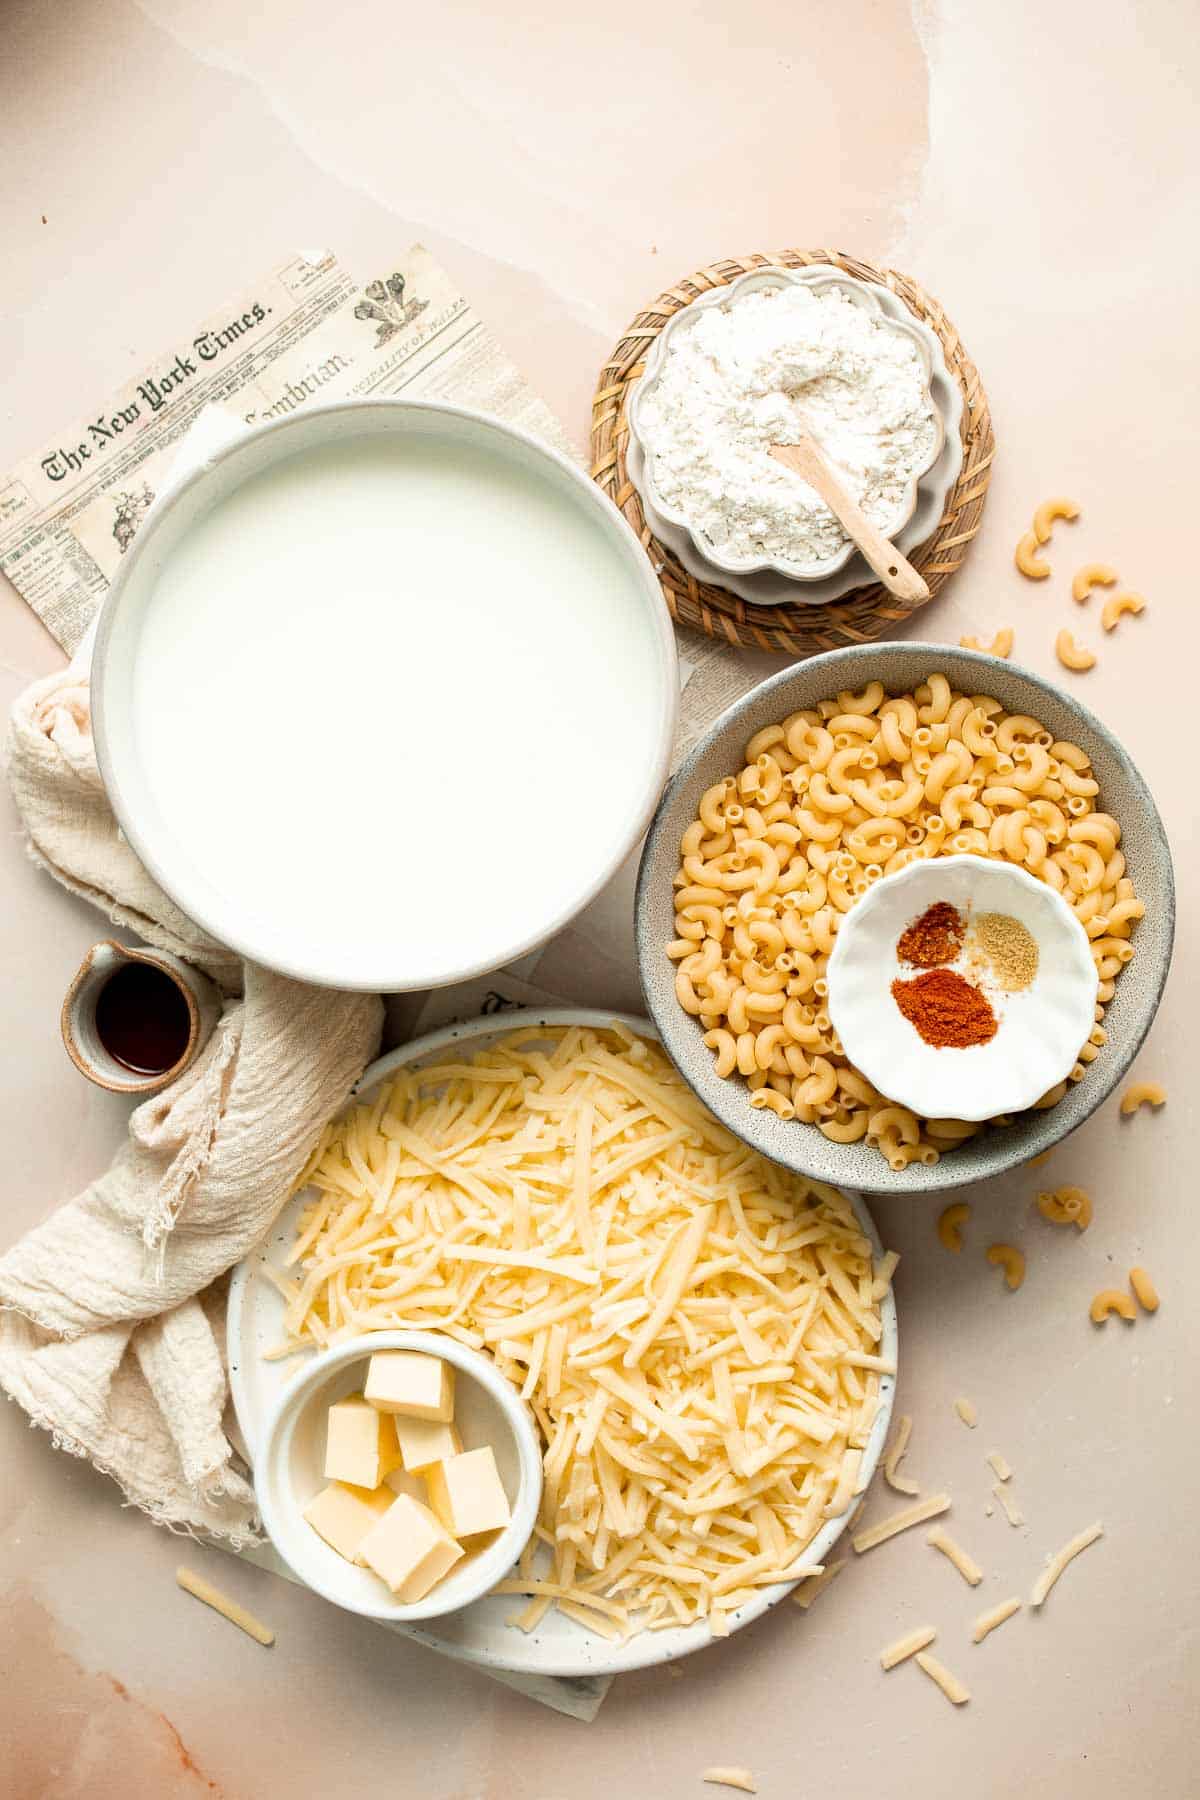
Ingredient Notes
To make this delicious spicy mac and cheese, you will need the following ingredients (full measurements in recipe card below):
- elbow macaroni - stick with regular elbow macaroni for a traditional mac, or try a different noodle for fun. Some fun options are farfelle (bowtie), penne, or shells.
- butter - use unsalted butter to create a roux to thicken the cheese sauce.
- flour - whisk the all purpose flour into the melted butter on the stove and gradually stir in milk to create a thick, creamy sauce.
- milk - this thins out the roux until the sauce has the perfect consistency.
- spices - season your homemade mac and cheese with mustard powder, paprika, and cayenne pepper. Feel free to add some black pepper or garlic powder, too.
- cheddar cheese - use sharp shredded cheddar cheese. Don't forget to save some to melt on top!
- hot sauce - we recommend using Tabasco brand hot sauce for the perfect tanginess and heat.
You will also need a large pot, strainer, large saucepan, whisk, and baking dish.
How to Make the Best Spicy Mac and Cheese
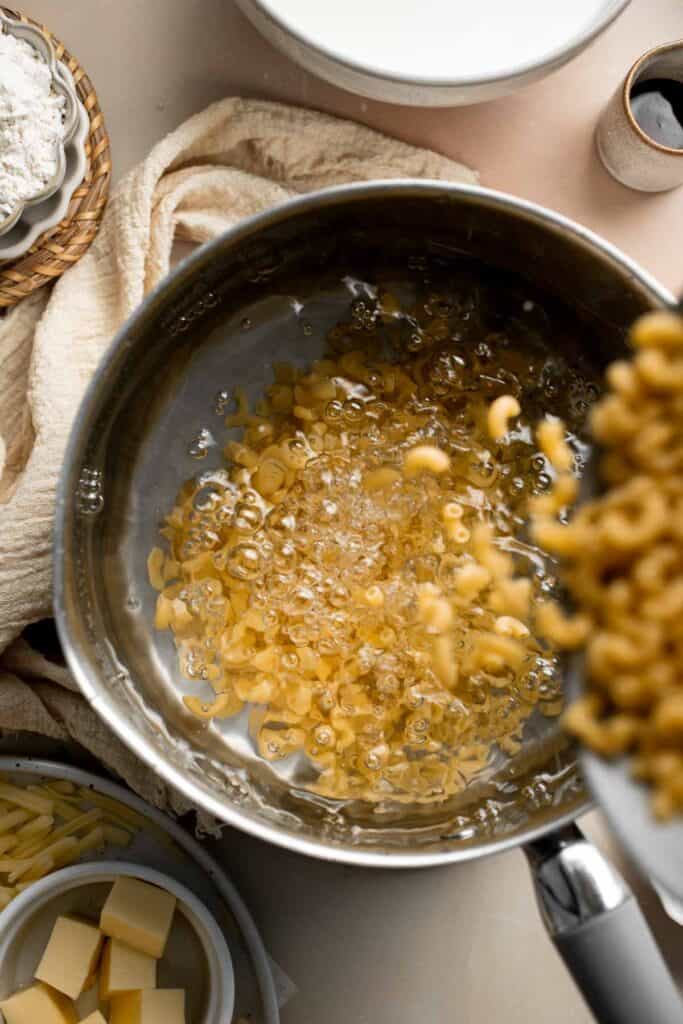
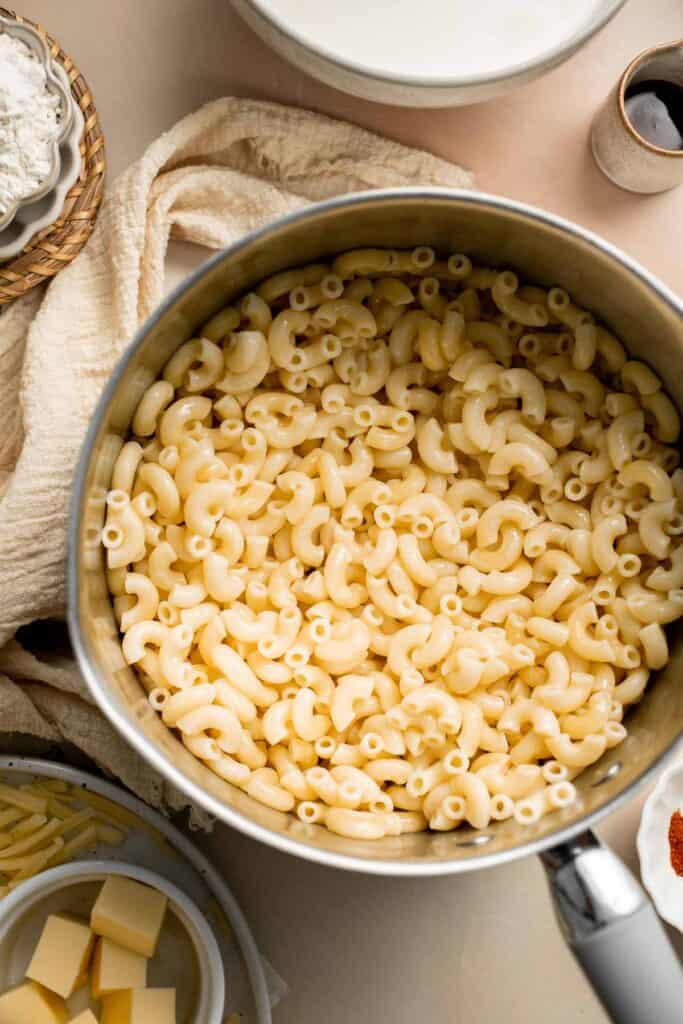
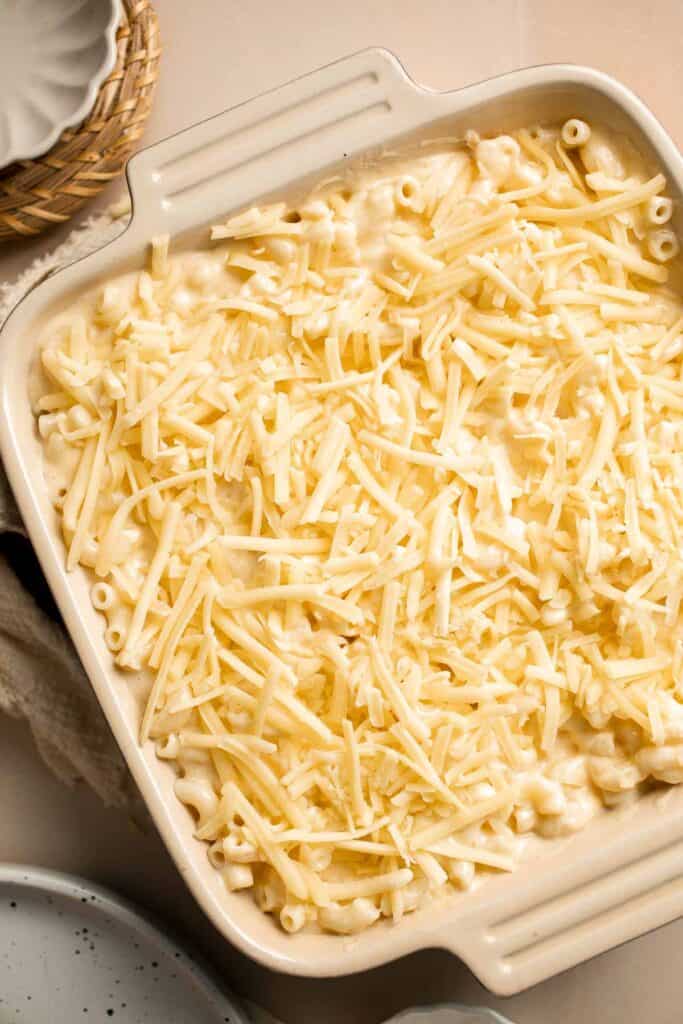
- Cook pasta. Bring a large pot of salted water to a boil over medium-high heat. Add macaroni pasta and cook just until before al dente, about 6-8 minutes (you want it slightly undercooked as it will cook further when baked). Drain well, rinse with cold water, and set aside.
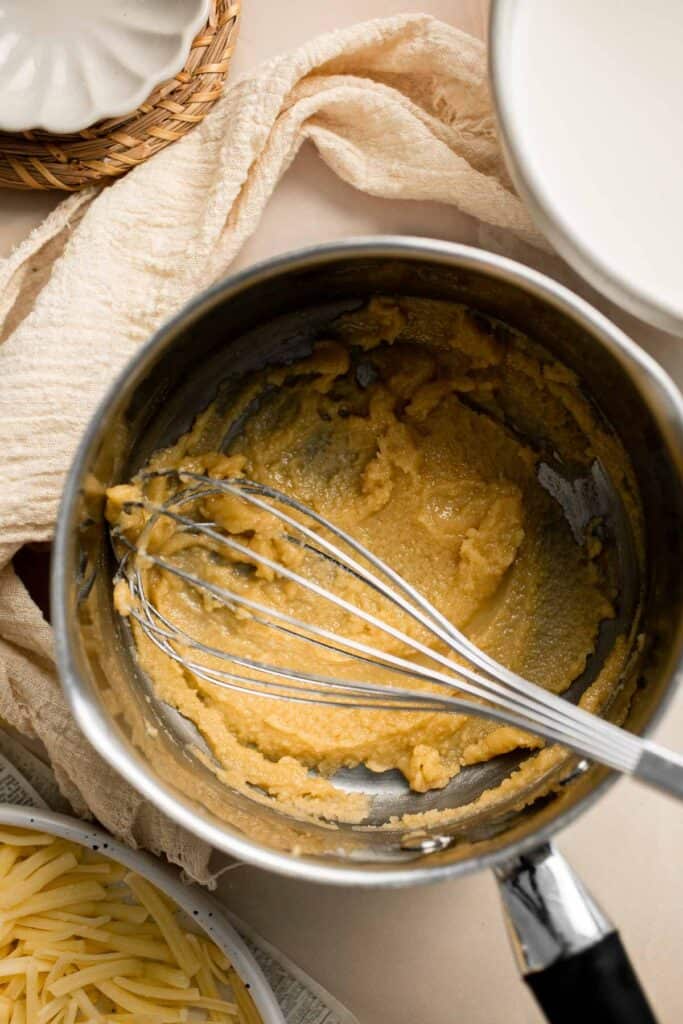
- Make roux. In a large saucepan, melt the butter over medium heat. Whisk in the flour to make a roux. Stir constantly for about 1-2 minutes until roux is light and golden.
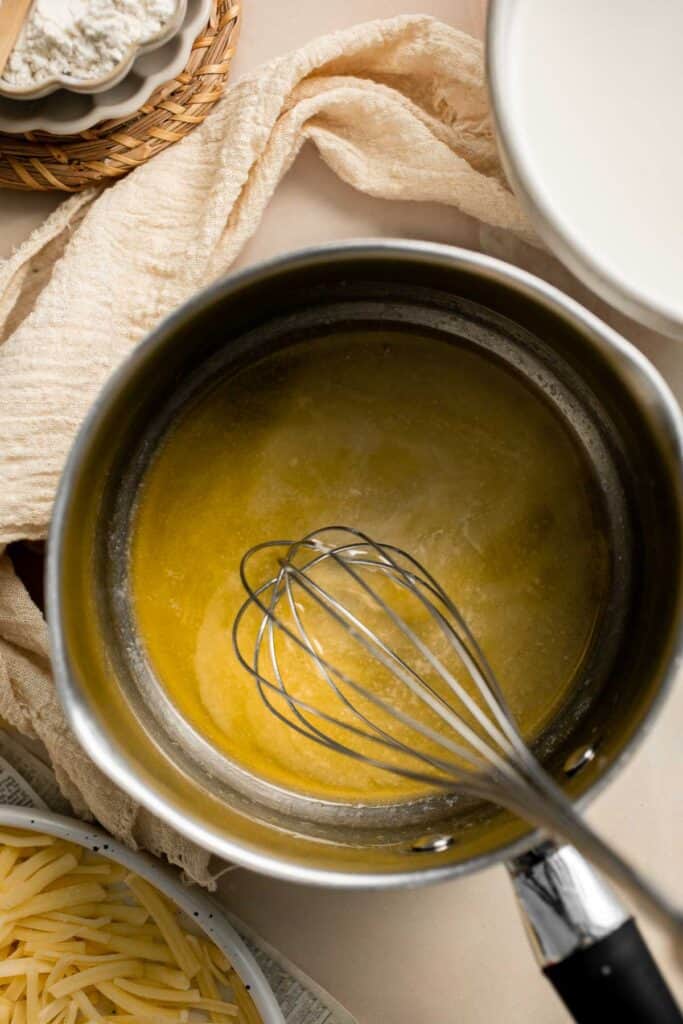

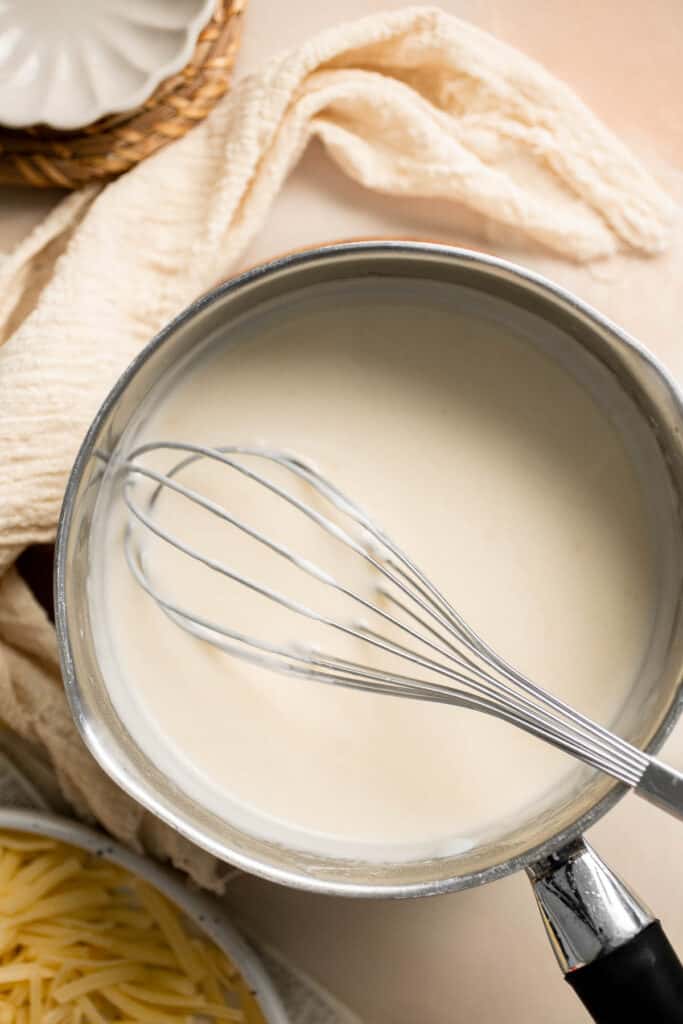
- Add milk. Gradually add in milk, whisking constantly to incorporate. The sauce will thicken and clump in the beginning but once you add in more milk, it will smoothen out again.
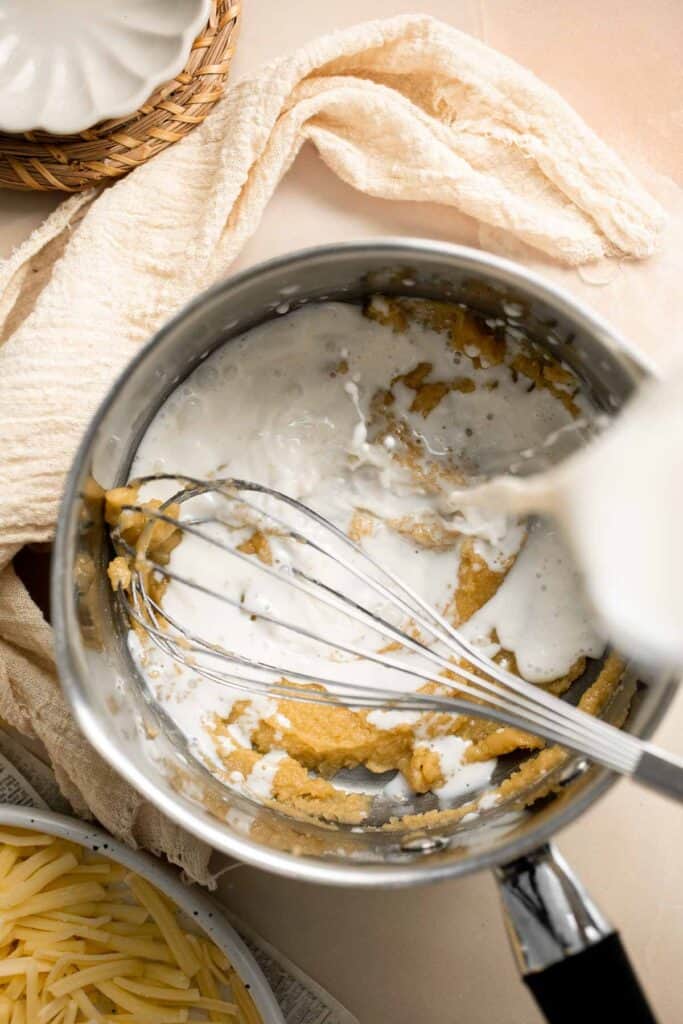
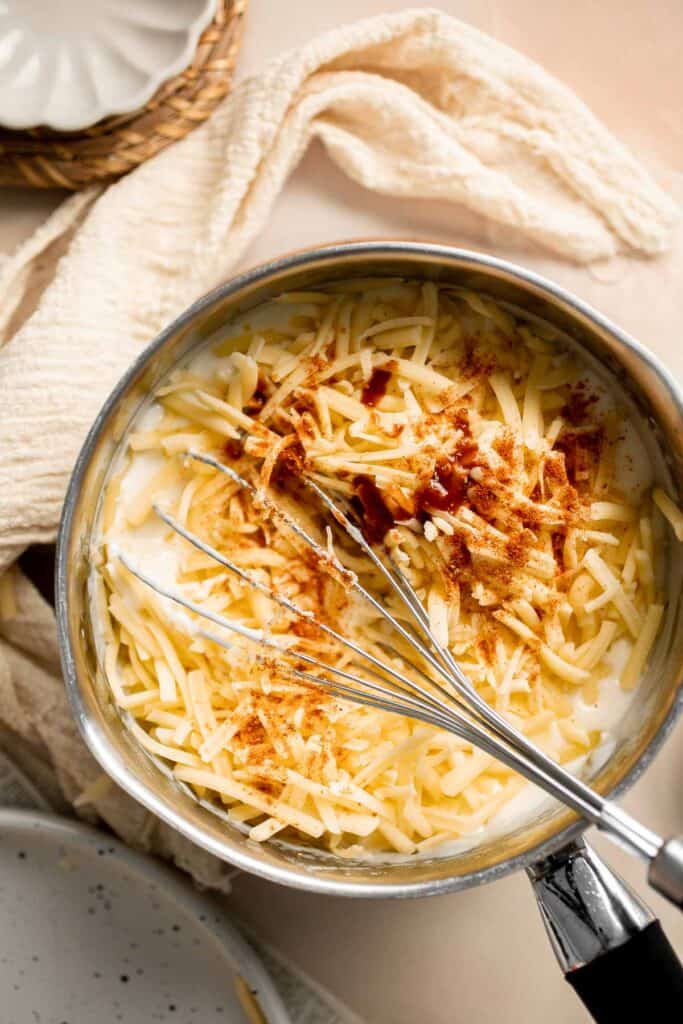
- Add cheese and seasoning. Add mustard powder, paprika, cayenne pepper, 2 cups of cheddar cheese, and tabasco sauce. Reduce heat to low and stir constantly until the cheese has melted and the sauce is smooth.

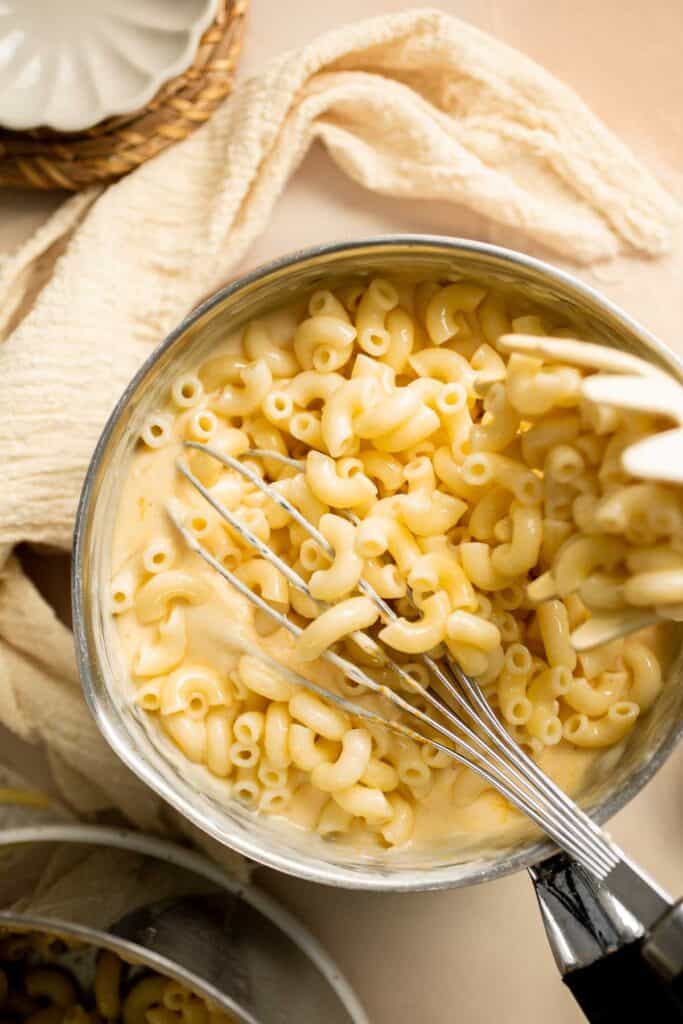
- Toss together. Add in cooked macaroni and stir together to fully coat with the cheese sauce.
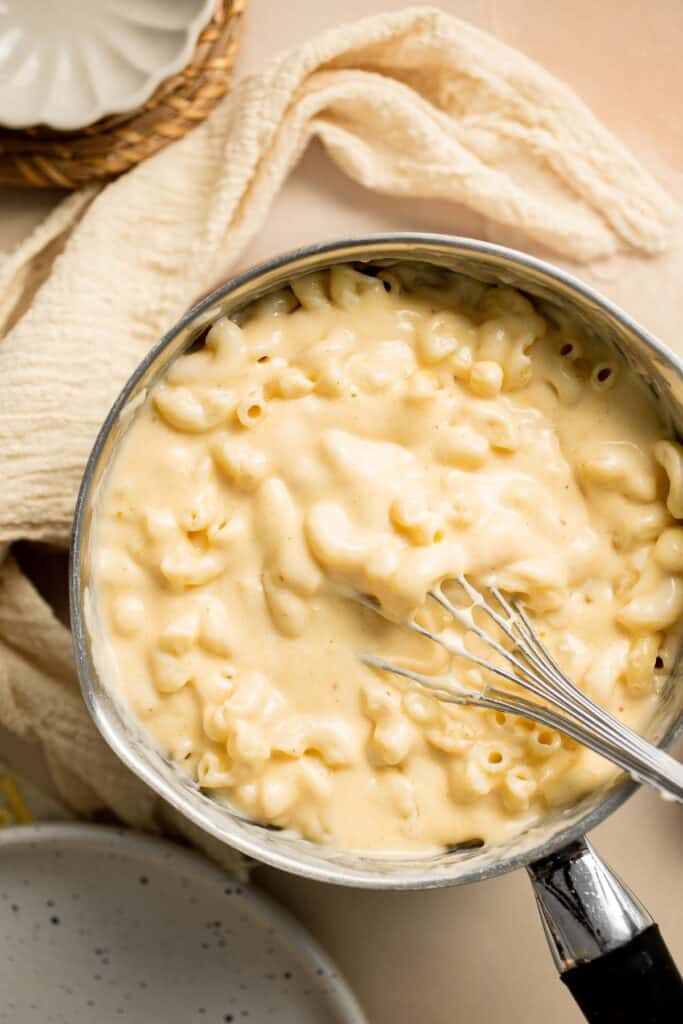
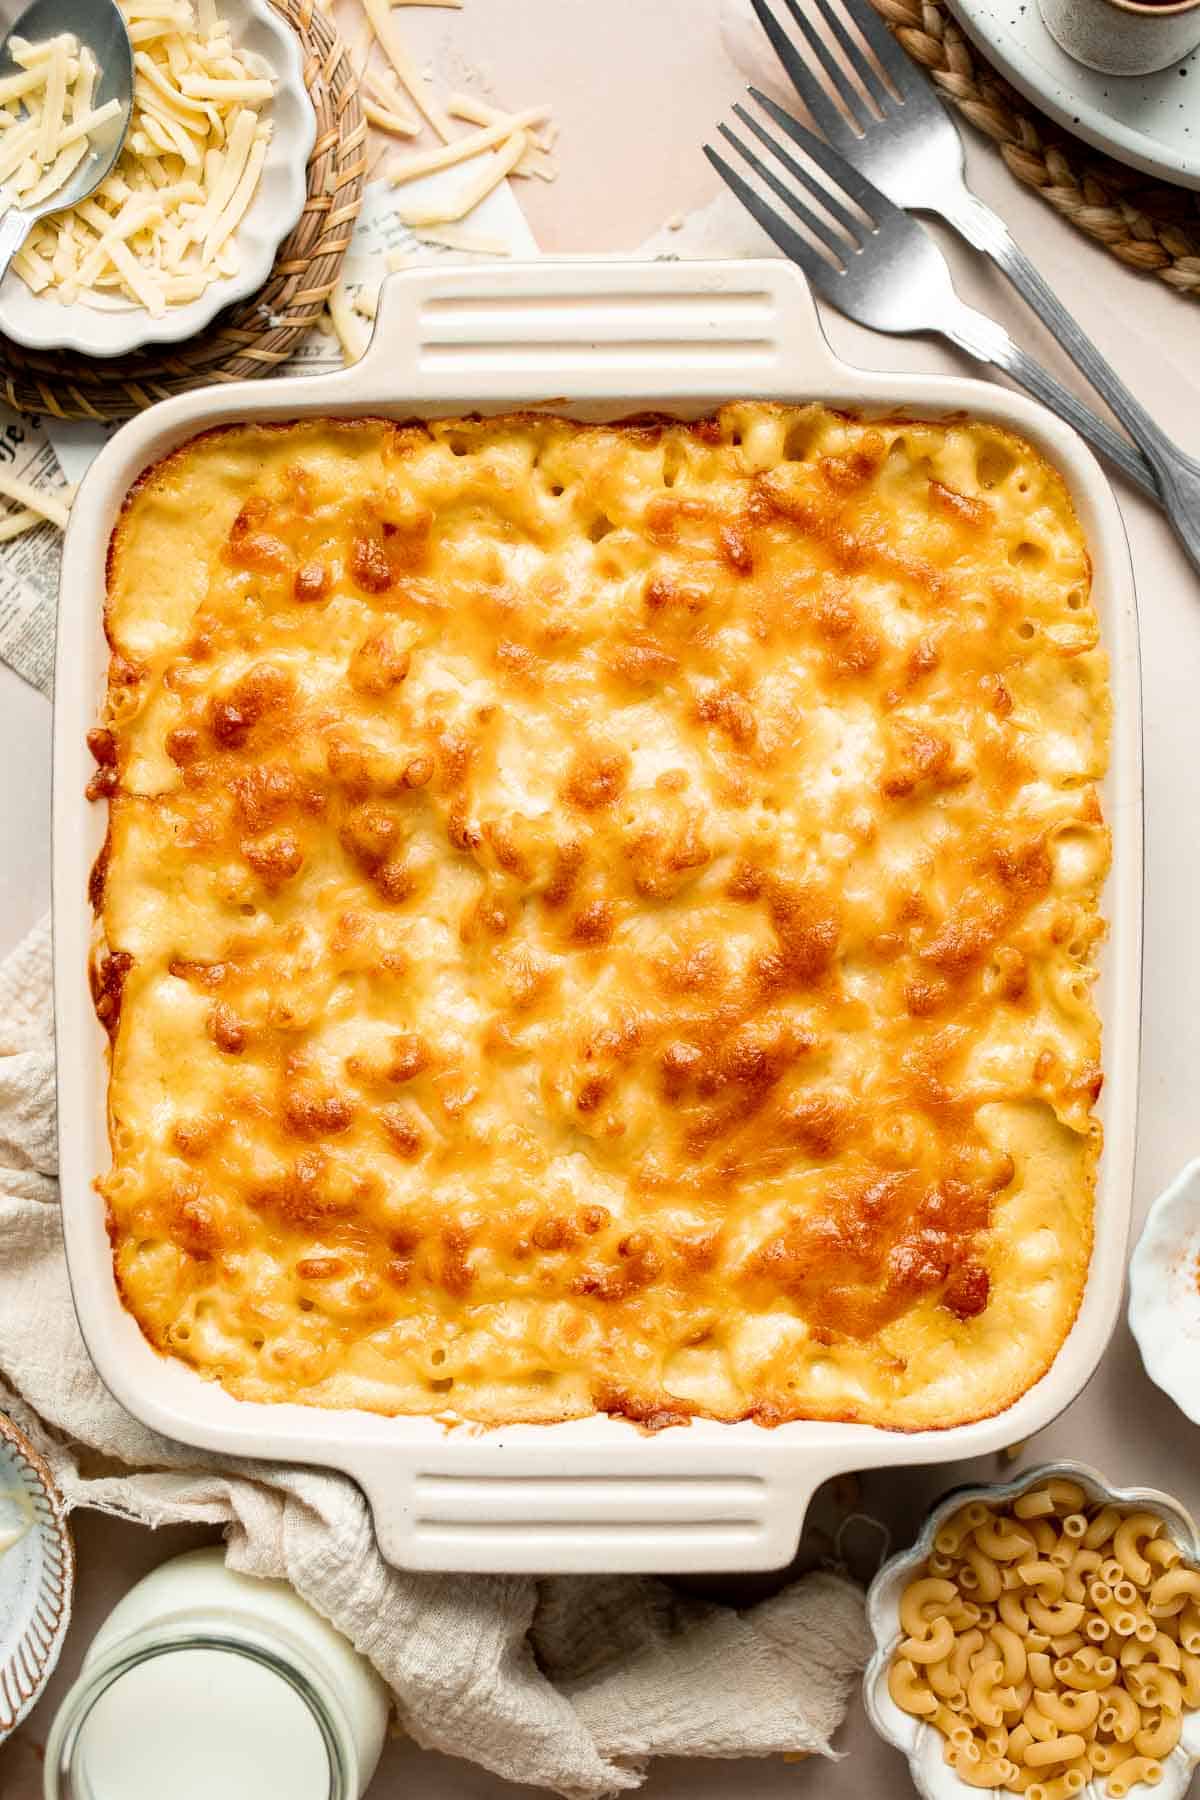
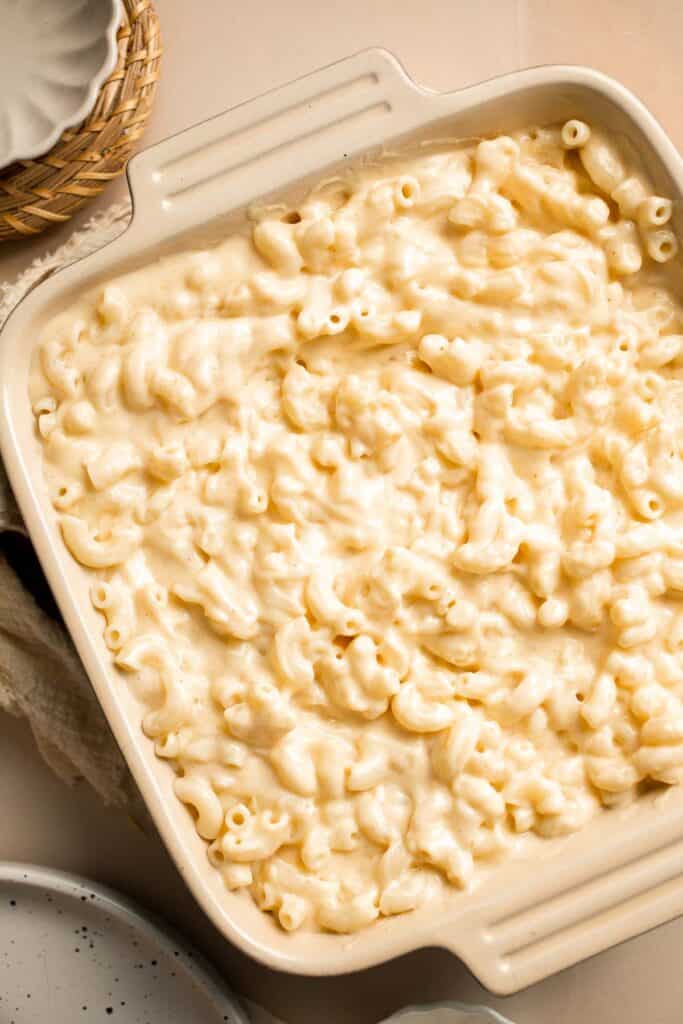
- Top with cheese. Transfer the macaroni into a large oven-proof skillet or casserole dish. Top with the remaining 1 cup of cheddar cheese.
- Bake. Bake in a 350° F preheated oven for 15-20 minutes until bubbly and the edges become crispy. Let it cool for 5 minutes.
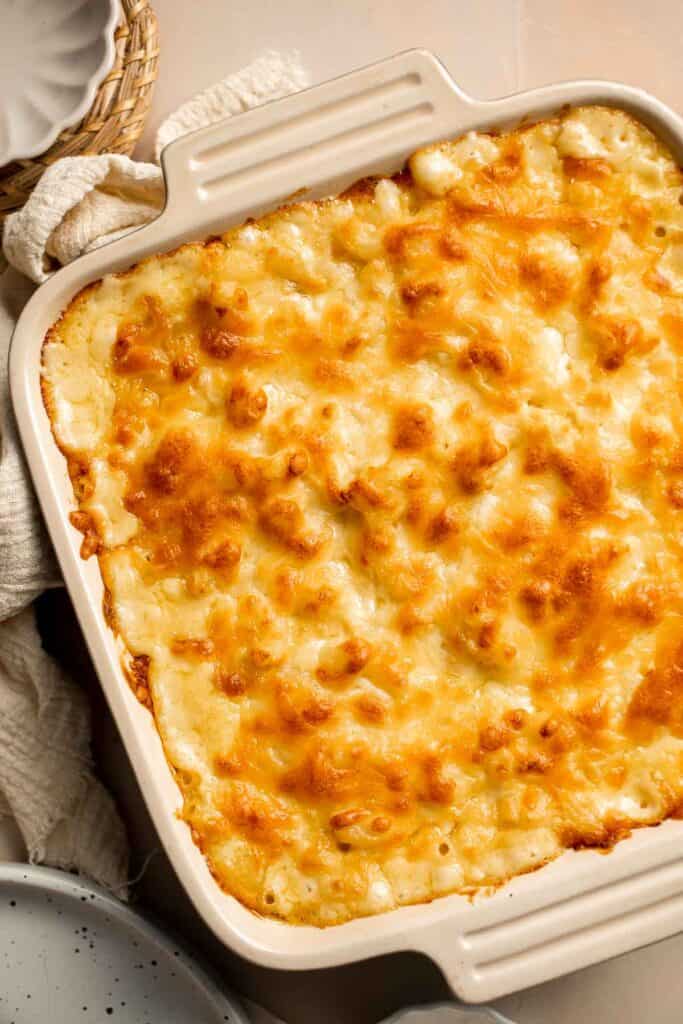
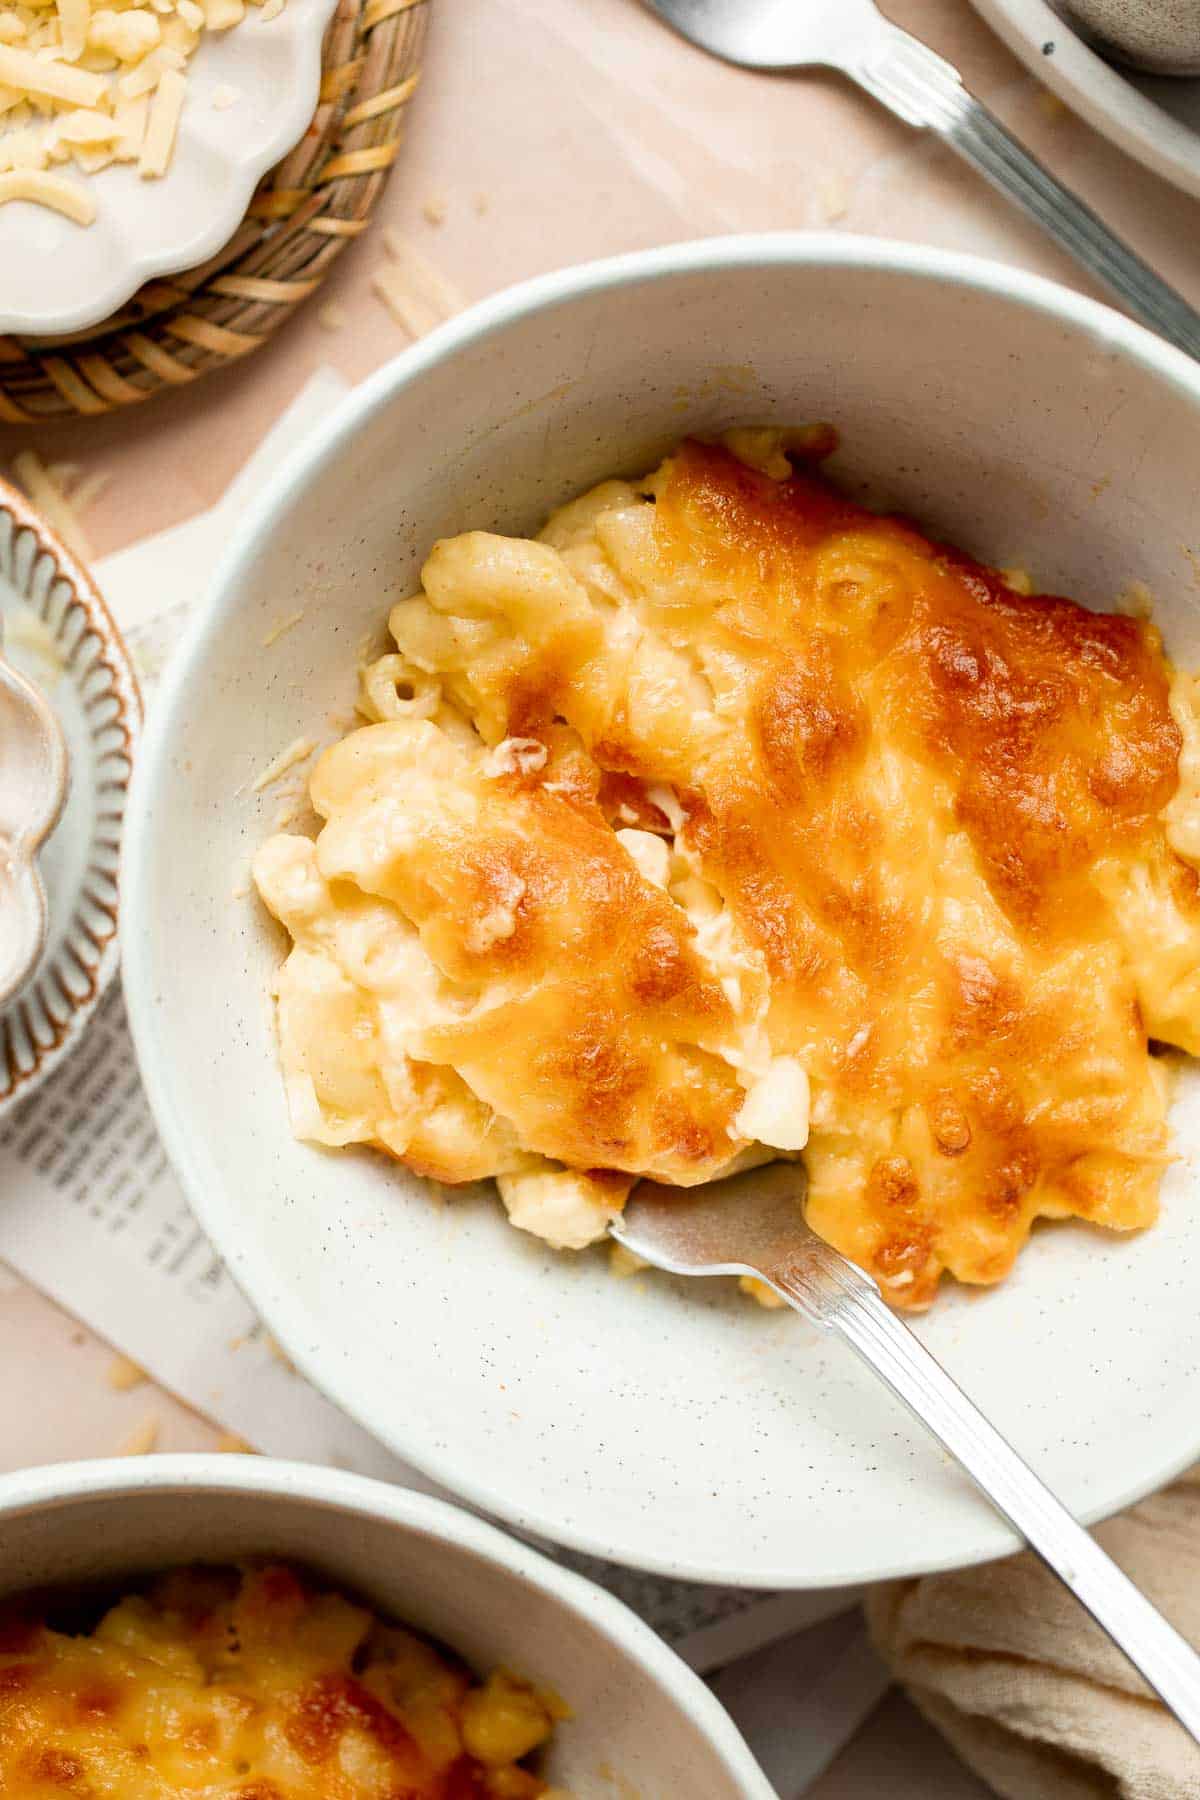
- Serve. Serve immediately. Add more hot sauce if desired.
Recipe Variations
- Add breadcrumbs. For a Southern mac, add panko breadcrumbs. For extra flavor, you can crumble hot Cheetos and use them to make a breadcrumb topping like this classic baked mac and cheese!
- Stir in jalapeño peppers. Add roasted or pickled jalapenos for an extra kick! Roasted green chile is great for this, too.
- Add different types of cheese. Although cheddar is a classic choice, you can also use Monterey jack cheese, pepperjack, mozzarella, smoked gouda, and other good melting cheeses.
- Make it meaty. Stir in some browned ground beef or spicy sausage, like chorizo.
How to Serve
This Spicy Mac and Cheese is delicious served on its own, or paired with some of my favorite entrees including:
- Glazed Honey Balsamic Pork Chops
- Slow Cooker BBQ Ribs
- Holiday Glazed Baked Ham
- Dutch Oven Whole Roast Chicken
- Easy Juicy Roasted Turkey Breast
Recipe Tips and Tricks
- Salt the pasta water. This draws out flavor from the noodles from the beginning, making every bite more flavorful.
- Make it extra cheesy. For a really concentrated cheese flavor, add a tablespoon or two of cheese powder.
- Less is more. When you first add cayenne to a recipe, it might not taste very spicy at first. However, the heat will continue to build. Give it some time! You can always add more, but you can't remove it.
Storing and Freezing Instructions
How to Store
Let the baking dish cool to room temperature, then store the mac and cheese leftovers in an airtight container in the fridge for 3-4 days.
How to Reheat
You can either pop a serving in the microwave for 2-3 minutes or bake your leftovers in the oven or air fryer at 350F for 4-5 minutes. You can also warm it up in a pan on the stove top. Add a little extra milk and cheese to keep it from being too dry.
How to Freeze
You can freeze mac and cheese to enjoy later, but the pasta will soften a bit after thawing. For best results, freeze mac and cheese right before baking. Thaw it in the fridge overnight, then bake it like normal!
FAQ
There are so many ways to take an ordinary mac and cheese recipe to the next level! Try adding these ingredients to spice things up:
- Add hot sauce for a spicy cheese sauce
- Sprinkle cayenne pepper, chipotle pepper, or red pepper flakes
- Grate in some pepper jack cheese
- Stir in fresh jalapeños or roasted green chile
- Crush Hot Cheetos into bread crumbs for a crunchy topping
- Saute some spicy sausage for a little bit of a kick
You can put hot sauce on anything! It's a fantastic ingredient to add to mac and cheese because the tangy, briny hot sauce cuts the rich, cheesy sauce so well. In fact, many chefs like to add a little hot sauce to regular mac and cheese to balance the flavors. We like to add even more for a spicy baked mac that warms you up from the inside out!
If you need to cool down a scorching mac and cheese, stir in a dollop of sour cream. This will dilute the sauce, add a tangy flavor, and cut through the heat. You can also add a squeeze of lime juice or make a half batch of the cheese sauce and fold it in for a really saucy mac and cheese with a little less of a kick.
More Mac and Cheese Recipes
- 40 Best Pasta Recipes
- Stovetop Mac and Cheese with White Cheddar
- Baked Mac and Cheese
- One Pot Chili Mac and Cheese
- Brie Mac and Cheese
- Cauliflower Mac and Cheese
Tried this recipe?
I'd love to hear what you think! Leave a comment and rating below to share your feedback. Your reviews help others discover this recipe and help me keep creating more free recipes for you. Snap a photo and tag me on social media @aheadofthyme too.

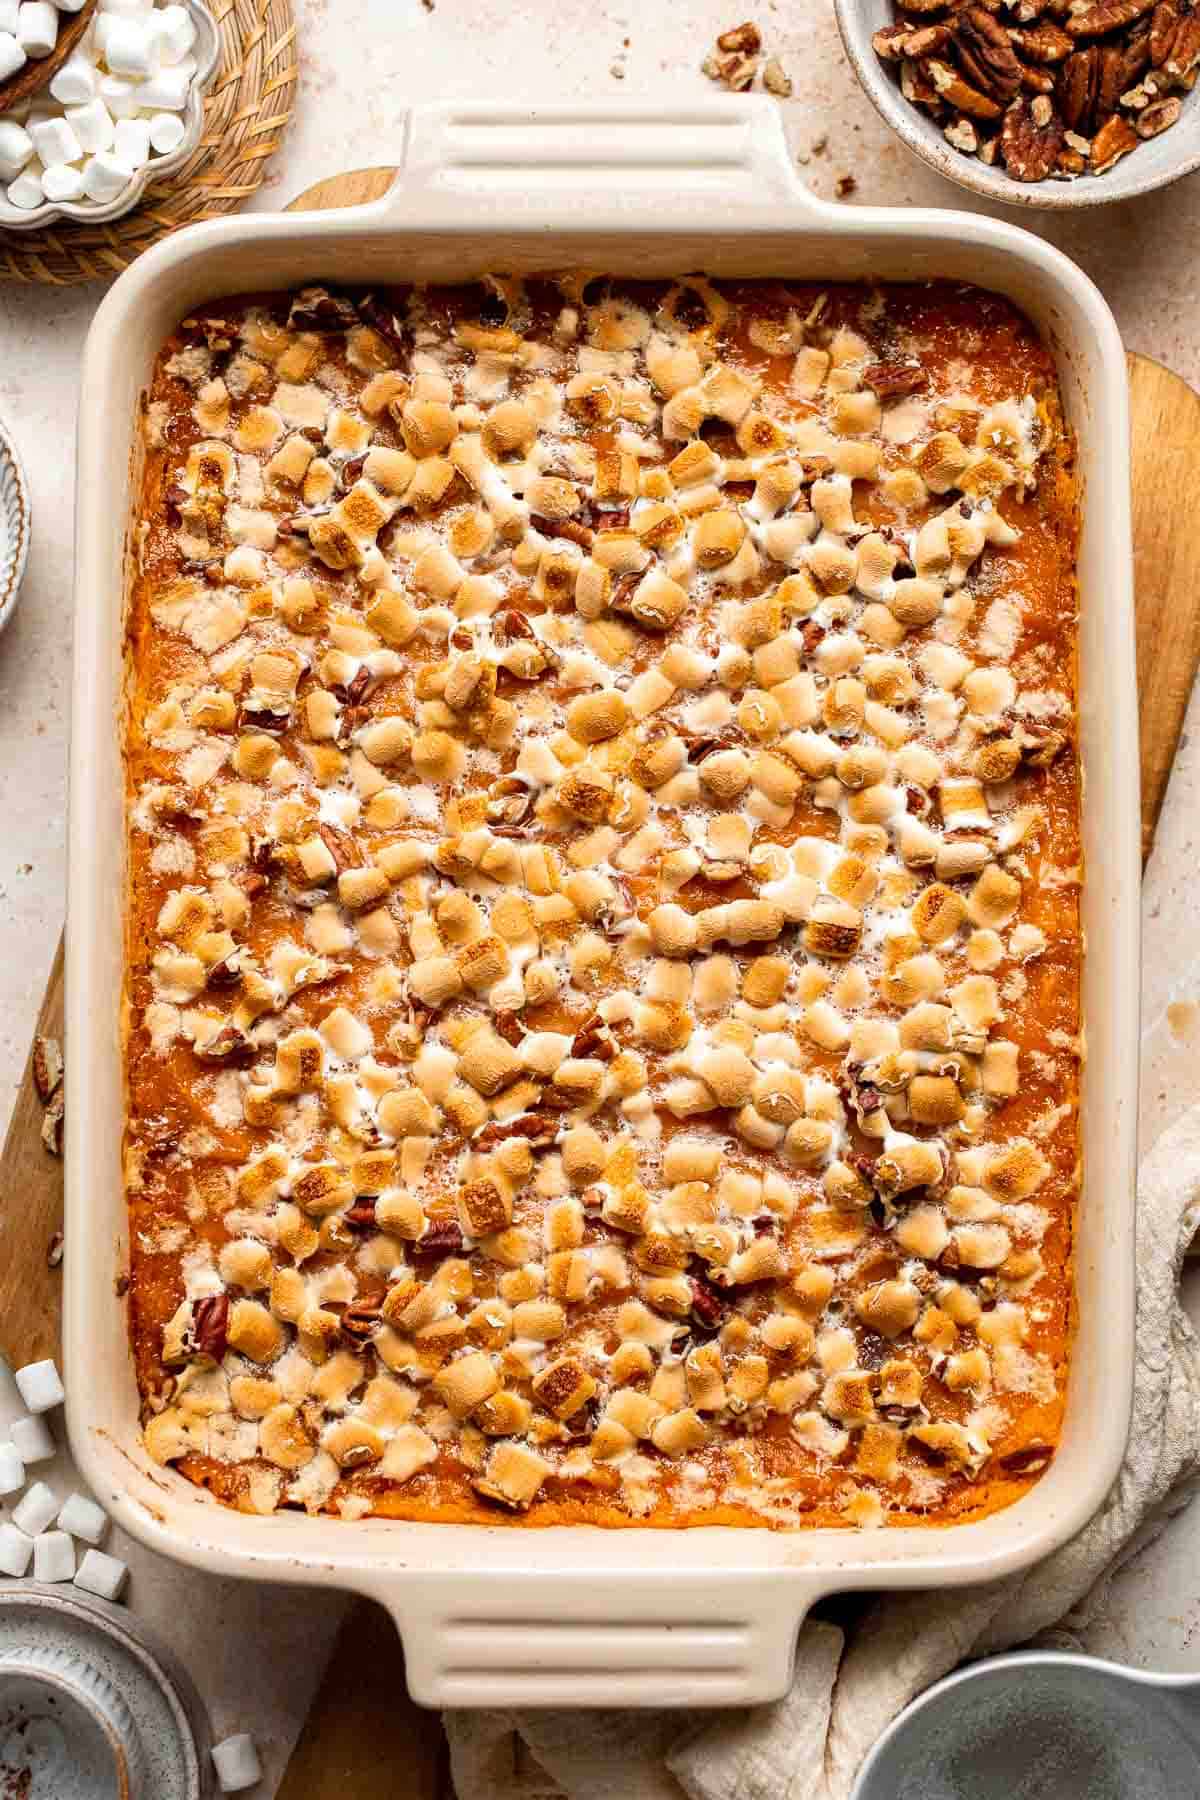
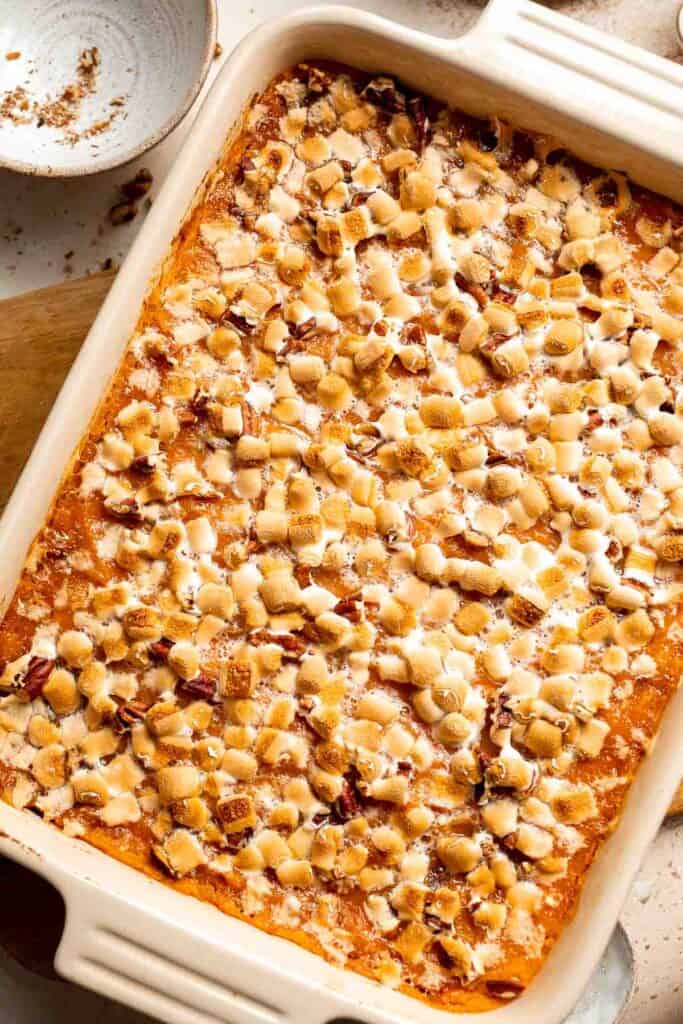
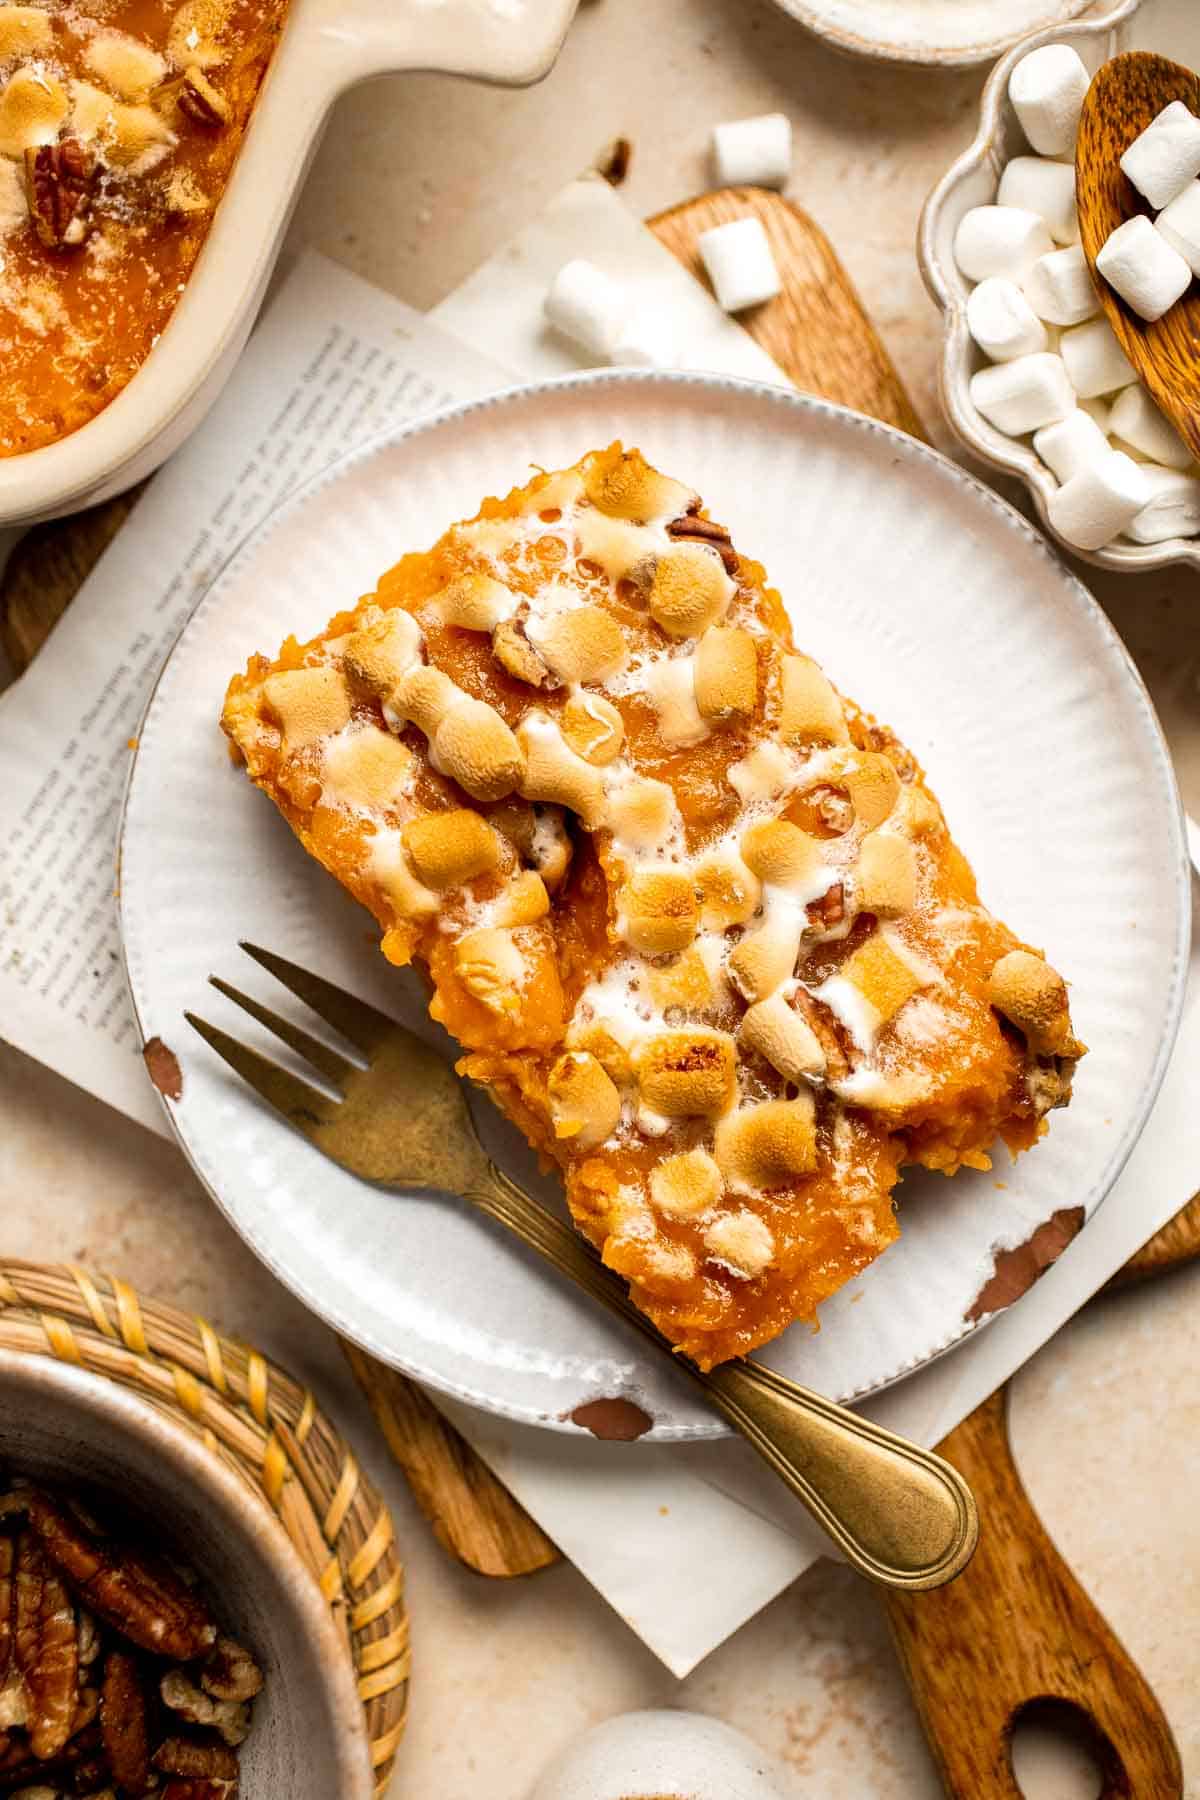
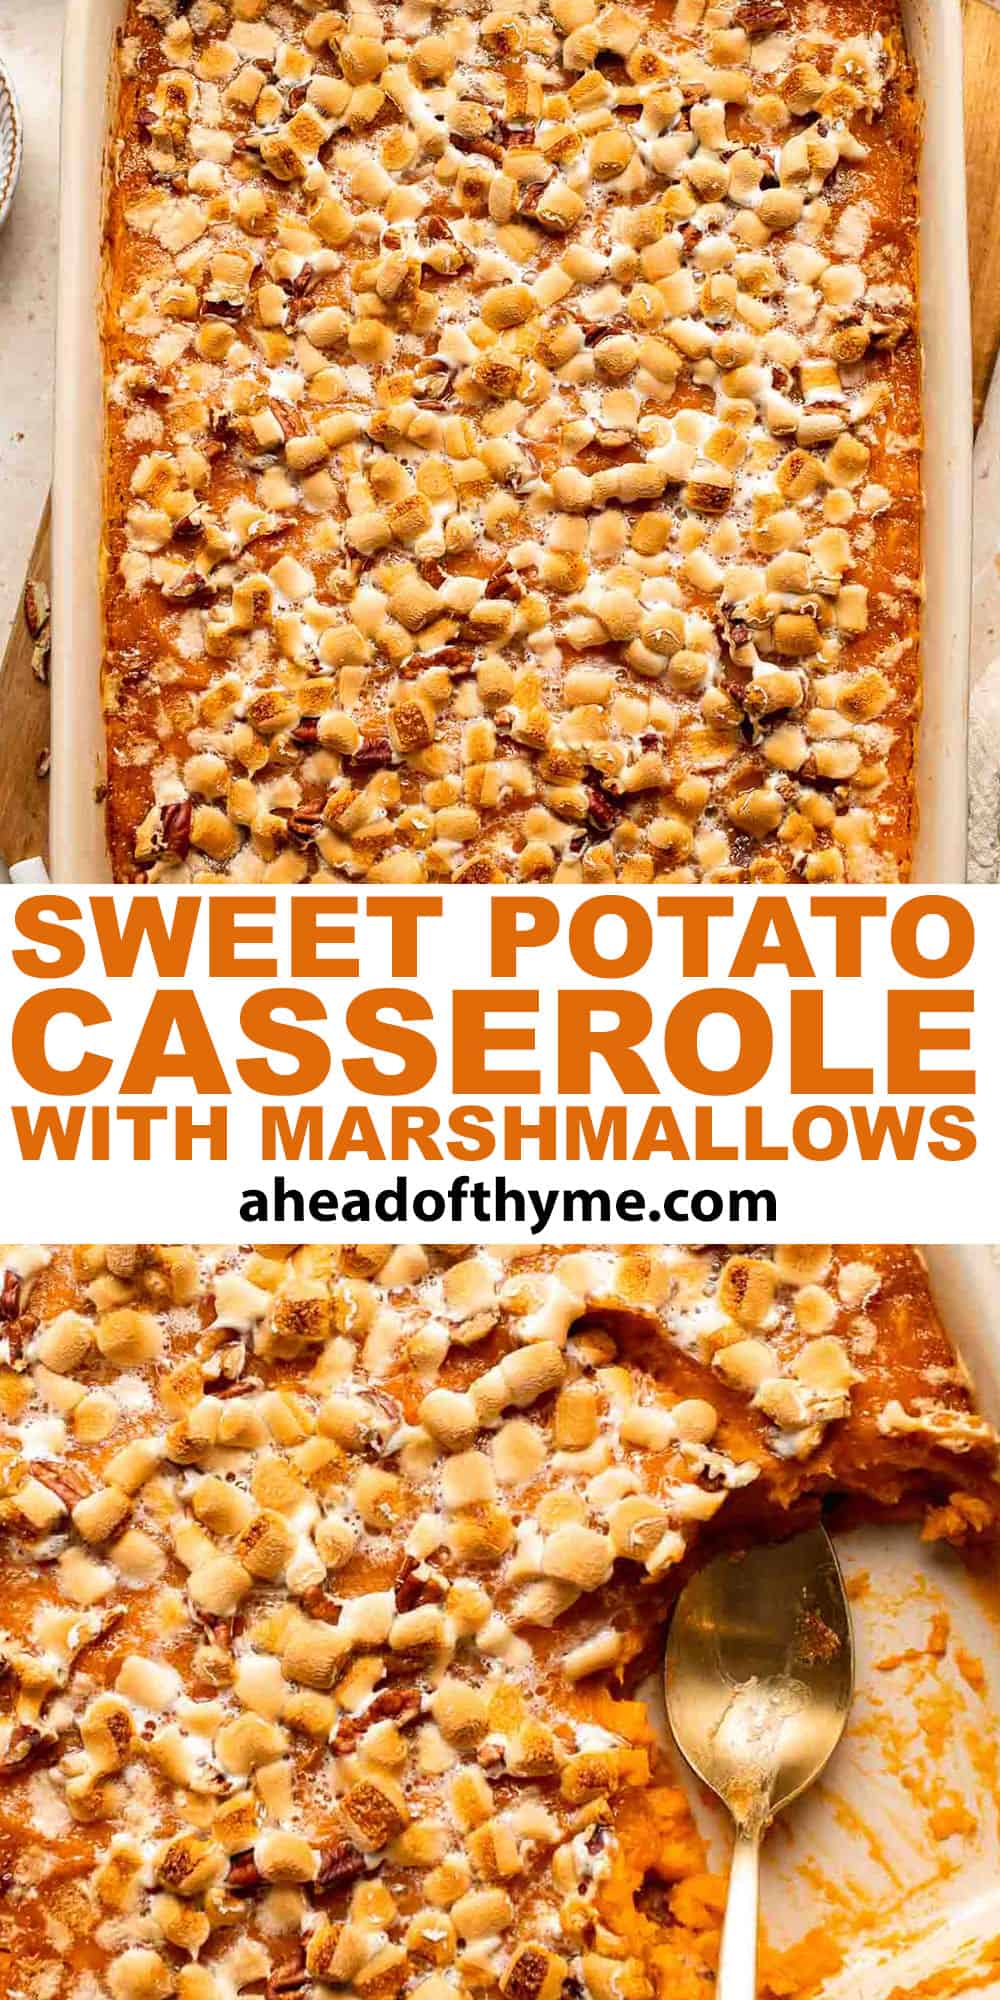
Sweet Potato Casserole with Marshmallows
Sweet Potato Casserole with Marshmallows is a classic Thanksgiving side dish for a reason. It's sweet and creamy with warm spices and molten, gooey marshmallows. Make your own homemade sweet potato casserole this year for your holiday table! It's quite easy to make and significantly better than the mushy, bland canned sweet potatoes from the store.

It's not Thanksgiving dinner without sweet potato casserole! Although it tastes more like a dessert than a side dish, this family favorite is an iconic part of this traditional meal. It's notoriously sweet, often overwhelmingly so, which is why we recommend making it from scratch. You can control the sweetness and adjust it to suit your preferences without going overboard!
Why You'll Love This Sweet Potato Casserole with Marshmallows
- So much flavor. This is the best sweet potato casserole recipe. Once you try it, you won't bother with the canned stuff ever again. Every ingredient is spot on, from the texture to the sweetness and the flavor. It's the way sweet potato casserole is supposed to be!
- Easy to make. Even though this recipe is completely from scratch (minus the marshmallows), it's quite easy! After peeling and boiling the sweet potatoes, mash them with cream, butter, sugar, and more, then add the pecans and place the sweet potato mixture in the baking dish. Top with more crunchy pecans and marshmallows, then bake. That's it!
- Holiday classic. Sweet potato casserole is a classic Thanksgiving side dish - at least in the United States. This homemade version will be a new holiday tradition.
Ingredient Notes
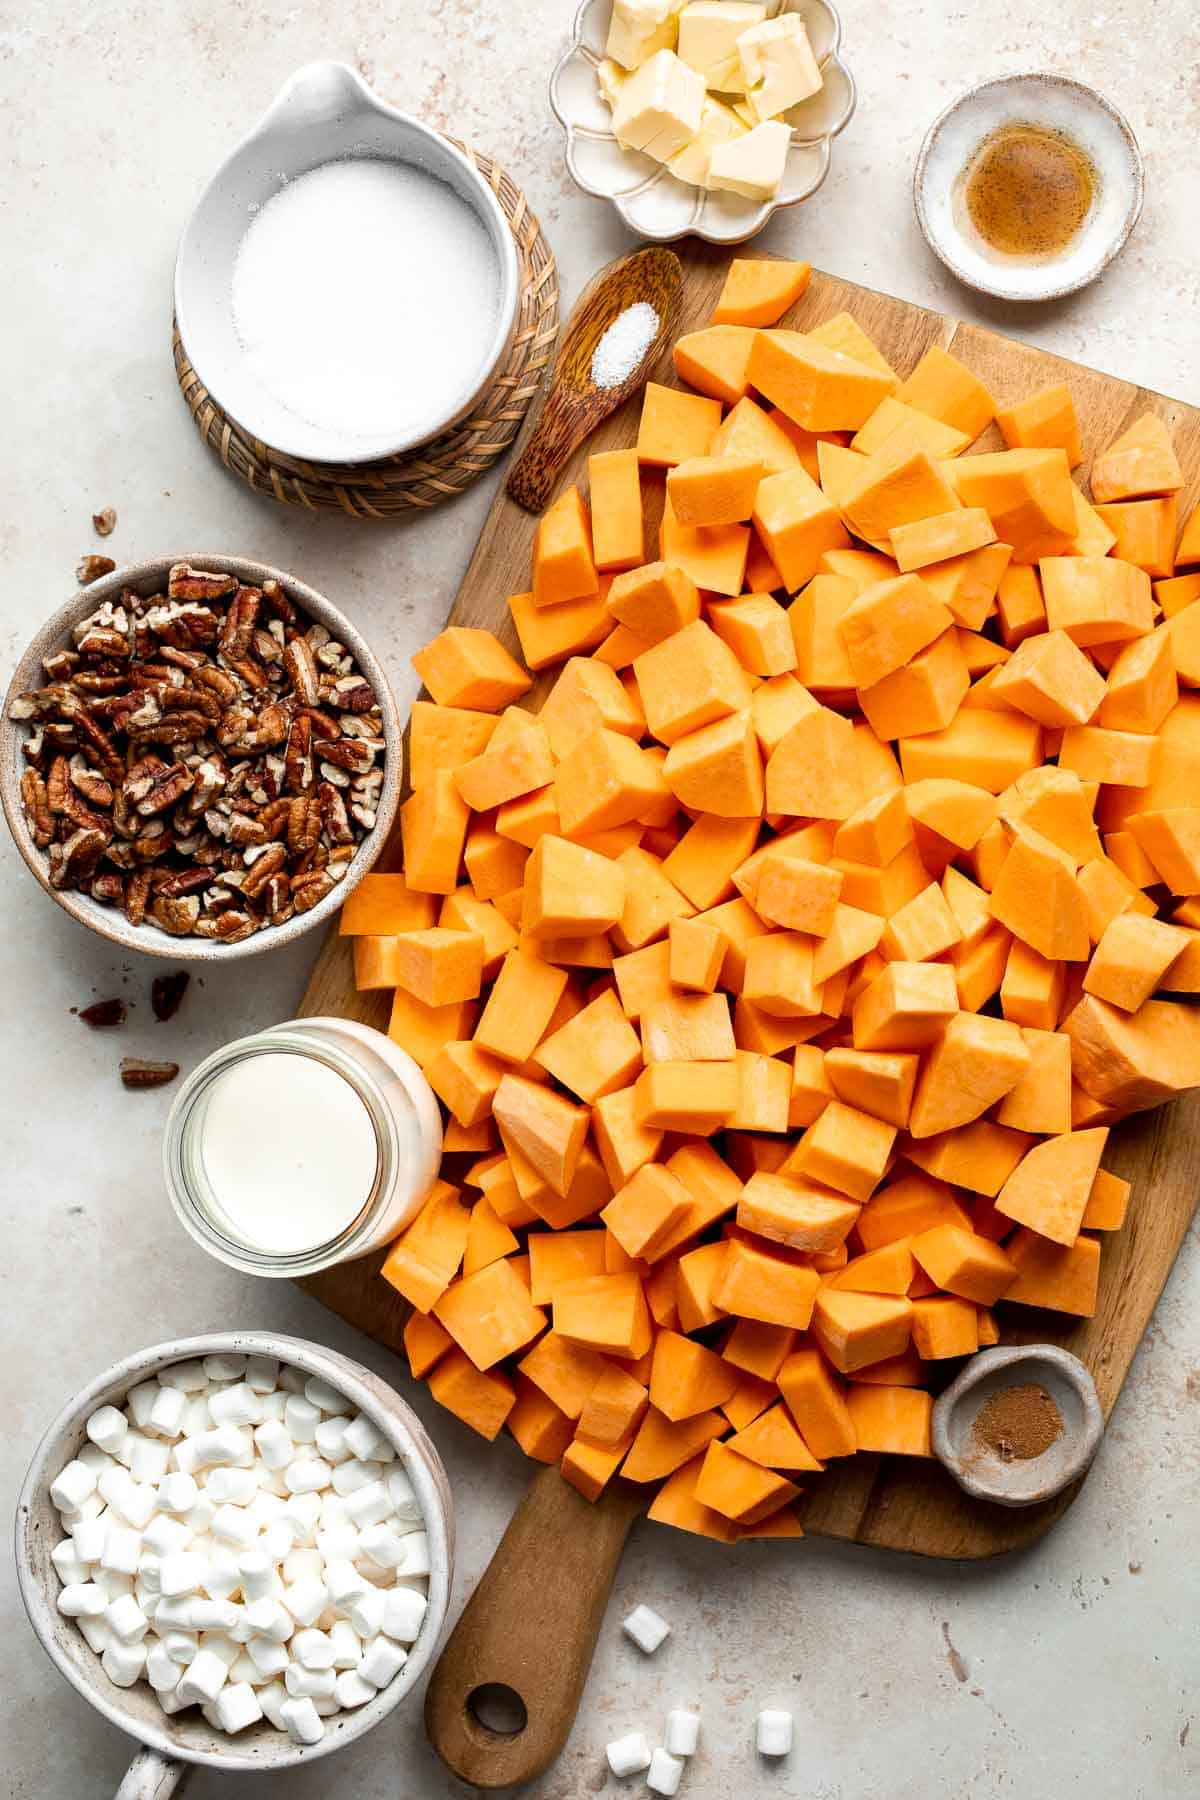
To make this delicious sweet potato casserole with marshmallows, you will need the following ingredients (full measurements in recipe card below):
- sweet potatoes - peel and cube fresh sweet potatoes or garnet yams.
- heavy cream - this adds a rich, creamy texture that makes these mashed potatoes so decadent.
- butter - soften the butter at room temperature before mixing into the mashed sweet potatoes.
- granulated sugar - although we used white sugar, feel free to use brown sugar for extra flavor. Maple syrup works in a pinch, too!
- vanilla extract - this will give your sweet potatoes a sweet, dessert-like aroma.
- ground cinnamon - it's crucial to add warm spices to give your sweet potato filling an inviting fall flavor.
- salt
- pecans - chop toasted pecans. Some will be added to the casserole, while others will be sprinkled on top for crunch.
- miniature marshmallows - these will melt into an ooey gooey mess in the best way possible.
You will also need a large pot, strainer, large mixing bowl, large spatula or electric mixer, and 9x13-inch casserole dish.
How to Make the Best Sweet Potato Casserole with Marshmallows
- Cook sweet potatoes. Add the sweet potatoes into a large pot of water. Bring it to a boil over medium-high heat. Turn the heat down to medium-low and simmer until fork tender, about 15 minutes. If you can easily insert a fork into the sweet potatoes, then they are ready. Drain and set aside. (You can also bake the sweet potatoes whole on a lined baking sheet for 1 hour until they are completely soft inside and fork tender. Cut the sweet potatoes in half and scoop out the flesh into a large mixing bowl).
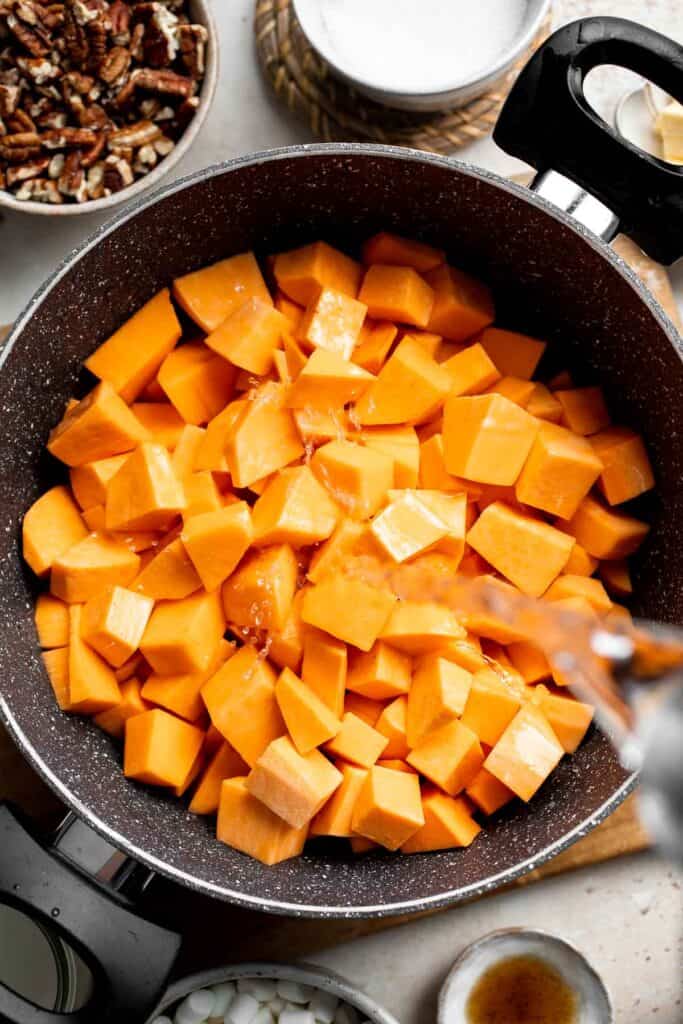
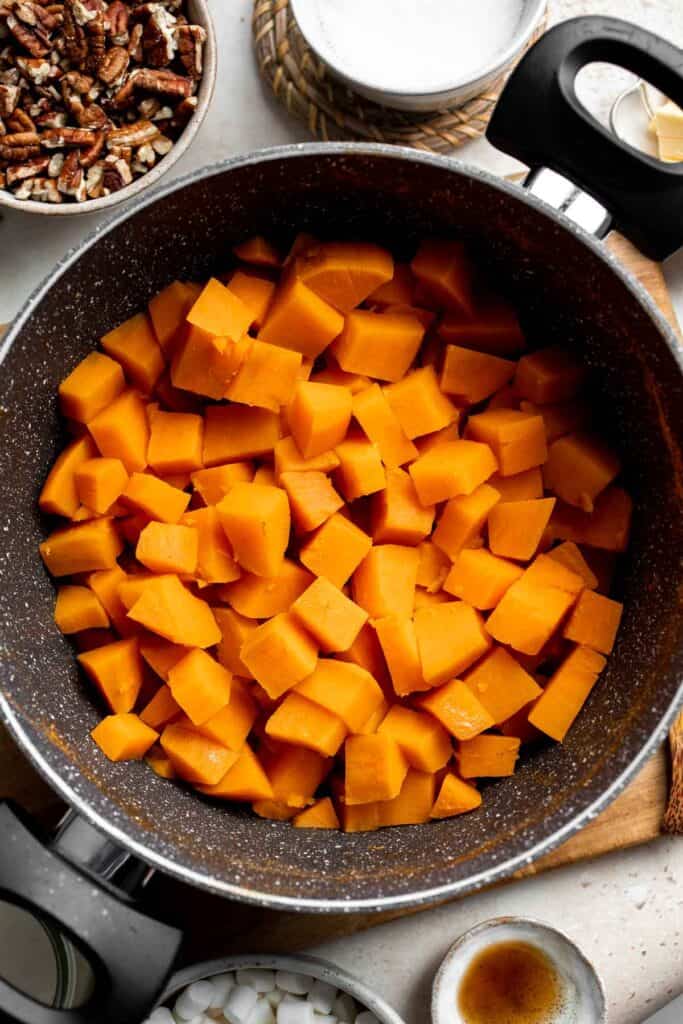
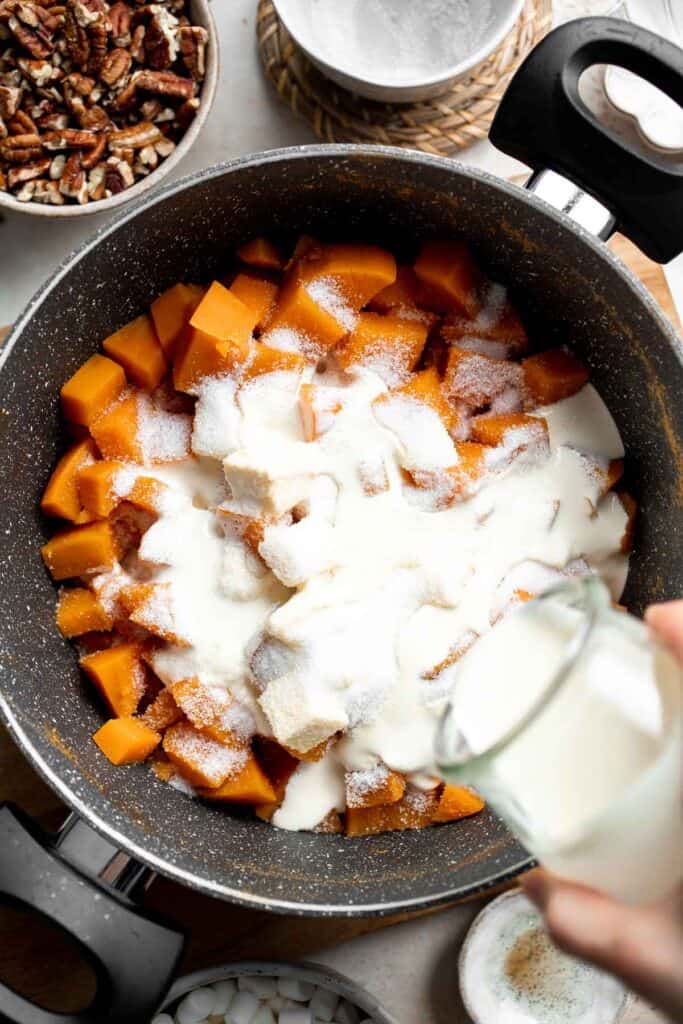
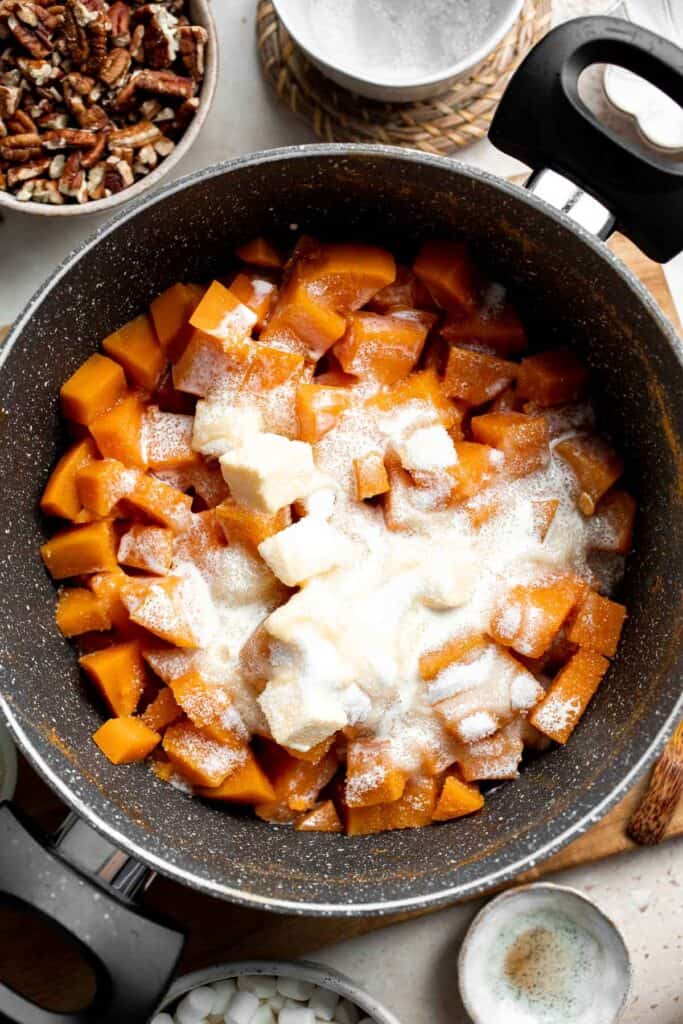
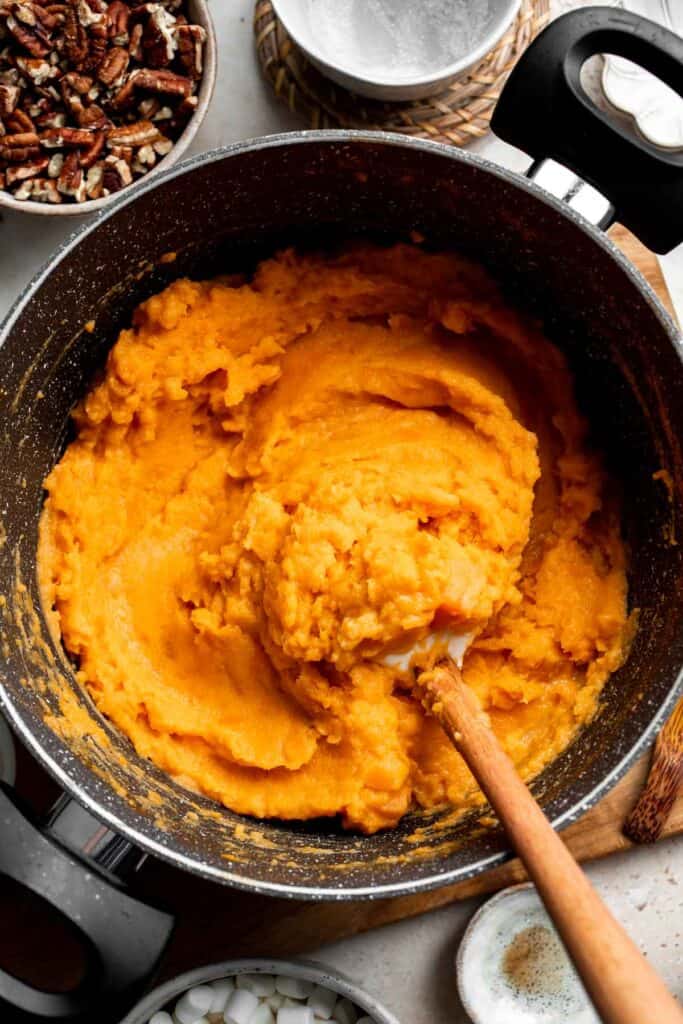
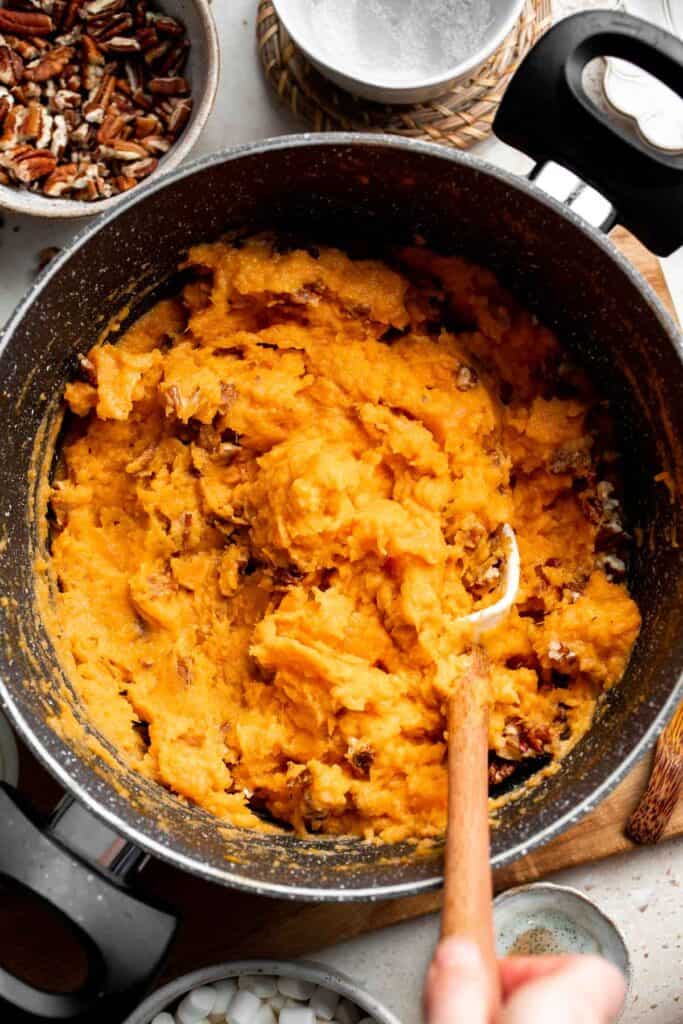
- Add ingredients and mash. Place the drained sweet potatoes back into the pot. Add heavy cream, butter, sugar, vanilla extract, cinnamon, and salt. Use a large spatula or hand mixer to mash and combine the mixture together until smooth.

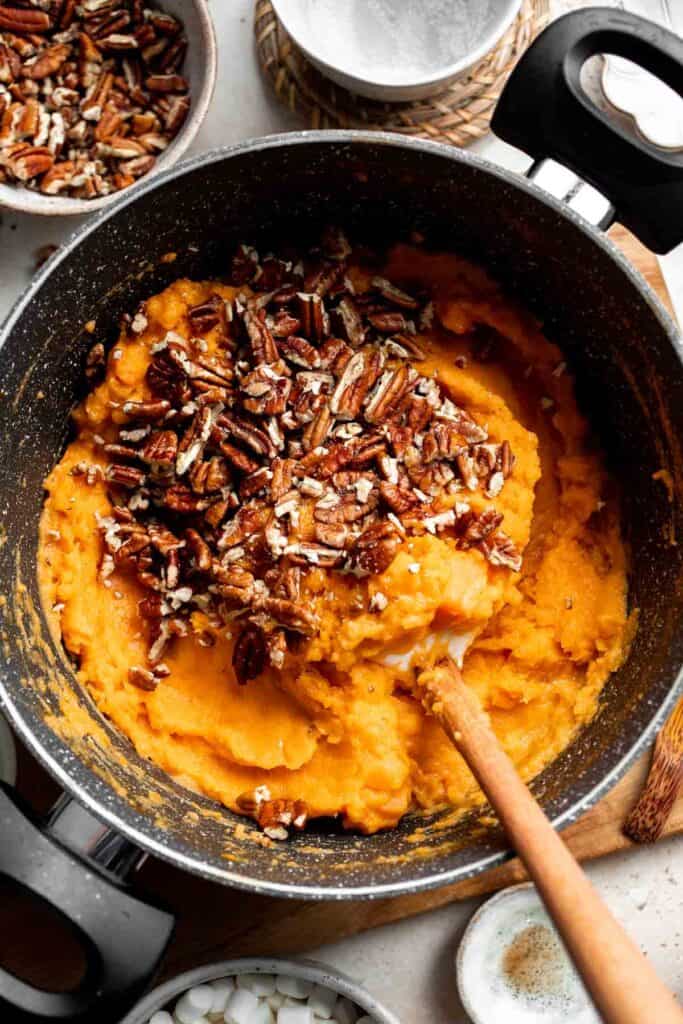
- Add pecans. Fold in 1 cup of chopped pecans until evenly combined.
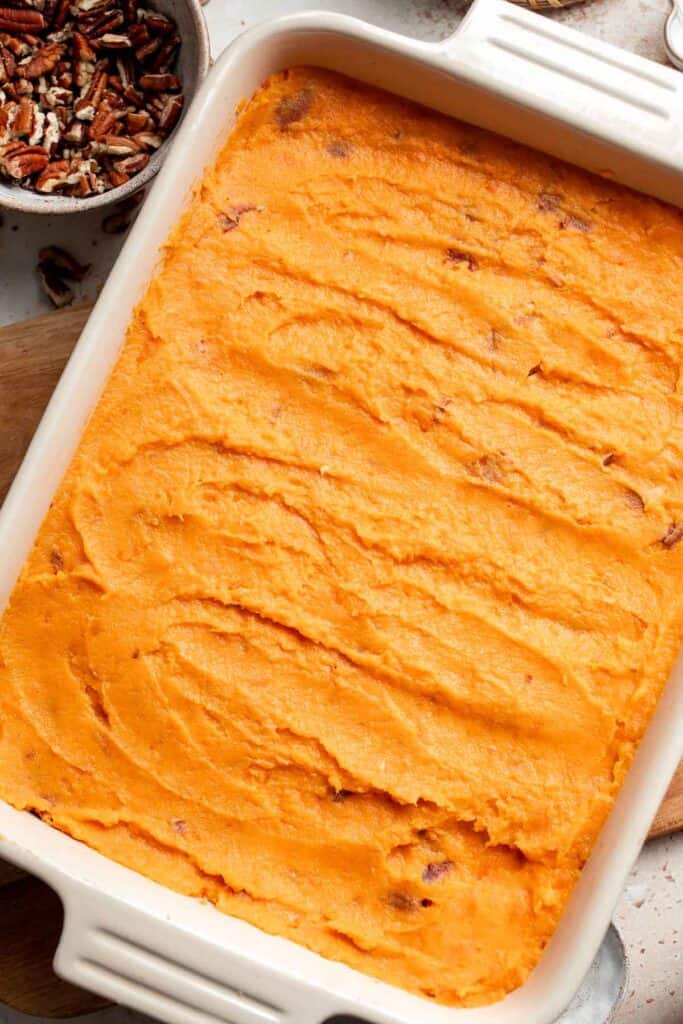
- Transfer mixture. Transfer the mixture into a 9x13-inch casserole pan. Gently tap the baking dish on the counter a few times to release any air bubbles and use the back of a spatula or spoon to spread the mixture evenly.
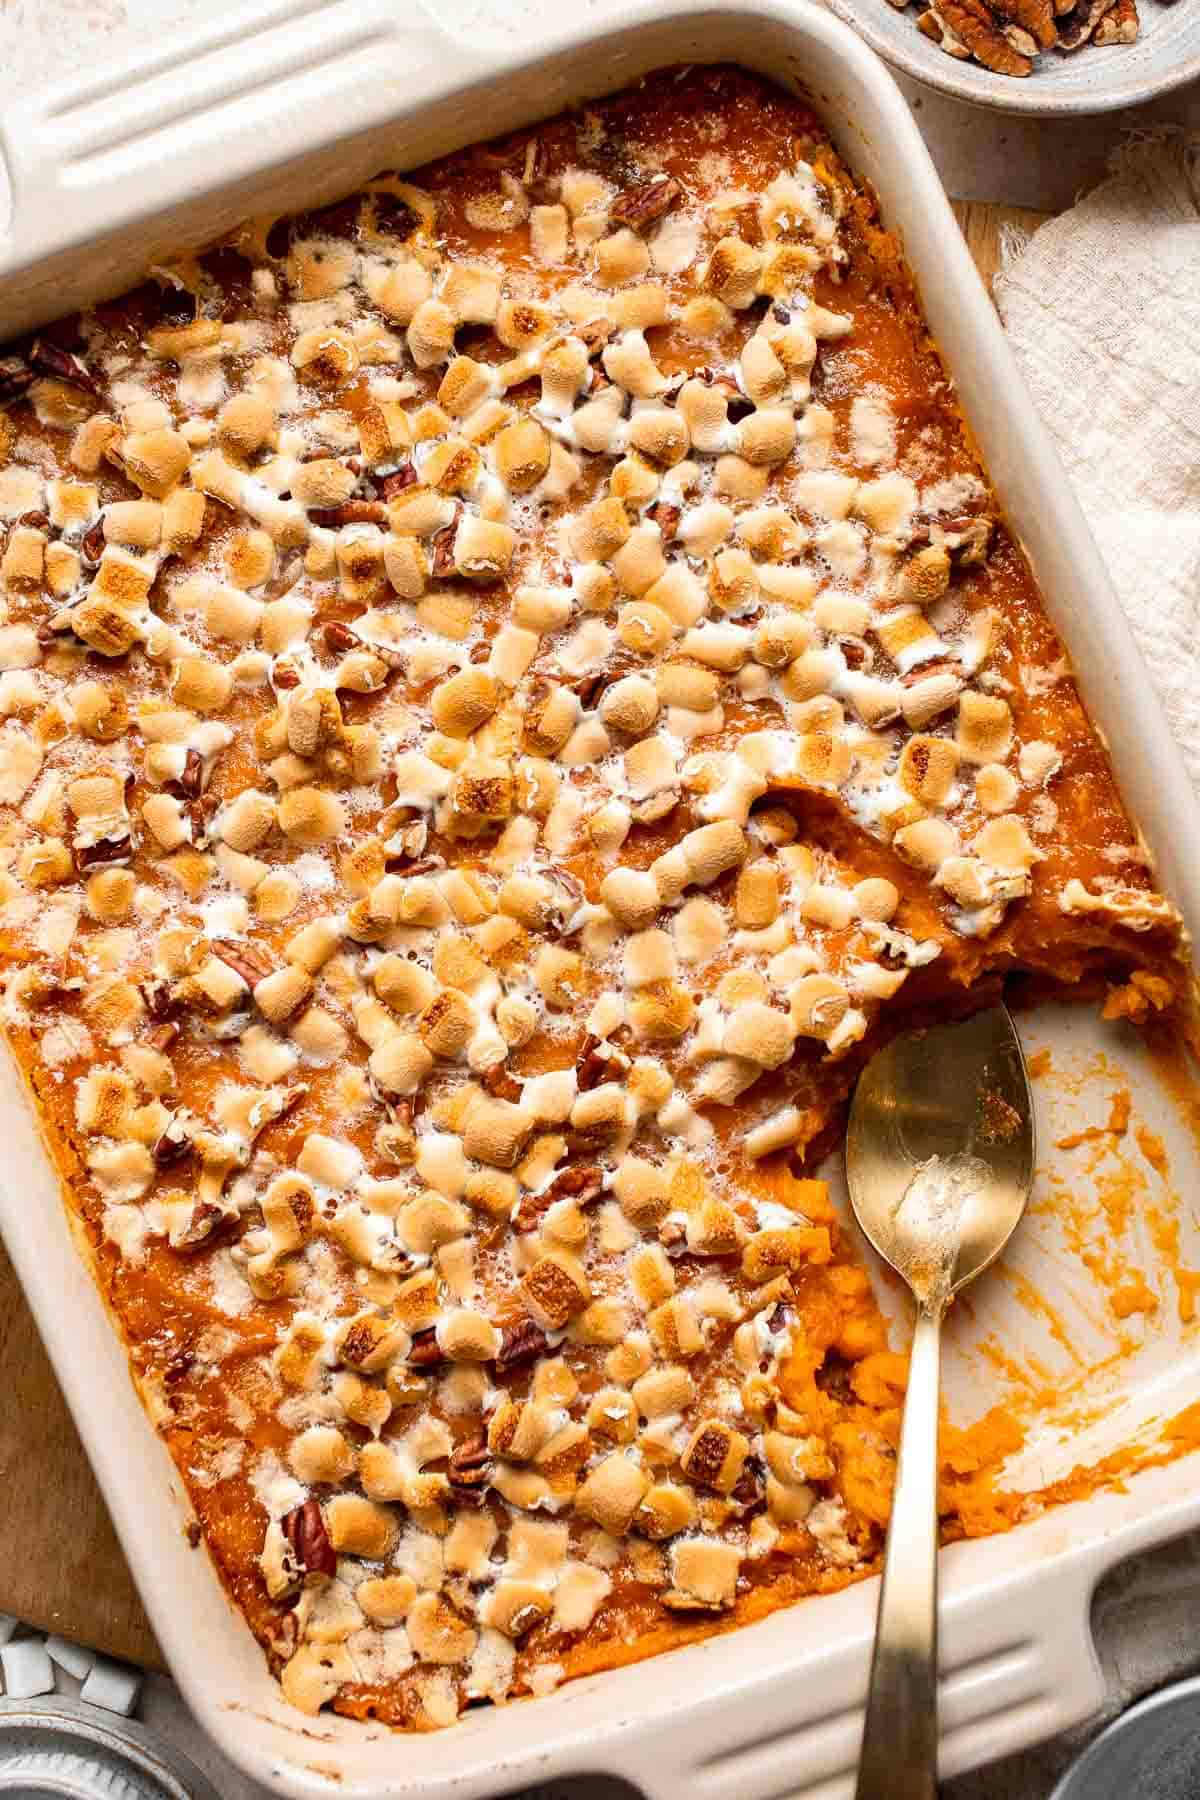
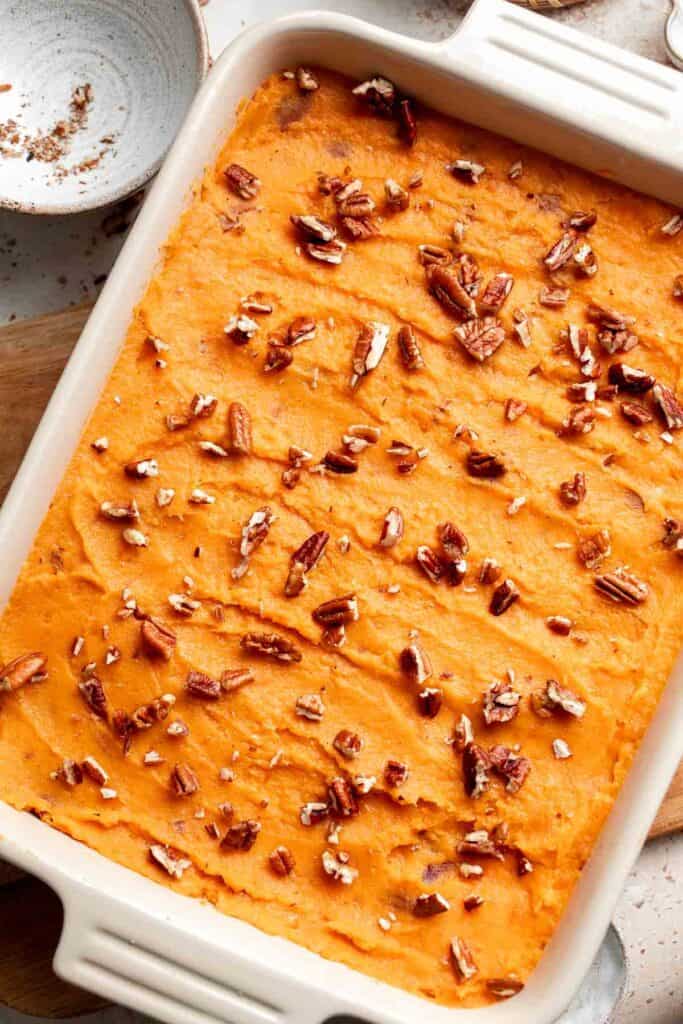
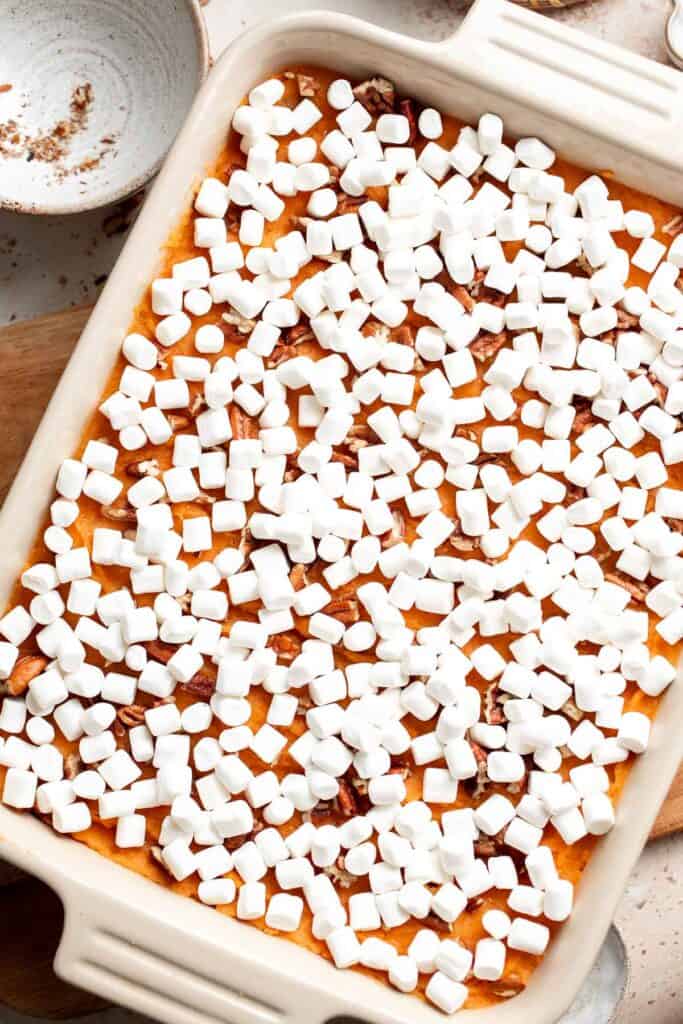
- Add toppings. Spread the remaining ½ cup pecans evenly on top of the sweet potato mixture. Top with marshmallows and spread them out evenly.
- Bake. Bake the casserole in a preheated 350F oven until golden brown on top, about 35 minutes. Set it aside and allow it to cool for 10-15 minutes before serving.
Recipe Variations
- Healthier sweet potato casserole. Replace the heavy cream with whole milk or your favorite non-dairy cream and sweeten the whole casserole with maple syrup or coconut sugar.
- Southern sweet potato casserole. Add a tablespoon or two of your favorite Southern bourbon for an extra layer of flavor.
- Cook sweet potatoes in the Instant Pot. Speed up the cooking time by boiling the sweet potatoes in your Instant pot or other pressure cooker. They'll need about 15 minutes under high pressure and 15-20 minutes of natural release.
- Vegan sweet potato casserole. You'll only need to make a few changes. Use your favorite plant-based butter, non-dairy cream, and vegan marshmallows.
How to Serve
This Sweet Potato Casserole with Marshmallows is an iconic side dish to serve with your holiday meal. Pair it with other holiday classics such as:
- The Best and Juiciest Roast Turkey Ever
- Easy Make-Ahead Cranberry Sauce
- Homemade Stuffing
- Green Bean Casserole
- Brown Butter Mashed Potatoes
- Cheesy Brussels Sprouts Bake
For more recipe inspiration, see our Easy Thanksgiving Menu.
Recipe Tips and Tricks
- Don't overcook the sweet potatoes. Although the sweet potatoes need to be soft and tender for this easy sweet potato casserole recipe, it's easy to overcook them and make them mushy. Stop cooking as soon as the sweet potatoes are fork tender.
- Toast the pecans. Untoasted nuts don't have nearly the same amount of flavor! Toast them in a skillet over low heat or in the oven at 325 just until you start to smell that pecan aroma. Let them cool before cutting.
- Doctor the seasonings. This recipe is great exactly as it is, but you can easily adjust it to suit your flavor preferences. Use pumpkin pie spice instead of cinnamon, add some cloves or ginger, add a splash of orange juice for a tangy flavor, etc.
- Use an electric mixer. Instead of beating the cooked sweet potatoes with a potato masher, add them to the bowl of a stand mixer and whip them on low speed. This will add extra air for a really light, fluffy texture.
Storing and Freezing Instructions
How to Store
Cover the casserole dish of leftover sweet potato casserole with a tight layer of plastic wrap or move the leftovers to an airtight container. Store them in the fridge for 3-4 days.
How to Reheat
Either microwave your leftovers for 1-2 minutes or bake them in the oven at 350 degrees for 5-6 minutes with a fresh sprinkle of marshmallows.
How to Freeze
Place any leftovers in a freezer-safe container and freeze for 2-3 months. Thaw overnight in the fridge before reheating.
FAQ
No, it's completely optional to add whole eggs to this classic holiday side dish! The eggs can give the sweet potato filling a lighter, fluffier texture, but they're not necessary. The mashed sweet potatoes are naturally creamy, and we like to add some butter and heavy cream to give them a really smooth texture.
On their own, sweet potatoes don't have a ton of flavor. It's important to season your sweet potatoes properly. Try salting the water you use to boil the sweet potatoes and add salt when you mash the cooked sweet potatoes. Salt will bring out the flavors and sweetness to make your dish taste restaurant quality.
Since the sweet potatoes are already cooked, the baking process is more about melting the marshmallow topping and evaporating any excess moisture. You can typically tell when the casserole is done if the marshmallows are melty and the casserole is slightly firm to the touch.
More Sweet Potato Recipes
- Herb Roasted Sweet Potatoes
- Sweet Potato Casserole with Pecans
- Baked Sweet Potato
- Thai Sweet Potato Yellow Curry
- Sweet Potato Soup
- Baked Sweet Potato Wedges
Tried this recipe?
I'd love to hear what you think! Leave a comment and rating below to share your feedback. Your reviews help others discover this recipe and help me keep creating more free recipes for you. Snap a photo and tag me on social media @aheadofthyme too.
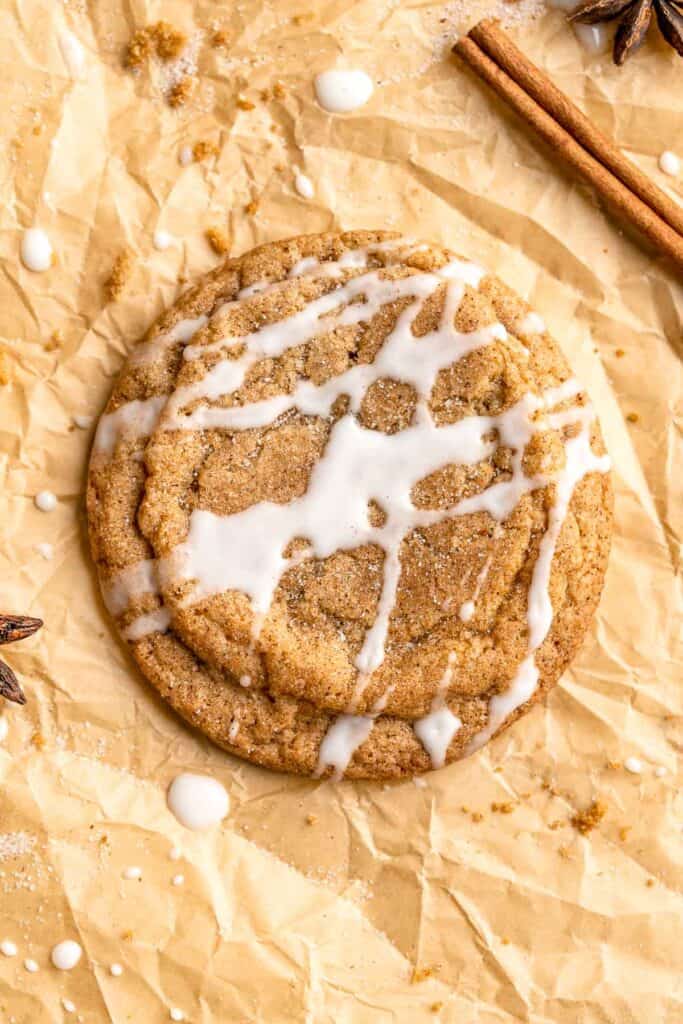
Chai Cookies
These soft and chewy Chai Cookies are loaded with warm chai spices in the cookie dough inside, in a layer of chai spice sugar rolled on the outside, and in the drizzle of a sweet, melt-in-your-mouth chai glaze. These fall treats are basically your favorite Chai Tea Latte in cookie form!
These beginner-friendly cookies are perfect for fall and might just need a place at your Thanksgiving dessert spread. They're super quick and easy to make in a few simple steps with no chill time required - and are made using simple common spice and baking ingredients.
Why You'll Love this Chai Cookie Recipe
- Cozy chai flavor. The spices in these chai spice cookies are the same as in your favorite milky chai tea latte, including cinnamon, ginger, cardamom, nutmeg, cloves, and allspice. These chewy cookies pair well with all things fall and are perfect for cold weather holidays.
- Easy 3-ingredient glaze. This homemade chai glaze is so good, you'll want to add it to everything. Made with just milk, confectioner's sugar, and a chai spice blend, it's the perfect way to top these chai cookies.
- Ready in 30 minutes. Unlike other cookie recipes, you can have these delicious chai cookies table-ready in only 30 minutes, no downtime necessary. You bake them immediately after making the dough, though you may need to work in batches to bake them all. Who doesn't love a no chill cookie?

Ingredient Notes
To make these delicious Chai Cookies, you will need the following ingredients (full measurements in recipe card below):
Ingredients in Chai Spice
We make our own blend of chai spices using the following spices. You can also substitute this with a store-bought chai spice blend.
- cinnamon - ground cinnamon is essential for chai cookies - don't skip it!
- ginger - ground ginger works best, but you can add a tiny bit of ginger paste to the wet ingredients if you don't have the dry stuff.
- cardamom - if you don't have cardamom or don't like the taste, you can omit it or add more cinnamon and nutmeg in its place.
- cloves
- nutmeg - both ground nutmeg and freshly grated nutmeg will work.
- allspice - if you don't have all of the aforementioned spices, a pumpkin pie spice blend will usually include all but the cardamom! A chai spice blend will include all of them.
Chai Cookie Ingredients
- unsalted butter - you can use salted butter if that's all you have available, but unsalted butter will give you more control over the flavor and has a lower water content than its counterpart.
- white sugar - cane sugar or coconut sugar work well, but any other sugar alternatives will change the overall taste of the cookies, so keep that in mind.
- brown sugar - brown sugar gives the cookies a chewy texture. If you don't have brown sugar on hand, you can make your own by adding 1-2 tablespoons of molasses per cup of white sugar.
- eggs - make sure your eggs are at room temperature before adding them. You can quickly bring them up to temp by covering them with warm water for 5-10 minutes.
- vanilla extract - you can use an equal measure of vanilla bean paste for a deeper vanilla flavor.
- all-purpose flour - a 1:1 gluten free flour blend can be used in place of the regular flour to make these gluten free.
- baking powder - use a 1:2 ratio of baking soda to cream of tartar for a baking soda substitute.
- baking soda - if you're out of baking soda, use more baking powder at a 3:1 ratio of the original measure of baking soda.
- salt
- confectioners' sugar - any powdered sugar or sugar-free powdered sugar substitute can be used for the glaze.
- milk - heavy whipping cream, half and half, or a nut milk will also work.
You will also need measuring cups and spoons, mixing bowls, cookie scoop, large baking sheet, and wire rack.
How to Make the Best Chai Cookies
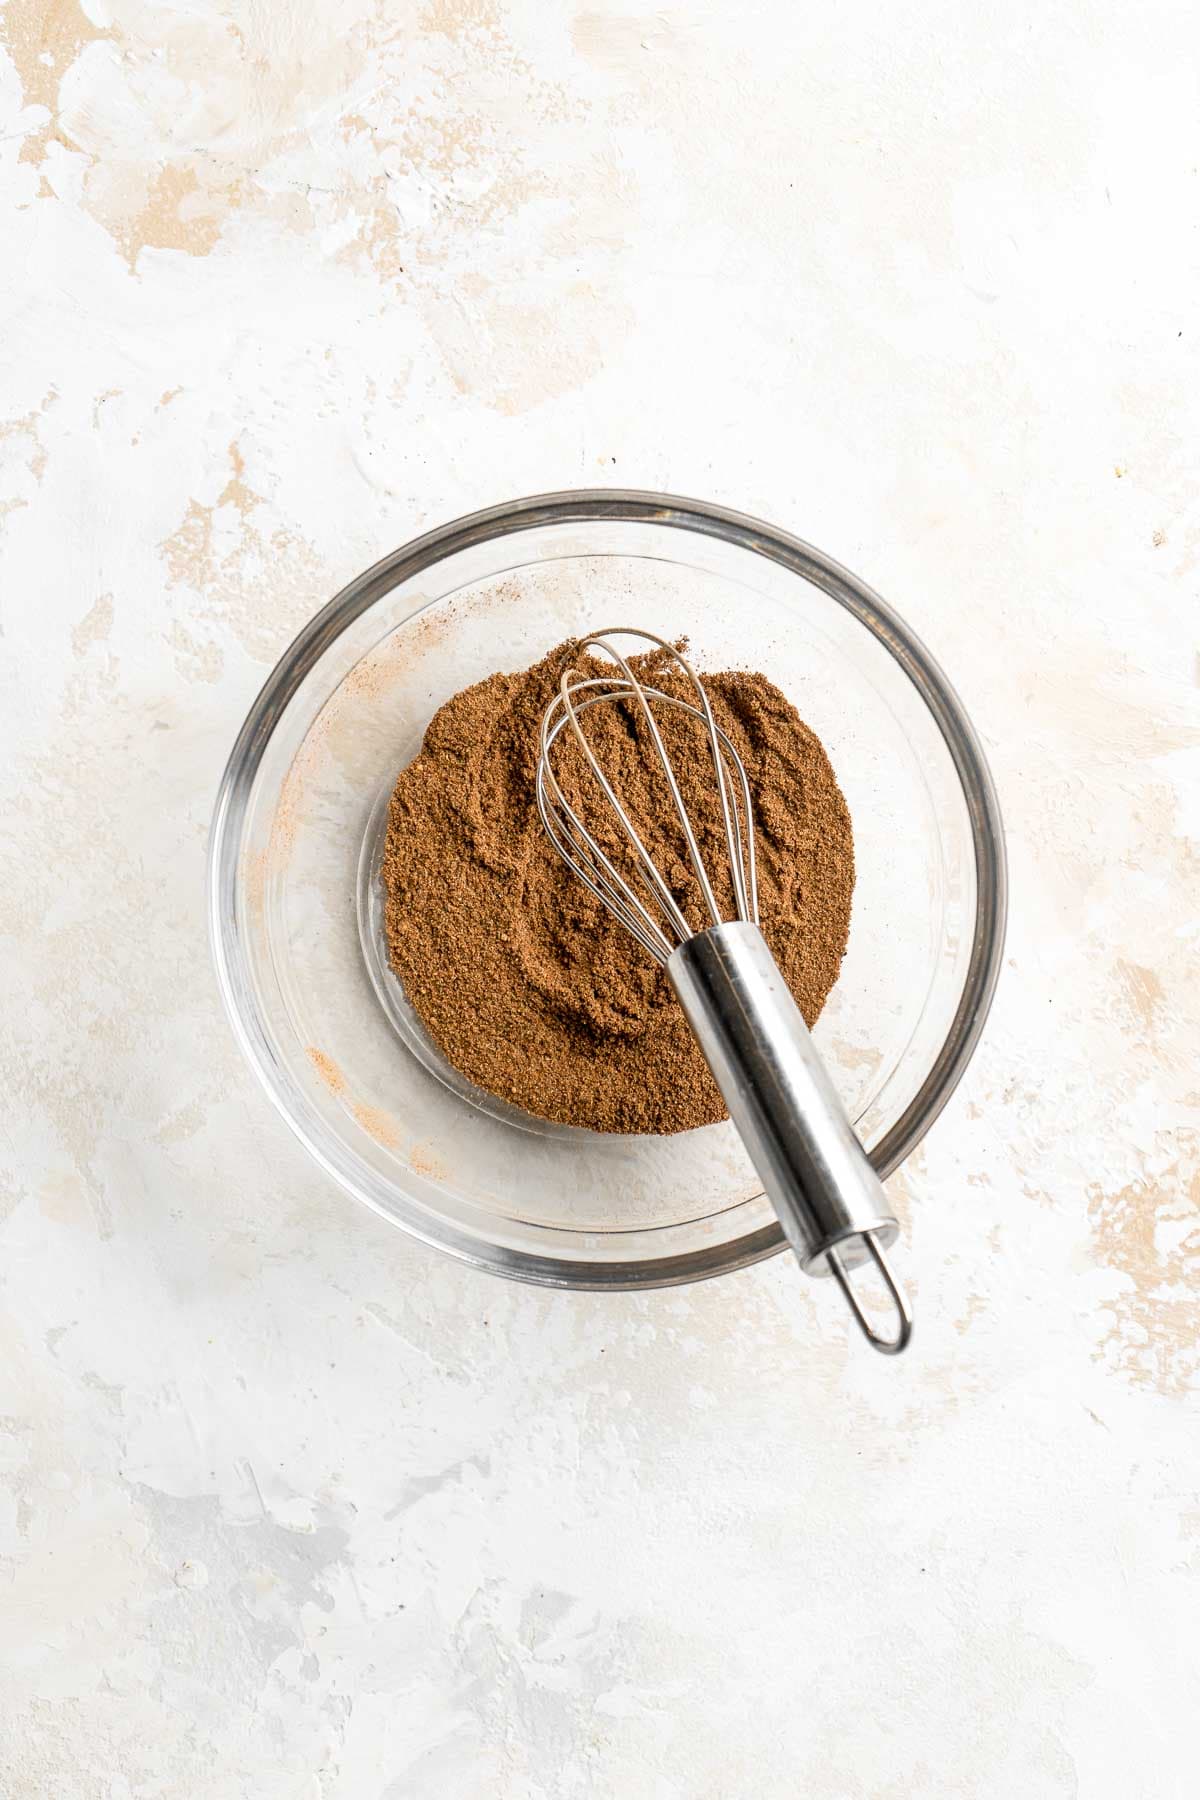
First, make the homemade chai spice blend.
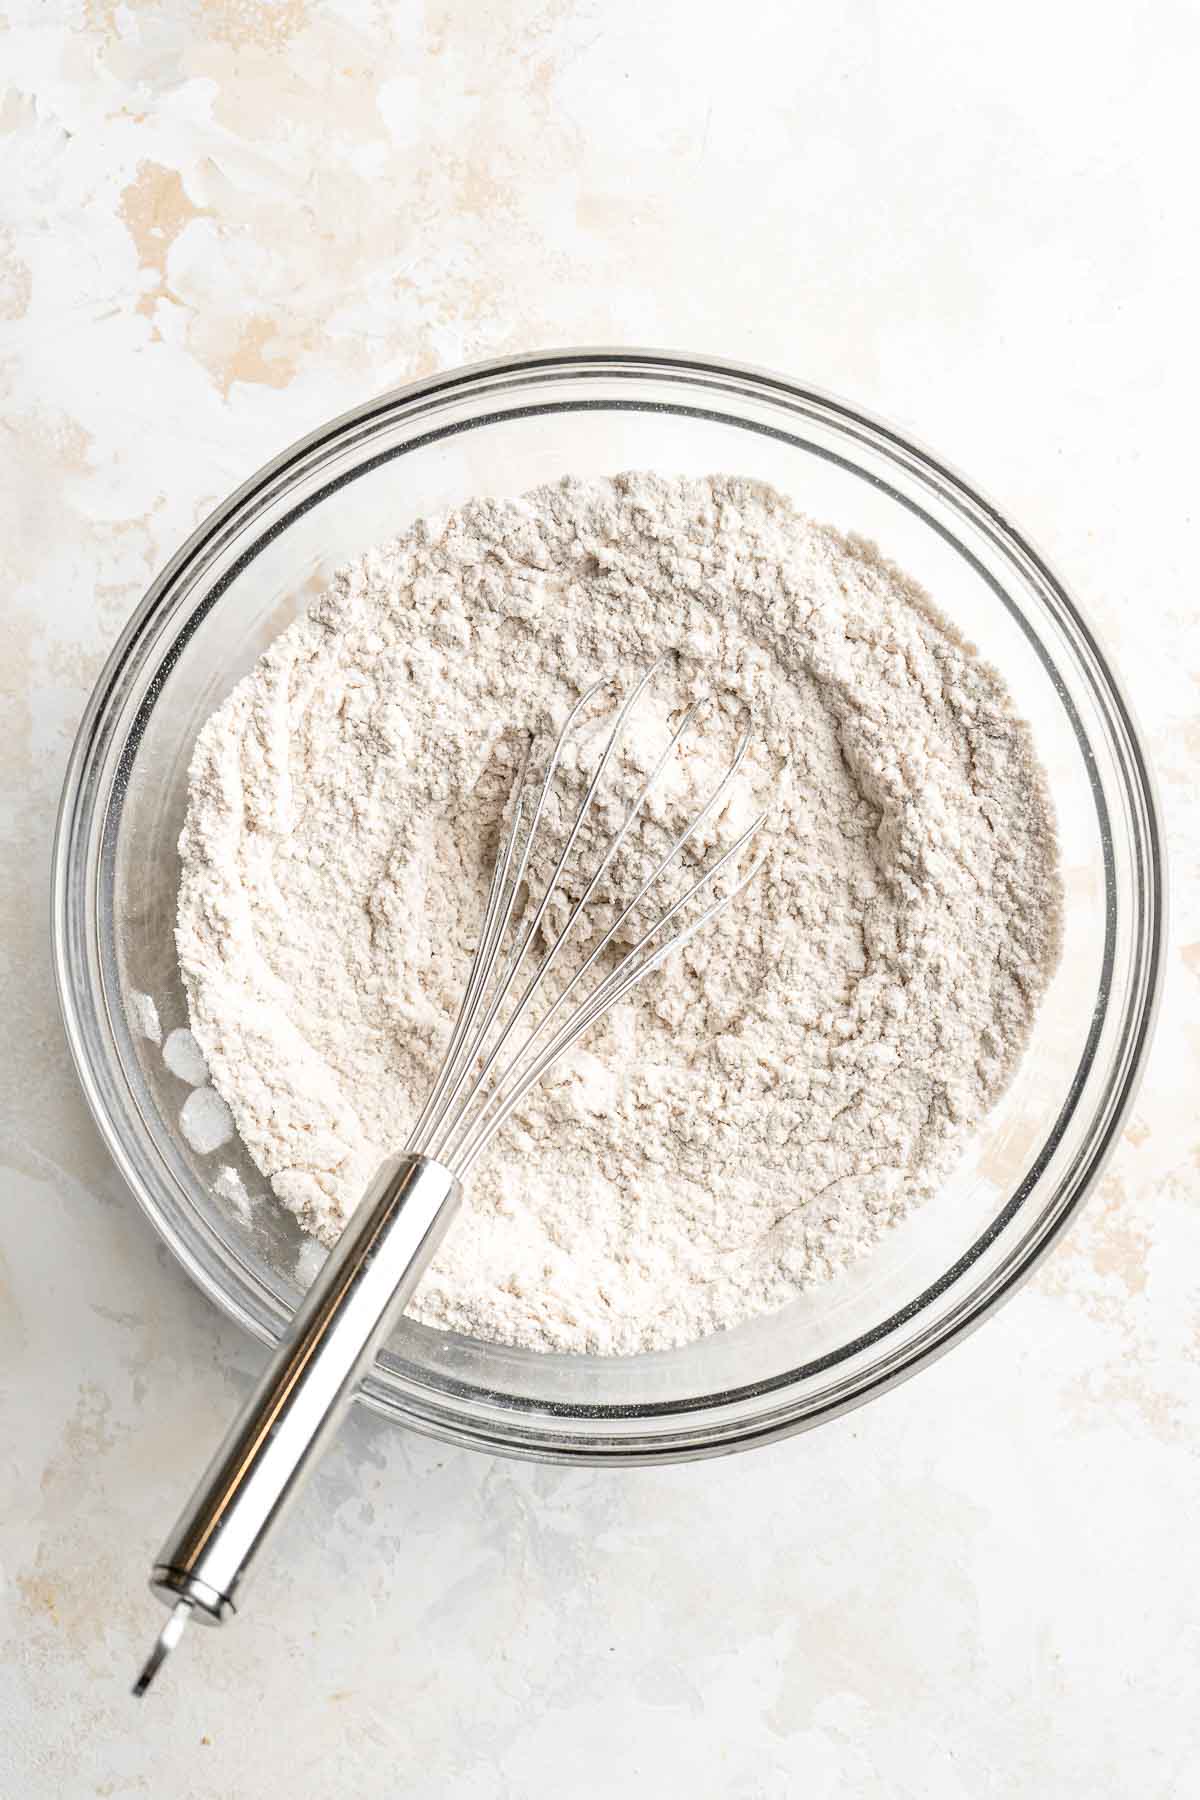
In a small mixing bowl, whisk together all of the spices until well-combined. Set aside.
Next, prepare the chai cookies.
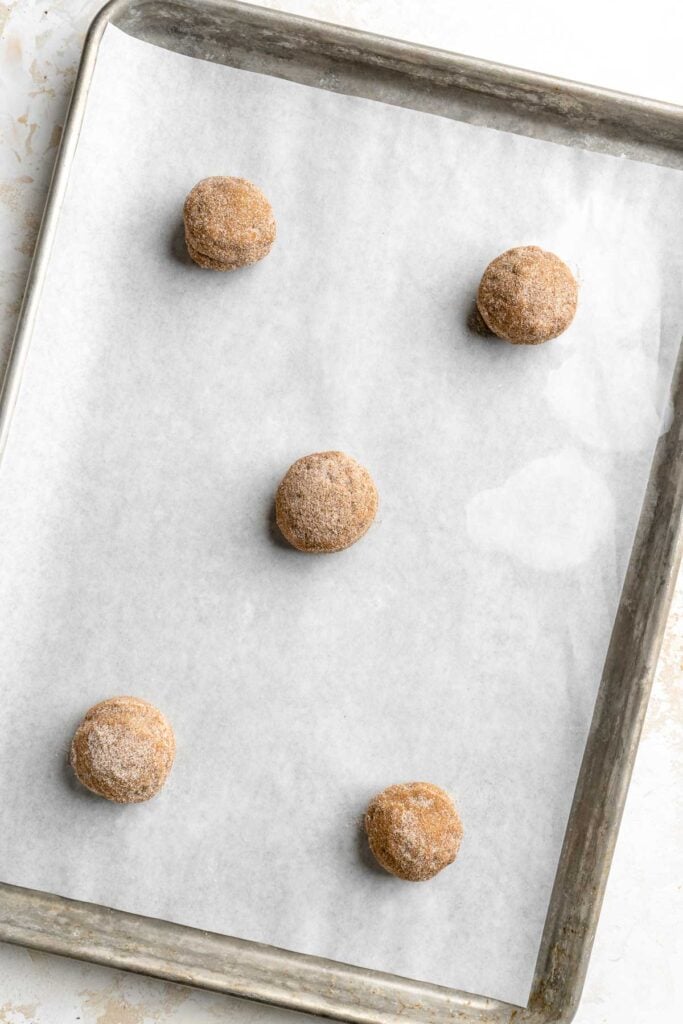
- Prep. Preheat the oven to 375F. Prepare 1-3 baking sheets with parchment paper or a silicone baking mat (I typically do 1 and then work in batches for even baking).
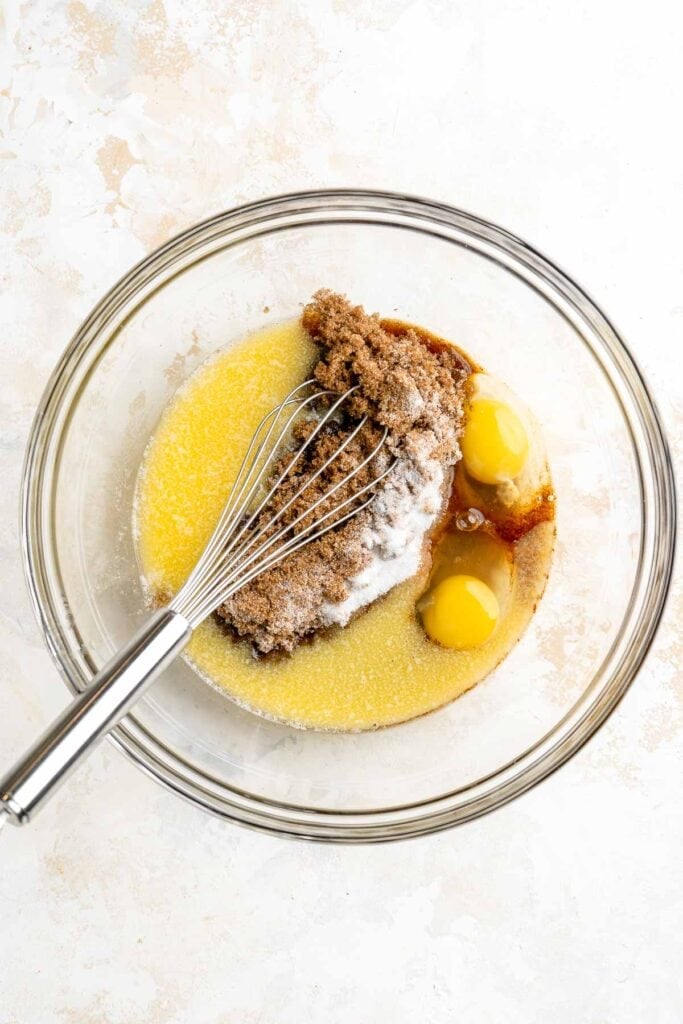
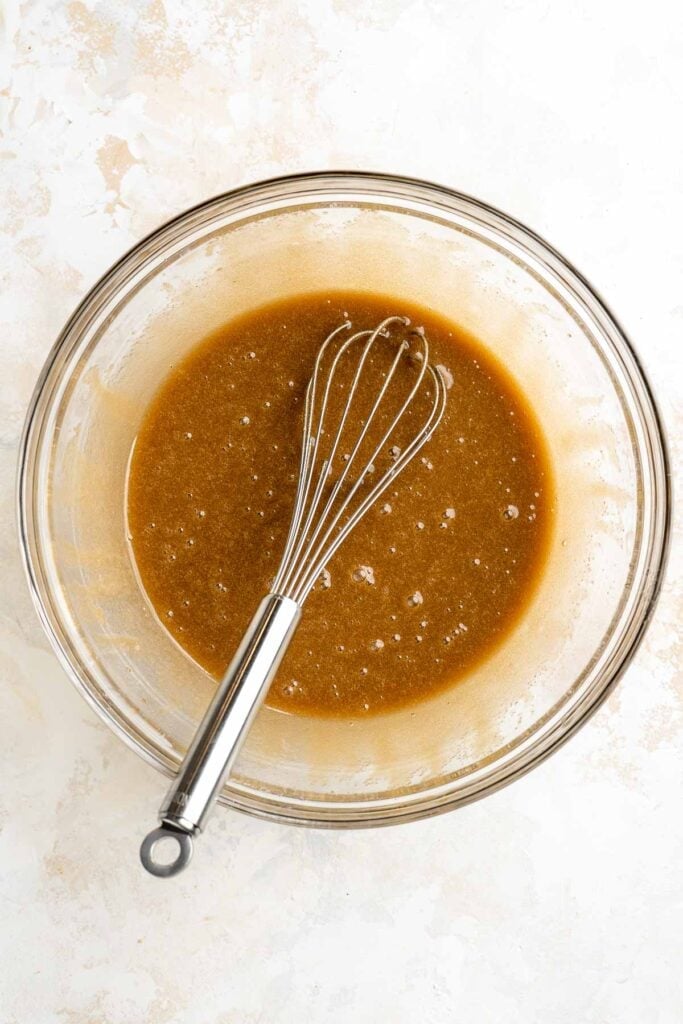
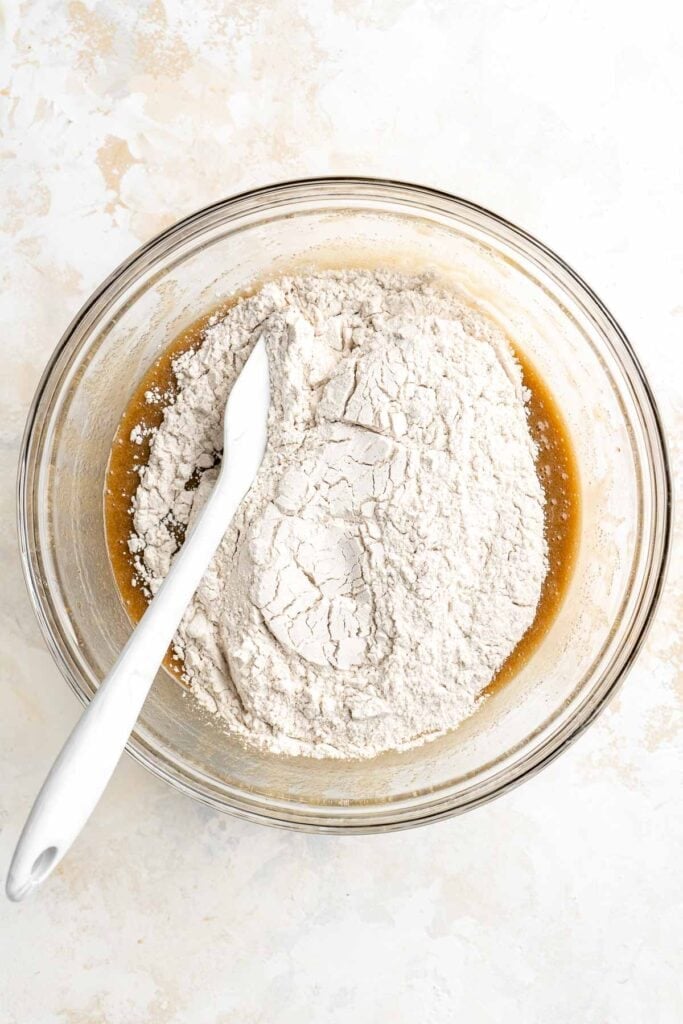
- Combine wet ingredients. In a large mixing bowl, whisk together the melted butter, brown sugar, white sugar, eggs, and vanilla, until smooth and well-combined.
- Combine dry ingredients. In a separate mixing bowl, whisk together the flour, 4 teaspoons chai spice blend, baking soda, baking powder, and salt, until well-combined.
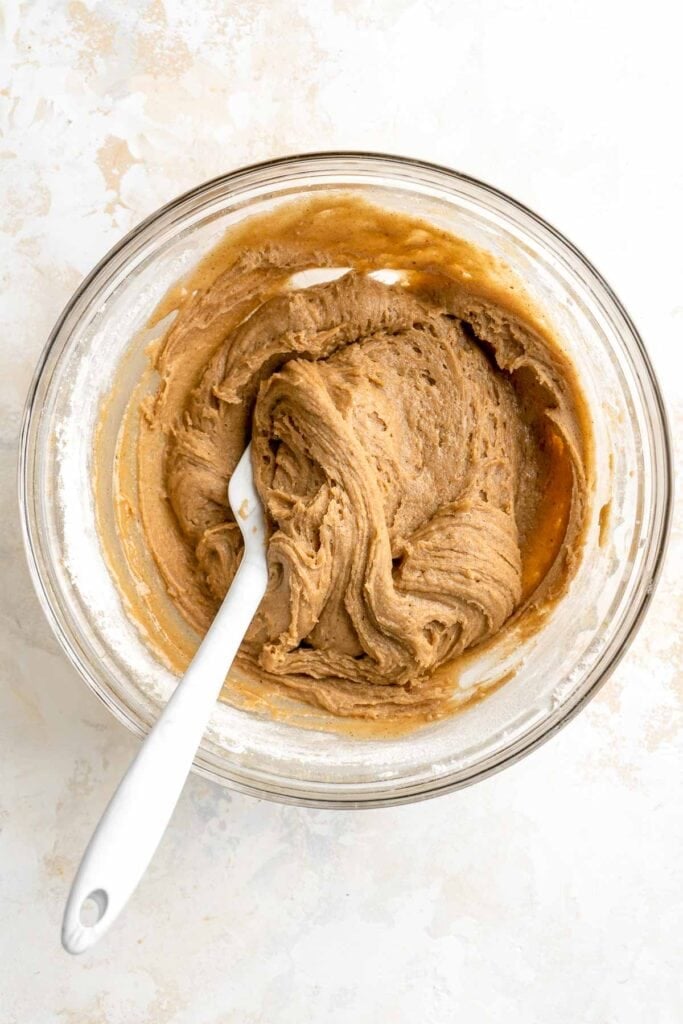
- Add dry ingredients to wet. Add the dry ingredients into the large mixing bowl with the wet ingredients. Fold together with a spatula until well-combined.
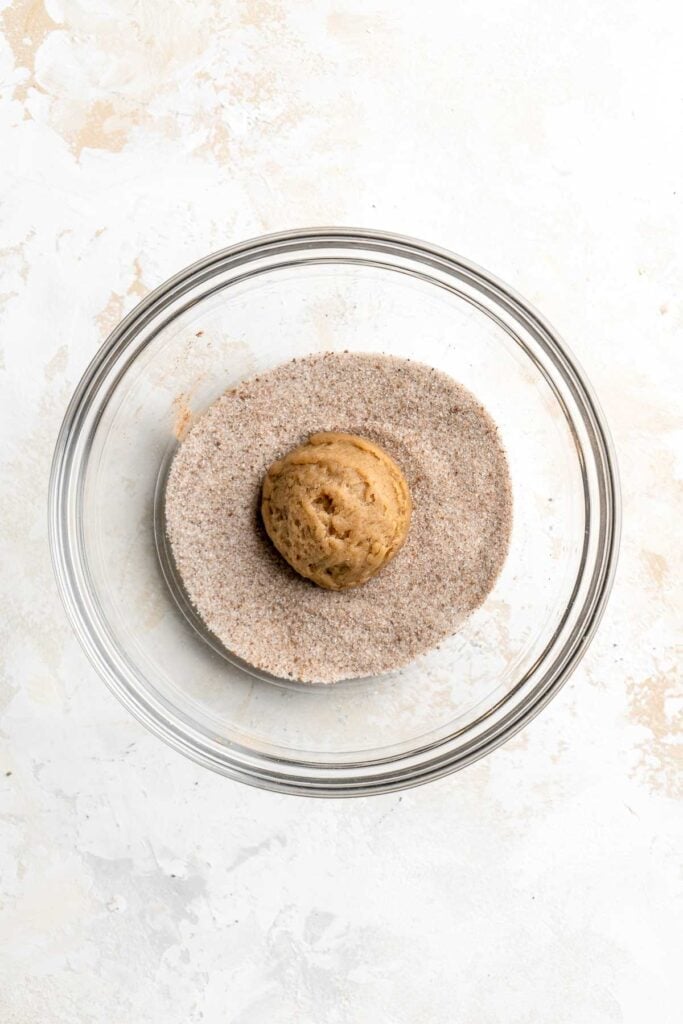
- Make chai sugar. In a small mixing bowl, make the chai sugar by mixing together the white sugar with the remaining tablespoon of chai spice.
- Scoop and coat cookies. Using a medium cookie scoop, scoop the cookies out and roll each cookie in the chai-spiced sugar.
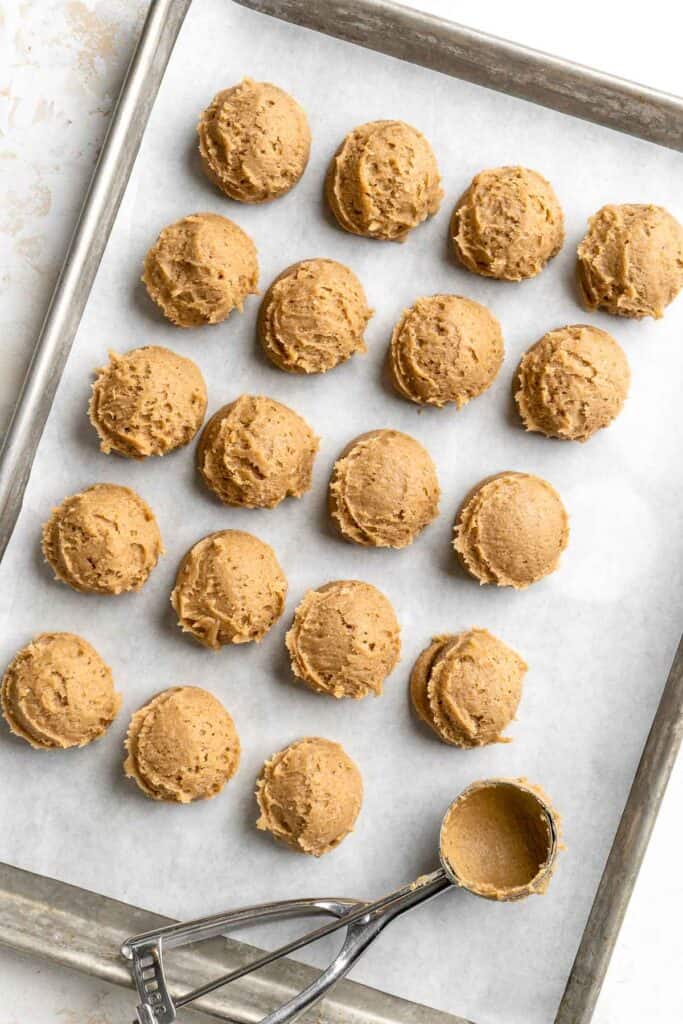

- Bake. Place the cookie balls on the prepared baking sheet. You can fit about 5-6 cookies onto each prepared baking sheet. Place the sheet(s) into the oven and bake for 13-14 minutes, or until the edges are beginning to turn slightly golden.
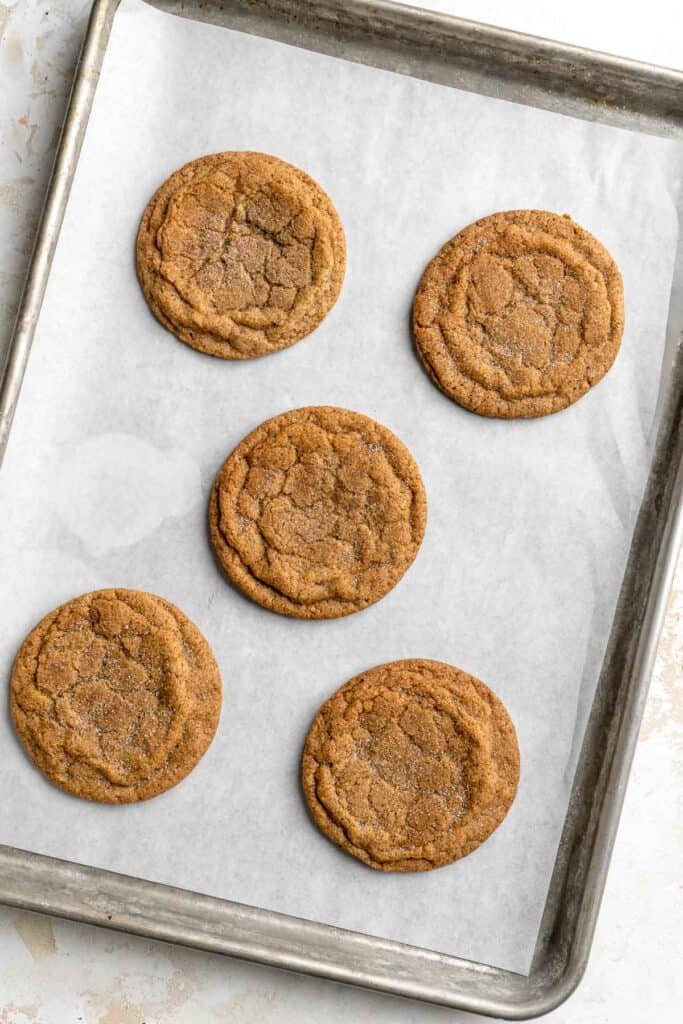
- Chill. Allow the cookies to cool for 5 minutes, then transfer onto a cooling rack to fully cool.
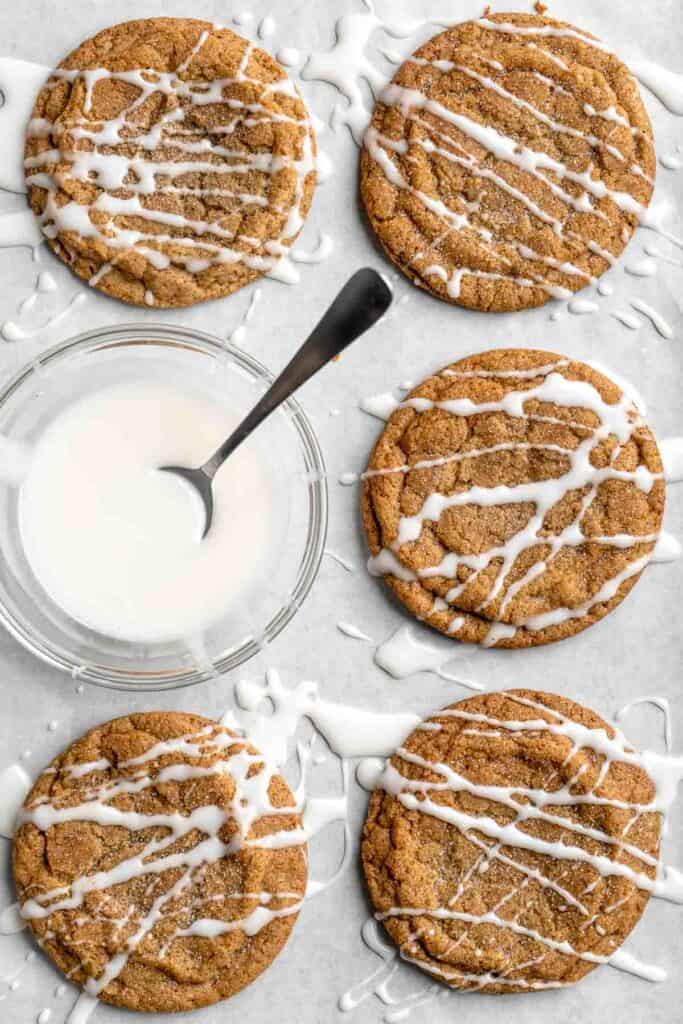
Finally, add the glaze.
Once the cookies are fully cooled, begin making the glaze by adding the confectioners' sugar, milk and vanilla to a medium mixing bowl. Whisk together until smooth, then drizzle over the cooled cookies with a spoon.
Recipe Variations
- Coffee glazed chai cookies. Add a little kick by replacing some of the milk in the glaze with coffee, espresso, or instant coffee (to your desired strength). Then, glaze and dream of a dirty chai latte.
- Chai ice cream sandwiches. These chai cookies make an excellent ice cream sandwich. Just add a scoop of vanilla ice cream between two chai cookies and enjoy right away or freeze for later.
- Pumpkin chai cookies. This is the perfect cookie for pumpkin spice latte lovers. Add ½ cup pumpkin puree to the wet ingredients and add more flour as needed to prevent the dough from getting too sticky. Then bake as usual!
How to Serve
These Chai Cookies are a delicious treat served on its own, as part of a fall dessert spread, or with a warm cozy drink. Some of our favorites to serve with this are:

Recipe Tips and Tricks
- Use the spoon method for measuring ingredients. For the best results, scoop and level ingredients into your measuring utensils with a spoon instead of straight from the container! It's a more precise method that will prevent you from accidentally altering the ratios.
- Use an oven thermometer. The temperature on your oven gauge isn't always accurate. To get a more precise oven measurement and prevent over- or underbaking the cookies, use an oven thermometer to calibrate the temperature when you preheat it.
- Don't crowd the pan. Patience is key for these chai cookies. Don't add more than a half dozen to the pan at a time to give them enough space to spread. Work in batches and allow the pans to cool in between each batch for the best chai cookies possible.
Storing and Freezing Instructions
How to Store
You can store unglazed baked chai cookies at room temperature in an airtight container for up to 1 week. Glazed cookies should be stored in the refrigerator for the same duration because they contain dairy.
How to Freeze
Place cookies on a lined baking sheet and freeze uncovered for 1 hour until frozen solid, then transfer to a freezer bag or freezer safe container and freeze for up to three months.
Freezing Cookie Dough
You can also freeze cookie dough by chilling balls of cookie dough in the refrigerator for at least 1 hour before transferring them into a freezer-safe Ziploc bag in a single layer. Then freeze for up to 3 months. You can bake them straight from frozen by adding a few minutes to the baking time.
FAQ
Nope! This chai cookie recipe doesn't require any chill time, so the cookies can go straight in the oven. If you need some buffer time, you can chill them for up to 24 hours. Just let them sit on the baking sheet to come back up to room temperature before you bake them for a similar result.
Yes, these chai cookies can be made gluten free by swapping the regular flour for a gluten free substitute - see the ingredient notes above for pointers. The baking time should stay the same whether you choose to make them as is or swap the flour.
More Cookie Recipes
- 50 Best Cookie Recipes
- Eggnog Cookies
- Oatmeal Raisin Cookies
- Butter Pecan Cookies
- Soft and Chewy Ginger Cookies
- Carrot Cake Cookies
Tried this recipe?
I'd love to hear what you think! Leave a comment and rating below to share your feedback. Your reviews help others discover this recipe and help me keep creating more free recipes for you. Snap a photo and tag me on social media @aheadofthyme too.

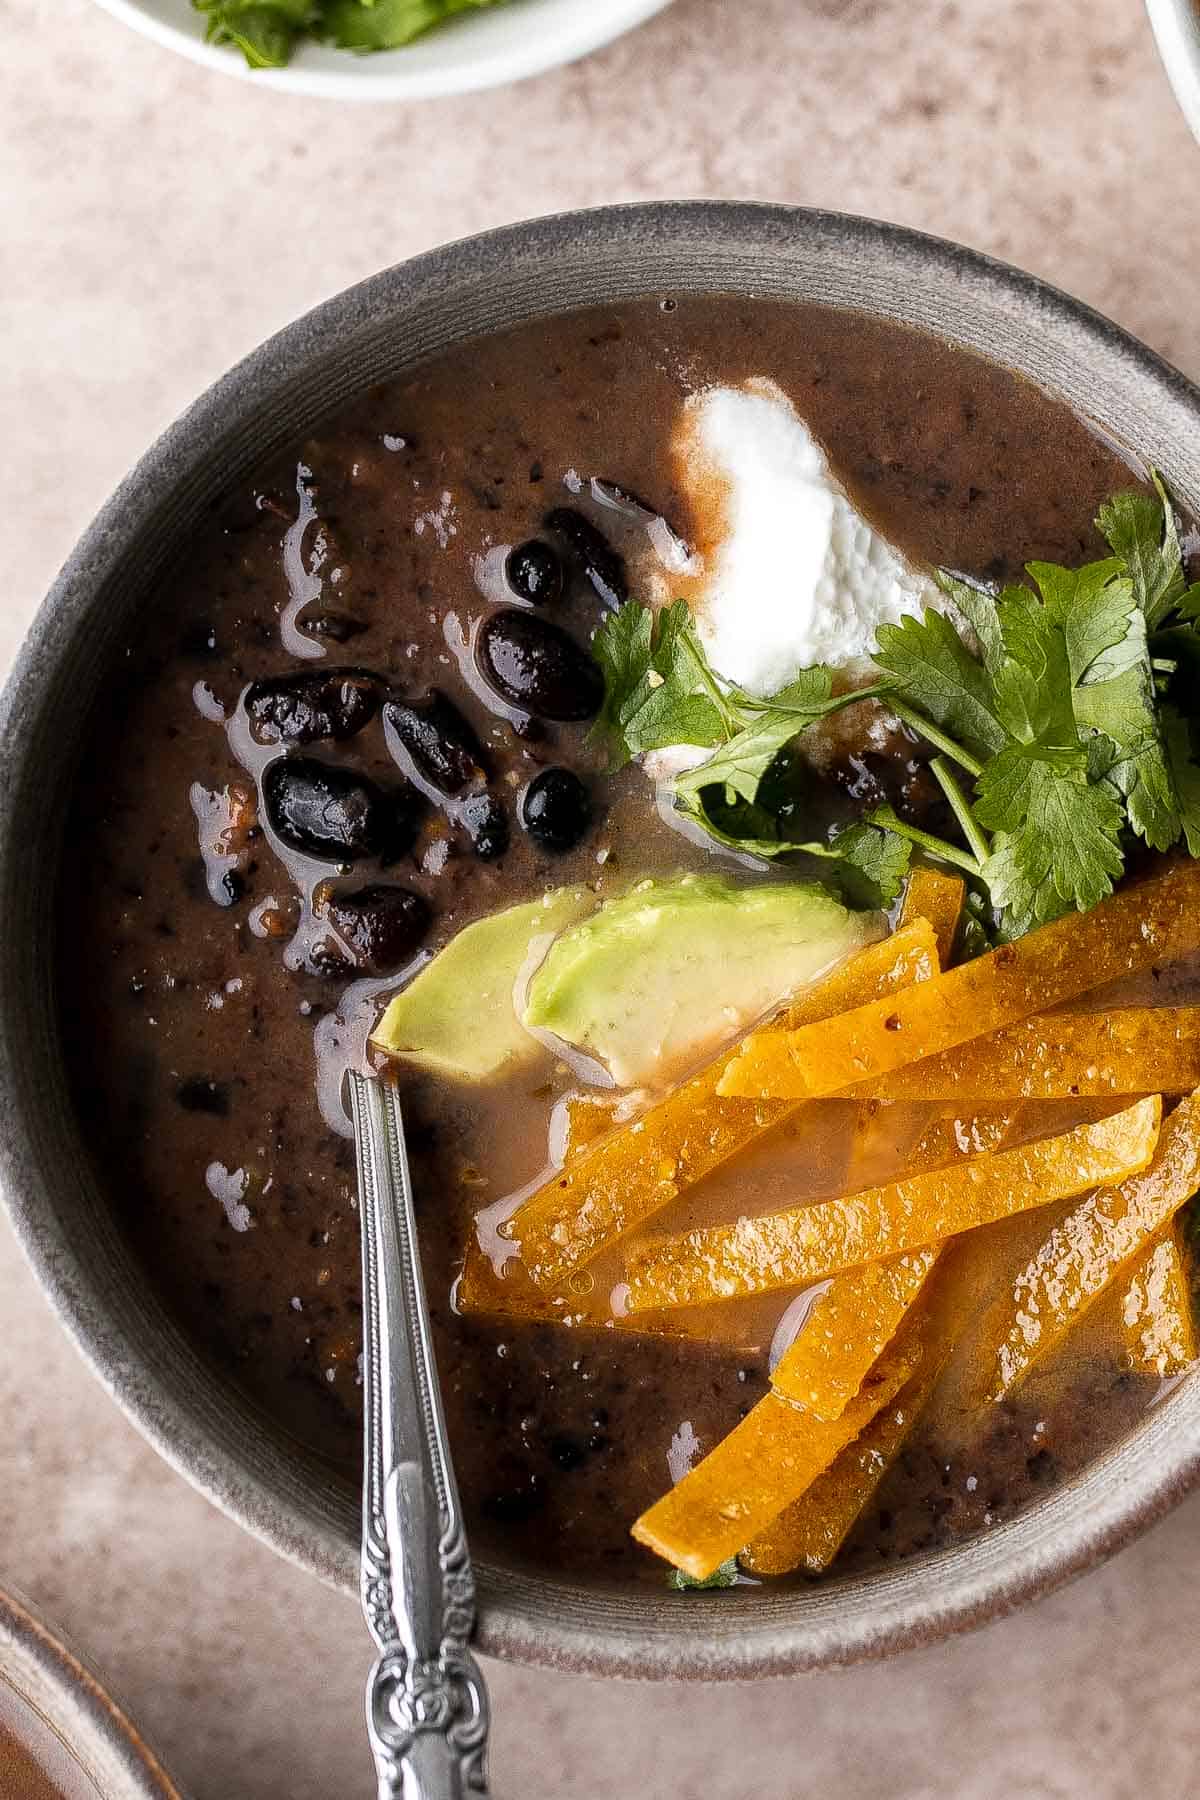
Black Bean Soup

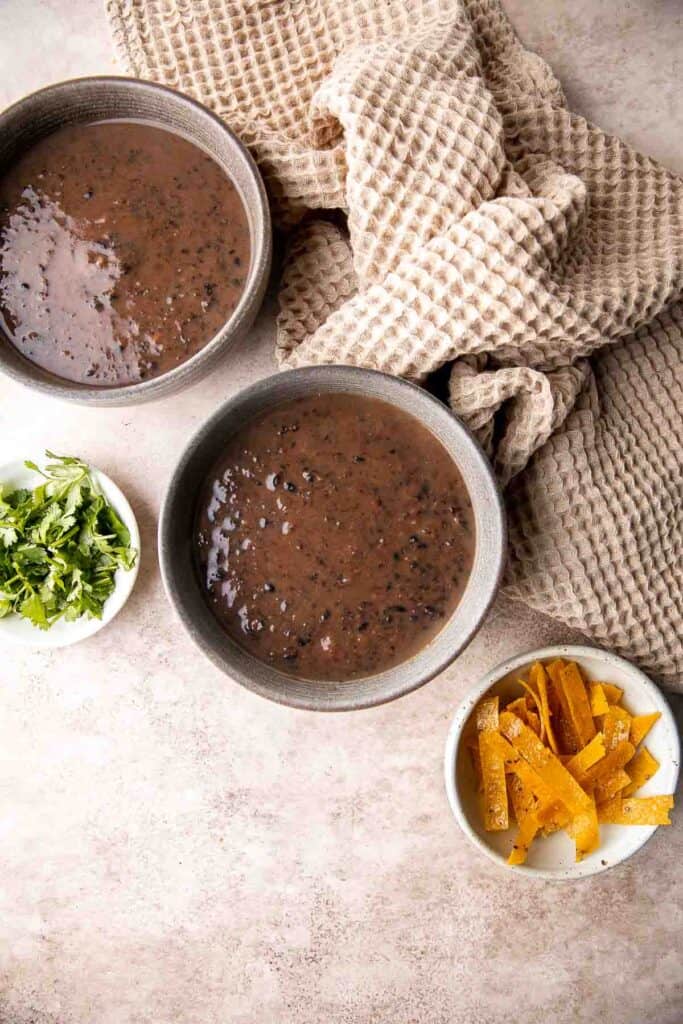
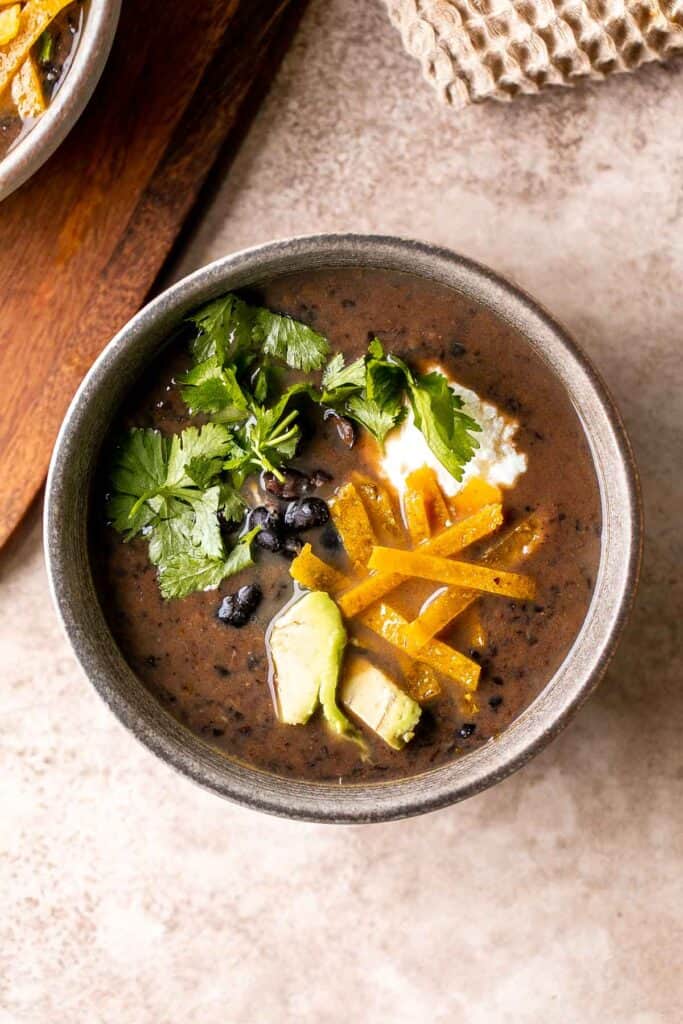
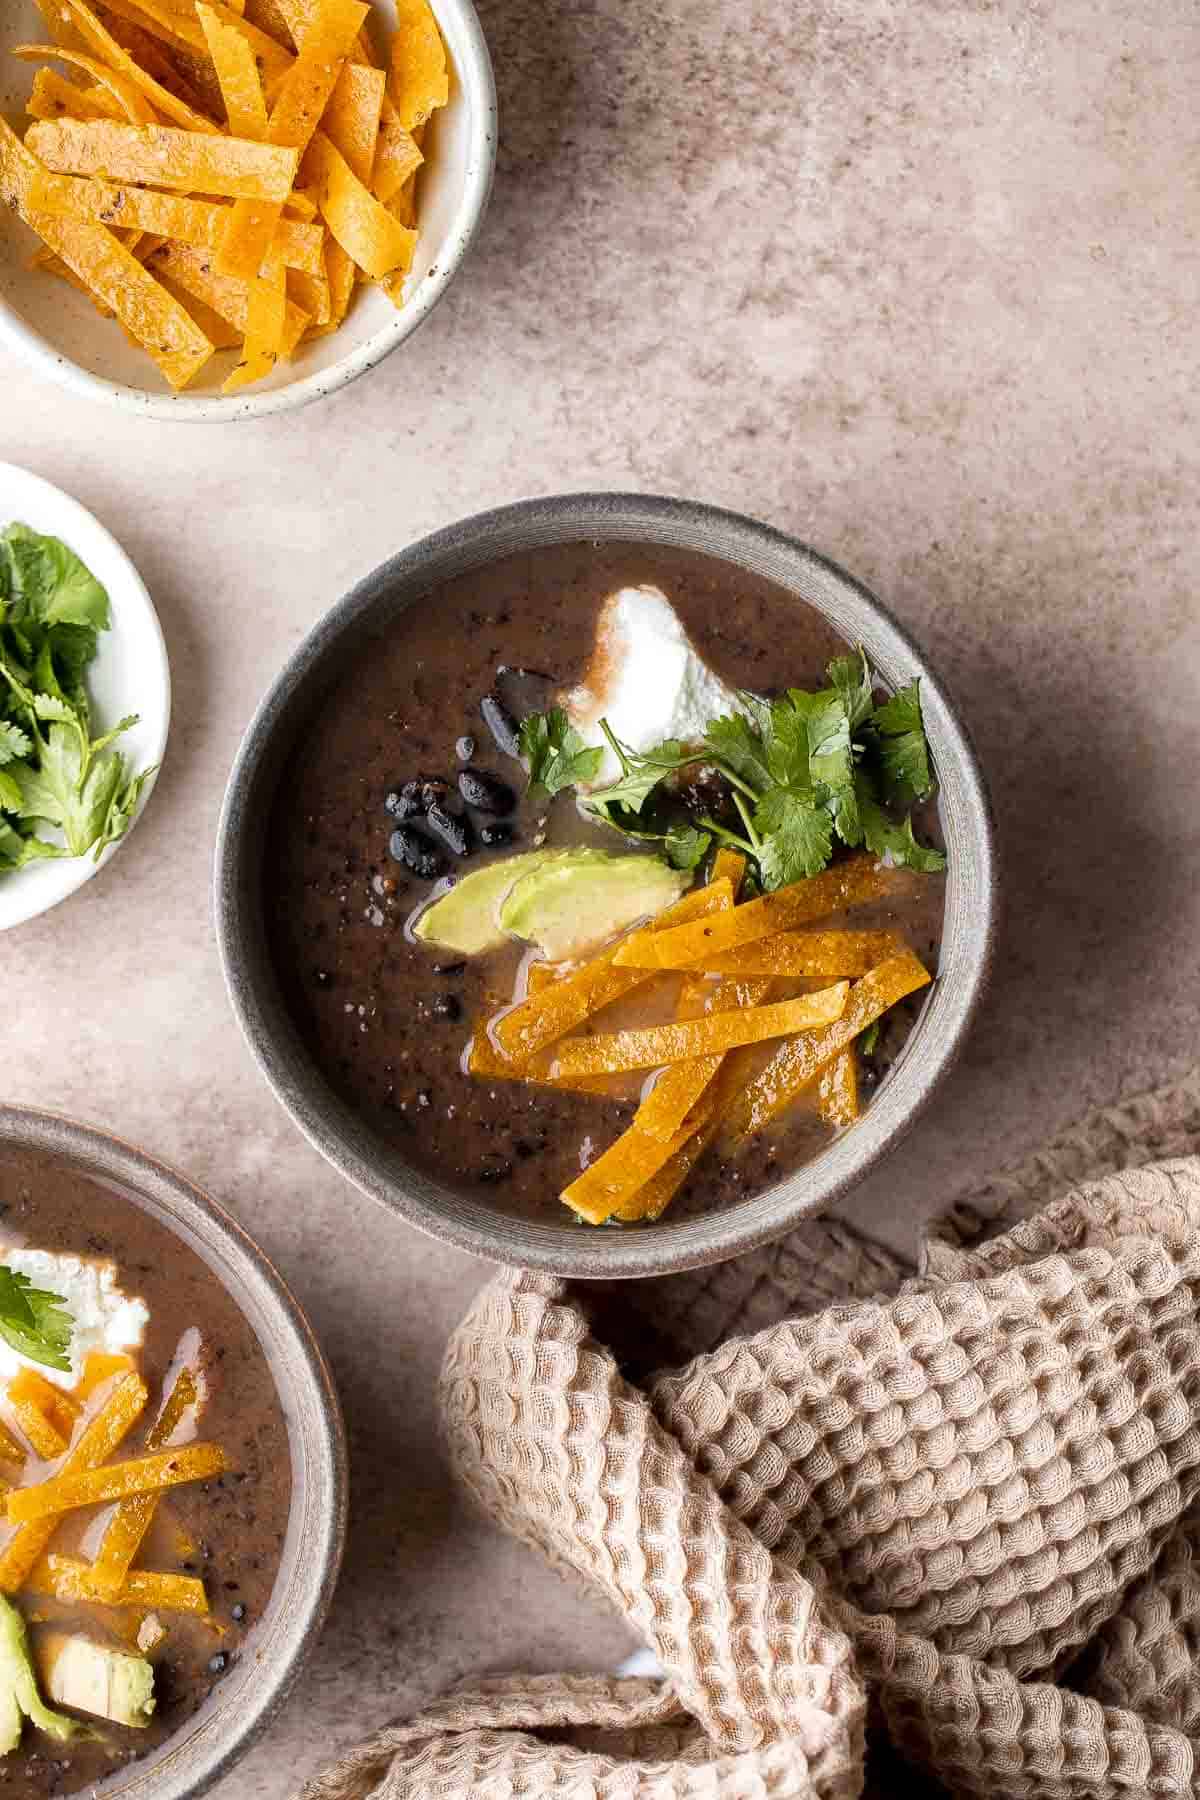
This Black Bean Soup is hearty, healthy, and cozy - everything you want in a soup! It's loaded with black beans and aromatic spices paired with a classic mirepoix and veggie broth that makes the base of this flavorful one-pot soup so delicious. It's has the perfect combination of creamy and chunky, but you can adjust the consistency to your liking.
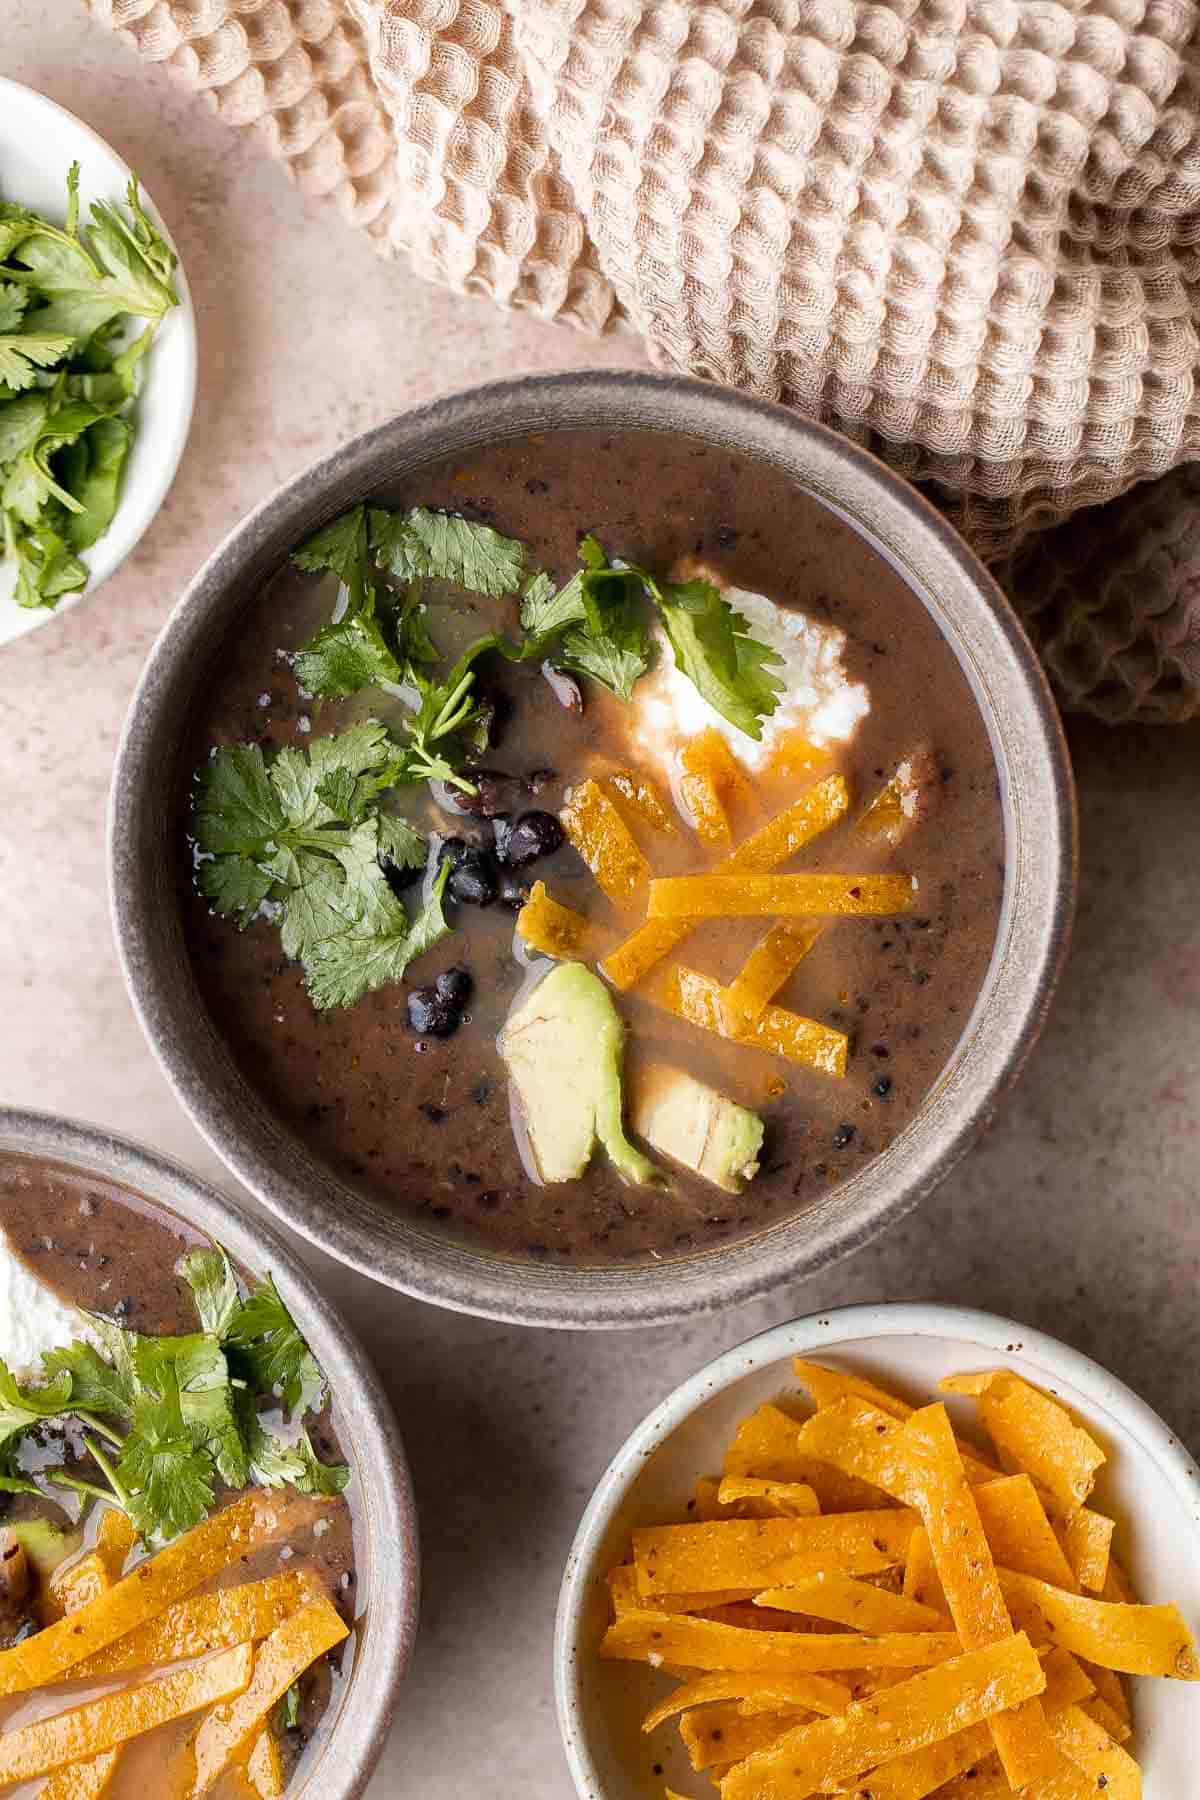
This bean soup is beginner-friendly and quick and easy enough to whip up any time. Served with our favorite Mexican inspired toppings like sour cream, crispy tortilla strips, fresh avocado slices, a sprinkle of cilantro and a squeeze of lime, this black bean soup is so tasty.
Why You'll Love this Black Bean Soup Recipe
- Easy vegan soup. This black bean soup is naturally vegetarian-friendly, without any meat involved. It's super filling thanks to the star ingredient, black beans, and can be served as an entree or side dish any time of day. You can make it completely vegan by swapping the sour cream garnish or leaving it out - see the Recipe Variations notes below!
- Tons of flavor. This soup is incredibly rich in spices like cumin and oregano and vegetables, with comforting Central American flavors like jalapeno, cilantro, and more. It's simple and unassuming, but this soup will surprise you with heaps of mouth-watering flavor.
- Ready in under an hour. Perhaps best of all, this soup is ready in just under an hour, so it can be pulled together quickly on a busy weeknight. It takes about 15 minutes to prep all the ingredients before combining and deepening all the flavors in a stockpot or Dutch oven.
- Nourishing and healthy. This gluten-free black bean soup features 4 heaping cans or 6 cups of drained cooked black beans. Black beans are a good source of essential nutrients like fiber, protein, folate, iron, calcium, and magnesium. They also contain antioxidants. This soup is nourishing, healthy, and delicious.
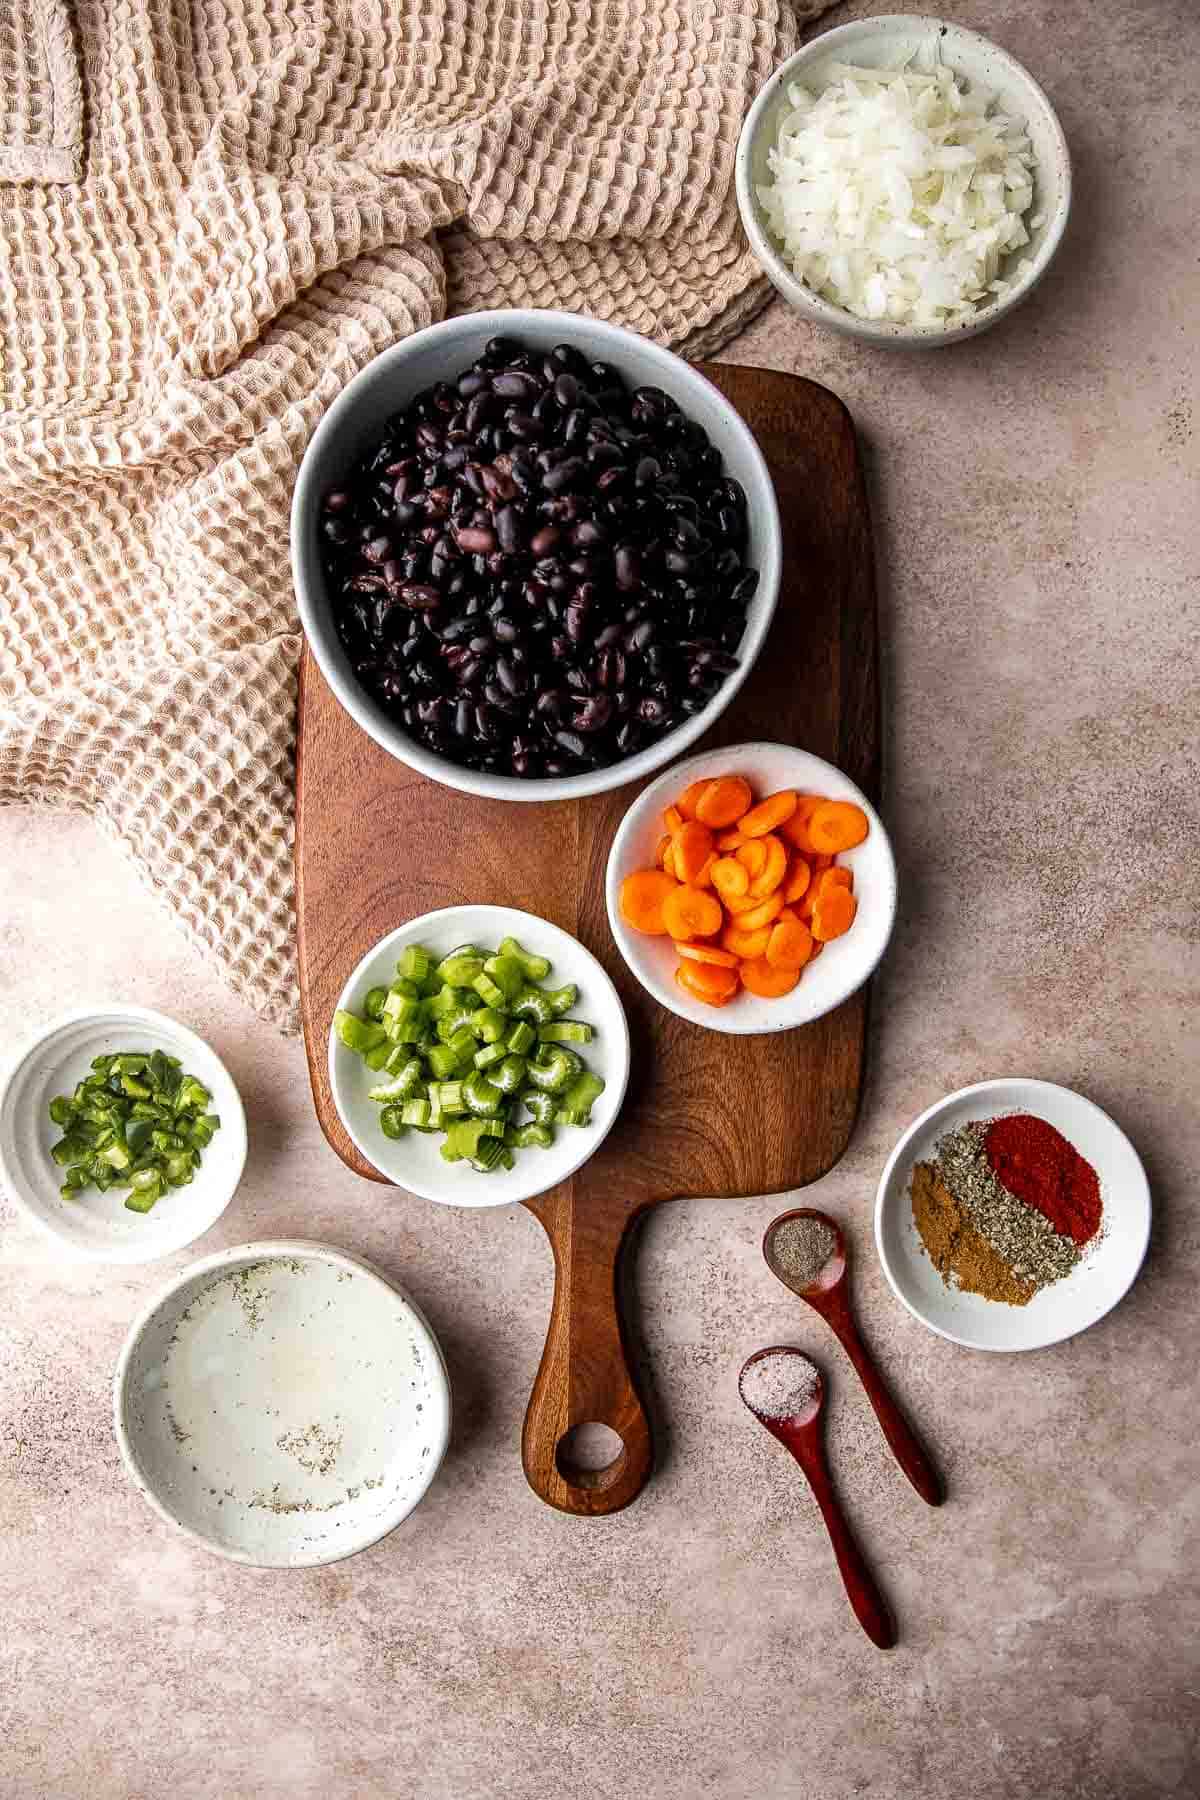
Ingredient Notes
To make this delicious Black Bean Soup, you will need the following ingredients (full measurements in recipe card below):
- avocado oil - olive oil or vegetable oil will also work.
- yellow onion - if you don't have yellow onions on hand, you can use white onion, shallots, or even red onion in a pinch.
- garlic - fresh garlic yields the best flavor, but you can use garlic paste or jarred minced garlic if you need to save some time.
- celery - no celery on hand? Try using fennel or leeks instead, or omit it entirely.
- carrot - parsnips or squash are great swaps for carrots, whether you're low on stock or prefer a different taste.
- jalapeño - if you want to take a less spicy route, use green bell peppers instead of jalapeños.
- cumin - ground coriander or a taco seasoning blend will also work.
- paprika - chili powder or a pinch of cayenne powder can be used in place of paprika.
- oregano - if you don't have oregano on hand, you can use an Italian seasoning blend or dried thyme or basil instead.
- black beans - you can use canned black beans or 6 cups of leftover cooked black beans. You can also soak 2 cups dry beans overnight and then cook them before adding to this recipe - see How to Cook Beans for instructions.
- vegetable broth - water, vegetable bouillon, or chicken broth will also work. If you use chicken broth, the soup will no longer be considered vegan.
Optional Toppings
Top this soup with your favorite Mexican toppings and taco fixings. We used:
- cilantro - the cilantro garnish can be replaced with a soft herb of your choice, like parsley, basil, dill, or chives.
- tortilla strips - both store-bought or homemade tortilla strips are okay to use.
- sour cream - plain Greek yogurt is a great substitute for sour cream, or you can use a vegan sour cream instead.
- avocado - if you don't have fresh avocado, you can use a homemade or store-bought guacamole instead.
- lime juice - fresh lime juice is best, but you can use lime juice concentrate if necessary.
- salt and pepper
You will also need measuring cups and spoons, large pot or 4 quart Dutch oven, and an immersion blender, upright blender, or food processor.
How to Make the Best Black Bean Soup
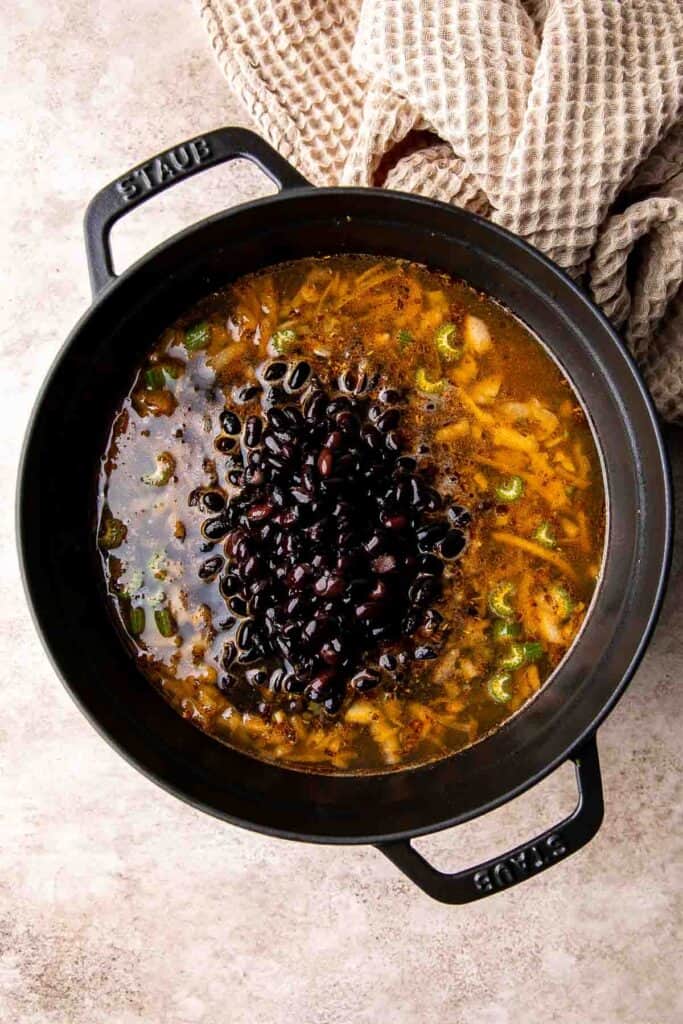
- Sauté aromatics. Heat oil in a 4 quart Dutch oven or large pot over medium heat until the hot oil starts to sizzle, about 1 minute. Add onion, garlic, celery, carrot, and jalapeño and sauté until tender, about 3-4 minutes. Stir in cumin, paprika, and oregano.
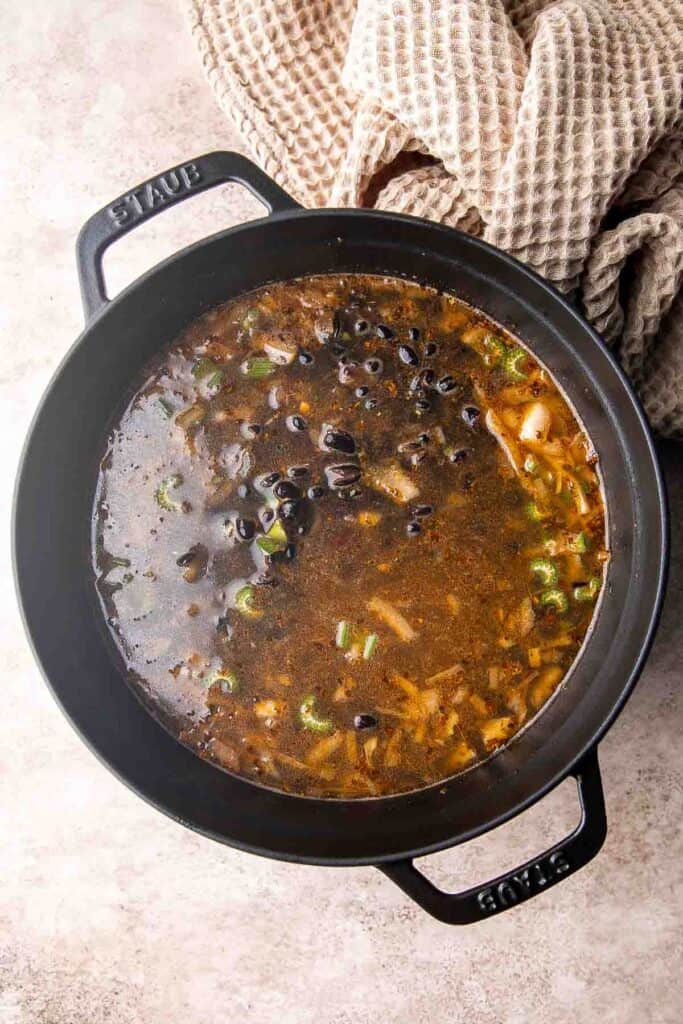
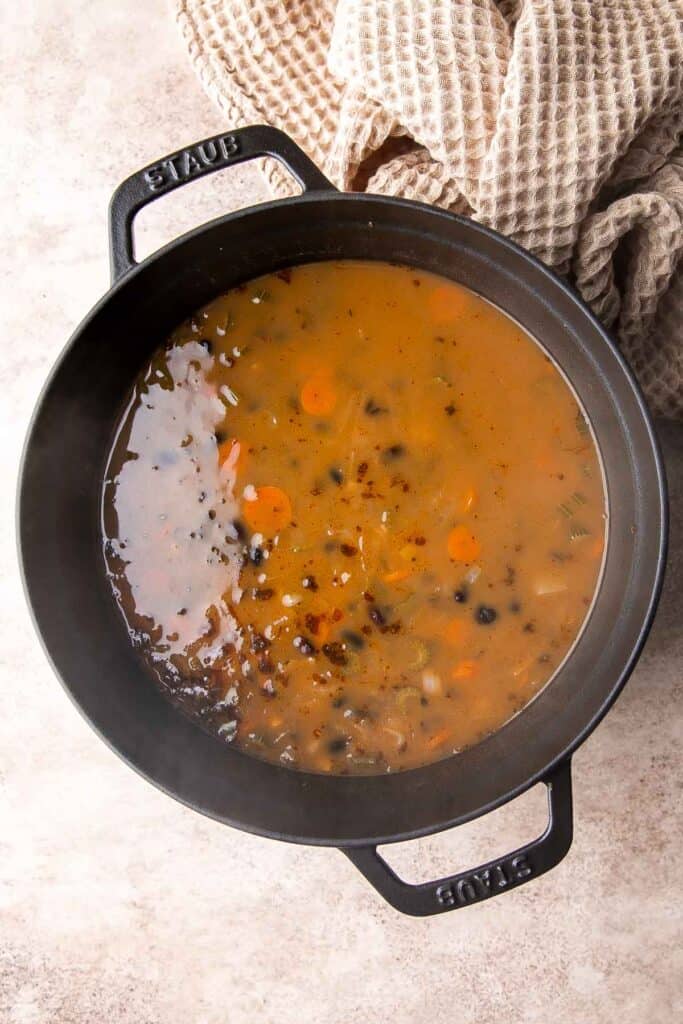
- Add beans and simmer. Add black beans and vegetable broth. Mix well and bring it to a boil. Reduce heat to low and cover the lid. Simmer until the beans are tender, about 30 minutes, stirring occasionally. Season with salt and pepper to taste.
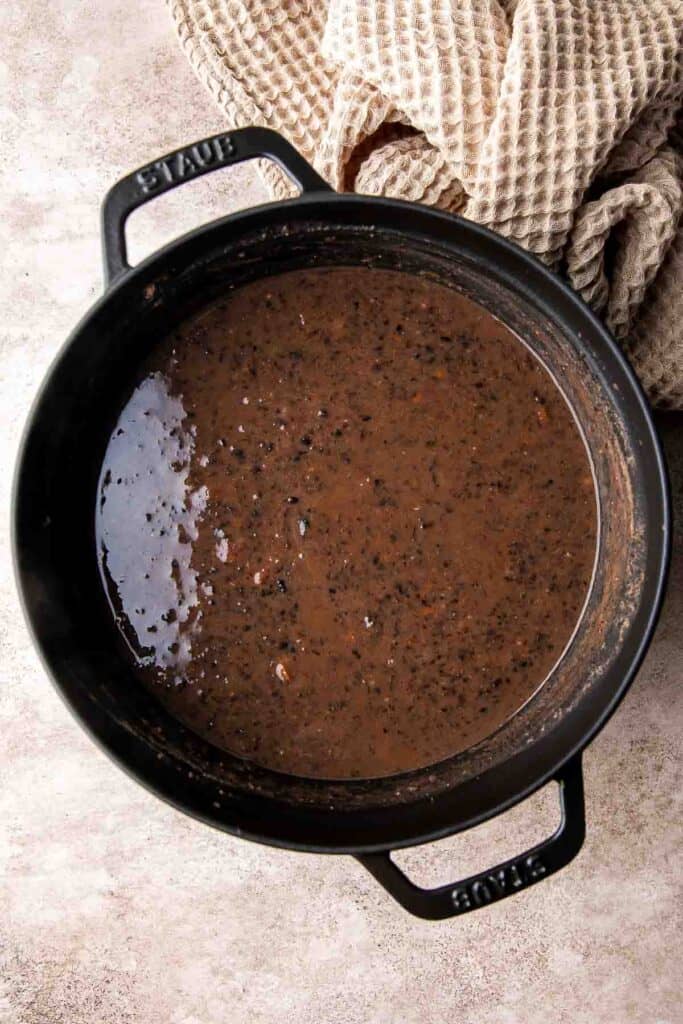
- Puree. Use an immersion blender and puree half of the soup until smooth. You can also transfer the soup to a food processor or upright blender to puree.
- Serve. Serve with your favorite Mexican style toppings like cilantro, tortilla strips, sour cream, avocado, and lime juice, if desired.
Recipe Variations
- Cheesy black bean soup. Make it cheesy! Add a few handfuls of Monterey Jack or sharp cheddar at the end to make this black bean soup even more irresistible. You can also offer cheese on the side to keep the main soup vegan but offer non-plant based diners the option to stir it in.
- Spicy black bean soup. Kick the heat up a few notches by adding hot sauce, increasing the amount of jalapeños, or adding ½-1 teaspoon of cayenne powder to the spice mix.
- Add protein. You can make this soup even more hearty by adding cooked chicken, ground beef, tofu, or seitan! Keep in mind that the protein you choose will affect the nature of the dish and may not make it suitable for vegans and vegetarians.
How to Serve
This Black Bean Soup is delicious served on its own for lunch or dinner with your favorite toppings or without. Make a full meal out of it with some of these complimentary side dishes:
- Mexican Caesar Salad
- Mexican Street Corn (Elote)
- Cilantro Lime Rice
- Vegetarian Stuffed Peppers
- Mexican Street Corn Salad
For more recipe inspiration, see our 25 Side Dishes for Soup.
Recipe Tips and Tricks
- Adjust the consistency. Want this black bean soup to be more chunky like chili? Blend less of the soup in the final step! Want it to be thicker and creamier? Blend more! You can also adjust the final consistency by increasing or decreasing the amount of stock you use, but it will also affect the volume of the soup.
- Use canned black beans. The biggest reason this soup is so speedy and simple is because it calls for canned black beans, which saves quite a bit of preparation time. If you use dried beans, try to cook them the day before or set aside extra time to allow them to cook completely before adding them to the soup. You will need 2 cups dried beans to yield 6 cups when cooked.
- Freeze for a rainy day. This soup freezes beautifully and is easy to reheat, making it ideal for prepping ahead of time to use when you don't have the time or energy to make a healthy recipe from scratch. Just make sure you date and label your frozen soup so you know when to use it!
Storing and Freezing Instructions
How to Store
Let the soup cool completely before transferring to an airtight container and refrigerating for up to 5 days.
How to Reheat
Reheat leftover black bean soup on the stovetop over medium-low heat for 10-15 minutes, stirring frequently until the soup reaches the desired temperature.
How to Freeze
Transfer leftovers to a freezer-safe container or Ziploc freezer bag and freeze for up to 3 months. Defrost overnight in the refrigerator or in a warm water bath before reheating.
FAQ
This black bean soup is ideal for plant-based diets, no substitutes needed! There are no animal products whatsoever in the recipe as it's written-save for the optional sour cream topping, but you can easily omit it or swap it for a dairy-free alternative.
If you take a wrong turn somewhere and your black bean soup turns out thinner than you'd like, you have a few options to thicken it up! The first option is to add more black beans and blend them up a bit to help them absorb some of the stock. The second option is to cook it longer on the stovetop to evaporate a bit of the liquid. Just keep a close eye on it and stir frequently to prevent burning!
More Soup Recipes with Beans
- 60 Best Soup Recipes
- White Bean Soup with Kale
- Persian Lentil Soup
- Creamy Mexican Corn Soup
- Vegetarian Split Pea Soup
- Beef Taco Soup
Tried this recipe?
I'd love to hear what you think! Leave a comment and rating below to share your feedback. Your reviews help others discover this recipe and help me keep creating more free recipes for you. Snap a photo and tag me on social media @aheadofthyme too.

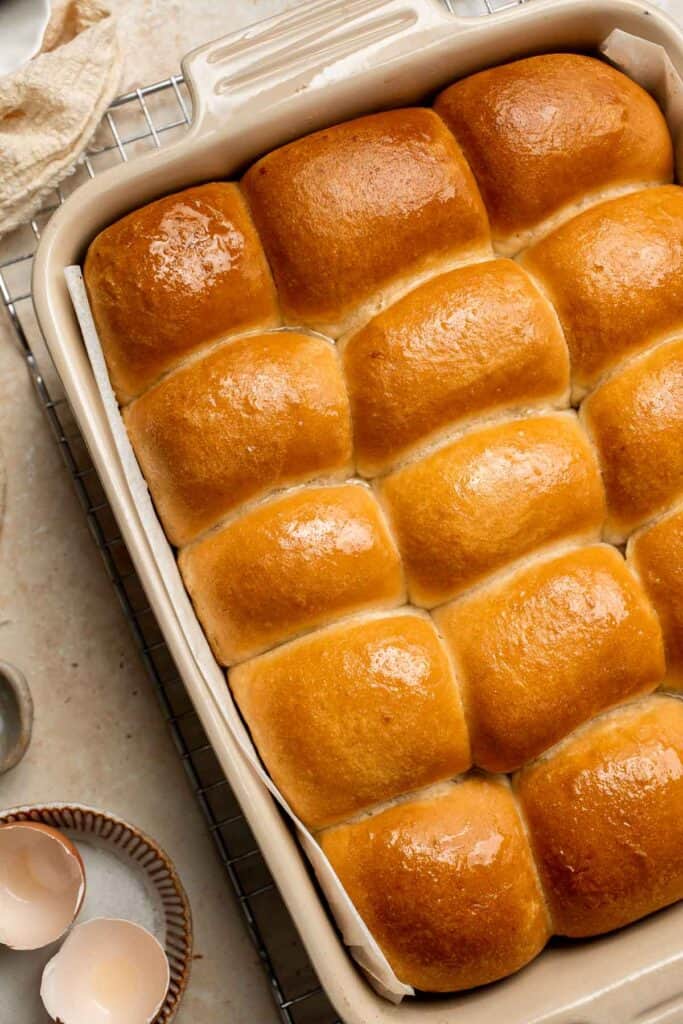
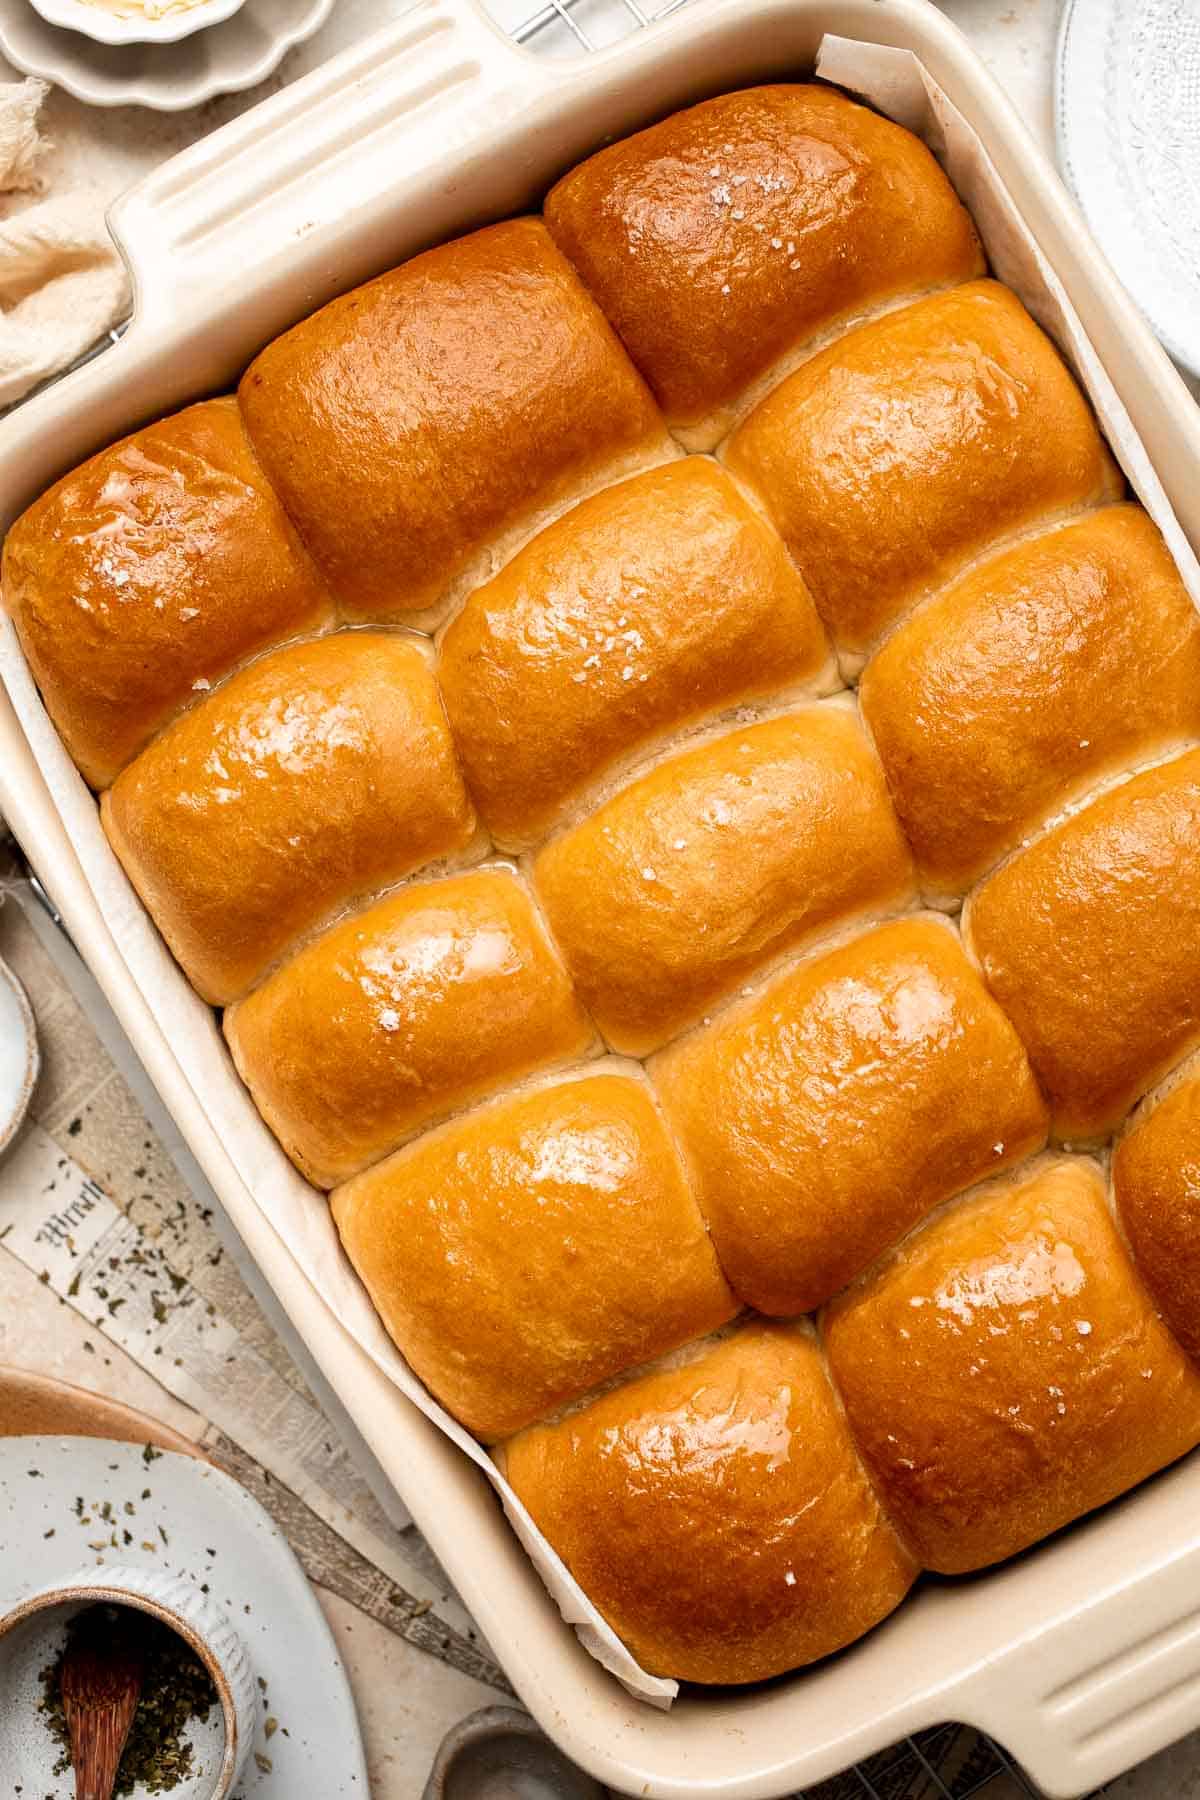
Parker House Rolls
Notoriously light and fluffy with a little fold in the middle, these Parker House Rolls are the perfect roll. They're made like regular dinner rolls, but instead of just rolling them into a ball, you press them into an oval and brush them with melted butter before rolling them up. This gives them a buttery flavor and incredibly tender texture that's such a treat to eat. This will quickly become your favorite roll recipe!

Originally created in the 1800s, the history of Parker House rolls starts at the Omni Parker House Hotel in Boston, Massachusetts. These rolls are known for their unusually narrow shape. Legend has it that they were invented when an angry baker placed a batch of unfinished rolls in the oven.
Word spread as people tried these super soft, tender rolls, which were so different from the hard, dry rolls of the day. They were popular worldwide for decades before the recipe was finally shared by the White House chef in the 1930s, which solidified this classic recipe as an American staple from then on.
Why You'll Love These Parker House Rolls
- Incredibly light and fluffy. These rolls start with a really tender basic dough recipe. As they're folded together, they create a natural pocket perfect for adding flavored butter or a drizzle of honey. They're so soft and so much fun to eat!
- Use basic ingredients. We love that you can turn a few simple ingredients into the most perfect rolls with this Parker House rolls recipe. You probably already have everything you need on hand! We love a good pantry staple recipe!
- So easy to make. This dough comes together really quickly, and you don't even need to use any fancy tools or equipment. Despite their simplicity, your dinner guests will be begging for the recipe! They are unbelievably fluffy and soft, perfect for sopping up gravy or the last drops of soup.

Ingredient Notes
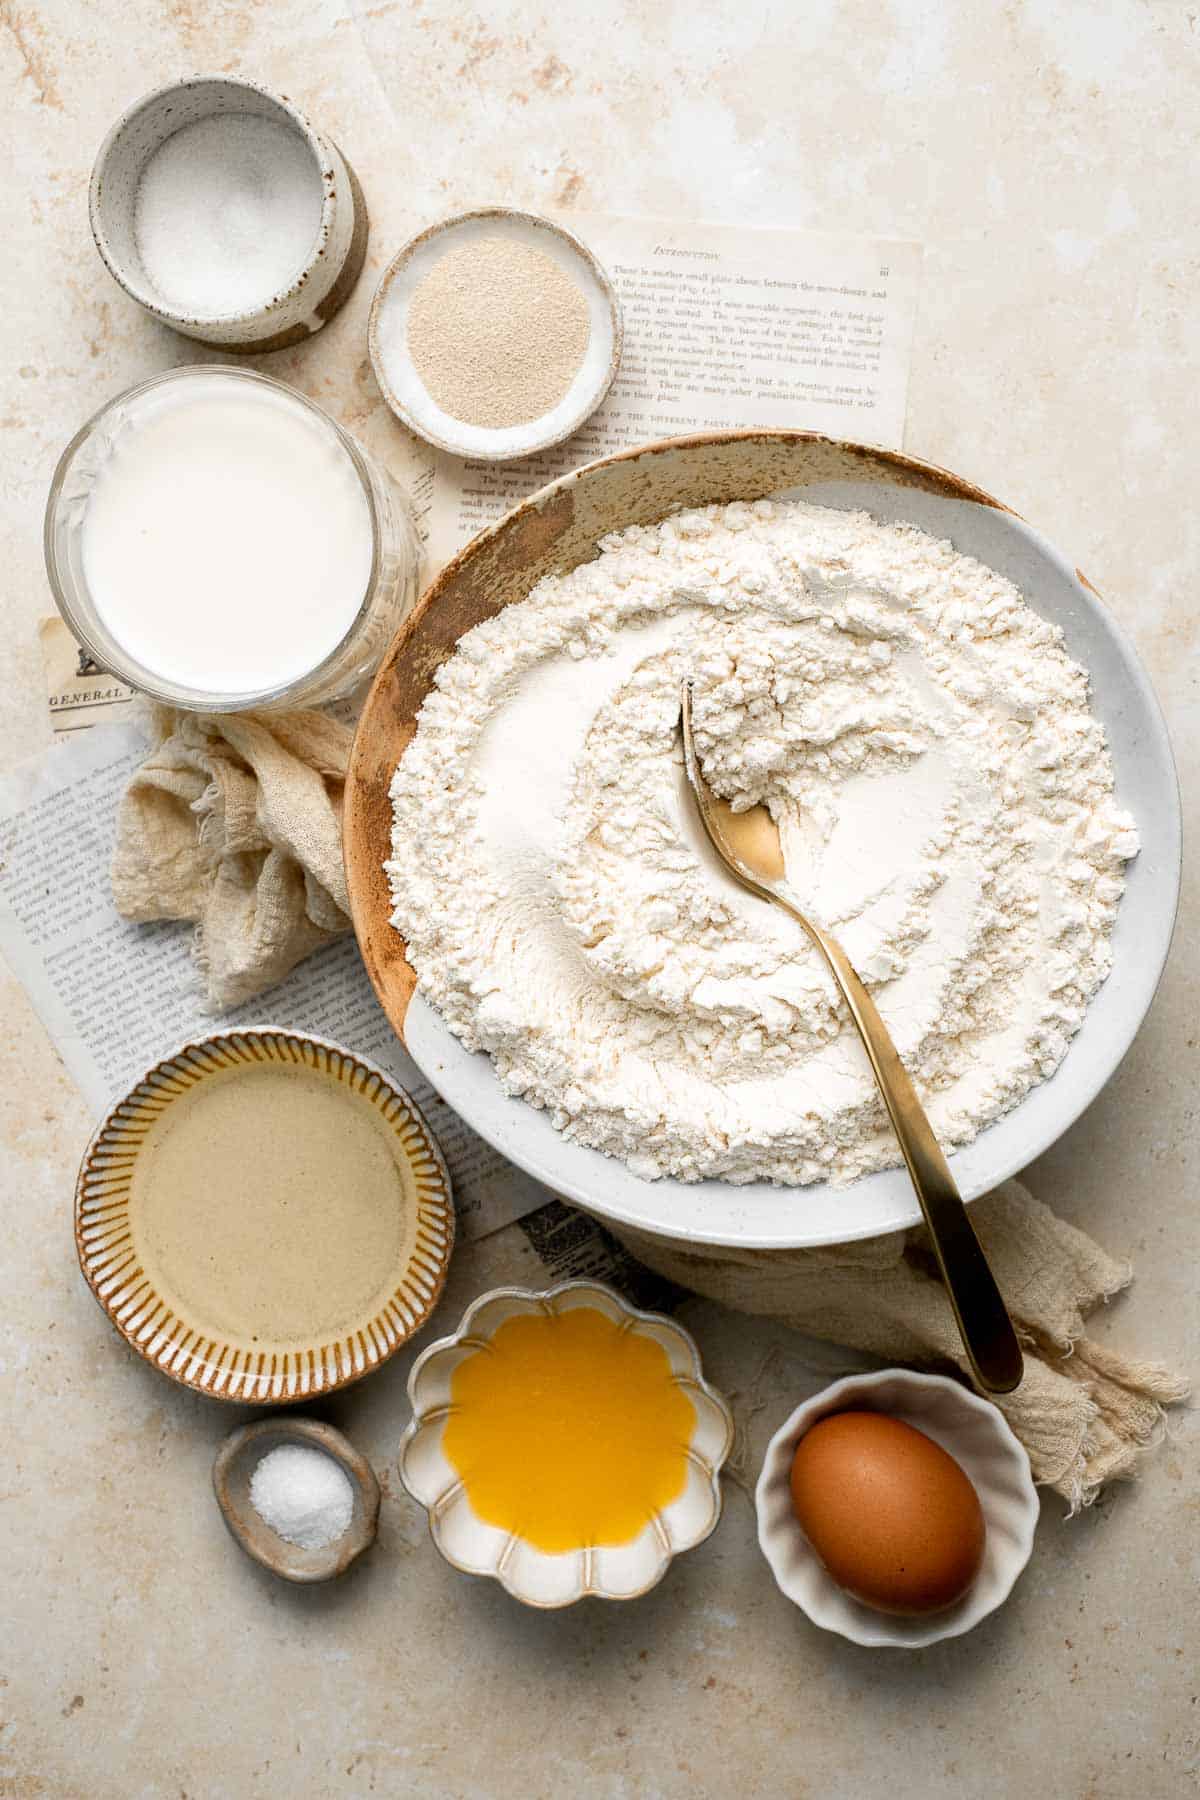
To make these delicious Parker House rolls, you will need the following ingredients (full measurements in recipe card below):
- whole milk - use lightly warm or room temperature milk to help activate the yeast.
- vegetable oil - this will add a moist, tender texture to your homemade bread.
- yeast - choose active dry yeast for best results. Instant yeast works, too.
- sugar - this adds just a little sweetness to these homemade rolls, which makes them absolutely irresistible. Sugar is also necessary for helping the yeast to proof the dough faster.
- flour - use regular all purpose flour. Divide the flour into two portions to avoid adding too much.
- egg - egg will bind the rolls together, give them a tender texture, and help them rise.
- salt - a little salt will highlight all the flavors in these tender rolls.
- butter - brush melted butter over the hot rolls fresh from the oven for a buttery flavor and shine.
You will also need a mixing bowl or stand mixer, measuring cups, knife or bench scraper, damp cloth, rolling pin, pastry brush, basket tray, parchment paper, and a clean kitchen towel.
How to Make the Best Parker House Rolls
First, prepare the dough.
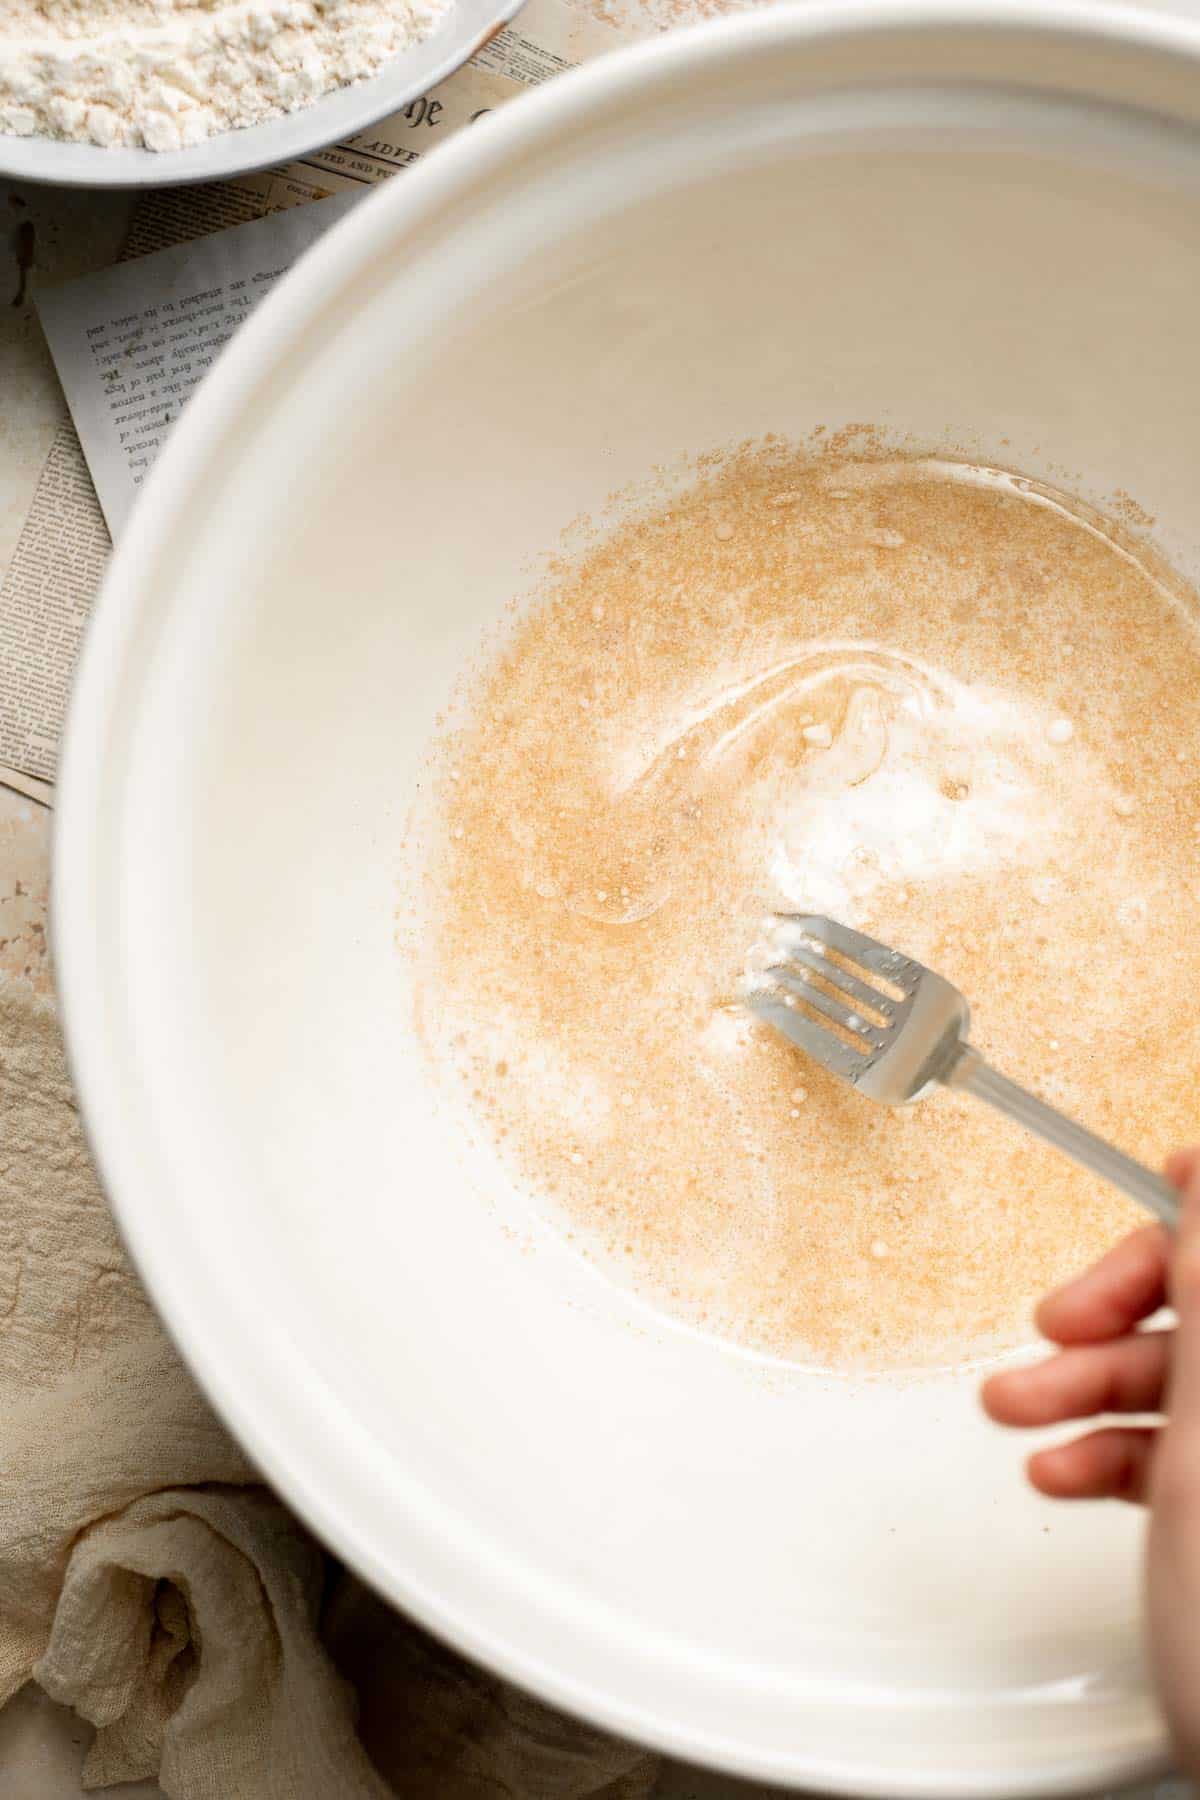
- Activate the yeast. In a mixing bowl (or in the bowl of a stand mixer), stir together milk, vegetable oil, yeast, and sugar. Let the milk mixture rest for 10 minutes until foamy.
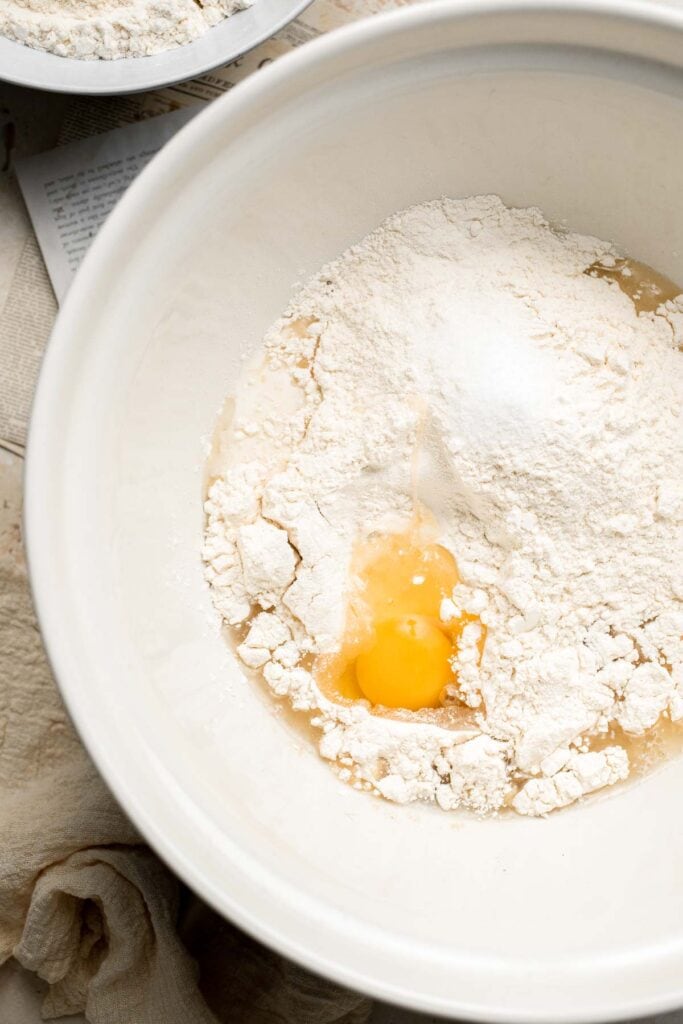
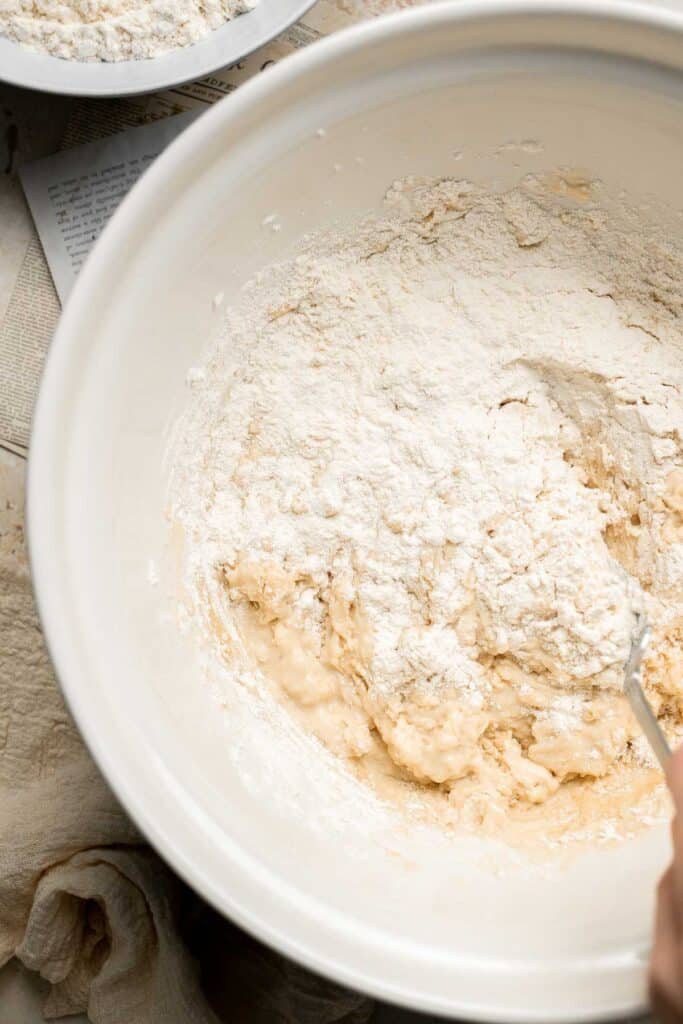
- Add remaining ingredients. Add in 2 cups flour, egg, and salt. Stir until combined (or use a dough hook in your stand mixer to mix until combined). Gradually add in the remaining flour and mix until completely combined.
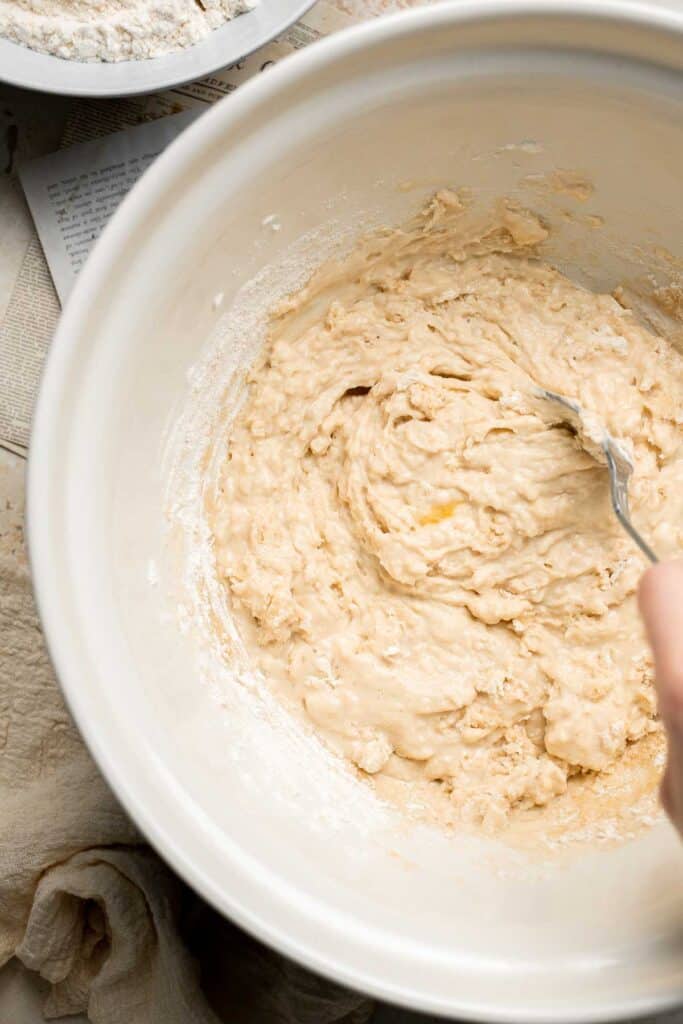
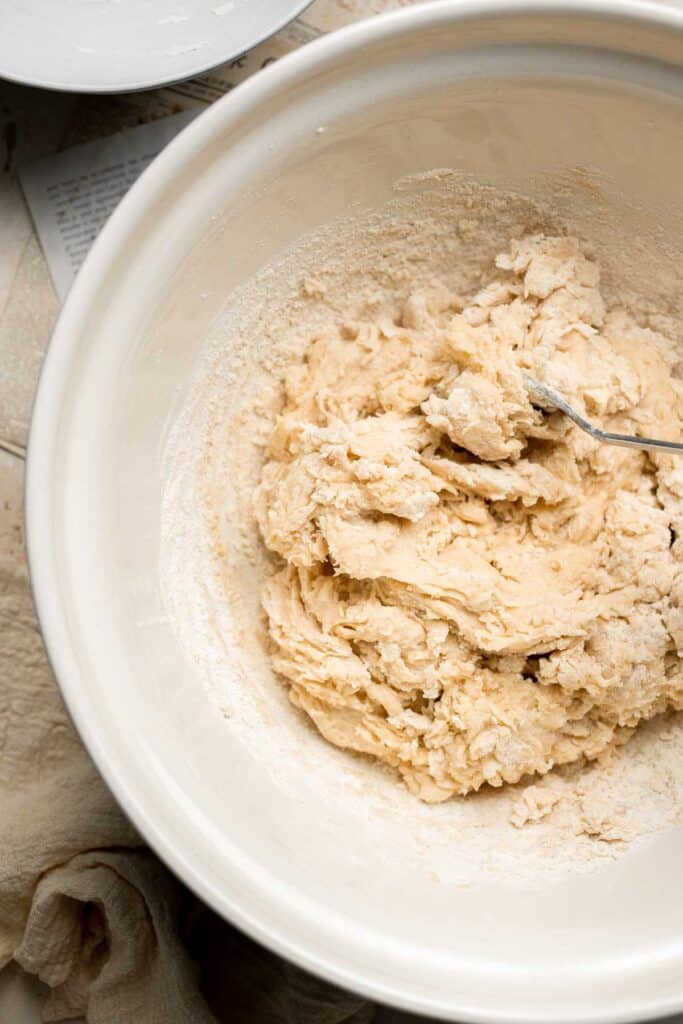
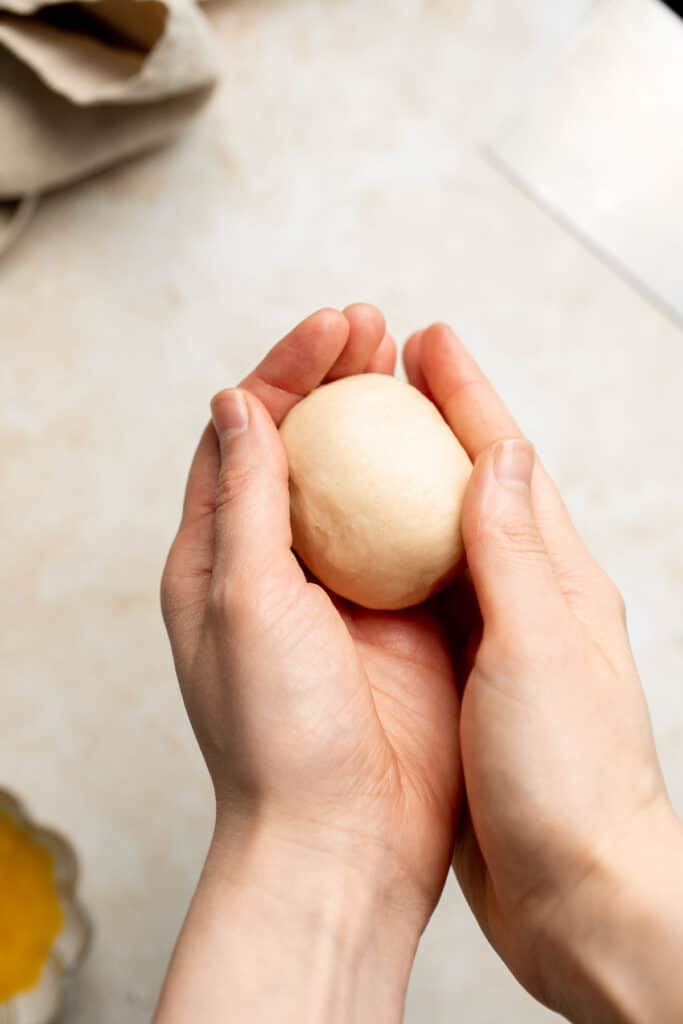
- Knead. Knead the dough manually using your hands on a clean surface for 5 minutes, or use the dough hook of your stand mixer to mix together until the dough ball forms and becomes smooth, about 5 minutes.
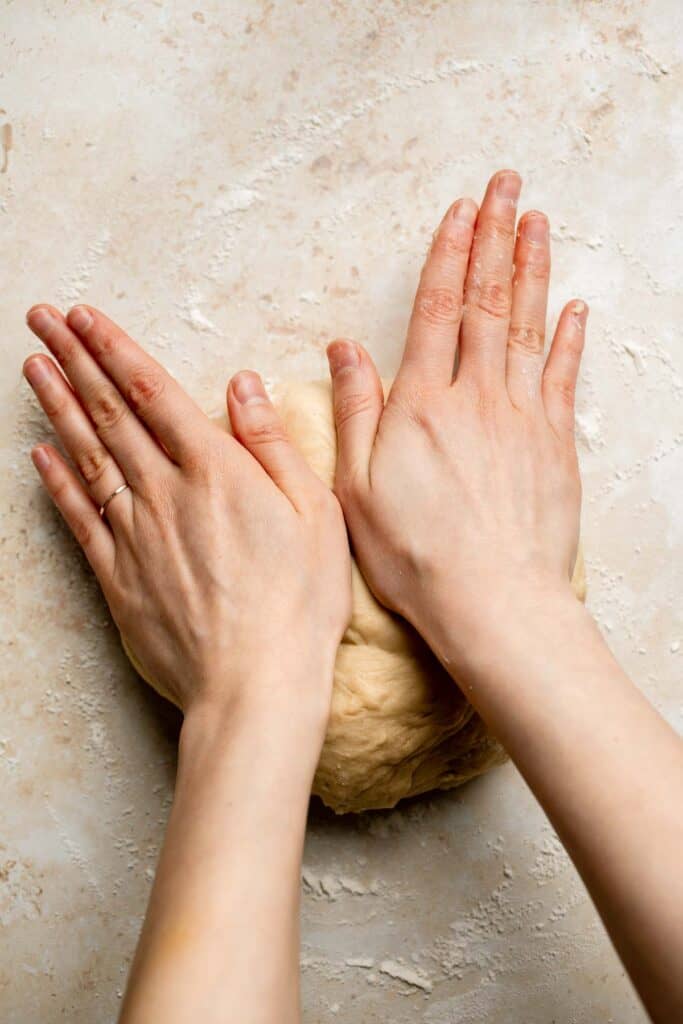
Tips for Kneading Dough
- How to knead dough: Knead the dough by pushing it down and outward using the palms of your hands. Fold the dough in half toward you and press down. Repeat this motion by pushing the dough down and outward, and then folding over towards you. This helps build up gluten strength in dough that is responsible for making the bread fluffy.
- How to test if dough is well-kneaded: A well-kneaded dough is smooth and can hold its shape. You can test the dough by giving it a firm poke with your finger. The indentation should bounce right back. If it doesn't bounce back and stays like a dimple, keep kneading for a few more minutes.
Next, shape the rolls.
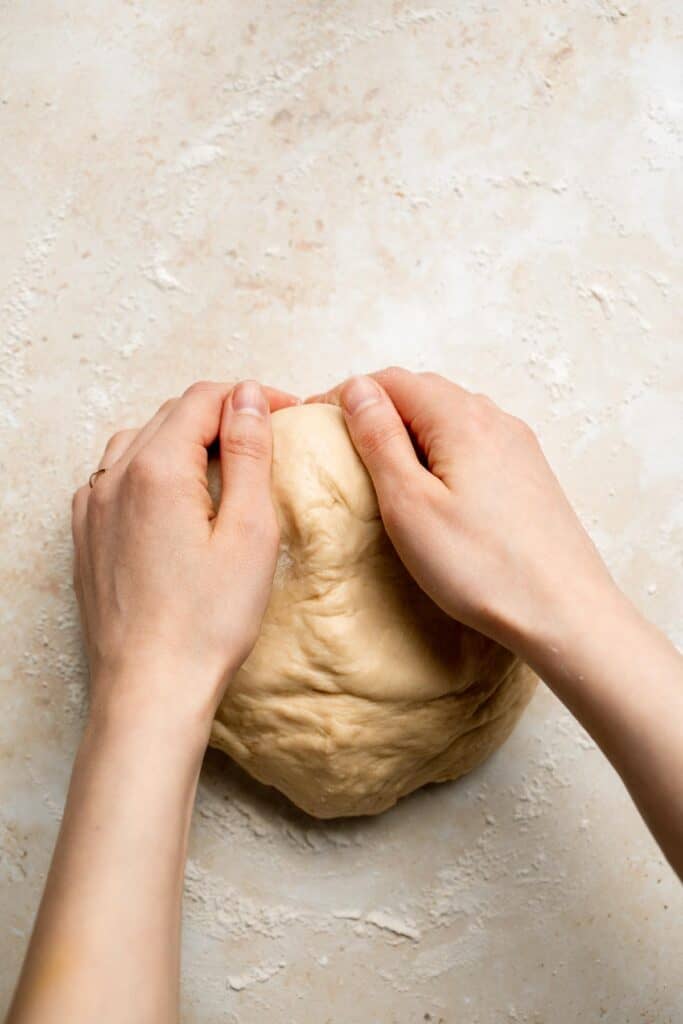
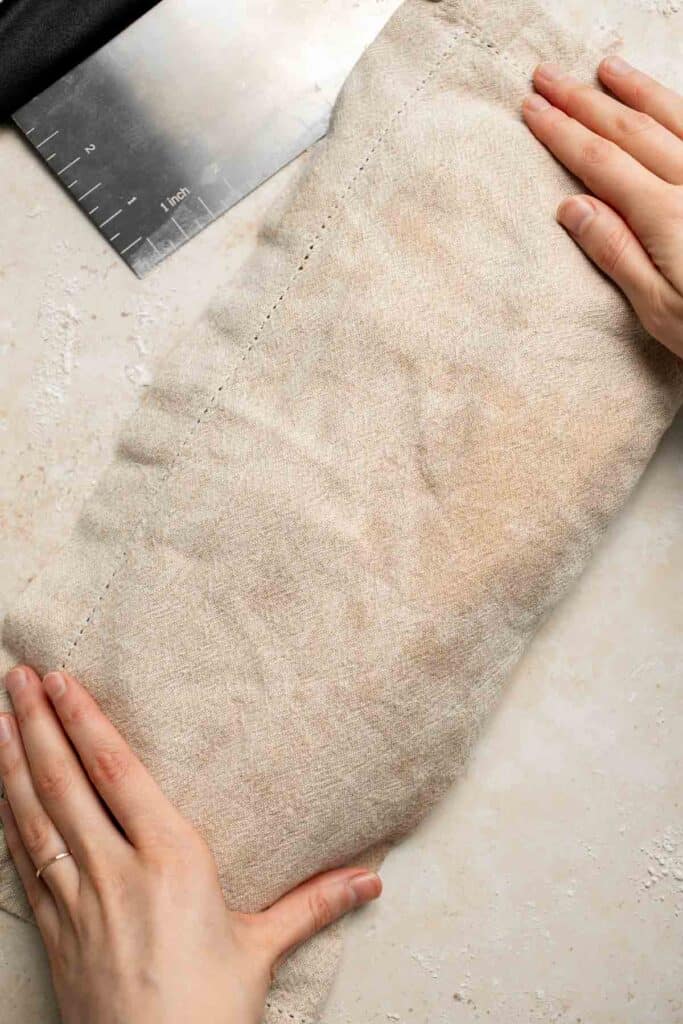
- Divide dough. Roll the ball of dough into a log and divide it into 15 equal pieces with a knife or bench scraper. Cover the dough with a damp cloth or plastic wrap to prevent it from drying. When the dough loses moisture, it tends to form hard skin around its surface, which creates a crust when baking.
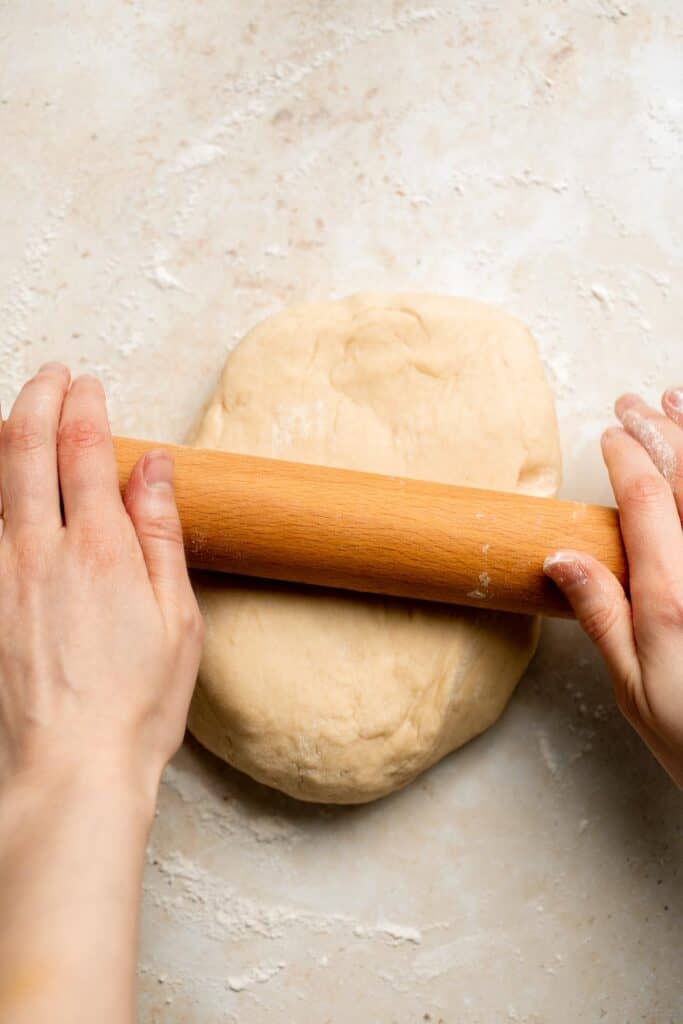


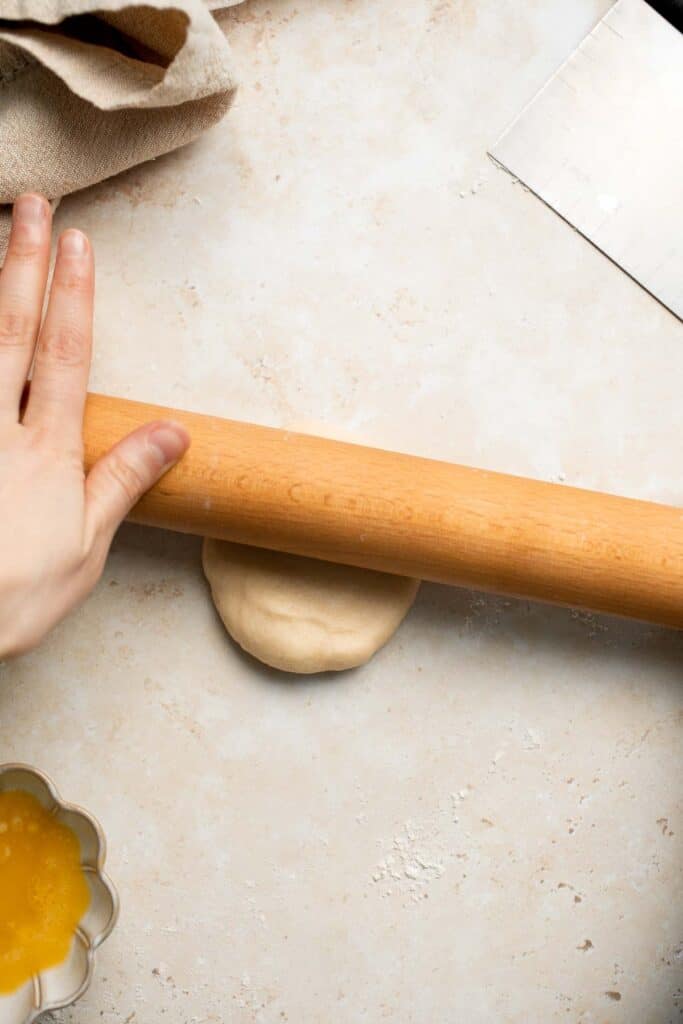
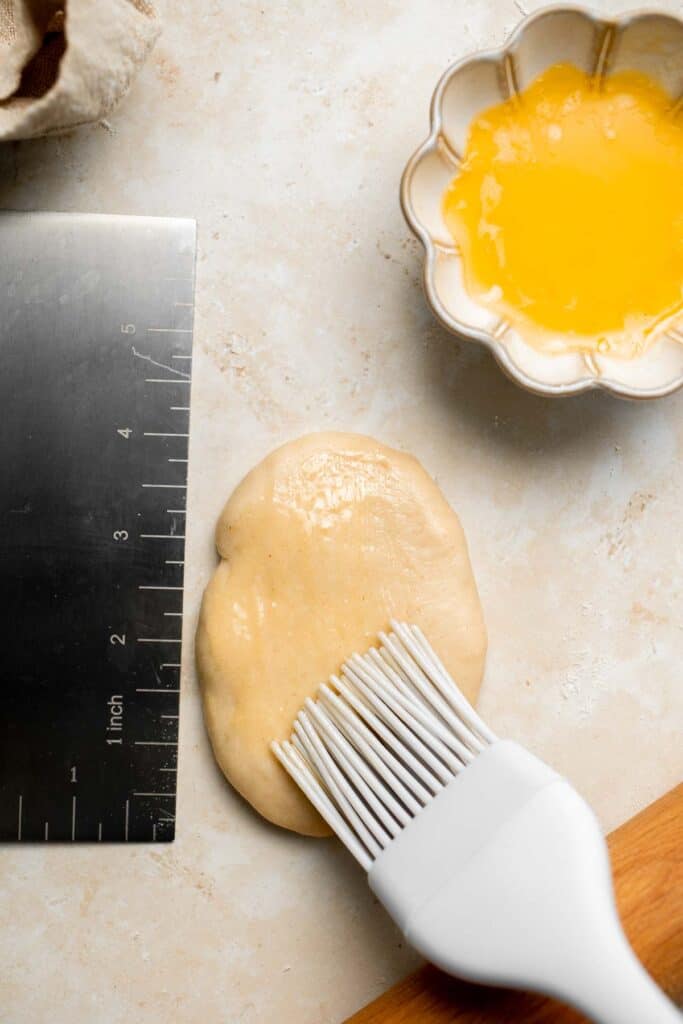
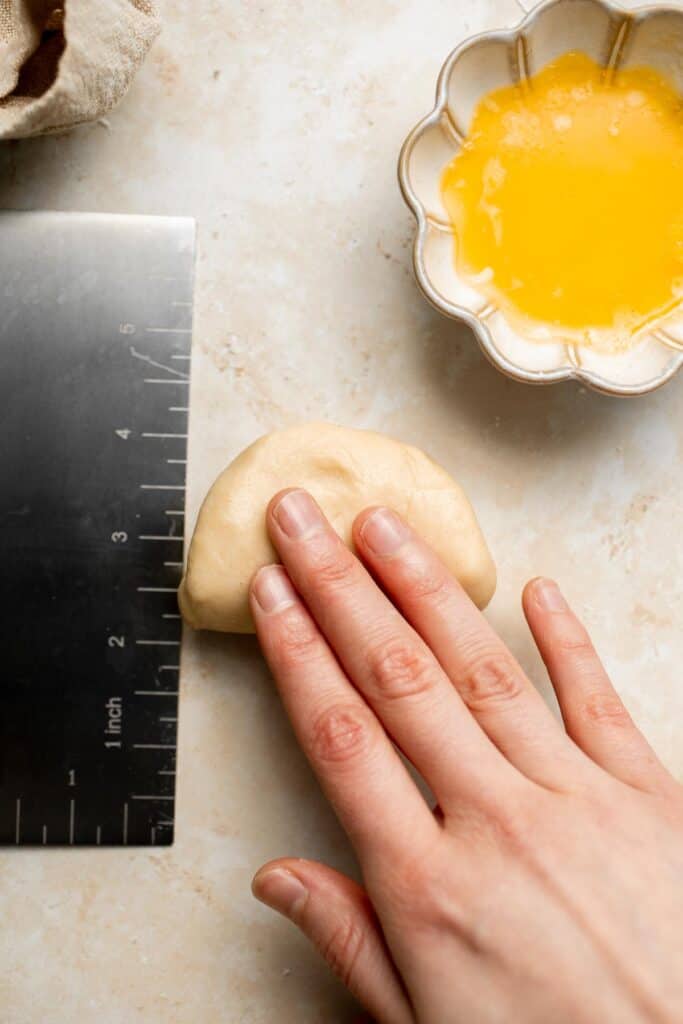
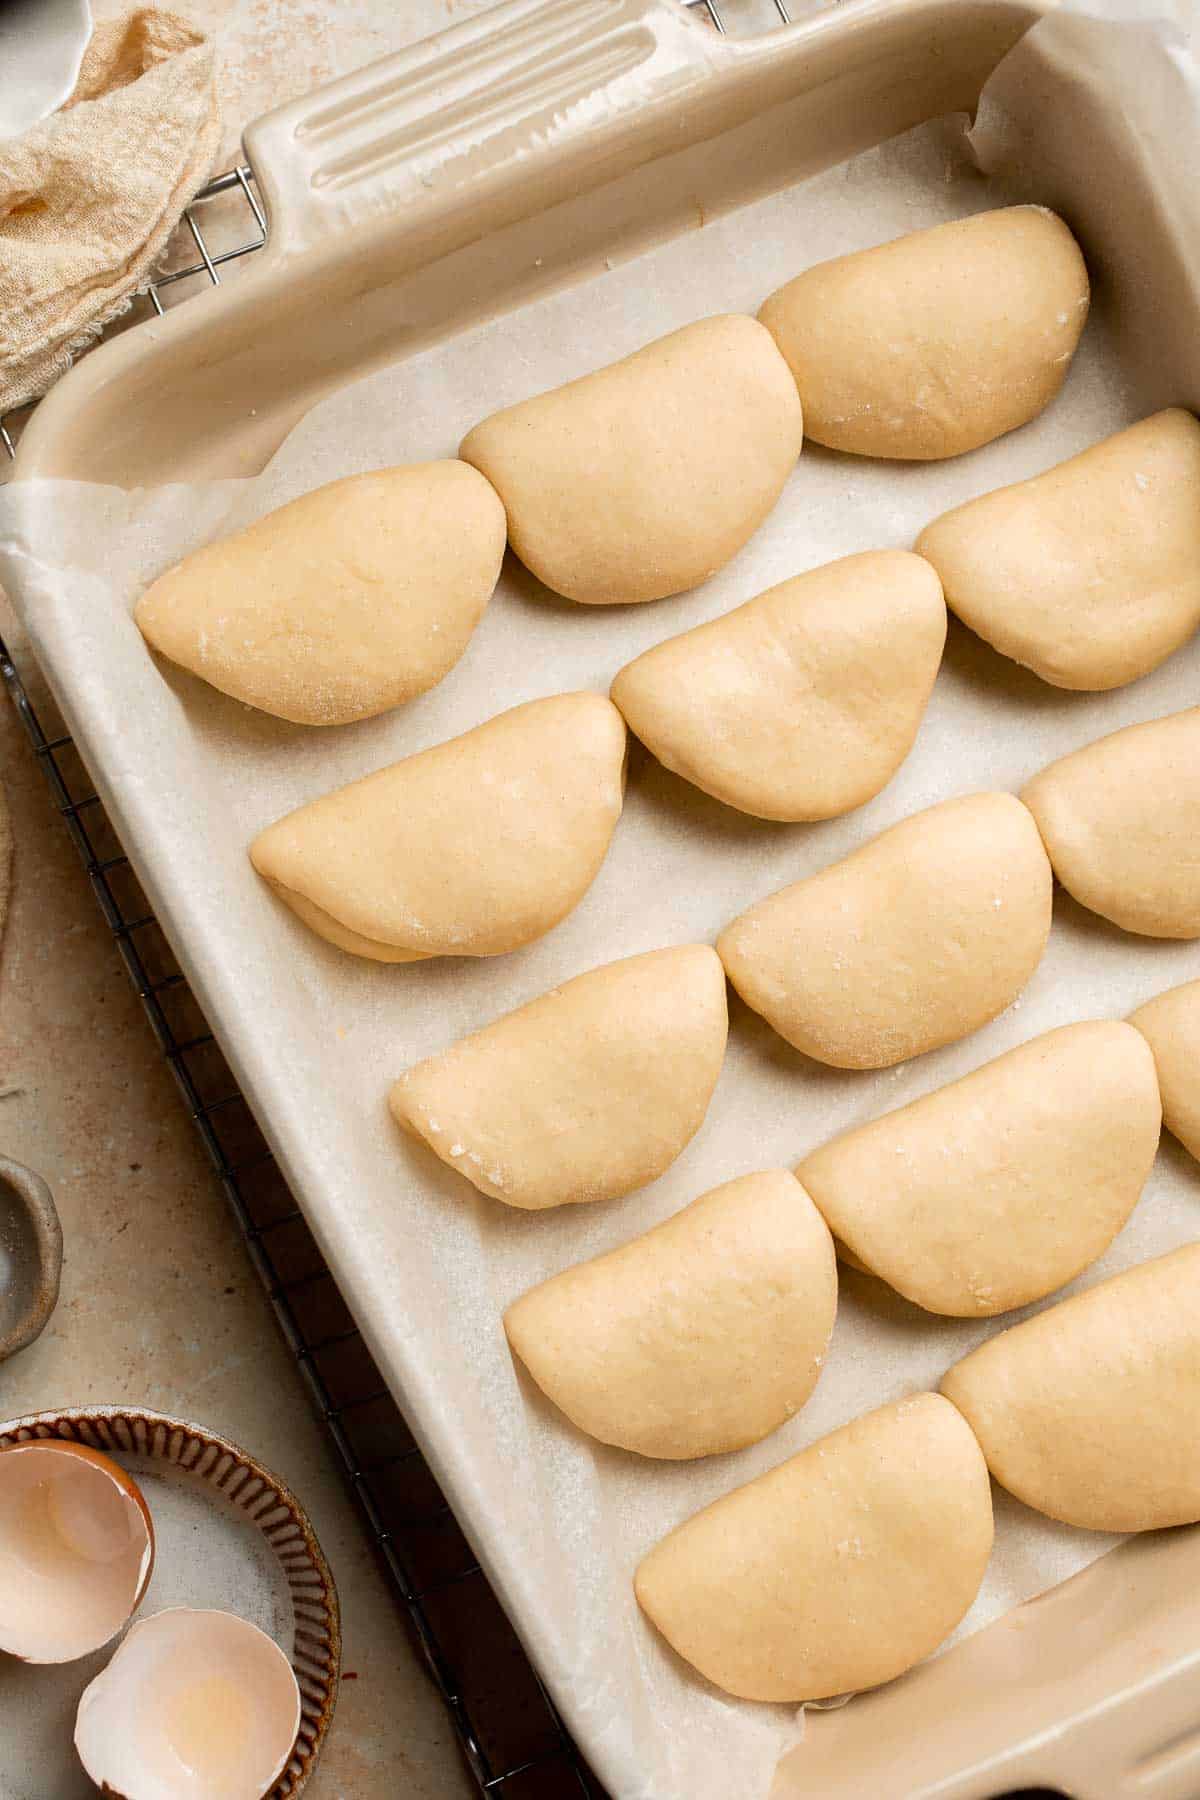
- Shape. Take one piece at a time and roll it out into an oval of 4 inch long. Brush with melted butter and fold in half.
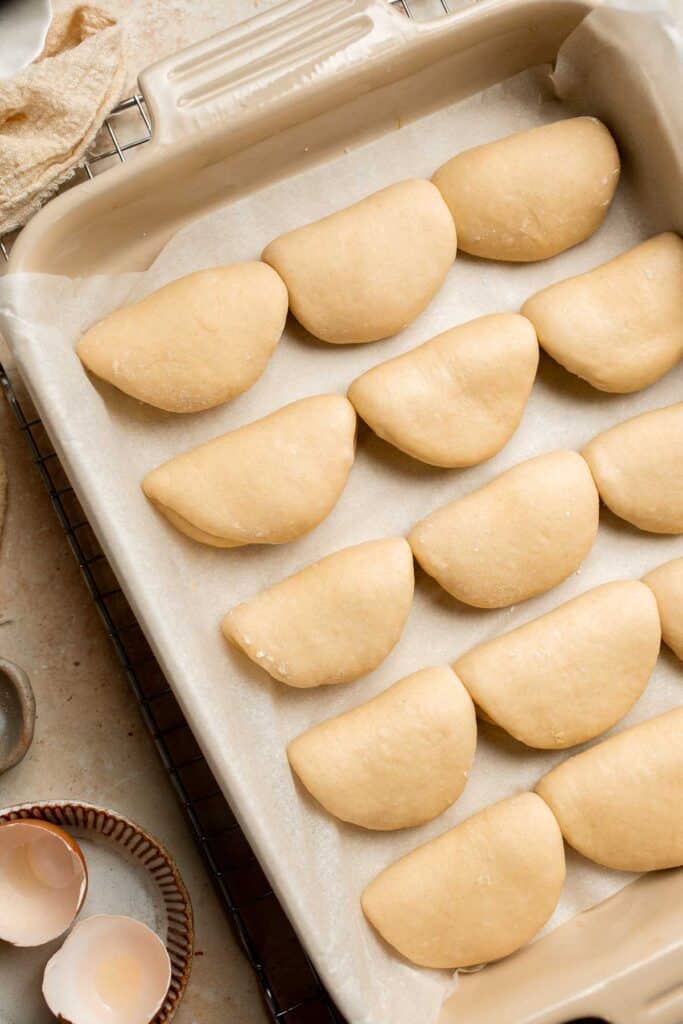
- Repeat. Repeat and arrange the rolls in a large half sheet baking tray (9x13-inch) lined with parchment paper.
Now it's time to proof the rolls.
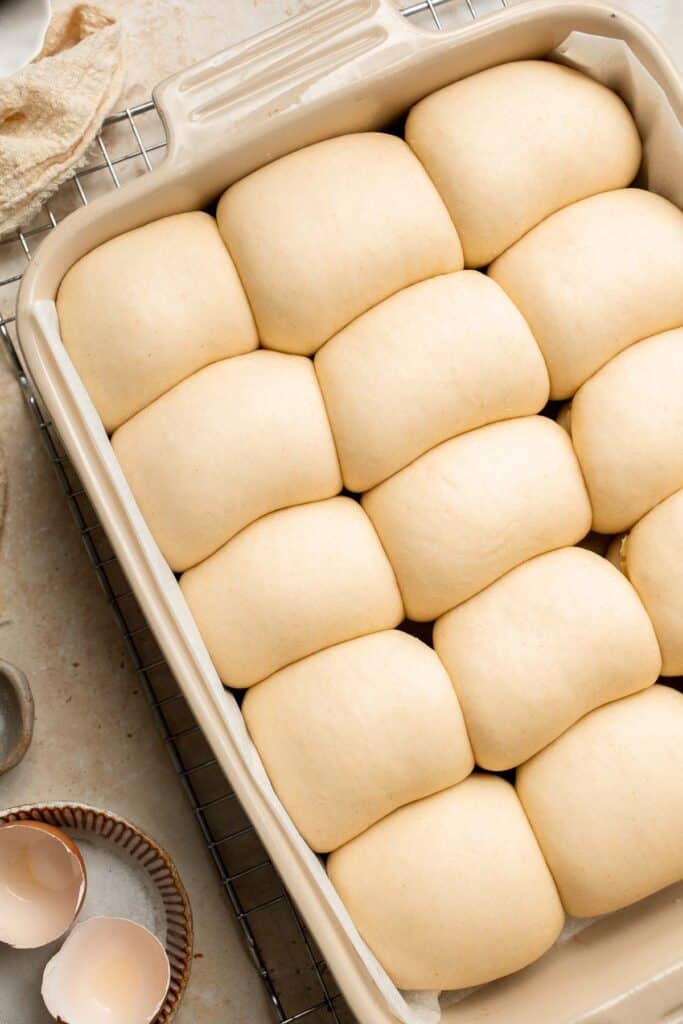
Cover the rolls with a clean kitchen towel or another baking pan upside down, on top. Let the rolls rest and rise for one hour. The rolls should almost double in size. Letting the dough rise in a warmer area will help the rolls rise faster.
Finally, let's bake the rolls.
Bake the rolls in a 375F preheated oven for 20 minutes, until the tops are golden brown. Let the rolls cool on a wire rack for 15 minutes and brush the tops with the remaining butter.
Recipe Variations
- Try whole wheat flour. For a richer flavor and darker color, replace half of the all-purpose flour with whole wheat.
- Use a stand mixer. Instead of making these rolls by hand, use a stand mixer with a dough hook attachment to speed up the process.
- Add honey. Instead of sugar, use honey for a mellow sweetness.
- Freeze first. You don't have to bake all of your rolls at once. After shaping, freeze the soft dough balls in the freezer for 2-3 months. Let the rolls come to room temperature before baking.
How to Serve
This Parker House rolls recipe is delicious served on its own, or paired with some of my favorite recipes including:
- Sunday Pot Roast
- The Best Ribeye Steak
- Dutch Oven Whole Roast Chicken
- Creamy Potatoes Au Gratin
- Chicken Pot Pie Soup
- Classic Homemade Turkey Gravy
For more recipe inspiration, see our 50 Sunday Dinner Ideas.
Recipe Tips and Tricks
- Proof in a warm place. Yeast doughs like to rise in a warm, draft-proof place. If your kitchen is cold, the dough will rise much more slowly. Set it on top of your stove or by a heater for best results.
- Use fresh yeast. If your yeast is expired or really old, you may struggle to get your dough to rise. It's best to use fresh active dry yeast.
- Try warm milk. If you have a cold kitchen, heat the milk to between 105-115 degrees F. It will cool down as the yeast mixture bubbles, so it won't affect the quality of your dough. Do not overheat the milk though, or the yeast will die.
- Serve with flavored butter. This Parker House rolls recipe tastes amazing peeled open and slathered with flavored butter, like homemade honey butter or garlic butter.
Storing and Freezing Instructions
How to Store
Store leftover rolls in an airtight container at room temperature for 4-5 days. You can also refrigerate them for longer storage.
How to Reheat
The best way to reheat famous Parker House rolls is to bake them in the oven. Warm up a 350 F degree oven and bake the rolls on a sheet tray for 6-8 minutes or until nice and warm. You can also reheat in the air fryer at 350F for 3-6 minutes. Enjoy!
How to Freeze
Freeze baked rolls in a freezer-safe bag for 2-3 months. Thaw in the fridge before reheating.

FAQ
This Parker House roll recipe should produce tender, fluffy rolls. If that doesn't happen, then you probably did not let the dough proof properly. Let the dough nearly double before punching it down and forming the individual rolls. If you did this and you still don't have tender rolls, then check the age of your yeast. It's possible that your yeast is too old and did not activate. It can also help to put the dough in a warm spot. It's a good rule of thumb to focus on what the dough is doing, not how long you've been waiting. Old or cold yeast may take longer to rise.
Like any homemade dinner rolls, the best way to reheat them is in the oven. Preheat your oven to 350 degrees F and bake the rolls for 6-8 minutes or until nice and toasty. Be careful not to overbake them, or they will become dry and hard.
These incredibly buttery rolls are named after where they were created: Parker House Hotel in Boston, MA. They were immediately popular for being tender and fluffy, which was unheard of at that time. They rose to fame in the 1870s when a French composer sang a song professing his love of these rolls, which spread around the world. The recipe was eventually shared in a cookbook published by the White House chef in the 1930s, and the rest is history!
More Bread Roll Recipes
- 50 Best Bread Recipes
- Skillet Dinner Rolls
- Garlic Knots
- Potato Dinner Rolls
- Cheesy Garlic Dinner Rolls
- Easy Small Batch Ciabatta Rolls
Tried this recipe?
I'd love to hear what you think! Leave a comment and rating below to share your feedback. Your reviews help others discover this recipe and help me keep creating more free recipes for you. Snap a photo and tag me on social media @aheadofthyme too.

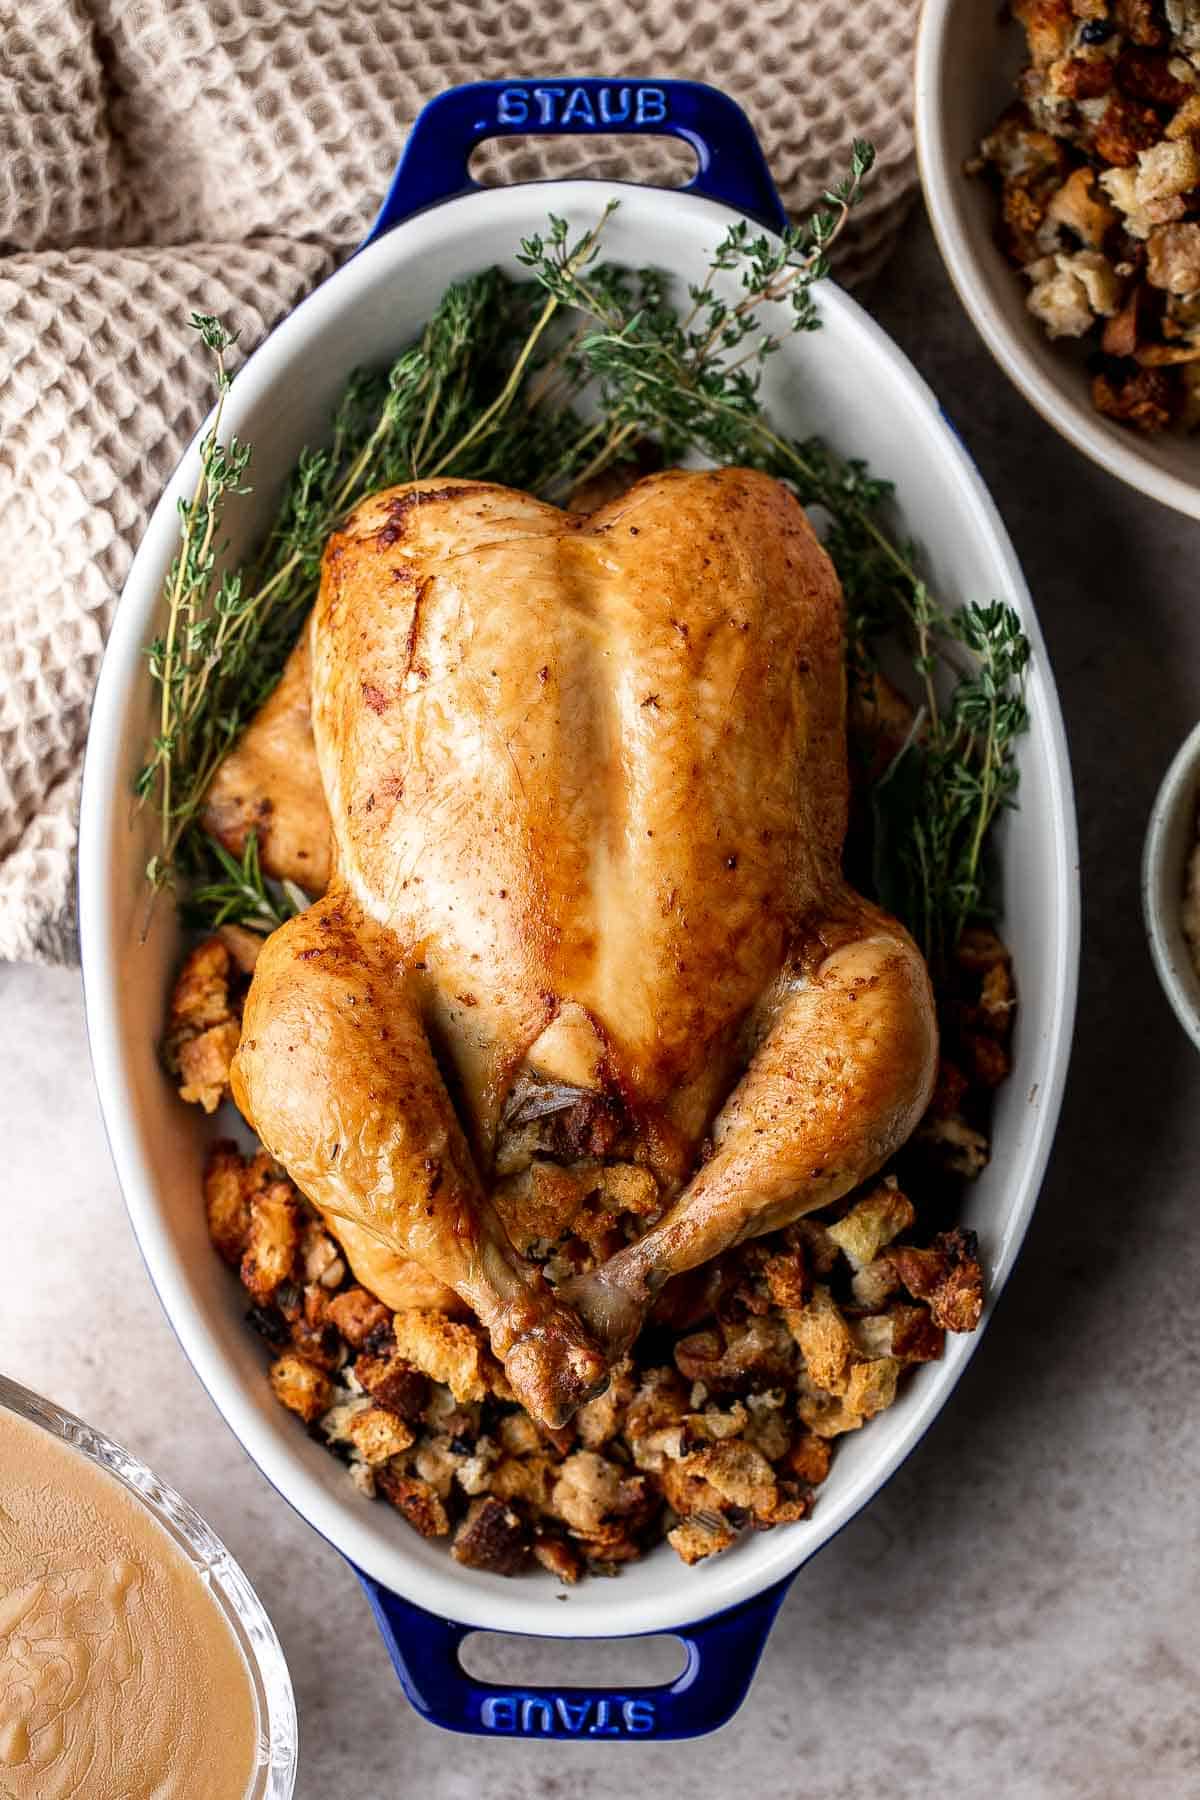
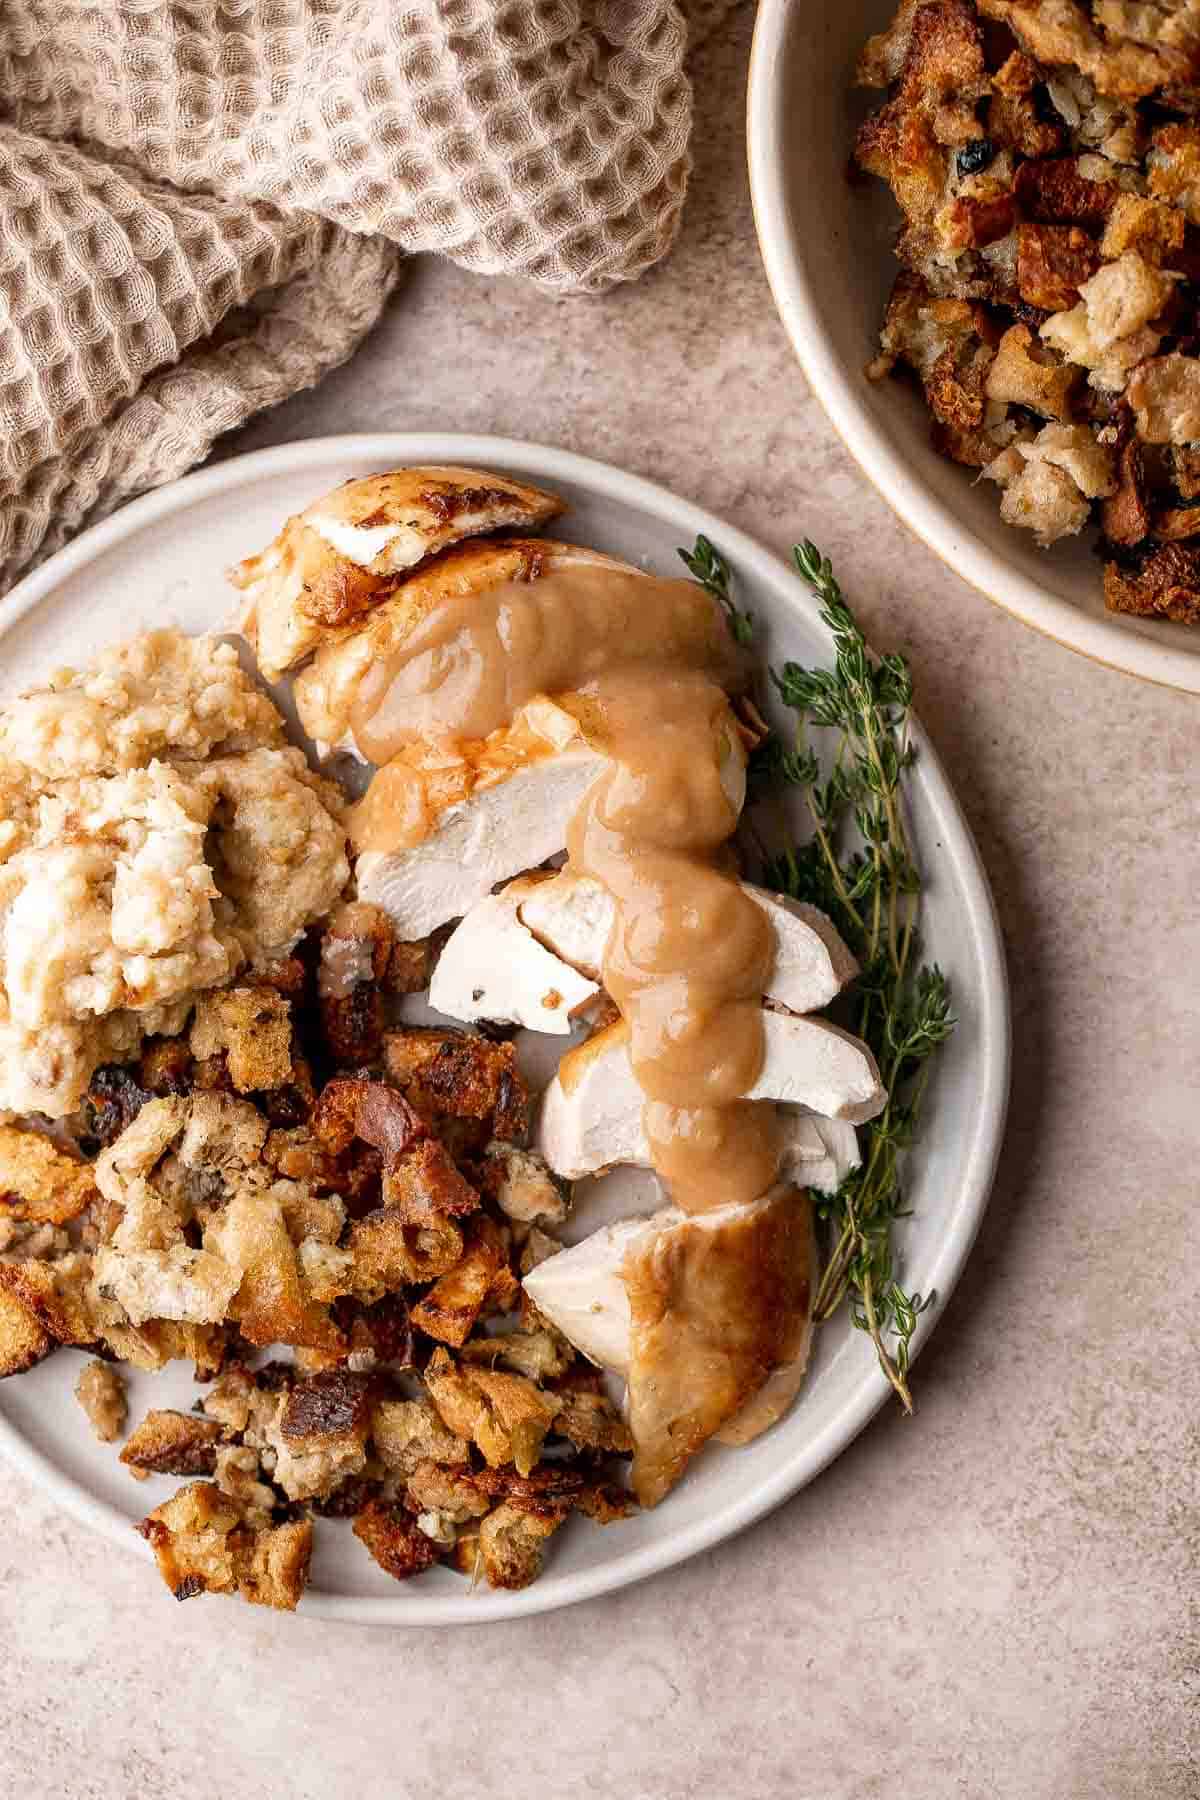
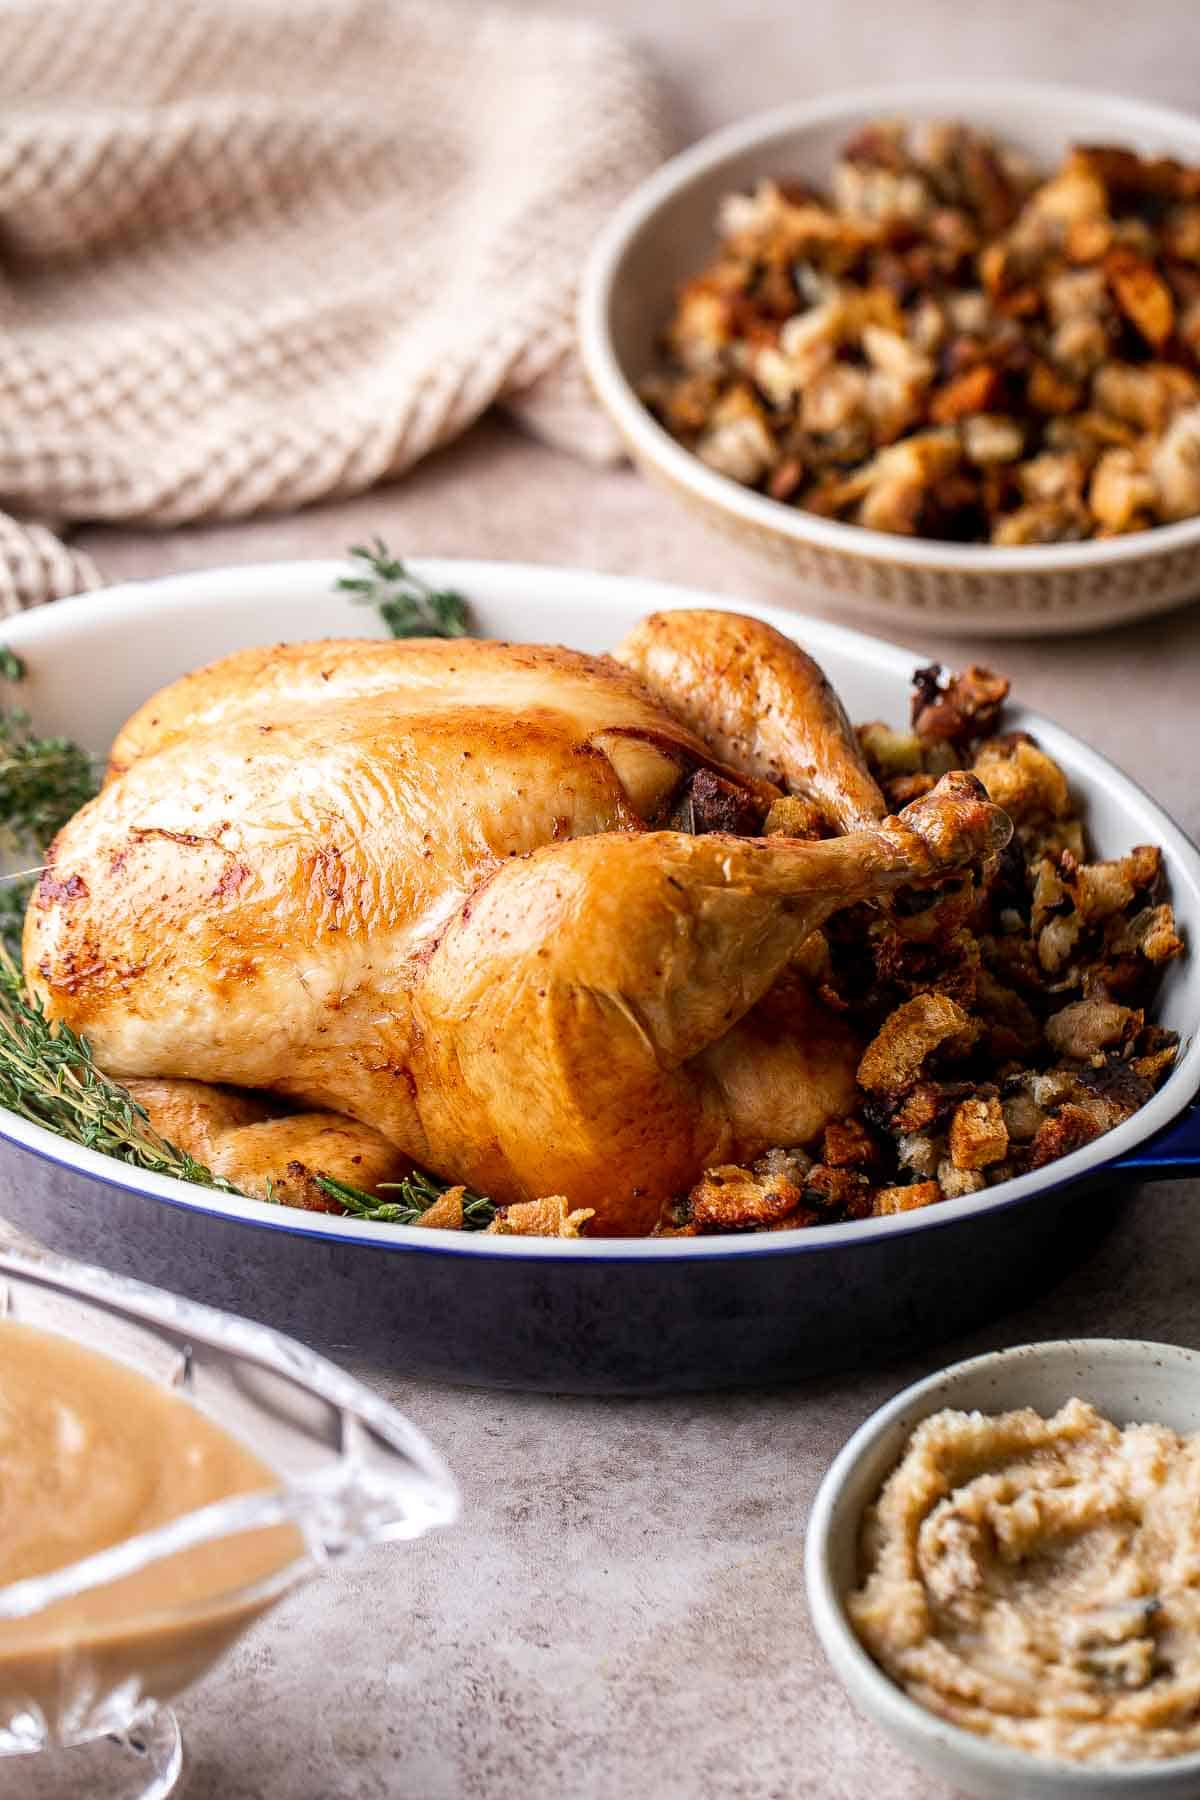
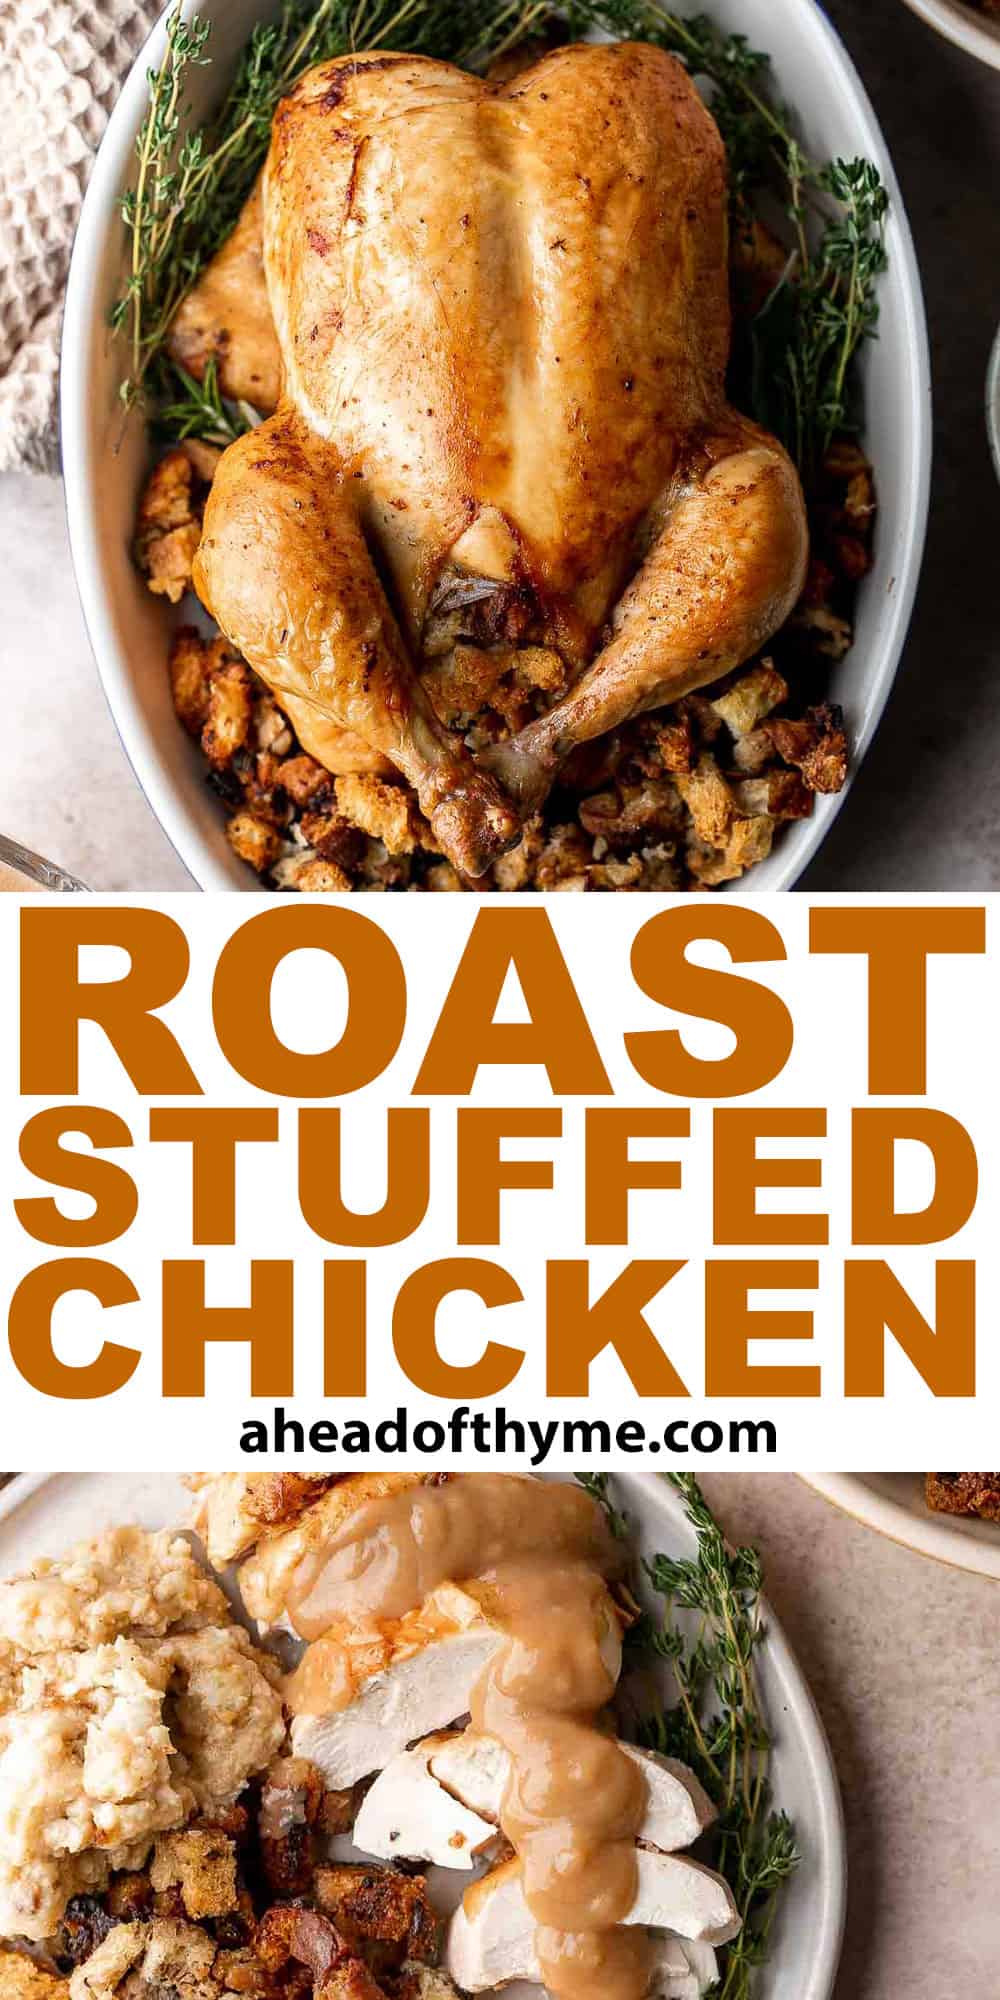
Roast Stuffed Chicken
A traditional Roast Stuffed Chicken is one of the most beautiful main dishes, but don't let it intimidate you. It's incredibly easy to make and has everything you need for a meal in one pan. Serve this stuffed whole chicken as a show-stopping meal for a special occasion, or make it every week for a Sunday roast dinner. It'll quickly become a new family favorite!
If you've ever roasted chicken before, you already have all the skills you need to make this roasted chicken recipe. The best part is that as the stuffed roast chicken cooks, it adds flavor to the stuffing and vice versa. This is the best way to get tender, flavorful chicken with flavor all the way inside the bird. It will also make your whole house smell amazing!
Why You'll Love This Roast Stuffed Chicken
- All-in-one meal. As a home cook, it's so lovely to have a recipe that includes the main dish and sides all in one! This whole chicken recipe is a time-saver. You'll have plenty of time to work on other dishes, desserts, or projects while the chicken slowly cooks in the oven. It's perfect for a busy day or the holidays!
- So much flavor. The homemade stuffing mix adds so much moisture and flavor to the inside of the chicken, and the chicken adds a savory flavor to the stuffing as well. Roast your chicken over a bed of root vegetables and let them absorb the delicious drippings for extra flavor.
- Beautiful display for a party. A whole roasted chicken always looks amazing. This is a fantastic main course to serve during the holiday season, yet it's simple enough to make any week! It's perfect for a smaller Thanksgiving celebration too when you don need to roast a whole turkey.
Ingredient Notes
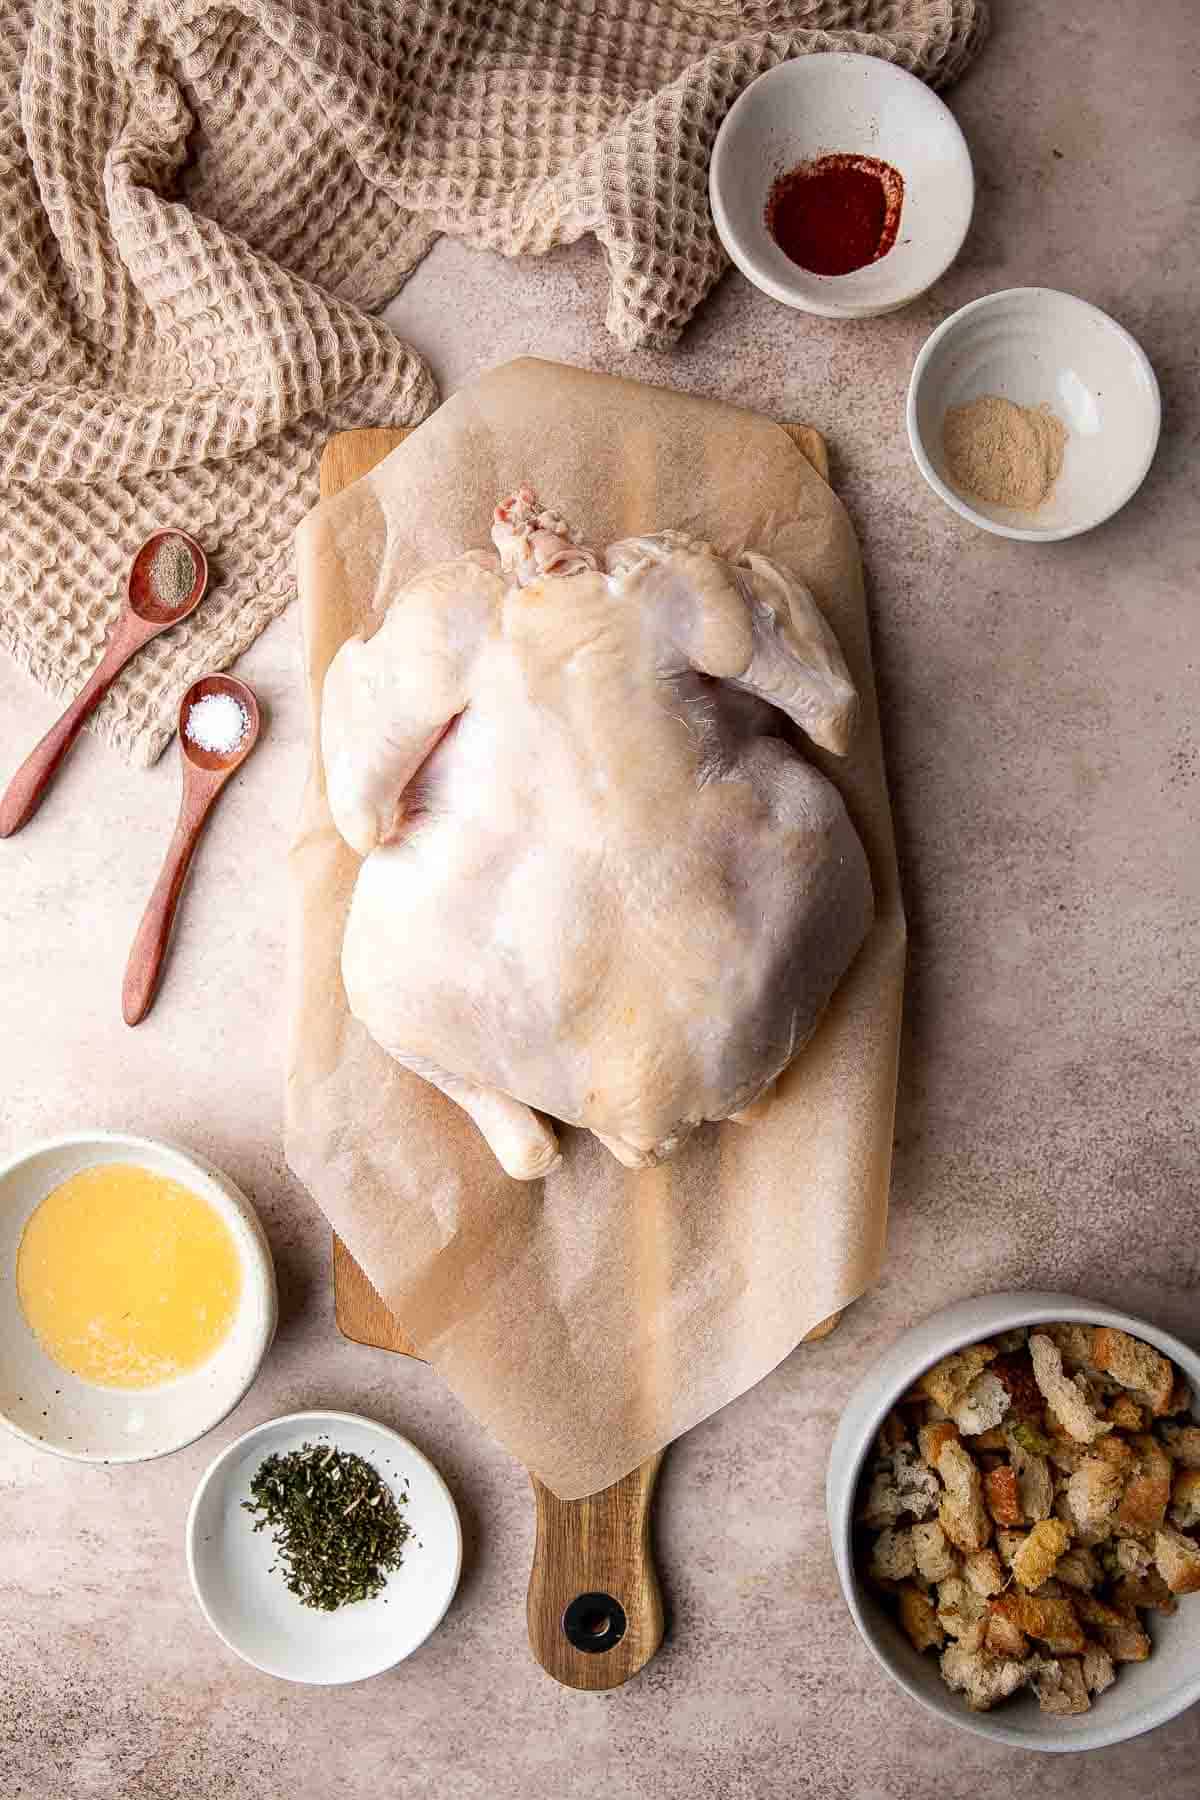
To make this delicious roast stuffed chicken, you will need the following ingredients (full measurements in recipe card below):
- whole chicken - choose a whole chicken. Remove any internal organs or gizzards, and if frozen, let the chicken thaw completely in the fridge before baking.
- seasonings and spices - season the whole bird with a mixture of salt, black pepper, paprika, and garlic pepper for lots of flavor. You can also substitute your favorite poultry seasoning.
- herbs - add fresh thyme and rosemary for a delicious aroma and fresh flavor.
- butter - melted butter is the glue to hold the seasoning paste together. It will melt into the bird to add extra flavor as well.
- chicken stuffing - either make a batch of homemade stuffing (or use leftover stuffing from a holiday party) or use 1 box of store-bought stuffing.
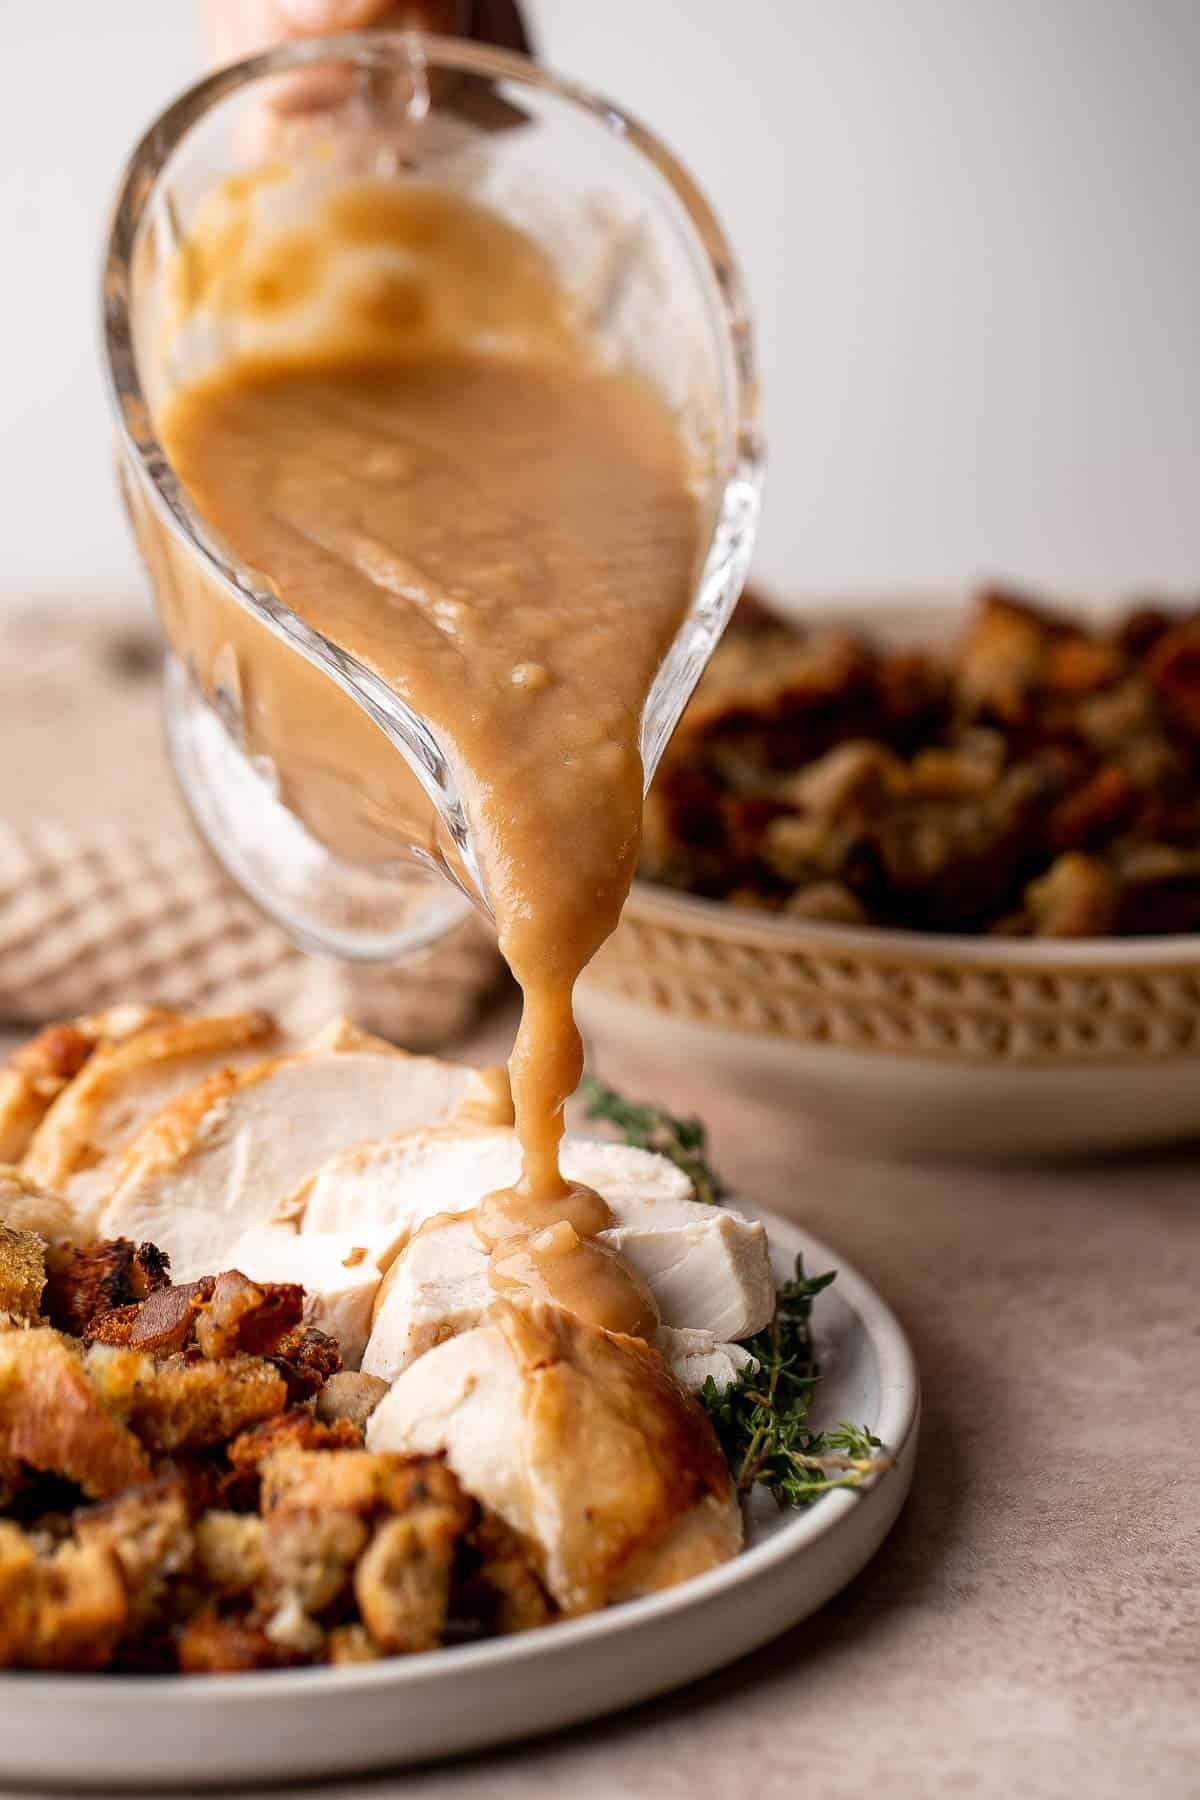
- gravy - make your own gravy from the drippings or use chicken or turkey gravy from the grocery store.
You will also need a small bowl, roasting tray, kitchen twine, instant-read thermometer, and serving knife.
How to Make the Best Roast Stuffed Chicken
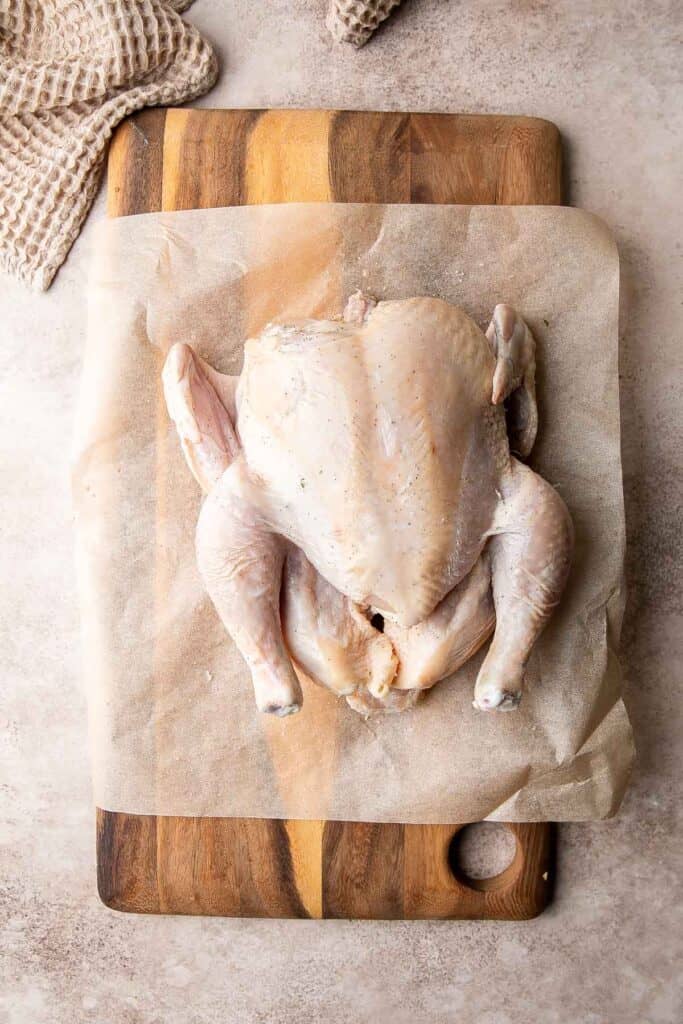
- Prep chicken. Use a paper towel to pat the whole chicken completely dry. This helps create an extra crispy skin when roasting. Generously rub salt and pepper all over the chicken, inside and out. Set aside for at least 30 minutes or refrigerate overnight.
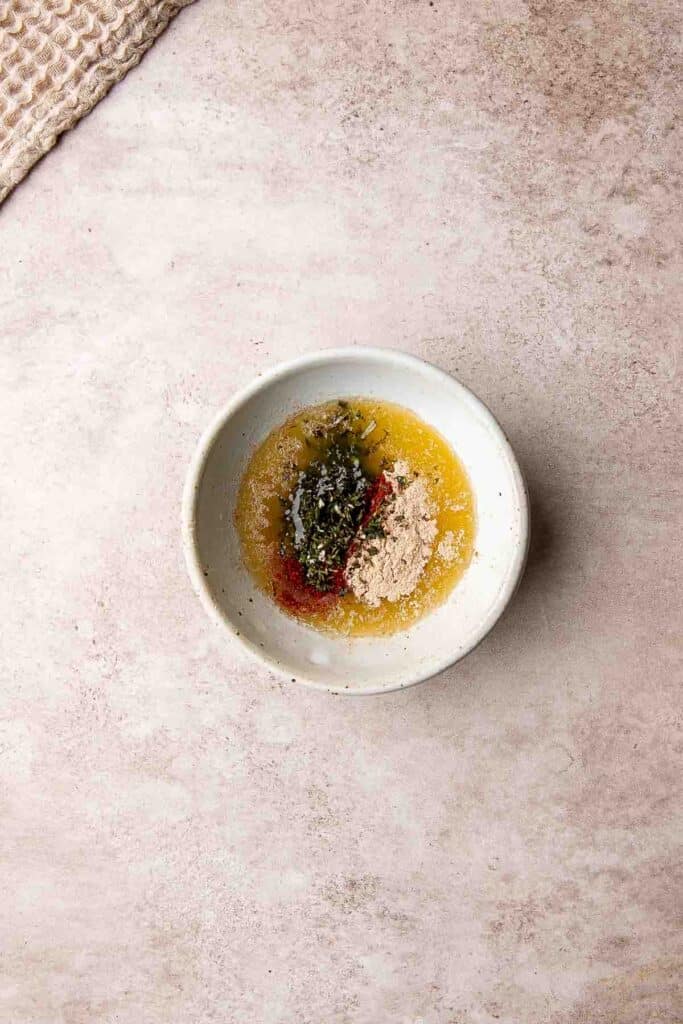
- Prepare seasoning. In a small mixing bowl, add melted butter, paprika, garlic powder, thyme, and rosemary. Stir to mix well.

- Season chicken. Generously rub the butter mixture all over the outside of the chicken.
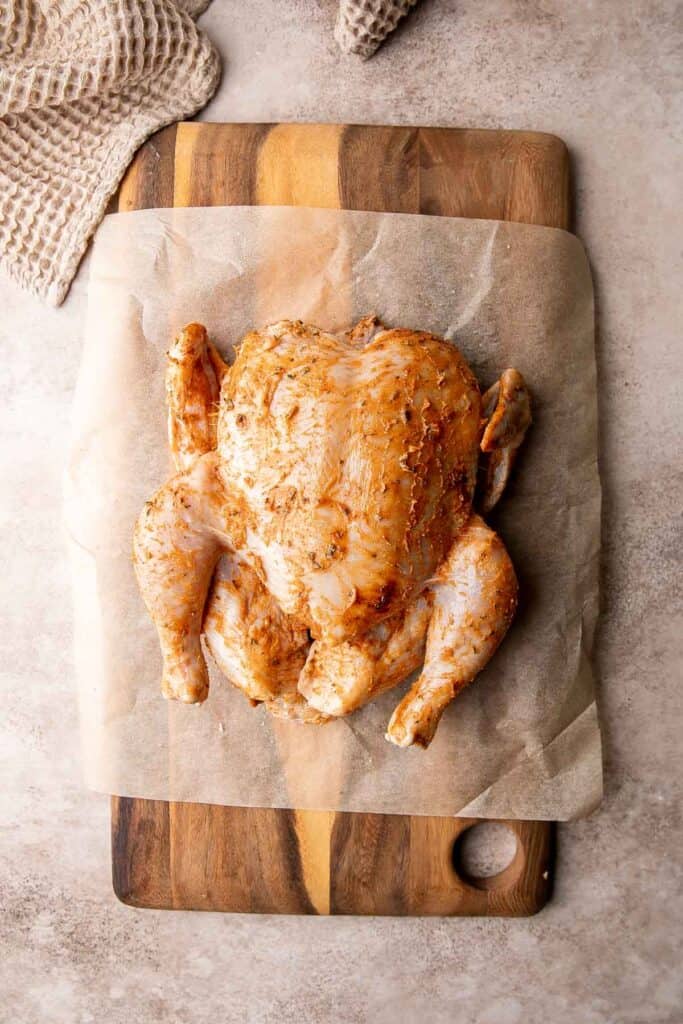
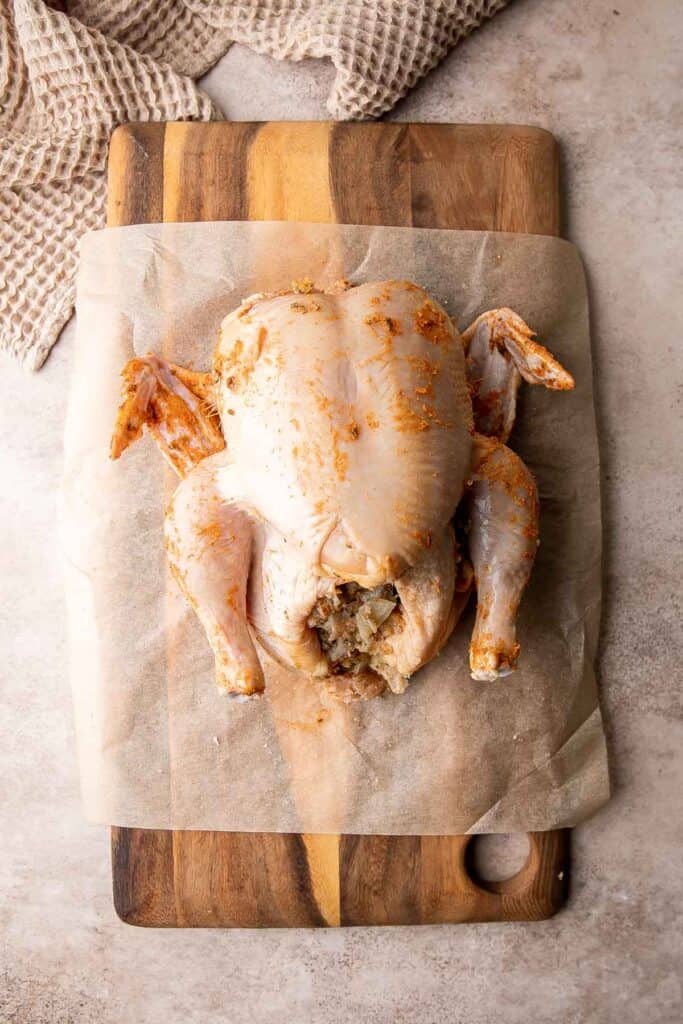
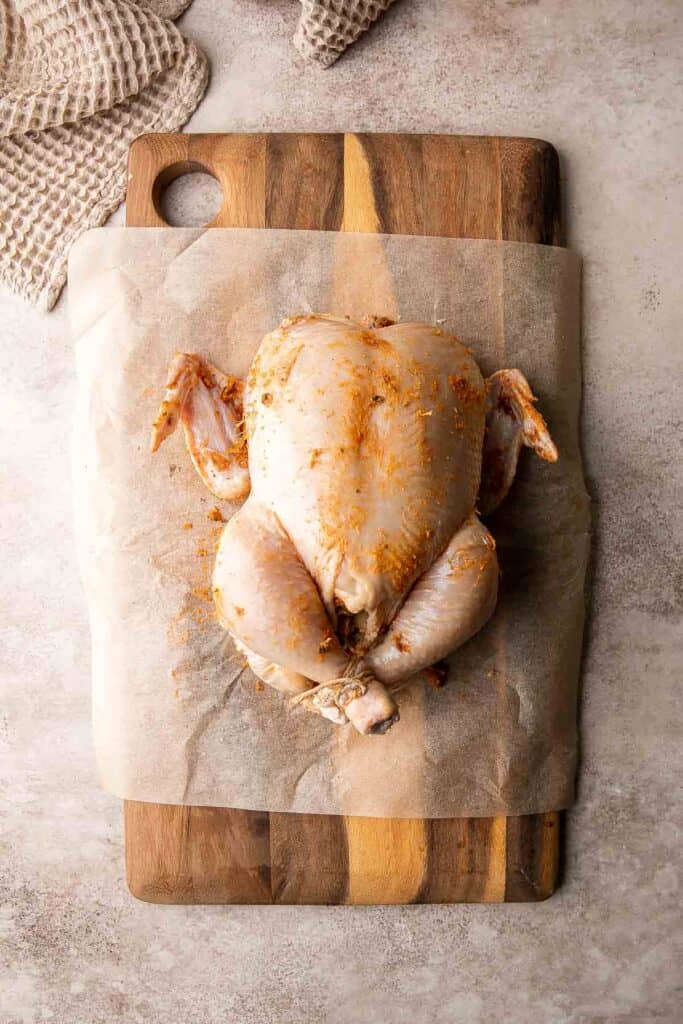
- Add stuffing. Slowly add the stuffing inside the cavity of the chicken. Truss the chicken by tying the chicken snugly with kitchen string so that legs stay close to the body. Tuck the wing tips under the chicken.
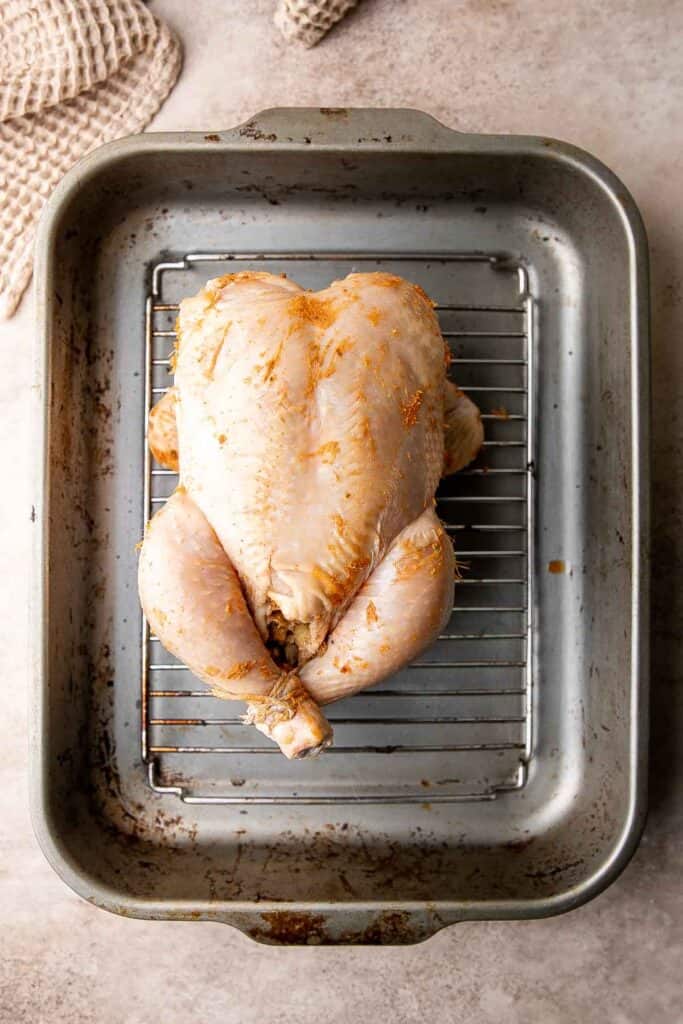
- Place chicken on pan. Place the whole chicken breast side up on a roasting rack in a roasting pan. If you don't have a roasting rack, you can place the chicken directly on top of some chopped vegetables such as carrots and onions.
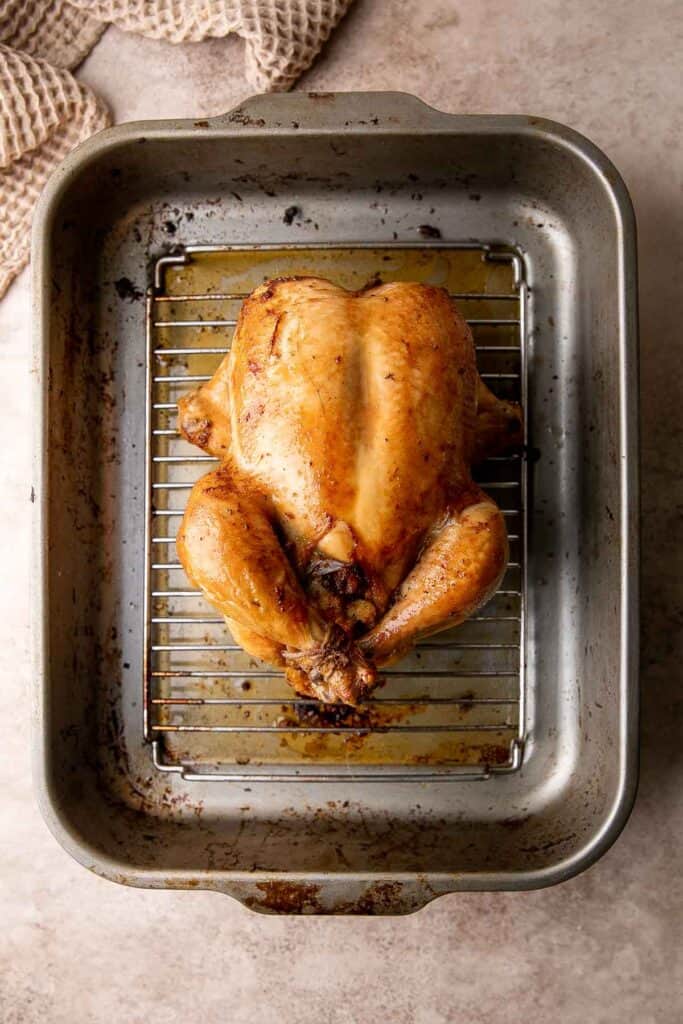
- Roast. Roast the chicken in a preheated 350F oven for 1 to 1.5 hours depending on the size of the chicken, until the internal temperature reaches 165F as read on a meat thermometer (As a rule of thumb, you need to bake 20-25 minutes per pound for the whole chicken at 350F). Baste the chicken with the pan drippings every 20 minutes to promote browning and to infuse more flavor into the chicken.
- Broil (optional). To make chicken skin extra crispy and browned, turn on the broil setting to high and broil for an additional 5 minutes. Keep a close eye on the broiler because things can heat up and burn quickly.
- Rest. Remove the pan from the oven and let it sit at room temperature for at least 15 minutes before serving (the chicken is still cooking gradually from the residual heat).
- Serve. Slice the chicken and serve with gravy and extra stuffing on the side, if desired.
Recipe Variations
- Add veggies. As the chicken cooks, the juices will drip into the bottom of the pan. If you have additional vegetables under the bird, they'll cook and absorb those delicious flavors at the same time.
- Make stuffed chicken breast. Instead of stuffing the entire chicken, stuff chicken breasts instead. Adapt the process for these Stuffed Chicken Breasts, with these savory flavors.
- Stuff with lemons and herbs. If you aren't a huge fan of stuffing or prefer to serve it on the side, don't leave the chicken empty. Stuff it with halved lemons, sliced yellow onions, fresh herbs, and herbed butter. This will infuse every bite with so much flavor.
- Make gravy. As the chicken roasts, it will release melted fats and other juices. While you're waiting for the chicken to cool, use those pan juices to make your own delicious gravy, like this Classic Turkey Gravy.
How to Serve
This Roast Stuffed Chicken is delicious served on its own, or paired with some of my favorite sides including:
- One Pan Roasted Harvest Vegetables with Butternut Squash
- Greek Lemon Roast Potatoes
- Creamy Tortellini Soup with Sausage
- Fall Harvest Salad with Butternut Squash and Apple
- Coconut Curry Pumpkin Soup
- Green Beans with Bacon
For more side dish recipe inspiration, see our 50 Best Fall Side Dishes.
Recipe Tips and Tricks
- Use a fully thawed chicken. It's really important that the chicken is fully thawed, especially since you are stuffing the chicken cavity. The chicken needs to cook very quickly to avoid letting the inside of the chicken stay in the temperature danger zone for too long.
- Add extra stuffing. You can add extra stuffing around the chicken in the roasting pan and bake together until the chicken is cooked through.
- Use an instant-read thermometer. It can be harder to tell when stuffed chickens are fully cooked. Insert the thermometer into the thickest part of the thigh and make sure it shows 165 degrees F before removing the chicken from the oven.
Storing and Freezing Instructions
How to Store
Store leftover chicken in an airtight container in the fridge for 3-4 days.
How to Reheat
To reheat leftover roasted chicken, either warm a serving in a large skillet over medium heat, microwave it, or bake it in the oven or air fryer at 350 for 5-7 minutes with a drizzle of gravy.
How to Freeze
Let the chicken cool in the fridge, then remove the meat from the bird and store it in a freezer-safe container. Freeze for 2-3 months.
FAQ
For this roast chicken recipe, we recommend setting your oven temperature to 350 degrees. This is plenty hot enough to cook the raw chicken until perfectly tender. Cooking the whole bird at a higher temperature will give you crispier skin, but you're also more likely to deal with burnt skin and dry white meat. The solution is to bake the chicken at a lower temperature for longer, then place the chicken under the broiler to crisp up the outside of the skin. It's the best of both worlds: tender, flavorful meat and crispy skin.
There are several reasons to stuff a whole chicken, and they typically have to do with flavor or convenience. The stuffing adds extra flavor to the inside of the chicken, where it is hard to season. It will also keep the chicken from drying out, which is really important. It's also just really convenient! It's amazing to pull out the baking tray and have the chicken and sides ready all at the same time.
Yes! There's a reason stuffing is called "stuffing." It's traditionally added to the inside of baked chickens or turkeys to add flavor to the inside of the bird. This can be the hardest section to season. The stuffing also keeps the chicken from drying out. If you've ever had dry, crumbly breast meat, you'll understand why this is so important!
More Whole Chicken Recipes
- 10 Whole Chicken Recipes
- Dutch Oven Whole Roast Chicken
- Instant Pot Whole Chicken
- Pesto Whole Chicken
- Roasted Spatchcock Chicken (Butterflied Chicken)
- Greek Lemon Garlic Whole Roast Chicken
Tried this recipe?
I'd love to hear what you think! Leave a comment and rating below to share your feedback. Your reviews help others discover this recipe and help me keep creating more free recipes for you. Snap a photo and tag me on social media @aheadofthyme too.
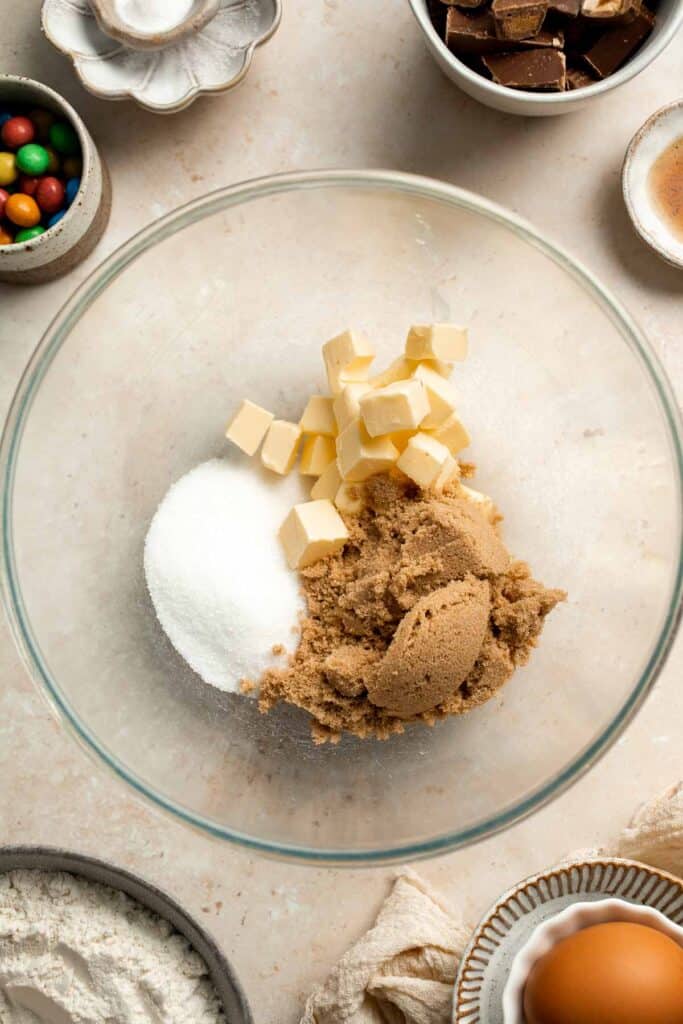
Leftover Halloween Candy Cookie Bars
Stretch your Halloween treats with these chewy and delicious Leftover Halloween Candy Cookie Bars! Whether they're candies you've collected from trick-or-treating or chocolates you've been hoarding over the last few days, these cookie bars are a fun way to use up all that excess Halloween loot.

You no longer have to deal with the dreaded "leftover candy dilemma" that comes after Halloween. With this recipe, you can get creative and turn your extra treats into chunky cookie bars that everyone in the family will love. To all the parents who are looking for a way to finish up the last of their Halloween candy stash without having to dole it out piece by piece, this simple cookie bar recipe will save the day. Same goes for all the sweet tooths out there who still want to get their candy fix long after the spooky season has ended!
Why You'll Love this Leftover Halloween Cookie Bar Recipe
- A great way to use leftovers. Save your Halloween candies from going to waste by turning them into piles of scrumptious cookie bars that everyone can enjoy. No more guilt trips from throwing away perfectly good candy, plus you get to indulge in a chocolatey snack!
- Quick and simple. This halloween cookie bar recipe takes less than an hour to make! It can't get any easier - just prepare the cookie dough by combining all the ingredients in one bowl, and bake for 30 minutes.
- Bonding activity for the whole family. Get the family together and take turns adding the Halloween candy pieces to the cookie dough. Kids will have a blast picking out which candy goes into the bars, and parents will get to bond with their little ones over a creative kitchen project.
- Versatile. Make every bite of these loaded cookie bars a surprise! You can add any type of candies you have on hand, from Reese's and Butterfinger to M&M's and Kit Kat, to make your experience either nutty, chunky, caramelly, chocolatey, or all of the above!

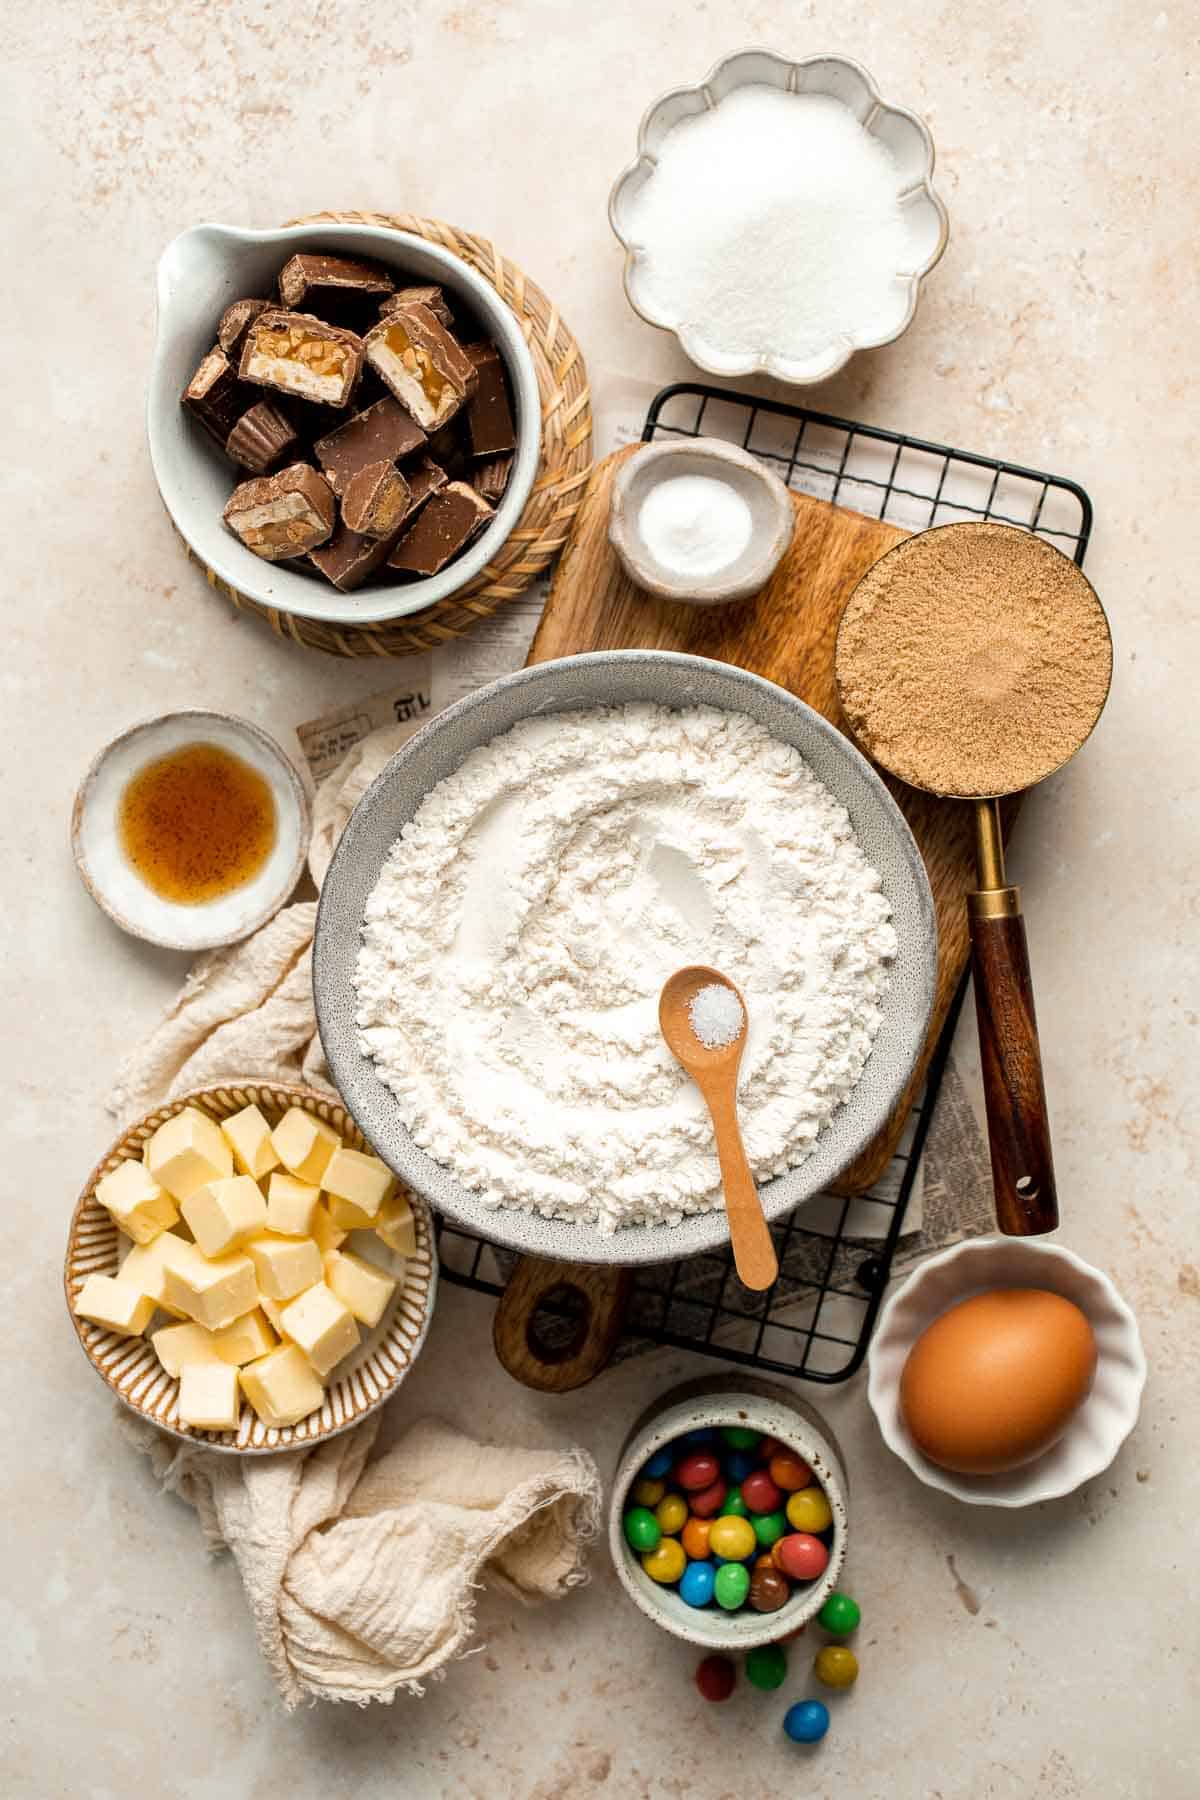
Ingredient Notes
To make these easy Leftover Halloween Candy Cookie Bars, you will need the following ingredients (full measurements in recipe card below):
- butter - use unsalted, softened butter for easier creaming with sugar and for lighter yet chewy cookies.
- sugar - a combination of granulated white and light brown sugar gives the cookie bars a nice balance of sweetness while adding a nice color and keeping the texture soft and moist.
- egg - acts as a binder for structure while adding moisture and richness.
- vanilla extract - adds a nice aroma and sweetness and enhances all the good flavors in the recipe.
- all-purpose flour - the base of the cookie bars. You can also do 50/50 AP flour and bread or cake flour for chewier or softer bars.
- baking soda - helps the cookie bars rise while baking.
- salt - balances out the sweetness for a better overall flavor.
- Halloween chocolate bars - use your favorite chocolate bars, such as Snickers, Twix, Butterfinger, Mars, Rolo, and Milky Way. I use mini Reese's, Kit Kat, and M&M's in this recipe.
- M&M's - we suggest making sure to add in M&M's or Smarties for a pop of color throughout these cookies. But feel free to leave them out if you dint have any in your Halloween candy stash.
You will also need measuring cups and spoons, mixing bowl, a hand mixer or stand mixer, an 8-inch square baking pan, and cooking spray oil.
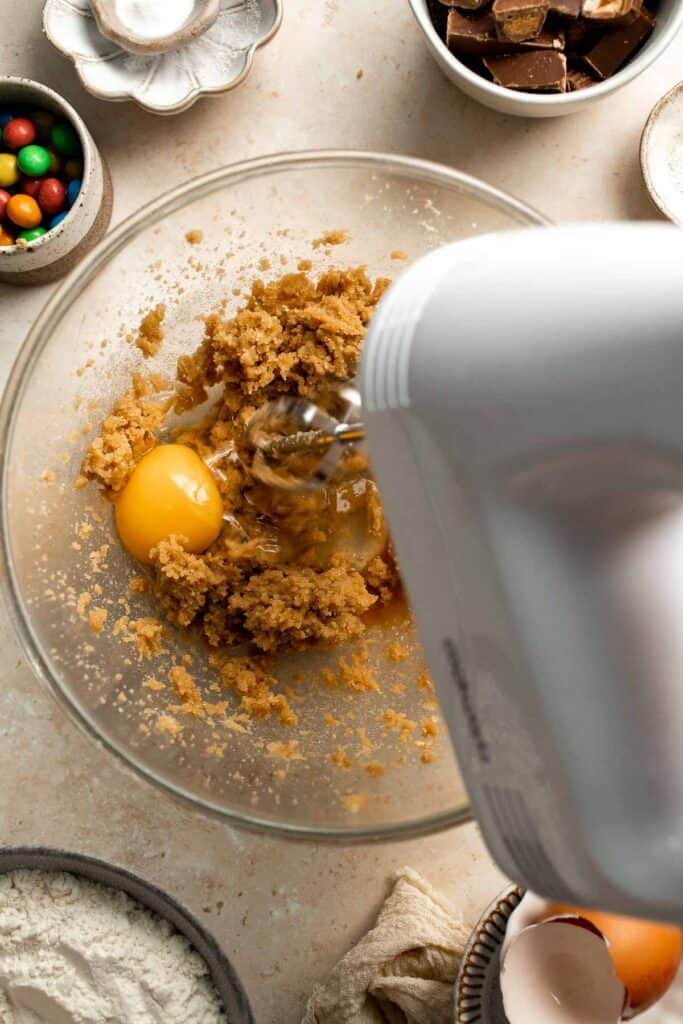
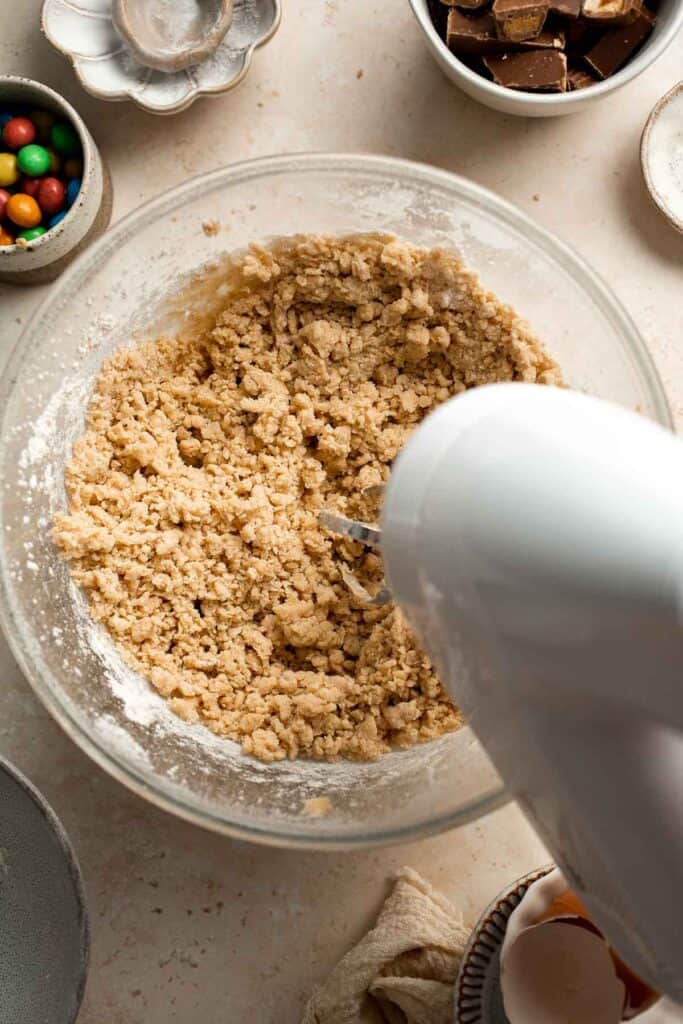
How to Make the Best Leftover Halloween Candy Cookie Bars
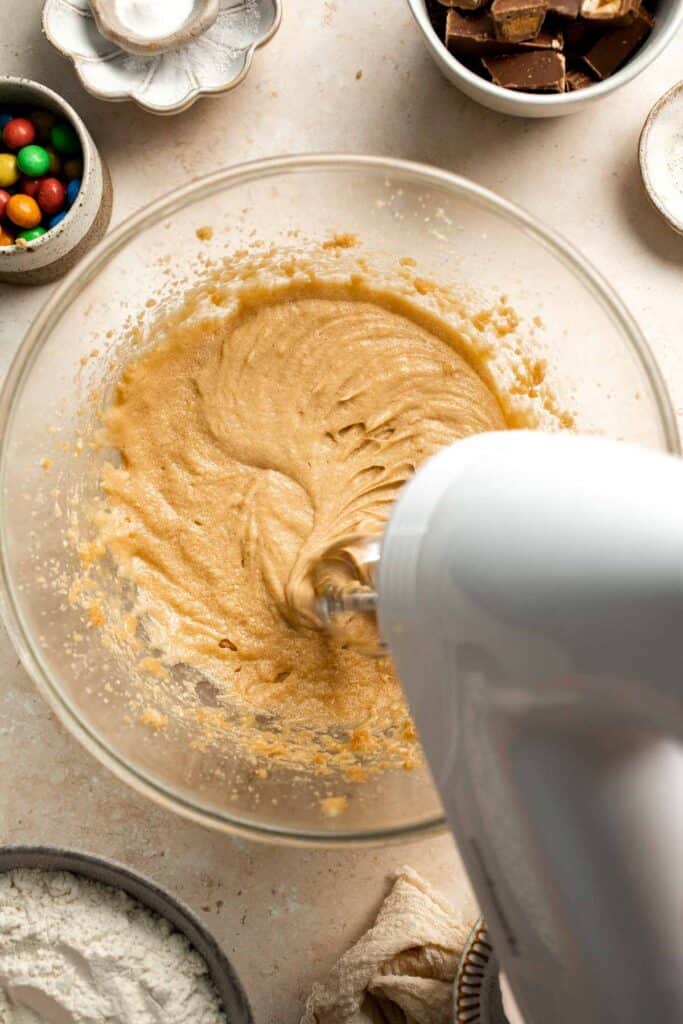
- Combine wet ingredients. In a large mixing bowl, use a hand mixer or stand mixer to cream together butter and sugars on medium speed until light and fluffy, about 2 minutes. Add egg and vanilla, and beat on low until incorporated.
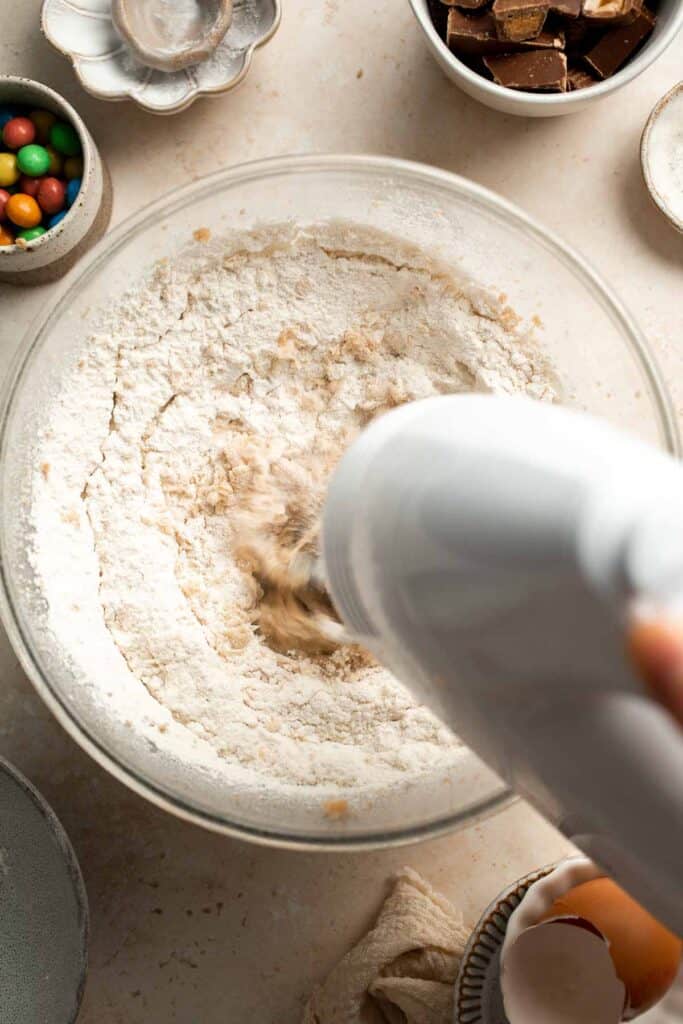
- Add dry ingredients. Add flour, baking soda, and salt and beat until just combined.
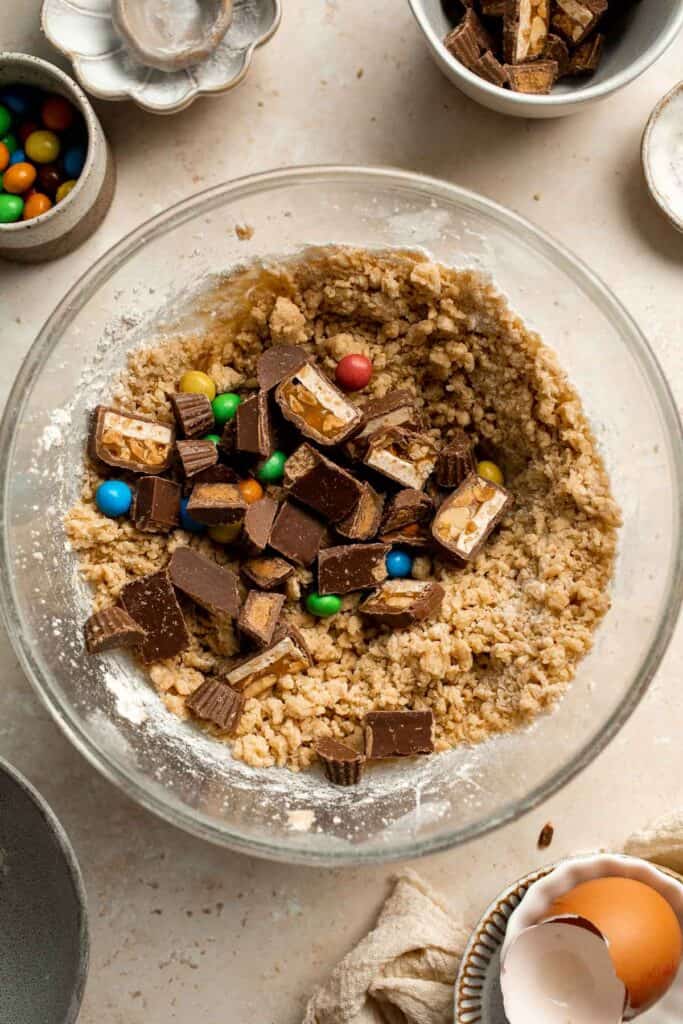
- Fold in mix ins. Reserve 2-3 tablespoons each of the Halloween candy and M&M's (for the top), and fold in the rest.
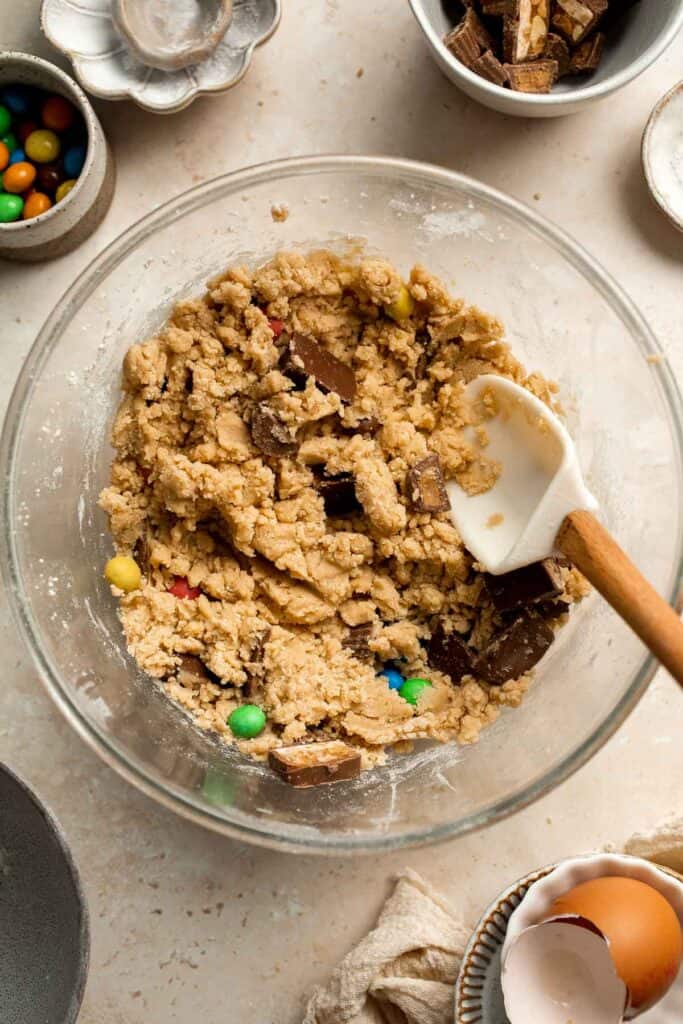
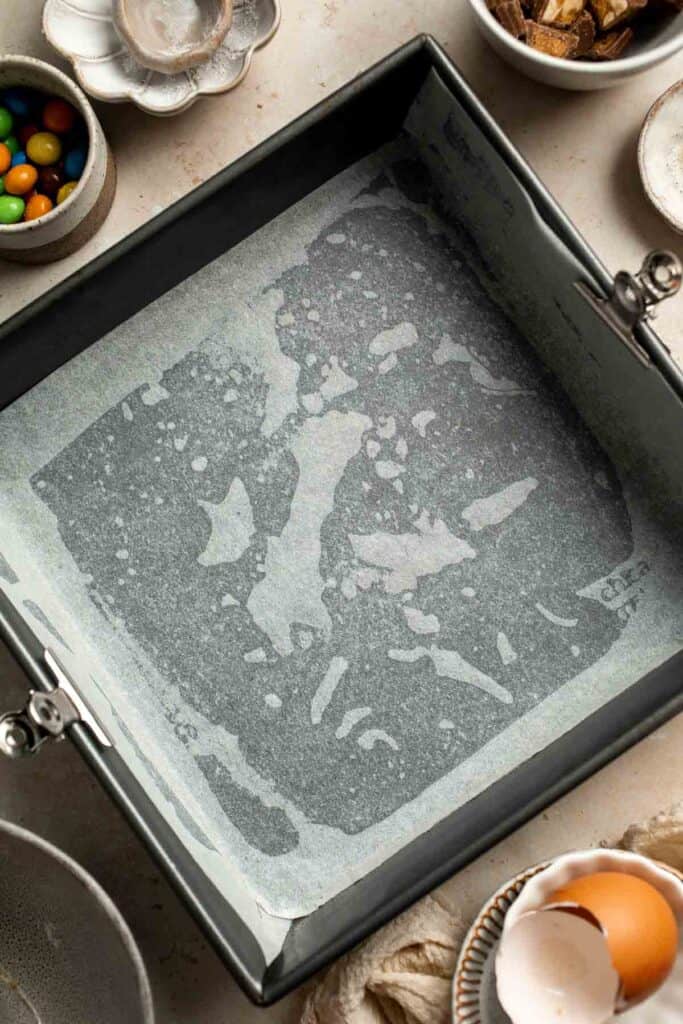
- Spread dough. Spray a 8-inch square baking pan with cooking spray oil and line it with a piece of parchment paper, allowing the overhang to come off the 2 sides. Spread the cookie dough onto the lined pan. Press in the remaining Halloween candy and M&M's on top.
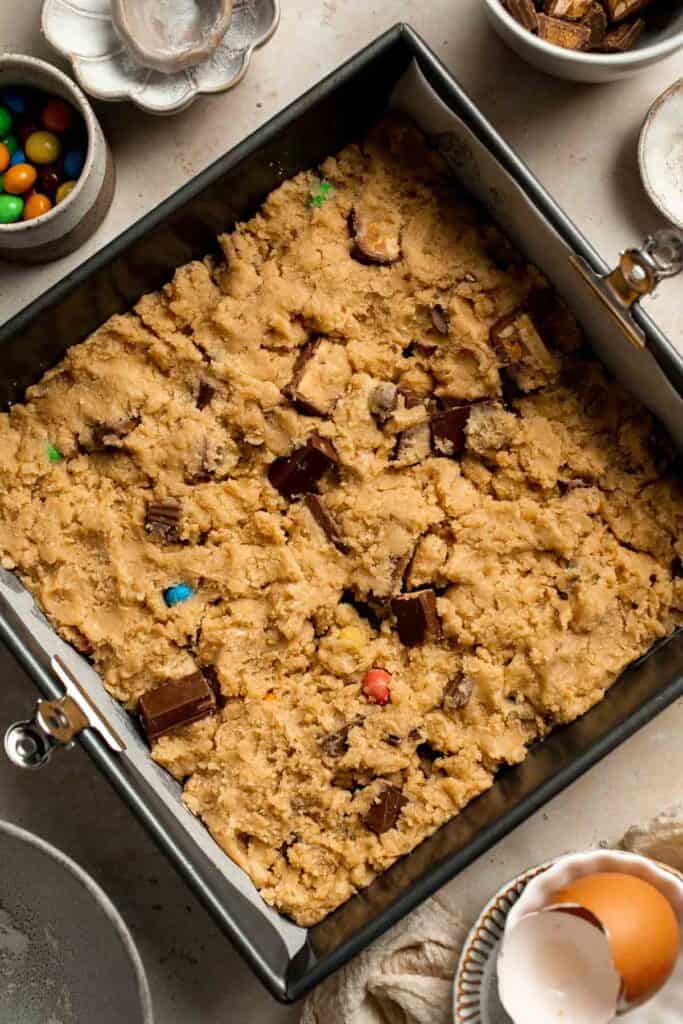

- Bake. Bake in a 325F preheated oven for 30-35 minutes until golden brown, and the a toothpick inserted into the center comes out clean. The cookie dough may not look completely done in the middle, but they will continue to cook as they are cooling.

- Serve. Allow the cookies to cool completely in the pan. Then, use the parchment paper overhang to pull them out. Slice into 9 or 16 pieces and serve.
Recipe Variations
- Give it some crunch. Use Snickers, Peanut M&M's, Baby Ruth, Goobers, or Almond Kisses for a nice texture and delicious nutty combo!
- Go caramelly. Throw in some Milky Way, Twix, Butterfinger, Rolo, or Caramello for a chewy and sweet surprise.
- Make classic cookies. Using an ice cream scoop or spoon, shape the cookie dough into balls for a classic round cookie look. You will also need to adjust the bake time down to 10-12 minutes. These are perfect for gifting to family and friends!
How to Serve
Enjoy these delicious Leftover Halloween Candy Cookie Bars as an on-the-go snack or serve with a warm drink like:
- Pumpkin Spice Latte
- White Hot Chocolate
- Chai Tea Latte
- Matcha Latte
- Turmeric Golden Milk Latte
- Peppermint Hot Chocolate

Recipe Tips and Tricks
- Don't overmix. You know how some recipes tell you to mix until just combined? That's the case here. Overmixing your dough can lead to dry, tough cookie bars, so the less you mix, the better.
- Spread evenly. Use an offset spatula or the back of a spoon to spread the cookie dough evenly in the pan before adding the toppings, so you don't end up with weird lumps or bumps.
Storing and Freezing Instructions
How to Store
Freshly baked cookie bars can be stored in an airtight container at room temperature for up to 3 days. If you plan on keeping them longer, you can store them in the fridge for up to 5 days.
How to Reheat
While these cookie bars can be eaten cold or at room temperature, they are pretty amazing warm. Just pop them in the microwave for about 15 seconds or so until soft and gooey.
How to Freeze
Place the cookie bars in a freezer bag or airtight container and freeze for up to 3 months. When ready to eat, just reheat them straight from frozen in a 300°F oven for 8 to 10 minutes or a 300°F air fryer for 4-6 minutes until warm and gooey.
More Halloween Dessert Recipes
- 25 Best Halloween Desserts
- Halloween Bark
- Caramel Apples
- Witch Finger Cookies
- Dirt Pudding Cups
- Spooky Halloween Chocolate Cake Pops
Tried this recipe?
I'd love to hear what you think! Leave a comment and rating below to share your feedback. Your reviews help others discover this recipe and help me keep creating more free recipes for you. Snap a photo and tag me on social media @aheadofthyme too.

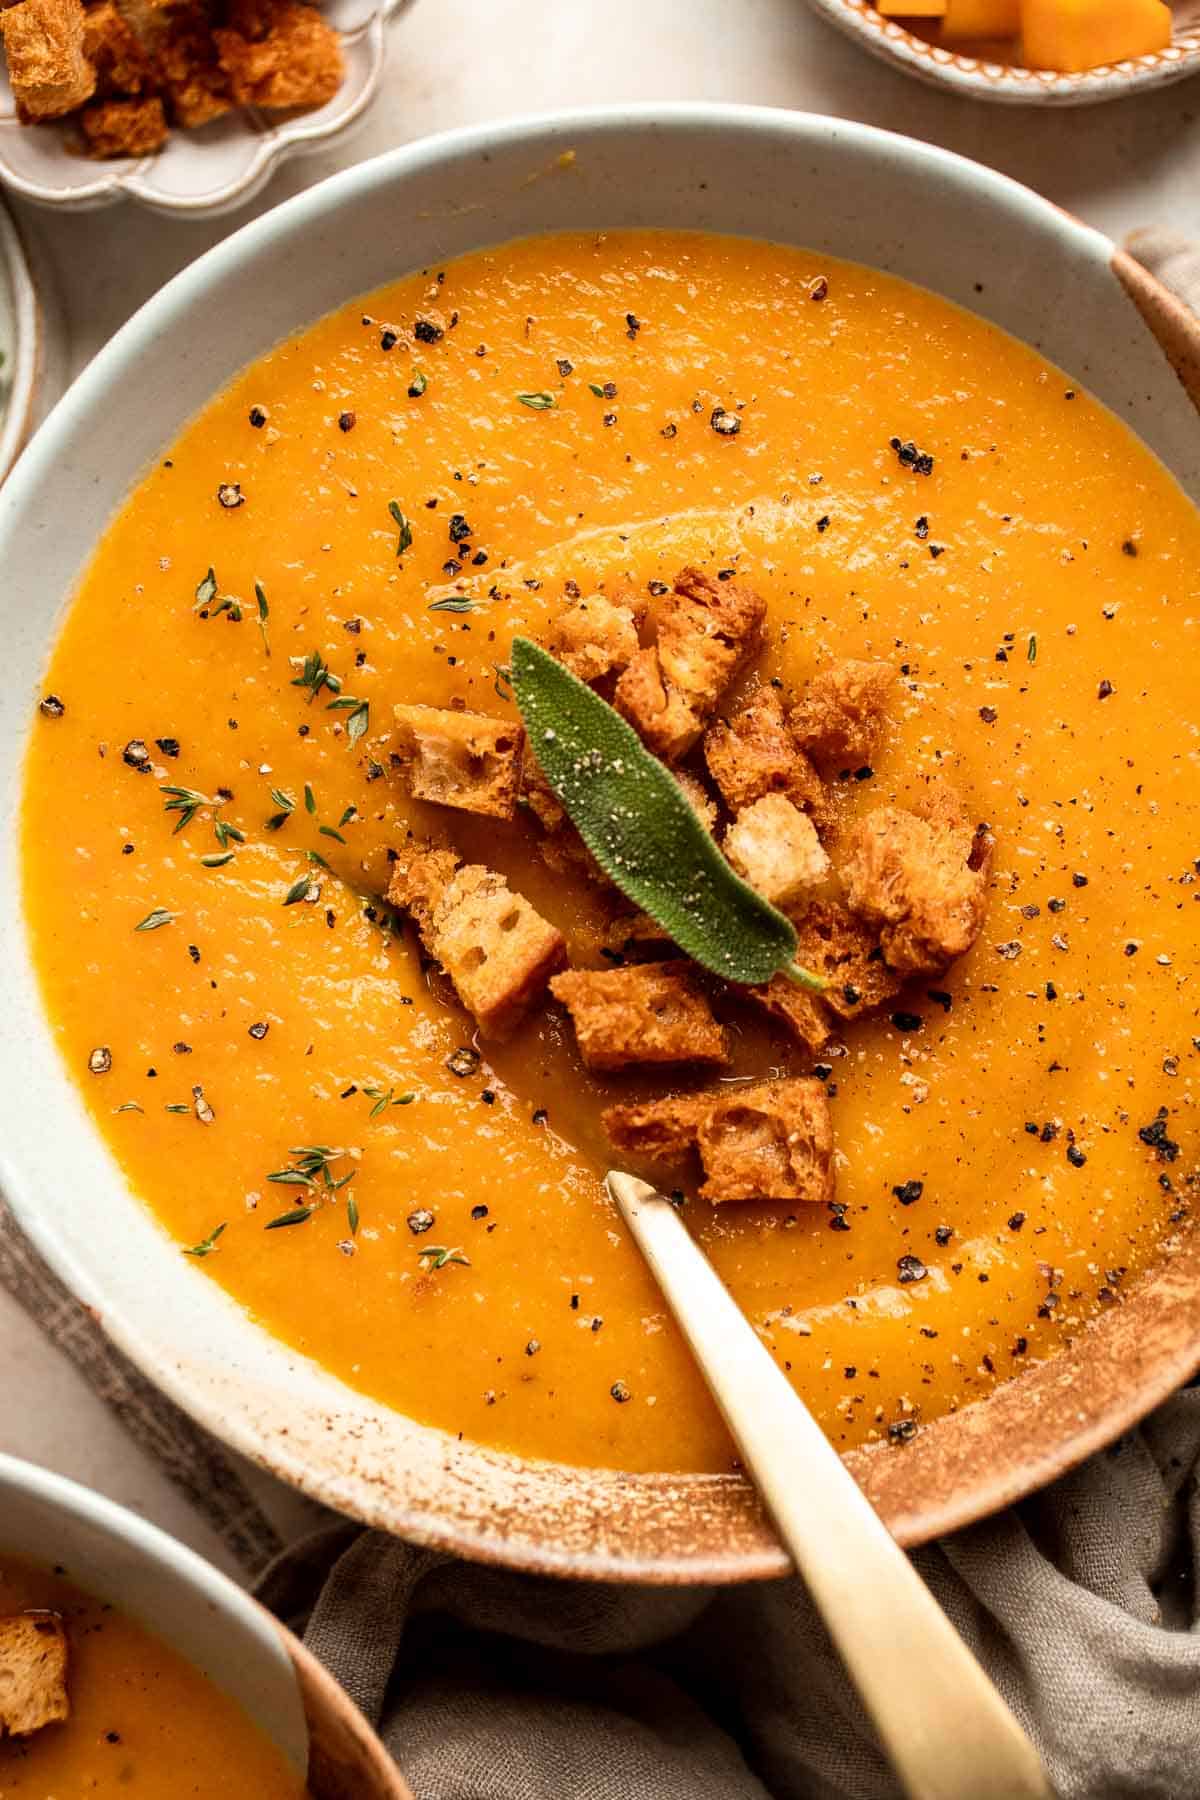
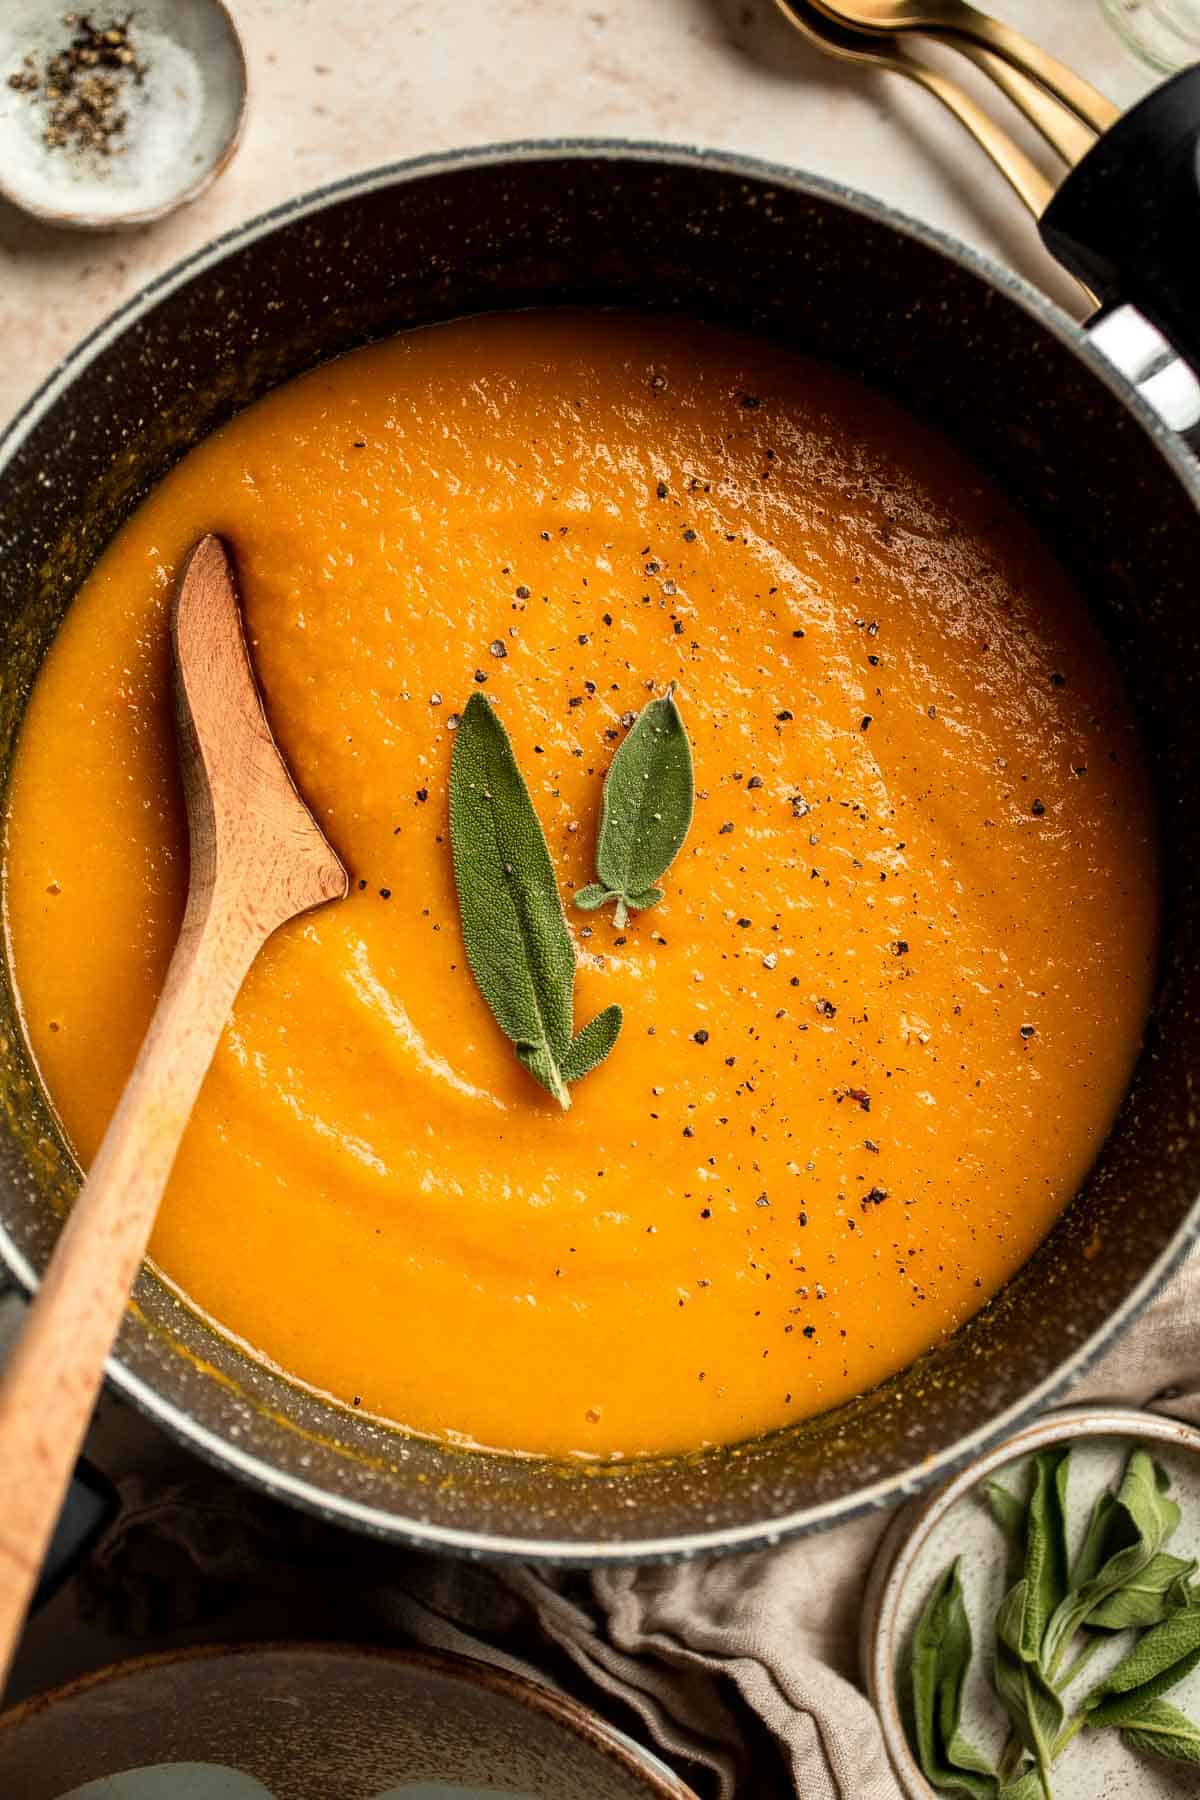
Butternut Squash Apple Soup
This Butternut Squash Apple Soup is healthy and simple yet packed with so much flavour. It gets sweetness from apples, squash, and carrots and has a kick of curry powder. Top this easy vegan soup with a layer of homemade toasted croutons or leave it out and keep it gluten-free. I'm convinced this may become your favourite butternut squash soup recipe! It is so good.
I am the kind of person who could eat butternut squash year round, so I obviously get super excited when it is actually in season. This comforting butternut squash and apple soup is exactly what I crave on a long, cold, fall day. And the best part is that it doesn't have to sit on the stove for hours. With just 15 minutes prep, and less than an hour on the stove, you can serve this comfort food relatively quickly, even after a busy work day. And the leftovers? They seem to get better every day.
Why You'll Love this Butternut Squash Apple Soup Recipe
- The best fall flavors. This butternut squash and apple soup has the perfect balance of flavors in every bite. It has the natural sweetness of butternut squash and apples and a hint of warmth from spices like cinnamon and curry powder.
- So easy to make. All you need to get this recipe going it 15 minutes of actual prep. Just chop up the veggies, get it cooking on the stove, then cover and let it simmer on the stove. Once done, puree the soup to a smooth and velvety consistency and enjoy! Whether you're an experienced cook or just starting in the kitchen, you can whip up a batch of butternut apple soup with ease.
- It's healthy and nourishing. This squash apple soup is a nutrient-rich bowl of comfort. Butternut squash is full of vitamins and antioxidants, while apples add another set of vitamins. This soup is vegan too and gluten-free if leaving out the croutons or using gluten-free bread.
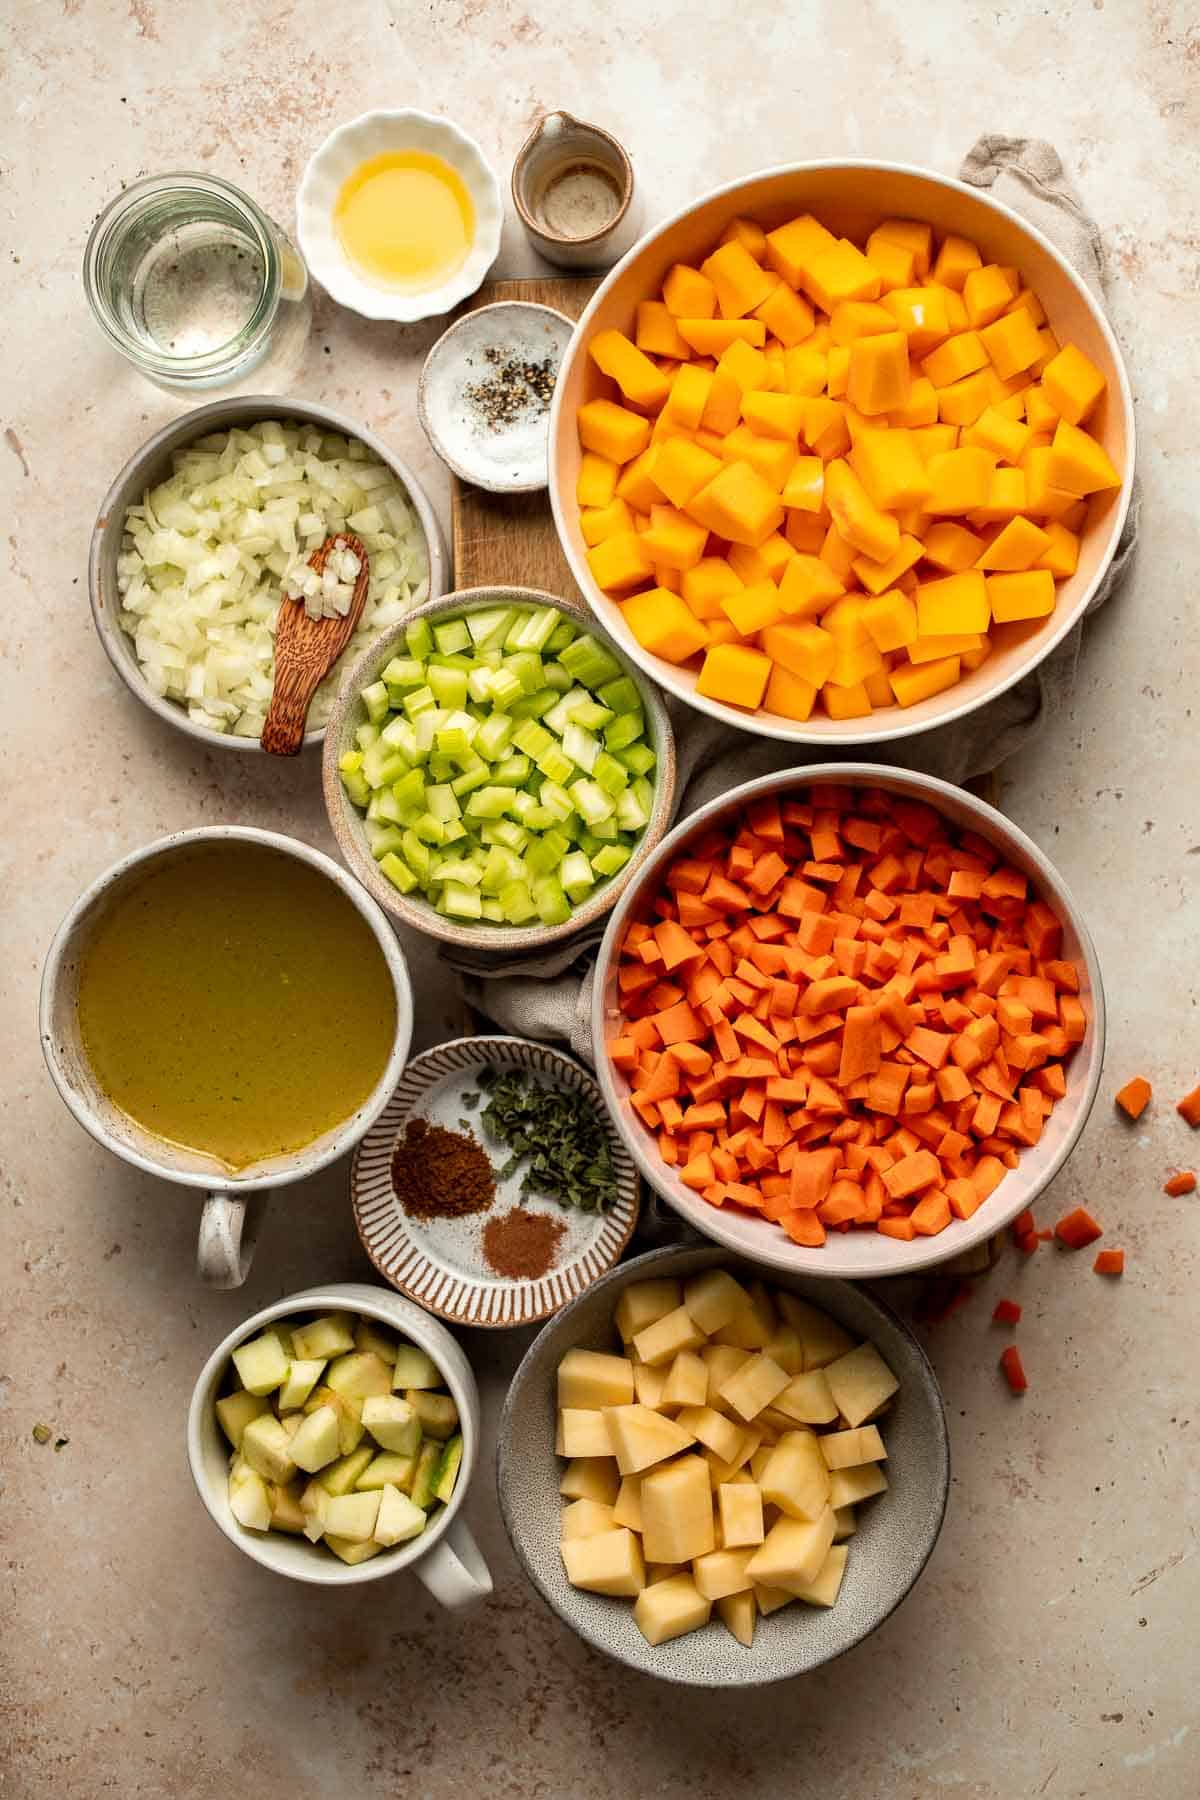
Ingredient Notes
To make this delicious Butternut Squash Apple Soup, you will need the following ingredients (full measurements in recipe card below):
- vegetable oil - choose your favorite neutral cooking oil to sautee the veggies. You can also use avocado oil or olive oil.
- mirepoix - we use a mixture of chopped onion, carrots, and celery to form the aromatic layer of flavor in this soup. This combination of vegetables are classic in many soup recipes.
- potatoes - Yukon gold potatoes or russet potatoes give the creamiest texture.
- butternut squash - start by prepping a whole butternut squash. For a quicker meal, use pre-cut butternut squash from the grocery store.
- Granny Smith apples
- apple cider vinegar - you can also substitute this with white vinegar or white wine vinegar.
- vegetable stock - if you are not sticking to a vegan or vegetarian diet, feel free to use or chicken stock instead.
- water
- seasoning - a few simple seasonings add a ton of flavor to this soup. We add in some curry powder, cinnamon, salt, and pepper.
- fresh sage - use other fresh herbs such as thyme or rosemary. If using rosemary, use less as it is much more potent in flavor than sage or thyme.
- toasted croutons - we make this easily using white bread, olive oil, and salt. Try it with No Knead Bread or Small Batch Sourdough Bread. The toasted croutons are absolute perfection and soak up all of that delicious, creamy soup. You can also top the soup with store-bought croutons or leave it out completely.
You will also need measuring cups and spoons, large cooking pot or dutch oven, and a food processor, immersion blender or heavy duty blender.
How to Make the Best Butternut Squash Apple Soup
- Cook the vegetables. Heat oil in a large cooking pot or dutch oven over medium-high heat until shimmering hot, about 1-2 minutes. Add onion, carrots, and celery and sauté, stirring often, until just beginning to brown, about 5 to 7 minutes. Season with ½ teaspoon salt and pepper. Add potatoes, butternut squash, and apples. Cook for 10 minutes, stirring as needed.
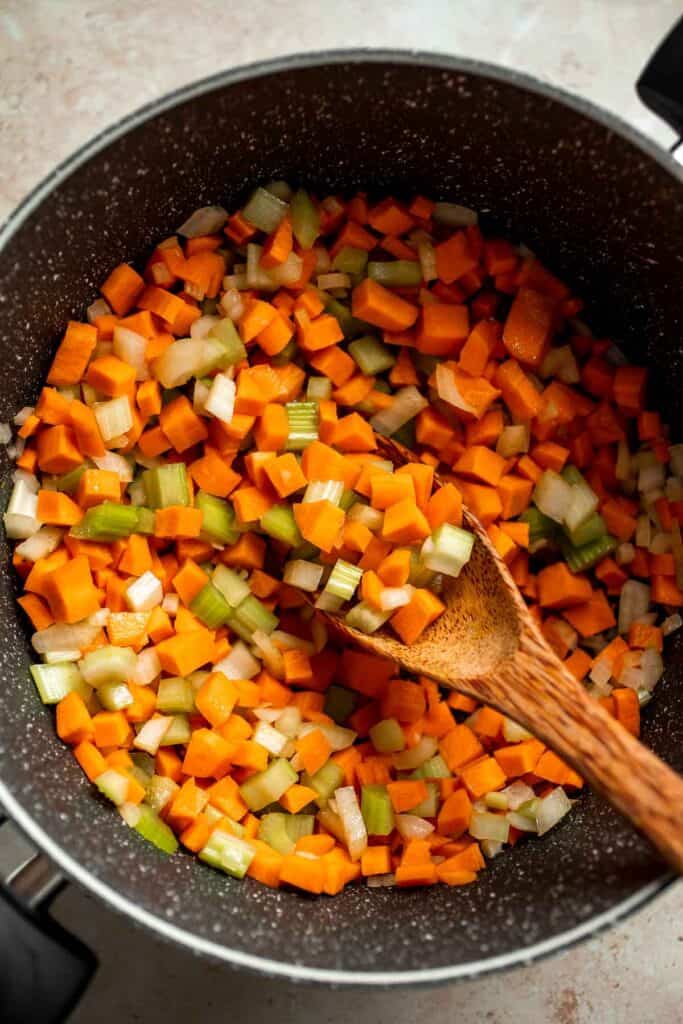

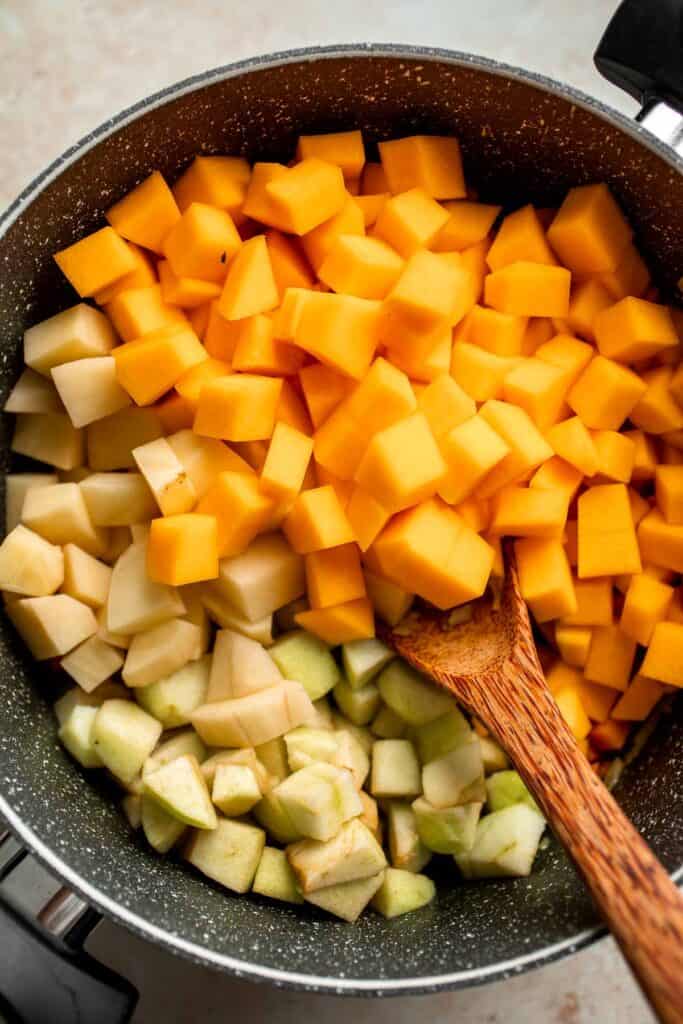
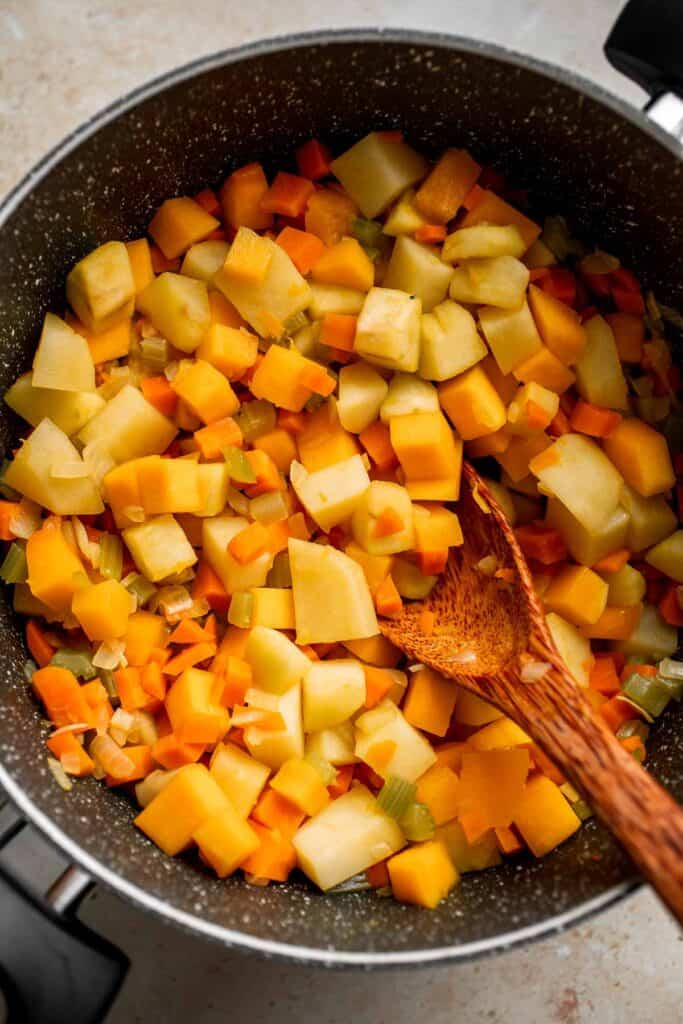
- Add liquids and seasoning. Pour in apple cider vinegar, vegetable stock (or chicken stock), and water. Add remaining ½ teaspoon of salt, curry powder, cinnamon, and whole sage leaves.
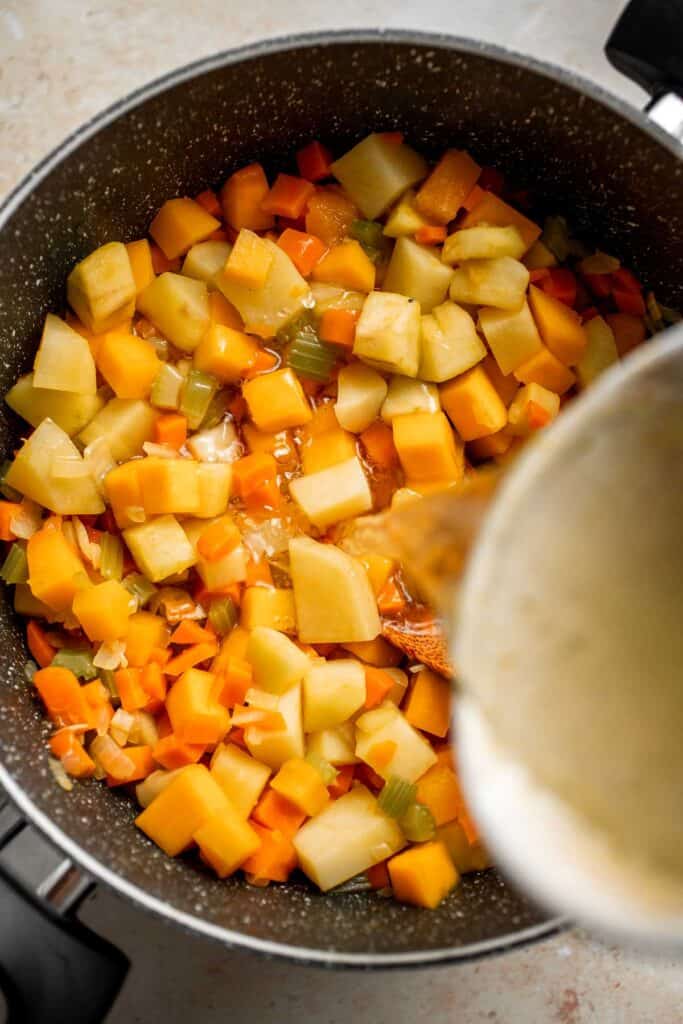
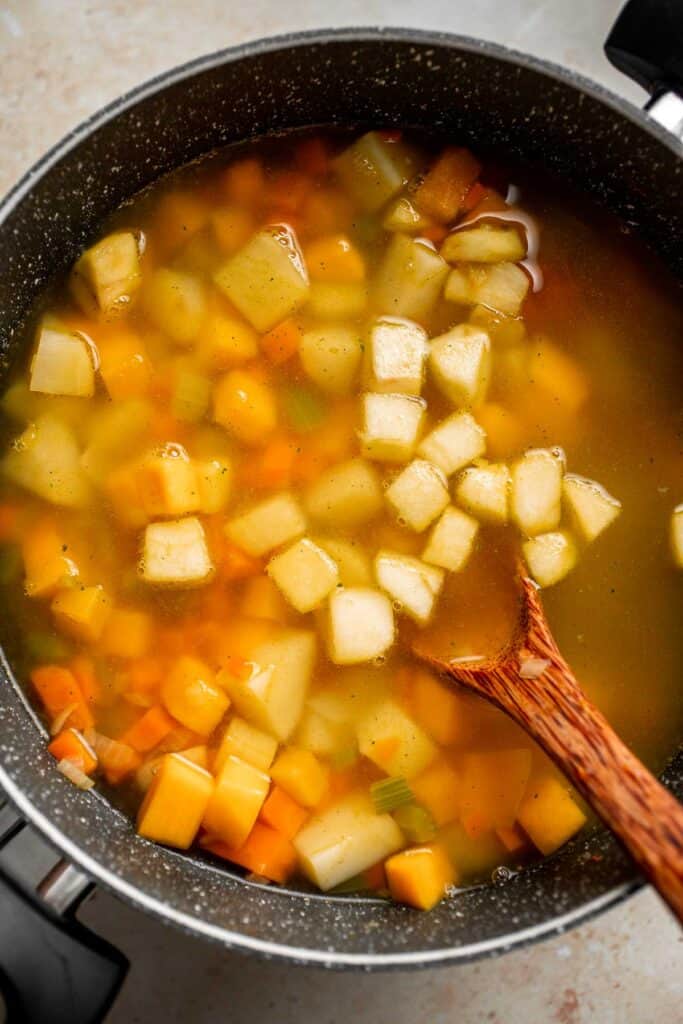
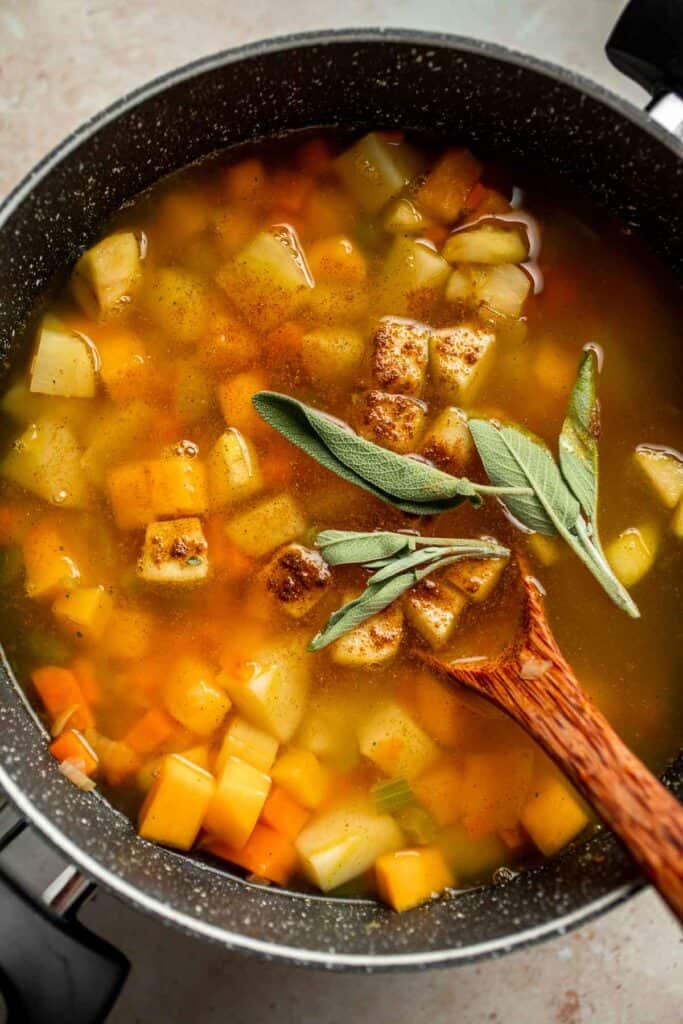
- Simmer. Bring to a boil. Then, reduce heat and simmer, covered, for 20 minutes. Test the vegetables with a fork to see if they're cooked through and tender. If you can easily insert a fork, then they are fork tender and ready.
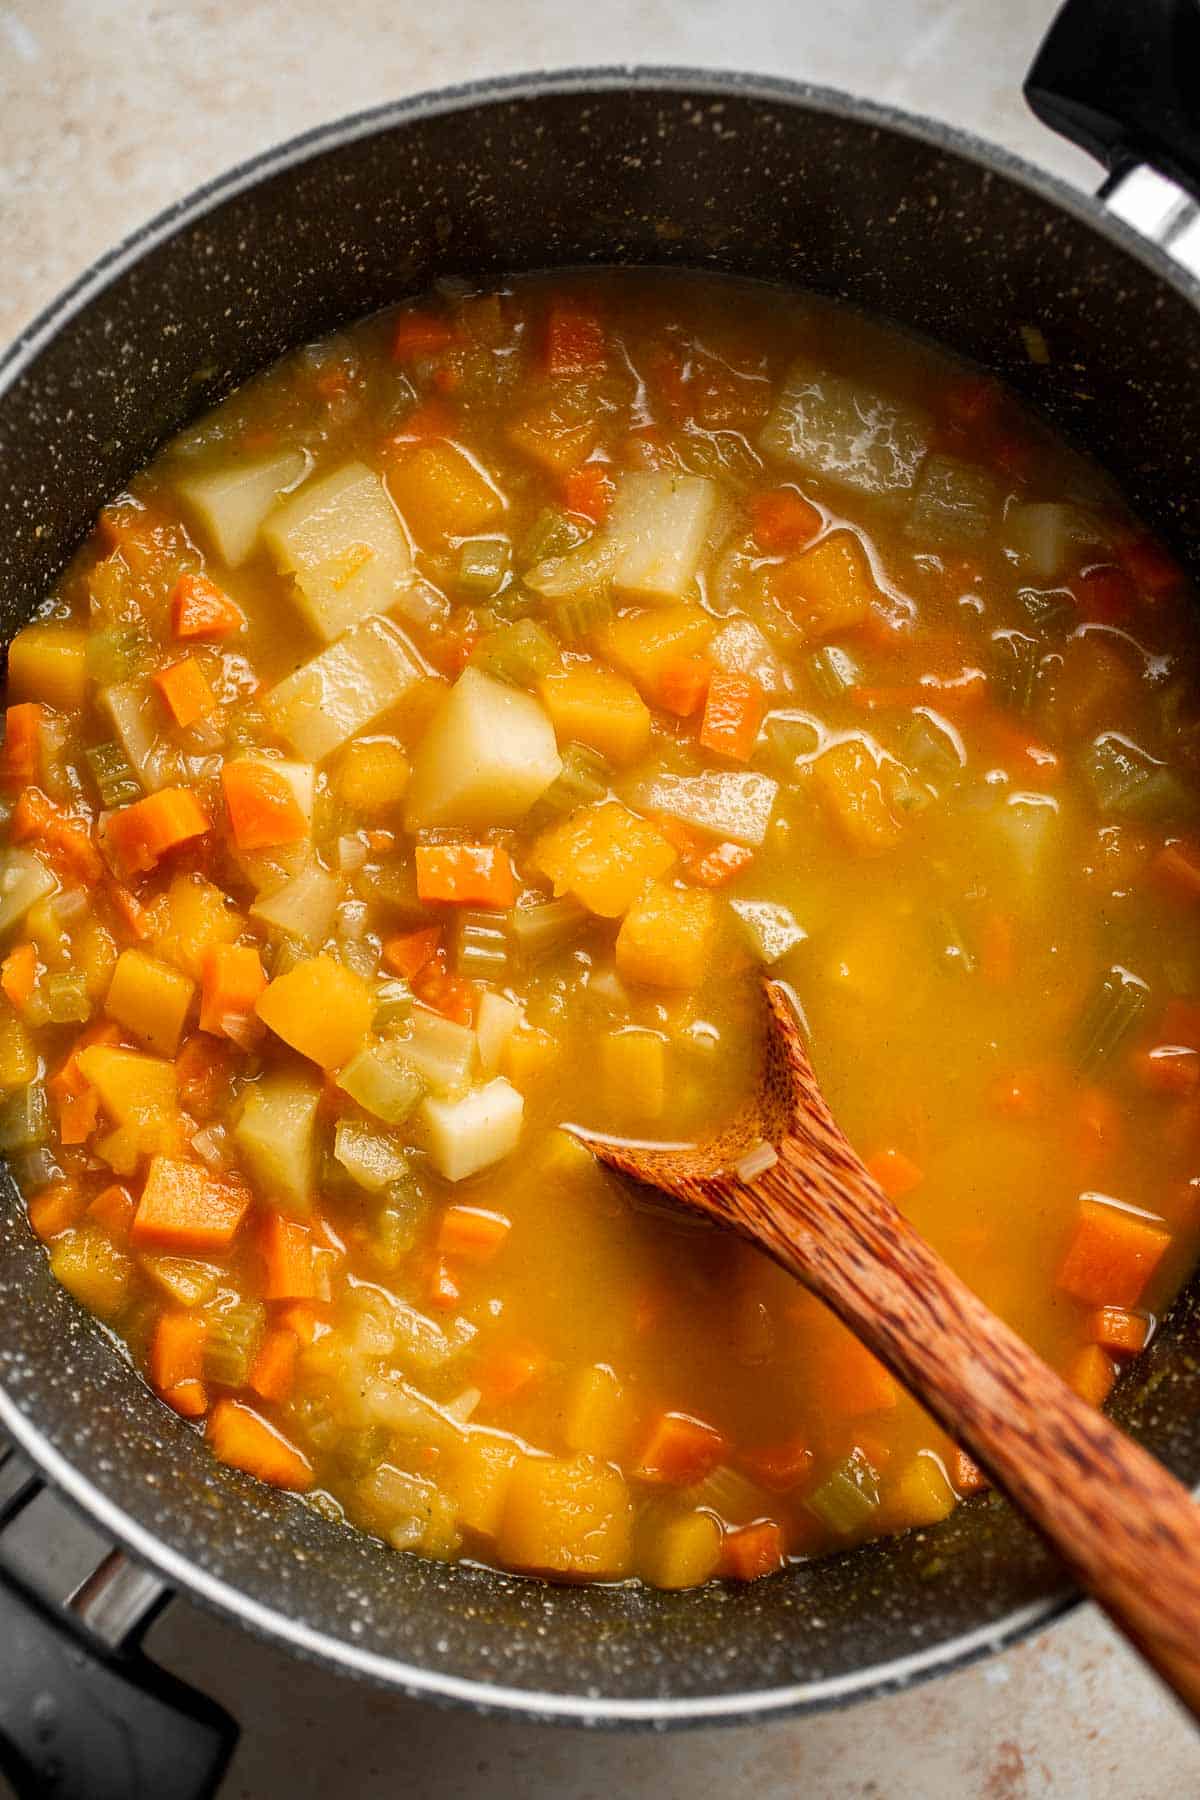
- Puree the soup. When ready, discard the sage and use an immersion blender to puree the soup directly in the pot or carefully transfer soup to a food processor or heavy duty blender. Process until soup is fully puréed (do this in batches, if needed) and return the soup to the pot. Taste and adjust seasoning as needed.
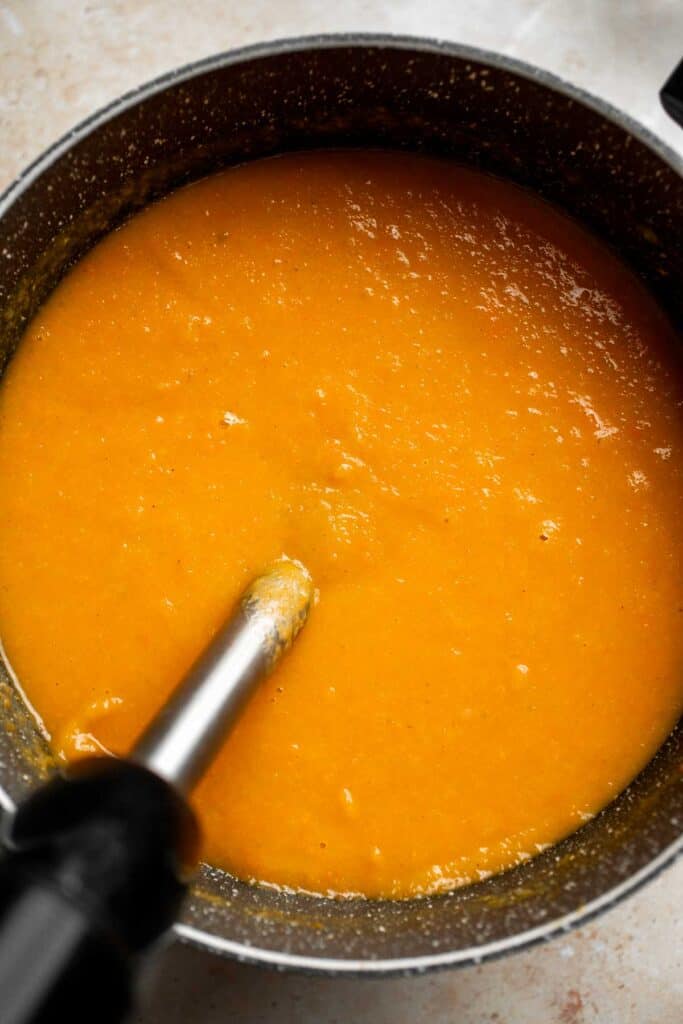
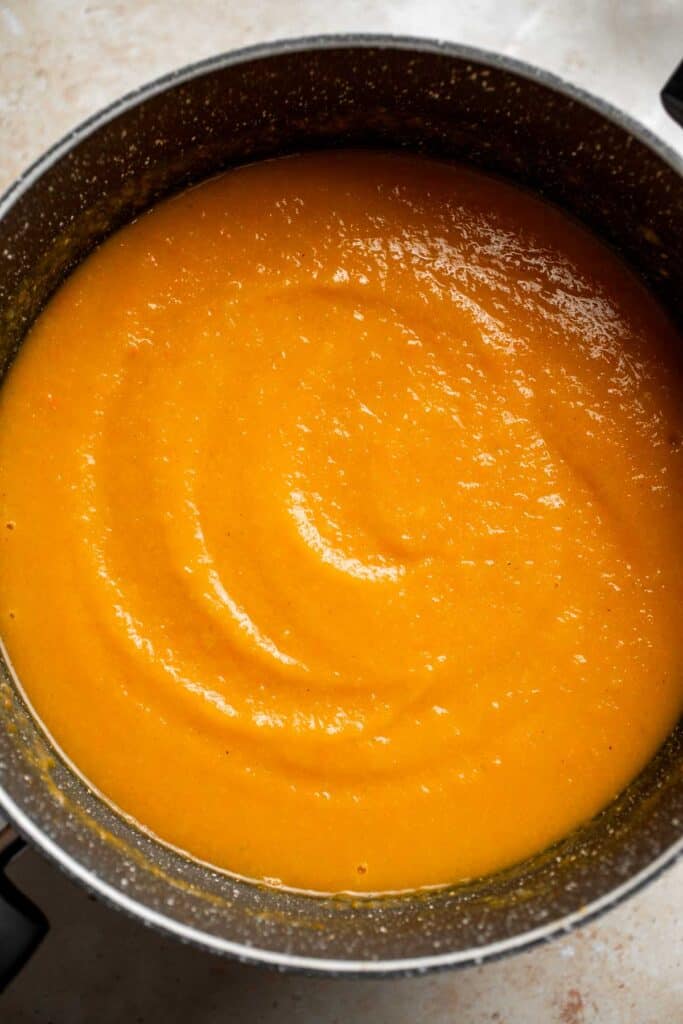
- Serve. Top soup with toasted croutons and serve warm.
How to Make Homemade Croutons
Preheat oven, toaster oven, or air fryer to 375 F. Place cubed bread in a small mixing bowl and drizzle with olive oil and salt.
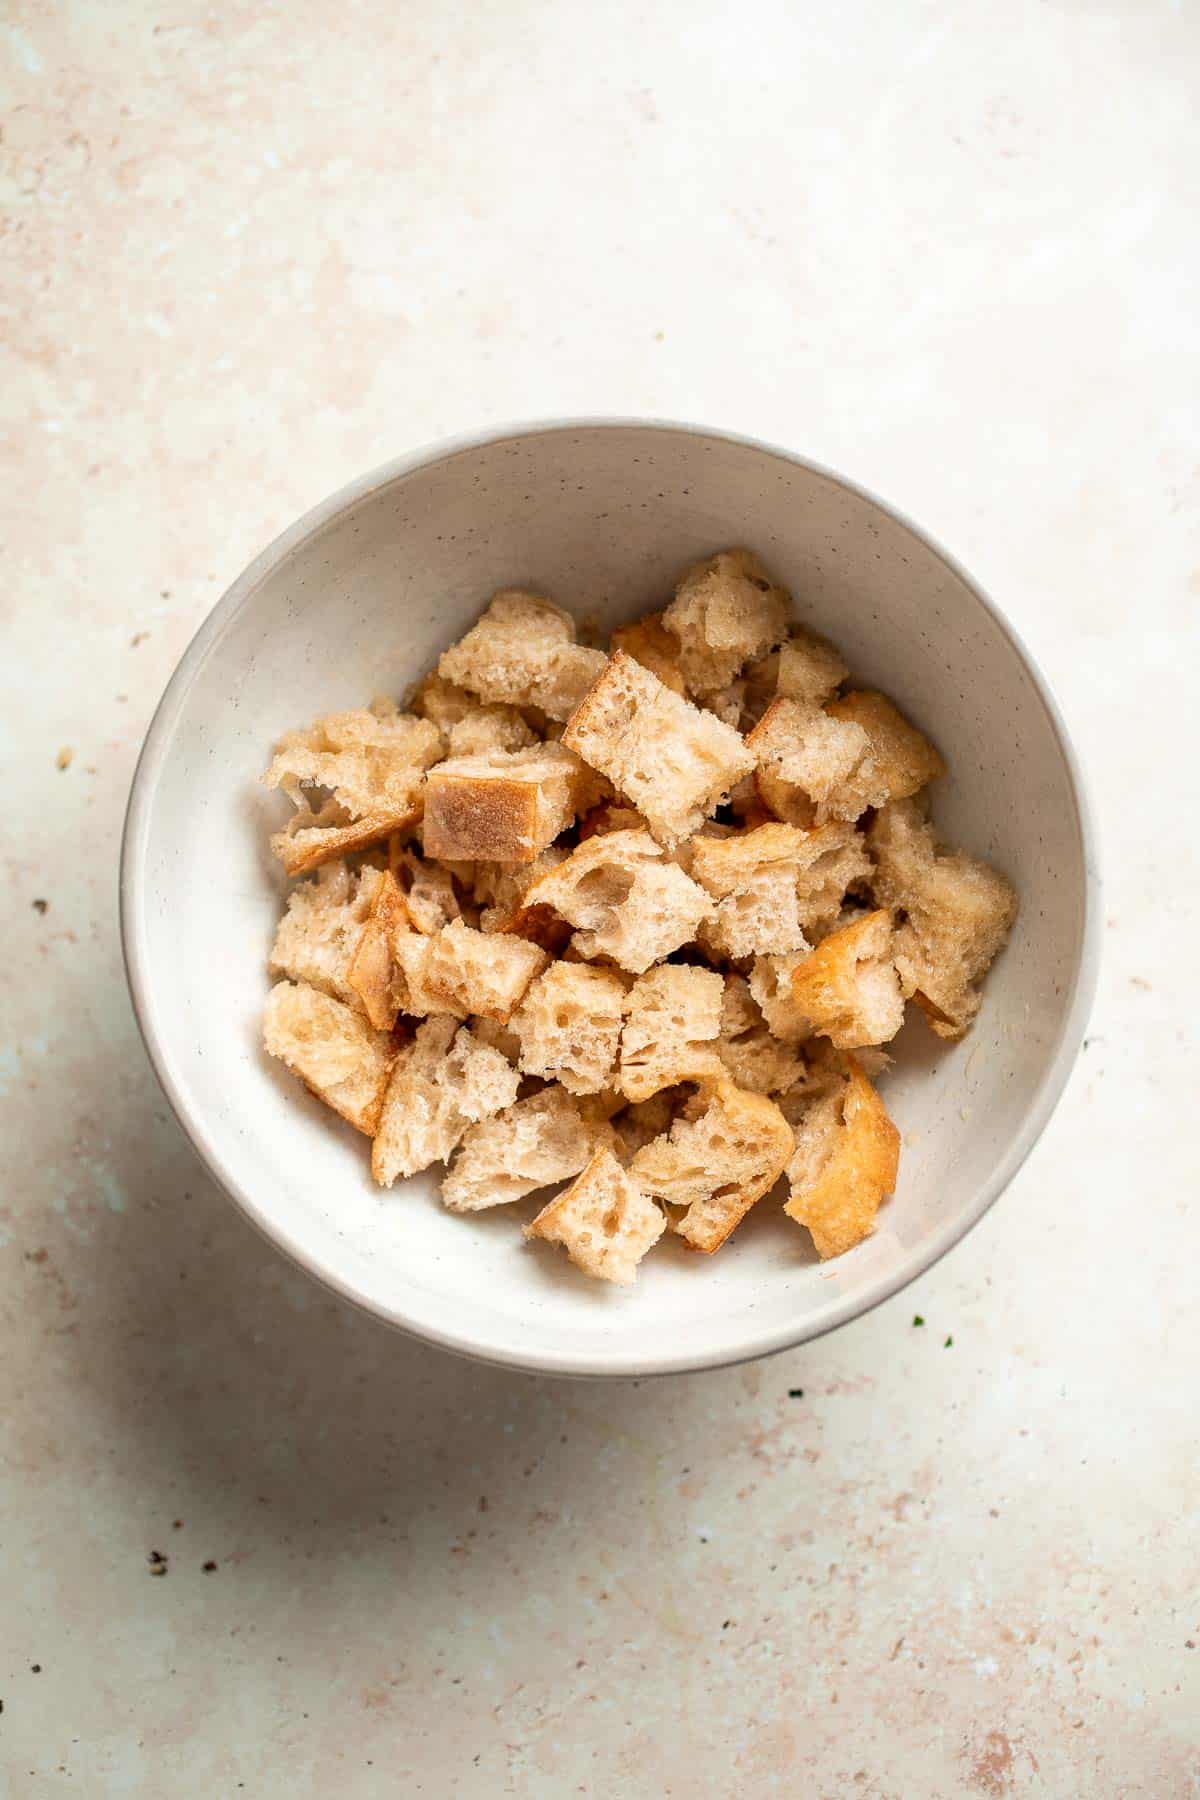
Place bread on a baking sheet lined with parchment paper or a silicone baking mat (or place into the air fryer basket) and bake for 5-7 minutes, or until bread is lightly toasted and brown.
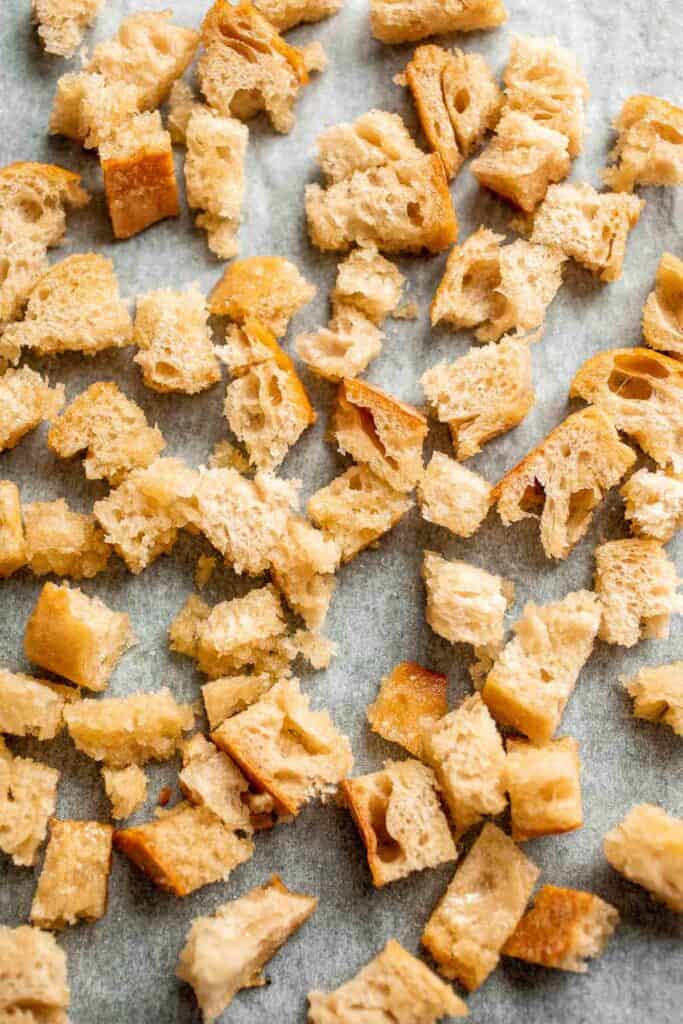

Recipe Variations
- Add pancetta. Add 4 ounces of cubed pancetta to this recipe to enhance the flavors. Before cooking the soup, heat 1 tablespoon oil in your cooking pot over medium-high heat. Once the oil is shimmering hot, add pancetta and cook until crispy, about 5 minutes. Remove with a slotted spoon and place in a paper towel-lined bowl or plate and set aside. Then sauté your onions, celery, and carrot sin the same pot and cook the soup as direct. Top your finished soup with the reserved pancetta.
- Make it creamy. Substitute some or all of the broth with coconut milk to turn this into a creamy vegan butternut squash and apple soup.
- Add nuts or seeds. Top this apple and butternut squash soup with chopped toasted nuts such as almonds, walnuts, or pecans - or seeds like pumpkin seeds or sunflower seeds.
- Add pears. Replace some of all of the apple with diced pairs for a different and complimentary flavor.
How to Serve
This Butternut Squash Apple Soup is delicious served on its own with toasted croutons or crusty bread, or paired with some of my favorite sides including:
- French Baguette
- Roasted Broccoli Grilled Cheese Sandwich
- Arugula Salad
- Spinach and Feta Quiche with Cauliflower Crust
- Vegetarian Stuffed Peppers
- Cheesy Garlic Bread
For more recipe inspiration, see our 25 Side Dishes for Soup.

Recipe Tips and Tricks
- Change the consistency. If the pureed soup is too thick, add a little stock or water to thin it out. If it is too thick, simmer on low until soup thickens to your desired consistency.
- Save time with store-bought items. Save some prep time by using pre-cut fresh butternut squash or store-bought croutons if it is more convenient for you.
Storing and Freezing Instructions
How to Store
You can store this butternut squash apple soup in the same cooking pot with the lid on or transfer to an airtight container, and place in the refrigerator for up to 5 days.
How to Reheat
Reheat leftover squash soup by transferring the soup to a cooking pot and heat over medium-low heat until warmed through. You can also heat a bowl of butternut apple soup in the microwave in 30 second increments until warmed through.
How to Freeze
Transfer soup to an airtight container and place in the freezer for up to 3 months. To serve, let it thaw in the refrigerator overnight before reheating.
More Butternut Squash Soup Recipes
- 40+ Cozy Fall Soup Recipes
- Roasted Butternut Squash Soup
- Instant Pot Butternut Squash Soup
- Roasted Butternut Squash and Cauliflower Soup
- 30-Minute Butternut Squash Soup
- Coconut Curry Pumpkin Soup
Tried this recipe?
I'd love to hear what you think! Leave a comment and rating below to share your feedback. Your reviews help others discover this recipe and help me keep creating more free recipes for you. Snap a photo and tag me on social media @aheadofthyme too.

Chicken Divan
Chicken Divan is a deliciously creamy casserole made by mixing tender cooked chicken in a cheesy broccoli mixture and then baking it with a breadcrumb topping for a little crunch. It's a warm, cozy dish full of cheesy goodness your whole family will absolutely love and ask for again and again!
Did you know Chicken Divan originated in the Divan Parisien Restaurant at the Chatham Hotel in New York City in the early twentieth century? It's been an American family favorite since then, and for good reason. It's incredibly flavorful and a great way to sneak in some extra veggies. There are so many variations out there, but this creamy chicken casserole uses a mixture of common, everyday ingredients you can easily find at your local grocery store to help you get dinner on the table quickly.
Why You'll Love This Chicken Divan Recipe
- Cozy comfort food. Everything about this recipe is cozy and comforting, from the tender pieces of chicken to the creamy sauce and crunchy, buttery topping. It's such a warm and inviting dish!
- Simple to make. Although the original chicken divan recipe uses a Mornay sauce and a béchamel sauce, this one keeps things easy with a couple of store-bought items to speed up the process.
- Family friendly. This is one of those delicious recipes that the whole family will love and want to eat on repeat. It's especially great for those days when you need something everyone will eat without a fight!
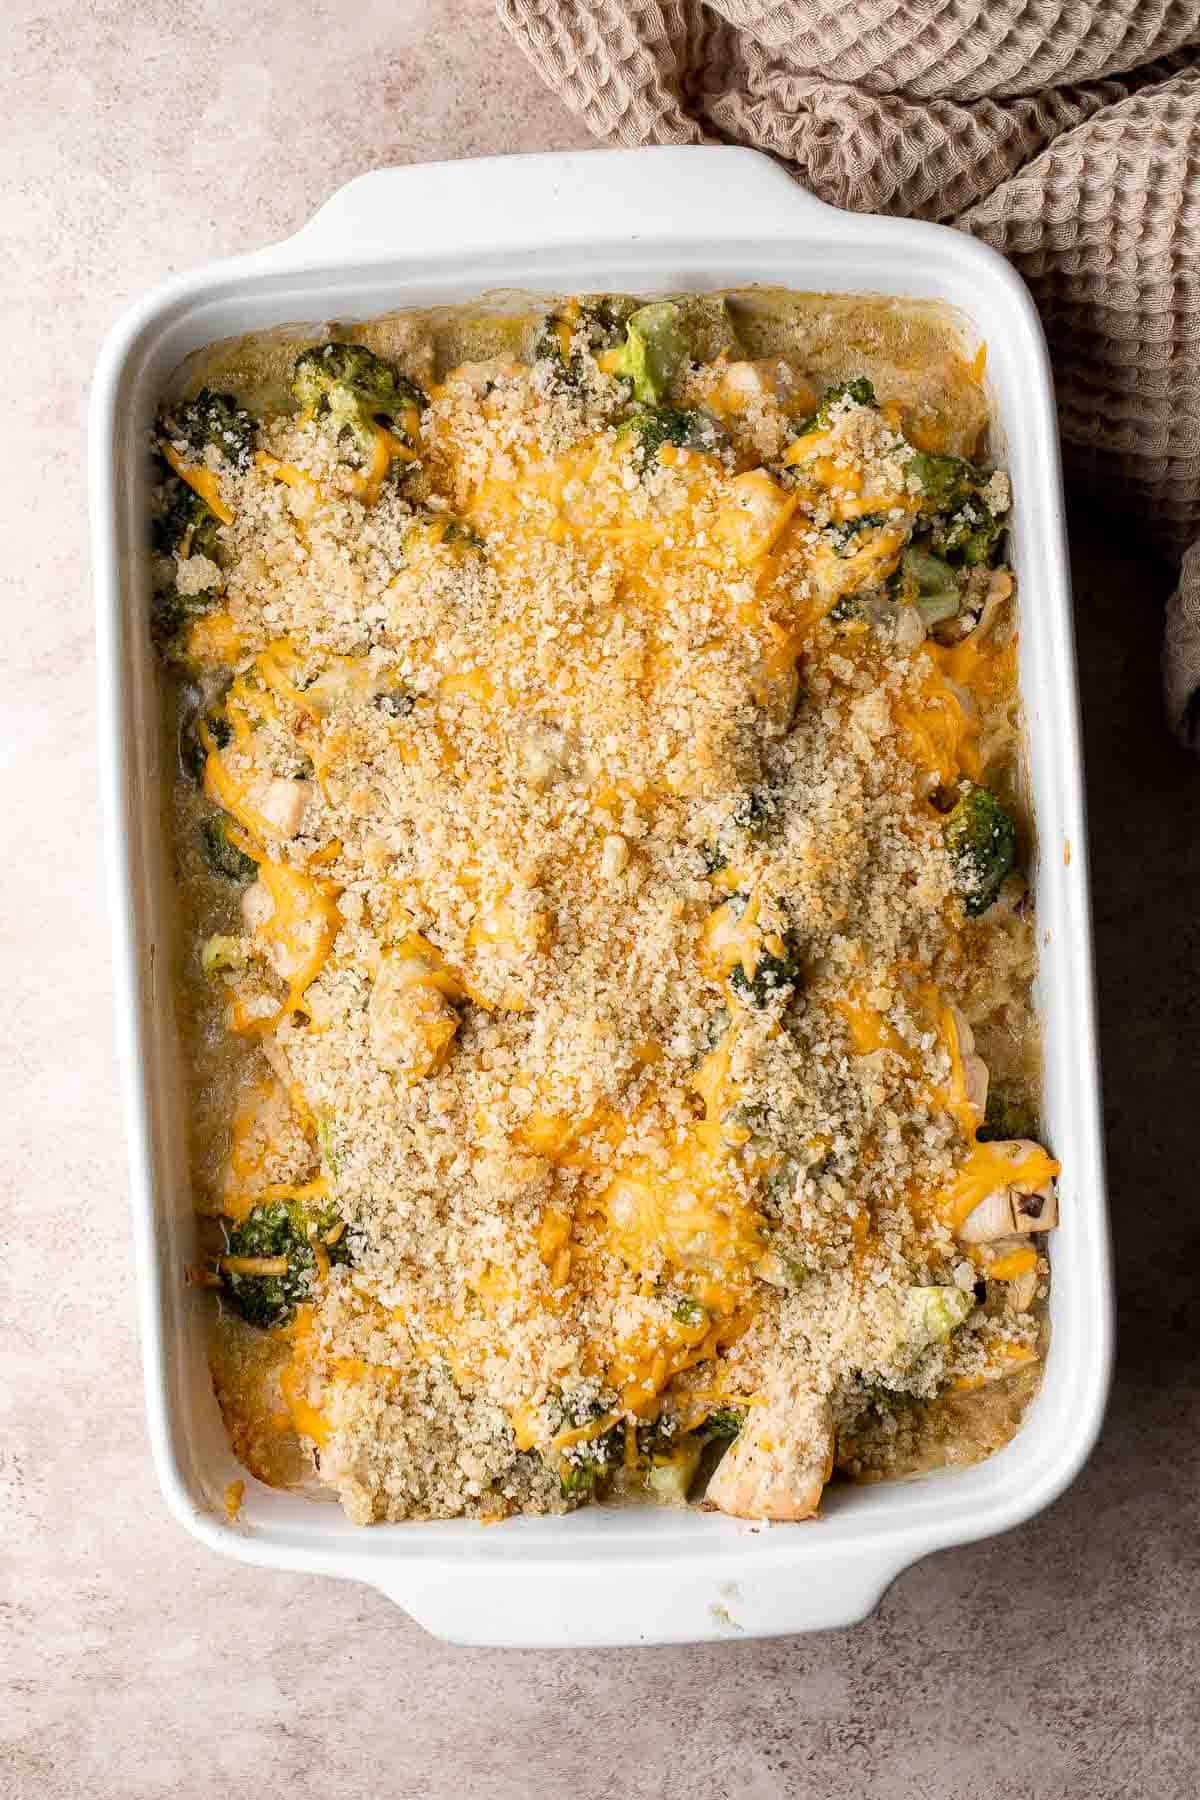
Ingredient Notes
To make this delicious chicken divan, you will need the following ingredients (full measurements in recipe card below):
- butter -start by sautéing bite-sized pieces of chicken in melted butter. Feel free to use coconut oil or olive oil instead. You also need some melted butter to mix with the panko breadcrumbs for the topping.
- chicken breasts - cut boneless, skinless chicken breasts into 1-inch cubes.
- salt and pepper
- onion powder - this gives the cheesy sauce a mild onion flavor that tastes wonderful with garlic and broccoli.
- garlic - finely chop fresh garlic for a savory note. Storebought minced garlic works, too.
- broccoli florets - use frozen broccoli to get dinner on the table quickly.
- cream of mushroom soup - use canned cream of mushroom soup or cream of chicken soup for a thick, creamy sauce.
- mayonnaise - mayo or sour cream adds extra richness and a little tanginess that keeps this cheesy chicken dish from tasting too rich.
- cheddar cheese - shredded cheddar goes into the chicken filling and on top of the casserole dish, where it bakes into a crunchy, cheesy topping.
- panko breadcrumbs - these bread crumbs have a really crisp texture that contrasts the creamy chicken broccoli divan filling. We mix this with melted butter to hold the breadcrumbs together like a pie crust.
You will also need a large pot, 9x13-inch baking dish, aluminum foil, and a small mixing bowl.
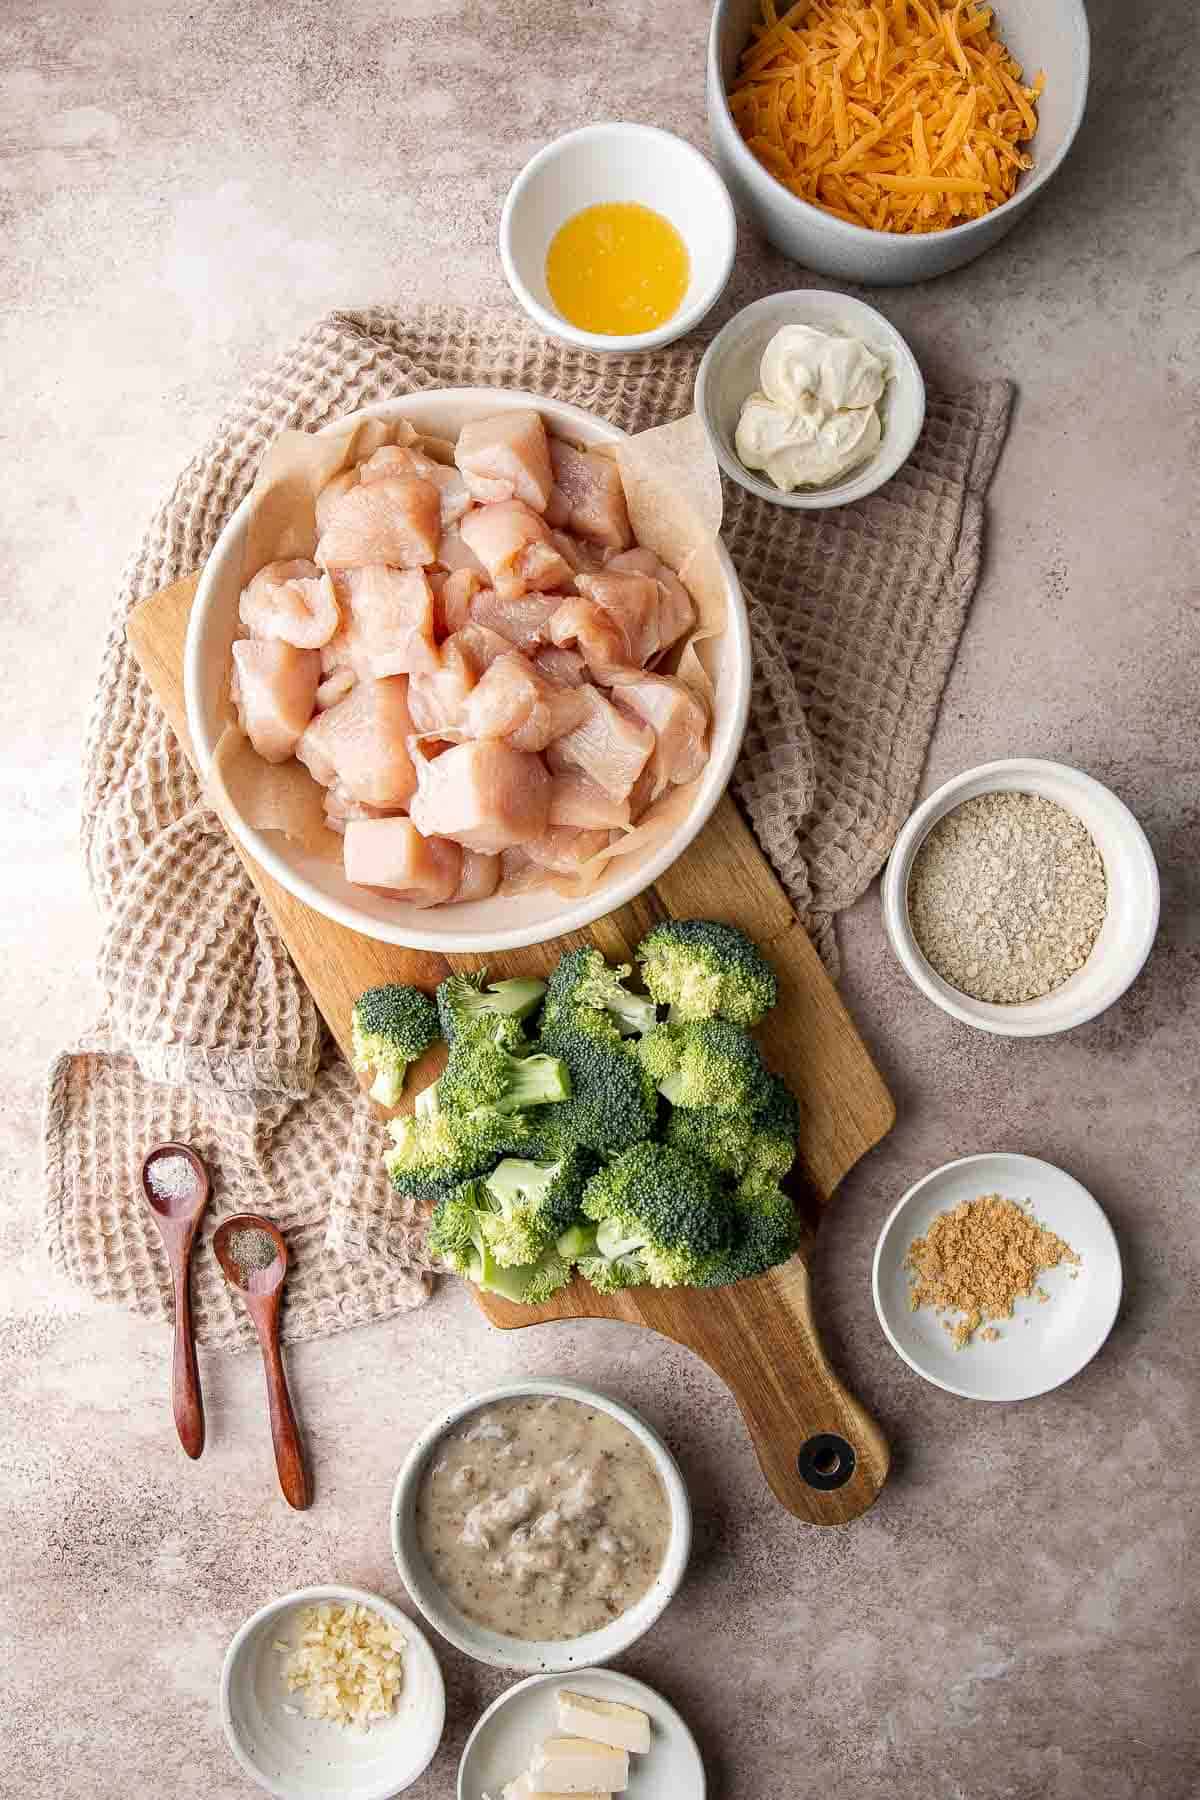
How to Make the Best Chicken Divan
- Cook chicken. In a large pot or Dutch oven, add butter and melt over medium-high heat until it starts to bubble, about 1 minute. Add chicken and season with salt and pepper. Sauté until no longer pink, about 5 minutes.
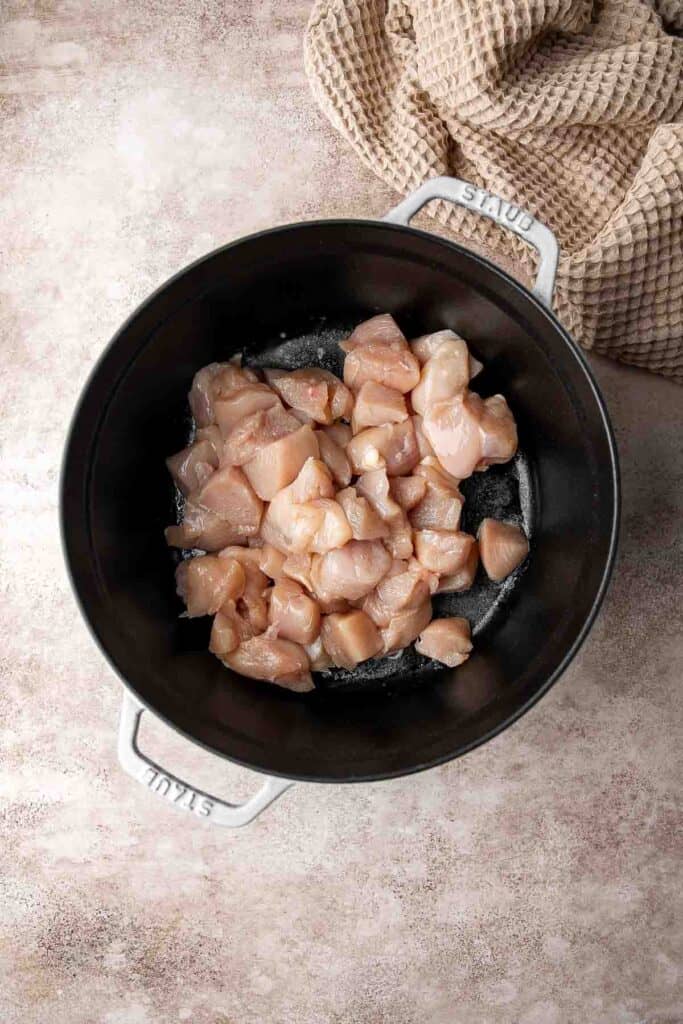
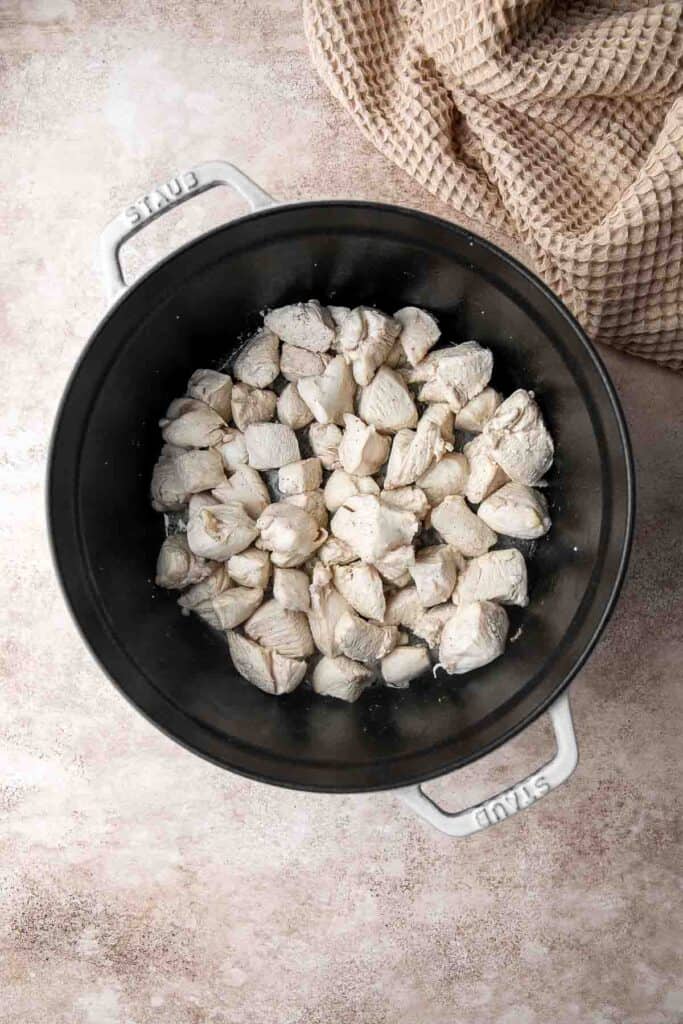
- Add broccoli. Add garlic and broccoli florets. Mix well and cook for another 3-5 minutes, stirring occasionally. Turn off the heat and drain excess liquid in the pot if necessary.
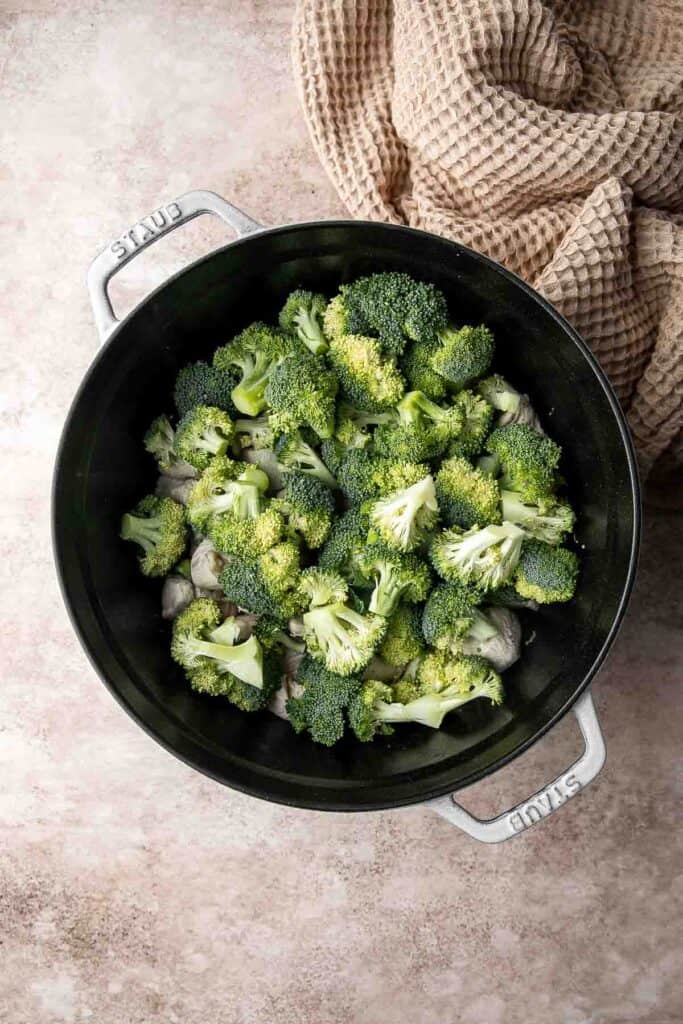
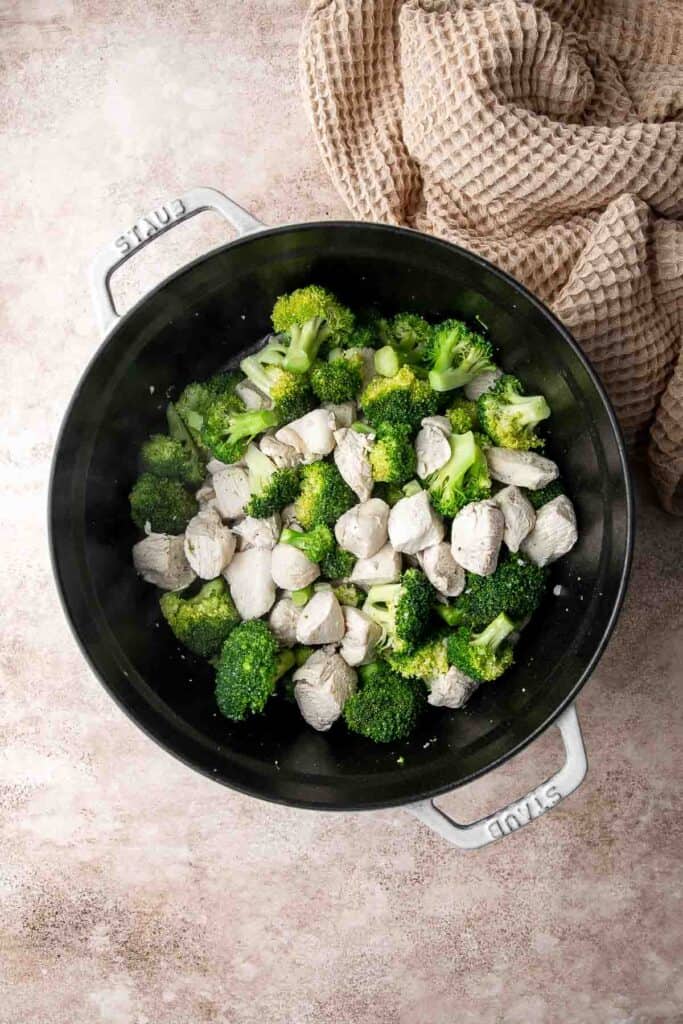
- Add remaining ingredients. Add cream of mushroom soup, mayonnaise, 1 cup of cheddar cheese, and onion powder. Stir well until evenly combined.
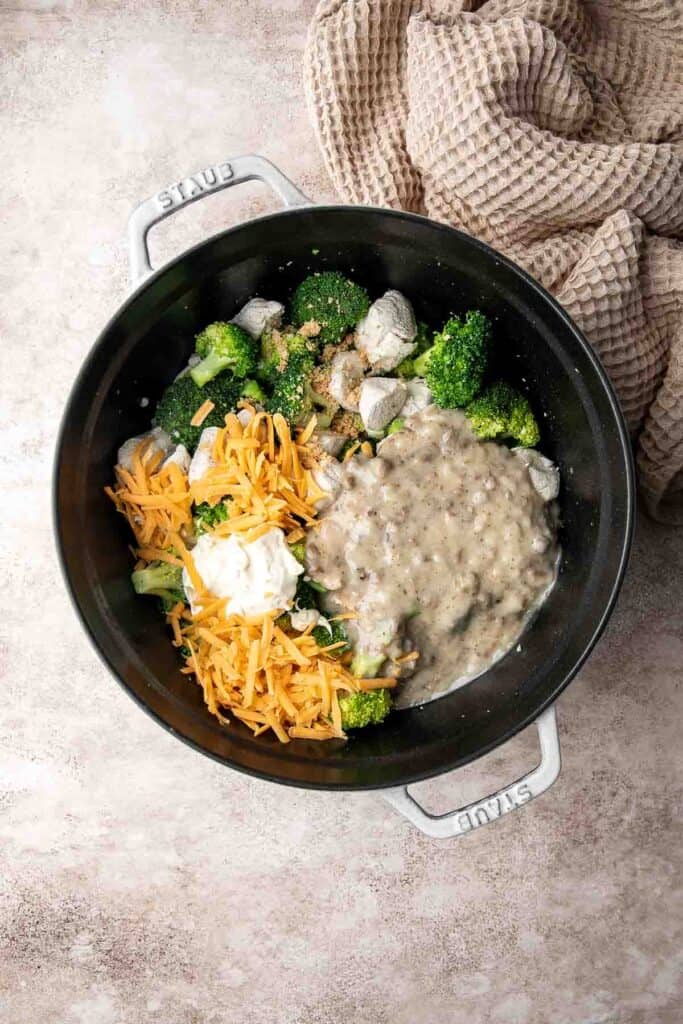
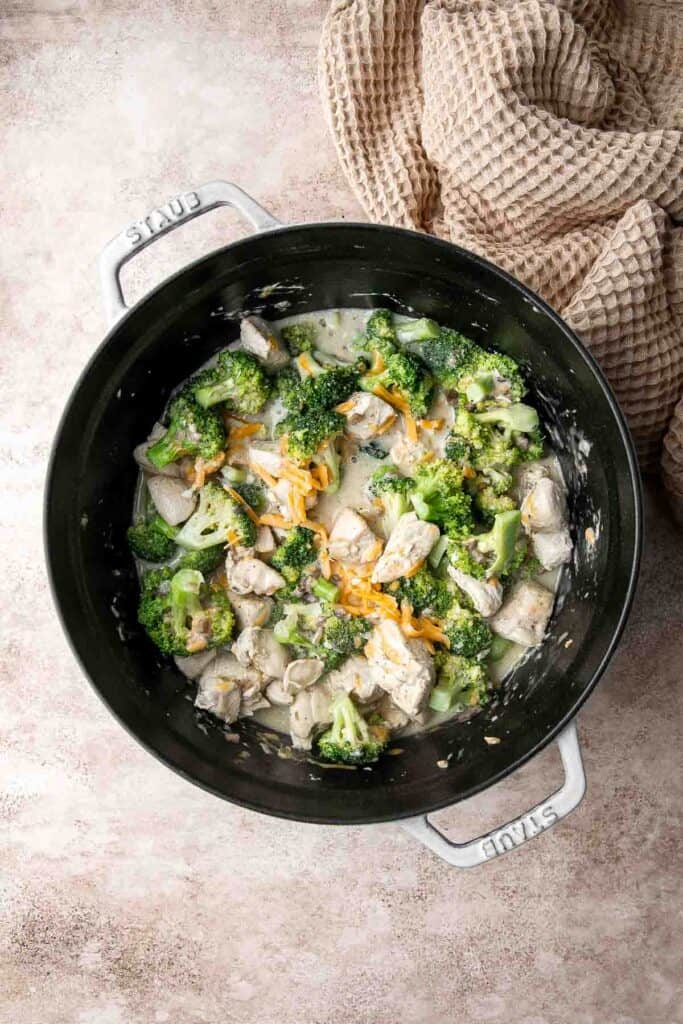
- Top with cheese. Transfer the chicken broccoli mixture into a 9x13-inch casserole pan and top with the remaining 1 ½ cups cheese.
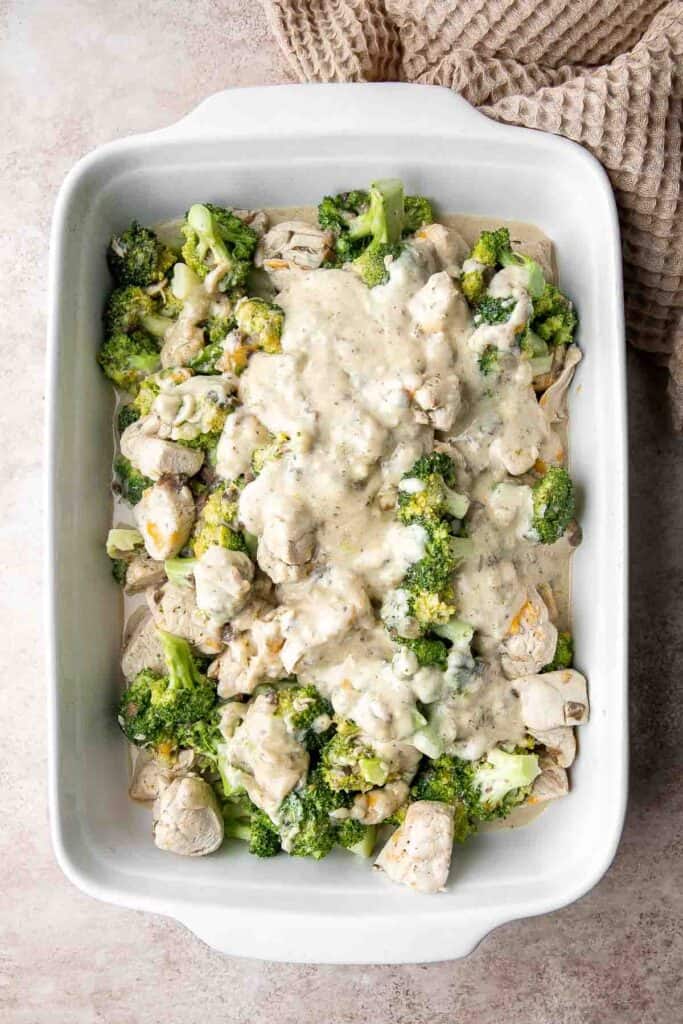
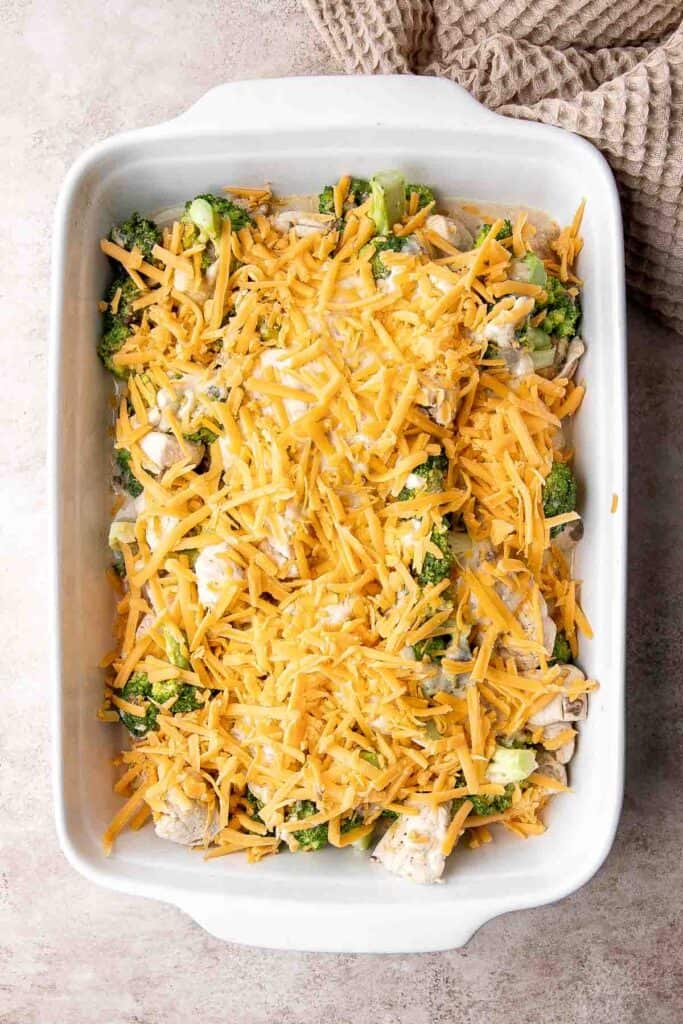
- Bake. Cover with aluminum foil and bake in a 375F preheated oven for 20 minutes until the cheese has melted.
- Add breadcrumbs. Meanwhile, in a small mixing bowl, combine breadcrumbs and melted butter. Sprinkle over the cheese and place back into the oven and bake uncovered for another 10 minutes until the top is golden brown. Serve warm.
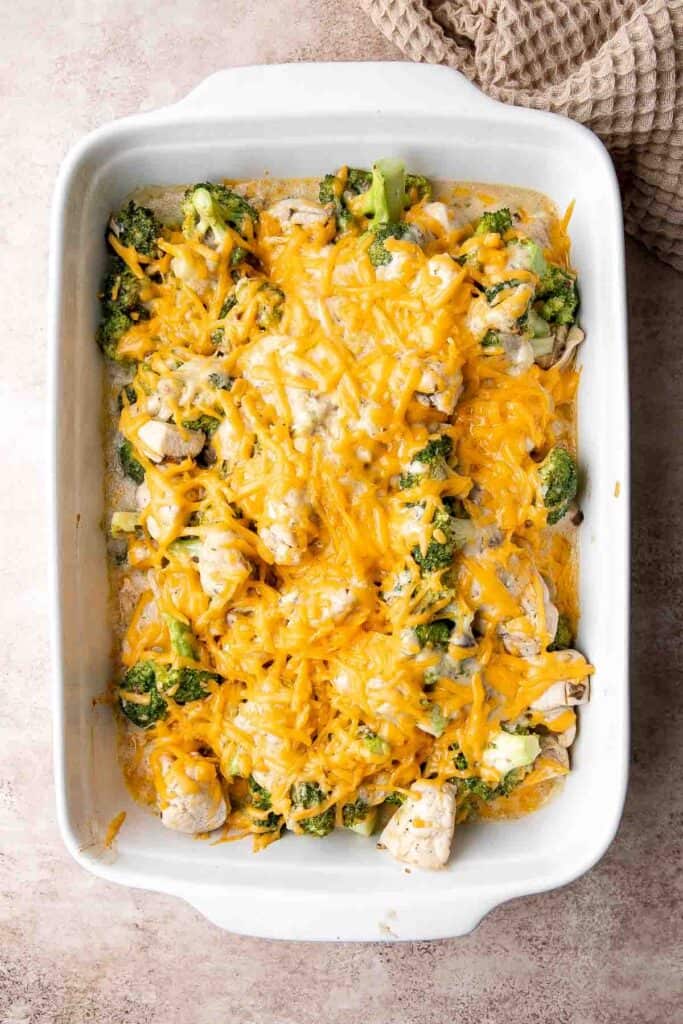
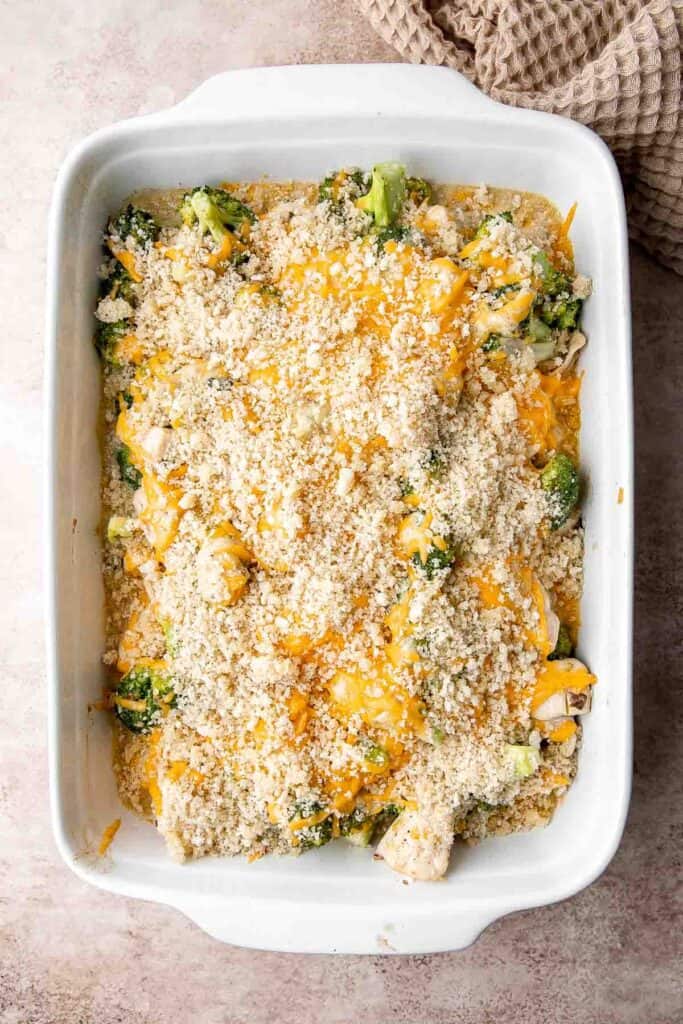
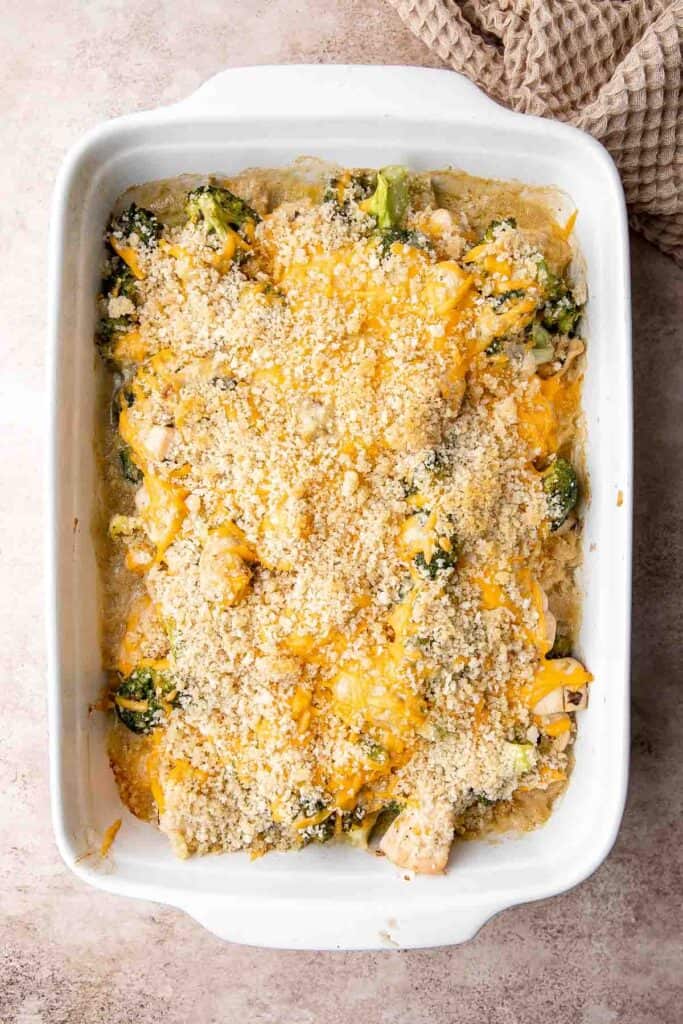
Recipe Variations
- Use Ritz crackers. Instead of breadcrumbs, crumble up salty Ritz crackers for a crunchy topping. It's easy and delicious.
- Add more veggies. This recipe can easily handle more vegetables. Try replacing some of the broccoli with cauliflower, add some frozen spinach or kale, add some cooked diced carrots or peas, or sauté some diced bell peppers. Make it your own!
- Make it from scratch. Instead of using canned, condensed soup, follow a homemade cream of chicken soup recipe.
- Add curry powder. Many chicken divan casserole recipes include a teaspoon or two of curry powder, which adds an extra layer of flavor and a pale yellow color. Feel free to add it if you'd like!
How to Serve
This Chicken Divan is delicious served on its own, or paired with some of my favorite sides including:
- The Best and Creamiest Mashed Potatoes
- Garlic Cheddar Biscuits
- Arugula Salad with Apple and Pecan
- Steamed Rice
- Cacio e Pepe
- Cornbread Muffins
For more recipe inspiration, see our 25 Side Dishes for Chicken.
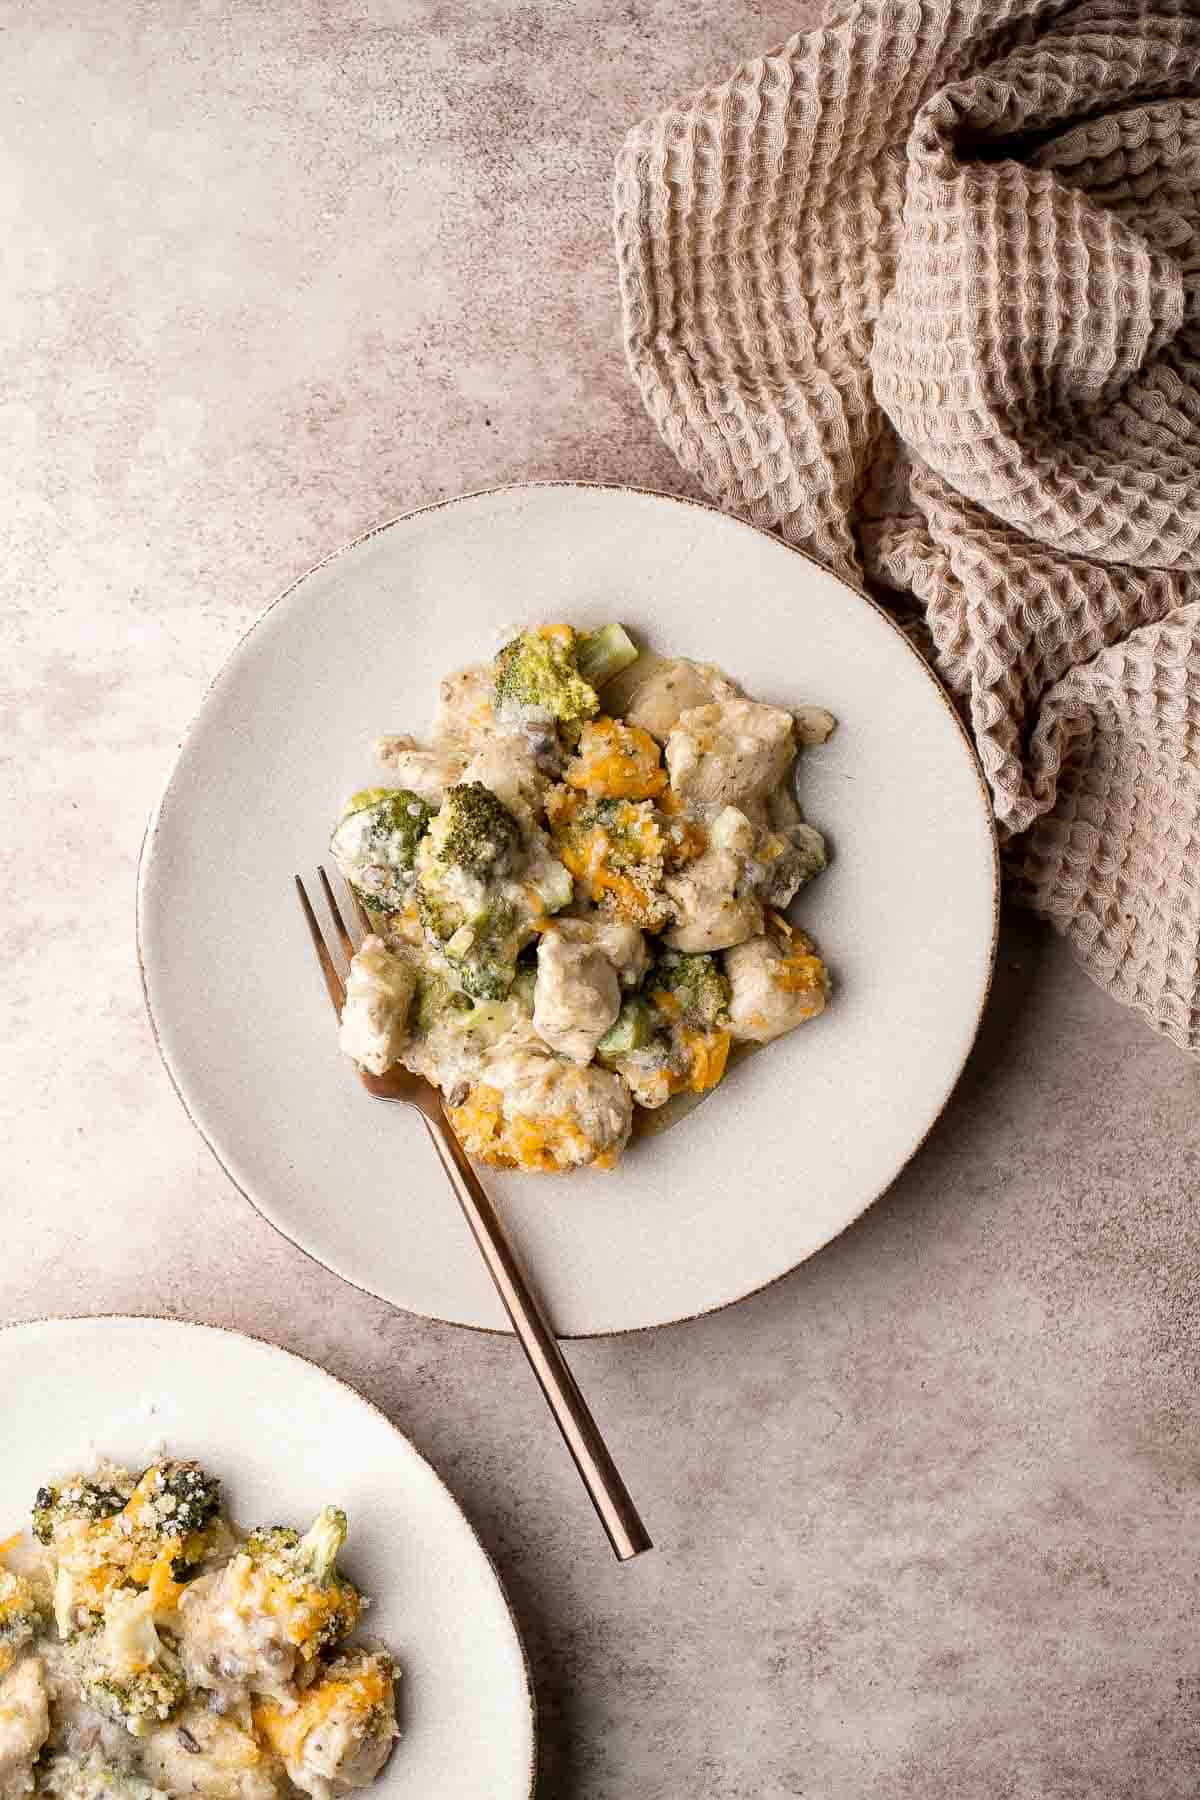
Recipe Tips and Tricks
- Use leftover rotisserie chicken. If you really want to make this easy chicken divan recipe quickly, use leftover cooked chicken. This is so nice on a really busy night!
- Use fresh broccoli. Chop fresh broccoli into small pieces and steam it for 4-5 minutes before adding to the chicken mixture.
- Take it easy on the salt. Since store-bought canned soups are really high in sodium, it's best to taste the dish before adding extra salt.
Storing and Freezing Instructions
How to Store
Store leftover chicken divan in an airtight container in the fridge for 3-5 days.
How to Reheat
Microwave your leftovers for 2-3 minutes, or bake them in a 375F preheated oven with a fresh layer of breadcrumbs for 8-10 minutes until warm and crispy.
How to Freeze
Place chilled leftovers in a freezer-safe container and freeze for 2-3 months. Thaw in the fridge before reheating.
FAQ
Although there are different variations of the classic recipe out there, most chicken divan recipes are similar to a chicken broccoli casserole. They include juicy chicken cooked in a creamy sauce with broccoli and flavorful seasonings. They're topped with a crunchy breadcrumb topping that adds a satisfying texture and extra layer of flavor.
Absolutely! Broccoli is standard in this signature dish, but you can easily adjust the recipe to suit your preferences. Try adding frozen peas, cooked carrots, sauteed bell peppers, sauteed onions, frozen spinach, or diced cooked potatoes. You can even add cooked rice for a chicken divan rice casserole. Have fun with it!
It can be a little tricky adapting this classic chicken casserole, especially with the creamy cheese sauce. The best substitutions are to use either non-dairy canned soup mixes or make your own using a neutral non-dairy milk. Add some nutritional yeast flakes for a cheesy flavor. Saute the chicken in coconut oil or olive oil, and use dairy-free cheese for the filling and crust.
More Creamy Chicken Recipes
- 60 Best Chicken Recipes
- Chicken a la King
- White Chicken and Spinach Lasagna
- Creamy Pesto Chicken
- Chicken Marsala
- Creamy Tuscan Chicken
Tried this recipe?
I'd love to hear what you think! Leave a comment and rating below to share your feedback. Your reviews help others discover this recipe and help me keep creating more free recipes for you. Snap a photo and tag me on social media @aheadofthyme too.

Monster Cookies
Monster Cookies are soft, chewy, colorful, and full of delicious goodies! Loaded with oats, peanut butter, chocolate chips, and M&M's, anyone who loves cookies will instantly fall in love with these delightfully monstrous treats. Take a bite once and you'll be hooked forever!

The idea behind this classic treat is to combine three types of cookies into one: chocolate chip, peanut butter, and oatmeal. And to make it even more scrumptious, we're throwing in a generous amount of candy-coated chocolates for a nice pop of color and texture. Cheap to make, easy to bake, and dangerously delicious, these monster cookies are sure to make your day a little sweeter.
Why You'll Love this Monster Cookie Recipe
- The best of three worlds. Although oats, peanut butter, and chocolate chips may seem like an unlikely trio, it's a classic that everyone loves. The oats add a chewy texture, the peanut butter gives a nutty sweetness, and the chocolate chips provide that melt-in-your-mouth goodness. And of course, who wouldn't like those M&M's?
- Easy to bake. One prepped and chilled, it takes just over 10 minutes to bake these cookies and have them coming come out of the oven smelling like heaven!
- An all-around treat. Whether you're looking for a quick snack to munch on during the day or a special dessert to serve your guests, these monster cookies have got you covered. Kids will definitely enjoy these rainbow treats, and adults won't be able to resist them either!
- Customizable. Add your unique twist to the recipe by using a different nut butter, opting for white chocolate or butterscotch chips, adding other mix-ins, or even incorporating a few of your favorite spices. And if you want to make your cookie extra special, top it with some ice cream or chocolate syrup!

Ingredient Notes
To make these delicious Monster Cookies, you will need the following ingredients (full measurements in recipe card below):
- all-purpose flour - suitable for almost all types of baked goods.
- baking soda + powder - gives the cookies a light, airy texture.
- salt - enhances all the flavors in the cookies.
- peanut butter - use creamy peanut butter to add a rich, buttery flavor yet still keep the cookies soft.
- butter - use melted butter to easily blend with the peanut butter.
- sugar - I use both white (granulated) and dark brown sugars to produce light, chewy, and moist cookies.
- egg - binds everything together and maintains structure.
- vanilla extract - adds a nice flavor and aroma.
- old-fashioned rolled oats - these hold their shape during baking and provide a chewier texture than quick oats.
- chocolate chips - use store-bought chocolate chips or chop up your favorite chocolate bar. We used mini chocolate chips, but you can also use regular sized ones.
- M&M's - adds a fun pop of color and texture. We used mini m&m's, but you can also use regular sized ones.
You will also need measuring cups and spoons, large baking sheets, stand mixer or hand mixer, ice cream or cookie scoop, and wire rack.
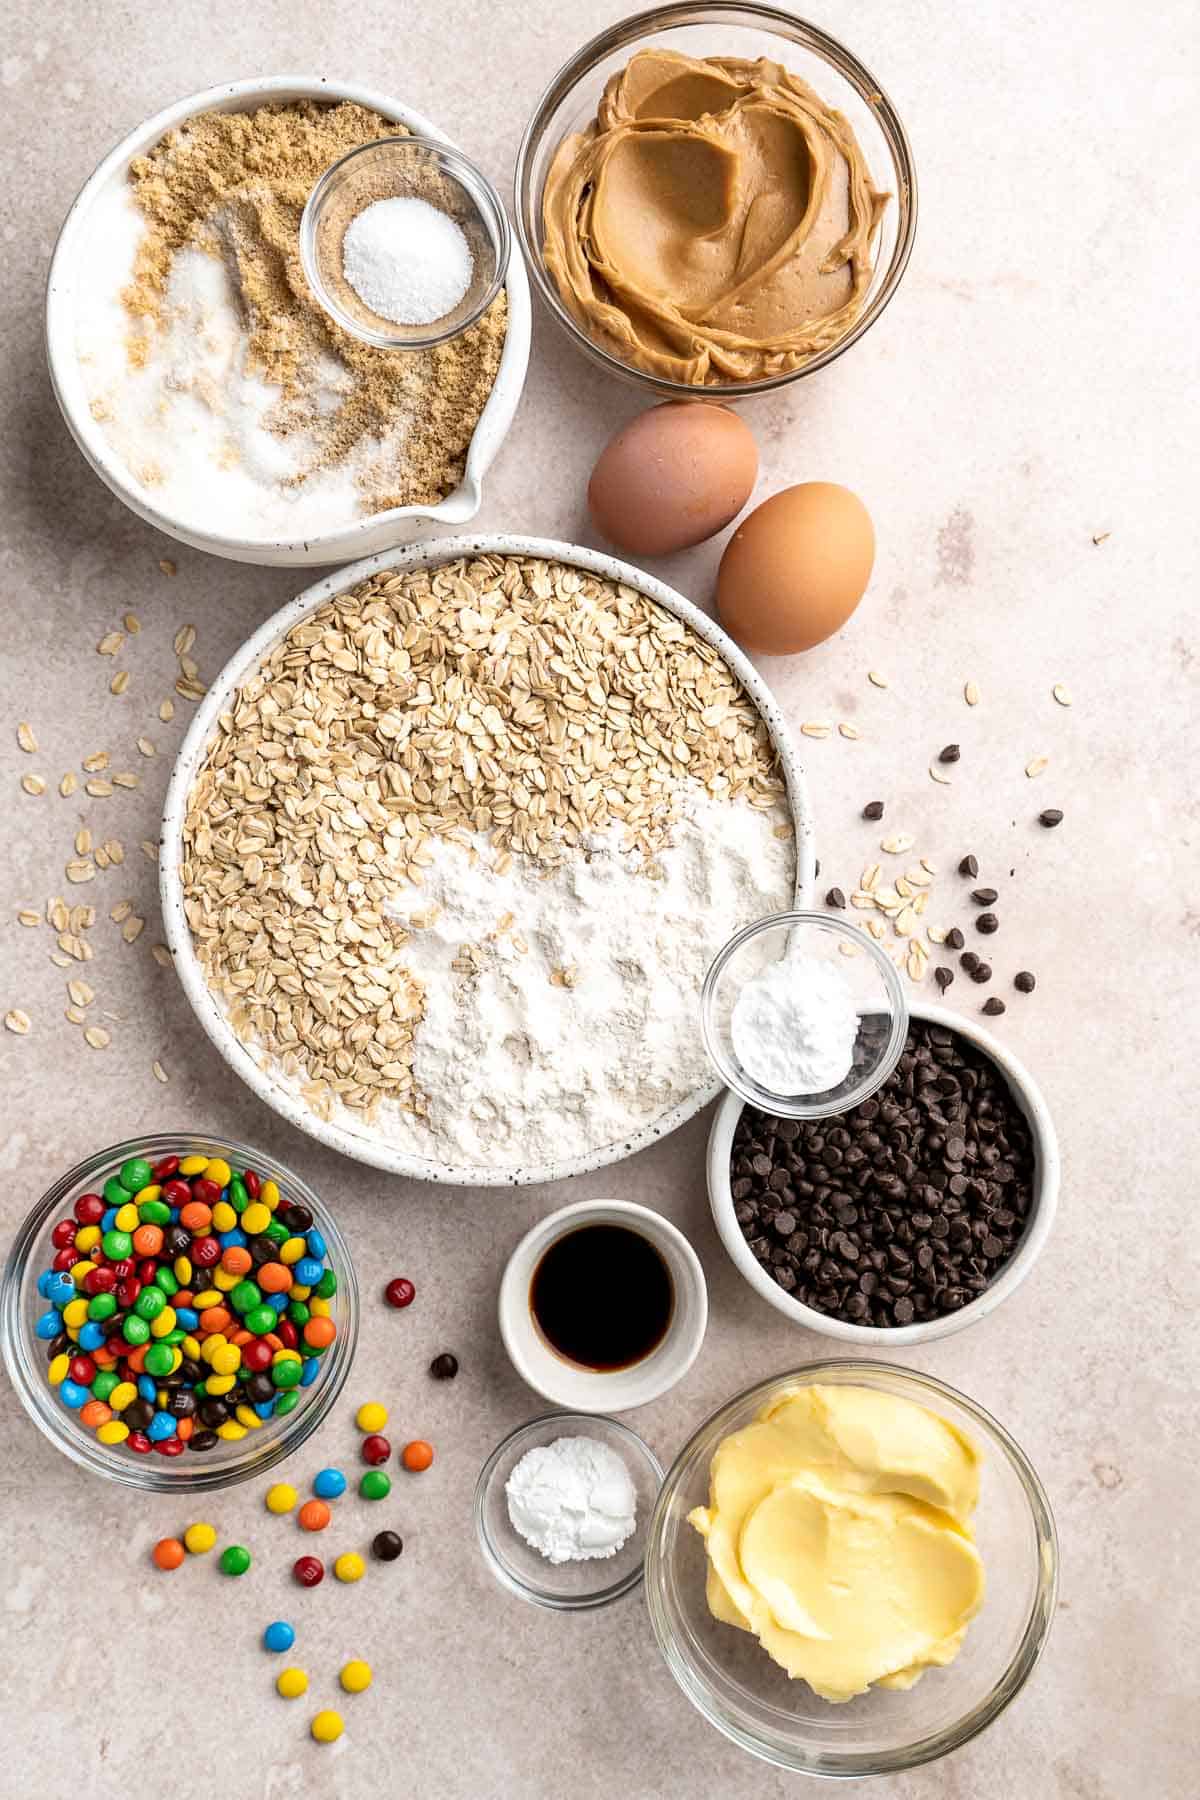
How to Make the Best Monster Cookies
- Combine dry ingredients. In a medium to large sized mixing bowl, add in flour, baking soda, baking powder, and salt. Whisk well to combine and set aside.
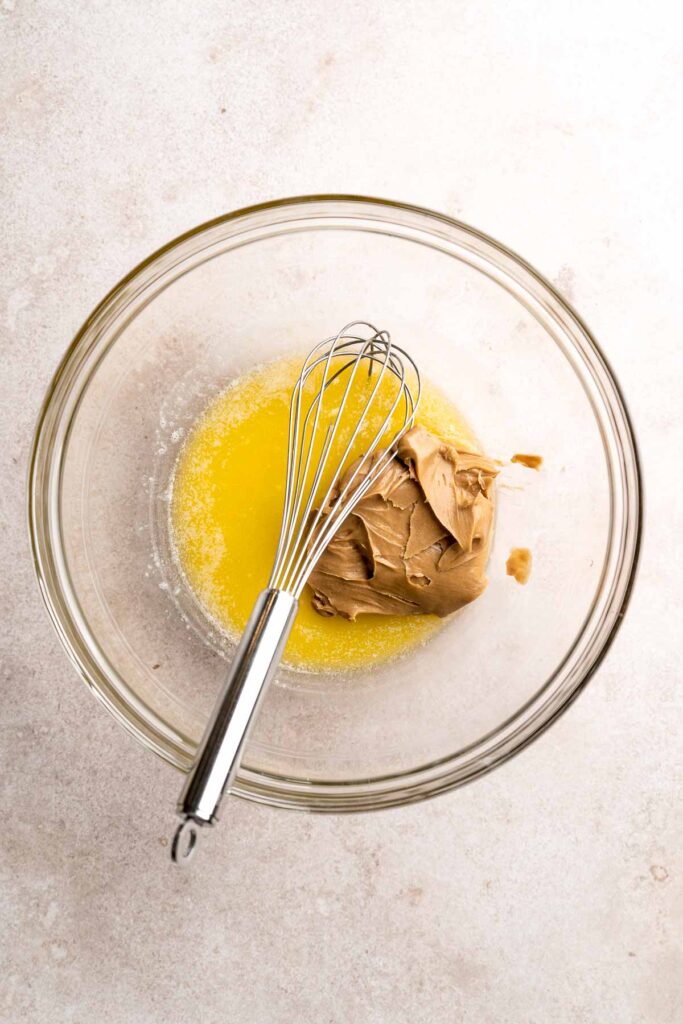
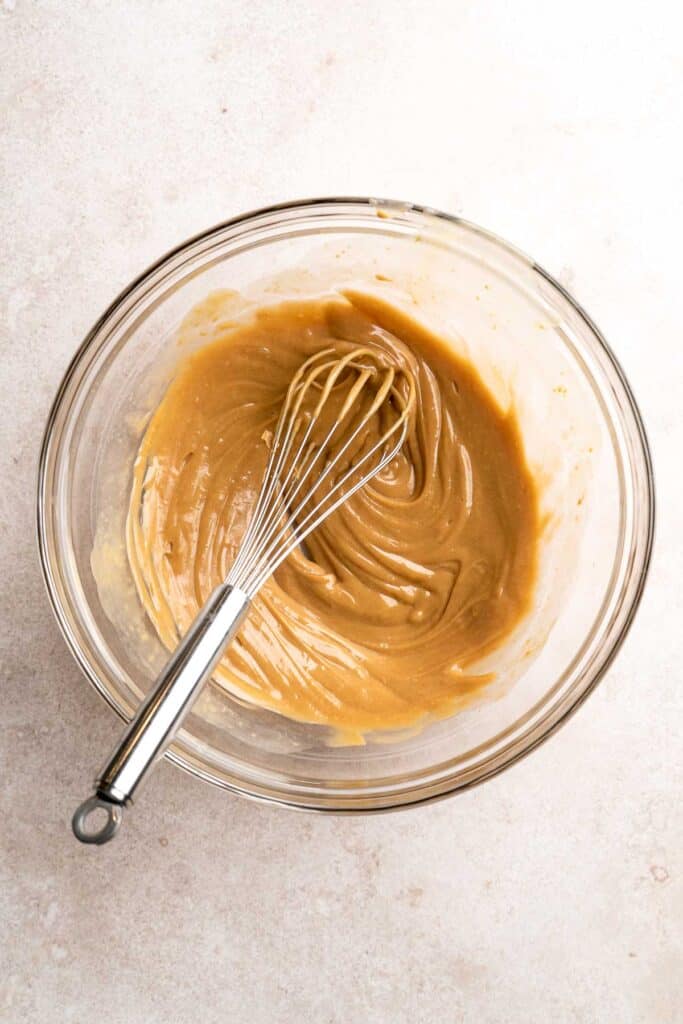
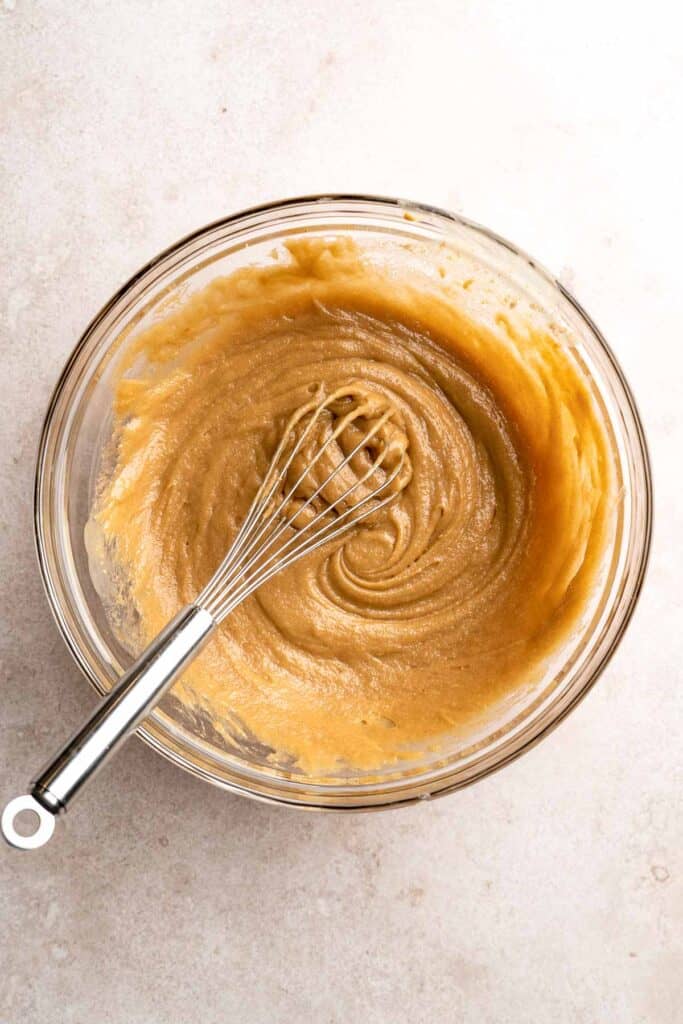
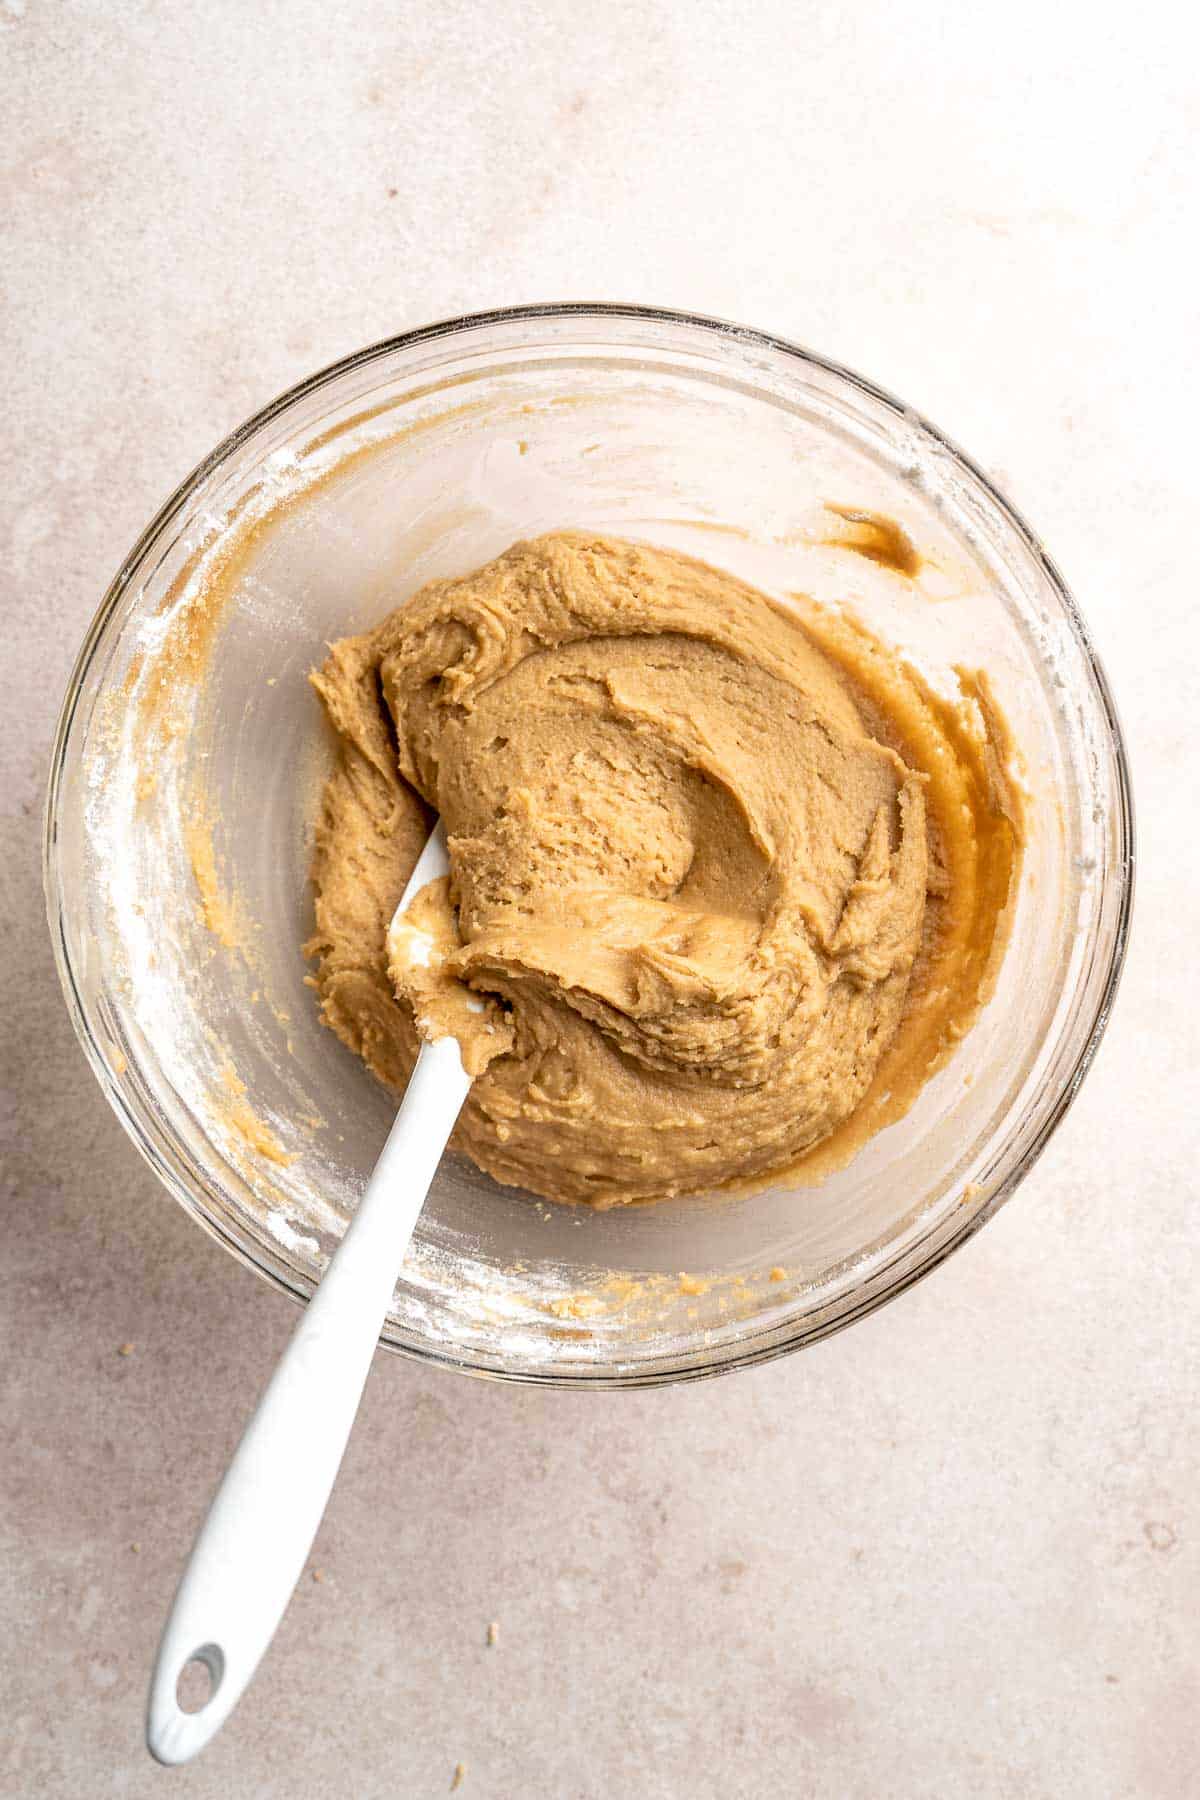
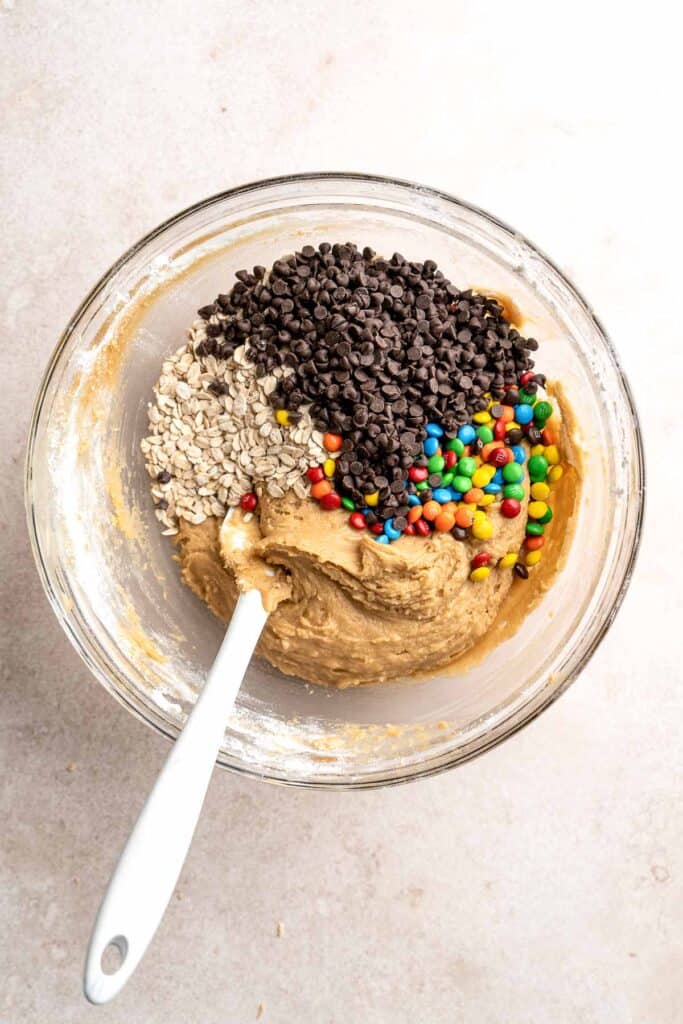

- Chill. Cover lightly with plastic wrap and place the cookies into the fridge to rest for 4 hours (up to overnight). Note: These cookies can be baked immediately and do not require to be chilled - however the rest makes them thicker and chewier!
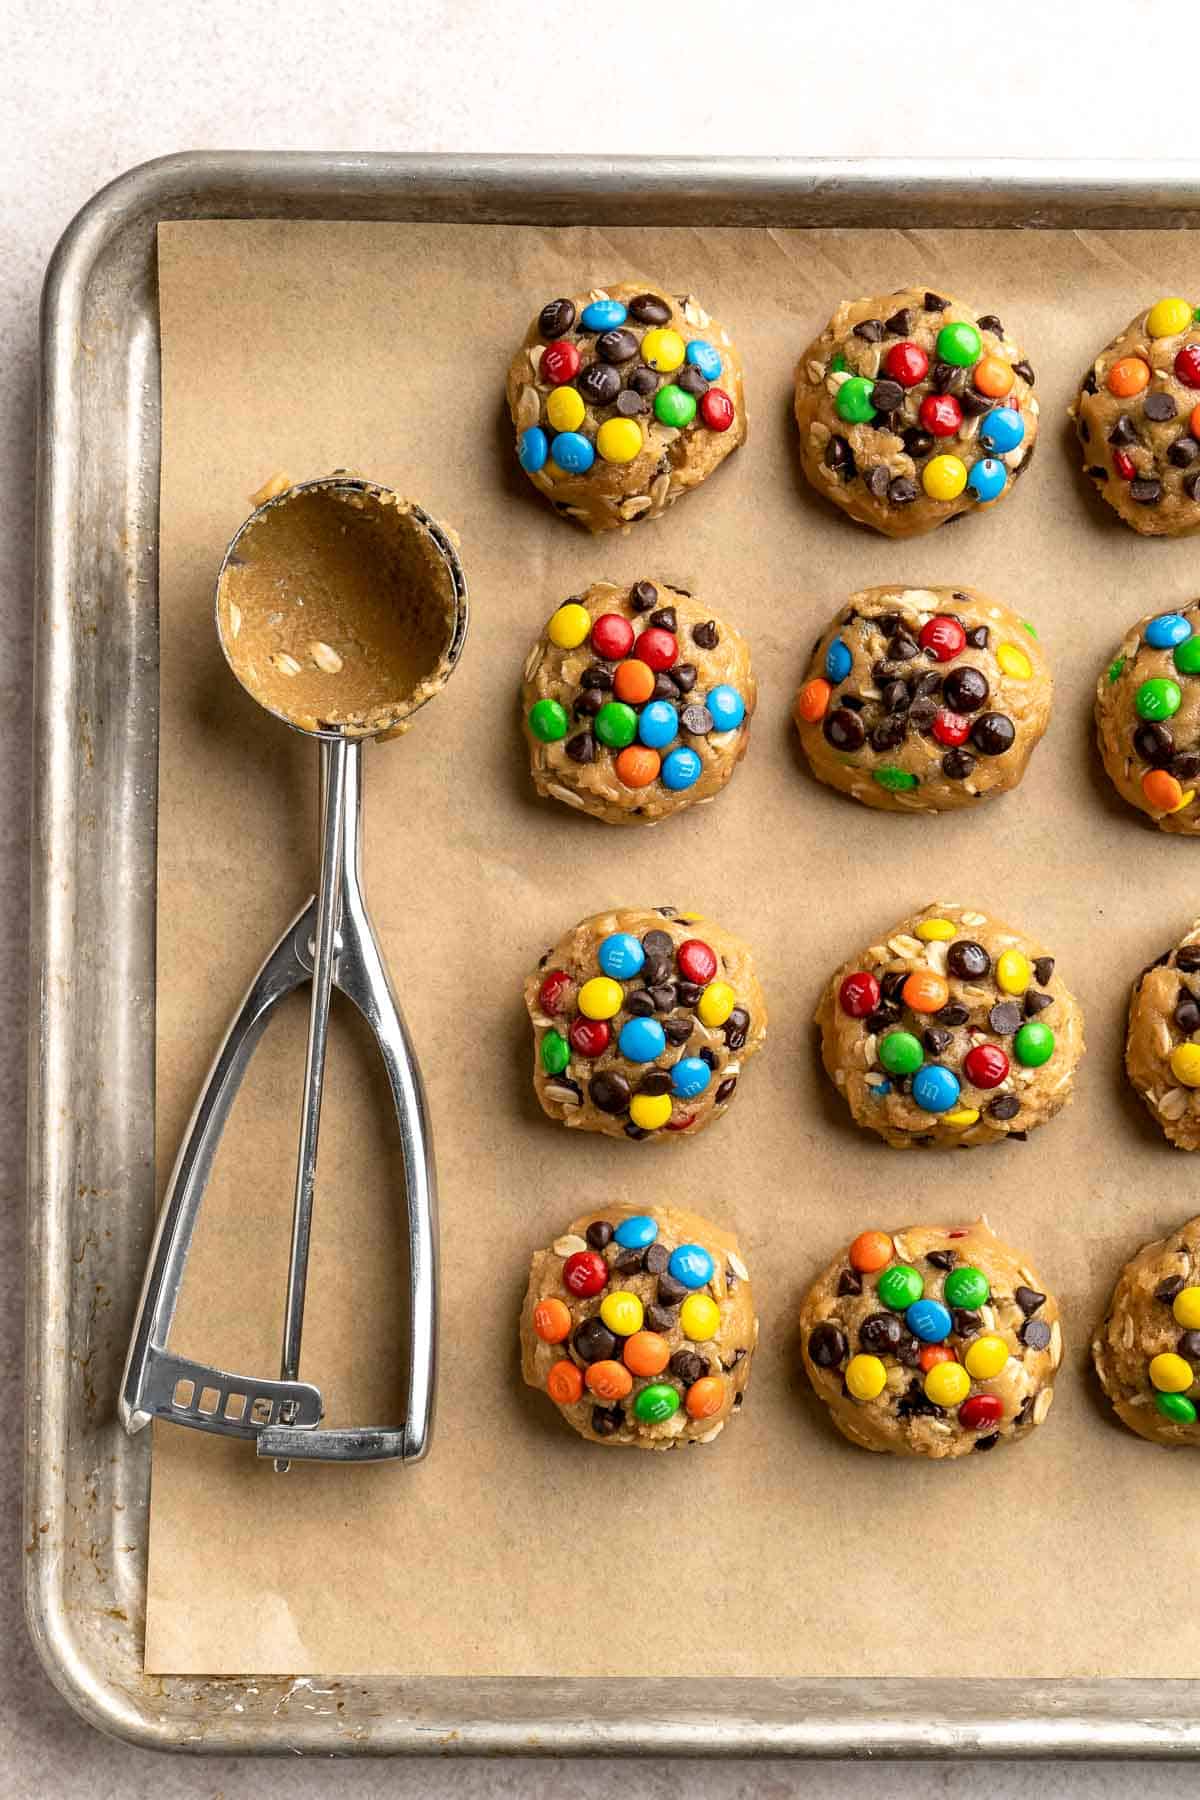

Recipe Variations
- Put in a surprise filling. Stuff a big chunk of chocolate, Reese's mini peanut butter cups, or tiny marshmallows in the middle of each cookie for a delicious surprise!
- Make it big. Double the recipe and surprise your family with a giant cookie treat. Who won't say yes to a six-inch monster cookie? It's a monster, after all.
- Match your mood. Switch up the color of the M&M's to match any holiday or special occasion. Red, white, and blue for the 4th of July, pastel colors for Easter, or red and green for Christmas.
How to Serve
Dip these delicious Monster Cookies in a glass of cold milk or top them off with a scoop of your favorite ice cream. Serve them at your next birthday party, holiday gathering, or just a random weeknight dinner with other desserts and drinks like:
- Vanilla Ice Cream with Strawberry Jam
- Chocolate Whoopie Pies
- Pumpkin Spice Latte
- Chocolate Pecan Pie
- Cold Brew Coffee
- White Hot Chocolate

Recipe Tips and Tricks
- Don't overmix. You'll want to mix just enough until the dry ingredients are incorporated into the wet ones to keep the texture soft, chewy, and gooey - exactly what you want from a cookie!
- Use a scoop. Scooping out cookie dough with a spoon and shaping it into a ball can take forever. An ice cream or cookie scoop is the perfect tool for getting consistently sized cookies without the fuss.
- Don't overbake. The cookies should still be slightly soft when you take them out of the oven. The residual heat will help them finish baking as they cool.
- Soften the butter. Any cookie recipe will benefit from softened butter as it helps create a light and airy cookie. Make sure to take out the butter 30 minutes before baking or if you're in a rush, microwave it in 10-second intervals until soft but not melted.
Storing Instructions
How to Store
Keep your cookies fresh and delicious by placing them in an airtight container at room temperature for up to 5 days. You can also store them in the fridge for up to a month, but the texture will suffer the longer it is stored.
How to Reheat
Enjoy a warm cookie after meals by popping it into the microwave for 10-15 seconds or until warm.
How to Freeze
Place your baked cookies in a freezer-safe container or freezer bag and freeze for up to 3 months. You can also freeze the dough balls for up to 3 months if you want to have ready-to-bake cookies all the time. Just allow them to thaw overnight in the fridge before popping into the oven to bake.
More Cookie Recipes
- 50 Best Cookie Recipes
- Oatmeal Raisin Cookies
- Chocolate Chunk Peanut Butter Cookies
- M&M Christmas Cookies
- Brownie Cookies
- Coffee Cookies
Tried this recipe?
I'd love to hear what you think! Leave a comment and rating below to share your feedback. Your reviews help others discover this recipe and help me keep creating more free recipes for you. Snap a photo and tag me on social media @aheadofthyme too.

Buttermilk Biscuits
Fluffy Buttermilk Biscuits are the gold standard in biscuits. They're perfectly tender with a buttery, flaky texture. Serve them under a bed of sausage gravy for homemade biscuits and gravy, use them to sop up homemade soups or stews, or peel apart those multiple flaky layers and add a drizzle of honey. You can't go wrong!

There's nothing quite like these classic buttermilk biscuits. Although they use a handful of simple ingredients you probably already have in your pantry, there is an art to making flaky buttermilk biscuits every time. Don't worry - just follow the steps below, and you'll have the best homemade biscuits in no time.
Why You'll Love These Buttermilk Biscuits
- Perfectly flaky. The process of cutting the cold butter into the dough creates tender, flaky layers that peel apart. Plus, we fold the dough multiple times to ensure a biscuit that is layered and sky high. These homemade buttermilk biscuits are so much fun to eat!
- Easy to make. Made with just a handful of basic ingredients, these biscuits are really quite simple to make. They use common pantry staples you likely already have on hand and are ready from start to finish in under 20 minutes!
- Tried-and-true recipe. Once you try these easy buttermilk biscuits once, you'll come back to this recipe over and over again. There is no need to buy the pre-made biscuit dough from the freezer aisle. This is the only biscuit recipe you need!

Ingredient Notes
To make these delicious buttermilk biscuits, you will need the following ingredients (full measurements in recipe card below):
- flour - use regular white all-purpose flour. Feel free to sift to remove any clumps.
- baking powder - this gives your biscuits a nice rise. Make sure your baking powder is fresh.
- salt - if you don't salt your biscuit dough, it will taste bland and flavorless.
- sugar - a little sugar adds just a bit of sweetness to balance out the flavors and takes these biscuits to the next level.
- butter - keep your butter very cold and cut into ½ inch cubes.
- buttermilk - use very cold buttermilk to help keep the butter nice and cold.
- melted butter - brush your warm biscuits with melted butter for a little shine, if desired
You will also need a large baking sheet, parchment paper or silicone baking mat, large mixing bowl, whisk, pastry cutter, 2.5-inch biscuit cutter or glass, and pastry brush (optional).
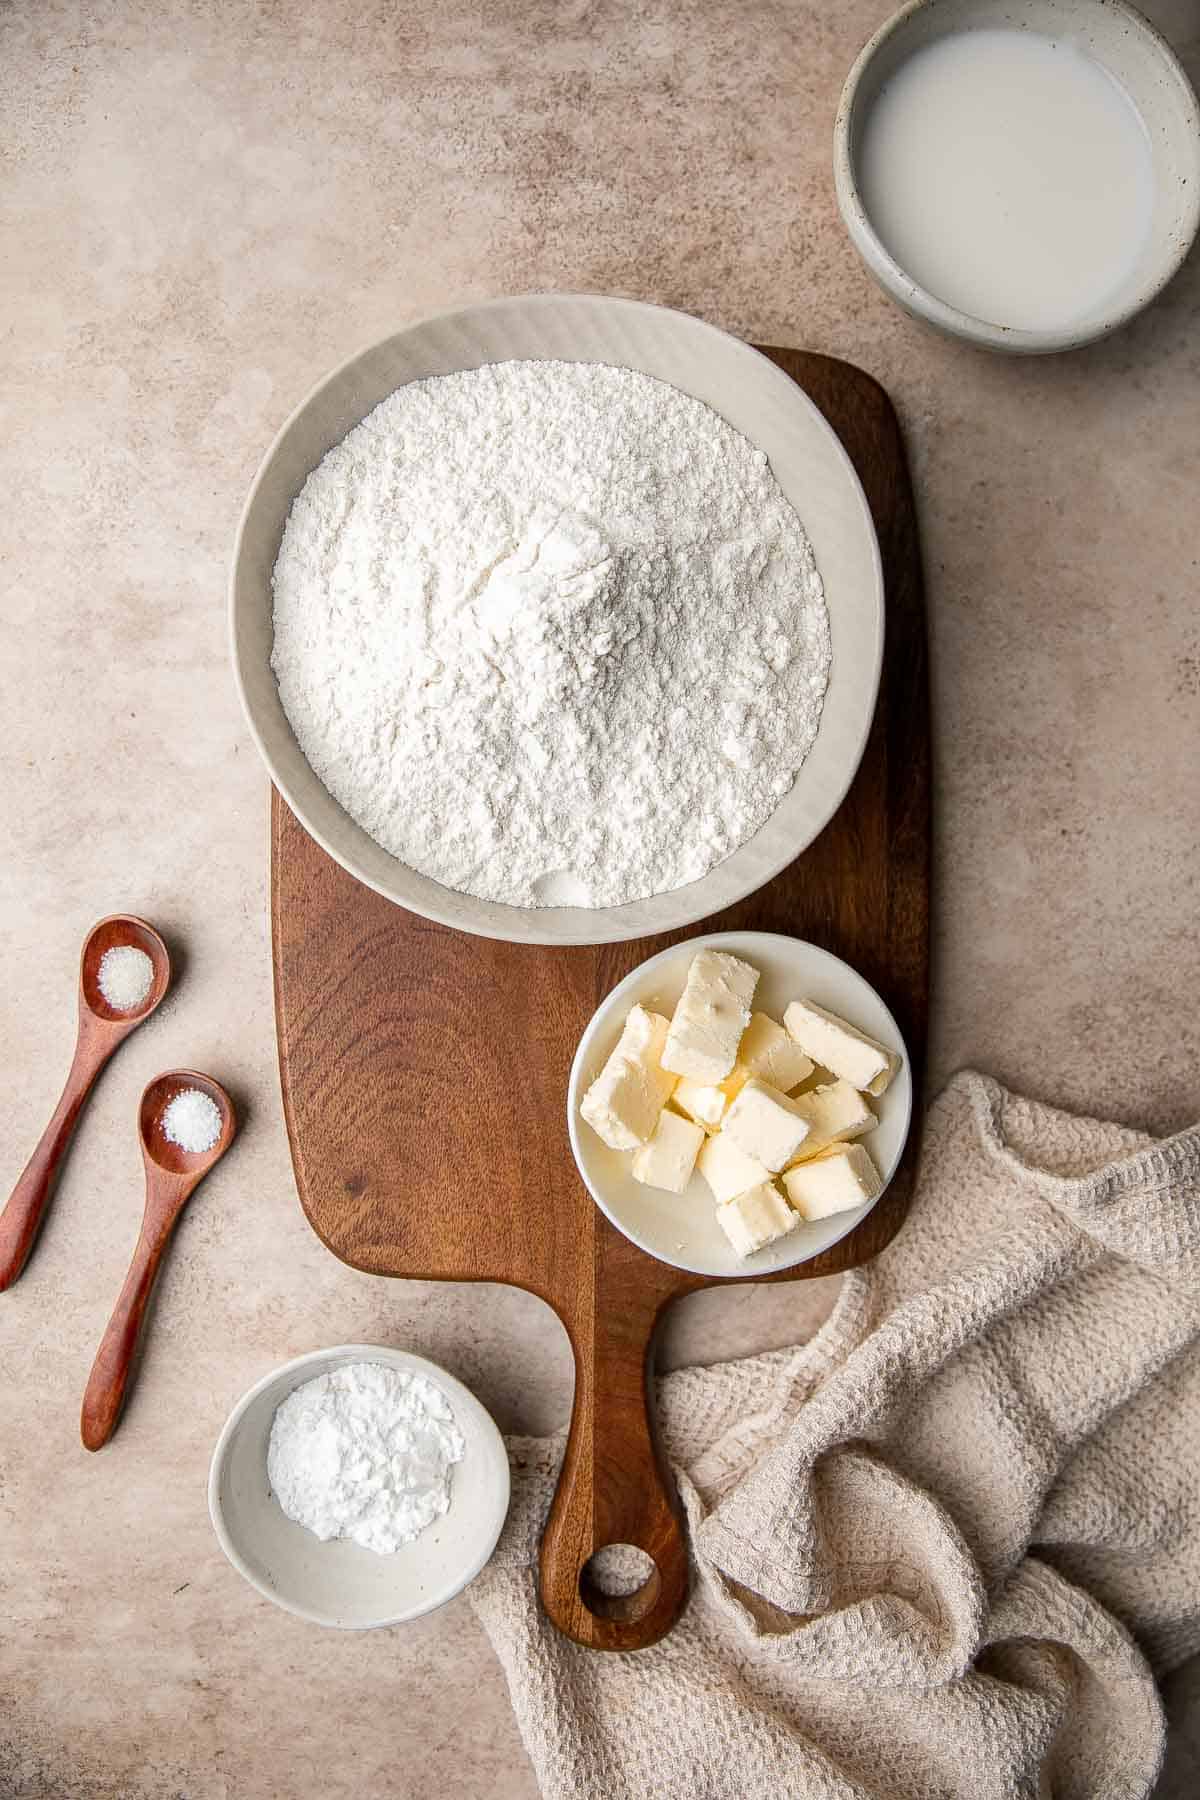
How to Make the Best Buttermilk Biscuits
- Combine ingredients. In a large mixing bowl, whisk together flour, baking powder, salt and sugar. Cut in the cold butter using a pastry cutter or fork until butter is the size of small peas.
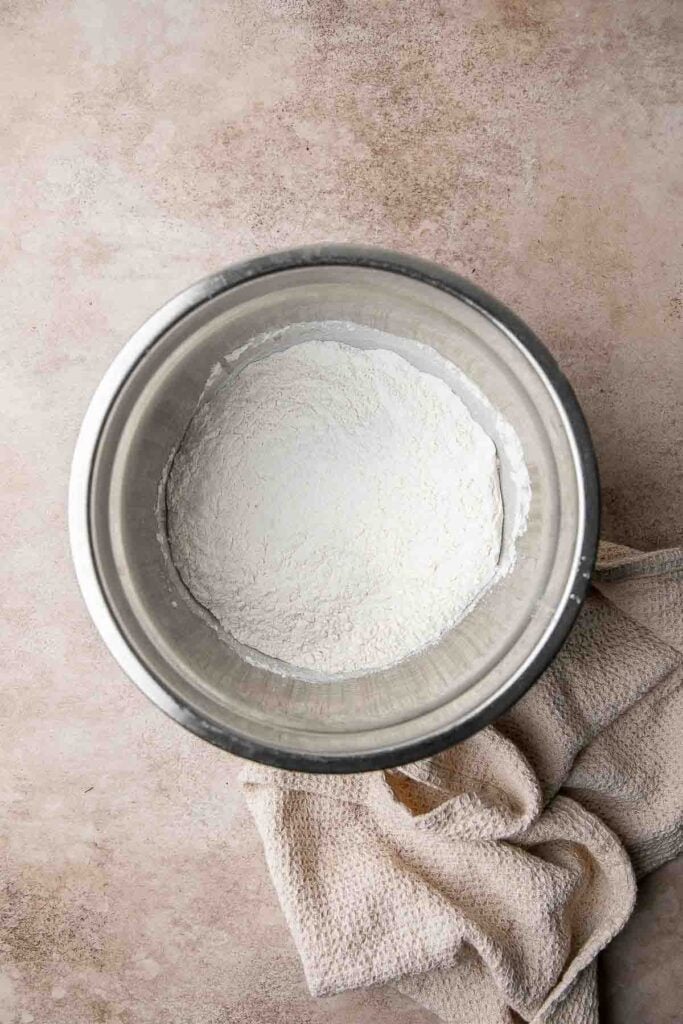
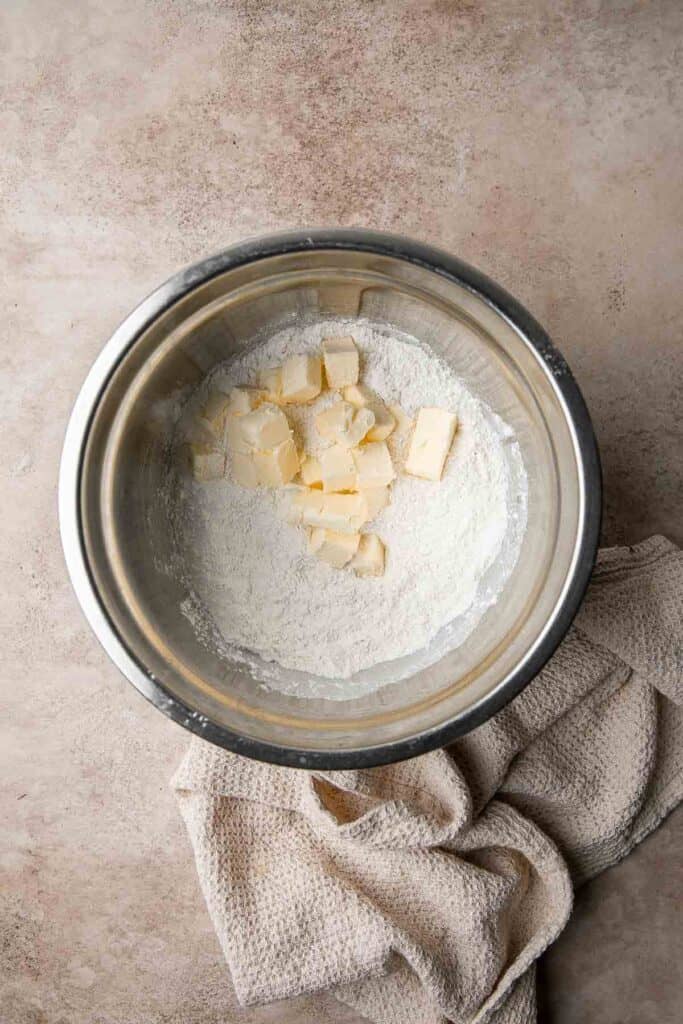
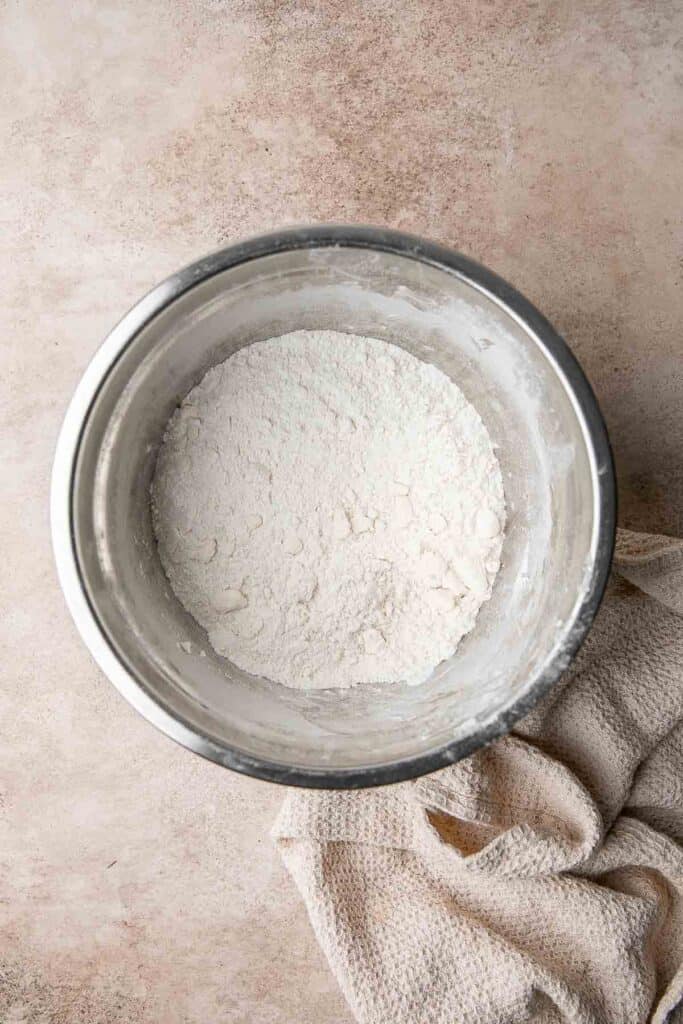
- Add buttermilk. Make a well in the center of the mixture and slowly pour in the buttermilk. Mix just until combined. Once the batter forms into a soft dough, use your hands to fold in the dry pieces that haven't been incorporated. Be careful not to overmix. Note that the dough will be slightly sticky.
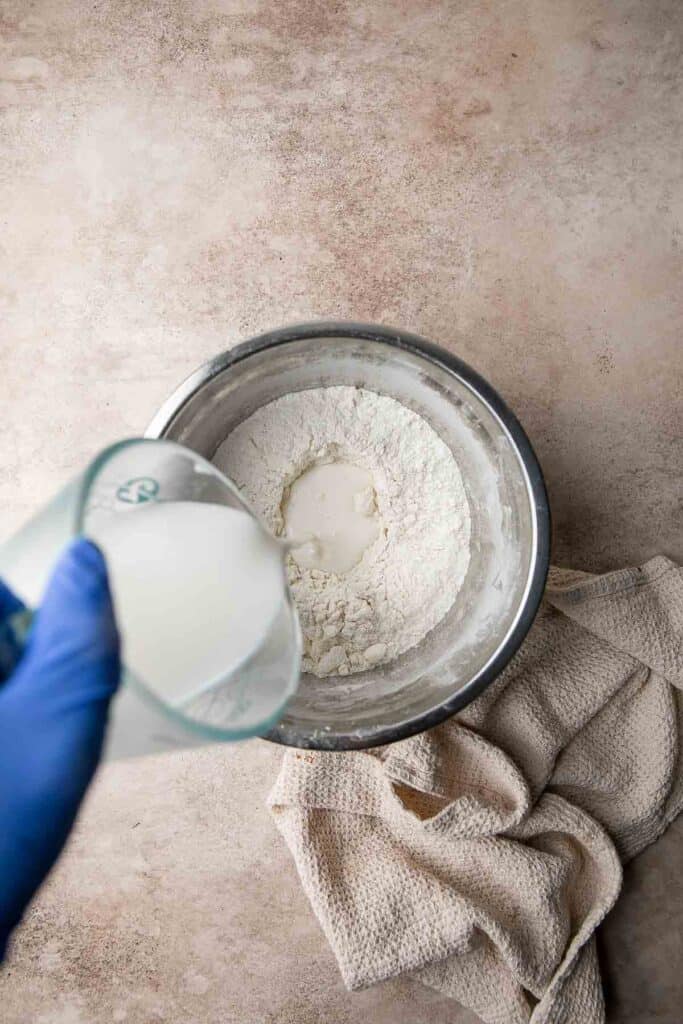

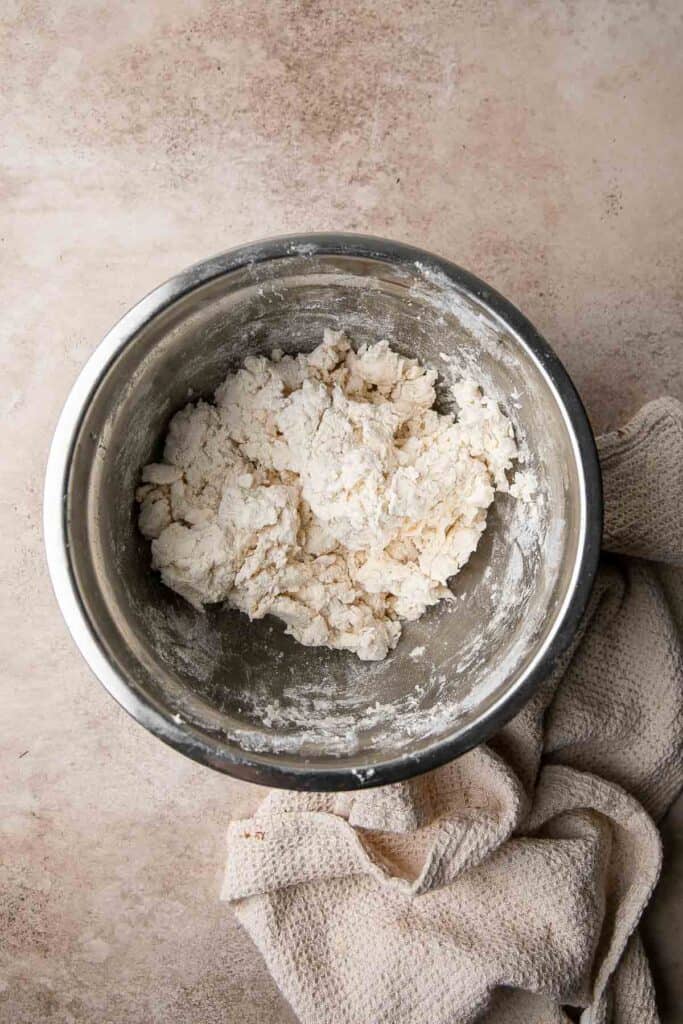
- Roll out dough. Turn the dough out onto a floured surface and form into a rectangle. Fold it into thirds by bringing one half to the center and then repeating with the other half overlapping. Then, pat the layered dough into a ¾-inch thick disk.
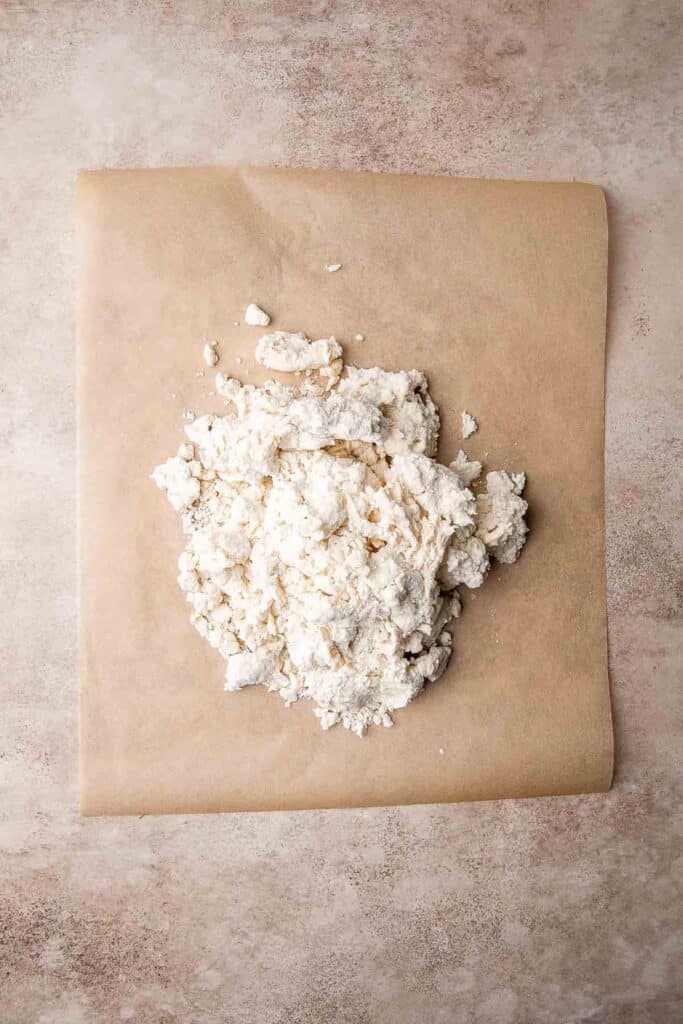
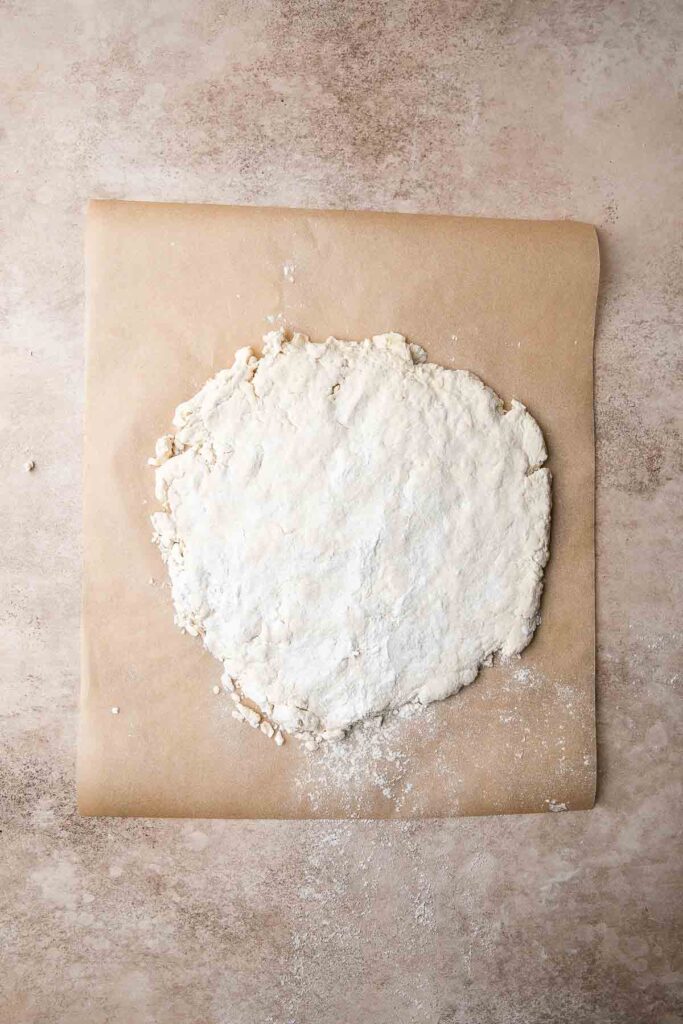
- Shape biscuits. Line a large baking sheet with parchment paper. Flour a 2.5-inch biscuit cutter (or the rim of a glass) and cut out rounds of dough. Place biscuits onto prepared baking sheet. Repeat by gathering scraps and shaping into a disk.
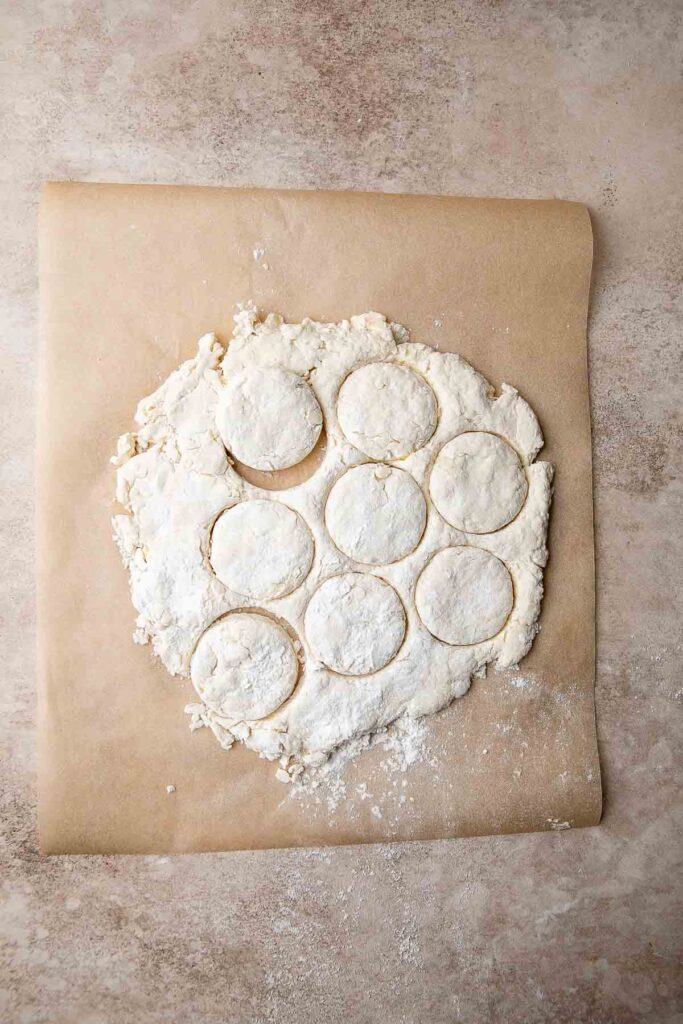
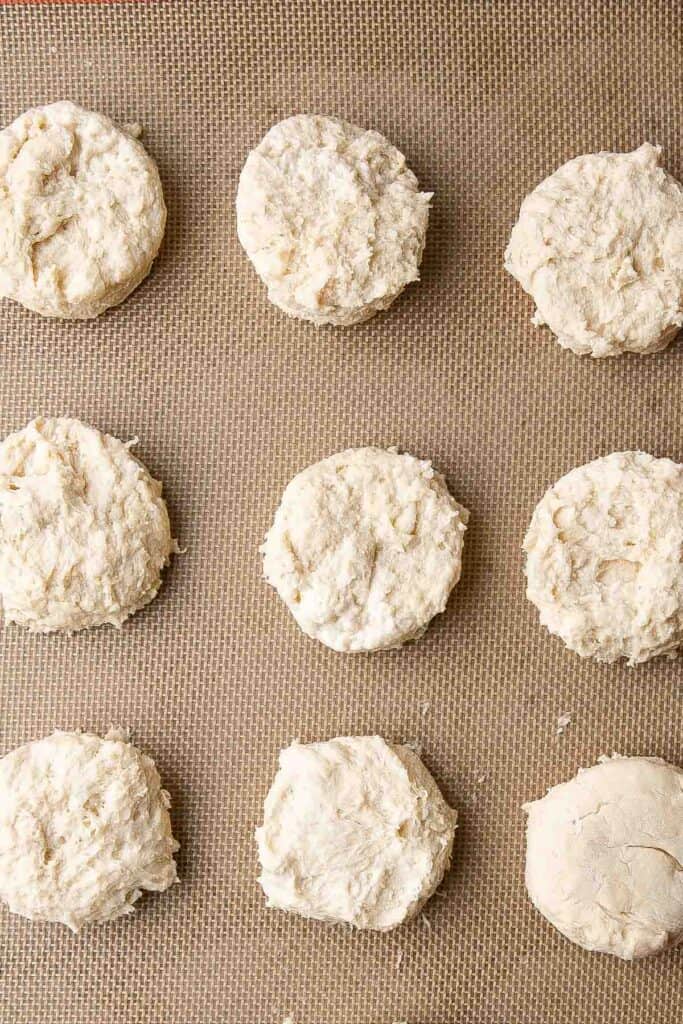
- Bake. Bake the biscuits in a 425 F preheated oven for 15 to 18 minutes, or until tops are just golden brown. Brush the tops of the biscuits with melted butter (optional) and serve warm.
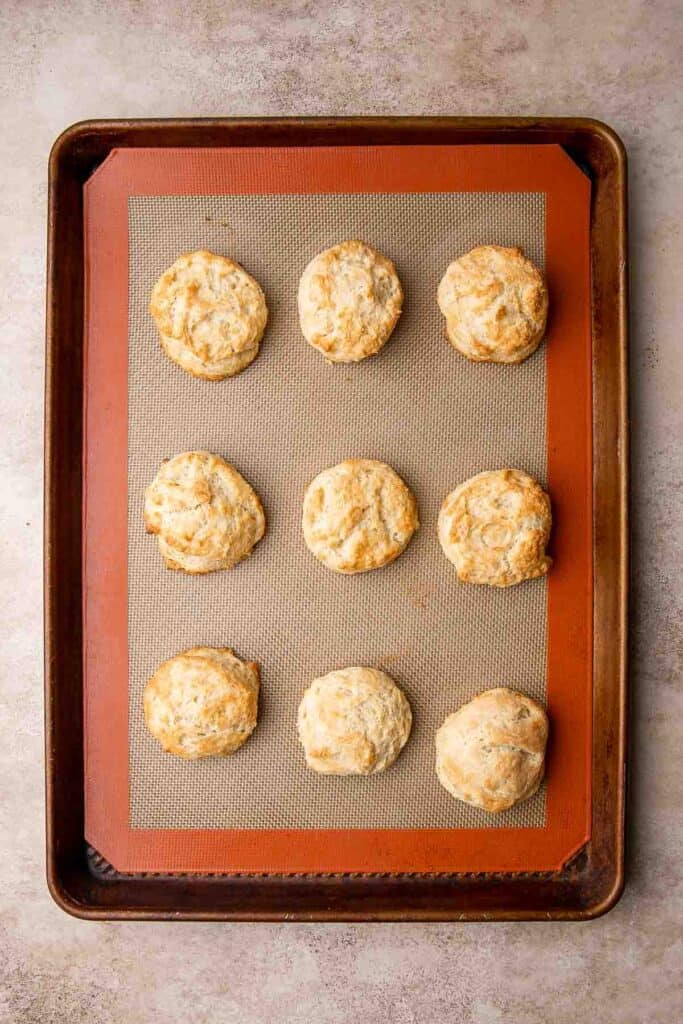

Recipe Variations
- Use a food processor. You can use a food processor to cut the butter into your flour mixture, but be careful. You want the butter pieces to be the size of peas, and don't want to overmix the dough.
- Try self-rising flour. This flour already contains leavening agents, so you can replace the all purpose flour and baking powder. White Lily flour is commonly used in Southern buttermilk biscuit recipes.
- Add honey. Instead of sugar, add up to 2 teaspoons of honey for a subtle sweetness.
How to Serve
These buttermilk biscuits are delicious served on their own, or paired with some of my favorite recipes including:
- Chicken Noodle Soup
- Baked Mac and Cheese
- Southern Black Eyed Peas
- Creamy Mexican Corn Soup
- Collard Greens with Bacon
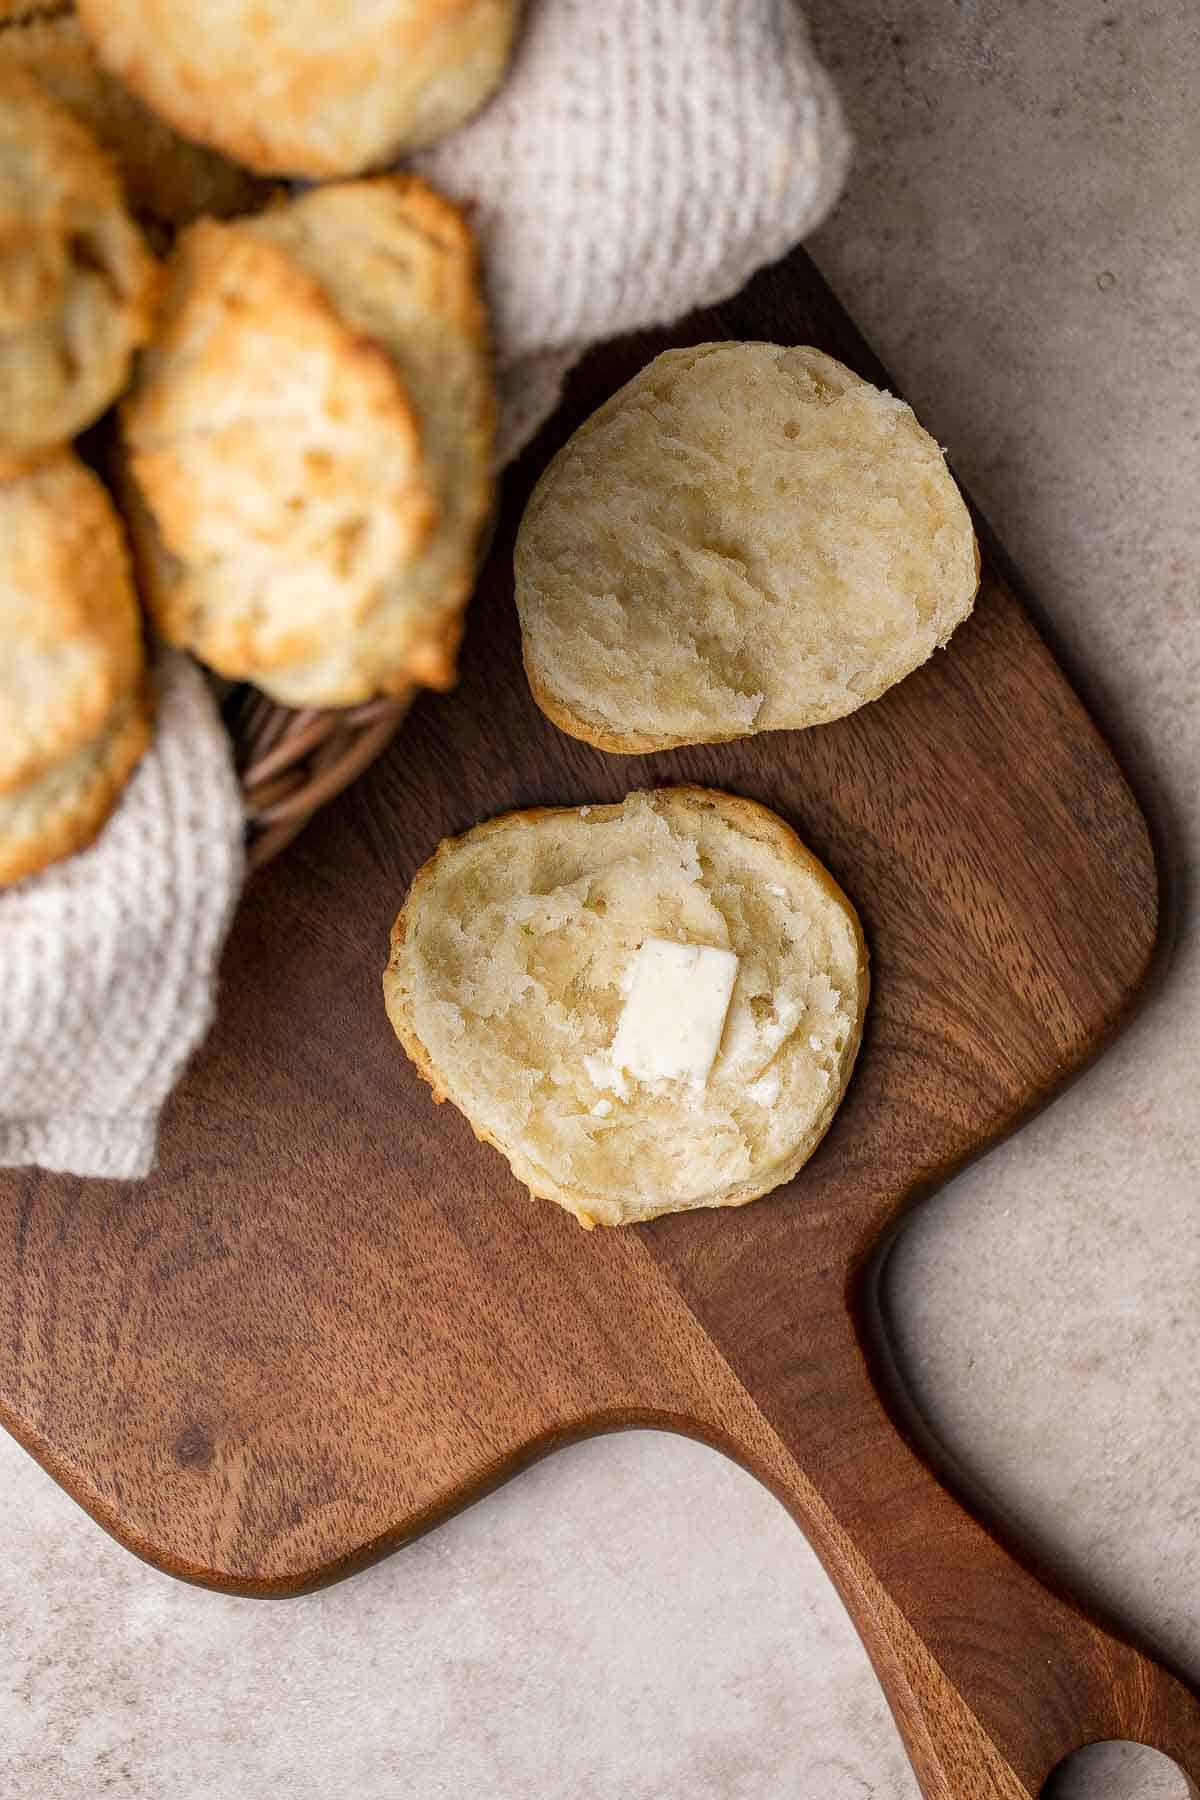
Recipe Tips and Tricks
- Keep the butter very cold. The only way to get those flaky layers is to use chilled butter. If the butter starts to soften before baking, it will melt right out of the biscuits. If in doubt, pop the whole tray in the fridge.
- Get the oven hot. The high temperature will help the biscuits rise immediately, creating those perfect layers and that soft, fluffy texture.
- Be gentle rerolling. When you're reshaping leftover scraps of biscuit dough before baking, touch them as little as possible. Biscuit dough is really sensitive to overworking, and you don't want a tough biscuit.
Storing and Freezing Instructions
How to Store
Keep leftover biscuits in an airtight container at room temperature for 2-3 days. To last longer, store in the fridge for up to 1 week.
How to Reheat
Pop your leftover biscuit in the microwave for 30 seconds to a minute to bring it back to life. You can also pop them in a 350-degree oven or air fryer for a few moments until warm and crisp.
How to Freeze
Wrap leftover flaky biscuits in plastic wrap, then store them in a freezer bag for 2-3 months.
How to freeze biscuit dough: You can also freeze the dough before baking! Cut out the biscuits and freeze them on a lined baking sheet for 1-2 hours until hard. Then, store in a freezer safe bag for 2-3 months and bake from frozen for 18-20 minutes or so.

FAQ
What's the difference between this buttermilk biscuit recipe and our easy biscuit recipe? The main difference is the type of milk. Buttermilk biscuits require buttermilk, which gives them an extra rise and a subtle tanginess that is just heavenly. Regular biscuits often use whole milk. Plus, we are using a different technique for these buttermilk biscuits to get high rising biscuits.
The answer is based on personal preference. Both buttermilk and whole milk make great biscuits! Personally, I prefer buttermilk because the extra acid gives you a really fluffy texture, and the little bit of tanginess is really lovely.
The key to fluffy biscuits is to use really cold butter and a hot oven. If your butter is not really cold and the oven is not fully preheated, you won't have a perfect biscuit. If you followed those steps and still had a problem, then check the age of your baking powder. It can go bad after a while and stop rising.
Another option is that you overworked the dough. Unlike yeasted doughs, biscuits should not be kneaded at all; just mix enough to bring the dough together. You don't want to develop any gluten, which can cause a tough texture. If you suspect you overworked the dough, just pop the biscuit dough in the fridge to let it rest for about 30 minutes before baking.
More Bread Recipes
- Garlic Cheddar Biscuits
- Cornmeal Cheddar Biscuits
- Garlic Knots
- Skillet Dinner Rolls
- Cheesy Garlic Dinner Rolls
- Potato Dinner Rolls
Tried this recipe?
I'd love to hear what you think! Leave a comment and rating below to share your feedback. Your reviews help others discover this recipe and help me keep creating more free recipes for you. Snap a photo and tag me on social media @aheadofthyme too.

Mashed Potato Casserole
This Mashed Potato Casserole elevates an ordinary batch of creamy mashed potatoes into something absolutely divine topped with cheddar, bacon bits, and green onions. It has all of the flavors of a fully loaded baked potato, but in casserole form. It's such a fun dish and the perfect way to elevate your side dish game for your next holiday meal!

Mashed potatoes are a must-have for any big family dinner. They're the ultimate comfort food: so warm and inviting with lots of creamy toppings and flavors. This mashed potato casserole recipe is perfect for your Thanksgiving dinner because it's perfectly seasoned and ready to serve exactly as it is. No need for gravy for anything else!
Why You'll Love This Mashed Potato Casserole
- So easy. If you can boil potatoes, you can make this potato side dish. It starts by making regular mashed potatoes, but then you add leftover bacon fat, milk, butter, and sour cream. Mash well then bake with shredded cheese and crispy bacon bits on top. Add a garnish of green onions for color. It's so flavorful and creamy!
- Tons of flavor. This recipe uses some of the most flavorful ingredients, like real butter, milk, bacon, sour cream, and more. There is one secret ingredient, though! After cooking the bacon, we actually add the leftover bacon grease into the potatoes to add that savory bacon flavor into every bite. So good!
- Family favorite. Be prepared to get lots of compliments on this easy casserole, and save this recipe because you'll be asked to make it again and again!

Ingredient Notes
To make this delicious mashed potato casserole recipe, you will need the following ingredients (full measurements in recipe card below):
- potatoes - use yukon gold or russet potatoes from the creamiest texture. Peel and cut your potatoes into 1-inch pieces.
- bacon - slice your bacon in half to help it cook more quickly.
- whole milk - the milk will soften the mashed potato mixture and give it a creamy texture. You can substitute with heavy cream for an even creamier texture.
- butter - use unsalted butter and cut into 1-inch pieces to help it melt evenly.
- sour cream - this adds a rich creaminess and a little tanginess.
- salt and pepper - season well. Potatoes need a lot of salt to have any flavor.
- cheddar cheese - shred sharp cheddar cheese for a molten cheese layer on top of the warm potatoes.
- green onions - finely chop green onions or fresh chives for a little color and a fresh flavor.
You will also need large pot, strainer, potato masher, large skillet, bowl, paper towels, plate, cutting board and knife, and a 2-quart casserole dish..
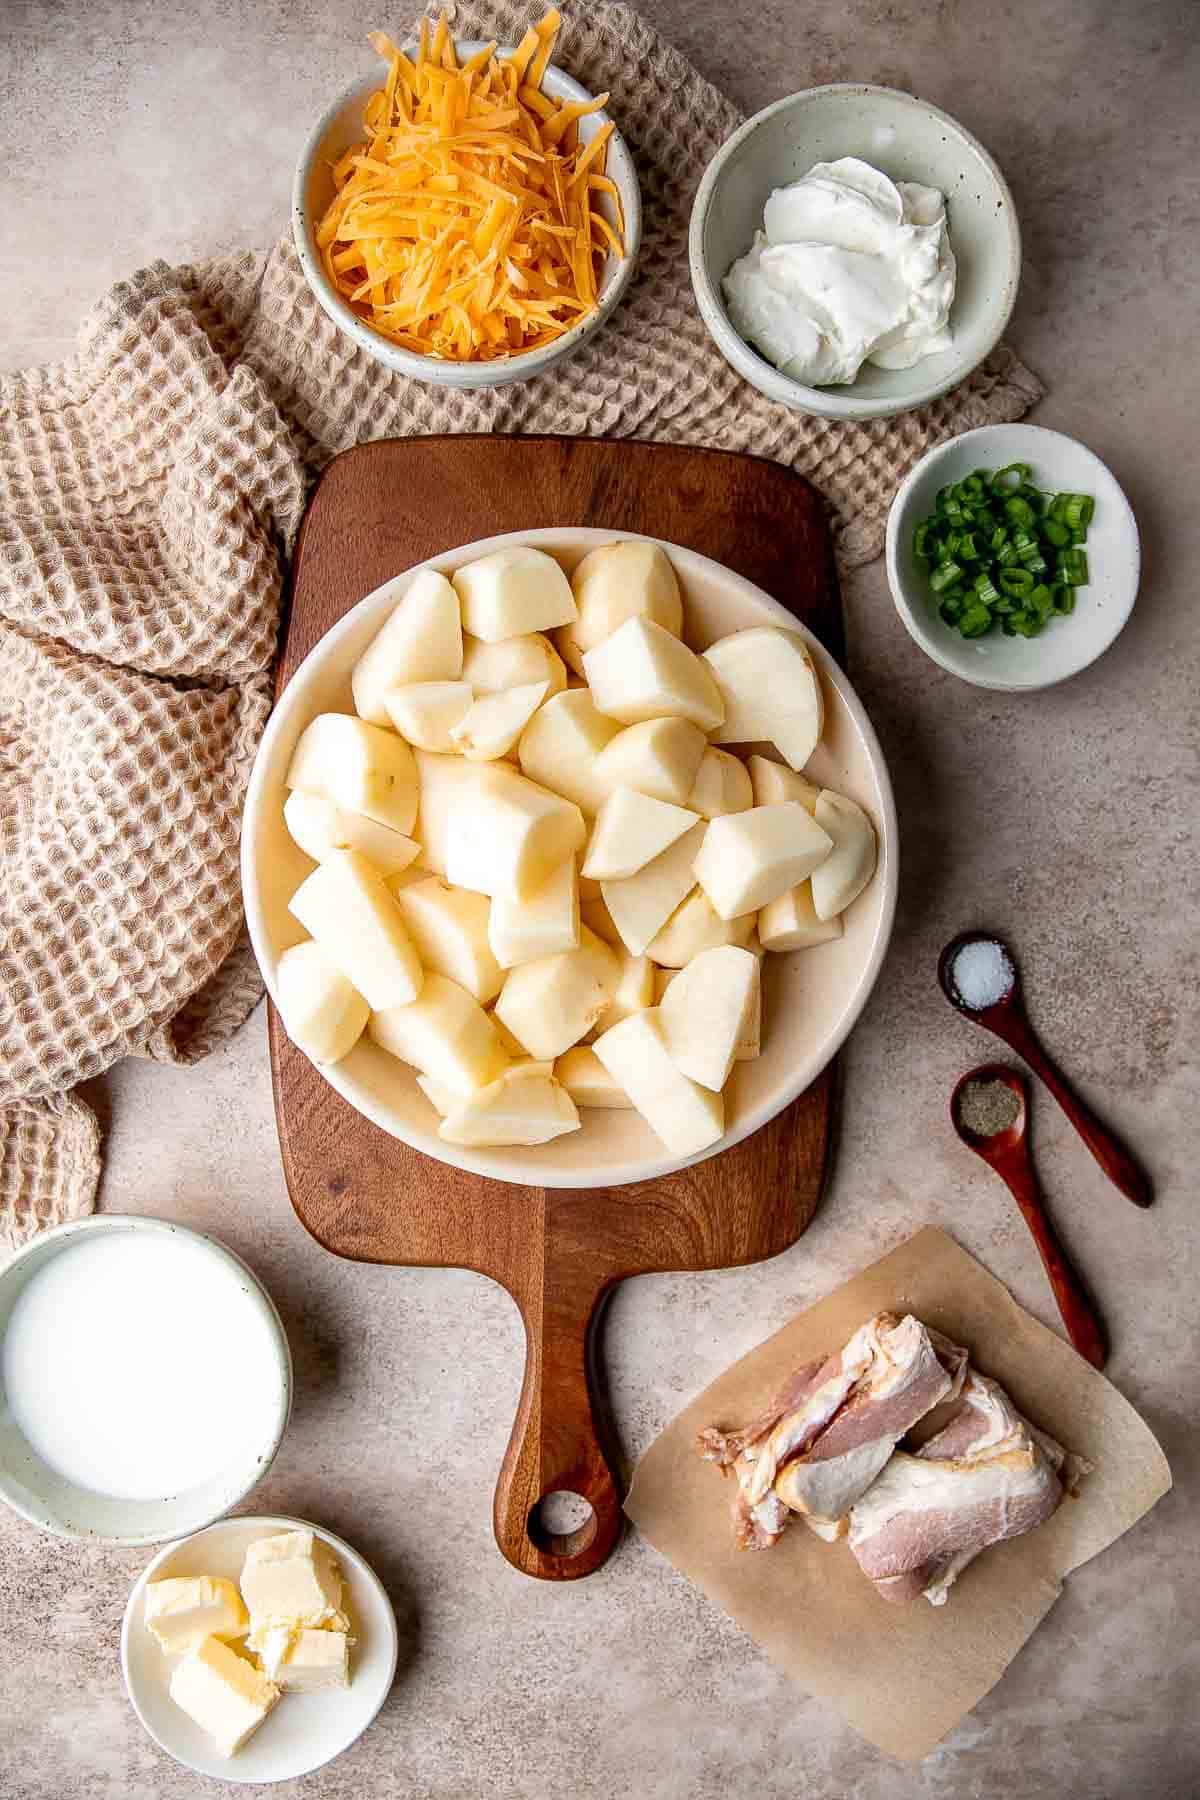
How to Make the Best Mashed Potato Casserole
- Cook potatoes. Place potatoes in a large cooking pot and cover with salted water, covering the potatoes by about an inch. Bring to a boil over high heat. Reduce heat to low, cover, and simmer for 15-20 minutes, until potatoes are soft when you insert a fork. Drain well and place back into the pot.
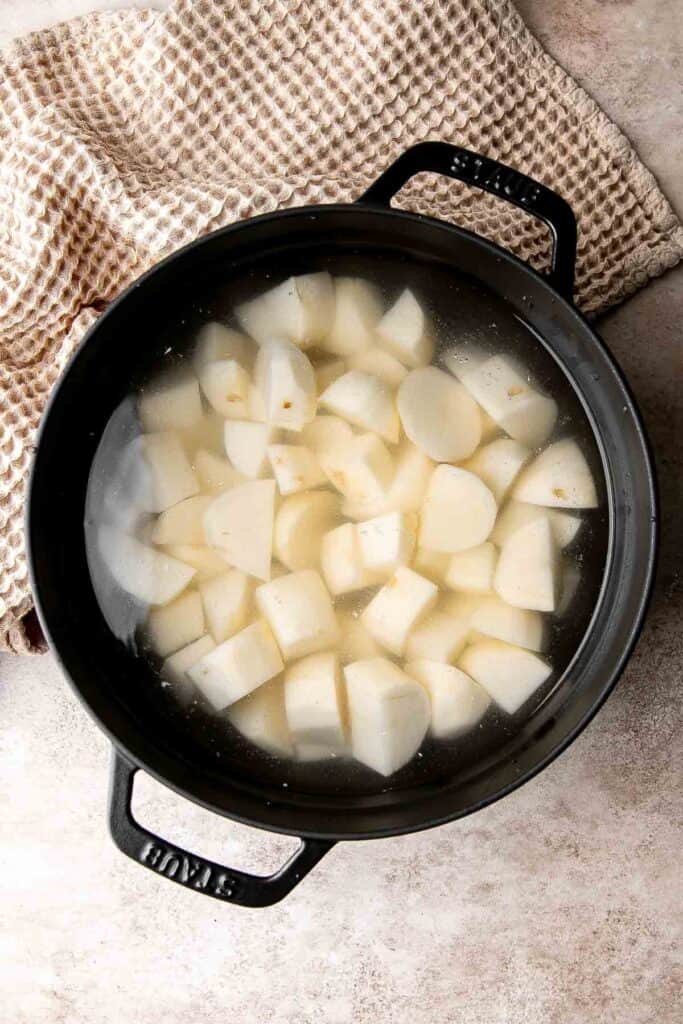
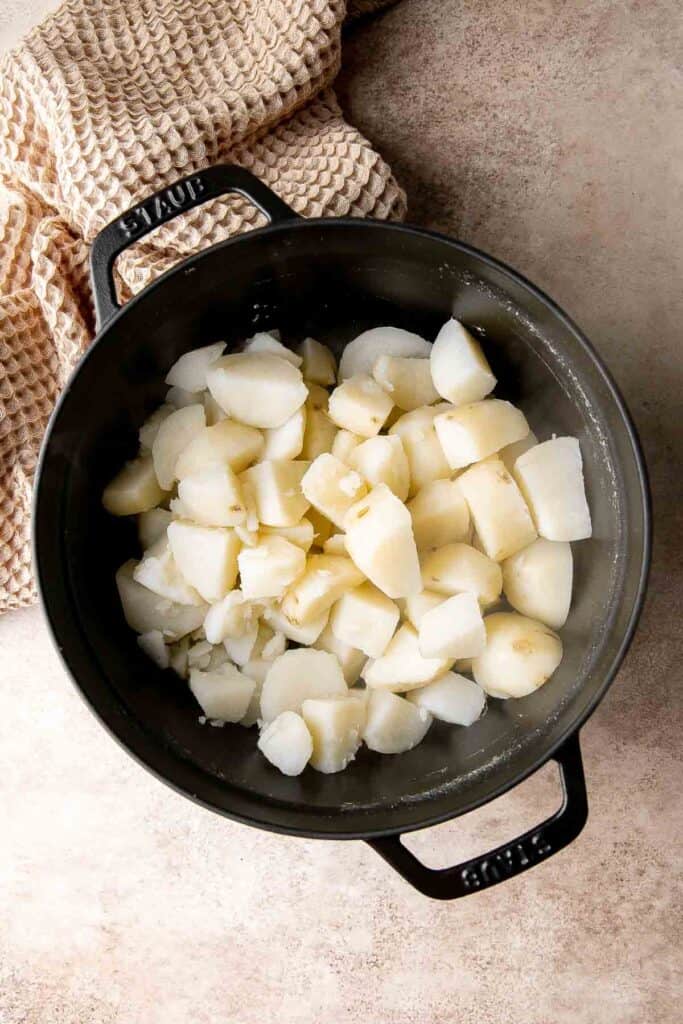
- Cook the bacon. While the potatoes are cooking, add bacon in a skillet and cook over medium-high heat until browned on both sides and crisp, about 6-8 minutes. Reserve the bacon fat in a bowl and transfer the bacon onto a paper towel lined plate. Chop the bacon into 1-inch bits.
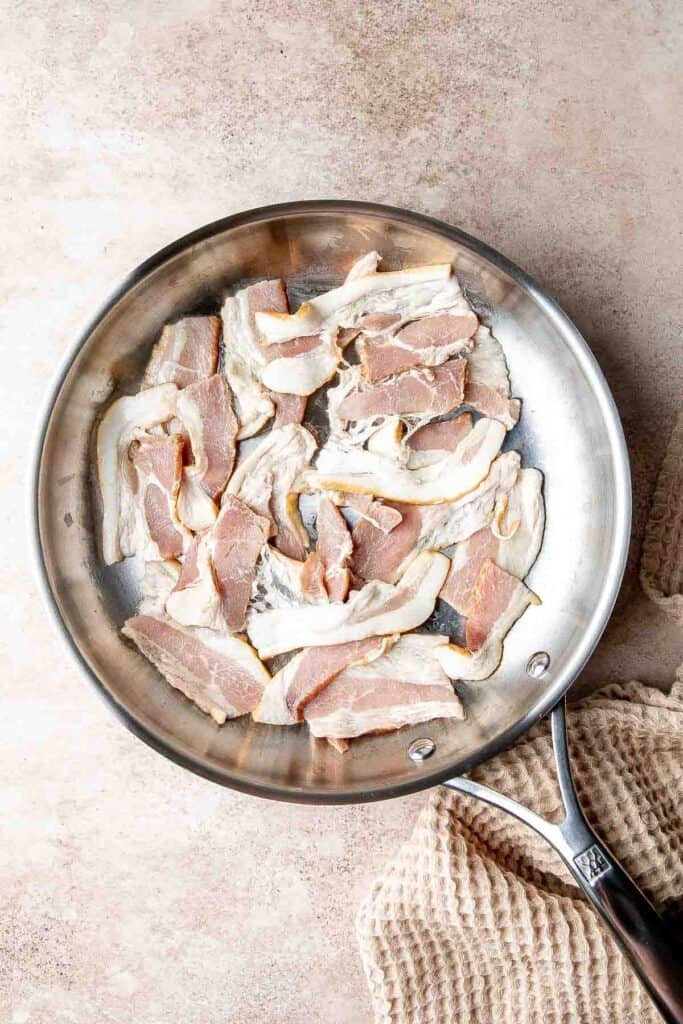
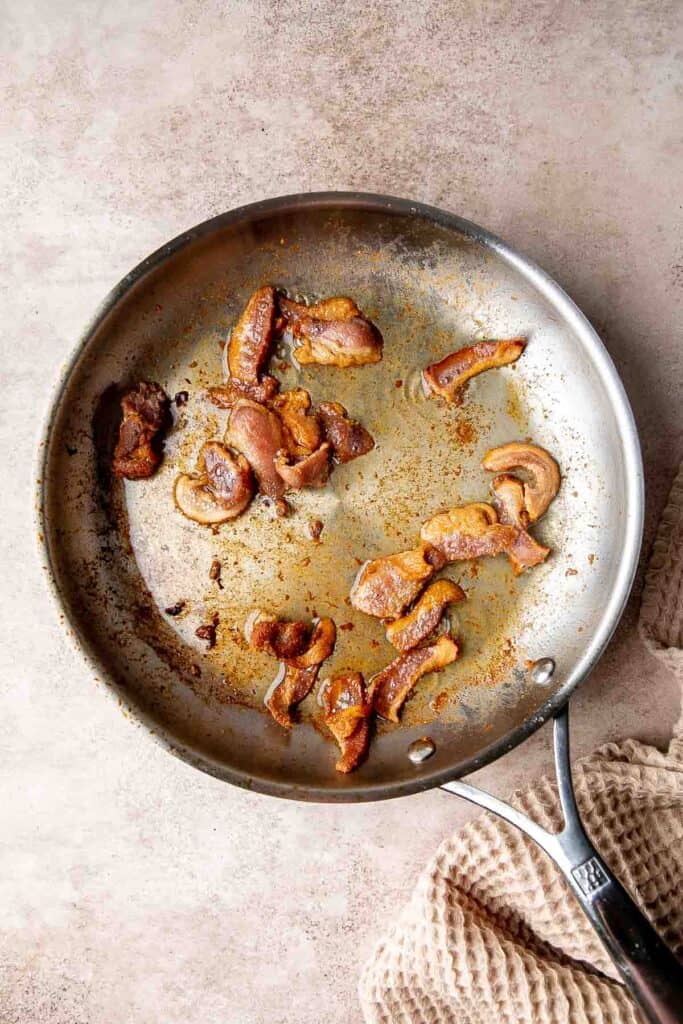
- Combine the ingredients. Once the potatoes are ready, drain well and place back in the pot. Use a potato masher (or a fork) to mash the potatoes. Add milk, butter, sour cream, salt, pepper, and reserved bacon fat. Stir well with a spatula until evenly combined.
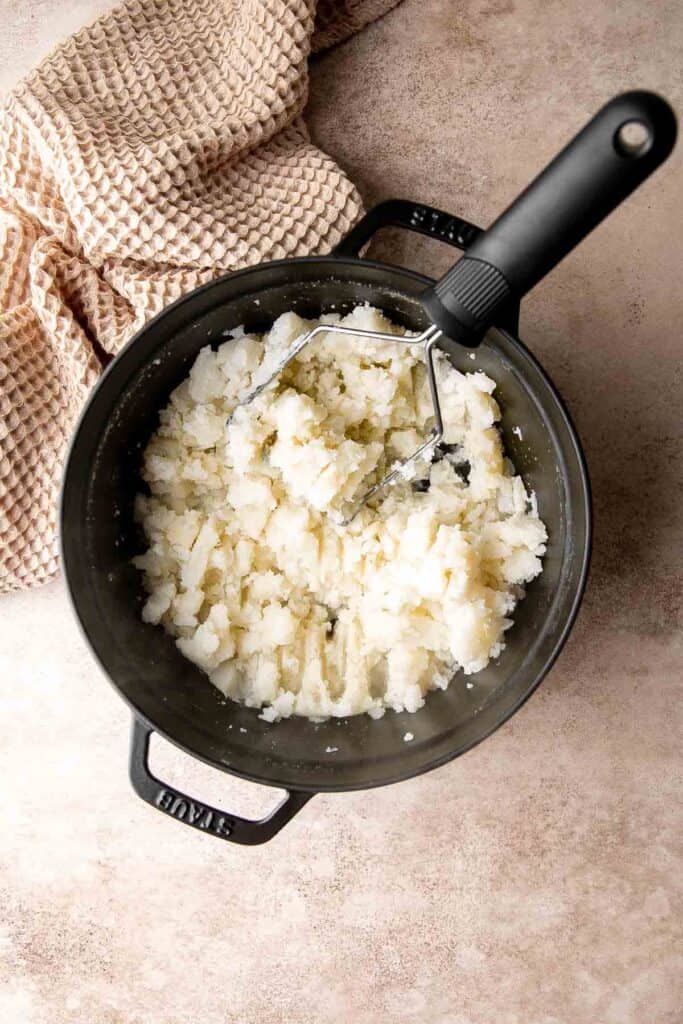
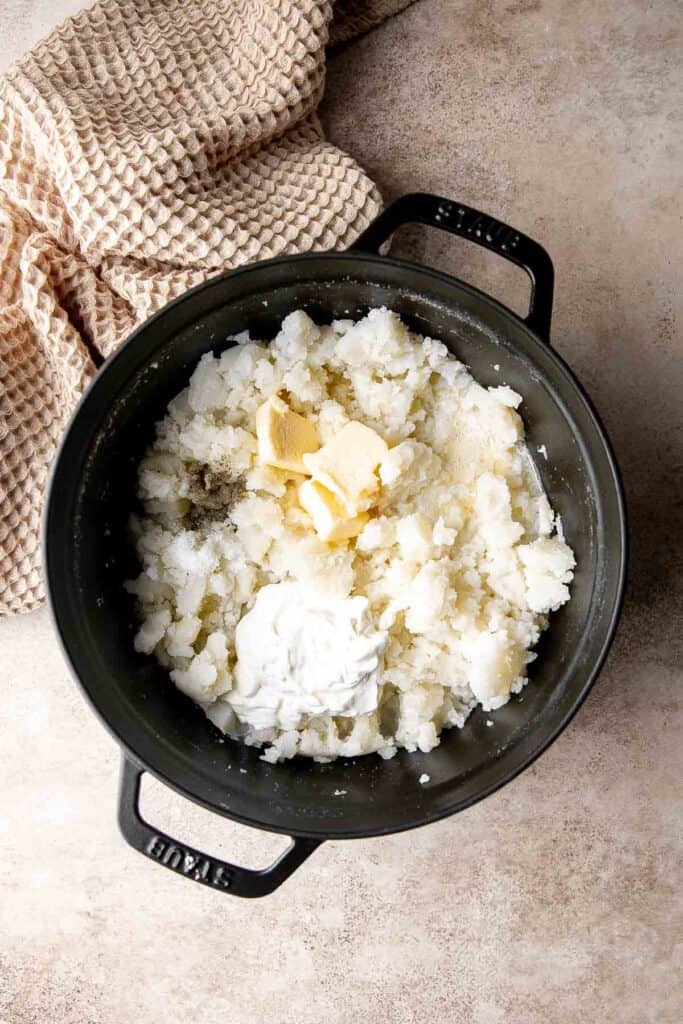
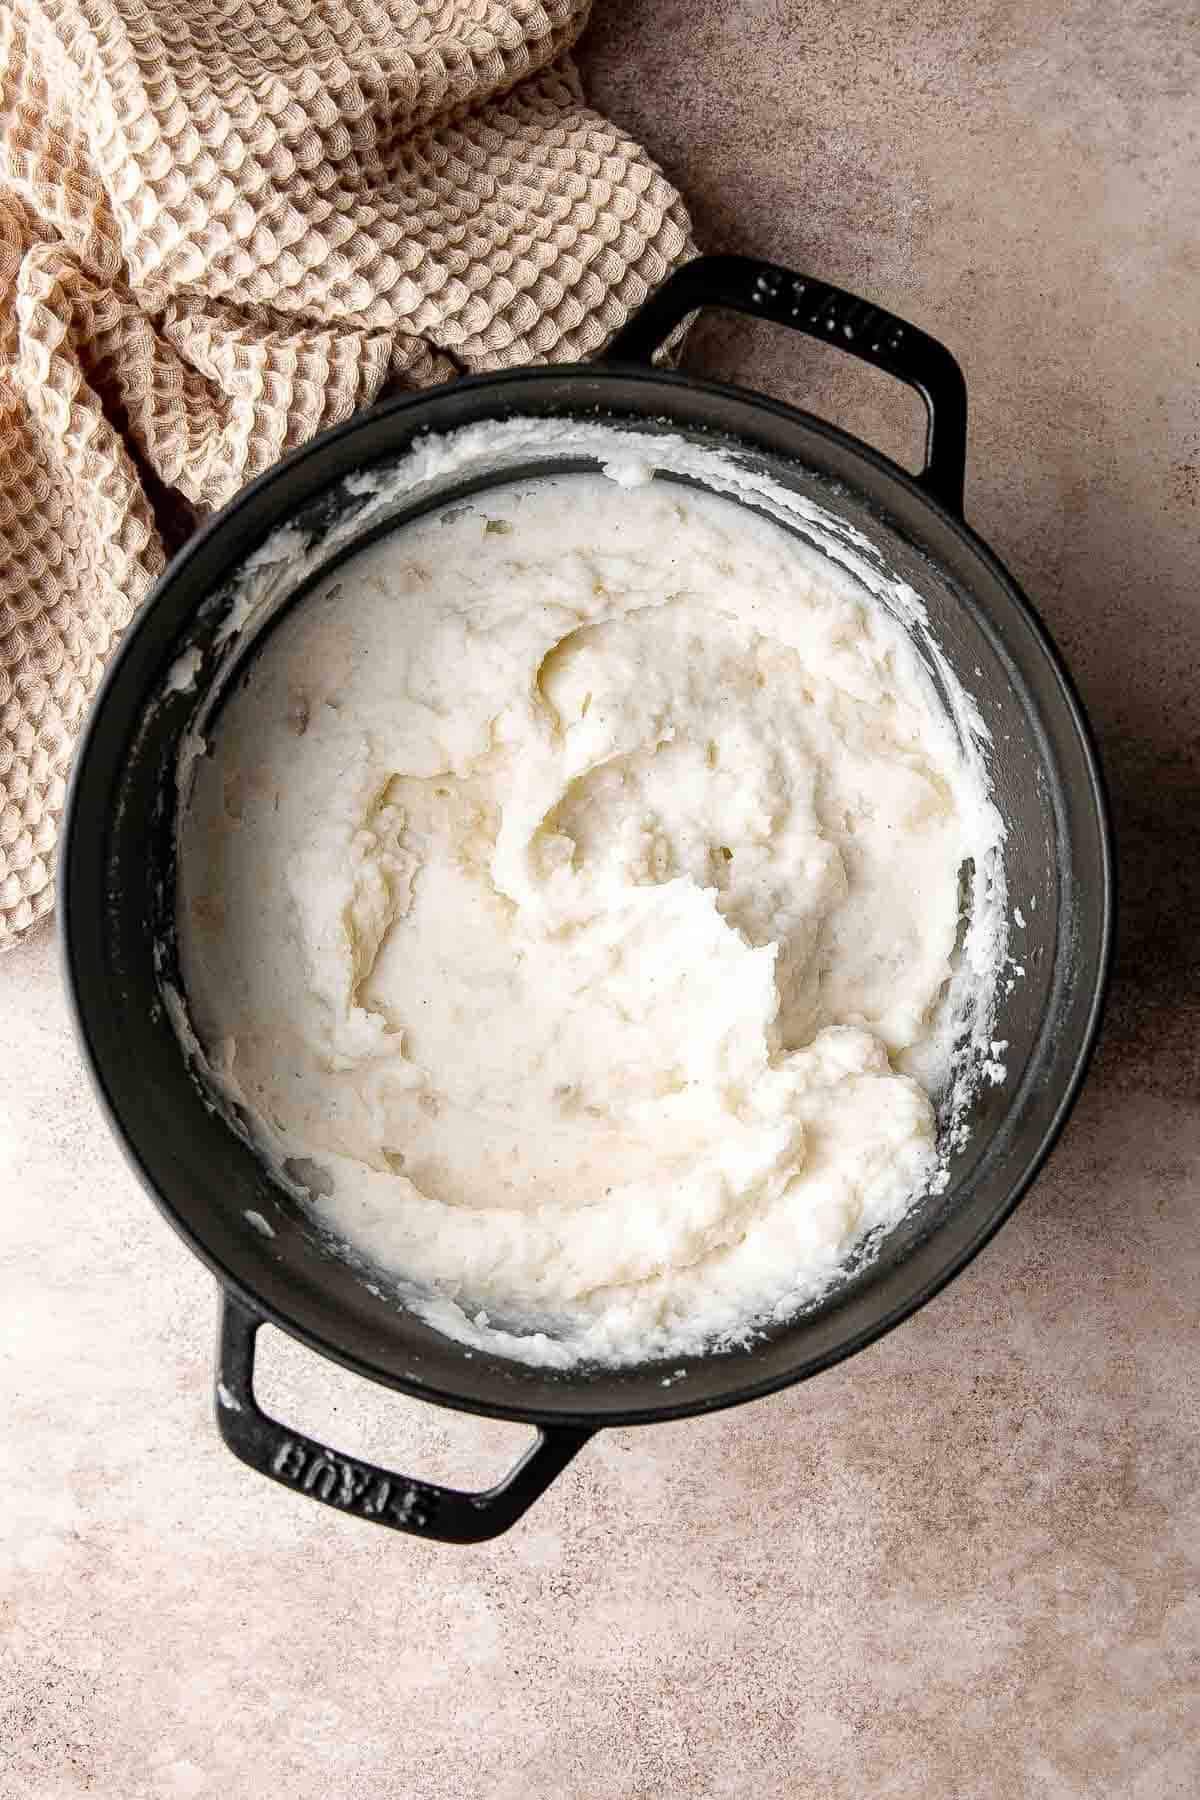
- Add toppings. Transfer the mashed potato into a 2-quart casserole dish and top with cheddar cheese and bacon bits.
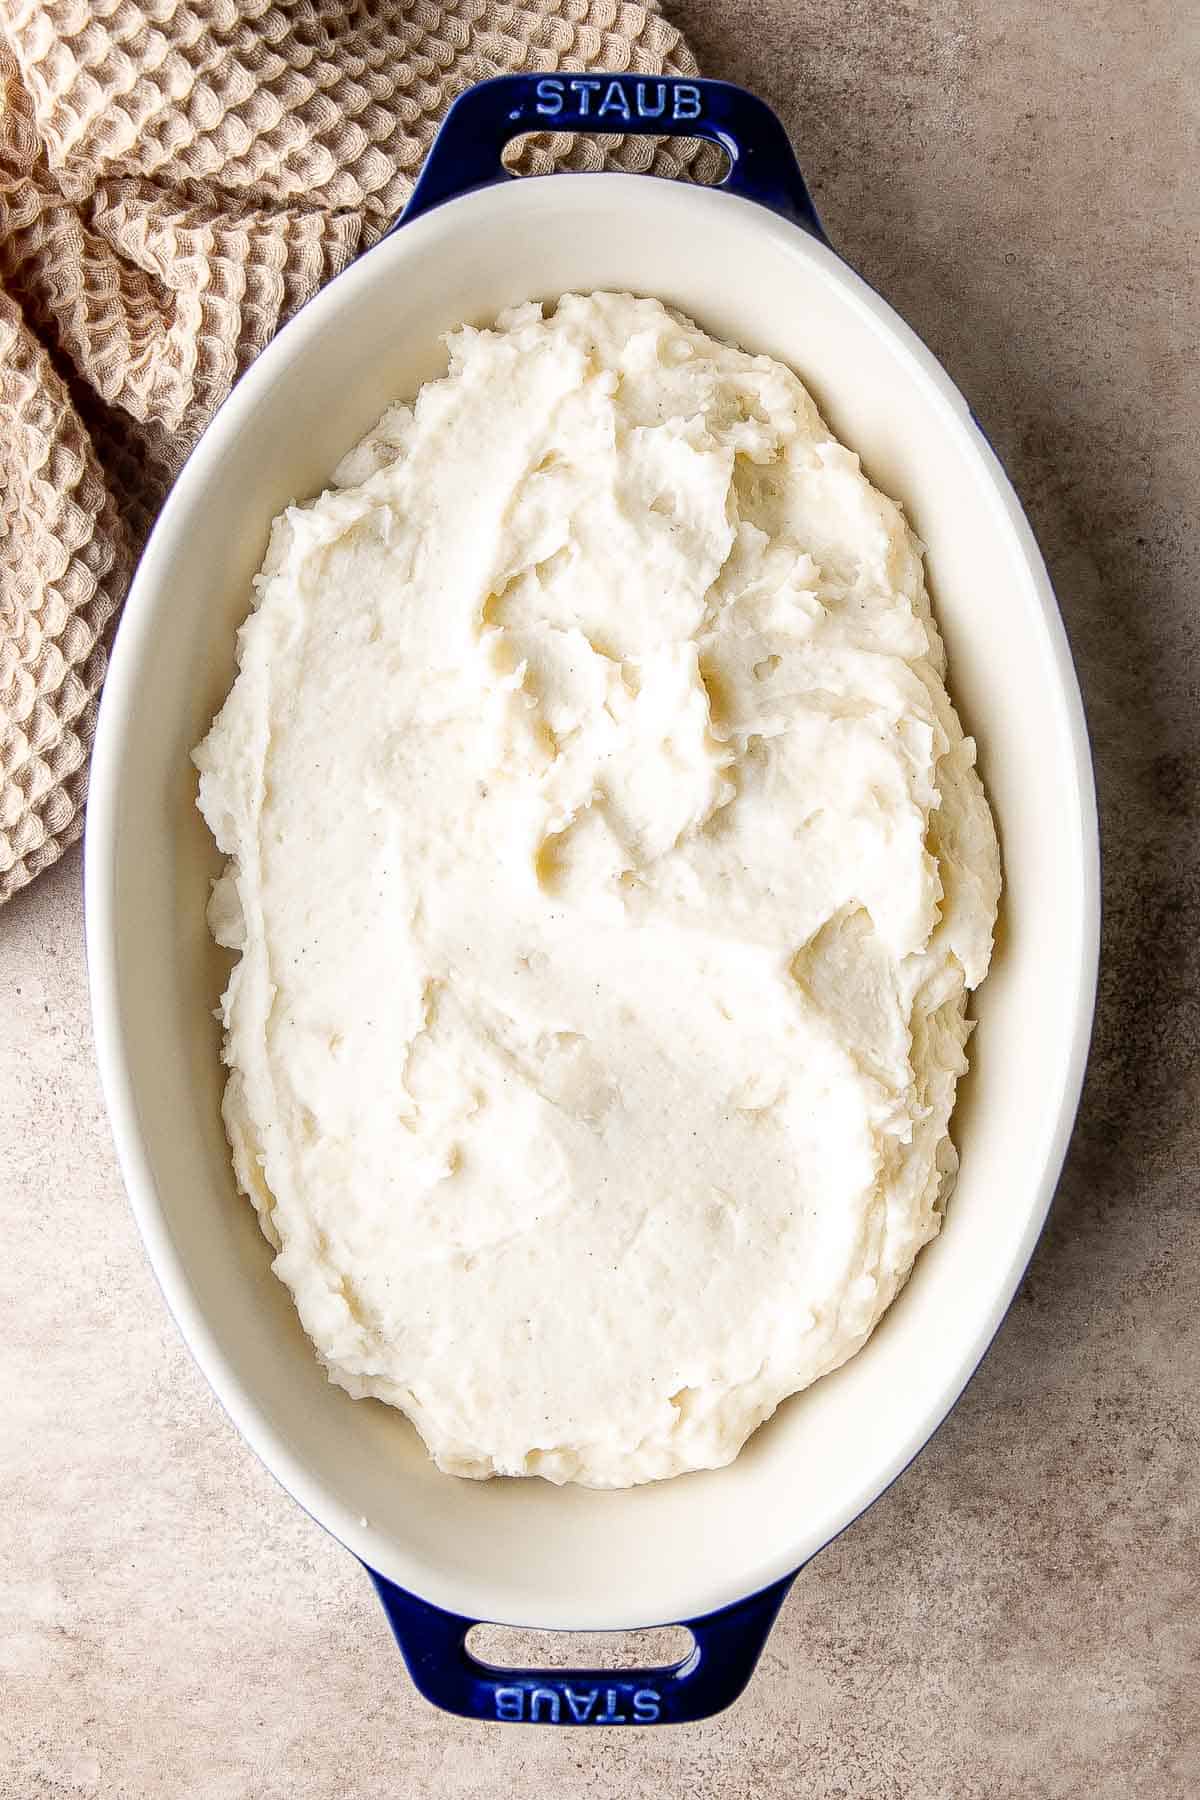

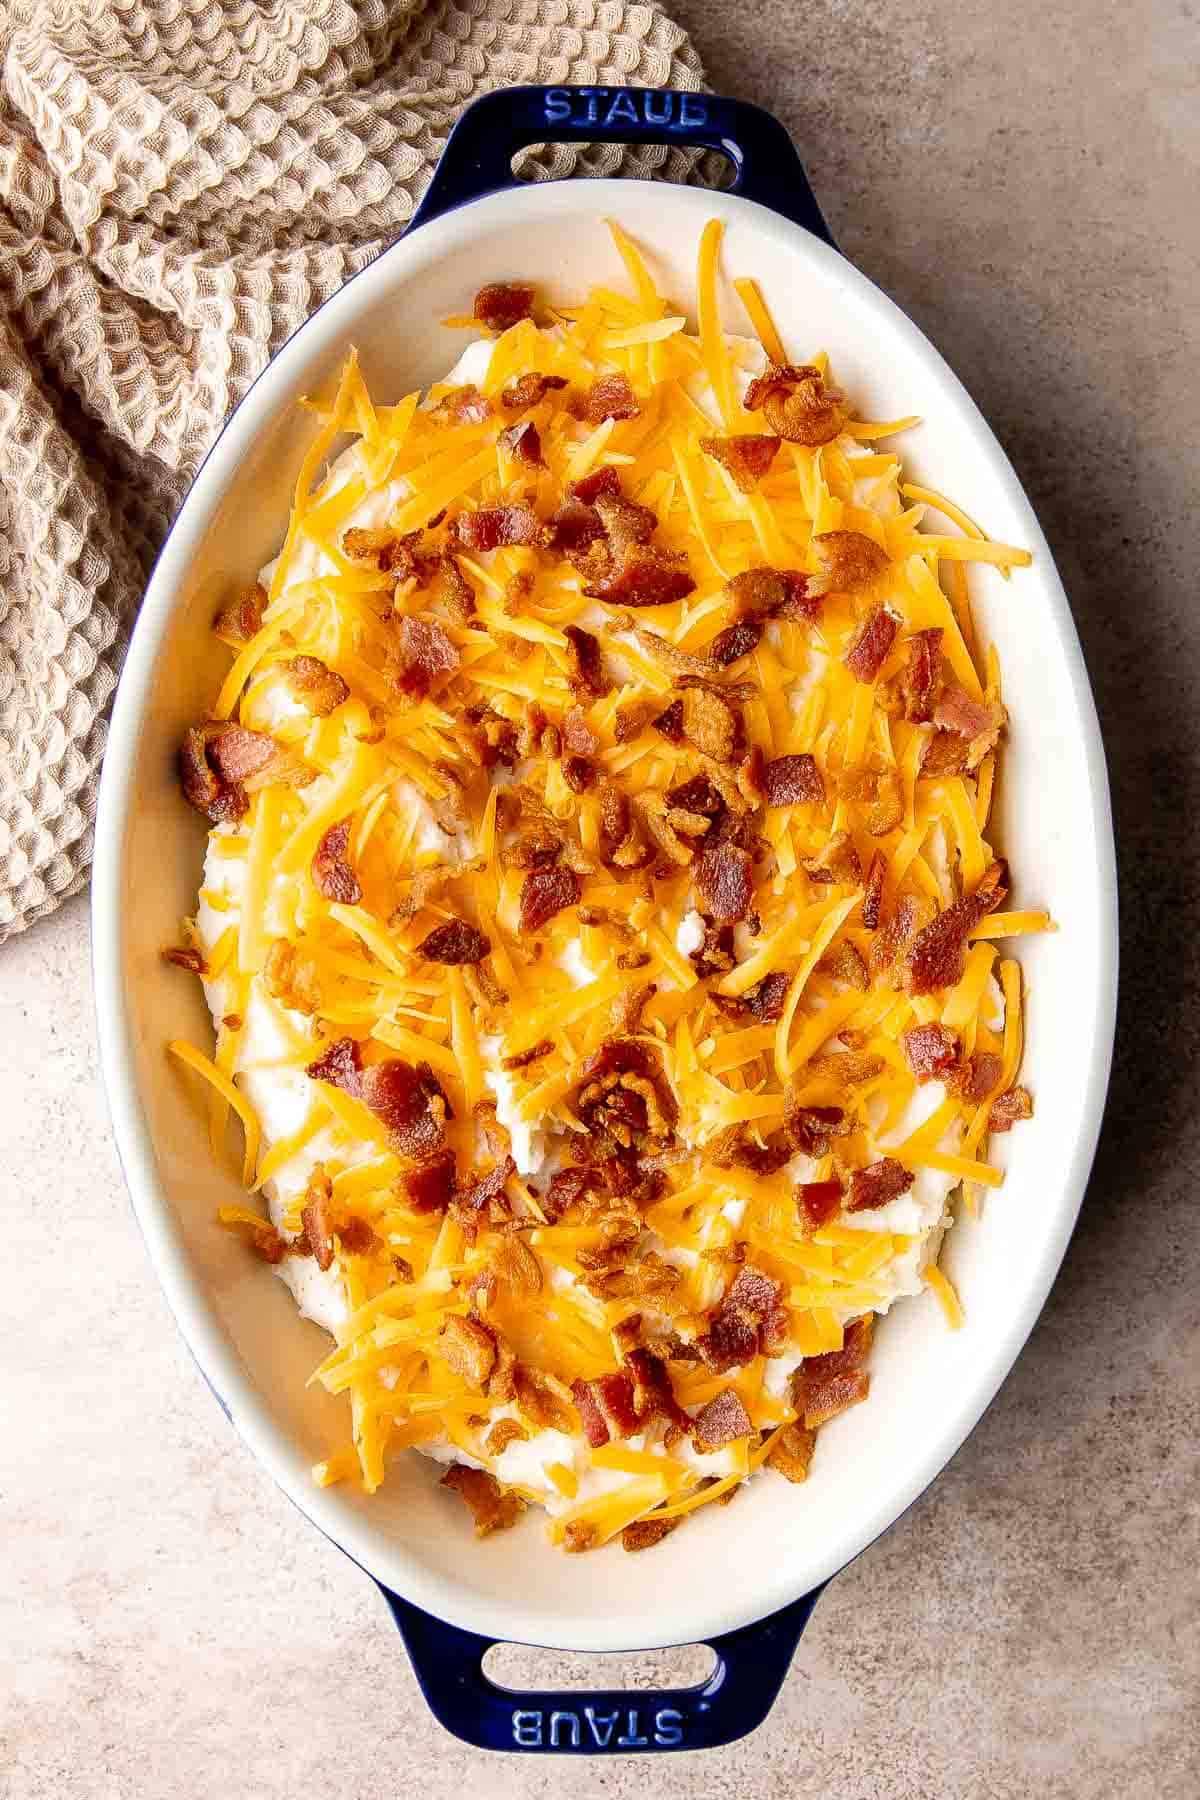
- Bake. Cover with foil and bake in a 375 F preheated oven for 20 minutes. Remove the foil and bake uncovered for another 10 minutes until the melted cheese is bubbly.
- Serve. Garnish with green onion and serve warm.
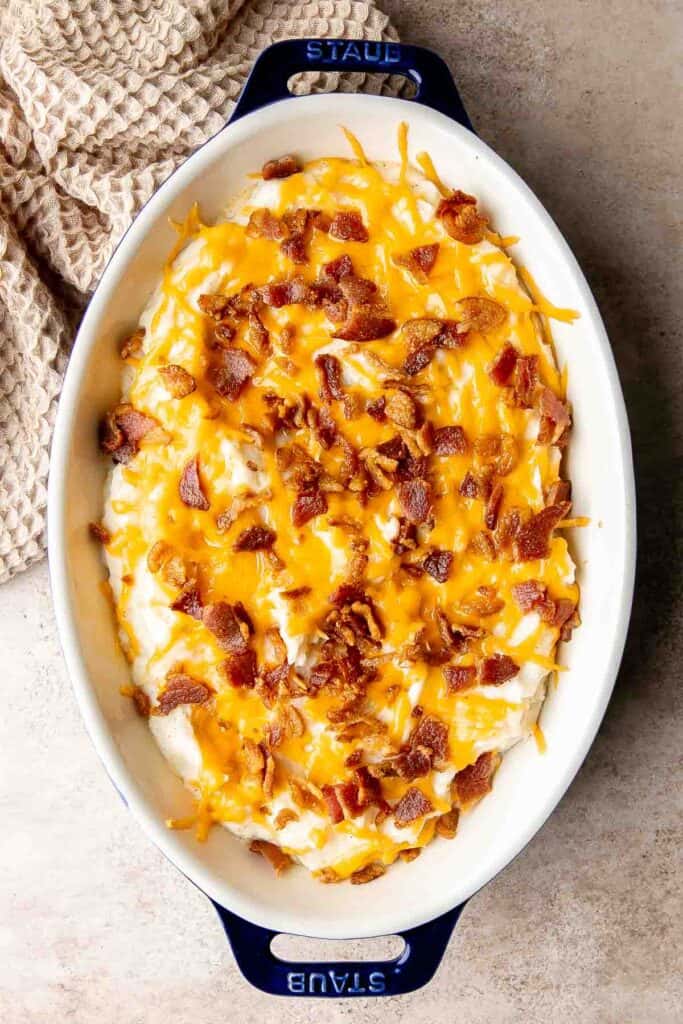

Recipe Variations
- Use cream cheese. Instead of sour cream, add cream cheese or even mayonnaise!
- Make a crunchy topping. Combine crunchy panko breadcrumbs and melted butter like the topping for this Chicken Divan recipe.
- Make it garlicky. Add roasted garlic cloves, garlic powder, or garlic salt to the mashed potatoes for an extra flavor.
- Use leftover mashed potatoes. This is a great way to repurpose any leftover mashed potatoes. Just spread your mashed potatoes in a casserole dish, add the tpppings, and bake.
How to Serve
This mashed potato casserole is delicious served on its own, or served as part of a holiday meal paired with more side dishes including:
- Green Bean Casserole
- Classic Homemade Turkey Gravy
- Corn Casserole
- Cranberry Walnut Apple Stuffing
- Cornmeal Cheddar Biscuits
For more recipe inspiration, see our 50 Best Thanksgiving Side Dishes.
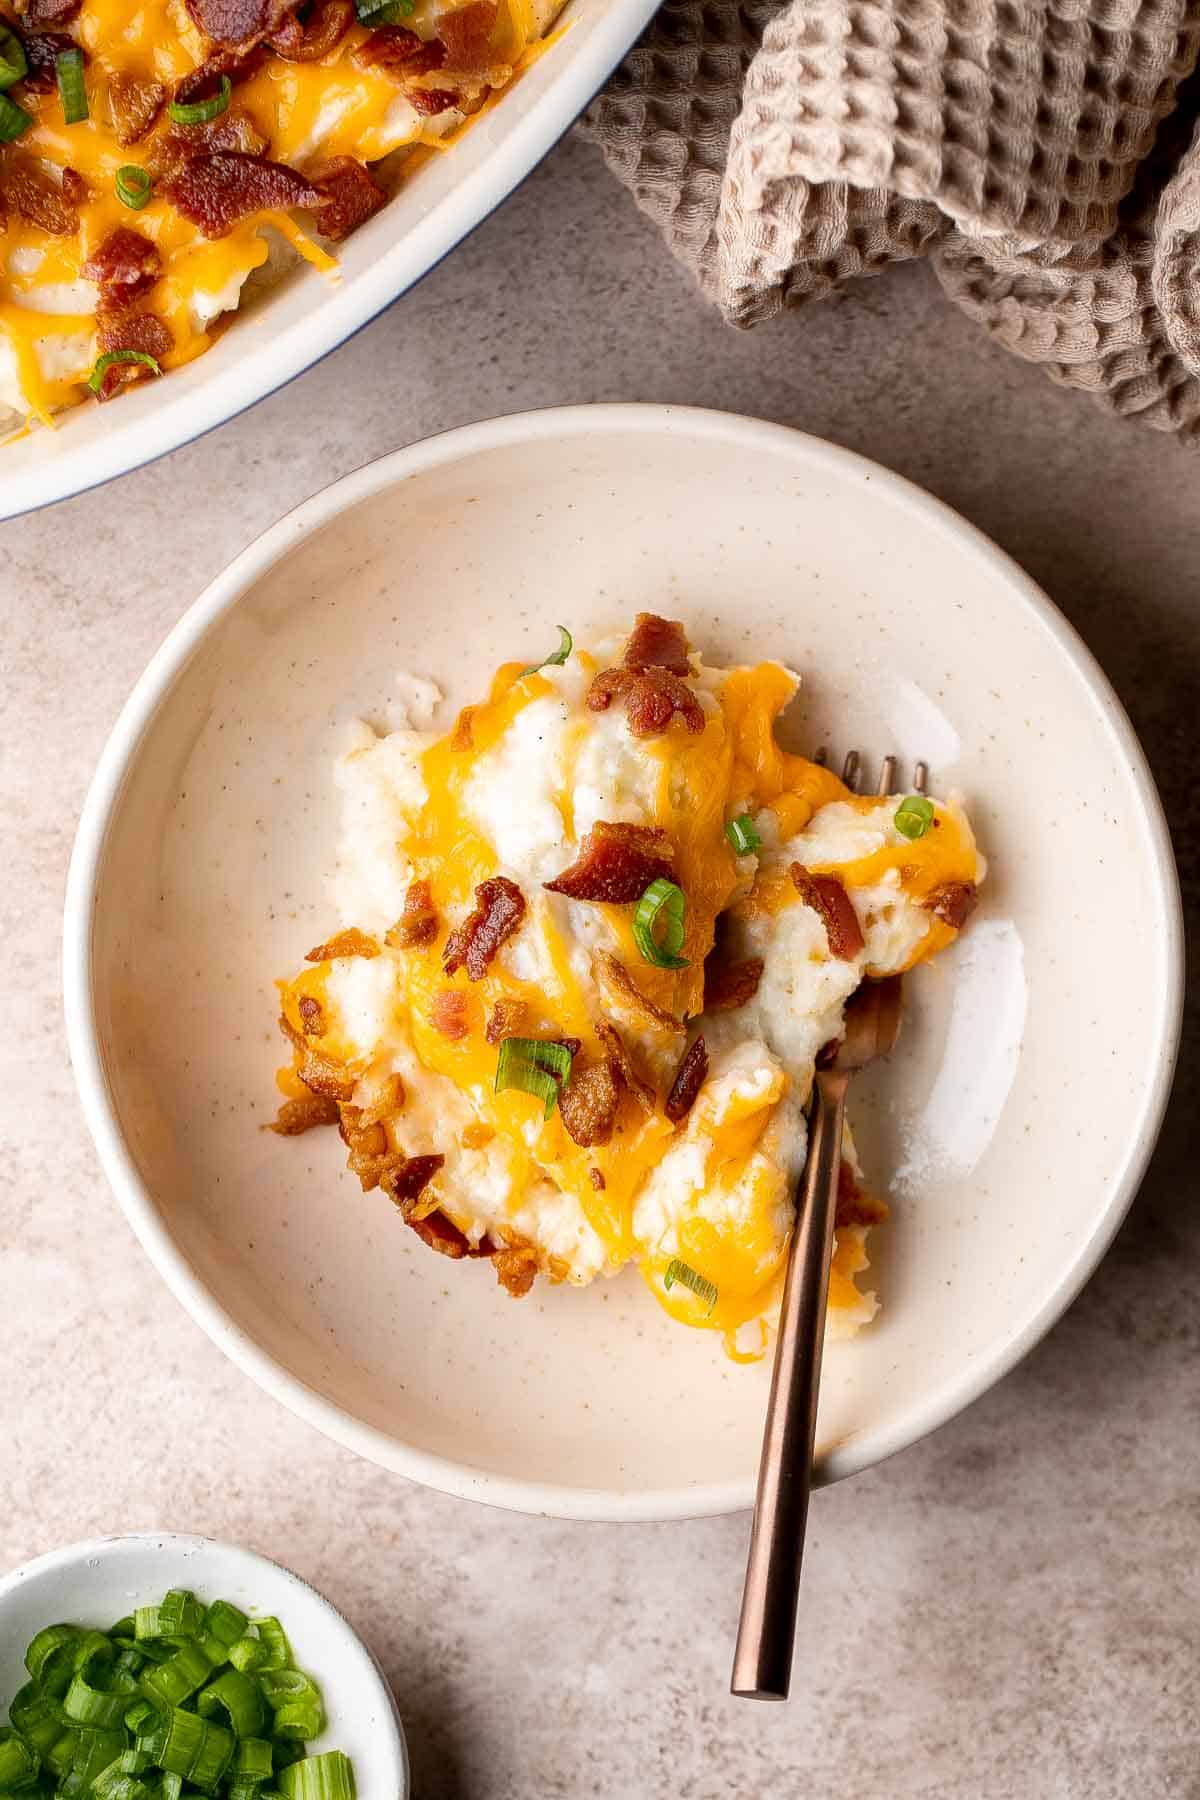
Recipe Tips and Tricks
- Don't overmix the mashed potatoes. If you blend the potatoes or mash them too much, they take on a really unpleasant gluey texture.
- Use a stand mixer. One great way to get really fluffy mashed potatoes is to whip them in the bowl of a stand mixer or with an electric mixer. This gives them a really light and airy texture.
- Start with cold water. An old trick to get the creamiest mash potatoes is to start the potatoes in cold water. This will allow the potatoes to soften gradually, becoming really soft and fluffy.
Storing and Freezing Instructions
How to Store
Place any leftover potatoes in an airtight container in the fridge for 3-4 days.
How to Reheat
Either microwave a serving for 2-3 minutes or pop them in a preheated 375F oven with a fresh sprinkle of cheese for 8-10 minutes until warm and the cheese is melted.
How to Freeze
Freeze chilled leftovers in a freezer safe container for 2-3 months. Thaw in the fridge overnight before reheating the next day.
FAQ
The best potatoes for mashed potatoes are really starchy varieties like Russets or Yukon Gold potatoes. Red potatoes are some of the least starchy potatoes, so they have a harder time becoming really light and fluffy. With that said, you can use them for mashed potato casserole, but just be aware they will not have the same level of creaminess.
Absolutely! Have you ever noticed how some dishes taste better the next day? As these cheesy potatoes sit in the fridge overnight, all of the flavors meld together. They taste amazing the next day!
With so many flavor-packed ingredients and baked potato toppings, your baked potatoes casserole should be really flavorful. If it isn't, there are likely a couple of reasons why. First, potatoes need a lot of salt. Boil the potatoes in salted water, then taste and season them several times as you're cooking. If you season as you go, your cooked potatoes will have plenty of flavor. Another thing to consider is the fat content of the dairy products you use. If you choose low fat or fat free options, you'll struggle to get the same luxurious creaminess as when you use full fat dairy products.
More Potato Recipes
- 30 Potato Side Dishes
- Brown Butter Mashed Potatoes
- Potato Stacks
- Baked Potato Wedges
- Hasselback Potatoes
- Duchess Potatoes
Tried this recipe?
I'd love to hear what you think! Leave a comment and rating below to share your feedback. Your reviews help others discover this recipe and help me keep creating more free recipes for you. Snap a photo and tag me on social media @aheadofthyme too.

French Onion Soup
Cozy up with a warm, cheesy bowl of classic French Onion Soup. This version is made in the traditional way by cooking down and caramelizing fresh onions until they are a deep golden brown, then deglazing the pan with wine before letting all those flavors simmer together. Top off each bowl of soup with a thick piece of French bread and some melty cheese for a deeply flavorful, savory meal you'll crave all winter long.
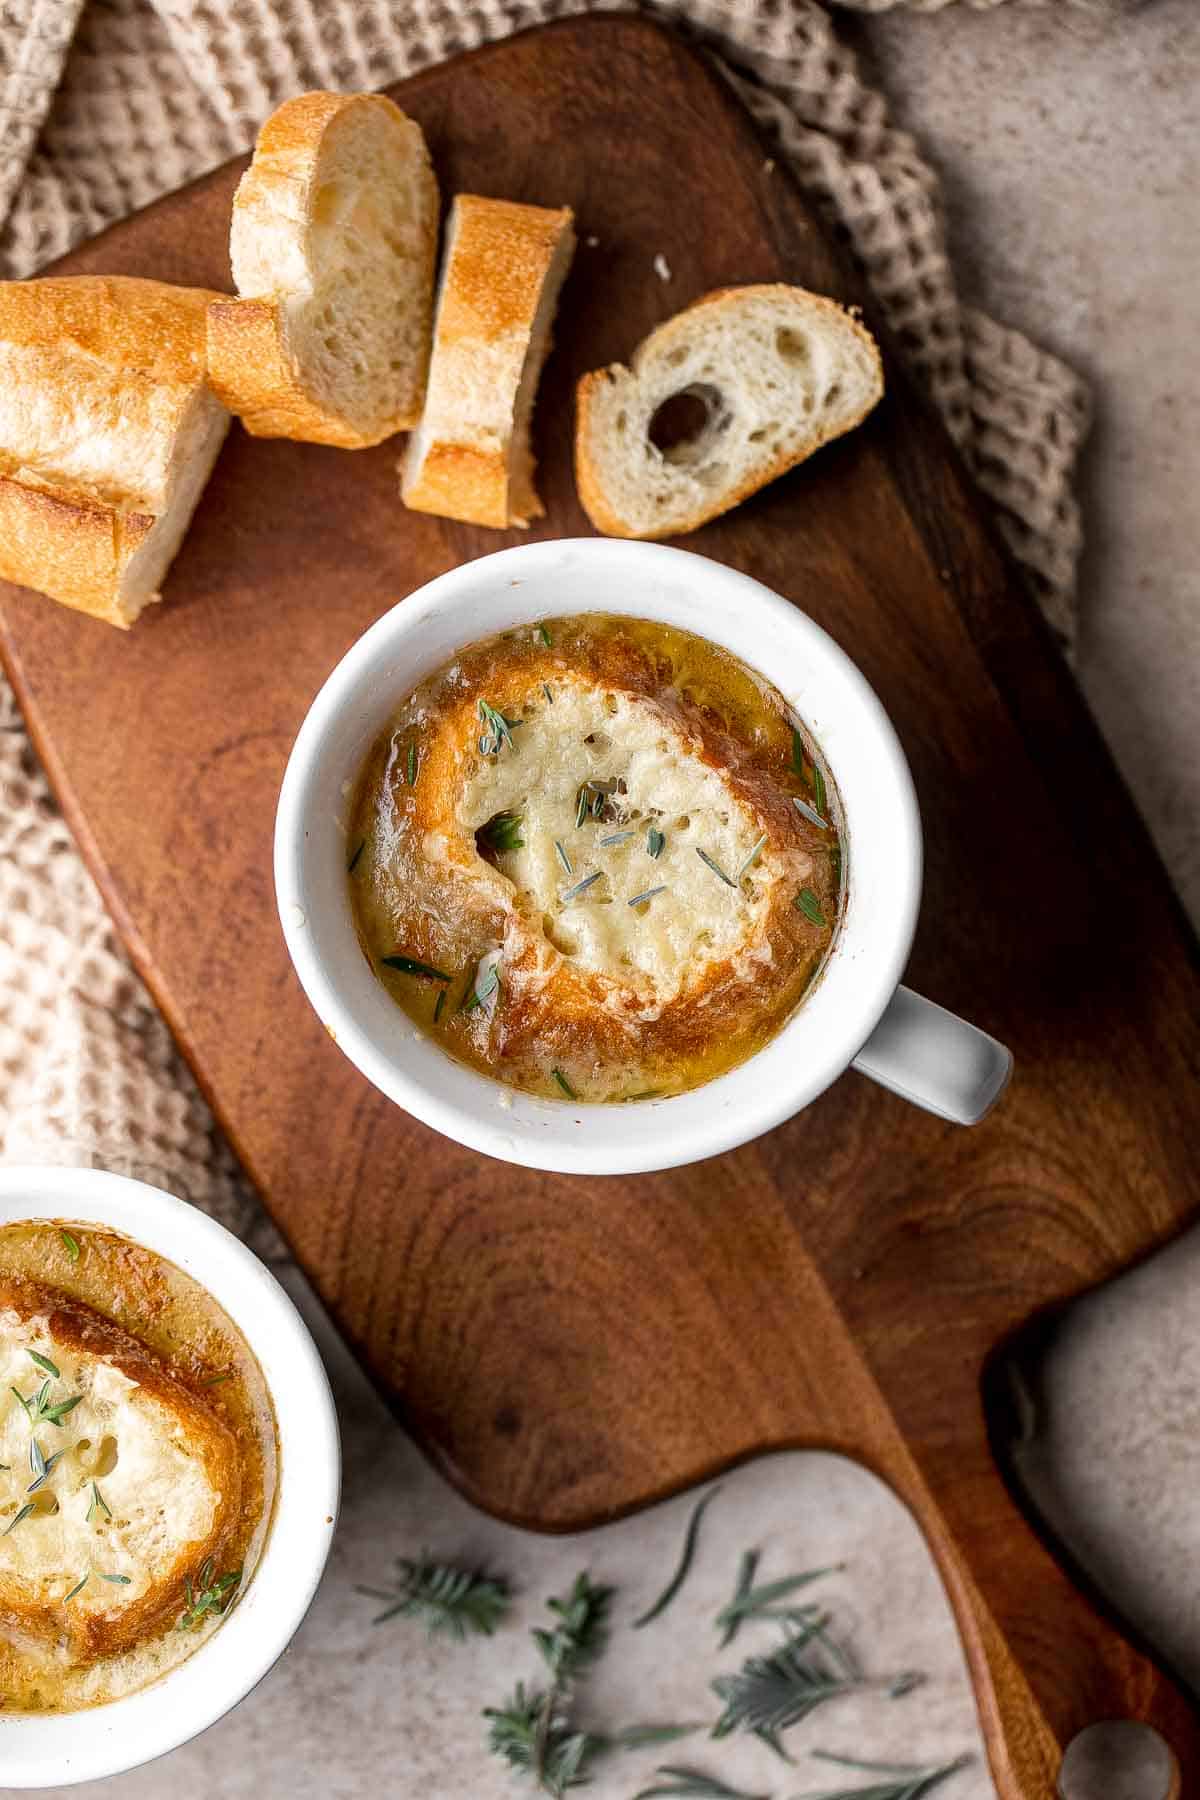
Traditional French onion soup is a classic for a reason. It's surprisingly easy to make, but it has a rich, savory flavor that tastes like you've been cooking all day. The molten gruyere cheese takes the entire dish to the next level with a creamy, nutty flavor that pairs perfectly with the sweet onions. It's simple enough for a cozy night in yet fancy enough for a dinner party or special gathering.
Why You'll Love This French Onion Soup
- Hearty, rich flavor. This is one of our all-time favorite soups because it's so rich and savory. The secret to this homemade French onion soup recipe is to deglaze the pan after caramelizing the onions with a little white wine. This will rehydrate those flavorful browned bits from the bottom of the pot and add a slightly sweet note from the cooked-down wine.
- So simple to make. This easy French onion soup recipe is a reminder that simple recipes don't have to be bland or boring. This is a very simple soup to make, yet it has absolutely fabulous flavor.
- Ultimate comfort food. Is there anything better than a bowl of French onion soup with cheesy bread slices that soak up that savory beef broth? Every part of this dish is cozy, from the warm bowl to the rich broth and the gooey cheese topping. It's such a treat!
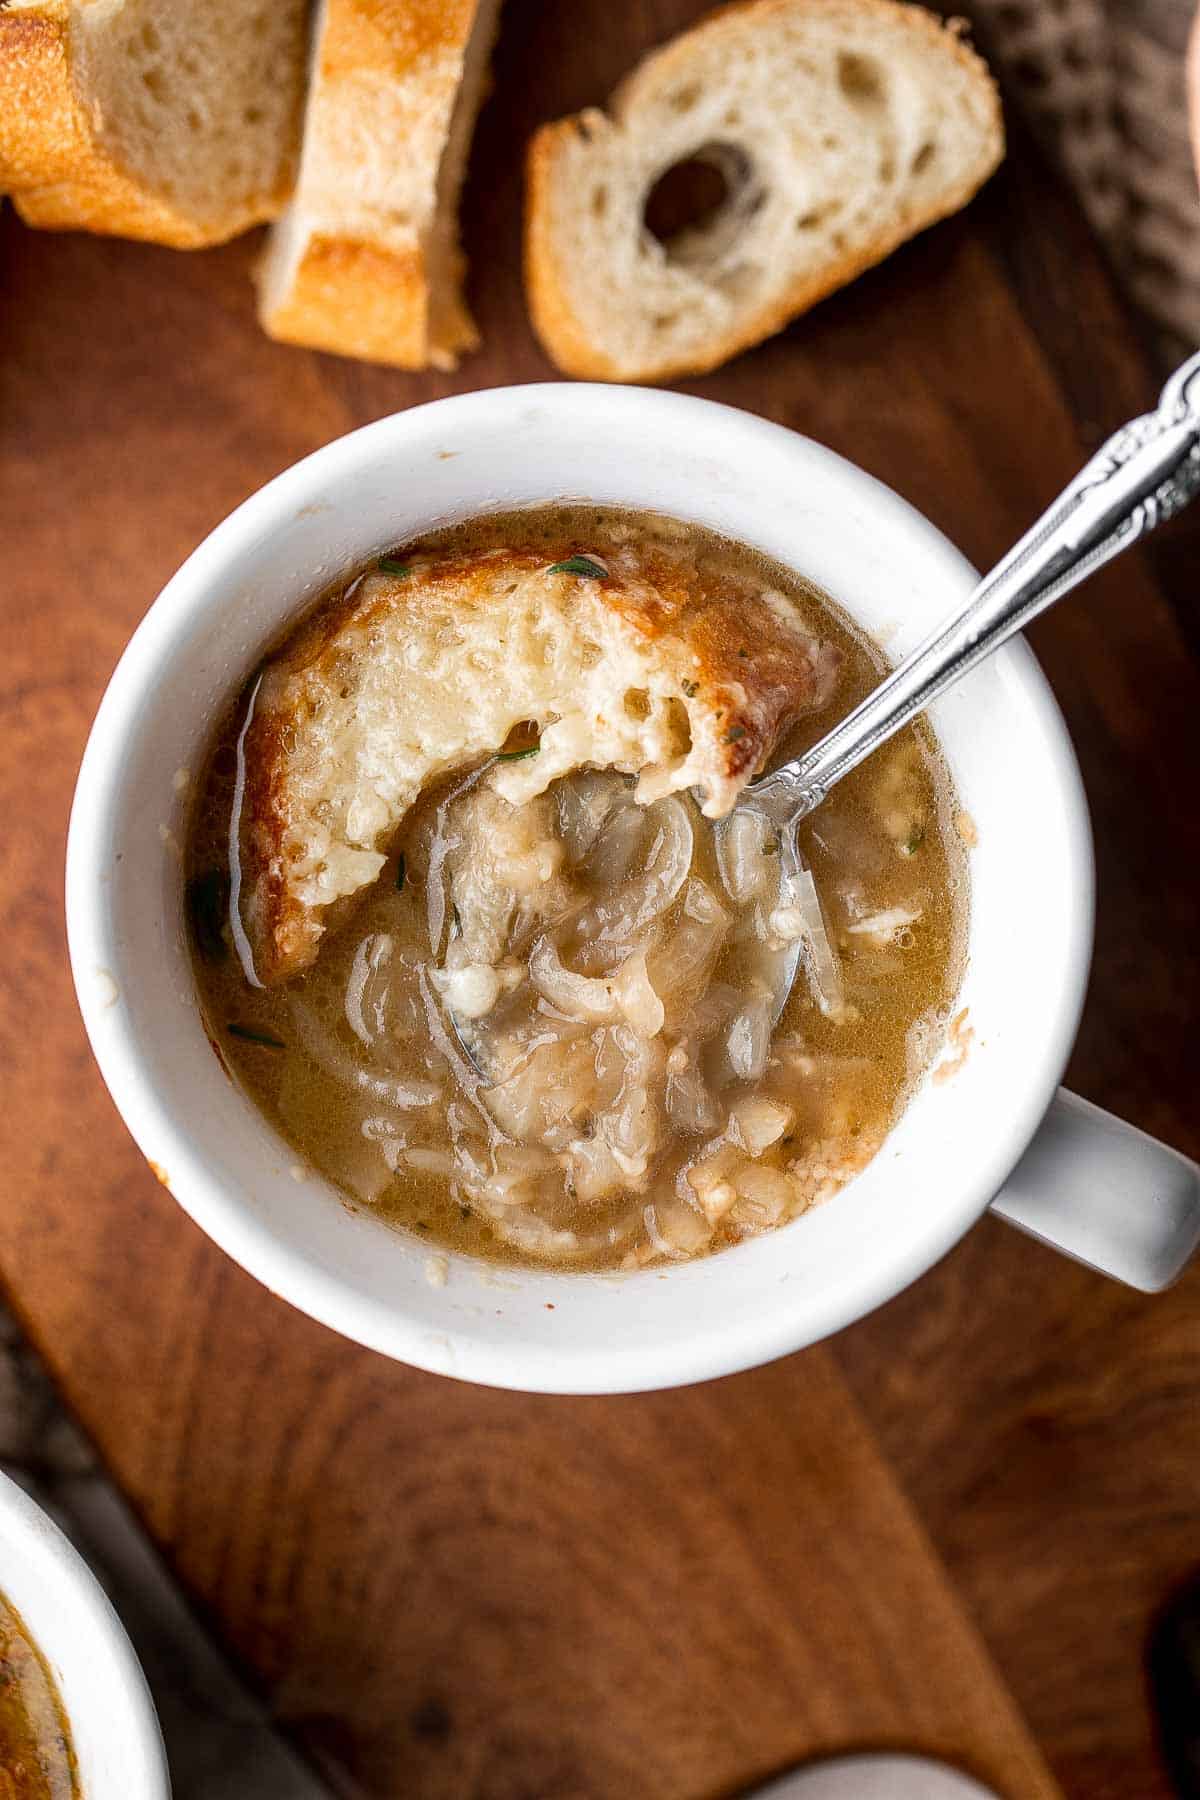
Ingredient Notes
To make this delicious French onion soup recipe, you will need the following ingredients (full measurements in recipe card below):
- butter - start by melting the butter in the bottom of the pan to saute the onions for this classic French onion soup recipe.
- onion - thinly slice yellow onions so they'll cook down into thin strands.
- wine - choose a sherry wine or dry white wine to deglaze the pan. This will add extra depth of flavor, so don't skip this step!
- flour - all purpose flour will thicken the broth just slightly.
- beef broth - it's classic to use beef stock for its rich, meaty flavor. Use storebought stock or make your own. Try our Slow Cooker Bone Broth or even Asian Beef Broth.
- fresh thyme - finely chop fresh thyme sprigs to sprinkle on top of the cheese as a garnish.
- salt and pepper
- french bread - you'll need 6 slices of French bread about ½ inch thick. Use a serrated knife to cut the bread slices smoothly.
- gruyère cheese - grate this buttery Swiss cheese to add on top of the soup.
You will also need a large pot, oven-proof bowls, ladle, and baking sheet.

How to Make the Best French Onion Soup
- Sauté onions. Melt butter in a large pot or 4 quart Dutch oven over medium-high heat and melt until it starts to bubble, about 1 minute. Add onion and sauté until tender and golden brown, about 12-15 minutes.

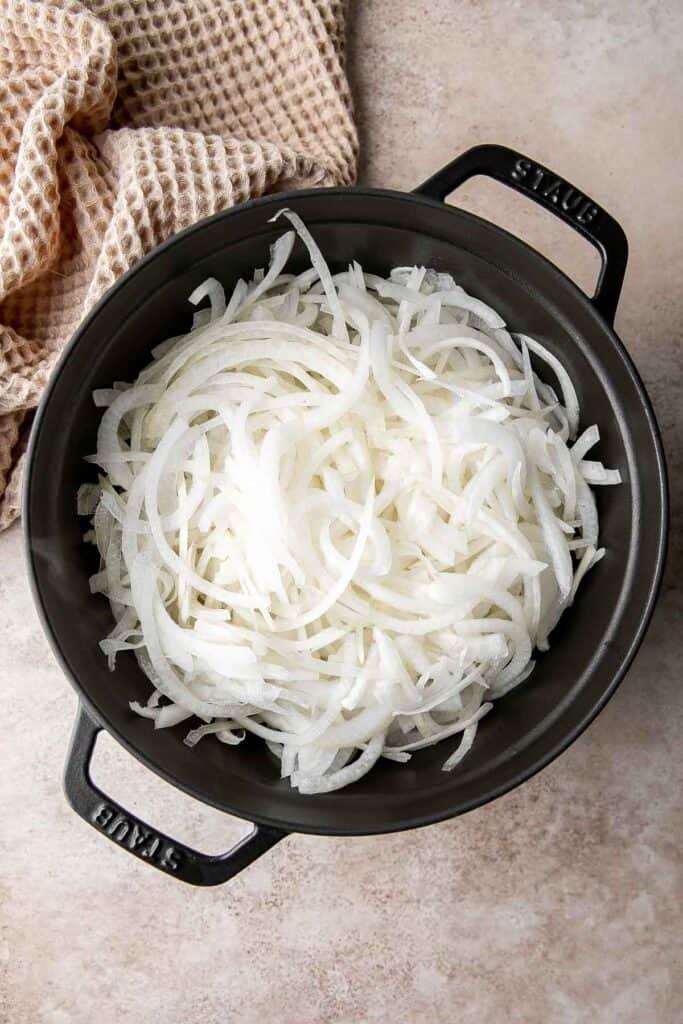
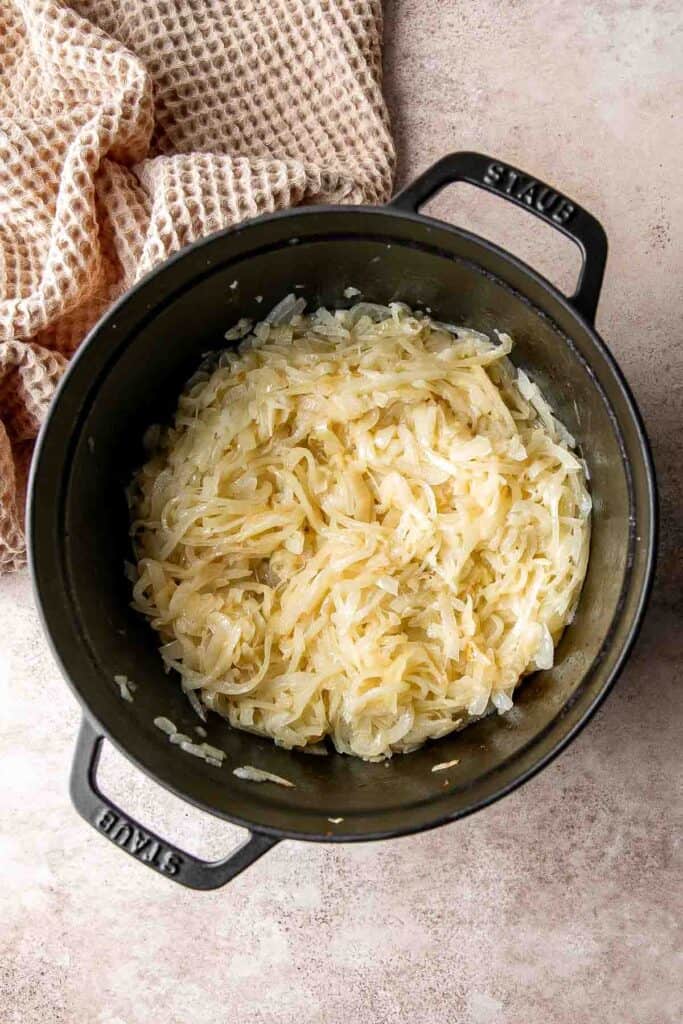
- Deglaze. Add wine and stir well to deglaze the pot.
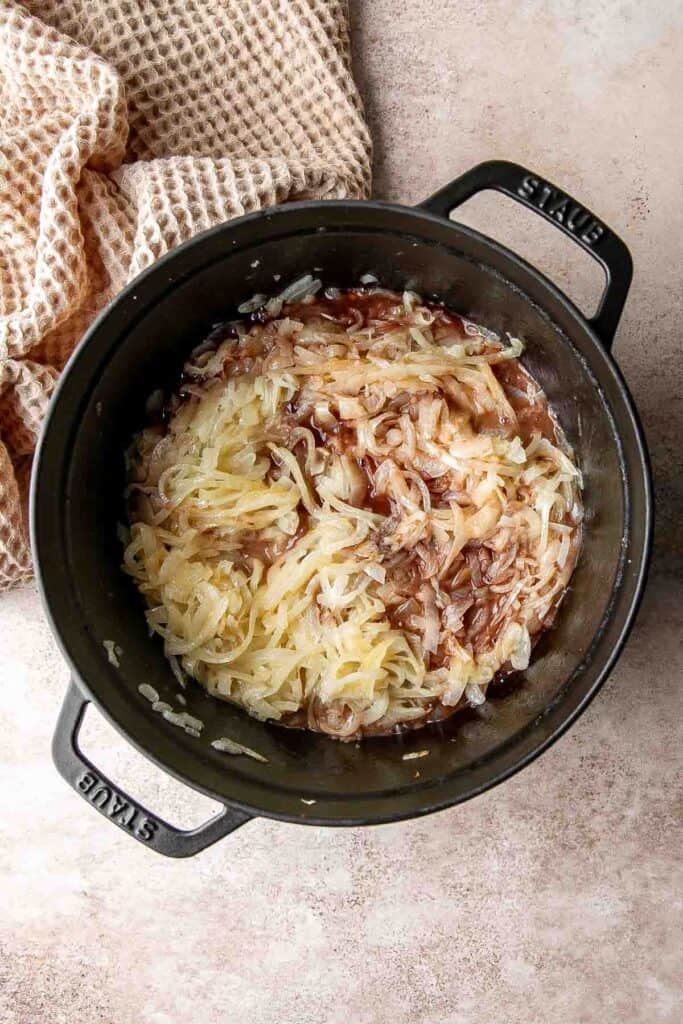
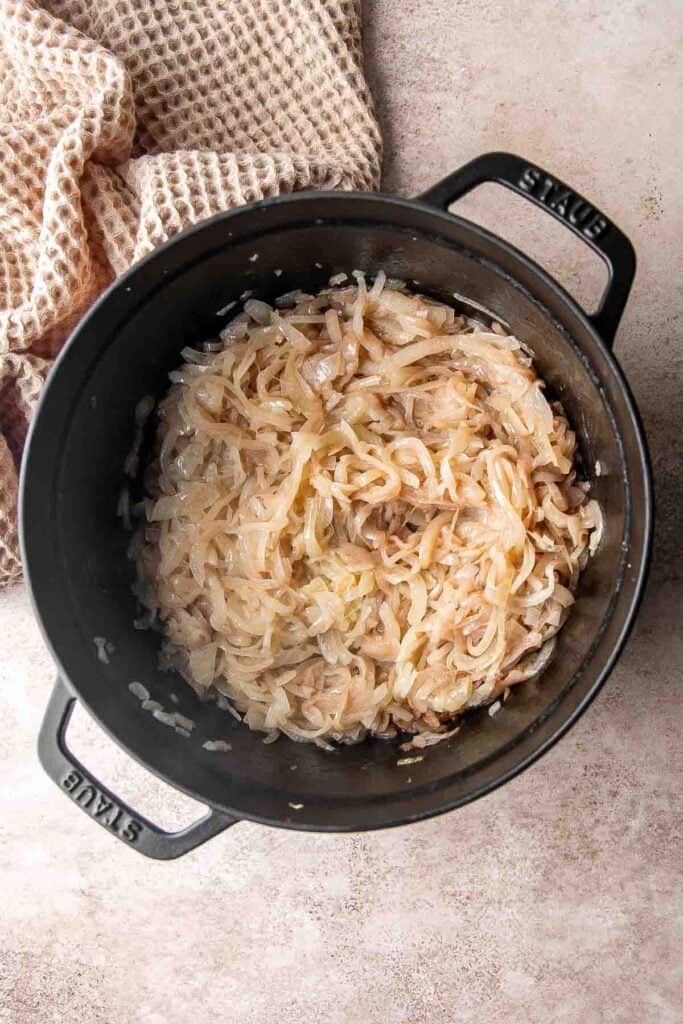
- Thicken. Stir in flour and mix well until evenly combined and thickened, about 1 minute.

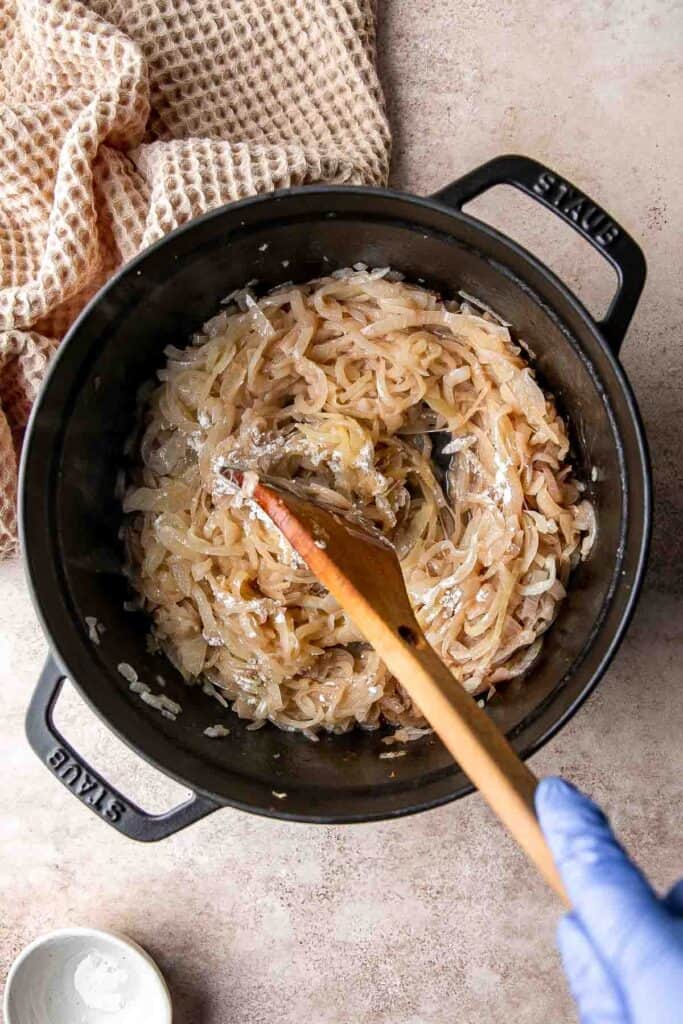
- Add broth and simmer. Add beef broth and thyme. Mix well and bring the mixture to a simmer. Let it simmer over medium heat for 10 minutes. Season with salt and pepper to taste.
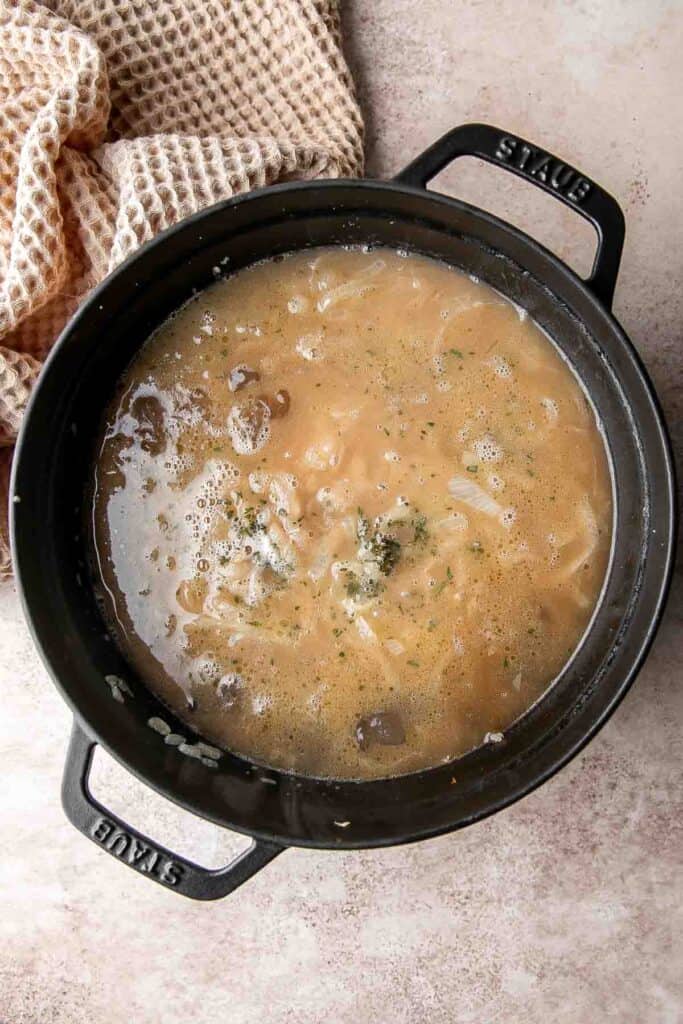
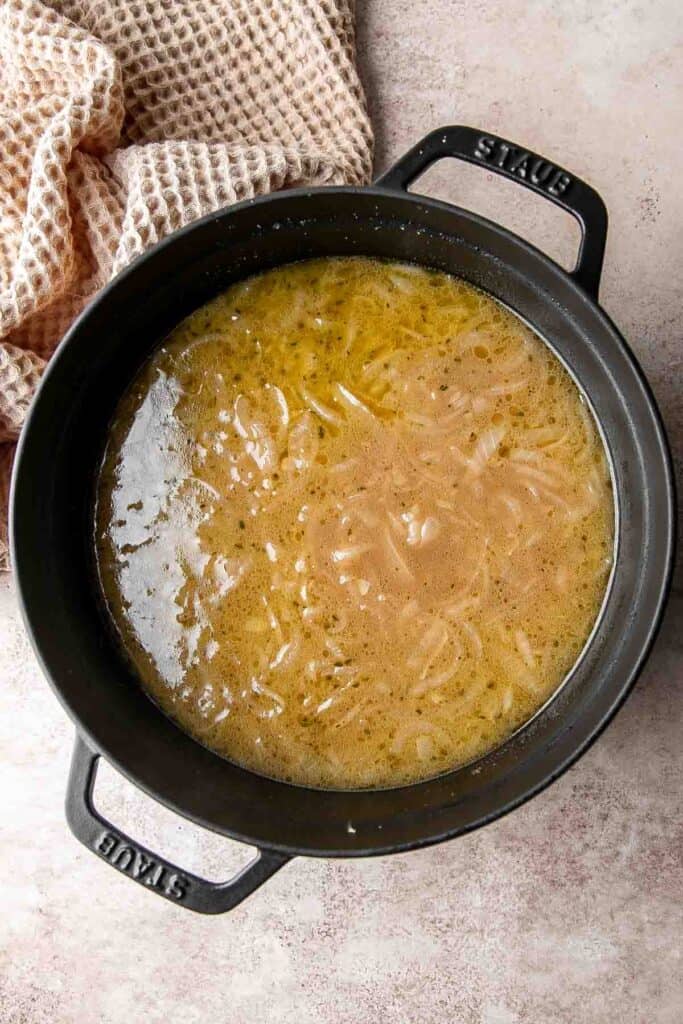
- Divide soup. Preheat broiler on Hi for 5 minutes. Ladle soup into individual oven-safe serving bowls and place the serving bowls on a large baking sheet (you may have to do this in batches).
- Add toppings. On each bowl, add a slice of bread on top and sprinkle with ¼ cup of cheese.
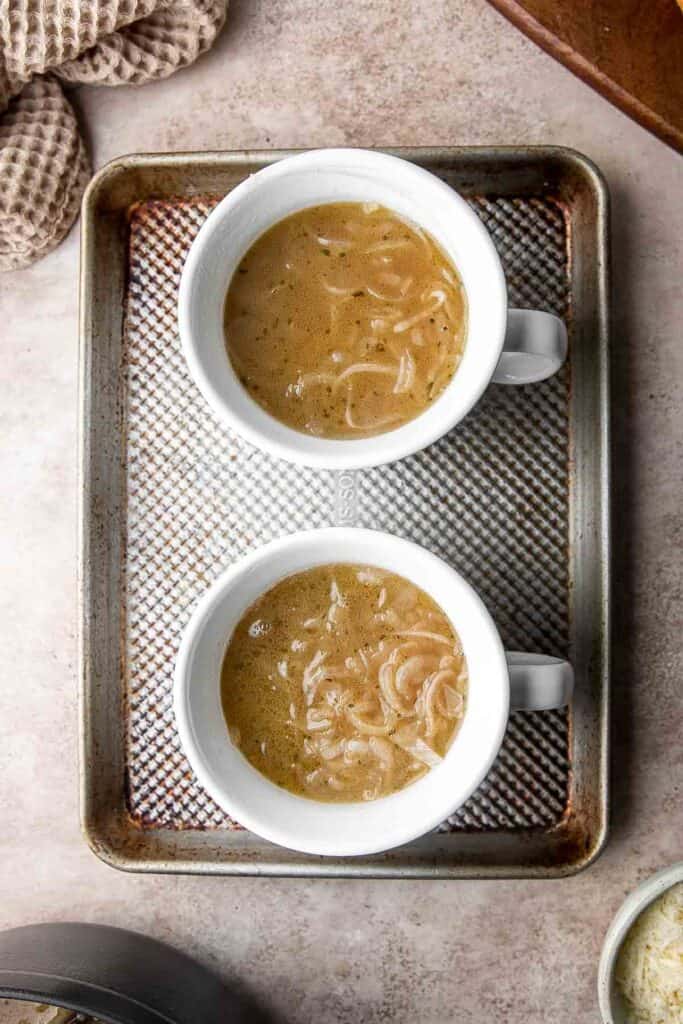
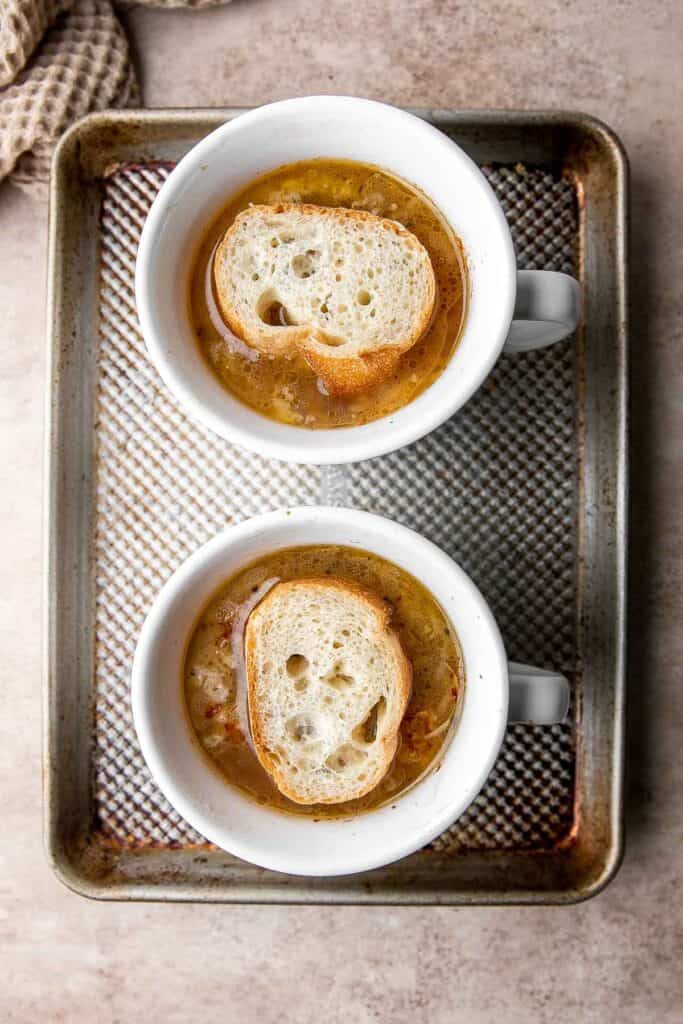
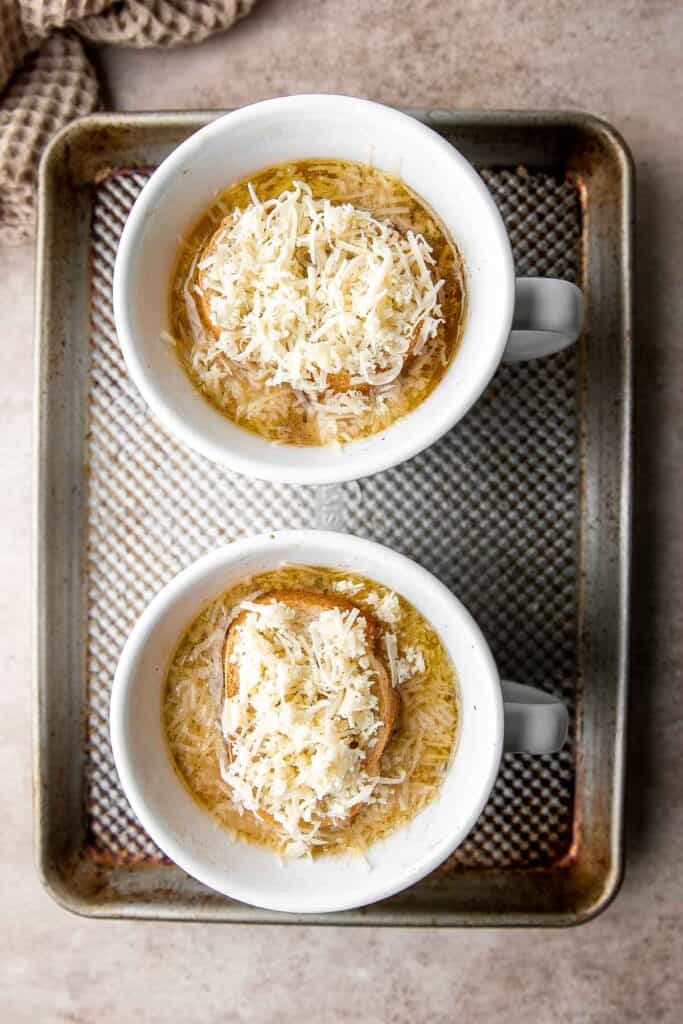
- Broil. Transfer the baking sheet into the oven and broil until the melted cheese turns golden brown, about 1 minute.
- Serve. Garnish with some chopped thyme and serve warm.
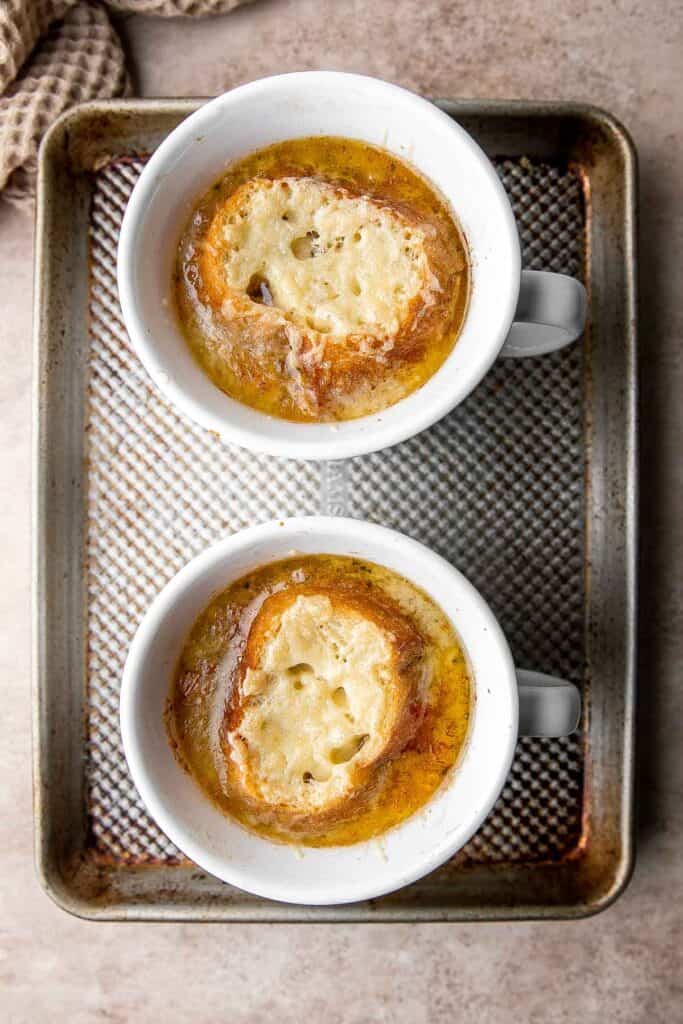
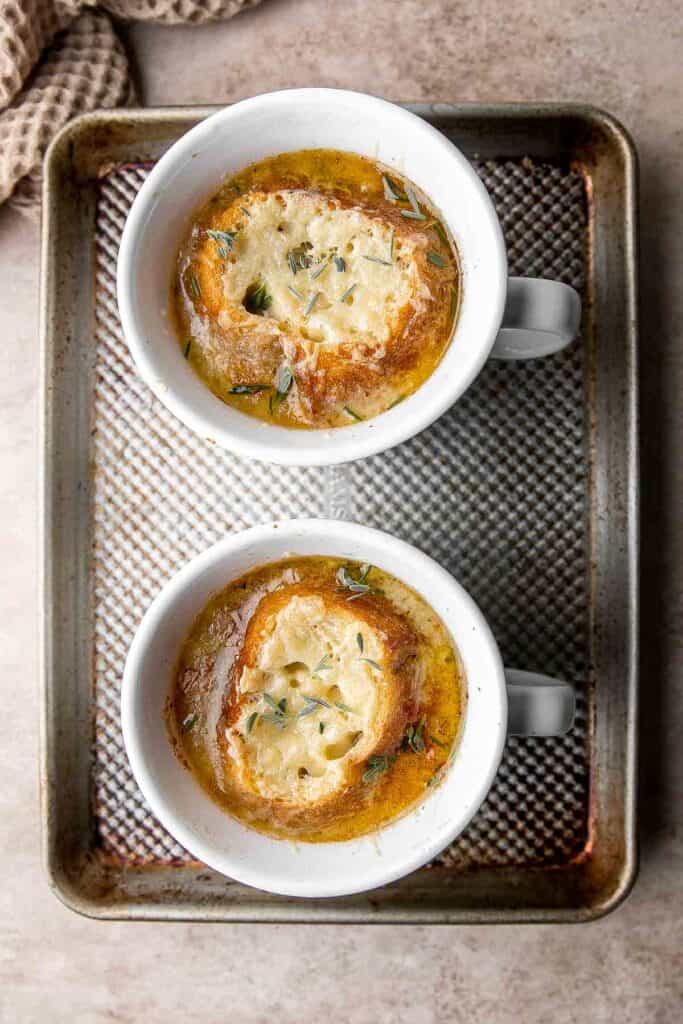
Recipe Variations
- Slow cooker French onion soup. After caramelizing the onions and deglazing the pan, add everything to a slow cooker and continue the recipe. Let the soup slow cook on high for 3-4 hours and serve with cheesy toast.
- Vegetarian French onion soup. This dish is traditionally made with beef stock, but you can use vegetable broth instead. To get that rich, savory flavor, add a teaspoon or two of vegan Worcestershire sauce.
- Gluten-free French onion soup. Skip the flour and use half as much cornstarch. Slice your favorite gluten-free breads to serve on top.
- Adjust the seasonings. There are so many little ways to tweak or adapt this recipe to suit your preferences. Add a bay leaf or two, deglaze with red wine, balsamic vinegar, or brandy, or add a little parmesan cheese to the gruyere for a salty, umami flavor. You can even saute some sliced garlic for a stronger flavor. Make it your own!
How to Serve
This French onion soup is delicious served on its own, or paired with some of my favorite recipes including:
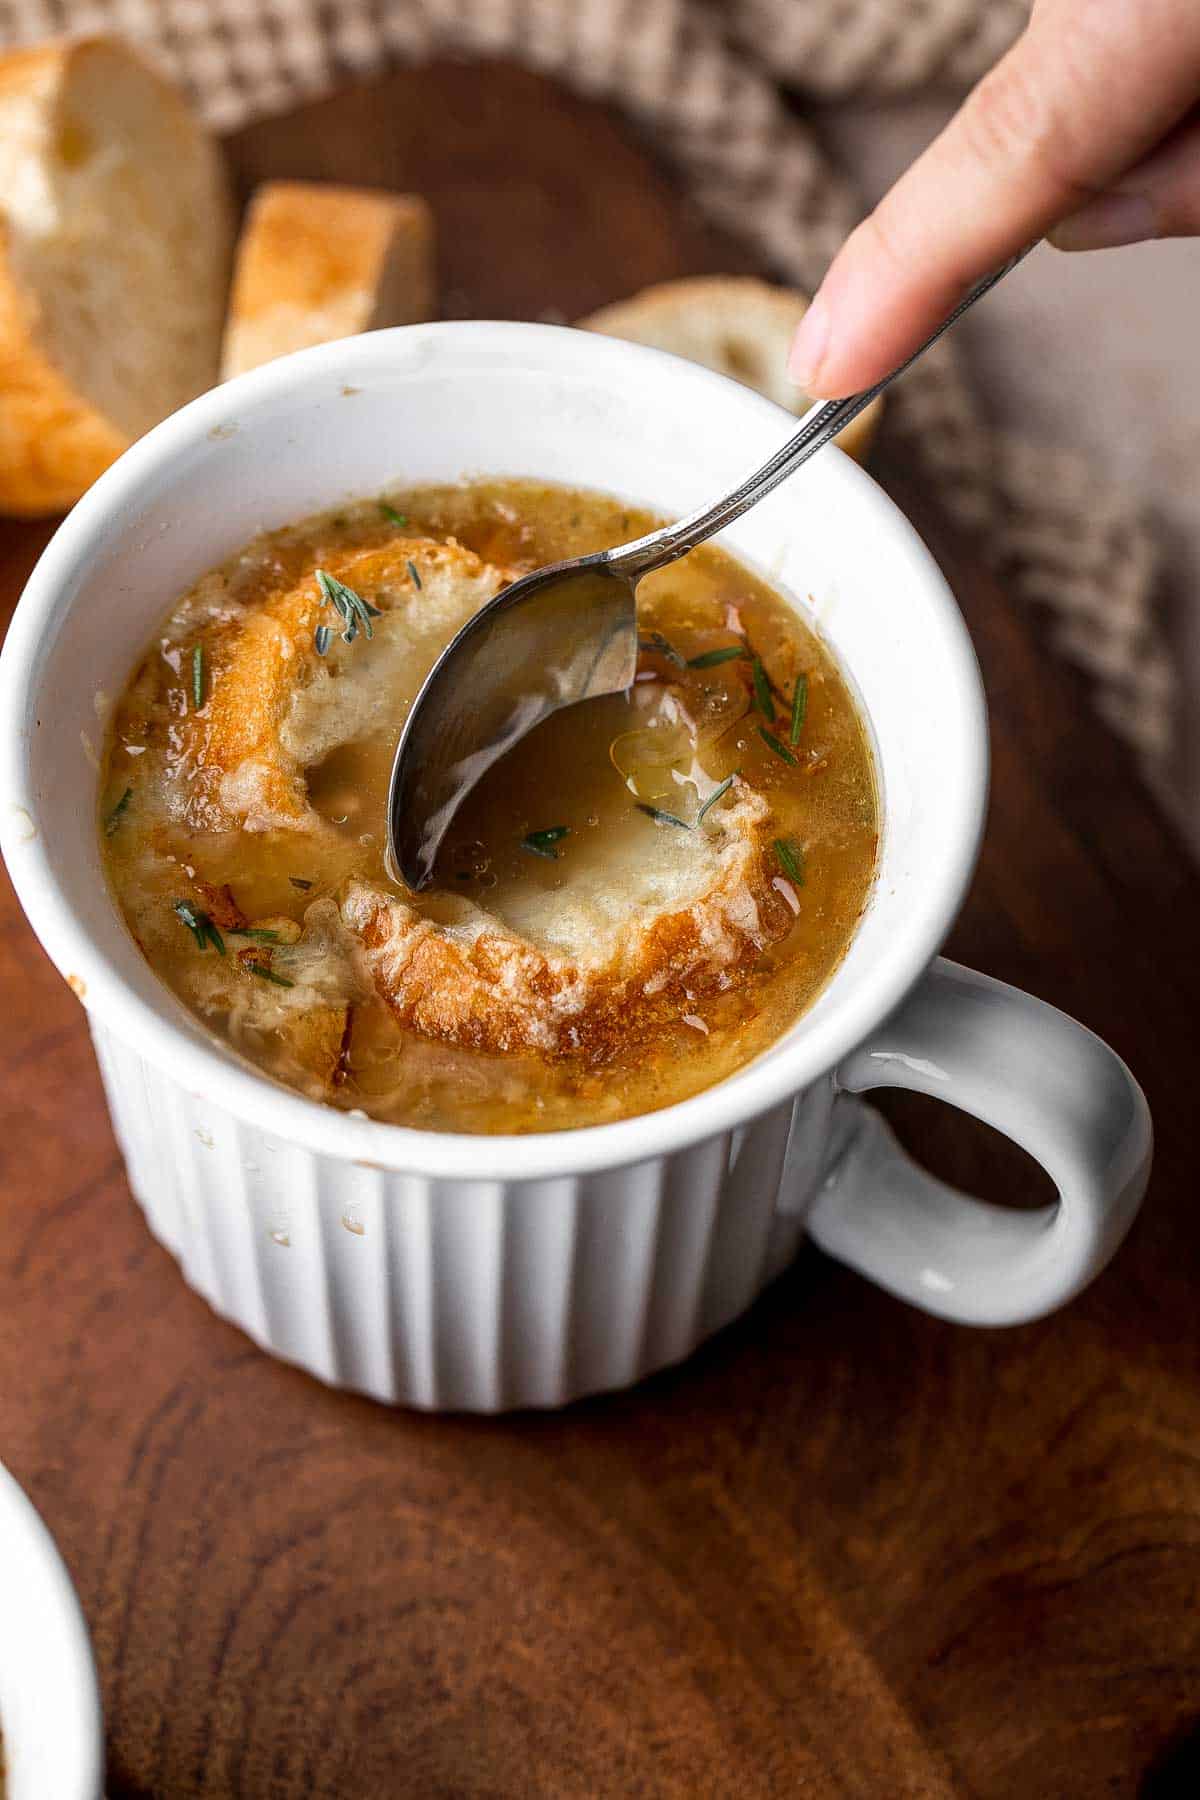
Recipe Tips and Tricks
- Use the right onions. For best results, use yellow onions, which are slightly sweet. White onions work in a pinch, but red onions are not a great fit.
- Use a mandolin. Instead of slicing your onions with a knife, speed up the process and get a more consistent result using a mandoline slicer. If you don't have one, use the slicer attachment for your food processor.
- Scale up. Make a double batch to feed a crowd. Just use a large Dutch oven and don't rush the caramelization process, as those sweet caramelized onions add so much flavor to this classic soup.
Storing and Freezing Instructions
How to Store
Store leftover French onion soup in an airtight container or jar in the fridge for 3-4 days. Store the bread and cheese separately to keep them from becoming soggy.
How to Reheat
Heat up some of this easy onion soup in a small saucepan over medium-low heat before topping it with freshly toasted bread and cheese.
How to Freeze
Freeze chilled leftover soup in a freezer safe container for 2-3 months. Thaw overnight in the fridge before reheating.
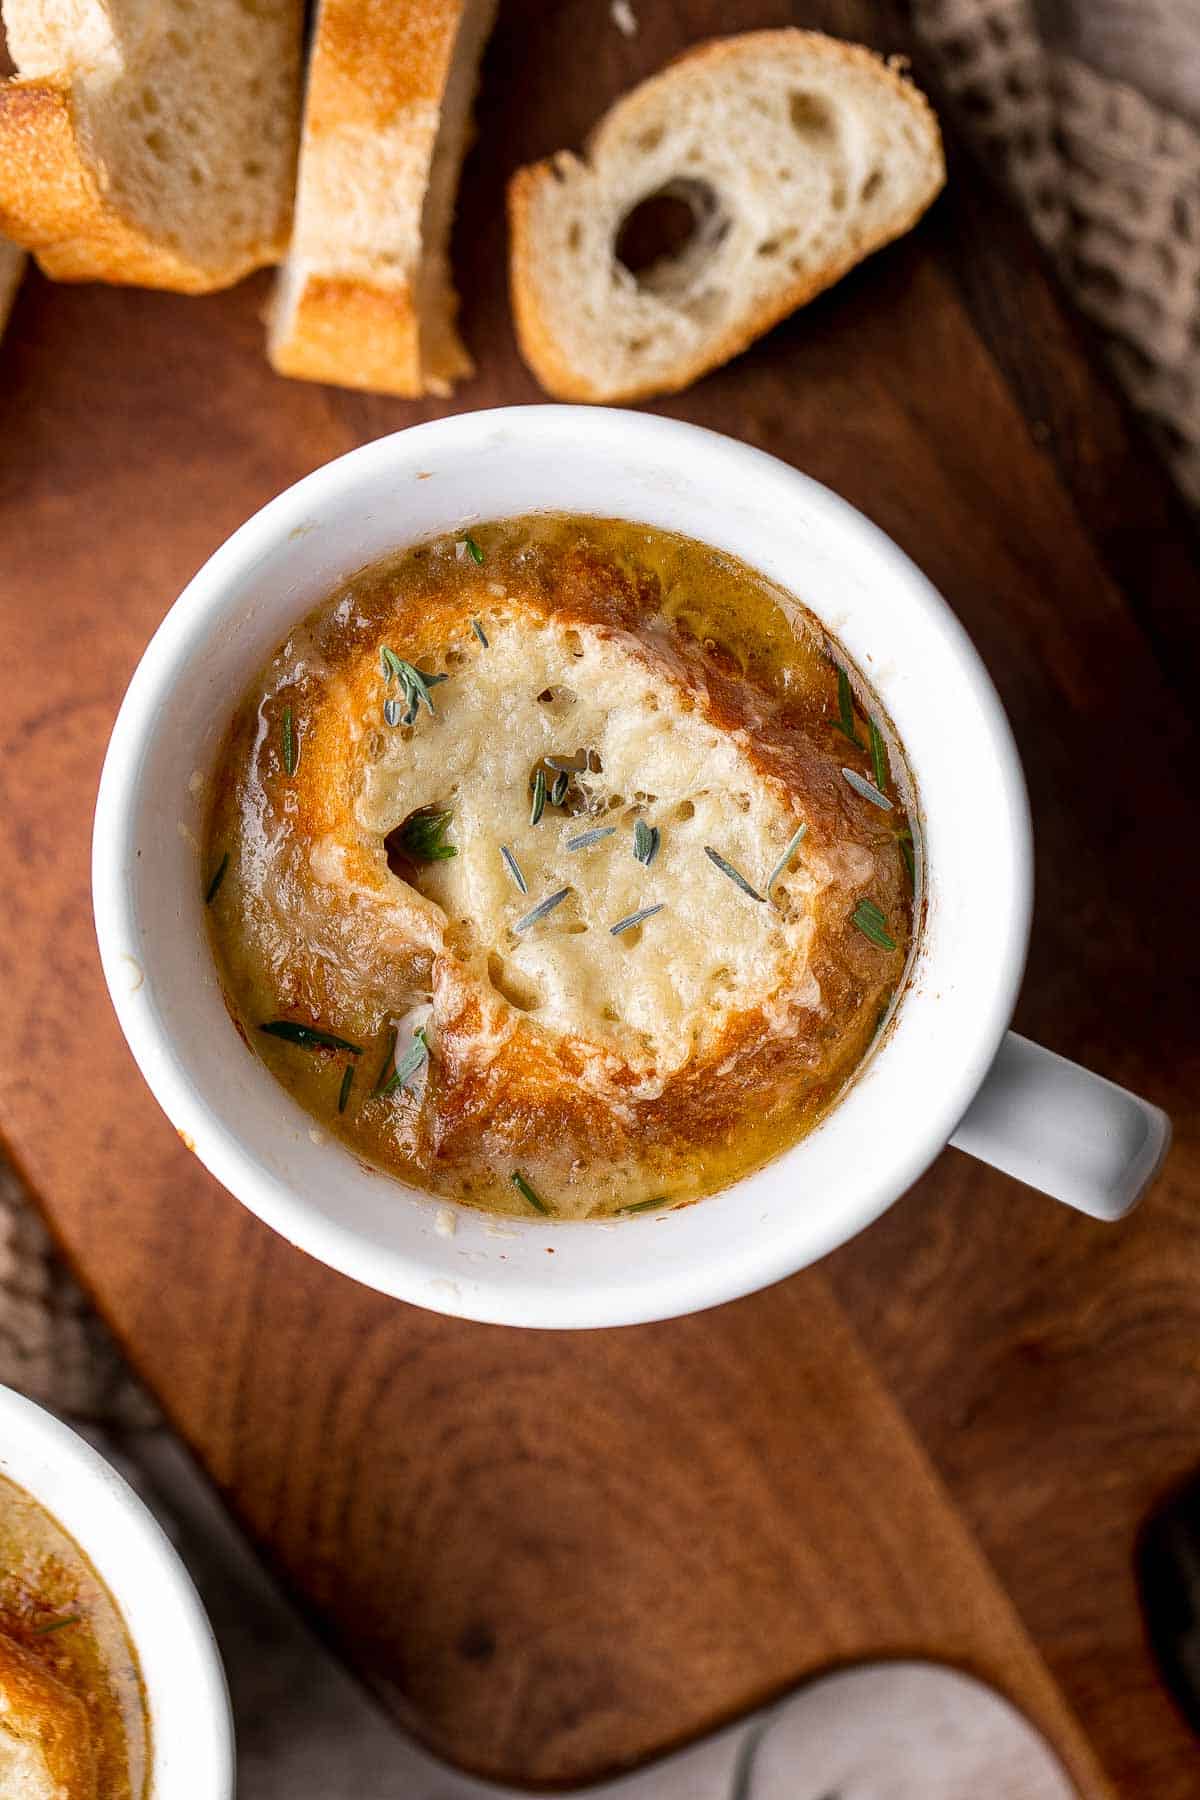
FAQ
The authentic French onion soup recipe uses very simple ingredients: butter, onions, flour, white wine, flour, beef broth, and salt and pepper. There are many different variations, so you may find some substitutions here and there, but this great recipe is a classic. Top it all off with toasted bread and some bubbly cheese, and it's ready to serve!
Although French onion soup doesn't contain meat exactly, it is traditionally made with beef broth for a really rich, savory flavor.
Because this classic French soup has so few ingredients, you really have to follow each step properly to get the best flavor. Fully caramelize the onions to release their flavors, use high-quality beef stock, and season the broth to taste using salt. If you skip any of these steps, your soup may taste overly watery and bland. Be patient; it's worth the wait to make it the right way.
More Soup Recipes
- 60 Best Soup Recipes
- Chicken Pot Pie Soup
- Minestrone Soup
- Cheesy Potato Soup
- Beef Wild Rice Soup
- Vegetable Soup
Tried this recipe?
I'd love to hear what you think! Leave a comment and rating below to share your feedback. Your reviews help others discover this recipe and help me keep creating more free recipes for you. Snap a photo and tag me on social media @aheadofthyme too.

Pecan Pie Cheesecake
This Pecan Pie Cheesecake takes the classic flavor of decadent pecan pie to an entirely new level. Made with a pecan graham cracker crust, a brown sugar cheesecake filling, and topped with a caramel pecan pie topping, this pecan pie cheesecake recipe is pure gold. Each layer balances the other, and it's hands-down the best way to enjoy this Thanksgiving dessert. This recipe will become a new holiday tradition!
The secret to making a great pecan pie cheesecake is to balance the sweetness as much as possible. The rich pecan pie filling is so decadent it can be hard to eat more than a bite or two. That's where the cream cheese comes in. This tangy, creamy ingredient has a remarkable ability to cut through really sweet flavors, giving them much-needed balance. This version is absolutely stunning, perfectly balanced, and a fun homage to this classic Thanksgiving dessert!
Why You'll Love This Pecan Pie Cheesecake
- Show-stopping appearance. This is the perfect dessert to bring to your Thanksgiving dinner! Your guests will immediately ooh and ahh over the gooey pecan caramel sauce spread over the top. It's absolutely stunning!
- Classic pecan pie flavor. It can be tricky to adapt a classic recipe because you don't want to stray too far from the original. The gooey caramel pecan sauce gives you that traditional flavor and texture you know and love. There are even pecans in the graham cracker pie crust!
- Perfectly balanced. Cream cheese cuts the sweetness of any dessert, even gooey pecan pie. This dessert has all the flavors you love from pecan pie without ever tasting too sweet or over-the-top. It's truly the best fall cheesecake, and you'll get rave reviews!
Ingredient Notes
To make this delicious pecan pie cheesecake recipe, you will need the following ingredients (full measurements in recipe card below):
Pecan Graham Cracker Crust Ingredients
- pecans - pulse the pecans into small pieces to add a nutty flavor to the crust.
- graham cracker crumbs - either crush your own graham crackers into fine crumbs or buy pre-crushed crackers.
- brown sugar - this adds a little sweetness with a subtle caramel flavor.
- butter - hold the crust together with melted unsalted butter.
Brown Sugar Cheesecake Ingredients
- cream cheese - it's very important to make sure your cream cheese is fully softened.
- brown sugar - this is the main flavor and source of sweetness for the cheesecake mixture. The caramel-like flavor pairs perfectly with the pecan topping.
- eggs - use a mixture of whole eggs and yolks for a creamy texture and perfect rise.
- sour cream - room temperature sour cream adds extra creaminess and tanginess that balances the sweet pecan pie filling.
- heavy cream - use room temperature heavy cream to give the cheesecake batter the perfect consistency.
- vanilla extract
- cornstarch - carefully sift the cornstarch to remove any clumps. This will absorb any excess moisture and help prevent cracking.
- salt
Caramel Pecan Pie Topping Ingredients
- pecans - roughly chopthe toasted pecans. This will add crunch and that must-have pecan flavor.
- butter - melt unsalted with the sugar and corn syrup to create a rich caramel sauce.
- brown sugar - this is the main sugar in this homemade caramel sauce. Brown sugar has more flavor thanks to the high molasses content.
- golden corn syrup - this gives the sauce a really glossy, pourable consistency and keep it from crystallizing.
- heavy cream - this gives the sauce a nice body and creamy texture.
- vanilla
- salt - salt draws out flavors and sweetness, so don't forget to season the topping.
You will also need a food processor, 9-inch springform pan, aluminum foil, stand mixer, spatula, large roasting pan, kettle, large skillet, and whisk.
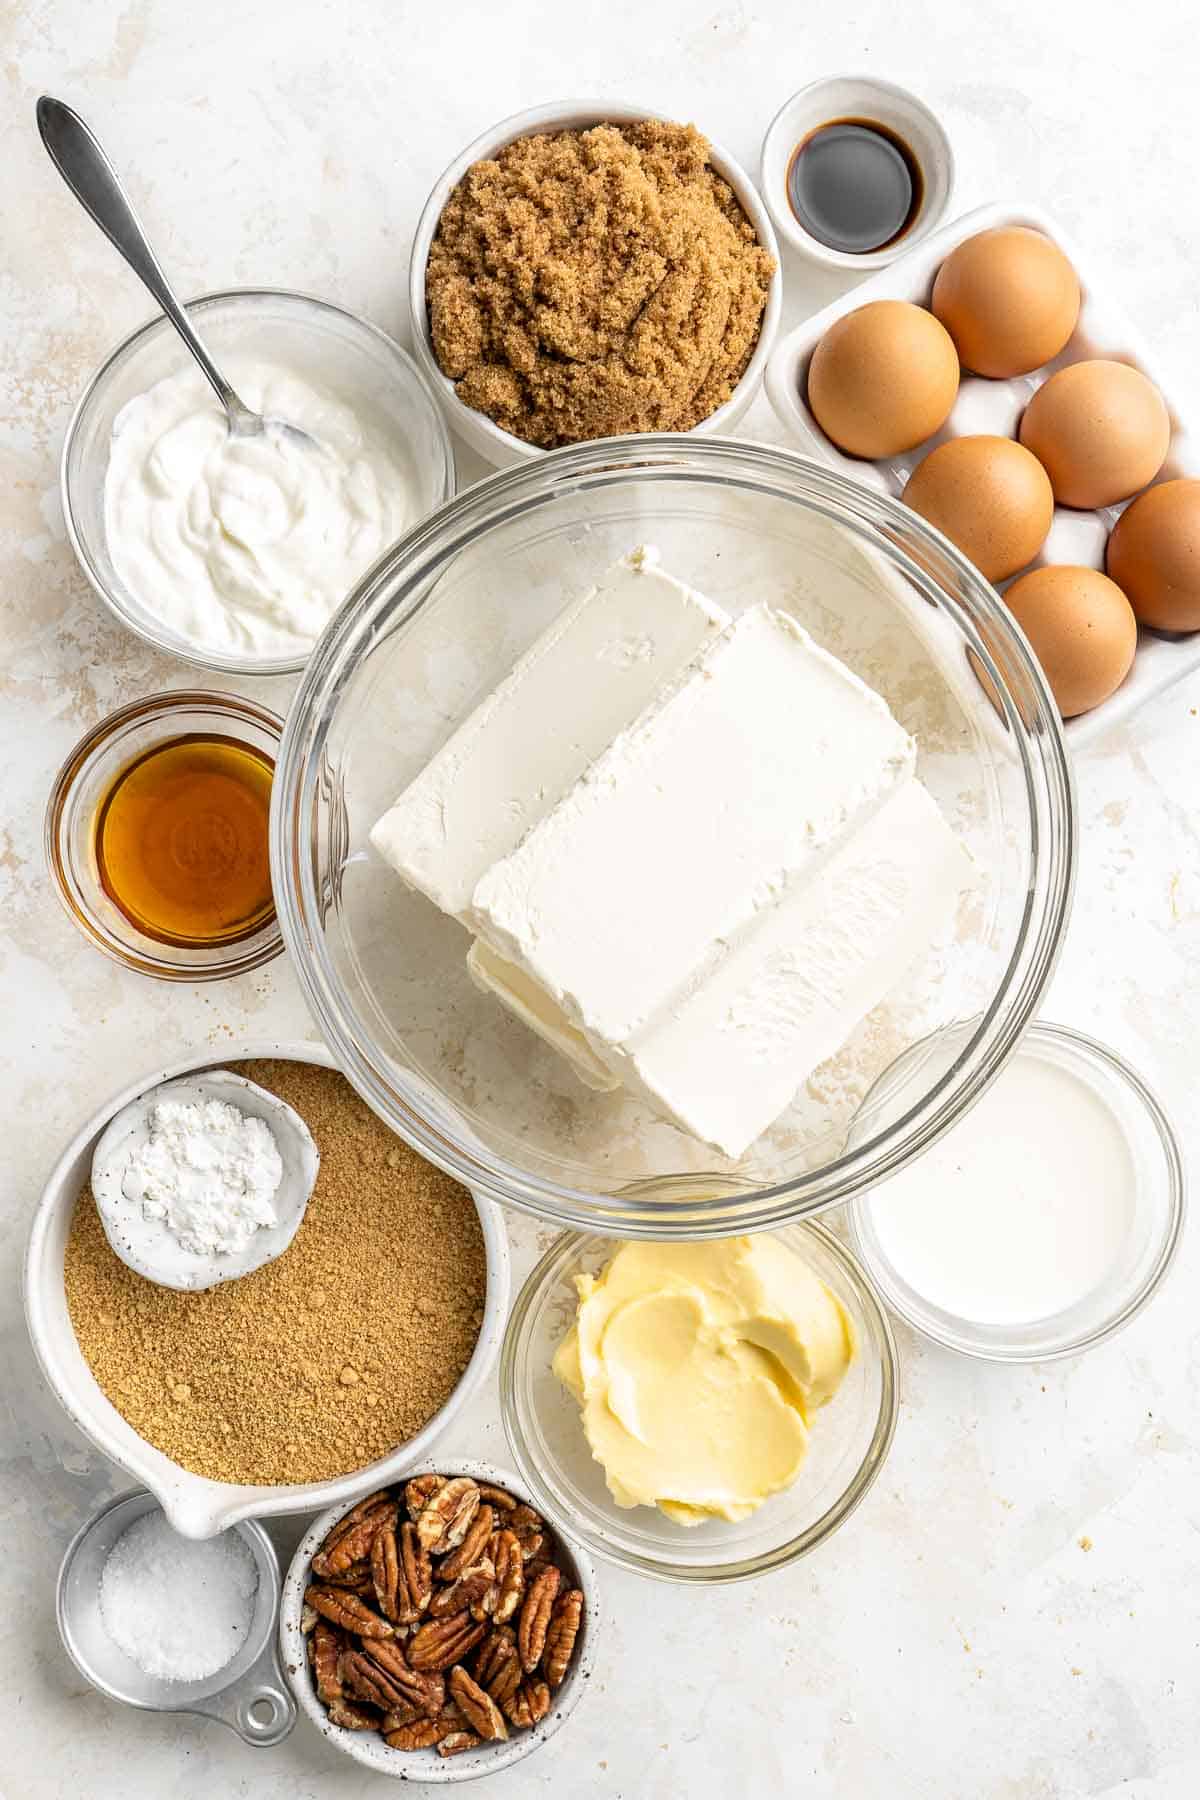
How to Make the Best Pecan Pie Cheesecake
First, make the pecan graham cracker crust.
- Combine ingredients. In the bowl of a food processor, add the pecans and grind until finely ground. Add in the graham crackers and brown sugar, then pulse until well-combined with the ground pecans. Finally, pour in the melted butter, then pulse again until well-combined.
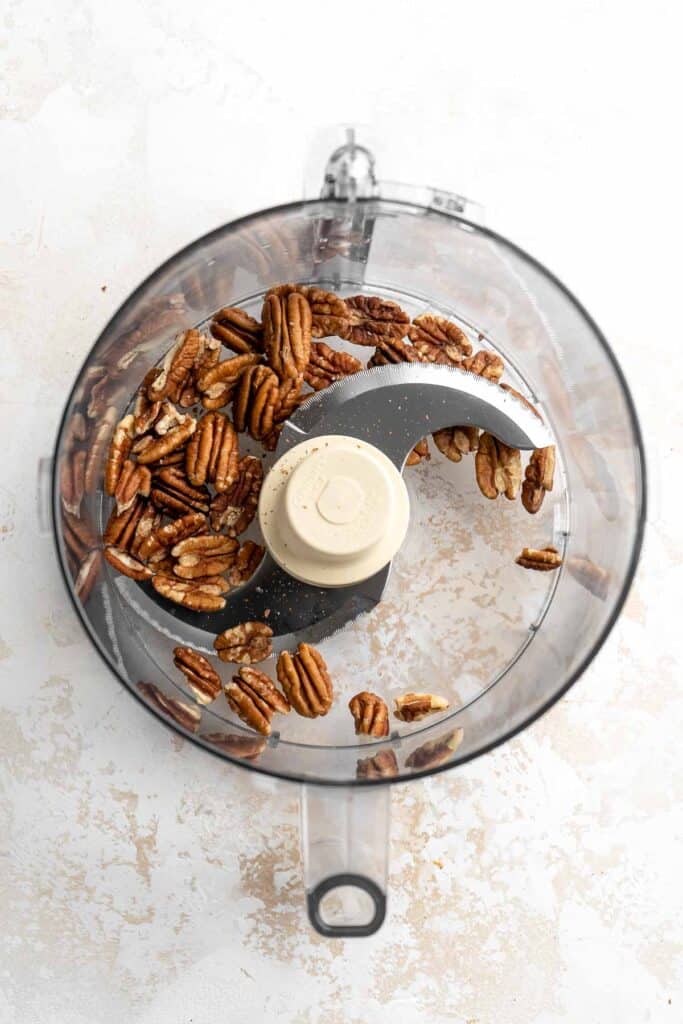


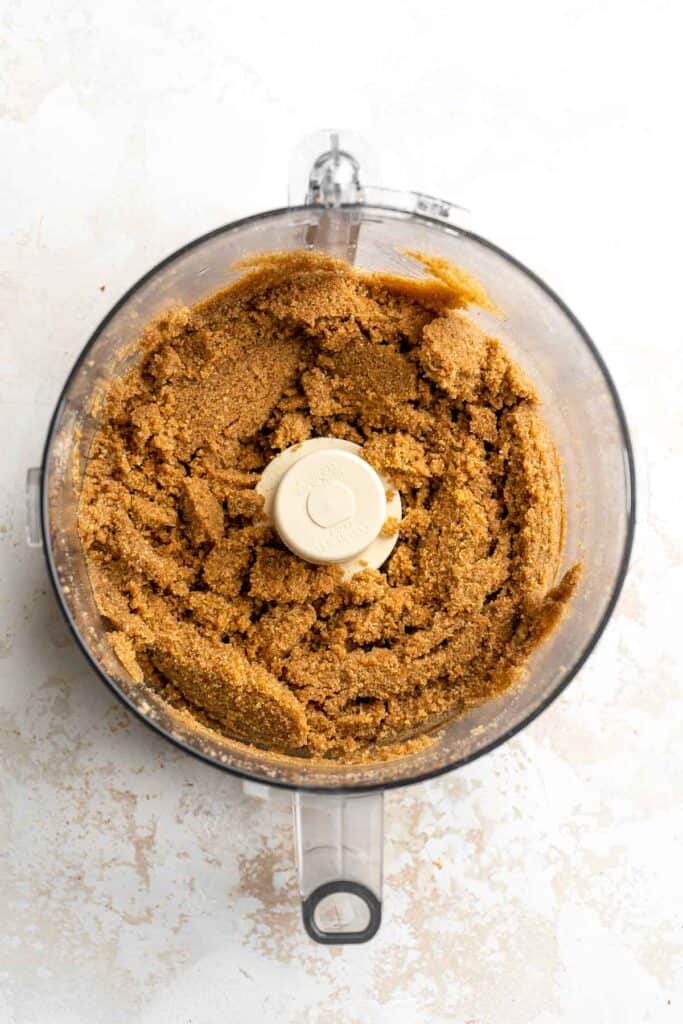
- Press crust. Pour the graham cracker crust into a 9-inch springform cheesecake pan. Press the crust into the bottom and halfway up the sides.
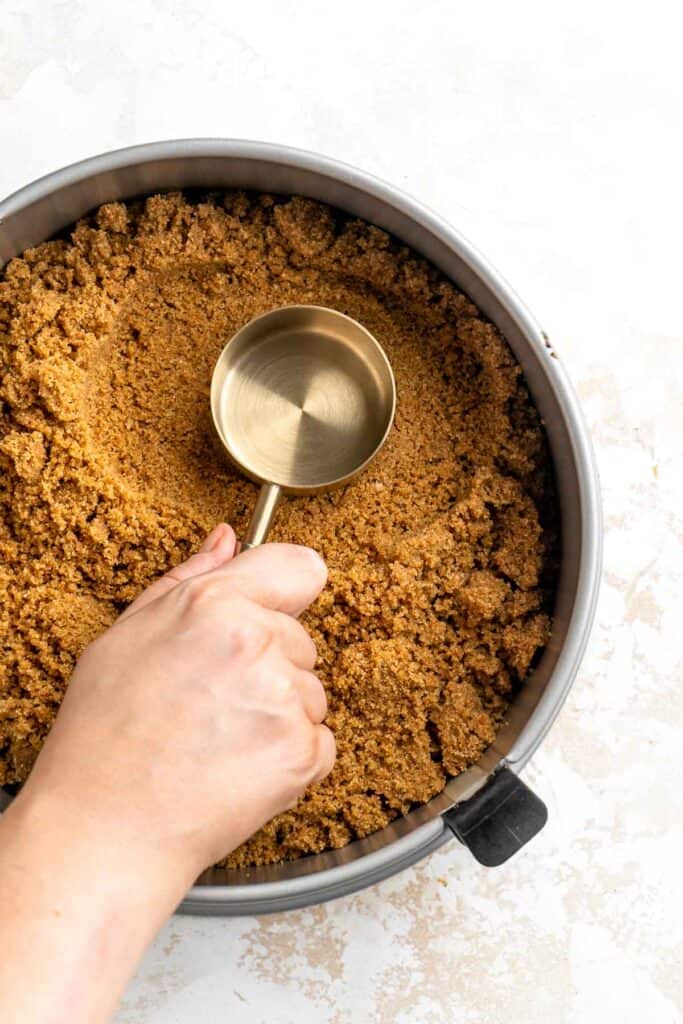
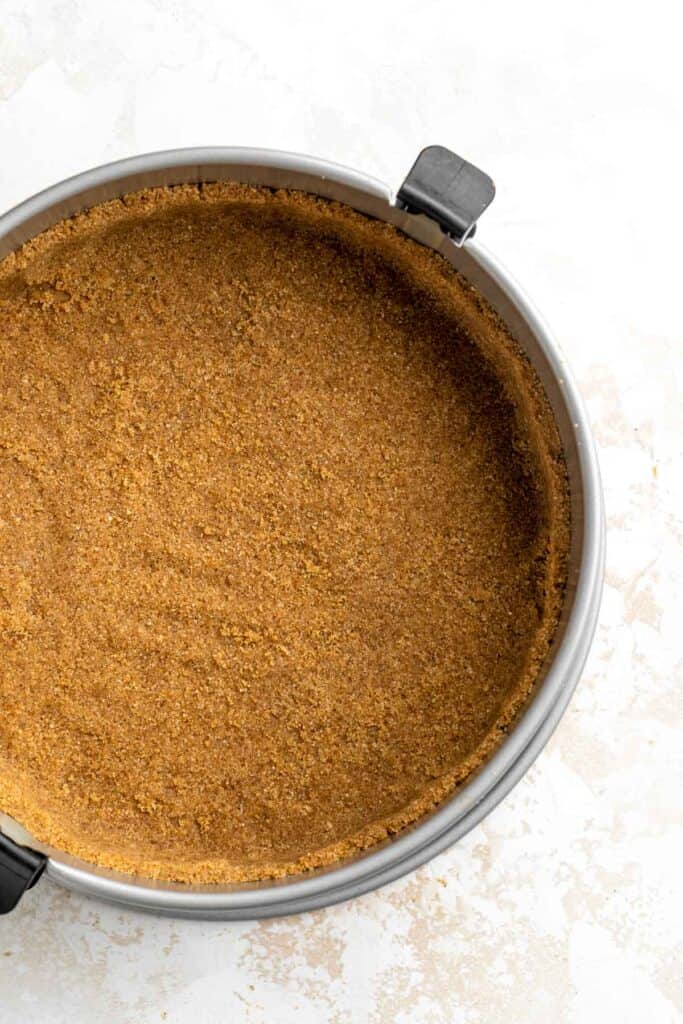
- Bake. Place into a 350F preheated oven to bake for 11 minutes. When done, allow to cool while you make the cheesecake filling.
Next, make the brown sugar cheesecake.
- Prep. Turn the oven down to 325F. Prepare the cooled springform pan (with the crust) by wrapping the bottom of the pan with 2 sheets of aluminum foil. Set aside for later.
- Make filling. In a stand mixer with the paddle attachment fixed, add the softened cream cheese and beat on low until it looks soft and creamy, about 2 minutes. Add the brown sugar and continue to beat on low until very creamy, about 3 minutes. While still beating on low, add the eggs and yolks, one at a time, ensuring that each egg is fully incorporated before adding the next. Scrape the bowl well to ensure everything is well-mixed.
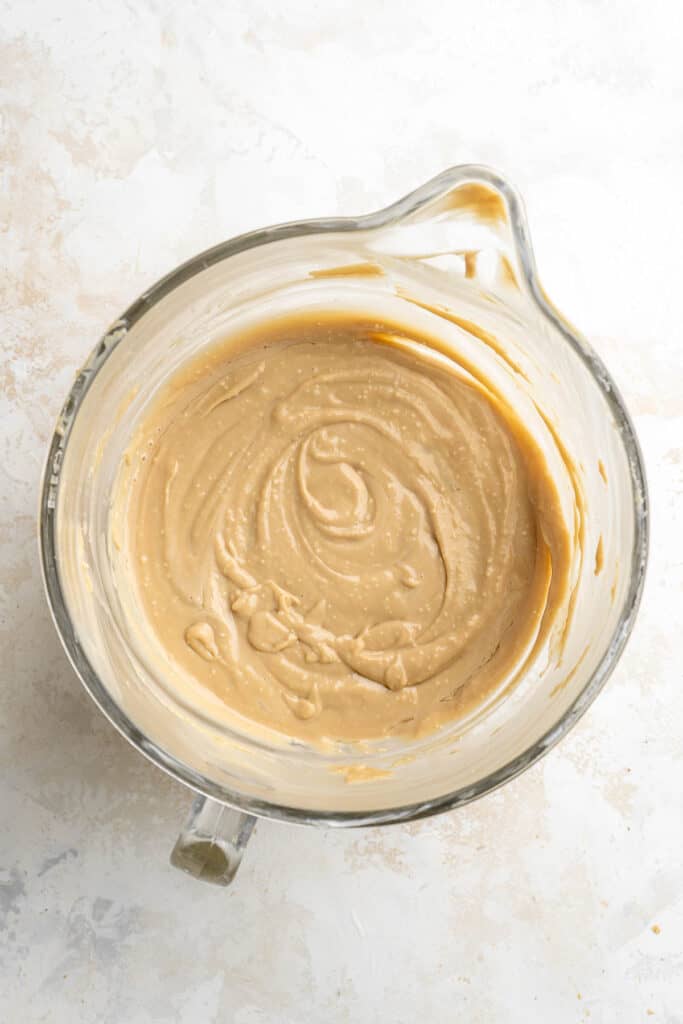
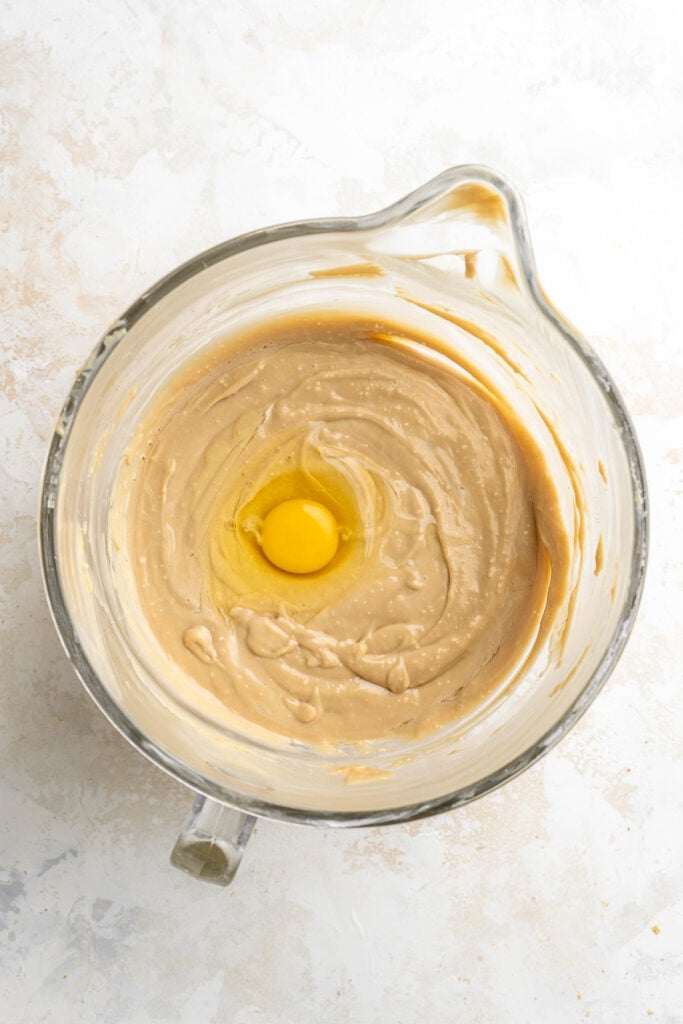
- Complete filling. Add the sour cream, heavy cream, cornstarch, vanilla, and salt. Beat on low until the cheesecake filling looks creamy, smooth, and uniform.
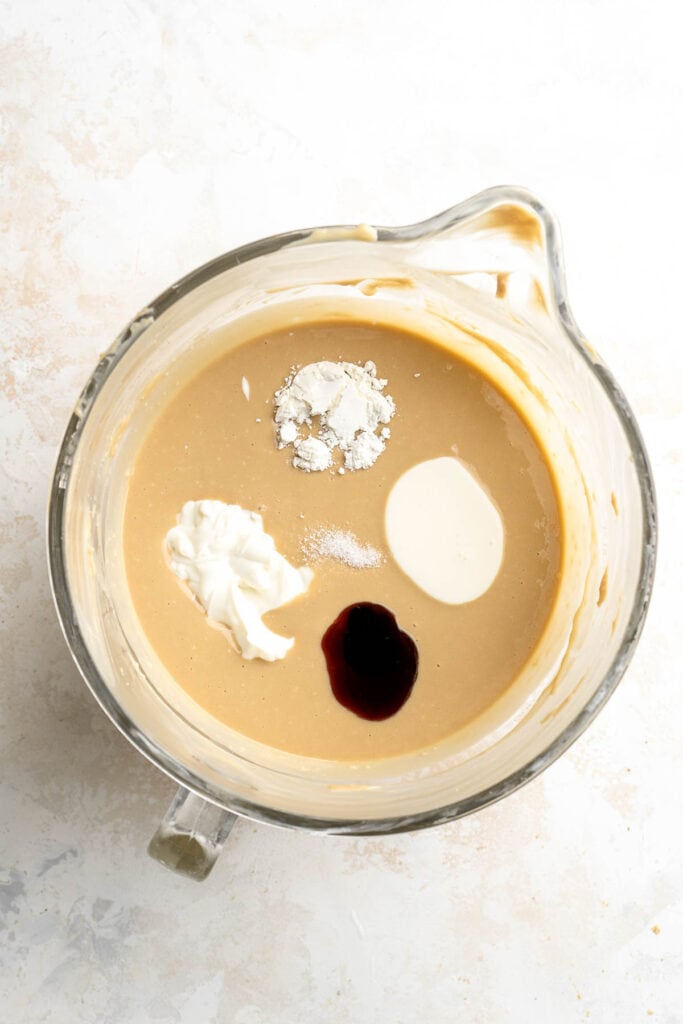

- Pour in pan. Pour the filling over top of the cooled crust in the springform pan.
- Make hot water bath. Place the cheesecake into a large roasting pan. Pour enough boiling water into the roasting pan so that it reaches about halfway up the sides of the springform pan.
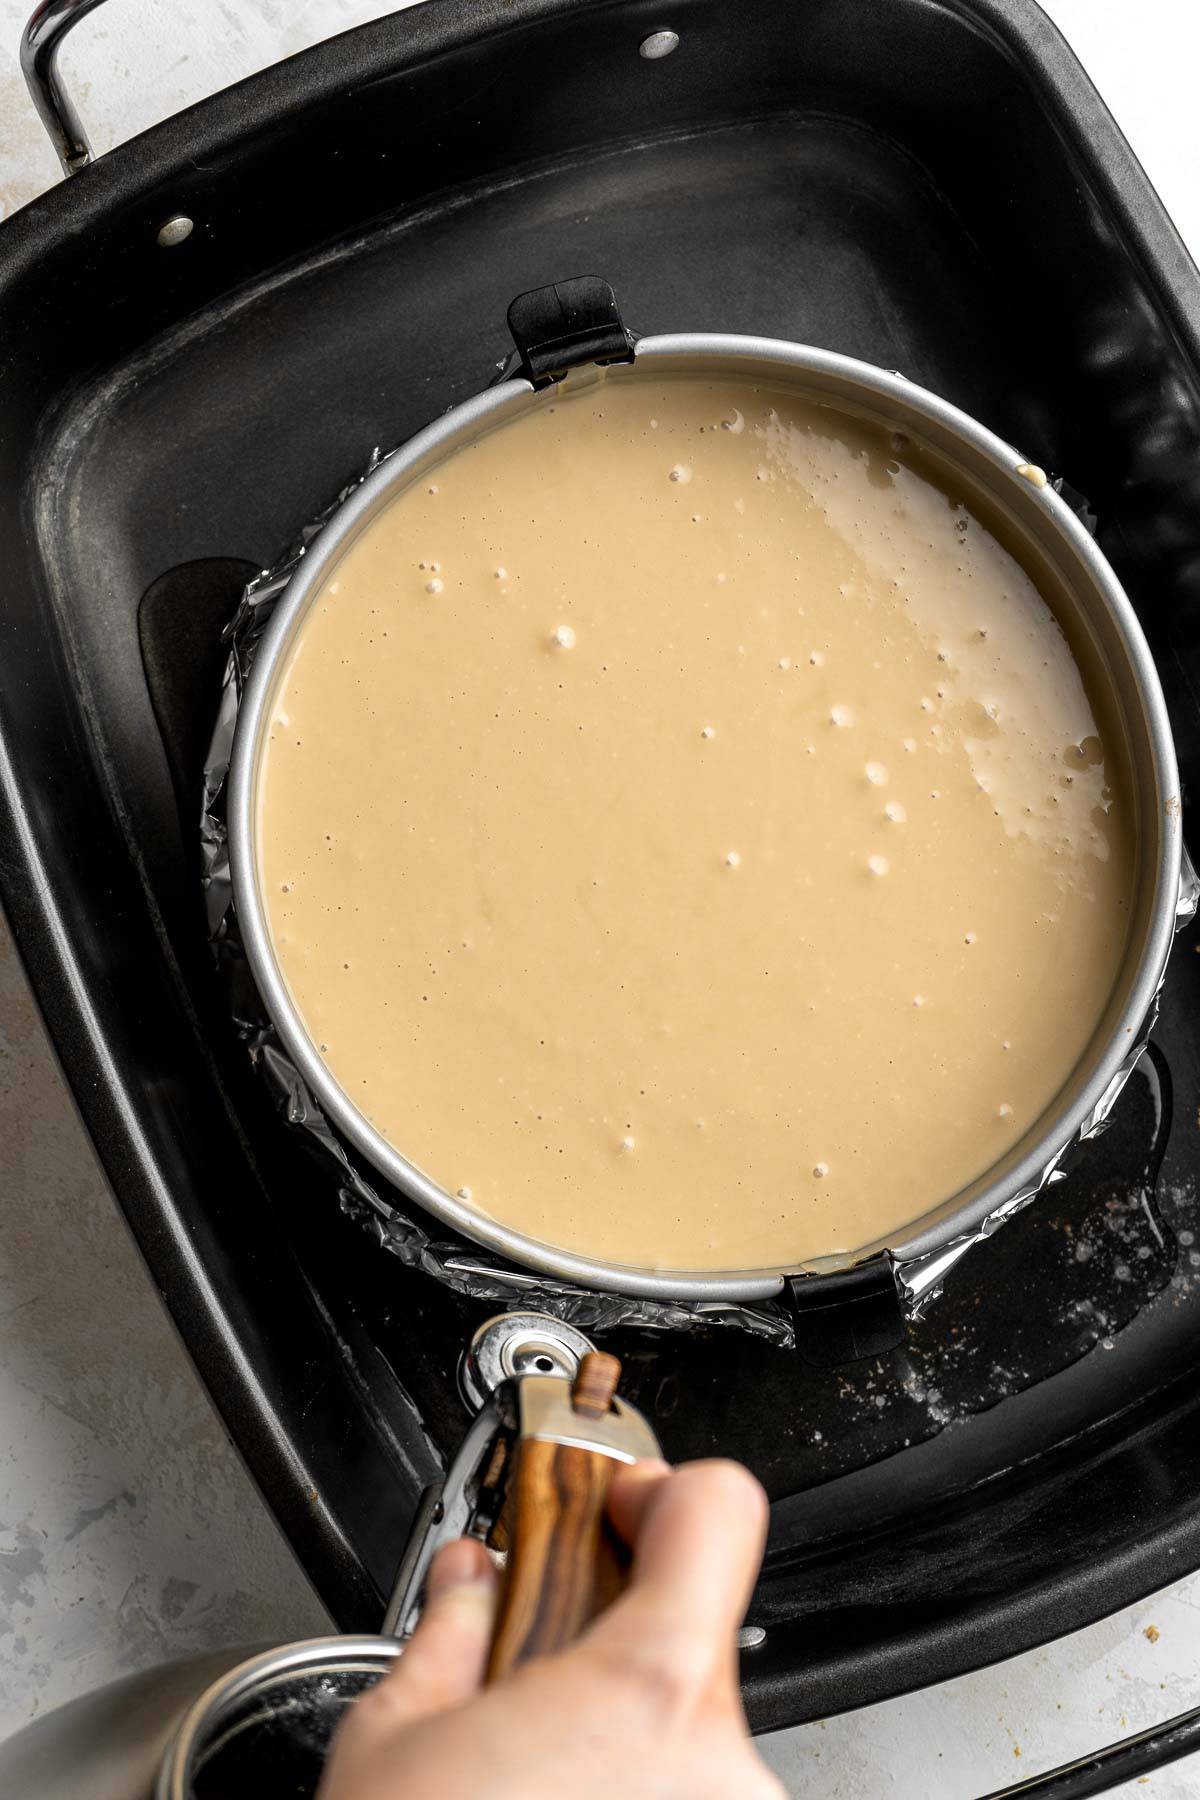
- Bake. Place into the oven to bake for about 1 hour and 30 minutes - begin checking at 1 hour 15 minutes, to ensure you do not overbake. When the cheesecake is done it should still be a little jiggly in the centre, but set around the edges.
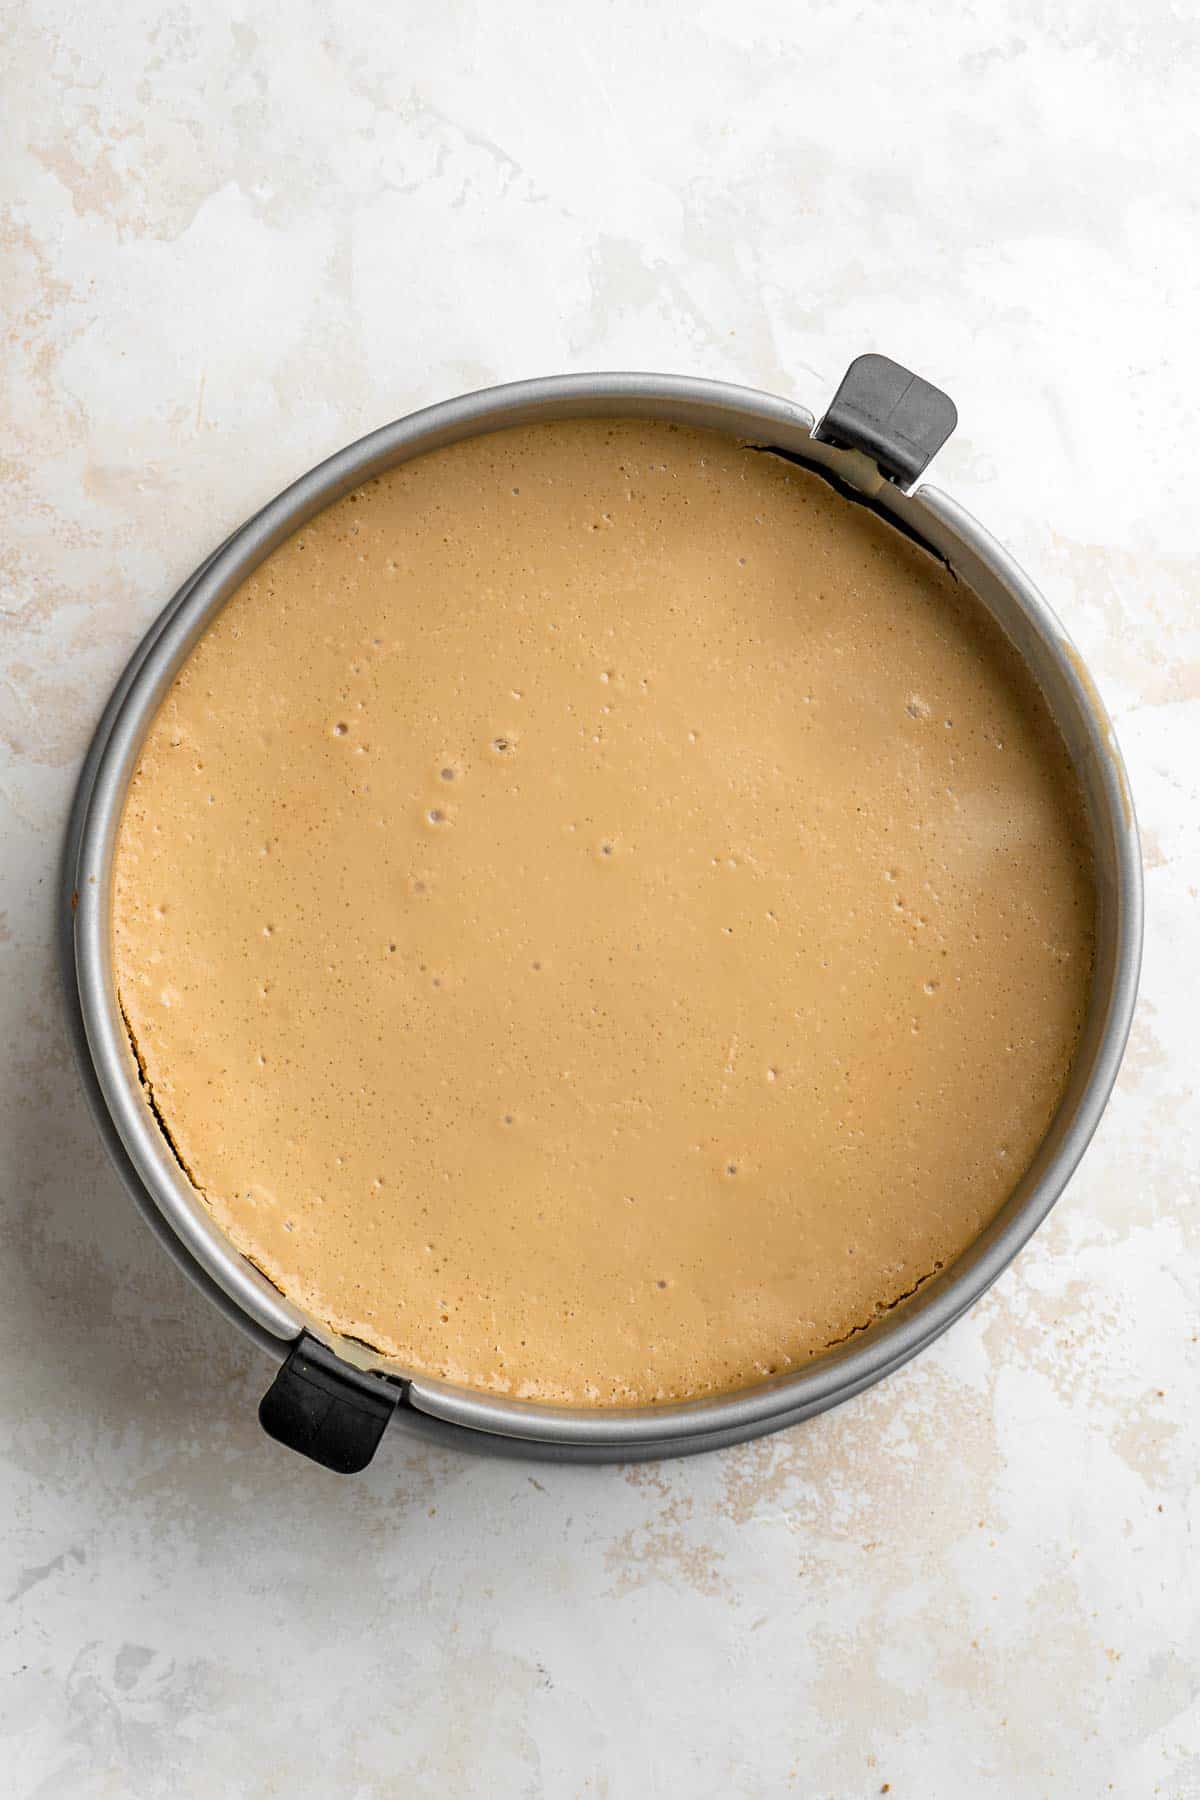
- Cool. When done, lightly crack the oven door open to allow the cheesecake to slowly cool for about an hour and a half. After an hour and a half, remove the cheesecake from the oven and water-bath and place onto the counter to cool to room temperature.
- Chill. Once at room temperature, wrap with plastic wrap and place into the fridge for at least 6 hours or preferably overnight to fully set up.
Finally, make the caramel pecan pie topping.
- Toast pecans. Heat a large skillet over medium heat and add the pecans. Toast for 3 minutes or until lightly browned and fragrant. Remove the pecans from the pan and set aside for later. Wipe out the pan to remove any pecan dust.
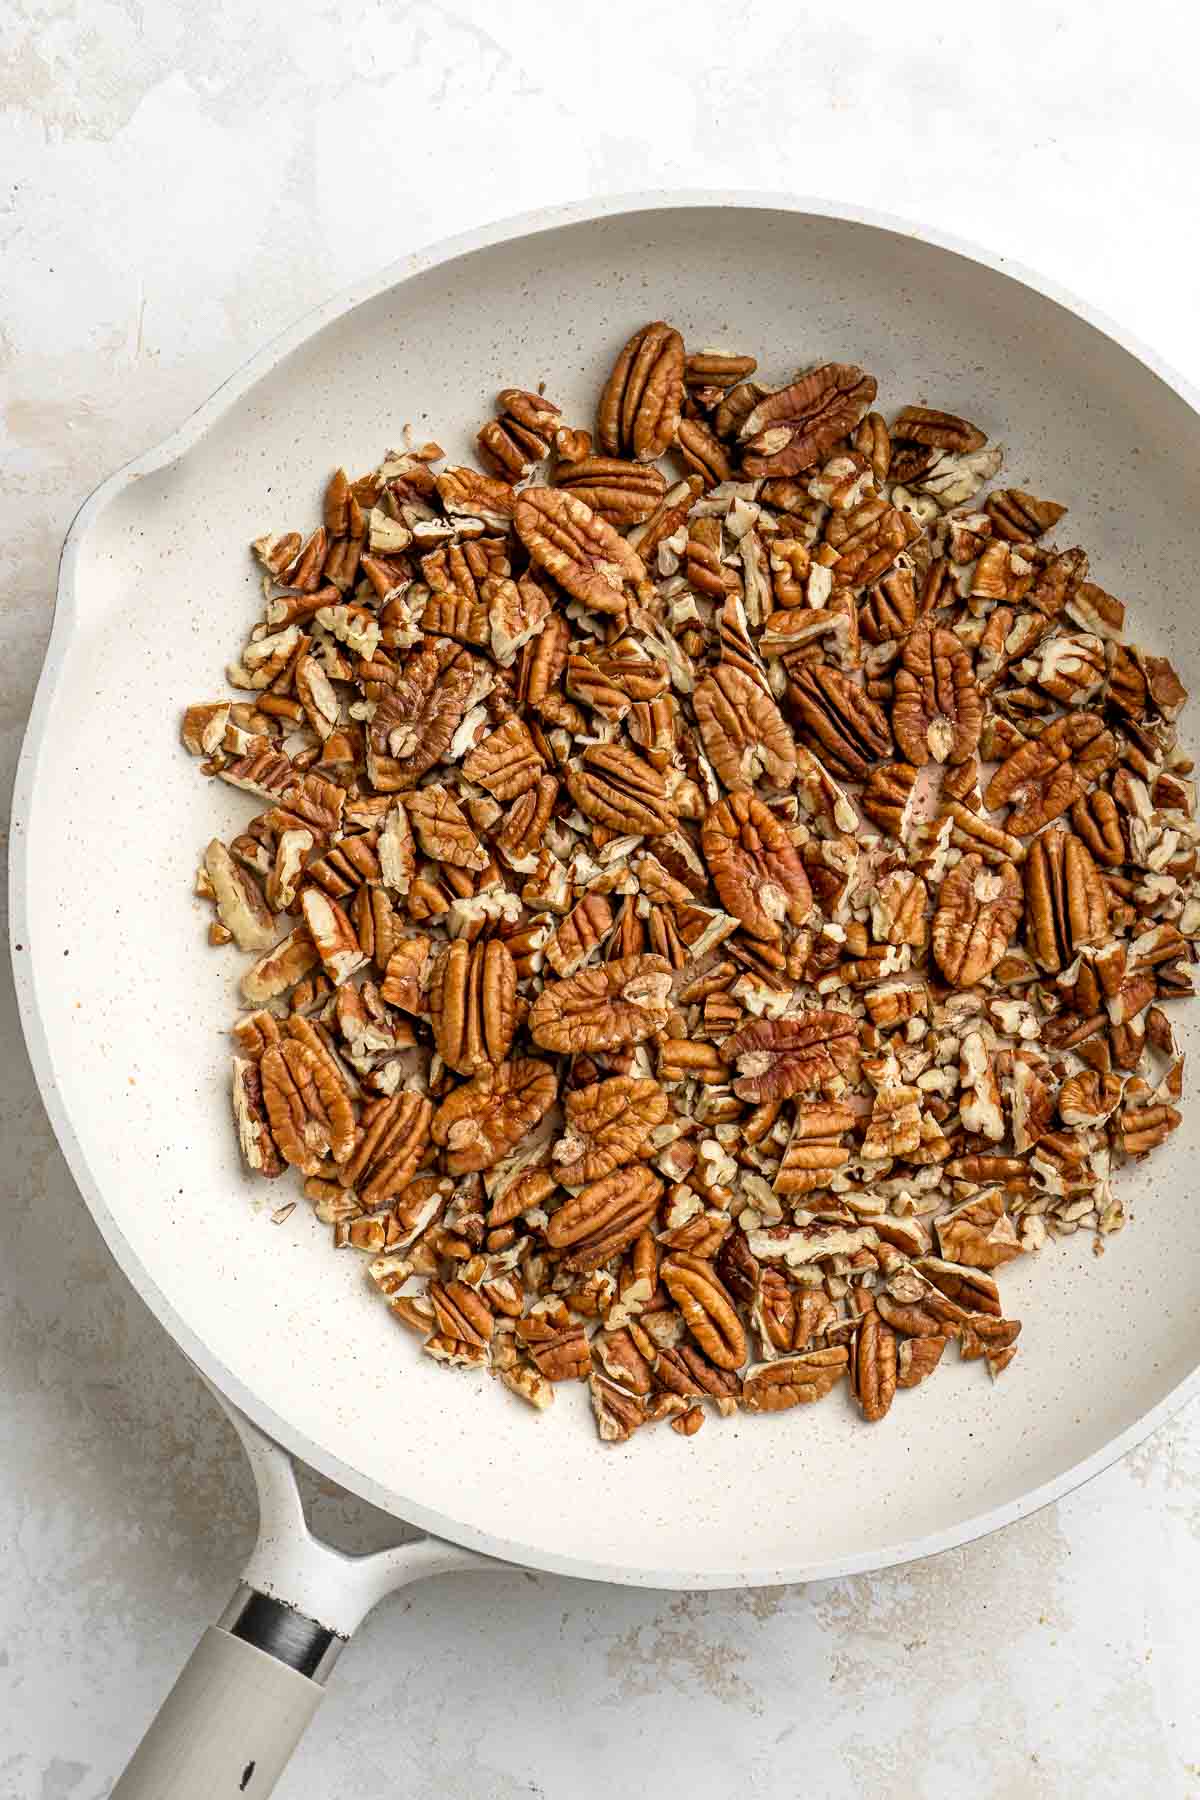
- Add sauce. Place the pan back over medium-low heat. Add the butter, brown sugar, and golden corn syrup. Heat, while whisking, until the sauce begins to boil and has come together.
- Finish. While whisking, slowly pour in the heavy cream. After all of the heavy cream has been added, add in the vanilla, salt, and toasted pecans, then fold together until combined.
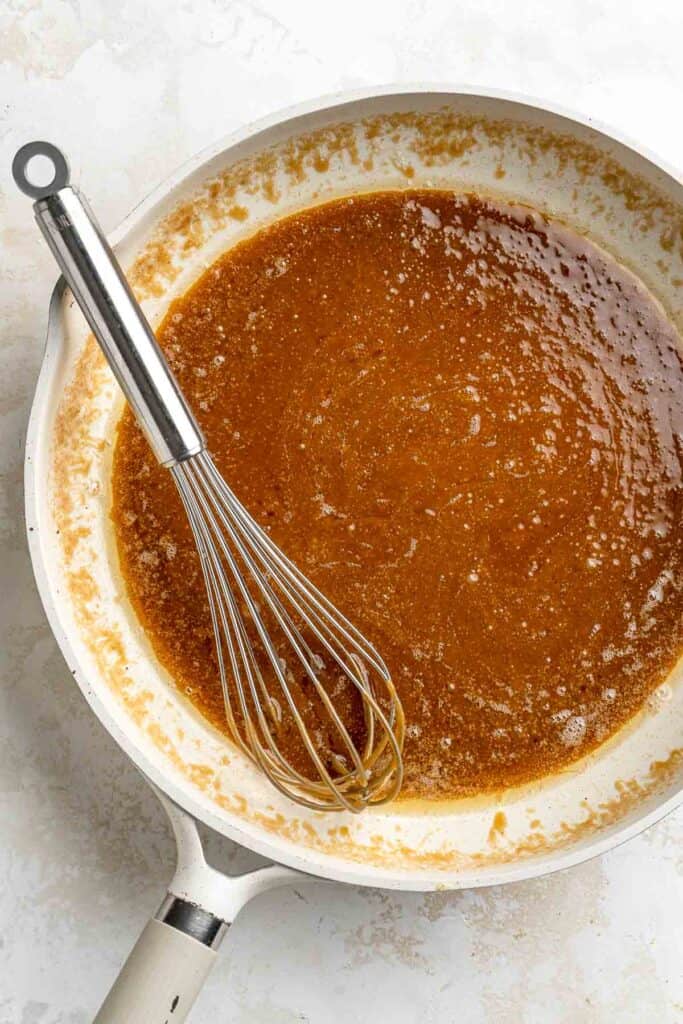
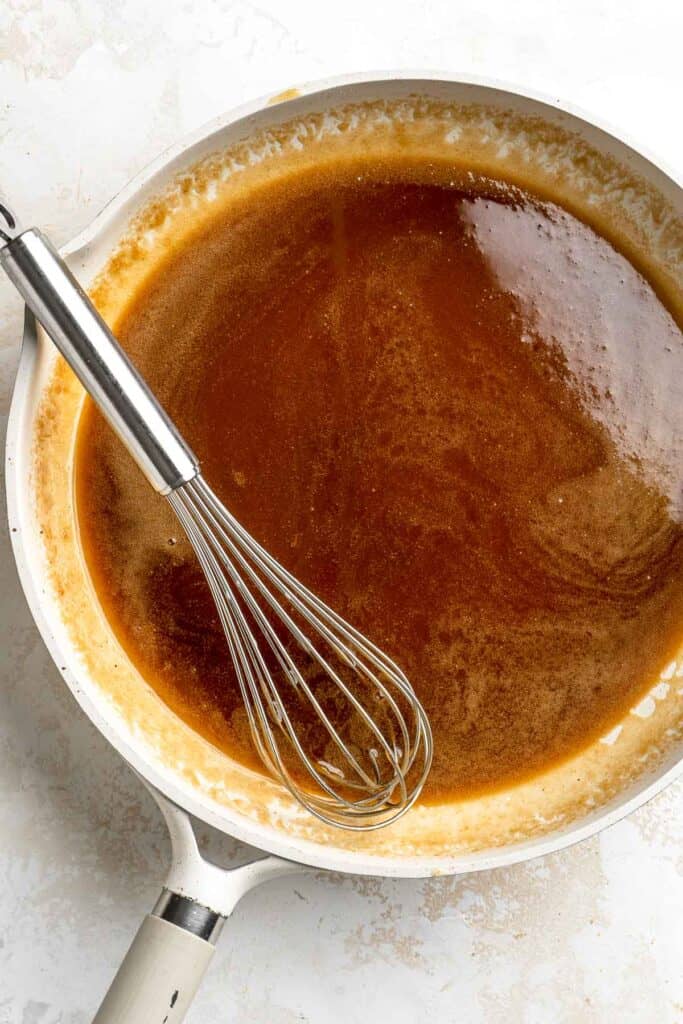
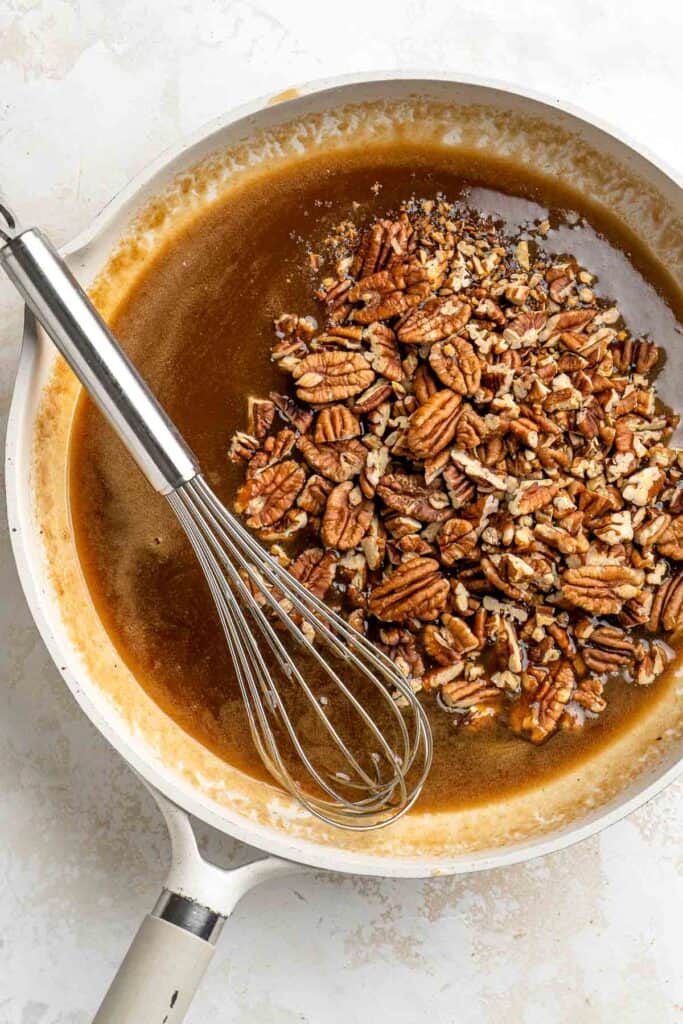
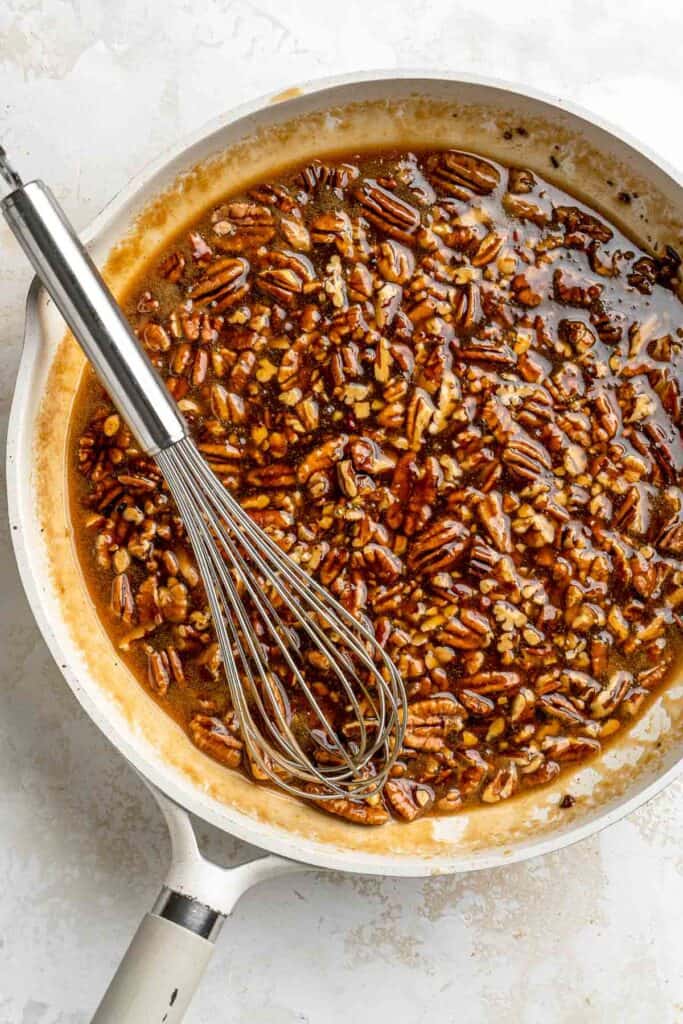
- Cool. Remove from the heat and allow the sauce to cool for 20-30 minutes before pouring onto the cheesecake.
- Serve. Serve cheesecake immediately after pouring sauce over.
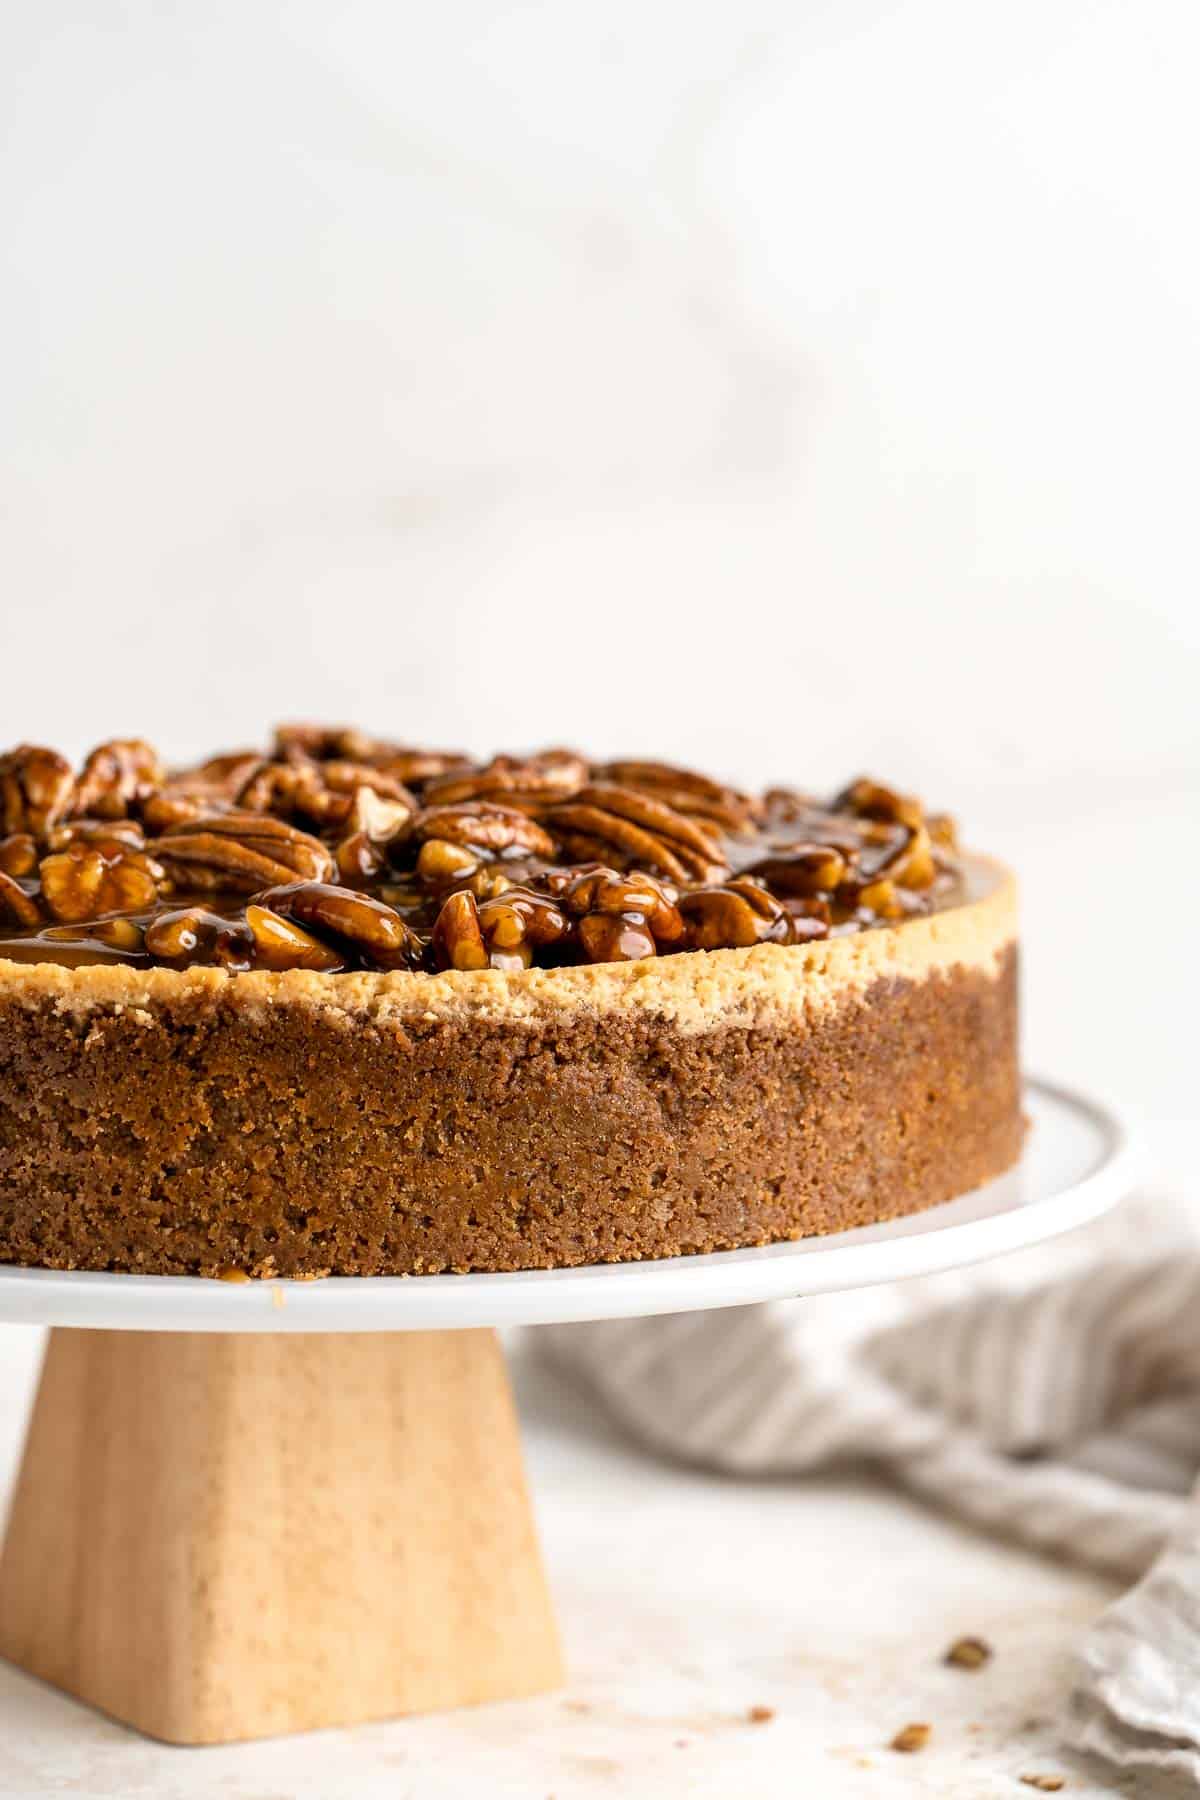
Recipe Variations
- Make pecan cheesecake. For a little extra crunch and flavor, add ground or finely chopped pecans to the classic cheesecake filling. You can even buy pecan extract for an even stronger pecan flavor!
- Add maple syrup. Instead of a brown sugar cheesecake, add dehydrated maple sugar for a fall flavor. You can also use liquid maple syrup, but you will need to adjust the other liquids in the recipe to account for the extra moisture.
- Make pumpkin pie cheesecake. Combine the flavors of two favorite desserts by making a pumpkin cheesecake and adding the pecan filling on top. So good!
How to Serve
This pecan pie cheesecake is delicious served on its own, or paired with some of my favorite holiday desserts including:
For more fall dessert inspiration, see our 50 Best Fall Desserts.
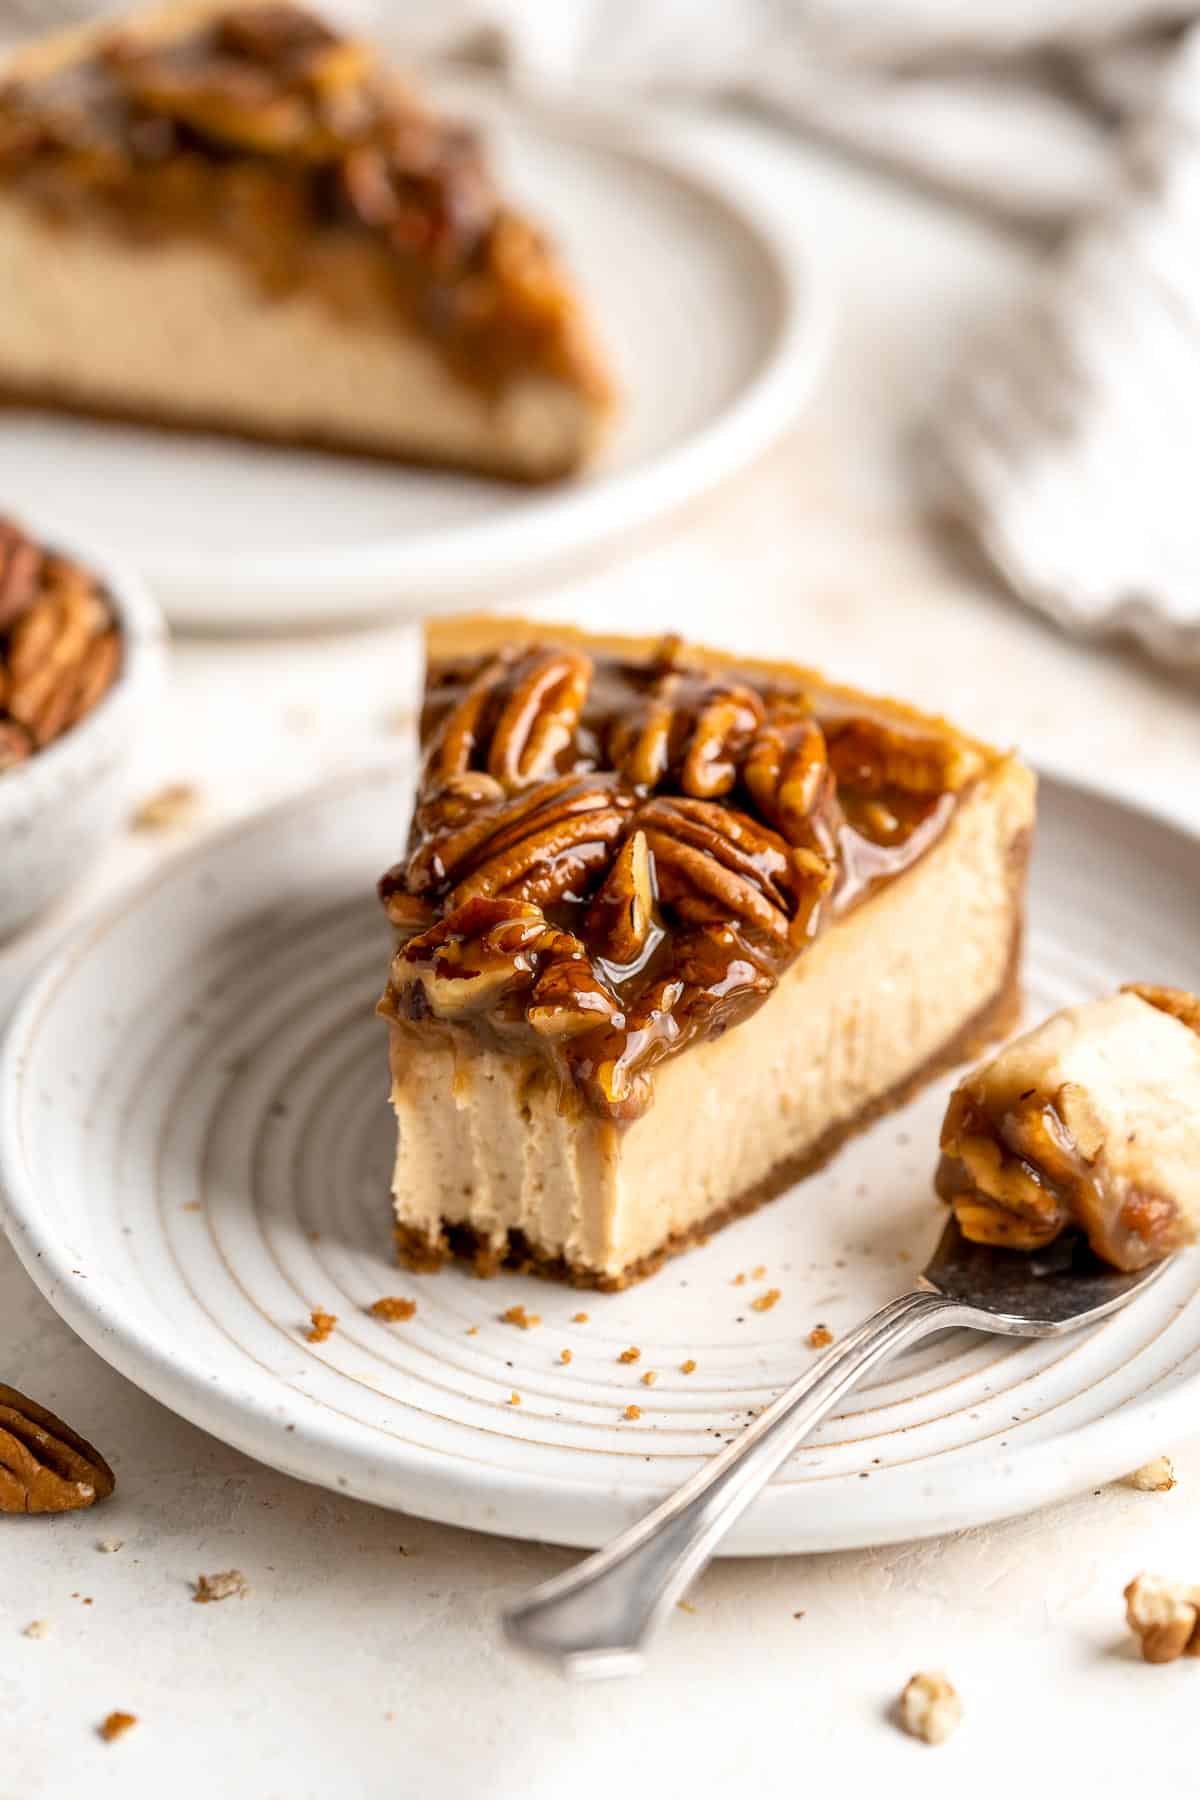
Recipe Tips and Tricks
- Use room-temperature dairy. For the best results, make sure the dairy and eggs are at room temperature before mixing the batter together.
- Use a water bath. It's really important to bake your cheesecake in a hot water bath for the best rise and texture. It makes a big difference!
- Use an electric mixer. Mix the cheesecake filling until it's really smooth and creamy. This is easiest to do with the help of a machine. Add the ingredients to the bowl of a stand mixer or use a large mixing bowl and hand mixer.
Storing and Freezing Instructions
How to Store
Let your cheesecake cool at room temperature for 2-4 hours before storing it in the fridge to cool overnight. Wrap it well with plastic wrap to avoid condensation. After serving, store any leftover cheesecake in an airtight container in the fridge for 3-4 days.
How to Freeze
Freeze leftover cheesecake by wrapping each piece in plastic wrap and placing them in a freezer bag for 2-3 months. Since the pecan pie filling is so sticky, it can help to freeze the cheesecake and the sauce separately. Thaw in the fridge before serving.
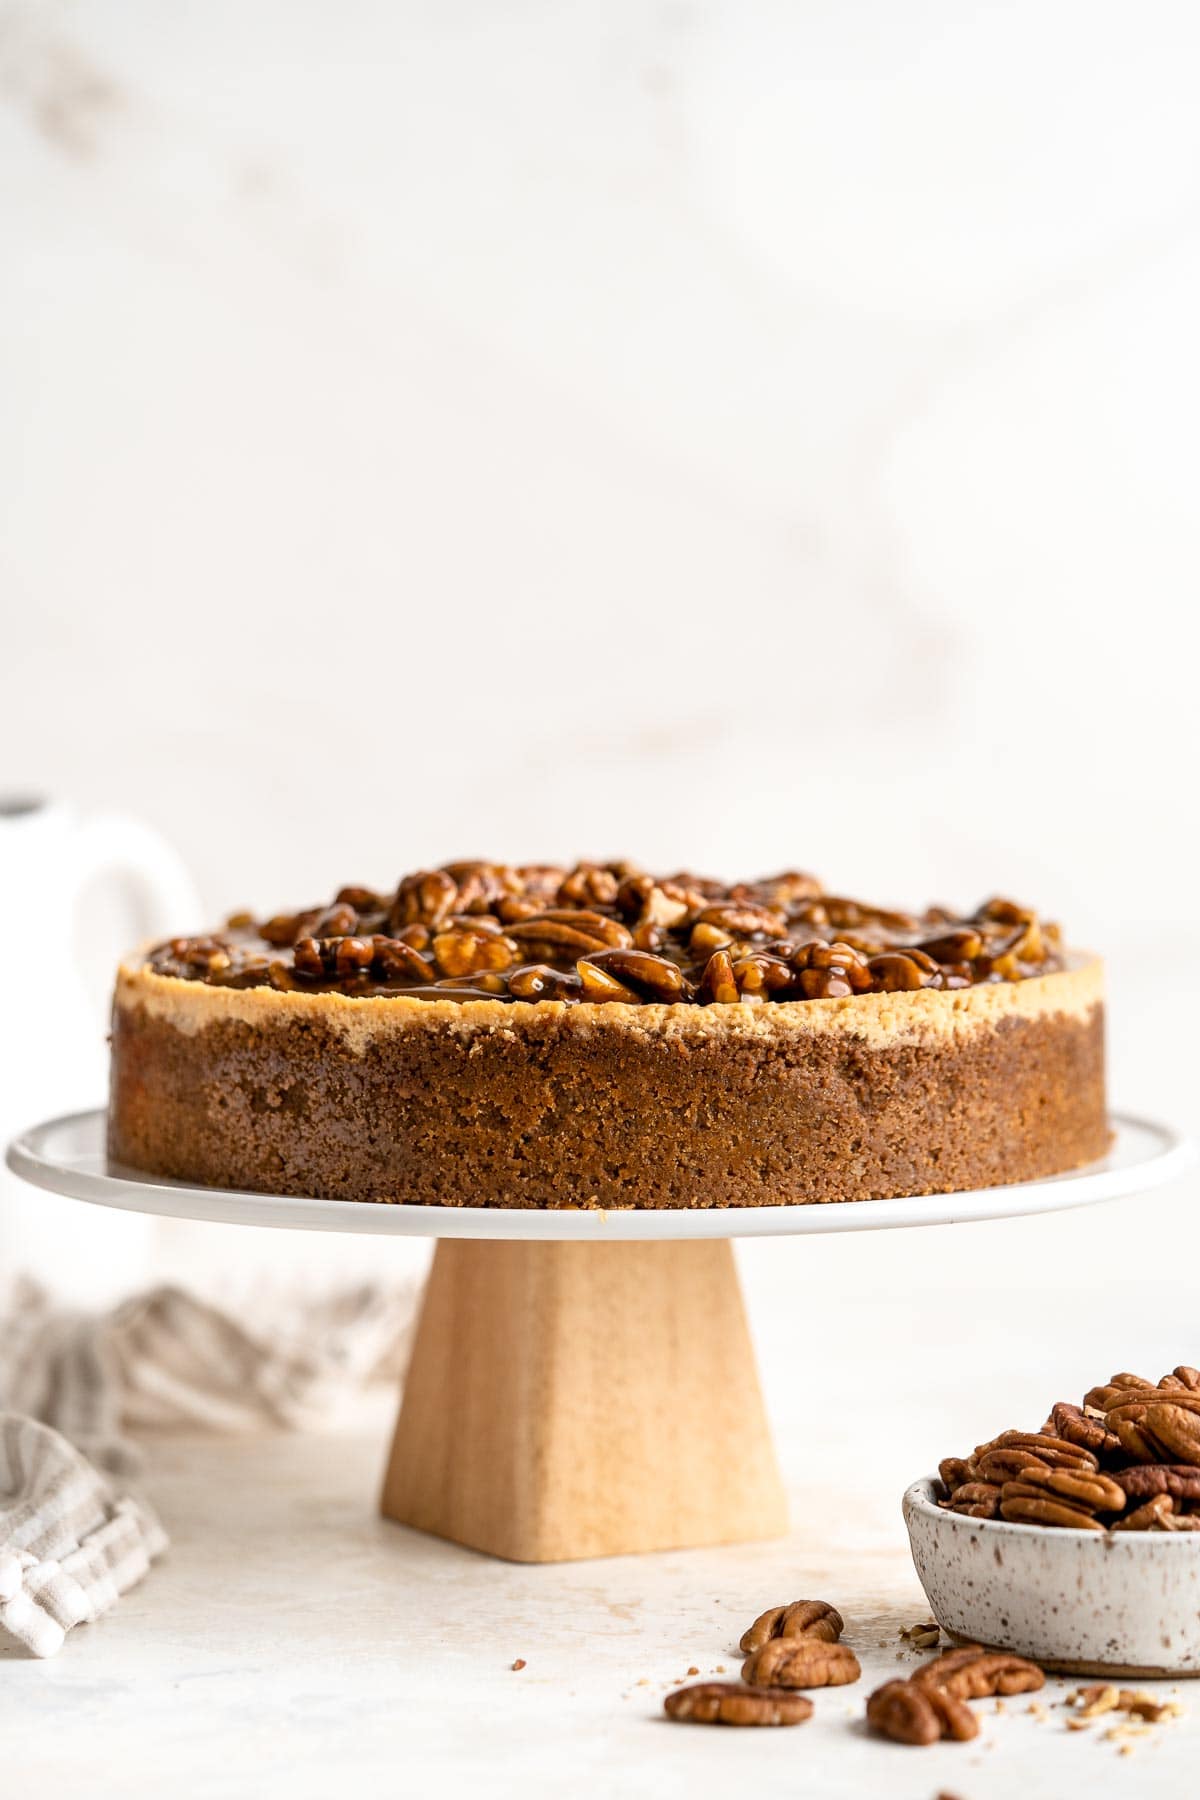
FAQ
You can use either light or dark corn syrup for pecan pie! The dark syrup has a richer, darker flavor, while the lighter syrup has a milder flavor. It's really based on personal preference!
It's really important to use room temperature dairy products for your cheesecake and make sure the oven is fully preheated. Place the springform pan in a baking dish and add hot water until it reaches halfway up the sides of the pan. Let the cheesecake cool in the warm oven with the door cracked. All of these steps will help you get the best texture every time!
Cheesecakes taste best when served at room temperature. After baking, let it cool at room temperature for several hours, then let it chill in the fridge overnight to solidify and for the flavors to mingle together. When you're ready to serve, set the cheesecake on the counter for at least 30 minutes to an hour before serving.
More Pecan Recipes
- 30 Best Pecan Recipes
- Chocolate Pecan Pie
- Pecan Pie Brownies
- Pecan Pie Bars
- Caramel Pecan Pie Cheesecake Bars
- Pecan Sandies
Tried this recipe?
I'd love to hear what you think! Leave a comment and rating below to share your feedback. Your reviews help others discover this recipe and help me keep creating more free recipes for you. Snap a photo and tag me on social media @aheadofthyme too.

Stuffed Pepper Casserole
If you love traditional stuffed peppers but don't have time for that process, try this easy Stuffed Pepper Casserole instead. It skips the stuffing process entirely - cooking the peppers with the beef, rice, tomatoes, and spices for a delicious, one pot meal that's sure to hit the spot. The entire dish comes together in about an hour and makes plenty of leftovers you'll be thankful for later in the week.
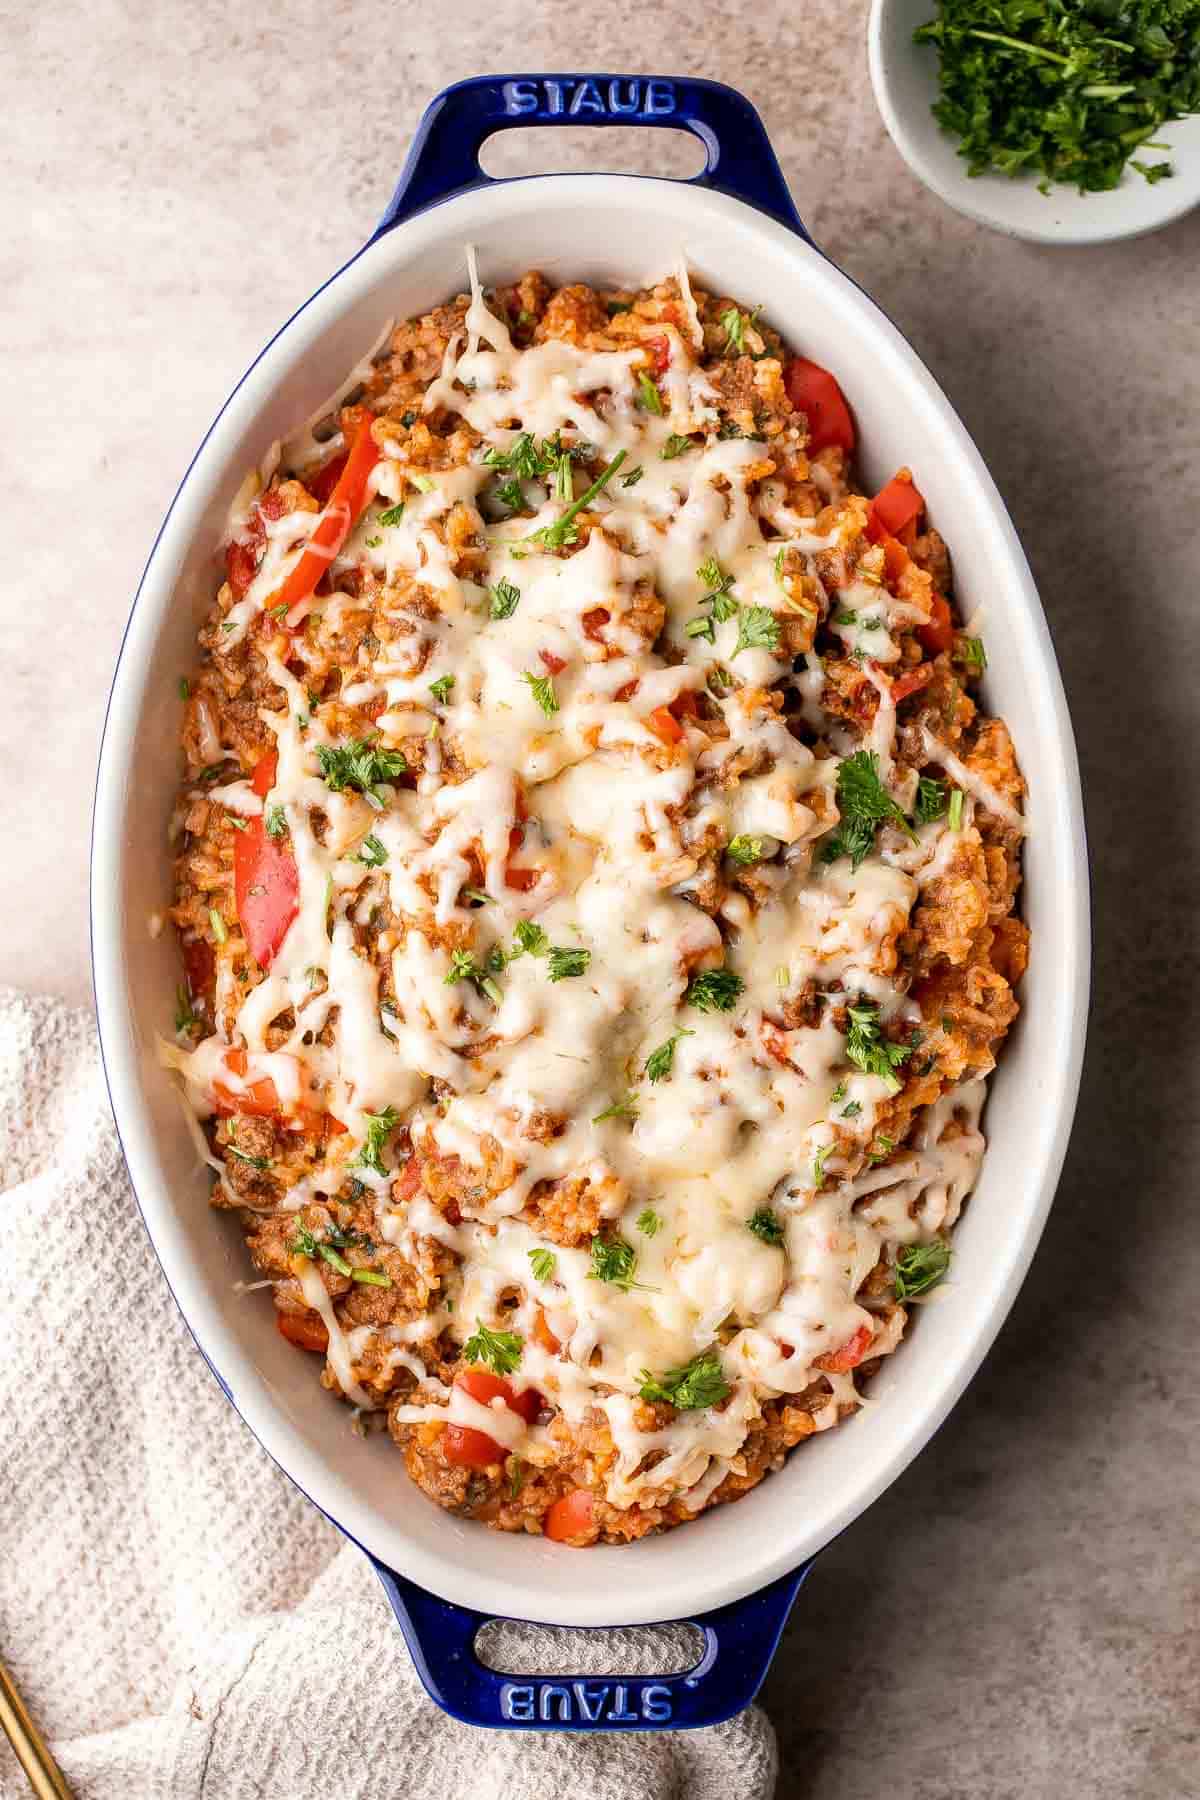
This unstuffed pepper casserole just might become your new favorite easy weeknight meal. It tastes just like stuffed peppers, but with way less effort. Since it requires minimal prep, you can focus on all the other little things on your to-do list while it's cooking away. Plus, the vegetables absorb so much flavor, your whole family will eat their fair share without complaints. This is such a simple way to get dinner on the table quickly without compromising on taste at all.
Why You'll Love This Stuffed Pepper Casserole
- Simple one pot casserole. This stuffed bell pepper casserole recipe comes together in one large pot! This is so much easier than making regular stuffed peppers, and you can easily prep the vegetables ahead of time to speed up the process.
- Family-friendly. This easy recipe has lots of kid-friendly ingredients and flavors like rice, ground beef, Italian seasoning, and plenty of cheese, making these deconstructed stuffed peppers quite the hit!
- So satisfying. As the rice cooks, it absorbs all the delicious flavors from the meat and broth. It's cheesy, meaty, warm, and satisfying in all the right ways. Top off these unstuffed peppers with a dollop of sour cream, and you'll be all set!
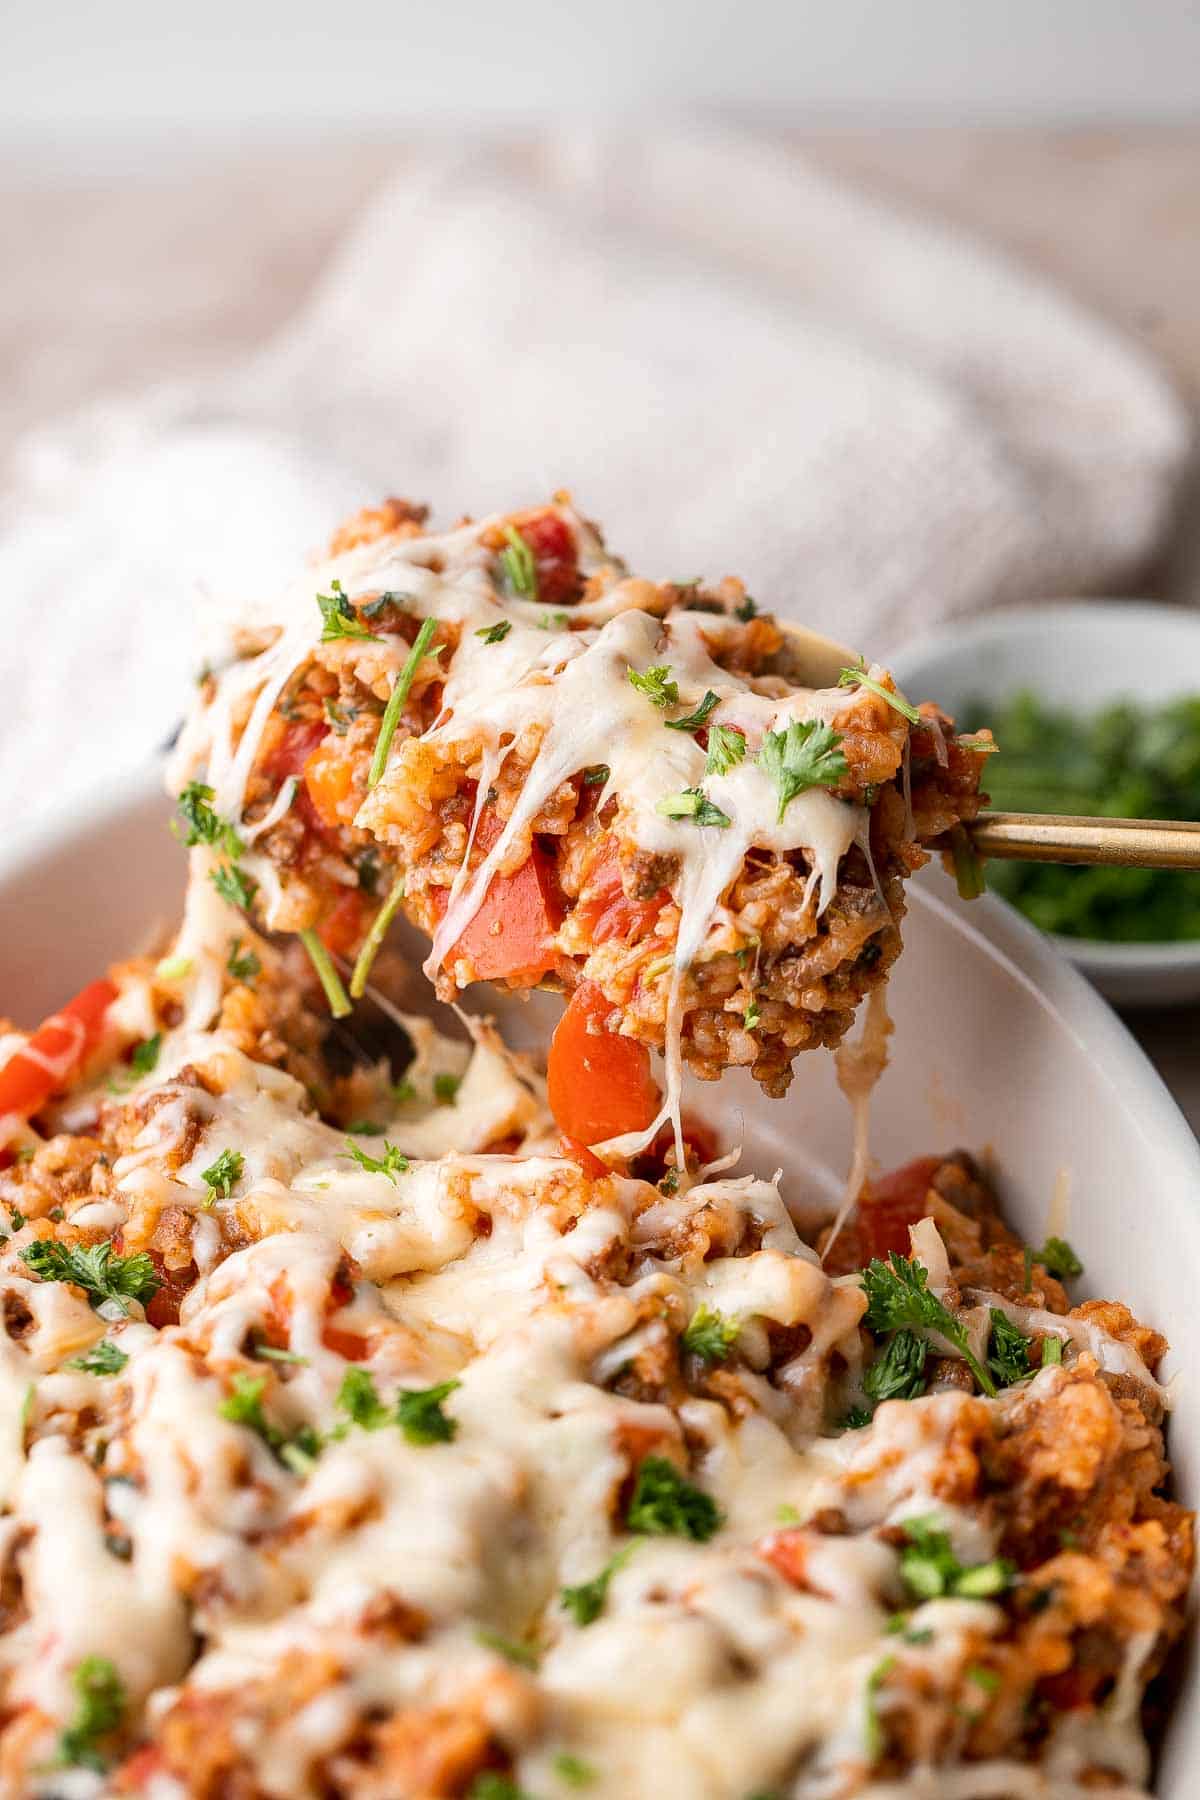
Ingredient Notes
To make this delicious stuffed pepper casserole, you will need the following ingredients (full measurements in recipe card below):
- ground beef - start by browning the ground meat. You can easily substitute ground turkey or chicken instead.
- yellow onion - the onion adds a slightly sweet, savory flavor that pairs really well with the other hearty flavors in this easy casserole.
- garlic - mince fresh garlic or use minced garlic if you're in a rush.
- red bell peppers - remove the stems, pith, and seeds in your peppers and cut them into 1-inch slices.
- Italian seasoning - this blend of herbs tastes lovely with the tomatoes and beef.
- beef broth - choose either beef stock or vegetable stock to hydrate the rice.
- canned tomatoes - use either whole peeled or diced tomatoes. The little pieces add a pop of color and flavor as you eat.
- tomato paste - this paste adds a rich tomato flavor that makes any recipe immediately more satisfying.
- basmati rice - start by rinsing your long-grain basmati rice, but do not precook it.
- fresh parsley - this adds a pop of fresh flavor and color.
- smoked gouda cheese - the smoky flavor tastes really wonderful with the peppers. You can also use any other great melting cheese, like mozzarella, Monterey Jack or cheddar cheese.
- salt and black pepper
You will also need a dutch oven or skillet, 2-quart casserole dish, and broiler (oven setting).
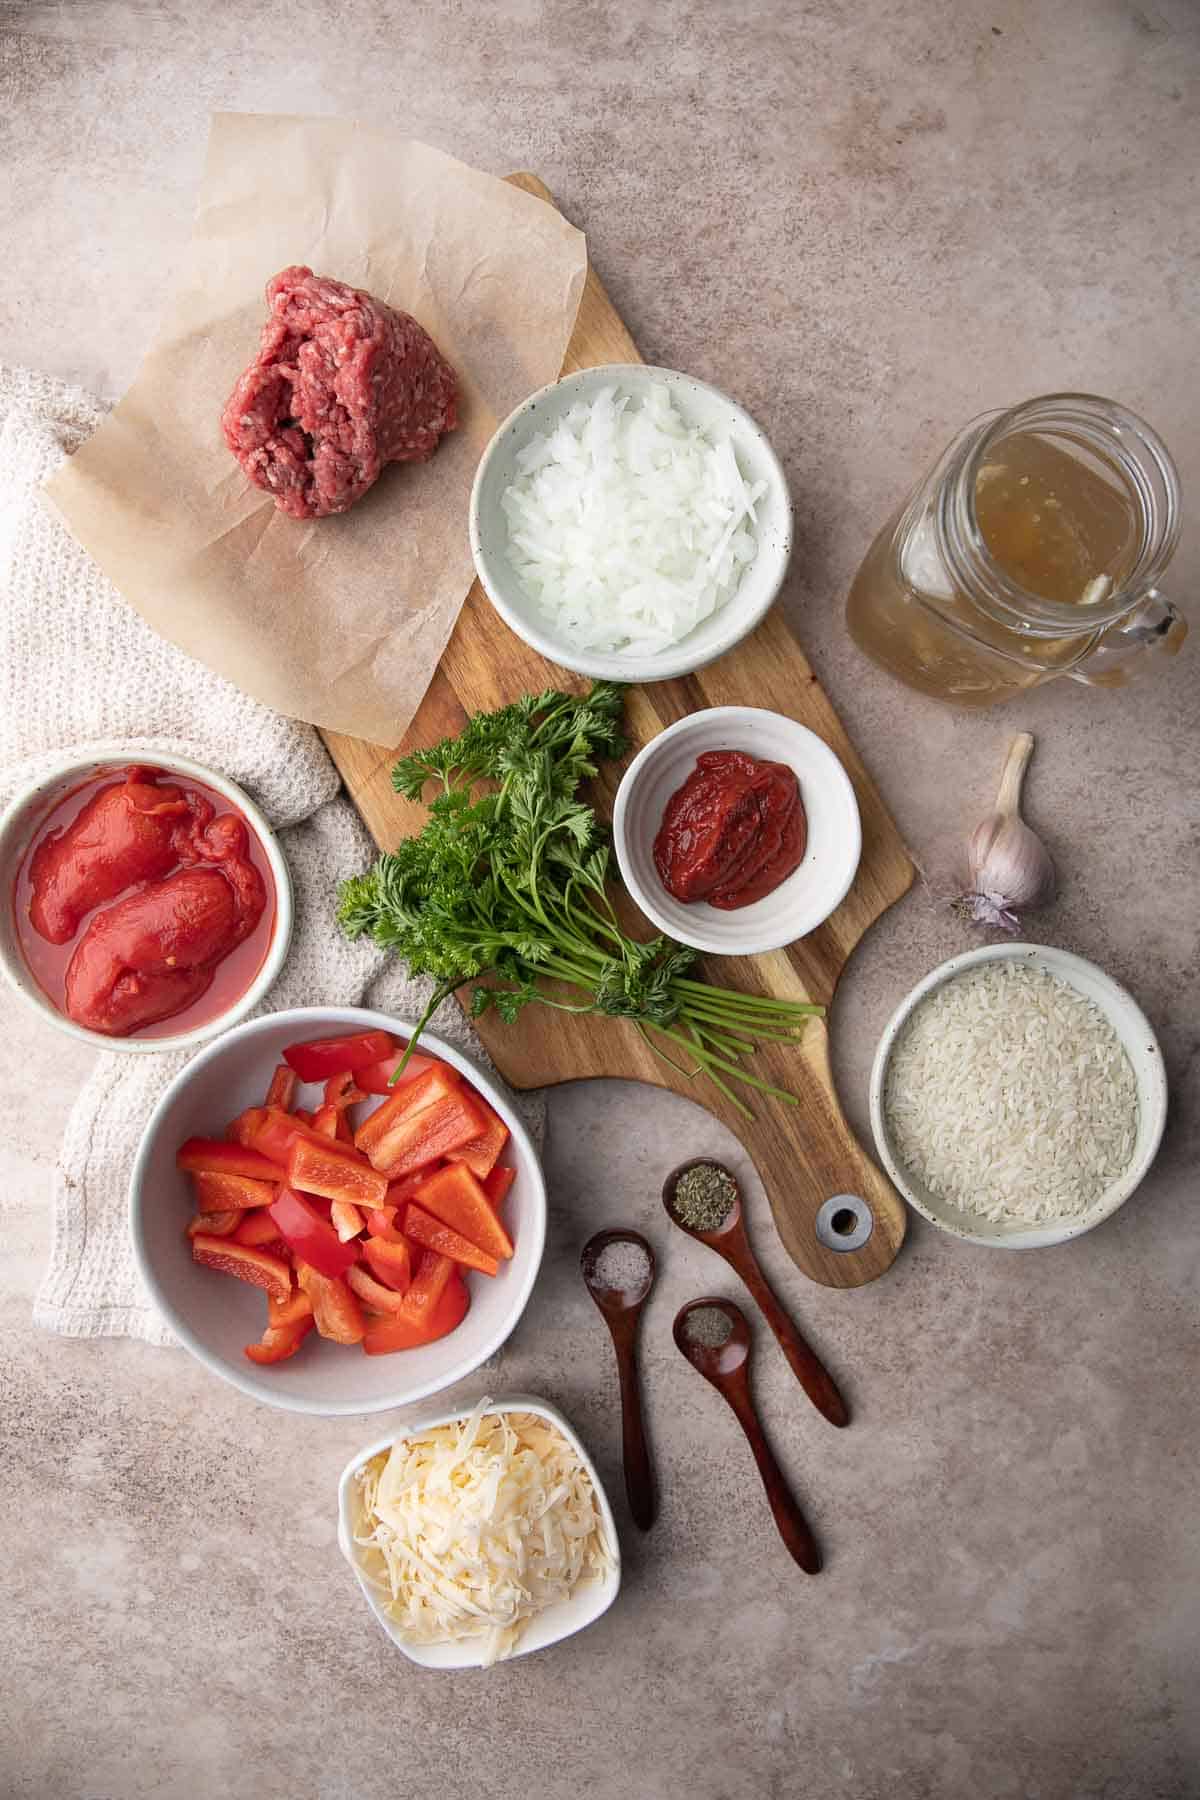
How to Make the Best Stuffed Pepper Casserole
- Brown the beef. In a 4 quart Dutch oven or large skillet, add ground beef and cook over medium high heat until no longer pink, about 5-7 minutes. Stir well and break up the beef into small pieces. Add onion and garlic. Stir well to combine and continue cooking for 3-4 minutes until tender.
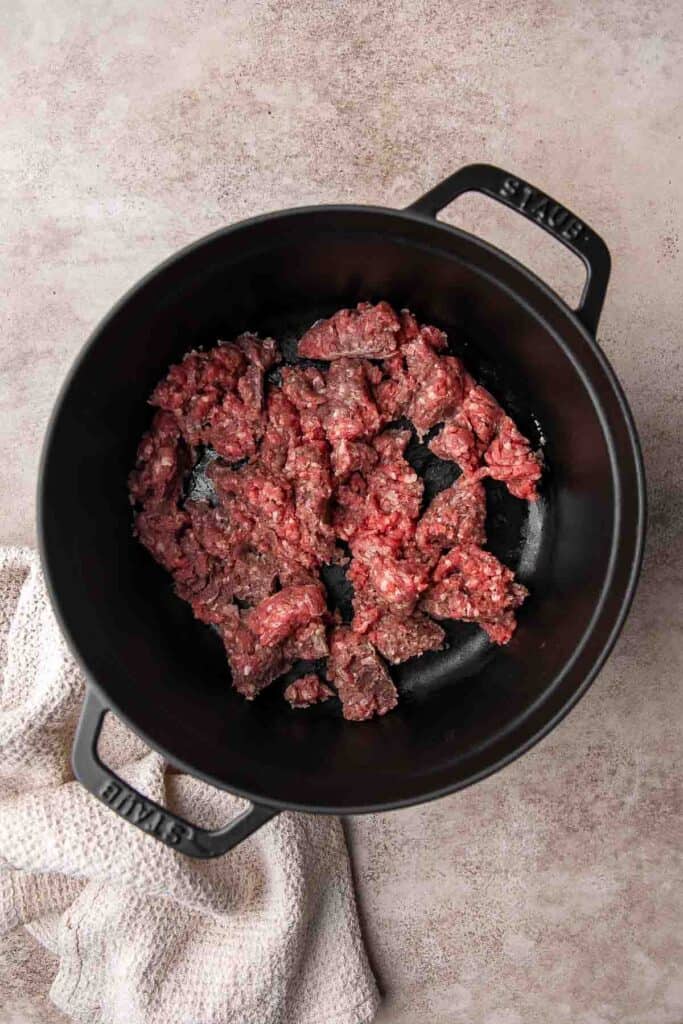
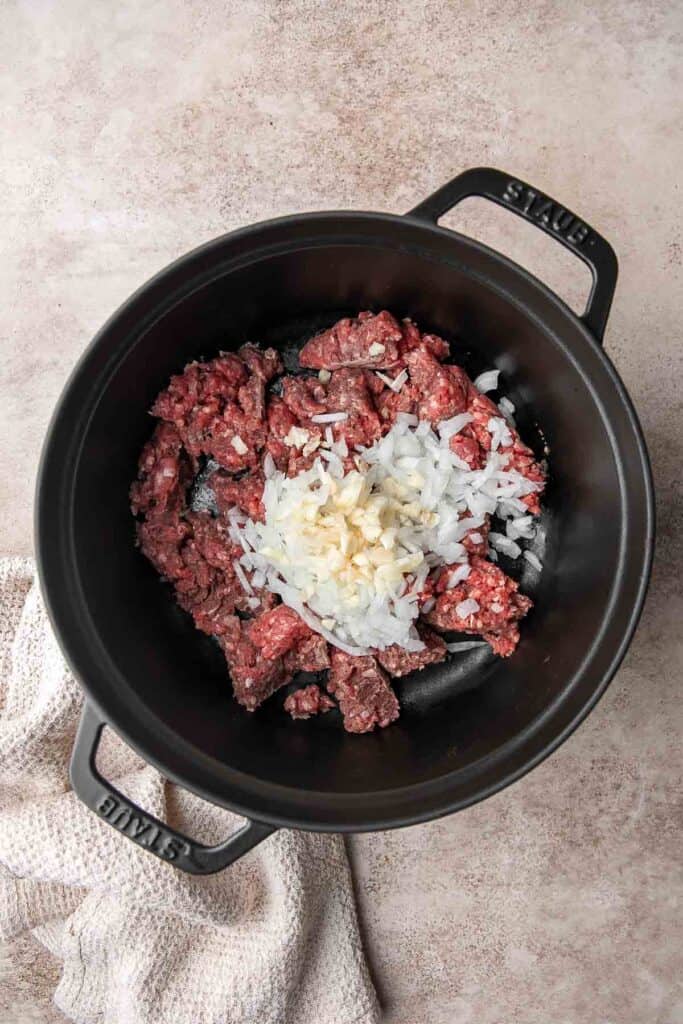
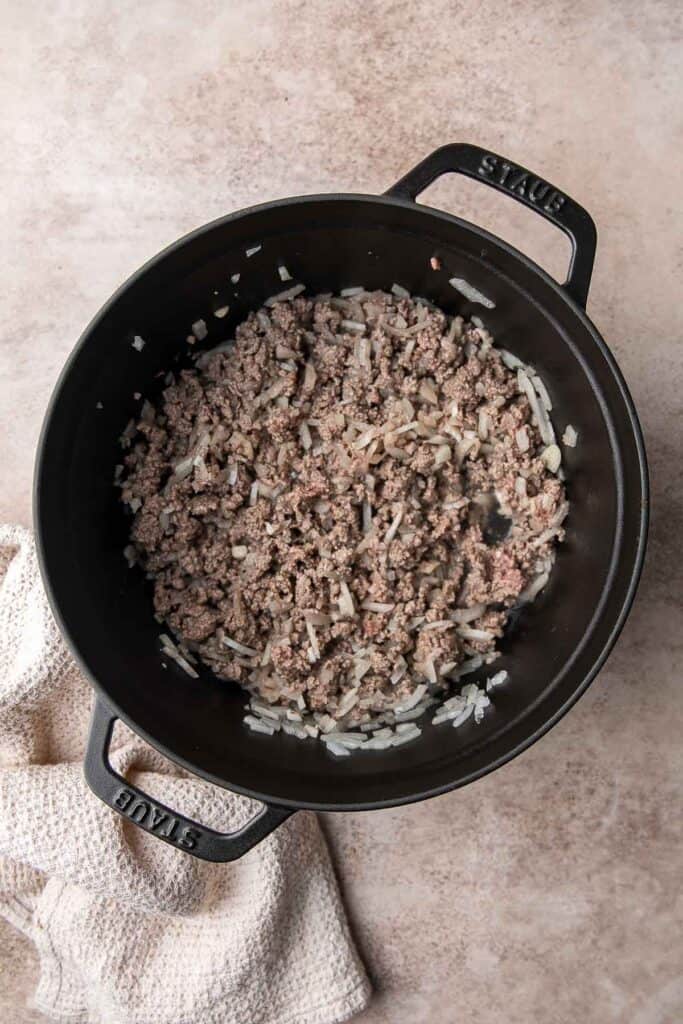
- Add the remaining ingredients. Add bell peppers, Italian seasoning, beef broth, canned tomatoes, tomato paste, and rice. Mix well and bring it to a boil. Reduce heat to low and cover the lid. Simmer until all the liquid has been absorbed and the rice is fully cooked, about 25 minutes.
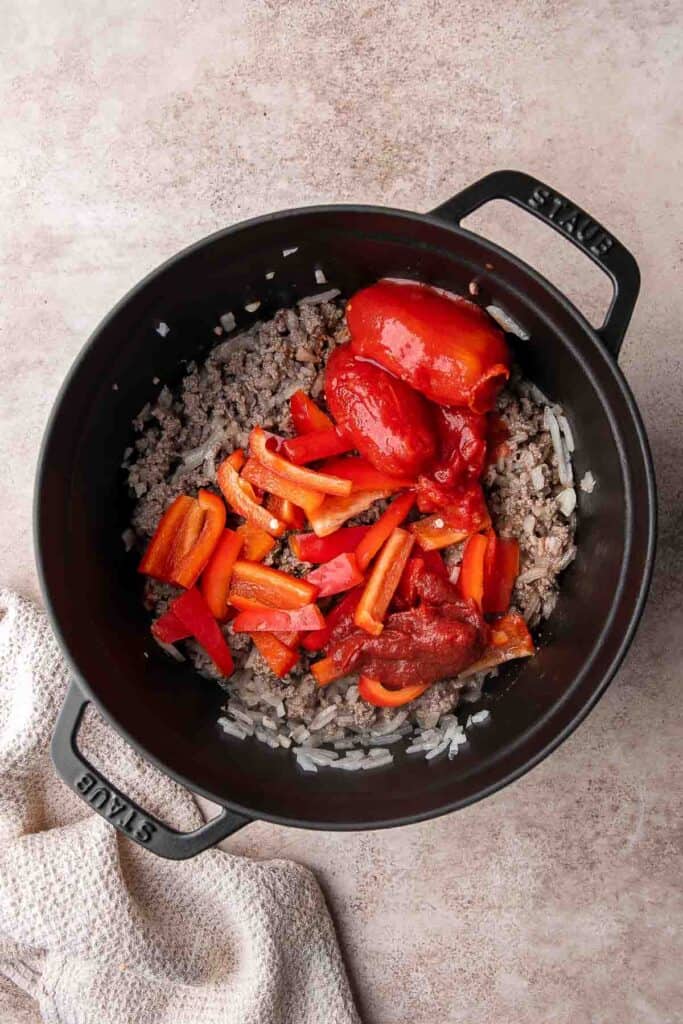
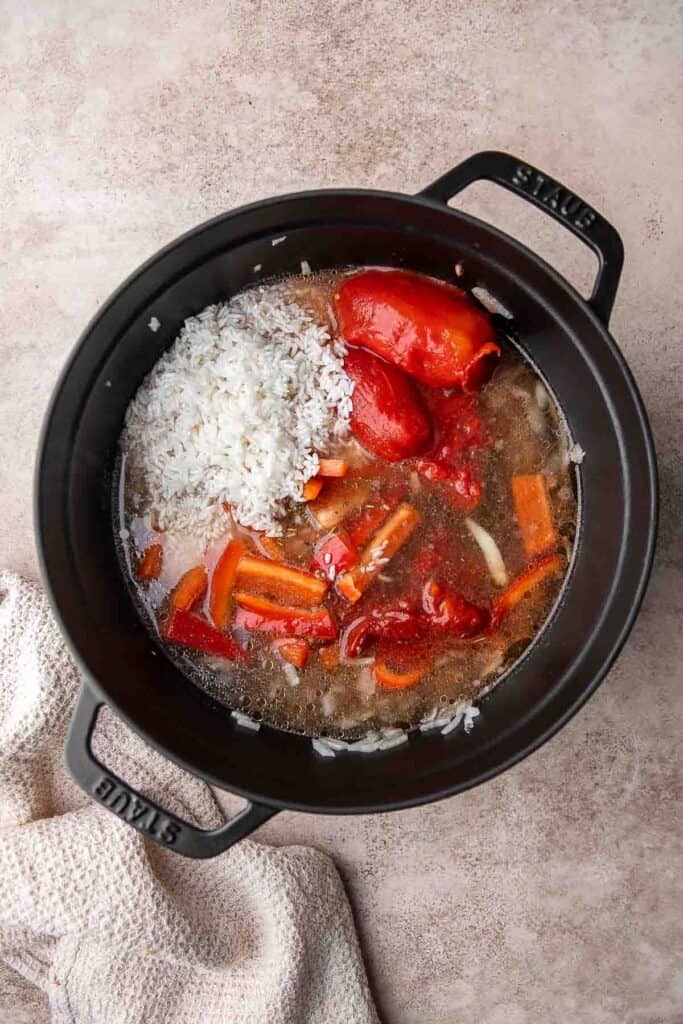
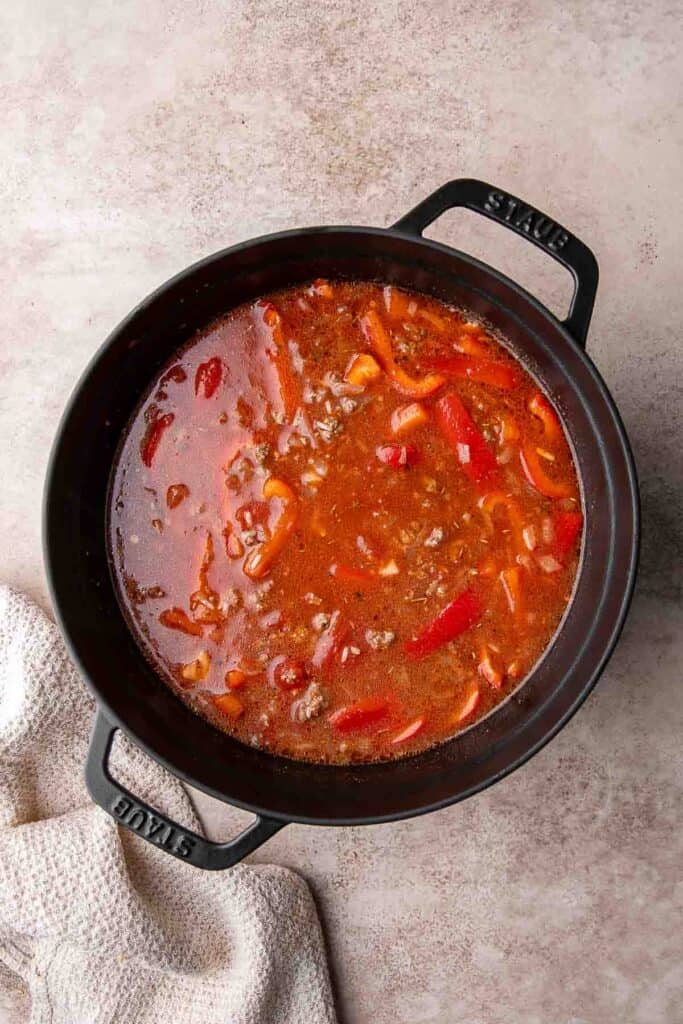
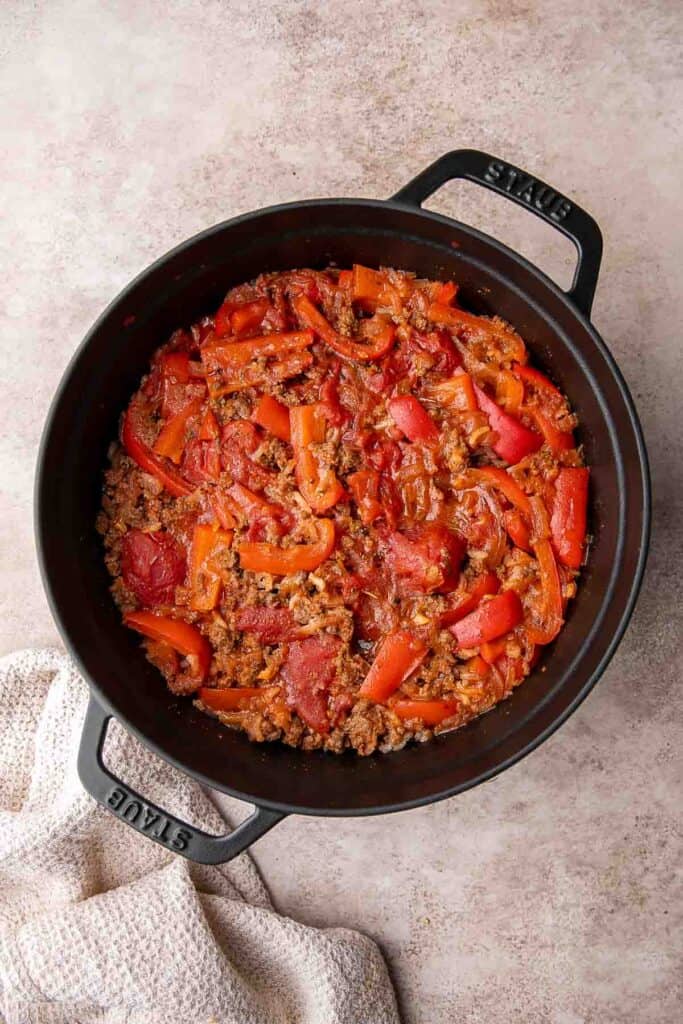
- Add parsley and cheese. Stir in parsley and ½ cup shredded cheese. Season with salt and pepper to taste.
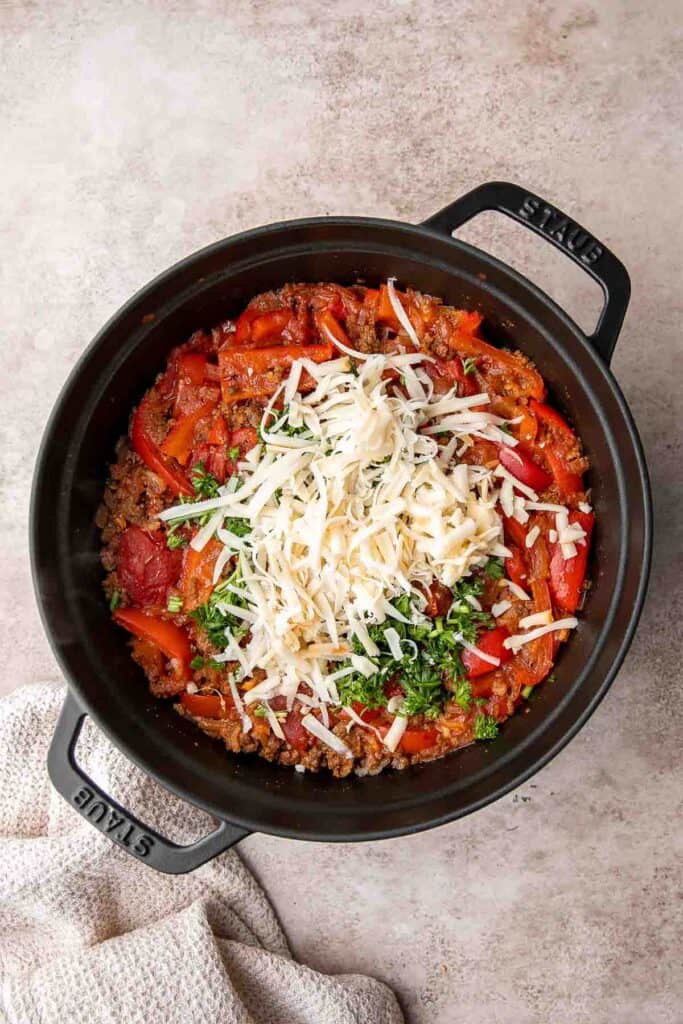
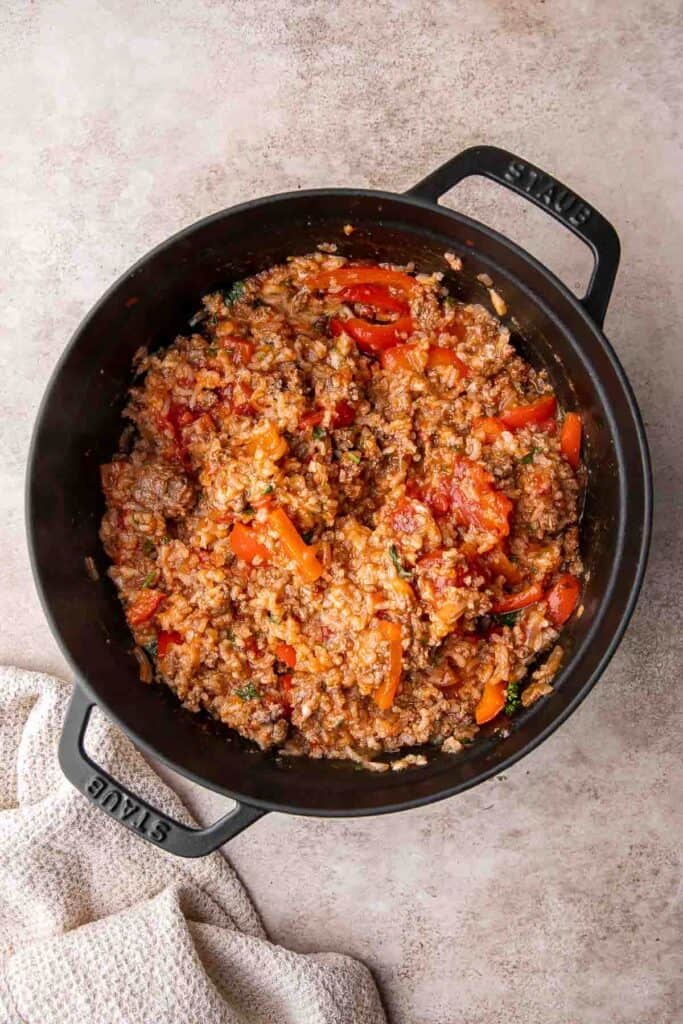
- Broil. Transfer the mixture into a 2 quart casserole pan and top with the remaining cup of cheese. Turn the broiler on HI and place into the oven until the melted cheese is golden brown, about 2 minutes. (You can also leave the mixture in the Dutch oven and top with cheese and cover the lid until the cheese is melted).
- Garnish. Top with extra parsley, if desired, and serve warm.
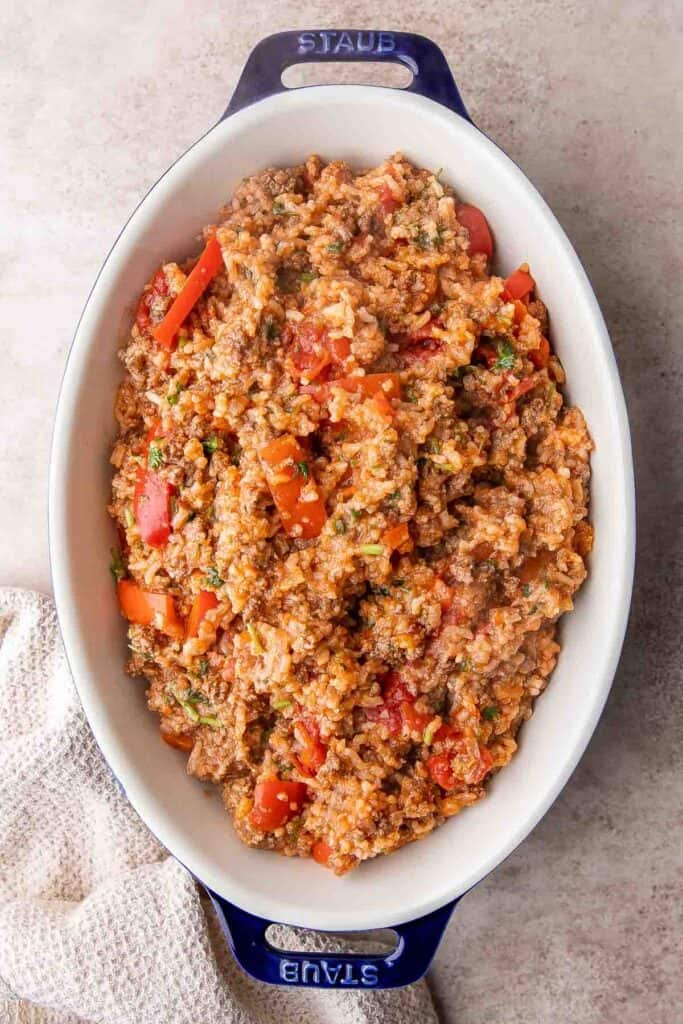
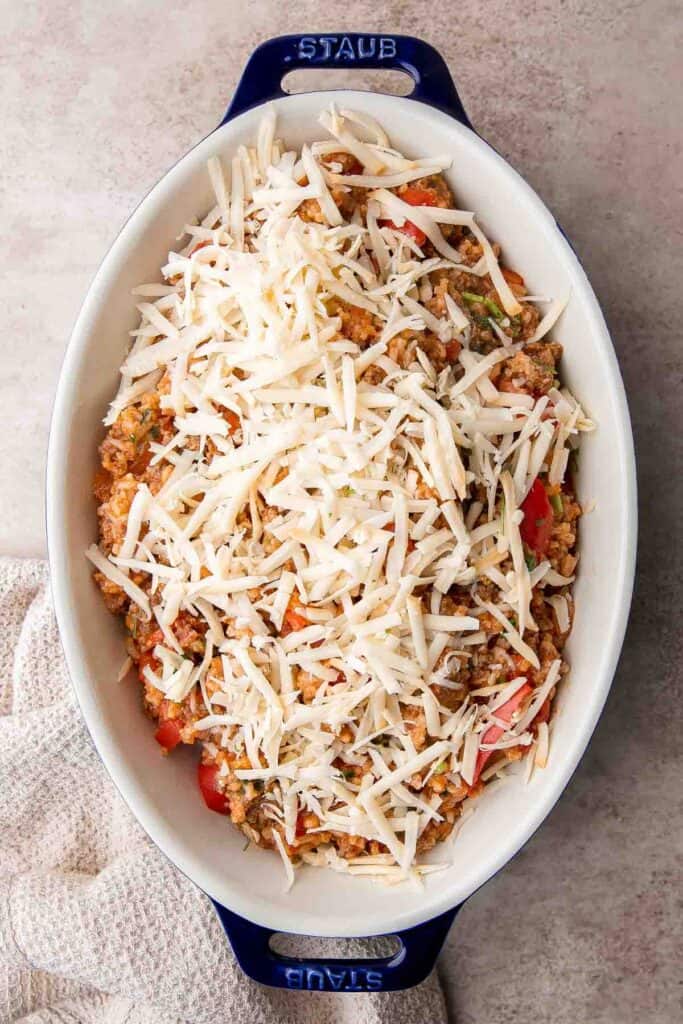
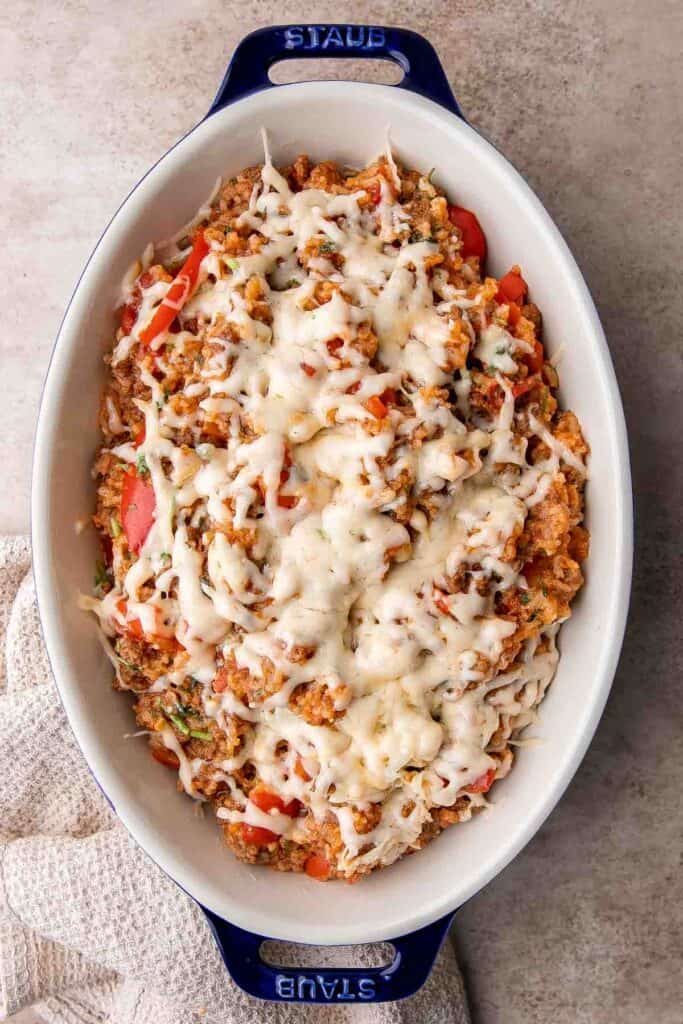
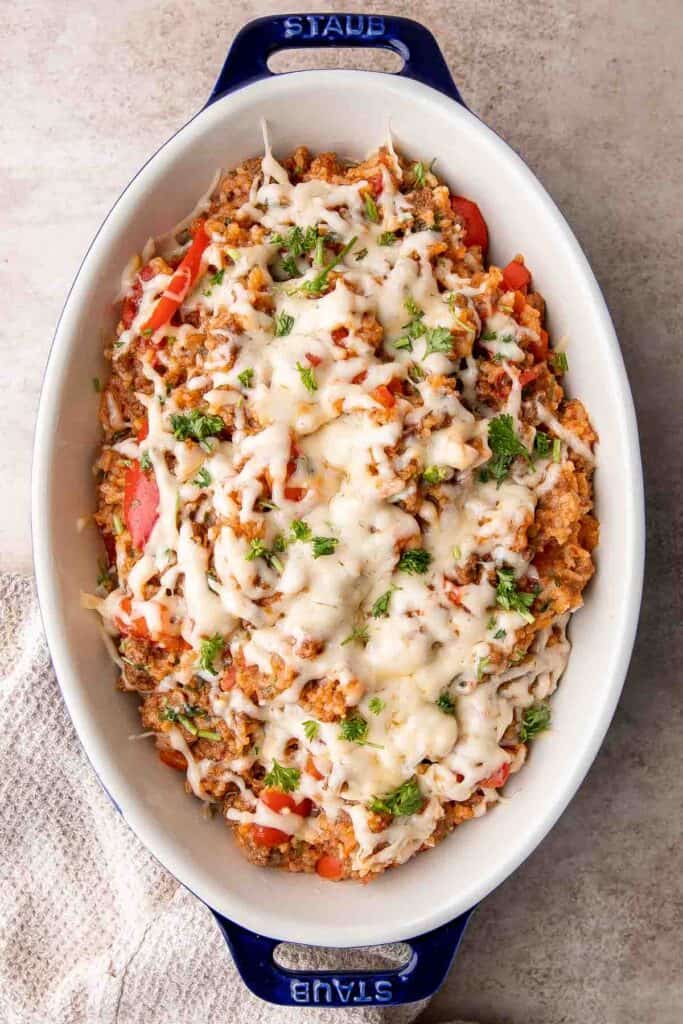
Recipe Variations
- Use green bell peppers. Although most regular stuffed peppers use red bell pepper, you can easily change things up and use green peppers for a slight flavor twist.
- Make it vegetarian. Want to skip the meat? Use your favorite plant-based ground beef instead. You can also substitute with more veggies including sautéed mushrooms.
- Adjust the seasonings. Experiment with different seasoning blends to change the flavor. This cheesy stuffed pepper casserole would taste lovely with Indian spices, like garam masala.
- Add more veggies. If you find yourself running low on peppers, you could also add roasted mushrooms, eggplant, or zucchini for extra flavor and nutrients.
- Make it spicy. Add some red pepper flakes or even cayenne pepper for extra heat and spice.
How to Serve
This easy stuffed pepper casserole recipe is delicious and filling served on its own, or pair it with some of my favorite sides including:
- Roasted Red Pepper and Tomato Soup
- The Perfect Greek Salad
- Oven Roasted Vegetables
- Potato Stacks
- Alphabet Soup
- Arugula Salad
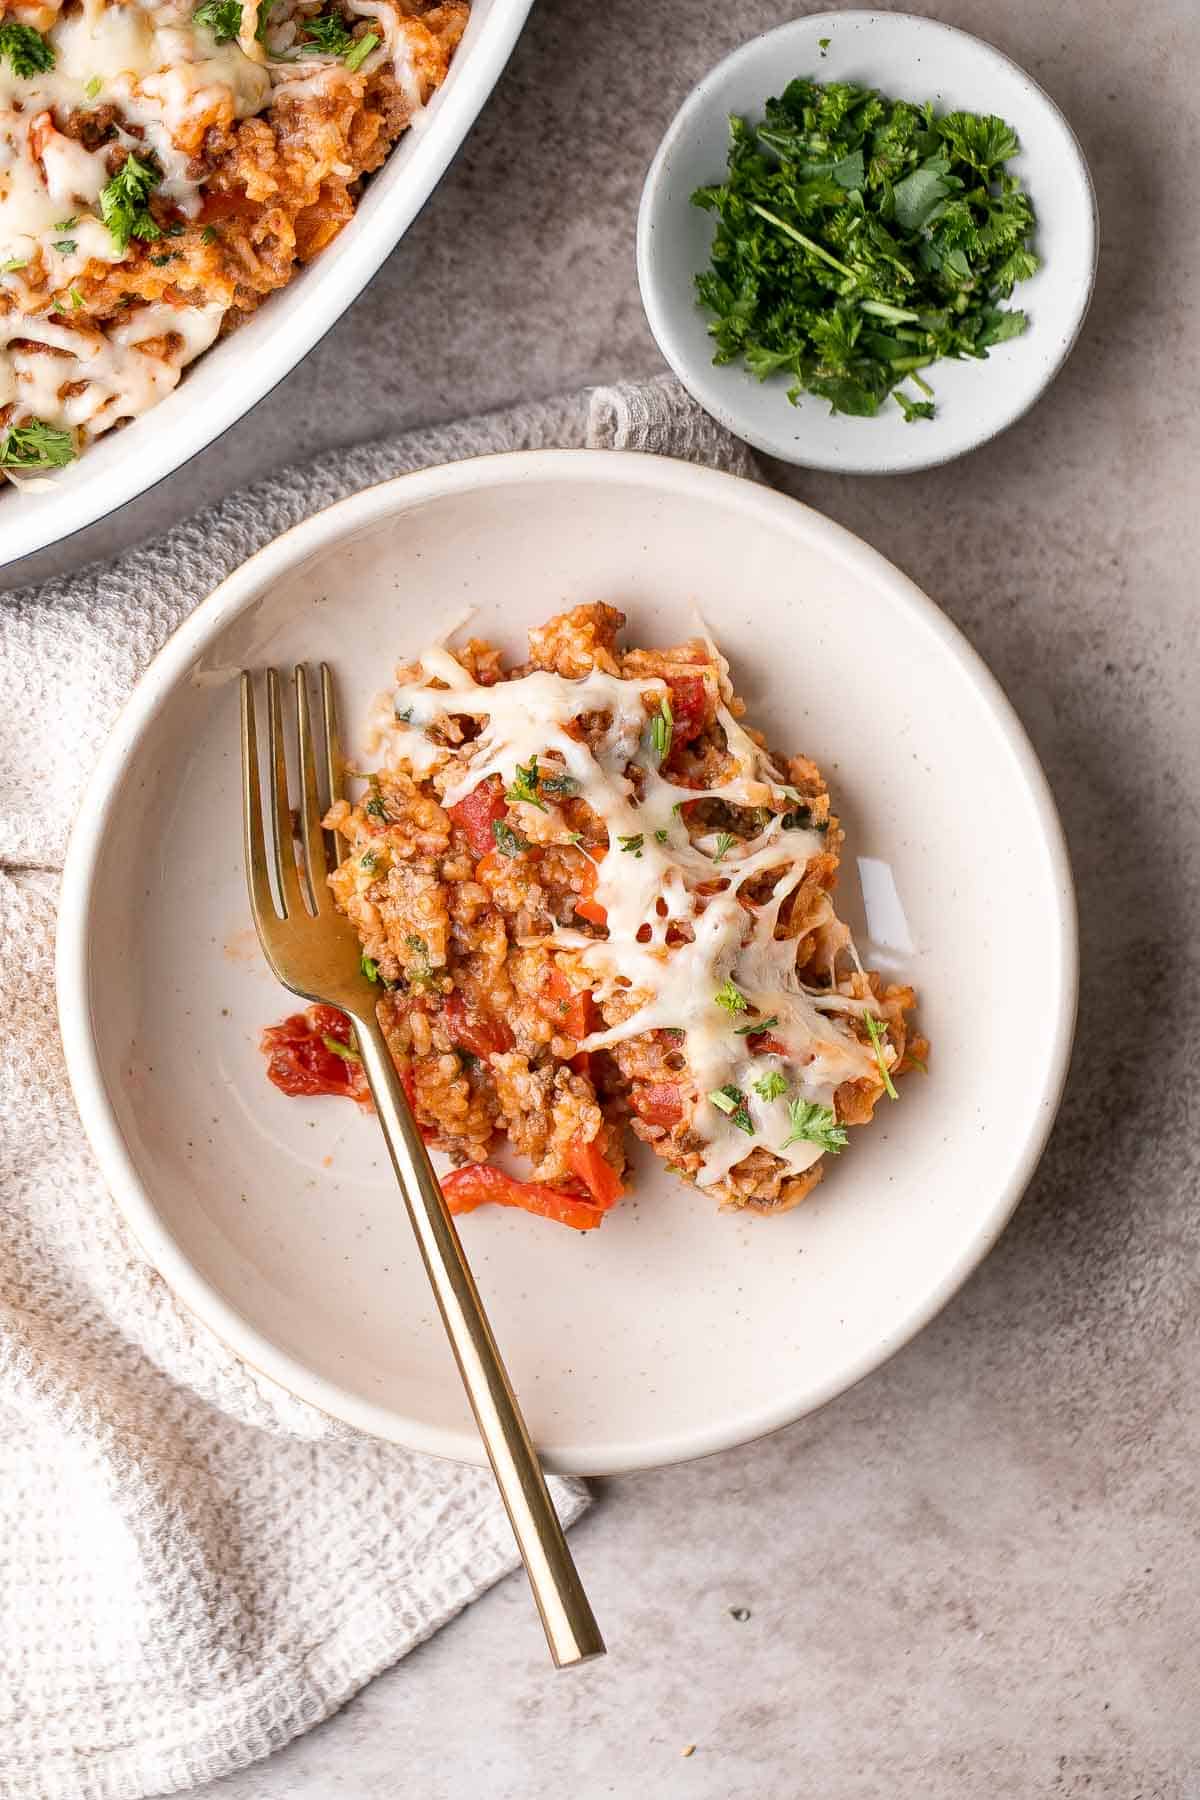
Recipe Tips and Tricks
- Be flexible with your rice. No basmati rice? Look for long-grain white rice like jasmine rice. You can even use long-grain brown rice, but you may need slightly more broth and a longer cooking time.
- Deglaze the pan. One trick you can do to add extra flavor to any dish is to deglaze the pan after sauteeing your onions and garlic. Add a splash of balsamic vinegar, and as it evaporates, it will leave a concentrated, umami flavor in the vegetables and beef.
Storing and Freezing Instructions
How to Store
Store leftover stuffed pepper casserole in an airtight container in the fridge for 3-4 days. You can also cover the entire baking dish in plastic wrap.
How to Reheat
To keep your rice from drying out, add an extra splash of beef stock or water, then microwave your leftovers for 1-2 minutes, stirring once. You can also sautee your leftovers in a skillet until fully heated.
How to Freeze
Let any leftovers cool to room temperature, then store them in a freezer safe container and freeze for 2-3 months. Thaw in the fridge overnight before reheating.

FAQ
The easiest way to reheat this easy stuffed pepper casserole recipe is to microwave your serving for 1-2 minutes. It may benefit from a little extra moisture, so add a splash of chicken broth or water first. You can also sautee your leftovers in a large nonstick skillet on the stove or bake them in a small dish in your oven at 350 degrees F for 5-6 minutes.
Although some stuffed pepper recipes call for boiling the peppers to remove any bitterness, that process is not necessary at all for unstuffed peppers. As the peppers cook, they will soften and absorb all the seasonings, tomato, and broth. It also helps you get dinner on the table quickly, too!
If you want an easy way to make stuffed pepper casserole, skip the baking dish and use a Dutch oven. You can cook everything right in the pot and even close the lid to melt the mozzarella cheese so it seeps into all the nooks and crannies. You can also cook everything in the pot and then transfer it to a baking dish under the broiler to melt the cheese, but that's just one more pot to clean up. For the easiest meal, cook the entire thing in your Dutch oven or large soup pot right on the stove!
More Ground Beef Recipes
- 25 Best Ground Beef Recipes
- Tater Tot Casserole
- Ground Beef Meat Pie
- Easy Meat Lasagna
- Homemade Hamburger Helper
- Skillet Shepherd's Pie
Tried this recipe?
I'd love to hear what you think! Leave a comment and rating below to share your feedback. Your reviews help others discover this recipe and help me keep creating more free recipes for you. Snap a photo and tag me on social media @aheadofthyme too.

Homemade Stuffing
Skip the boxed mix this year and make your own Homemade Stuffing from scratch. All you need is a loaf of bread, a few common vegetables, fresh herbs, eggs, and your favorite stock for a delicious, aromatic side dish that takes any Thanksgiving dinner to the next level.
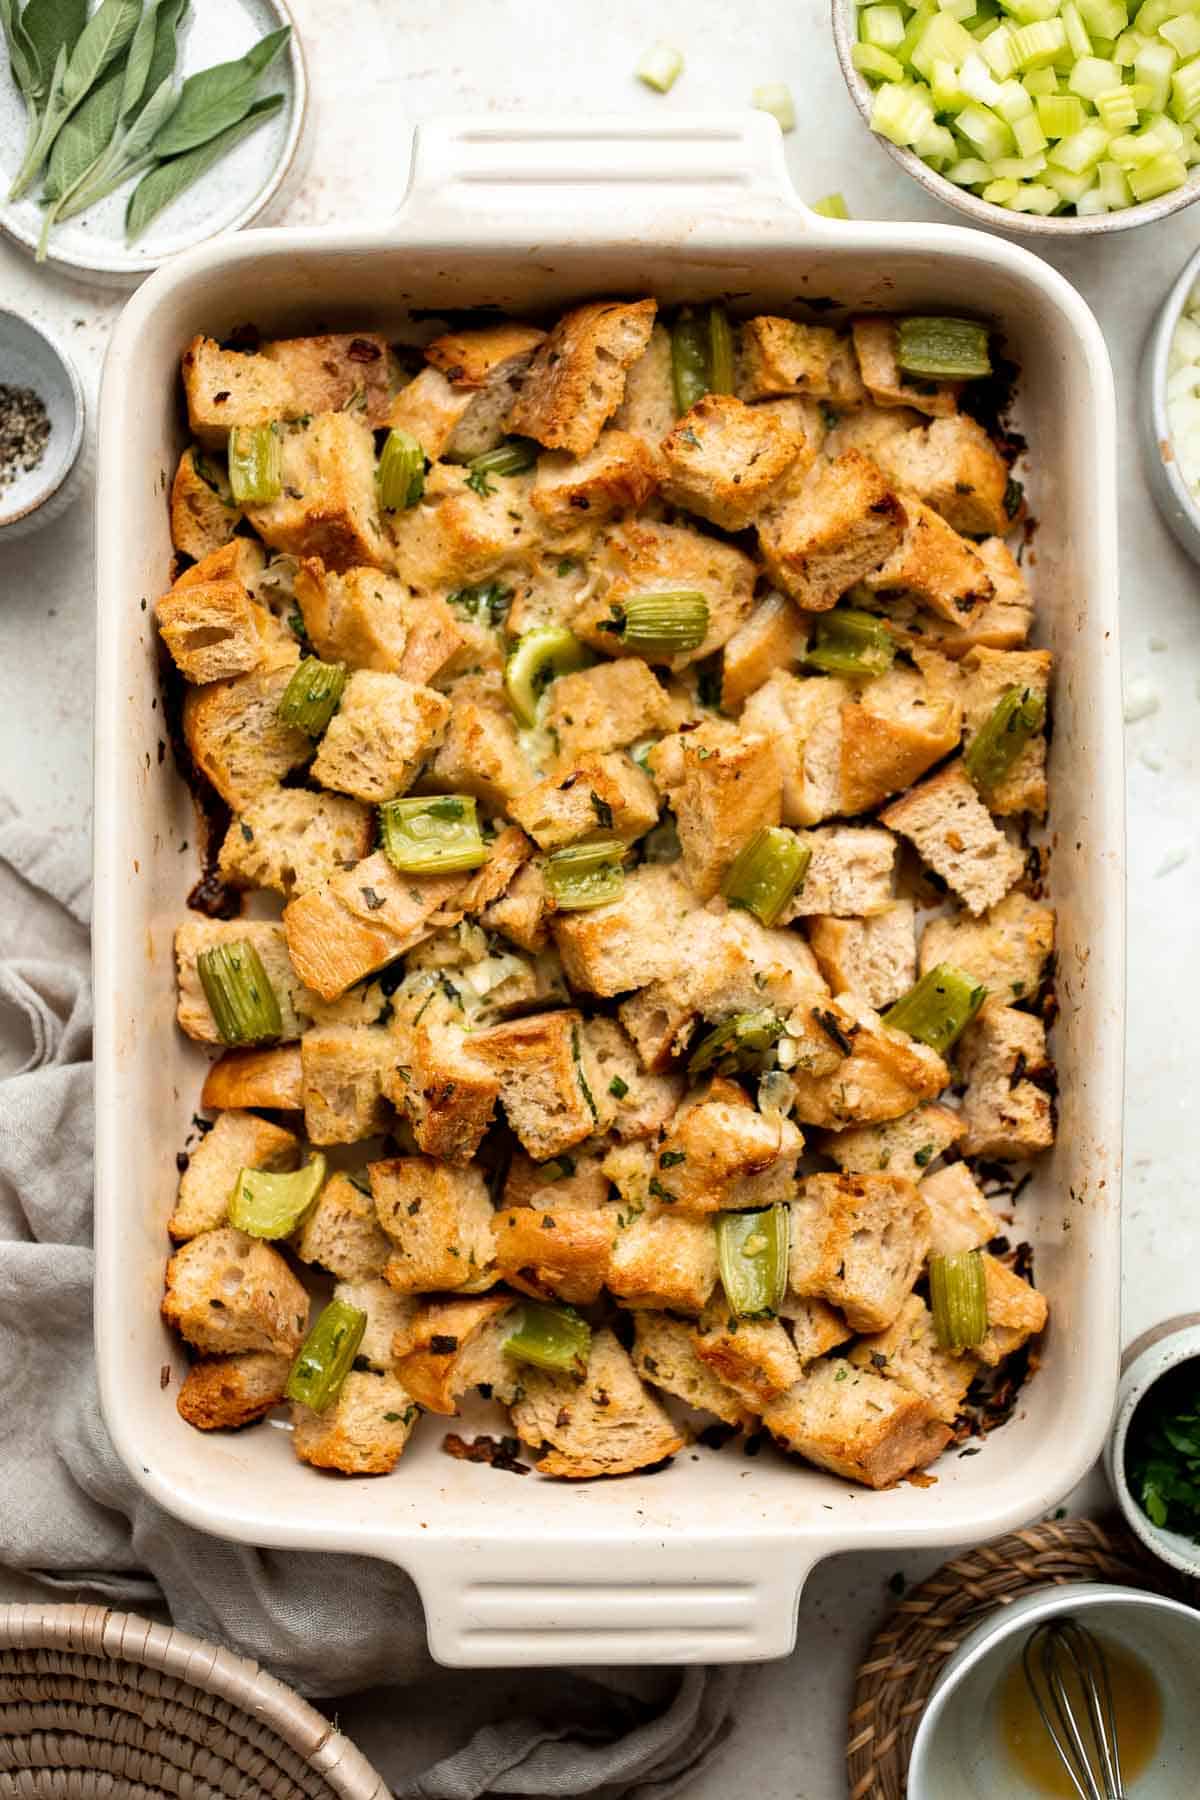
As you prepare your holiday meal this year, grab an extra container of stock and a loaf of good, crusty bread. Cut the veggies while you're prepping your roast turkey or mashed potatoes. Before you know it, you'll have everything you need for this classic side dish! It takes about an hour to make and most of that time is spent in the oven. This traditional stuffing recipe has far more flavor than the boxed stuff and will quickly become your new family favorite!
If you like this recipe, try our Cranberry Walnut Apple Stuffing or Vegetarian Cornbread Stuffing.
Why You'll Love This Homemade Stuffing Recipe
- So simple to make. This easy recipe is made by rehydrating dried bread cubes with a mixture of tender, aromatic vegetables, fresh herbs, vegetable stock, eggs, and spices. Bake it in the oven, then serve. It's really that simple!
- Customizable. Prefer sourdough bread? That's fine. Want to add Italian sausage? You can do that. Only have chicken broth on hand? Use it! This Thanksgiving stuffing recipe is simple and easily adapted to suit your preferences.
- Less processed. Have you ever read the ingredients on boxed stuffing? It's not exactly the most nutritious. This traditional stuffing recipe is made with simple, wholesome ingredients you can feel good about eating and serving to your family.
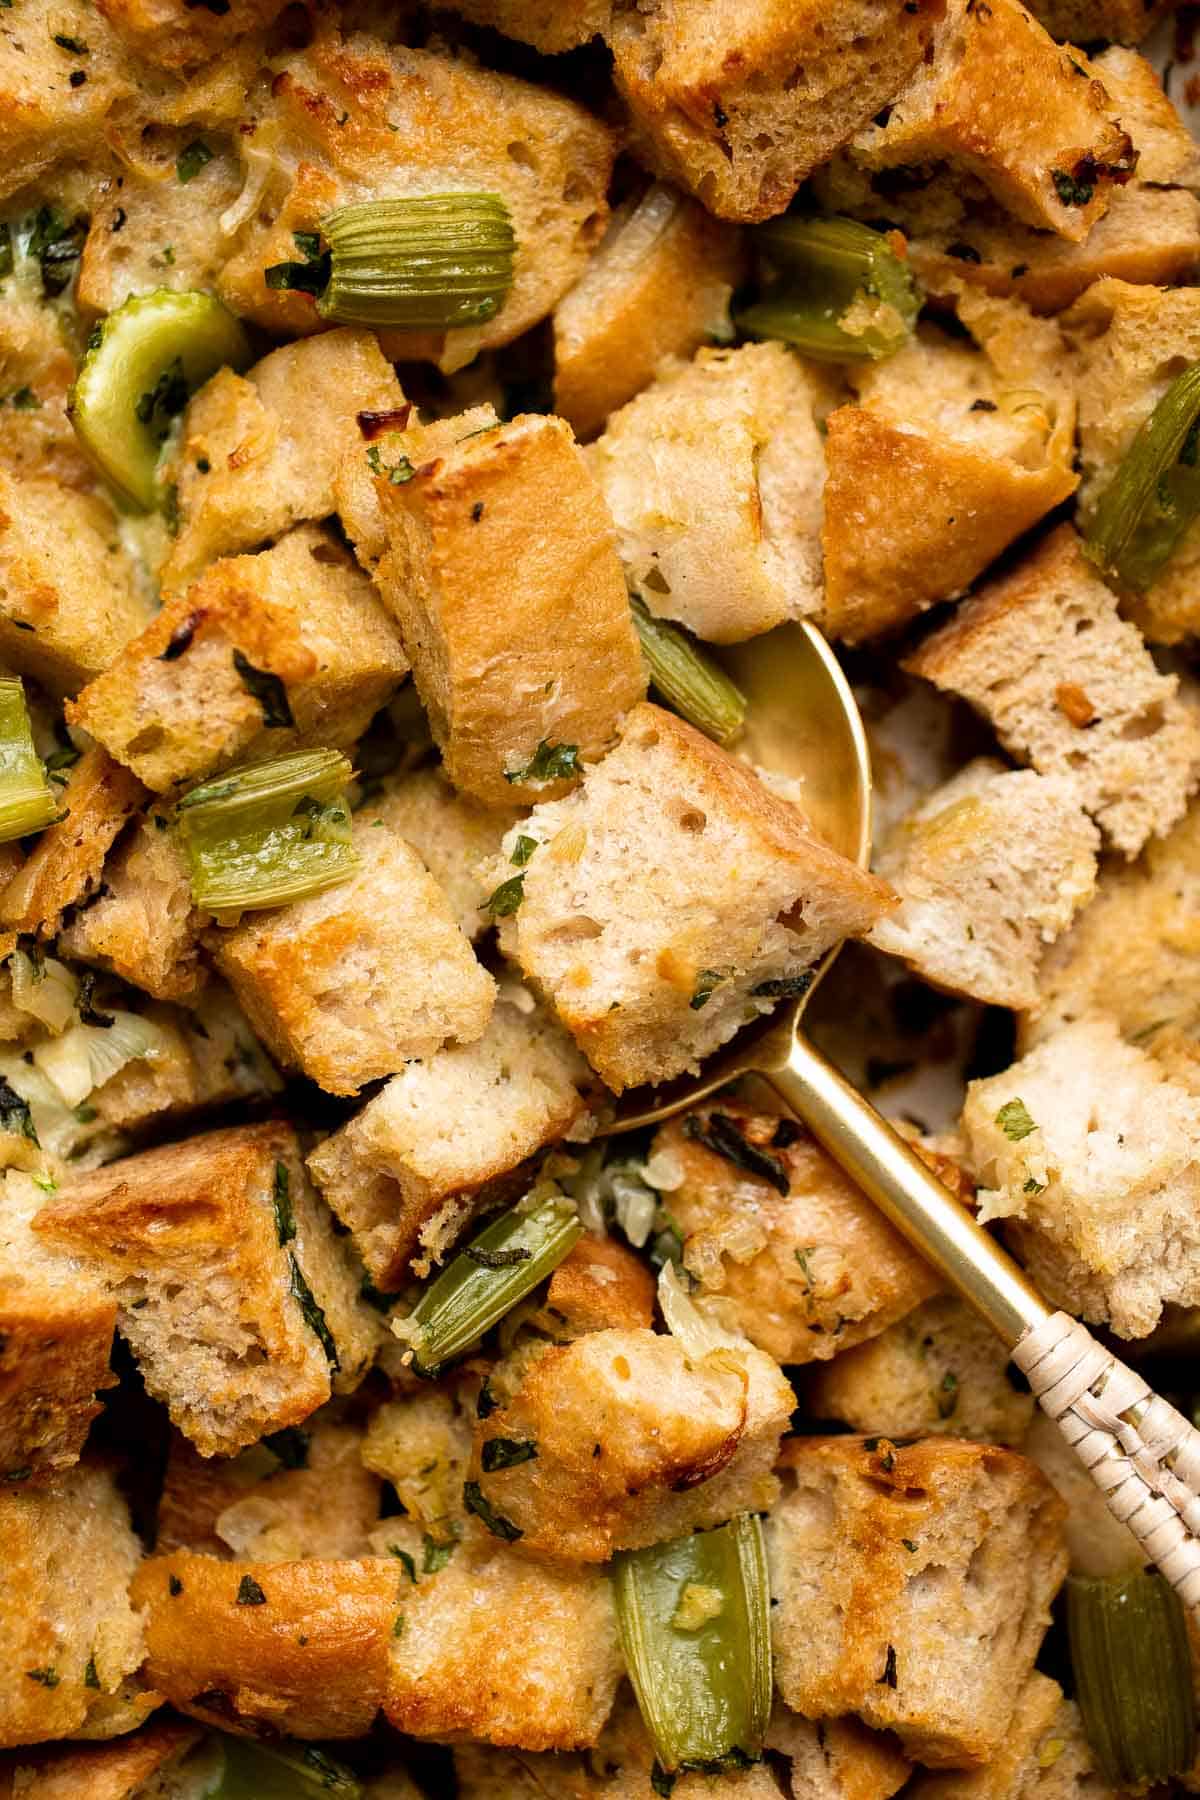
Ingredient Notes
To make this delicious homemade stuffing, you will need the following ingredients (full measurements in recipe card below):
- white bread - start with one loaf of day-old bread. It can be Italian bread, French bread, sourdough, etc. Cut it into cubes.
- olive oil - this will be used to sautee the vegetables. Use butter if you prefer.
- onion - choose a yellow or white onion.
- garlic - fresh garlic highlights the savory flavors in this easy Thanksgiving recipe.
- celery - celery adds a little color, texture, and a delicious flavor.
- salt and pepper - be sure to season your baked stuffing to make sure it is full of flavor.
- fresh herbs - finely chop fresh parsley and thyme to stir into the bread mixture.
- vegetable stock - use either vegetable stock, chicken broth, or diluted bouillon paste.
- eggs - beat together a couple of eggs to hold the stuffing together.
You will also need a cutting board and knife, a sheet pan, large cast-iron skillet, 9x13 casserole dish, and aluminum foil.
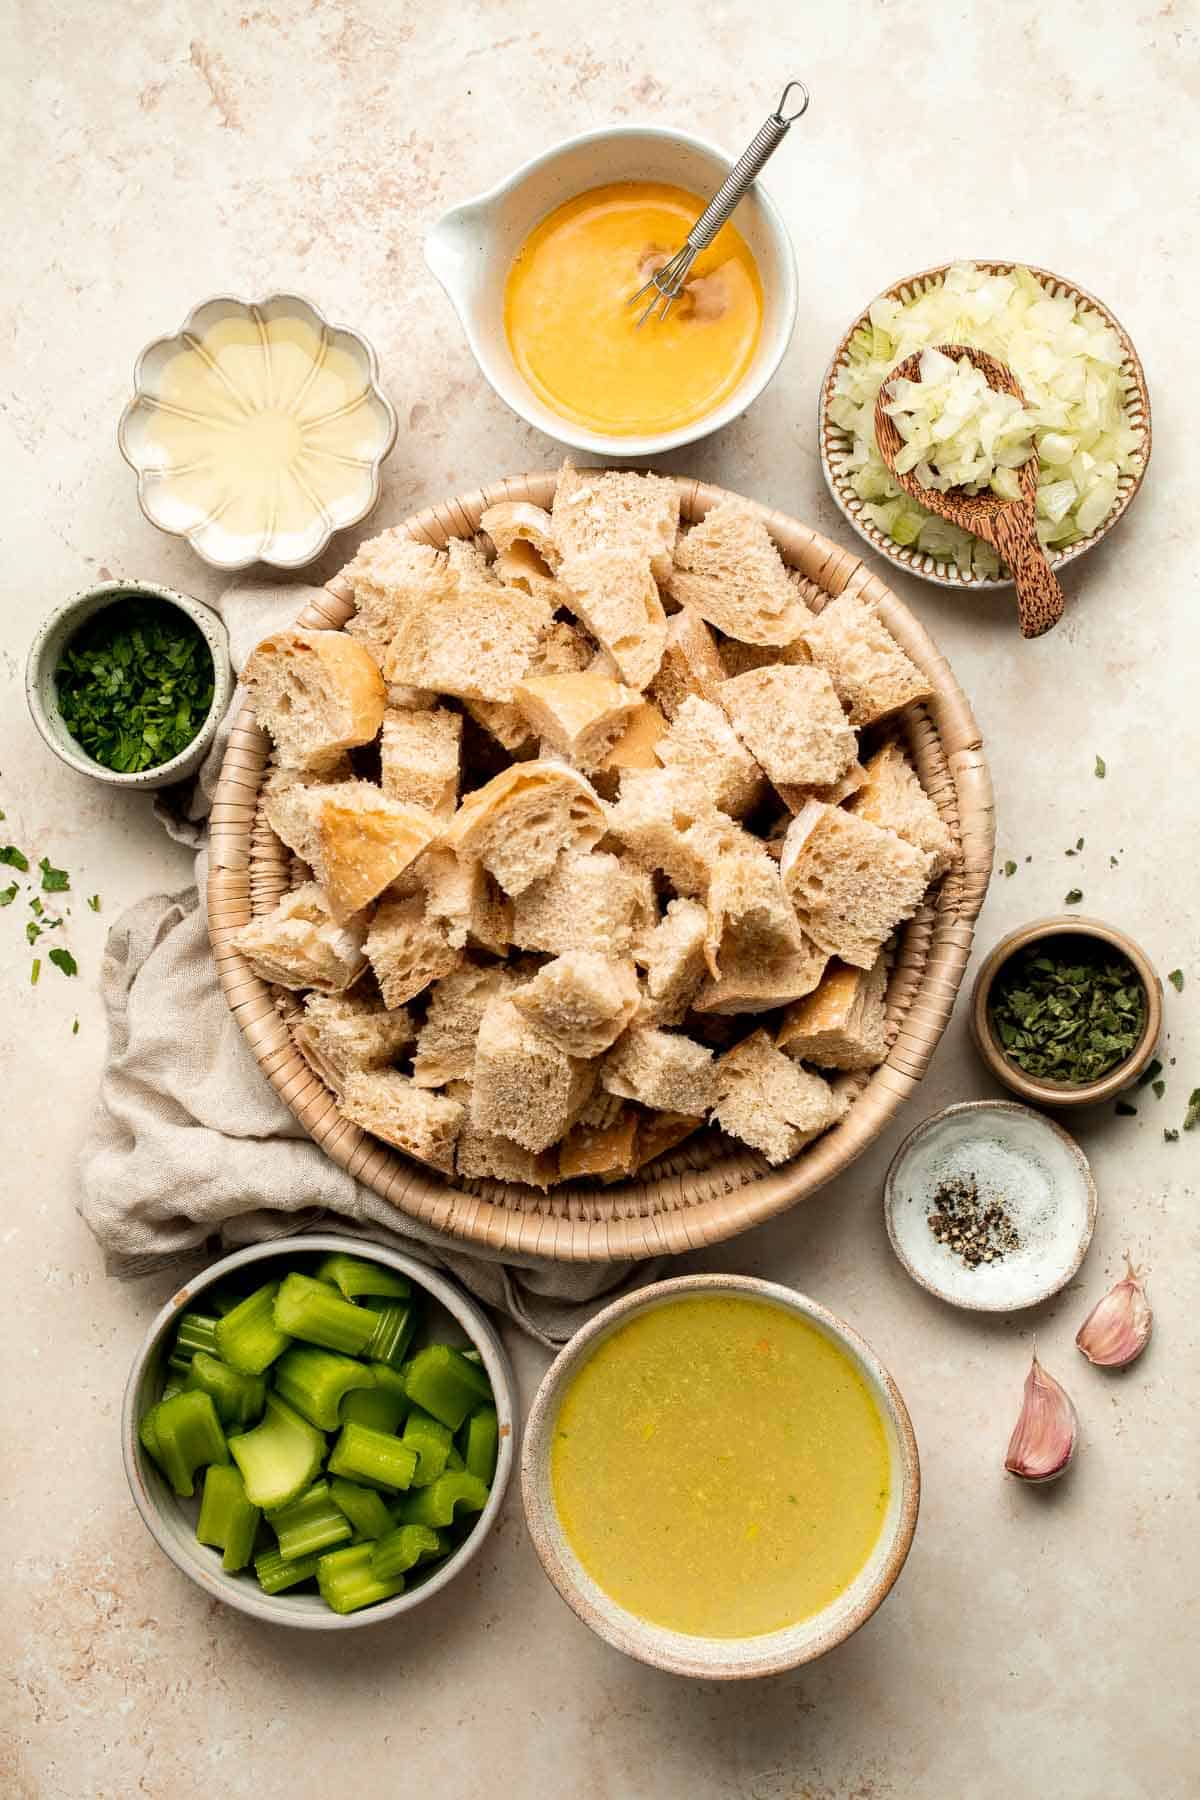
How to Make the Best Homemade Stuffing
- Dry the bread. Evenly arrange the cubed bread onto a large sheet pan. Transfer into the oven while the oven is preheating and keep it in the oven for a total of 20 minutes, or until the bread crisps up. This helps the bread cubes dry out and become crunchy.
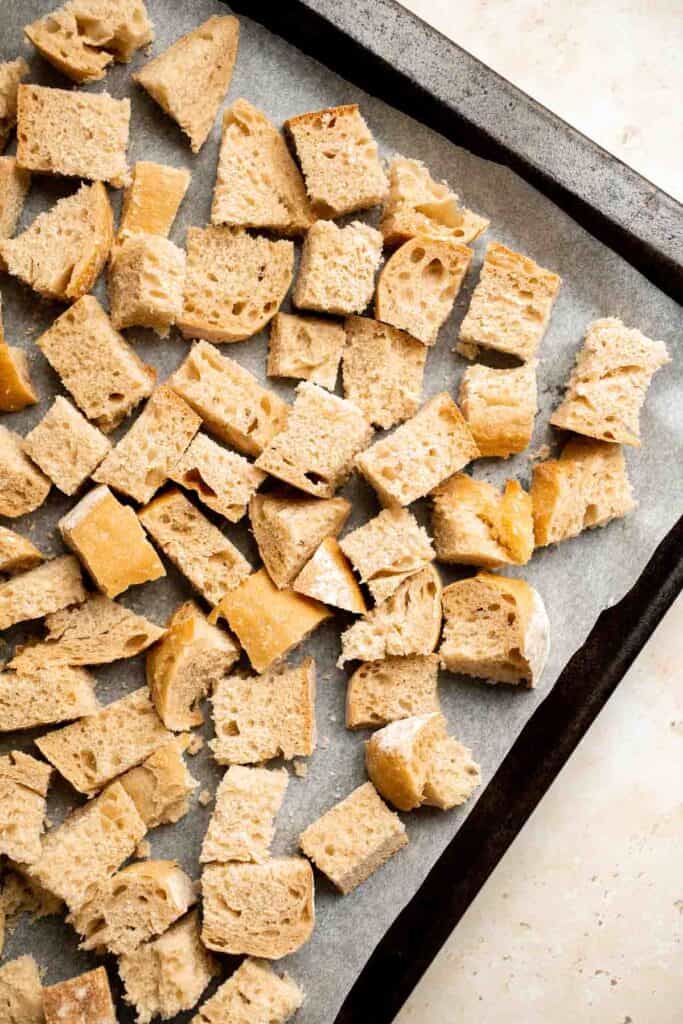
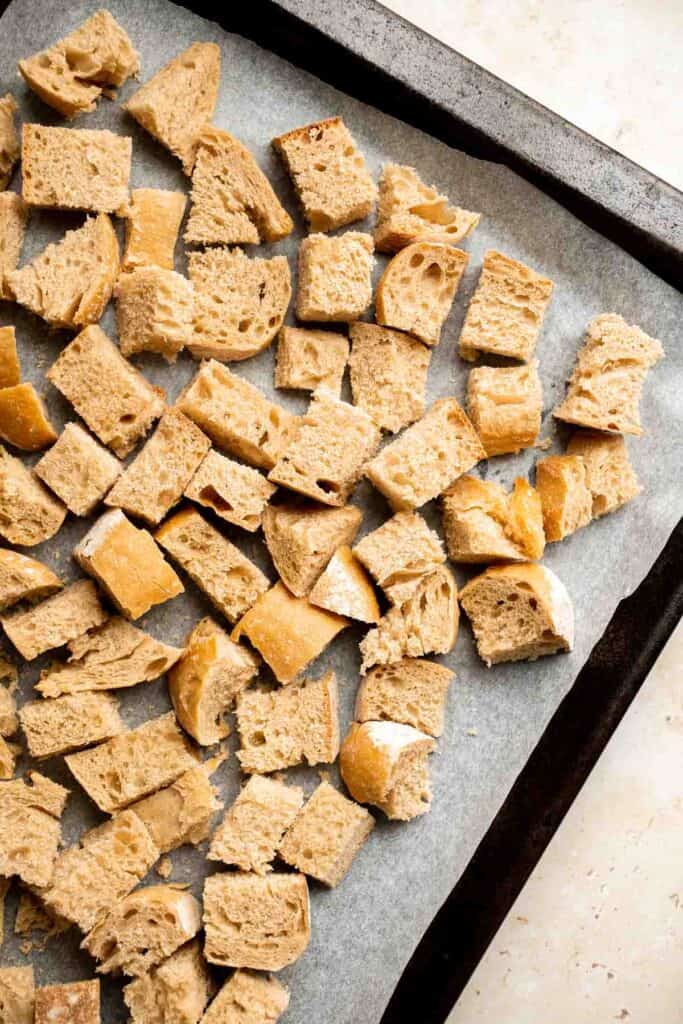
- Sauté vegetables. Heat oil in a large cast-iron skillet over medium heat for 2 minutes until the oil is hot and starts to sizzle and shimmer. Add onion, garlic, and celery and sauté until tender, about 5 minutes. Season with salt and pepper.
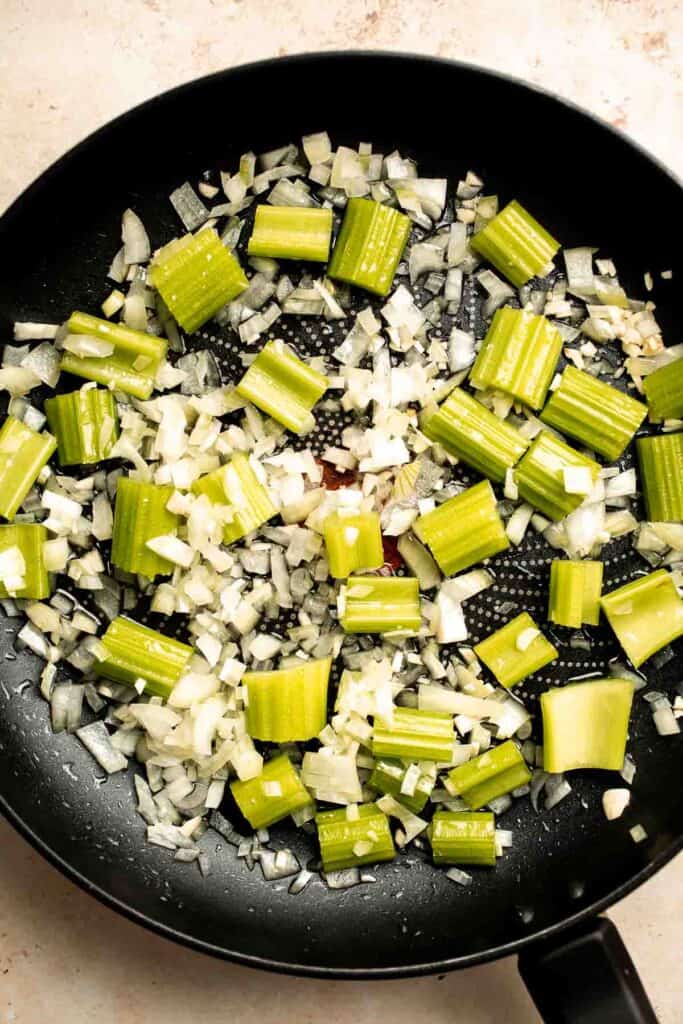
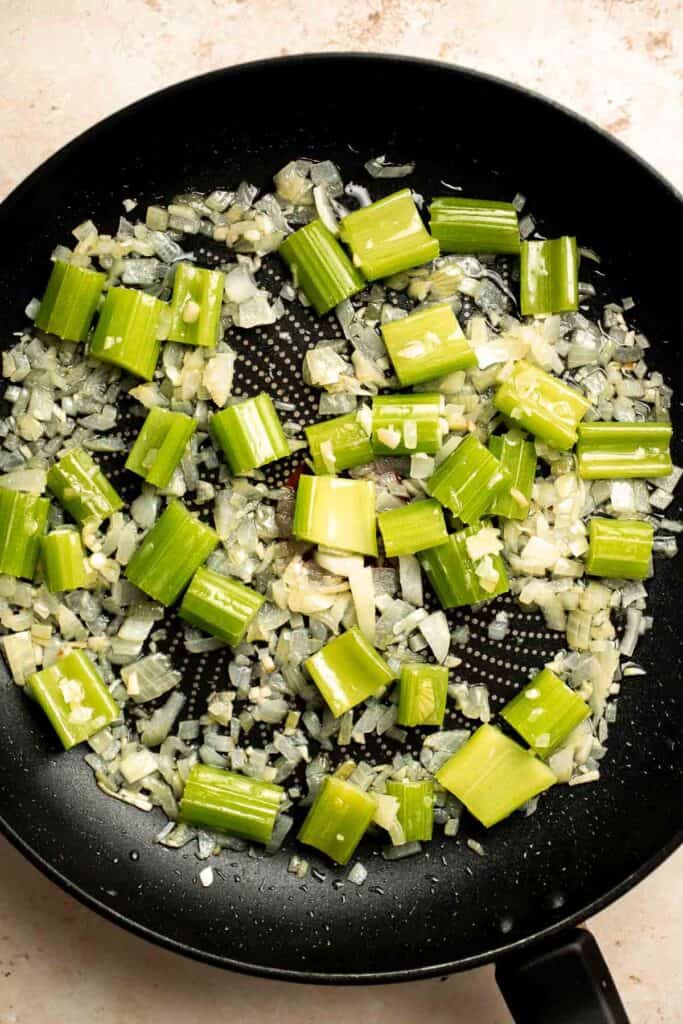
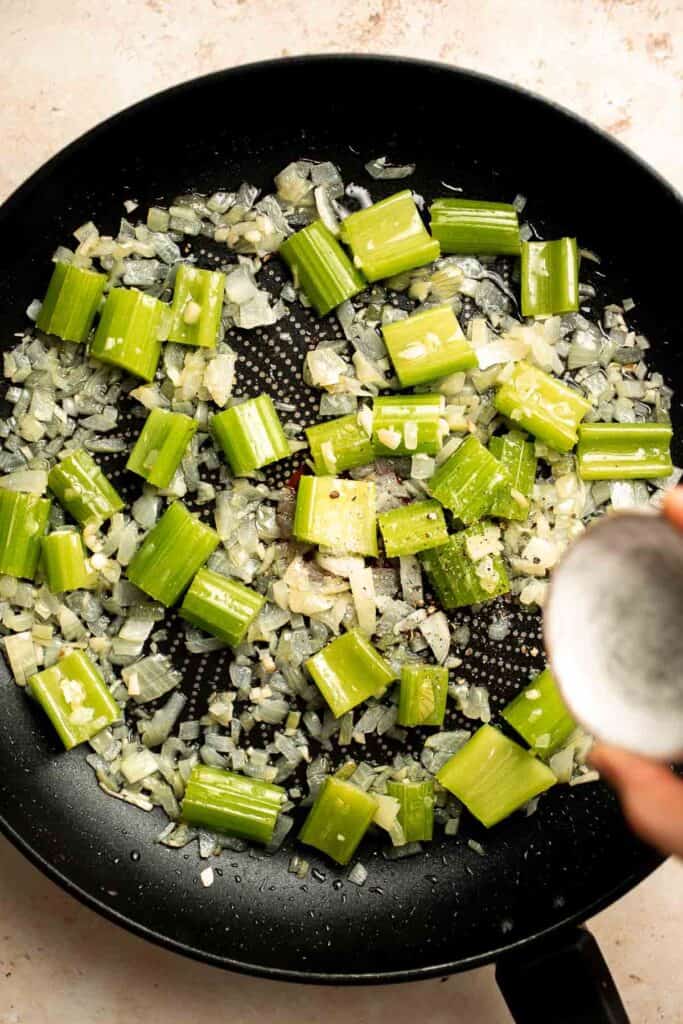
- Mix together. Transfer the bread cubes, sauteed vegetable mixture, thyme, and parsley to a 9x13-inch casserole pan. Toss well until combined.
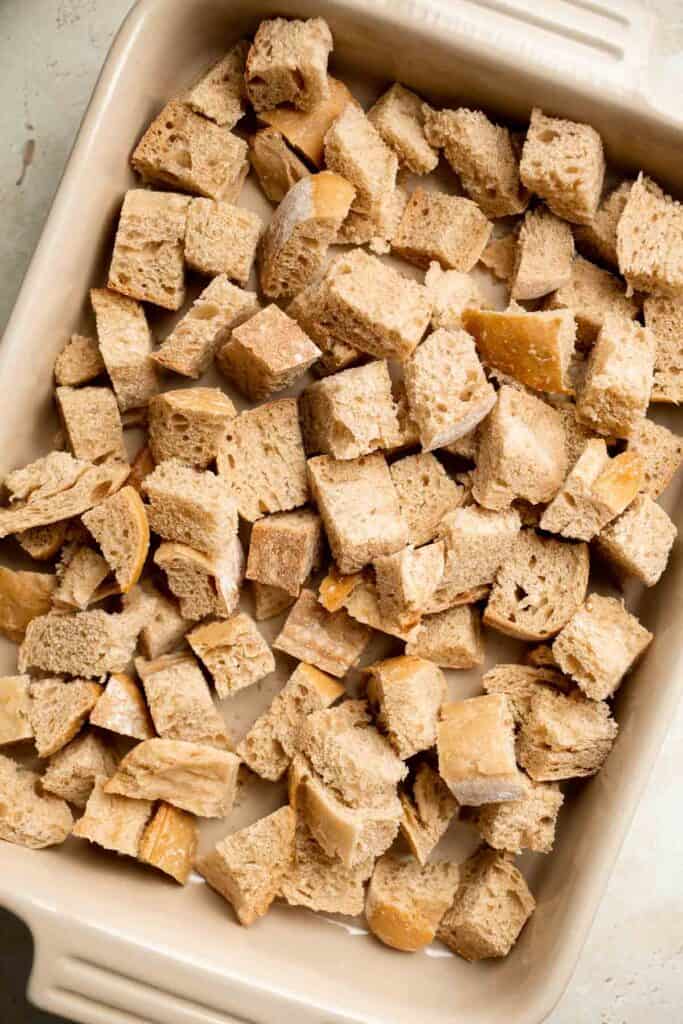
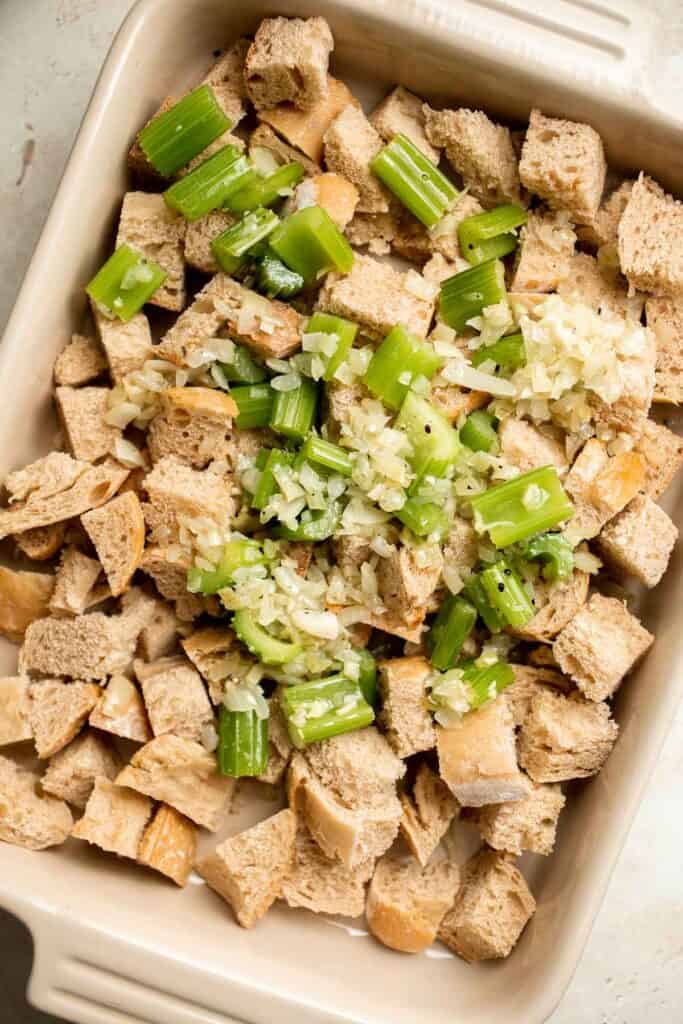
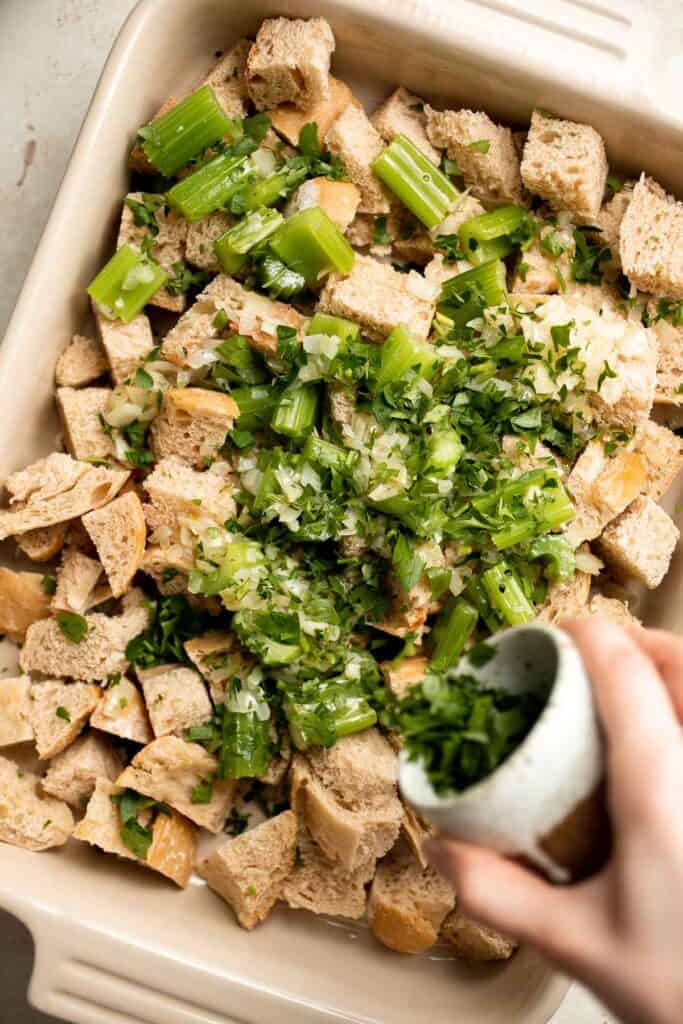
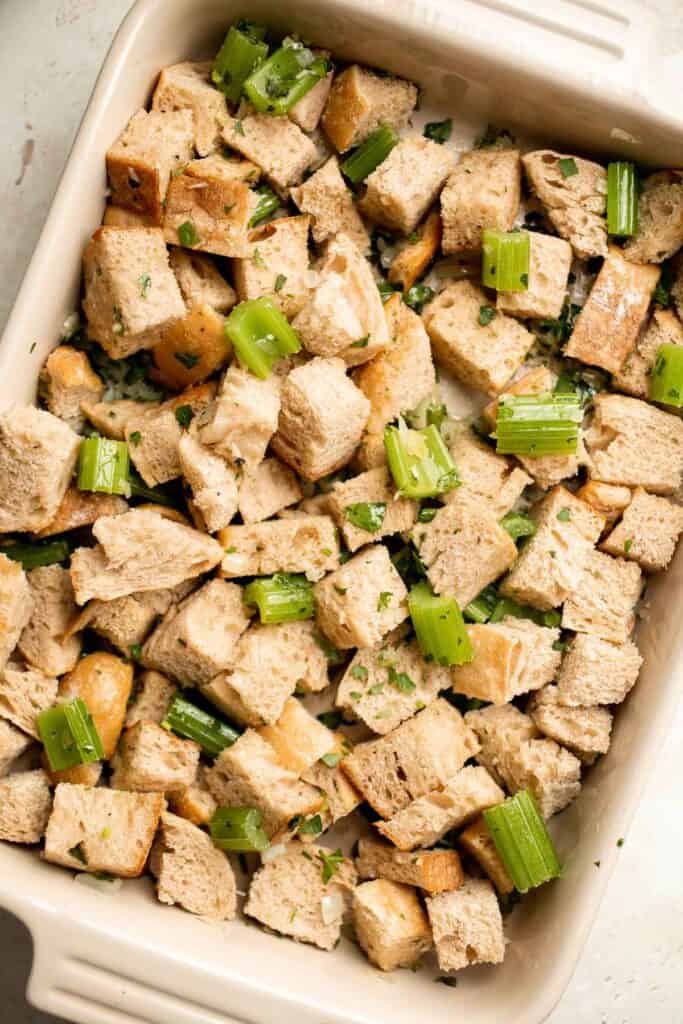
- Add stock and eggs. Evenly pour the vegetable stock on top and toss well again to coat. Add eggs and fold in evenly.
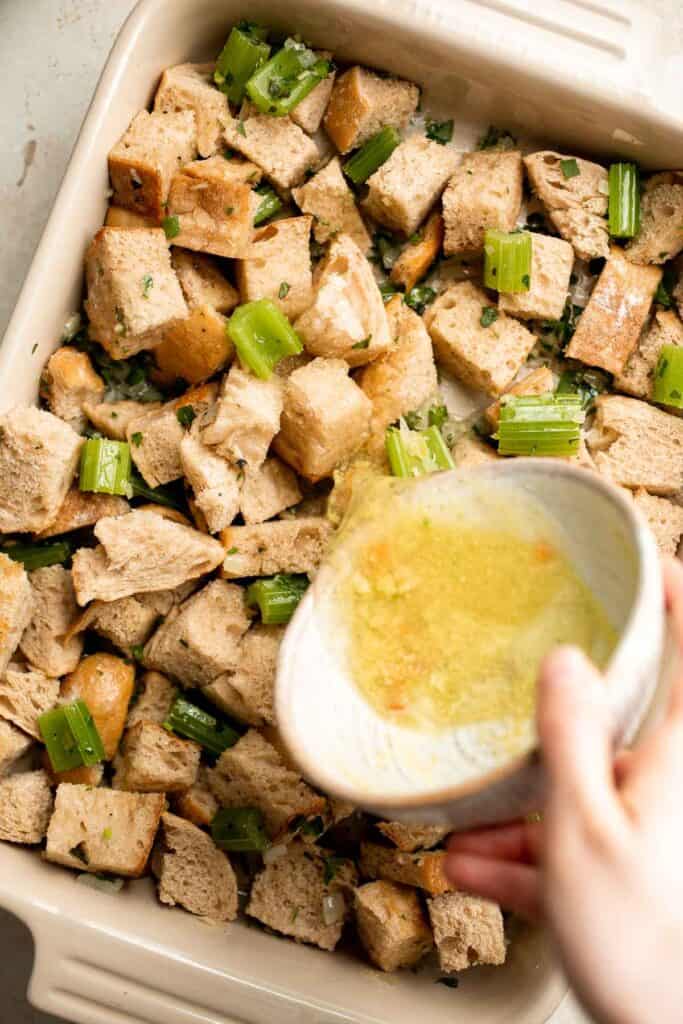
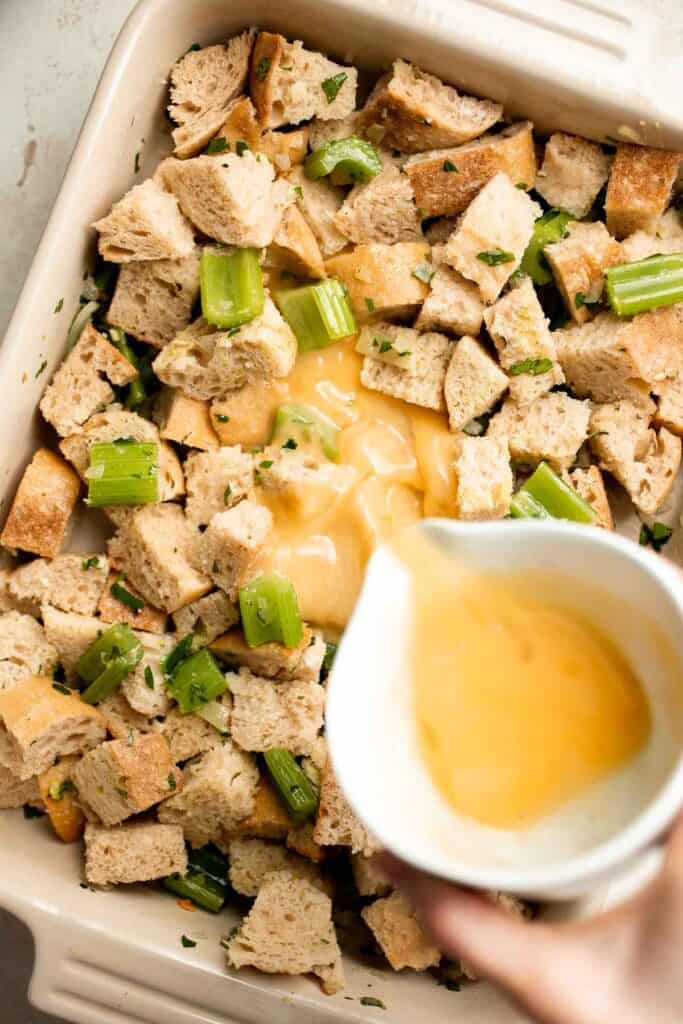
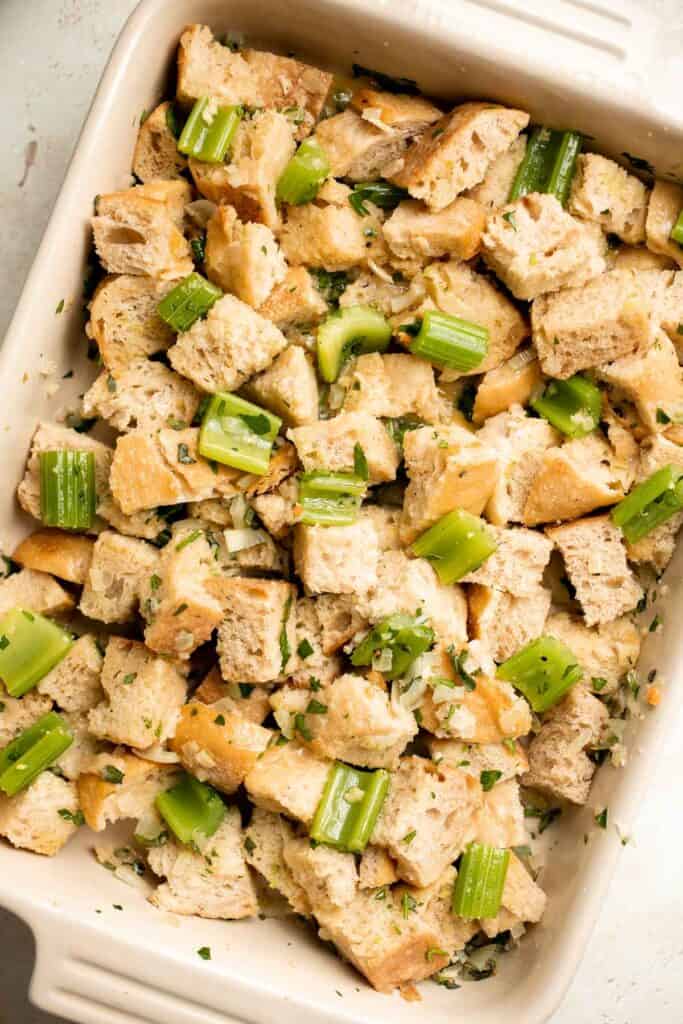
- Cover and bake. Cover with aluminum foil and bake in a 350 F preheated oven for 30 minutes. If the stuffing is still pretty wet, remove the foil and bake for another 10 minutes until the top turns golden brown and crisp.
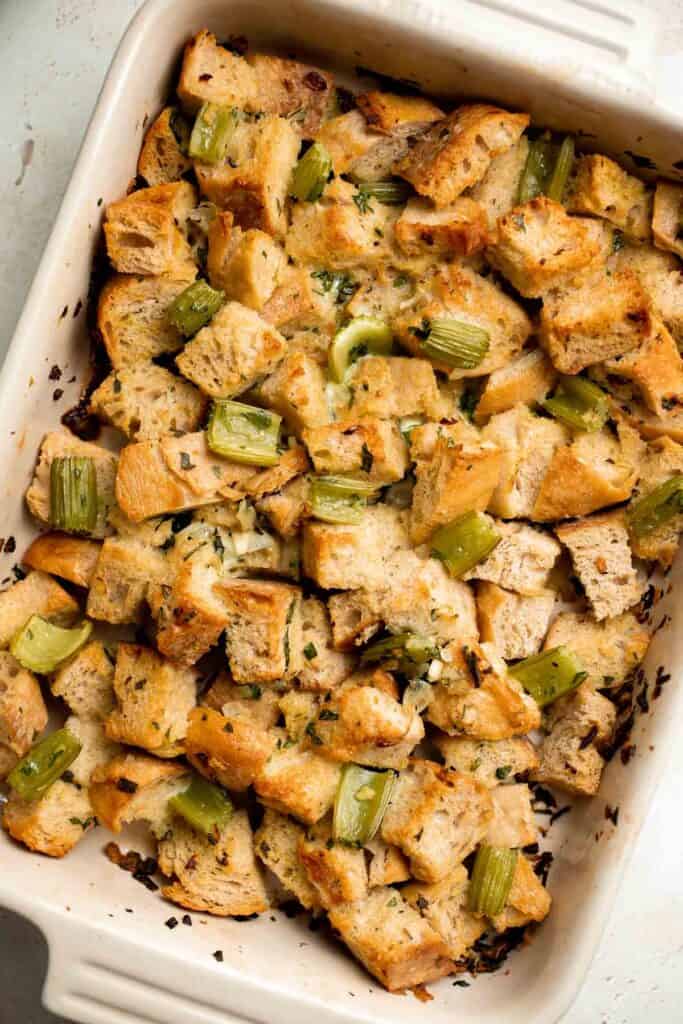
Recipe Variations
- Make sausage stuffing. Cook up a half pound of your favorite sausage, like sage sausage, and let it cool. Stir it into the stuffing mixture before baking.
- Mix different types of bread. You can use any kind of bread you'd like and even mix different types. Sourdough or French bread are two popular choices.
- Add nuts or dried fruits. Chop some walnuts, chestnuts, and/or dried cranberries to add extra color, texture, and flavor to this homemade stuffing.
- Use storebought bread cubes. You can often find prebaked bread cubes at the store the week before Thanksgiving. These can help you skip a few steps.
How to Serve
This Homemade Stuffing is delicious served on its own, or paired with some of my favorite Thanksgiving dinner recipes including:
- Easy Juicy Roasted Turkey Breast
- The Best and Creamiest Mashed Potatoes
- Easy Make-Ahead Cranberry Sauce
- Green Bean Casserole
- Sautéed Garlic Mushrooms
For more recipe inspiration, see our Easy Thanksgiving Menu.
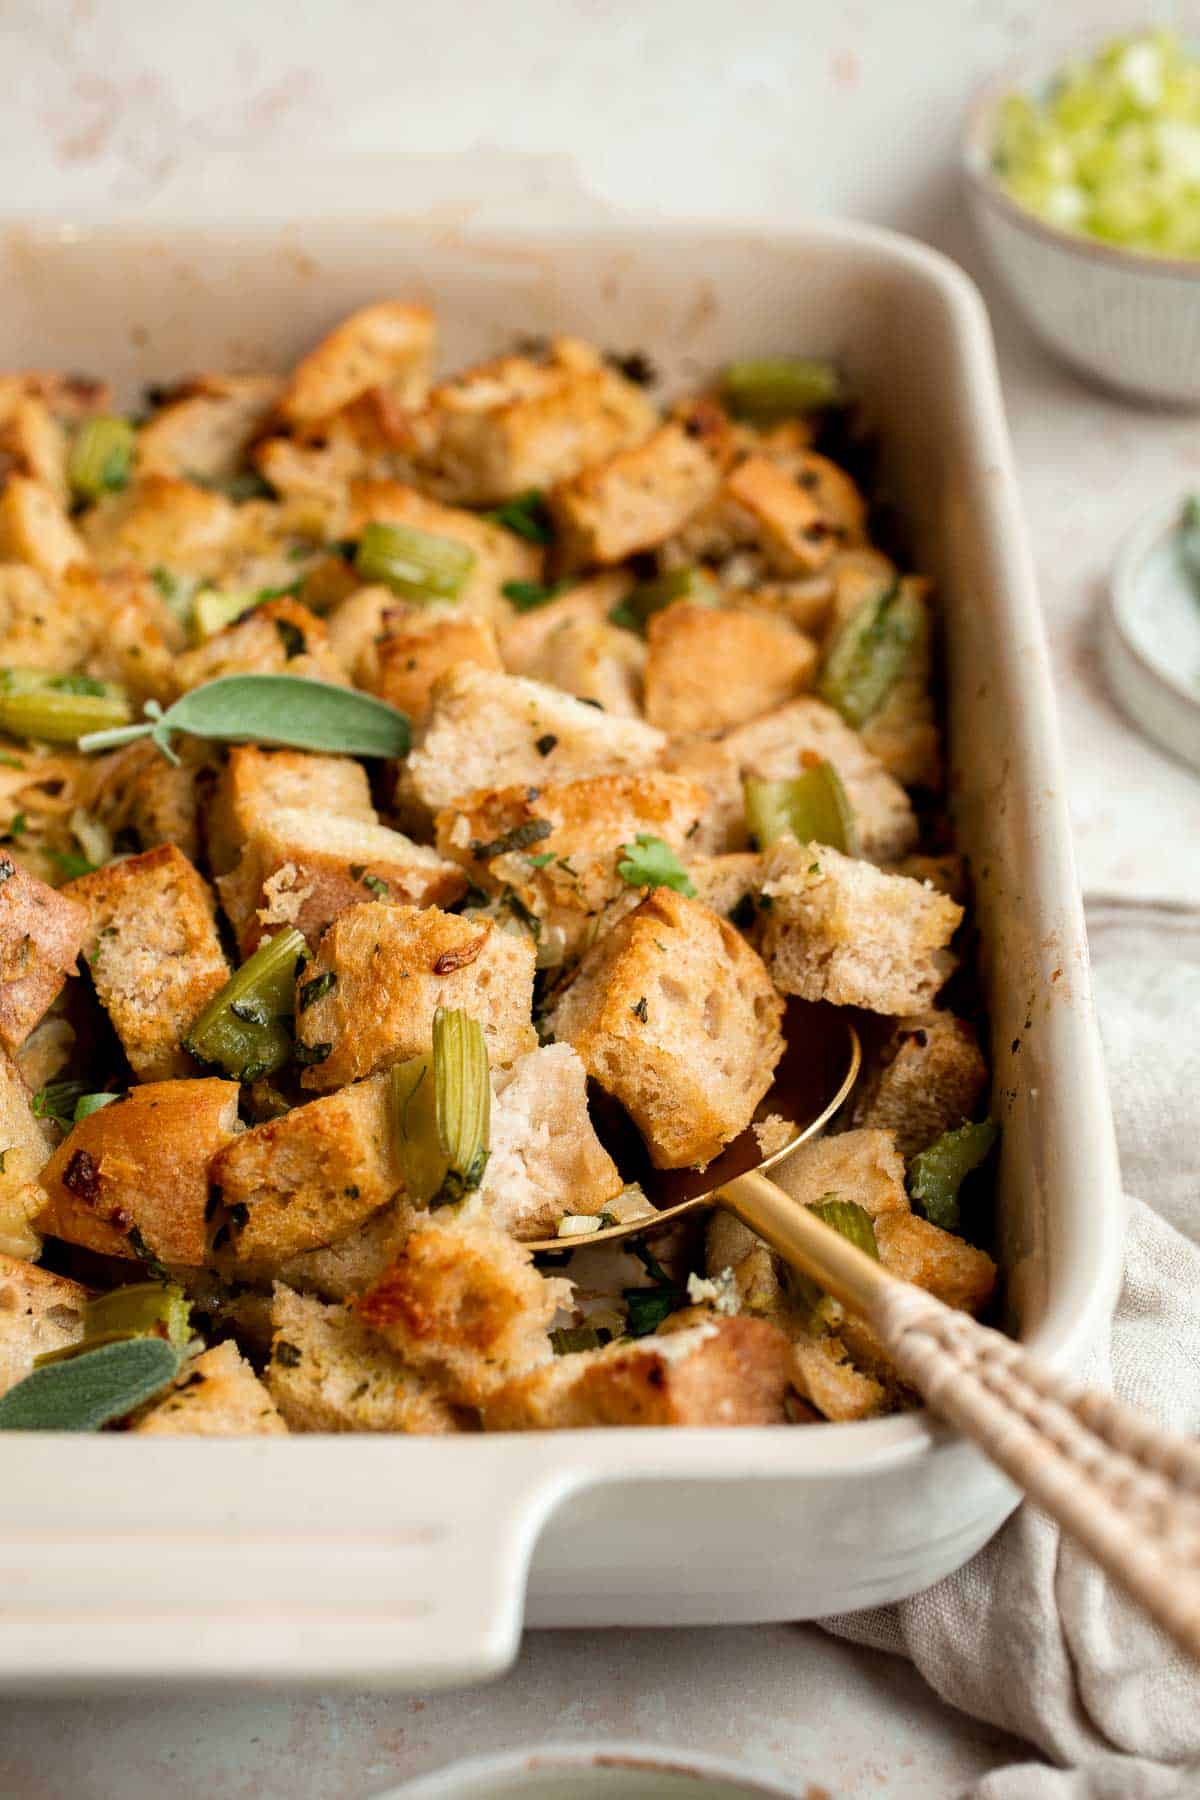
Recipe Tips and Tricks
- Prep in advance. Instead of scrambling on Thanksgiving day, dry out your bread cubes a day or two before. You can also precut the vegetables to have them ready to go.
- Make your own stock. Make your own chicken stock or turkey broth at home for extra flavor.
- Stuff it inside a turkey. You can bake your stuffing in a casserole dish like we did or stuff it inside a whole turkey for a traditional approach.
Storing and Freezing Instructions
How to Store
Store any leftover stuffing in an airtight container in the fridge for 3-4 days.
How to Reheat
Either microwave your leftover stuffing for 30 seconds to 1 minute or bake a small dish of it in the oven or air fryer at 350 for 2-3 minutes to warm it up.
How to Freeze
If you have too much stuffing on hand, freeze it in a freezer-safe container or freezer bag for 2-3 months. Thaw it in the fridge before reheating.
FAQ
You only need a few simple ingredients to make the best homemade stuffing recipe. Start with dry bread cubes, then sauté onion, garlic, and celery in oil or butter. Toss the bread with vegetables, stock, eggs, fresh herbs, and salt and pepper before baking it in a large baking dish. The vegetables, stock, and spices will rehydrate the dry bread, giving it a light, fluffy texture and tons of flavor.
There are so many different types of breads to use for stuffing! You can easily make this classic stuffing recipe with regular white bread, French bread, Italian bread, or sourdough, but you can also use challah bread, Hawaiian bread, whole wheat, cornmeal, and more. Just make sure the bread is fully dried.
For the very best stuffing, you must use dry, stale bread. Fresh bread is soft, so when you mix it with vegetable stock and eggs, it turns into a soggy stuffing no one will want to eat. Start with really dry bread cubes. These are commonly available at the grocery store, or you can dry fresh bread in the oven until the bread pieces are crispy and dry.
More Thanksgiving Side Recipes
- 50 Best Thanksgiving Side Dishes
- Brown Butter Mashed Potatoes
- Sweet Potato Casserole with Pecans
- Cheesy Brussels Sprouts Bake
- Green Beans with Bacon
- Creamed Corn
Tried this recipe?
I'd love to hear what you think! Leave a comment and rating below to share your feedback. Your reviews help others discover this recipe and help me keep creating more free recipes for you. Snap a photo and tag me on social media @aheadofthyme too.
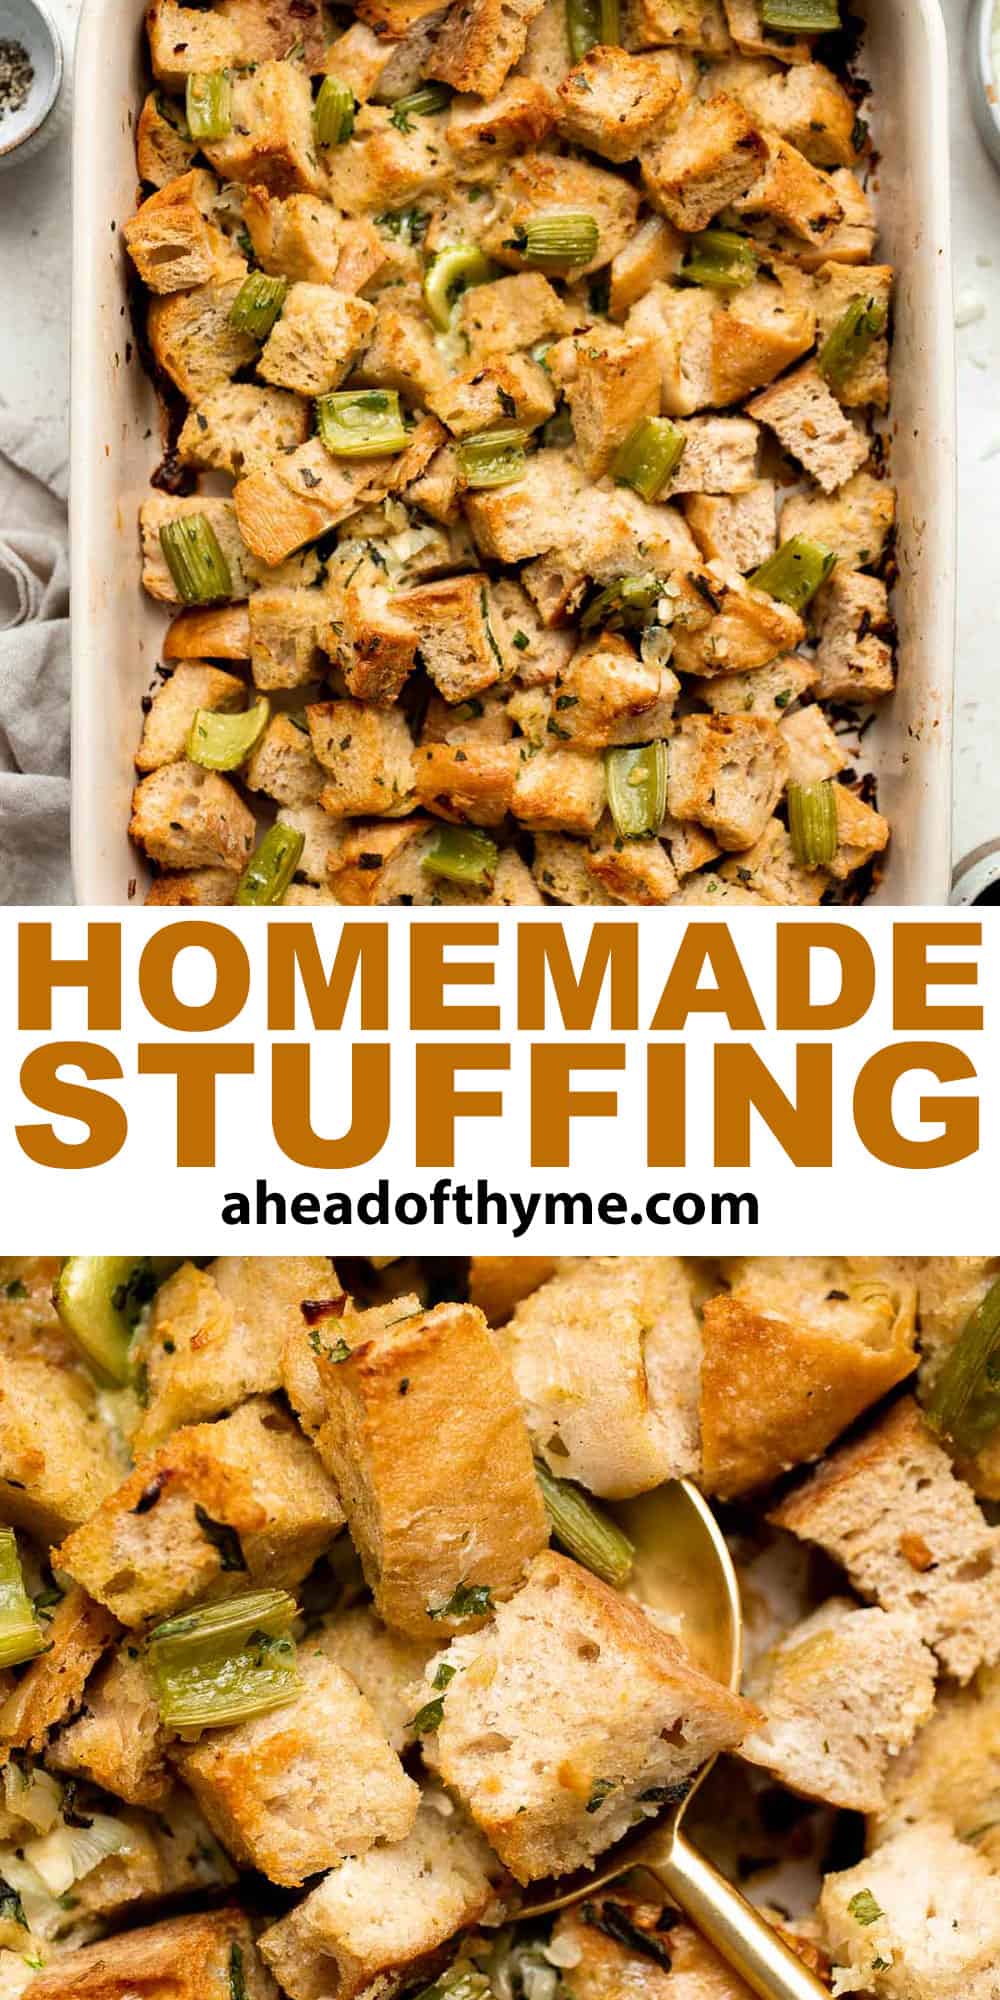
Garlic and Herb Roasted Carrots
Garlic and herb roasted carrots are delicious and flavorful, easy to make, and the perfect vegan holiday side dish for Easter or Thanksgiving - or for any time of the year!

Made with with only four ingredients (plus salt and pepper), one sheet pan, and a few minutes of prep time, these garlic and herb roasted carrots will be one of the easiest sides you can make for dinner, but you wouldn't know it from how good they are. It's not a coincidence that these easy carrots makes the Easter dinner cut. Plus, you can easily transform any leftovers into Roasted Carrot Soup the next day.
Why You'll Love Garlic and Herb Roasted Carrots
- A delicious and easy way to cook carrots. The tastiest (and easiest!) way to make carrots is to roast them. Roasting brings out their flavour and intensifies it, making them sweeter and more flavourful. And why not throw in some garlic and herbs while you are at it? Carrots will never taste the same! For a different flavor, try our can also try our Honey Roasted Carrots or Maple Roasted Carrots.
- Quick to prep. These garlic roasted carrots take just 5-10 minutes to prep and can be prepped directly in the sheet pan which means you only have one dish to clean! It's easy, stress-free, and worry-free, so you can focus on preparing and cooking your other dishes.
- Roasted carrots pair well with everything. Are you making chicken, steak, pork, or salmon for dinner? No matter what your main course is, these garlic and herb roasted carrots taste delicious paired with them. They are also the perfect Easter side dish to serve with a holiday ham.
- Carrots are healthy. These roasted carrots and healthy, vegan, and gluten-free. Packed with nutrients like beta carotene, fiber, vitamin K, potassium, and antioxidants, carrots are great for maintaining healthy cholesterol levels and eye health.
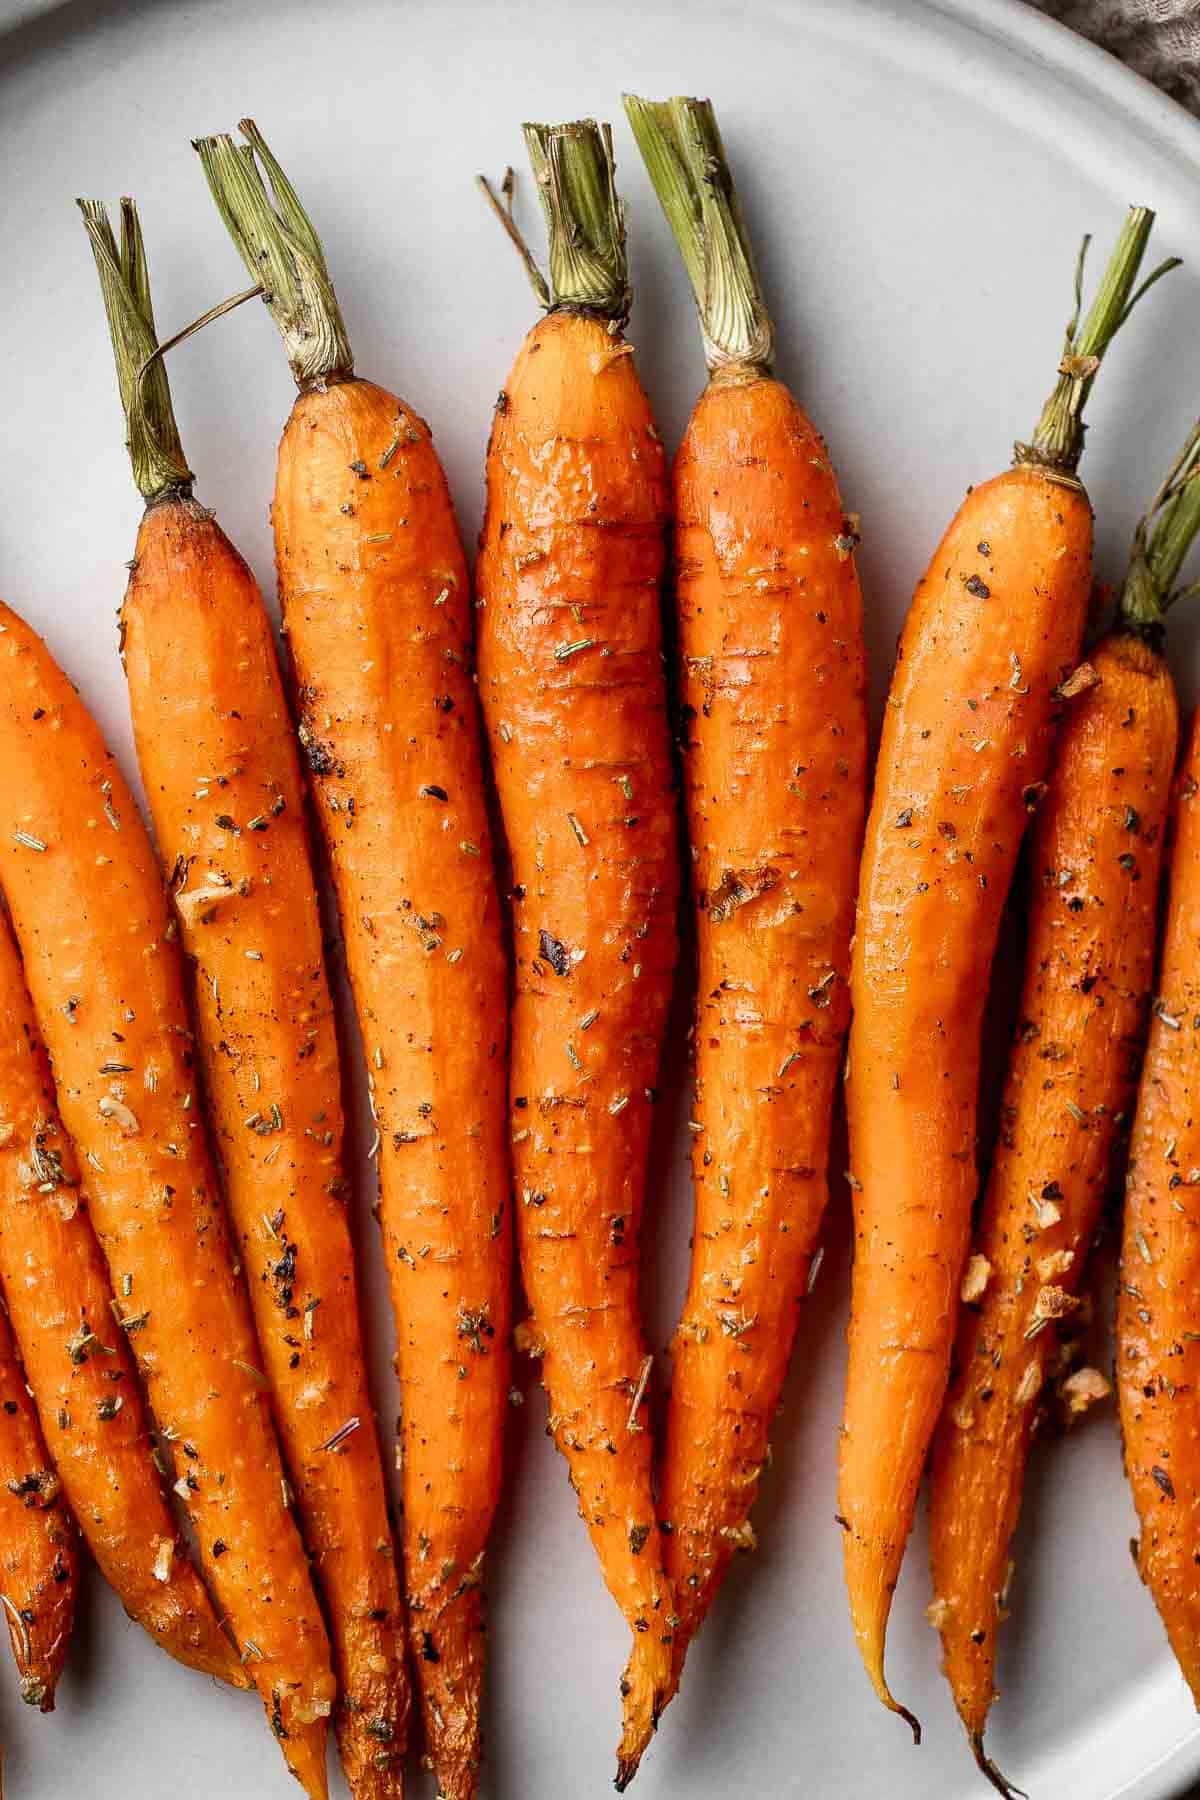
Ingredient Notes
To make easy garlic and herb roasted carrots, you will need a large half sheet baking pan and a few simple ingredients (full measurements in recipe card below):
- baby carrots - I like to use baby carrots in this recipe, but feel free to use medium carrots if that is what you have. Baby carrots are slightly smaller than medium carrots and they still have their stems attached. When choosing the perfect baby carrots, avoid the pre-peeled baby carrots (which are actually whole carrots that are shaped into small pieces). Instead, choose small, fresh carrots that are smooth, bright orange, and firm. Carrots that bend, feel limp, or have discoloured tips are not good.
- olive oil - you can also use any vegetable oil that you have on hand such as avocado oil.
- garlic - we love the potent flavor that fresh garlic adds to these carrots. You can also substitute with ½ teaspoon of garlic powder if that is all you have on hand.
- Italian seasoning - you can also substitute this with dried oregano.
- salt and pepper
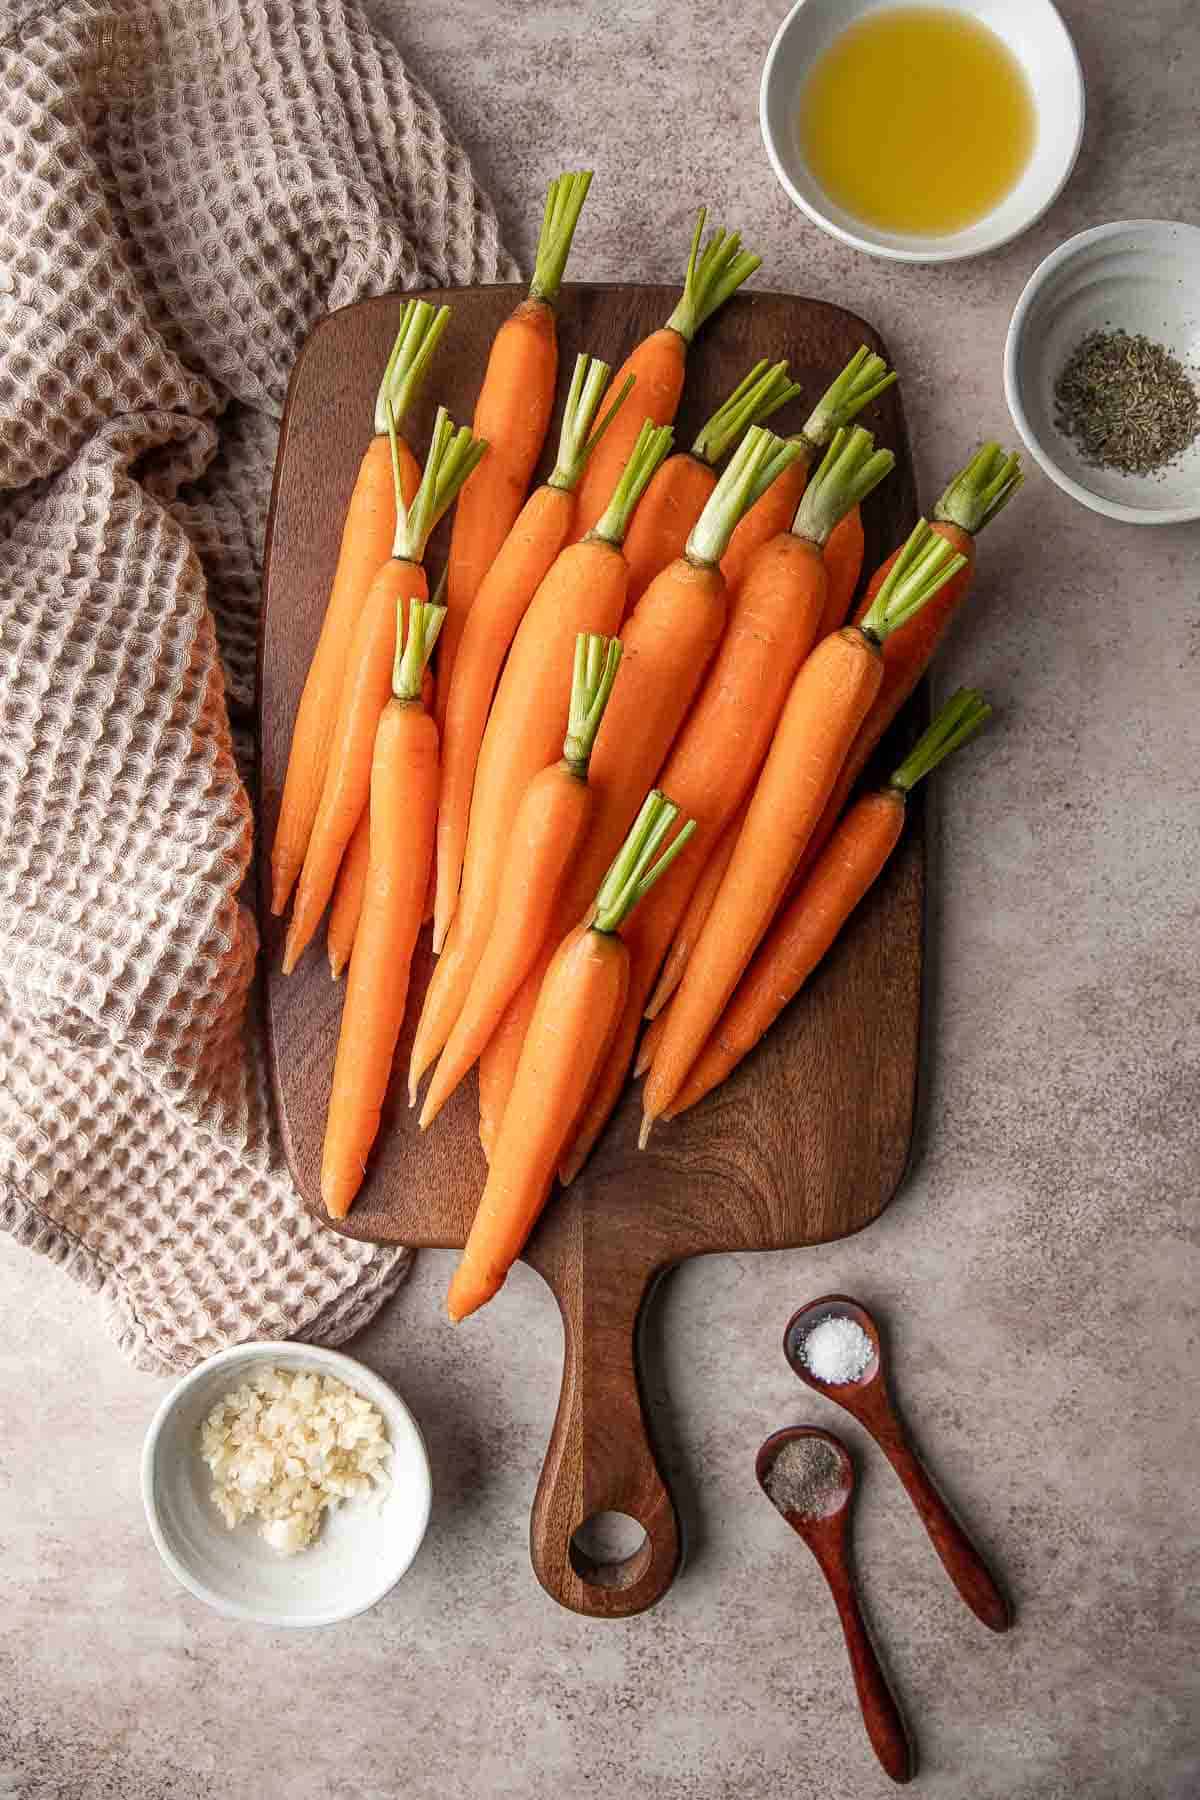
How to Make the Best Garlic and Herb Roasted Carrots
A recipe can't get any easier than two basic steps - season and bake.
- Season the carrots. Place carrots on a large half sheet baking pan and add olive oil, garlic, Italian seasoning, salt, and pepper. Toss to combine. Then, arrange the carrots in a single layer.
- Bake. Place baking sheet into a 375F preheated oven. Bake for 35-40 minutes until tender. Note that you will need to increase the cook time if using larger carrots.
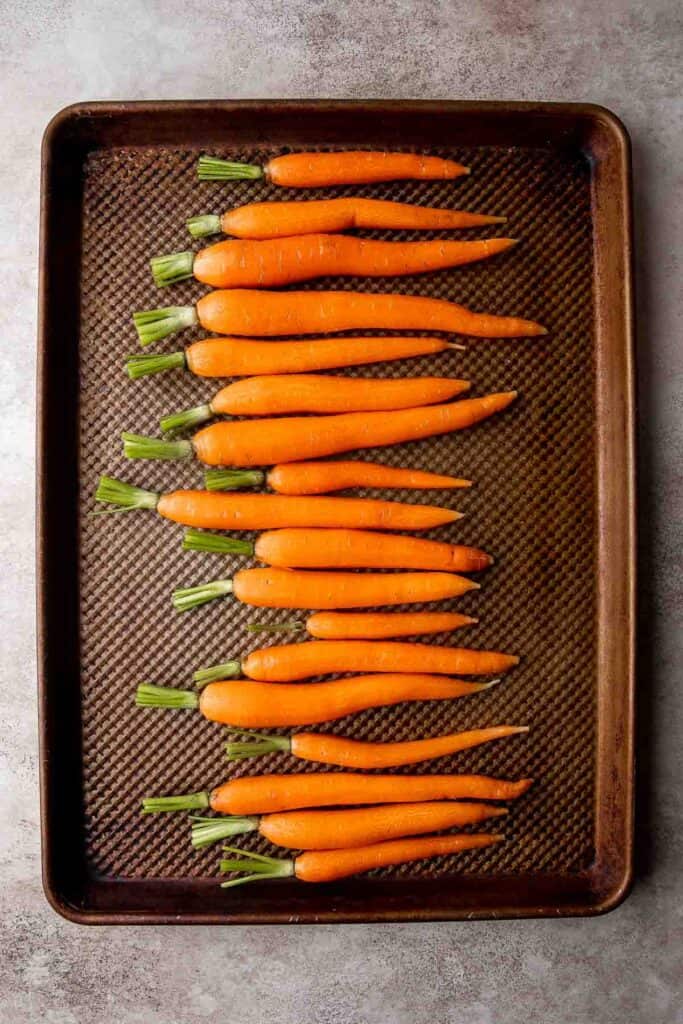
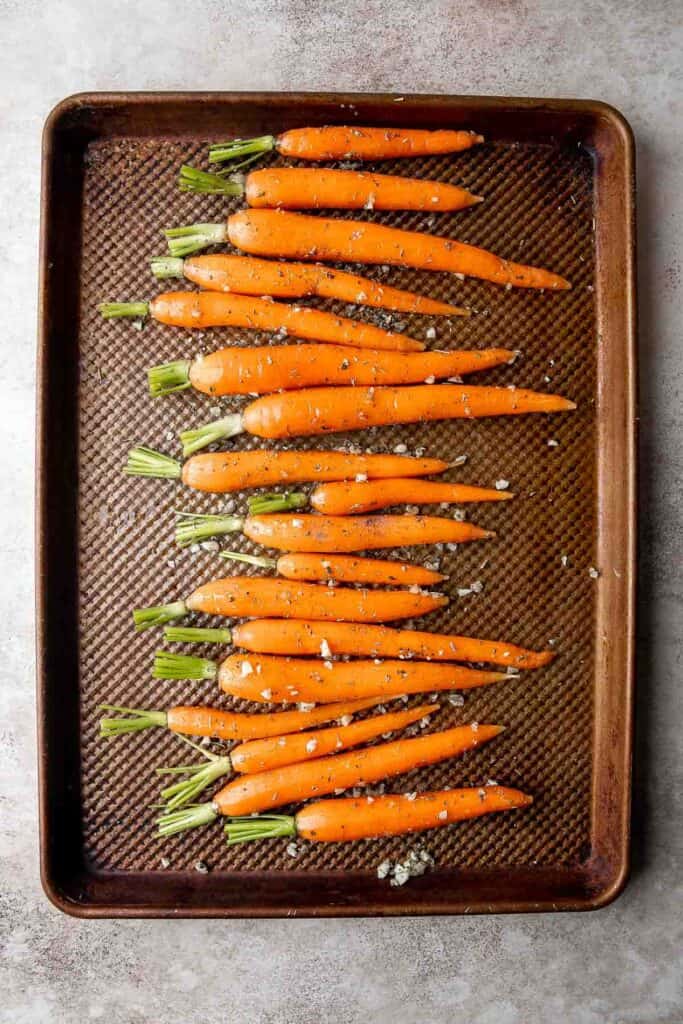
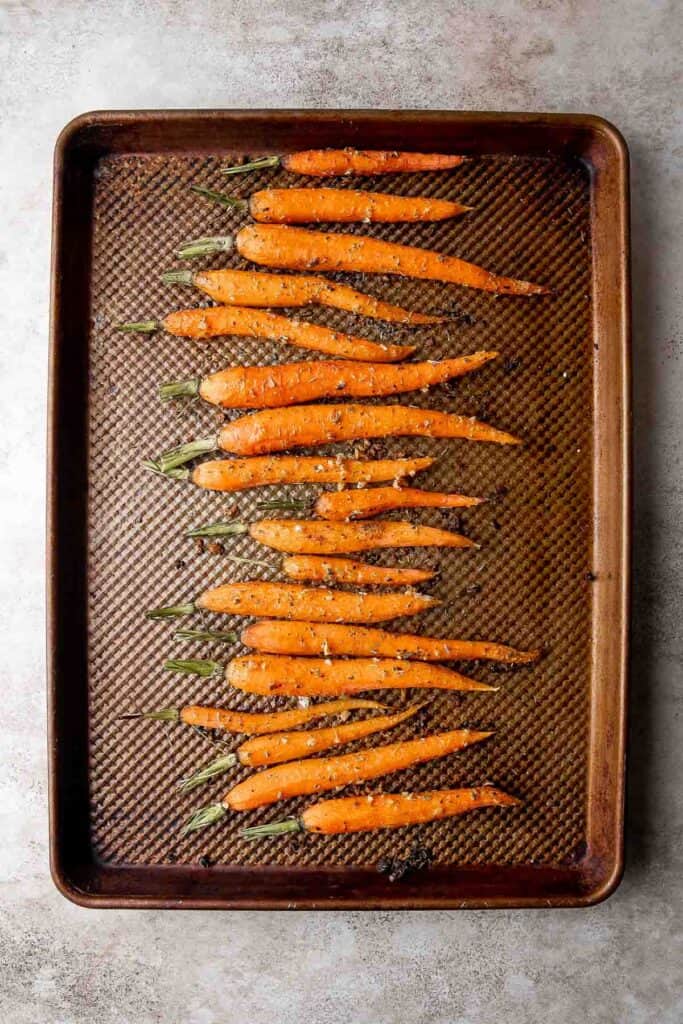
You can also sprinkle some freshly chopped parsley on top when serving.
Recipe Video
Recipe Variations
- Chop up the carrots. You don't have to roast these baby carrots whole. Instead chop them up into bite sized pieces and toss with seasoning. You will need to decrease the cook time to about 30 minutes. See our Roasted Carrots recipe for tips.
- Add a glaze. Give these roasted carrots a sweet twist with a drizzle of honey or maple syrup after roasting. Another delicious glaze to add is balsamic reduction. It's sweet and tangy.
- Make it spicy. Like to heat things up? Add in some smoked paprika, a pinch of cayenne pepper powder, or a sprinkle of red chili flakes.
- Serve with fresh herbs. Make these herb roasted carrots even more herby with a sprinkle of fresh herbs on top when serving. Try parsley, dill, or thyme.
- Add nuts. Add some crunch and flavor by adding some chopped nuts on top for serving. We like these with toasted pecans, walnuts, or almonds.
How to Serve
These Garlic Herb Roasted Carrots are delicious served as a side dish paired with a main course holiday entree or easy weeknight dinner. Some of our favorites to pair with this are:
- Roasted Turkey Breast
- Pineapple Glazed Ham Slices
- Chicken Milanese
- Creamy Salmon Pasta
- Glazed Honey Balsamic Pork Chops
- Butternut Squash Risotto
For more recipe inspiration for holiday mains, see our 40 Best Easter Mains and Entrees.
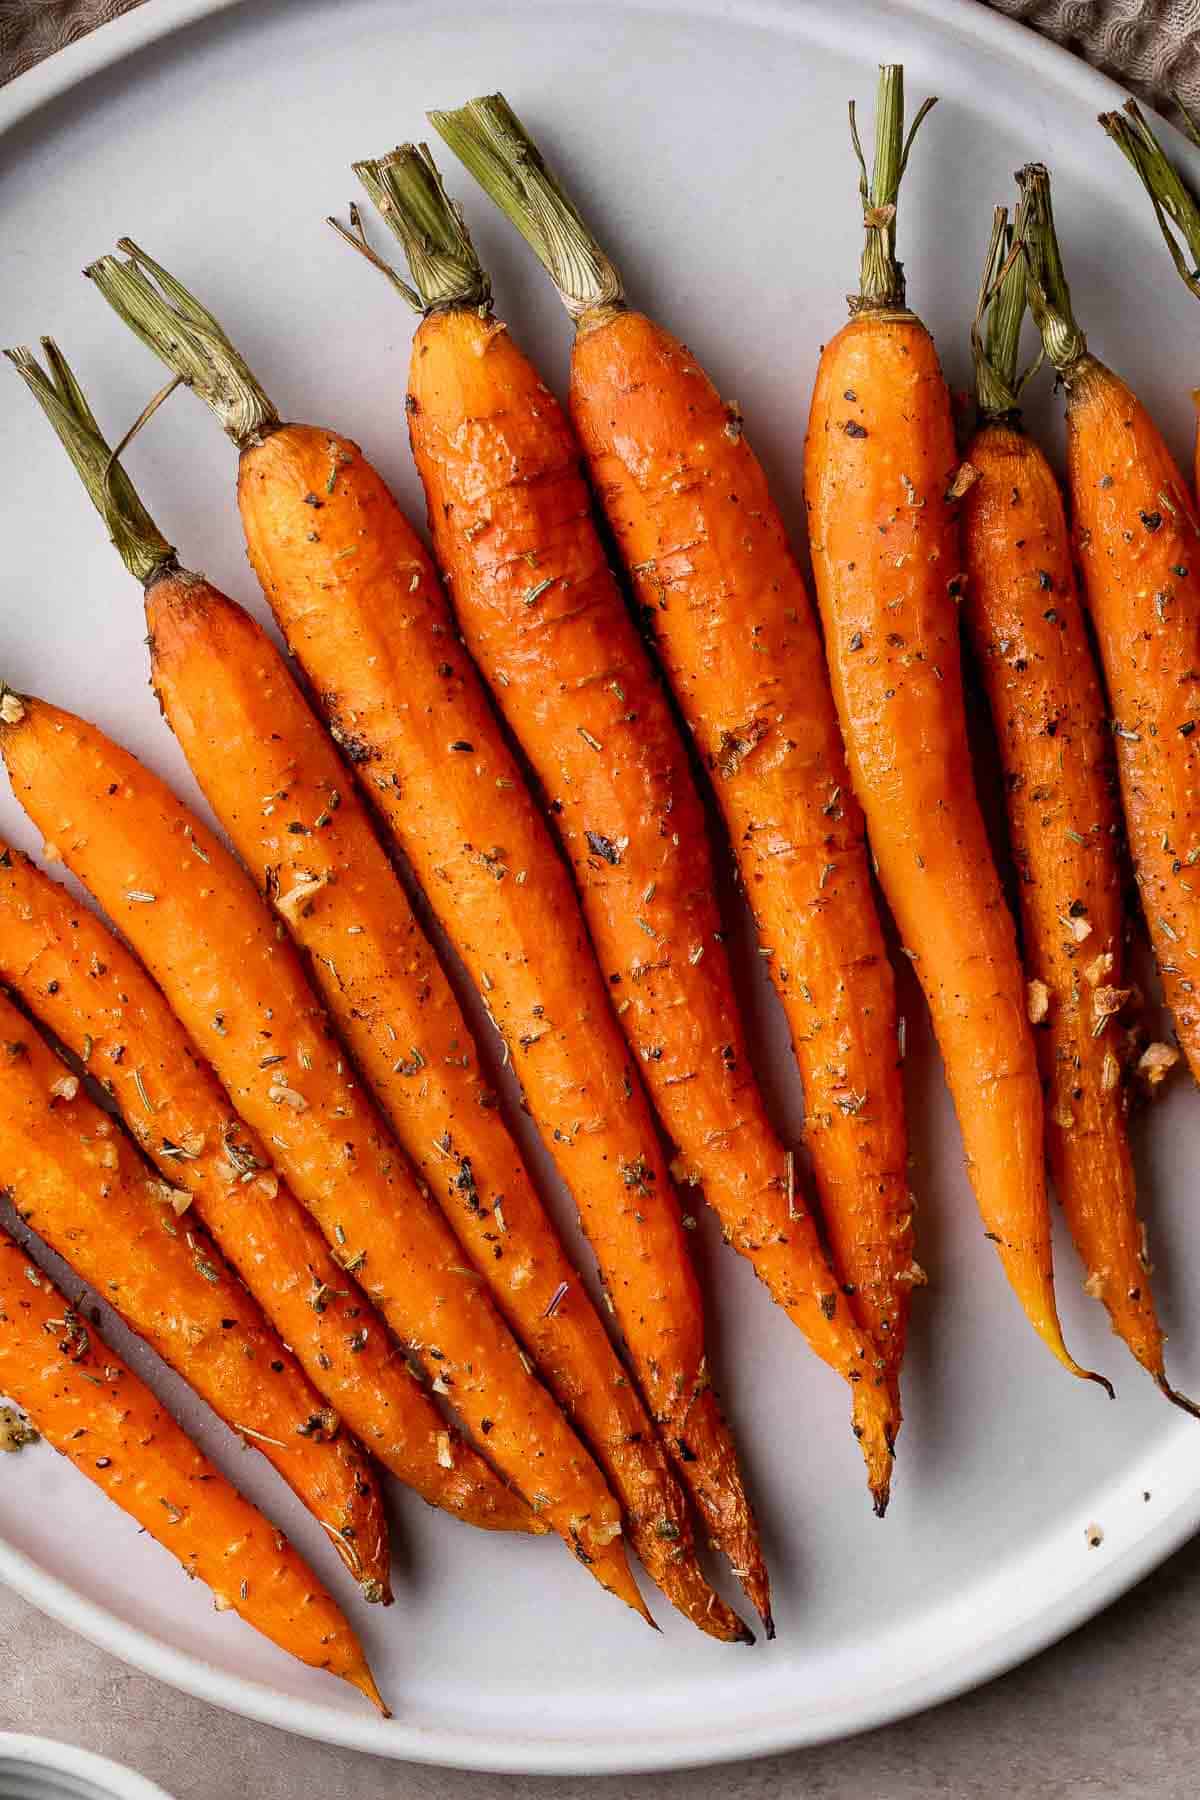
Recipe Tips and Tricks
- Peel the carrots. You can clean and scrub the carrots or peel them using a potato peeler for a more polished look and smoother texture. It's totally optional though.
- Spread them evenly. Be sure to spread the carrots out evenly in a single layer on the baking sheet. If you overcrowd them, the carrots will not result in as crispy as a texture that you get from roasting and instead will be steam cooked.
- How to check doneness. The time it takes to roast these carrots really depends on the size of your baby carrots and how hot your oven actually gets. You can check for doneness by piercing the carrots with a fork. If they slide out easily, that means they are fork tender and ready.
- What to do with leftovers: You can enjoy leftovers as a side dish, just like you did when you made the recipe. Or you can repurpose them into a Roasted Carrot and Ginger Soup (which can be stored even longer in the freezer!) or a Roasted Carrot Salad.
Storing and Freezing Instructions
How to Store
- How to store fresh uncooked carrots: When stored properly, whole raw carrots will stay fresh for up to four weeks. Yes, four weeks! To prolong their shelf-life, you can store them in an airtight container filled with cold water, and replace the water every few days.
- How to store roasted carrots: Honey roasted carrots keep in the refrigerator in an airtight container for up to 4 days. I do not recommend freezing them.
How to Reheat
How to reheat: Reheat roasted carrots in a 350F preheated oven or air fryer until warmed through, about 5-10 minutes.
How to Freeze
Once cooled to room temperature, store the roasted carrots in a freezer bag or airtight container. Freeze for up to 3 months. Allow to thaw overnight in the fridge before reheating or add directly to soups and other stovetop recipes. If planning to add leftovers to soups, I recommend chopping up the carrots before freezing so that you can easily add them to your cooking pot from frozen.
More Carrot Recipes
- 40 Best Carrot Recipes
- Honey Roasted Carrots
- Roasted Spring Vegetables
- Carrot Cake Muffins
- Maple Roasted Carrots with Yogurt Sauce
- Roasted Carrot and Ginger Soup
Tried this recipe?
I'd love to hear what you think! Leave a comment and rating below to share your feedback. Your reviews help others discover this recipe and help me keep creating more free recipes for you. Snap a photo and tag me on social media @aheadofthyme too.

Vegetarian Shepherd's Pie
Ditch the ground lamb and enjoy this cozy Vegetarian Shepherd's Pie that uses a blend of perfectly seasoned mushrooms and lentils instead. Top it all off with fluffy, creamy mashed potatoes for a show-stopping family meal you'll want again and again. It's the ultimate comfort food.
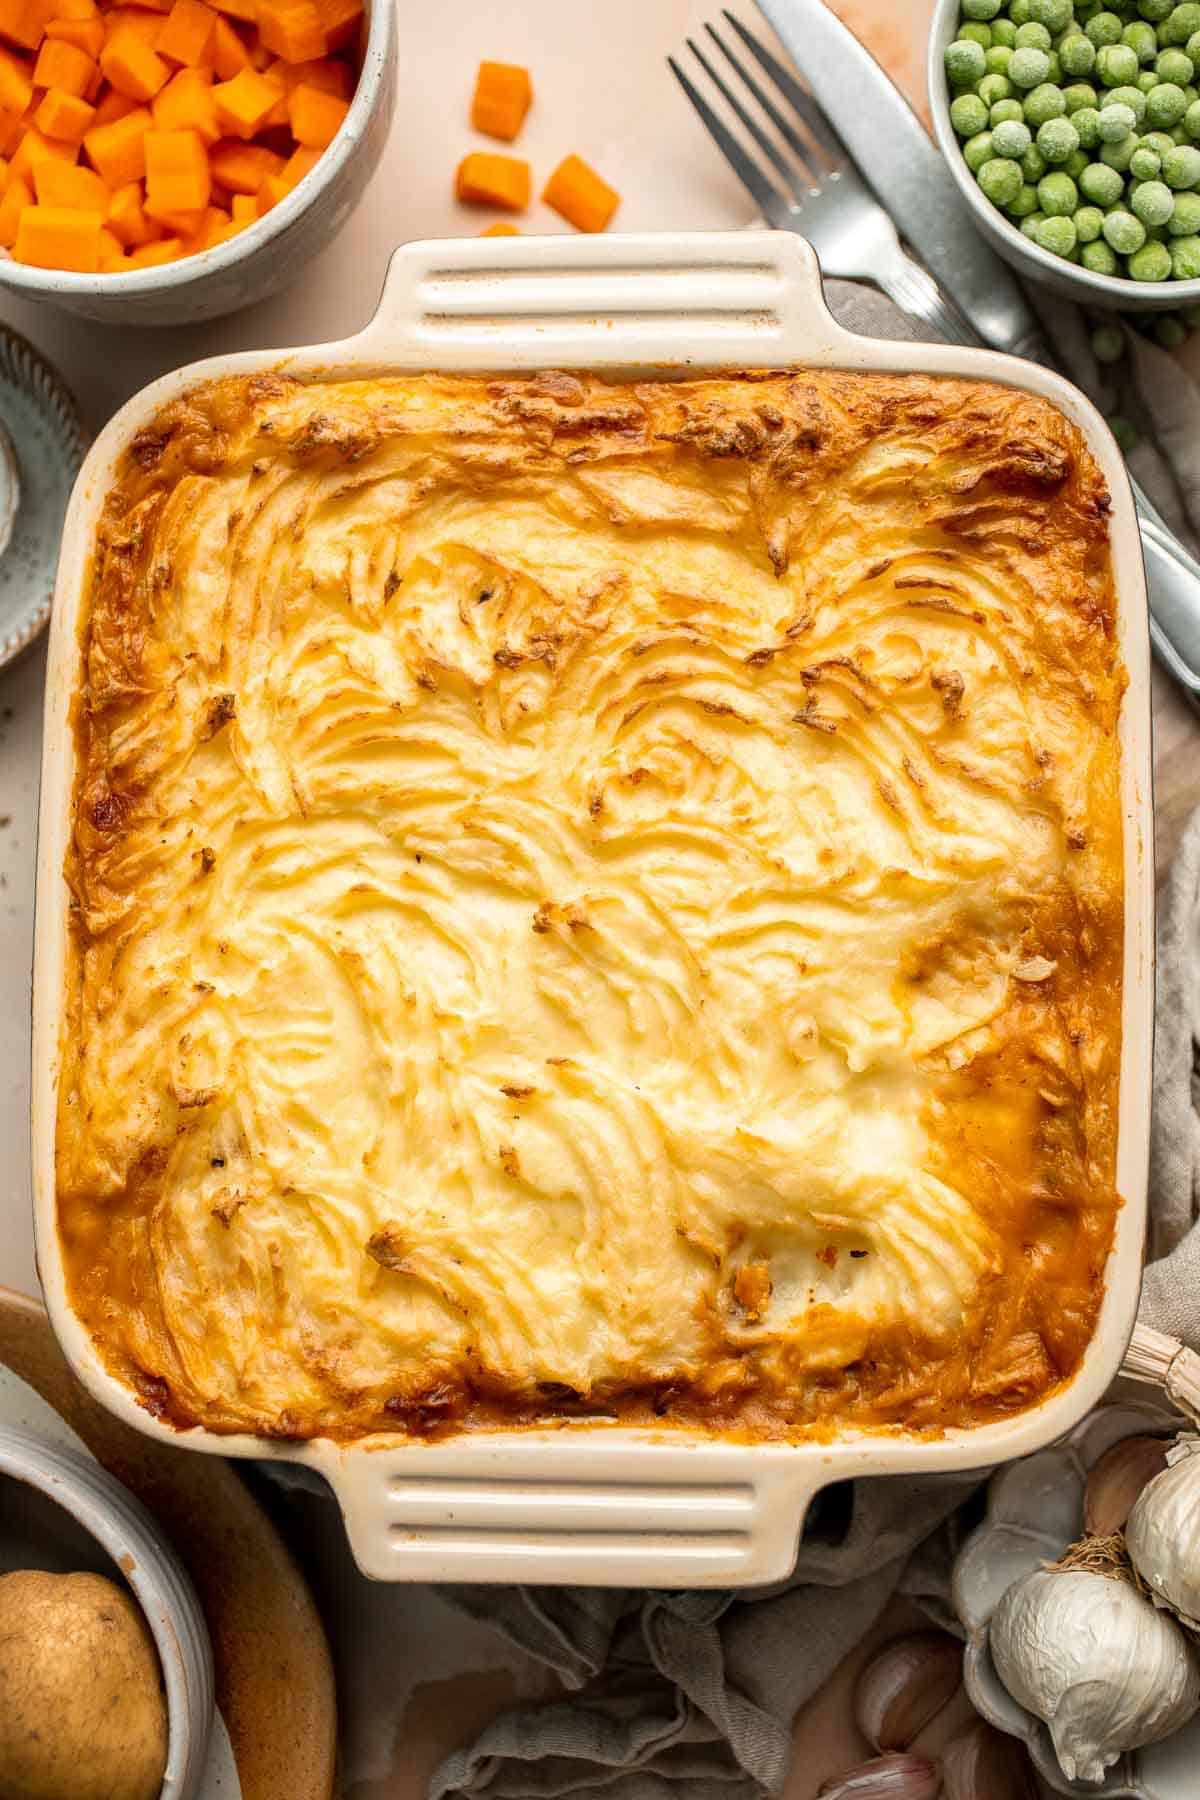
Although Shepherd's pie is usually made with ground lamb, this vegetarian version is just as cozy and filling even without the meat. Mushrooms are a great alternative to ground meat, and the cooked lentils will keep you full for hours. The rest of the flavors are the same ones you already know and love. You won't even know it's vegetarian!
Why You'll Love This Vegetarian Shepherd's Pie
- Perfect make-ahead meal. Prep this lentil shepherd's pie on the weekend and enjoy it all week long as leftovers! It's one of those make-once-and-eat-all-week kinds of recipes (the best kind).
- So filling and hearty. The mushroom and lentil filling will tide you over for hours, absolutely perfect for a cold winter's night. This shepherd's pie without meat is a total crowd favorite!
- Lots of veggies. When we say vegetarian, we really mean veggie-packed. This easy vegetarian shepherd's pie has potatoes, mushrooms, onion, garlic, carrots, and peas, so it's the perfect way to get plenty of veggies into your diet.
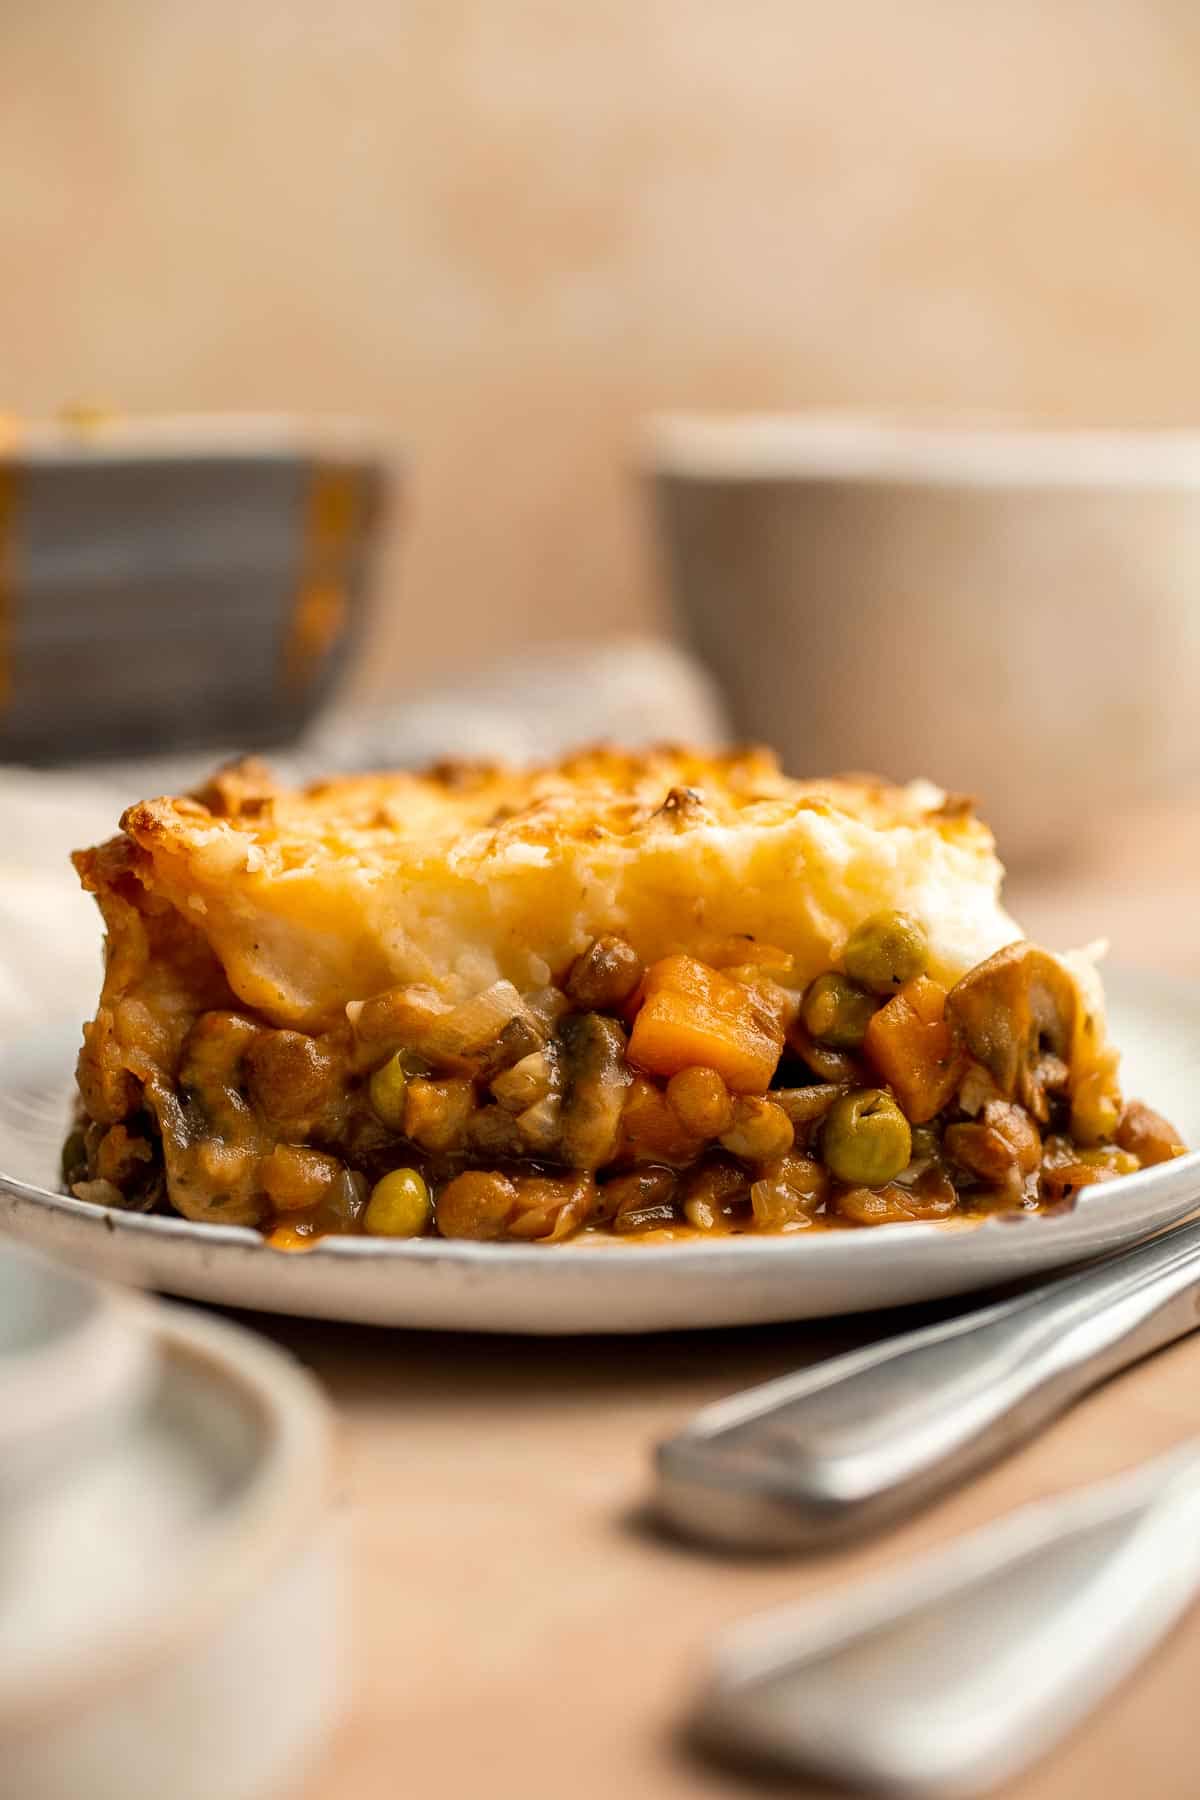
Ingredient Notes
To make this delicious Vegetarian Shepherd's Pie, you will need the following ingredients (full measurements in recipe card below):
For the mashed potato topping:
- russet potatoes - russets are notoriously starchy, so they're the best type of potato for fluffy mashed potatoes. Yukon gold potatoes are great, too.
- unsalted butter - this butter will add a rich, creamy smoothness.
- milk - thin out the cooked potatoes with your favorite milk.
- sour cream - make the flavors pop with Greek yogurt or sour cream.
- garlic powder - a little garlic powder complements the savory vegetable filling.
- salt and black pepper
For the vegetable mixture:
- olive oil - use a drizzle of olive oil to saute your veggies.
- white mushrooms - start by cooking most of the moisture out of the mushrooms. This will keep the filling from becoming overly soggy and highlight their meaty texture.
- onion - choose a yellow or white onion for a slightly sweet, aromatic flavor.
- garlic - adjust the amount of garlic to suit your personal preference.
- carrots - dice these into small cubes to help them cook quickly.
- all purpose flour - a little flour will absorb any excess liquid and create a saucy texture
- Worcestershire sauce - this is optional, but it adds an amazing umami flavor that replicates the flavor of meat. You can try substituting a little soy sauce instead.
- tomato paste - tomato paste has a really rich flavor that makes this vegetarian shepherd's pie recipe taste really hearty.
- Italian seasoning - this blend of herbs works really well in shepherd's pie. Feel free to use dried thyme instead.
- paprika - paprika has a slightly smoky, savory flavor that makes the filling taste meaty.
- vegetable stock - use either veggie broth or water to bring the filling together.
- frozen peas - add these right at the end to preserve their bright green color.
- canned lentils - the combination of cooked lentils and mushroom tastes a lot like ground beef and will make this shepherd's pie even more filling.
- salt and pepper
You will also need a large skillet, 2-quart casserole dish, colander, and potato masher.
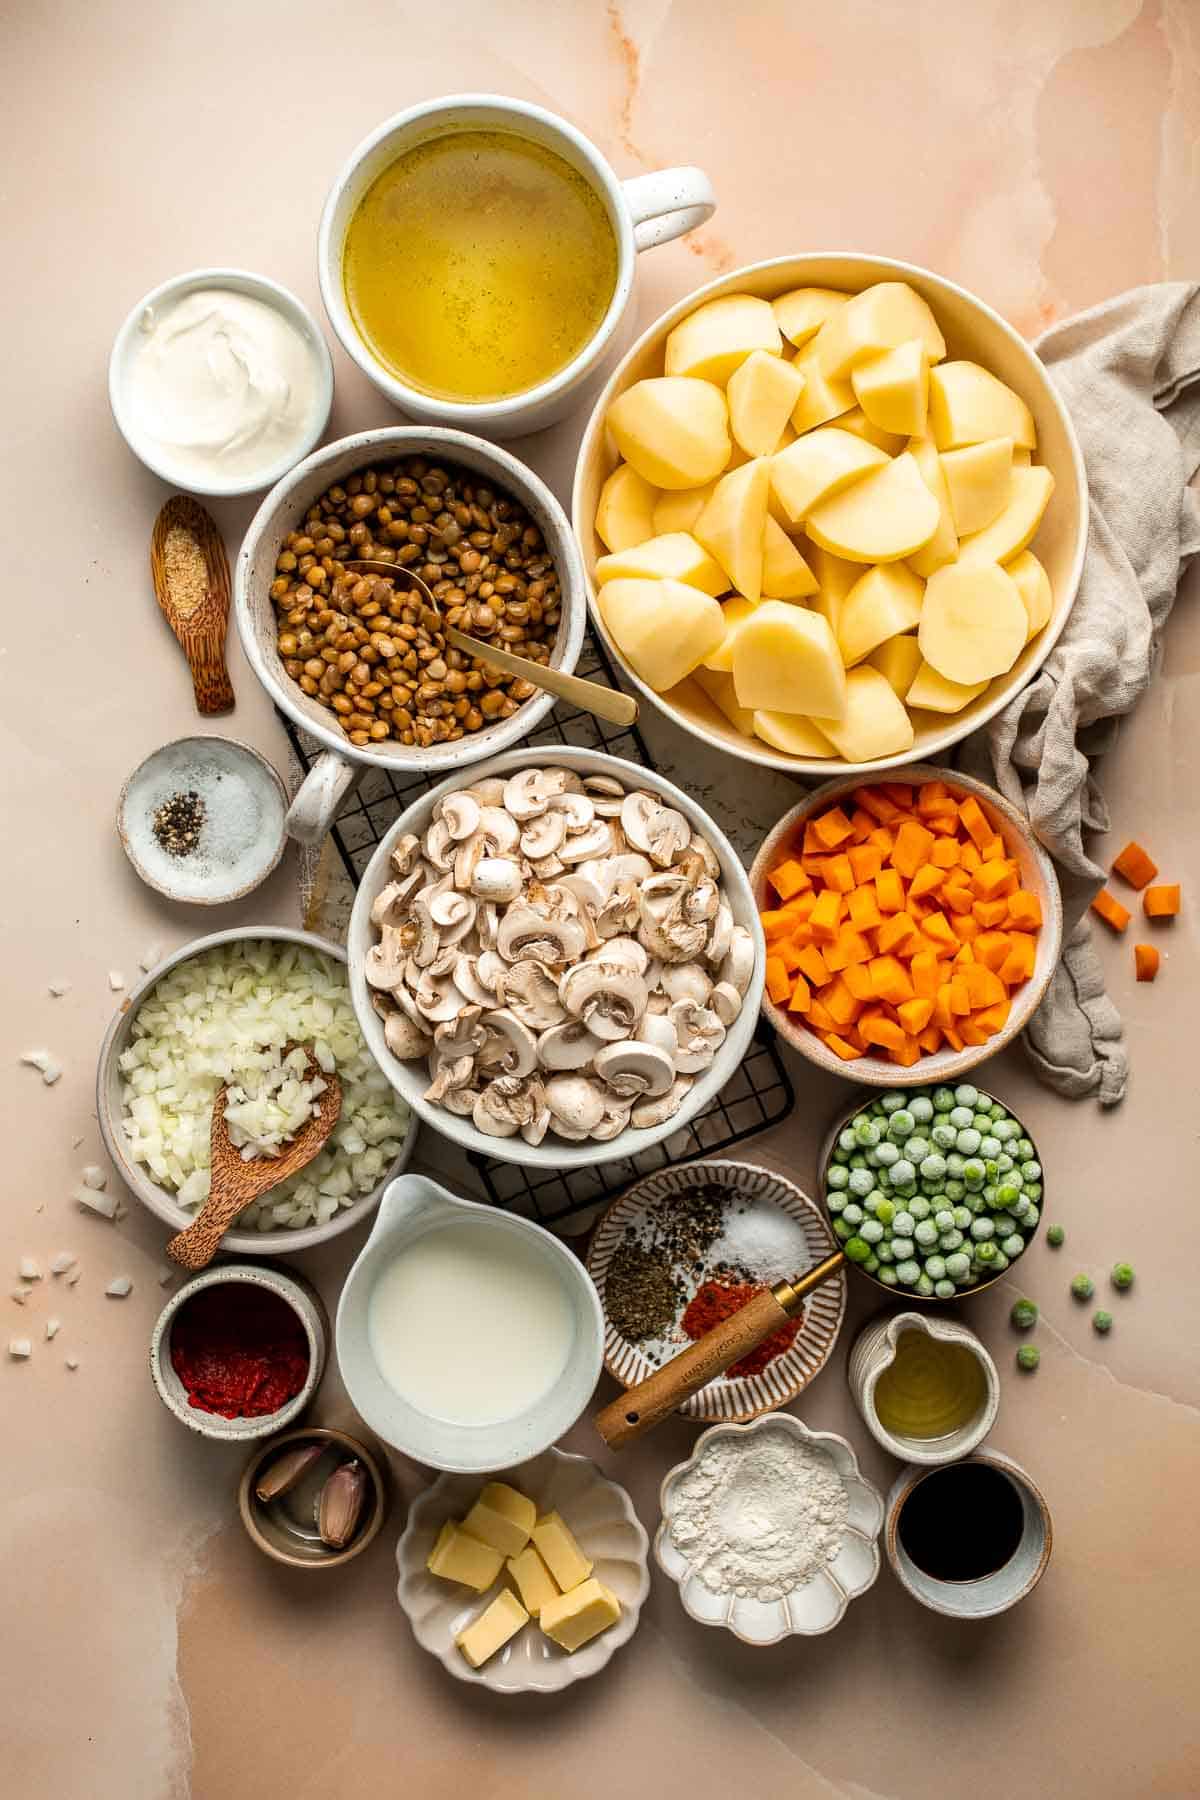
How to Make the Best Vegetarian Shepherd's Pie
First, make the mashed potato topping.
- Boil potatoes. Add the potatoes into a large pot of salted water. Bring it to a boil over medium-high heat and cook until fork tender, about 10-15 minutes. If you can easily insert a fork into the potatoes, then they are ready.
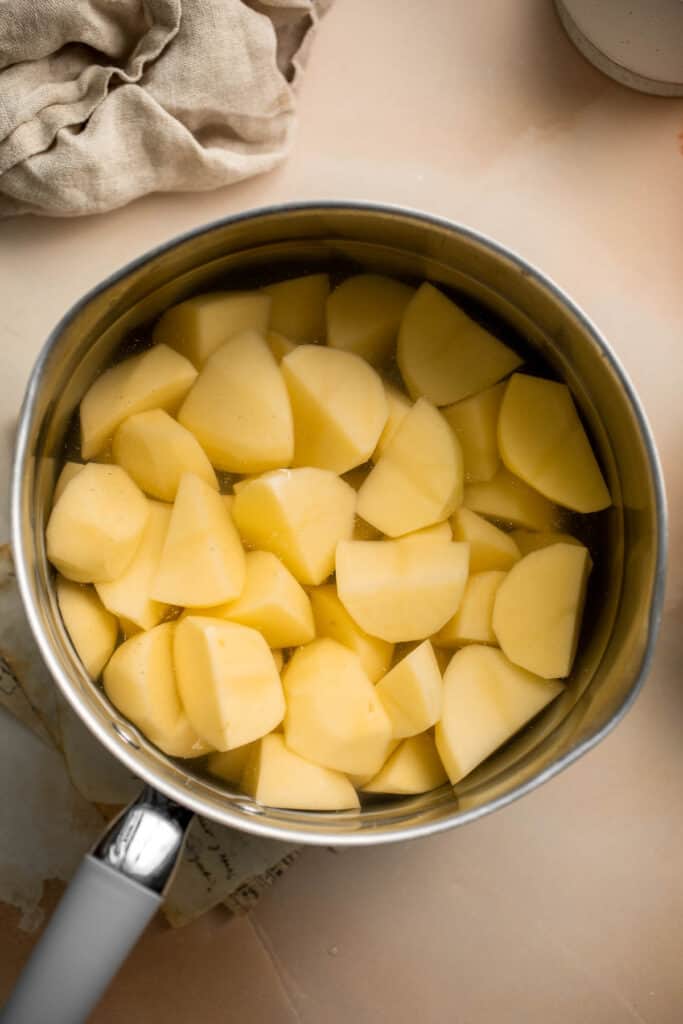
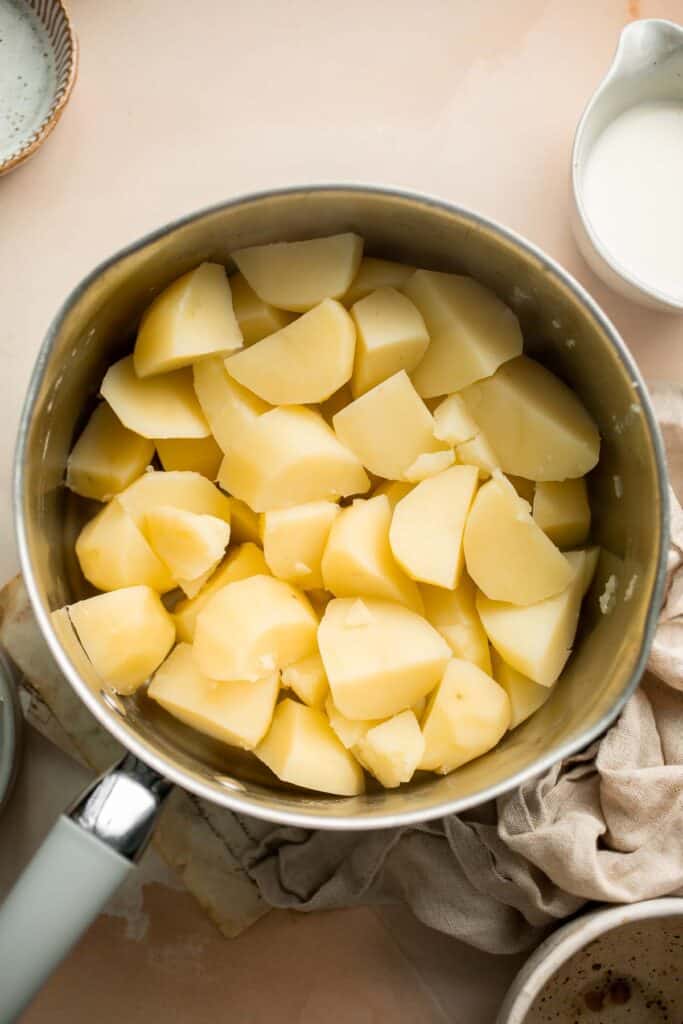
- Mash potatoes. Drain the water and mash the potatoes using a potato masher or a fork.
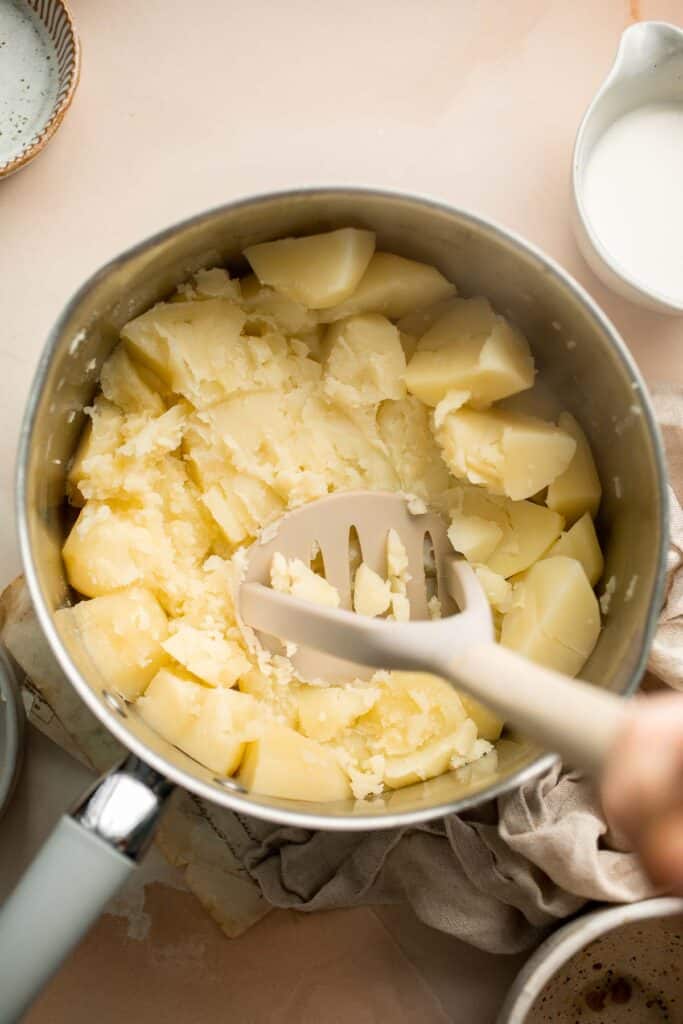
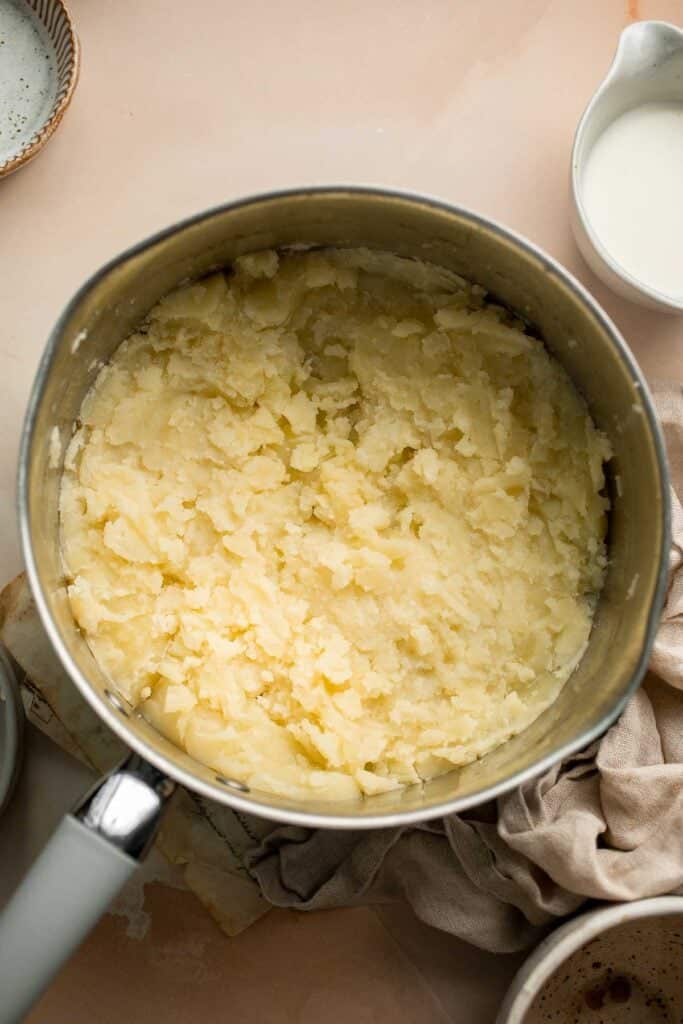
- Combine with remaining ingredients. Add butter, milk, sour cream, garlic powder, salt, and pepper. Mix well and set aside.
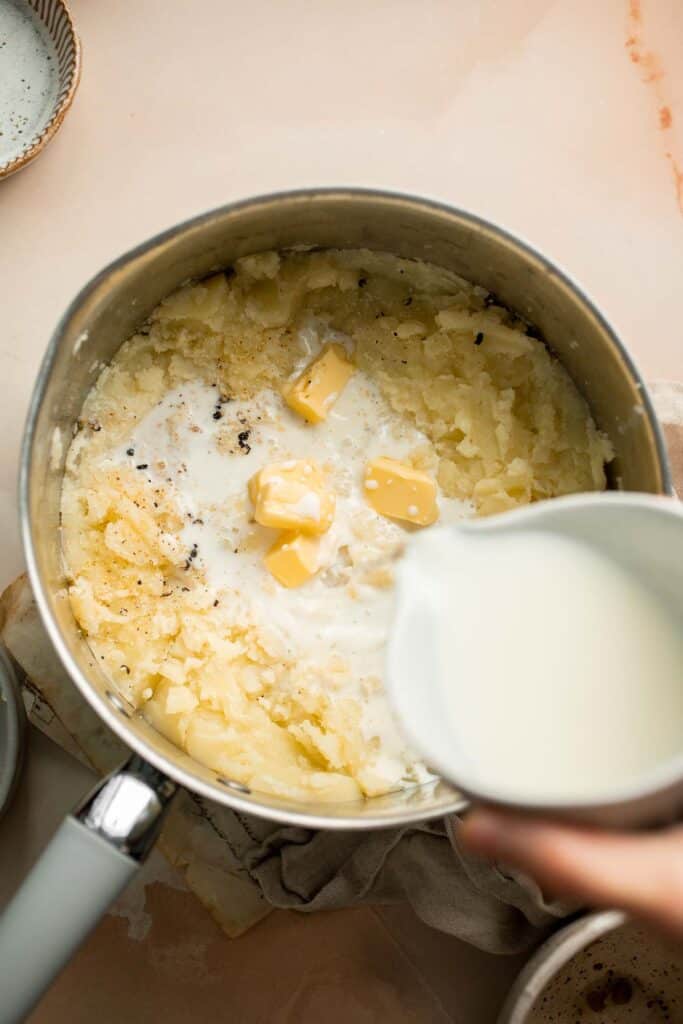
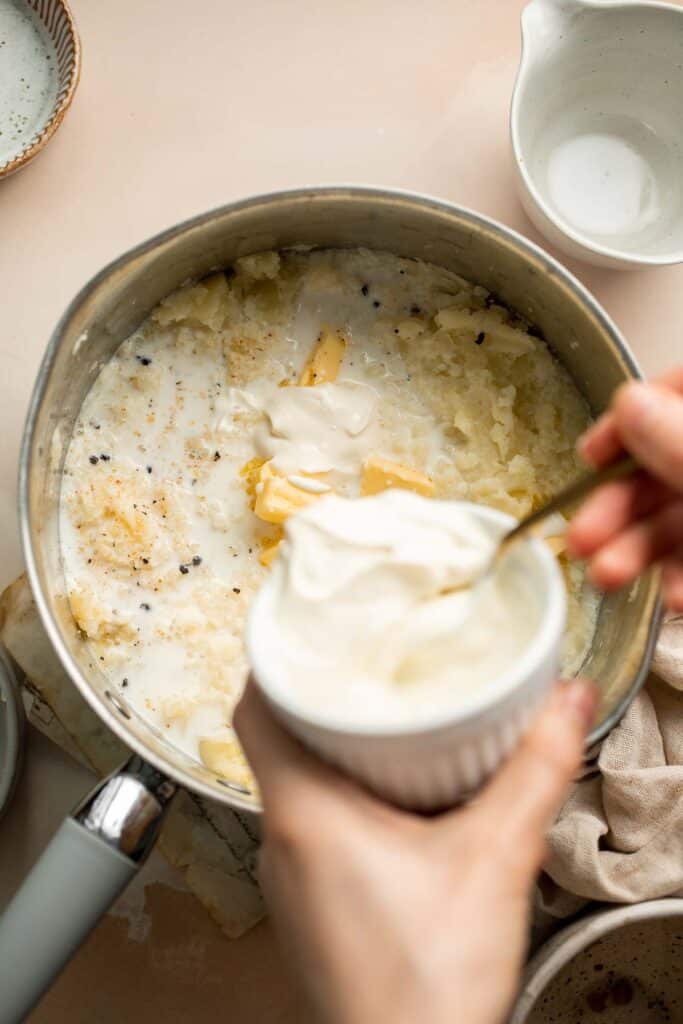
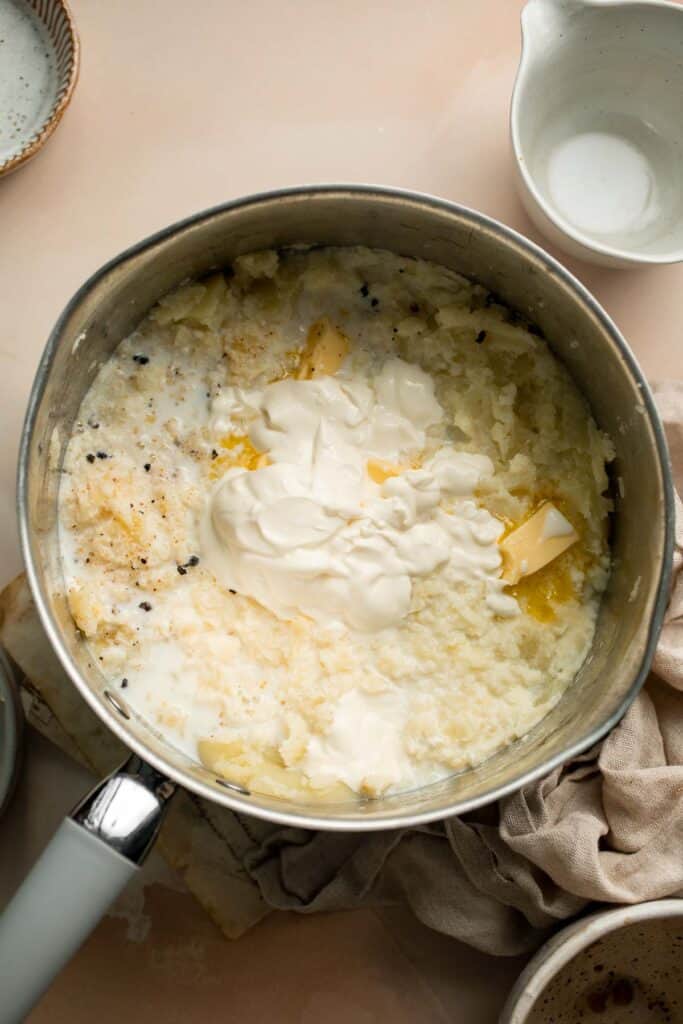
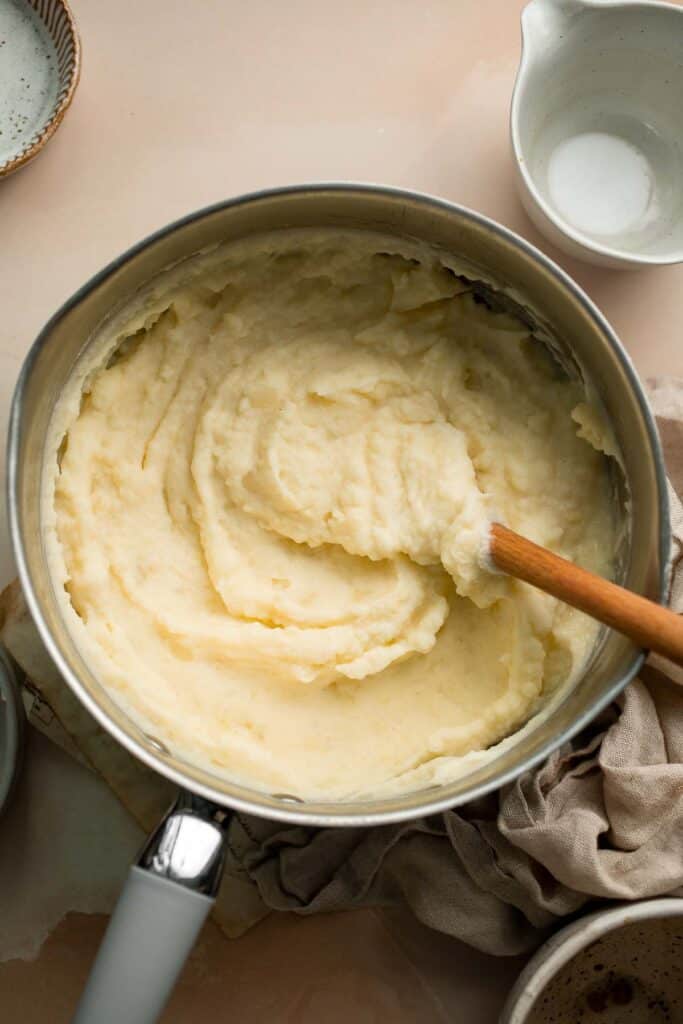
Then, make the vegetable mixture.
- Sauté mushrooms. While potatoes are boiling, heat olive oil in a cast-iron skillet (or other oven-proof skillet) for 2 minutes over medium-high heat until the hot oil sizzles. Add mushrooms and cook until most of the liquid has evaporated, about 5-7 minutes.
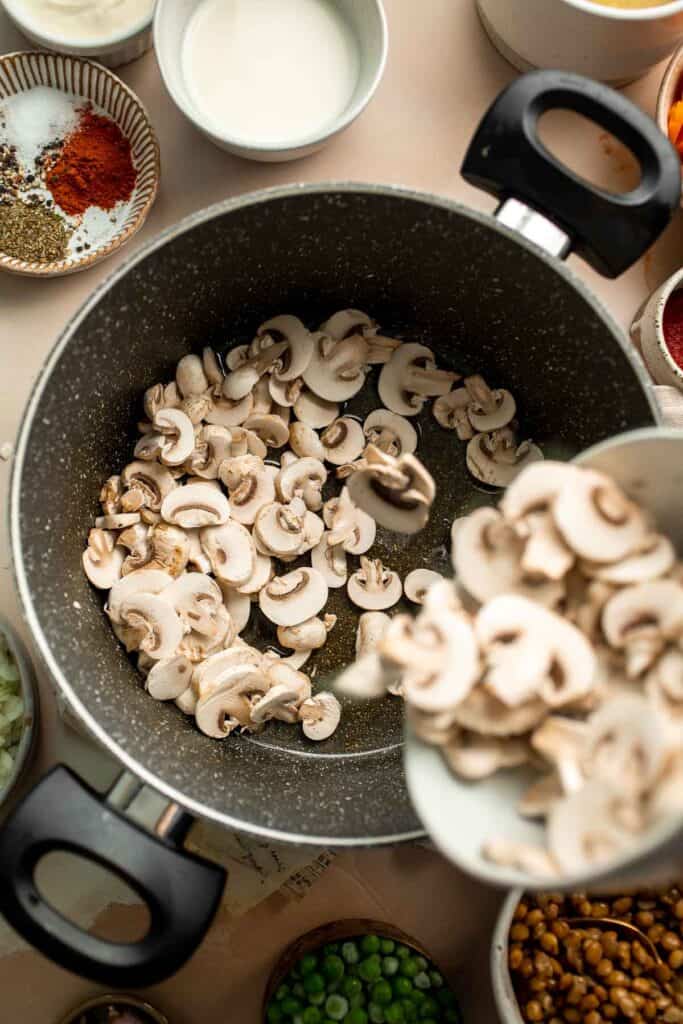
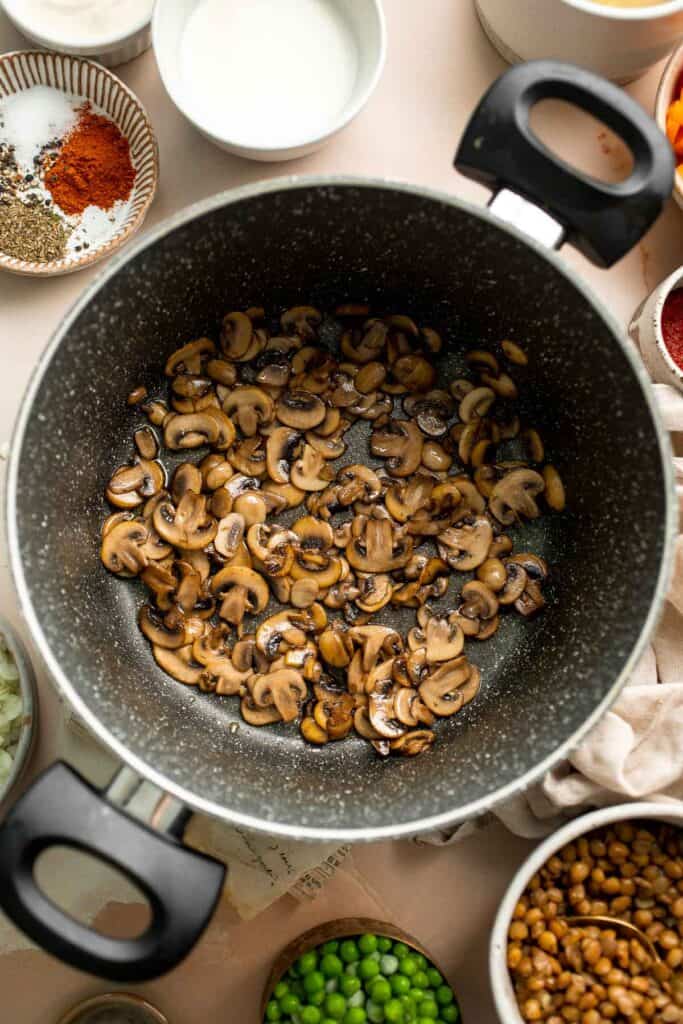
- Add veggies. Add onion, garlic and carrots. Stir well to combine and continue cooking until tender, about 2-3 minutes.
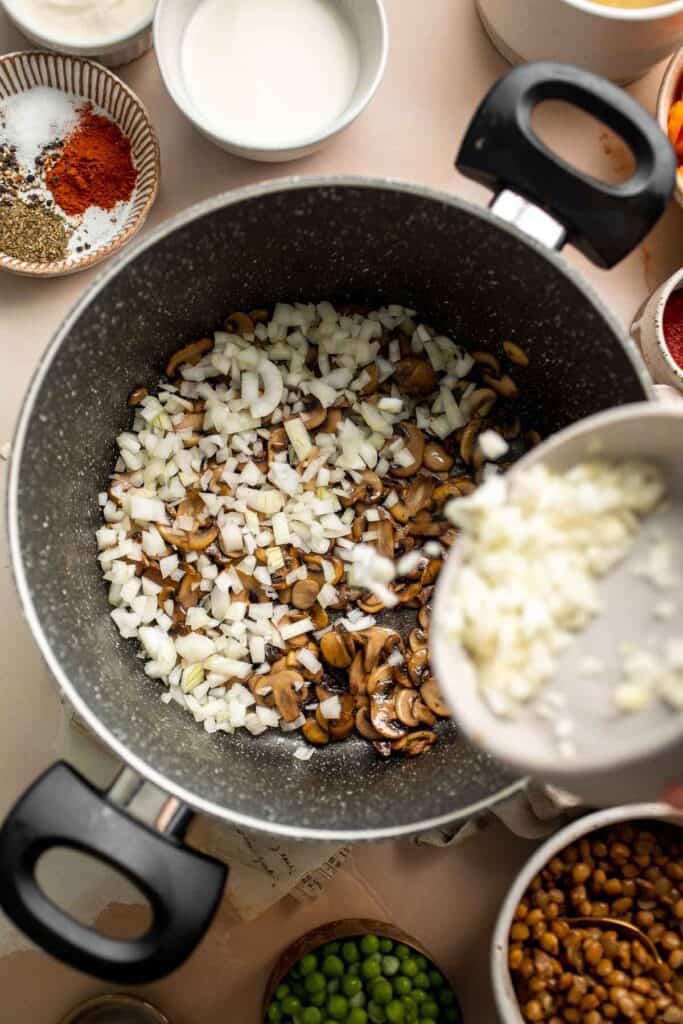
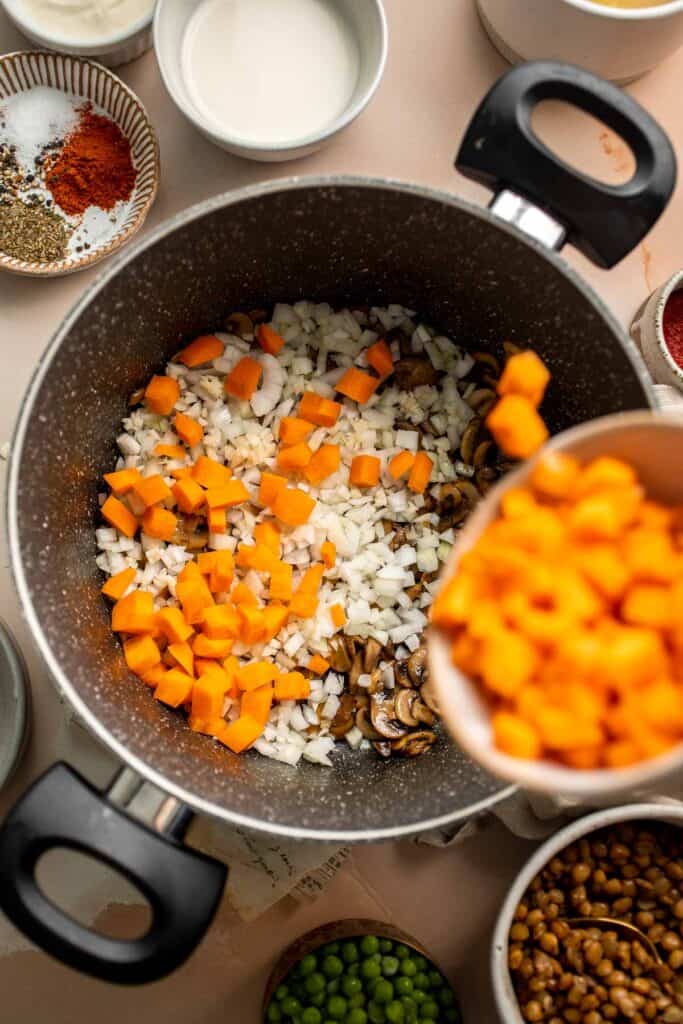
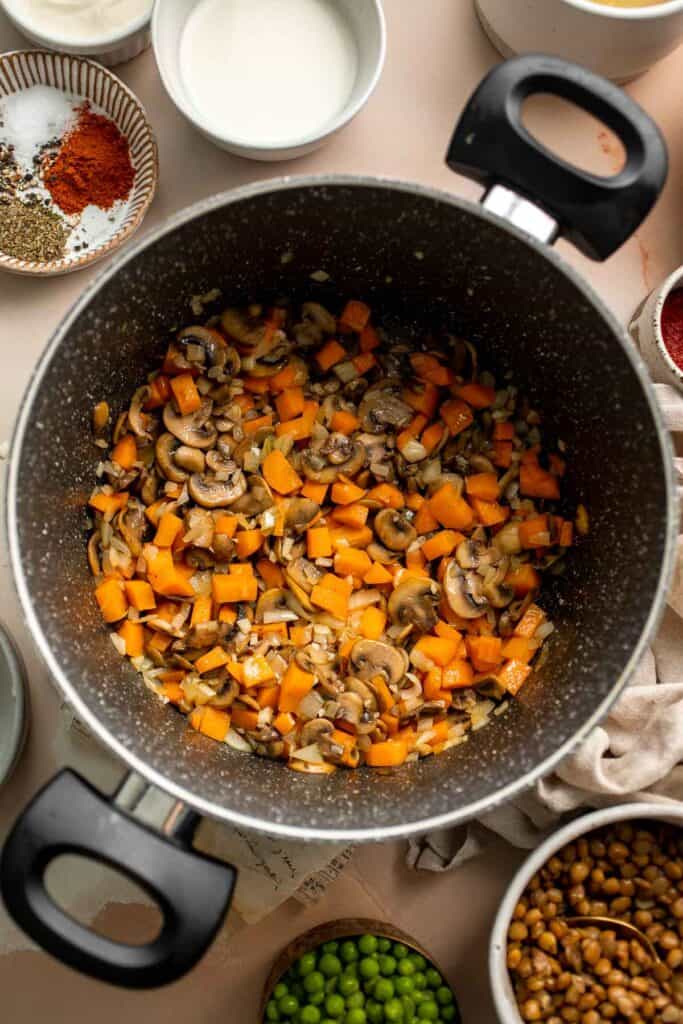
- Add seasoning. Add flour, Worcestershire sauce (if using), tomato paste, Italian seasoning, paprika, salt, and pepper. Stir well to combine.
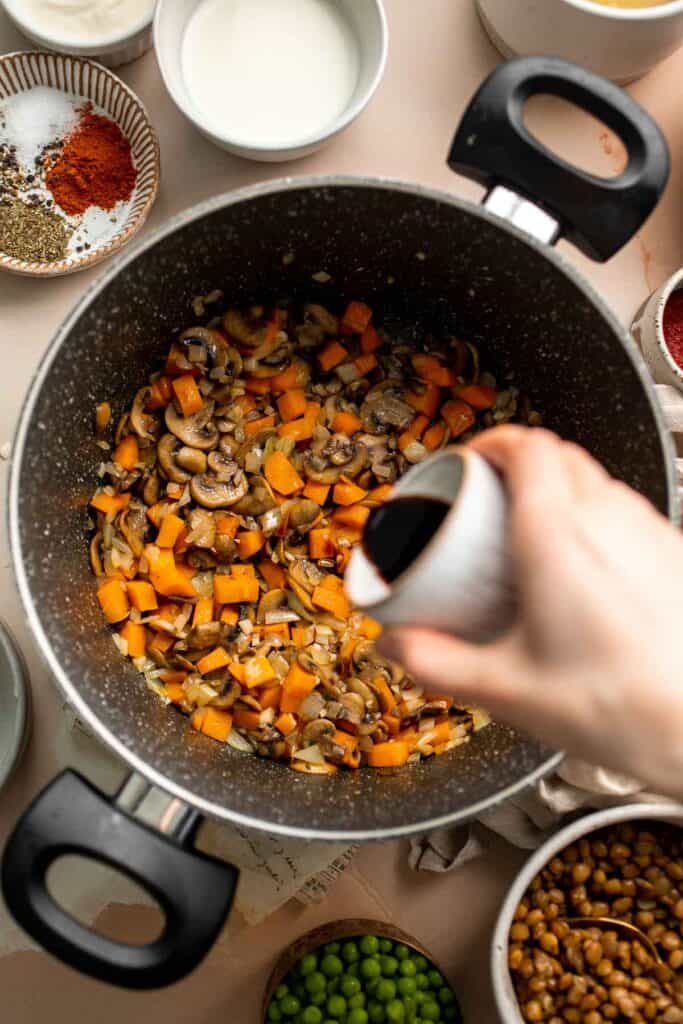
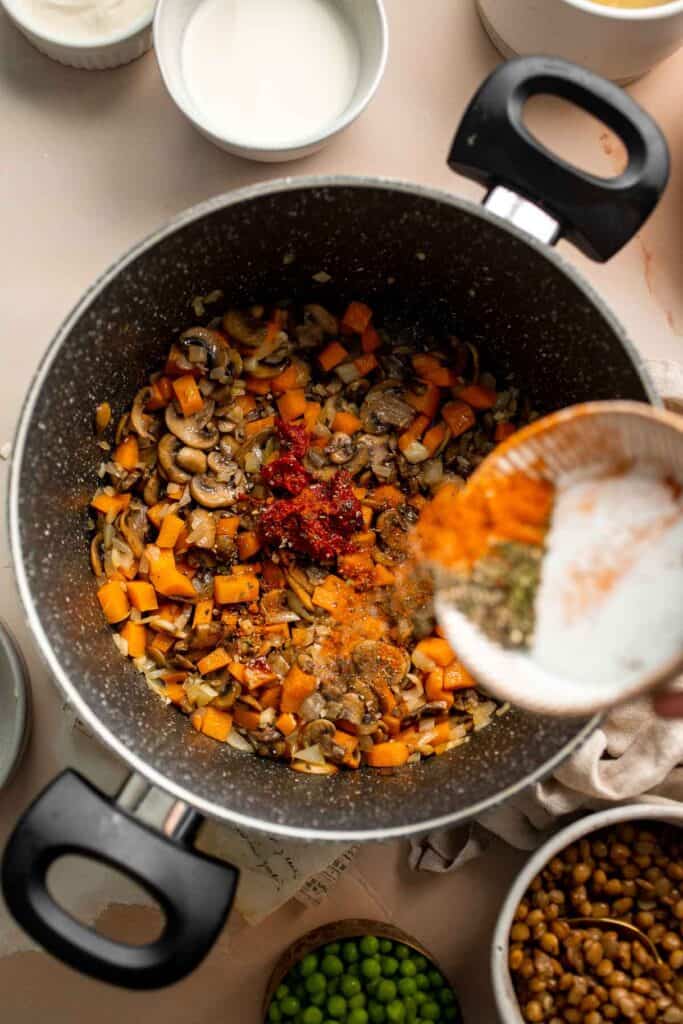

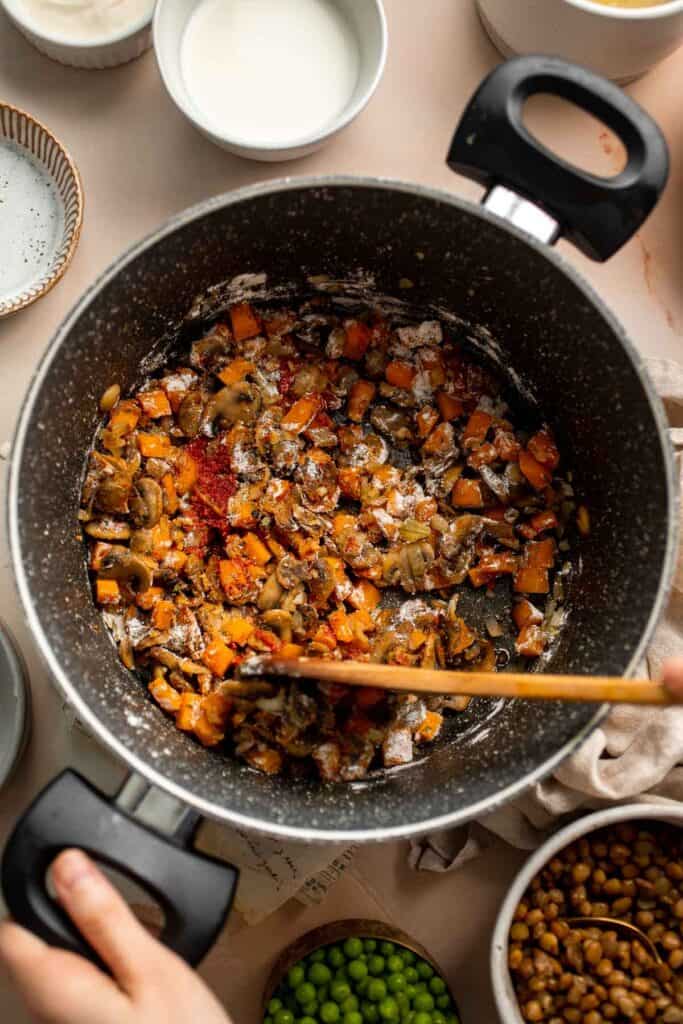
- Add remaining ingredients. Add vegetable stock, peas, and lentils. Stir occasionally and bring the mixture to a simmer, about 2 minutes.
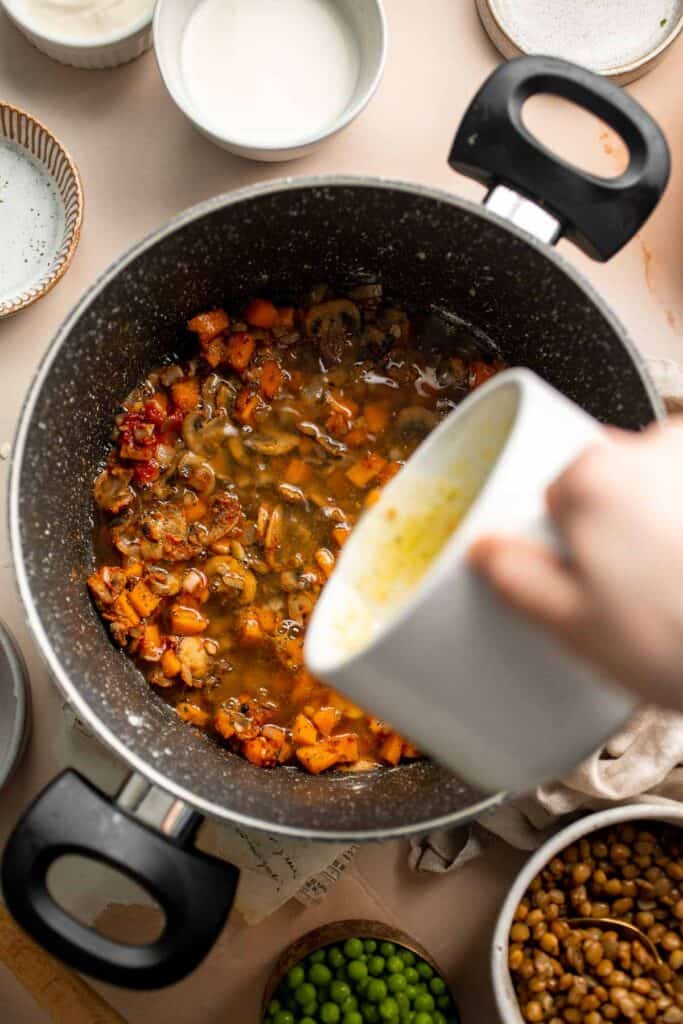

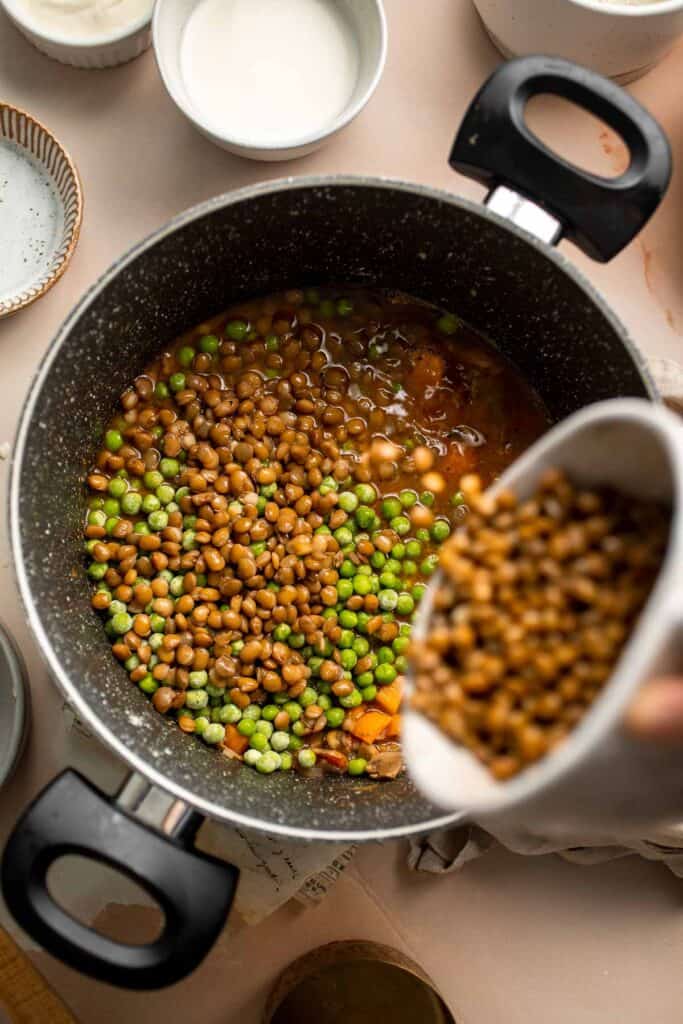
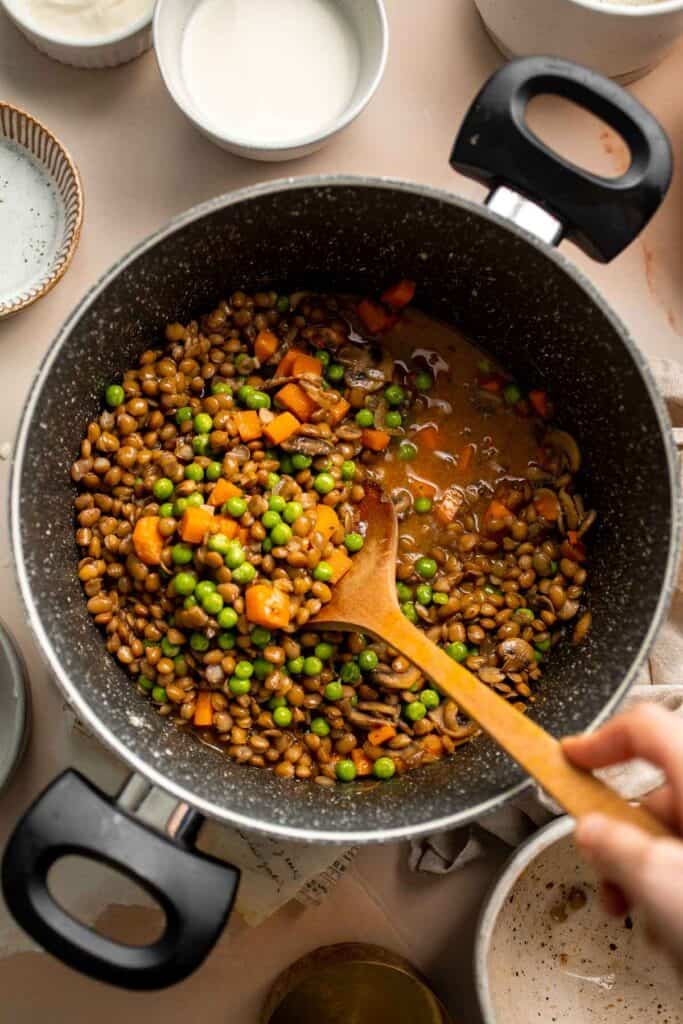
- Simmer. Reduce the heat to medium and let it simmer for another 2 minutes until thickened to a desired consistency, stirring occasionally.
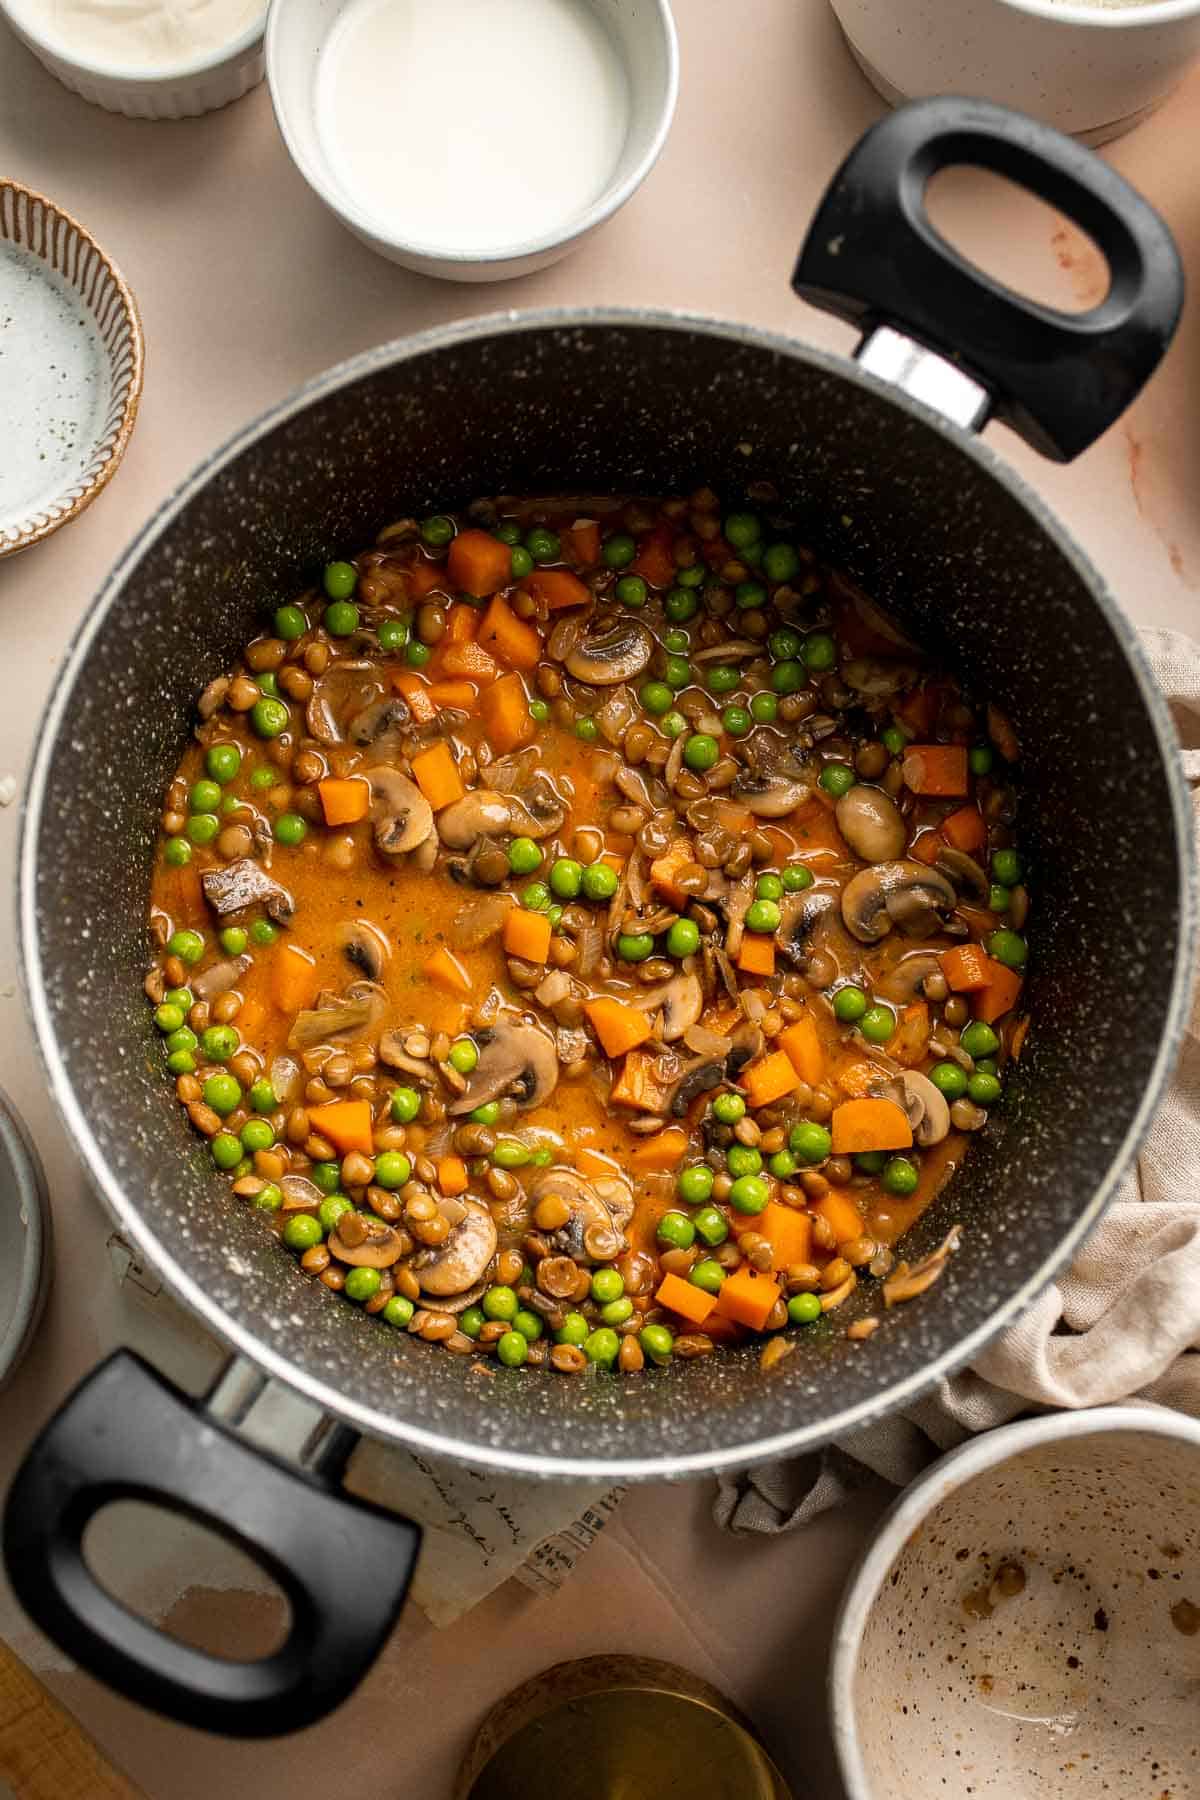
Now, let's assemble and bake.
- Transfer. Transfer the vegetable mixture into a 2 quart casserole dish (or 7x11-inch casserole dish) and spread evenly. You can also use the same skillet for assembling and baking.
- Assemble. Carefully add spoonfuls of the mashed potatoes on top and spread it evenly on top using a fork.
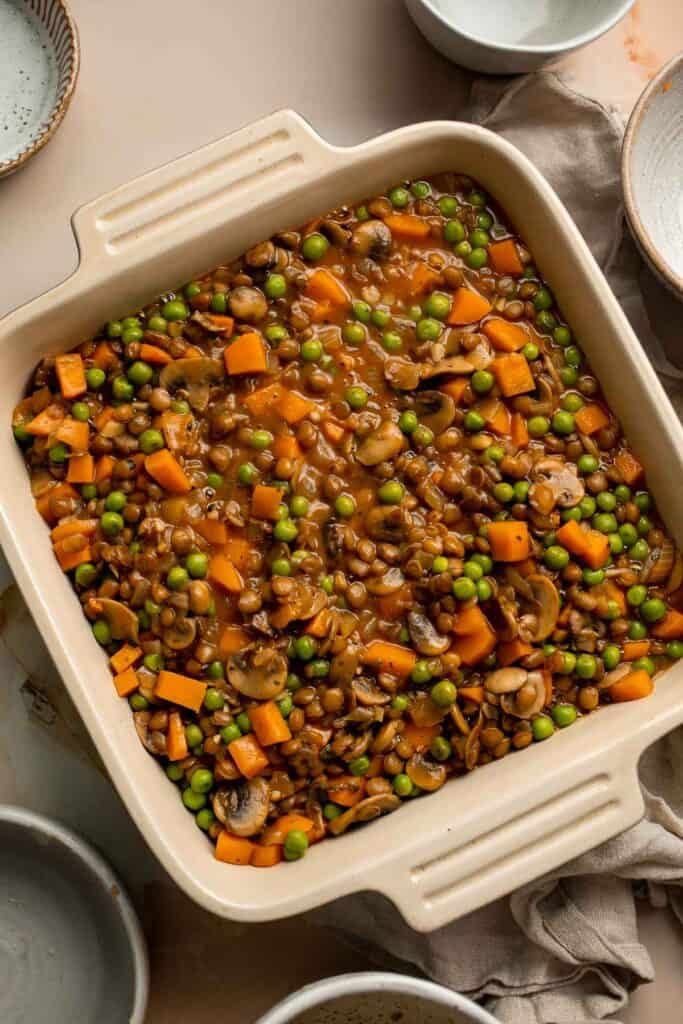
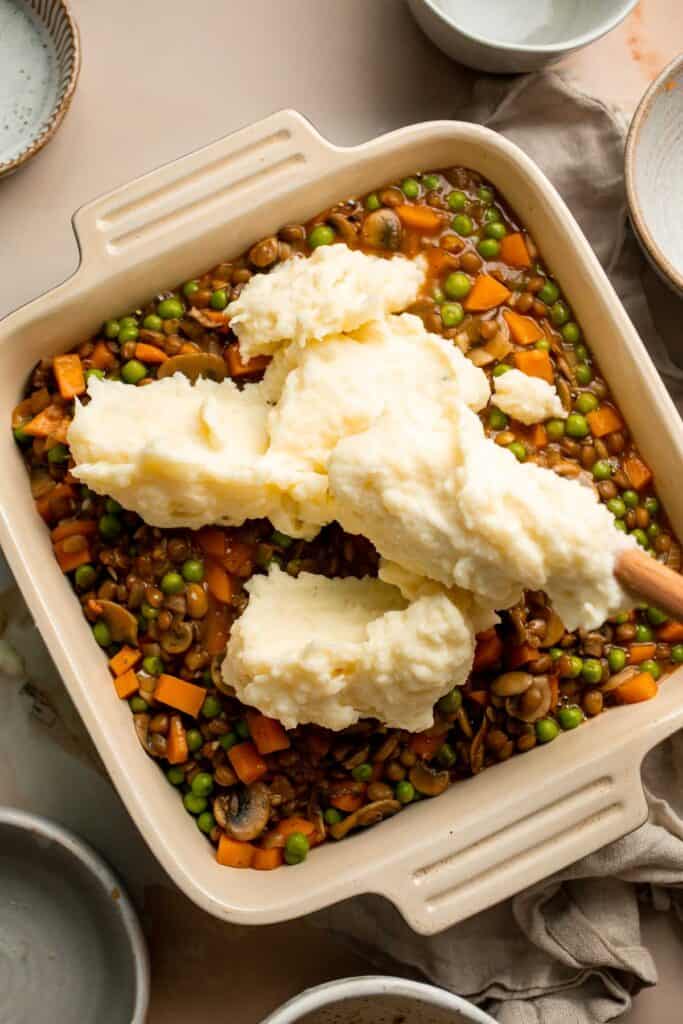
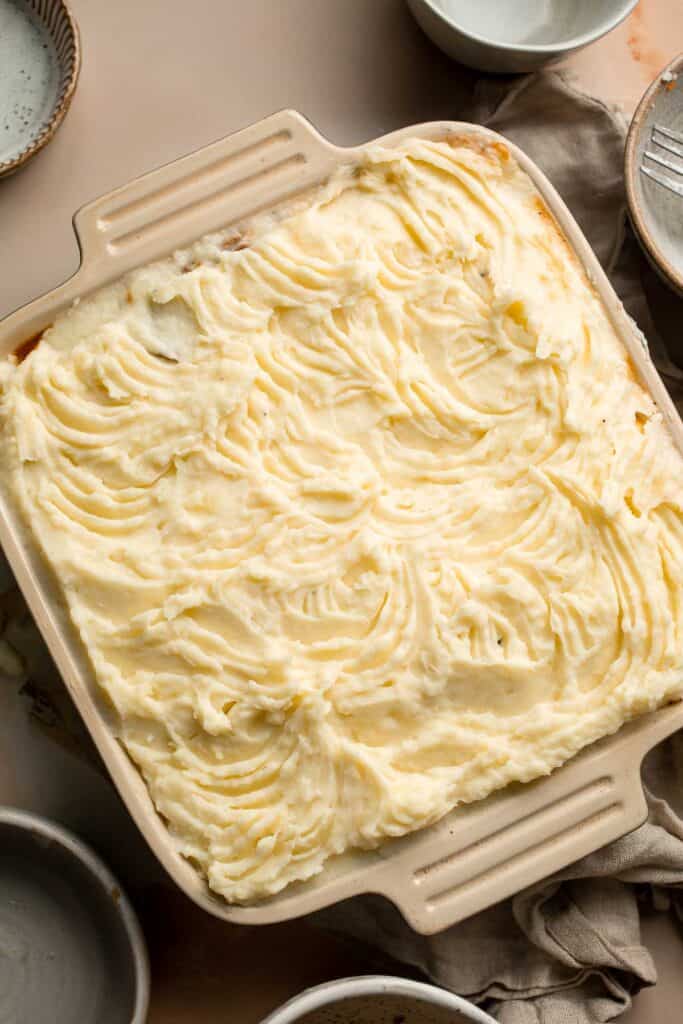
- Bake. Bake in a 400F preheated oven for 25-30 minutes until the top turns golden brown. Let cool for 15 minutes before serving.
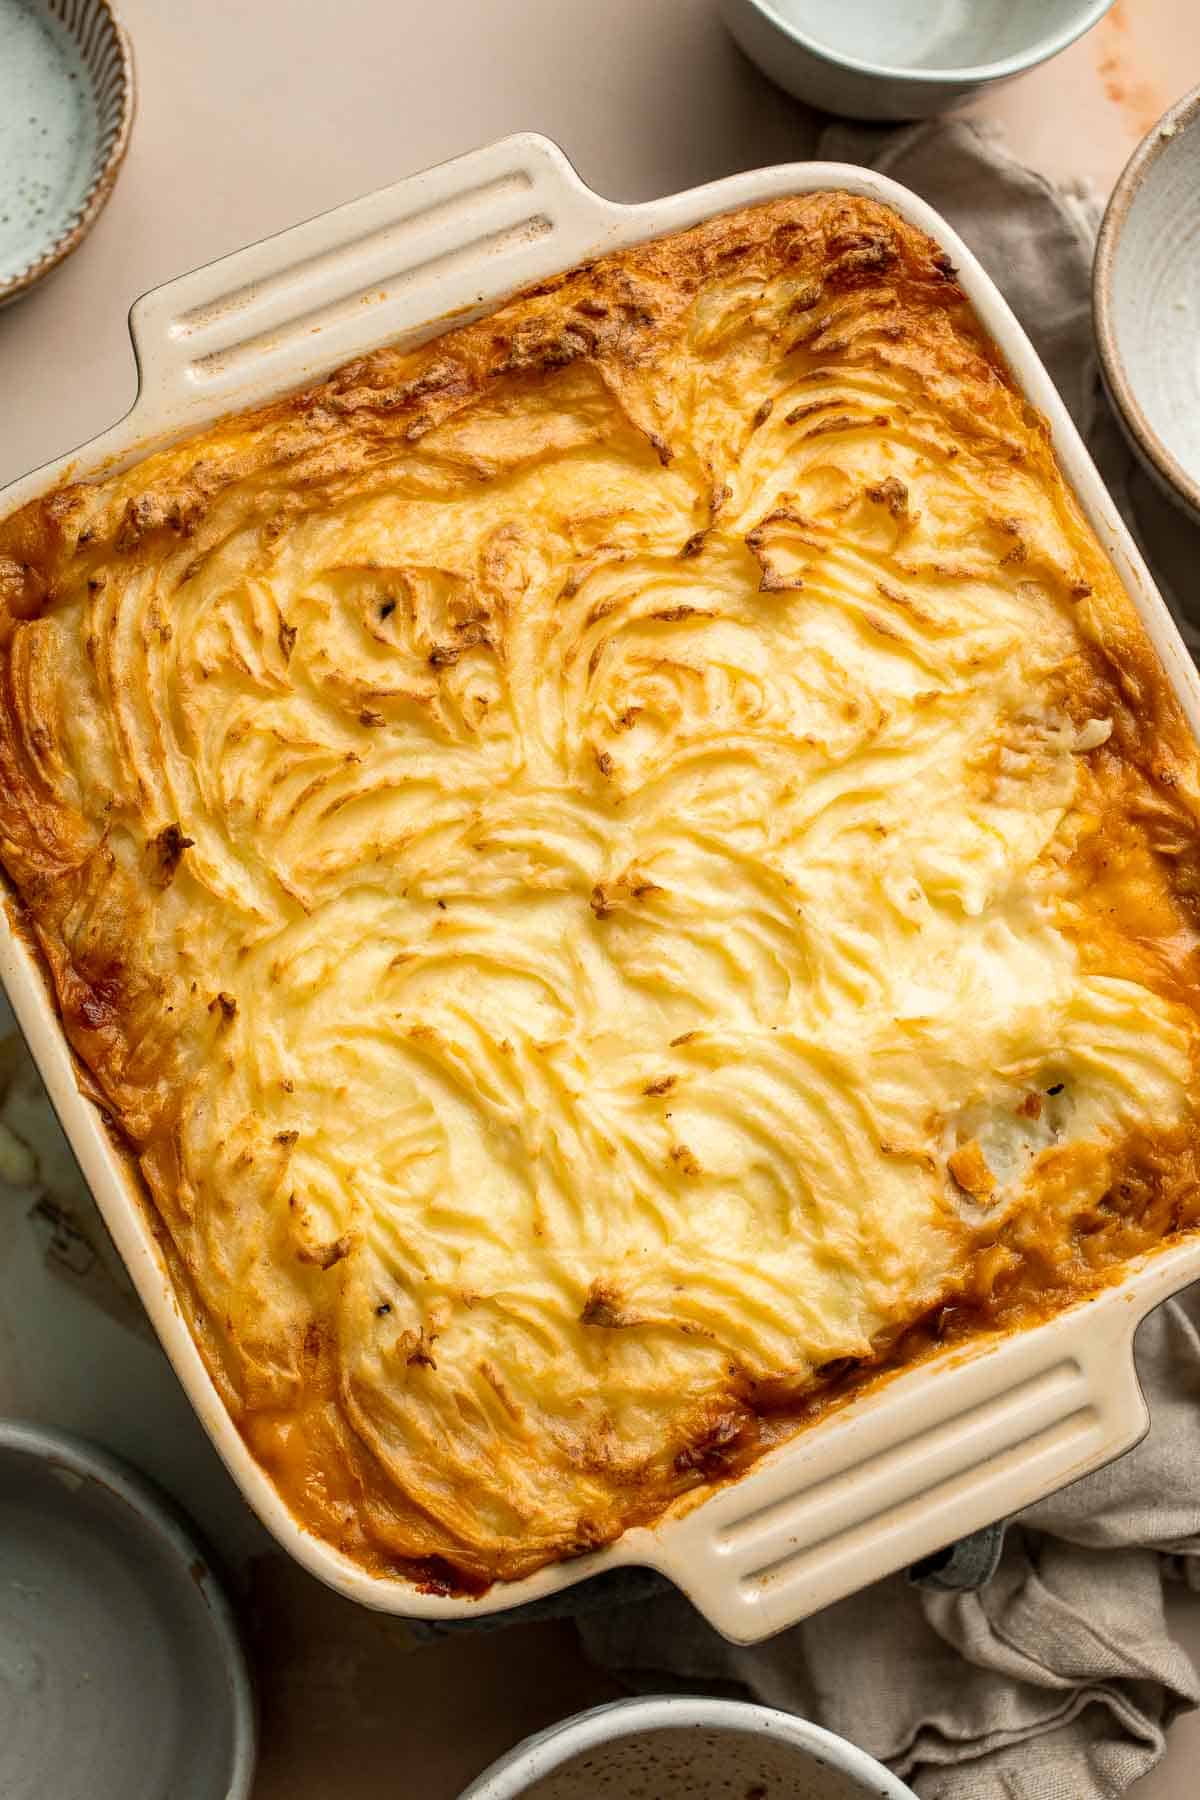
Recipe Variations
- Vegan shepherd's pie. For a vegan version, you'll mostly need to adjust the potato recipe. Use non-dairy milk, vegan butter, and dairy-free sour cream for a creamy mashed potato topping. Don't forget to use vegan Worcestershire sauce or skip it.
- Sweet potato topping. Instead of white potatoes, use sweet potatoes. They'll add a bright orange topping and a little sweetness to balance the hearty lentil mixture.
- Use dried lentils. It will take a little longer, but you can easily cook your own brown or green lentils at home. ou will need about ⅔ cup dried lentils. Soak them for an hour or two, then cook them on the stove with water until they soften. See How to Cook Dried Beans. Strain and use like canned lentils. ⅔ cup dried lentils will yield 1.5 cups cooked (which is what you will find in a 15 ounce can).
- Use leftover mashed potatoes. This is a great recipe to use leftover mashed potatoes. Instead of preparing the mashed potato top, use about 5 cups of mashed potatoes. Try it with our Brown Butter Mashed Potatoes, Instant Pot Mashed Potatoes, or Cheddar Mashed Potatoes.
How to Serve
This vegetarian shepherd's pie recipe is delicious served on its own, or paired with some of my favorite sides including:
- Skillet Dinner Rolls
- Oven Roasted Vegetables
- Potato Stacks
- Sautéed Garlic Green Beans
- Fall Harvest Salad with Butternut Squash and Apple
- Cheesy Brussels Sprouts Bake
For more recipe inspiration, see our 50 Best Fall Side Dishes.
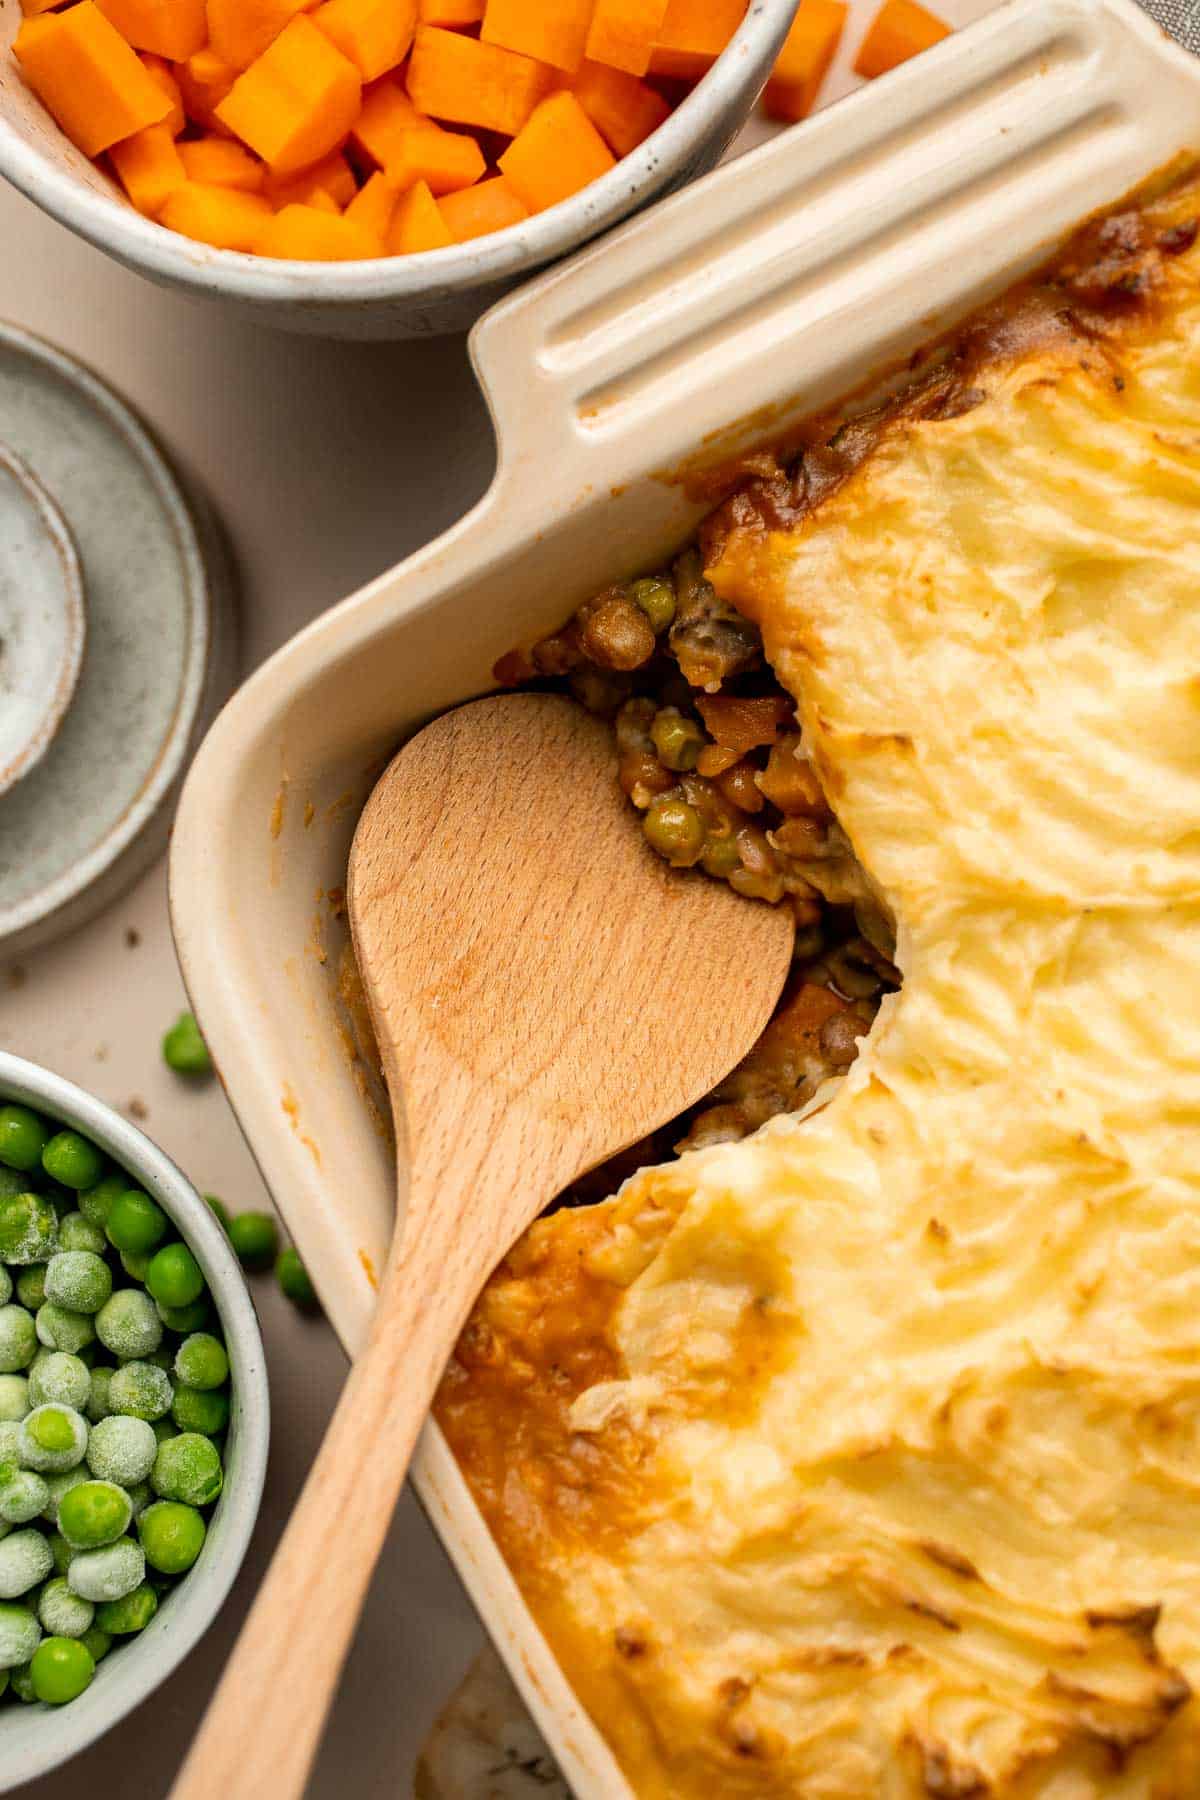
Recipe Tips and Tricks
- Season the potatoes well. Potatoes need lots of salt to have any flavor. Boil them in salted water or use vegetable broth. Season the mashed potatoes to taste before placing over the mushroom lentil filling.
- Don't rush the mushrooms. Mushrooms require patience. If you don't cook them down all the way, they'll be watery and bland. Let them really cook down until they are golden brown and dry. It's worth it for the best flavor.
- Add more veggies. The traditional shepherd's pie recipe typically uses common storage crops, like onions, carrots, and potatoes, since those are available during the winter. However, you can easily add extra veggies, like bell peppers, green beans, and more.
Storing and Freezing Instructions
How to Store
Store leftovers in an airtight container in the fridge or cover your baking dish with plastic wrap. It will last for 3-4 days in the fridge.
How to Reheat
Either microwave your leftovers for 3-4 minutes, stirring halfway, or bake them in the oven at 350 degrees F for 4-5 minutes until warm.
How to Freeze
To freeze, store your leftovers in a freezer safe container for 2-3 months. Thaw in the fridge overnight before reheating.
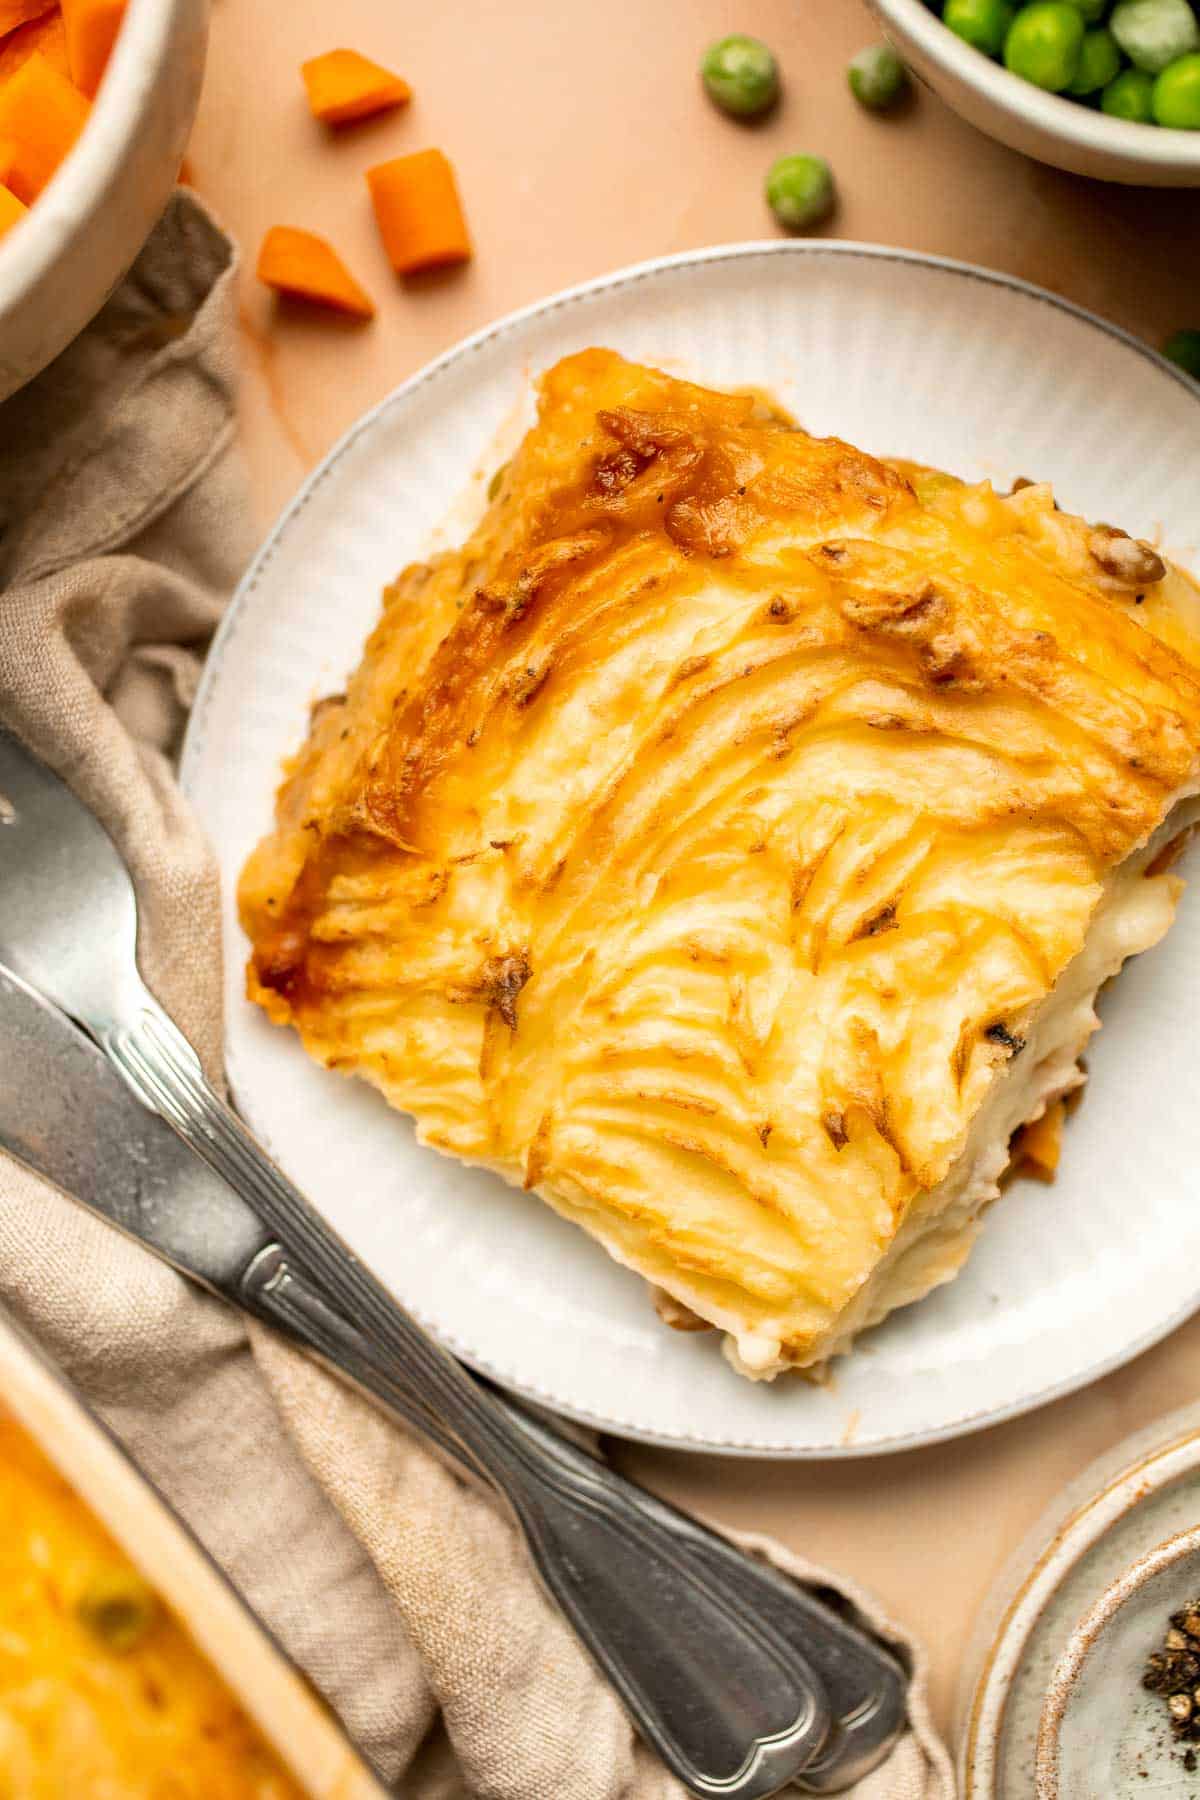
FAQ
Shepherd's pie is traditionally made by mixing cooked ground lamb with onions, carrots, and other veggies, then topping it off with a fluffy layer of mashed potatoes. Vegan shepherd's pie uses a mixture of cooked brown lentils, mushrooms, and vegetables instead. For the fluffy mashed potato layer, be sure to use your favorite vegan non-dairy products to get a creamy texture without the animal products.
If you want to make veggie shepherd's pie quickly, use frozen vegetables. You can easily cut frozen carrots into small pieces or use frozen onions or garlic. Since frozen foods can become overcooked quickly, be sure to cook them for a shorter period of time to preserve their color and texture.
Absolutely! As long as you properly store your shepherd's pie, you can easily reheat a portion the next day to enjoy for lunch or dinner. Be sure to let your freshly baked shepherd's pie cool at room temperature for no more than 2 hours and store it in the fridge overnight. It should only be reheated once, so it's best to warm just the portion you want to eat that day.
More Vegetarian Recipes
- 60 Easy Vegetarian Dinner Recipes
- Vegetarian Stuffed Peppers
- Vegetarian Lasagna with Spinach
- Stuffed Butternut Squash with Wild Rice
- Falafel
- Vegetarian Bolognese
Tried this recipe?
I'd love to hear what you think! Leave a comment and rating below to share your feedback. Your reviews help others discover this recipe and help me keep creating more free recipes for you. Snap a photo and tag me on social media @aheadofthyme too.

Vietnamese Pho
Vietnamese Pho is a one-of-a-kind soup known for its incredibly aromatic broth seasoned with fragrant spices served over tender rice noodles, beef sirloin, fresh herbs, and other garnishes. These days, you don't have to leave the house to enjoy this traditional soup at home. You just need about 30 minutes and a handful of simple ingredients!

Pho is a traditional Vietnamese soup often served for breakfast. The secret to a good pho starts with the broth. It's typically slow cooked for hours with incredibly fragrant spices like star anise, coriander, and more. This clear broth flavors every element of the soup from the rice noodles to the thinly sliced sirloin that cooks almost instantly in the hot broth. There are plenty of variations, but this simple Vietnamese beef noodle soup is perfect exactly as it is.
Why You'll Love This Vietnamese Beef Pho Recipe
- Extremely fast. Although the broth takes time, you can easily use leftover homemade broth or grab some from the store for a complete meal in less than 30 minutes! That's faster than it'd take to get an order delivered from your local Vietnamese restaurant.
- Tons of flavor. No one would ever describe pho as bland. Every element is perfectly balanced for tons of flavor. Even the neutral rice noodles soak up the flavorful broth, and the fresh herbs, lime juice, and jalapeno make this pho soup recipe absolutely delicious from the first bite to the last.
- Incredibly filling. The rich, fragrant broth makes this Vietnamese soup so filling. It's the best way to warm up on a cool day, and it will stick to your ribs for hours!

Ingredient Notes
To make this delicious Vietnamese pho, you will need the following ingredients (full measurements in recipe card below):
- dry rice noodles - it's essential to start with rice stick noodles. These will need to be soaked for about 20 minutes before you cook them.
- Vietnamese beef broth - make your own homemade broth made by roasting beef bones or short ribs with lots of spices before simmering them in a stock pot for hours. See our Asian Beef Broth for the recipe details. For a faster meal, use store bought pho broth instead.
- beef sirloin slices - these are completely optional, but frozen beef sirloin slices will cook almost instantly, absorbing the flavors from the broth. If you make our Asian Beef Broth, you can use the reserved beef from it.
- bean sprouts - these add a lovely crisp texture that balances the soft noodles.
- herbs - use lots of fresh herbs for maximum flavor. Fresh cilantro and Thai basil are classic toppings for beef pho.
- lime wedges - squeeze a little lime on top of your bowl to cut through the savory flavor of this traditional Vietnamese noodle soup.
- jalapeno - this is completely optional, but the bright heat of jalapenos pairs really well with the savory broth.
- chili garlic hot sauce - this is also optional for those who want some heat. It also adds a nice red contrast to the bowl of pho soup. We use this chili garlic hot sauce.
You will also need a large mixing bowl, 2 large pots, colander, ladle, and individual serving bowls (like these ramen bowls).
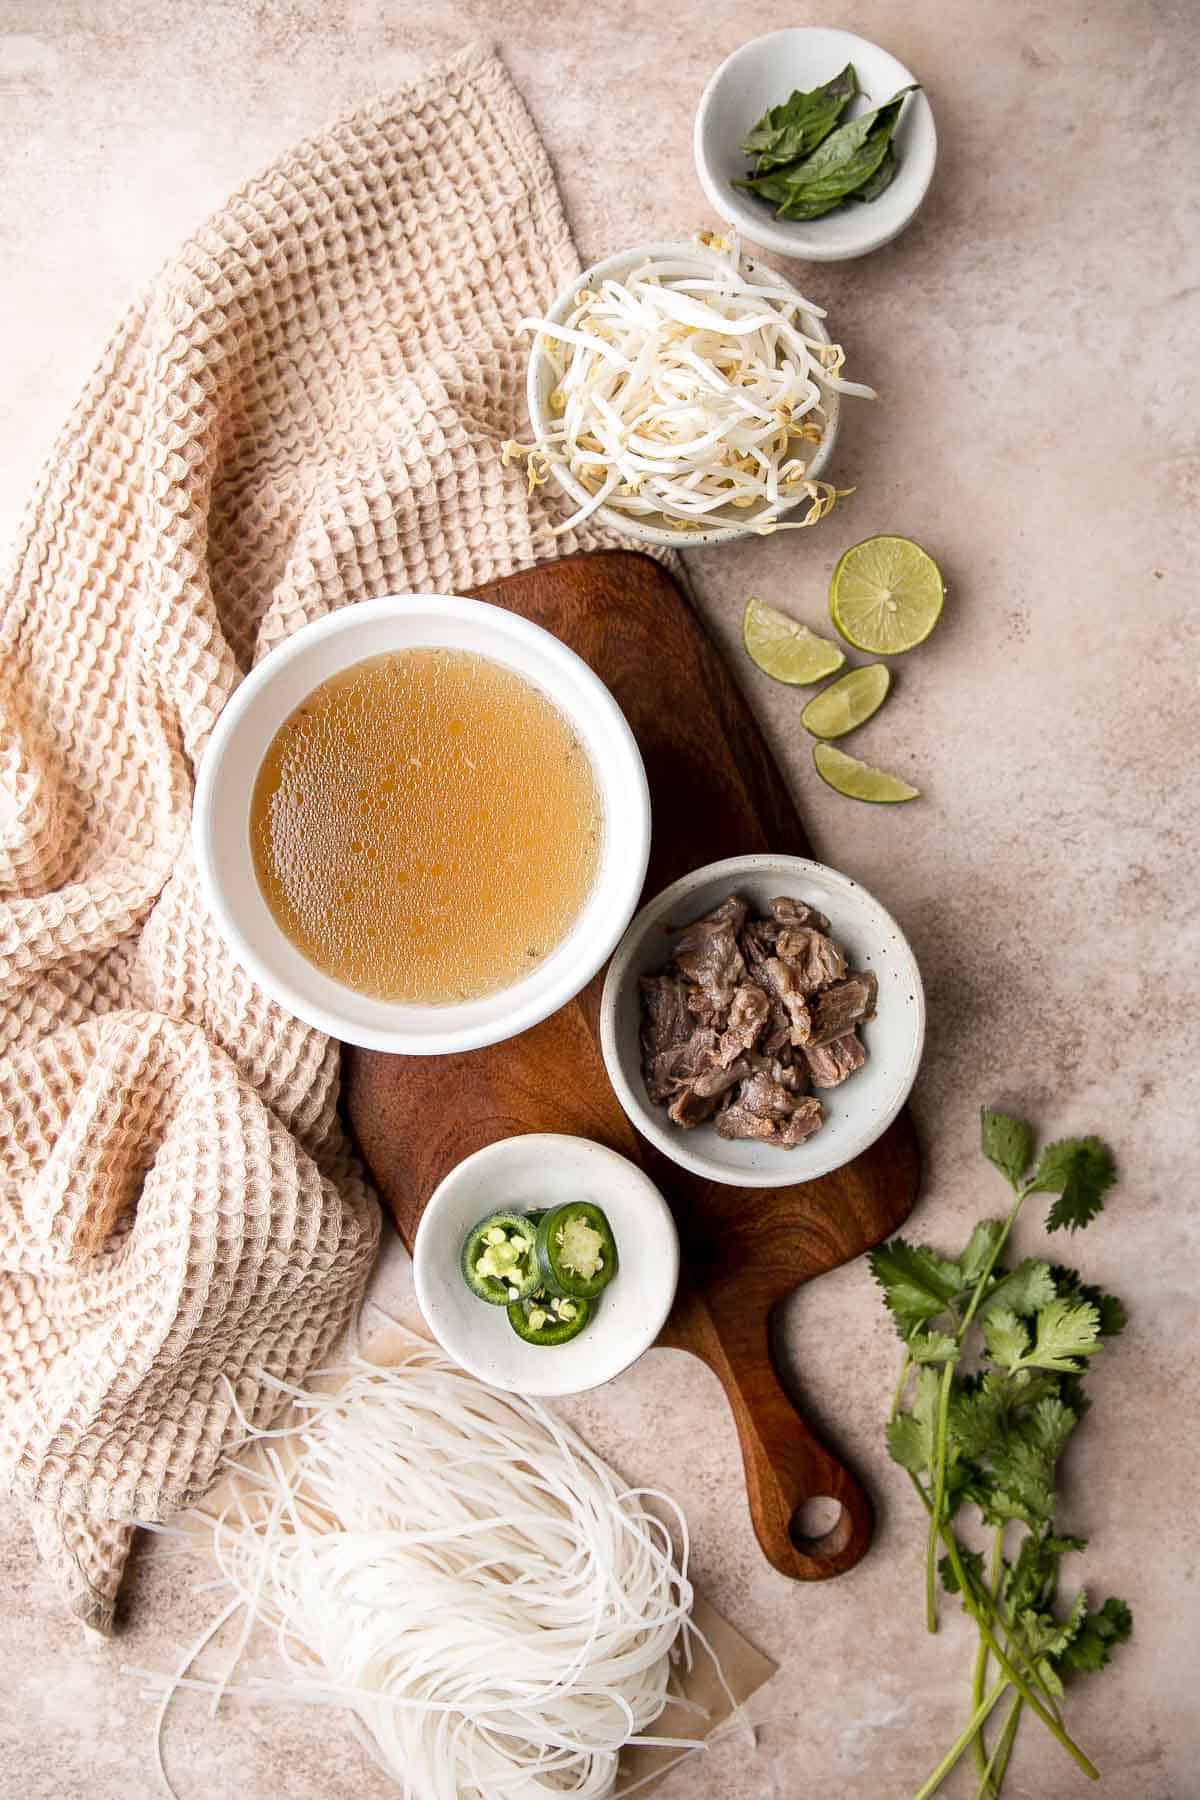
How to Make the Best Vietnamese Pho
- Soak the noodles. Fill a large mixing bowl with cold water. Add the dried rice stick noodles and allow it to soak until softened and pliable, about 20 minutes.
- Cook the noodles. Bring a large pot of water to a boil over high heat. Add noodles and cook until tender and fully cooked, about 2-3 minutes (or according to the package instructions). You can also cook the dried noodles without soaking but it will take slightly longer to fully cook them. Drain well.
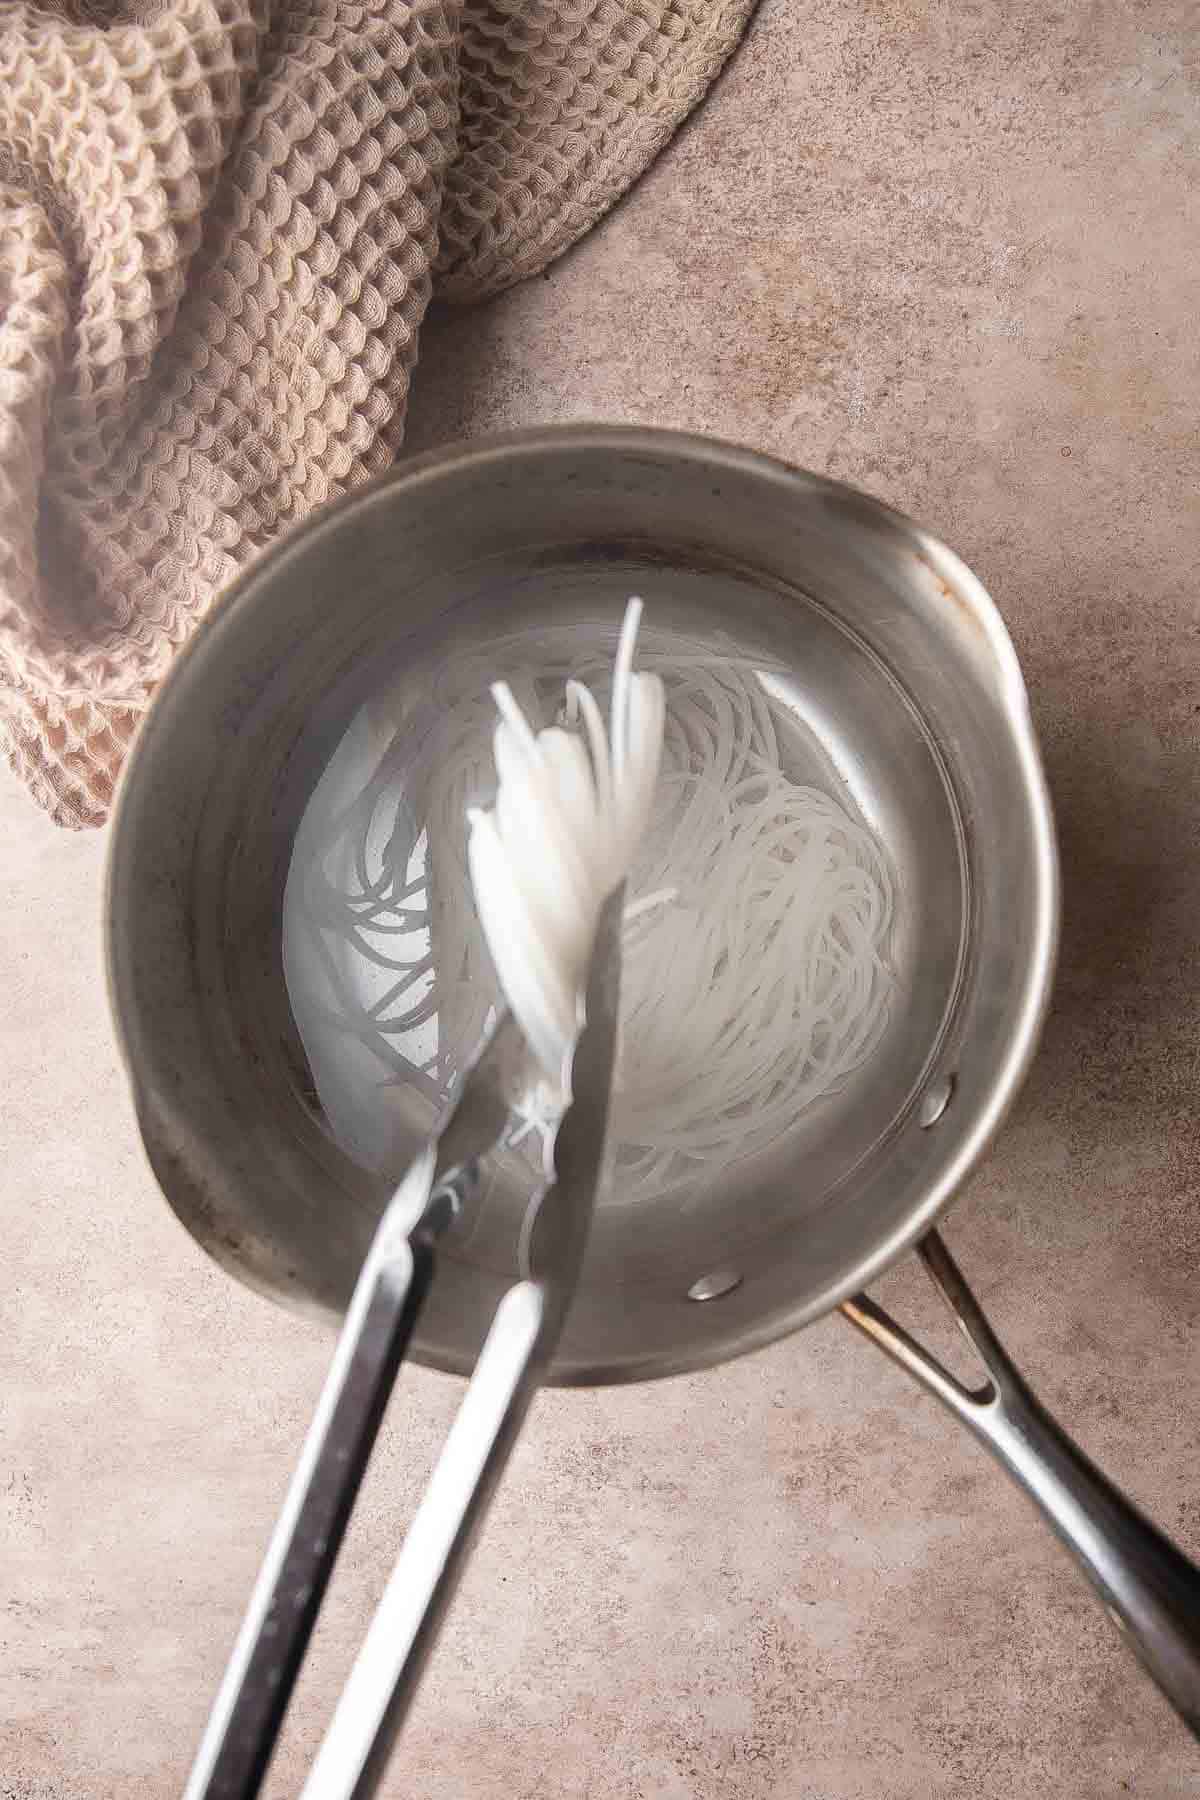
- Heat the broth. In a separate stockpot, add beef broth and bring to a boil over high heat.
- Prepare the bowls. Assemble the pho by dividing the noodles evenly into ramen bowls. Ladle the boiling hot broth over the noodles.
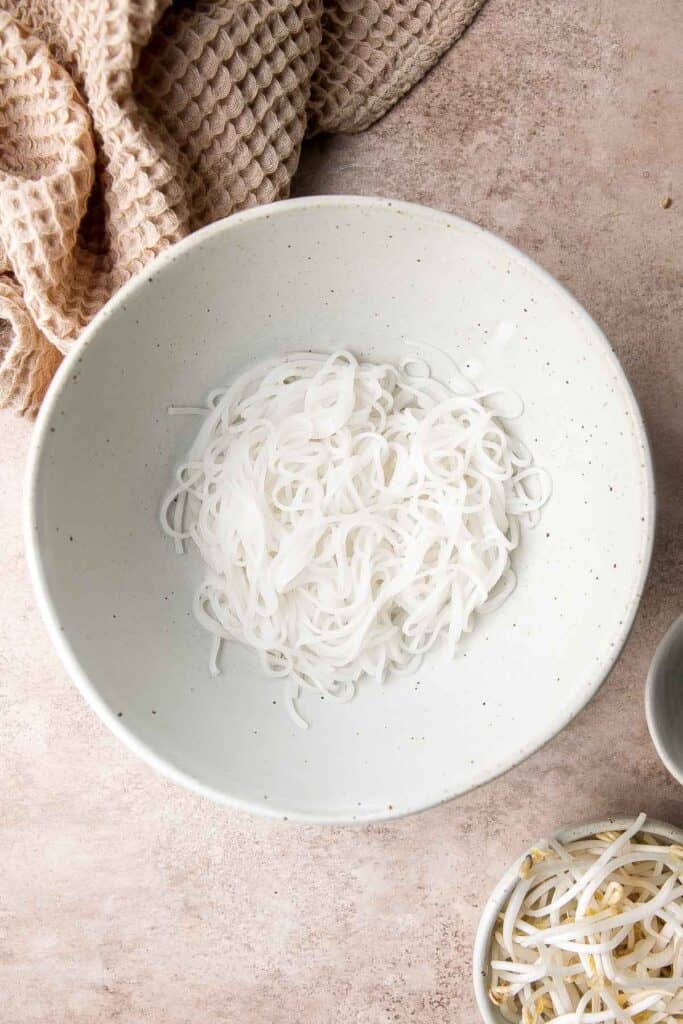
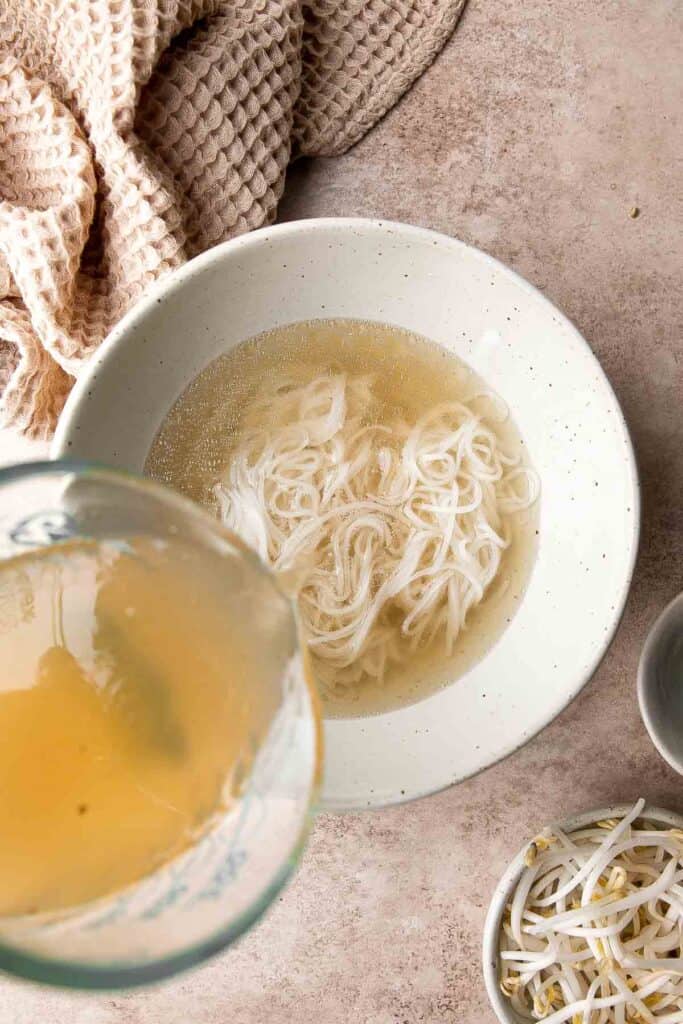
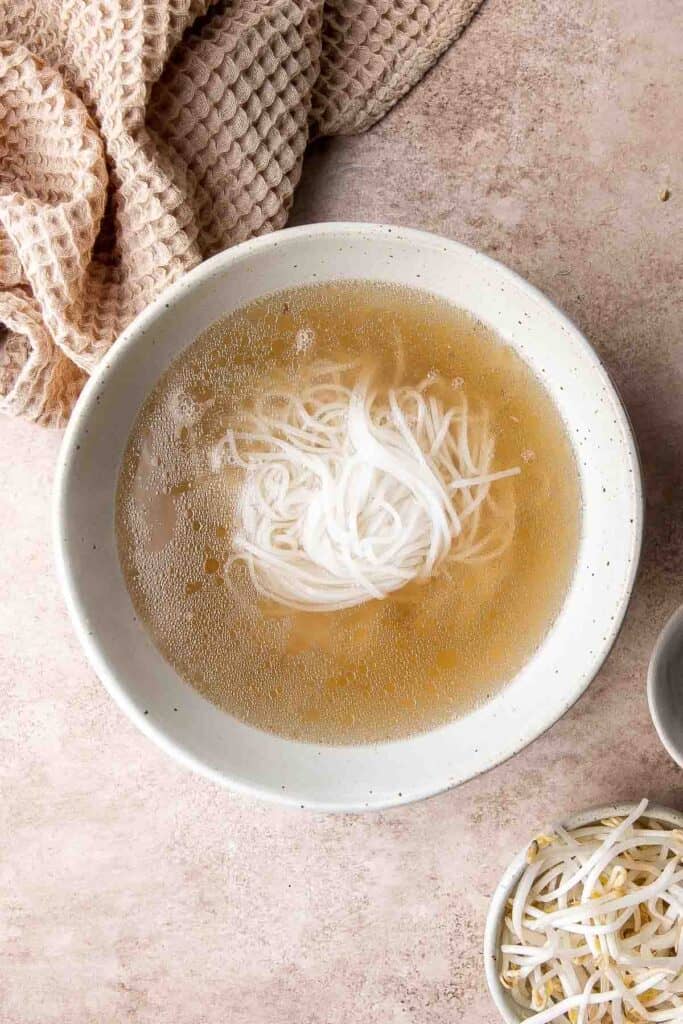
- Add beef. Top with raw beef slices or reserved cooked beef oxtail meat from homemade Asian Beef Broth.
- Garnish. Top your bowls of pho with bean sprouts, cilantro or basil, lime juice, jalapeño, and chili garlic hot sauce (if using).
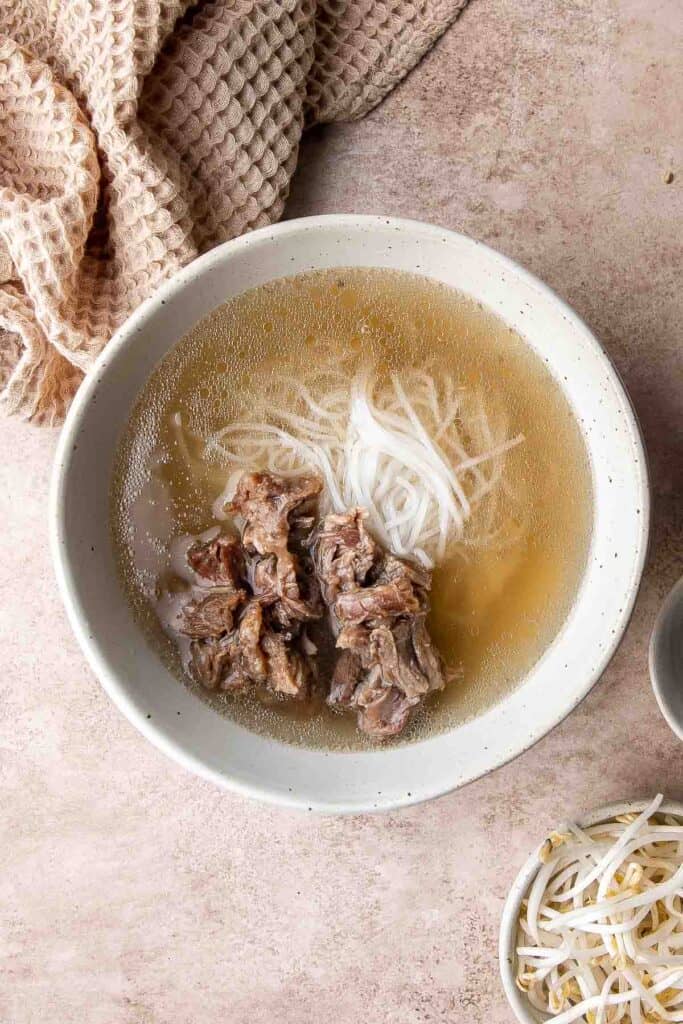


Recipe Variations
- Vegetarian pho recipe. Use a vegetarian broth and skip the sirloin for a veggie pho. Consider adding extra veggies like charred onion, baby bok choy, snow peas, or Chinese broccoli.
- Chicken pho. Replace the beef broth with chicken broth and add leftover cooked chicken to your soup pot - or make a batch of shredded chicken to add.
- Serve a sweeter broth. If you prefer a little sweetness in your Vietnamese beef noodle soup, add a little hoisin sauce or rock sugar to taste. Our homemade Asian beef broth has a little rock sugar so taste and see if you need to sweeten it more to taste.
- Adjust the garnishes. There are so many ways to top your pho, and even throughout Vietnam, you'll find different flavor profiles and garnishes. Try adding sliced green onions or thinly sliced white onion, fresh mint, or thinly sliced carrots. It's also lovely with a little splash of fish sauce.
How to Serve
This homemade Vietnamese Pho is delicious served on its own, or paired with some of my favorite Vietnamese dishes including:
- Vietnamese Noodle Bowl with Chicken
- Lemongrass Chicken Skewers
- Vietnamese Shrimp Salad Rolls
- Vietnamese Chicken Salad
- Pan-fried Lemongrass Chicken
- Vietnamese Grilled Pork
- Vietnamese Summer Rolls with Chicken

Recipe Tips and Tricks
- Make your own broth. The secret to the best pho is to use a good pho broth. Although it takes a long time to make the beefy broth for authentic pho, it's worth the effort. Make a big batch and freeze it for later for homemade pho anytime. See our Asian Beef Broth for recipe details for cooking on the stove or instant pot pressure cooker.
- Slice your own beef. If you can't find sirloin slices, you can make your own by freezing a raw sirloin steak and then letting it thaw for about 30 minutes. Use a very sharp knife to cut ¼-inch slices.
- Use leftover meat. Instead of using raw beef, feel free to use leftover beef chuck, pot roast, steak, or oxtail.
Storing and Freezing Instructions
How to Store
To save leftover pho for later, you'll want to separate the noodles from the broth, as the noodles can absorb too much liquid and disintegrate. Store them in airtight containers in the fridge for 3-4 days.
How to Reheat
You can microwave leftover pho, but it's best to reheat it in a pot on the stove until fully heated through.
How to Freeze
Freeze leftover broth in an airtight container for 3-4 months. Thaw in the fridge before making a fresh pot of this Vietnamese pho recipe.

FAQ
Since the clear beef broth requires so much work to make, it's only appropriate to savor every last drop by drinking your leftover broth. Many people do this in Vietnam as well, but it's based on personal preference.
The clear broth used to make pho is made by roasting beef bones and different cuts of meat with fragrant spices like star anise, cinnamon stick, coriander seeds, and more. These spices have an amazing aroma that pairs incredibly well with the savory broth and fresh herbs. There's nothing quite like it!
Did you know the word for rice noodles in Vietnamese is phở? The soup was named after the noodles, so real pho requires real phở (rice noodles). These clear noodles are mostly flavorless on their own, which makes them perfect for absorbing all those incredible flavors from the tasty broth. Save your egg noodles for other dishes, like lo mein or other stir-fried recipes.
More Hearty Soup Recipes
- 60 Best Soup Recipes
- One Pot Thai Red Curry Noodle Soup
- Easy 10-Minute Wonton Soup
- Beef Wild Rice Soup
- Pot Roast Soup
- Persian Lentil Soup
Tried this recipe?
I'd love to hear what you think! Leave a comment and rating below to share your feedback. Your reviews help others discover this recipe and help me keep creating more free recipes for you. Snap a photo and tag me on social media @aheadofthyme too.

Asian Beef Broth
This Asian Beef Broth is the perfect base for your favorite noodle soups, stews, and braises. It's light yet flavorful with just the right amount of umami from the beef meat, bones, and aromatics. It has the signature Asian flavors of ginger, cardamom, and coriander with a hint of sweetness from star anise and cinnamon that will give your dishes a complex and robust flavor.

If you love soups, stews, or any cozy dish that requires a flavorful broth, then you'll love this homemade beef broth. Making this at home is one of the best ways to get that rich, deep flavor without having to use a lot of ingredients. Even better, this beef broth is so versatile that it can be used in a variety of dishes ranging from Chinese noodle soup to Vietnamese Pho.
Why You'll Love this Asian Beef Broth
- Better than store-bought broth. Throwing a carton of broth into your dishes won't give you the same depth of flavor, richness, and thickness that this homemade Asian beef broth will. Trust me, you'll be able to taste the difference!
- Extremely simple to make. You don't need to be a chef to make this delicious beef broth. All it takes is a few basic ingredients like good-quality beef meat and bones with seasonings, 20 minutes of prep time, and about 3 hours of simmering.
- Perfect for any dish. This broth is perfect for making any kind of noodle dishes, soups, stews, and braises with an Asian twist. You can even enjoy it as a hot soup with rice and veggies for a simple and comforting meal.
- Versatile. On its own, the broth is extremely delicious and flavorful. But you can customize it to your liking by adding different vegetables like carrots, celery, green onions, and shiitake mushrooms.

Ingredient Notes
To make this nourishing Asian Beef Broth, you will need the following ingredients (full measurements in recipe card below):
- beef - for the most flavorful broth, use a mix of bones and meaty pieces. I kept it simple by using marrow bones and oxtails, but you can opt for knuckles, joints, short ribs, back ribs, shank, or chuck.
- water - use cold water for rinsing the bones. Use just enough water to boil the beef with the aromatics.
- white vinegar - for soaking the bones to end up with a clear broth.
- salt and fish sauce - for seasoning the broth. Use just enough salt and fish sauce and adjust to your taste.
- ginger - it gives the broth a spicy yet comforting flavor that's common in Asian cooking.
- onion - for a subtle sweetness and a bit of umami flavor.
- lime - it adds a bright flavor and helps to balance out the richness of the beef.
- sugar - a touch of sugar helps to round out all the good flavors and give the broth a classic Vietnamese flavor.
- star anise - a unique Asian spice that adds a sweet and licorice-like flavor to the broth.
- cinnamon - another favorite in Asian cooking for its sweet aroma that gives warmth and spice to the broth. I use sticks.
- cardamom - these small black seeds have an aromatic, sweet, and slightly smoky flavor with hints of citrus and mint. You can use ground or pods.
- coriander - for an earthy touch that adds complexity to the broth.
You will also need measuring cups and spoons, a Dutch oven or stockpot (or Instant Pot pressure cooker), a slotted spoon, tongs, and a fine mesh sieve.
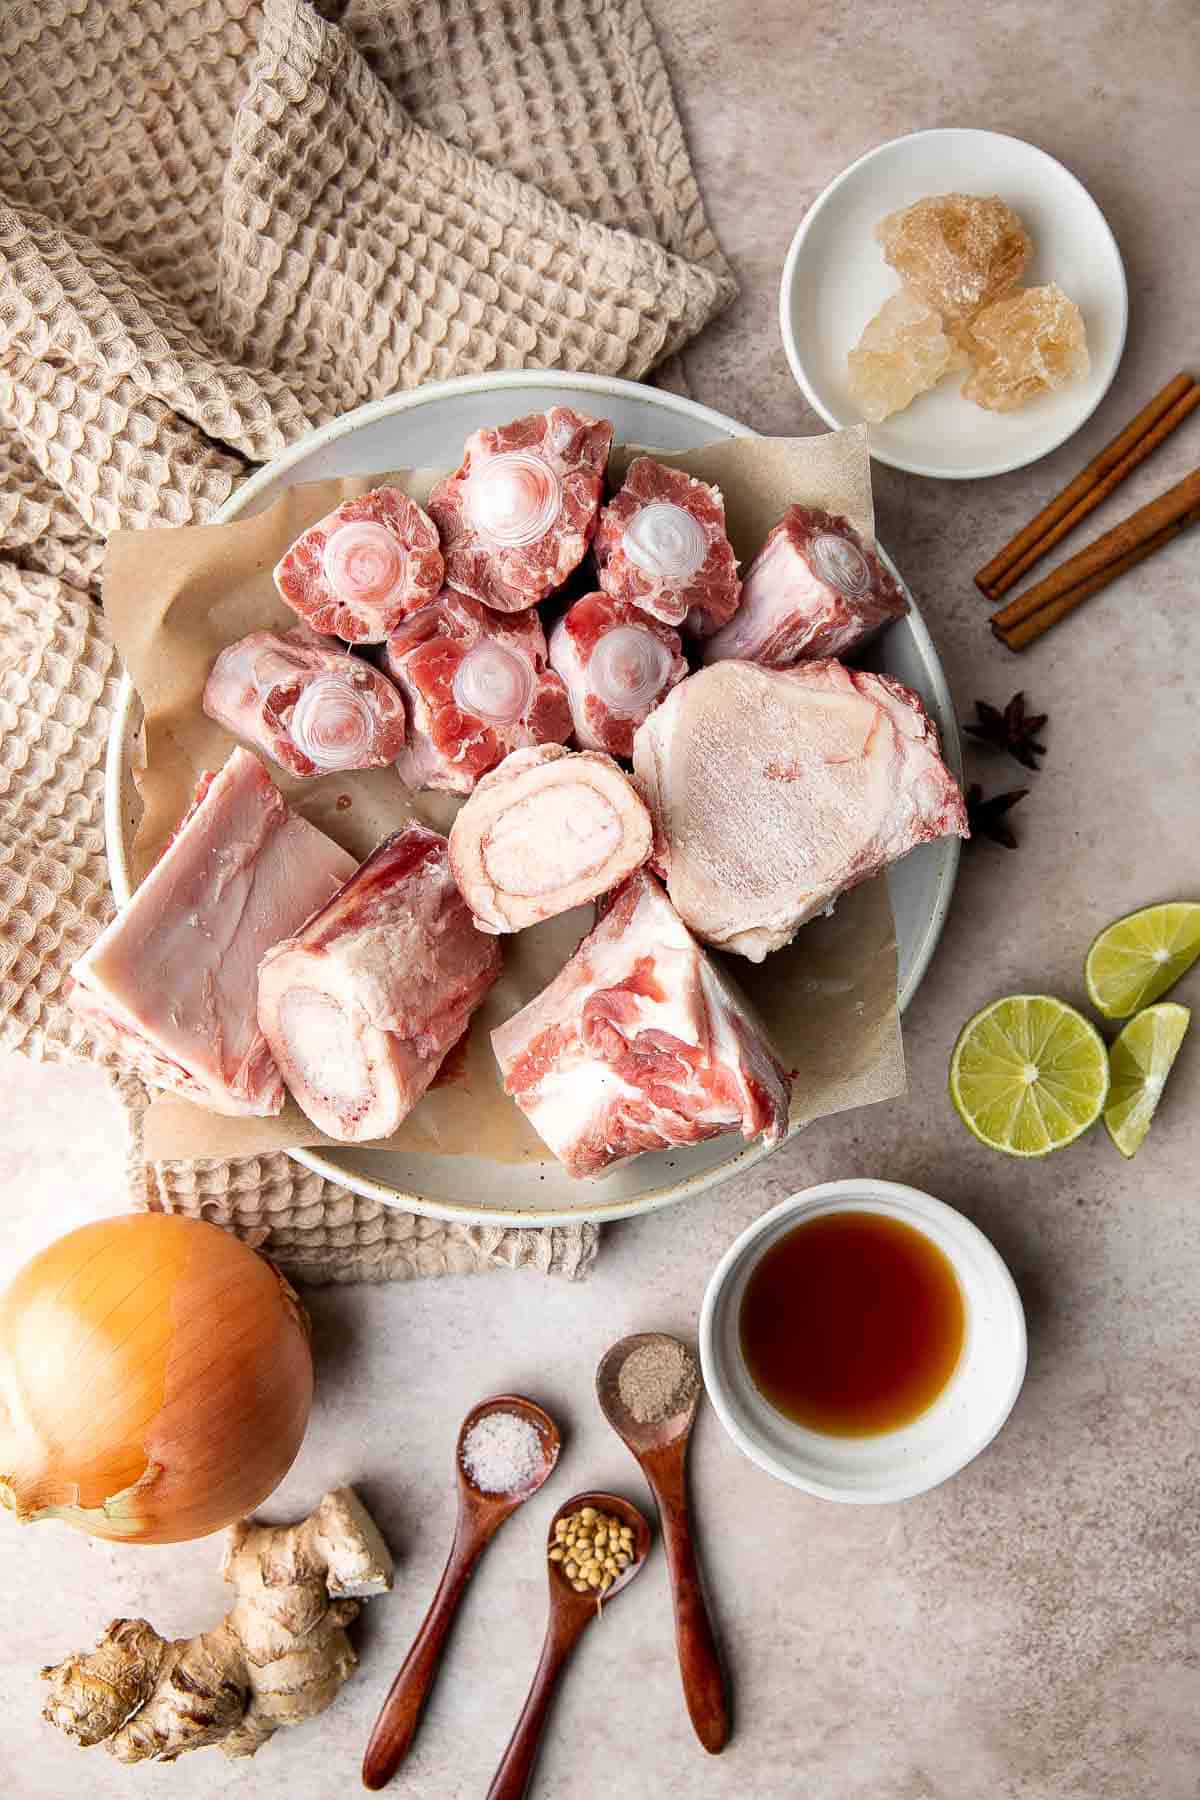
How to Make the Best Asian Beef Broth
First, prep the bones.
Rinse the bones and oxtails in cold water to remove blood and bone fragments.
Fill a large mixing bowl with cold water. Add white vinegar and salt and place the bones and meat inside to immerse it. Soak for 15-20 minutes. This helps get rid of some impurities and gives a much clearer broth in the end.
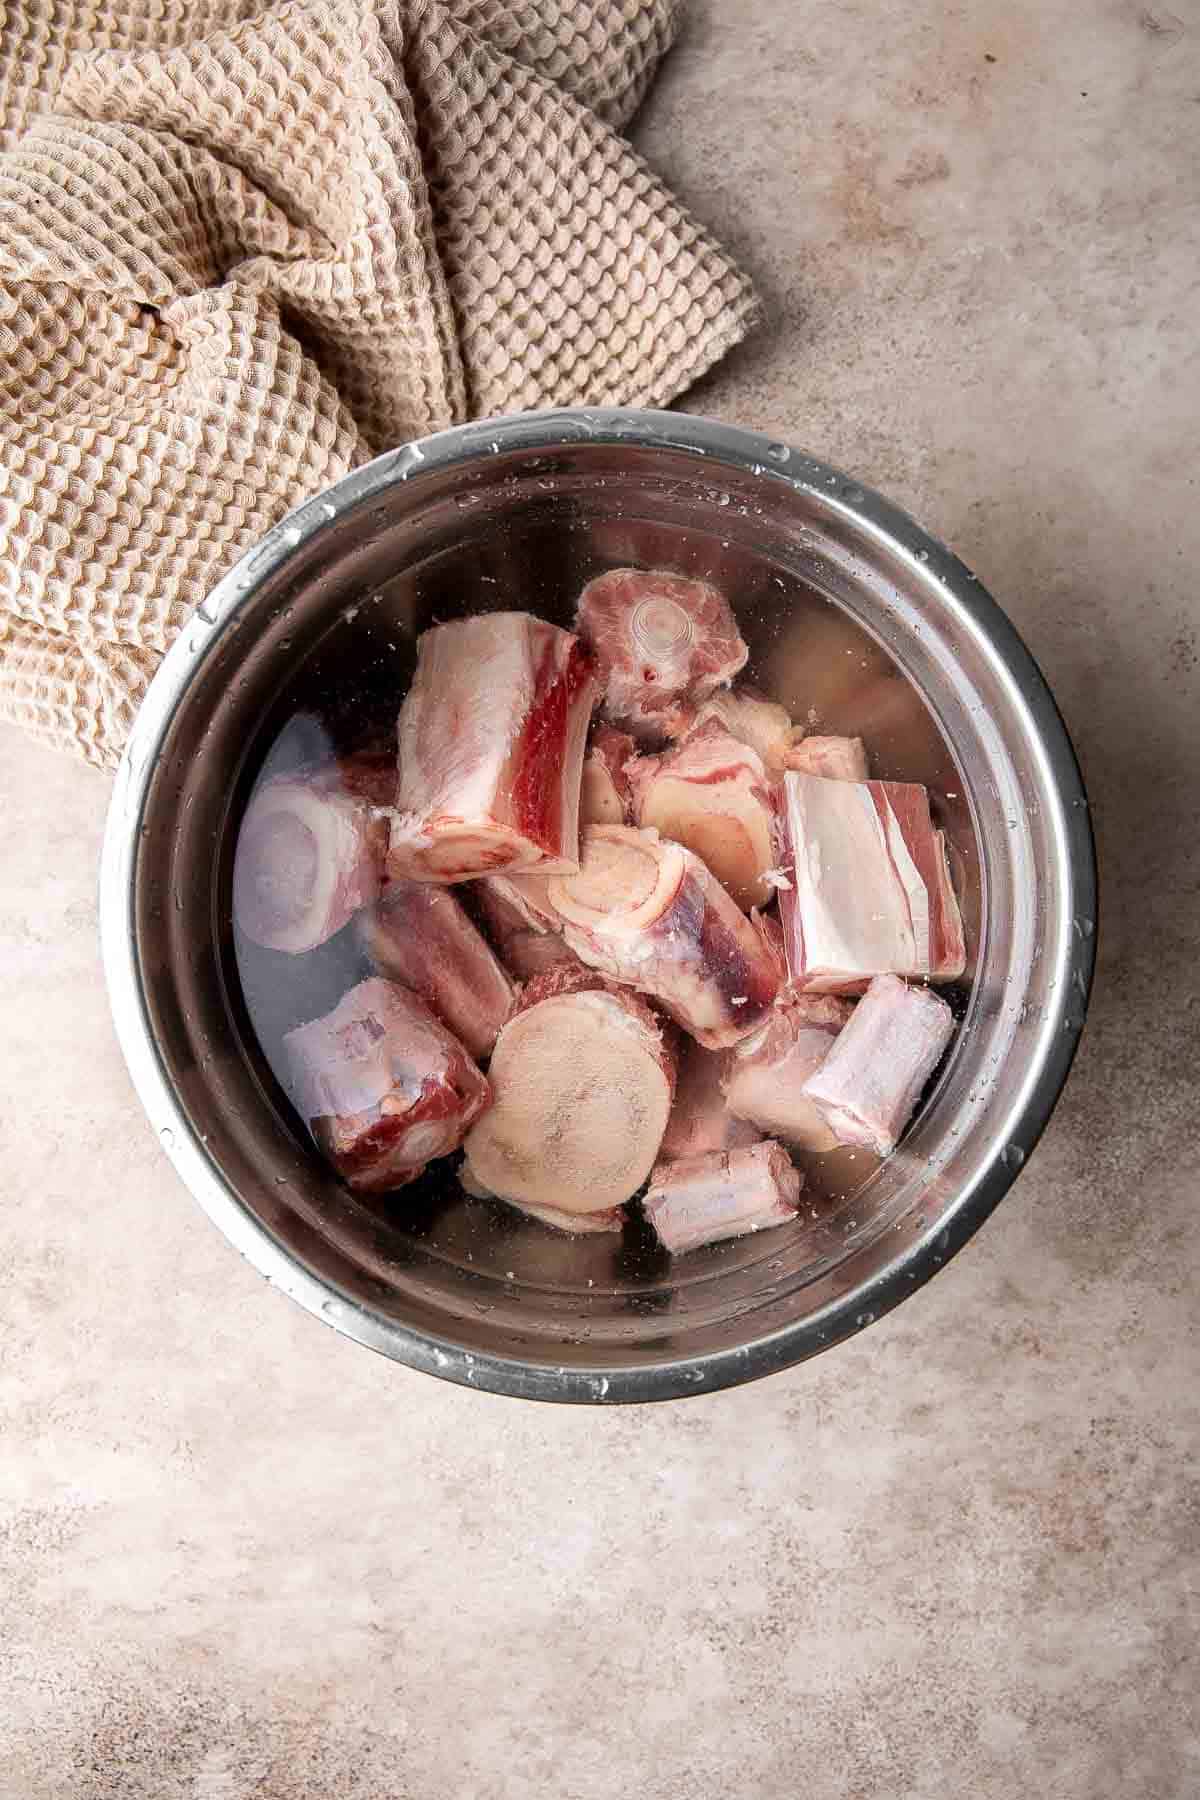
Next, make the broth.
Stovetop Method
- Boil. In a large 5.5 quart Dutch oven or stockpot, add beef bones, oxtails and 5 quarts of water. Heat over high heat and bring it to a boil. Boil for 5-10 minutes until you see foamy bits float on top. Use a slotted spoon or sieve to remove as much foam as possible.
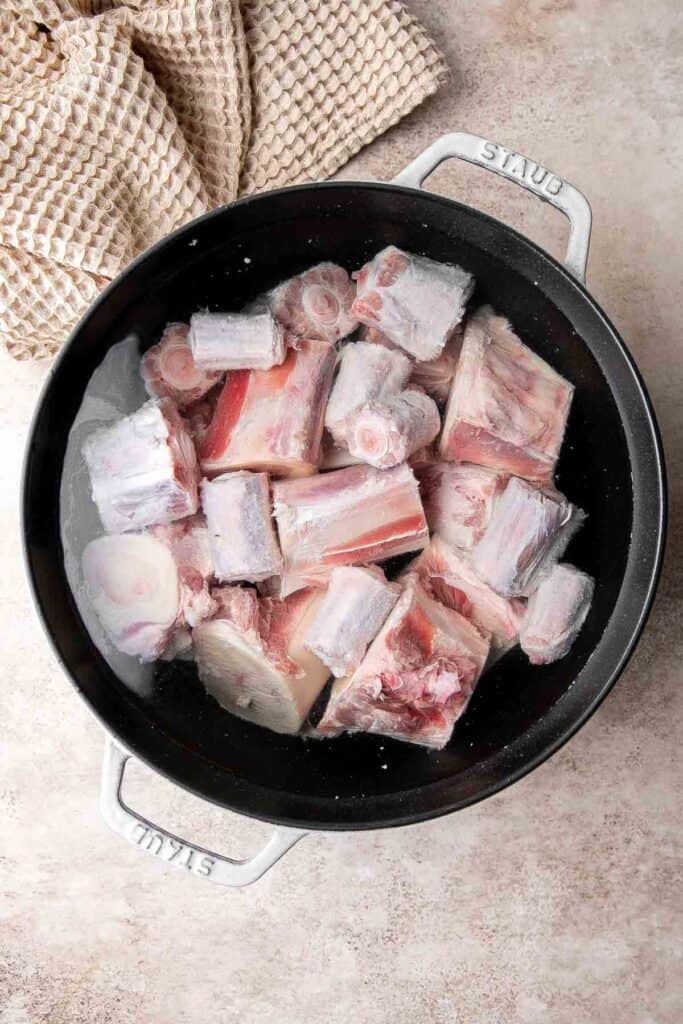
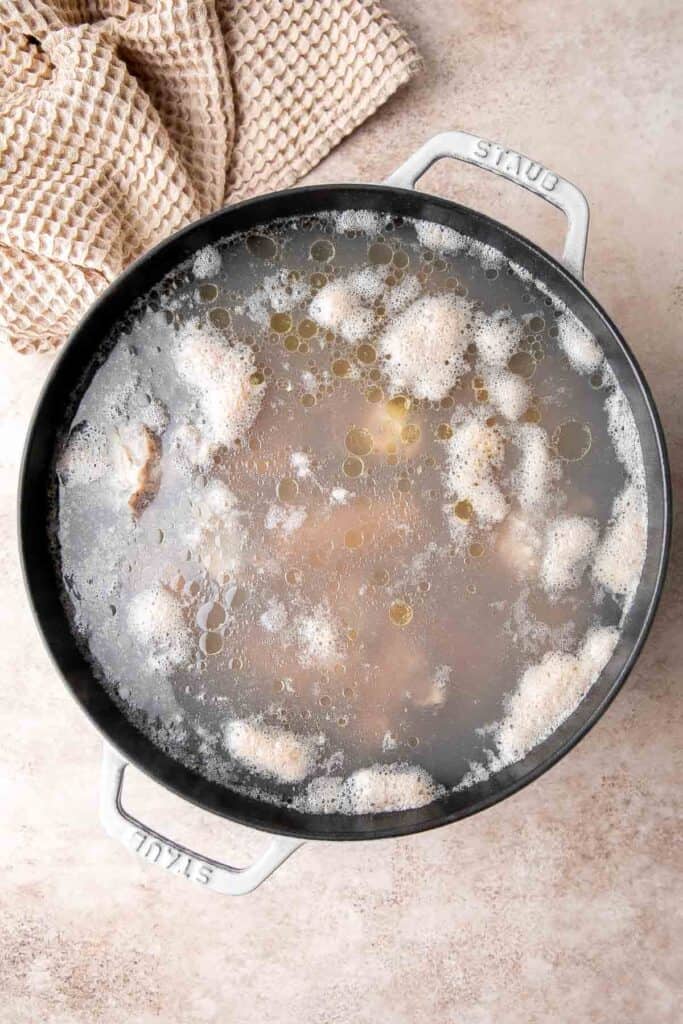
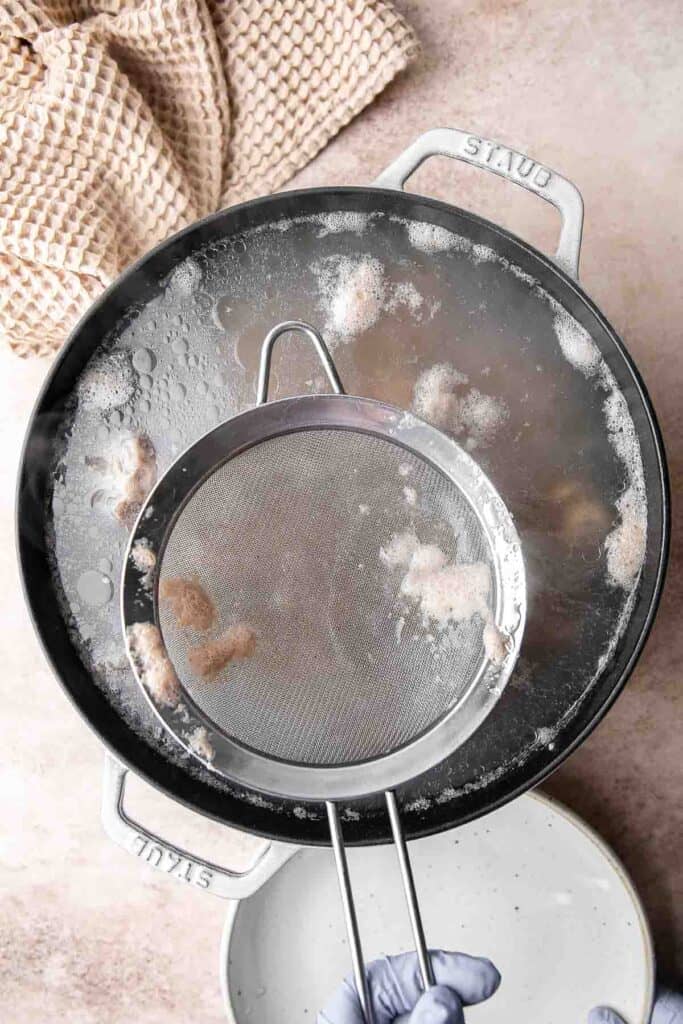
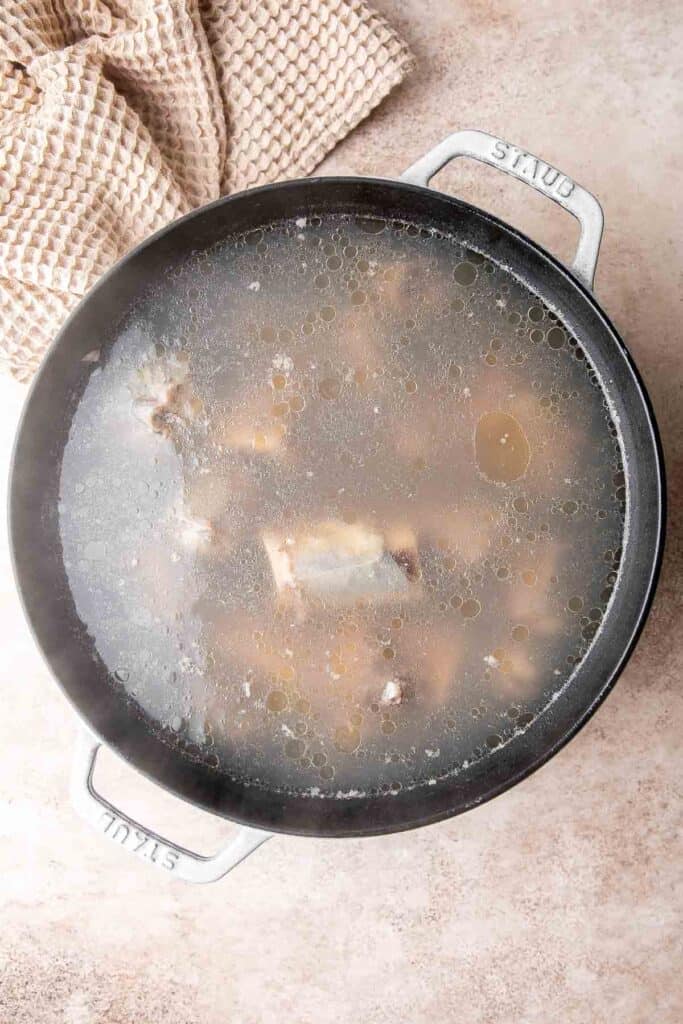
- Add seasoning. Reduce the heat to medium and add ginger, onion, lime, sugar, star anise, cinnamon sticks, cardamom, and coriander seeds. Stir to combine. Cover with lid and simmer for 3 hours. Check occasionally and remove more foamy bits and fat if necessary.
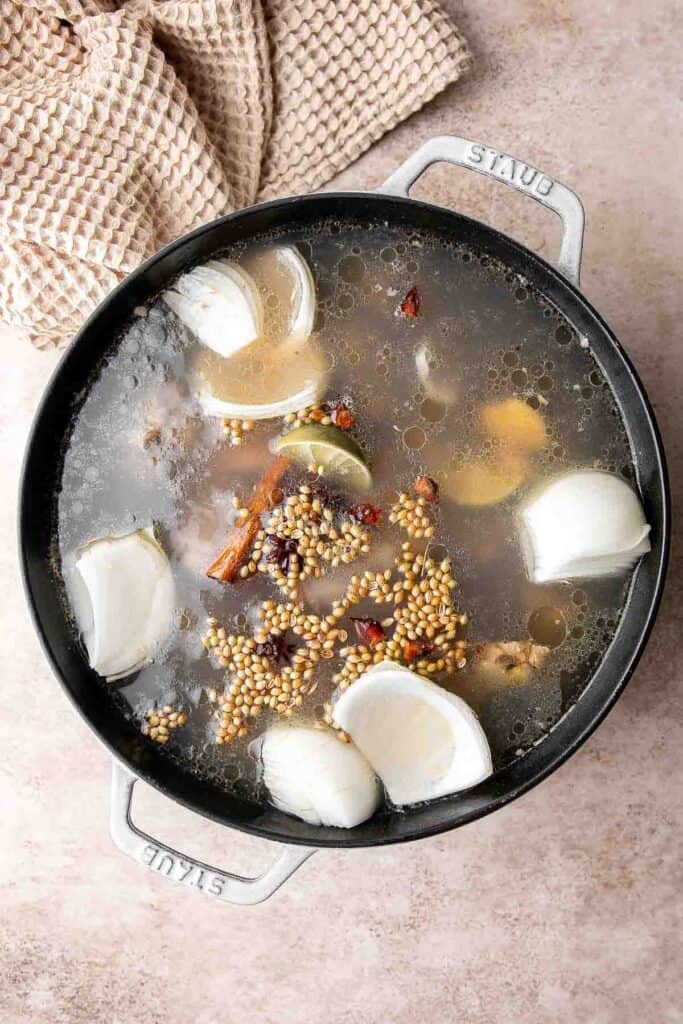

- Remove bones. Use tongs to transfer all the bones and oxtails into a large mixing bowl. Remove all the edible meat from the bones and oxtails (the meat should fall of the bone). Set aside to add to other recipes such noodles soup like Vietnamese Pho.
- Strain. Strain the broth through a fine mesh sieve into another large pot and discard all the spices, remaining small bits, and fat. Add salt and fish sauce to taste.
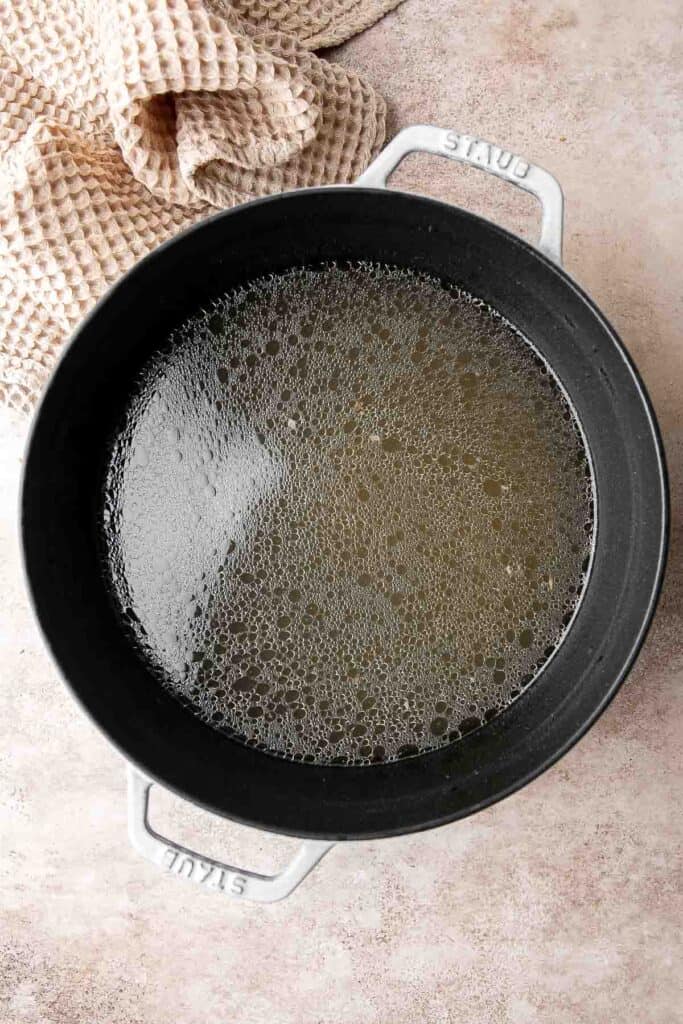
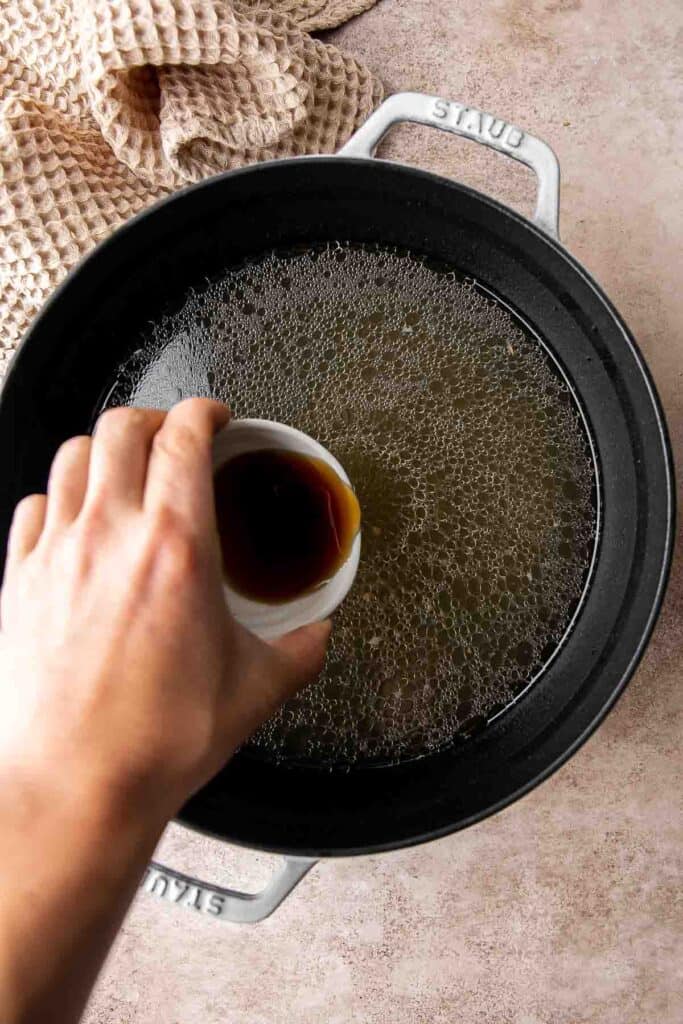
Asian Beef Broth in the Instant Pot (Pressure Cooker)
- Once the beef bones and oxtails have been soaked, place into the instant pot along with ginger, onion, lime, sugar, star anise, cinnamon sticks, cardamom and coriander seeds. Stir to combine.
- Set to pressure cooking mode for 1 ½ hours. Once the time is up, press the quick release to release all the pressure.
- Remove as much foam bits and fat as possible with a slotted spoon. This helps preserve the flavors of the broth.
- Strain the broth through a fine mesh sieve into another large pot and discard all the spices, remaining small bits, and fat.
- Use tongs to transfer all the bones and oxtails into a large mixing bowl. Remove all the edible meat from the bones and oxtails (the meat should fall of the bone). Set aside.
- Add salt and fish sauce to the broth, to taste.
Finally, serve the beef broth.
Serve the beef broth immediately on its own or with noodles, if desired. Use it in our Vietnamese Pho recipe.
You can also store it in the fridge or freezer (See Storing Instructions below).
Recipe Variations
- Roast the bones first. Roasting the bones for an hour before boiling will give your broth a richer, deeper flavor. It's worth the extra effort, especially if you're looking for a more intense flavor. And you'll get a nice browning at the same time. See our Slow Cooker Bone Broth for instructions.
- Spice it up. For a spicy version, add some chili peppers like jalapeños or Thai chiles while the broth simmers.
- Switch up the flavors. Don't be afraid to experiment with different spices and aromatics. Try adding bay leaves, cilantro, or even lemongrass for a bright flavor.
How to Serve
Serve this delicious Asian Beef Broth on its own with some rice, meat, and stir-fried vegetables, or use it as a base for noodle soups, stews, and braises. It is a must make recipe for Vietnamese Pho.
To serve it with some side dishes, try these Asian favorites:
- Beef Potstickers
- Instant Pot Chicken Fried Rice
- Beef Noodle Stir Fry
- Orange Chicken
- Tofu and Mushroom Stir Fry
- Steamed Scallion Buns

Recipe Tips and Tricks
- Control the salt content. Feel free to skip the salt if you are looking for a low-sodium broth or just reduce the amount.
- Don't cut the beef too small. When cooking, smaller pieces will lose moisture quickly and they might get dry over time.
- Cook for longer. Extend the cooking time to get a more concentrated flavor and a thicker texture. Make sure to turn the heat to low to avoid drying the meat pieces.
- Use a pressure cooker. Cut down cooking time in half by using an Instant Pot or pressure cooker. Follow the steps above.
Storing and Freezing Instructions
How to Store
Once cooled to room temperature, store the leftover broth in a glass jar or airtight container and refrigerate for up to 1 week until ready to use. You can store it in portions for easier access.
How to Reheat
Reheat the broth in a saucepan over low heat, stirring occasionally, before using in your favorite recipes.
How to Freeze
Store the cooled broth in a freezer-safe container and freeze for up to 3 months.
More Beef Soup Recipes
- 60 Best Soup Recipes
- Slow Cooker Bone Broth
- Beef Wild Rice Soup
- Pot Roast Soup
- Slow Cooker Asian Beef Noodle Soup
- Beef Cabbage Barley Soup
Tried this recipe?
I'd love to hear what you think! Leave a comment and rating below to share your feedback. Your reviews help others discover this recipe and help me keep creating more free recipes for you. Snap a photo and tag me on social media @aheadofthyme too.

30 Best Keto Side Dishes
Preparing a keto-friendly feast and wondering what keto side dishes to serve with it? So if you're cooking a ketogenic main course, like a succulent steak or a flavorful salmon, and wondering, "what to serve with keto meals," you're in the right place! We've compiled a collection of the 30 Best Keto Side Dishes featuring an assortment of low-carb sides including fresh salads, roasted veggies, creamy mashed vegetables, healthy soups, and more.
These mouthwatering recipes are perfect for anyone following a keto diet, whether you're just starting out or a seasoned keto pro. So get ready to elevate your keto dining experience!

Best Keto Side Dishes
Brussels Sprouts with Bacon is a quick and easy side dish with the best flavor and texture. The best part? This holiday side is ready in under 15 minutes.
This buttery, garlicky Sautéed Spinach is the best way to enjoy this nutritious green. It's the ultimate healthy side dish and takes a few minutes to make!
Mashed Cauliflower is a fluffy and buttery side dish and a low carb, keto-friendly alternative to mashed potatoes. Plus, it's easier and quicker too!
Egg muffins are a quick and easy way to meal prep breakfast on-the-go, loaded with cheddar cheese, bacon or salami, and green onions. Make 12 in 30 minutes.

Creamy Garlic Cauliflower Soup
Creamy Garlic Cauliflower Soup is creamy and healthy. This vegetarian soup is ready in 45 minutes with a handful of wholesome ingredients and a few steps.
Oven Roasted Vegetables are a delicious flavorful side dish that goes well with almost any dinner main. Customize it with whatever veggies you have on hand.
Spinach and Feta Quiche with Cauliflower Crust
Spinach and feta quiche is healthy and gluten-free with a keto cauliflower crust and savoury vegetarian filling. Serve for breakfast, lunch or dinner.
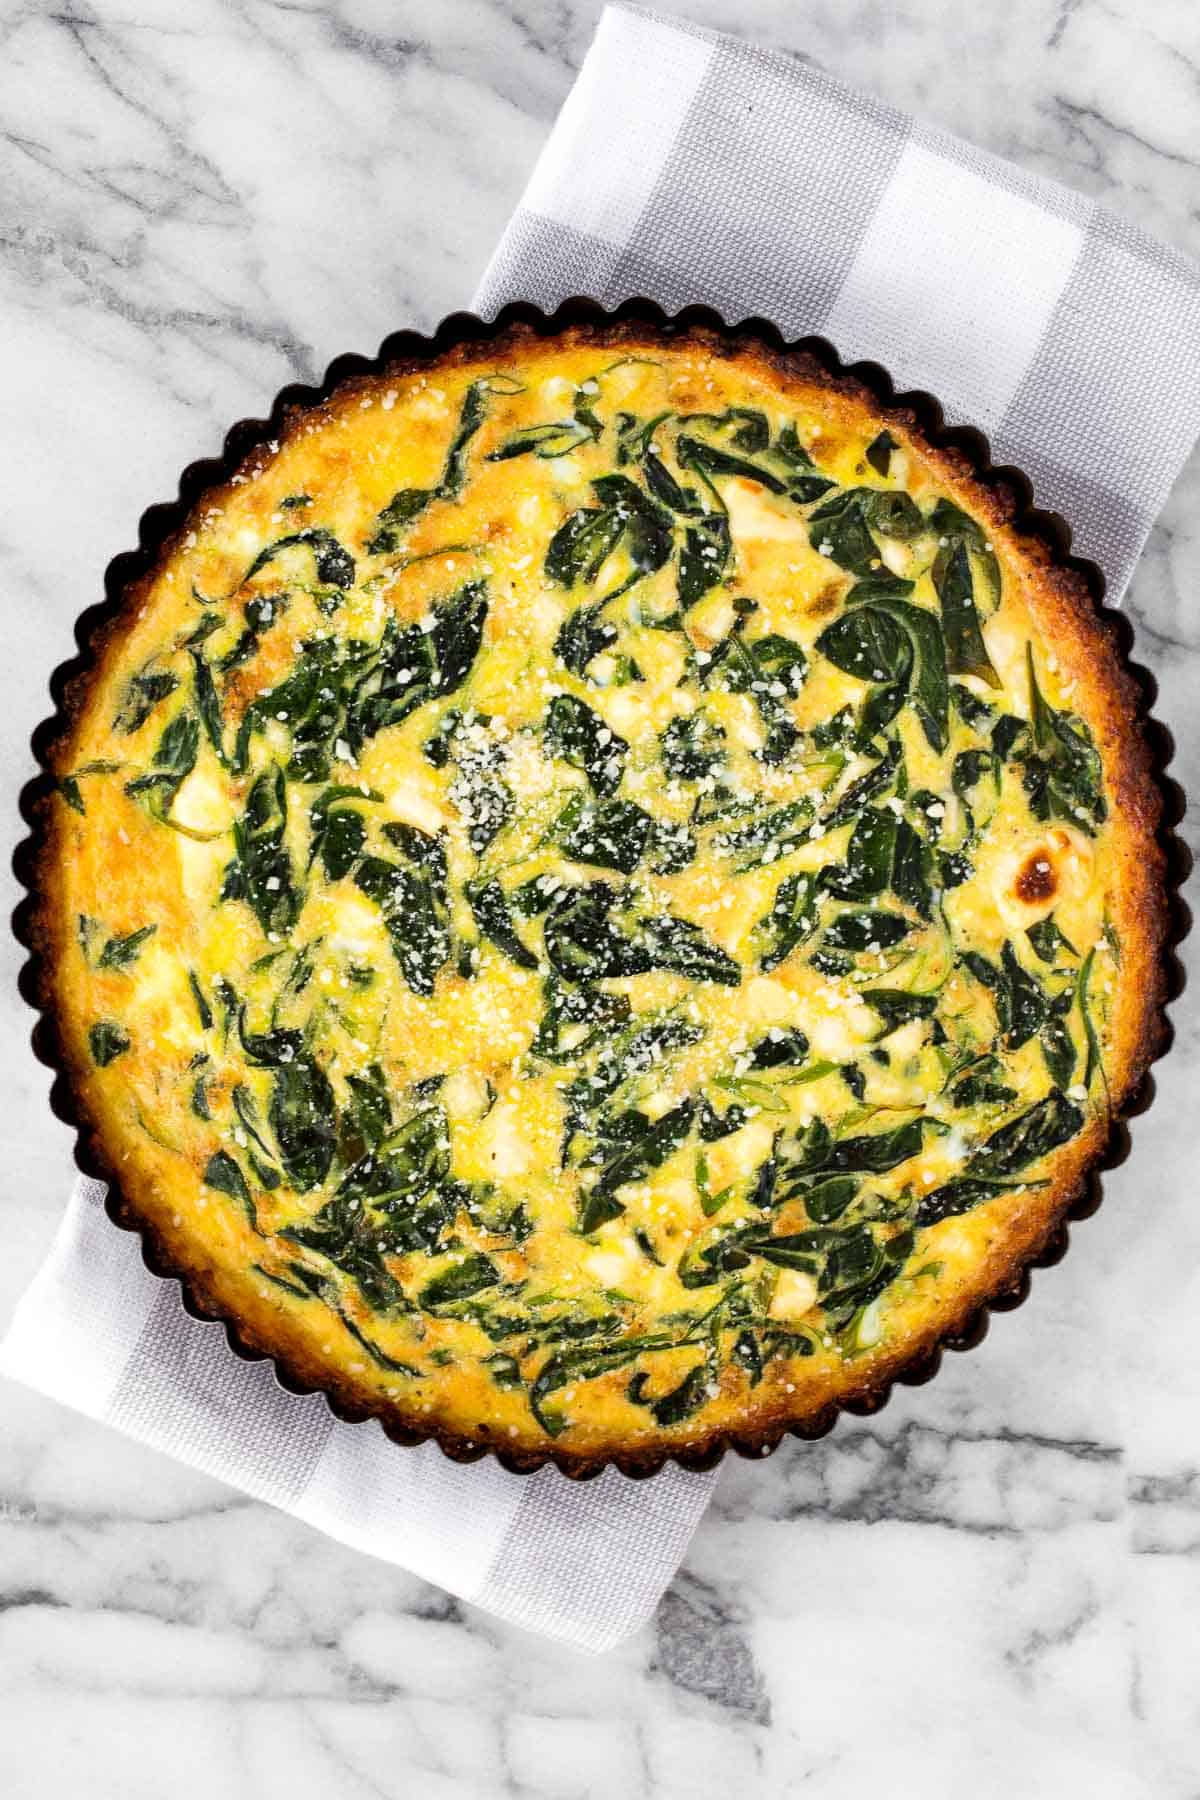
Buttery sautéed garlic mushrooms are silky smooth with an incredible caramelization and earthy rich flavour. A simple side dish in under 15 minutes.
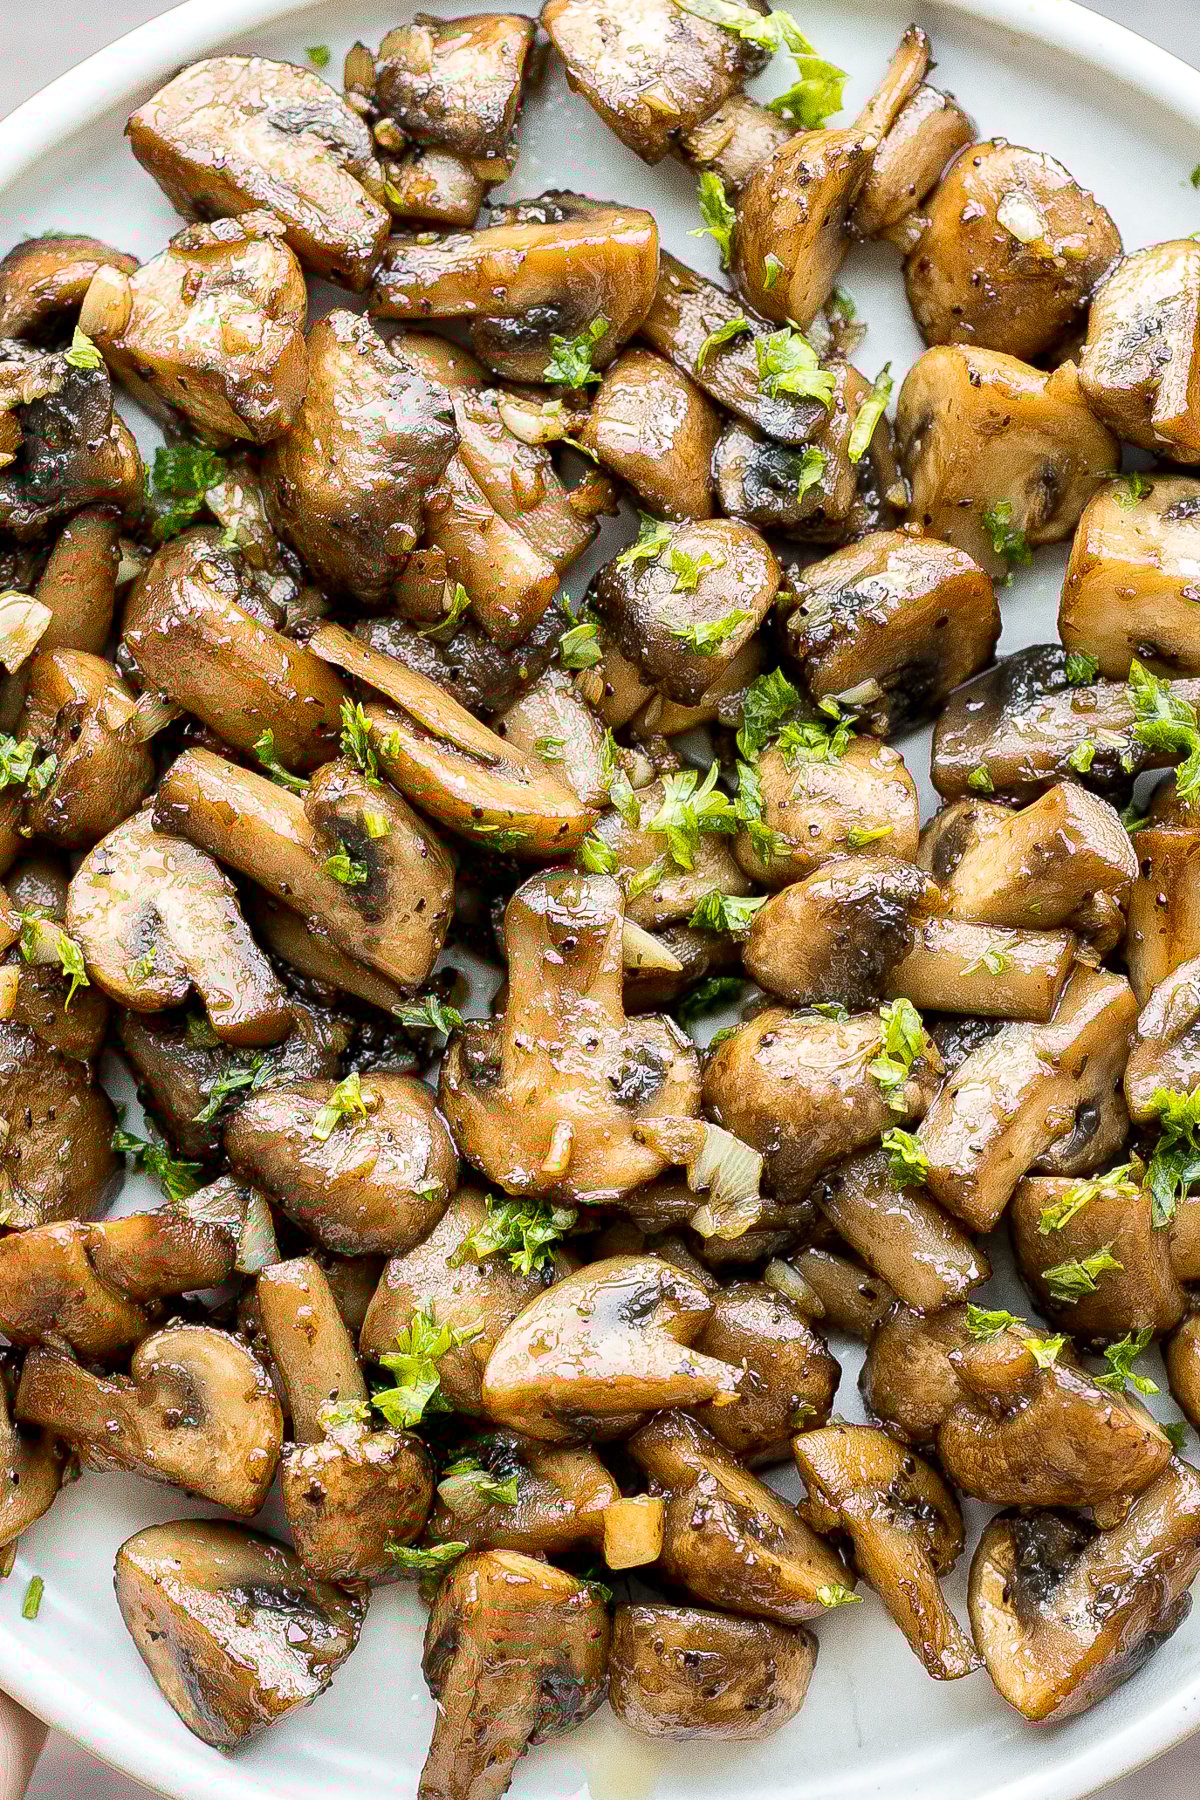
Cheesy roasted asparagus is a quick and easy side dish made with a handful of simple ingredients in 20 minutes. They're garlicky, cheesy, and flavorful.
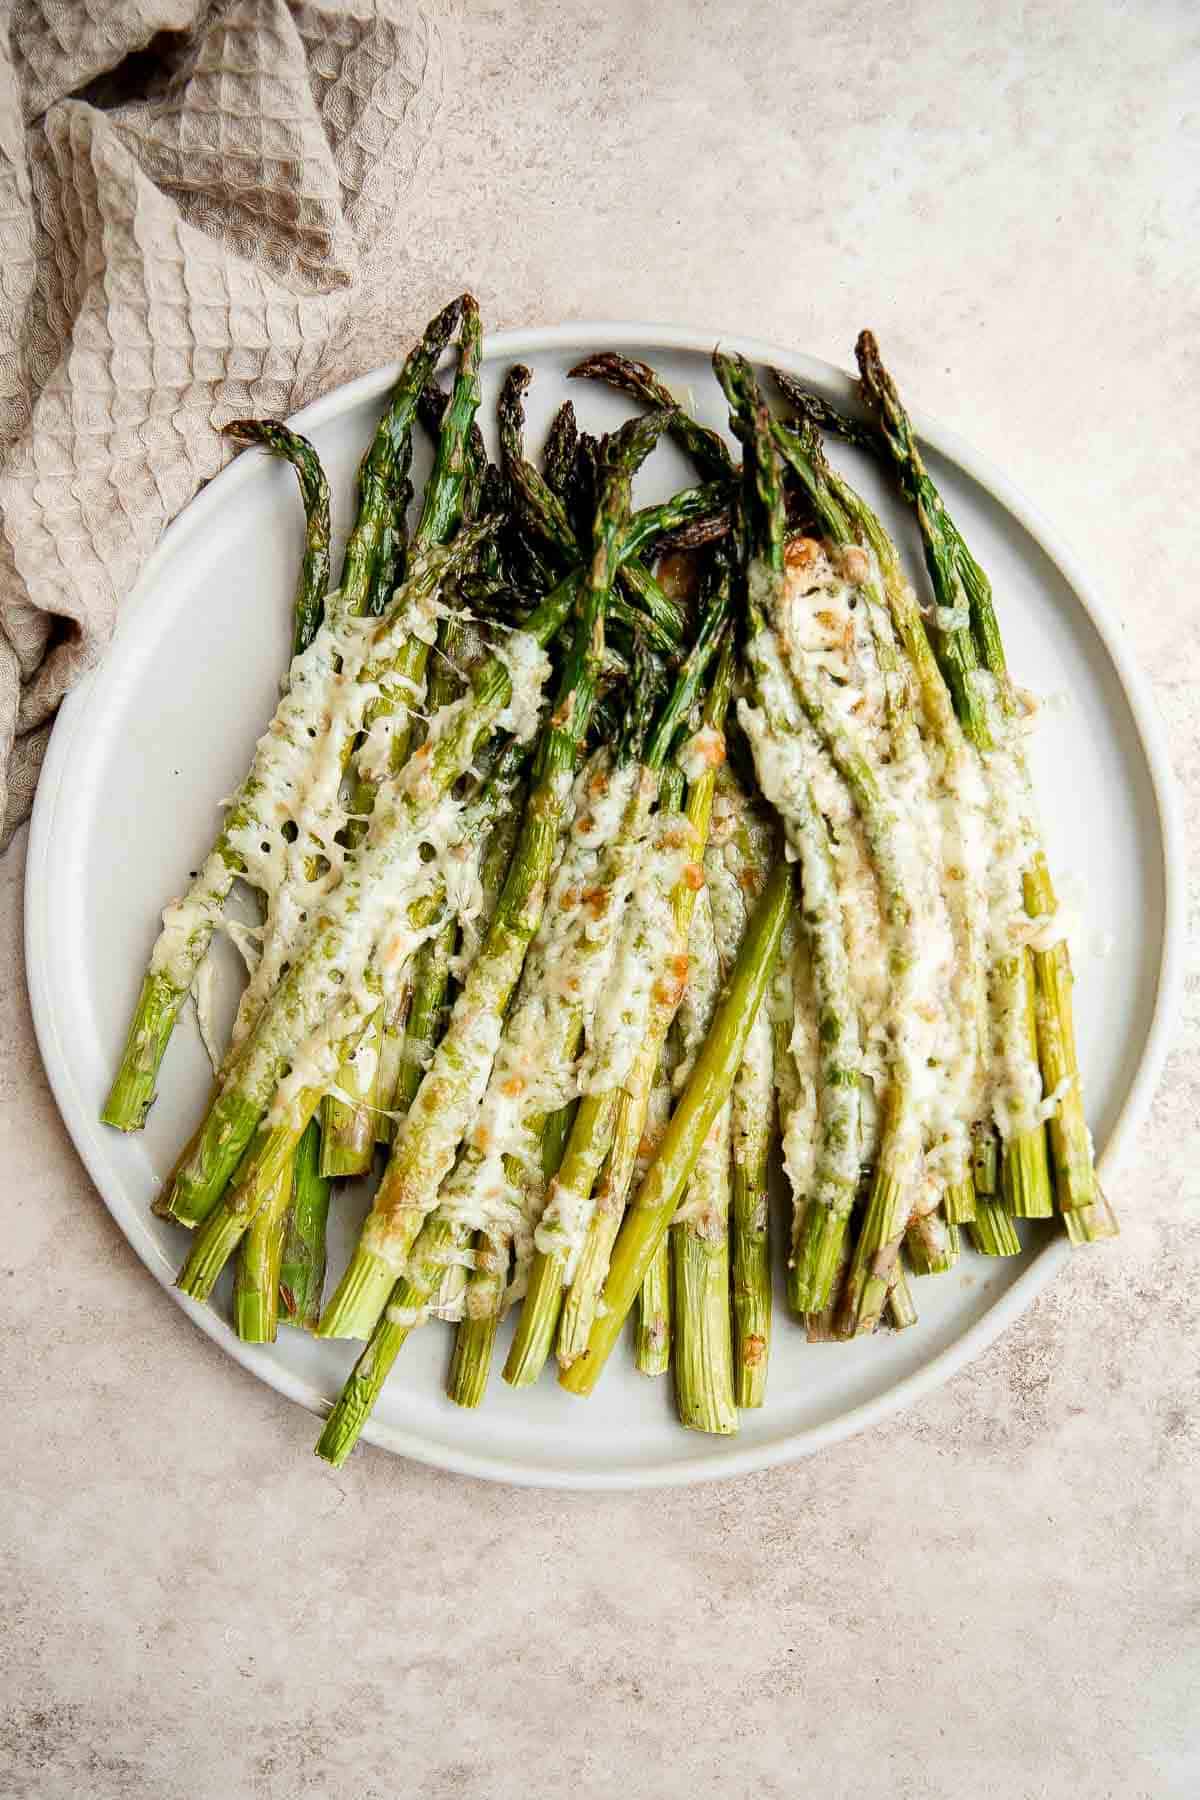
Arugula Salad with Parmesan cheese and a simple homemade lemon dressing is healthy, fresh, and delicious. Toss it together in just 5 minutes!
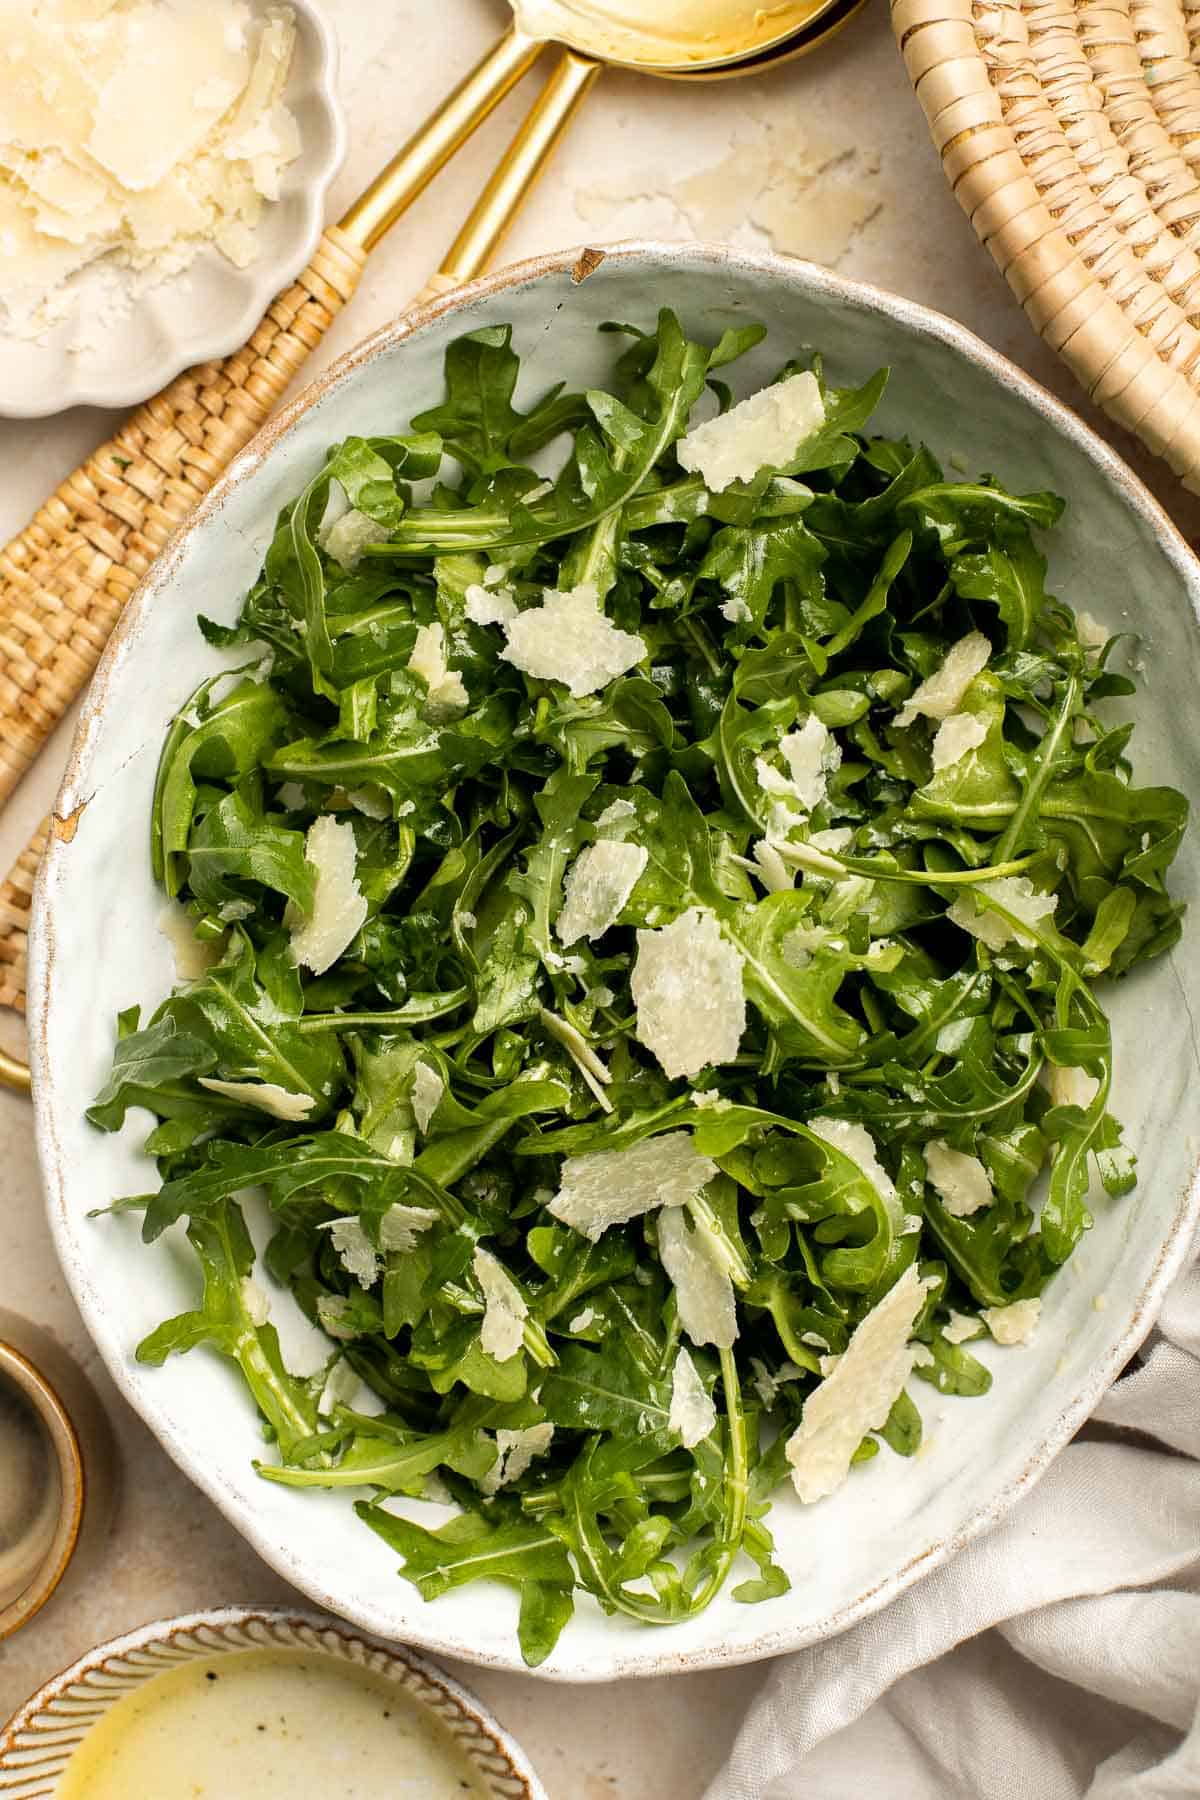
Air fryer cauliflower bites have a crispy breaded coating outside, yet tender and light inside. They are bite-sized, flavorful, easy to make, and healthy.

Lemon Parmesan Green Beans are the perfect side to any entree dinner meal - buttery, lemony, and cheesy. This quick side dish is easy to make in 20 minutes.

This Eggplant Lasagna is cheesy, saucy, and packed with layers of roasted eggplant, mushrooms, and melty cheese. It's gluten-free and vegetarian too.
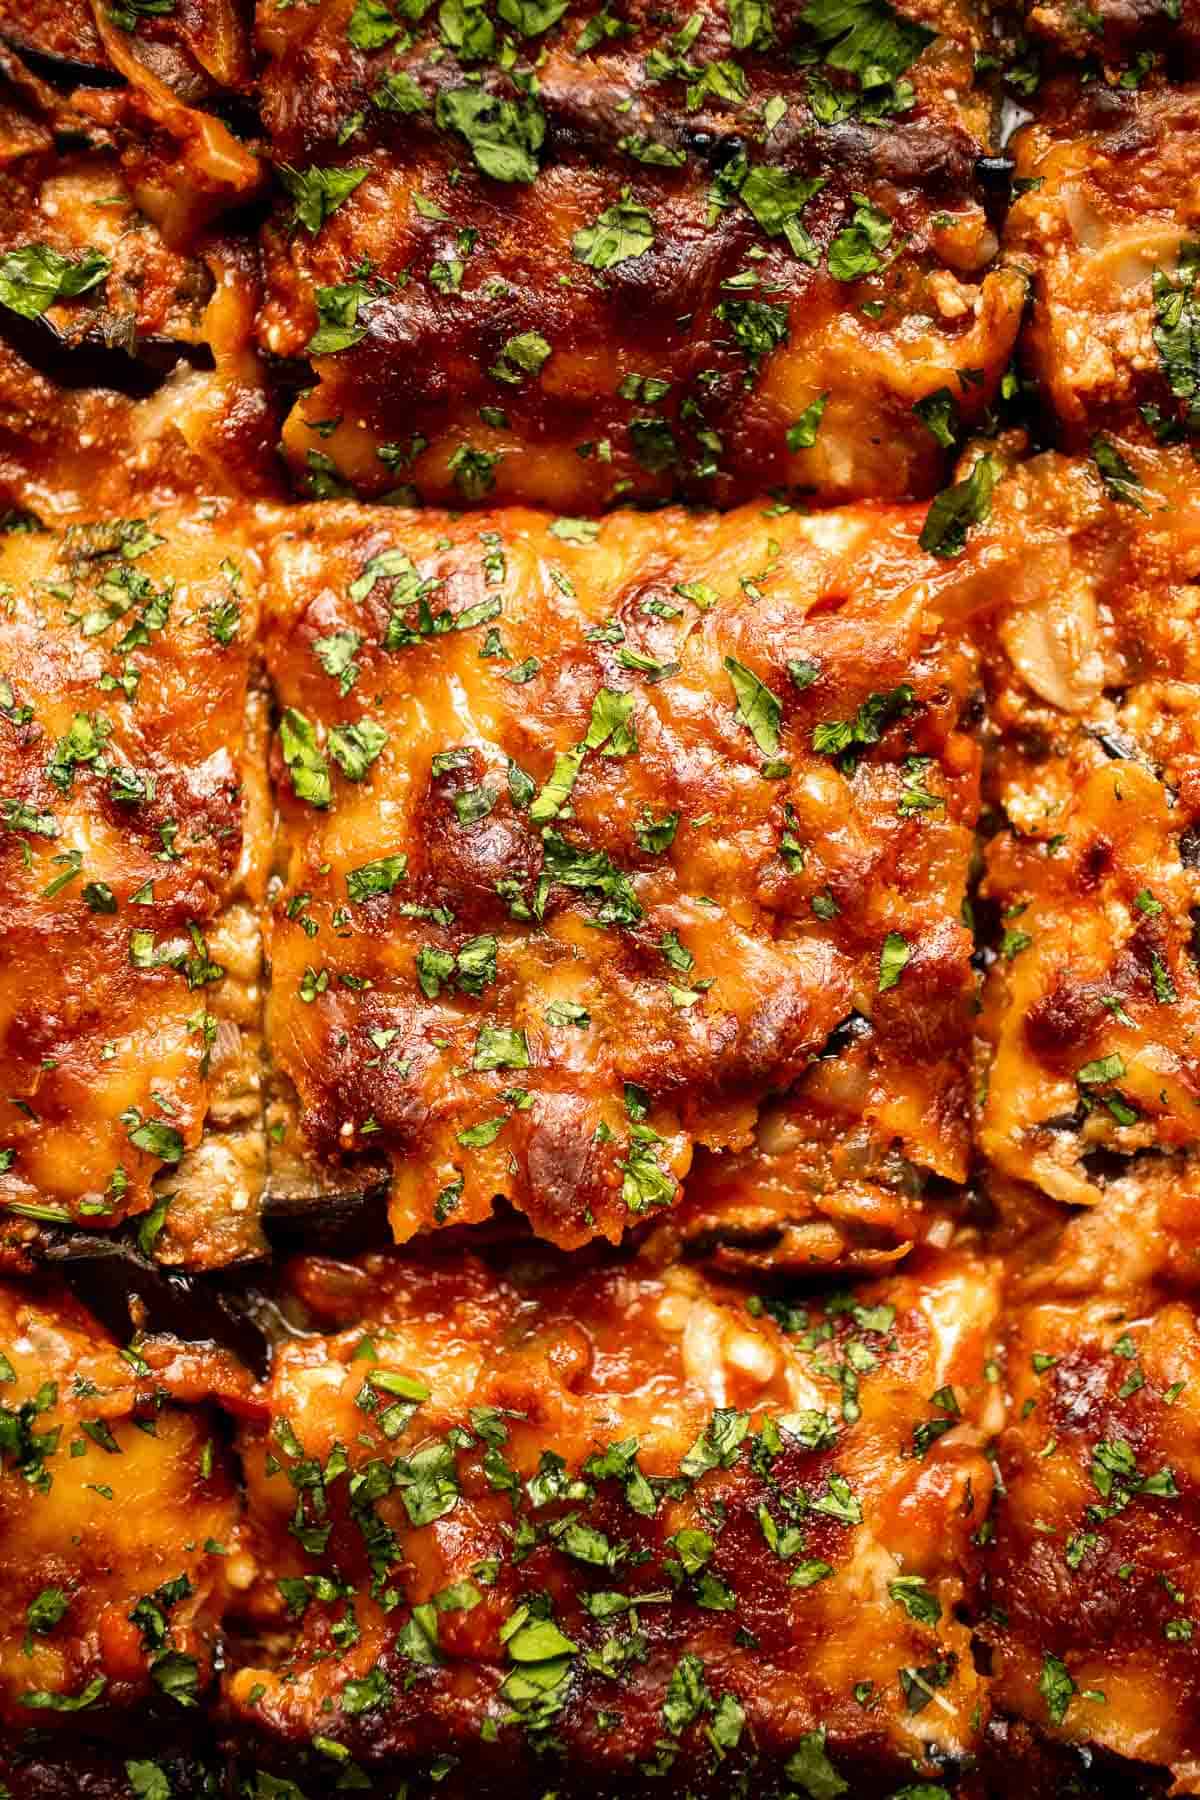
White chicken chili is an easy and delicious one pot meal made with shredded chicken, hearty veggies, and a creamy broth that's loaded with flavor.

Delicious, garlicky, cheesy and creamy brussels sprouts bake is the ultimate comfort food side dish. So flavourful and the best way to eat brussels sprouts.
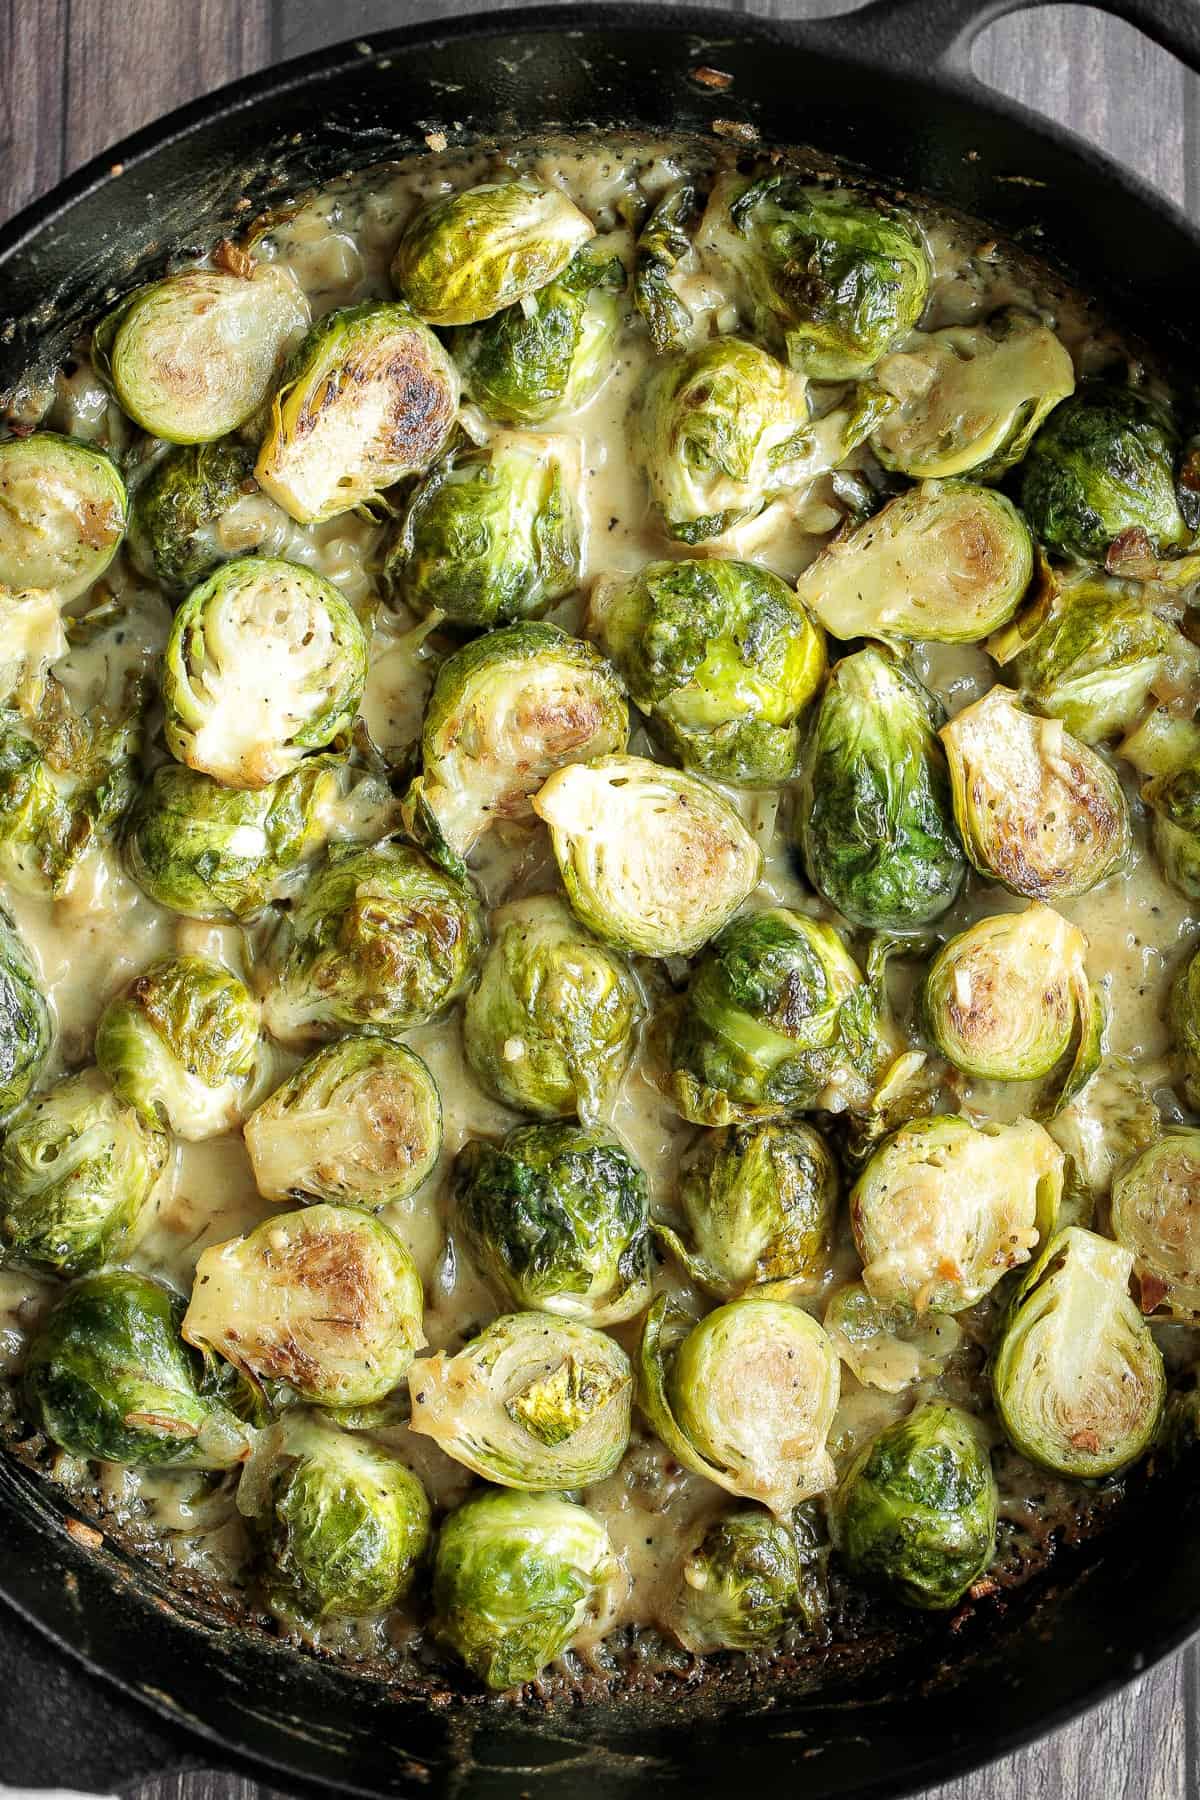
Mashed butternut squash is the perfect side dish for fall - creamy, smooth, and delicious, with the perfect balance between sweet and savory fall flavors.
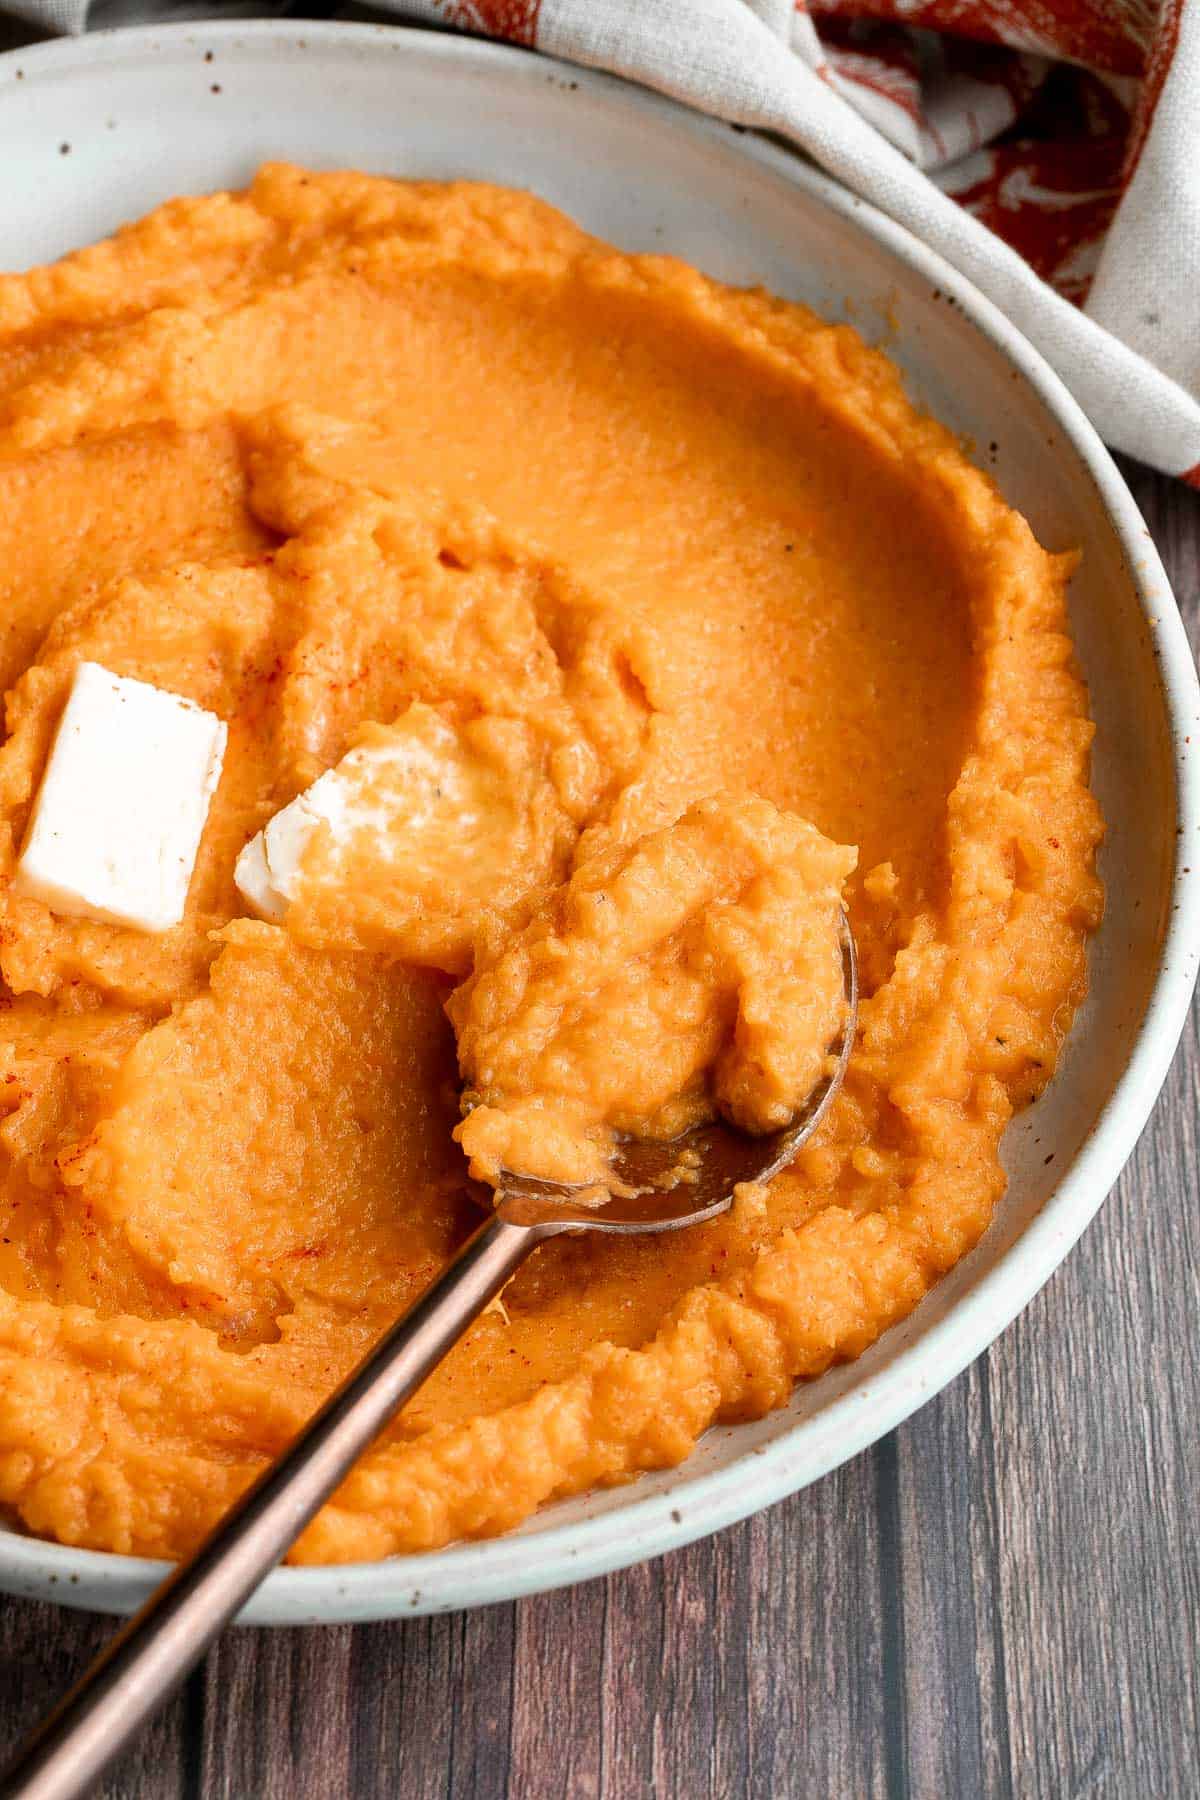
Leftover Turkey Stuffed Peppers
Leftover turkey stuffed peppers are a nutritious, wholesome and healthy dinner that you can throw together easily and quickly. A total crowd-pleaser.

Bacon Wrapped Brussels Sprouts
Bacon wrapped brussels sprouts are the sweet, savory, and salty appetizer that you need at your next holiday gathering this fall. Simple and easy to make.

Cheesy Baked Zucchini with Marinara
Cheesy Baked Zucchini with Marinara will save your weeknight dinner routine (and the kids love it too!). It's low carb, vegetarian, gluten-free, and keto.

Beef taco salad is a simple, filling, and delicious meal loaded with your favorite taco fillings, and a creamy lime dressing. Make it in 20 minutes.
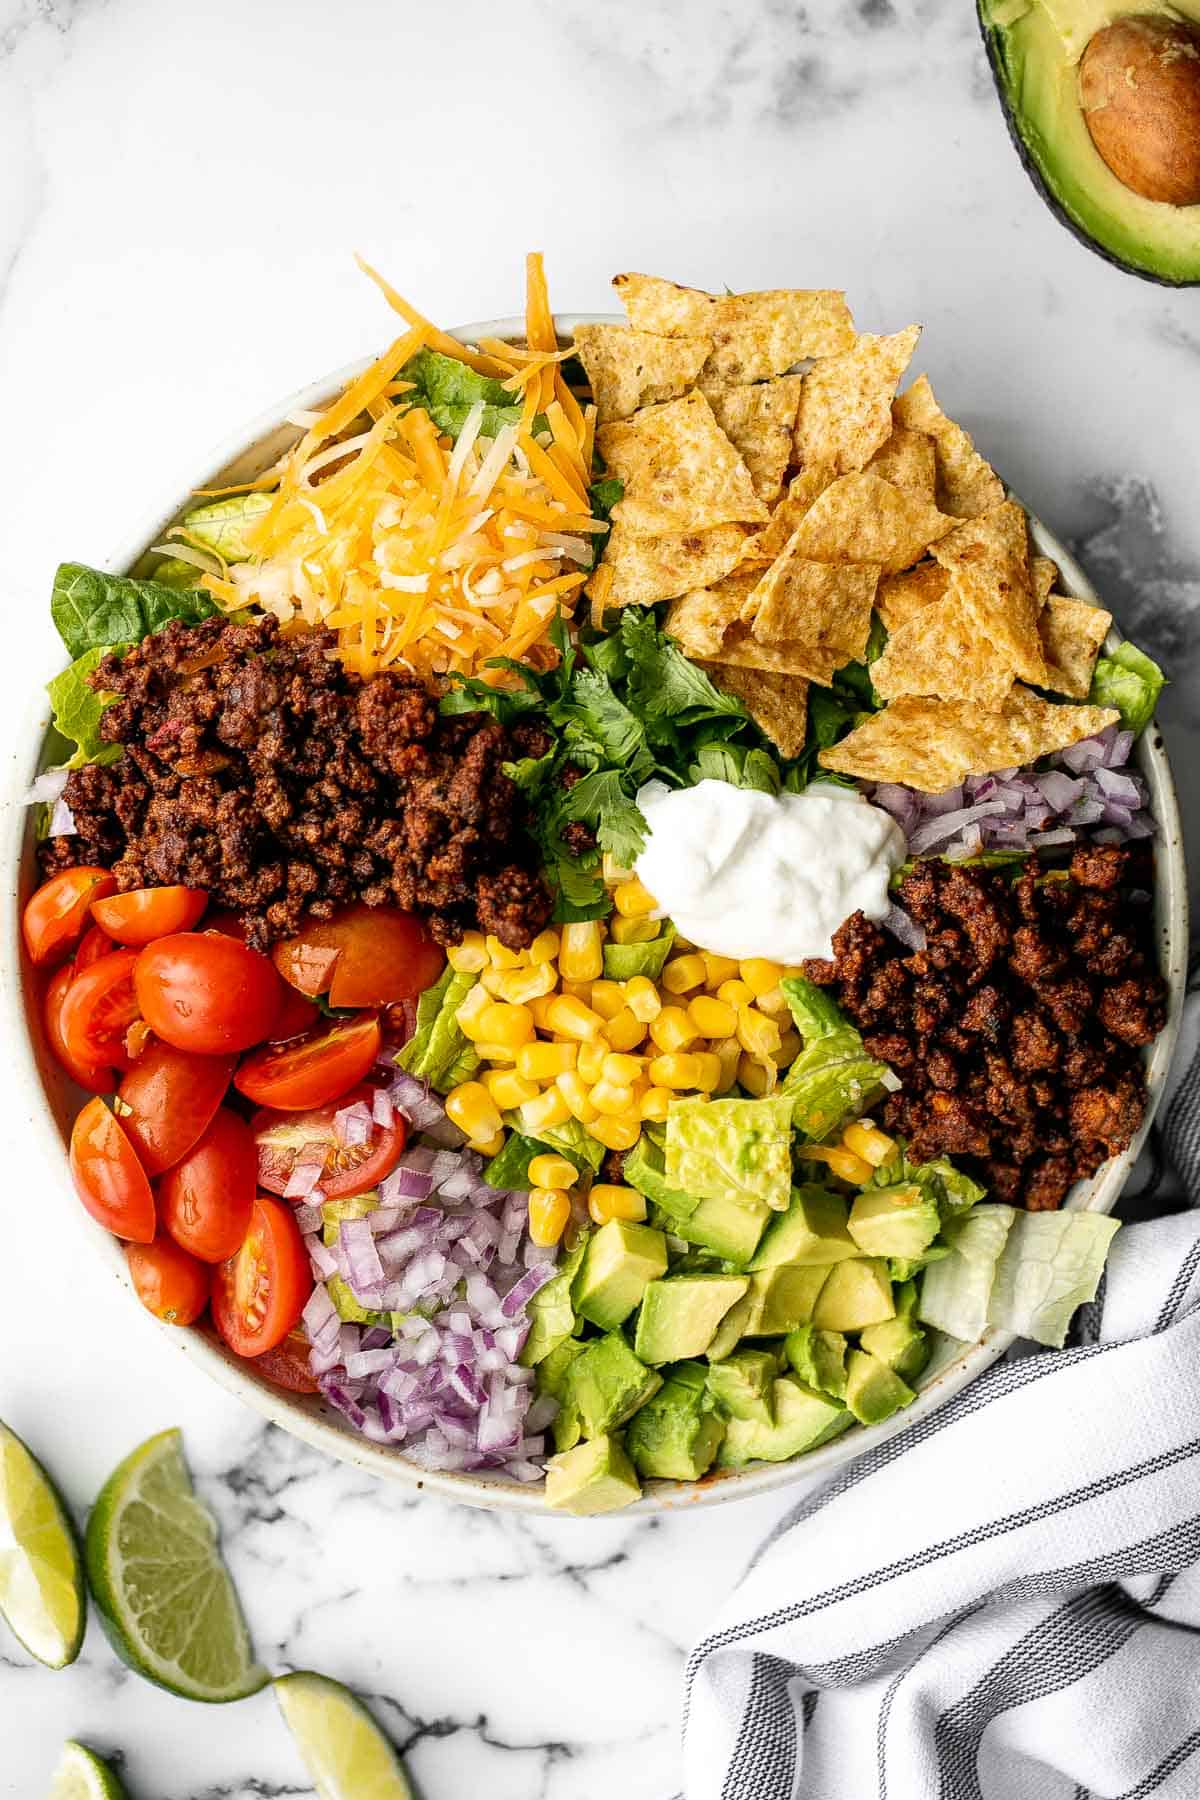
Balsamic Roasted Broccoli is a quick easy side dish made with tender, crispy broccoli tossed in a flavorful 5-ingredient glaze and is ready in 25 minutes.
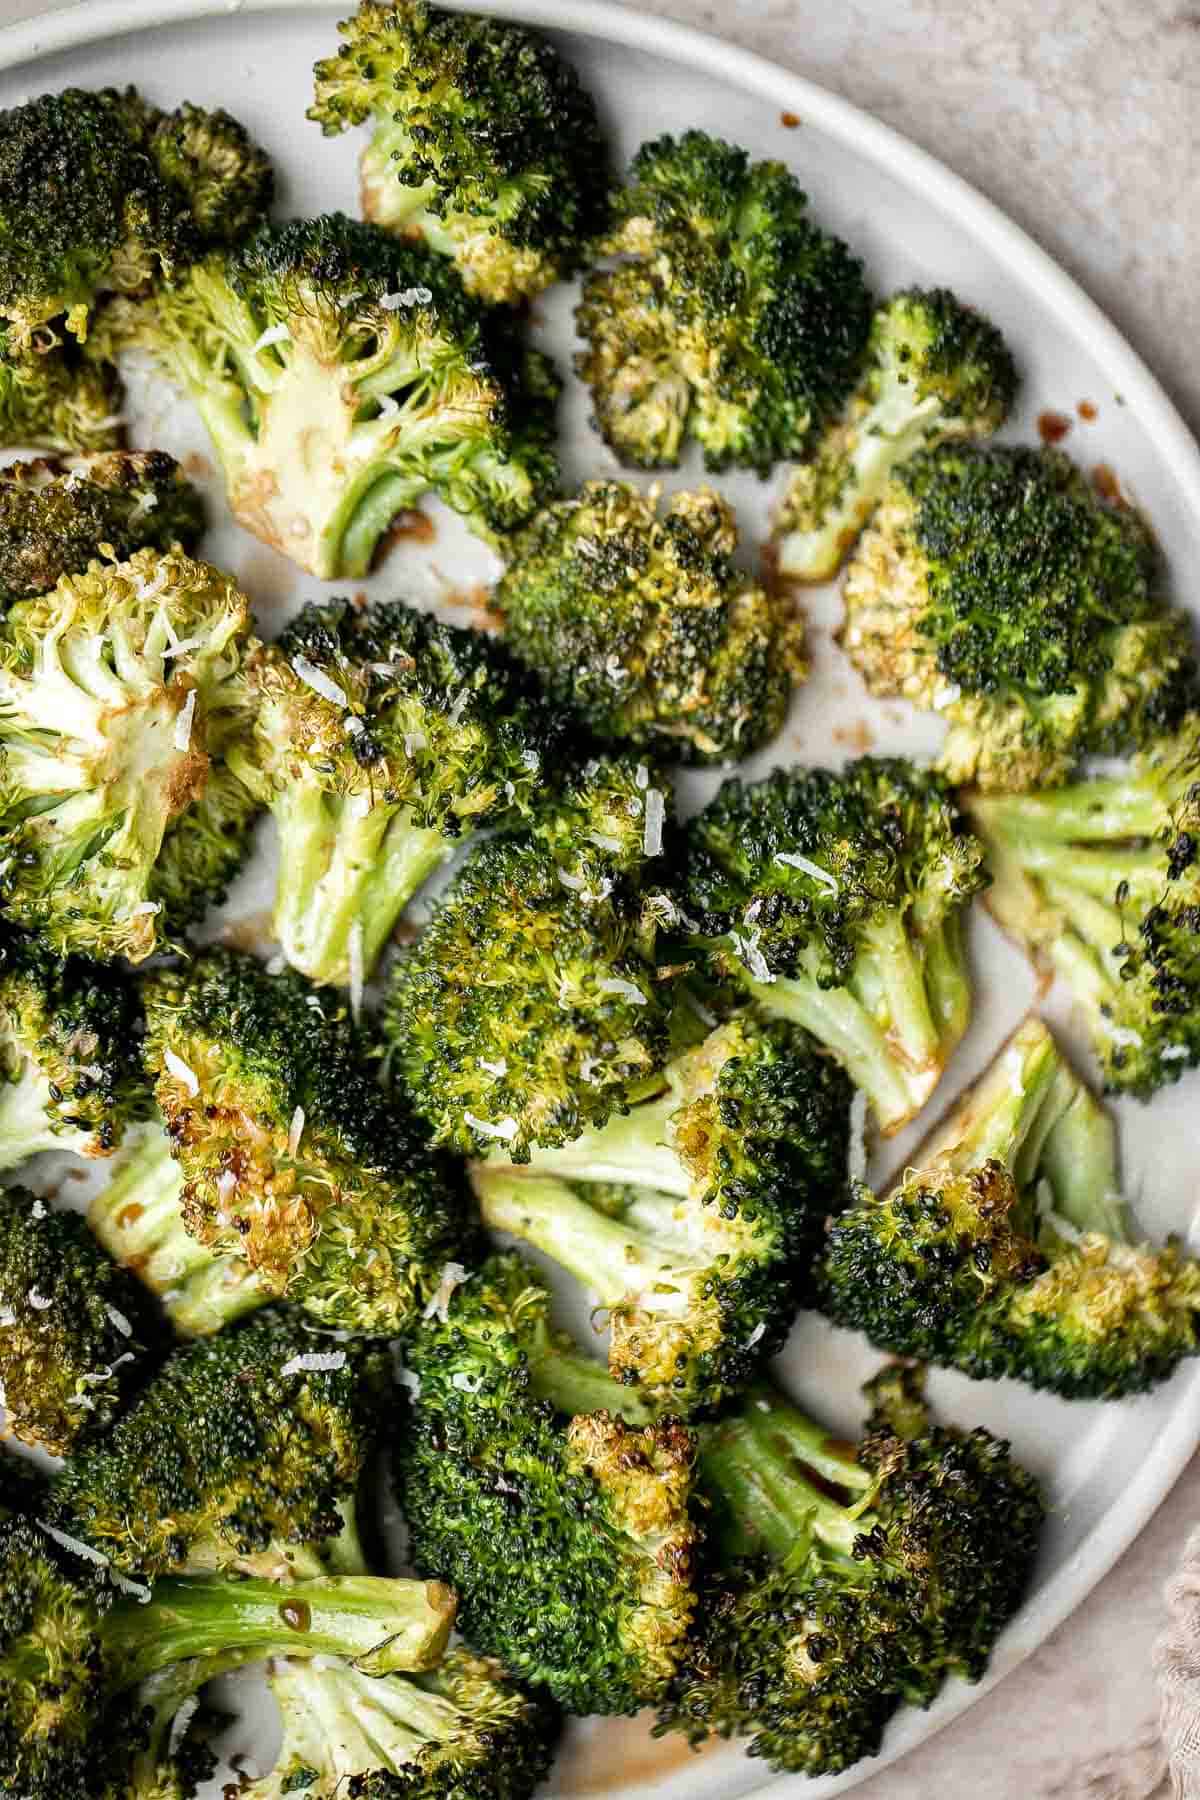
Ratatouille is a classic summer stew loaded with tender, flavorful vegetables smothered in a rich homemade tomato sauce. It is easy to make too!
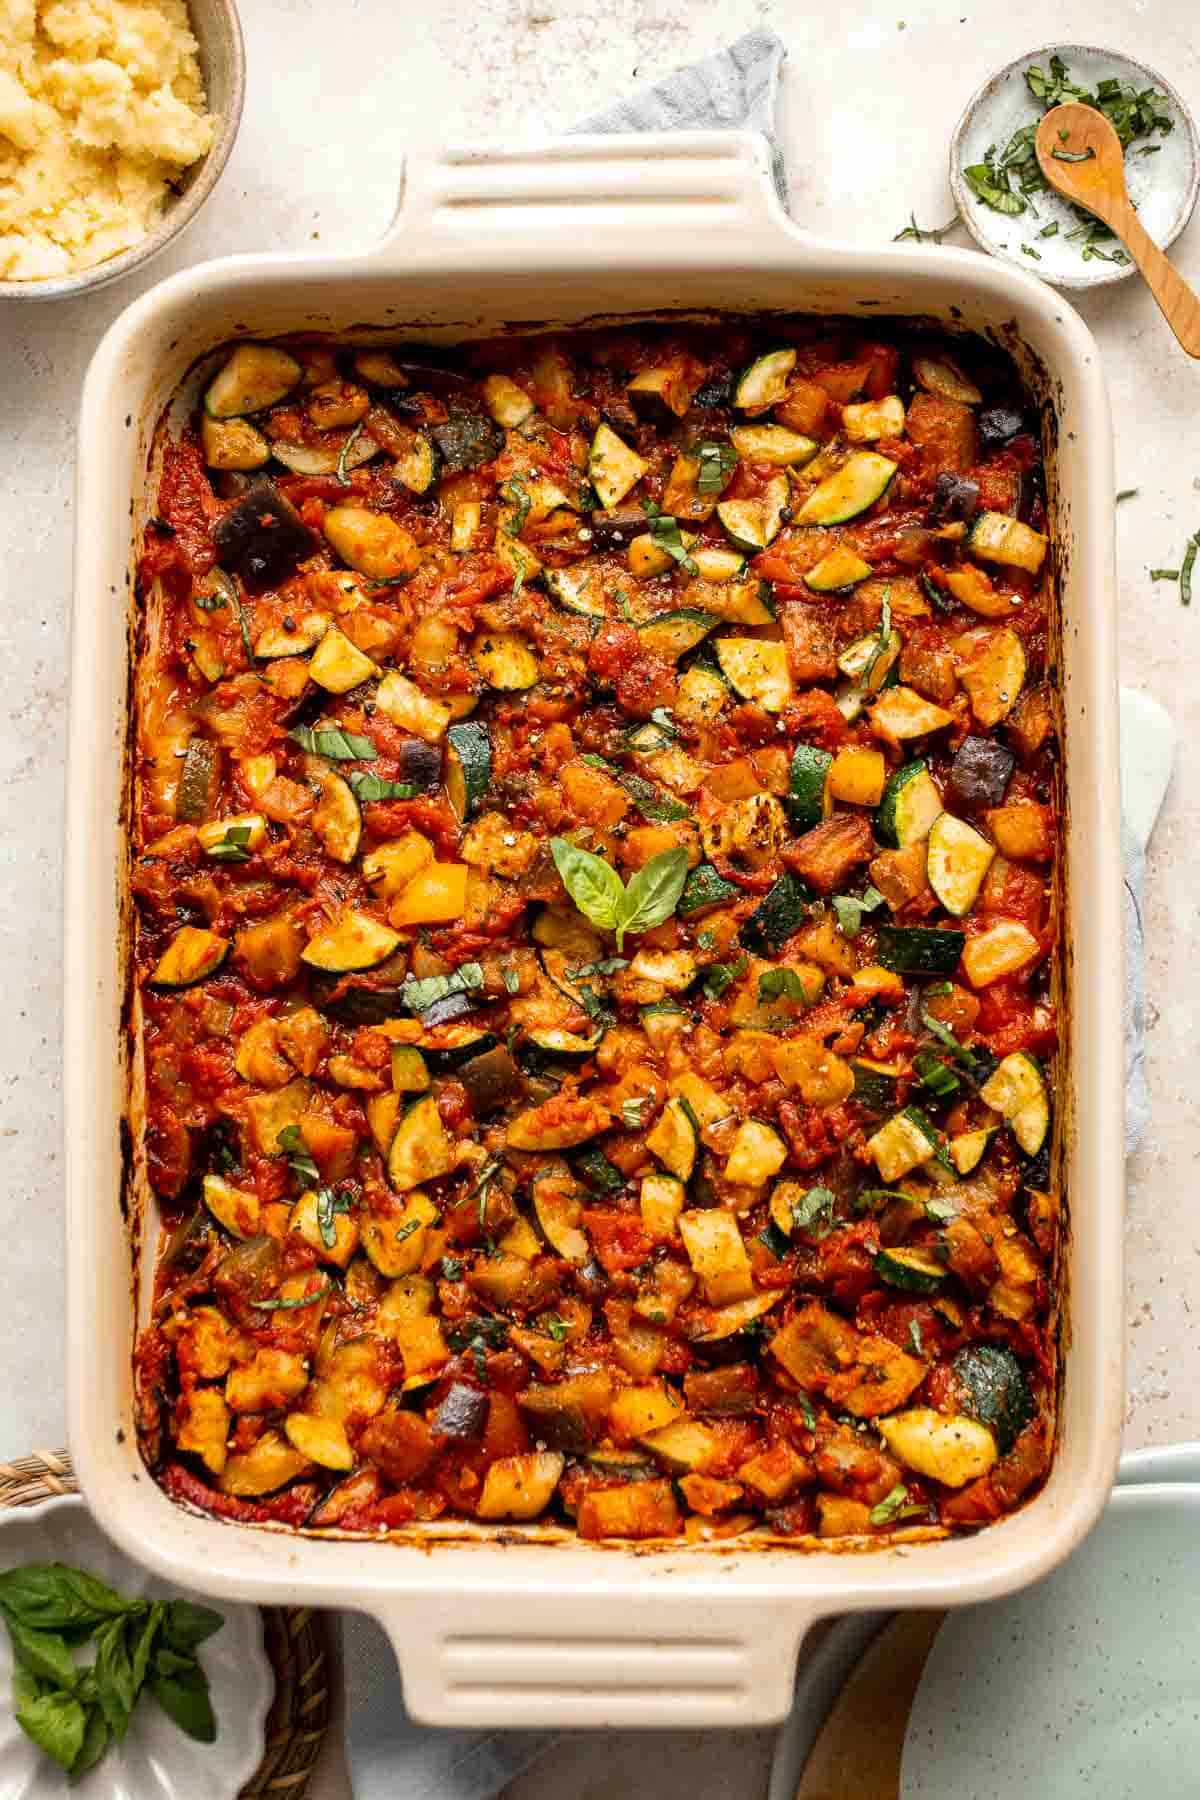
Creamed spinach is a rich, creamy, and delicious side dish to make this fall. Easy to make ahead and reheats well - perfect for Thanksgiving holiday dinner.
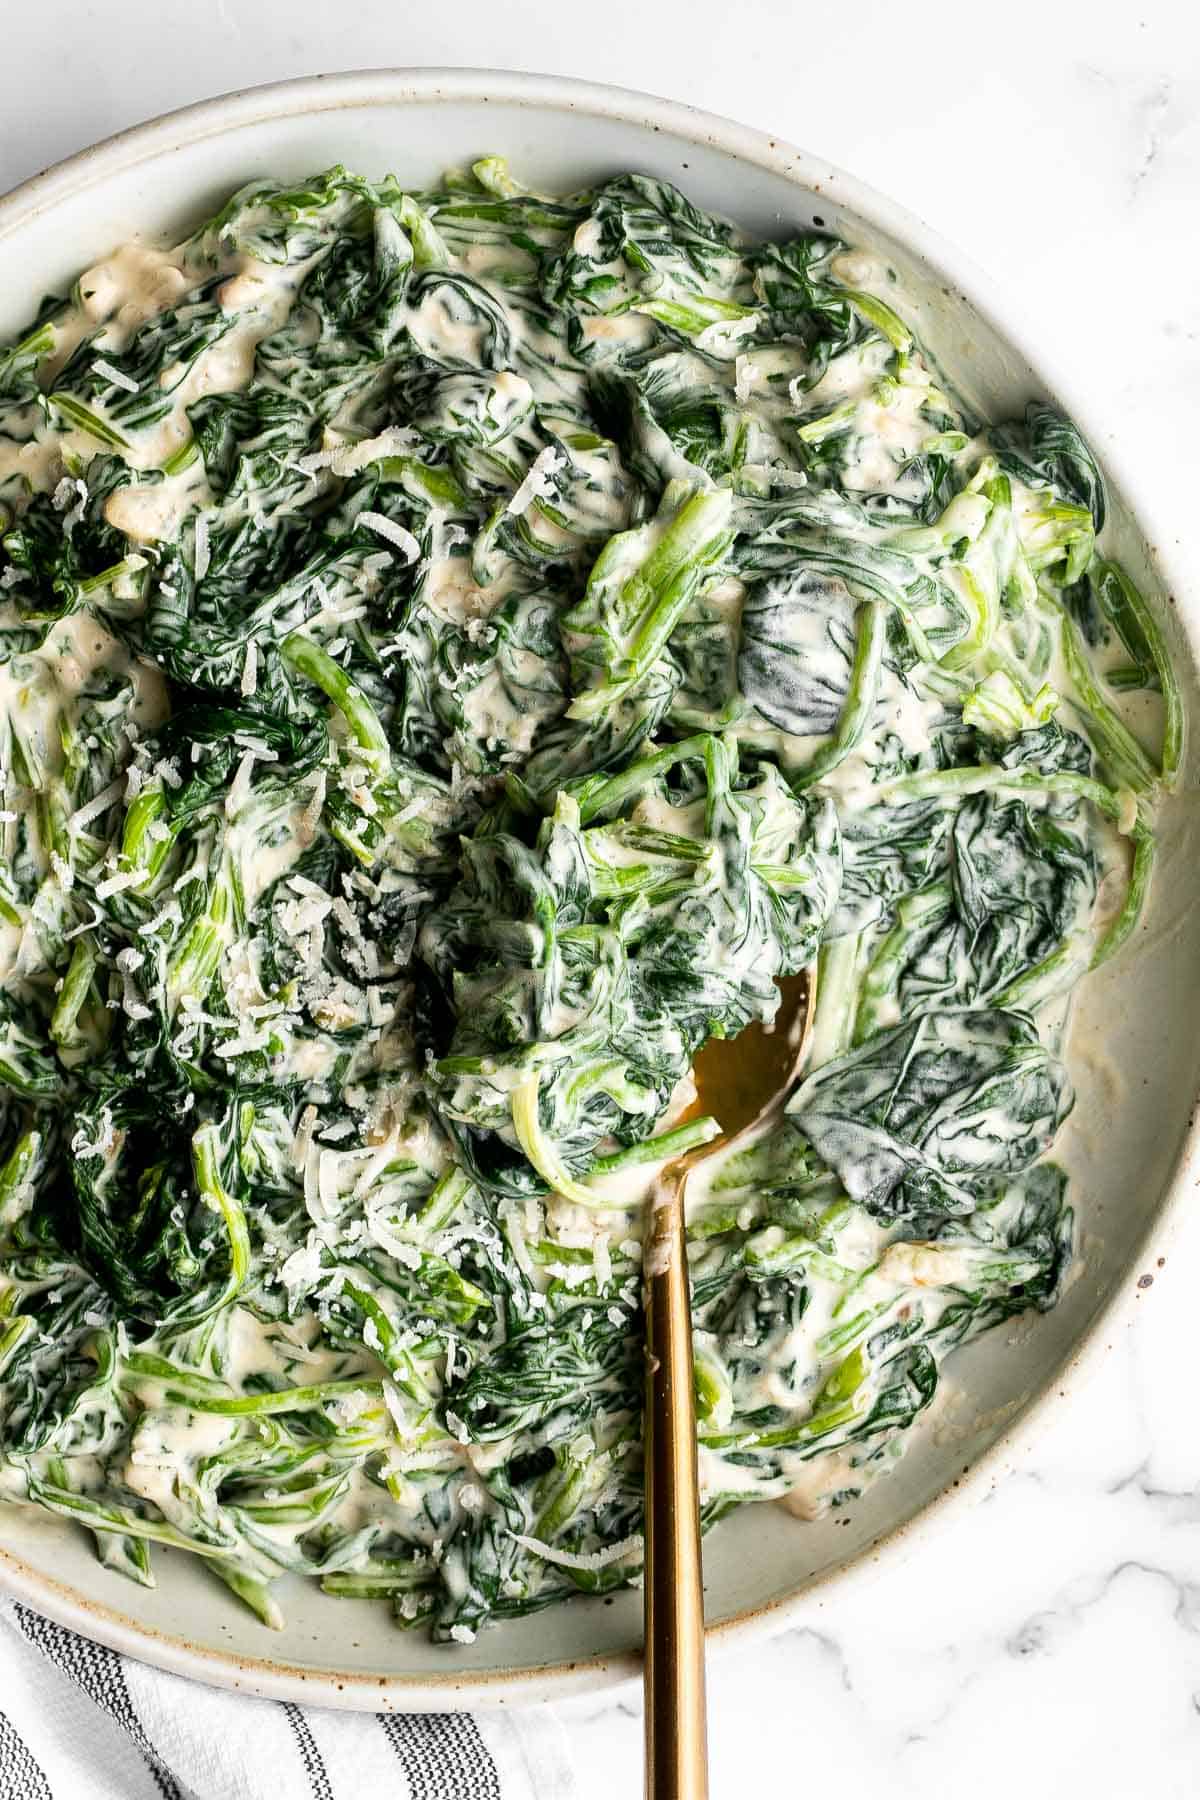
Creamless Cream of Asparagus Soup
Creamless cream of asparagus soup is healthy, delicious, smooth, creamy, quick and easy to make. A perfect spring soup for a last minute lunch or dinner.
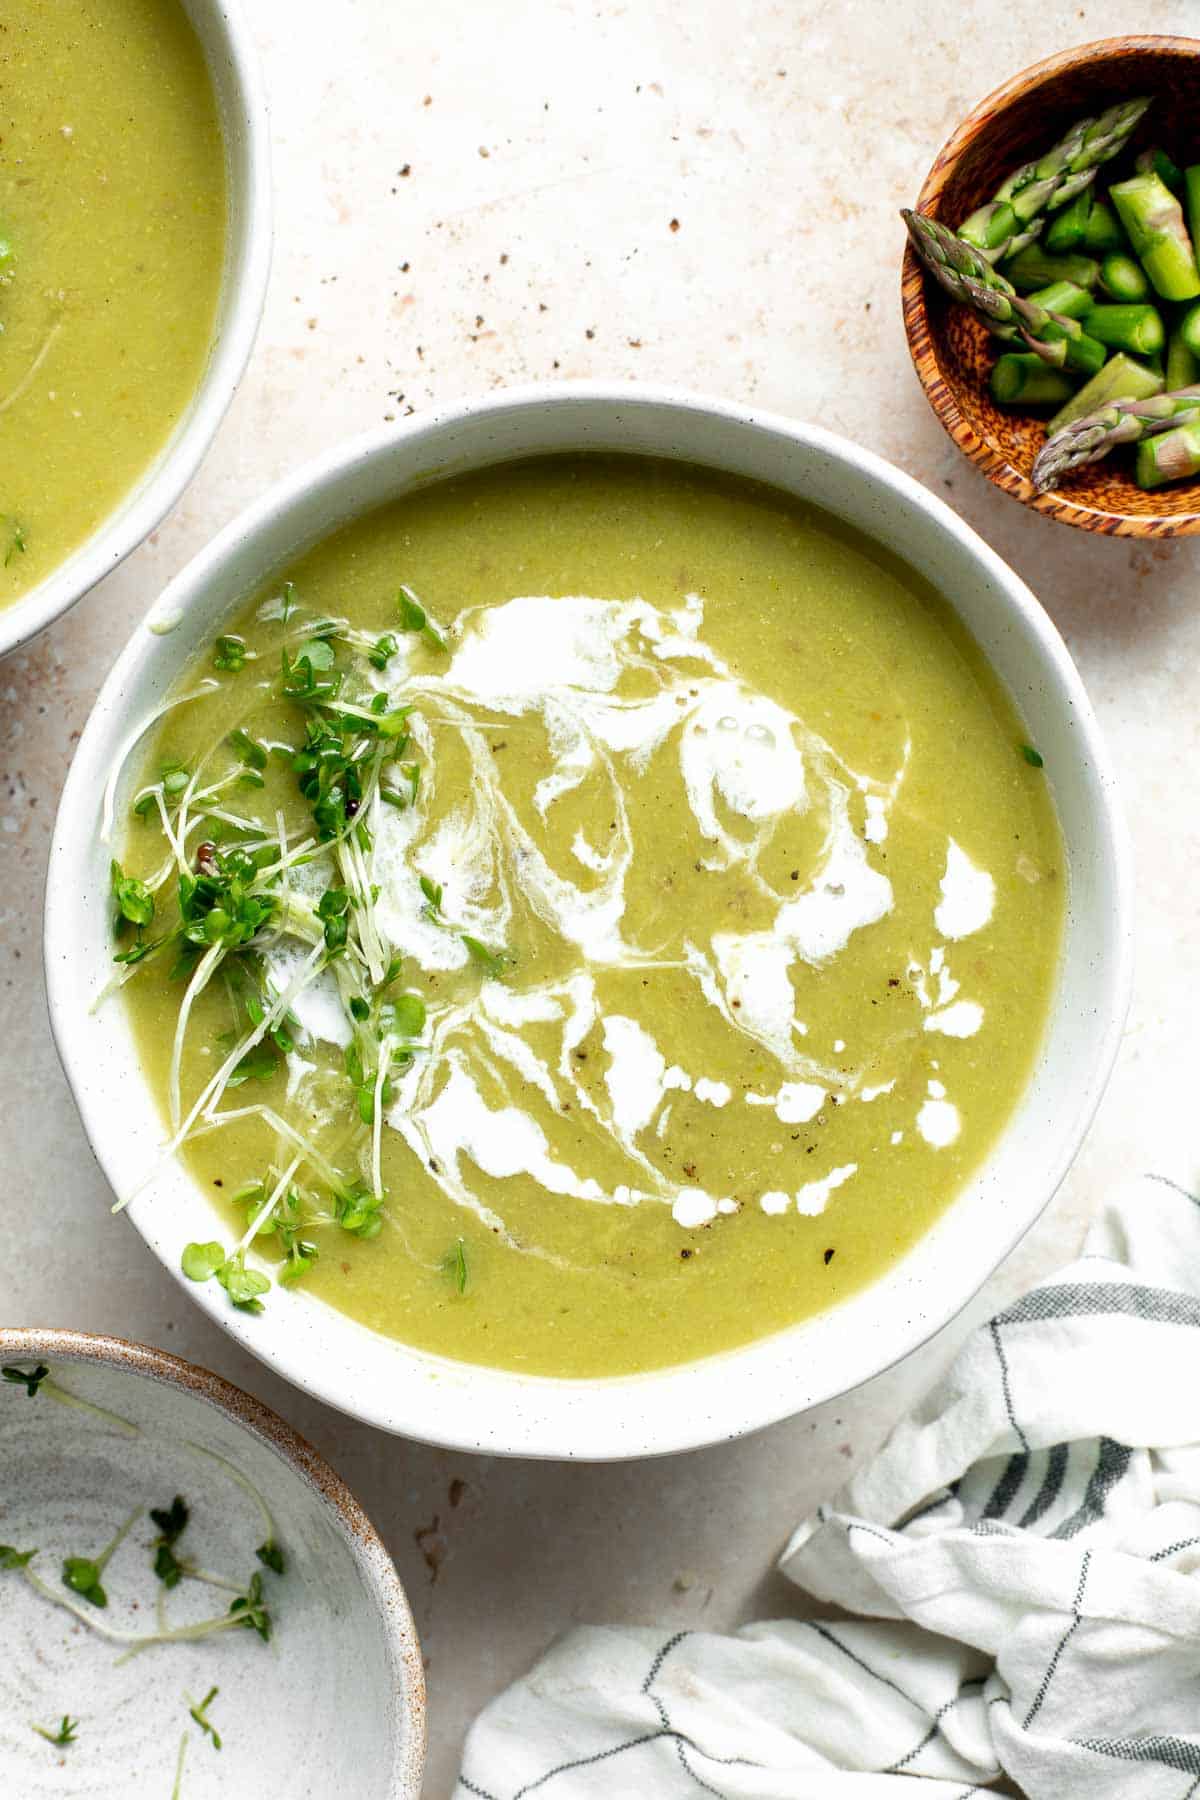
Buttery sautéed garlic green beans is a simple side dish that is quick, easy and delicious. Make these vibrant, crispy and tender green beans in 10 minutes.
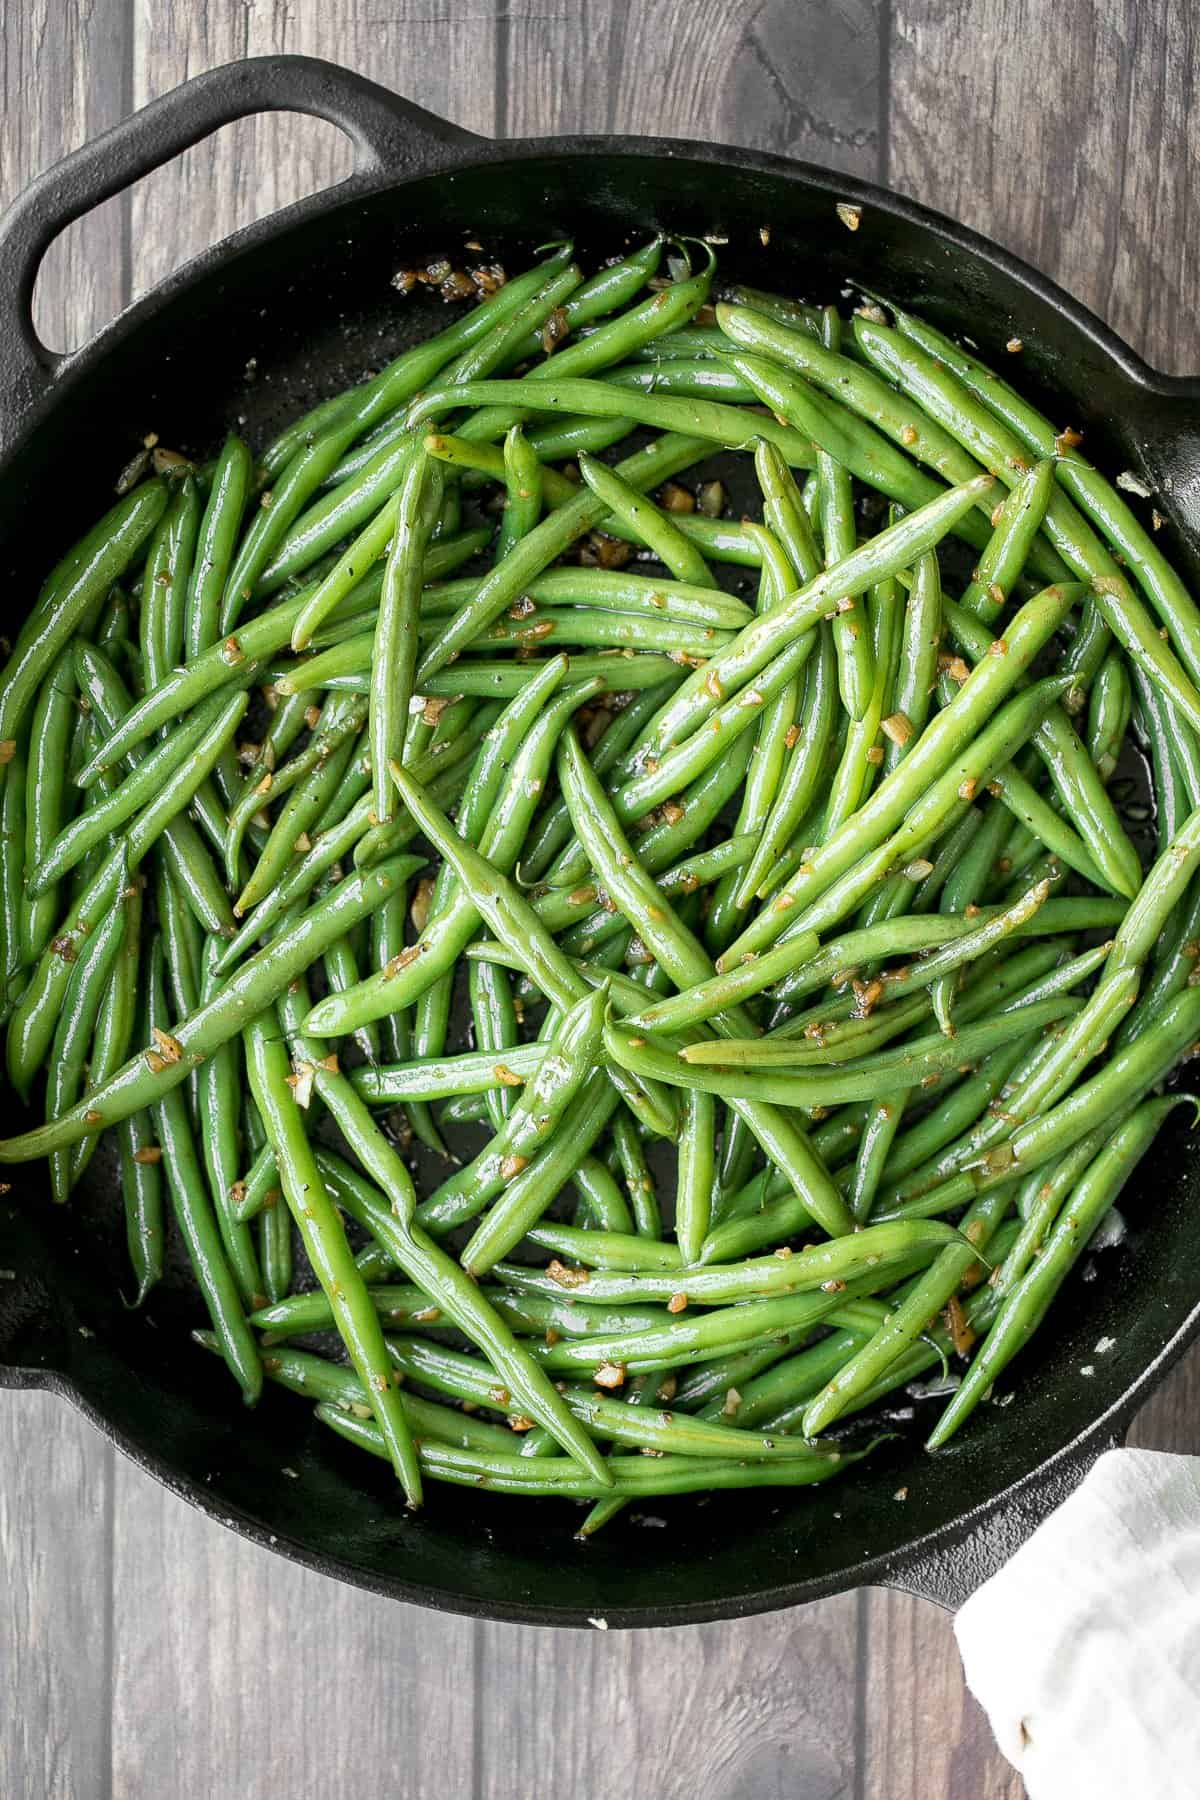
Air fryer vegetables are healthy, flavorful, and delicious. This vegan side dish is quick and easy to make in the air fryer in under 15 minutes.
Warm, rich, creamy baked spinach dip is a delicious and easy appetizer that is baked until warm and melty. Easy to make ahead and a total crowd pleaser.
Simple tomato cucumber avocado salad with a delicious lemon vinaigrette is a light and refreshing salad that comes together in literally 5 minutes.
Green Beans with Bacon is a delicious, flavorful side dish that comes together quickly in 20 minutes (including prep!) with a handful of simple ingredients.
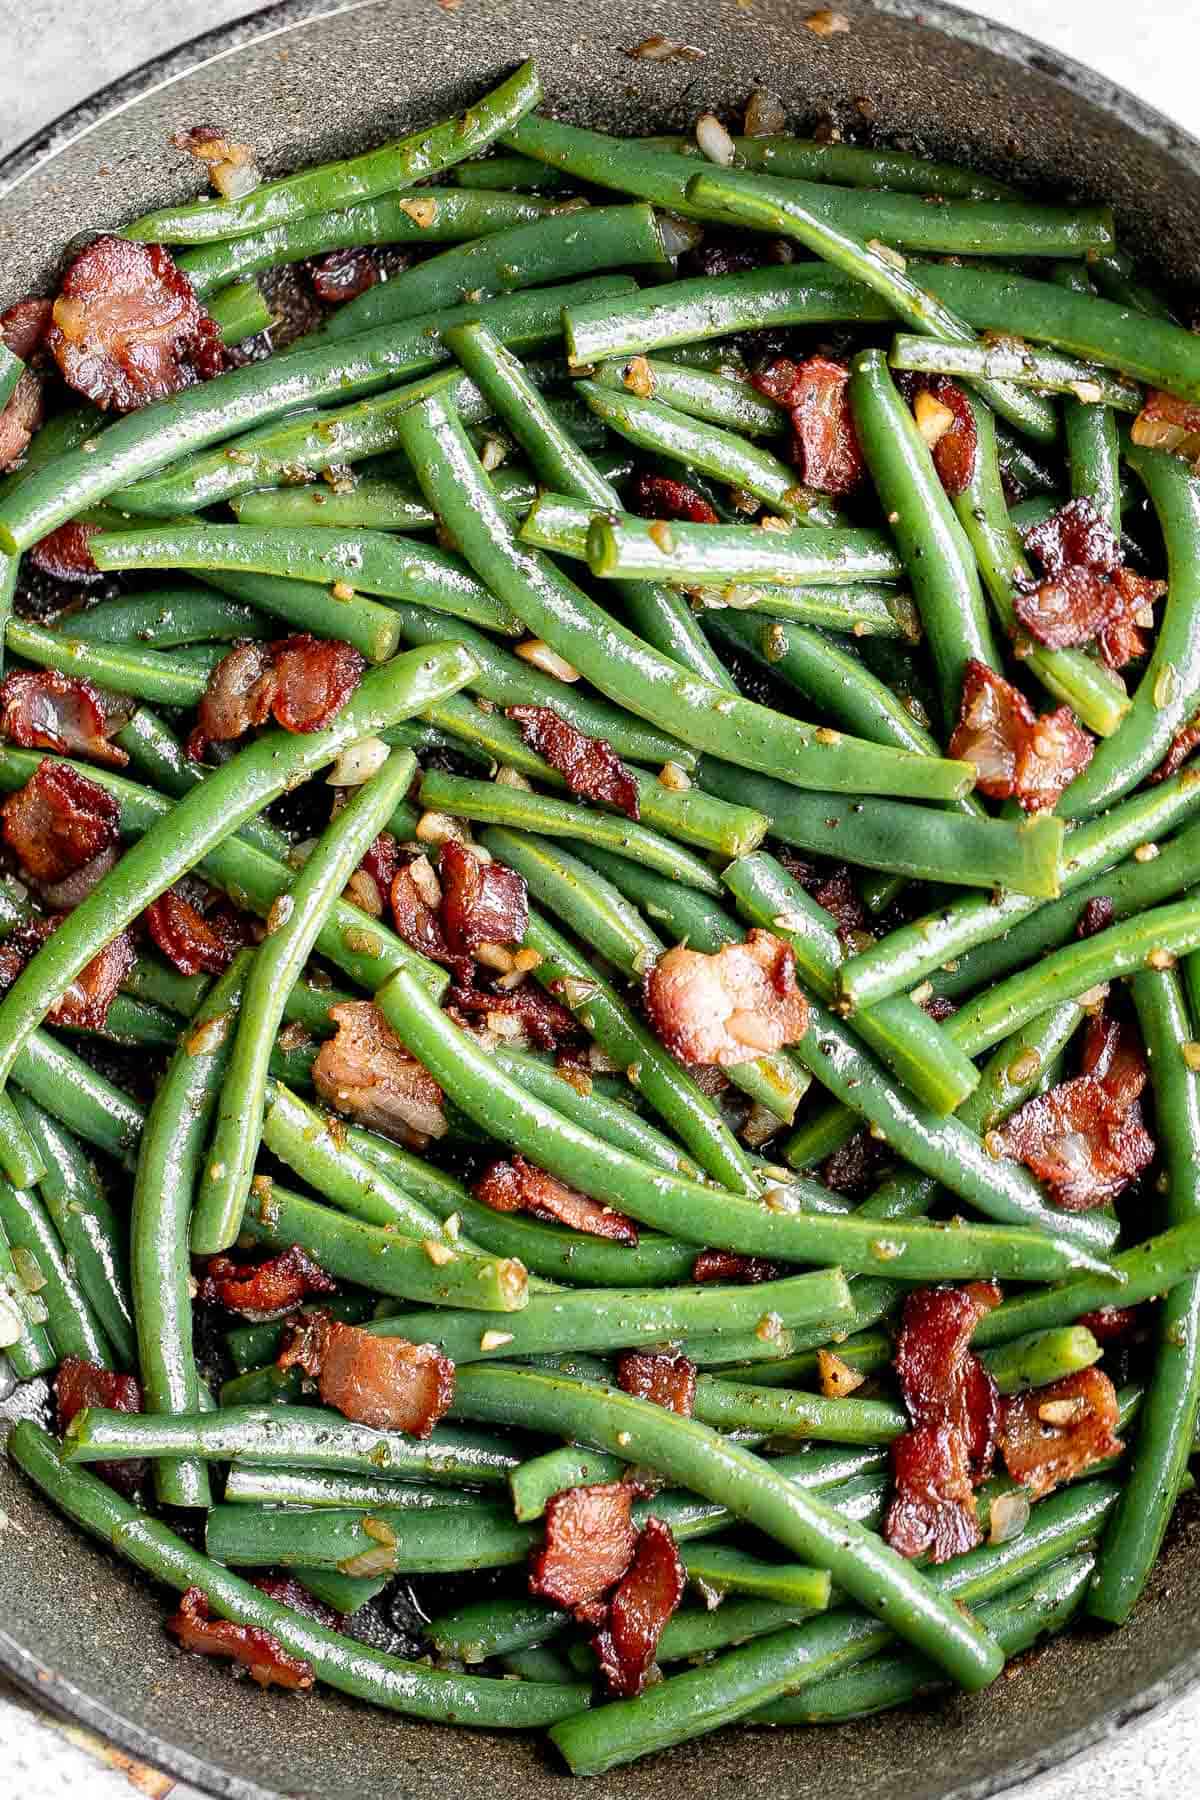
Homemade tomato basil soup is comforting, rich, and smooth. This cozy soup is easy, flavourful, and nourishing, making it so much better than canned.
Cheesy Brussels Sprouts Bake is a comforting side dish made with sautéed garlic brussels sprouts, topped with bacon and cheese, and baked until bubbly.
More Side Dish Recipes
- 40 Vegetable Side Dishes
- 35 Best Italian Side Dishes
- 25 BBQ Side Dishes
- 40 Vegetable Side Dishes
- 30 Potato Side Dishes
Did You Make Any of These Keto Side Dishes?
Please leave a comment and rating below, and let me know what you thought of this round up of Italian side dish recipes. Be sure to snap a picture and tag me on Instagram @aheadofthyme or share it on the Pinterest pin so that I can follow along.
HUNGRY FOR MORE? Don't forget to sign up for my email newsletter so that you d
Pumpkin Dump Cake
This Pumpkin Dump Cake is loaded with the flavors of fall and is incredibly easy to make. Made with homemade pumpkin pie filling and topped with a box of spice cake mix, chopped pecans, and melted butter, this delicious dessert is more like a pumpkin cobbler than a regular cake. Your guests will rave over these fall flavors, and you'll love how quickly this easy pumpkin crunch cake comes together.
Whether you're hosting a fall party or just want to try something different, this easy dump cake recipe is the perfect choice. It has more texture than a classic pumpkin pie, yet it has that pumpkin spice flavor everyone loves. Top it off with a scoop of vanilla ice cream or some homemade whipped cream for a Thanksgiving dessert that's sure to become a new family favorite. It might even replace pumpkin pie on your dessert table. It's really that good!
Why You'll Love This Pumpkin Dump Cake
- So quick and easy. The hardest part about making this easy pumpkin recipe is making the pumpkin filling, but even that just takes a moment or two of effort. Dump cake recipes are all about dumping everything into the pan, so they're always easy!
- Delicious mix of textures and flavors. The pumpkin part of this easy fall dessert is like the creamiest, most delicious pumpkin pie made with two types of sugar, your favorite fall spices, and pure pumpkin puree. The box of cake mix bakes into a crunchy, crumbly topping thanks to a little melted butter and chopped pecans. It's so much more interesting than a regular pie crust (and way faster, too).
- Enjoy all the fall spices. From the pumpkin pie spice, ginger, and allspice in the pumpkin mixture to the warm spices in the box of cake mix, every drop of this easy pumpkin cake is full of those beloved fall flavors.
- Crowd-pleasing. It's not often that an easy recipe really draws a crowd, but this one does. The pumpkin fans will love the buttery cake topping, and even the non-pumpkin lovers will appreciate the balance of textures. This pumpkin dump cake recipe is a must-try!
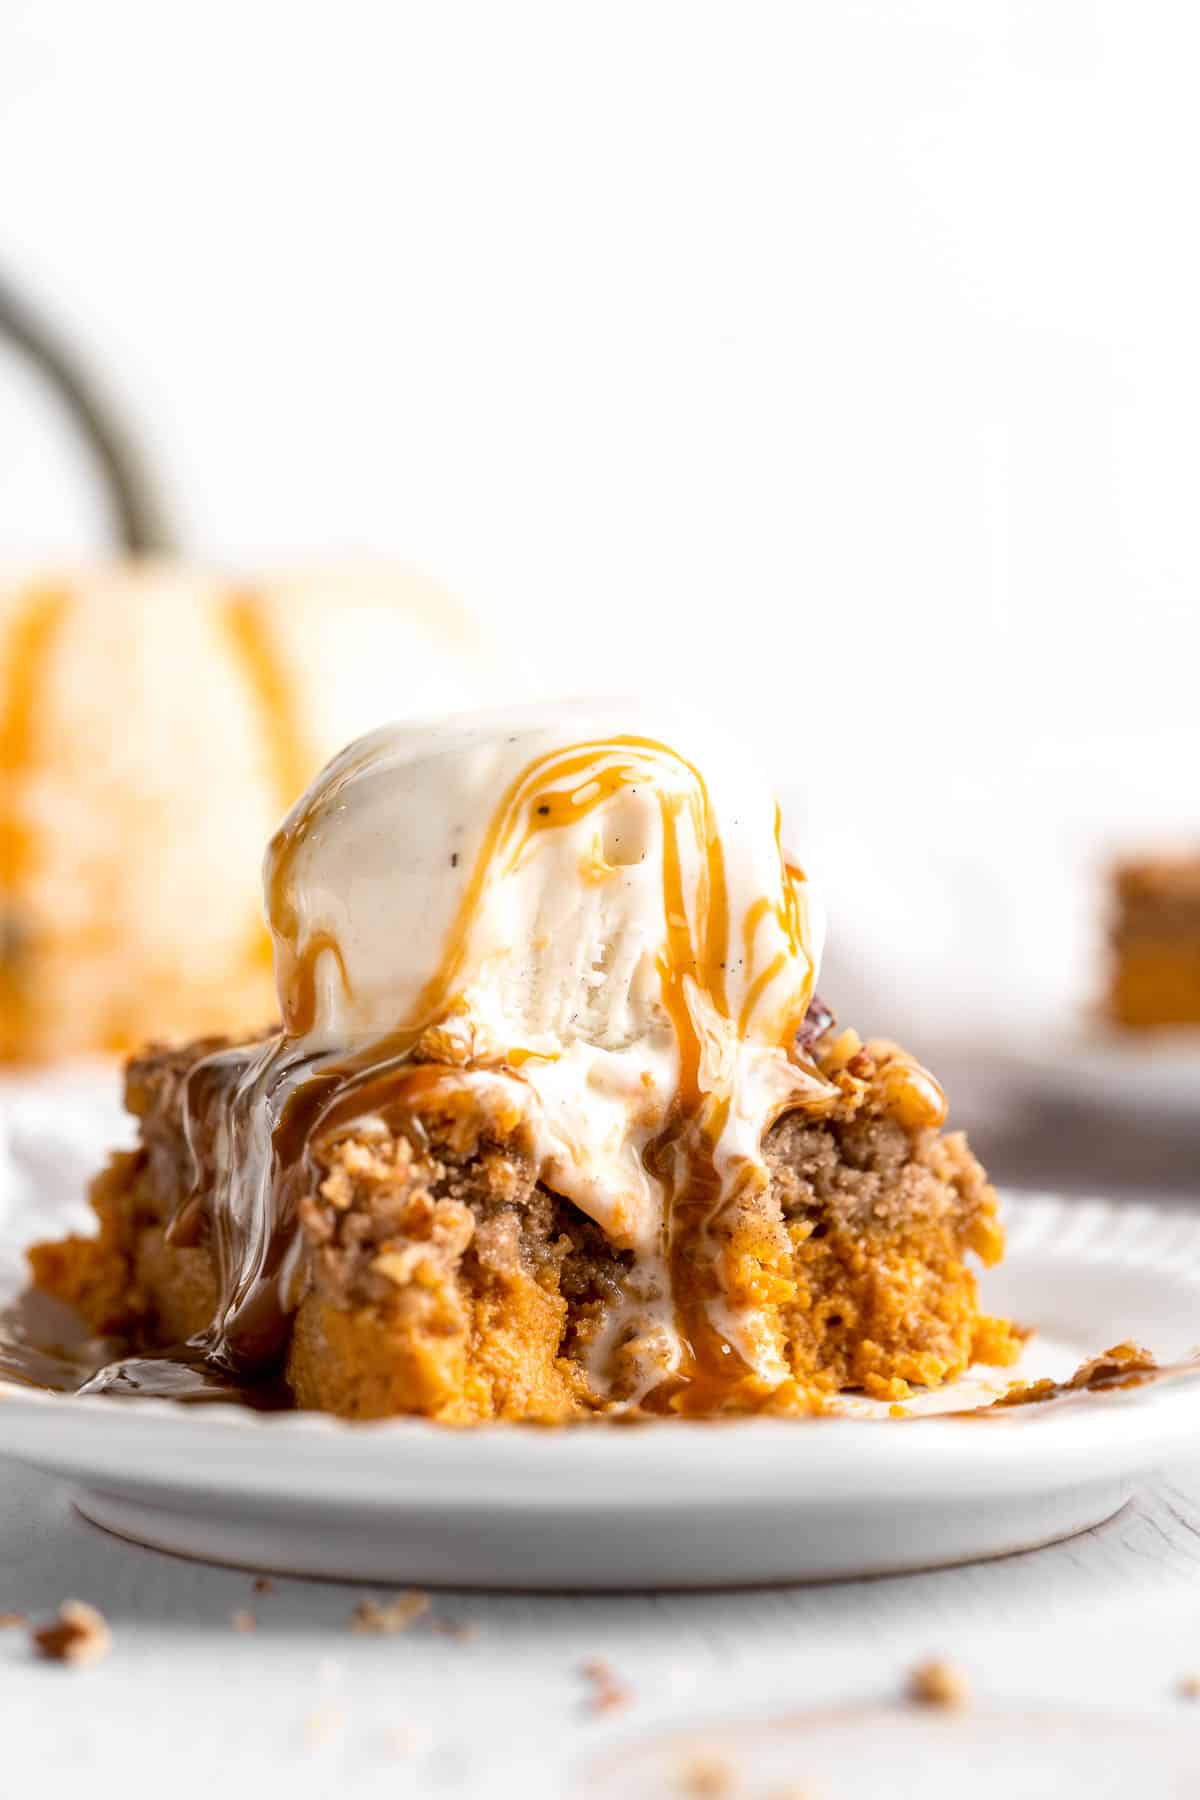
Ingredient Notes
To make this delicious Pumpkin Dump Cake, you will need the following ingredients (full measurements in recipe card below):
- cooking spray - spray your baking dish well to make this pumpkin dessert easier to serve.
- canned pumpkin puree - either use a can of pumpkin puree from the store or make homemade pumpkin puree by roasting pie pumpkins until tender.
- evaporated milk - this milk is richer and creamier than regular milk and is commonly used when baking a traditional pumpkin pie.
- white sugar - white sugar has a neutral flavor and sweetness that lets the pumpkin spice flavor stand out.
- brown sugar - add a little brown sugar for a richer, caramel-like flavor that pairs well with pumpkin.
- eggs - to give the pumpkin layer a little rise, you'll need to whisk in eggs and one egg yolk.
- spices - keep it simple with pumpkin pie spice, ground ginger, and allspice.
- salt
- cornstarch - as the cake bakes, the cornstarch will absorb any excess moisture from the pumpkin puree to keep it from becoming soggy.
- boxed spice cake mix - choose any type of boxed spice cake mix.
- pecans - chopped pecans add extra crunch and a nutty flavor to the top layer.
- unsalted butter - melted butter will soften the cake mix and turn it into a crunchy, buttery topping.
You will also need a 9x13-inch baking dish, parchment paper, large mixing bowl, and a whisk.

How to Make the Best Pumpkin Dump Cake
- Prepare. Preheat the oven to 350°F. Prepare a 9x13-inch baking pan with cooking spray and parchment paper.
- Make the pumpkin filling. In a large mixing bowl, whisk together the pumpkin puree, evaporated milk, white sugar, brown sugar, eggs, egg yolk, pumpkin pie spice, ginger, allspice, salt, and cornstarch, until smooth.
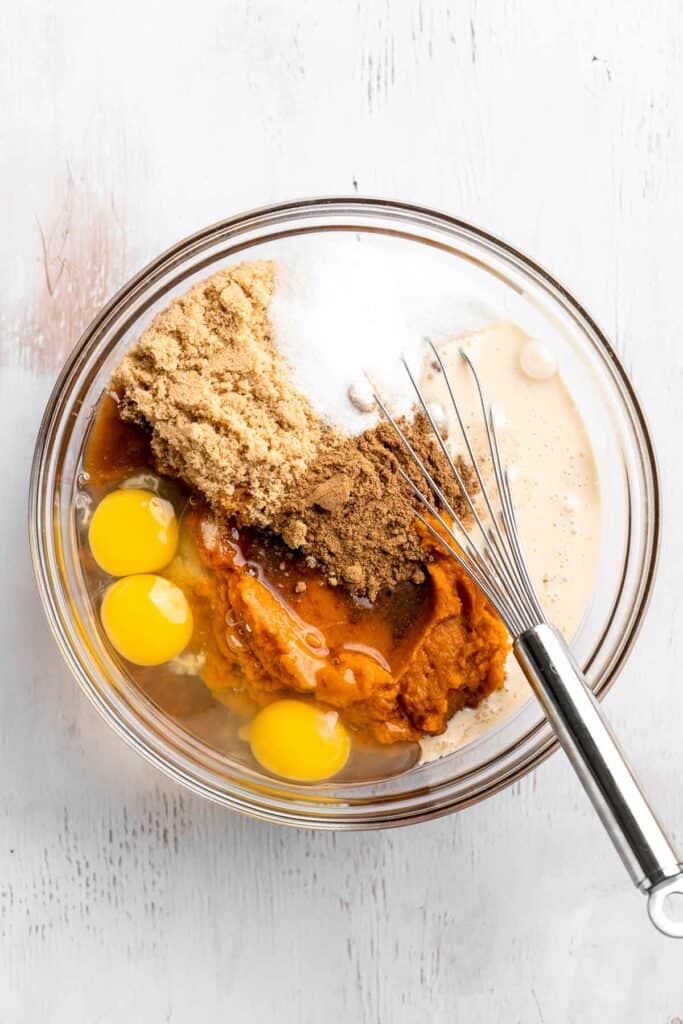
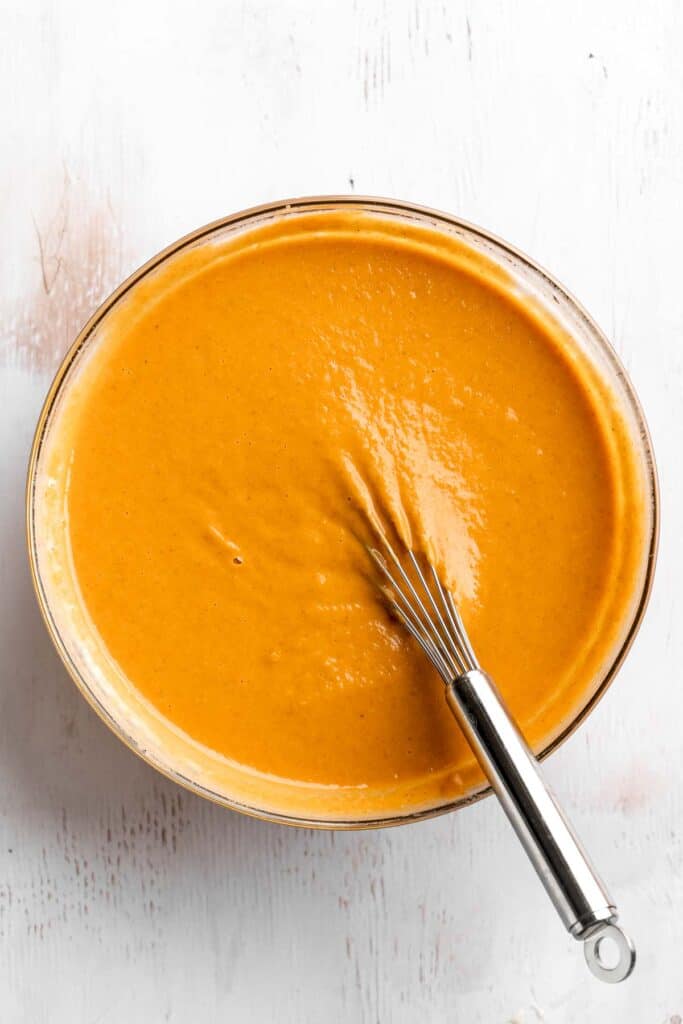
- Add the cake mix. Pour the pumpkin pie filling into the prepared baking pan. Sprinkle the dry cake mix over top of the pumpkin batter in an even layer.
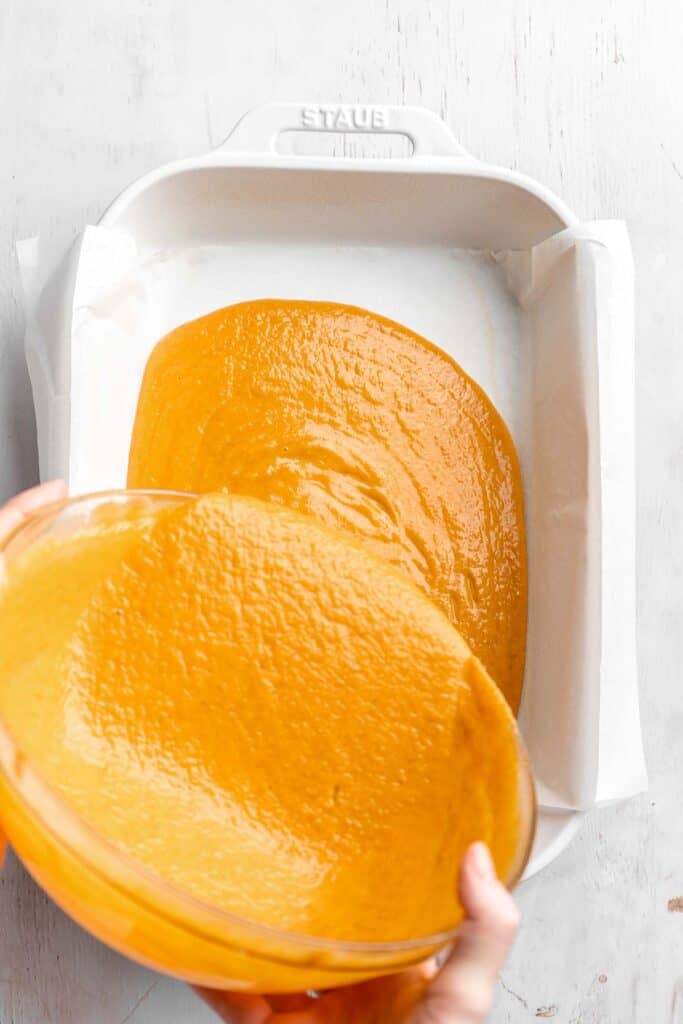
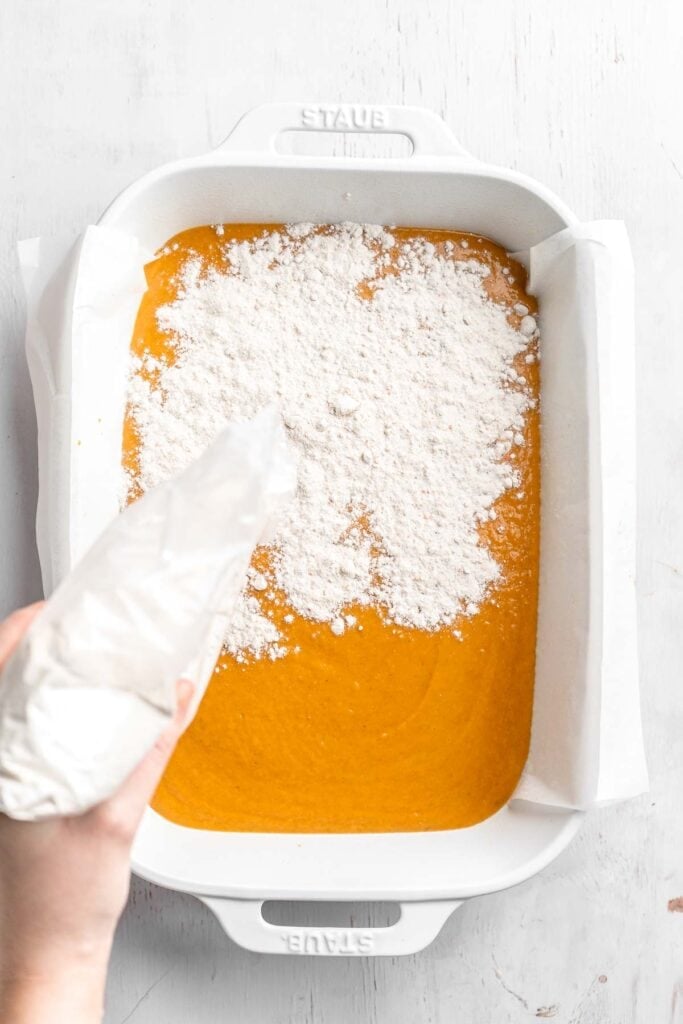
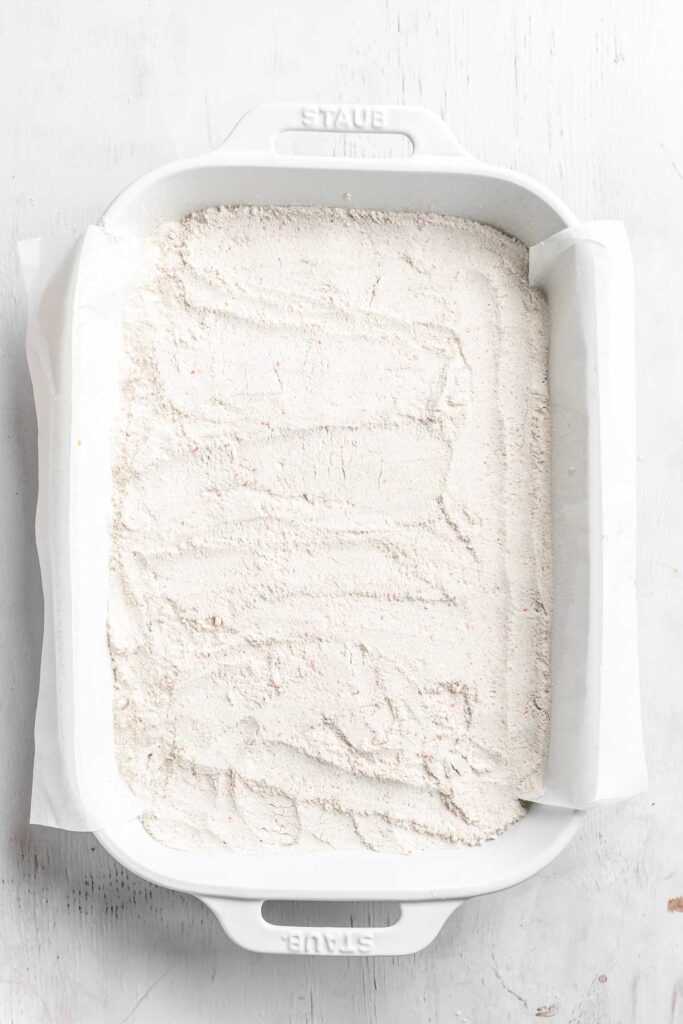
- Add pecans and butter. Top with chopped pecans. Evenly pour the melted butter over top of the dry cake mix and pecans, ensuring even coverage and that all of the dry cake batter is covered with melted butter.
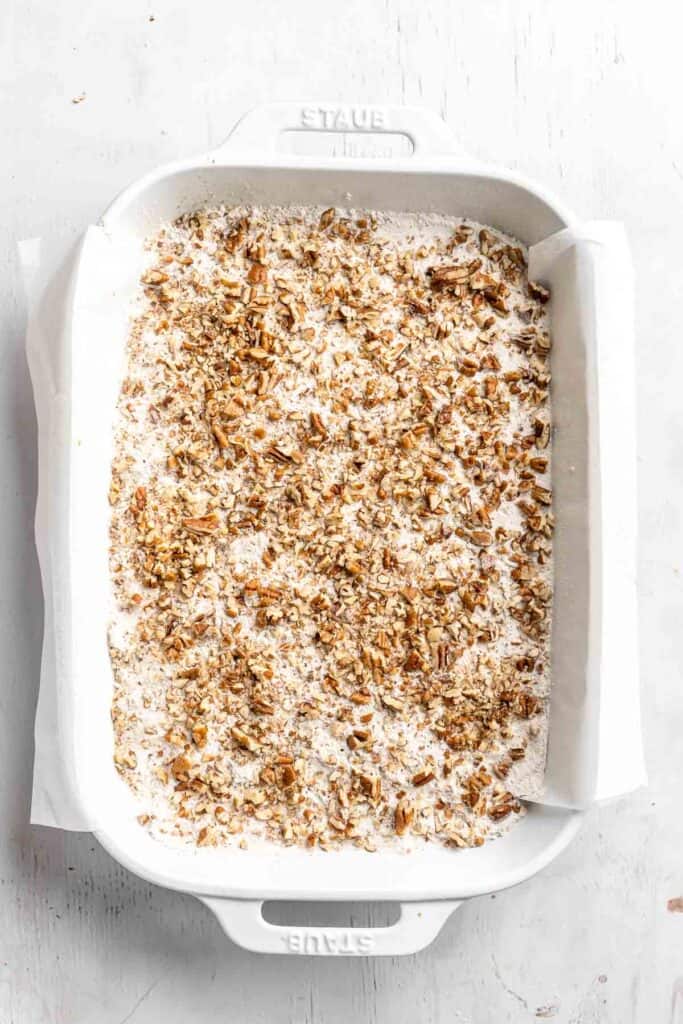
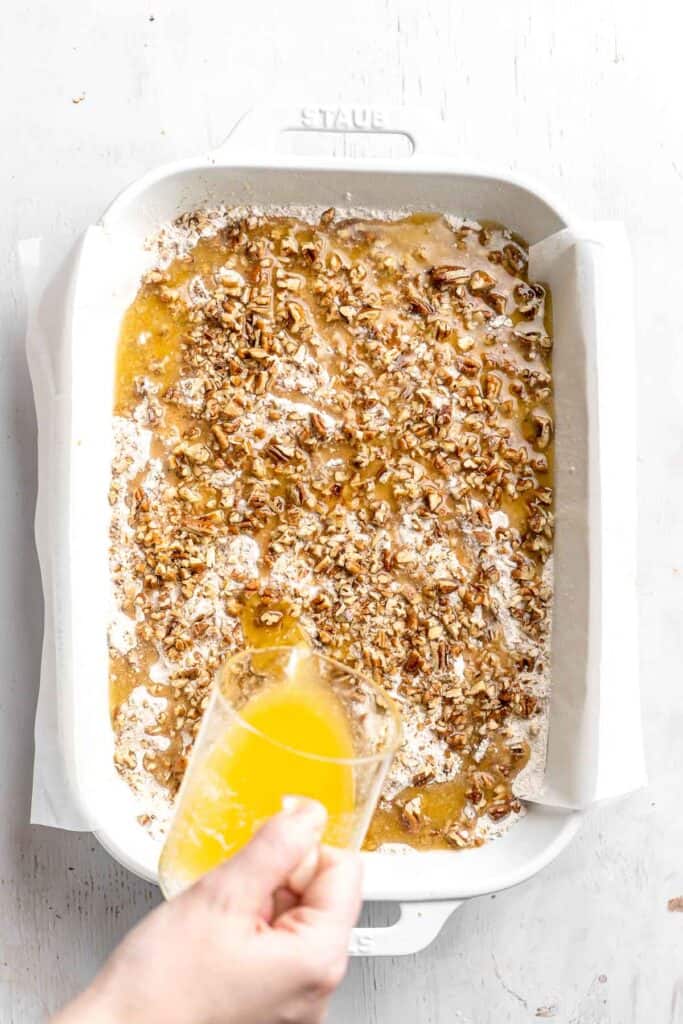
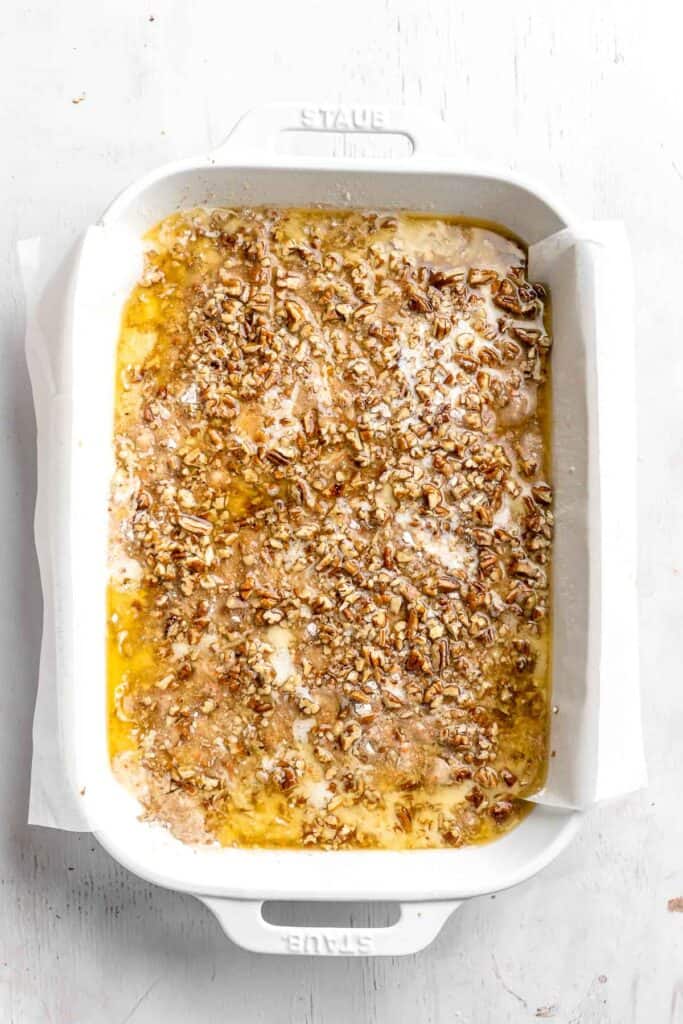
- Bake and set. Place into the oven to bake for 55 minutes. When done, the center should still be jiggly. Allow the cake to rest for 1-2 hours for the center to finish cooking and set.

- Serve. Serve cold or warm with ice cream and a drizzle of salted caramel sauce.
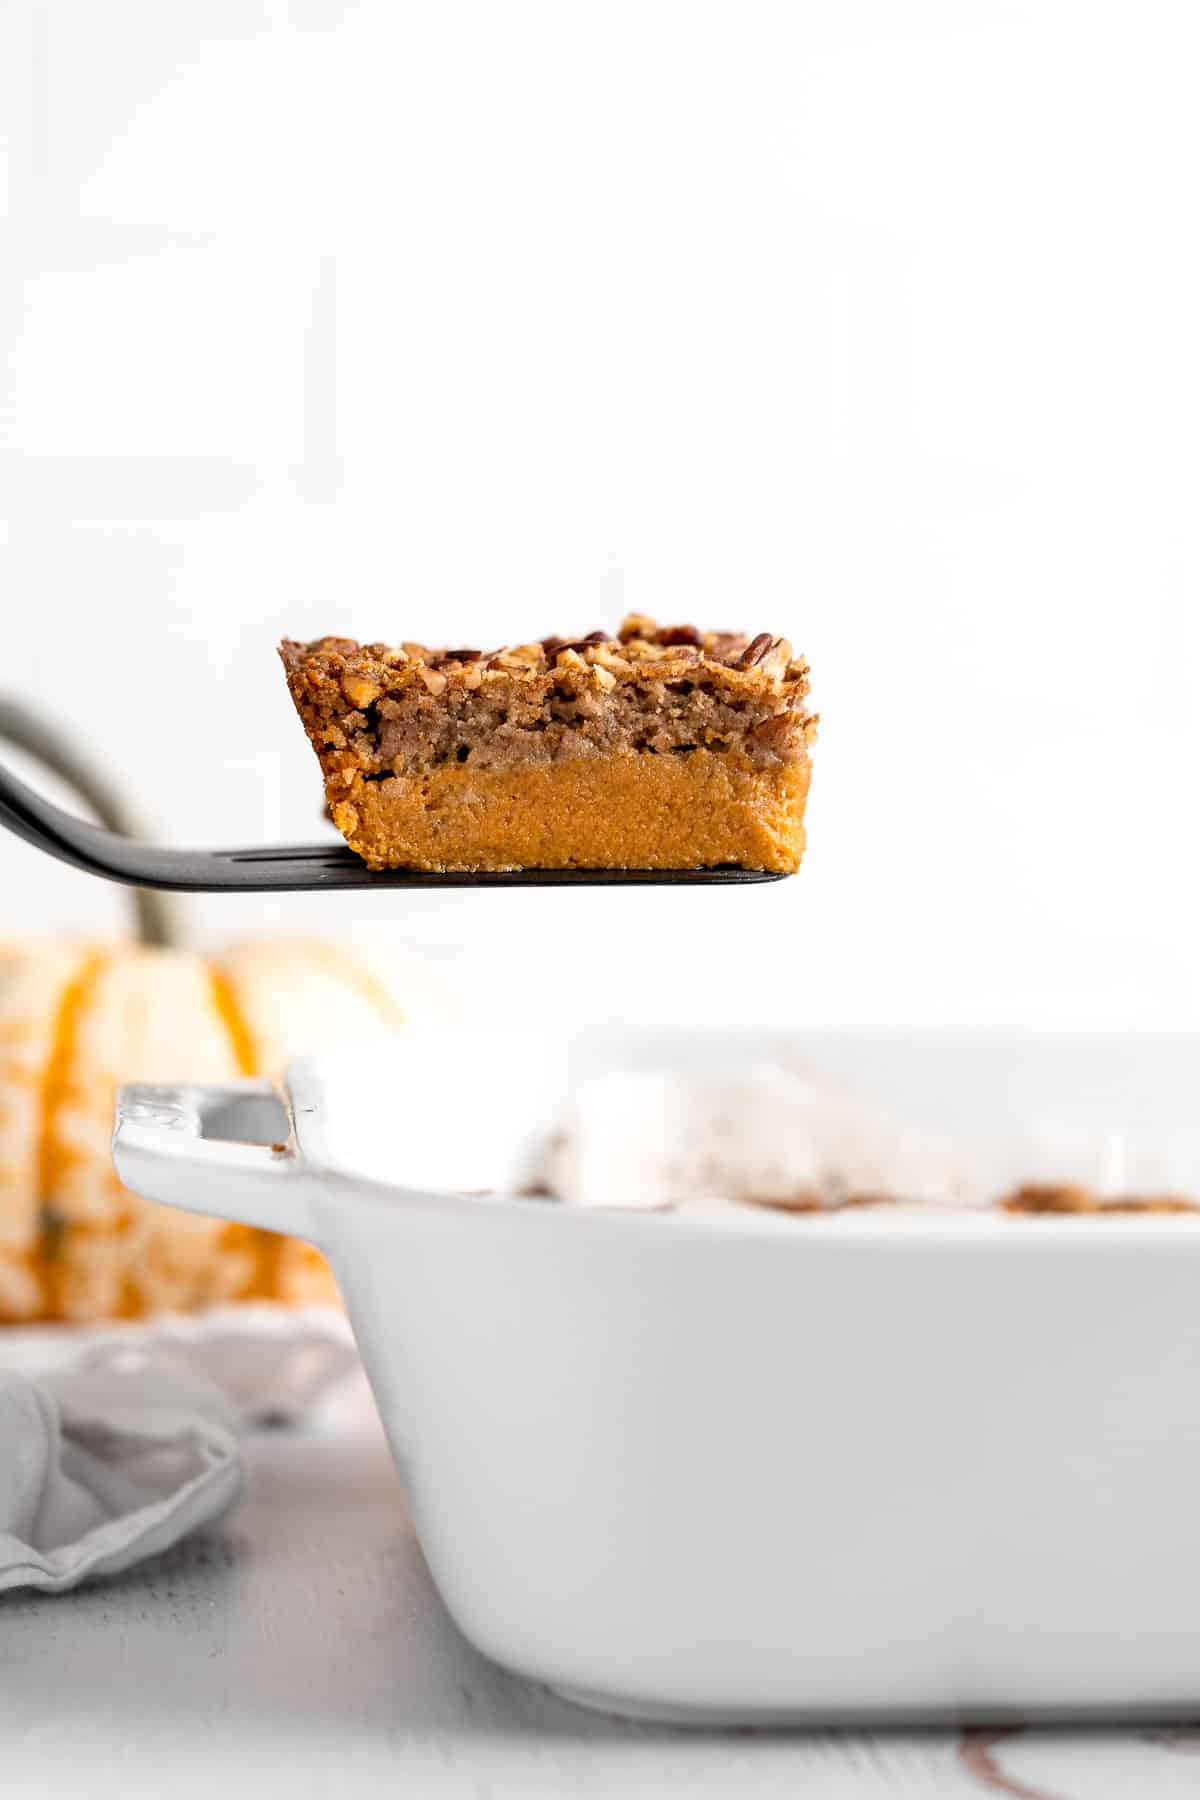
Recipe Variations
- Add chocolate chips. Fold in ½ cup of dark chocolate chips for a little extra texture and bitterness to contrast the sweet pumpkin pie filling.
- Sprinkle toffee bits. Crunchy toffee bits add even more texture and fall flavor. Sprinkle some into the cake layer to give this pumpkin pie dump cake extra crunch.
- Gluten free pumpkin pie dump cake. Use gluten-free spice cake mix instead of regular cake. The rest of the recipe is already naturally gluten-free.
- Try a different cake. Although the spice flavor from the spice mix tastes perfect with pumpkin spice, you can also try using a box of yellow cake mix, chocolate cake, or any kind you like.
How to Serve
This pumpkin dump cake is delicious served on its own, or paired with some of my favorite fall desserts including:
- Pecan Pie
- Braided Lattice Apple Pie
- Gingerbread Bundt Cake
- Caramel Pecan Pie Cheesecake Bars
- Apple Turnovers
Looking for treats to serve after your Thanksgiving dinner? Try these 25 Thanksgiving Dessert Recipes.

Recipe Tips and Tricks
- Be patient. Unlike traditional cakes, this pumpkin dump cake needs to set after baking for 1-2 hours. Otherwise, it will be overly soft and gooey. Treat it like baking a regular pumpkin pie!
- Don't stir. It's so tempting to stir the cake mix into the bottom layer - but don't! That's how you get the buttery, crumbly topping. If you stir, the cake will become soggy and clumpy. Resist the urge!
- Toast the pecans. Before you sprinkle pecans on top of the cake mix, give them a good toast on the stove or in the oven. This draws out their nutty flavor.
Storing and Freezing Instructions
How to Store
Store your leftover pumpkin dump cake in an airtight container or wrap it with plastic wrap and keep it in the fridge for 4-5 days.
How to Reheat
The easiest way to reheat your homemade pumpkin dump cake is to microwave an individual serving for 1-2 minutes. If you want to reheat the whole baking dish, pop it in the oven at 350 degrees F for 5-7 minutes until warm.
How to Freeze
Freeze any leftover pumpkin crunch cake in a freezer-safe container for 2-3 months. Thaw in the fridge before reheating.
FAQ
Absolutely! Most dump cakes use fruit or other fresh ingredients that must be refrigerated to avoid food-borne illness. Your dump cake should be cooled at room temperature for no more than 2 hours before being stored in the fridge where it will last for 4-5 days.
If your cake layer is still powdery, you probably did not distribute the cake mix evenly over the top of the pumpkin pie filling, so there were some patches that did not have any butter. For best results, make sure the cake mix is in an even layer and drizzle butter over every section.
Dump cakes last for 4-5 days in the fridge, and the pumpkin spice flavors usually come out more as it sits. The leftovers are so good!
More Pumpkin Dessert Recipes
- 20 Best Pumpkin Desserts
- Pumpkin Roll
- Pumpkin Mousse
- No Bake Pumpkin Cheesecake
- Pumpkin Bundt Cake
- Pumpkin Bread
Tried this recipe?
I'd love to hear what you think! Leave a comment and rating below to share your feedback. Your reviews help others discover this recipe and help me keep creating more free recipes for you. Snap a photo and tag me on social media @aheadofthyme too.
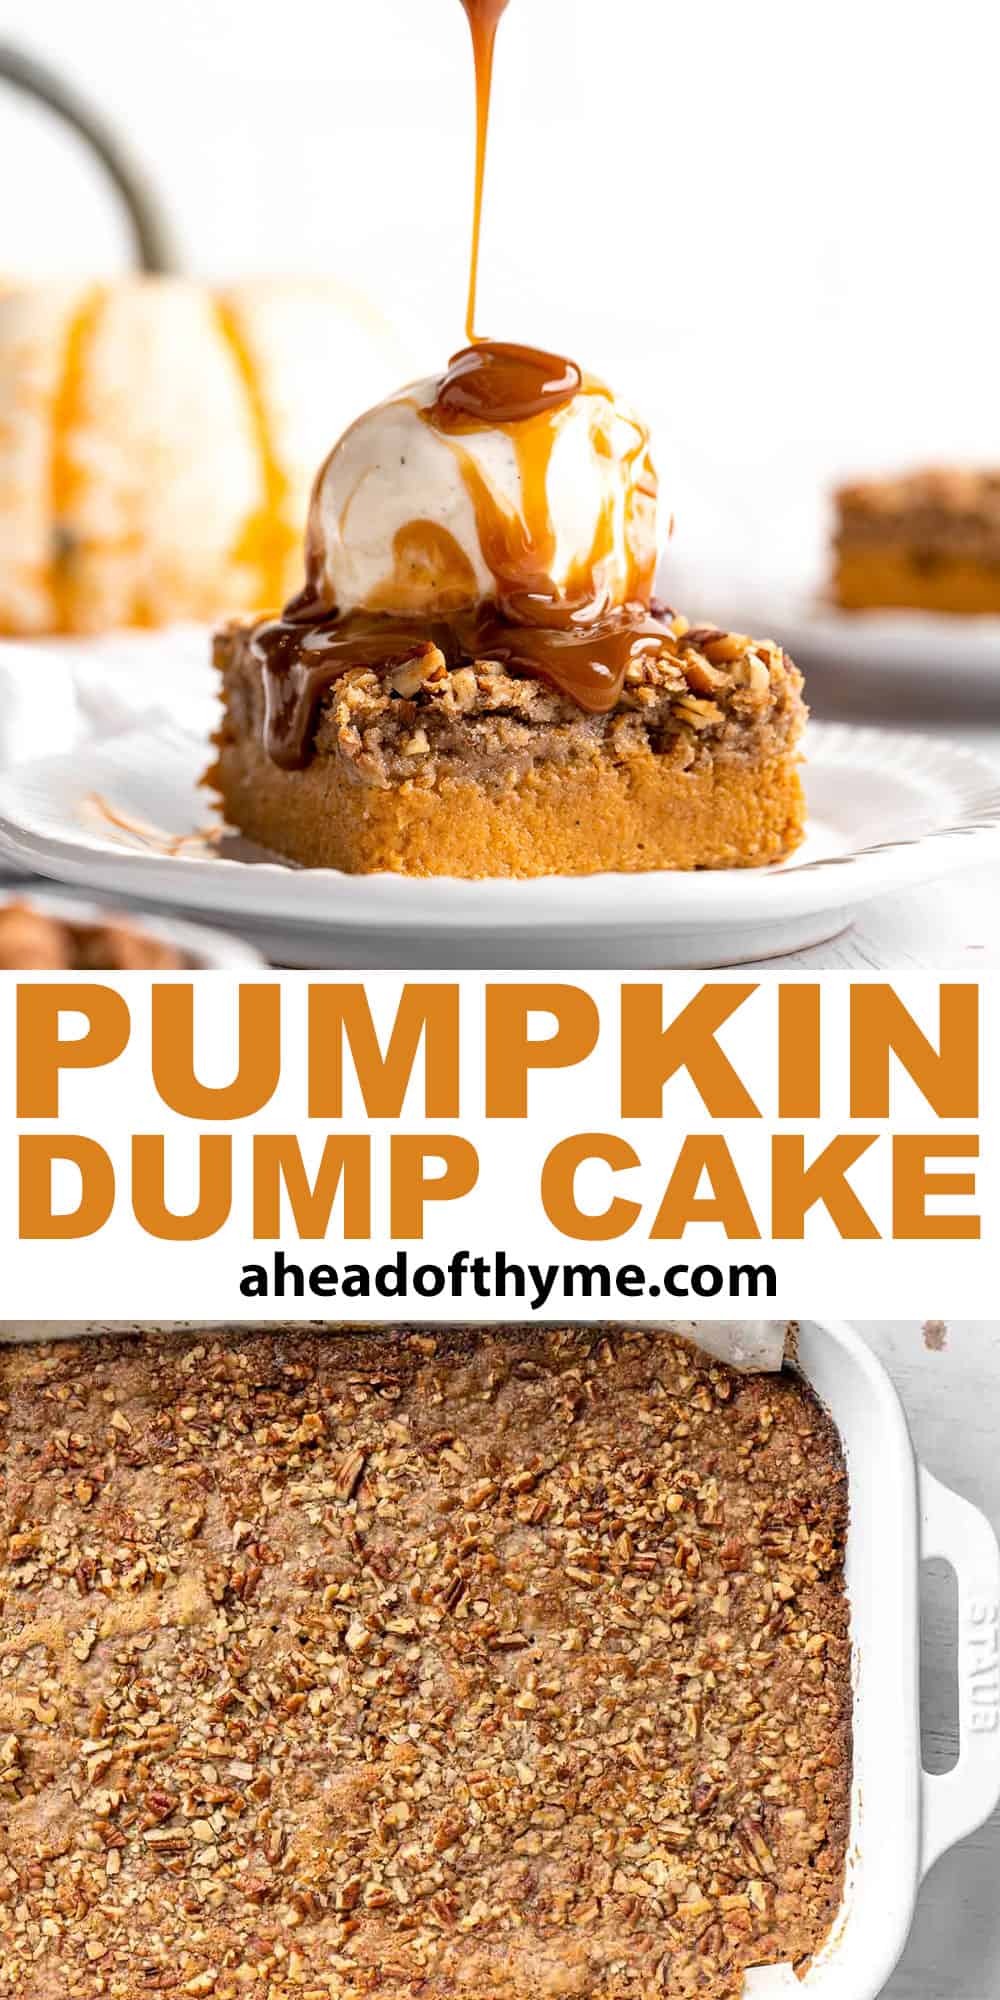
Cranberry Sauce Parfait
This Cranberry Sauce Parfait is a light, creamy, and delightful breakfast or dessert that can be enjoyed anytime, but especially during the holidays. It's made with layers of creamy Greek yogurt, tart cranberry sauce, and crunchy granola topped with a drizzle of honey for a sweet finish.
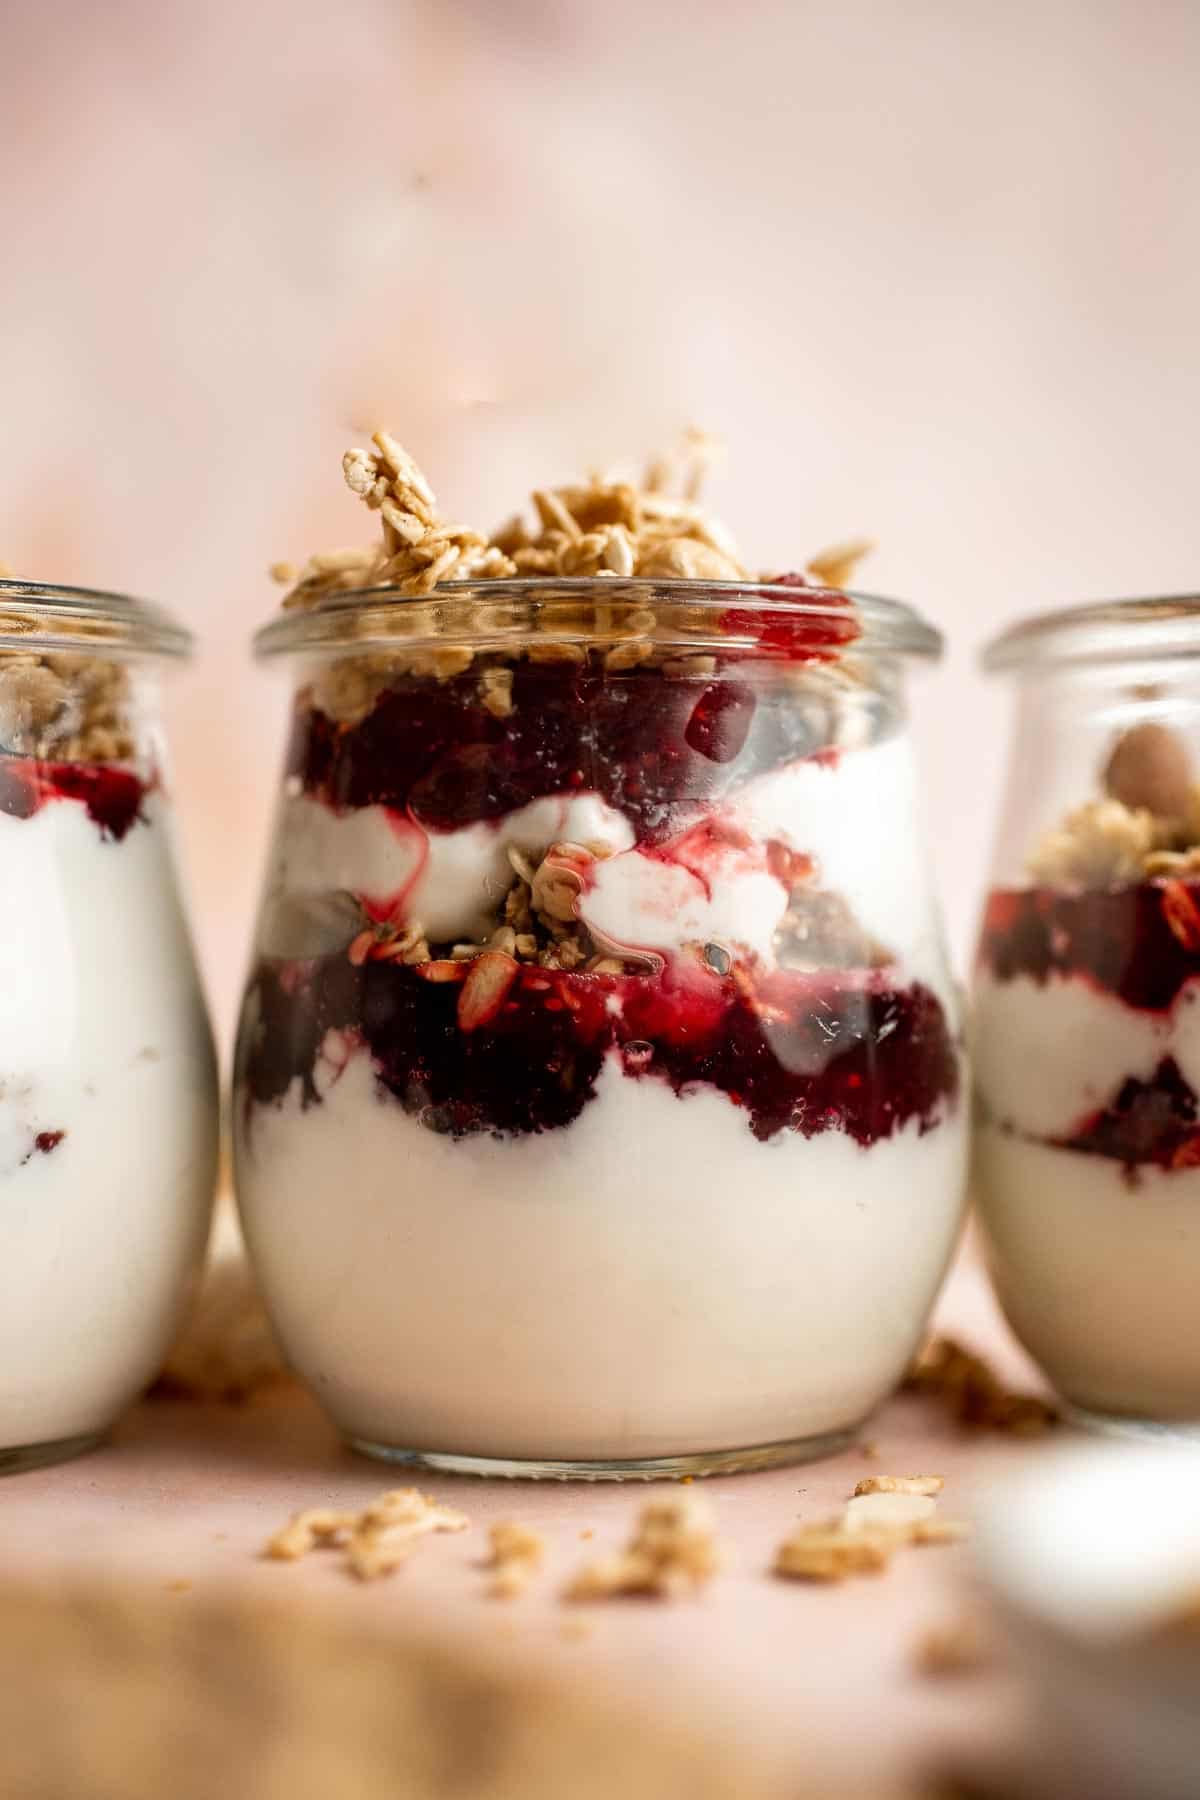
Cranberry sauce is a must-have for Thanksgiving dinner and other holiday meals, and this easy parfait recipe is a great way to enjoy any leftovers in a completely different form. The tartness of the cranberry sauce provides a nice contrast with the creamy yogurt and sweet, crunchy granola, giving you a unique and amazing texture and flavor experience. Creamy, tart, and crunchy all in one bite, this cranberry-based treat is not only beautiful to look at, but also a delight to eat.
Why You'll Love this Cranberry Sauce Parfait
- So simple and quick. Anybody can make this leftover cranberry sauce parfait, and it's ready to eat in just 5 minutes! It's perfect for busy mornings or when you need a quick dessert after dinner. It's definitely an easy, delicious treat that everyone will love!
- Perfect for leftovers. This yogurt parfait is a great way to use up leftover cranberry sauce from the holidays, and it tastes just as good, maybe even better. You can even make it a few hours ahead of time and store it in the fridge until you're ready to serve.
- Customizable. Switch up the ingredients or add more toppings to make it your own. Get creative by trying different flavors of yogurt, adding a layer of whipped cream, swapping out granola for various nuts, or topping with some fresh fruit, shredded coconut, mint leaves, or even shaved dark chocolate.
- Healthy and delicious. Greek yogurt is a great source of protein, and granola is packed with healthy fats and fiber. Plus, this cranberry parfait is sweetened with just a touch of honey (and only if you want!) for a light and delicious dessert that won't leave you feeling guilty afterwards.
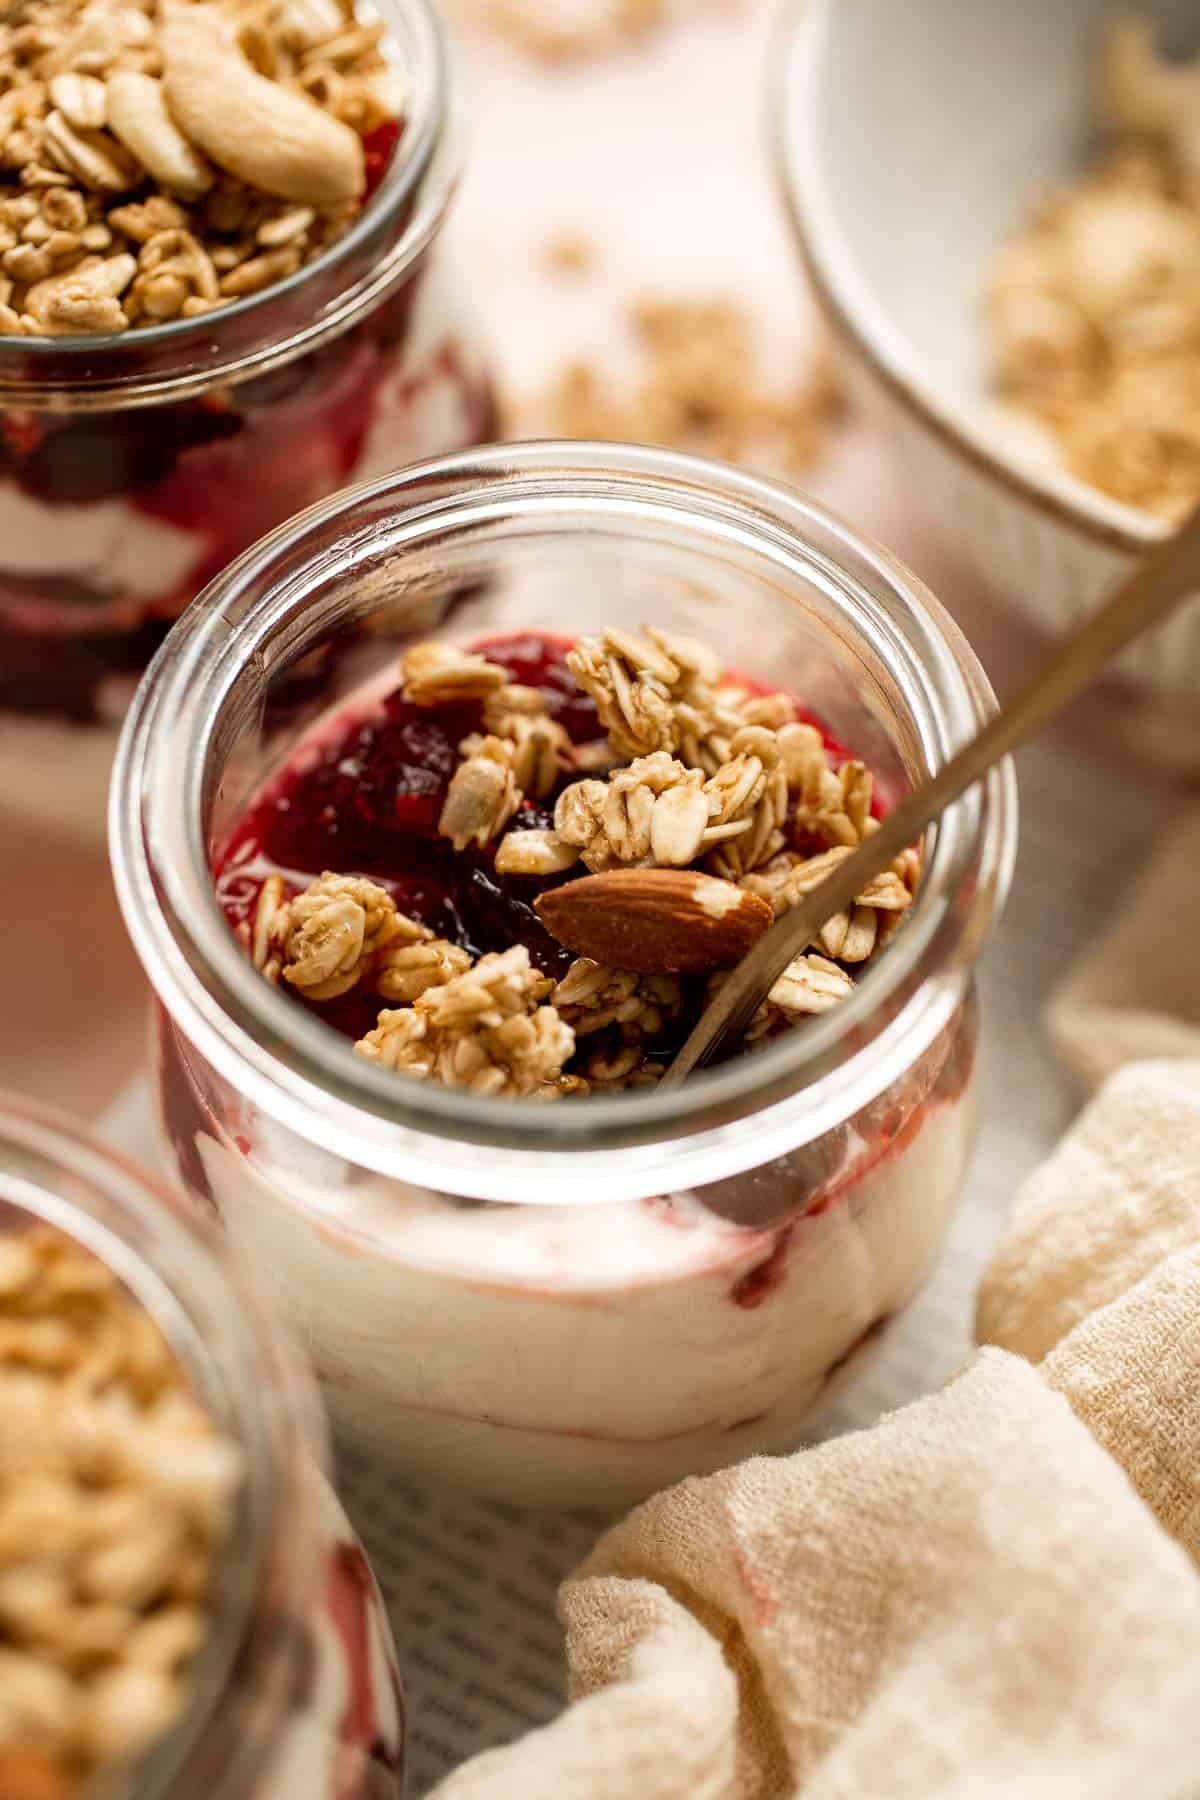
Ingredient Notes
To make this easy Cranberry Sauce Parfait, you will need the following ingredients (full measurements in recipe card below):
- Greek yogurt - any plain Greek yogurt will work for this recipe. But you can also use regular or homemade yogurt.
- cranberry sauce - use a store-bought sauce or make your own with this easy make-ahead cranberry sauce recipe.
- granola - we used our homemade granola, but any kind you have on hand is perfect. You can even use store-bought granola, but make sure to check the label for added sugars if you are looking out for that.
- honey - cranberry sauce is already typically quite sweet so adding a drizzle of honey is optional. I recommend using it if you need an extra touch of sweetness.
You will also need measuring cups and spoons and dessert glasses.
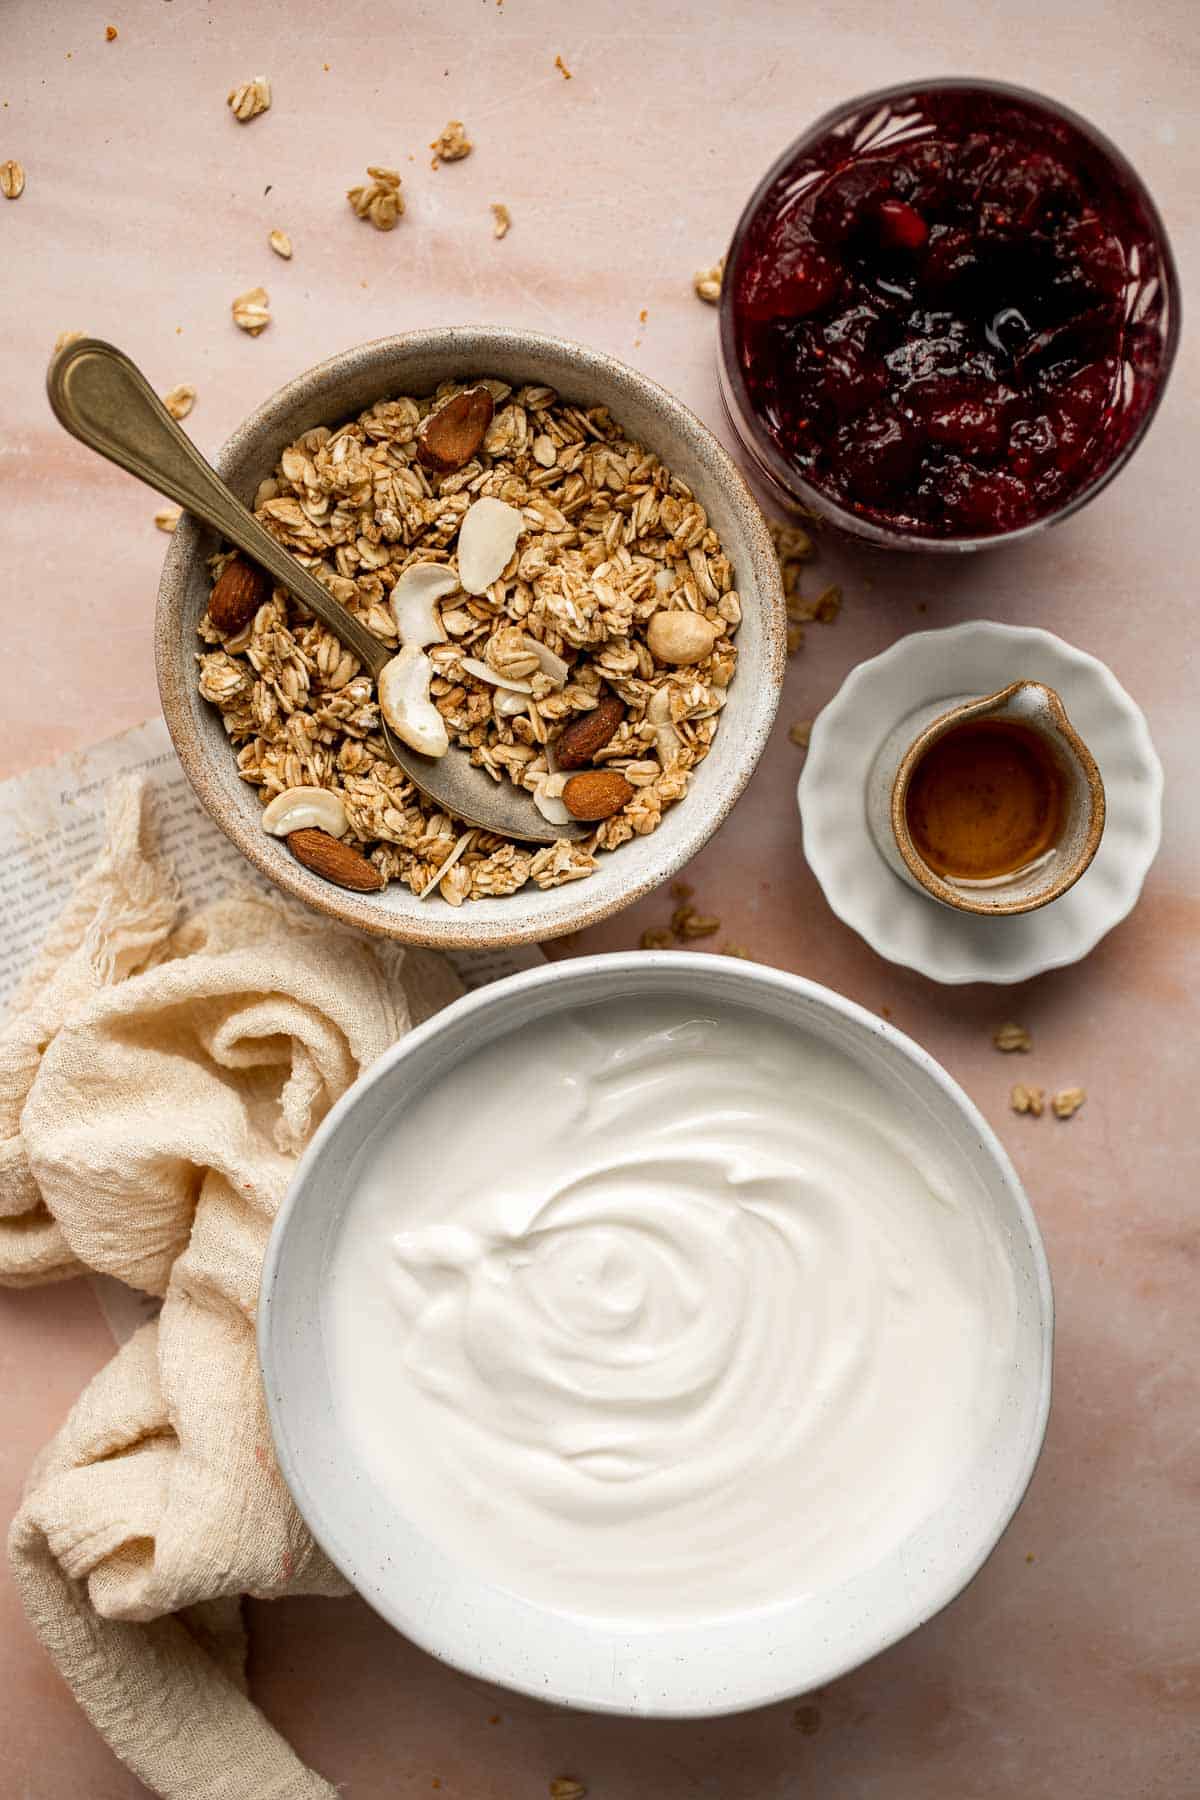
How to Make the Best Cranberry Sauce Parfait
- Assemble. In a small dessert glass, add ¼ cup of yogurt to the bottom. Add 3 tablespoons of cranberry sauce. Add 2 tablespoons of granola over top. Repeat with another layer of ¼ cup yogurt, a tablespoon of cranberry sauce, and top with a granola.
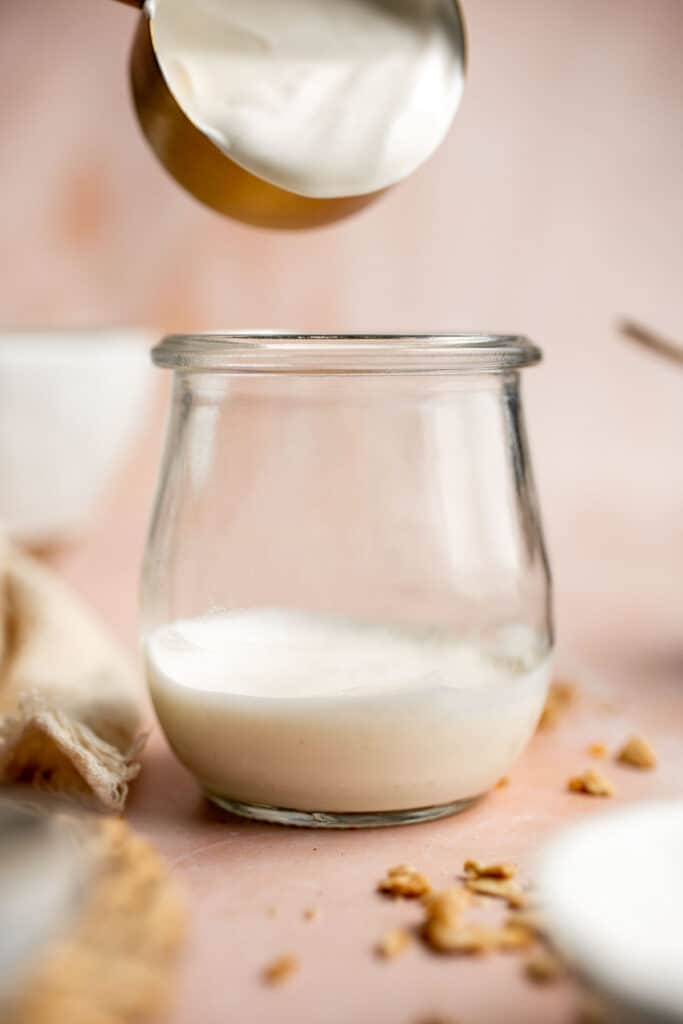
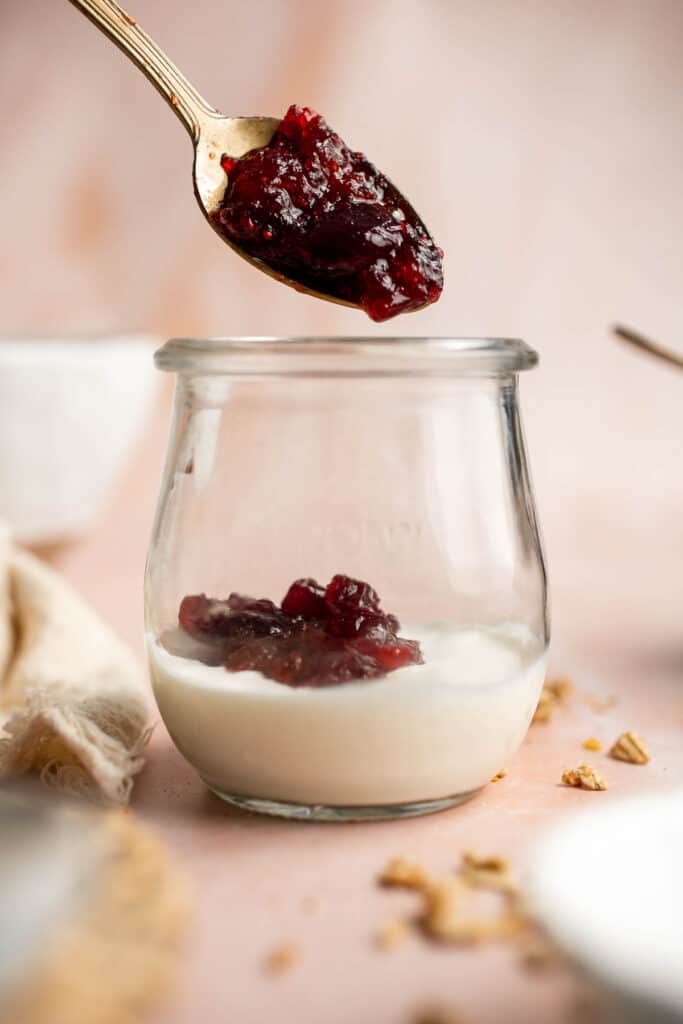
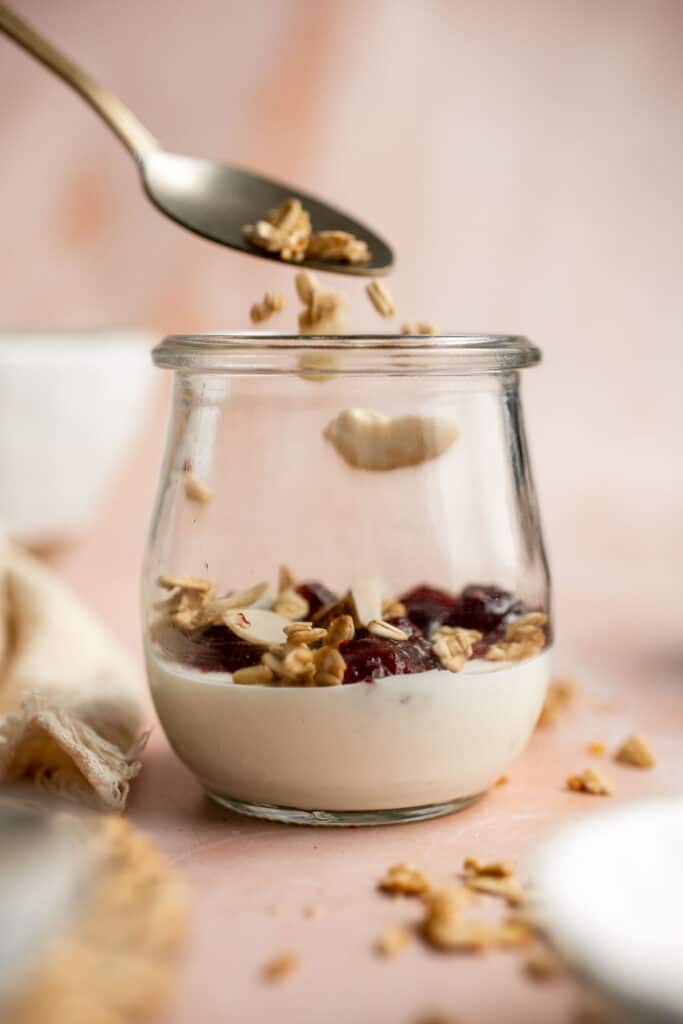
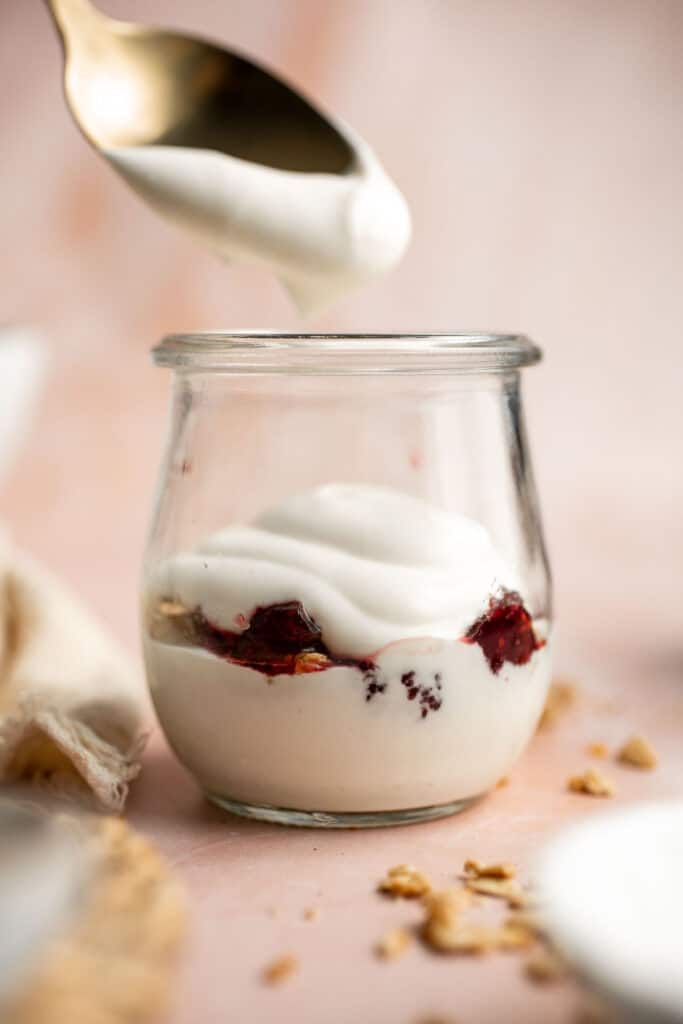
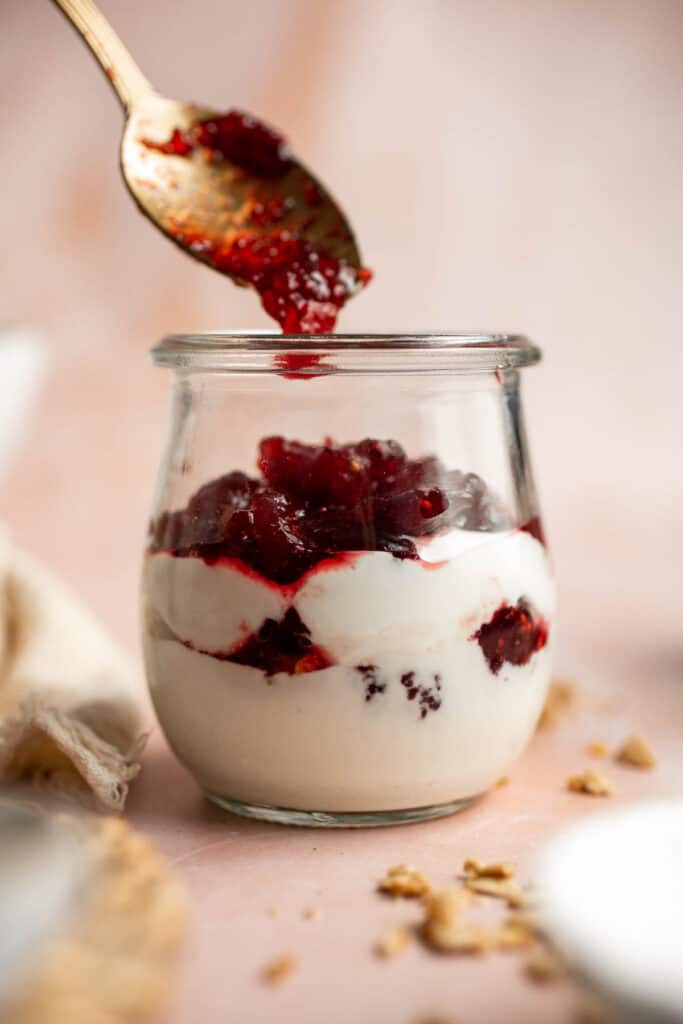
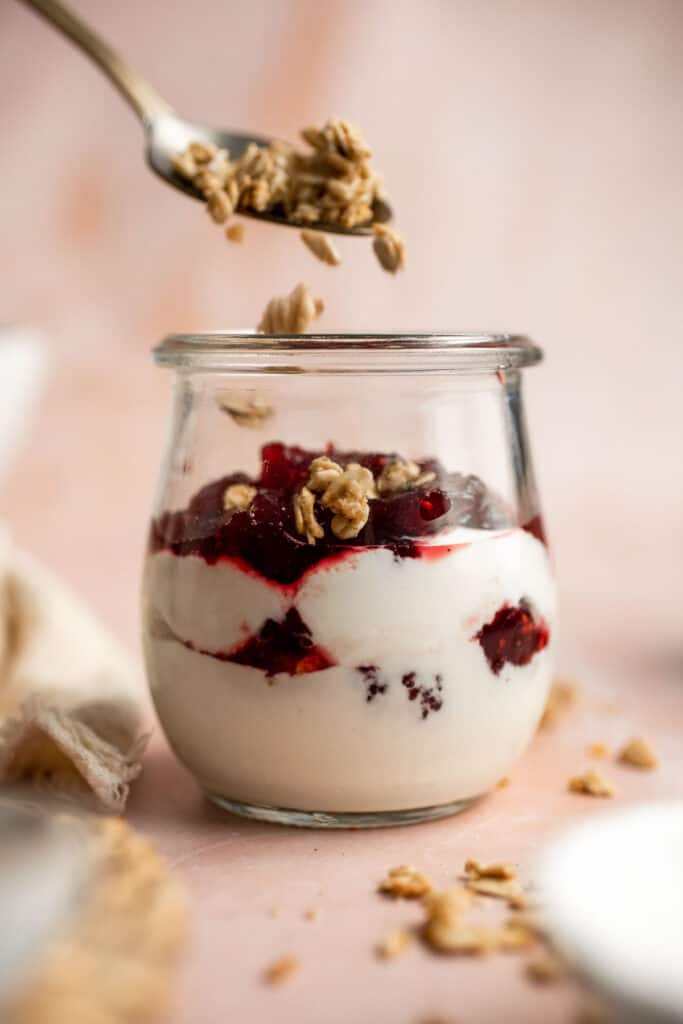
- Add sweetness. For extra sweetness, add a drizzle of honey on top (if needed).
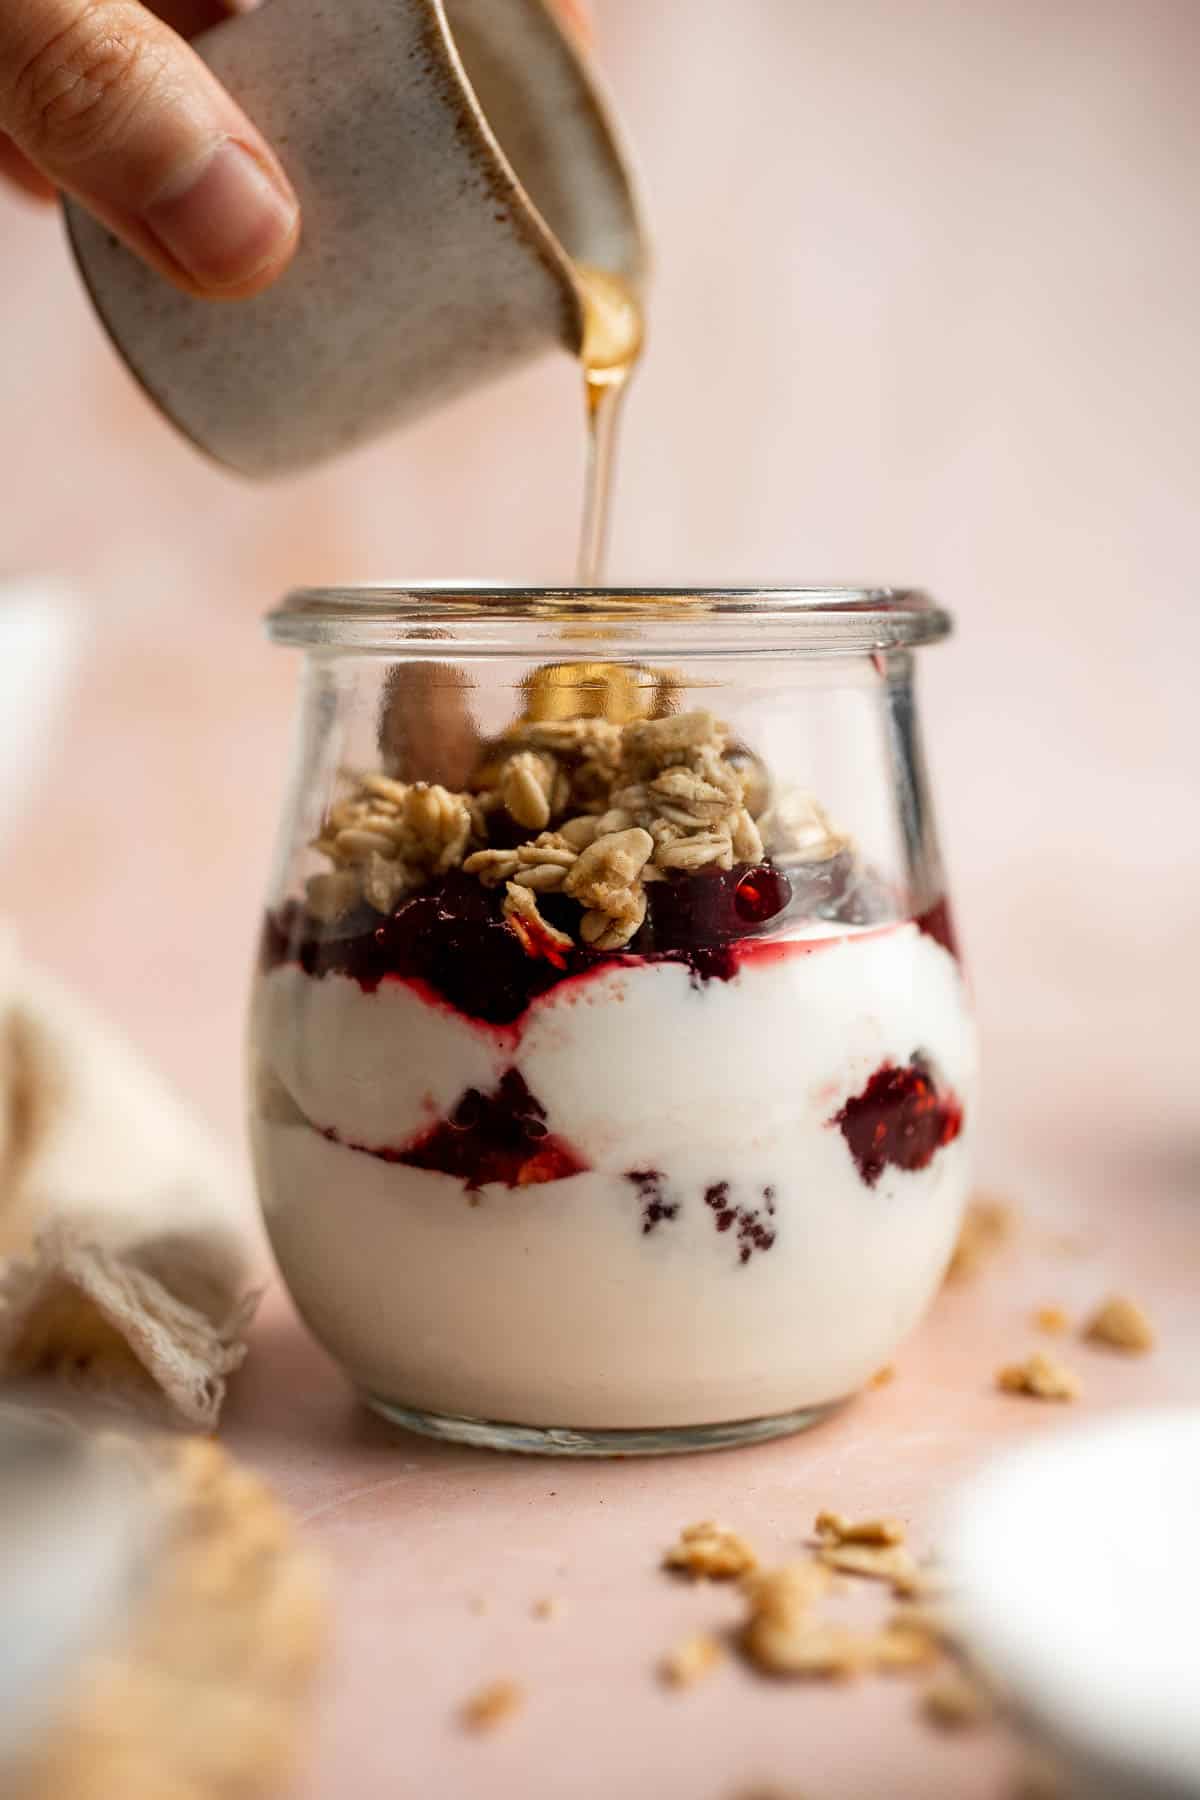
- Repeat. Repeat with remaining 3 dessert cups.
Recipe Variations
- Use vanilla Greek yogurt. For those who don't like the tang of regular Greek yogurt, use vanilla flavored instead.
- Add fruits. Berries, bananas, kiwi, or any other fruit of your choice can be added on top of the parfait before serving. Customize the parfait to whatever fruit is in season or easy for you to find at the local market.
- Mix in spices. Add some cinnamon or nutmeg to the yogurt layer for a warm, comforting flavor that is perfect for fall.
- Top with nuts. Gently toast some hazelnuts, almonds, or walnuts and sprinkle them over the top of the parfait for a crunchy addition.
- Use flavored granola. If you don't have plain granola on hand, try using a flavored variety like pumpkin pie granola, coconut maple, or gingerbread granola.
How to Serve
Serve this delicious Cranberry Sauce Parfait on its own, or with other holiday meals, beverages, and desserts. We like serving it for breakfast or brunch along with these fall favorites:
- Cinnamon Apple Baked Oatmeal
- Deviled Eggs
- Gingerbread French Toast Casserole
- Pumpkin Spice Latte
- Arugula Salad with Apple and Pecan
- Oat Porridge
- Pumpkin Cinnamon Rolls
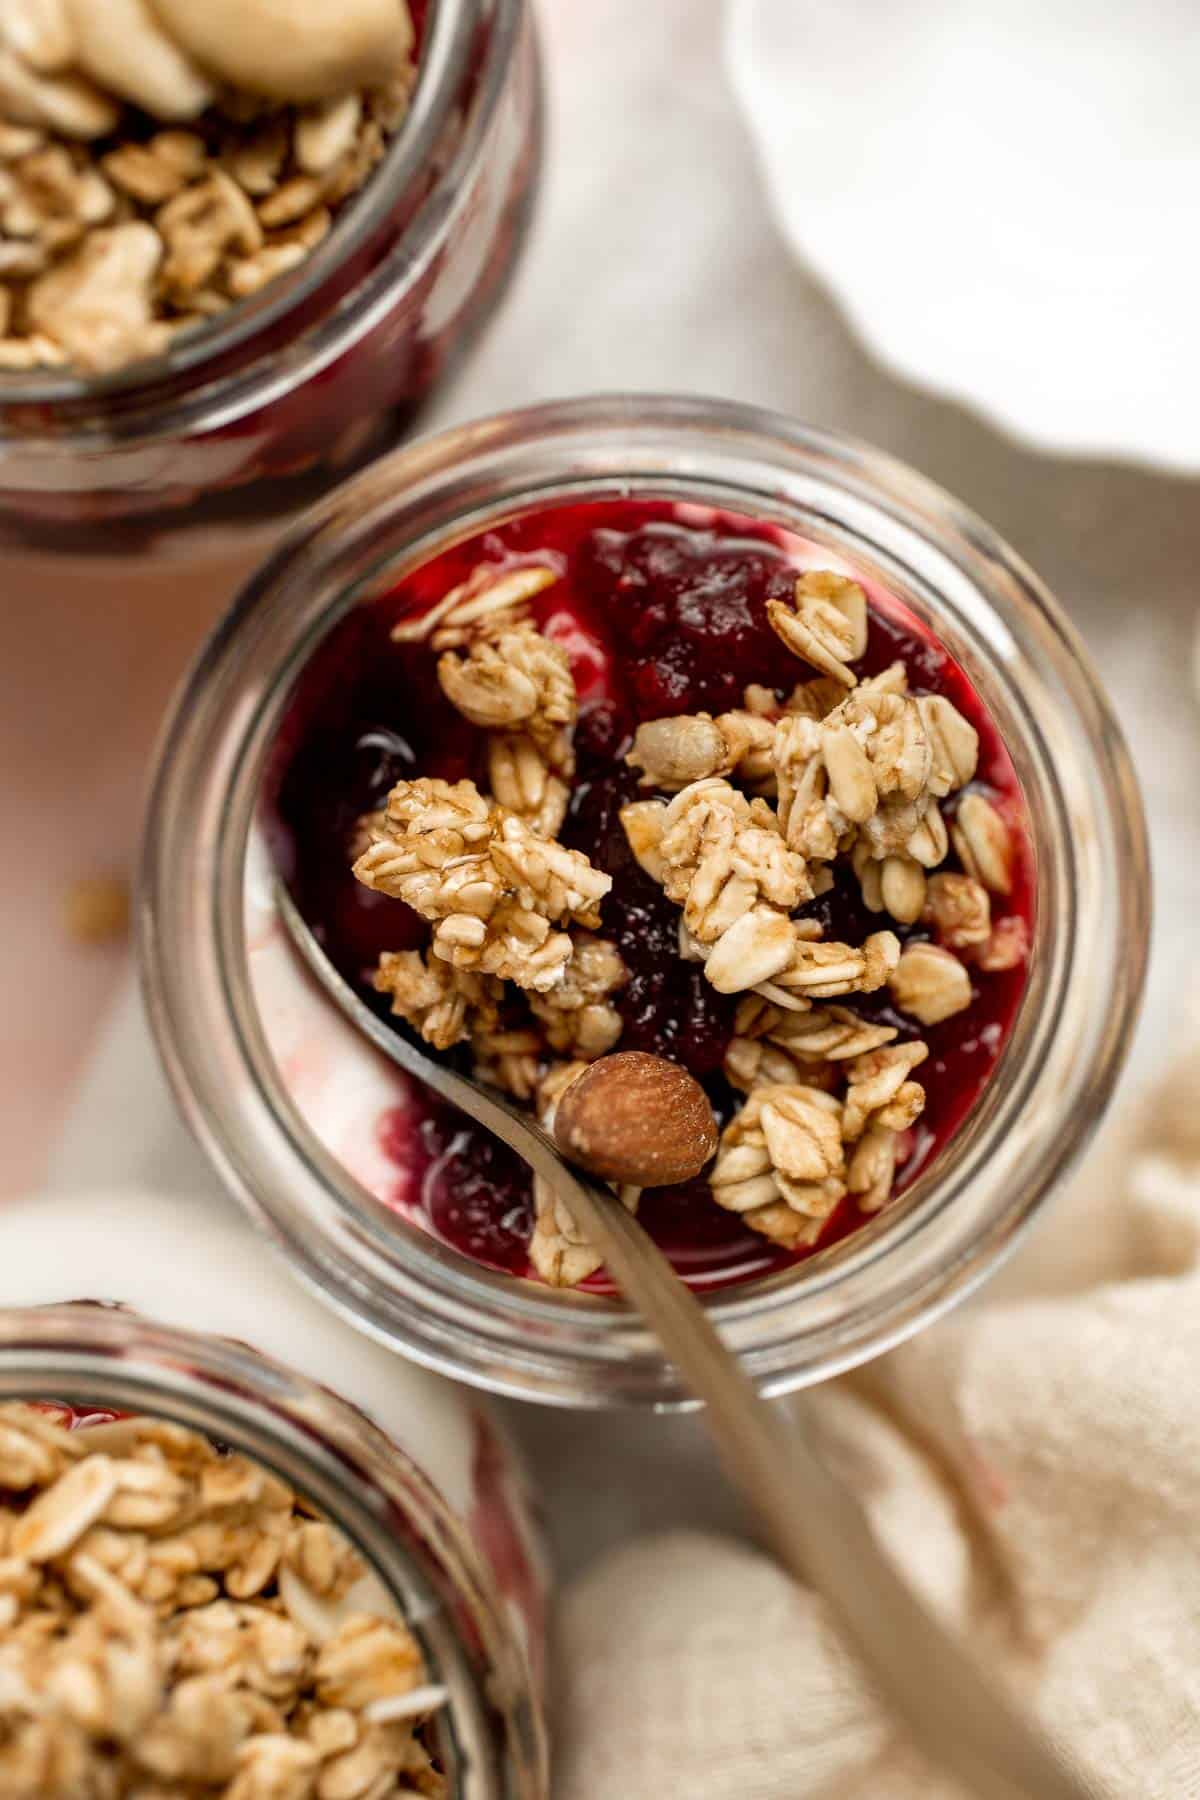
Recipe Tips and Tricks
- Add granola topping right before serving. Granola will get soggy if it sits for too long, so add the topping just before serving for that crunchy texture.
- Store in mason jars. If you don't plan to serve this right away, store the parfait in mason jars for an easy grab-and-go snack or dessert.
- Use low-sugar cranberry sauce. Cranberry sauce can be super sugary, so opt for one with less sugar or make your own to keep it healthier. Check out my homemade recipe here.
Storing and Freezing Instructions
How to Store
If you're using dessert glasses, cover them with plastic cling wrap and store them in the fridge for up to 3 days. You can also use mason jars with lids for better storage.
How to Freeze
Place the parfait in a freezer-safe container with a cover or lid and freeze for up to 1 month. Thaw overnight in the fridge before topping with granola, honey, and other desired ingredients.
More Cranberry Sauce Recipes
- 15 Leftover Cranberry Sauce Recipes
- Cranberry Sauce Oat Bars
- Cranberry Brie Bites
- Leftover Cranberry Sauce Muffins
- Cranberry Sauce Swirl Pound Cake
- Cranberry Baked Brie
Tried this recipe?
I'd love to hear what you think! Leave a comment and rating below to share your feedback. Your reviews help others discover this recipe and help me keep creating more free recipes for you. Snap a photo and tag me on social media @aheadofthyme too.
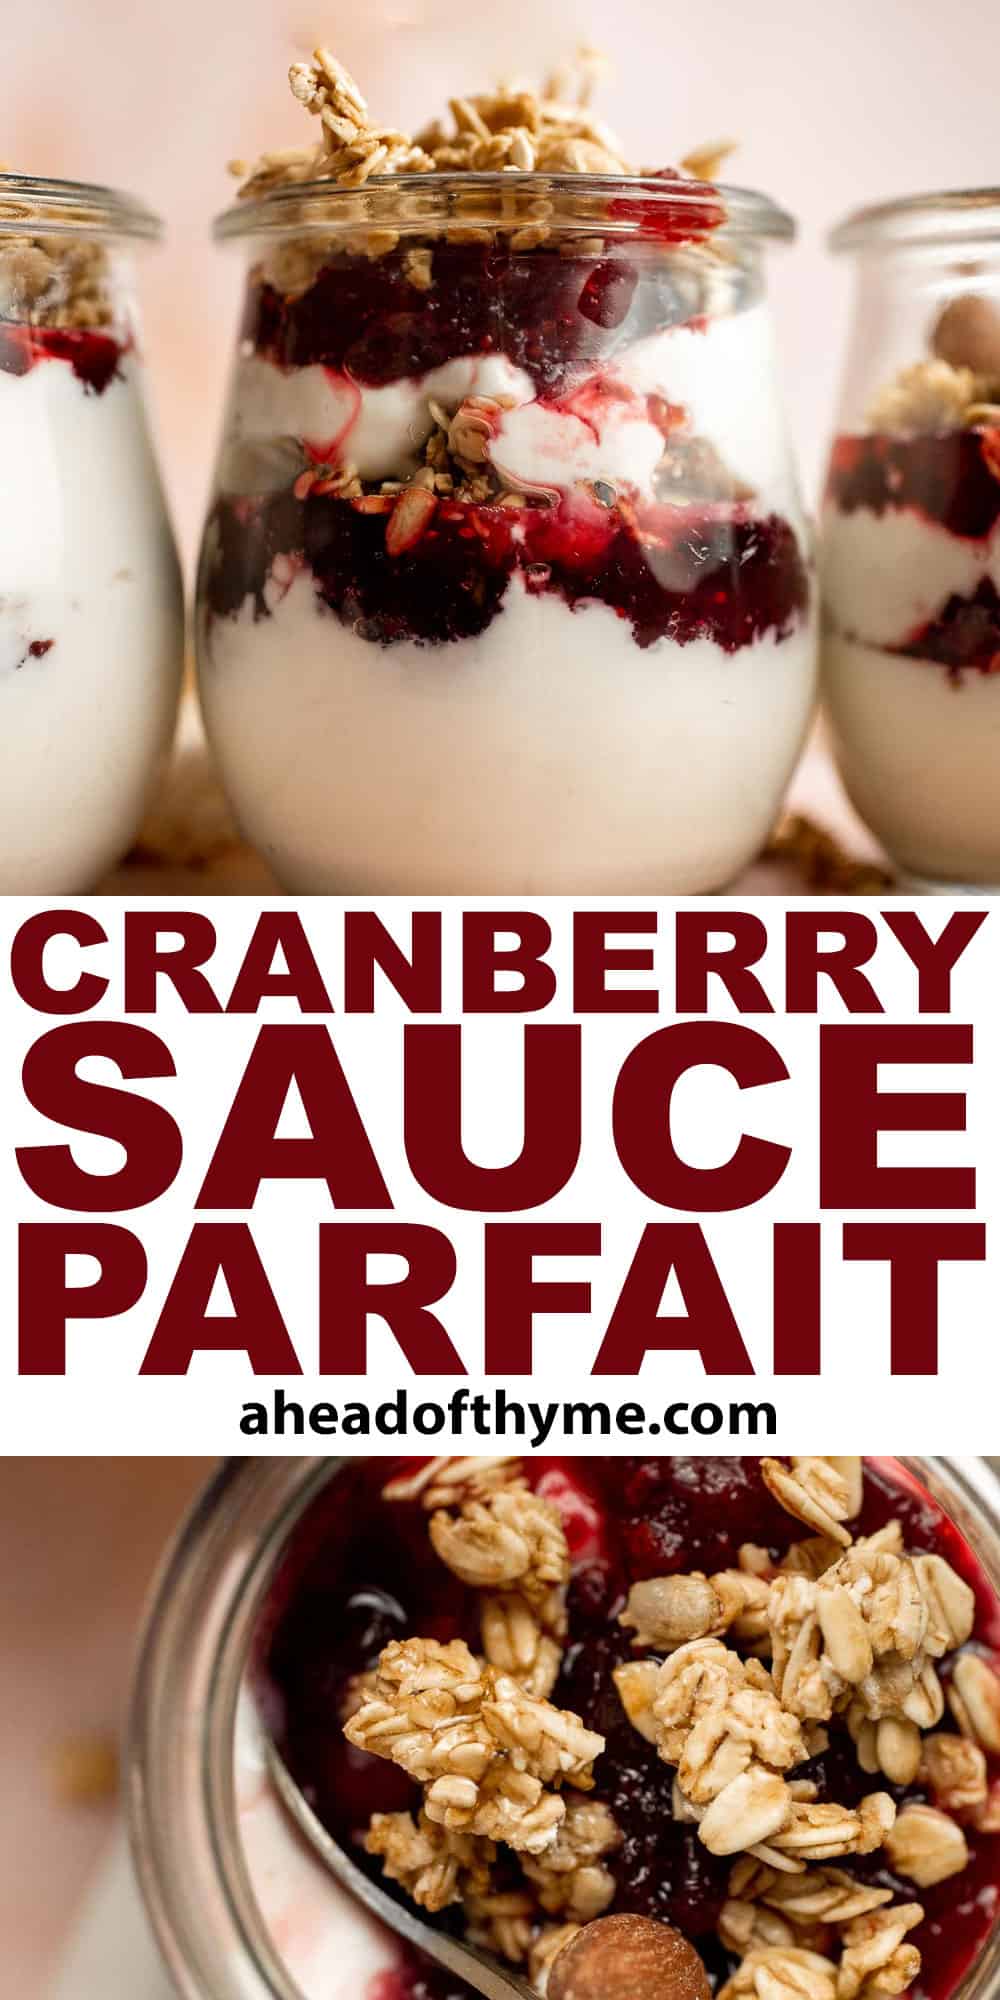
Brussels Sprouts with Cranberries
Brussels Sprouts with Cranberries are a delicious, festive side dish that could be the highlight of your holiday meal - or any meal, really! The earthy flavors of Brussels sprouts with the tartness of cranberries make for a unique combination that is simply amazing. Not to mention, it's so easy to make and takes just 15 minutes from start to finish.

Brussels sprouts are one of the most versatile vegetables out there. They can be boiled, steamed, sautéed, roasted, or even grilled to perfection. But for us, the easiest way to cook them is by sautéing. It brings out their natural sweetness and makes them tender on the inside while keeping a slight crisp on the outside. Since they are naturally earthy and bitter, pairing them with sweet-tart cranberries is the perfect way to balance out the flavors. Topped off with sweet, fruity balsamic vinegar, there's no way you can resist this delicious vegetable side dish.
Why You'll Love this Brussels Sprouts with Cranberries Recipe
- Quick and easy. Making an appetizing side dish doesn't have to take hours. This brussels sprouts recipe is so simple with just six ingredients and 15 minutes of prep and cooking time. Plus, no special equipment is needed!
- Great holiday side dish. This dish is so pretty and festive, making it perfect for the holidays and other special occasions. The bright green Brussels sprouts and gorgeous red cranberries add a nice pop of color to your holiday table. But don't think twice about making it any day of the year!
- Healthy and tasty. Brussels sprouts are incredibly nutritious, packed with fiber, minerals, and vitamins B9, C, and K. Adding antioxidant-rich cranberries to the mix just makes them even better in terms of nutrition and flavor.
- Unique flavor combination. The nutty flavors of Brussels sprouts and sweet-tart cranberries are a match made in heaven. It's a combination you don't see very often, but you'll be surprised how these two ingredients work so well together.
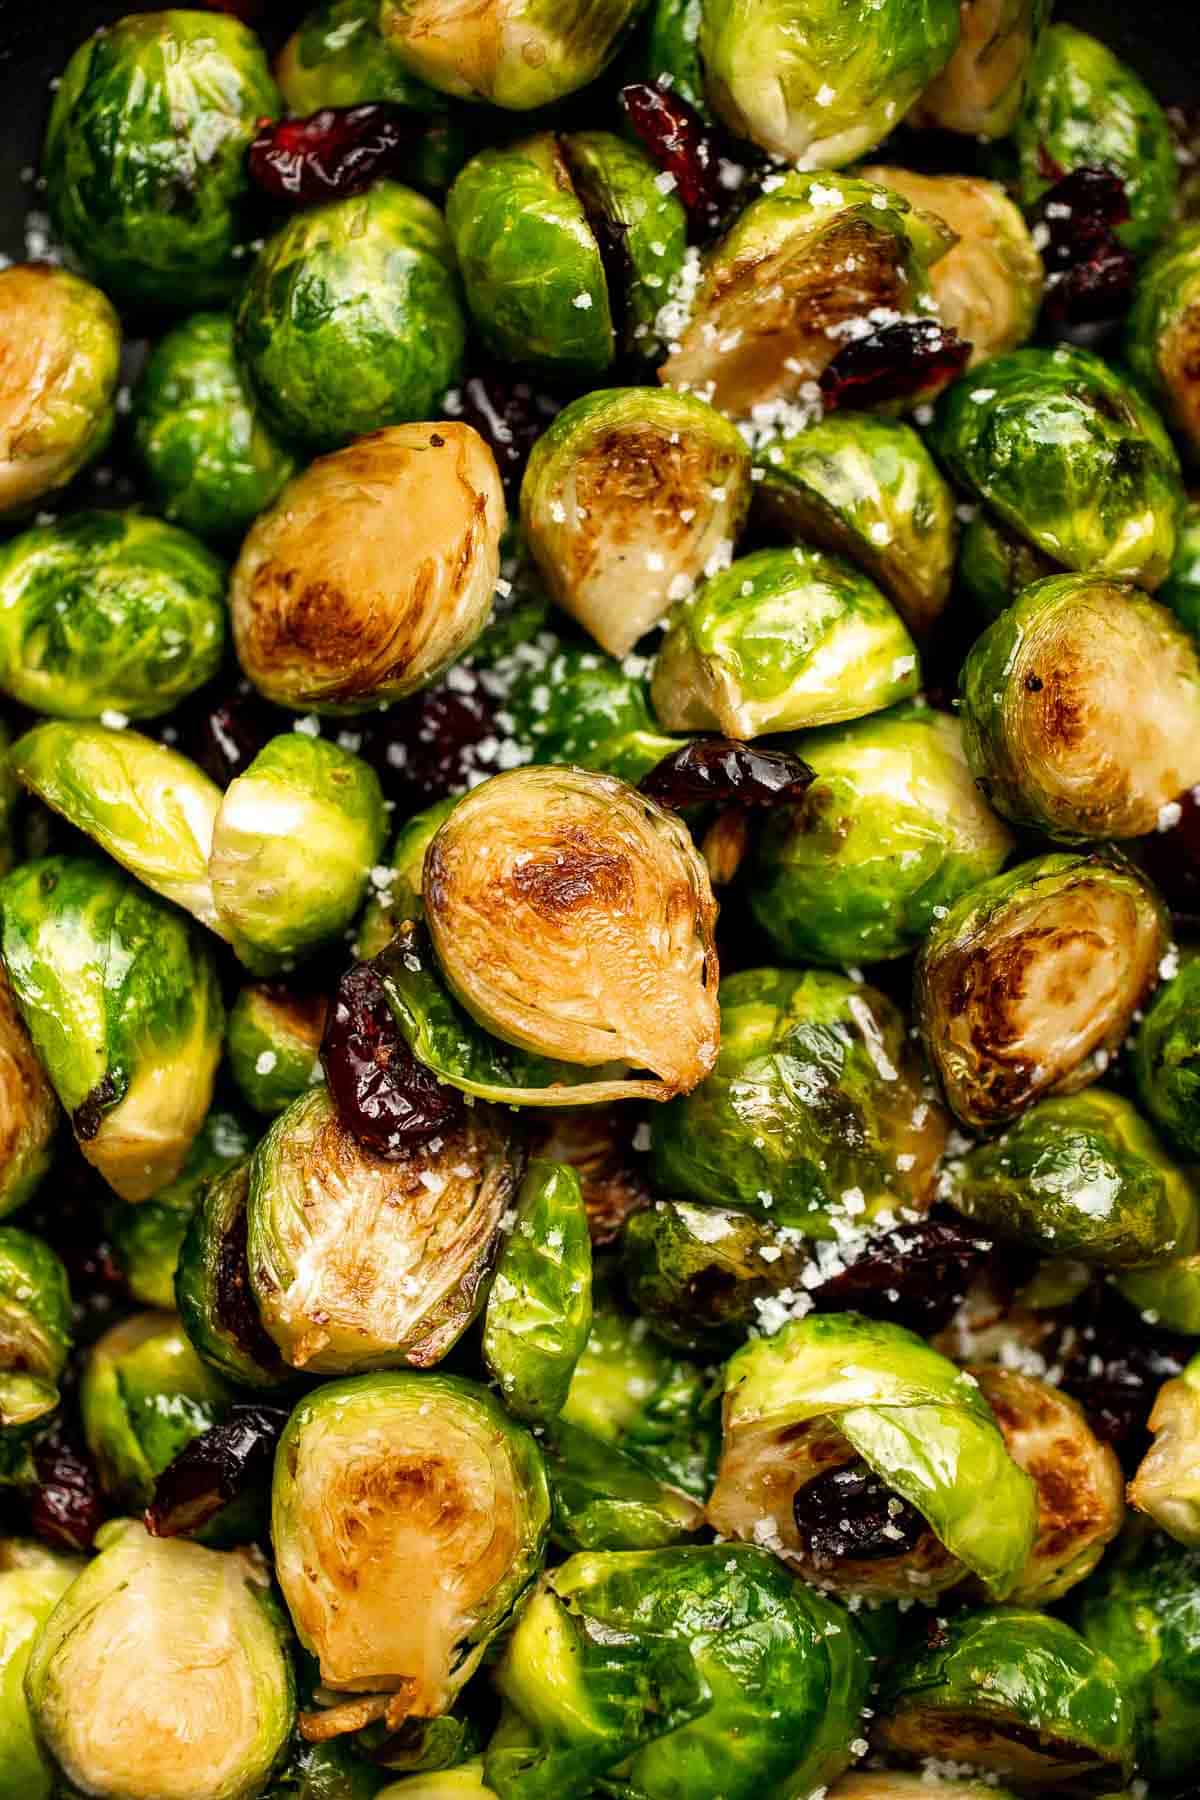
Ingredient Notes
To make these easy Brussels Sprouts with Cranberries, you will need the following ingredients (full measurements in recipe card below):
- cooking oil - we used avocado oil for sautéing the sprouts. Use any cooking oil like vegetable oil and olive oil.
- Brussels sprouts - use fresh Brussels sprouts for the best flavors. If possible, choose small to medium-sized pieces as they tend to be sweeter and more tender. Make sure to cut them in half and discard the stem ends.
- cranberries - I use dried cranberries for this recipe, but you can also use fresh ones.
- balsamic vinegar - adds a nice zing to the dish that complements the earthy flavor of sprouts and the sweetness of cranberries.
- salt and black pepper - season to taste.
You will also need measuring cups and spoons and a large skillet.
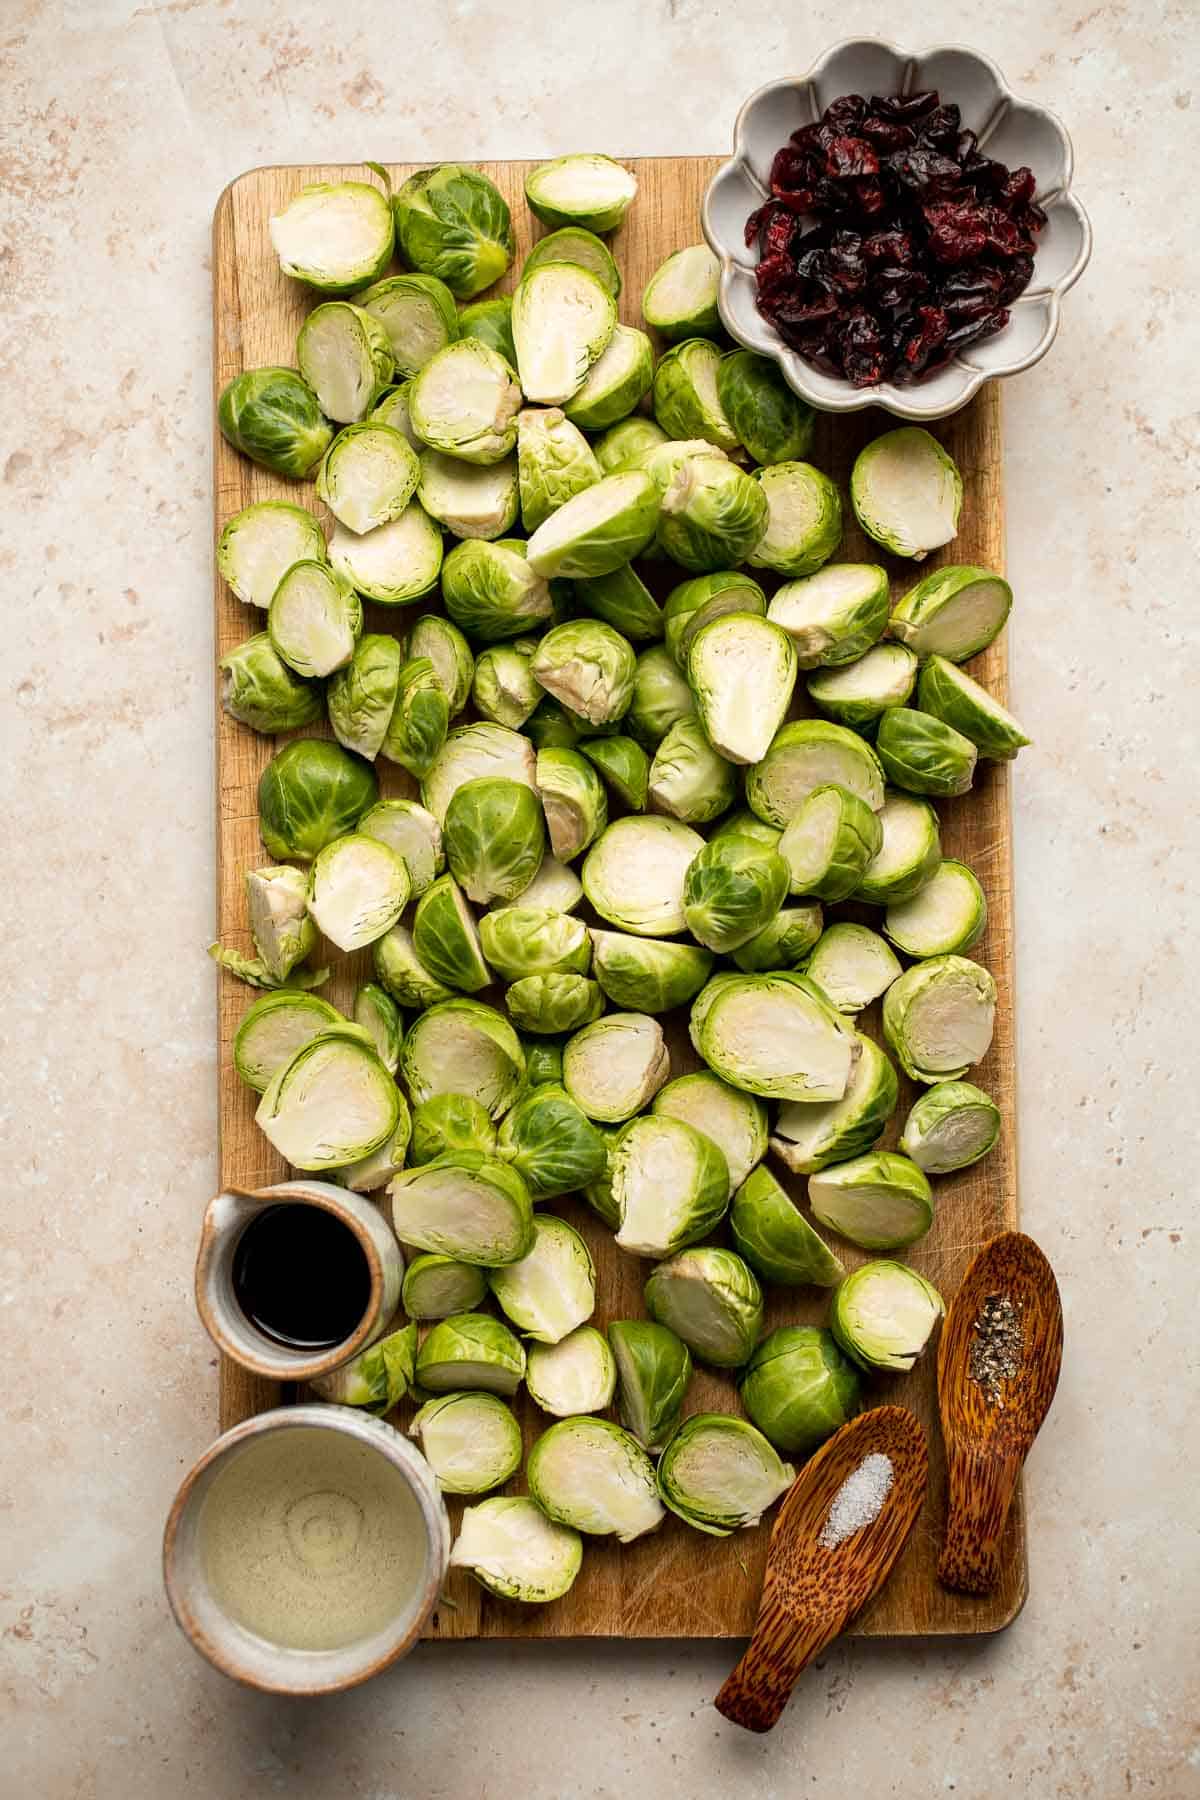
How to Make the Best Brussels Sprouts with Cranberries
- Sauté brussels sprouts. In a large skillet, add oil and heat over medium heat until it sizzles, about 1-2 minutes. Add Brussels sprouts and cook until caramelized golden brown and tender, about 5 minutes. Season with salt and pepper.
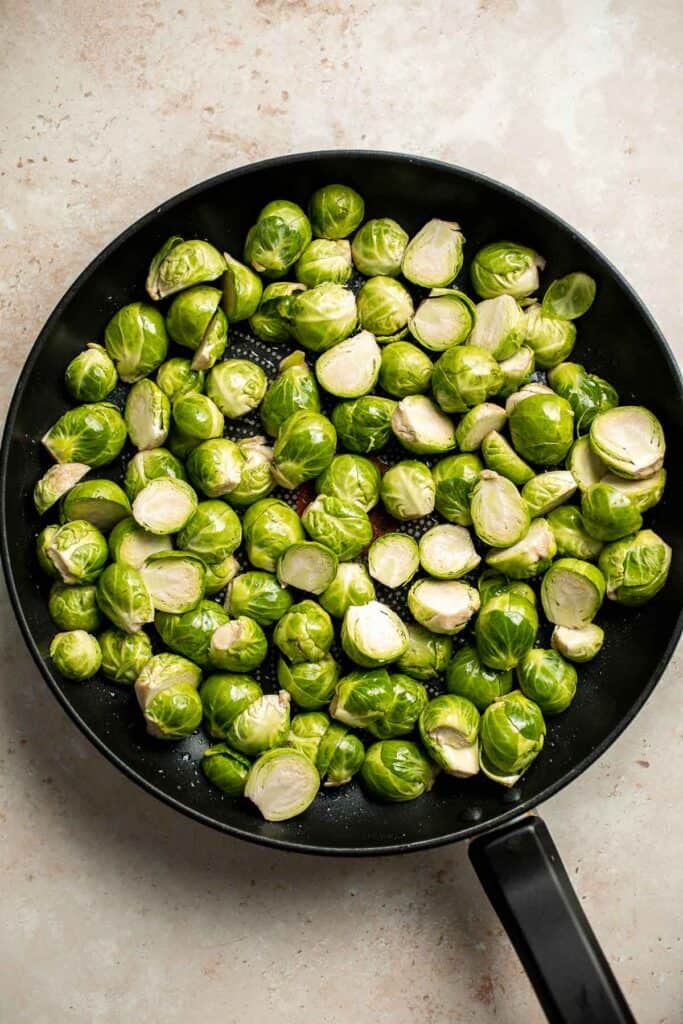
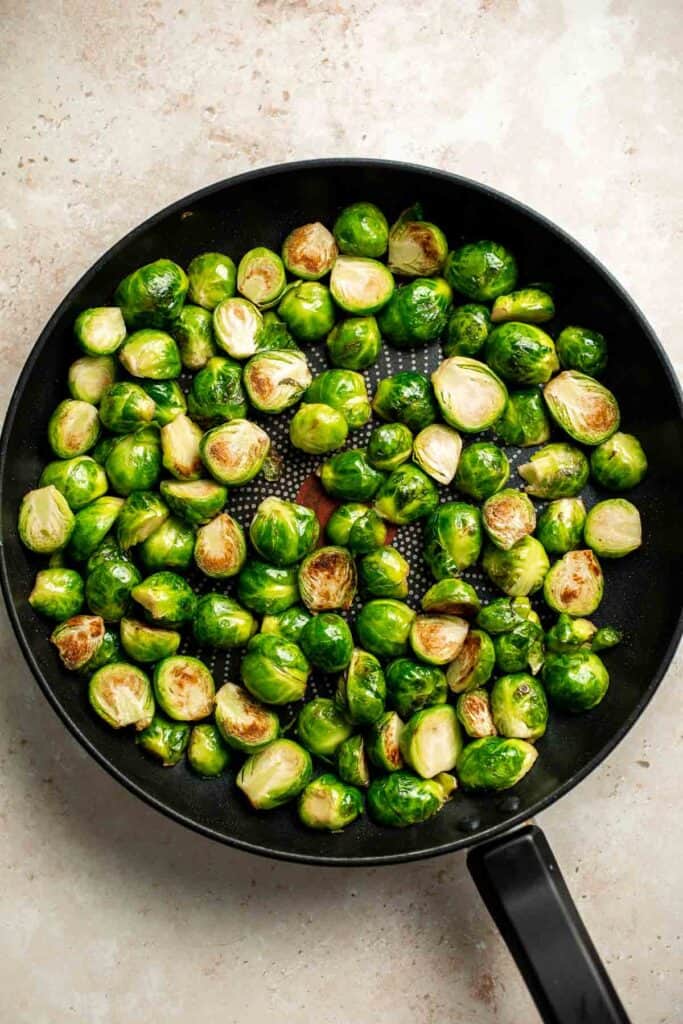
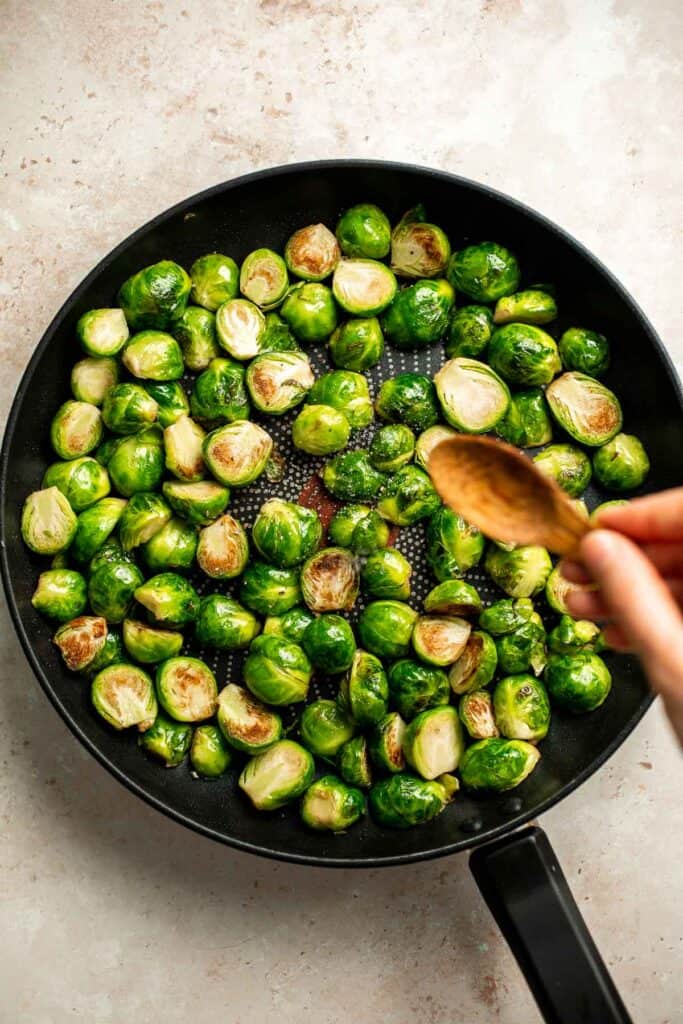
- Add cranberries. Add balsamic vinegar and cranberries. Toss well and cook until the cranberries are tender, about 3-4 minutes. Serve immediately.
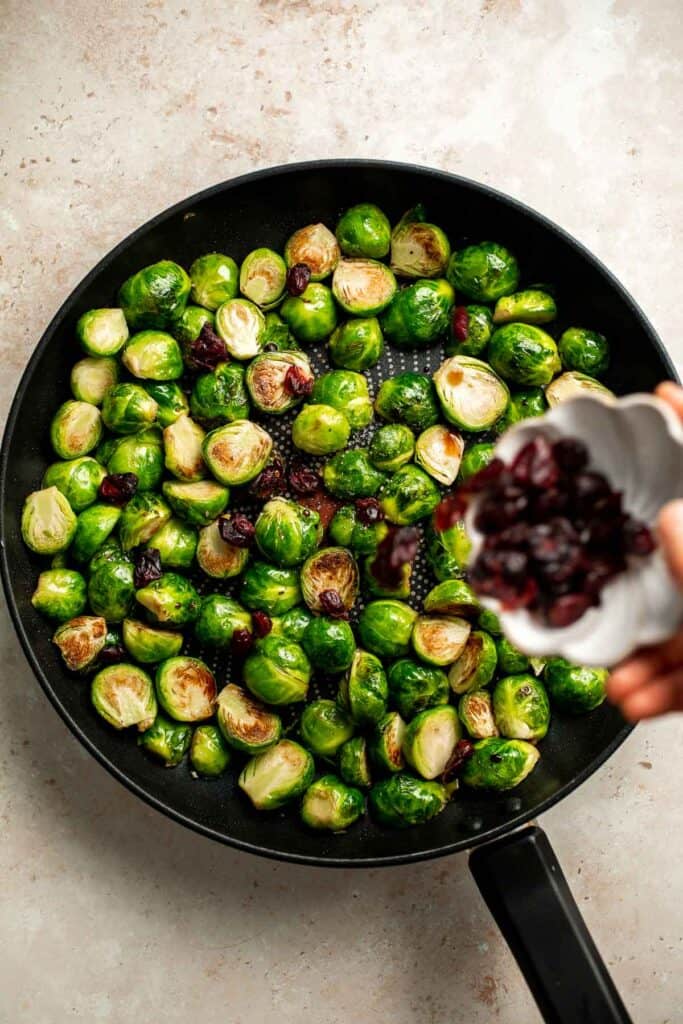
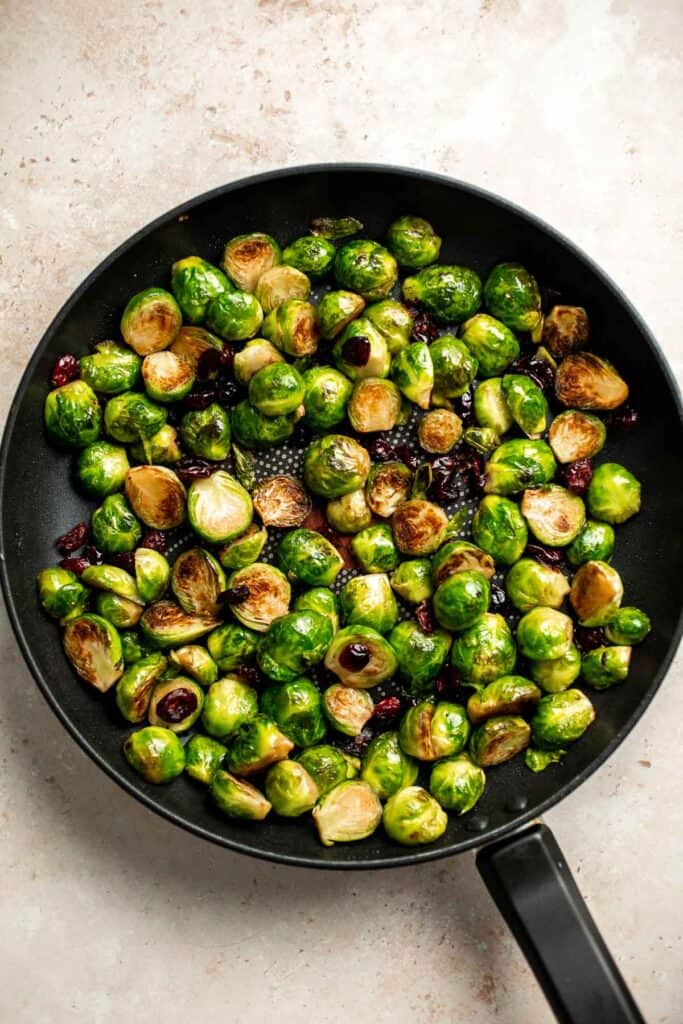
Recipe Variations
- Add nuts. Throw in some walnuts, pecans, pistachios, or almonds for an added crunch.
- Try different seasonings. Adding garlic powder, crushed red pepper flakes, or spices like cinnamon and nutmeg will give the dish an extra flavor boost.
- Make it cheesy. Sprinkle Parmesan or feta cheese on top for that creamy, cheesy goodness. Check out our Parmesan Crusted Brussels Sprouts for inspiration.
- Roast it instead. Toss the Brussels sprouts, season with salt and pepper, bake at 375°F for about 15 minutes, mix in the cranberries, and bake until everything is cooked through. Top it off with some balsamic vinegar, and you're good to go!
- Use maple or honey. Drizzle the dish with a bit of maple syrup or honey before serving for a hint of sweetness.
- Add butter. If you want a richer flavor, add a pat of butter to the sprouts while they're cooking. It makes everything so much better!
How to Serve
Serve these delicious Brussels Sprouts with Cranberries with beef, chicken, pork, or even fish for a complete meal. They also make a great side for a vegetarian meal. Here are some recipes that would go well with this dish:
- Pecan Crusted Chicken
- Butternut Squash Risotto
- Ribeye Steak
- Garlic Butter Salmon
- Roasted Turkey Breast
- Glazed Honey Balsamic Pork Chops
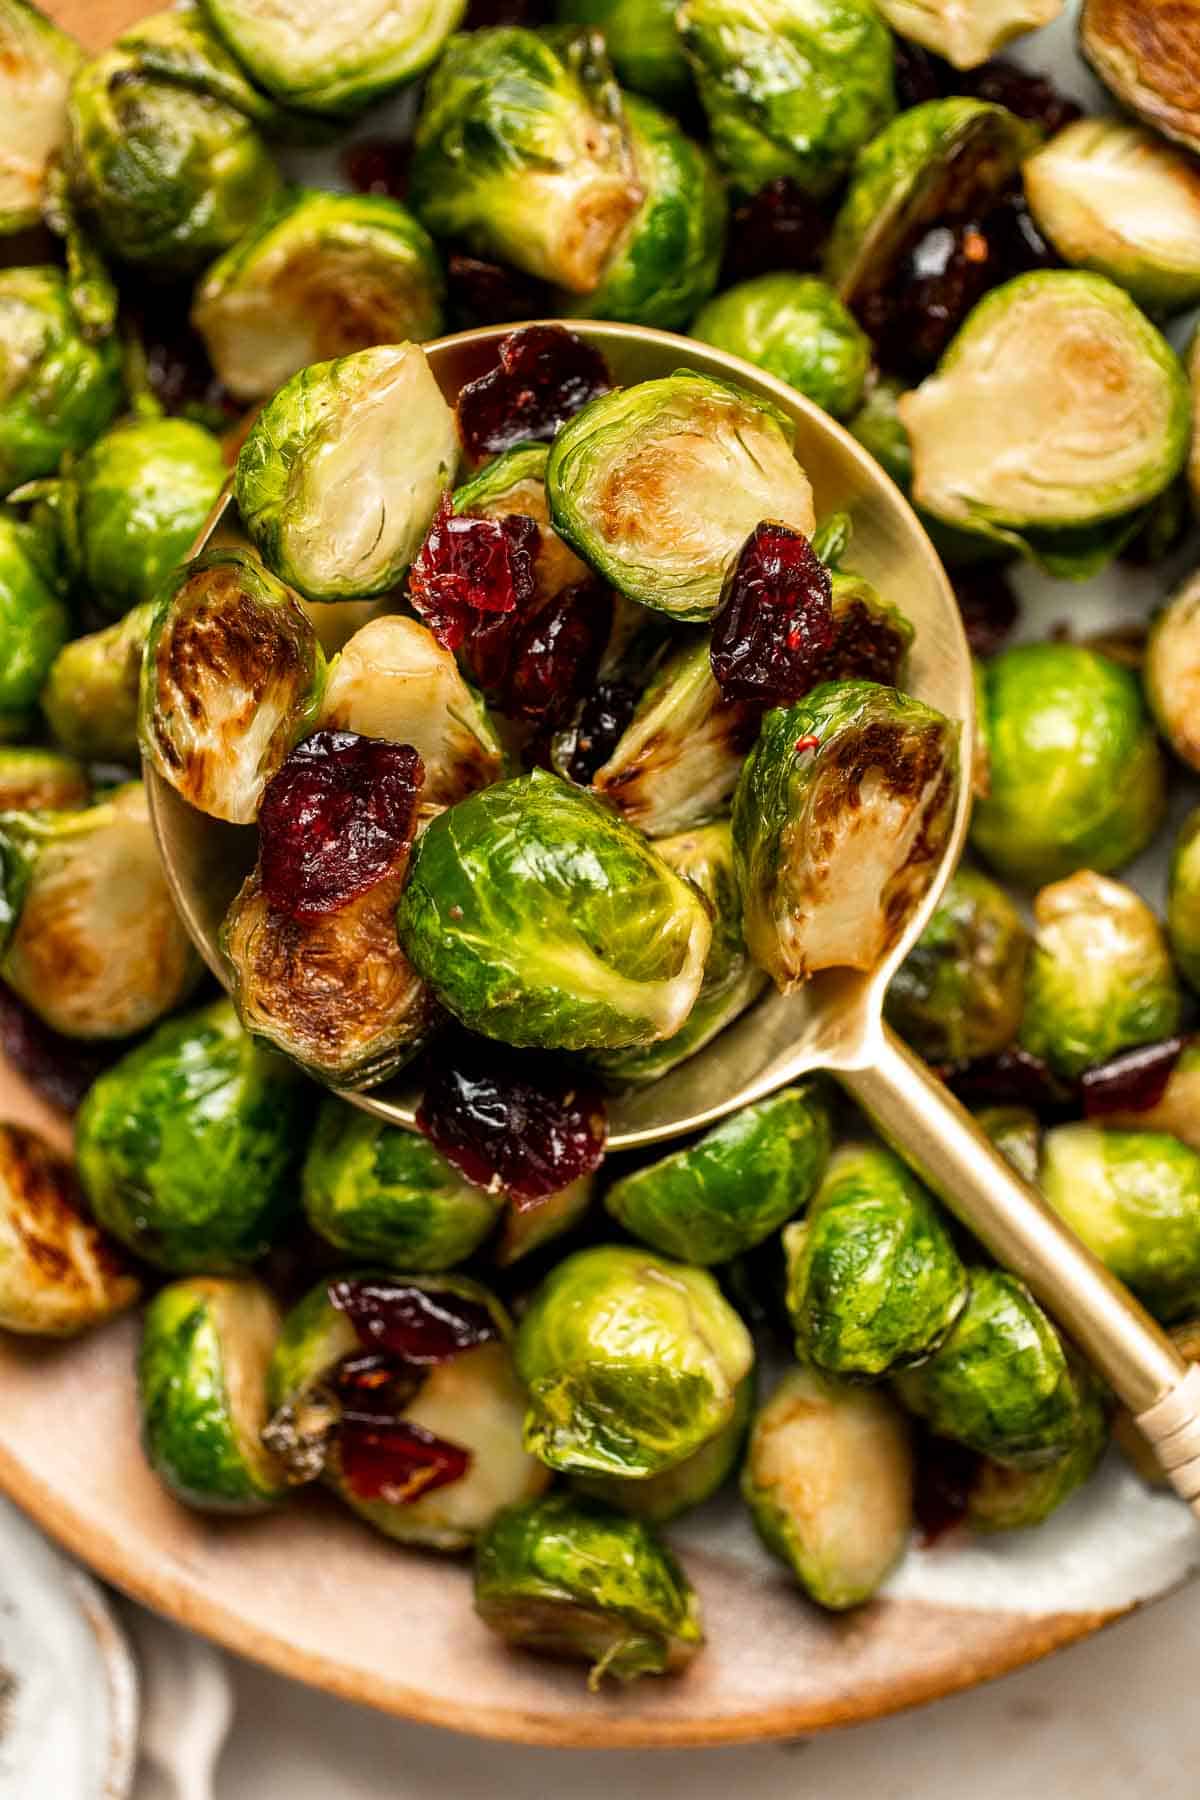
Recipe Tips and Tricks
- Heat the oil enough. When cooking the sprouts, use hot enough oil to help them brown nicely and develop that crispy texture we all love. It's ready for cooking when the oil starts to sizzle.
- Don't overcook the sprouts. Even though we want them to be nicely browned, they can become too soft and mushy if cooked for too long. Cook them just until they are tender-crisp and caramelized.
- Use high-quality balsamic vinegar. Thick, syrupy balsamic vinegar helps to add a sweet, fruity, and slightly tangy flavor that makes the dish even more delicious!
Storing and Reheating Instructions
How to Store
Let the sprouts cool completely before transferring them to an airtight container. They can be stored in the fridge for up to 3 days.
How to Reheat
The best way to reheat these sprouts with cranberries is in an oven. Preheat the oven to 350°F and bake for about 10-15 minutes, or until it's hot and crispy again. You can also cook the leftovers in a skillet over medium heat. Add a little bit of oil or butter, and cook for just a few minutes until warmed through.
More Brussels Sprouts Recipes
- 15 Best Brussels Sprouts Recipes
- Sautéed Brussels Sprouts
- Honey Balsamic Brussels Sprouts
- Maple Roasted Brussels Sprouts and Butternut Squash
- Brussels Sprouts with Bacon
- Parmesan Crusted Brussels Sprouts
Tried this recipe?
I'd love to hear what you think! Leave a comment and rating below to share your feedback. Your reviews help others discover this recipe and help me keep creating more free recipes for you. Snap a photo and tag me on social media @aheadofthyme too.

Antipasto Platter
If you're looking for a show-stopping appetizer for your next dinner party, nothing beats a good Antipasto Platter. Combine a variety of marinated veggies, olives, cheeses, breads, cured meats, and fresh vegetables on a serving platter, and watch as your guests crowd around to try every single one. It's a must-have appetizer for any event!

Whether you're planning a big cocktail party during the holiday season or just having people over for dinner, try this antipasto recipe! They are usually served as the first course of an Italian meal, but they're special (and easy) enough to serve for any event. Since most ingredients are prepackaged from the grocery store, you'll spend more time arranging your favorite ingredients than cutting or cooking anything!
Why You'll Love This Antipasto Platter Recipe
- Stunning presentation. This classic Italian appetizer is absolutely gorgeous, with bowls of roasted red bell peppers and marinated olives, a delicious array of meats, different cheeses, the best fresh bread, and more. Your guests will be floored by your thoughtful display and generous servings! It's a vibrant and colorful masterpiece.
- Easy to prepare. Although some of the ingredients need to be sliced, most are purchased brined or marinated from the store. Just add your olives and peppers in small bowls, and arrange everything else on your wooden cutting board or serving platter. and you have the perfect appetizer ready to go!
- Perfect for a crowd. A good antipasto tray draws people in. You can't help but grab a bite of this or nibble on a little of that. Plus, since each one has a range of items, your guests can easily find something that fits their dietary preferences without having to make 10 different appetizers.

Ingredient Notes
To make this delicious antipasto platter recipe, you will need the following ingredients (full measurements in recipe card below):
- marinated olives - choose at least one type of marinated olives. Some options include kalamata olives, castelvetrano, stuffed olives, and more.
- marinated artichoke hearts - these marinated artichoke hearts have a buttery, herby flavor that pairs well with deli meats.
- roasted red peppers - choose roasted red peppers or sun-dried tomatoes for a pop of color and flavor.
- marinated mushrooms - select pickled or marinated mushrooms for their tender, delicate texture.
- marinated mozzarella balls - these are made by marinating fresh mozzarella balls in olive oil with different herbs and spices and are easy to find at the grocery store. See our easy Marinated Mozzarella Balls for instructions on how to make it at home.
- cheese - you'll need a mix of different kinds of cheeses. Pair different flavors and textures, like parmesan, gouda, provolone, or gorgonzola.
- cured meats - select a variety of different cured meats like salami, prosciutto, and pepperoni.
- crackers or bread - your guests will need some bread or crackers to eat the marinated vegetables, cheeses, and meats. Try serving ciabatta rolls, pita chips, or fresh breadsticks.
- vegetables - slice cherry tomatoes and cucumbers into bite-sized pieces. These will fill any gaps on your Italian antipasto platter.
- optional items - fill out your platter with a variety of other ingredients like nuts, fresh fruits, honey, olive tapenade, and fresh herbs.
You will also need a variety of small bowls, a wooden cutting board, different serving platters, and small spoons, knives, and forks for serving.
How to Make the Best Antipasto Platter
- Position bowls. On a large platter, arrange the items that are in a bowl (these are the marinated items), spacing them apart from each other in a non-symmetrical pattern.
- Arrange cheeses. Arrange the cheese around the bowls, also spacing them away from each other to keep things pleasing to the eyes.
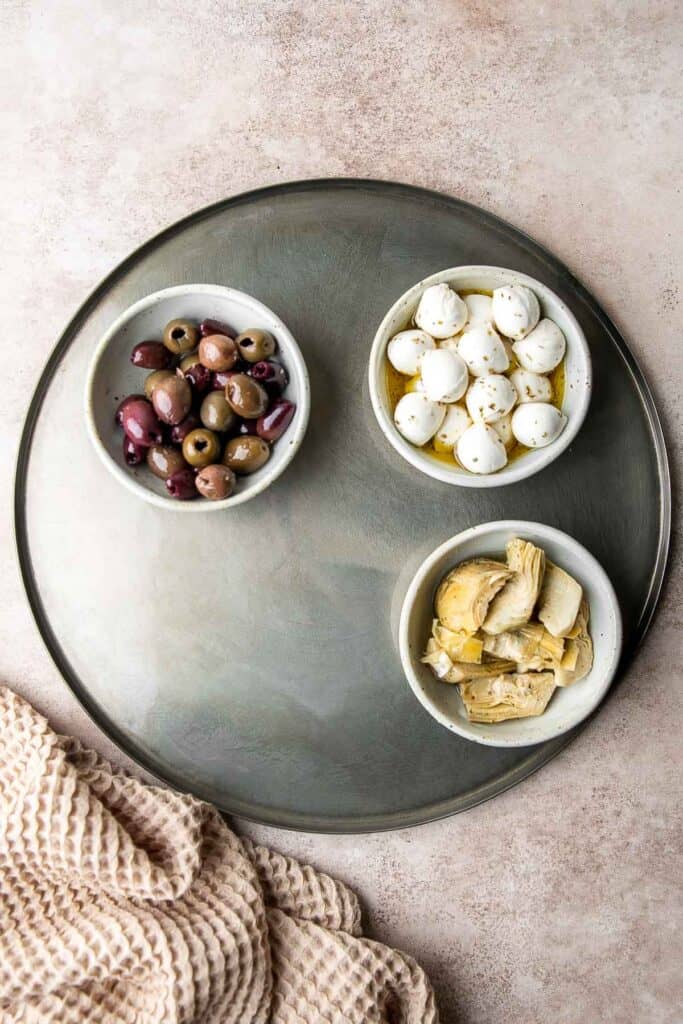
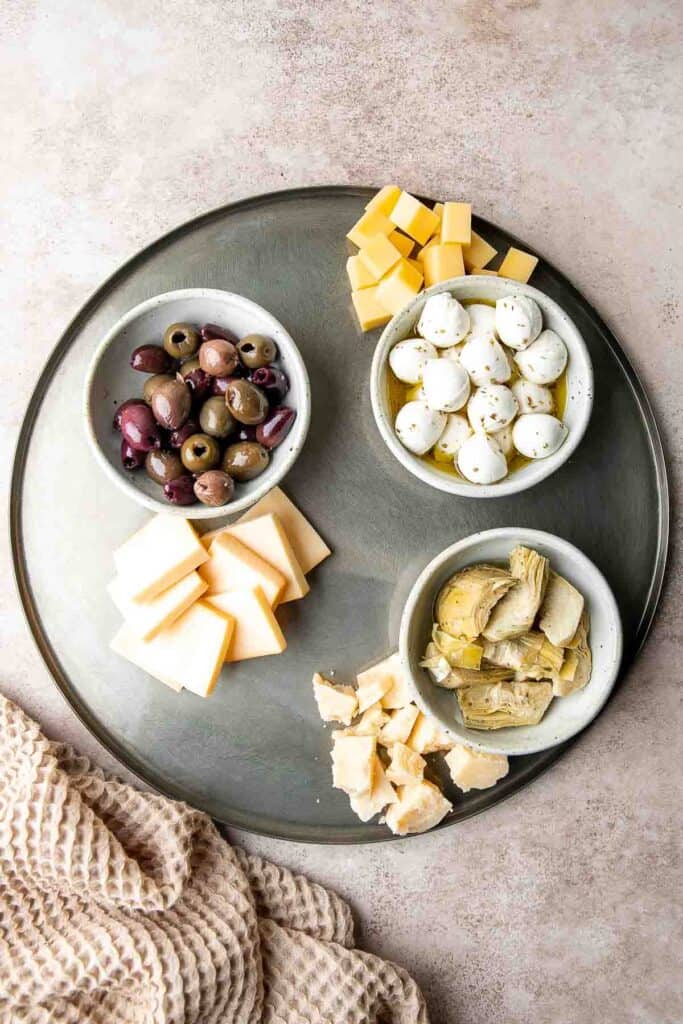
- Layer meats. Arrange the cured meats around the bowls and cheese. You can use your hands to roll up the meat to create an aesthetically pleasing design.
- Add bread. Arrange the crackers and bread in gaps (also keeping them apart from each other).
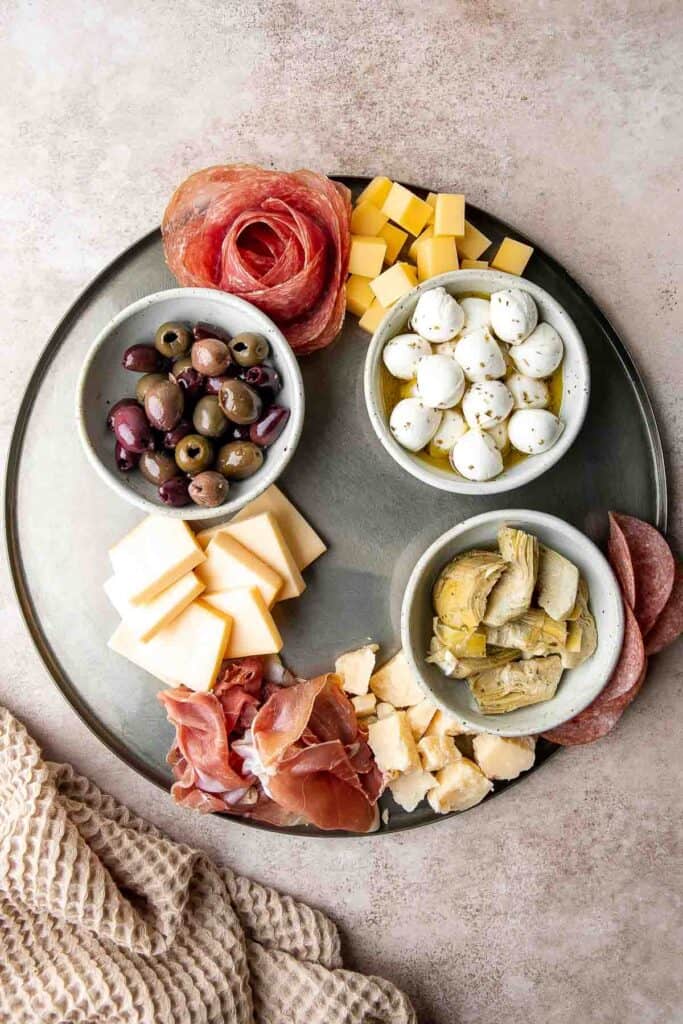
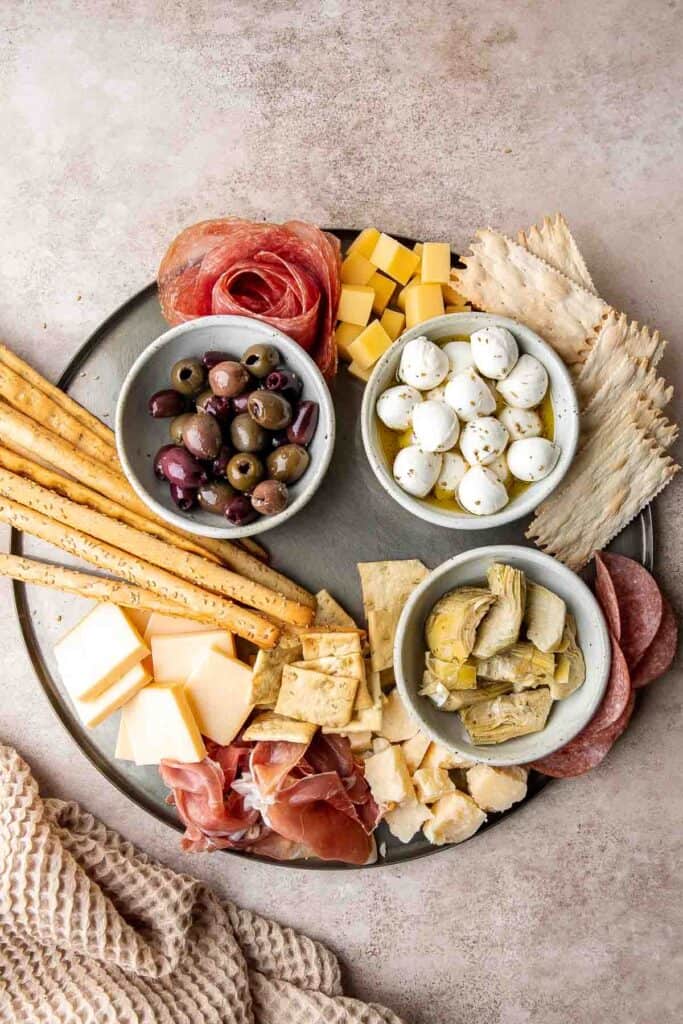
- Add vegetables. Fill any large gaps with vegetables

Recipe Variations
- Add variety. If you're throwing a big party, offer different types of peppers, olives, and mushrooms instead of having multiple bowls of the same type. Look for cherry peppers, blue cheese stuffed olives, almond stuffed olives, etc.
- Go big. For a deluxe antipasto platter, add Marcona almonds, fresh figs or other fruits, Italian honey, fig jam, dried fruit, olive tapenade, fresh pesto, and more.
- Make an Italian antipasto platter. Although most of these ingredients are Italian, take it to the next level and choose only the best Italian cheeses and cured meats for your antipasto board.
- Make a Mediterranean antipasto platter. Switch up the flavor by adding in classic Mediterranean ingredients to the platter such as Hummus and Tzatziki, Pita Bread, stuffed grape leaves (dolmades), and feta cheese.
How to Serve
This Antipasto Platter is delicious served on its own, or paired with some of my favorite Italian recipes including:
- Italian Meatballs
- Tomato Bruschetta with Balsamic Glaze
- Creamy Tuscan Chicken
- Eggplant Parmesan
- Italian Pasta Salad
For more recipe inspiration, see our 50 Best Italian Recipes.
Recipe Tips and Tricks
- Balance textures and flavors. The best antipasto platters have a mixture of flavors and textures. Offer a range of textures, like crunchy, soft, and creamy, and incorporate all the different tastes (sweet, salty, sour, umami, and bitter).
- Find the right blend of cheeses. The secret to a good cheese board is to incorporate several different types of cheeses with a range of flavors and textures. Choose at least one of each of these types of cheese: fresh or soft (mozzarella balls, goat cheese, or gorgonzola dolce), soft-ripened (taleggio or cambozola), semi-hard cheeses (provolone or fontina), and hard Italian cheese (parmesan, pecorino, or piave).
- Include something fresh. Since many of these ingredients are cured or marinated, some fresh basil leaves or fresh fruit can make the whole platter light and inviting.
- Look for a local deli. Although you can find many of these ingredients at the grocery store, you'll learn so much about Italian food and have a real, authentic antipasti board after a trip to an Italian deli.
Storing and Freezing Instructions
How to Store
The fresh ingredients in your antipasto platter should be at room temperature for at most 2 hours. Consider storing them in chilled dishes to keep them fresh for longer. Hard cheese can be at room temperature for up to 4 hours and bread/crackers can be longer.
How to Freeze
It's best to make antipasti platters right before serving. The ingredients do not typically freeze and thaw very well.

FAQ
The best antipasto platters contain a variety of ingredients that can be paired together in different ways. You typically want to offer some bread, cured meats, cheeses, olives, marinated meats, and fresh vegetables, but there are many different options for each one you can choose from. Add several types of olives or marinated vegetables or round out your display with nuts, fresh fruits, herbs, honey, and more. Your guests will eat some items on their own and combine others together, so think about items that will taste delicious together or separately.
Although these terms are often used interchangeably, charcuterie refers specifically to cured meats. A charcuterie board should contain a variety of cured meats with other ingredients that enhance the flavors of the salami and prosciutto. On the other hand, an antipasto platter has a much wider arrangement of ingredients. It typically includes a variety of breads, marinated vegetables, olives, nuts, salami, a great cheese selection, and other sauces, dips, and fresh fruits for people to graze on.
For a great antipasto platter, you need a great selection of cheeses. Include a range of flavors and textures, like a mixture of fresh cheeses, soft-ripened cheeses, semi-hard cheeses, and hard cheeses. For an Italian antipasto platter, choose exclusively Italian cheeses.
More Appetizer Recipes
- 75+ Easy Appetizer Recipes
- How to Make a Charcuterie Board
- Veggie Tray
- Antipasto Skewers
- Marinated Mozzarella Balls
- Caprese Skewers
Tried this recipe?
I'd love to hear what you think! Leave a comment and rating below to share your feedback. Your reviews help others discover this recipe and help me keep creating more free recipes for you. Snap a photo and tag me on social media @aheadofthyme too.

Brown Butter Mashed Potatoes
Brown Butter Mashed Potatoes are the ultimate side dish for any meal. It's smooth and creamy with a rich, nutty flavor from the brown butter and just the right amount of seasoning. Not to mention, the looks of it are just as gorgeous and appetizing as the flavor!
Whether you're looking for something unique to serve at a holiday meal or just want to add some gourmet flair to your weeknight dinner, this mashed potatoes recipe takes the humble spud to a whole new level. The addition of brown butter adds a nutty, caramelized flavor that you won't find in your regular mashed potatoes. Plus, mashed potatoes with brown butter can be paired with almost any protein, from Stuffed Chicken Breasts and Parmesan Crusted Chicken to Roast Beef and Creamy Garlic Salmon.
Why You'll Love this Brown Butter Mashed Potatoes Recipe
- That brown butter. The moment you add brown butter to your mashed potatoes, you might wonder why you haven't been doing this all along! It's amazing how much flavor it adds that you probably won't be able to go back to regular mashed potatoes.
- Super simple to make. This brown butter potato recipe is so easy to follow yet it still adds a gourmet touch to your meal. It takes about 30 minutes to make and all you need are potatoes, butter, cream, cheese, and seasonings.
- Perfect for entertaining. Everyone loves mashed potatoes, and these brown butter ones will probably become a new favorite. It doesn't take long to make, so you can easily whip it up for last-minute guests. You can even make it ahead of time if you're serving a large crowd.
- Incredibly creamy. If you've ever been disappointed by dry, lumpy mashed potatoes, making this mashed potato with brown butter recipe will turn that around. The combination of butter, sour cream, and whole milk makes the creamiest and fluffiest mashed potatoes ever!
Ingredient Notes
To make easy and delicious Brown Butter Mashed Potatoes, you will need the following ingredients (full measurements in recipe card below):
- potatoes - I use Russets in this recipe, which are starchy and perfect for mashing. But Yukon Gold works great as well!
- butter - use unsalted butter to make the brown butter. Browning the butter is an extremely easy process yet it adds tons of amazing flavors to the mashed potatoes.
- garlic - fresh garlic is always best!
- sour cream - this adds a slightly tangy flavor and makes the mashed potatoes extra creamy. You can also use Greek yogurt if that's all you have.
- whole milk - use whole milk to get the perfect consistency without thinning the flavors. You can also use heavy cream - especially if you're using Greek yogurt which is thinner and lower in fat.
- Parmesan cheese - I recommend using freshly grated Parmesan cheese for maximum flavor.
- salt and black pepper - season to taste.
- fresh parsley - optional, for serving.
You will also need measuring cups and spoons, a large pot, a saucepan or skillet, and potato masher (or fork).
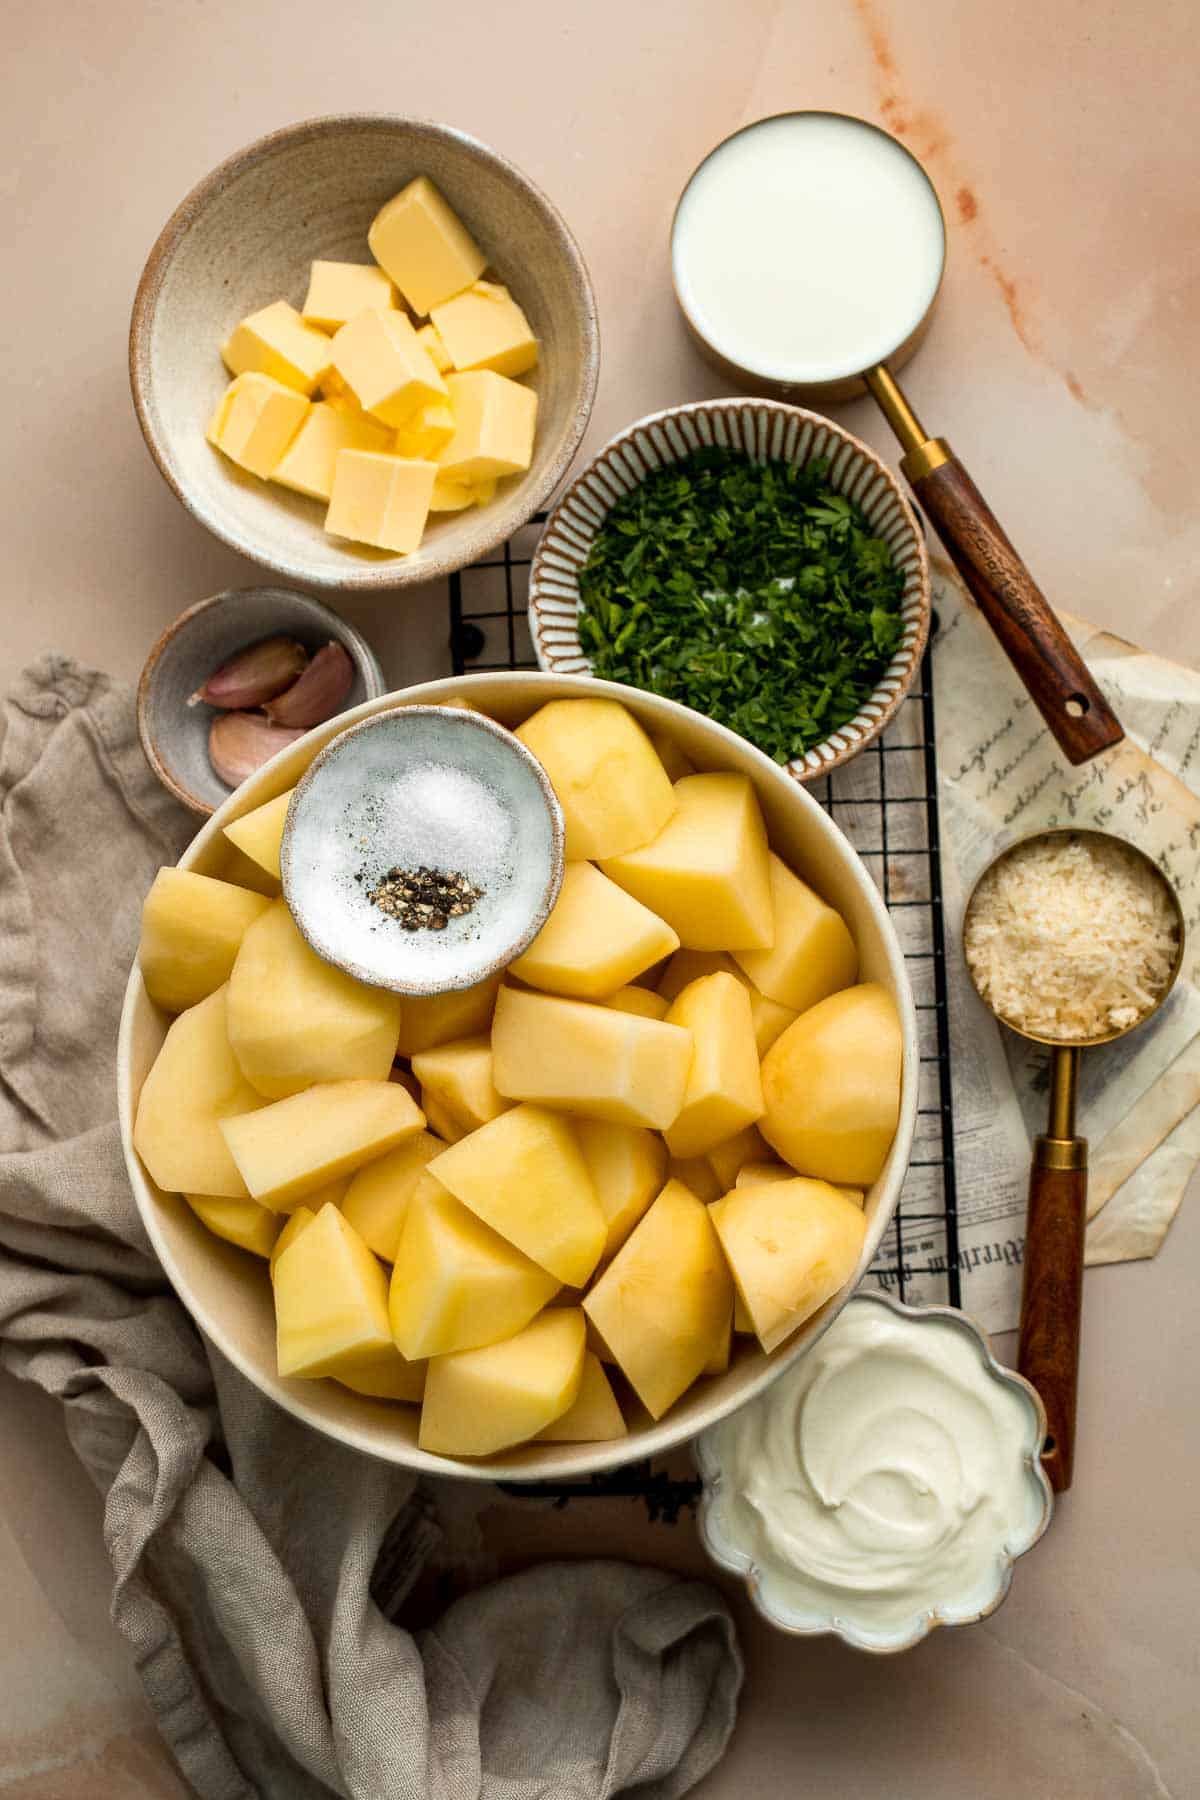
How to Make the Best Brown Butter Mashed Potatoes
- Cook potatoes. Add the potatoes into a large pot of salted water. Bring it to a boil over medium-high heat and cook until fork tender, about 10-15 minutes. If you can easily insert a fork into the potatoes, then they are ready.
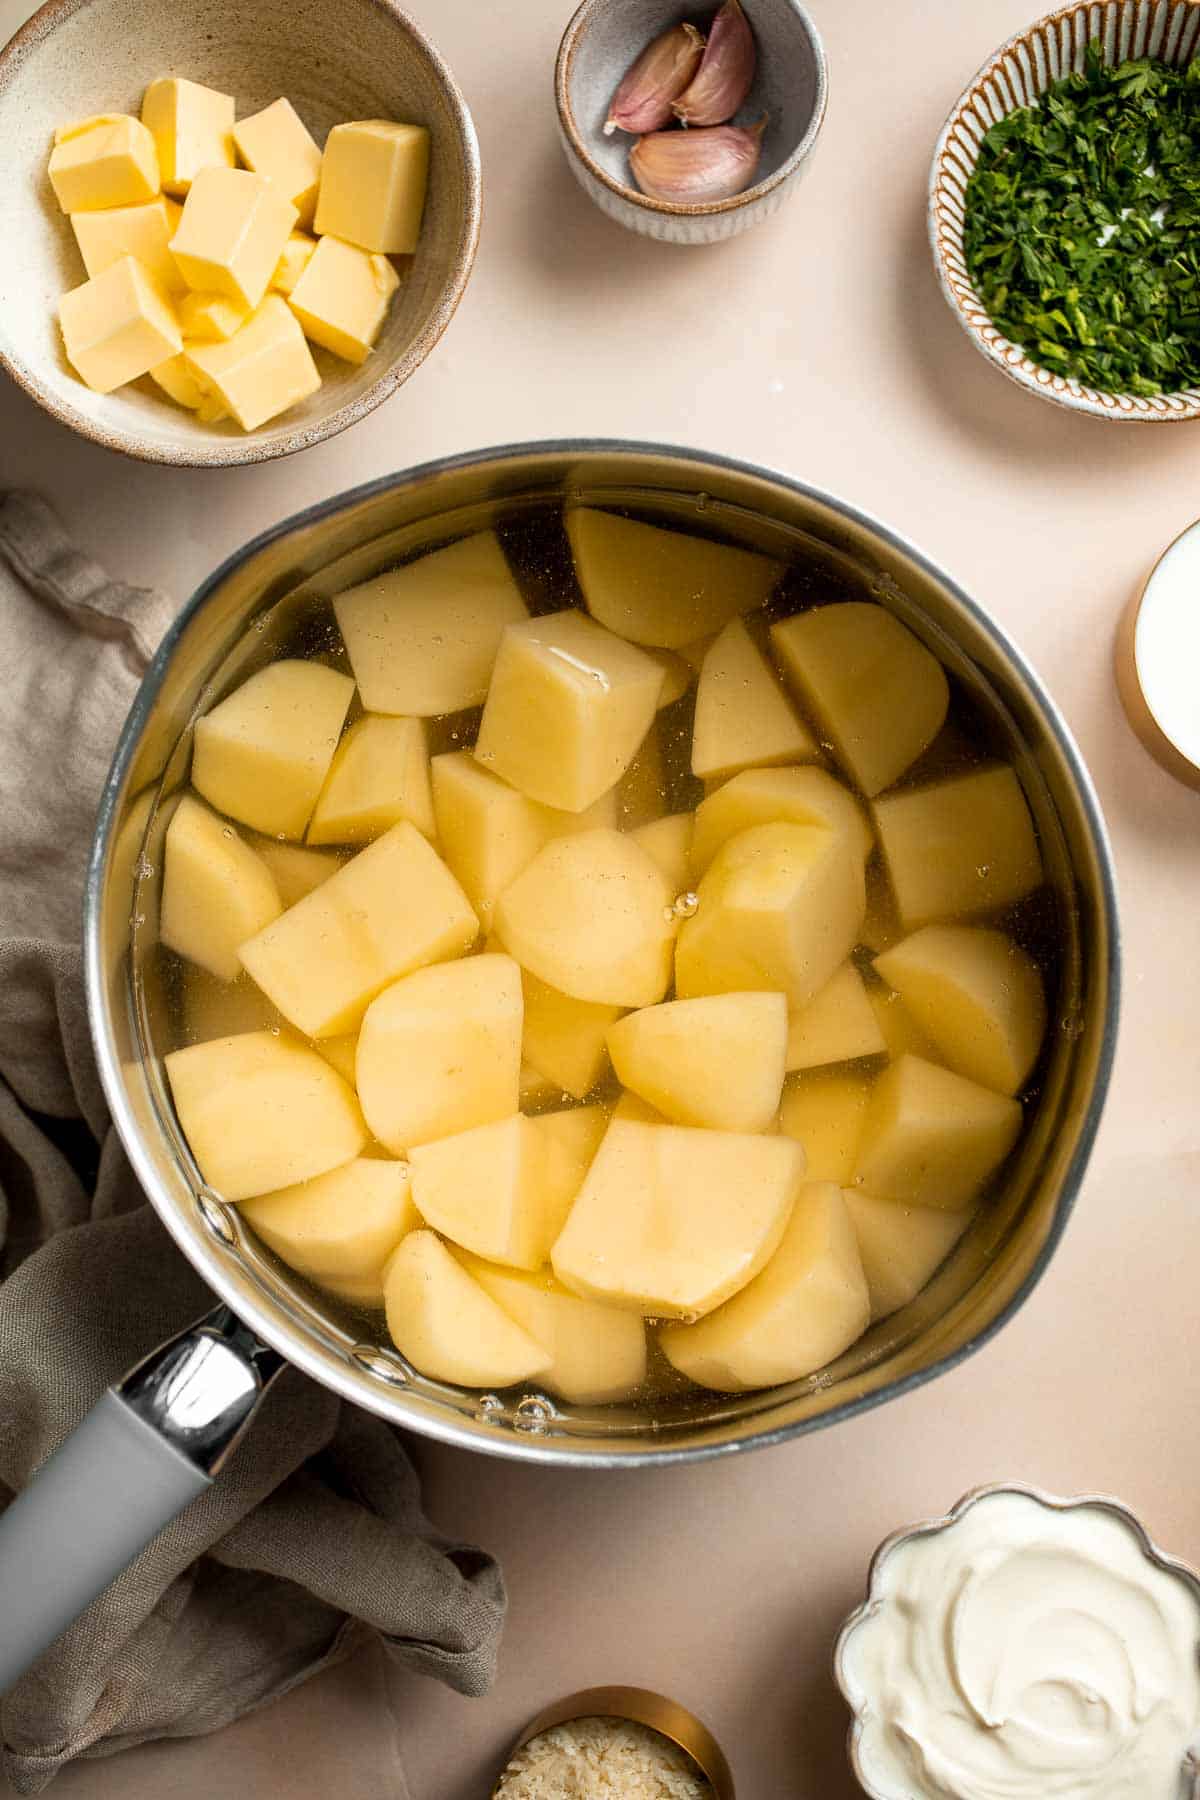
- Brown the butter. While the potatoes are cooking, melt the butter in a saucepan over medium-low heat. Use a rubber spatula, and begin stirring as soon as the butter melts. Continuously stir throughout the entire process to prevent burning. The butter will start to foam and sizzle after a few minutes. Add garlic and continue to sauté. You will start to see the milk solids on the bottom of the pan. Keep cooking until the butter turns a golden brown color and gives off a nutty aroma, about 3-4 minutes. Once the milk solids turn a toasty brown colour, immediately remove from heat and set aside.
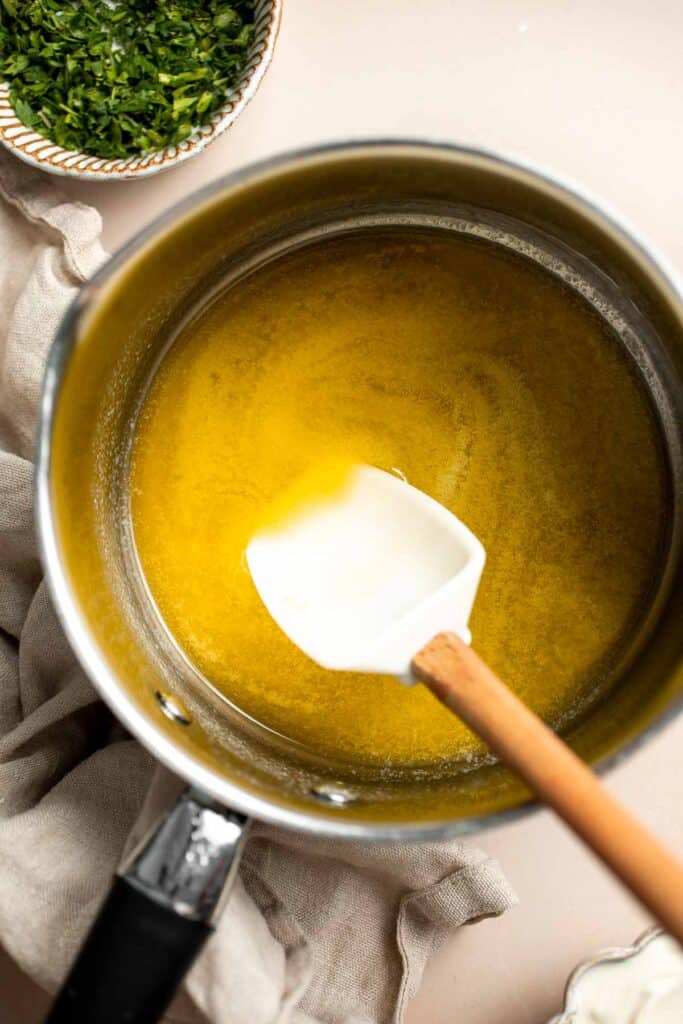

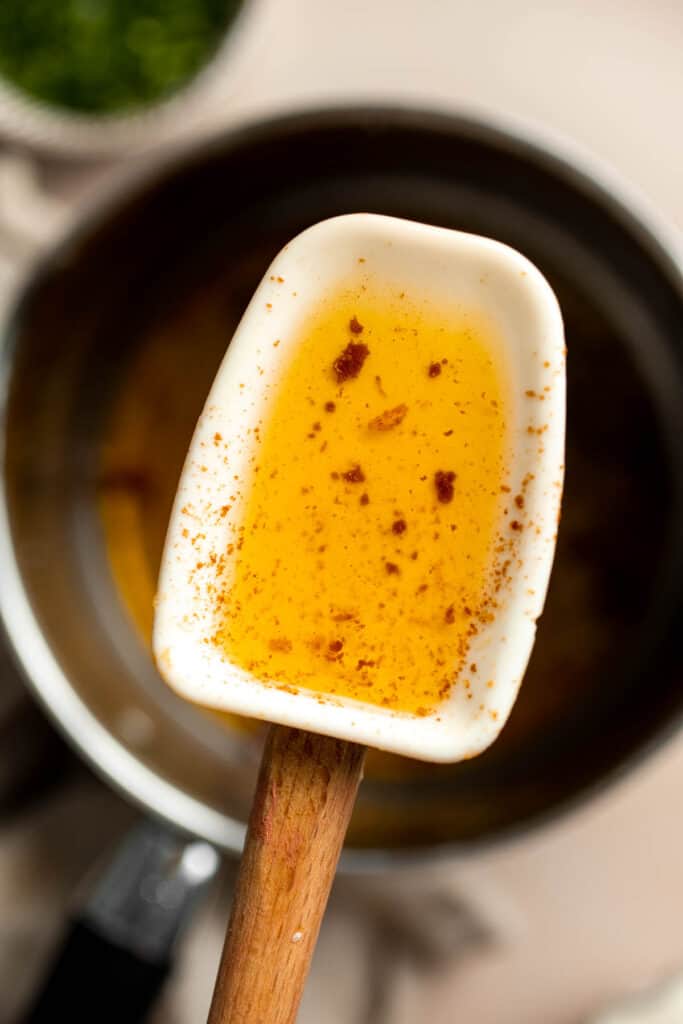
- Mash potatoes. Drain the water from the potatoes and mash the potatoes using a potato masher or a fork.
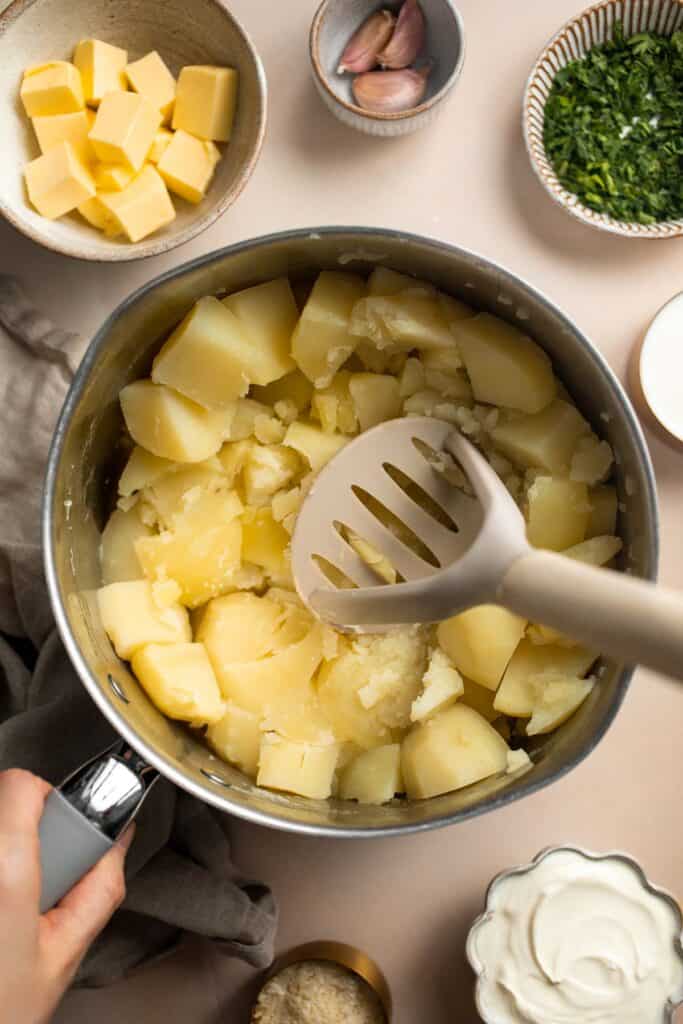
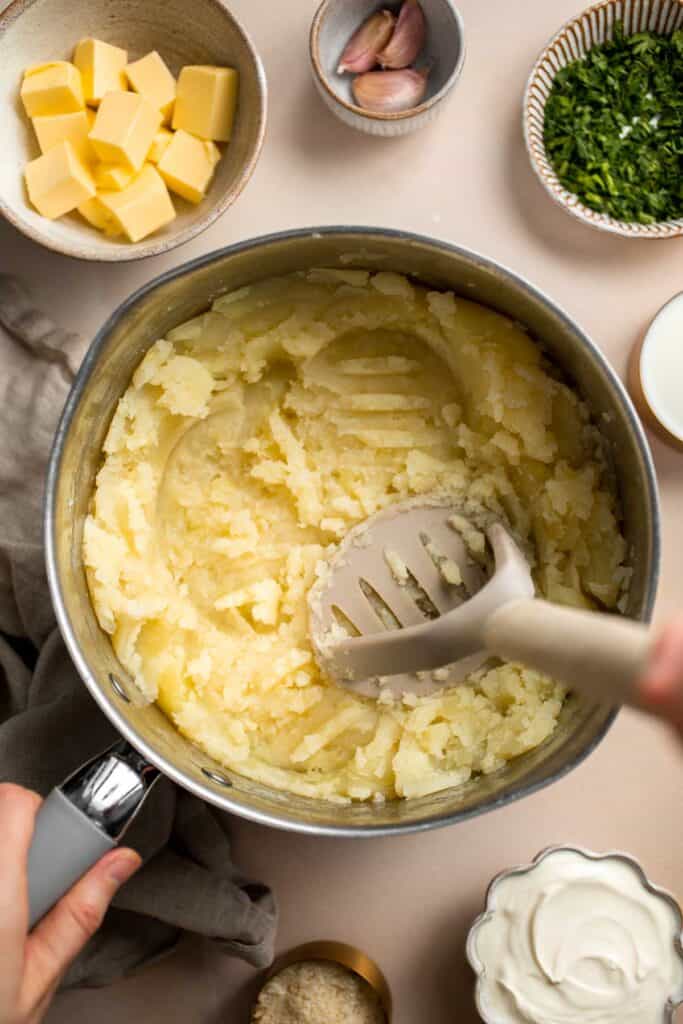
- Combine ingredients. Add half of the garlic brown butter mixture, sour cream, milk, parmesan, salt, and pepper. Mix well until smooth. Add more milk if needed until desired creamy texture is reached.

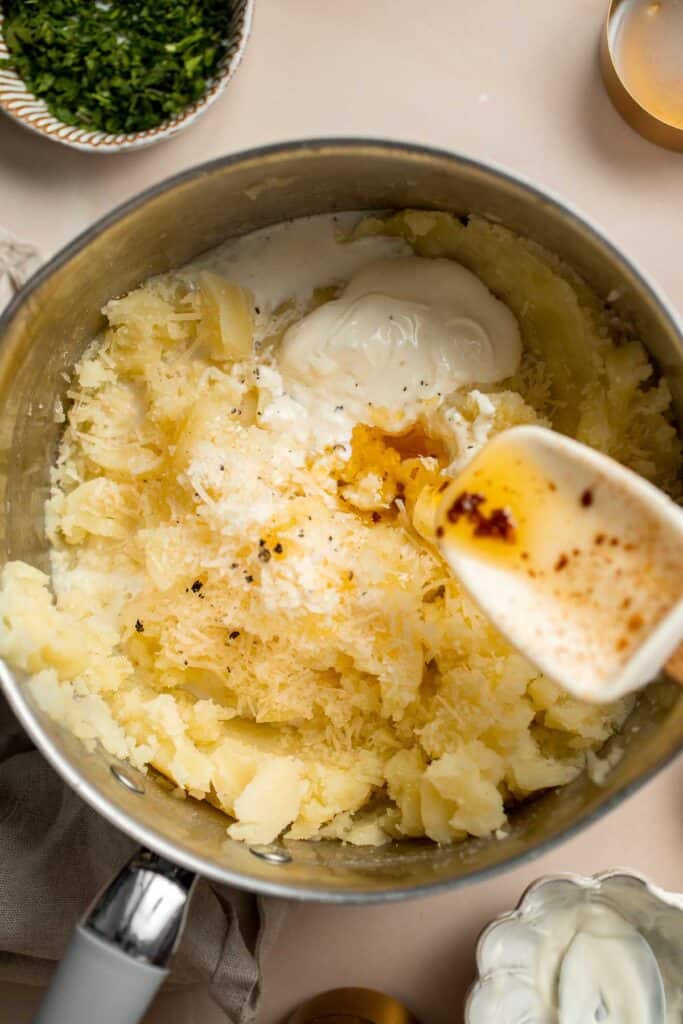
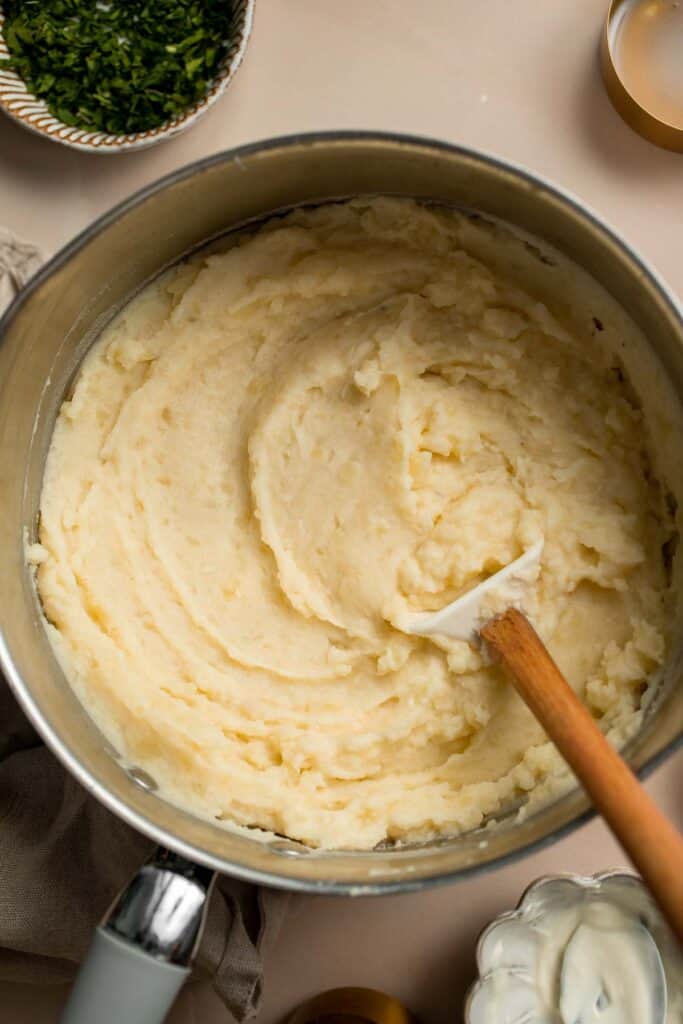
- Serve. Transfer to the mashed potatoes to a round serving dish and use the back of a spoon to swirl it on the serving dish. Drizzle the remaining garlic brown butter mixture on top. Sprinkle some chopped parsley on top and serve immediately.
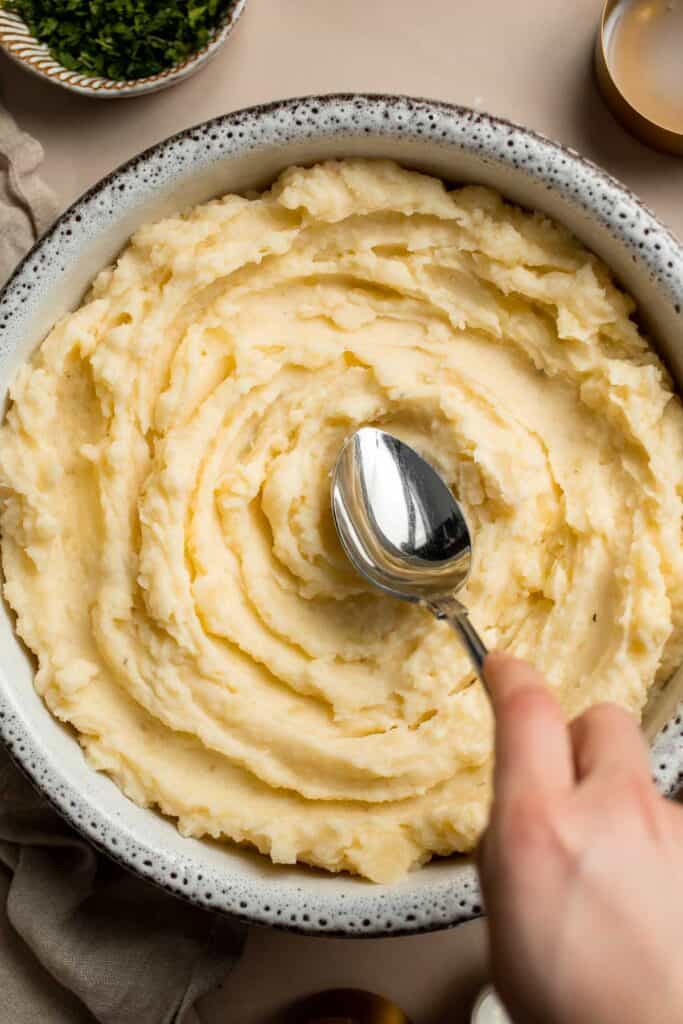
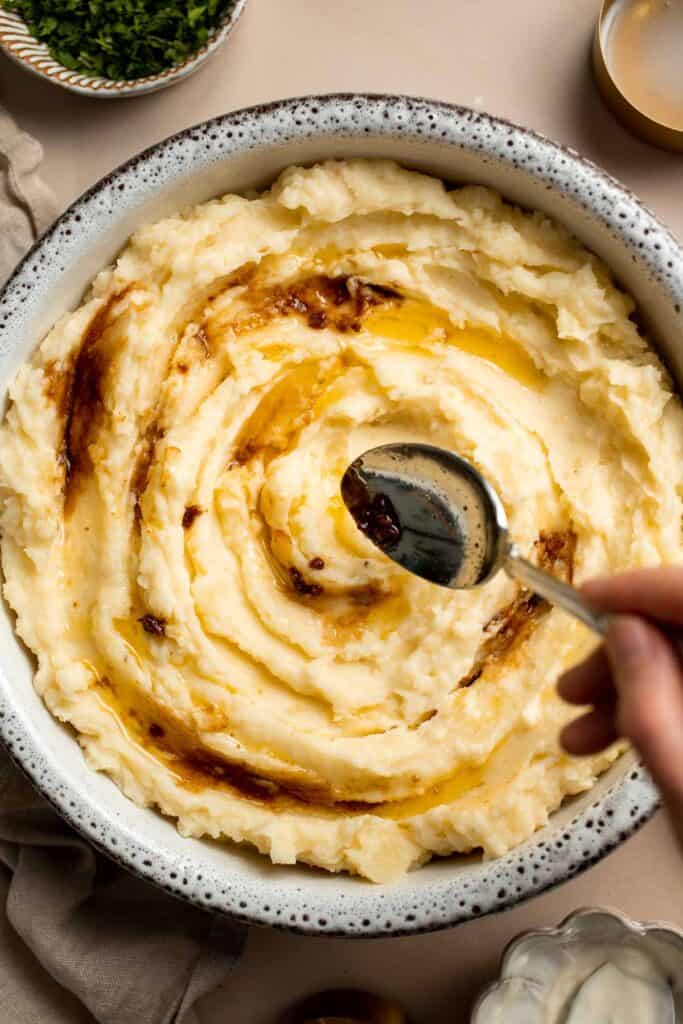
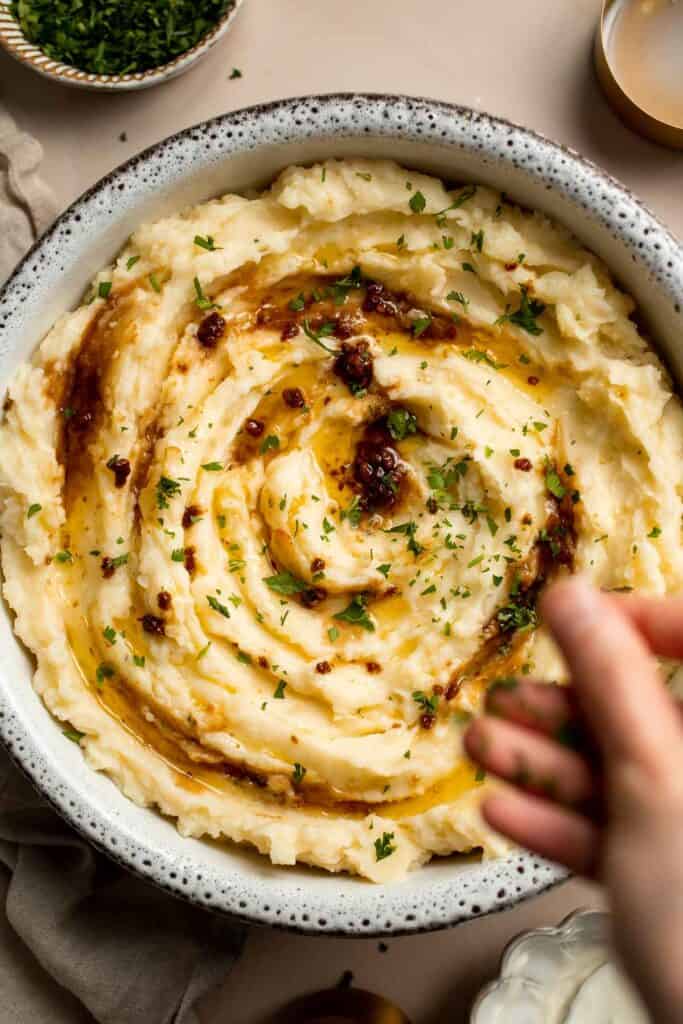
Recipe Variations
- Add toppings. Top your mashed potatoes with anything from chives and caramelized onions to bacon bits and sautéed mushrooms. The options are endless!
- Mix in herbs. Add herbs like rosemary, oregano, thyme, and parsley for a more complex flavor profile.
- Skip the cheese. Go light by leaving out the cheese and adding in some fresh herbs and lemon zest instead.
- Use roasted garlic. If you're feeling fancy, roast some garlic in the oven and mash it with the potatoes for that mild yet sweet, nutty flavor.
- Make it quicker. Put it together in 20 minutes with my Instant Pot Mashed Potatoes recipe.
How to Serve
Serve these delicious Brown Butter Mashed Potatoes with proteins, salads, vegetables, and other side dishes. Some of our favorites to pair with it are:
- Roasted Spatchcock Chicken
- Garlic Butter Steak Bites
- Roast Turkey
- Garlic Rosemary Rack of Lamb
- Ribeye Steak
- Lemon Parmesan Green Beans
Recipe Tips and Tricks
- Use the right potato variety. Choose starchy potatoes such as Russet, Idaho, or Yukon Gold. They're higher in starch which makes them easier to mash and blend into a perfect creamy and fluffy texture.
- Peel the potatoes. While some recipes call for leaving the skins on, we prefer peeling them for a silky-smooth mash. Feel free to prepare them how you like.
- Cut potatoes into even pieces. Using evenly sized potato pieces helps ensure they cook evenly and at the same rate.
- Watch the butter closely. Browning the butter is quick and takes about 5 or so minutes, so keep an eye on it to prevent burning.
- Don't overwork the potatoes. Be careful not to overmix the potatoes after mashing as they can become gummy and gluey.
- Don't skimp on the milk. If you find your mashed potatoes too thick, add one tablespoon of milk at a time until you reach the desired consistency.
How to Use Leftover Mashed Potatoes
Sick of leftover mashed potatoes? No problem! Repurpose them into something new! These are some of our favorite ways to use up leftover brown butter mashed potatoes:
- Mashed Potato Balls
- Mashed Potato Soup
- Potato Dinner Rolls
- Mashed Potato Cakes
- Skillet Shepherd's Pie
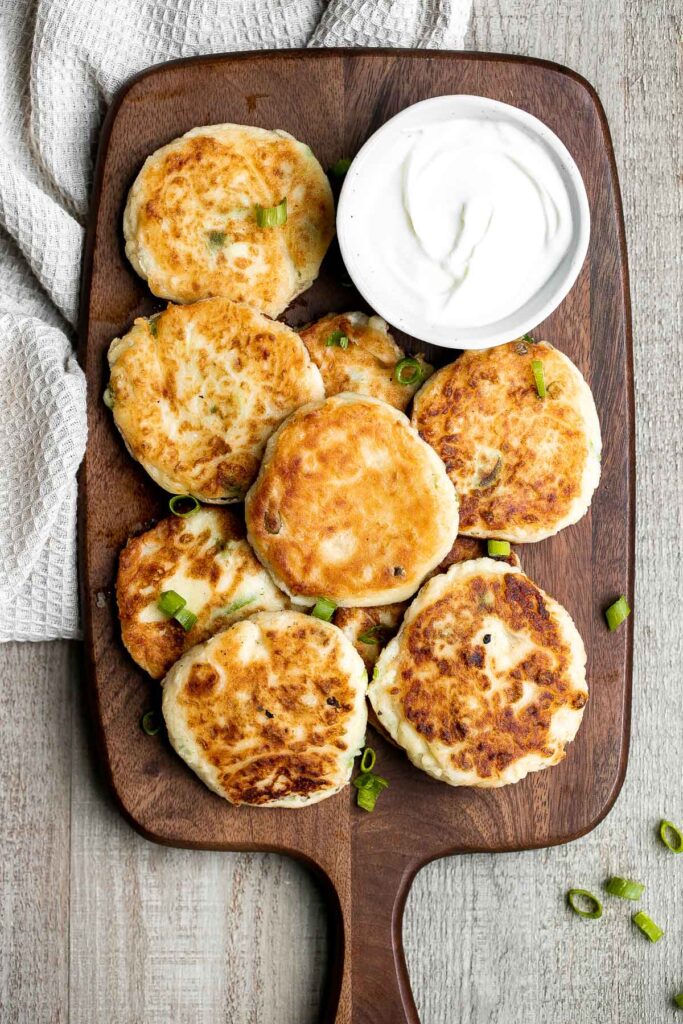

Storing and Freezing Instructions
How to Store
Keep the leftover mashed potatoes in an airtight container and store them in the fridge for 3 to 5 days.
How to Reheat
Place the leftovers in an oven-safe dish, add a splash of milk, and cover with a lid or foil to prevent it from drying out. Heat in the oven at 350°F for 15 to 20 minutes, or until warmed through.
How to Freeze
Put the brown butter mashed potatoes in a freezer-safe container or freezer bags and store for up to 3 months. Thaw in the fridge before reheating in the oven.
More Mashed Potato Recipes
- The Best and Creamiest Mashed Potatoes
- Garlic Mashed Potatoes with Sour Cream
- Mascarpone Mashed Potatoes
- Instant Pot Mashed Potatoes
- Mashed Red Potatoes
- Healthy Mashed Potatoes
Tried this recipe?
I'd love to hear what you think! Leave a comment and rating below to share your feedback. Your reviews help others discover this recipe and help me keep creating more free recipes for you. Snap a photo and tag me on social media @aheadofthyme too.

Pumpkin Soup
Perfectly smooth and creamy with aromatic vegetables and warm spices, this easy Pumpkin Soup recipe is the only one you'll ever need. It's ready from start to finish in about 30 minutes and is the perfect way to warm up on a cool fall day. Serve this cozy soup with a hunk of crusty bread and a glass of chilled white wine for a simple, timeless fall dinner.
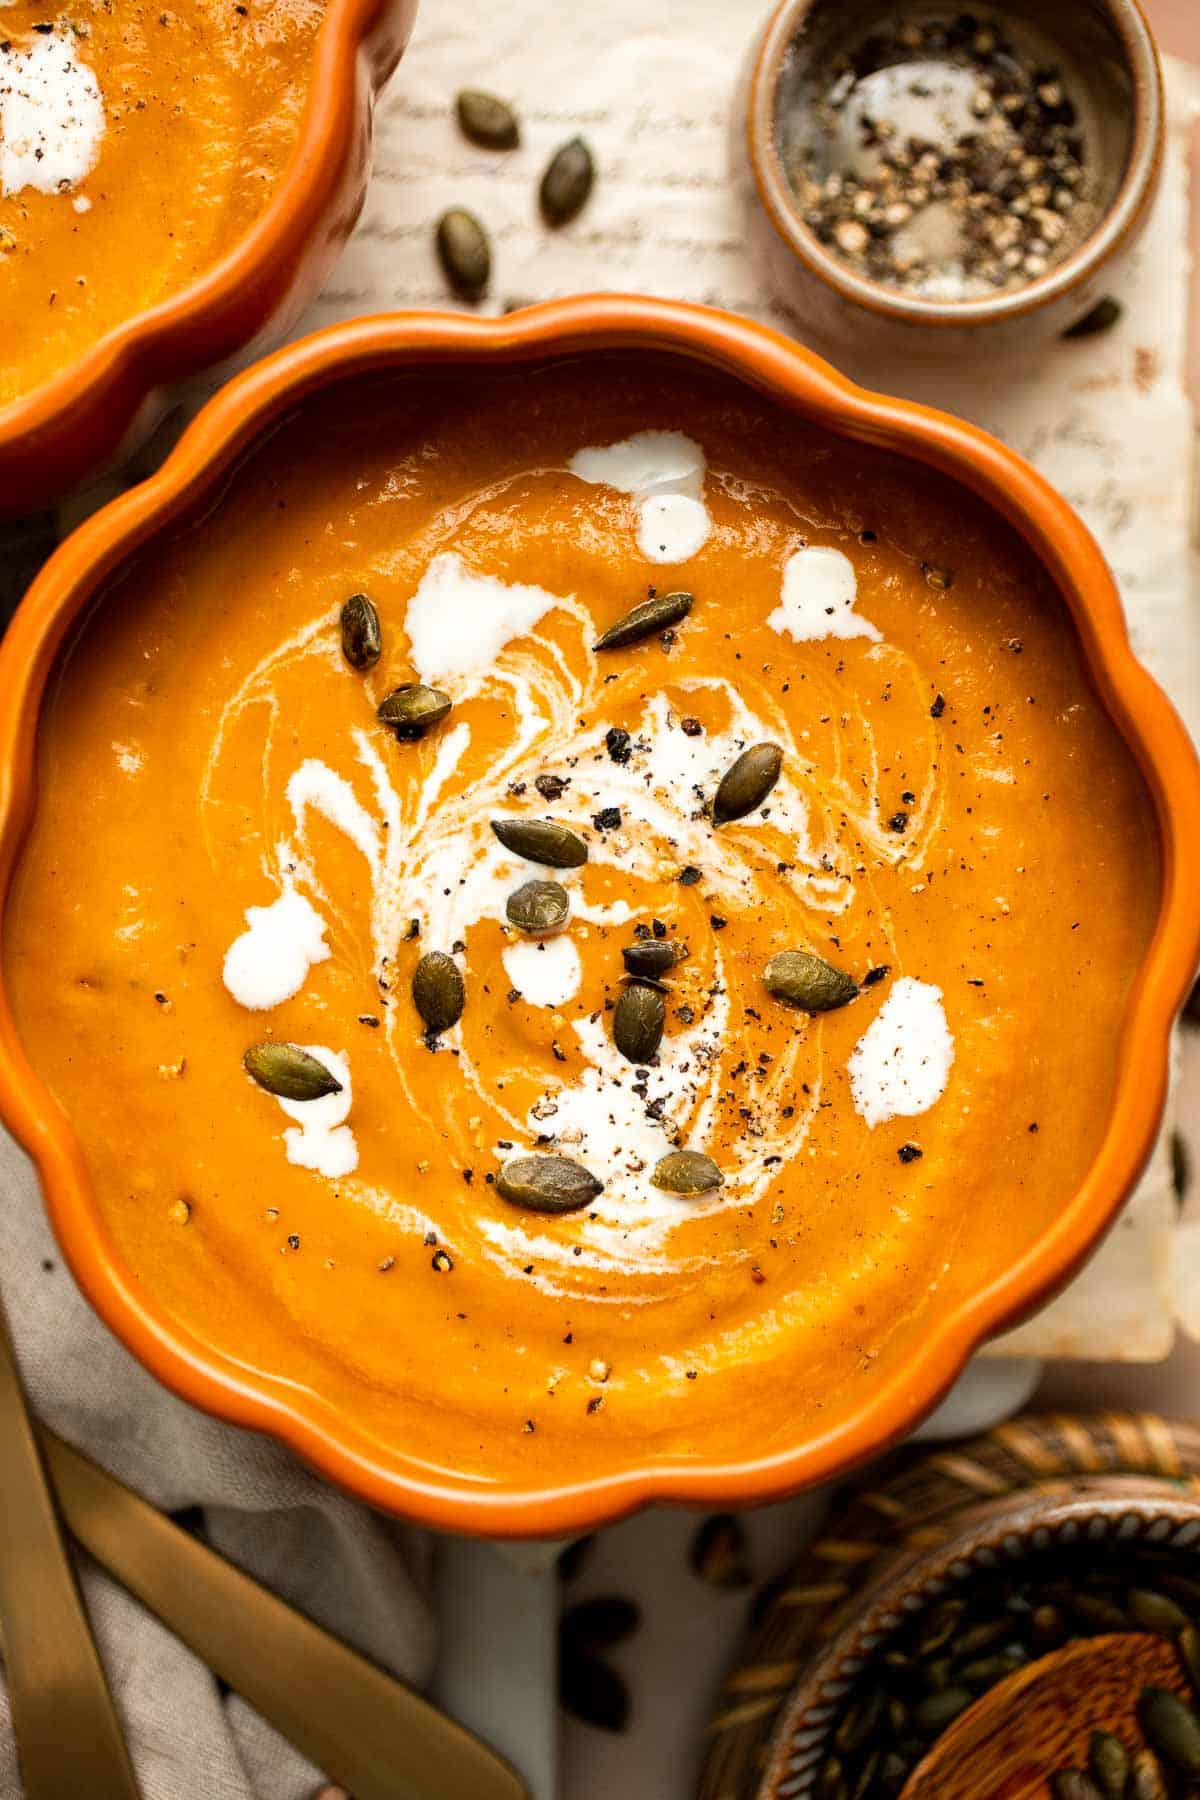
Homemade pumpkin soup is one of the easiest soups you'll ever make. Since this recipe starts with canned pumpkin puree, the only things you need to do are chop the onions, garlic, and fresh ginger. Everything else goes right in the pan and is cooked to perfection before being blended until smooth and creamy. This canned pumpkin soup is simple enough for an easy meal yet luxurious enough for your holiday table.
Why You'll Love This Creamy Pumpkin Soup Recipe
- So easy to make. If the thought of having to peel and chop heaps of vegetables puts you off, this is the pumpkin soup recipe for you. There are just a few ingredients to prepare; the rest just have to be measured out!
- Full of fall flavor. As you saute the onion, garlic, and fresh ginger in melted butter, they add layers of savory flavors that pair perfectly with cinnamon and nutmeg. These take this savory pumpkin soup to the next level!
- Naturally vegetarian. For a vegetarian soup, use vegetable stock. You can even make it vegan with a few substitutions! See the Recipe Variations below for details.
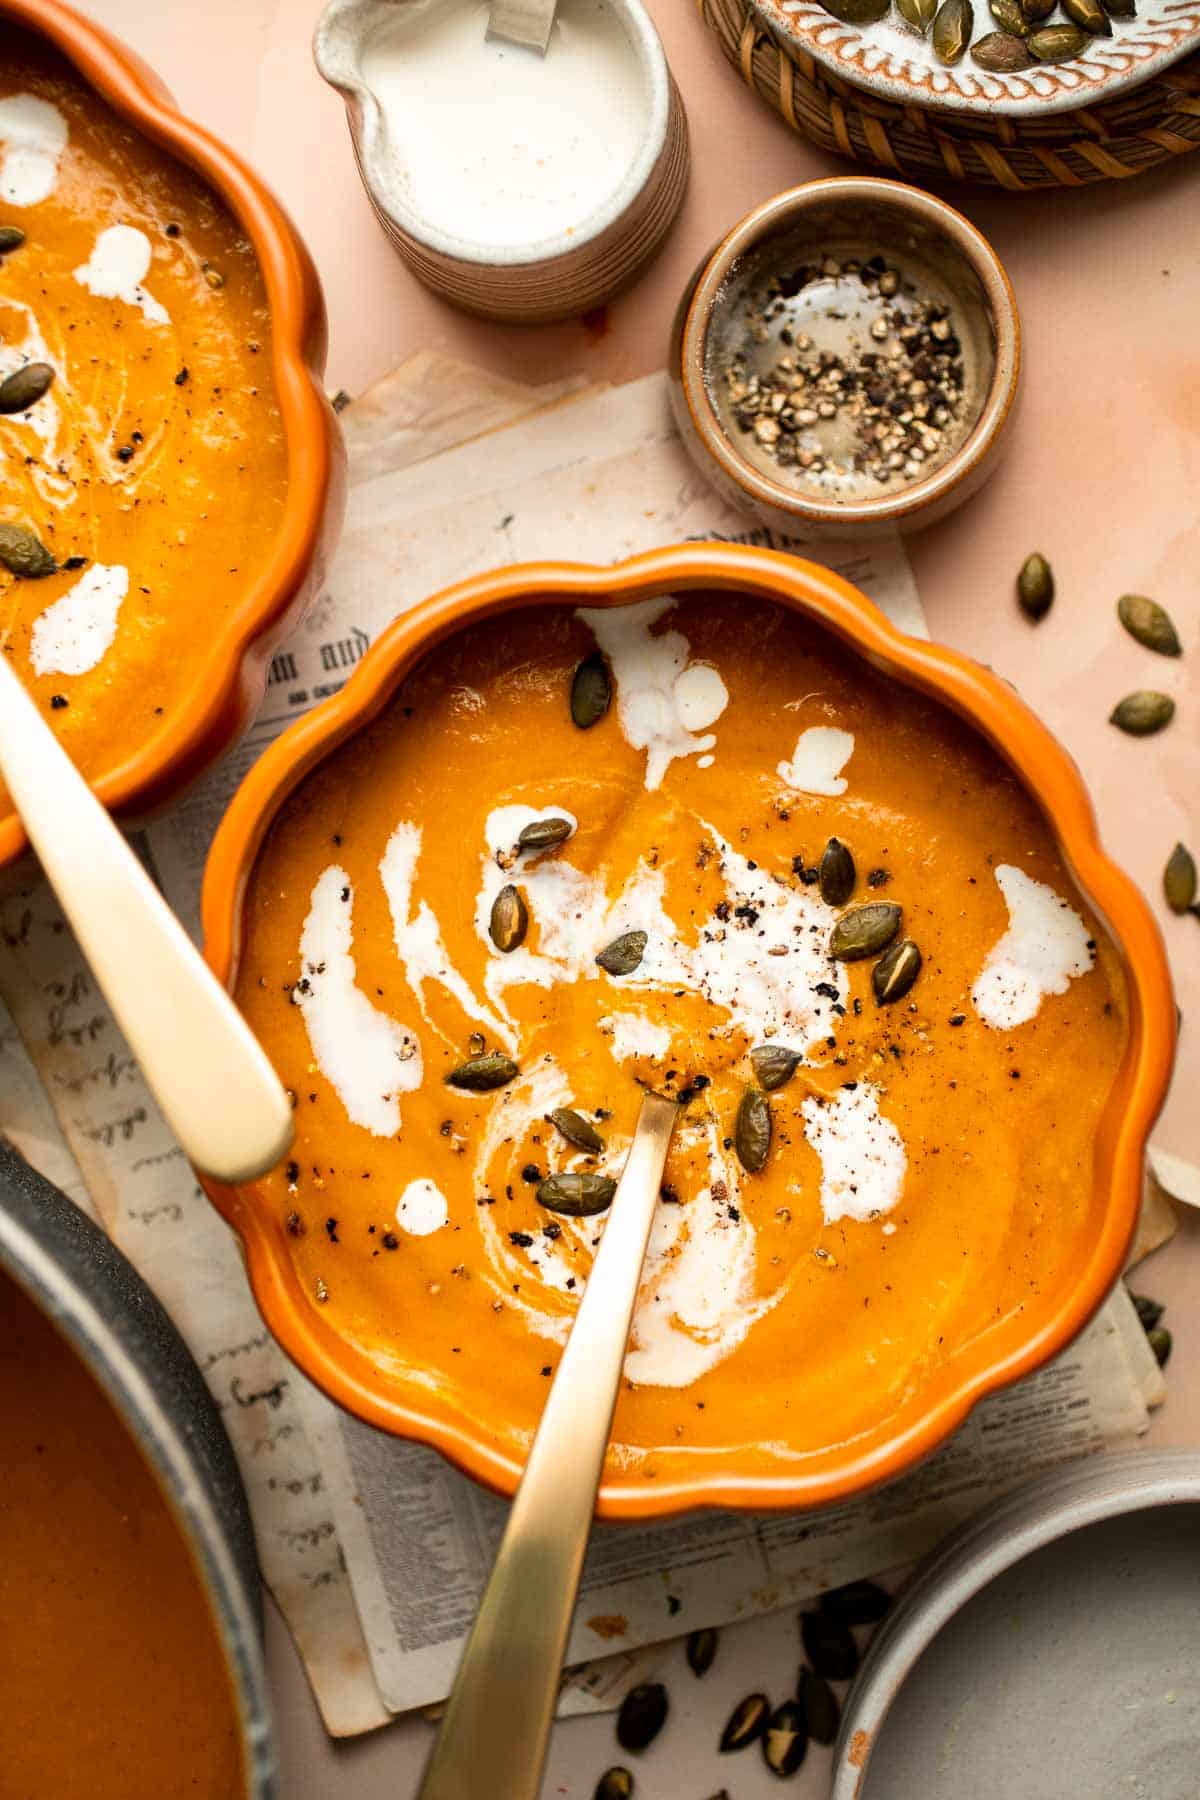
Ingredient Notes
To make this delicious canned pumpkin soup, you will need the following ingredients (full measurements in recipe card below):
- unsalted butter - as the butter melts and begins to bubble, it will add a delicious layer of flavor and bring out the savory flavors in the onion, garlic, and ginger.
- onion - choose white or yellow onion for a mild sweetness and onion flavor.
- garlic - mince fresh garlic for a pungent bite that tastes wonderful with the pumpkin and spices.
- fresh ginger - grated ginger adds a bright, refreshing flavor to this creamy soup.
- spices - for flavor, add cinnamon, nutmeg, salt, and ground black pepper. Be sure to taste and adjust the spices to your preference.
- pumpkin purée - you'll need two cans of pumpkin puree, or you can roast sugar pumpkins to make a roasted pumpkin soup.
- vegetable stock - to thin out the soup to the right consistency, add either vegetable broth or chicken stock. Bouillon paste also works!
- heavy cream - this adds an extra richness that makes this homemade soup absolutely irresistible.
- toasted pumpkin seeds - as a garnish, sprinkle some pumpkin seeds on top before serving.
You will also need a cutting board and knife, large cooking pot, wooden spoon, and an immersion blender.
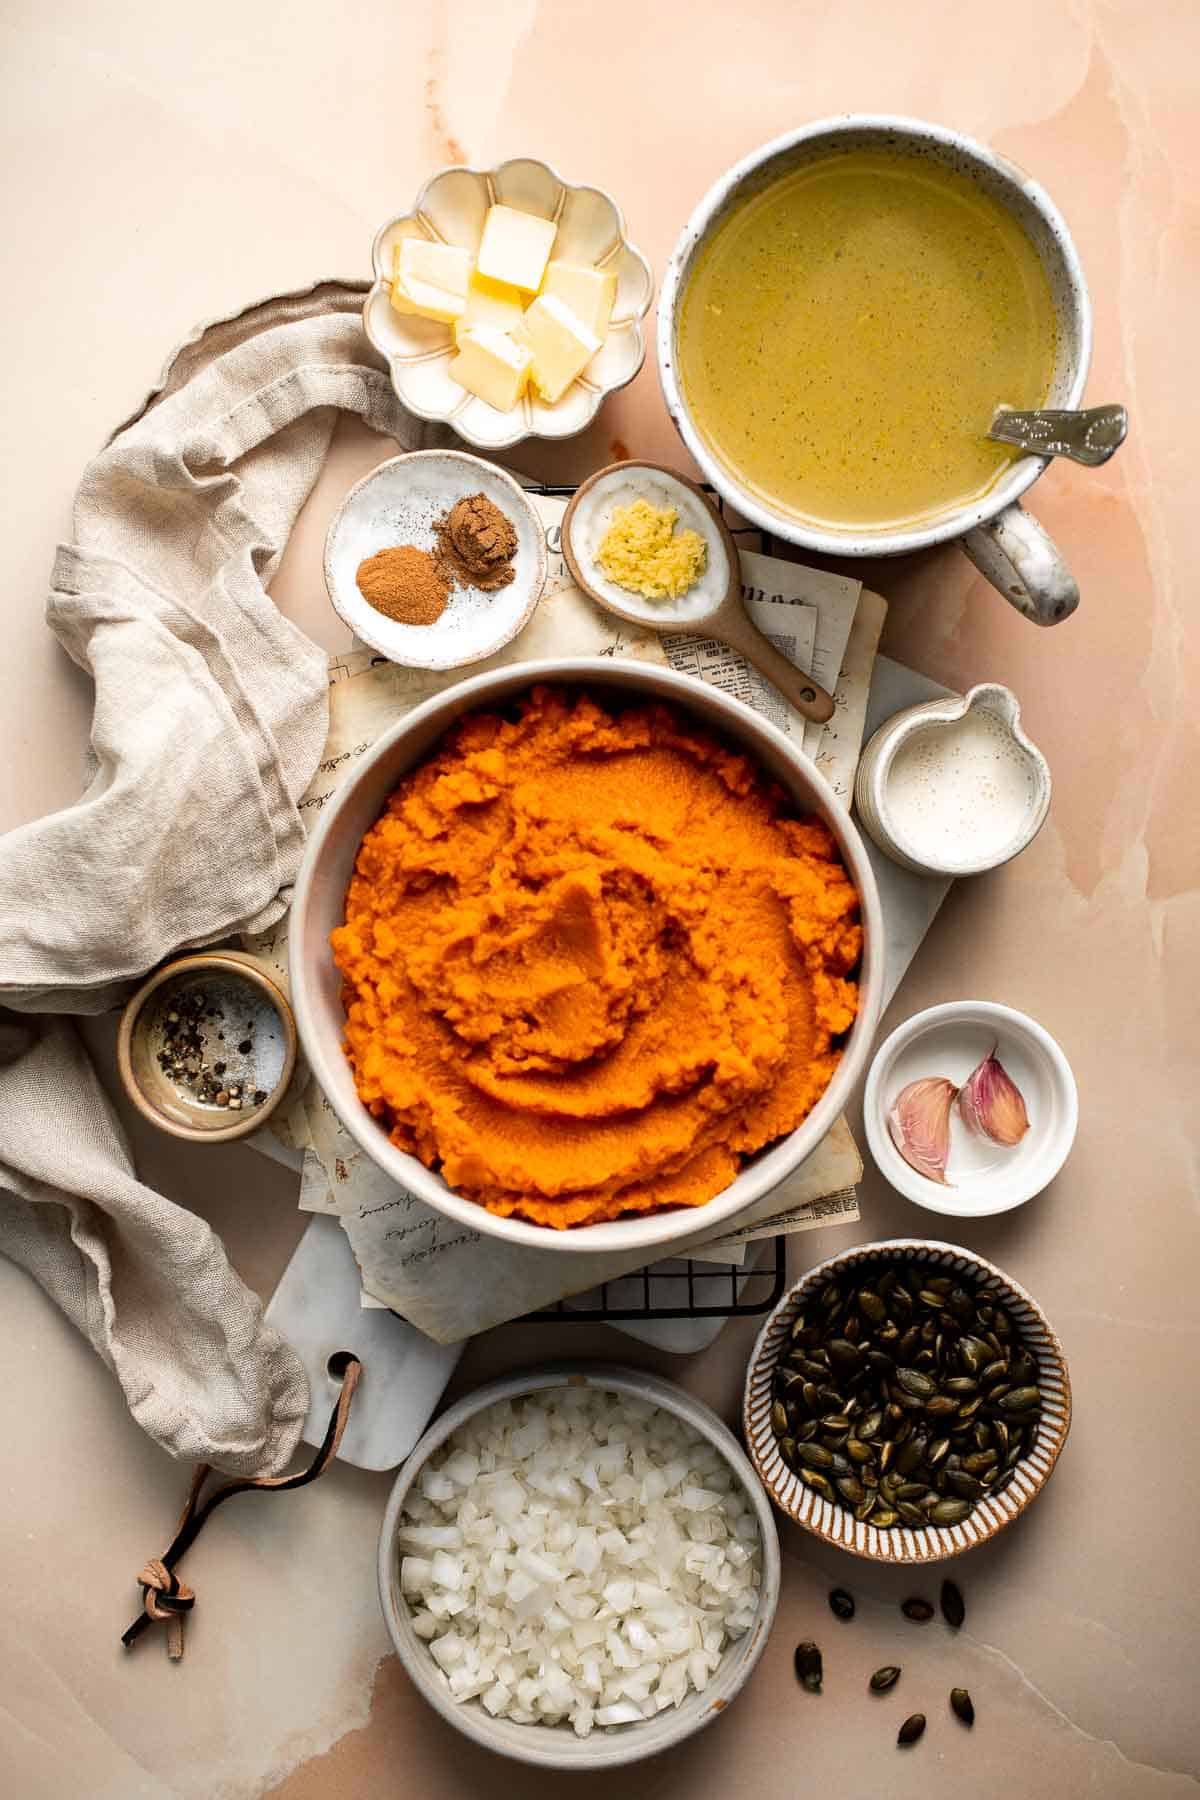
How to Make the Best Pumpkin Soup
- Sauté aromatics. In a large cooking pot, melt butter over medium heat until it starts to foam, about 1-2 minutes. Add onion, garlic and ginger and sauté until fragrant, about 2-3 minutes. Add cinnamon and nutmeg and mix well.
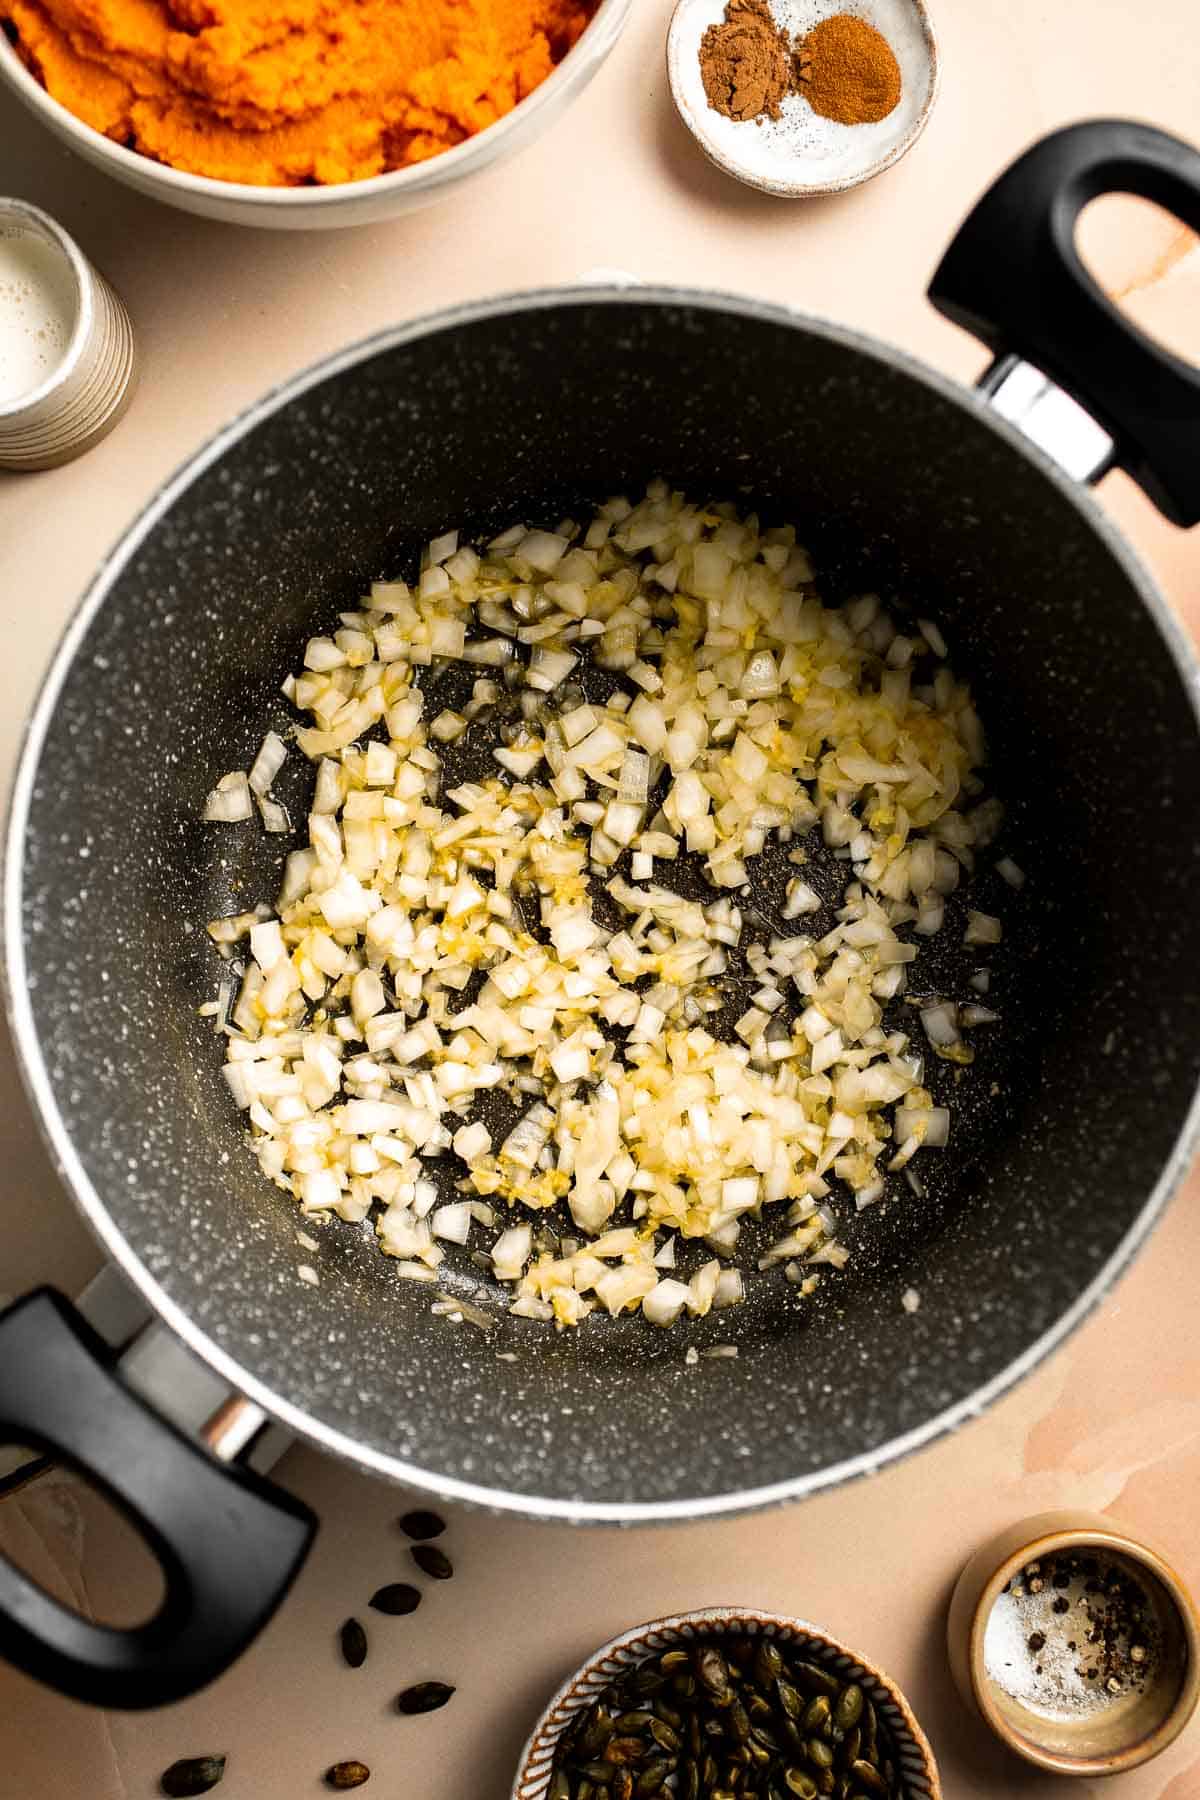
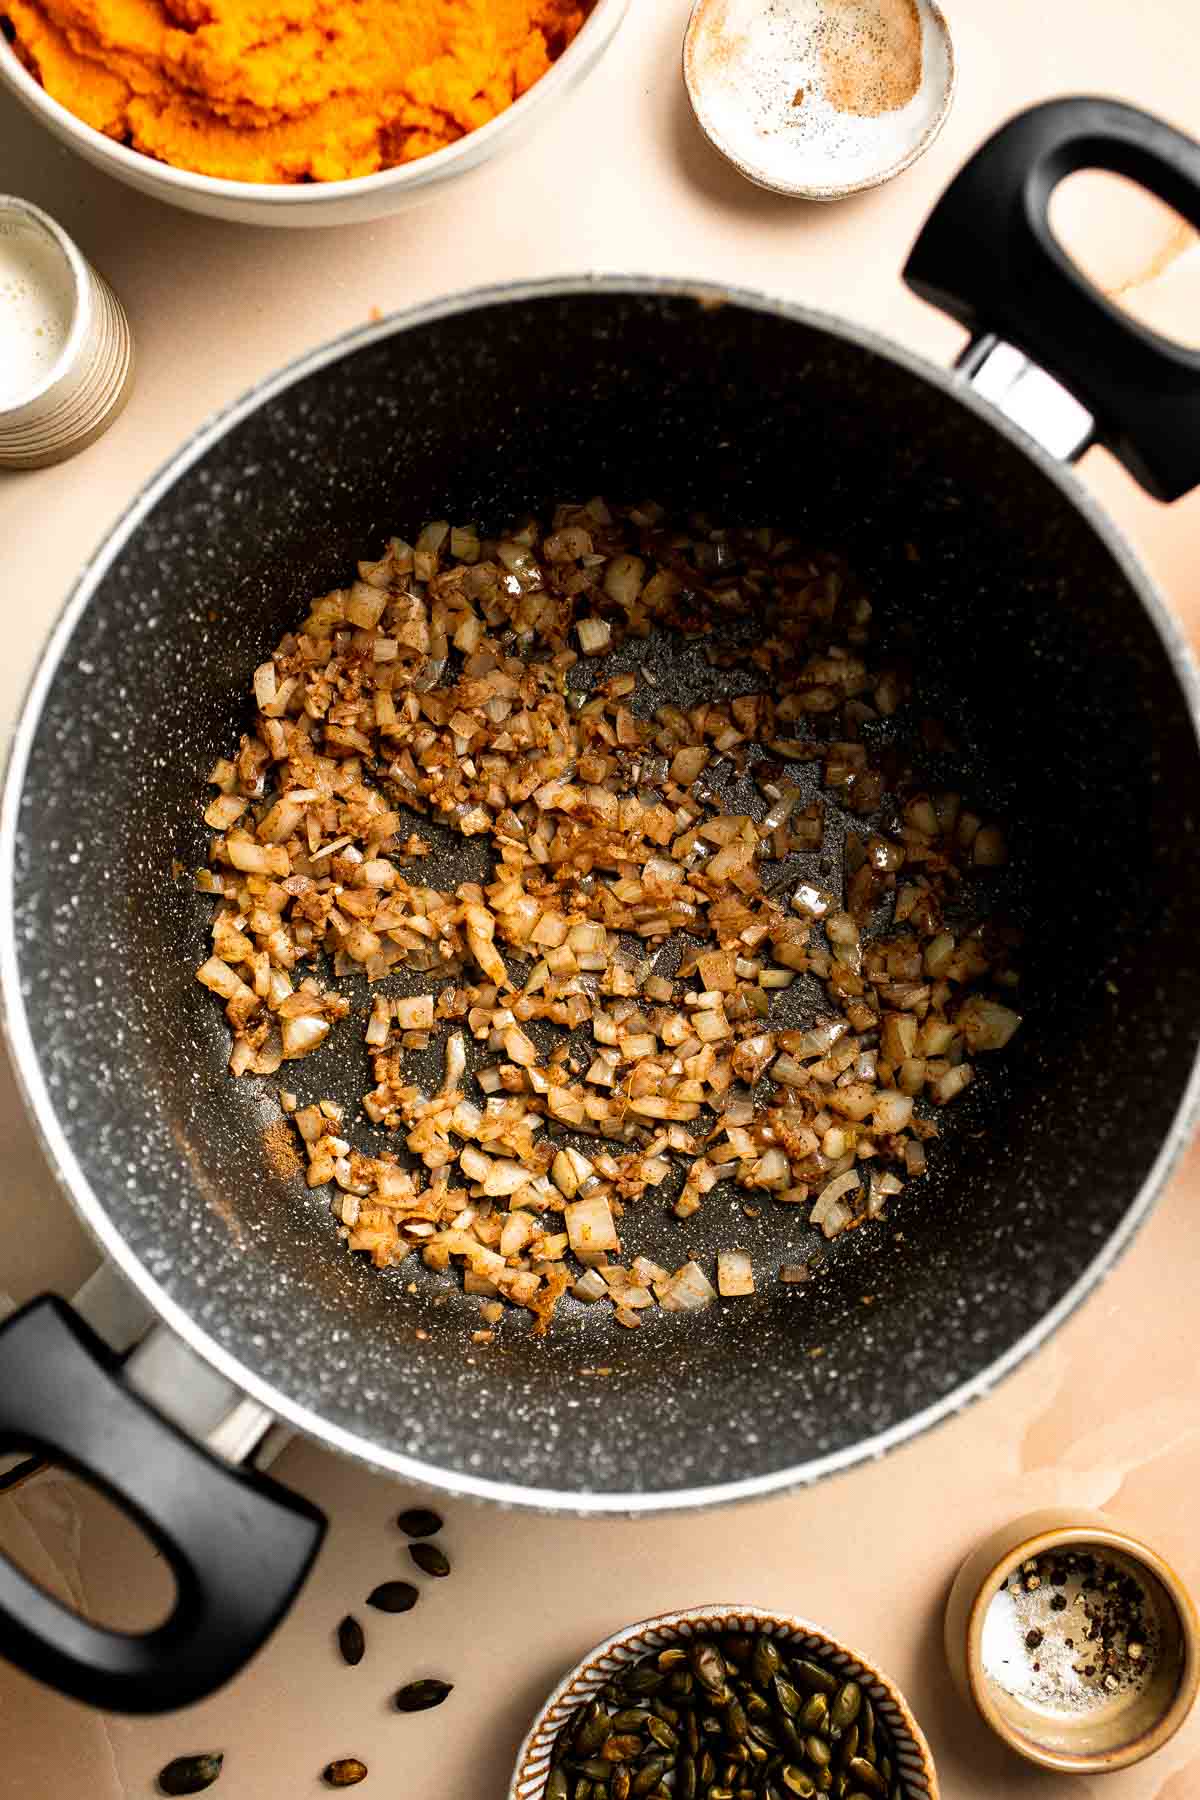
- Stir in pumpkin. Add pumpkin puree and vegetable stock. Mix well and bring it to a boil.
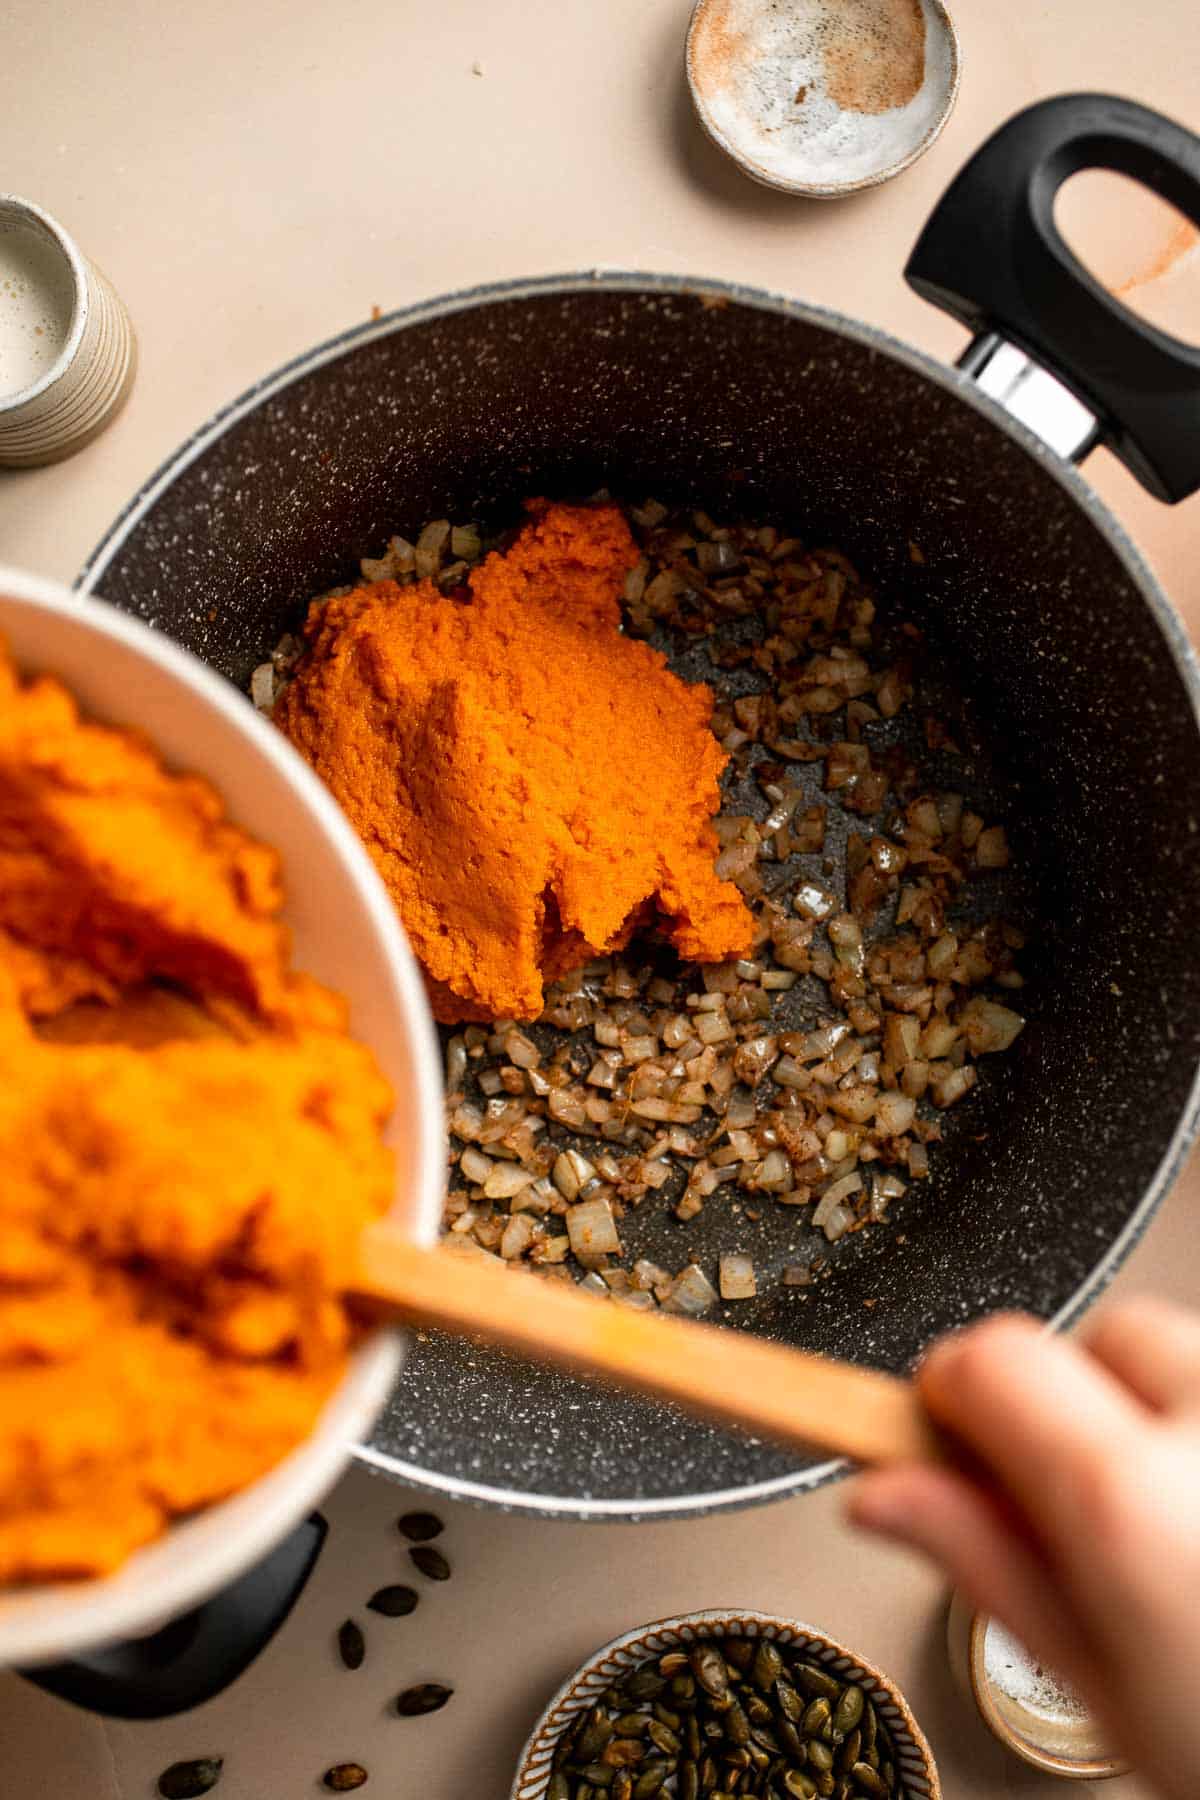
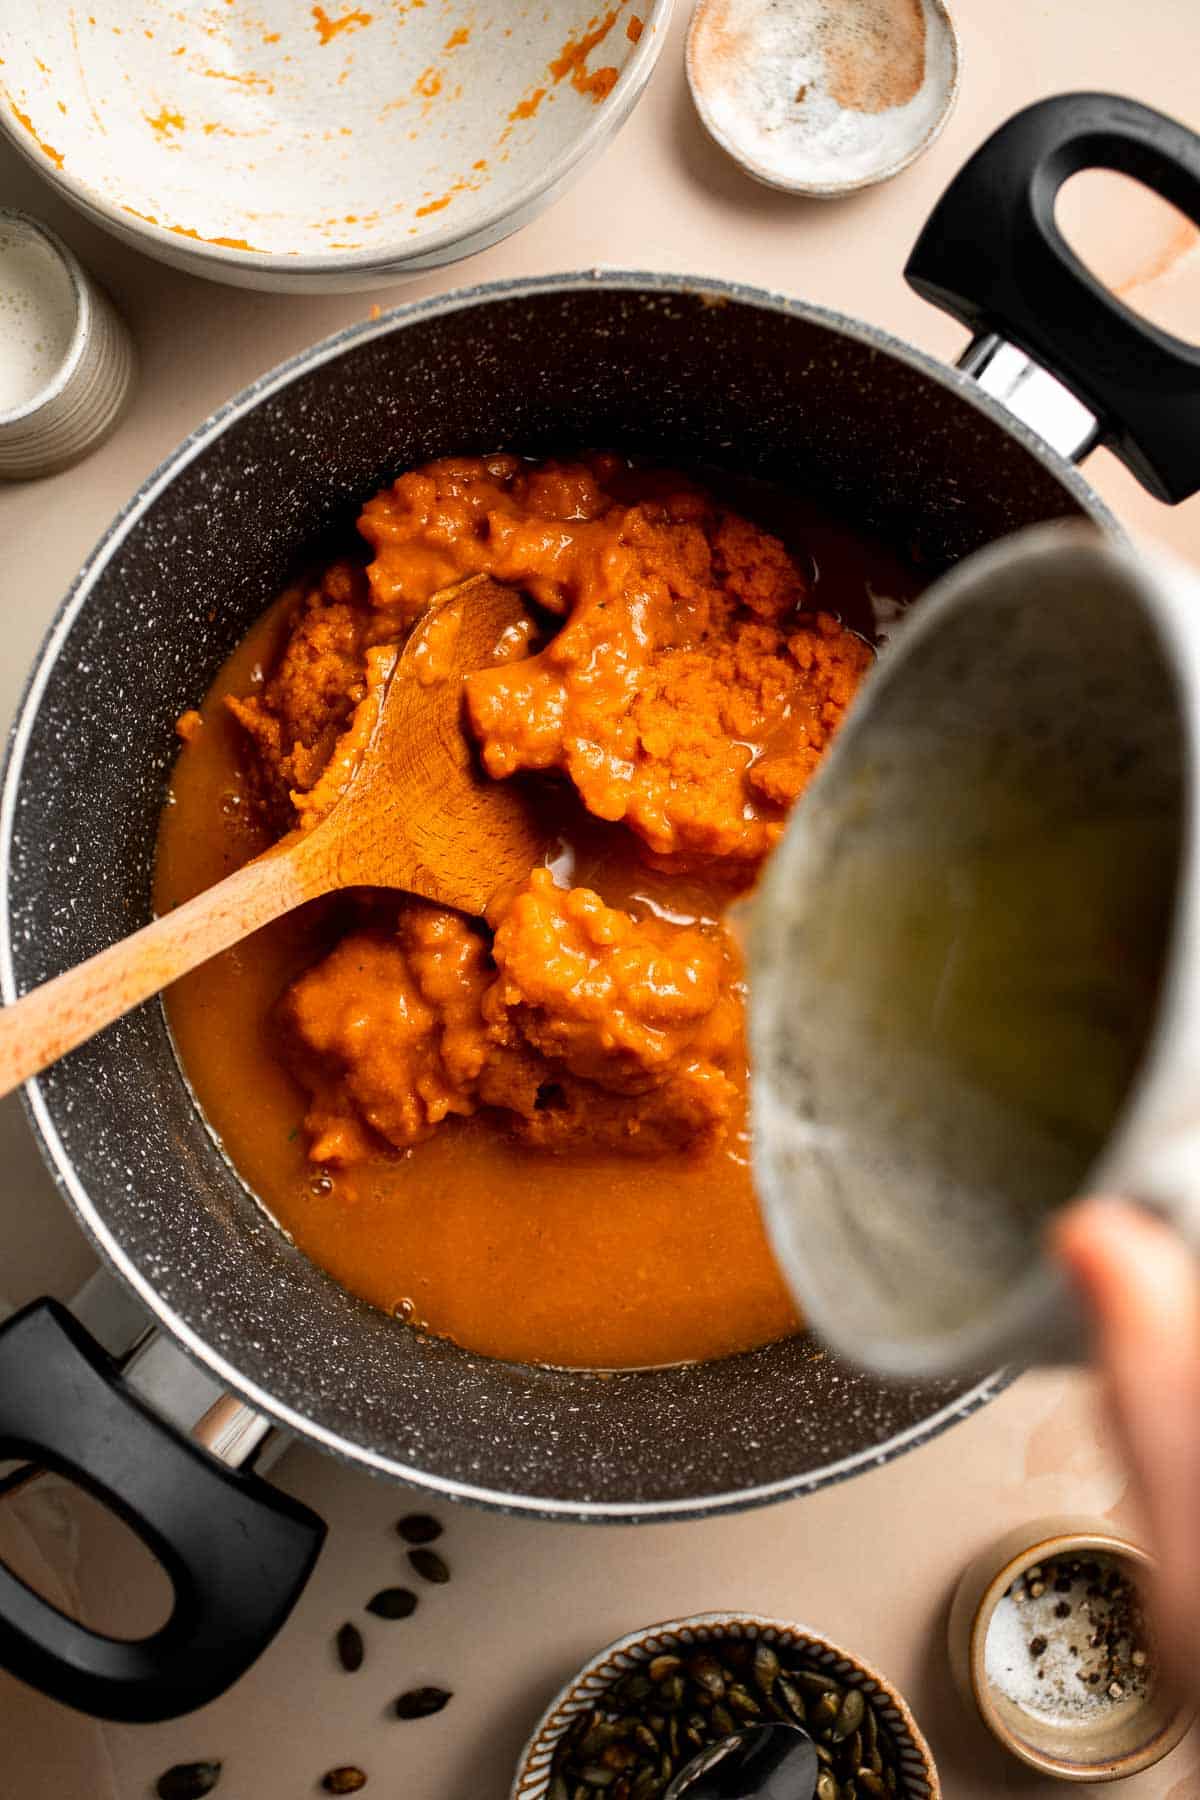
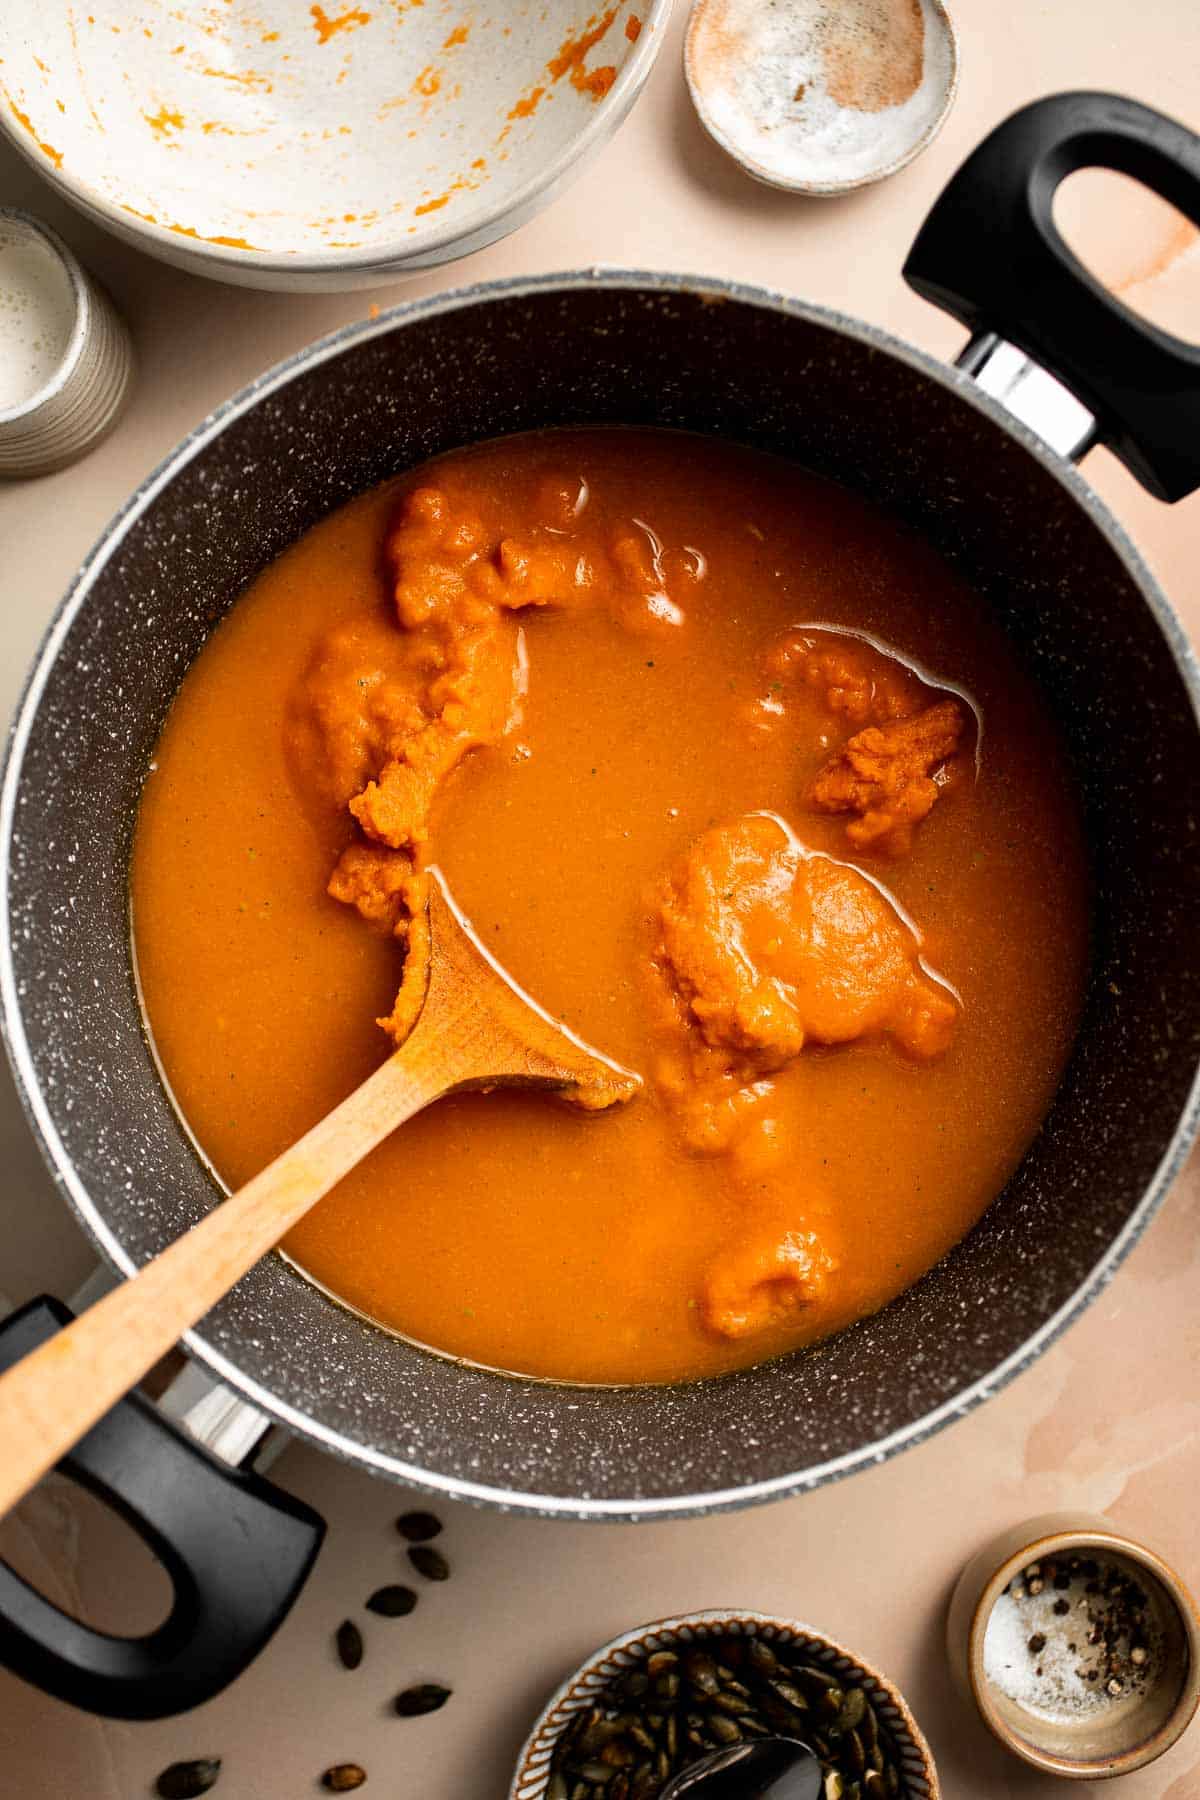
- Simmer. Reduce the heat to low, cover, and simmer for 20 minutes, stirring occasionally. Season with salt and pepper to taste.
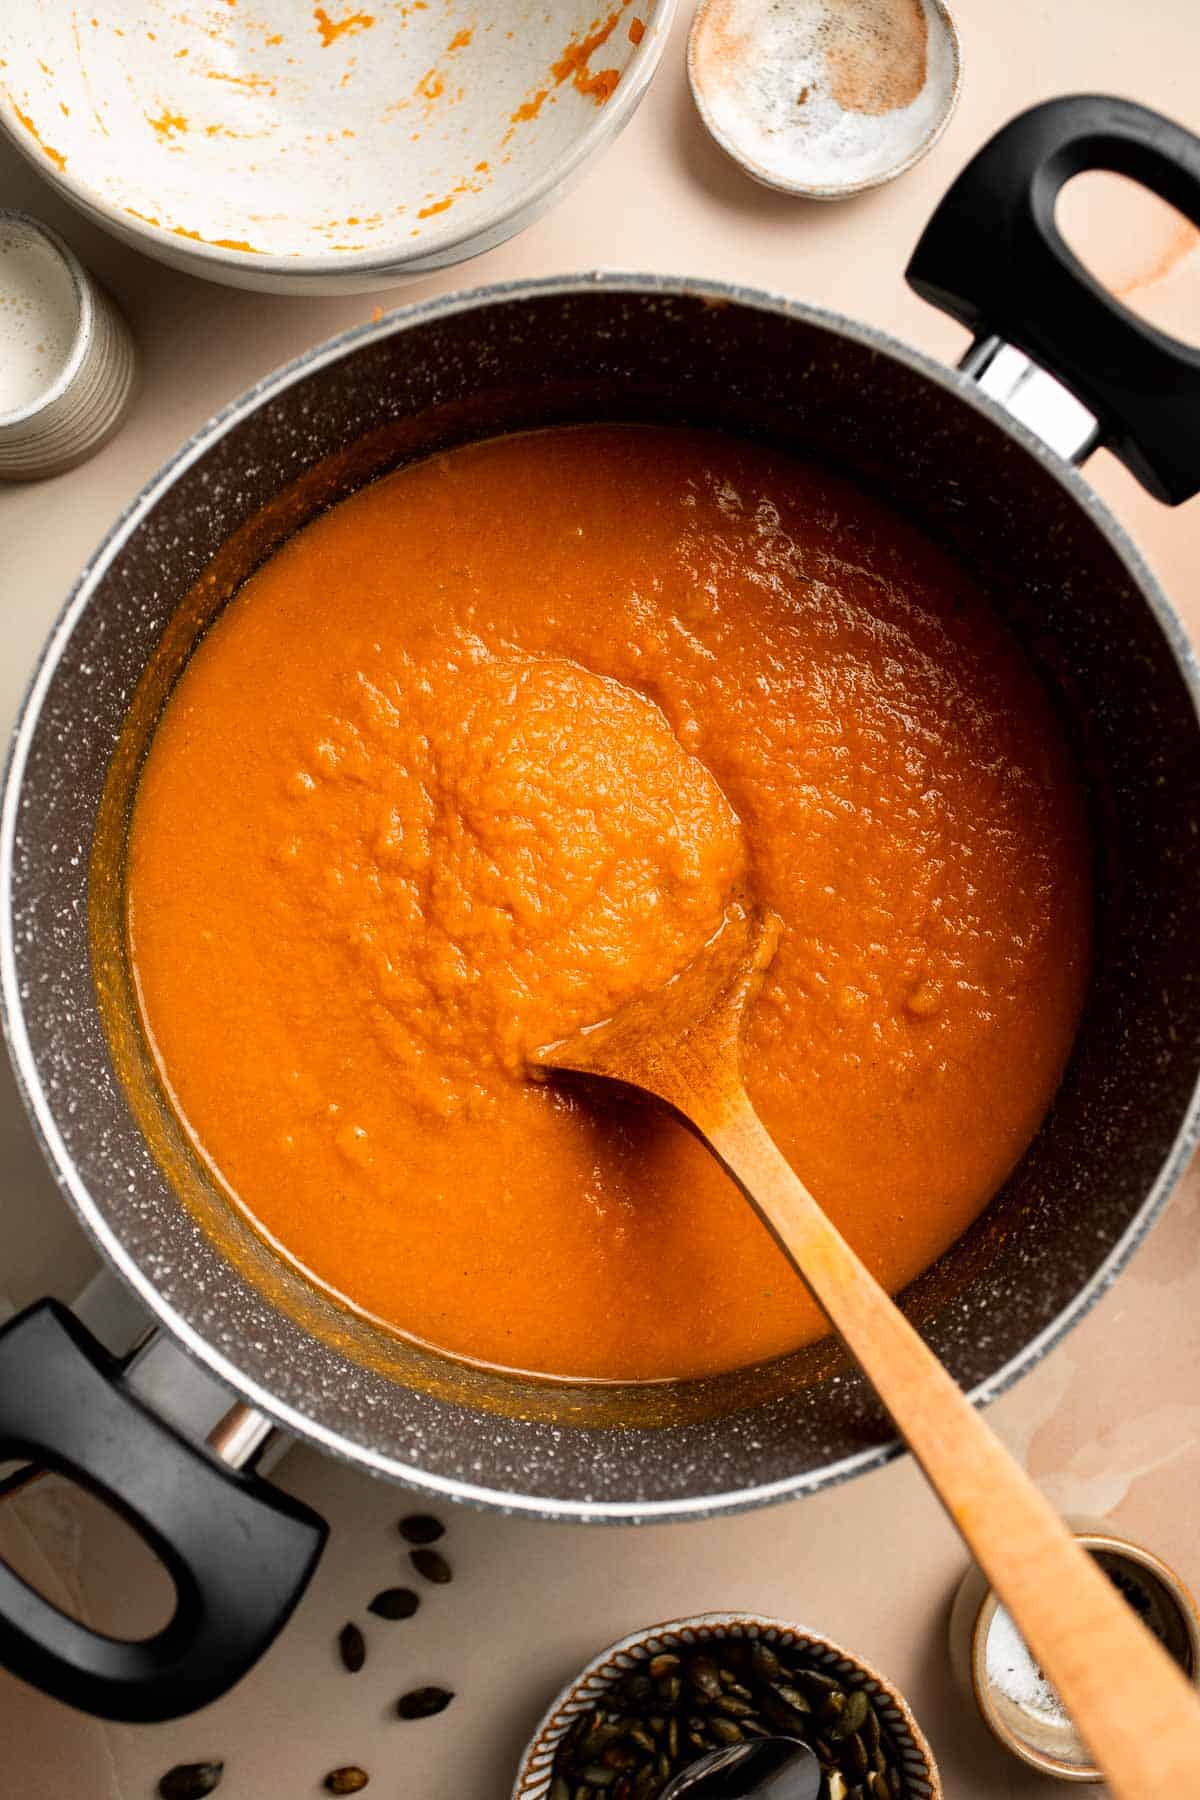
- Blend. Use an immersion blender and puree the soup until smooth, if needed. You can also transfer the soup to a food processor or upright blender to puree.
- Add cream. Stir in heavy cream.
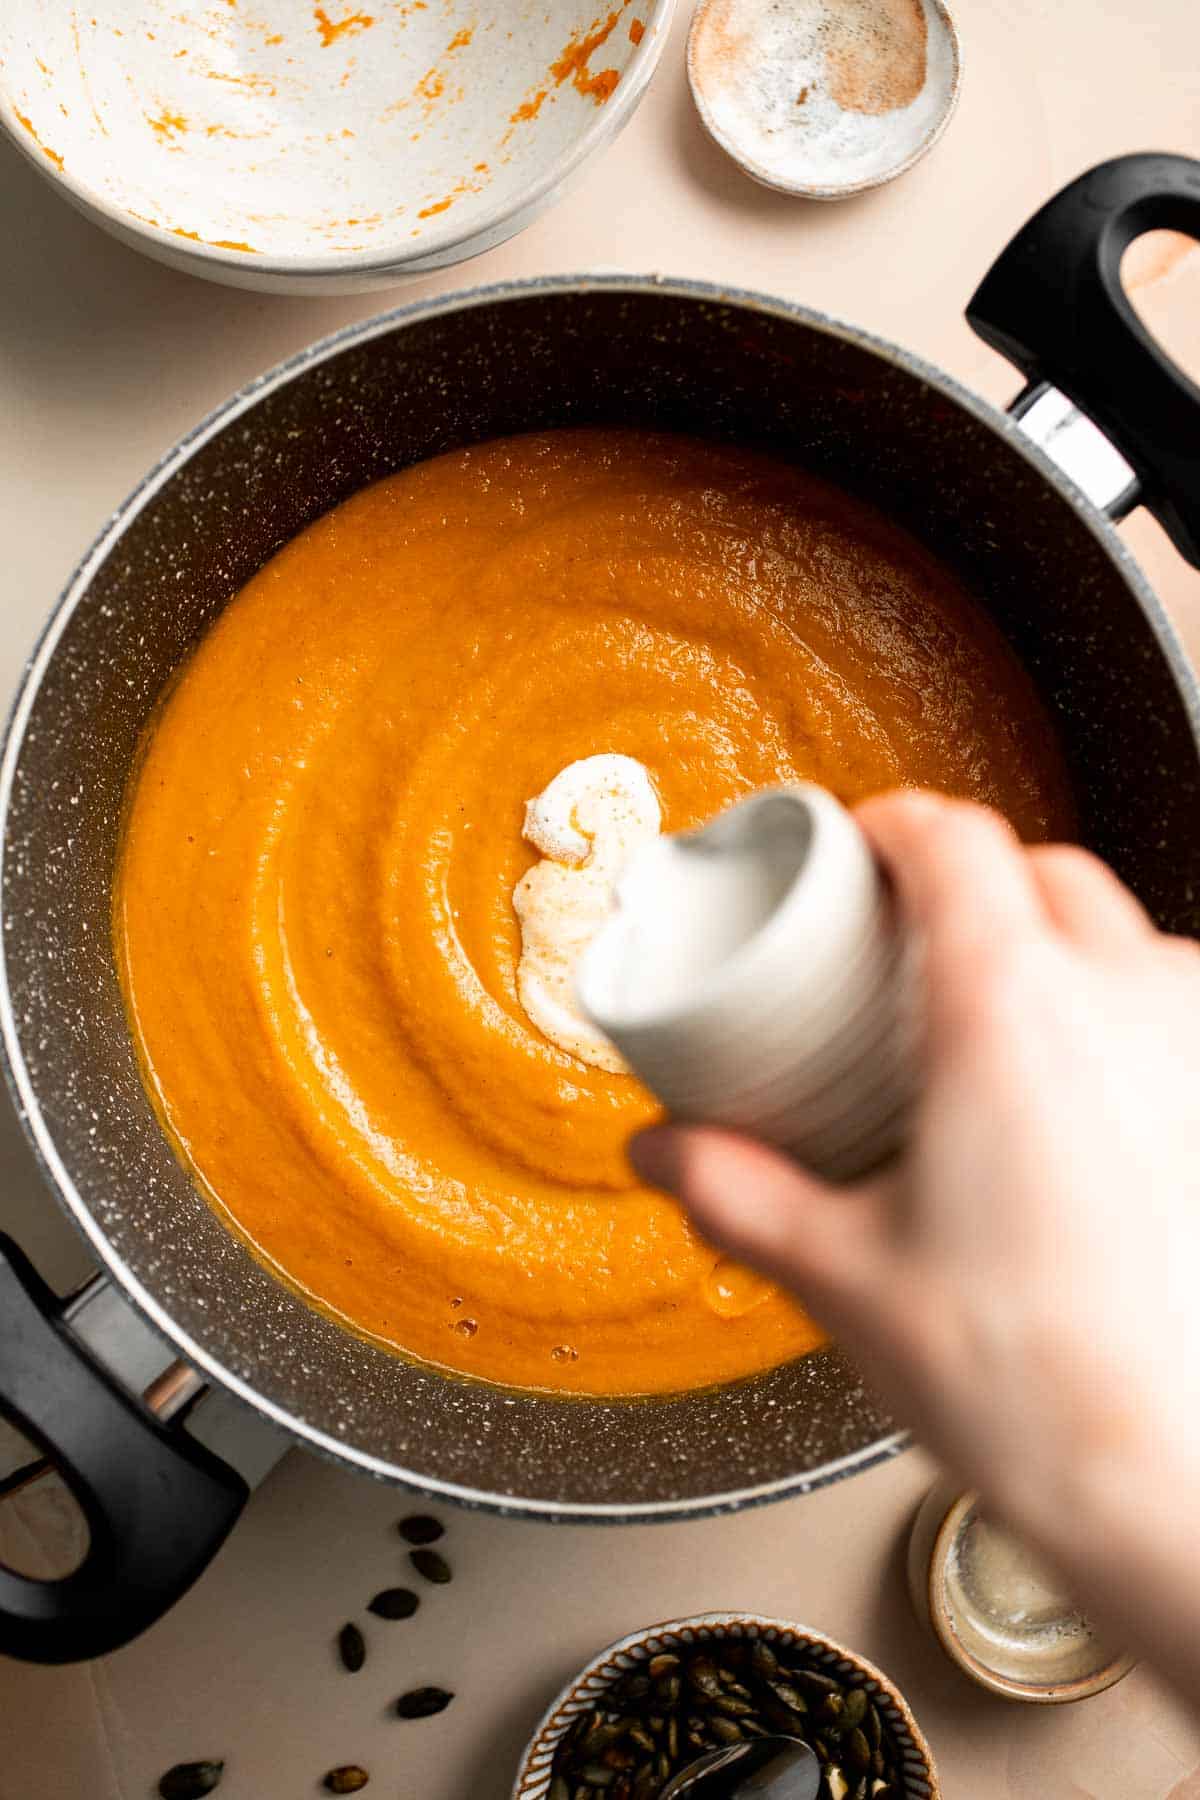
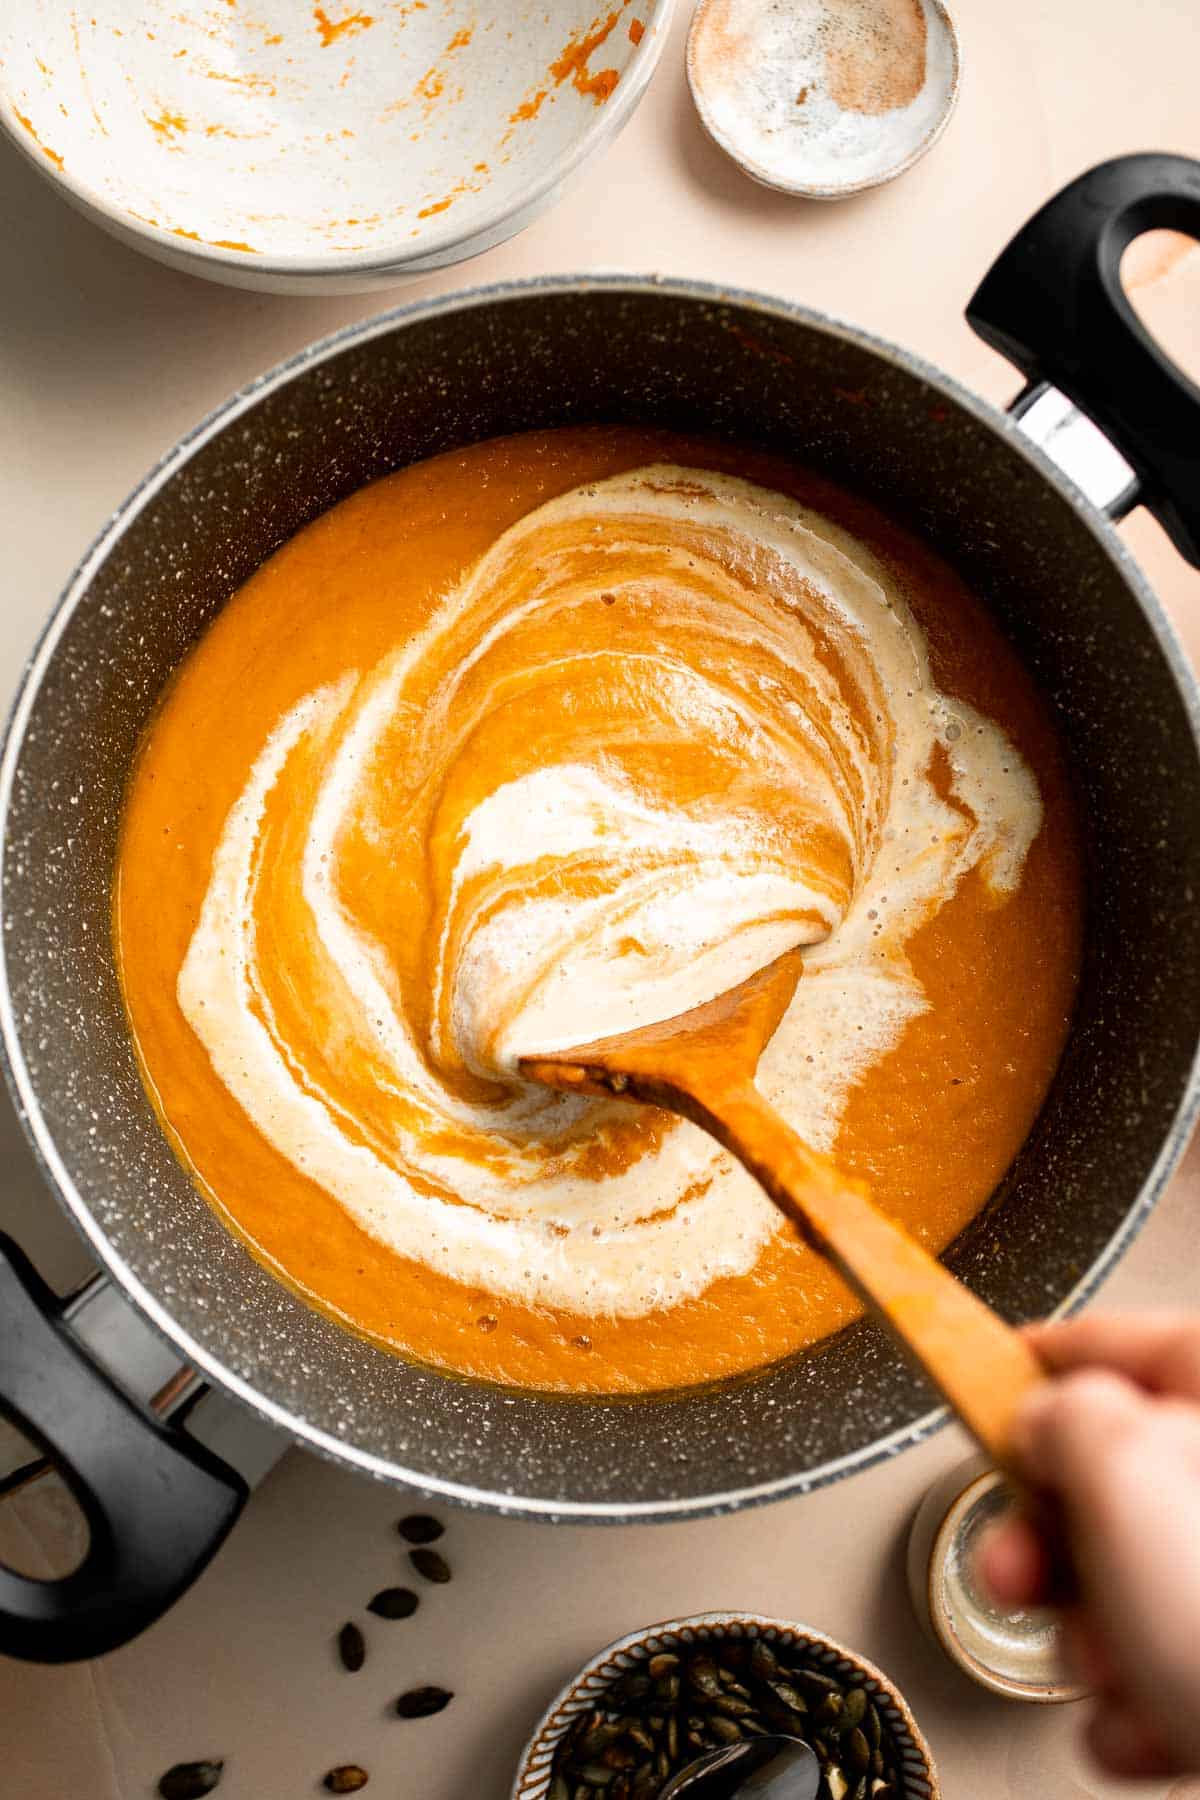
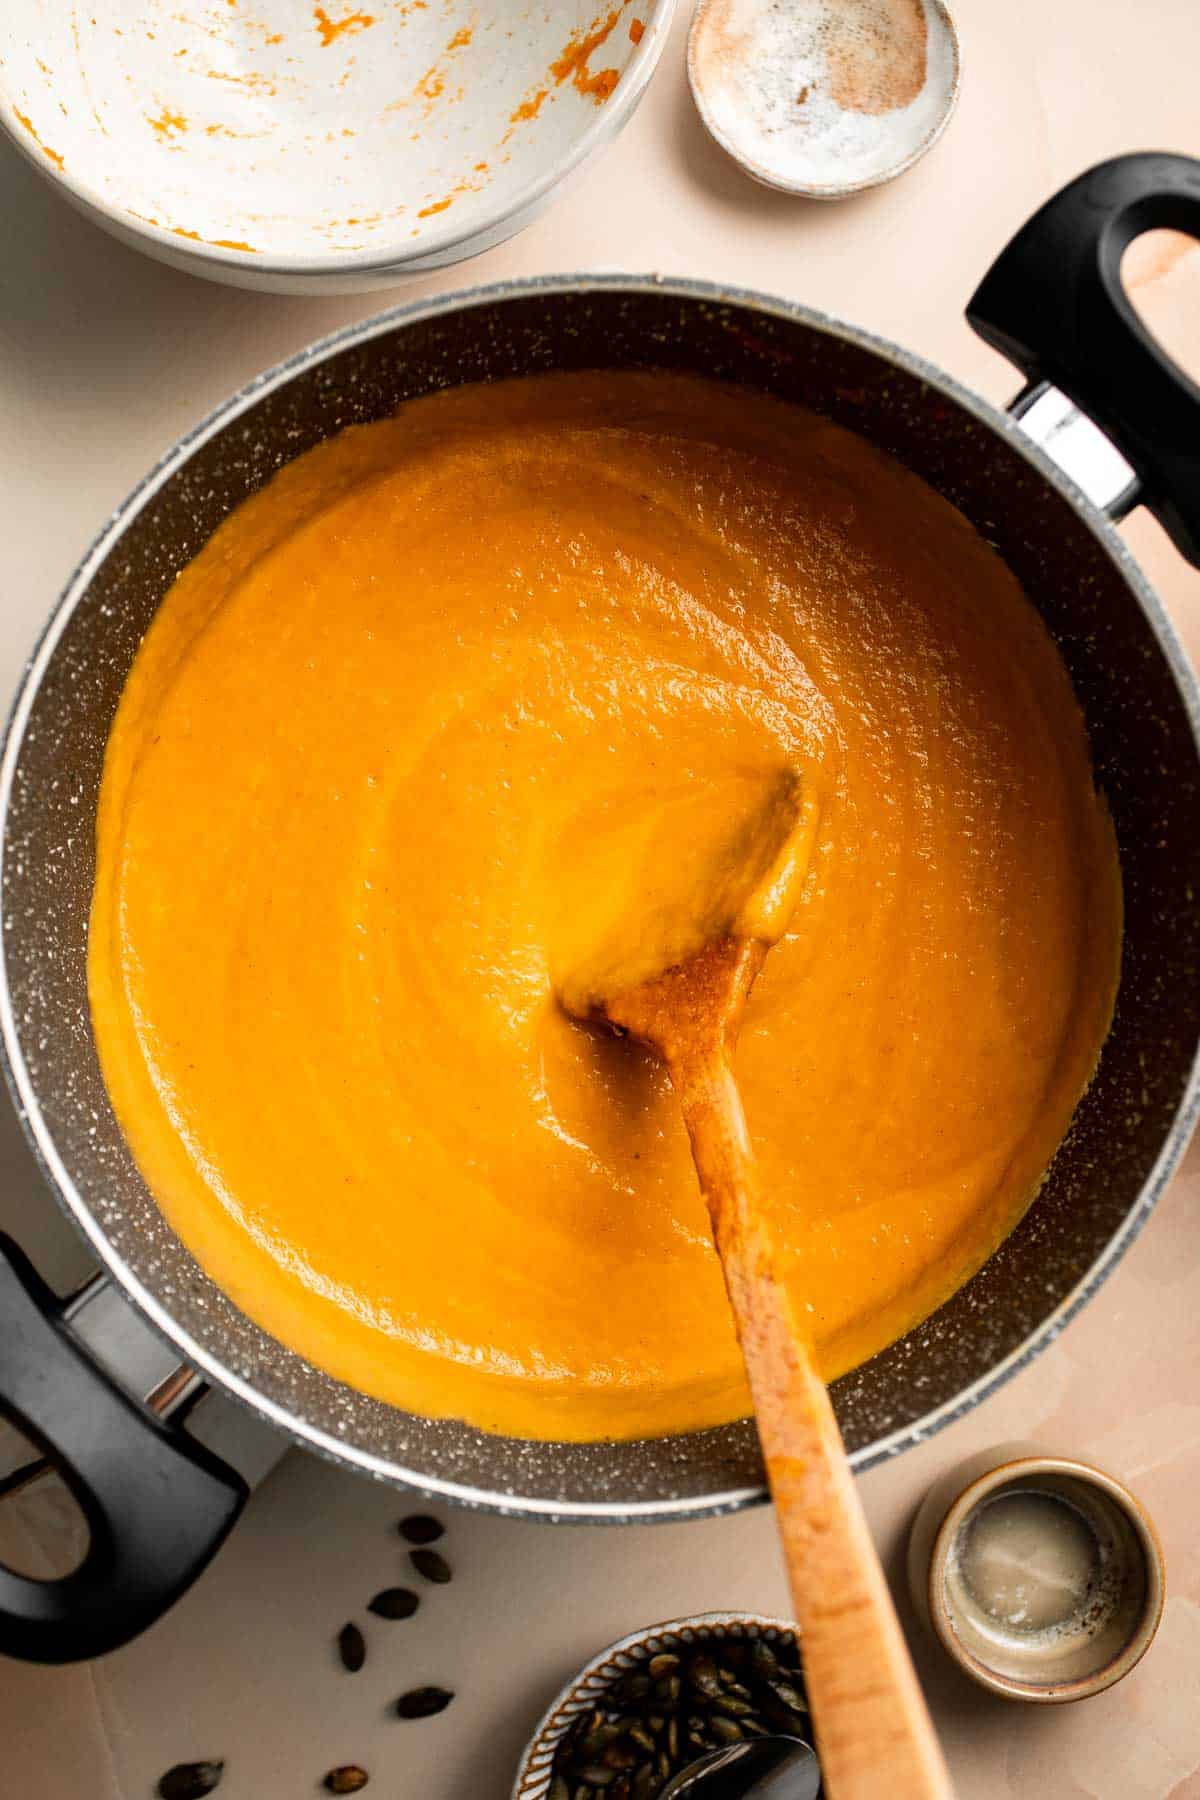
- Serve. Serve with a drizzle of heavy cream, a sprinkle of toasted pumpkin seeds, and freshly cracked black pepper. Serve immediately.

Recipe Variations
- Make it vegan. For a fully plant-based soup, use coconut oil or olive oil and replace the cream with full-fat coconut milk or coconut cream.
- Try a different squash. This soup recipe would taste wonderful with other types of canned or roasted squash, like butternut or kabocha squash.
- Add a little sweetness. Although this is a savory soup, a little maple syrup would pair really well with the pumpkin flavor and warm spices.
- Make it spicy. For extra heat, add a little cayenne pepper or red pepper flakes to taste.
How to Serve
This pumpkin soup is delicious served on its own or paired with some crusty bread for scooping and dipping, including:
- Homemade Biscuits
- Easy Rosemary Garlic Focaccia Bread
- Small Batch No-Knead Bread
- Pumpkin Focaccia with Fresh Herbs
- Easy Small Batch Ciabatta Rolls
Need some more ideas? Check out these 25 Side Dishes for Soup.
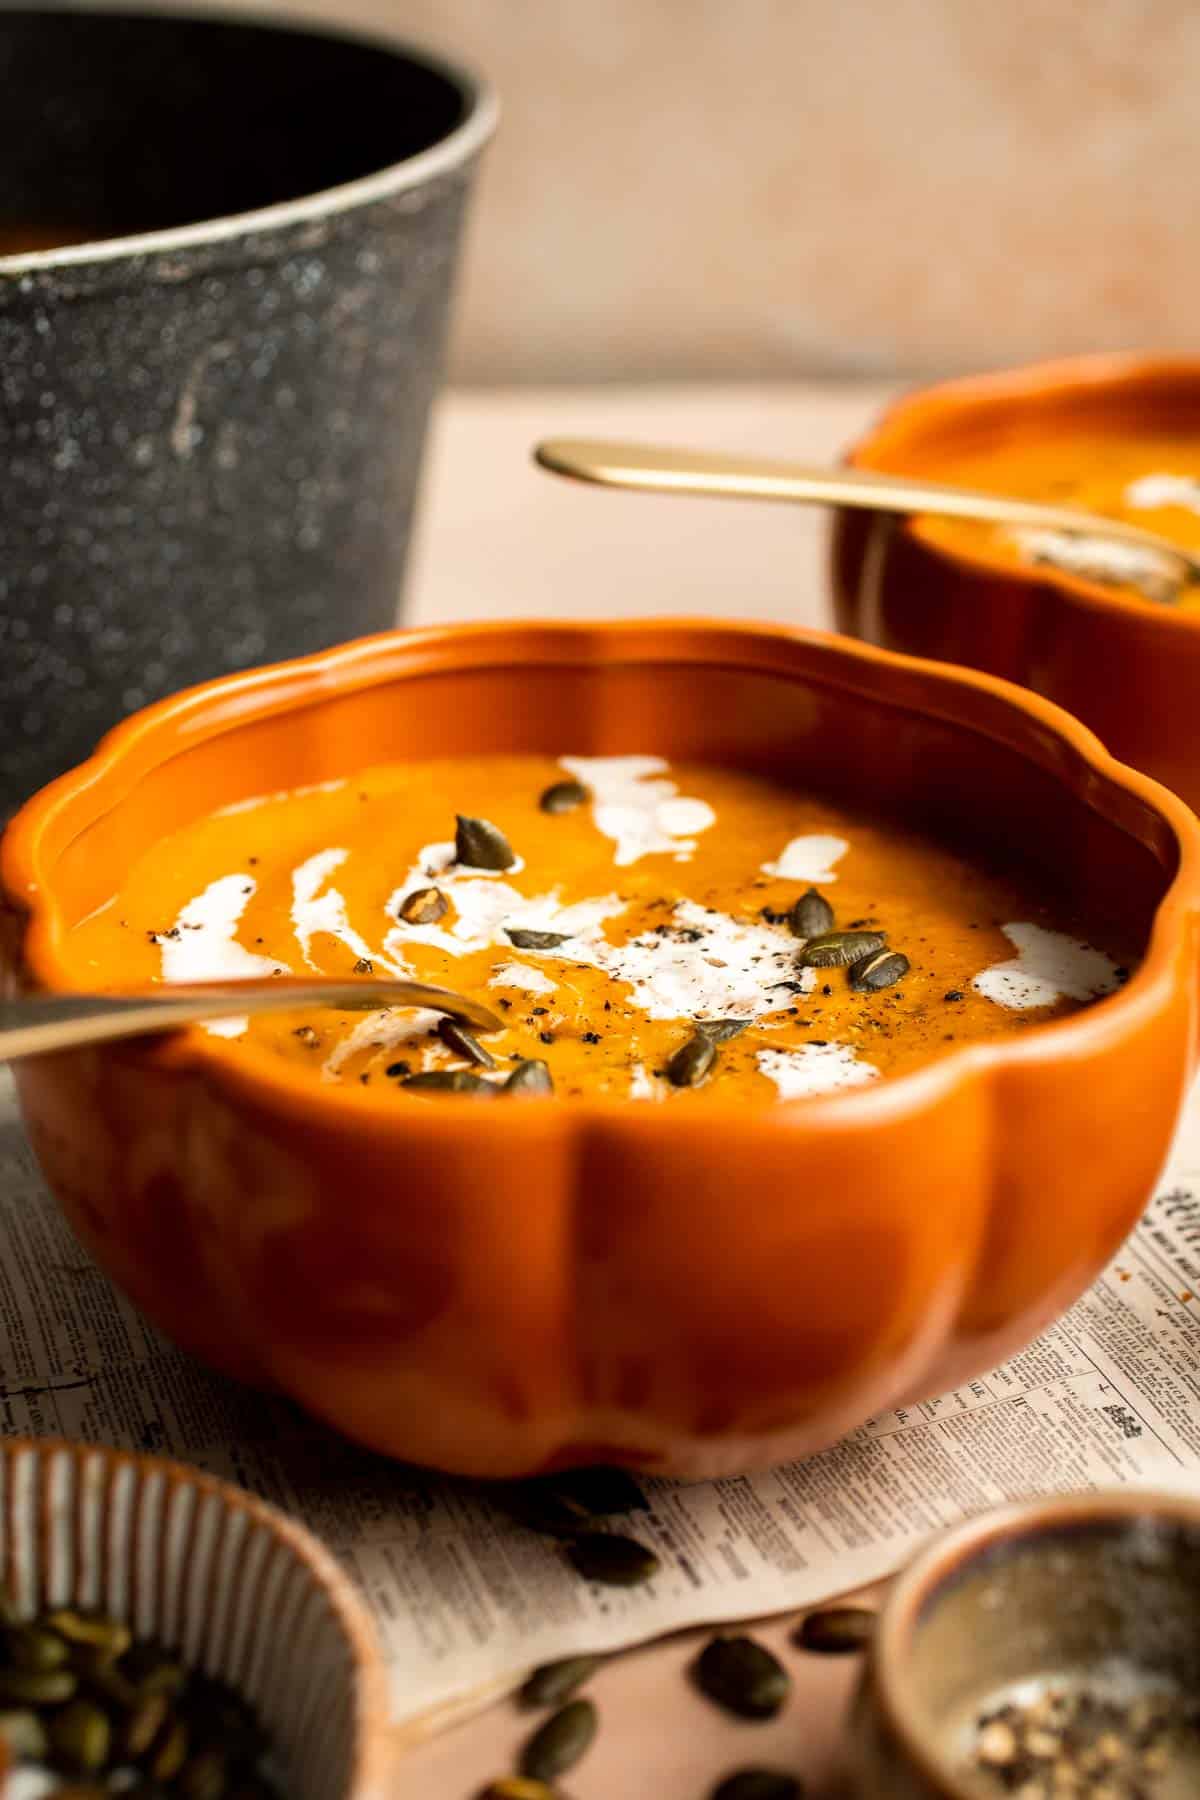
Recipe Tips and Tricks
- Adjust the consistency. Since this is a pureed soup, you can easily make it thinner by adding a little extra stock.
- Make your own pumpkin puree. Remove the seeds and roast your pumpkin halves face down on a baking sheet at 400 degrees until they soften. Remove the pumpkin flesh and blend until creamy.
- Use a blender. If you don't have a stick blender, blend the soup in small amounts in an upright blender or food processor until it has a silky texture.
Storing and Freezing Instructions
How to Store
Allow leftover pumpkin soup to cool to room temperature for about two hours, then store it in an airtight container in the fridge for 4-5 days.
How to Reheat
Add the soup to a small saucepan with a splash of water. Heat over medium low until fully warmed, and serve with leftover toasted pumpkin seeds.
How to Freeze
To preserve your soup for longer, store the chilled soup in a freezer-safe container, and freeze for 2-3 months. Thaw in the fridge before reheating.
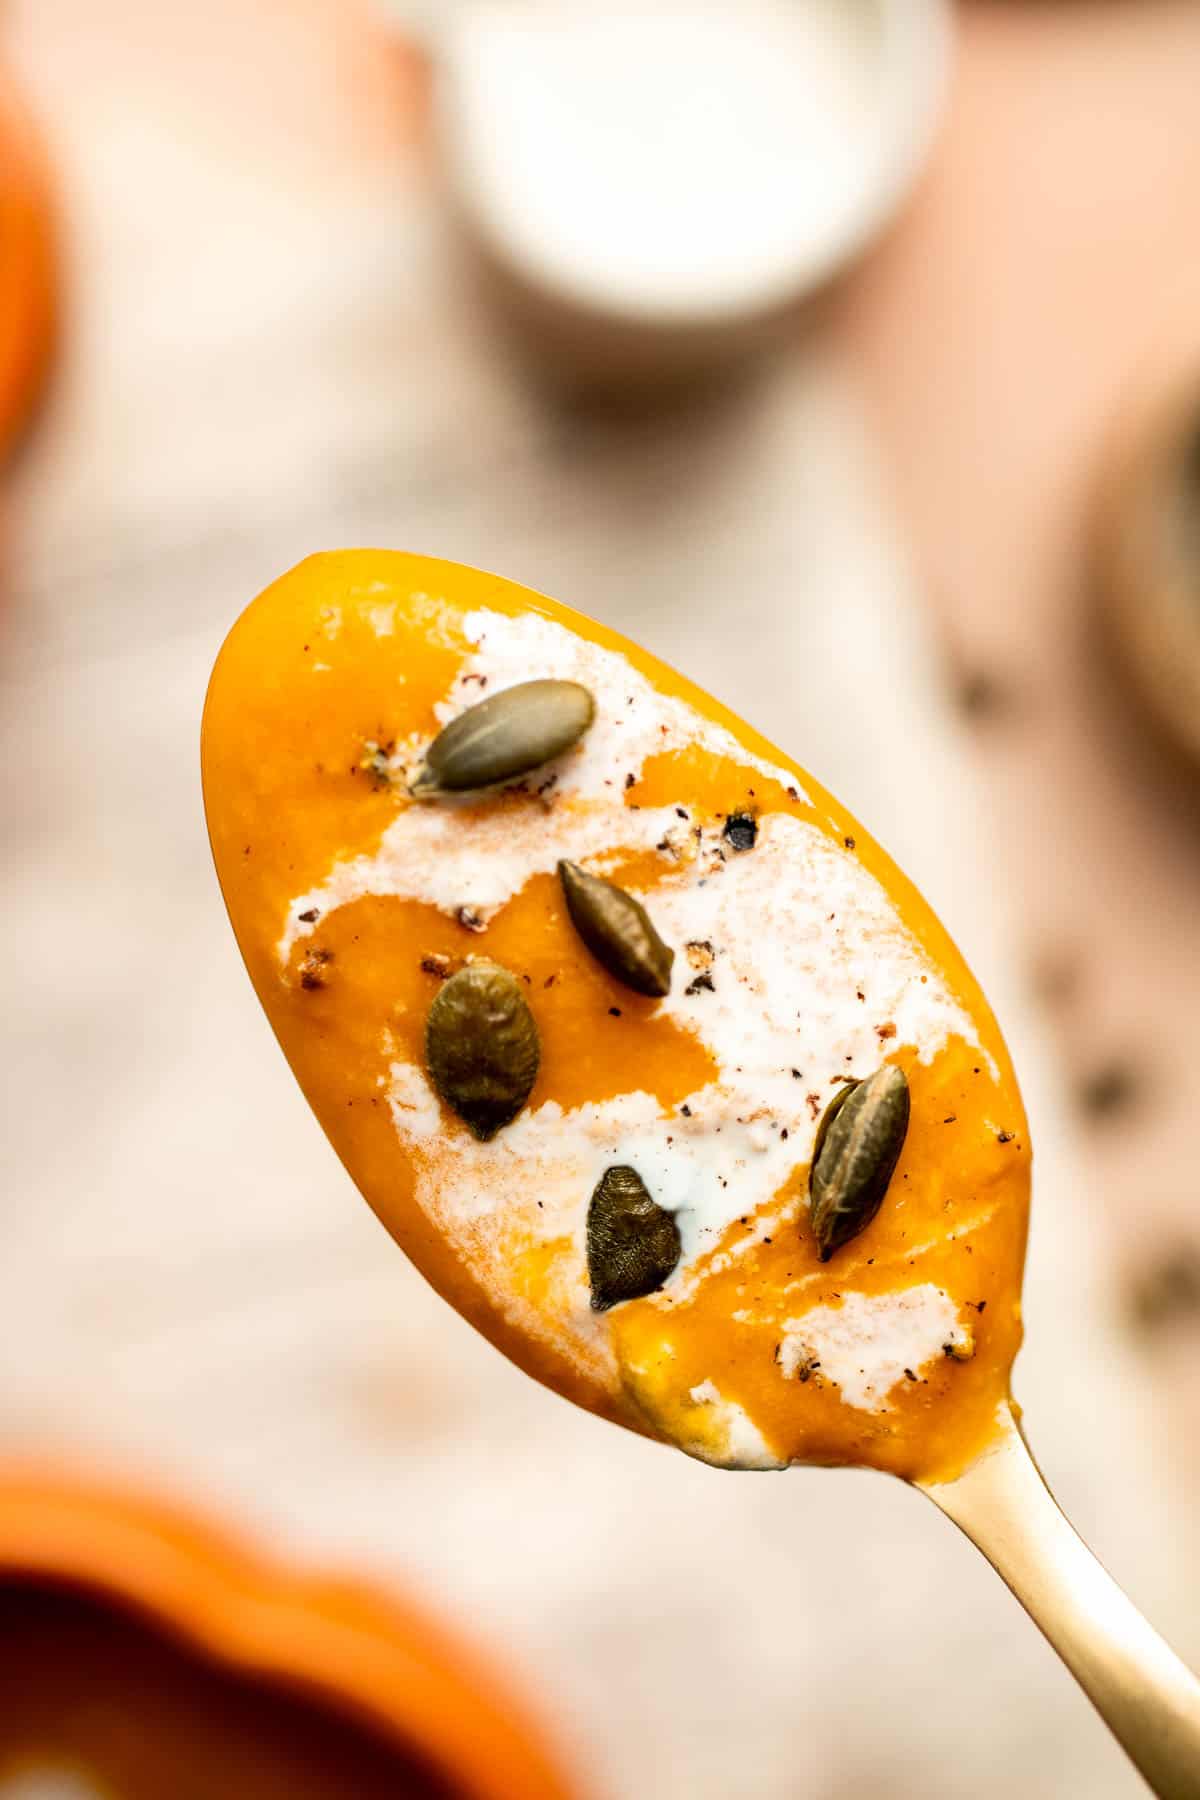
FAQ
If it's made properly, you won't need to worry about thickening your pumpkin soup. The canned pumpkin is already thick and creamy, so unless you add too much chicken broth or other liquids, it will be easy to get the right consistency. If your soup is watery, you can either continue cooking it longer to evaporate out some of the liquid, or you can scoop out some of the excess liquid to speed up the process.
Without proper seasoning, canned pumpkin does not have a lot of flavor. It needs different spices and seasonings to let the pumpkin flavor shine. Start by cooking aromatic ingredients like onion, garlic, and fresh ginger in butter. Then, add your spices to let them bloom. Once you add the pumpkin and stock, you also want to add salt. When you taste the soup, it should have a subtle saltiness, and as it cooks down, the flavors will really develop. Taste and season again before serving.
Yes, canned pumpkin is cooked by steaming, which gives it that soft texture. It can easily be added to pumpkin soup, pumpkin bread, or your favorite pumpkin recipes and tastes wonderful with pumpkin pie spice, brown sugar, or a little maple syrup.
More Pumpkin Recipes
- Pumpkin Pasta
- Coconut Curry Pumpkin Soup
- Pumpkin Pancakes
- Carrot Pumpkin Soup
- Pumpkin Bread
- Pumpkin Bundt Cake
Tried this recipe?
I'd love to hear what you think! Leave a comment and rating below to share your feedback. Your reviews help others discover this recipe and help me keep creating more free recipes for you. Snap a photo and tag me on social media @aheadofthyme too.
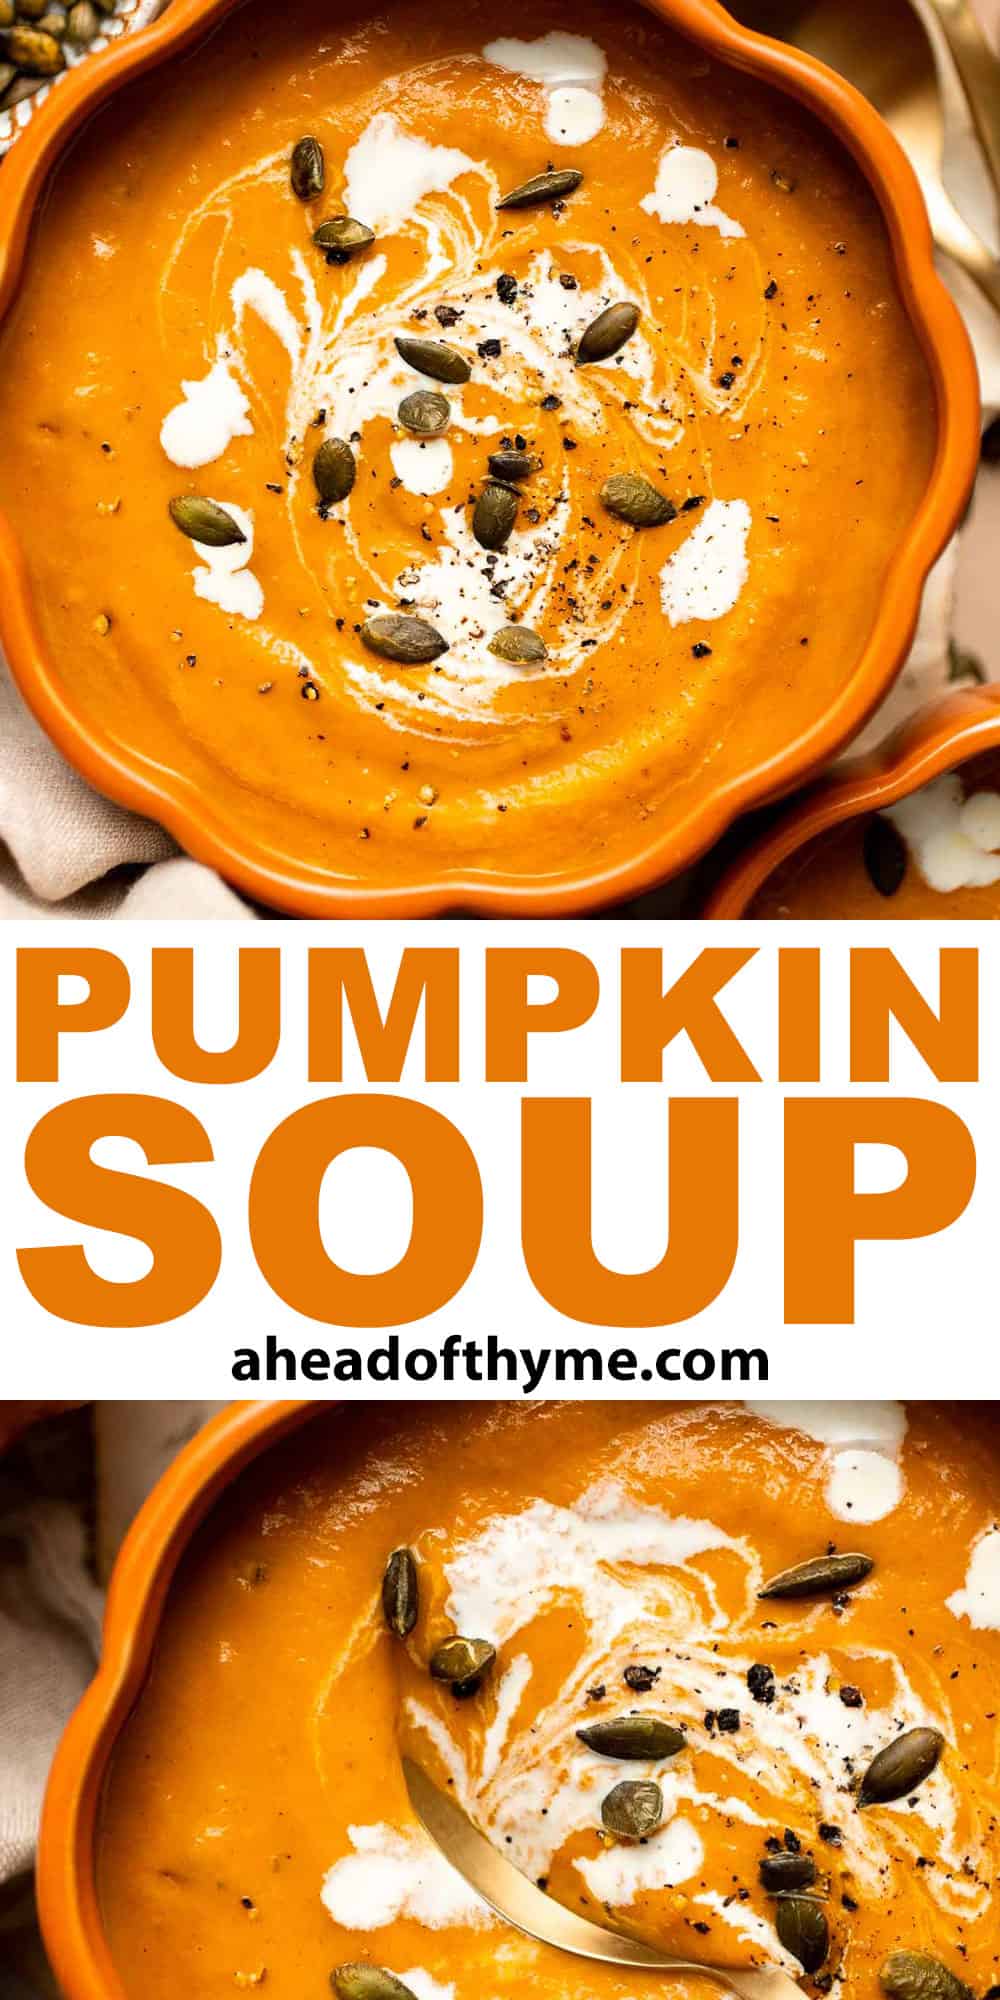
35 Best Italian Side Dishes
Planning an Italian feast and in search of the perfect side dishes to complement your meal? Whether you're preparing pasta, pizza, or a hearty Italian main course, and you find yourself thinking, "what to serve with Italian food," you've come to the right place! We have curated a list of 35 Best Italian Side Dishes including everything from fresh salads, crispy bread, Italian soups, roasted vegetables, and more. These delicious recipes are ideal for any Italian-themed dinner - whether it's a family gathering, a romantic date night, or a casual dinner with friends. Buon appetito!
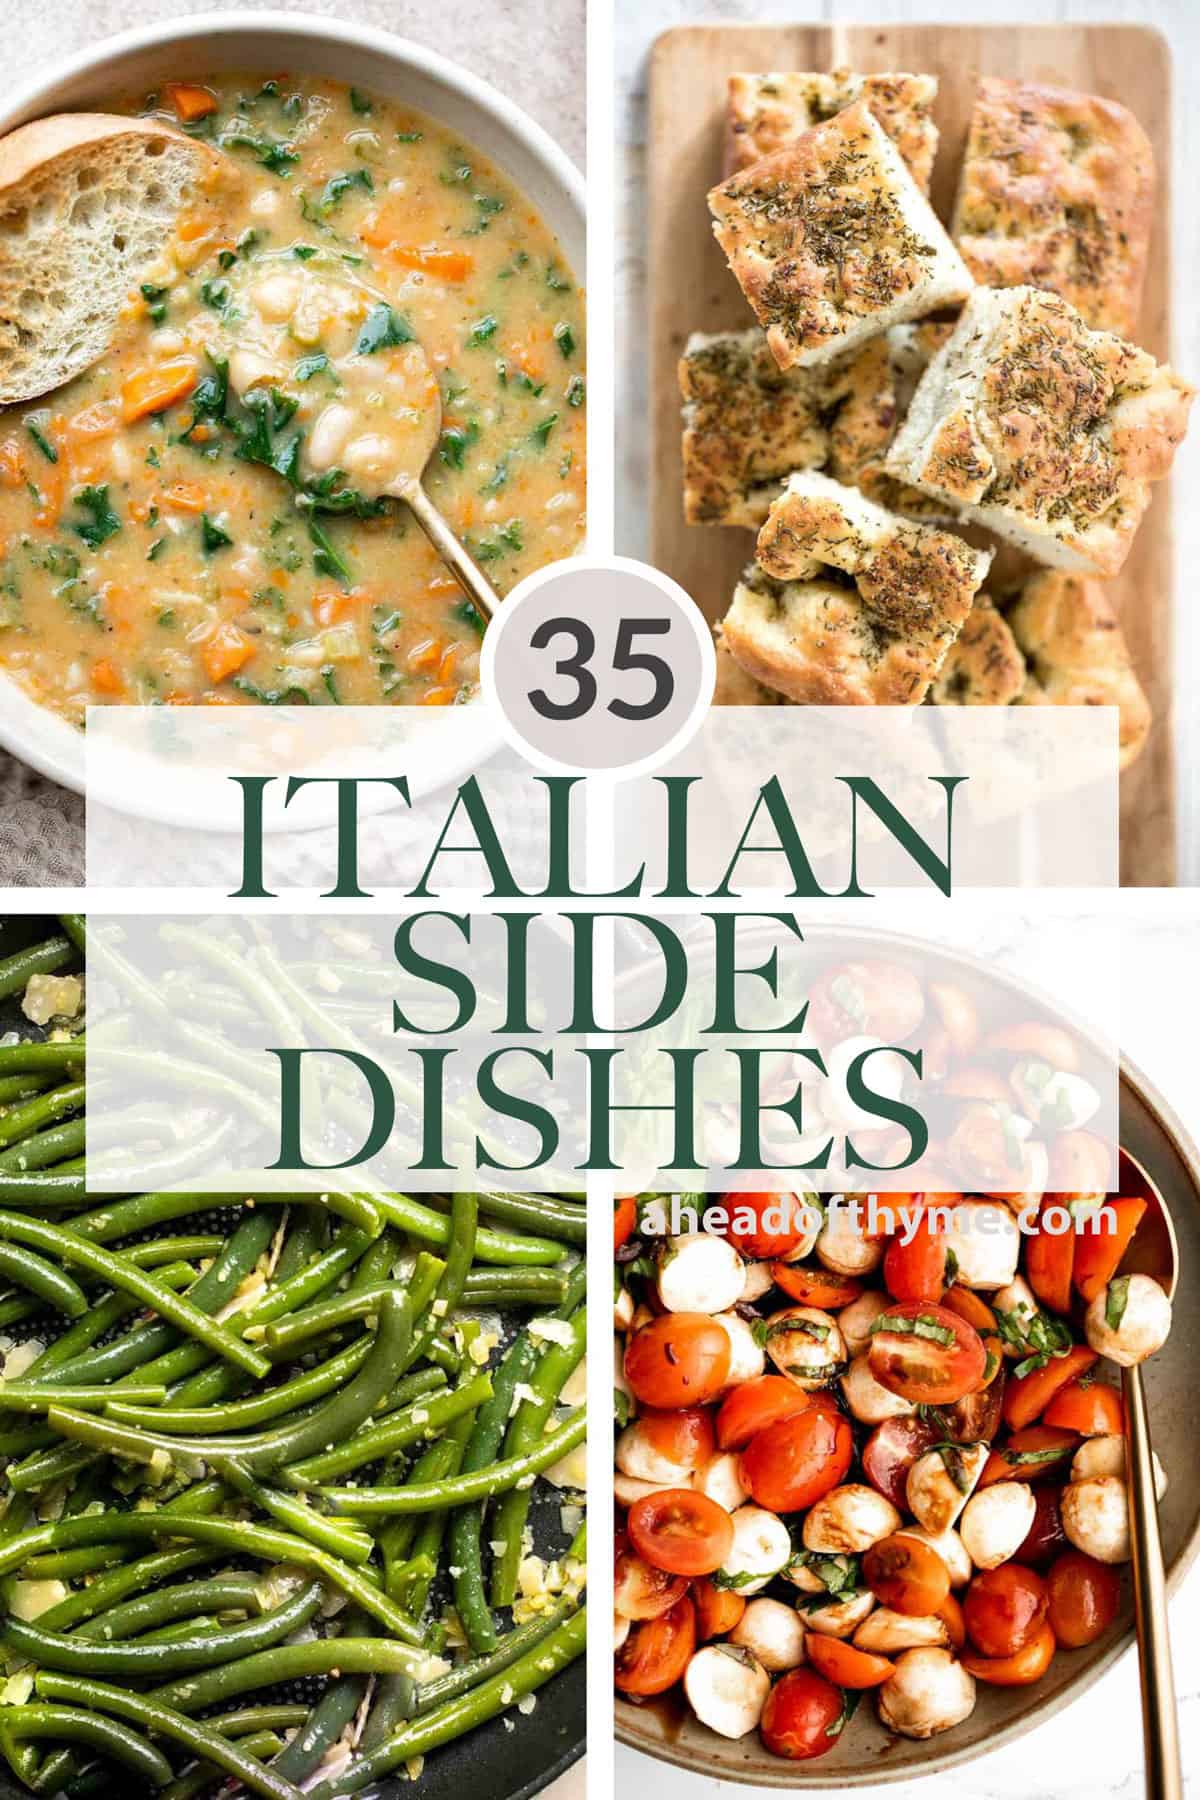
Best Italian Side Dishes
Italian pasta salad is delicious, wholesome, and easy to make. Make it up to three days ahead for your summer picnics and cookouts.
White Bean Soup with Kale is a hearty and nourishing one-pot meal that is flavorful and easy. Make this healthy soup in 30 minutes using simple ingredients.
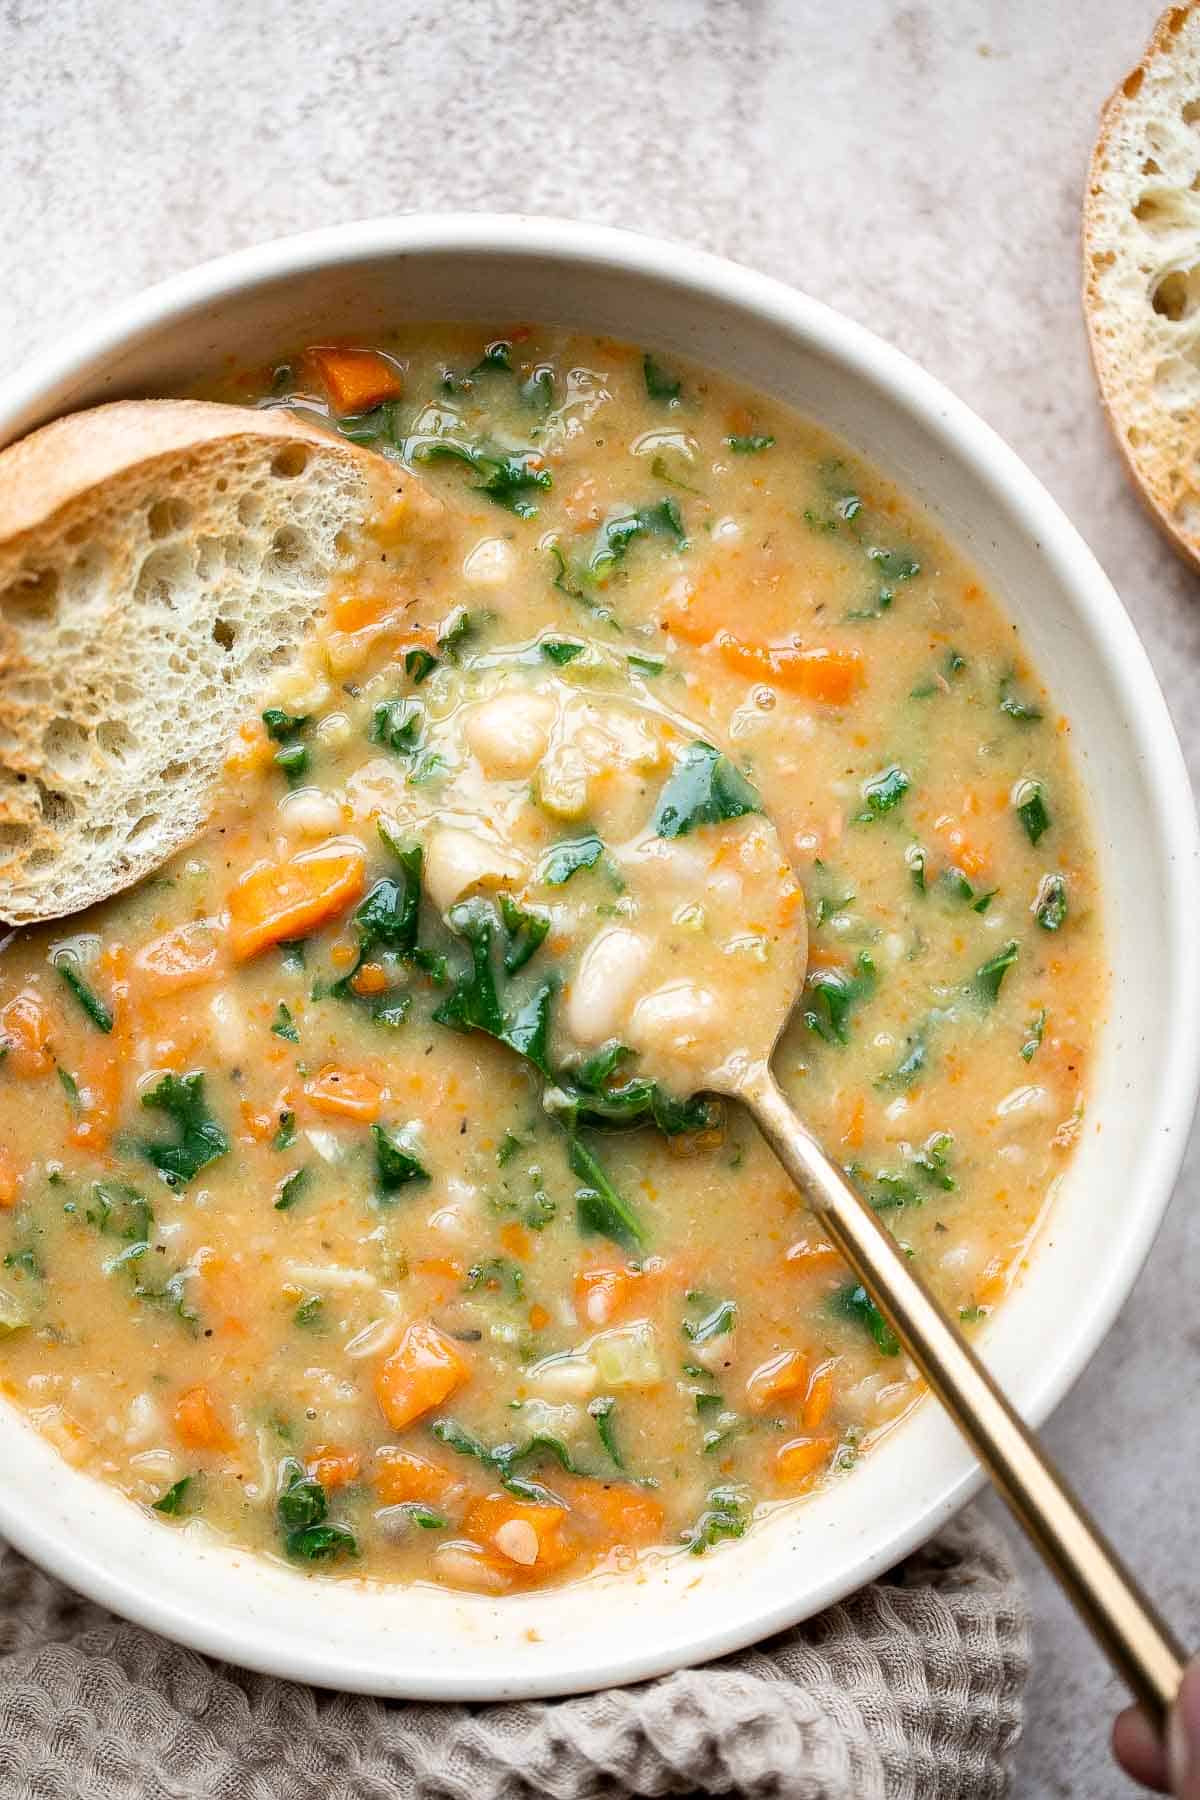
Vegetarian stuffed mushrooms are a delicious, flavorful, healthy, and nutritious appetizer. Plus, quick and easy to make in under 30 minutes including prep!
Easy Rosemary Garlic Focaccia Bread
No knead, easy rosemary garlic focaccia bread is thick with a perfect golden and crispy texture on the outside, but soft, fluffy and tender inside.
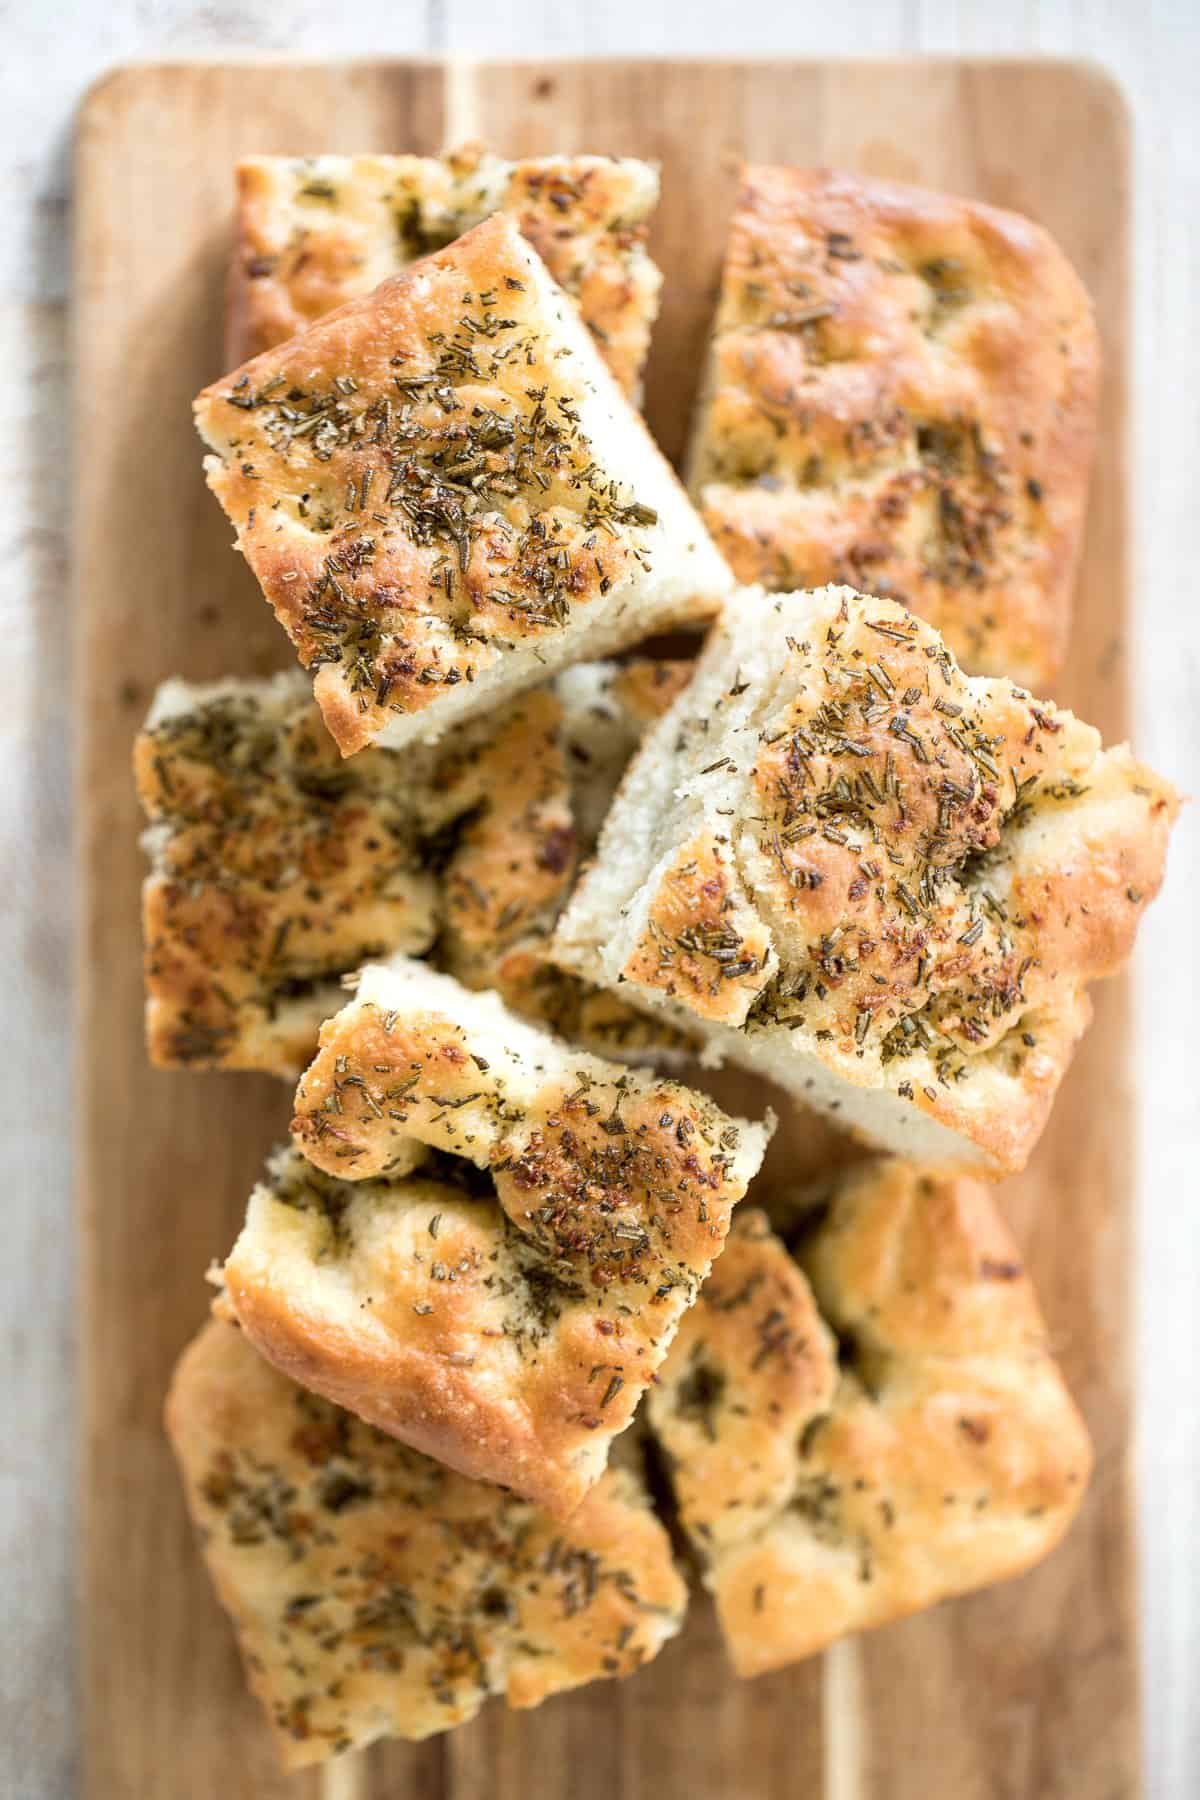
Olive tapenade is a delicious, flavorful, easy dip that comes together in minutes, made with the perfect combination of sharp, tangy, salty, and savory.
Creamy Parmesan (No Wine) Risotto
Creamy Parmesan (No Wine) Risotto is a rich, creamy, and comforting classic Italian dish that may be intimidating but is actually quick and easy to make.
Easy Tomato Bruschetta with Balsamic Glaze
Tomato bruschetta with balsamic glaze is an easy Italian appetizer topped with tomatoes, onions, garlic, basil and olive oil. Delicious, fresh and simple.
Whether you're cooking this roasted eggplant in your oven or air fryer, you'll fall in love with how fast, easy, and delicious this simple recipe is.
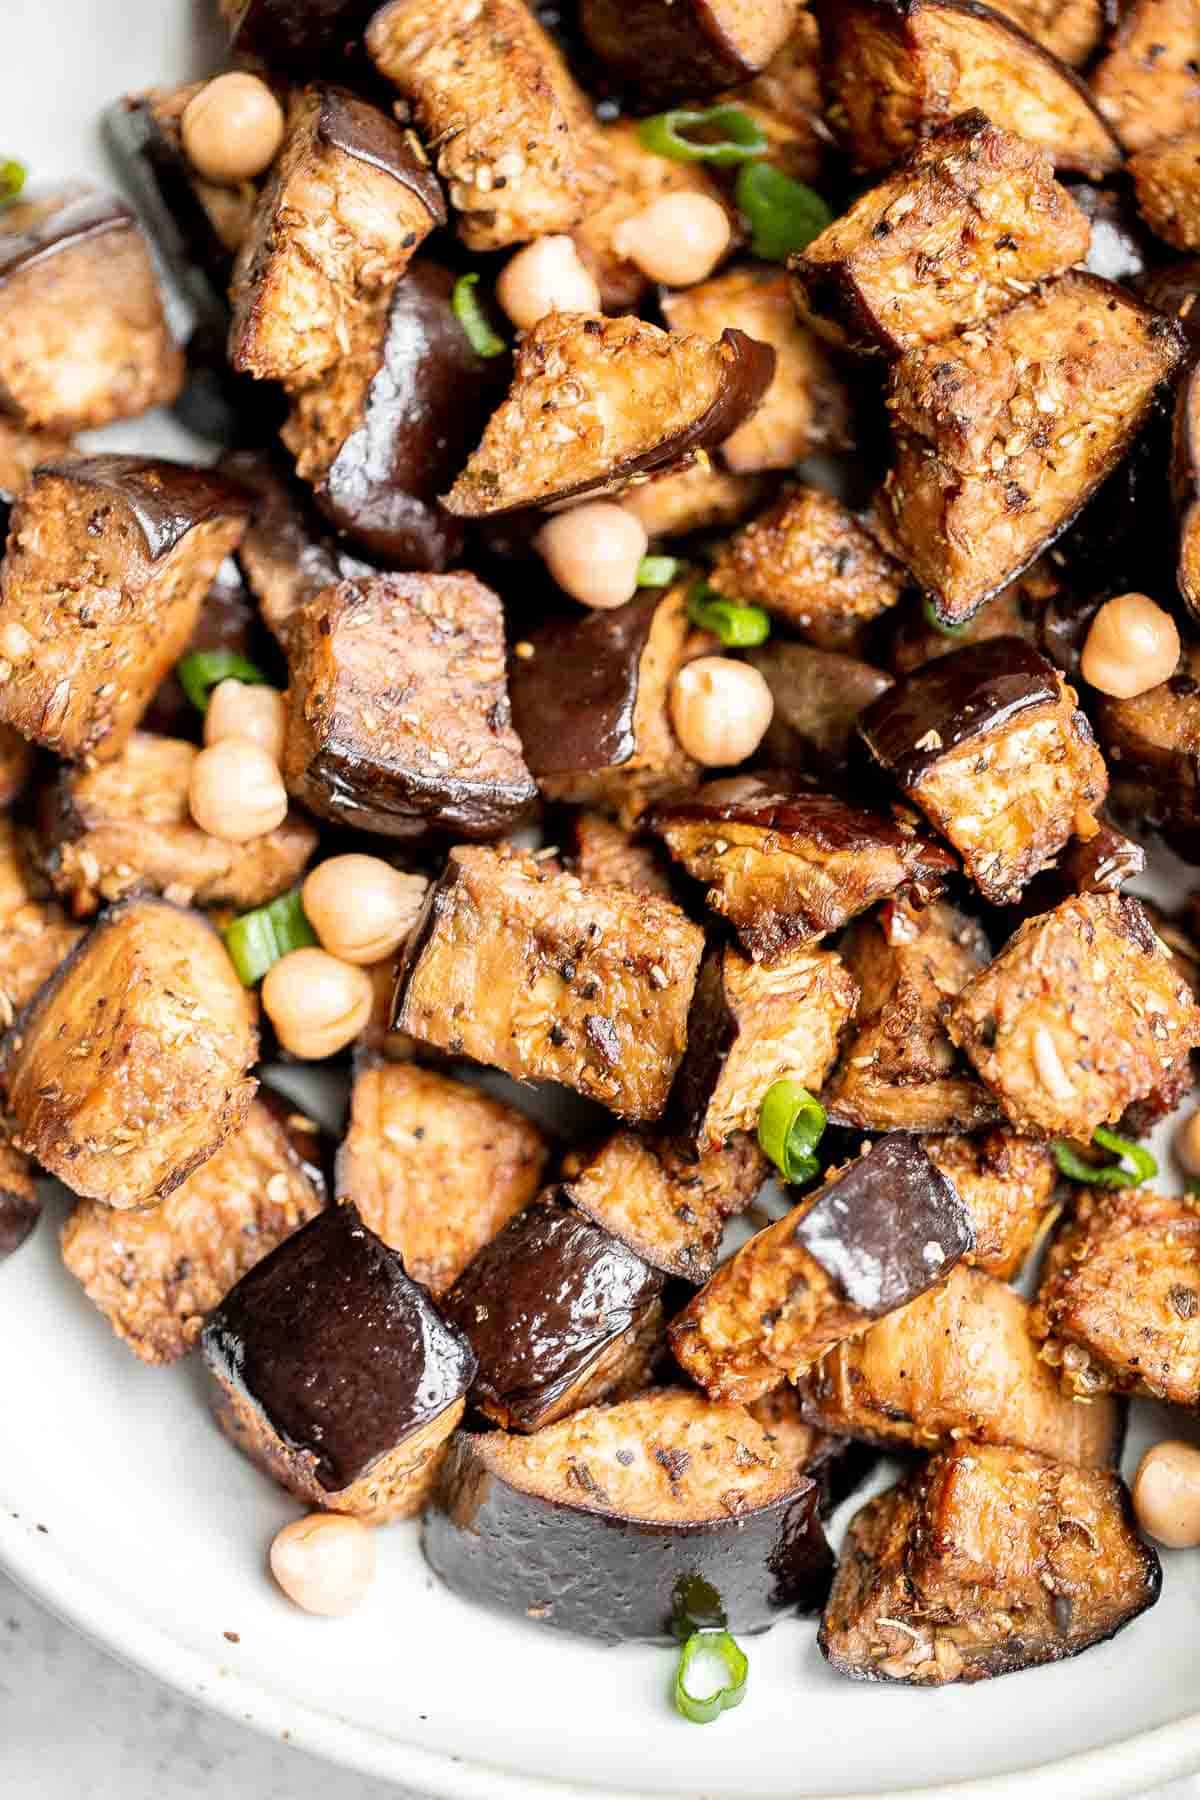
Quick and easy tomato and mozzarella caprese salad is a fresh, light, and delicious summer salad, made with just a few simple ingredients in 10 minutes.
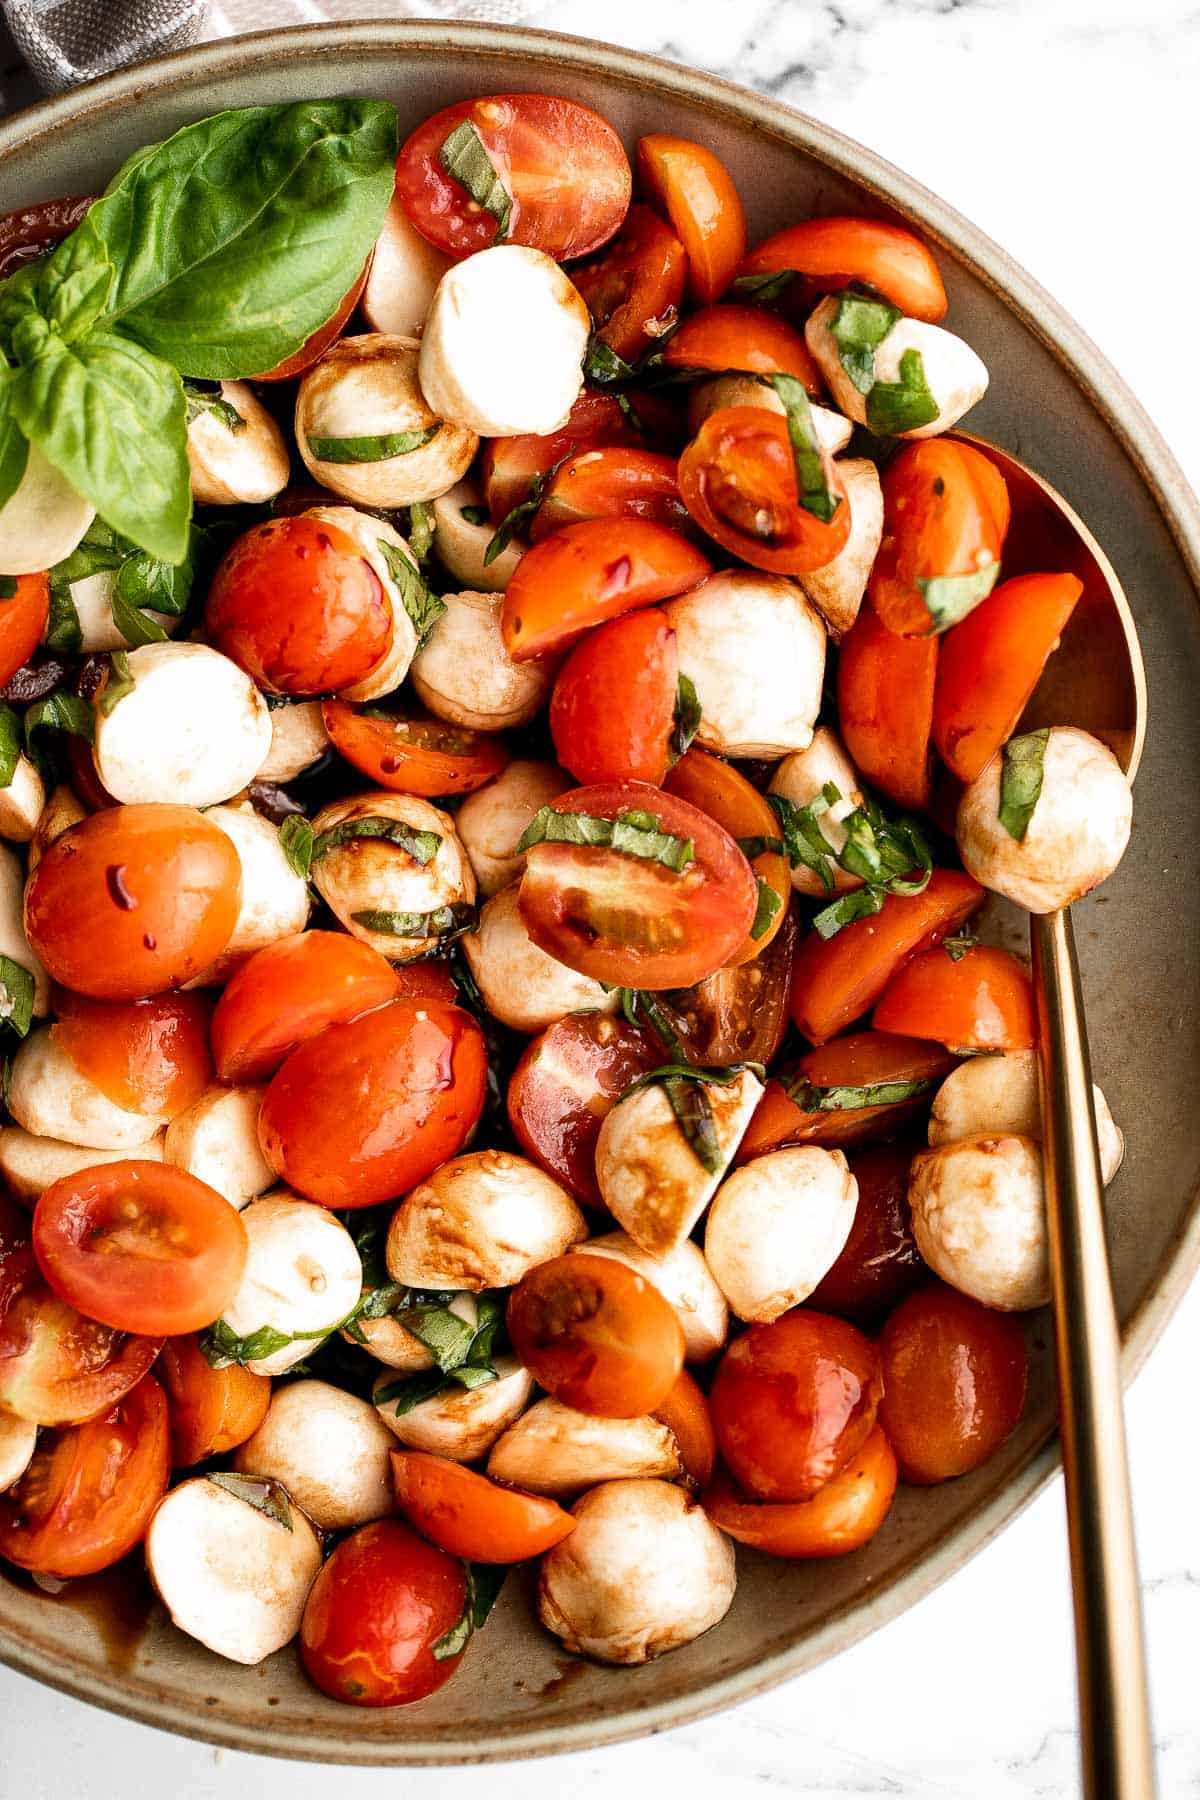
Minestrone soup is a hearty, healthy, nourishing, and delicious classic Italian soup, packed with vegetables and pasta simmered in a rich tomato broth.
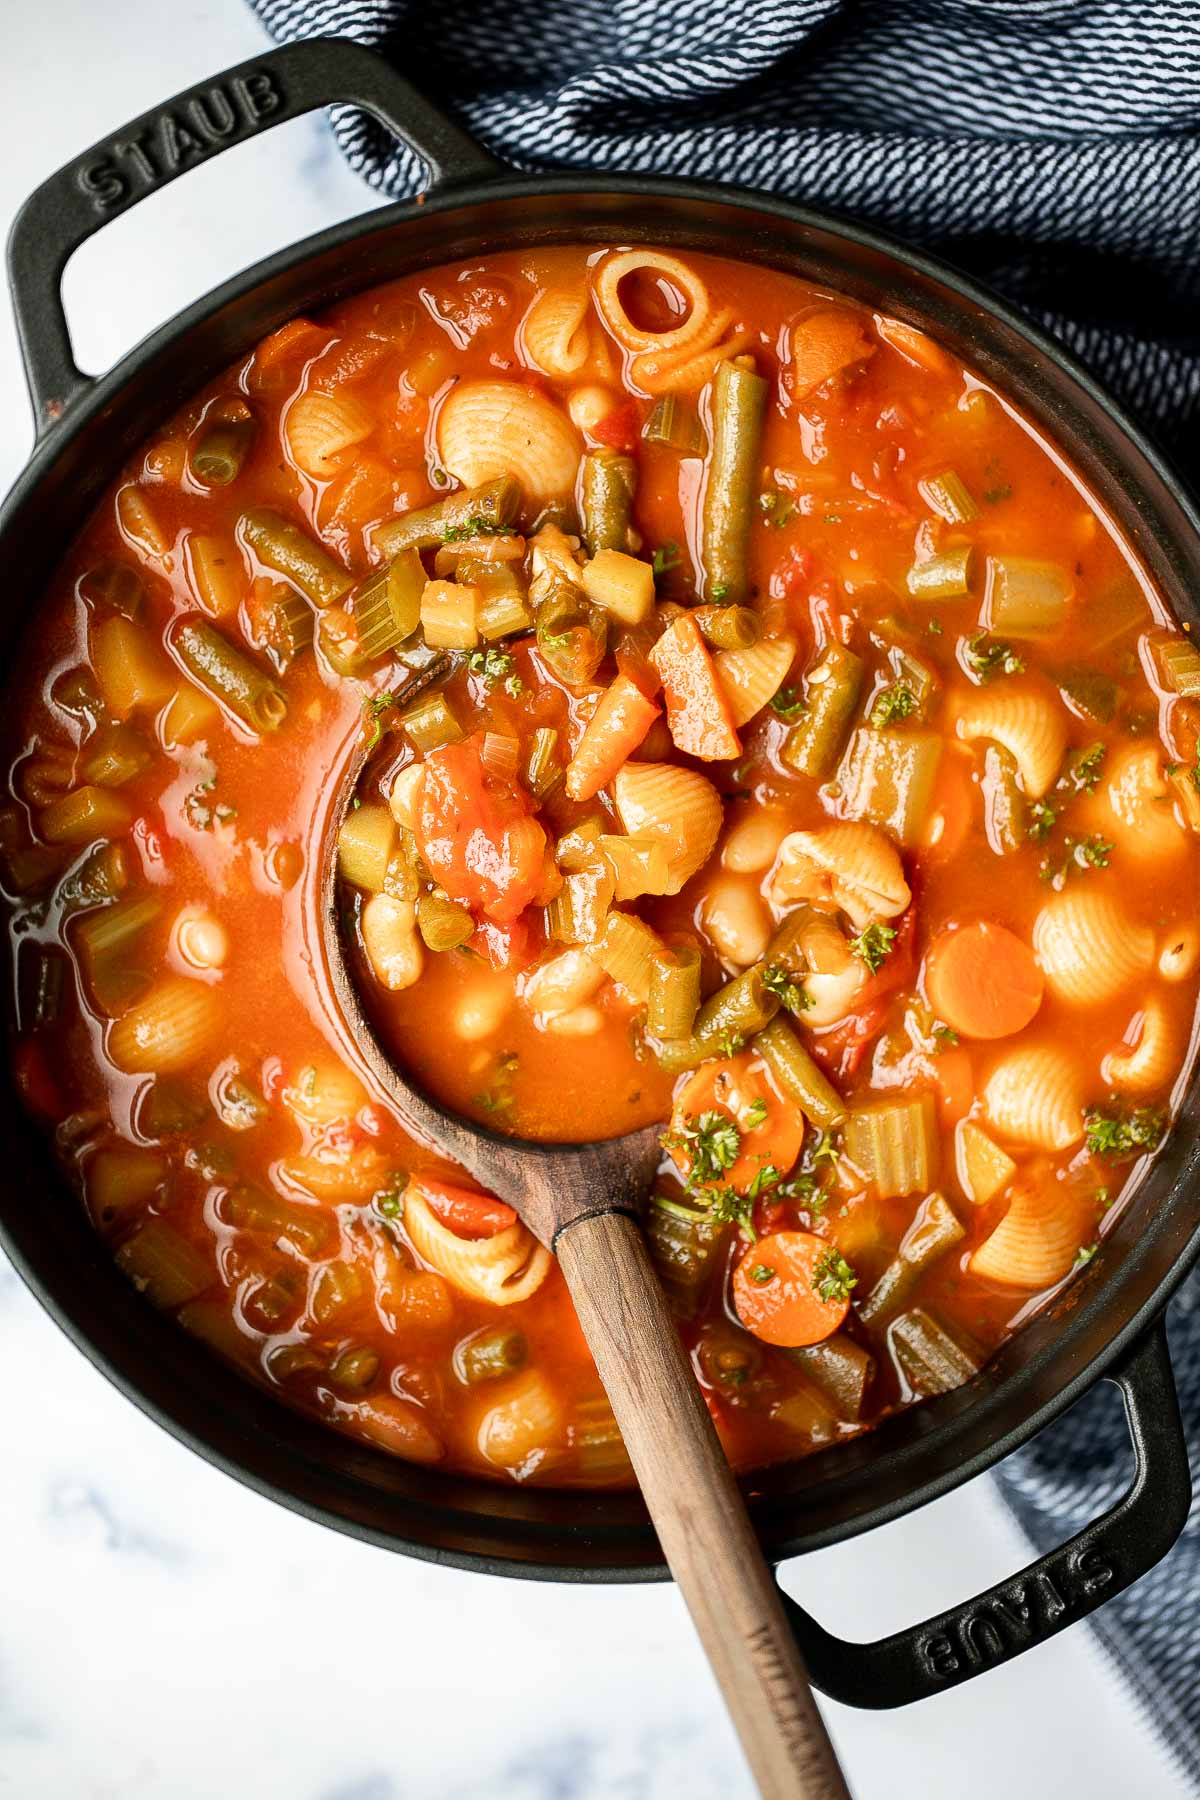
Antipasto Platter
This Antipasto Platter is a show-stopping appetizer made with a variety of marinated veggies, olives, cheeses, breads, cured meats, and fresh vegetables.
Soft garlic breadsticks are fluffy, airy, buttery, and delicious. They're an easy recipe that is perfect for beginners at baking bread.
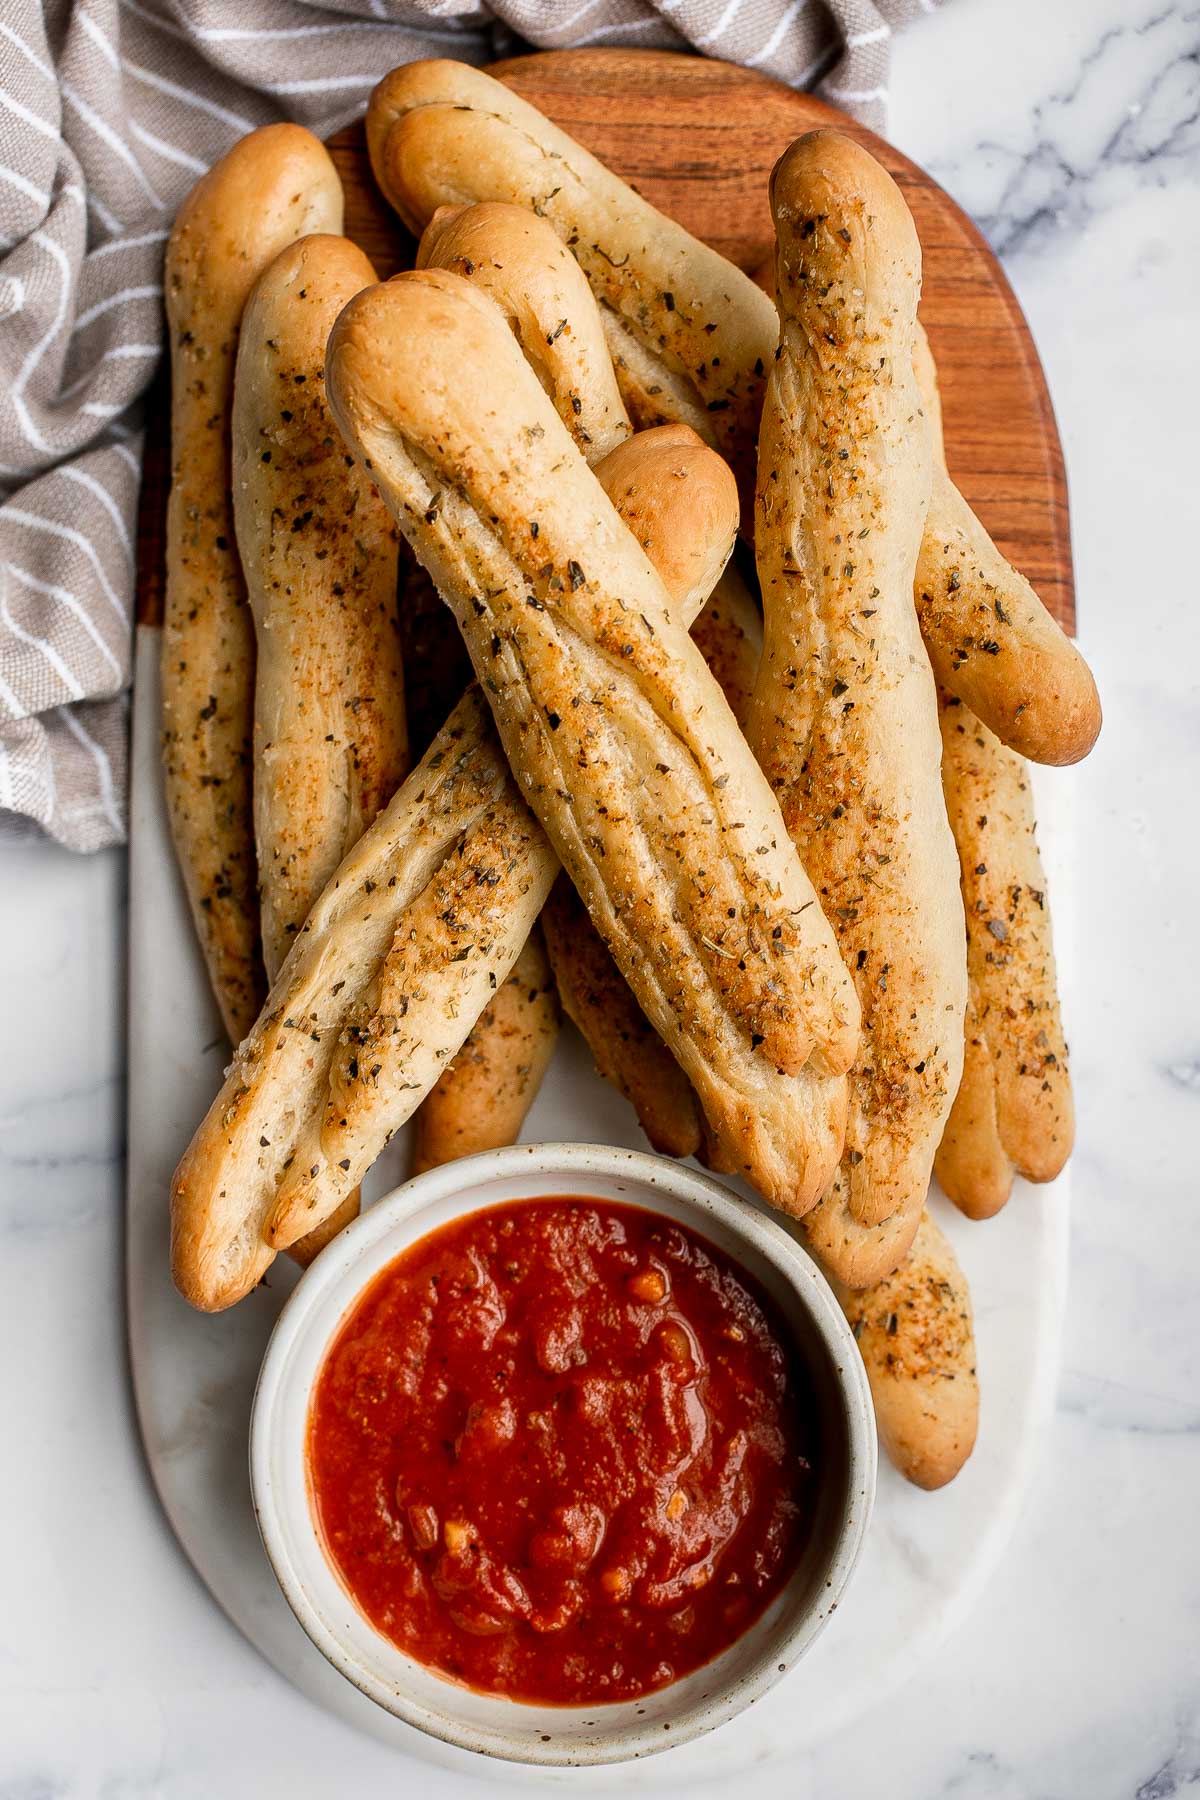
Caprese Skewers are a quick and fresh appetizer made with bite-sized mozzarella, juicy tomatoes, and basil leaves with a drizzle of balsamic glaze.
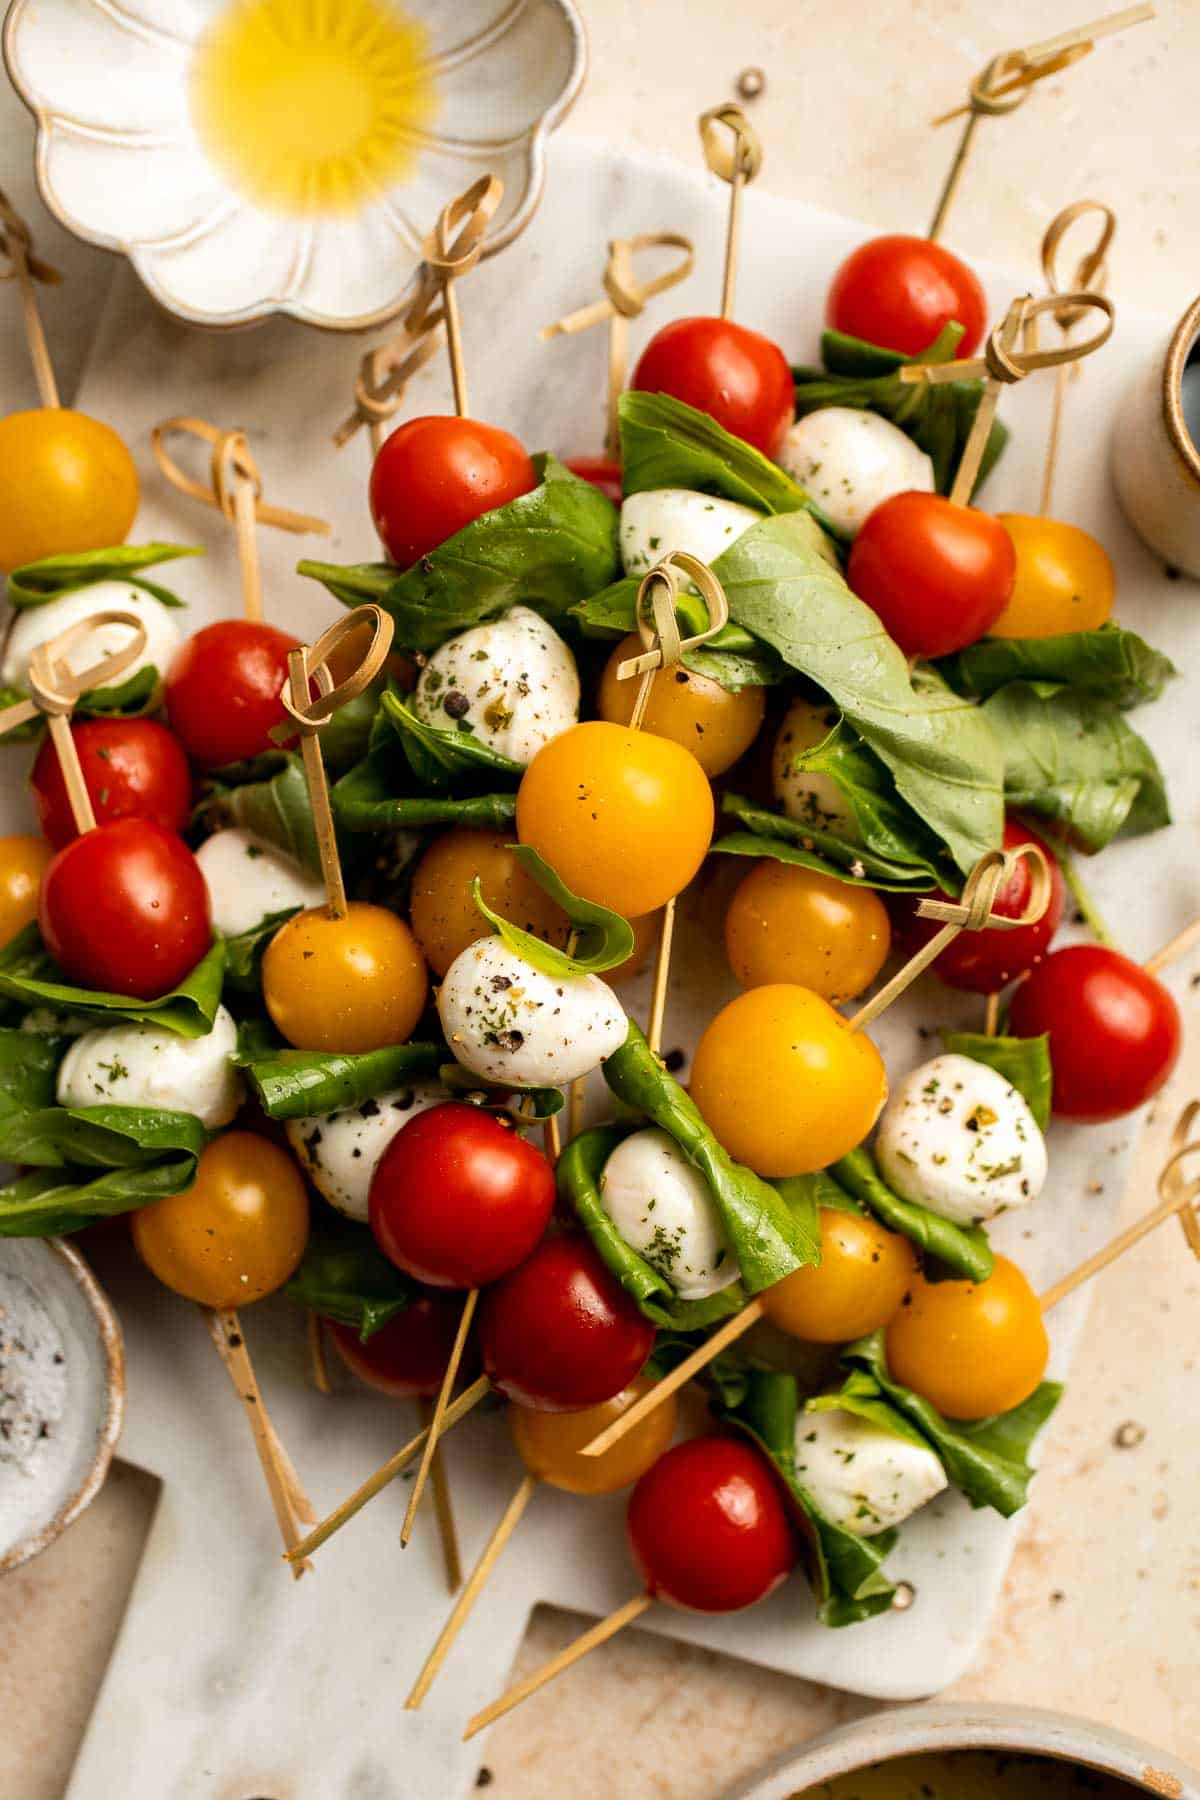
Light and airy, whipped ricotta dip is so easy to make in just 5 minutes with a few fresh ingredients including fresh herbs, olive oil, garlic, and honey.
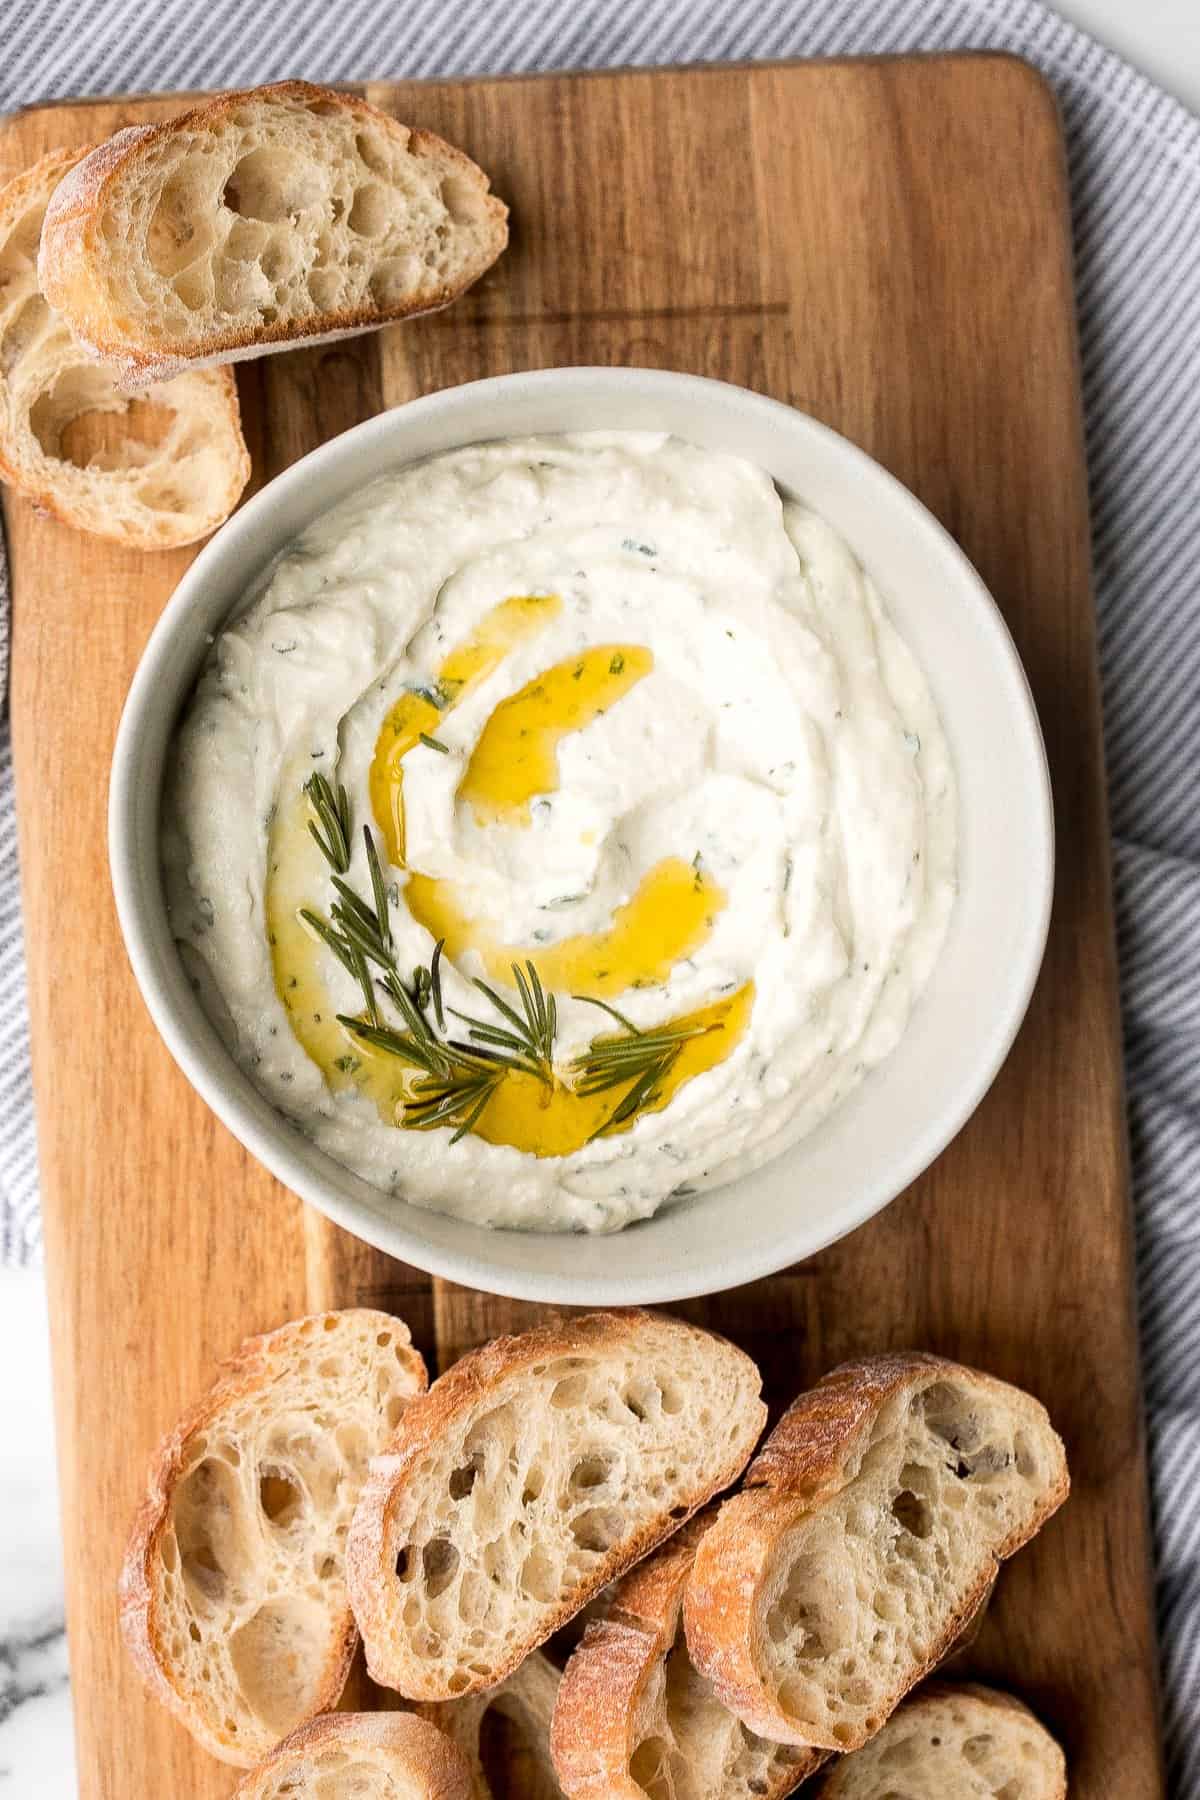
Cheesy Baked Gnocchi is quick and easy comfort food made all in one pot with chewy bites of gnocchi, a simple tomato-based sauce, and gooey melty cheese.
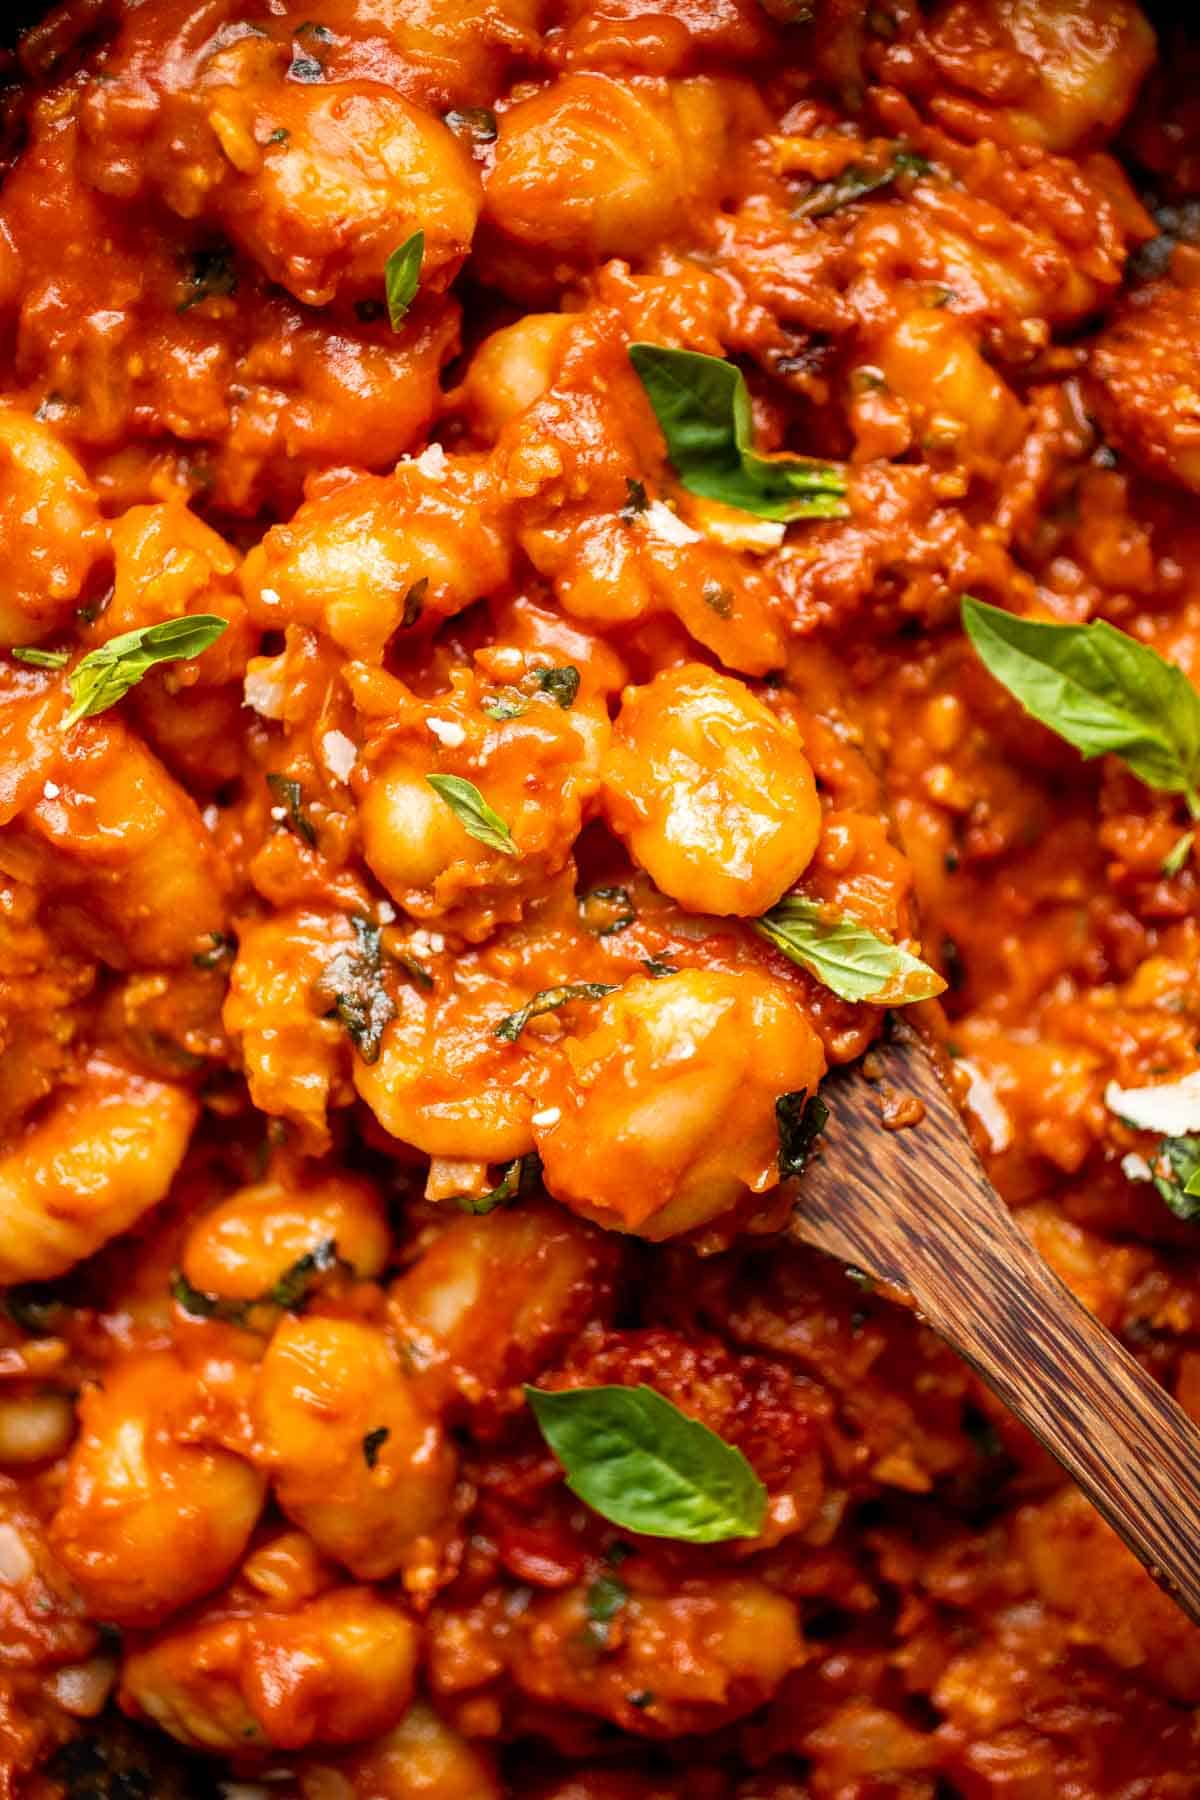
Arugula Salad with Parmesan cheese and a simple homemade lemon dressing is healthy, fresh, and delicious. Toss it together in just 5 minutes!
Smooth, hearty and light, one pot lemon chicken orzo soup is pure comfort in a bowl. This family favourite is like chicken noodle soup with a major upgrade.
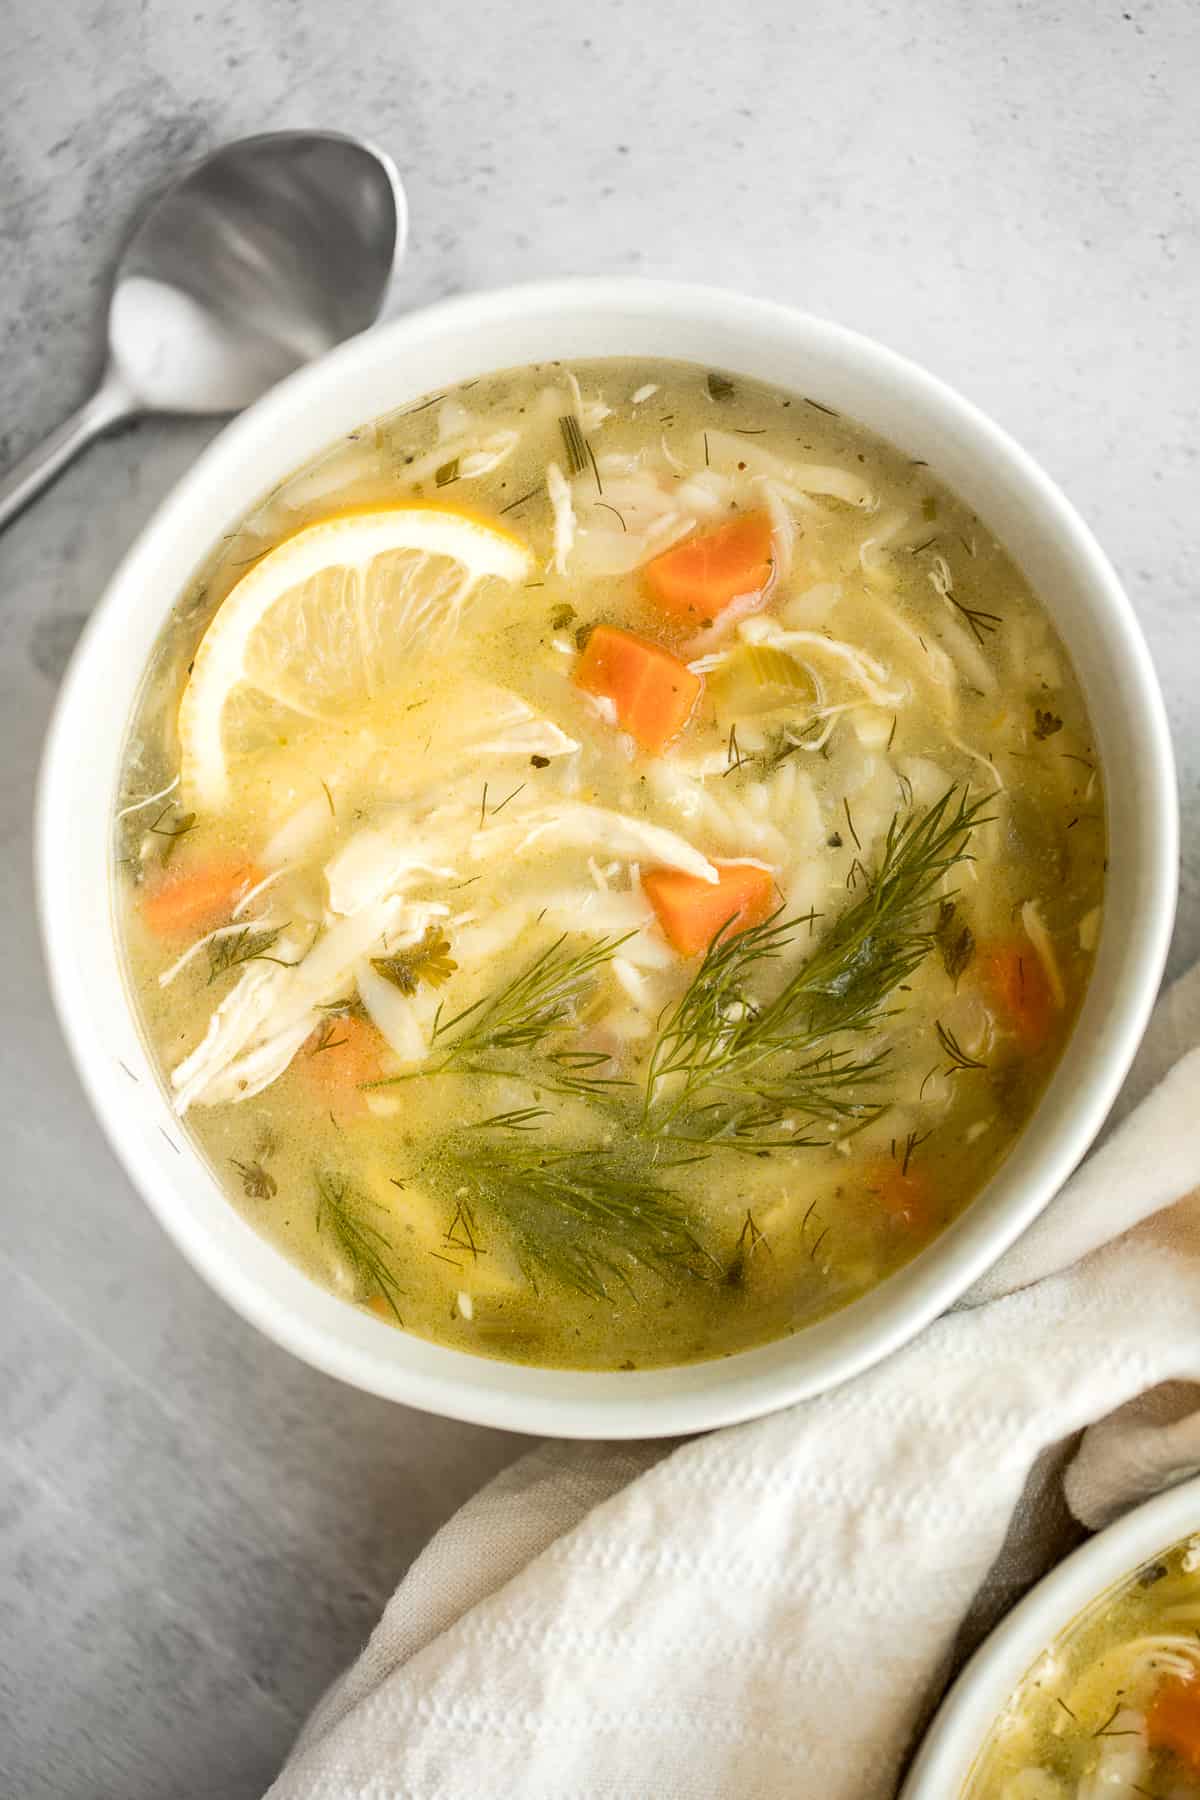
Cheesy roasted asparagus is a quick and easy side dish made with a handful of simple ingredients in 20 minutes. They're garlicky, cheesy, and flavorful.

Easy small batch ciabatta rolls are fluffy and airy with a perfect crunchy, crackly crust. They take only 10 minutes to prepare and require no kneading. These are the most popular bread recipe on our entire site!
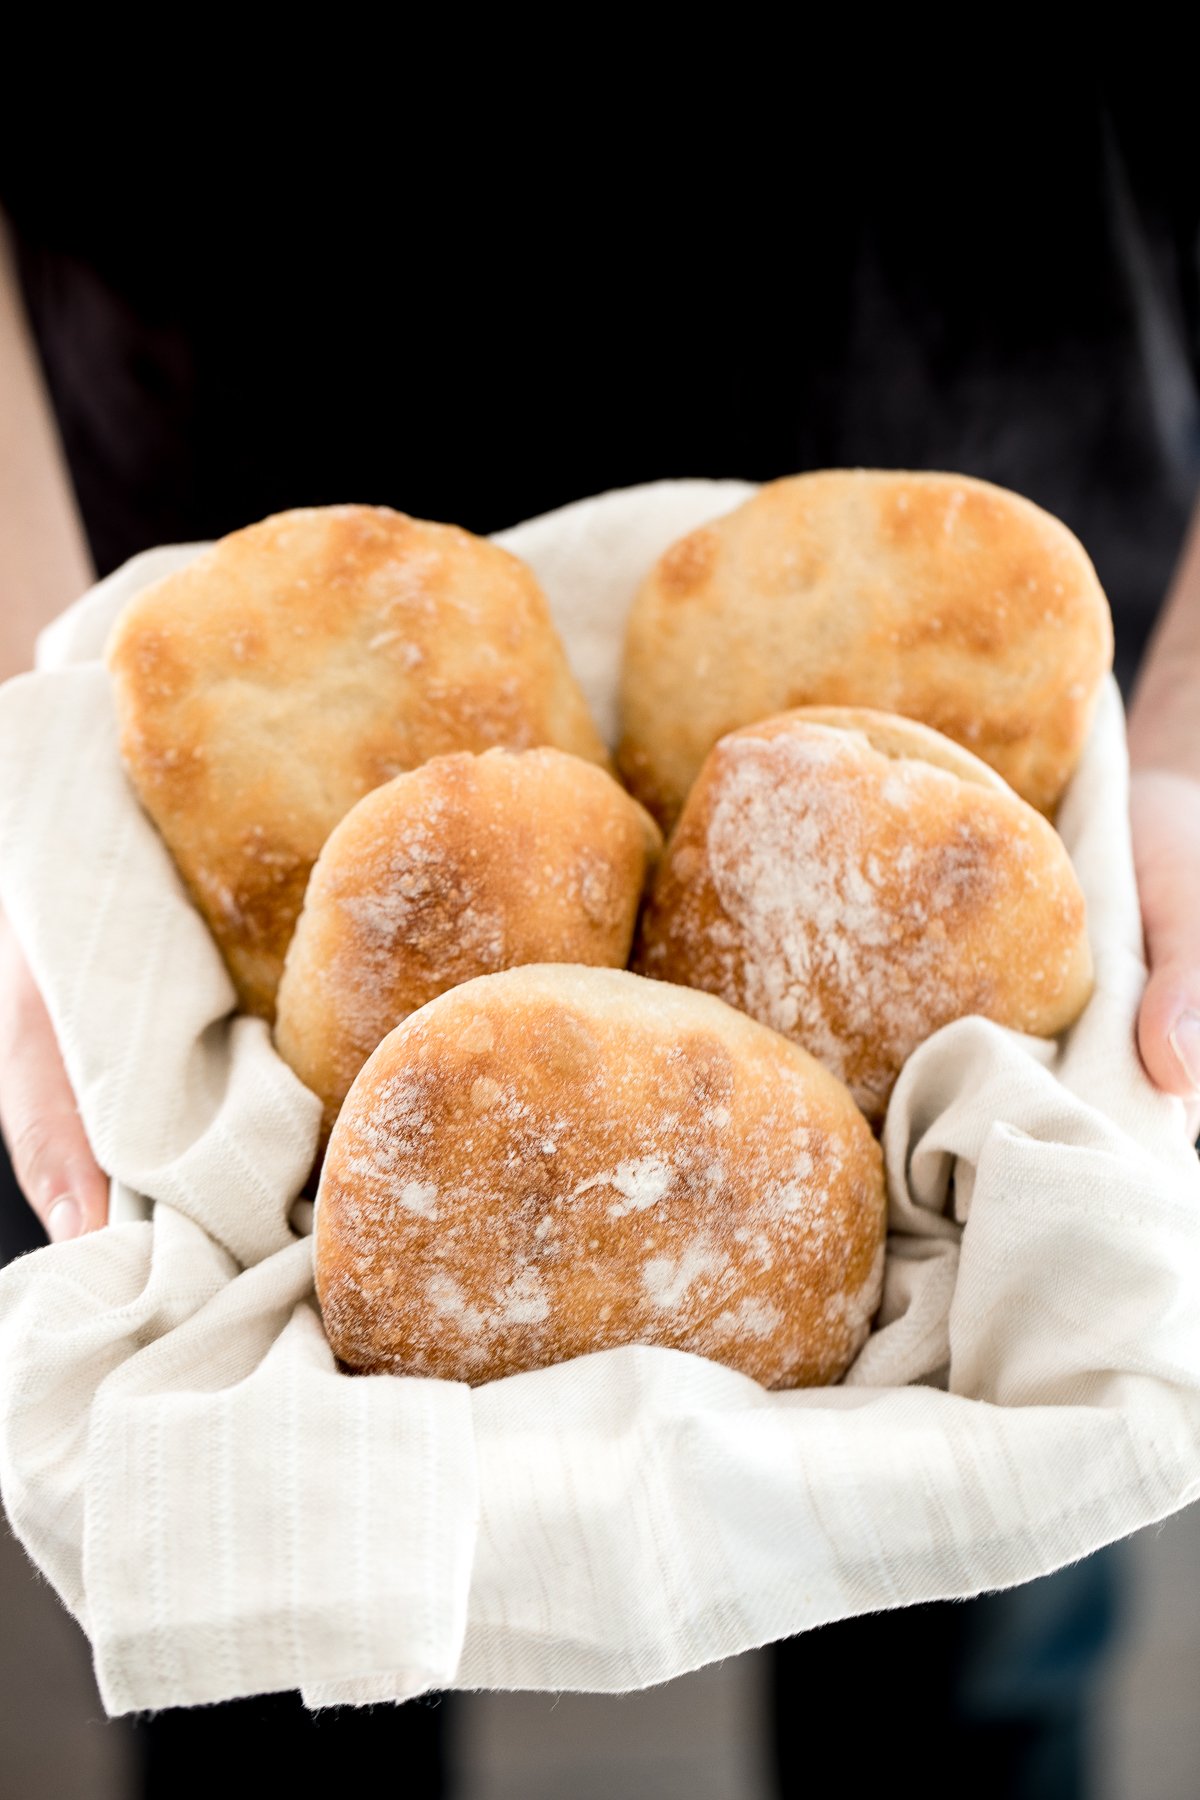
Marinara sauce is rich, vibrant, and loaded with flavor. It's easy to make with a few simple fresh ingredients. Serve as a dip or in pasta and pizza.
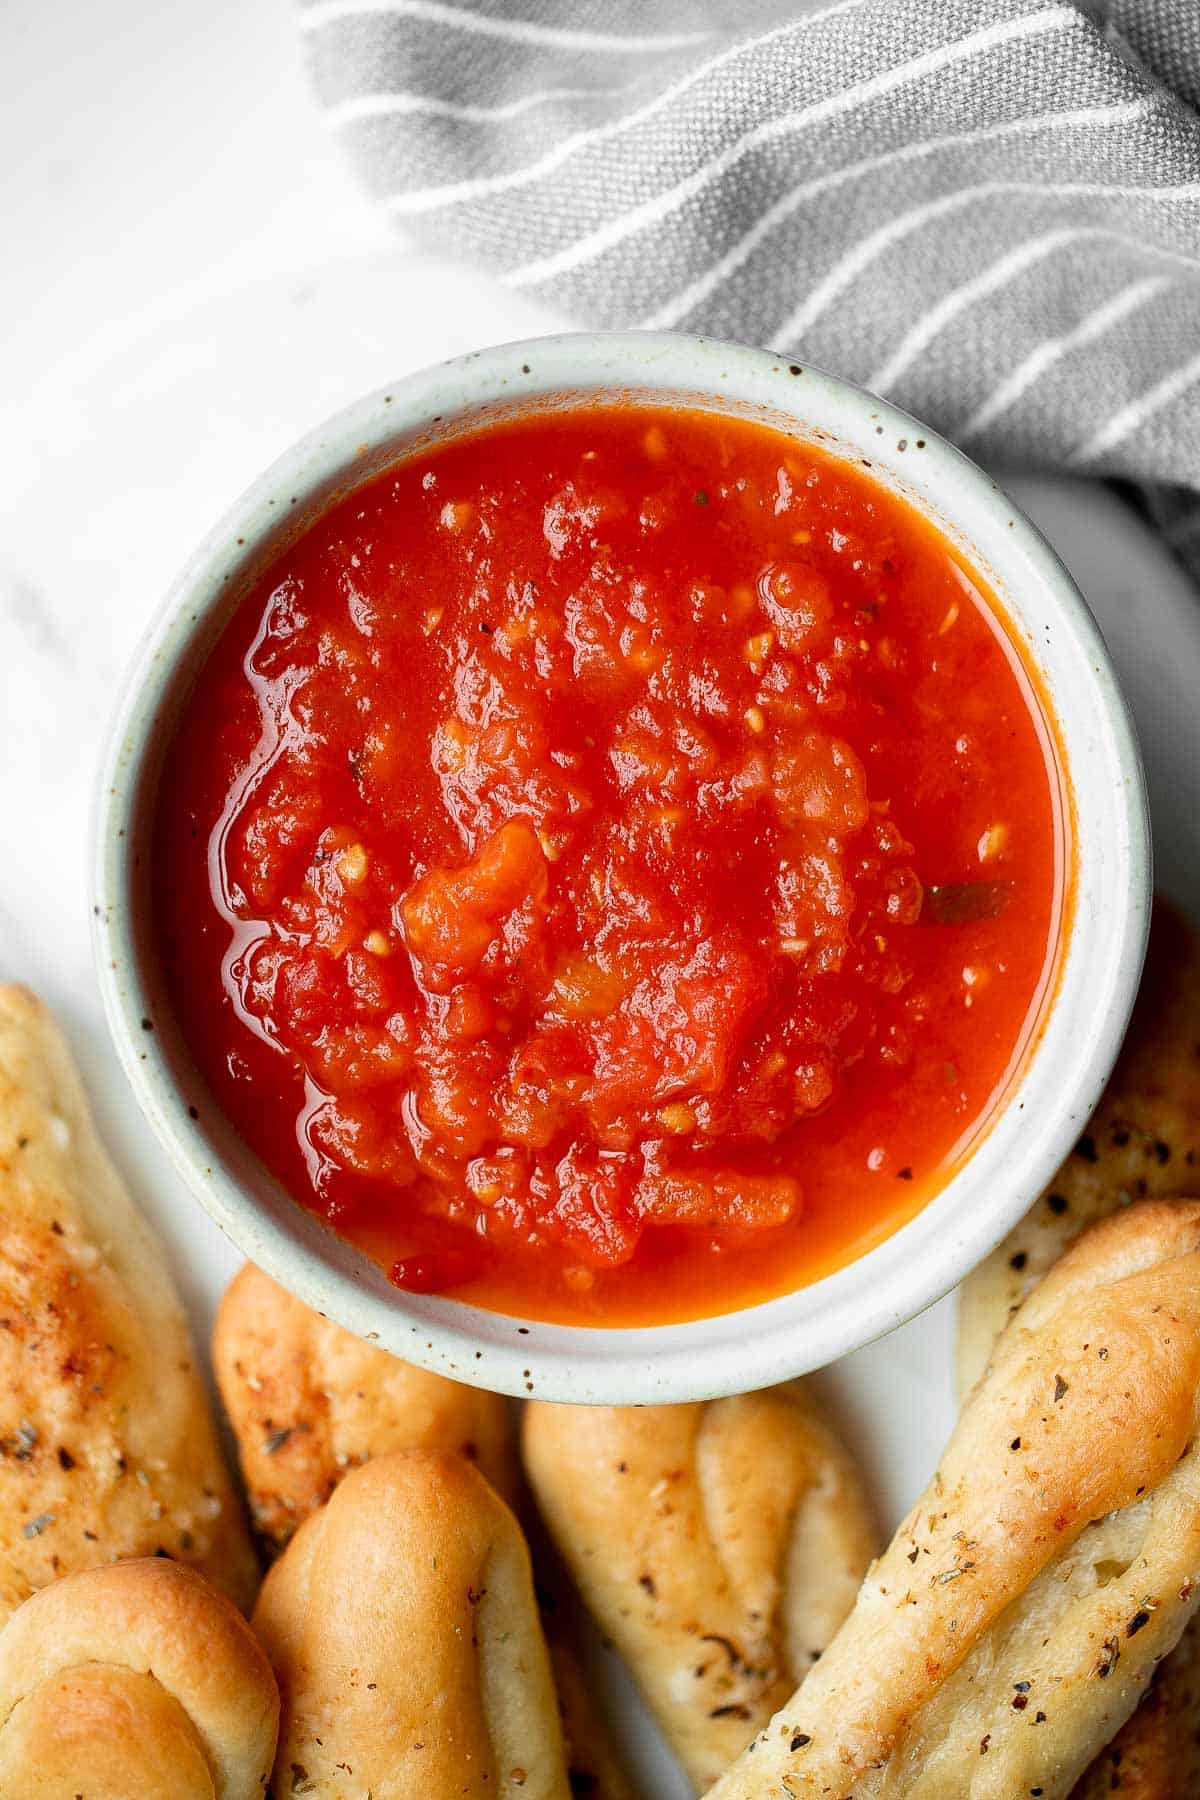
Eggplant Parmesan is a vegetarian Italian dish made featuring tender eggplant slices coated in crispy breadcrumbs, melty cheese, and baked in tomato sauce.
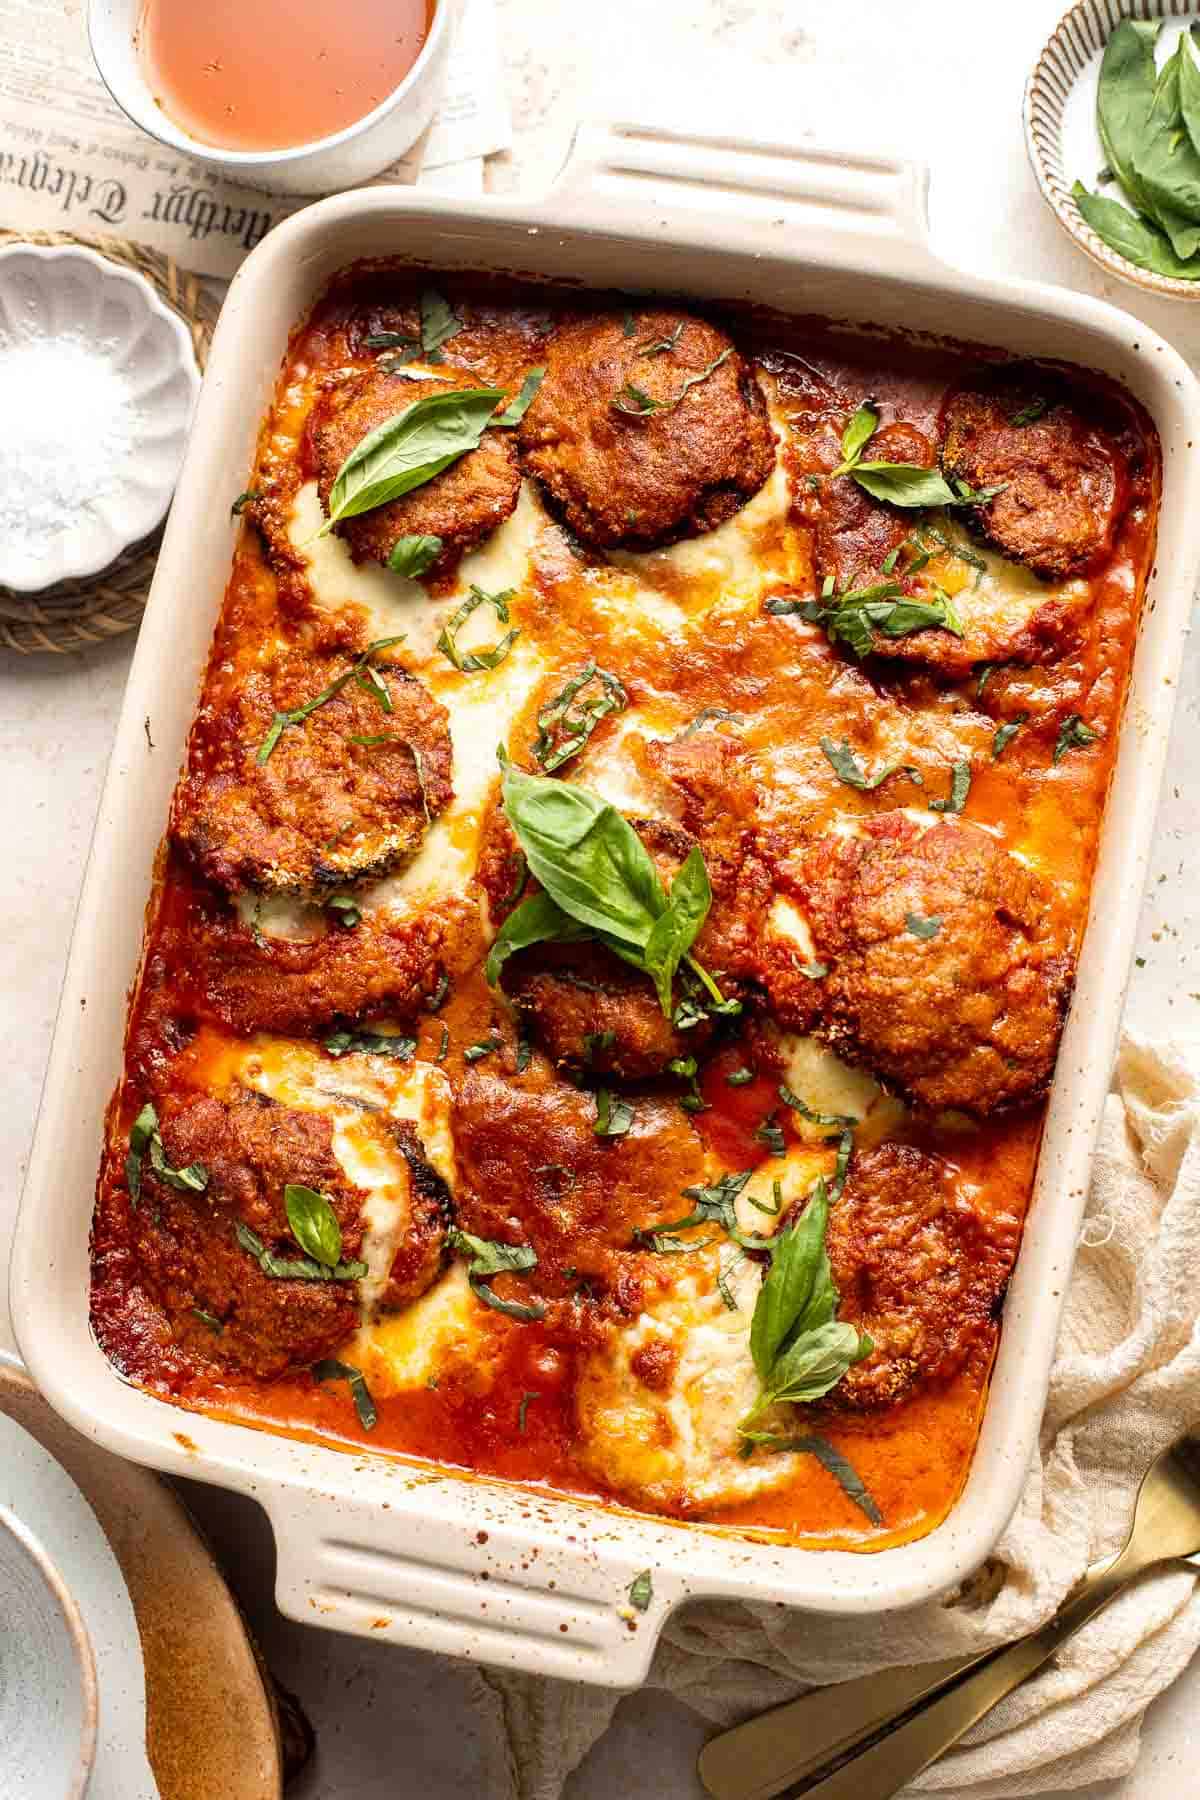
Whipped ricotta crostini is a fancy easy appetizer to make in just minutes or prepare in advance and assemble before serving. A total crowd pleaser.

Roasted Garlic Parmesan Baby Potatoes
Quick and easy roasted garlic Parmesan baby potatoes are crispy on the edges and tender inside. They are delicious, flavourful and bakes in just 30 minutes.
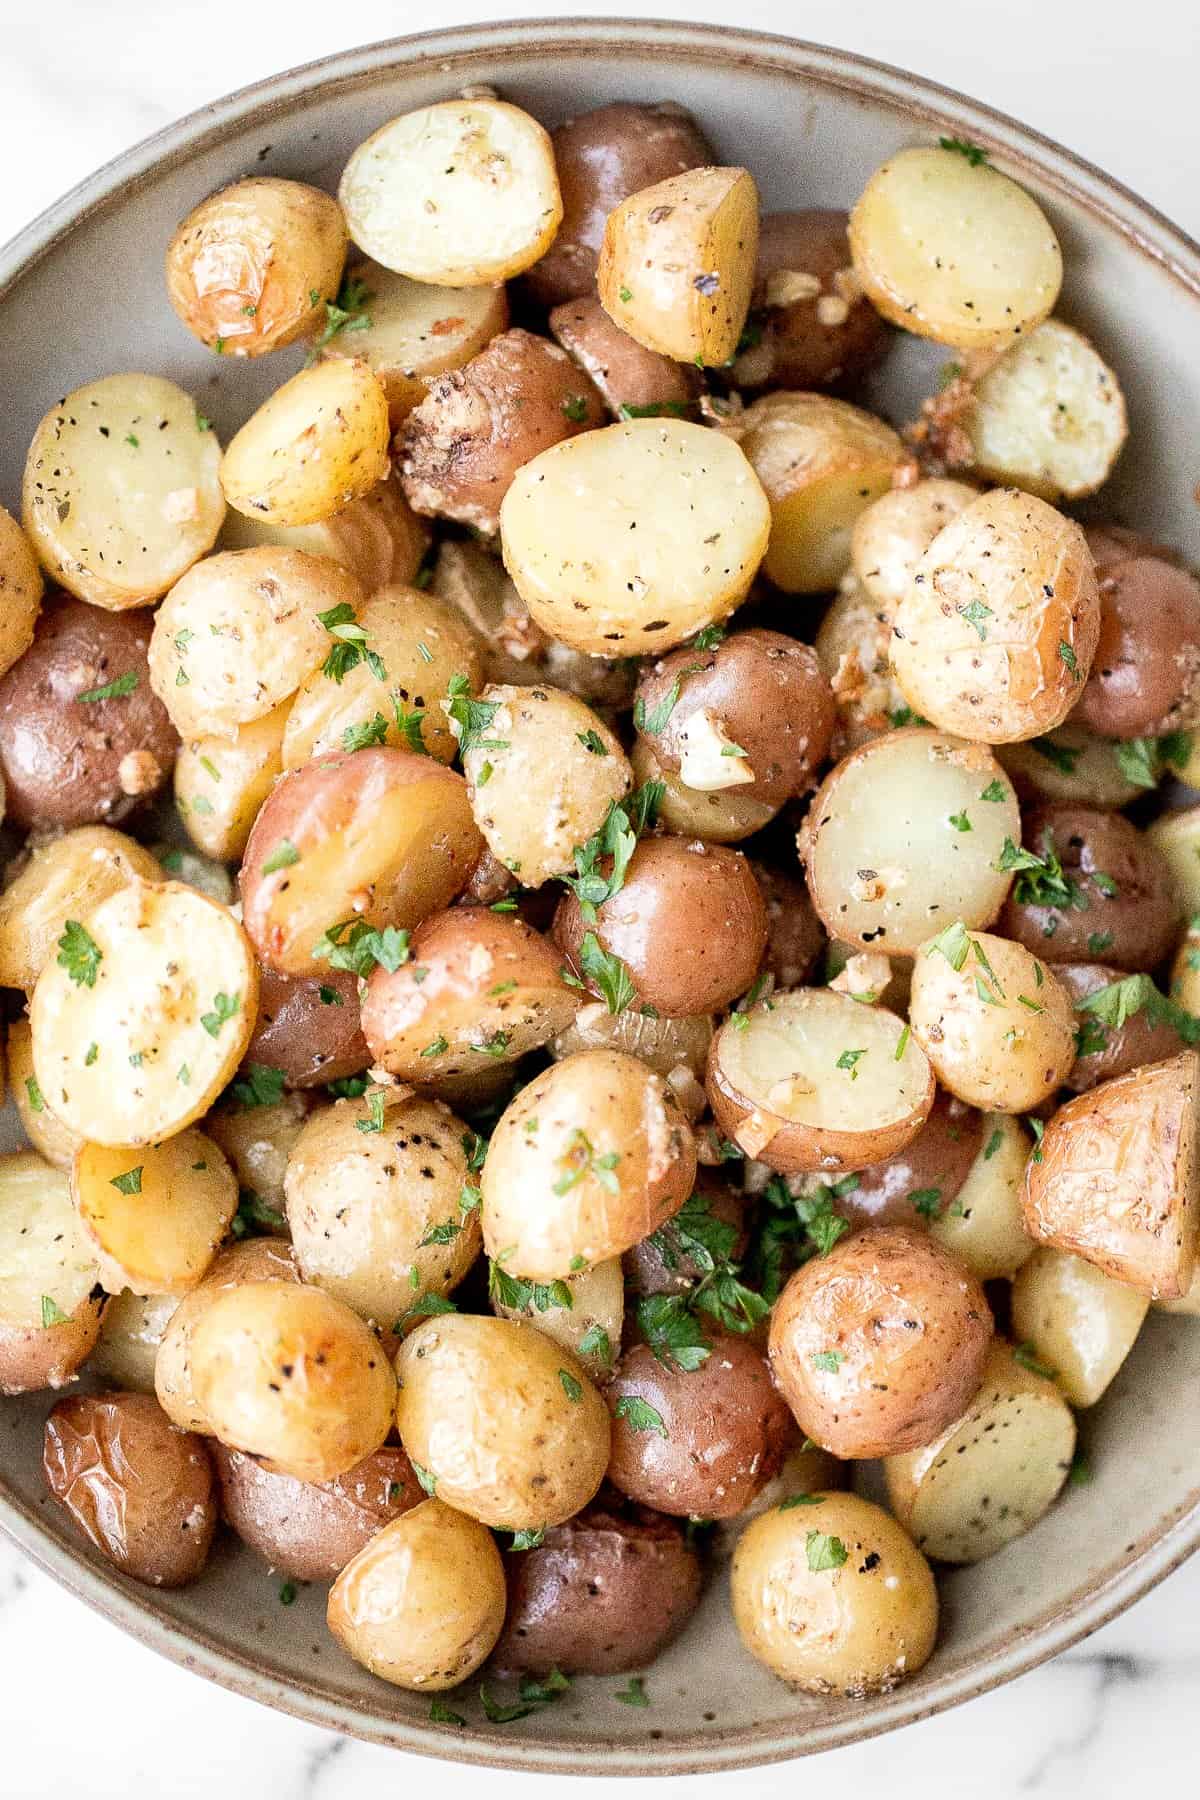
Mediterranean White Bean Salad is loaded with cannellini beans, veggies, feta, and fresh herbs, tossed in a homemade Greek dressing. Perfect for meal prep!
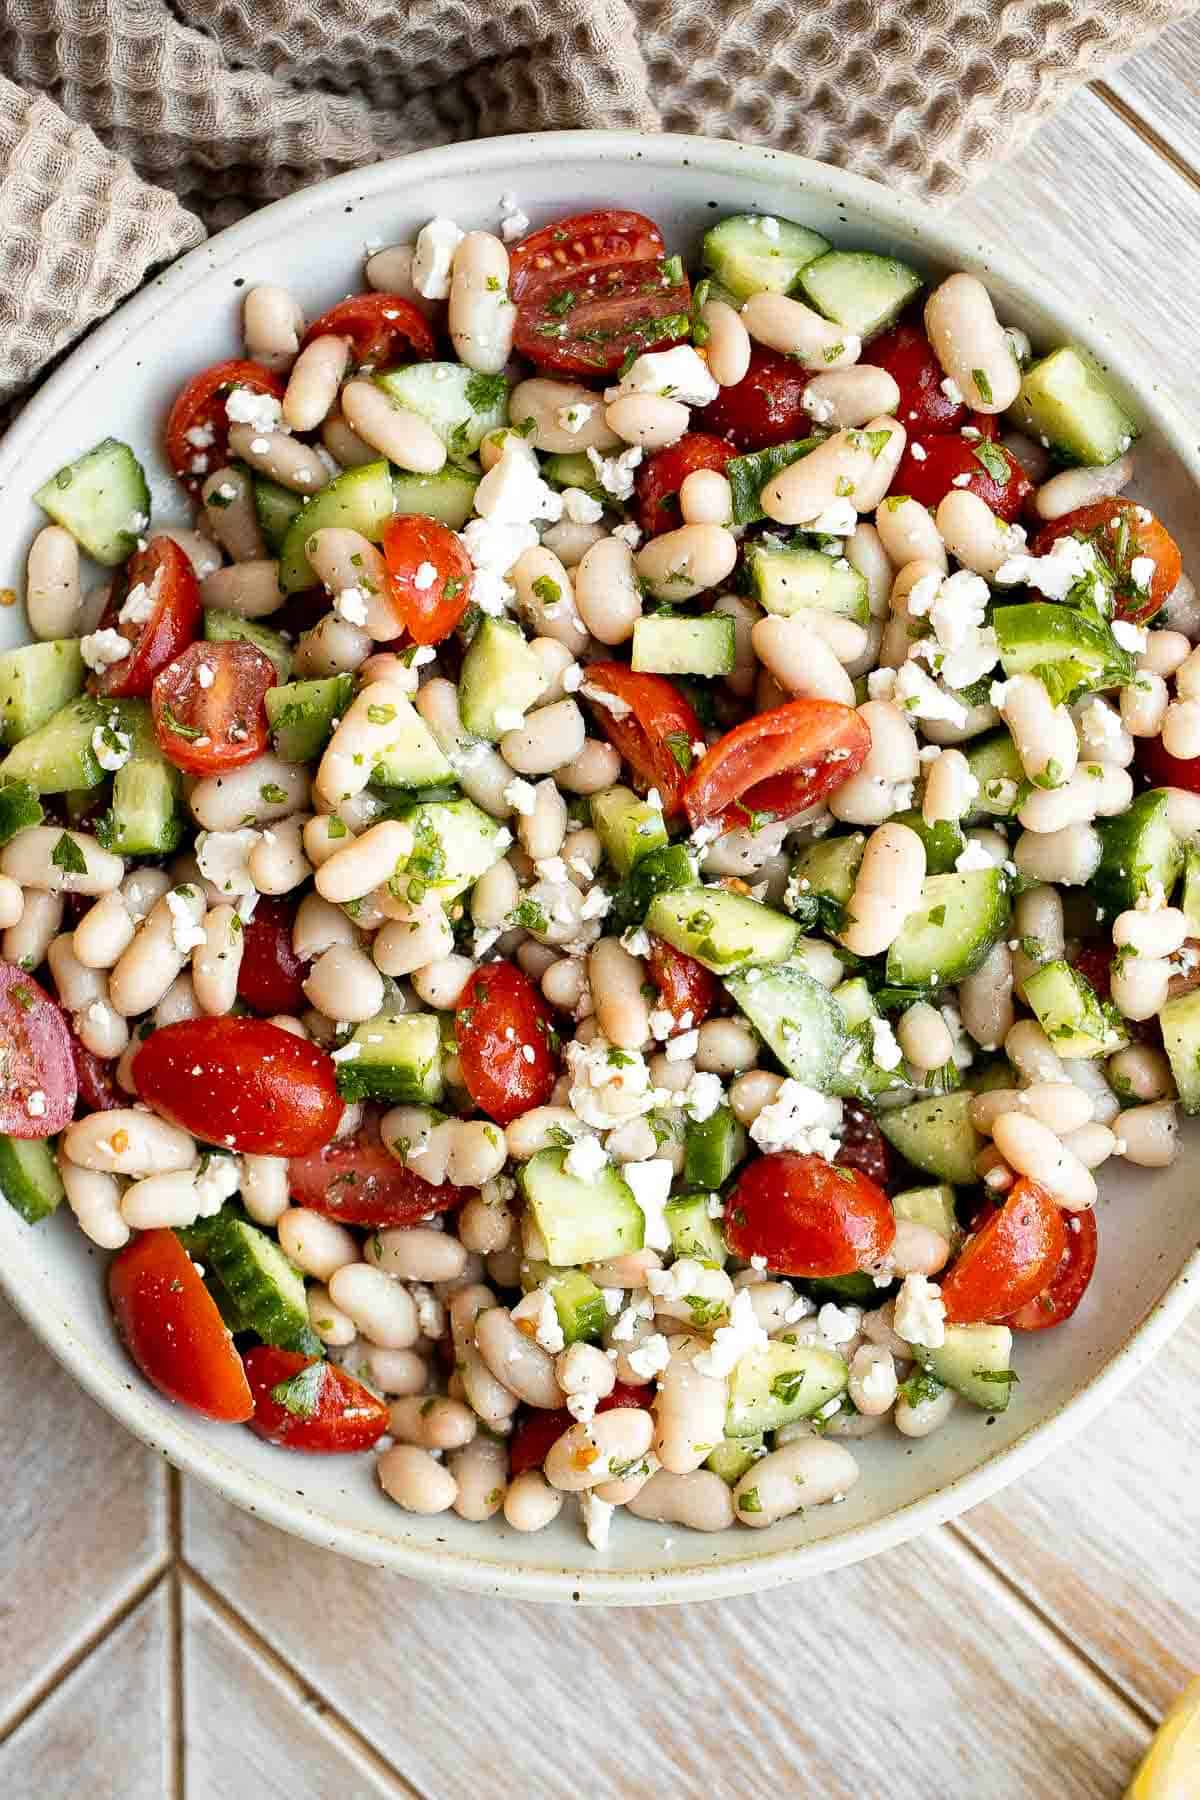
Creamy Tortellini Soup with Sausage
Hearty and creamy tortellini soup with sausage, spinach and kale is total comfort food in a bowl. Make this flavourful one pot meal in under 30 minutes.
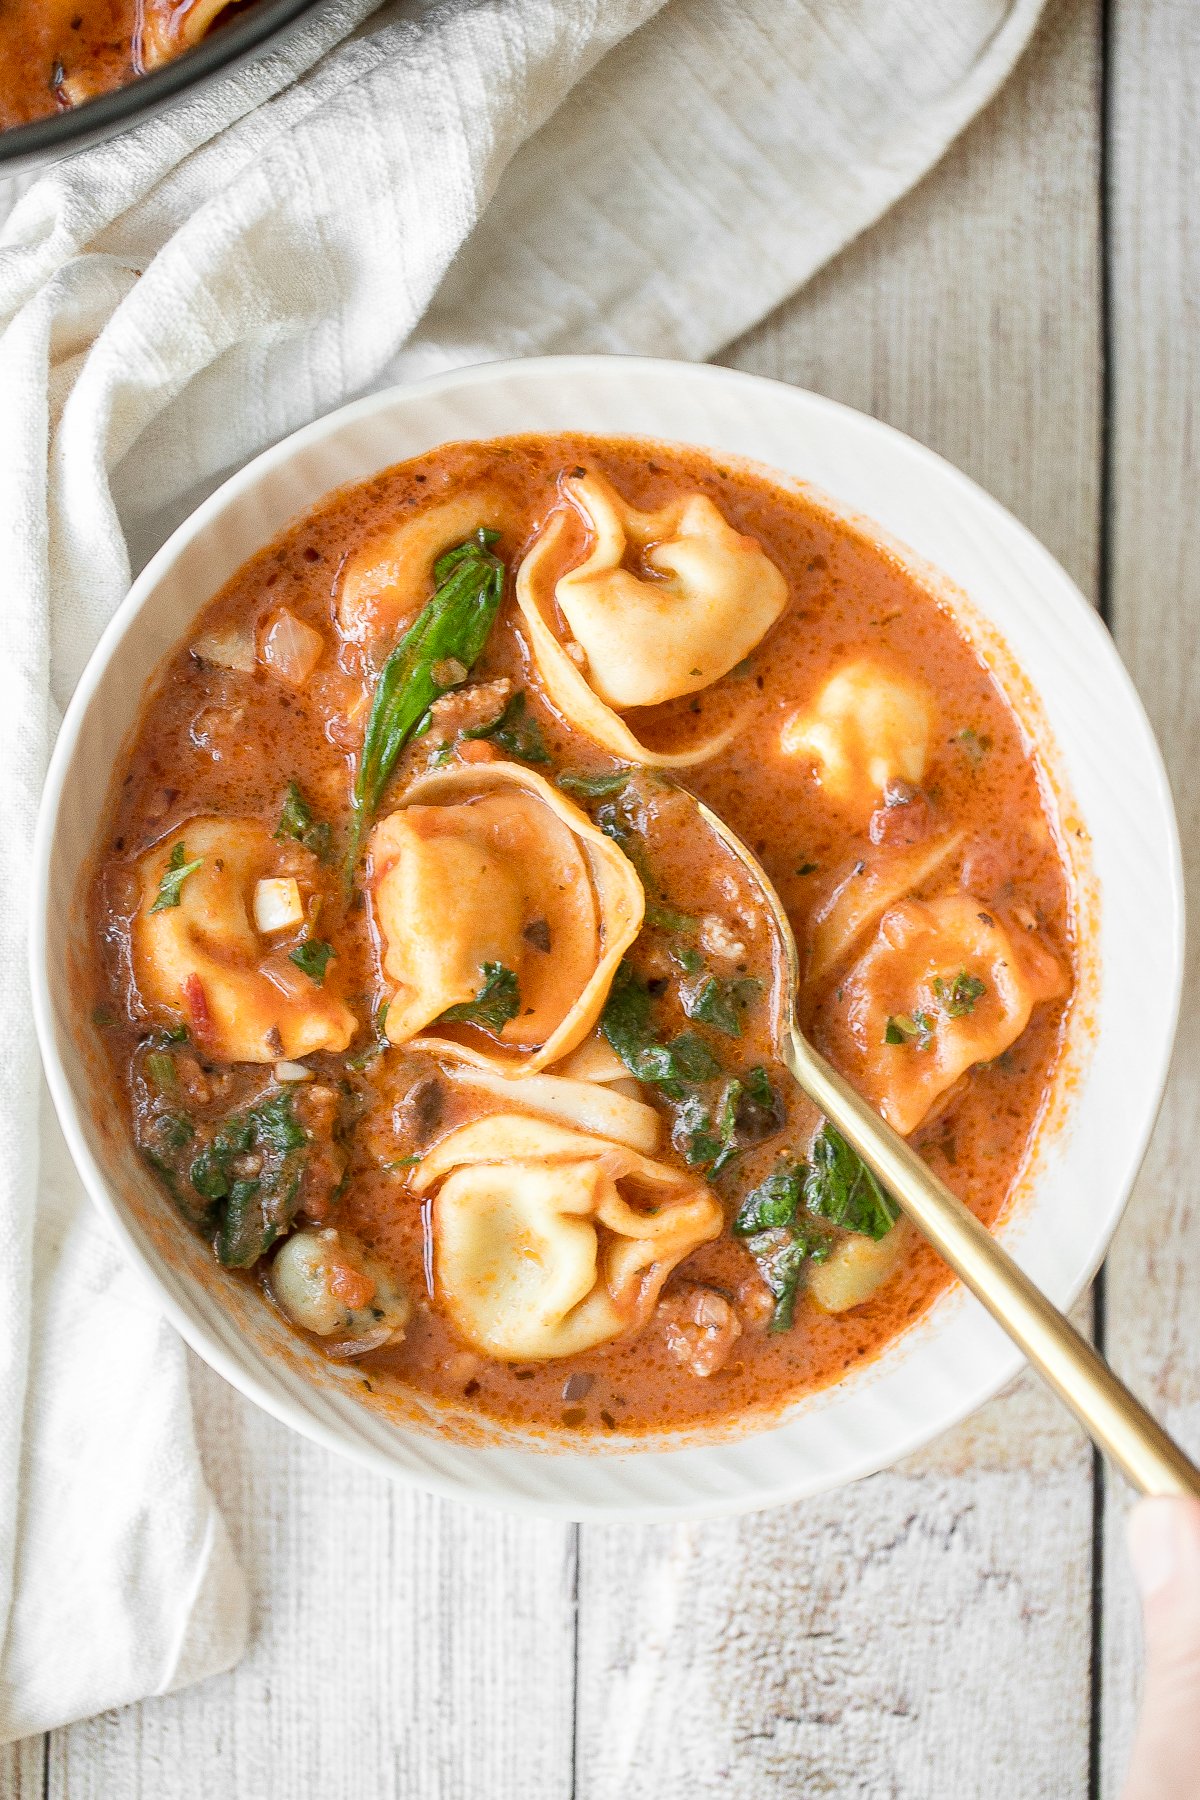
Lemon Parmesan Green Beans are the perfect side to any entree dinner meal - buttery, lemony, and cheesy. This quick side dish is easy to make in 20 minutes.
Cheesy Garlic Bread is toasty and crispy on the outside, tender and soft inside with a garlic butter and melty cheese on top. Make in under 20 minutes!

Baked ricotta is creamy, smooth, and flavorful. This delicious warm dip is packed with Parmesan and seasoned with dried herbs for the ultimate cheesy dip.
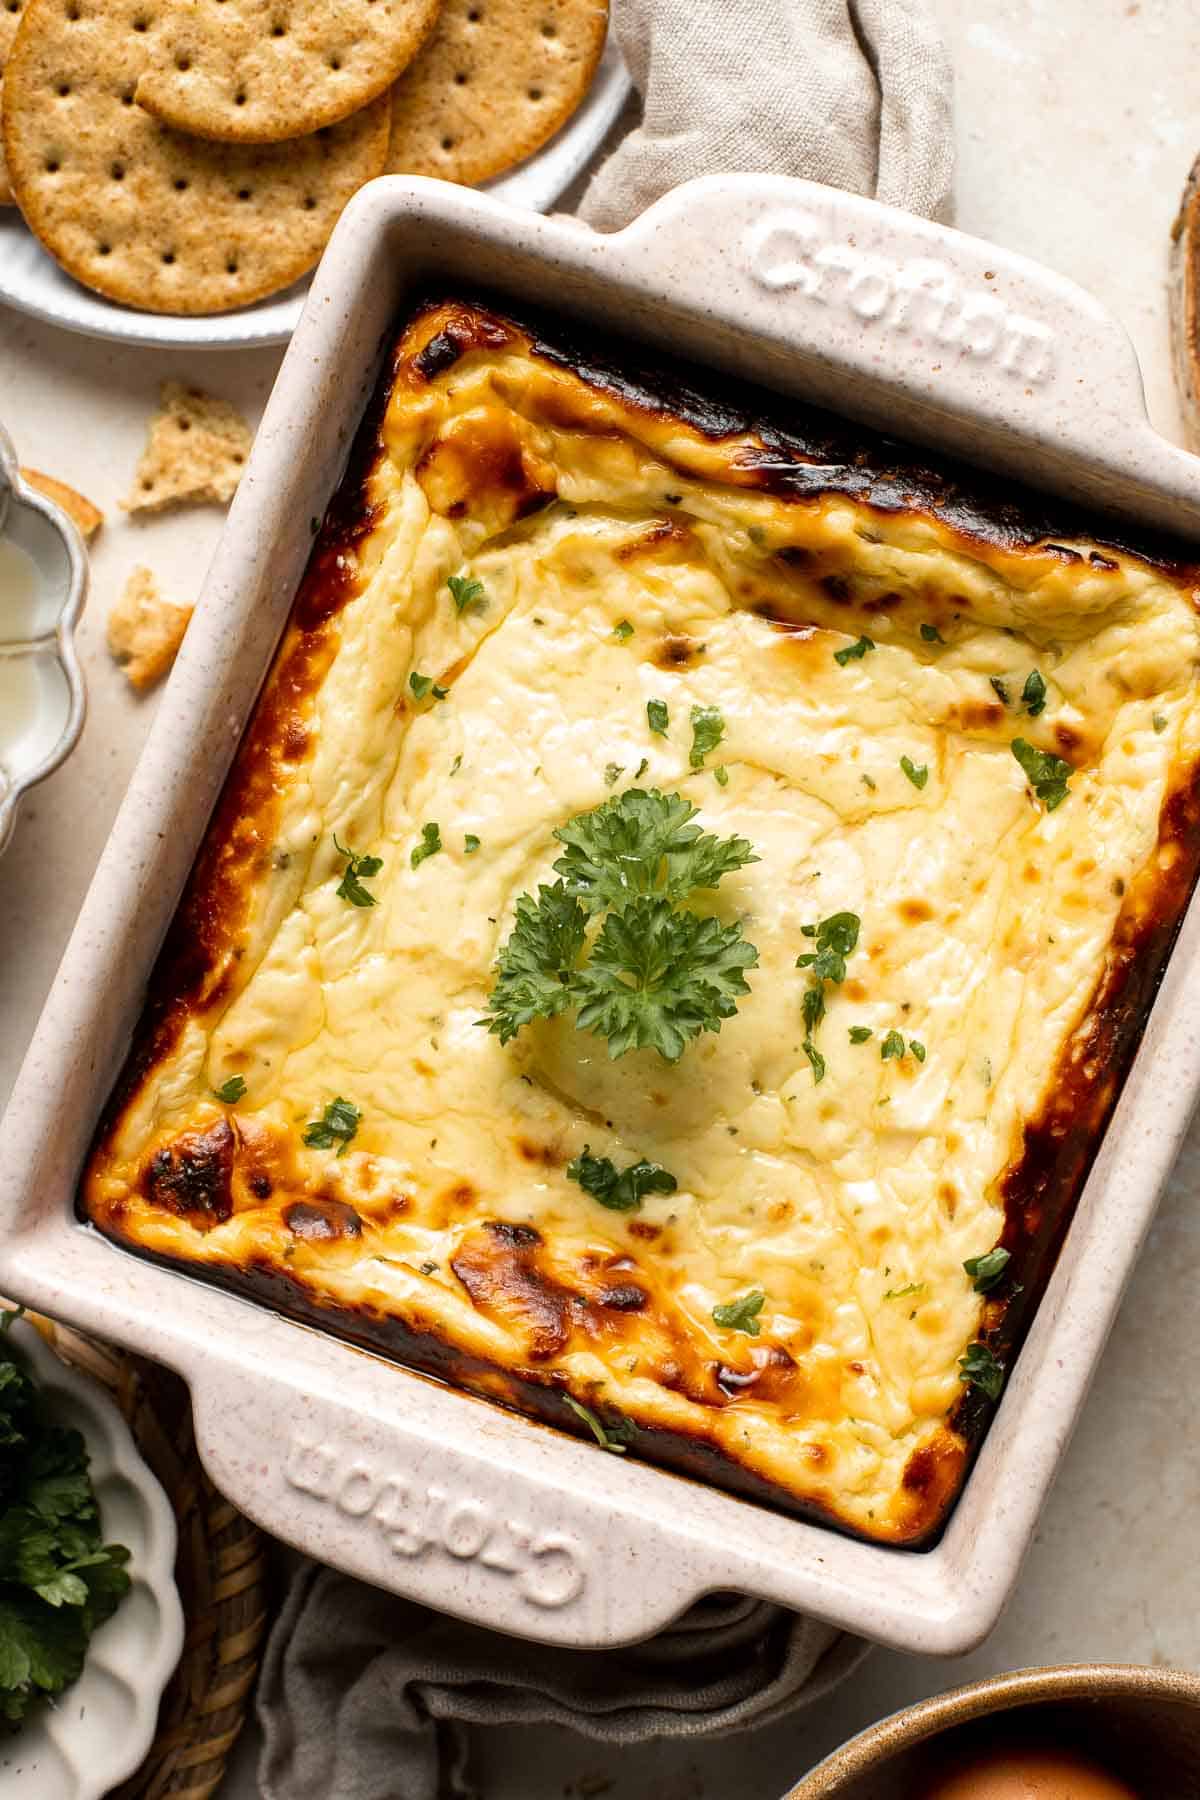
Creamy garlic mushrooms are a simple, delicious, and easy side dish. This comforting family favorite that is quick and easy to make in just 15 minutes.
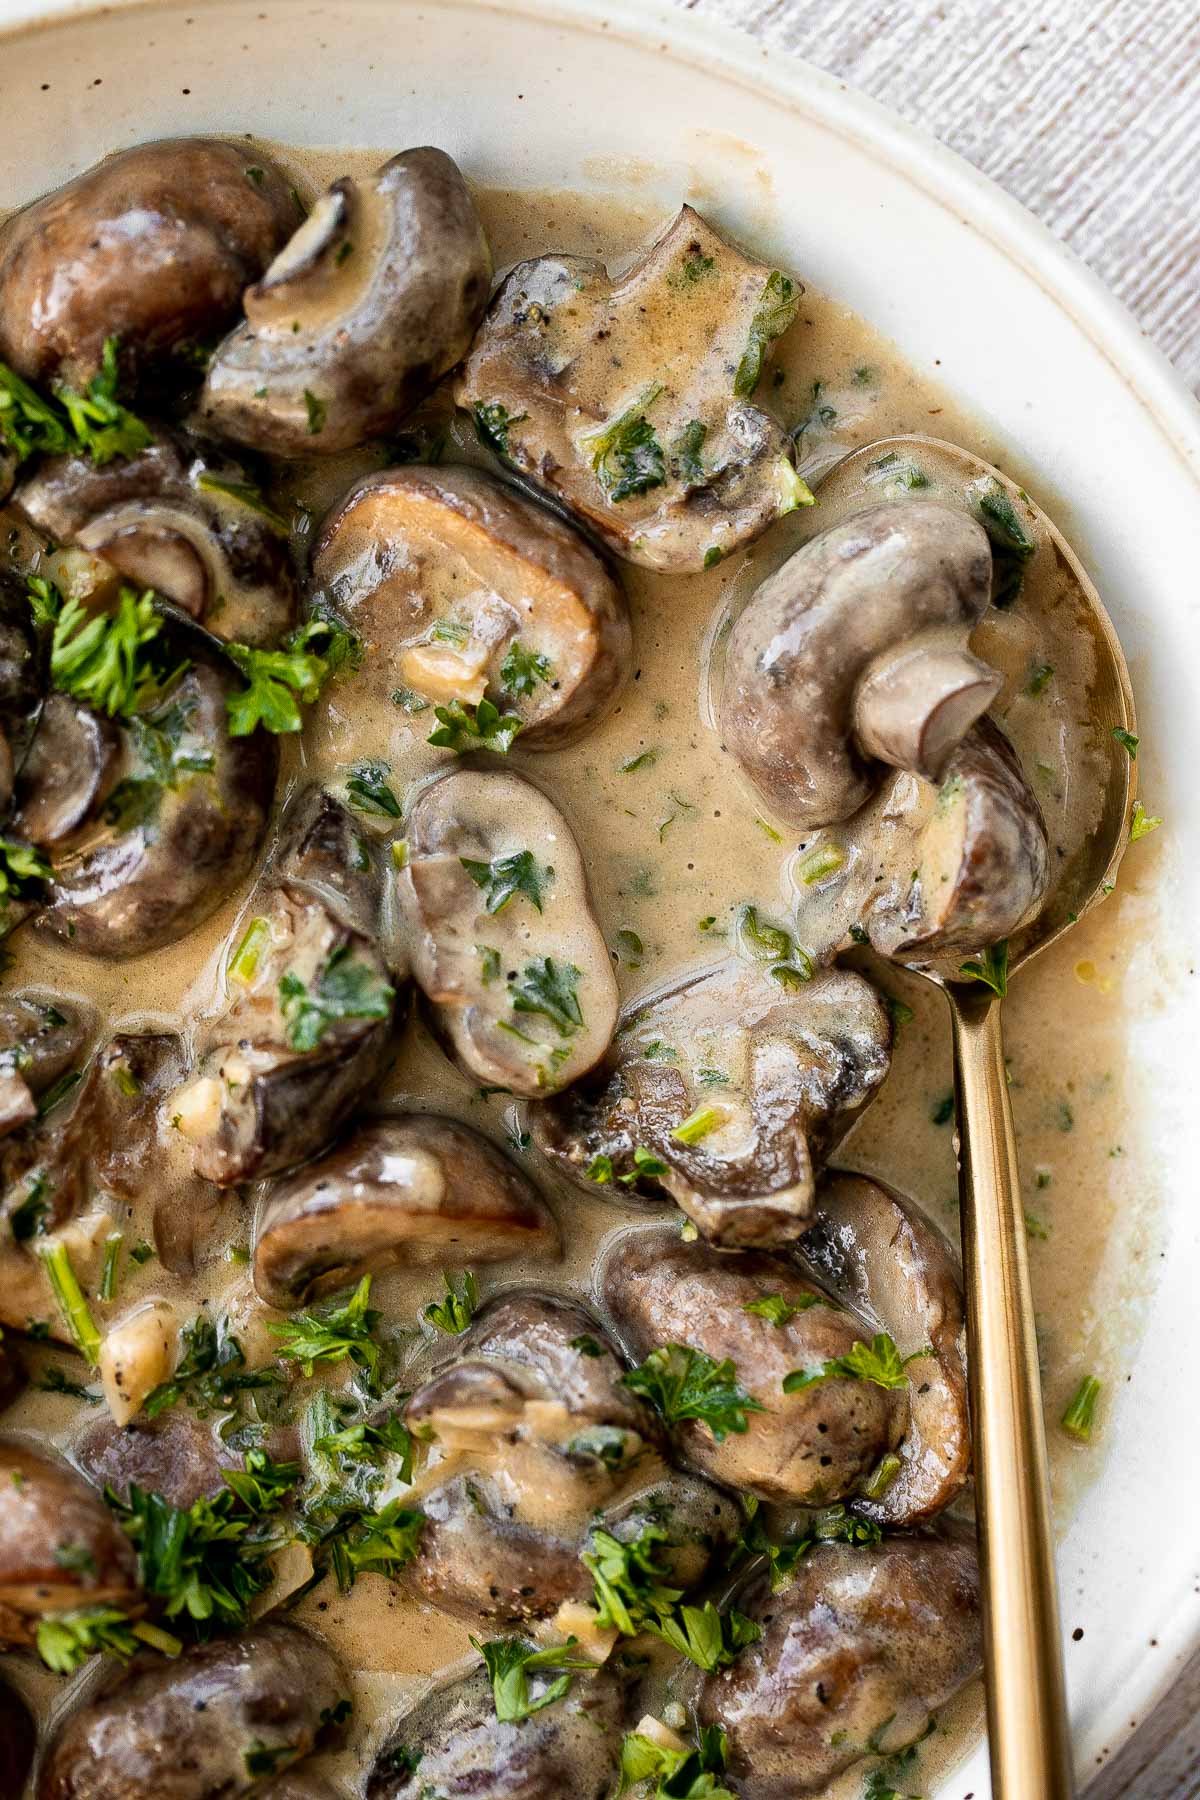
This Mediterranean Stuffed Eggplant is delicious, filling, and healthy. This vegetarian dinner is loaded with veggies and topped with bubbly cheese.

Bright and colorful caprese pasta salad is the ultimate summer side dish. It's fresh, light, and loaded with vibrant summer flavors. Quick and easy too!
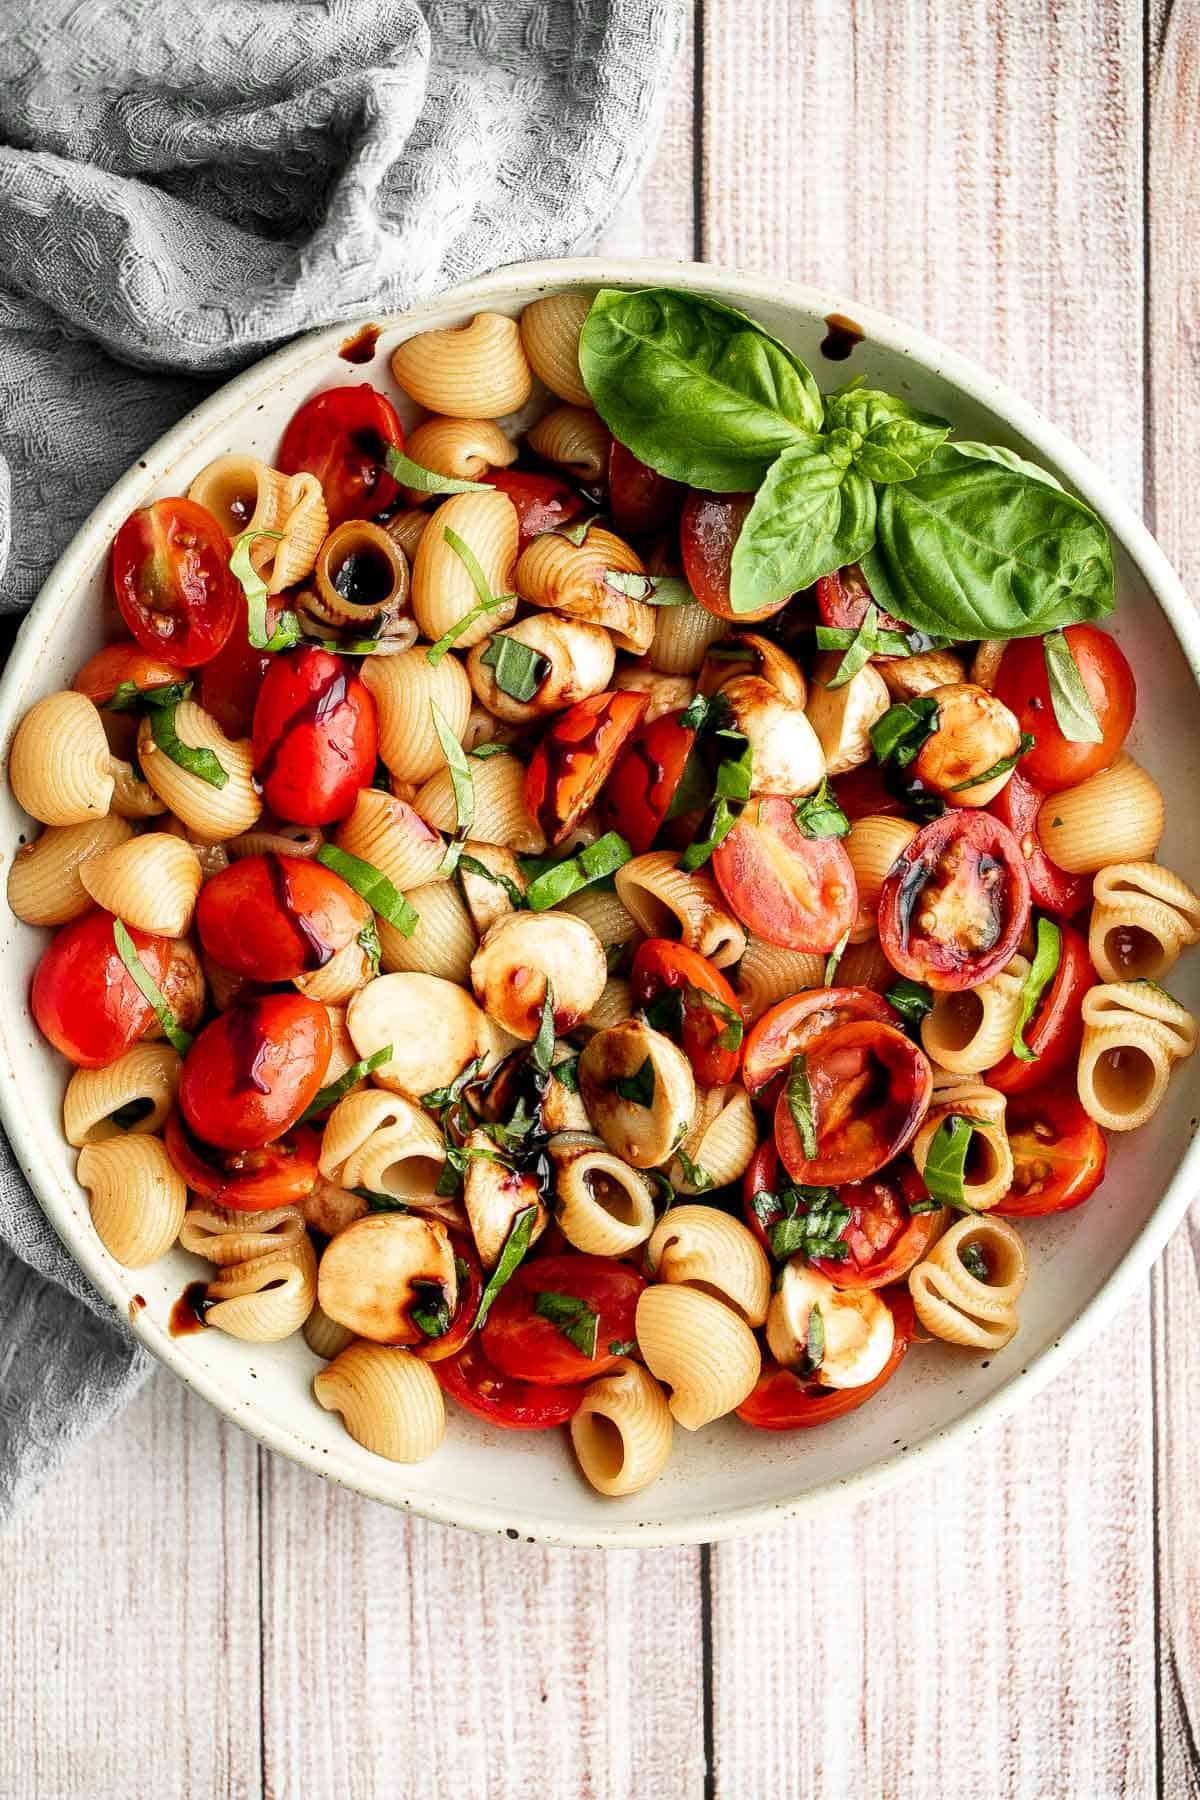
Homemade tomato basil soup is comforting, rich, and smooth. This cozy soup is easy, flavourful, and nourishing, making it so much better than canned.
Baked Zucchini Fries are healthy, flavorful, and delicious. This summer vegetable is crispy on the outside while soft and creamy on the inside.

Garlic knots are fluffy on the inside, crispy on the outside, and topped with delicious savory garlic herbed butter that will have you begging for more.

Balsamic Roasted Broccoli is a quick easy side dish made with tender, crispy broccoli tossed in a flavorful 5-ingredient glaze and is ready in 25 minutes.
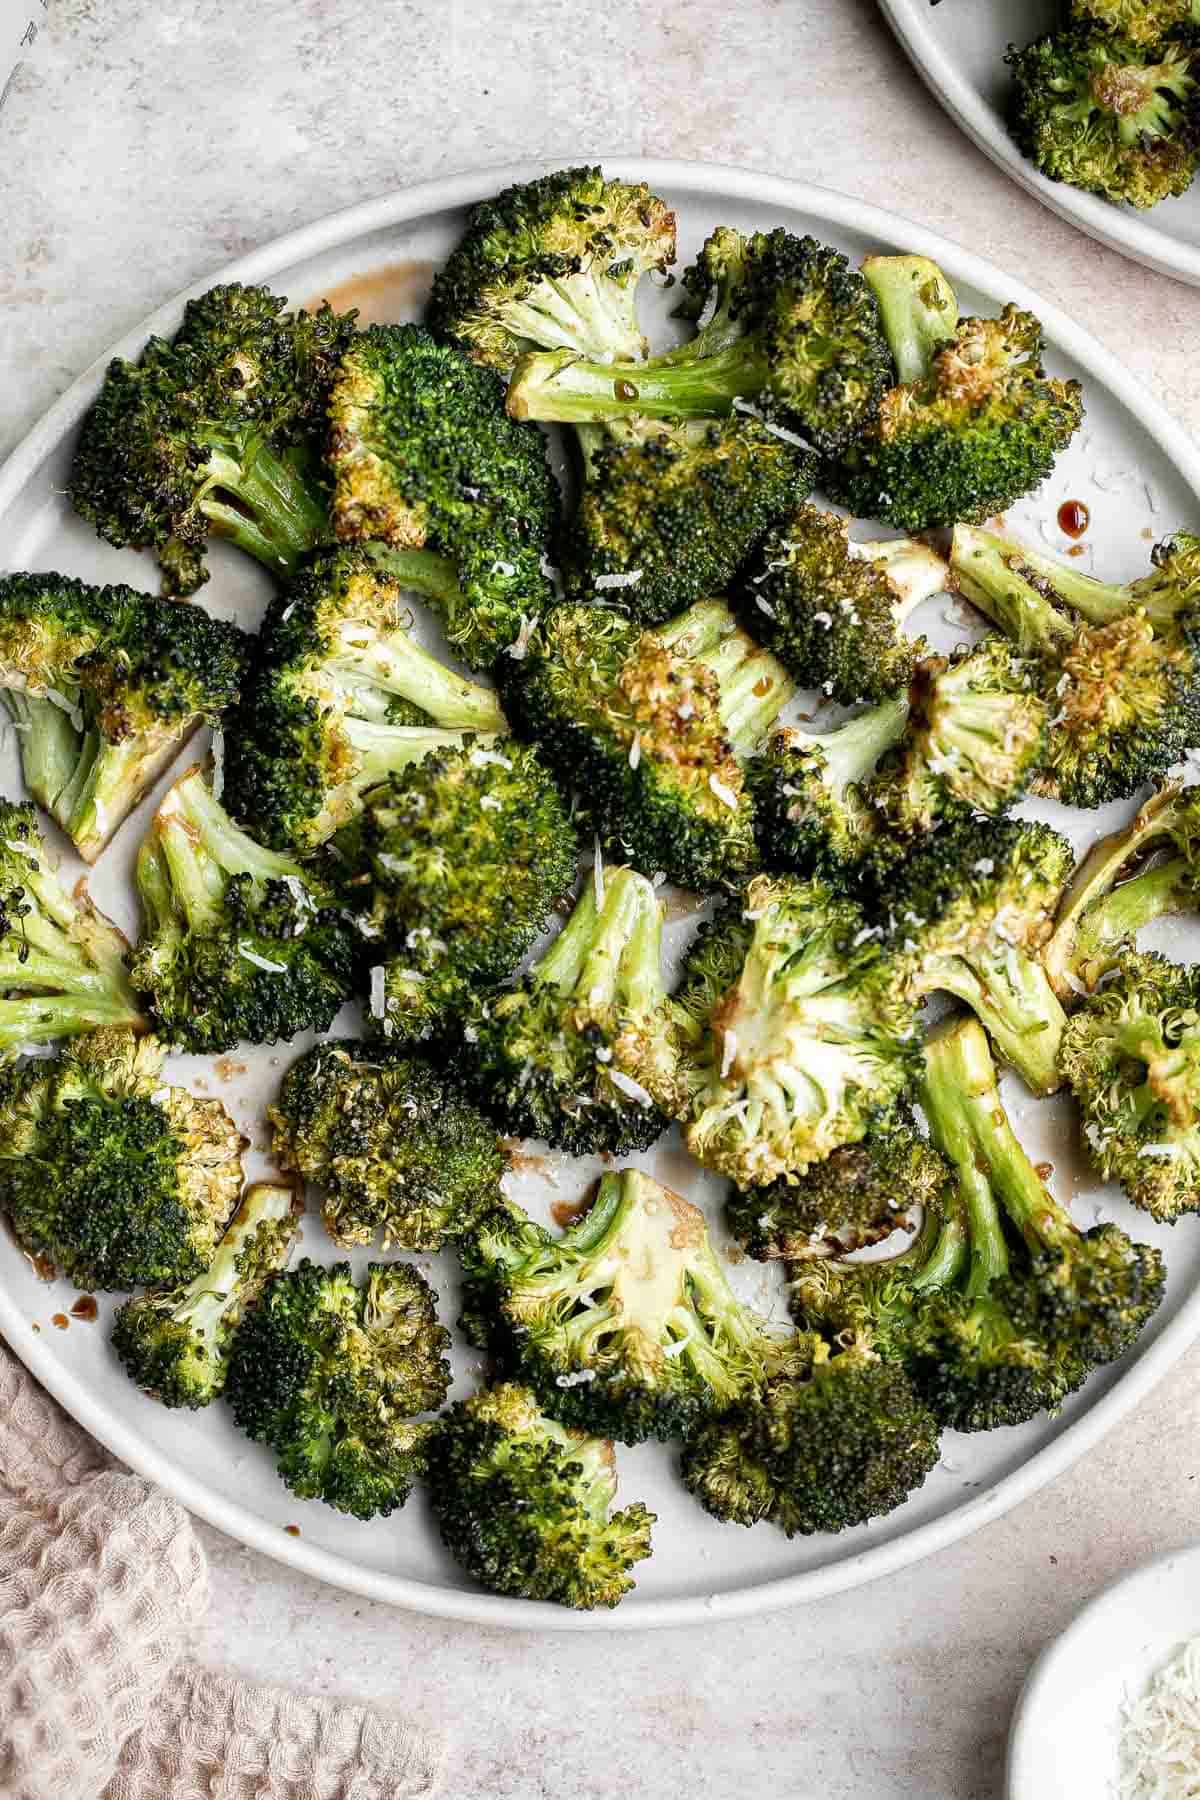
Mediterranean Orzo Pasta Salad
Quick and easy Mediterranean orzo pasta salad packed with fresh vegetables and herbs is tossed in a Greek lemon vinaigrette. Healthy, light and delicious.
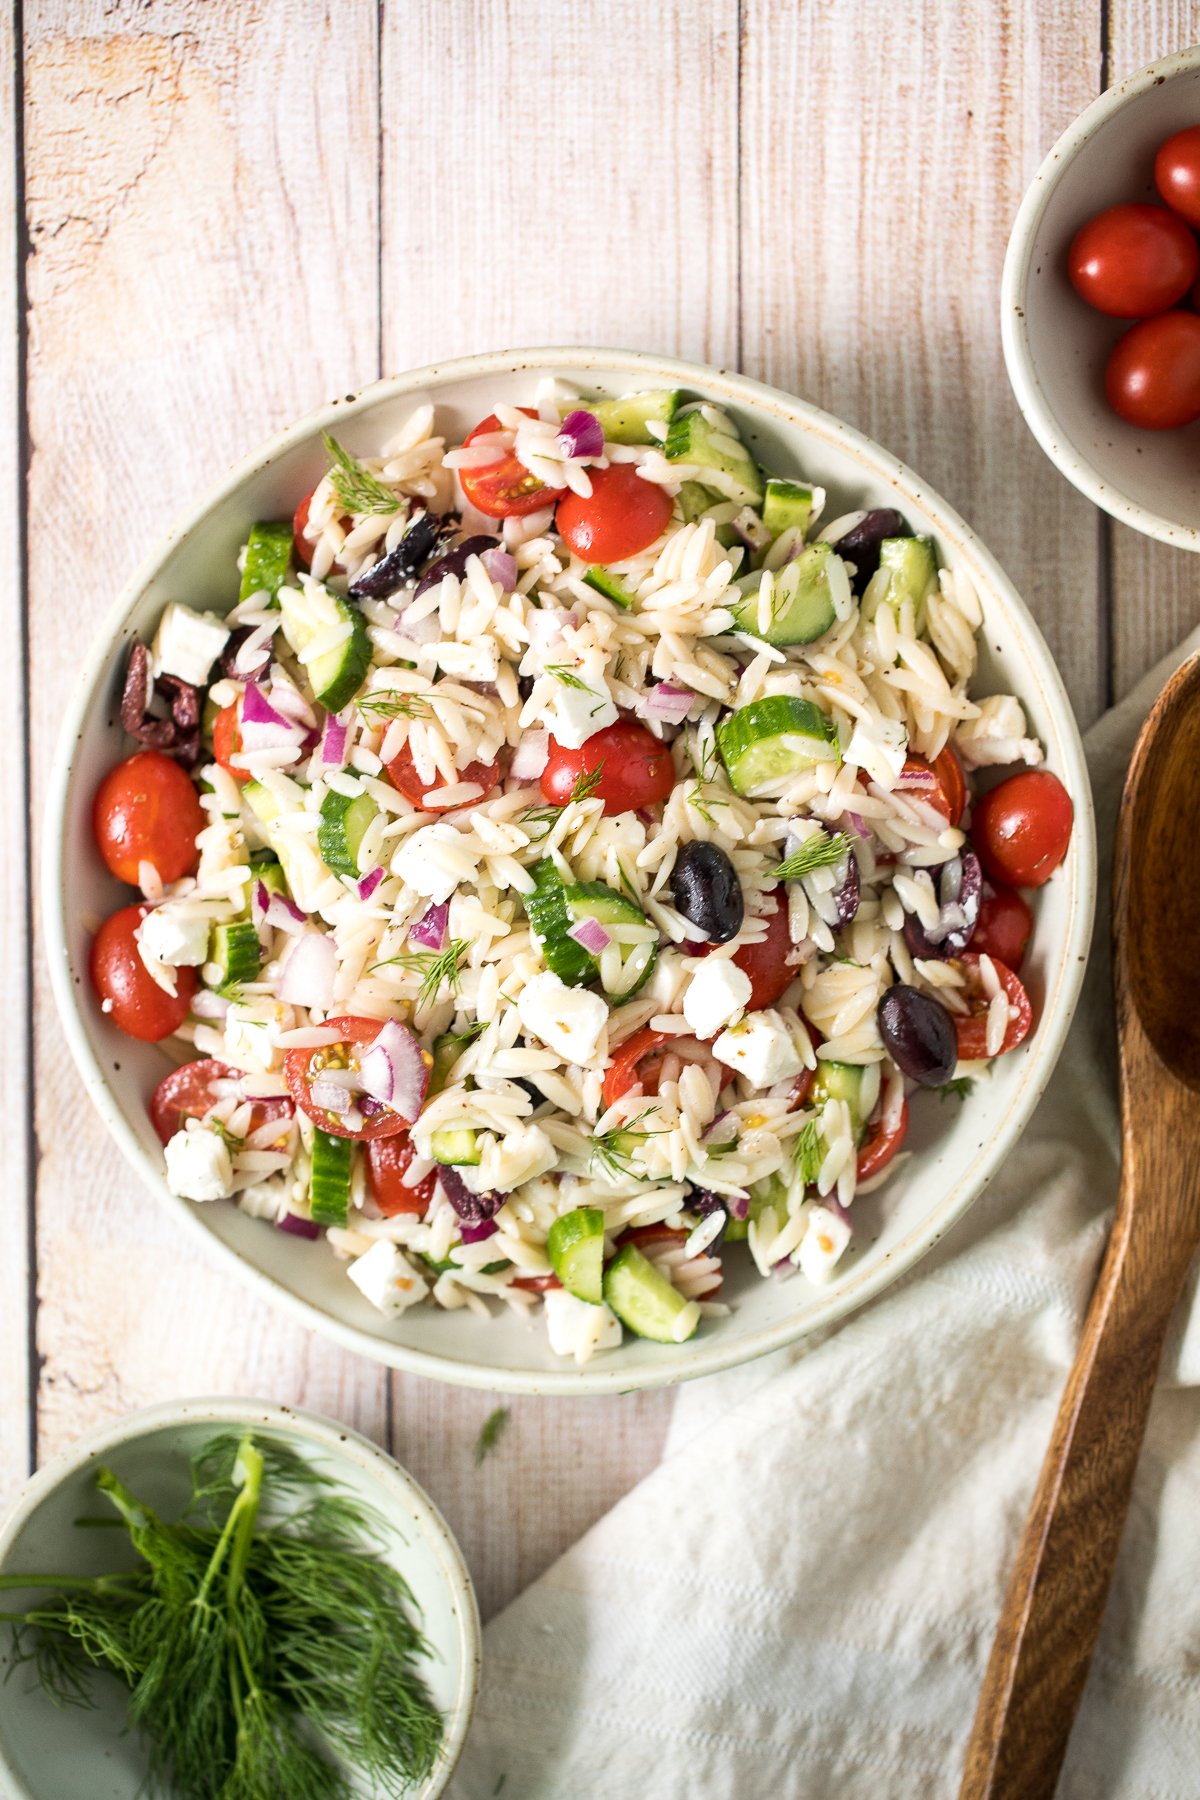
No Knead Tomato Focaccia Bread
Easy no knead tomato focaccia is so flavourful, packed with olive oil, tomatoes and fresh herbs. It's crispy and golden outside, fluffy and pillowy inside.
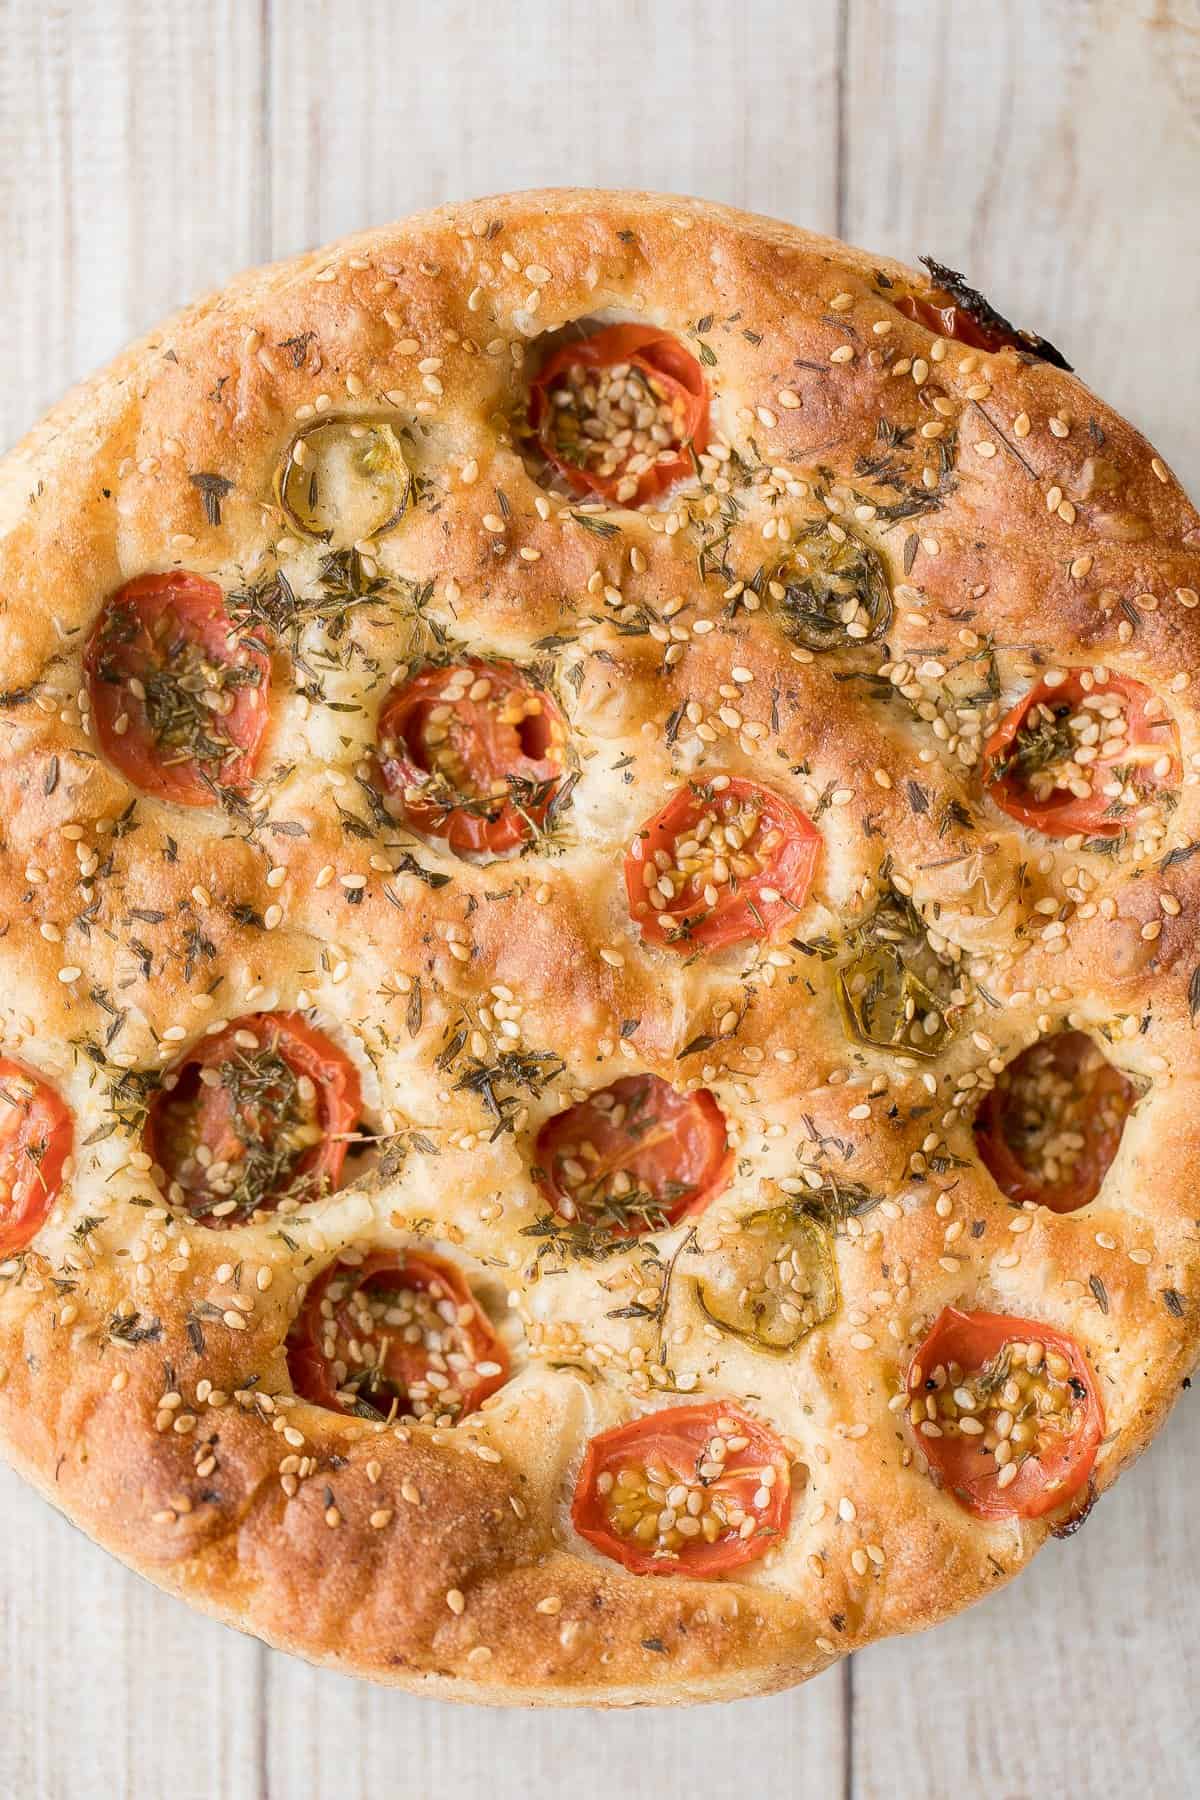
Antipasto skewers with tortellini are a quick, easy, and delicious appetizer with the best parts of a traditional antipasto platter but easier to eat.

More Italian Recipes
More Side Dish Recipes
- 40 Vegetable Side Dishes
- 25 Side Dishes for Soup
- 30 Side Dishes for Pasta
- 25 Side Dishes for Chicken
- 25 BBQ Side Dishes
- 40 Vegetable Side Dishes
- 30 Potato Side Dishes
Did You Make Any of These Italian Side Dishes?
Please leave a comment and rating below, and let me know what you thought of this round up of Italian side dish recipes. Be sure to snap a picture and tag me on Instagram @aheadofthyme or share it on the Pinterest pin so that I can follow along.
HUNGRY FOR MORE? Don't forget to sign up for my email newsletter so that you don't miss any recipes. You can also follow along on Instagram and Pinterest for more recipe updates.
Chocolate Pecan Pie
Take your holiday table to the next level this year with the most luxurious and decadent Chocolate Pecan Pie. It's a twist on a classic pecan pie recipe, but instead of just being sugary-sweet, it has a rich, dark chocolate flavor that pairs wonderfully with homemade pie crust and toasted pecans. There's no finer dessert this holiday season, and you'll be pleased to know just how simple this easy chocolate pecan pie recipe really is.
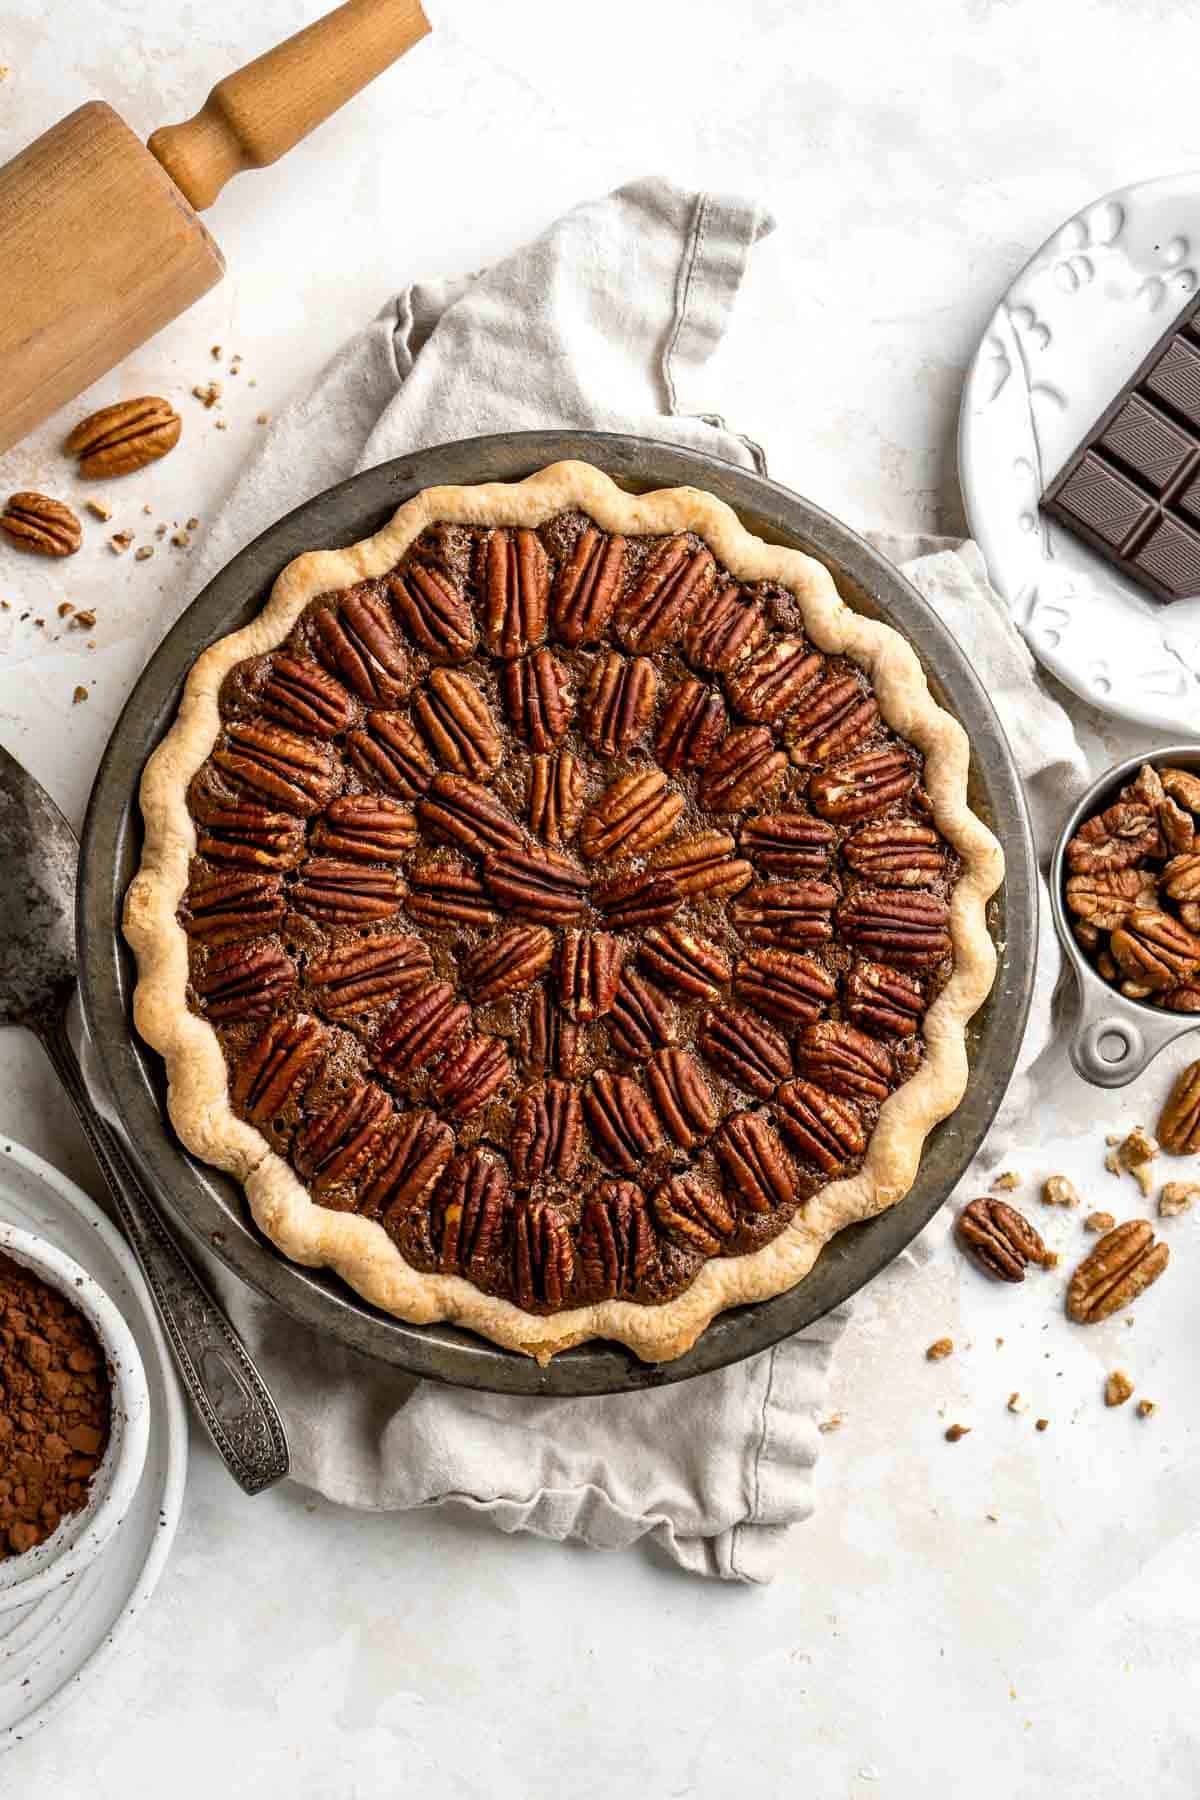
Who doesn't look forward to a plate of perfect pecan pie after Thanksgiving dinner? As delicious as this decadent dessert is, it's also notoriously sweet. It can be hard to eat more than a sliver due to all the corn syrup and sugar. Fortunately, the bitterness of dark chocolate mellows out the sugar-sweet pie and turns it into something you'll want way more often than just once a year!
Why You'll Love This Chocolate Pecan Pie
- Easy to make. Especially if you use a storebought pie crust, this gooey chocolate pecan pie comes together really quickly. After melting the butter and chocolate chips together, you whisk in all the other ingredients, pour them into the crust, and bake. It's really that simple!
- Decadent flavor and texture. You know that gooey filling that oozes out of a good slice of pecan pie? Imagine that same filling, but with a molten chocolate flavor. Between the flaky pie crust, the crunchy nuts, and the thick, rich chocolate syrup filling, this chocolate chip pecan pie is a true flavor experience!
- A holiday dessert. Pecan pie is a must for the holidays, and this version adds a much-needed dose of chocolate to your holiday table. Serve it with a scoop of vanilla ice cream or a dollop of homemade whipped cream to take it over the top!
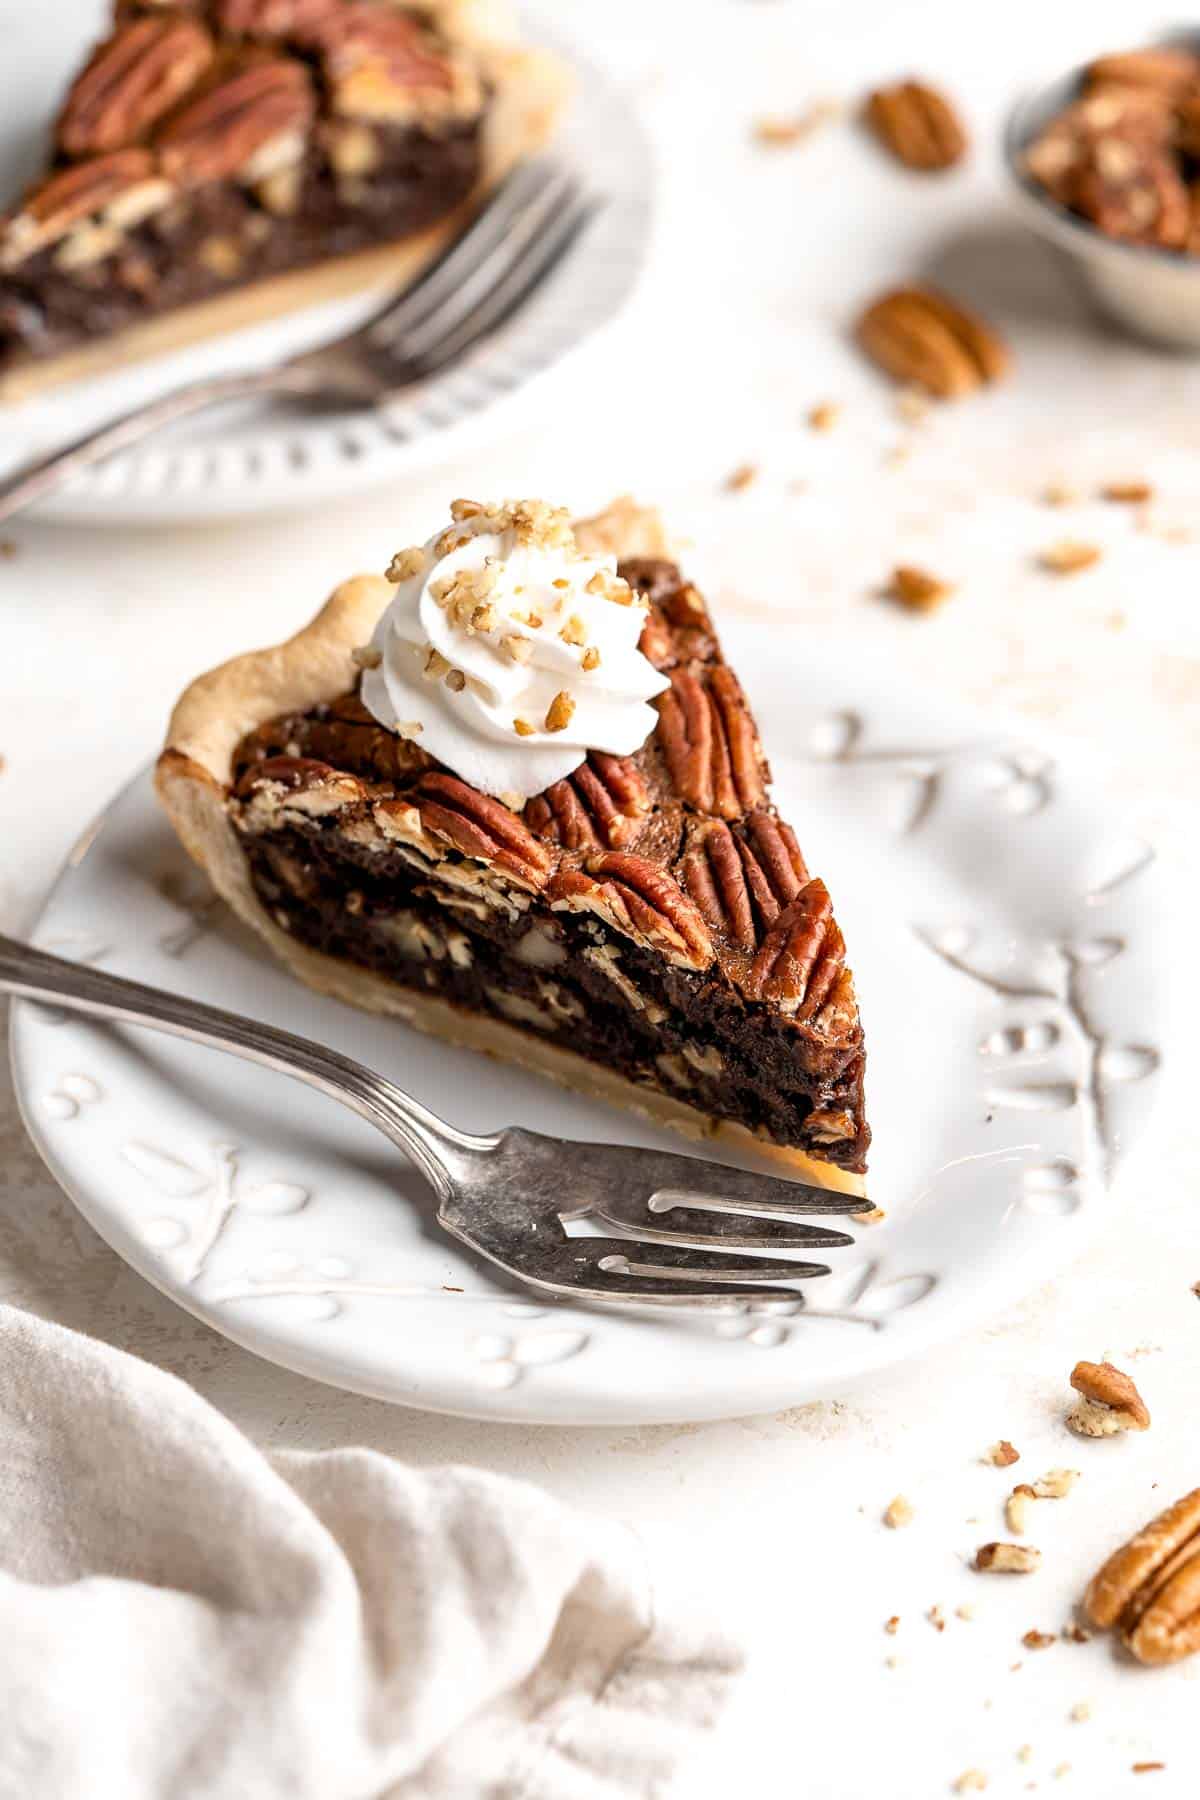
Ingredient Notes
To make this delicious chocolate pecan pie, you will need the following ingredients (full measurements in recipe card below):
- 9-inch pie crust - choose either a store-bought or homemade homemade pie crust. You'll just need one crust for a 9-inch pie plate.
- pecans - you'll need both chopped pecans for the filling and halves for the top of the pie.
- semi-sweet chocolate - these dark chocolate chips will add a bitter note that pairs really well with the sweet ingredients. Feel free to substitute bittersweet chocolate or any dark chocolate with 50-75% cacao.
- unsalted butter - combine melted butter with the chocolate chips to make the base for the pie.
- Dutch process cocoa powder - adds a second layer of chocolate to make sure this pie has a rich chocolate flavor.
- light corn syrup - the secret to a gooey filling is syrup. Choose light corn syrup to let the chocolate flavors shine. Dark corn syrup is a bit too rich. If you can't find light corn syrup, you can either use maple syrup or golden syrup.
- light brown sugar - this sweetener adds a rich, caramel-like flavor that's classic in a traditional pecan pie recipe.
- all purpose flour - although there is flour in the crust, this flour will thicken the filling as it bakes to give it that classic texture.
- vanilla - add a splash of vanilla to really highlight the sweet flavors in this chocolate pie.
- salt - this will make every bite taste even more flavorful.
- eggs - you'll need both whole eggs and one yolk to give the rich chocolate filling the perfect texture.
You will also need a rolling pin, 9-inch pie plate, two baking sheets, a cutting board and knife, a microwave-safe bowl, a whisk, spatula, and wire rack.
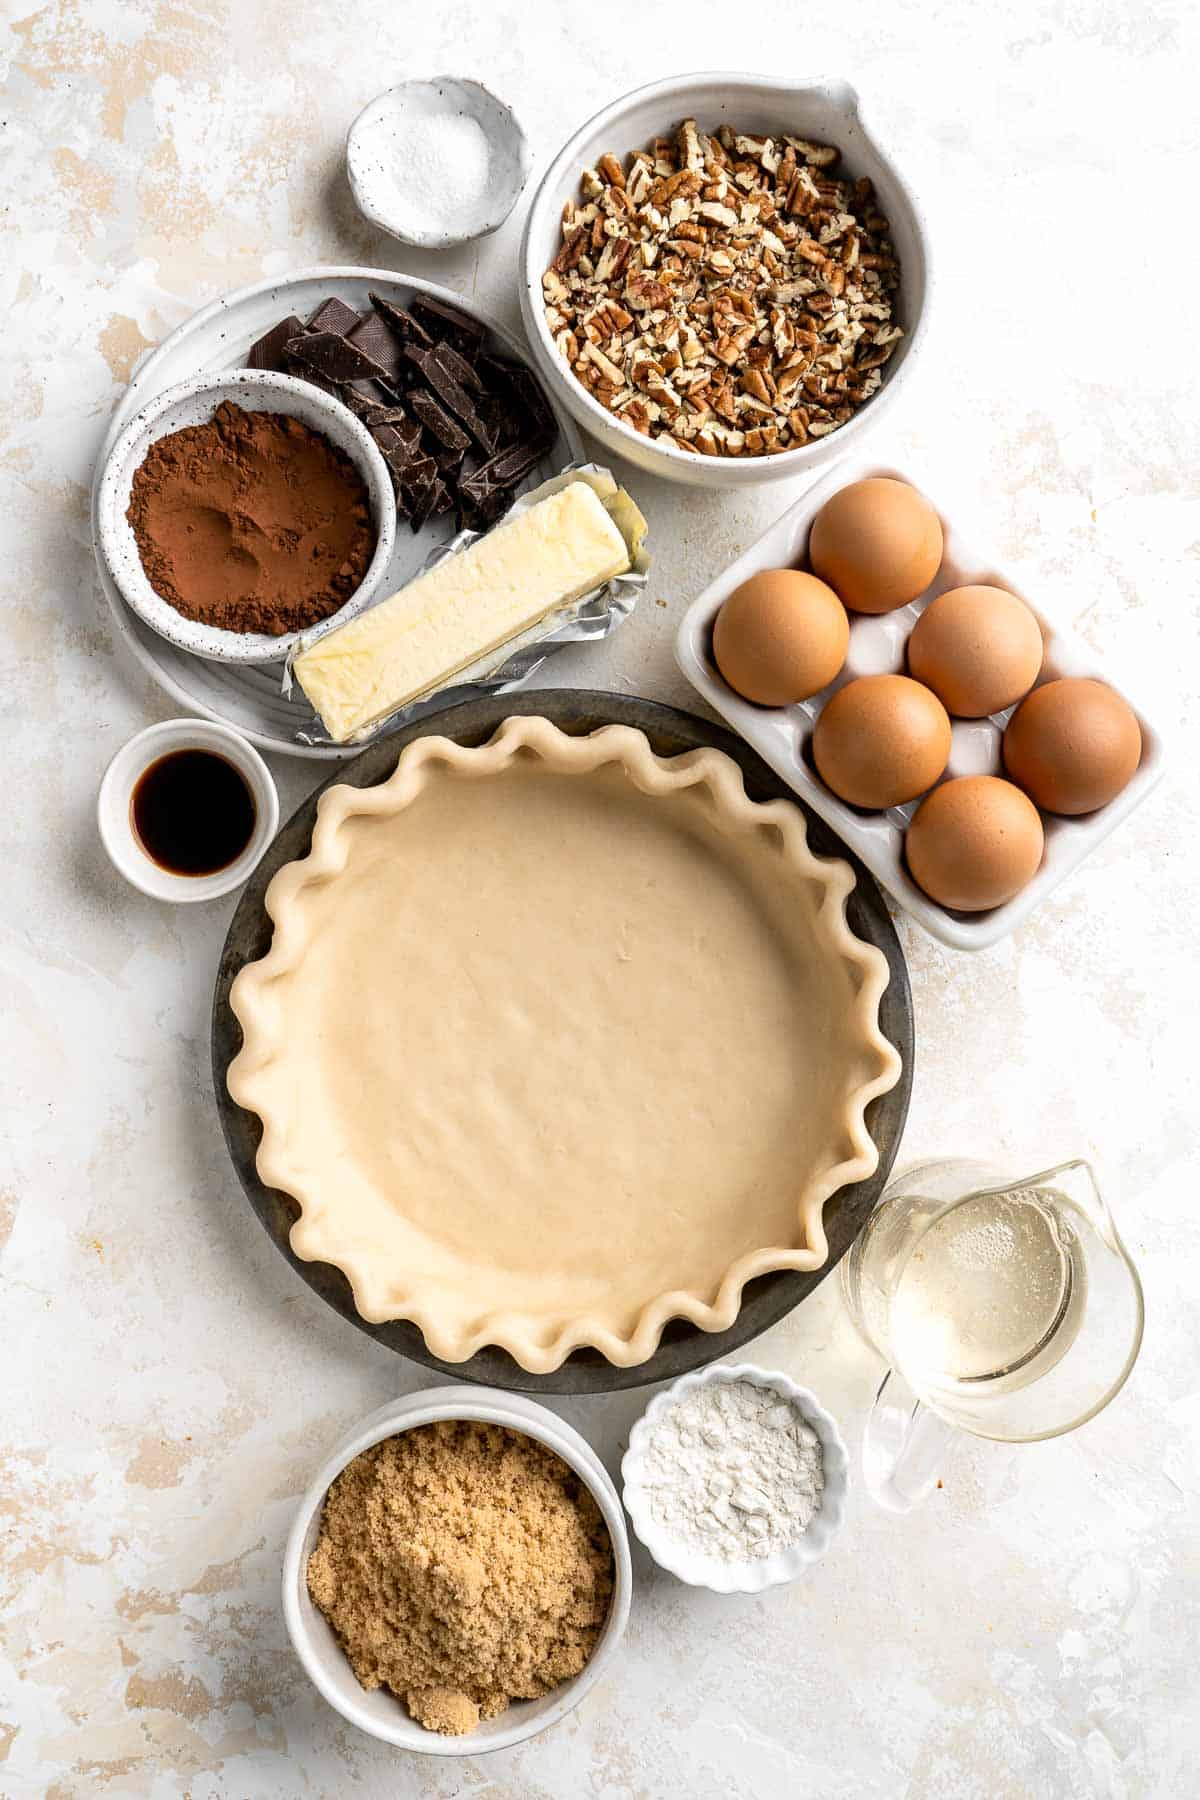
How to Make the Best Chocolate Pecan Pie
- Make the crust. If using homemade pie dough, roll it out to be about 12 inches in diameter. Carefully transfer it into a 9-inch pie dish. Press it into the dish and flute/crimp the edges. Using a fork, prick the bottom of the crust. Place the prepared pie crust onto a large baking sheet, then place somewhere cold (like the fridge or freezer) while you make the filling.

- Toast the pecans. On a separate baking sheet, add both the chopped and whole pecans (try to keep them separated), and place into the oven to toast for 10 minutes.
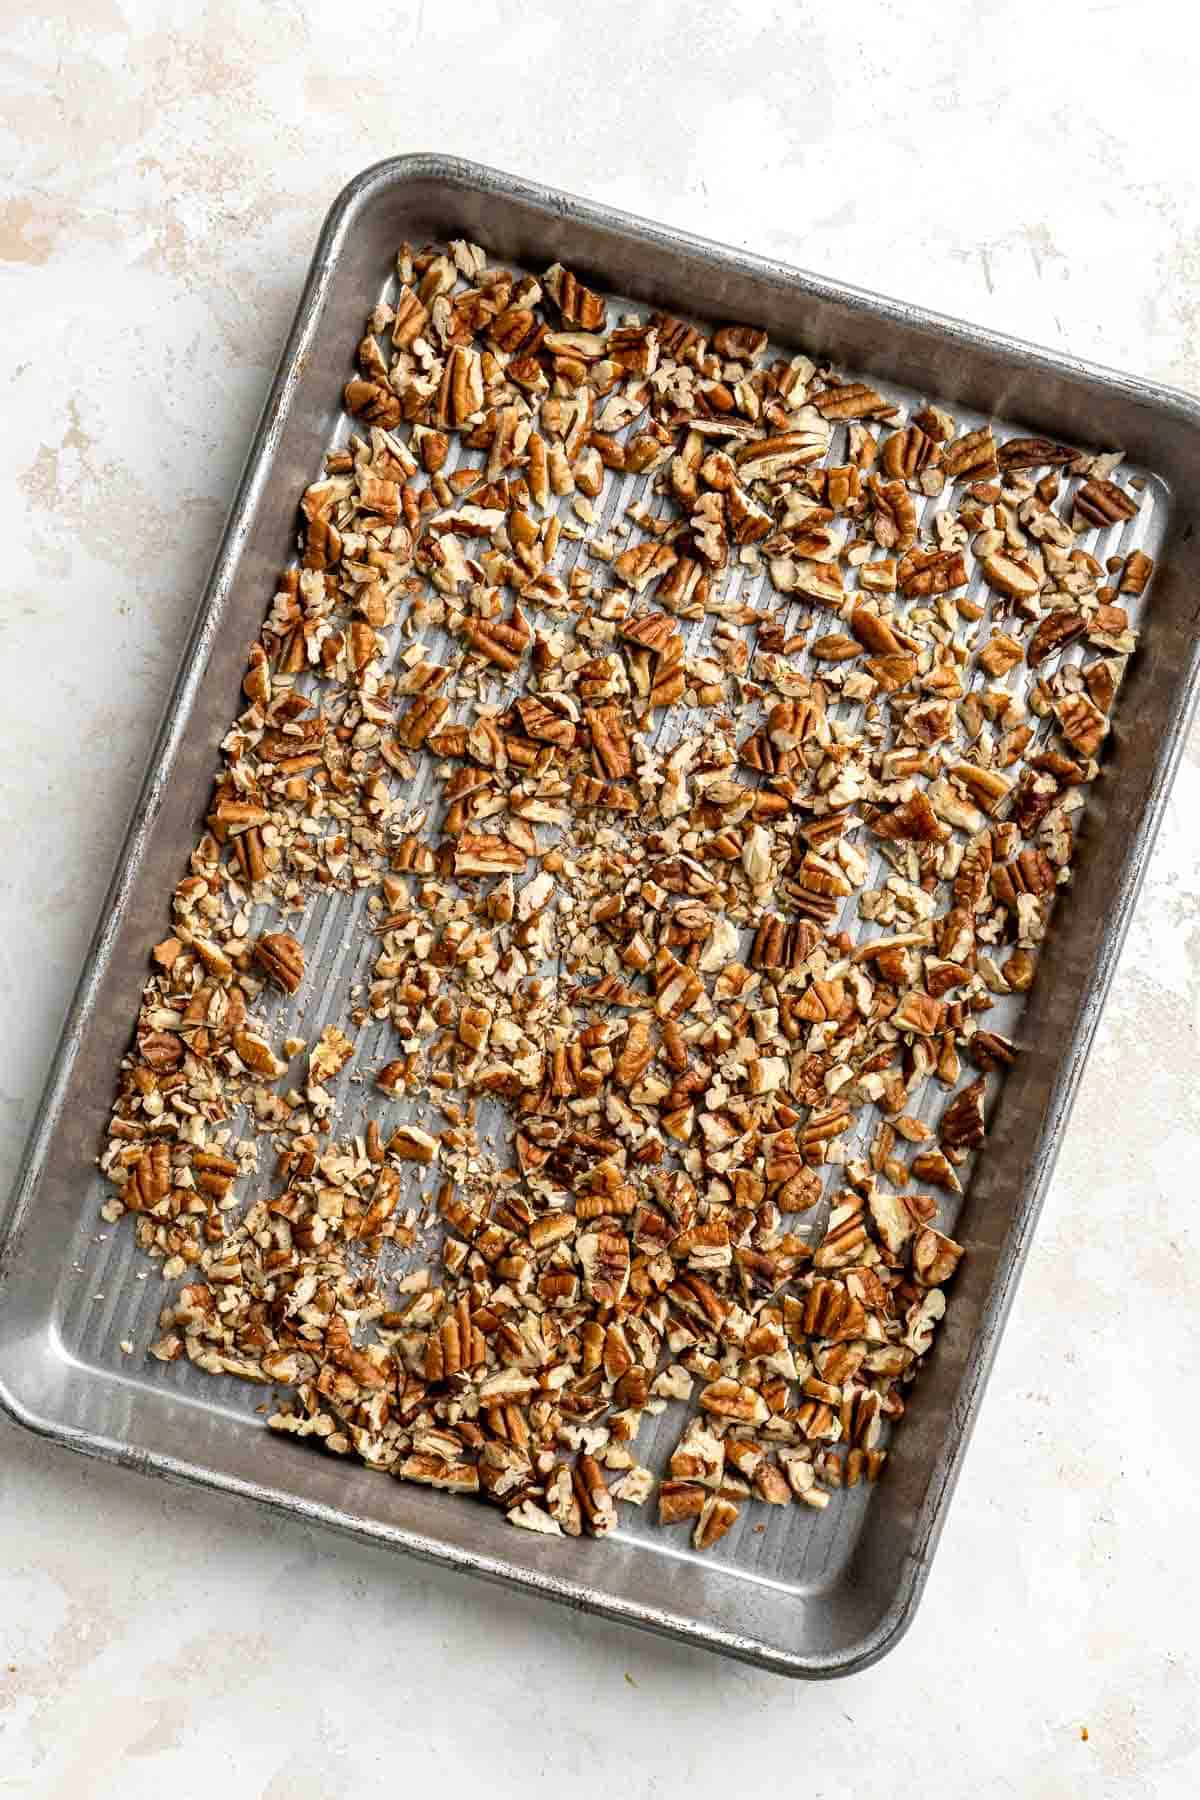
- Melt the chocolate and butter. Add the chopped chocolate and butter to a large microwave-safe mixing bowl. Microwave in 30 second intervals, stirring in between, until the chocolate and butter are both fully melted, smooth, and combined. Remove from the microwave and whisk in the cocoa powder until smooth.
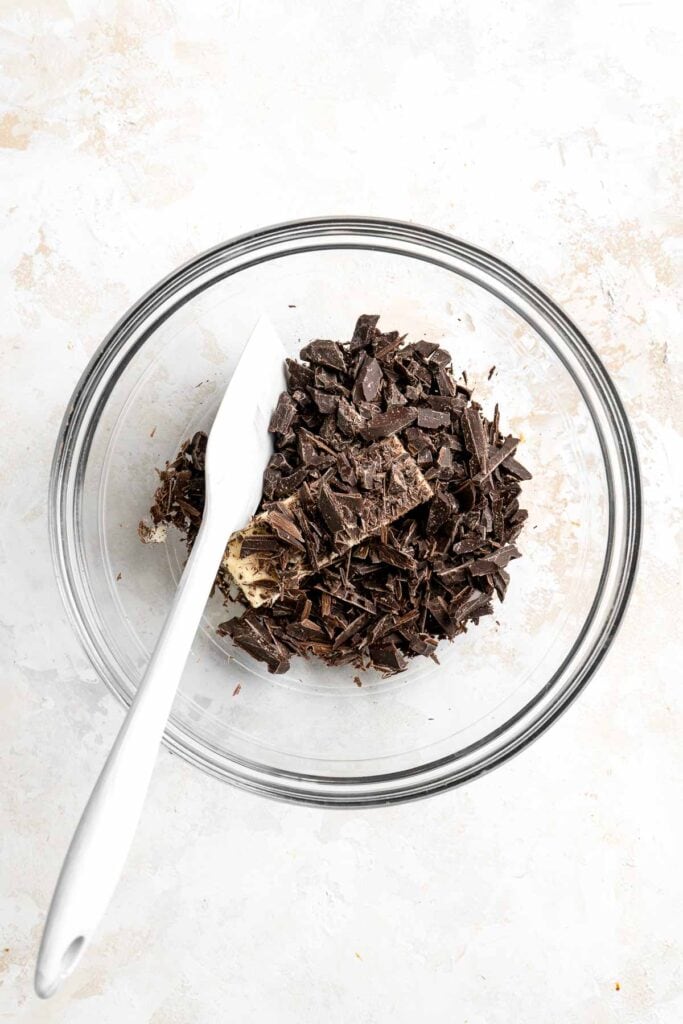
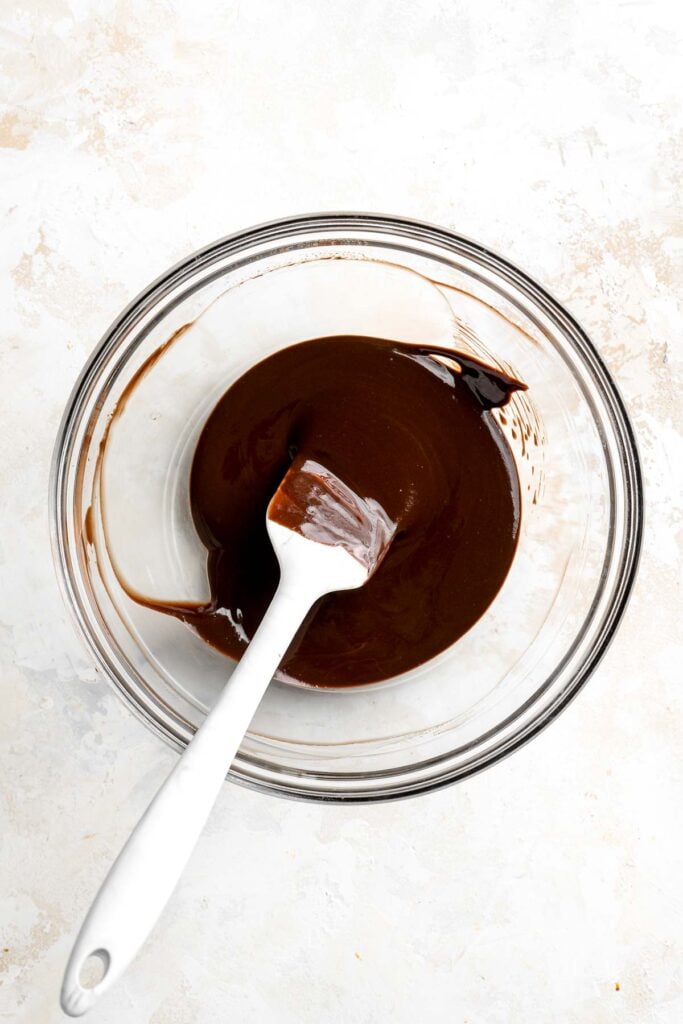
- Make the pie filling. Add the corn syrup, brown sugar, flour, vanilla, and salt to the bowl with the chocolate, then whisk until smooth and combined.
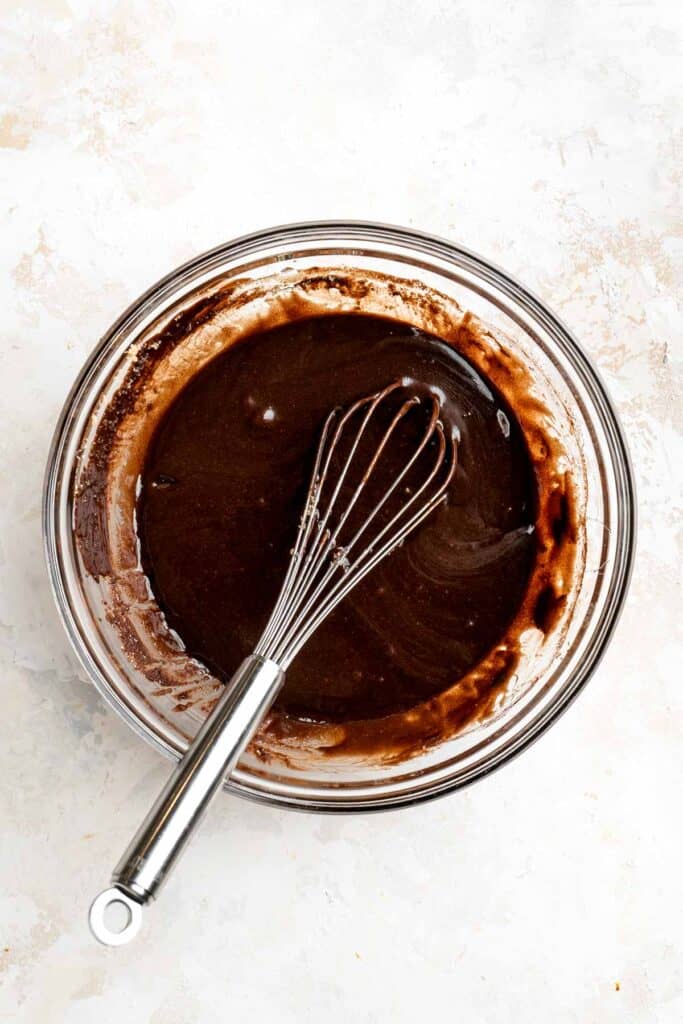
- Whisk the eggs. In a separate bowl, whisk together the eggs and egg yolk. Add into the pie filling and whisk again until smooth and combined.
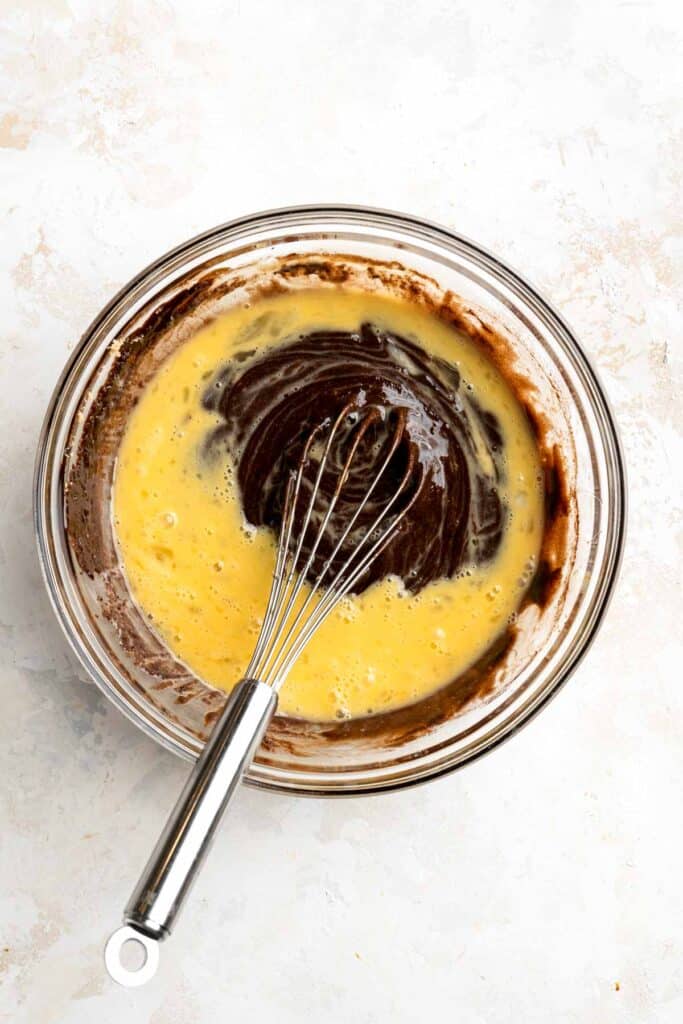
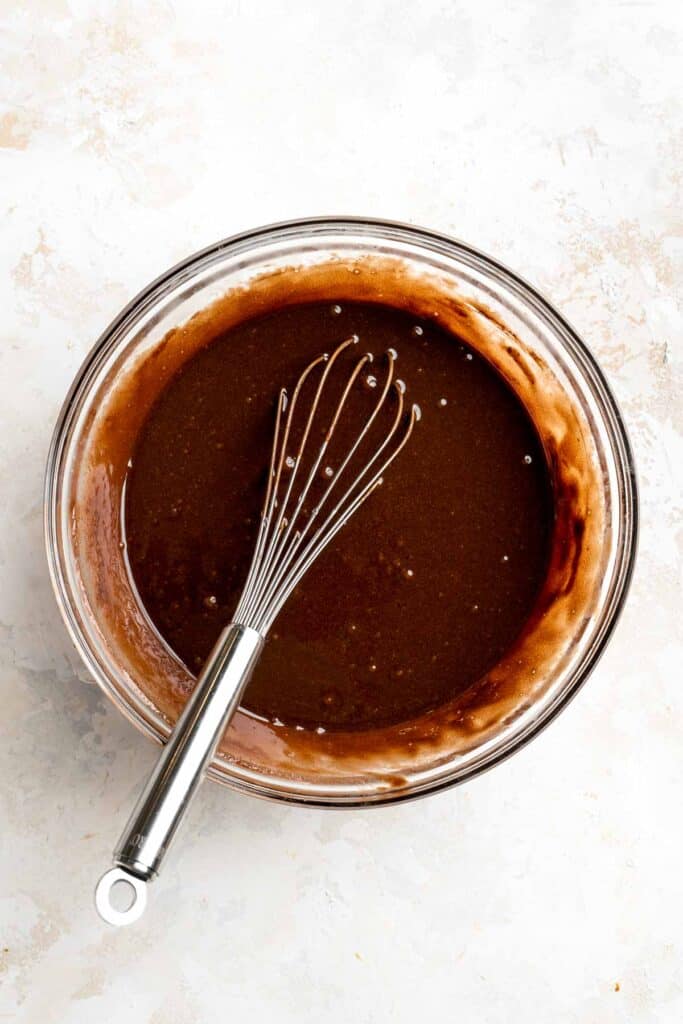
- Add the pecans. Finally, add the toasted chopped pecans to the pie filling, and fold to combine.
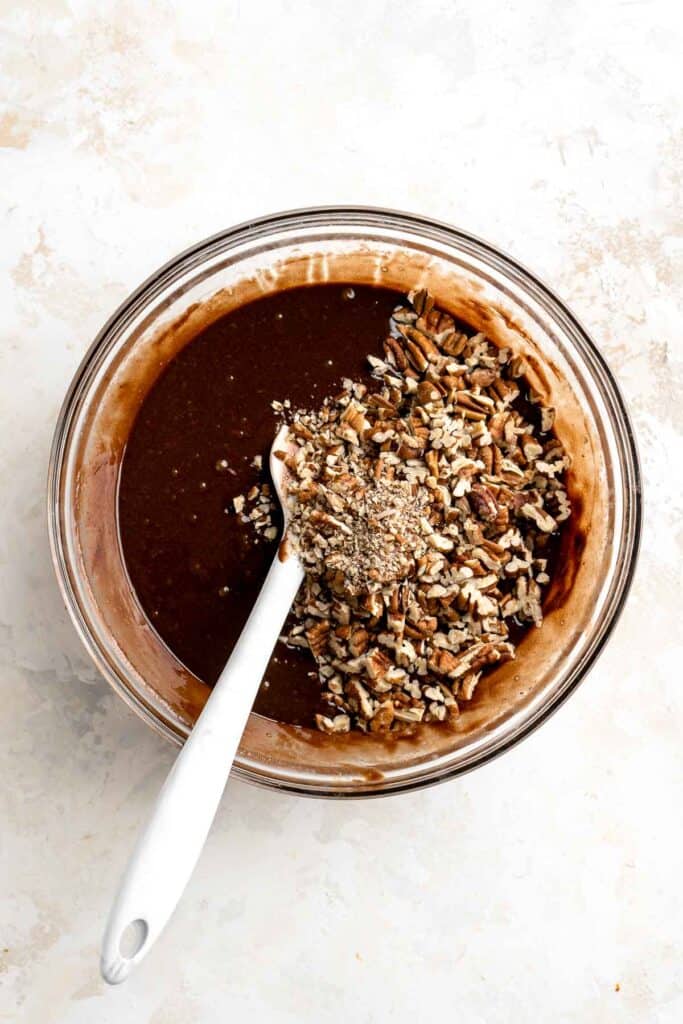
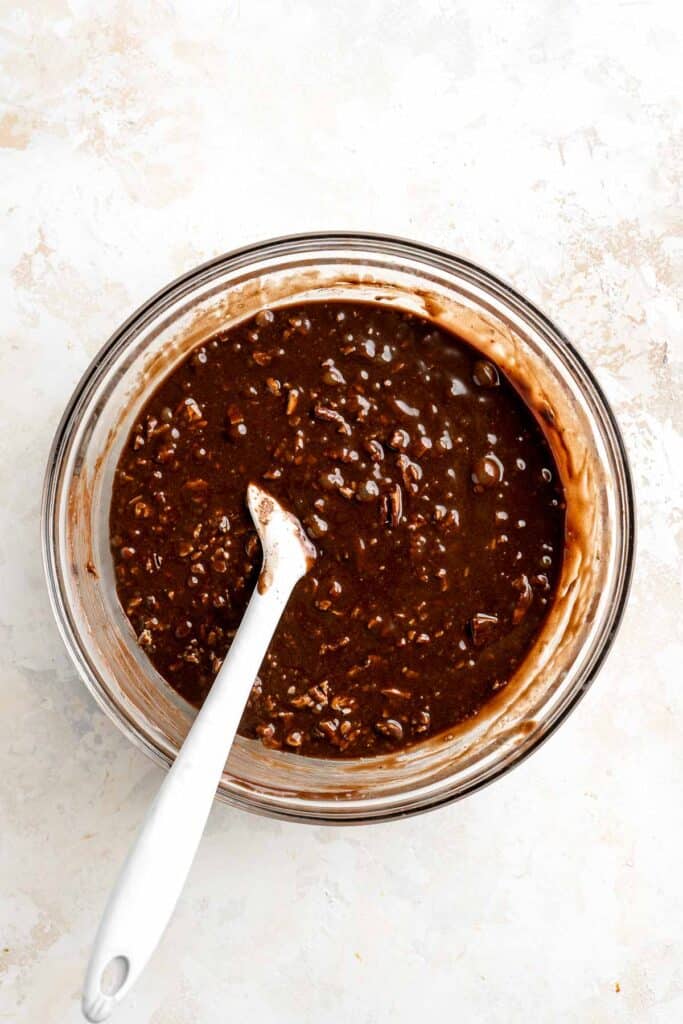
- Fill the crust. Remove the pie crust (with baking sheet) from the fridge or freezer. Pour the pie filling into the crust, top with the whole pecans, then place into the oven to bake.

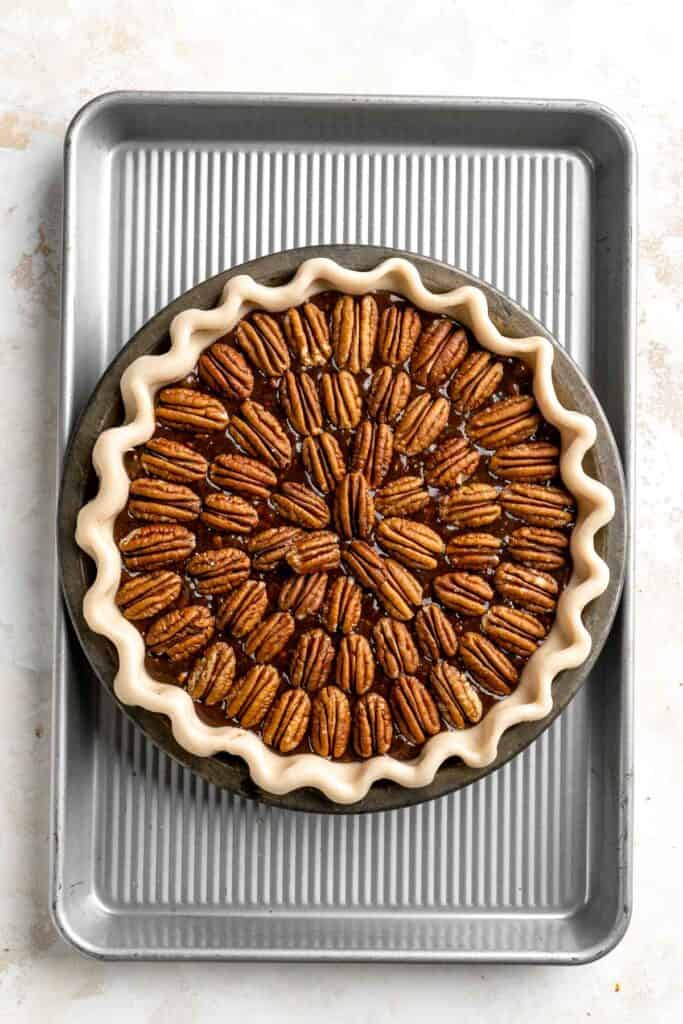
- Bake. Bake in a 350°F preheated oven for 50-55 minutes, or until the edges are set but the centre is still slightly jiggly. Allow to cool for an hour on a wire rack, then transfer to the fridge to cool and set overnight (or enjoy warm, if you prefer that!).
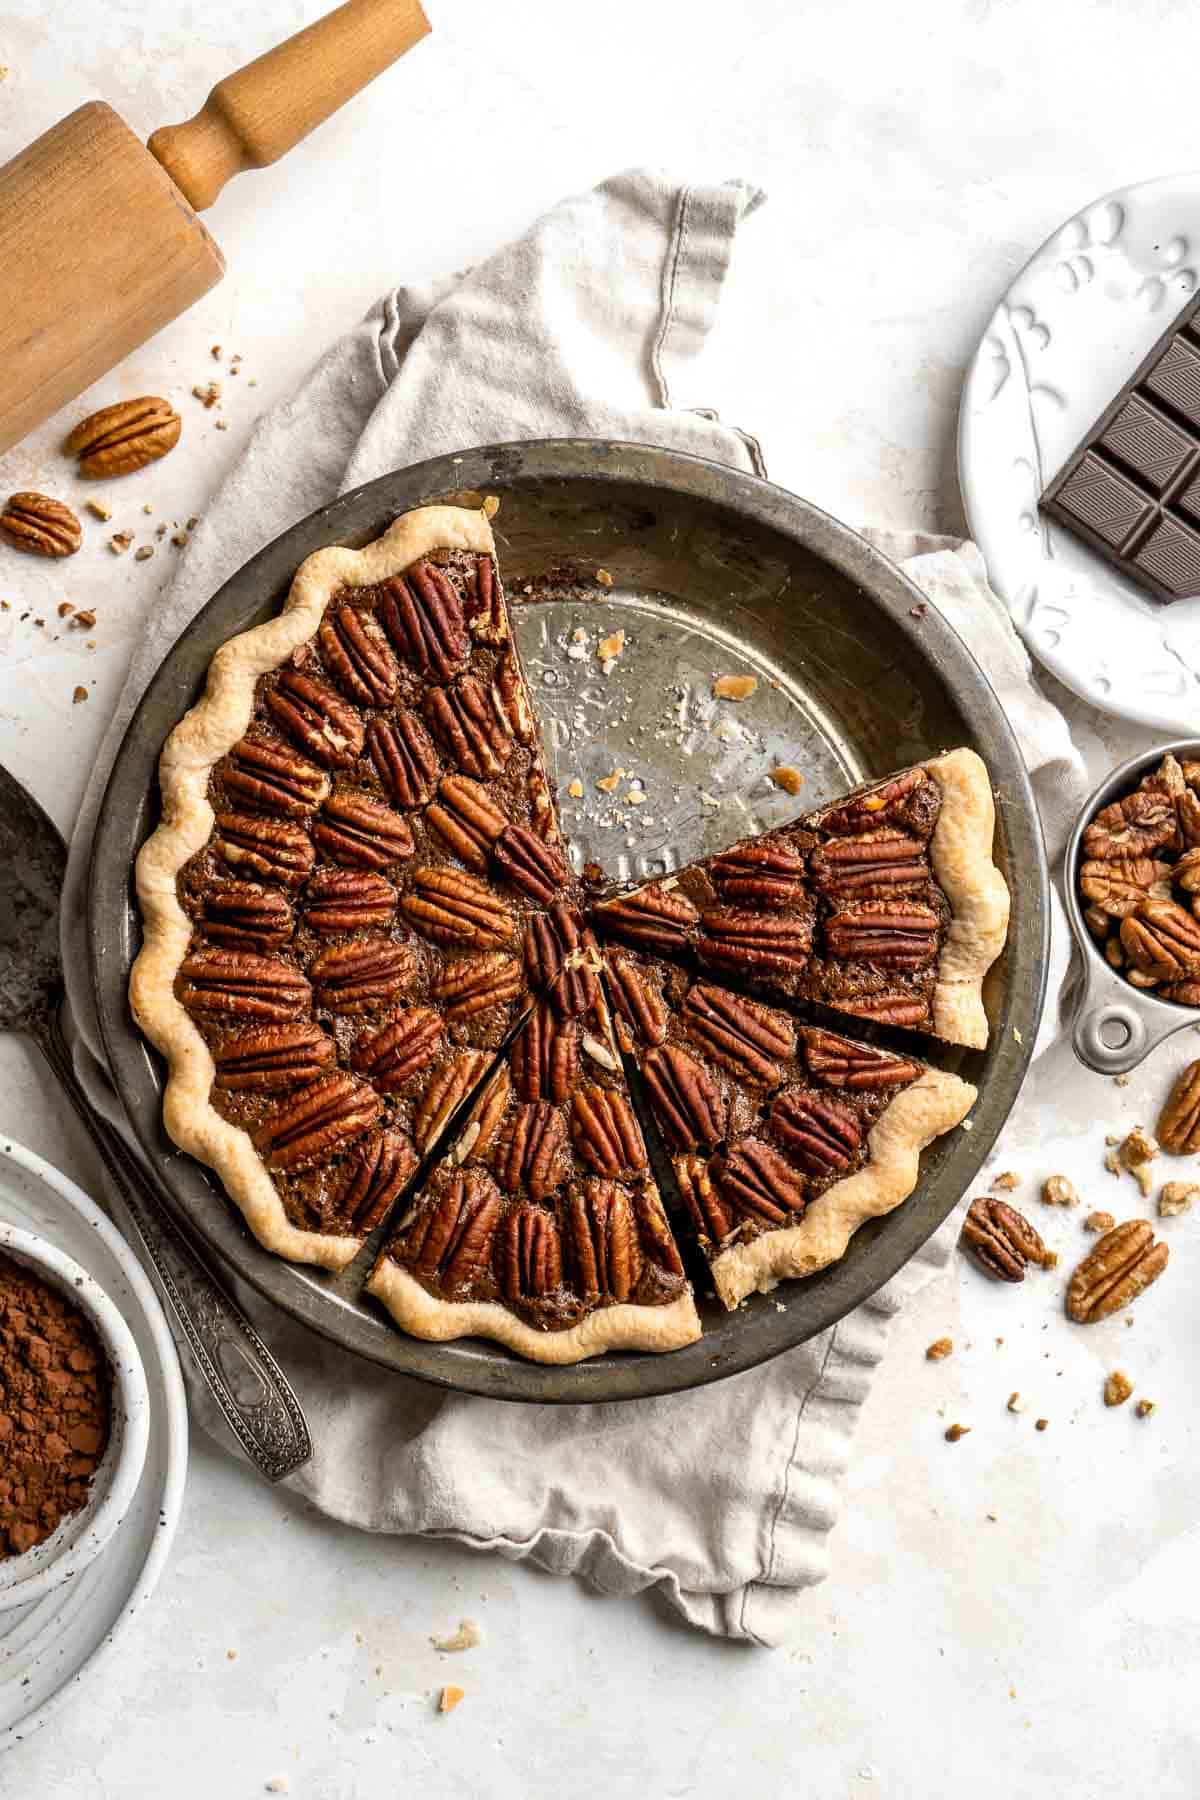
Recipe Variations
- Chocolate bourbon pecan pie. Replace the vanilla extract with a splash of your favorite bourbon for an amazing aroma and flavor.
- Add spices. Take the flavor in a different direction by adding your favorite spices, like cardamom, cayenne pepper, or cinnamon.
- Make mini pies. For individual-sized bites, make mini pie crusts and add the filling. Be sure to watch the pies carefully and reduce the baking time.
- Try a different crust. This recipe uses a regular flaky crust, but you could also try a chocolate crust, a pecan crust, or your favorite pie crust recipe. Choose a baked crust - not something as porous as graham cracker crust.
- Gluten-free chocolate pecan pie. Use your favorite gluten free pie crust and replace the flour in the filling with your favorite 1:1 gluten-free all-purpose flour.
How to Serve
This Chocolate Pecan Pie is delicious served on its own, or paired as a dessert after a holiday feast, including:
- Sheet Pan Thanksgiving Dinner
- Roast Turkey
- Candied Yams
- Easy Make-Ahead Cranberry Sauce
- Green Bean Casserole
- The Best and Creamiest Mashed Potatoes
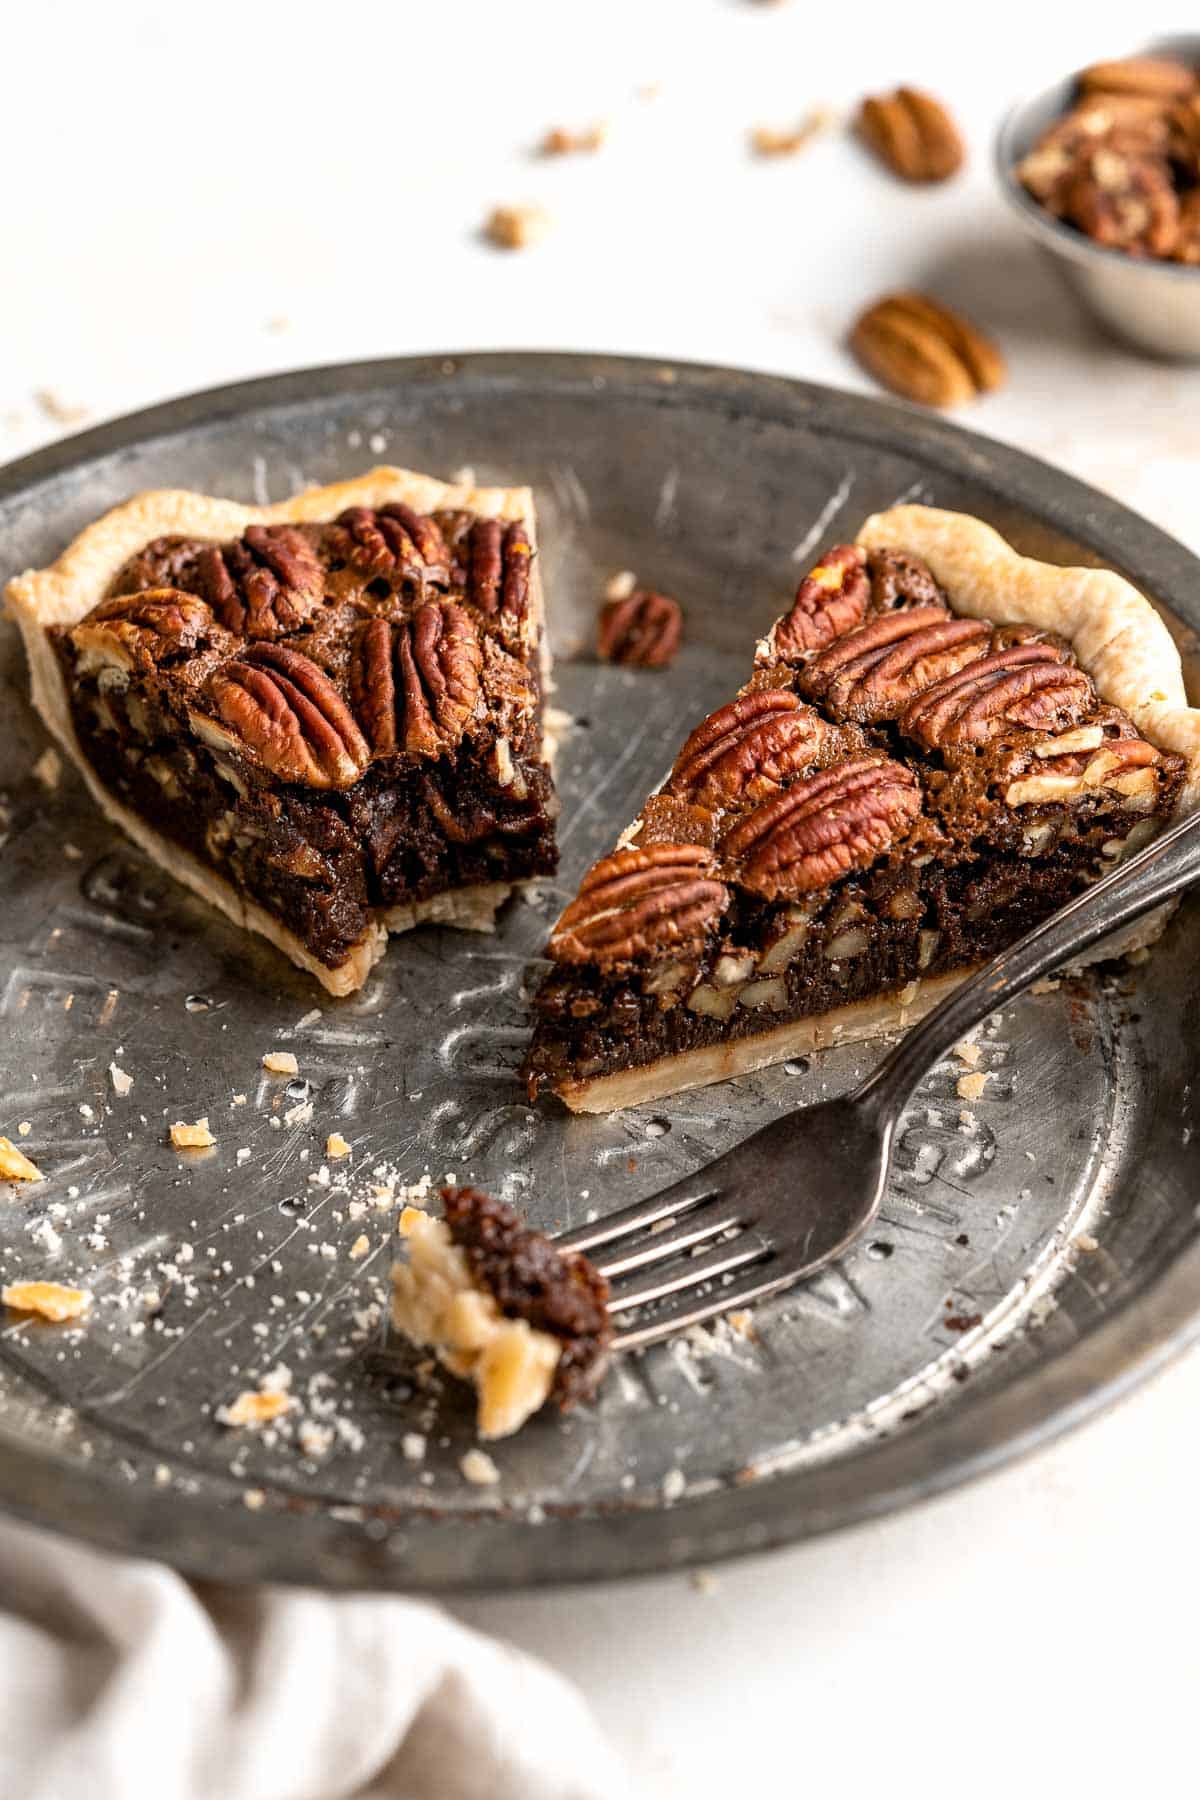
Recipe Tips and Tricks
- Skip the microwave. It's really quick to melt the chocolate for the filling using the microwave, but if you don't have one, you can make a double boiler. Fill a saucepan with 3 inches of water, set a metal or glass mixing bowl on top, and set the heat over medium low. Melt the butter and chocolate in the bowl first, then add the other ingredients following the recipe instructions.
Storing and Freezing Instructions
How to Store
Let the chocolate pecan pie cool at room temperature for two hours, then cover it in plastic wrap or aluminum foil and store it in the fridge for up to 3-4 days.
How to Reheat
Pecan pie is usually served at room temperature, but if you prefer a warm slice, pop your slice in the microwave for 10-15 seconds or place the whole pie back in the oven at 350 degrees for 3-5 minutes until warm.
How to Freeze
Leftover pie freezes very well. Allow the pie to chill in the fridge first, then wrap it well in several layers of plastic wrap, and store it in an airtight container or freezer bag in the freezer for 2-3 months. Thaw in the fridge before serving.
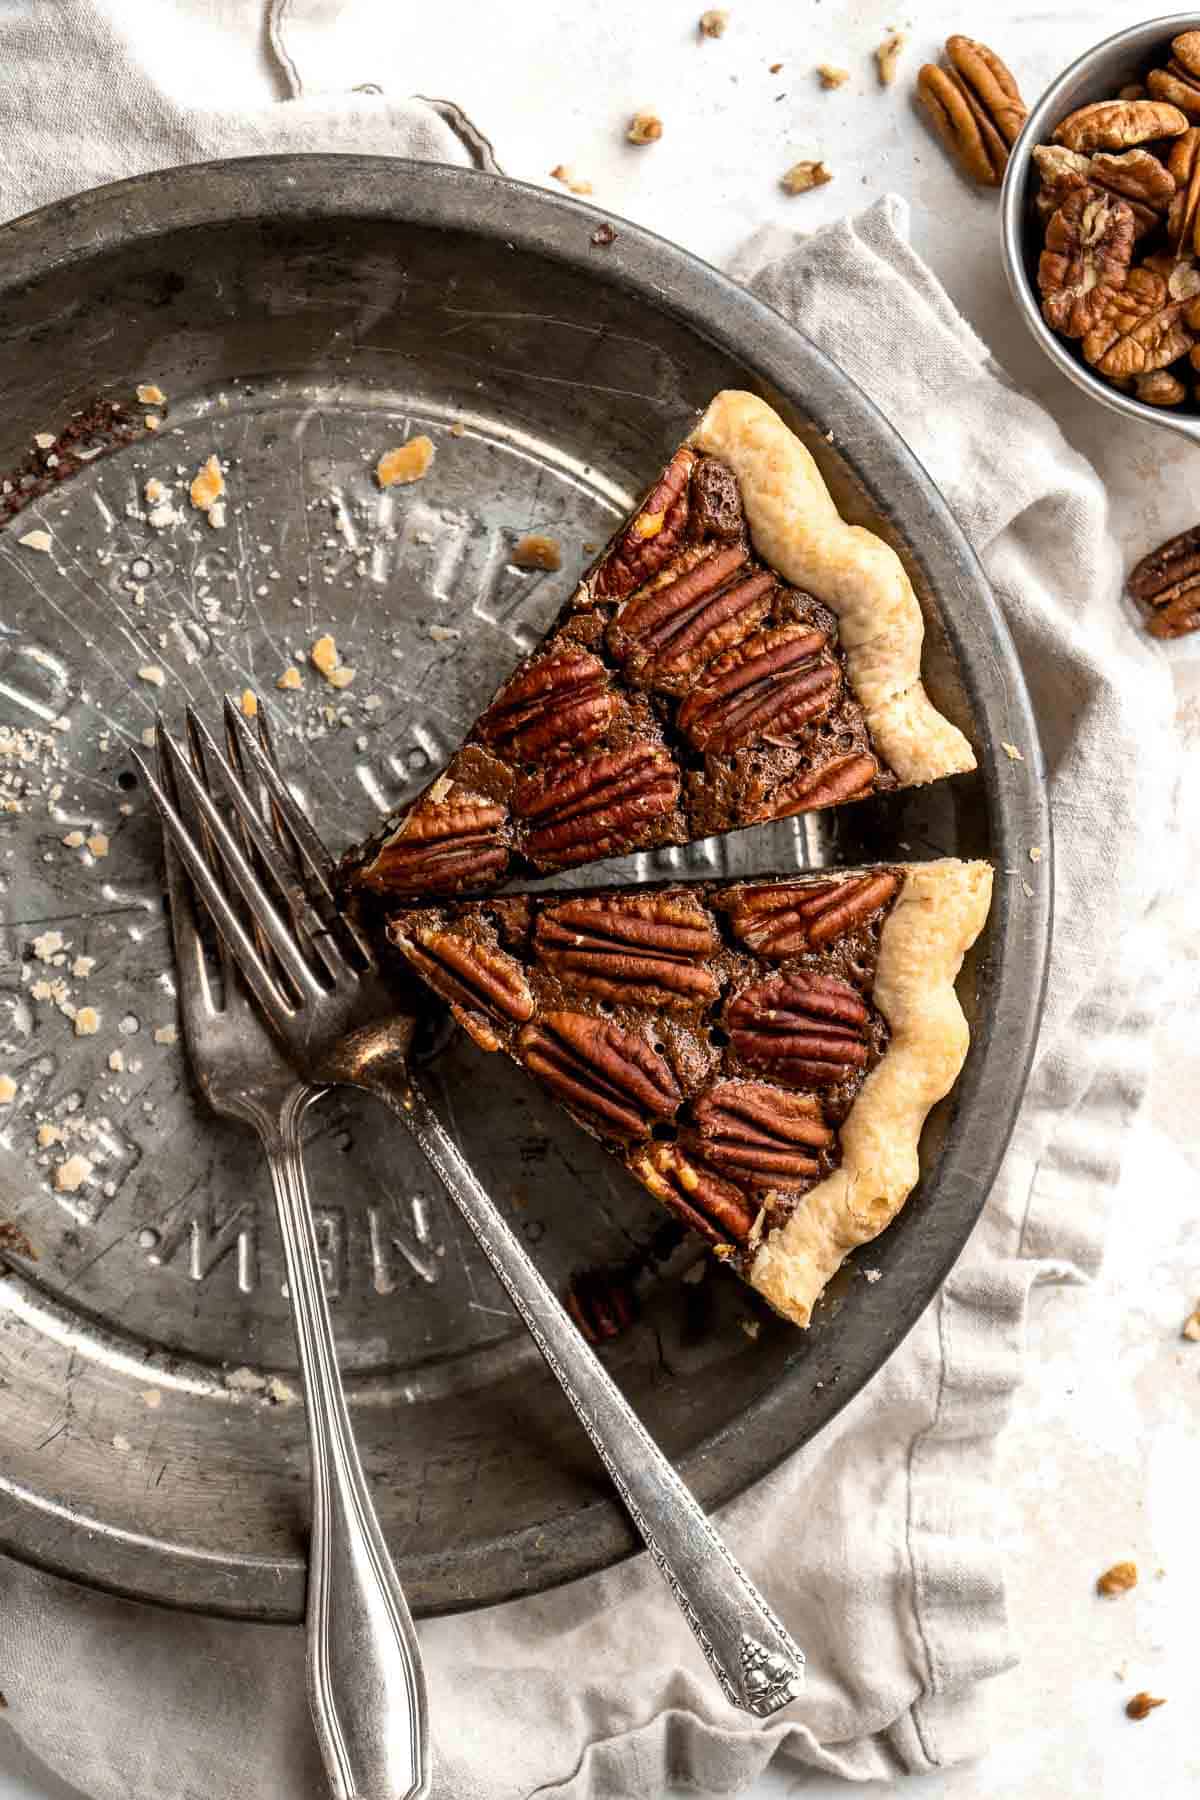
FAQ
Since this recipe contains eggs, it's best to follow regular food safety rules to avoid any possible food-borne illness. The pie should be cooled to room temperature within two hours of baking, then stored in the fridge for 3-4 days. Be sure to wrap the entire pie in foil or plastic wrap to keep it fresh.
If your pecan pie is runny, it's likely that you either added too much liquid or you didn't bake it long enough. Any type of pecan pie usually takes about an hour to bake, and it will need an additional hour on the counter to set up. If it is still runny and you just took it out of the oven, keep baking it for an additional 10-15 minutes to see if that helps.
It's generally recommended to store pecan pie in the refrigerator to avoid any harmful germs and bacteria from growing. Your pie should not be on the counter for longer than two hours.
More Pecan Pie Recipes
- 30 Best Pecan Recipes
- Pecan Pie
- Pecan Pie Brownies
- Caramel Pecan Pie Cheesecake Bars
- Pecan Pie Bars
- Chopped Pecan Pie
Tried this recipe?
I'd love to hear what you think! Leave a comment and rating below to share your feedback. Your reviews help others discover this recipe and help me keep creating more free recipes for you. Snap a photo and tag me on social media @aheadofthyme too.

Cheesy Brussels Sprouts Bake
This Cheesy Brussels Sprouts Bake is a warm and comforting side dish that is perfect for any occasion. Sautéed garlic brussels sprouts are topped with bacon and cheese and baked until bubbly and golden. Serve this easy to make and flavorful side dish for a holiday feast or busy weeknight dinner.
Cheesy baked brussels sprouts with bacon is one of the best ways to eat brussels sprouts. This recipe takes Brussels sprouts to a whole new level of flavor and indulgence. Tender, cheesy, and delicious. Plus, it is easy to prepare using a handful of simple ingredients and following a few basic steps. So whether you're a Brussels sprouts lover or have been hesitant to give them a try, these cheesy brussels sprouts are a must-try recipe that will change your perception of this vegetable forever.
Why You'll Love this Cheesy Brussels Sprouts Bake
- So easy to make. This brussels sprouts recipe comes together quickly and easily with just a few simple steps and ingredients, making it perfect for both weeknight dinners and special occasions. All you do is cook the bacon, sauté the brussels sprouts, then combine and top with cheese. Finally, pop into the oven until melty and bubbly.
- Delicious and flavorful. This baked brussels sprouts and bacon dish is rich, cheesy, and packed with flavor. The nutty and slightly sweet flavor of the Brussels sprouts is perfectly complemented by the smoky flavor of bacon and gooey melty cheese. It's a match made in culinary heaven.
- Brussels sprouts are healthy. Brussels sprouts are packed with essential nutrients, including vitamins K, C, and A, as well as fiber, potassium, and antioxidants. By incorporating them into a cheesy bake, you can enjoy their nutritional benefits in a delicious and comforting way.
- Serve it on any occasion. Serve these baked brussels sprouts with bacon as a side dish paired with roasted meats like turkey, chicken, or pork on busy weeknights, alongside a holiday roast for Thanksgiving dinner, or as a side on Sunday dinner.

Ingredient Notes
To make this flavorful Cheesy Brussels Sprouts Bake, you will need the following ingredients (full measurements in recipe card below):
- Brussels sprouts - look for fresh Brussels sprouts that are firm and green without any brown spots. Trim the ends and cut them in half for even cooking.
- bacon - use freshly crisp bacon for the best flavor and texture. Alternatively, you can use pre-cooked bacon bits for convenience.
- garlic - we used fresh garlic cloves for the best flavor but you can use pre-minced garlic if it is more convenient.
- mozzarella cheese - Freshly grated cheese will melt more smoothly compared to pre-shredded cheese. You can also feel free to substitute with other cheeses like cheddar, Gruyère, or Parmesan.
- salt and pepper
You will also need measuring cups and spoons and a large oven-safe skillet (like a 12-inch cast iron skillet).
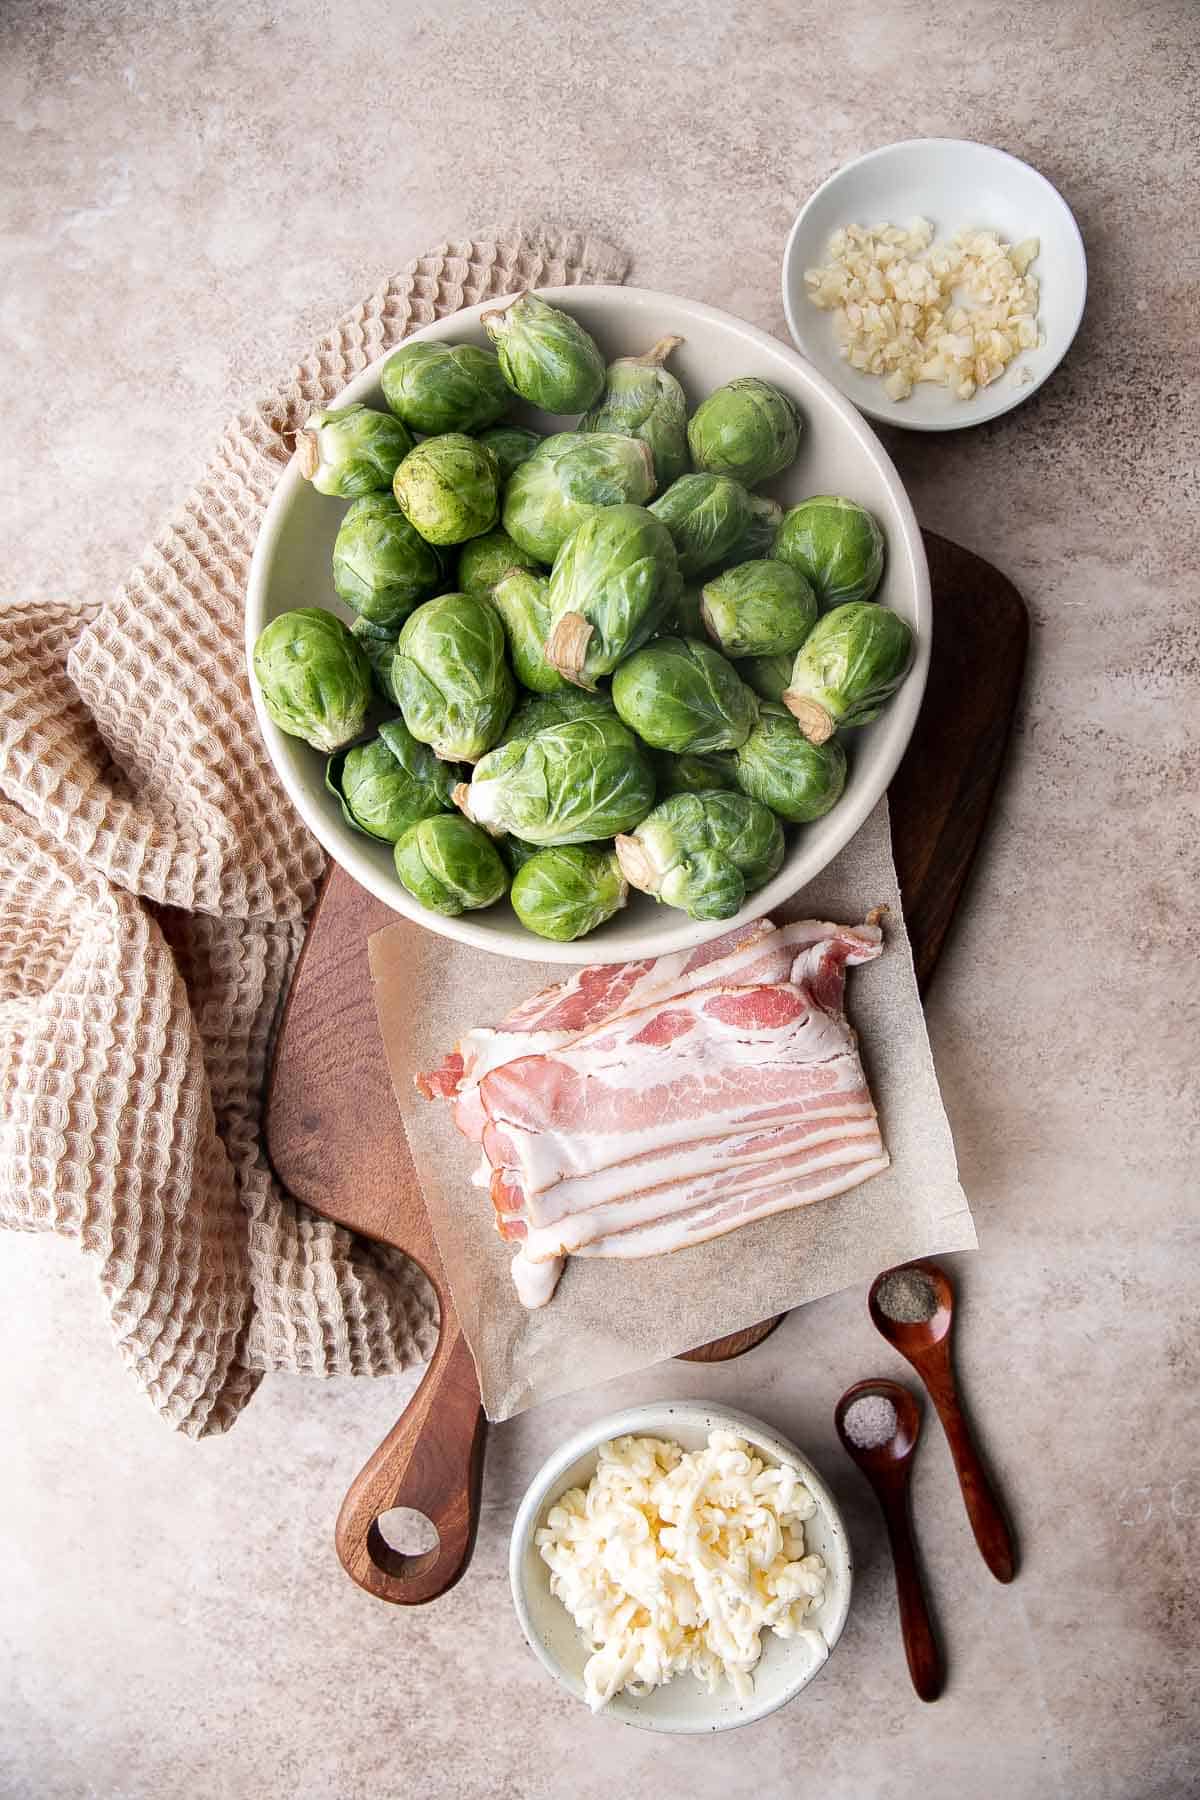
How to Make the Best Cheesy Brussels Sprouts Bake
- Cook bacon. In a large ovenproof skillet, add bacon and cook over medium-high heat until browned on both sides and crisp, about 8-10 minutes. Leave the bacon fat in the skillet and transfer the bacon onto a paper towel lined plate. Chop the bacon into 1 inch bits.
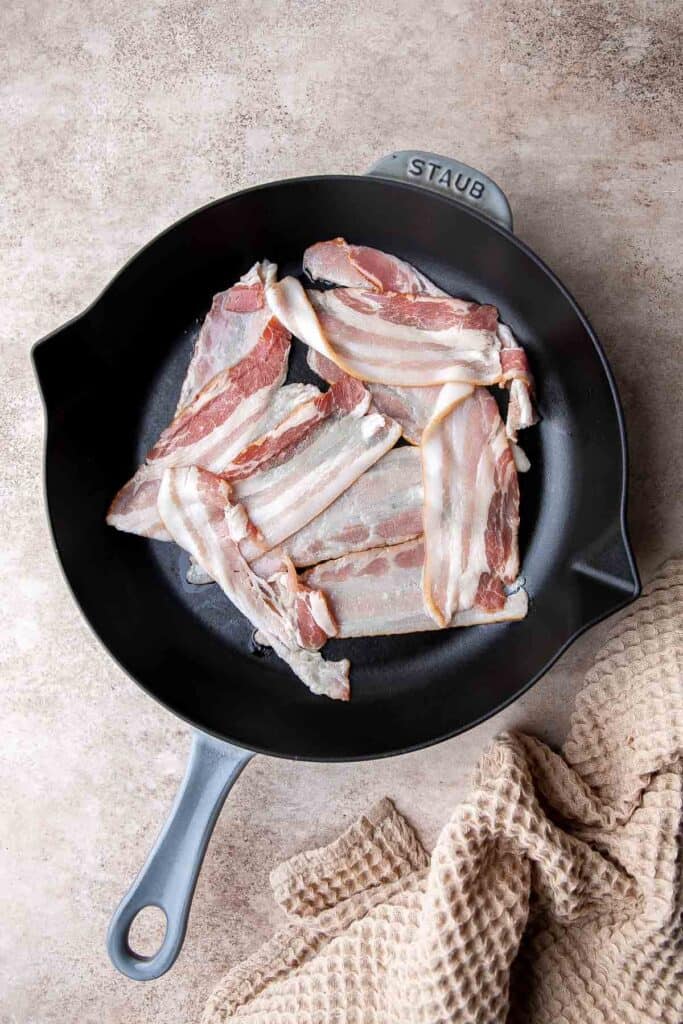
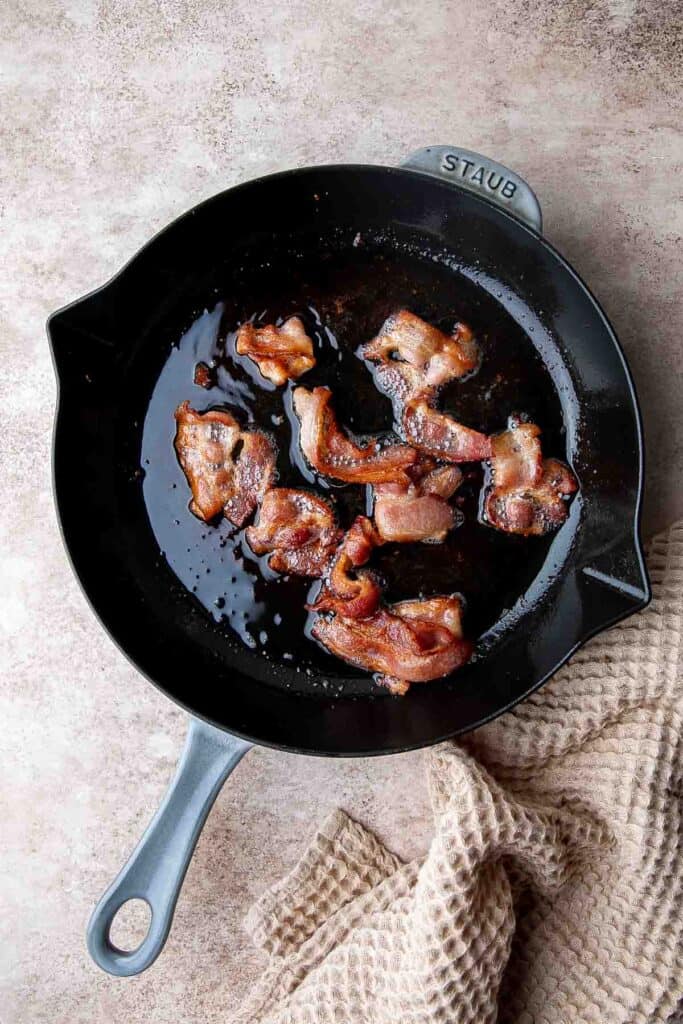
- Add Brussels sprouts. Add Brussels sprouts and garlic to the same pan. Stir constantly and cook until golden brown and caramelized, about 5-7 minutes. Season with salt and pepper.
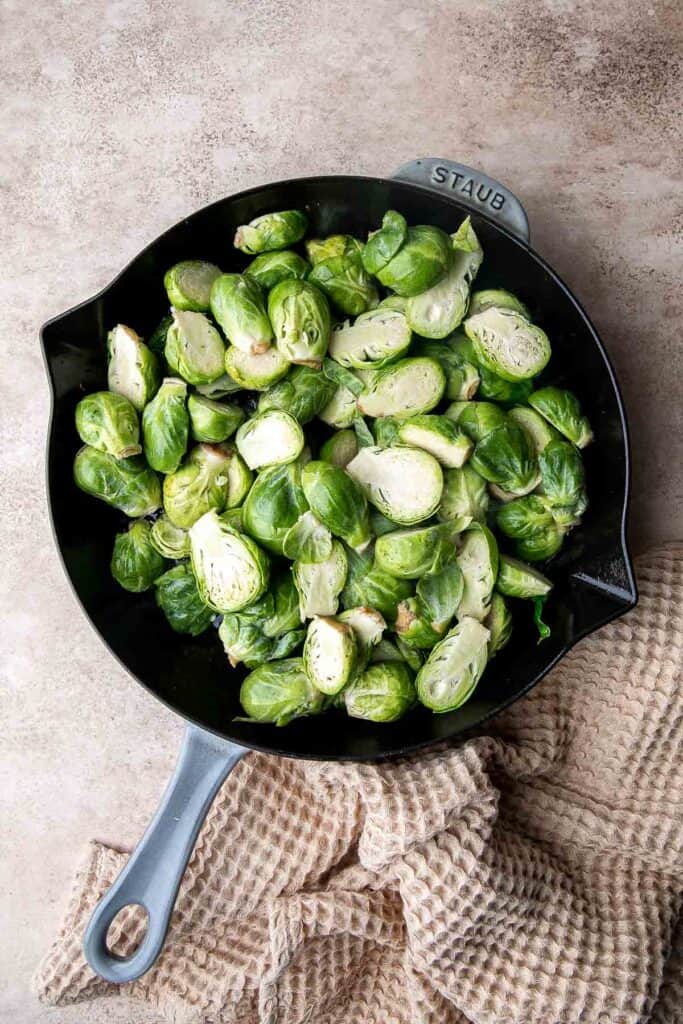
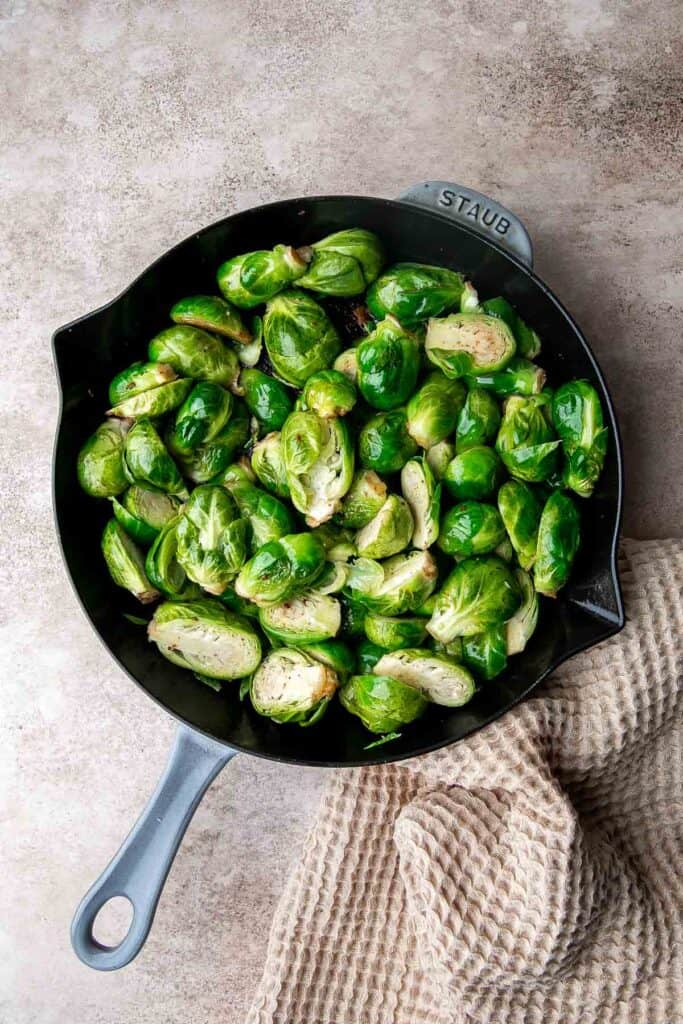
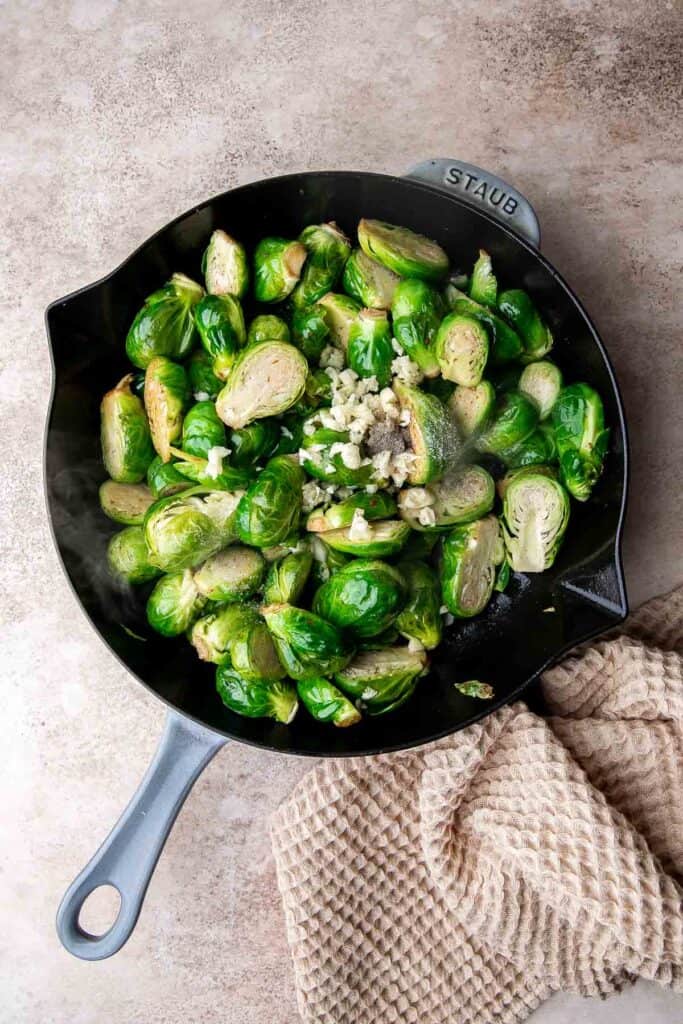
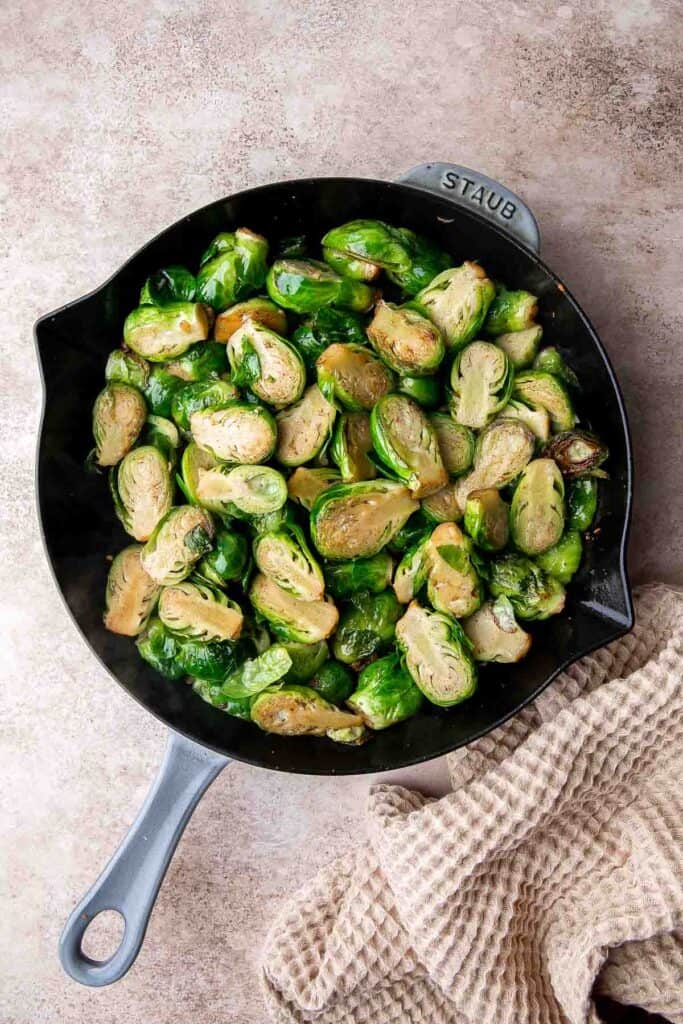
- Add cheese. Sprinkle bacon bits and shredded cheese evenly over the Brussels sprouts and bake in a 375F preheated oven until the melted cheese is bubbly and golden brown, about 10-12 minutes.
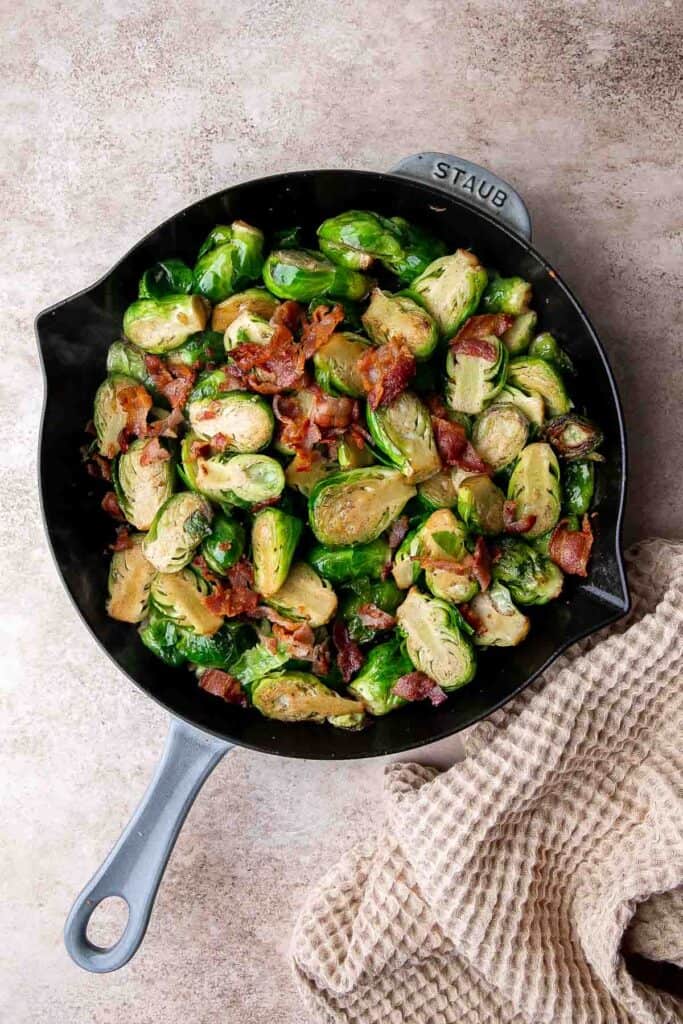
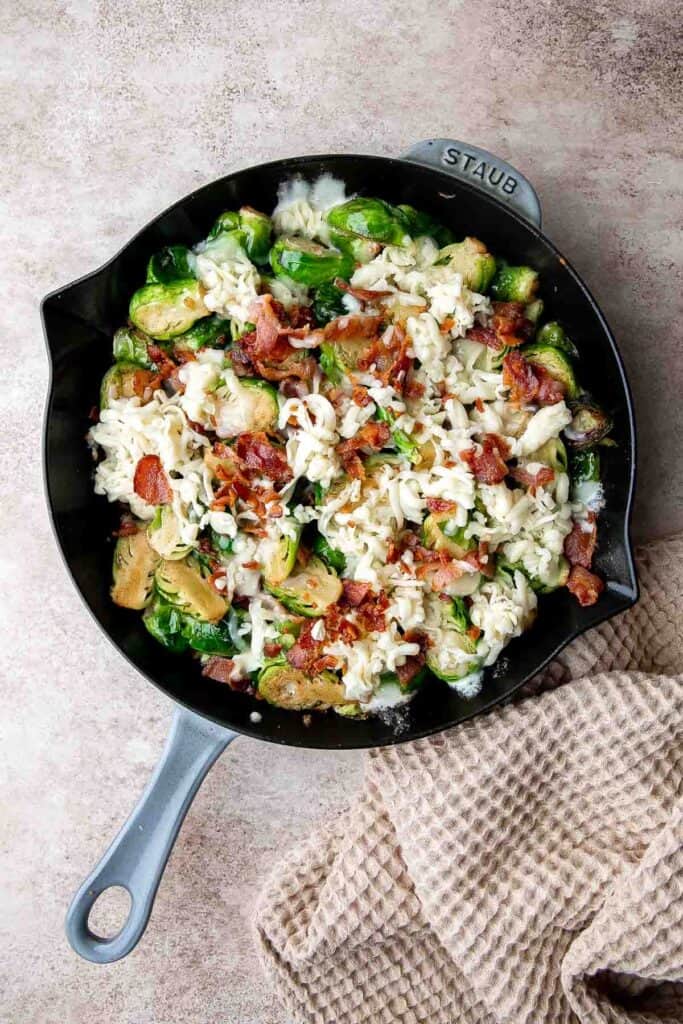
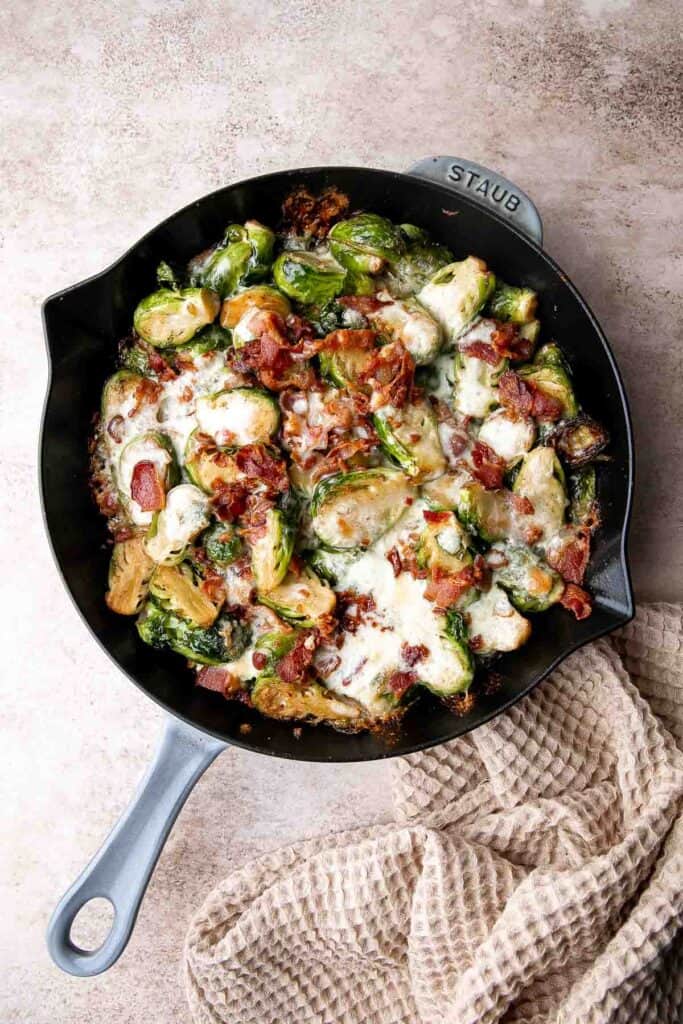
- Serve. Serve immediately.
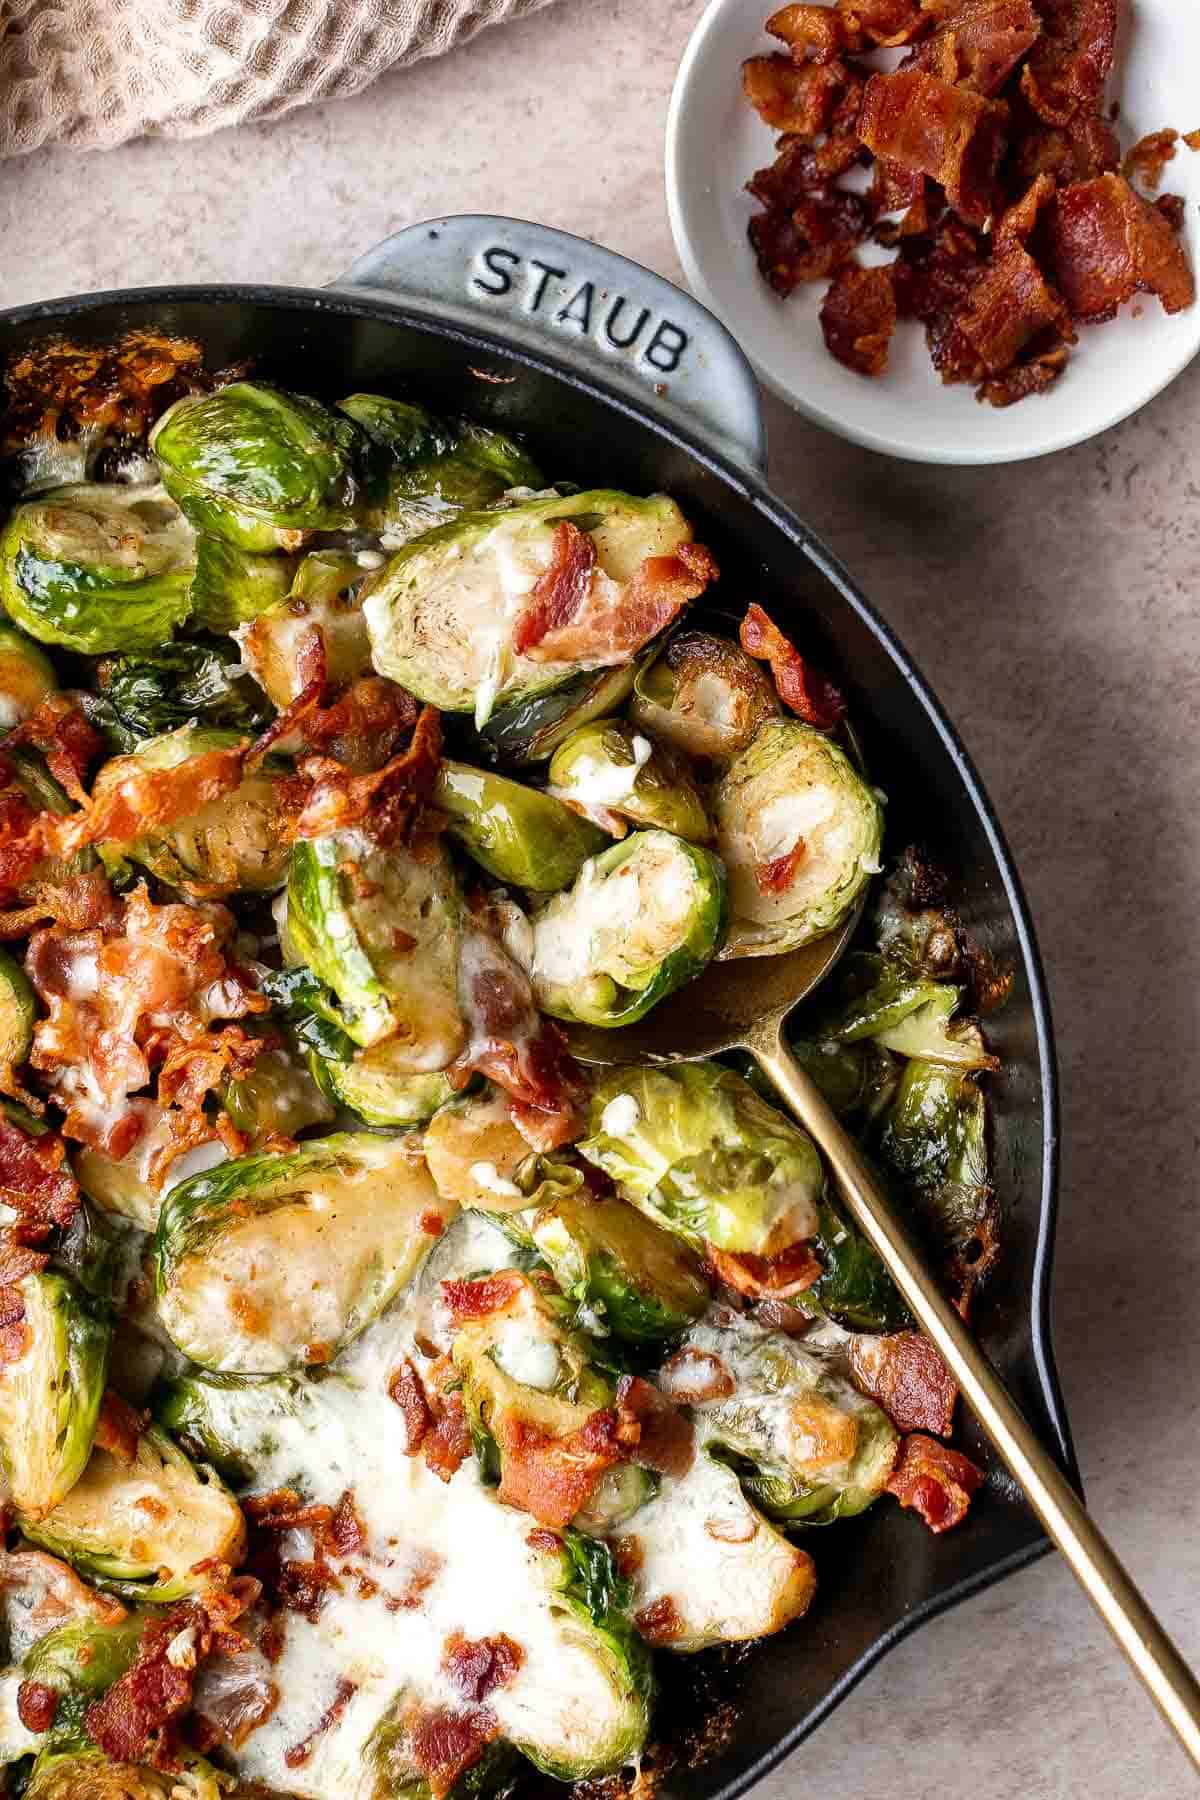
Recipe Variations
- Make it vegetarian. Not a fan of bacon? No problem, just leave it out. Instead of sauteeing the brussels sprouts in the bacon fat, add 1-2 tablespoons of olive oil.
- Use different cheese. We top this with mozzarella but you can experiment with different types of melty cheese for a different flavor. Try white cheddar, Gruyere, Parmesan, or Fontina cheese.
- Add herbs. Elevate the flavor of these baked brussels sprouts by adding in fresh herbs like thyme, rosemary, or sage. Sprinkle it over the brussels sprouts before popping into the oven.
- Make it spicy. Add some heat with cayenne pepper powder or go more subtle with a sprinkle of smoked paprika.
How to Serve
This Cheesy Brussels Sprouts Bake is delicious served as a side dish paired with a holiday roast or other roasted meats for dinner and a range of other sides. Some of our favorite entrees and sides to pair with this are:
- Prime Rib Roast
- Slow Cooker Turkey Breast
- Cheddar Mashed Potatoes
- Dutch Oven Whole Chicken
- Roasted Pork Tenderloin
- Fall Harvest Salad
- Oven Roasted Vegetables
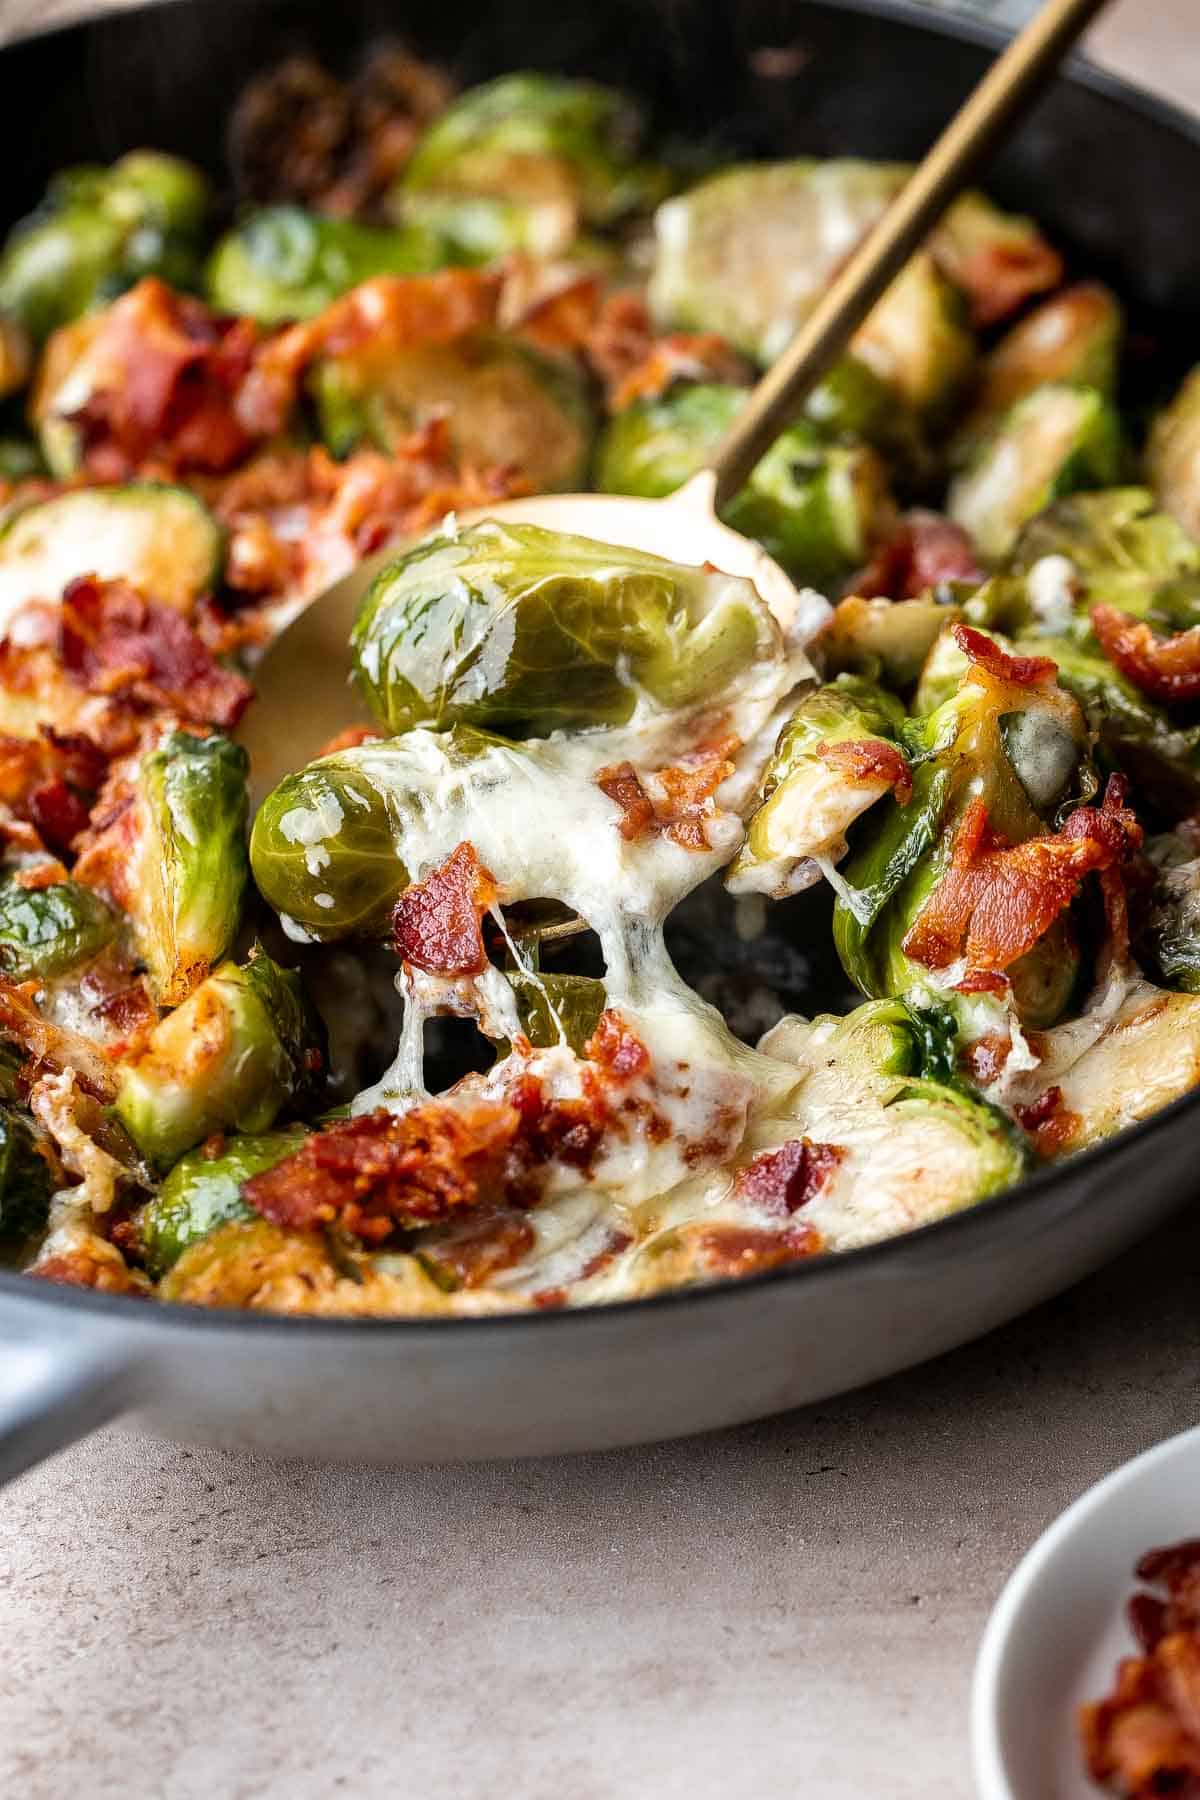
Recipe Tips and Tricks
- Cut the Brussels sprouts evenly. For even cooking, it's important to prepare the Brussels sprouts properly. First, trim the steps and remove any wilted or discolered outer leaves. Slice the sprouts in half (or quarter larger sprouts). This will create more surface area for caramelization and a better texture.
- Make without an oven safe skillet. If you do not have an oven-safe skillet like a cast iron skillet, just cook everything in a regular skillet. Transfer the sautéed bruseels sprouts to a casserole pan or baking dish, top with bacon and cheese, and place into the oven.
- Broil for crispy cheese. If you prefer the cheese to be extra crispy and golden on top, you can broil this in the last couple minutes of baking for 1-2 minutes. Keep a close eye on it to prevent burning.
- Serve immediately. These cheesy baked brussels sprouts with bacon are best enjoyed hot while the cheese is melted and bubbly.
Storing and Freezing Instructions
Make Ahead
To make this cheesy brussels sprouts bake ahead of time, you can assemble the dish up to the point of baking. Then, cover it tightly with plastic wrap or aluminum foil and refrigerate for up to 1 day. When ready to bake, remove the dish from the refrigerator and allow it to come to room temperature before baking according to the recipe instructions.
How to Store
Store leftover brussels sprouts in an airtight container in the refrigerator for up to 3 days.
How to Reheat
Reheat leftovers in a 375F preheated oven for 5-10 minutes until warmed through and the cheese is melty. You can also microwave until warmed through. Note that the texture of the Brussels sprouts may be softer after reheating.
Frequently Asked Questions
For the best texture and flavor, we recommend fresh Brussels sprouts. However, you can use frozen Brussels sprouts in a pinch. Thaw the frozen sprouts before cooking and adjust the cooking time accordingly. Keep in mind that frozen sprouts may have a slightly different texture compared to fresh sprouts.
Yes, you can omit the bacon if you prefer a vegetarian version or simply don't have it on hand. The dish will still be delicious and cheesy without the bacon. You can also experiment with other vegetarian toppings like toasted breadcrumbs or chopped nuts for added texture and flavor.
More Brussels Sprouts Recipes
- 15 Best Brussels Sprouts Recipes
- Sautéed Brussels Sprouts
- Brussels Sprouts with Bacon
- Creamy Brussels Sprouts Bake
- Parmesan Crusted Brussels Sprouts
- Bacon Wrapped Brussels Sprouts
Tried this recipe?
I'd love to hear what you think! Leave a comment and rating below to share your feedback. Your reviews help others discover this recipe and help me keep creating more free recipes for you. Snap a photo and tag me on social media @aheadofthyme too.

Pumpkin Spice Latte
Celebrate the start of fall with the most iconic seasonal coffee drink - the Pumpkin Spice Latte. Made with just a handle of simple ingredients, you can enjoy your own pumpkin spice lattes at home whenever you'd like and for way less.

The second the weather starts to change (and sometimes before then), Starbucks releases its pumpkin spice latte. This cozy drink has the perfect blend of hot espresso, real pumpkin puree, pumpkin spice syrup, and creamy milk. It's easy to replicate the Starbucks experience at home with this simple homemade version. Even better, you'll be able to store your pumpkin spice syrup in the fridge to enjoy this seasonal drink any time you'd like!
Why You'll Love This Pumpkin Spice Latte Recipe
- Made with high quality ingredients. As much as we love the Starbucks pumpkin spice latte, it's really high in sugar and uses dyes, preservatives, and stabilizers to get the perfect texture. This homemade version is made with the highest quality ingredients; no stabilizers or dyes necessary. Plus, it is made with real pumpkin!
- So convenient. When you have the pumpkin spice mixture in your fridge, you can make your own lattes anytime. It's also so much cheaper than running to the coffee shop every day!
- Easy to customize. Prefer oat milk? That's easy. Want to use homemade pumpkin puree? No problem. Like a specific roast or coffee brewing method? You can customize this homemade pumpkin spice latte recipe to suit your preferences.
- Great hot or iced. This pumpkin mixture tastes just as great in an iced pumpkin spice latte as in a hot one! It's seriously versatile and a must for pumpkin lovers this pumpkin spice season.

Ingredient Notes
To make this delicious pumpkin spice latte, you will need the following ingredients (full measurements in recipe card below):
- milk - choose your milk of choice, including regular dairy or non-dairy such as oat milk, almond milk, soy milk, or coconut milk.
- pumpkin purée - choose either canned puree or make your own.
- pumpkin pie spice - this is where the spice flavor comes from, so be sure to use your pumpkin spice mix. Add an extra sprinkle of pumpkin pie spice on top as a garnish!
- sugar - this adds a little sweetness to really highlight the pumpkin flavor. For extra richness, feel free to use brown sugar. You can also substitute with honey, maple syrup, or agave.
- vanilla extract - this plays up the sweet, spiced flavors in the best way.
- coffee or espresso - you can use any type of coffee. If you have an espresso machine, you'll need 1-2 shots, or you can make strong coffee using your favorite brewing method.
- whipped cream - add a little whipped cream on top as an optional garnish.
You will also need a medium saucepan, whisk, and an airtight container.
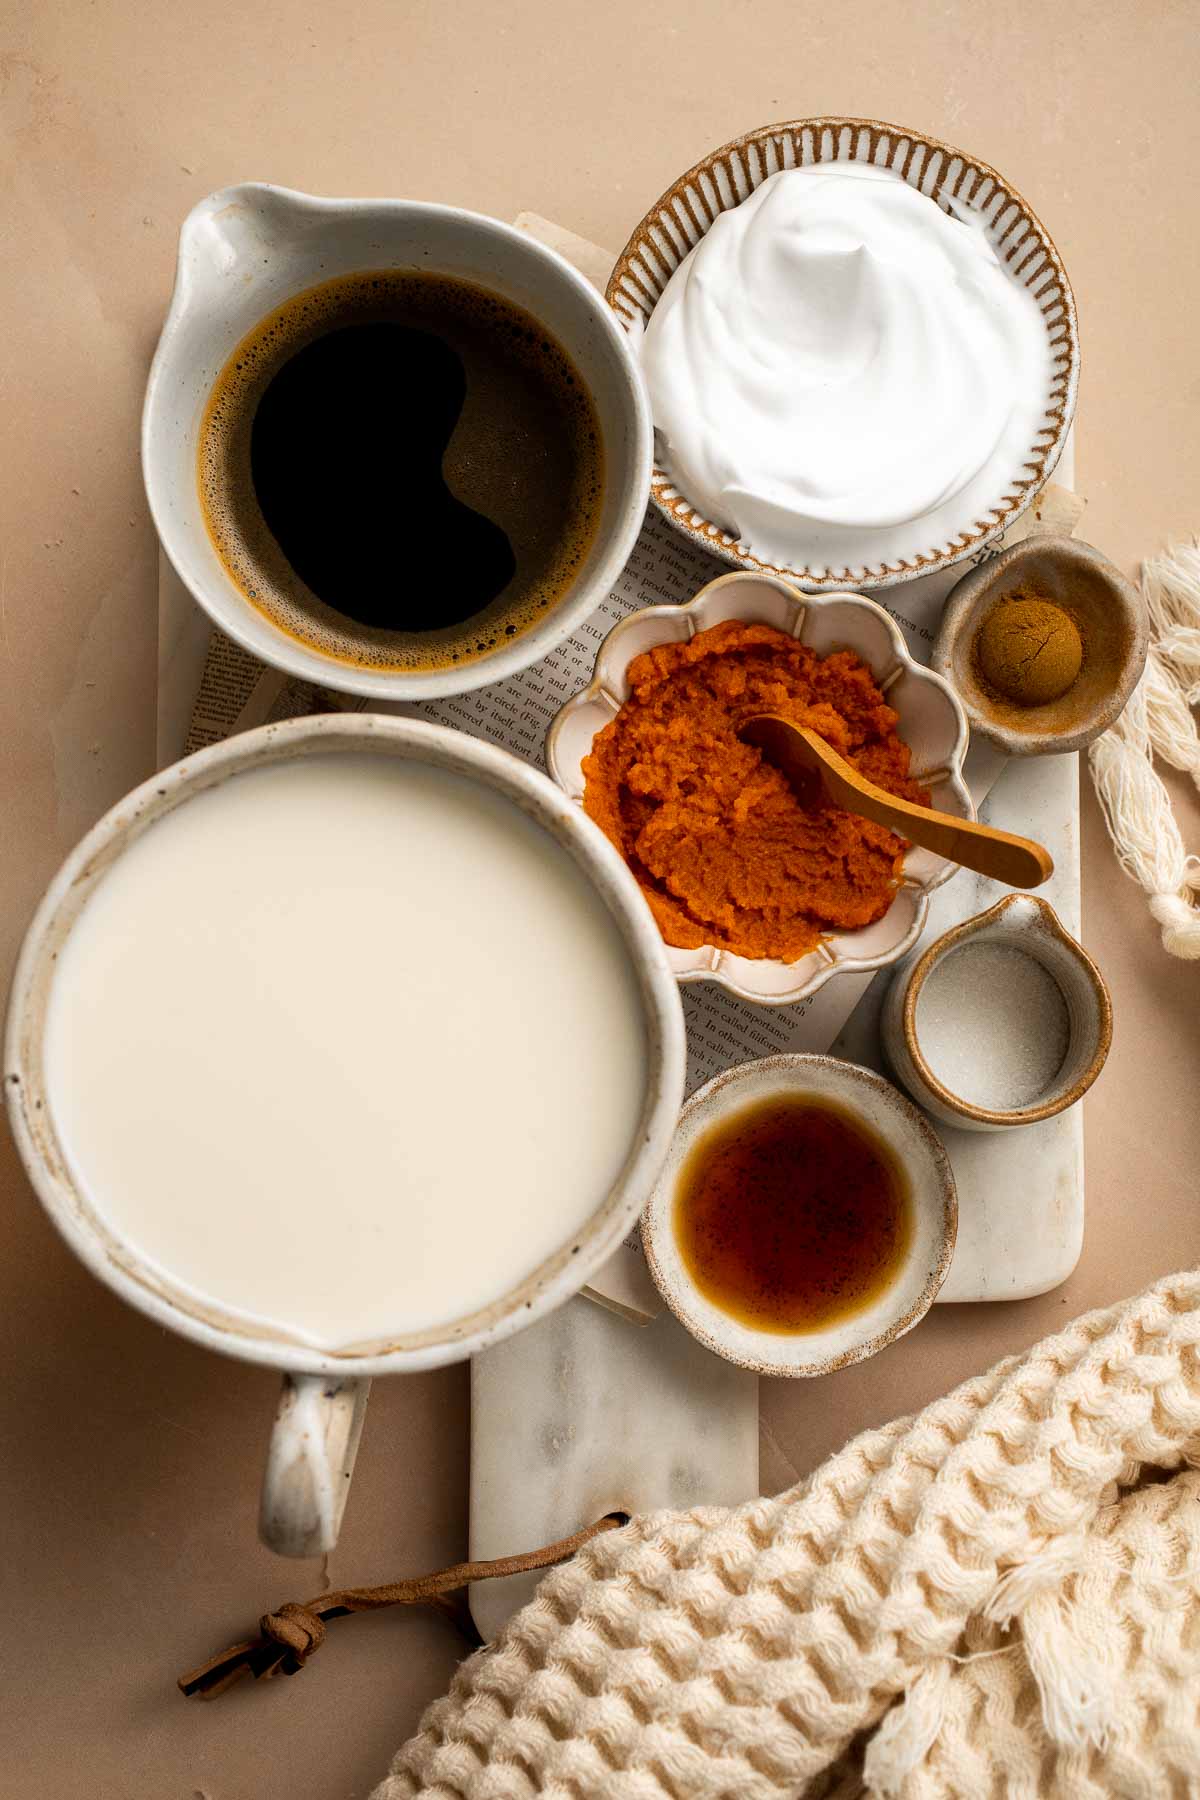
How to Make the Best Pumpkin Spice Latte
- Heat ingredients. In a medium saucepan, add milk, pumpkin puree, pumpkin spice, sugar and vanilla extract. Whisk well and heat over medium heat until warm, about 2 minutes.

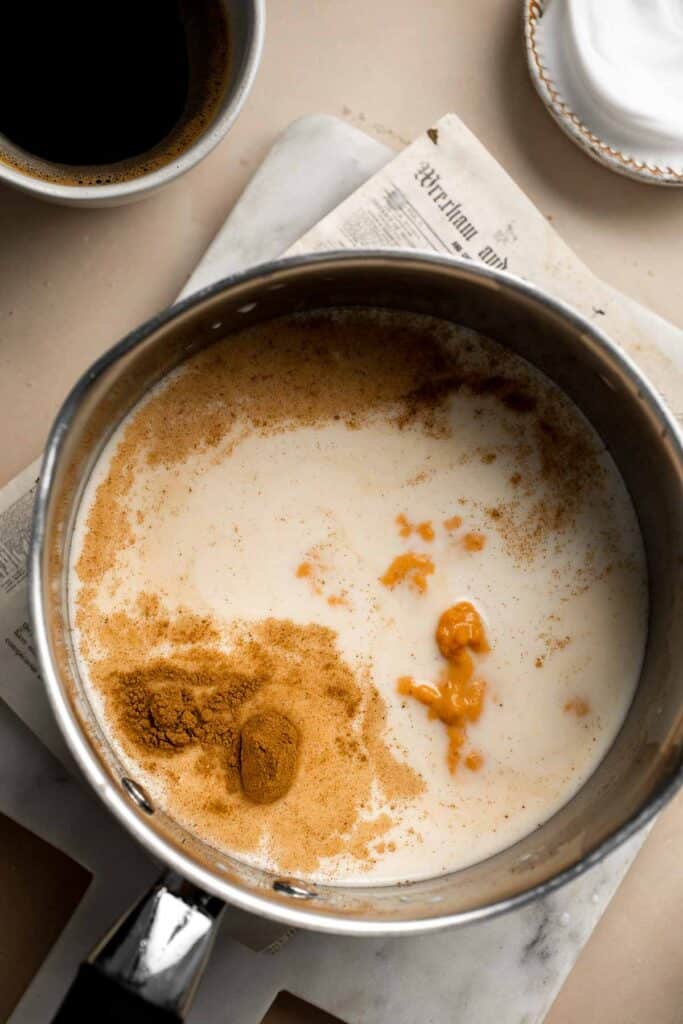
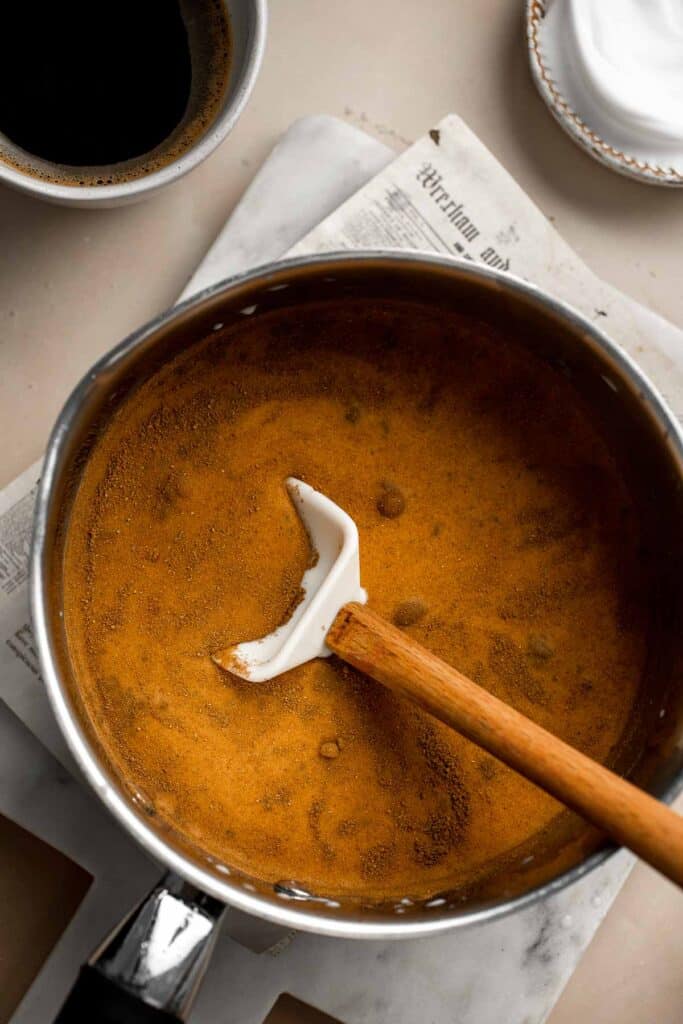
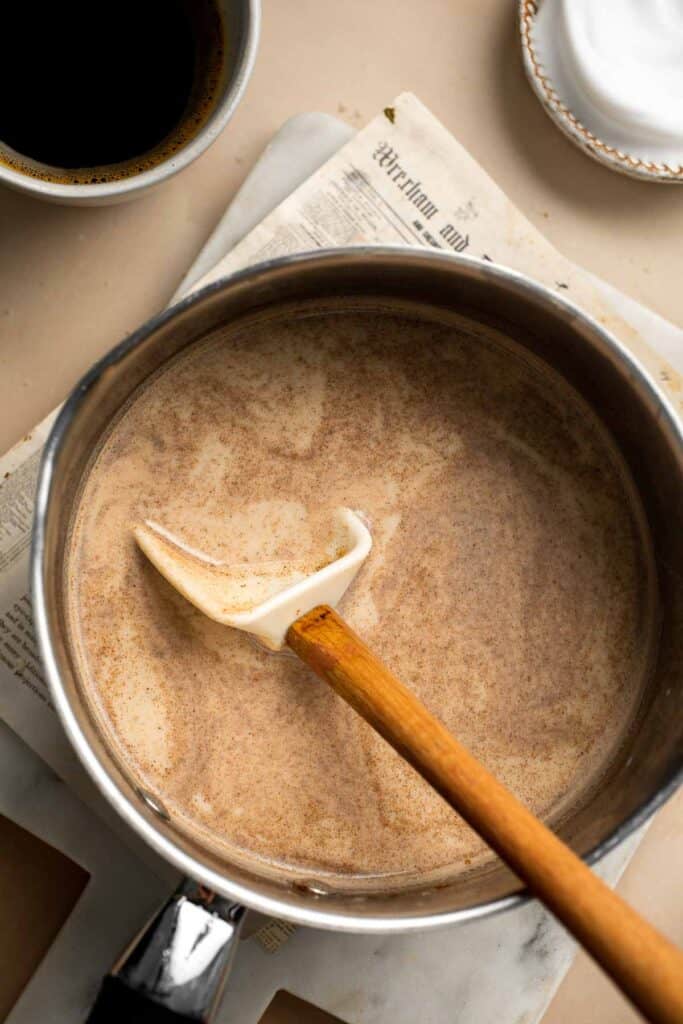
- Add coffee. Divide the mixture into two cups and top each with ¼ cup coffee. Stir well.
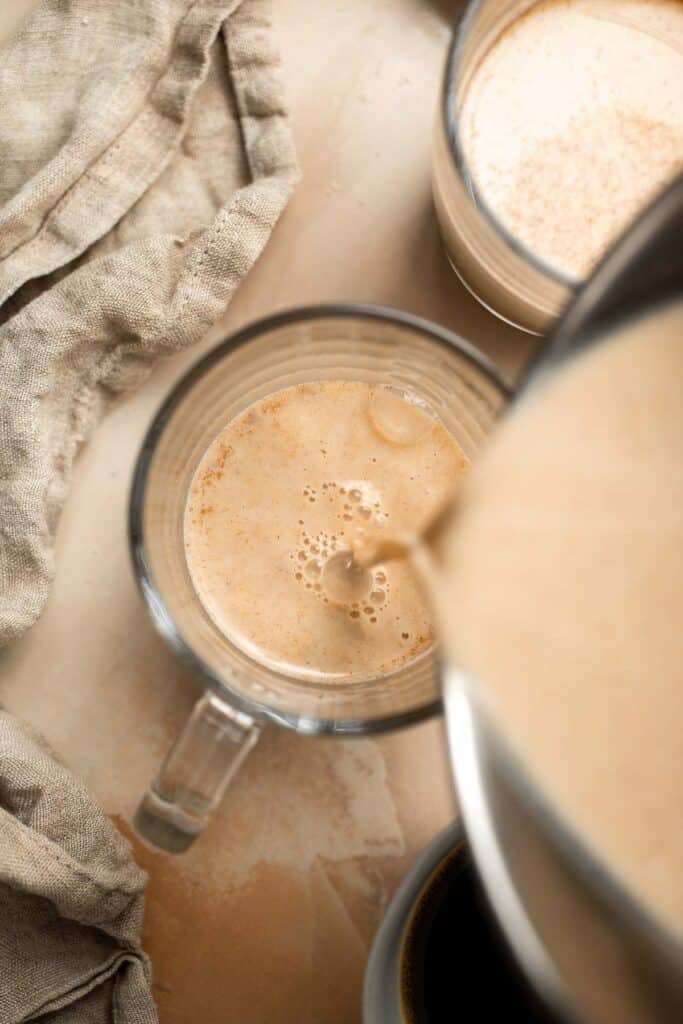


- Serve. Top with whipped cream and a sprinkle of extra pumpkin pie spice, if desired.


Recipe Variations
- Make an iced coffee. If you like your PSL chilled, use cold brew coffee or chilled espresso and let the pumpkin spice mixture cool in the fridge before serving over ice.
- Sweeten naturally. Trying to reduce your sugar intake? Add pure maple syrup to taste instead.
- Serve a kid-friendly drink. If your kid loves PSLs and you don't want them to have caffeine, warm the milk mixture for a refreshing fall drink.
How to Serve
This Pumpkin Spice Latte is delicious served on its own, or paired with some of my favorite fall treats including:
- Pumpkin Bread
- Mini Glazed Pumpkin Scones
- Pumpkin Chocolate Chip Cookies
- No Bake Pumpkin Cheesecake
- Pumpkin Energy Bites
- Mini Pumpkin Pies
For more dessert inspiration, see our 50 Best Fall Desserts.

Recipe Tips and Tricks
- Heat the milk with the spices. Some recipes call for making a sugary syrup and then adding it to your milk or milk alternative right before serving. We actually don't recommend that because adding the milk with the pumpkin puree and fall spices allows those flavors to infuse into every drop. It's so much better!
- Use strong coffee. Since you only add ¼ cup of hot coffee or espresso per serving, you want it to be strong enough to taste.
- Don't use pumpkin pie filling. Pie filling is already sweetened and has spices, so you would need to adjust this recipe quite a bit to use it.
- Froth the milk. For a really creamy treat, use a milk frother or steam wand to take your DIY pumpkin spice latte to the next level.
Storing and Freezing Instructions
How to Store
After making your pumpkin spice mixture, store it in the fridge for 4-5 days in a large glass jar or sealed jug.
How to Reheat
Warm your milk mixture in a small saucepan or use a frother or steam wand. Pour the mixture over the hot coffee in your mug, stir, and top with whipped cream and extra pumpkin pie spice.
How to Freeze
Make a double batch of this recipe and freeze the extra milk mixture for later in a freezer-safe container. Let the mixture thaw in the fridge for several hours before reheating. Dairy milk does not thaw as well as non-dairy milk, so you may want to choose coconut milk or cashew milk.
FAQ
It's really simple to make your own pumpkin lattes at home. You'll need coffee or espresso, any kind of milk, pumpkin puree, spices, vanilla extract, and sugar. To make your drink more exciting, top it off with some whipped cream, extra pumpkin spice, or a whole cinnamon stick!
The grande-size latte usually contains 2 shots of espresso, which is approximately 120 mg of caffeine. For larger servings, you may want 3 espresso shots.
Although the ingredient list has changed over the years, Starbuck's PSL contains a mixture of milk, pumpkin spice sauce (made from sugar, condensed milk, pumpkin puree, flavors, and other ingredients), espresso, whipped cream, vanilla syrup, and pumpkin spice topping. Unlike homemade recipes, the Starbucks version contains different colors, natural flavors, stabilizers, and preservatives to ensure a consistent, stable product at all their stores. Make this copycat recipe to enjoy the real thing in your own kitchen without the long lines or additives.
More Hot Drink Recipes
- Chai Tea Latte
- Matcha Latte
- White Hot Chocolate
- Golden Milk Turmeric Latte
- Slow Cooker Apple Cider
- Peppermint Hot Chocolate
Tried this recipe?
I'd love to hear what you think! Leave a comment and rating below to share your feedback. Your reviews help others discover this recipe and help me keep creating more free recipes for you. Snap a photo and tag me on social media @aheadofthyme too.

Chicken Milanese
Chicken Milanese is an Italian classic that's utterly delicious yet easy to make at home. It's made with lightly breaded thin chicken cutlets pan-fried in a skillet until crispy and golden brown. Flavorful, crispy, and juicy all at the same time, this simple chicken recipe is the perfect dinner choice for any night of the week.

There are tons you can do with chicken cutlets, from the classic chicken parmesan to other breaded variations like the Japanese katsu and German schnitzel. But if you're in the mood for something Italian, this chicken Milanese recipe is our go-to! Drizzle it with a fresh squeeze of lemon juice and serve it with a simple Arugula Salad for an easy, delicious, and impressive meal.
Why You'll Love this Chicken Milanese Recipe
- Extremely simple. A generous sprinkle of salt and pepper, a few pantry staples for the breading, and a few minutes in the skillet are all you need. It's as good as any restaurant-made version, maybe even better!
- Perfect for busy weeknights. Dinner in a little over 30 minutes? Yes, please! It's an excellent way to get a delicious and impressive meal on the table that won't take all night to make.
- Classic Italian dish. No need for complicated sauces or seasonings, this recipe is truly all about the simple flavors of Italy. It's light, flavorful, comforting, and fancy all at the same time.
- High in protein. Care for a healthy dinner? This recipe has around 40 grams of protein per serving, so it won't leave you feeling hungry anytime soon. Plus, you get to enjoy it without feeling guilty!

Ingredient Notes
To make this delicious Chicken Milanese, you will need the following ingredients (full measurements in recipe card below):
- chicken - You need about 6 boneless and skinless breast cutlets for this recipe. Some grocery stores have pre-made breast cutlets, but you can also buy 3 chicken breast pieces, slice them in half horizontally, and pound them to an even thickness. It's also a bit cheaper that way!
- salt and pepper - for seasoning the chicken cutlets. Super simple!
- breadcrumbs - use Panko for a light yet crispy coating, but you can opt for regular breadcrumbs. You can also use store-bought Italian breadcrumbs, but they come pre-seasoned with oregano, basil, and other spices.
- cheese - use freshly grated Parmesan cheese. It always has the best flavor and melts nicely when cooked. I also peeled some thin strips for the arugula salad.
- all-purpose flour - use flour to lightly coat the chicken cutlets before breading for an extra crispy texture.
- eggs - beaten eggs help the breading stick to the chicken nicely.
- oil - use olive oil or vegetable oil for frying
You will also need rolling pin (or meat tenderizer), shallow plates, and a frying pan or skillet.
How to Make the Best Chicken Milanese
- Flatten the chicken. Use a paper towel to pat dry each chicken cutlet completely dry. Place the cutlets on a clean surface. Take one cutlet and cover it with a piece of plastic cling wrap. Use a rolling pin (or meat tenderizer) to carefully flatten the cutlet until it is approximately ¼-inch thick. Don't pound the breasts too hard as it could tear the breast apart. Ideally, you want flattened chicken breasts with uniform thickness. Repeat with remaining cutlets.
- Season. Season both sides of each chicken breast with salt and pepper. Set aside on a plate.
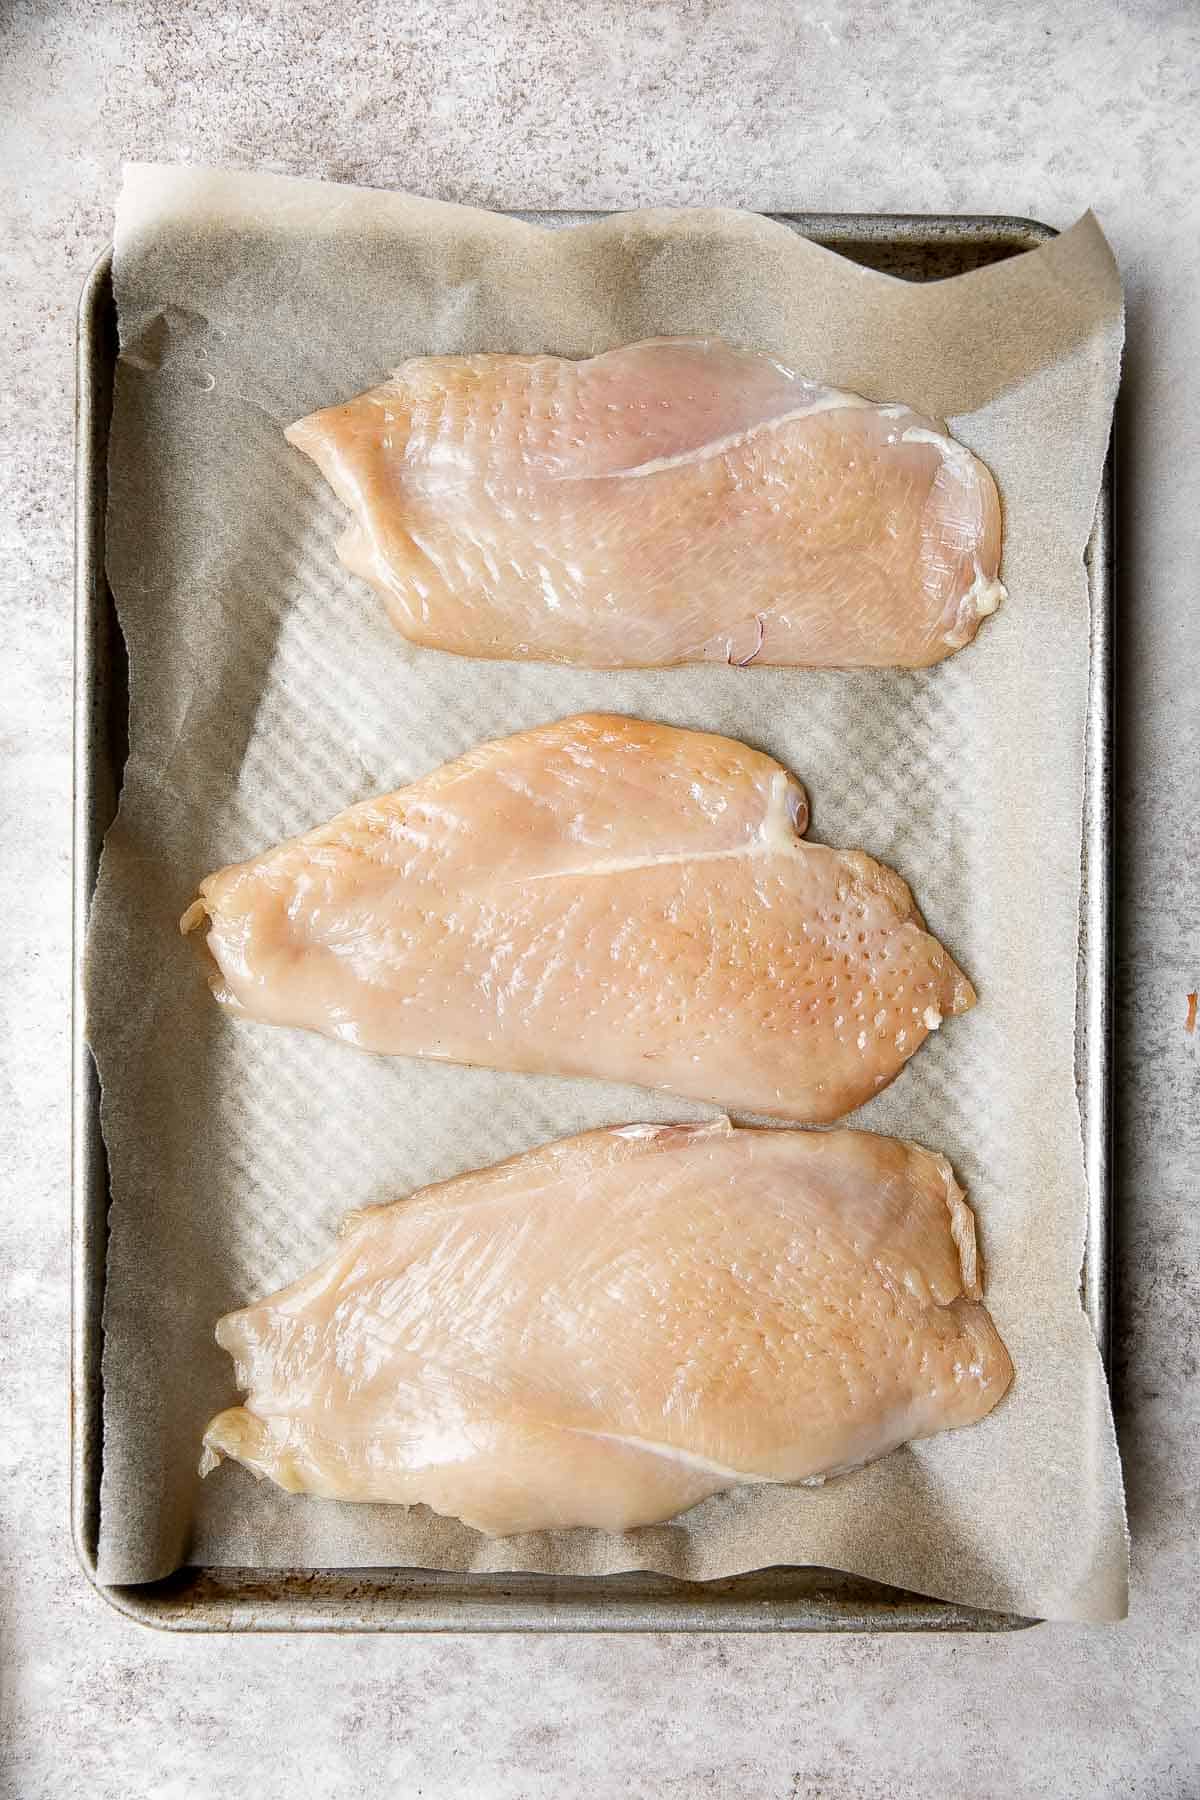
- Prepare coating. In a shallow plate, combine breadcrumbs and Parmesan. Mix well to combine. Prepare another shallow plate with flour and another shallow plate with the beaten eggs.
- Coat the chicken. Dip each piece of chicken into the flour to evenly coat it on all sides. Then, dip into the egg to evenly coat, and then dip into the breadcrumb mixture to evenly coat. The flour will stick to the chicken, the egg sticks to the flour, and the breadcrumbs stick to the egg. Shake off any excess breadcrumbs. Arrange the breaded chicken on a large baking sheet lined with parchment paper.
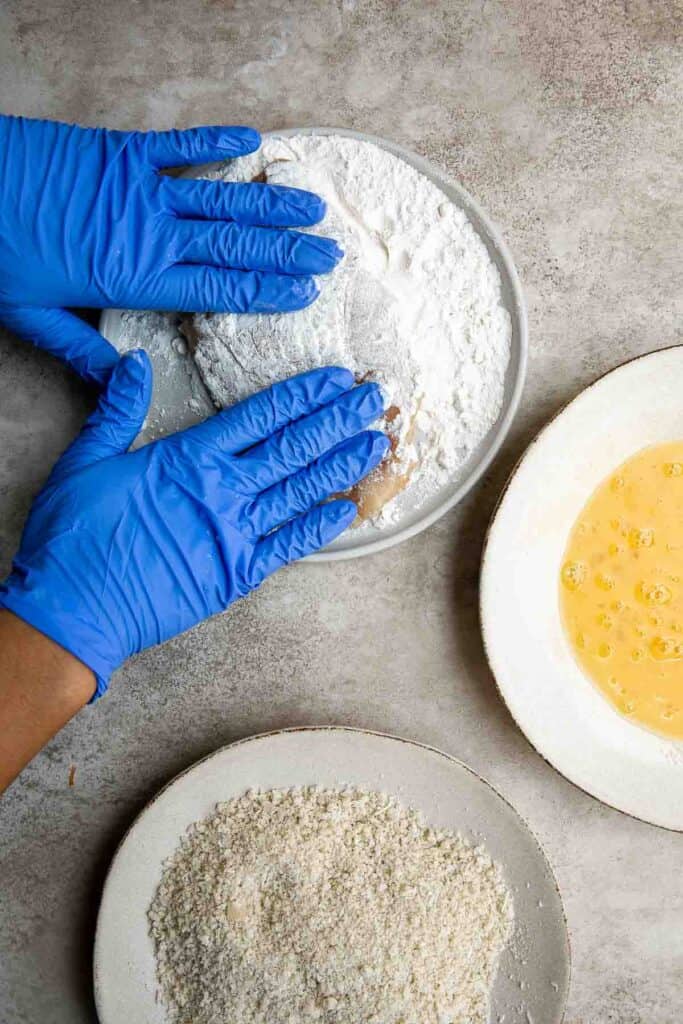
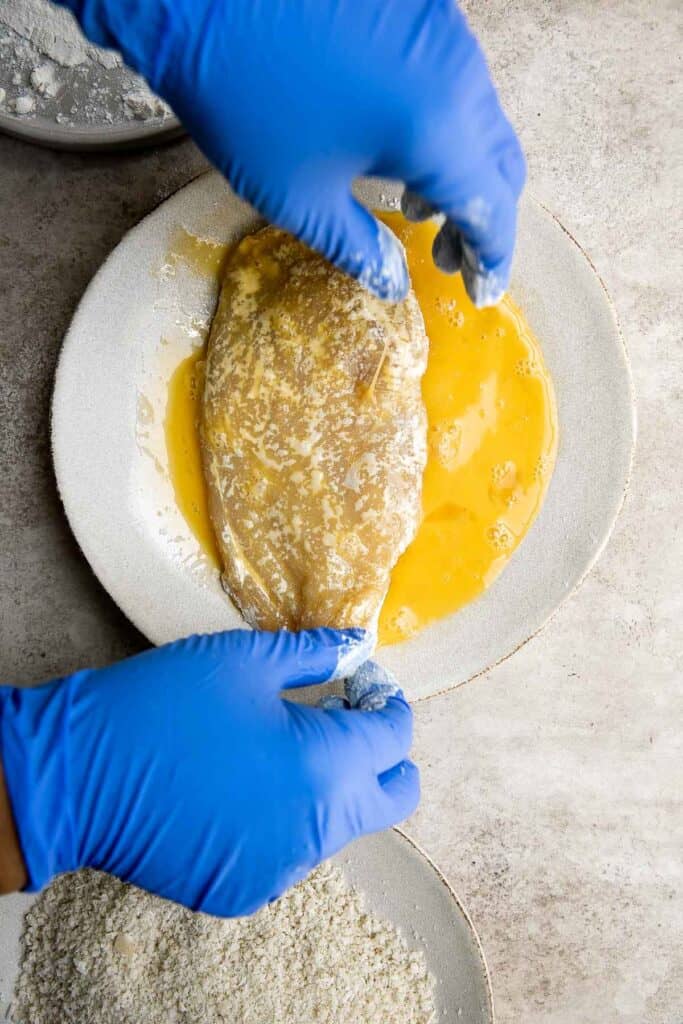
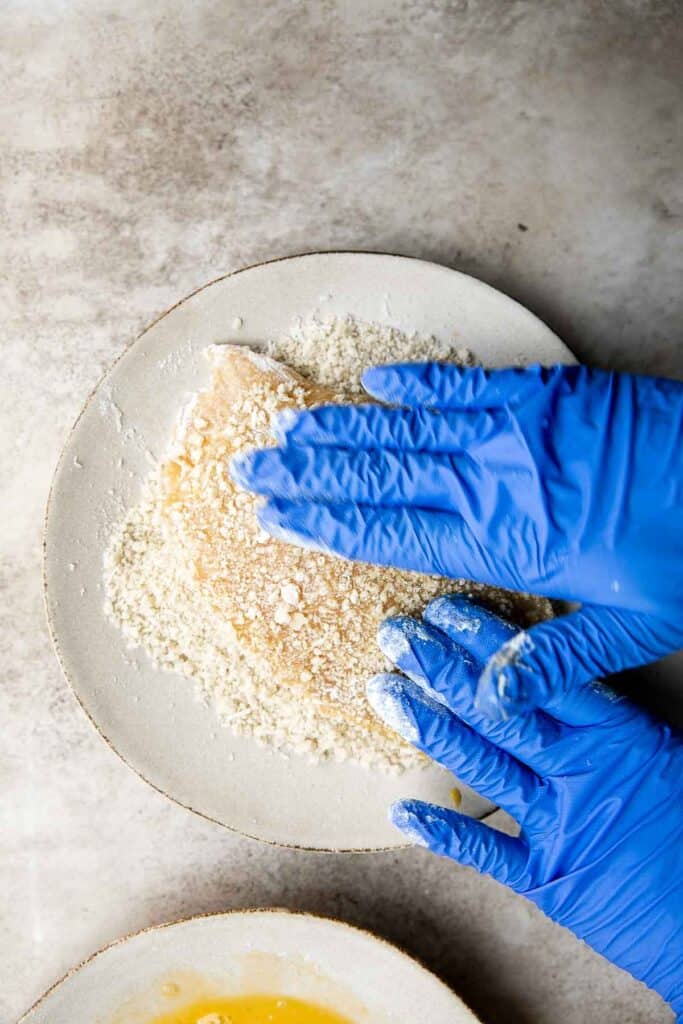
- Fry. Heat oil in a large frying pan over medium-high heat until the hot oil sizzles. Add 2 pieces of chicken at a time and pan fry until golden brown and cooked through, about 3 minutes per side. The chicken cutlets don't need to be submerged in the hot oil. Transfer the cooked cutlets onto a paper towel-lined plate to drain excess oil.
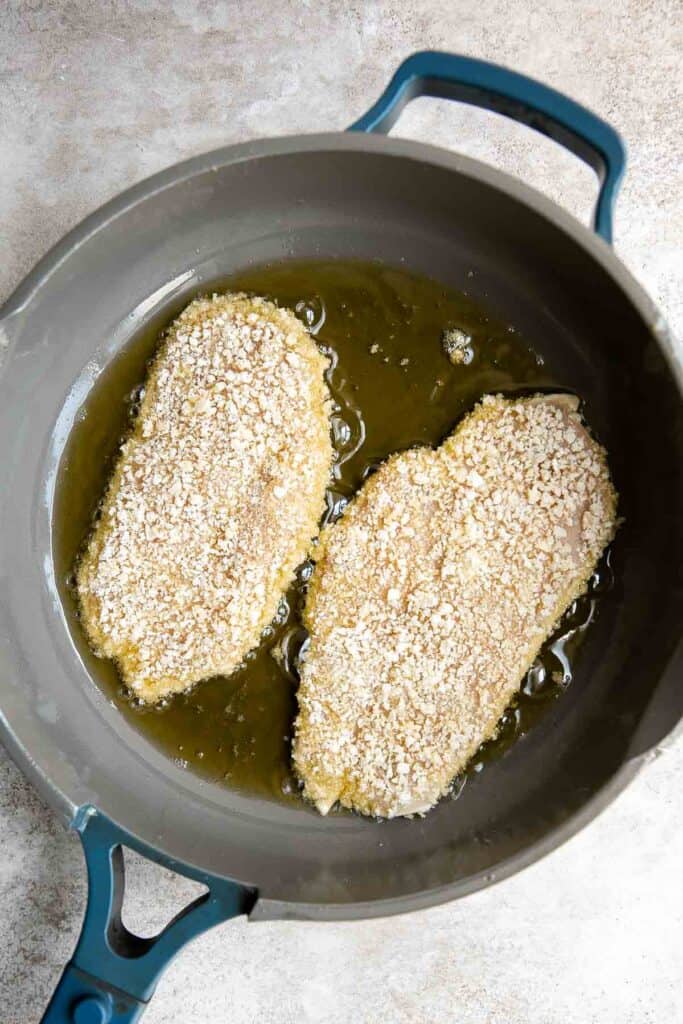
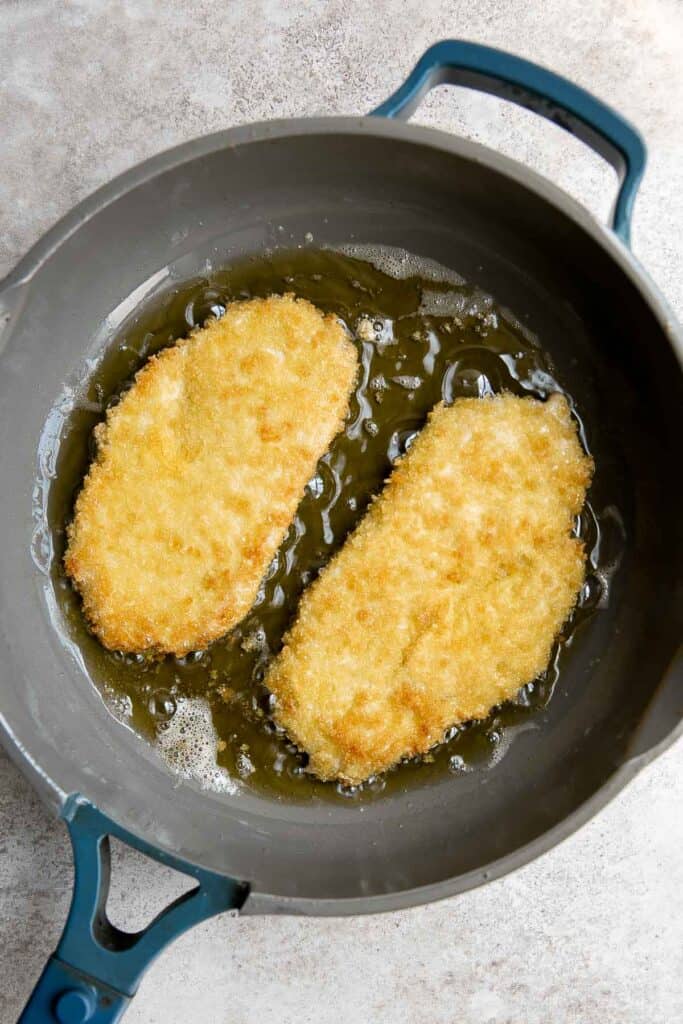
- Serve. Drizzle with lemon juice and serve with a simple arugula salad, if desired.

Recipe Variations
- Use pork. Switch things up by subbing pork cutlets for the chicken in this recipe. Just follow the same steps and cook time as above.
- Baked version. If you're looking for a lighter option, bake the chicken instead. Preheat your oven to 400°F and place the cutlets on a baking sheet lined with parchment paper. Bake for 15 to 20 minutes until cooked through, crispy, and golden brown.
- Add herbs. For an added flavor punch, add some basil leaves to the breading. Other great options are oregano, parsley, thyme, or even Italian seasoning.
How to Serve
Serve this delicious Chicken Milanese with salads, vegetables, pasta, and even soups such as:
- Tomato and Mozzarella Caprese Salad
- Oven Roasted Vegetables
- Cacio e Pepe
- Tomato Basil Soup
- Caprese Skewers
- Fettucine Alfredo
For more recipe inspiration, see our 25 Side Dishes for Chicken.

Recipe Tips and Tricks
- Pound chicken. Flatten the chicken cutlets by pounding them with a rolling pin or meat mallet until they're around ¼-inch thick for even and quick frying. It also helps to tenderize the meat and gives you nice, thin cutlets to work with.
- Press crumbs. When coating the chicken with breading, press them firmly onto the cutlets to help them stick better.
- Use tongs. To avoid messy fingers, use tongs or a fork when breading the chicken. But if you prefer using your hands, keep one hand for wet ingredients (egg wash) and one hand for dry (flour and breadcrumbs).
- Rest before frying. Let the chicken rest for at least 10 minutes before frying to allow the coating to set.
Storing and Freezing Instructions
How to Store
Keep the leftover chicken milanese in an airtight container and store it in the refrigerator for up to 3 days.
How to Reheat
Preheat the oven to 400°F and bake for 8 to 10 minutes or until the chicken is heated through and crispy again. You can also reheat in the air fryer at 400 F for about 5 minutes until heated through.
How to Freeze
Store leftover breaded chicken in an airtight container of freezer bag and freeze for up to 3 months. To reheat, allow the chicken to defrost in the refrigerator overnight and then follow the reheating instructions above.
More Chicken Breast Recipes
- 50 Best Chicken Breast Recipes
- Oven Baked Chicken Breast
- Pecan Crusted Chicken
- Creamy Lemon Chicken Piccata
- Air Fryer Chicken Breast
- Chicken Marsala
Tried this recipe?
I'd love to hear what you think! Leave a comment and rating below to share your feedback. Your reviews help others discover this recipe and help me keep creating more free recipes for you. Snap a photo and tag me on social media @aheadofthyme too.

Roasted Butternut Squash Soup
Savor the taste of fall with Roasted Butternut Squash Soup. This vegan soup is healthy, nourishing, and delicious comfort food in a bowl.
I love everything about this time of year. I love the fashion (the scarfs, gloves and hats), I love the outdoors (the red and orange falling leaves and the snow-capped mountains), and I love all the seasonal vegetables and fresh herbs. Pumpkins, squash, yams, thyme, rosemary and sage.... Need I say more? If I could give the holidays a "taste", a spoon of this roasted butternut squash soup would pretty much be that "taste".

Why You Will Love this Roasted Butternut Squash Soup Recipe
- The most popular soup recipe on Pinterest. This post was first published in 2015 and has become the most popular soup recipe that has been pinned on Pinterest ever, and for good reason. It is packed with butternut squash, gets some sweetness from the carrots, and it's got a bite from the cayenne powder.
- Healthy and nourishing. This roasted butternut squash soup is just all around comfort food - without the guilt. This soup is super healthy. It's vegan, gluten-free and whole 30 compliant. Which also means that there is no cream, no milk, and no butter! Yet this soup has a very creamy and smooth texture from the butternut squash and is not lacking in any flavor. You really can't get any healthier than that.
- Loaded with flavor. This roasted butternut squash soup is a packed with so much flavor in every bite. It is rich, earthy, sweet, and has a slight kick. When butternut squash is roasted in the oven it gets caramelized and it's natural sweet flavor intensifies for an incredible depth of flavor. Pair it with savory veggies and fragrant herbs and you've got an incredible balance of flavors.
- Easy to make. The beauty of this soup is that it is so easy to make. All you do is chop up your veggies, roast the ingredients together, puree, and thin it out with broth.
Vegan Butternut Squash Soup
The first year that I hosted Thanksgiving dinner at my house, one of our guests was allergic to dairy. So, I had to come up to with alternative recipes to my usual dishes, including the whole roast turkey (usually doused in butter), creamy mashed potatoes (full of dairy goodness), sautéed garlic green beans (also in butter) and of course, roasted butternut squash soup. For the soup, I decided to make it without butter and cream and see what happens. Well, what happened was quite amazing. The soup turned out absolutely delicious, if not tastier.
Ingredient Notes
To make this easy Roasted Butternut Squash Soup, you will need to gather the following simple ingredients (full measurements in recipe card below):
- butternut squash - choose a firm butternut squash that is heavy without any blemishes on its skin. It should also have a sweet aroma which indicates that it is ripe and ready to be used.
- carrots - adds natural sweetness and color to our butternut squash soup.
- celery - when picking out celery, look for ones that are crisp.
- onion - yellow or white onion works well in this recipe.
- garlic - for the best and most potent flavor, use real cloves of garlic. However, you can substitute with 2 tablespoons garlic powder for a similar taste.
- fresh herbs - we use fresh sage, thyme, and rosemary in this soup for the best depth of flavor. You can also substitute with dry herbs. I recommend using half the amount if using dry herbs - use 1 teaspoon dried sage, 1 teaspoon dried thyme and ½ teaspoon dried rosemary.
- cayenne red pepper powder - cayenne pepper gives the soup quite a kick but is a nice balance to the sweet squash. I recommend starting with a pinch and adding more if needed. If you are not a person who can tolerate spicy flavors, then leave it out completely.
- salt and pepper
- olive oil - we use olive oil to roast the veggies. You can also substitute with vegetable oil or avocado oil.
- vegetable stock - use vegetable broth to keep the soup vegan or use chicken stock or bone broth if you don't have a dietary preference.
You will also need a large half sheet baking pan, food processor or heavy duty blender, and a large cooking pot like a 4 quart Dutch oven.
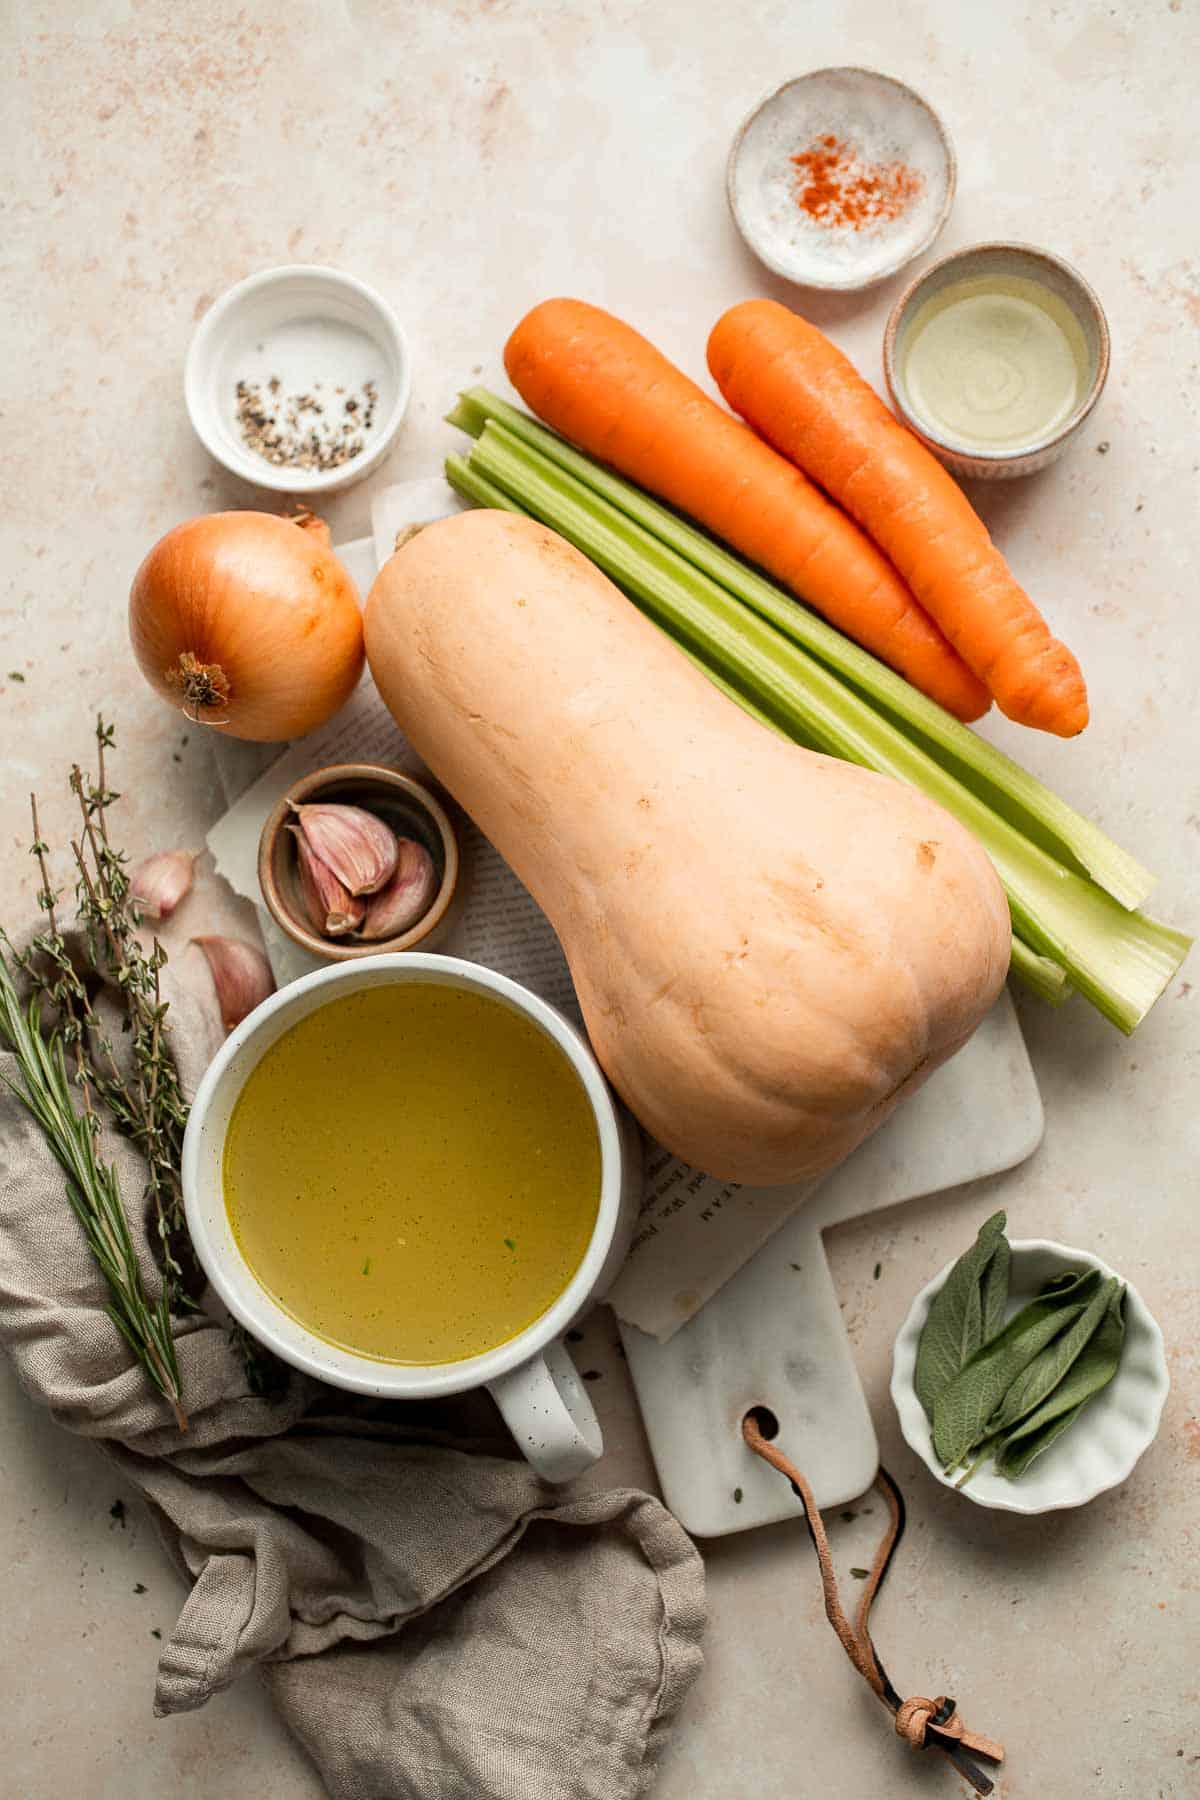
Butternut Squash Soup Recipe Video
This soup is super easy to make. All you have to do is literally throw your ingredients into a roasting pan, let the oven do its work, then puree and serve. Yes, it is that easy. Watch the recipe video below for a quick one-minute demonstration, and follow along the instructions below.
How to Make the Best Roasted Butternut Squash Soup
- Prep the vegetables: Peel, pit and chop the butternut squash into 1 inch squares. Chop the carrots, celery and onions in big chunks. Peel the garlic keep the cloves whole or halved. Add everything into a large half sheet baking pan.
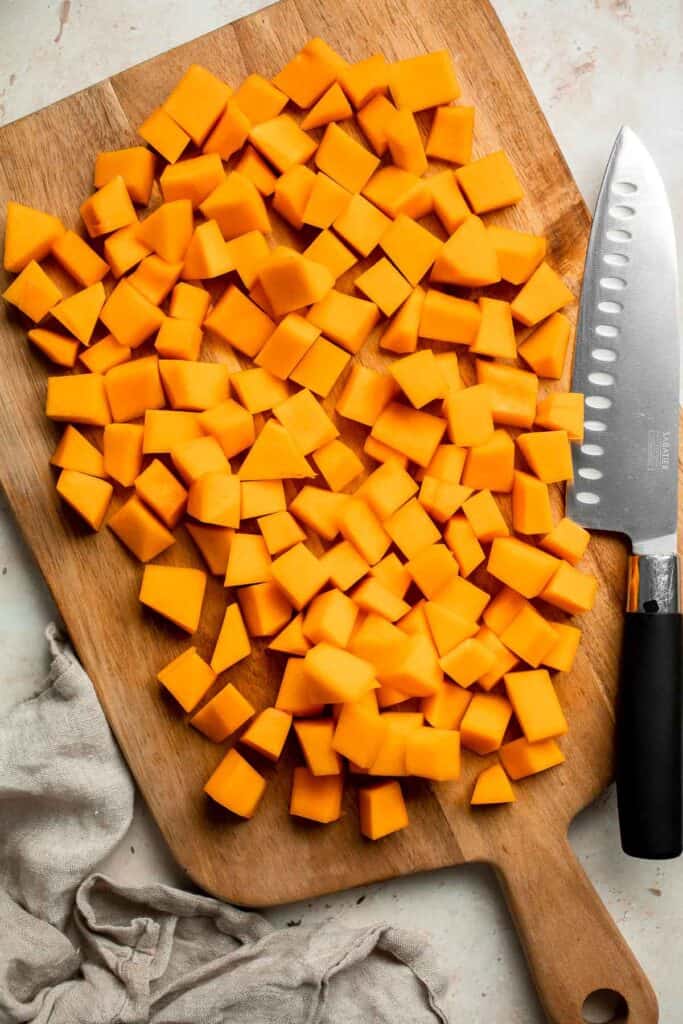
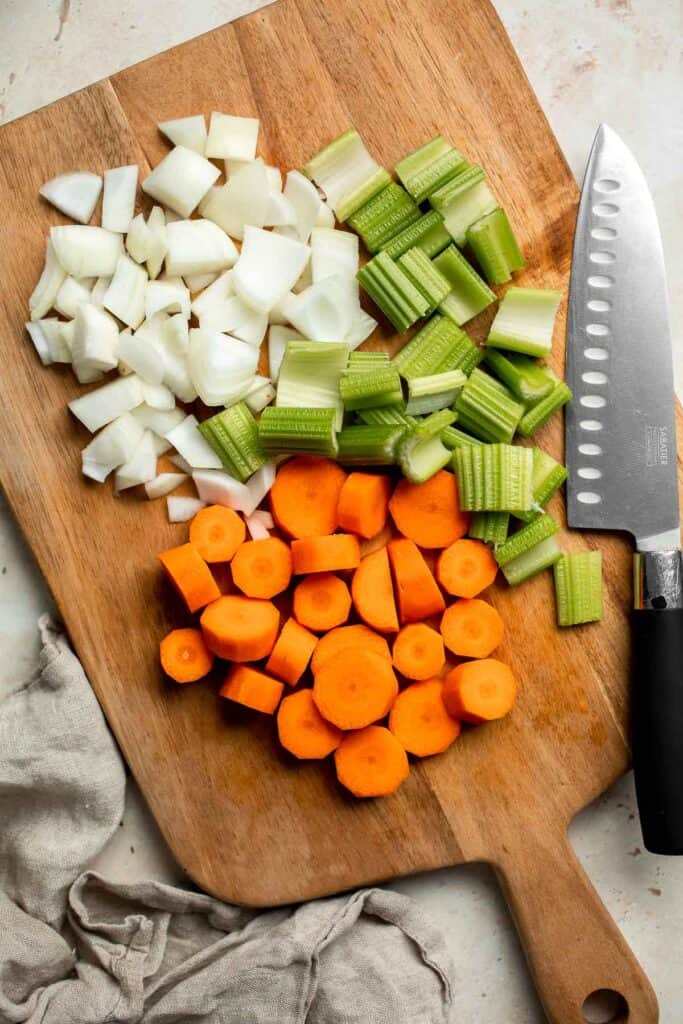
- Season the vegetables: Add the herbs with stems removed (it will be easier to puree later if stems are removed, especially for the thyme), red pepper powder, salt and pepper. Add olive oil and toss to coat.
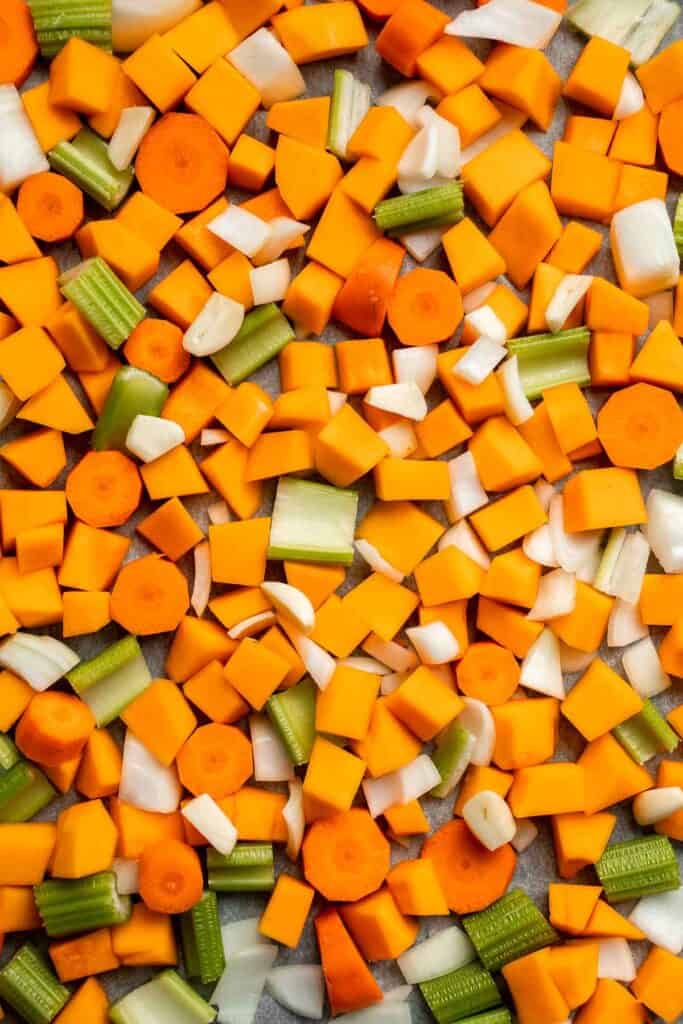
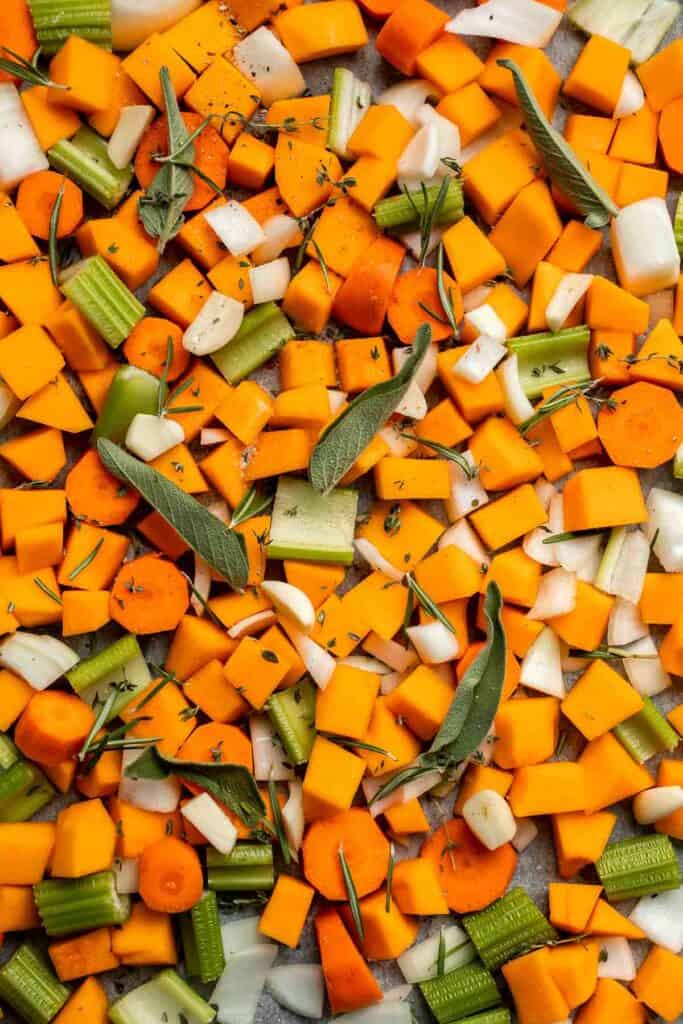
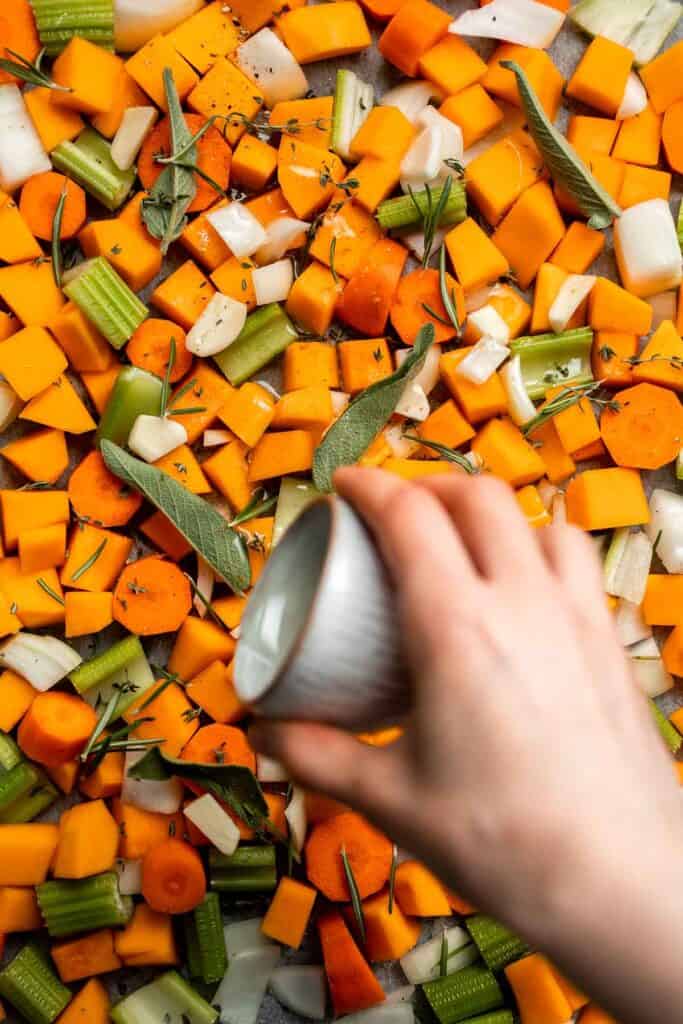
- Roast the vegetables: Roast for 1 hour in a preheated 350 F oven, until veggies are soft and fork tender. To check if fork tender, insert a fork into the vegetable. If it comes out easily, then it is fork tender and done. You will want to check the carrots in particular, as they may take the longest to cook. If the vegetables are not soft and fork tender, then cook for another 15 minutes. Keep checking every 15 minutes.
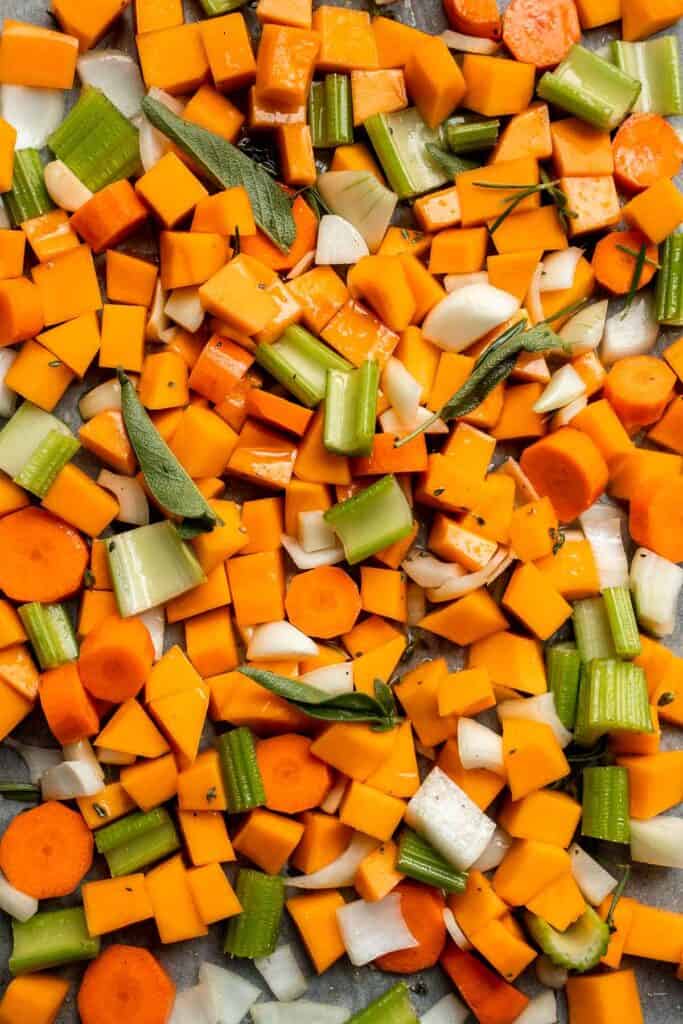
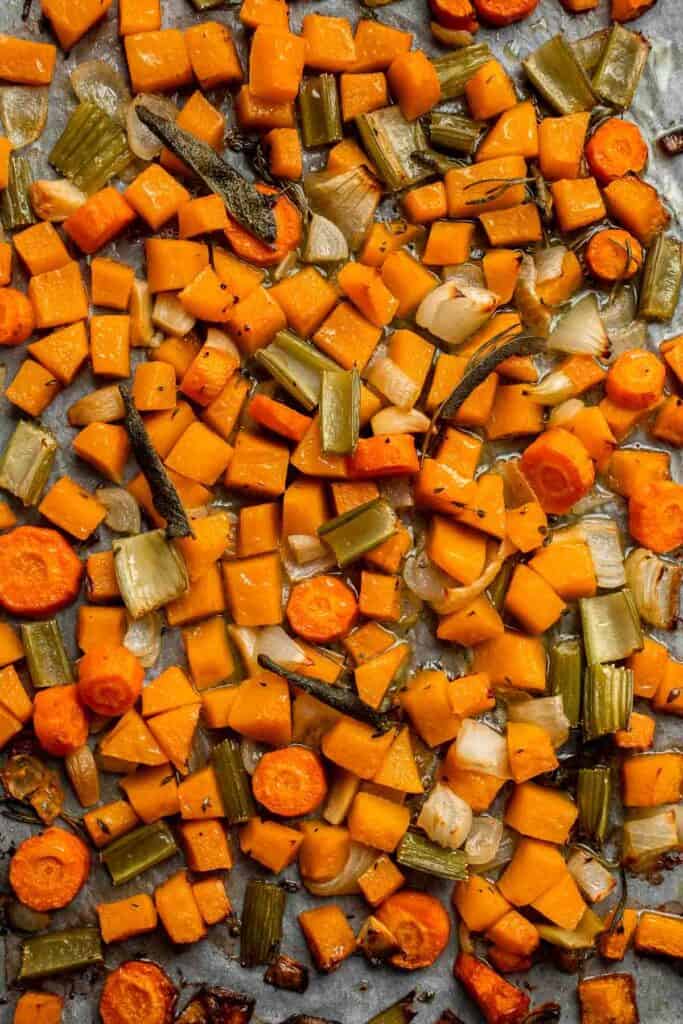
- Puree the vegetables: Transfer cooked vegetables to a food processor or heavy duty blender with 1 cup of vegetable stock and puree until smooth and creamy, or until desired consistency is reached. You may need to do this in a couple batches. You can also blend the soup directly in the pot using an immersion blender.
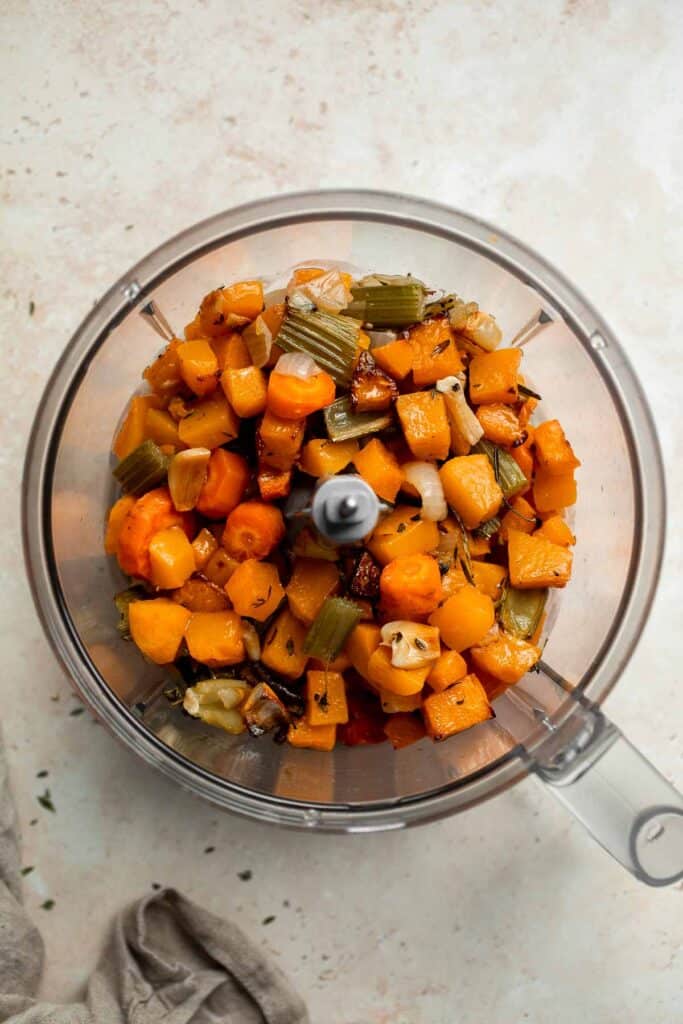
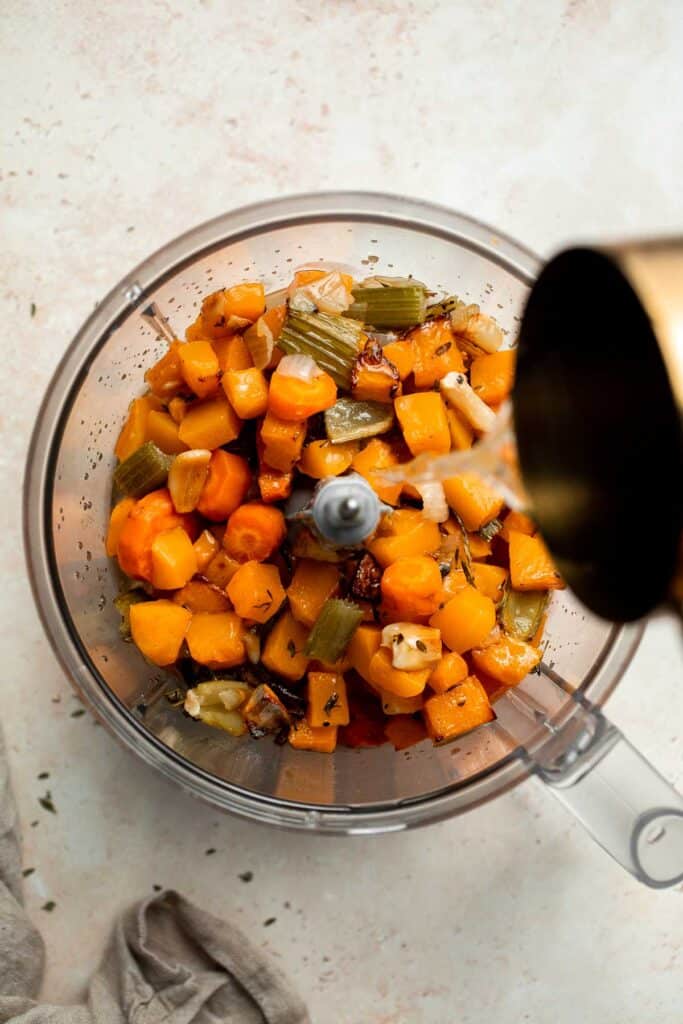
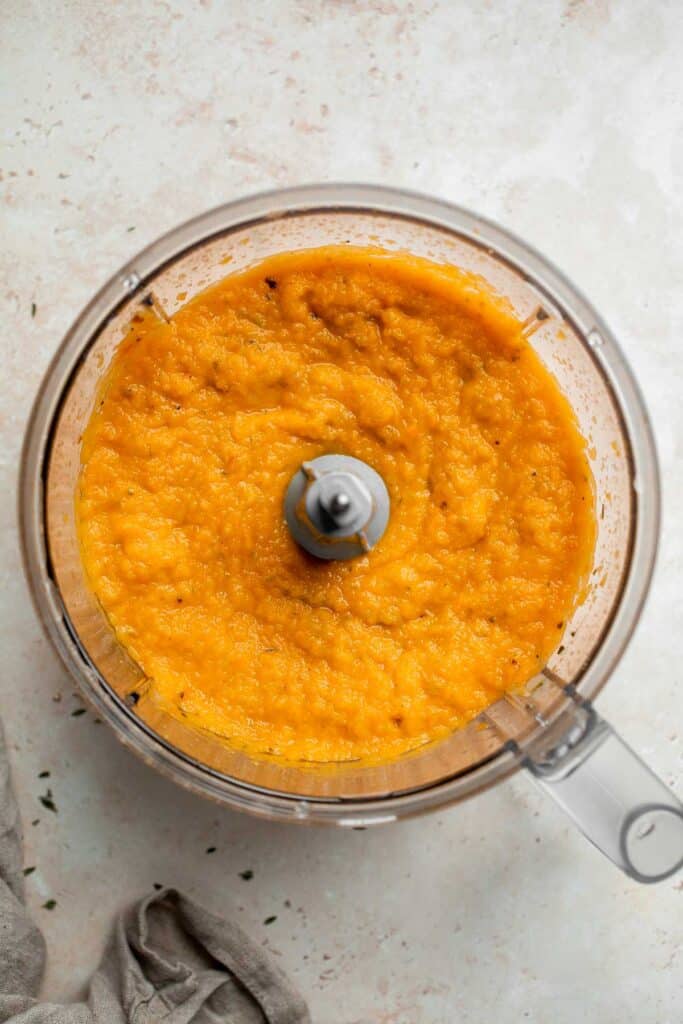
- Simmer: Pour the mixture into a large cooking pot. Add the remaining vegetable stock and stir well. Simmer on low for 10 minutes. If the consistency of the soup is too thick, just thin it out with some water until you reach your desired consistency.

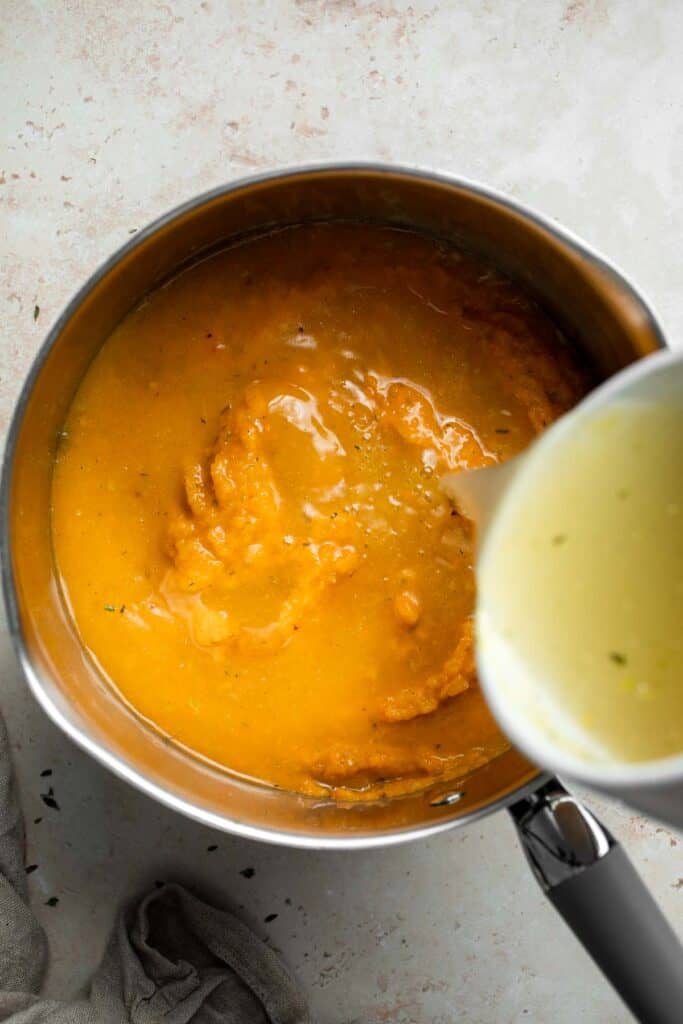
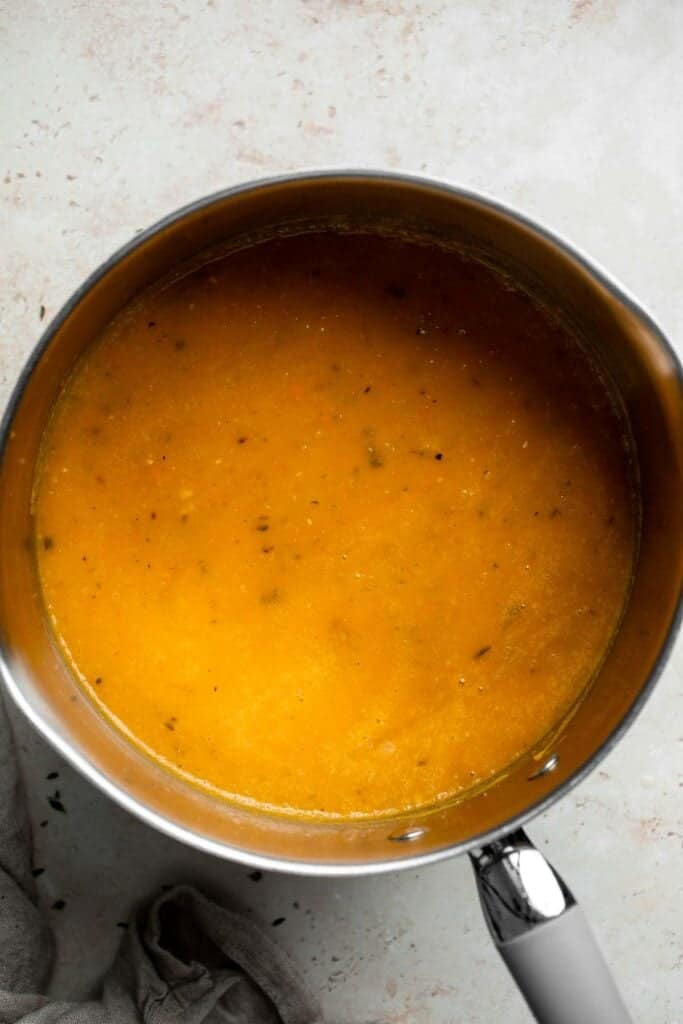
- Serve: Garnish with your favorite soup toppings such as extra fresh herbs, chopped nuts or pumpkin seeds, and a drizzle of coconut cream or dollop of sour cream on top (optional). Serve warm.

Recipe Variations
There are many ways to customize butternut squash soup. Here are some of our favorites:
- Sweeten it. Add in a drizzle of maple syrup or honey to sweeten the soup if you prefer.
- Make it creamy. Make it creamy and stir in some heavy cream at the end or keep it vegan with coconut milk like in our 30-Minute Butternut Squash Soup
- Add apples. Add diced apples into the soup to give it a natural sweetness and tartness. See our Butternut Squash and Apple Soup for tips. You can also substitute the apples for pears.
- Add other veggies. Add in other veggies when you are roasting the butternut squash soup such as cauliflower, red bell peppers, or potatoes.
- Experiment with spices. Play around with different flavors by adding in different spices such as cinnamon and nutmeg, ginger, or curry powder.
- Add beans. Make the soup heartier by adding in some cooked beans like lentils, chickpeas, or white beans.
- Adjust the spiciness. This soup gets a little kick from the red pepper powder. If you are adverse to a little spice, I would recommend that you add less red pepper powder (or leave it out completely) and once the soup has been pureed, add more as desired to taste.
How to Serve Roasted Butternut Squash Soup
Serve this Roasted Butternut Squash Soup for a light lunch or dinner whenever you are craving a warm and cozy bowl of fall or winter soup, or as a starter on your Thanksgiving dinner table. We love serving butternut squash soup with a side of crusty homemade bread for dipping including:
- Garlic Rosemary Focaccia Bread
- Ciabatta Rolls
- Homemade Biscuits
- Garlic Breadsticks
- Small Batch Sourdough Bread
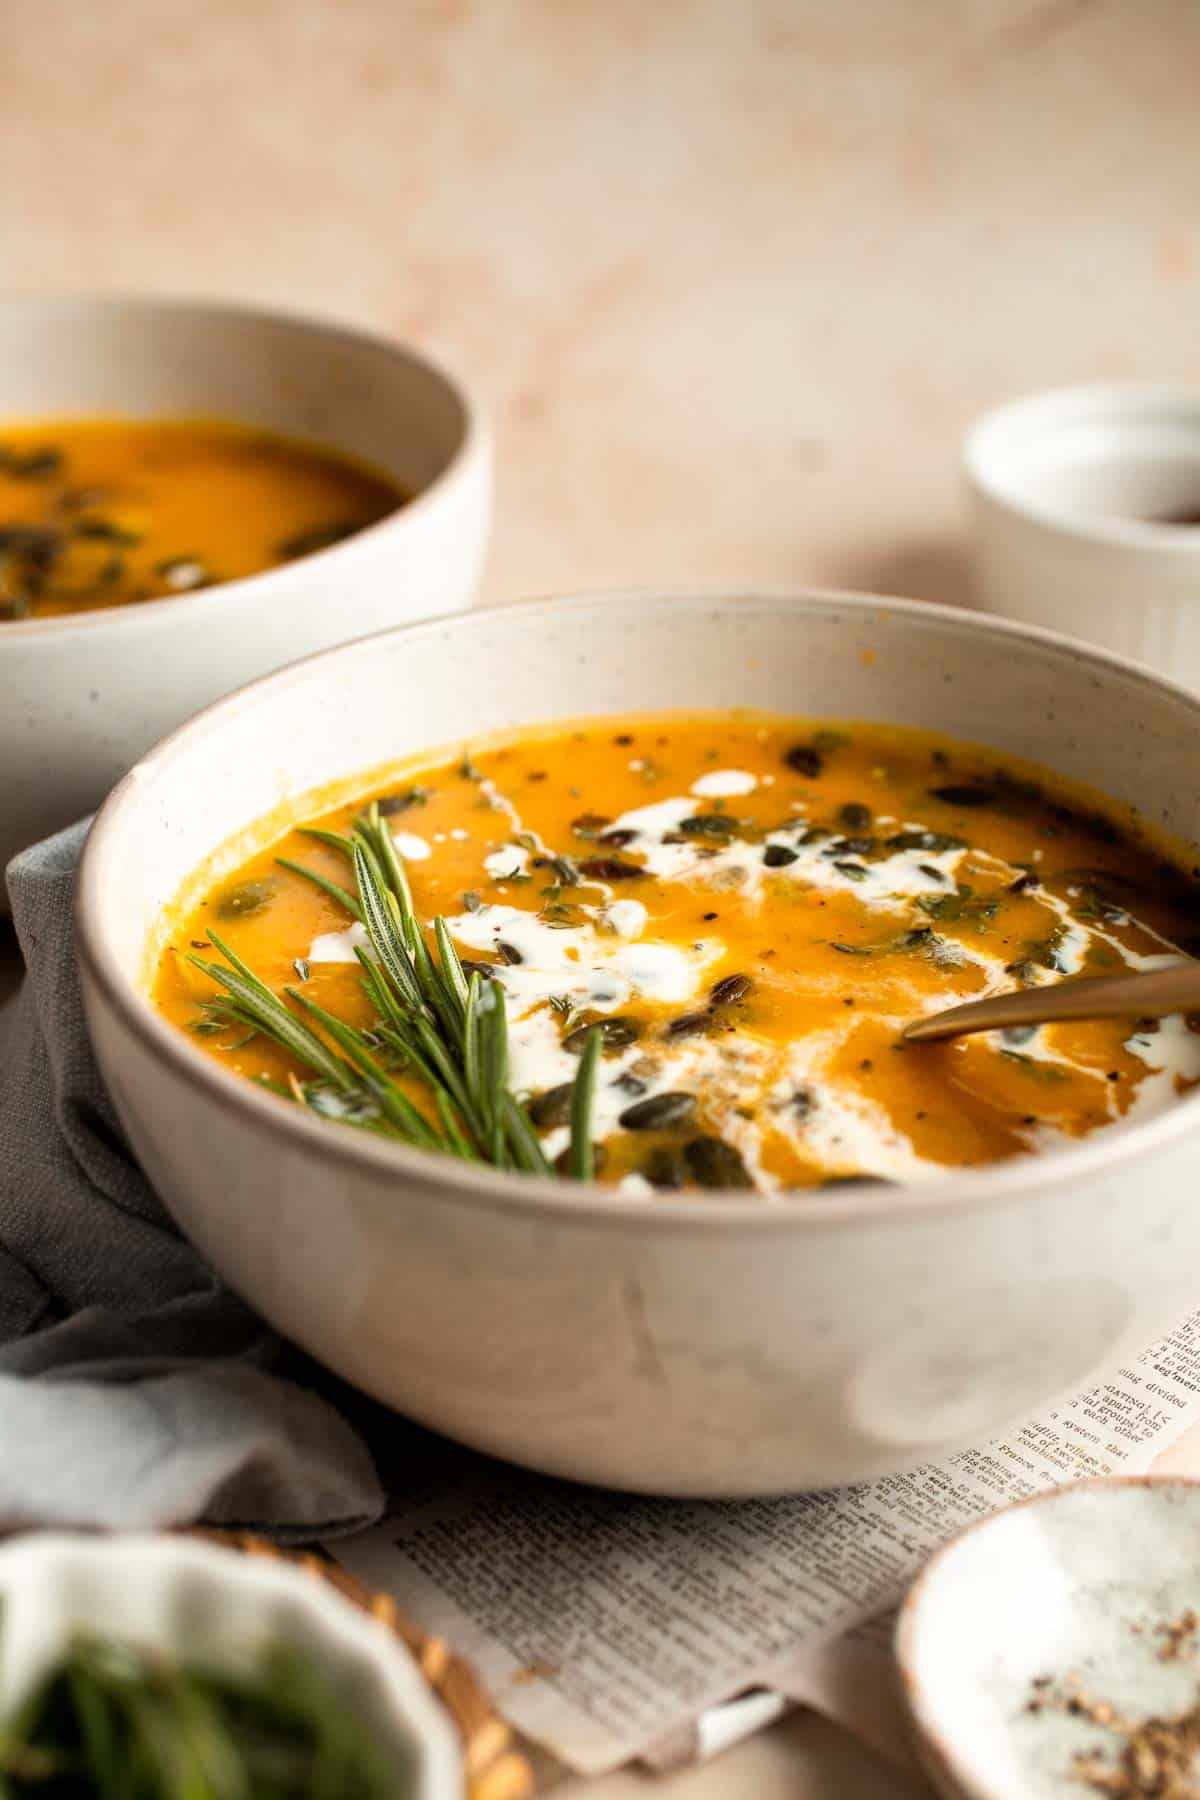
Recipe Tips and Tricks
- Choose the right butternut squash. When picking out a ripe butternut squash to cook with, look for one that is firm, heavy for its size, and has a matte skin (not glossy) without any blemishes or soft softs.
- Use pre-cut butternut squash. To save time, you can use fresh pre-cut butternut squash and roast as directed in the recipe.
- Adjust the consistency: If the consistency is too thick, just thin it out with more stock or some water until you reach your desired consistency. If you prefer a thicker soup, simmer it a bit longer to reduce the liquid.
- Add your favorite soup toppings. Serve this butternut squash soup as is or garmish with your favorite toppings. Some popular options are pumpkin seeds, croutons, fresh herbs, chopped nuts, bacon bits, or a drizzle of cream.
Frequently Asked Questions
Absolutely! You can make a chunky version by using a potato masher or fork to lightly mash the vegetables. The soup will still taste amazing, it just won't have a smooth and velvety texture.
To reduce the level of spiciness, you can do one of two things. The first option is to dilute the soup by adding more liquid such as more broth or add in some cream. Secondly, you can balance out the spiciness in the soup with added sweetness such as a drizzle of maple syrup or honey.
You can easily store this easy butternut squash soup by placing the pot with the lid in the refrigerator, or transferring the soup to an airtight container. It will keep for up to 5 days in the refrigerator.
Yes, this easy butternut squash soup recipe freezes beautifully. So, if you can't finish it all (since this recipe yields a large pot of soup), just freeze it for later. To freeze, transfer soup to an airtight container and place in the freezer for up to 3 months. To reheat, let it thaw in the refrigerator overnight or place on the counter and let it thaw at room temperature. Then, reheat on the stove over medium-low heat. It's so convenient on a lazy fall or winter evening.
Storing and Freezing Instructions
Make Ahead Instructions
Can I make this soup ahead of time? Absolutely. This is one of the reasons that I love this roasted butternut squash soup so much, and why it's such a great choice to make on a holiday dinner. You can make it ahead in one of two ways:
- Make the entire soup ahead of time: Make the entire butternut soup a day or two ahead of time and easily reheat it later on the stove over medium-low heat. The soup may thicken a bit after being refrigerated, so if it is still too thick after reheating, just add in a little water to thin it out to the consistency that you like.
- Roast the vegetables in advance: You can roast the vegetables up to a day ahead, allow them to cool to room temperature and then store in the refrigerator in an airtight container. Then, when you are ready to make the soup, puree the vegetables and make the soup as per recipe instructions.
How to Store
Allow the roasted butternut squash soup to cool to room temperature, then transfer to an airtight container and store in the fridge for up to 5 days.
How to Reheat
Reheat on the stove over medium-low heat until warmed through. You may need to adjust the consistency with more broth or some water if it has thickened up too much when stored. You can also reheat it in the microwave in 30 second increments until warm.
How to Freeze
Once cooled to room temperature, store butternut squash soup in an airtight container or freezer bag (leaving some room for expansion) and freeze for up to 3 months. Allow it to thaw in the fridge overnight before reheating according to the instructions above.
More Butternut Squash Soup Recipes
- 60 Best Soup Recipes
- Roasted Butternut Squash and Cauliflower Soup
- Instant Pot Butternut Squash Soup
- Butternut Squash and Apple Soup
- 30-Minute Butternut Squash Soup
- Acorn Squash Soup
Tried this recipe?
I'd love to hear what you think! Leave a comment and rating below to share your feedback. Your reviews help others discover this recipe and help me keep creating more free recipes for you. Snap a photo and tag me on social media @aheadofthyme too.
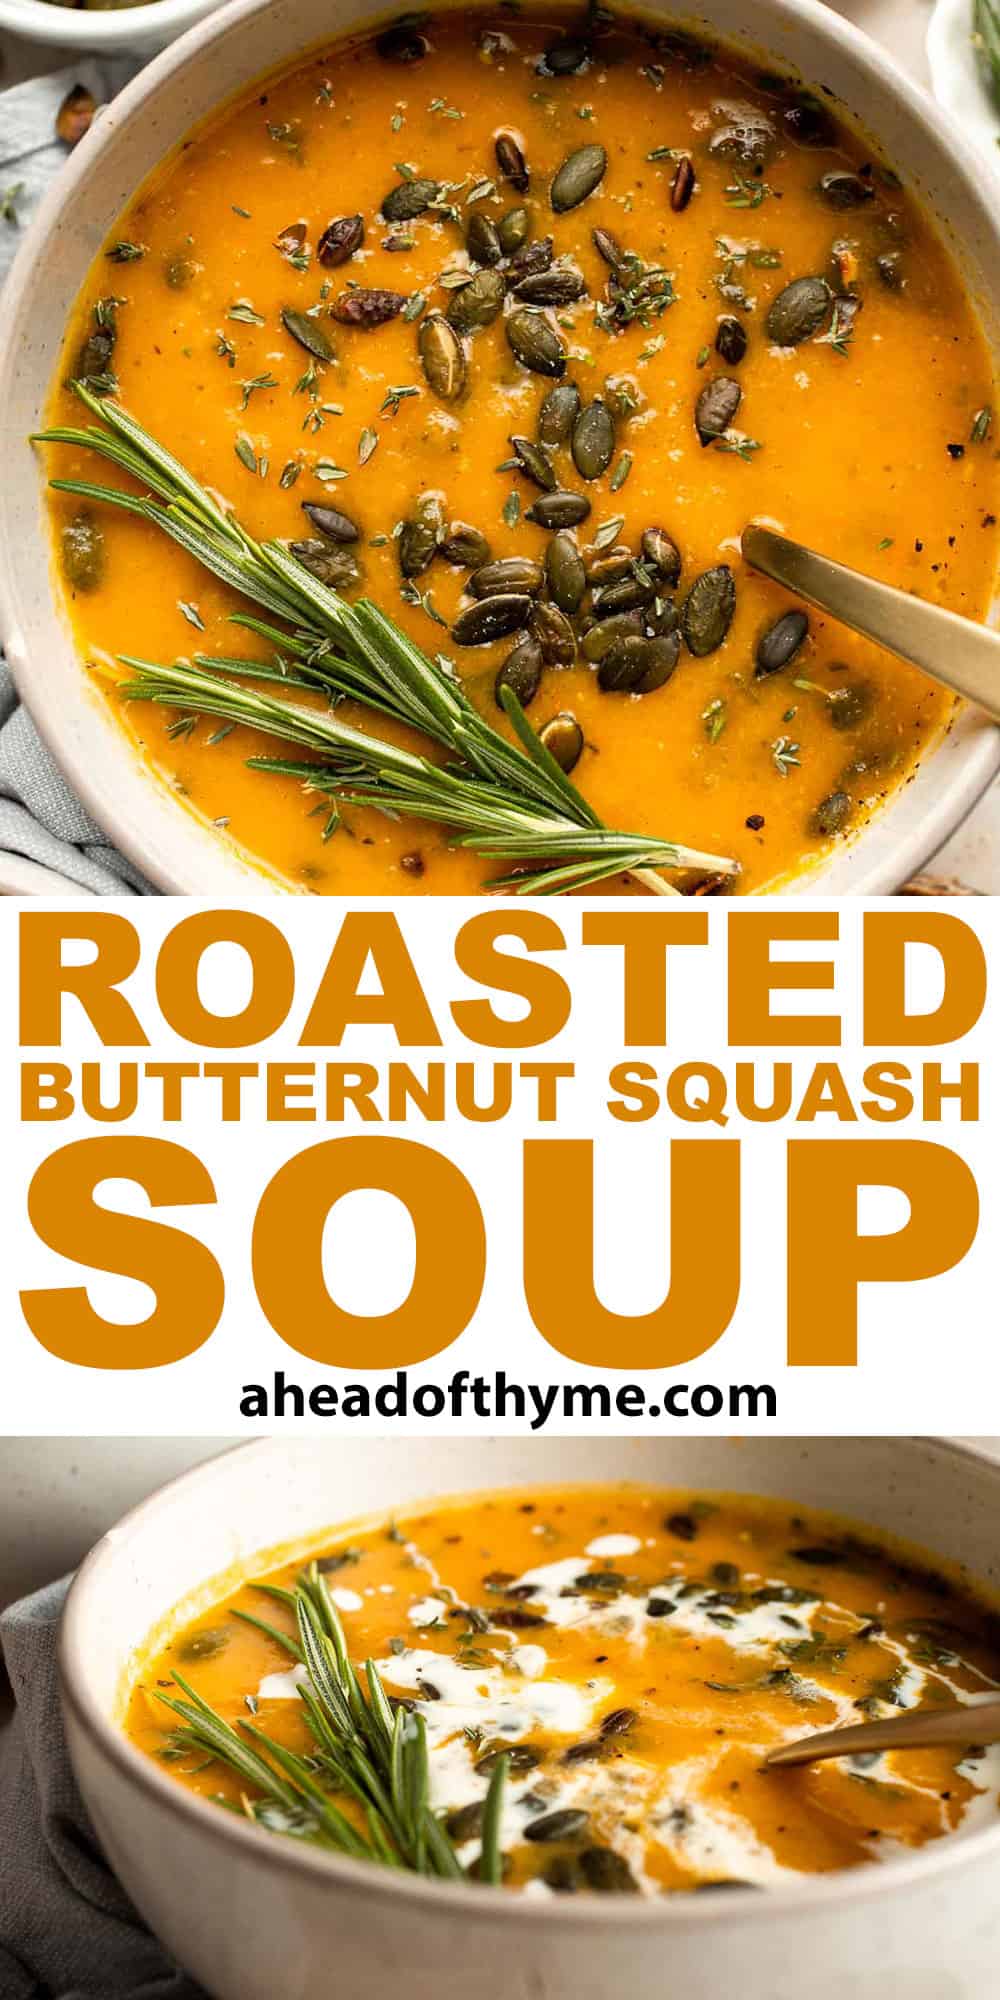
Butternut Squash Risotto
This Butternut Squash Risotto recipe is the most perfect dinner for fall. It's made by slowly cooking aromatic ingredients with fresh butternut squash and real arborio rice, then gradually hydrating the rice with a splash of white wine and lots of broth until each grain is creamy and plump. It's warm, satisfying, and naturally vegetarian - ideal for a quiet fall dinner or a show-stopping entree at your next fall party.
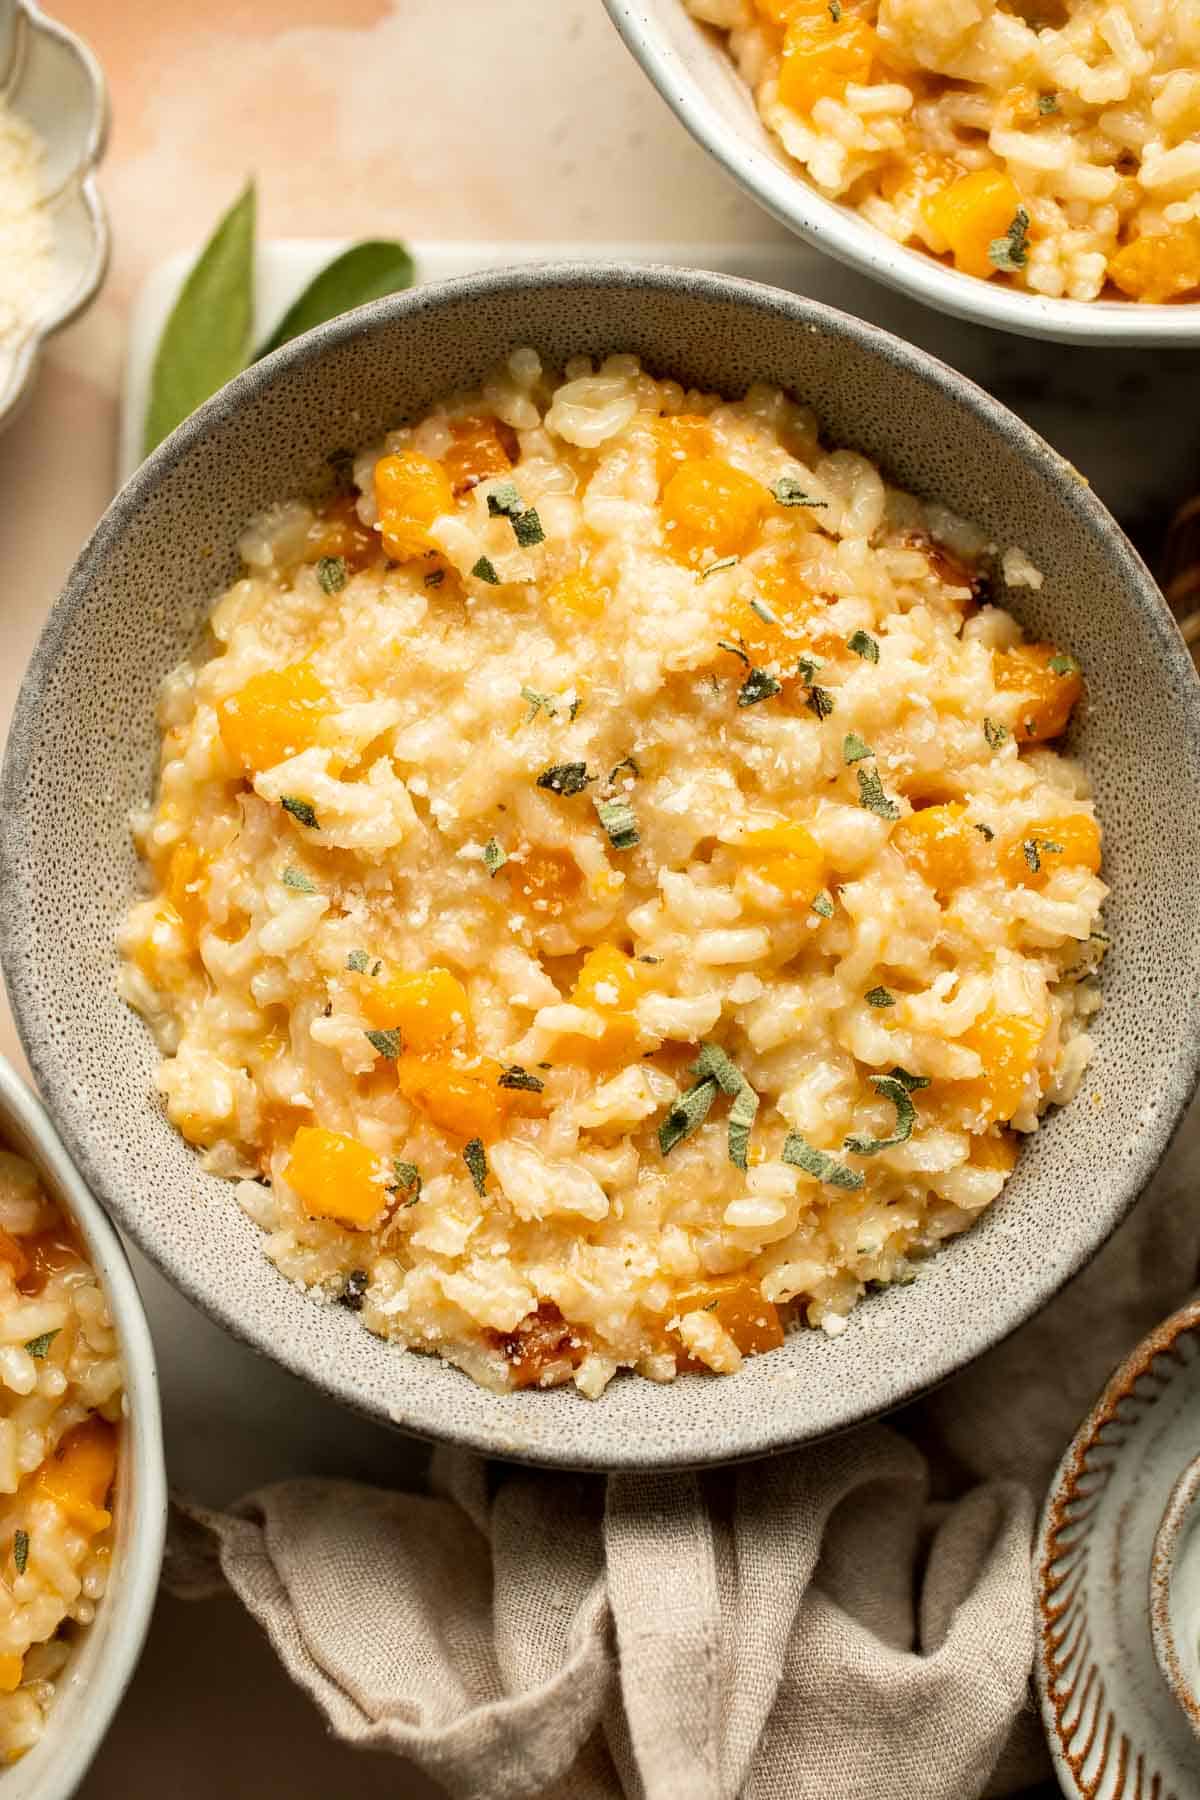
If you've been intimidated by cooking risotto, let those worries go. The secret to the perfect risotto is taking your time; it cannot be rushed. You also need to use a key ingredient, arborio rice, a special short-grain rice traditionally used in this Italian rice dish. It's a little labor intensive, but just follow the steps below for perfectly cooked risotto every time.
Why You'll Love This Butternut Squash Risotto
- Perfectly creamy texture. Since arborbio rice has a high starch content, it's creamier than other types of rice. The rich, creamy texture is so satisfying to eat and pairs perfectly with the sweet squash. You won't want dinner to end!
- Classic fall recipe. Although risotto may be too warm or filling during the summer, it's the perfect cozy meal to snuggle up to during the cooler months. This creamy butternut squash risotto is made with onion, garlic, whole butternut squash, and fresh sage for layers of fall flavors in every bite.
- Naturally vegetarian. Need a main dish for a dinner party that everyone can eat? This risotto is naturally vegetarian and can easily be made vegan as well. It's perfect for those with these dietary restrictions.
- A one skillet meal. The beauty of risotto is that everything is cooked in one pan - which means you'll spend less time cleaning up after meals. We love a good one pot meal on busy weeknights!
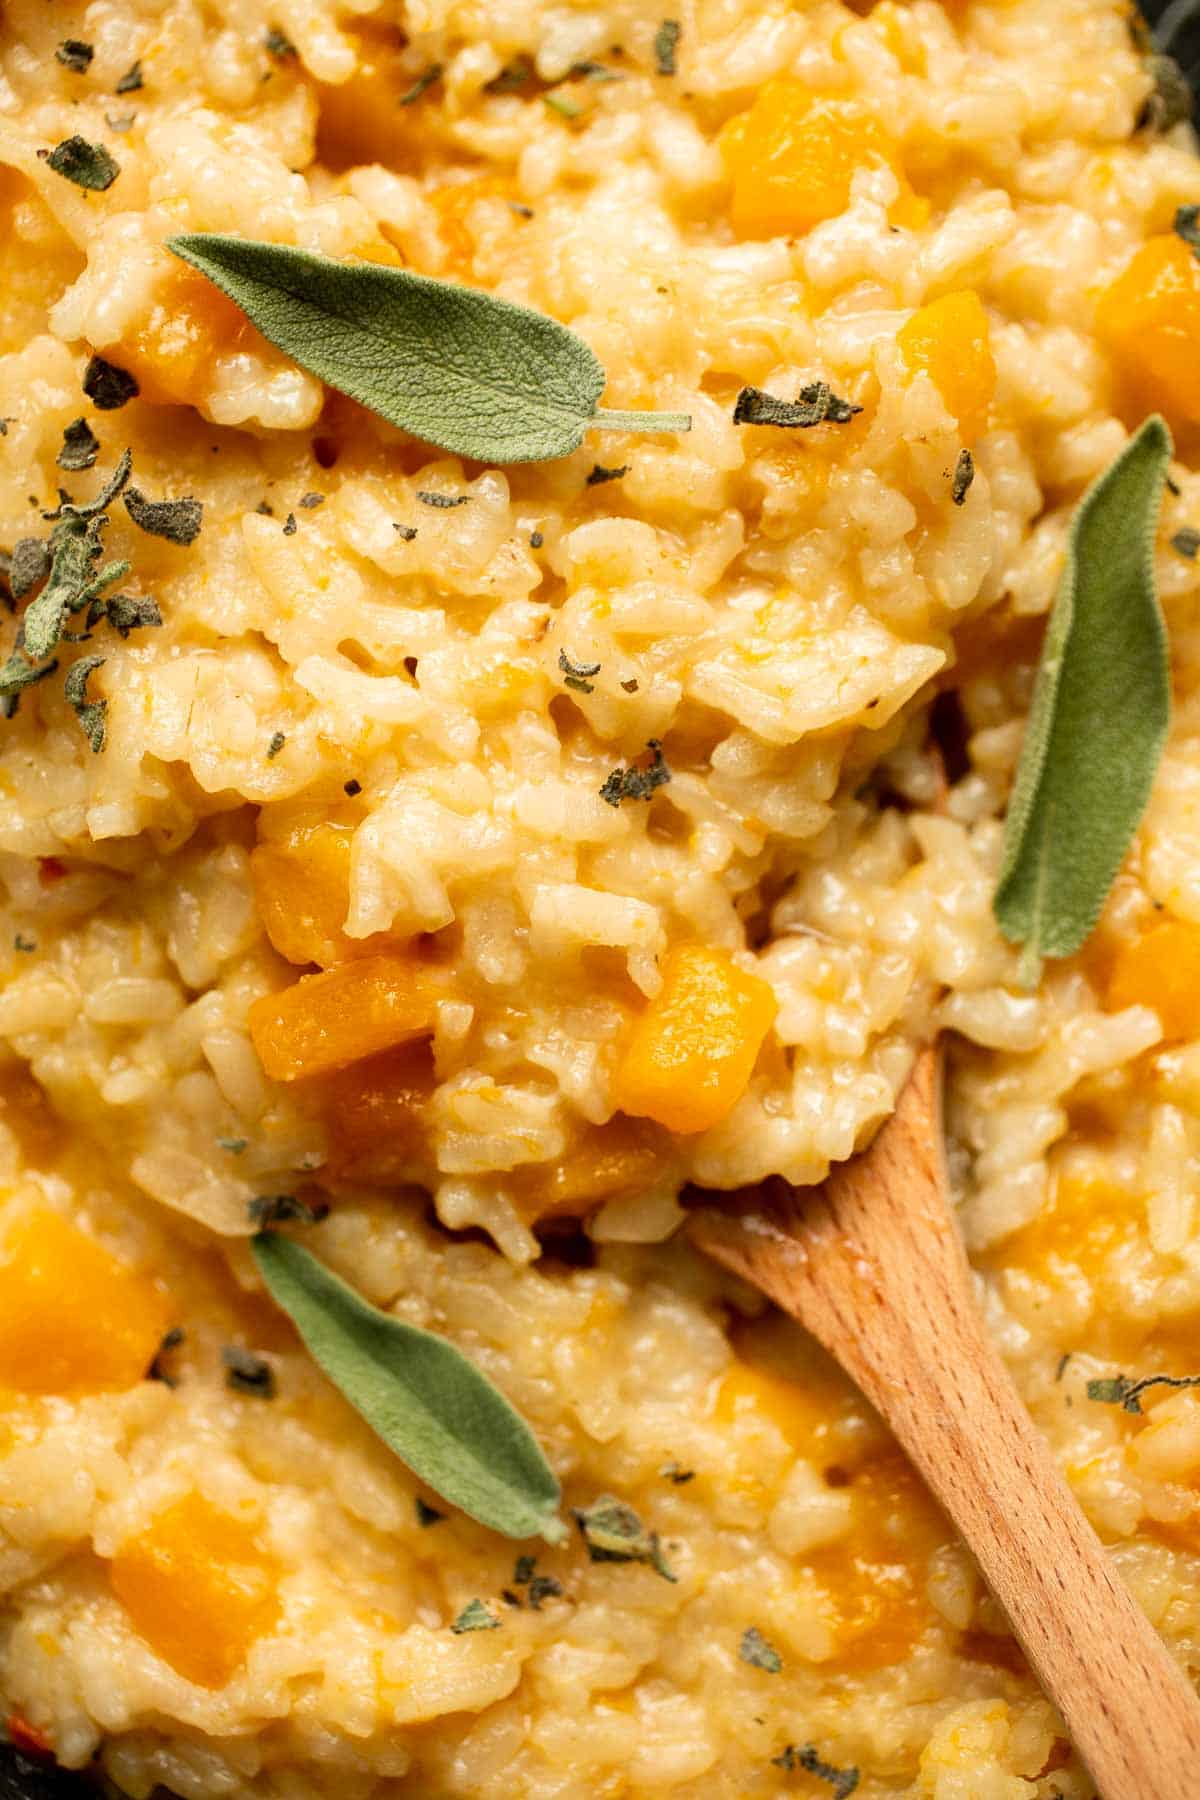
Ingredient Notes
To make this delicious butternut squash risotto, you will need the following ingredients (full measurements in recipe card below):
- avocado oil - choose your favorite neutral cooking oil to sautee the onion and garlic. Vegetable oil is another great option.
- onion and garlic - sautéed garlic and onion add an aromatic layer of flavor that takes this dish to the next level.
- butternut squash - start by prepping a whole butternut squash. For a quicker meal, use pre-cut butternut squash from the grocery store.
- seasonings - you don't need much. Keep it simple with Italian seasoning, salt, and ground black pepper.
- arborio rice - it's really important to use the right kind of rice. Use arborio or risotto rice for best results. It is often available in grocery stores or online.
- dry white wine - this will deglaze the pan and absorb all those savory flavors you've developed so far.
- vegetable stock - choose your favorite stock. Stick with vegetable broth or chicken broth.
- Parmesan cheese - grated Parmesan cheese will melt into the tender risotto and add a salty, umami flavor that tastes seriously good. Pecorino Romano is a good alternative, too.
- fresh sage leaves - garnish with fresh sage for a little color and fall flavor. You can always leave this out if you prefer.
You will also need a large skillet and a wooden spoon.
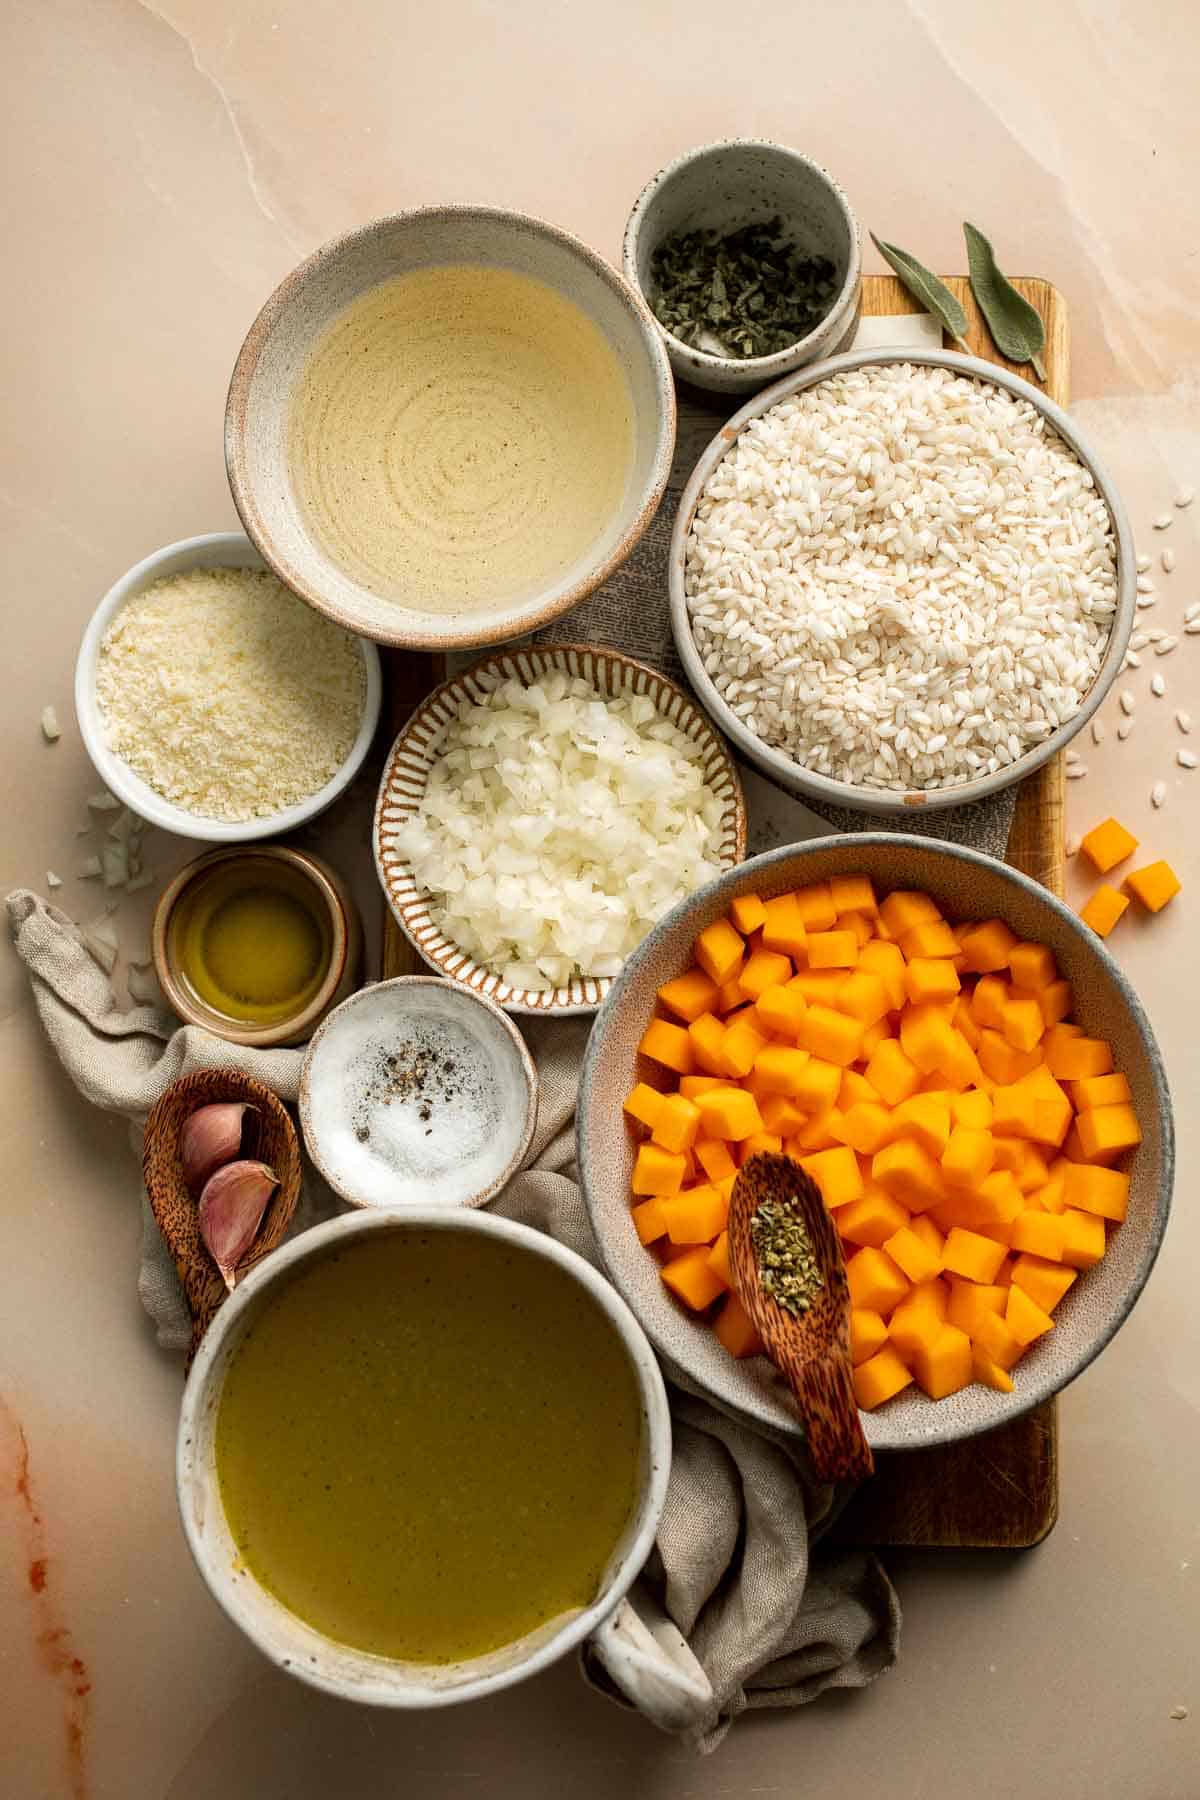
How to Make the Best Butternut Squash Risotto
- Sauté aromatics. Heat oil in a large skillet over medium-high heat until it sizzles, about 1 minute. Add onion and garlic and sauté until fragrant, about 1 minute.
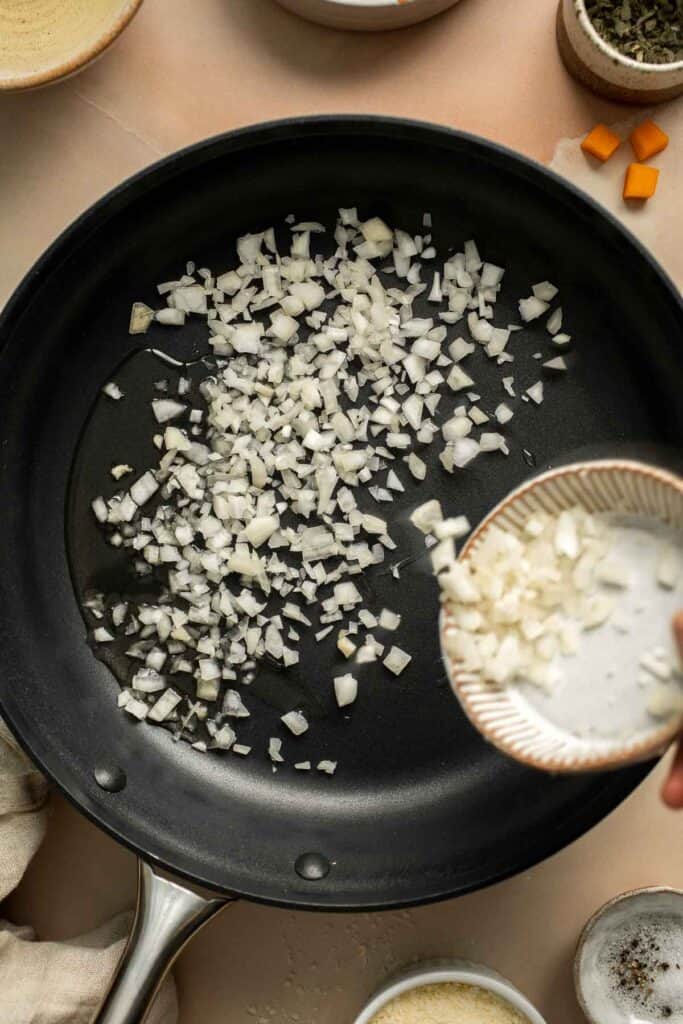
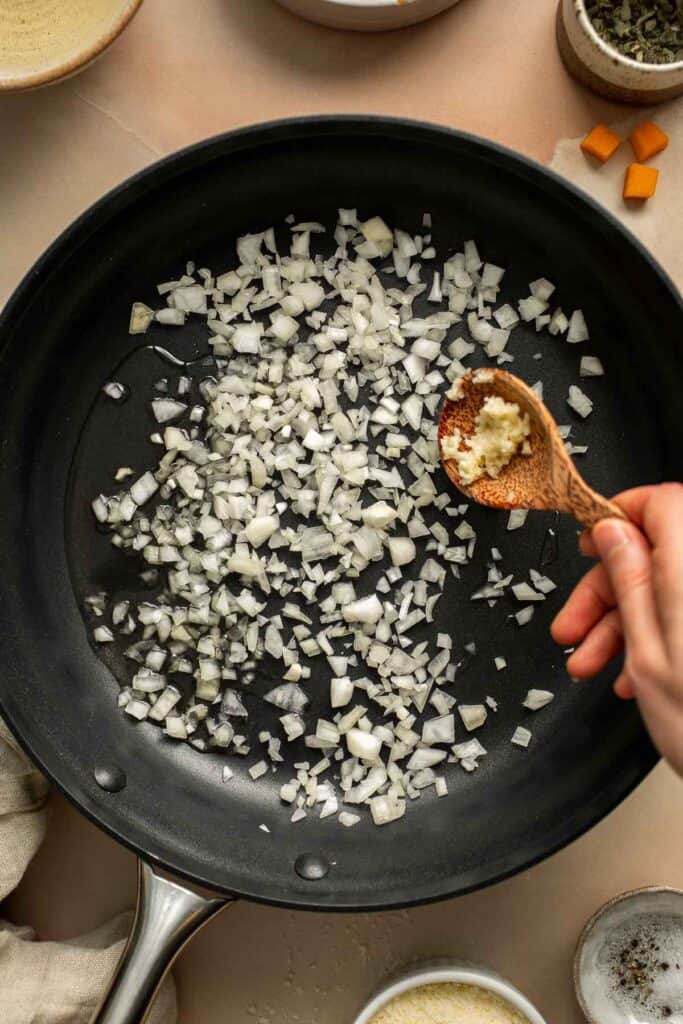

- Add butternut squash and seasoning. Add butternut squash and cook until it starts to turn golden brown, about 5-8 minutes. Season with Italian seasoning, salt, and pepper. Mix well to incorporate.
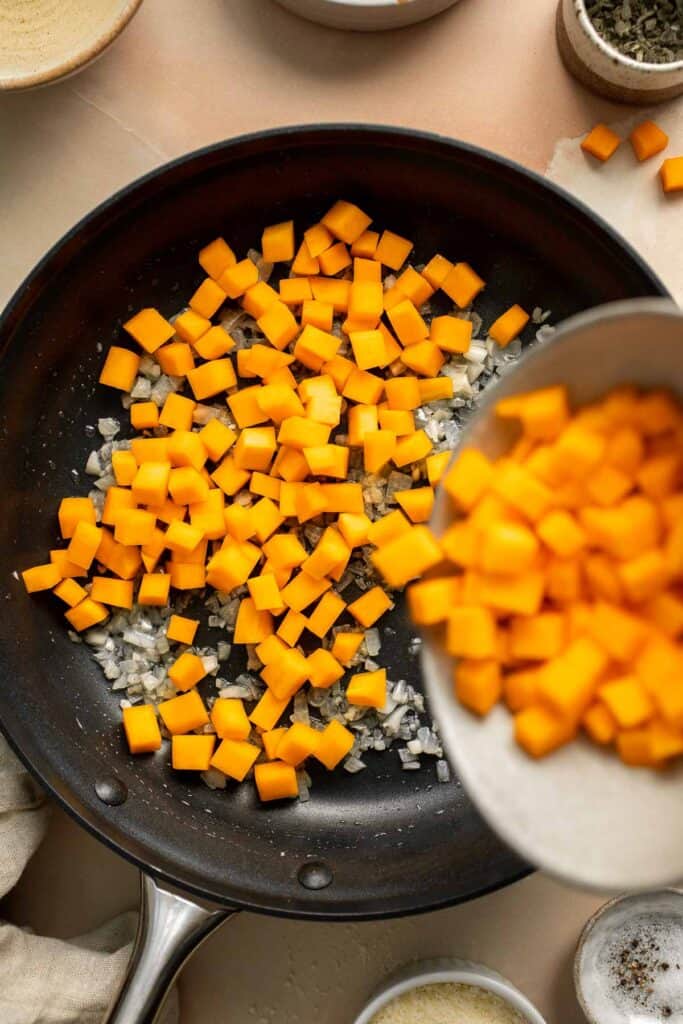

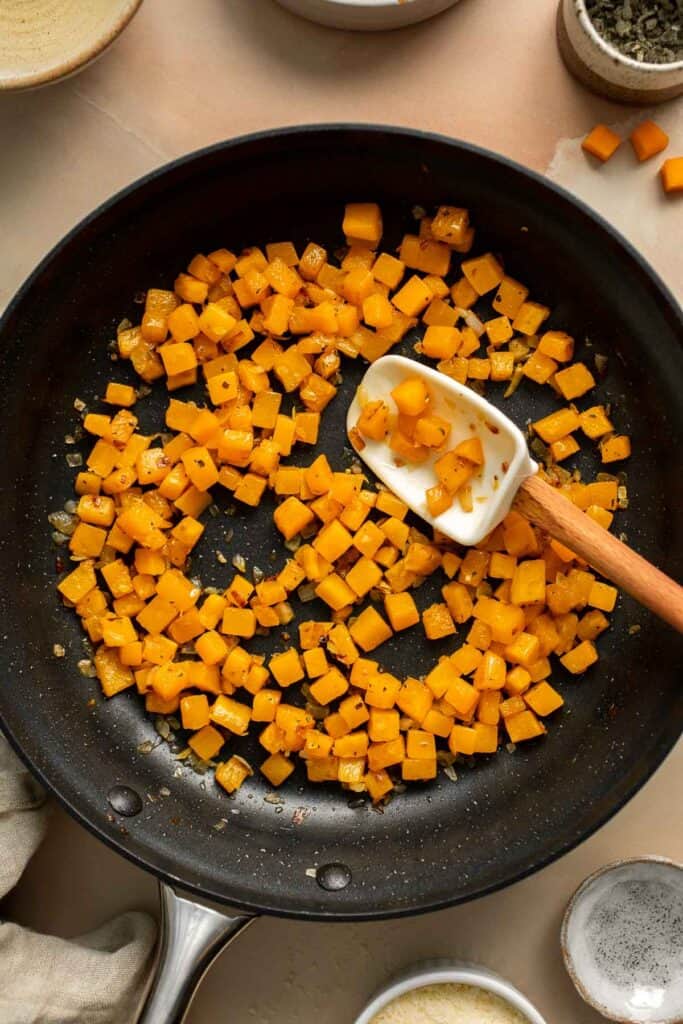
- Add rice. Stir in arborio rice, mixing well to incorporate. Cook for 1 minute.
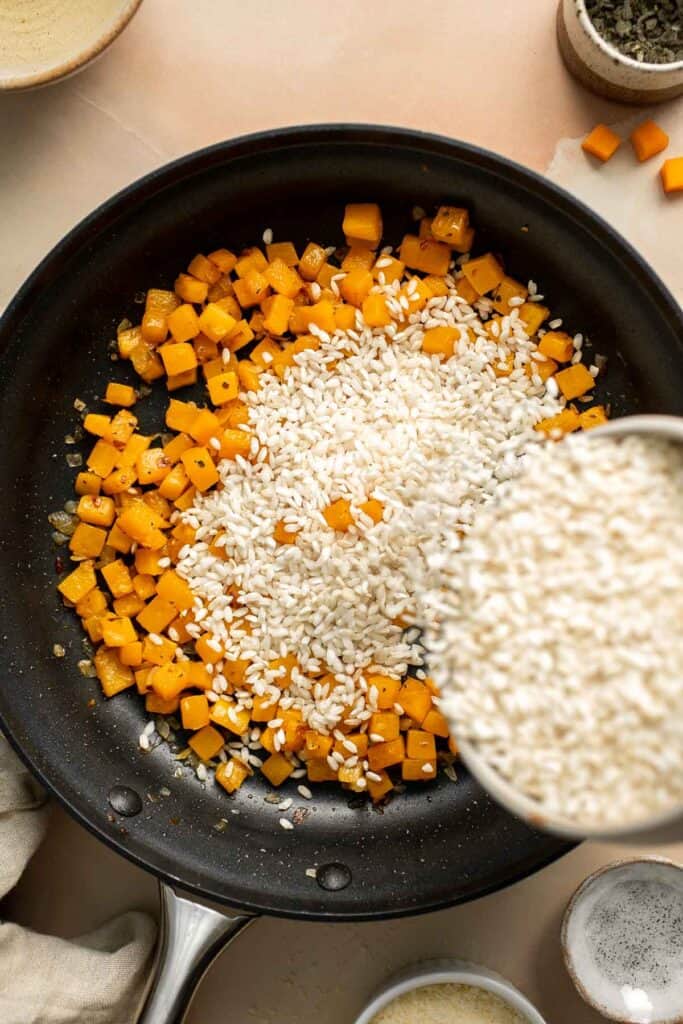
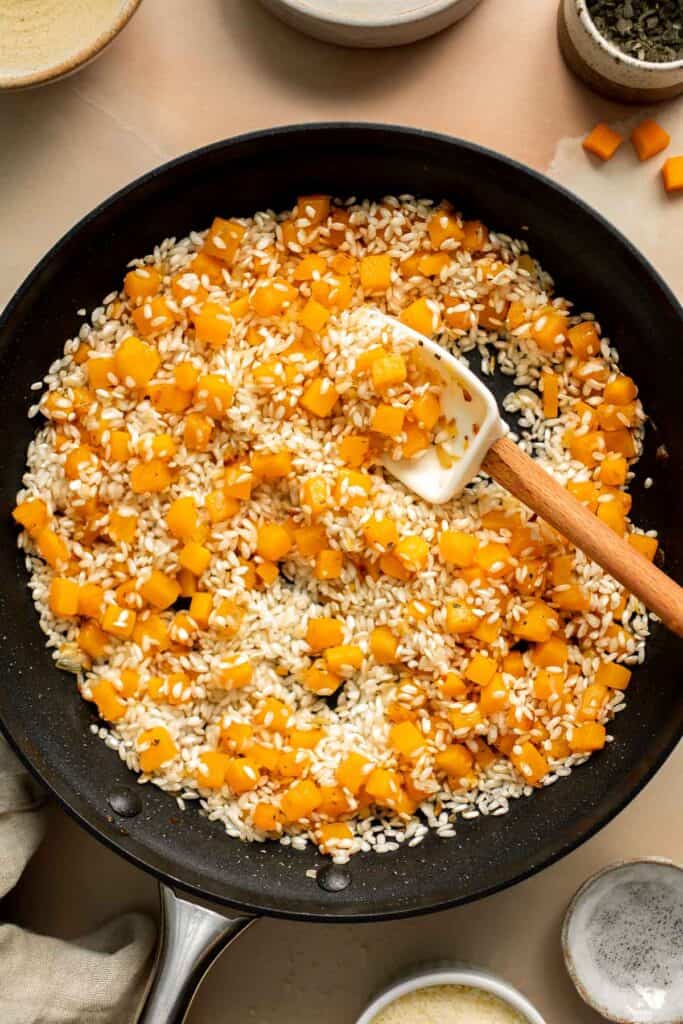
- Add wine. Add wine and stir constantly until almost all the liquid has absorbed, about 3-4 minutes.
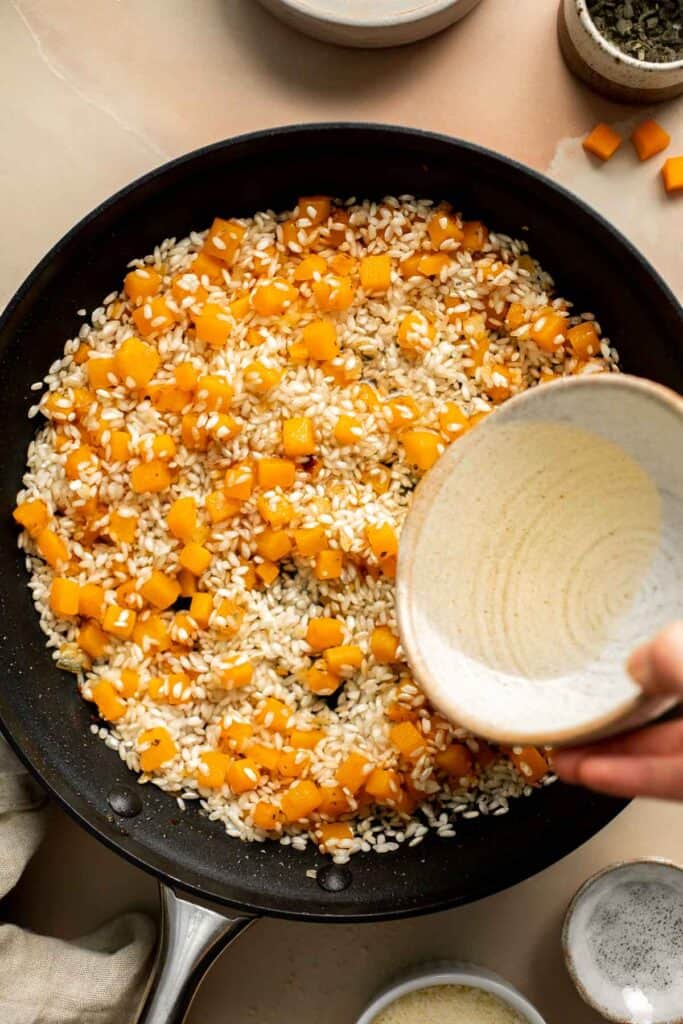

- Add stock. Add vegetable stock, one cup at a time. Stir constantly so that the rice doesn't stick to the pan. Cook until the liquid is completely absorbed before adding more broth. Repeat until all the broth has been added and absorbed, about 22-25 minutes. The rice should be soft and the butternut squash should be tender. Repeat with more broth if needed.
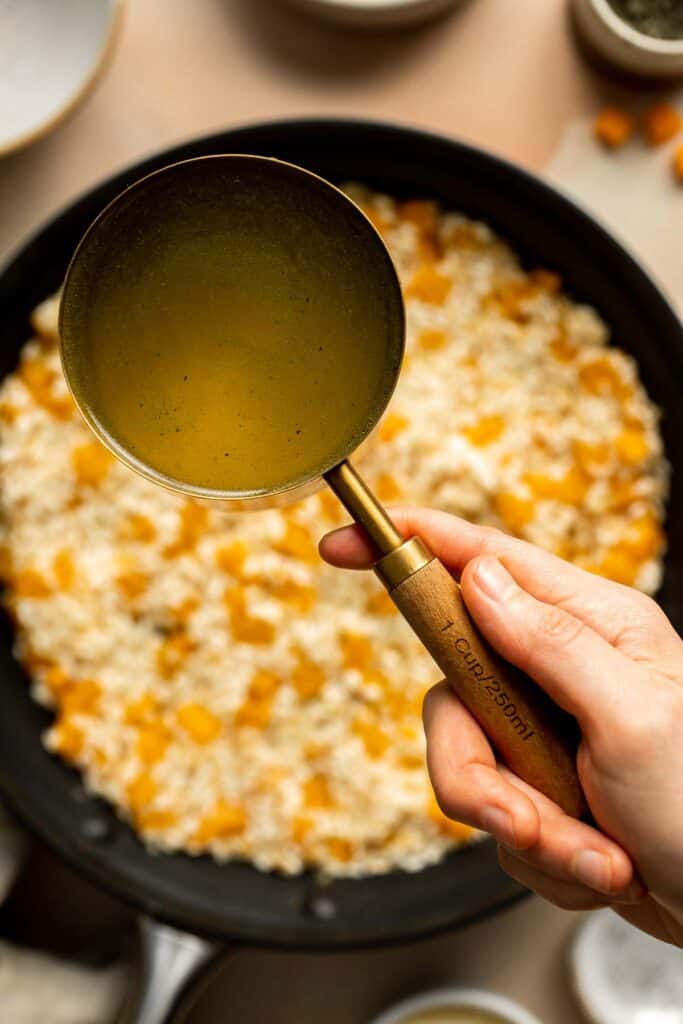
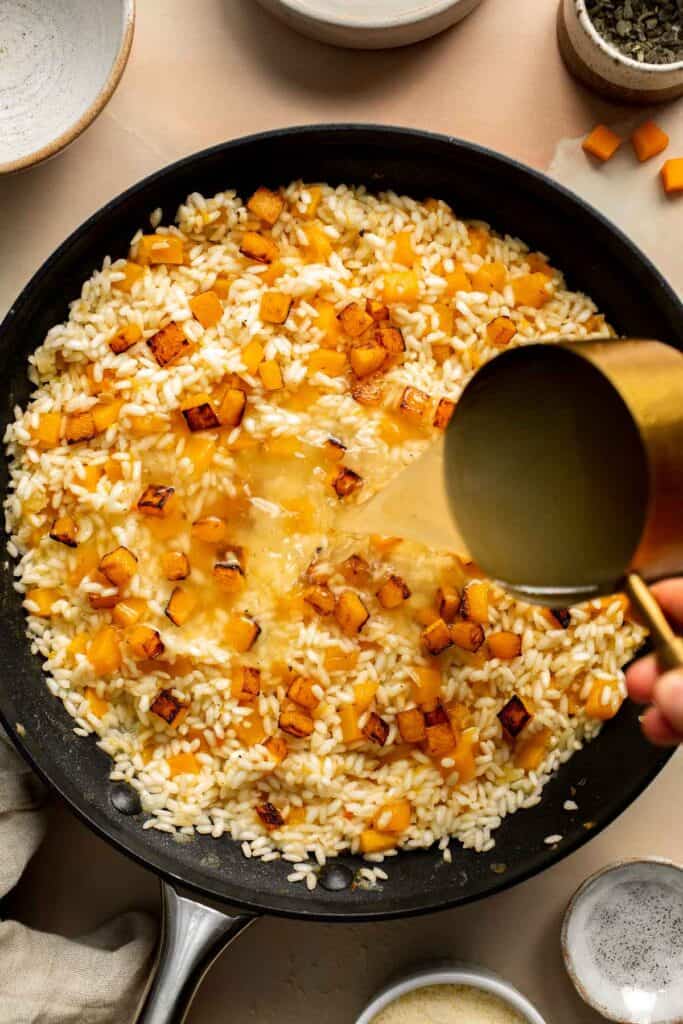
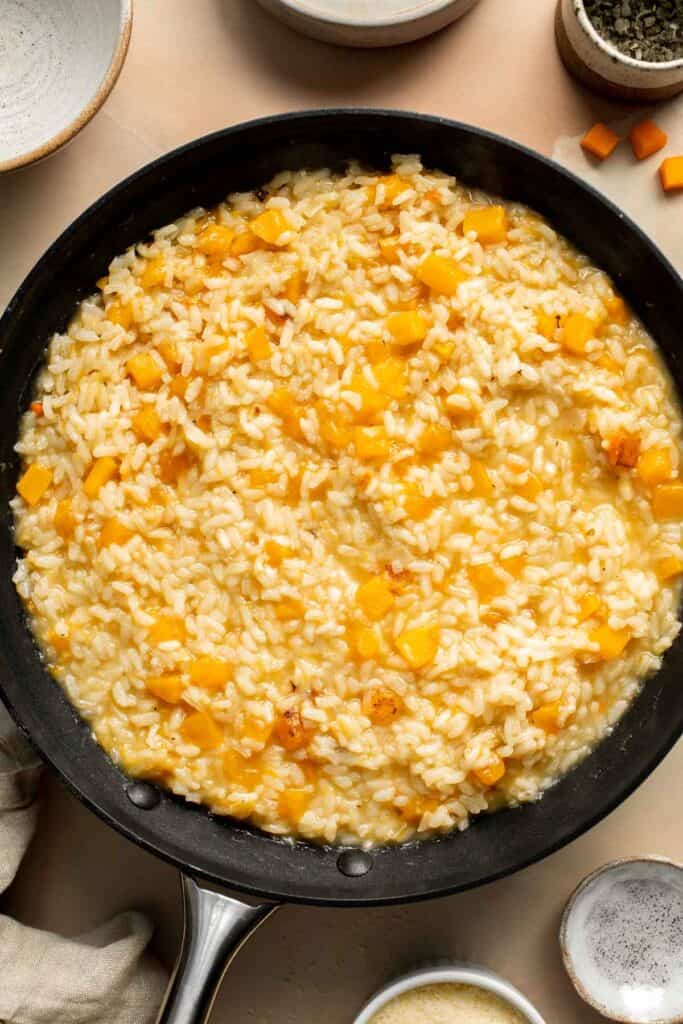
- Add cheese. Turn off the heat and stir in parmesan cheese.
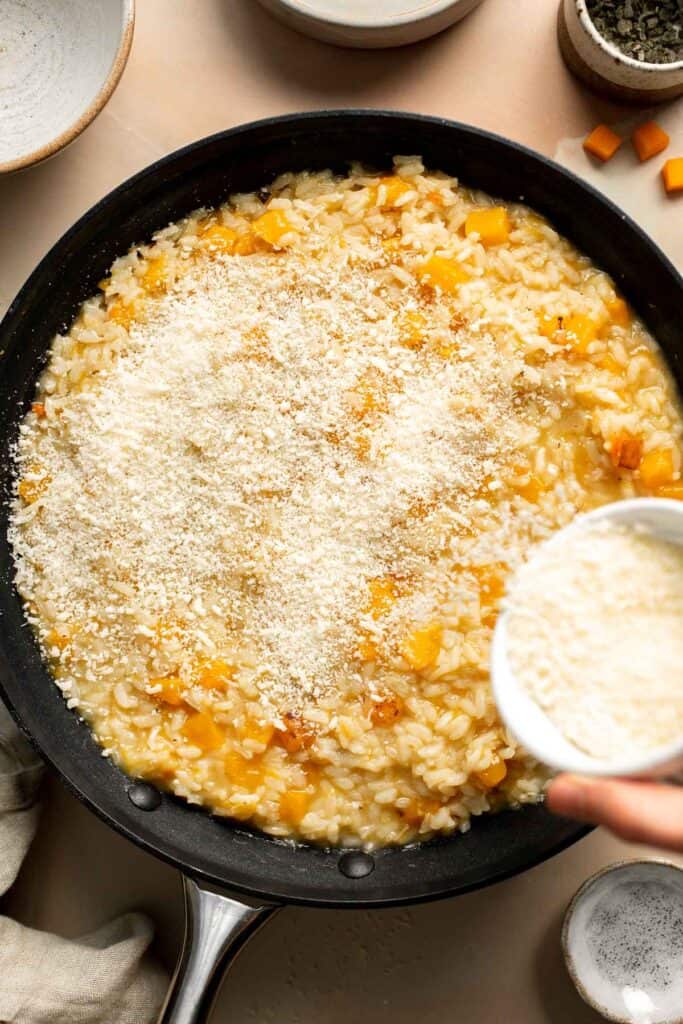
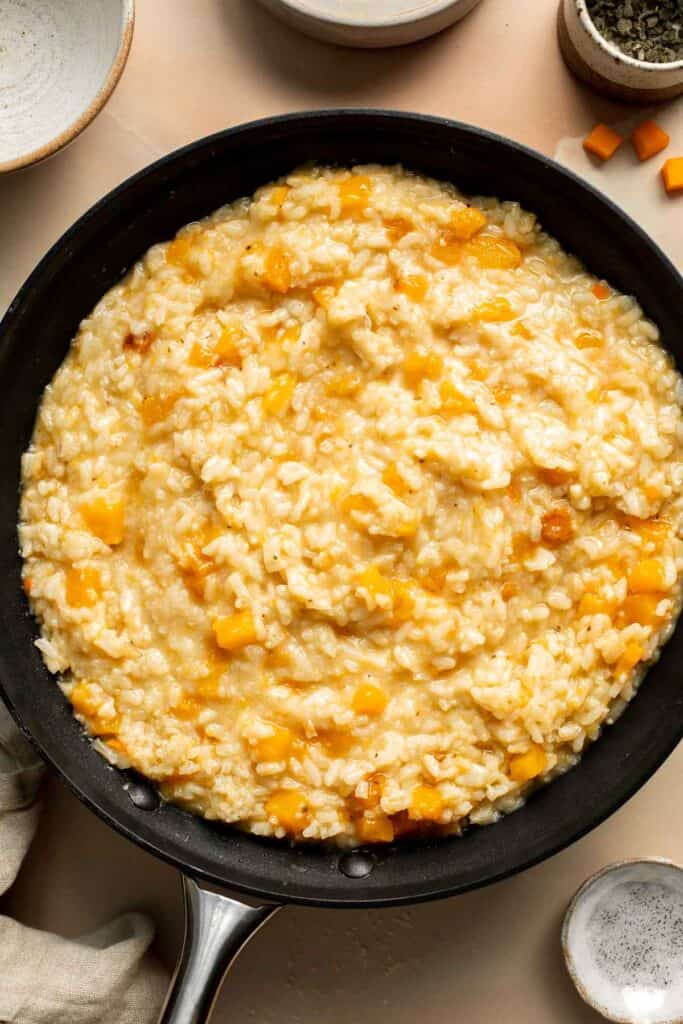
- Serve. Garnish with sage and serve immediately.
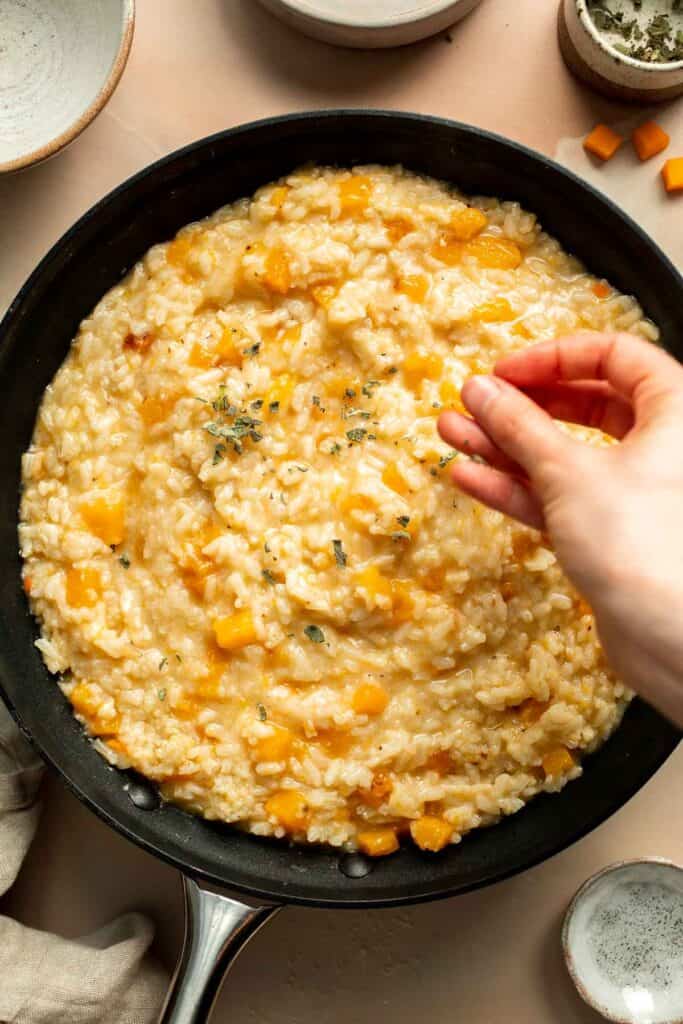

Recipe Variations
- Try a different winter squash. You can easily use other types of hard winter squash. Make a pumpkin risotto or substitute diced kabocha or acorn squash.
- Tweak the spices. This is an understated recipe that highlights high quality ingredients. We recommend keeping it simple, but you can try other dried herbs like sage or thyme for extra flavor.
- Use roasted butternut squash. Instead of cooking the squash into the risotto, add roasted butternut squash on top of the risotto right before serving. Roasting the squash adds a depth of flavor that is amazing!
- Make it vegan. The only ingredient that makes this risotto not vegan is the grated Parmesan. Either skip it or try using nutritional yeast for a cheesy flavor without the animal products.
How to Serve
This Butternut Squash Risotto is delicious served on its own, with a side salad, or paired with some of my favorite main courses including:
- One Pan Garlic Roasted Chicken and Baby Potatoes
- Glazed Honey Balsamic Pork Chops
- Arugula Salad
- Baked Maple Salmon
- Garlic Butter Shrimp
- Apple Dijon Braised Chicken Thighs
For more fall recipe inspiration, see our 60+ Fall Dinner Ideas.

Recipe Tips and Tricks
- Use hot stock. Restaurants often keep hot broth in a separate pan to help it absorb into the rice faster. You also want to use a good quality broth as it is a significant ingredient in this risotto.
- Add the broth gradually. We add in the broth 1 cup at a time to give the rice time to absorb most of it before adding more. We also stir constantly to help the rice release its starches which makes the risotto creamy.
- Taste as you go. You want the rice to be al dente, so be careful not to overcook it.
- Serve immediately. It is best to serve risotto immediately as it continues to absorb liquid as it sits. For the right consistency, serve it right away.
Storing and Freezing Instructions
How to Store
Store any leftover risotto in the fridge in an airtight container. It will stay fresh for 3-4 days.
How to Reheat
To reheat, add the leftover risotto to a small saucepan and stir in a little extra stock. Let it warm up over medium heat for several minutes until fully warmed through.
How to Freeze
Although you can freeze leftover risotto recipes, the texture of the rice may change after thawing. It's best to eat risotto fresh or reheated from the fridge.
FAQ
Since butternut squash risotto is so rich and creamy, it tastes great with a refreshing green salad, roasted meats, and a glass of wine. Try pairing the creamy texture of risotto with roasted chicken or pork, maple-glazed salmon, or hearty salads with fall greens, apples, and nuts. A tangy vinaigrette will cut through the creaminess of the risotto and balance the meal perfectly.
Since the peel is so thick, it's best to use a heavy-duty vegetable peeler. There are some with a serrated edge that can grab onto the squash skin easier than others. We don't recommend using a knife as you'll likely remove more squash than you need, and you'll be more likely to injure yourself.
A good risotto starts with the right type of rice: arborio rice. This is an essential ingredient because it's so starchy. Don't rinse it or soak it first. Let the rice release the starch gradually as you add spoonfuls of broth every few minutes. To make your risotto even creamier, stir in grated parmesan cheese or even a dollop of butter for a perfect dining experience.
More Rice Recipes
- 30 Best Rice Recipes
- Creamy Parmesan (No Wine) Risotto
- Mushroom Risotto
- Broccoli Rice
- Rice Pilaf with Carrots
- Coconut Rice
Tried this recipe?
I'd love to hear what you think! Leave a comment and rating below to share your feedback. Your reviews help others discover this recipe and help me keep creating more free recipes for you. Snap a photo and tag me on social media @aheadofthyme too.
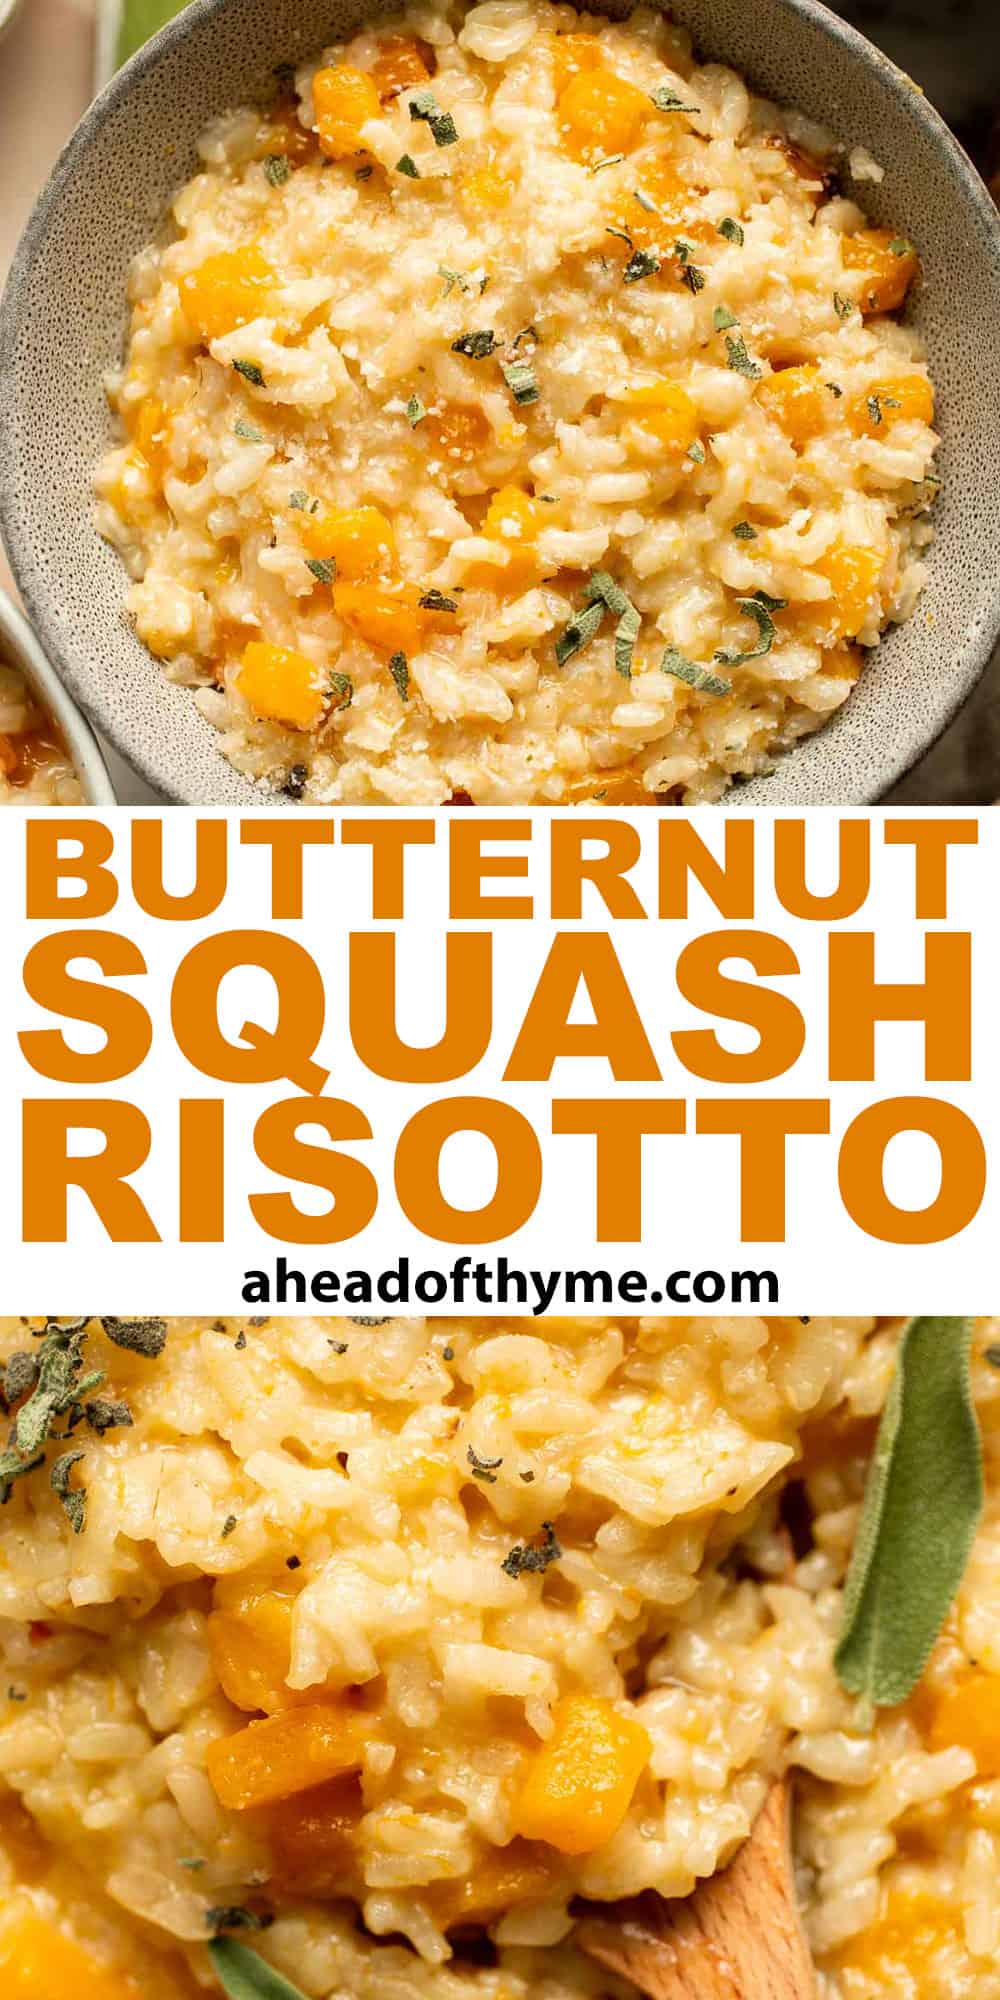
55+ Easy Family Dinner Ideas
Weeknight dinners are all about quick and easy recipes that should be a breeze, especially when you've got a hungry family waiting. Whether you need kid-friendly recipes that please even the pickiest eaters or wholesome family dinner recipes to feed a large crowd, we've got your back. We are sharing over 55 Easy Family Dinner Ideas from delicious one-pot wonders and simple sheet pan dinners, to comforting casseroles and pasta, to healthier takes on classic favorites, and everything in between. So set the table, gather 'round, and bring a smile to the everyone's faces with these tasty family dinners.

Easy Family Dinner Ideas
Baked Chicken Drumsticks are ideal for busy weeknights. Marinate inexpensive chicken legs with everyday spices and bake until crispy, tender, and flavorful.

Homemade hamburger helper is a family favorite but you can make a cheaper, healthier, and way tastier version at home, ready in just 30 minutes.
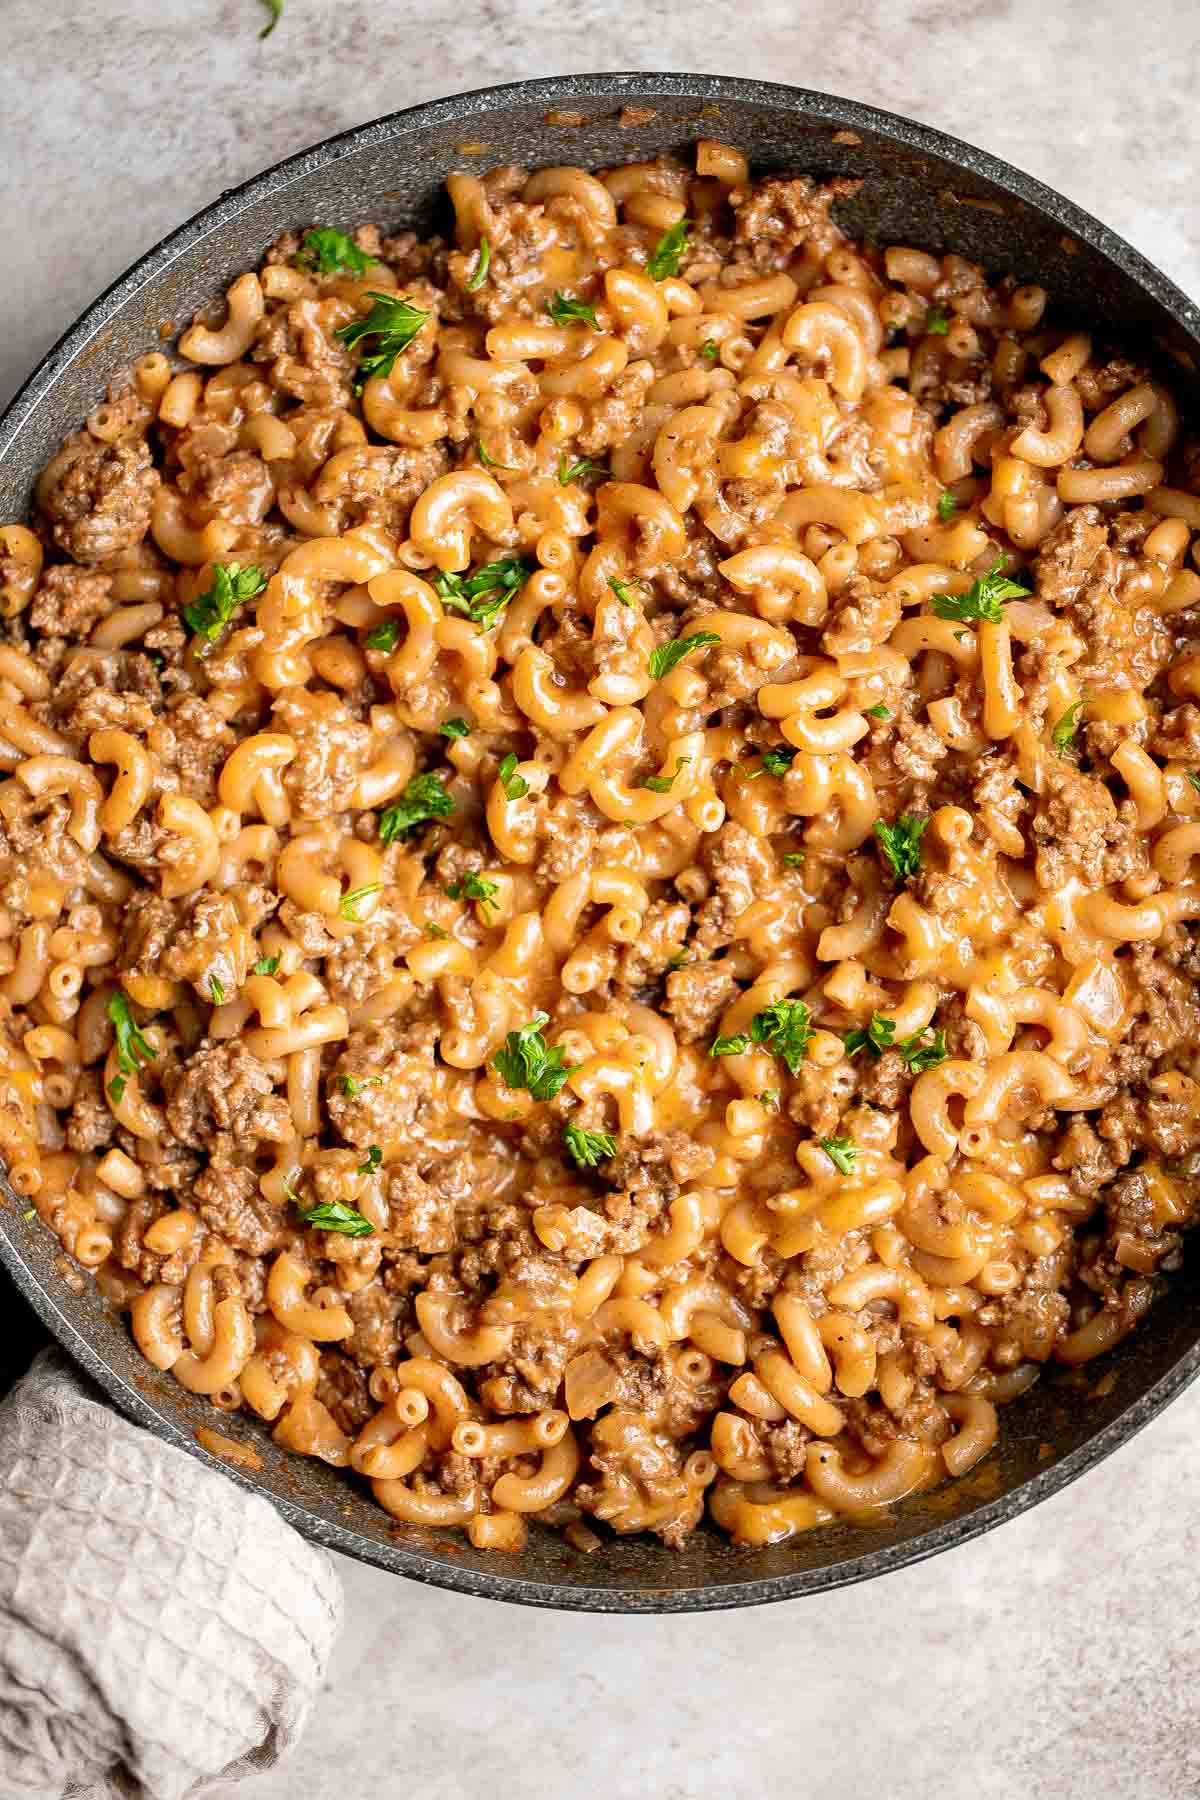
Meatballs are probably my favorite of all ground beef recipes. These quick, easy homemade Italian meatballs are juicy, flavourful, and delicious, simmered in a rich and savoury tomato sauce. Make them in just 30 minutes.

Tater Tot Casserole is classic comfort food that incorporates delicious layers of crispy tater tots, melted cheese and a creamy beef and vegetables mixture.

Tender, flaky, flavorful garlic butter salmon is well-seasoned, seared to perfection, and basted until juicy. Quick and easy to make in 20 minutes.
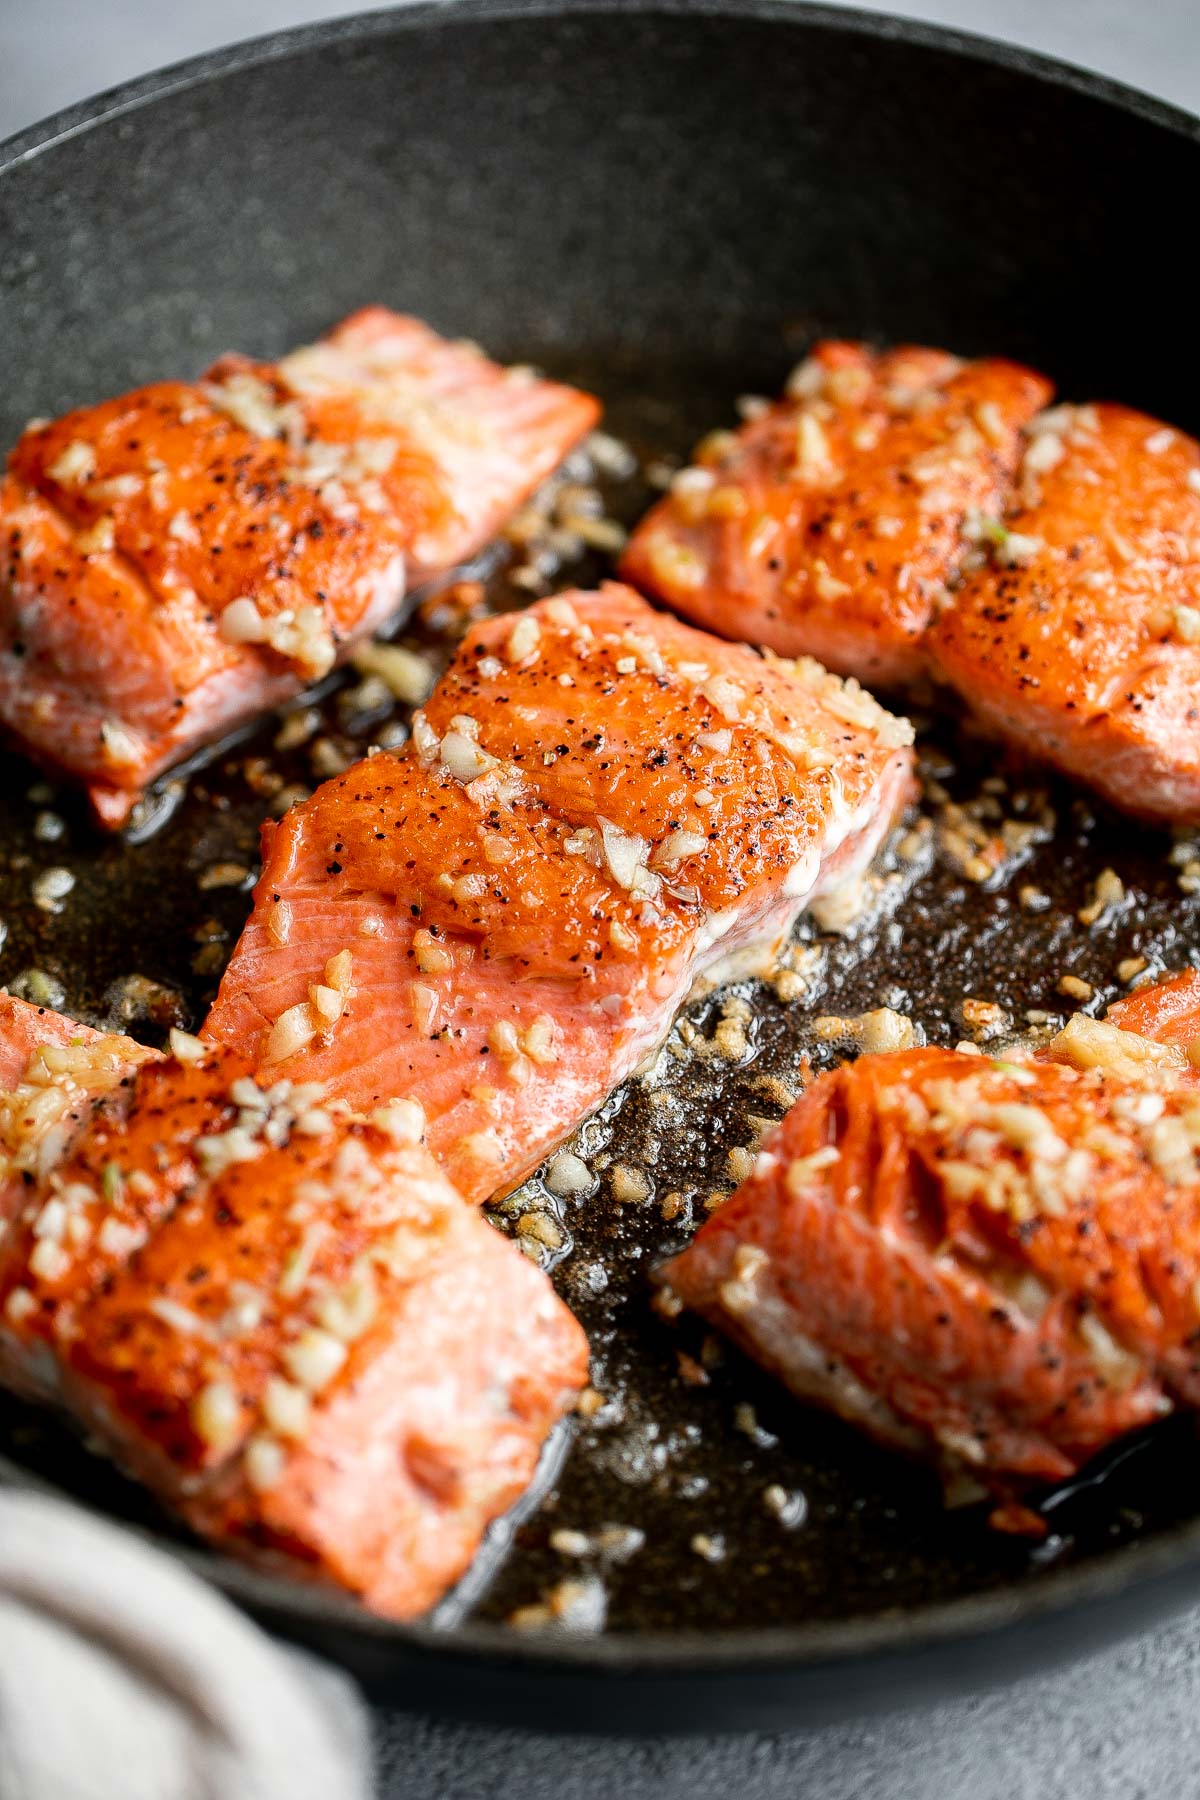
Homemade Potato and Cheese Perogies are comforting, delicious, and satisfying. These cheddar pierogi from scratch as easier to make than you think!

This Creamy Tomato Pasta is a simple and delicious meal made from scratch in 25 minutes with a cream and tomato based sauce that is rich and silky smooth.

Forget delivery and make sweet, tangy, and smoky BBQ chicken pizza from the comfort of your own home in under 30 minutes. The easiest weeknight dinner.

Homemade Alphabet Soup will quickly become a family favorite with its hearty vegetables and fun alphabet noodles. It's quick and easy to make in 30 minutes.
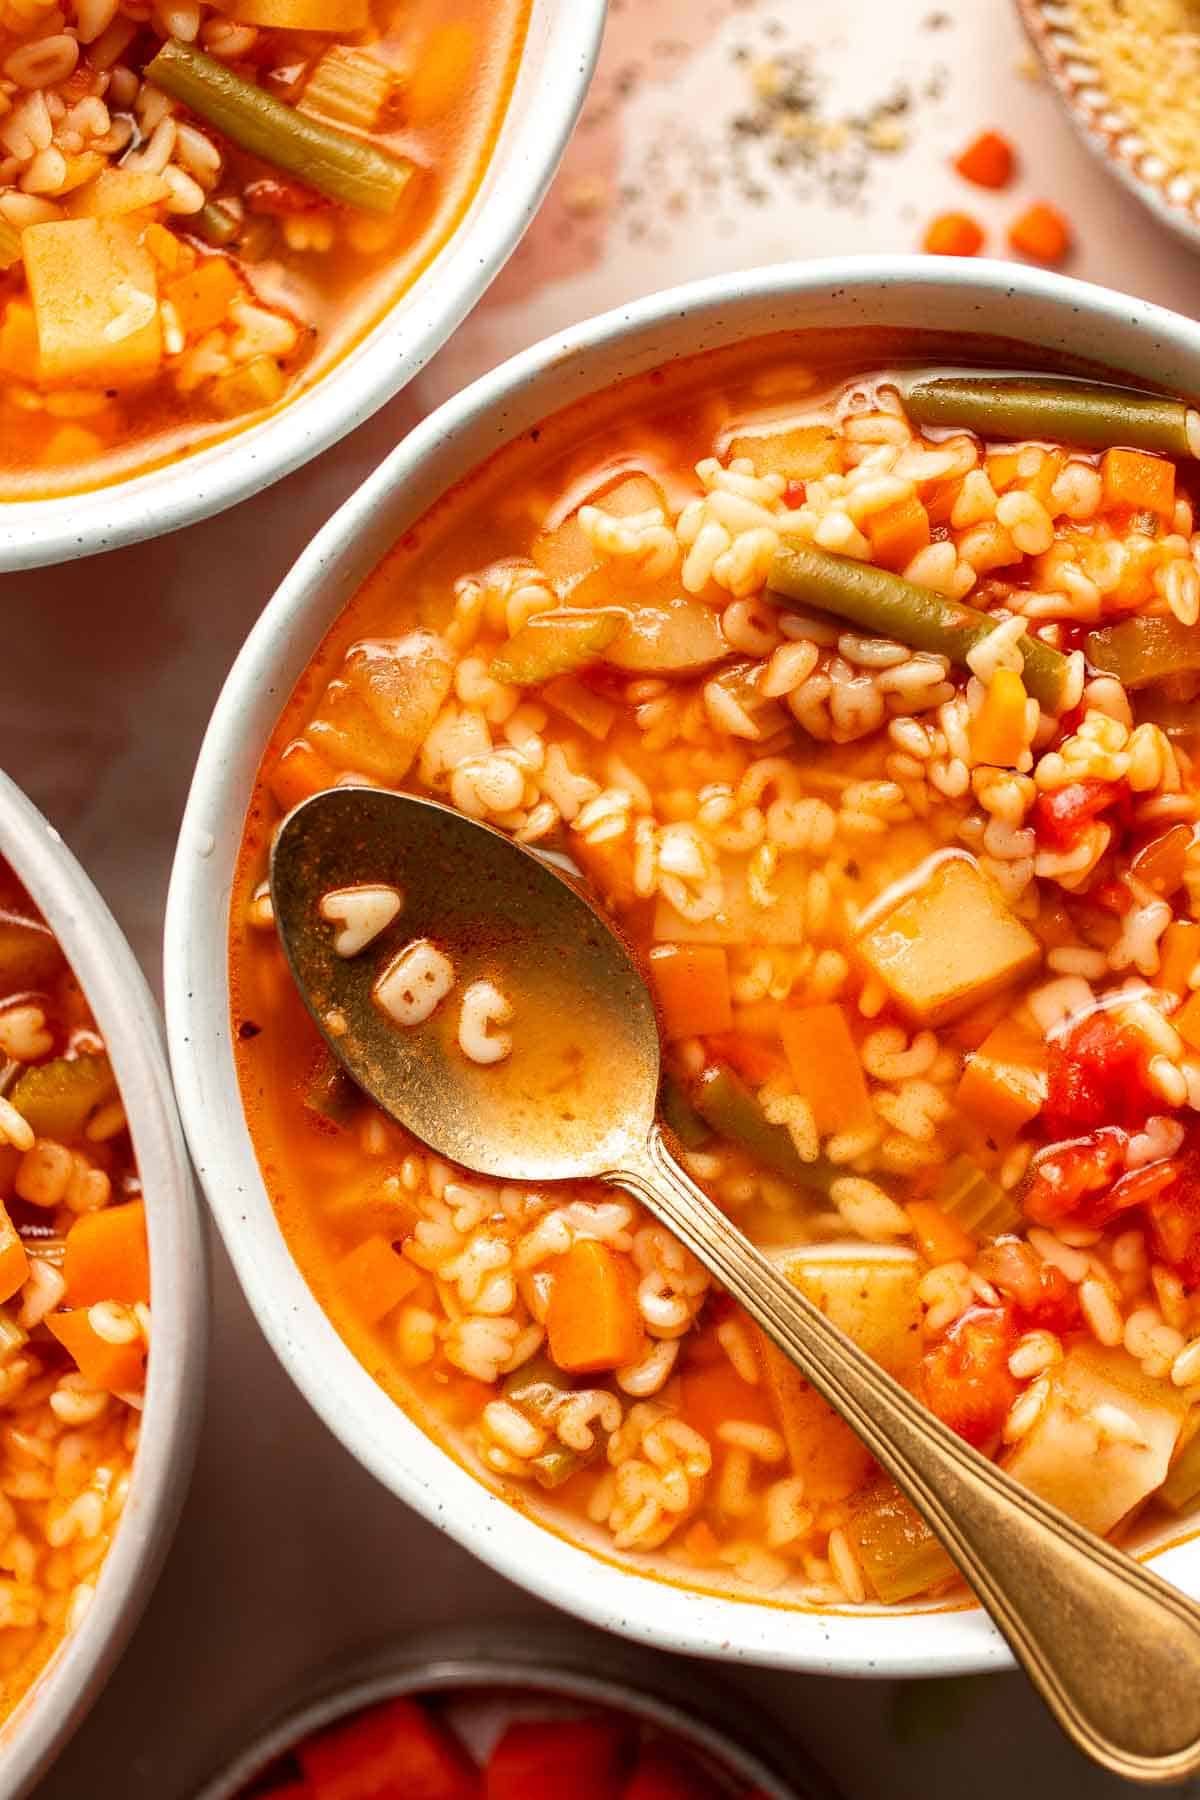
These Sheet Pan Quesadillas are loaded with veggies and gooey cheese, baked in the oven until crispy, and made to feed a crowd in just 30 minutes.
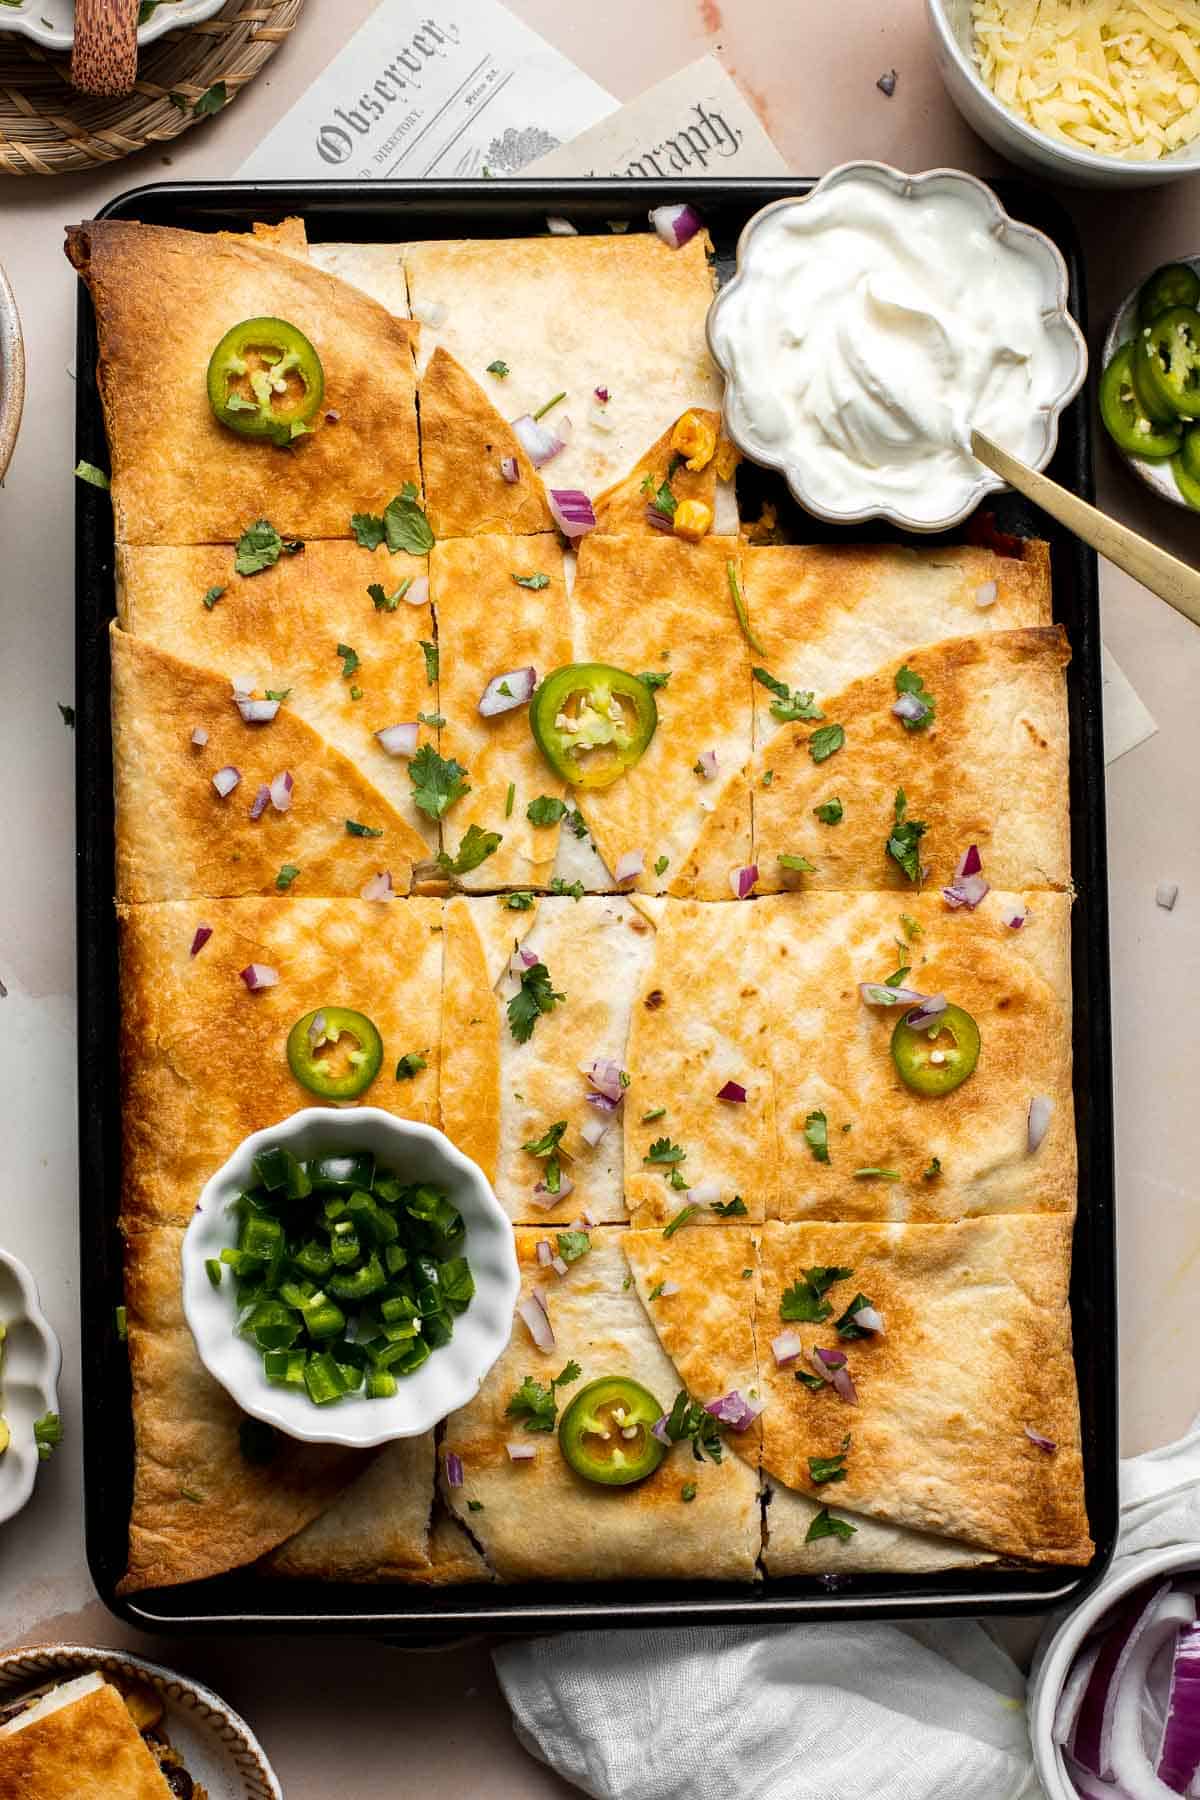
Easy 20-minute one pot lentils is vegan, gluten-free, and packed with protein. It's immune boosting properties makes it the perfect comfort food. It's one of the best vegan dinners.
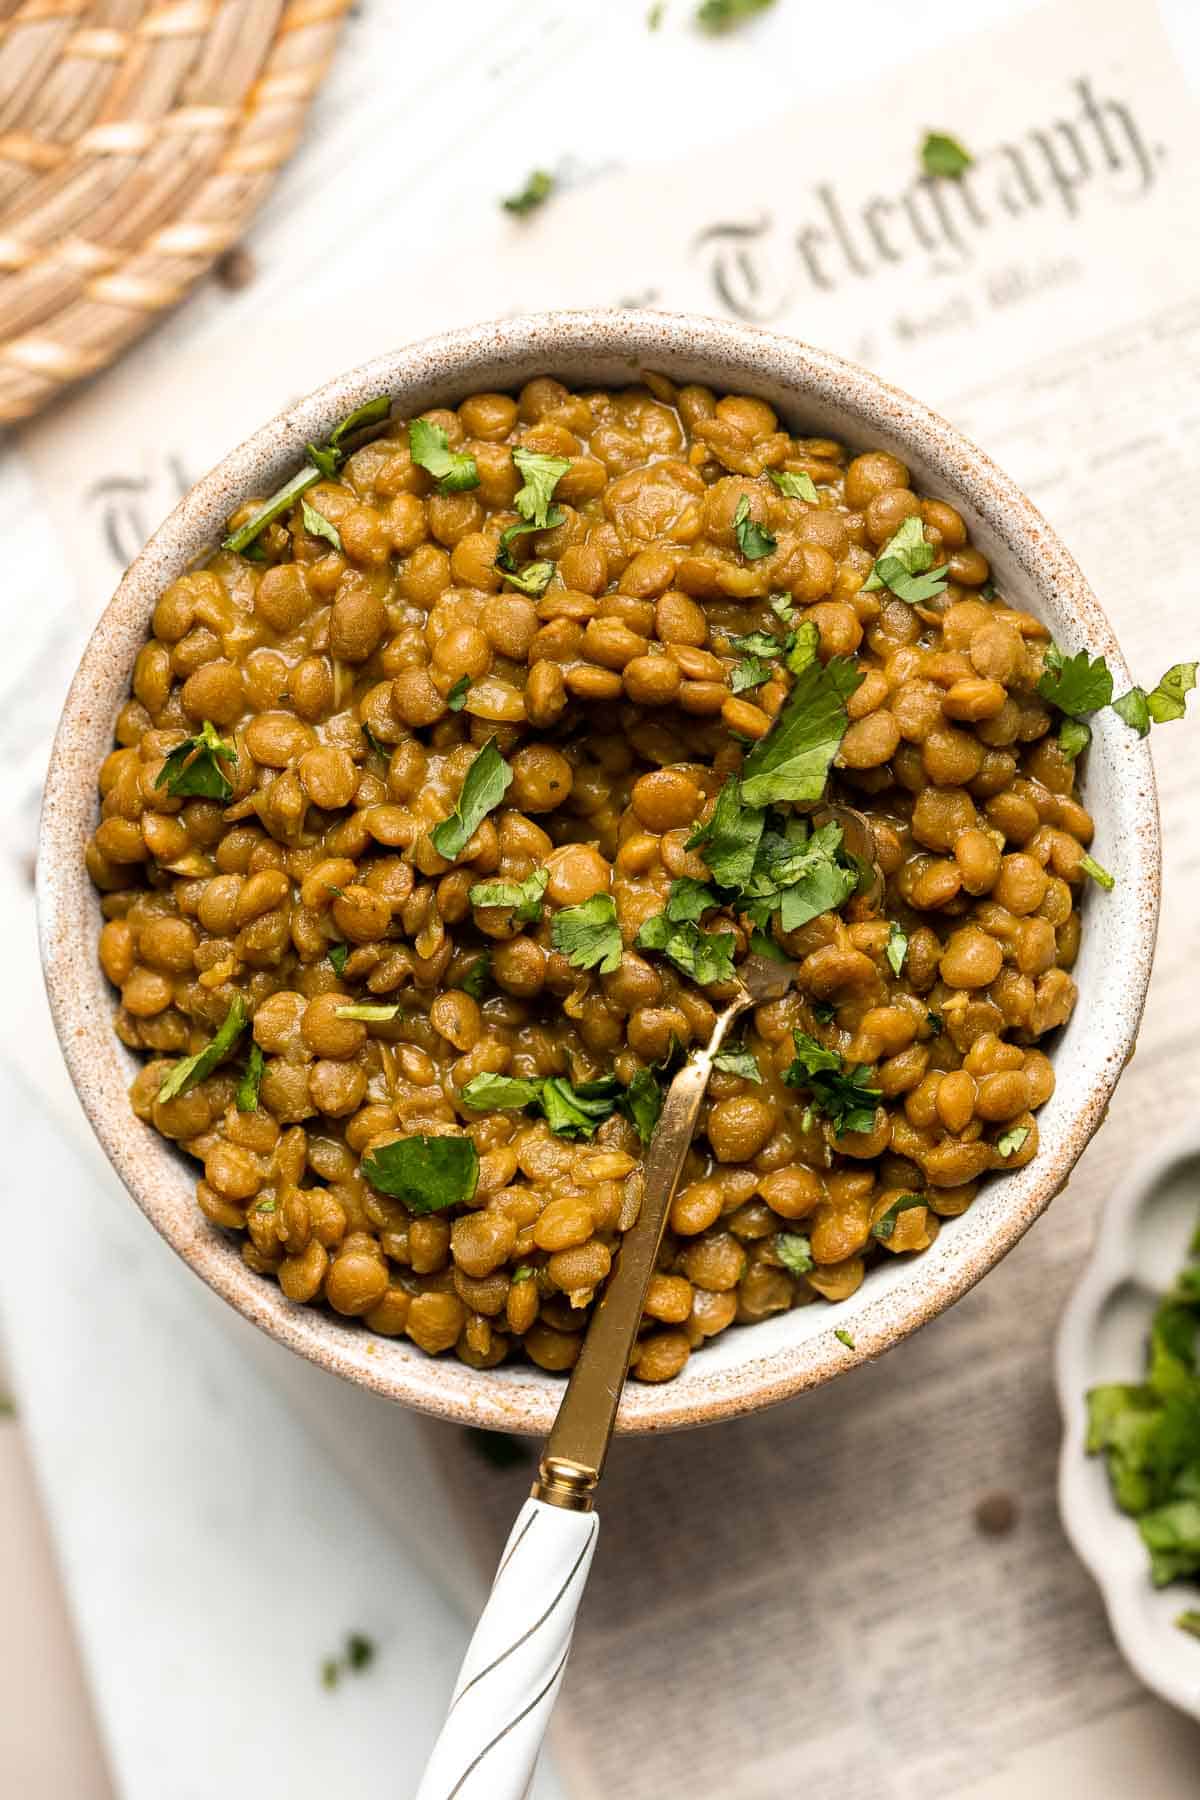
Instant pot whole chicken with gravy is tender, juicy, and flavorful. It's the fastest way to cook a whole rotisserie chicken for dinner in just 40 minutes.
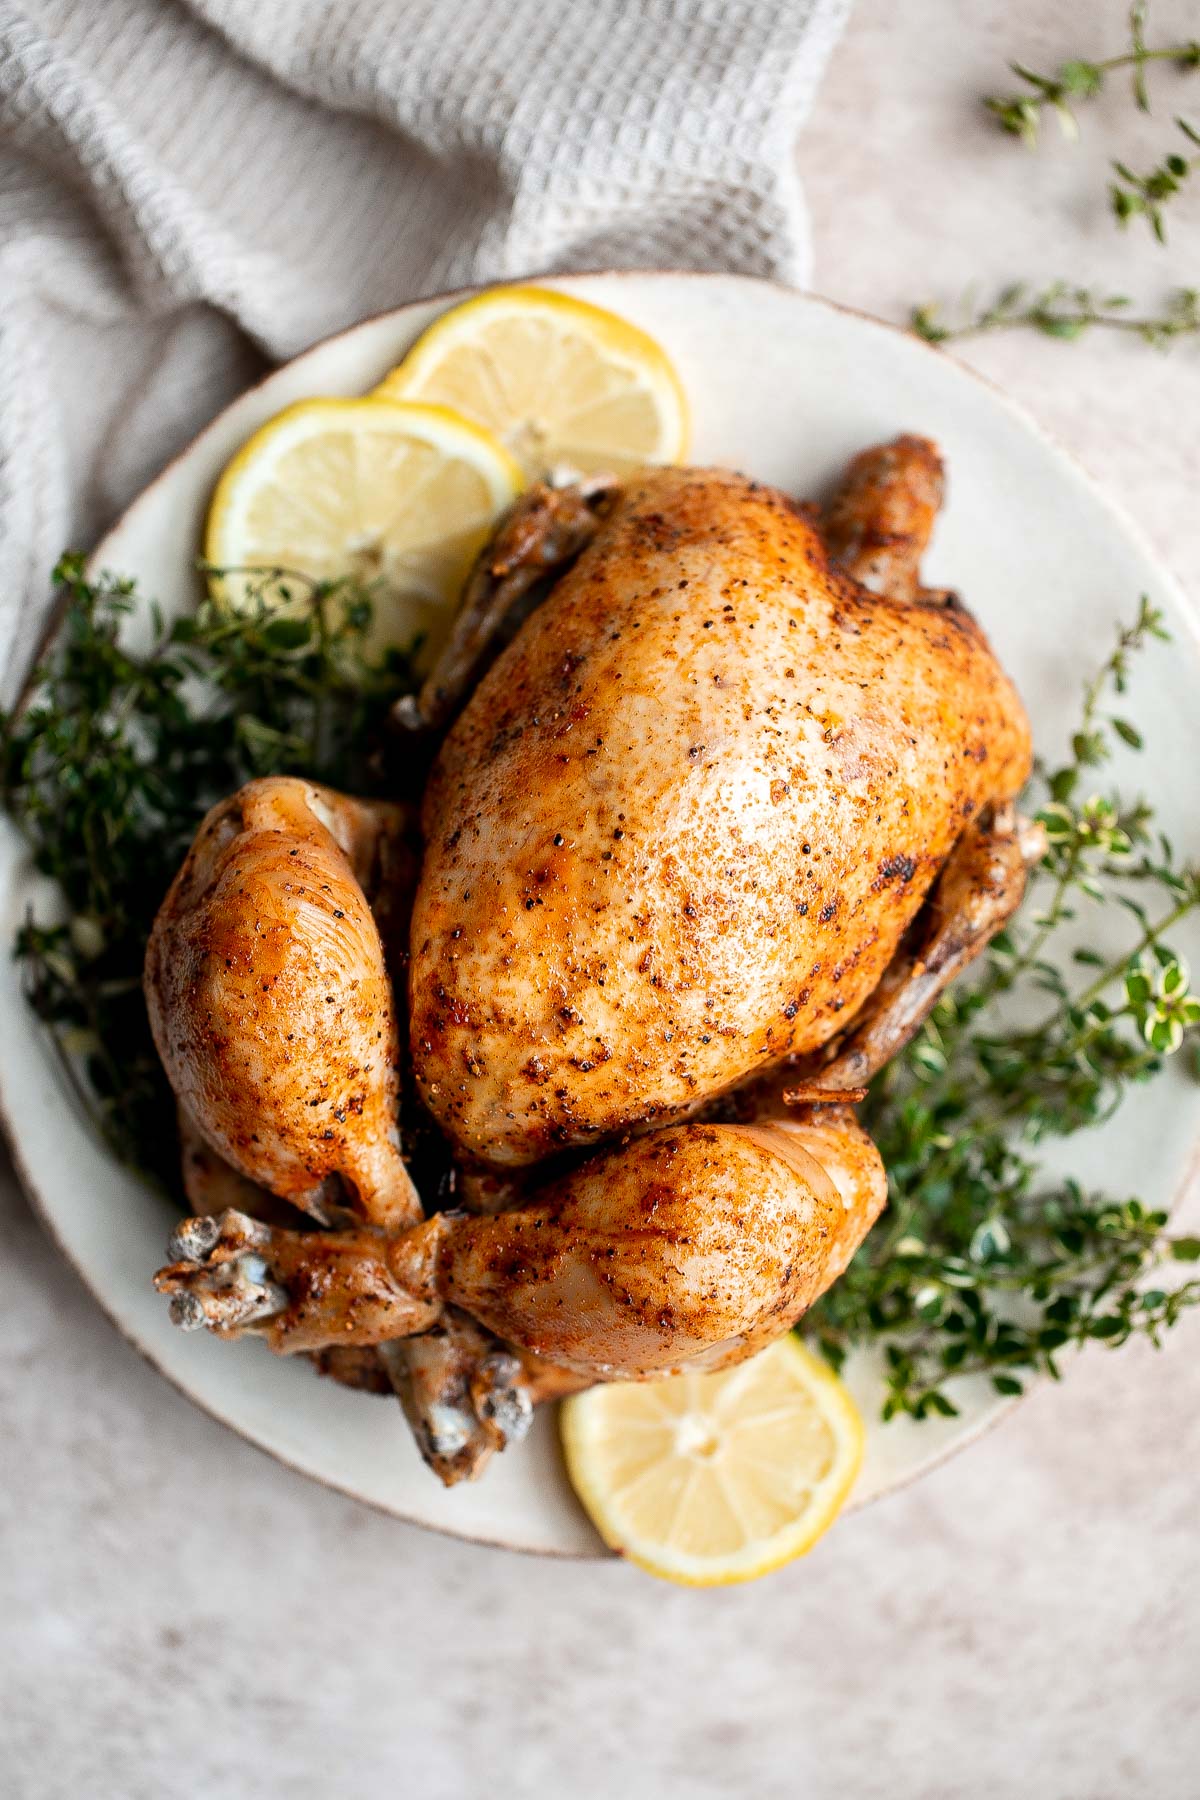
Stovetop Mac and Cheese with White Cheddar
Quick and easy, creamy stovetop mac and cheese with white cheddar is a delicious and comforting one pot 20-minute meal packed with three types of cheese.
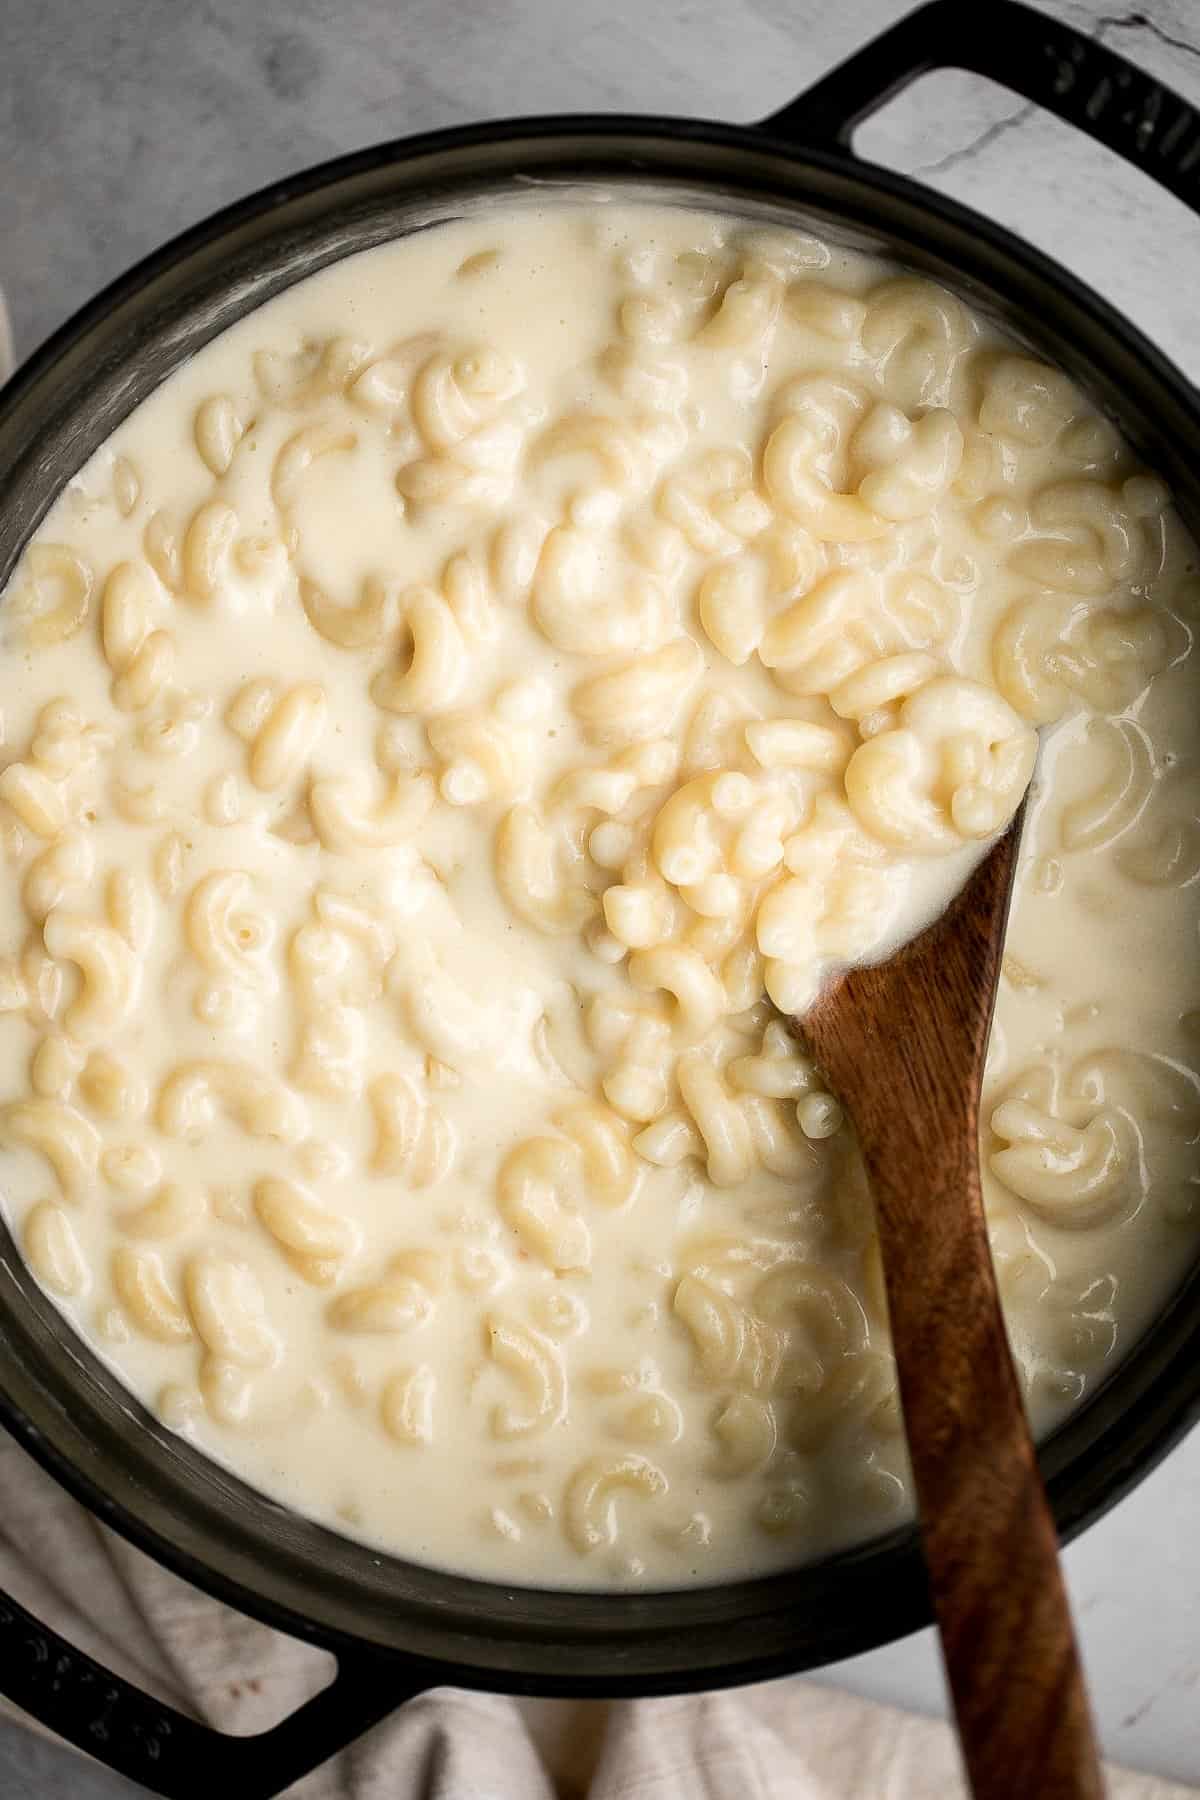
Garlic Butter Steak Bites are tender, juicy, and flavorful. This quick and easy appetizer or weeknight dinner takes just 15 minutes to make in one skillet.
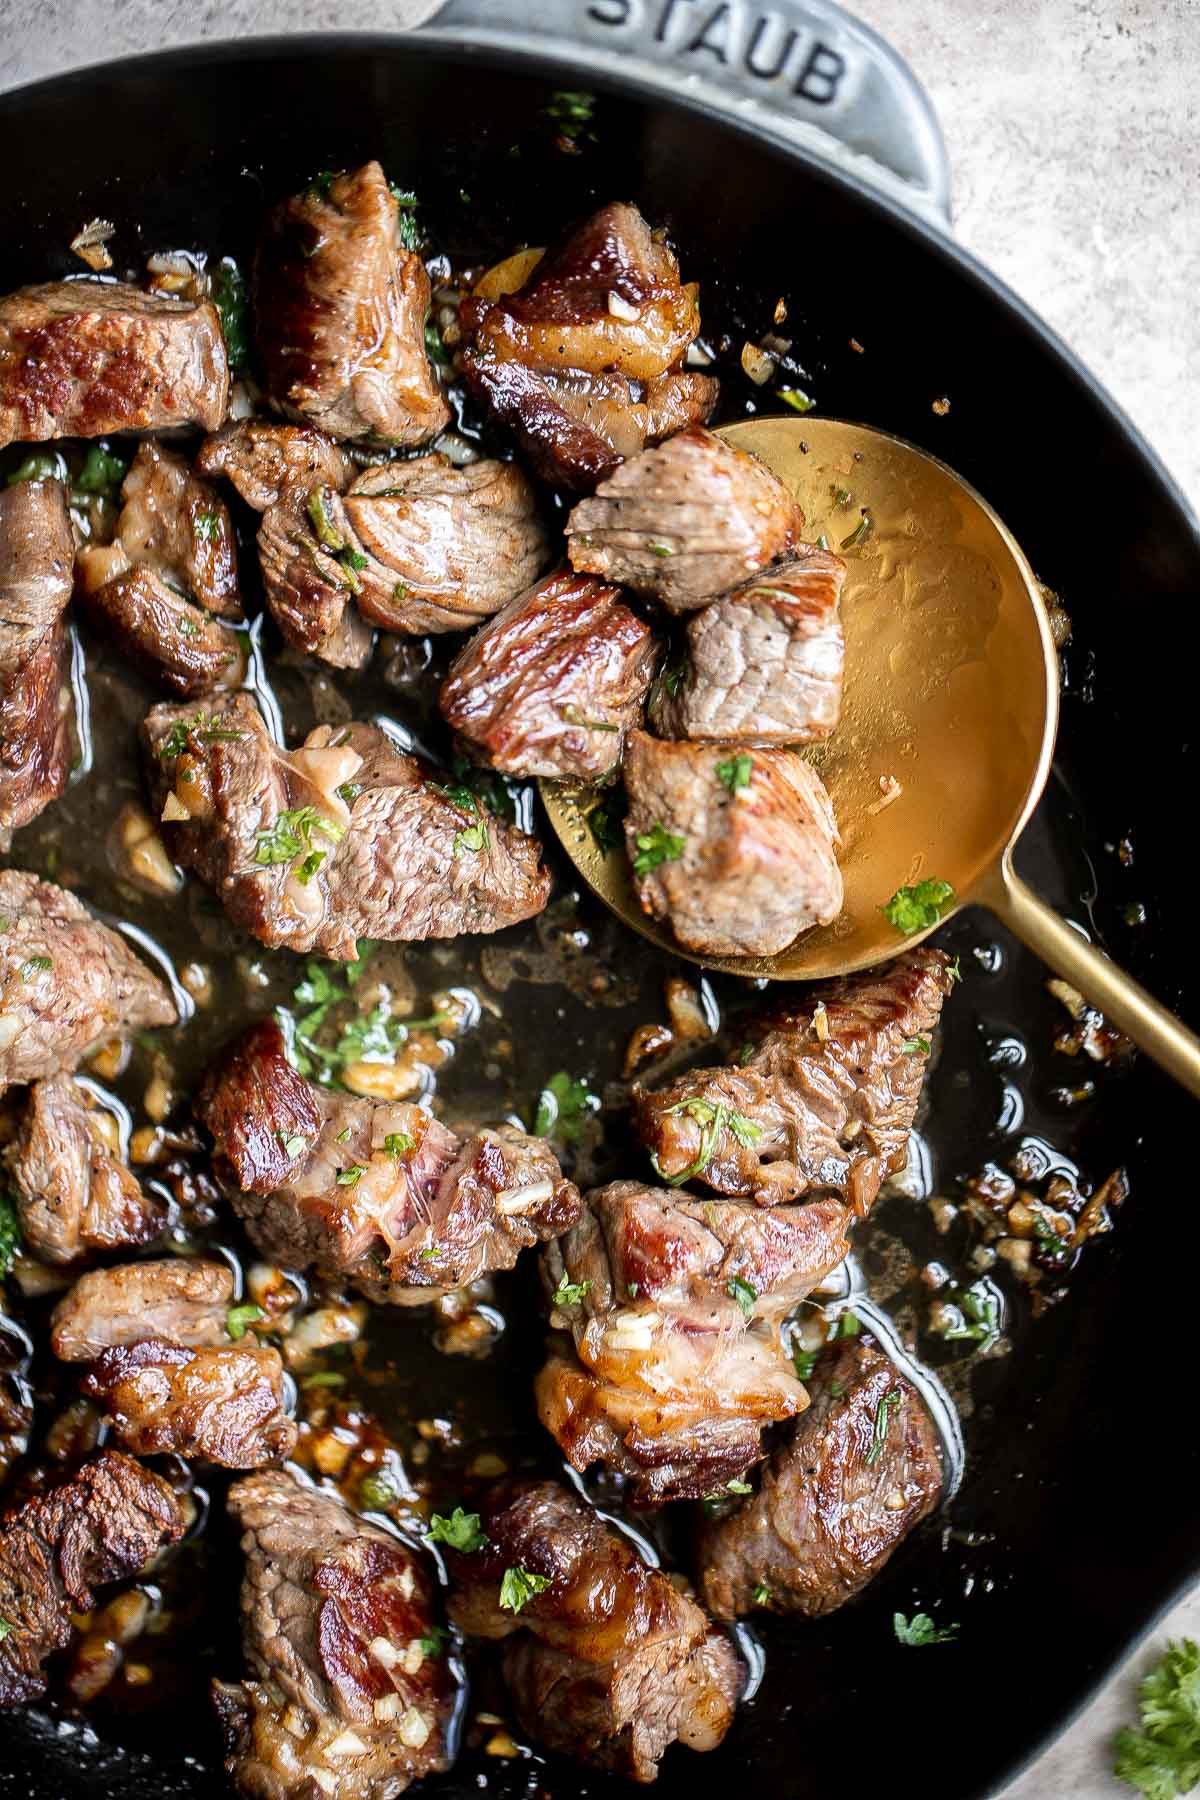
Chicken Enchilada Casserole is cheesy, saucy, and packed with layers of enchilada classics like chicken and beans, tortillas, and cheese. A family favorite!
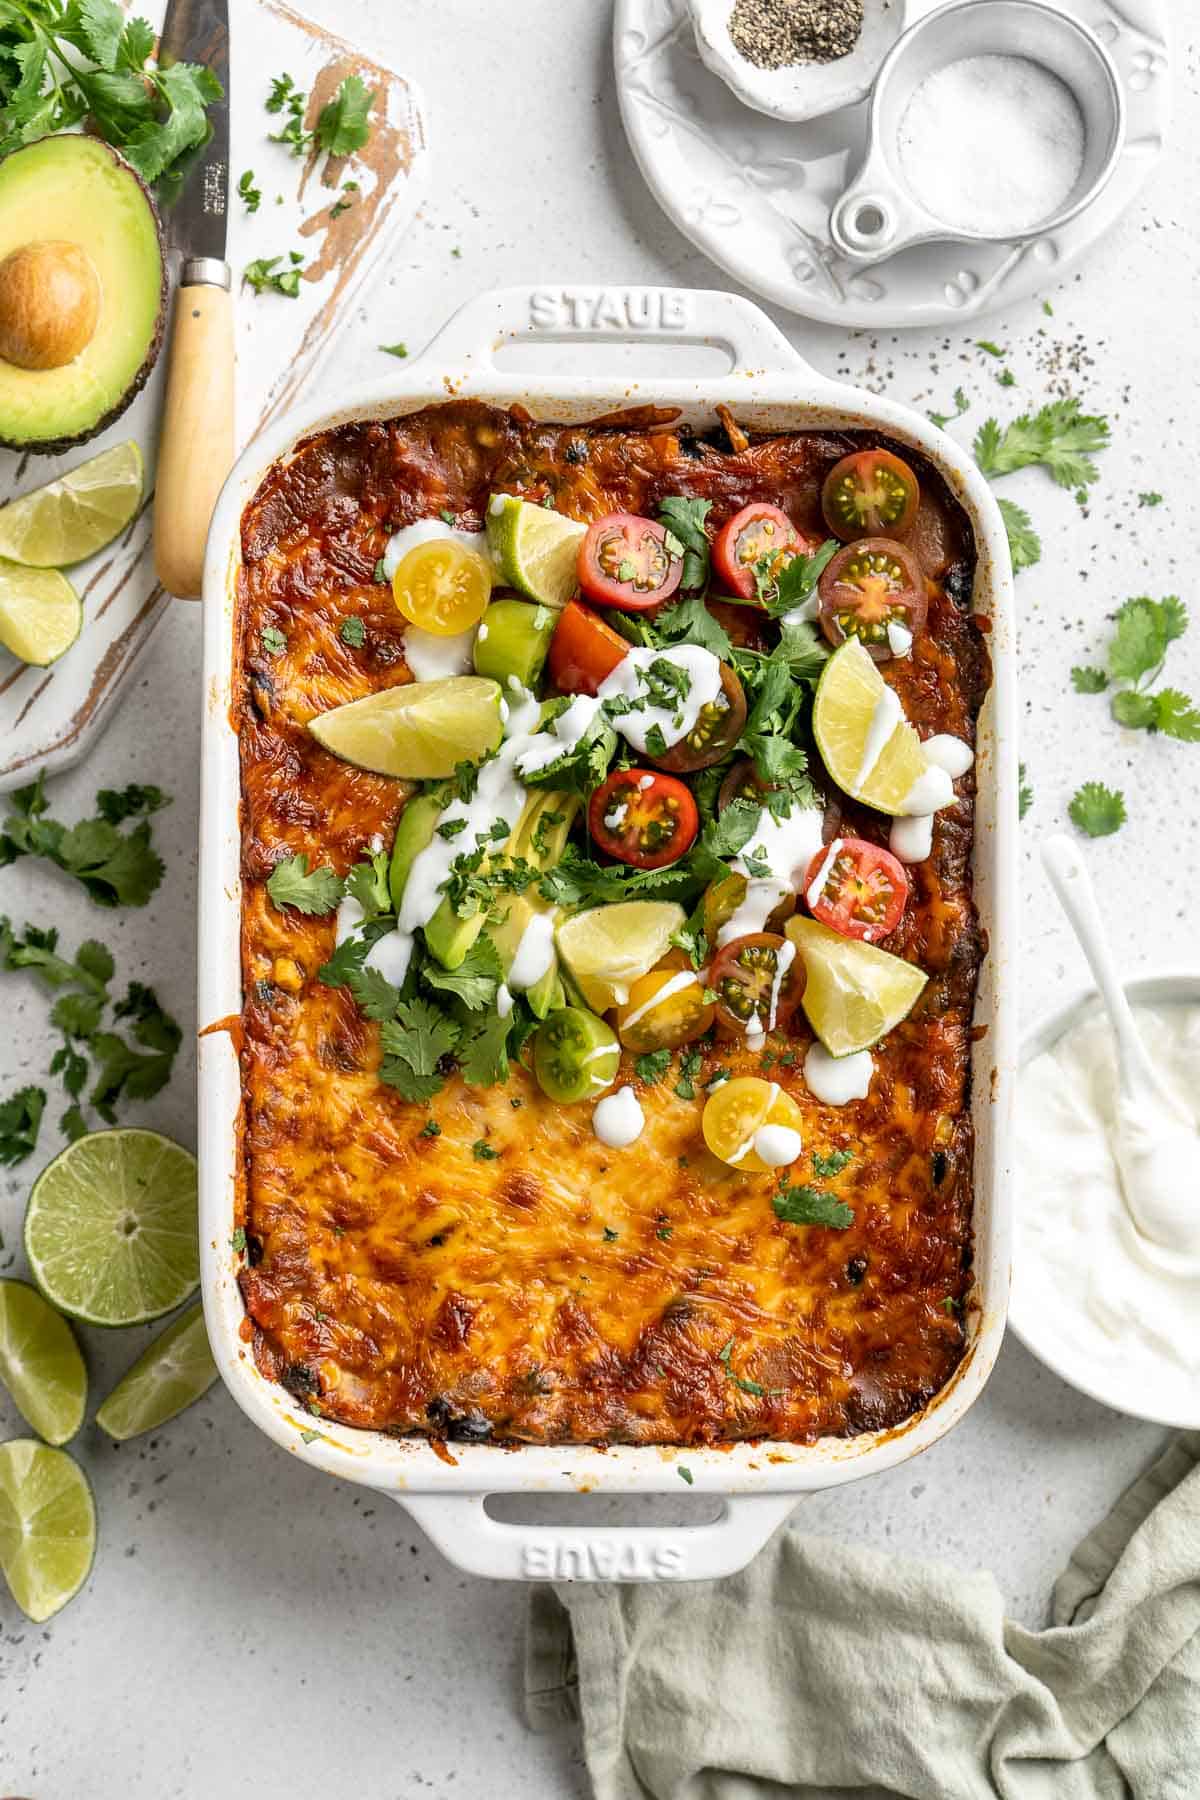
Quick easy baked homemade fish sticks are crispy on the outside, tender and flaky on the inside, and packed with flavor. Kid-friendly + freezer-friendly.

Skillet Neapolitan Margherita Pizza
Quick and easy skillet Neapolitan margherita pizza has an iconic thin and soft crust with a perfectly crisp exterior, and simple and fresh toppings.

Hamburger soup with macaroni is a quick and easy weeknight dinner that's wholesome, filling, comforting and nutritious. Prep, cook and serve under an hour.
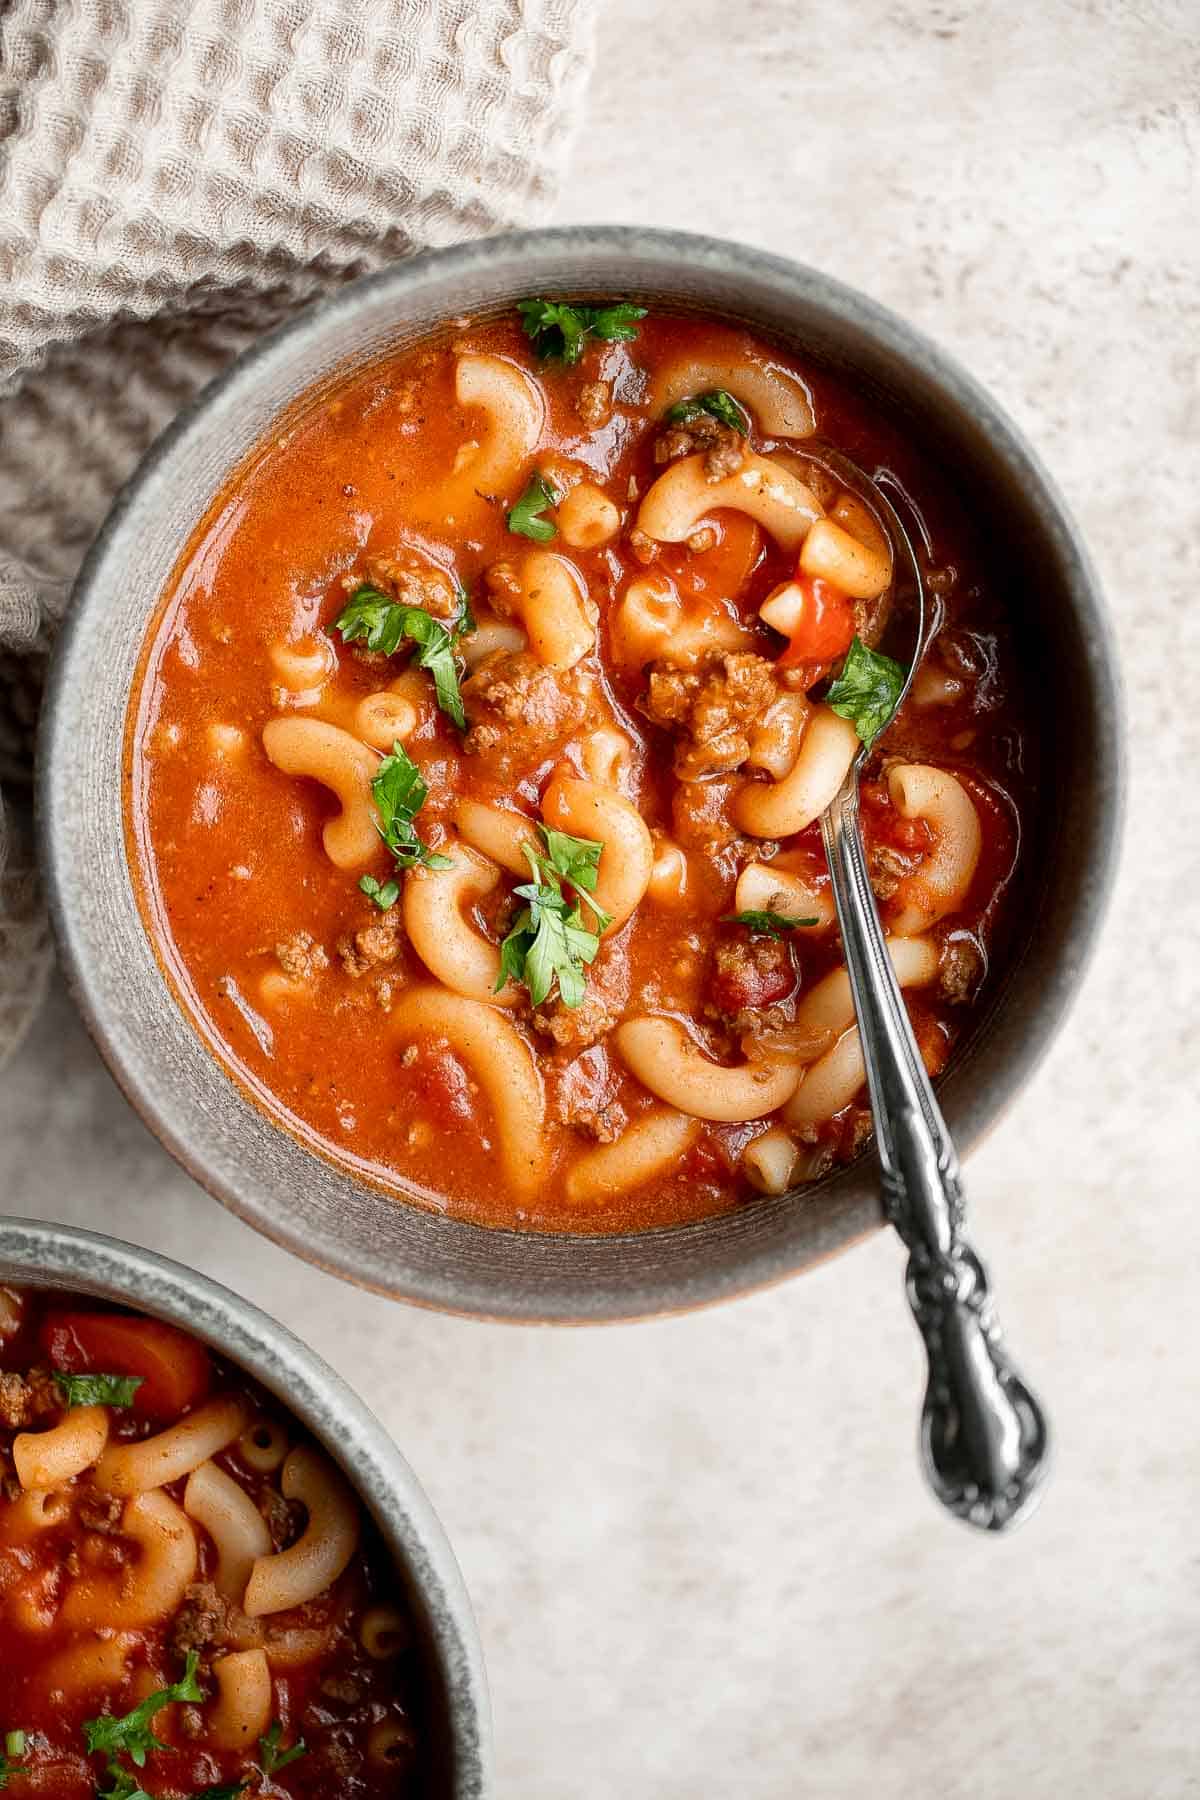
Baked Pizza Fries are loaded with a rich marinara sauce, melted cheese, and crispy pepperoni - transforming ordinary fries into the ultimate finger food.

Chicken Chow Mein is a classic Chinese noodle dish that is quick and easy to make at home in 20 minutes - faster, healthier, and better than takeout.

Pasta Bake with Sausage (Baked Ziti)
Pasta bake with sausage (baked ziti) is a lazy day lasagna with layers of pasta tossed in a rich meat sauce, layered with mozzarella, and baked.
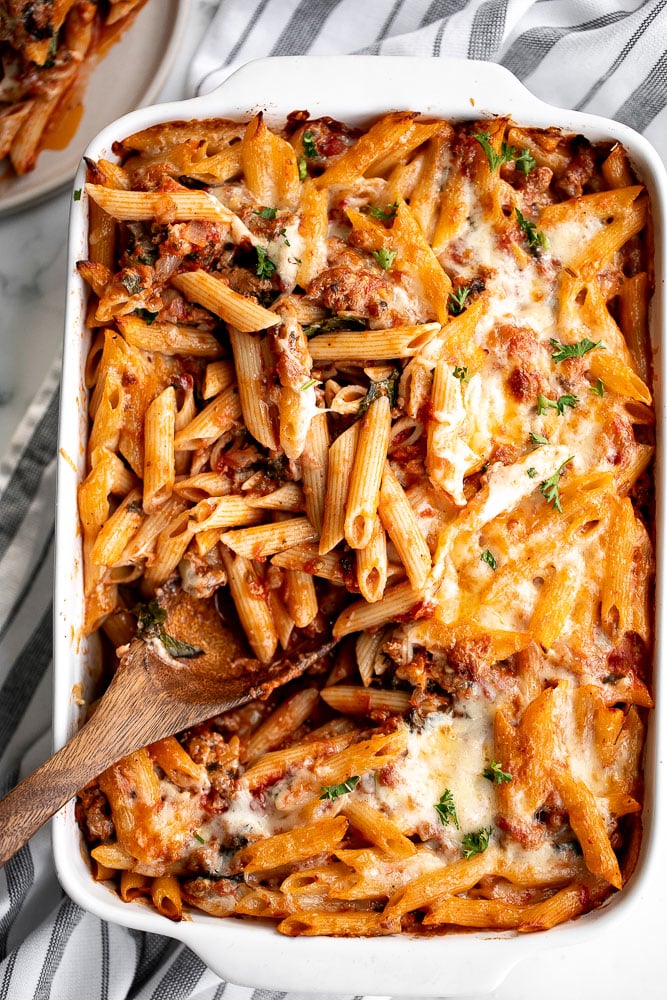
Creamy Parmesan (No Wine) Risotto
Creamy Parmesan (No Wine) Risotto is a rich, creamy, and comforting classic Italian dish that may be intimidating but is actually quick and easy to make.
Pecan Crusted Chicken is a simple, delicious, and flavorful, quick and easy dinner ready in 40 minutes that can be baked in the oven or air fryer.

Cheesy Baked Gnocchi is quick and easy comfort food made all in one pot with chewy bites of gnocchi, a simple tomato-based sauce, and gooey melty cheese.
Turkey chili is hearty, filling, flavorful, and delicious. It's warm and cozy, quick and easy to make in one pot, and can be made faster in the instant pot.
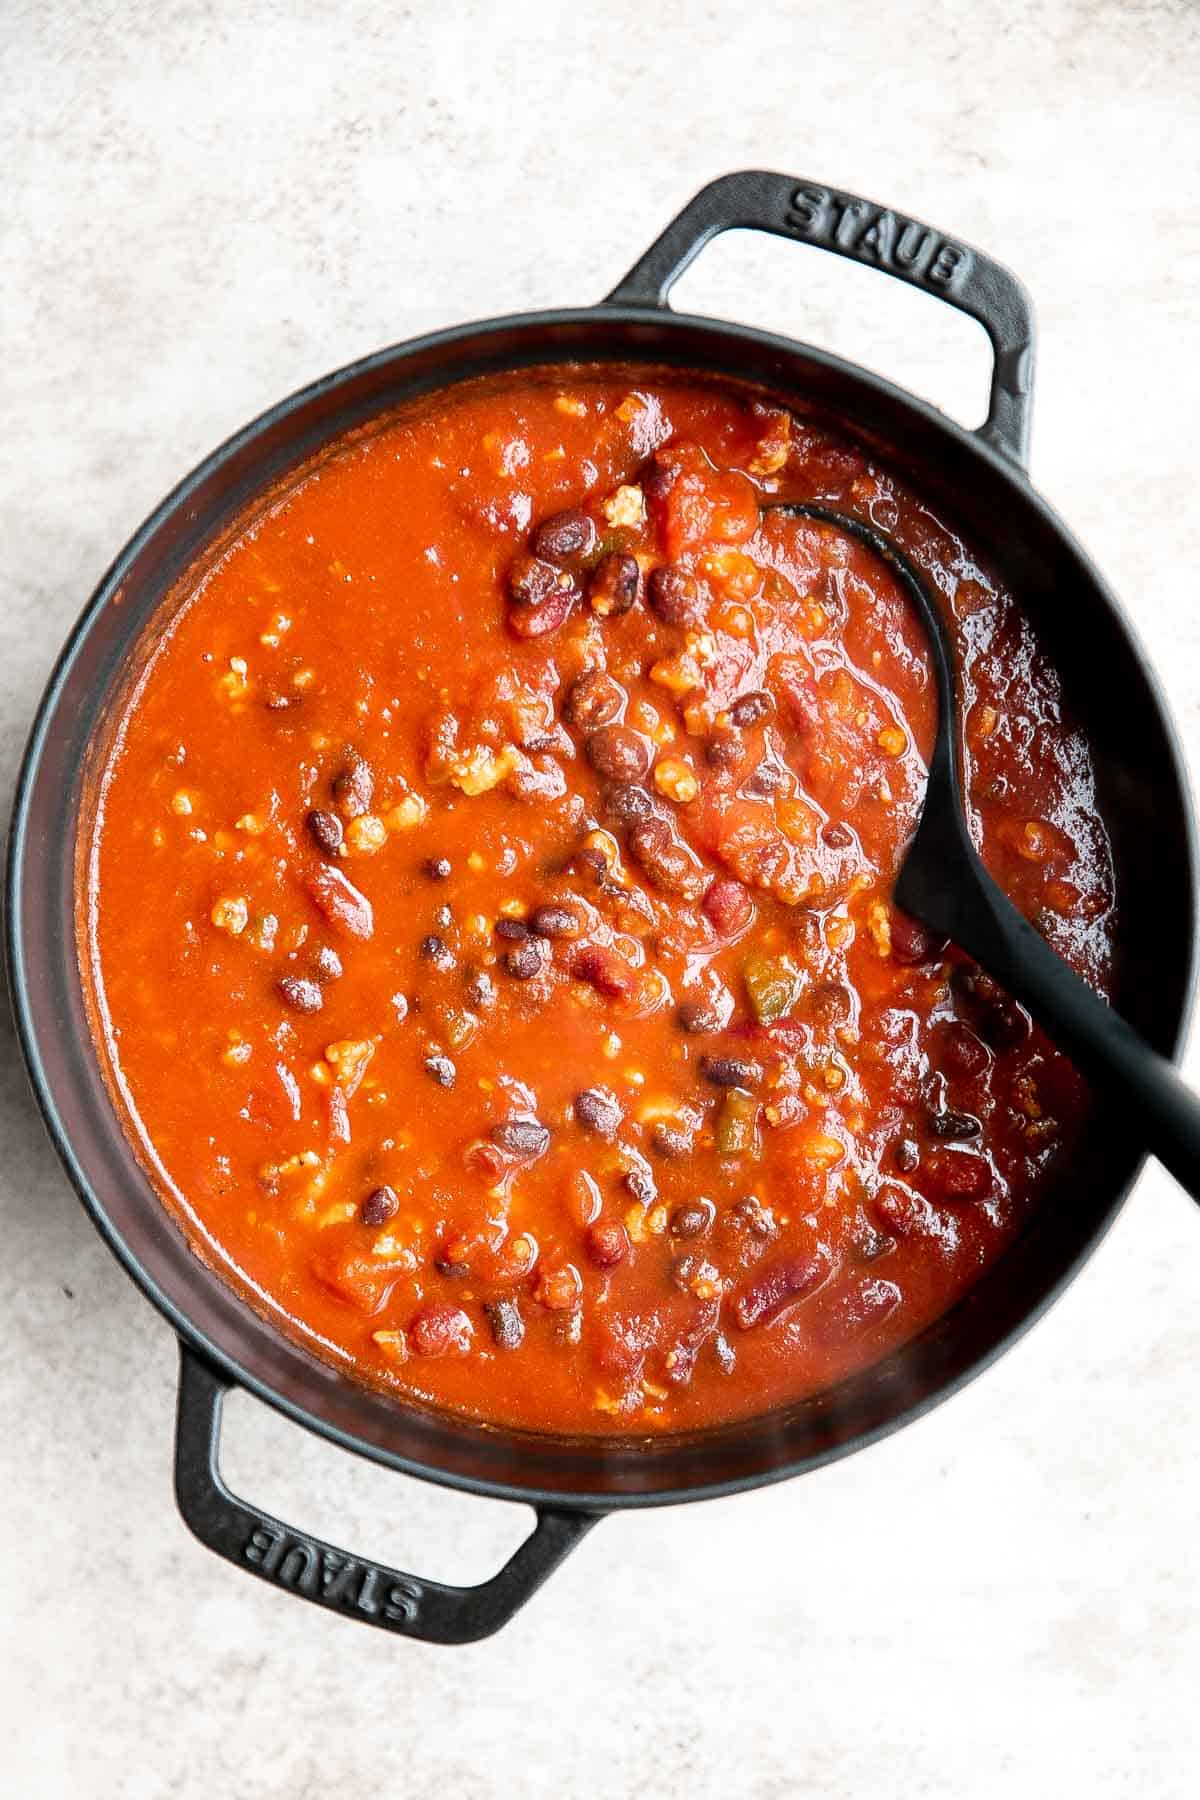
Classic easy meat lasagna is the ultimate Italian comfort food with layers of tender lasagna, meaty tomato sauce, cheese filling and melted cheese on top.
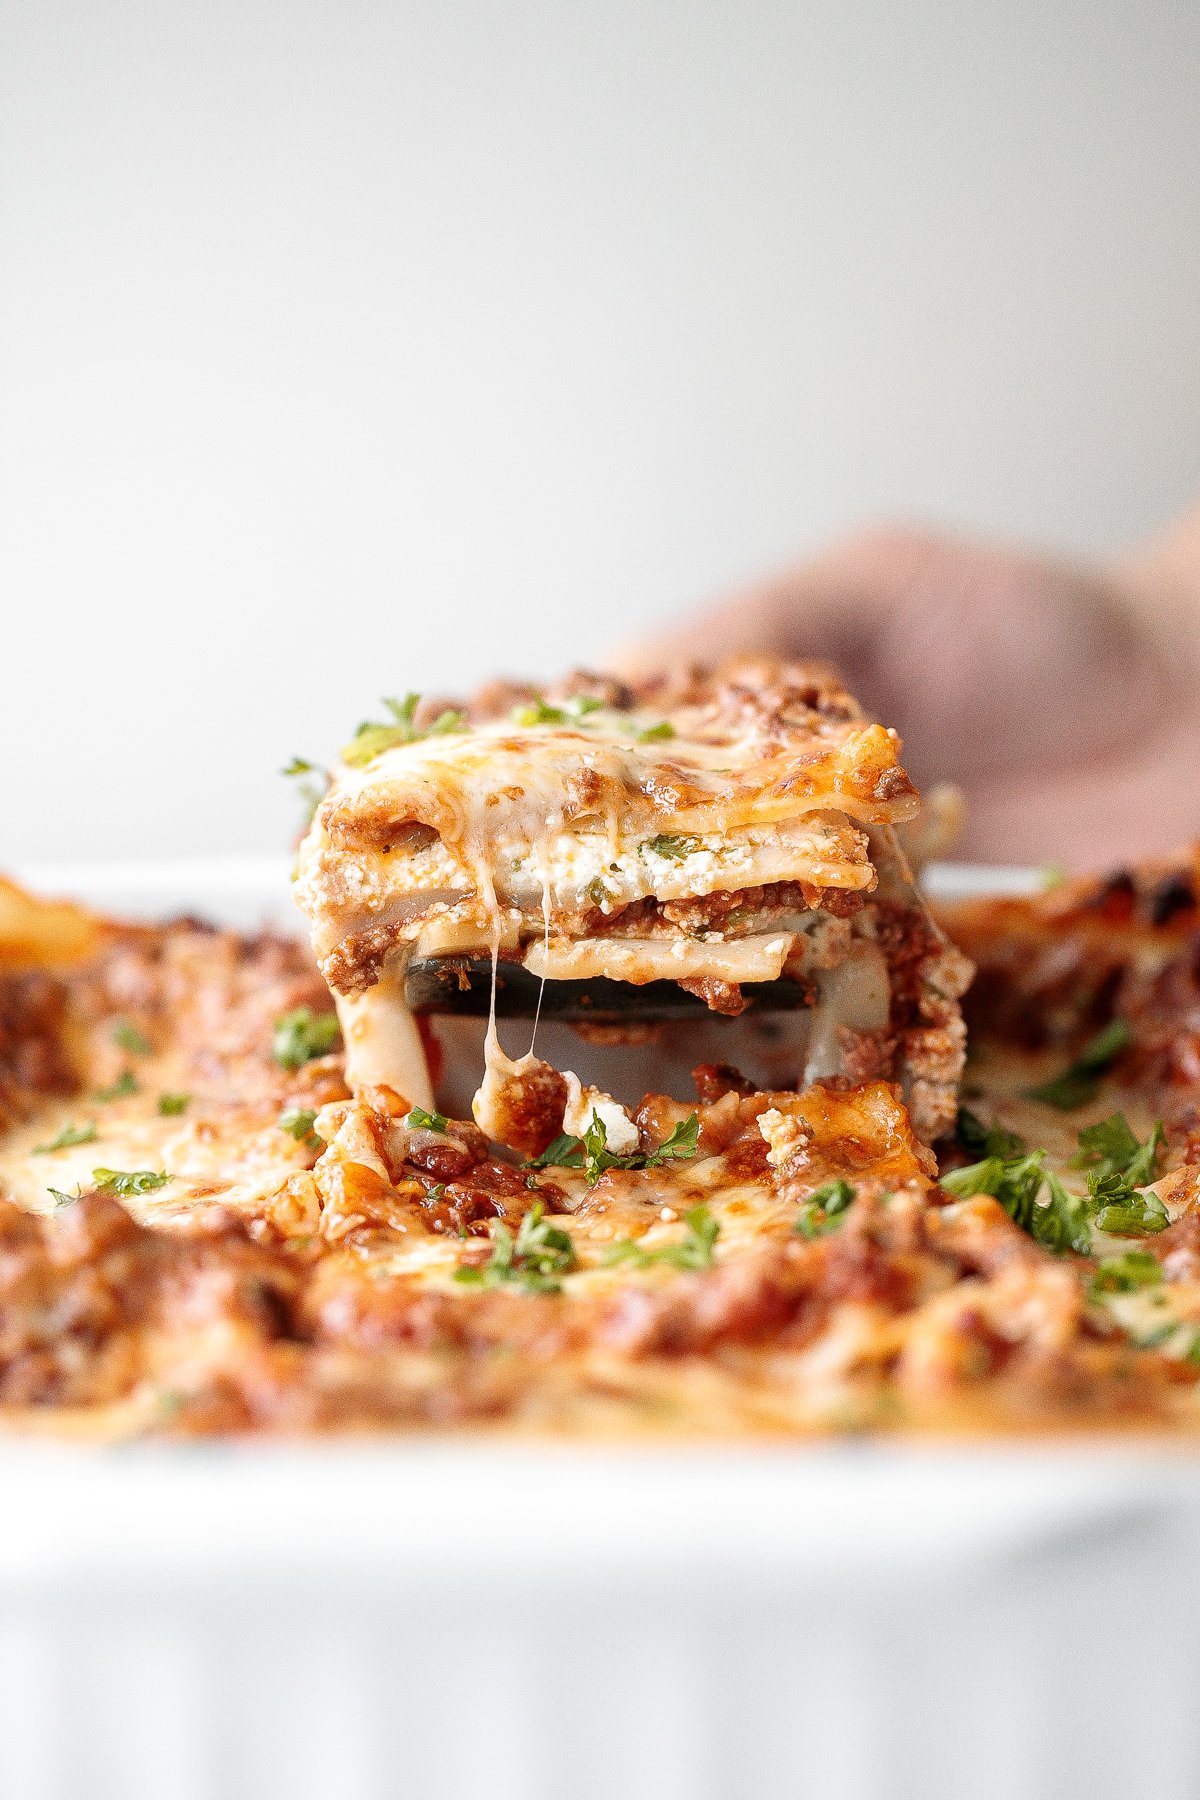
Homemade chicken noodle soup is classic, comforting, simple, quick, and easy to make at home. Plus, you can use leftover rotisserie chicken to save time.
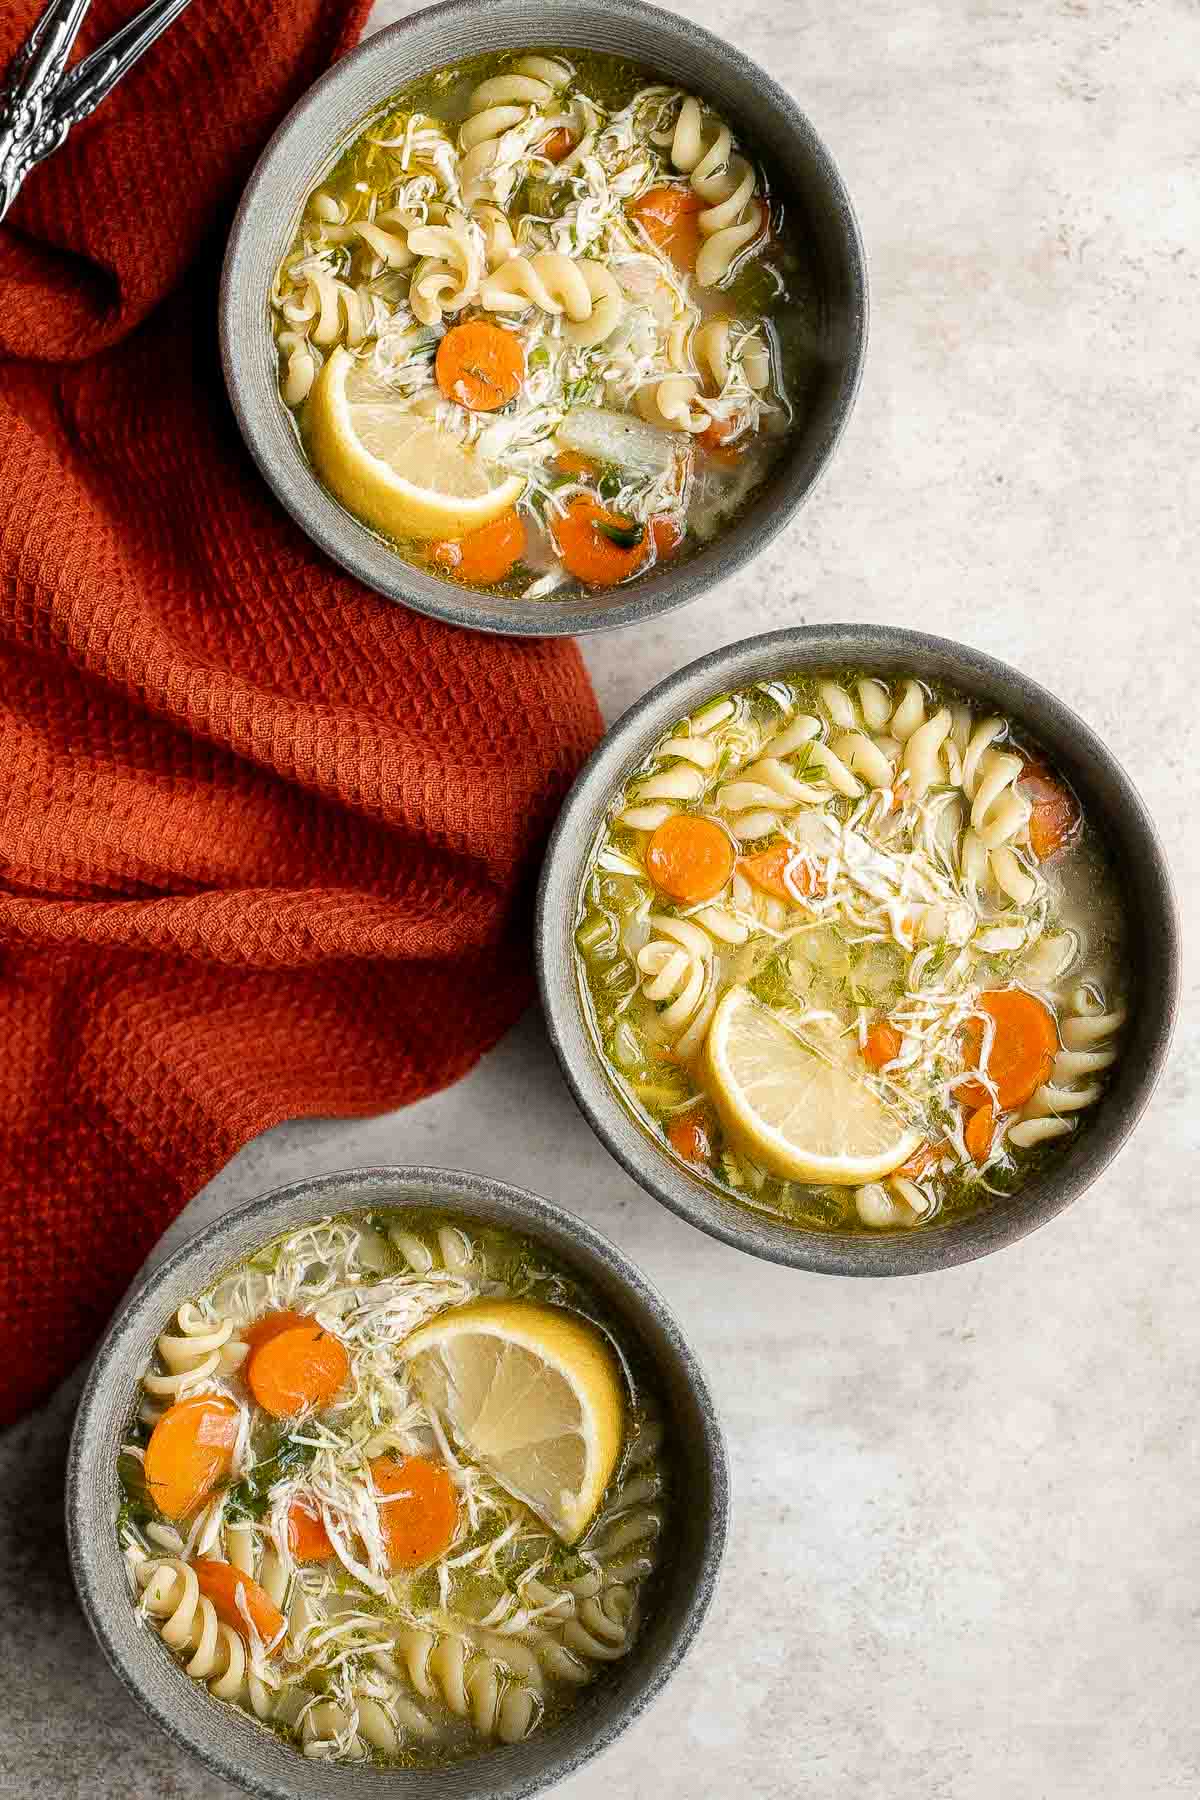
Salmon Bites are flavorful and delicious bite-sized pieces of salmon cooked until tender with crispy, golden edges and coated with an homemade sticky glaze.
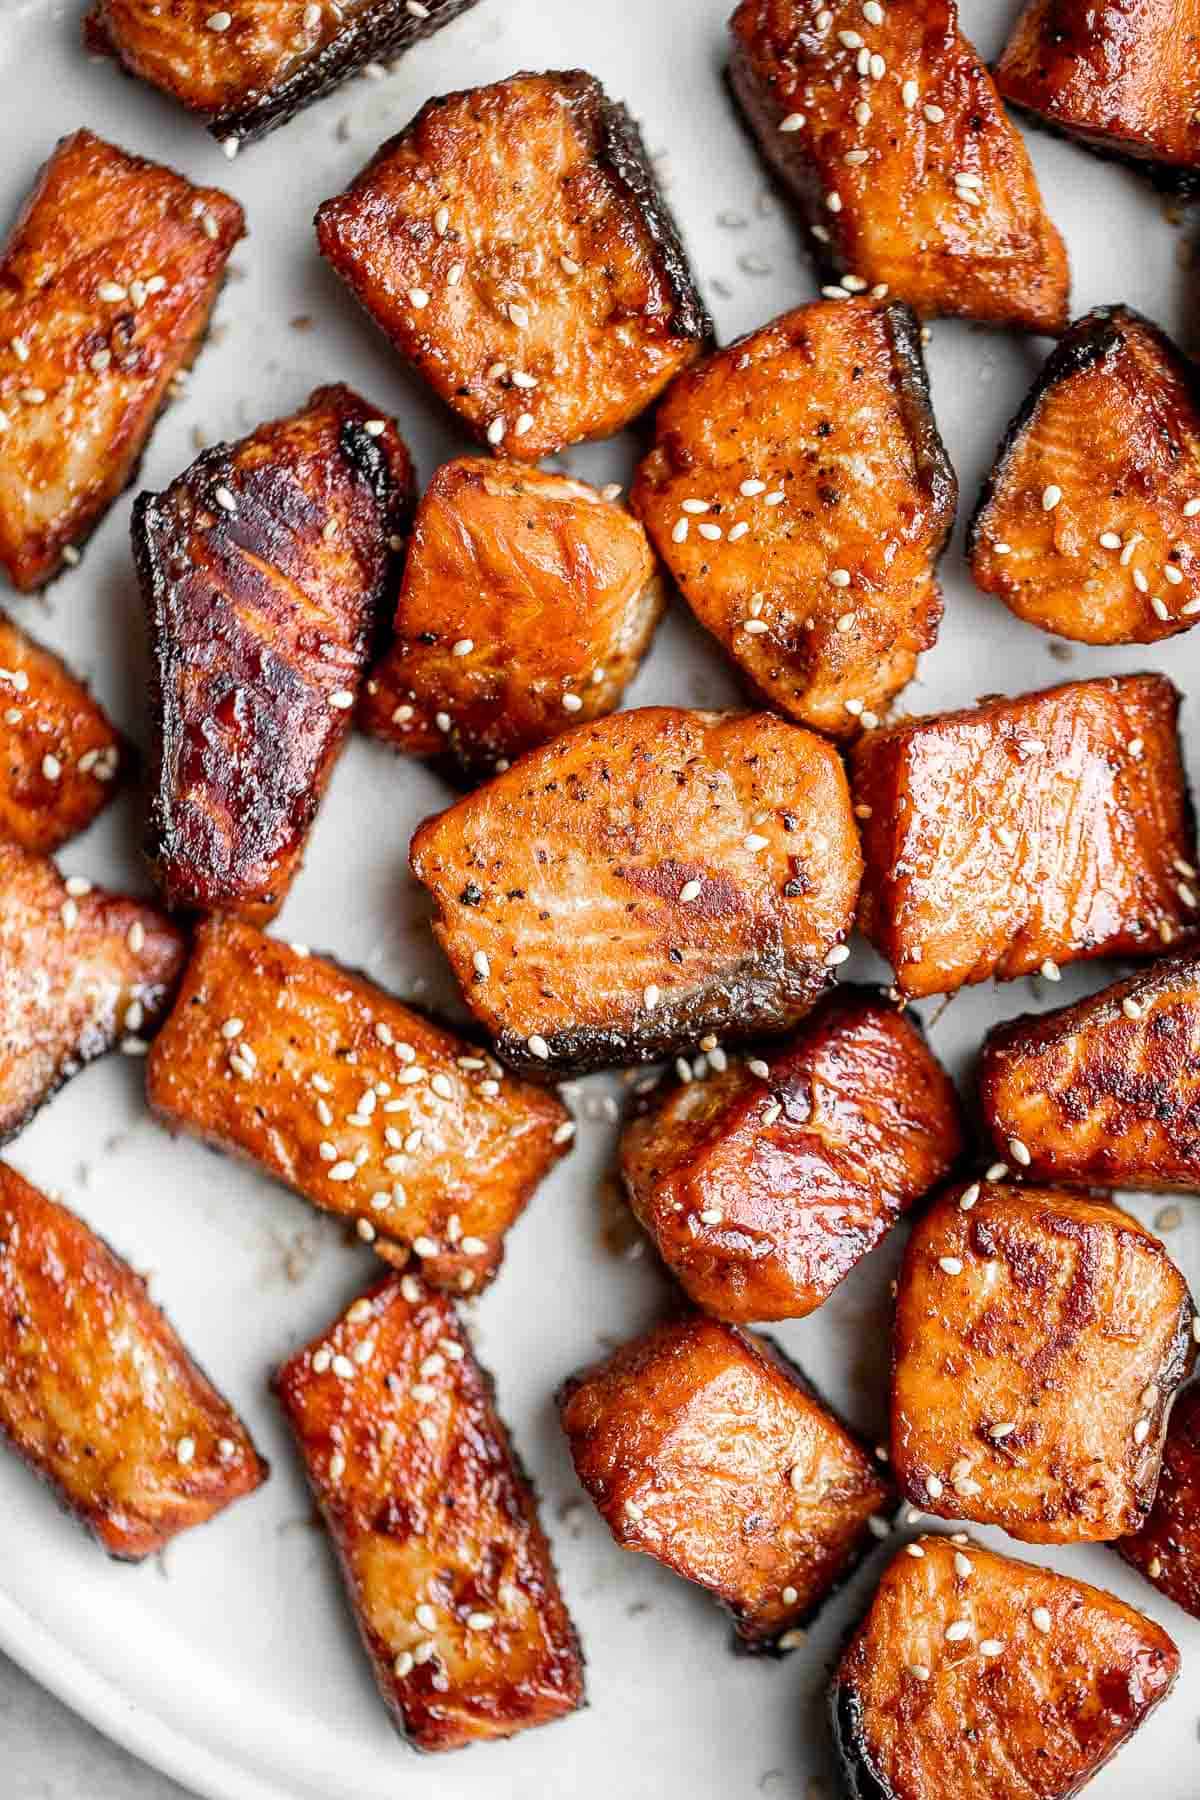
Caprese Frittata is light and fluffy, laced with fresh basil and topped with melted mozzarella cheese and blistered balsamic tomatoes. Ready in 10 minutes!
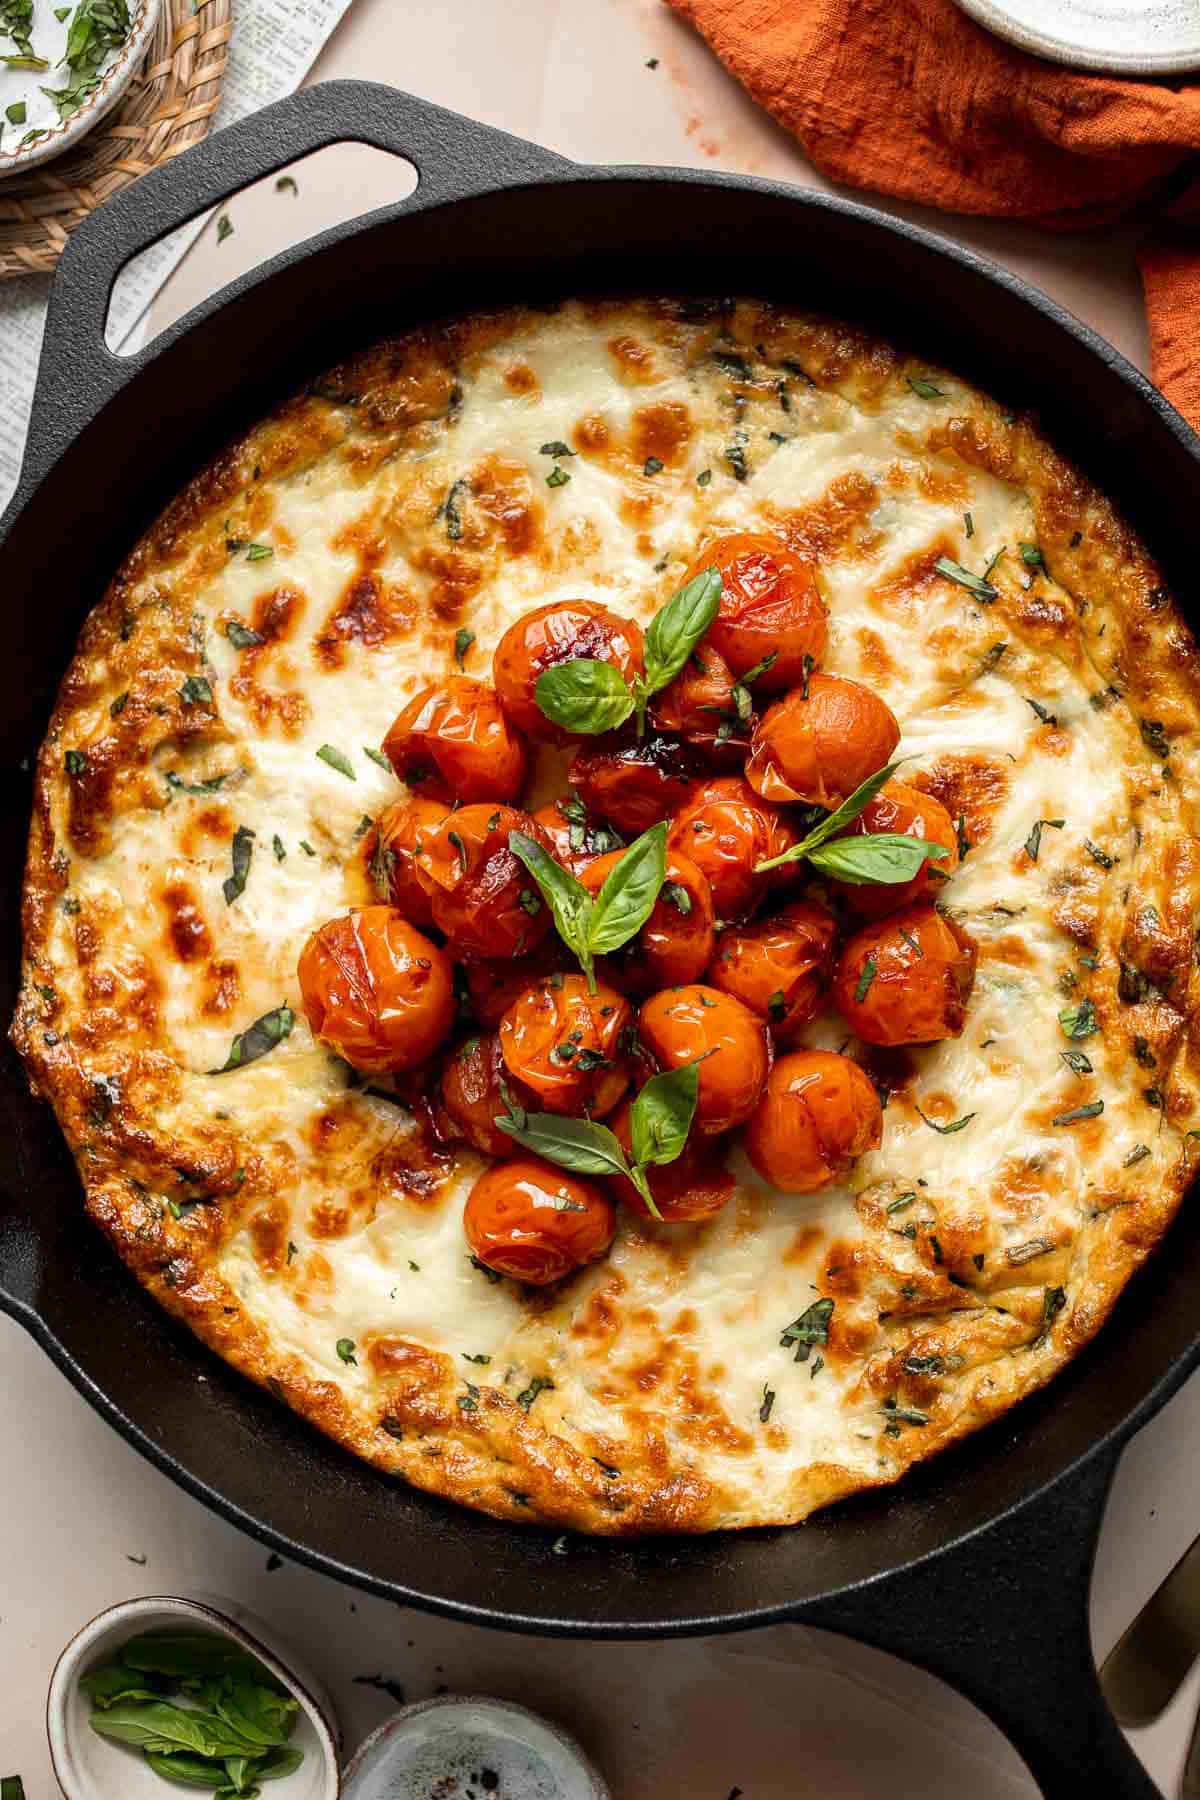
Chicken penne pasta is a quick and easy dinner that is delicious, rich, creamy, and flavorful. It's a family favorite that's ready in under 30 minutes.

Homemade Taquitos are crispy, delicious and flavorful. These rolled tacos are filled with seasoned ground beef and melty cheese - and can be fried or baked!

Air fryer chicken thighs are the crispiest, tastiest, and juiciest chicken you'll eat. They take just 25 minutes to cook - perfect for busy weeknights.
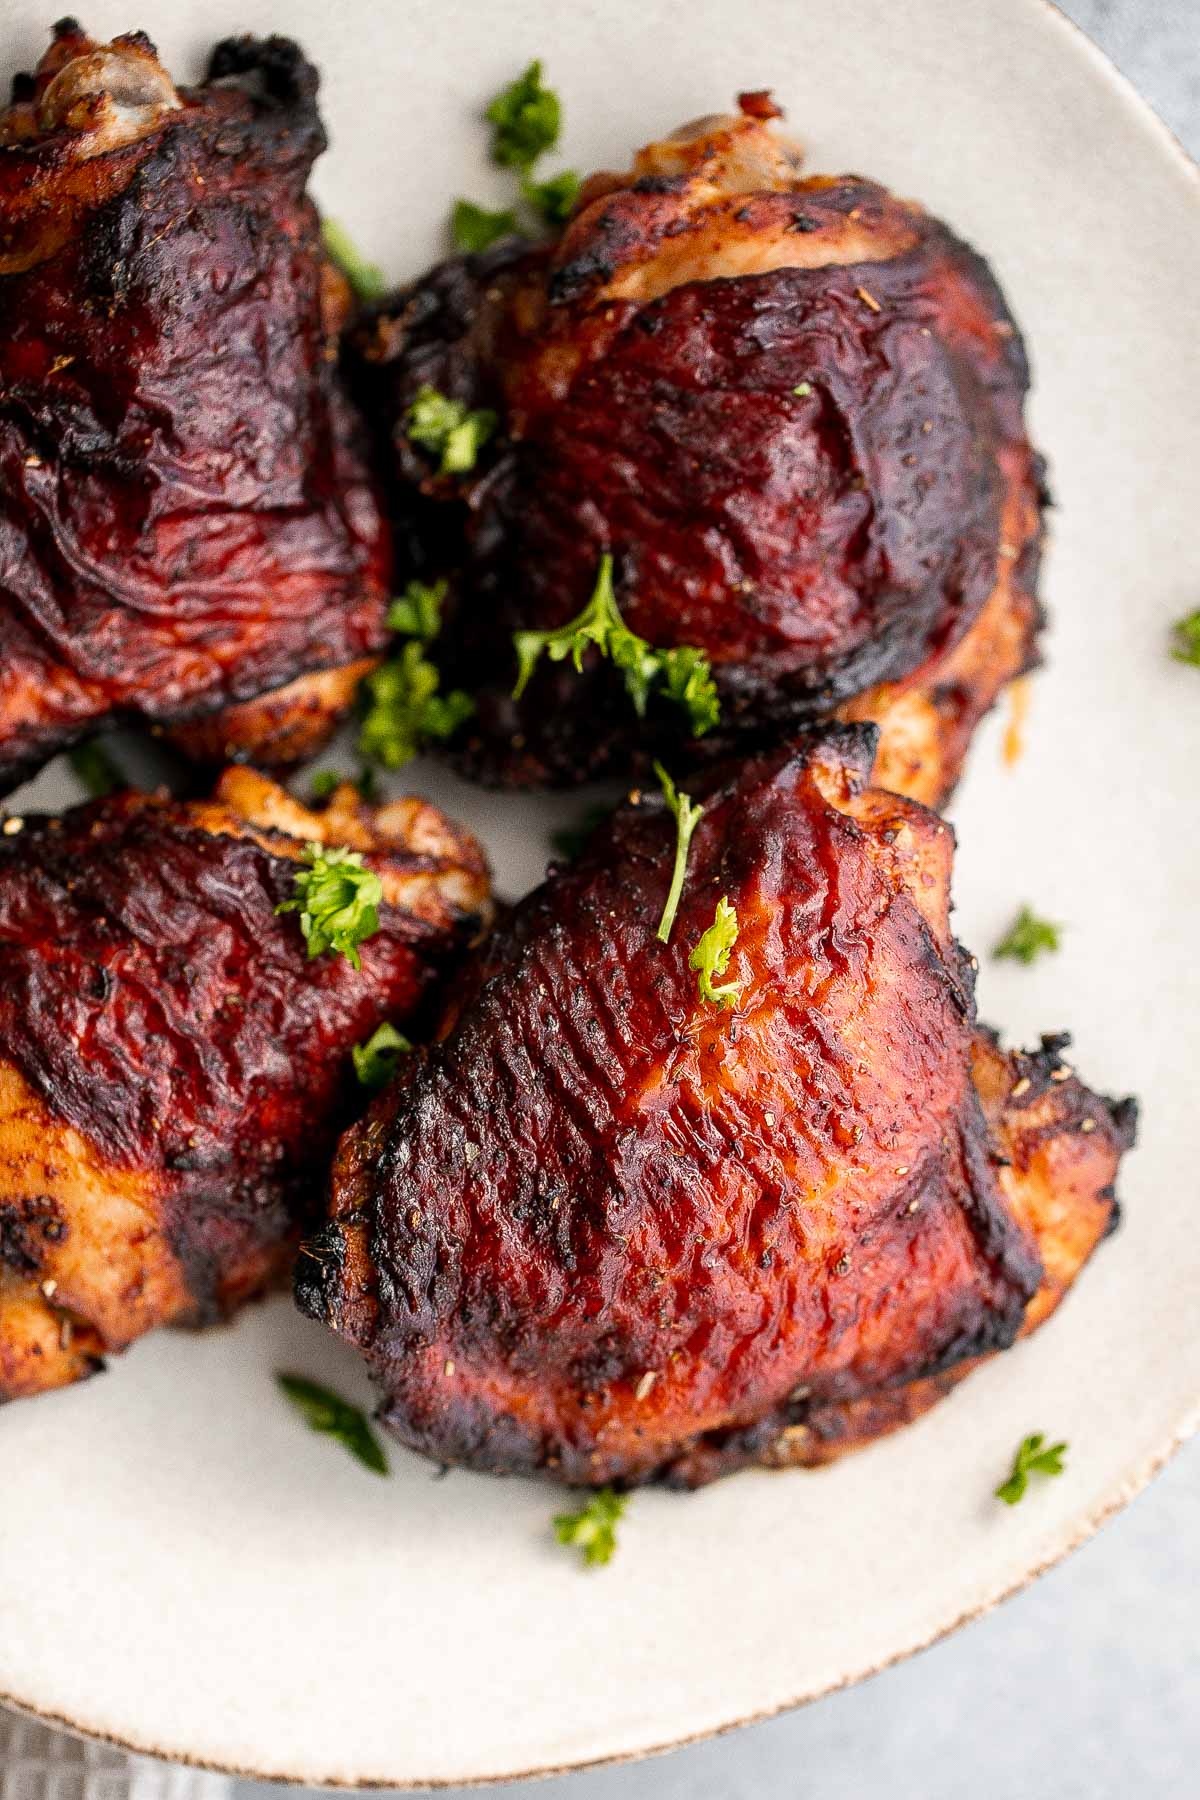
Baked Feta Pasta is a quick and easy weeknight dinner recipe that is creamy, delicious, and flavorful - the whole family will love this Tiktok pasta!
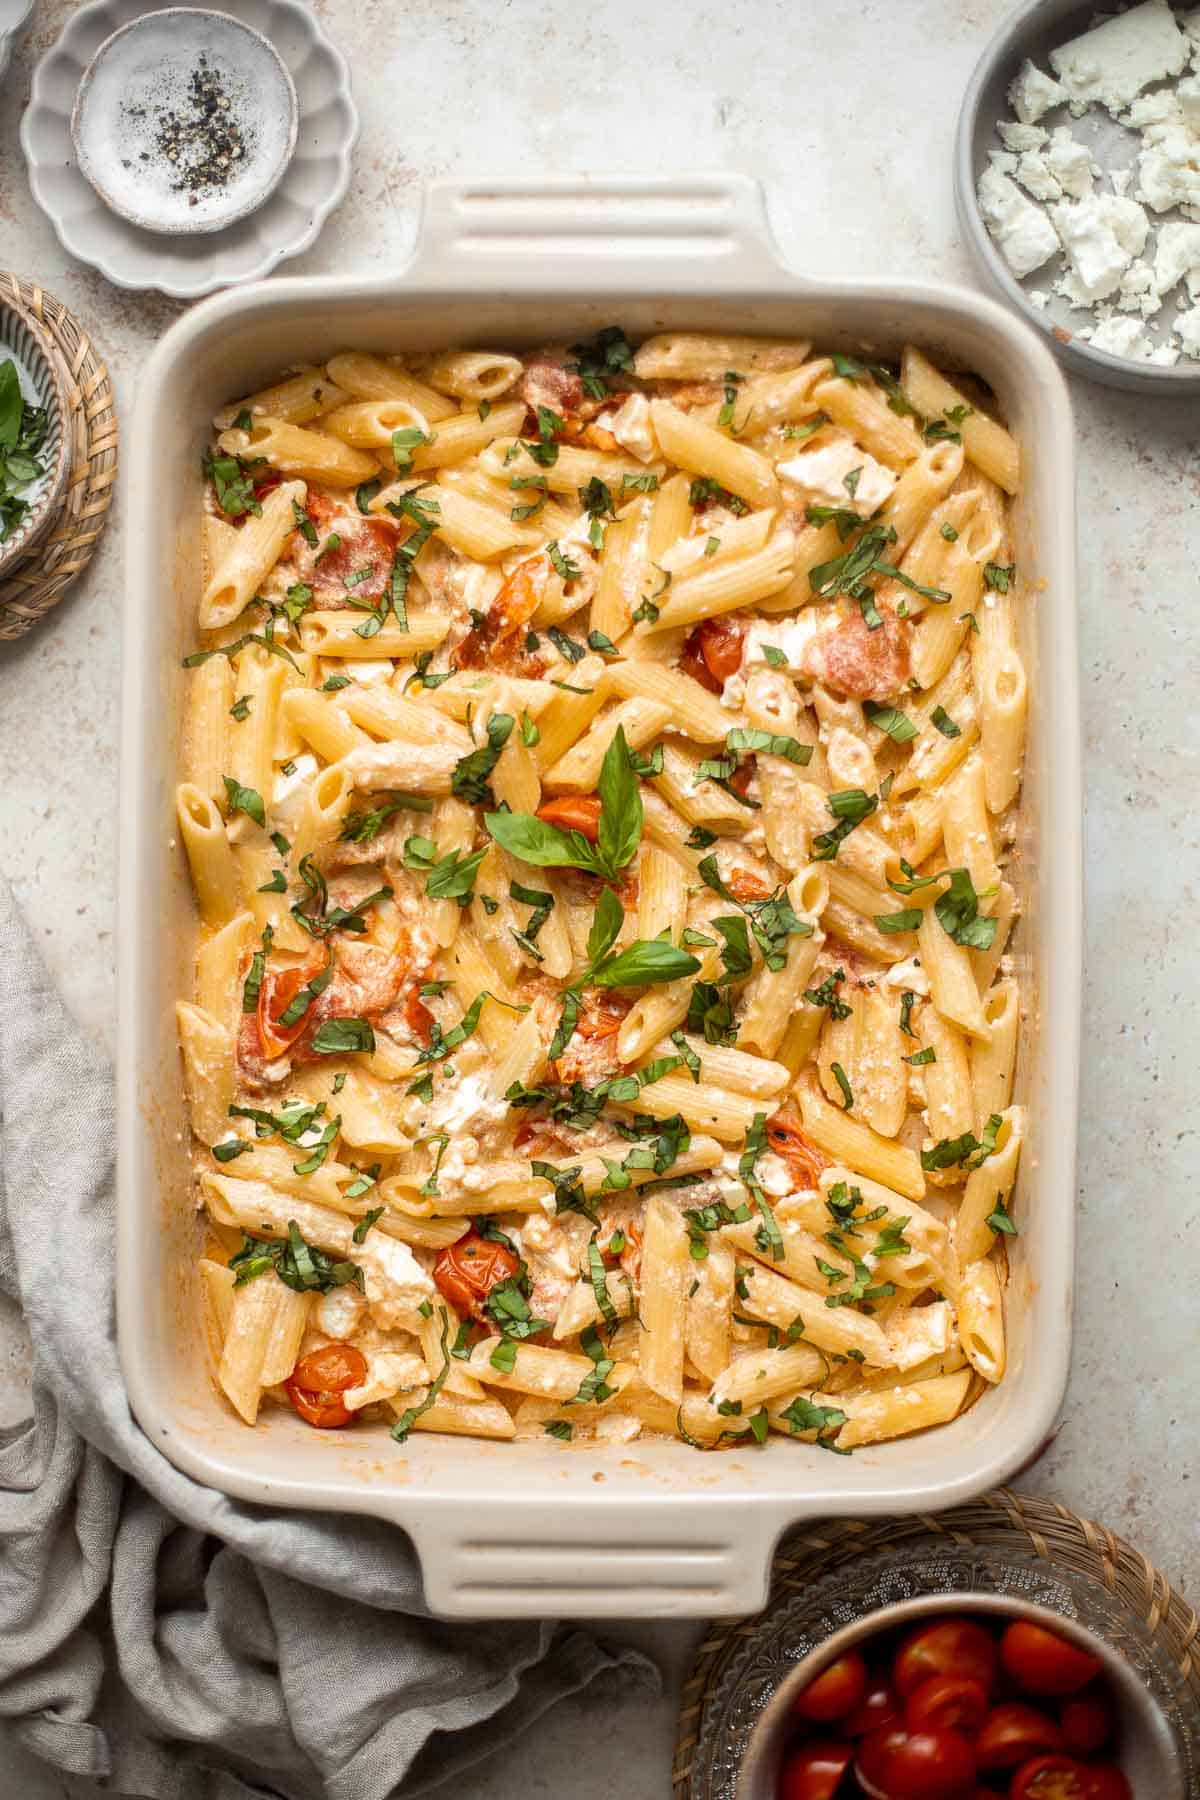
Thai Turkey Meatballs in Coconut Curry
Thai turkey meatballs in coconut curry are the perfect weeknight dinner when you want something delicious, healthy, flavorful, and satisfying.

Oven-baked loaded sheet pan nachos are a crowd pleaser for an easy weeknight dinner or a crave-worthy appetizer to serve on Cinco de Mayo.
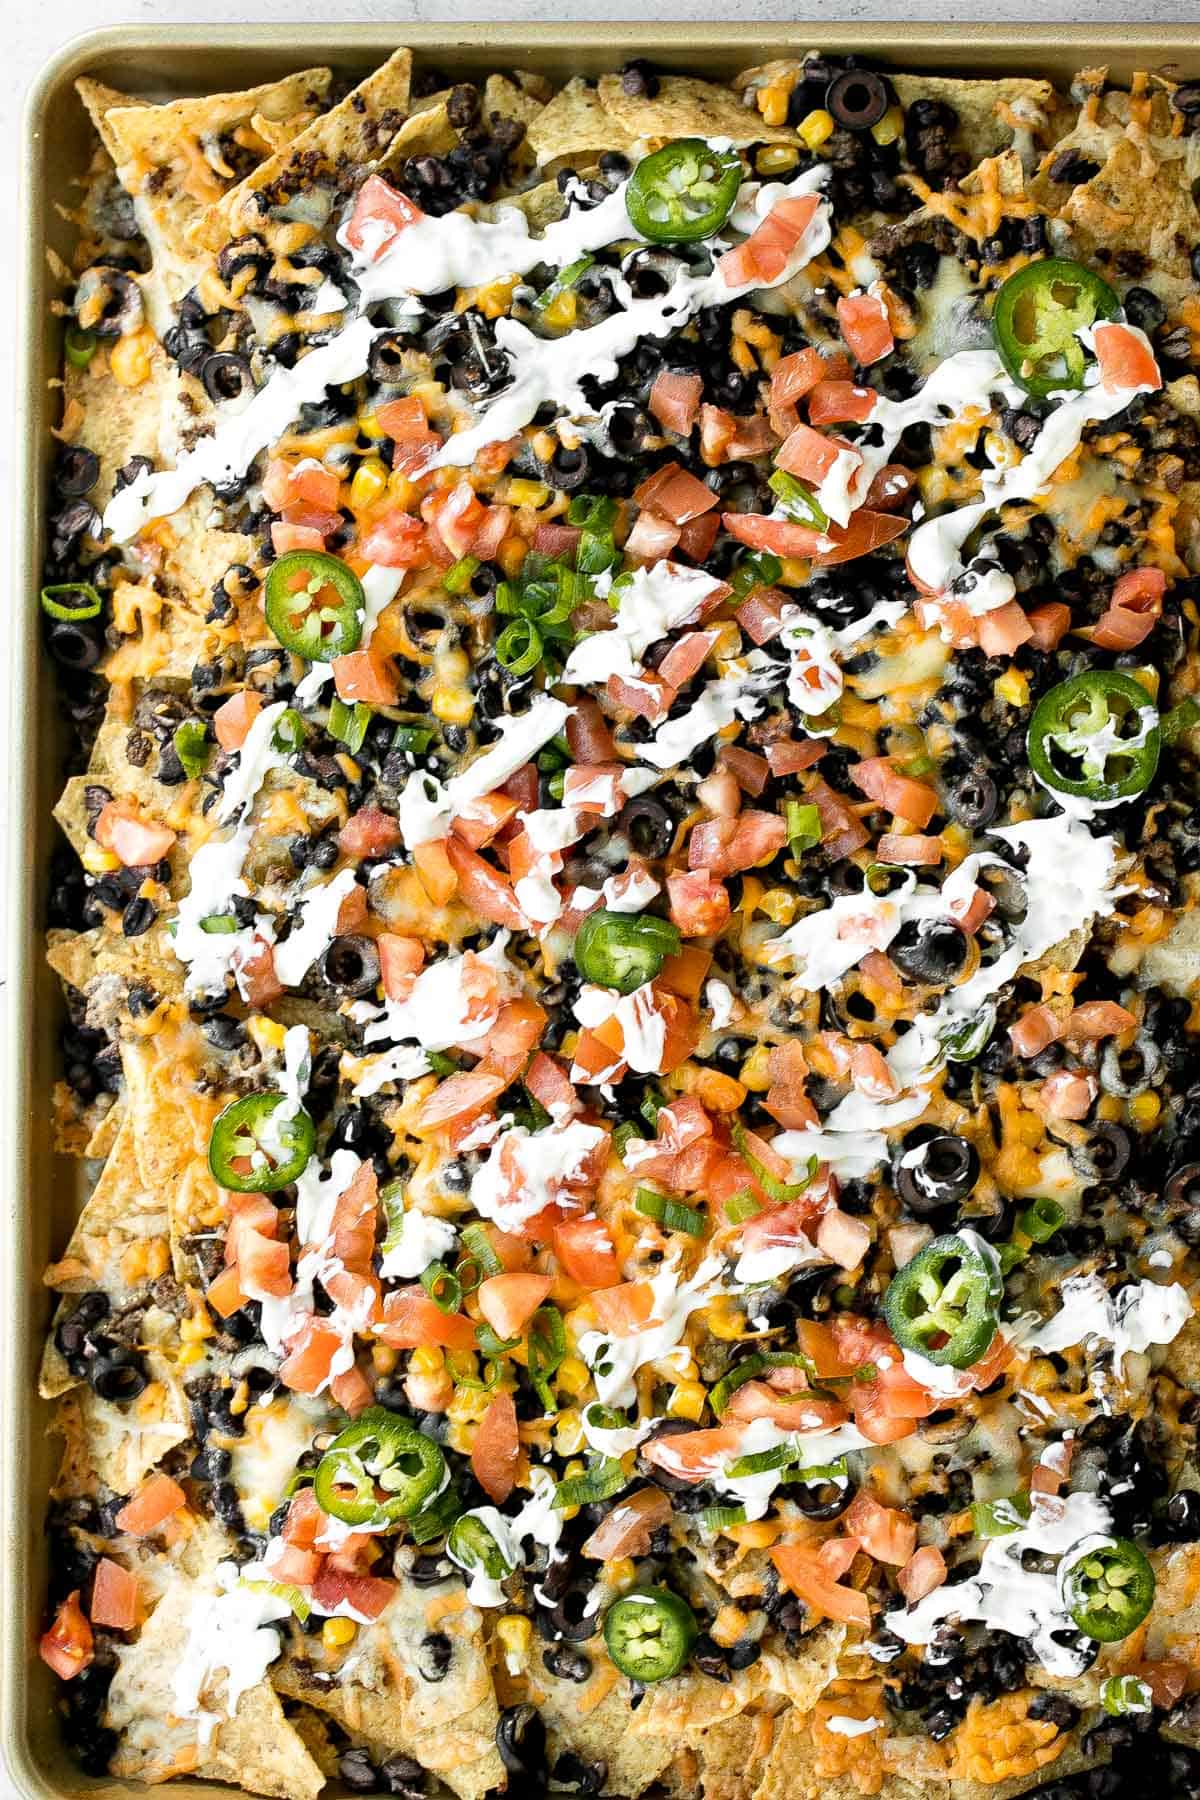
Garlic butter shrimp is a quick and easy dinner ready in just 10 minutes! It's loaded with flavor and perfect for busy weeknights and special occasions.
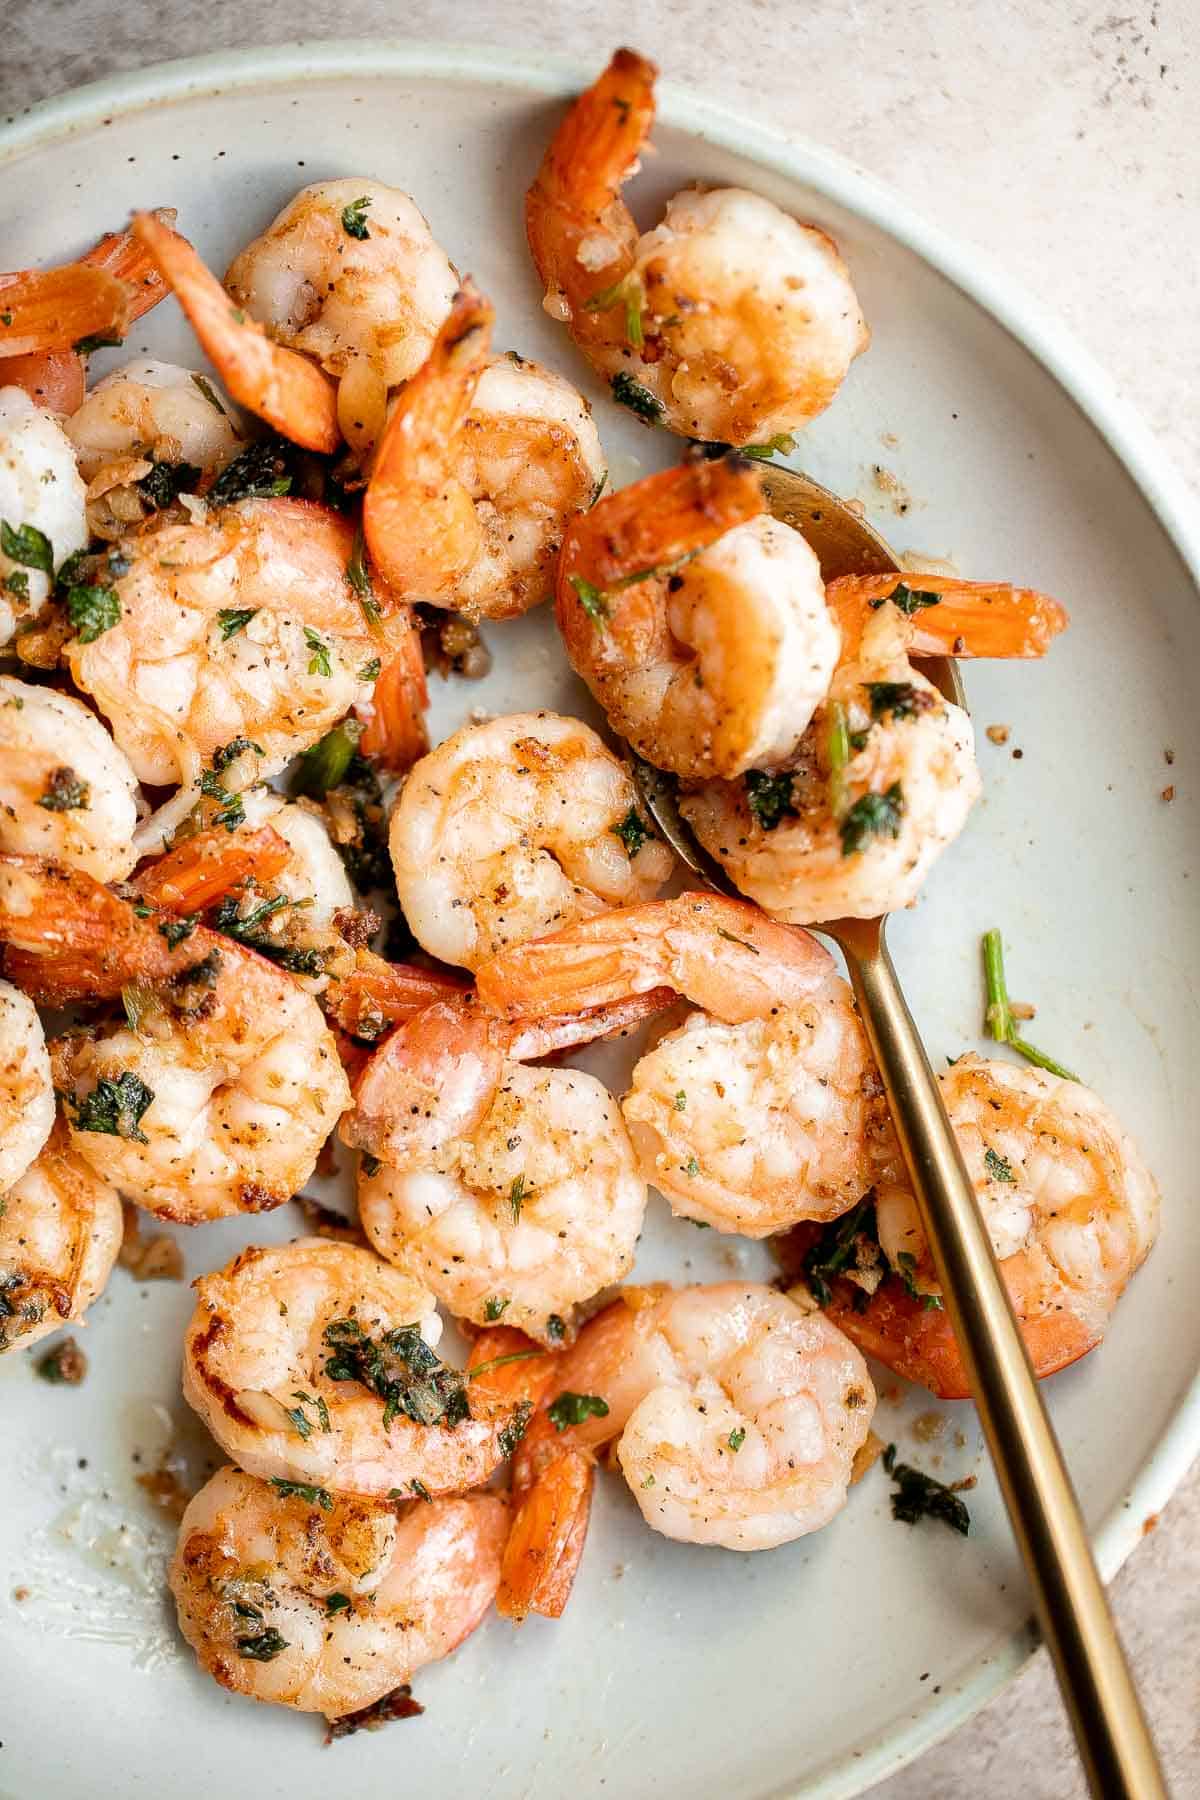
Delicious, moist and juicy Mediterranean chicken patties have everything you want in one bite: protein, veggies, herbs, and they're quick and easy to make.
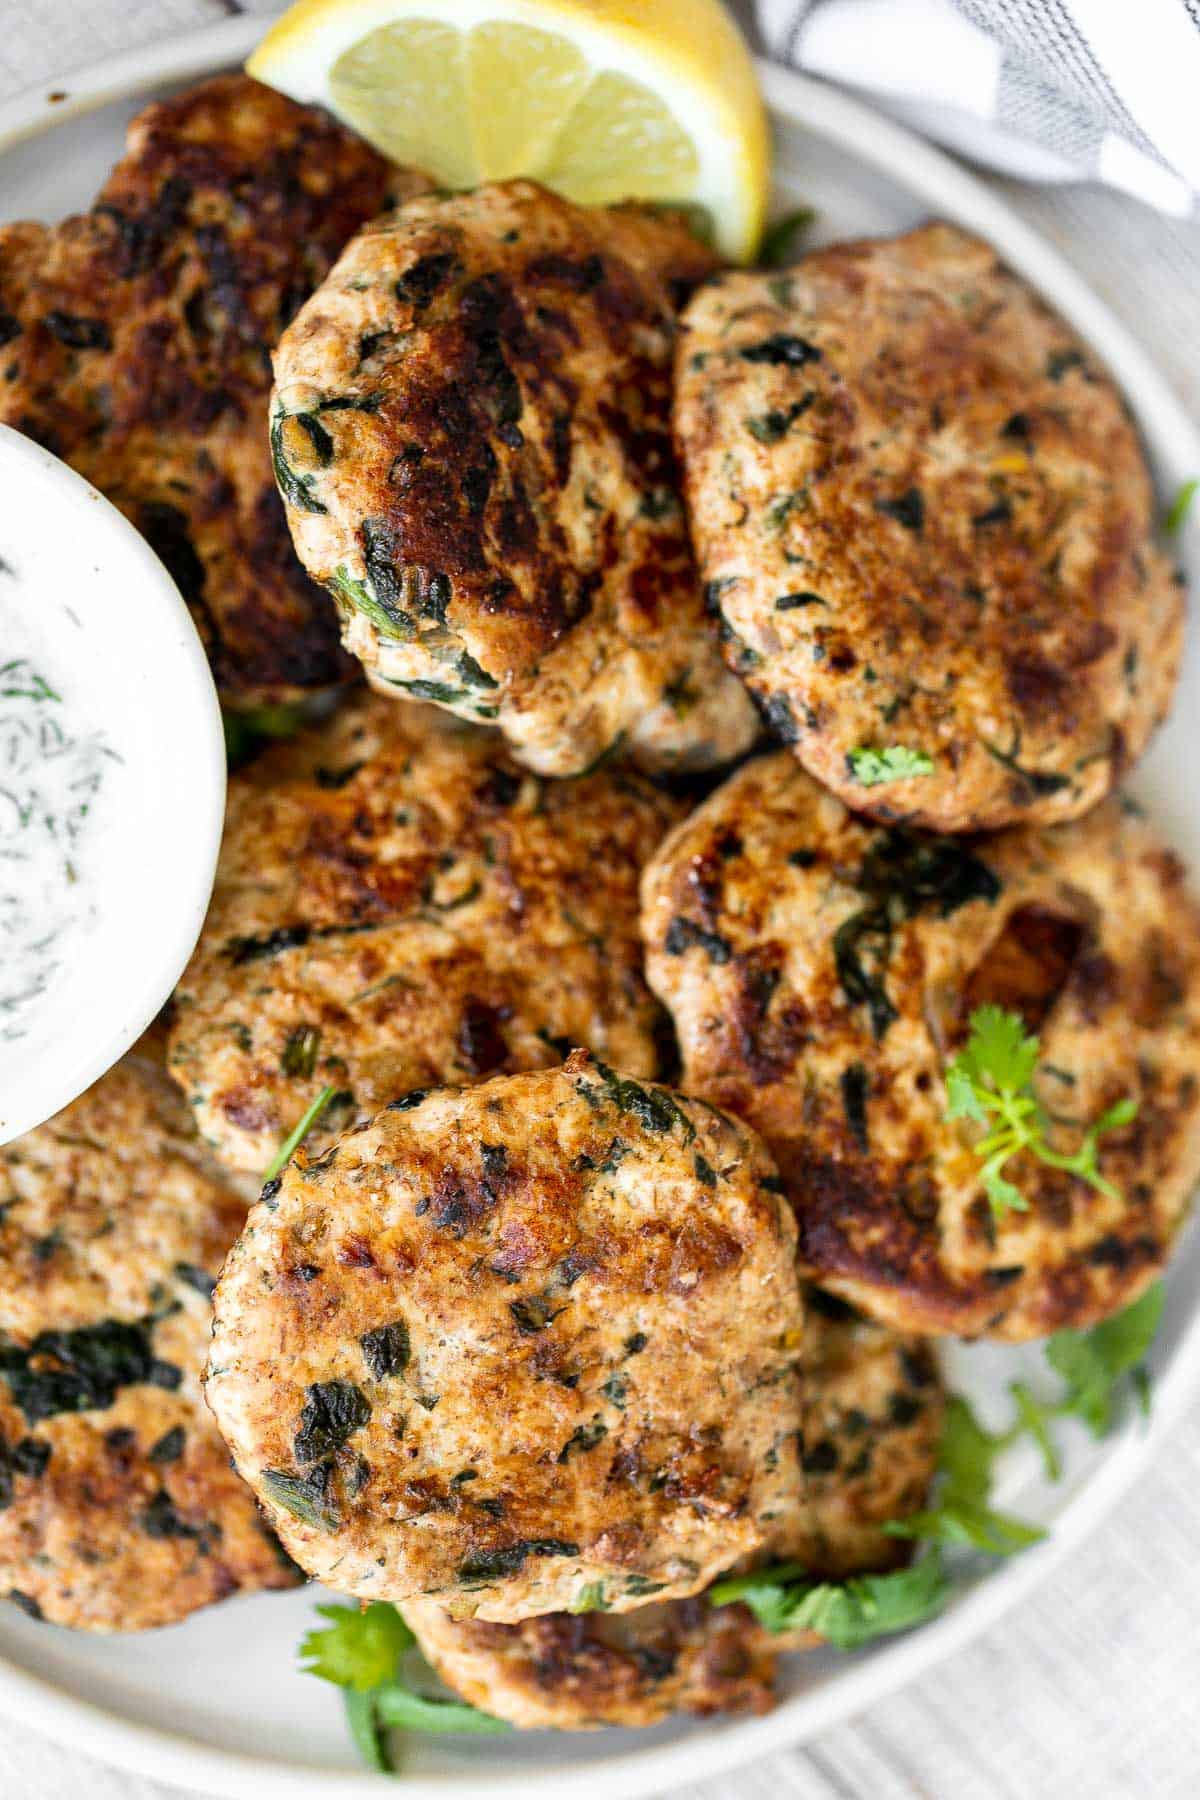
Homemade tomato basil soup is comforting, rich, and smooth. This cozy soup is easy, flavourful, and nourishing, making it so much better than canned.
Toasted Ravioli is a classic Italian appetizer that is crispy and golden on the outside, and tender and gooey on the inside. Ready in less than 30 minutes!

Turkey and Cheese Sliders are quick and easy, made with deli meat and Swiss cheese filled inside soft Hawaiian dinner rolls topped with a buttery sauce.
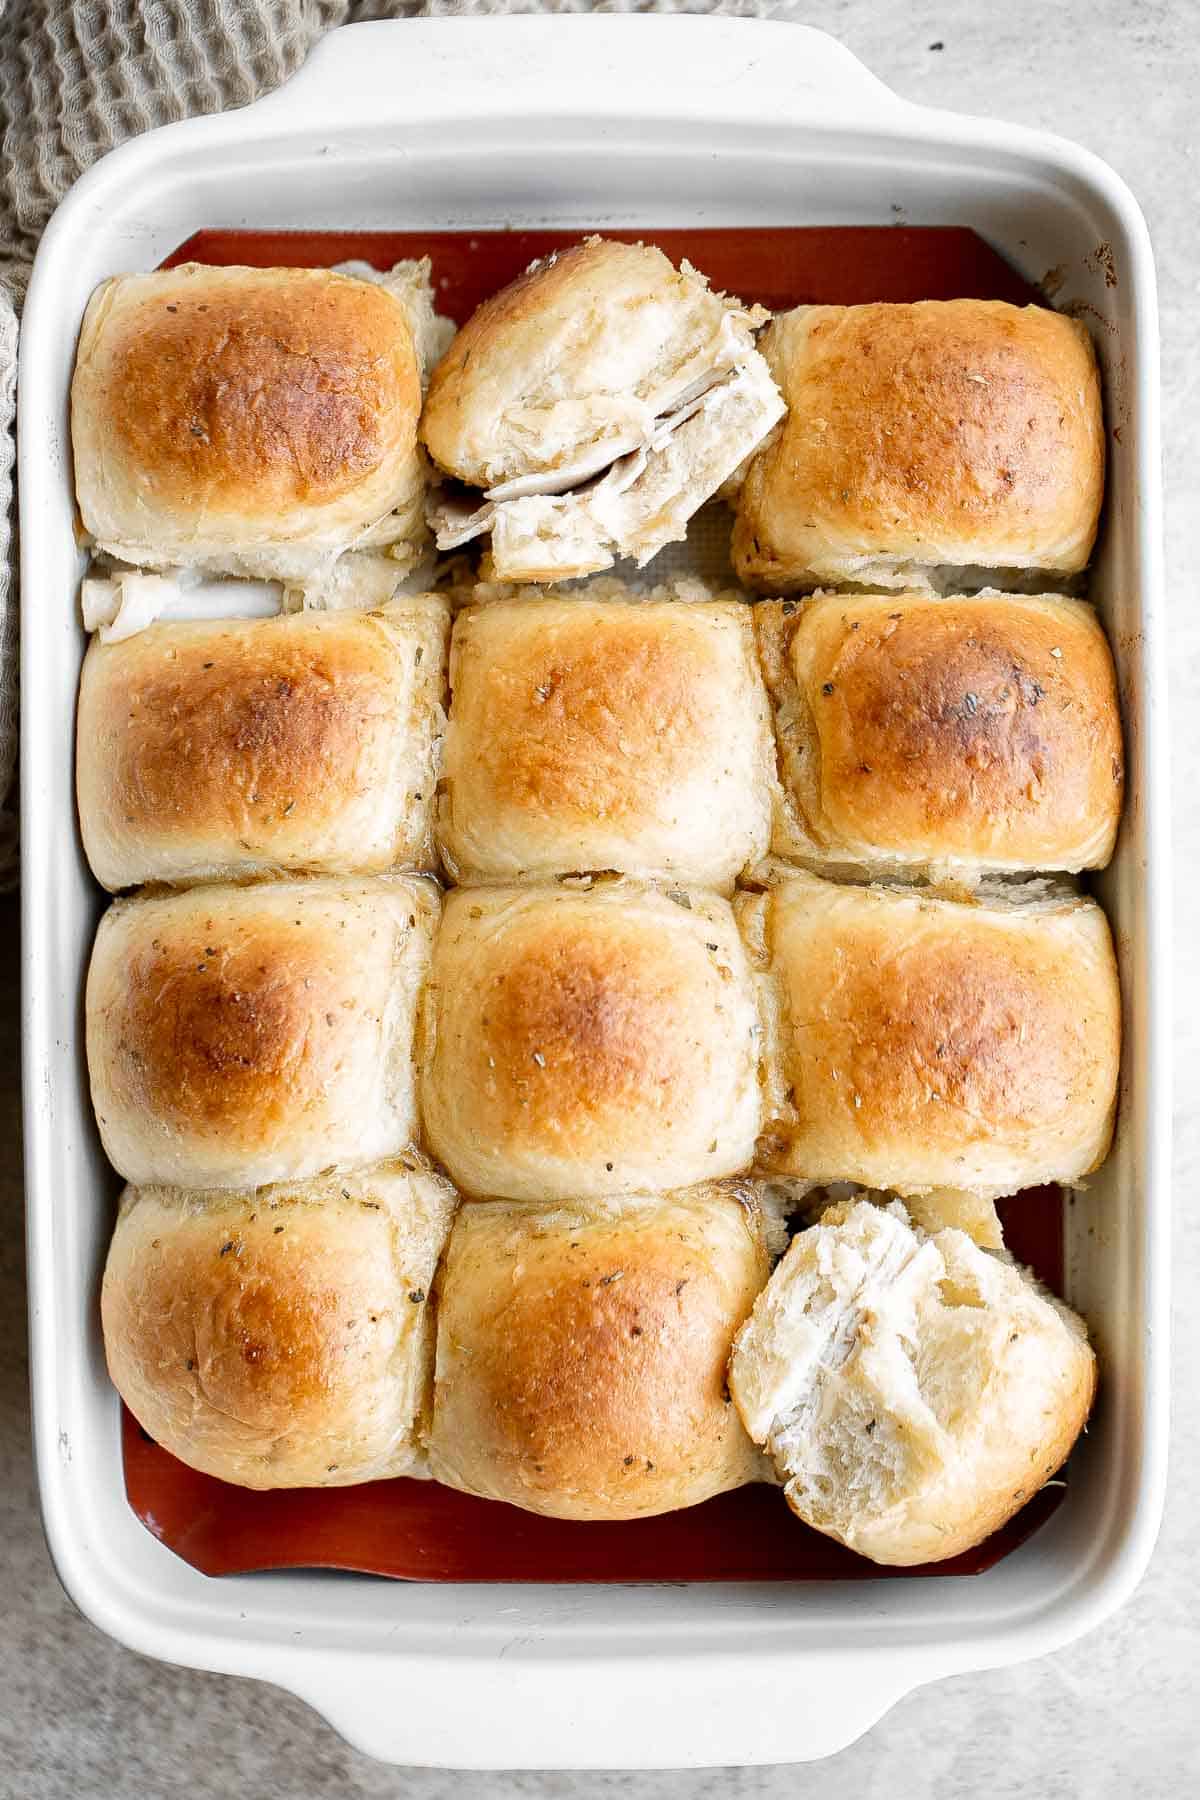
Teriyaki chicken is a quick easy chicken stir fry that is delicious, flavorful, healthy, and better and faster than takeout. Perfect for busy weeknights.

Shrimp Alfredo is creamy, garlicky, and delicious! This quick and easy, under 30-minute recipe is a go-to for busy nights and a year-round family favorite.
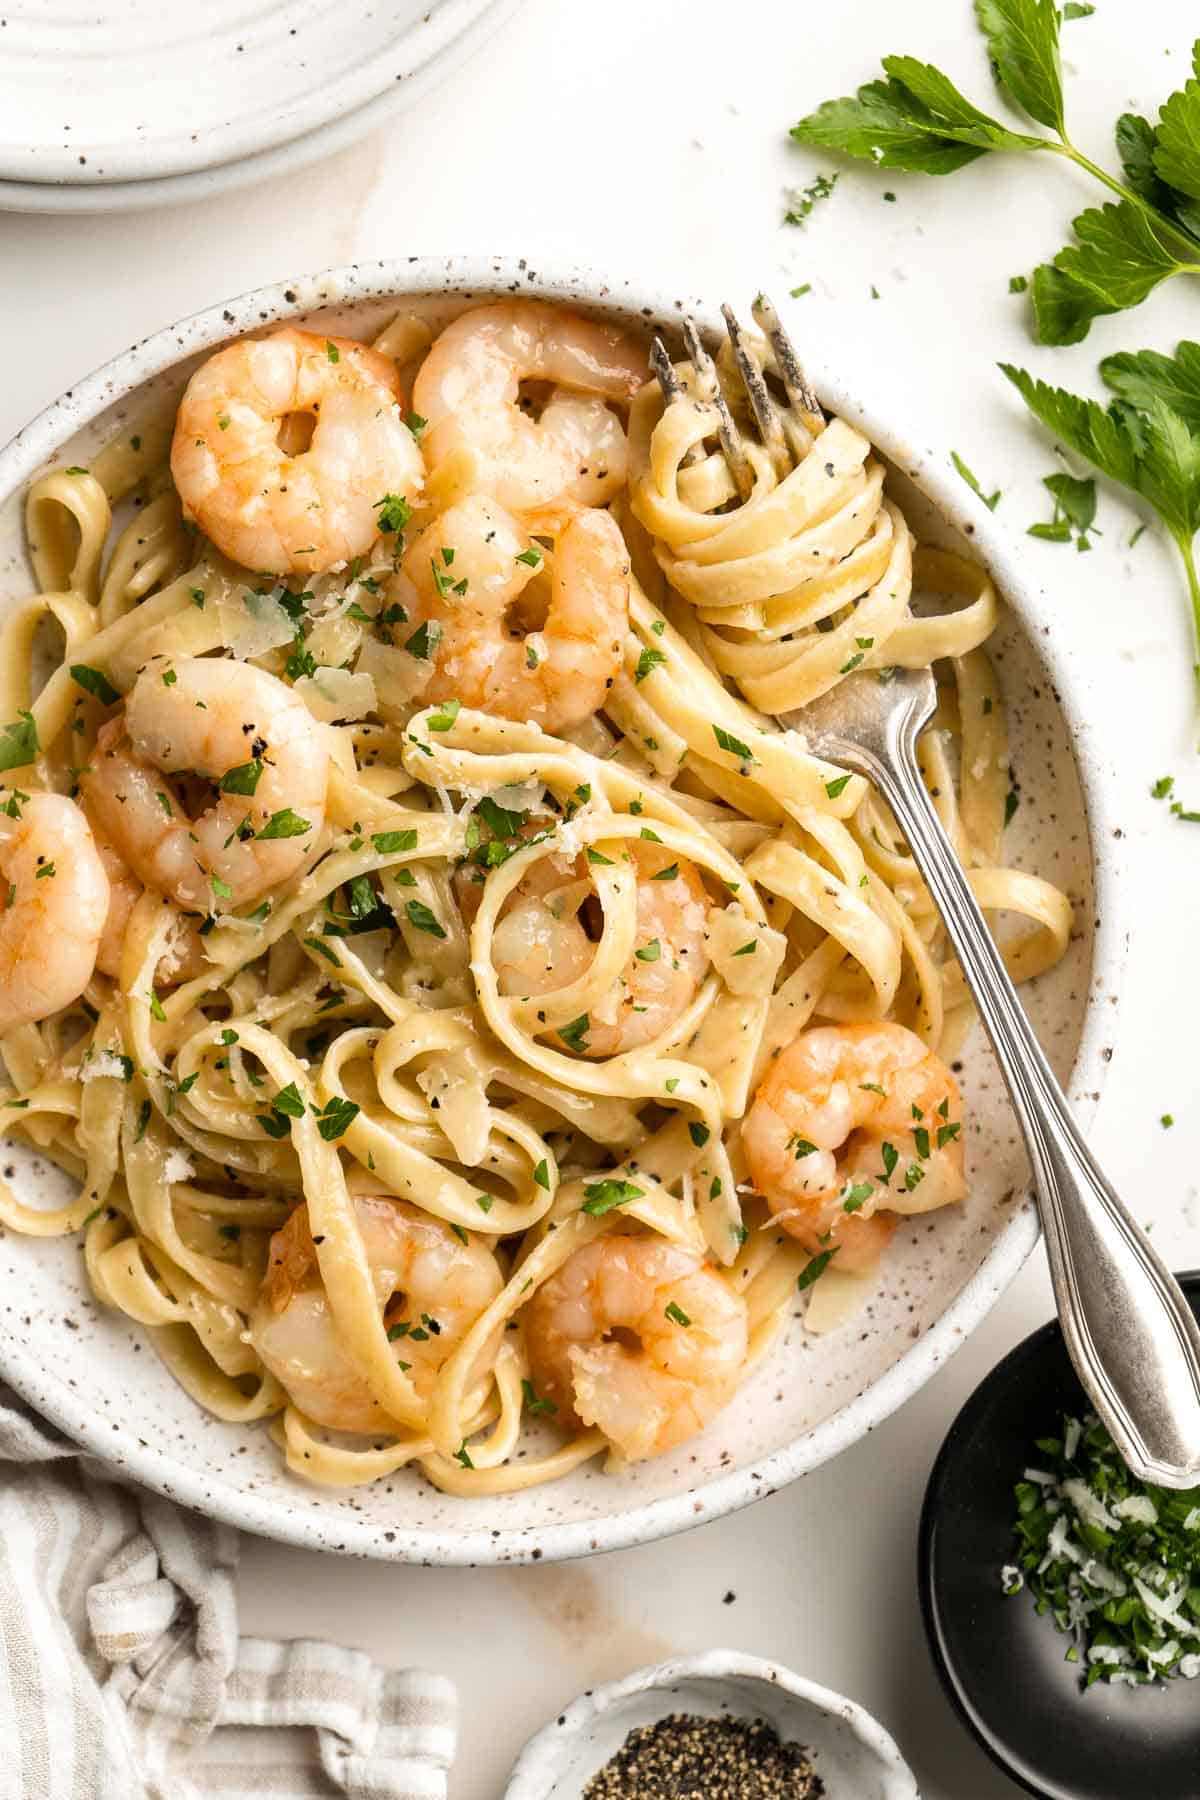
Delicious, comforting homemade Swedish meatballs are seared and smothered in a creamy gravy sauce and taste so much better than IKEA meatballs.
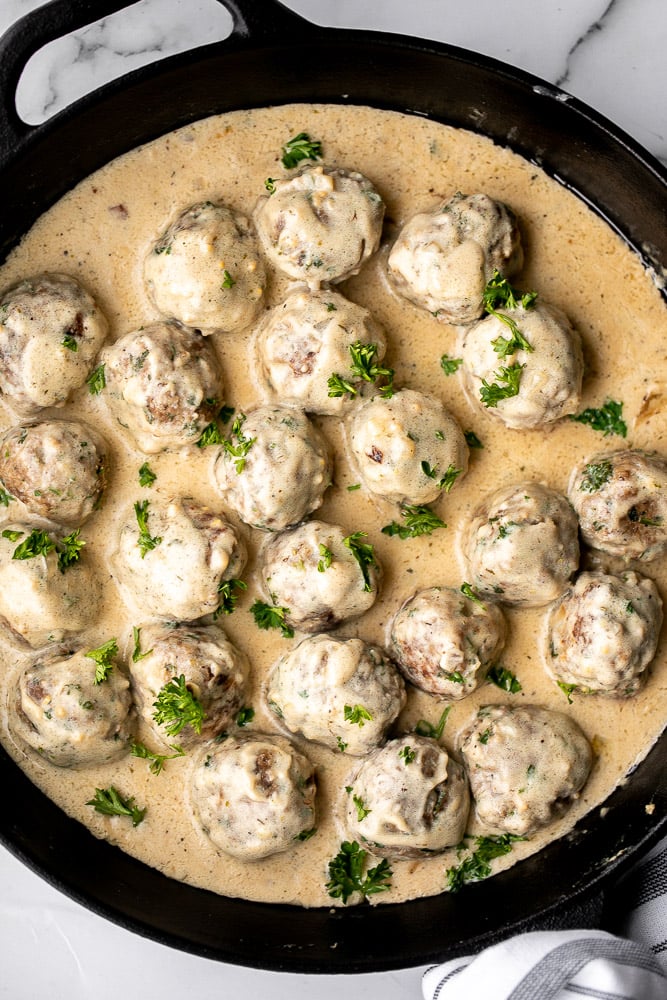
Easy baked chicken enchiladas brings the taste of authentic Mexican food into your kitchen -- saucy, spicy, and savoury. Perfect for a Mexican fiesta on Cinco de Mayo.

Beef taco soup is a delicious take on tacos, transforming it into a hearty, wholesome, filling soup topped with all the taco fixings. Ready in 30 minutes.

Broccoli cheese casserole is creamy, cheesy, and delicious - the most comforting side dish. It's crispy on the outside but soft and tender inside.

Quick easy spaghetti bolognese with a rich, thick, delicious and flavourful meat sauce is a family favourite ready in 30 minutes. Best weeknight dinner.
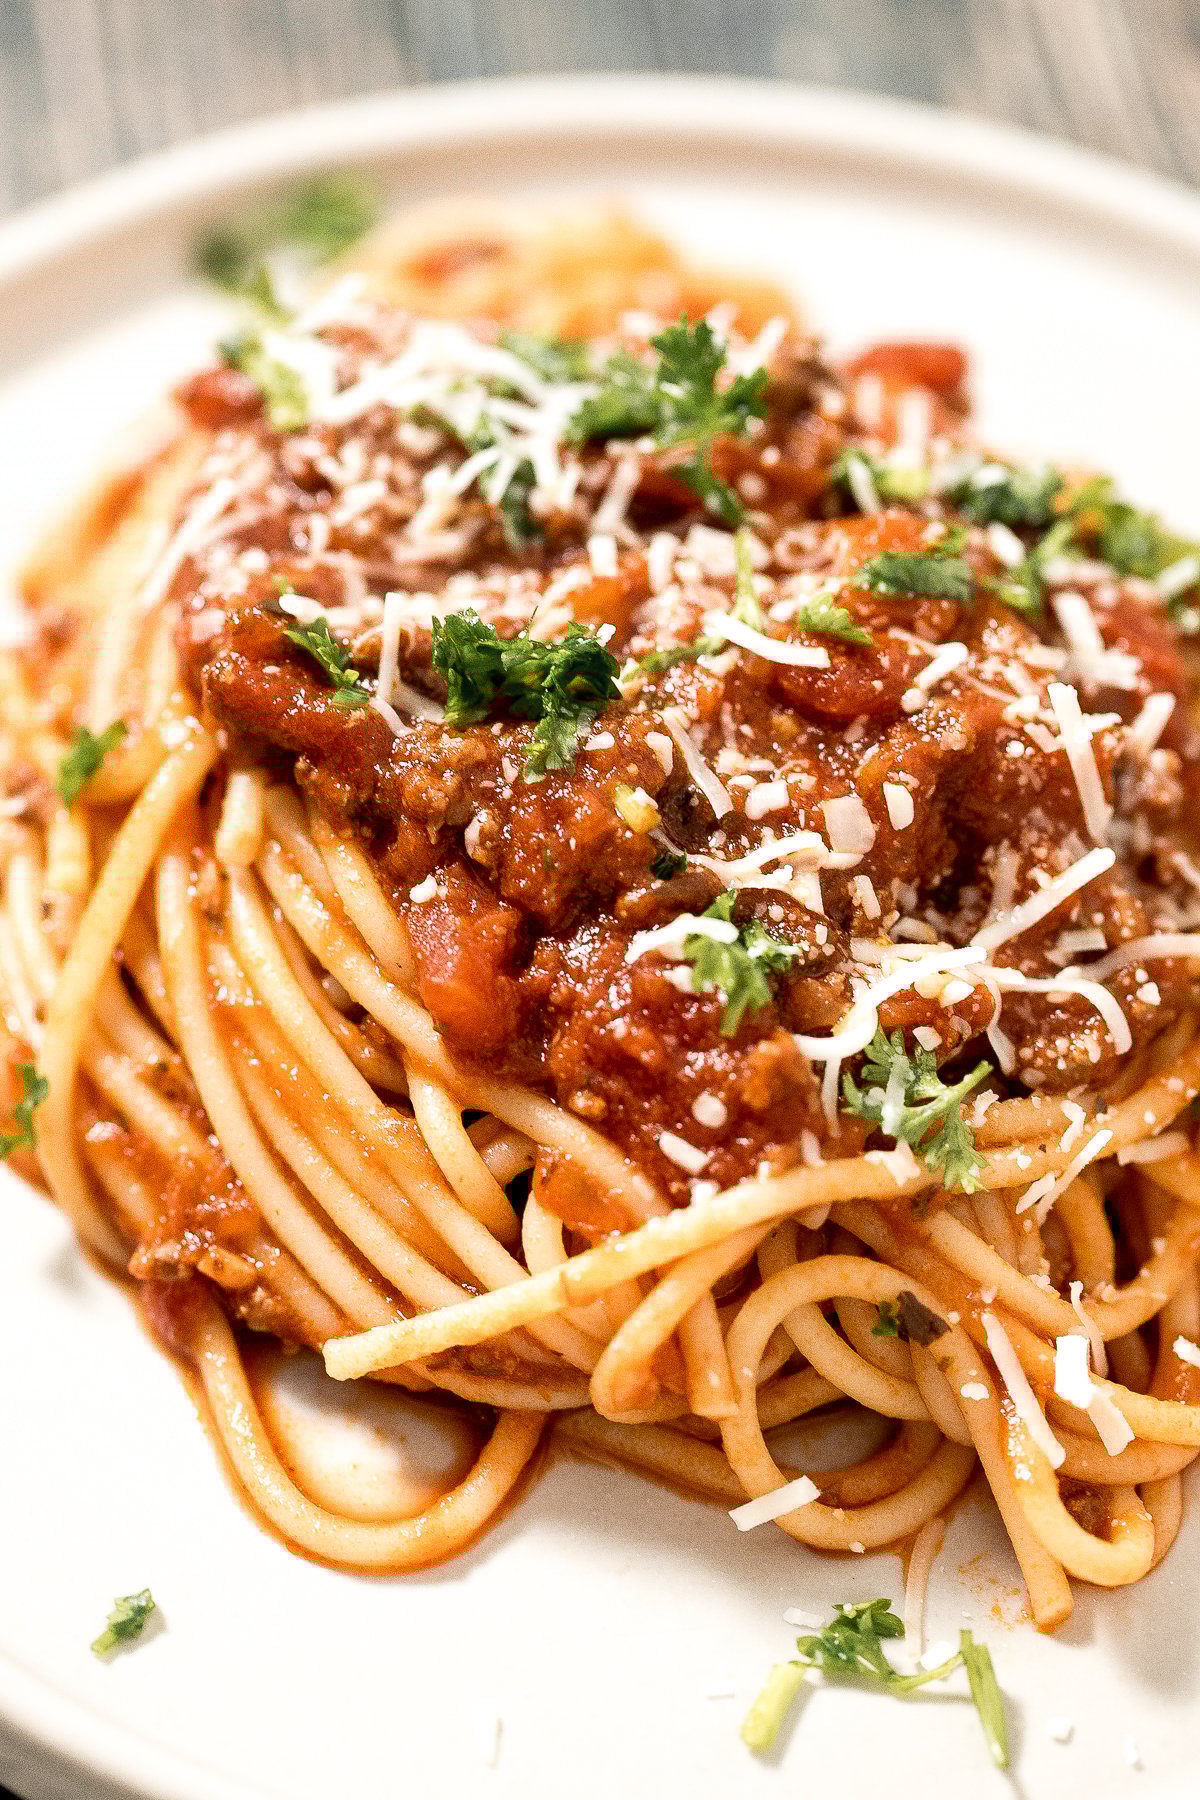
Creamy Tuscan chicken with sun-dried tomatoes and spinach is a quick and easy 30 minute Italian chicken dinner that is delicious, flavorful, and comforting.

Creamy Mushroom Tagliatelle Pasta is a quick and easy, restaurant-worthy vegetarian dinner that is ready in just 30 minutes! Elevated comfort food at home.
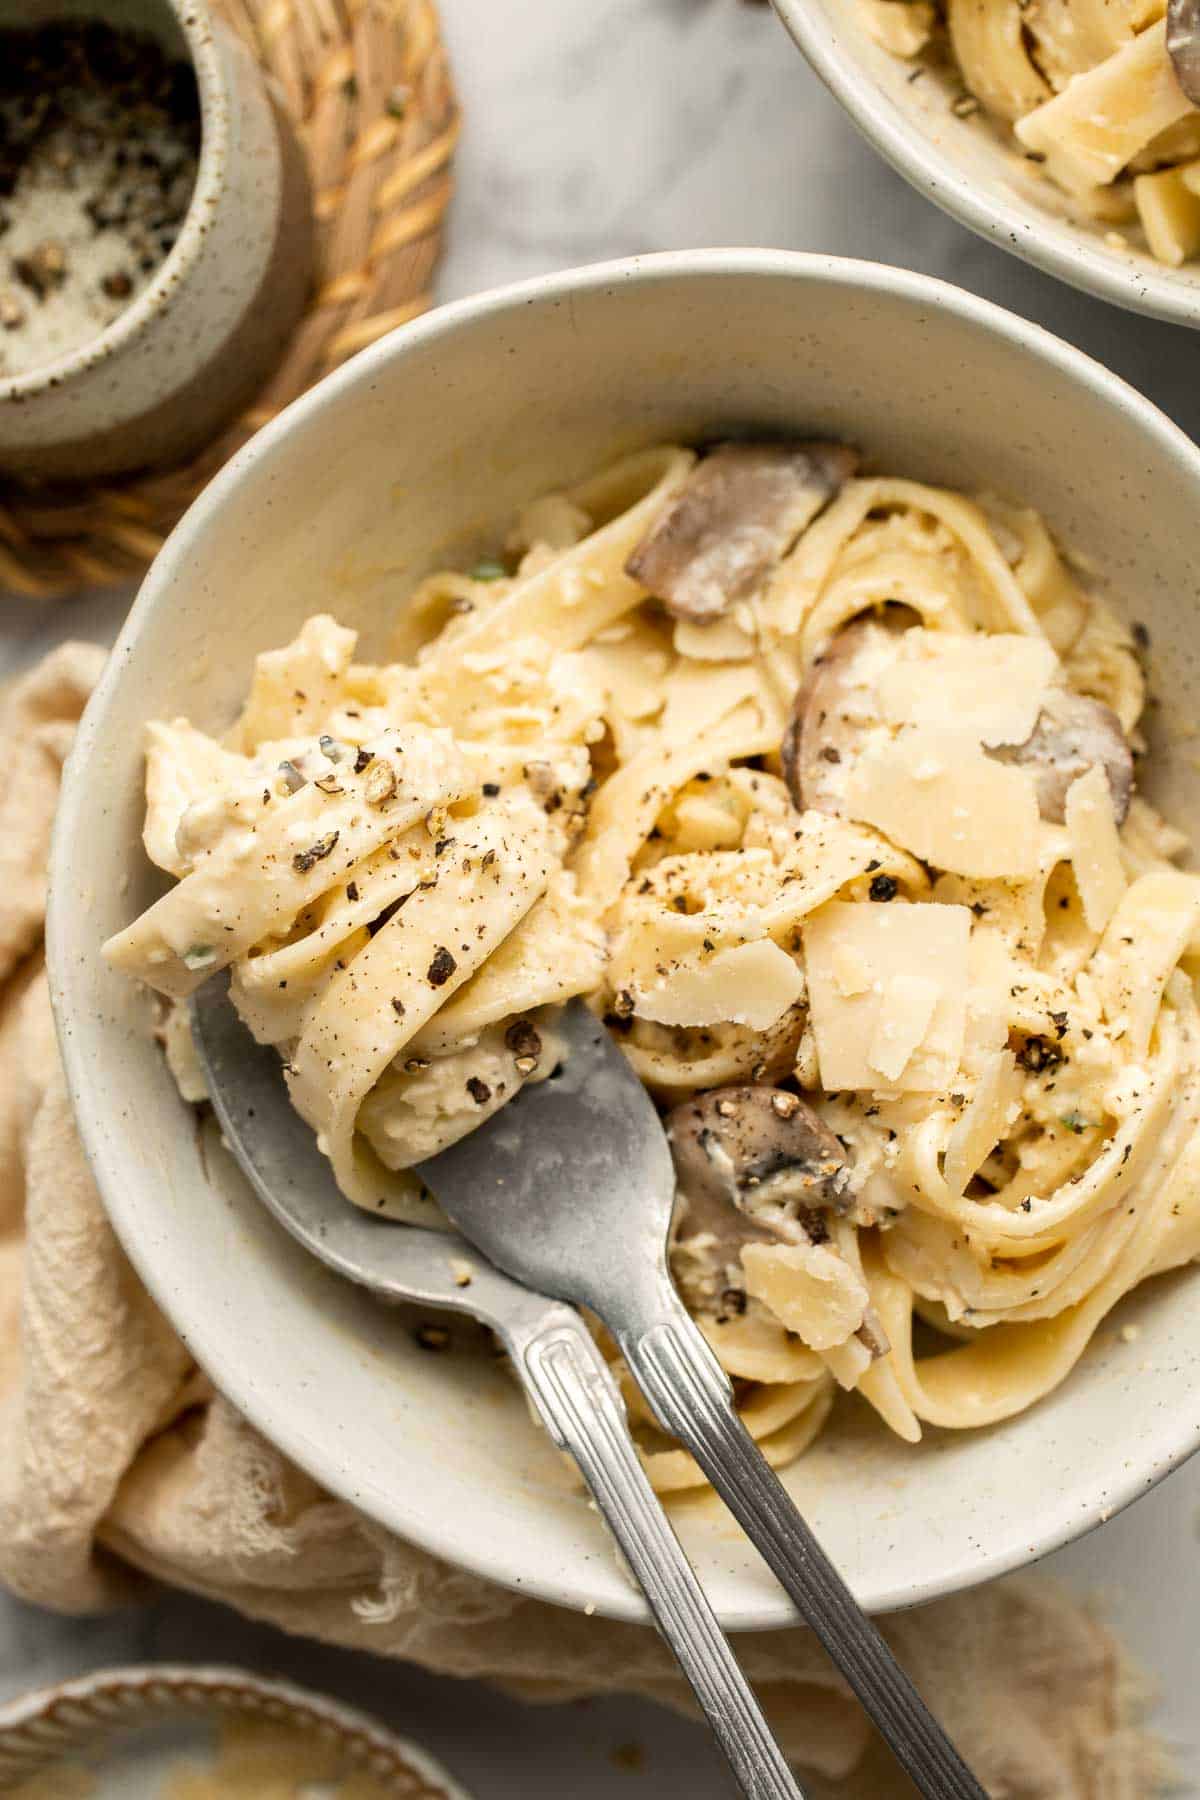
Sticky and sweet, easy honey garlic glazed salmon is one of the best salmon recipes to add to your weeknight dinner rotation. Ready in under 25 minutes.
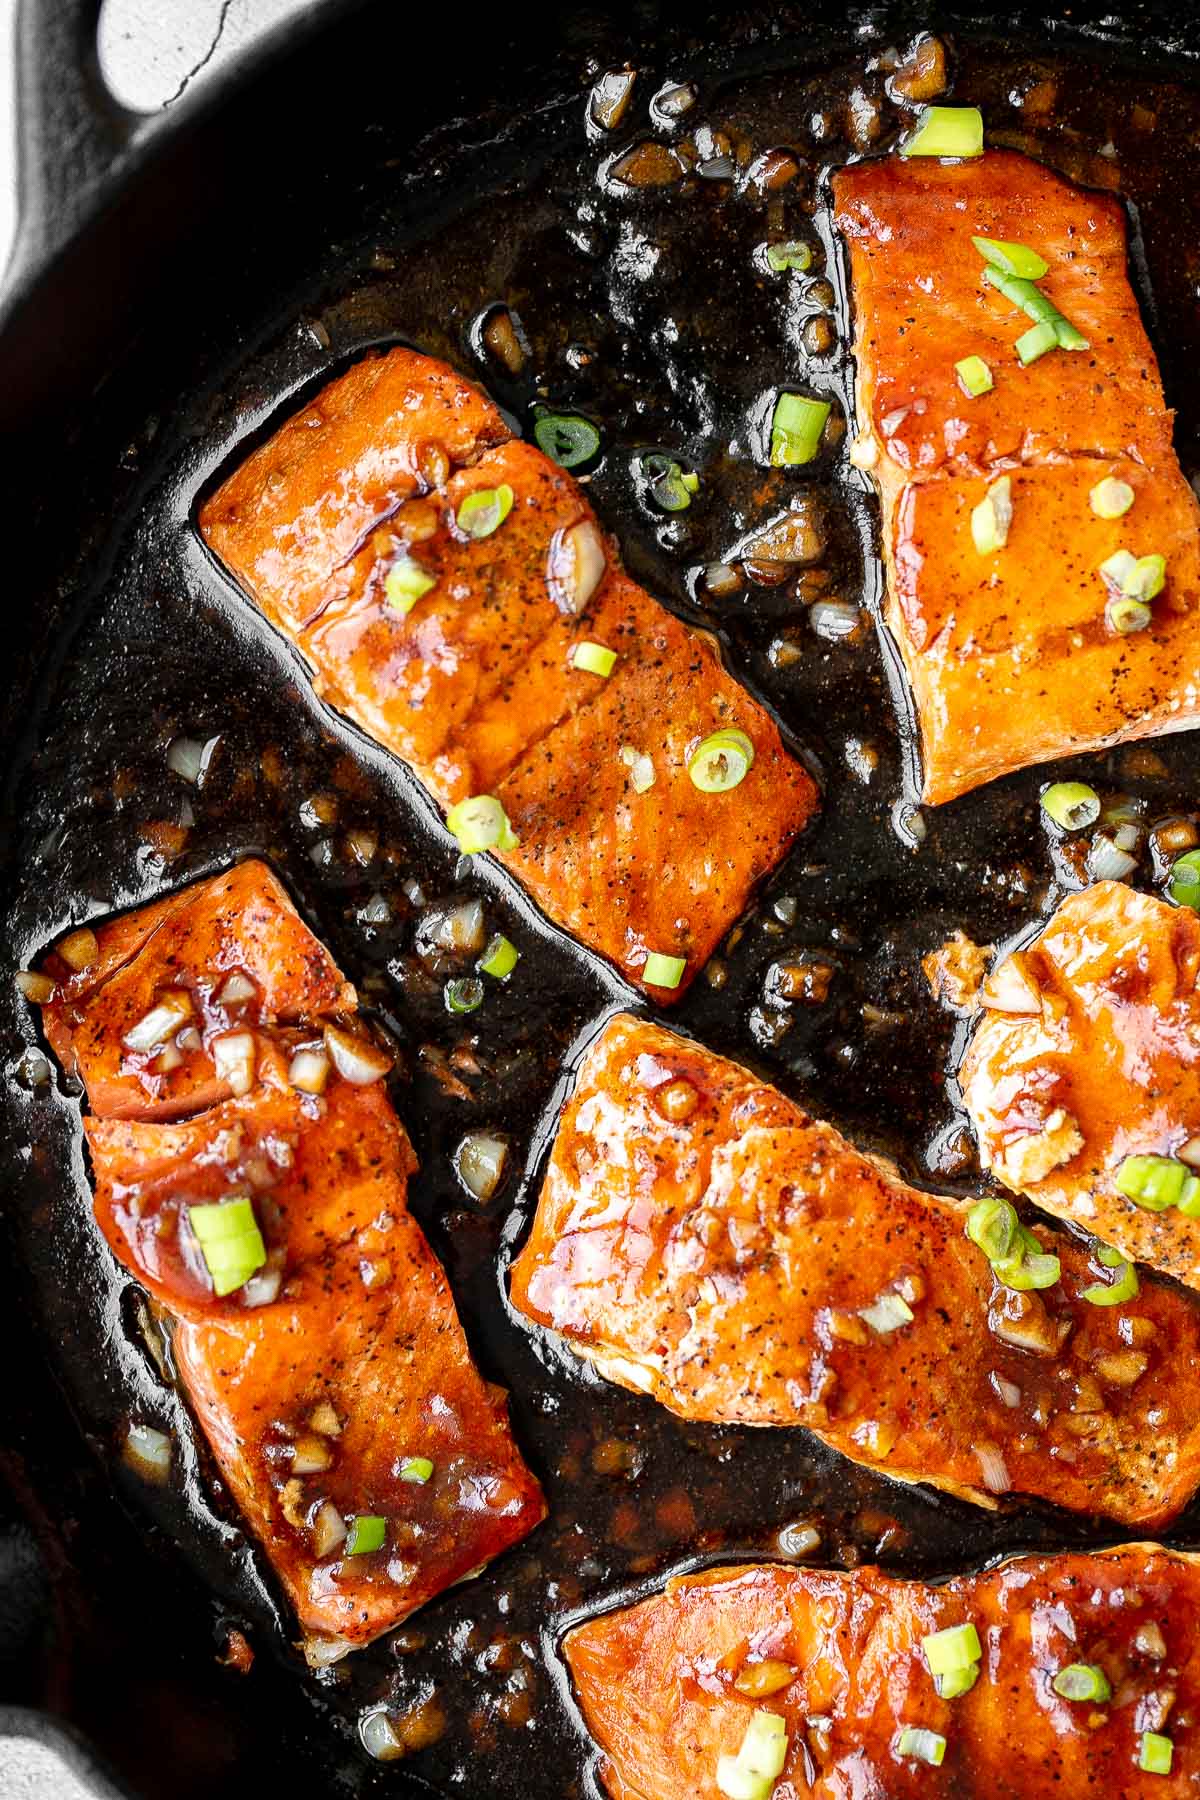
Air fryer chicken breast is crispy on the outside, juicy and tender inside, and packed with flavor in every bite. Quick and easy dinner on busy weeknights.

Baked Ravioli is simple delicious comfort food that is perfect for a weeknight family dinner or for entertaining. It's hearty, comforting, and kid-friendly.
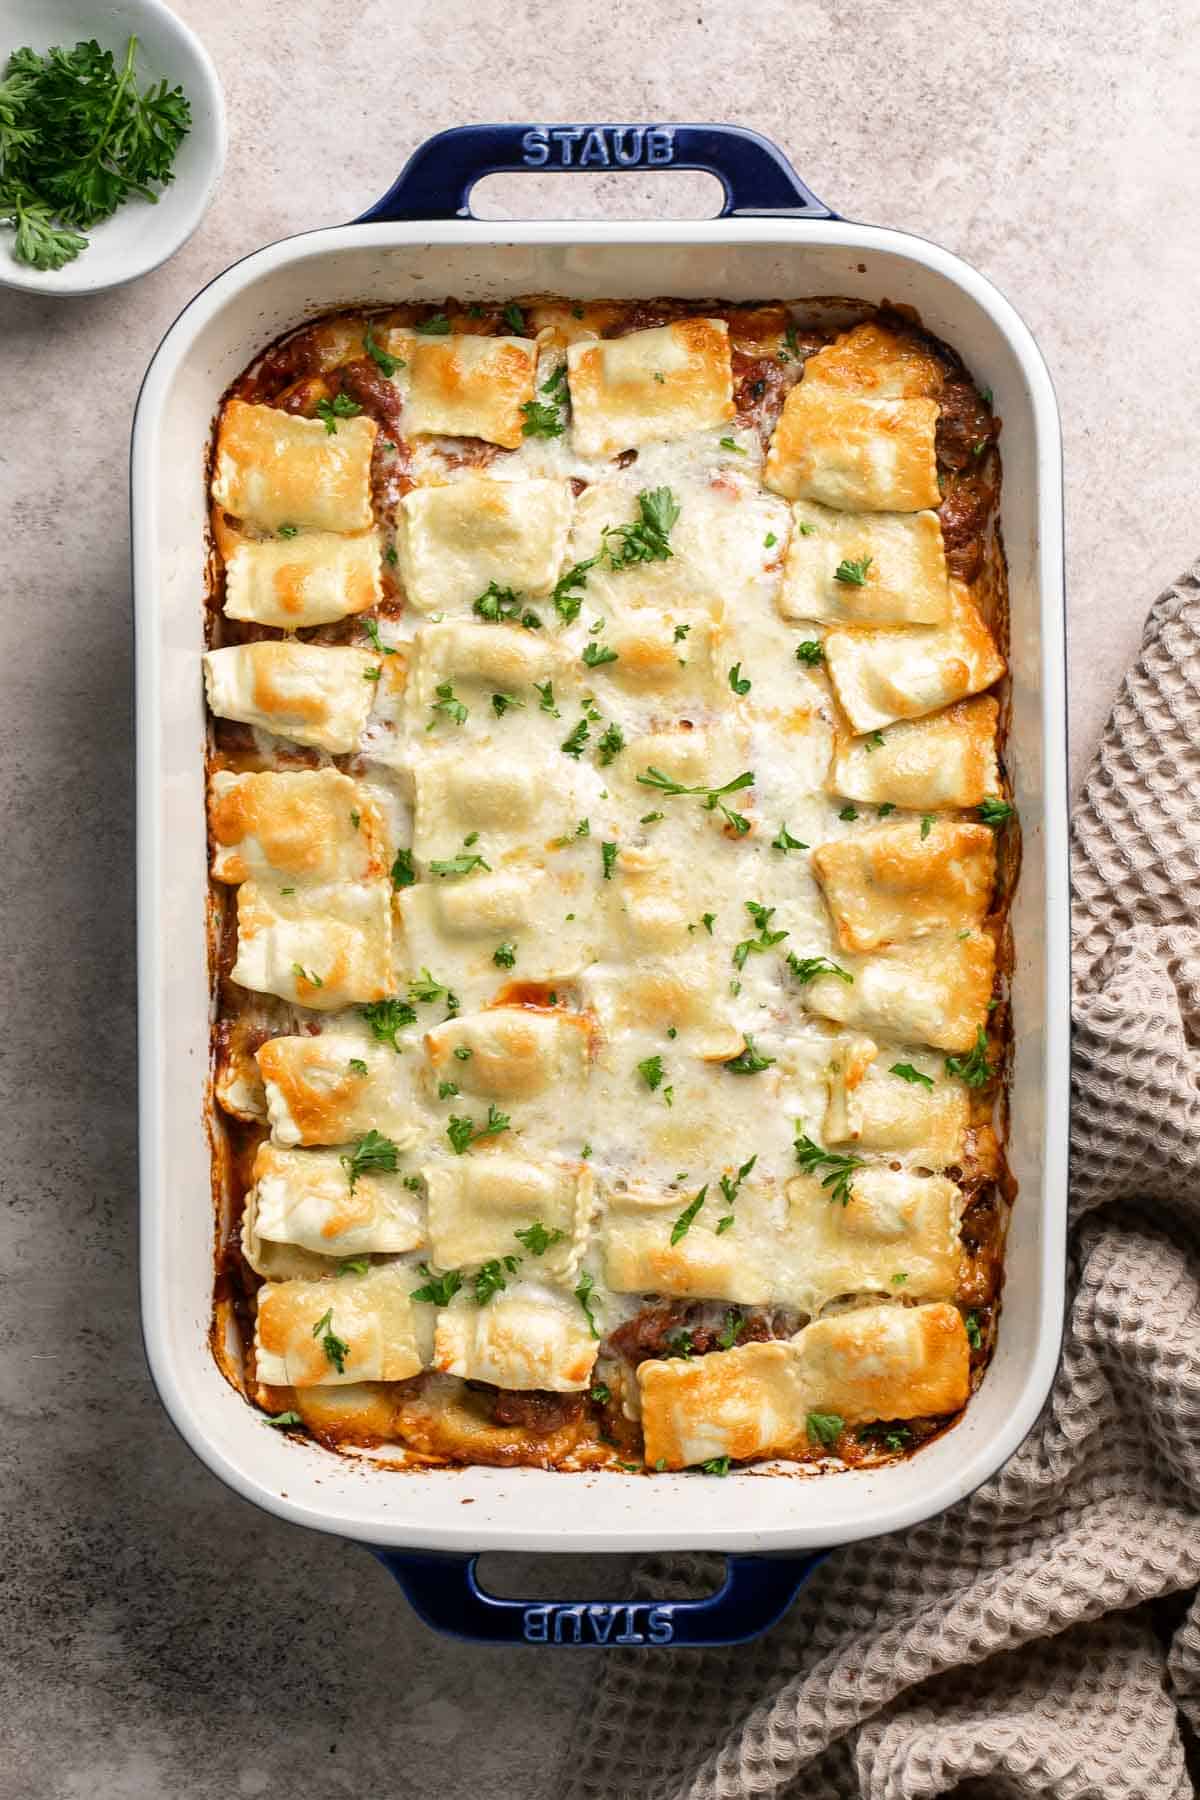
Cheesy Potato Soup is creamy, delicious, and comforting. This recipe takes everyday ingredients and transforms them in 30 minutes to a rich, luscious soup.

Baked Chicken Quesadillas are cheesy, crispy, flavorful, and delicious. This family-friendly recipe is quick and easy to make in just 30 minutes!

Cheesy Tortellini and Sausage Bake
Quick and easy, cheesy tortellini and sausage bake is a delicious 30-minute dinner packed with flavour. A family-favourite comfort food for busy weeknights.
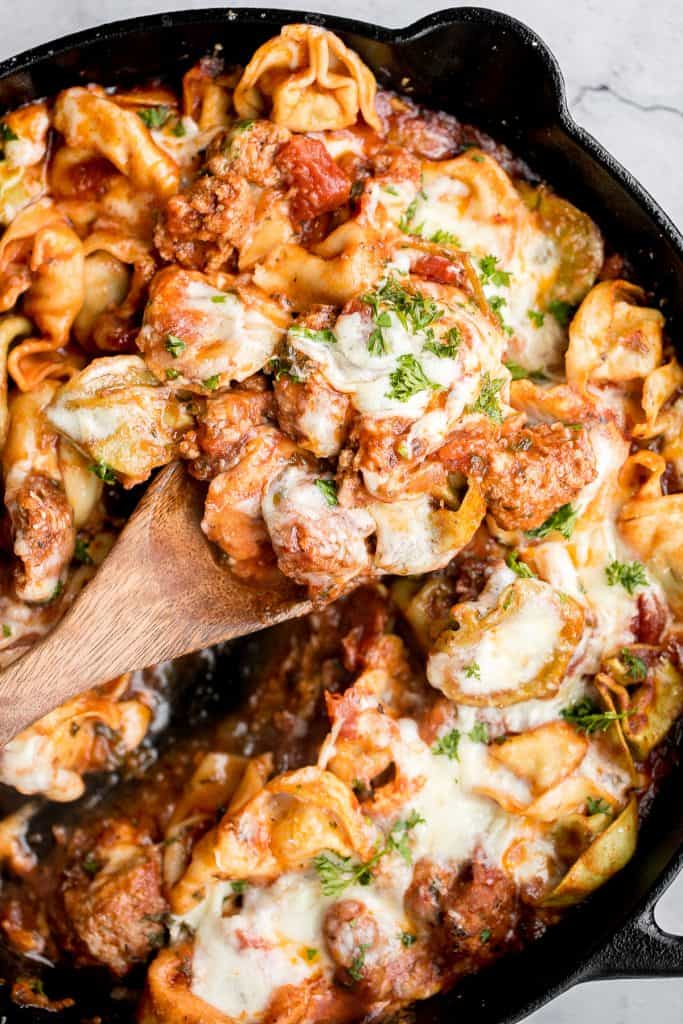
Baked Chicken Meatballs are tender, juicy, and flavorful (no dry meatballs here!). Made in just 45 minutes using simple ingredients. So quick and easy!

What to Serve with Dinner
Homemade chicken soup is delicious served on its own, or paired with some of my favorite soup sides including:
- 60 Best Soup Recipes
- 40 Best Vegetable Sides
- 40 Best Salad Recipes
- 50 Best Bread Recipes
- 50 Easy Baking Recipes
More Dinner Recipes
- 60+ Easy Dinner Ideas
- 60+ Healthy Dinner Ideas
- 50 Sunday Dinner Ideas
- 50 Date Night Dinner Ideas
- 40 Friday Night Dinner Ideas
Did You Make Any of These Family Dinner Recipes?
Please leave a comment and rating below, and let me know what you thought of this round up of easy family dinner ideas. Be sure to snap a picture and tag me on Instagram @aheadofthyme or share it on the Pinterest pin so that I can follow along.
HUNGRY FOR MORE? Don't forget to sign up for my email newsletter so that you don't miss any recipes. You can also follow along on Instagram and Pinterest for more recipe updates
Key Lime Pie
Perfectly creamy and tart with a buttery graham cracker crust, this easy Key Lime Pie is a classic for a reason. Authentic key limes have a lovely mellow citrus flavor that pairs perfectly with this creamy, custard-like key lime filling that bakes to perfection in the oven. You won't need another key lime pie recipe again!
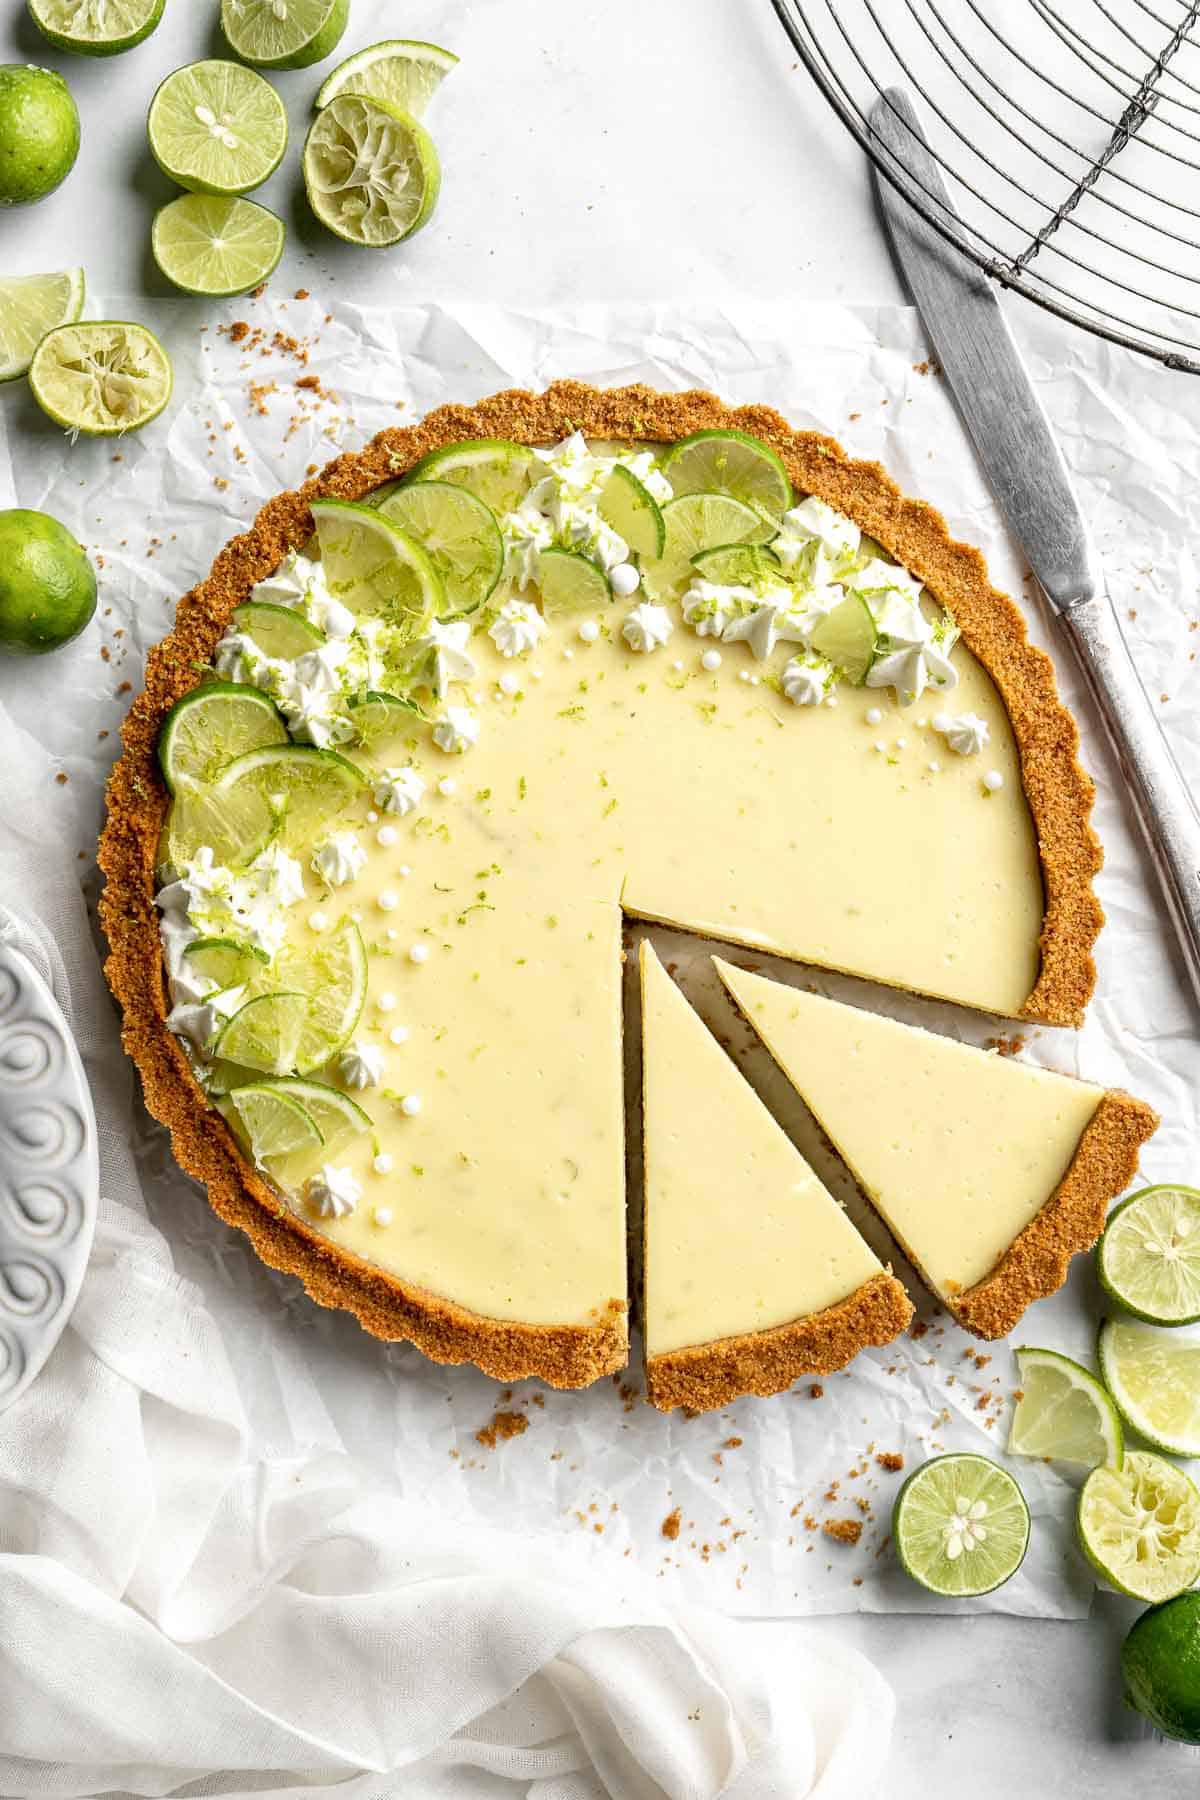
Key lime pie is one of the most popular pies ever for a reason. It's the perfect balance in every way. It has just the right amount of crunch from the crust, the custard isn't too rich or sweet, and the lime flavor sings with the sweet, creamy filling. It's an absolutely perfect dessert that only requires a little dollop of whipped cream on top to round it all off. Serve it anytime of the year - as a summer dessert or as a holiday dessert at Thanksgiving or Christmas.
Why You'll Love this Key Lime Pie Recipe
- Made completely from scratch. There are quick recipes out there that throw together a few ingredients and toss them in a store-bought crust. This recipe is not that. We're going to make homemade graham cracker crust and a custard-style filling that is baked in the oven. It takes a bit longer, but it is absolutely worth the extra effort.
- Classic flavor. Although key lime pie's history is contested, there's no doubt that this pie has always been made with a mixture of sweetened condensed milk and lime juice. This particular recipe goes the extra step to bake the key lime custard for the smoothest, creamiest texture possible.
- Family favorite. There's a reason why this little-known pie from the Florida Keys exploded onto the national scene and has been a favorite for over 70 years. Your family will absolutely love this version and request it for special occasions!

Ingredient Notes
To make this delicious Key Lime Pie, you will need the following ingredients (full measurements in recipe card below):
Graham Cracker Crust
- graham cracker crumbs - to make crumbs quickly, add your graham crackers to the food processor and pulse.
- white sugar - this adds a little extra sweetness to balance the tangy filling.
- unsalted butter - melted butter will hold your crust together and make it crunchy.
Key Lime Pie
- egg yolks - these add a richness and creaminess that's so satisfying.
- sweetened condensed milk - this is a critical ingredient that has been used in homemade key lime pie recipes since the beginning. Don't skip it.
- key lime juice - you'll need to juice approximately 25 limes. It helps to have a good citrus juicer.
- key lime zest - add even more key lime flavor with the zest of 3 limes.
- full fat sour cream - this adds a richness and creaminess that balances out the sweetened condensed milk and tart limes.
- salt - you just need a pinch!
You will also need a 9-inch tart pan or pie dish, measuring cups, large baking sheet, medium mixing bowl, whisk, spatula, and wire rack.
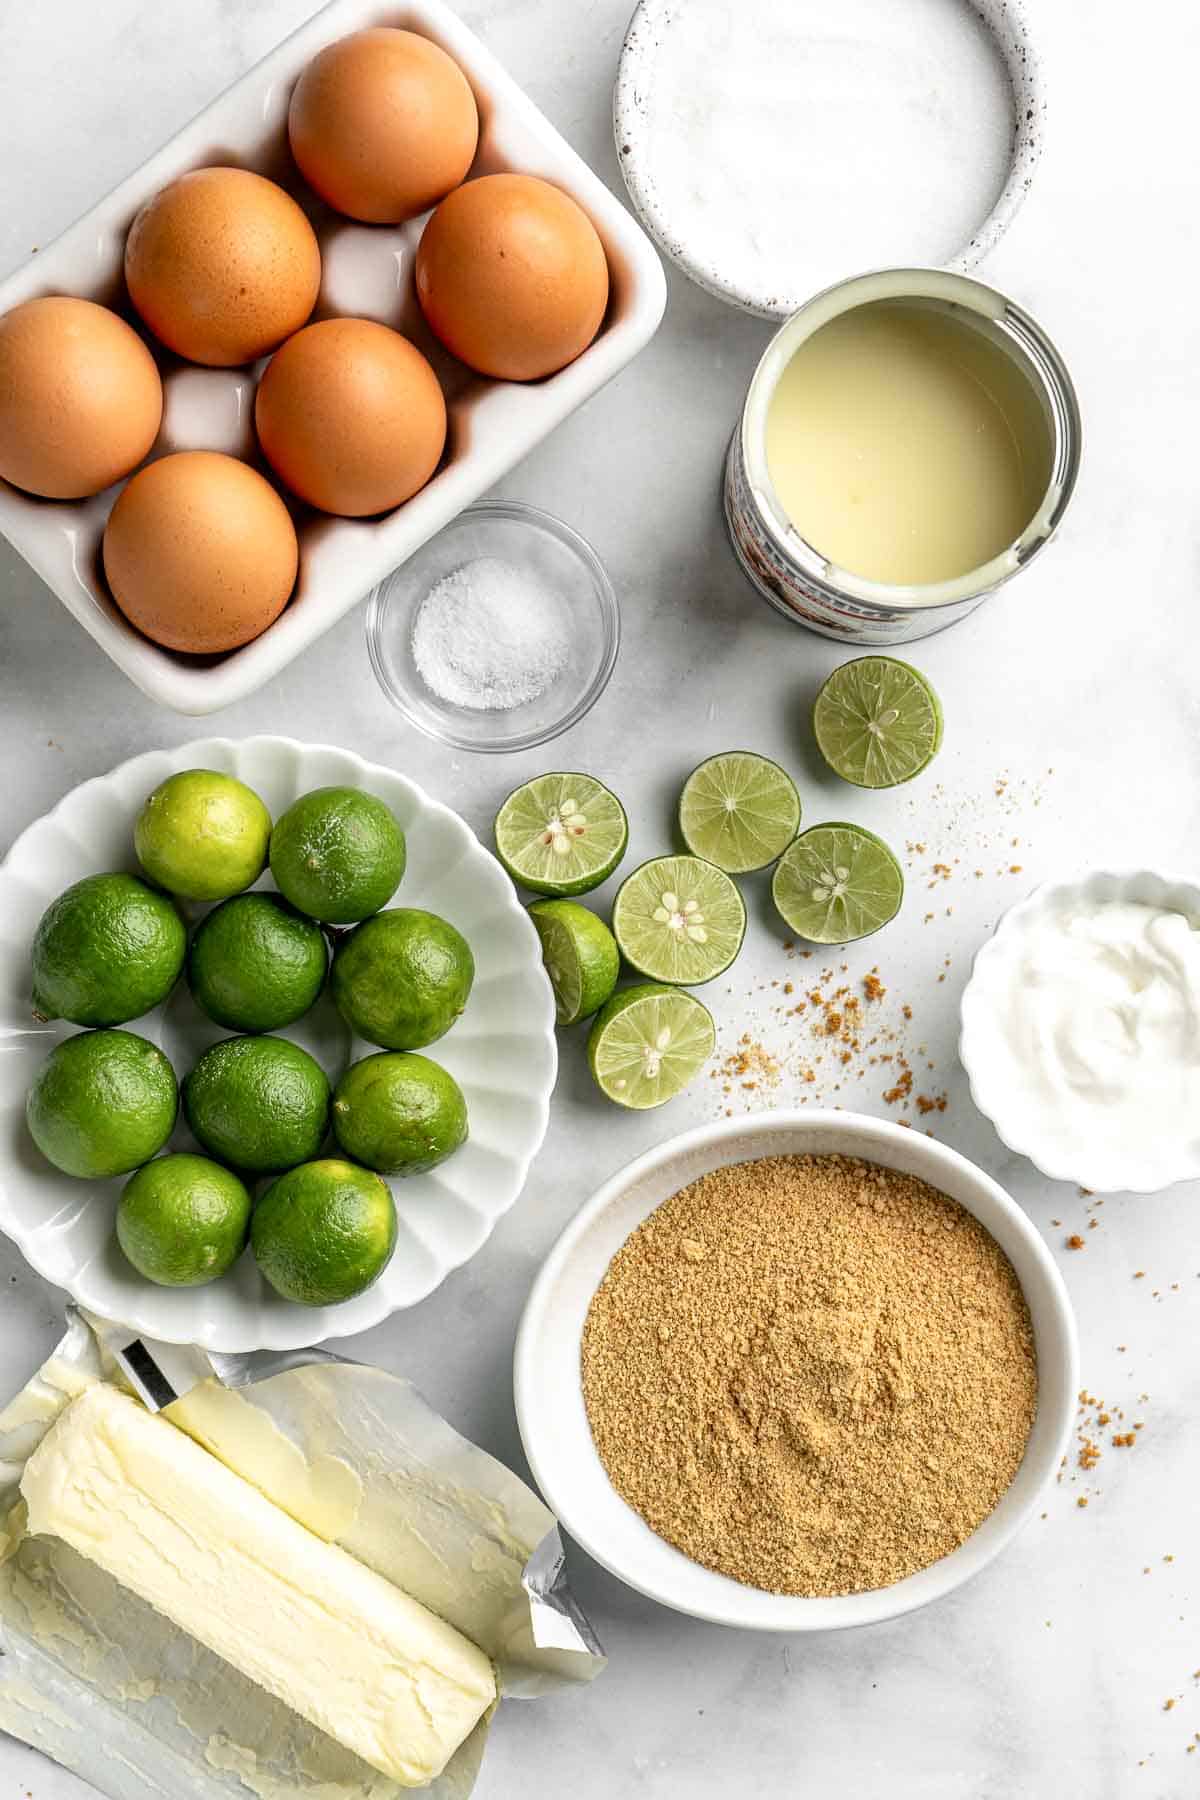
How to Make the Best Key Lime Pie
First, prepare the Graham cracker crust.
- Combine ingredients. In a medium mixing bowl, add the graham cracker crumbs and melted butter. Use a fork to mix until well combined.
- Transfer to pan. Pour the crumbs into a 9-inch tart pan. Use a flat bottomed measuring cup to press the crumbs into the pan.
- Bake. Place the pan onto a large baking sheet, and transfer into a 350°F preheated oven. Bake for 11 minutes. Remove from the oven and allow to cool a bit while you make the filling.
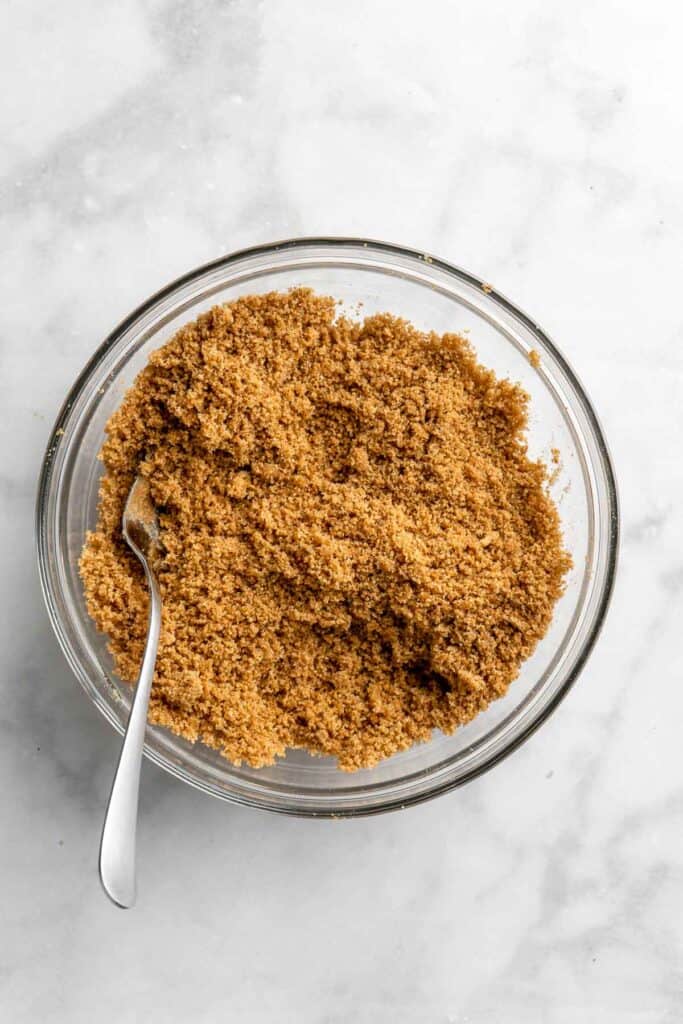
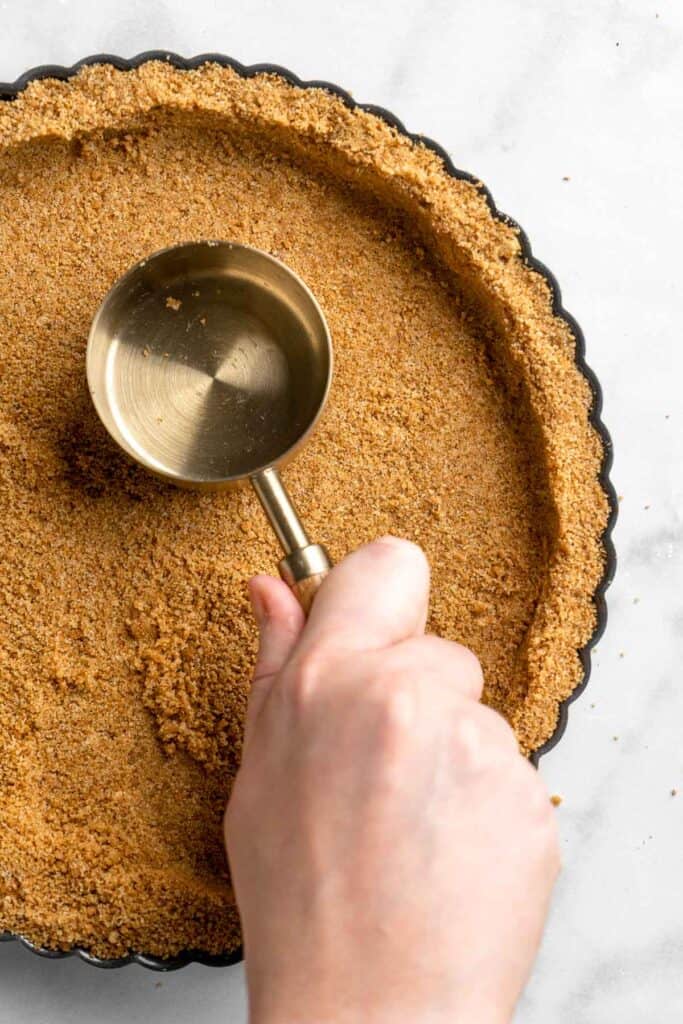
Next, make the key lime filling.
- Prep. Turn the oven down to 325°F. Ensure your key lime juice is strained and free of any seeds.
- Combine ingredients. In a medium mixing bowl, add the egg yolks, sweetened condensed milk, key lime juice, lime zest, sour cream, and salt. Whisk until very smooth.
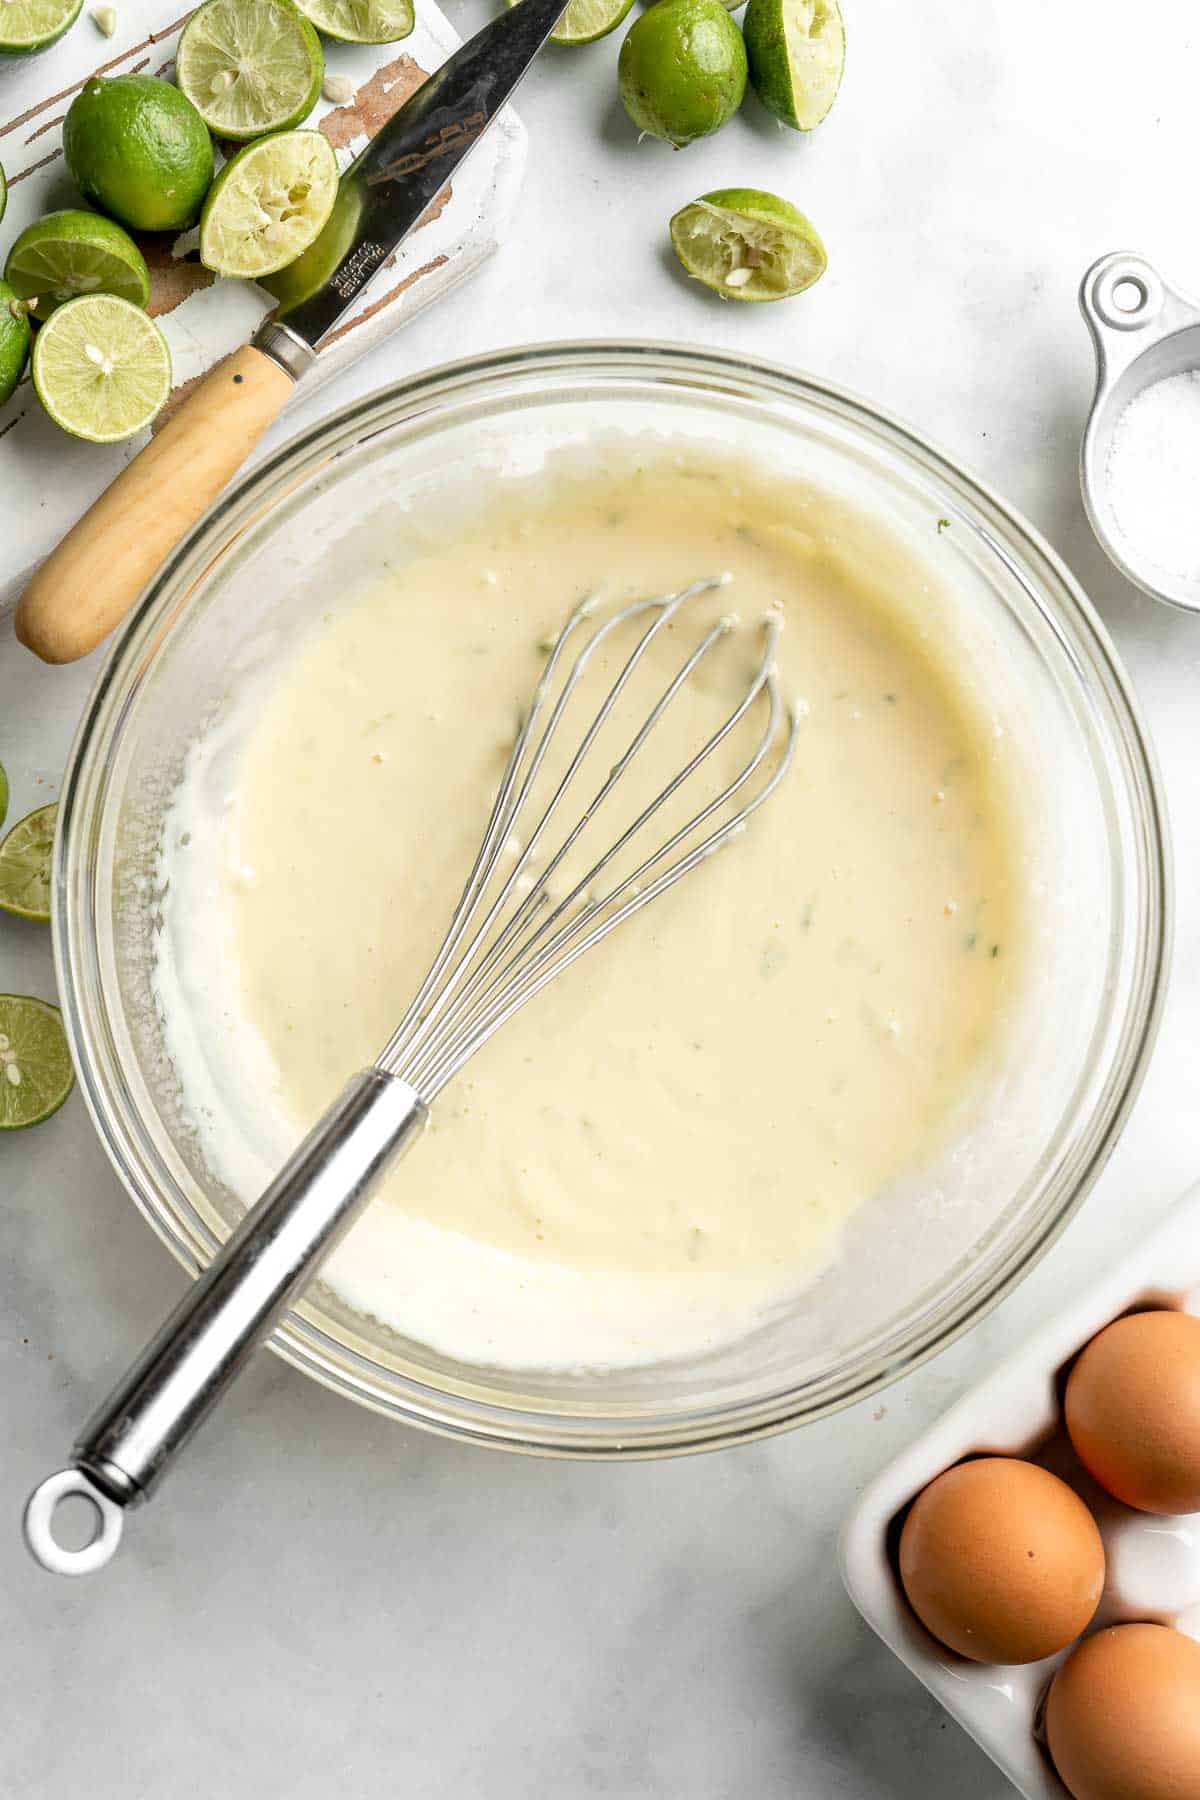
Lastly, assemble and bake the key lime pie.
- Assemble. Pour the fillimg mixture over the baked graham cracker crust.
- Bake. Place the pie into the oven to bake for 20 minutes, or until the centre has a slight jiggle, but the outside seems set.
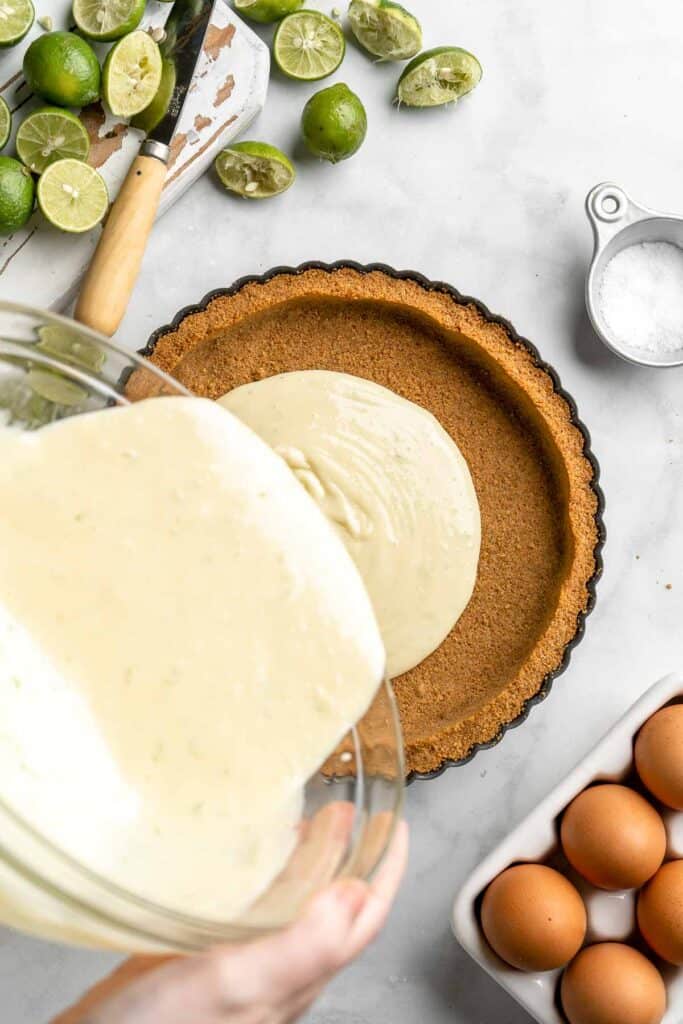
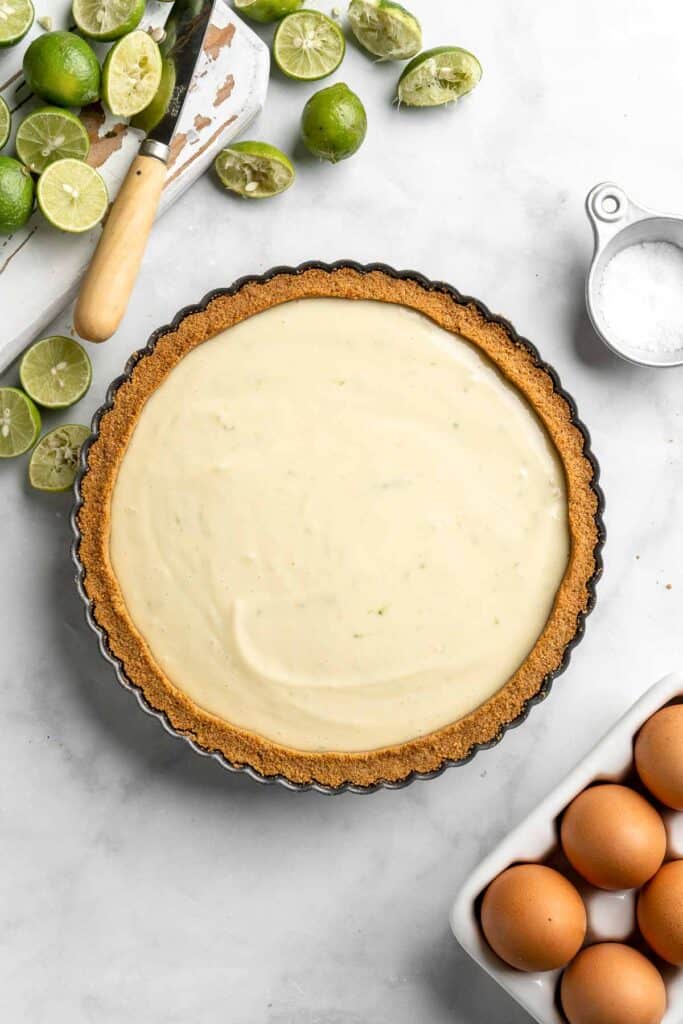
- Chill. Remove from the oven and allow to cool on a wire rack for 2 hours, before transferring into the fridge to set overnight.
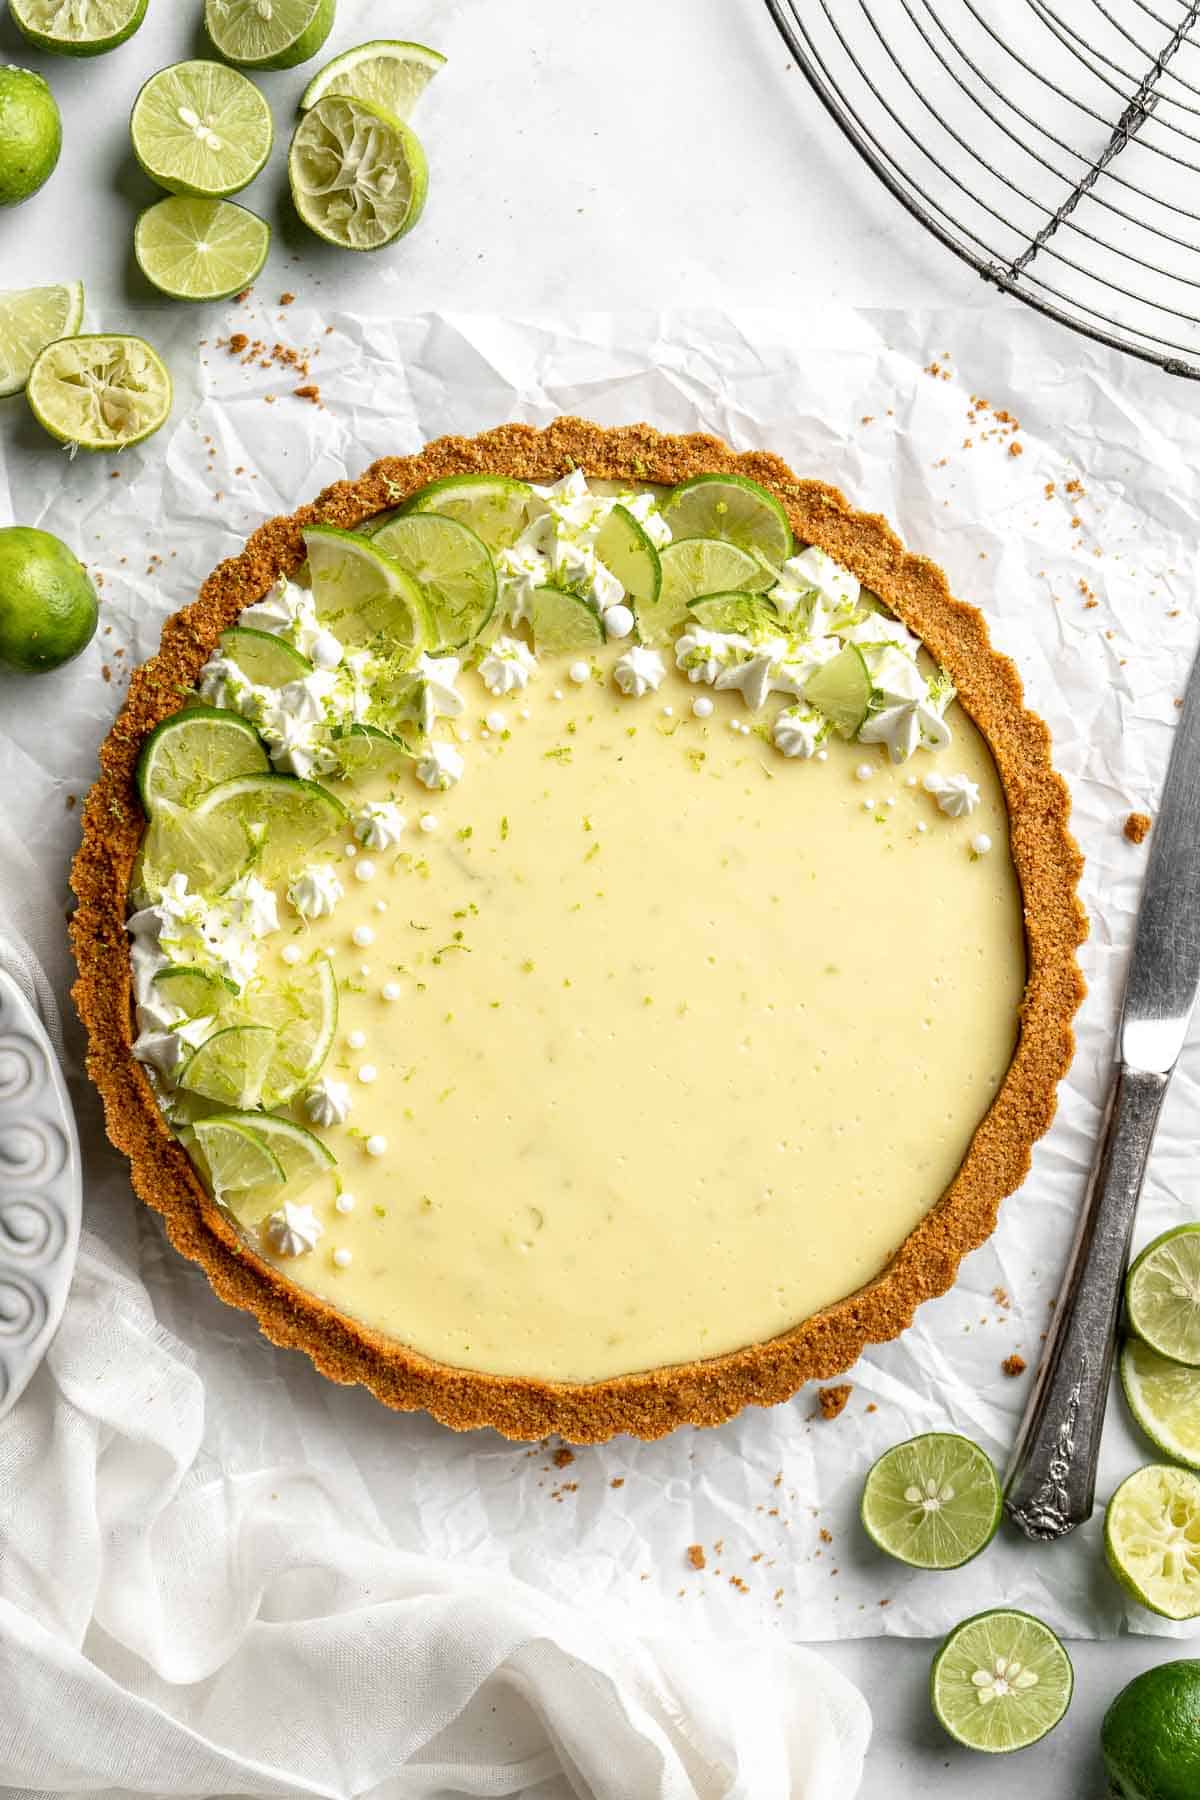
Recipe Variations
- Freeze it. Frozen key lime pie is its own trend! Bake your pie in a freezer-safe pan (like a foil tray) and wrap the cooled, baked pie in aluminum foil or plastic wrap to freeze it. Then slice your pie into individual pieces, remove them from the pie pan, add a popsicle stick, and dip them in melted chocolate for a perfect summer treat.
- Mostly homemade. If you can't find or don't have time to press real key limes, use the zest of regular limes and bottled key lime juice from the store. You can even use store-bought graham cracker crust in a pinch.
- Top with whipped cream. A little homemade whipped cream complements the creamy, tangy filling so well. To make your own, whip cold heavy whipping cream with powdered sugar and vanilla extract until it has stiff peaks, then add the cream to a piping bag and pipe swirls around the top of the pie. Garnish with lime slices.
How to Serve
This key lime pie would be a fantastic dessert to serve with these main dishes that celebrate the flavor of lime:
- Fish Tacos with Lime Crema
- Vietnamese Salad Rolls with Shrimp
- Chipotle Chicken Burrito Bowls with Lime Cilantro Rice
- Sheet Pan Chicken Fajitas
- Thai Coconut Red Curry with Prawns
- Chilaquiles Verdes
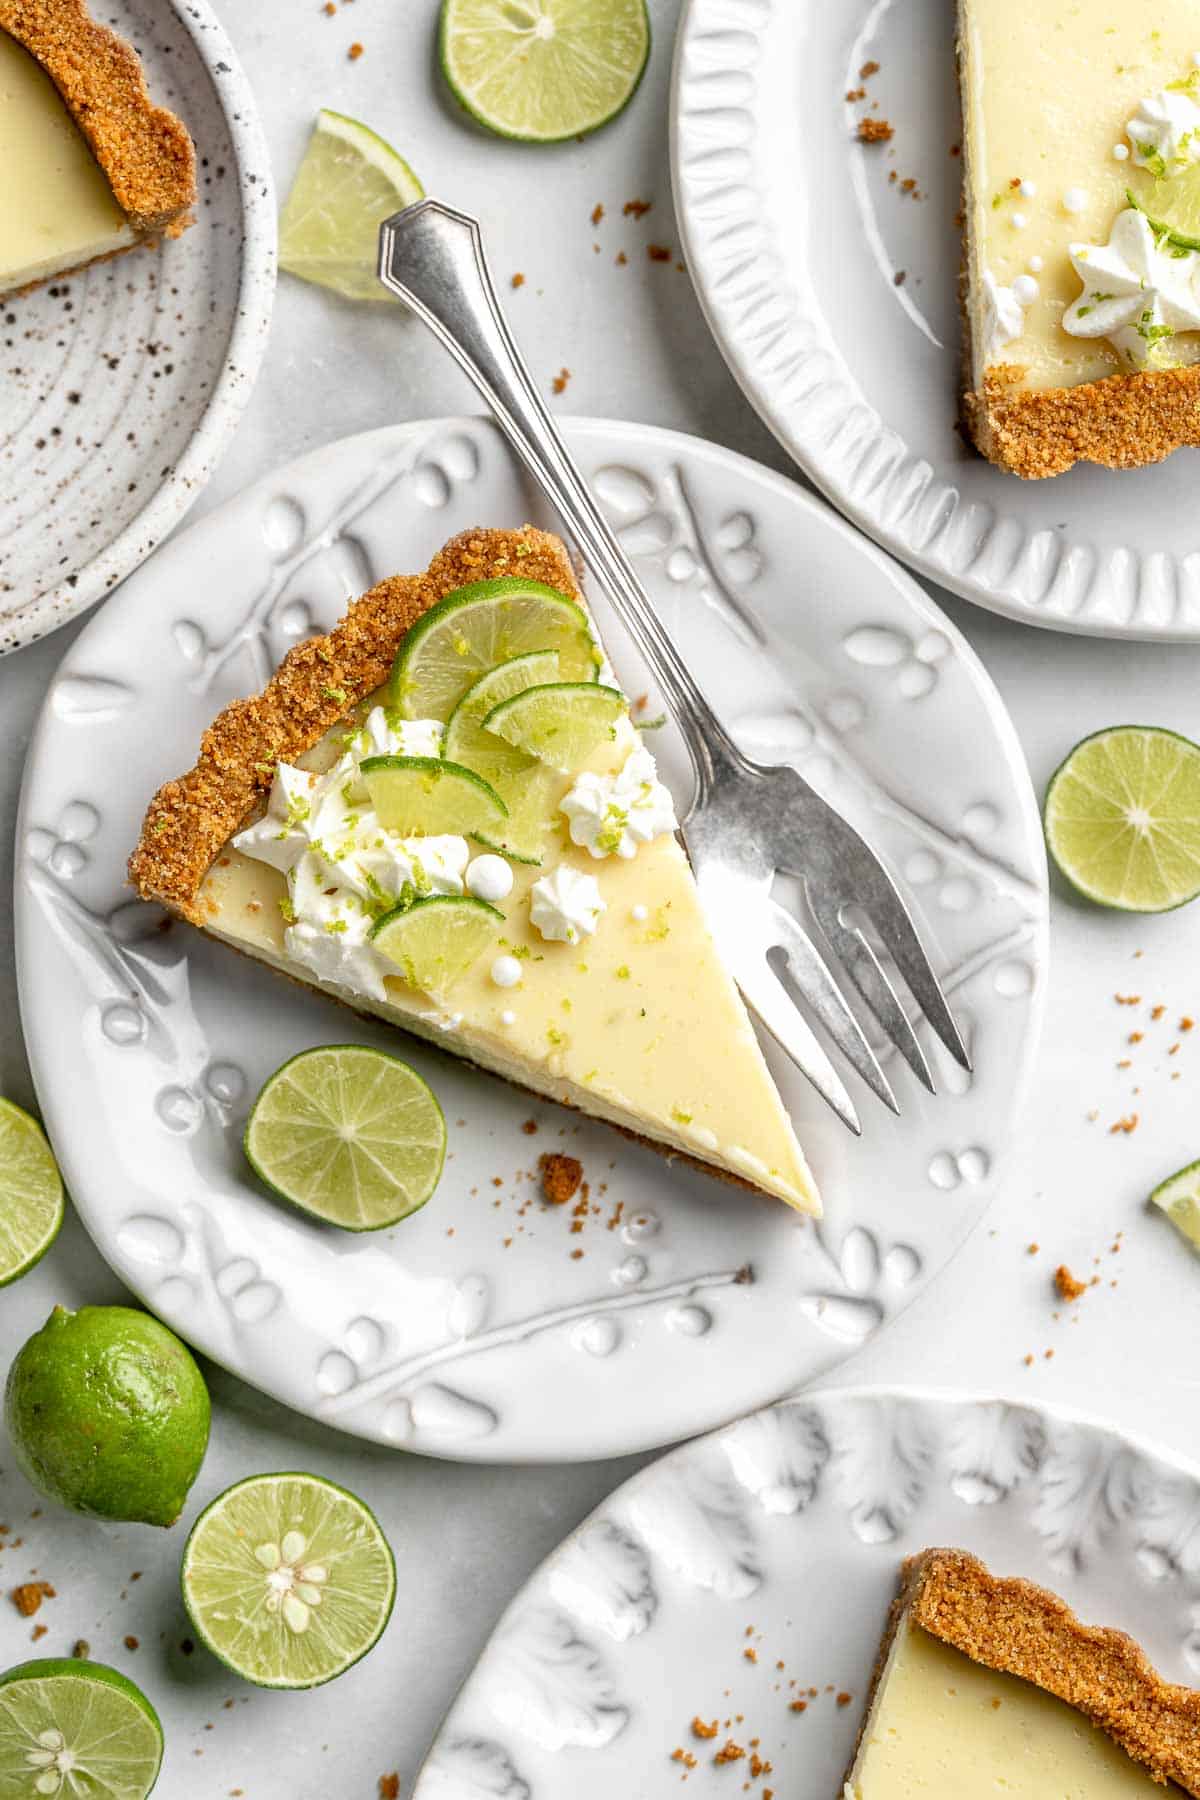
Recipe Tips and Tricks
- Use fresh key lime juice. You can often find bags of key limes in the summer at local grocery stores. Be sure to give them a good wash, roll them between your palm and the counter to soften them up, then slice them open and use a citrus juicer to catch every drop.
- Measure your butter. You need the perfect ratio of butter to graham cracker crumbs for your crust. The crust won't have the same texture or flavor if you use too much.
- Don't skip the sweetened condensed milk. This is the secret ingredient that makes key lime desserts taste amazing. It's got the perfect thickness, creaminess, and sweetness to balance the tart lime juice. If you try to replace it with a different ingredient, you won't have the same creamy filling and flavor you know and love.
Storing and Freezing Instructions
How to Store
Wrap leftover key lime pie with plastic cling wrap or aluminum foil and store it in the fridge for 3-4 days. If you plan to store it for later, wait to add the whipped cream right before serving.
How to Reheat
This classic key lime pie recipe is best served cold.
How to Freeze
Key lime pie freezes very well! Freeze the entire pie, remove it from your pie pan, and cut it into slices. Wrap the individual slices with foil or plastic wrap to keep them fresh. Store in an airtight container or freezer-safe bag for up to 3 months. Thaw in the fridge for several hours before serving.
FAQ
Although you technically can use regular lime juice from your grocery store, Persian limes have a stronger lime flavor than delicate key limes. Instead, look for bottled key lime juice or try substituting equal parts lemon and lime juice to replicate the unique flavor of key limes.
Homemade key lime pie lasts well for 3-4 days. It's best to keep it in the original pie pan, then wrap it with aluminum foil in the fridge. If you can't finish it all in that time frame, freeze it for later!
If you wake up the next morning to realize you forgot to store your pie in the fridge, you should toss it. Unfortunately, bacteria thrive in the food danger zone between 40 -140 degrees F. Your creamy key lime pie should only be out at room temperature for 2 hours at most. You may be able to eat pie that sat out slightly past that window but overnight is too long. When in doubt, throw it out.
More Pie Recipes
Tried this recipe?
I'd love to hear what you think! Leave a comment and rating below to share your feedback. Your reviews help others discover this recipe and help me keep creating more free recipes for you. Snap a photo and tag me on social media @aheadofthyme too.

Pumpkin Roll
Celebrate the flavors of fall with a show-stopping Pumpkin Roll featuring a tender pumpkin spice cake swirled around a rich cream cheese filling. It's the perfect make ahead dessert for brunch or a fall party but simple enough to serve anytime during pumpkin season.
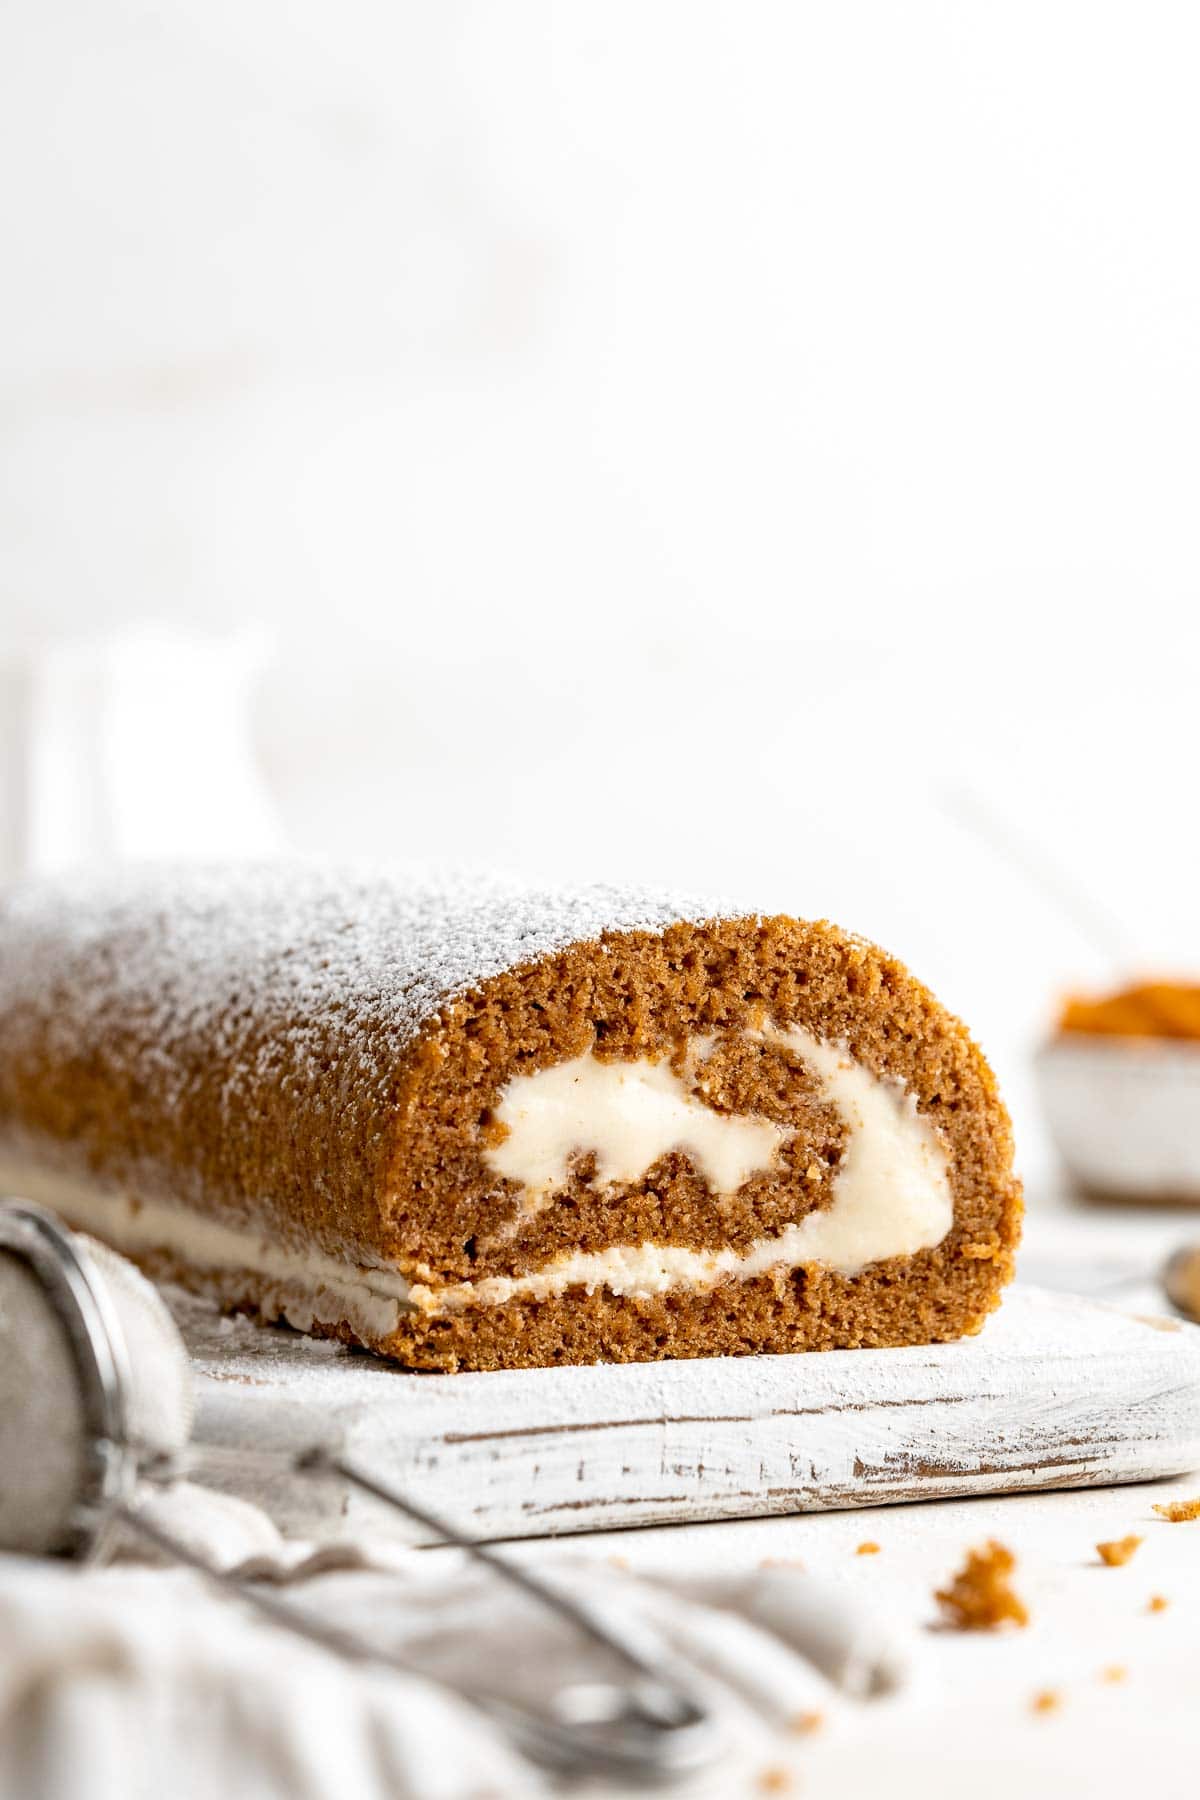
If you've never made a classic pumpkin roll, this is the year to try it! Although making any type of rolled cake can be intimidating the first time, it's not nearly as complicated as it may seem. Plus, we're sharing our favorite tips to make the perfect pumpkin swiss roll even on your first try.
Why You'll Love This Pumpkin Roll Cake Recipe
- Stunning fall dessert. There's a reason the pumpkin cream cheese roll is such a classic. It has a gorgeous orange and white swirl that screams fall. From the spiced pumpkin cake to the heavenly cream cheese filling, nothing tops a homemade pumpkin roll!
- Perfect balance of flavor. Elevate ordinary canned pumpkin by making this fluffy, tender pumpkin cake filled with warm spices. The tangy cream cheese frosting adds a creamy texture that cuts through the rich sweetness of the moist pumpkin cake, keeping this dessert from becoming too sweet.
- Easy step-by-step recipe. This classic pumpkin roll recipe is the best of the best. Follow these simple step-by-step instructions to make a perfect pumpkin roll, even as a total beginner.

Ingredient Notes
To make this delicious Pumpkin Roll recipe, you will need the following ingredients (full measurements in recipe card below):
Pumpkin roll ingredients
- cooking oil spray - prepare the pan really well for easy removal.
- confectioner's sugar - this is used to roll the cake, not to sweeten it.
- all purpose flour - although you can also use pastry flour, all purpose flour is easy to find and works really well.
- baking soda - this will help lift the batter, making this cake light and airy.
- spices - use classic fall spices like cinnamon, allspice, ground ginger, and nutmeg.
- salt
- eggs - combined with baking soda, these will help the pumpkin cake batter rise and have a tender, fluffy texture.
- white sugar - this will sweeten the cake batter just enough without making it too sweet.
- pumpkin puree - choose either storebought or homemade pumpkin puree. Don't use pumpkin pie filling - it has sugar and spices already mixed in.
- vanilla extract
Cream cheese filling ingredients
- cream cheese - start with softened cream cheese to make the cream cheese mixture really fluffy.
- unsalted butter - room temperature butter will whip the best.
- confectioner's sugar - this adds a little sweetness to balance the tangy cream cheese.
- vanilla extract - this adds another layer of scent and flavor to make the sweet cream cheese filling taste really luxurious.
You will also need jelly roll pan (10x15 half sheet tray), cooking spray, parchment paper, clean kitchen towel, whisk, medium and large mixing bowls, hand mixer, wire rack, and a sifter for sprinkling powdered sugar.
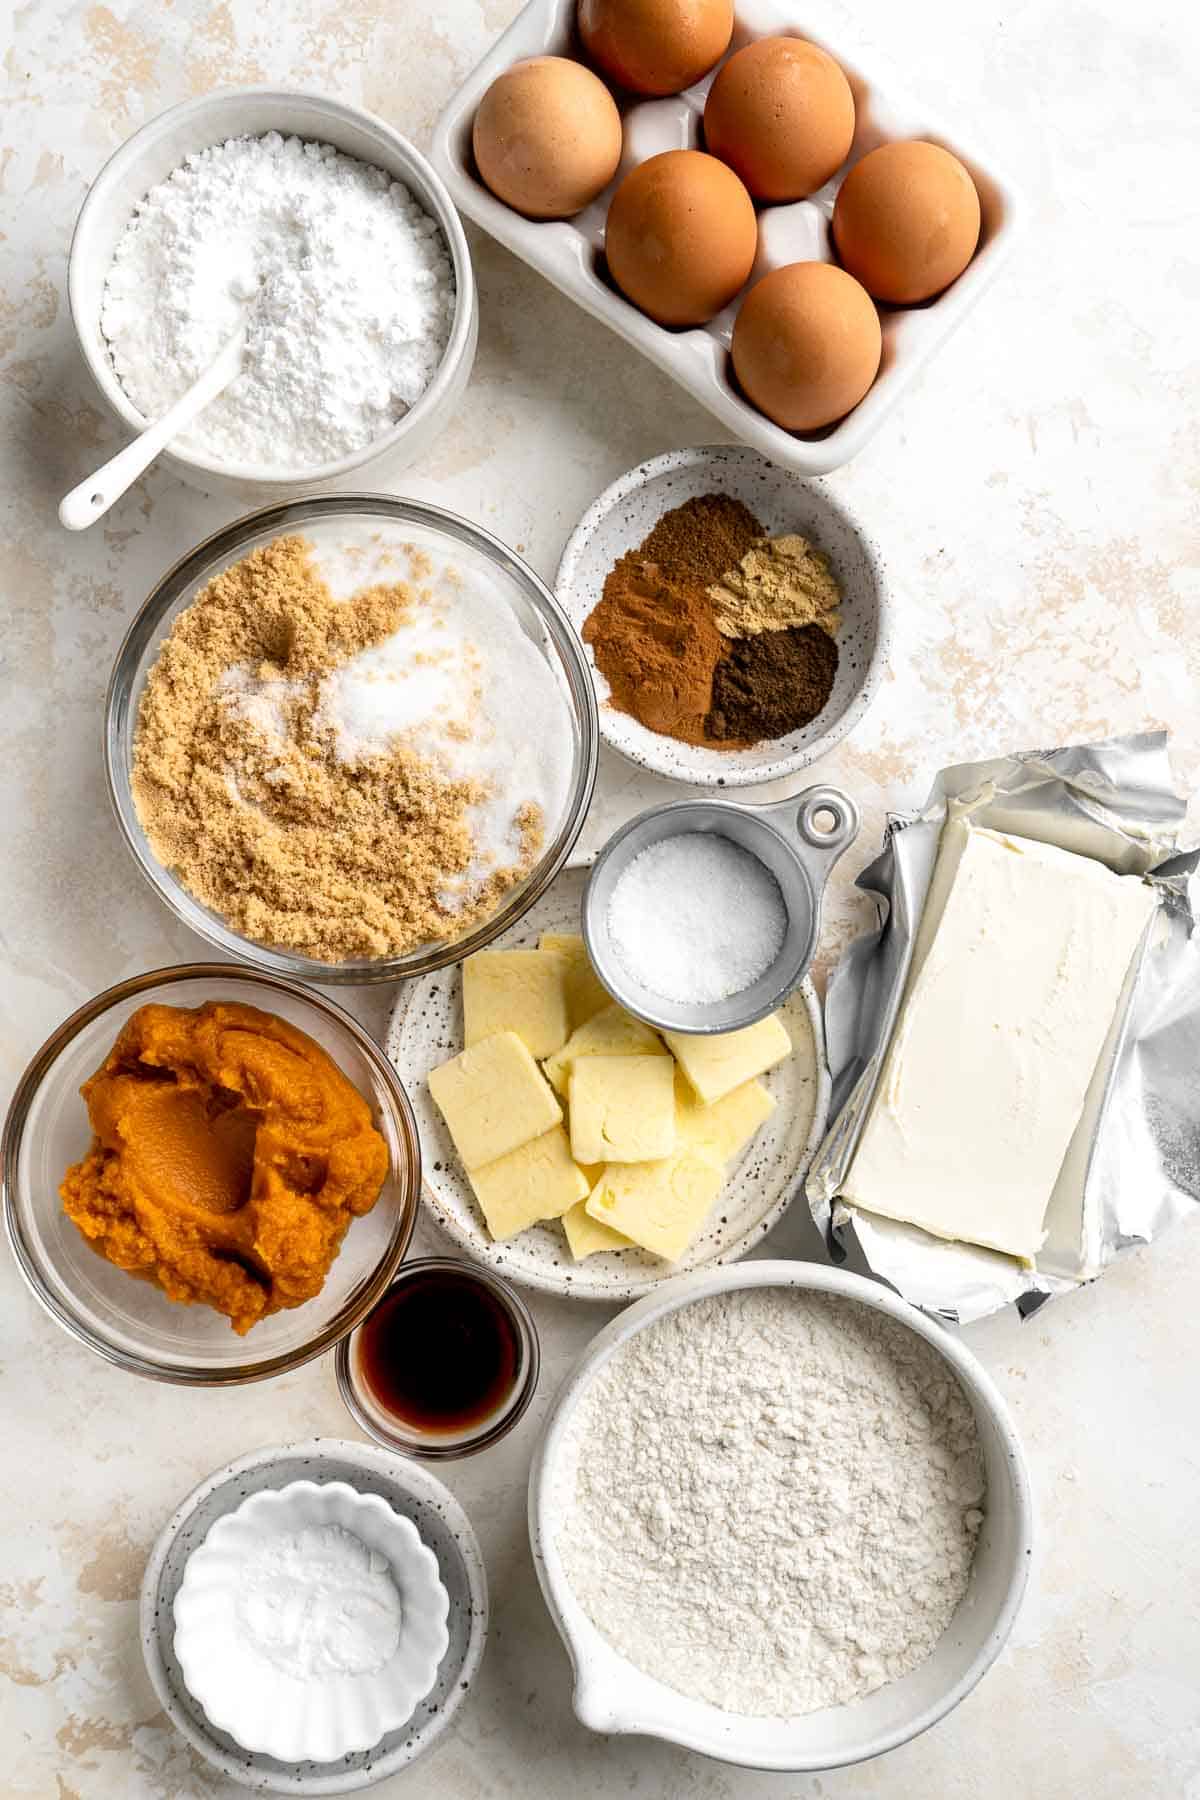
How to Make the Best Pumpkin Roll
First, bake the pumpkin cake.
- Prep. Preheat the oven to 375°F. Spray a 10x15-inch jelly roll pan with cooking oil spray and parchment paper, ensuring that the parchment overhangs the pan by about 1-inch for easy removal. Spray the top of the parchment with cooking spray, as well. Layout a clean cotton kitchen towel. Liberally sprinkle it with confectioners' sugar. This will be used later to roll up the pumpkin roll.
- Combine dry ingredients. In a medium mixing bowl, whisk together the flour, baking soda, cinnamon, allspice, ginger, nutmeg, and salt, until well-combined. Set aside.
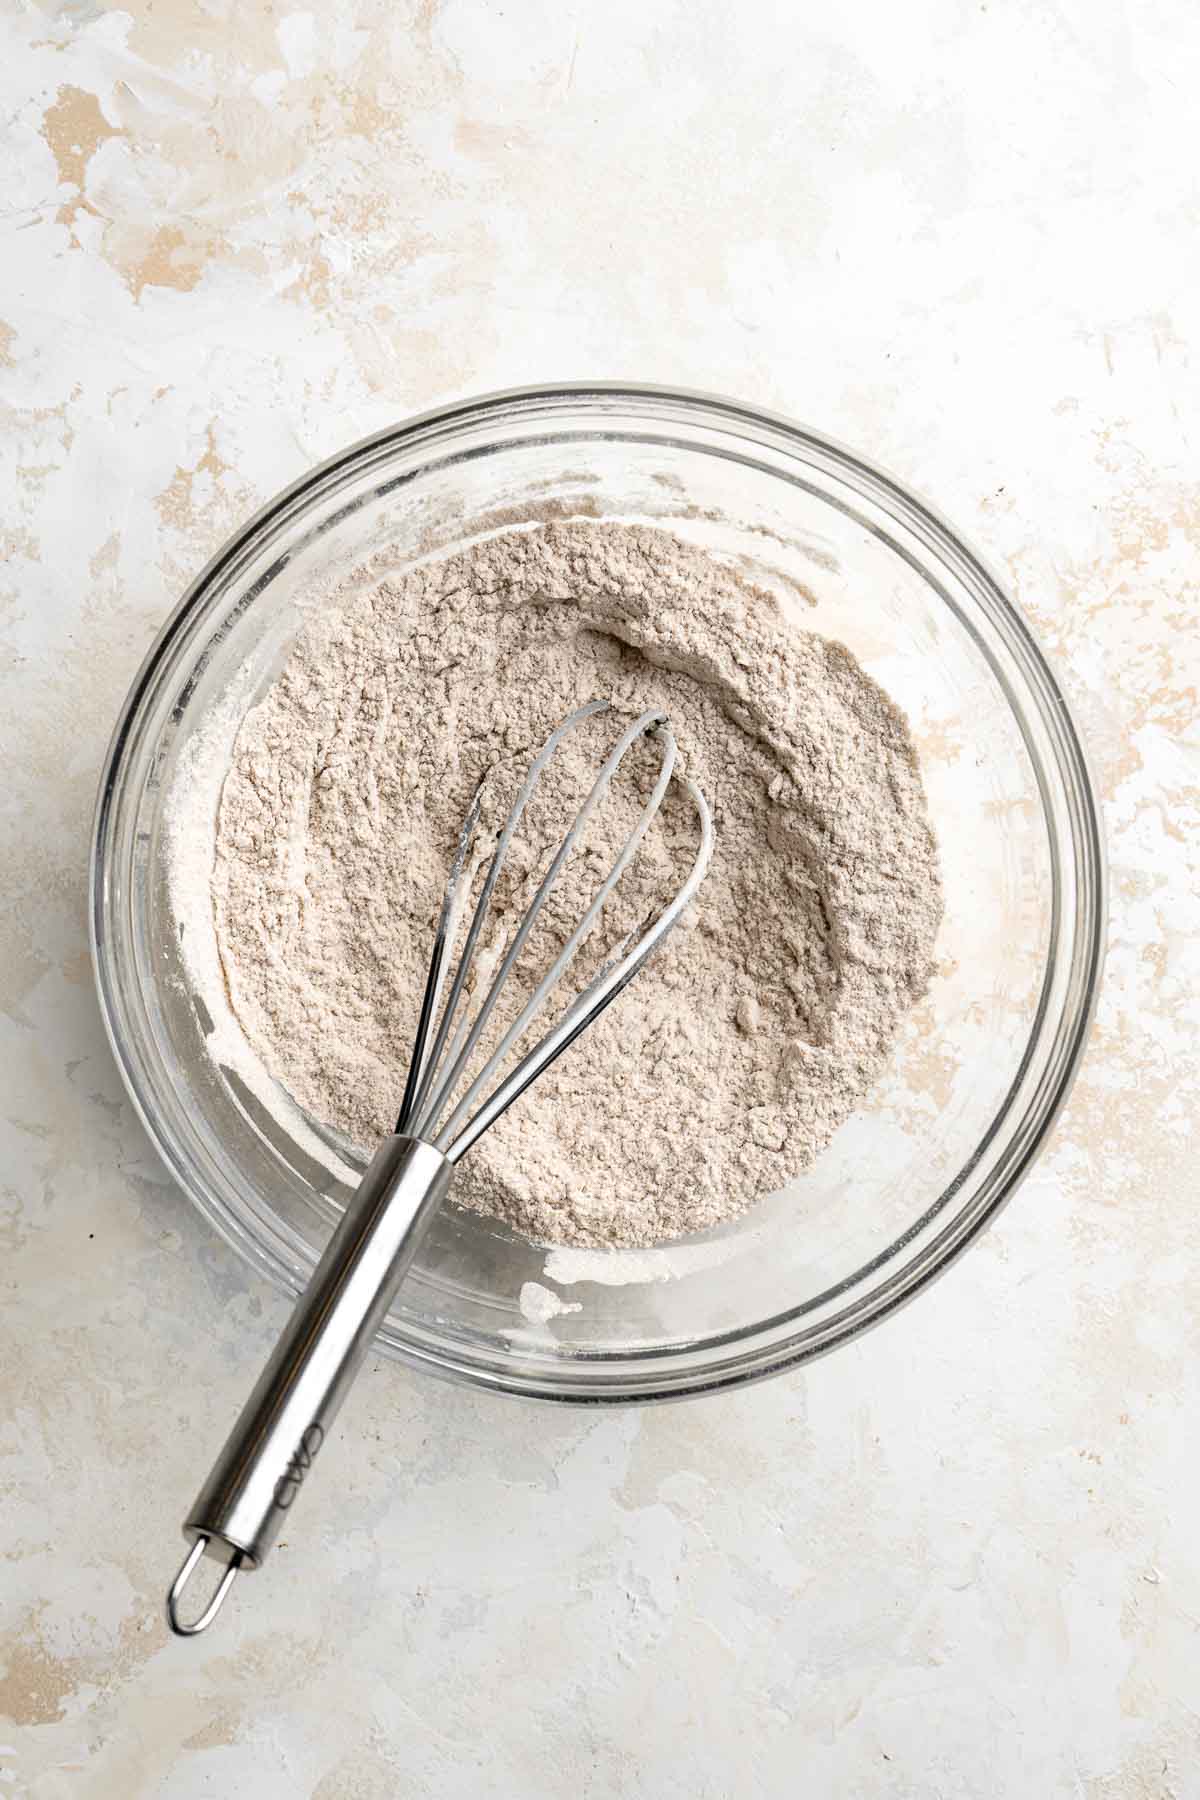
- Combine wet ingredients. In a separate large mixing bowl, add the eggs, white sugar, and vanilla. Use a hand mixer to beat on high until thickened and voluminous, about 5 minutes. Add pumpkin puree, then beat again until smooth and combined.
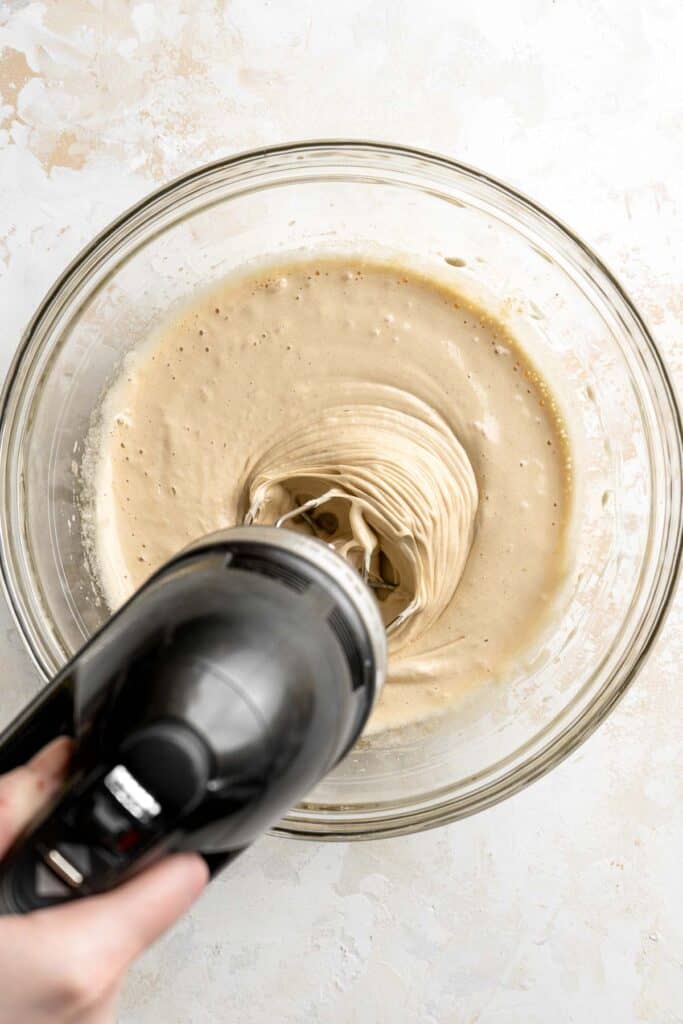
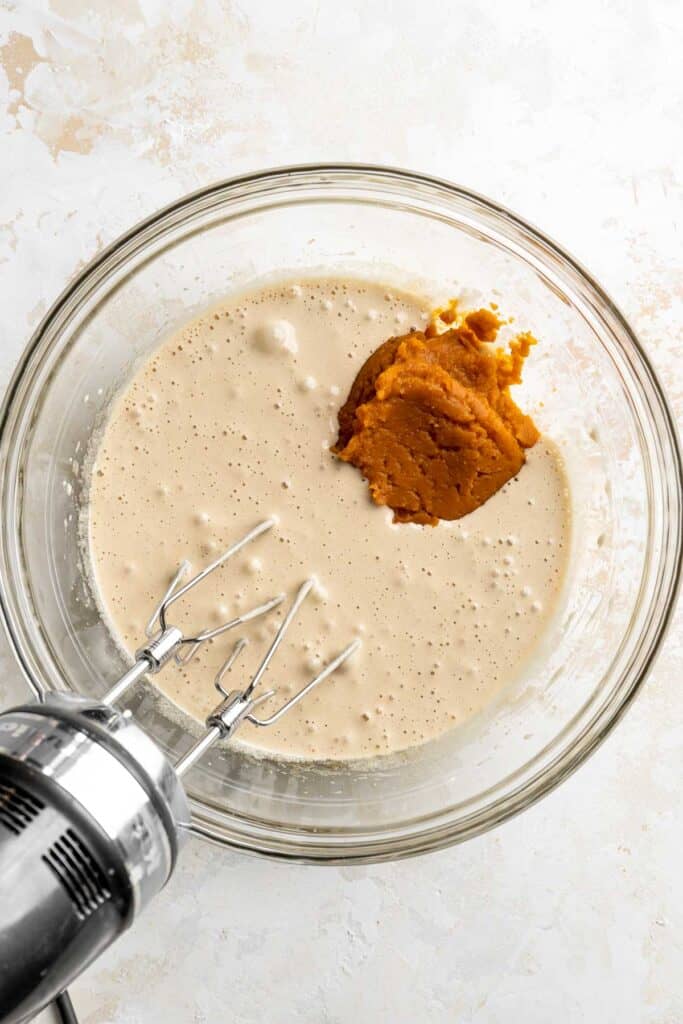
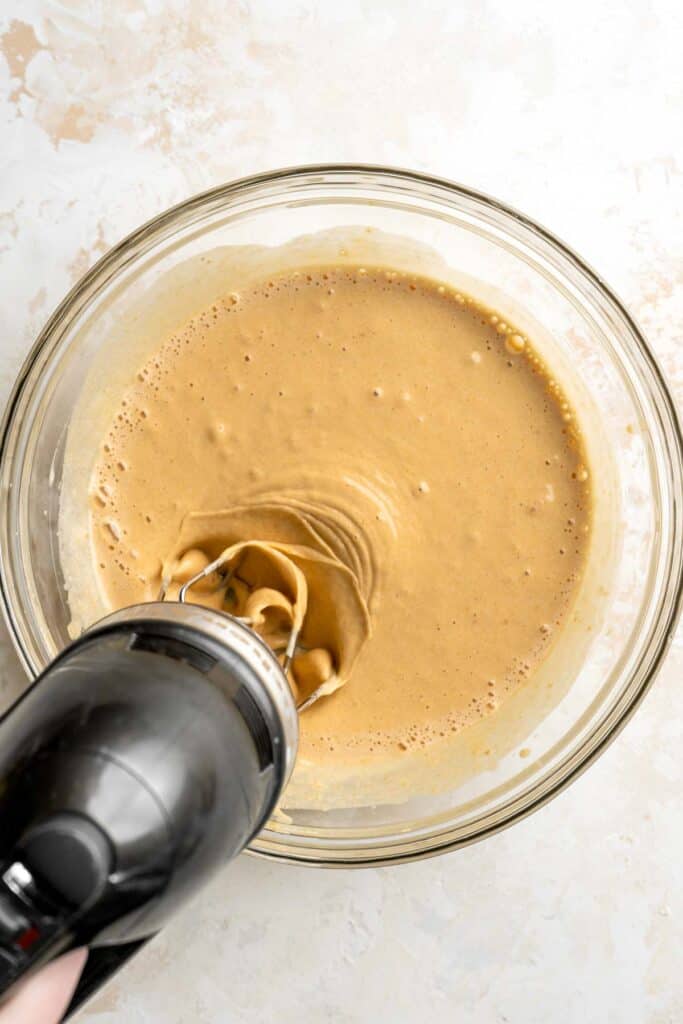
- Add dry to wet. Add the dry ingredients to the batter. Beat until combined and smooth.
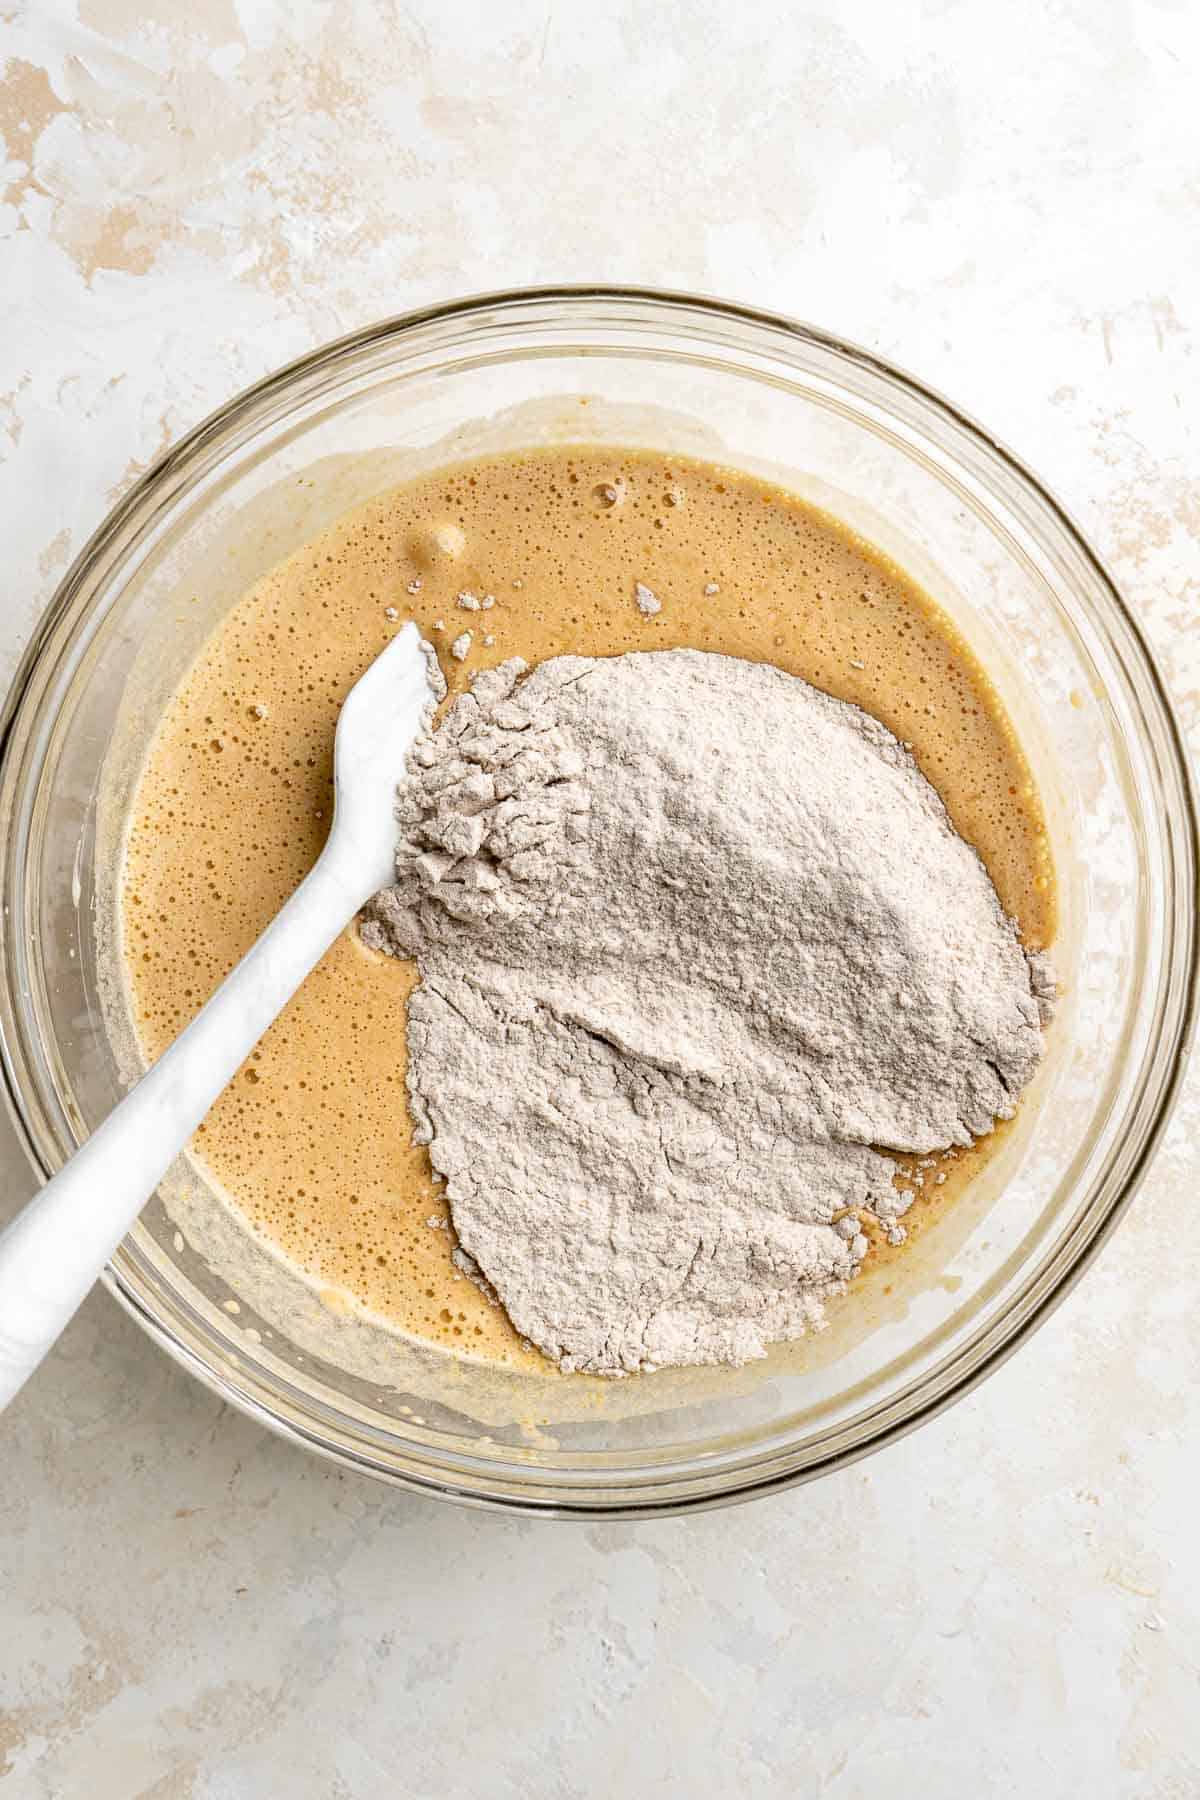
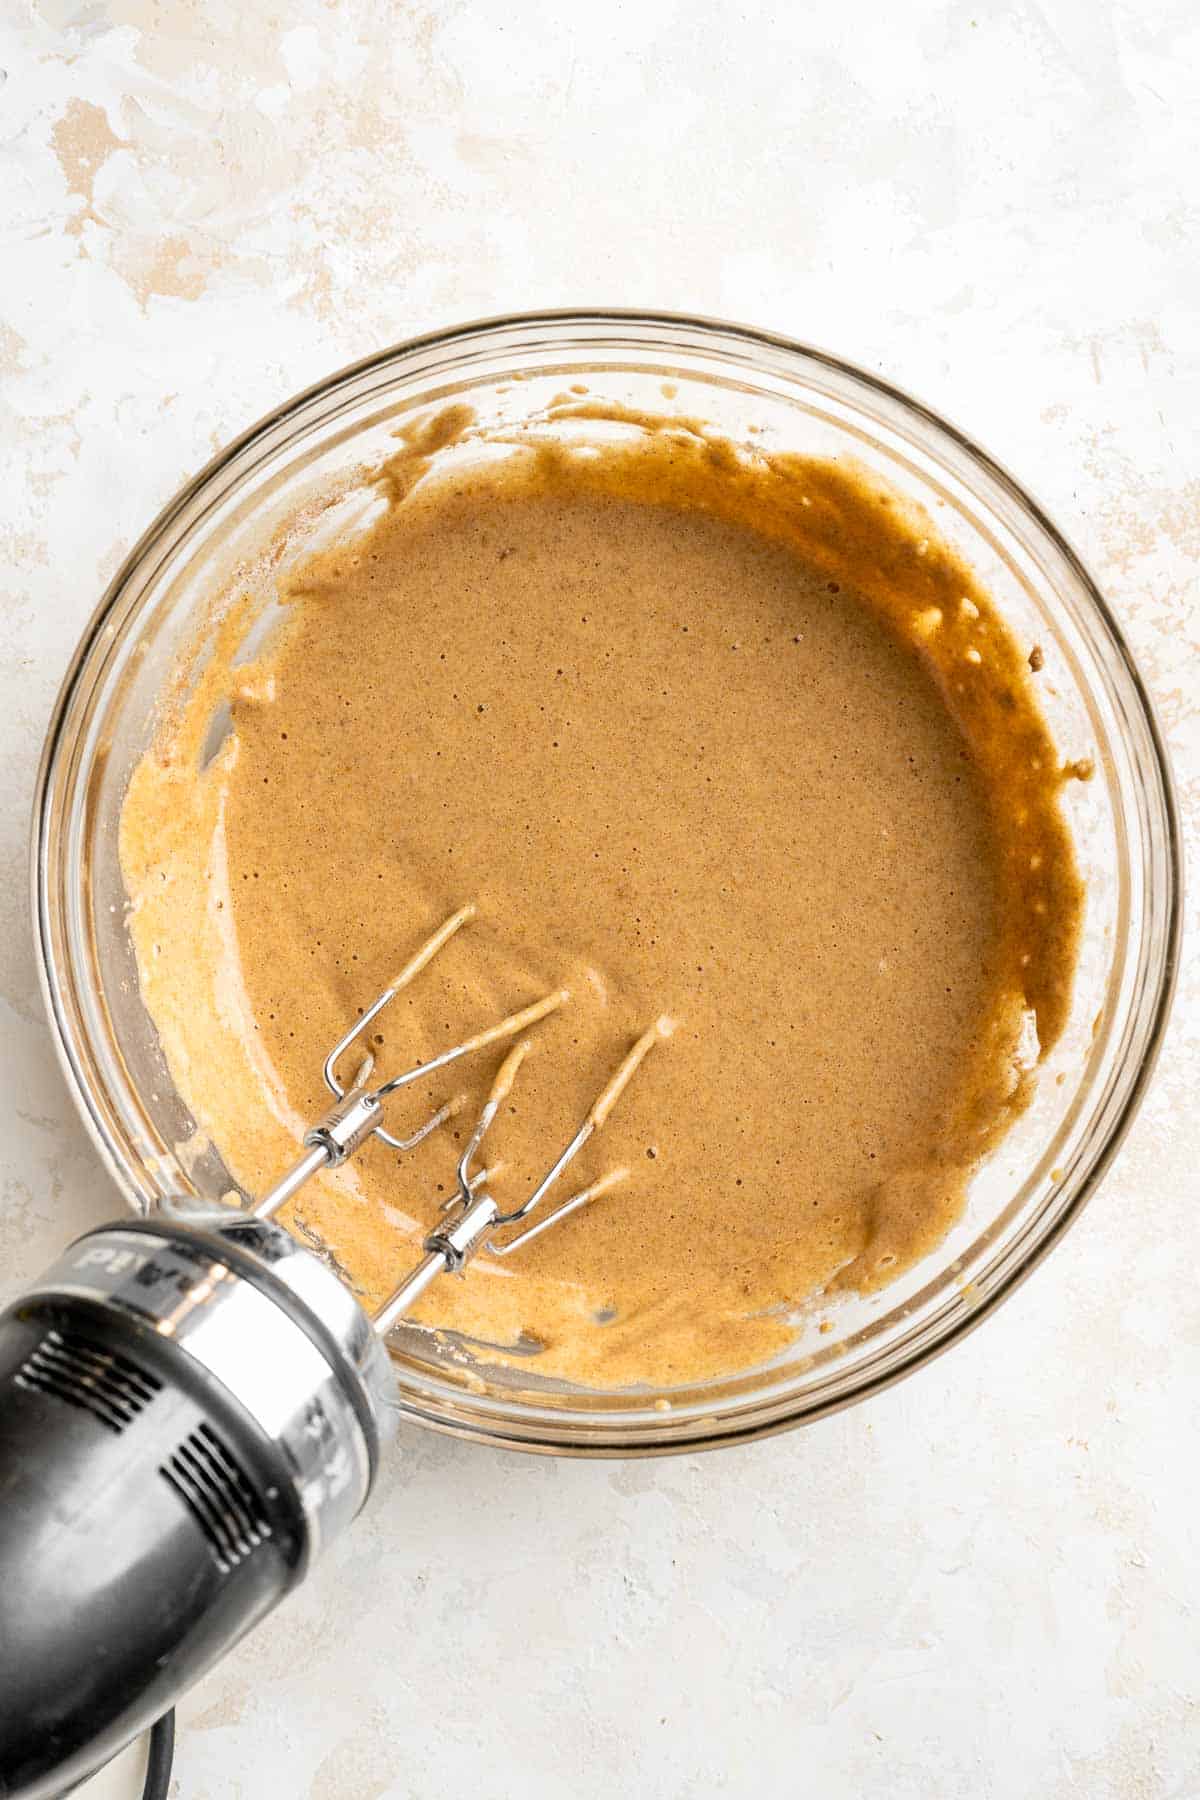
- Bake. Pour the batter into the prepared pan. Place into the oven to bake for 13-15 minutes, or until an inserted toothpick comes out clean.
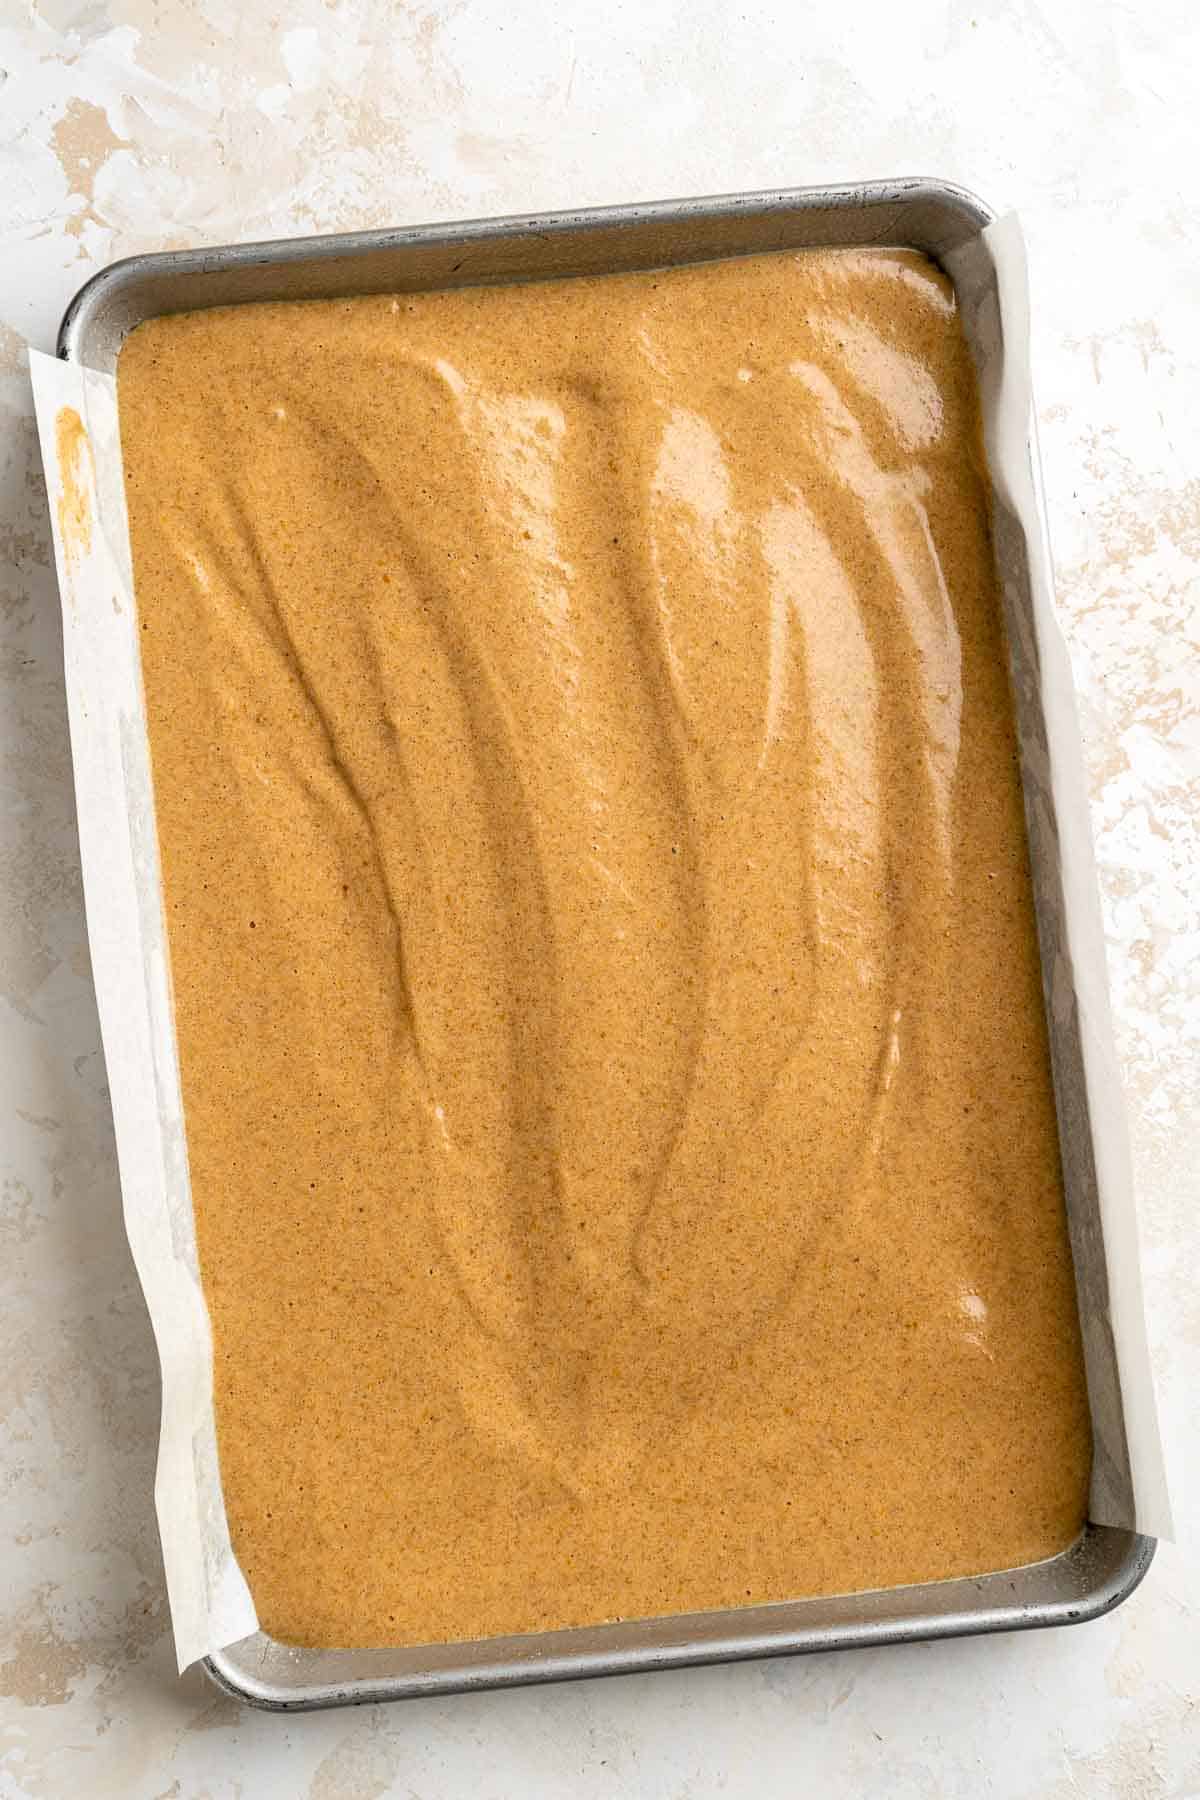
- Roll. When the cake comes out of the oven, immediately invert it onto the prepared kitchen towel, and peel off the parchment paper. Sprinkle the top of the cake liberally with more confectioners' sugar, then immediately roll the cake slowly and gently from the narrow end with the kitchen towel until the entire cake is rolled into the towel. Note that the cake will be warm when first rolled.
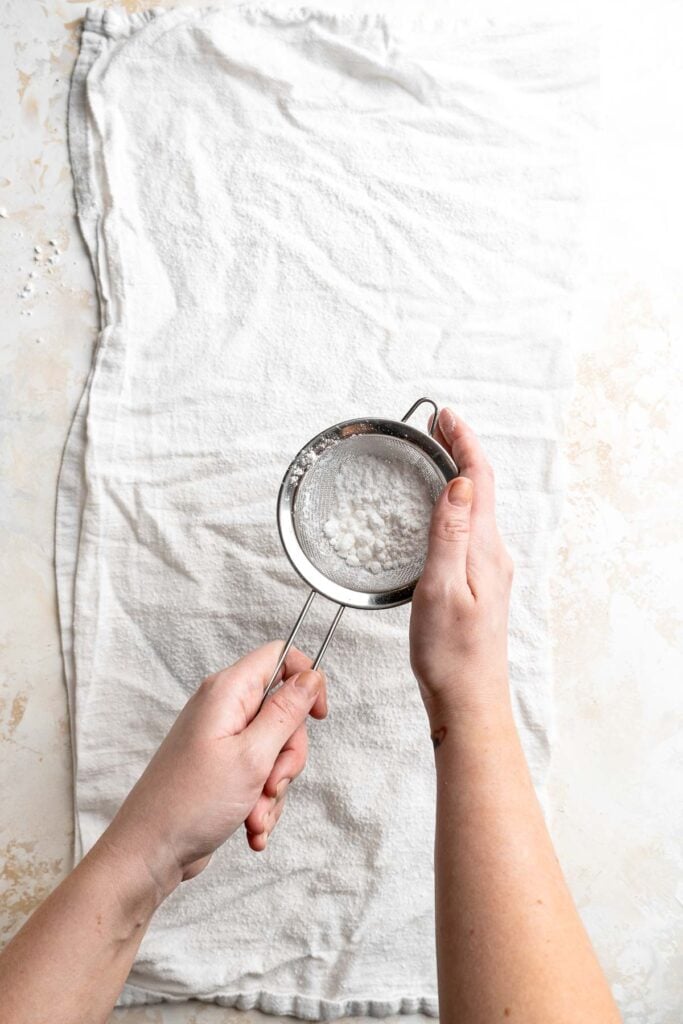
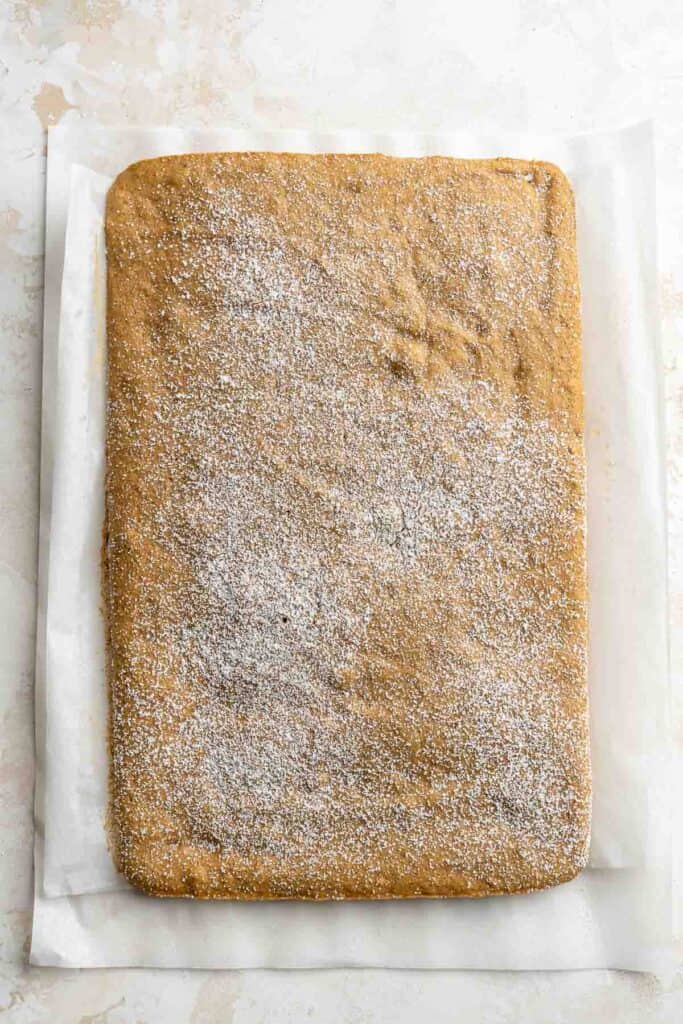
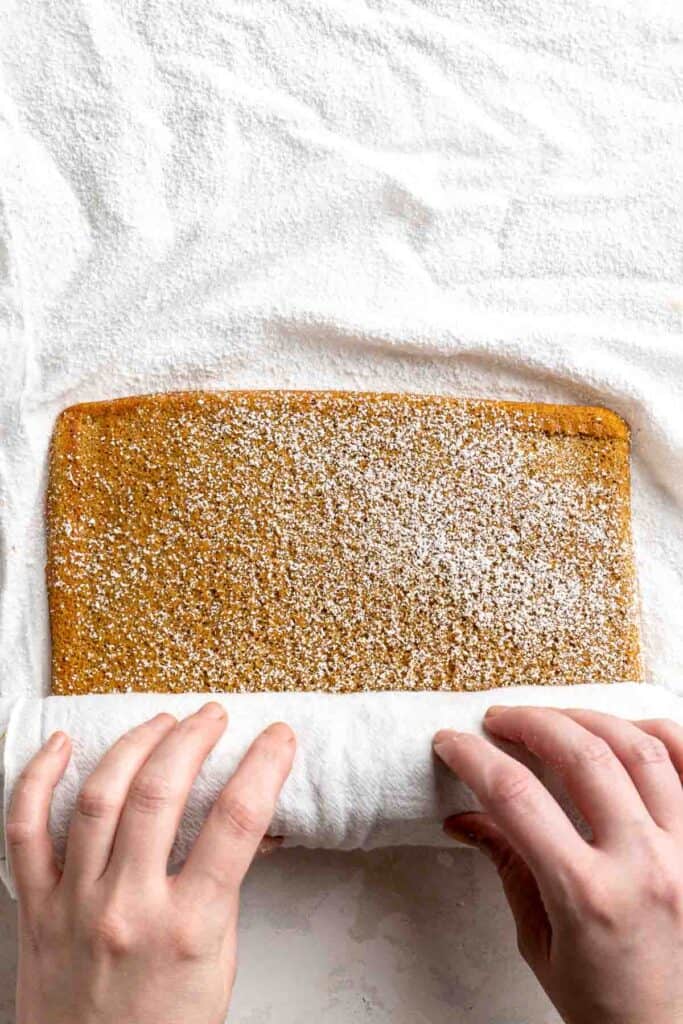
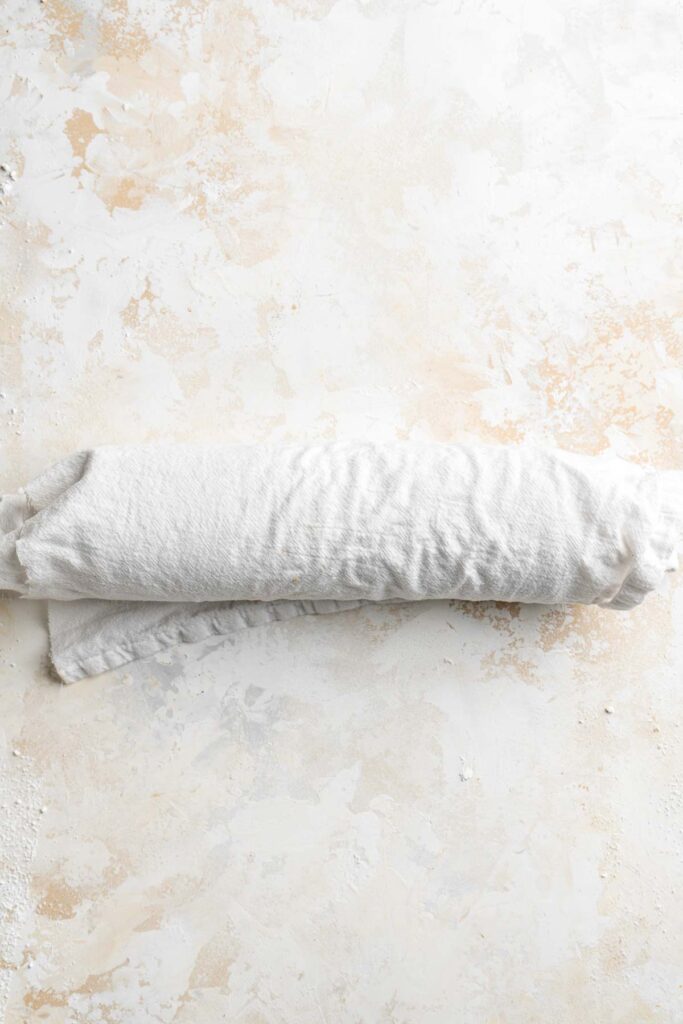
- Cool. Allow the cake to cool rolled up in the towel for 30-45 minutes.
Next, make the cream cheese filling.
Prepare the cream cheese filling while the cake cools. In a large mixing bowl, add the butter and cream cheese. Use a hand mixer to beat until combined and fluffy, about 3 minutes. Add in the confectioners' sugar and vanilla, then beat again for 3-5 minutes, or until fluffy.
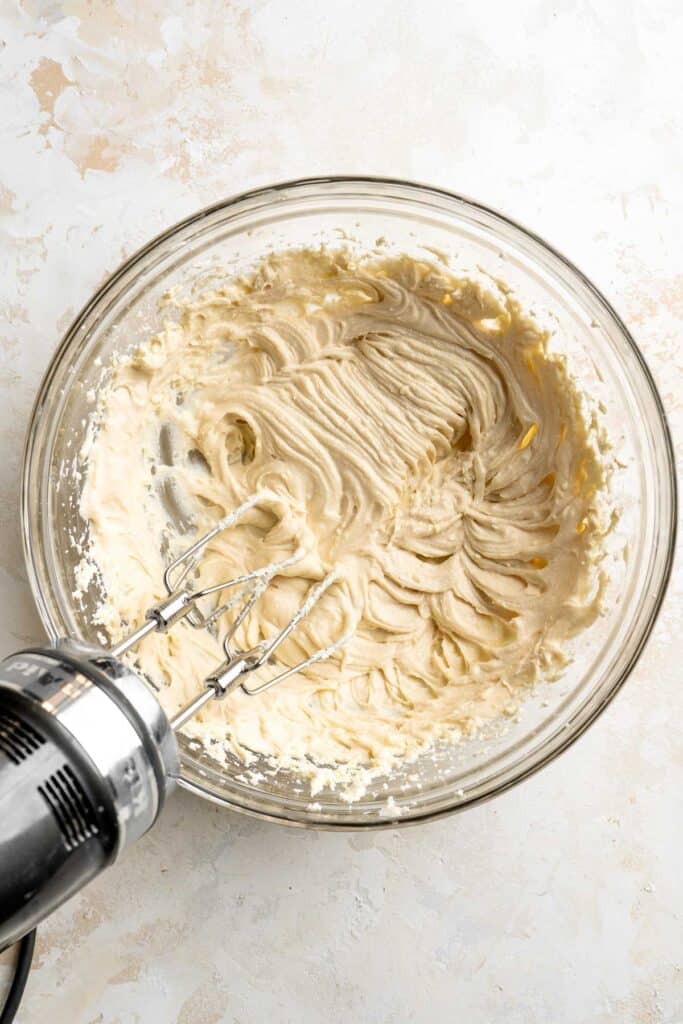
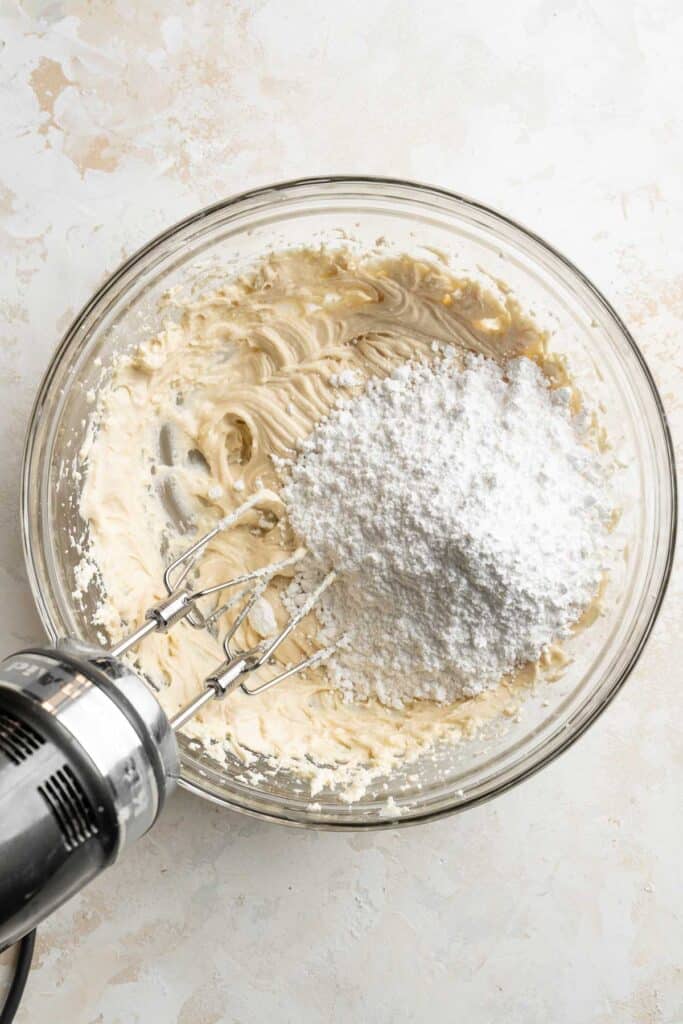
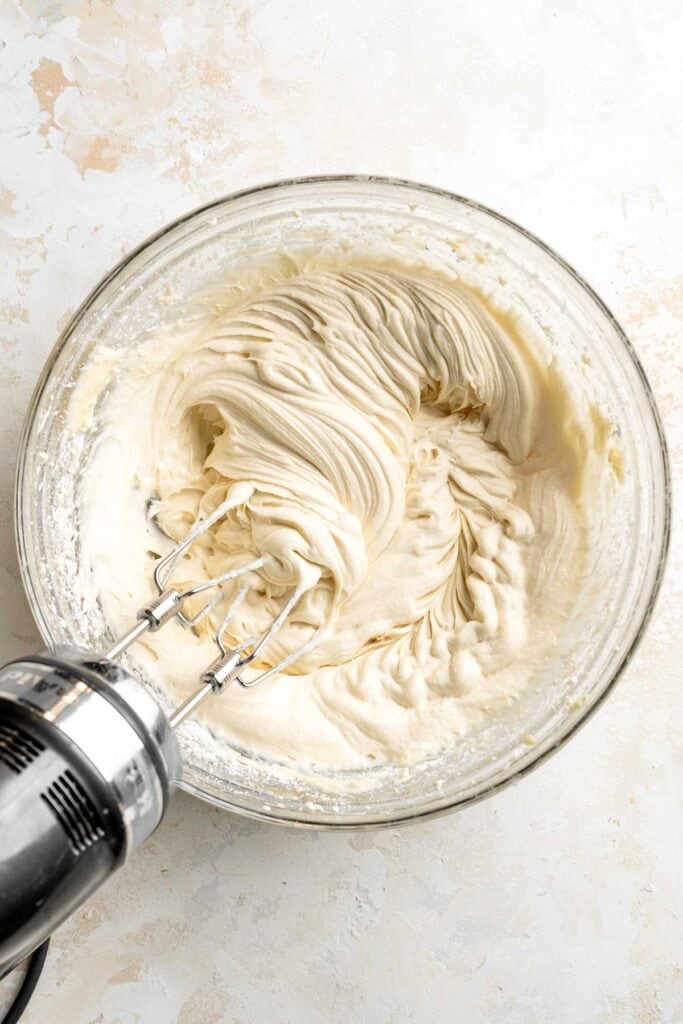
Finally, assemble the roll cake.
- Unroll. After the cake has cooled down completely for the allotted time, gently and very slowly unroll the cake.
- Ice. Use a small icing spatula to carefully spread the cream cheese filling evenly onto the cake, leaving a 1-inch border on the top and bottom empty.
- Roll. Carefully and slowly roll the cake back up. Cover tightly with plastic cling wrap and place into the fridge to set for at least 1 hour, up to overnight.
- Serve. Dust with confectioners' sugar before serving.
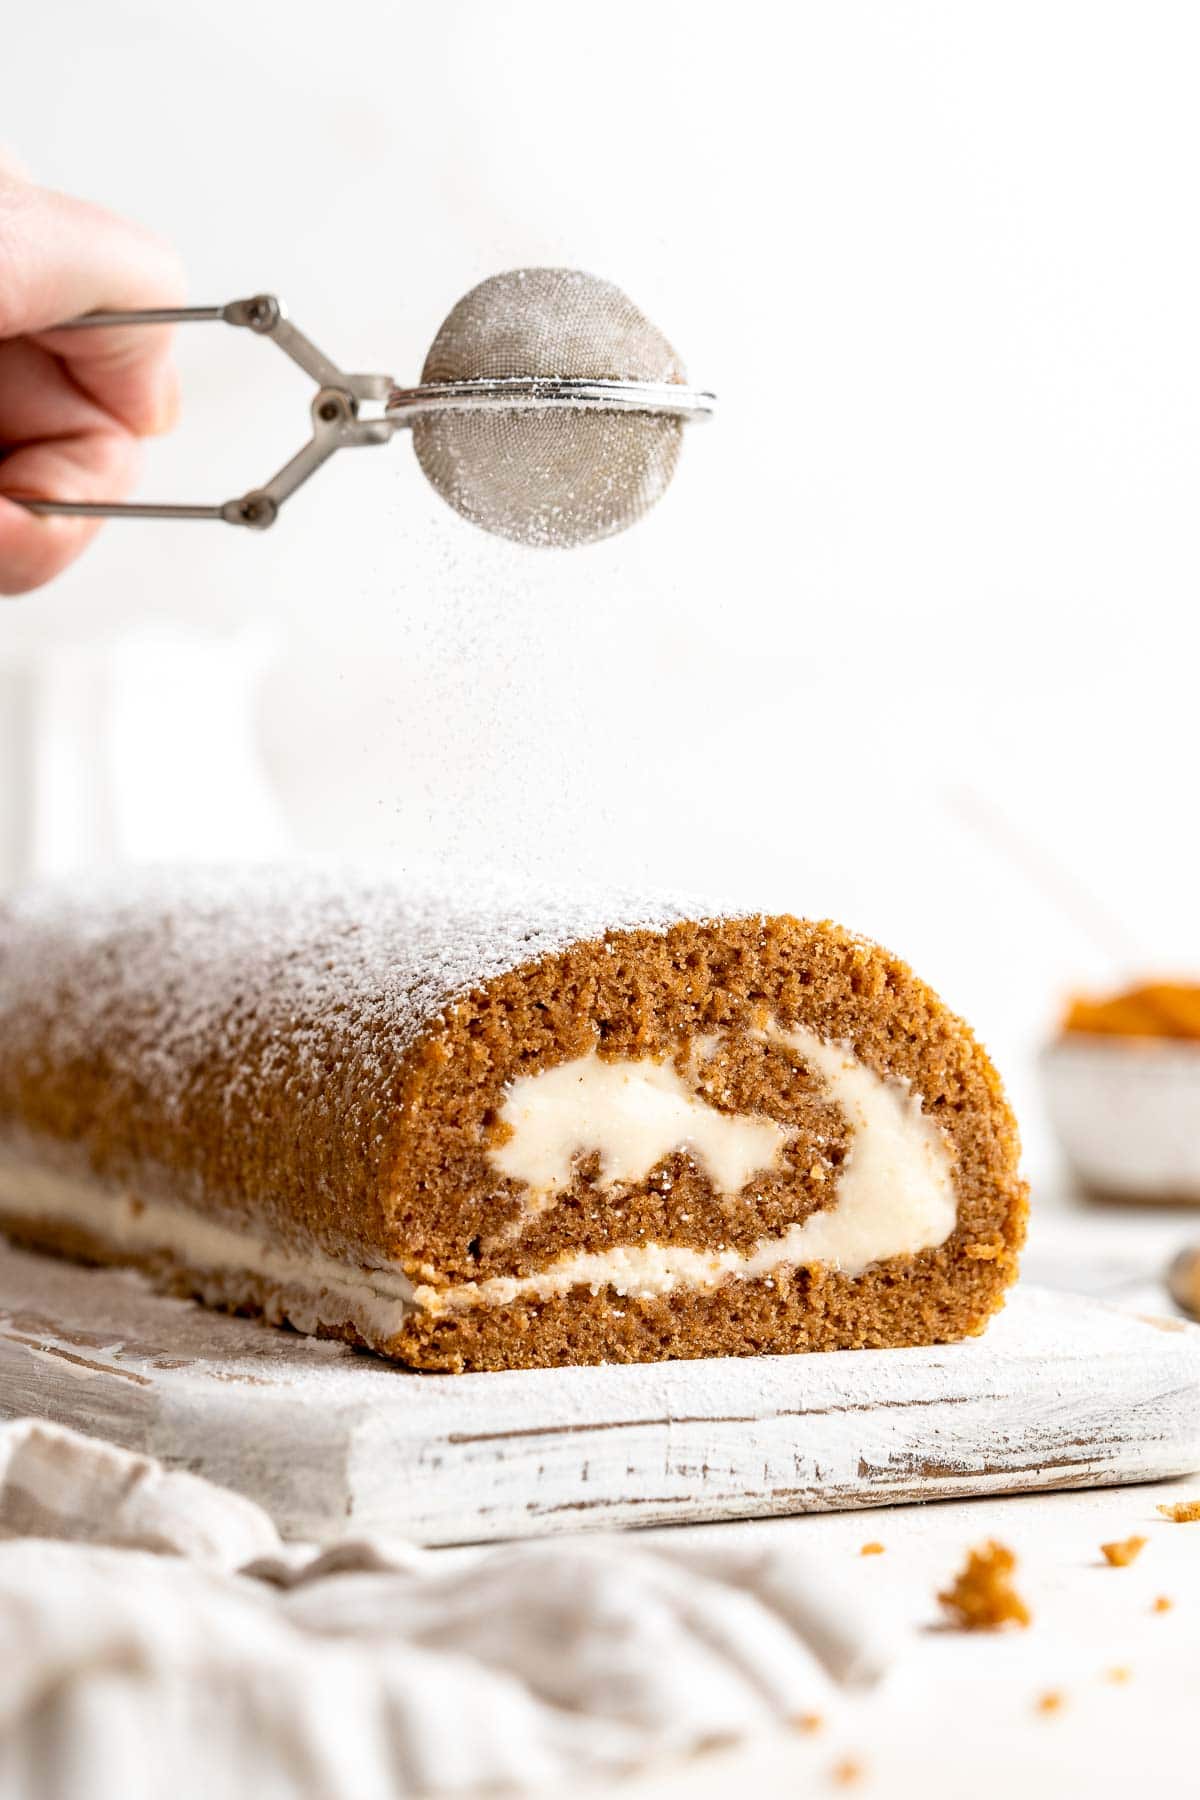
Recipe Variations
- Add chopped nuts or shaved chocolate. Before you roll your frosted pumpkin cake roll, sprinkle chopped toasted walnuts or shave some dark chocolate over the cream cheese mixture for a little crunch.
- Adjust the spices. Although we love the blend of spices in this easy pumpkin roll recipe, you can use all pumpkin pie spice, all cinnamon, or add a little flair with ground cardamom or extra ginger.
- Decorate it. This beautiful pumpkin roll is lovely sprinkled with a little powdered sugar, but you don't have to end there! You can pipe a design onto the baking tray before you add the cake batter, slice it into thick rounds then glaze them with melted ganache and sugar pumpkins, or pipe little meringue mushrooms or pumpkin macarons for a fun scene. Have fun with it!
How to Serve
This pumpkin roll is delicious served on its own, or paired as part of a dessert spread with some of my favorite fall desserts, including:
For more dessert recipe inspiration, see our 50 Best Fall Desserts.

Recipe Tips and Tricks
- Prepare the pan first. To make a great swiss roll, the warm cake has to come out of the cake perfectly. Spray your sheet pan really well, lay out the piece of parchment paper, and have your clean tea towel ready to go.
- Roll the cake right away. It feels strange to roll a hot cake, but it's essential! You need to train the cake how to roll otherwise, it will crack and break when you reroll it later.
- Be gentle adding the filling. After you unroll the cake to add the cream cheese filling, the cake won't lay perfectly flat. Be gentle to avoid breaking the delicate sponge cake.
- Bring your cream cheese and butter to room temperature. For the best cream cheese filling, you need to let the cream cheese and butter soften. Otherwise, they'll be thick and dense, not the fluffy, creamy cloud you're dreaming of.
Storing and Freezing Instructions
How to Store
Before you serve this cake, it should be refrigerated to firm up, and you should continue refrigerating it after your party, too. It will last 4-5 days in the fridge in an airtight container or covered with plastic wrap. The powdered sugar may fall off or dissolve in the fridge, so sprinkle it with extra right before serving.
How to Reheat
This cake is typically served chilled or at room temperature. If you heat it, the cream cheese mixture will melt and become a mess. If you prefer it warm, try microwaving a slice for 10-15 seconds.
How to Freeze
To freeze your pumpkin roll for later, wrap it well with plastic wrap, then store it in a freezer-safe bag for 2-3 months. Let it thaw in the fridge for several hours before serving.
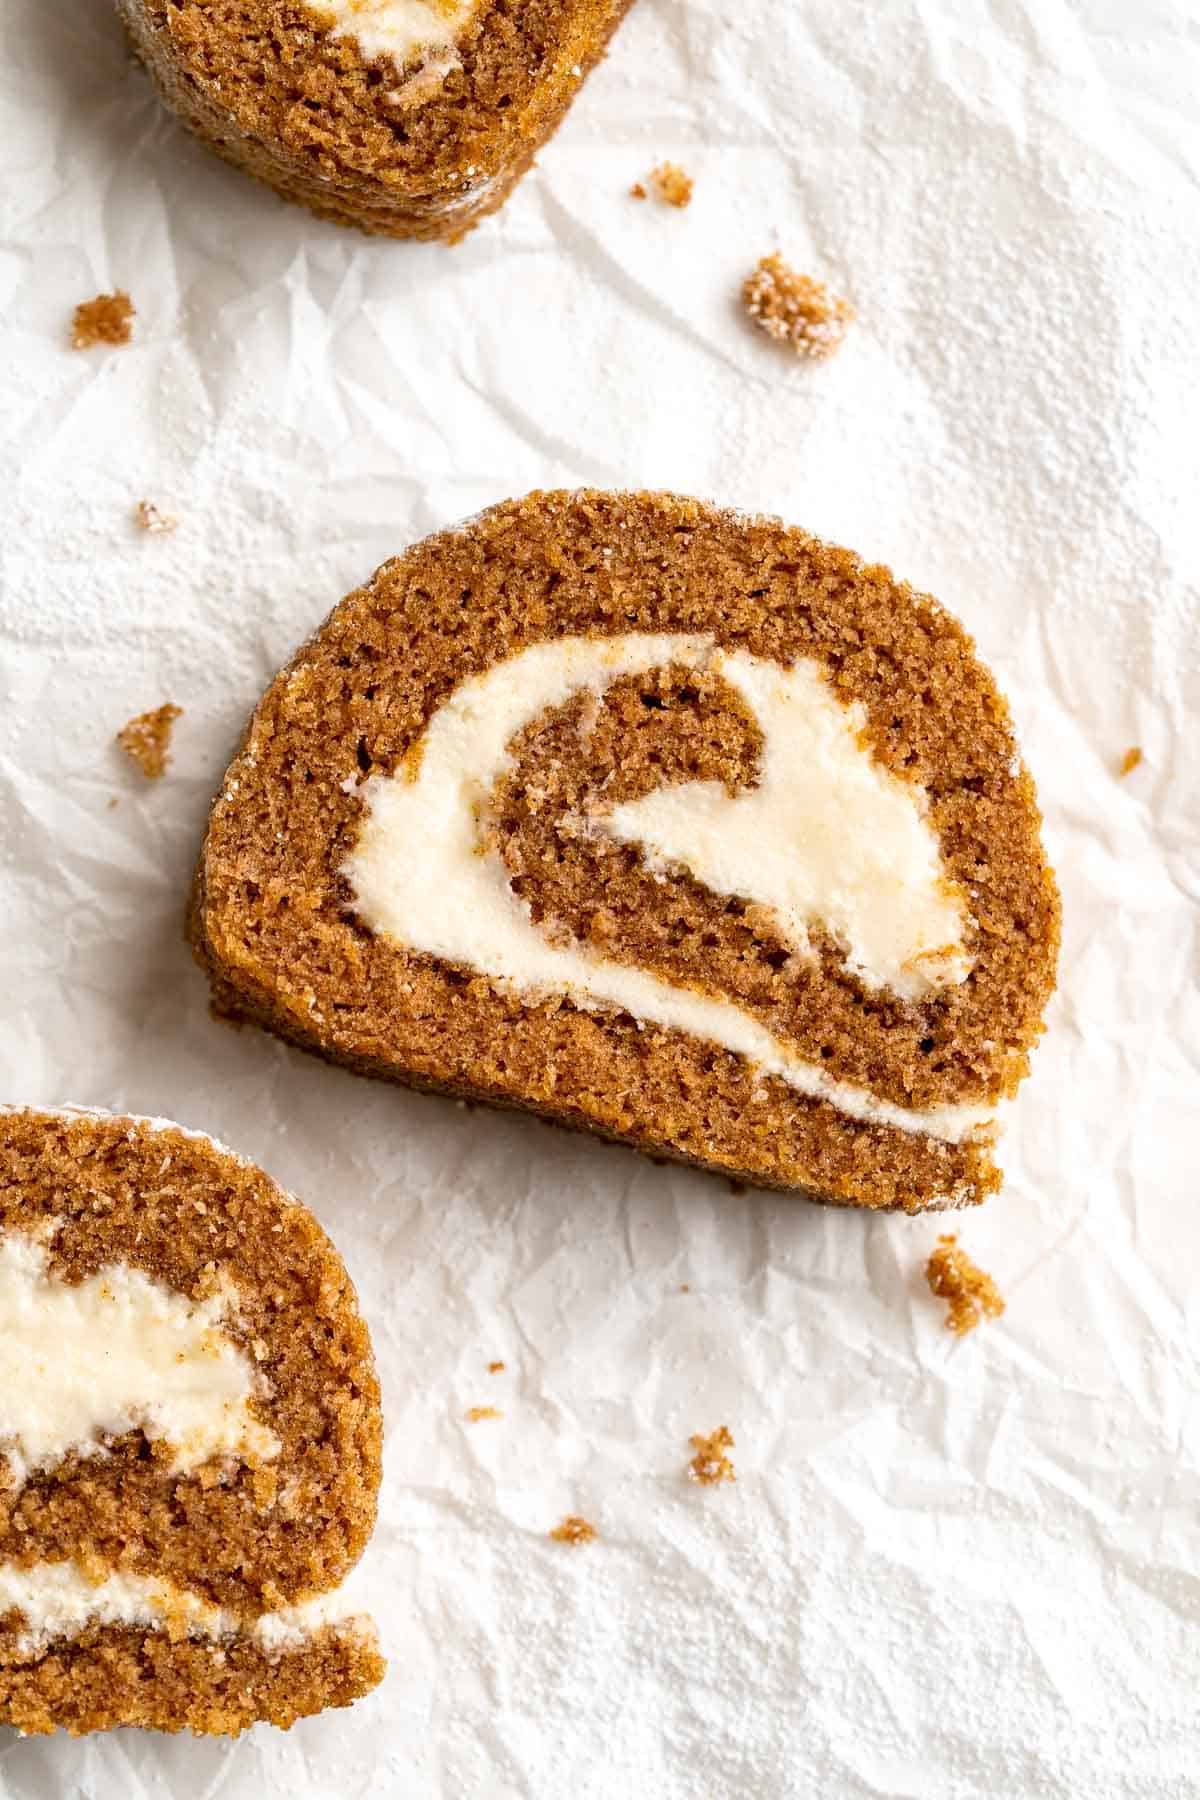
FAQs
The best pumpkin rolls are made with a heavenly cream cheese filling, which adds a sweet tangy flavor and creaminess that pairs perfectly with the fluffy, springy cake. It's so easy to make your own cream cheese filling. Just whip together softened cream cheese, butter, powdered sugar, and vanilla extract until light and fluffy.
If this is the first time you've made a swiss roll, it can be a little intimidating to nail the rolling process! Fortunately, it's quite easy. You'll need to remove the cake from the pan while it is still hot, inverting it onto a clean tea towel coated with confectioner's sugar. Then, slowly and carefully roll it from the long side. Let the hot cake cool on a wire rack for 30-45 minutes while you prepare the filling. Then, carefully unroll the cake, add your filling, and slowly reroll the cake. Let it chill in the fridge to firm up, then sprinkle with powdered sugar and serve!
Since the pumpkin roll filling is made from just cream cheese, butter, powdered sugar, and vanilla extract, there are only two reasons why the filling would be runny. The first issue is if you added too much vanilla extract. However, it would take quite a bit of extract to have this problem. It's much more likely that the cream cheese and butter are too warm. They should be soft before whipping, but not wet or runny. If your filling is too runny, chill it for 20-30 minutes, then try rewhipping.
More Pumpkin Dessert Recipes
- 20 Best Pumpkin Desserts
- Pumpkin Bread
- Pumpkin Pie
- No Bake Pumpkin Cheesecake
- Pumpkin Mousse
- Mini Pumpkin Pies
Tried this recipe?
I'd love to hear what you think! Leave a comment and rating below to share your feedback. Your reviews help others discover this recipe and help me keep creating more free recipes for you. Snap a photo and tag me on social media @aheadofthyme too.

Creamy Pumpkin Pasta
This delicious Pumpkin Pasta is one of the easiest pasta dishes you can make this fall! Made with real pumpkin, heavy cream, and Parmesan cheese, it's flavorful, creamy, cheesy, and just the right amount of savory pumpkin goodness. Ready in 20 minutes, this recipe is ideal for busy weeknights or cozy Sunday dinners.
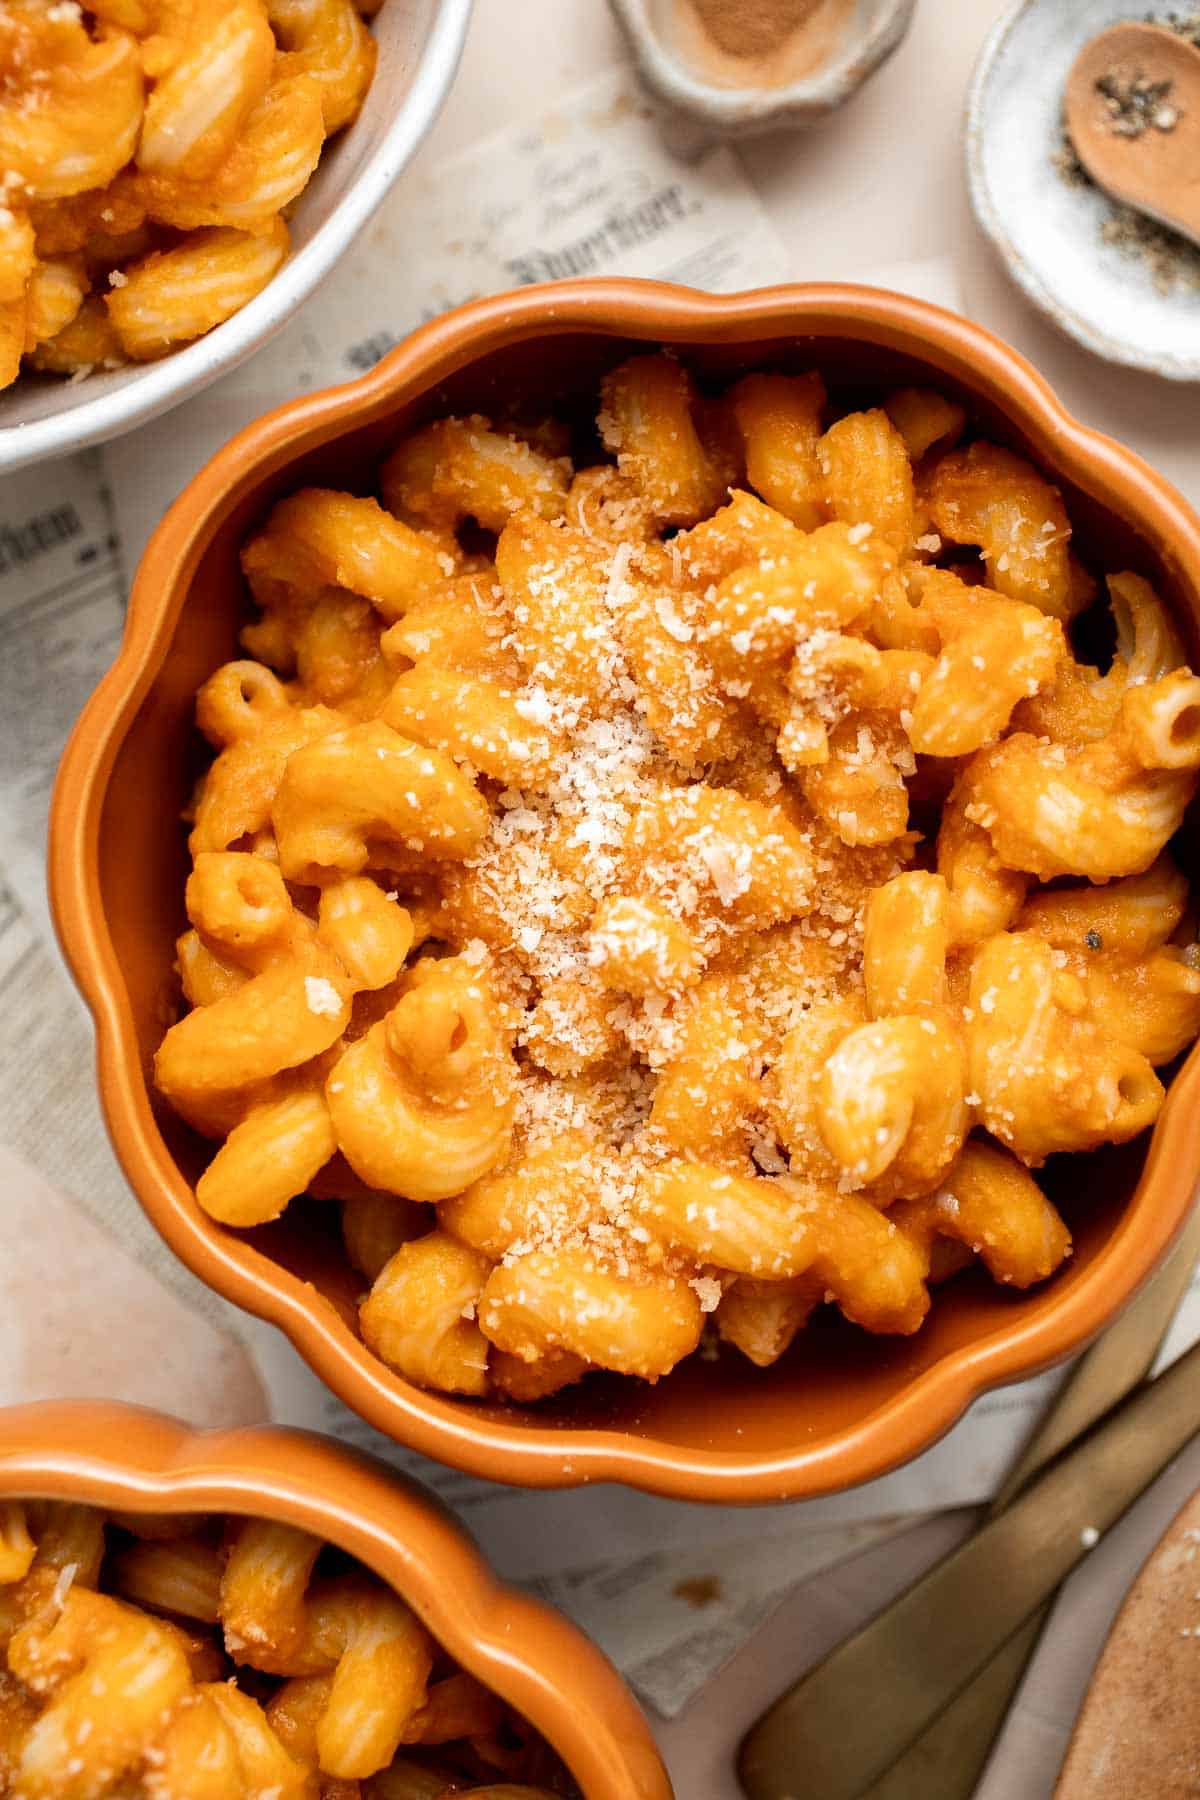
Fall or not, this creamy pumpkin pasta is simple to make yet truly comforting for those chilly nights. Whether you're in the mood for some cozy comfort food or just want to make something delicious using pumpkin, you won't need a lot of prep time or fancy ingredients to make this quick recipe. Easily pair this with a green salad, crusty bread, or some roasted vegetables for a complete meal.
Why You'll Love this Pumpkin Pasta Recipe
- Made with real pumpkin. Even if you're not a fan of pumpkin, the combination of tomato paste, heavy cream, and Parmesan cheese mellows out the flavor so it's not overwhelmingly pumpkin-y. It has the perfect balance of savory and sweet that most people would enjoy!
- Quick and easy to make. With just a few ingredients and 20 minutes, you can have this delicious pumpkin pasta on the dinner table even on the busiest weeknights. Plus, it's a one-pot meal so you'll definitely save time and effort on clean-up.
- Creamy and cheesy. The heavy cream gives this pumpkin pasta a rich and luscious texture, while the Parmesan cheese adds just enough salty, nutty flavors to round out the sweetness of the pumpkin.
- Versatile. Mix in some shredded chicken and ground beef for a protein boost, use any type of pasta you'd like, season with herbs like sage or oregano, and add green like spinach or kale.

Pumpkin is Fall's Superfood
Pumpkin is one of the main ingredients in this creamy pumpkin pasta - and guess what? It is fall's superfood. Which means it has a whole list of amazing health benefits. Some of these health benefits includes: helping your eyesight, a great source of fibre, has cancer preventing properties, fights wrinkles, boosts your mood, boosts your immune system, lowers blood pressure, and promotes heart health.
Ingredient Notes
To make this creamy Pumpkin Pasta, you will need the following ingredients (full measurements in recipe card below):
- pasta - I use cavatappi for this recipe, but you can use any pasta you have on hand like macaroni, penne, ziti, and rigatoni.
- olive oil - for sautéing the aromatics.
- garlic - fresh minced garlic adds a lot of flavor to the dish.
- pumpkin puree - use canned, pure pumpkin puree for this recipe. Don't buy the pumpkin pie filling because it has added sugar and spices that's certainly not for this recipe. Feel free to make your own pumpkin puree at home.
- tomato paste - a little bit of tomato paste provides a rich umami flavor.
- salt and pepper - season to taste.
- heavy cream - this transforms the sauce into a rich, creamy, and delicious mixture. You can use half-and-half or whole milk, but the texture won't be as creamy.
- cinnamon - a pinch of cinnamon adds a hint of warmth and sweetness.
- Parmesan cheese - for topping the pasta. Use freshly grated for the best flavor.
You will also need a medium cooking pot and a medium skillet or saucepan.

How to Make the Best Pumpkin Pasta
- Cook pasta. Bring a medium pot of salted water to a boil. Add pasta and cook for 8-10 minutes until al dente, or according to package instructions. Reserve 1 cup of the pasta water and drain. Set aside.
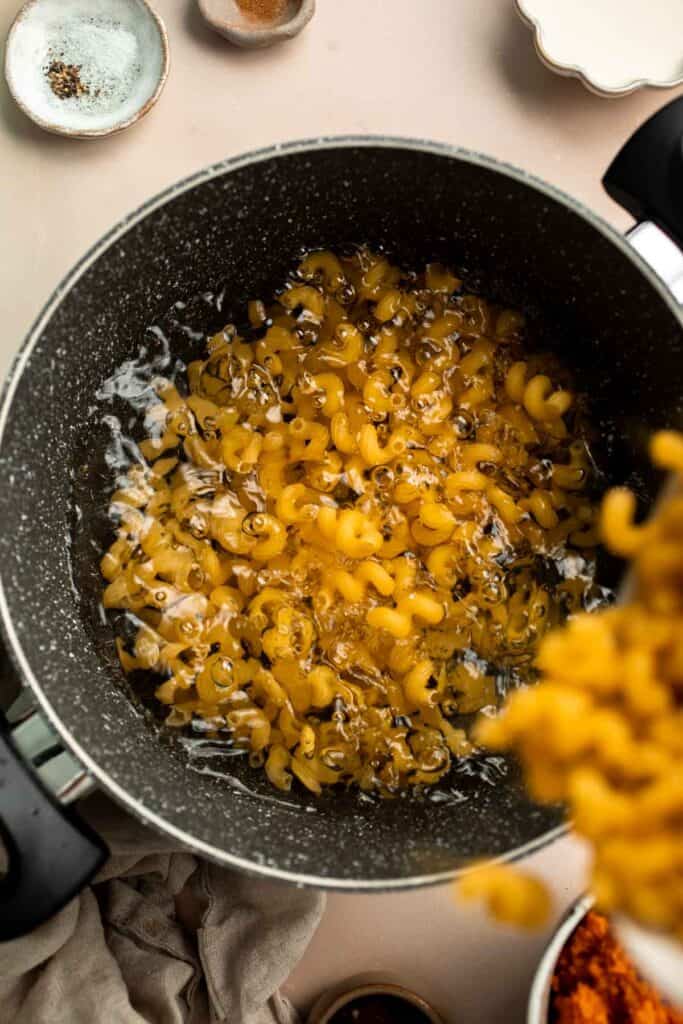

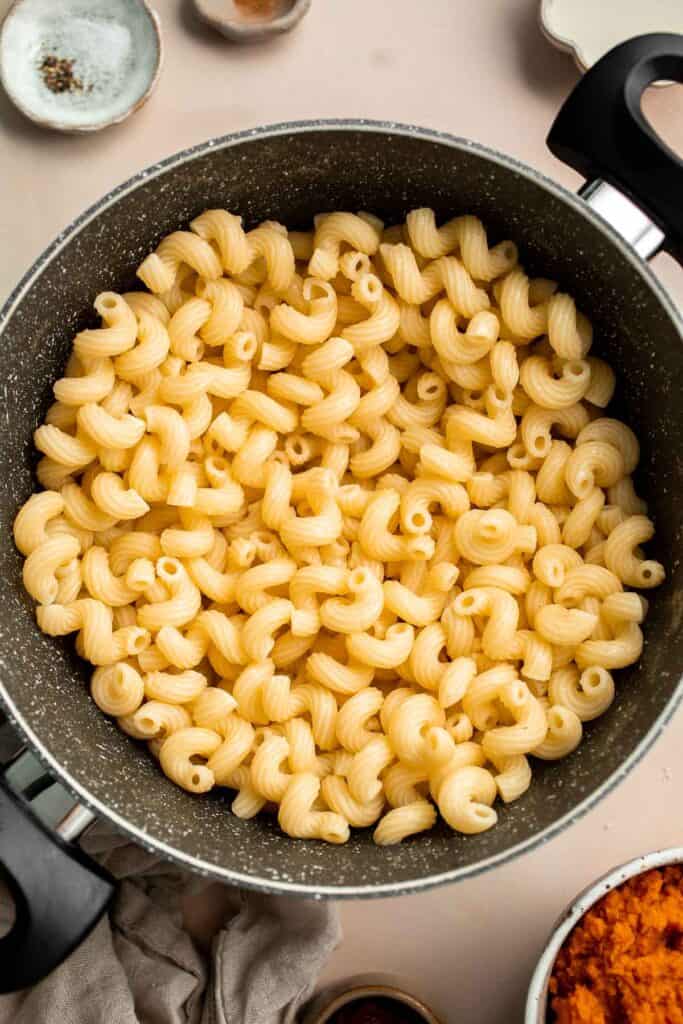
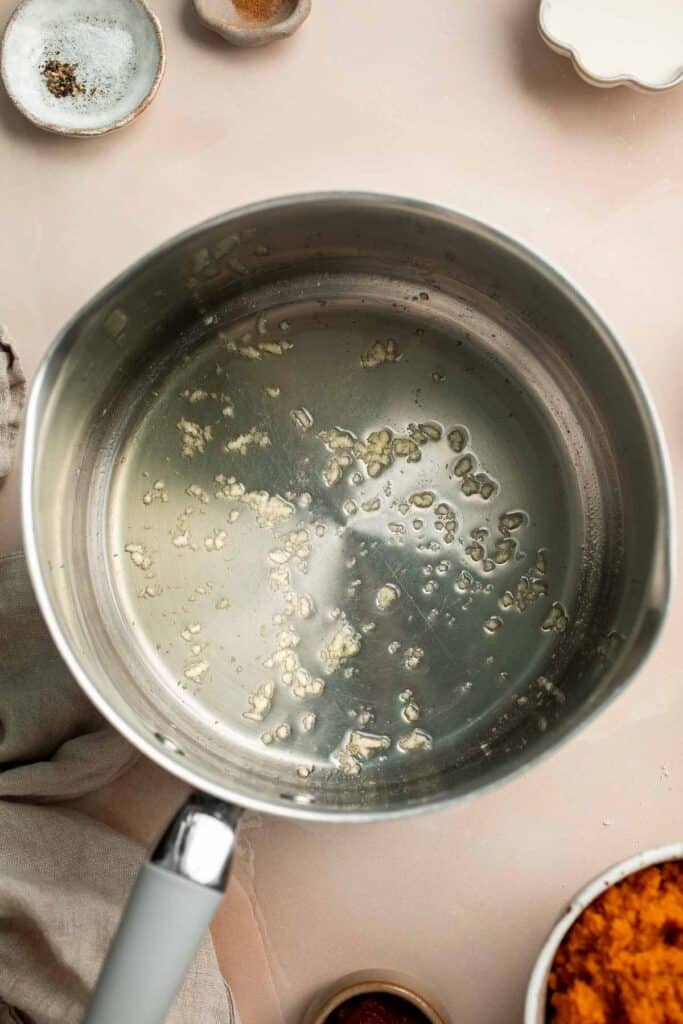
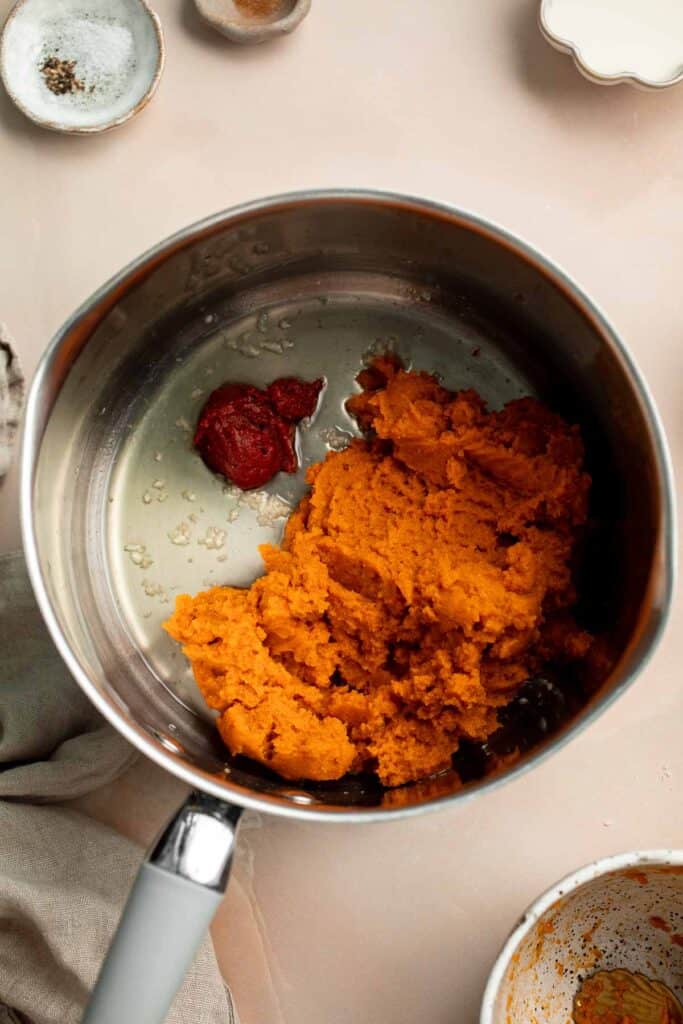
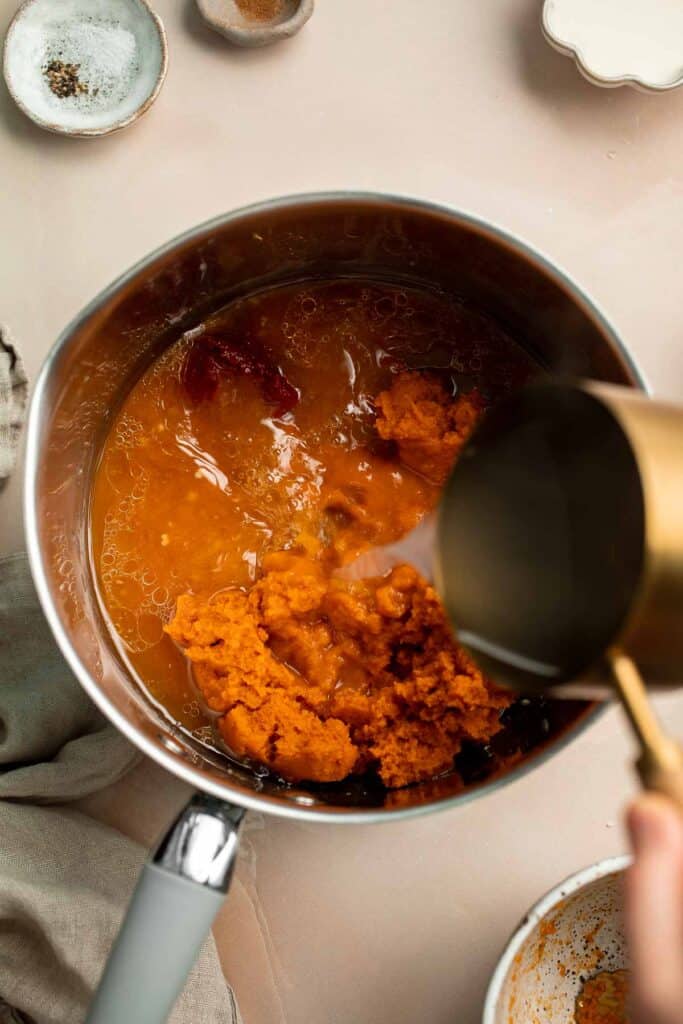
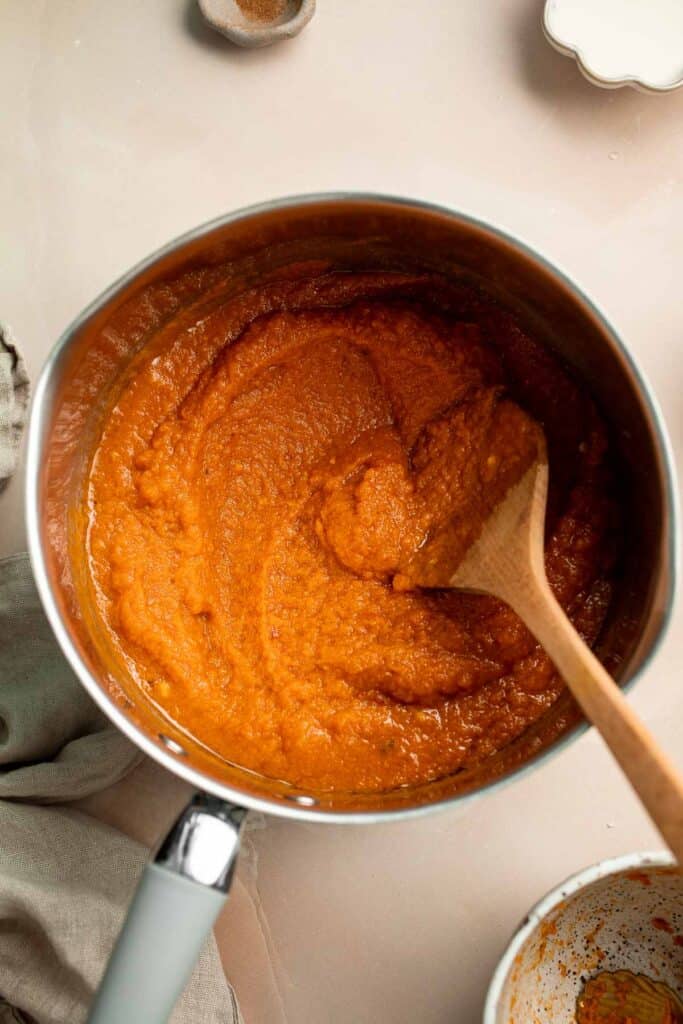
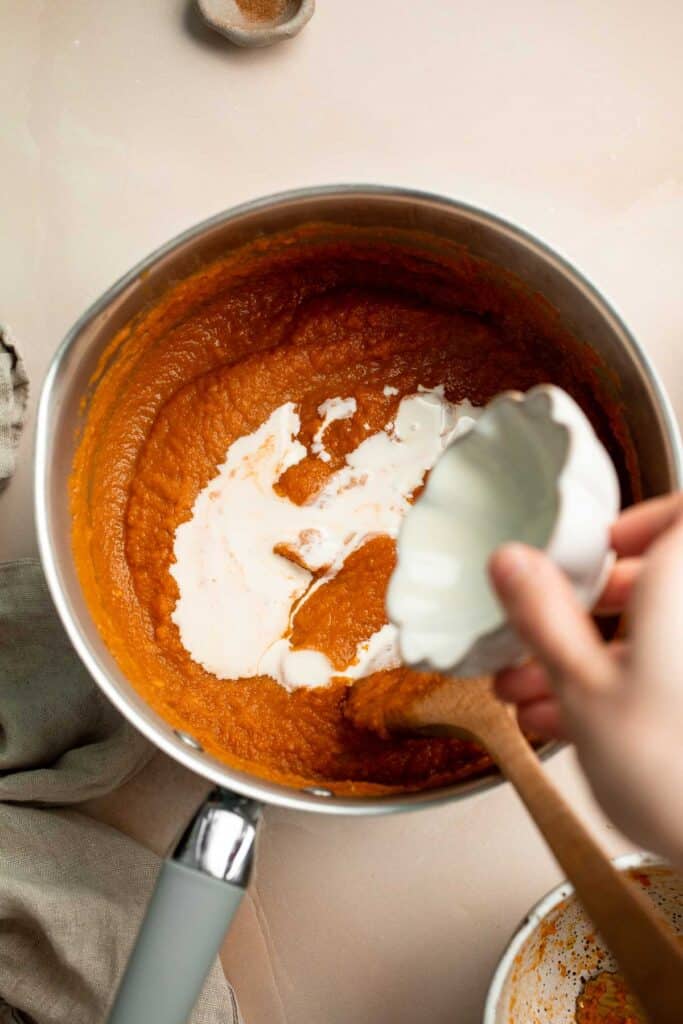
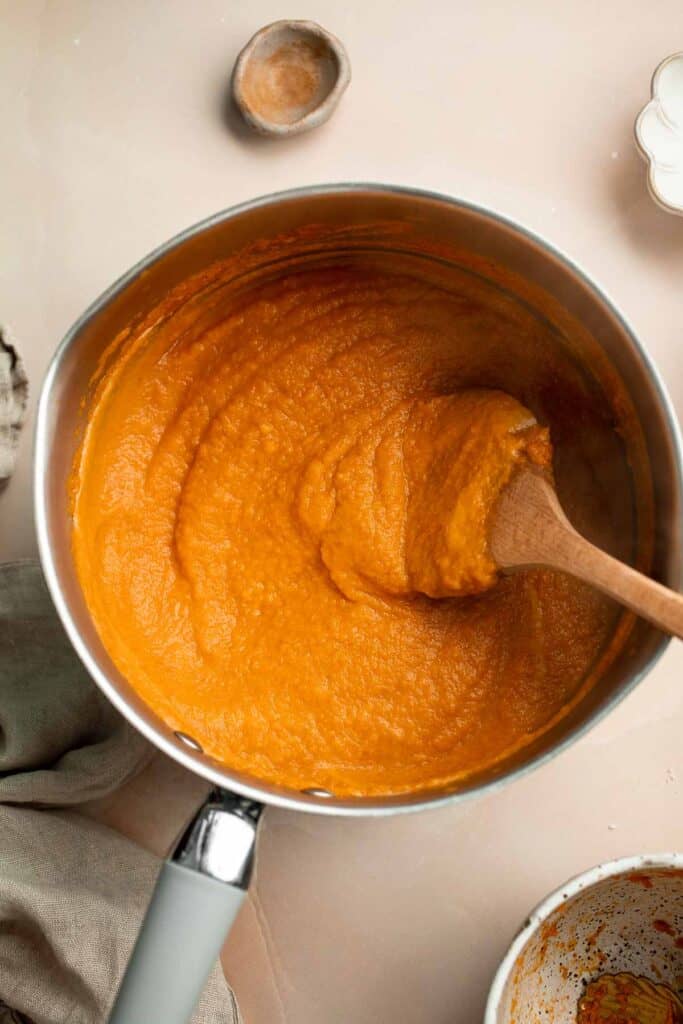
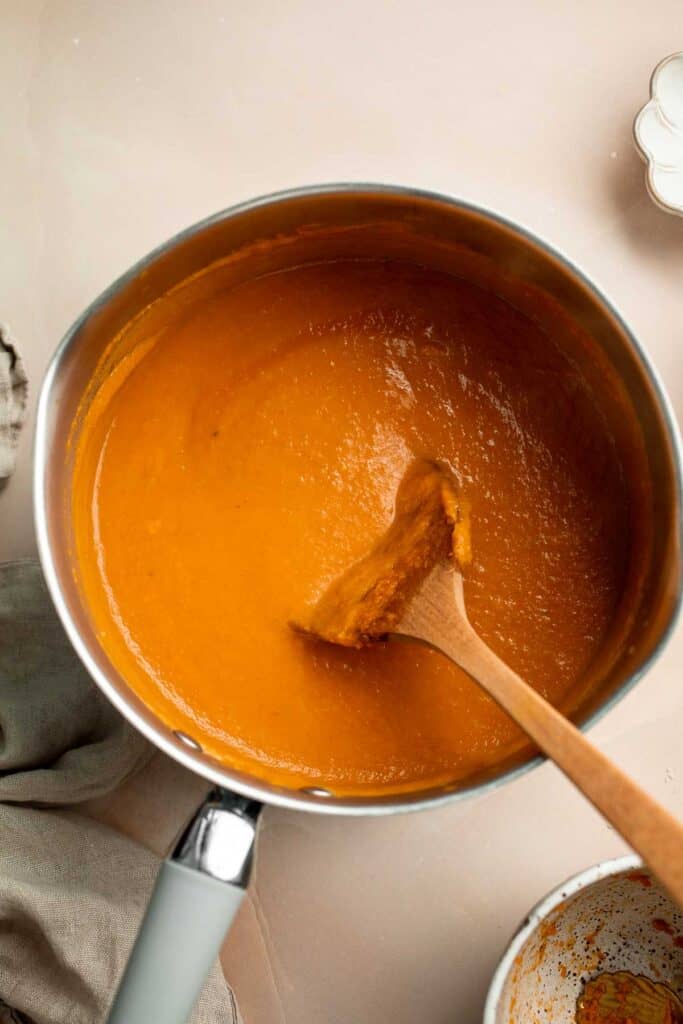
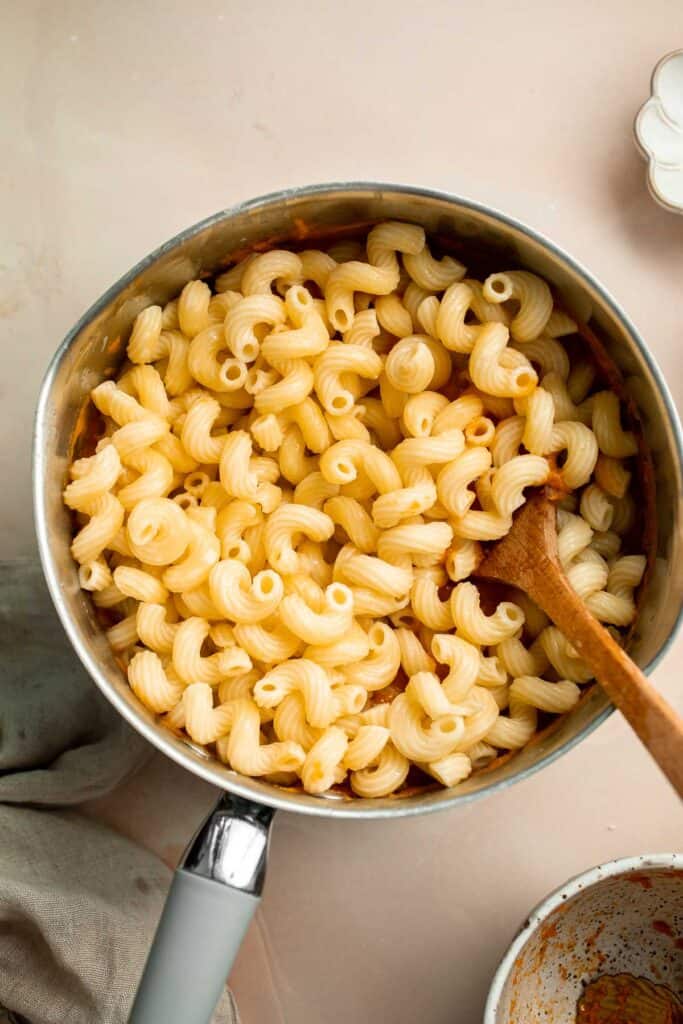
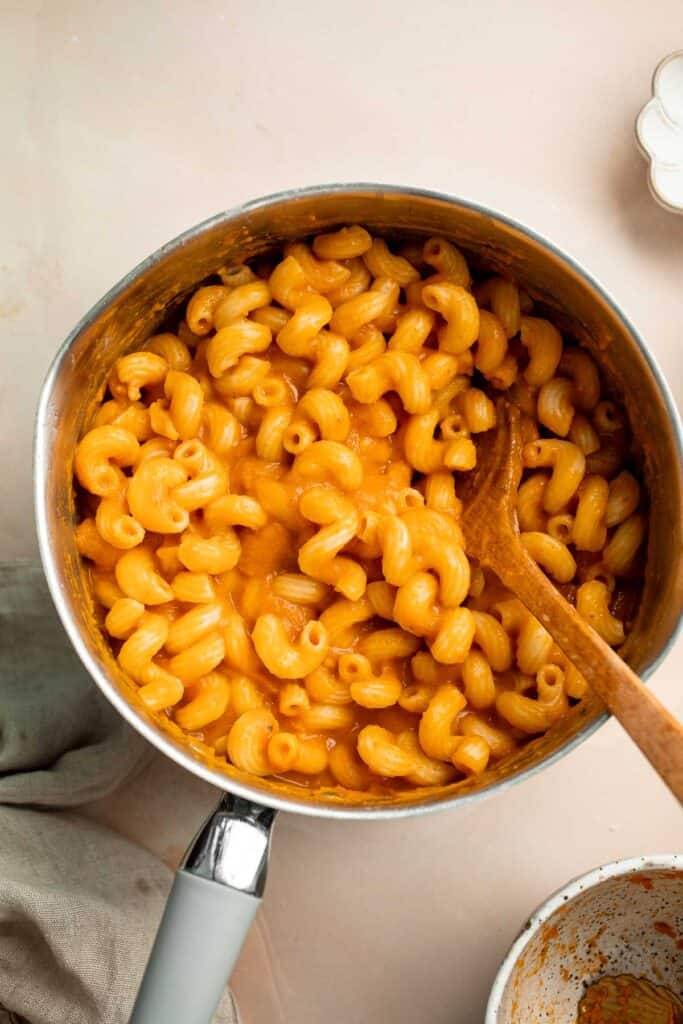
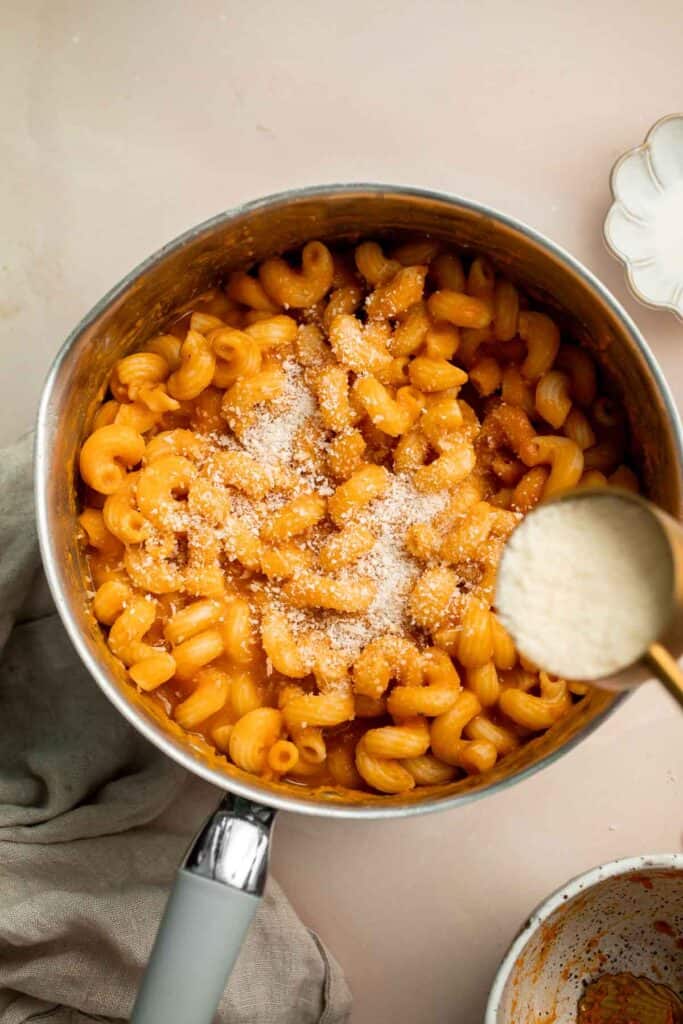
Recipe Variations
- Use homemade pumpkin puree. Make your own pumpkin puree by roasting a small pumpkin in the oven and pureeing it in a food processor.
- Skip the cream. Go light by swapping out the heavy cream for vegetable or chicken broth.
- Add meat. Give this pasta a protein boost by stirring in some shredded chicken, ground beef, or Italian sausage are all great options.
- Mix in some veggies. Try adding spinach, kale, mushrooms, or zucchini for a healthier meal.
- Experiment with seasonings. Use your favorite herbs and spices such as oregano, basil, parsley, nutmeg, turmeric, and red pepper flakes for an extra boost of flavor.
- Sprinkle some nuts. Add some crunch with walnuts, hazelnuts, cashews, or pine nuts.
- Make it extra cheesy. Pile on more Parmesan cheese, or add in some mozzarella for a melty cheesy pasta.
How to Serve
Serve this delicious Pumpkin Pasta on its own or pair it with a salad, bread, vegetables, or grilled or baked protein such as:
- Caesar Salad
- Rosemary Garlic Focaccia Bread
- Oven-Baked Chicken Breast
- Cheesy Garlic Bread
- Balsamic Roasted Broccoli
- Pecan Crusted Chicken
For more recipe inspiration, see our 30 Best Side Dishes for Pasta.
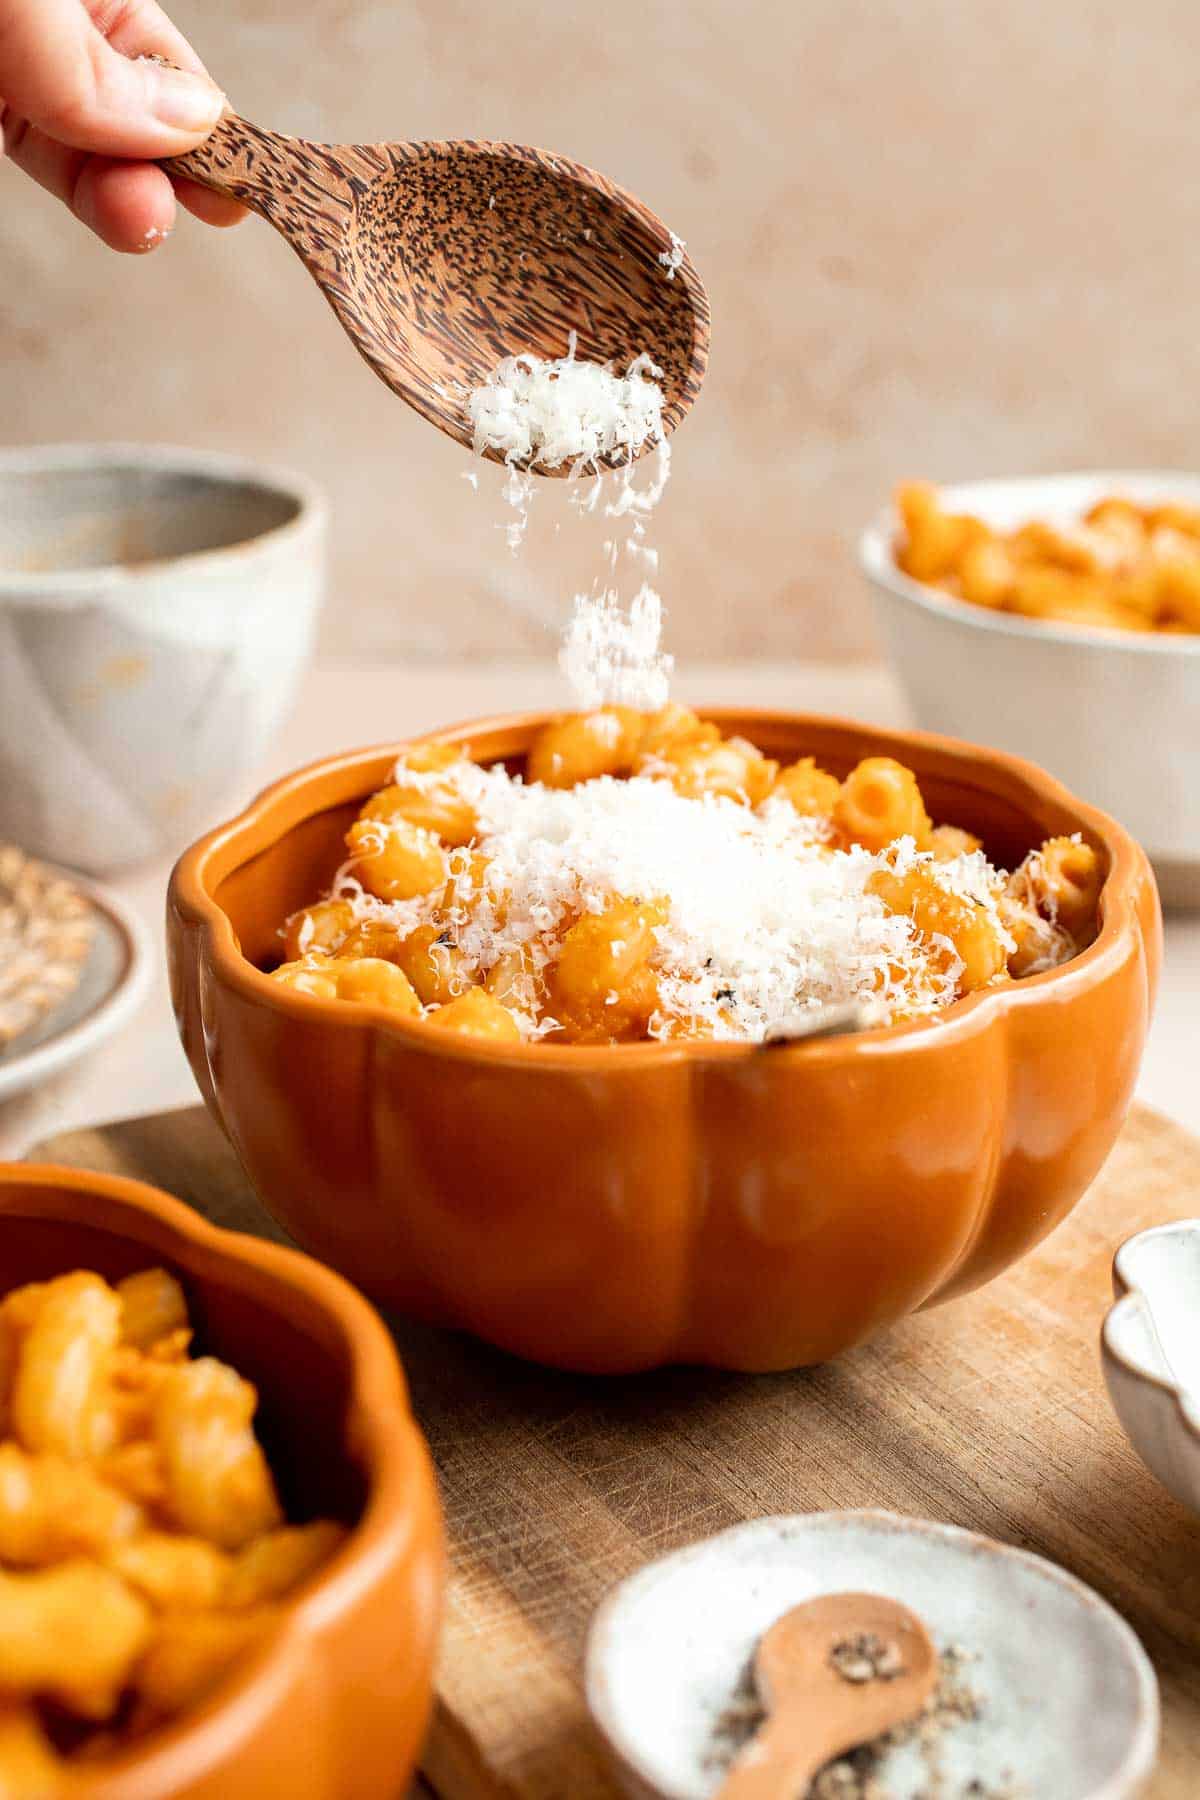
Recipe Tips and Tricks
- Don't overcook the pasta. Cook it until al dente as it will continue to cook in the sauce. The perfect texture still has a bite to it.
- Use a tubular type of pasta. Tubular shapes like cavatappi, rigatoni, ziti, macaroni, and penne are all great options to hold the sauce better.
- Save some pasta water. Thin out the sauce with pasta water if it becomes too thick. It also creates the perfect creamy texture to help it cling to the pasta.
Storing and Freezing Instructions
How to Store
Keep any leftover pumpkin pasta in an airtight container and store it in the refrigerator for up to 4 days.
How to Reheat
Reheat creamy pumpkin pasta in a saucepan over medium-low heat, stirring occasionally until warmed through. You may need to add a bit more water or broth if the sauce thickens too much during storage. If you're in a rush, you can also heat it in the microwave for 30 seconds or so.
How to Freeze
Let the pasta cool completely before storing in an airtight container or freezer bag. Freeze for up to 3 months. To serve, allow the pasta to thaw overnight in the refrigerator before reheating according to the instructions above.
More Pumpkin Recipes
- Coconut Curry Pumpkin Soup
- Pumpkin Pancakes
- Pumpkin Cornbread
- Carrot Pumpkin Soup
- Pumpkin Energy Bites
- Pumpkin Hummus
Tried this recipe?
I'd love to hear what you think! Leave a comment and rating below to share your feedback. Your reviews help others discover this recipe and help me keep creating more free recipes for you. Snap a photo and tag me on social media @aheadofthyme too.

Baked Chicken Drumsticks
These Baked Chicken Drumsticks are the ideal dinner for a busy weeknight. Marinate some inexpensive chicken legs in a little oil and everyday spices, then bake them in a hot oven until they have crispy skin and tender, flavorful meat that just starts to fall apart. They're sure to be a new family favorite!
If you're trying to eat well on a budget, add drumsticks to your grocery list. They're an ideal source of protein for busy families since they are typically inexpensive, cook quickly, and have the most delicious dark meat. As they bake in the oven, the marinated spices bake into every bite, ensuring every taste is tender and full of flavor. This recipe is the perfect reminder that delicious doesn't have to mean complicated, and your whole family will enjoy eating this easy chicken recipe any night of the week.
Why You'll Love These Baked Chicken Drumsticks
- So simple. Absolutely anyone can make these oven-baked chicken drumsticks. You don't need special skills or fancy equipment, just a few simple ingredients and some standard kitchen tools.
- Perfect for meal prep. Since the chicken needs to marinate, either prep them the night before or the morning of, then bake them right before dinner while you're preparing your sides. No last-minute thawing or hunting through the pantry!
- Affordable. Drumsticks tend to be one of the cheapest cuts at the store, making them perfect for a large family or people trying to eat well on a budget.
- So much flavor. Since drumsticks are higher in fat, they tend to absorb flavor much better than lean chicken breasts. They really just need a little seasoning to make them really flavorful!

Ingredient Notes
To make these delicious oven baked chicken drumsticks, you will need the following ingredients (full measurements in recipe card below):
- chicken drumsticks - keep it simple and choose bone-in, skin-on chicken drumsticks.
- avocado oil - the oil will seep into the chicken, infusing the seasoning mix into every bite. You can also use extra virgin olive oil.
- spices - assemble your own dry rub from paprika, allspice powder, Italian seasoning, garlic powder, onion powder, salt, and ground black pepper.
You will also need a Ziploc bag or bowl, 9x13-inch casserole pan or baking sheet with parchment paper, and a meat thermometer.

How to Make the Best Baked Chicken Drumsticks
- Marinate the chicken. Use a paper towel to pat the chicken drumsticks completely dry. Place the drumsticks into a large Ziploc bag or bowl. Add the oil and all the seasoning including paprika, allspice, Italian seasoning, garlic powder, onion powder, salt, and pepper. Press the air out of the bag and seal tightly. Press the seasoning around the chicken drumsticks to coat evenly. Let the drumsticks marinate for at least 1 hour or refrigerate overnight.
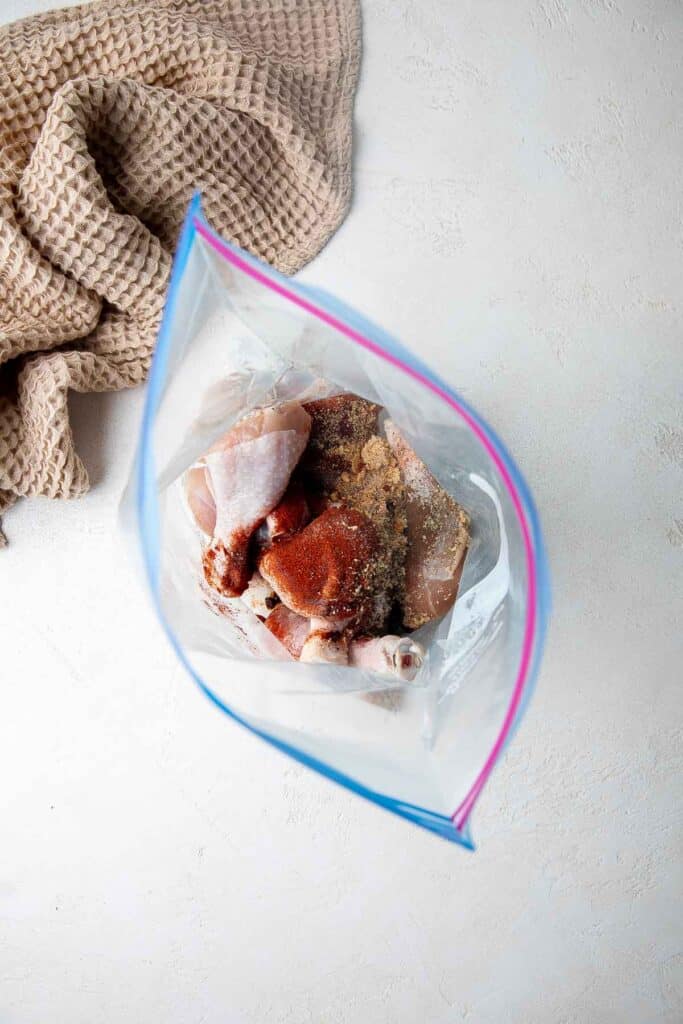

- Bake. Arrange the marinated chicken drumsticks on a 9x13-inch casserole pan or a large baking sheet lined with parchment paper. Bake in a 400 F preheated oven for 40-45 minutes until the skin is crispy and the internal temperature for the chicken reaches 165 F, as read on a meat thermometer.
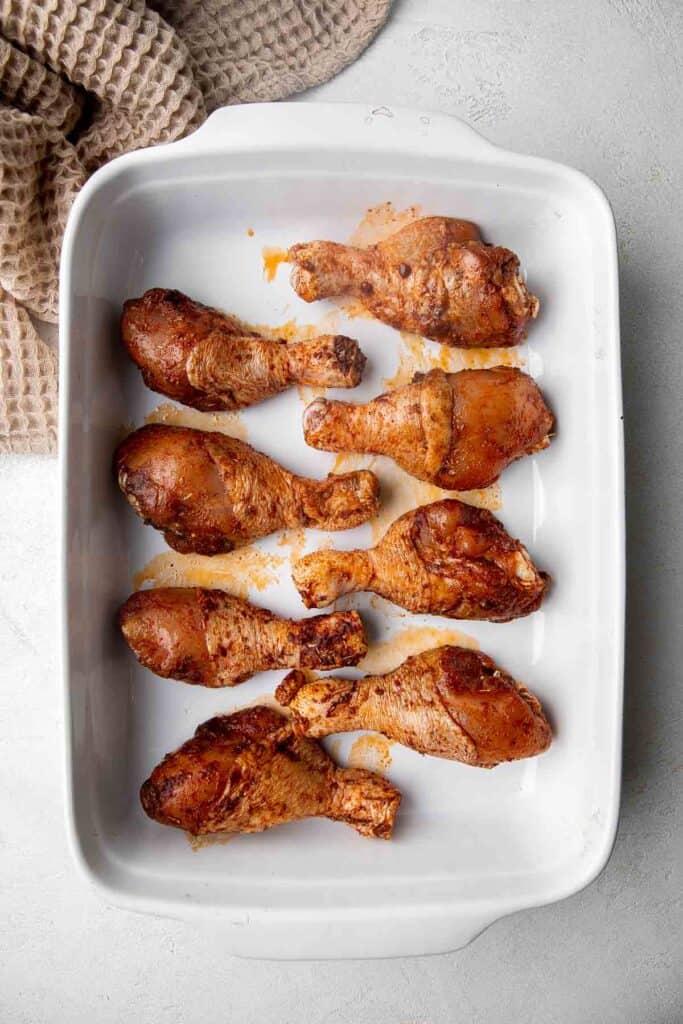
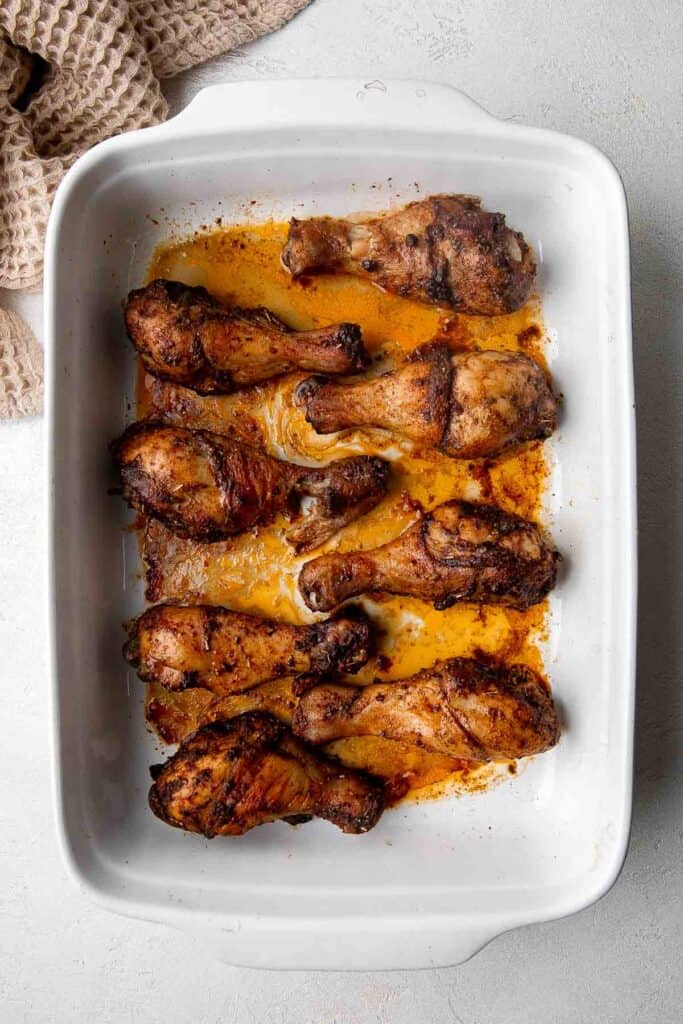
- Broil (optional). Optionally, turn on broiler on HI and cook for another 5 minutes until nicely charred. Keep a close eye on the drumsticks to make sure they don't burn as things can burn quickly under the broiler.
- Serve. Brush the drumsticks with pan juices, if desired, and serve immediately.
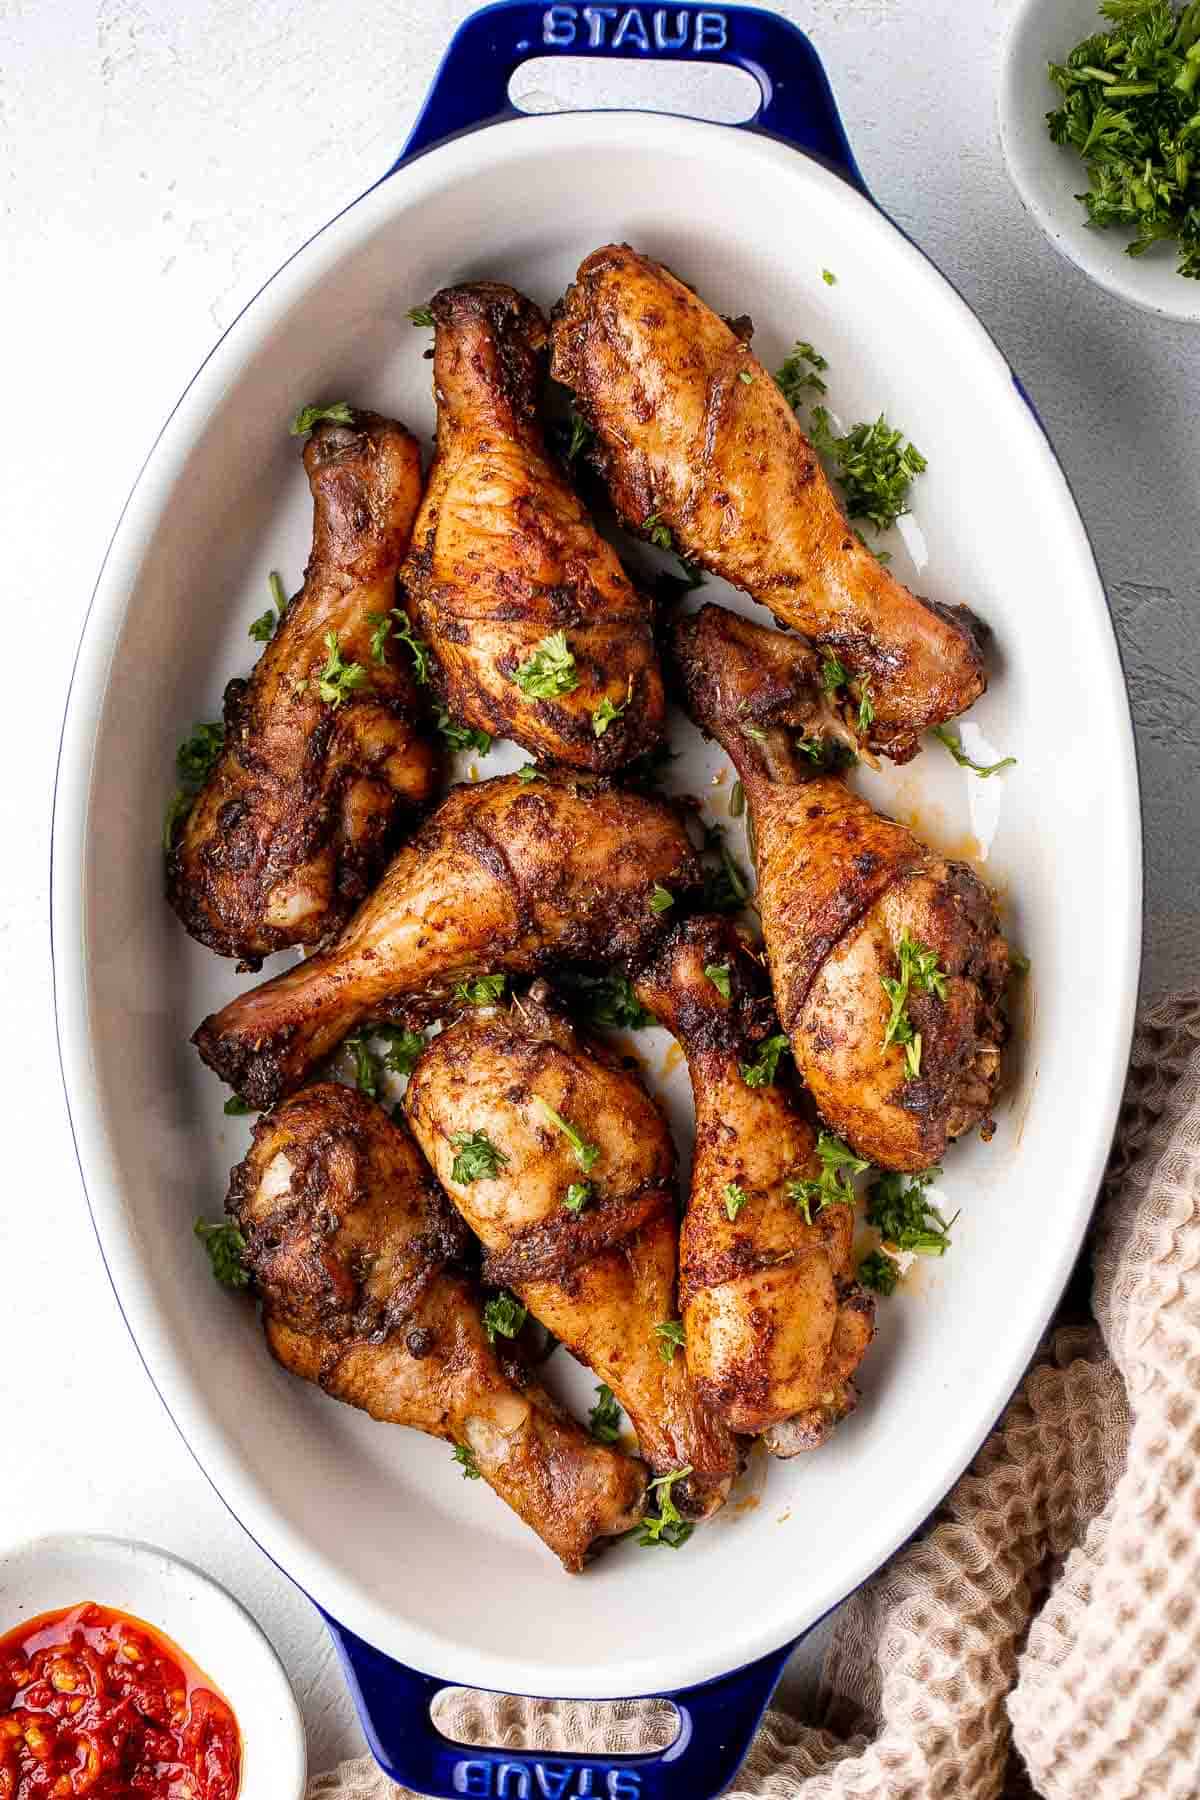
Recipe Variations
- Use a different cut. Adapt this chicken leg recipe and use bone-in chicken thighs or chicken breast instead. Thighs will take a little longer and the breast will cook faster, so be sure to use your thermometer to check for doneness.
- Try the air fryer. Too busy to bake? Turn on the air fryer and make air fryer chicken drumsticks by following the guidelines for our Air Fryer Chicken Thighs.
- Adjust the seasonings. If you prefer a different balance of flavors, you can easily adjust the rub mixture to suit your preferences. Try adding smoked paprika, cayenne pepper, chili powder, a little brown sugar, or your favorite all purpose seasoning blends.
- Make it citrusy. Lemon and chicken are a perfect match. Feel free to add ¼ cup of lemon juice to the marinate for extra tanginess.
How to Serve
These easy oven baked drumsticks are delicious served on their own, or paired with some of my favorite side dishes including:
- The Best and Creamiest Mashed Potatoes
- Honey Roasted Carrots
- Green Beans Almondine
- Pesto Asparagus
- One Pot Rice Pilaf with Carrots
For more recipe inspiration, see our 25 Side Dishes for Chicken.

Recipe Tips and Tricks
- Adjust the baking time. Depending on the size of the drumsticks, you may need to extend or reduce the cooking time. Use your instant-read thermometer as a guide; chicken should always reach an internal temperature of 165 degrees F.
- Preheat your oven. For crispier skin, preheat your oven to 400 F for at least 5-10 minutes.
- Don't rush the marinade. Even if you're busy, let the chicken drumsticks marinate for at least an hour for the best flavor. You could skip the marinating part but then the flavor will not infuse into the chicken meat as well.
- Make extra. Since these easy oven-baked drumsticks taste great the next day, you can easily double the recipe and enjoy leftovers later in the week.
- Broil. For really crispy baked chicken drumsticks, broil them for a maximum of 5 minutes.
Storing and Freezing Instructions
How to Store
Place your leftover chicken legs in an airtight container in the fridge. They'll keep for approximately 3-4 days.
How to Reheat
Although you can microwave your juicy chicken legs for a quick meal, they'll taste better and have crispier skin if you bake them again. Reheat in a 375F preheated oven for 5-10 minutes or set your air fryer to 375 and bake them for 3-5 minutes or until they are fully reheated.
How to Freeze
Store your leftover baked chicken legs in a freezer-safe container or freezer bag for several months. Thaw in the fridge before reheating.
Frequently Asked Questions
We prefer to bake chicken drumsticks at 400 to lock in the moisture and create a crispy skin. Although you can bake this easy chicken leg recipe at 350 degrees and still have a delicious meal, you're much more likely to have softer skin that won't crunch when you bite through it. That golden brown, perfectly seasoned, crispy skin is the best part!
Raw chicken legs usually bake within 40-45 minutes, although the cooking time depends on the size of the legs. It's best to use an internal thermometer to ensure the meat is fully cooked instead of watching the time. Your chicken should reach an internal temperature of 165 degrees F before you remove it from the oven.
There are differing opinions on this question, but if you like crispy skin, it's so important to leave your chicken legs uncovered. Otherwise, the aluminum will hold in the excess moisture and cause the skin to soften instead of crisping up. The chicken will still taste great, but the texture won't be quite as enjoyable. For the best results (and the crispiest chicken skin), bake your favorite chicken drumstick recipes uncovered and at a high heat.
More Chicken Recipes
- 60 Best Chicken Recipes
- Tandoori Chicken Drumsticks
- Baked Curried Chicken Drumsticks
- Skillet Chicken Thighs and Potatoes
- Instant Pot Turkey Thighs
- Apple Dijon Braised Chicken Thighs
Tried this recipe?
I'd love to hear what you think! Leave a comment and rating below to share your feedback. Your reviews help others discover this recipe and help me keep creating more free recipes for you. Snap a photo and tag me on social media @aheadofthyme too.

Sautéed Spinach
This buttery, garlicky Sautéed Spinach is the best way to enjoy this nutritious green. It's wilted to make it tender, then sauteed with butter and fresh garlic for a burst of flavor. It's the ultimate healthy side dish and only takes a few minutes to make!
This savory side dish is the perfect reminder that healthy, nutritious meals and tons of ingredients don't have to take hours in the kitchen. You can have this sauteed spinach on the table in a matter of minutes. Even better, it's simple enough for your quick weeknight dinner or fancy enough for a dinner party with main dishes like Dutch Oven Chicken or Roast Beef. It's truly the perfect side dish, so keep this easy recipe on hand for next time!
Why You'll Love This Sauteed Spinach
- Great way to eat more greens. We know we should eat more leafy greens, but that's easier said than done. Fortunately, a nice dollop of butter and some fresh garlic make it easier than ever to enjoy bunches of spinach regularly.
- Quick and so easy. The active time required to make this easy sautéed spinach recipe is so little it almost doesn't count. It takes 30 seconds to wilt the spinach; then you sautee it for approximately 5 minutes. Is there anything better for busy weeknights?
- Simple yet flavorful. This delicious side dish provides that things don't have to be complicated to be delicious. This recipe has just 5 simple ingredients yet tastes absolutely lovely. Add this garlic spinach to your dinner menu tonight!
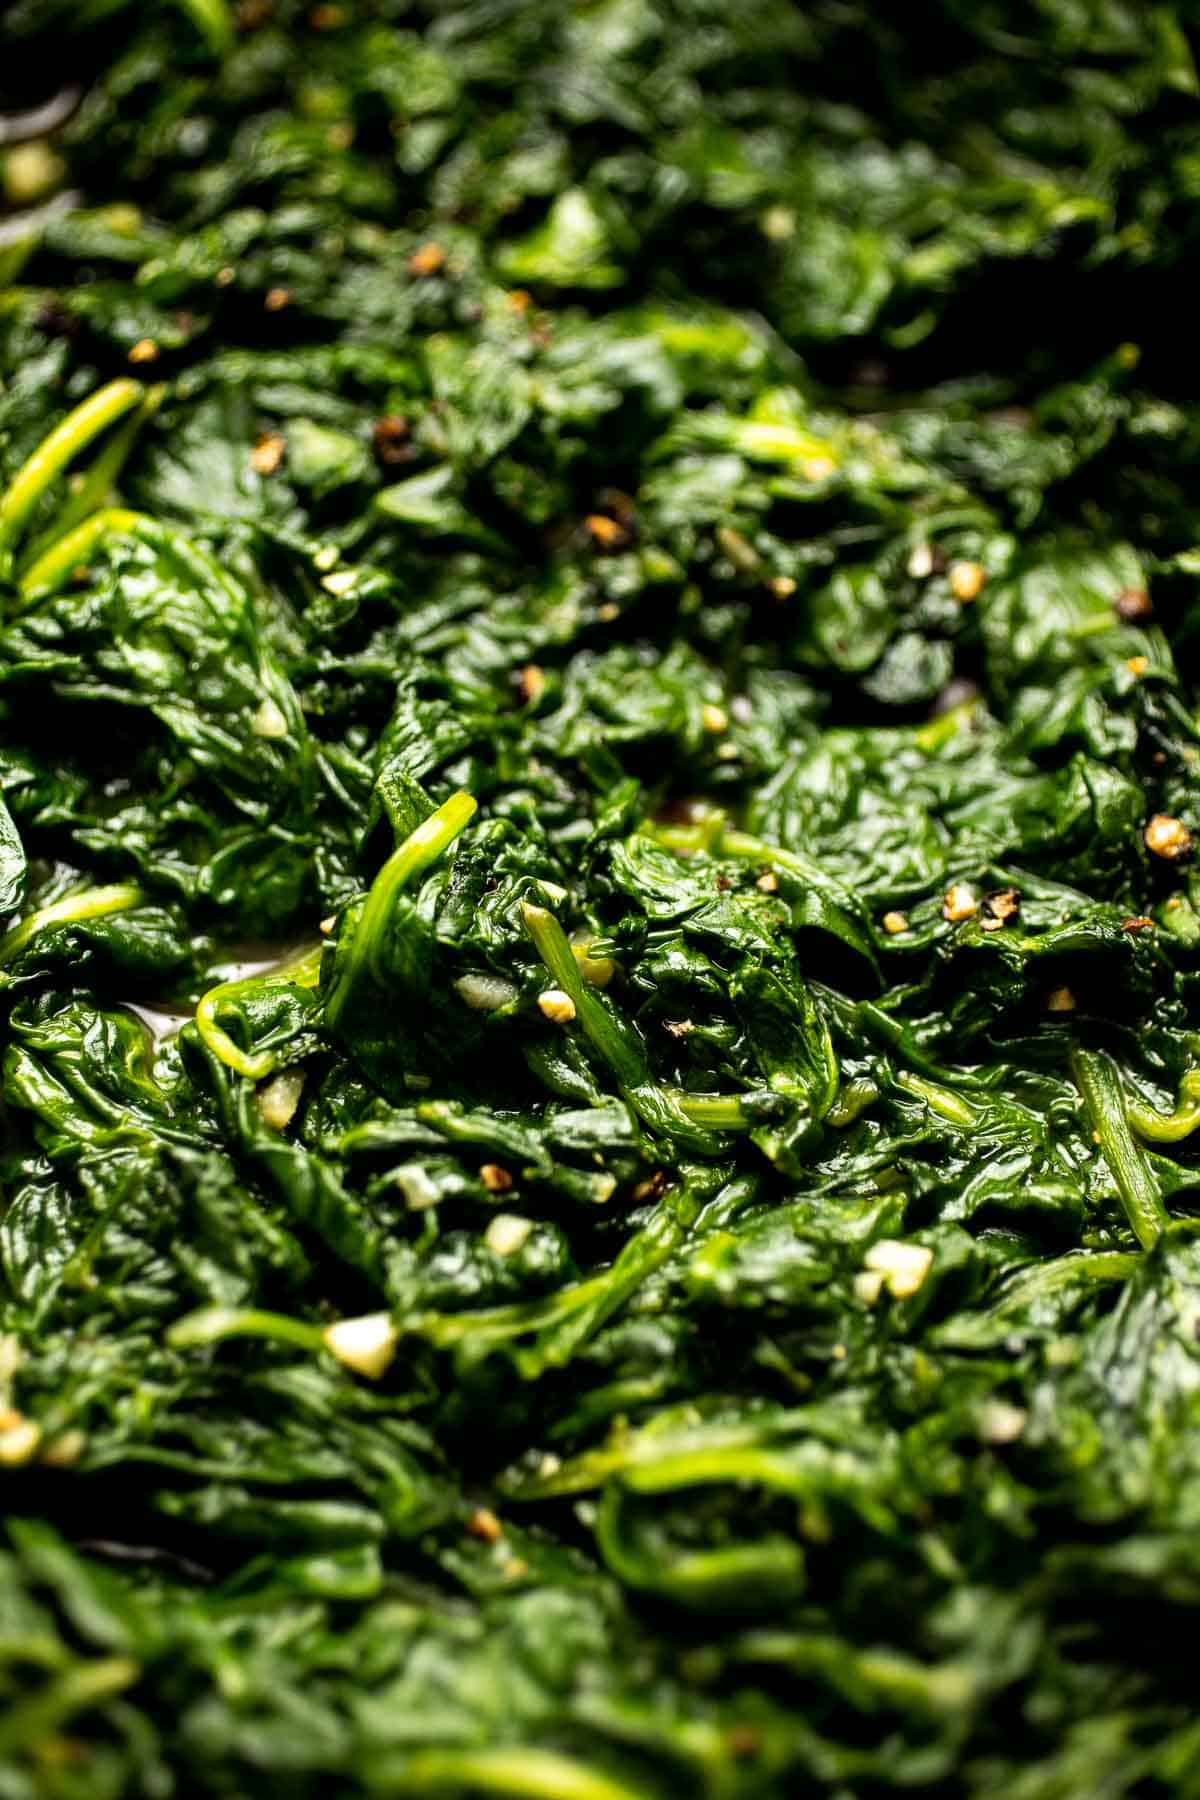
Ingredient Notes
To make this delicious Sauteed Spinach, you will need the following ingredients (full measurements in recipe card below):
- fresh spinach - we used mature spinach bunches cut in half with the ends trimmed. You can also use baby spinach leaves to make it even easier. It just needs to be fresh!
- butter - the melted butter will soak into the spinach, sending that garlicky flavor into every bite. Olive oil works well, too.
- garlic - mince fresh garlic for an aromatic, savory side dish.
- salt and black pepper - season to taste.
You will also need a large pot, colander, large skillet, and a wooden spoon.
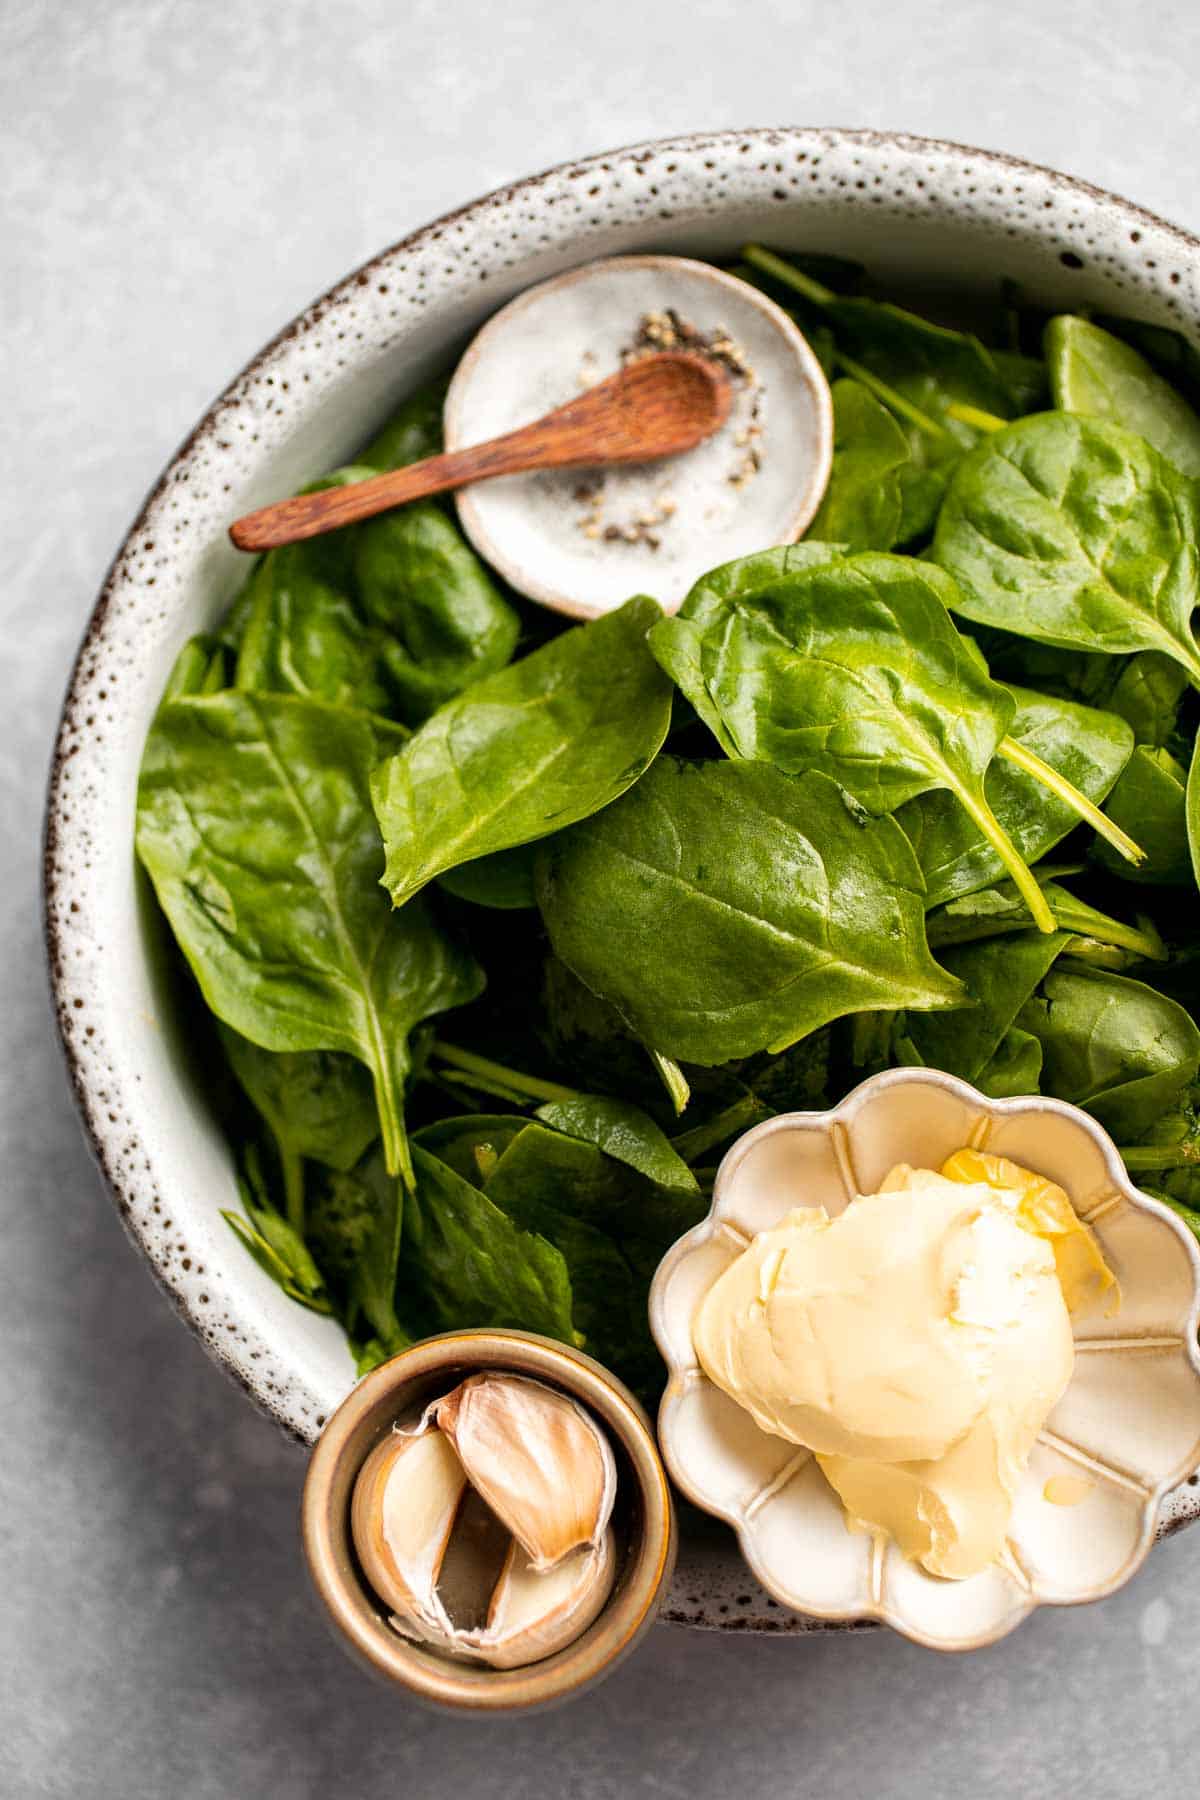
How to Make the Best Sauteed Spinach
- Wilt spinach. Bring a large pot of water to a boil. Add the spinach and cook for 30 seconds until wilted. Remove the wilted spinach and rinse it under cold running water until it is cool enough to handle. Drain it in a colander and squeeze out excess water. Set aside.
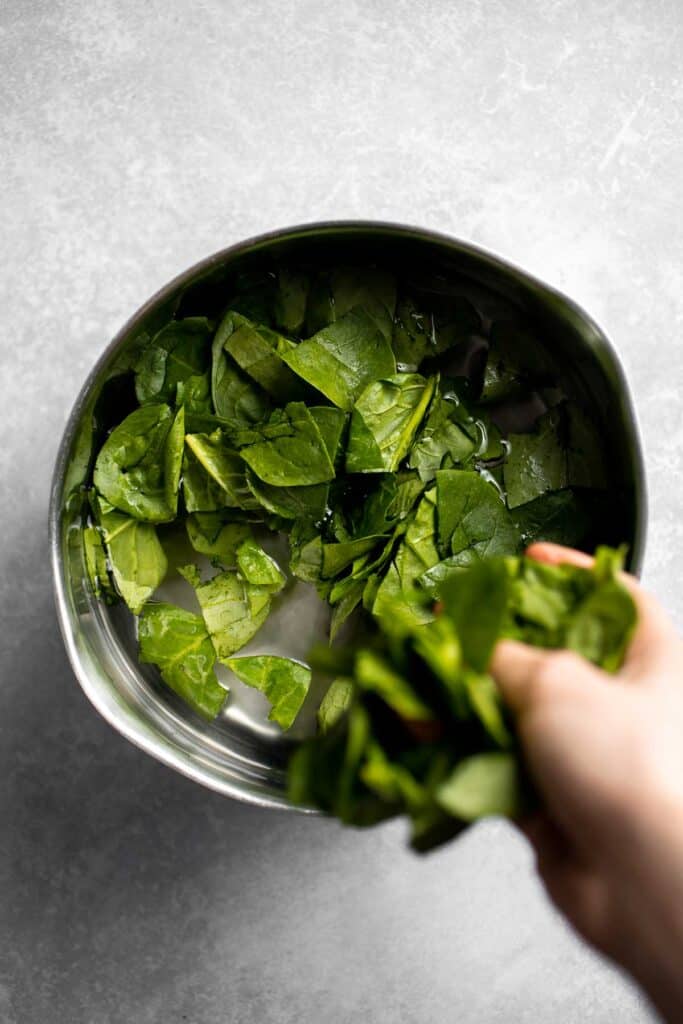
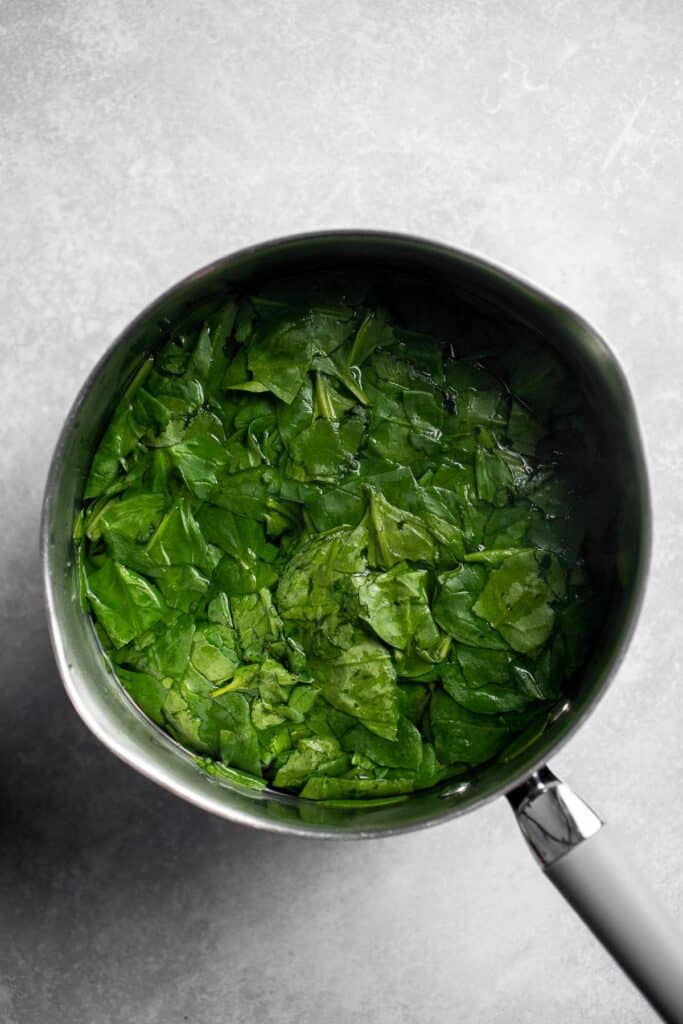
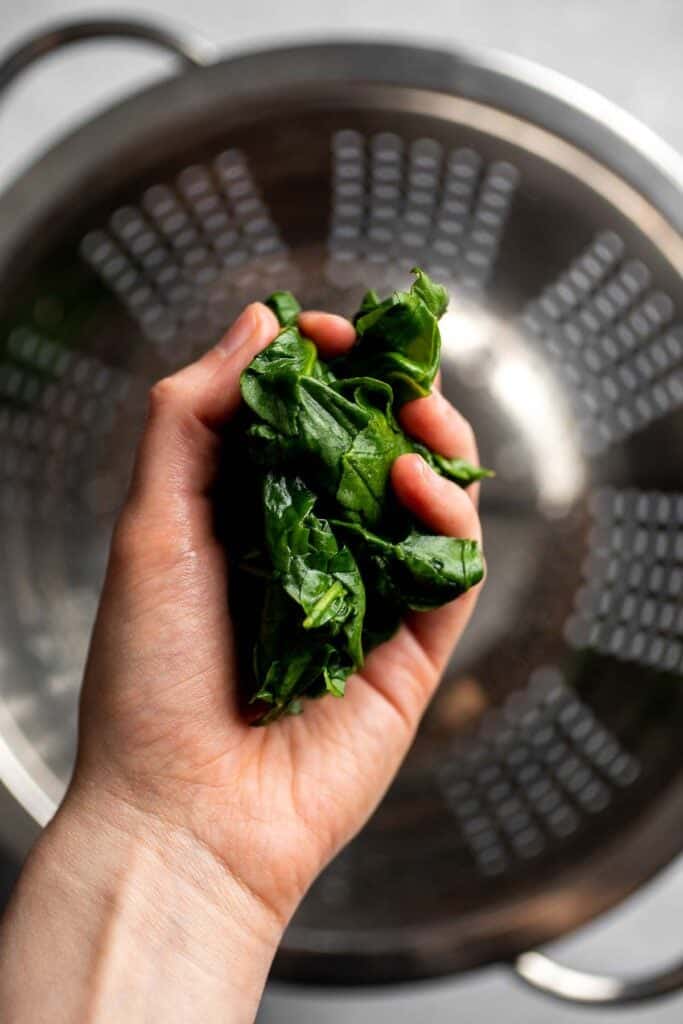
- Sauté garlic. In a large skillet, melt butter over medium-high heat until bubbly, about 1-2 minutes. Add garlic and sauté until fragrant, about 1 minute.

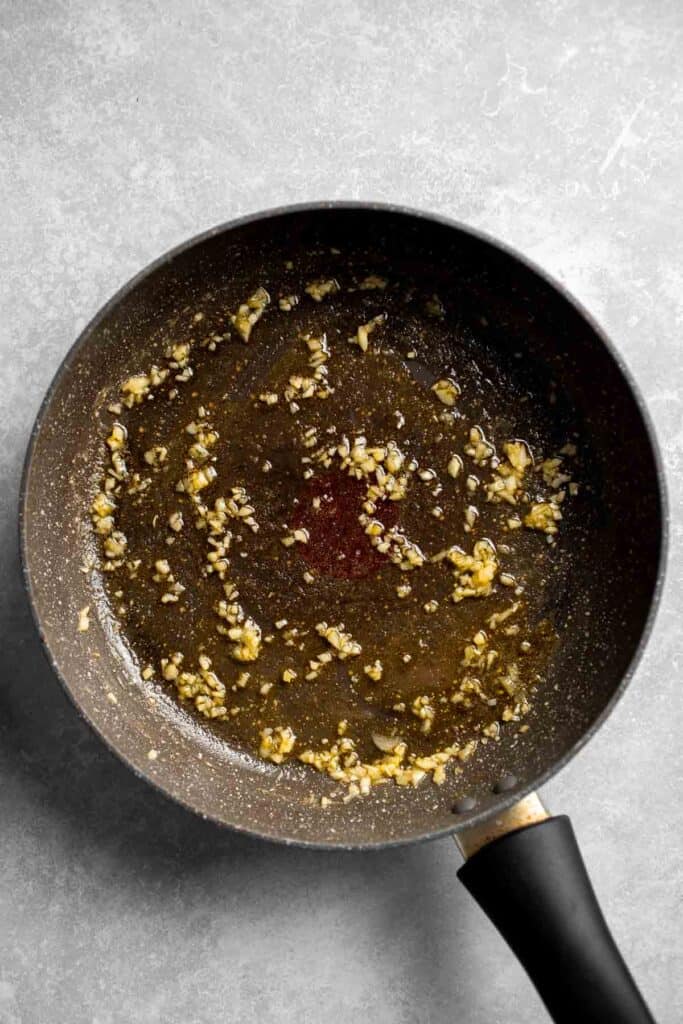
- Add spinach. Stir in spinach and toss well to coat. Cook for 1 -2 minutes until heated through. Season with salt and pepper. Serve immediately.
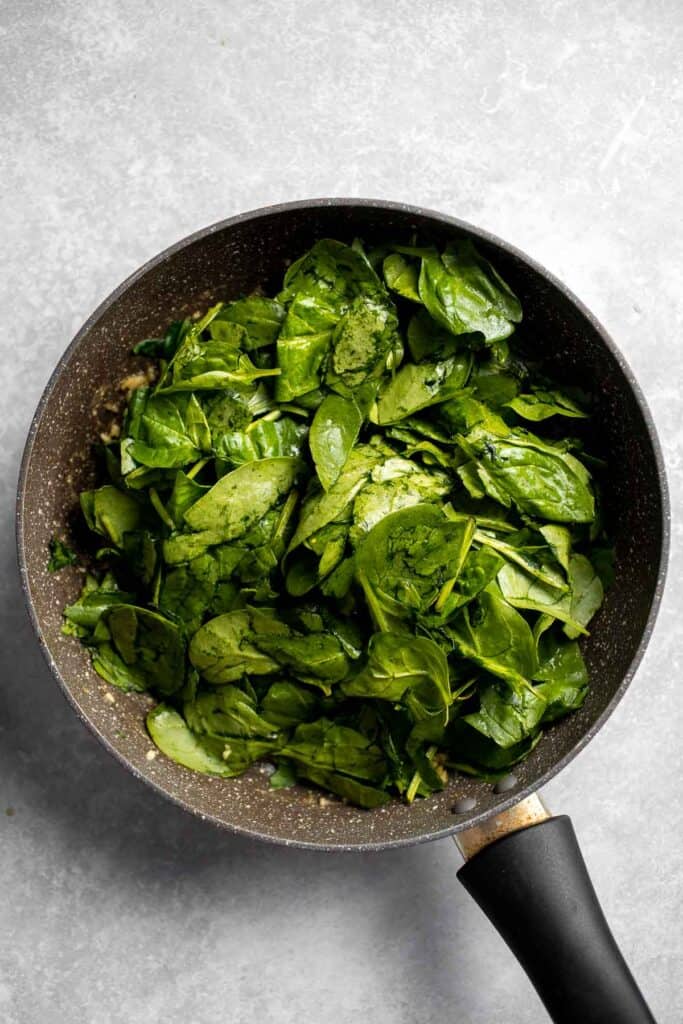
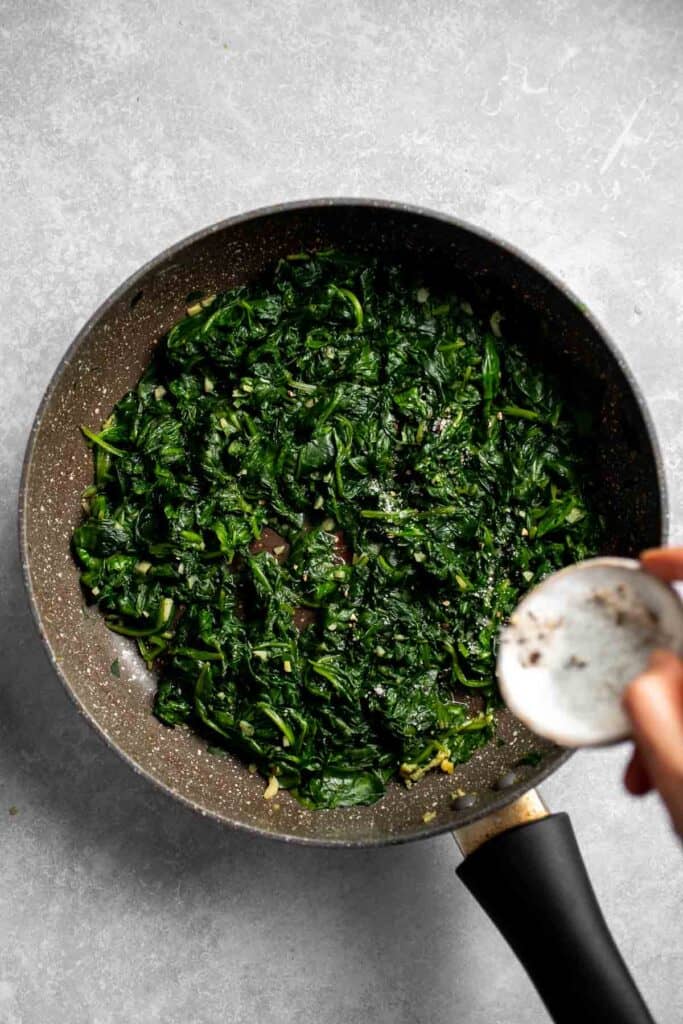
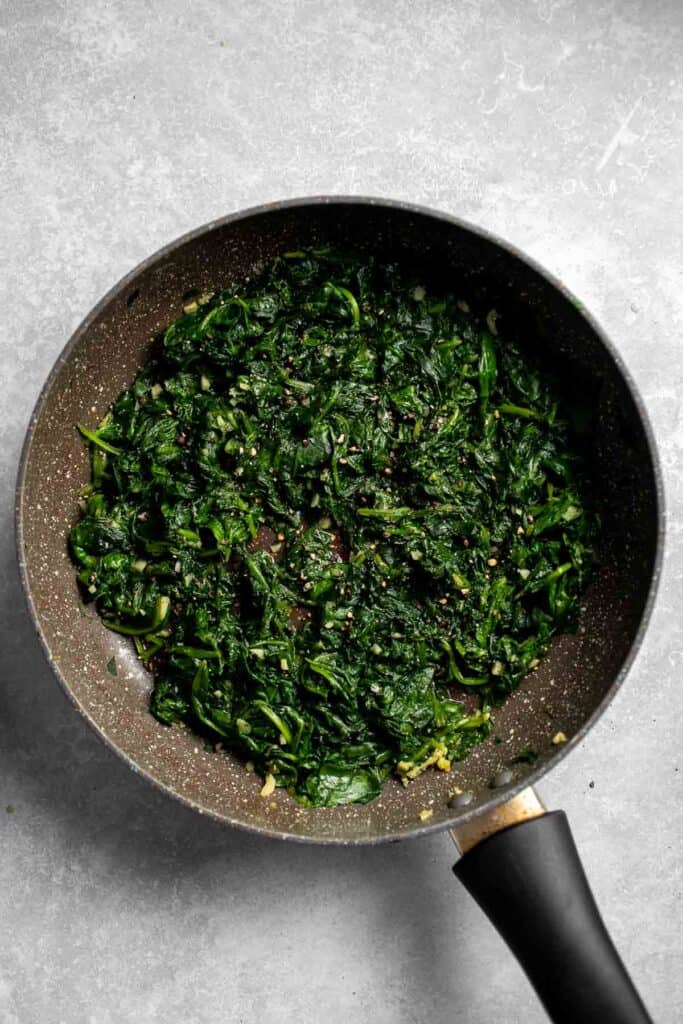
Recipe Variations
- Make it meaty. Sauté some chopped bacon instead of melting butter and let the bacon grease infuse into the tender greens.
- Add some heat. Add a shake of red pepper flakes for a little heat with this classic side dish. You can add more garlic, too!
- Try a different green. Although these instructions are for regular spinach, this technique works great for other greens, like Swiss chard or even kale. They may need an additional minute or two to soften their sturdier leaves.
- Season with fresh herbs. This is a super simple recipe that can easily be adapted. Sautee some chopped fresh rosemary or parsley for an extra layer of flavor.
How to Serve
This Sautéed Spinach is an easy side dish that pairs well with so many main dishes. Some of my favorites to pair with this are:
- Honey Glazed Roast Pork with Vegetables
- Oven Baked Chicken Breasts
- Ribeye Steak
- Glazed Honey Balsamic Pork Chops
- Greek Salmon
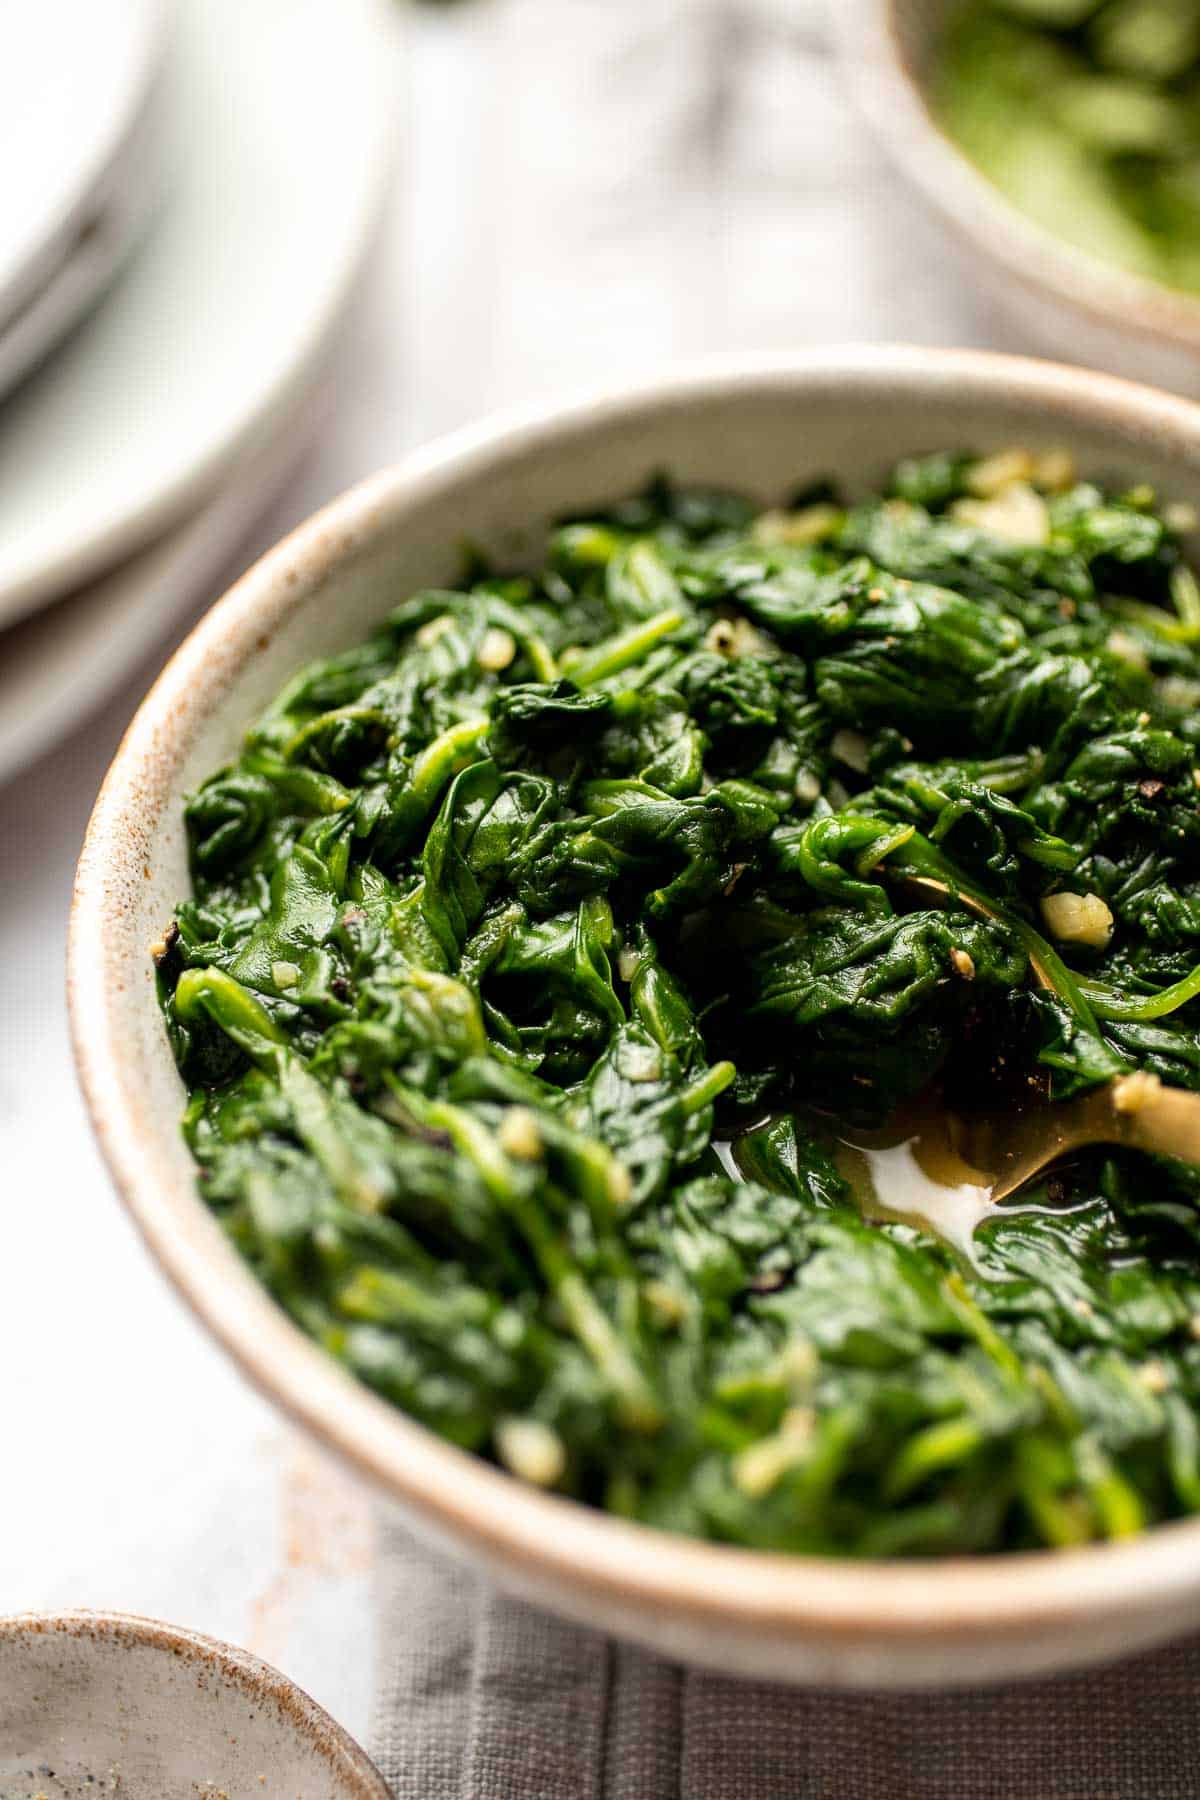
Recipe Tips and Tricks
- Let your pan get hot first. Watch for the butter to fully melt and start to bubble before adding the garlic. This will give your spinach the best flavor.
- Use fresh greens. If your spinach is already slimy, it will add an unpleasant flavor. Pick out any wilting, softening pieces, then rinse and spin your greens in a salad spinner to ensure they're clean and fresh.
- Top with lemon. Serve with a squeeze of lemon for a bright, sunny flavor that pairs well with hearty dishes like roasted meats.
Storing and Freezing Instructions
How to Store
This easy sautéed spinach recipe is best served right away, but you can also store it in an airtight container in the fridge for 3-4 days.
How to Reheat
The easiest way to reheat your leftover spinach is to microwave it for approximately 1-2 minutes or sauté it quickly in a pan over medium heat until warm.
How to Freeze
Cooked spinach freezes very well. Freeze your leftover spinach in an ice cube tray or silicone mold, then store the little pucks in a freezer bag. You can either serve the leftovers as a side dish with dinner or let the precooked, seasoned spinach add flavor and extra nutrients to your casseroles or soups.
FAQ
Although blanching the spinach in boiling water is entirely optional, there are several key reasons for this extra step that make it worth it. First, blanching will help reduce the concentration of oxalates, which can contribute to health issues for certain individuals. You'll also be able to remove any excess moisture that may make this recipe taste soggy or overcooked. Blanching also speeds up the sauteeing process while preserving the dark green color.
Since spinach is mostly water, it will naturally release those liquids the second it is exposed to heat. For the best flavor and texture, start by boiling your spinach for 30 seconds, then rinsing and straining it completely. Then, sautee it in melted butter with freshly minced garlic for a simple side dish that's loaded with flavor (not water).
If your spinach has seen better days but you want to salvage it, soak it in a bath of cold ice water for approximately 30 minutes to an hour. The cold water will perk the leaves back up and give them a new lease on life. Then, strain the water and spin the spinach leaves before using them in your favorite spinach recipes.
More Recipes with Spinach
- Creamed Spinach
- Baked Spinach Dip
- Spinach Gratin
- Spinach and Pea Soup
- Spinach Cheese Rolls
- Spinach Artichoke Dip
Tried this recipe?
I'd love to hear what you think! Leave a comment and rating below to share your feedback. Your reviews help others discover this recipe and help me keep creating more free recipes for you. Snap a photo and tag me on social media @aheadofthyme too.

- « Previous Page
- 1
- …
- 10
- 11
- 12
- 13
- 14
- …
- 41
- Next Page »