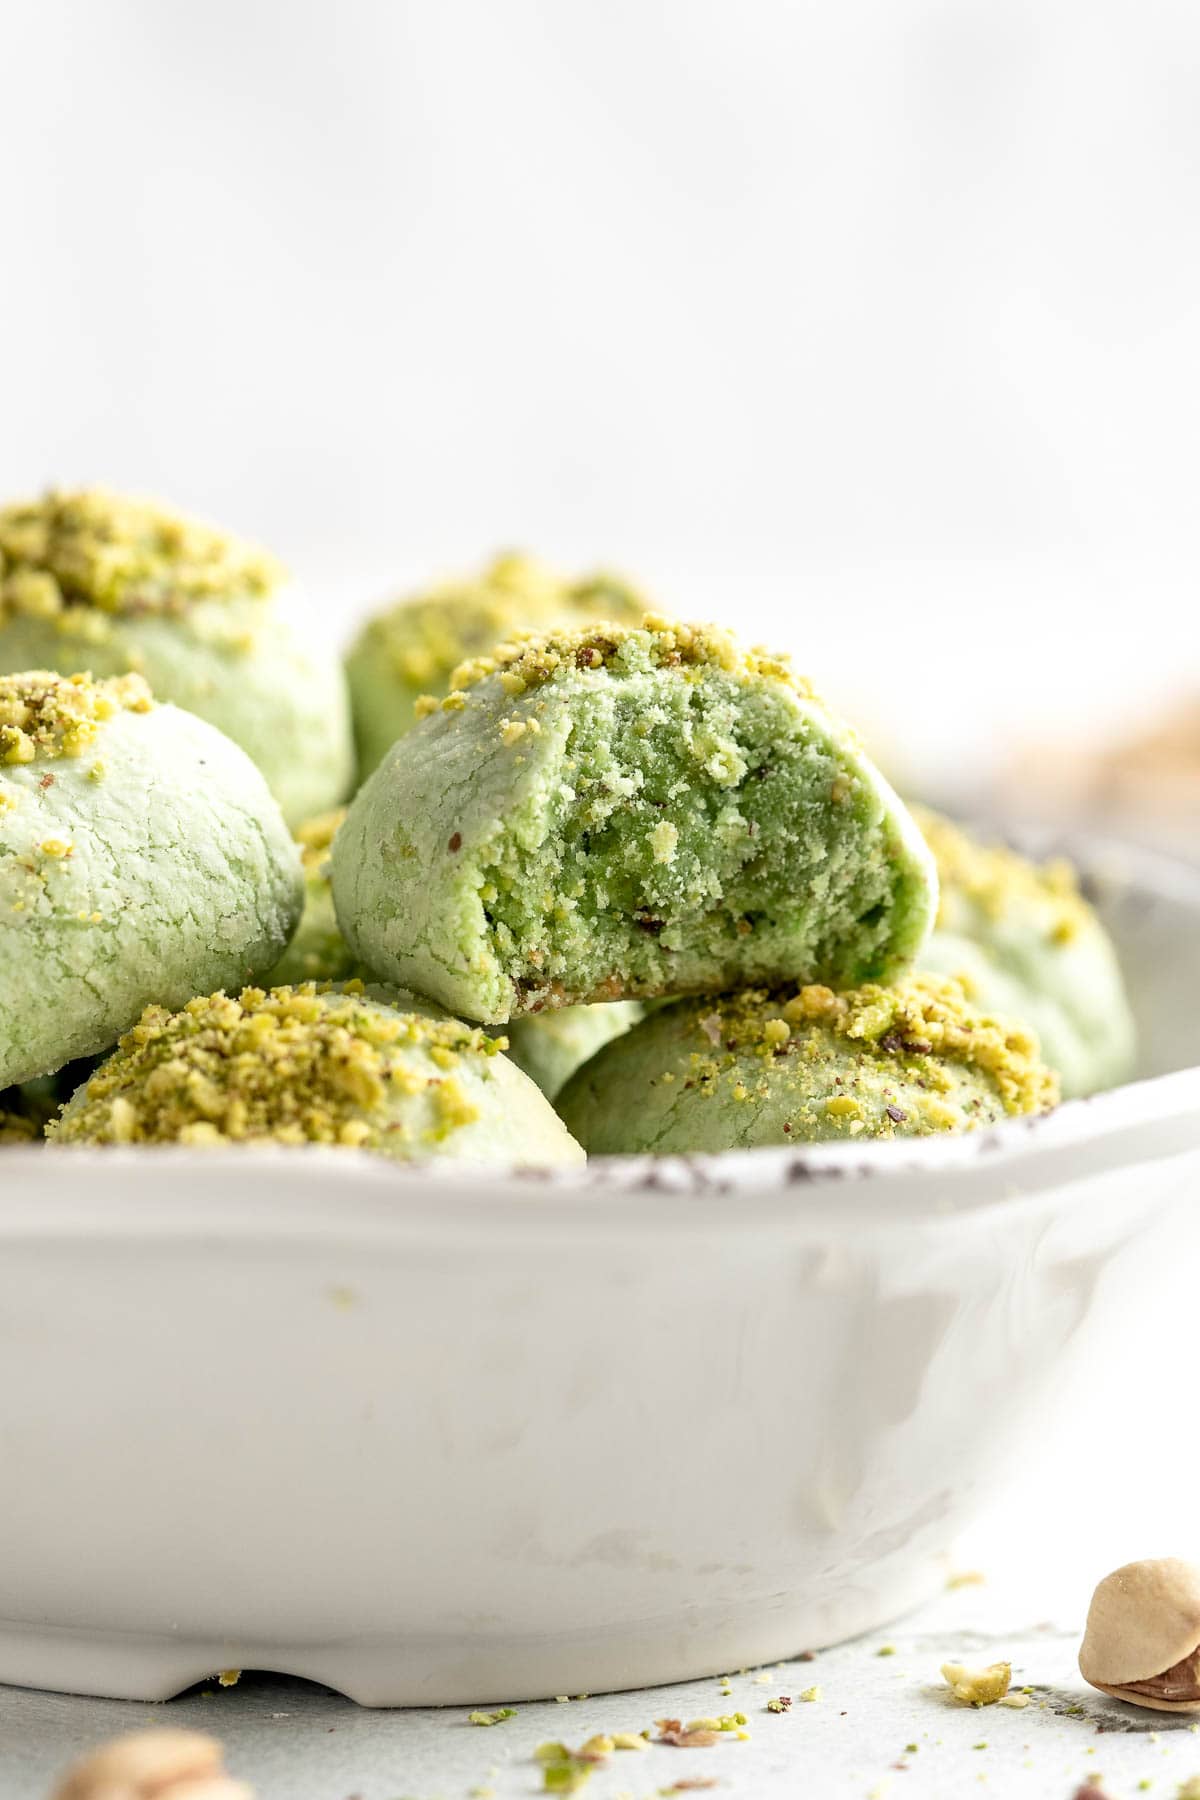
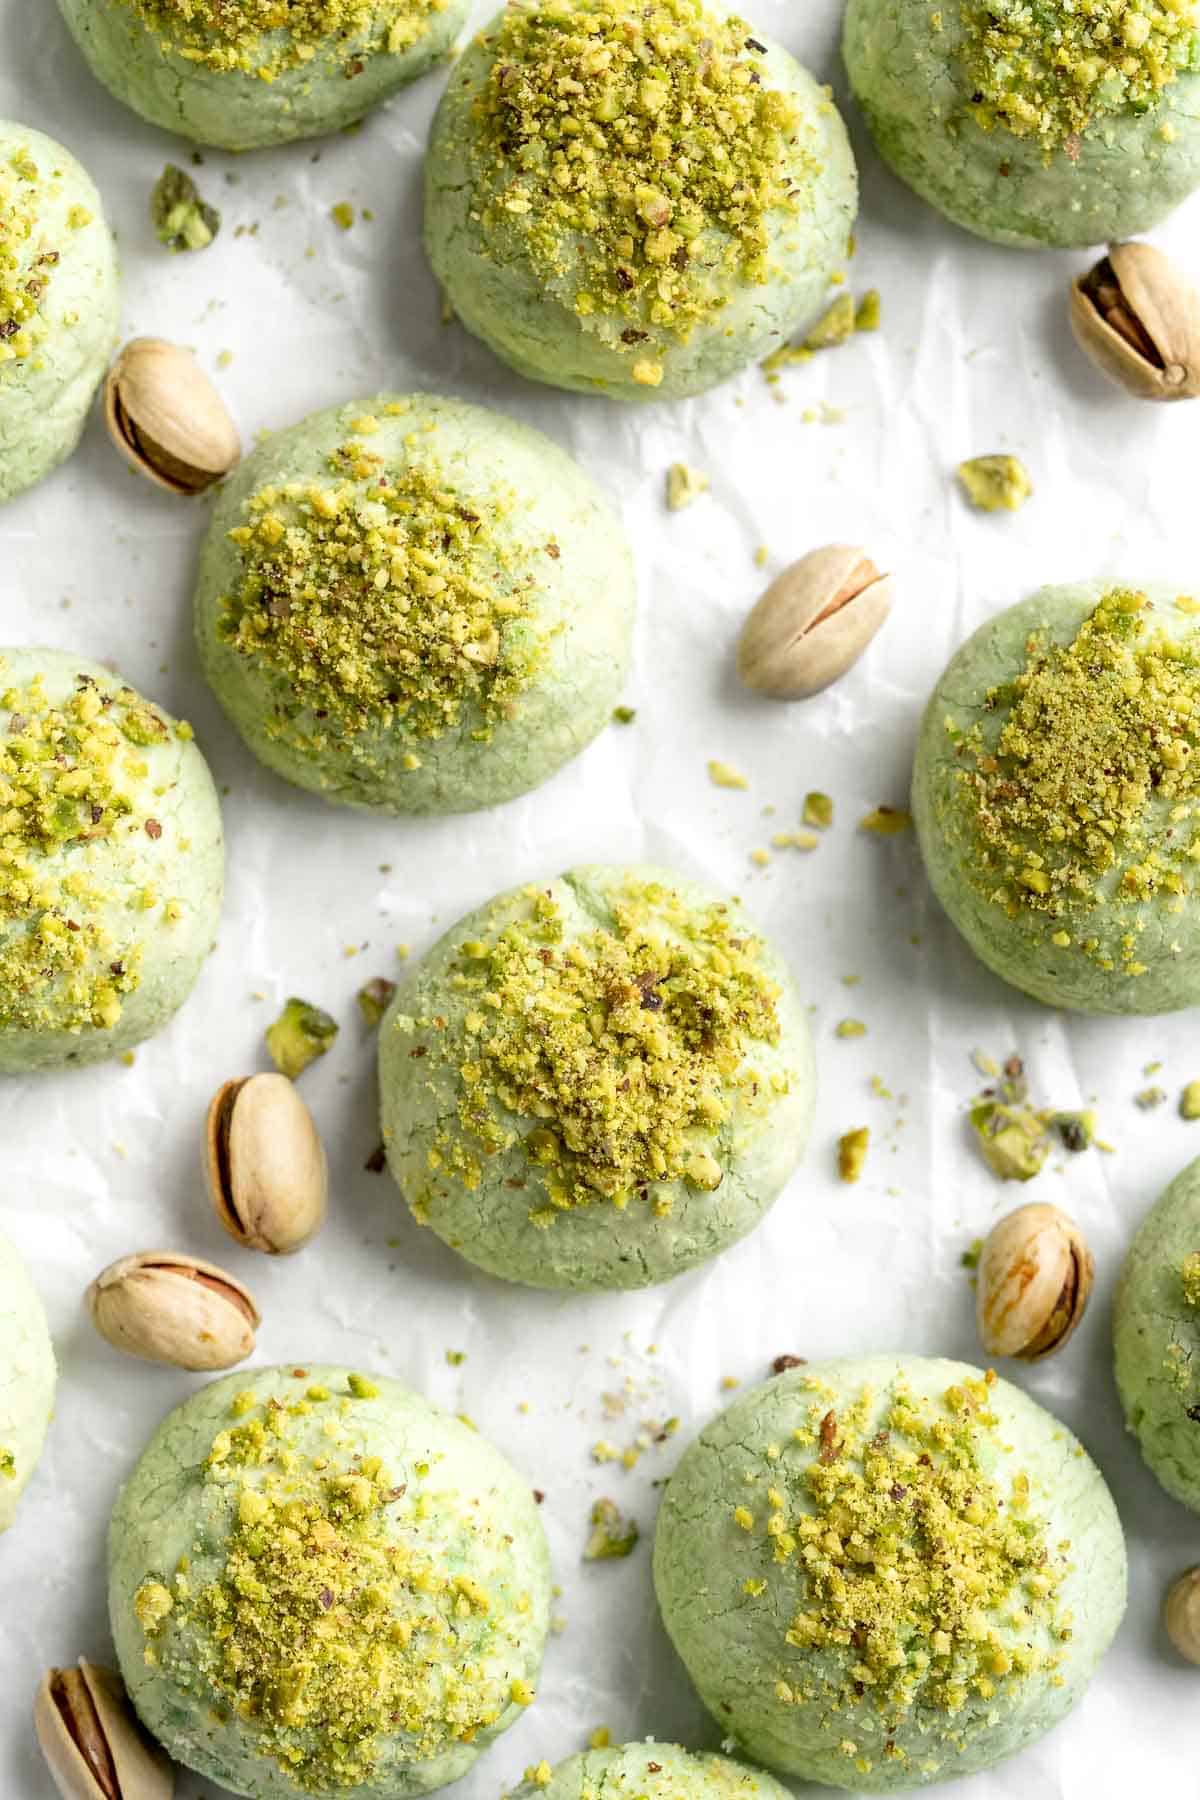
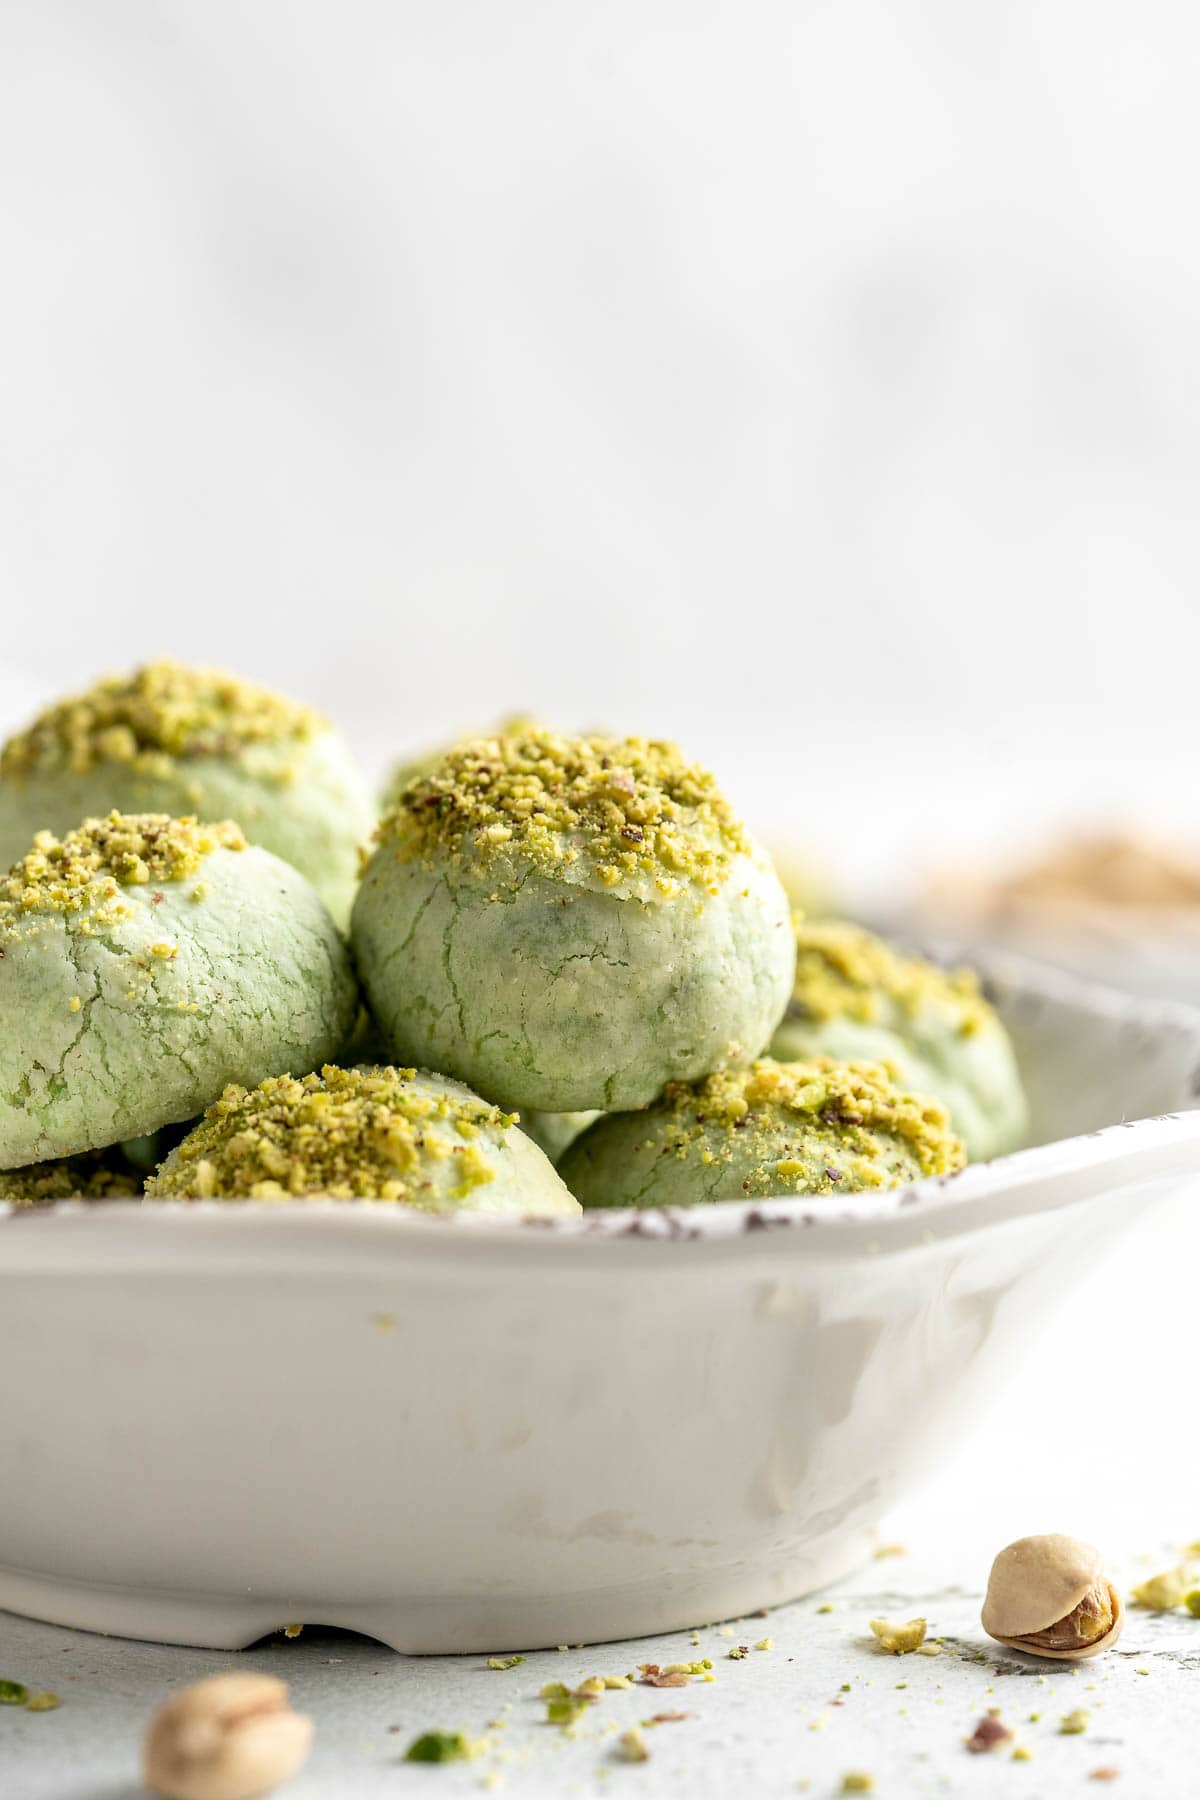
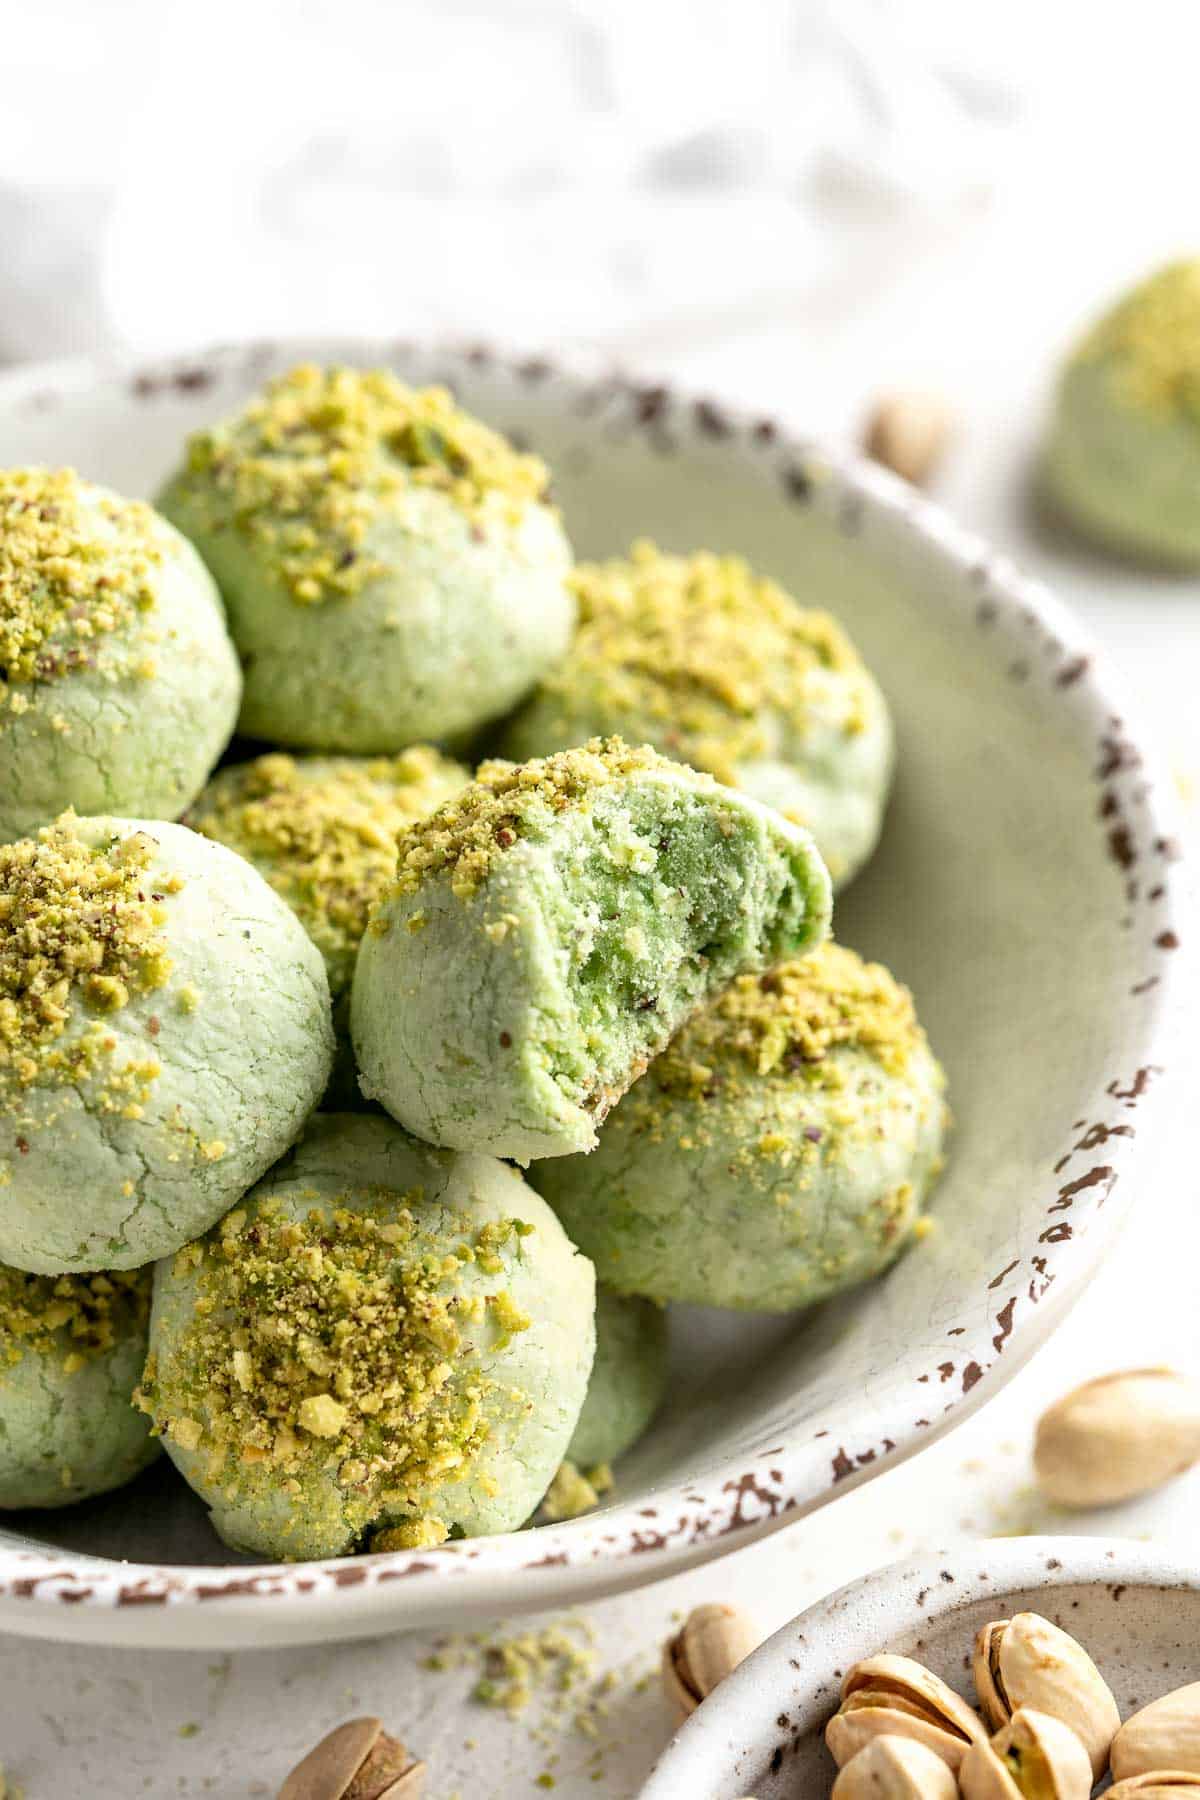
These Pistachio Cookies are the perfect little bites! They're made with real ground pistachios suspended in a buttery, crumbly cookie dough, which melts in your mouth. The powdered sugar makes them stand out on any cookie tray and gives the shortbread-like interior a little extra sweetness. Even better, this is also a no-chill recipe, so you can have perfectly baked cookies ready in just minutes!
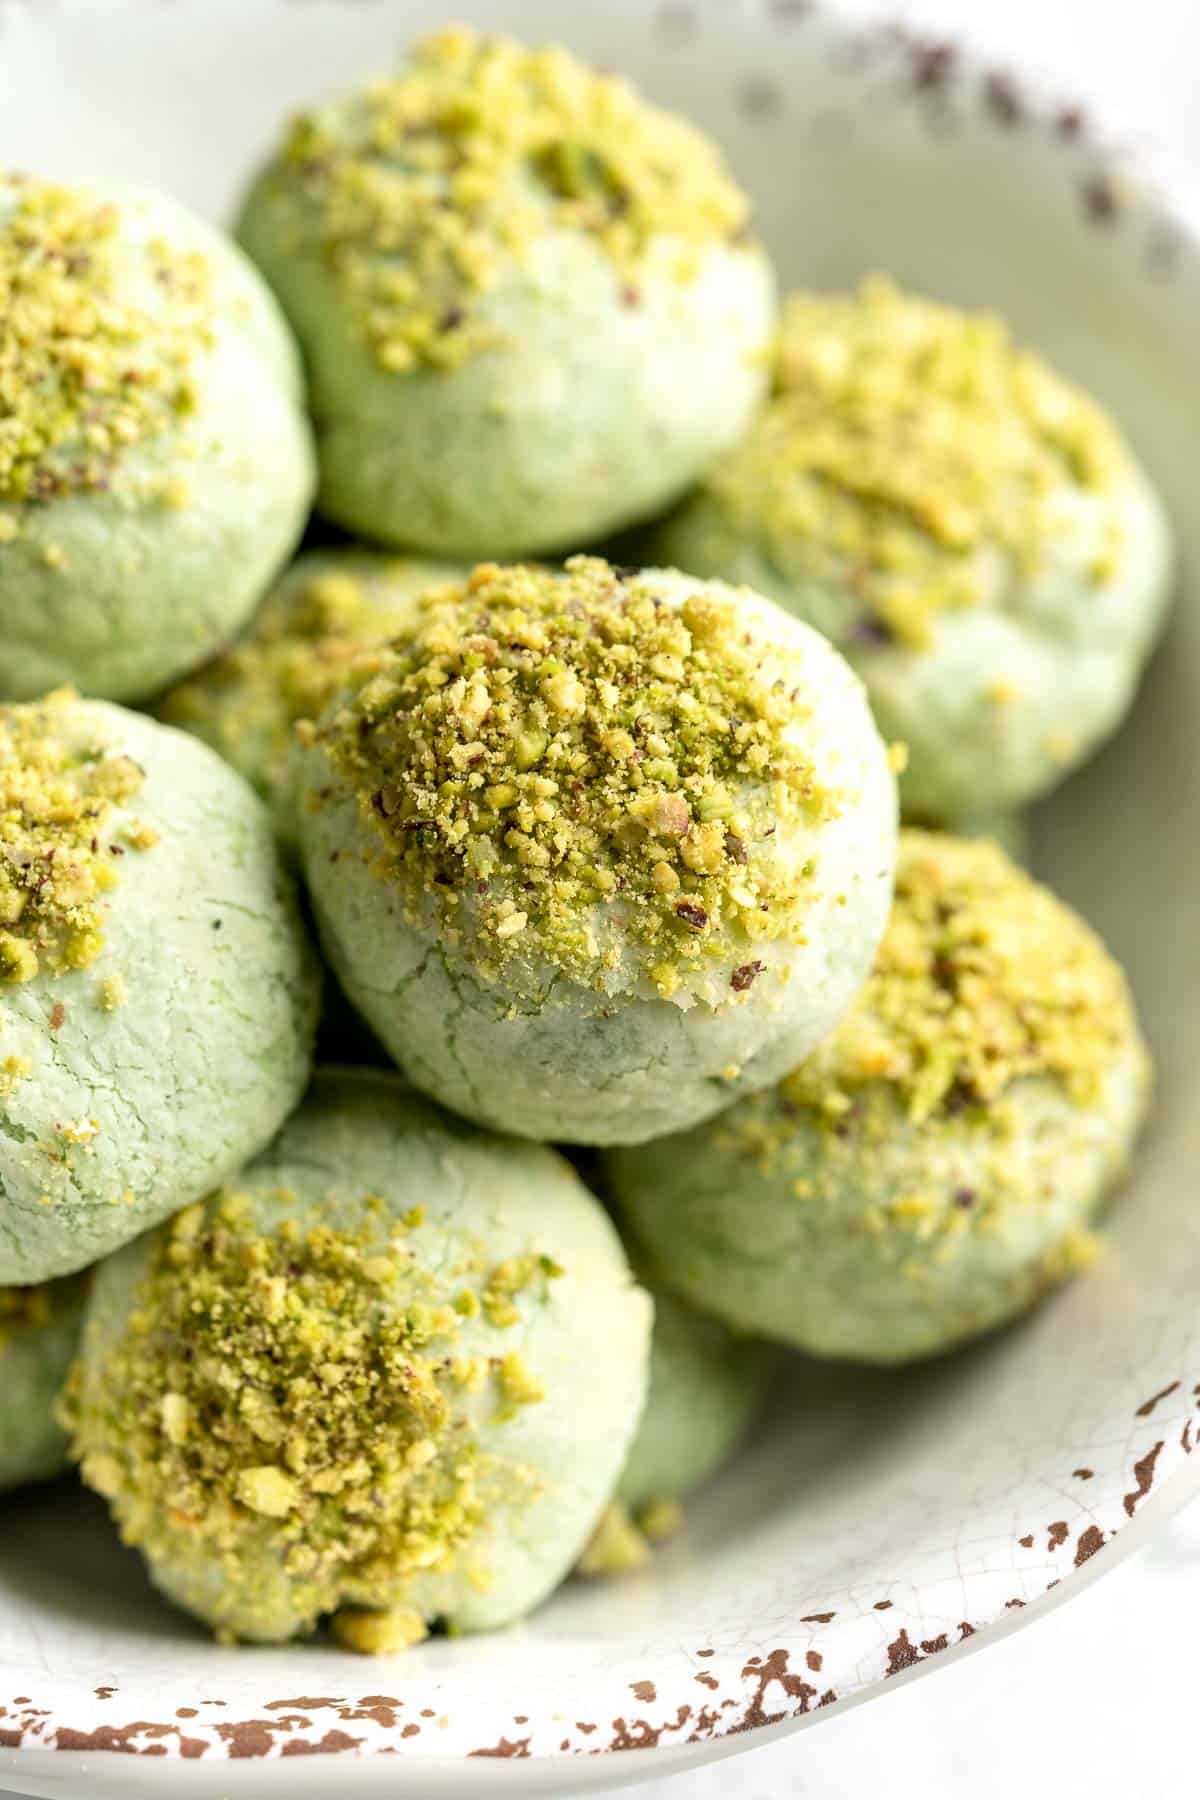
There's something so special about pistachios. They have a wonderful flavor and nutty aroma that's quite different from other nuts, and that green color is so striking. This Italian-style pistachio cookie recipe is the perfect way to celebrate them. Honestly, they're great any time of the year, but the green color makes them absolutely perfect for Christmas or St. Patrick's Day too. They're lovely to include on a holiday cookie tray or to serve with some hot coffee at your next brunch.
Why You'll Love These Pistachio Cookies
- Deliciously nutty flavor. These Italian pistachio cookies are made with ground pistachios, but then we also add a splash of almond extract to play up that delicate nutty flavor. They're the perfect treat for pistachio lovers!
- Quick and easy to make. This easy cookie recipe comes together really quickly! The longest part will be waiting for your butter to come to room temperature. You don't even have to chill the dough, so you can bake a batch of these delicious cookies right away!
- Tender, buttery texture. These cookies are much more like shortbread than regular chocolate chip cookies. They have a wonderful bite and delicately soft texture that dissolves in your mouth, melting into a sweet, buttery pistachio flavor. They're just wonderful! I dare you to eat just one.
Ingredient Notes
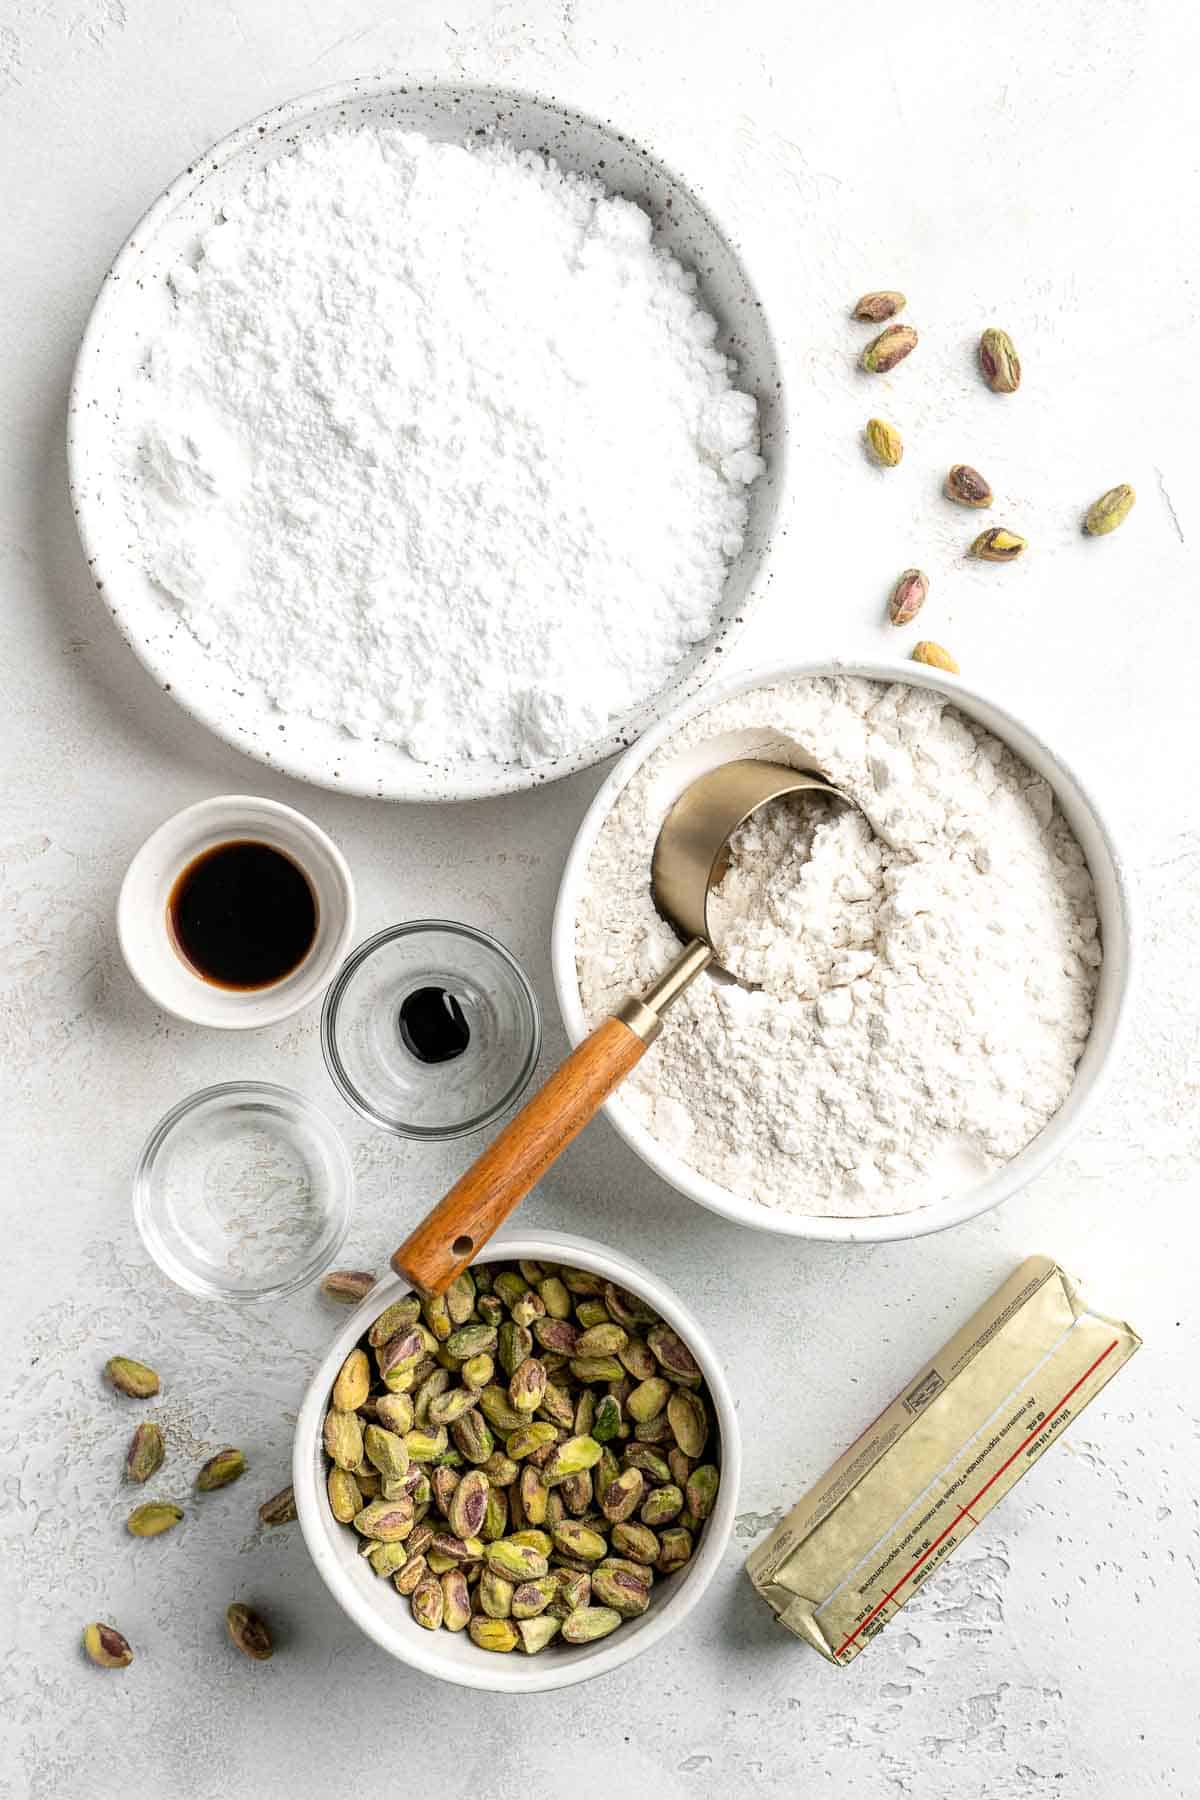
To make these delicious Pistachio Cookies, you will need the following ingredients (full measurements in recipe card below):
- pistachios - use raw pistachios. You can use salted or unsalted ones - whatever you prefer. Make sure they are fully cleaned to remove any shells.
- butter - use unsalted butter softened to room temperature.
- confectioners' sugar - you'll use the powdered sugar to sweeten the cookie dough and to roll the cookie dough balls before baking.
- extracts - use a mixture of almond extract and vanilla extract for a rich, nutty flavor.
- green gel food coloring - this plays up the pistachio color and makes it easy for people to tell what's inside. You can leave it out if you prefer but the cookies will not be the same green color.
- all-purpose flour - this is the base of the cookie dough.
You will also need measuring cups and spoons, half sheet baking tray, silicone baking mat or parchment paper, food processor or blender, large bowl, electric mixer, small cookie scoop, and a wire rack.
How to Make the Best Pistachio Cookies
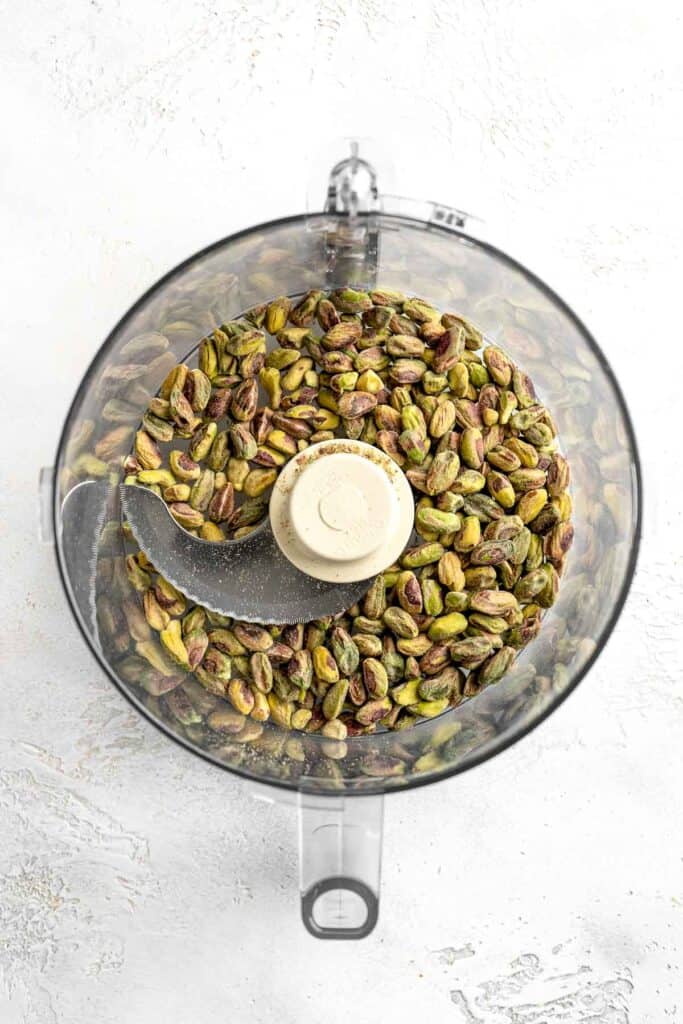
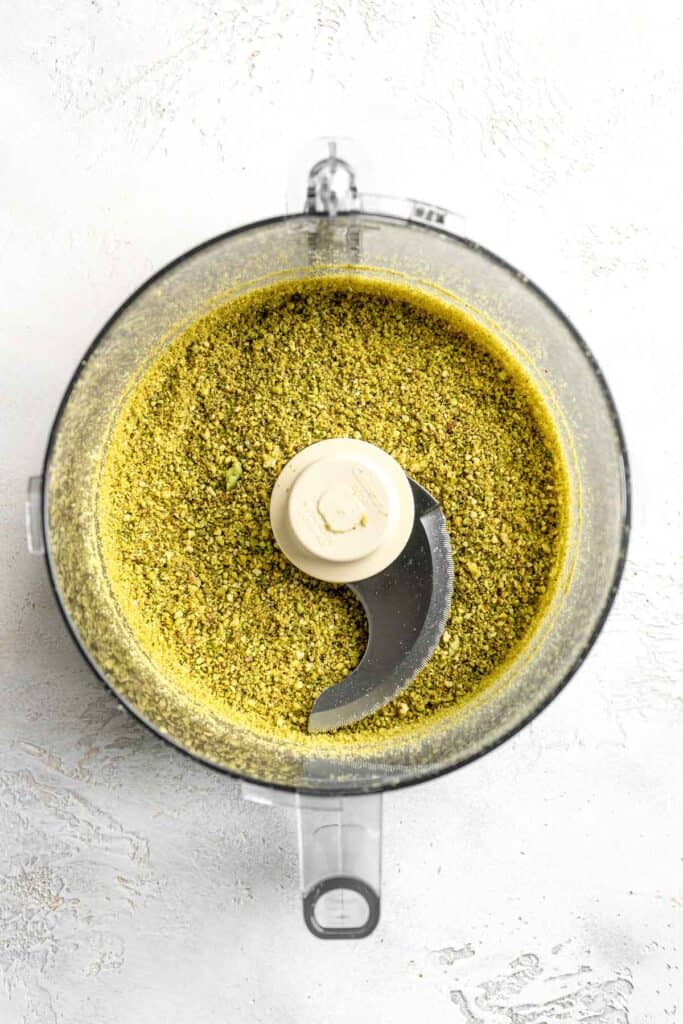
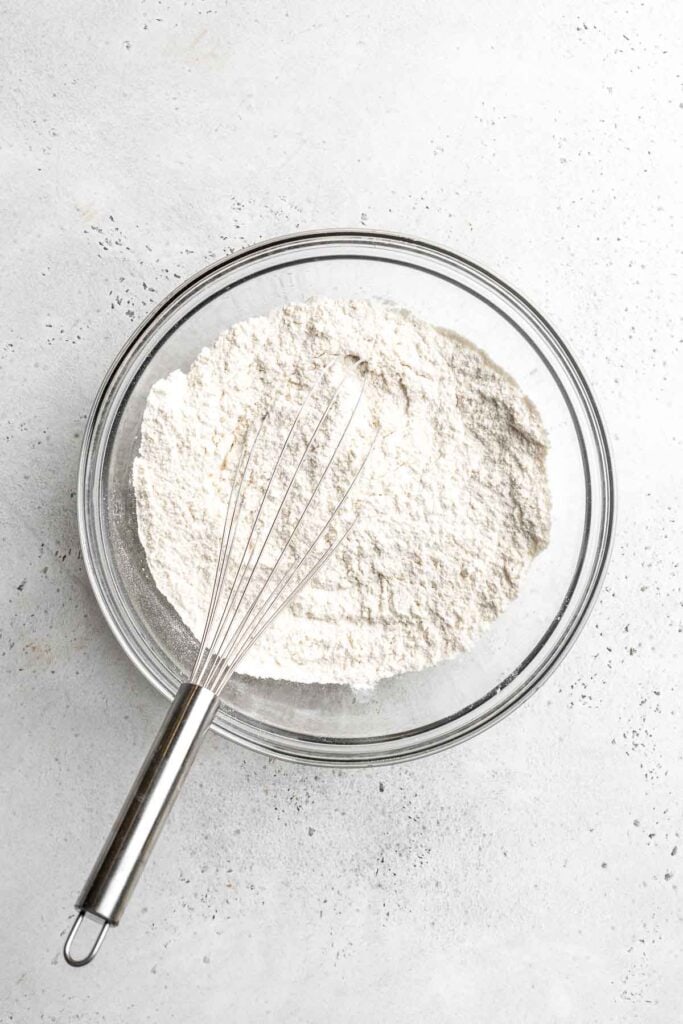
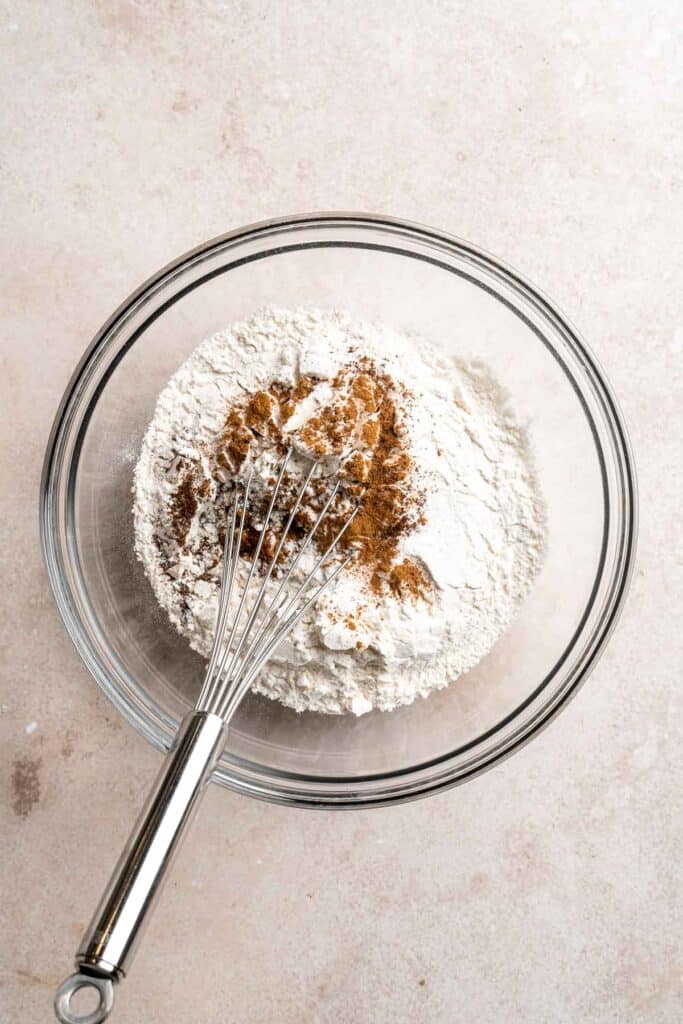
- Crush pistachios. Add the pistachios to a food processor or blender and pulse mix until they are ground finely. Set aside.
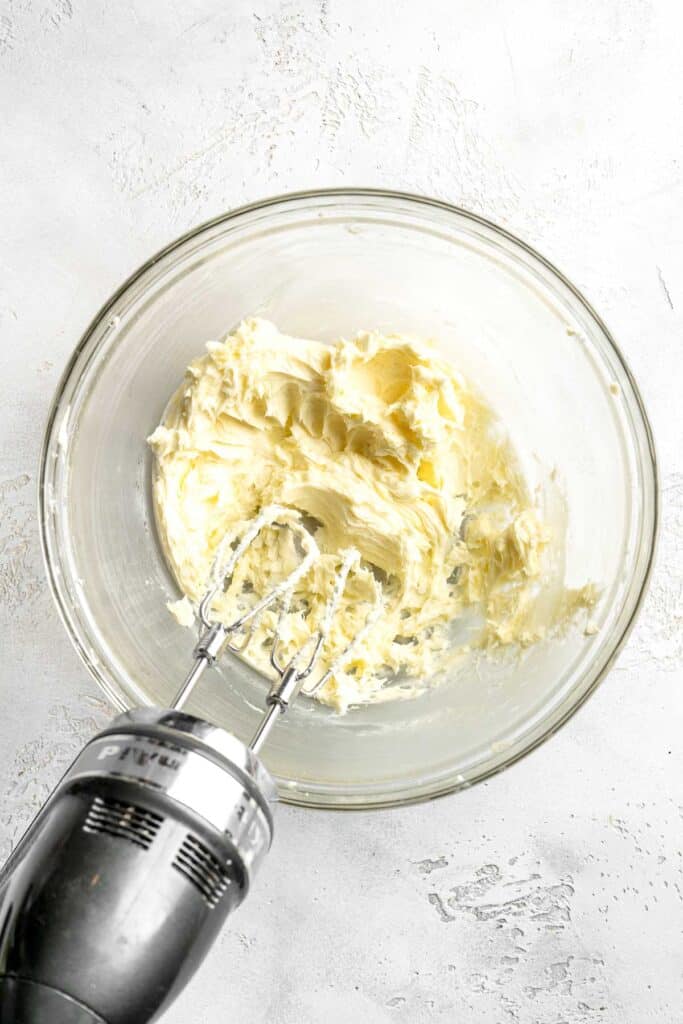
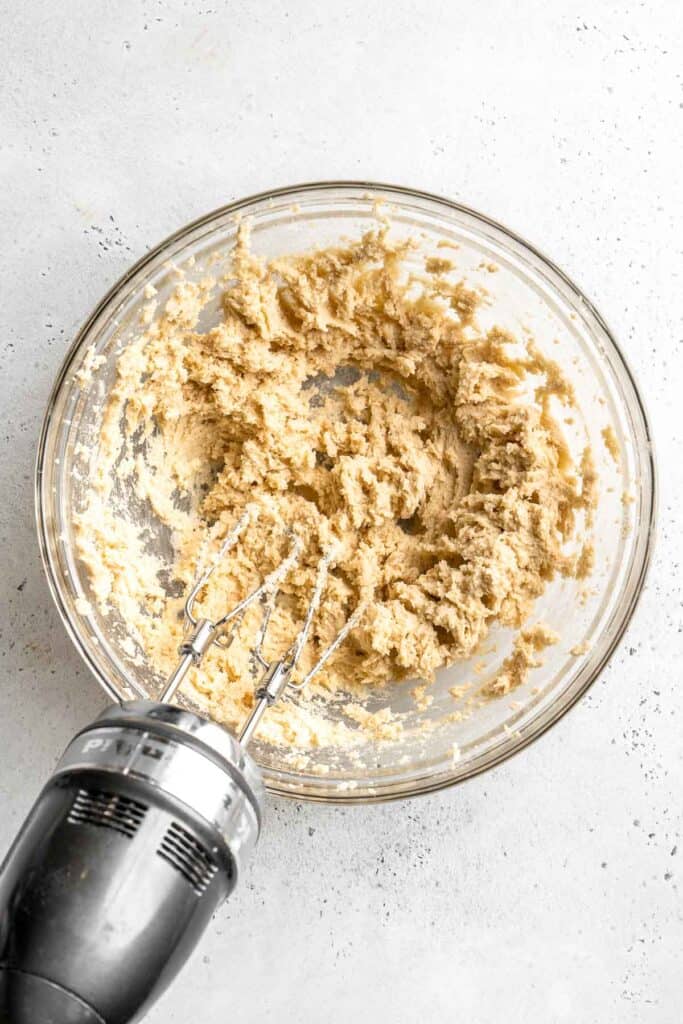
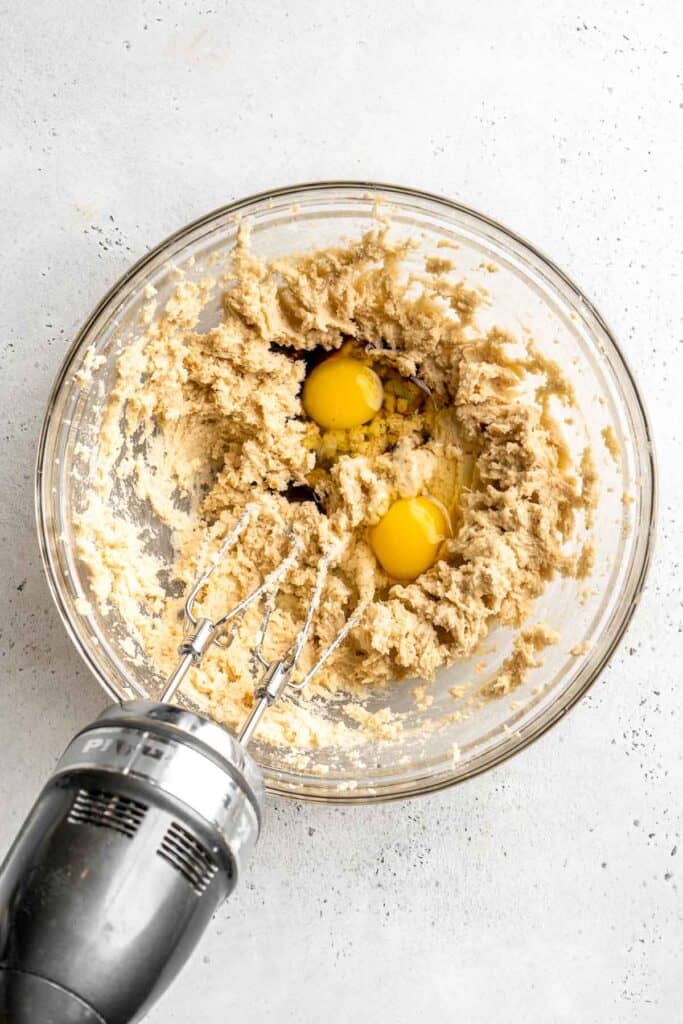
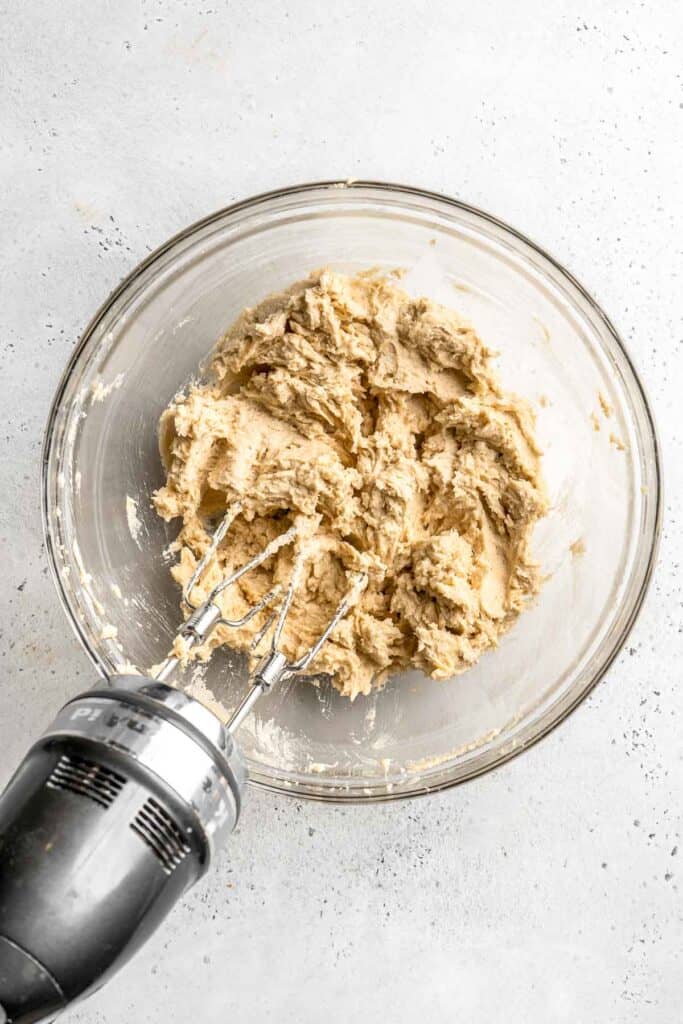
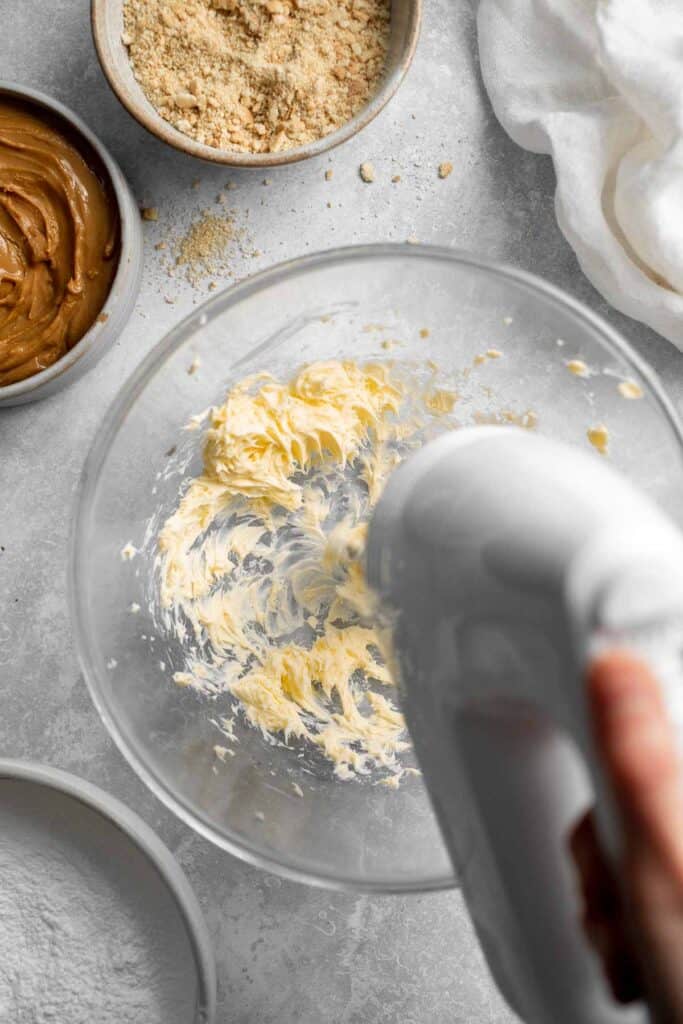
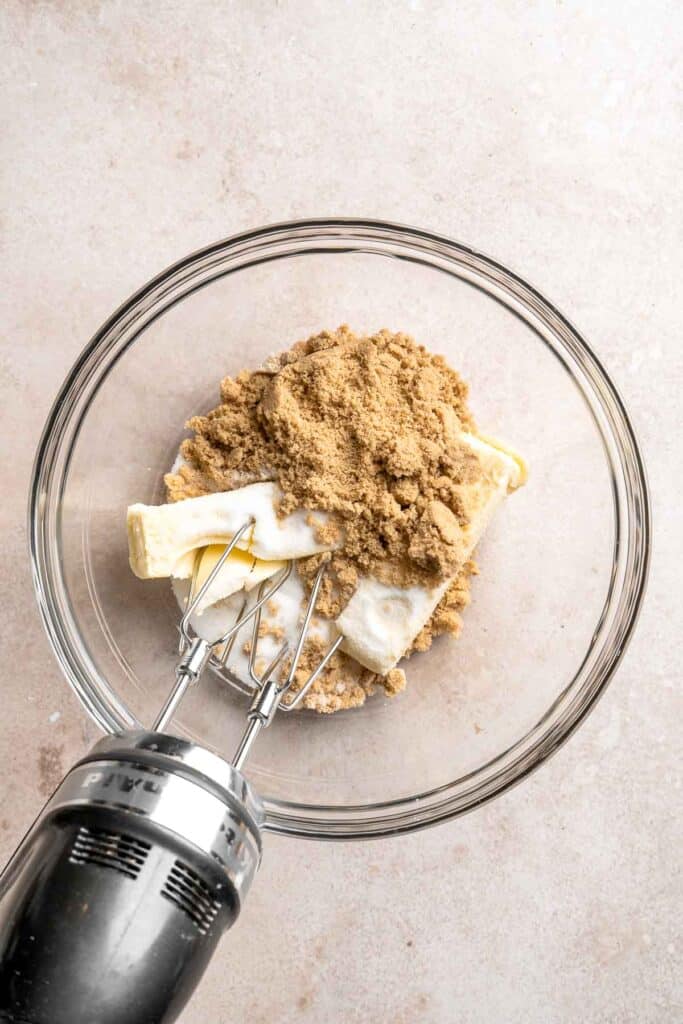
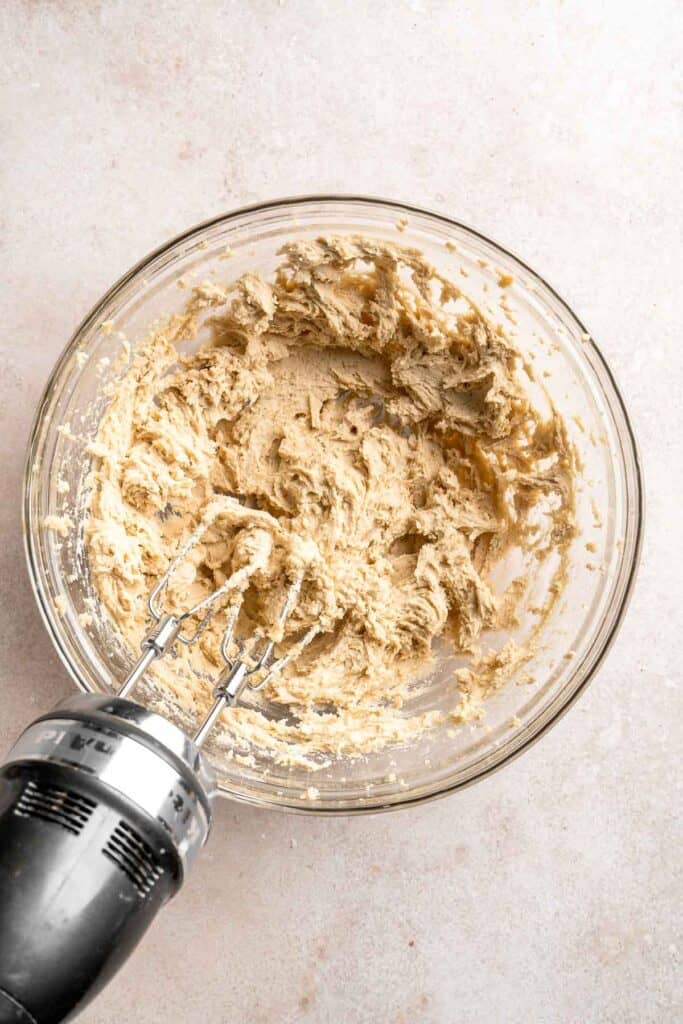
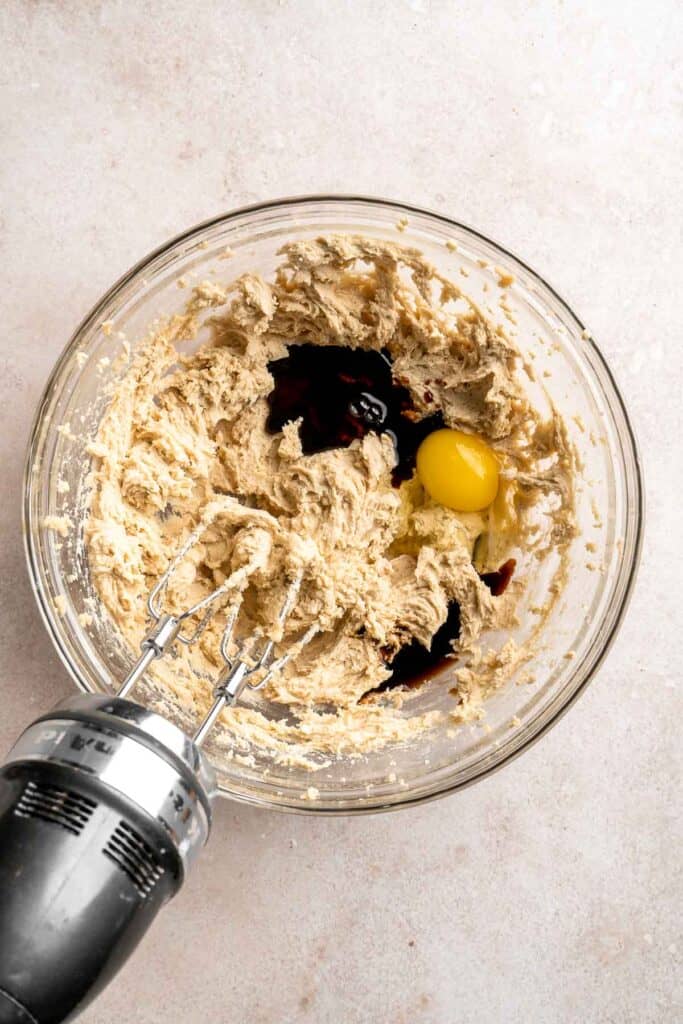
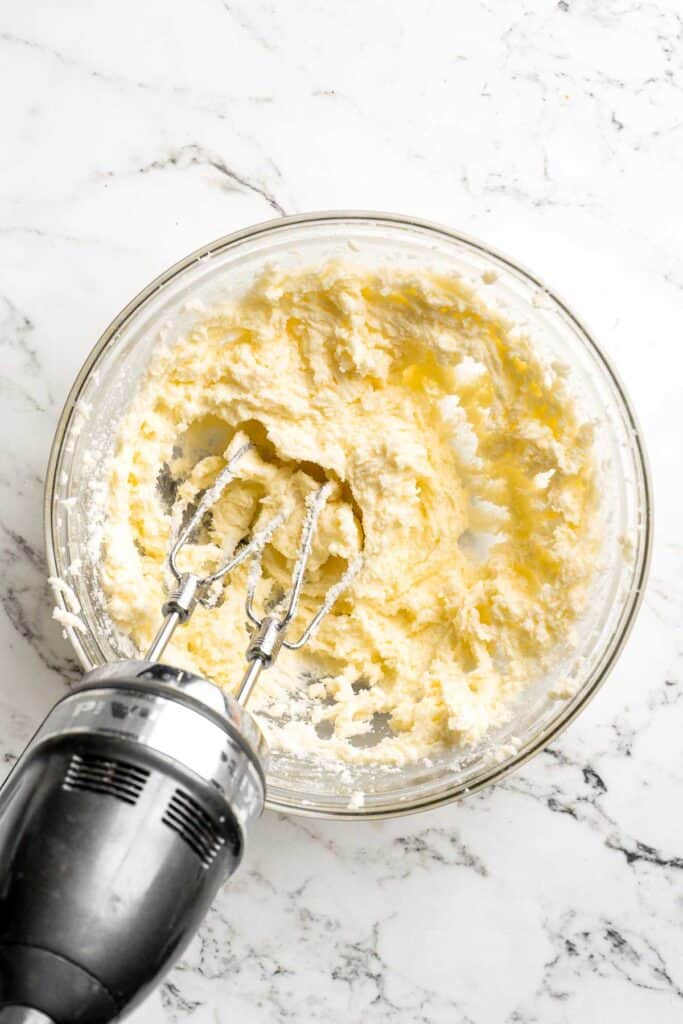
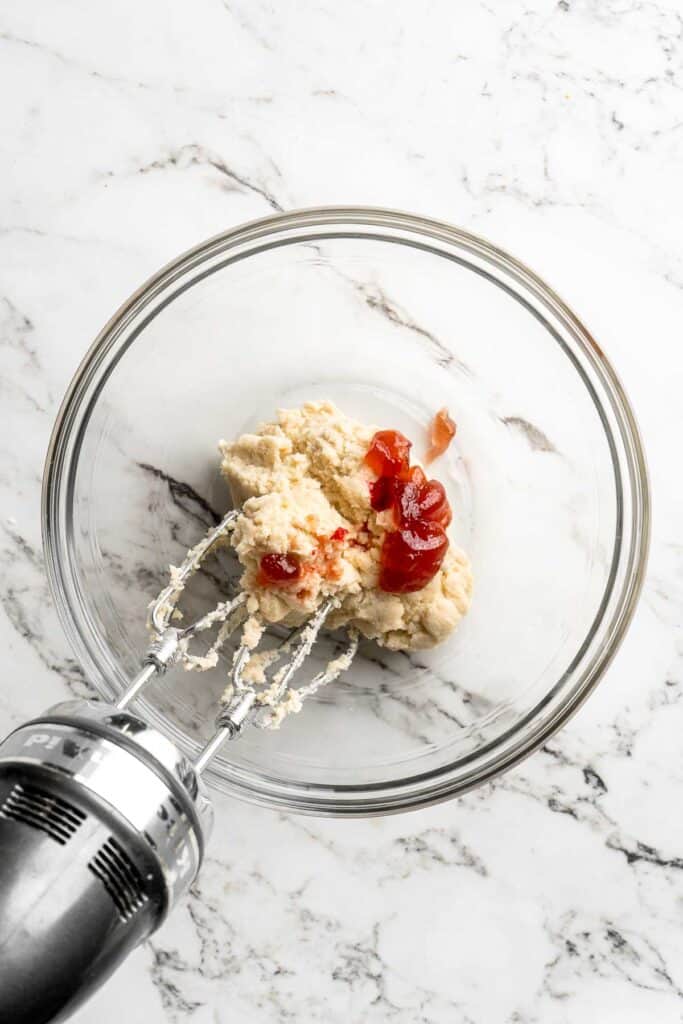
- Cream butter and sugar. In a large mixing bowl, use a hand mixer or stand mixer cream together butter and ½ cup sugar on medium speed until light and fluffy, about 2 minutes.
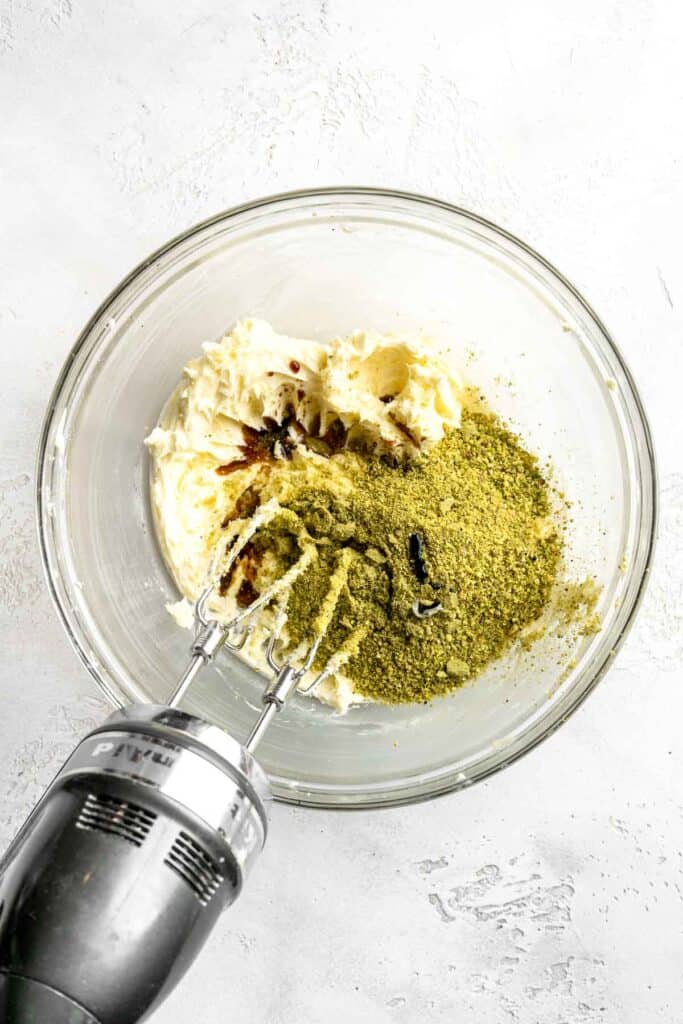
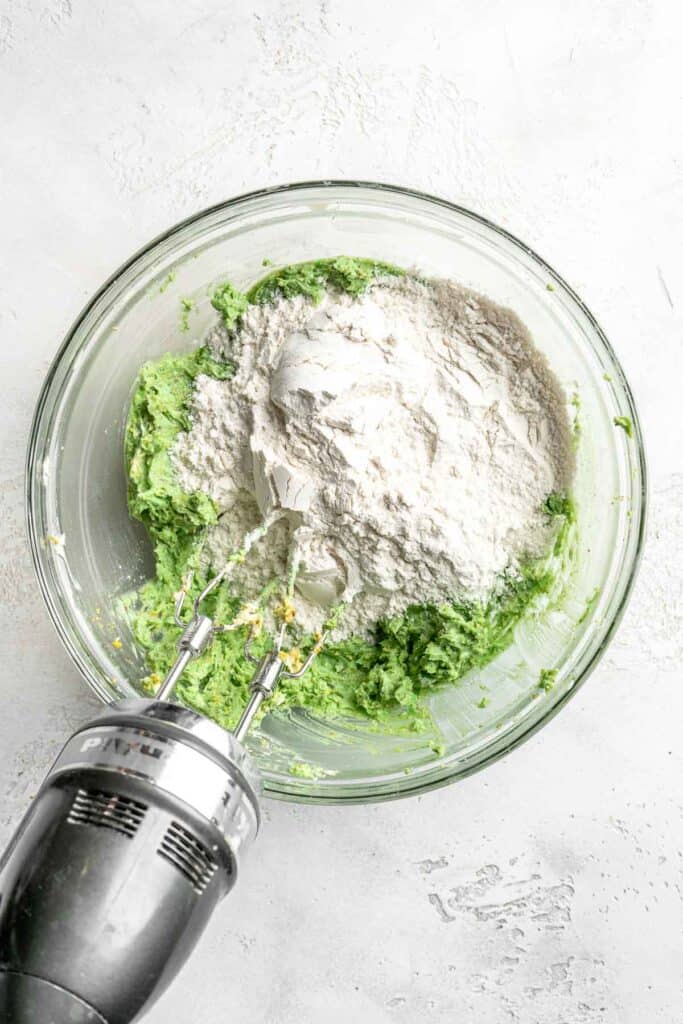
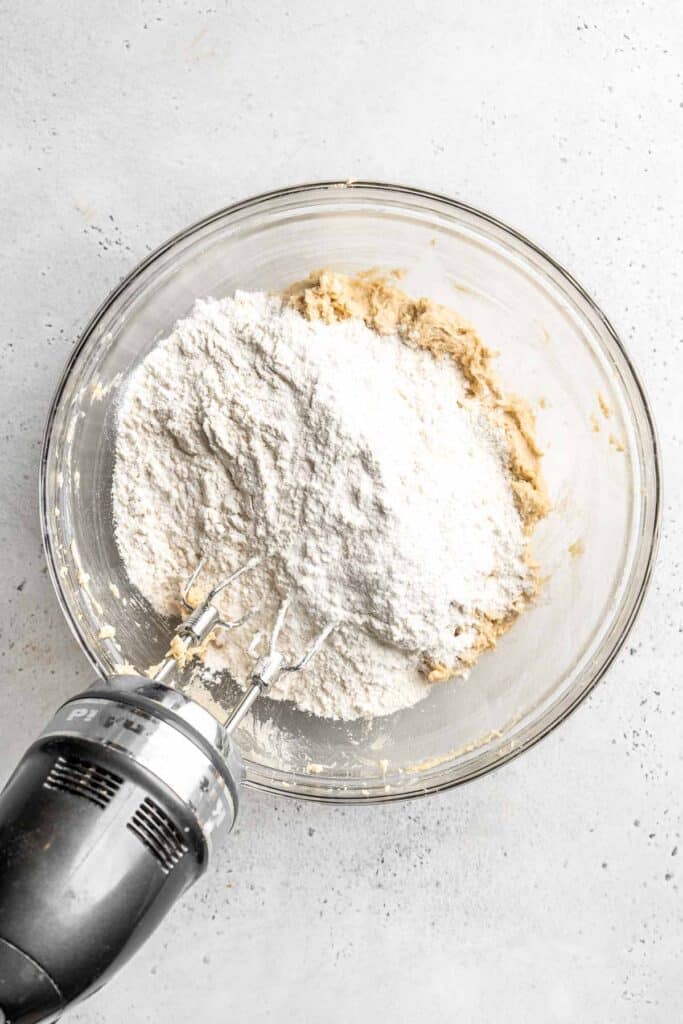
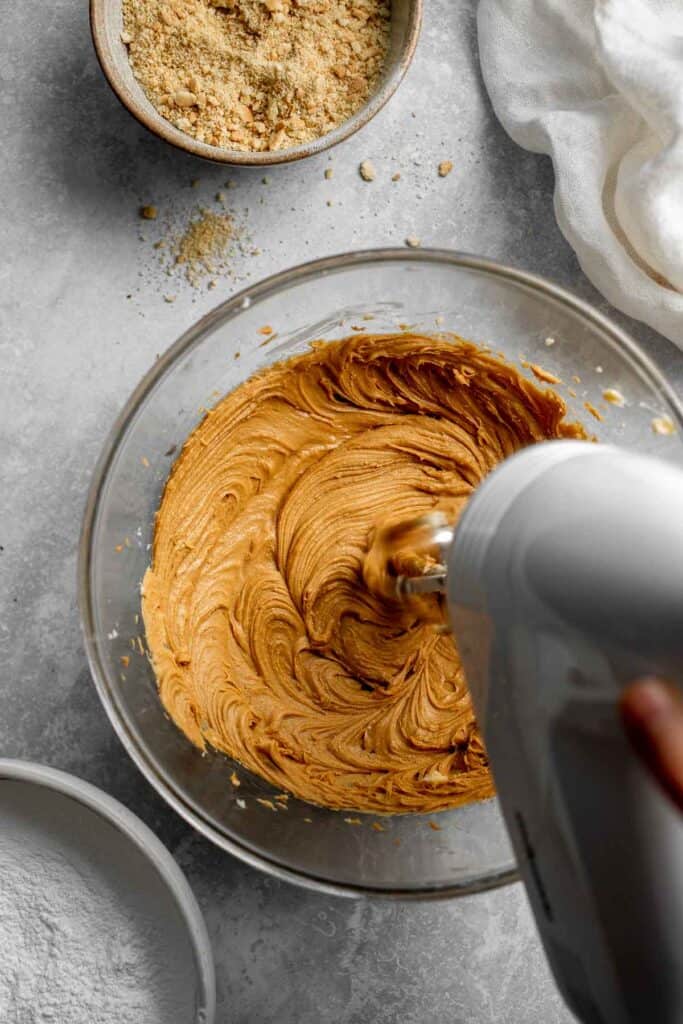
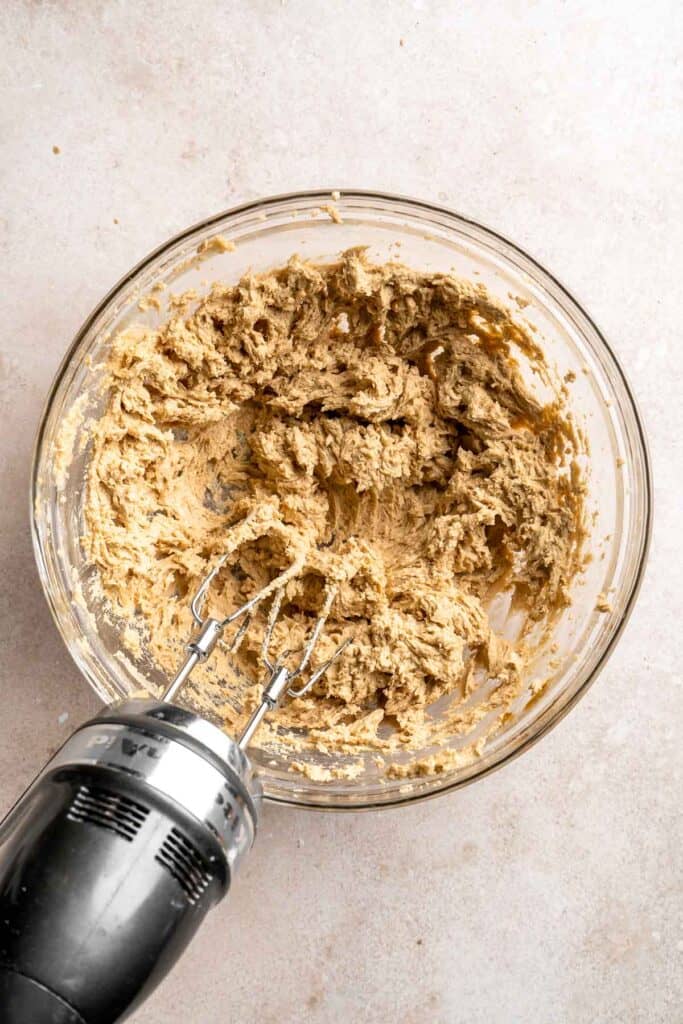
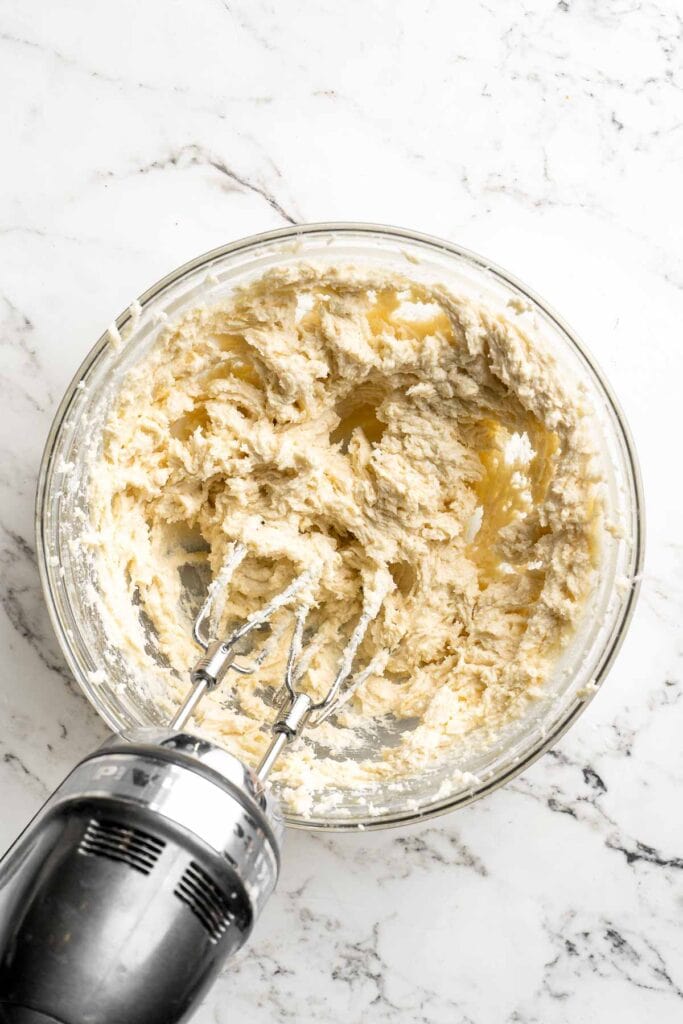
- Add pistachios. Add crushed pistachios, almond extract, vanilla, and food coloring. Beat on low until incorporated.
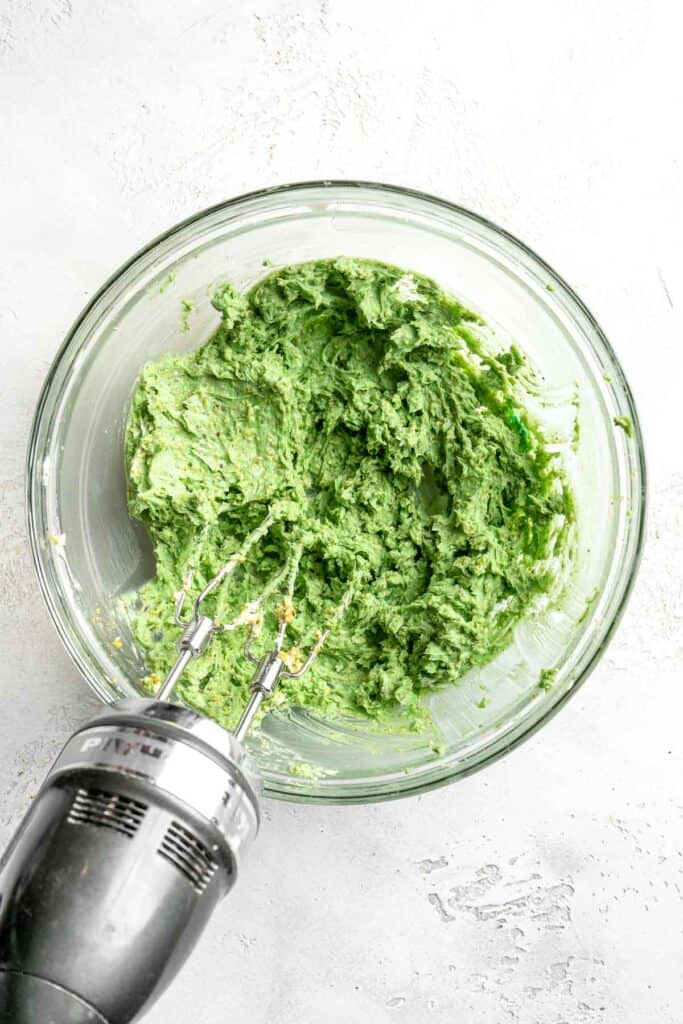
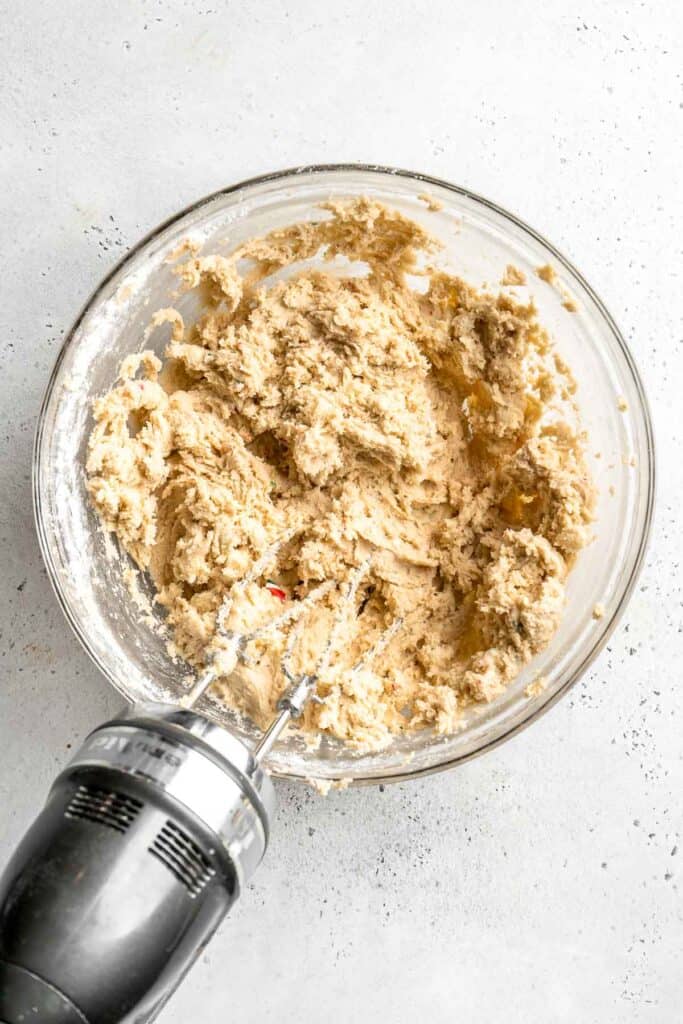
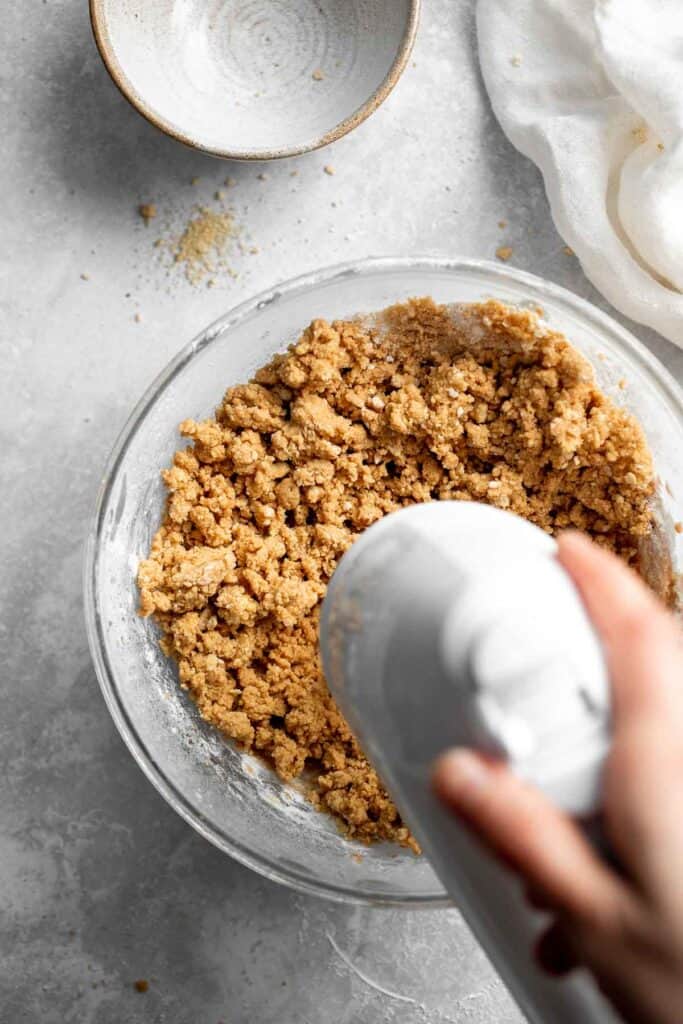
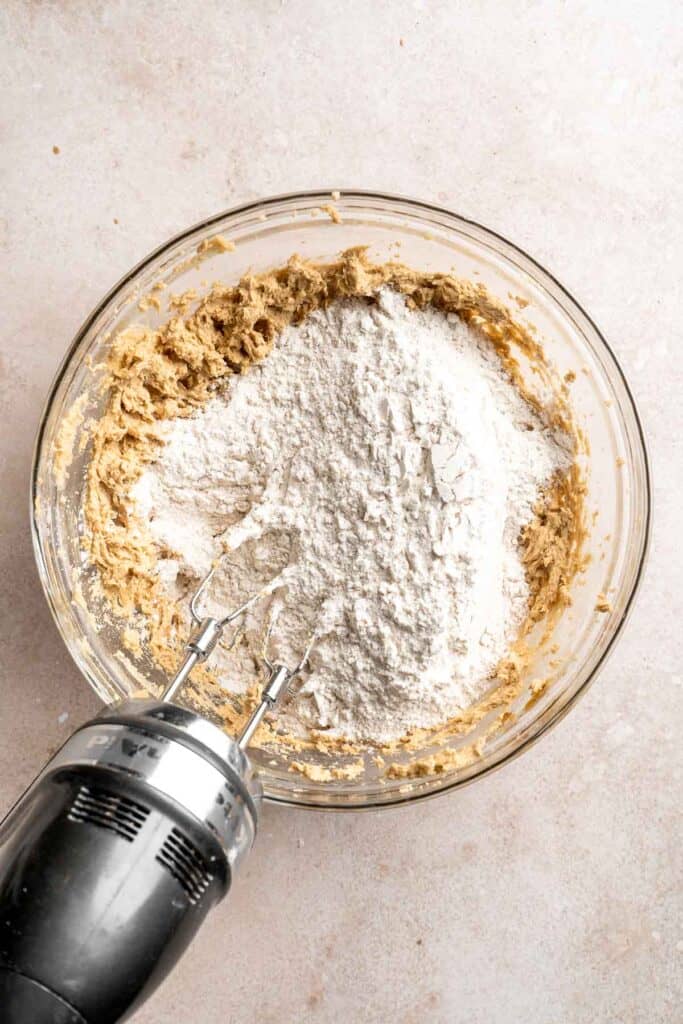
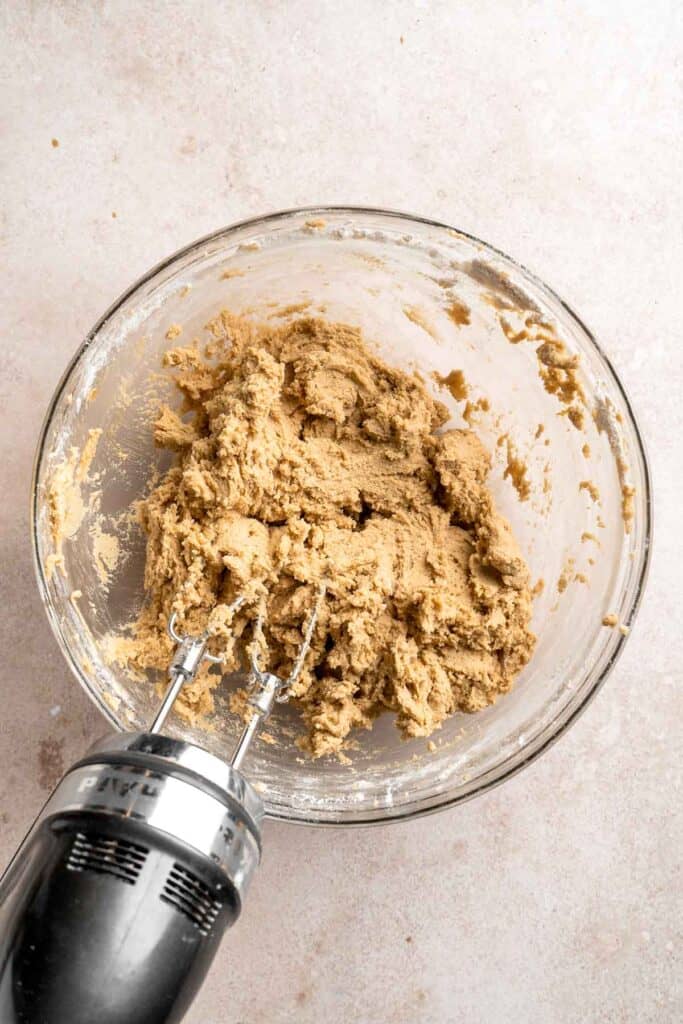
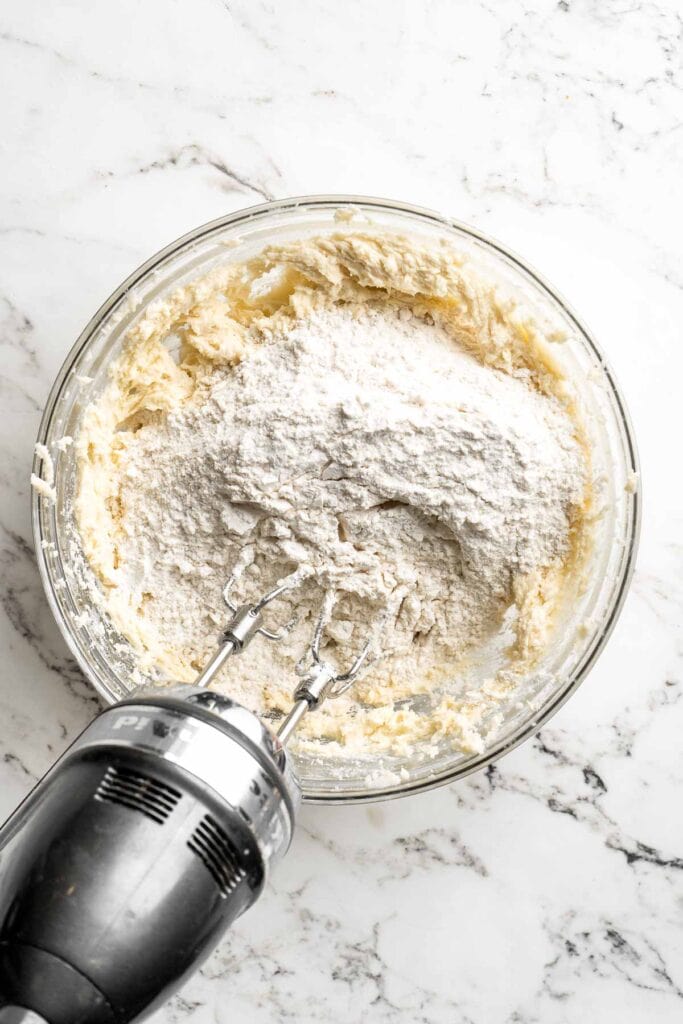
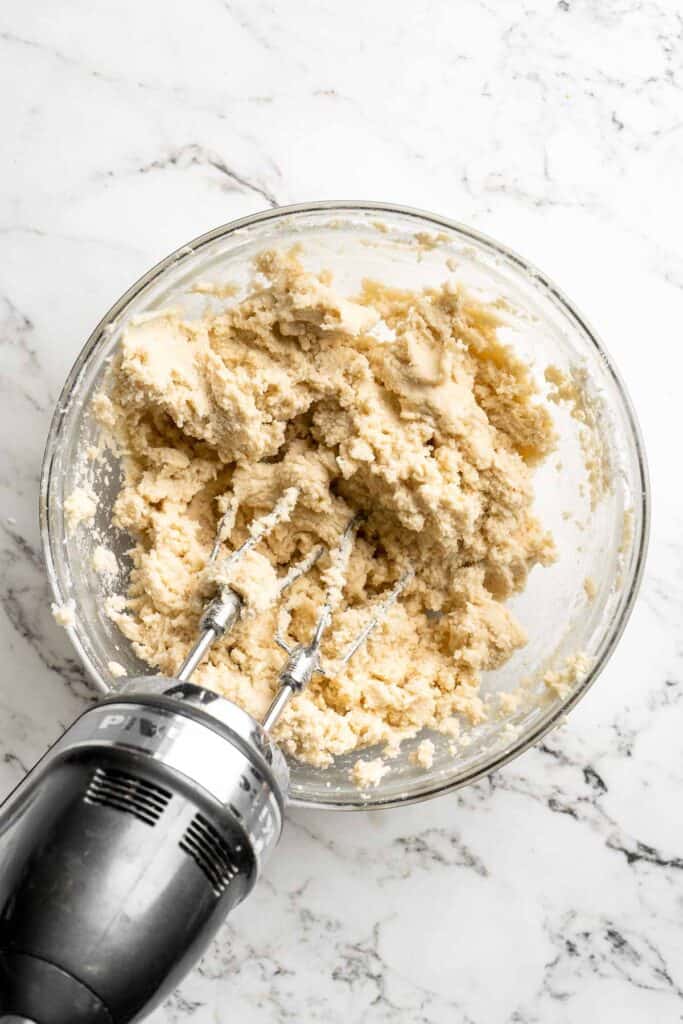
- Add flour. Add flour and beat until just combined.
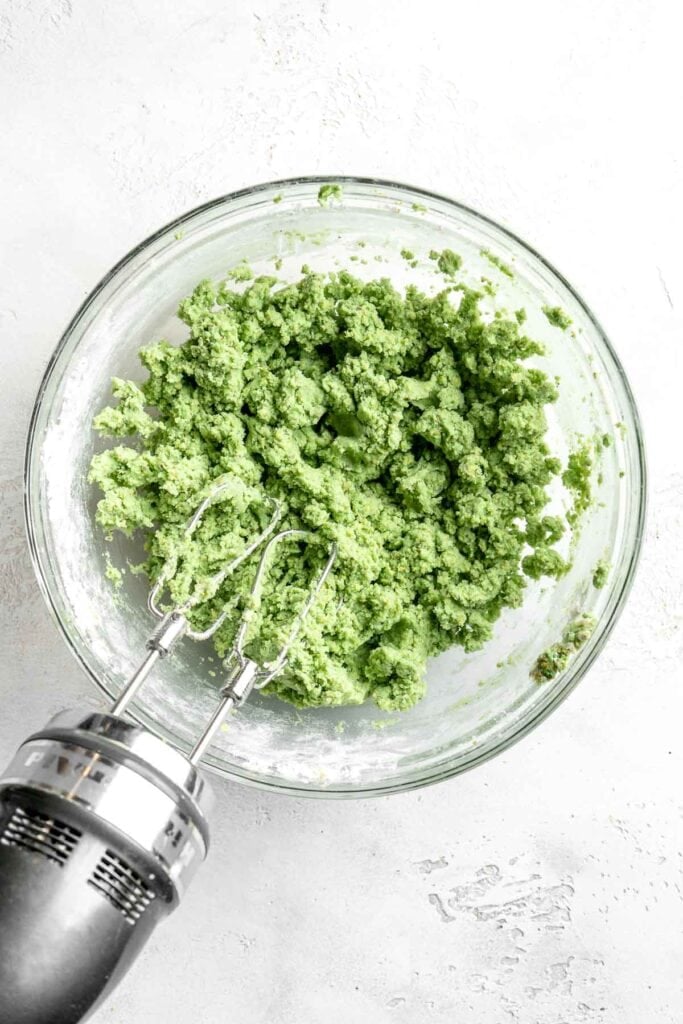
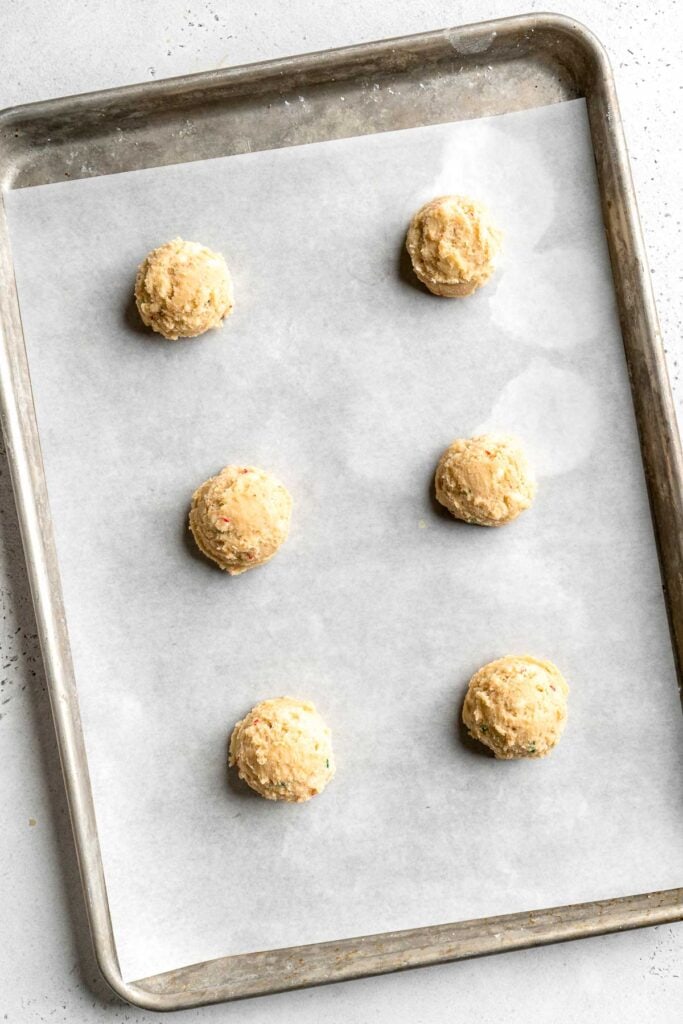
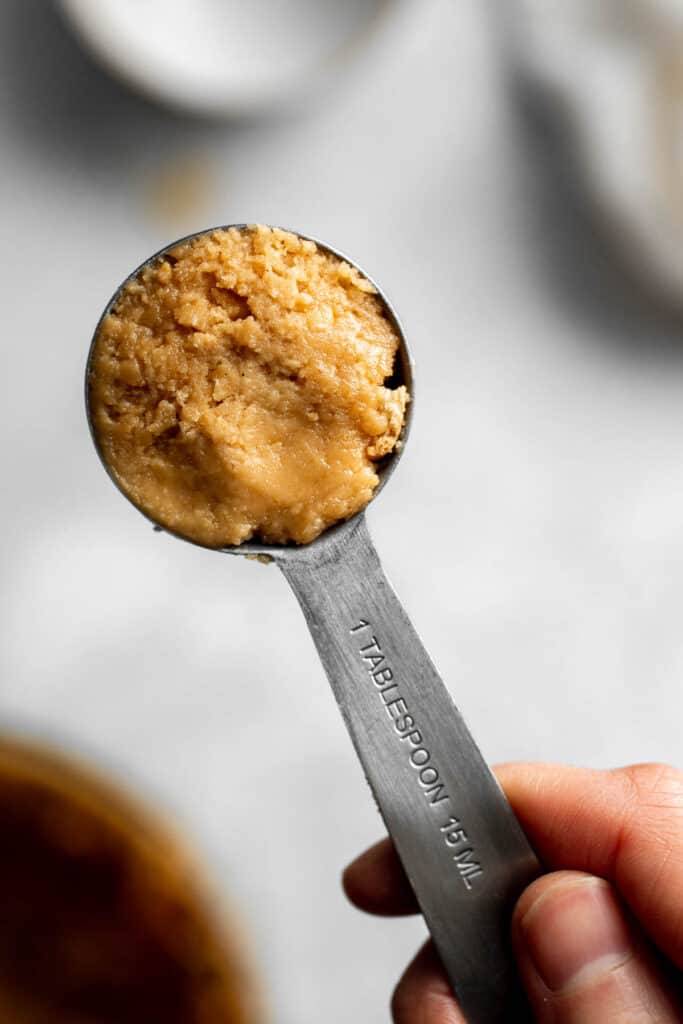
- Scoop. Use a small cookie scoop to scoop out 1 tablespoon of cookie dough. Use your hands to roll it into a ball.
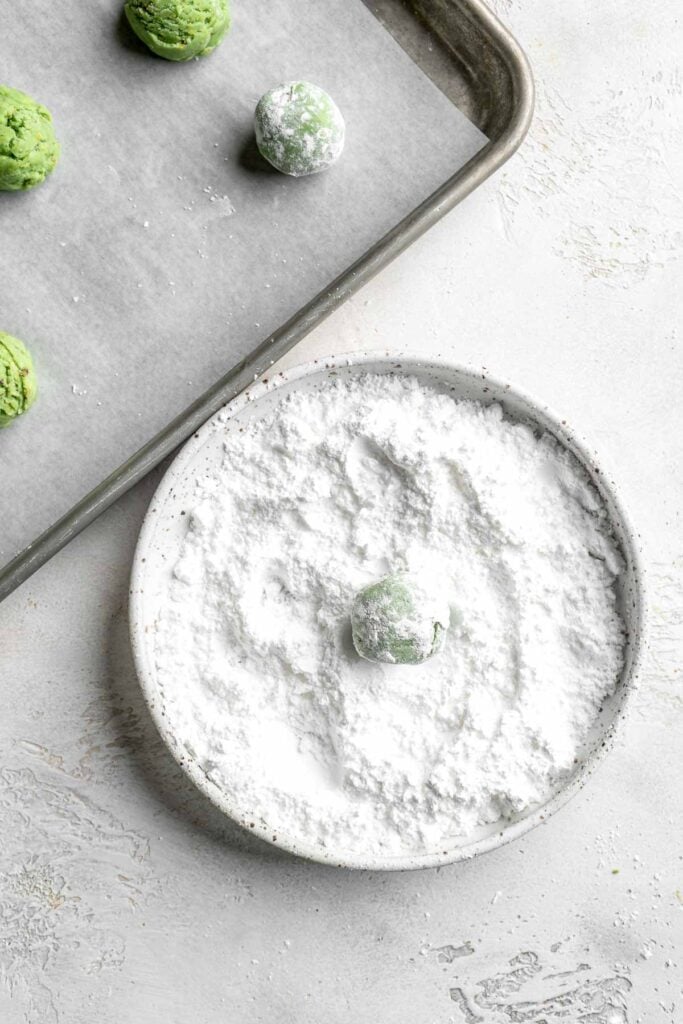
- Coat cookies. Dip the cookie balls in confectioners' sugar and roll to coat. Place the cookie balls a parchment lined baking sheet, spaced about 2 inches apart.
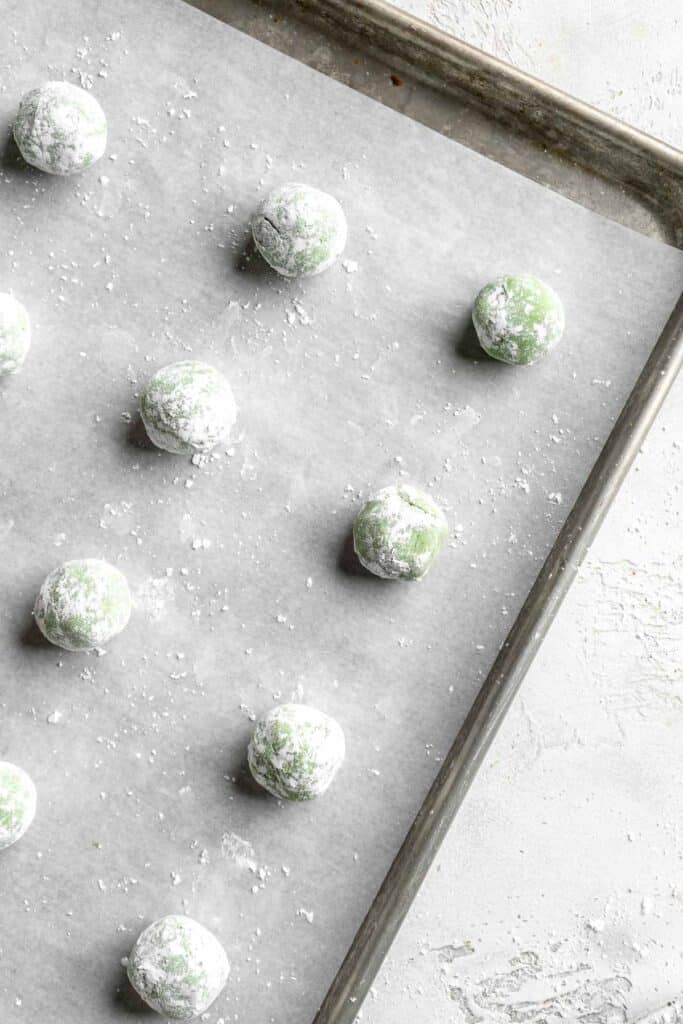
- Bake. Bake in a 350F preheated oven for 13 to 15 minutes, until edges just start to brown. Remove from oven and allow the cookies to cool in the baking sheet for 5 minutes, then carefully transfer to a wire cooling rack to cool completely.
Recipe Variations
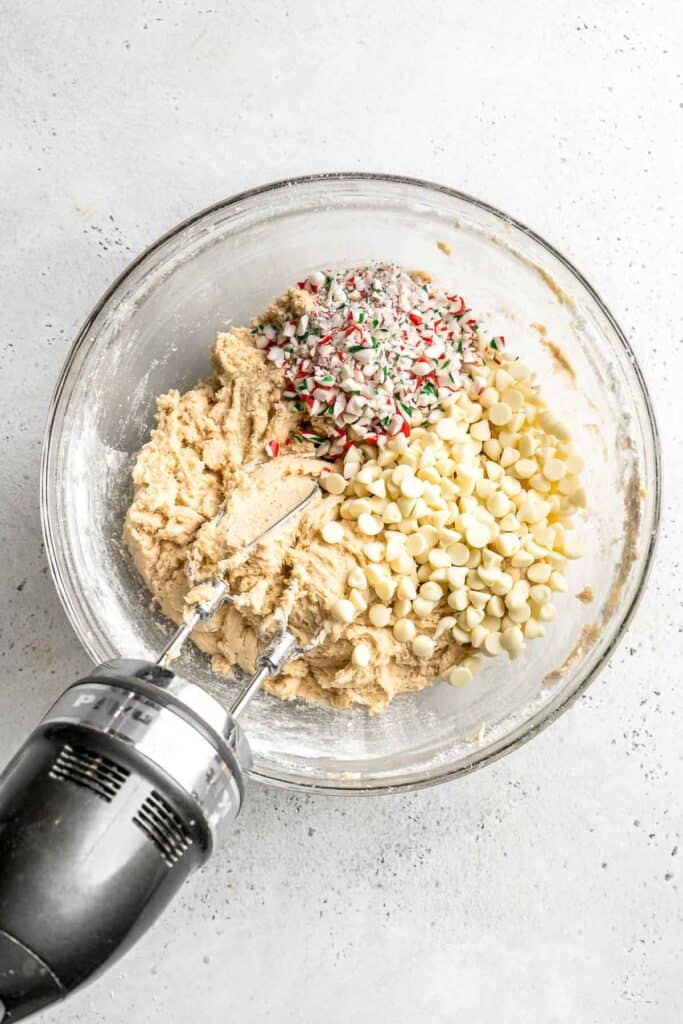
- Make chocolate chip pistachio cookies. If you want even more crunch, finely chop some dark chocolate chunks or white chocolate chips to fold into the cookie dough.
- Roll in pistachio pieces. Instead of rolling the cookie dough in powdered sugar, try rolling the dough balls in crushed pistachios. Be sure not to burn them!
- Add zest. To add more flavor without affecting the texture of the cookies, add a little zest! Fresh lemon zest or orange zest would taste amazing with the pistachios.
- Try a different nut. Of course, this recipe is meant for pistachios, but you could easily substitute walnuts, hazelnuts, or almonds instead. Just be sure to ditch the green coloring!
How to Serve
These Pistachio Cookies are delicious served on their own, or paired with some of my favorite cookie recipes including:
- Chocolate Crinkle Cookies
- Italian Christmas Cookies (Ricotta Cookies)
- Italian Rainbow Cookies
- Lemon Drop Cookies (Anginetti)
- Italian Easter Cookies
For more cookie inspiration, see our 50 Best Cookie Recipes.
Recipe Tips and Tricks
- Cream the butter properly. Since these cookies are more like shortbread, it's really important to get the butter and sugar mixture light and fluffy. The butter mixture should become pale and about 3 times as large as when you started. Don't rush!
- Use powdered sugar. The buttery, crumbly texture comes from powdered sugar. Neither granulated sugar or brown sugar will not have the same texture or flavor.
- Don't overmix. After you add the pistachios, extracts, and food coloring, mix as little as possible. Make sure the ingredients are incorporated, then stop. Otherwise, you may overwork the dough and get a dense, firm texture.
Storing and Freezing Instructions
How to Store
Store leftover cookies in an airtight container at room temperature for approximately 1 week or refrigerate them for 2-3 weeks. Be sure to choose an airtight container, as the powdered sugar will become clumpy and hard if there is any moisture.
How to Freeze
Freezing Baked Cookies
Your freezer is your friend when it comes to these cookies! Freeze the baked cookies in a freezer-safe container for up to 3 months and thaw them in the fridge or on the counter.
Freezing Cookie Dough Balls
You can also freeze the unbaked dough balls to bake later. Just place the cookie balls (uncoated in sugar) on a parchment paper lined baking sheet. Freeze for 1-2 hours until hard, then transfer to an airtight container or freezer bag. Let the cookie balls thaw in the fridge overnight, then roll them in powdered sugar just before baking.
FAQ
Absolutely! Pistachios are a wonderful ingredient to add to your bakes, whether you're making these buttery Italian cookies, Cranberry Pistachio Biscotti, Pistachio Macarons, Persian Chickpea Cookies with Pistachio, pistachio ice cream, and so much more! You can even use pistachio flour instead of almond flour to add that nutty flavor to special cakes, pastries, and fillings. Get yourself a bag of pistachios and have fun with them!
Although you can use either, I prefer to use raw pistachios. They seem to add even more of a green color and a wonderful flavor. Plus, they'll toast in the oven. If you use toasted nuts, they could become overbaked and turn bitter. That doesn't happen often, so it's really up to you! You can also use unsalted pistachios instead of salted, but you may want to add a pinch of sea salt to compensate for the change in flavor.
There are so many great recipes for pistachio cookies out there, and they're all slightly different! These pistachio cookies are similar to Italian wedding cookies, so they're rolled in powdered sugar. This adds a little sweetness to balance the buttery cookies on the inside, and it gives them a really fun appearance. You can roll the balls and cook them without the powdered sugar, but they won't have the same sweetness, flavor, or final texture.
More Pistachio Recipes
- Pistachio Macarons
- Sohan (Persian Pistachio Brittle)
- Cranberry Pistachio Biscotti
- Chocolate Thumbprint Cookies
- Persian Love Cake
- Pistachio-Crusted Salmon
Tried this recipe?
I'd love to hear what you think! Leave a comment and rating below to share your feedback. Your reviews help others discover this recipe and help me keep creating more free recipes for you. Snap a photo and tag me on social media @aheadofthyme too.

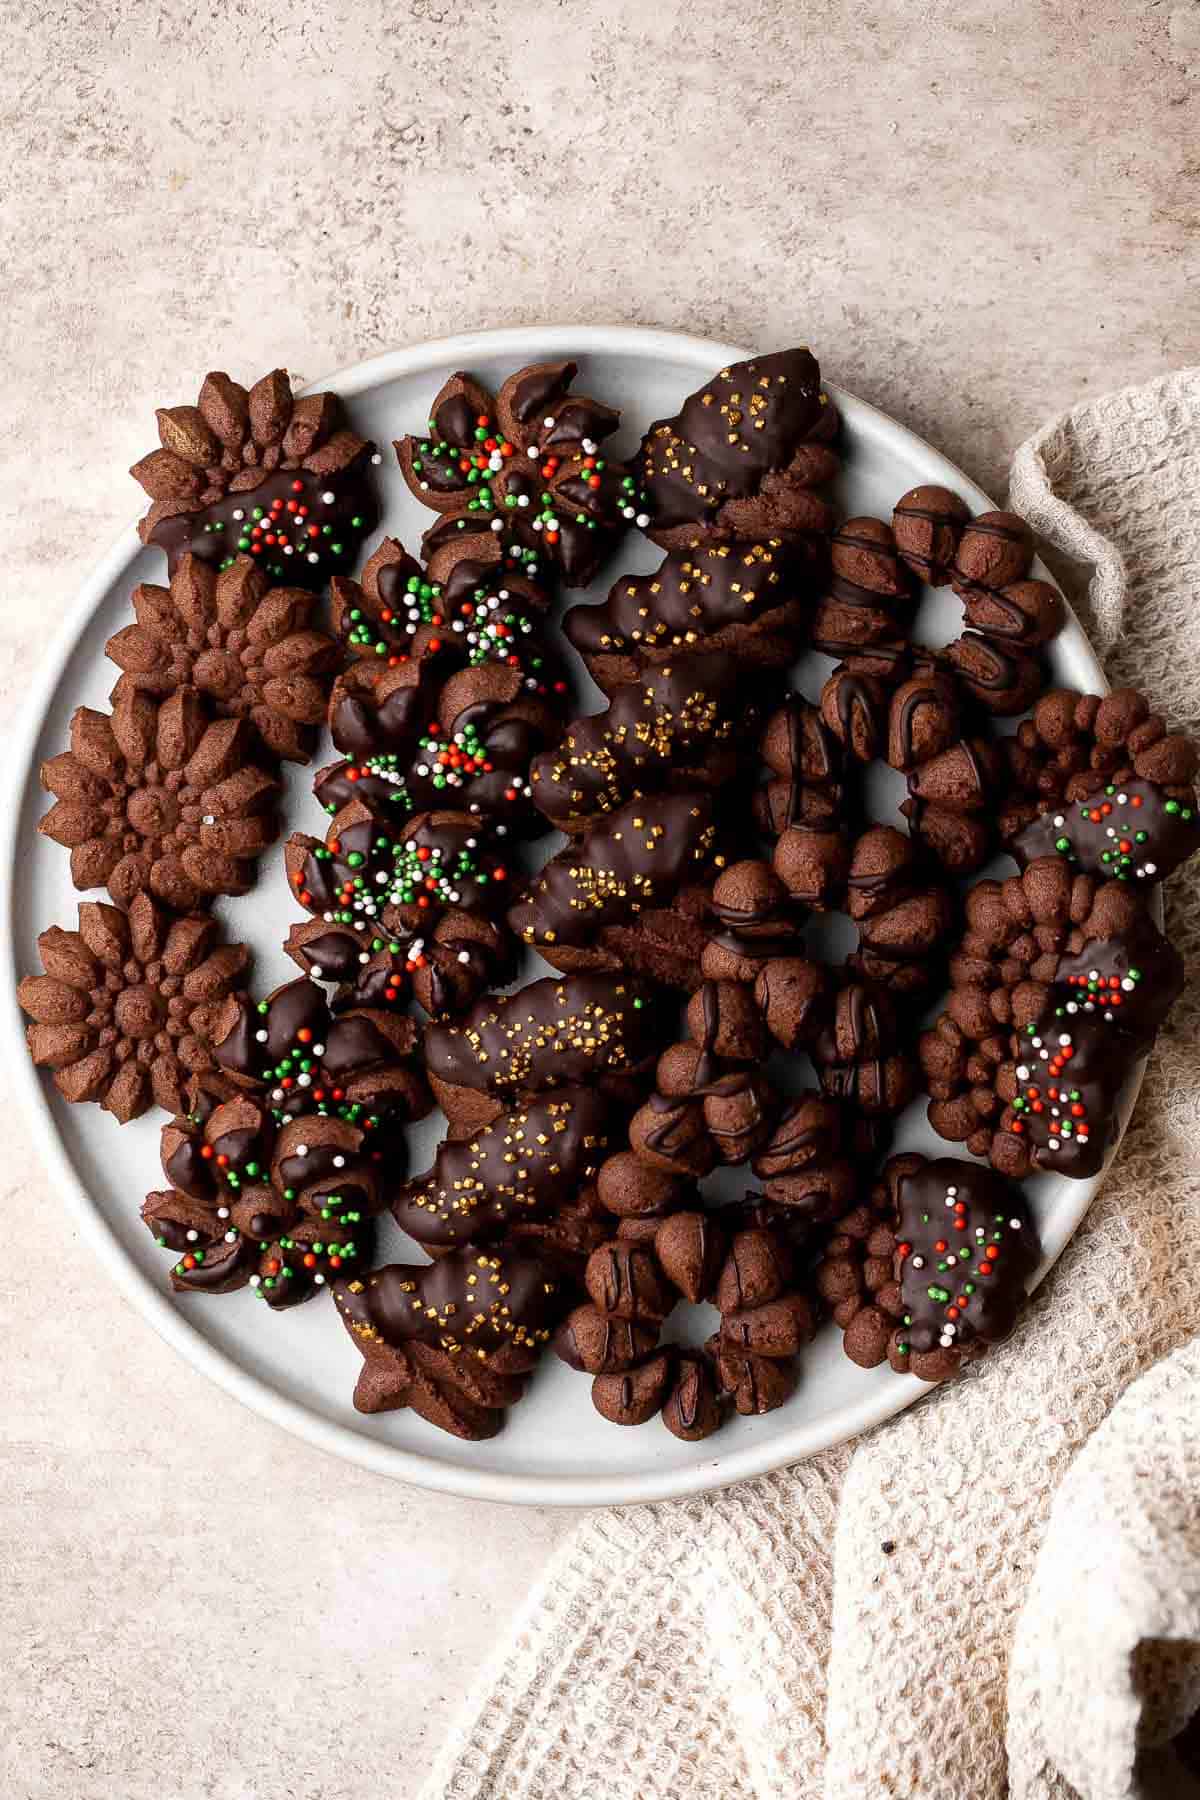
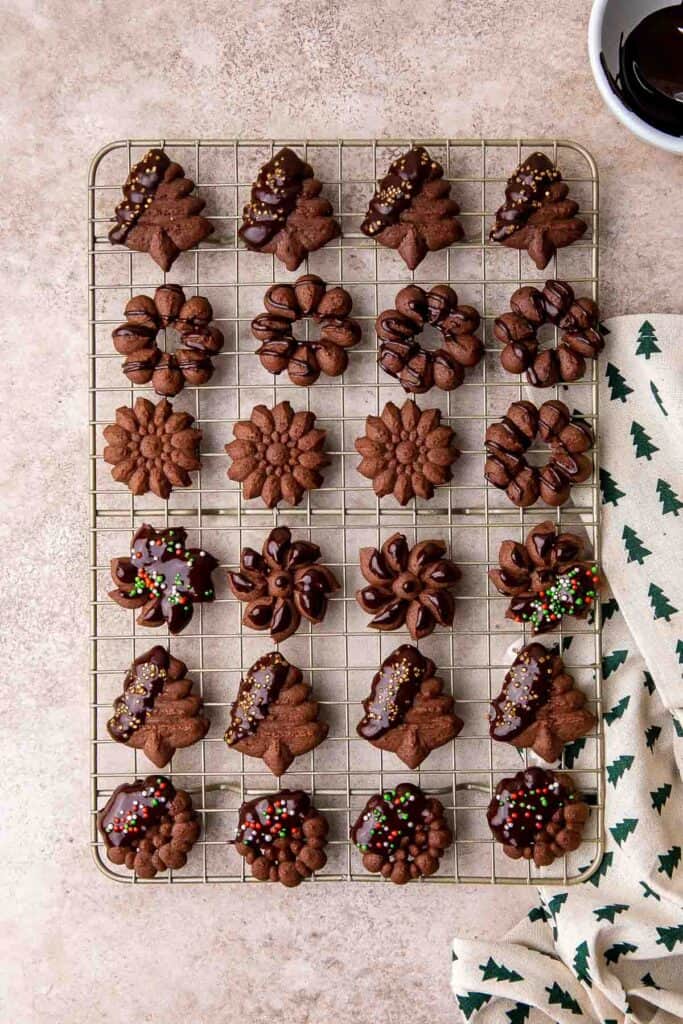
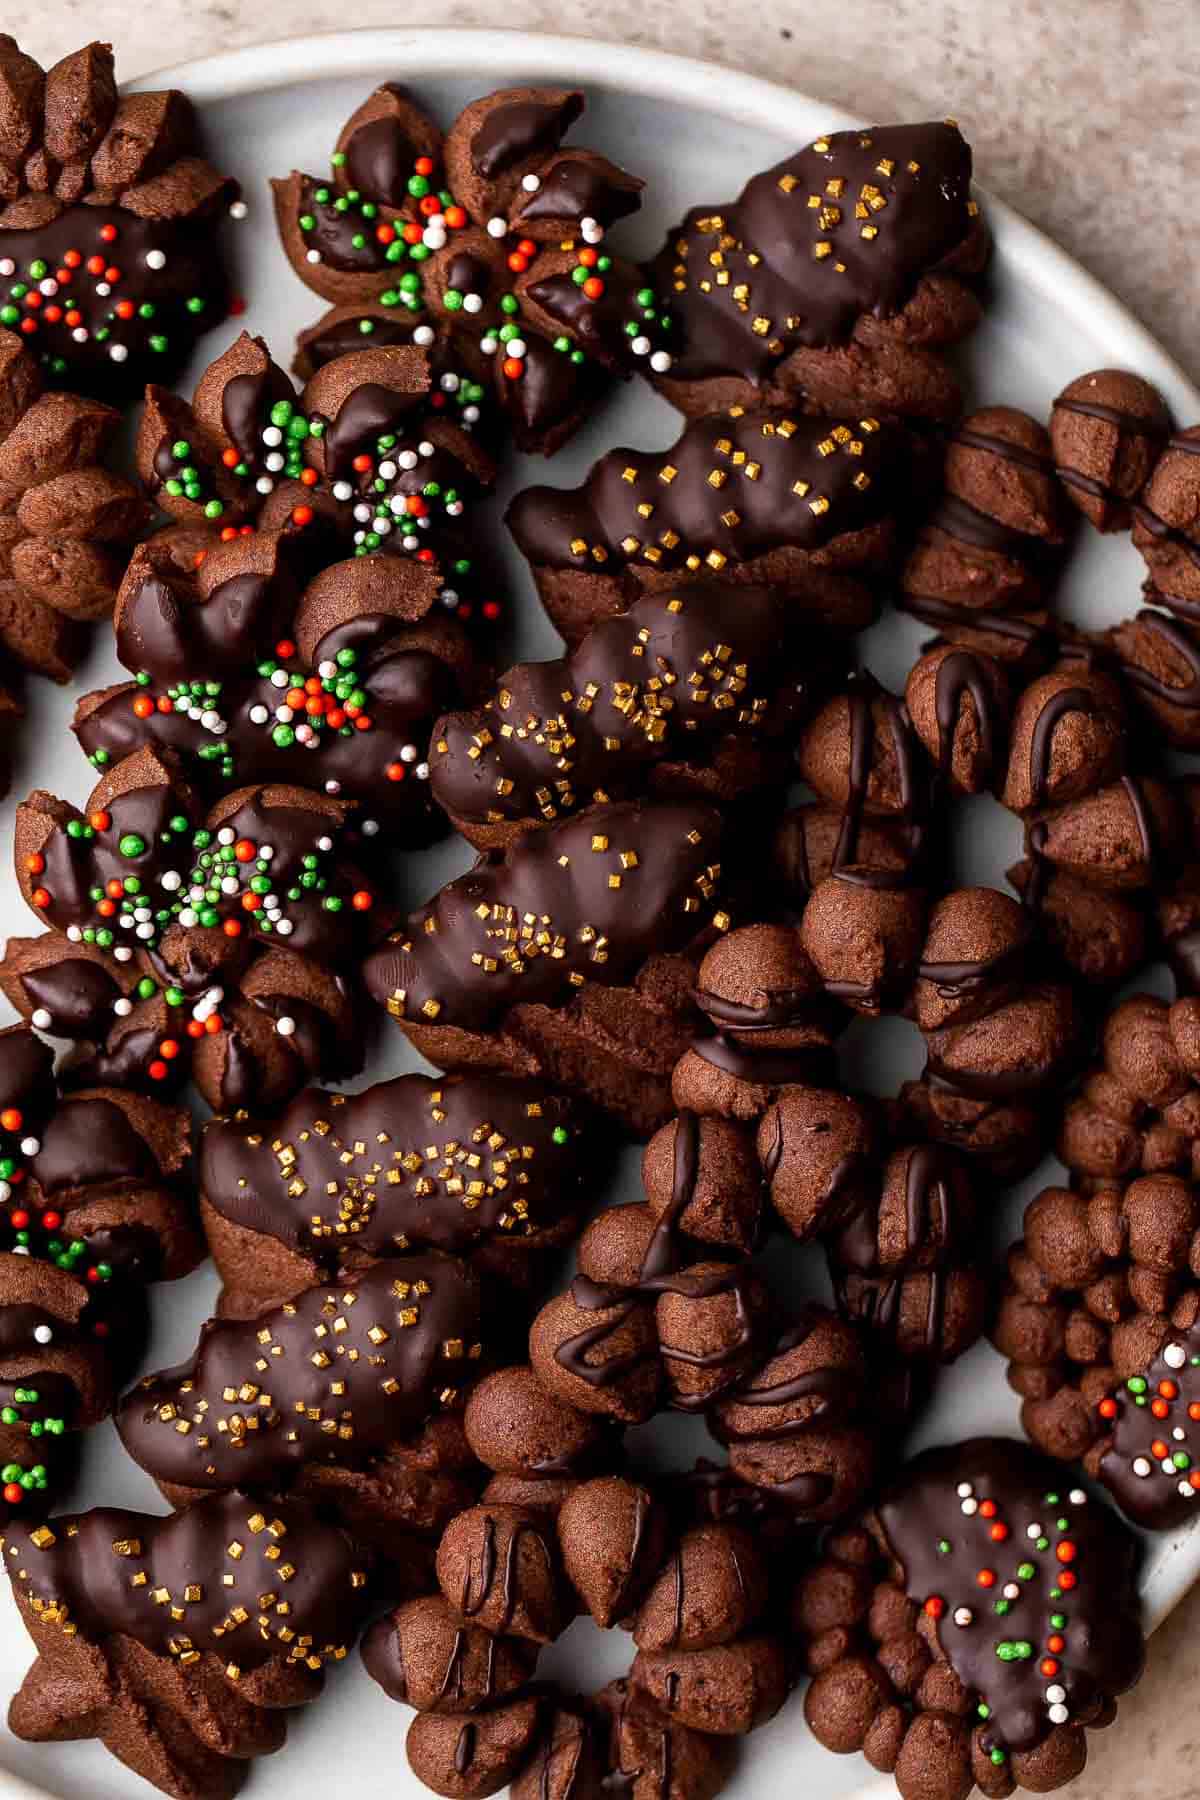
Chocolate Spritz Cookies
Chocolate Spritz Cookies are a rich and indulgent twist on the classic buttery spritz cookies. These melt-in-your-mouth chocolate cookies are shaped into different beautiful festive designs and can be dipped in extra chocolate or topped with colorful sprinkles for an extra sweet touch. This easy recipe is the perfect way to share the holiday spirit with friends and family without spending too much time baking.
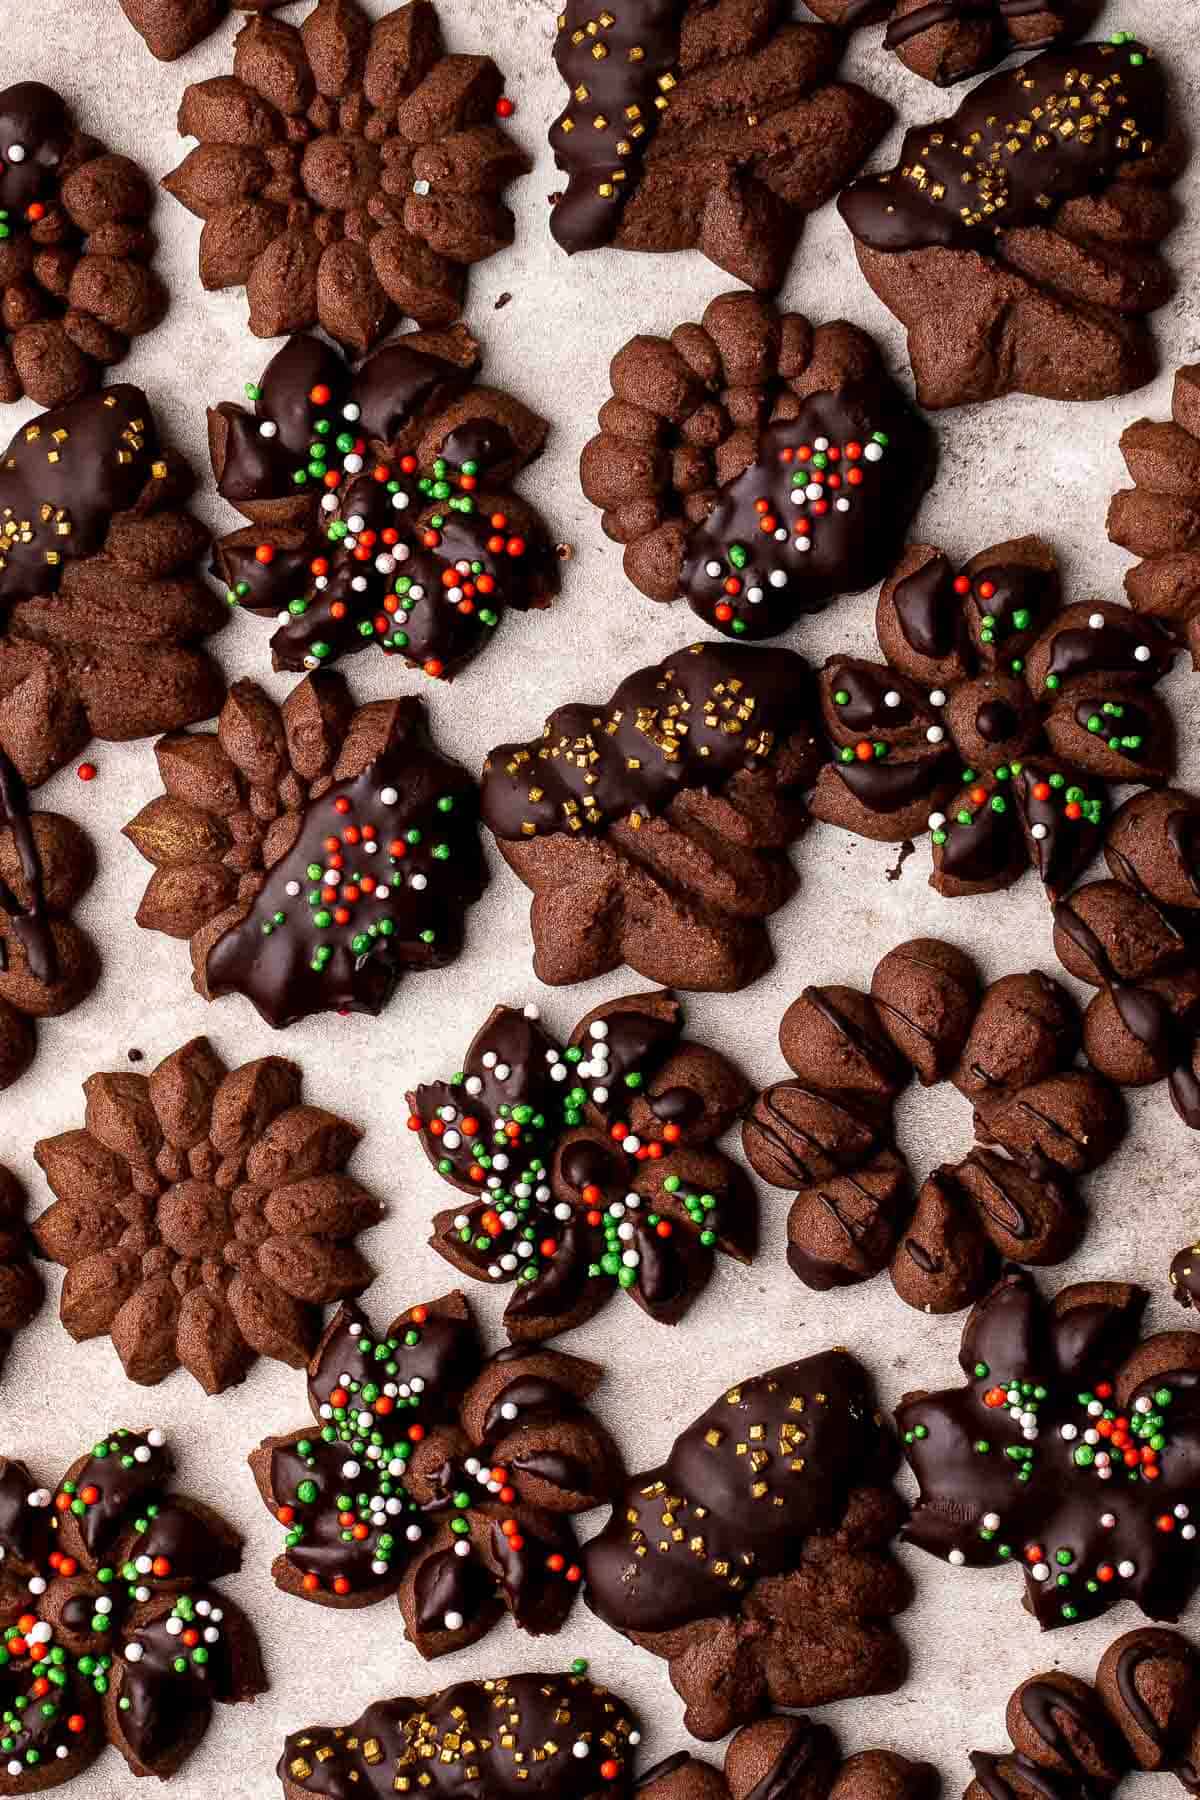
A good spritz cookie starts by mixing just a handful of ingredients into a thick, buttery dough. The addition of cocoa powder creates a contrast of chocolatey richness while spices like cinnamon, cloves, ginger, and nutmeg provide warm and comforting flavors. Plus, it's so fun to create holiday shapes using a cookie press. This recipe is guaranteed to complete your holiday table, and I'm sure everyone won't be able to stop grabbing a piece or two!
Why You'll Love this Chocolate Spritz Cookie Recipe
- Easy and fun to make. This recipe is pretty straightforward, so anybody can make these chocolate cookies. Shaping them into different designs is also a great way for kids to get involved in the process. You can all watch the cookies as they bake in the oven and enjoy them together as soon as they're cooled.
- Customizable. Get creative and experiment with different shapes, flavors, and decorations. A cookie press comes with an assortment of attachments to make different cookie shapes. You can even use a pastry bag with different tips for more complex designs. Other great flavors you can use are orange and coffee, while toppings like marshmallows and nuts will add extra flavor and texture.
- Great for any occasion. From holidays to everyday snacking, everyone is always down for a delightful cookie treat. These chocolate spritz cookies are the perfect snack or dessert with that luscious and decadent cocoa taste that no one's ever going to resist.
- Ideal for gifting. These chocolate butter cookies look so beautiful and taste amazing, so they're absolutely perfect for giving as gifts during the holidays. Put them in festive tins or jars and give them away to your friends, family, and colleagues.
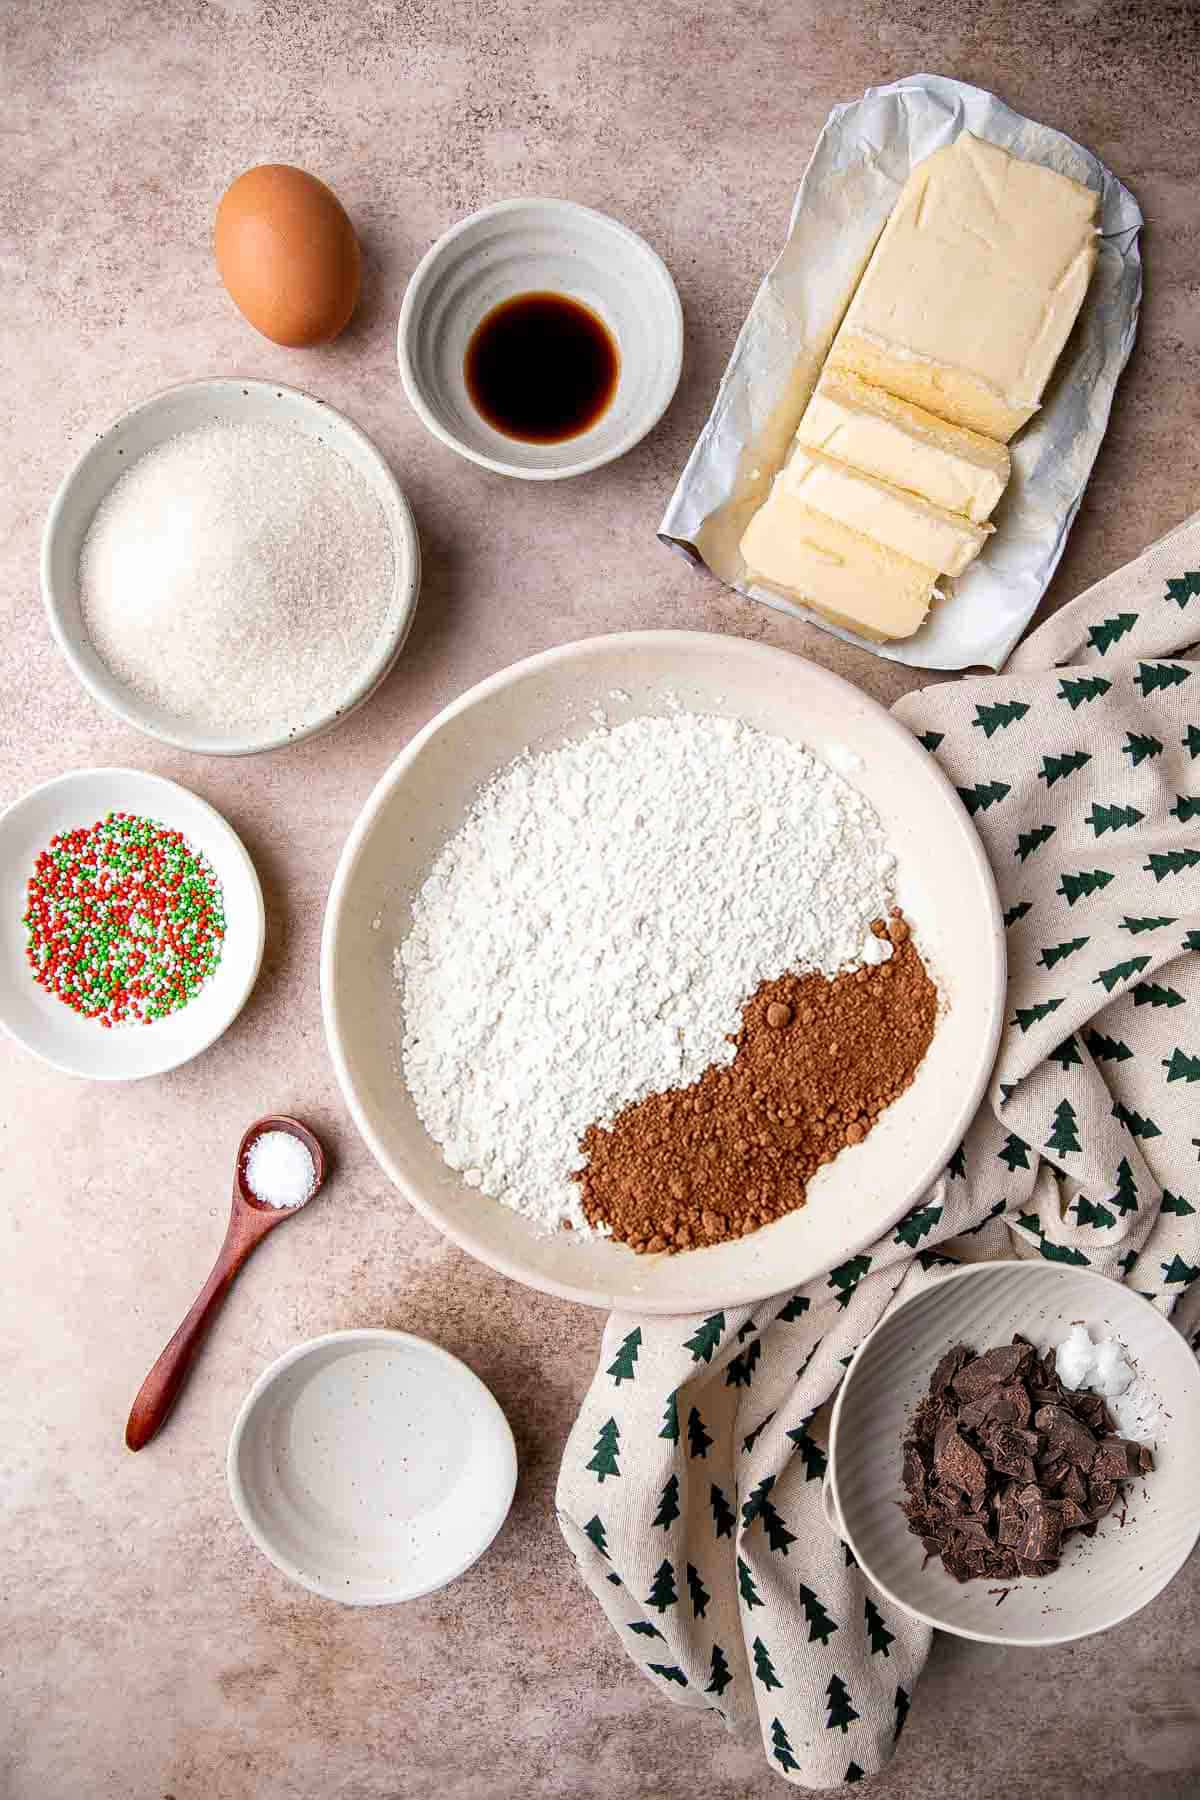
Ingredient Notes
To make this delicious Chocolate Spritz Cookies, you will need the following ingredients (full measurements in recipe card below):
- butter - gives the dough a rich buttery flavor and smooth consistency that's needed for perfect shaping.
- granulated sugar - for a nice cookie spread during baking. I prefer using white granulated sugar with a clean sweet taste.
- salt - a little amount balances the sweetness from sugar.
- vanilla extract - enhances the overall flavor.
- flour - I use all-purpose flour for light yet crisp cookies. You can partially replace this with cake or bread flour for a slightly chewier cookie.
- cocoa powder - I prefer using light cocoa powder for a nice brown color.
- chocolate - Use semi-sweet dark chocolate to coat the cookies (optional).
- sprinkles - completely optional but it will add a festive touch to your cookies.
Baking Equipment and Tools
You will also need the following baking tools and equipment:
- measuring cups and spoons
- mixing bowls
- stand mixer or hand mixer
- large baking sheet
- wire cooling rack
- cookie press
How to Make the Best Chocolate Spritz Cookies
First, make the chocolate cookies.
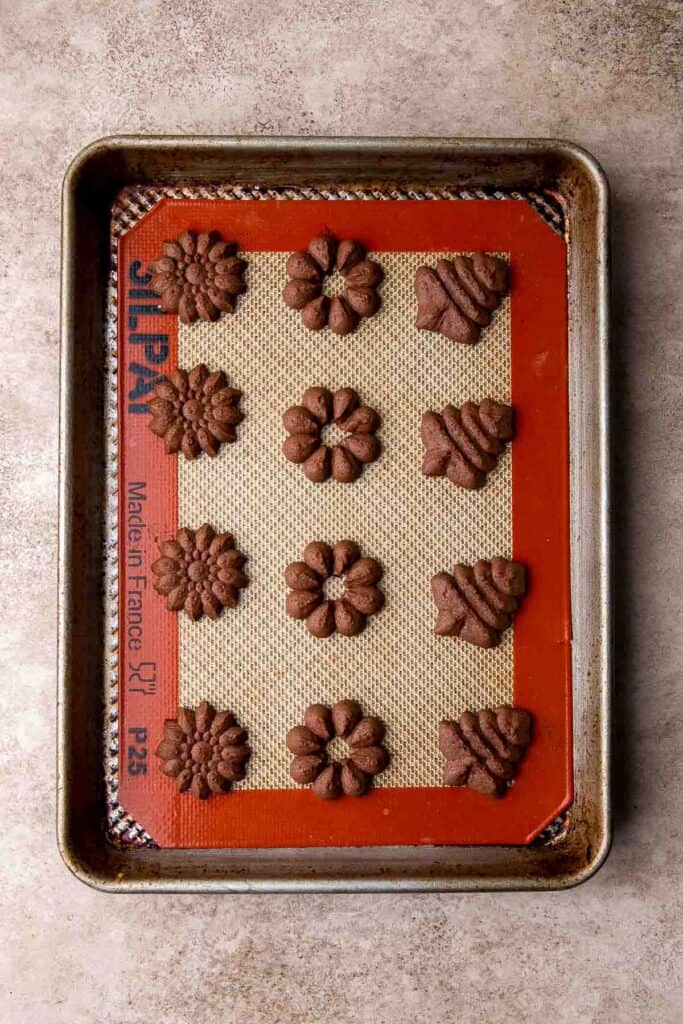
- Prep. Preheat oven to 350 F. Line a large baking sheet with a silicone baking mat (no parchment paper) or use a non-stick baking sheet without a liner. You can prepare 2-3 baking sheets or bake in batches using one baking sheet.
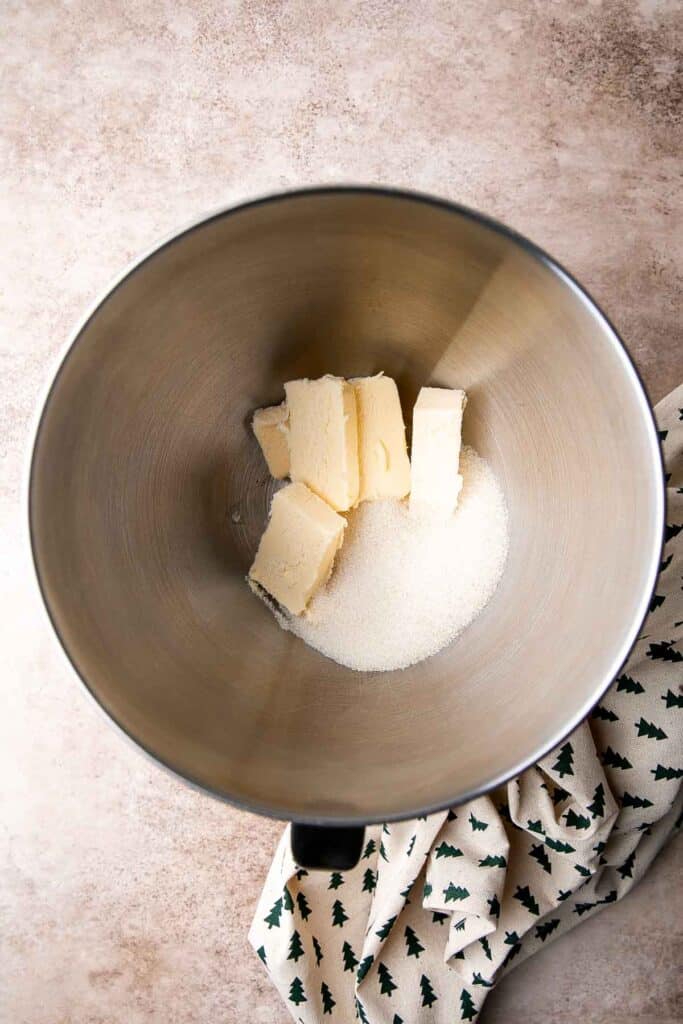
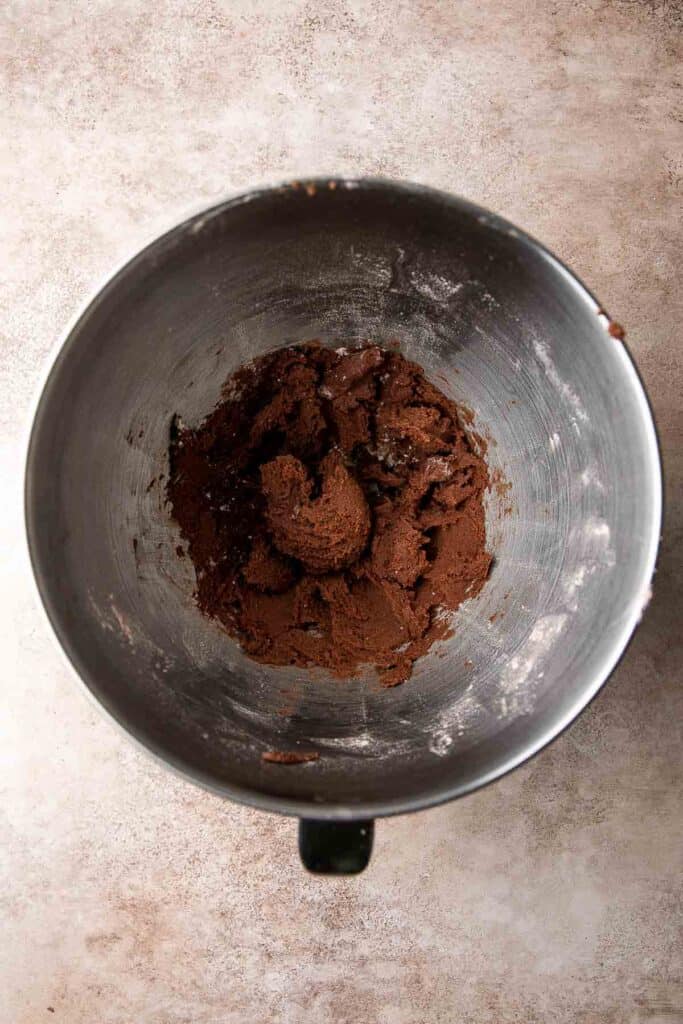
- Cream butter and sugar. Cream butter and sugar together using a stand mixer fitted with the paddle attachment (or in a large mixing bowl with a hand mixer) on medium speed until light and fluffy, about 2 minutes.
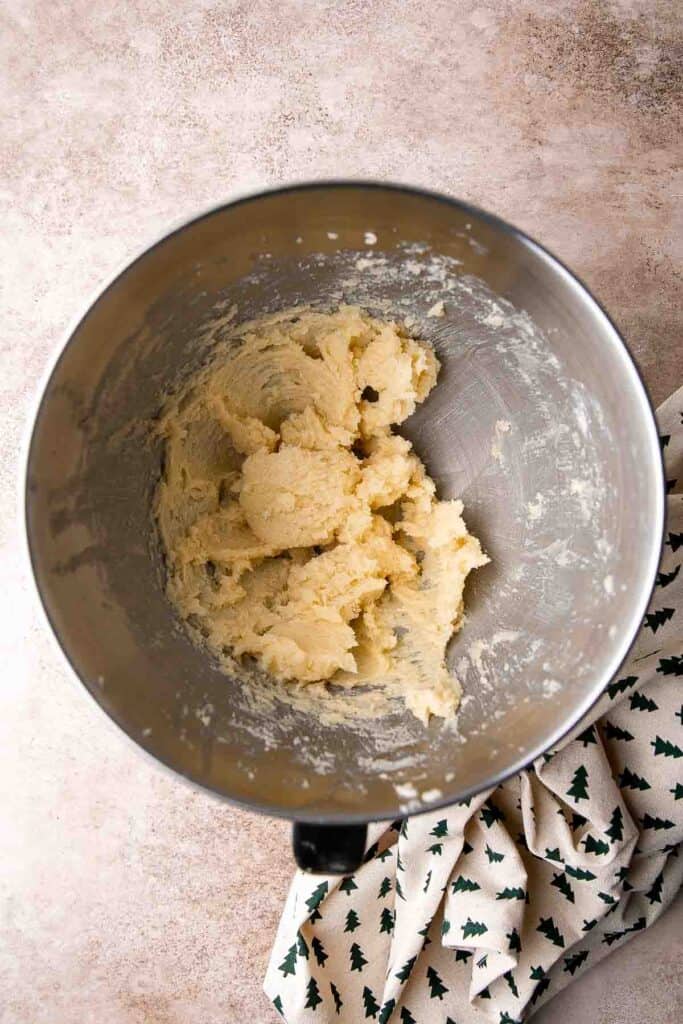
- Add wet ingredients. Add salt, egg, and vanilla almond extract and beat until incorporated.


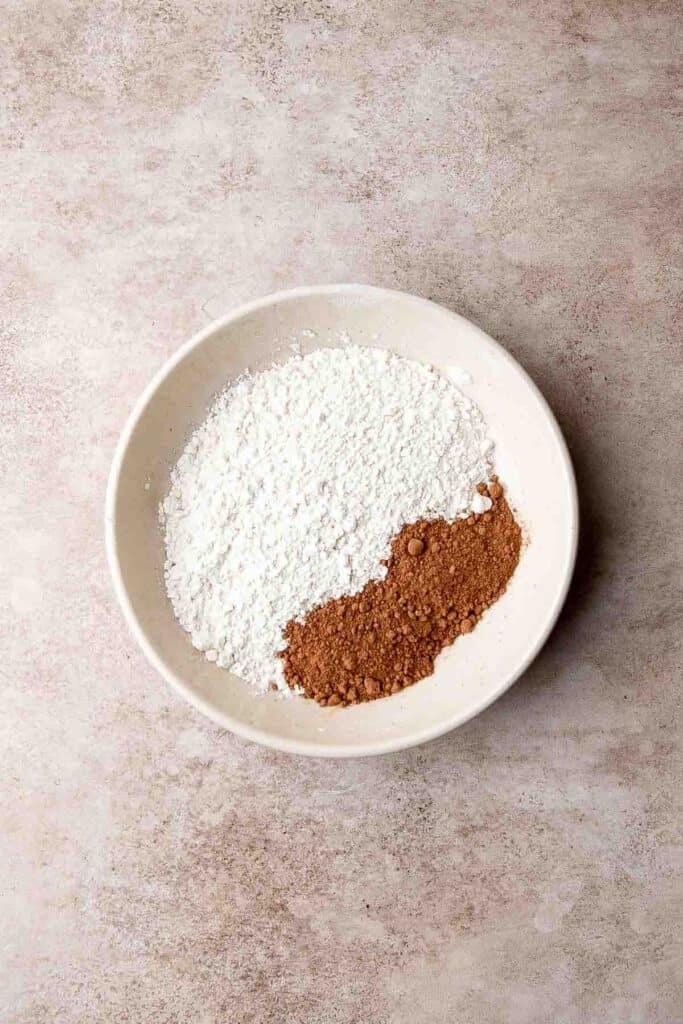
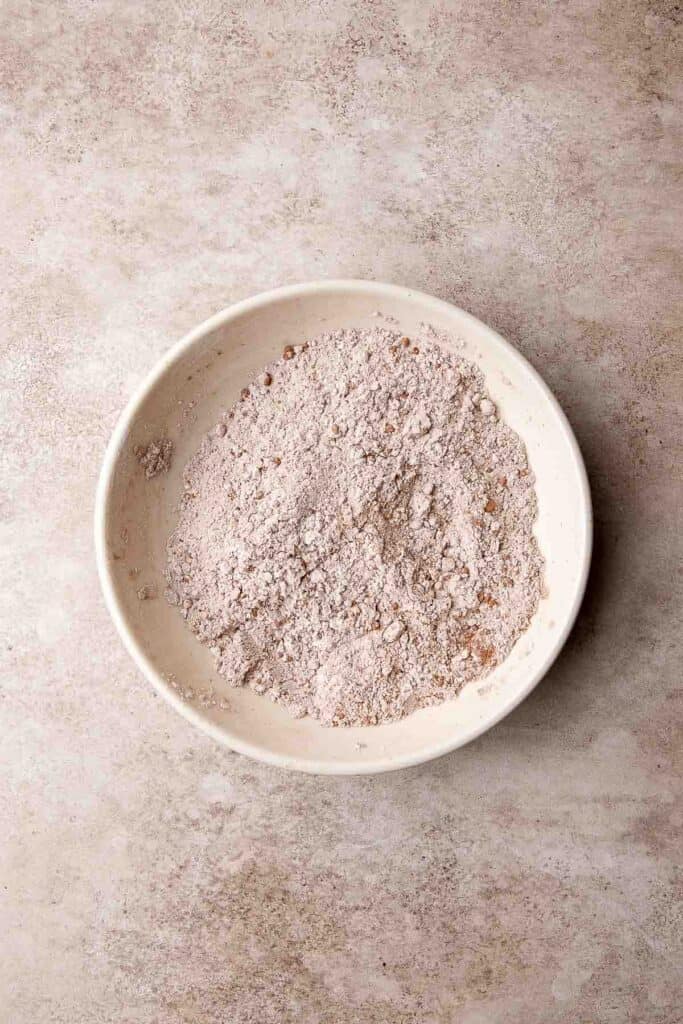
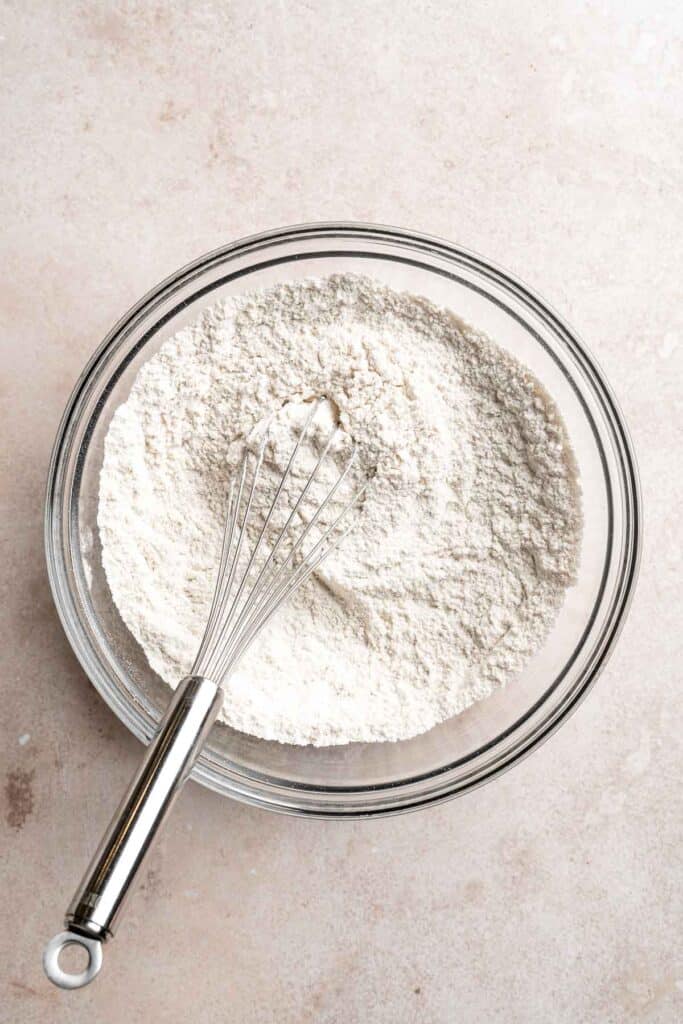
- Add dry ingredients. In another bowl, whisk together the flour and cocoa powder. Gradually add them to the wet ingredients and beat on low speed until combined.
- Press cookies. Transfer the dough into a cookie press and fit it with the pattern that you like. Press the cookies into the lined baking sheet placed 2 inches apart. Add sprinkles on top, if desired.

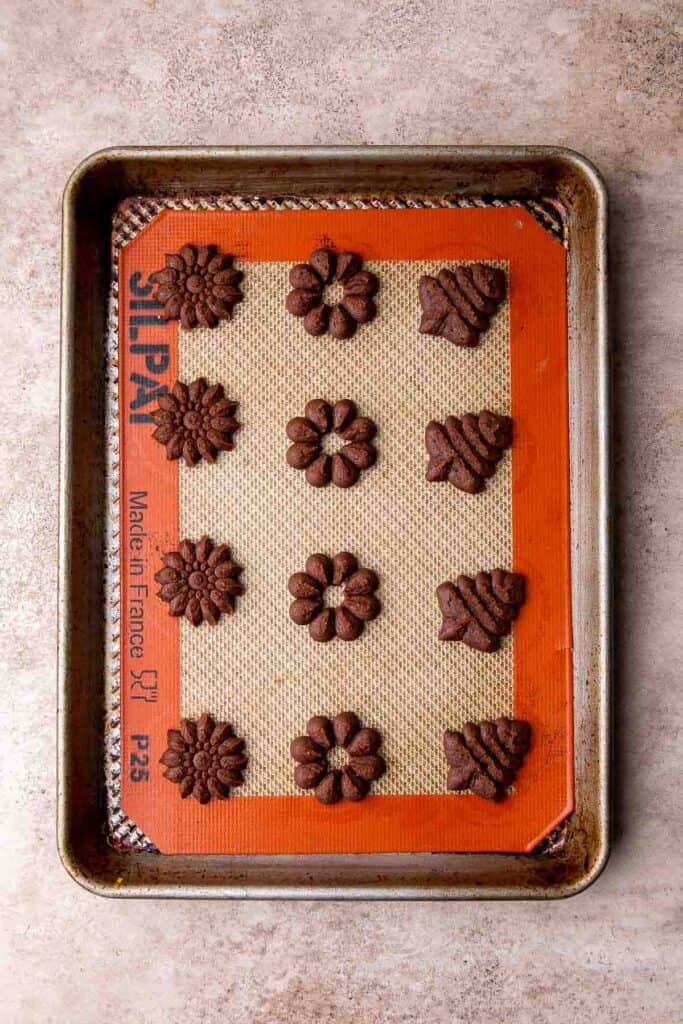
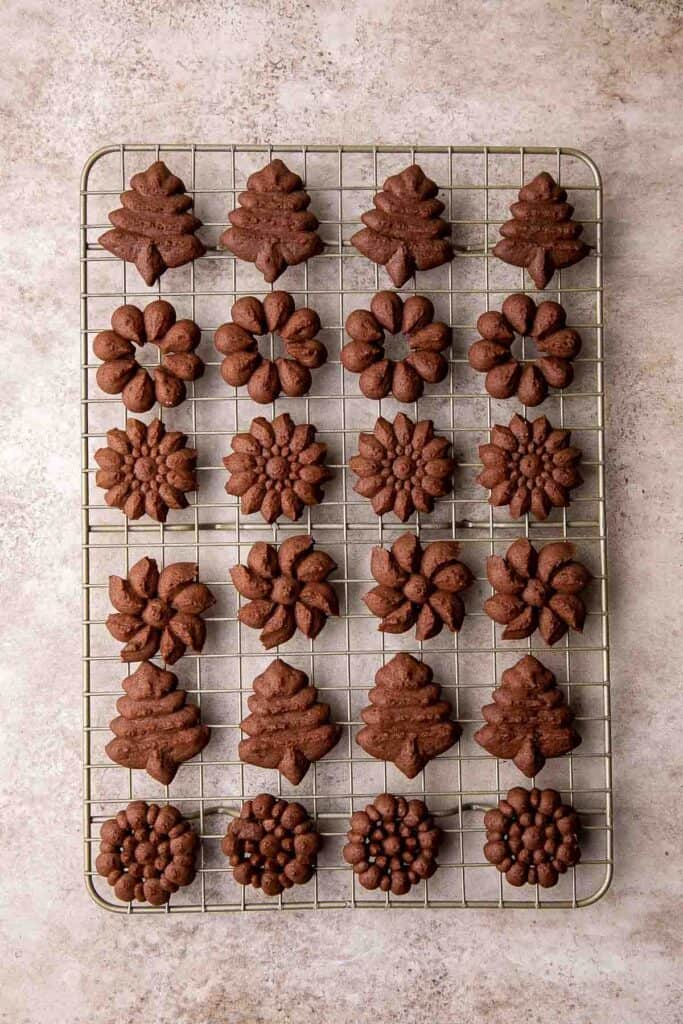
- Bake. Bake for 7-9 minutes, until the edges and bottoms of the cookies are light golden brown. Allow the cookies to cool on the baking sheet for 5 minutes before transferring to a wire cooling rack to cool completely.
Decorate the cookies.
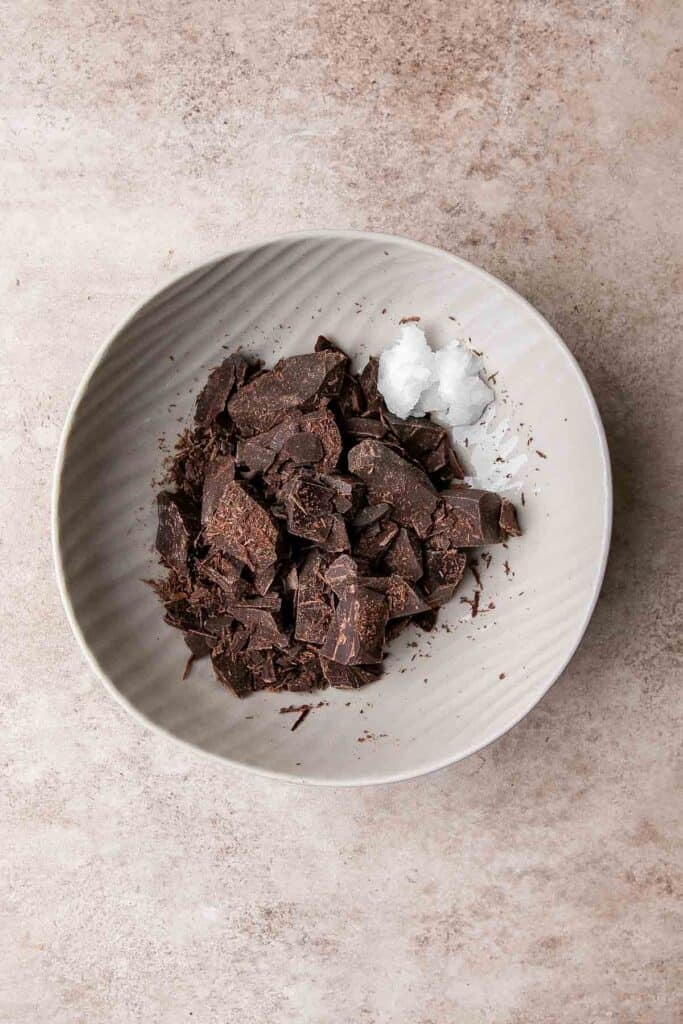
- Melt chocolate. Melt the chocolate in a double boiler on the stove or in the microwave.
- On the stove: Bring 2 inches of water to a low simmer in a saucepan over medium-low heat. Turn the heat to low and place a medium heatproof bowl on the mouth of the pot. Make sure that there is a gap of a few inches in between the bottom of the bowl and the water (You can also place a bowl on a steamer attachment on top of your pot). Add the chocolate and stir constantly as it melts. Stir until the chocolate is completely smooth and melted. This should take a few minutes.
- In the microwave: Place the medium heatproof bowl of chocolate into the microwave and microwave in 30 second intervals. Remove the bowl at each interval and stir well. Repeat until the chocolate has completely melted. Stir until smooth.
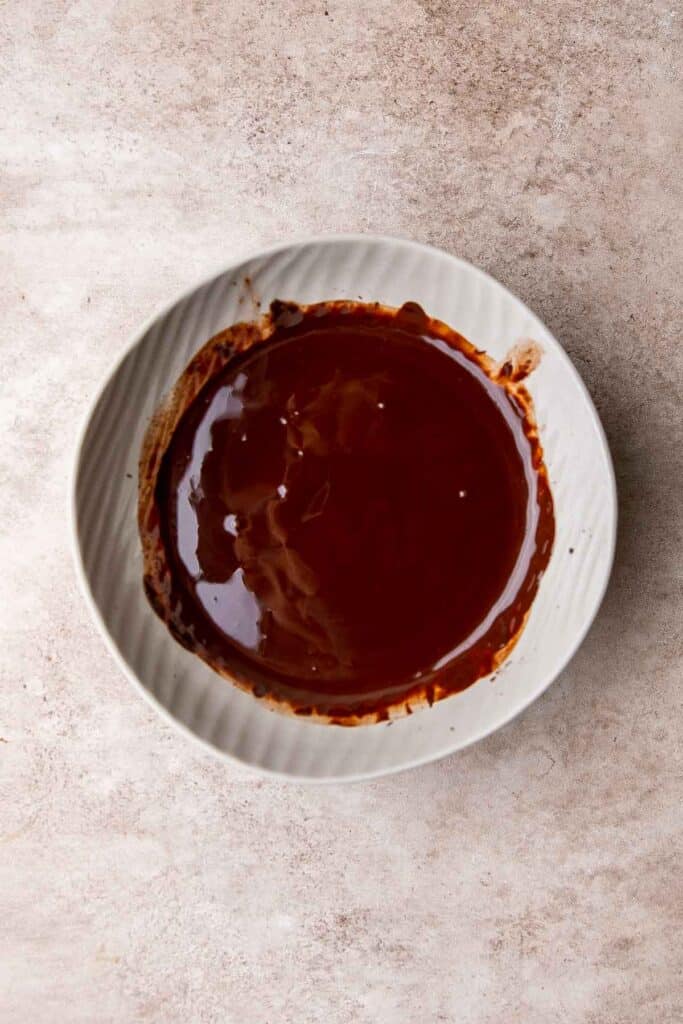
- Coat cookies. Dip the cooled cookies into the melted chocolate. You can dip them fully, dip them halfway, or use a spoon to drizzle the chocolate in a drizzle pattern.
- Add sprinkles. Add sprinkles while the chocolate is wet, if using.
- Rest. Place the cookies on a lined cookie sheet and let it sit until the chocolate is set and hard. You can place the cookies in the fridge to speed up the process.
Recipe Variations
- Add nuts. Mix finely chopped walnuts, pecans, or almonds into the cookie dough for a delightful crunch, or sprinkle some of the nuts on top of the melted chocolate before it hardens.
- Mocha flavor. Add finely ground espresso or coffee powder to the cookie dough for a delicious mocha flavor. Coffee lovers will certainly enjoy the added coffee aroma and flavor to their cookies.
- Swirl with fruit jams. Create a swirl by adding some fruit jams, like blueberry, raspberry, or strawberry, into the cookie dough. Combining fruits and chocolate creates a contrasting fruity and decadent flavor that's definitely worth the try.
- Opt for white chocolate. Instead of milk or dark chocolate, dip cooled chocolate spritz cookies in melted white chocolate and top with crushed candy canes for a pop of color.
How to Serve
Enjoy these delicious Chocolate Spritz Cookies alongside a cup of hot or cold beverage such as:
They are also perfect in a Holiday Cookie Box along with some other classic Christmas cookies including:
- Christmas Shortbread Cookie Bites
- Peppermint Snowball Cookies
- Christmas Sugar Cookies with Royal Icing
- Candy Cane Cookies
- Butter Cookies
- Soft and Chewy Ginger Cookies
For more recipes, see our 30 Best Christmas Cookies.
Recipe Tips and Tricks
- Use softened butter. Creaming with fully melted butter will make your dough frothy and greasy while using solid butter can make it crumbly. You definitely don't want to mess up a whole batch of cookies!
- Don't overmix. Your cookies will be tough when you overwork the dough. Mix the ingredients just until everything is well incorporated.
- Chill dough. As the dough heats up while shaping, you could end up in a sticky situation, thus making shapes with a cookie press trickier. Place the dough in the fridge and wait 15-30 minutes until it becomes firm but soft enough to create different fun shapes again.
- Chill the pan. An easier alternative for when you find that the cookie dough is not sticking to the pan after trying to press out the cookies, chill the pan in the fridge for 5 minutes. It will help a lot.
Storing and Freezing Instructions
How to Store
Once cooled, these chocolate-covered cookies can last for up to a week if stored in an airtight container. Keep them away from direct sunlight and heat sources to maintain their structure and flavor.
How to Reheat
If you want your cookies warm, reheat them in the oven at 250°F for about 2 to 3 minutes. You can also microwave them in 15 to 20-second intervals.
How to Freeze
The cooled cookies can be frozen for up to a month. Place them on a baking sheet lined with parchment paper, and transfer to a freezer-safe container or freezer bag once frozen. Let the cookies thaw at room temperature and serve.
More Chocolate Cookie Recipes
- 50 Best Cookie Recipes
- Brownie Cookies
- Chocolate Thumbprint Cookies
- Chocolate Whoopie Pies
- Hot Chocolate Cookies
- Double Chocolate Chip Cookies
Tried this recipe?
I'd love to hear what you think! Leave a comment and rating below to share your feedback. Your reviews help others discover this recipe and help me keep creating more free recipes for you. Snap a photo and tag me on social media @aheadofthyme too.

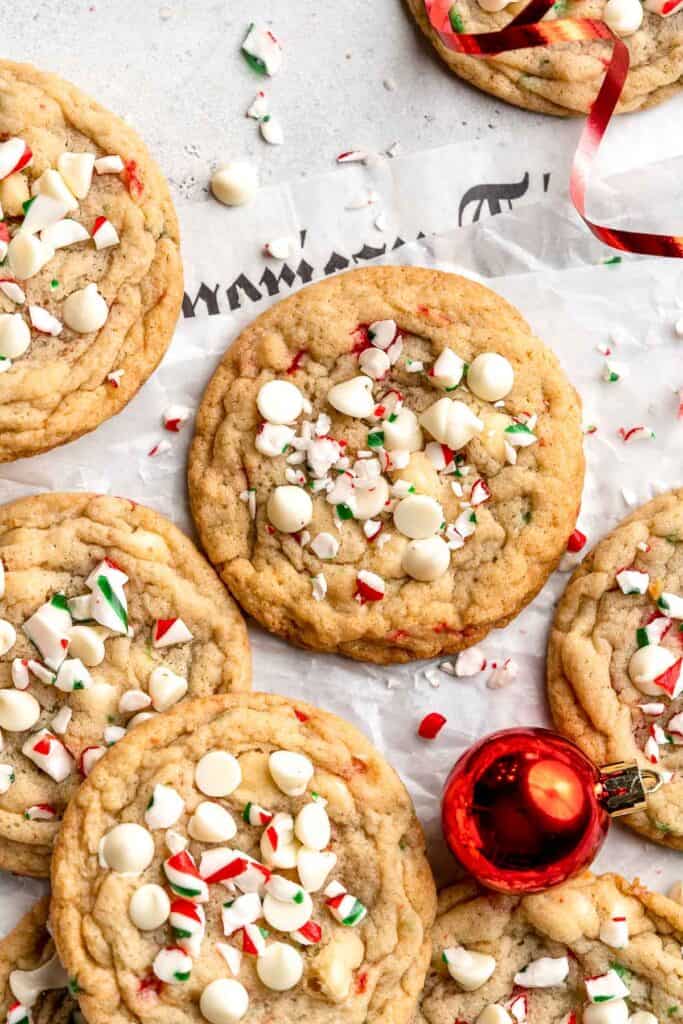
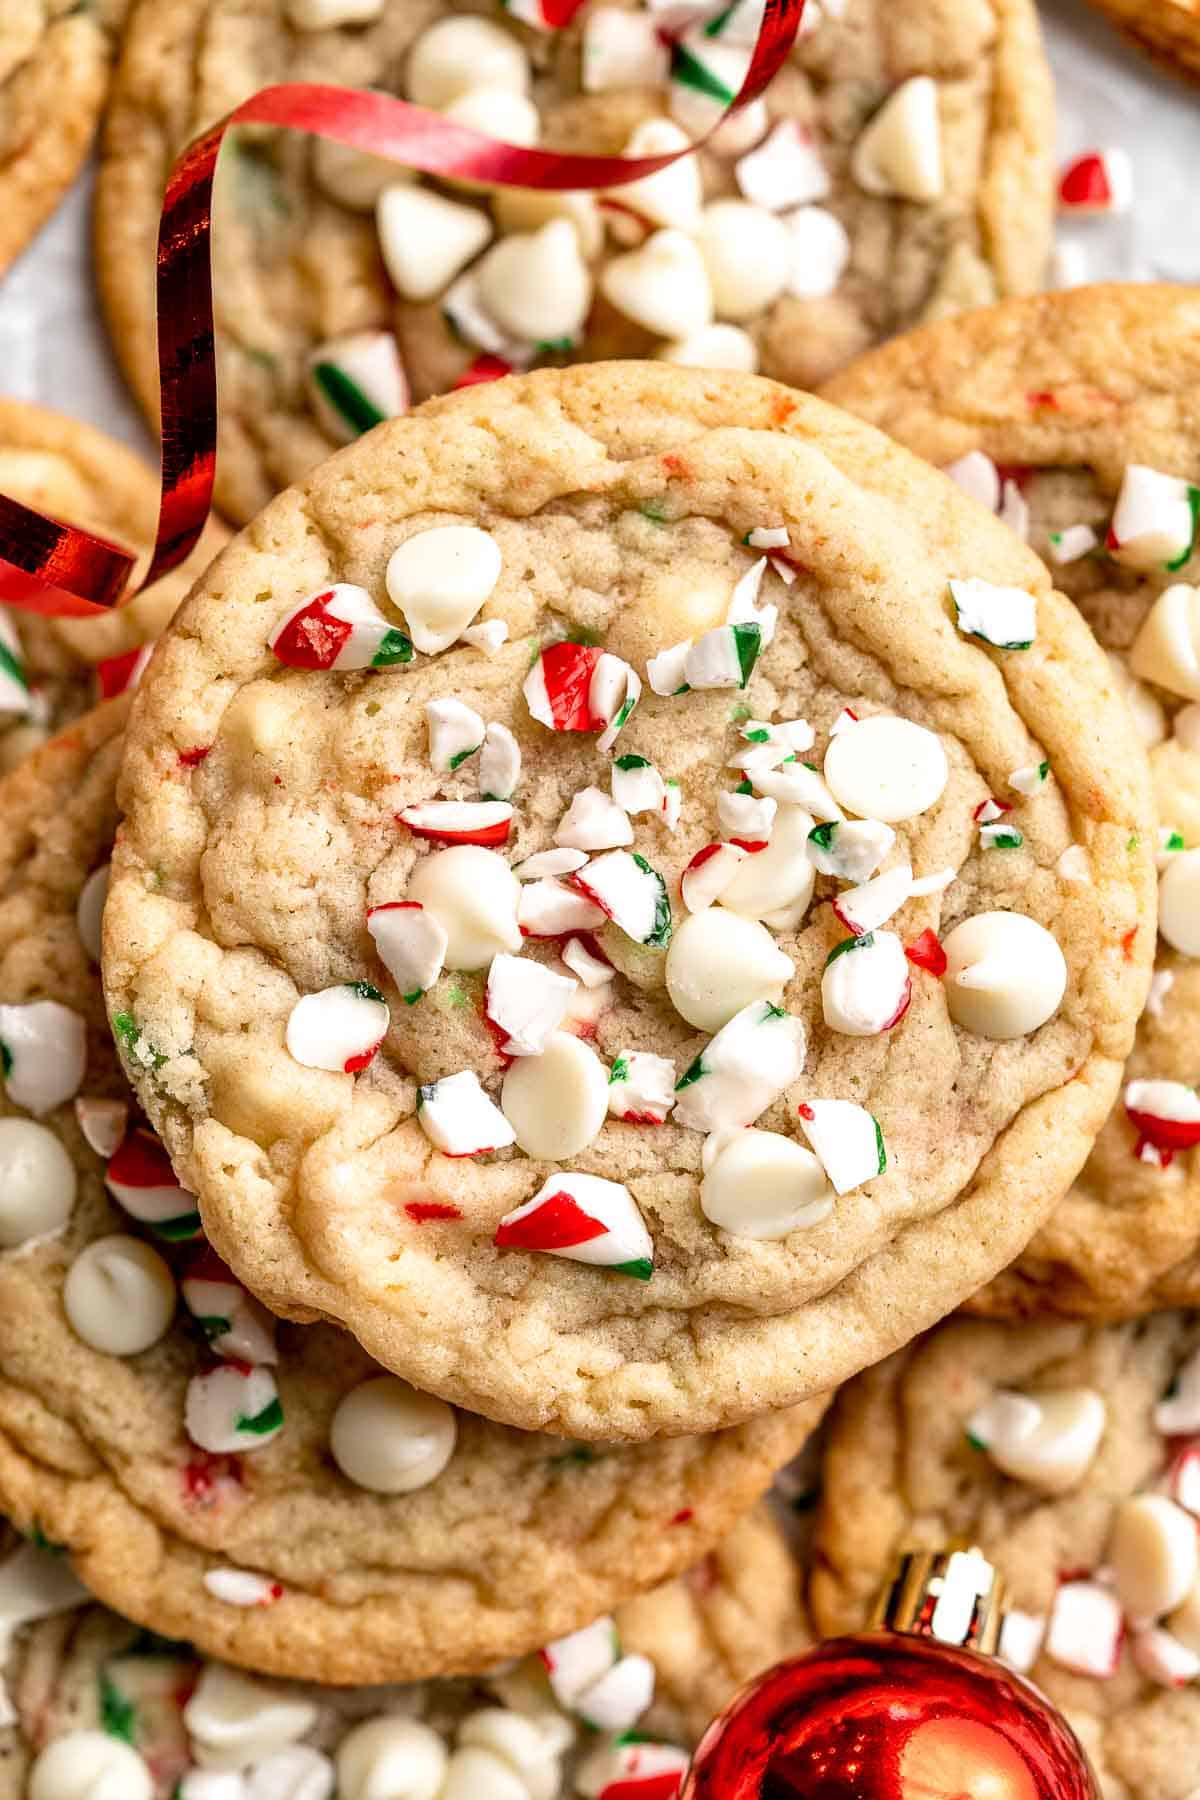
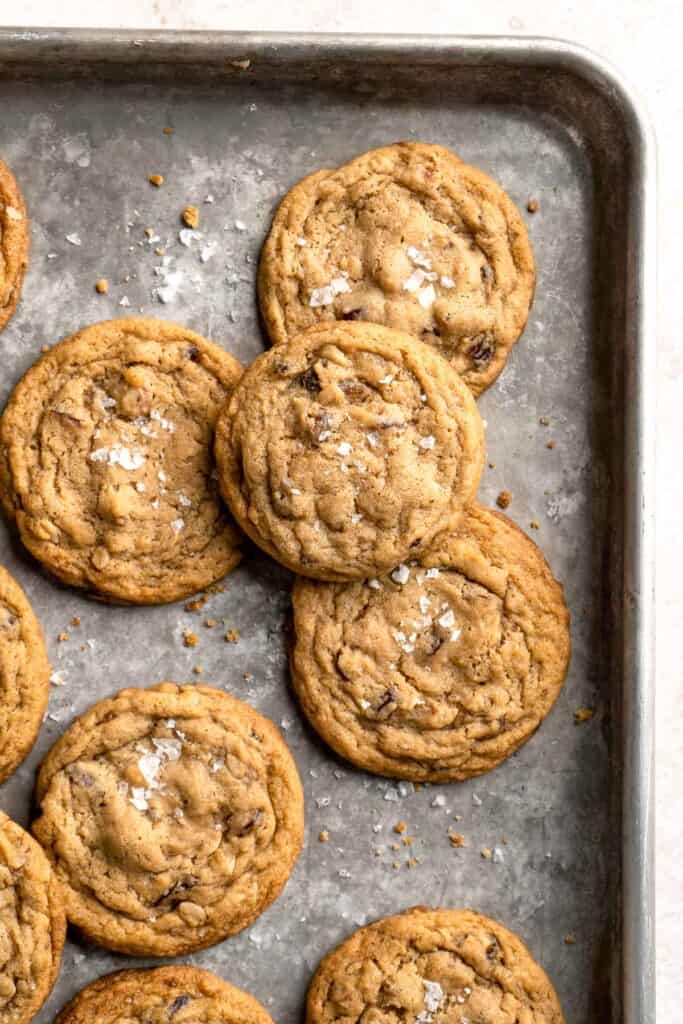
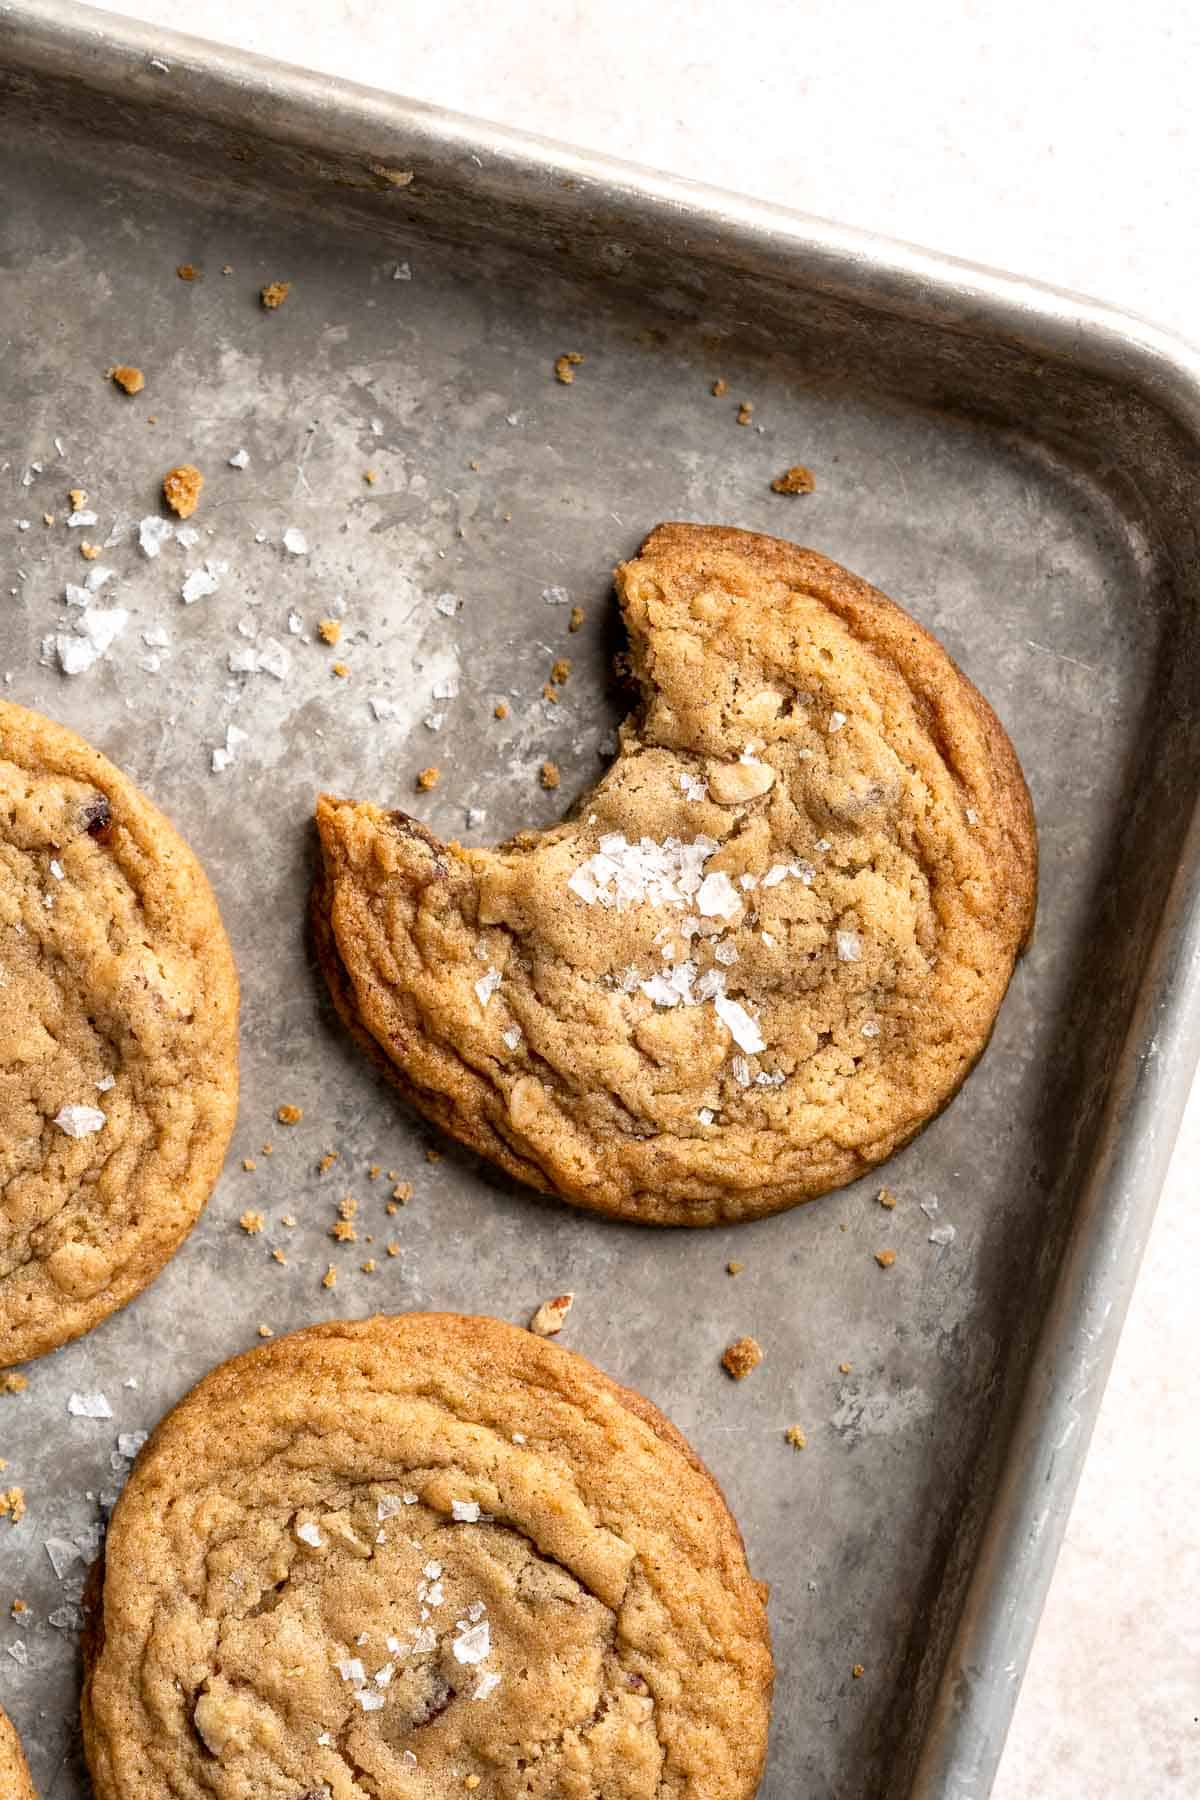
White Chocolate Peppermint Cookies
Sweet and chewy with little pops of candy canes, these White Chocolate Peppermint Cookies taste like Christmas in cookie form! They're a fun seasonal twist on chocolate chip cookies and look amazing on holiday cookie trays with the little candy cane bits peeking out. Make a batch of these white chocolate candy cane cookies for your holiday party or cookie exchange!
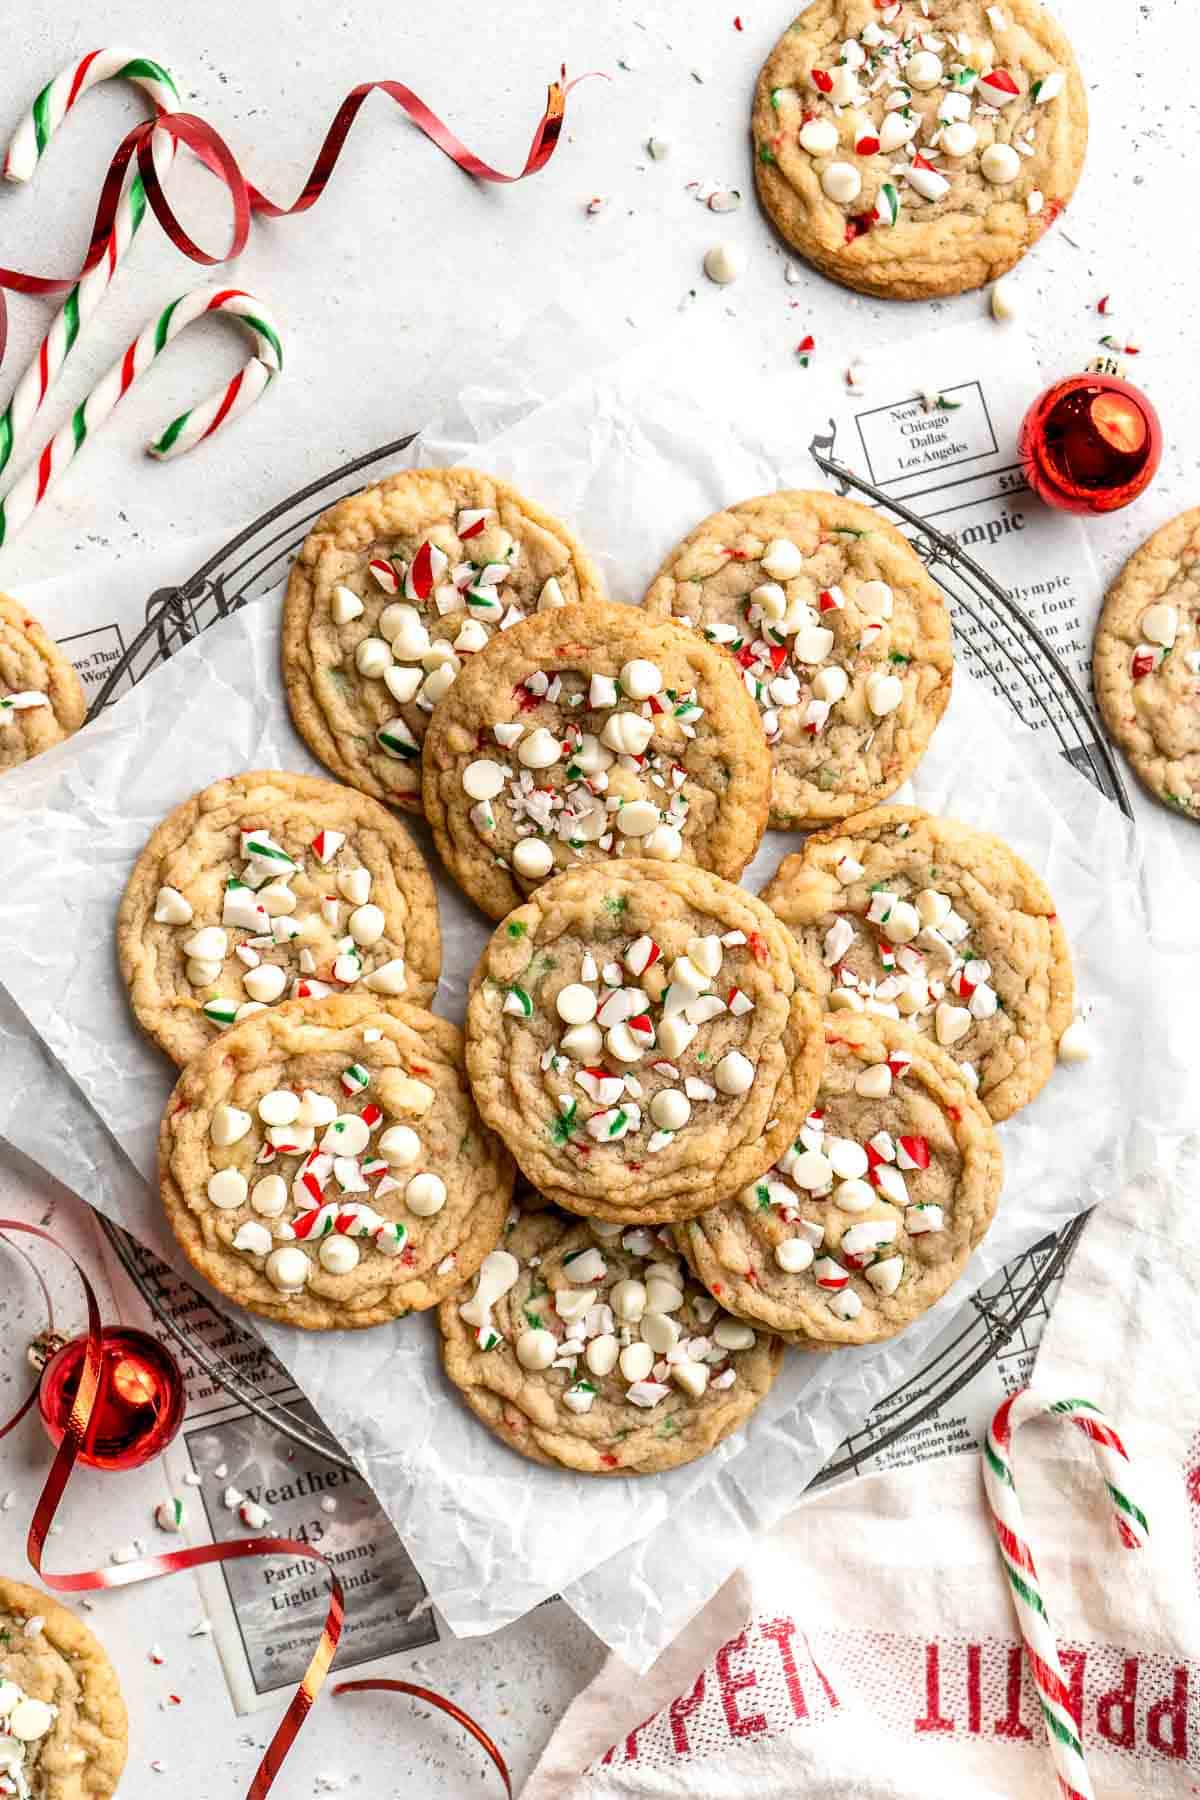
These peppermint white chocolate chip cookies are one of my all-time favorite Christmas cookies. They have a wonderfully chewy, buttery texture but the white chocolate chips and crushed candy canes give them a festive, wintery flavor. They're really easy to make, too, even for beginners!
Why You'll Love These White Chocolate Peppermint Cookies
- Classic holiday flavor. The peppermint pieces in these white chocolate peppermint cookies will remind you of eating candy canes as a kid. These festive cookies taste like the holidays in every bite!
- So easy to make. This easy recipe requires no chilling and is practically made in one bowl. After creaming the butter and sugar together, mix in the remaining ingredients, scoop out the cookie dough balls, and bake! They're that easy to make. Perfect for a last minute sugar craving too!
- Great for entertaining. If you're participating in a holiday gift exchange or hosting a Christmas party, these colorful white chocolate cookies always stand out. You can even dip them in extra chocolate and sprinkle them with peppermint candies for extra flair! Make sure to include them in your Holiday Cookie Box this year.

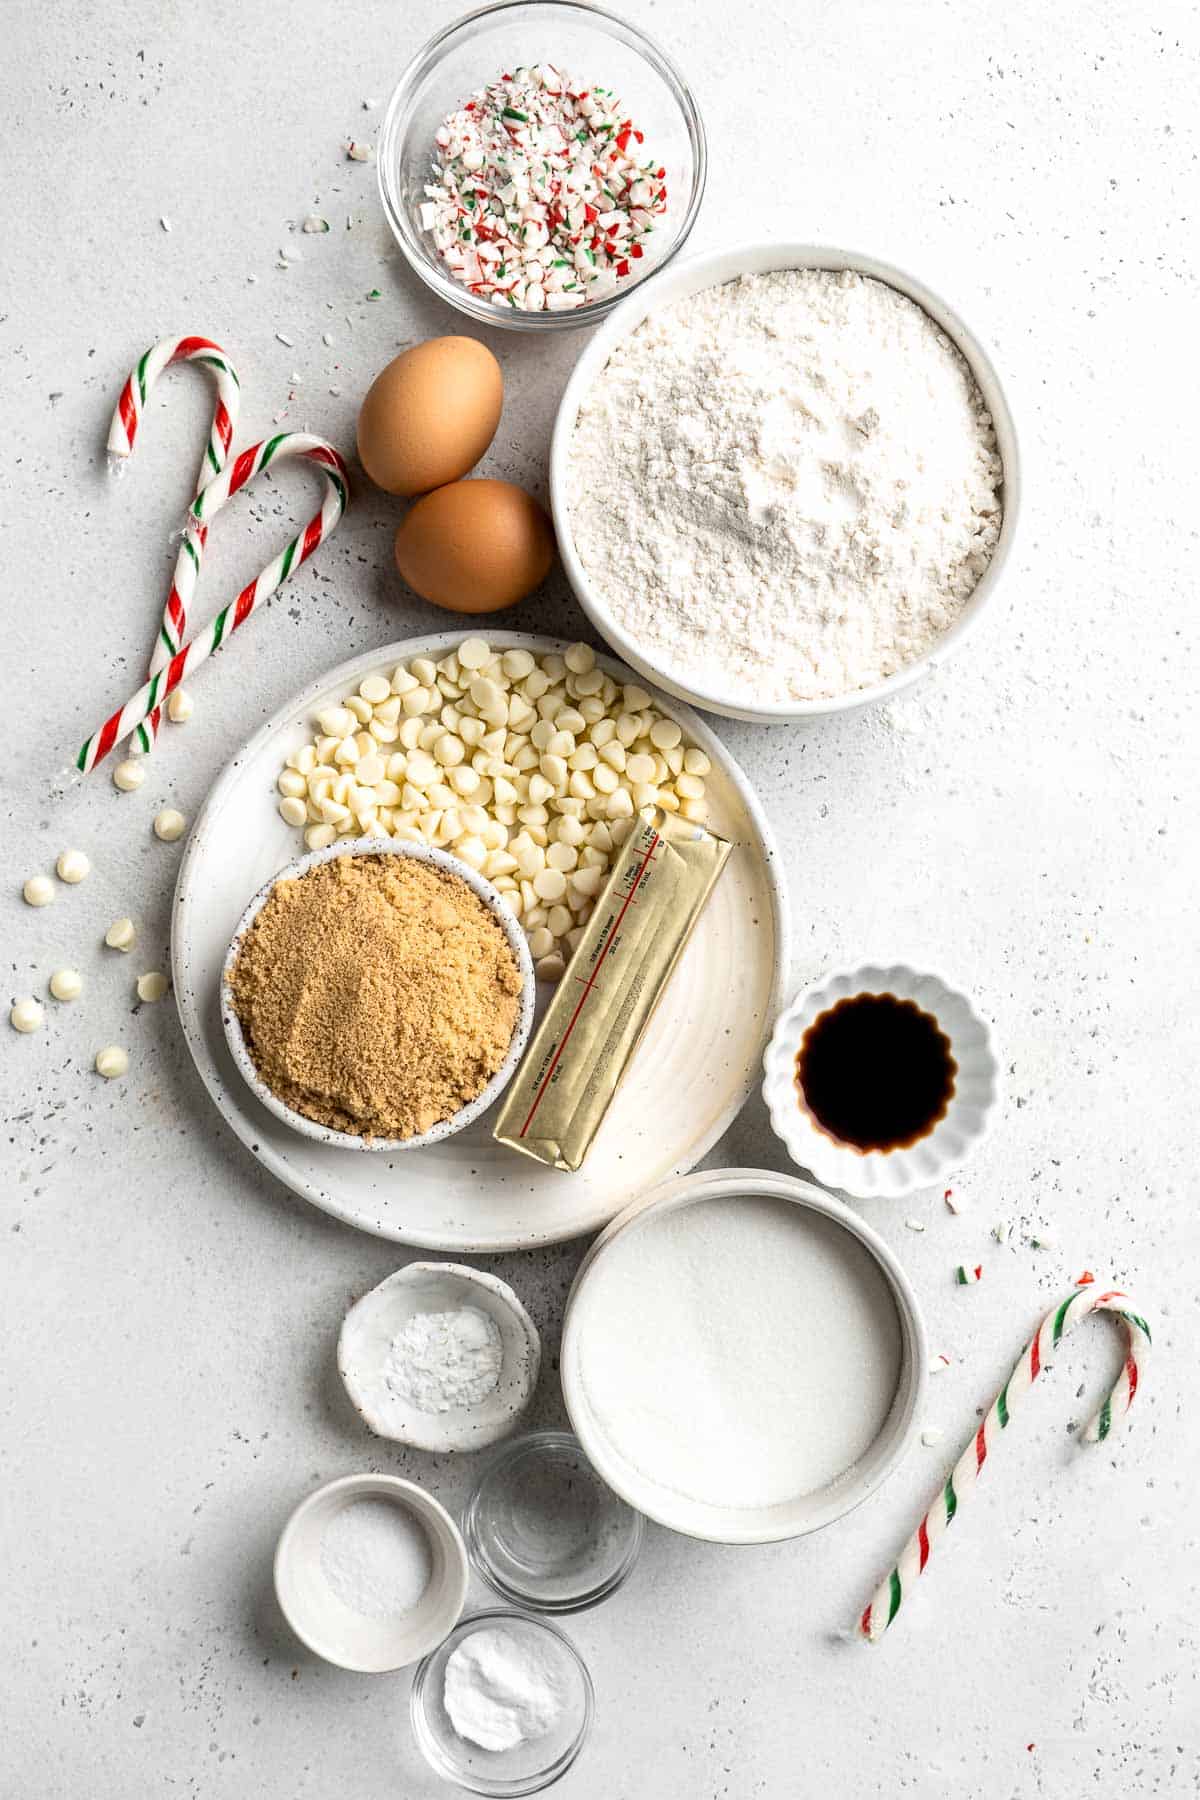
Ingredient Notes
To make this delicious white chocolate peppermint cookies, you will need the following ingredients (full measurements in recipe card below):
- all-purpose flour - this is the perfect go-to flour for baking Christmas cookies.
- baking powder + baking soda - gives the sugar cookie dough the perfect puffy texture.
- salt - the salt will activate the baking soda and highlight the flavors in these delicious cookies.
- butter - only use softened room temperature butter. Unsalted butter is best for cookie recipes.
- sugar - you will need both white sugar and light brown sugar in this recipe. They add sweetness without taking away from the peppermint flavor.
- egg - let the egg come to room temperature before baking.
- vanilla extract - this adds a delicious vanilla aroma that works wonderfully with the white chocolate.
- peppermint extract - this adds an extra minty flavor to these cookies. You can leave it out if you cannot get your hands on some.
- white chocolate chips - choose your favorite white chocolate chips or cut a white chocolate bar into chunks. Save extra for topping before baking.
- peppermint candies - crush peppermint candies or candy canes for a pop of mint flavor that takes these holiday cookies over the top. You may also want to save some for the cookie tops too.
Baking Equipment
You will also need the following baking tools and equipment:
- half sheet baking tray
- silicone baking mat (or parchment paper)
- large mixing bowl
- hand mixer (or stand mixer)
- medium cookie scoop
- wire cooling rack
How to Make the Best White Chocolate Peppermint Cookies
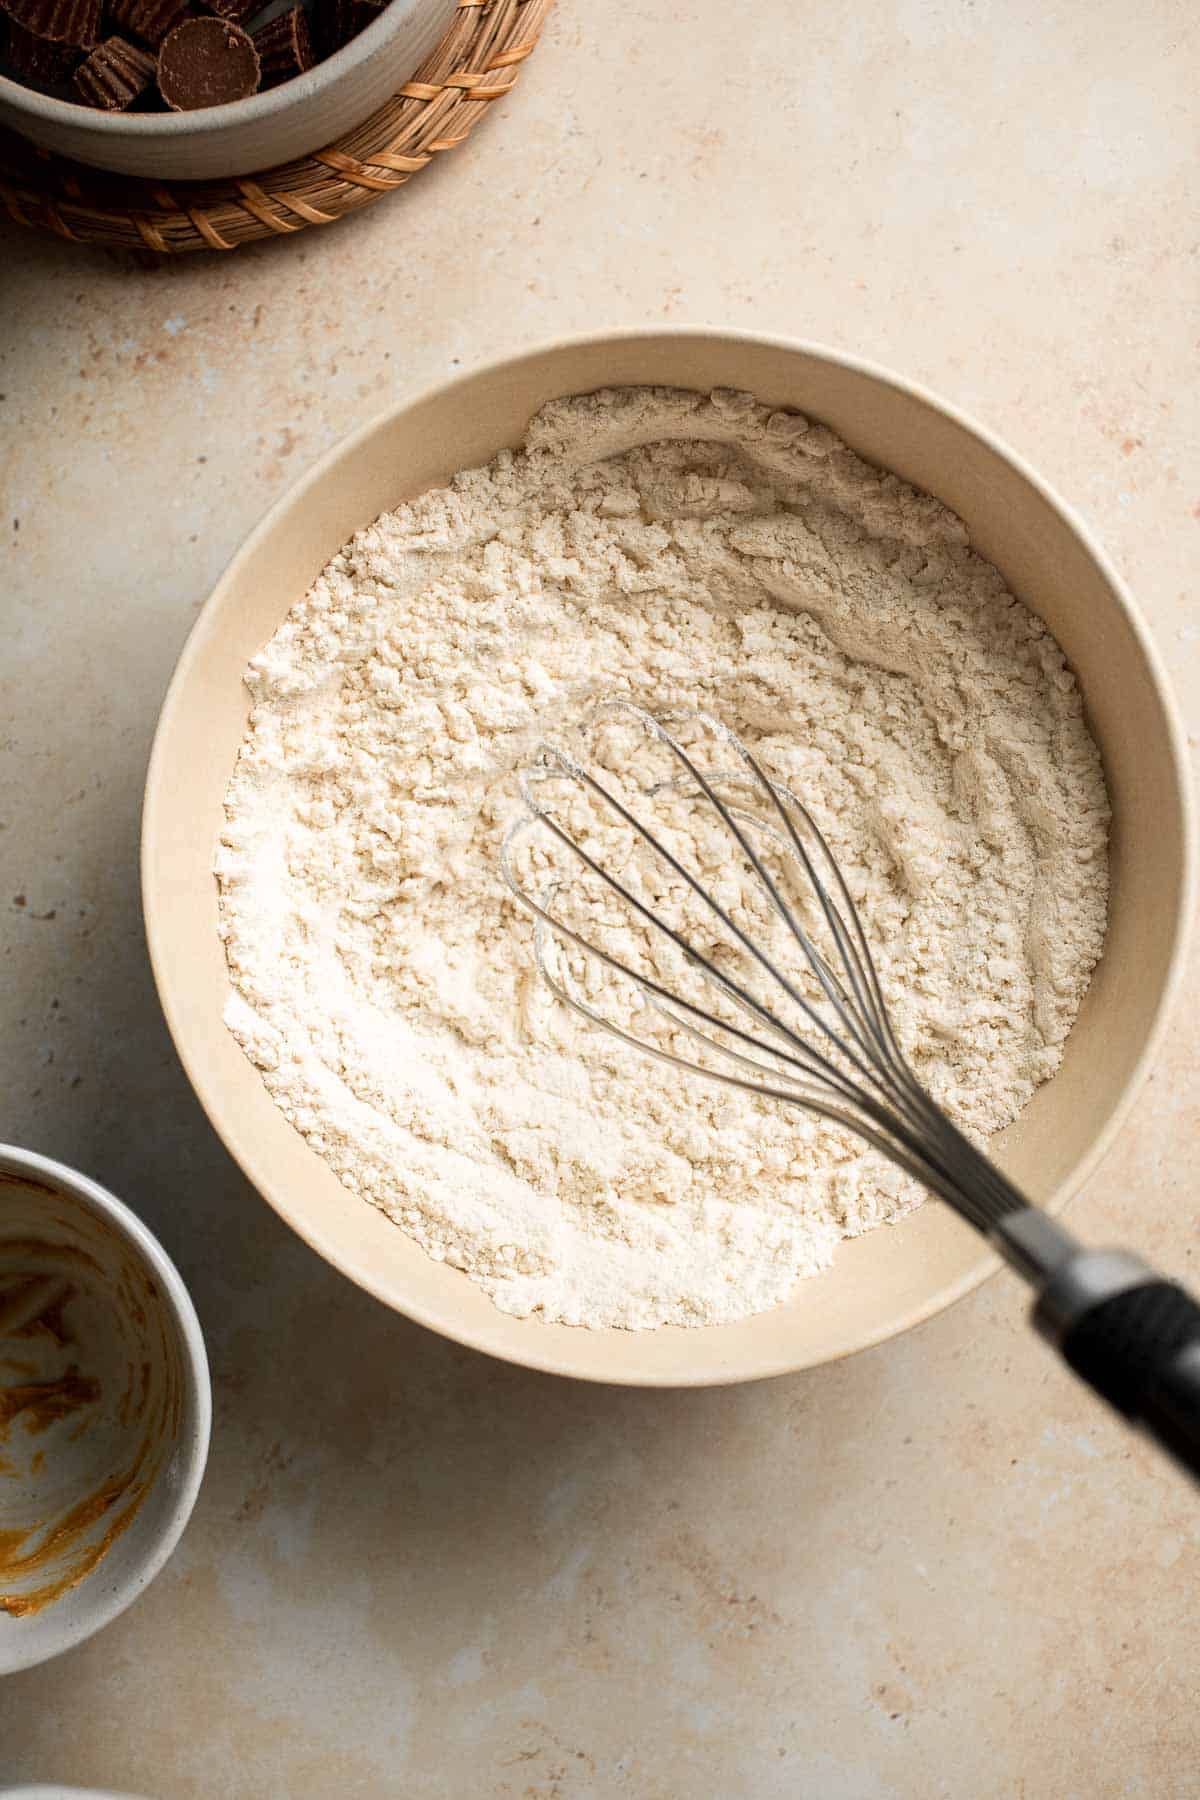
- Combine dry ingredients. In a medium to large sized mixing bowl, add in flour, baking soda, baking powder, and salt. Whisk well to combine, then set aside.
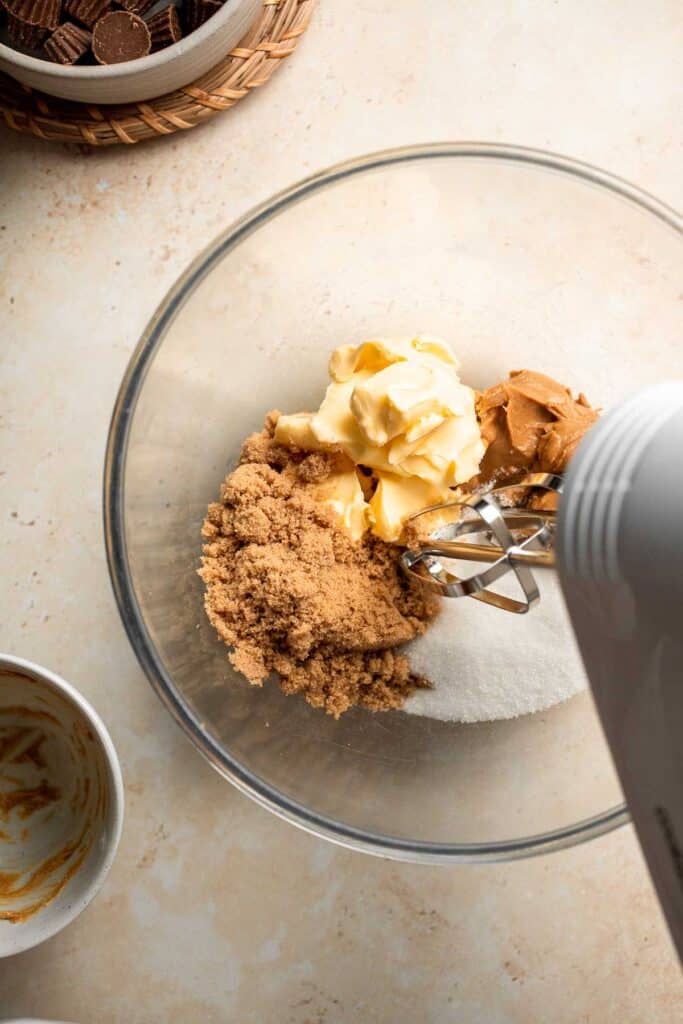
- Cream butter and sugars. In a large mixing bowl, use a hand mixer or stand mixer to cream together butter, white sugar, and brown sugar on medium speed until light and fluffy, about 3-4 minutes.
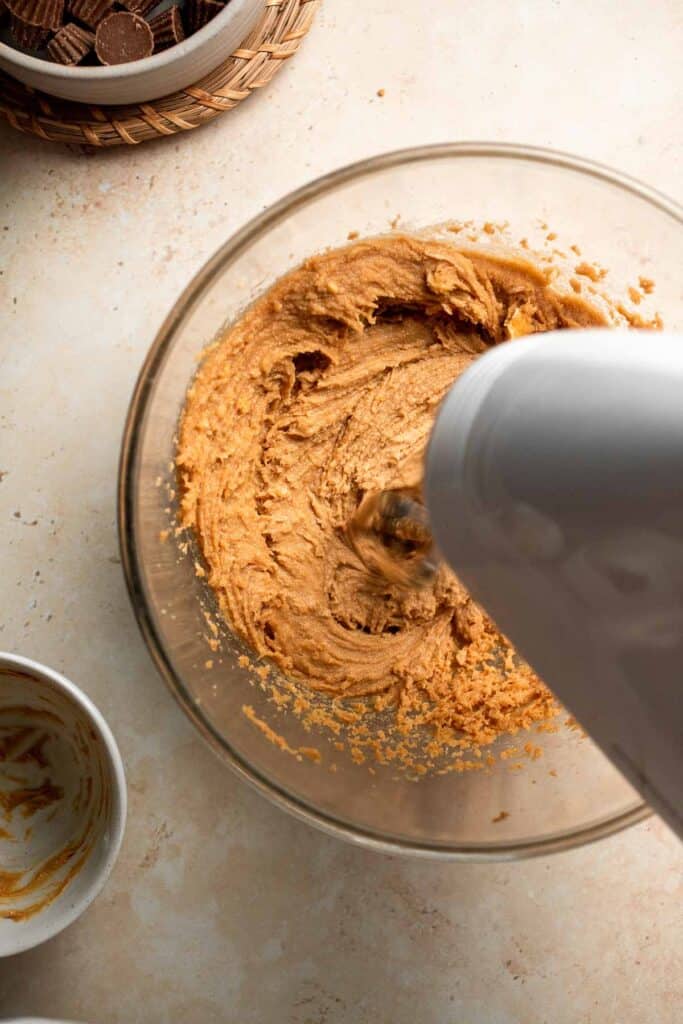
- Add remaining ingredients. Add in egg, vanilla, and peppermint extract and beat again until smooth and fluffy.
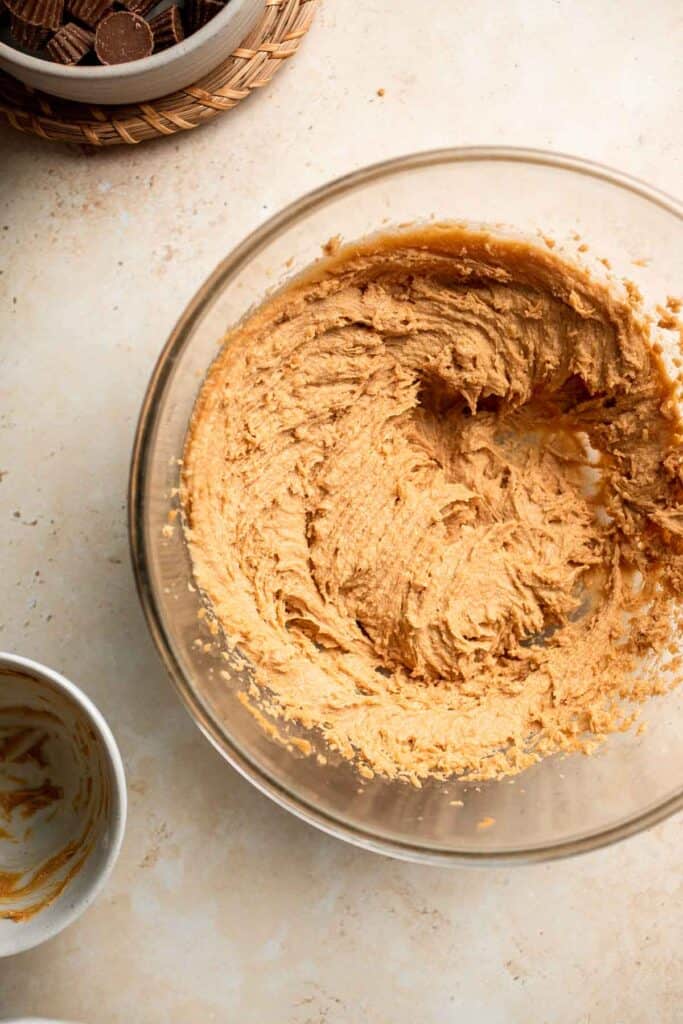
- Add dry ingredients. Add in the flour mixture, then beat together until well combined. Fold in the white chocolate chips and crushed candy canes until well-dispersed.
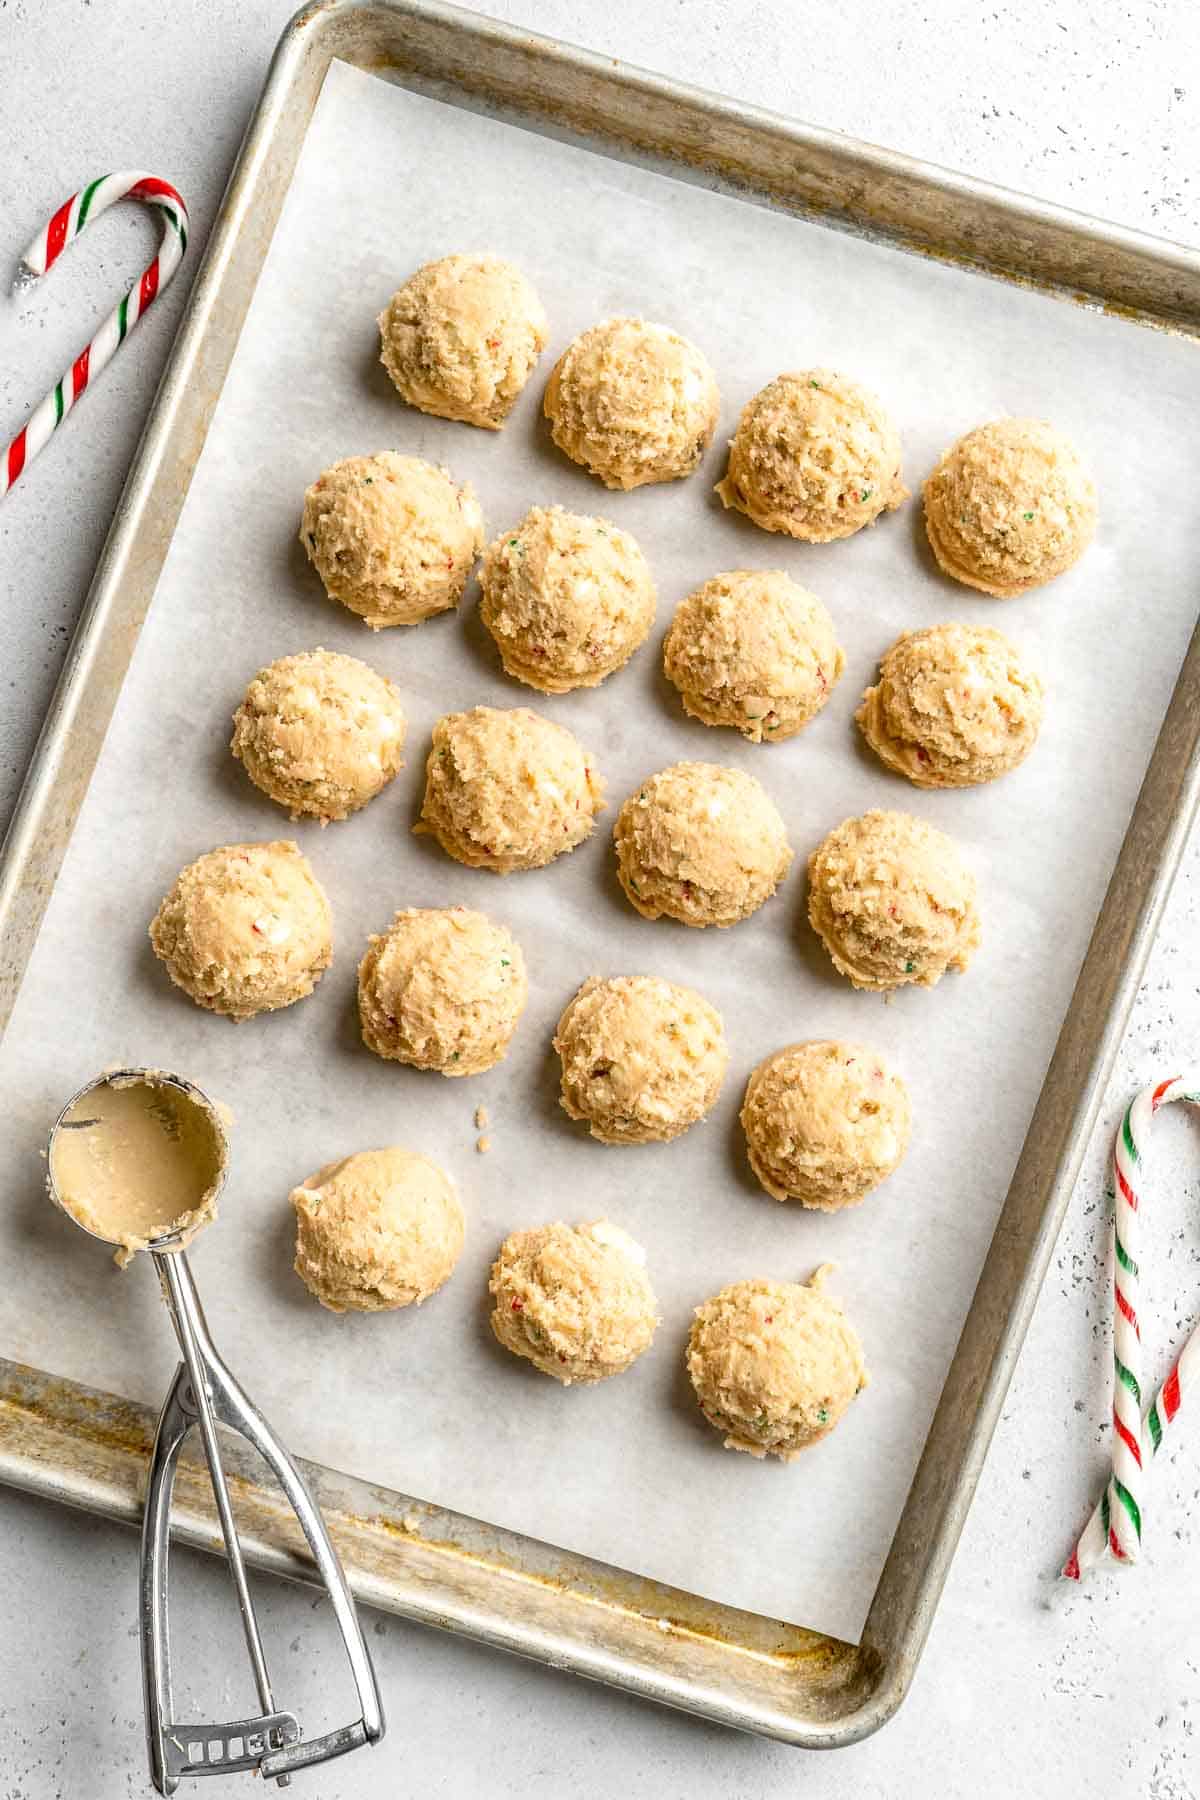
- Scoop. Line a large half sheet baking tray with a silicone baking mat or parchment paper. Use a medium cookie scoop to scoop out 2 tablespoons of cookie dough onto the prepared baking sheet. Place the cookie balls onto the lined baking sheet, spaced at least 2 inches apart (you can fit about 6 on a large cookie sheet). Press in extra chocolate chips and candies on the top.
- Bake. Bake (in batches) in a 350F preheated oven for 10-12 minutes, until edges just start to brown. Remove from oven and allow the cookies to cool in the baking sheet for 5 minutes, then carefully transfer to a wire cooling rack to cool completely. Repeat baking in batches with remaining cookies.
Recipe Variations
- Dip and sprinkle. After baking, dip one-half of the cooled cookies in melted white chocolate and sprinkle them with extra peppermint candy pieces. You can also do a drizzle of white chocolate if you prefer!
- Use dark chocolate. Prefer bold flavors? Replace the white chocolate with dark chocolate chips.
- Crush up peppermint bark. Instead of adding white chocolate chips and candy cane pieces to this white chocolate peppermint cookies recipe, crush your favorite holiday bark and use that instead!
How to Serve
These white chocolate peppermint cookies are delicious served on their own as a treat after dinner, or include them in a holiday cookie spread with some of our favorite holiday cookies including:
- Christmas Sugar Cookies with Royal Icing
- Italian Christmas Cookies (Ricotta Cookies)
- Christmas Shortbread Cookie Bites
- Candy Cane Cookies
- Peanut Butter Cup Cookies
- Red Velvet Whoopie Pies
Deck out your Christmas cookie tray with any of our 30 Best Christmas Cookies.
Recipe Tips and Tricks
- Spoon and level. Instead of scooping the flour directly into your measuring cup, scoop it with a spoon instead. Once the cup is full, use the edge of the spoon handle or a knife to level it off. This will make sure you don't add too much flour, which can make the cookies dry.
- Use softened butter. It's very important to use fully softened butter if you want tender, chewy cookies. If the butter is starting to melt, though, it is too soft and should be refrigerated to firm up slightly.
- Crush the candies. There are two main ways to crush your own candy canes for this easy cookie recipe. The first option is to place the candies in a bag and hit them with a rolling pin until they break into pieces. You can also add the candies to your food processor and pulse them until they break apart. Choose whichever method works for you.
Storing and Freezing Instructions
How to Store
Store leftover cookies in an airtight container at room temperature for approximately one week. They can also be refrigerated for up to 1 month.
How to Freeze
For long-term storage, freeze baked cookies in an airtight container for 2-3 months. Thaw the cookies at room temperature before serving. You can also freeze the cookie dough for several months. Scoop out the cookie balls, then place on a parchment lined baking sheet and freeze for 1-2 hours until hard. Transfer to a freezer bag and store for up to 3 months. Thaw the cookie dough balls in the fridge before baking.
FAQ
If you want to add a mint flavor to your next batch of cookies, there are two popular methods. The first one is to use peppermint extract, which adds a mint flavor directly to the cookie dough. This is great for dark chocolate mint cookies, but the mint can easily taste like toothpaste if you use too much. My favorite method is to use crushed candy canes or peppermint candies. They break very easily (just crush them in a plastic bag with a rolling pin), keep the mint flavor from becoming overpowering, and the iconic red and white colors tell everyone exactly what's inside.
Yes! Freezing cookies is a great way to preserve them for later, especially if you only want to bake once during the holiday season. Let the cookies cool to room temperature, then store them in a freezer-safe bag or container for 2-3 months. You can even freeze cookie dough! Just let it thaw in the fridge before baking like normal.
Although waiting for butter to soften can be a pain when you're in a rush, it's worth the patience. Softened butter whips up wonderfully, and all that extra air creates a tender, fluffy texture you just can't get with cold butter.
More Peppermint Recipes
- Peppermint Kiss Cookies
- Peppermint Macarons
- Peppermint Snowball Cookies
- Easy Peppermint Hot Chocolate
- Peppermint Brownies
- Chocolate Peppermint Christmas Bark
Tried this recipe?
I'd love to hear what you think! Leave a comment and rating below to share your feedback. Your reviews help others discover this recipe and help me keep creating more free recipes for you. Snap a photo and tag me on social media @aheadofthyme too.

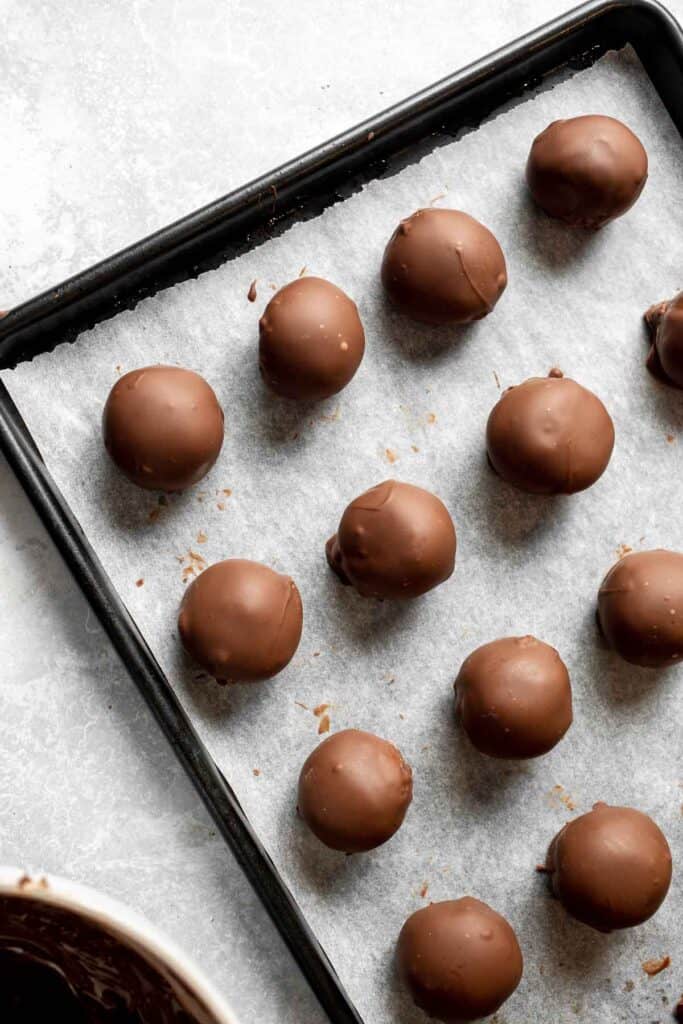
Peanut Butter Balls
Soft, sweet, and creamy, these Peanut Butter Balls are perfect as bite-sized treats for the holidays or any day you need a little pick-me-up. These no bake treats are made with just a handful of ingredients that are shaped into small balls and coated with a layer of rich chocolate that adds a luscious finish and takes them over the top.

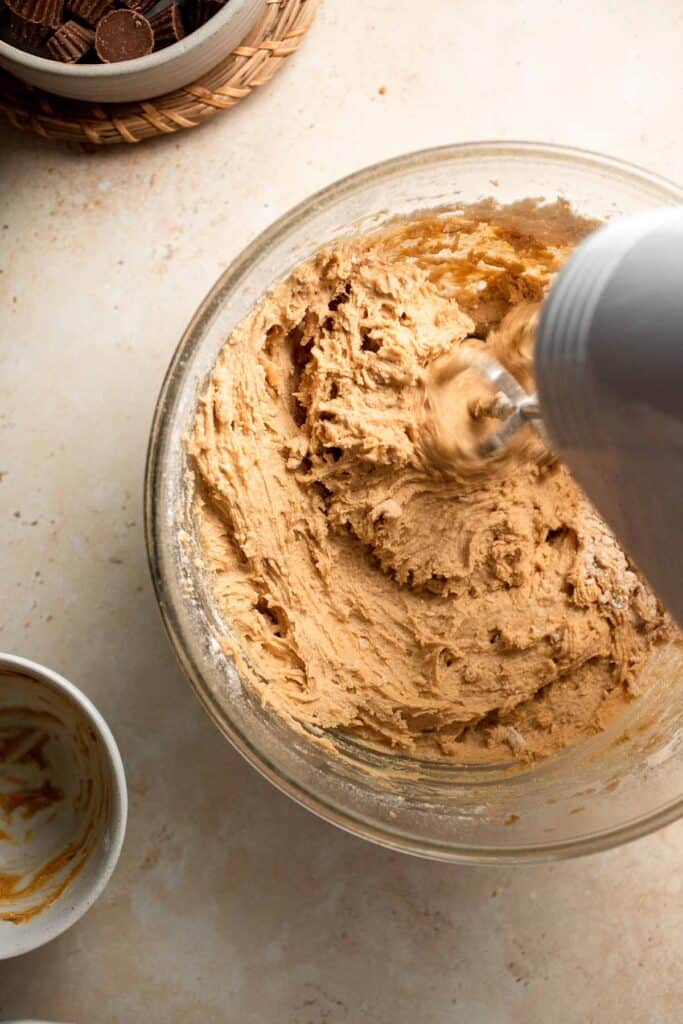
Peanut butter truffles have a light and creamy texture that comes from creaming butter, peanut butter, and powdered sugar together. Add some graham crackers to this mixture, and you get a delightful crumbly texture that tastes like peanut butter cups. The truffles are then rolled into small balls and coated in melted chocolate, which not only adds another layer of sweetness but also creates a decadent shell that gives them a nice crunch with every bite. The best part? No need for an oven to make any part of this recipe - just some mixing, rolling, and melting to whip up these tasty treats.
Why You'll Love these Peanut Butter Balls
- Quick and easy. Prepped in just 30 minutes, these no-bake treats are the perfect solution for last-minute cravings. All you have to do is mix the ingredients together, form bite-sized balls, dip in melted chocolate, and chill in the fridge until ready to enjoy.
- A classic flavor combo. Peanut butter with chocolate is such a good combination that never gets old, and these truffles deliver every time. The peanut butter adds a nutty, salty flavor while the chocolate brings in a sweet and rich finish, making an irresistible mix that won't make it far in the kitchen. They taste like Reese's peanut butter cups, but better!
- Great for any occasion. The least time-consuming and most convenient way to treat your guests, these peanut butter truffles are great for parties, holidays, or just because. And they're so easy to customize by adding different mix-ins such as chopped nuts, mini marshmallows, and sprinkles.
- Perfect for gifting. As indulgent as they look, these small treats are some of the most impressive homemade goodies you can make. Package these peanut butter balls in small, pretty boxes and tie with a ribbon for a unique and thoughtful gift.

Ingredient Notes
To make these delicious Peanut Butter Balls, you will need the following ingredients (full measurements in recipe card below):
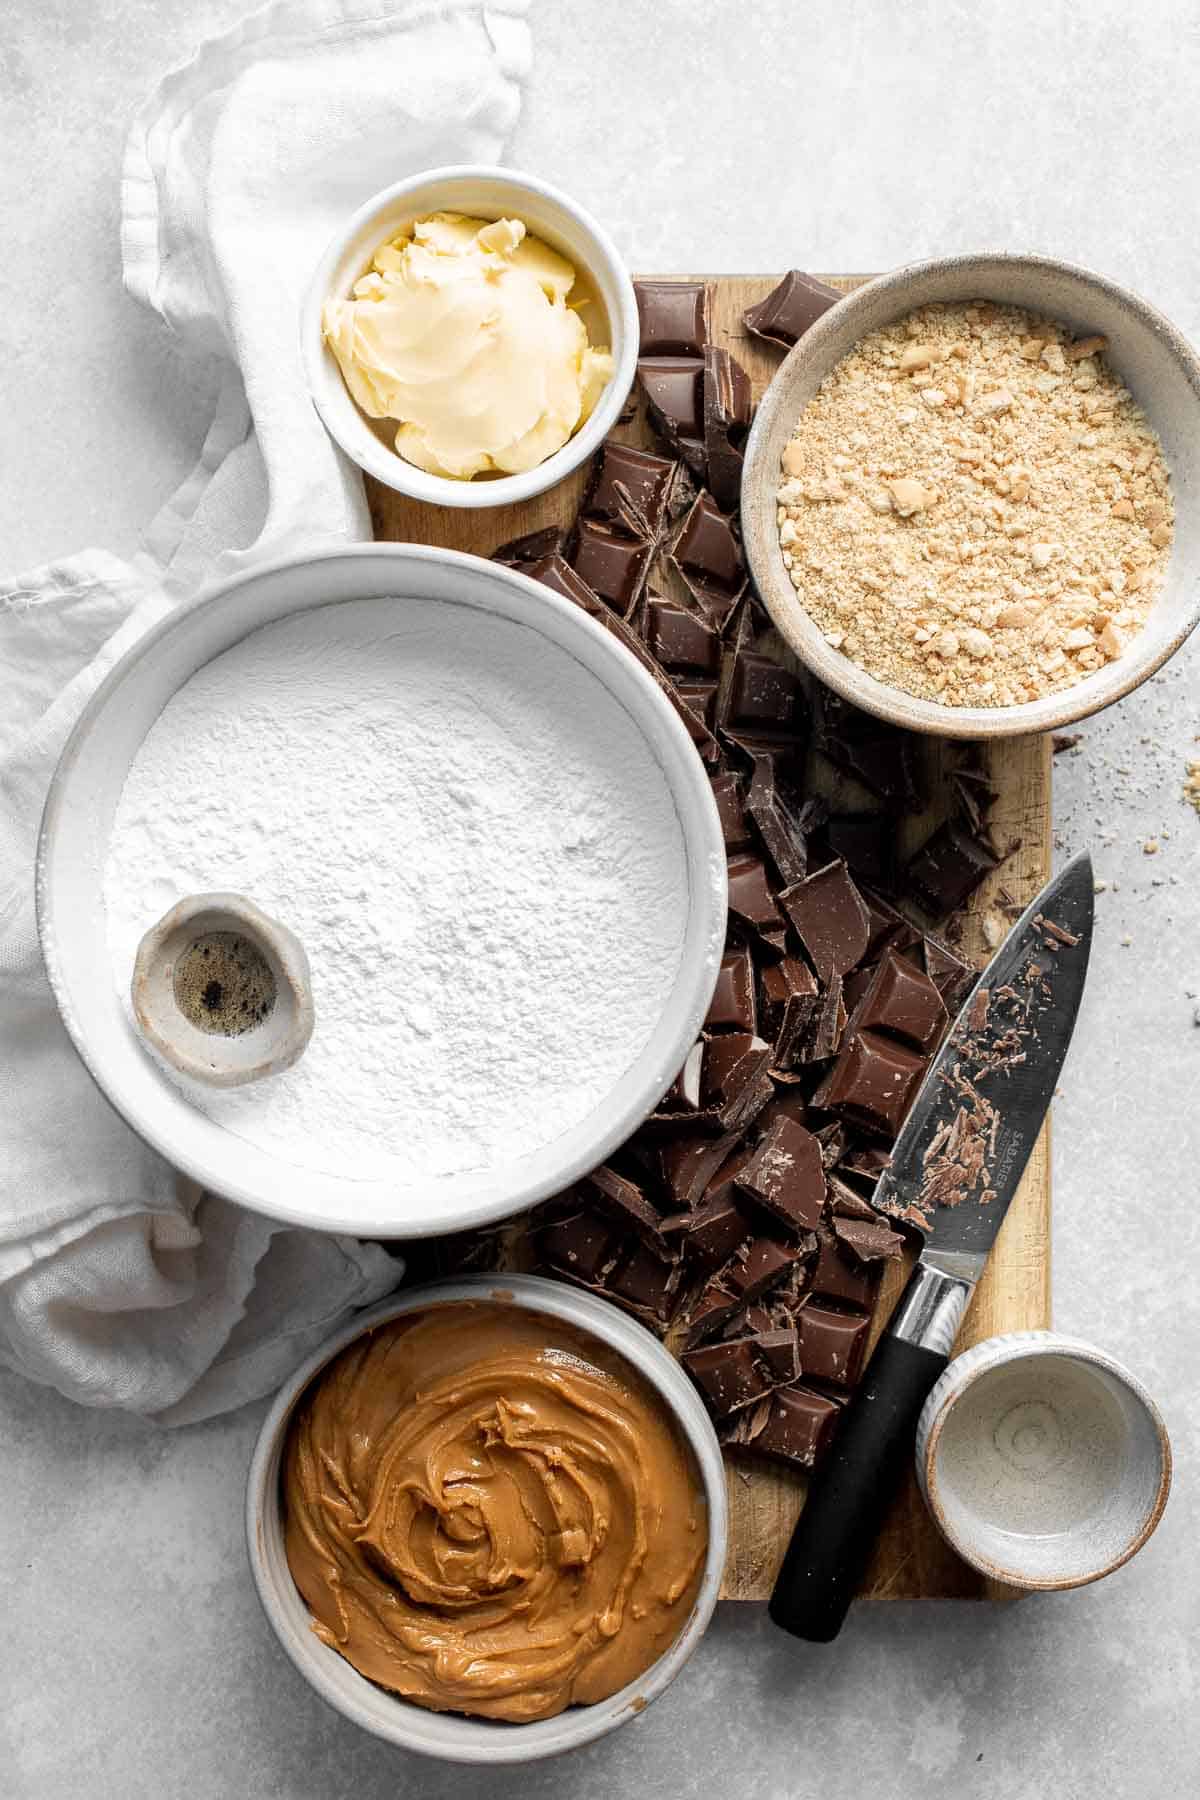
- butter - the base that adds a rich, creamy texture and flavor. Use unsalted for better control.
- peanut butter - use creamy peanut butter for a better texture. Natural peanut butter tend to be too runny, which might not give the truffles enough structure.
- graham crackers - add an extra layer of texture that makes these truffles like peanut butter cups.
- confectioners' sugar - gives the truffles added sweetness while keeping the mixture smooth.
- vanilla extract - for that nice vanilla flavor and aroma.
- chocolate - use pure baking chocolate bars or chips for dipping. You can choose either milk chocolate for a creamy taste or dark for a bittersweet flavor. In fact, any kind of chocolate works including semi-sweet chocolate or white chocolate.
- coconut oil - makes it easier to dip the peanut butter balls into the melted chocolate, leaving a shiny chocolate coating on them. You can also use other kinds of vegetable oil.
You will also need measuring cups and spoons, large mixing bowl, hand mixer or stand mixer, baking pan, and saucepan or microwave.
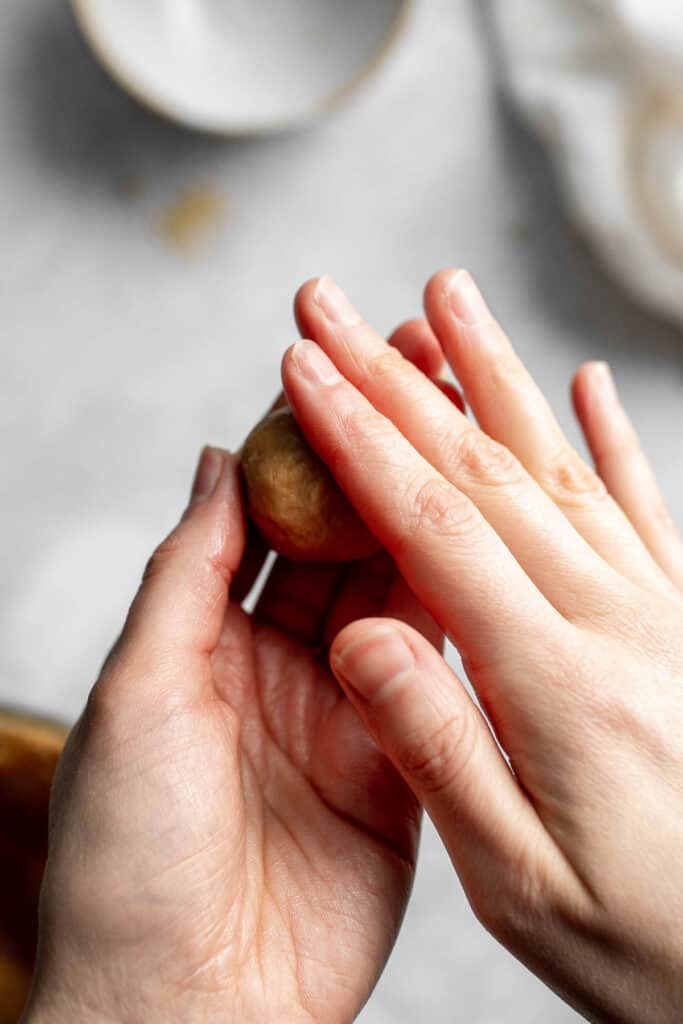
How to Make the Best Peanut Butter Balls
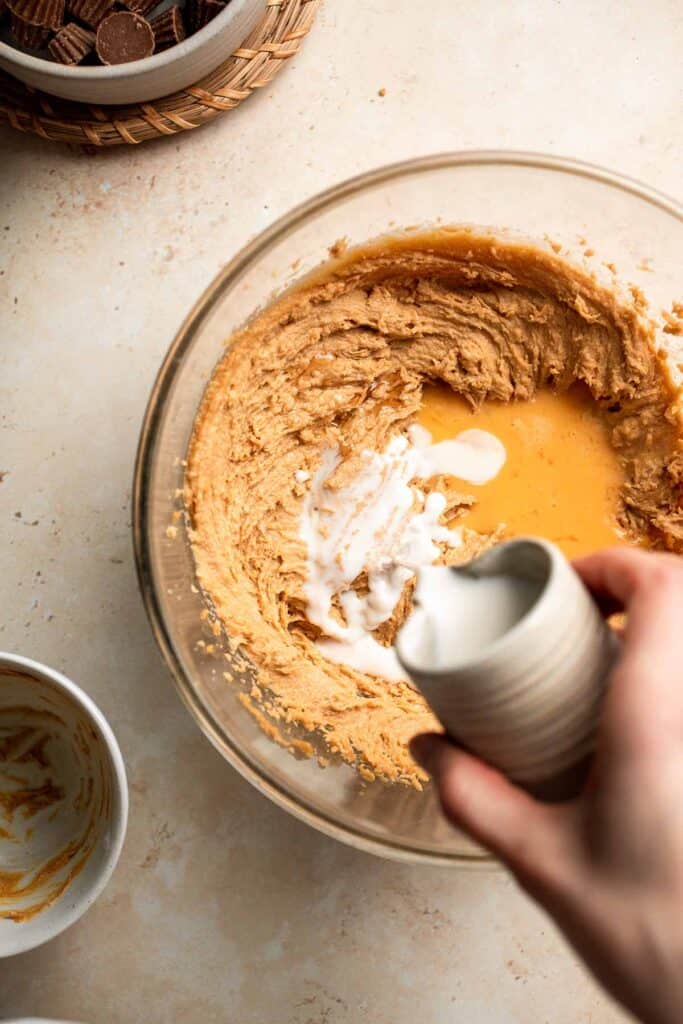
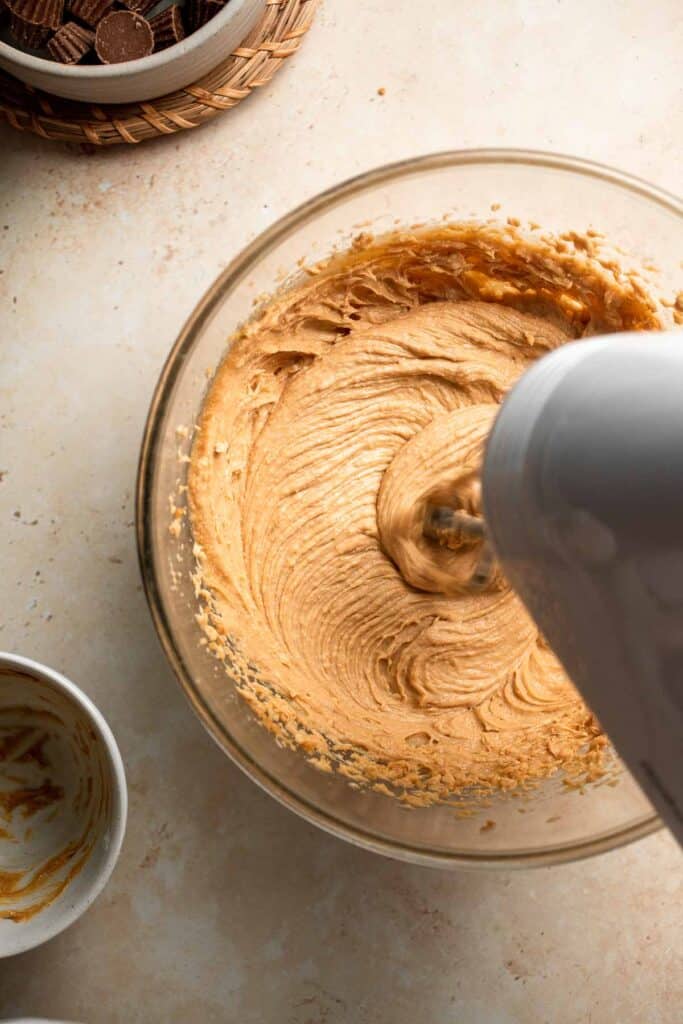
- Cream butter. In a large mixing bowl, use a hand mixer or stand mixer to cream the butter until smooth and creamy, about 1-2 minutes.
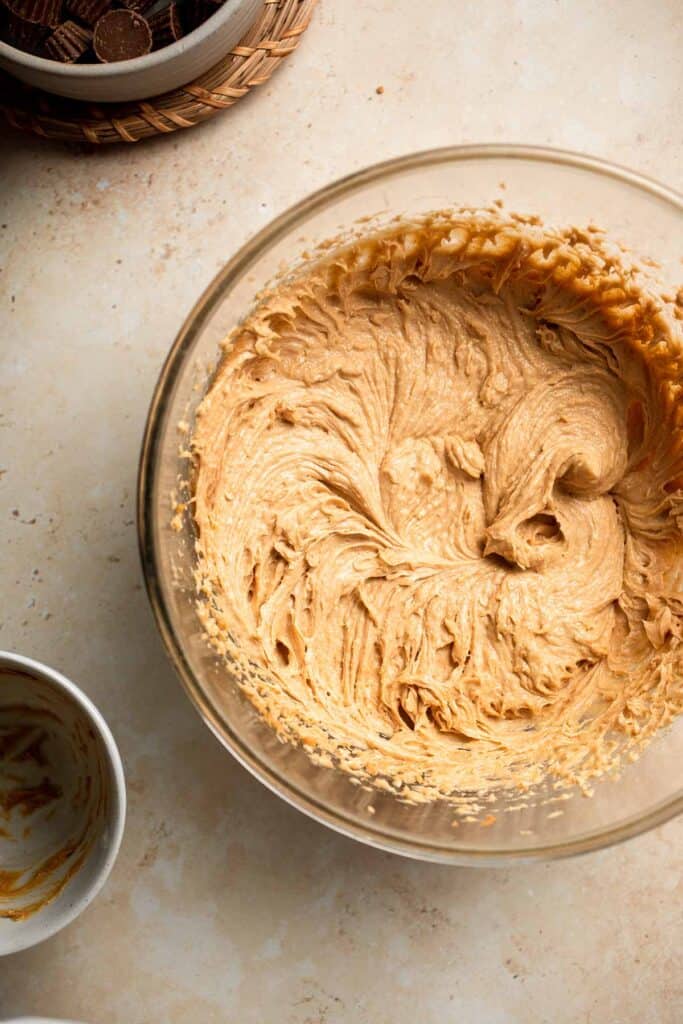
- Add peanut butter. Add the peanut butter and beat to incorporate for about 1 minute.
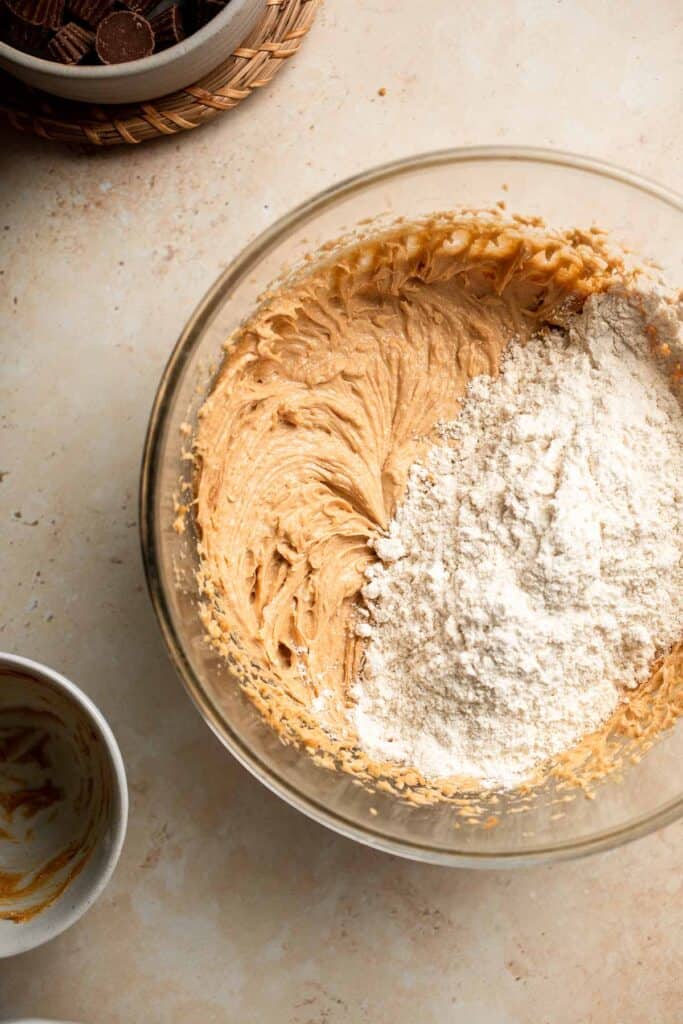
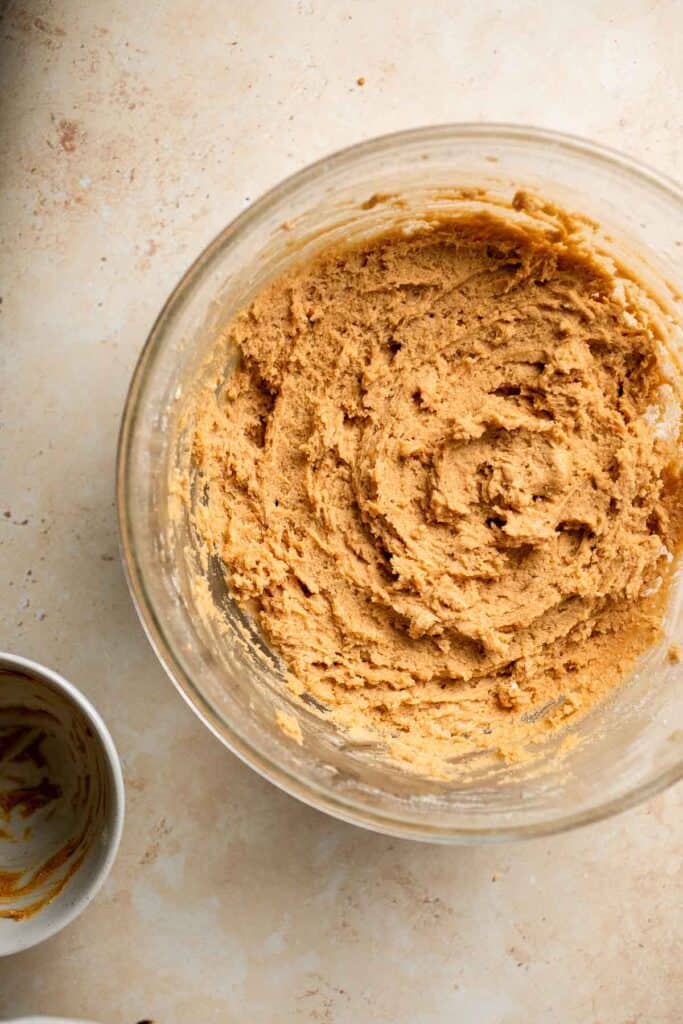
- Add remaining ingredients. Add in graham crackers, confectioners' sugar, and vanilla extract and beat on low until combined, about 1 minute. The dough will be crumbly.
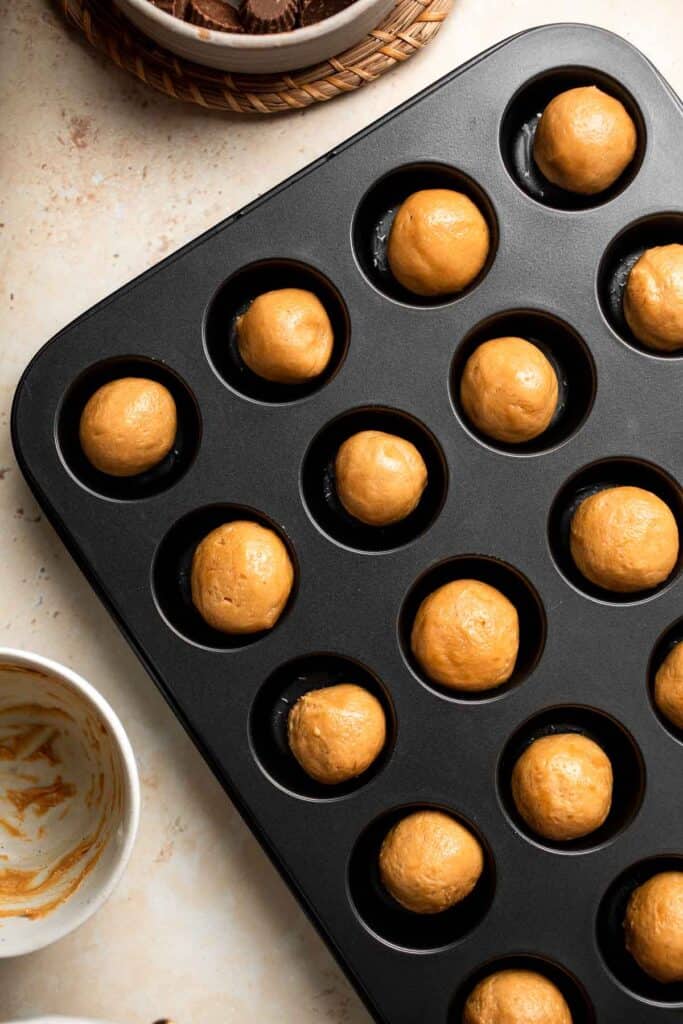
- Shape into balls. Take 1 tablespoon of dough and shape it into a ball. If you are finding the dough too dry and crumbly to do this, then beat in 1-2 tablespoons of water on low speed until combined. It should now be easier to work with but should still be soft and crumbly.
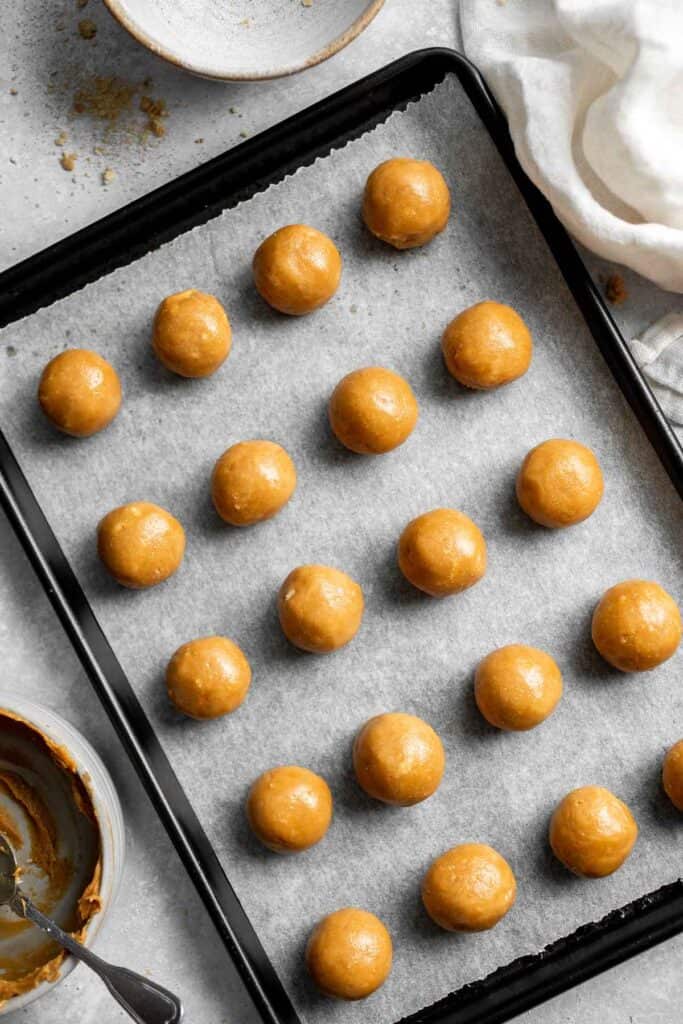
- Chill. Transfer the balls to large half sheet baking pan lined with parchment paper. Allow them to set and harden in the refrigerator for 1 hour.
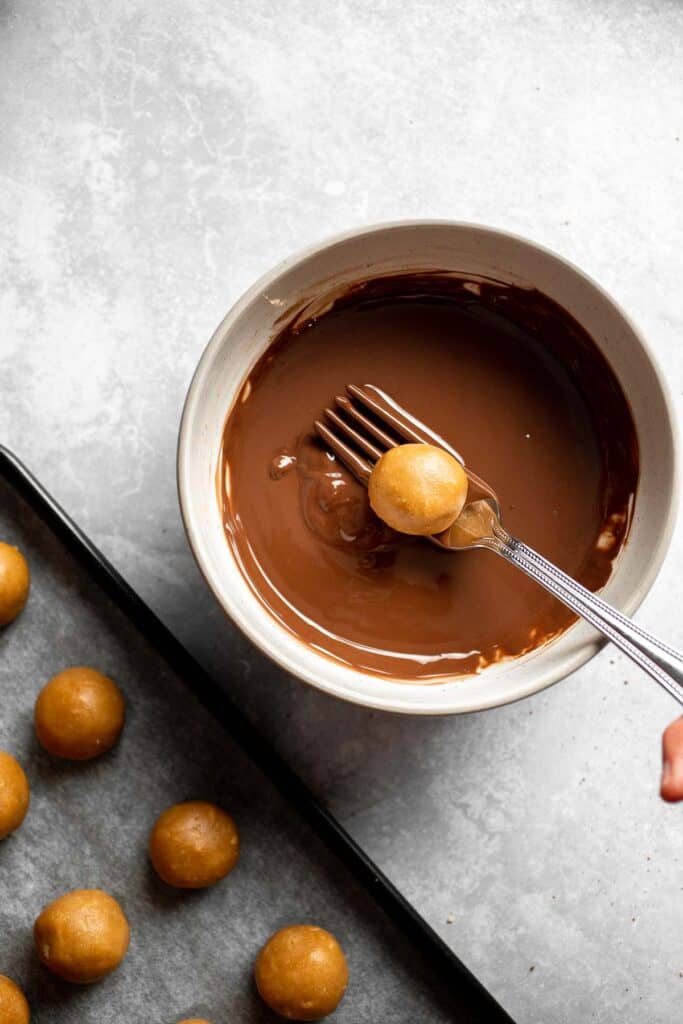
- Melt chocolate. Once set, you are ready to melt the chocolate. Melt the chocolate either on the stove or in the microwave:
- On the stove: Bring 2 inches of water to a low simmer in a saucepan over medium-low heat. Then turn the heat to low and place a large heatproof bowl of chocolate chips with vegetable oil on the mouth of the pot. Make sure that there is a gap of a few inches between the bottom of the bowl and the water (You can also place a bowl on a steamer attachment on top of your pot). Stir the chocolate constantly as it melts. Stir until the chocolate is completely smooth and melted. This should take a few minutes.
- In the microwave: The second way to melt chocolate (and an easier way) is in the microwave. Place the chocolate and vegetable oil into a microwave-safe bowl and microwave in 30-second intervals. Remove the bowl at each interval and stir well. Repeat until the chocolate has completely melted. Stir until completely smooth.
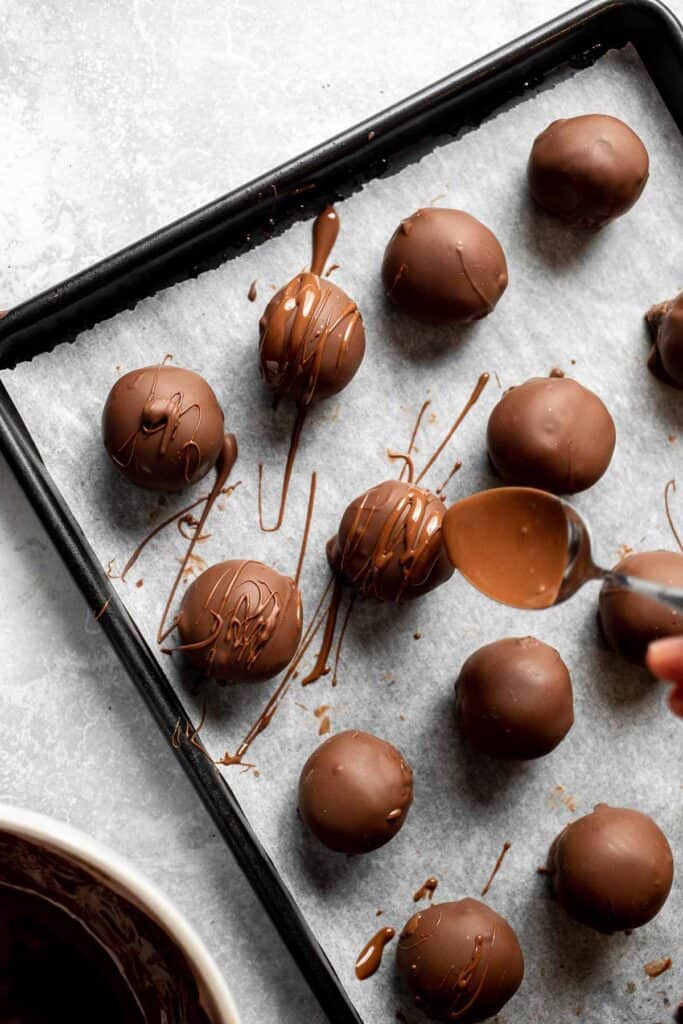
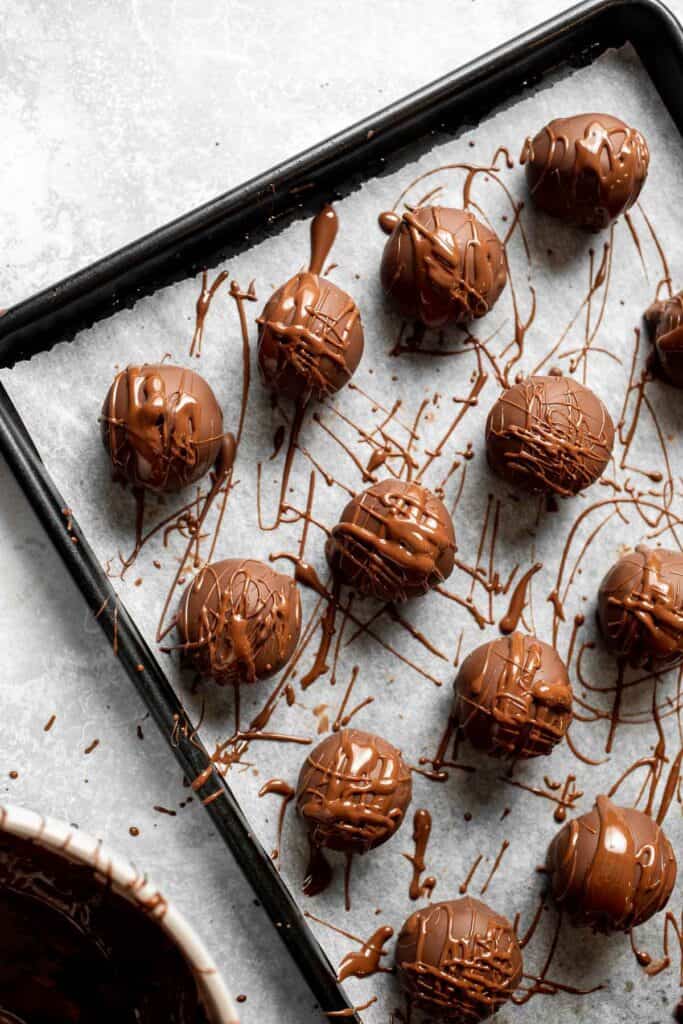
- Coat with chocolate. Use a fork to carefully dip each chilled egg into melted chocolate. Tap the edge of the bowl to remove any excess chocolate and place the coated eggs back onto the lined baking sheet. You can also use a spoon to help coat the eggs with chocolate.
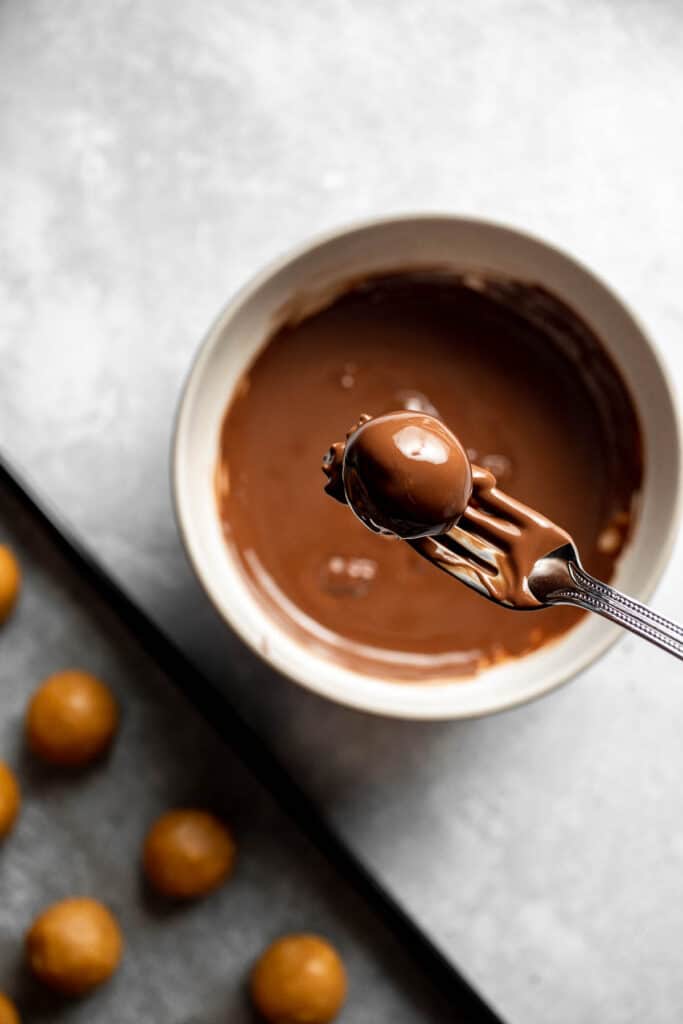
- Set. Transfer the coated eggs back to the fridge to slightly set for 5 minutes. Then use any excess melted chocolate and drizzle over the balls in a diagonal motion to add texture. Place back into the fridge to set completely, about 30 minutes.
Recipe Variations
- Use crunchy peanut butter. If you like a bit of crunch in your treats, use crunchy peanut butter instead of the smooth version. You can also use a combination for a balanced texture.
- Add some mix-ins. Get creative and mix some crushed pretzels, chopped nuts, dried fruits, and chocolate chips into your dough.
- Roll in shredded coconut. Give these truffles a tropical twist by rolling them in shredded coconut after dipping in chocolate. So good!
How to Serve
Serve these delicious Peanut Butter Balls as a special treat after your next holiday party or any dinner party, along with other desserts such as:
- Chocolate Covered Oreos
- Gingerbread Cake
- Monster Cookies
- Classic New York Cheesecake
- Chocolate Whoopie Pies
- Oreo Brownies
For more recipe inspiration, see our 50 Easy Baking Recipes.

Recipe Tips and Tricks
- Use softened butter. Softened butter will create a smooth mixture of peanut butter and powdered sugar, making it easier to shape into balls. If you use melted butter, the truffles may not hold their structure as well.
- Add water. If your mixture is too dry to form into balls, add a little bit of water and beat on low speed until it becomes soft enough to work with.
- Use a fork. To avoid getting chocolate all over your hands, use a fork to dip the balls in melted chocolate, and then tap the fork on the side of the bowl to let any excess chocolate drip off.
Storing and Freezing Instructions
How to Store
Place the leftover peanut butter truffles in an airtight container and store in the fridge for up to 2 weeks.
How to Freeze
Place leftover peanut butter balls on a lined baking sheet and keep in the freezer for about an hour until hard. Then transfer to a freezer-safe container or freezer bag and freeze for up to 3 months. Allow the truffles to thaw overnight in the fridge before serving.
More Peanut Butter Recipes
- Peanut Butter Cup Cookies
- Soft and Chewy Peanut Butter Cookies
- Peanut Butter Blossoms
- Peanut Butter Thumbprint Cookies
- Chewy Peanut Butter Granola Bars
- Chocolate Chunk Peanut Butter Cookies
Tried this recipe?
I'd love to hear what you think! Leave a comment and rating below to share your feedback. Your reviews help others discover this recipe and help me keep creating more free recipes for you. Snap a photo and tag me on social media @aheadofthyme too.

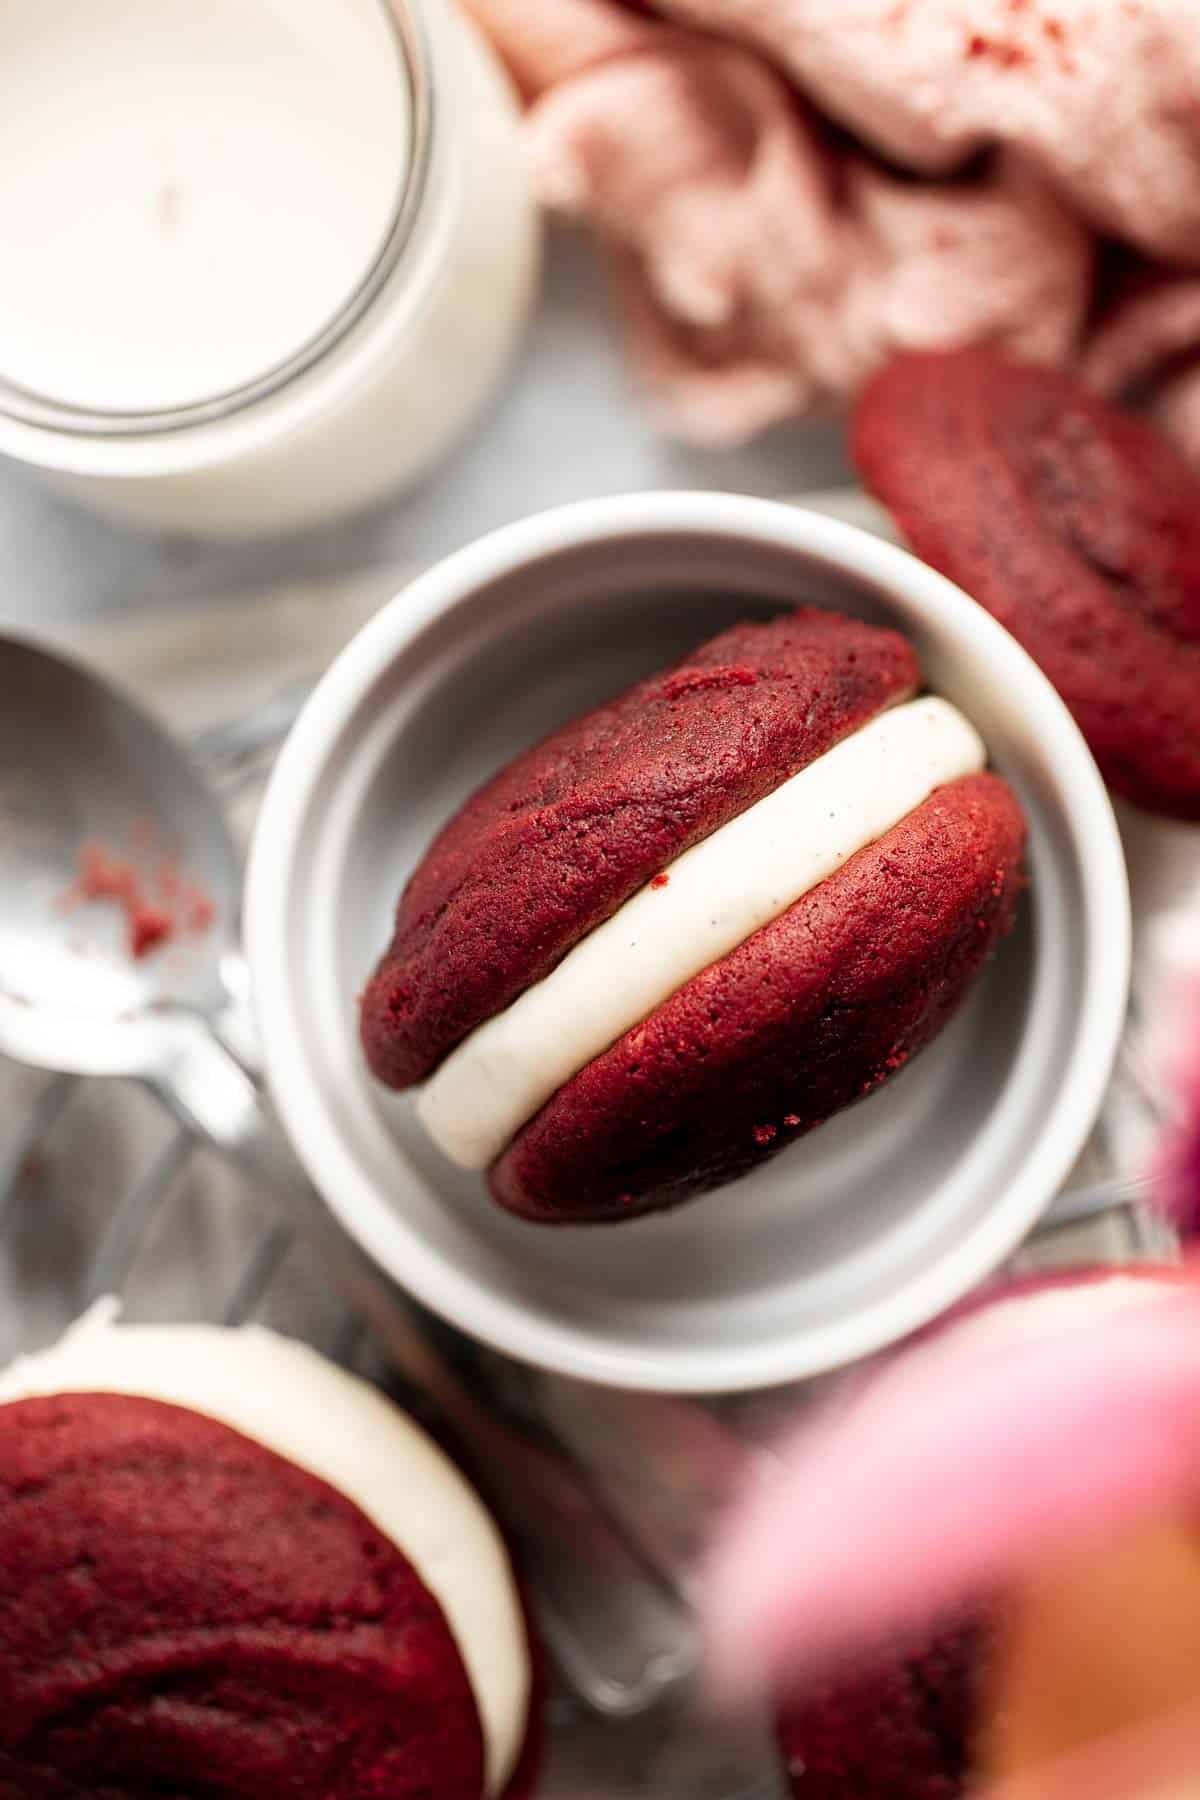
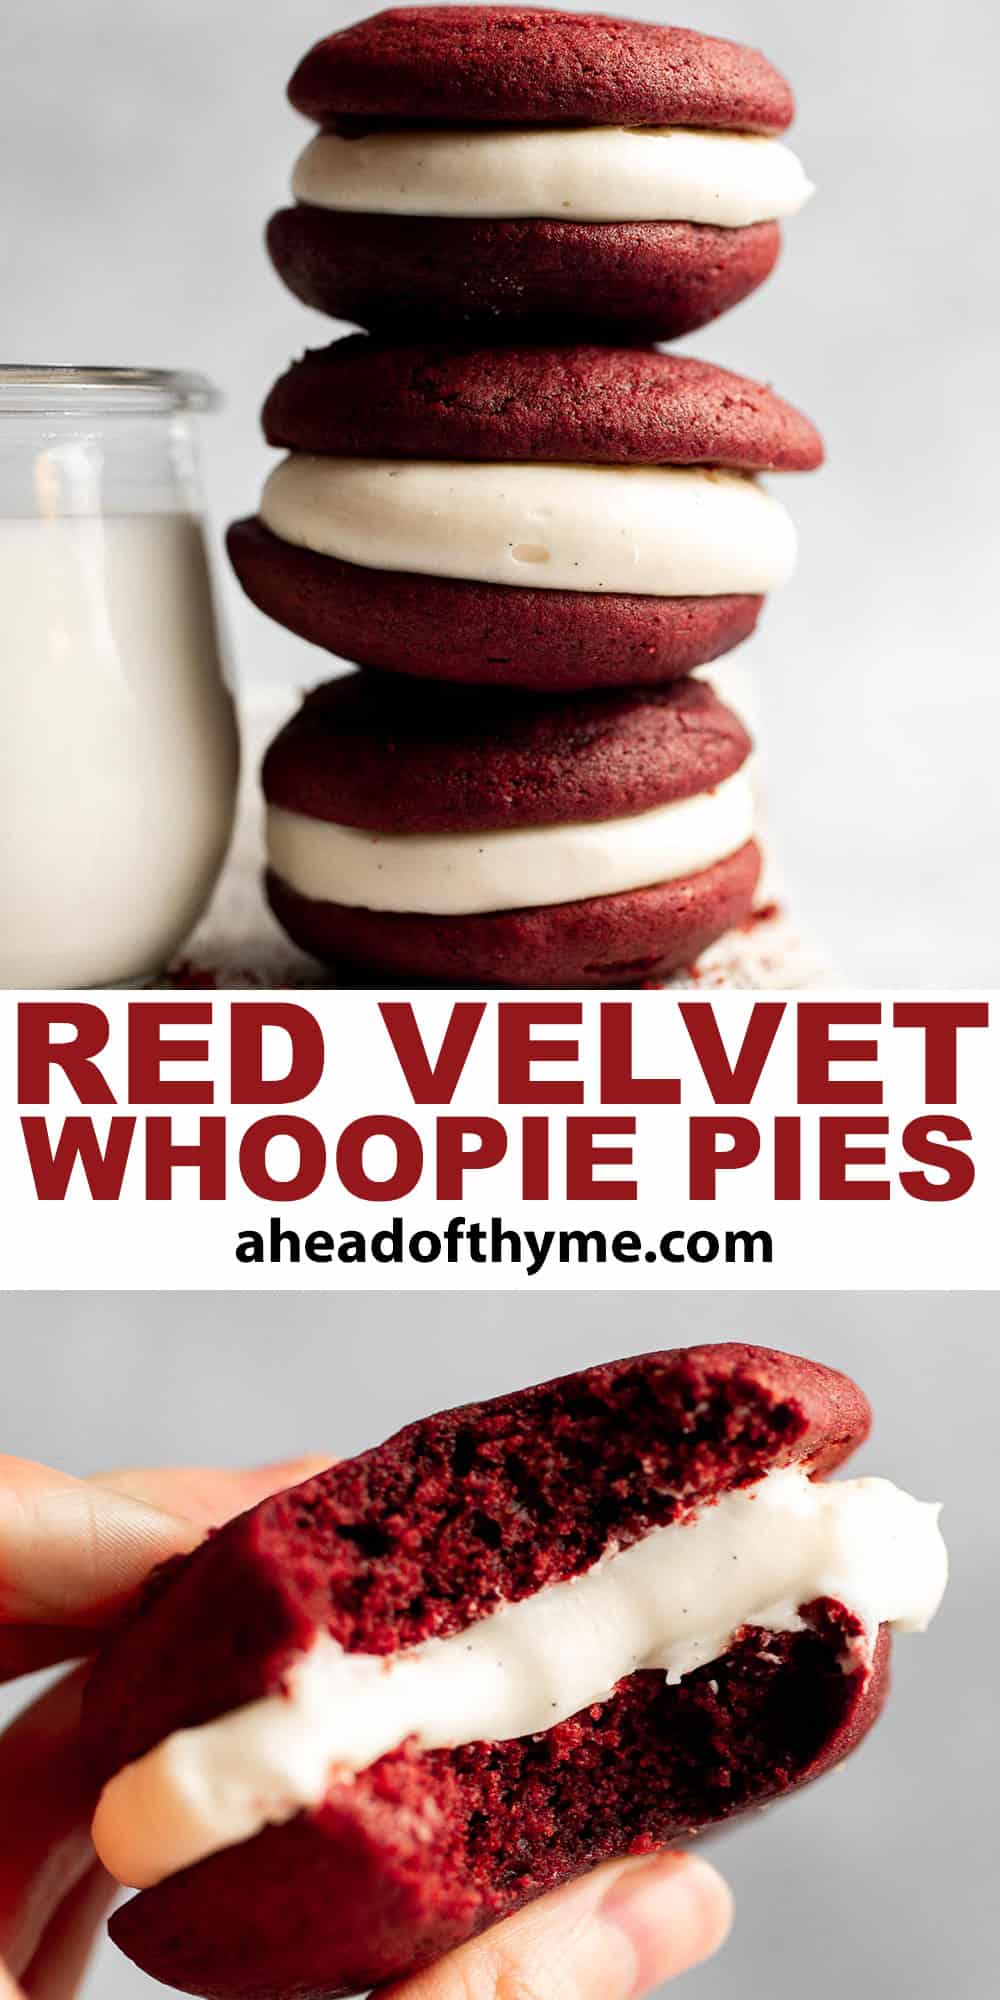
Red Velvet Whoopie Pies
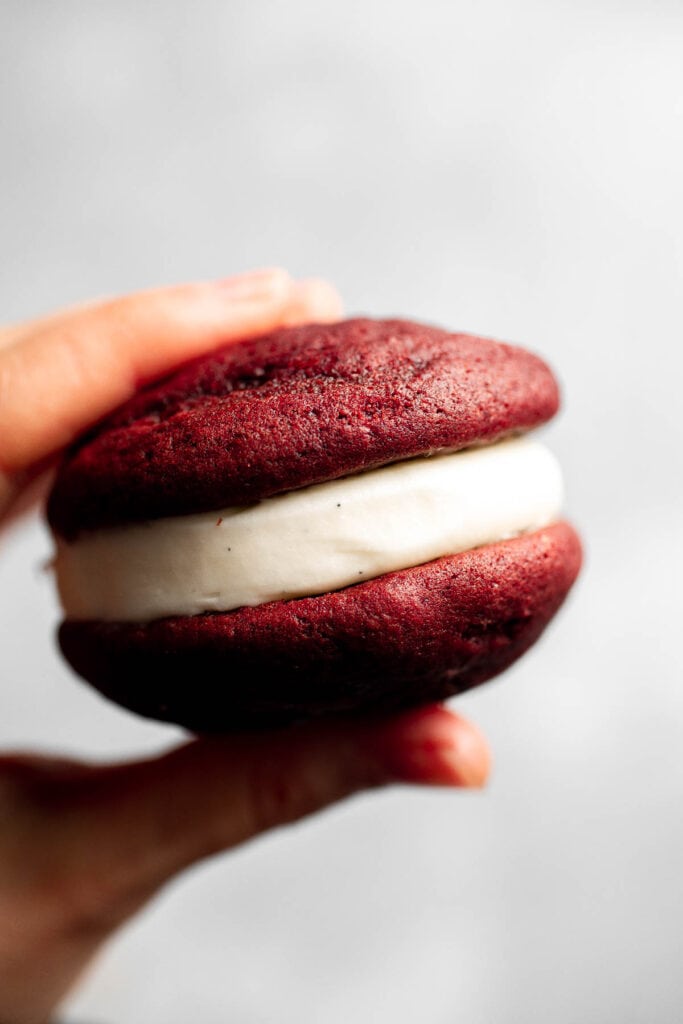
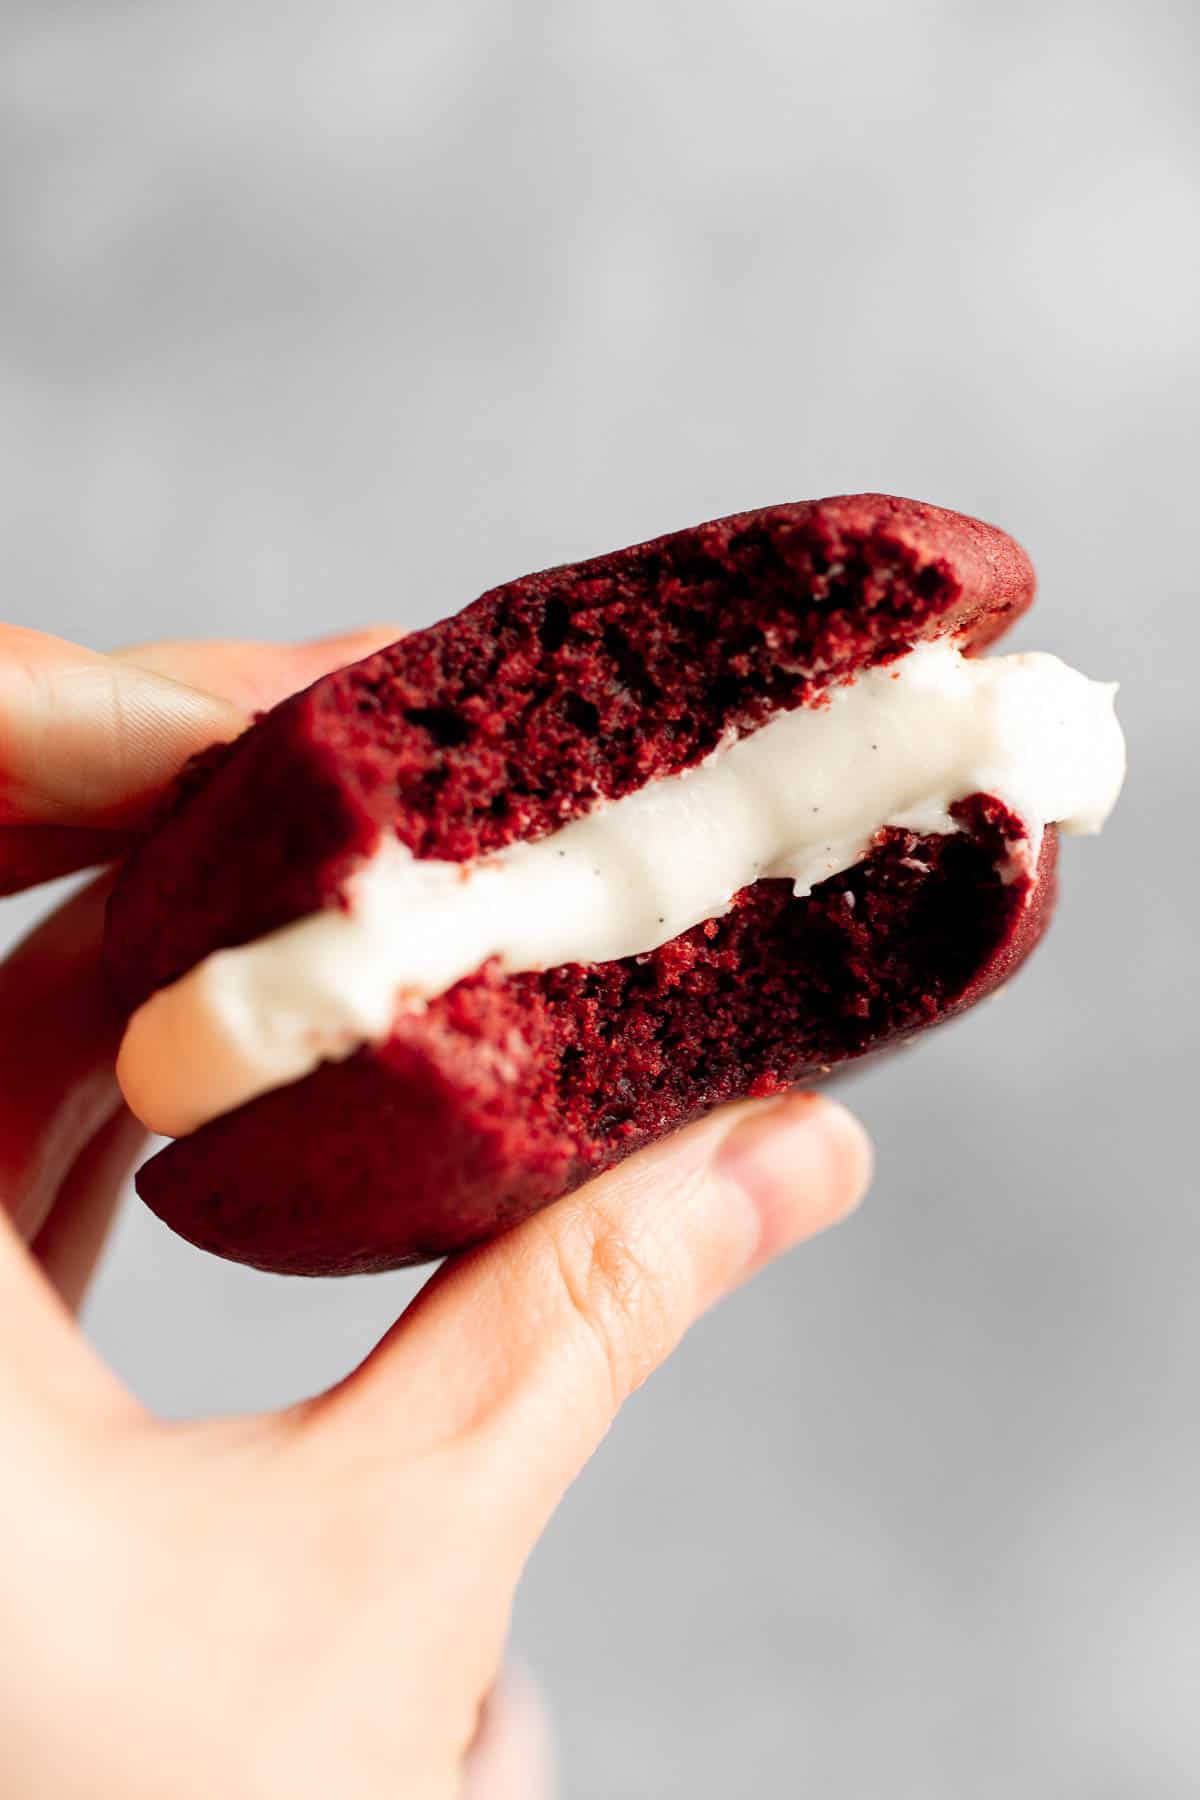
These fluffy Red Velvet Whoopie Pies are like mini cupcakes in sandwich form. Two soft and moist cake-like cookies are filled with a decadent cream cheese frosting in the middle for a delightful take on the classic whoopie pies. These little red treats are so easy to make that you'll be tempted to whip up a batch any chance you get!
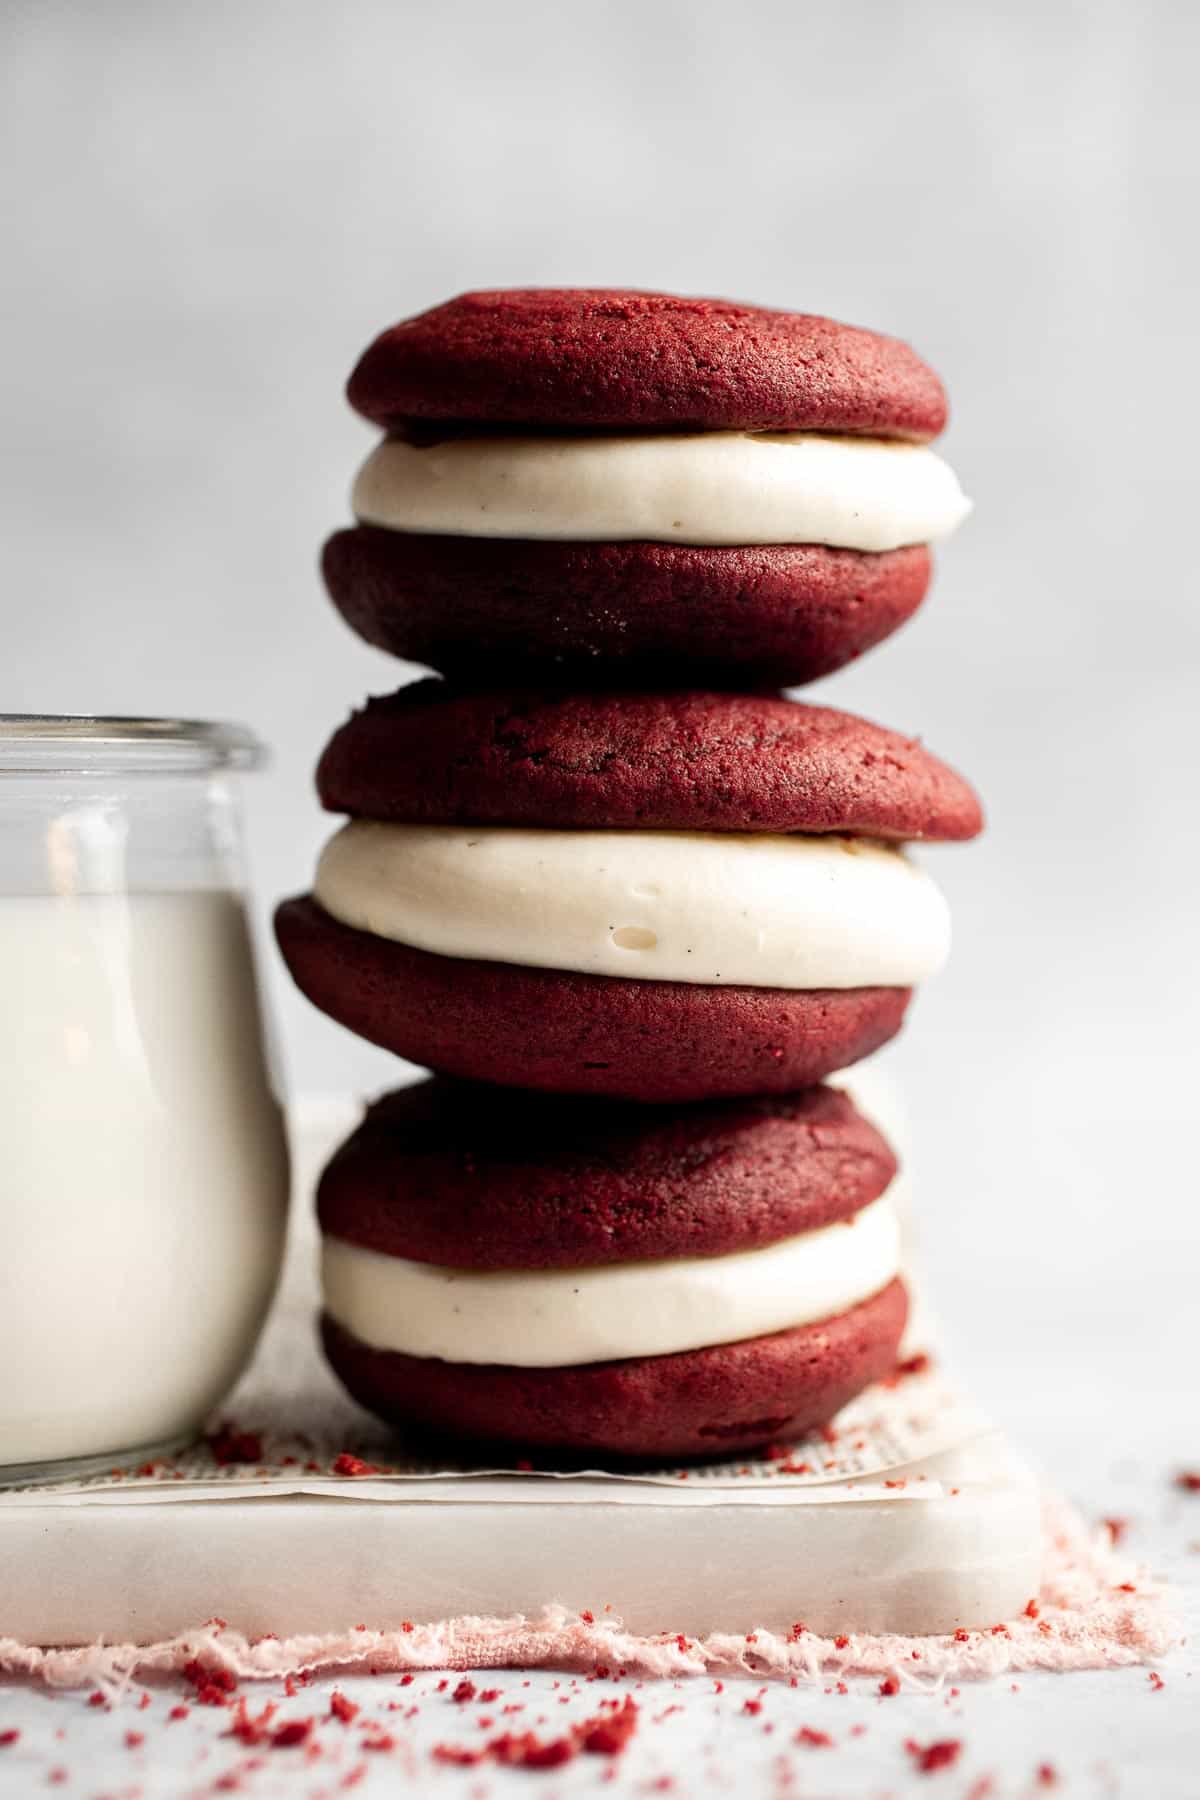
Red velvet is a classic flavor for cakes and cupcakes, but it's also fantastic when used to make whoopie pies. The deep red color gives these little dessert sandwiches an extra special flair, and the cream cheese frosting filling adds a delicious tanginess that's absolutely irresistible with red velvet. They're also pretty convenient to eat on the go, making them a perfect party treat, whether you're serving them at family dinners, birthdays, holiday gatherings, or just indulging in a sweet snack for yourself.
Why You'll Love this Red Velvet Whoopie Pie Recipe
- Quick and easy. At first glance, these red velvet whoopie pies might look like they took a lot of effort to make, but they're surprisingly simple to put together! Just a little over 30 minutes to prep, bake, and assemble, and you're at the finish line.
- Rich and flavorful. It's impossible not to love the combination of soft and fluffy red velvet cookies stuffed with a creamy cream cheese frosting. The cookies are rich and moist, while the cream cheese filling adds a nice tang that's so satisfying to munch on.
- Eye-catching. Two vibrant red velvet cookies held together by a white creamy filling are the perfect contrast of colors. You won't be able to resist taking a bite (or two) just by looking at these whoopie pies!
- Perfect for all occasions. Whether you're hosting a birthday party, an afternoon tea, or a holiday celebration, these whoopie pies are the ones you'll want to make. They're also great for Valentine's and Christmas as they match perfectly with the vibe. So much better than cupcakes but way easier to make!
Ingredient Notes
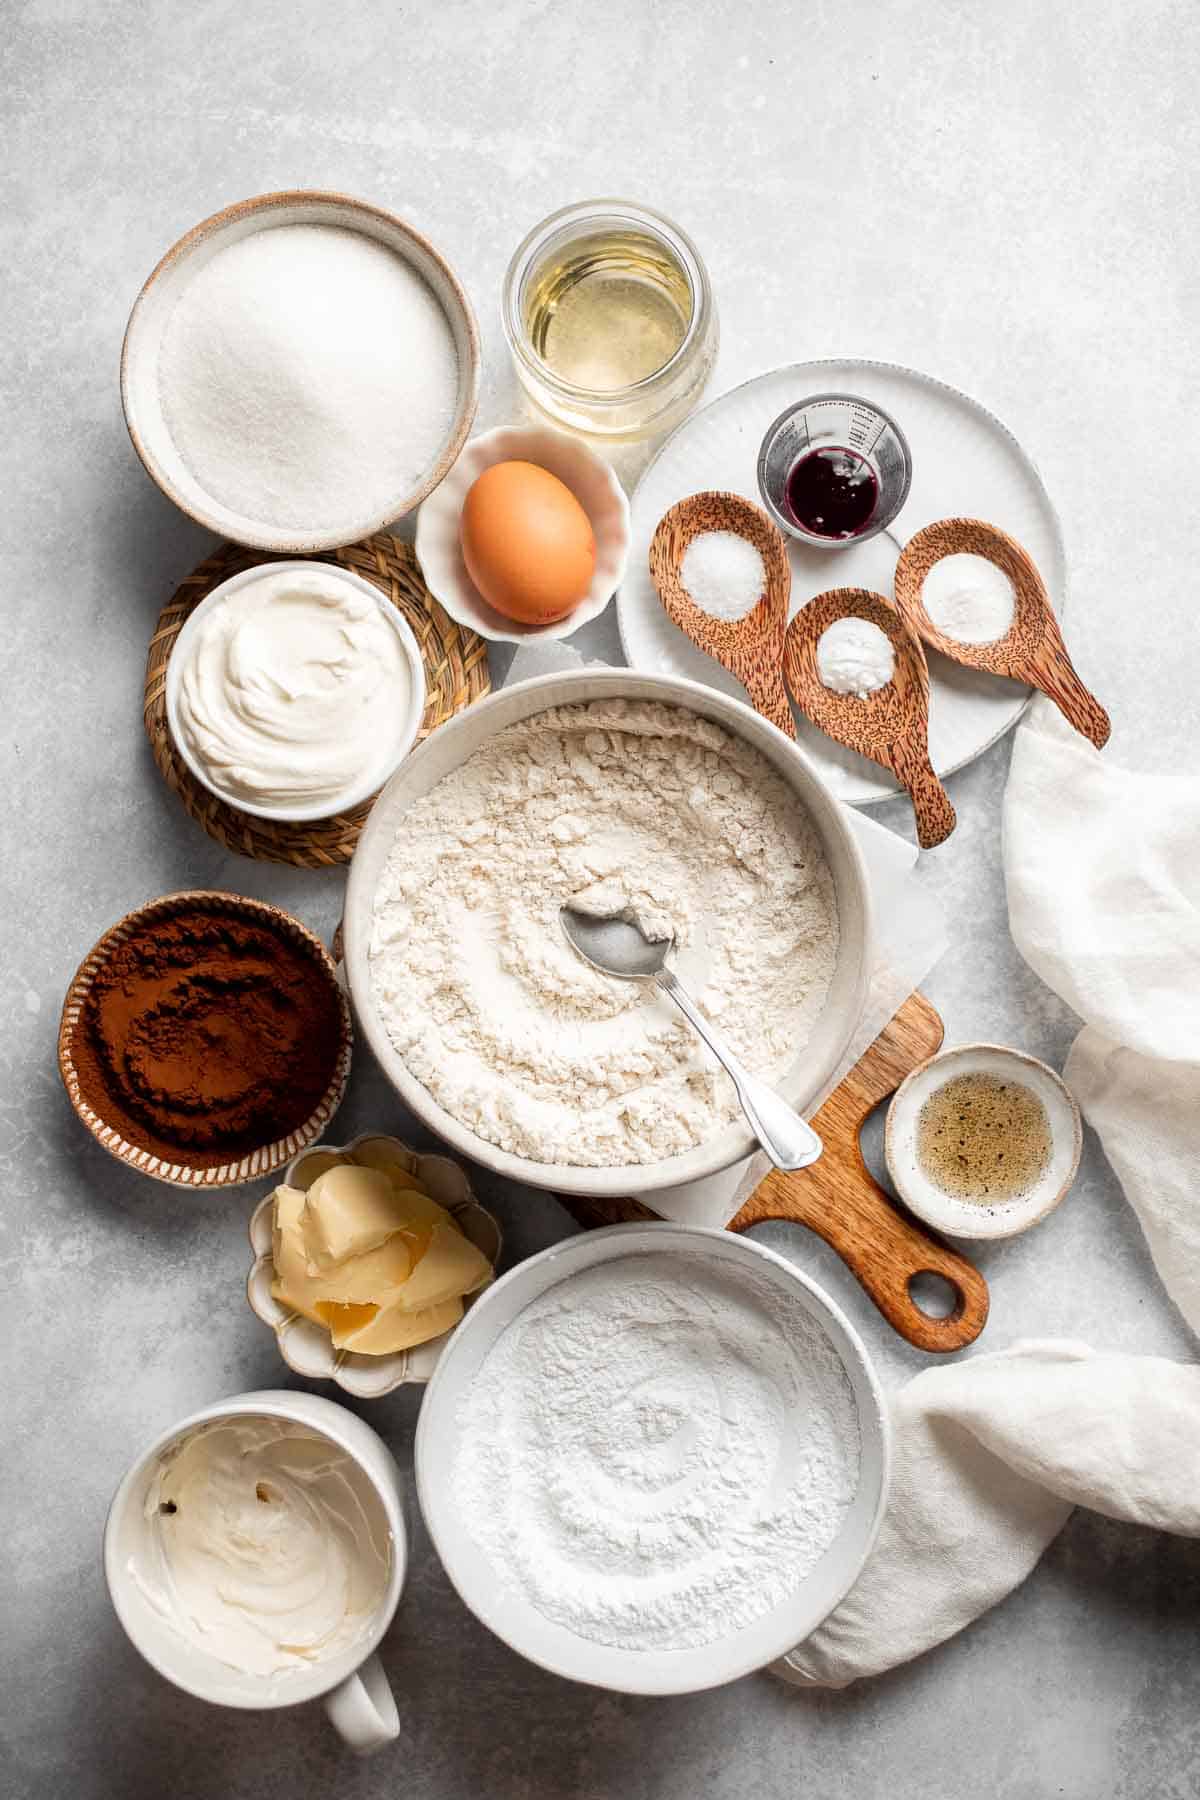
To make these delicious Red Velvet Whoopie Pies, you will need the following ingredients (full measurements in recipe card below):
- white sugar - also known as granulated sugar.
- sour cream - gives the cookies a slightly tangy taste and a smooth consistency.
- vegetable oil - use a mild flavored oil like avocado oil or grapeseed oil.
- egg - warmed to room temperature for easier mixing.
- vanilla extract - use pure vanilla extract or use the same amount of vanilla bean paste for a slight flavor boost.
- red food coloring - I use gel-type food coloring to avoid adding too much liquid to the batter. It also has more intense colors.
- all-purpose flour - works well with many goodies like these whoopie pies. It gives you the same results every time, but you can try substituting some with cake flour for a lighter and more delicate texture.
- cocoa powder - I prefer unsweetened natural cocoa for a mild and light flavor. If you prefer a richer whoopie pies, you can use a Dutch-processed variant.
- baking powder - makes the pies light and fluffy.
- salt - enhances all the flavors.
Cream Cheese Filling Ingredients
- cream cheese - forms the base of this rich and creamy filling. It also helps all the ingredients bind together.
- butter - use unsalted butter to highlight the sweet and creamy flavor of the filling.
- confectioners' sugar - makes for a smoother texture.
- vanilla - rounds up all the flavors in the filling.
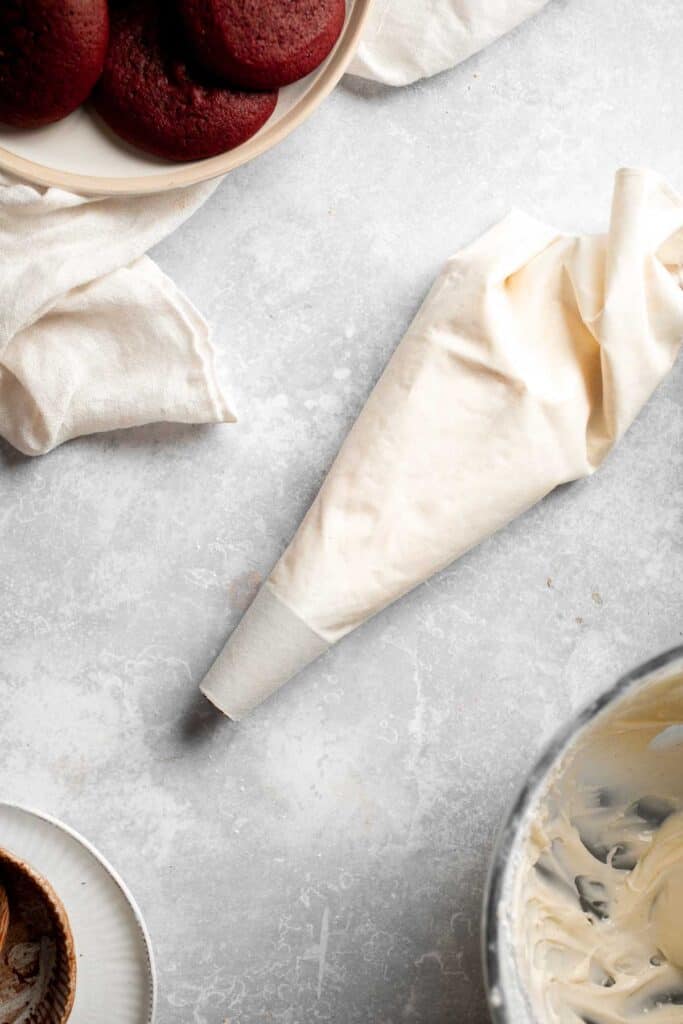
You will also need measuring cups and spoons, baking sheets, large mixing bowl, whisk, spatula, small cookie scoop or piping bag, and hand mixer.
How to Make the Best Red Velvet Whoopie Pies
First, make the whoopie pies.
- Preheat oven. Preheat the oven to 350°F. Prepare 3 large baking sheets with parchment paper or a silicone baking mat (or prepare just one if working in batches).
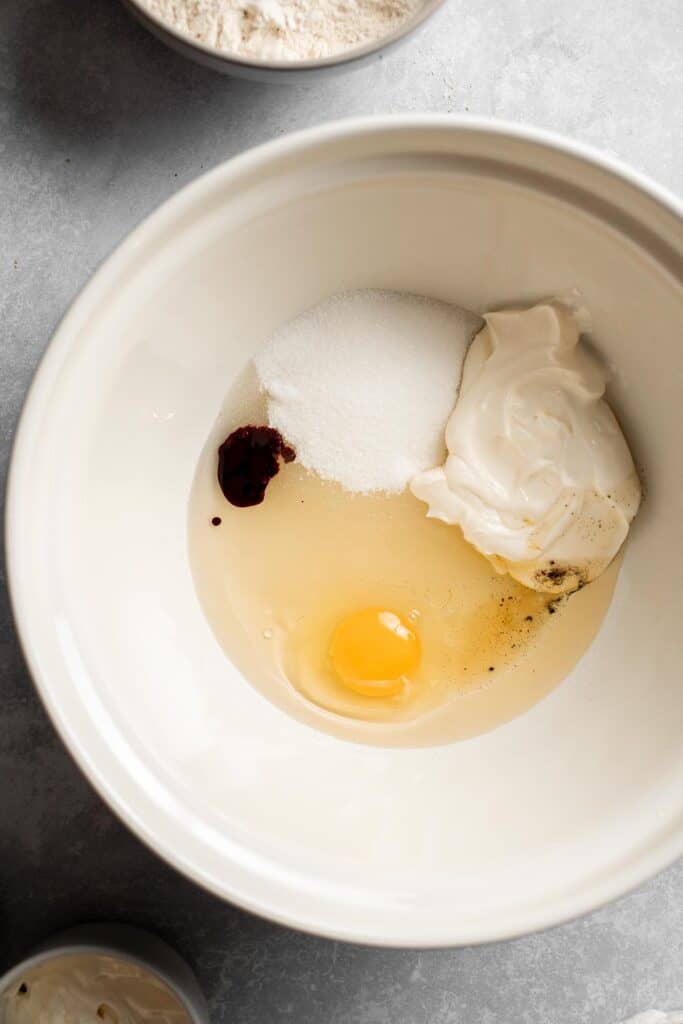
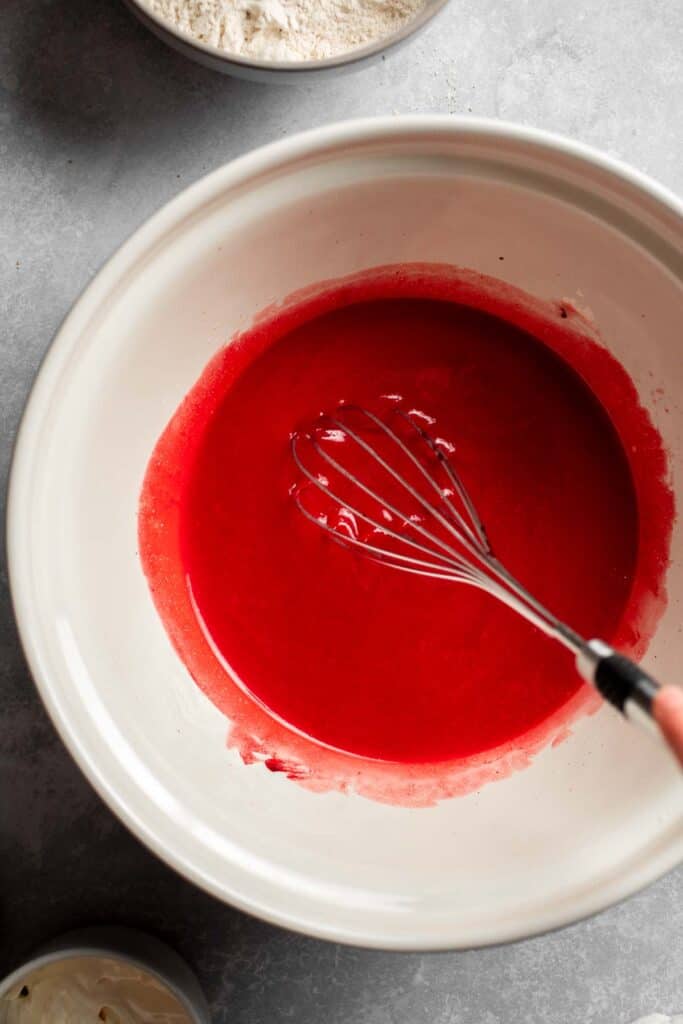
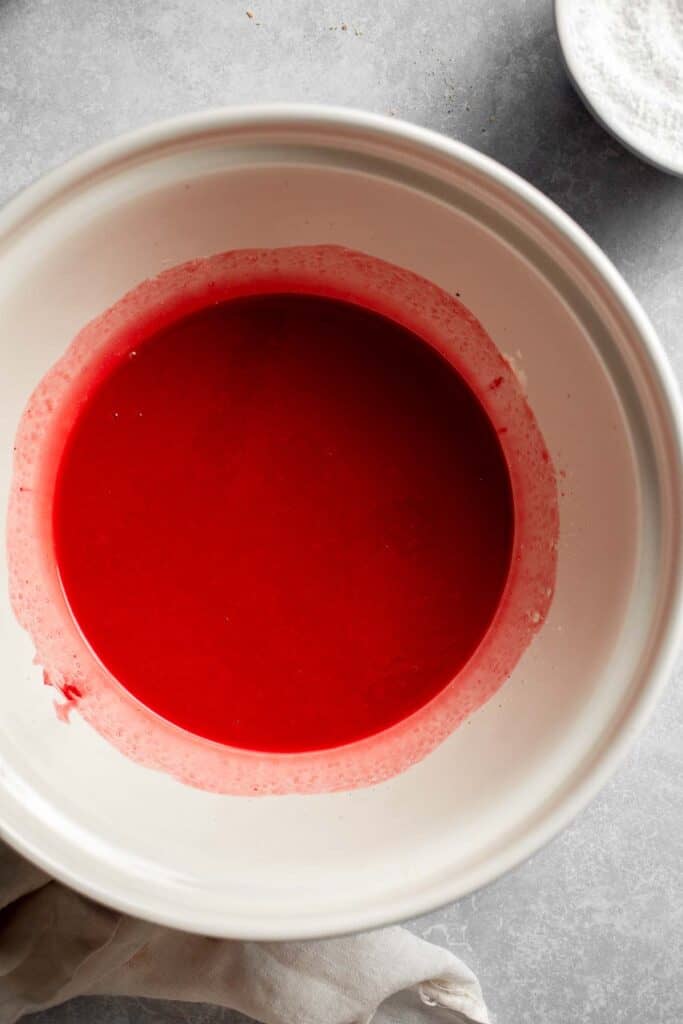
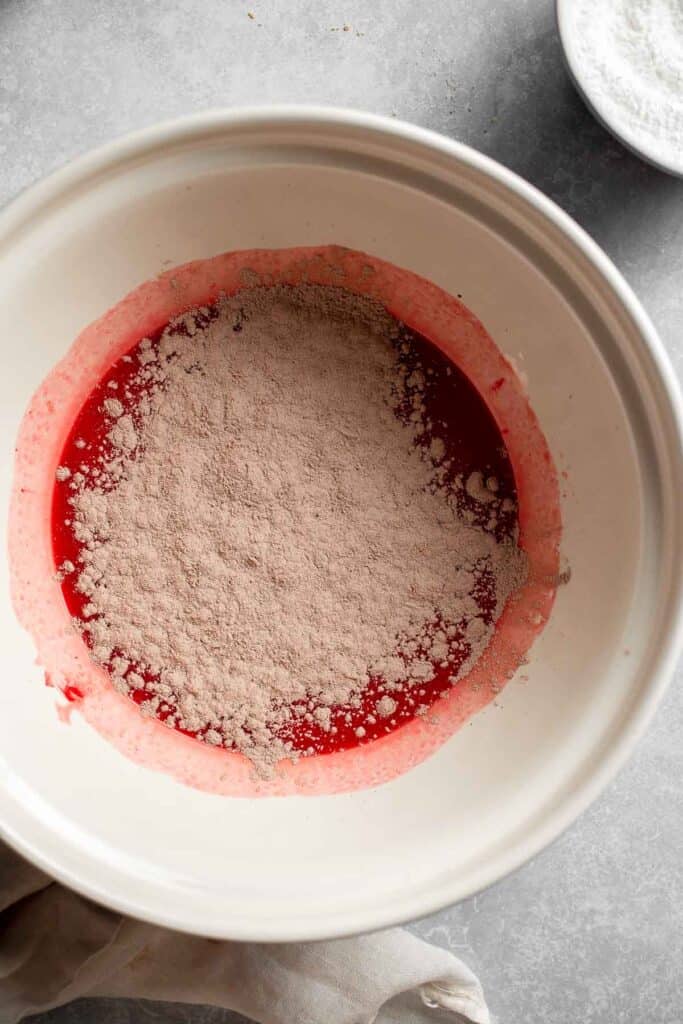
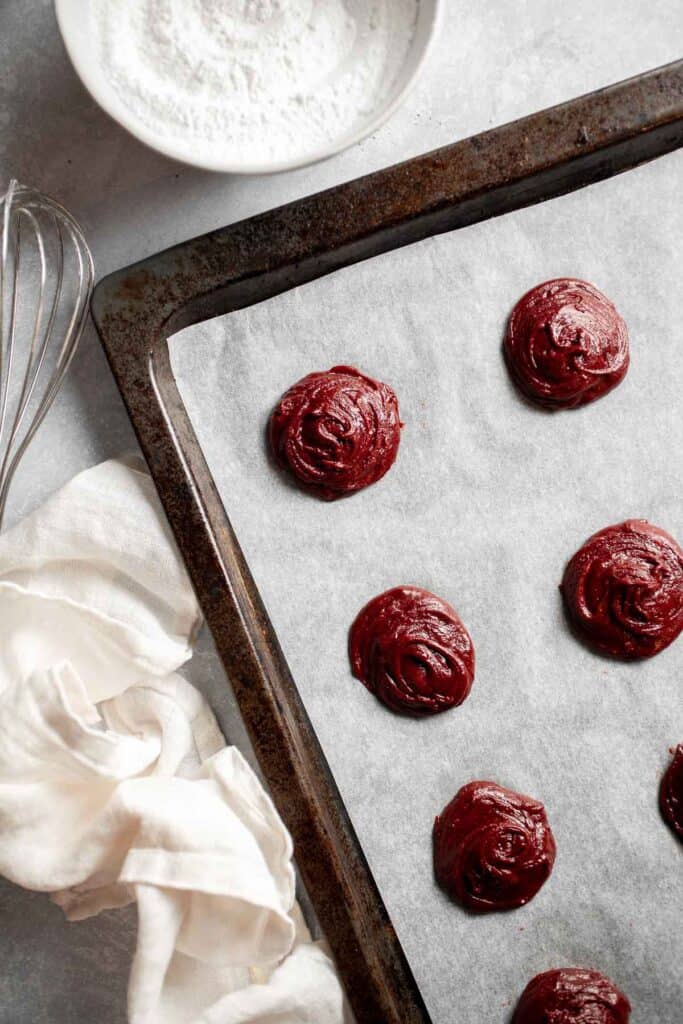
- Combine wet ingredients. In a large mixing bowl, add the white sugar, sour cream, vegetable oil, egg, vanilla, and 1 teaspoon red gel food coloring. Whisk until very smooth. If the color is not a deep red color, add up to a teaspoon more food coloring as necessary.
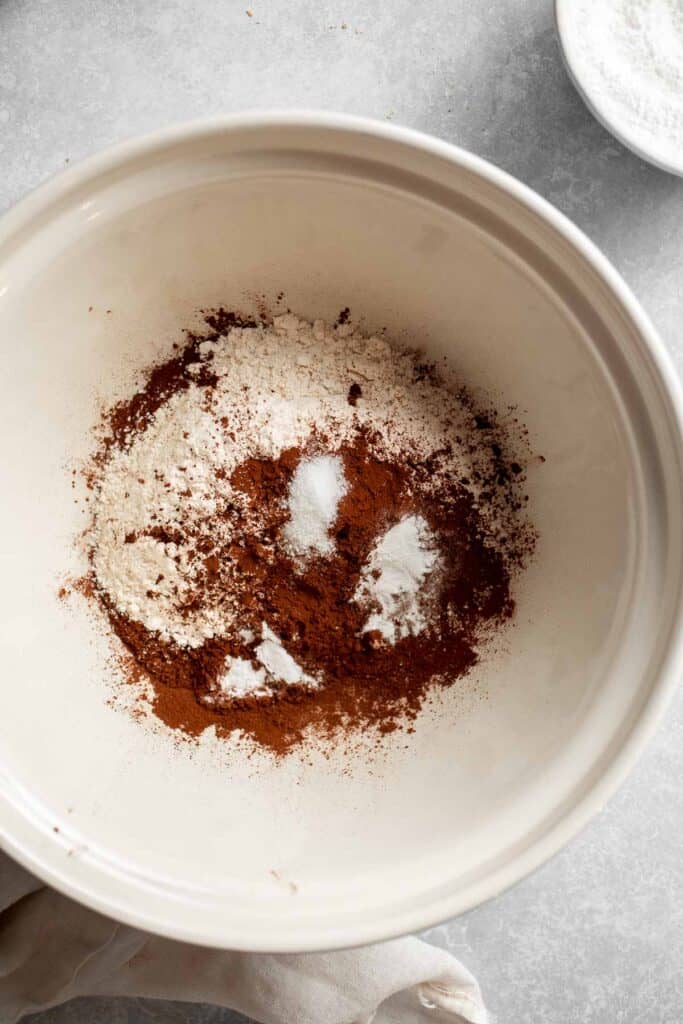
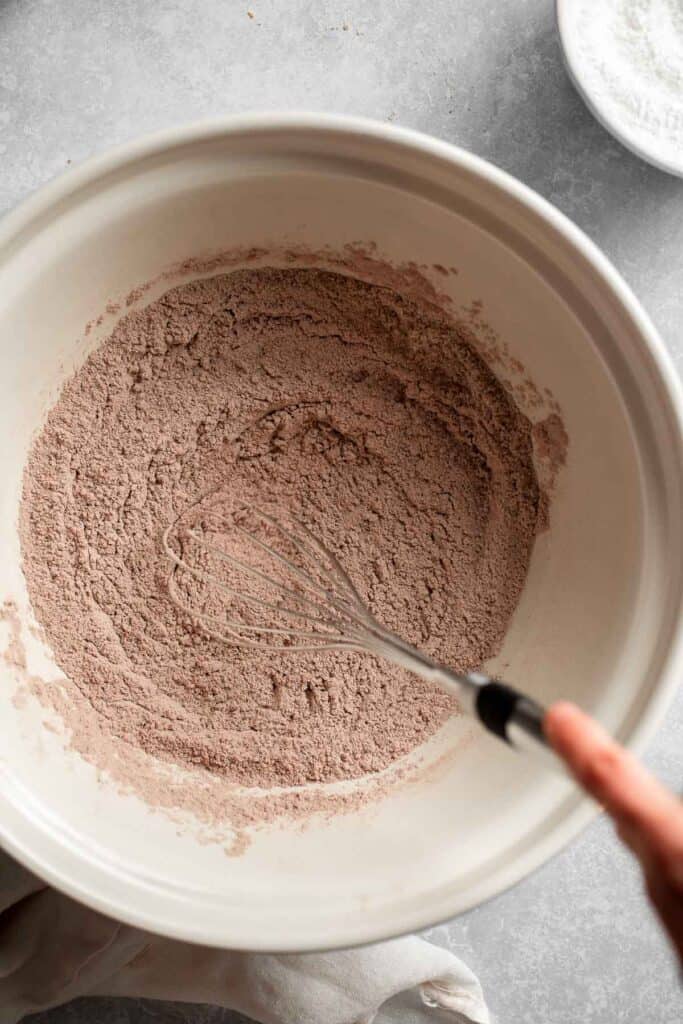
- Sift dry ingredients. In a separate large mixing bowl, add flour, sifted cocoa powder, baking powder, baking soda, and salt. Whisk until well combined.
- Mix all ingredients. Using a spatula, fold the dry ingredients into the wet ingredients. Mix only until everything is just incorporated and smooth, but ensure not to overmix.

- Scoop batter. Using a small cookie scoop or a piping bag, scoop or pipe little mounds of batter (about one tablespoonful) onto the prepared baking sheets, ensuring there is about 2 inches of space between each. You should fit about 12 cookies per sheet.
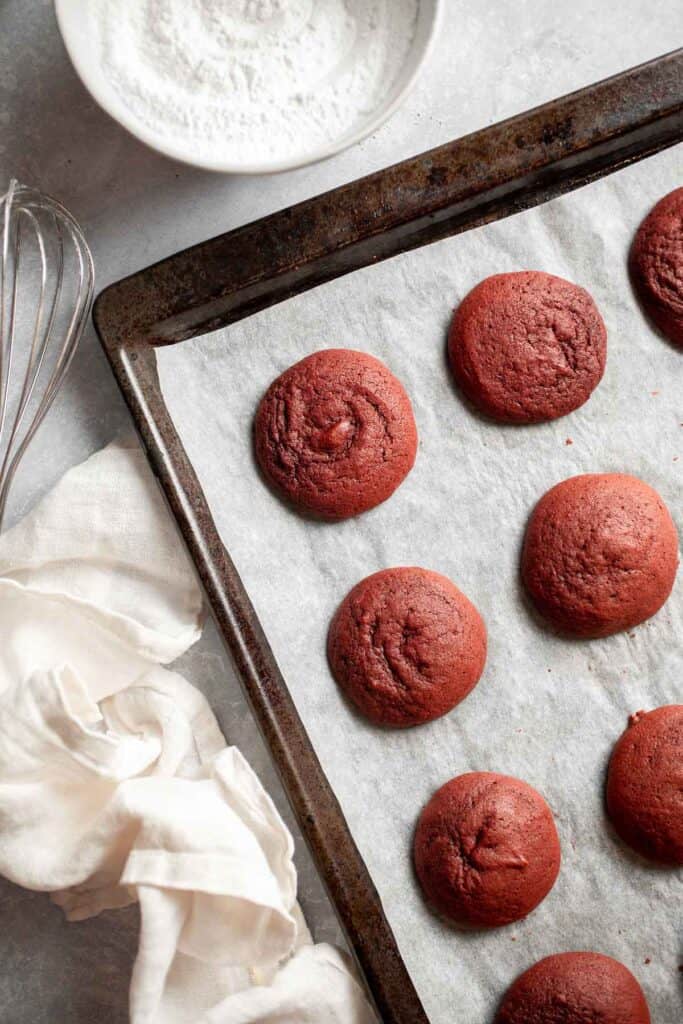
- Bake. Place the baking sheets into the oven and bake for 10-11 minutes. When done, the cookies should have a springy top, and a toothpick should come out clean. Allow to cool completely before filling.
Now, make the cream cheese filling.
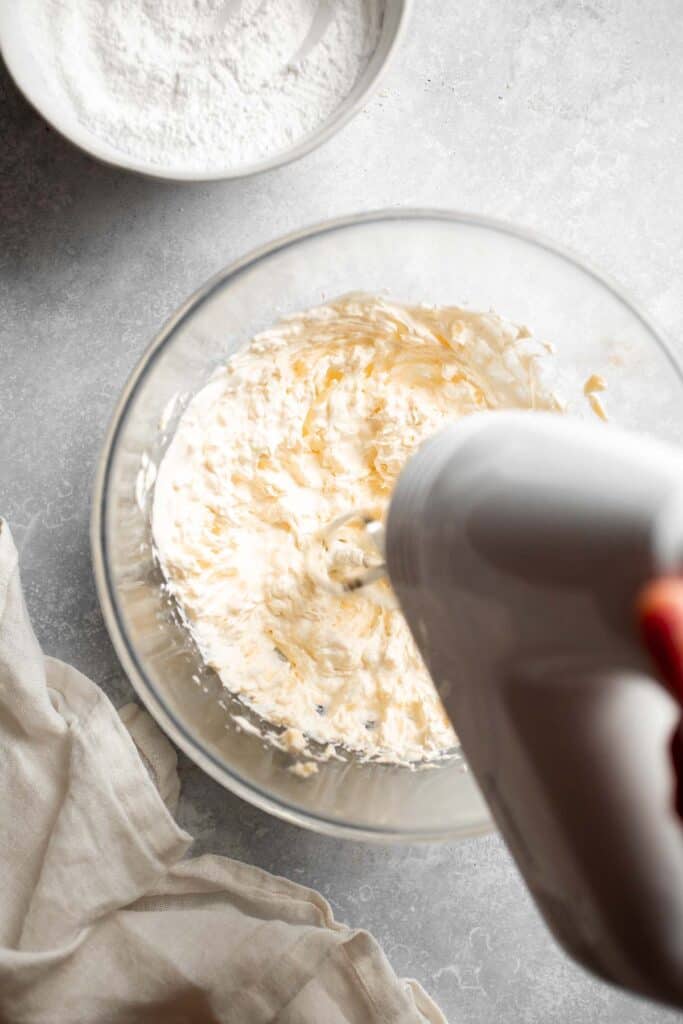
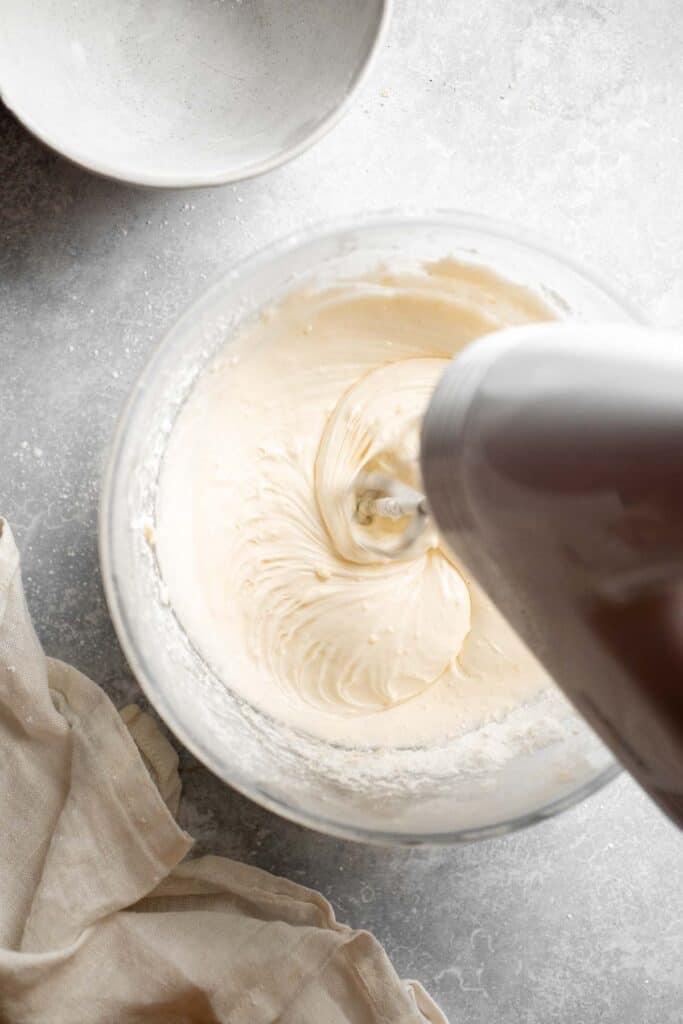
- Beat cream cheese. Place the softened cream cheese in a large mixing bowl. Use an electric mixer and beat on high until creamy and smooth, about 1 minute.
- Mix other ingredients. Add in the confectioners' sugar and vanilla. Beat again until well integrated and fluffy, about 2 minutes.
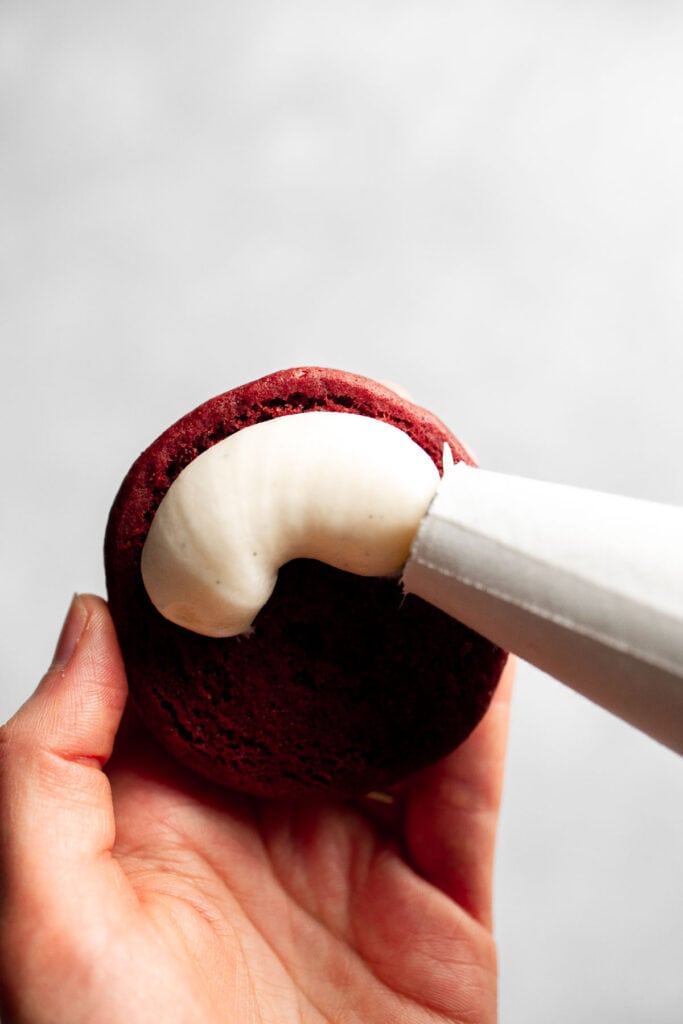
- Fill cookies. Add the filling to a piping bag with a large round tip. Pipe the filling onto half of the cookies. Top each filled cookie with another cookie.
Recipe Variations
- Design with sprinkles. Add a festive touch to the filled pies by rolling the sides in brightly colored sprinkles.
- Add fruit bits. Cream cheese tastes so good when paired with fresh fruits like strawberries, raspberries, and blueberries. Fold in some chopped fruit into the filling for a sweet and refreshing taste.
- Coffee-flavored. Create a mocha red velvet cookie by adding a few teaspoons of instant coffee or espresso powder to the batter. The subtle coffee flavor complements the chocolate and cream cheese filling, making it much more flavorful!
- Add marshmallows. Make your whoopie pies more interesting by adding mini marshmallows in the filling for a gooey center and added sweetness that pairs well with cream cheese. You can even make a marshmallow filling instead like in our Chocolate Whoopie Pies.
How to Serve
Enjoy these delicious Red Velvet Whoopie Pies on their own as a sweet snack or dessert. Serve them at your next party with a warm drink like:
- White Hot Chocolate
- Pumpkin Spice Latte
- Golden Milk Turmeric Latte
- Chai Tea Latte
- Slow Cooker Apple Cider
Recipe Tips and Tricks
- Sift dry ingredients. Make the batter less lumpy and easy to mix by sifting the dry ingredients. Everyone wants a soft whoopie pie, and doing this step helps avoid overmixing, which can make them tough to chew.
- Check for doneness. The red velvet whoopie pies should be soft and slightly springy when baked correctly. Check the pies once in a while in the oven to avoid drying them out.
- Adjust the filling texture. Make the cream cheese filling softer or stiffer by adjusting the ingredients. Add more sugar if you prefer a stiff cream, or incorporate more butter if you want it soft and velvety. I find the ratio in this recipe the sweet spot for a balanced consistency.
Storing and Freezing Instructions
How to Store
Keep the cooled red whoopie pies in an airtight container and store in the fridge for up to 5 days. You can serve cold or bring it down to room temperature when serving.
How to Freeze
Place the leftover whoopie pies in a freezer-safe container or freezer bag and store in the freezer for up to a month.
More Dessert Recipes
Tried this recipe?
I'd love to hear what you think! Leave a comment and rating below to share your feedback. Your reviews help others discover this recipe and help me keep creating more free recipes for you. Snap a photo and tag me on social media @aheadofthyme too.
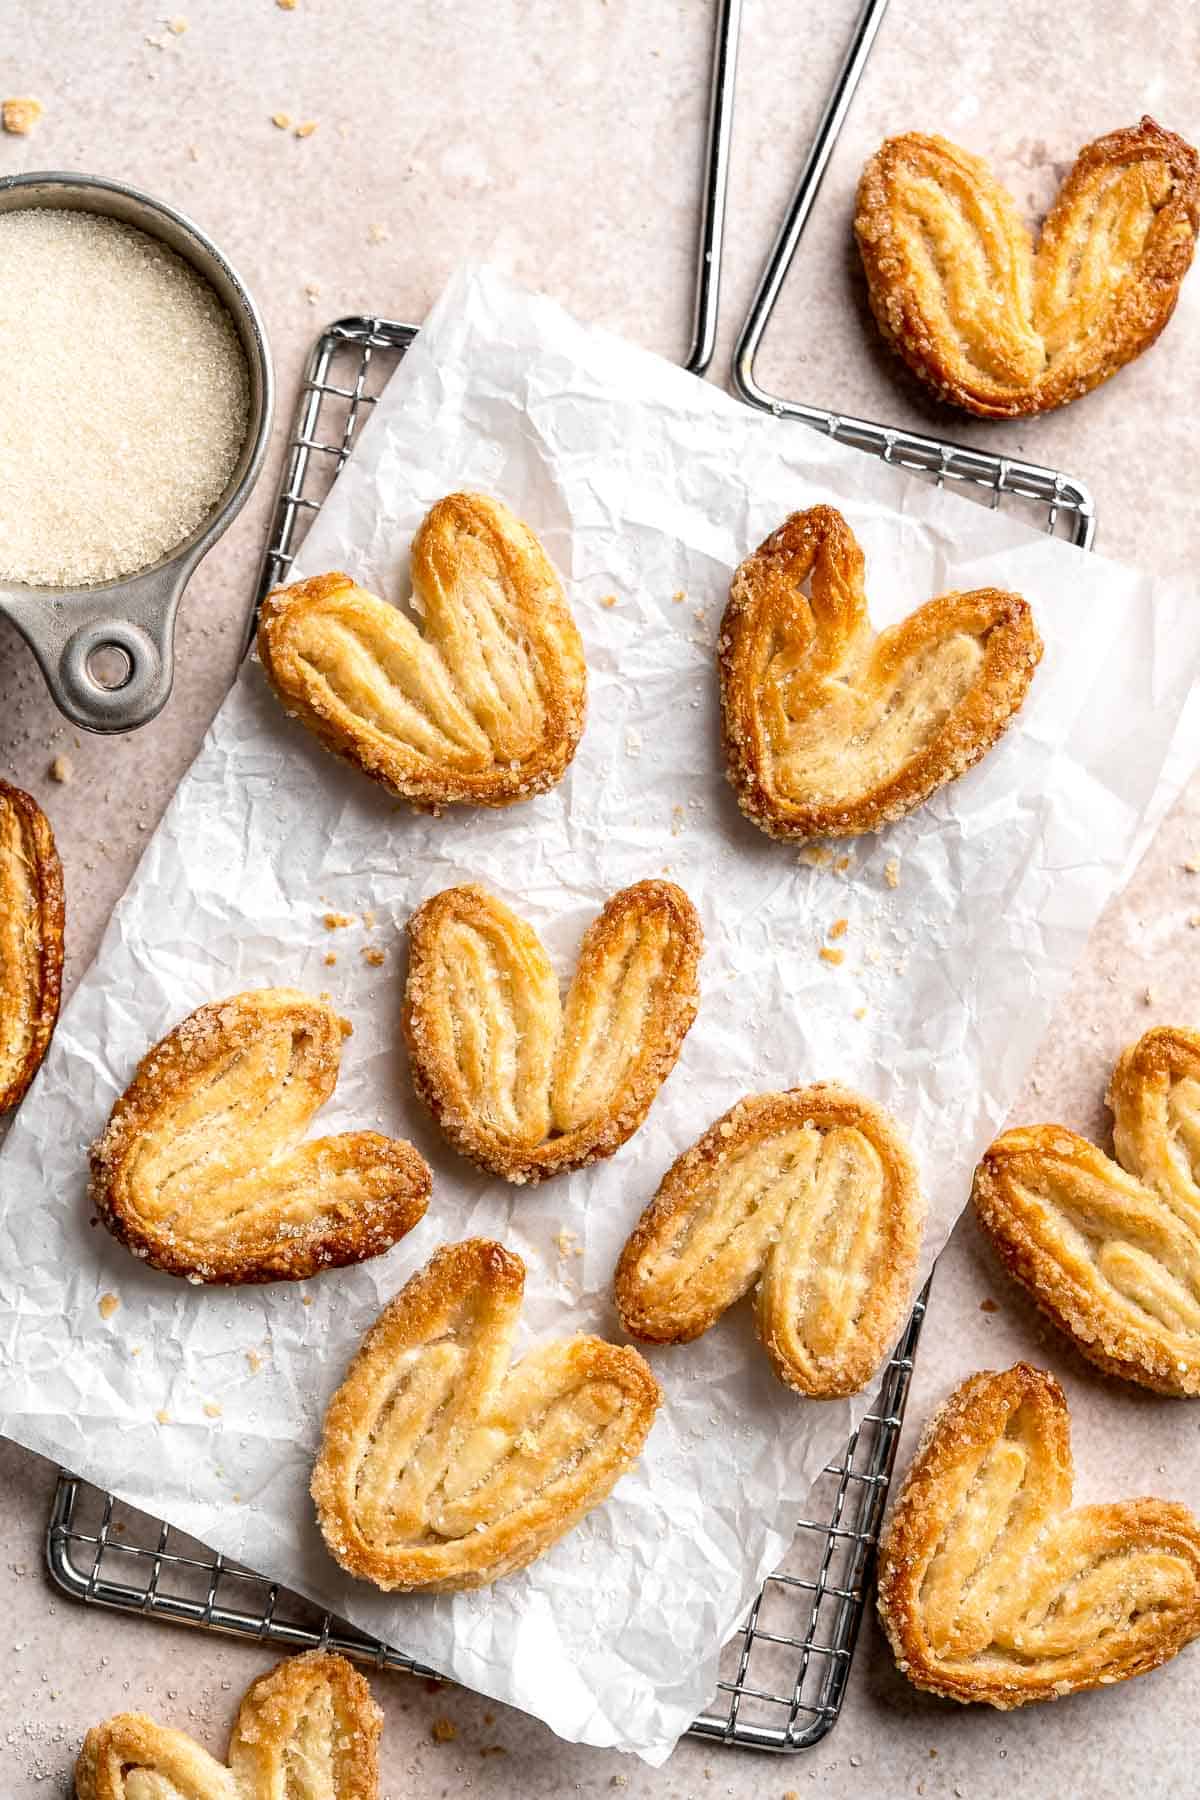
Palmiers
Palmiers are light, crunchy, swirled treats you can easily make in under 30 minutes. With a buttery puff pastry covered in sweet caramelized sugar, these cookies have a delightful balance of flavor and texture in every bite. They're buttery, crispy, flaky, and sweet. It's made with only two ingredients, so I'm pretty sure it's the easiest cookie recipe you'll ever make!
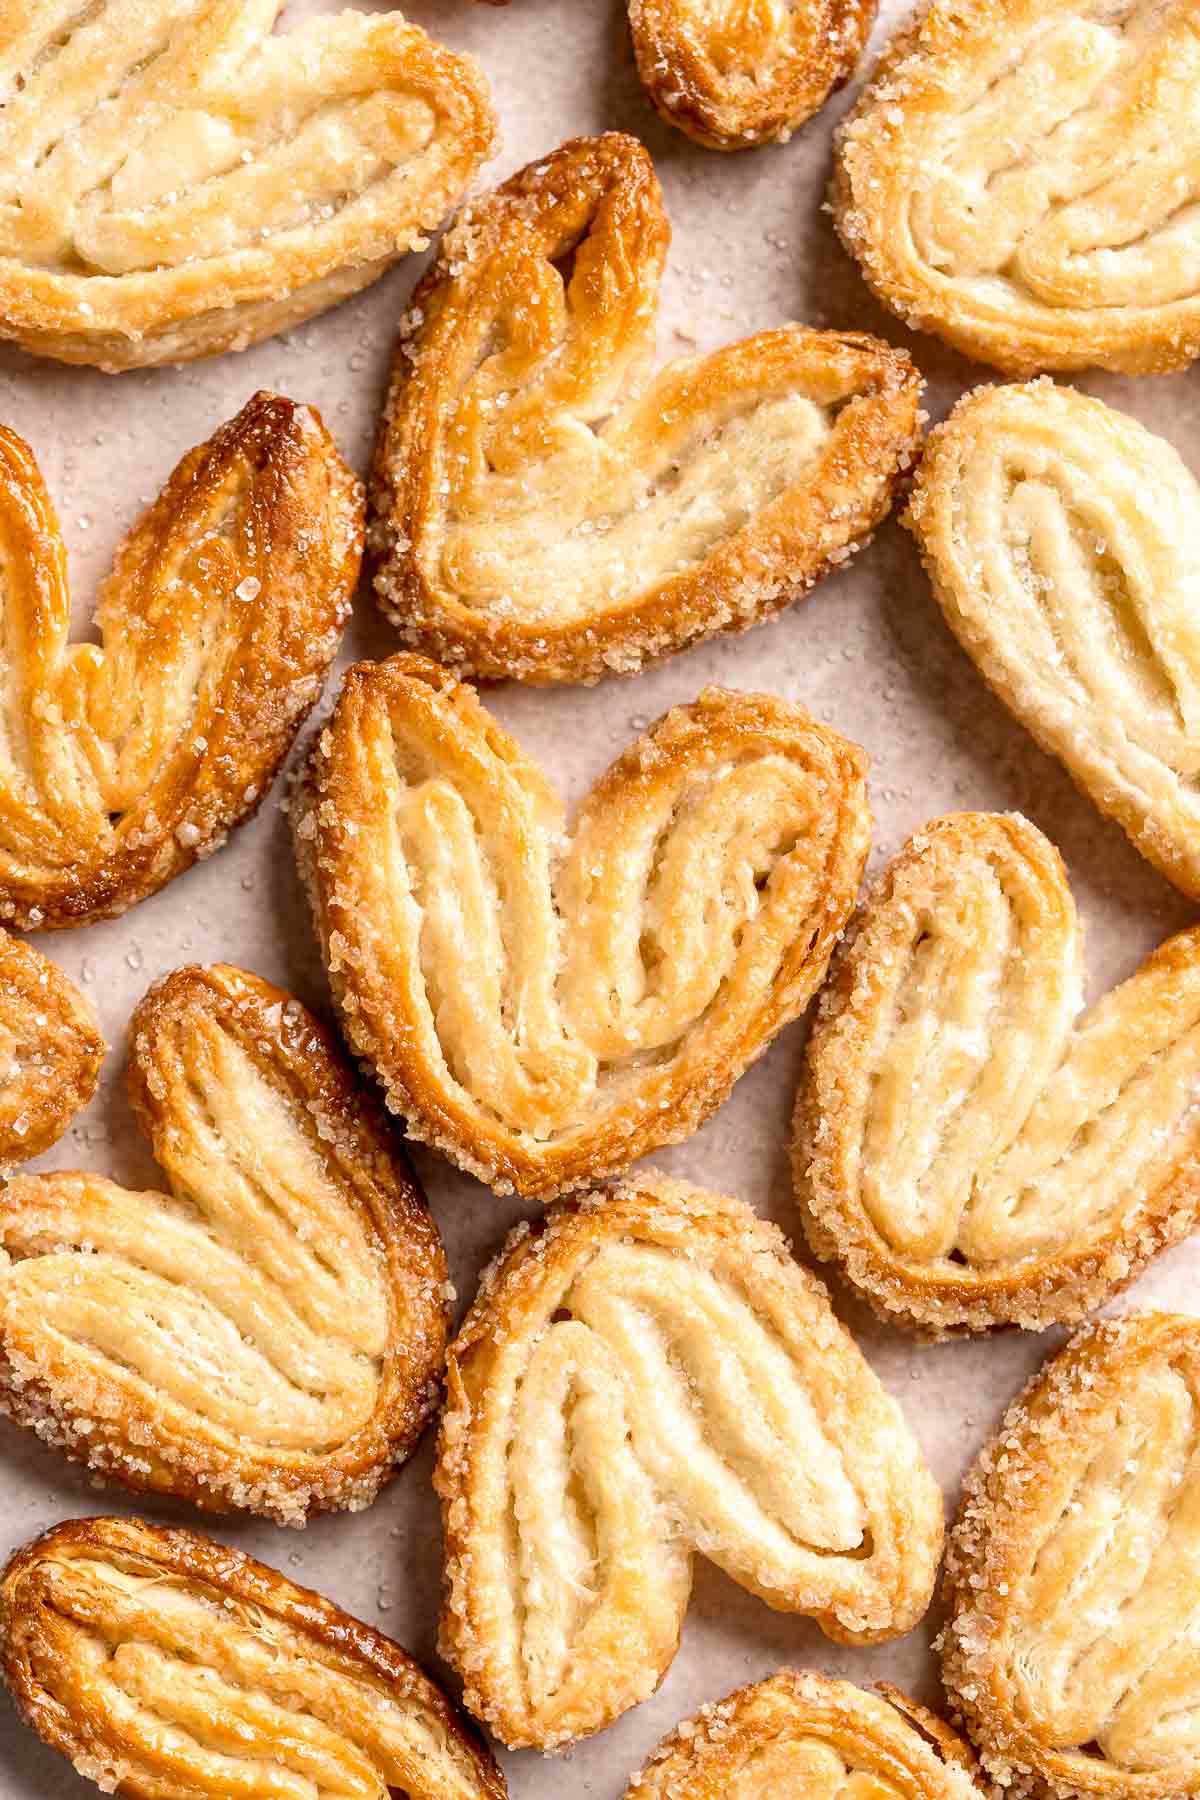
Also known as elephant ear cookies, palmier cookies are a classic French pastry that looks like a palm leaf ("palmier" means palm tree in French). The uniquely shaped cookies are formed by folding the puff pastry dough multiple times, rolling with coarse sugar, and then baking until crispy. The result is a golden brown treat with a delicate, flaky interior and a sweet glossy coating that makes it so irresistible to snack on. Not to mention, it has a very rich and buttery flavor that's perfect with a cup of coffee or tea for an after-dinner treat. Since these sweets use ready-made puff pastry, they're incredibly easy to make at home even if you're not a pro baker.
Why You'll Love this Palmier Cookie Recipe
- Extremely easy to make. These cookies might have a complicated shape, but they're really easy to make. The puff pastry is pre-made to make your life easier, and you can add as much sugar as you want to get the perfect sweetness level. Plus, it only takes less than 15 minutes to bake.
- Crispy and buttery. The beautiful layers of puff pastry, the rich, buttery flavor, as well as the crunchy, sweet sugar coating will make you want to eat the entire batch! They're also surprisingly lightweight, so it won't feel like you're eating a brick.
- Classic taste. The combination of the flaky puff pastry and caramelized sugar is just heavenly. The sugar gives that sweet, caramel-like flavor that pairs perfectly with the buttery pastry dough. Plus, it looks pretty impressive too with that unique shape, so everyone will surely want to have their hands on them.
- Make-ahead. Who doesn't like to have ready-to-bake cookies when those late-night cravings hit or unexpected guests arrive? This cookie recipe can be made in advance and stored in the freezer for up to a month. And when it's time to bake, just pop them in the oven and voila!
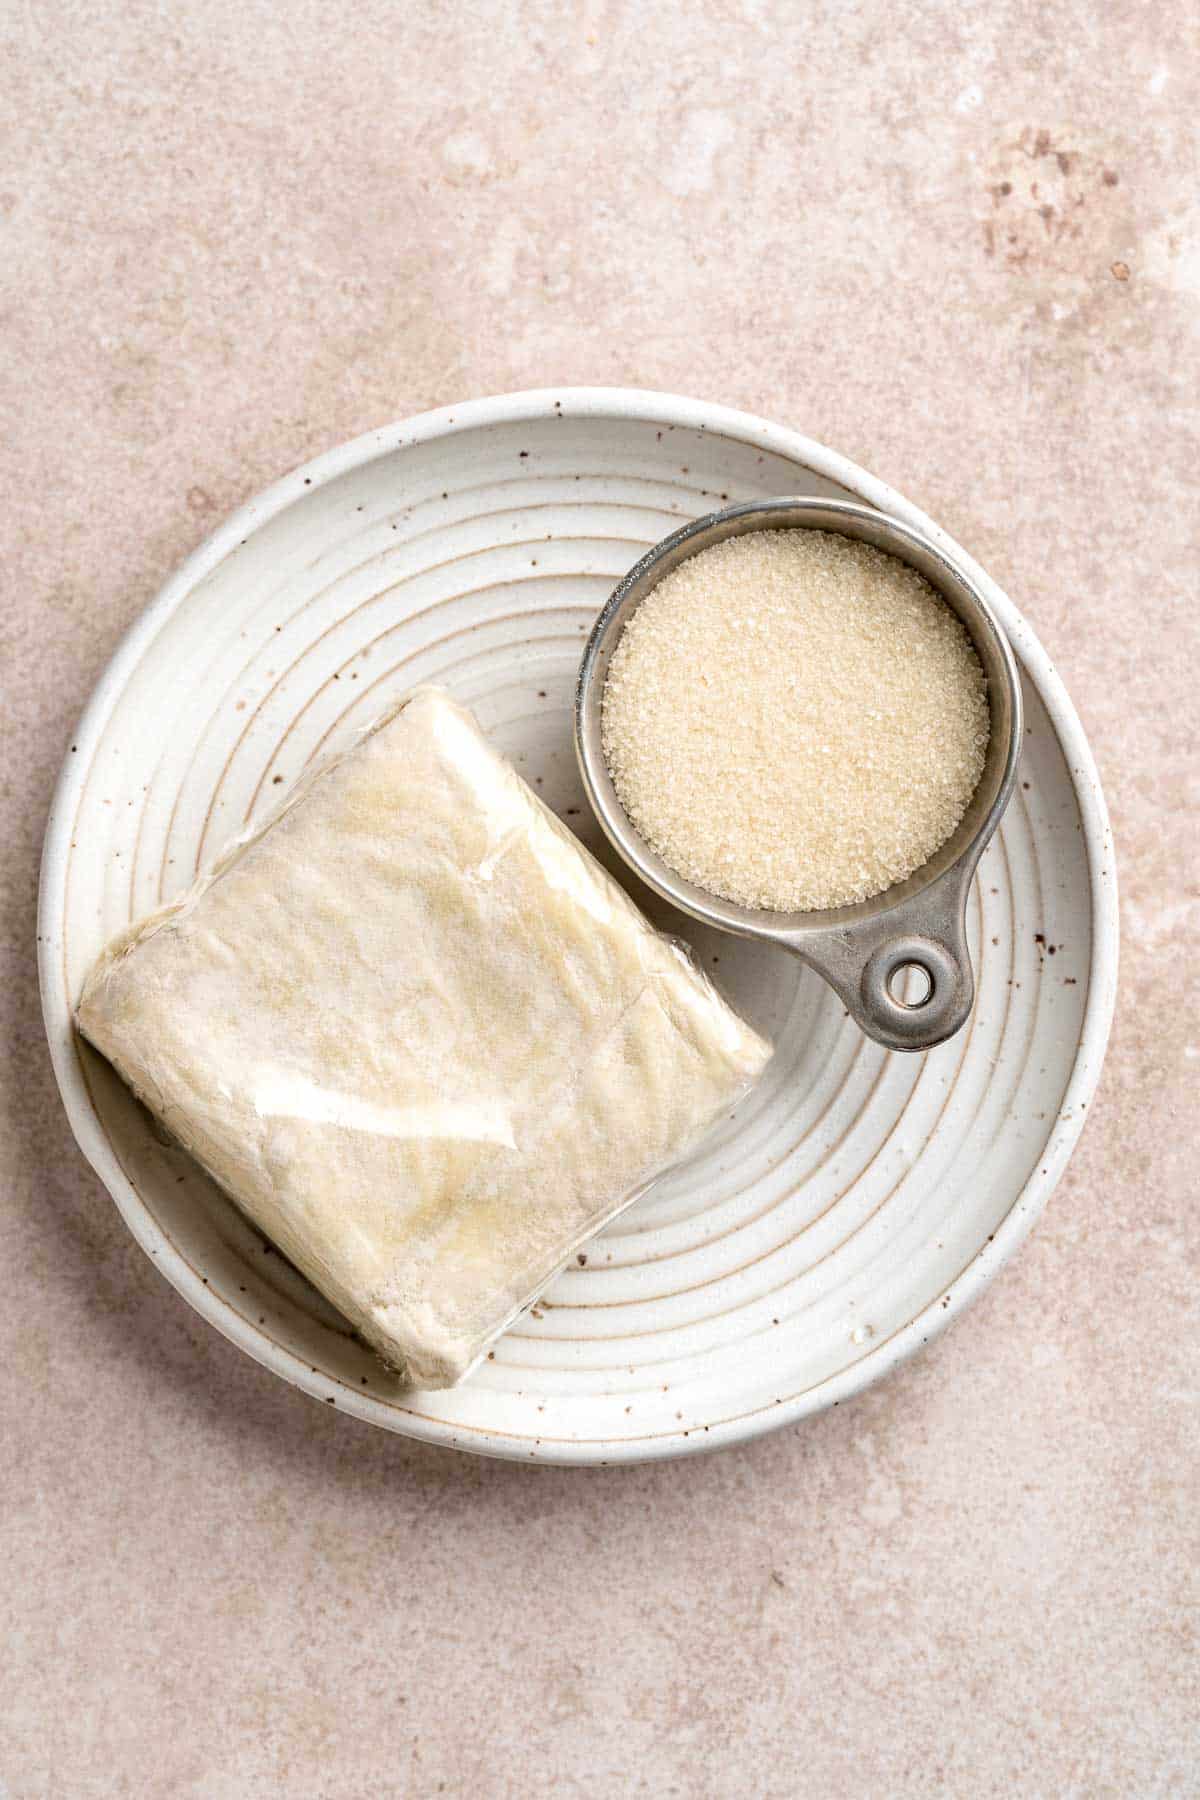
Ingredient Notes
To make these easy and delicious Palmiers, you will need the following ingredients (full measurements in recipe card below):
- coarse cane sugar - use coarse can sugar or turbinado sugar. This give a sweet caramel taste and a nice golden brown color to the cookies. You can also use white granulated sugar if you prefer a clean, sweet taste.
- puff pastry sheet - the base of the cookies. It has a buttery taste and flaky texture when baked. I prefer using store-bought, but a homemade version is also easy to make with a few pantry staples.
You will also need measuring cups and spoons, baking sheets with parchment, rolling pin, and wire cooling rack.
How to Make the Best Palmiers
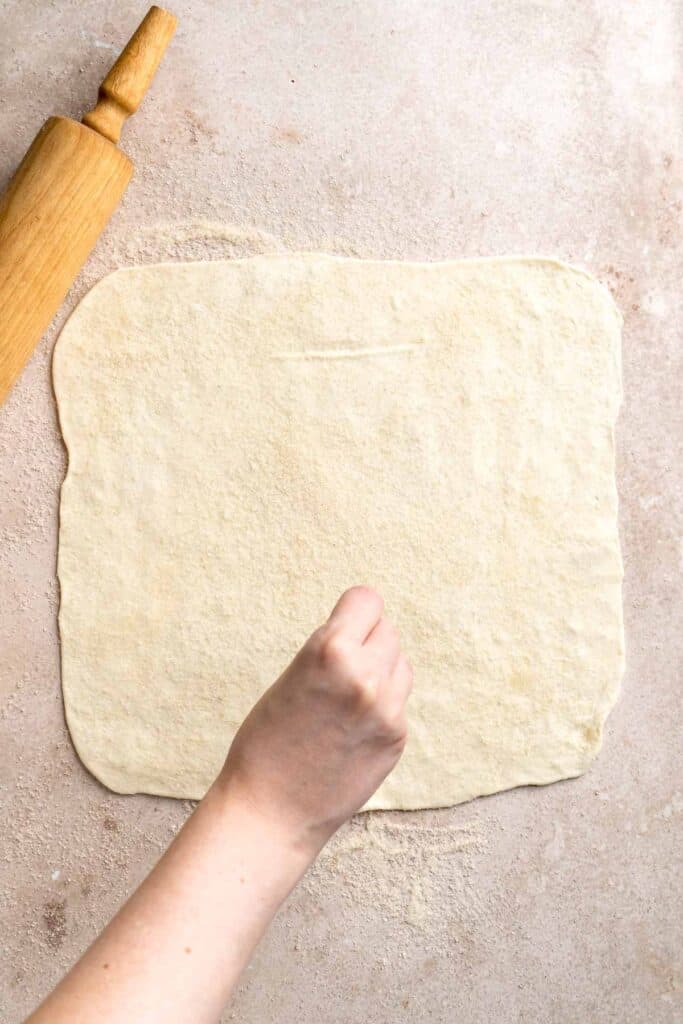
- Roll the dough. On a clean work surface, sprinkle about ½ cup sugar across the work surface, then unfold your puff pastry onto the work surface. Using a rolling pin, roll the puff pastry out to be about a 14x14-inch rectangle.
- Add sugar. Generously sprinkle the top of the rolled out puff pastry with the remaining sugar, lightly press the sugar into the puff pastry.

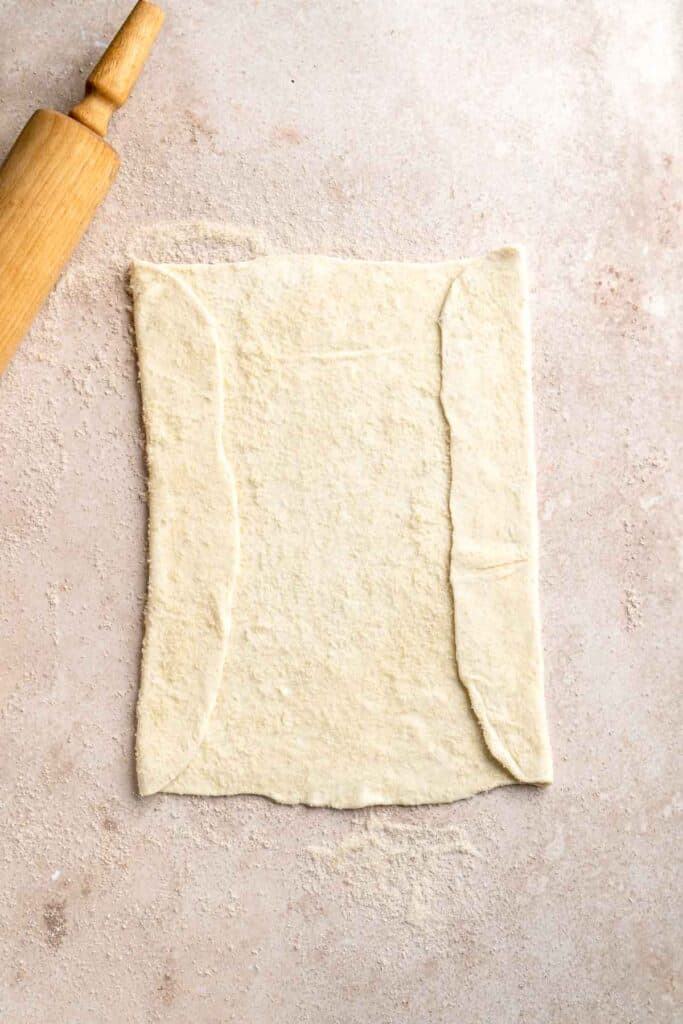
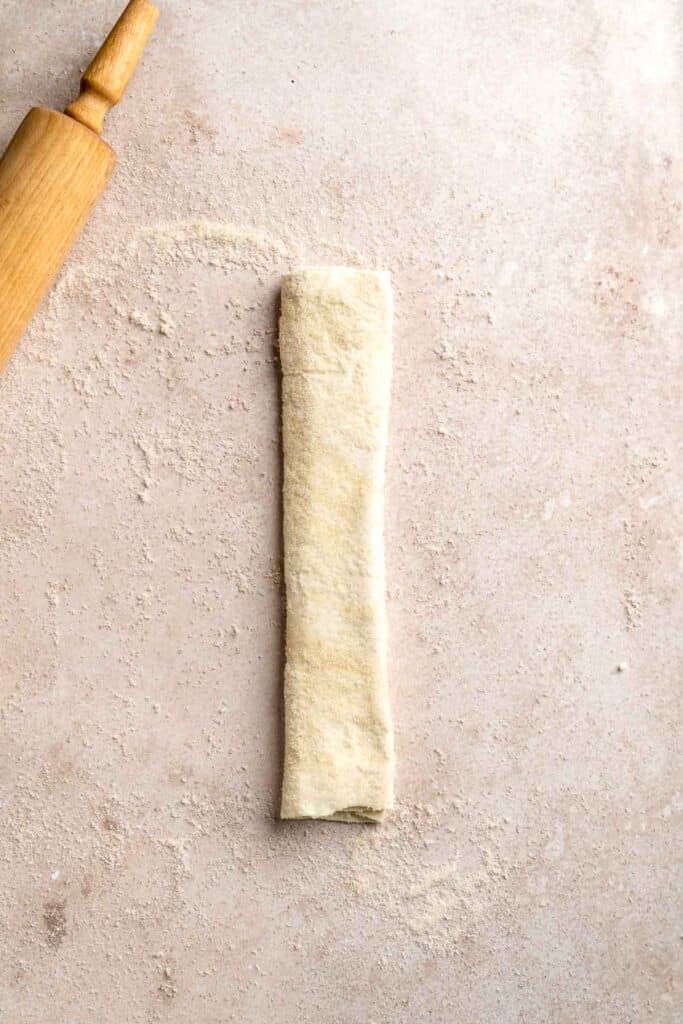
- Fold. Fold the sides in about halfway towards the middle, then fold again until the two sides meet each other. Then finally, fold the one side on top of the other side.

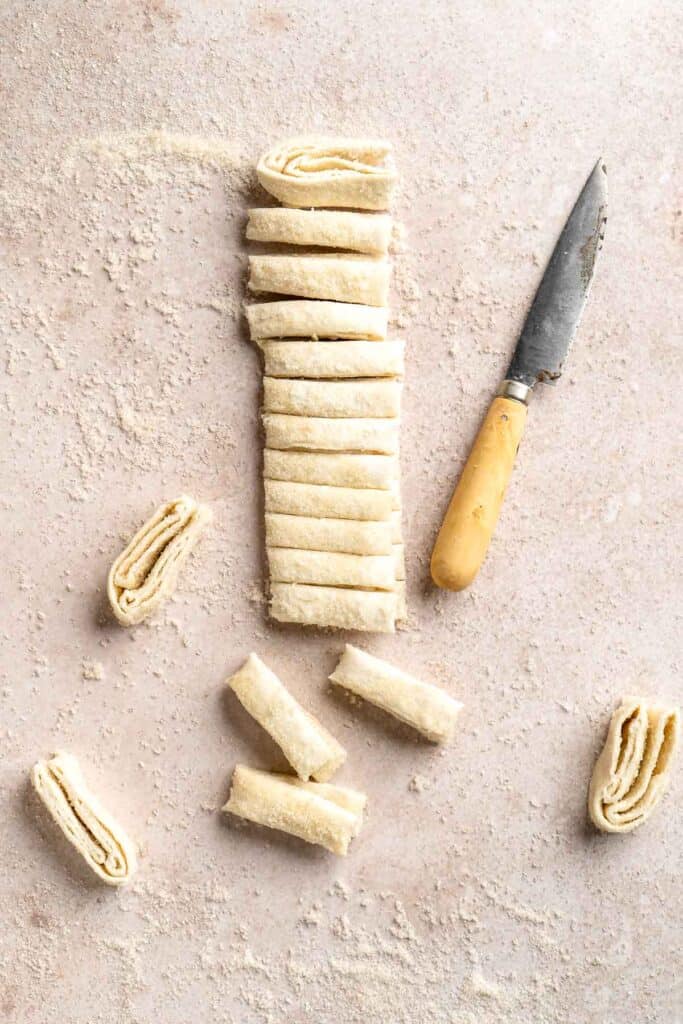
- Cut. Prepare 2 baking sheets with parchment paper. Using a sharp knife, slice into ¾-inch slices and divide the cookies evenly onto the two baking sheets, placing them cut side up. Place the baking sheets into the freezer for 15 minutes.
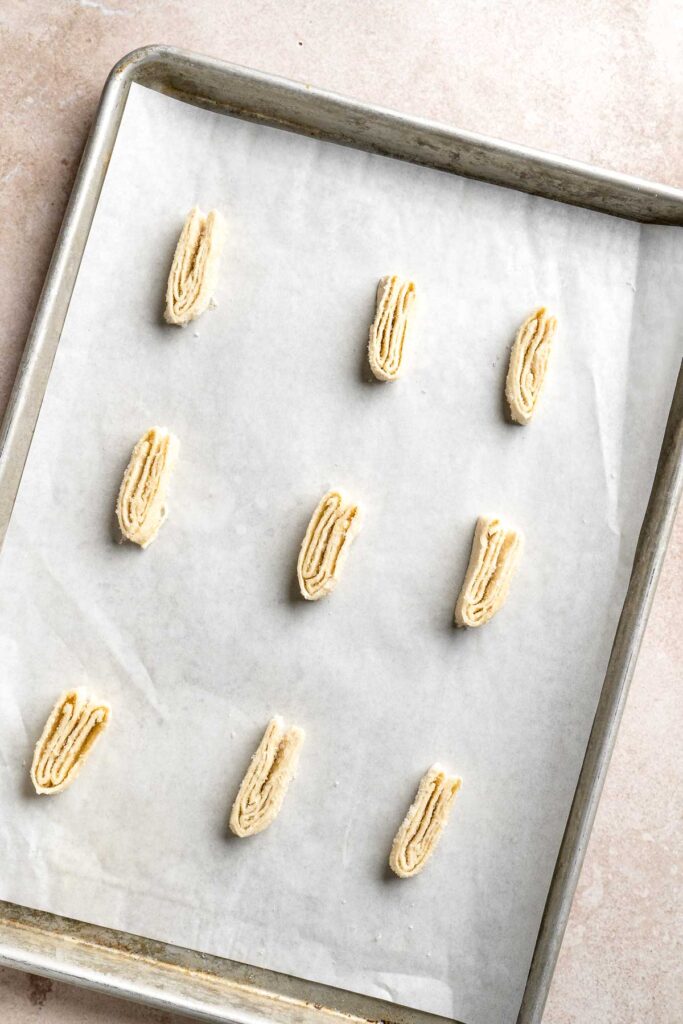
- Bake. After 15 minutes, remove the sheets from the freezer, then place into a 425F preheated oven to bake for 14-16 minutes, flipping the cookies over halfway through.
- Cool and serve. Remove the cookies from the oven, transfer to a cooling rack and allow the cookies to fully cool before enjoying.


Recipe Variations
- Add cinnamon. For a touch of fall flavor, you can coat the cookies with cinnamon sugar by stirring in a teaspoon if cinnamon to the coarse sugar before sprinkling it on a puff pastry sheet. It elevates the buttery taste of your cookies with an aromatic and warm flavor everyone loves.
- Texture with nuts. Evenly spread finely chopped almonds, pecans, or walnuts together with sugar. The crunchy texture of nuts complements the caramelized sugar very well. Those nutty bits also add a pleasing visual accent to your cookies.
- Add chocolate. Make your cookies chocolatey by applying a thin layer of chocolate ganache or hazelnut spread before folding the rolled-out pastry. You can also drizzle some melted chocolate over the cookies or dip them into melted choclate after they've been baked and cooled.
How to Serve
Serve these delicious Palmier Cookies with coffee, tea, or even ice cream as dessert and snacks for parties and get-togethers. They pair well with these drinks and sweets:
- Pumpkin Spice Latte
- Chai Tea Latte
- Matcha Latte
- Chocolate Covered Strawberries
- Strawberry Muffins
- Blueberry Cake

Recipe Tips and Tricks
- Use homemade puff pastry. If you're not in a hurry, you can make the puff pastry from scratch. Just combine cold butter and water with flour and salt in a food processor.
- Roll tightly. Those beautiful layers are achieved only when the puff pastry sheet is rolled tightly. This step also ensures that your cookies hold their shape well when during baking.
- Adjust sugar. When sugar is baked at a high temperature, it caramelizes and gives this cookie its distinct color and flavor. You can add or reduce the sugar to control the sweetness and texture. I find one cup of coarse cane sugar the ideal amount for a perfect balance of flavor and appearance.
- Freeze before baking. Make your palmiers as crispy and flaky as possible by freezing the dough so that the butter is kept cold and won't melt as quickly during baking.
Storing and Freezing Instructions
How to Store
Store the palmiers in an airtight container at room temperature for up to 3 days. I don't recommend keeping them in the fridge as they will come out sticky.
How to Freeze
Baked palmier cookies do not freeze well. You can however freeze the cut dough before baking. Place on a lined baking sheet and freeze for 1-2 hours until hard. Then transfer to a freezer bag and freeze for up to 3 months. When ready to bake, allow it to thaw overnight in the fridge first.
More Cookie Recipes
- 50 Best Cookie Recipes
- Pecan Snowball Cookies
- Whipped Shortbread Cookies
- Coconut Macaroons
- Buckeyes
- Chocolate Covered Oreos
Tried this recipe?
I'd love to hear what you think! Leave a comment and rating below to share your feedback. Your reviews help others discover this recipe and help me keep creating more free recipes for you. Snap a photo and tag me on social media @aheadofthyme too.

Date Cookies
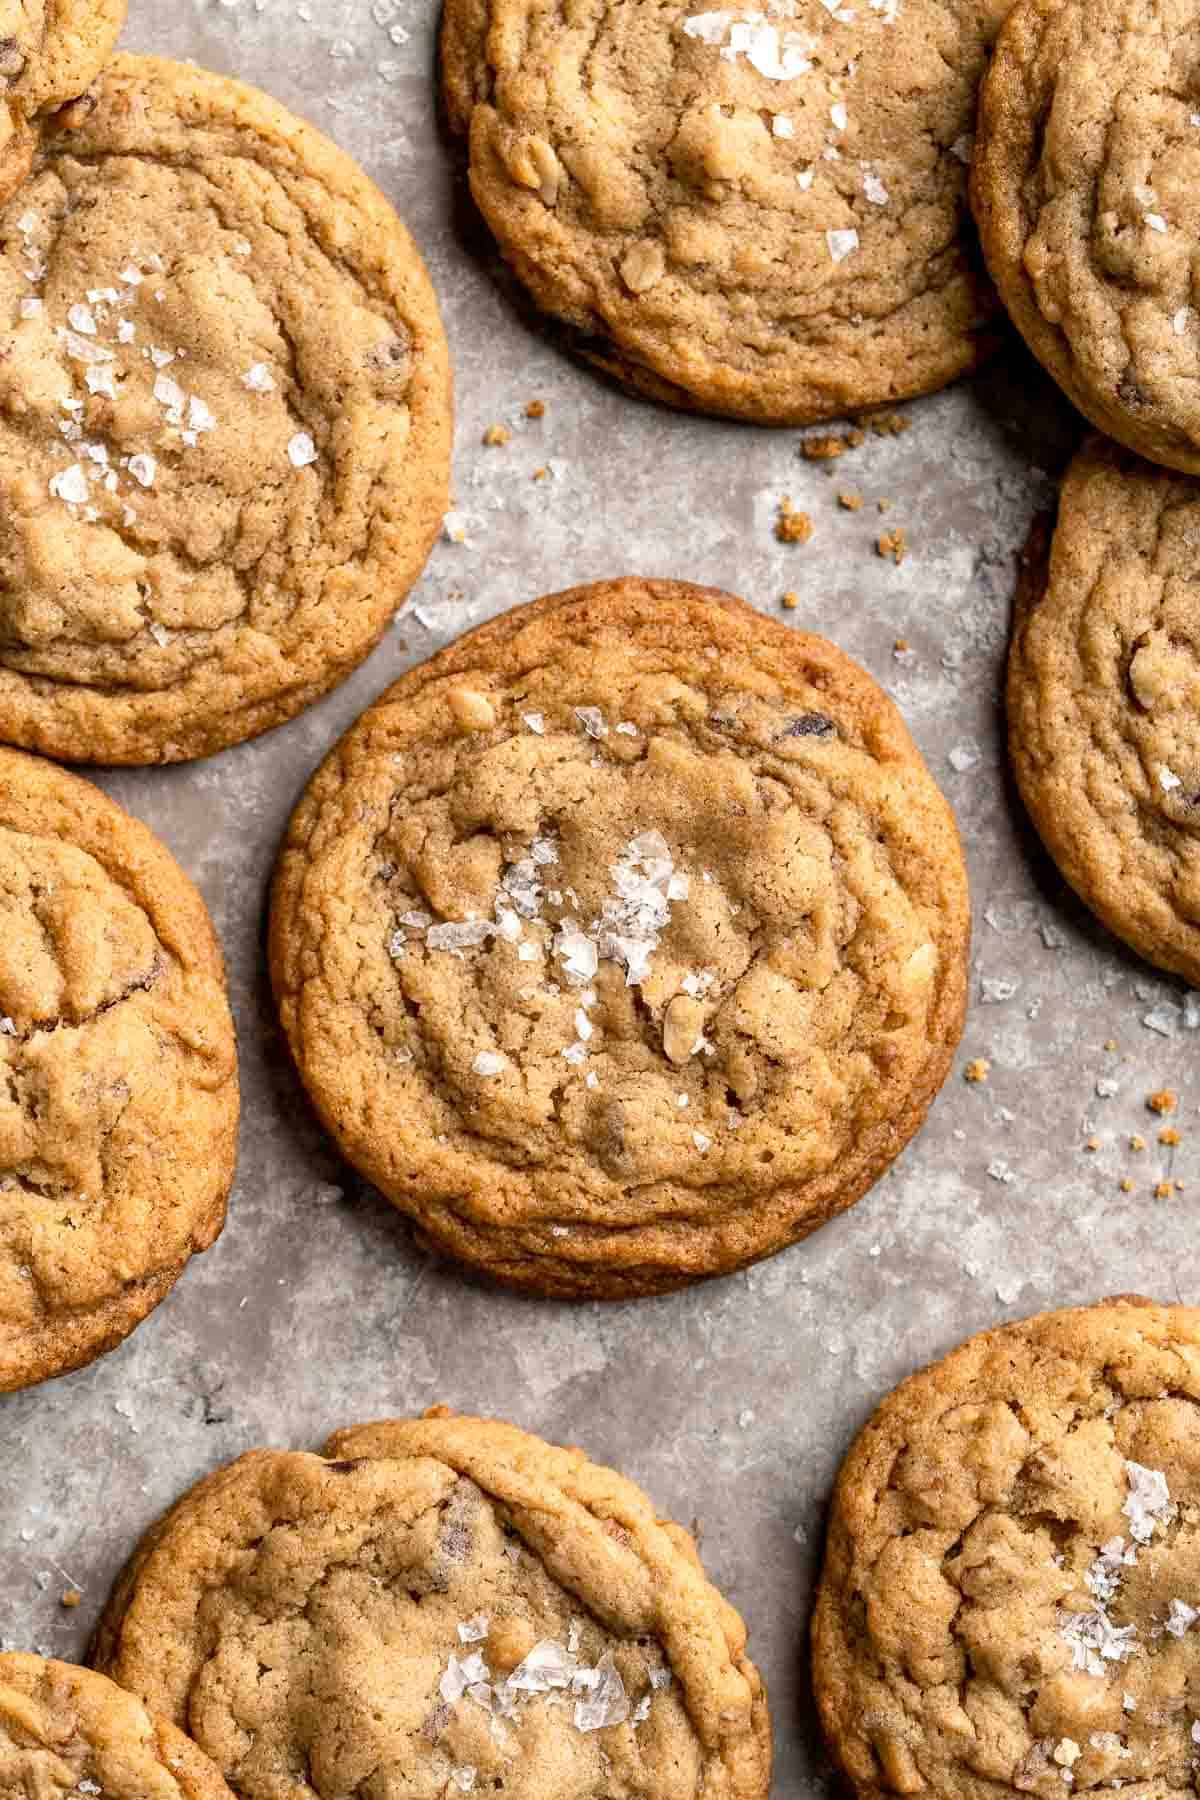
These Date Cookies are sweet, soft, and chewy with a rich caramel-like flavor from dates and a touch of crunch from walnuts. Perfect for the holidays, these cookies are a wonderful treat to enjoy with your morning coffee or afternoon tea even after the festivities are over. They are rich and buttery with a delightful fruity twist that's so good, you won't leave any crumbs behind!
Also known as nature's candy, dates are naturally sweet fruits that taste like a combination of caramel, figs, and honey. Their natural sugar makes them an excellent choice for baking treats like this recipe. They provide a rich and complex sweetness that pairs perfectly with the crunchy walnuts and buttery cookie dough. It creates a contrast of chewy, crunchy, and melt-in-your-mouth texture that no sane person could resist. The best part? Making these date oatmeal cookies is really simple, so you can whip them up for last-minute parties, family dinners, birthdays, or those mid-day cravings!
Why You'll Love this Date Cookie Recipe
- Quick and simple. Nothing beats a cookie that's delicious yet easy to make. Combine the ingredients for the cookie dough, fold in the dates, oats, and walnuts, and bake for 12 minutes. It's a ridiculously simple treat you can make at the last minute and enjoy without breaking too much sweat!
- Deliciously sweet. Dates have a caramel-like that doesn't taste too sweet, making them a perfect addition to these cookies. They have a unique flavor that pairs really well with the cookie dough and walnuts. So if you are looking for a cookie with a hint of fruity sweetness, then here's the recipe for you.
- Chewy yet crunchy. Every bite of these soft cookies has an interesting combination of textures. The dates contribute to the chewiness while the walnuts add a nice crunch, making these cookies even more enjoyable as an afternoon snack or an after-dinner treat.
- Perfect for any occasion. Whether you're having a tea party or just want to bake some sweet treats for the house, sharing these freshly baked date cookies can make any holiday gathering warmer and sweeter. They also make great gifts for family and friends, so don't forget to save some!
Ingredient Notes
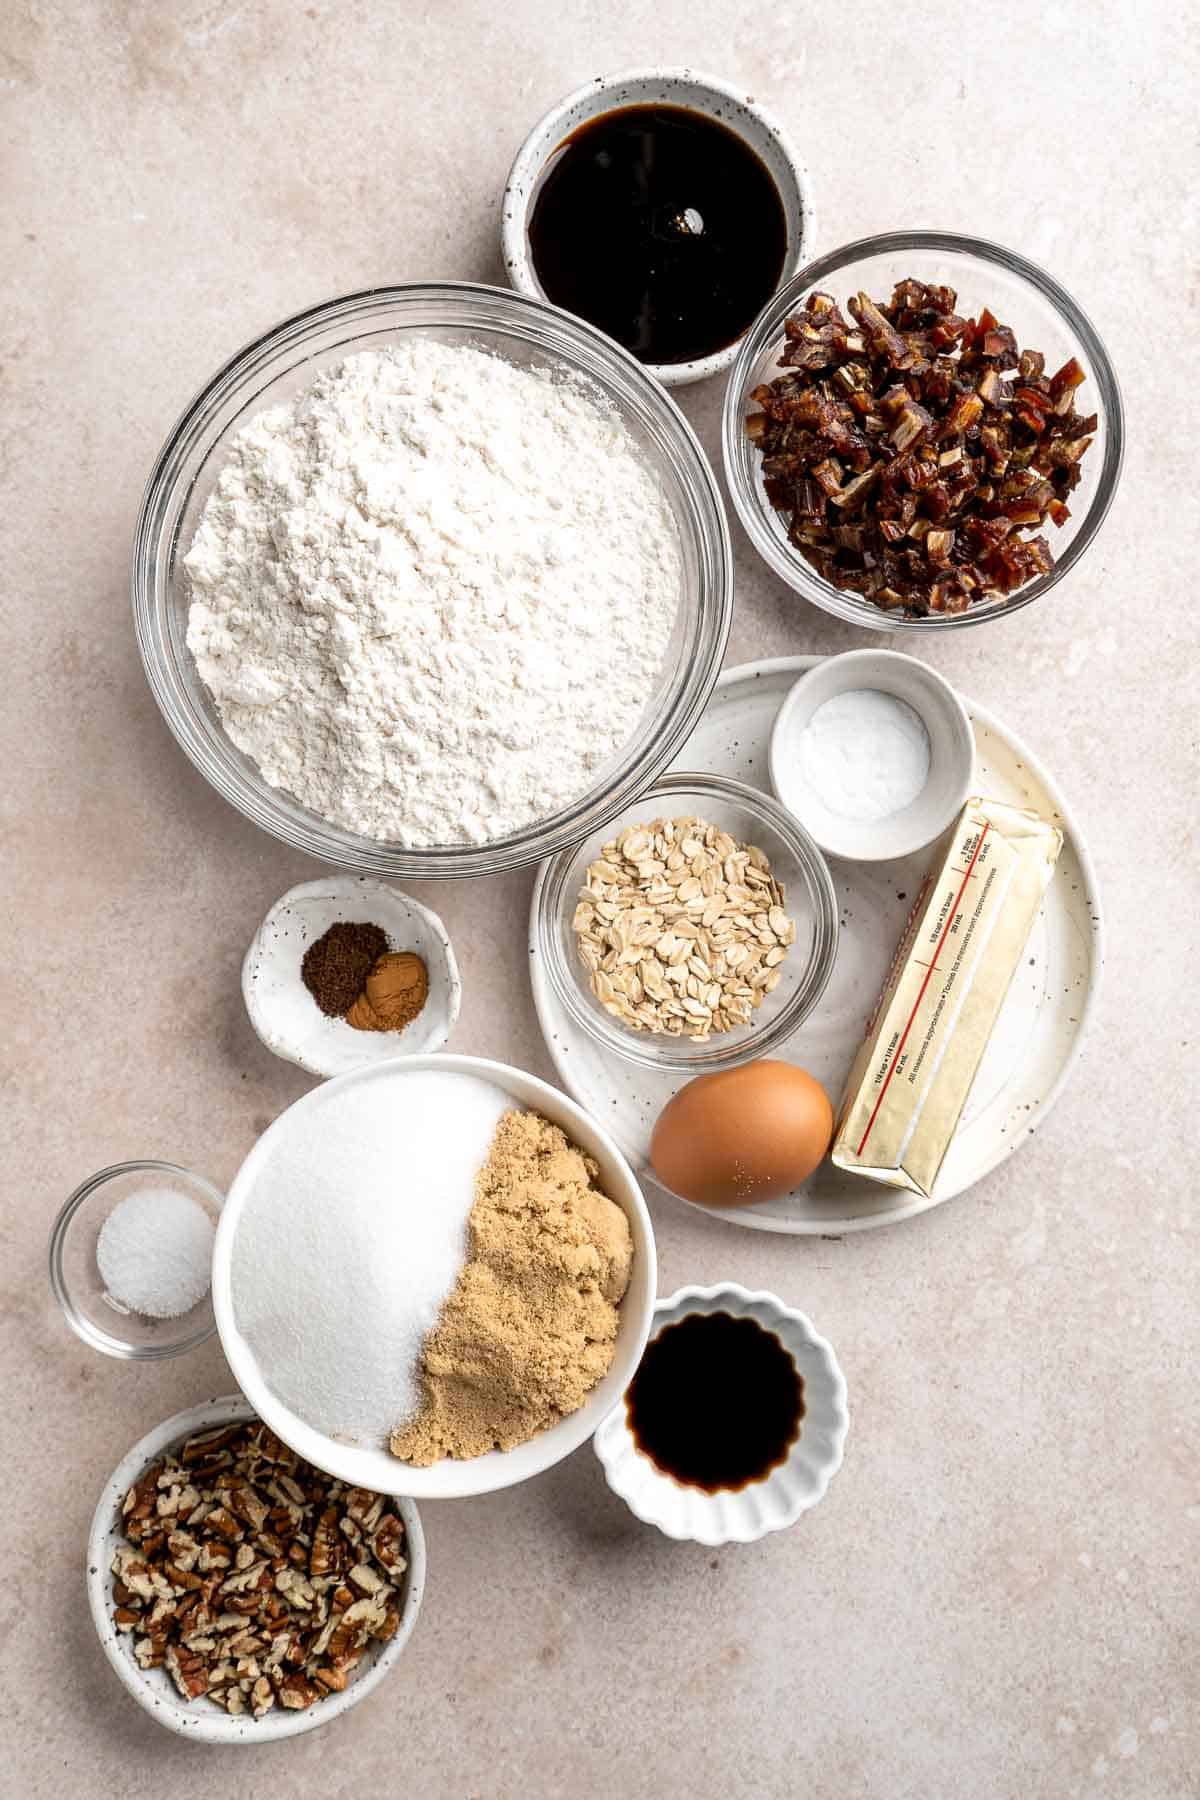
To make these easy and delicious Date Cookies, you will need the following ingredients (full measurements in recipe card below):
- all-purpose flour - this makes up the dough. Sift it well before using to avoid any lumping.
- baking soda - helps the cookies rise while making them softer to bite. You can replace one part of this with three parts of baking powder if you don't have one.
- salt - for balancing the sweetness of the cookies.
- spices - we added spices including cinnamon and cloves to add warmth to these cookies.
- butter - gives a rich and creamy taste to the cookies. I prefer unsalted butter to control the amount of salt that comes into it.
- light brown sugar - you can replace this with dark brown sugar if you prefer a strong, caramel flavor.
- white sugar
- date syrup - this adds another touch of date flavor but if you cannot find a bottle, you can easily substitute 1:1 with brown sugar.
- egg - warmed to room temperature to help hold the cookies' structure.
- vanilla extract - helps in bringing all the flavors together.
- dates - gives the cookies a chewy texture and a sweet, fruity taste. You can use chopped dates for an even distribution, or you can opt for pitted ones for a much chewier cookie.
- oats - adds a chewier texture to these cookies. It also gives the cookie a heartier texture with a load of healthy fibers.
- walnuts - chopped for added crunch.
You will also need measuring cups and spoons, large baking sheet, silicone baking mat or parchment paper, hand mixer or stand mixer, and wire cooling rack.
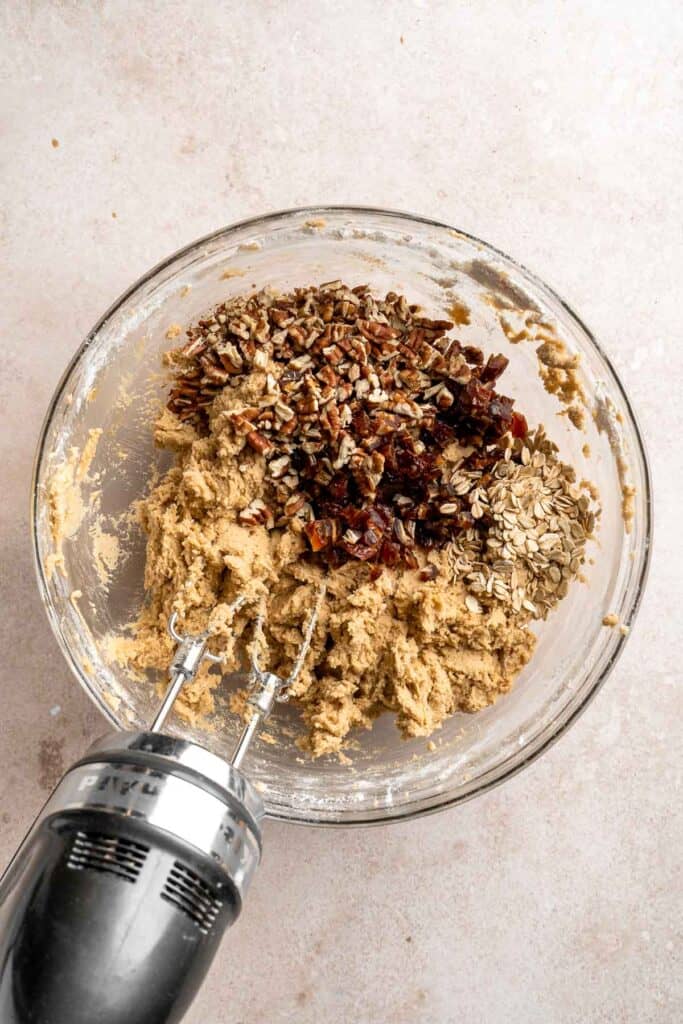
How to Make the Best Date Cookies
- Combine dry ingredients. In a medium to large sized mixing bowl, add in flour, baking soda, salt, cinnamon, and cloves. Whisk well to combine, then set aside.
- Combine wet ingredients. In a large mixing bowl, add the butter, brown sugar, and white sugar, and beat with an electric hand mixer until fluffy, about 3-4 minutes. Add in the date syrup, egg, and vanilla, then beat again until smooth and fluffy.
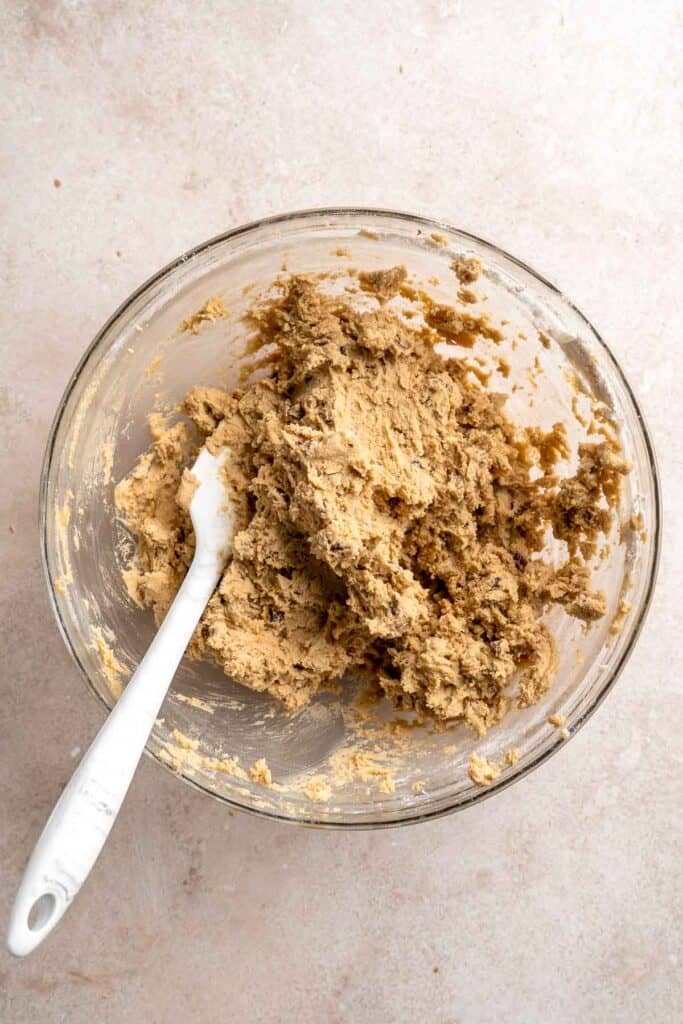
- Add dry to wet. Add in the flour mixture, then beat together until well-combined.
- Add the mix-ins. Add in the chopped dates, chopped pecans, and rolled oats, then fold until well-dispersed.
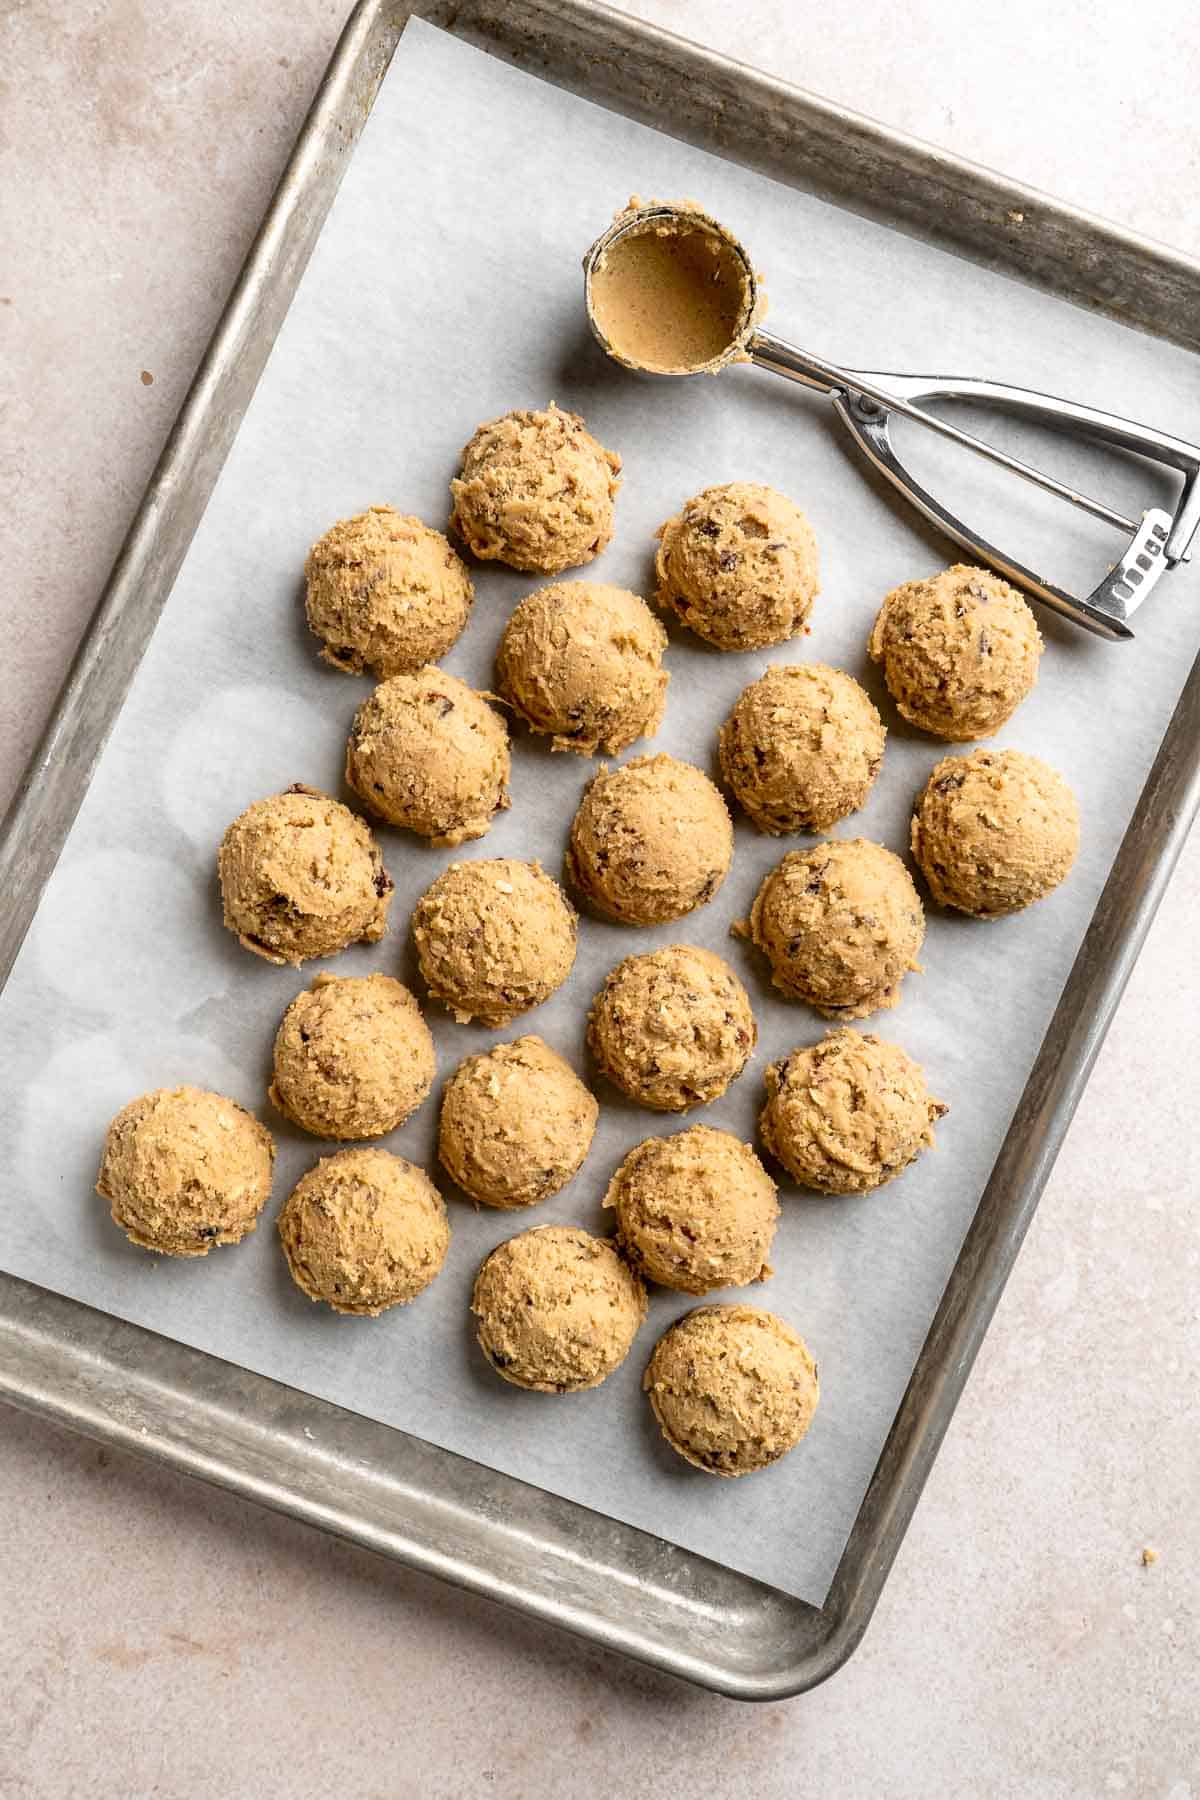
- Scoop cookies. Using a medium cookie scoop, scoop out your cookies onto a large parchment paper lined baking sheet. Place 6 cookie dough balls onto the lined baking sheet, spacing them 2 inches apart.
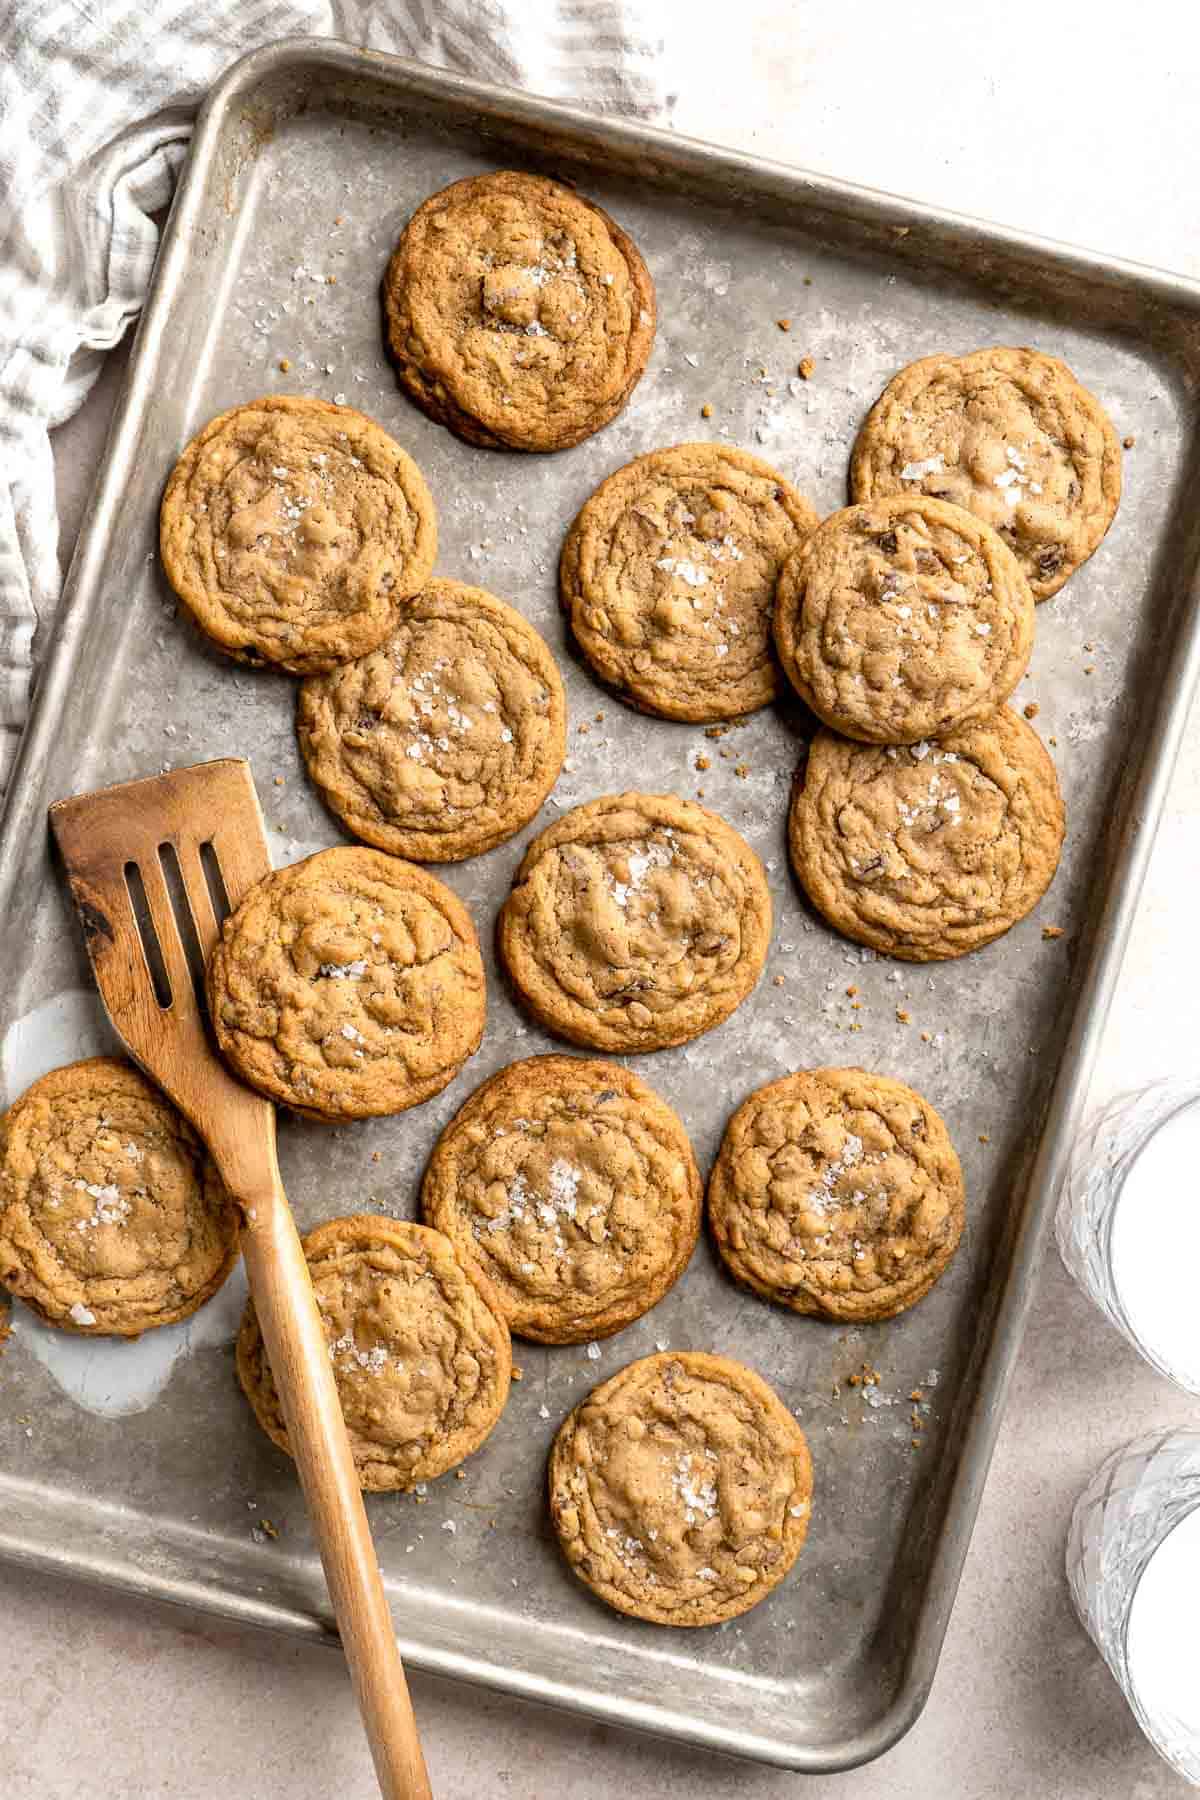
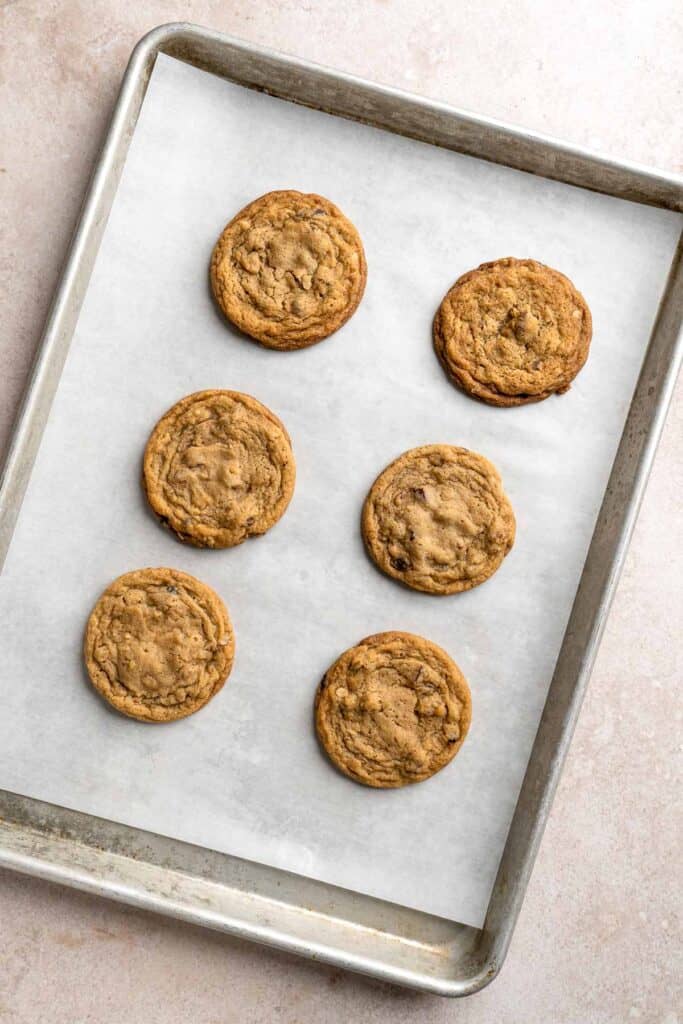
- Bake. Bake the cookies in a 350F preheated oven for 12-13 minutes. Allow the cookies to cool for 5 minutes before transferring onto a wire rack to fully cool. Repeat baking in batches with remaining cookies.
Recipe Variations
- Make without oats. For a much chewier texture, we added oats to our batter. For a differ texture and flavor, feel free to leave it out.
- Spice it up. Add a touch of fall flavor by incorporating other warm spices like nutmeg or cardamom while mixing the cookie dough.
- Stuff with cream cheese. Surprise everyone by putting cream cheese in the center of your date cookies. First, make a thumbprint on the dough, place in the sweet cheese filling, roll the cookies, then bake.
- Add zest. Use lemon or orange zest for a refreshing with a citrusy kick.
How to Serve
Enjoy these delicious Date Cookies with a warm or cold beverage such as:
- Chai Tea Latte
- Pumpkin Spice Latte
- Golden Milk Turmeric Latte
- Cold Brew Coffee
- Slow Cooker Apple Cider
- Homemade Iced Latte
Recipe Tips and Tricks
- Soften dates. If the dates are too hard to cut, soften them by soaking in hot water for 10 to 15 minutes before chopping and slicing.
- Experiment with nuts. Try to use different types of nuts in this recipe. If you want a mild and nutty flavor, you can add chopped almonds, but if you prefer a sweet and rich taste with a hint of butter, you can use pecans. Toasting the nuts also locks in flavor and aroma that is sure to elevate the entire dessert.
- Chill the dough. For thicker cookies, place the shaped dough in the refrigerator for at least thirty minutes before baking so they keep their structure better when baking.
- Make ahead. Prepare these date cookies in advance by storing the rolled cookie dough balls in the freezer. This way, you can enjoy these delicious treats by popping them into the oven whenever you have those last-minute gatherings or late-night cravings.
Storing and Freezing Instructions
How to Store
Date cookies will stay fresh on your counter for up to 5 days. Just make sure to store any leftovers in an airtight container to avoid them from getting stale.
How to Reheat
If you prefer warm cookies, you can reheat a few in the oven at 350°F (177°C) for 4 to 5 minutes or in the microwave for 30 seconds until warm and soft.
How to Freeze
I don't recommend freezing the baked cookies as it can significantly affect their flavor and texture. But you can always freeze the raw cookie dough for later use. Place the dough balls on a parchment-lined baking tray and freeze for 2 hours. Once frozen, transfer them to a freezer-safe bag or container and store in the freezer for up to a month.
More Cookie Recipes
- 50 Best Cookie Recipes
- Oatmeal Raisin Cookies
- Monster Cookies
- Chai Cookies
- Molasses Cookies
- Nutella Cookies
Tried this recipe?
I'd love to hear what you think! Leave a comment and rating below to share your feedback. Your reviews help others discover this recipe and help me keep creating more free recipes for you. Snap a photo and tag me on social media @aheadofthyme too.

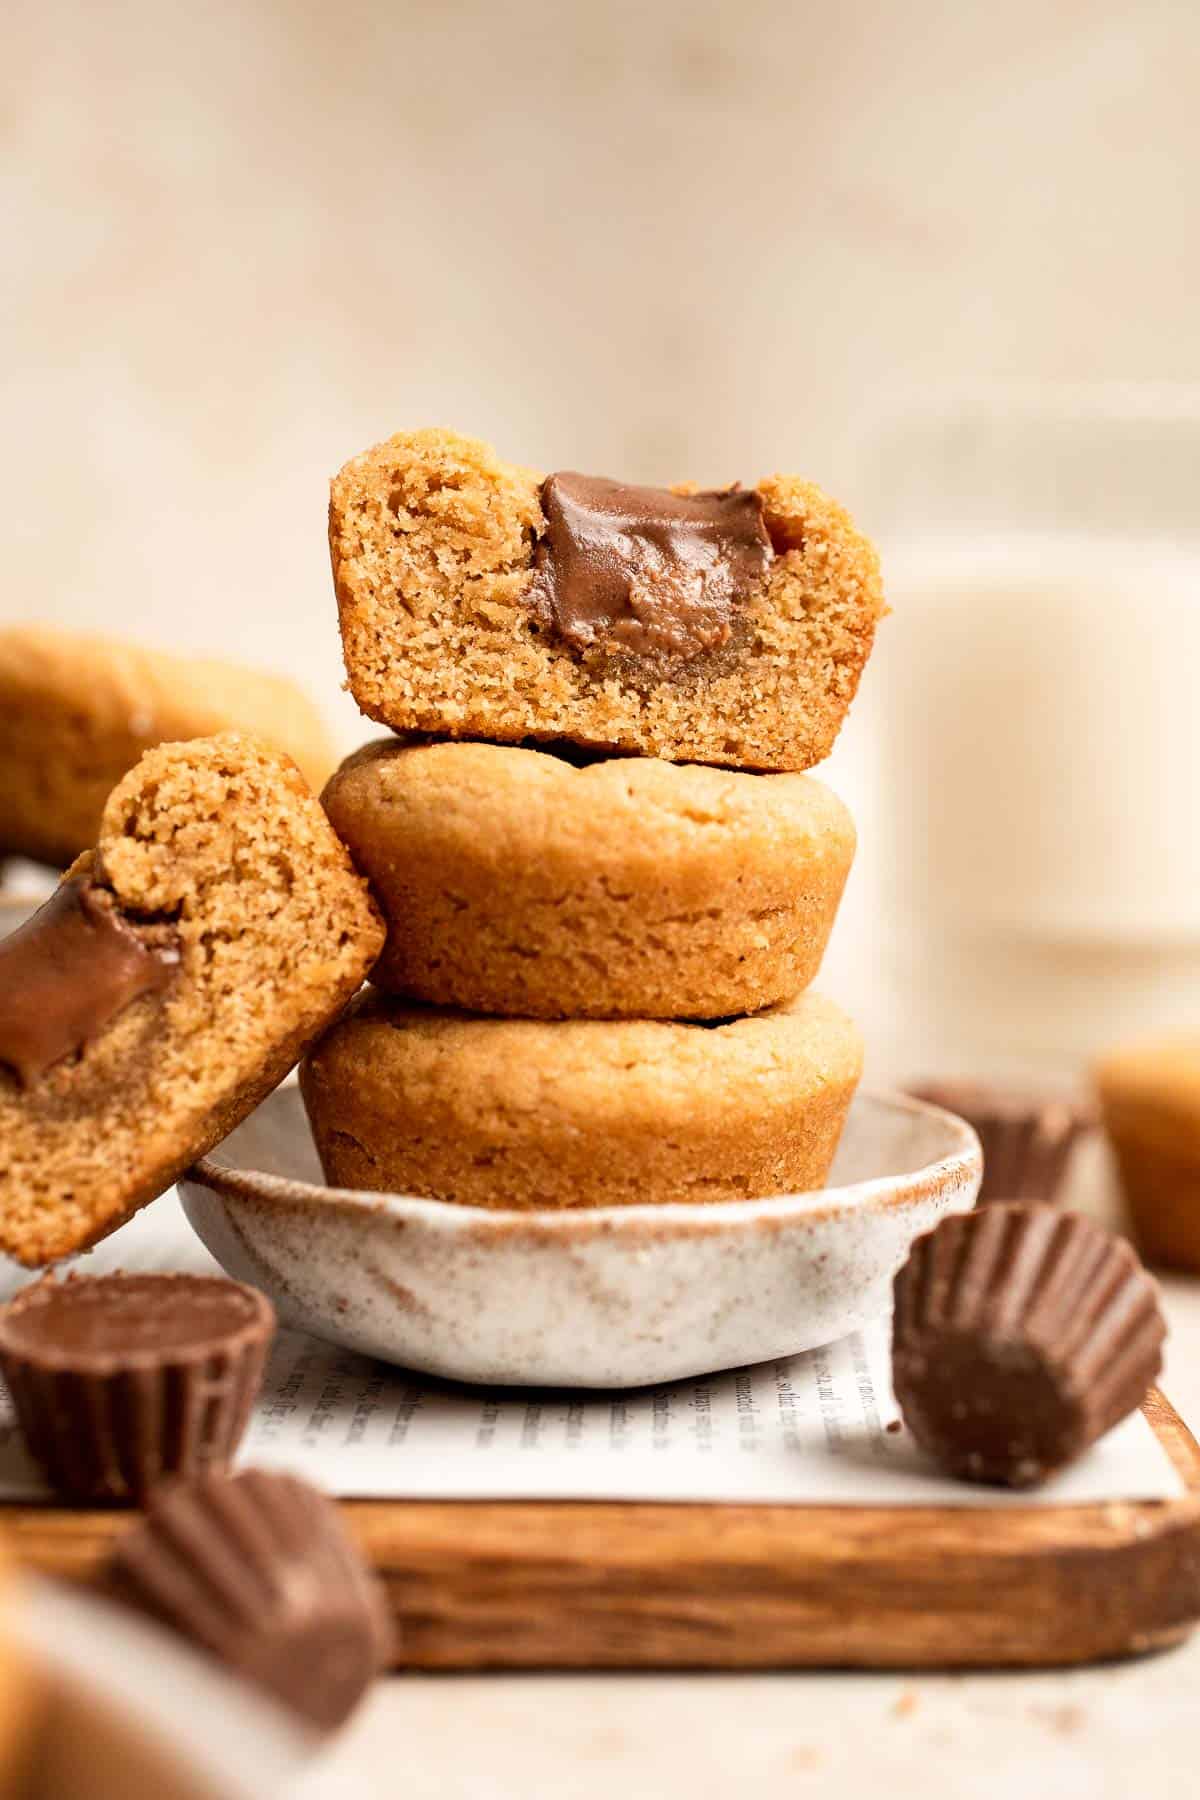
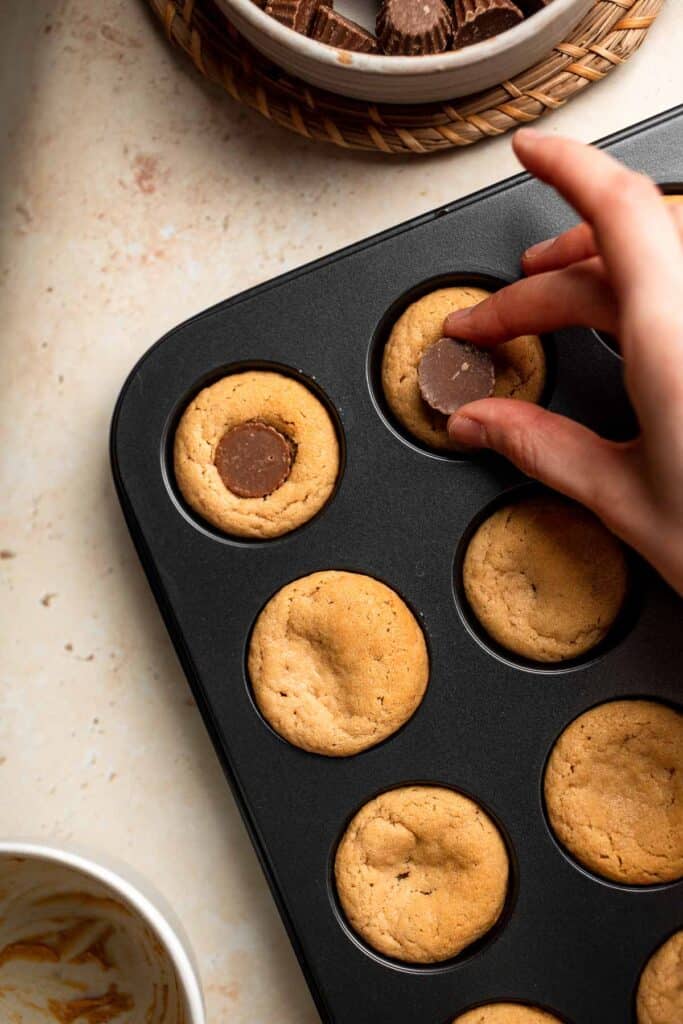
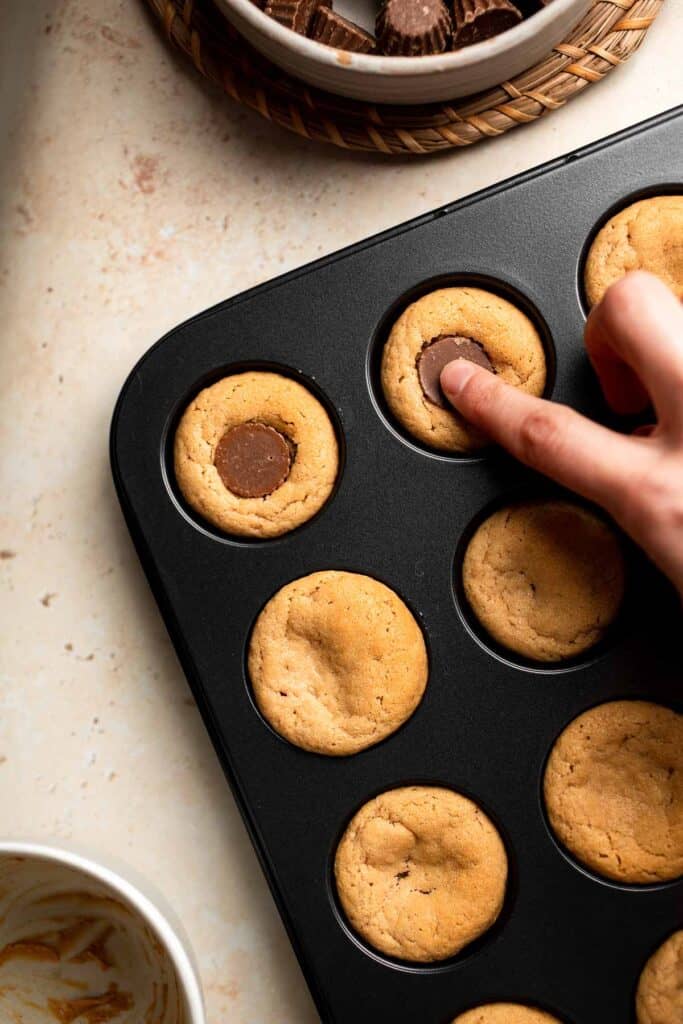
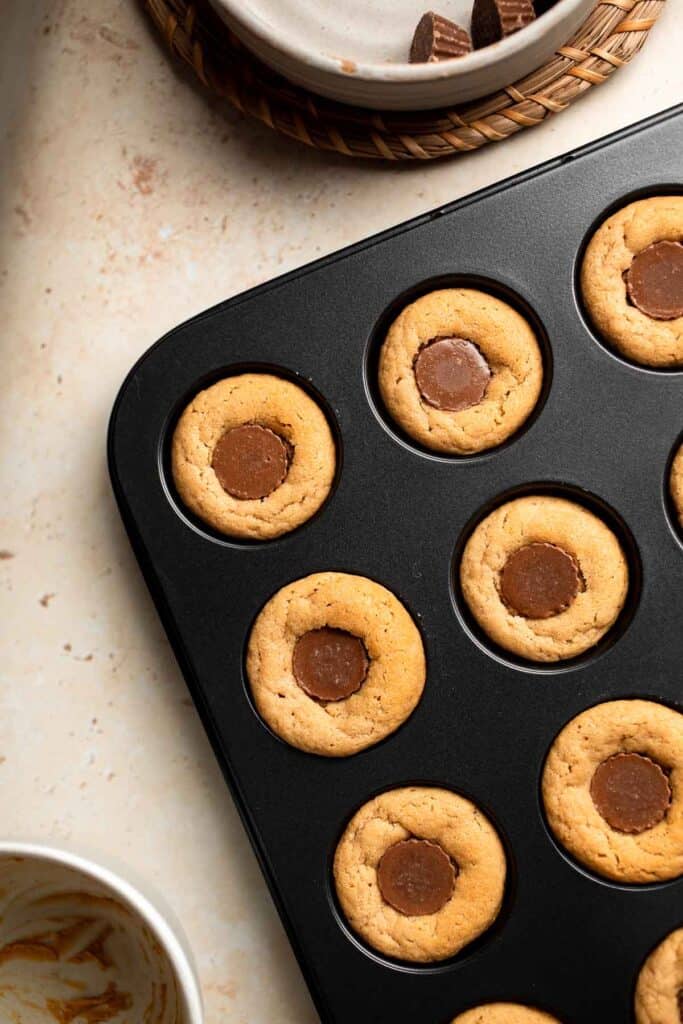
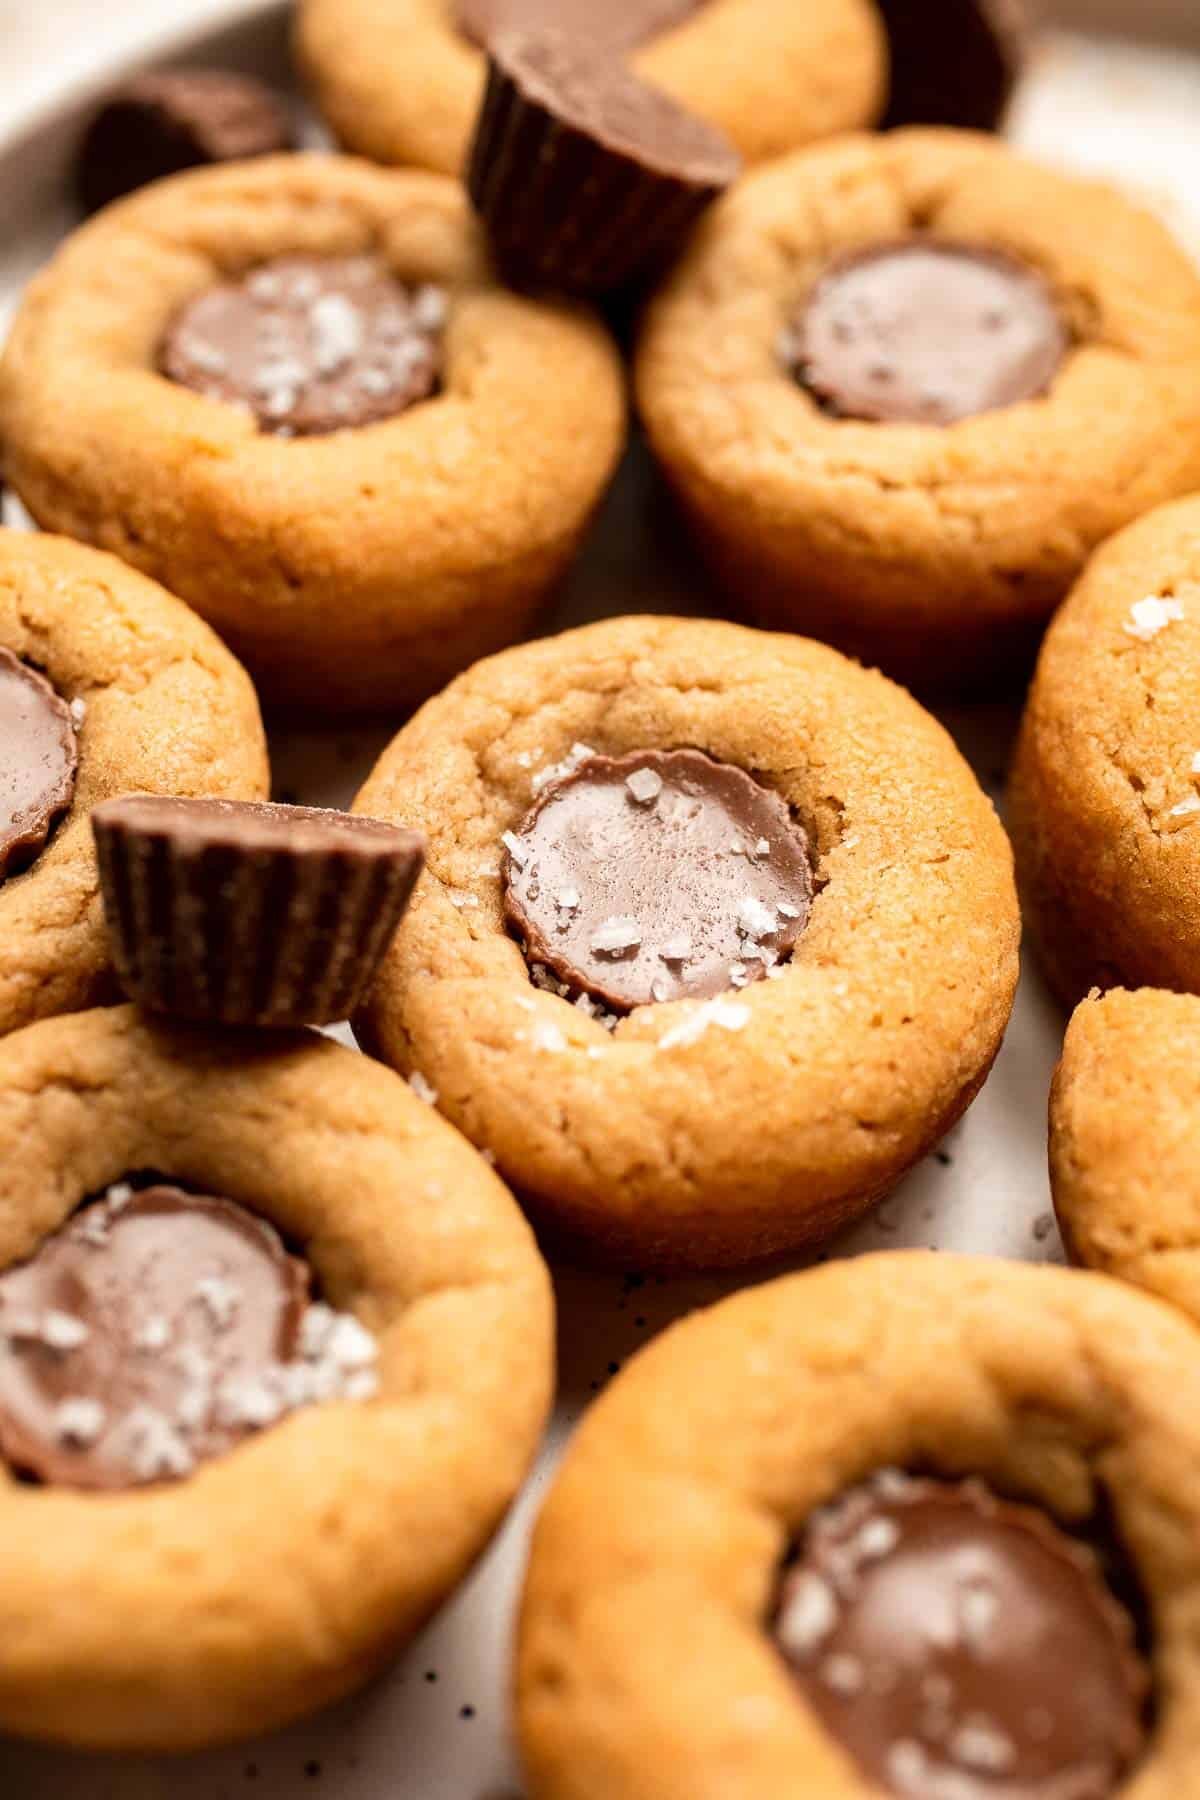
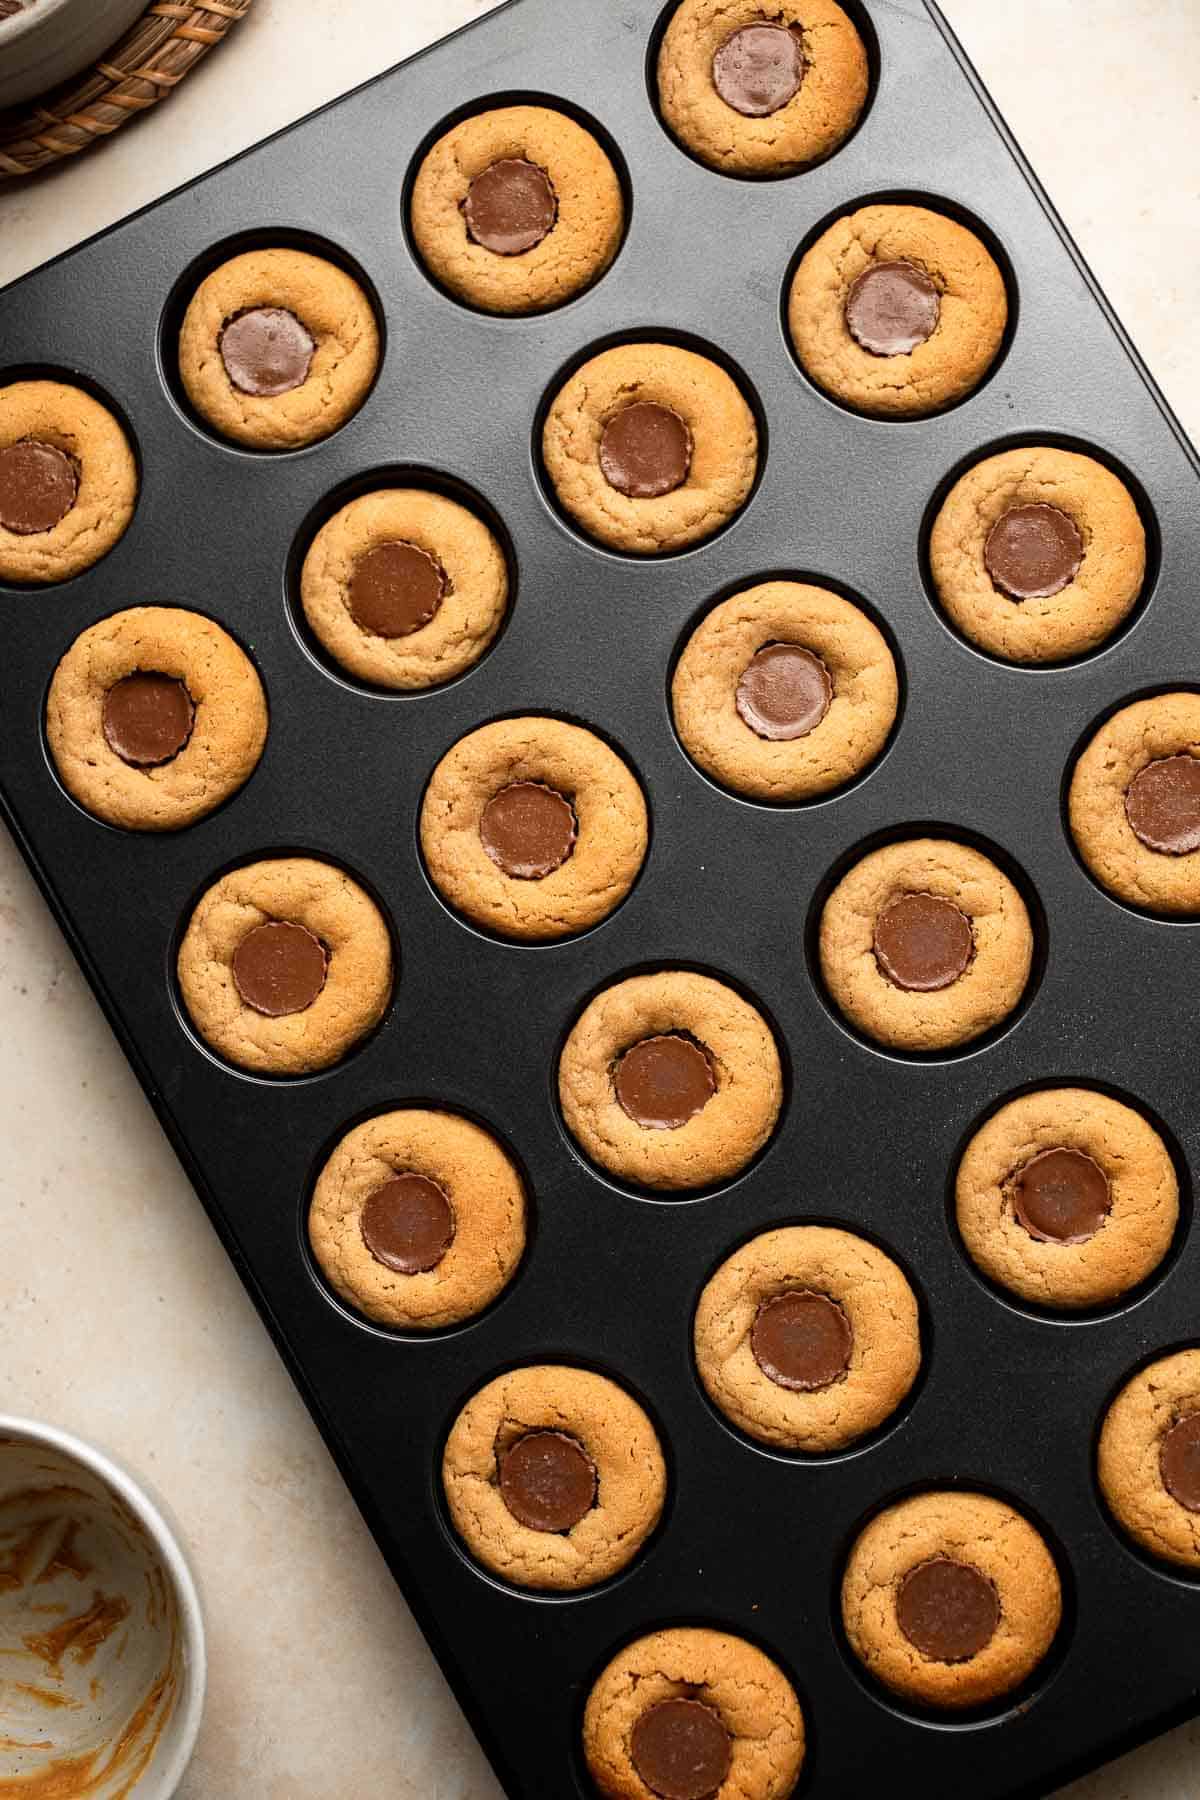
Peanut Butter Cup Cookies
These easy Peanut Butter Cup Cookies are a modern classic. Start with a delicious peanut butter cookie dough, and then press an entire mini Reese's cup in each one right after baking. They're a delicious mixture of textures and flavors and just may be the perfect cookie for peanut butter lovers!

Although peanut butter cookie cups can easily be made any time of the year, they often show up at family gatherings around the holidays and are a classic Christmas cookie. They're similar to peanut butter blossoms, but instead of baking the dough on a regular baking sheet, the dough is baked in a mini cupcake tin and the peanut butter cup is pressed into freshly baked peanut butter cookies. They're tall, thick cookies that are just a pleasure to eat!
Why You'll Love These Peanut Butter Cup Cookies
- Deliciously chewy. The cookie dough on the outside of the peanut cups is absolutely delicious on its own! Biting into the crunchy shell of the mini peanut butter cups takes them over the top.
- Lots of peanut butter flavor. From the peanut butter in the cookie dough to the Reese's cups in the center of each cookie, these chewy peanut butter cookies are loaded with peanut butter goodness!
- Perfect for parties. Make a tray of these Reese's peanut butter cup cookies and watch them disappear almost instantly. They're a real crowd-pleaser!
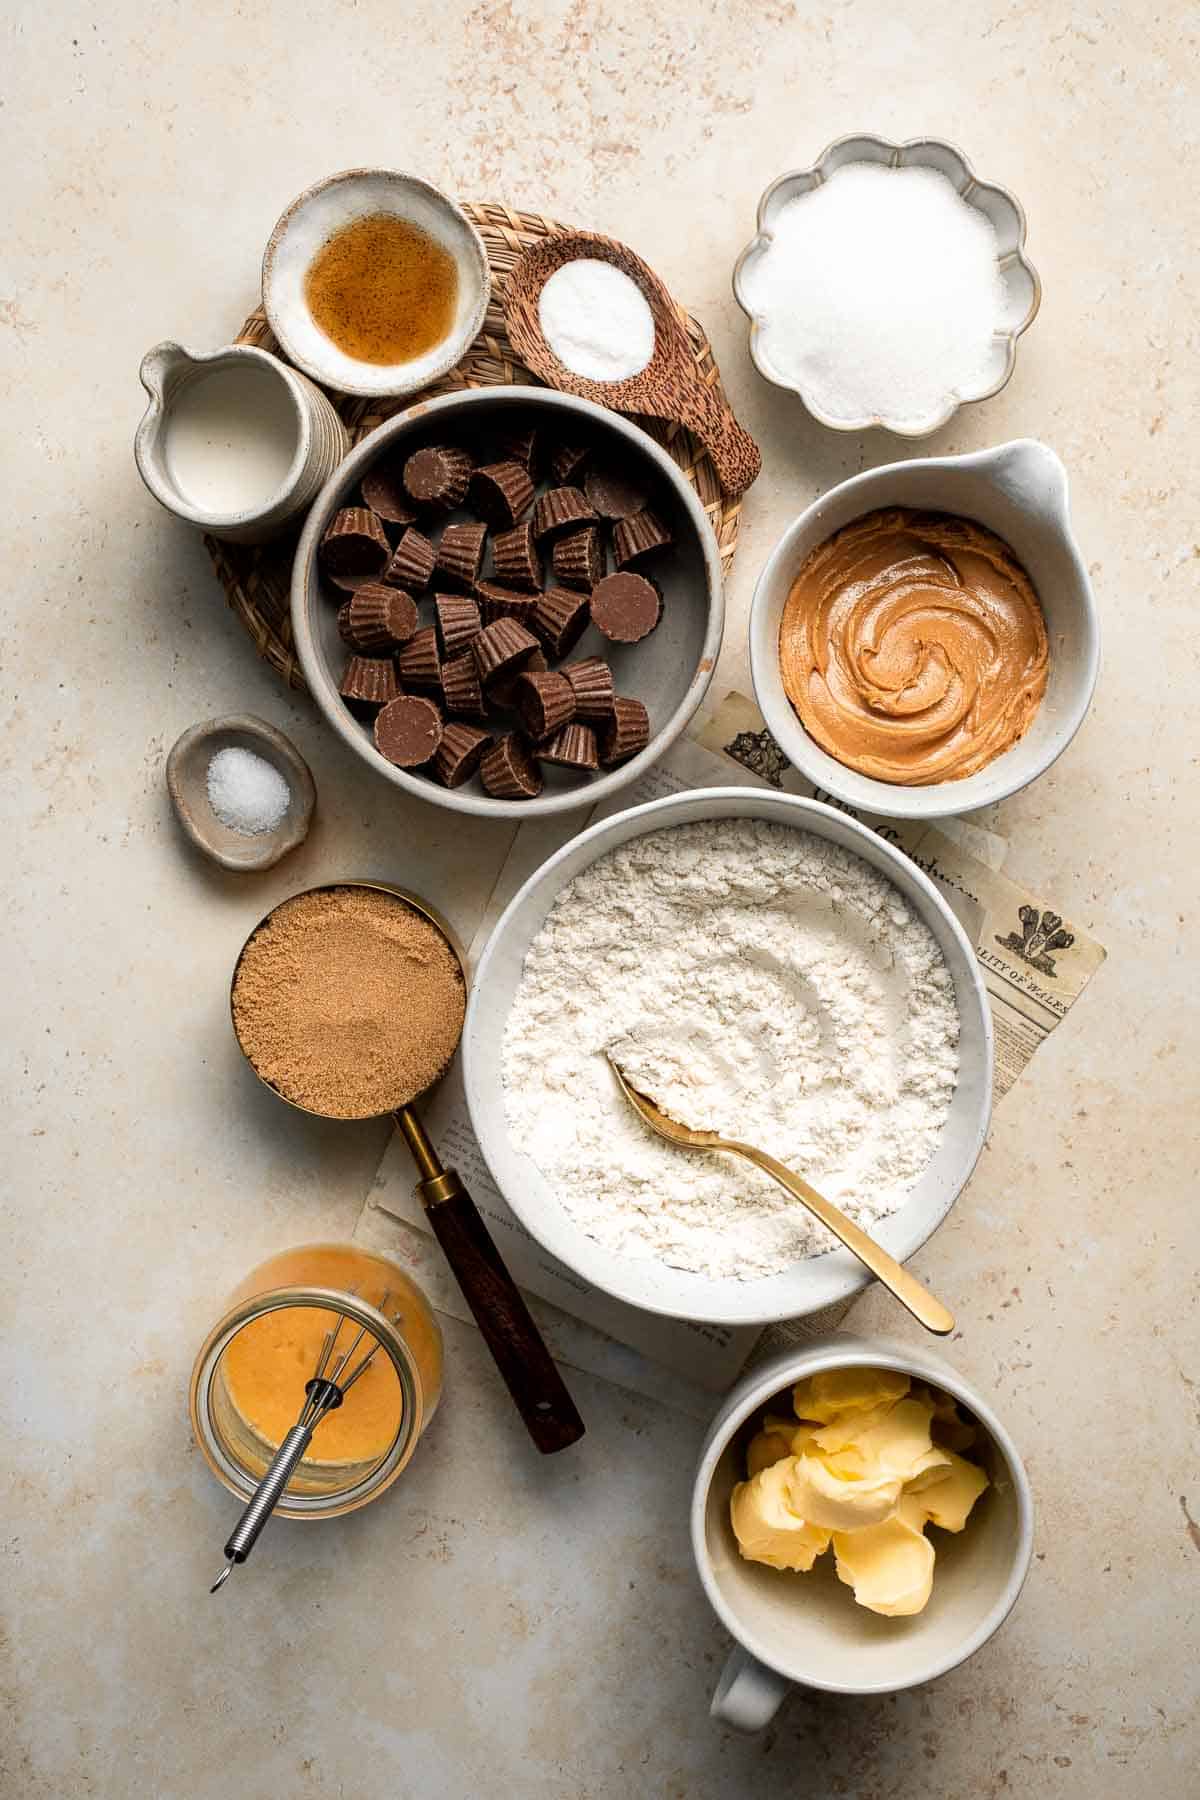
Ingredient Notes
To make these delicious peanut butter cup cookies, you will need the following ingredients (full measurements in recipe card below):
- cooking spray - lightly spray the mini muffin tin for each removal.
- all-purpose flour - use regular all purpose flour, not self-rising or pastry flour.
- baking soda - this will give these easy peanut butter cup cookies a little rise so they'll puff up nicely.
- salt - this will highlight the peanut butter and chocolate flavors and help activate the baking soda.
- unsalted butter - use room temperature butter for a light, fluffy texture.
- peanut butter - stick with regular creamy peanut butter, like JIF, for best results.
- granulated sugar - this will sweeten the cookies and give them a crispy bite.
- brown sugar - brown sugar highlights the peanut butter flavor and gives these cookies a wonderful chewy texture.
- egg - add one egg to bind the cookie dough together.
- vanilla extract - this adds a wonderful aroma to the homemade cookies.
- milk - thin out the dough to the perfect consistency with regular milk.
- mini peanut butter cups - unwrap and add a miniature peanut butter cup into each cookie dough ball.
You will also need a mini muffin pan, medium mixing bowl, whisk, large mixing bowl, and hand mixer.
How to Make the Best Peanut Butter Cup Cookies
- Whisk the dry ingredients. In a medium mixing bowl, whisk together the flour, baking powder, and salt. Set aside.
- Cream butters and sugar. In a large mixing bowl, use a hand mixer or stand mixer to cream together the butter, peanut butter, white sugar, and brown sugar until smooth and creamy, about 2 minutes.
- Add wet ingredients. Add egg, vanilla, and milk. Beat to incorporate.
- Add dry ingredients. Beat until just combined.
- Shape cookie dough balls. Lightly grease a mini muffin pan with cooking spray. Scoop out 1 tablespoon of dough and shape it into a ball. Place each ball into each tin of the mini muffin pan.
- Bake the cookies. Bake in a 375°F preheated oven for 8 minutes.
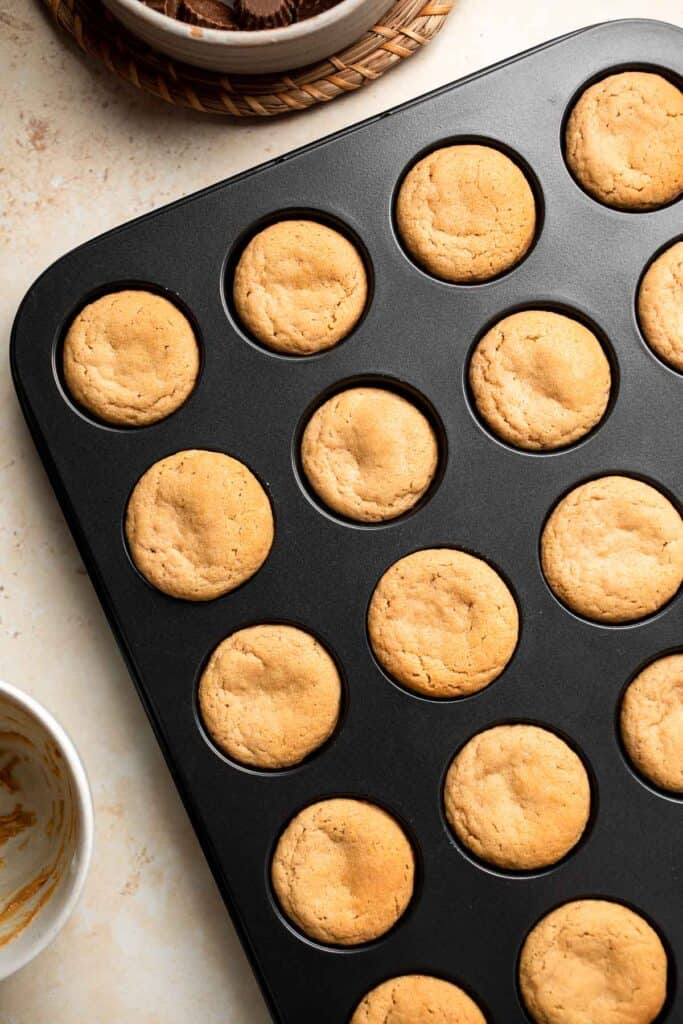
- Add chocolate peanut butter cup. Remove from the oven and immediately press a miniature peanut butter cup into each ball. Allow the cookies to cool, then carefully remove from the pan.
Recipe Variations
- Stuffed peanut butter cup cookie. Don't just press the peanut butter cup into these cookies; cover the entire cup with dough and bake for a chocolatey surprise.
- Use different types of chocolate. Instead of regular Reese's peanut butter cups, use dark or white chocolate cups instead!
- Try crunchy peanut butter. If you like extra crunch, use crunchy peanut butter instead of creamy or stir in a handful of chopped nuts.
How to Serve
These peanut butter cup cookies are delicious served on their own, or paired with some of my favorite holiday cookies including:
- Christmas Sugar Cookies with Royal Icing
- Eggnog Cookies
- Linzer Cookies
- Gingerbread Cookies
- Chocolate Crinkle Cookies
- Peppermint Snowball Cookies
Decorate your holiday cookie display with the 30 Best Christmas Cookies.
Recipe Tips and Tricks
- Use the right peanut butter. To get the best texture, use storebought creamy peanut butter like JIF or Peter Pan. Natural peanut butter doesn't have the same consistency and is more likely to separate.
- Grease the muffin tin. Don't use a regular cookie sheet for this peanut butter cup cookies recipe! Use a mini muffin tin and grease it lightly for easy removal.
- Use a cookie scoop. Use a small cookie scoop to roll out the perfect amount of cookie dough each time.
Storing and Freezing Instructions
How to Store
Store leftover cookies in an airtight container at room temperature to enjoy within 2 weeks. Refrigerate the cookies, and they'll last for up to 2 months.
How to Freeze
Place any leftover cookies in a freezer-safe container and freeze for 2-3 months. Thaw in the fridge before serving. You can also freeze the cookies before baking, following the same steps. Just let the dough thaw in the fridge, then come to room temperature before baking like normal.
FAQ
Most peanut butter cup cookies are made with miniature Reeses, which are easy to find and just the right size. However, there are way more options out there these days! You can use white chocolate Reese's or visit Trader Joe for dark chocolate peanut butter cups with incredible flavor. You can even use sunflower butter and sunflower butter cups for a nut-free option!
Yes! Store your leftover Reese's peanut butter cup cookies in a freezer-safe container for several months. Thaw them in the fridge or at room temperature before eating, or enjoy them frozen for a really chewy texture.
Most foods can go bad, but these peanut butter cookies can really last a while. According to the USDA, cookies can be stored for approximately 2-3 weeks in an air-tight container at room temperature. For longer storage, pop them in the fridge, where they can last for up to 2 months. For even longer storage, freeze the cookies (2-3 months).
More Cookie Recipes
- 50 Best Cookie Recipes
- Peanut Butter Blossoms
- Soft and Chewy Peanut Butter Cookies
- Peanut Butter Thumbprint Cookies
- Peanut Butter Eggs
- Monster Cookies
Tried this recipe?
I'd love to hear what you think! Leave a comment and rating below to share your feedback. Your reviews help others discover this recipe and help me keep creating more free recipes for you. Snap a photo and tag me on social media @aheadofthyme too.

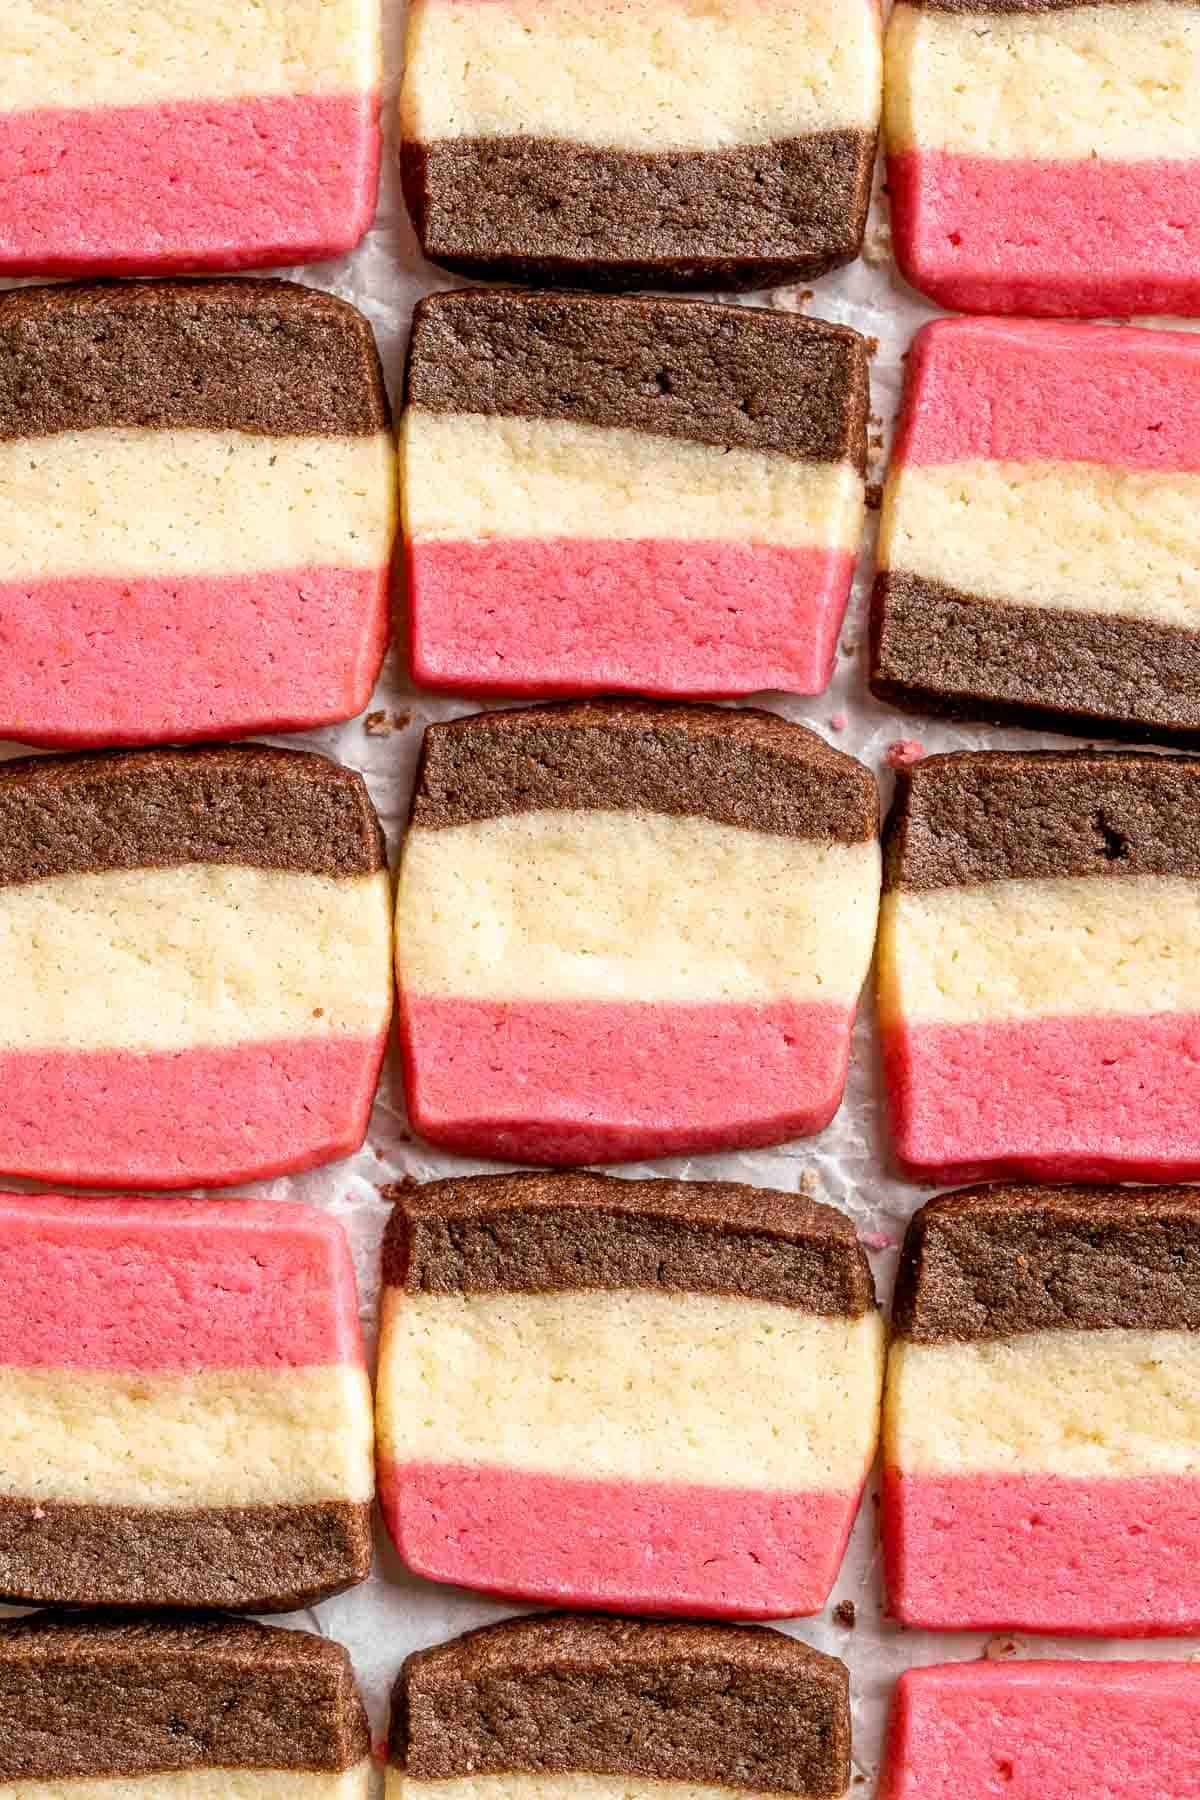
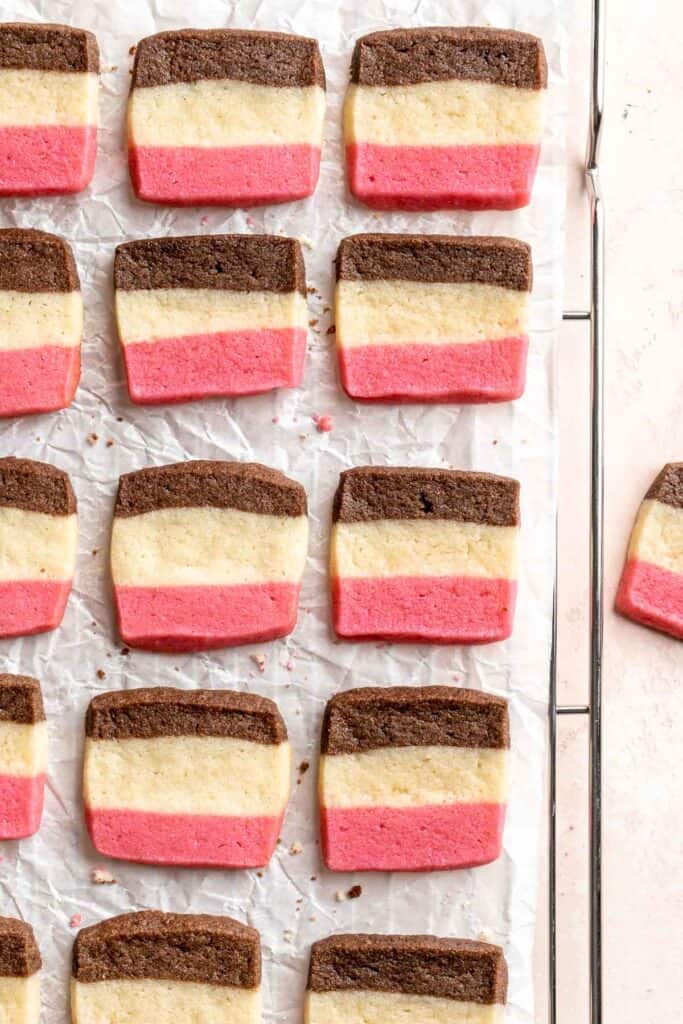
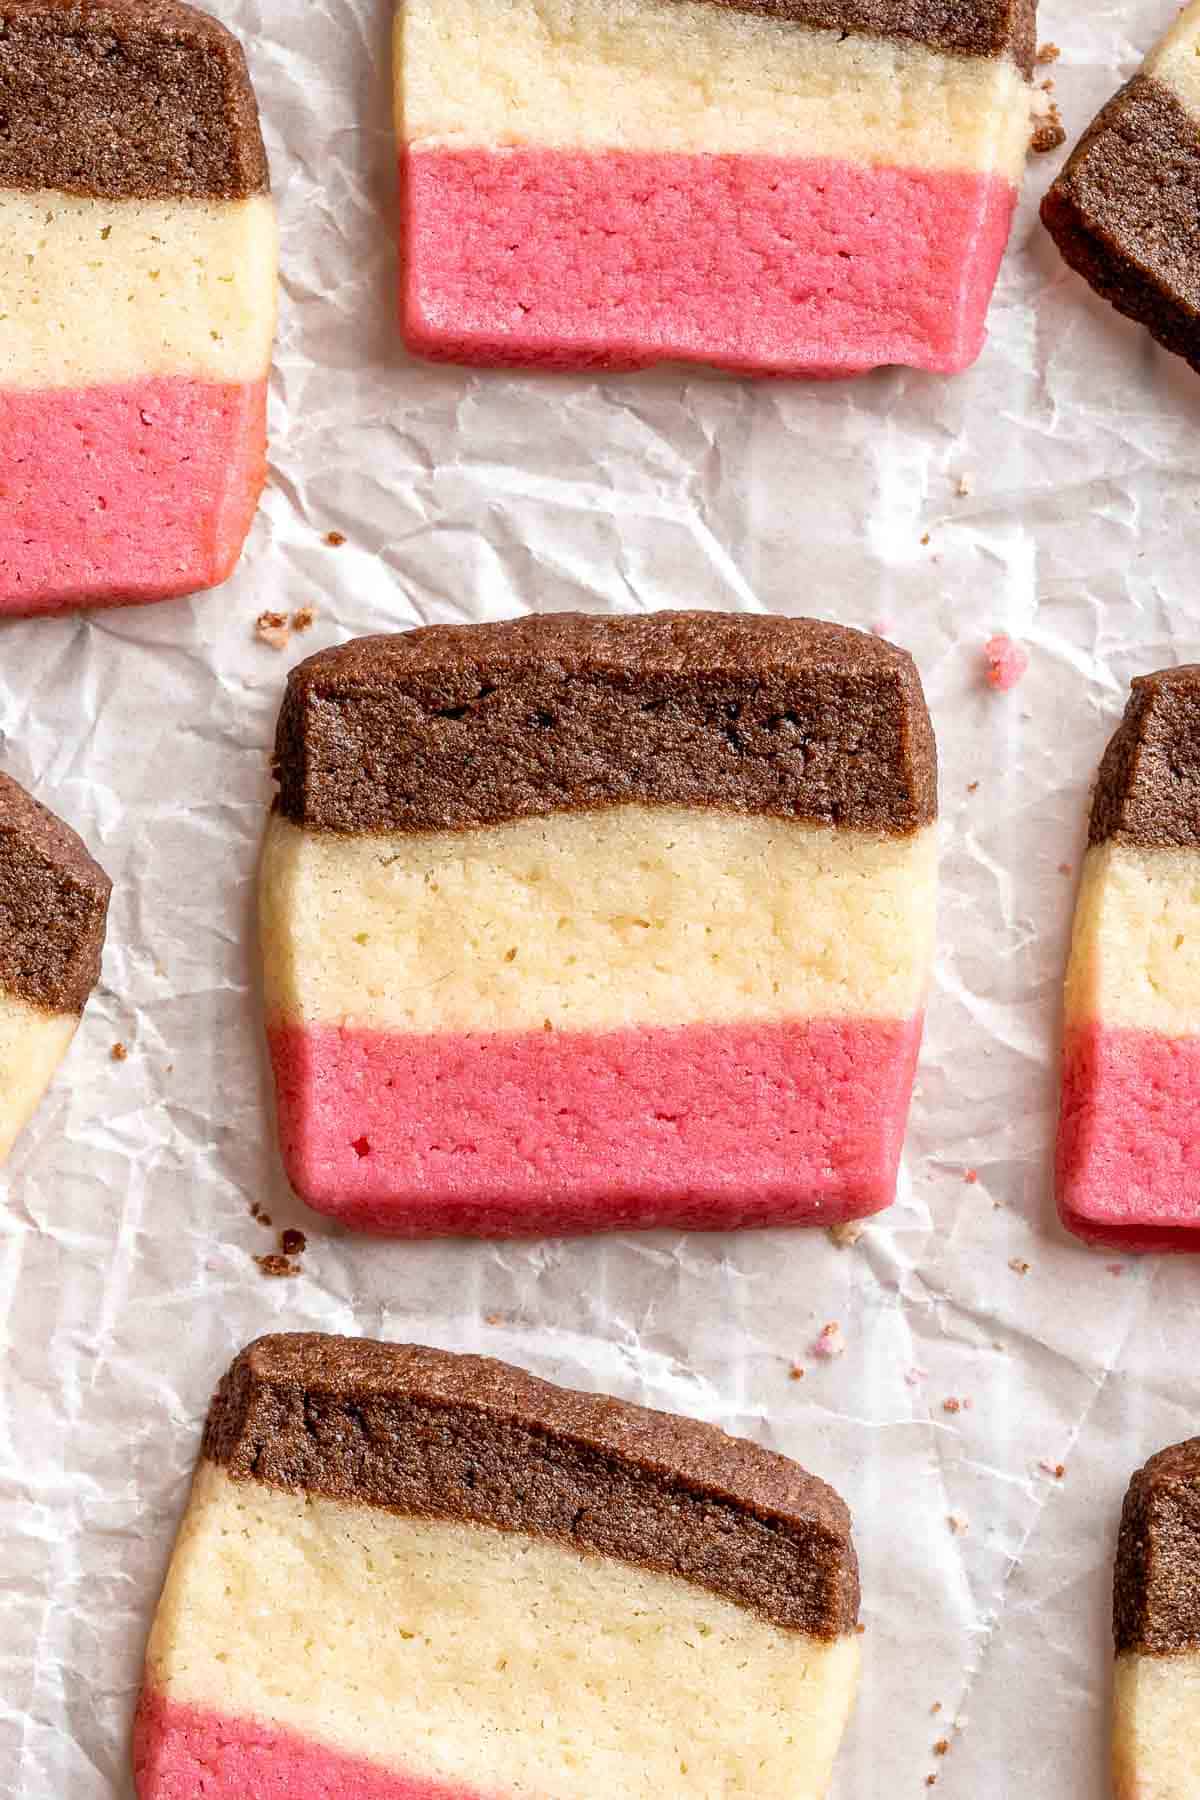
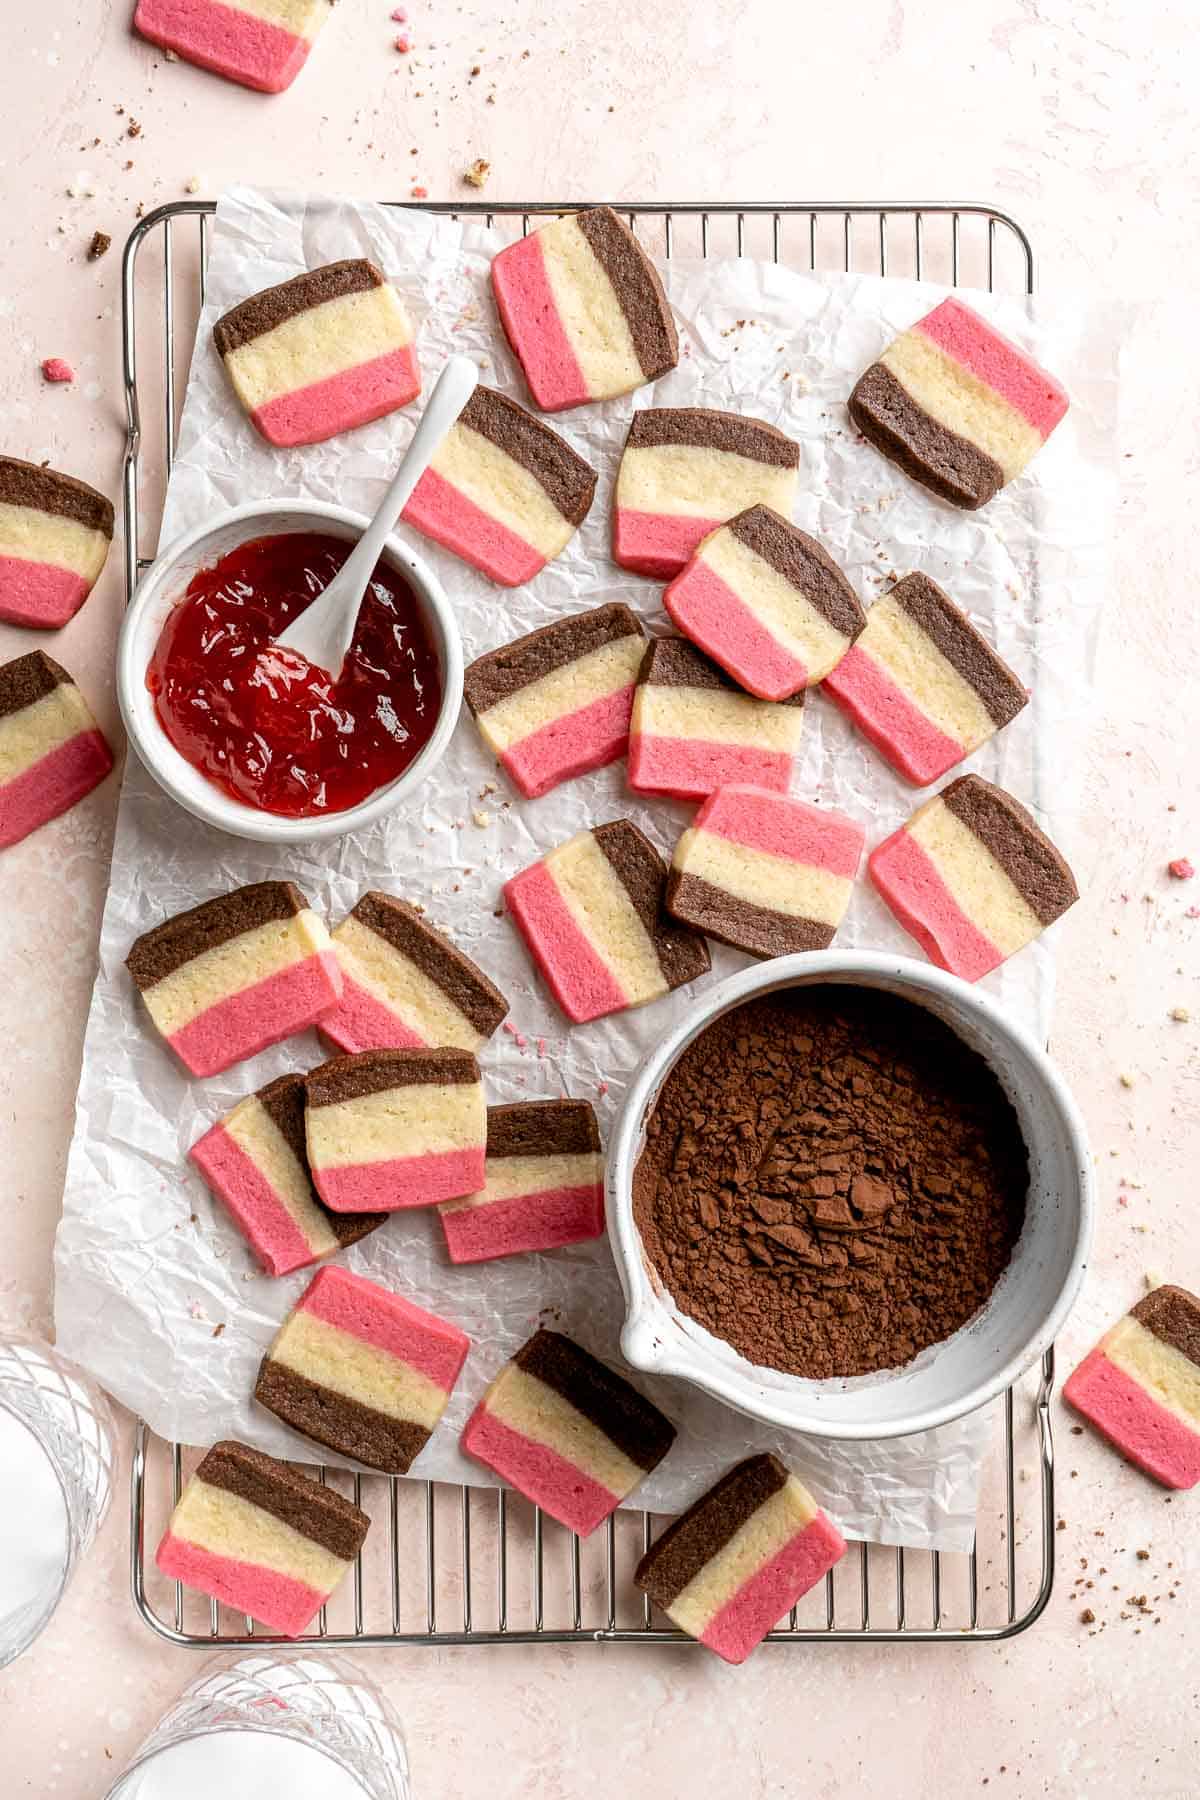
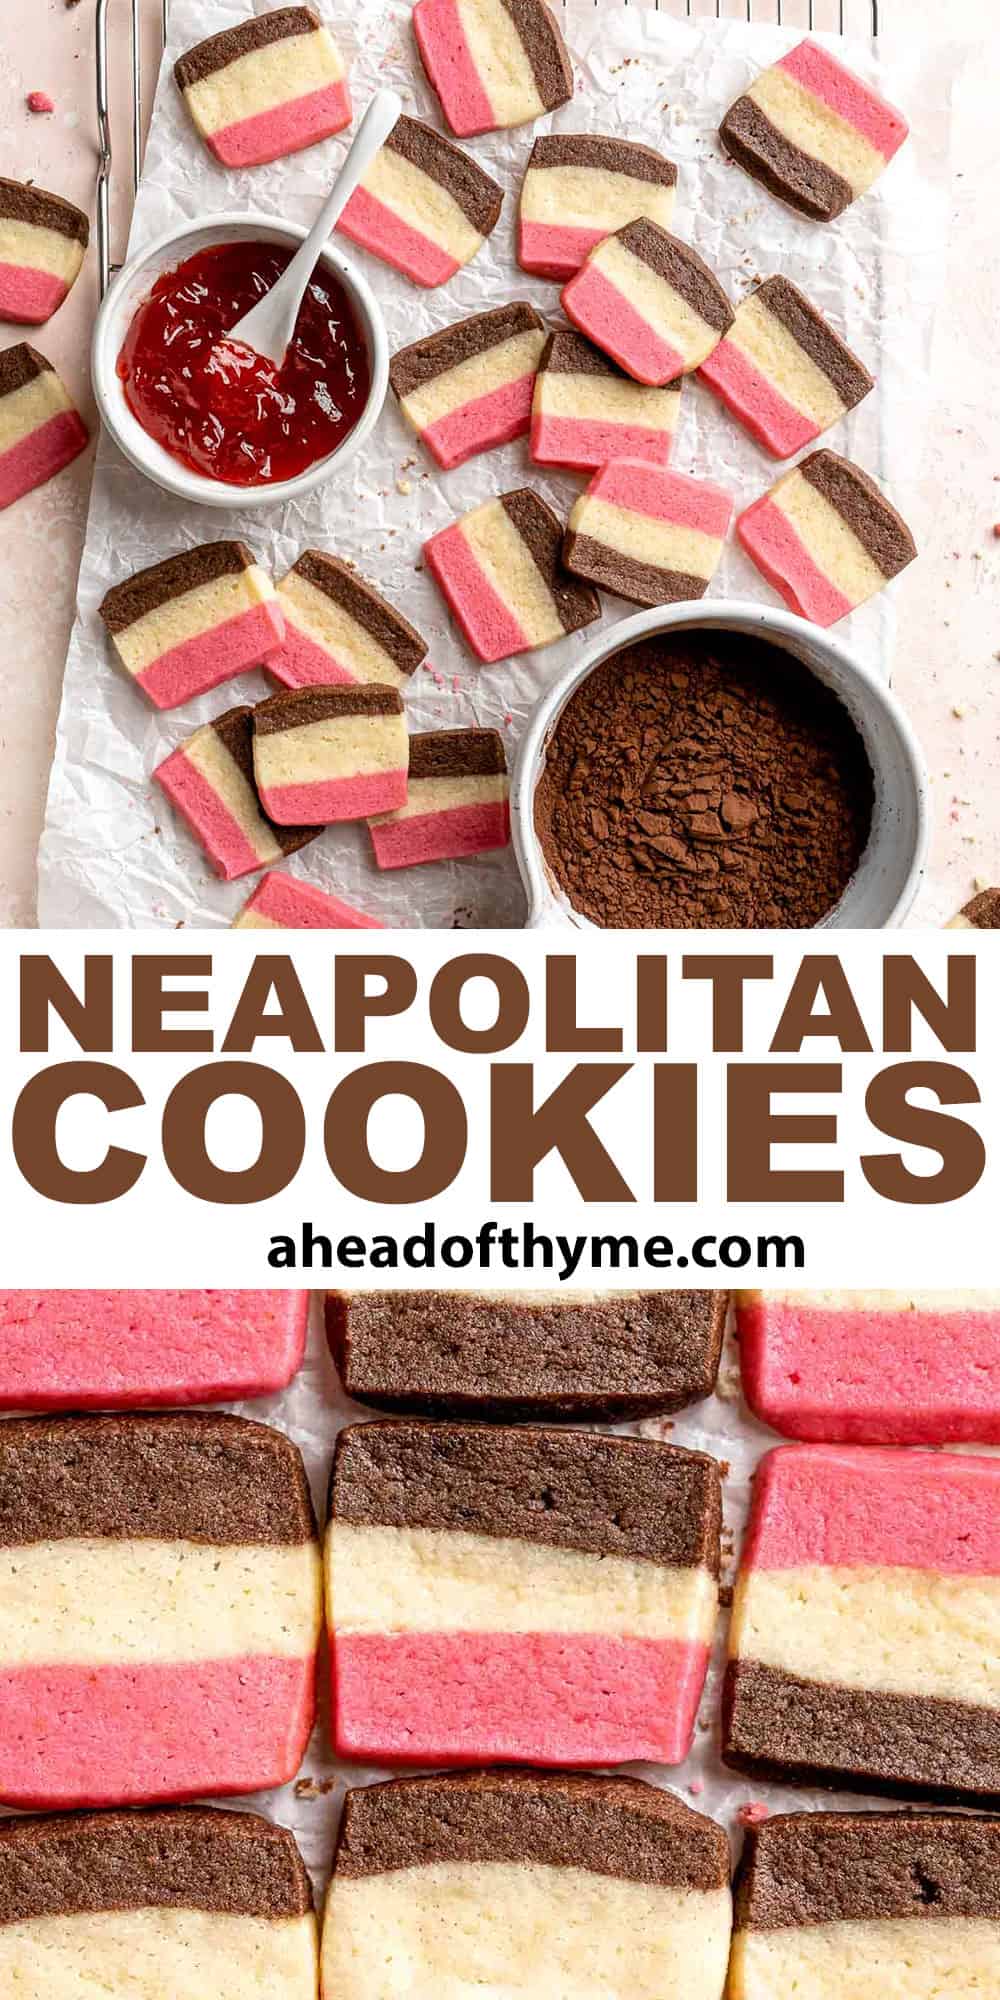
Neapolitan Cookies
With their iconic pink, brown, and white stripes, these homemade Neapolitan Cookies are both beautiful and delicious. Each section matches the flavors of Neapolitan ice cream with layers of chocolate, strawberry, and vanilla all pieced together. Plus, they're much easier to make than you'd expect! This recipe starts with one batch of dough, and you'll divide it to make the strawberry and chocolate sections.
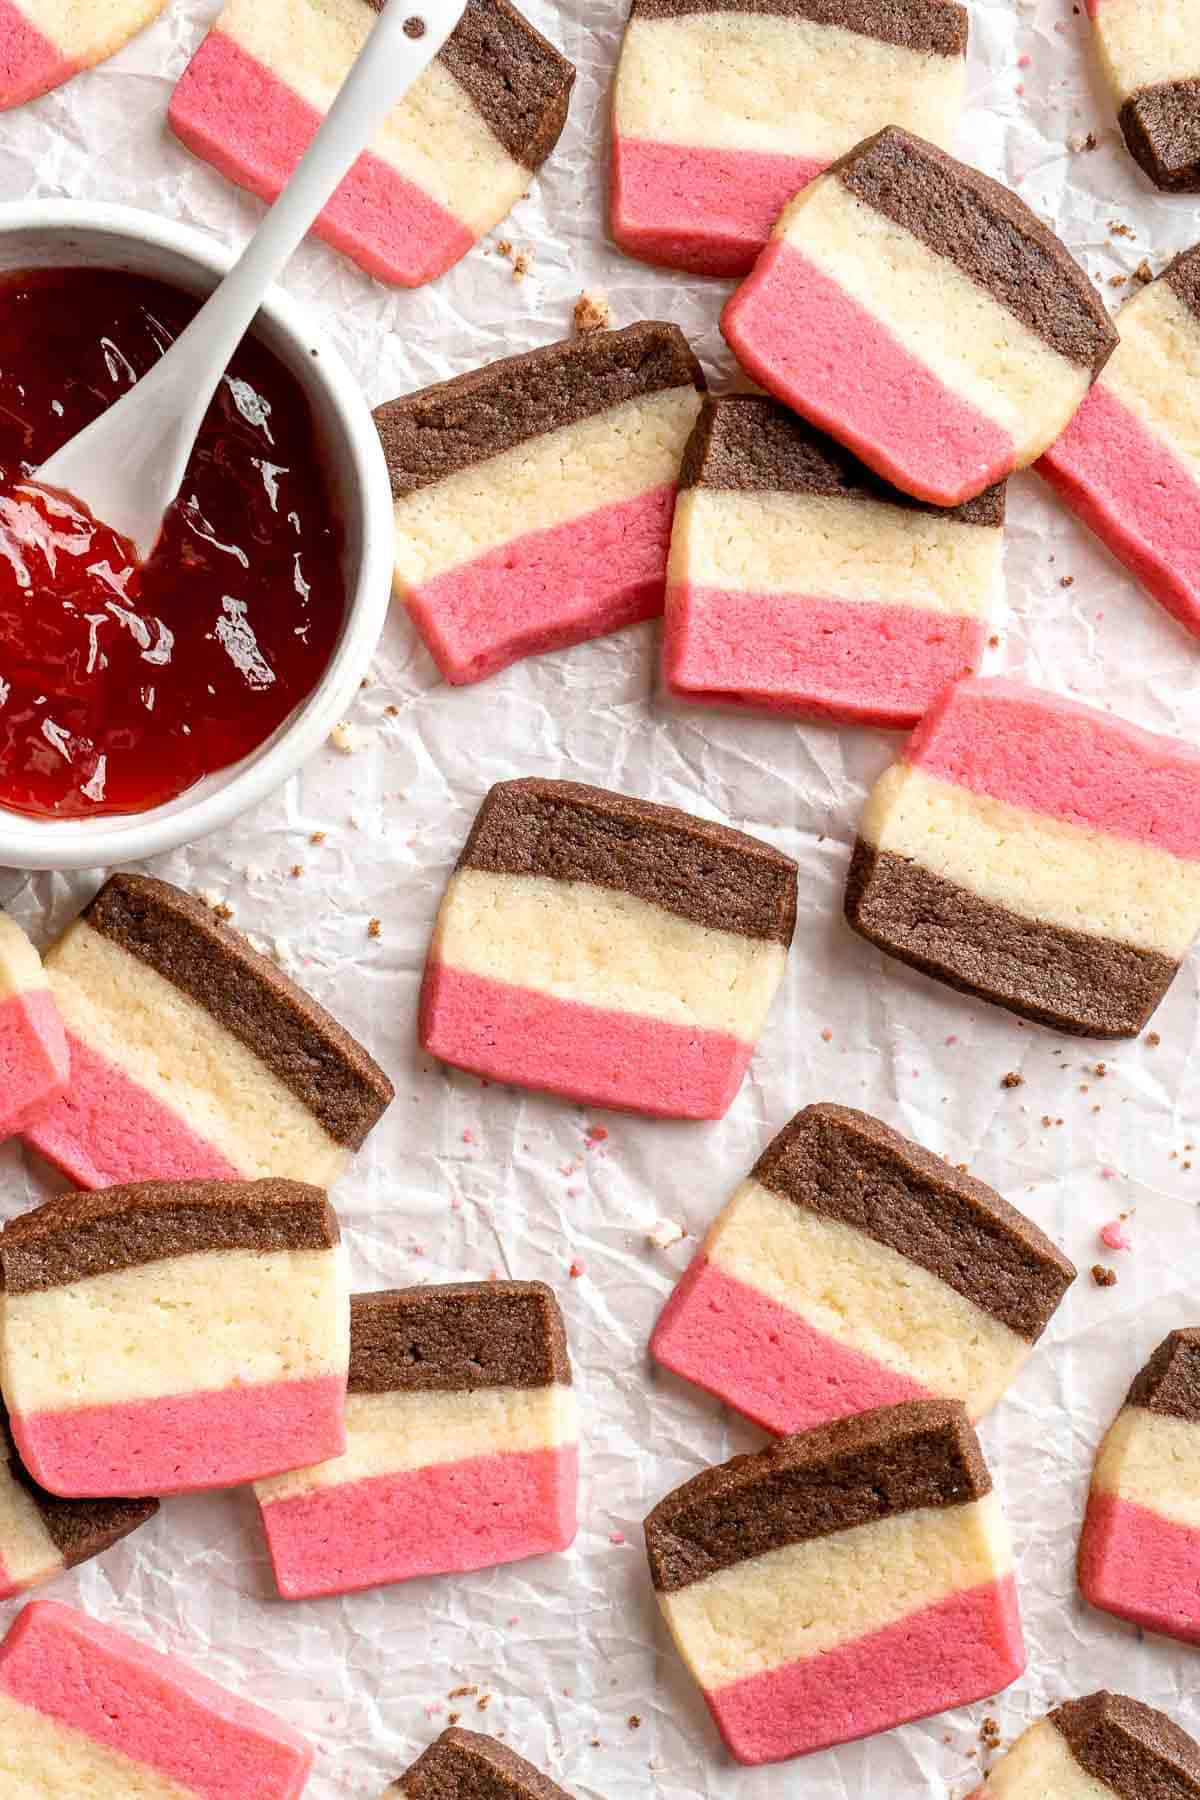
There's something so wonderful about these slice and bake Neapolitan sugar cookies! They look amazing with their three different colors, and each layer brings its own unique flavor to the mixture. Plus, this Neapolitan cookie recipe has a crumbly shortbread-like texture that makes them truly irresistible. You also won't be able to eat just one! I like to eat them in a different way each time to taste how the flavors come together. They're such a wonderful treat!
Why You'll Love These Neapolitan Cookies
- Stunning appearance. The white, chocolate, and strawberry layers in these cookies really catch the eye. They're absolutely beautiful cookies, perfect for baby showers, brunch, anniversaries, or any other special occasion!
- Delicious flavor. We can't get enough of the different flavors and how they play together. The buttery, almond-flavored cookie dough is delicious on its own, but we especially love how it tastes with the strawberry and chocolate layers. There's a reason why this is such a popular ice cream choice!
- Fun to make. Although they aren't exactly the easiest cookies to make, they sure are fun! It's exciting to divide the dough and add the different flavors. The best part is slicing the layered cookie dough and watching the cookies crisp up. If you enjoy baking, this slice and bake cookie recipe is one to try!
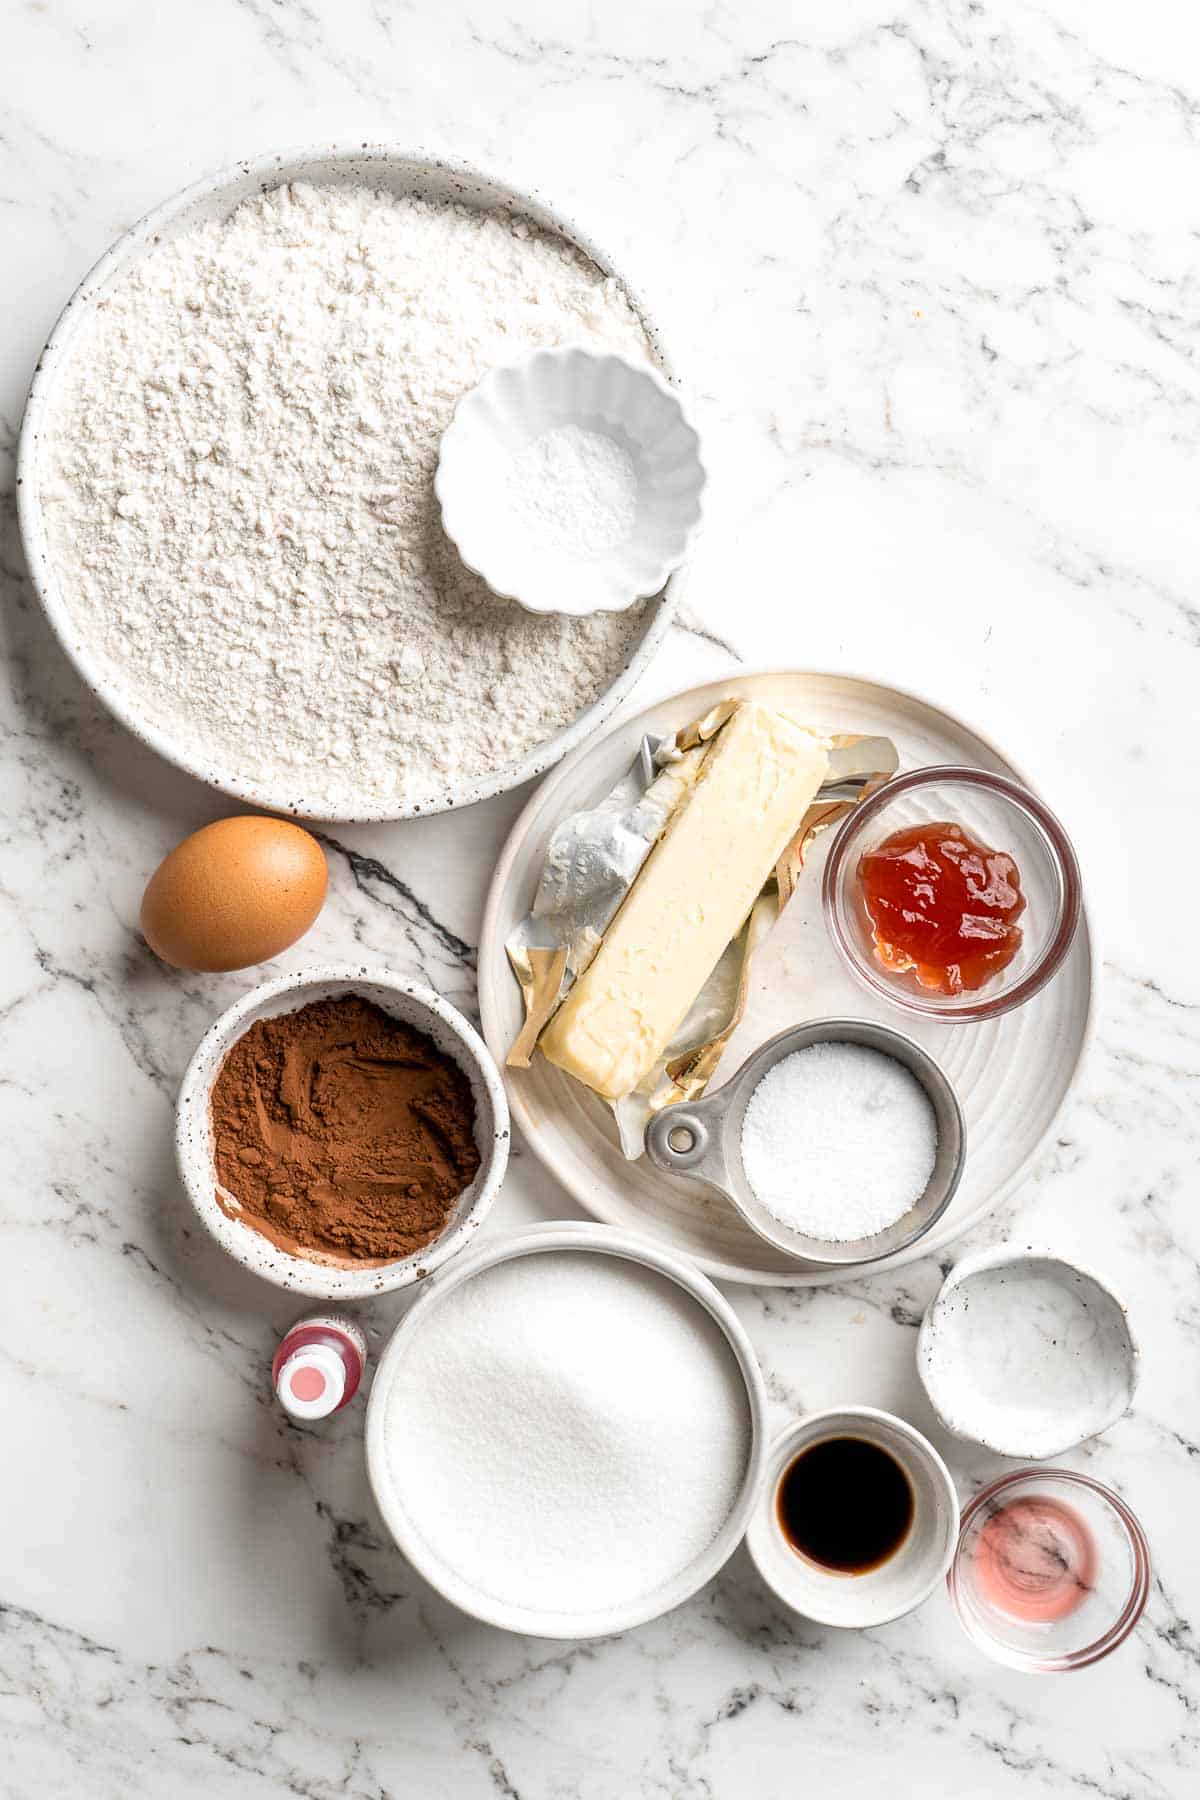
Ingredient Notes
To make these delicious Neapolitan cookies, you will need the following ingredients (full measurements in recipe card below):
- butter - start with unsalted butter at room temperature and cream the butter mixture well for a light, fluffy texture.
- white sugar - this will sweeten the cookie dough without adjusting the flavor too much, allowing the add-ins to shine.
- egg - use a room-temperature egg for best results.
- extracts - use a mixture of vanilla extract and almond extract for a fragrant nuttiness that pairs well with the chocolate and strawberry layers.
- all-purpose flour - scoop and level the flour into your measuring cup to get the perfect amount. We also add some flour to the strawberry sugar cookie dough layer to keep it from becoming too wet with the jam.
- salt - this highlights all the flavors in your cookie dough; don't skip it.
- baking powder - baking powder adds a little lift for a nice, tender texture.
- seedless strawberry jam - this will add real, rich strawberry flavor to the pink layer.
- strawberry extract - use a little extract to make the strawberry flavor really jump out.
- pink gel food coloring - add a little bit of pink or red food coloring to play up the pink color in the strawberry layer.
- dutch-processed cocoa powder - cocoa powder will add a darker color and rich chocolate flavor for a little contrast in the chocolate layer.
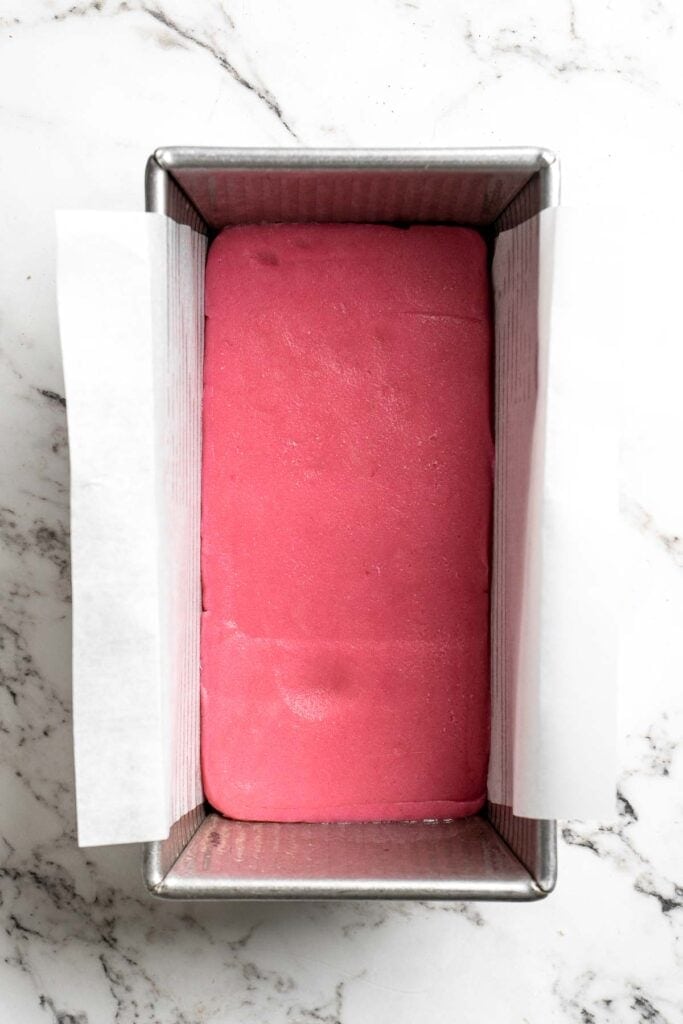
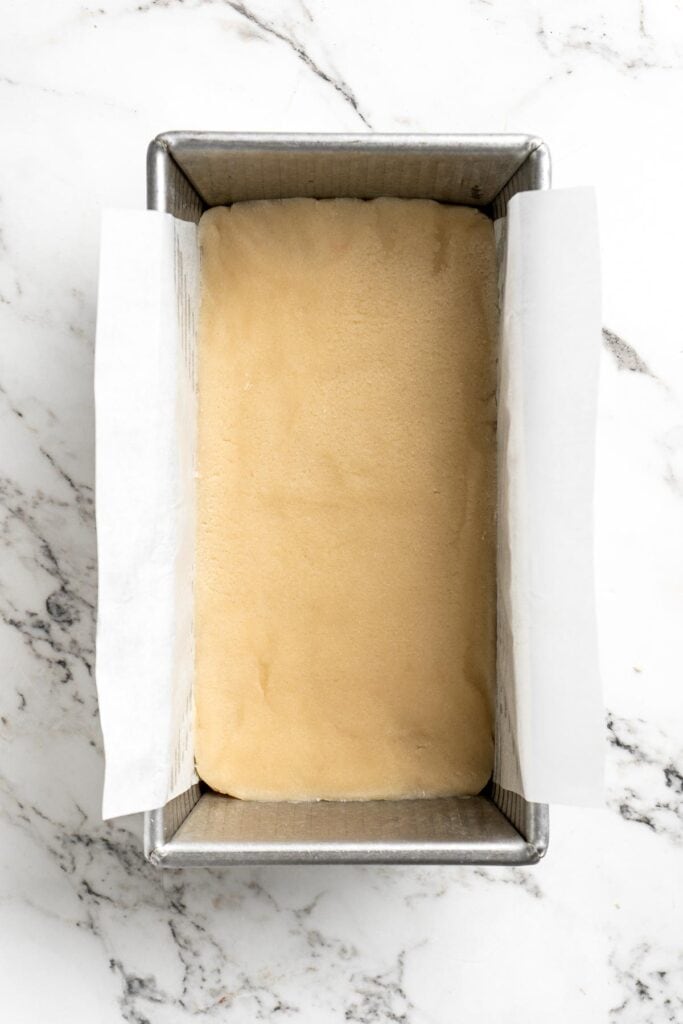
You will also need a 9x5 inch loaf pan, parchment paper, multiple mixing bowls, a hand mixer, plastic wrap, a large baking sheet, and a sharp knife.
How to Make the Best Neapolitan Cookies
First, make the cookie base.
- Prep. Prepare a 9x5-inch loaf pan with a light spray of cooking spray. Line with parchment paper, leaving an overhang on the 2 longest edges for easy removal.
- Combine wet ingredients. In a large mixing bowl, add butter and sugar and beat with a hand mixer until it looks fluffy and slightly pale, about 1-2 minutes. Add the egg, vanilla, and almond extract, then beat well until it is well-combined with everything else and the batter looks smooth and fluffy.

- Combine dry ingredients. In a separate medium mixing bowl, whisk together the flour, baking powder, and salt.
- Add dry to wet. Add the dry ingredients into the batter. Beat until a crumbly but soft dough forms.
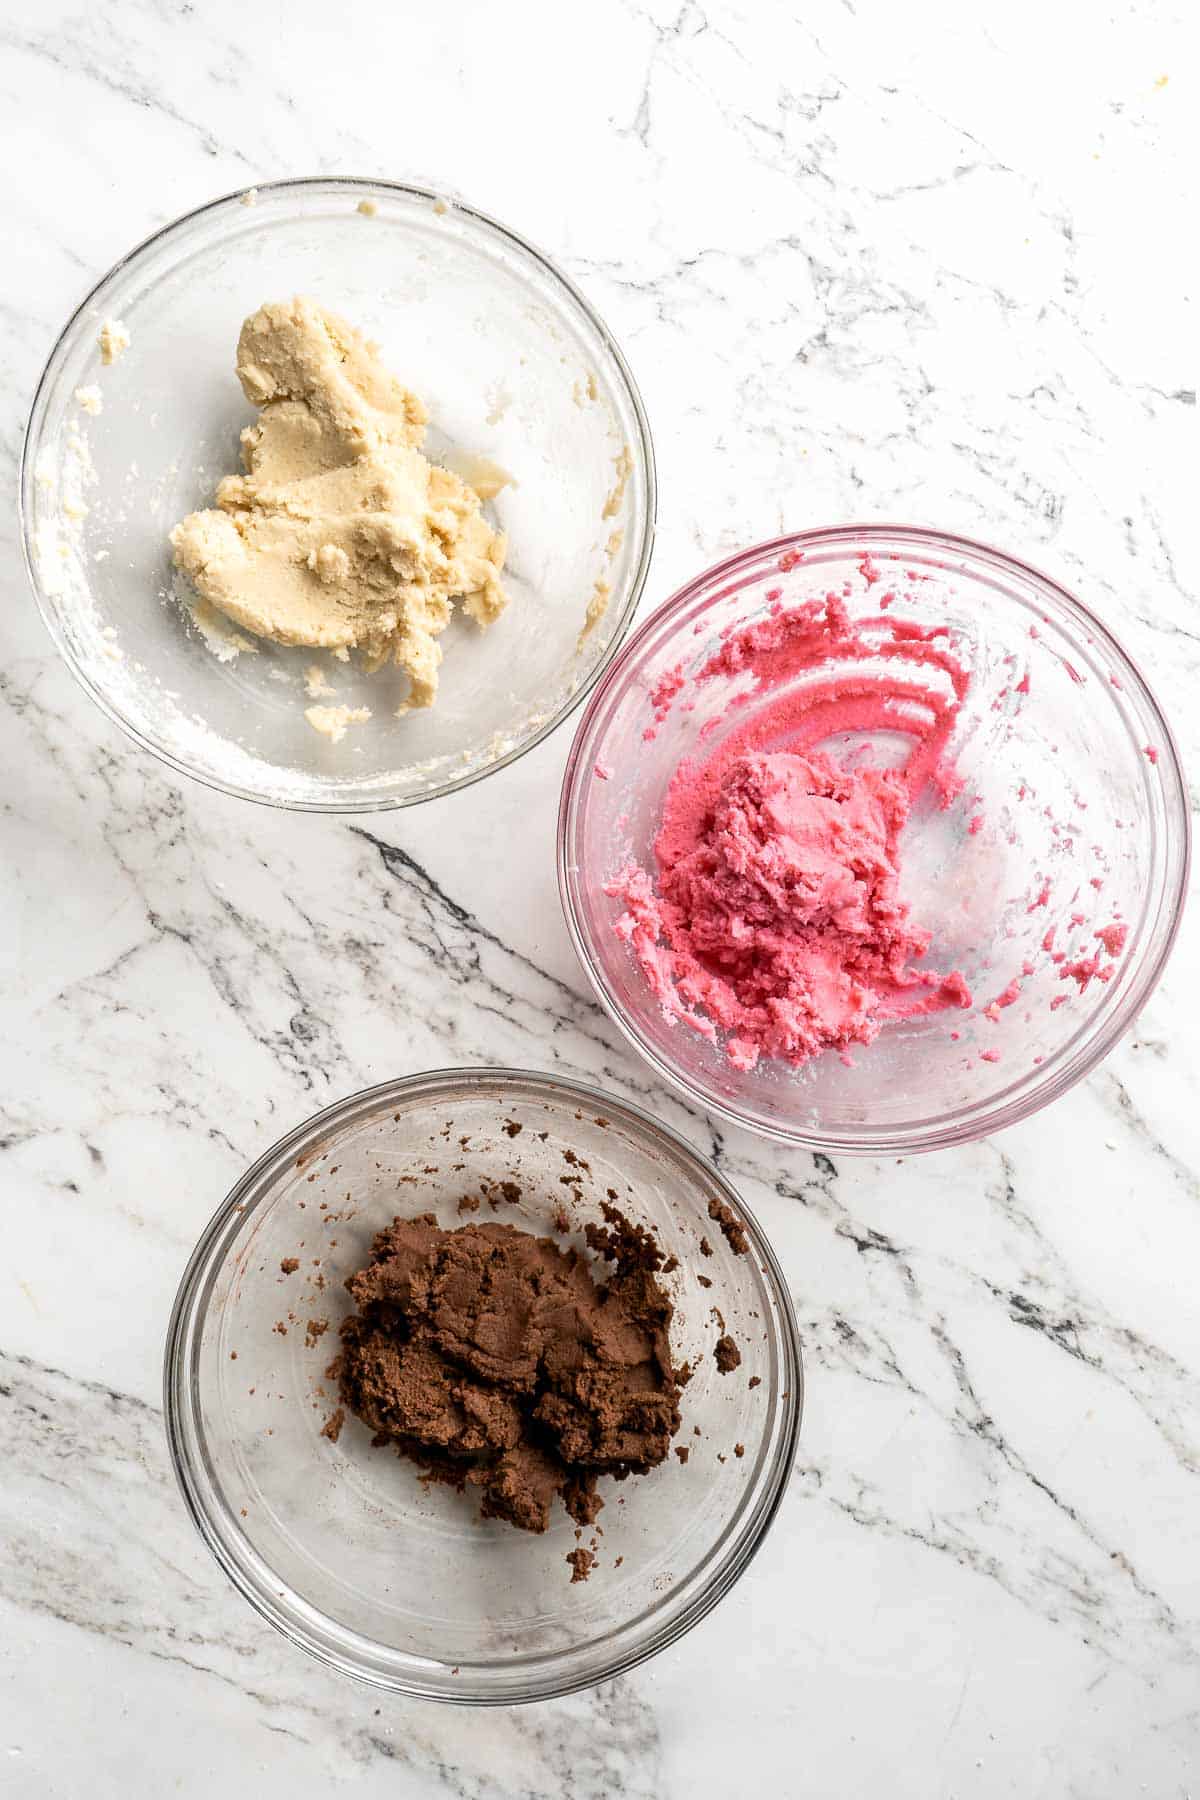
- Divide. Divide dough into 3 equal portions among 3 bowls: one will be vanilla (nothing more will be added to this bowl), one will be strawberry, and one will be chocolate.
Now, make the strawberry layer.
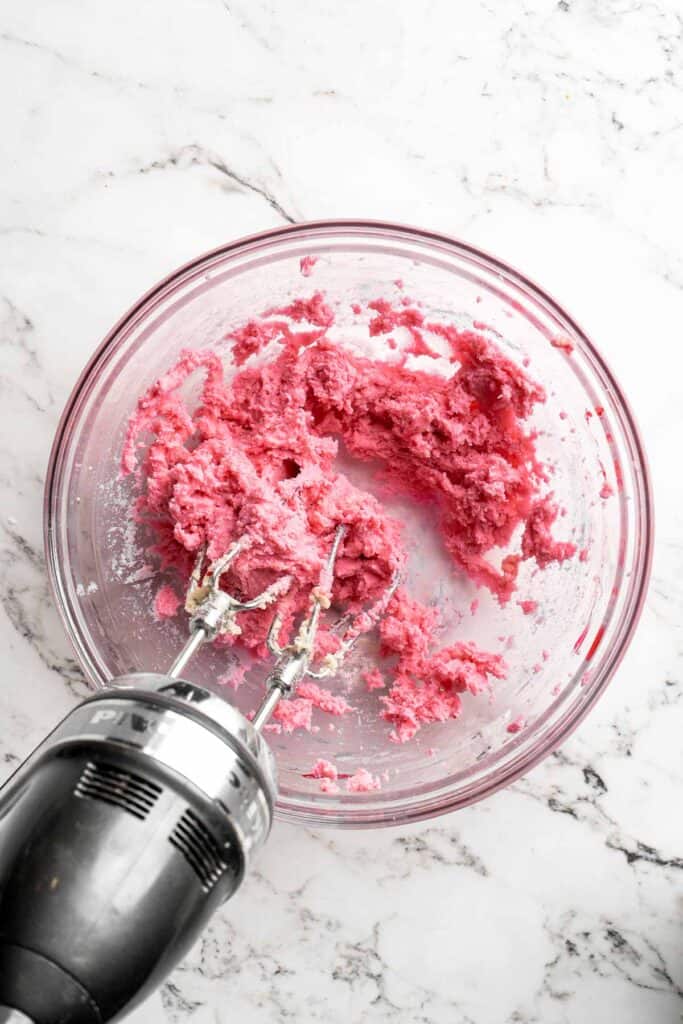
In one of the bowls, add all of the 'strawberry layer' ingredients to the dough, including flour, jam, strawberry extract, and pink gel food coloring. Beat with the hand mixer until combined.
Next, make the chocolate layer.
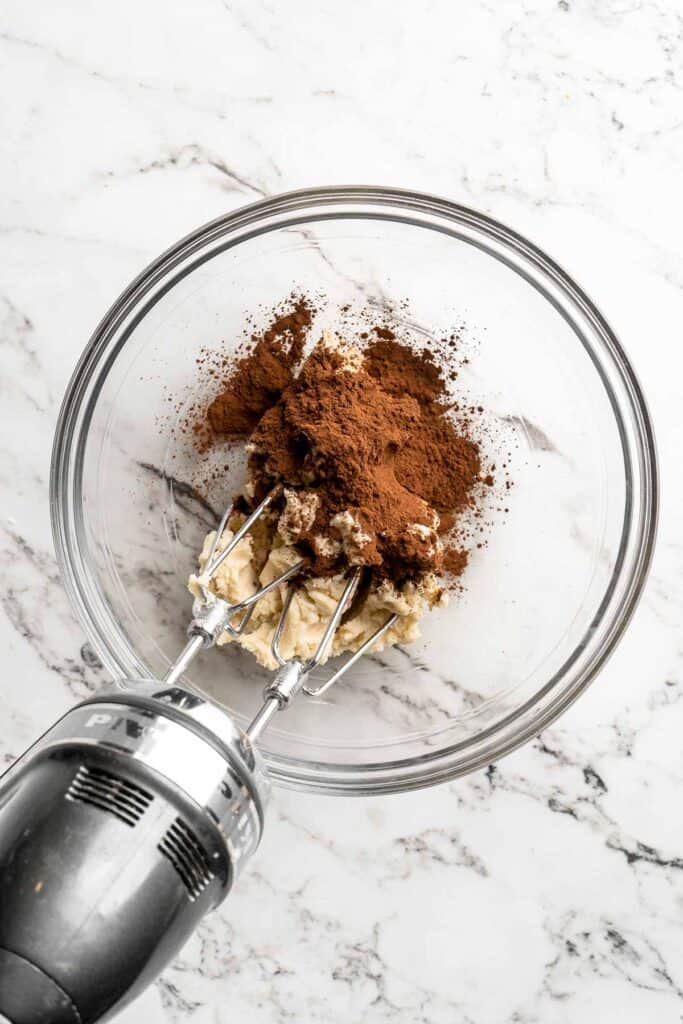
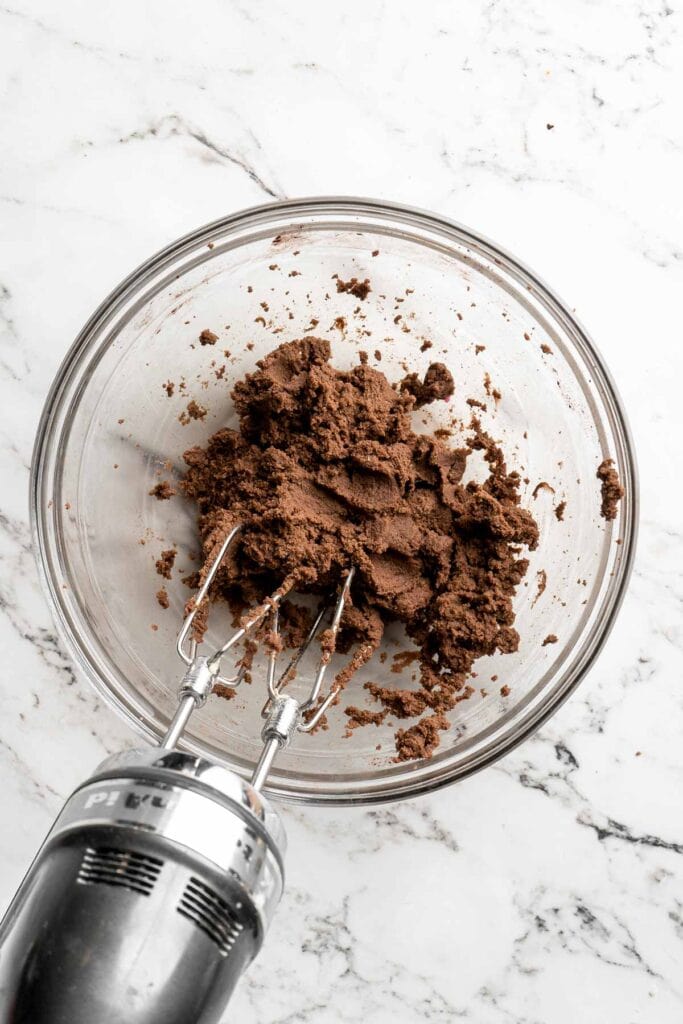
In another one of the bowls, add the cocoa powder and beat with the hand mixer until combined.
Now, let's assemble the cookies.
- Layer. Add the strawberry layer dough to the bottom of the prepared 9x5-inch pan, using your fingers to evenly spread it across the bottom of the pan. Add the vanilla dough on top of the strawberry dough, then use your fingers again to evenly spread it out. Finally, add the chocolate dough on top, then spread evenly again using your fingers.
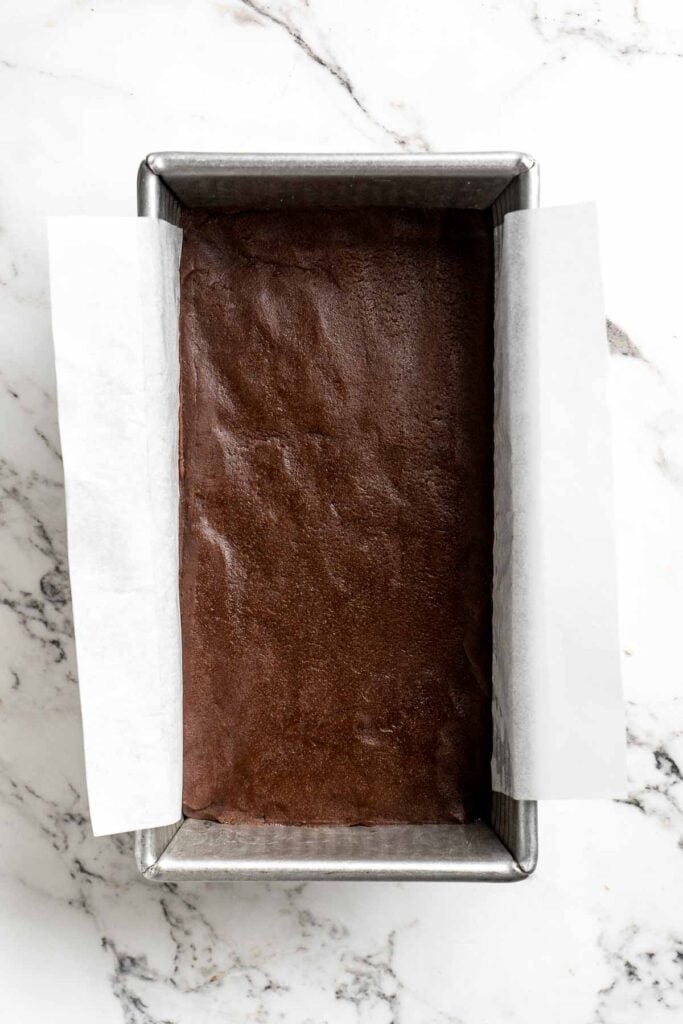
- Chill. Place a piece of plastic cling wrap on top on the surface of the dough, and place into the fridge to harden for at least 4 hours, or preferably overnight.
- Prep. When ready to bake, prepare a large baking sheet lined with parchment paper. Carefully remove the dough from the pan.
- Slice. Using a sharp knife, slice the dough brick in half lengthwise, then slice each half into 16 slices that are about ½-inch thick each, totally 32 cookies.
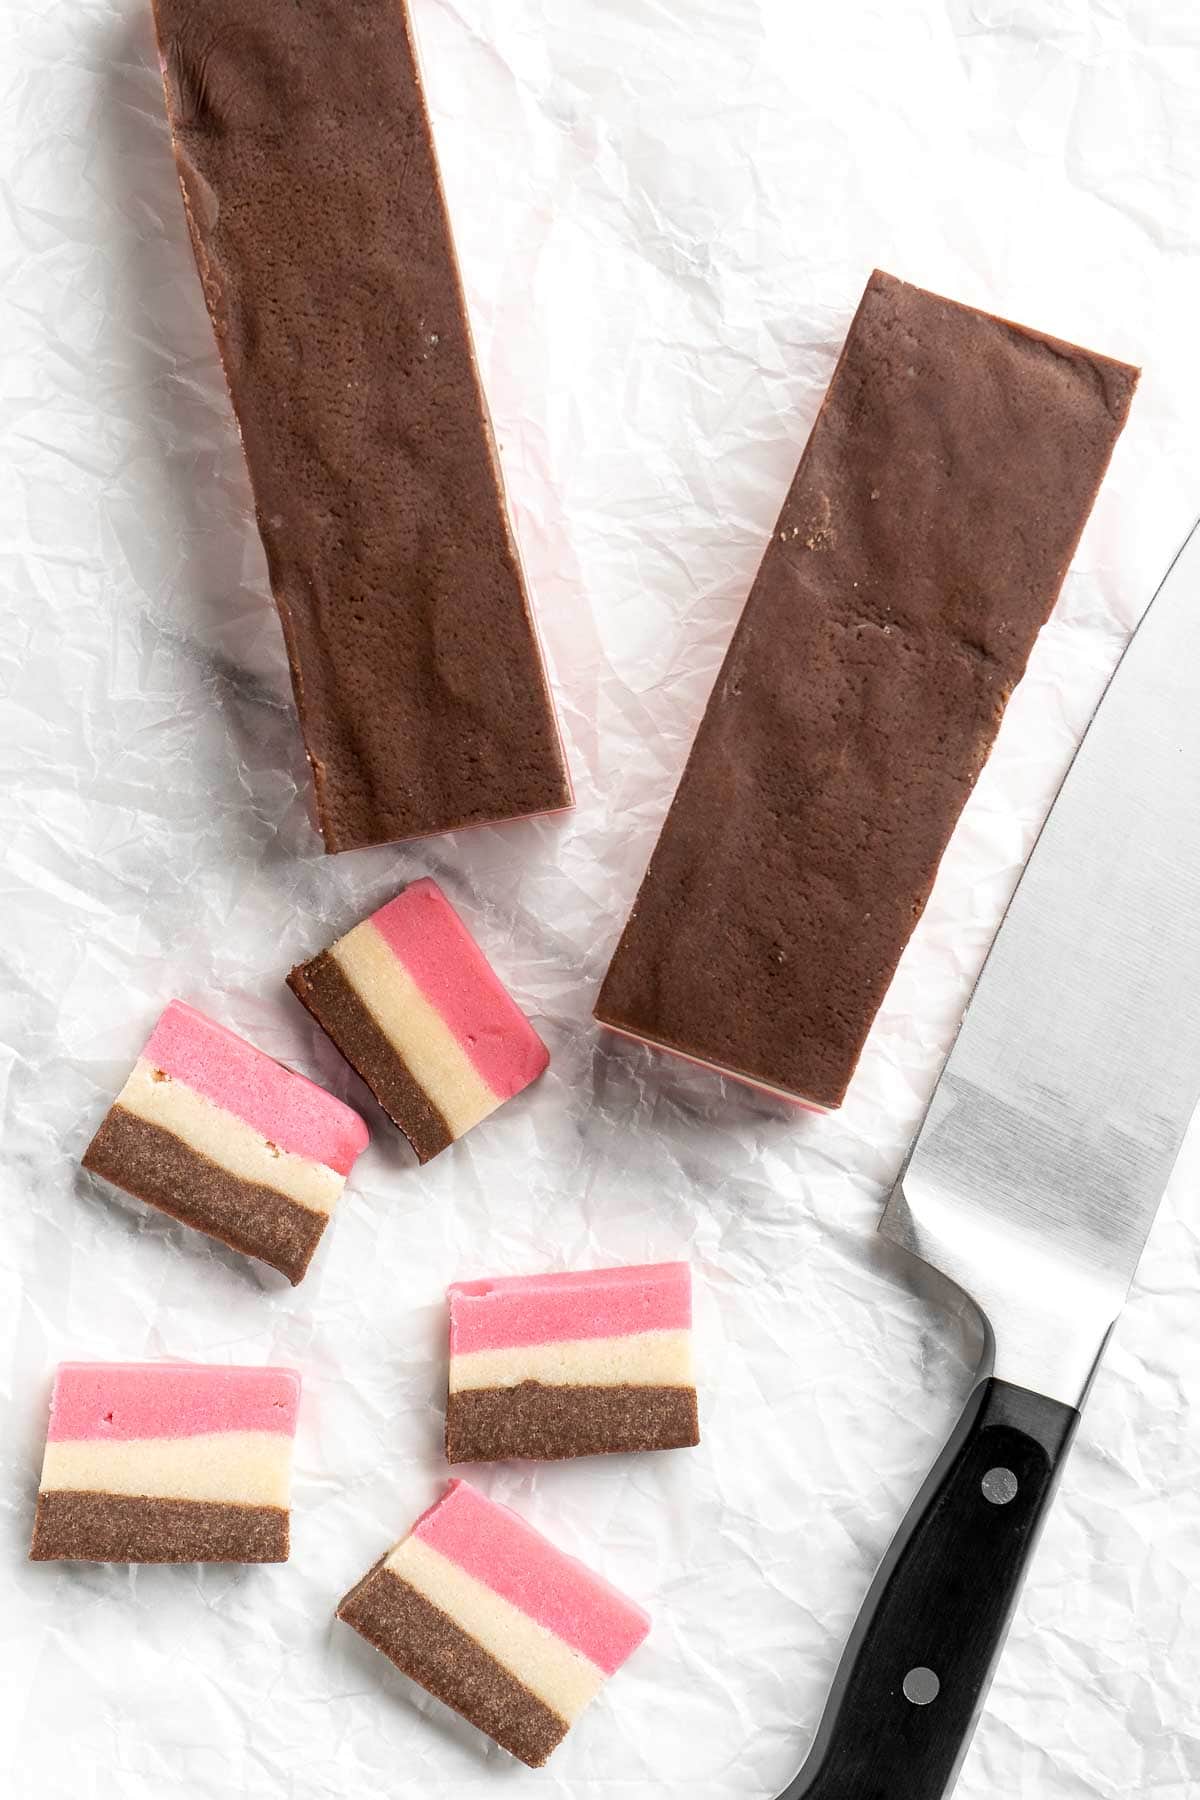
- Chill. Transfer the slices onto the prepared baking sheet, and place back into the fridge for 30 minutes to reharden.
Finally, bake the cookies.
Arrange the cold cookies onto parchment lined baking sheets (I did 16 cookies per sheet). Place into a 375F preheated oven to bake for 9 minutes. I recommend baking in batches, and keeping the remaining cookies cold in the fridge before baking.
Allow to cool to room temperature before enjoying.

Recipe Variations
- Use freeze-dried strawberries. Freeze-dried fruits have intensely concentrated flavor without any additional liquid! Grind them up into a powder to add to the strawberry layer for extra flavor.
- Dip in melted chocolate. Melt some dark chocolate and dip the sides of the baked cookies for an extra texture and even more chocolate flavor. You can even sprinkle some chopped pistachios or almonds for extra crunch.
- Adjust the flavors. Instead of strawberry, use your favorite flavors like cherry or blueberry. Skip the regular cocoa powder and try black cocoa powder. Keep the proportions of everything the same, but adjust the specific ingredients to adapt the original recipe to your preferences. Have fun with it!
How to Serve
These Neapolitan cookies are delicious served on their own, or paired with some of my favorite desserts:
- Mothers Day Vanilla Cupcakes with Rose Petal Buttercream Frosting
- Lofthouse Cookies (Soft Frosted Sugar Cookies)
- Chocolate Covered Strawberries
- Sugar Cookie Bars
- Strawberry Muffins
Recipe Tips and Tricks
- Chill layers before assembling for a cleaner look. If you have extra time, we found that refrigerating the dough after adding each layer to the loaf pan resulted in more even, straight layers in the cookies. So, add the strawberry layer in, press it out evenly, then place into the fridge for 30-45 minutes to harden before adding the next layer. This isn't necessary to making the cookies and is time consuming, but it will result in a more perfect looking cookie, if desired.
- Don't overmix. Since the dough is already mixed before you divide it, it's important to mix just enough to bring the mixture together. Once the color is integrated, stop mixing and let the dough rest.
- Use a metal measuring spoon. A key part of this recipe is pressing the layers of dough together in the loaf pan. One easy tip is to use the base of a metal measuring spoon. It's already flat and won't warm the dough like your fingers. You'll still need to use your hands for the corners of the pan, but it'll help you get an even layer quickly
Storing and Freezing Instructions
How to Store
Store leftover Neapolitan cookies in an airtight container at room temperature for approximately 1 week. They'll last 2-3 weeks in the fridge.
How to Freeze
If you have too many cookies, pack the extras in a freezer-safe container, adding a sheet of wax paper between the layers. Freeze for up to 3 months. You can also freeze the cookie dough. Just be sure to wrap it really well with plastic wrap and let it thaw in the fridge before slicing and baking like normal.
FAQ
Just like other Neapolitan desserts, the cookies have layers of vanilla, chocolate, and strawberry flavor. These different flavors pair perfectly together and look amazing in any display.
Yes! Cookie dough can typically be frozen for 3 months, so if you have way too much on hand, freeze it for later. Since these cookies are already layered together, it's easy to wrap the dough in several layers of plastic wrap and then freeze them for later. Be sure to let them thaw in the fridge before slicing and baking.
Although it's traditional to serve vanilla, chocolate, and strawberry, that's just the start! You can easily replace the cherry with other berries or use different extracts to doctor the dough. Use spices to season the base dough or use other types of cocoa powder for the chocolate or use black sesame instead! The vanilla layer would taste wonderful with ground pistachios or almonds, too. This is a great opportunity to get creative with the flavors you have on hand!
More Cookie Recipes
- 50 Best Cookie Recipes
- Slice and Bake Pecan Shortbread Cookies
- Sugar Cookies
- Nutella Cookies
- Whipped Shortbread Cookies
- Spritz Cookies
Tried this recipe?
I'd love to hear what you think! Leave a comment and rating below to share your feedback. Your reviews help others discover this recipe and help me keep creating more free recipes for you. Snap a photo and tag me on social media @aheadofthyme too.
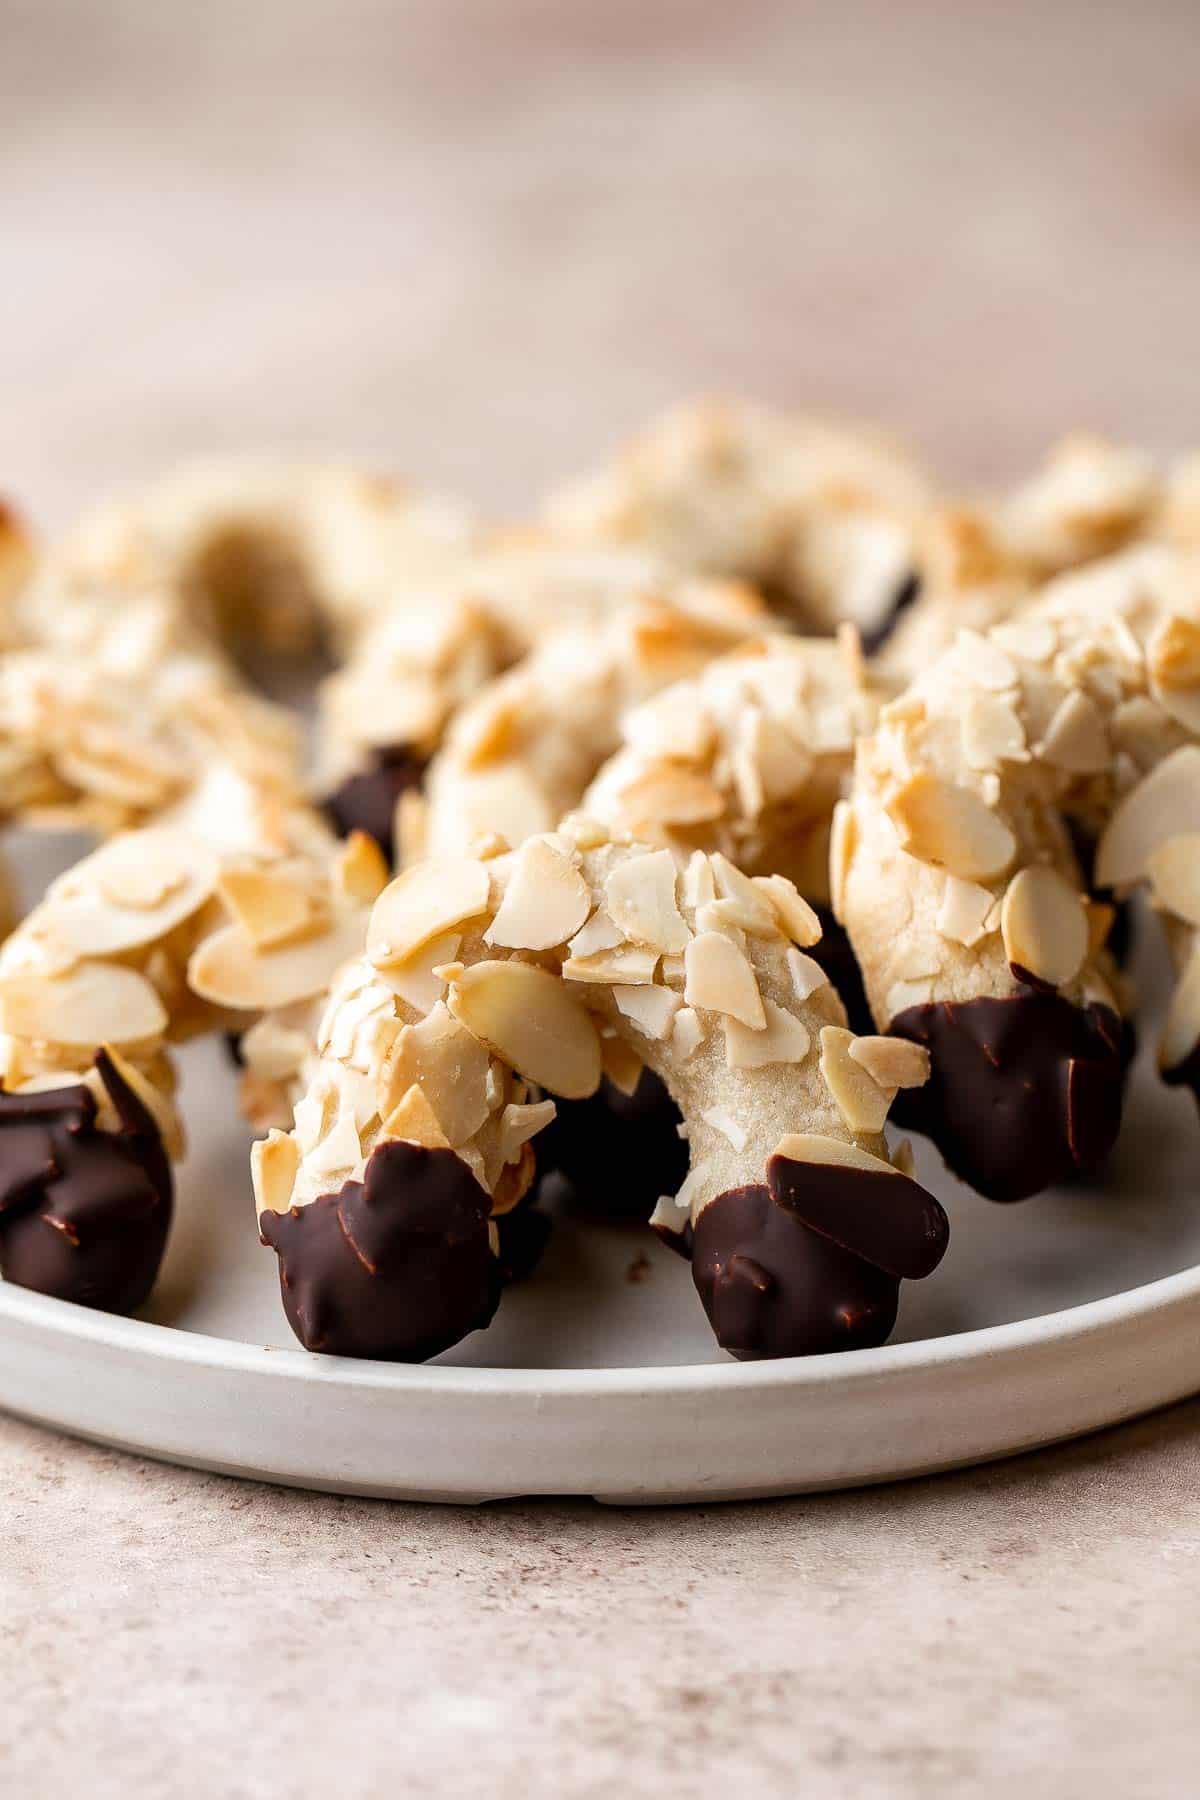
Almond Horns
These Almond Horns are chewy, horseshoe-shaped crescent cookies covered in crunchy almonds and dipped in chocolate. These delicious almond cookies will rival the ones from your local bakery! They are irresistible as a holiday treat or all-year-round gluten-free dessert.
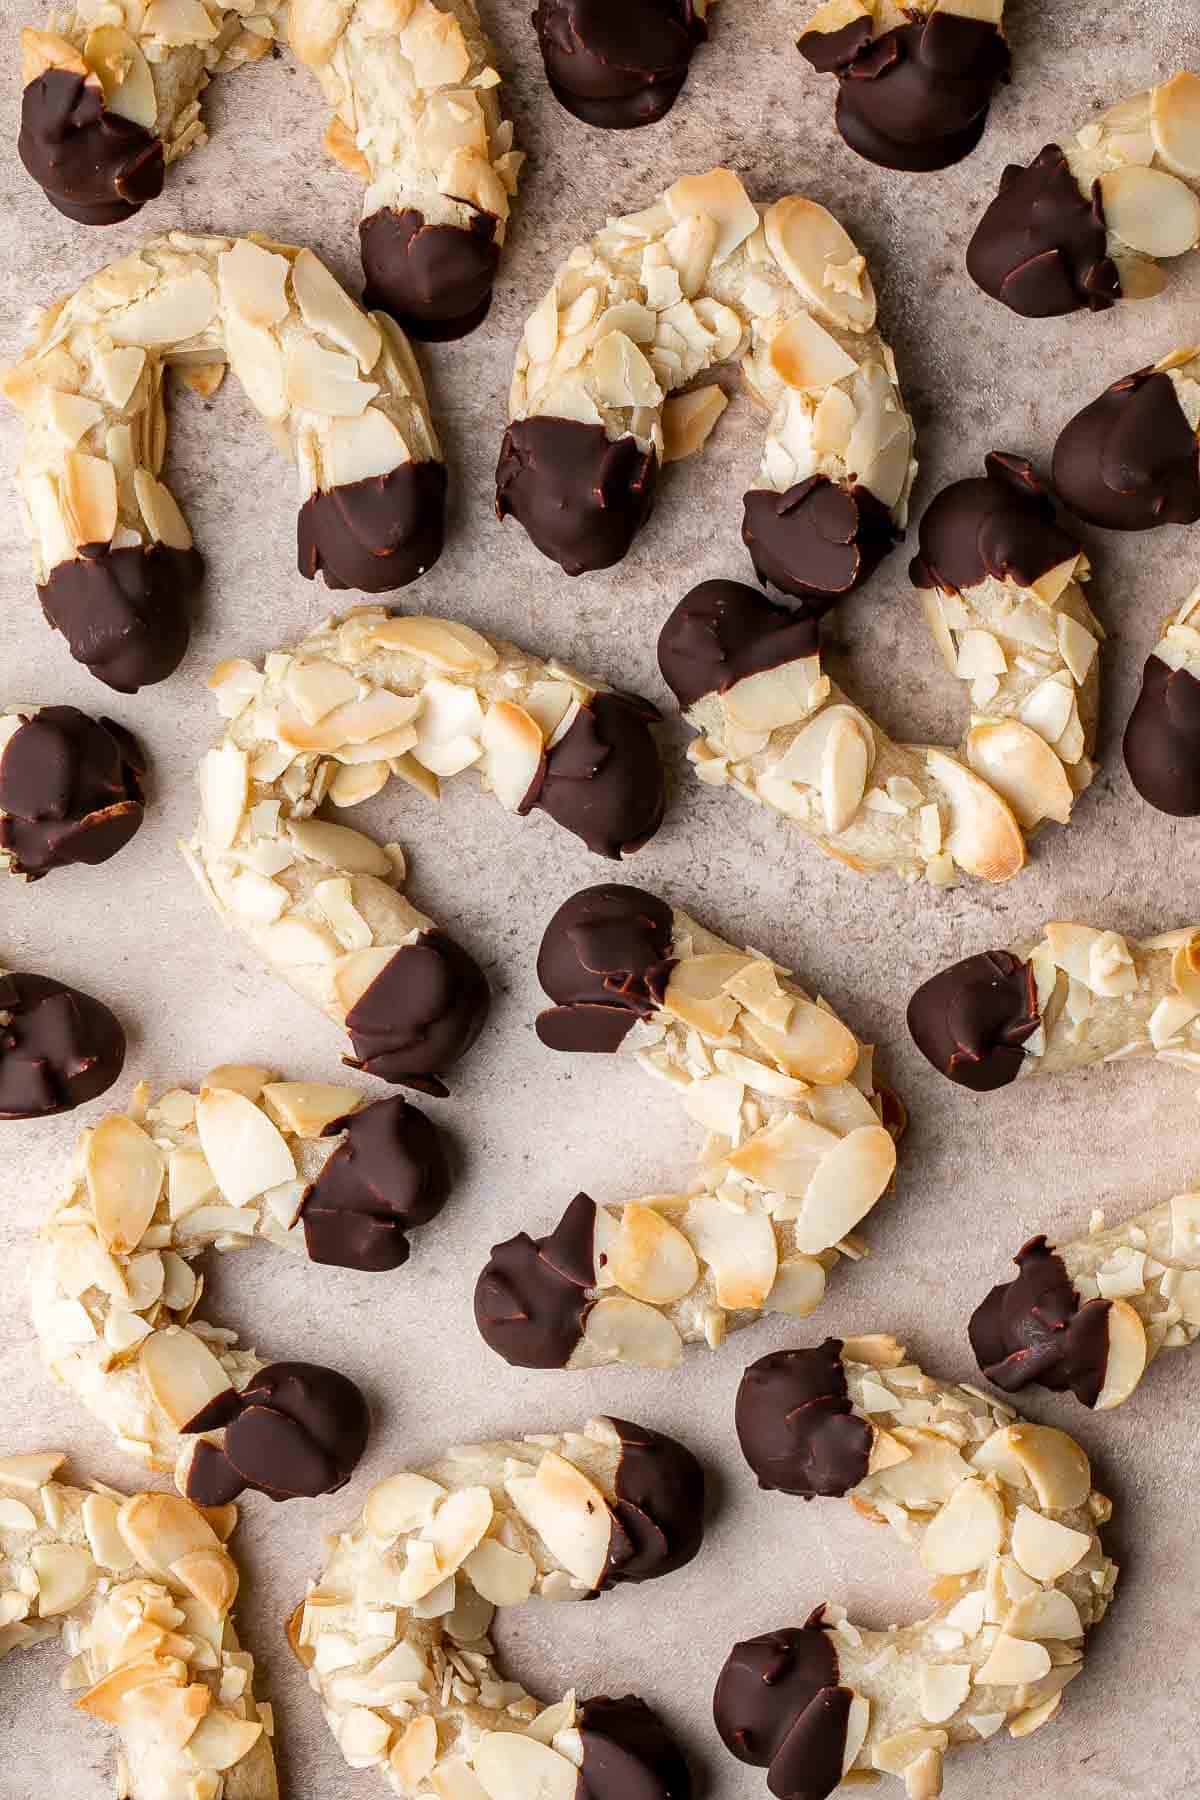
Simple yet elegant, these almond horns are inspired by the classic German Christmas treat called Mandelhörnchen. Made with a simple dough of almond paste, almond meal, and sugar, the cookies are rolled into small logs, covered with almonds, bent into a crescent shape, and then baked until golden brown. The tips of the "horn" are partially dipped in melted chocolate, giving them a festive and delicious finish that would make any dessert platter look impressive.
Why You'll Love this Almond Horn Recipe
- Surprisingly easy. These gluten-free almond cookies might look tricky to shape and assemble, but they're actually very easy to make! The dough comes together quickly and the shaping process doesn't take too long even if it's your first time making them. Give yourself around a max of 40 minutes to prep and bake and you'll have a batch of freshly baked goodies ready to serve.
- Very unique. It's hard to miss the charm of these U-shaped cookies on any dessert platter or Holiday Cookie Box. With its distinct nutty coat and chocolate tips, these little horns are certainly an eye-catcher. And just by the looks of it, you can already tell how much time and love went into making them.
- Deliciously nutty and crunchy. These horn cookies pack a lot of almonds, literally. Each piece is filled with nutty goodness as you bite into the crunchy almond coating and chew on the tender almond dough. The chocolate tips also add a nice touch of sweetness that's perfect with all the nutty flavors!
- Great for gifting. Want something unique and special to give as a gift? These almond horns are perfect for the job! The classic almond and chocolate flavor is a sure winner, and they just look so beautiful in a gift box.
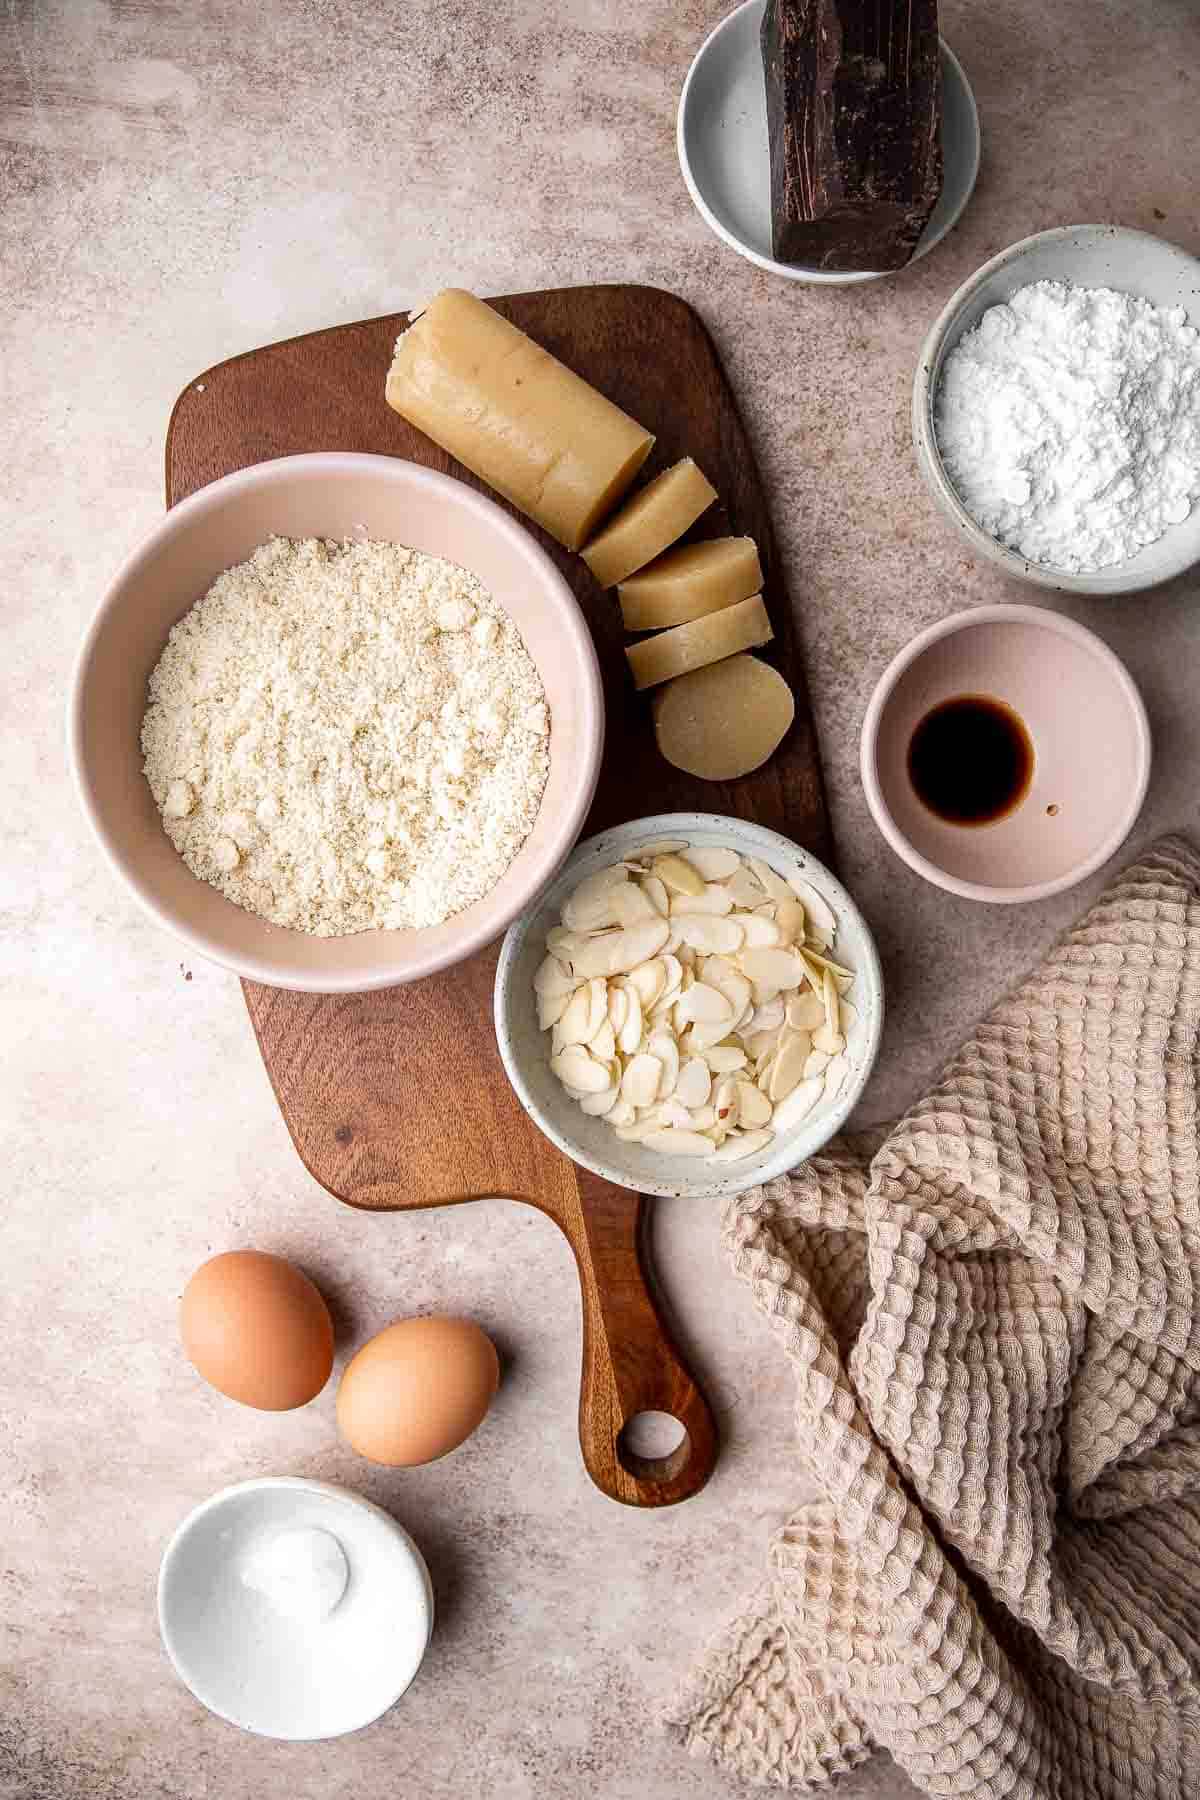
Ingredient Notes
To make these delicious Almond Horns, you will need the following ingredients (full measurements in recipe card below):
- almond paste - gives a distinct almond and slightly bitter flavor. Do not confuse this with marzipan, which usually has fewer almonds, is much sweeter, and doesn't hold up well in the oven.
- almond meal - this forms the base of the dough. I prefer finely ground almond meal without skin, but you can use skin-on ones for a slightly darker color. You can also make your own almond flour by finely grinding skinless almonds in a food processor.
- confectioners' sugar - I use confectioner's sugar as it's easier to mix with other ingredients, especially when making the dough. It also adds a melt-in-your-mouth texture to these cookies.
- egg whites - divided into two separate portions. The first is used to bind the dough ingredients while the second one is used to stick the chopped almonds stick to the logs.
- almond extract - I prefer bittersweet almond extract, but you can use the sweeter variant for a subtle almond flavor. You can also leave this out if you prefer.
- sliced almonds - I use blanched sliced almonds for a nice, mild buttery flavor. We used skinless almonds but you can easily substitute with skin on sliced almonds.
- semi-sweet chocolate - You can also use dark or milk chocolate.
- coconut oil - males the chocolate smoother and easier for dipping.
Baking Equipment Needed
You will also need the following baking tools and equipment:
- measuring cups and spoons
- large baking tray
- parchment paper or silicone baking mat
- stand mixer or large mixing bowl and hand mixer
- small mixing bowl
- pastry brush
- wire cooling rack
- saucepan or microwave-safe bowl
How to Make the Best Almond Horns
- Make the base. In a stand mixer (or large mixing bowl with hand mixer) add almond paste, almond meal, and sugar. Beat on medium-low speed until combined. The mixture should resemble blueberry-sized balls.
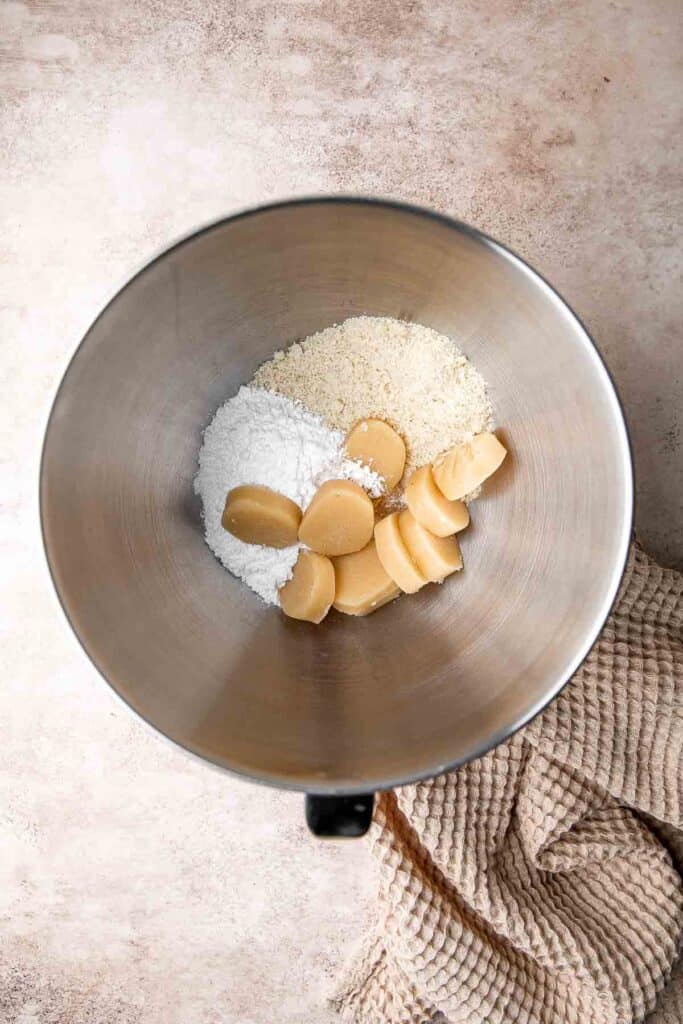
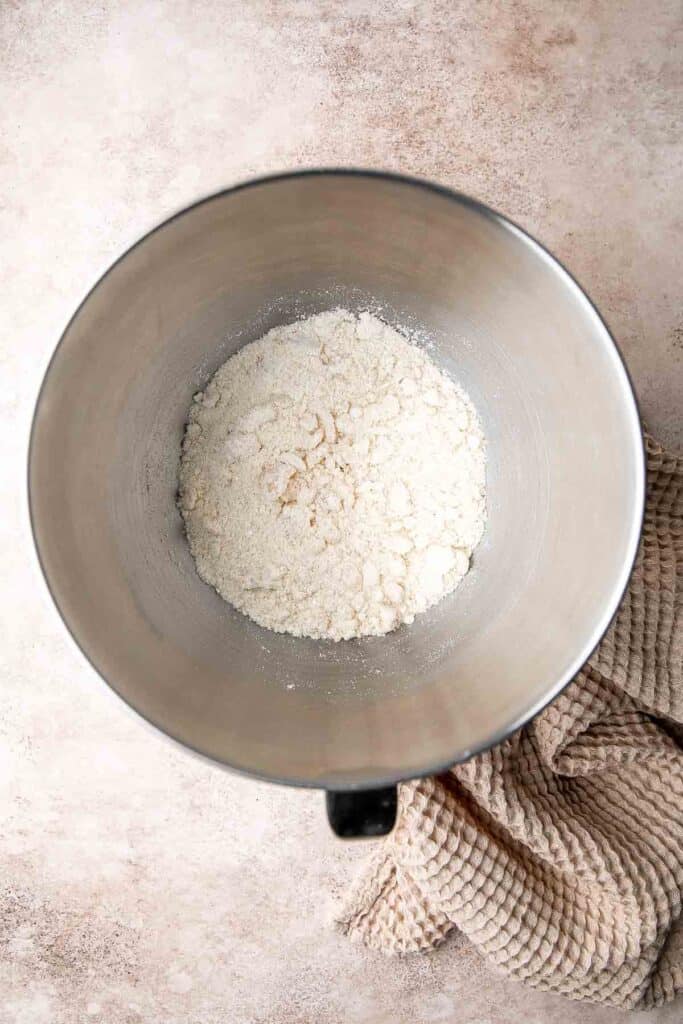
- Add liquids. Add 1 egg white (32 grams) and vanilla. Beat until the dough forms into a thick dough. The dough will be slightly sticky.
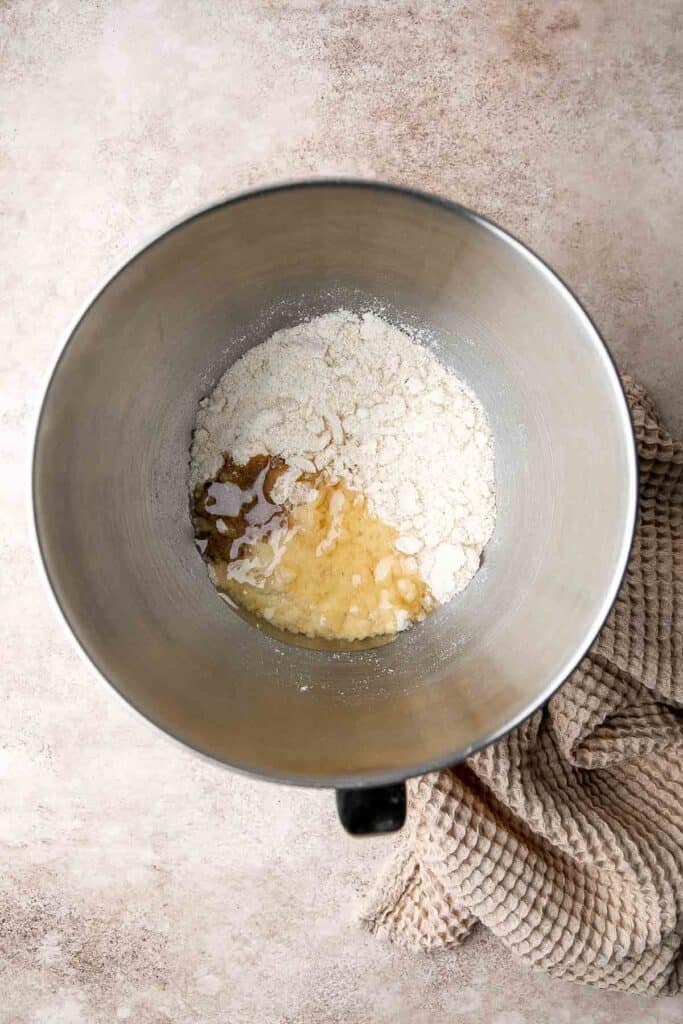
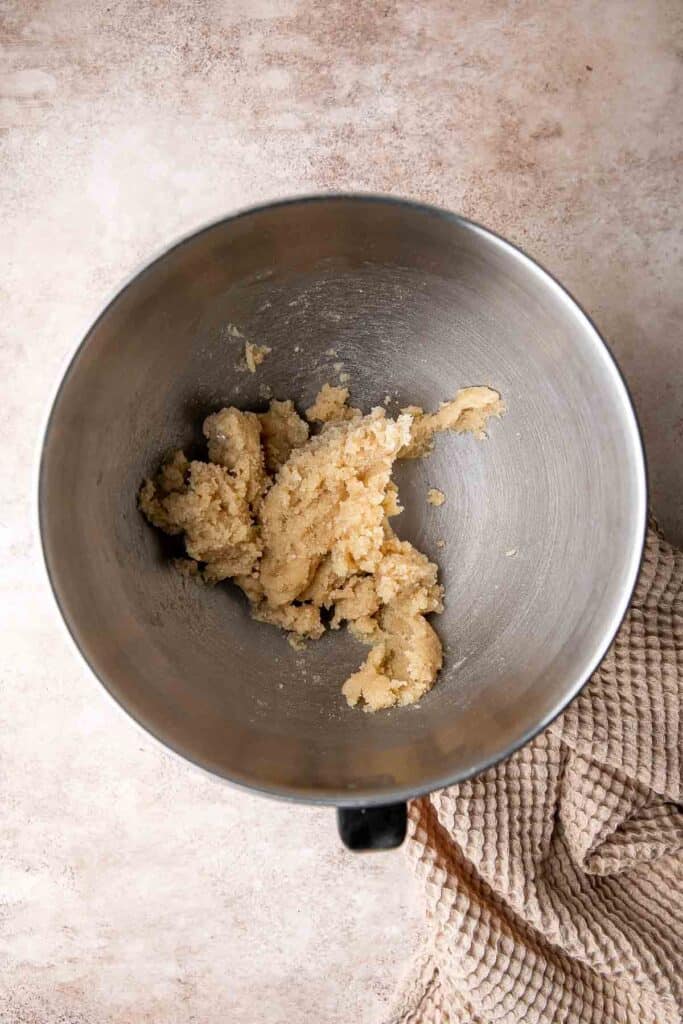
- Shape into logs. Take 1 tablespoon of dough at a time and use your hands to roll into a 1-inch ball. Then, shape into a small log, about 3 to 3.5 inches long.
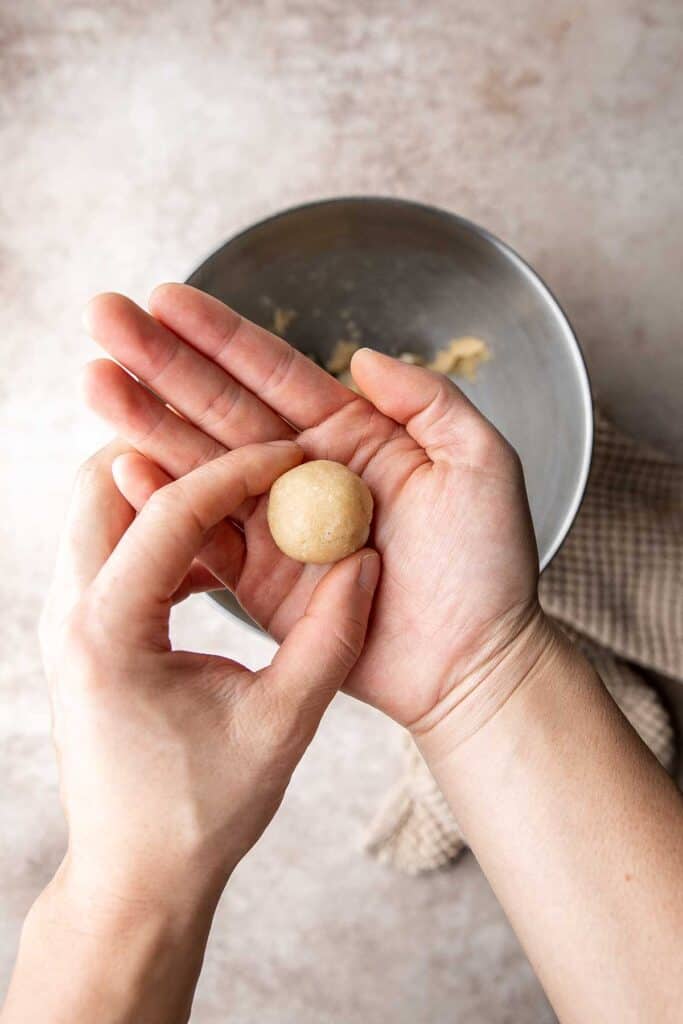
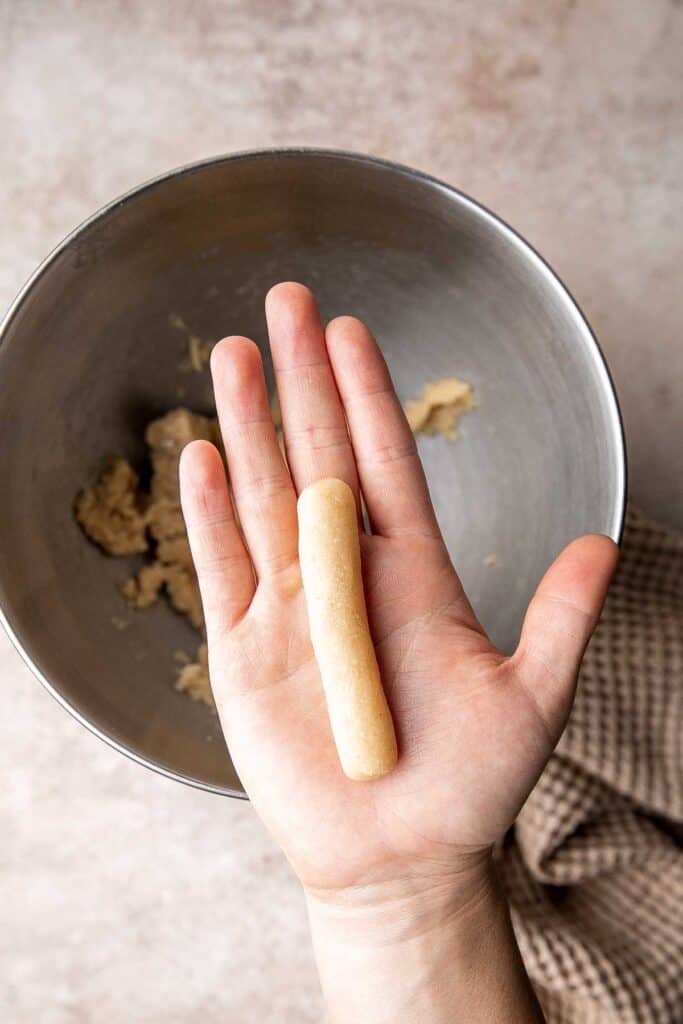
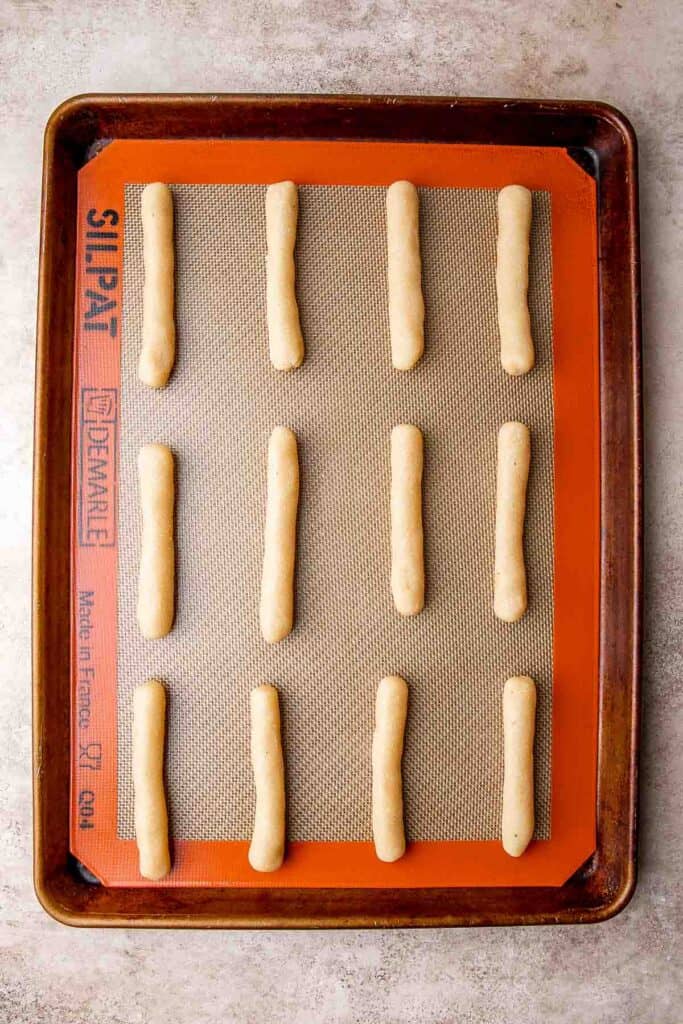
- Coat. Place the remaining egg white into a small bowl. Place sliced almonds into a shallow bowl. Take one log of dough at a time and use a pastry brush to brush the egg white all over. Place into the bowl of sliced almonds and roll. If you find that the almonds are not sticking very well, crush them slightly with your hands. I find that when they are crushed they adhere better.
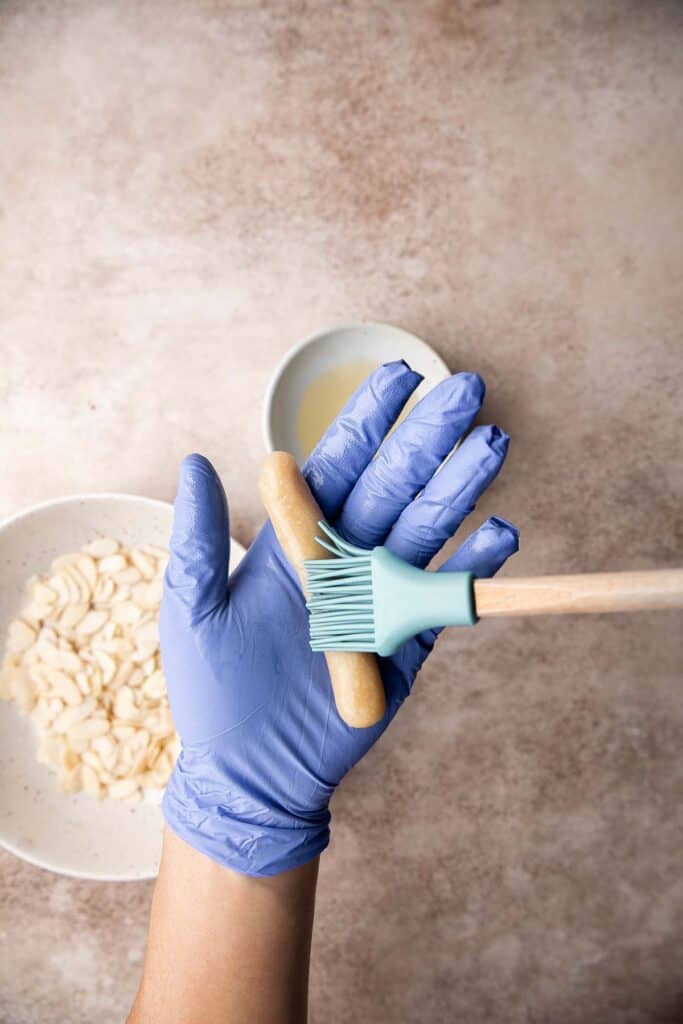

- Bend dough. Bend the almond-coated logs into a crescent or U-shape. Place the cookies on a large baking tray lined with parchment paper or a silicone baking mat, placed about an inch apart (I fit 12 cookies on one sheet pan).
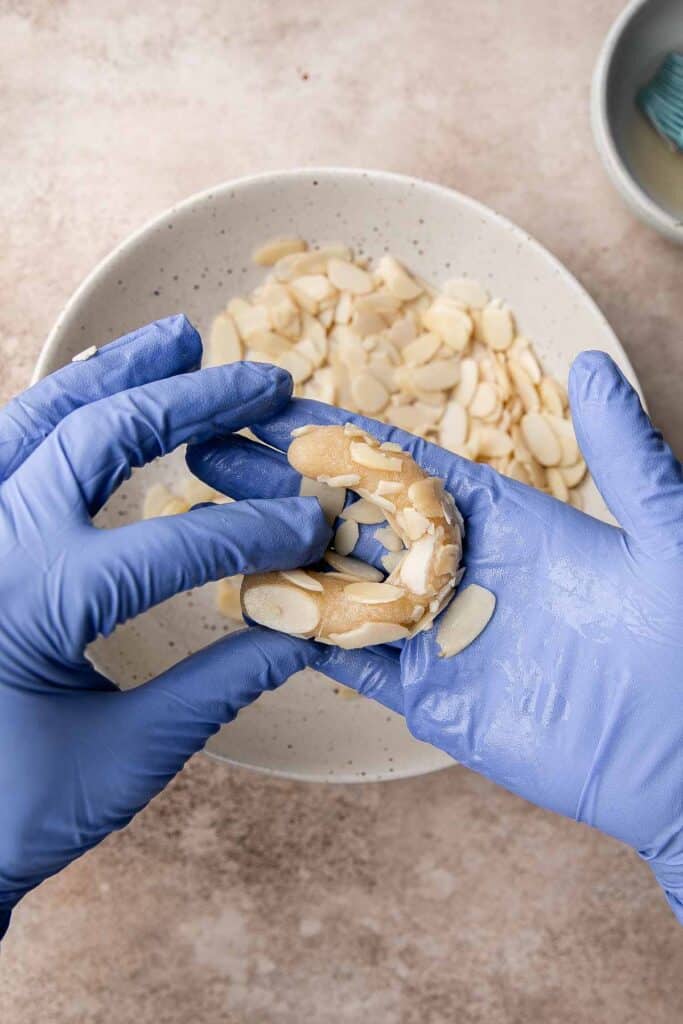
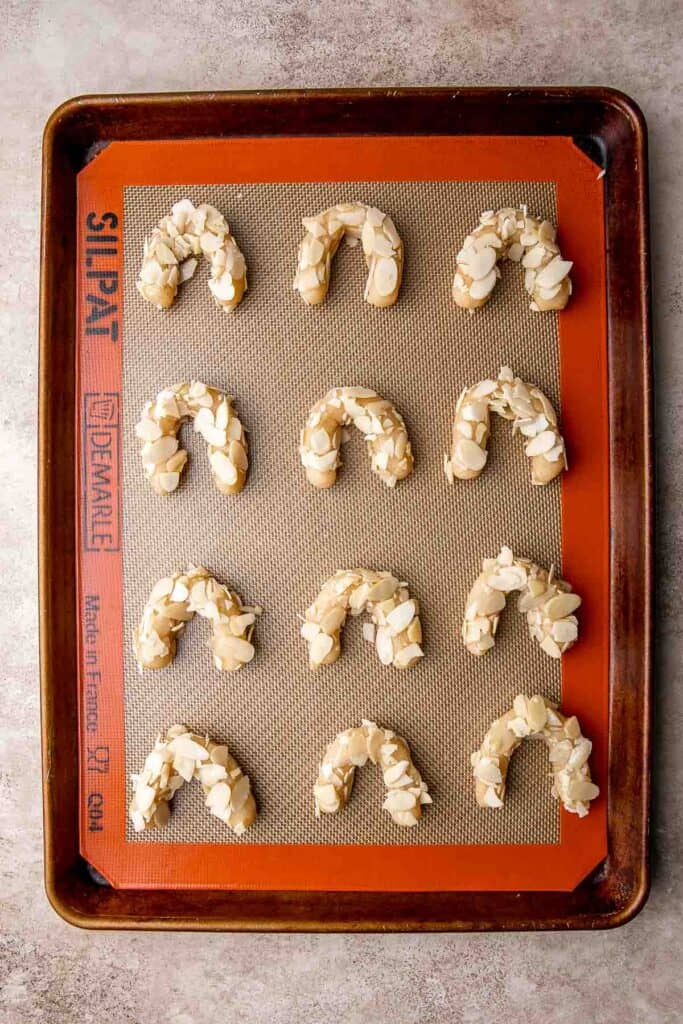
- Bake. Bake in a 350F preheated oven for 13-15 minutes until the tips of the cookies start turning golden brown. Allow the cookies to cool on the pan for 5 minutes, then carefully transfer to a wire rack to cool completely.
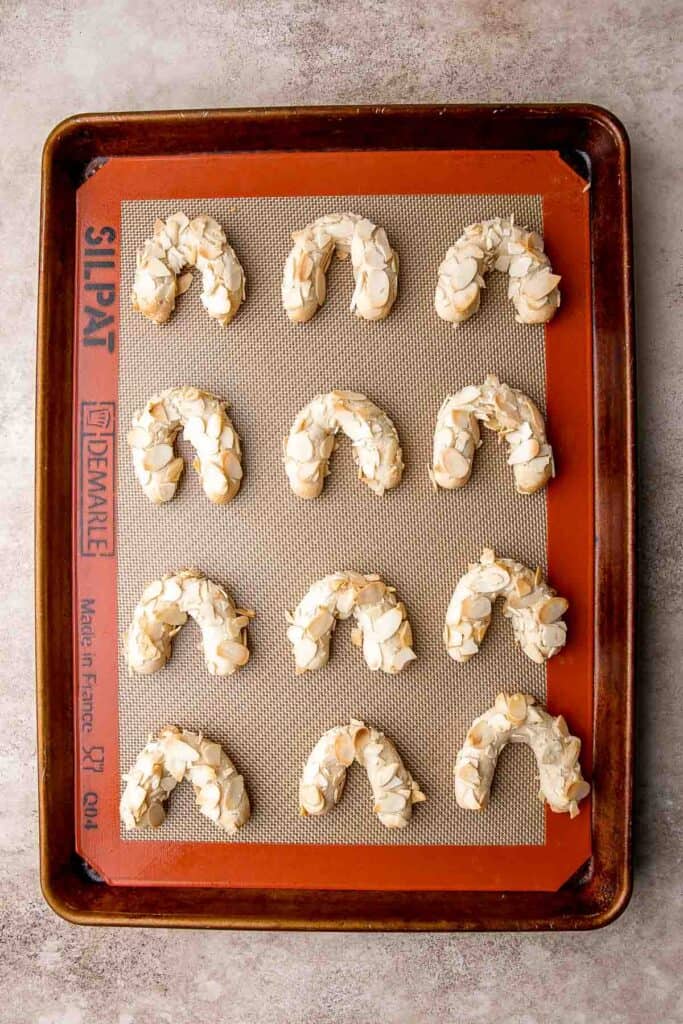
- Melt chocolate. Melt the chocolate either on the stove or in the microwave:
- On the stove: Bring 2 inches of water to a low simmer in a saucepan over medium-low heat. Then turn the heat to low and place a large heatproof bowl of chocolate with coconut oil on the mouth of the pot. Make sure that there is a gap of a few inches between the bottom of the bowl and the water (You can also place a bowl on a steamer attachment on top of your pot). Stir the chocolate constantly as it melts. Stir until the chocolate is completely smooth and melted. This should take a few minutes.
- In the microwave: Place the chocolate and oil into a microwave-safe bowl and microwave in 30-second intervals. Remove the bowl at each interval and stir well. Repeat until the chocolate has completely melted. Stir until completely smooth.


- Dip in chocolate. Dip the cooled almond horns into the bowl of chocolate to coat the tips. Place them back on the wire rack until the chocolate has set.
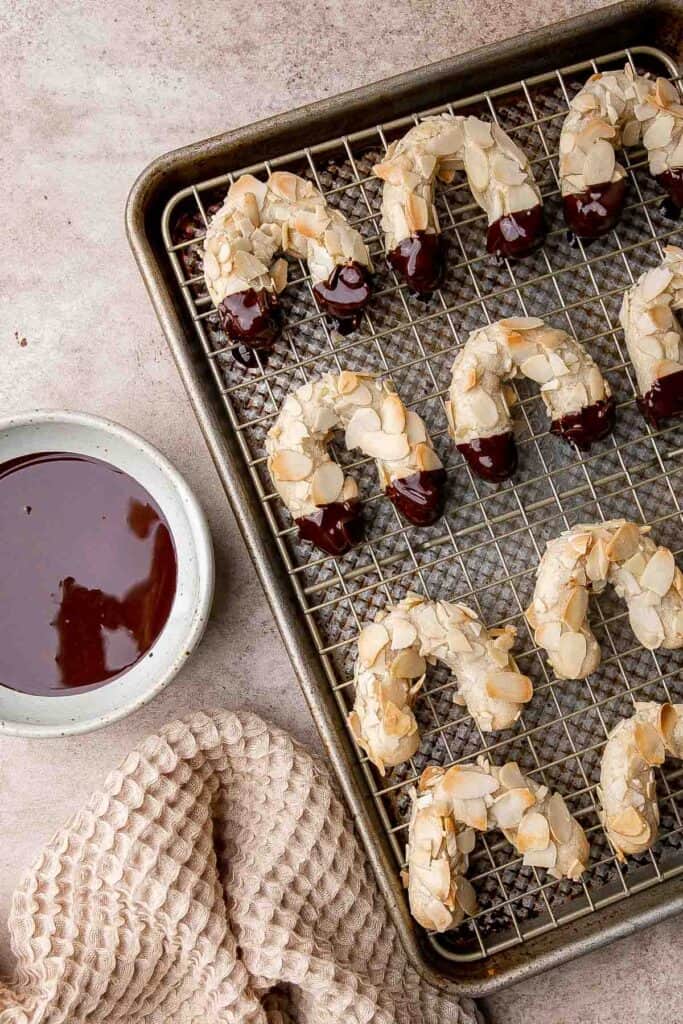
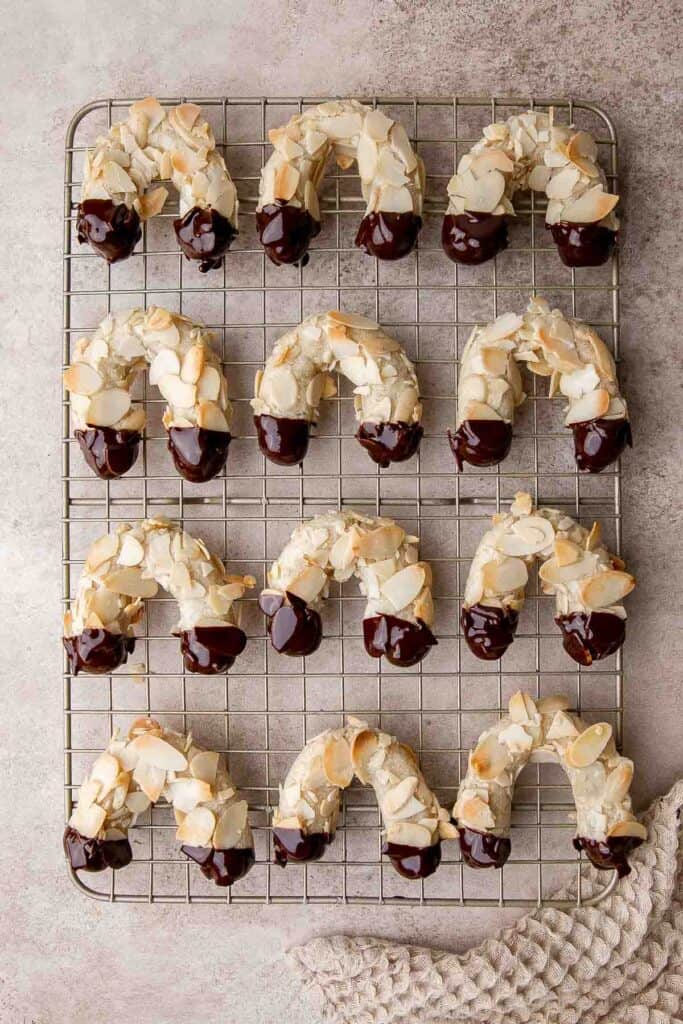
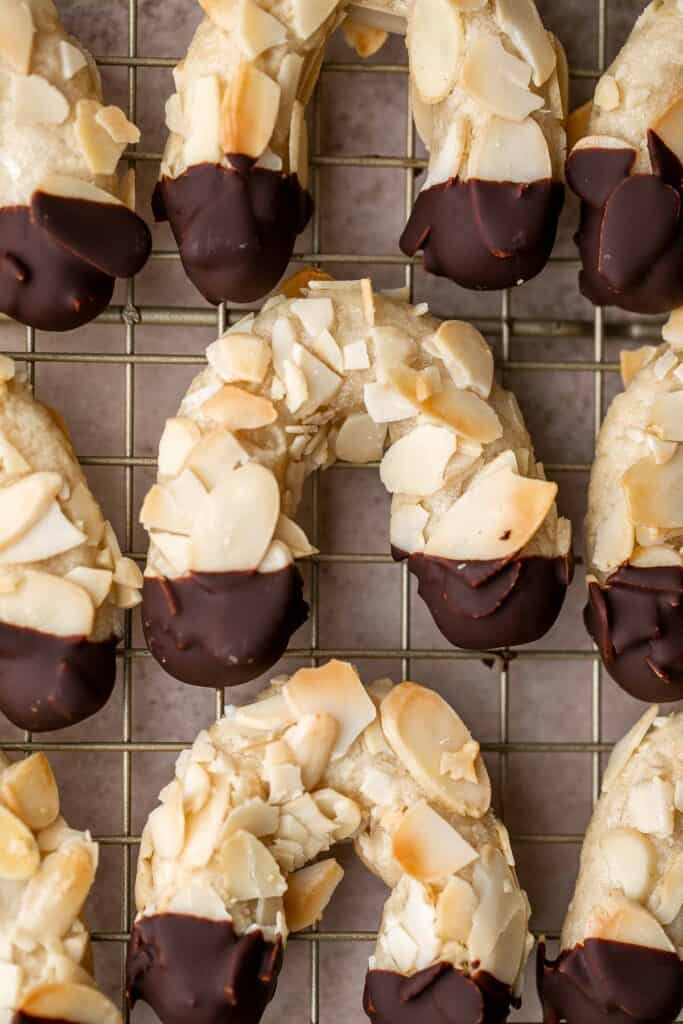
Recipe Variations
- Make it chocolatey. Enjoy a chocolatey version of these almond horns by adding cocoa powder to the dough. You can also fill the crescents with a chocolate ganache or chocolate hazelnut spread for a full chocolate experience.
- Add pistachio. Substitute some of the almond meal with ground pistachios for an additional rich, nutty flavor. For the coating, you can also blend the almonds with crushed pistachios to give your cookies a touch of green.
- Fill with fruit jam. For a unique twist, add a small amount of strawberry or blueberry jam at the center of each horn before rolling.
- Cover with coconut. Add a tropical touch by rolling the chocolate-dipped ends in shredded coconut flakes for a sweeter flavor and interesting texture.
How to Serve
Almond Horns are delicious as-is, but they can also be served with a scoop of ice cream or some fresh fruits. They also go well with a warm beverages like:
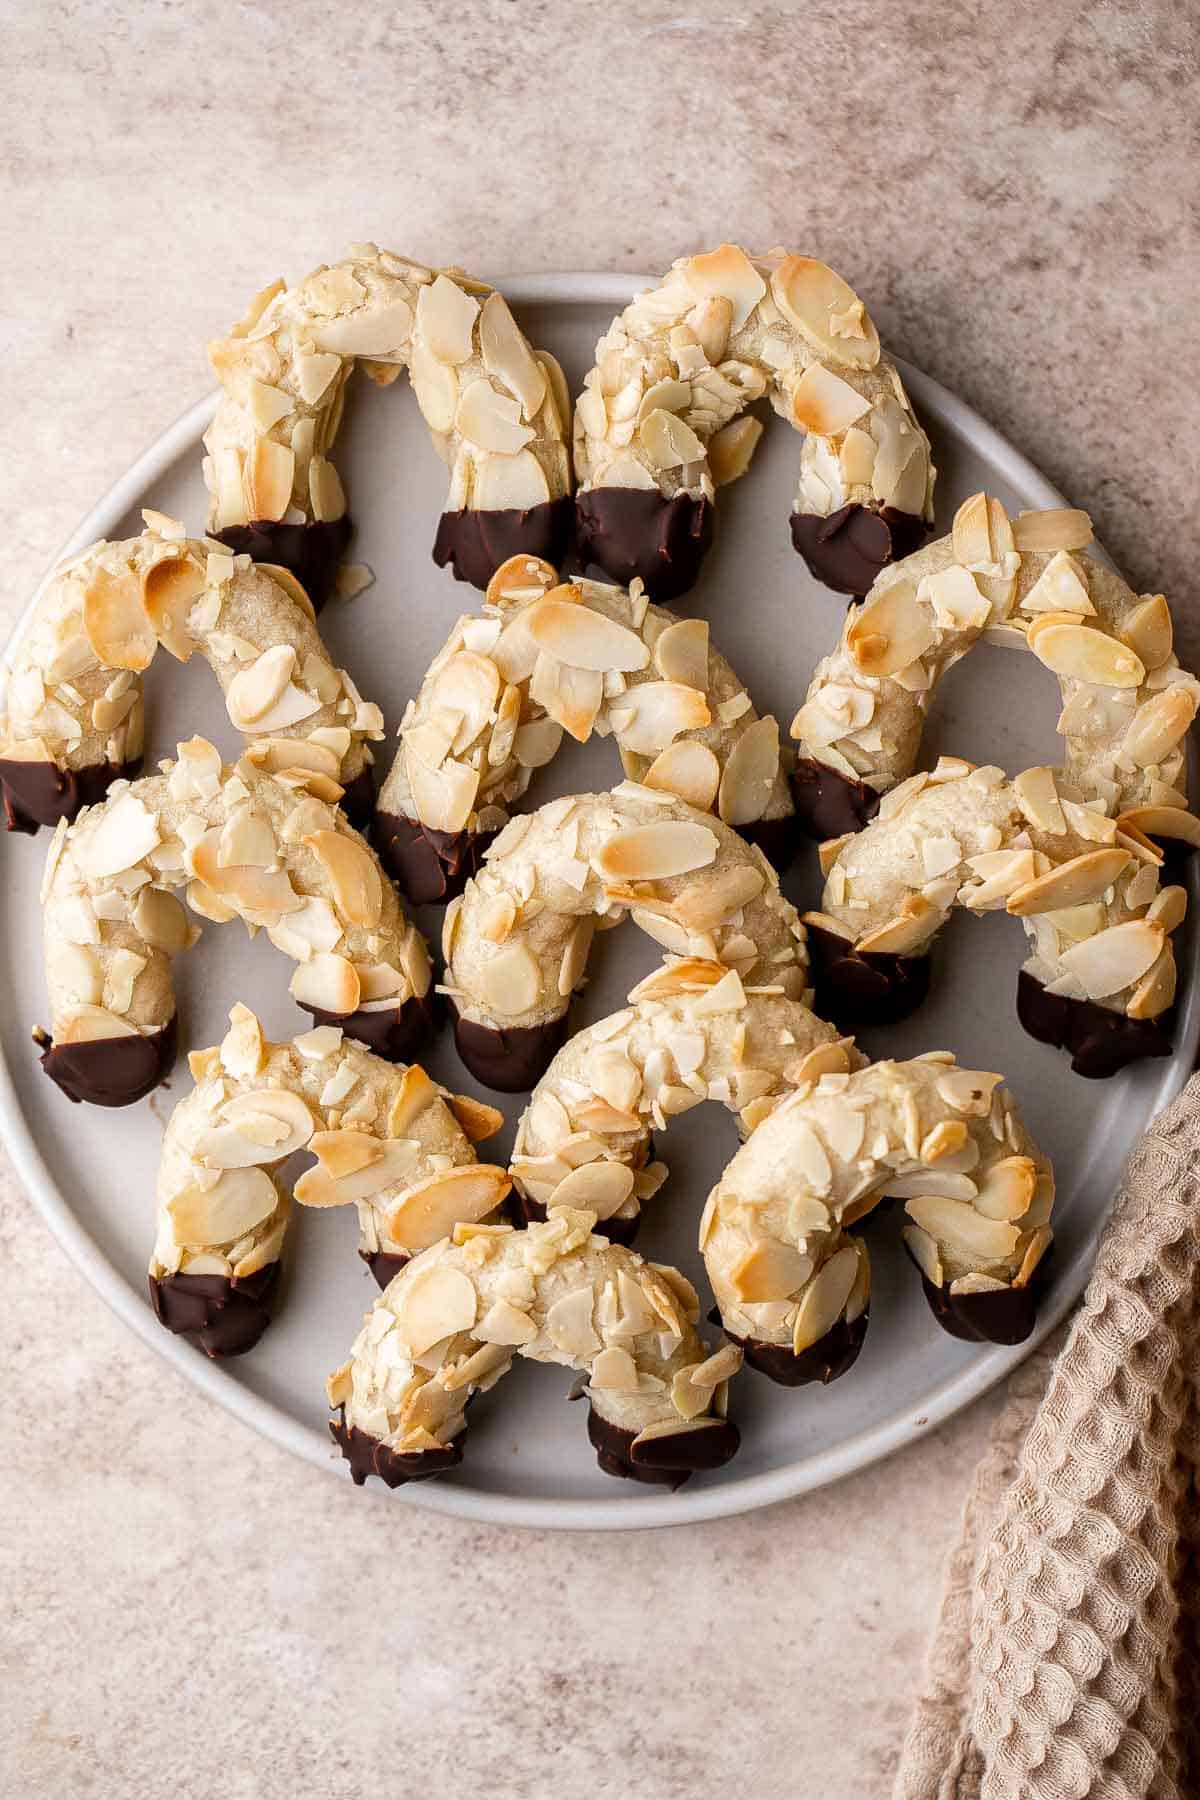
Recipe Tips and Tricks
- Use almond paste. Unlike marzipan, almond paste is made with more almonds and less sugar, which gives the dough a more intense almond flavor that's perfect for these sweet treats.
- Toast almonds. Slightly toast chopped almonds to add an extra layer of flavor to your cookies. This step seals in the warm and slightly roasted aroma, which makes the cookies much more flavorful.
- Adjust almond flavor. Most people might find the taste of almond extract too strong, so adjust the amount to your liking. I find one-half teaspoon enough to bring out the full almond flavor in these cookies.
Storing and Freezing Instructions
How to Store
Place almond horns in an airtight container and keep at room temperature for up to 7 days.
How to Freeze
For longer storage, place almond horns in a freezer-safe bag and keep in the freezer for up to 3 months. You can also freeze the almond cookie dough for up to a month.
More Almond Cookie Recipes
- 50 Best Cookie Recipes
- Almond Crescent Cookies
- Italian Rainbow Cookies
- Almond Biscotti
- Florentines
- Pistachio Macarons
Tried this recipe?
I'd love to hear what you think! Leave a comment and rating below to share your feedback. Your reviews help others discover this recipe and help me keep creating more free recipes for you. Snap a photo and tag me on social media @aheadofthyme too.

Peppermint Kiss Cookies
These sweet and crunchy Peppermint Kiss Cookies taste like the holidays in one bite! They're the perfect Christmas cookies, made with real candy canes crushed and folded into the sugar cookie dough. Make a double batch to share at your holiday cookie exchanges or to add to your Christmas cookie tray. They're always a hit!
This is the best Christmas cookie recipe! They have all the fun of our favorite Peanut Butter Blossoms, except there's no peanut butter flavor. Instead, they have a candy cane cookie dough base with real peppermint extract and candy cane pieces. They're topped off with peppermint kisses on top of the cookies! Save a few for yourself to enjoy with a big mug of our Peppermint Hot Chocolate. So good!
Why You'll Love These Peppermint Kiss Cookies
- Perfect for the holidays. The combination of peppermint and chocolate makes this the perfect Christmas cookie. The real candy cane pieces take the cookie dough to the next level! They're always a hit at cookie exchanges, yet are easy enough to make with the kids for your own holiday cookie tray.
- Customizable. Technically, these peppermint sugar cookies can be made with any type of Hershey's kisses! I love them with the Hershey's peppermint kiss, but they'd also be wonderful with dark chocolate kisses or the mint truffles. Just be sure to choose kisses that work well with a peppermint flavor!
- Crowd-pleasing. The candy cane stripes will immediately catch your guests' attention this holiday season. These candy cane kiss cookies really are the star of any holiday cookie platter! They're the perfect festive treat.
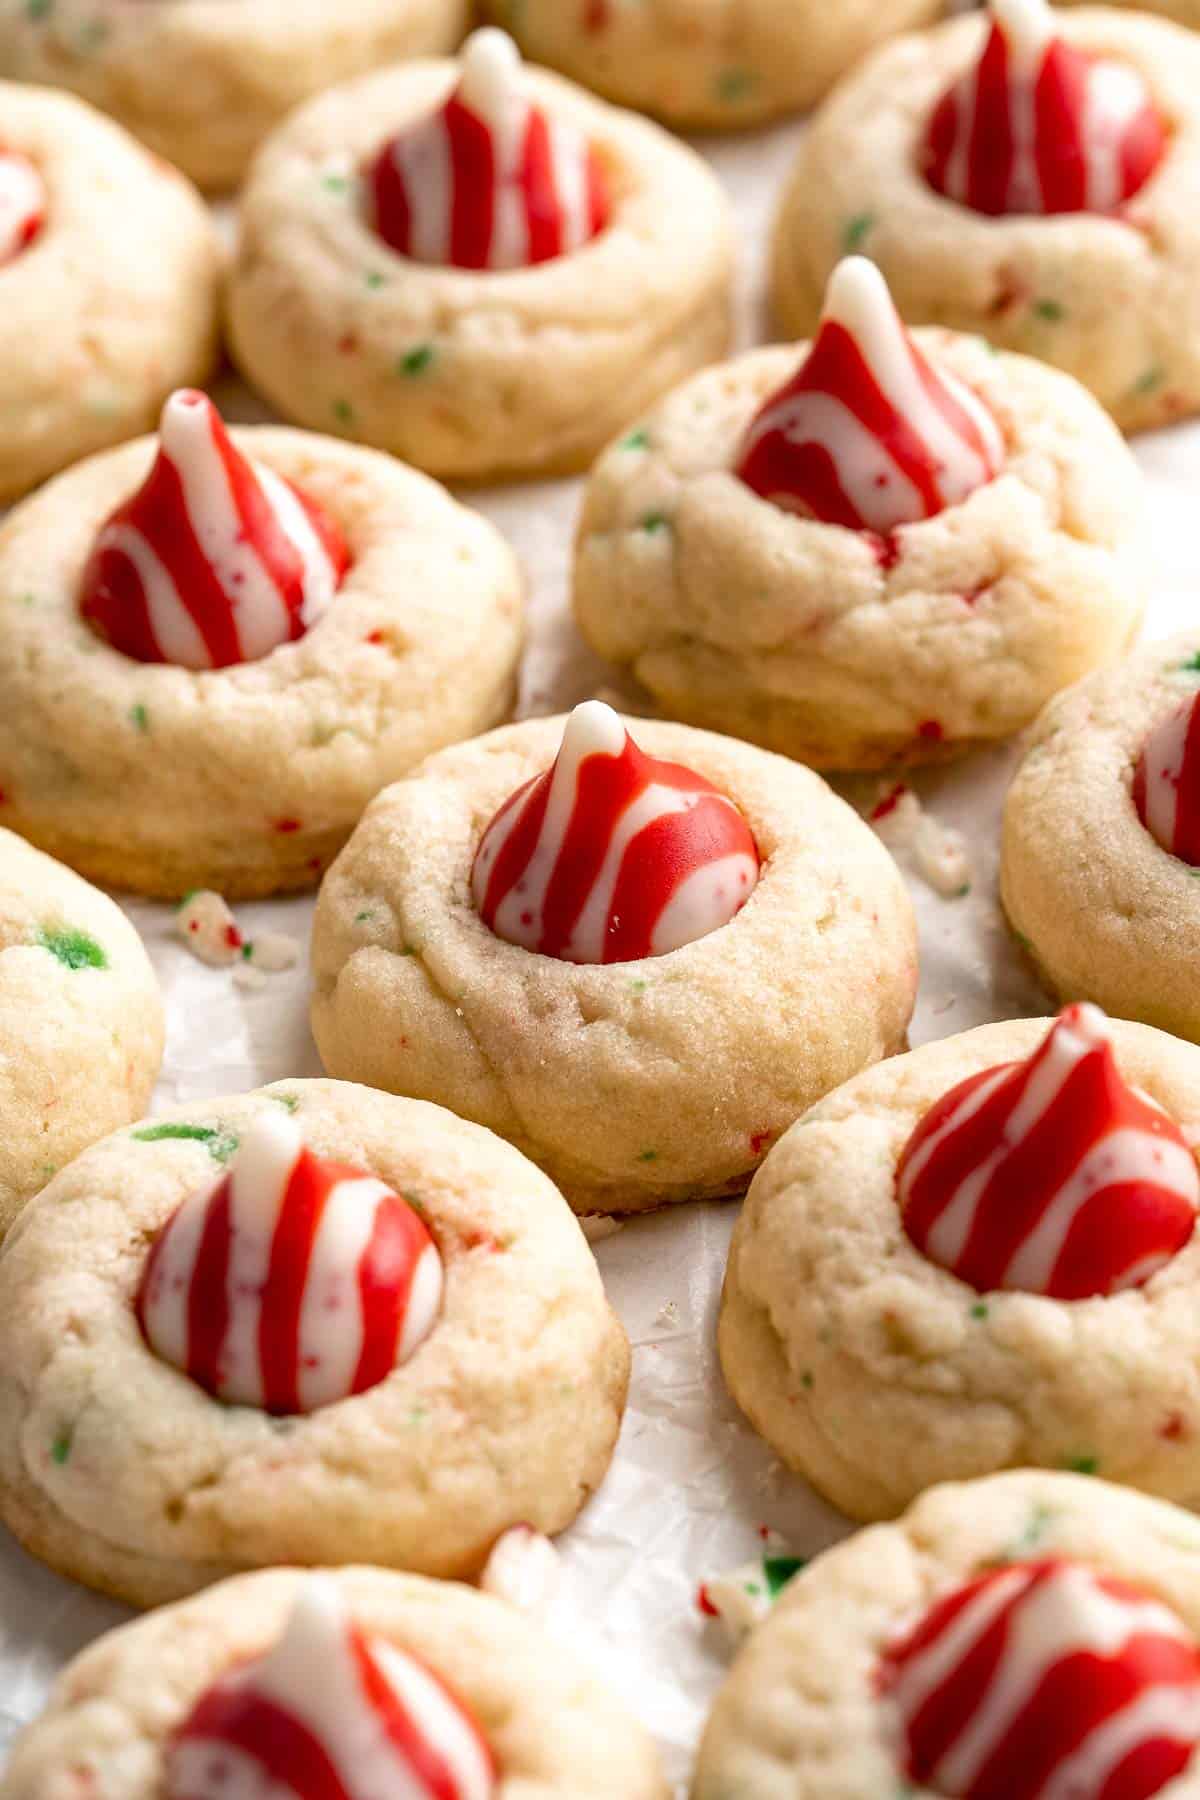
Ingredient Notes
To make these delicious Peppermint Kiss Cookies, you will need the following ingredients (full measurements in recipe card below):
- all-purpose flour - spoon the flour into your measuring cups and level it to get the right amount of flour every time.
- salt - salt will highlight all the delicious flavors in these cookies, making them even more tempting.
- baking powder - this will give the cookie dough a little lift and a puffy texture.
- butter - always use softened unsalted butter at room temperature.
- white sugar - white sugar adds sweetness without hiding the candy cane flavor.
- egg - use room temperature egg for best results.
- extracts - use a combination of vanilla extract and peppermint extract for a fragrant, minty aroma that smells amazing!
- crushed candy canes - the little broken pieces of candy cane add that iconic red and white color, a minty flavor, and a little crunch to the cookie dough. Feel free to use peppermint candies instead.
- hershey's peppermint kisses - unwrap each Hershey's kiss before placing them in the center of the just-baked cookie dough balls.
You will also need multiple large baking sheets, parchment paper, two large mixing bowls, and a hand mixer.
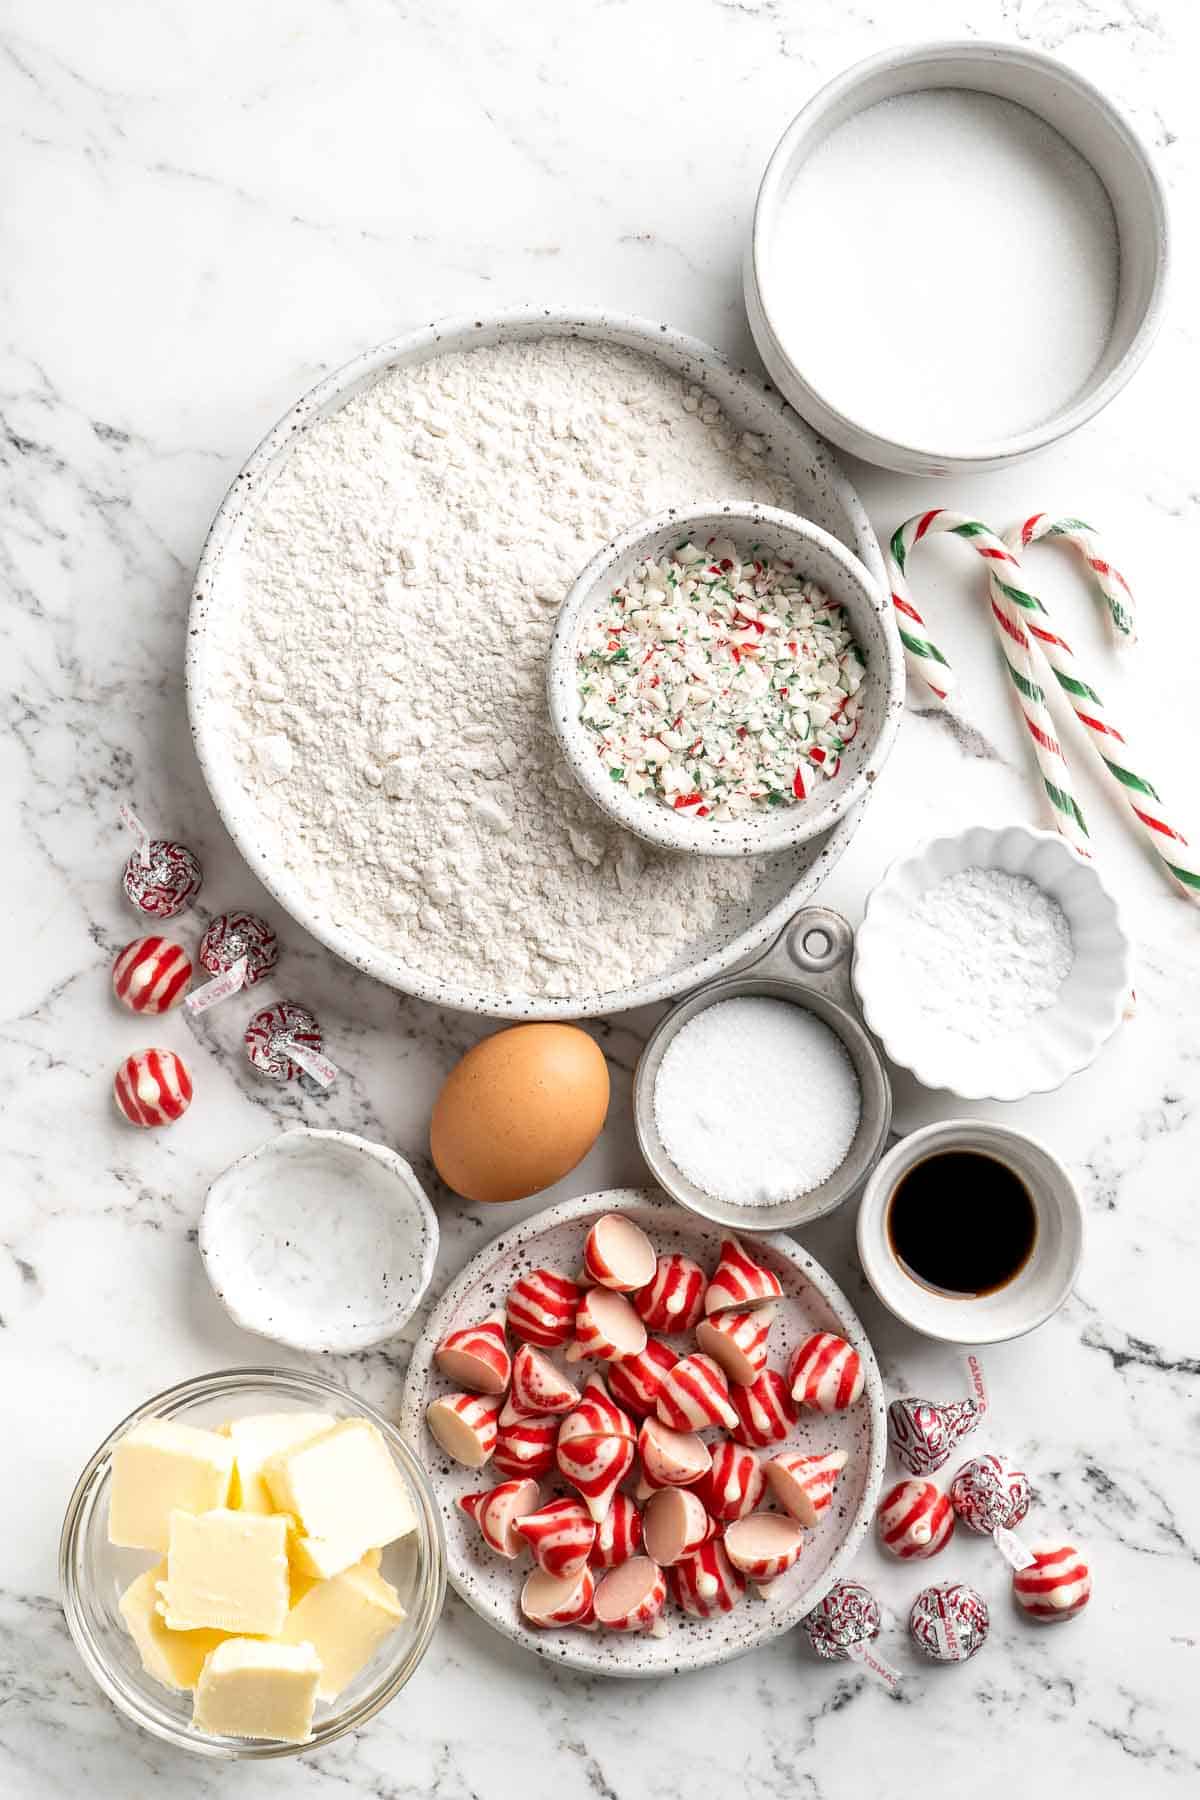
How to Make the Best Peppermint Kiss Cookies
- Prep. Prepare a large baking sheet with parchment paper.
- Combine dry ingredients. In a large mixing bowl, whisk together the flour, salt, and baking powder. Set aside.
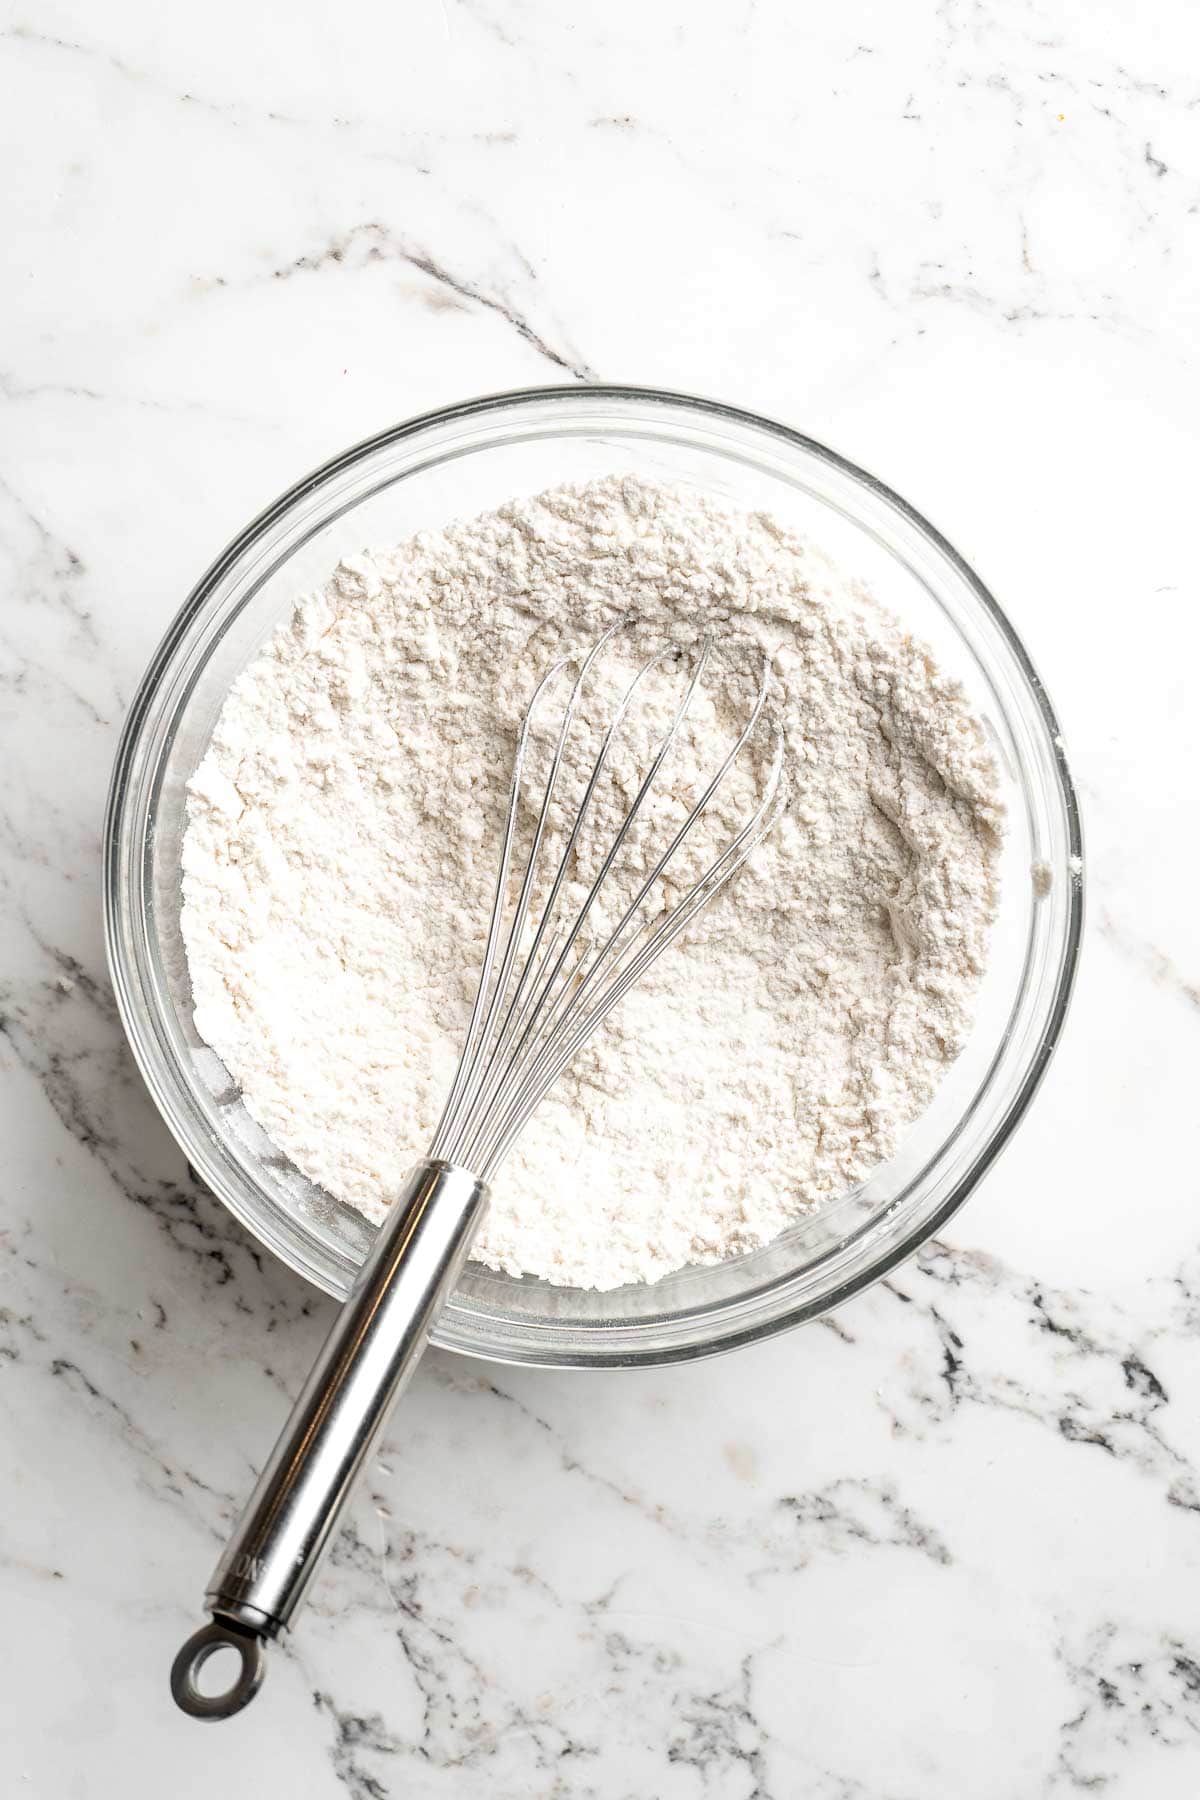
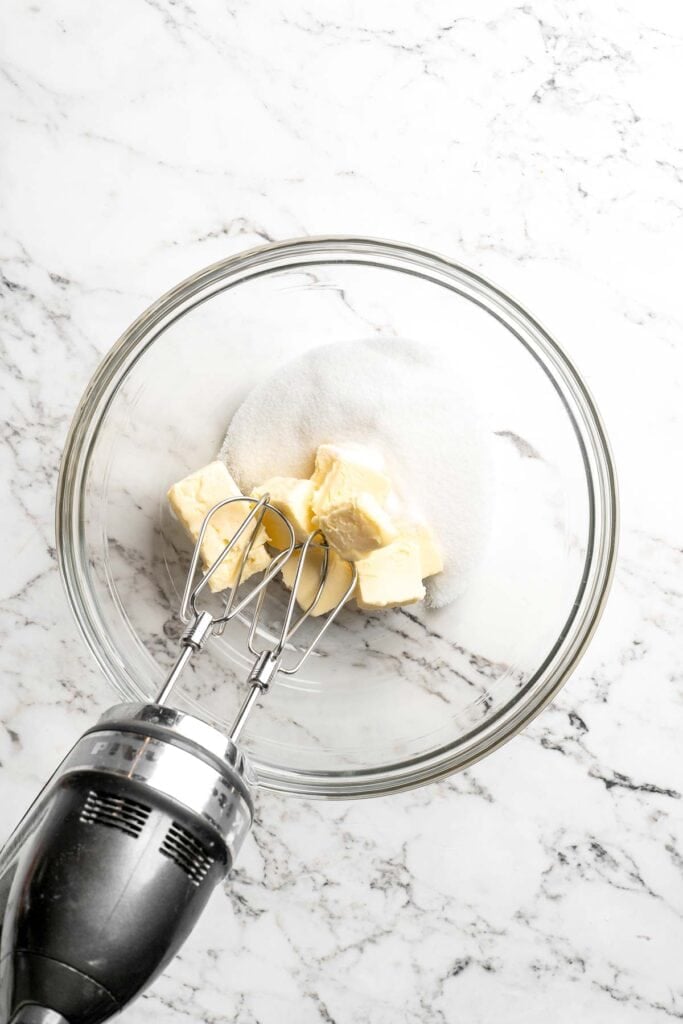
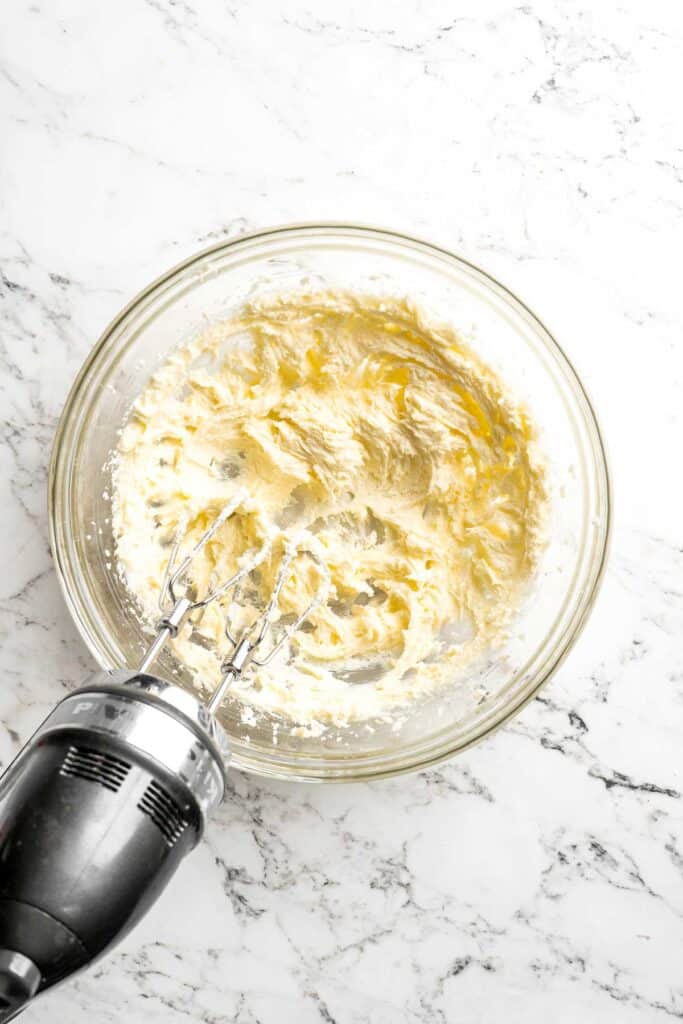
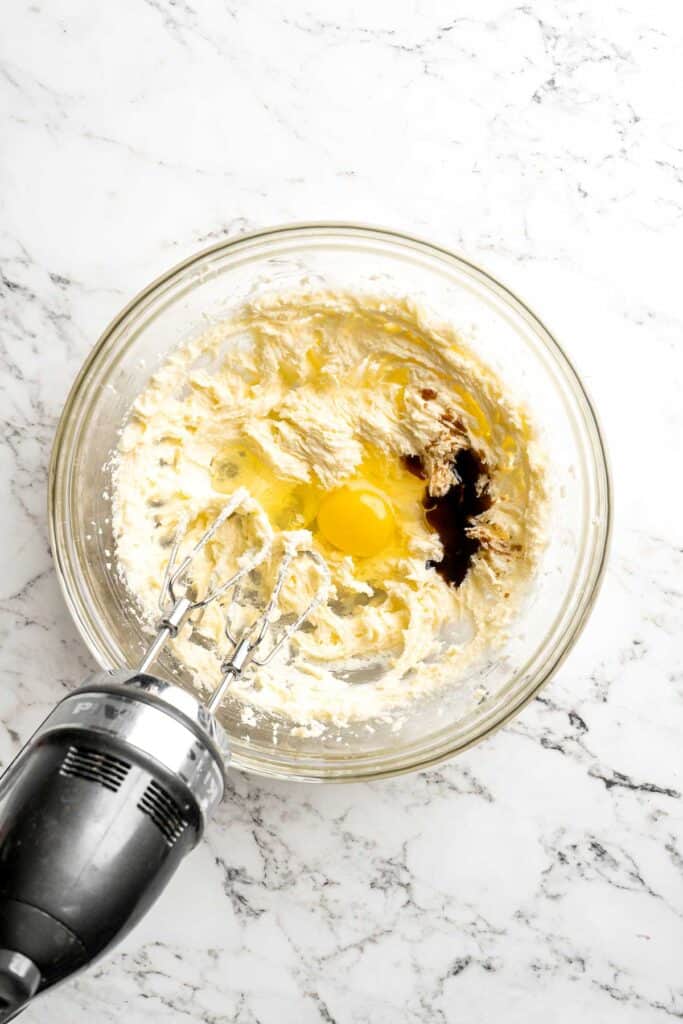
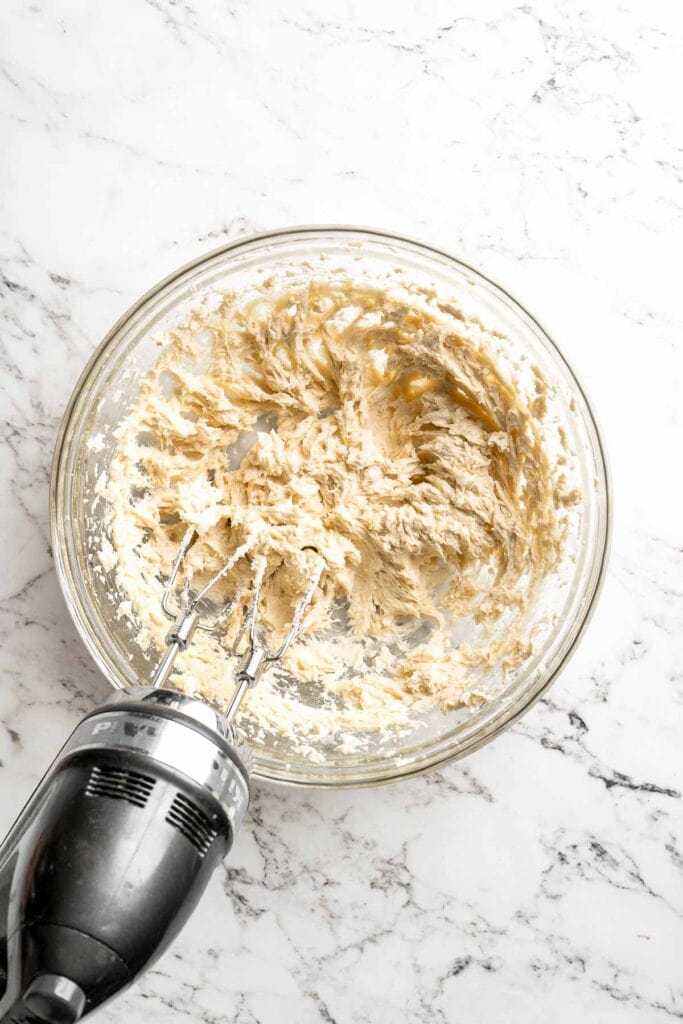
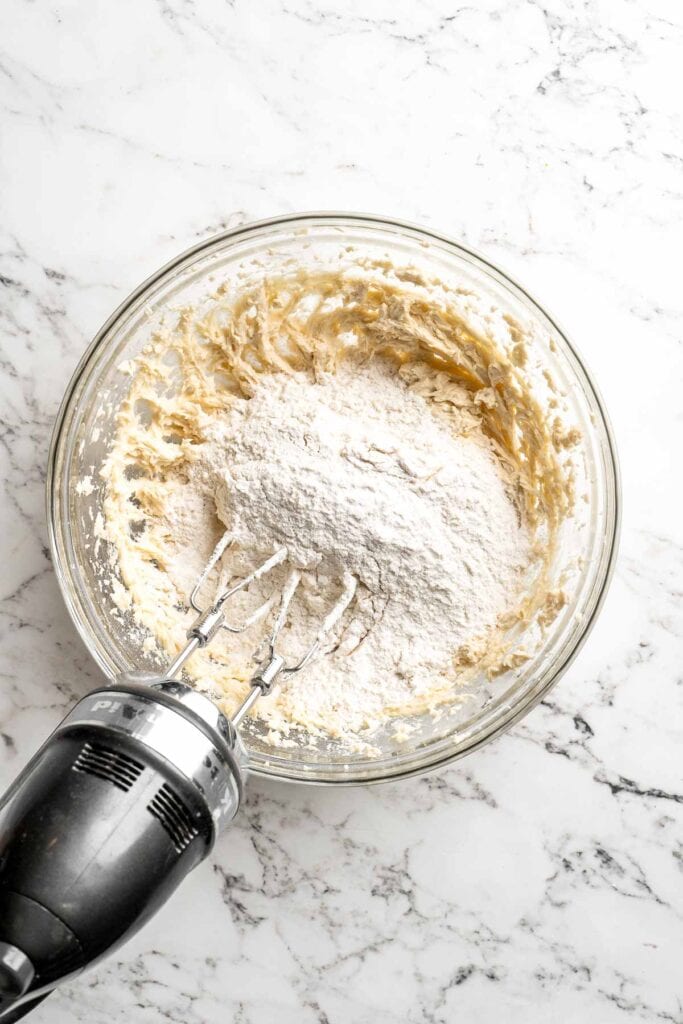
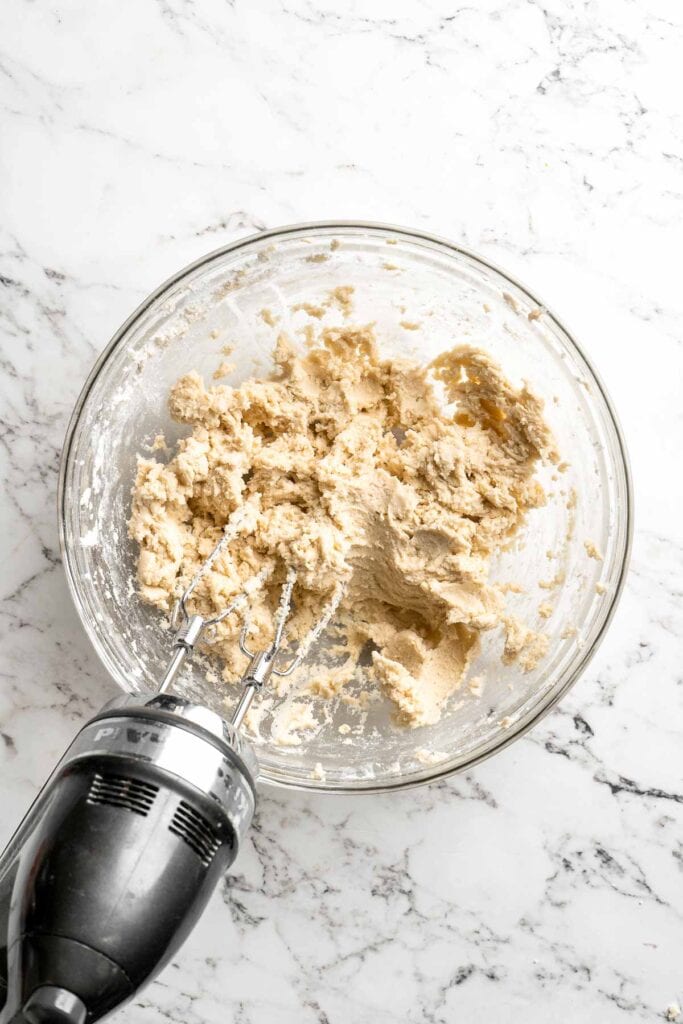
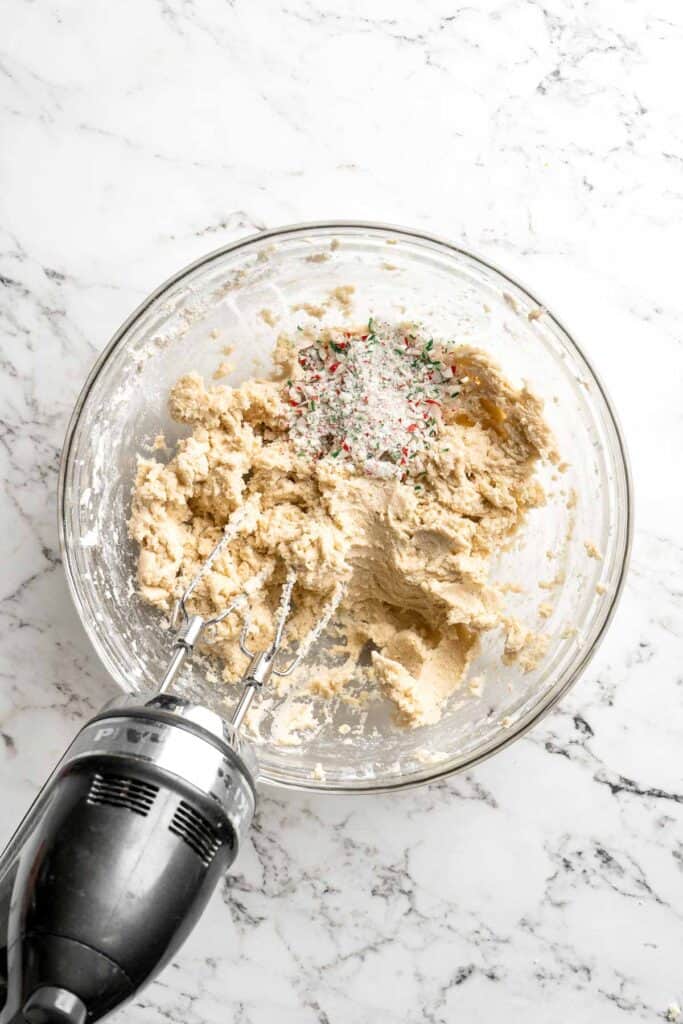
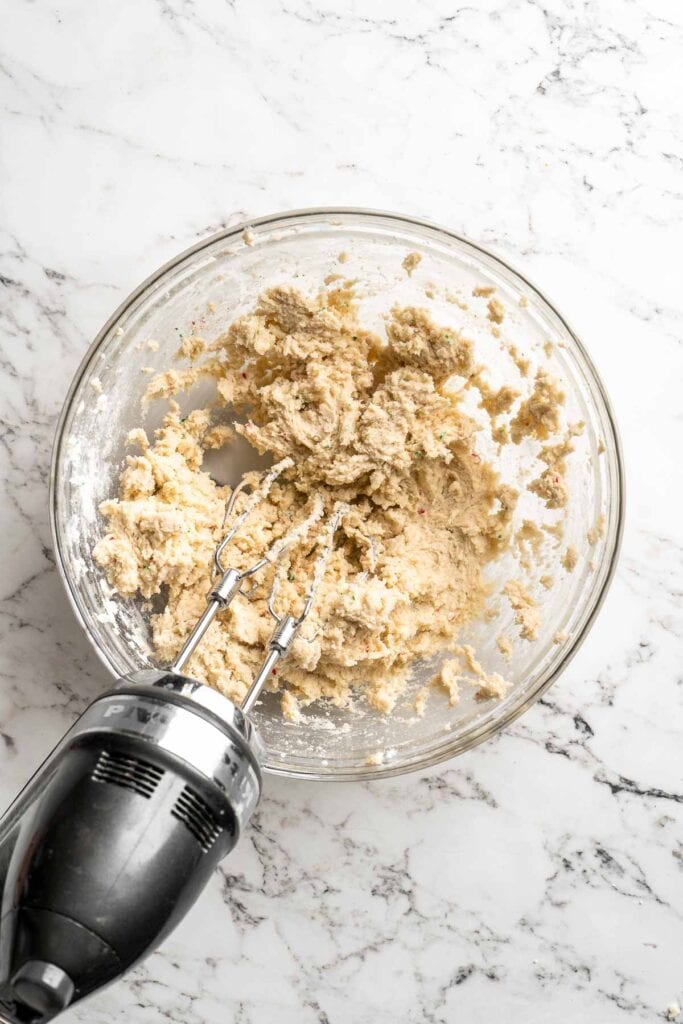
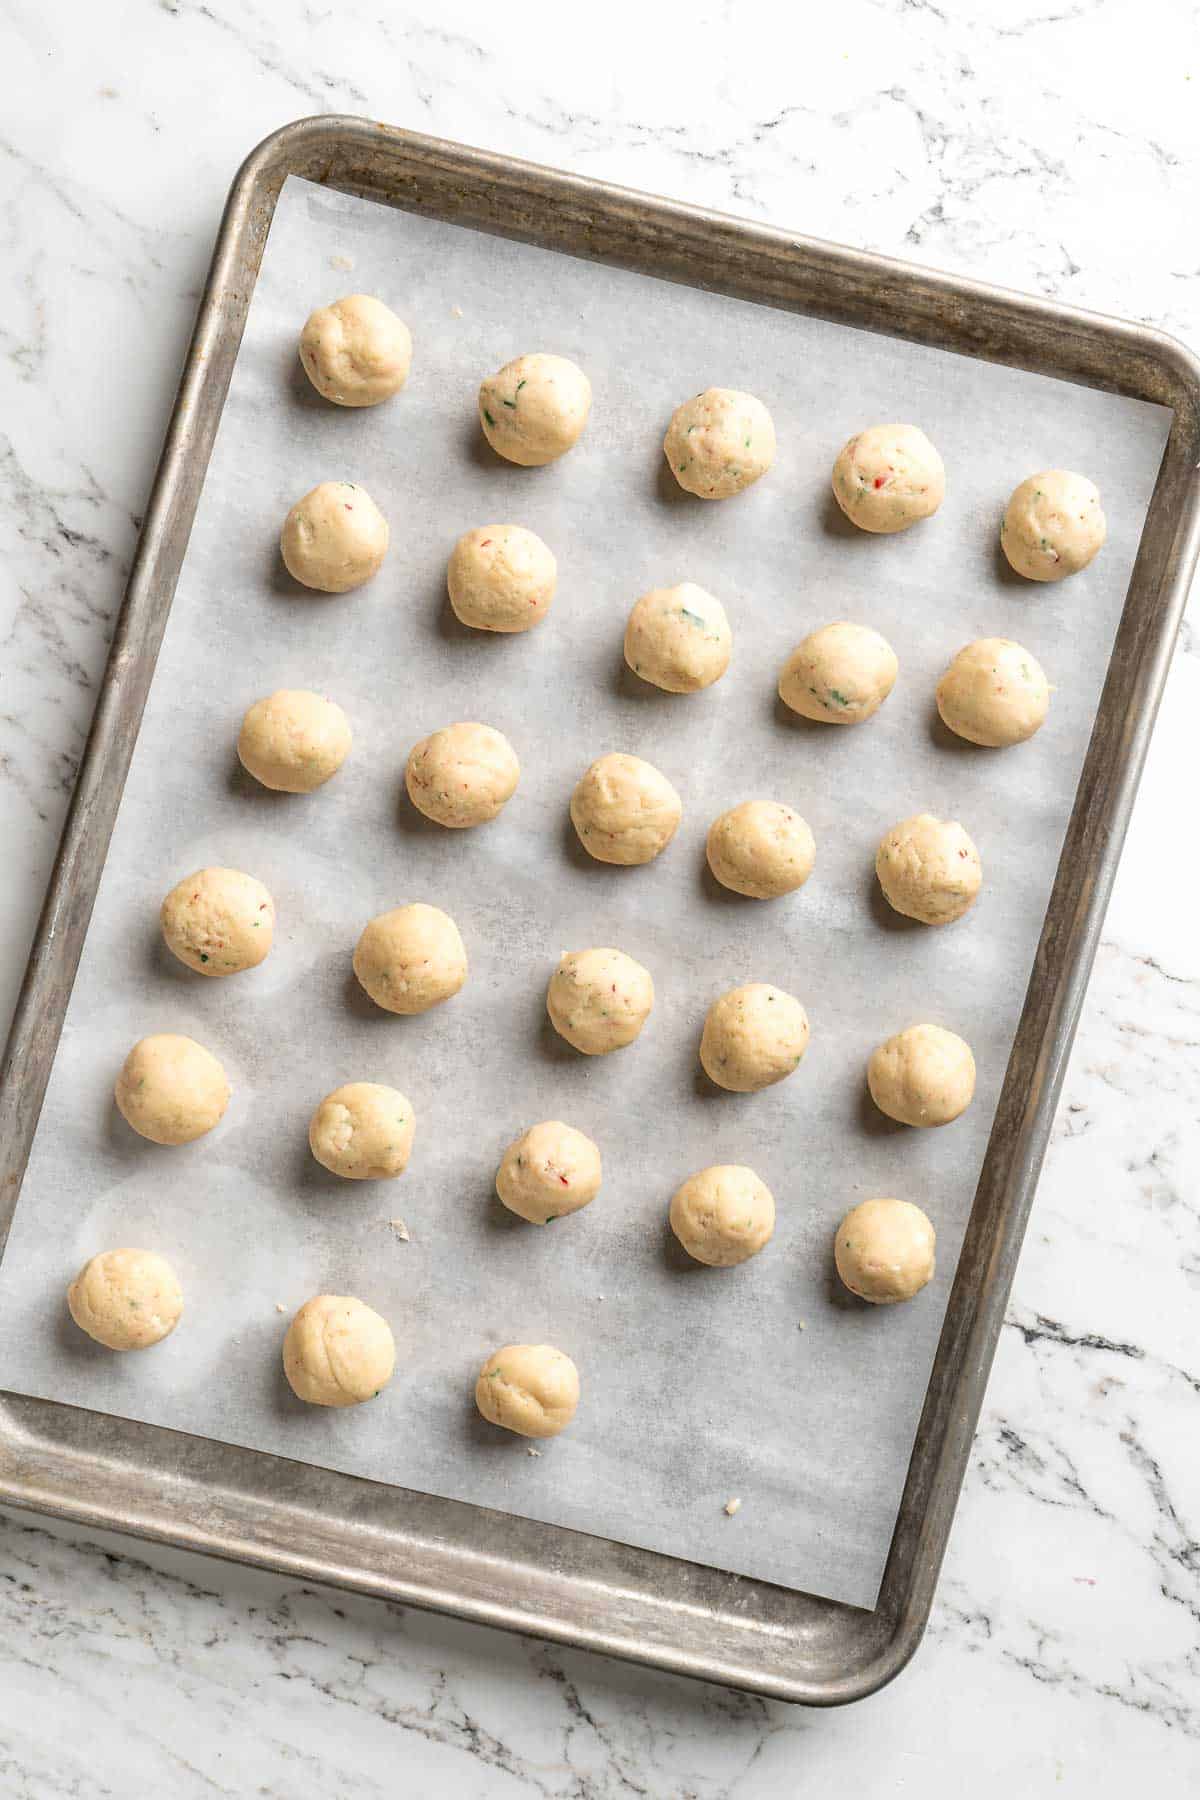
- Add peppermint kiss. Remove the cookies from the oven, allow to cool for 5 minutes, then press an unwrapped Peppermint Kiss into the center of each cookie. Allow to cool completely before enjoying.
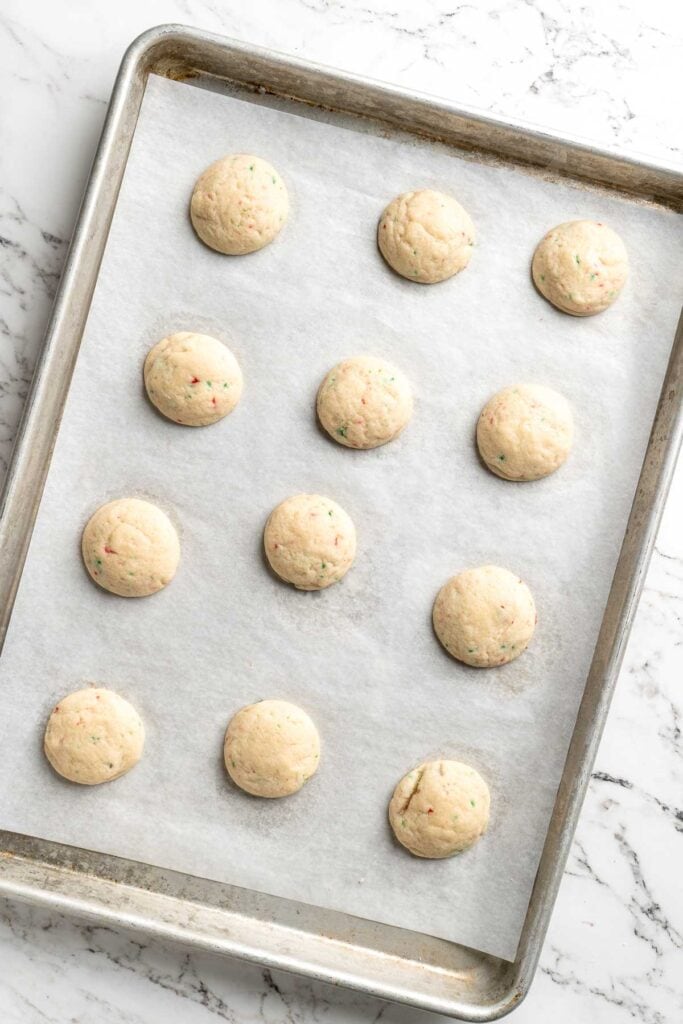
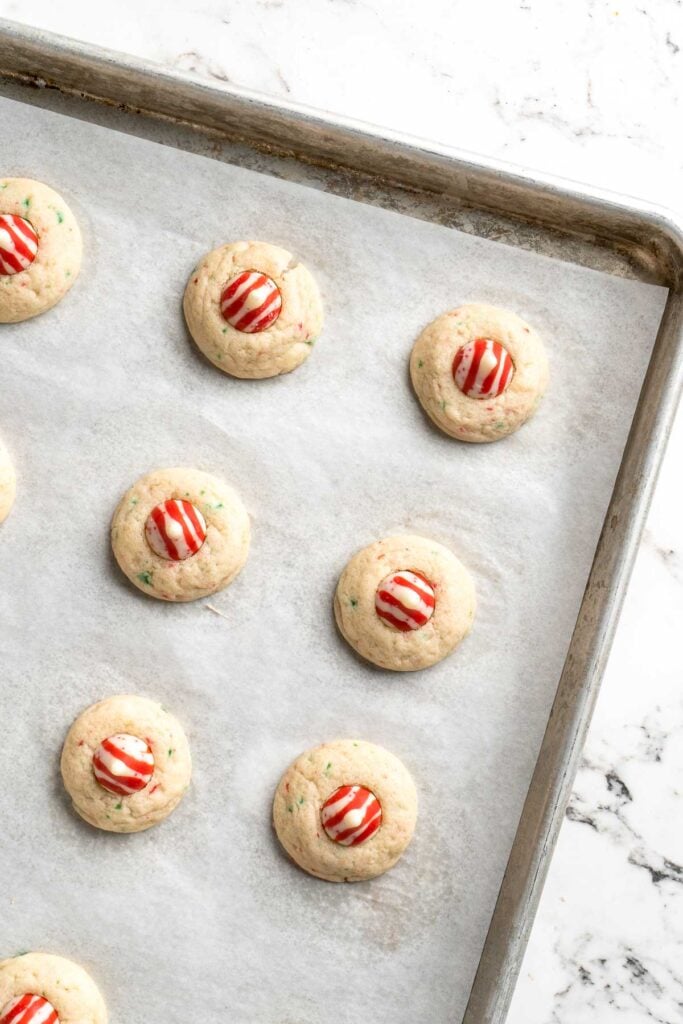
Recipe Variations
- Use different kisses. Although this recipe uses Hershey's candy cane kisses, you can easily use the mint truffle, dark chocolate, or any other Hershey kisses that pair well with mint!
- Roll in sprinkles. After rolling the cookie dough balls, you can roll them in red, white, and green sprinkles or just some regular sugar. They'll have a little extra texture and a beautiful color that pops on any Christmas cookie tray.
- Add more chocolate. We love the minty flavor of these sugar cookie blossoms, but you could easily add more chocolate! Add mini chocolate chips to the cookie dough, or choose a chocolate Hershey's kiss instead of candy cane kisses. You can also add cocoa powder to the cookie dough for chocolate peppermint blossom cookies!
- Drizzle melted chocolate. After baking, let cookies cool completely, then drizzle them with melted chocolate. Sprinkle even more crushed candy canes or holiday sprinkles on top for a festive look!
How to Serve
These Peppermint Kiss Cookies are delicious served on their own, or paired with some of my favorite Christmas cookie recipes including:
- M&M Christmas Cookies
- Spritz Cookies
- Eggnog Cookies
- Hot Chocolate Cookies
- Christmas Shortbread Cookie Bites
- Gingerbread Cookies
These cookies would be a perfect addition to the best holiday cookie box! They're the perfect festive cookies for gifting all winter long.
For more cookie recipes, see our 30+ Christmas Cookies.
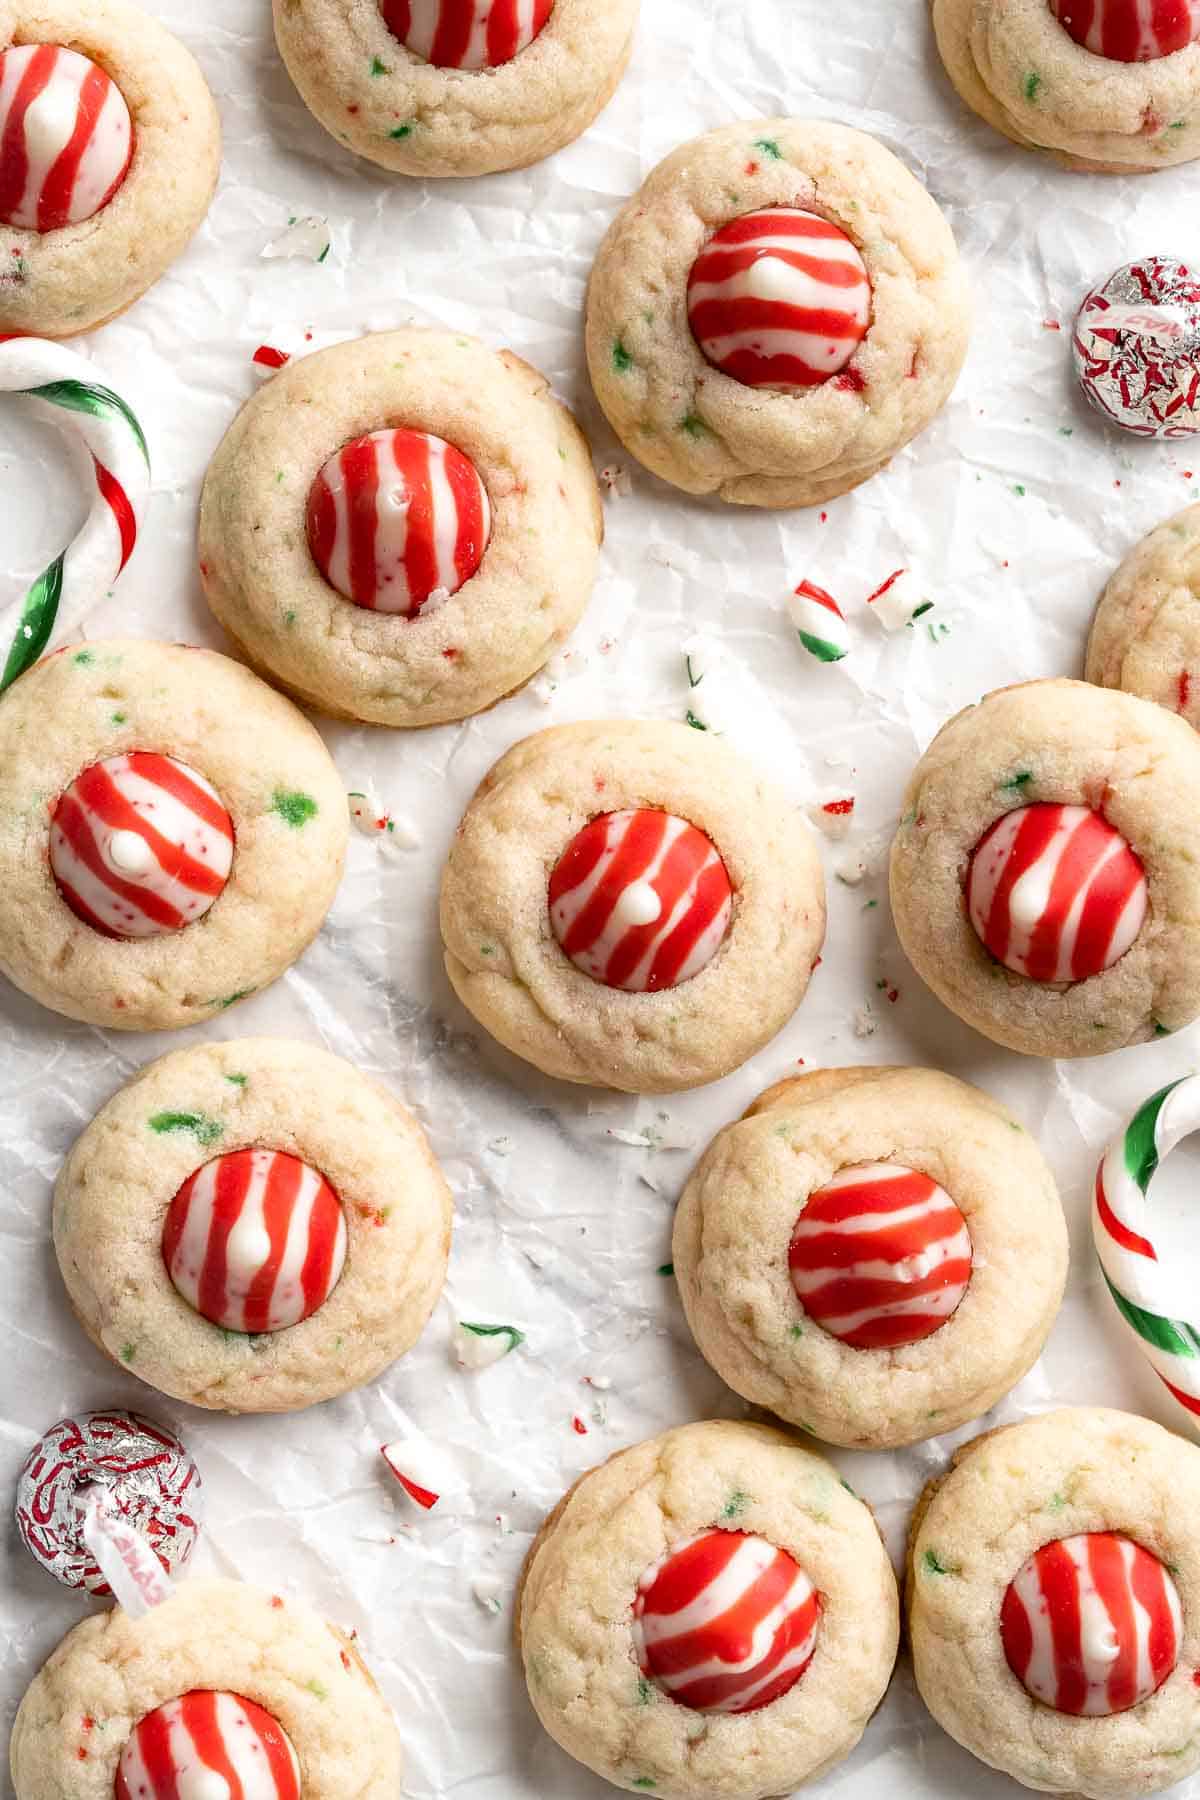
Recipe Tips and Tricks
- Press the kisses after baking. It's so tempting to add the kisses before baking, but don't! The Hershey's candy cane kisses melt very quickly and will become a puddle in the oven. Press them into the freshly baked cookies, and they'll meld together just right.
- Chill the dough. Chilling your cookie dough is crucial to get the perfect cookie texture! It will also allow the dough to relax and stay very tender.
- Cool before storing. Let these Hershey's kiss cookies cool on a wire rack at room temperature until completely cooled before you transfer them to a storage container. Otherwise, the warm cookies will produce steam, which will make the cookies become stale quickly.
Storing and Freezing Instructions
How to Store
Store leftover cookies in an airtight container at room temperature for approximately 1 week. If you are stacking them in a cookie tin or other container, separate each layer with a piece of wax paper.
How to Freeze
Allow the candy cane kiss cookies to cool completely at room temperature, then store the extras in a freezer-safe container or freezer bag for up to 3 months. Let them thaw before eating. You can also freeze the cookie dough in a freezer-safe container. Let the dough thaw in the fridge before baking like normal, and store the kisses separately.
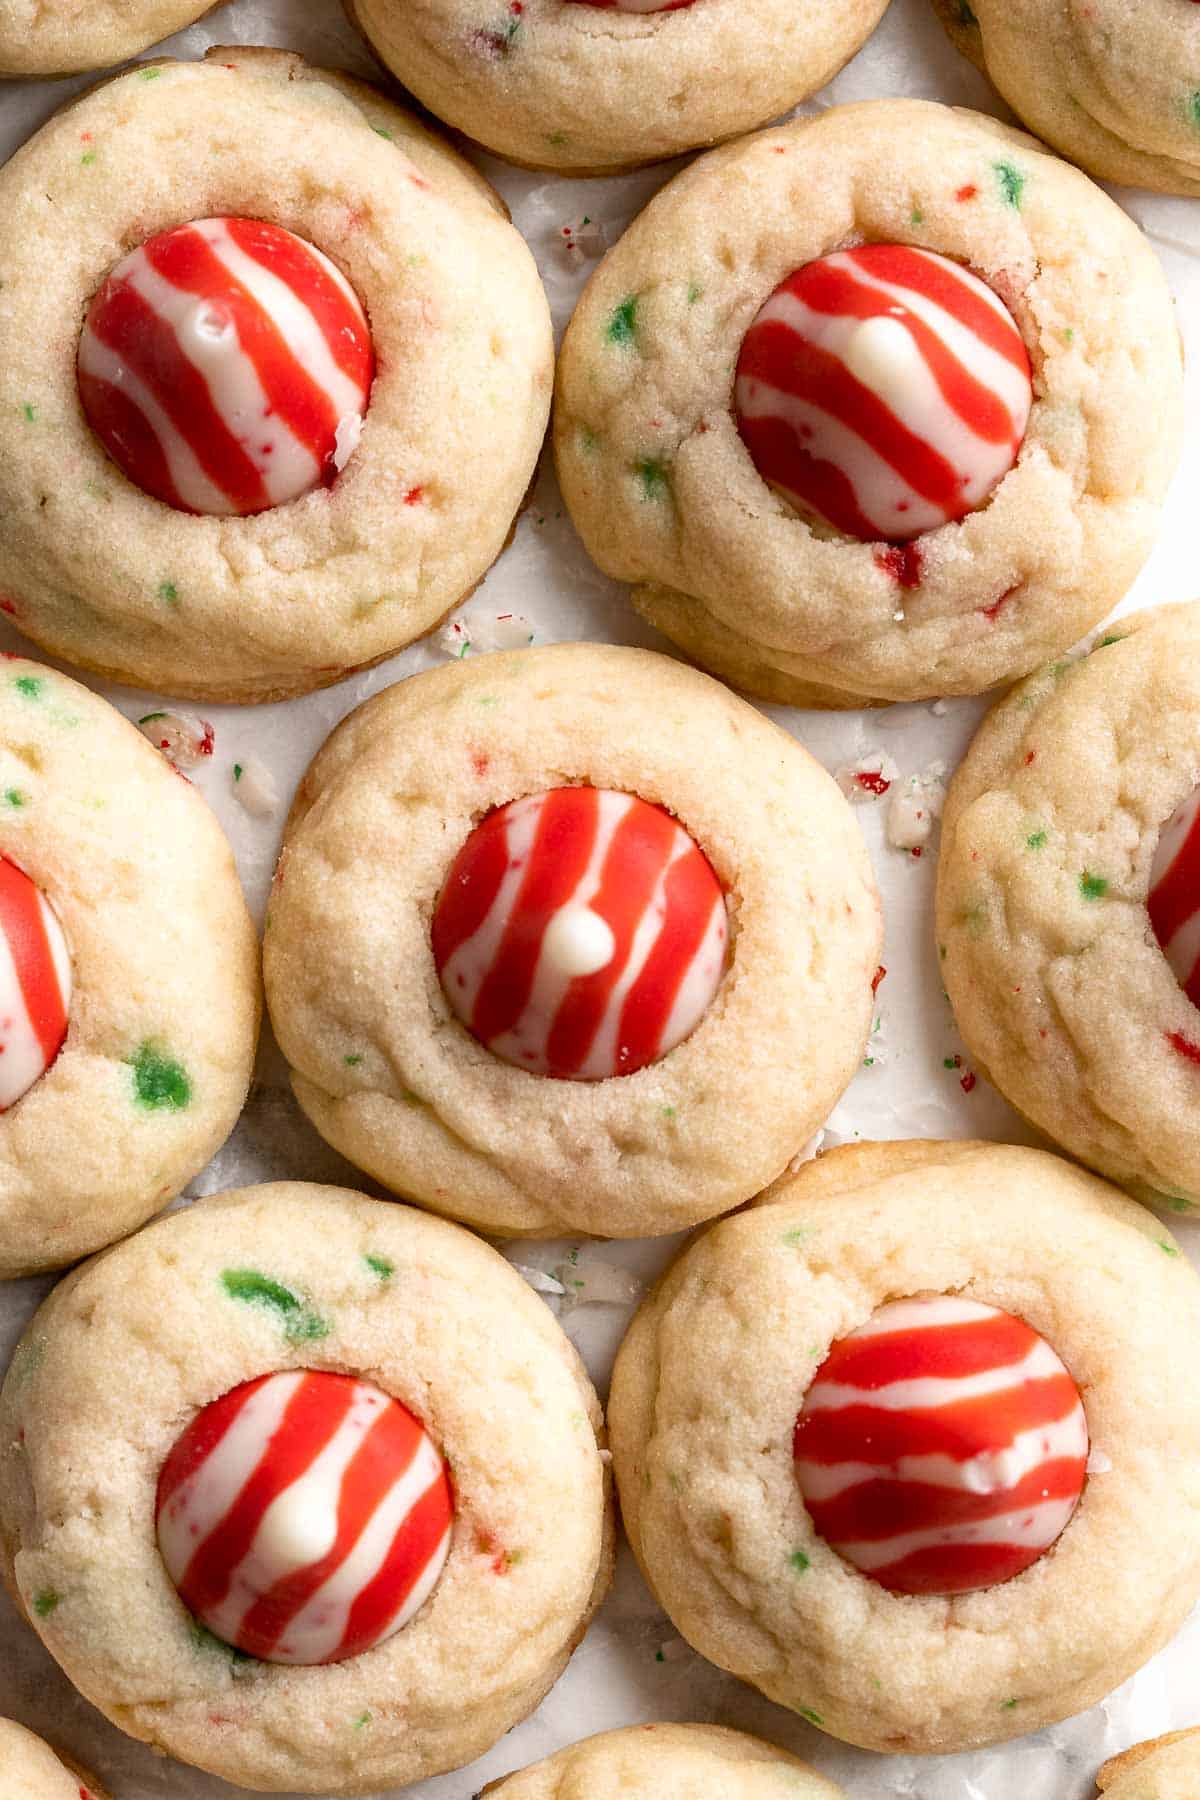
FAQ
Although it can help to use a stand mixer, a hand mixer will work just fine for these simple cookies! Just make sure to use fully softened butter and cream it very well with the sugar. If you do use a stand mixer, use the paddle attachment, not the whisk.
Baked cookies can typically be frozen for approximately three months. Be sure to let them cool completely, then store them in a freezer bag or container. You can also freeze the unbaked cookie dough (even the rolled dough balls) following the same tips. Be sure to thaw the dough in the fridge before baking.
Although we normally add brown sugar to cookies for its wonderfully rich flavor and chewy texture, it can detract from the mint flavor in cookie recipes. Instead, we recommend using regular white sugar for any type of mint cookies, including Peppermint Snowball Cookies or Candy Cane Cookies, unless the cookies also contain molasses or chocolate.
More Cookie Recipes
- 50 Best Cookie Recipes
- Lofthouse Cookies (Soft Frosted Sugar Cookies)
- Lemon Drop Cookies (Anginetti)
- Chai Cookies
- Lemon Curd Cookies
- Monster Cookies
Tried this recipe?
I'd love to hear what you think! Leave a comment and rating below to share your feedback. Your reviews help others discover this recipe and help me keep creating more free recipes for you. Snap a photo and tag me on social media @aheadofthyme too.

Molasses Cookies
These delicious Molasses Cookies are a popular holiday treat that can be enjoyed all year round. The warm, comforting sweet flavors of these cookies combined with a crispy exterior and a soft, chewy center make them so irresistible regardless of the season. There's no reason not to try this quick old-fashioned recipe as it's guaranteed to leave a sweet smile on everyone's face!
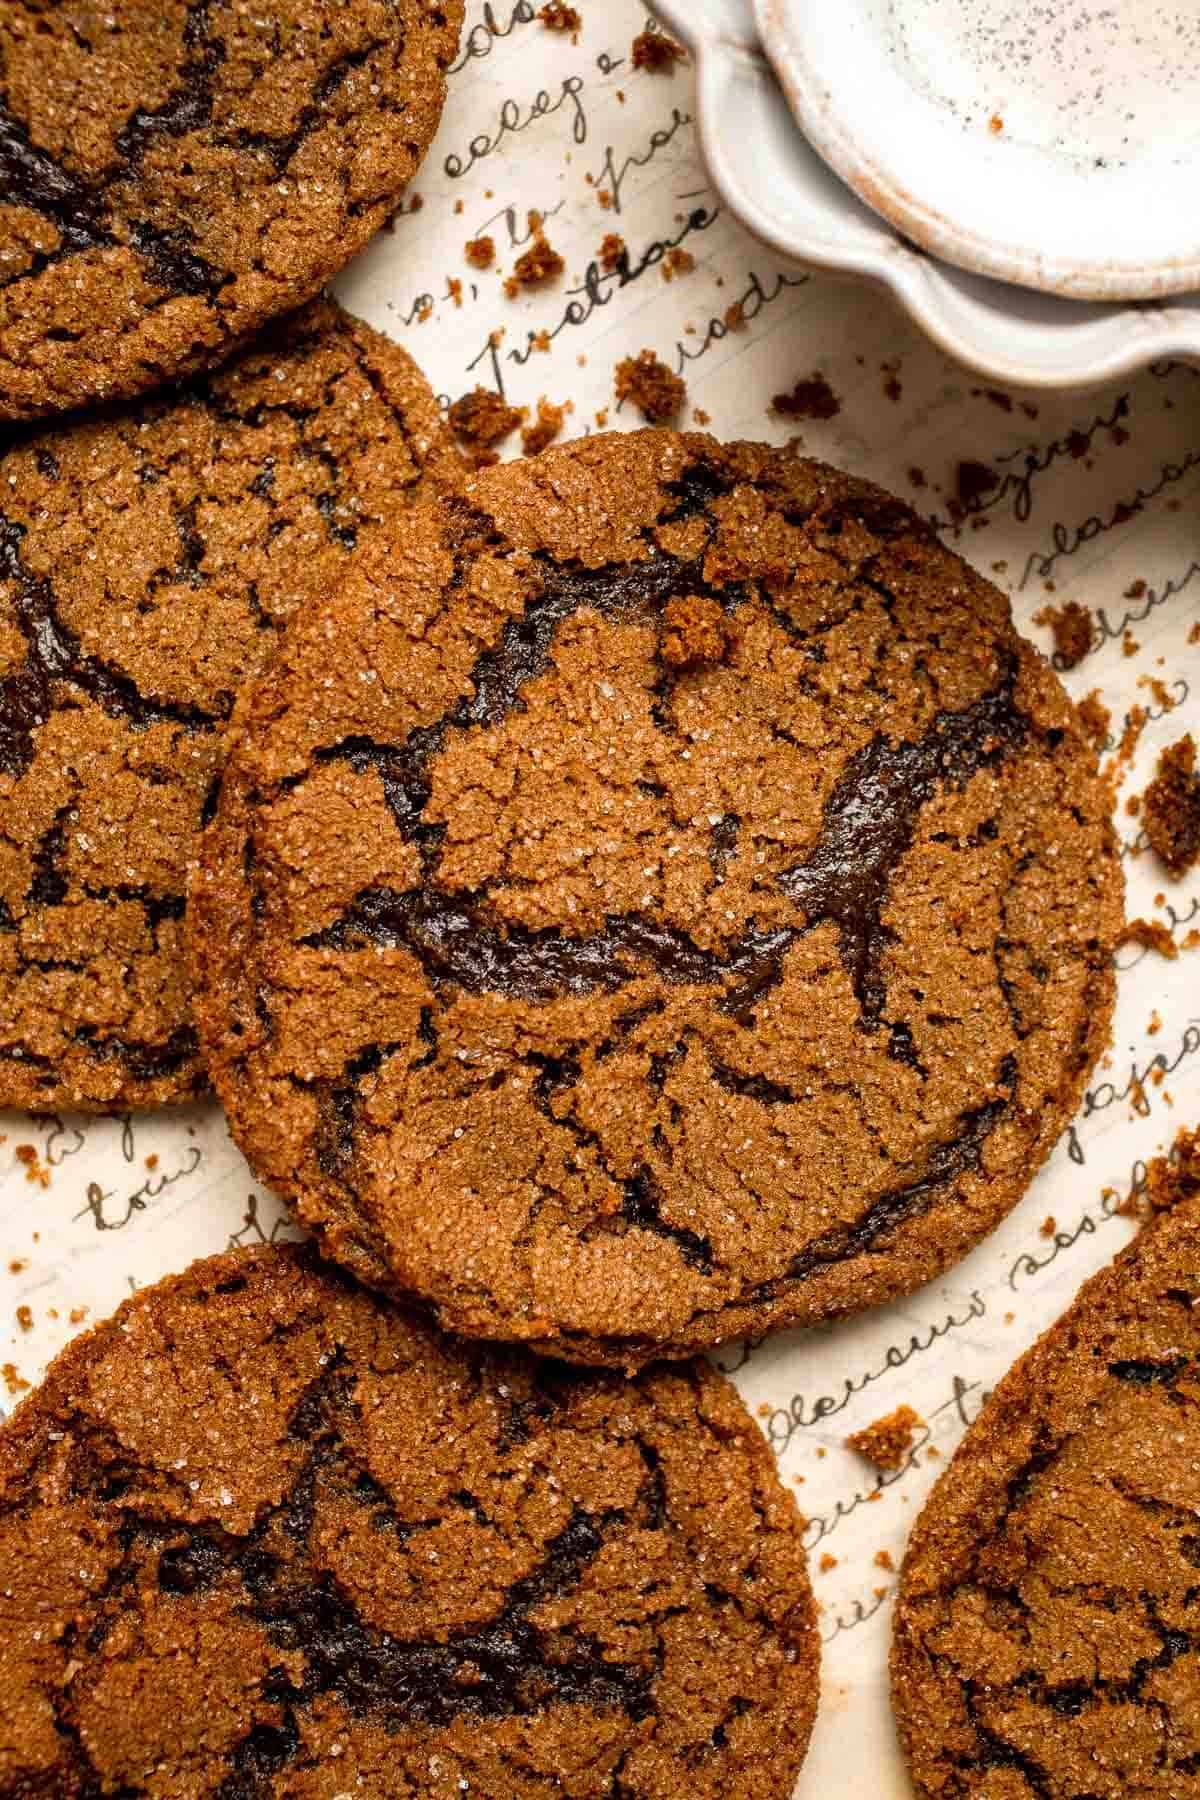
The holiday season is a time for family traditions, and baking molasses cookies is certainly one of them. Molasses is a by-product of sugarcane and provides the cookies with their characteristic deep flavor. The soft, chewy texture of these cookies comes from the combination of molasses and brown sugar. Combine that with fall spices and you have a warm, comforting treat the whole family can enjoy. These cookies are classic Christmas treats, and they're the perfect accompaniment to a warm cup of milk, tea, hot chocolate, or apple cider.
Why You'll Love this Molasses Cookies
- Quick and easy. A little bit of effort for a lot of reward! With only a handful of basic ingredients like butter, sugar, molasses, and spices, these soft cookies are simple to make. The dough can be prepped in a few minutes, and all you have to do is roll them into balls and bake them in your preheated oven in just 10 minutes! No chilling required!
- Flavorful and comforting. The spices like ginger, cinnamon, and nutmeg give these cookies an incredibly rich flavor that is both sweet and spicy at the same time. And even though molasses is not the sweetest ingredient, it adds a nice caramel-like flavor that makes them so comforting.
- Versatile. Whether you're making these cookies for the holidays or just as a special treat, you can always make them your own. Simply fashion the dough into balls for classic drop cookies, or form it into festive shapes like a gingerbread man or a Christmas tree for a holiday-inspired twist.
- Great as a gift. These molasses cookies are so fragrant and flavorful that they make the perfect homemade gift for any occasion. You can package them in a nice tin, jar, or box and give them to your friends and family as an edible token of your love.
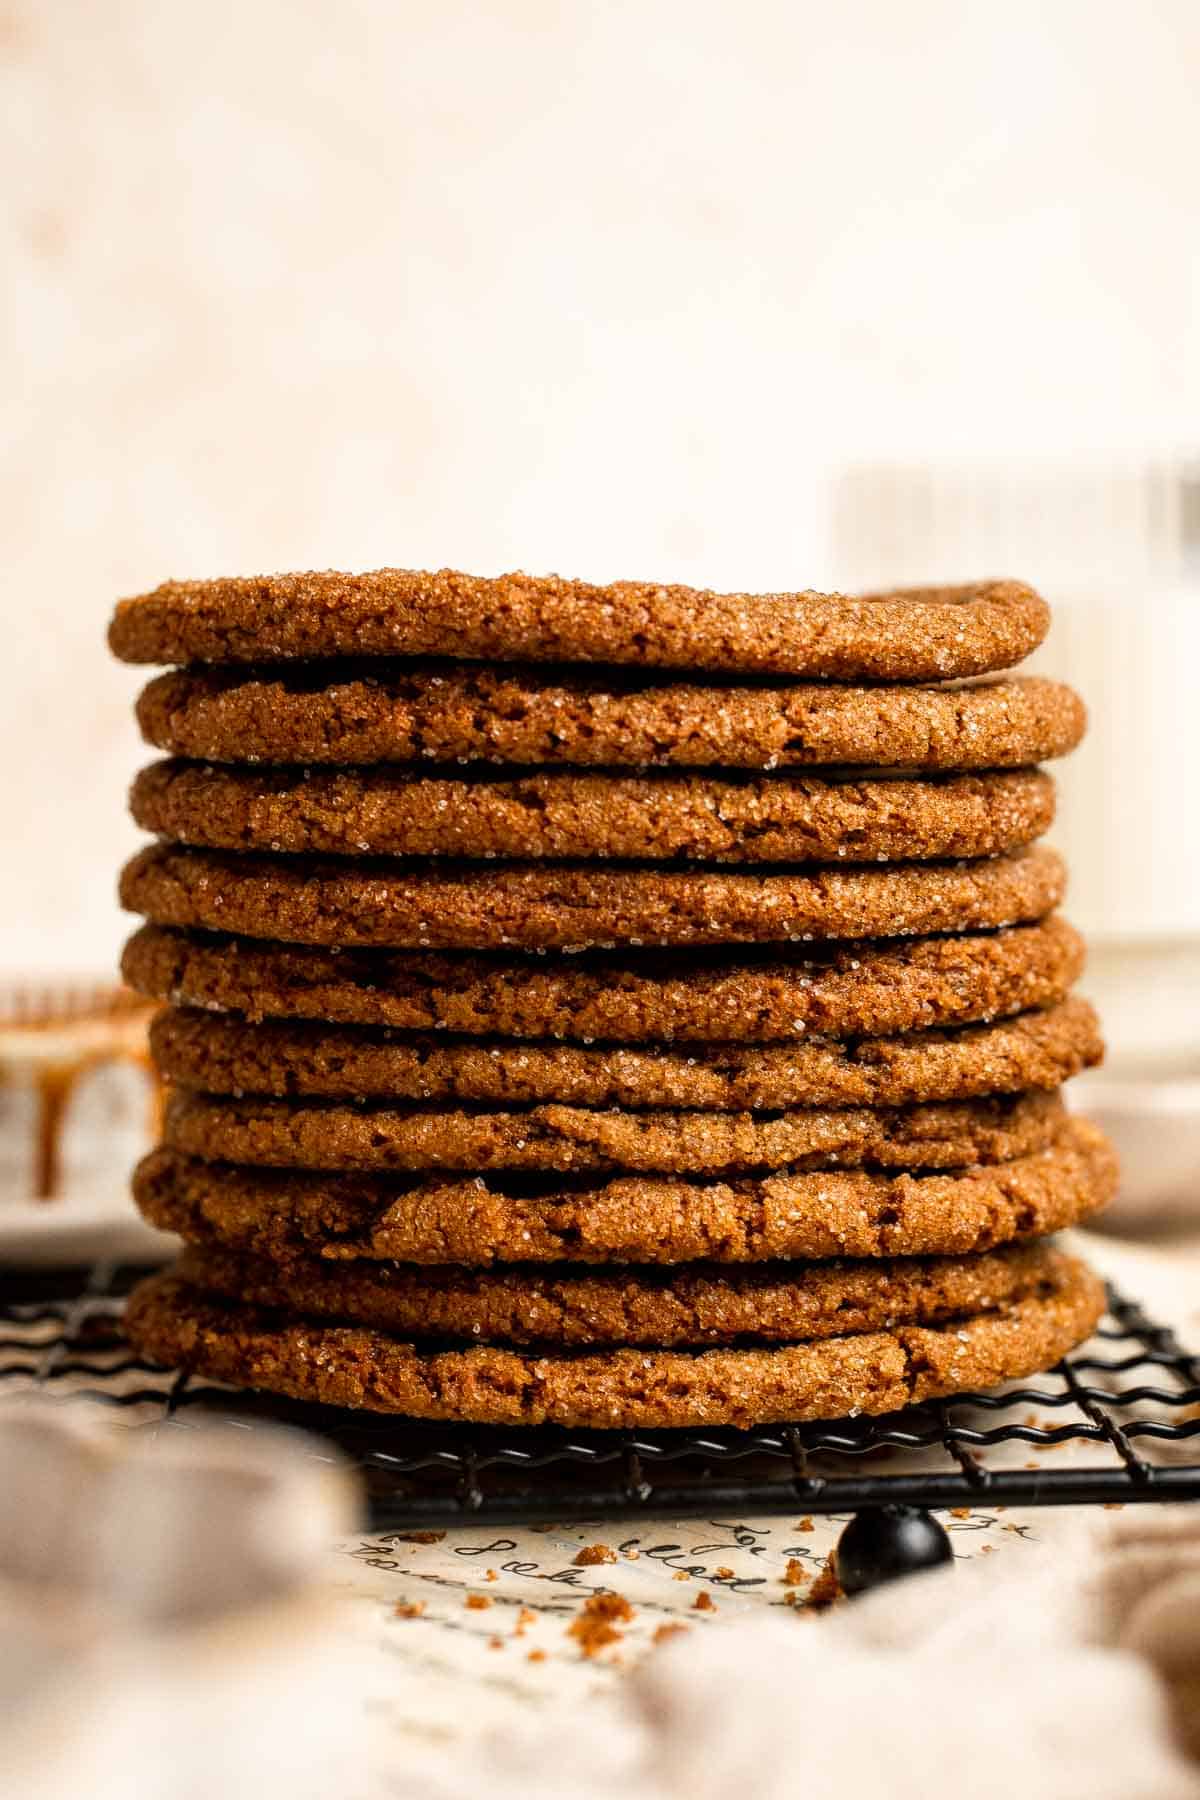
Ingredient Notes
To make these chewy molasses cookies, you will need the following ingredients (full measurements in recipe card below):
- all-purpose flour - this works best for cookies, but you can partially replace this with cake or bread flour for a chewier texture.
- baking soda - use three teaspoons of baking powder for every teaspoon of baking soda if you don't have one at hand.
- ginger - gives a sweet, peppery flavor and aroma. You can use freshly grated ones for a refreshing flavor.
- cinnamon - provides a sweet and slightly sour flavor.
- nutmeg - gives a subtly sweet flavor with spicy and nutty notes.
- cloves - combines well with other fall spices and has a unique aroma. You can use freshly ground ones for a fuller flavor.
- salt - balances the overall sweetness of the cookies.
- butter - softened to room temperature. Use unsalted for better control of flavor.
- granulated sugar - I prefer using white granulated sugar to balance the flavor of molasses with a clean, sweet taste.
- brown sugar - you can use light or dark brown sugar. You can also make brown sugar by mixing a cup of granulated sugar with a teaspoon of molasses.
- egg - warmed to room temperature.
- molasses - light molasses has a mild flavor and is the best choice for baking cookies
- vanilla extract - adds a distinct flavor and aroma.
You will also need measuring cups and spoons, baking pan, mixing bowls, hand mixer or stand mixer, cookie scoop, and wire cooling rack.

How to Make the Best Molasses Cookies
- Combine dry ingredients. In a medium mixing bowl, whisk together flour, baking soda, ginger, cinnamon, cloves, and salt. Set aside.
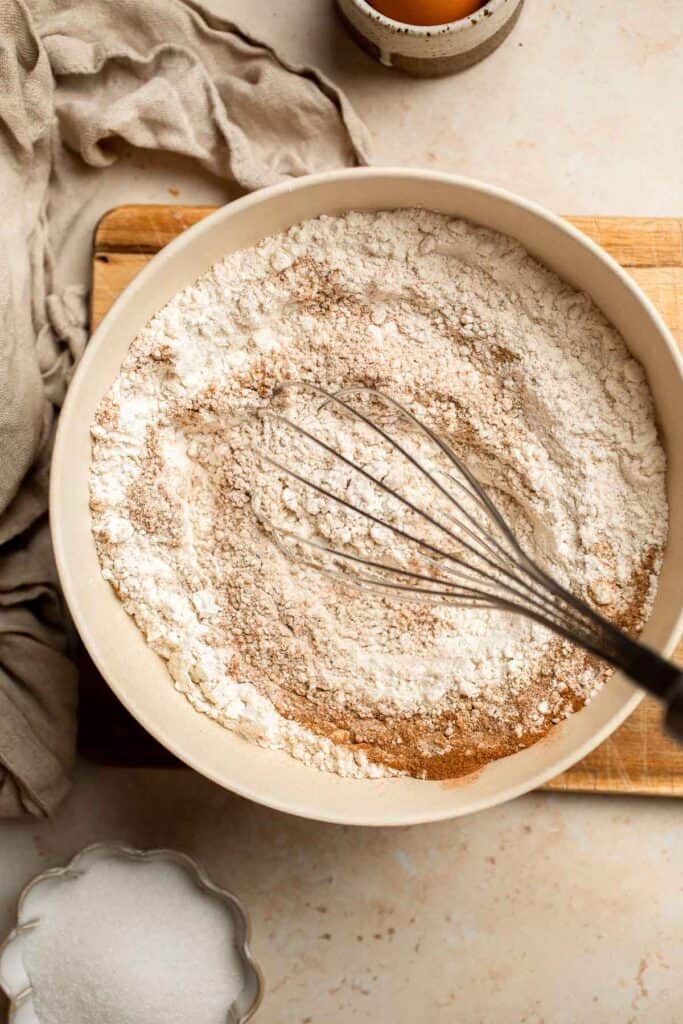
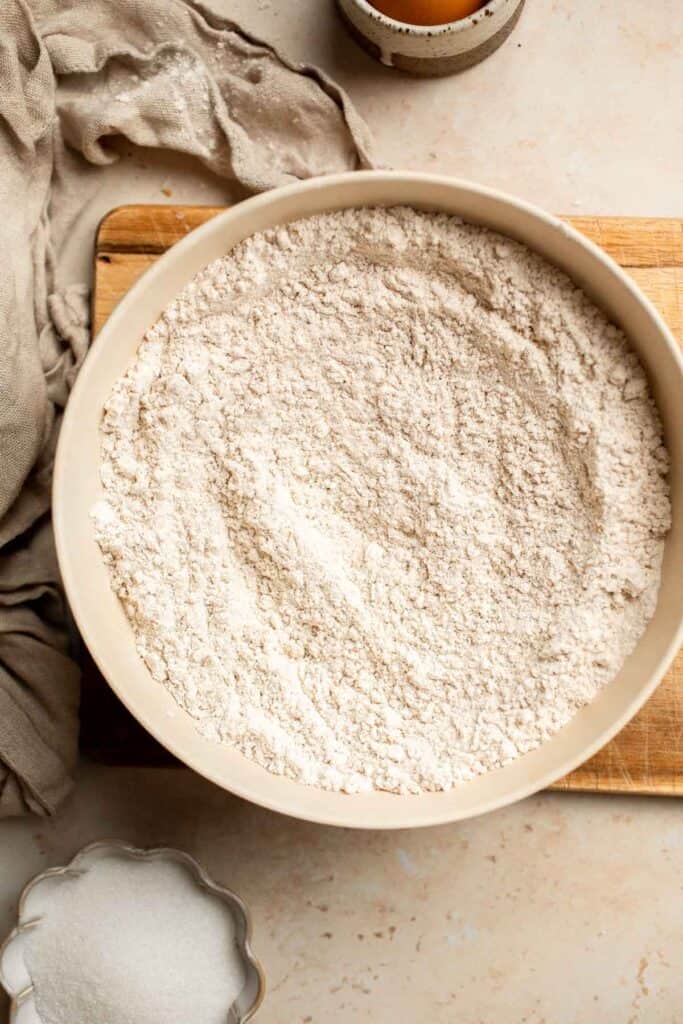
- Cream butter and sugar. In a large mixing bowl, cream together the butter and sugars using a hand mixer or stand mixer on medium speed until light and fluffy, about 2 minutes.
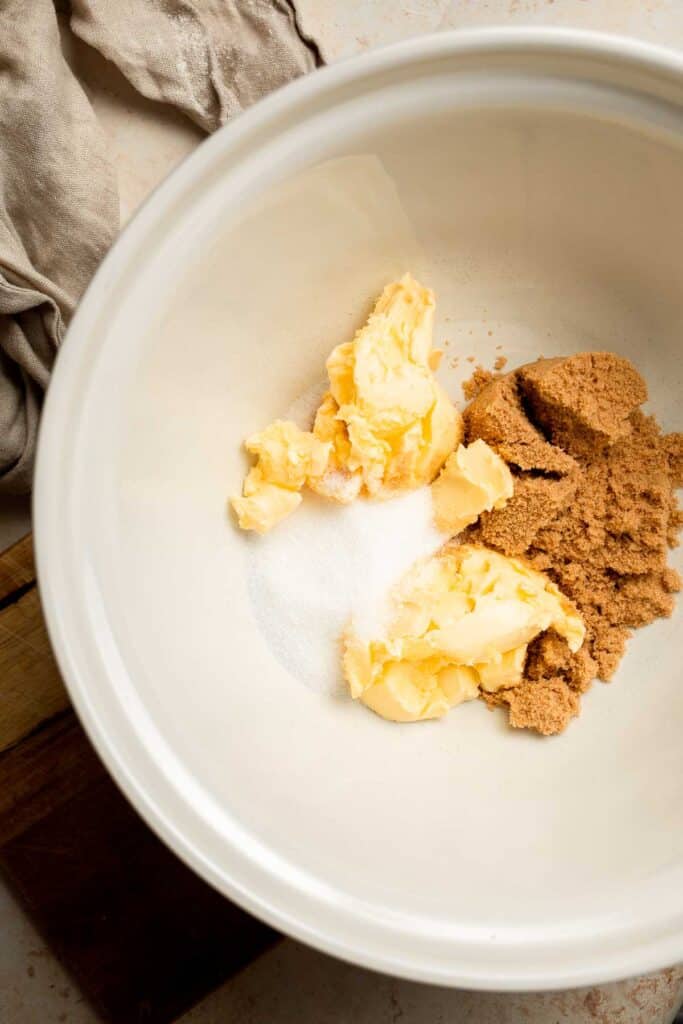
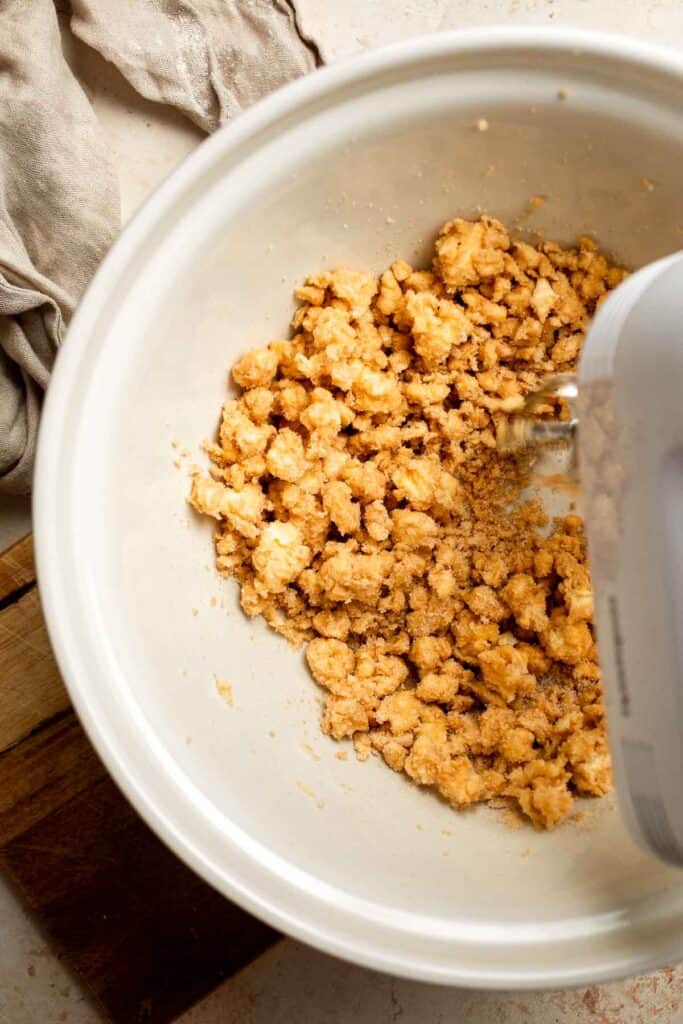
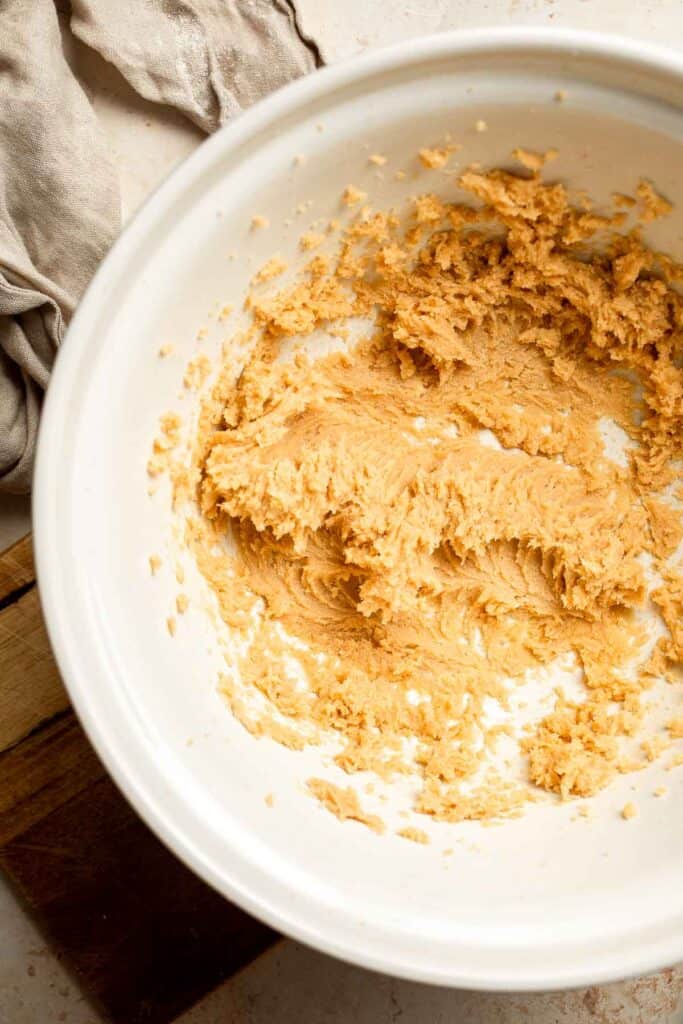
- Add wet ingredients. Add the egg and beat until incorporated. Then add molasses and vanilla and beat on low until combined.
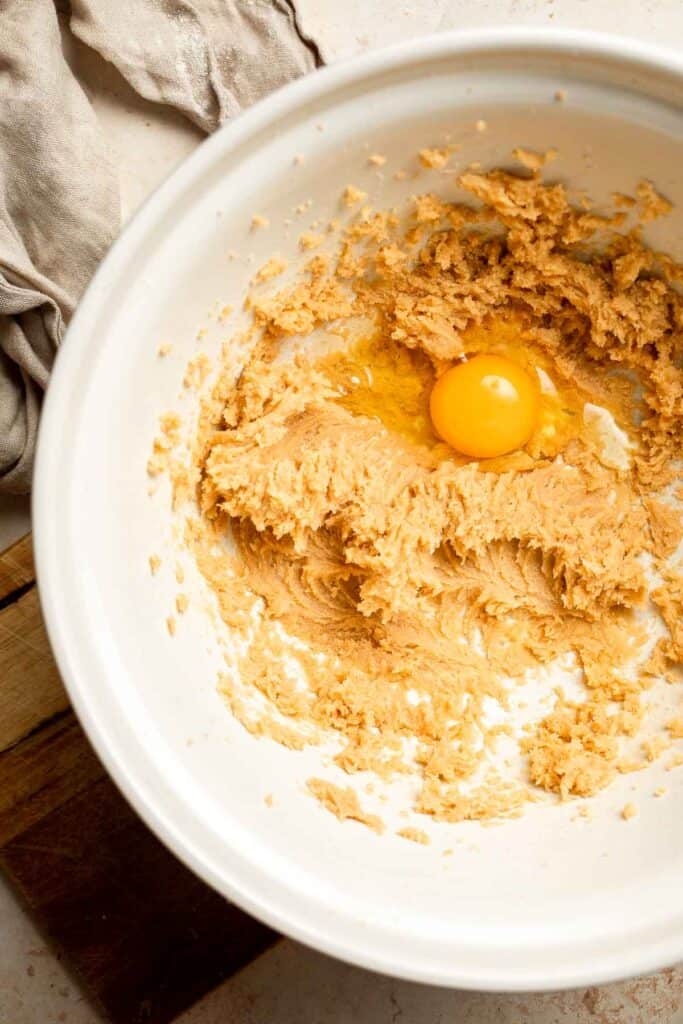
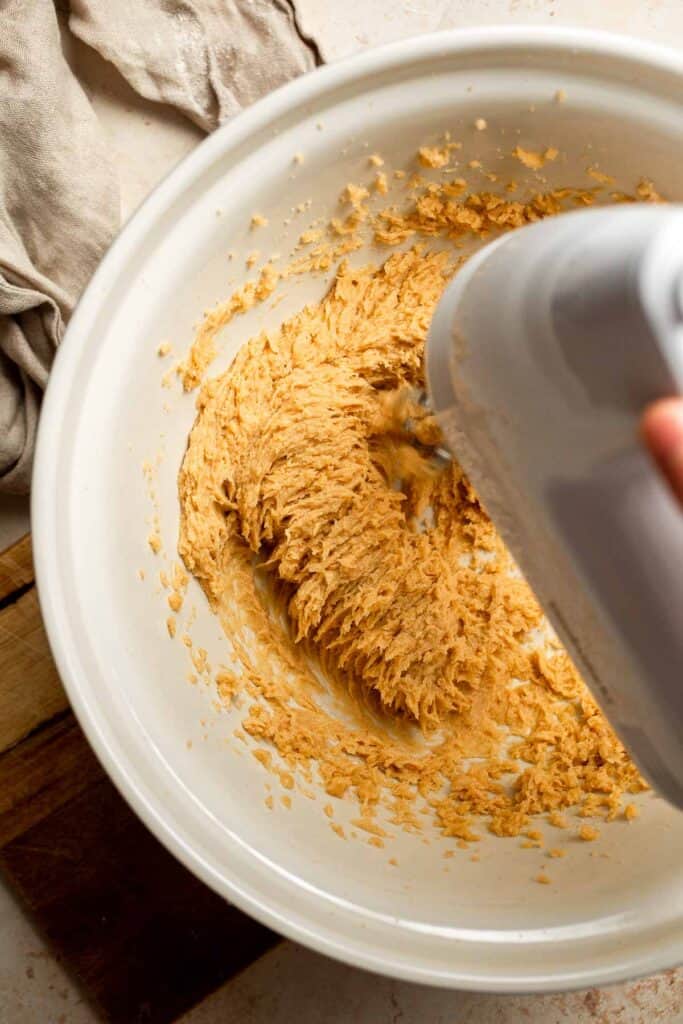
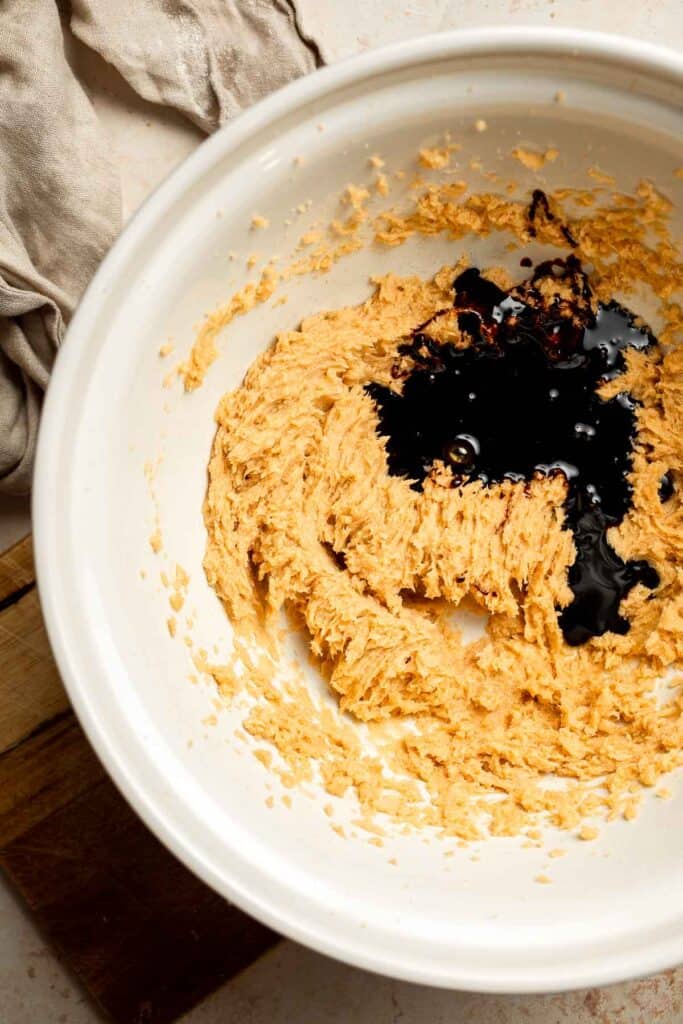
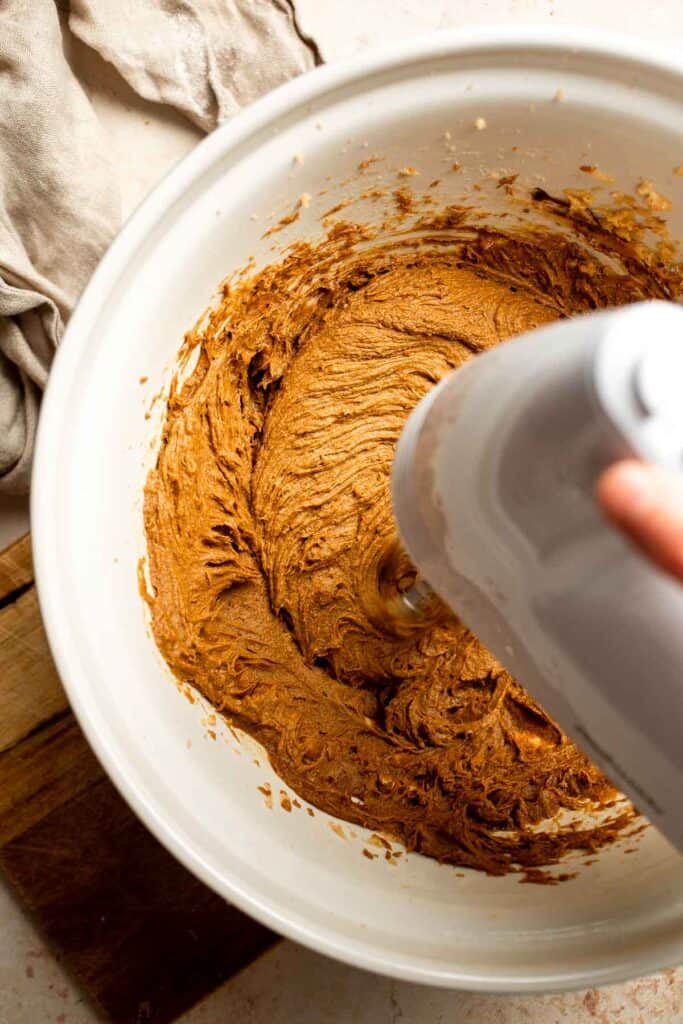
- Mix everything. Gradually add in the dry ingredients and beat until just combined.
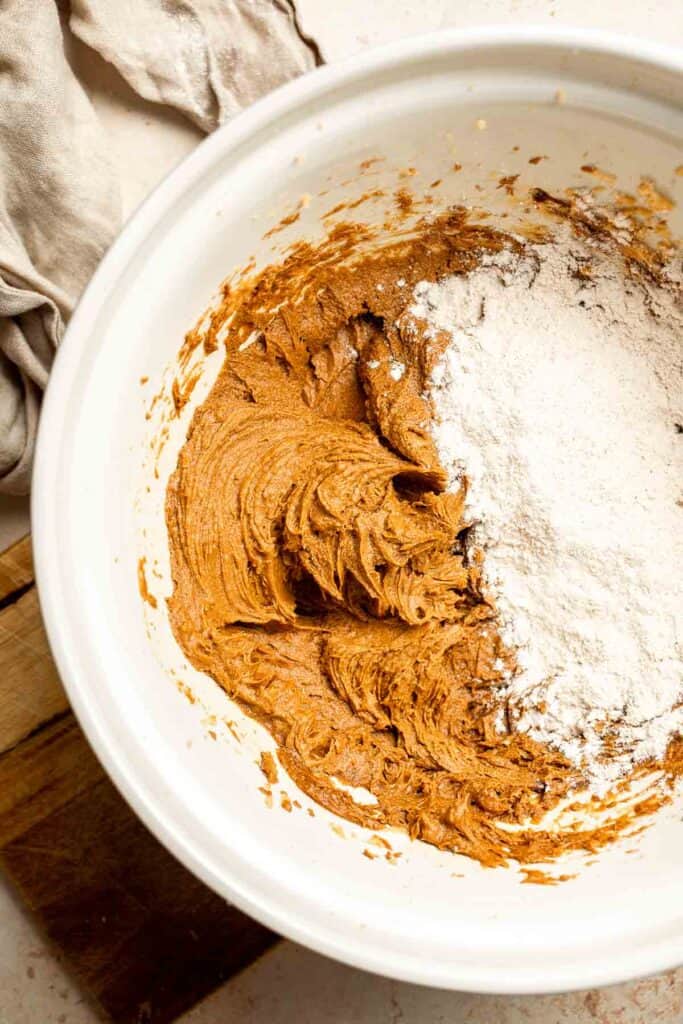
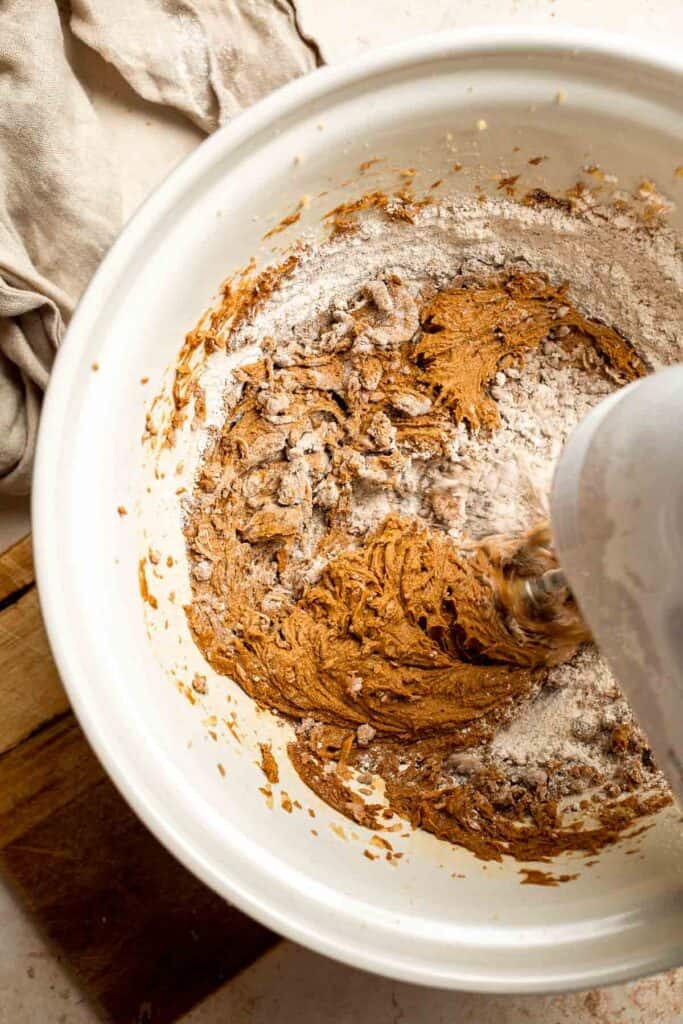
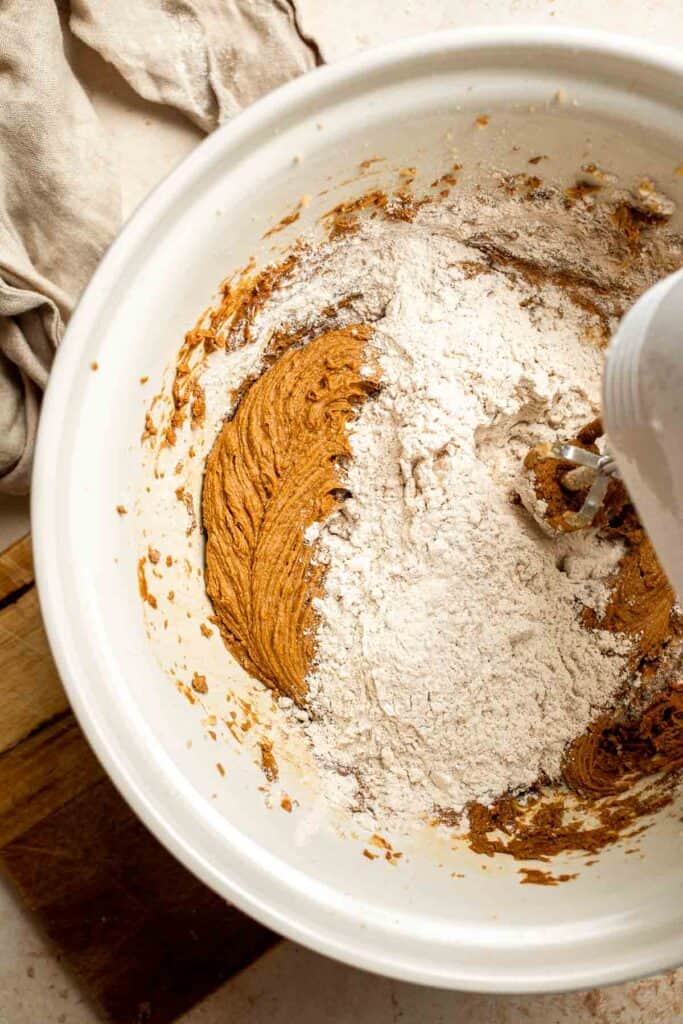
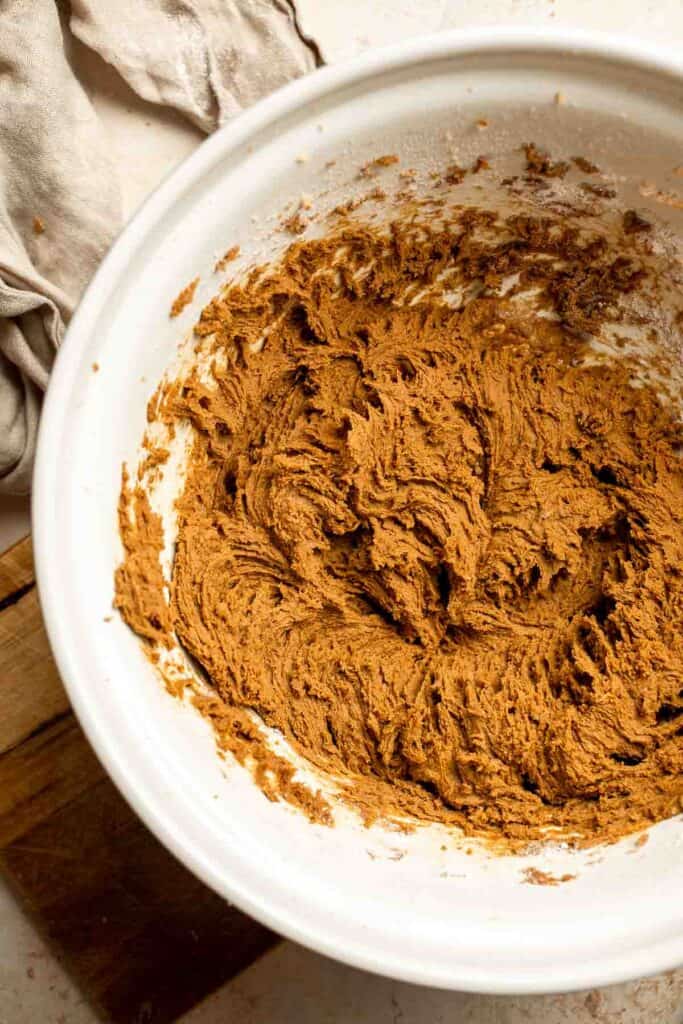
- Roll and coat. Transfer coarse sugar into a small bowl. Then, use a cookie scoop to scoop out 1-2 tablespoons of cookie dough at a time, and roll it into a 1-inch ball. Roll the cookie ball into the bowl of sugar to fully coat it.

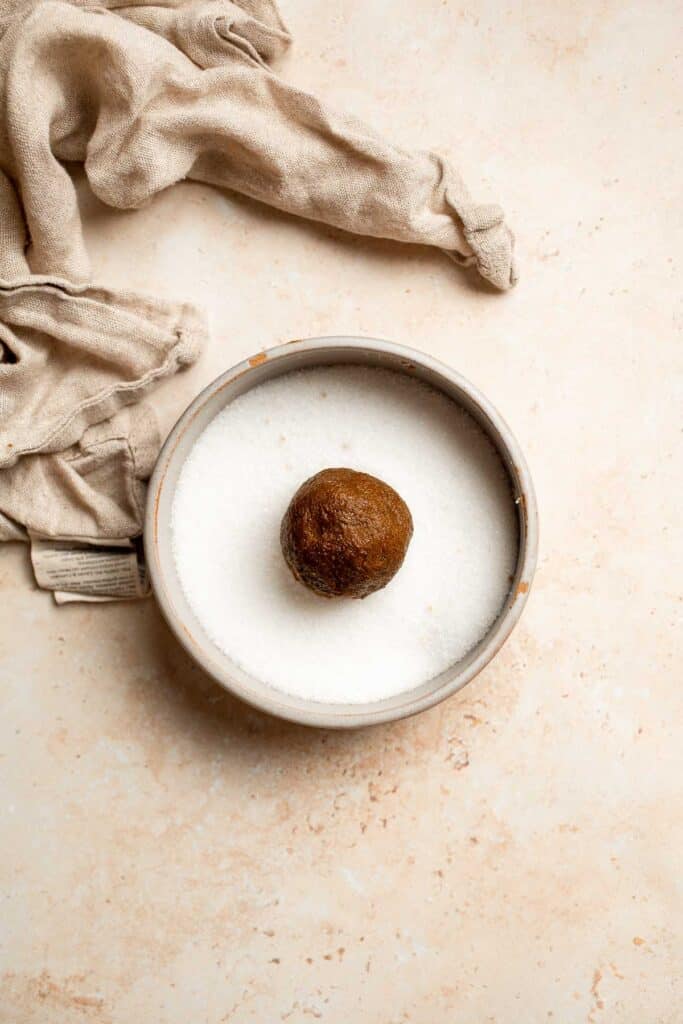
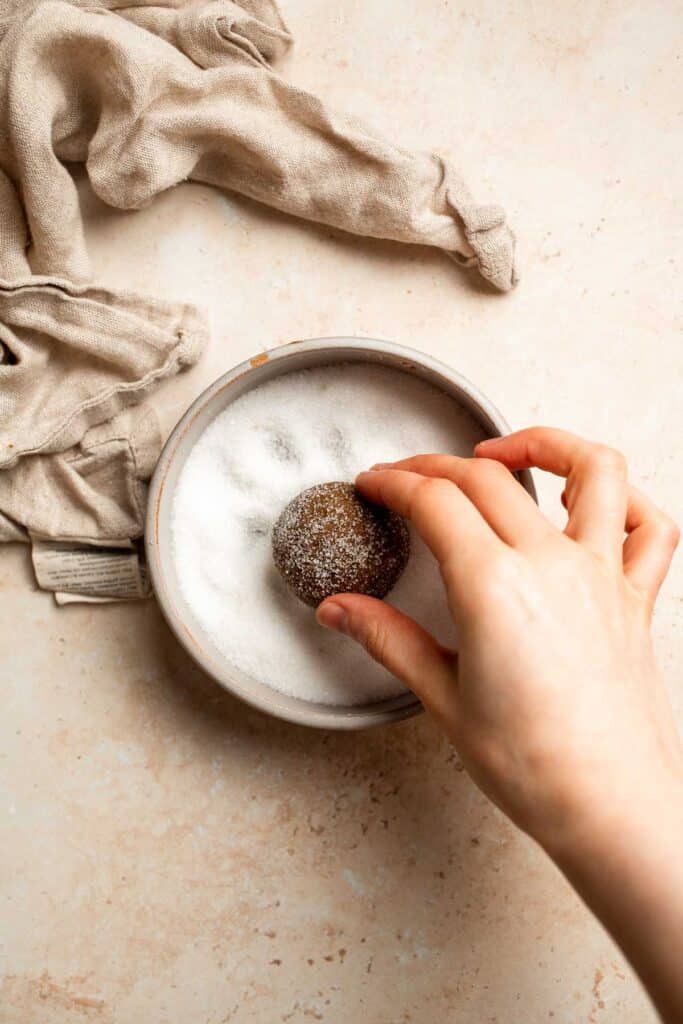
- Prepare for baking. Line a half-sheet baking pan with parchment paper or a silicone mat. Place on the lined baking tray, spaced 2-3 inches apart. You will have to bake in multiple batches or freeze some uncoated cookie balls to bake later.
- Bake. Bake in a 350 F preheated oven for 8-10 minutes until the edges are set. Remove from the oven and allow the cookies to cool for 5 minutes on the baking sheet. Then transfer to a wire cooling rack to cool down completely. If the cookies have a dome to them and are not very crinkled, tap the cookie sheet a few times on the counter. Then, transfer to the cooling rack to cool down completely.
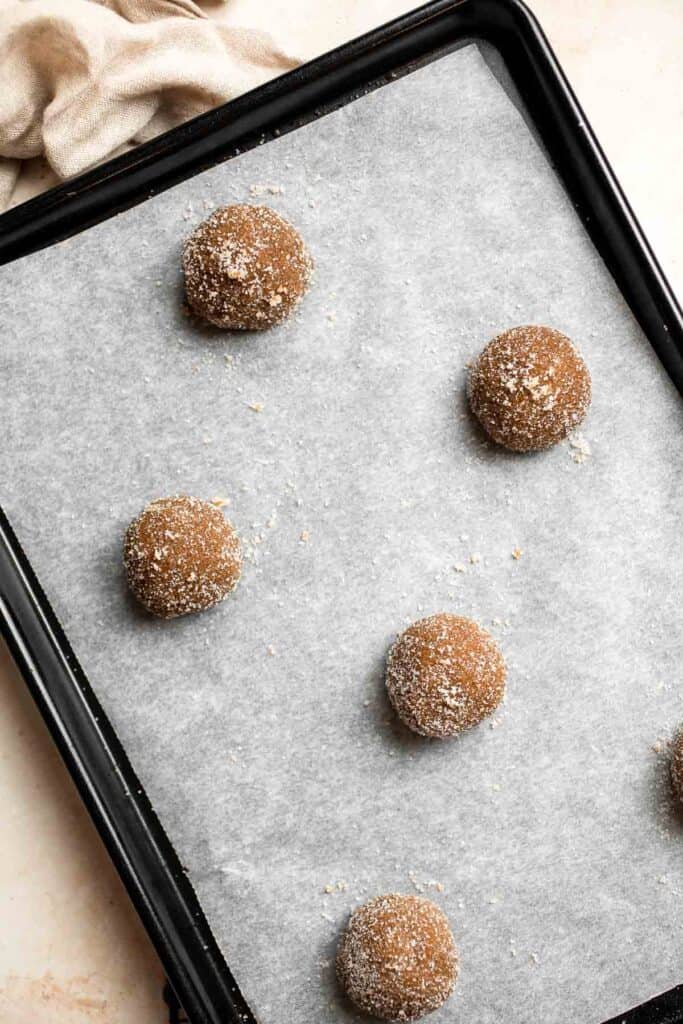
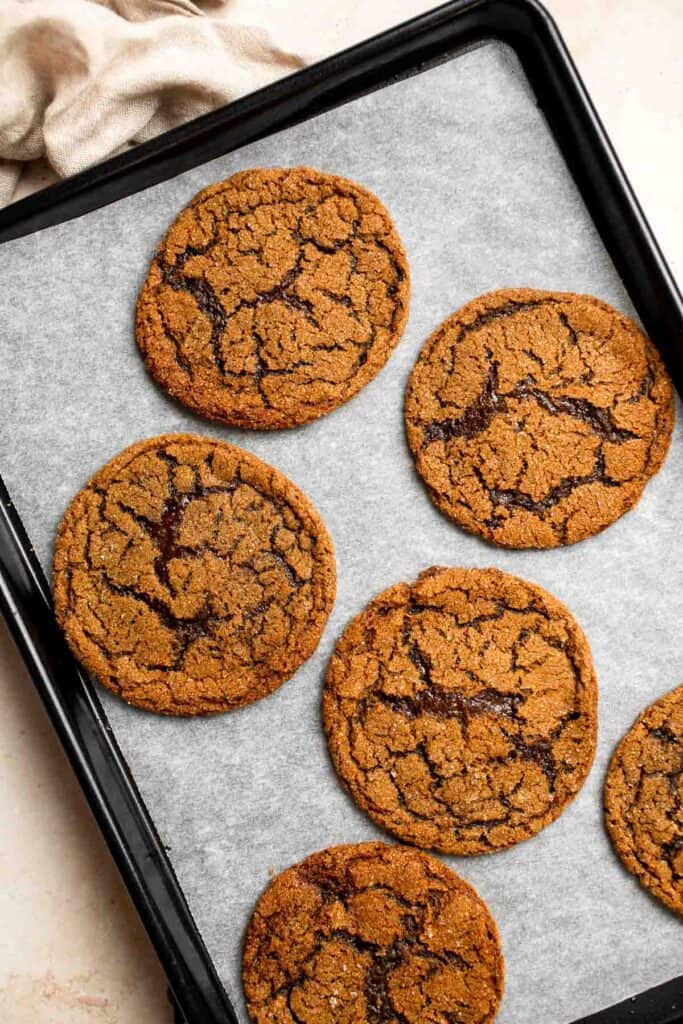
Recipe Variations
- Add chocolate chips. Enjoy a scrumptious treat by adding chocolate chips to your molasses cookies. Spiced molasses with sweet chocolate provides a wonderful balance of flavors that's deliciously comforting.
- Mix in some nuts. Throw in some chopped pecans, walnuts, or almonds in the dough for a chewy cookie with a nutty crunch. Fold them in at the end.
- Fill with cream cheese. Surprise everyone by adding a cream cheese filling to your cookies. Put the cream cheese in when rolling the dough into balls for a contrast of creamy and warm flavors.
- Brighten up with zest. Add a few teaspoons of grated lemon peel to your cookies. A fusion of zest with fall spices and molasses creates a rich depth of flavor with a citrusy twist.
How to Serve
Enjoy these delicious Molasses Cookies as a snack with your favorite cup of tea or coffee such as Chai Tea Latte, Slow Cooker Apple Cider, or White Hot Chocolate, or serve as an after-dinner treat, or include it as part of a Holiday Cookie Box along with some of these classic Christmas cookies:
- Italian Christmas Cookies (Ricotta Cookies)
- Peanut Butter Blossoms
- Christmas Sugar Cookies with Royal Icing
- Christmas Shortbread Cookie Bites
- Pinwheel Cookies
- Chocolate Crinkle Cookies
For more cookie recipes, see our 30 Best Christmas Cookies.
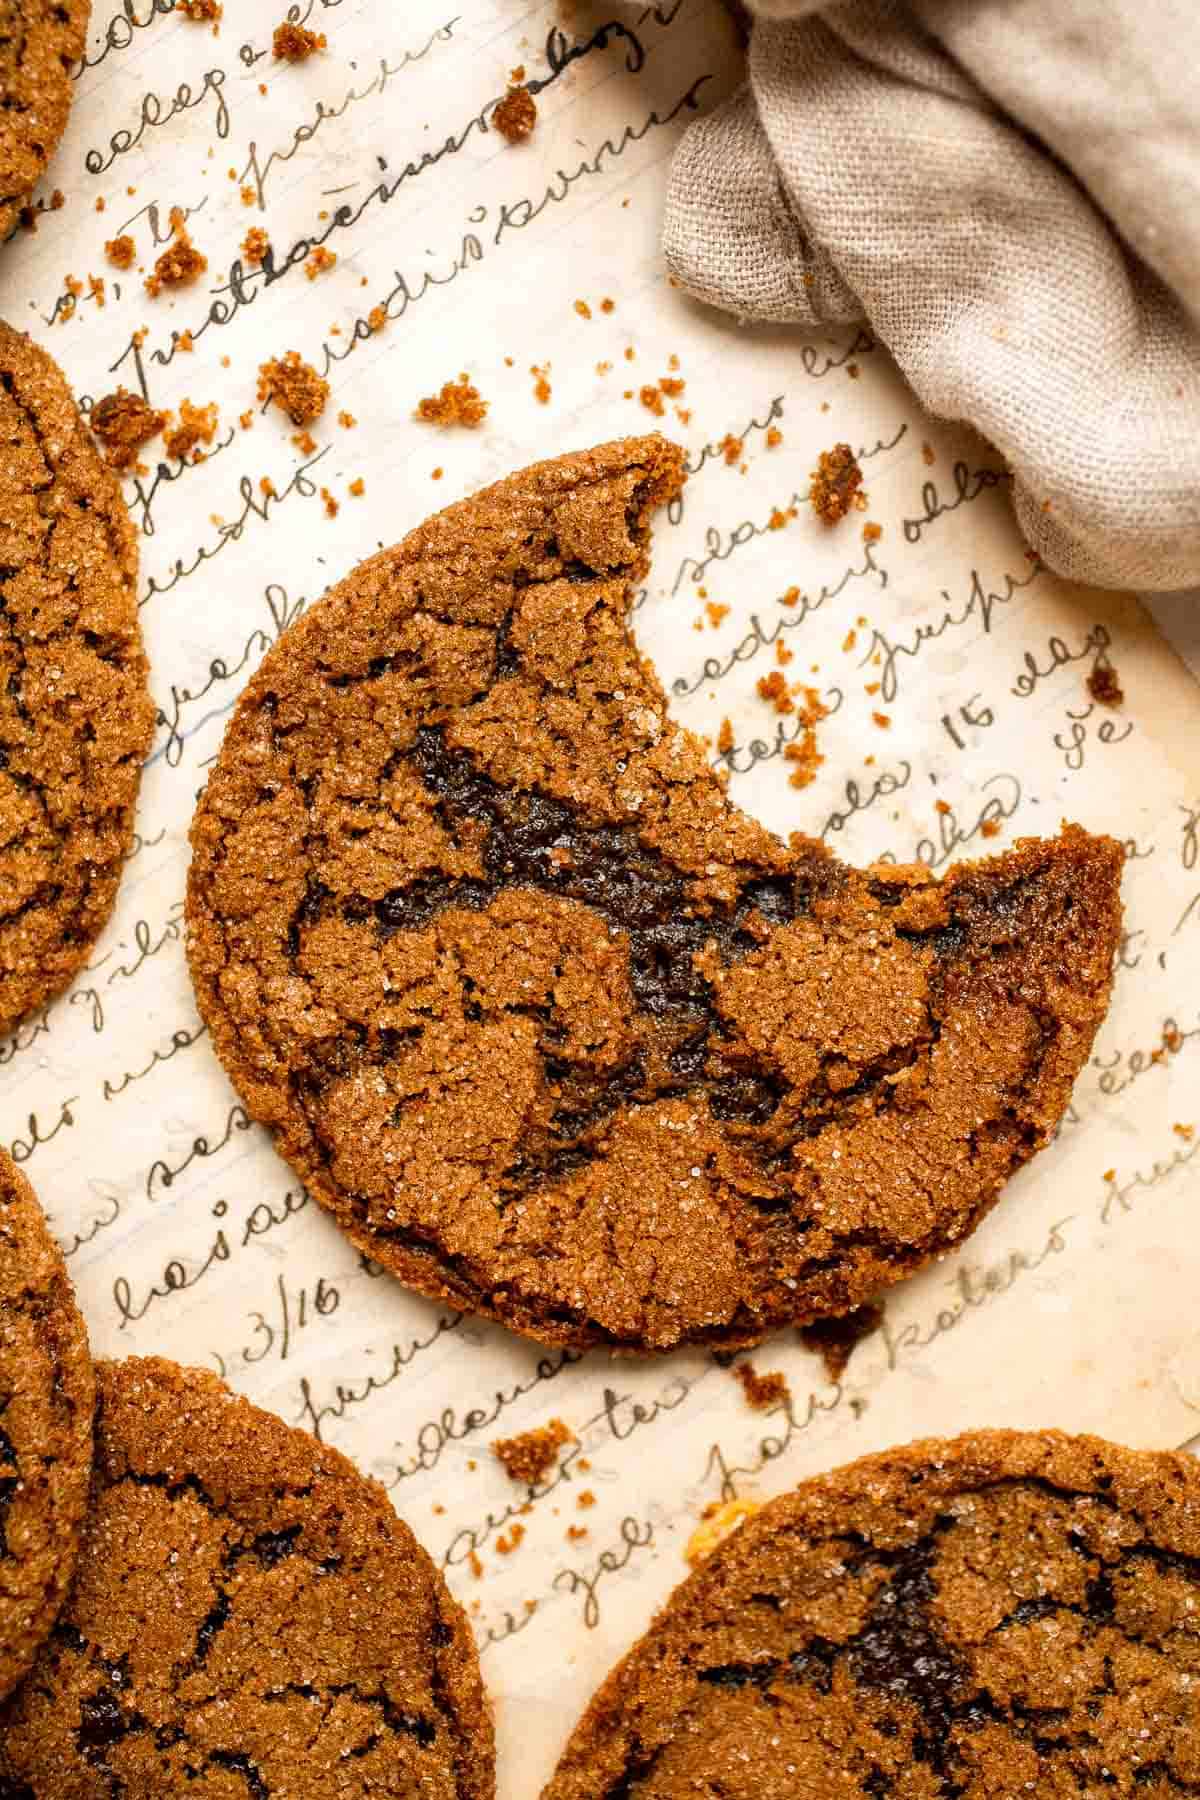
Recipe Tips and Tricks
- Sift dry ingredients. Flour, sugar, and spices are sometimes lumpy, making it harder to blend with liquid ingredients. Sift your dry ingredients to break up the clumps for even flavor distribution and smoother consistency.
- Don't overmix. Mix the dough just enough to combine the ingredients. Overmixing can lead to tough cookies, so watch the mixing time and speed closely.
- Adjust spices. Adding more ginger or cinnamon makes your cookies a little spicier. I find the balance of spices in this recipe enough, but you can always adjust these according to your taste.
- Underbake slightly.Taking the cookies out of the oven when they are slightly undone will give a chewy, gooey texture with crispy edges. Don't worry, they'll continue to bake while cooling down!
- Chill before baking. For thicker cookies, chill the cookie balls for at least 30 minutes before baking.
Storing and Freezing Instructions
How to Store
Store the cooled cookies in an airtight container for up to 1 week at room temperature. Keep them in a dry, cool place to preserve their flavor and texture.
How to Reheat
Reheat the cookies in a preheated oven for about 4 to 5 minutes or until warm. You can also pop them in a microwave for quicker reheating.
How to Freeze
Place the cooled cookies in a freezer-safe container lined with parchment paper and freeze for up to 3 months. Make sure to thaw them at room temperature before reheating.
More Cookie Recipes
- 50 Best Cookie Recipes
- Soft and Chewy Ginger Cookies
- Gingerbread Cookies
- Gingersnaps
- Chai Cookies
- Gingerbread Biscotti
Tried this recipe?
I'd love to hear what you think! Leave a comment and rating below to share your feedback. Your reviews help others discover this recipe and help me keep creating more free recipes for you. Snap a photo and tag me on social media @aheadofthyme too.
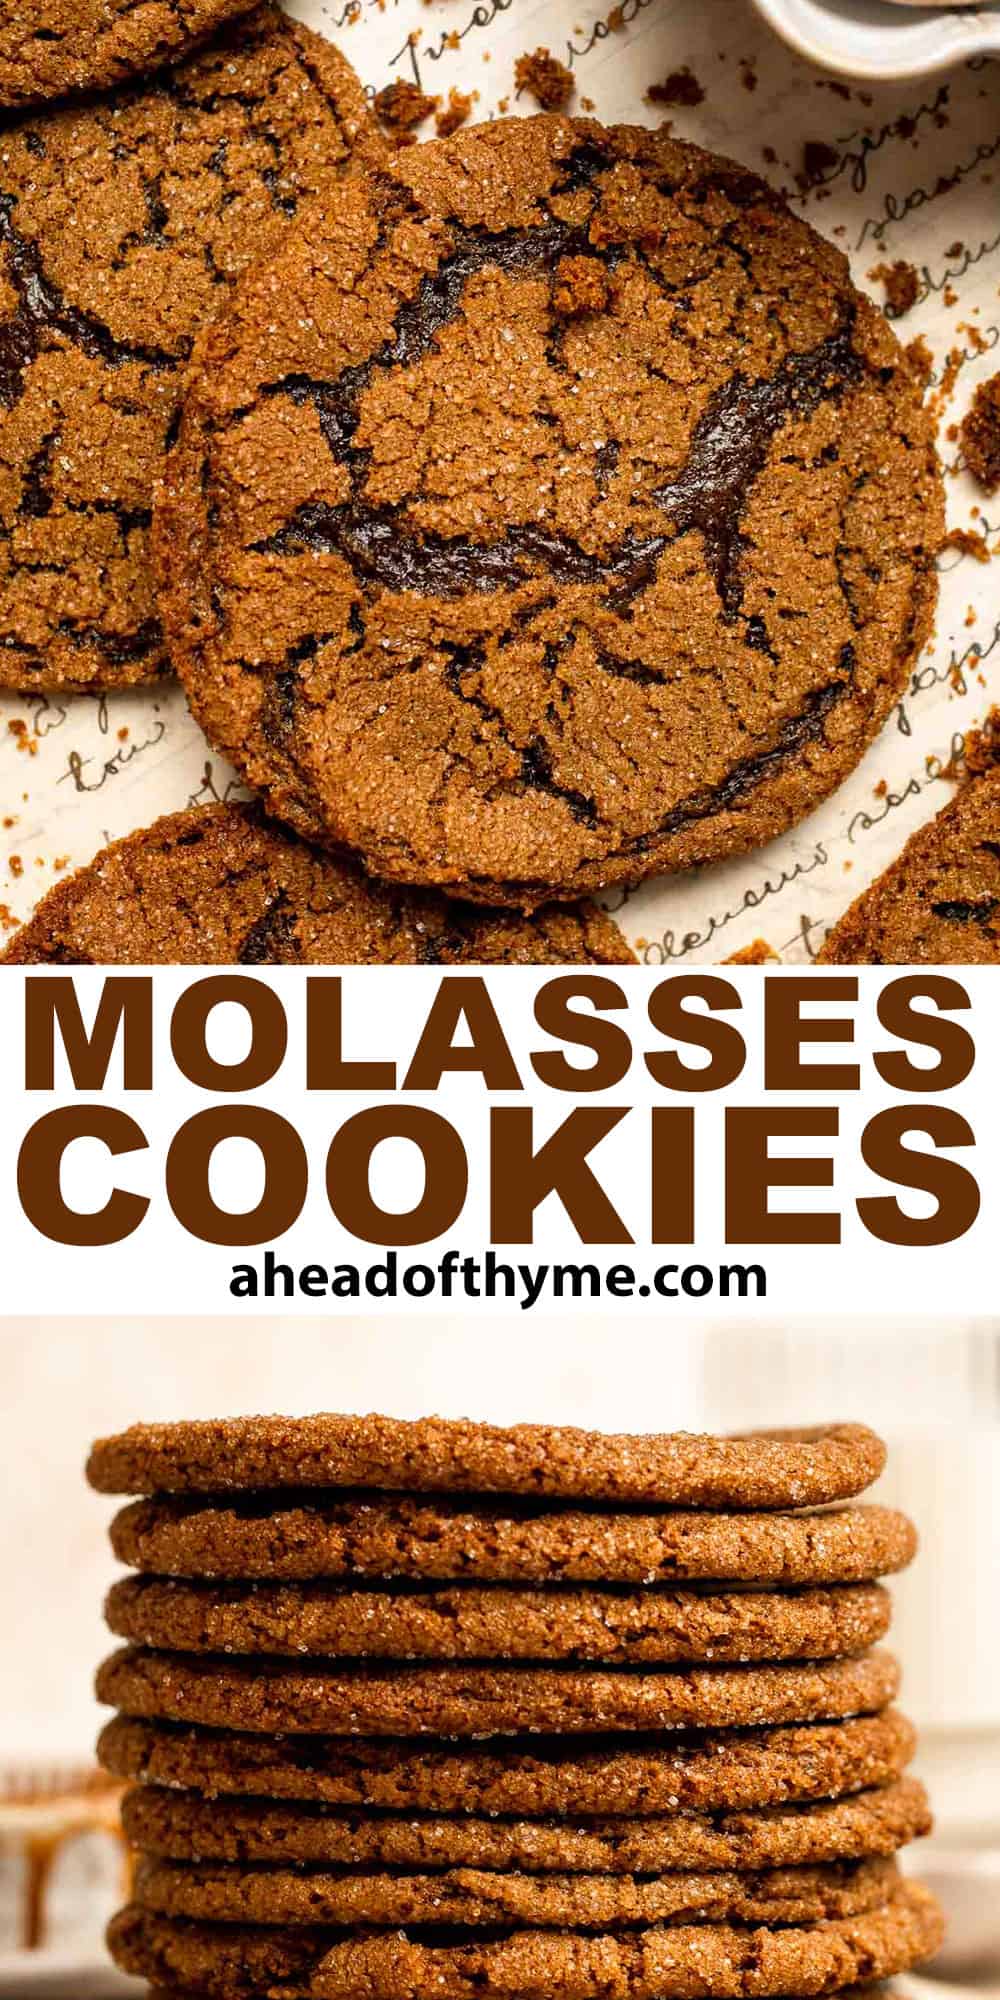
Chocolate Sugar Cookies
These Chocolate Sugar Cookies are such a fun twist on traditional sugar cookies. The warm brown color is the perfect background for your creative piping and decorations, ideal for creating gorgeous cookies for your holiday dessert table, Valentine's Day, or any special occasion. Just follow this simple chocolate sugar cookie recipe for the perfect cookies every time.

This is really the perfect chocolate sugar cookie recipe. Each cookie is chewy and tender with a melt-in-your-mouth texture and rich chocolate flavor. Like traditional sugar cookies, this dough is perfect for cut-out cookies, so break out the cookie cutters! Use this easy recipe instead of sugar cookie dough next time you feel like baking, or make them for a special chocolate lover in your life!
Why You'll Love These Chocolate Sugar Cookies
- Perfectly chewy. This chewy chocolate sugar cookie is perfectly soft with a wonderful chewiness that allows you to savor the rich chocolate flavor. They're such a treat!
- Rich chocolate flavor. The chocolate lovers in the crowd will adore these chocolatey sugar cookies! Feel free to use dark cocoa powder for a really deep flavor.
- Gorgeous for decorating. Regular sugar cookies are beautiful on their own, but the darker appearance of these soft chocolate sugar cookies adds an eye-catching contrast to your icing. They make beautiful Valentine's hearts or festive Christmas trees!

Ingredient Notes
To make these delicious chocolate sugar cookies, you will need the following ingredients (full measurements in recipe card below):
- all-purpose flour - keep it simple with regular all purpose.
- unsweetened cocoa powder - use Dutch-processed cocoa powder for the best and richest flavor.
- baking powder - this will give your chewy chocolate cookies a gentle rise and the perfect texture.
- salt - this enhances flavor and draws out sweetness.
- room temperature butter - soften unsalted butter completely before creaming.
- granulated sugar - regular sugar will add just enough sweetness and give your cookies a delicious crust.
- egg - egg will bind the cookie dough together and help it rise.
- vanilla extract - this adds a wonderful aroma that pairs well with the chocolate flavor.
- royal icing - make a batch of our favorite royal icing for decorating.
- sprinkles - these are optional but make for gorgeous cookies.
Baking Equipment and Tools
You will also need the following baking equipment and tools:
- medium and large mixing bowls
- hand mixer (or use the bowl of a stand mixer with a paddle attachment)
- parchment paper
- large sheet pan
- silicone baking mat
- cookie cutters
- wire rack
How to Make the Best Chocolate Sugar Cookies
- Whisk dry ingredients. In a medium mixing bowl, whisk together the flour, cocoa powder, baking powder, and salt. Set aside.

- Cream butter and sugar. In a large mixing bowl, cream butter and sugar together using a hand mixer (or stand mixer) on medium speed until light and fluffy, about 2 minutes.
- Add remaining wet ingredients. Add egg and vanilla and beat until combined.
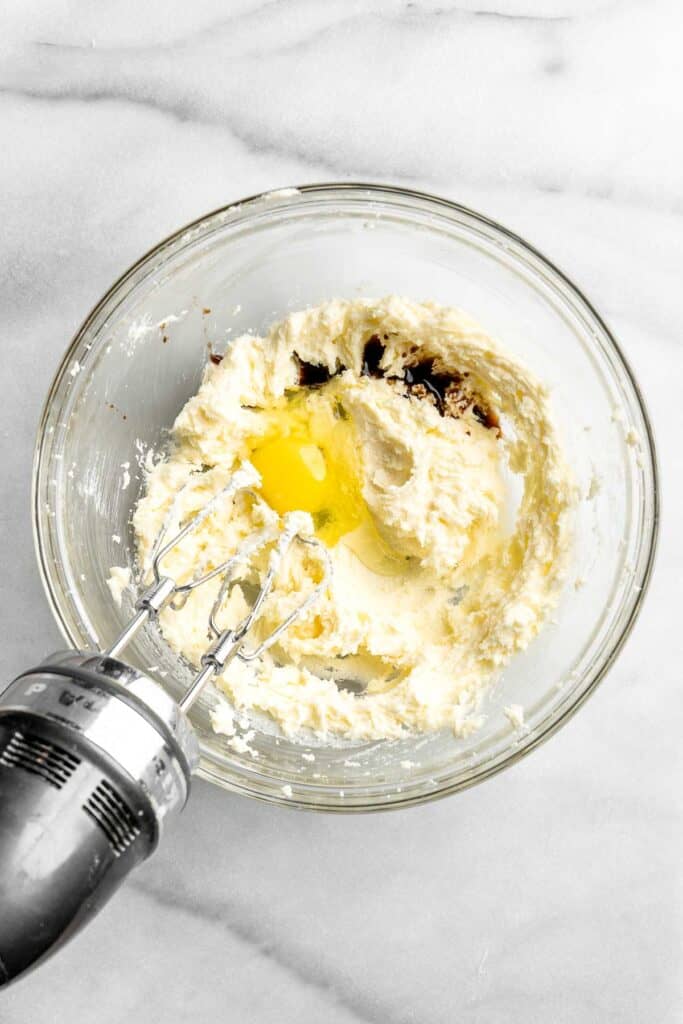
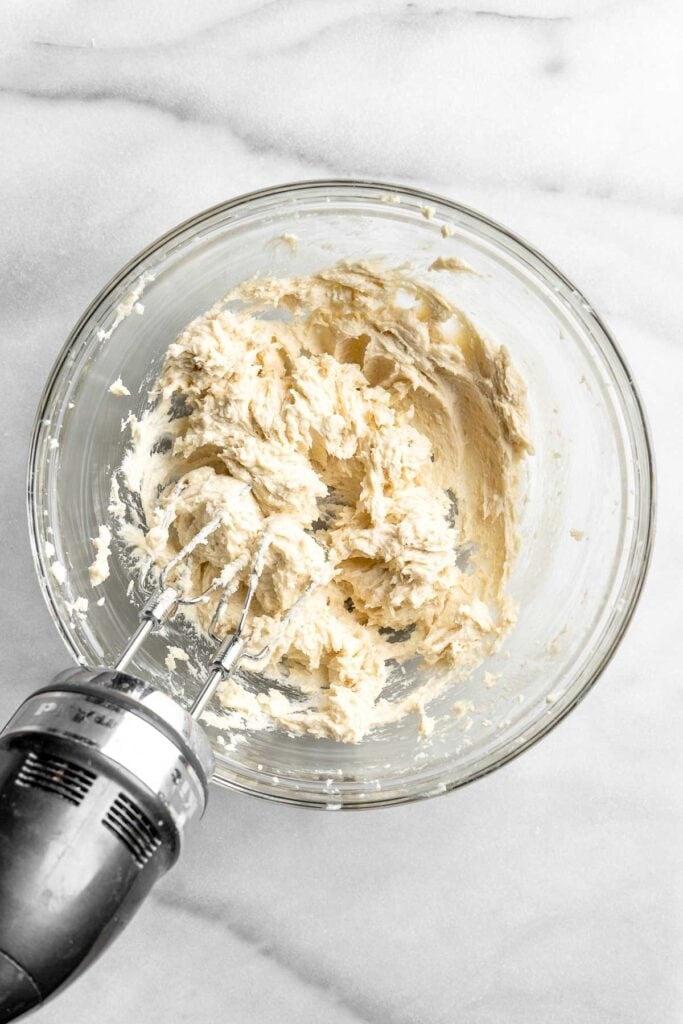
- Add dry ingredients. Turn the mixer to low speed and gradually add the dry ingredients and beat until combined.
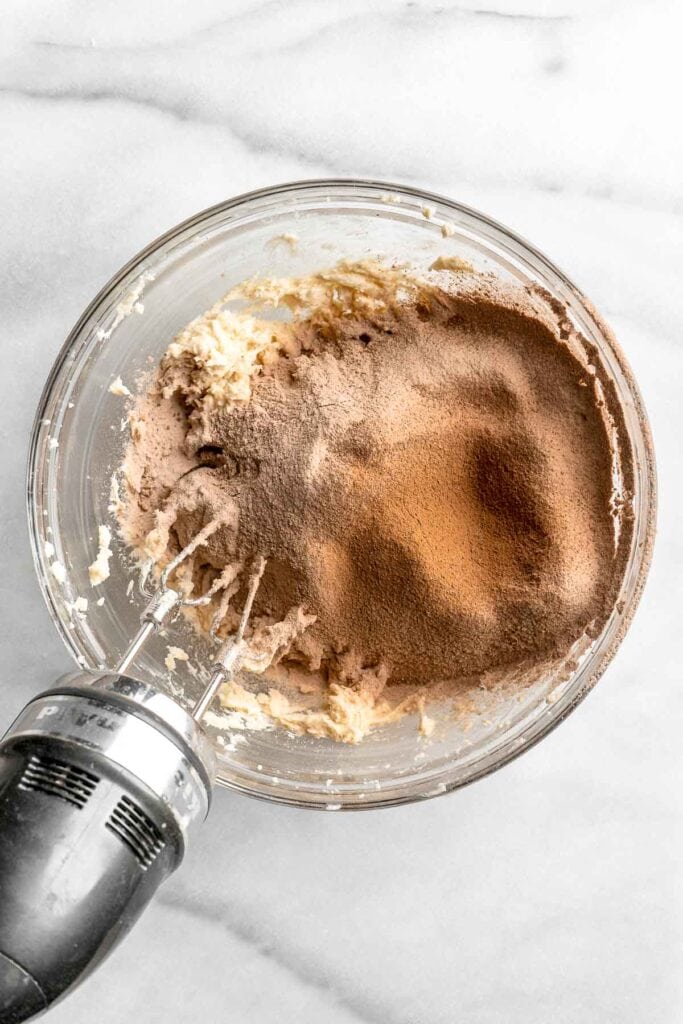
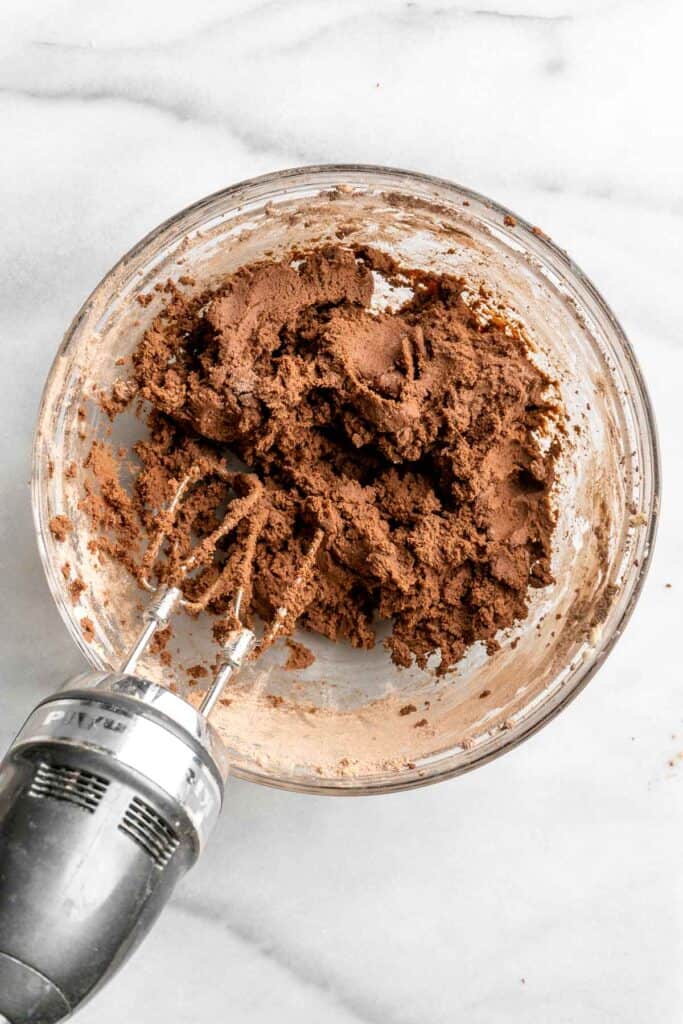
- Roll out dough. Form the dough into a ball and divide the dough in half. Pat each half into a disk. Dust 2 large pieces of parchment paper with cocoa powder and place each disk on one piece. Dust each disk with cocoa powder as well and roll each out until it is ¼ inch thick. Place another piece of parchment paper on top.

- Chill dough in fridge. Carefully place the two sheets of rolled out cookie dough into the fridge and chill until firm, at least 1 hour.
- Preheat. Preheat the oven to 350 F. Line a half sheet baking pan with parchment paper or silicone baking mat.
- Cut out shapes. Remove one sheet of cookie dough from refrigerator at a time. Use Christmas cookie cutters to cut out cookie shapes.
- Arrange cookies. Transfer the cookies onto the lined baking sheet, placing them 1-inch apart. Re-roll any scraps and repeat to cut out more cookies.
- Continue shaping. Repeat with second batch of dough.
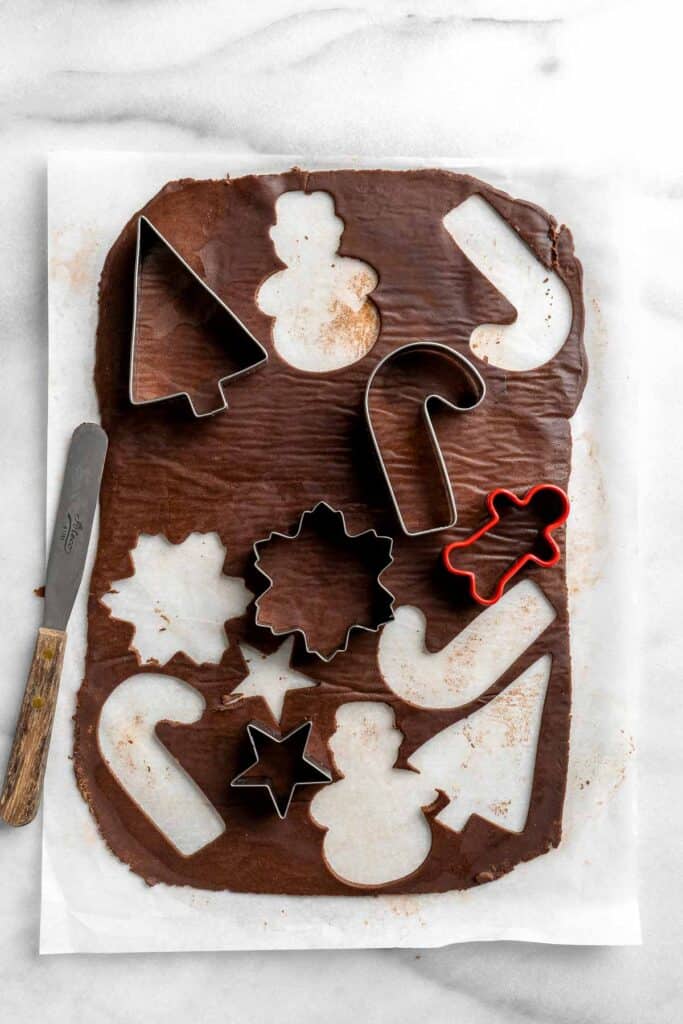
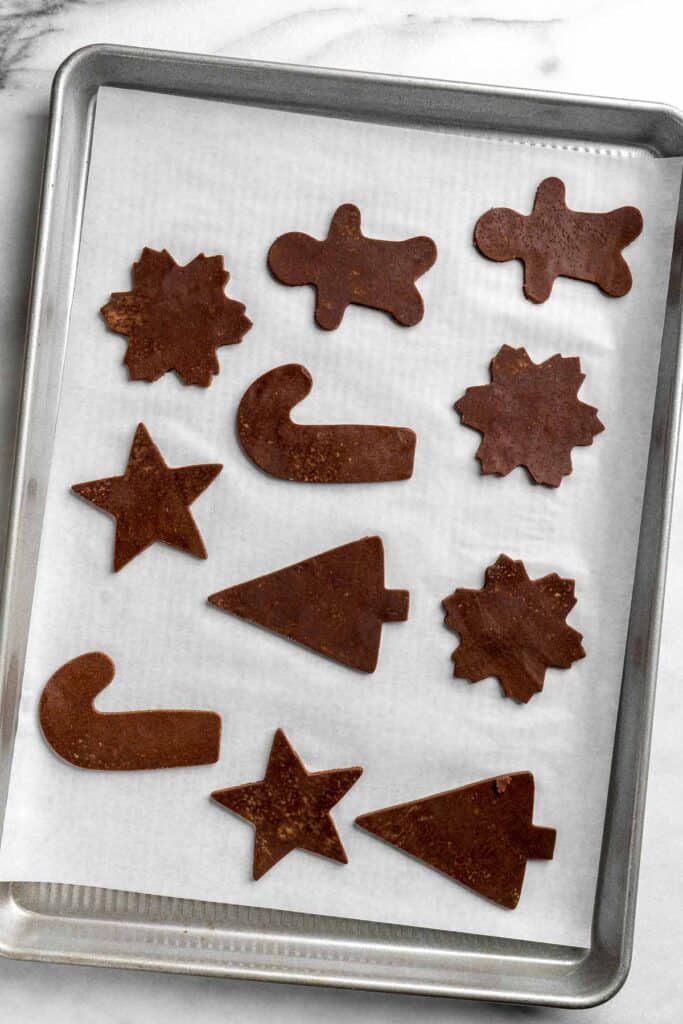
- Bake and cool. Bake cookies for 8-10 minutes, until the edges start to firm up. Let the cookies cook for a couple minutes on the baking sheet, then transfer them to a wire cooling rack to cool completely before icing.
- Decorate. Decorate with royal icing and sprinkles.


Recipe Variations
- Double chocolate sugar cookies. Stir in some mini chocolate chips or shaved chocolate for even more chocolate flavor.
- Use dark chocolate. Use a really rich cocoa powder like Hershey's special dark cocoa powder to really make these sweet cookies pop with extra rich flavor.
- Add instant coffee. Give your cookies an even deeper flavor by adding up to 2 teaspoons of instant coffee powder. Hydrate it with the vanilla extract first.
How to Serve
These chocolate sugar cookies are delicious during the holidays as part of a Holiday Cookie Box along with some other favorites such as:
- Peanut Butter Blossoms
- Soft and Chewy Ginger Cookies
- M&M Christmas Cookies
- Red Velvet Crinkle Cookies
- Linzer Cookies
- Buckeyes
For more recipes, see our 30 Best Christmas Cookies.

Recipe Tips and Tricks
- Soften your butter. To get a perfectly chewy cookie, you need to cream the butter and sugar together until light and fluffy. For best results, make sure your butter is completely softened before mixing.
- Chill the dough. Chilling the dough allows it to relax after mixing and will give your cookies the most perfect texture.
- Roll out with cocoa, not flour. Although we normally roll dough with white flour, that will add a white color to your brown dough. Use cocoa powder instead.
Storing and Freezing Instructions
How to Store
Store leftover cookies in an airtight container at room temperature for 1-2 weeks. For longer storage, place the container of baked cookies in the fridge.
How to Freeze
Allow the cookies to cool to room temperature, then store them in a freezer-safe container in layers, separated by pieces of parchment paper. You can also freeze the unbaked dough for 2-3 months. Let it thaw in the fridge, then soften at room temperature before baking.
FAQ
The best sugar cookies are soft! Since these chewy sugar cookies are for decorating, they do need to be firm enough to pipe and decorate yet soft enough to enjoy as a cookie. There's a fine line between being perfectly baked and overdone, so check that the edges have begun to firm up before removing the cookies from the oven.
Since it's harder to see when chocolate cookies are turning golden brown, you need to test the edges of the cookies. Poke the edges of the cookies with your finger or a fork. If the edges have started to firm up, you can remove the cookies from the oven and let them continue cooking on the tray for a few minutes before setting them on a wire rack to cool completely.
Yes, absolutely! Sugar cookies can stay out at room temperature for up to 2 weeks, especially without icing. To keep them fresh, store them in an airtight container.
More Chocolate Cookie Recipes
- 50 Best Cookie Recipes
- Brownie Cookies
- Chocolate Thumbprint Cookies
- Double Chocolate Chip Cookies
- Hot Chocolate Cookies
- Nutella Cookies
Tried this recipe?
I'd love to hear what you think! Leave a comment and rating below to share your feedback. Your reviews help others discover this recipe and help me keep creating more free recipes for you. Snap a photo and tag me on social media @aheadofthyme too.

Spritz Cookies
Buttery Spritz Cookies are impossibly light with a melt-in-your-mouth texture, making them a beloved holiday tradition for a reason. The soft spritz cookie dough is squeezed through a cookie press, which turns it into a variety of holiday shapes. They're both fun to make and absolutely delicious, so even if you didn't grow up with these butter cookies, they'll quickly become a part of your family Christmas.

We always look forward to making these classic spritz cookies! The name comes from the German word "spritzen," which means "squirt" as the soft dough must be extruded through a piping bag or spritz cookie press. They are very similar to shortbread cookies and dissolve like a soft, buttery cloud almost immediately. They can be a little fussy, but don't worry; we're sharing our top tips so you can make your new favorite cookies perfectly every time!
Why You'll Love These Spritz Cookies
- Traditional Christmas cookie. The spritz is a type of German Christmas cookie, and it's been popular for centuries! They are similar versions from other European countries as well, so many people have fond memories of this classic Christmas cookie.
- They're fun to make. We think all cookies are fun to bake, but these ones take the cake! The extruding process is so much fun, and it's part of what makes these shaped cookies such an iconic Christmas tradition. You can even dip them into melted chocolate and sprinkles for extra detail!
- So crunchy and buttery. This is the best spritz cookie recipe! It will make buttery cookies with a crunchy texture on the outside. They aren't dry or boring though; they immediately begin to melt in your mouth, releasing their sweet, buttery flavor. You'll definitely want more than one!

Ingredient Notes
To make these delicious spritz cookies, you will need the following ingredients (full measurements in recipe card below):
- butter - it's essential to use softened butter. Let your butter come to room temperature before preparing the dough.
- sugar - use regular white sugar for a pale color and crunchy texture.
- salt - this will highlight all the flavors in this spritz cookies recipe.
- egg - egg will bind the dough together and add a fluffy texture.
- vanilla extract
- almond extract - the nutty flavor of almond extract makes these cookies irresistible!
- flour - use regular all purpose flour. No fancy pastry flour required.
- food coloring - if you want to dye your cookie dough, use gel food coloring for the best results.
- sprinkles - these are optional, but it can be fun to use festive sprinkles for a pop of color.
You will also need a baking sheet, stand mixer with paddle attachment, cookie press (try OXO or Wilton), wire rack, and a small spatula.
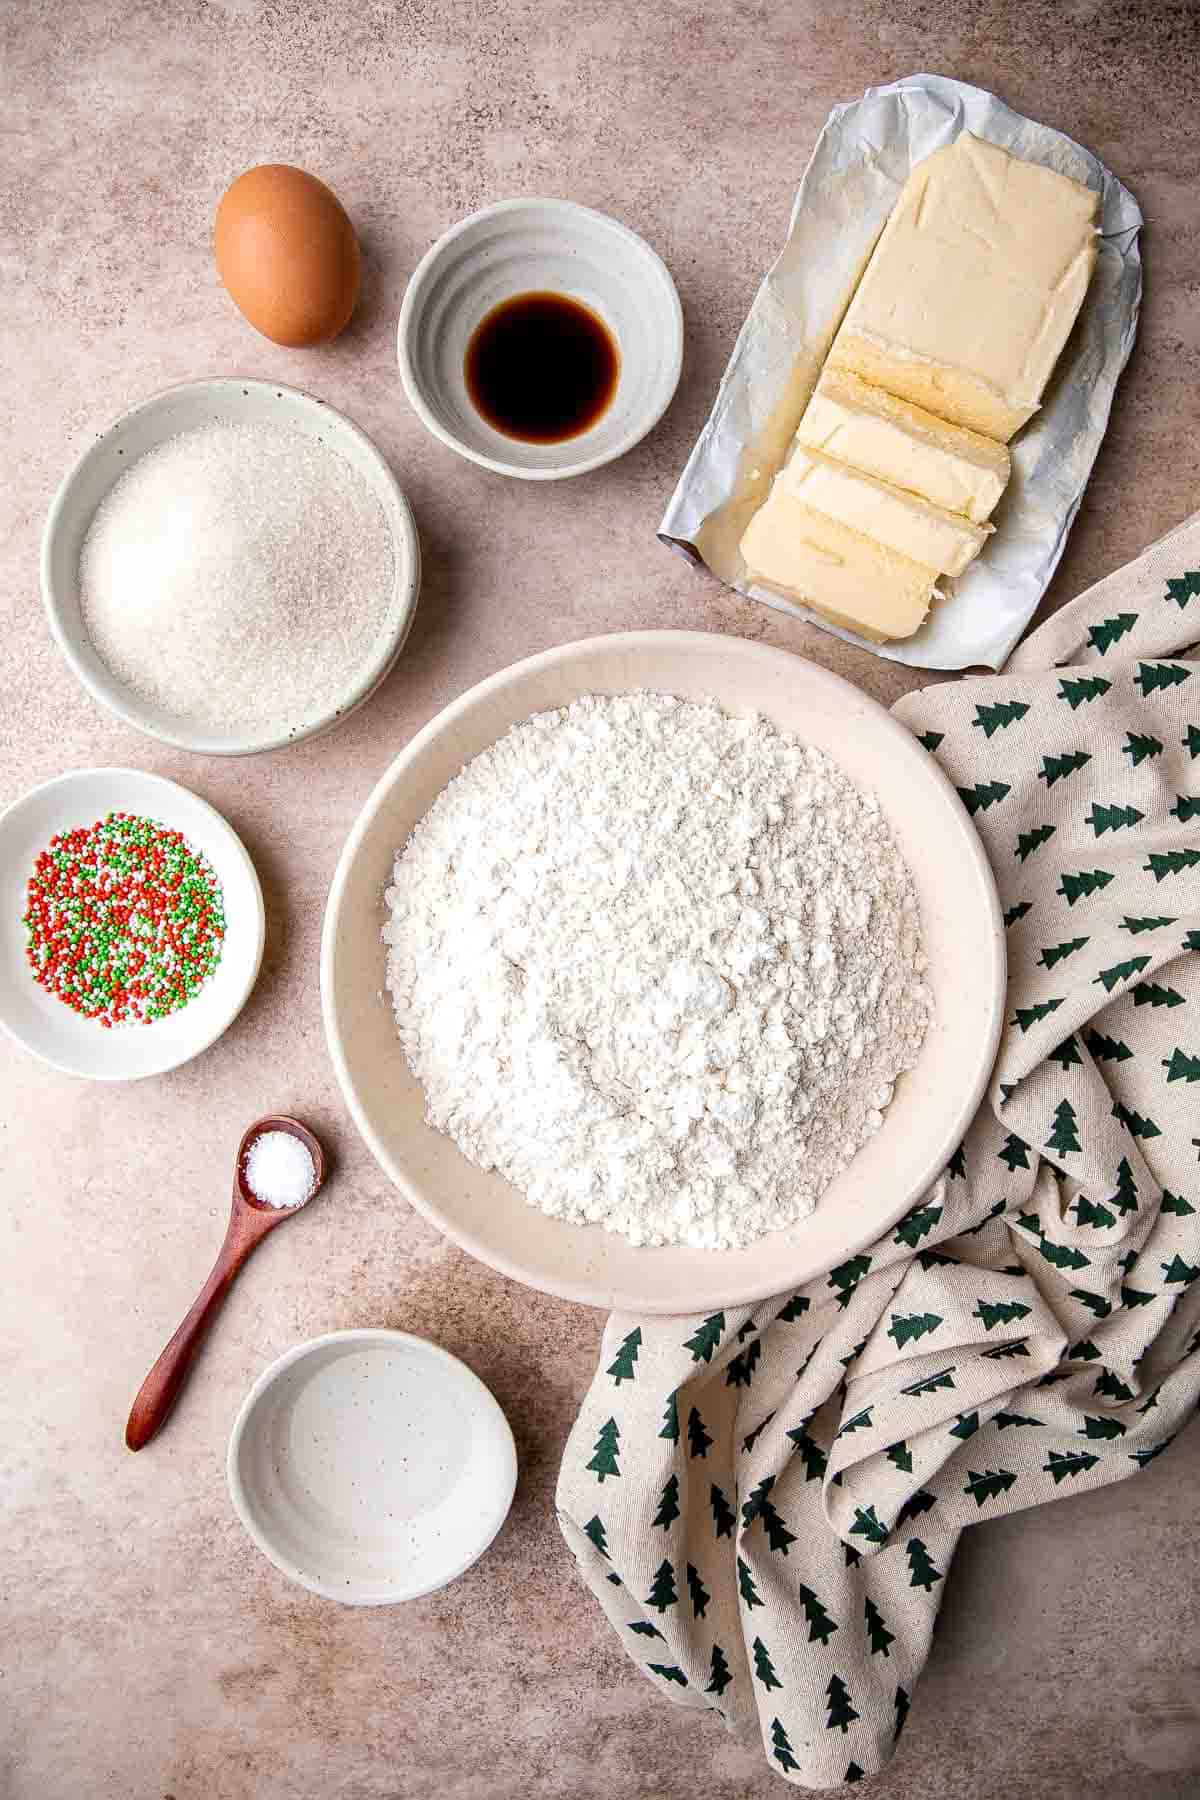
How to Make the Best Spritz Cookies
- Prep. Preheat oven to 350 F. Line a large baking sheet with a silicone baking mat (no parchment paper) or use a non-stick baking sheet without a liner. You can prepare 2-3 baking sheets or bake in batches using one baking sheet.
- Cream butter and sugar. Cream butter and sugar together using a stand mixer fitted with the paddle attachment (or in a large mixing bowl with a hand mixer) on medium speed until light and fluffy, about 2 minutes.


- Add wet ingredients. Add salt, egg, vanilla, and almond extract and beat until incorporated.
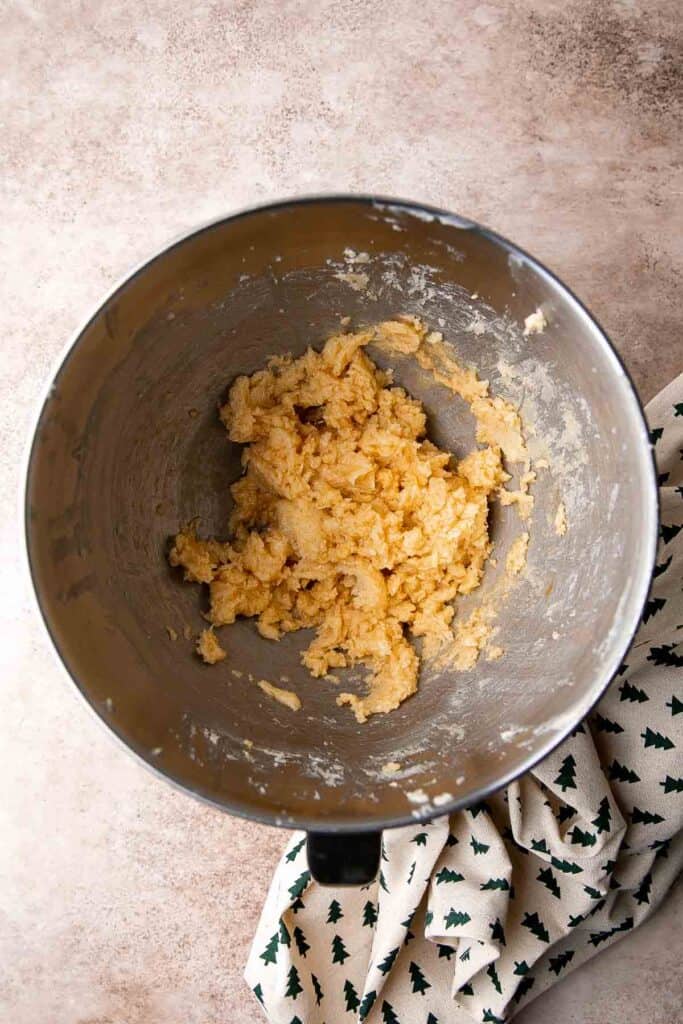
- Tint dough (optional). If tinting the dough, add in the gel food coloring.
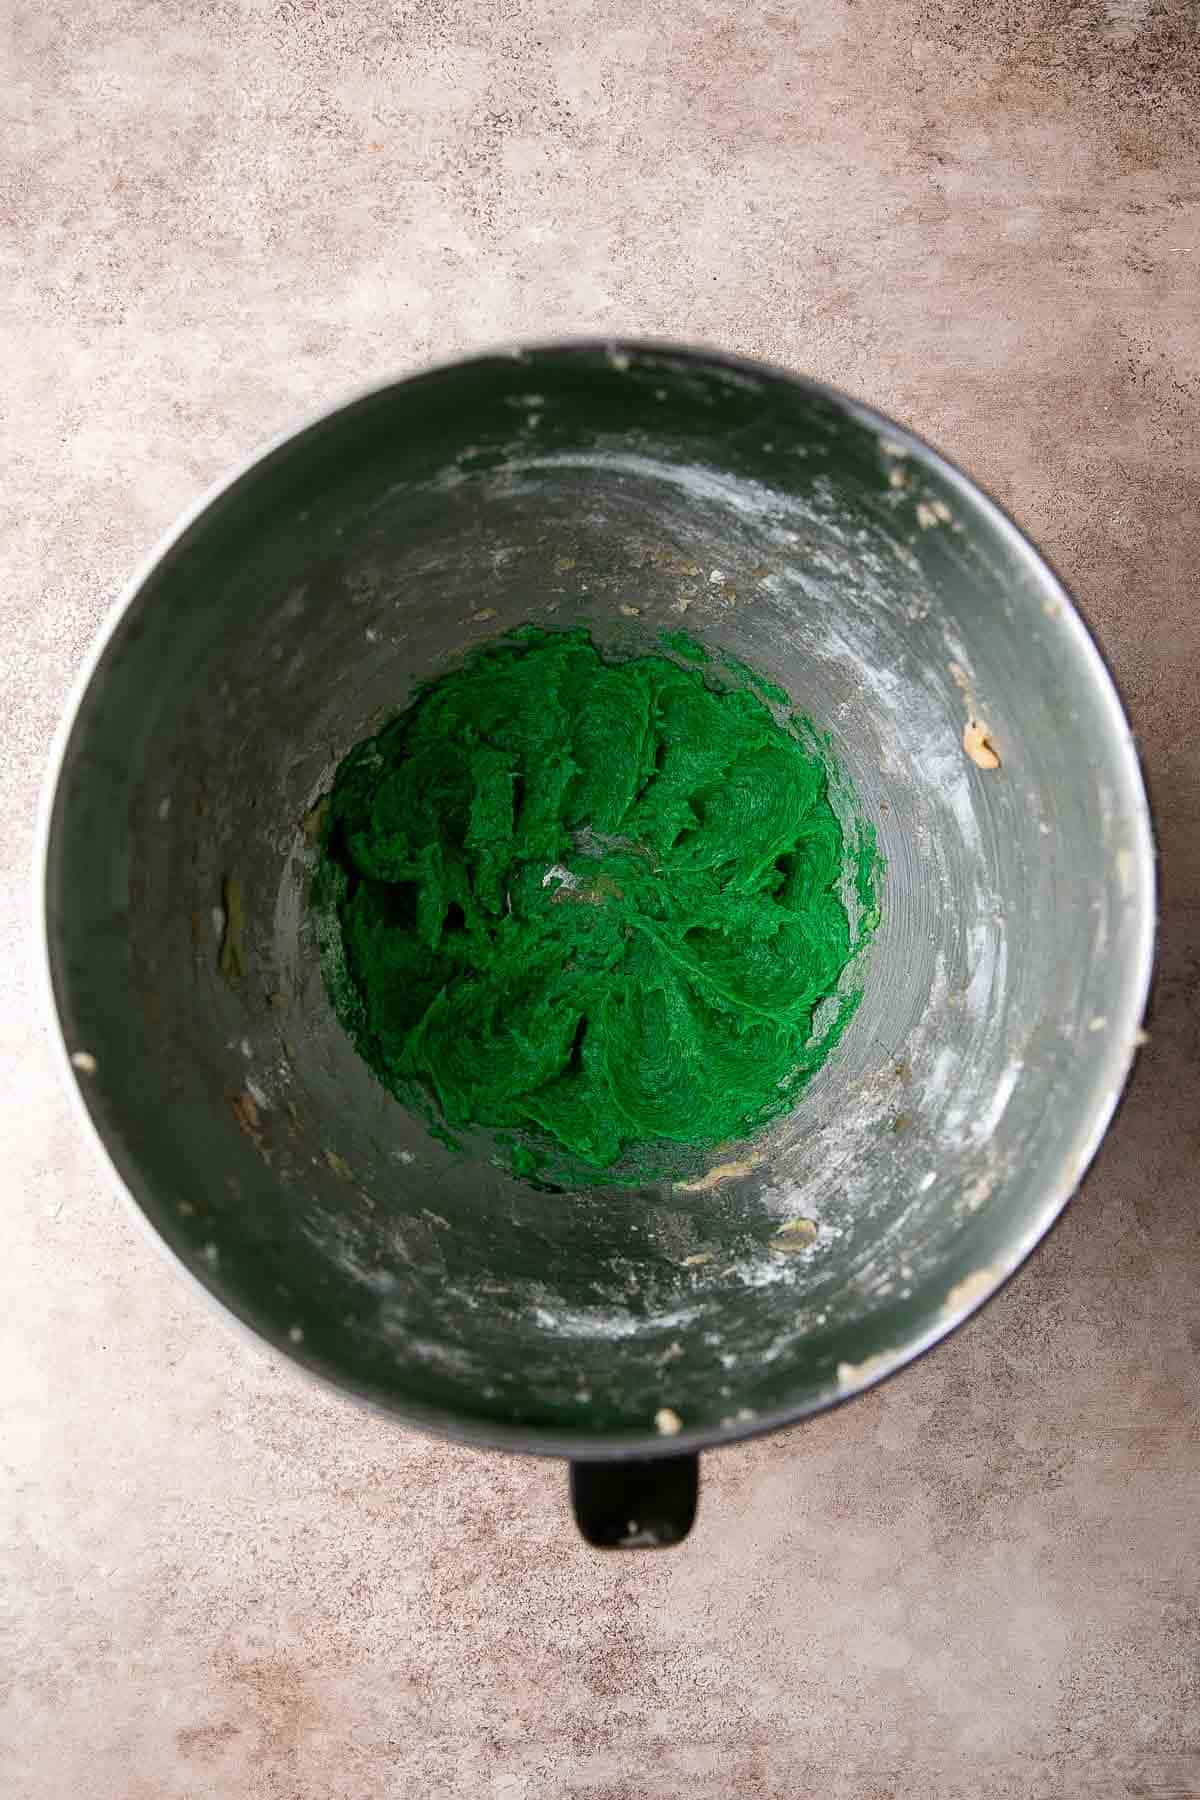
- Add flour. Gradually add the flour and beat on low speed until combined.
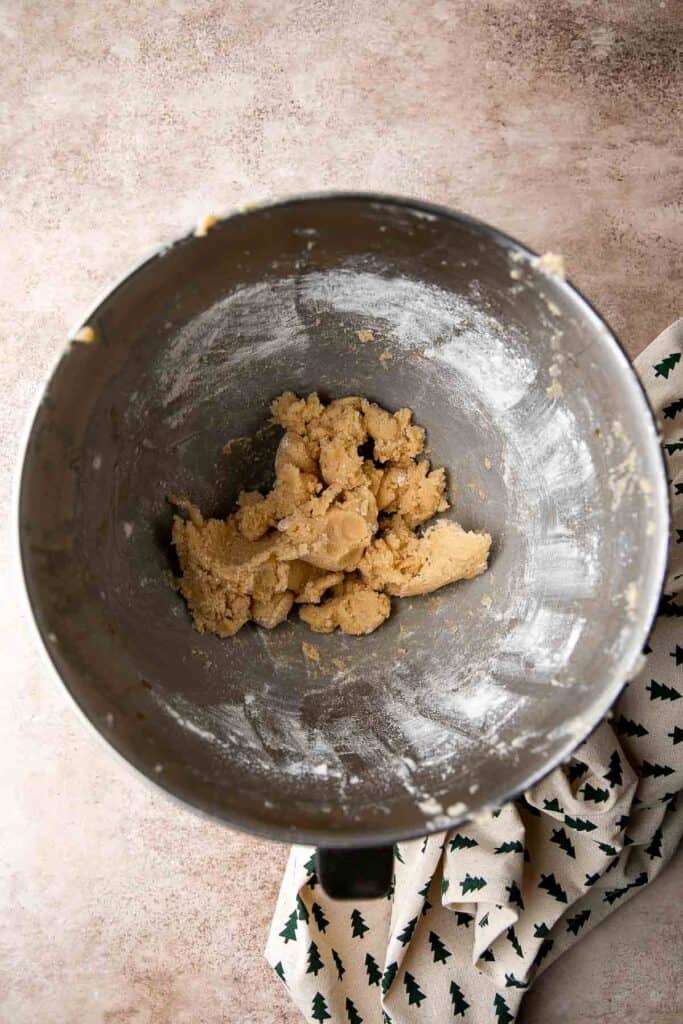
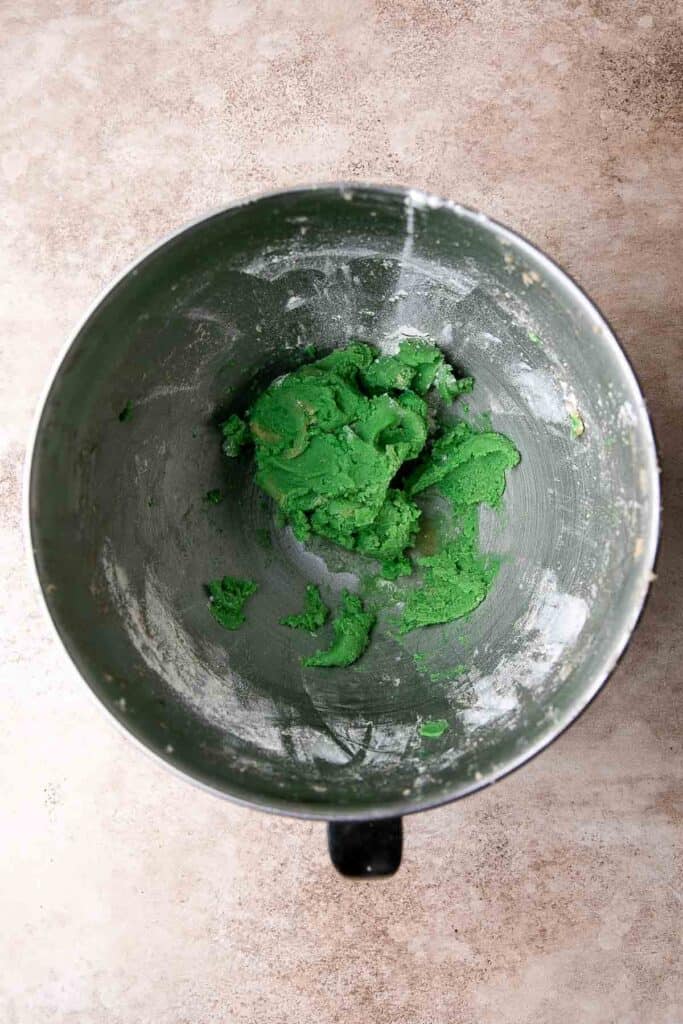
- Press cookies. Transfer the dough into a cookie press and fit it with the pattern that you like. Press the cookies into the baking sheet placed 2 inches apart. Add sprinkles on top, if desired.
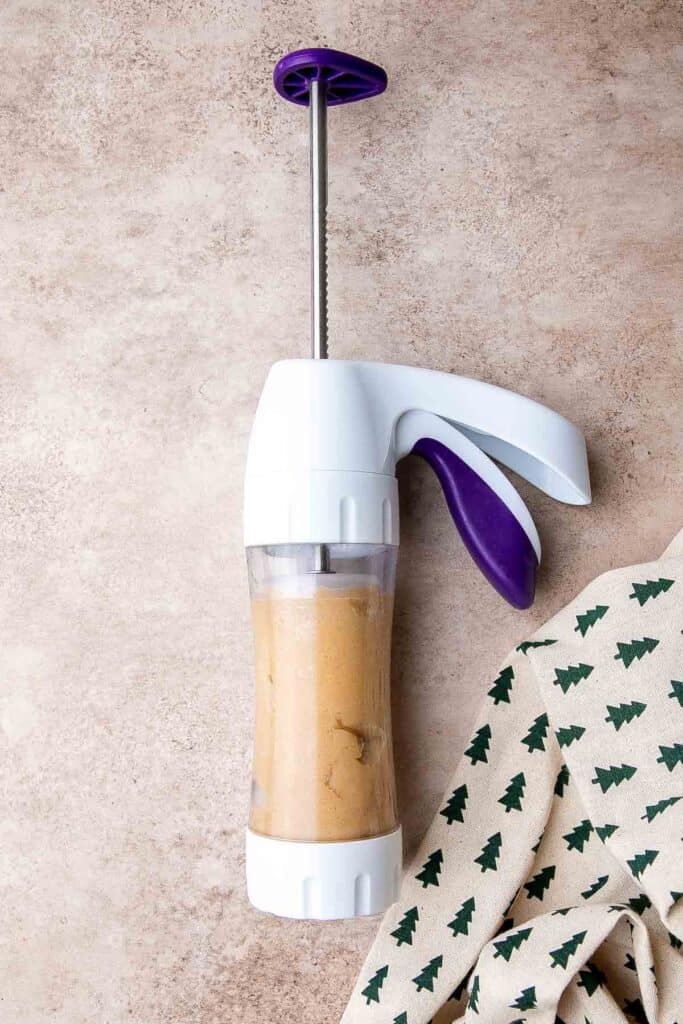

- Bake. Bake for 7-9 minutes, until the edges and bottoms of the cookies are light golden brown.
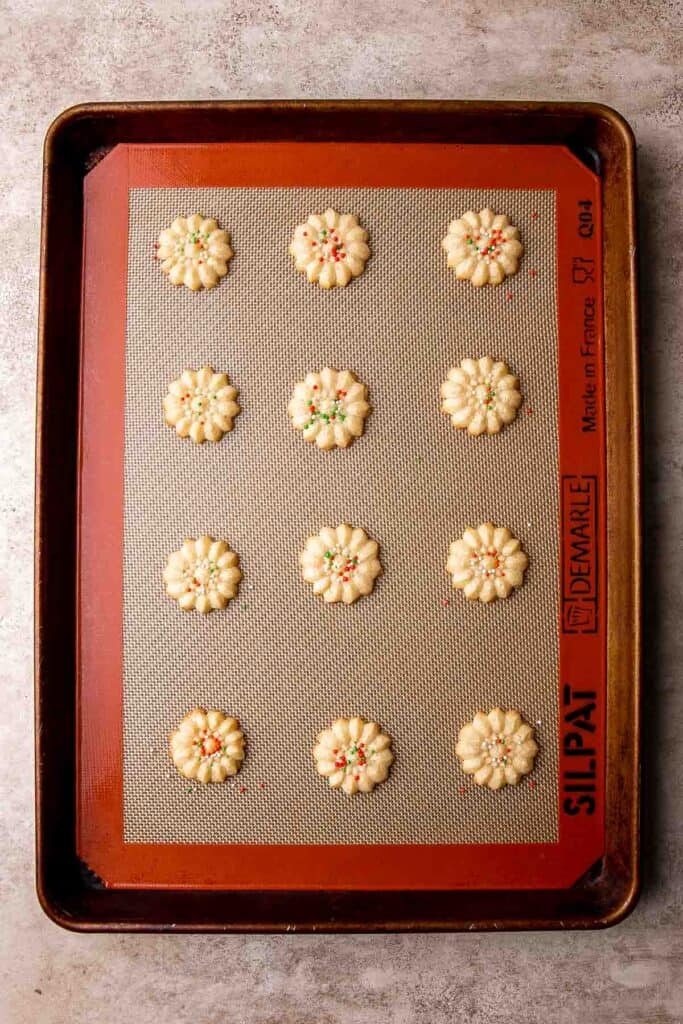
- Cool. Allow the cookies to cool on the baking sheet for 5 minutes before transferring to a wire cooling rack to cool completely. Once cool, feel free to dip into melted chocolate or add a chocolate drizzle on top, if desired.
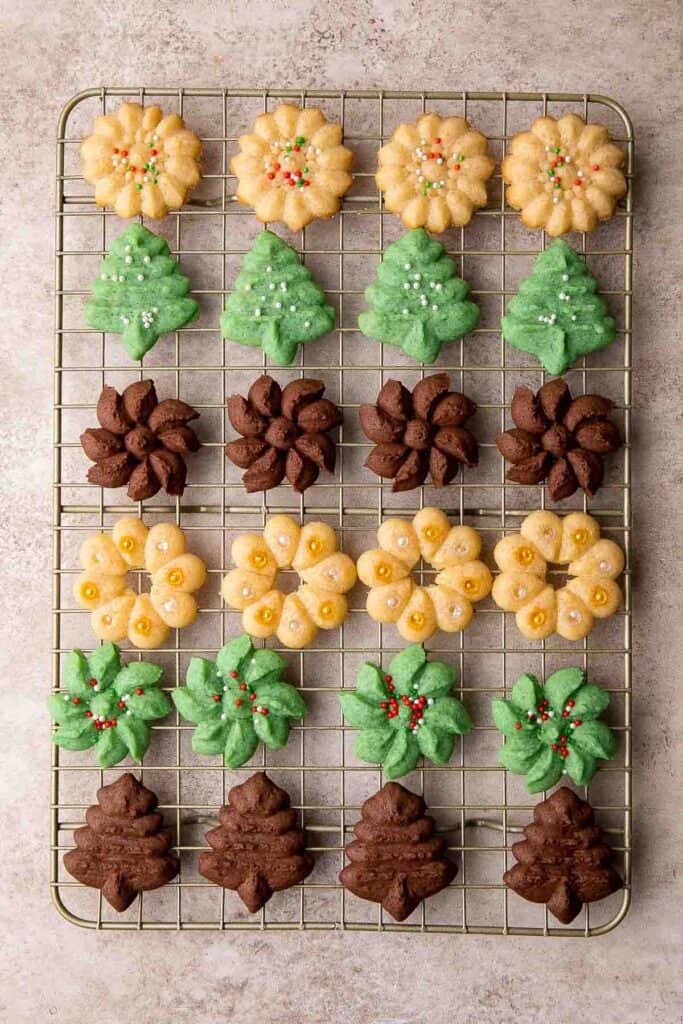
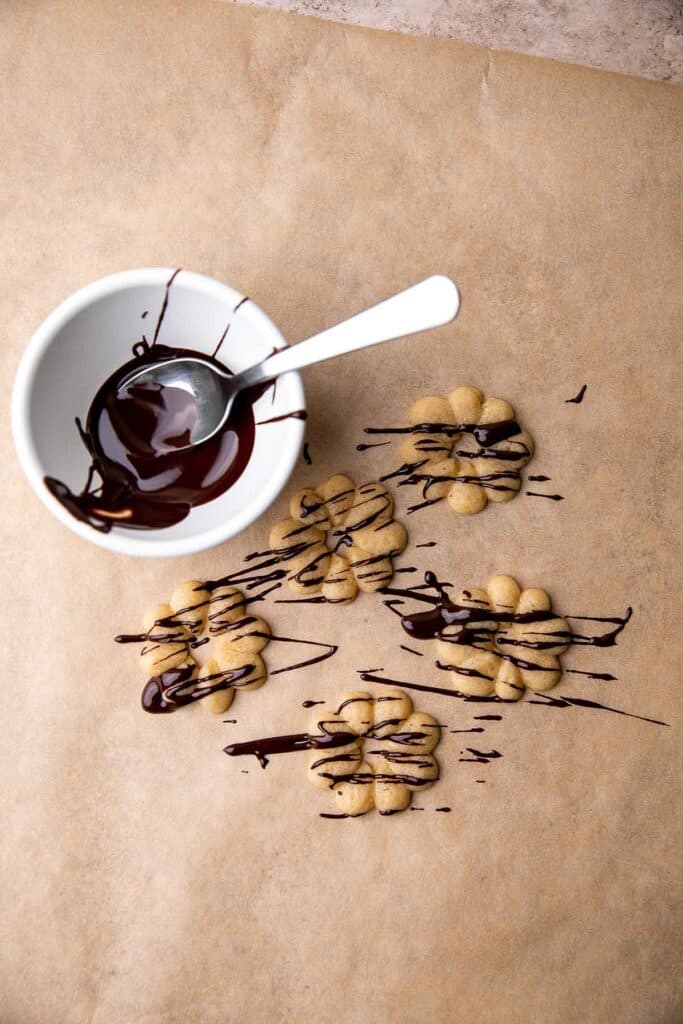
Recipe Variations
- Add color and sprinkles. It's fun to make all the different designs stand out with food dye and sprinkles! They'll look so colorful on your Christmas cookie tray.
- Use a pastry bag. Don't have a cookie press? Try adding the dough to a pastry bag with a star tip and squirt it onto an ungreased baking sheet.
- Adjust the flavor. This spritz cookie recipe uses a mixture of vanilla and almond extract, but you can use any flavor. Lemon extract would be lovely!
- Add a glaze. For an extra layer of sweetness, make a simple glaze with powdered sugar and either water or milk. Dip each one, then let them set on a wire rack.
How to Serve
Ths spritz cookie recipe is delicious served on its own, or paired with some of my favorite holiday cookies as part of a Holiday Cookie Box. Try:
- Christmas Sugar Cookies with Royal Icing
- Italian Christmas Cookies
- M&M Christmas Cookies
- Peppermint Snowball Cookies
- Red Velvet Crinkle Cookies
If you love these spritz cookies, you'll love these 30 Christmas Cookie Recipes.

Recipe Tips and Tricks
- Don't rush the creaming process. Since spritz cookies are like shortbread, it's really important to get the butter and sugar really light and fluffy. Be patient!
- Be careful not to overmix the dough. If you mix the dough too much, you will activate the gluten, which will give you hard, dry cookies instead of light, fluffy clouds. Mix just enough to bring the dough together, then stop.
- Test the dough. If you try to press the dough through your cookie press and it won't come out properly, try chilling it for 4-5 minutes first.
- Do not line the pan. With this type of cookie, the dough actually needs to stick to the pan. For best results, do not use cooking spray or parchment paper. I found a silicone baking mat to work.
- Chill the pan. If you finding that the cookie dough is not sticking to the pan after pressing out the cookies, chill the pan in the fridge for 5 minutes. It will help a lot.
Storing and Freezing Instructions
How to Store
Store leftover spritz cookies in an airtight container at room temperature in layers separated by sheets of parchment paper for 3-4 days. The unbaked dough can also be refrigerated for 3-4 days. Just let it come to room temperature before baking!
How to Freeze
Wrap the cookies carefully in wax paper or plastic wrap, then store them in a freezer-safe container or bag for several months. If you end up with too much dough, you can freeze it for later too! Wrap it tightly in plastic cling wrap and freeze for up to 3 months. Just be sure to thaw it in the fridge, then let it come to room temperature before baking.

FAQ
You typically do not have to chill the dough for this easy spritz cookie recipe unless your kitchen is warm or you've begun to overwork the dough. If you notice the dough won't hold its shape very well though, place it in the fridge for a few minutes and try again.
Absolutely! The press is totally optional. You can also try rolling the dough out to use your favorite cookie cutters. They make great thumbprint cookies, too! To do this, just roll the dough into a ball and press into it with your thumb, or use the bottom of a glass to leave an interesting pattern. Have fun with it!
One of the challenges of making any spritz recipe is using the press. The dough must be at the right temperature and consistency, and you must use the right pan! Unlike most cookie recipes, you actually want the dough to stick to the pan. This is what separates the dough from the cookie press. If you use parchment paper or a nonstick baking sheet, the dough won't be able to stick. Instead, use an ungreased cookie sheet. It also helps to chill the pan first.
More Cookie Recipes
- 50 Best Cookie Recipes
- Butter Cookies
- Whipped Shortbread Cookies
- Chocolate Thumbprint Cookies
- Lemon Drop Cookies (Anginetti)
- Italian Christmas Cookies (Ricotta Cookies)
Tried this recipe?
I'd love to hear what you think! Leave a comment and rating below to share your feedback. Your reviews help others discover this recipe and help me keep creating more free recipes for you. Snap a photo and tag me on social media @aheadofthyme too.

Stuffed Pork Loin
This juicy and tender Stuffed Pork Loin filled with a delicious mushroom stuffing with bacon, mustard, and spinach, is a gorgeous entree to serve for your next dinner party or any special occasion. Although it requires a bit of work, it's so worth it for a show-stopping main dish option your friends and family will beg for again and again.

If you're tired of turkey, ham, or prime rib for the holidays, try this tender pork loin recipe. Pork is already so neutral and light - it's the ideal vehicle to serve a rich, savory mushroom filling. The flavorful pan drippings make a wonderful gravy to bring the whole dish together. The best part is the delicious crust this rolled pork loin gets after searing all the sides!
Why You'll Love This Stuffed Pork Loin Recipe
- Show-stopping display. This is a fantastic entree for dinner parties because it's so stunning! Everyone will look on as you slice rounds of perfectly rolled pork for dinner.
- Incredibly flavorful. Tender pork loin absorbs all the flavors from the bacon, mushrooms, spinach, and onions, adding flavor and moisture to every bite.
- Perfect for the holiday season. This pork recipe is the perfect main course for a special occasion. Thanks to its gorgeous appearance, it's even fancy enough for Christmas dinner!
Ingredient Notes
To make this delicious stuffed pork loin, you will need the following ingredients (full measurements in recipe card below):
- bacon - you'll be adding both bacon fat and pieces of cooked bacon to the filling.
- brown mushrooms - thinly slice mushrooms to let them cook down in the bacon fat.
- onion - add diced onion for a slightly sweet, savory flavor.
- baby spinach - fresh spinach will wilt almost instantly in the mushroom mixture and add a gorgeous green color and fresh flavor.
- seasonings - season the pork well with Italian seasoning, salt, and black pepper.
- boneless pork loin roast - this will be butterflied open and then gently hammered to create an even surface for rolling.
- dijon mustard - mustard seasons the meat and acts like glue to hold the mushroom stuffing in place.
You will also need a medium skillet, a bowl for bacon drippings, a mixing bowl, a long sharp knife, plastic wrap, a meat mallet, kitchen twine, and an ovenproof skillet or baking sheet.
How to Make the Best Stuffed Pork Loin
First, make the mushroom stuffing.
- Cook bacon. Heat a medium skillet over medium-high heat until hot. Add bacon and cook until browned on both sides and crisp, about 6-8 minutes. Set aside 1 teaspoon of the bacon fat in a bowl and leave the remaining fat in the skillet. Transfer the bacon onto a paper towel lined plate and chop the bacon into small bits.
- Cook mushrooms. In the same skillet with the grease, add mushrooms and sauté until golden brown, about 5 minutes.

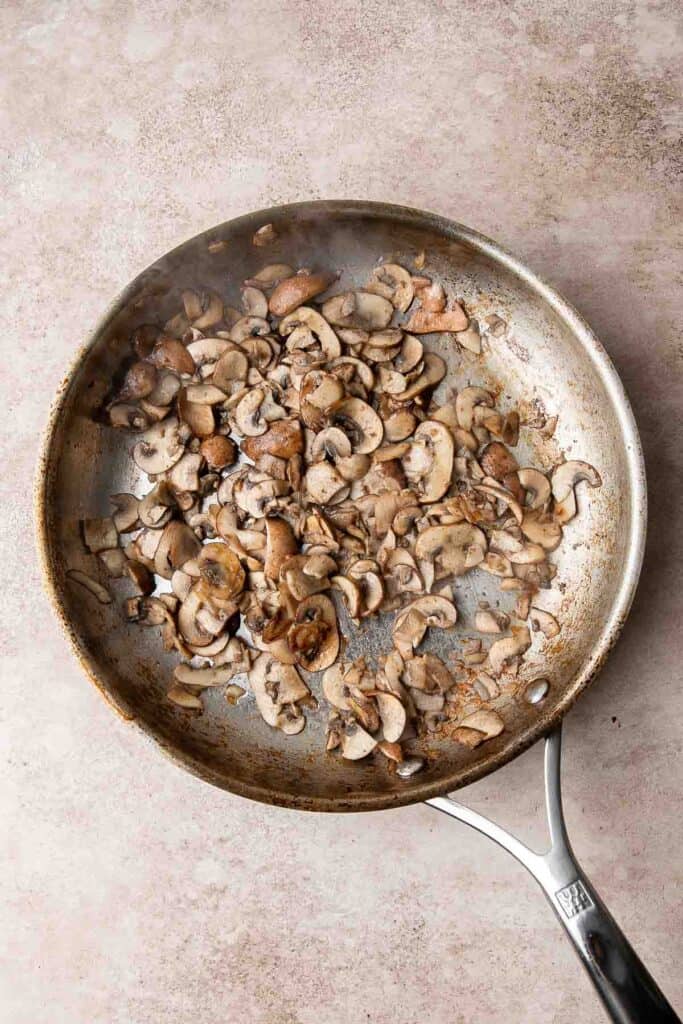
- Add onion. Add onion and cook until tender, about 2-3 minutes.
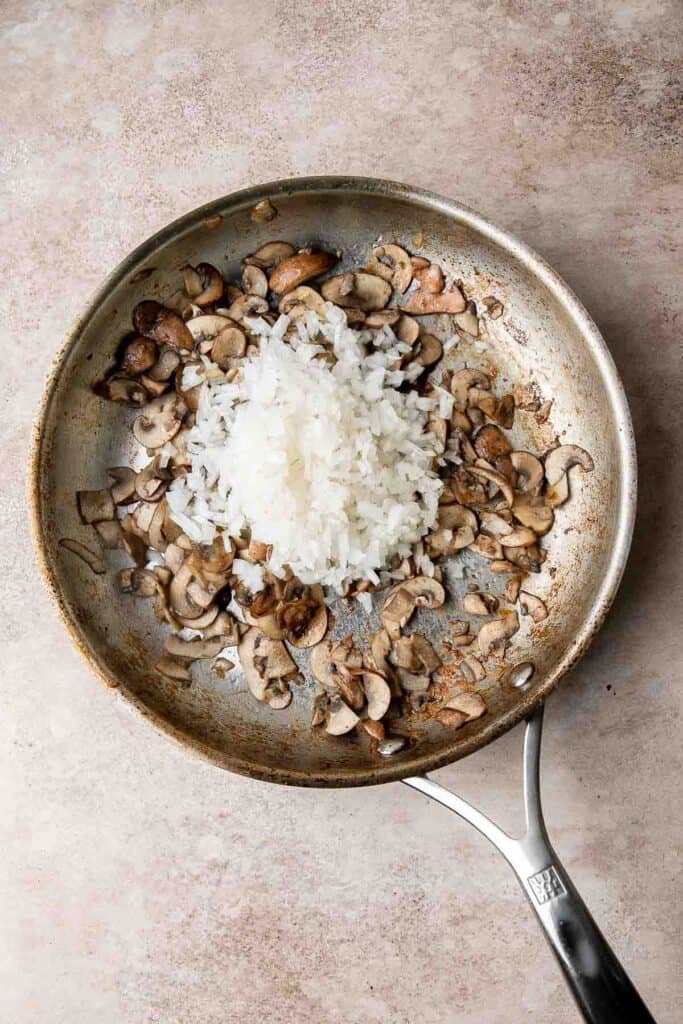
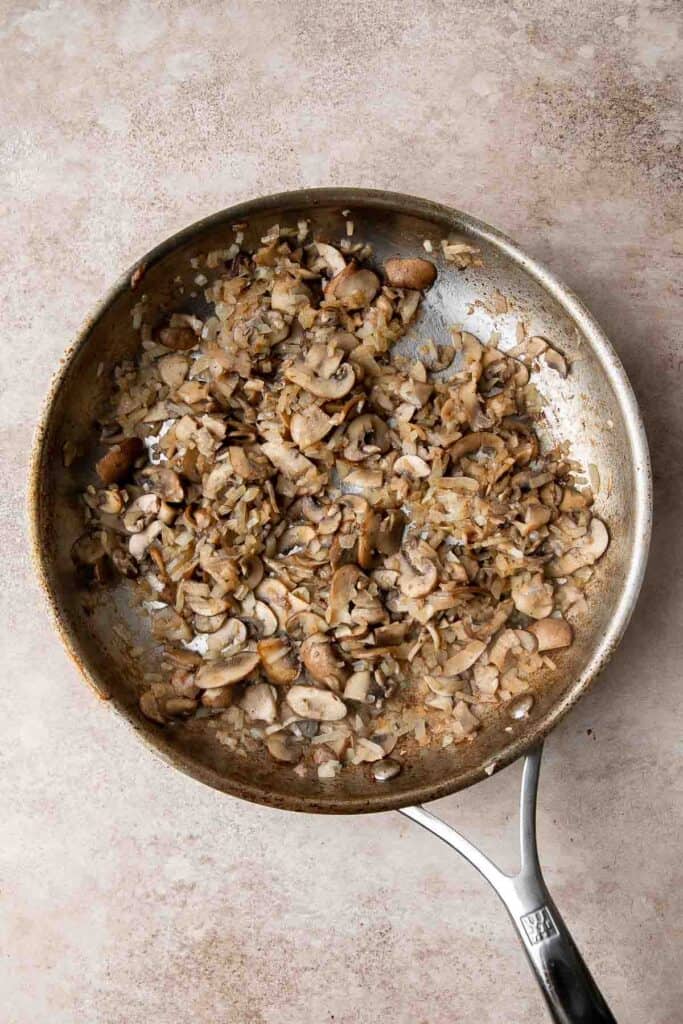
- Add spinach. Stir in spinach, Italian seasoning, and reserved bacon bits. Mix well and cook for 1 minute until the spinach has wilted. Transfer the mushroom spinach mixture into a mixing bowl.
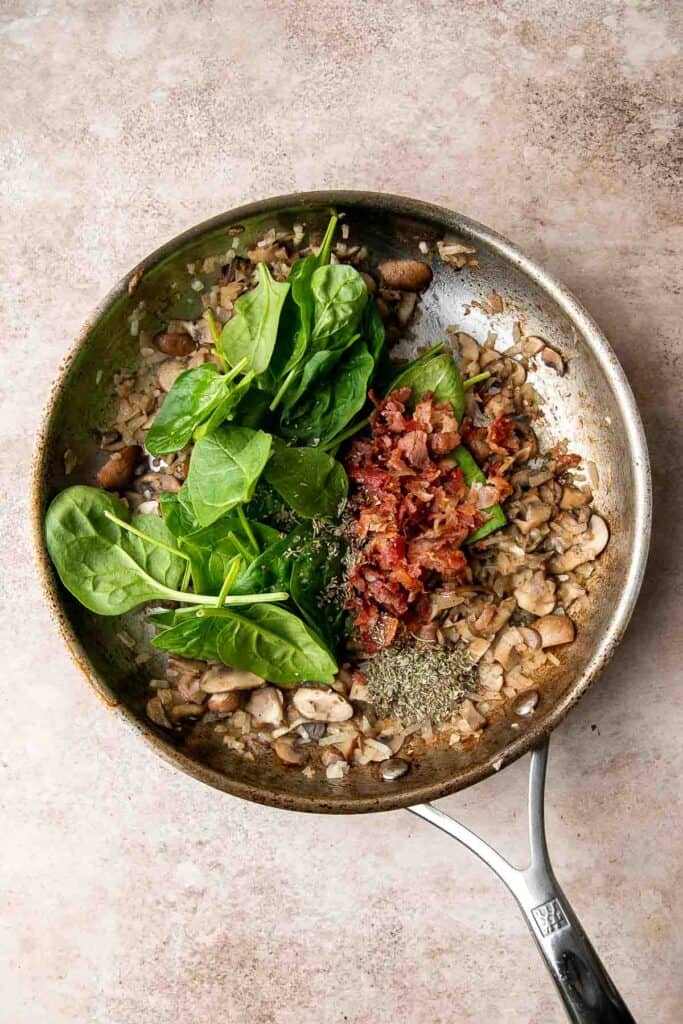
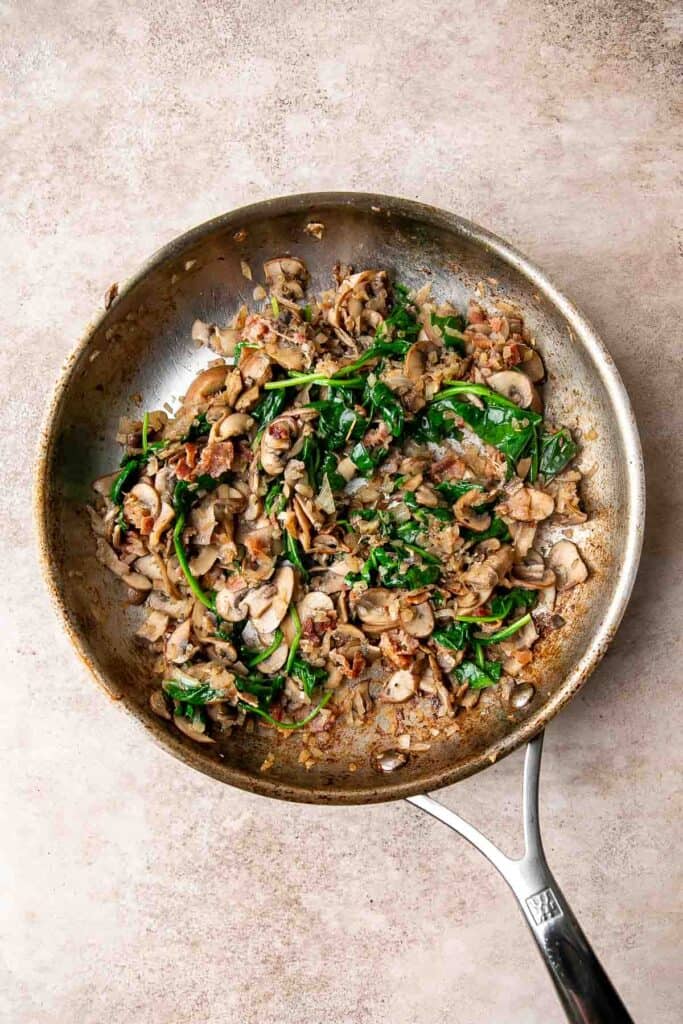
Next, prepare the pork loin.
- Cut the pork. Use a paper towel to pat the pork loin completely dry. Place on a clean work surface. Use a long, sharp knife to cut lengthwise down the center of the meat, leaving about 1 inch uncut. Make sure you don't cut all the way through.
- Flatten. Open the pork loin from the cut like a book. Put a layer of plastic wrap on top of the meat and use the flat side of a meat mallet to pound it gently to achieve even thickness on both halves.
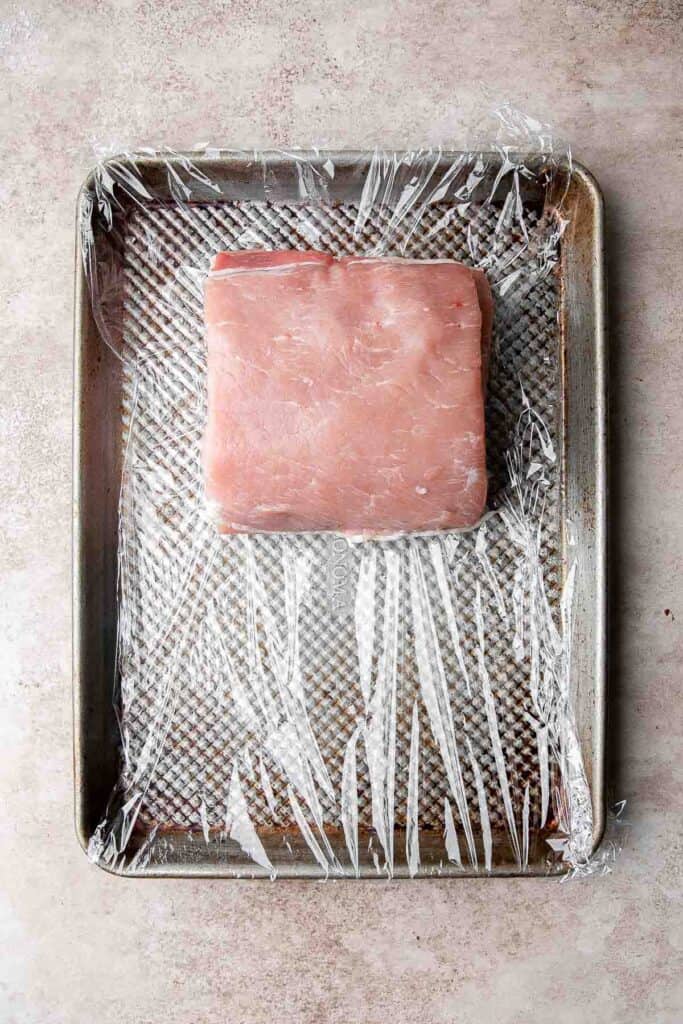
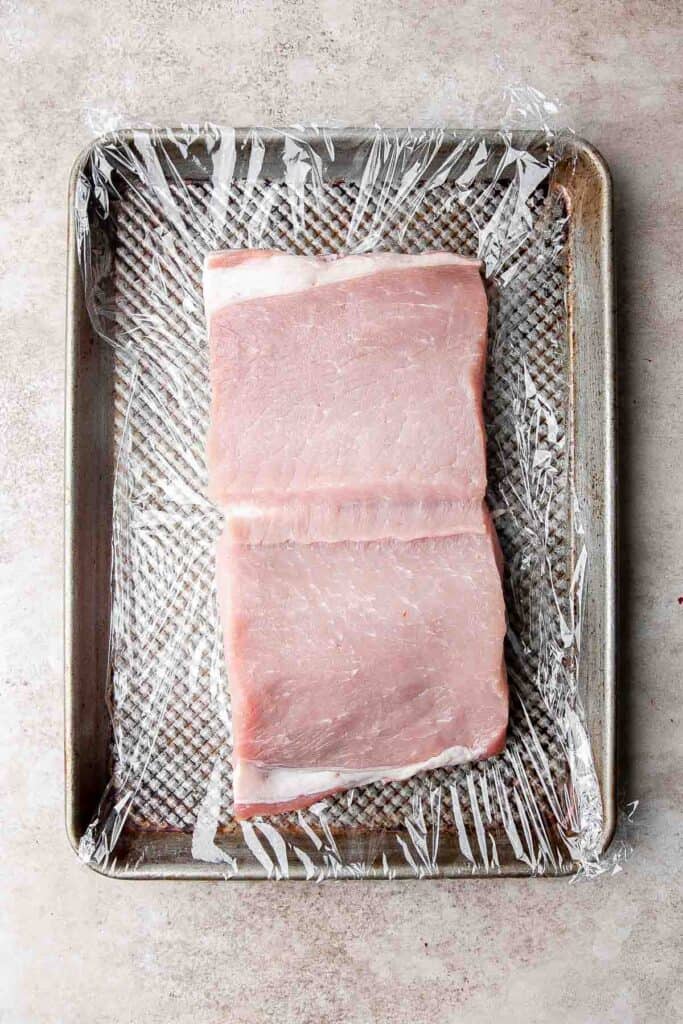
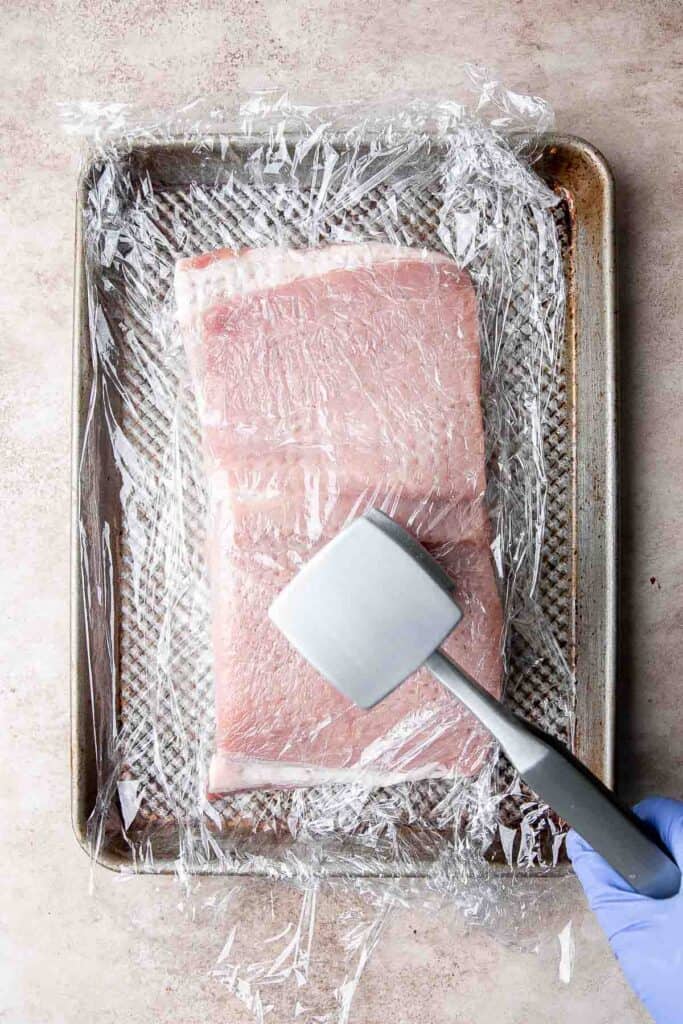
- Add filling. Brush evenly with mustard and spread mushroom mixture evenly over the pork loin, leaving ½ inch border on all sides.
- Roll. Tightly roll the pork loin, enclosing the filling inside.
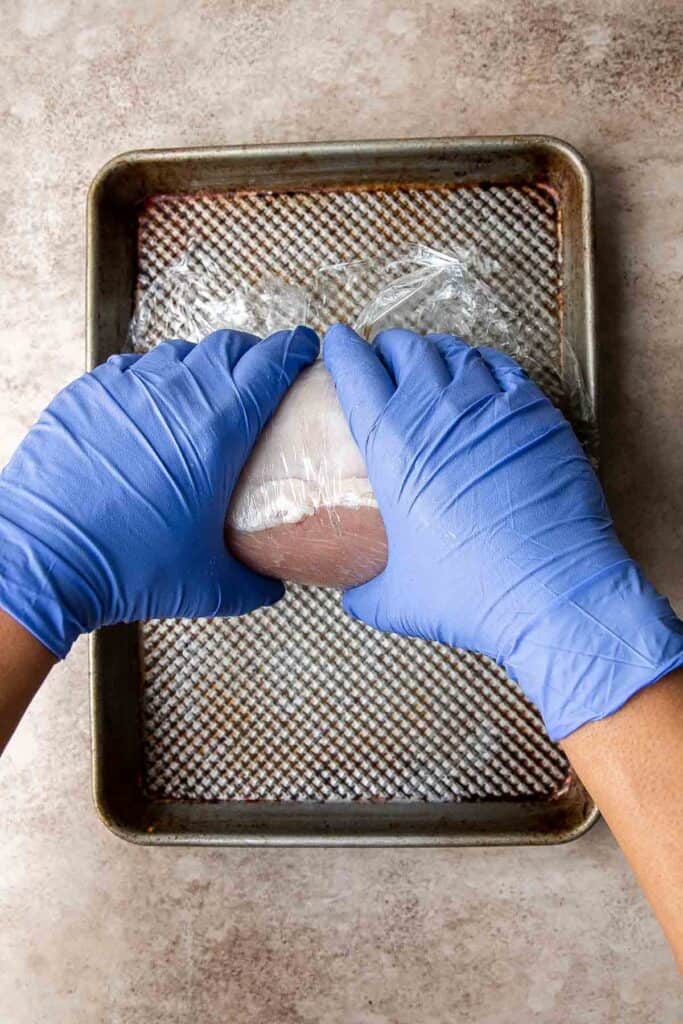
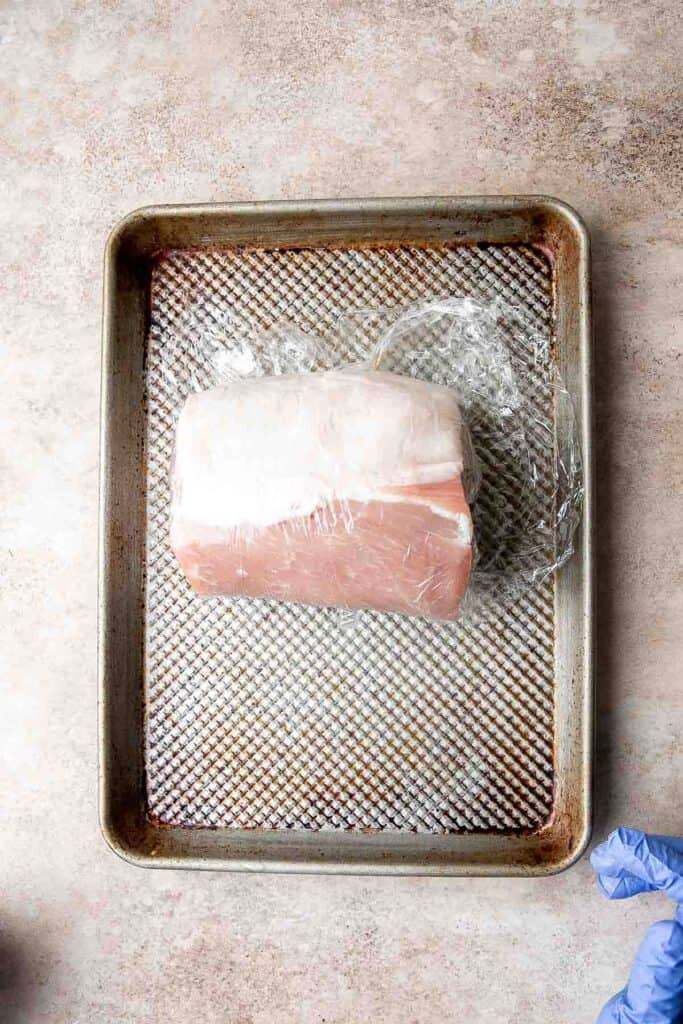
Finally, cook the stuffed pork loin.
- Tie. Tie the rolled pork with kitchen twine in 3 places to hold the stuffed pork loin together.
- Season. Season the stuffed pork loin well with salt and pepper and rub evenly with the reserved 1 teaspoon bacon fat.
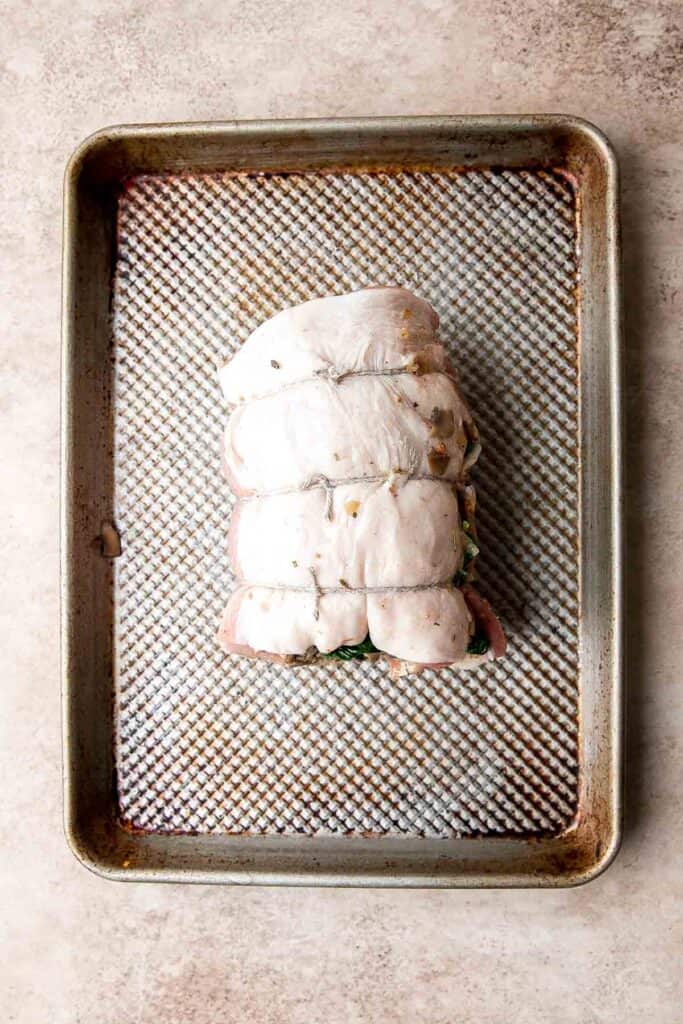
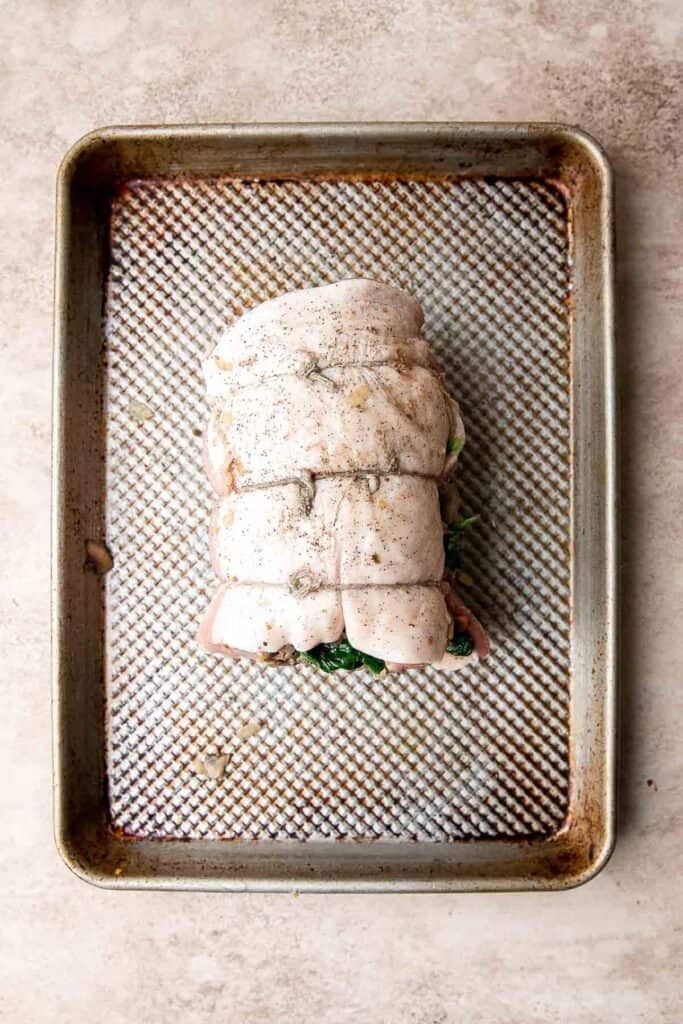
- Sear. Heat a large ovenproof skillet over medium-high heat and sear the pork loin until browned on all sides, about 6-8 minutes.
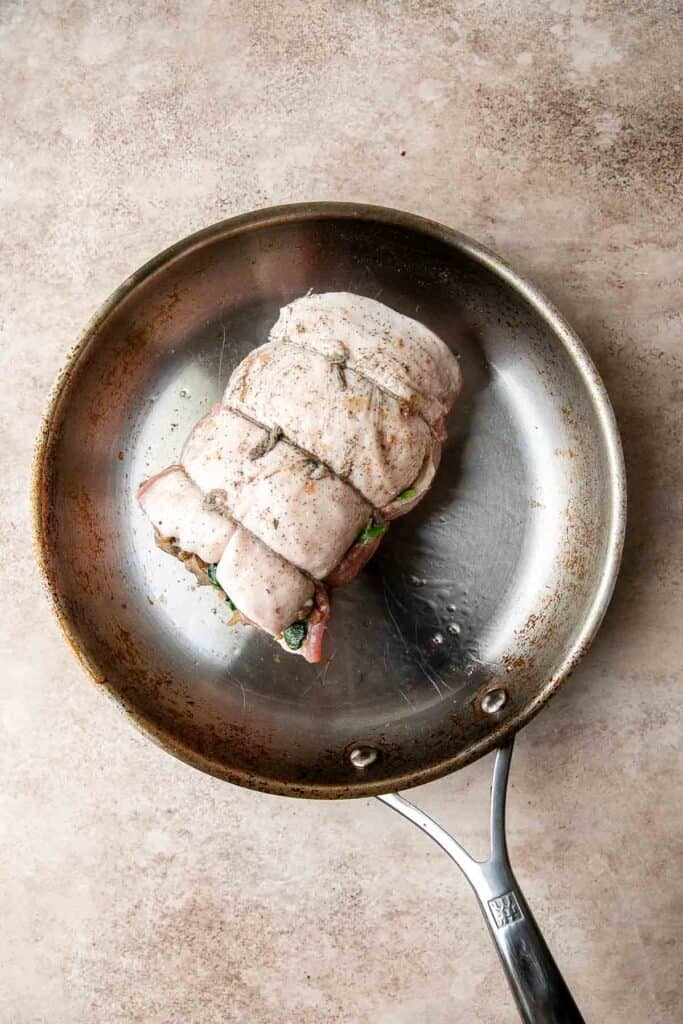
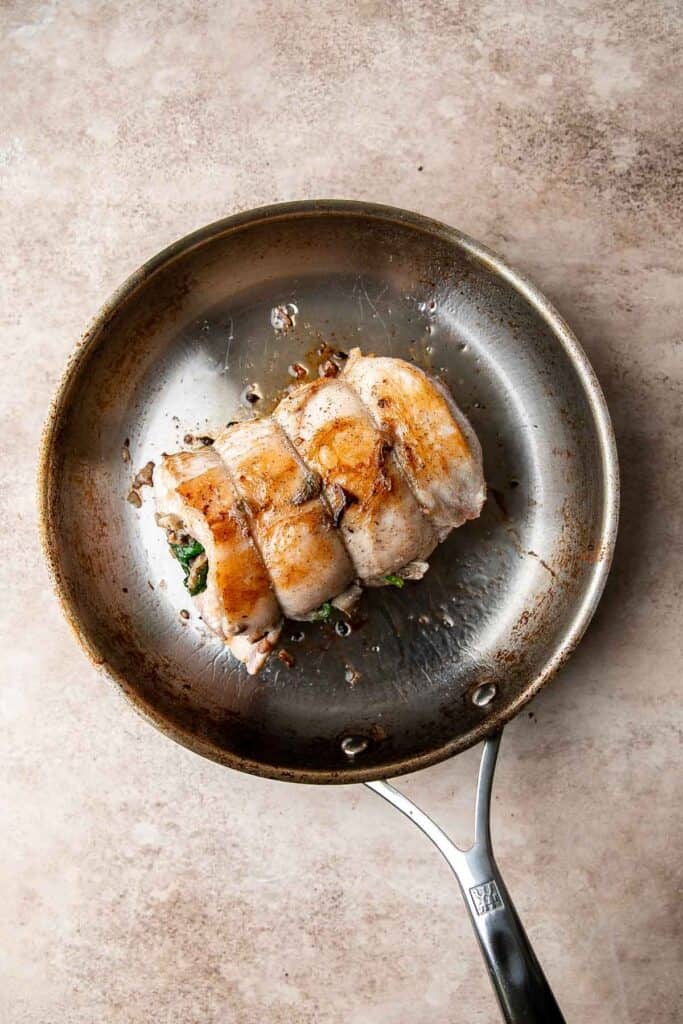
- Bake. Transfer the skillet into a 375F preheated oven and bake until the pork is cooked through, about 40 minutes. The internal temperature for the pork loin should reach at least 145F as read on a meat thermometer. If you do not have an ovenproof skillet, you can transfer the seared pork loin into a baking sheet or casserole dish and bake.
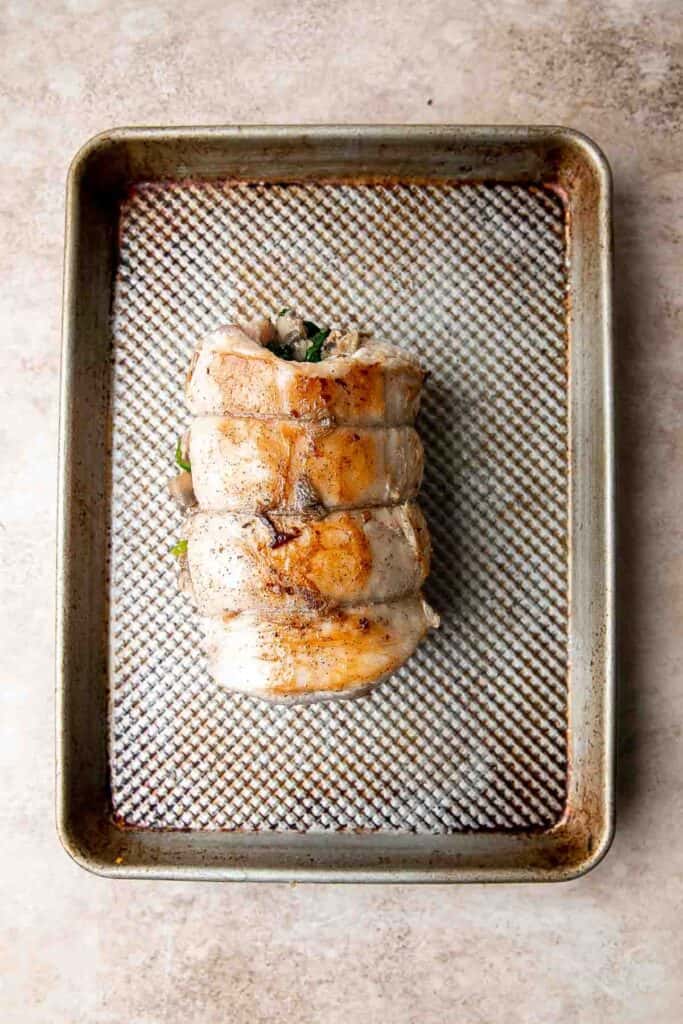
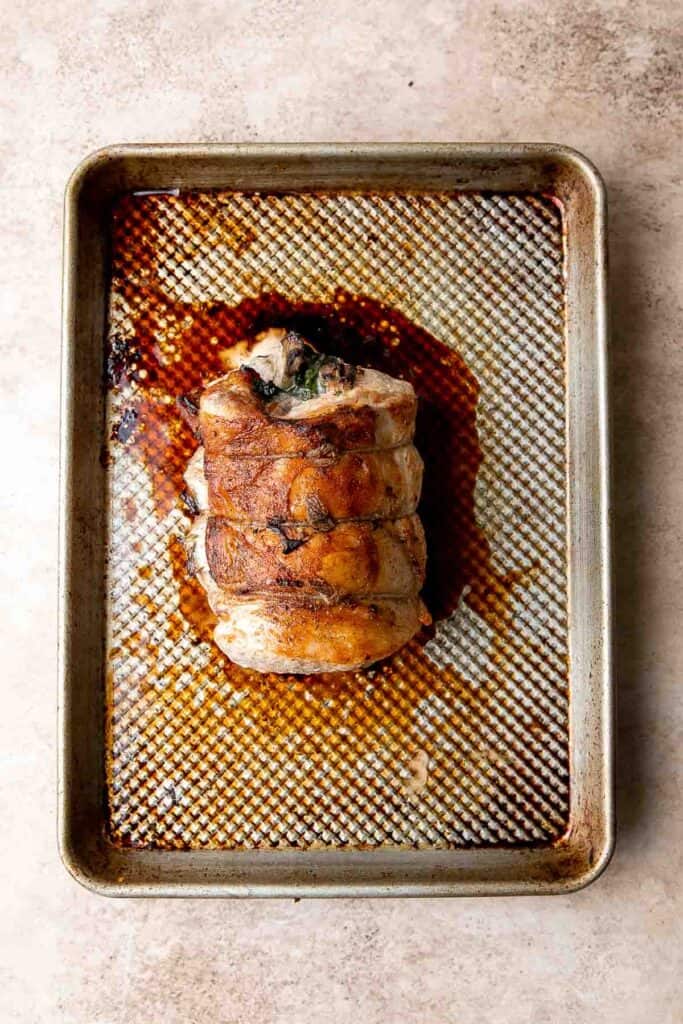
- Rest. Let the pork loin rest for 10 minutes. Slice and serve with pan juices.
Recipe Variations
- Make stuffed pork tenderloin. Instead of regular pork loin, use the best pork tenderloin you can find. They tend to be small, so you'll either need less filling or layer and roll multiple tenderloins together.
- Make it creamy. Add cream cheese or goat cheese to the filling for a creamy texture.
- Add peppers. Saute red peppers for extra flavor and a beautiful pop of red.
- Stuff chicken breasts. Butterfly and roll chicken with the same filling for a wonderful main dish!
How to Serve
This stuffed pork loin is delicious served on its own, or paired with some of my favorite sides including:
- Easy Roasted Brussels Sprouts
- The Best and Creamiest Mashed Potatoes
- Fall Harvest Salad with Butternut Squash and Apple
- Spinach Gratin
- Mushroom Risotto
For more recipe ideas, see our 50 Best Fall Side Dishes.
Recipe Tips and Tricks
- Prepare in advance. If you're serving this simple recipe as the centerpiece for a special dinner, prepare it the day before for a stress-free meal. Be sure to let the filling cool completely before rolling the loin, then let it rest covered in the fridge overnight until you're ready to sear and roast.
- Use the right knife. The secret to the best stuffed pork loin is preparing the roast properly. Use a long, sharp knife that can handle cutting thick pieces of meat easily, like a slicing or carving knife. This knife will also be perfect for serving the pork in gorgeous slices (after washing the knife, of course).
- Don't skip searing the meat. This will add a delicious crust that will stay crisp and flavorful in the oven, which is a great contrast to the tender pork and flavorful filling.
Storing and Freezing Instructions
How to Store
Store leftover pork in an airtight container in the fridge within 2 hours of roasting it in the oven. The leftovers will last 3-4 days.
How to Reheat
To keep the juicy pork loin from drying out, warm the pork in a skillet over medium heat with the lid on. Add a splash of chicken stock. You can also warm it in a 350-degree oven in a covered dish until fully heated through.
How to Freeze
For easy serving, slice the pork into rounds, then freeze the cooked loin in a freezer-safe container for 2-3 months. Thaw in the fridge before reheating.
FAQ
It's a matter of personal preference, but searing the outside of the pork adds a wonderful crust and flavor to the final dish. It's a nice contrast to the tender pork and stuffing and only requires a few minutes of effort.
There are many variations of stuffed pork loin, but they all use a pork roast butterflied and tenderized into a mostly flat rectangle. Then, stuff it with a mixture of spinach, bacon, mushrooms, and onions that have all sauteed down in bacon fat. Brush the pork roast with mustard, add the filling, then roll, sear, and roast to perfection.
Slice down the center of the pork loin lengthwise with a sharp knife, leaving at least 1 inch uncut to hold the meat together. Make slow, long cuts until the roast opens like a book. Then, use a meat tenderized to hammer the piece of meat until it's mostly flat before filling and rolling. After cooking, use a long carving knife or serrated knife to gently trim slices of the stuffed pork loin for serving.
More Pork Recipes
- Roasted Pork Tenderloin
- Glazed Honey Balsamic Pork Chops
- Honey Glazed Roast Pork with Vegetables
- Char Siu (Chinese BBQ Pork)
- Vietnamese Grilled Pork
- Slow Cooker Carnitas (Pulled Pork)
Tried this recipe?
I'd love to hear what you think! Leave a comment and rating below to share your feedback. Your reviews help others discover this recipe and help me keep creating more free recipes for you. Snap a photo and tag me on social media @aheadofthyme too.
Mushroom Galette
Made with homemade pie crust and an earthy, cheesy mushroom filling, this savory Mushroom Galette is an absolute delight for any mushroom lover. It makes the most eye-catching appetizer or the perfect side dish to pair with a hearty main course at your next dinner party. Although it requires a few steps, it's so much easier than you'd expect!
There's something so wonderful about galettes in general, and savory galettes are seriously underrated. This creamy mushroom galette recipe has the best flavors and textures! It's made by preparing a simple pie crust, and then cooking down mushrooms with aromatic vegetables and fresh herbs. The tangy, cheesy layer keeps the crust from becoming soggy and adds a creaminess that takes the whole dish over the top. You'll want all your veggies to be wrapped in pie crust after you try this recipe!
Why You'll Love This Mushroom Galette Recipe
- Tender, flaky crust. The homemade pie crust is the perfect base for this savory mushroom tart. It adds a crisp crunch and a buttery flavor that pairs perfectly with the mushrooms.
- Perfect for any event. This delicious mushroom galette can be served as a hearty appetizer, a filling side dish for a roast, prime rib or steak, or at brunch alongside quiche and frittata. Save the recipe so you can make it again and again!
- Rich, earthy flavor. As the cremini mushrooms cook down, they release a delicious savory flavor that pairs perfectly with the funky gruyere cheese mixture. It's absolute heaven for mushroom lovers!
Ingredient Notes
To make this delicious mushroom galette, you will need the following ingredients (full measurements in recipe card below):
Pie dough ingredients
- all-purpose flour - use regular all purpose flour for a simple, rustic pie crust.
- salt - this seasons the flour and brings out the buttery flavors.
- butter - use unsalted room temperature butter for a tender, crumbly crust and use extra to cook down the mushrooms and onions.
- ice water - use very cold water to chill the butter for lovely flaky layers.
Filling ingredients
- butter - melt butter to add a rich, buttery flavor to the mushrooms.
- cremini mushrooms - thinly slice cremini mushrooms with a knife or mandolin slicer.
- onion - dice a white or yellow onion to add a slightly sweet, savory flavor to the galette.
- garlic - finely chopped fresh garlic will add an aromatic note that pairs well with the mushrooms and cheese.
- salt and black pepper - season to taste.
- thyme - fresh, finely chopped thyme pairs perfectly with the hearty flavor of cooked mushrooms.
- crème fraîche - use creme fraiche or sour cream to balance the mushrooms and keep the pastry from becoming soggy.
- gruyere cheese - shred Gruyere or another mild Swiss cheese. Divide it to add between two layers of the mushroom mixture.
- egg - brush an egg wash over the pastry before baking.
- thyme twigs - display fresh herbs on top as a beautiful garnish when serving.
You will also need several mixing bowls, a pastry cutter, plastic wrap, a rolling pin, parchment paper, a baking sheet, and a large skillet.
How to Make the Best Mushroom Galette
First, make the pie dough.
- Combine ingredients. Combine flour and ½ teaspoon salt in a mixing bowl, then add cubed butter. Use a pastry cutter (or 2 knives) to incorporate butter into the flour until large pea-sized pieces remain.
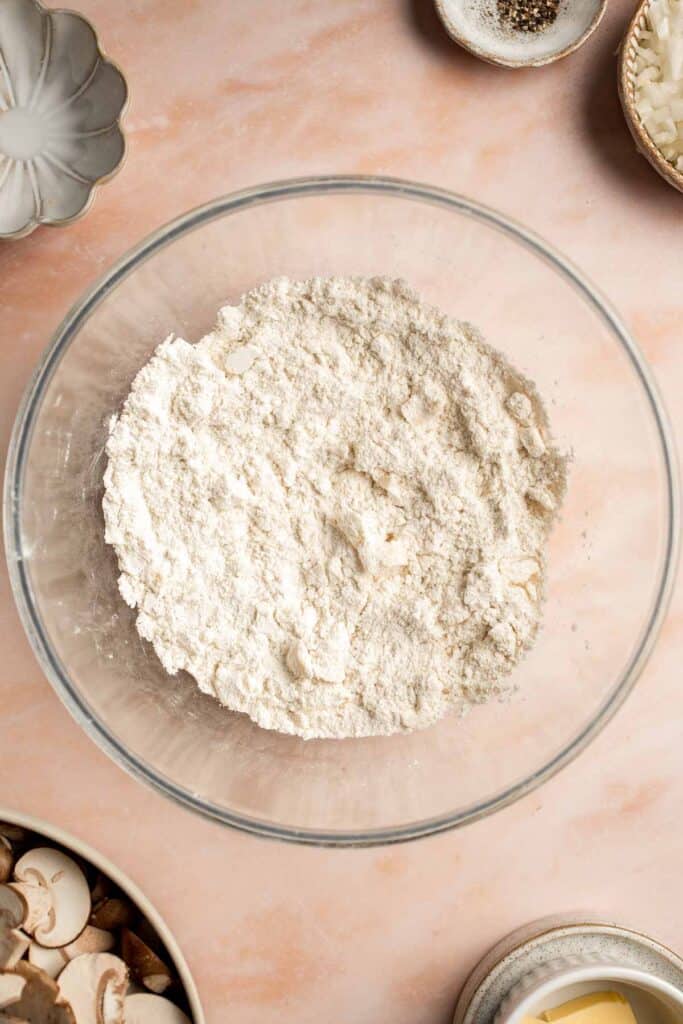
- Form dough. Add ice water and mix with your hands until most of the flour is incorporated and the dough is smooth.
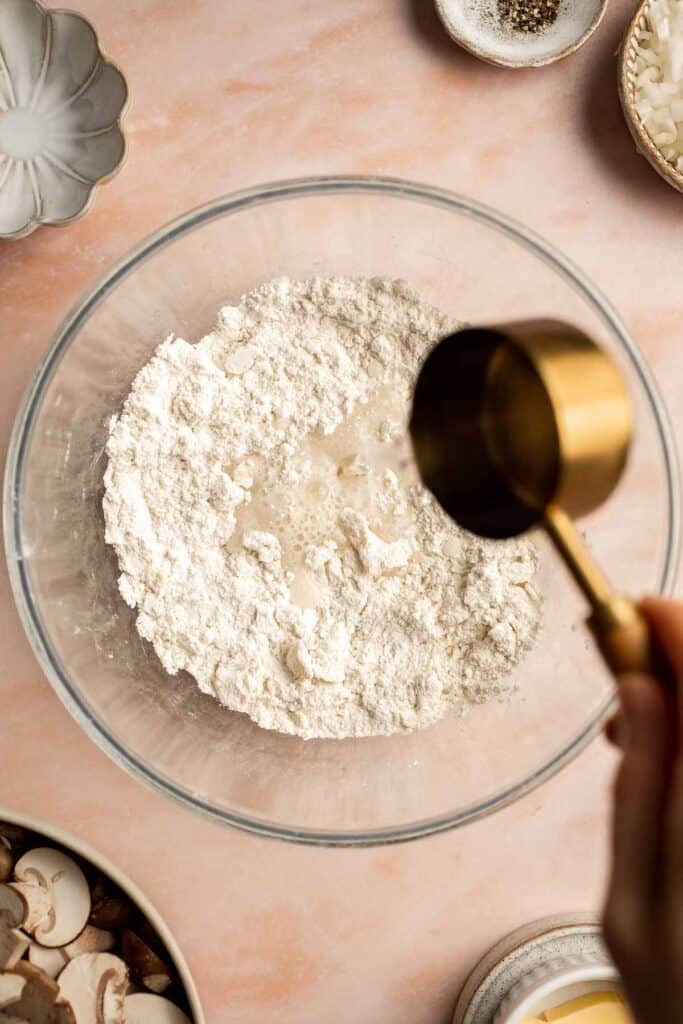
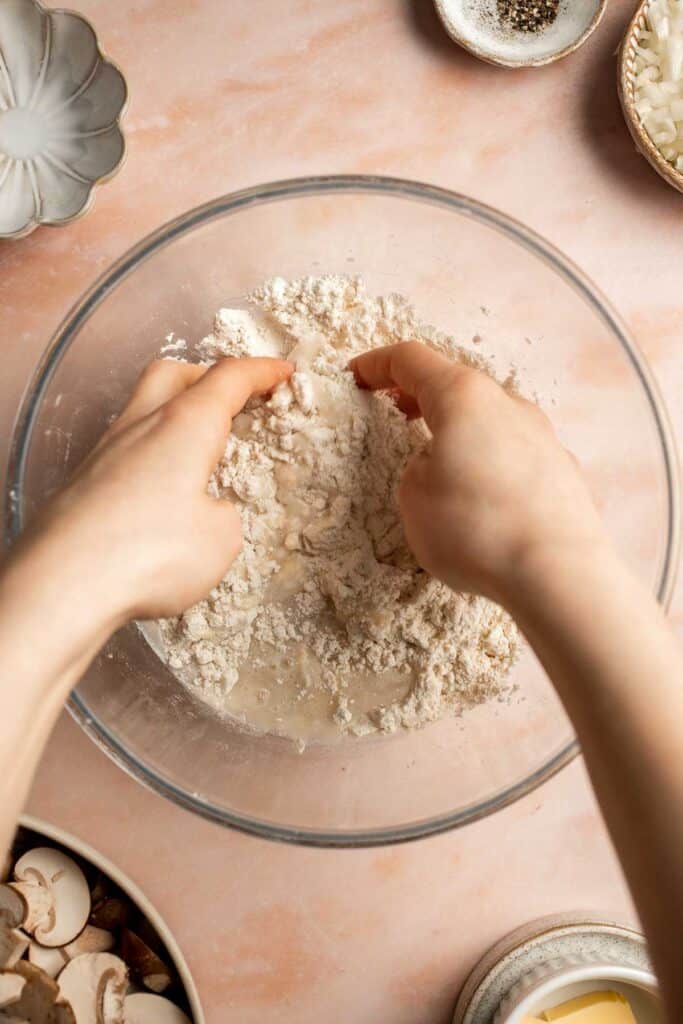
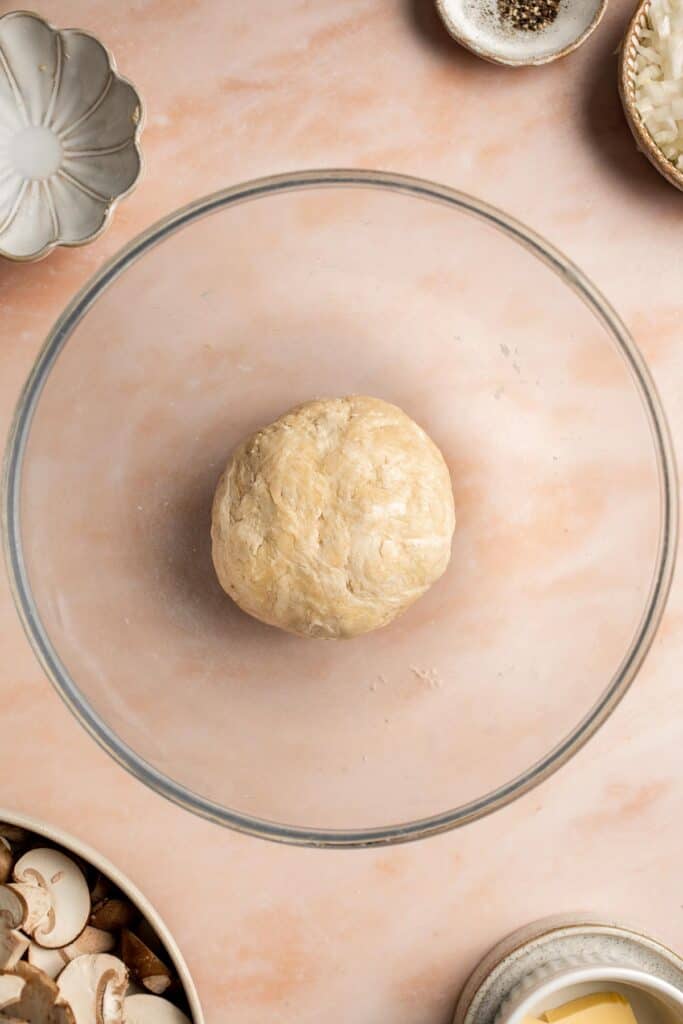
- Rest. Wrap the dough tightly in plastic wrap and place in the refrigerator to rest and firm up for 30 minutes.
- Roll. Once the dough has firmed up, place it on a lightly floured surface. Use a rolling pin to roll it out into a circle or oval shape, about ¼-inch thick (The edges will be folded over, so the shape doesn't have to be perfect).

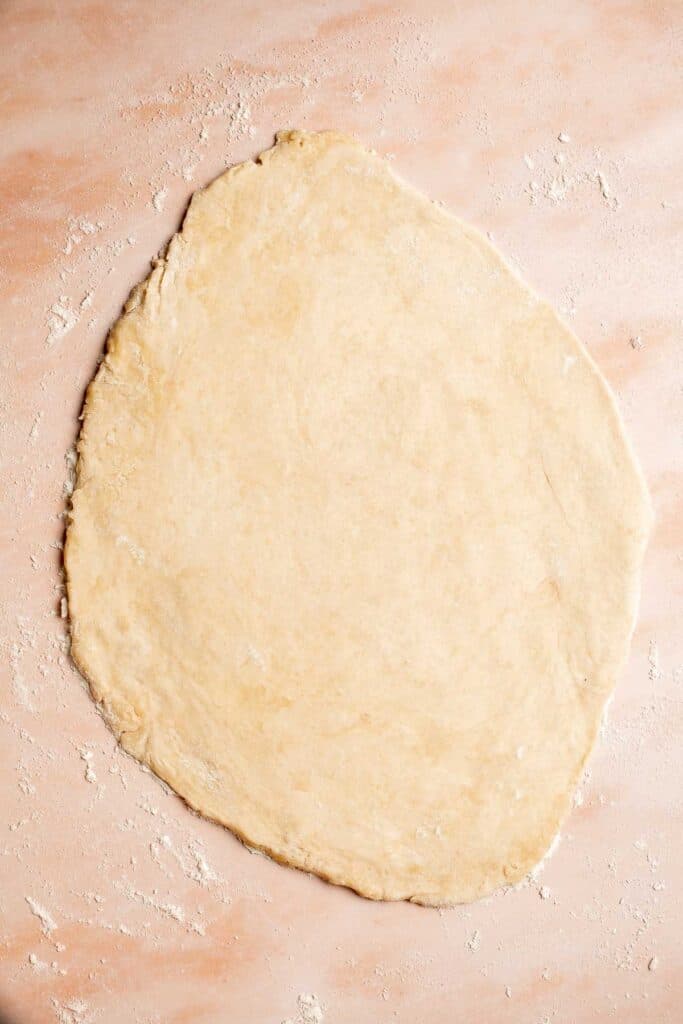
- Chill. Transfer the dough to a large parchment-lined baking sheet. Cover in plastic cling wrap and and refrigerate until the filling is ready.
Prepare the mushroom filling.
- Cook mushrooms. Melt butter in a large skillet over medium-high heat until it starts to bubble, about 1 minute. Add mushrooms and cook without turning for 3-5 minutes.
- Add aromatics. Add onion and garlic and season with salt and pepper. Cook until the mushrooms are golden brown and almost all the liquid has evaporated, about 5 minutes. Stir in thyme.
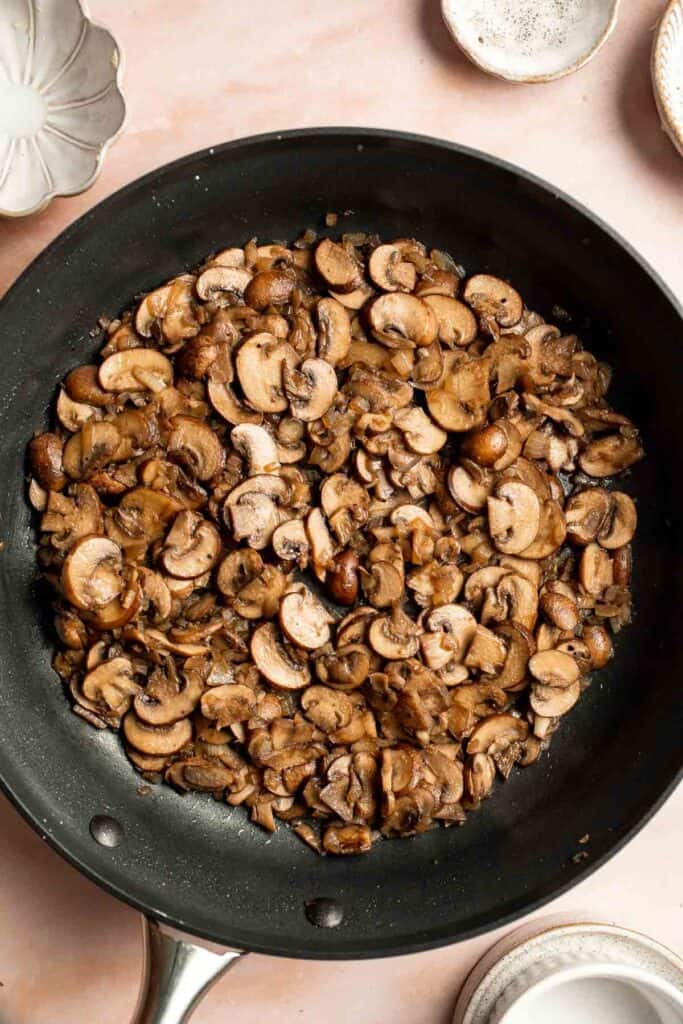
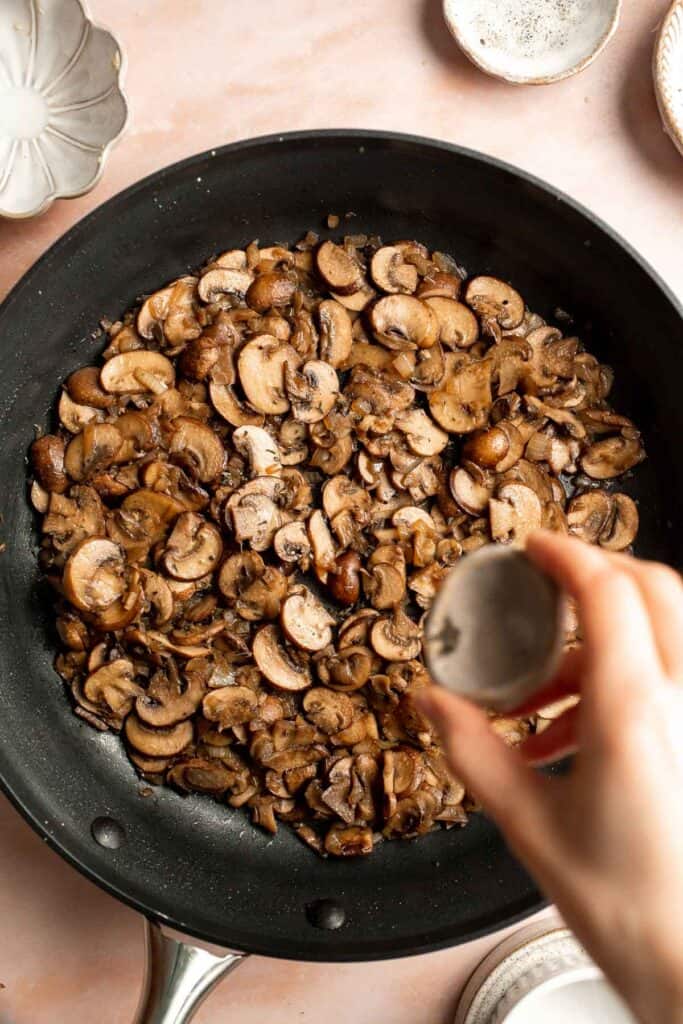
- Make crème fraiche mixture. In a small mixing bowl, stir together crème fraîche and ½ cup gruyere cheese and set aside.
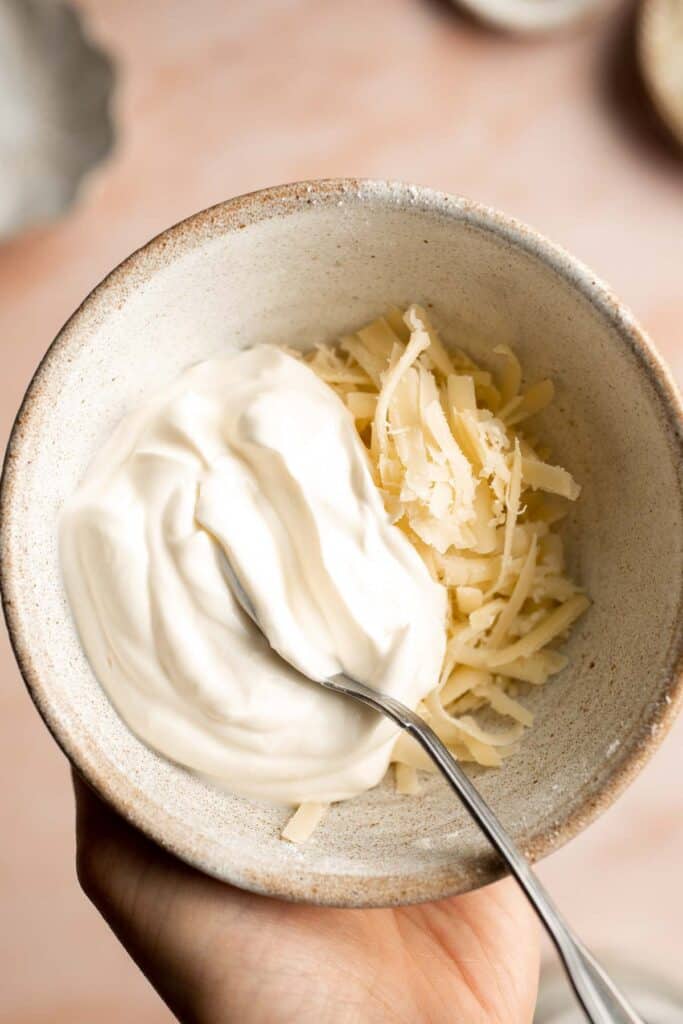
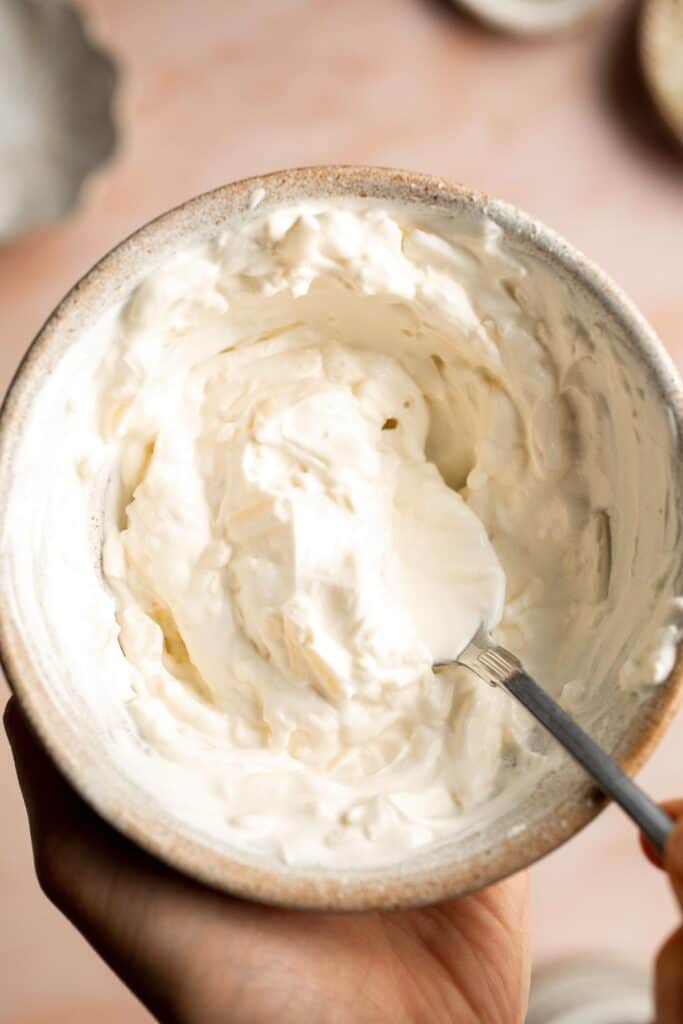
Assemble and bake the galette.
- Add crème fraiche mixture. Take the dough out of the fridge and spread the crème fraîche mixture onto the base of the rolled out dough, making sure to leave a clear 1-inch border around the edge.
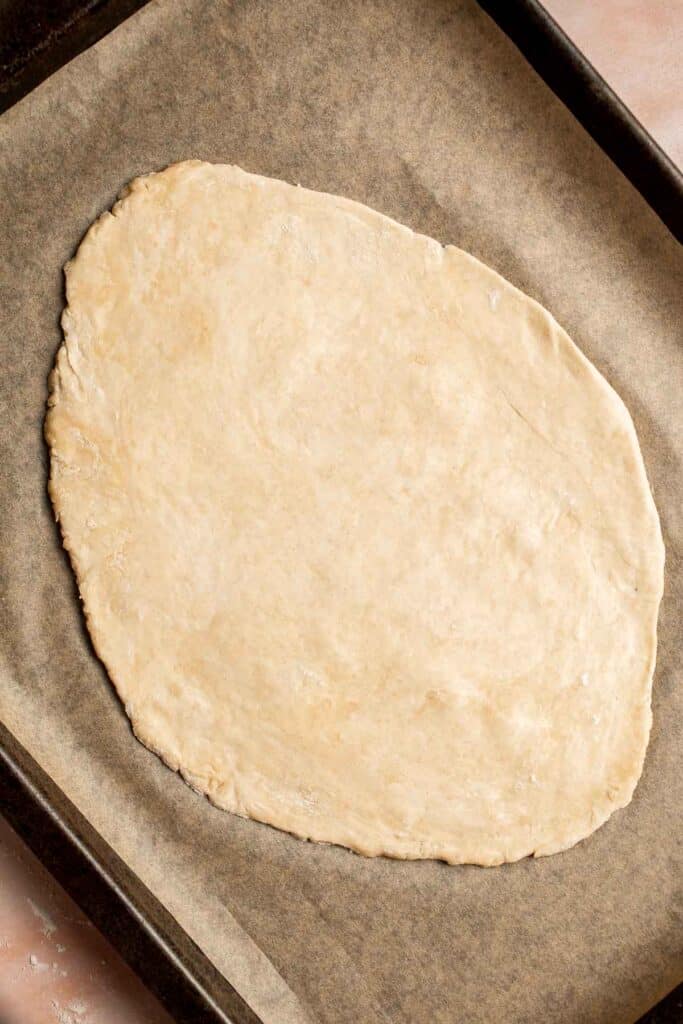
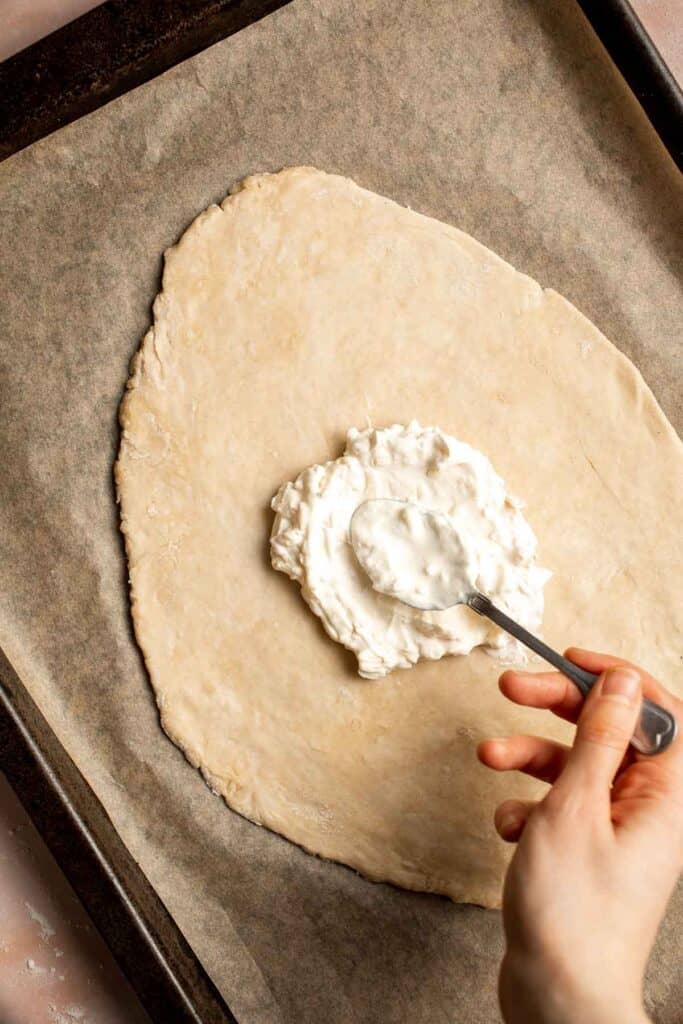
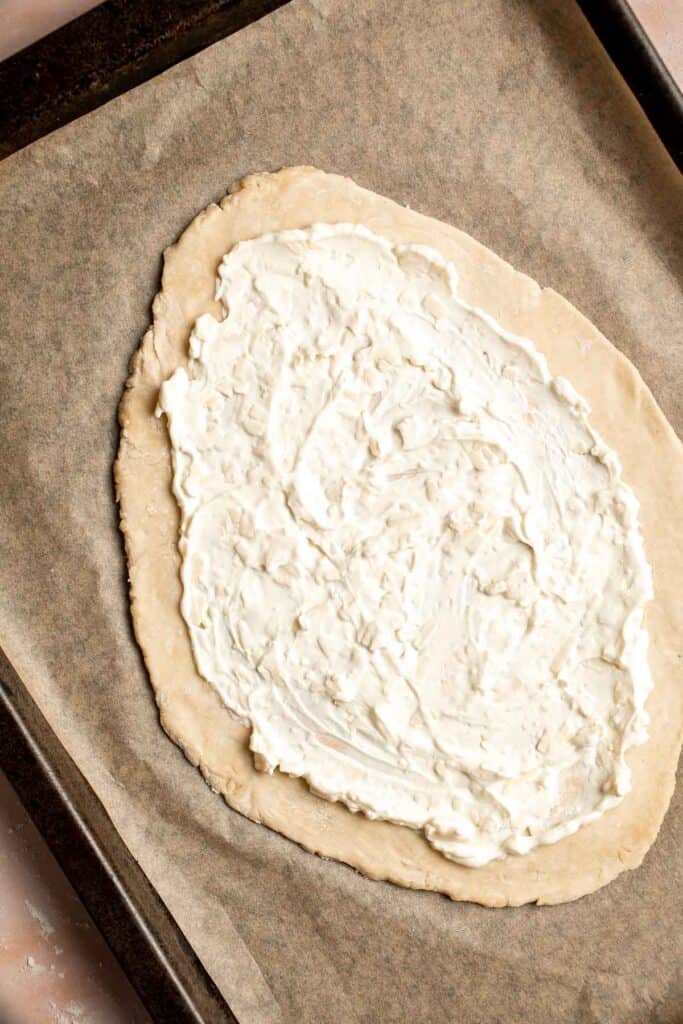
- Add mushroom filling. Spoon the mushroom filling on top of the crème fraiche.
- Add cheese. Top with the remaining ½ cup gruyere cheese.
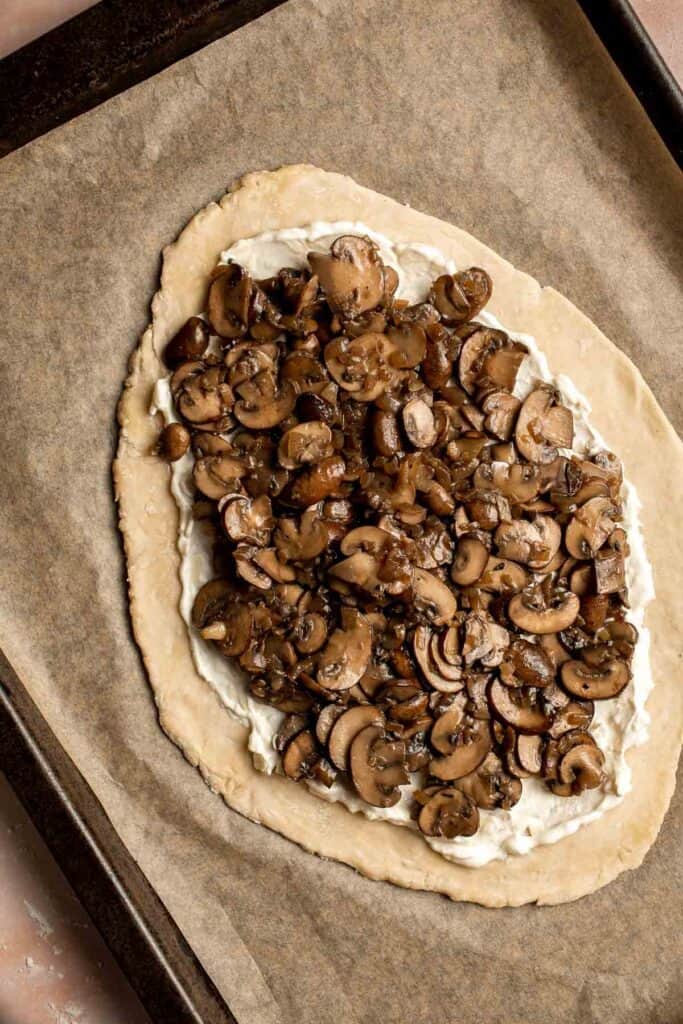
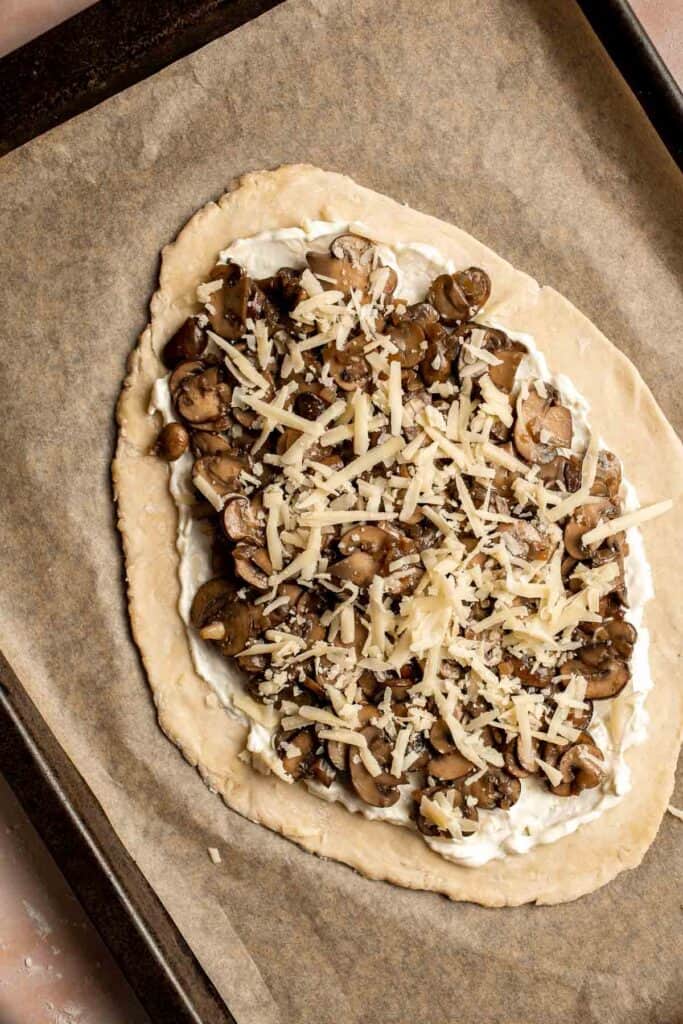
- Fold edges. Carefully fold over the outer edge over the filling, overlapping about every inch. Brush egg wash along the folded over edges.
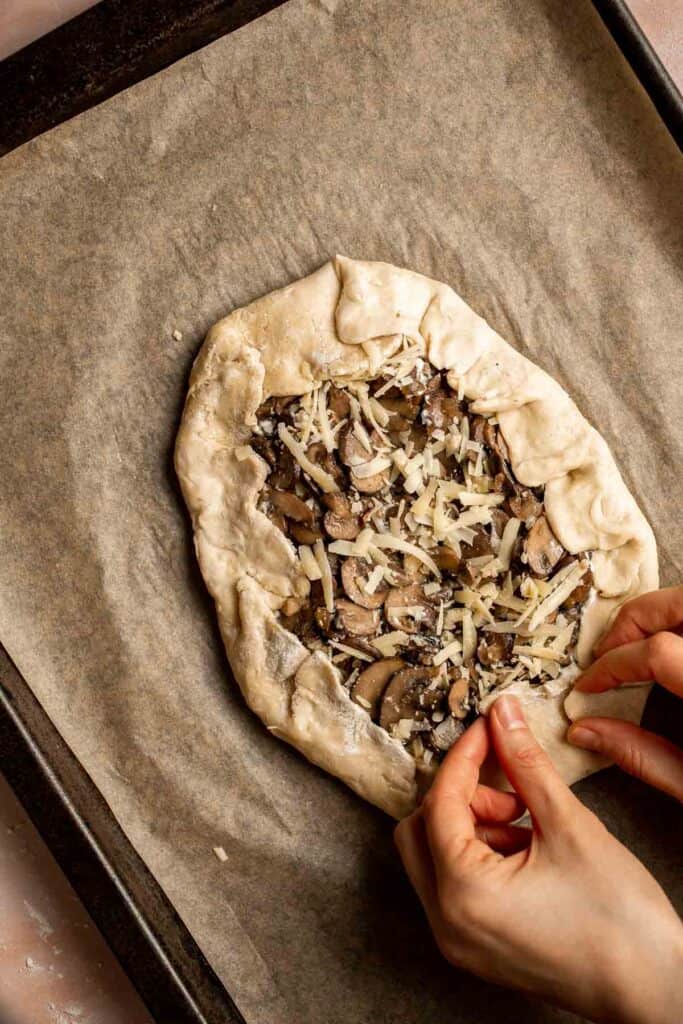
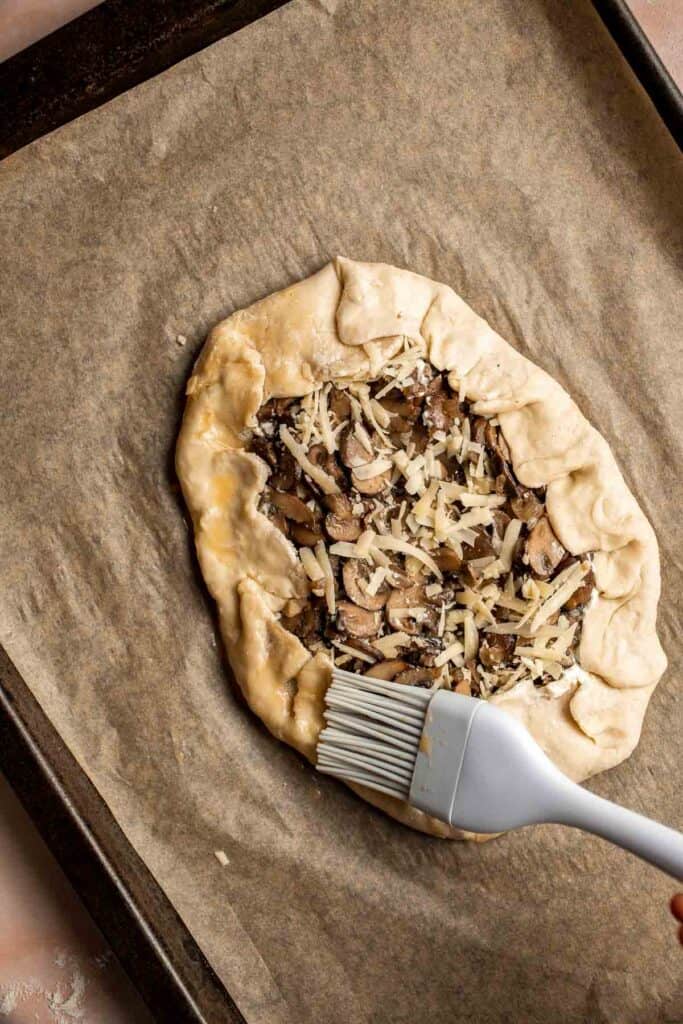
- Bake. Bake in a 375F preheated oven for 50-55 minutes, or until the dough crust turns golden brown. Let cool for 5 minutes.
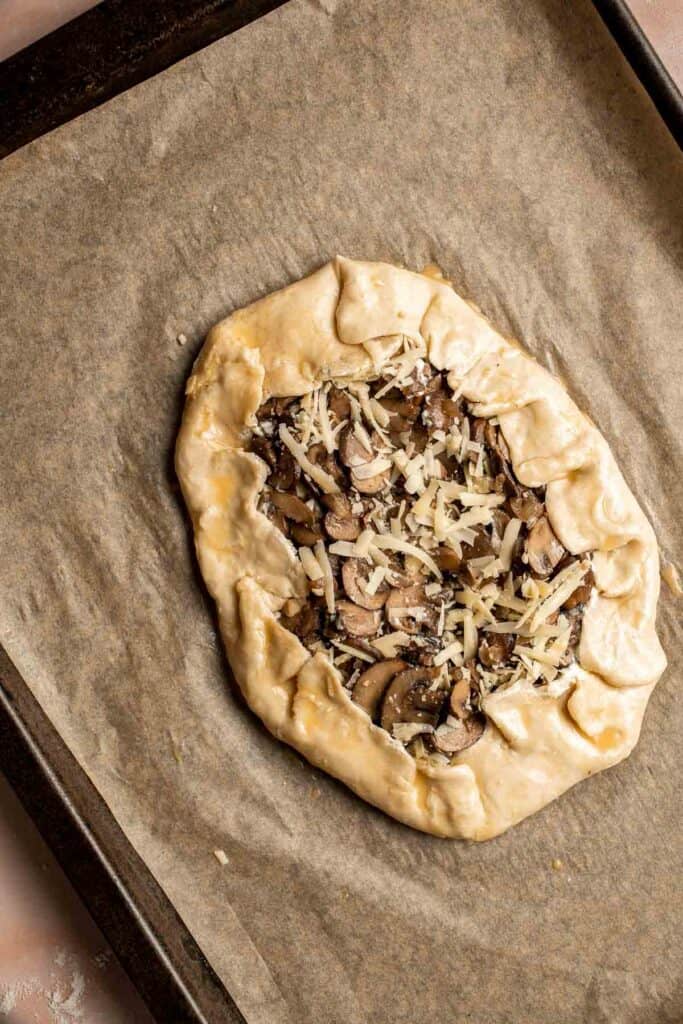
- Serve. Let cool slightly for about 5 minutes and garnish with fresh thyme. Slice and serve warm.
Recipe Variations
- Shiitake mushroom galette. Meaty shiitake mushrooms are a perfect match for gruyere cheese and fresh thyme, although they can be harder to find and more expensive. If you have some available, they're absolutely worth a try.
- Use store-bought pastry. There's no rule that says you have to make your pastry dough from scratch. Use either store-bought pie crust or puff pastry to speed up the process.
- Try a different soft cheese. Instead of creme fraiche, you can also try a garlicky goat cheese or Boursin for a creamy, herby flavor that tastes wonderful with the mushrooms.
- Use rosemary. Although thyme tastes great in mushroom recipes, you can also use fresh rosemary instead.
How to Serve
This mushroom galette is delicious served on its own, or paired with some of my favorite appetizers including:
- Bacon Cheddar Cheese Ball
- Cranberry Brie Bites
- Sweet Potato Croquettes
- Butternut Squash Galette
- Whipped Ricotta Crostini
For more recipes, see our 75+ Easy Appetizer Recipes.
Recipe Tips and Tricks
- Don't overmix the dough. For a flaky pie crust, you normally use very cold unsalted butter. This recipe uses room temperature butter to get a delicate, crumbly texture. If you mix the butter too much, you will lose the little pockets of butter and have a dense crust.
- Rest the dough. After all that mixing, the dough will start to develop gluten. For the best, tender texture, the dough needs to rest in the fridge for 30-40 minutes before baking.
- Cook off the mushroom liquid. Raw mushrooms release so much moisture when you cook them! Let that moisture cook off completely before removing them from the heat. You'll get a much better texture and richer mushroom flavor.
Storing and Freezing Instructions
How to Store
The galette tastes best served fresh. If you have any leftovers, store them in an airtight container in the fridge for 3-4 days.
How to Reheat
Reheat leftover galette like pizza. Either toast it in a skillet to crisp up the crust or bake it in the oven at 350 degrees F until nice and warm.
How to Freeze
After chilling, wrap the remaining galette slices in several layers of plastic wrap and store them in a freezer-safe bag for several months. Thaw in the fridge before reheating.
FAQ
Rich, earthy mushrooms are best for savory mushroom dishes like mushroom pizza or galettes. Use common button mushrooms or the humble cremini or baby portabella. They're also wonderful with a mix of mushrooms, including wild mushrooms like king trumpet, shiitake, and oyster mushrooms.
It's highly recommended to egg wash the crust of your galette recipe before baking for a gorgeous shine and rich golden color.
Use a regular rimmed baking sheet (also called a half sheet baking tray). This will allow the galette to bake quickly without becoming soggy from any steam it lets off. It's best to use a stainless steel or aluminum pan instead of a dark-colored nonstick tray, and we recommend using a piece of parchment to make it easy to lift and serve the galette after baking.
More Mushroom Recipes
- Hungarian Mushroom Soup
- Sautéed Garlic Mushrooms
- Mushroom Risotto
- Farfalle Pasta with Mushroom Rosé Sauce
- Vegetarian Stuffed Mushrooms
- Tofu and Mushroom Stir Fry
Tried this recipe?
I'd love to hear what you think! Leave a comment and rating below to share your feedback. Your reviews help others discover this recipe and help me keep creating more free recipes for you. Snap a photo and tag me on social media @aheadofthyme too.
Royal Icing
This quick and easy Royal Icing is smooth, thick, and glossy - it's the only frosting recipe you need for perfectly decorated cookies! The traditional method uses raw egg whites and lemon juice, but this easy, reliable royal icing recipe uses a clever ingredient instead that gives you the same perfect result every time.
If you're a fan of cookie decorating, then you've probably scrolled past plenty of bakers piping perfect royal icing onto their cookies. There's something hypnotic about cookie decorating. You can really zen out and focus on the intricate designs in front of you, but it's a lot easier when you have a piping bag loaded with perfectly thick royal icing at the right consistency. Whether you want to make some cute sugar cookies or decorate an entire gingerbread house, this is the only royal icing recipe you'll need!
Why You'll Love This Royal Icing Recipe
- So simple to make. You just need a handful of ingredients and a mixer to whisk your ingredients together! Just add a little more water or sugar to get the desired consistency.
- No raw eggs necessary. Unlike the traditional royal icing recipe that calls for egg whites, this simple royal icing recipe uses meringue powder for a consistent result every time.
- Adapt to different consistencies. Whether you need thick icing to pipe in your borders or thinner flood icing to fill in your designs, you can easily adjust the consistency of the icing by adding a little warm water. It's so much easier than you'd think!

Ingredient Notes
To make this easy royal icing, you will need the following ingredients (full measurements in recipe card below):
- confectioners' sugar - also known as powdered sugar, this is the base of this easy royal icing recipe.
- meringue powder - this unusual white powder replaces the raw eggs in the traditional recipe while giving your icing a thick, stable texture to keep your designs intact. It also keeps the recipe vegan!
- water - use room temperature water to thin your icing until it's just right.
- vanilla extract - this gives your icing a delicious aroma as you bite into each cookie.
- gel food coloring - food dye is entirely optional, but it allows you to make endlessly beautiful designs in every color of the rainbow.
You will also need a large mixing bowl, hand mixer, small bowls, piping bags, and your favorite decorating tools.
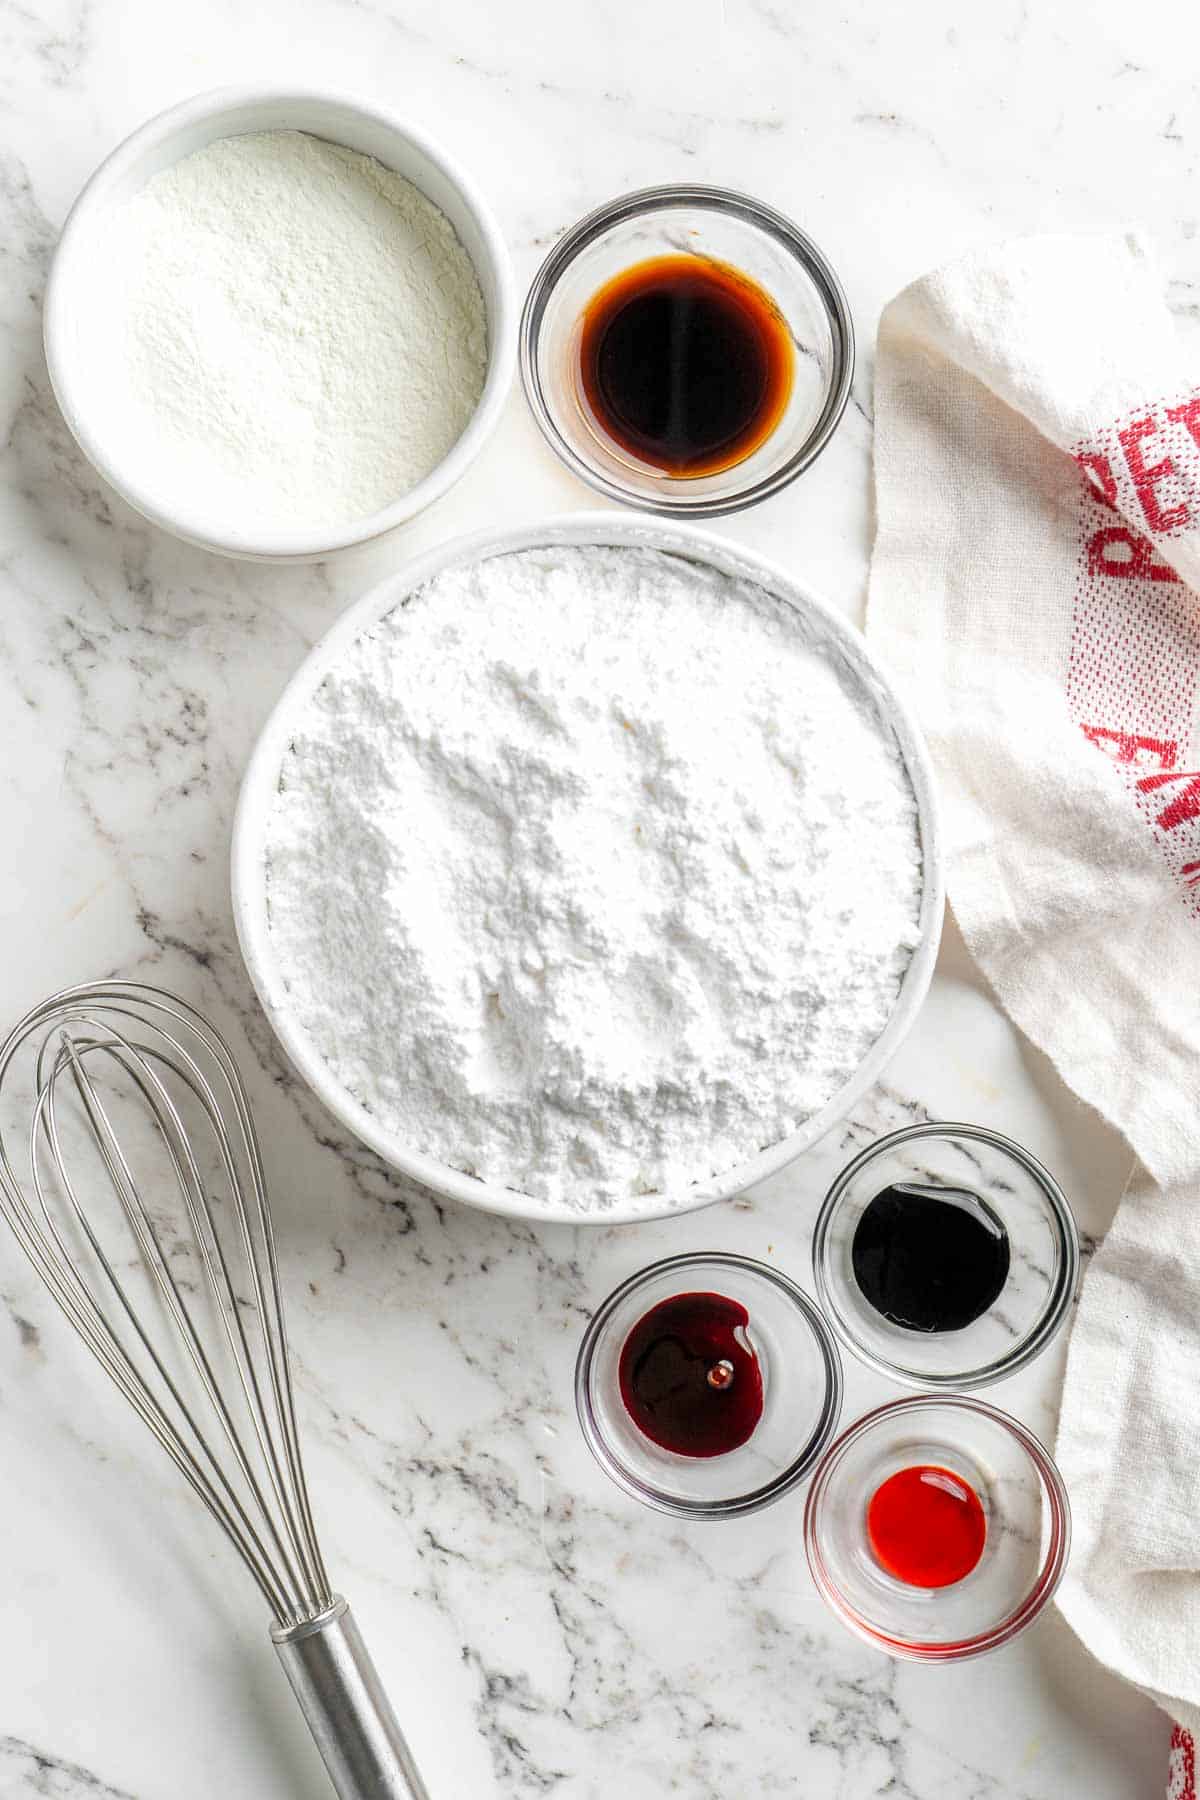
How to Make the Best Royal Icing
- Mix together. In a large mixing bowl, combine confectioners' sugar with meringue powder. Add water and vanilla extract and beat with a hand mixer on medium-high speed, until smooth. If you find that the icing is too thick, add a little water (a teaspoon at a time). If you find the icing too thin, add a little more sugar.
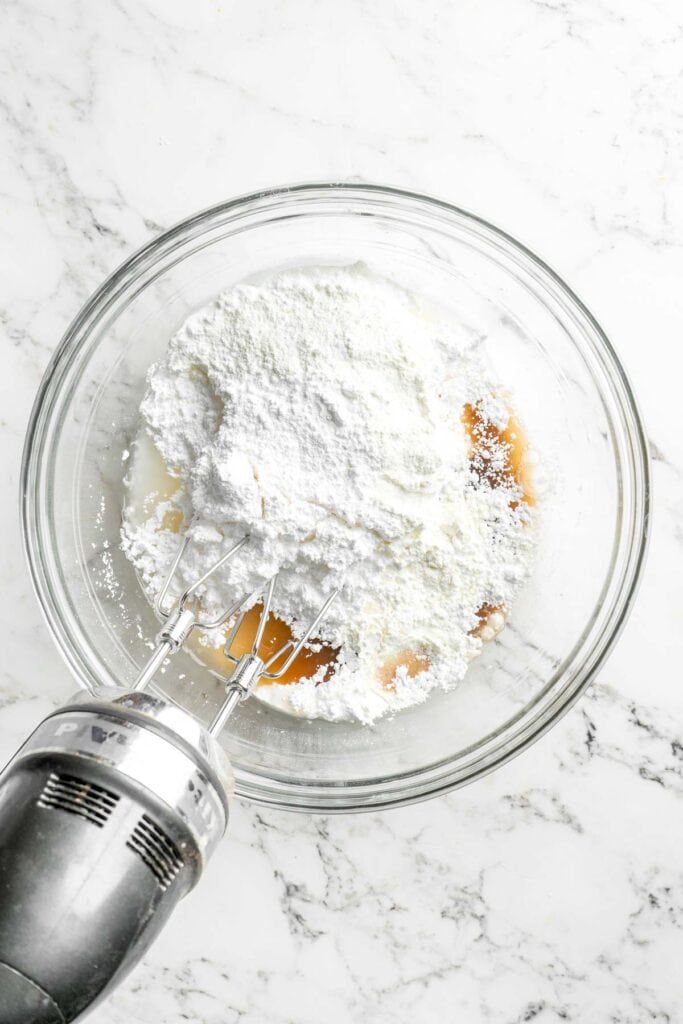
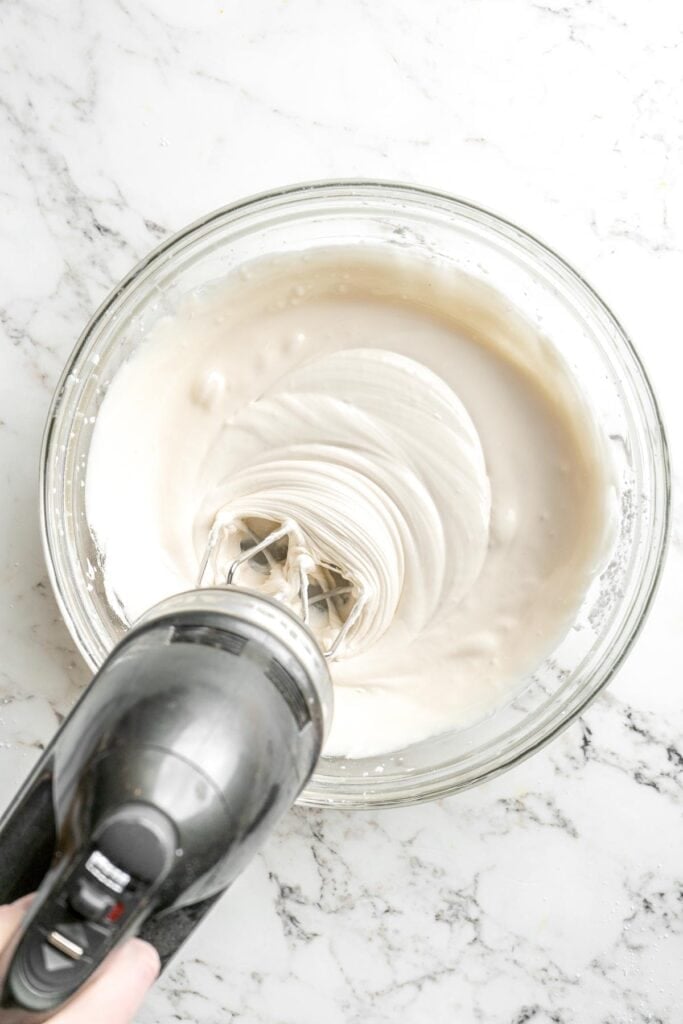
- Add coloring. Divide the icing into small bowls and tint each one by adding a different gel food coloring to each. Beat until combined.
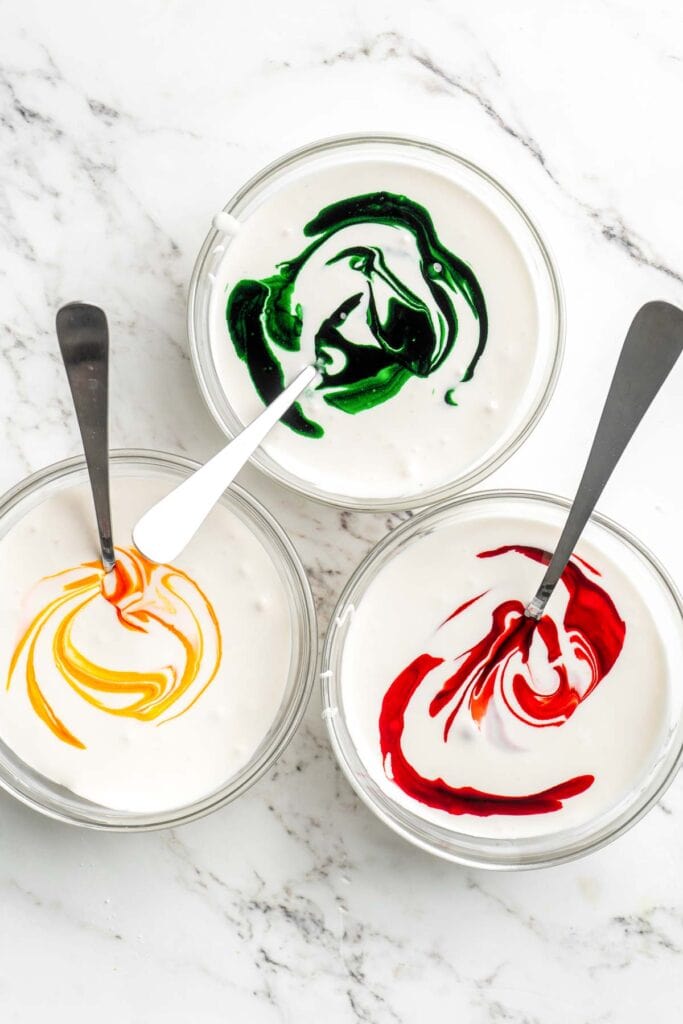
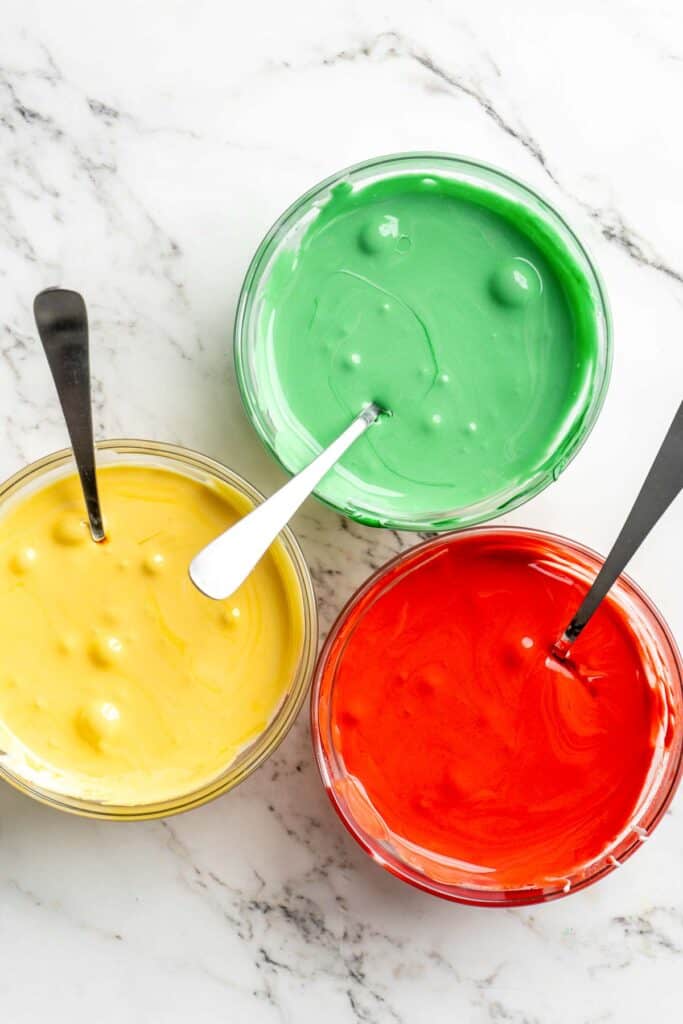
- Pipe and decorate. Transfer to piping bags and decorate cooled cookies.
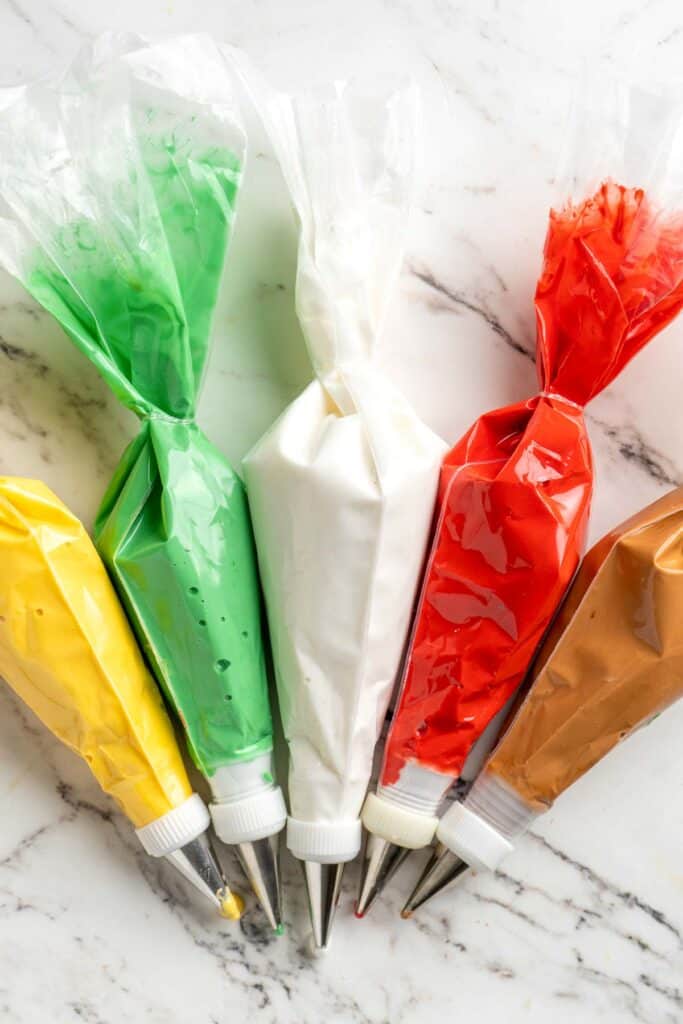

Recipe Variations
- Adjust the flavor. Vanilla is wonderful, but you can easily use almond extract, orange extract, or any other flavor to make your royal icing taste amazing.
- Add a little corn syrup. If you want really shiny, glossy royal icing, add a little corn syrup.
- Get the perfect consistency. There are 3 different consistencies for royal icing, and you can use this one recipe for all of them!
- Make stiff icing. Whip your royal icing until it has stiff peaks that do not collapse. This thicker icing is ideal for making three-dimensional flowers or other large details.
- Detail icing. When you lift the beater out of the bowl, the tip of the icing will curl down without dissolving into itself right away. This is the best icing for detail work, like piping borders or lettering.
- Flood consistency. After lifting the beater, the icing will smooth itself out quickly (usually within 10-15 seconds). This thinner icing is used to fill in large sections of your designs.
How to Serve
This royal icing is perfect for decorating your favorite cookies including:
- Sugar Cookies
- Chocolate Sugar Cookies
- Cut Out Shortbread Cookies
- Gingerbread Cookies
- Chocolate Shortbread Cookies
For cookie decorating inspiration and icing tips, see our Christmas Sugar Cookies, Valentine's Sugar Cookies, or Easter Egg Sugar Cookies.

Recipe Tips and Tricks
- Use gel food coloring. Liquid food coloring doesn't hold true to its color as much and can thin out your icing. For best results, use vivid gel food coloring instead.
- Dry in front of a fan. An important part of making decorated cookies is getting the icing to dry quickly so you can move on to the next level of detail. Place your freshly iced cookies in front of a fan to speed up the process.
- Thin or thicken as needed. One of the beautiful things about royal icing is that you can easily thin or thicken it by adding water or powdered sugar. Just keep working on it until you get the proper consistency.
Storing and Freezing Instructions
How to Store
If you are working on a lot of recipes, you can leave your royal icing at room temperature in an airtight container for up to 2 weeks. Be sure to add a layer of plastic wrap to keep the top from drying out, or leave it in your pastry bag if you'll be coming back to the same project the next day. For longer storage, keep it in the fridge for approximately one month.
How to Freeze
For long-term storage, freeze your leftover royal icing in a freezer-safe container for up to 3 months. Thaw in the fridge before bringing it back to room temperature.
FAQ
Depending on the recipe you use, there are a few reasons why your royal icing may have an unpleasant taste. First, consider freshness. If you used raw eggs or milk, they may have gone bad. This icing should not be eaten. Other reasons may be that you used too much extract or food coloring, which can add an unpleasant taste. If you know your ingredients are fresh, try adding more water and powdered sugar to dilute the bad flavor to see if that helps or start over.
Although milk can add a creamy, rich texture to your royal icing, it is not shelf-stable at room temperature and will not last as long. To be able to make and serve sugar cookies as gifts, we recommend using water.
Typically, yes. The drying process is an important part of decorating cookies, and the cookies need to be uncovered to let the icing dry completely. If you're using a royal icing recipe with raw eggs, be sure to include some sort of acid to keep the egg from going bad, or try using meringue powder instead.
More Recipes with Icing
- Creamy Nutella Buttercream Frosting
- Gingerbread Cookies
- Lofthouse Cookies (Soft Frosted Sugar Cookies)
- Lemon Bundt Cake
- Moist Chocolate Cupcakes
- French Macarons with Vanilla Buttercream Filling
- Carrot Bundt Cake with Cream Cheese Glaze
Tried this recipe?
I'd love to hear what you think! Leave a comment and rating below to share your feedback. Your reviews help others discover this recipe and help me keep creating more free recipes for you. Snap a photo and tag me on social media @aheadofthyme too.

Bacon Wrapped Scallops
These Bacon Wrapped Scallops are the most decadent appetizer to serve at your next party. In this recipe, tender, fresh scallops are wrapped in salty bacon slices before being baked to perfection. The sweet scallops absorb the flavor from the bacon, which bakes into a crispy shell. Drizzle the whole thing with a lemon butter sauce to take it over the edge. Your guests will rave over this perfect appetizer, and you'll be thrilled by just how easily this scallop recipe comes together.

Not all bacon-wrapped scallops are created equally. Although these two ingredients always go well together, there is a wide range between the cheapest bacon and the fanciest scallops. With higher quality ingredients, this luxurious appetizer can quickly become something utterly exquisite, fit for a main dish for your special occasion.
Why You'll Love This Bacon-Wrapped Scallops Recipe
- Exquisite flavor. Scallops are already known for their tender, sweet flavor, and the rich bacon takes them to the next level. The bacon is crispy, the scallops have just the right bite, and the lemony garlic sauce keeps them from tasting too rich. These just may be the perfect scallops!
- So easy to make. Your guests will think these scallops took you all day, but they won't! This easy appetizer just requires a few simple ingredients, a handful of common supplies, and a few minutes of work.
- Crowd-pleasing appetizer. Bacon and scallops are a match made in heaven, and your guests will realize that right away. The second they see what you've made for them, they'll disappear in a hurry!

Ingredient Notes
To make these delicious bacon-wrapped scallops, you will need the following ingredients (full measurements in recipe card below):
- scallops - use large sea scallops if possible. Dry them with a cloth before wrapping them in bacon.
- bacon - use either regular or thick-cut bacon.
- salt and black pepper
- butter - this will be melted down with garlic and lemon juice to highlight the flavors of the tender scallops.
- garlic - saute finely chopped garlic to bring out a sweet, savory flavor.
- lemon juice - fresh squeezed lemon juice will cut the richness and fattiness of the bacon to balance this dish.
- fresh parsley - chopped parsley is an optional garnish.
You will also need toothpicks, a small saucepan, parchment paper, and a baking sheet.
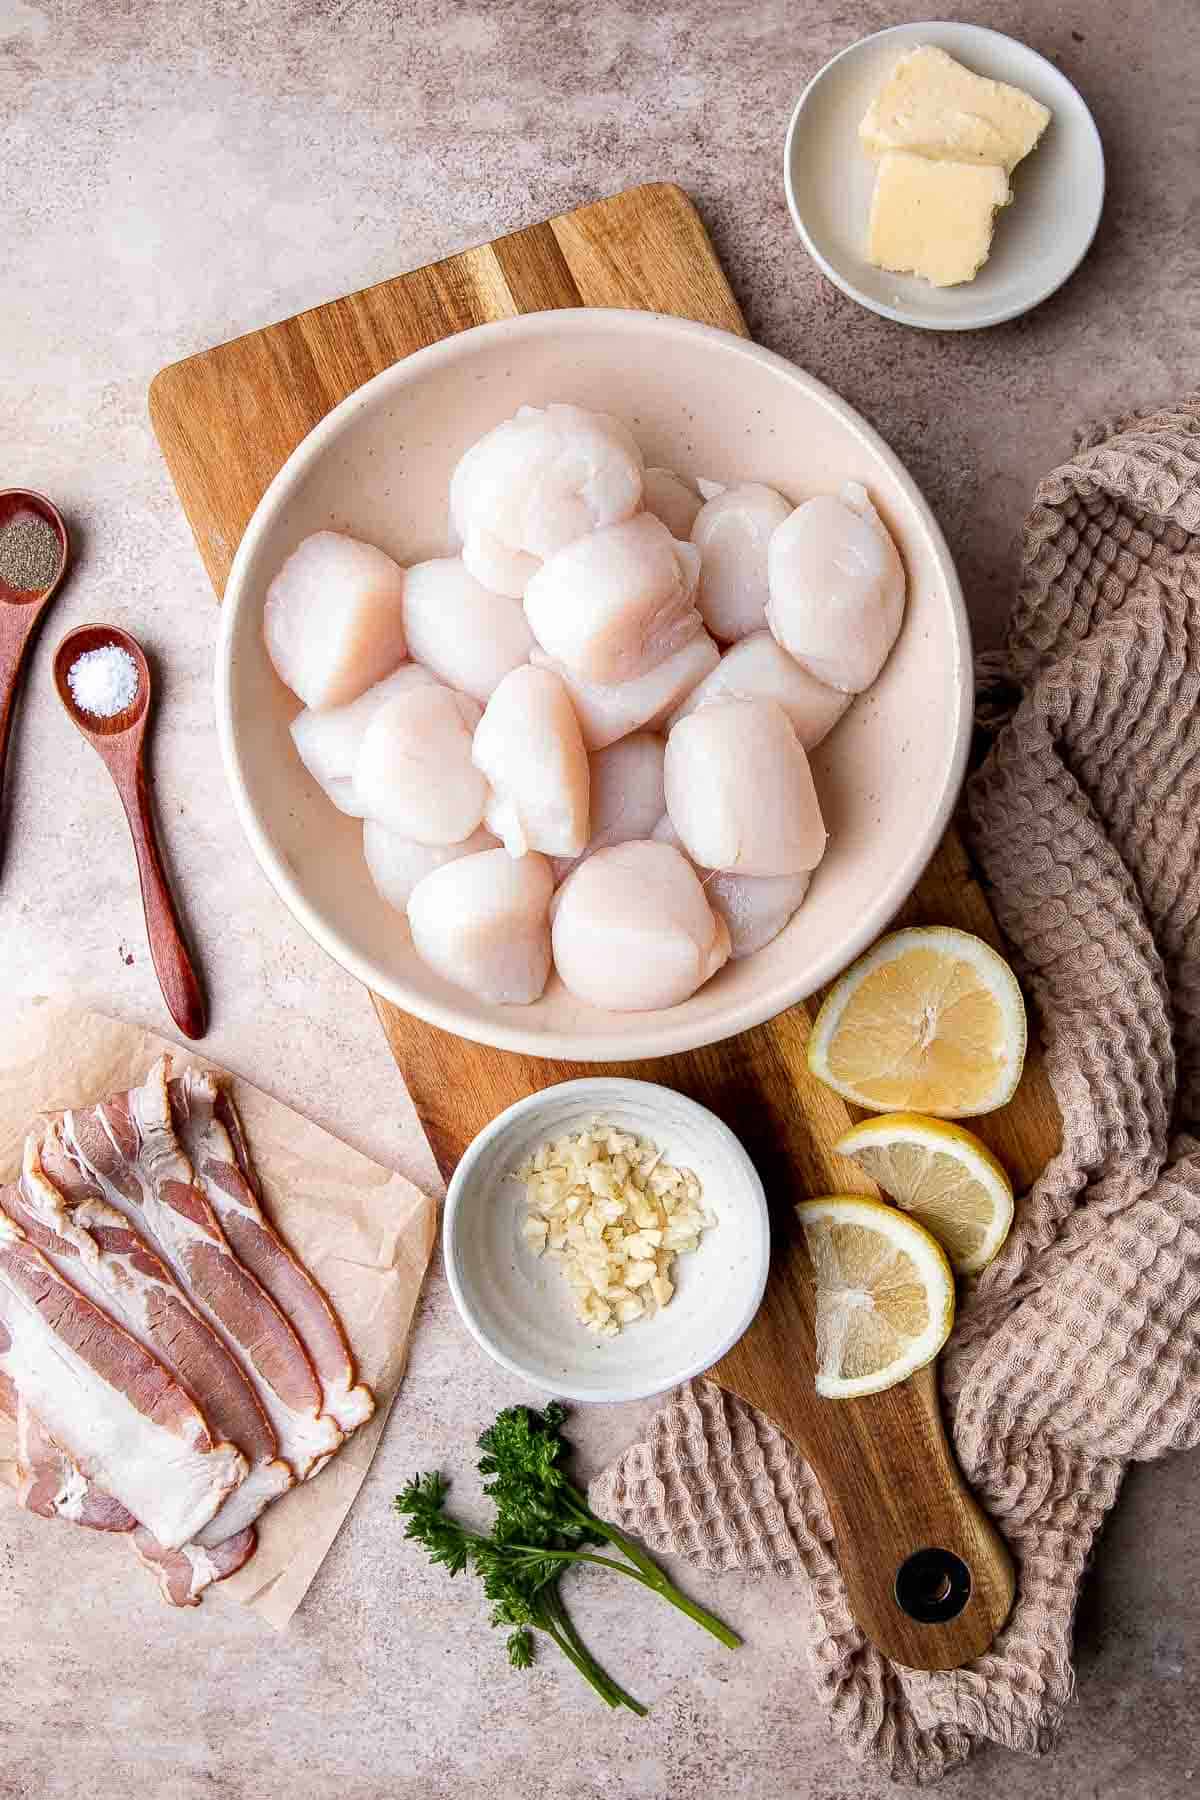
How to Make the Best Bacon Wrapped Scallops
- Wrap scallops. Use a paper towel to gently pat the scallops dry. Cut each piece of bacon in half and wrap it around the side of each scallop. Insert a toothpick through to secure the wrapped scallops. Sprinkle evenly with salt and pepper.
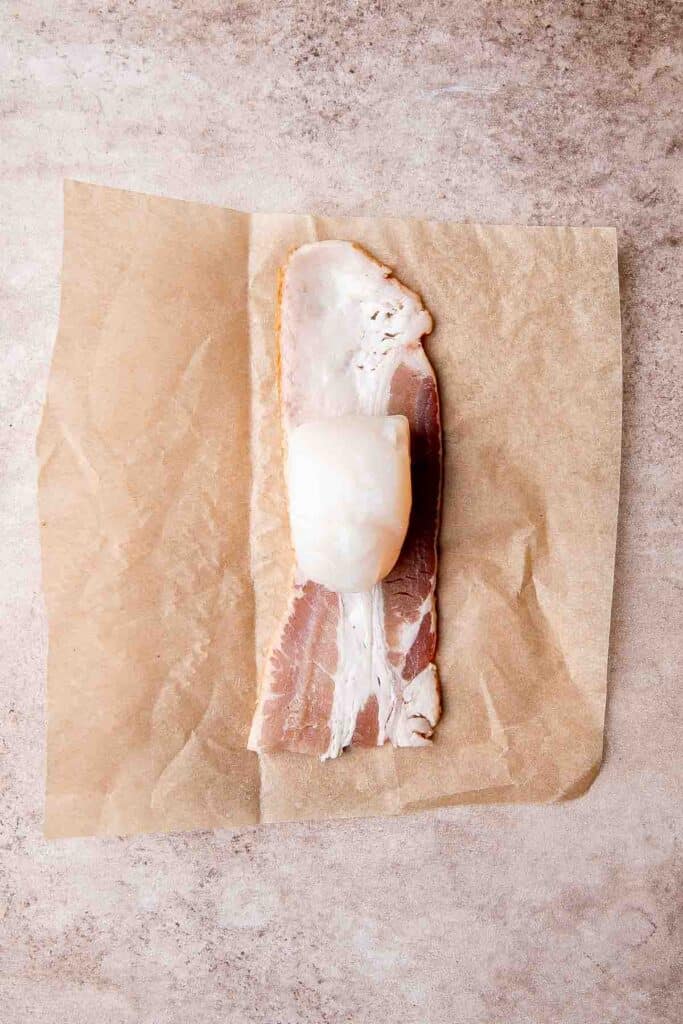
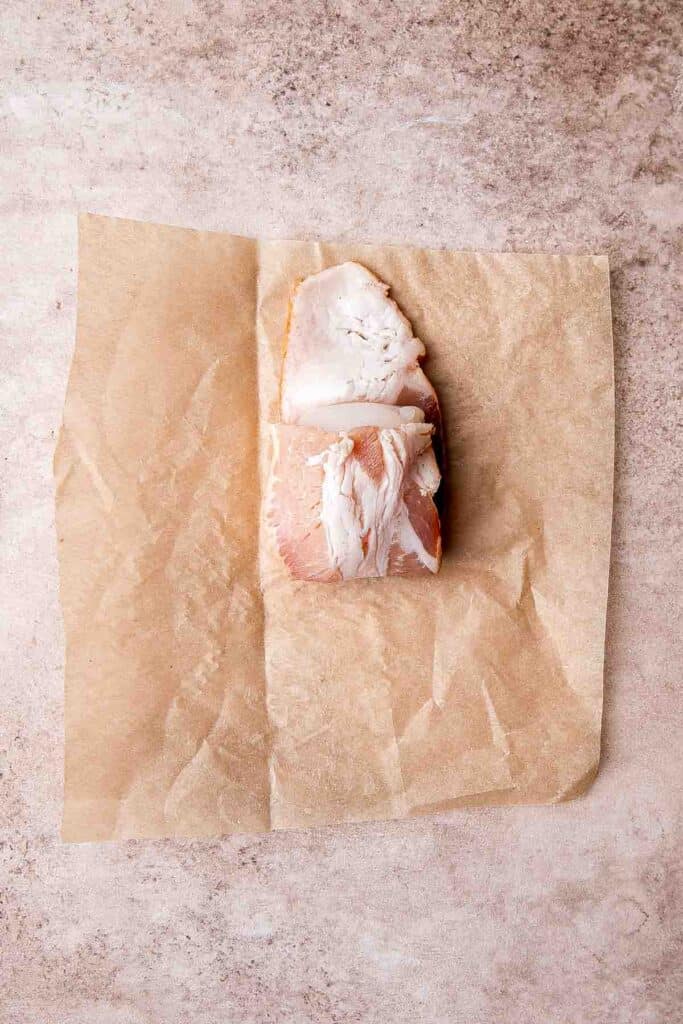
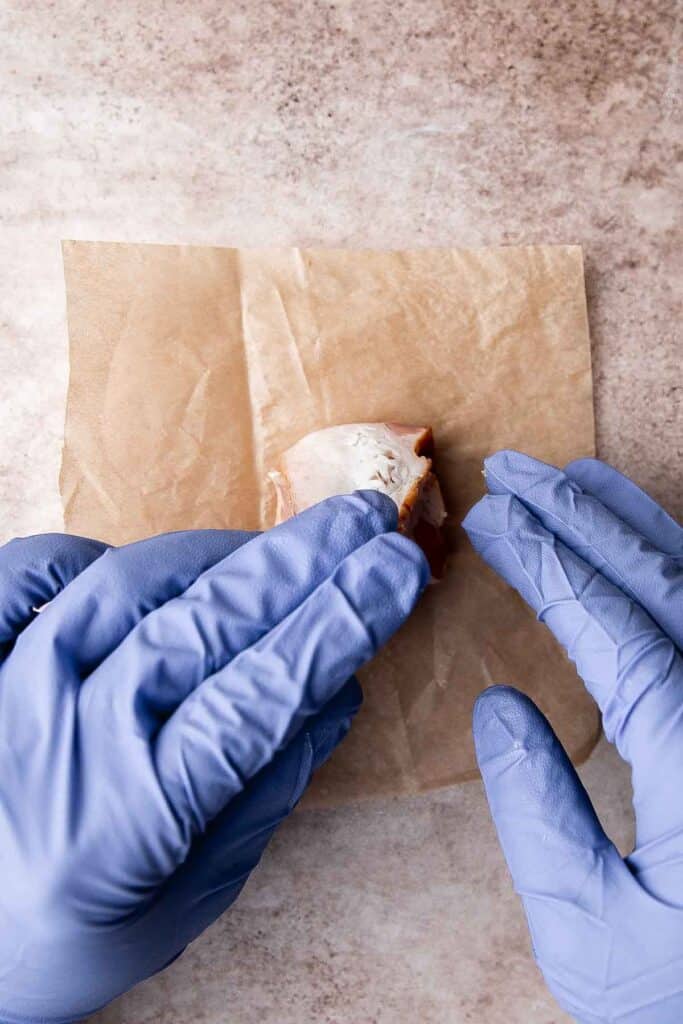
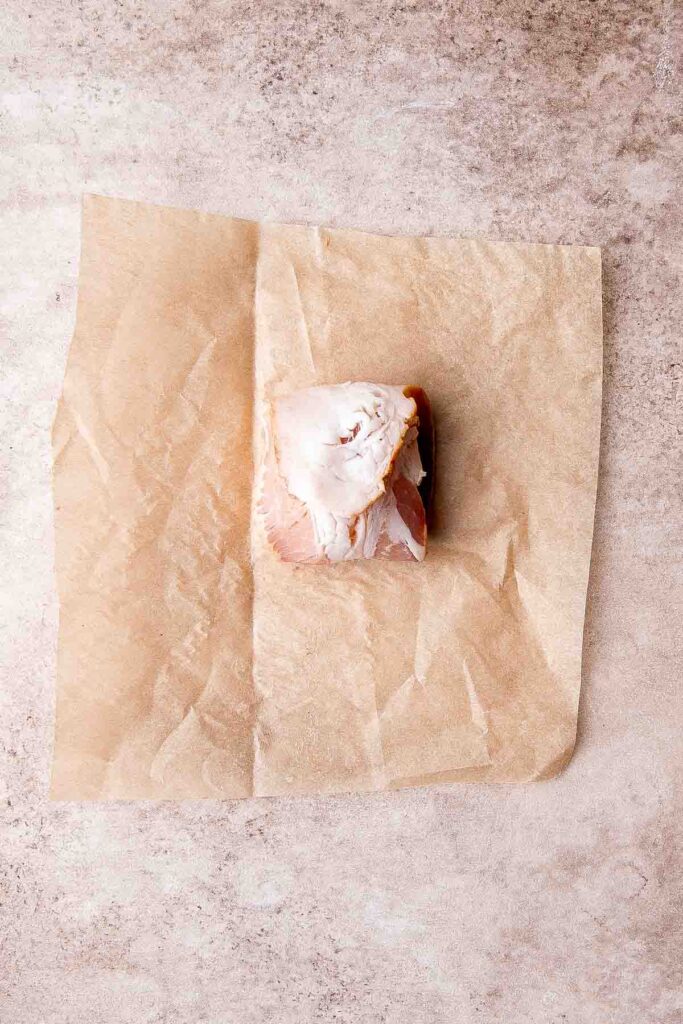
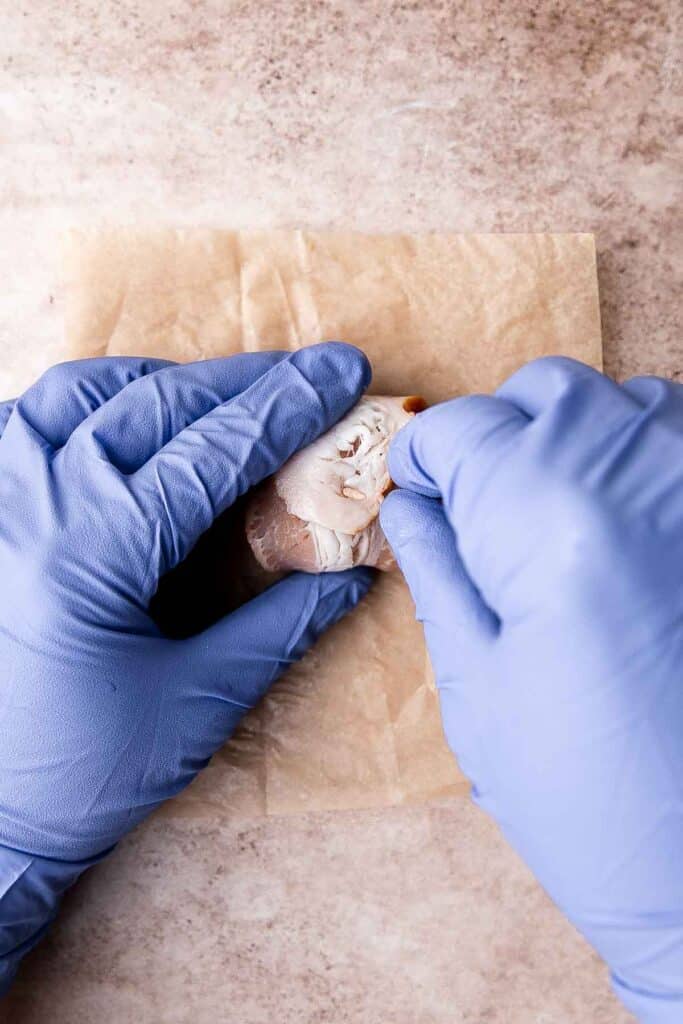
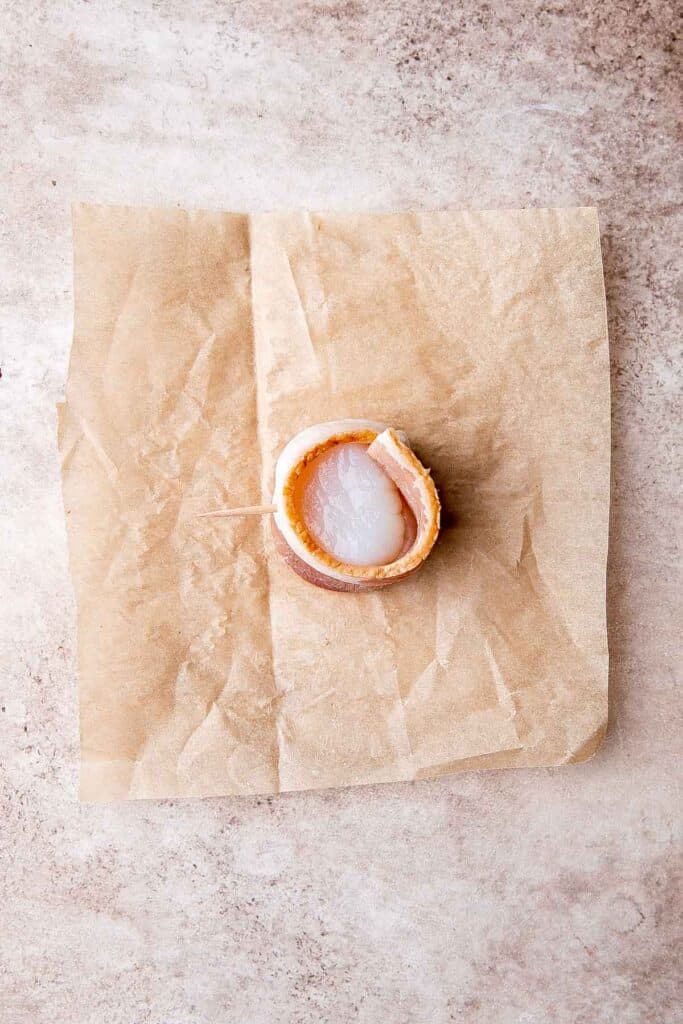
- Make sauce. In a small saucepan, melt butter over medium heat. Add garlic and sauté until fragrant, about 1 minute. Squeeze in lemon juice and set the sauce mixture aside.
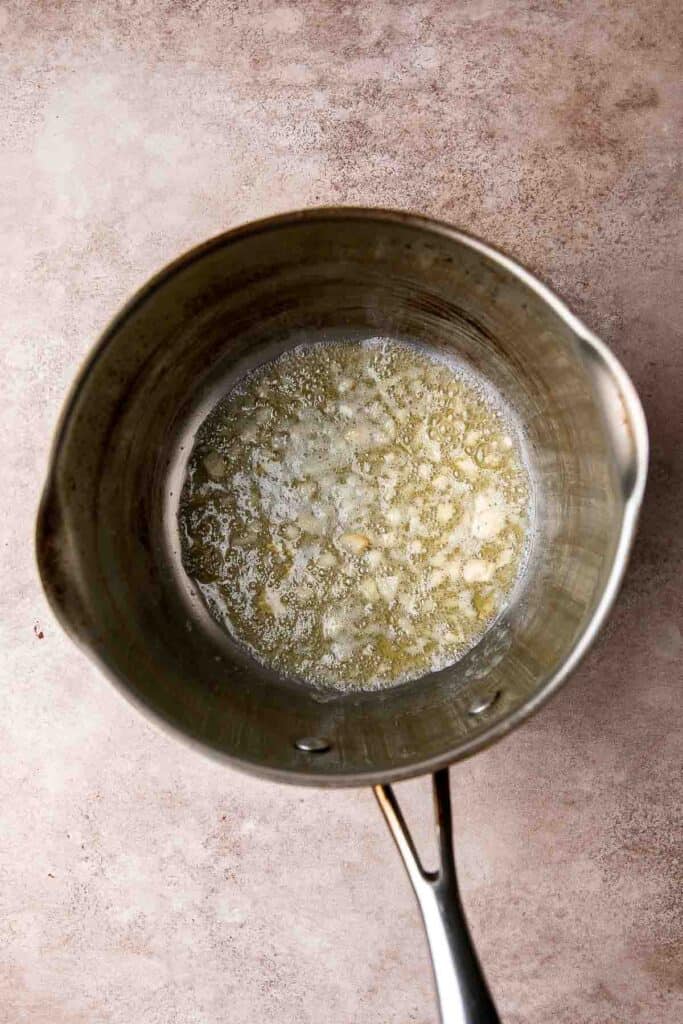
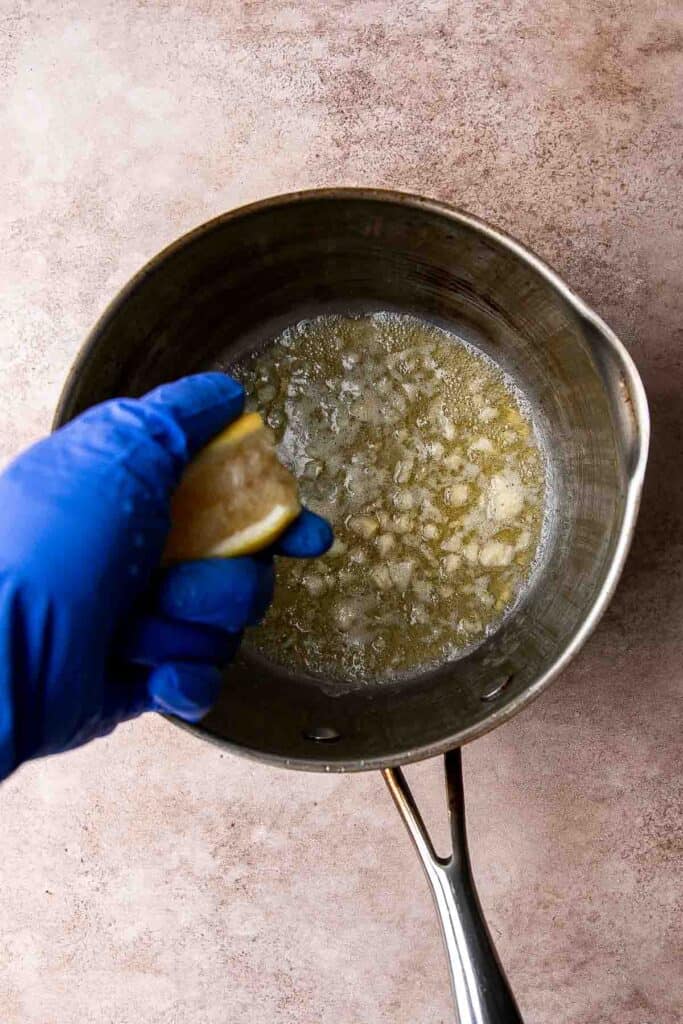
- Cook. Arrange the wrapped scallops on a large parchment-lined baking sheet and turn the broiler in the oven on HI. Broil for 12-15 minutes until the scallops are cooked through and the bacon is crispy. Brush the wrapped scallops with some butter garlic sauce halfway through baking.
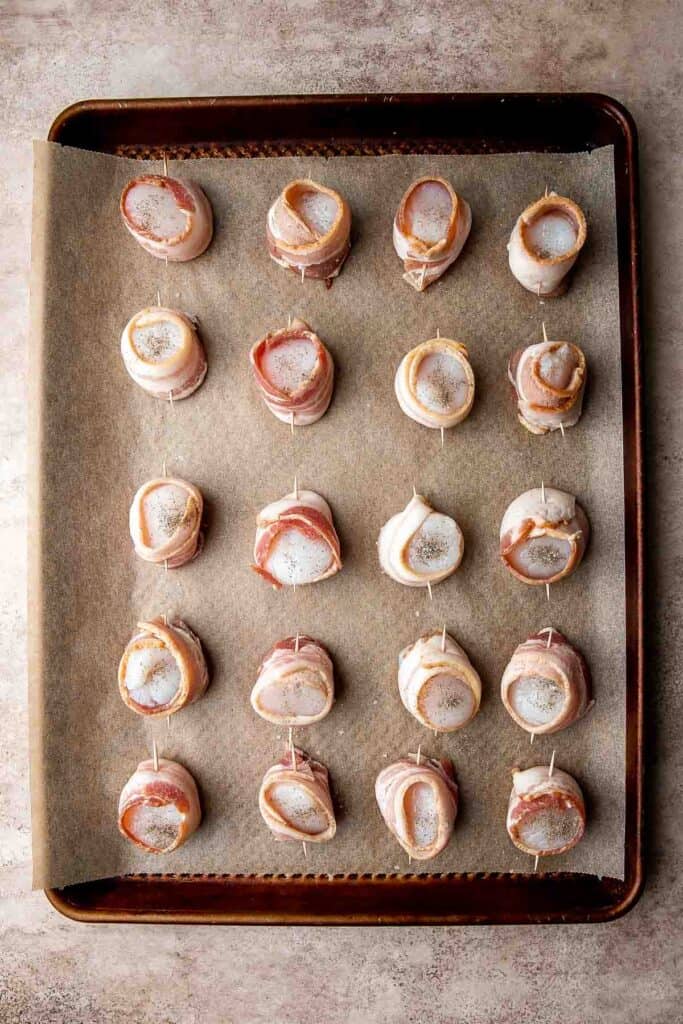
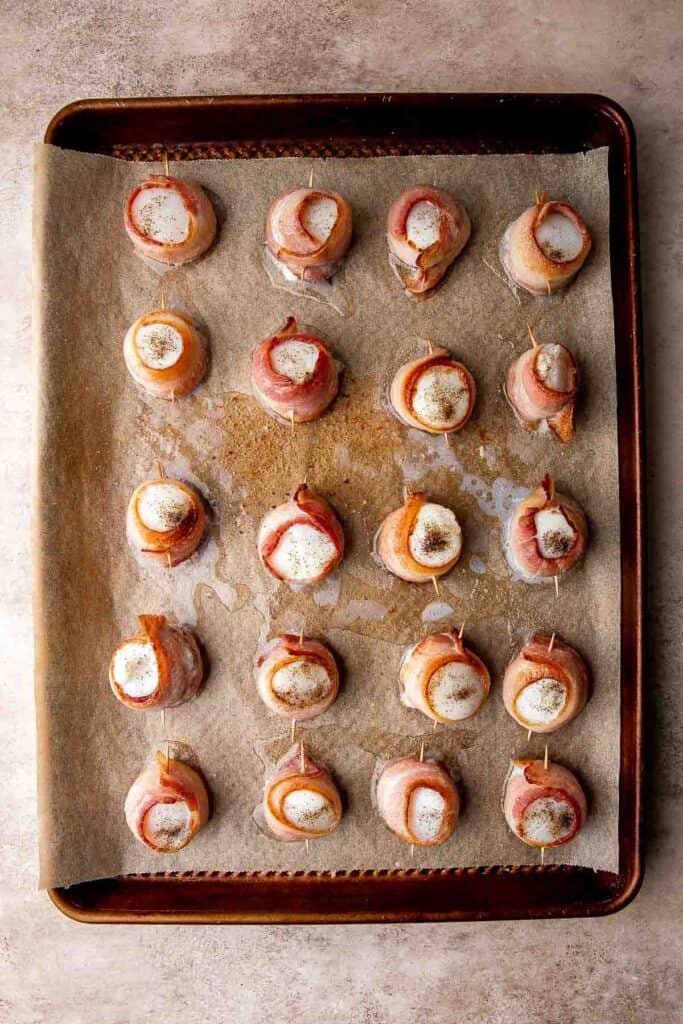
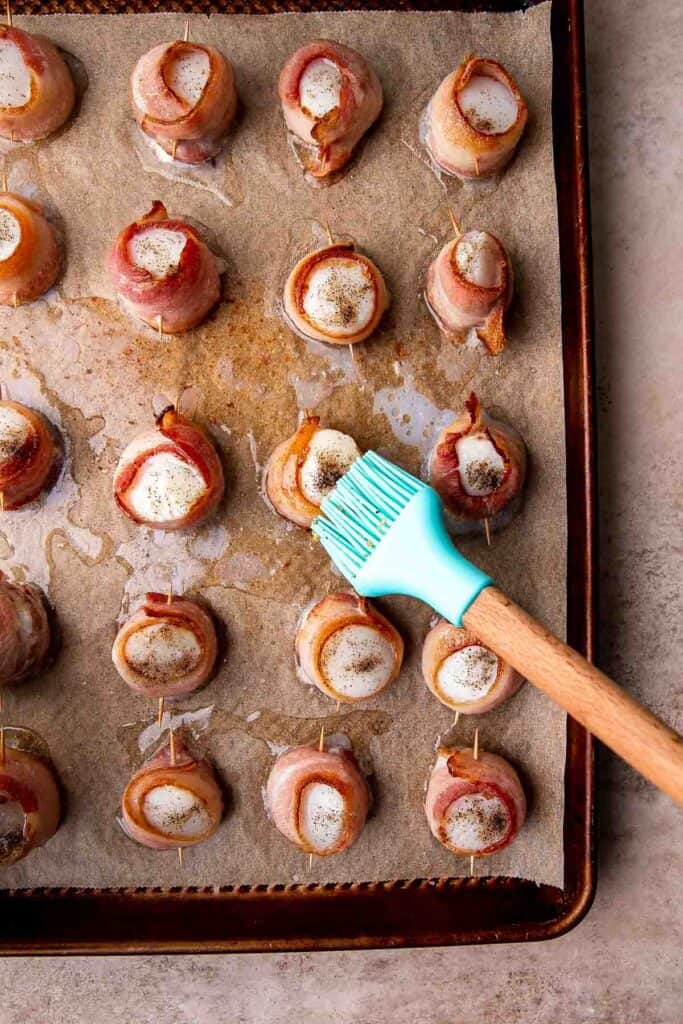
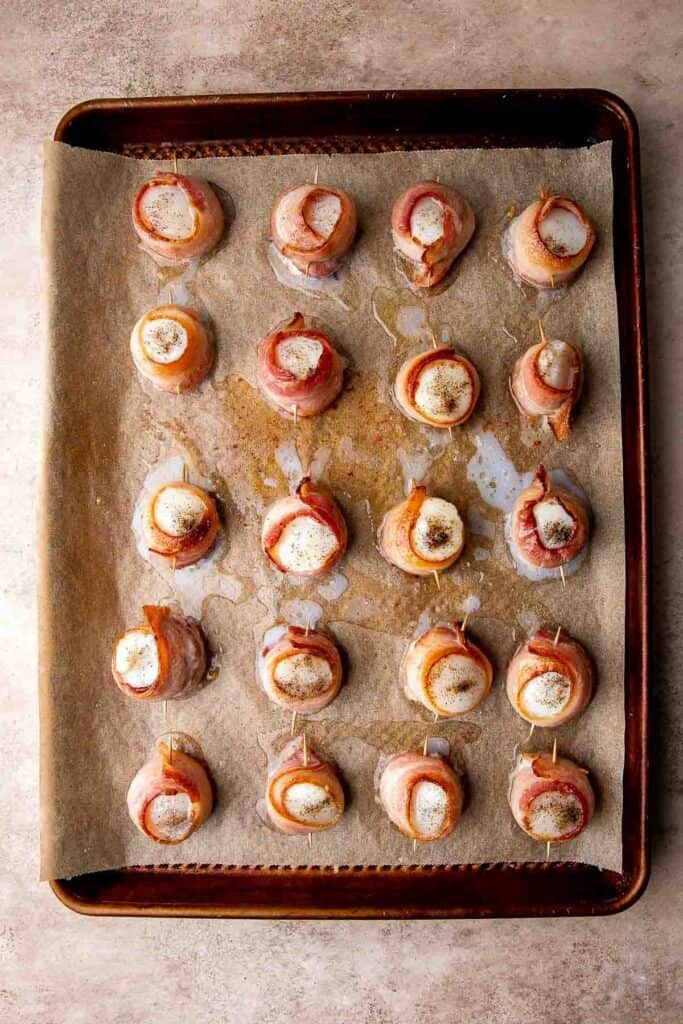
- Serve. Drizzle with the remaining garlic butter sauce and garnish with parsley.
Recipe Variations
- Try a different bacon. This simple recipe is incredibly flexible. You can use regular cut bacon, turkey bacon, or fancy bacon from a local butcher for a really special occasion.
- Air fryer bacon wrapped scallops. Get this easy appetizer on the table even faster by baking the scallops in the air fryer. This is easiest to do with a multipurpose air fryer that has a broil feature. Be careful not to burn or overcook the scallops!
- Serve a teriyaki dipping sauce. Skip the lemon butter and make a sweet Teriyaki Sauce out of brown sugar and soy sauce. The sweet and salty flavors will balance perfectly with the crispy bacon and sweet scallops.
How to Serve
These bacon-wrapped scallops are delicious served on their own, or paired with some of my favorite appetizers including:
- Antipasto Skewers
- Sticky Honey Garlic Meatballs
- Fried Goat Cheese Balls
- Cranberry Brie Bites
- Vegetarian Stuffed Mushrooms
For more recipe ideas, see our 40 Best Fall Appetizers.

Recipe Tips and Tricks
- Use the best quality scallops you can afford. Scallops are pricey, and if you're serving them to a crowd, you'll need quite a lot. Get the best scallops you can afford. Small bay scallops can be a lot more affordable than larger sea scallops.
- Dry the scallops. For the best texture, pat the scallops dry with a kitchen towel before wrapping them with a slice of bacon.
- Adjust the baking time. Smaller scallops will cook faster, and big scallops will take longer. Make sure the bacon is fully cooked before you remove them from the heat.
Storing and Freezing Instructions
How to Store
Store leftover bacon wrapped scallops in an airtight container in the fridge for 2-3 days.
How to Reheat
For the best results, serve this appetizer fresh. If you have leftovers to reheat, toast the scallops in the oven or air fryer at 400 degrees for 3-4 minutes. The microwave will make them soggy, so it's not recommended.
How to Freeze
Store leftover scallops in a freezer bag or airtight container and freeze for 2-3 months.
FAQ
Yes, but if you want to make bacon-wrapped scallops using frozen scallops, you need to thaw and drain the scallops first. This will make sure they cook evenly and get the best flavor and texture.
Absolutely. It's so important to season your scallops to give them the best flavor. Be sure to dry them off, then season them with salt and pepper before cooking.
For an appetizer, the rule of thumb is to plan on 2-3 scallops per person. For a main course, you'll likely need about 6-8 oz per person, which is double this amount (4-6 large scallops or 8-12 smaller ones).
More Appetizer Recipes
- 75+ Easy Appetizer Recipes
- Salmon Bites
- Cheese Board
- Cranberry Brie Bites
- Air Fryer Pizza Rolls
- Shrimp Cakes
Tried this recipe?
I'd love to hear what you think! Leave a comment and rating below to share your feedback. Your reviews help others discover this recipe and help me keep creating more free recipes for you. Snap a photo and tag me on social media @aheadofthyme too.

Gingerbread Cake
This sheet pan Gingerbread Cake is a perfect treat to delight your friends and family with this holiday season. Made with real molasses and lots of warm spices, this gingerbread snack cake has the flavor of real, old-fashioned gingerbread yet comes together with common pantry staples. Top it all off with a luxuriously creamy brown butter cream cheese frosting to balance the rich spices, and you've got an adorable (and delicious) winter dessert for any occasion.
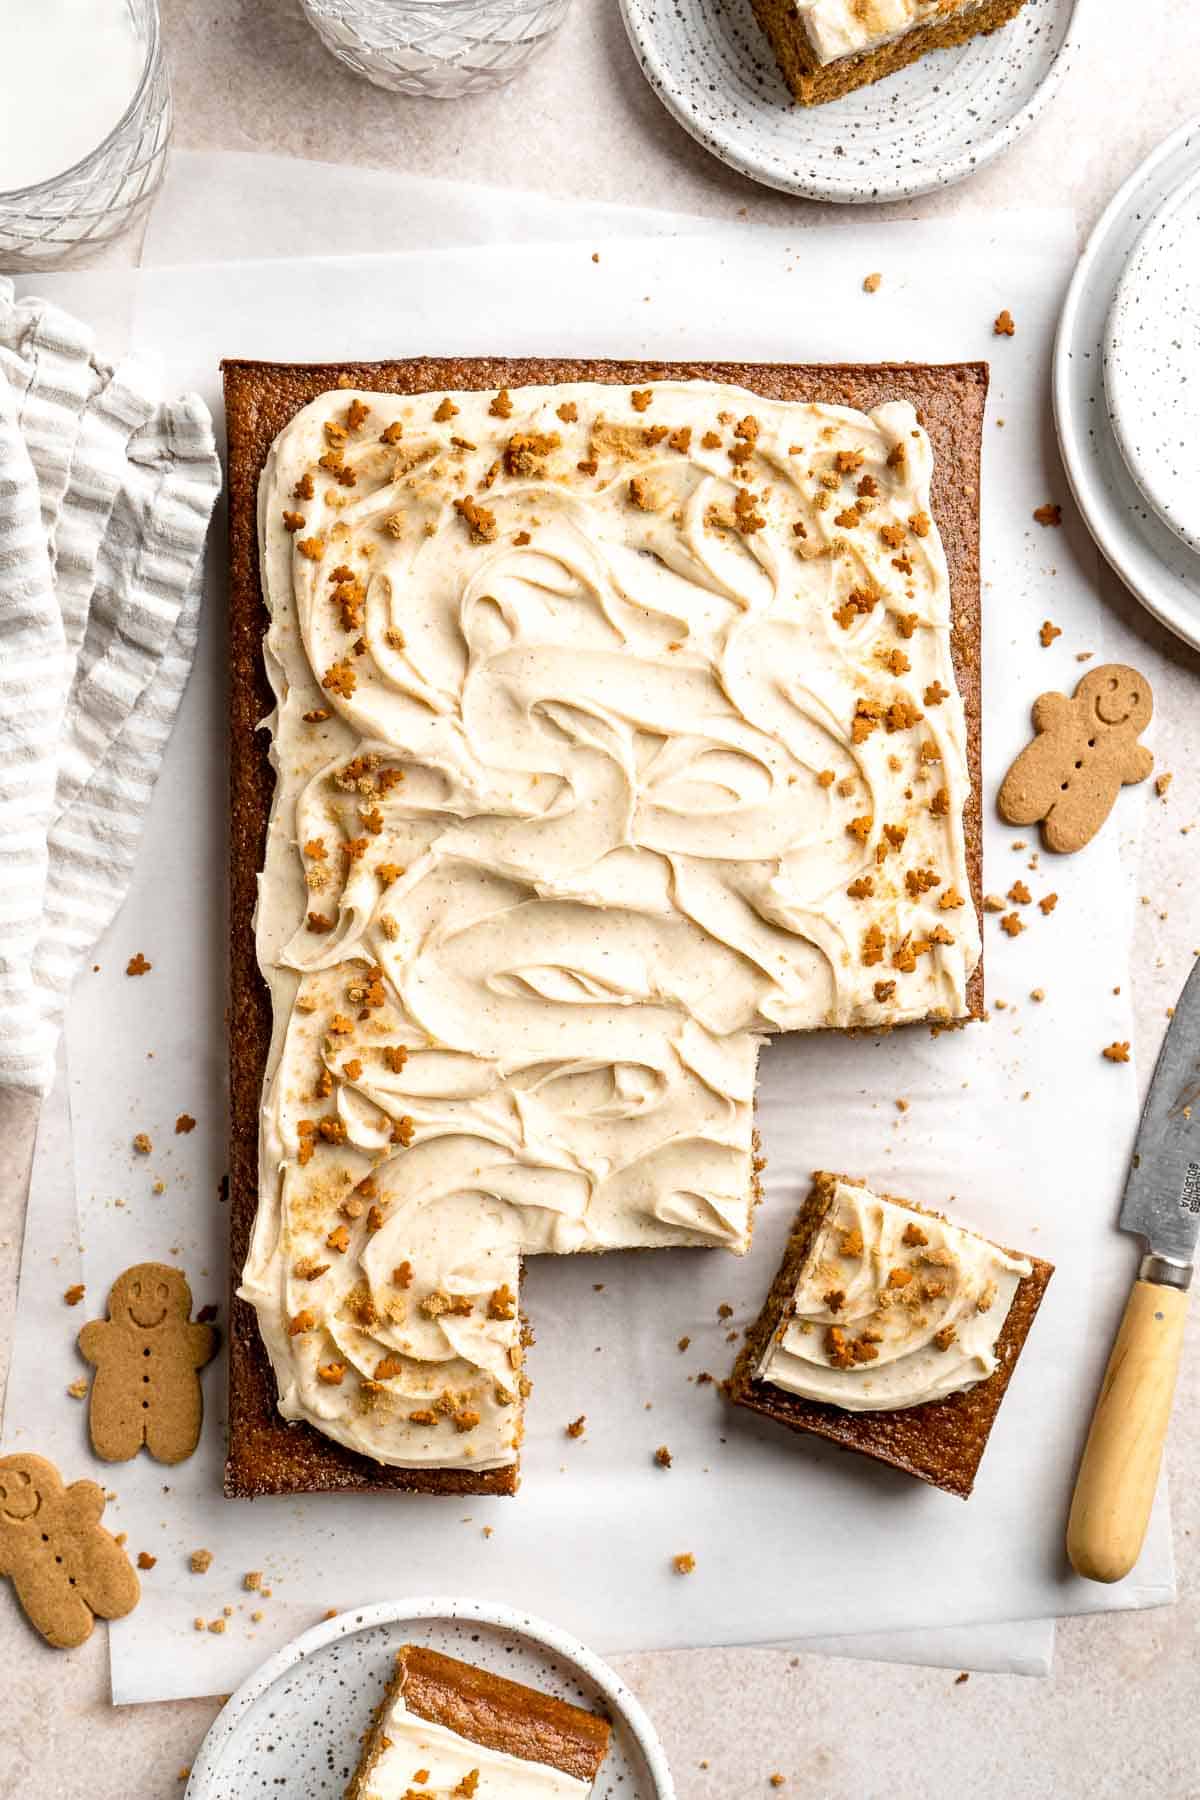
If you're looking for the perfect cake to make after your Christmas dinner, you found it! There's something so comforting about the deep, rich flavor of gingerbread, especially when you balance it with tangy cream cheese. Since this cake is made in a regular 9x13 pan, you don't even have to fuss with cutting layers or any fancy frosting techniques (unless you want to). Just bake, cool, frost, and serve!
Why You'll Love This Gingerbread Cake
- So easy to make. This gingerbread sheet cake recipe uses the creaming method, and comes together with just a few minutes of effort. It's easy enough, even for beginner bakers. No layering required!
- Tender, moist cake. This cake uses a few ingredients that guarantee a rich, moist texture, like vegetable oil and sour cream. It has such a soft, dreamy texture!
- Classic gingerbread flavor. To get that iconic gingerbread flavor, this gingerbread cake recipe uses real molasses, lots of warm spices, and dark brown sugar. It's so good!
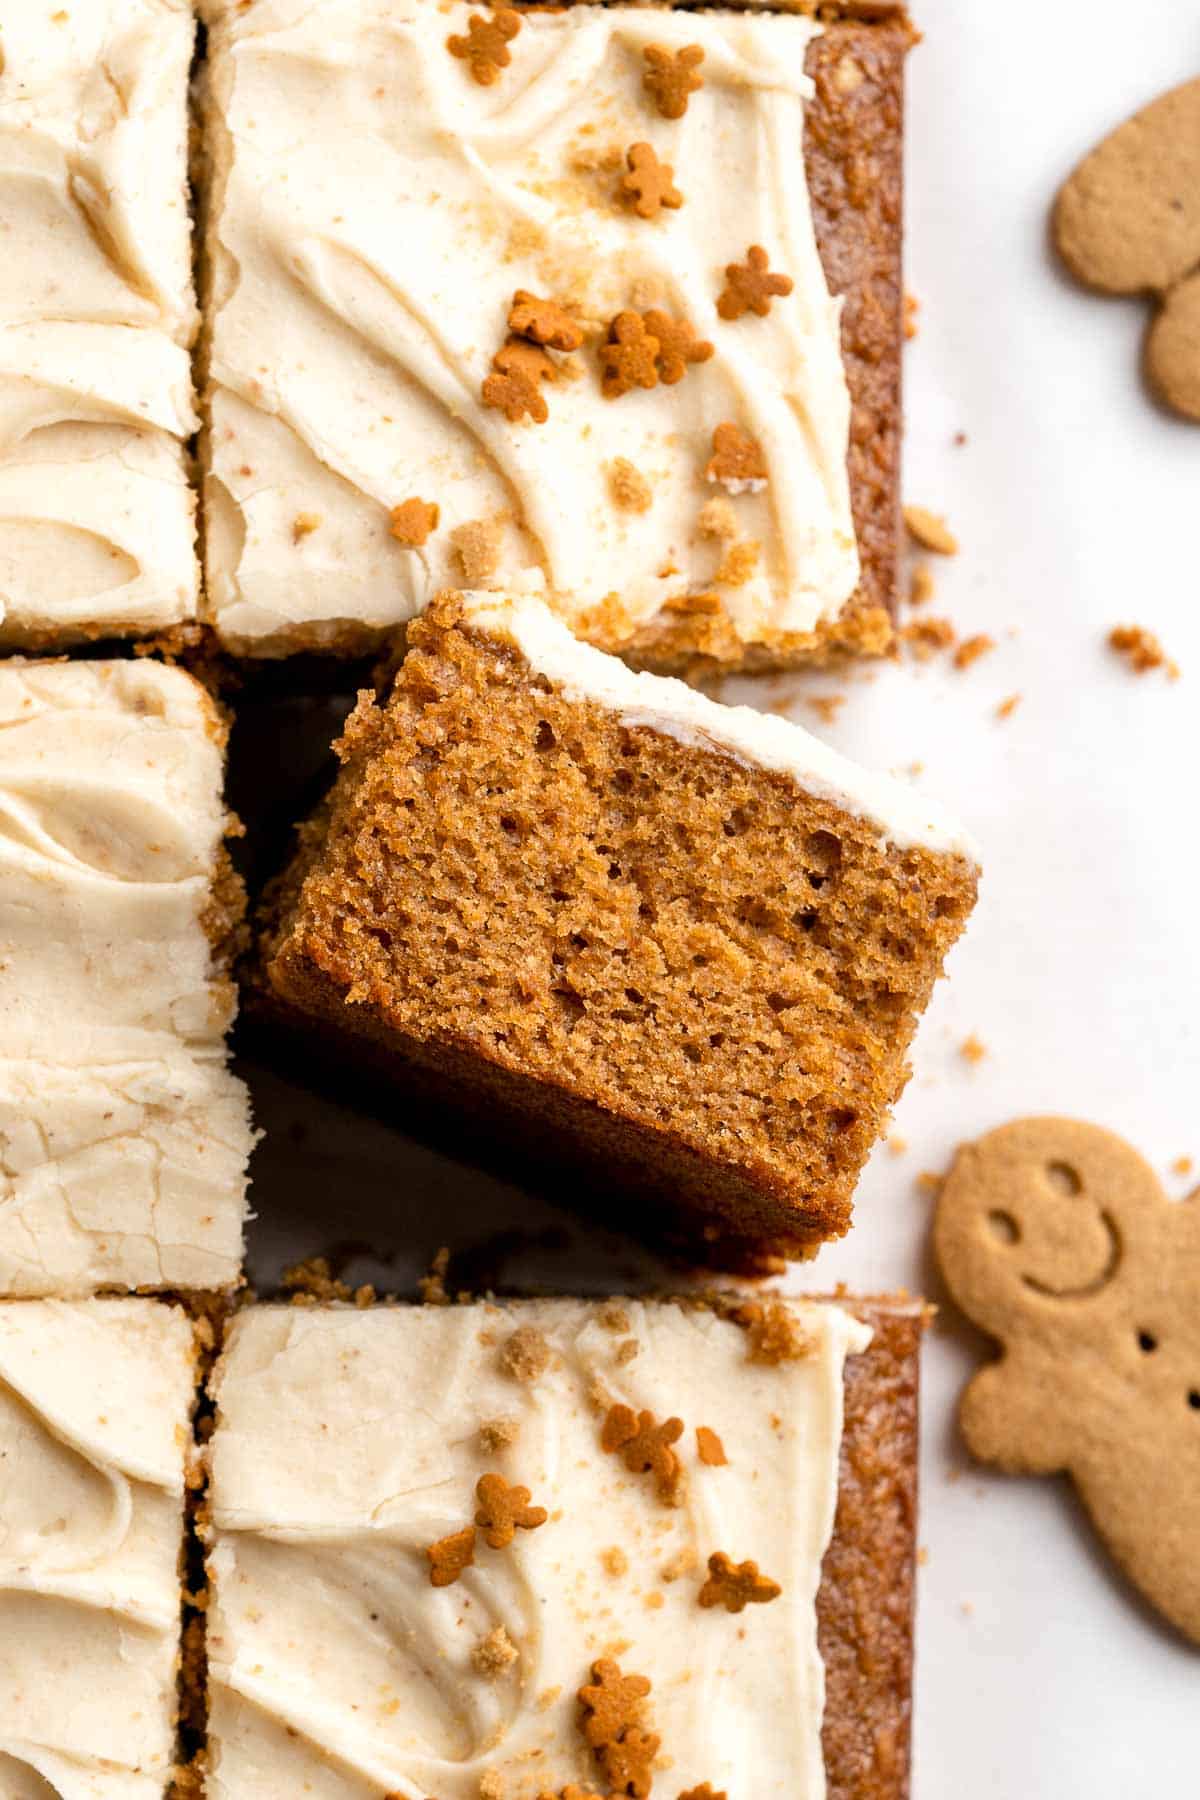
Ingredient Notes
To make this delicious gingerbread cake, you will need the following ingredients (full measurements in recipe card below):
Gingerbread Sheet Cake Ingredients
- cooking spray oil - spray the pan well and add parchment paper for easy release.
- fancy molasses - this is essential to get that classic, rich gingerbread flavor.
- water - hot water will dilute the molasses to make it easier to integrate into this gingerbread cake recipe.
- all-purpose flour - regular all purpose flour works great in this recipe; no need for pastry flour.
- baking powder - this will give the gingerbread cake batter a nice, fluffy texture.
- spices and seasonings - the secret to gingerbread cake is the right mix of spices. This recipe uses cinnamon, ground ginger, allspice, and ground cloves for lots of spice flavor.
- salt - salt highlights all the flavors in this gingerbread recipe to make it even more flavorful.
- eggs - use room temperature eggs to bind the batter together and get a lovely rise.
- brown sugar - dark brown sugar has a rich flavor that pairs perfectly with warm spices.
- vanilla extract
- vegetable oil - cakes made with vegetable oil are incredibly soft and tender.
- sour cream - the added moisture in the sour cream gives the cake a very moist texture and it balances the sugar and spices.
Brown Butter Cream Cheese Frosting Ingredients
- butter - instead of whipping the butter for buttercream, brown it to release a nutty brown flavor that tastes amazing in the tangy cream cheese frosting.
- cream cheese - let the cream cheese come to room temperature for easy whipping.
- confectioners' sugar - powdered sugar will sweeten the frosting. Adjust to taste.
- vanilla extract
- gingerbread sprinkles - these are entirely optional but give the finished cake an eye-catching look.
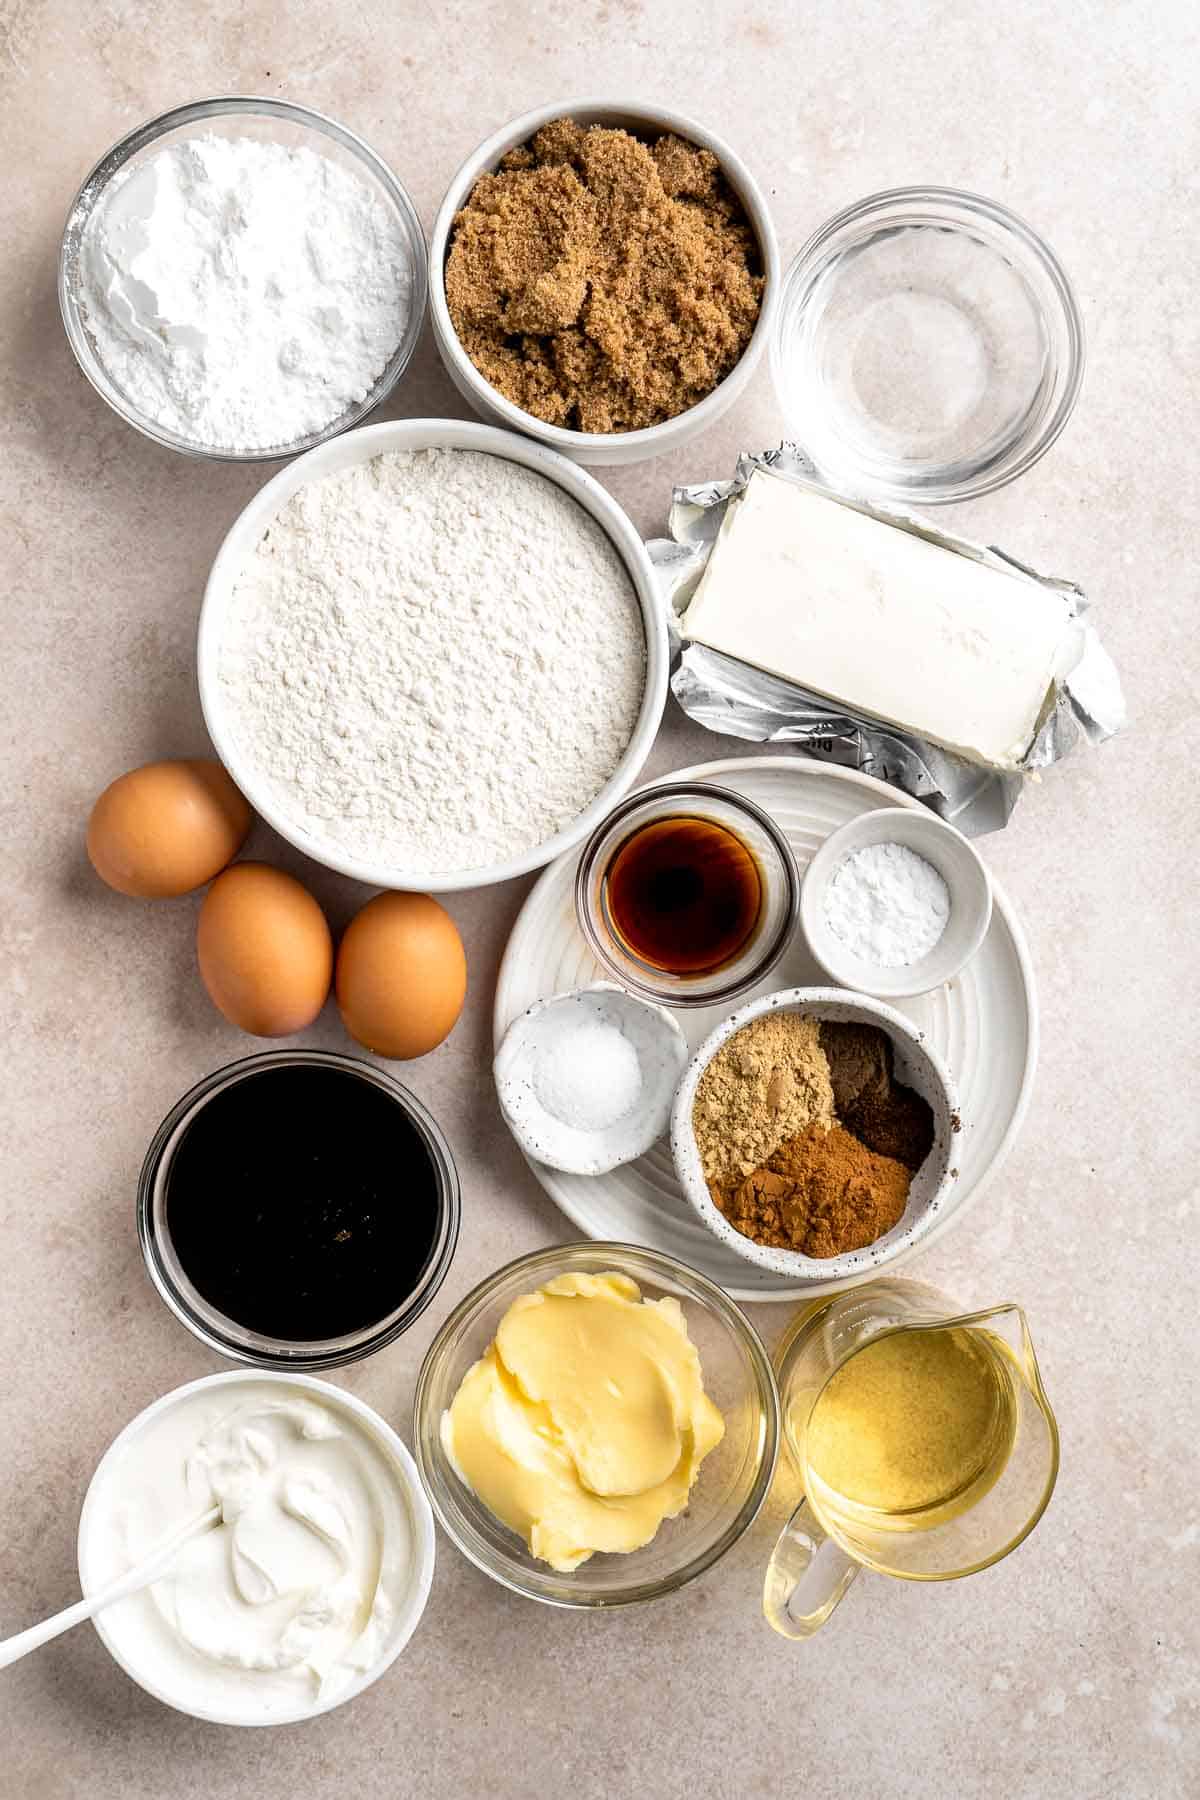
Equipment Needed
You will also need the following baking tools and equipment:
- 9x13 cake pan
- parchment paper
- a small mixing bowl
- a whisk
- two large mixing bowls
- stand mixer or electric mixer
- toothpick
- medium cooking pan
- heat-proof bowl
- spatula
How to Make the Best Gingerbread Cake
First, let's make the gingerbread sheet cake.
- Prep. Preheat the oven to 350°F. Prepare a 9×13-inch cake pan with cooking spray and parchment paper on top, leaving an overhang on 2 sides for easy removal after baking. Set aside.
- Prepare molasses. In a small mixing bowl, whisk together the molasses and hot water until well-combined. Set aside.
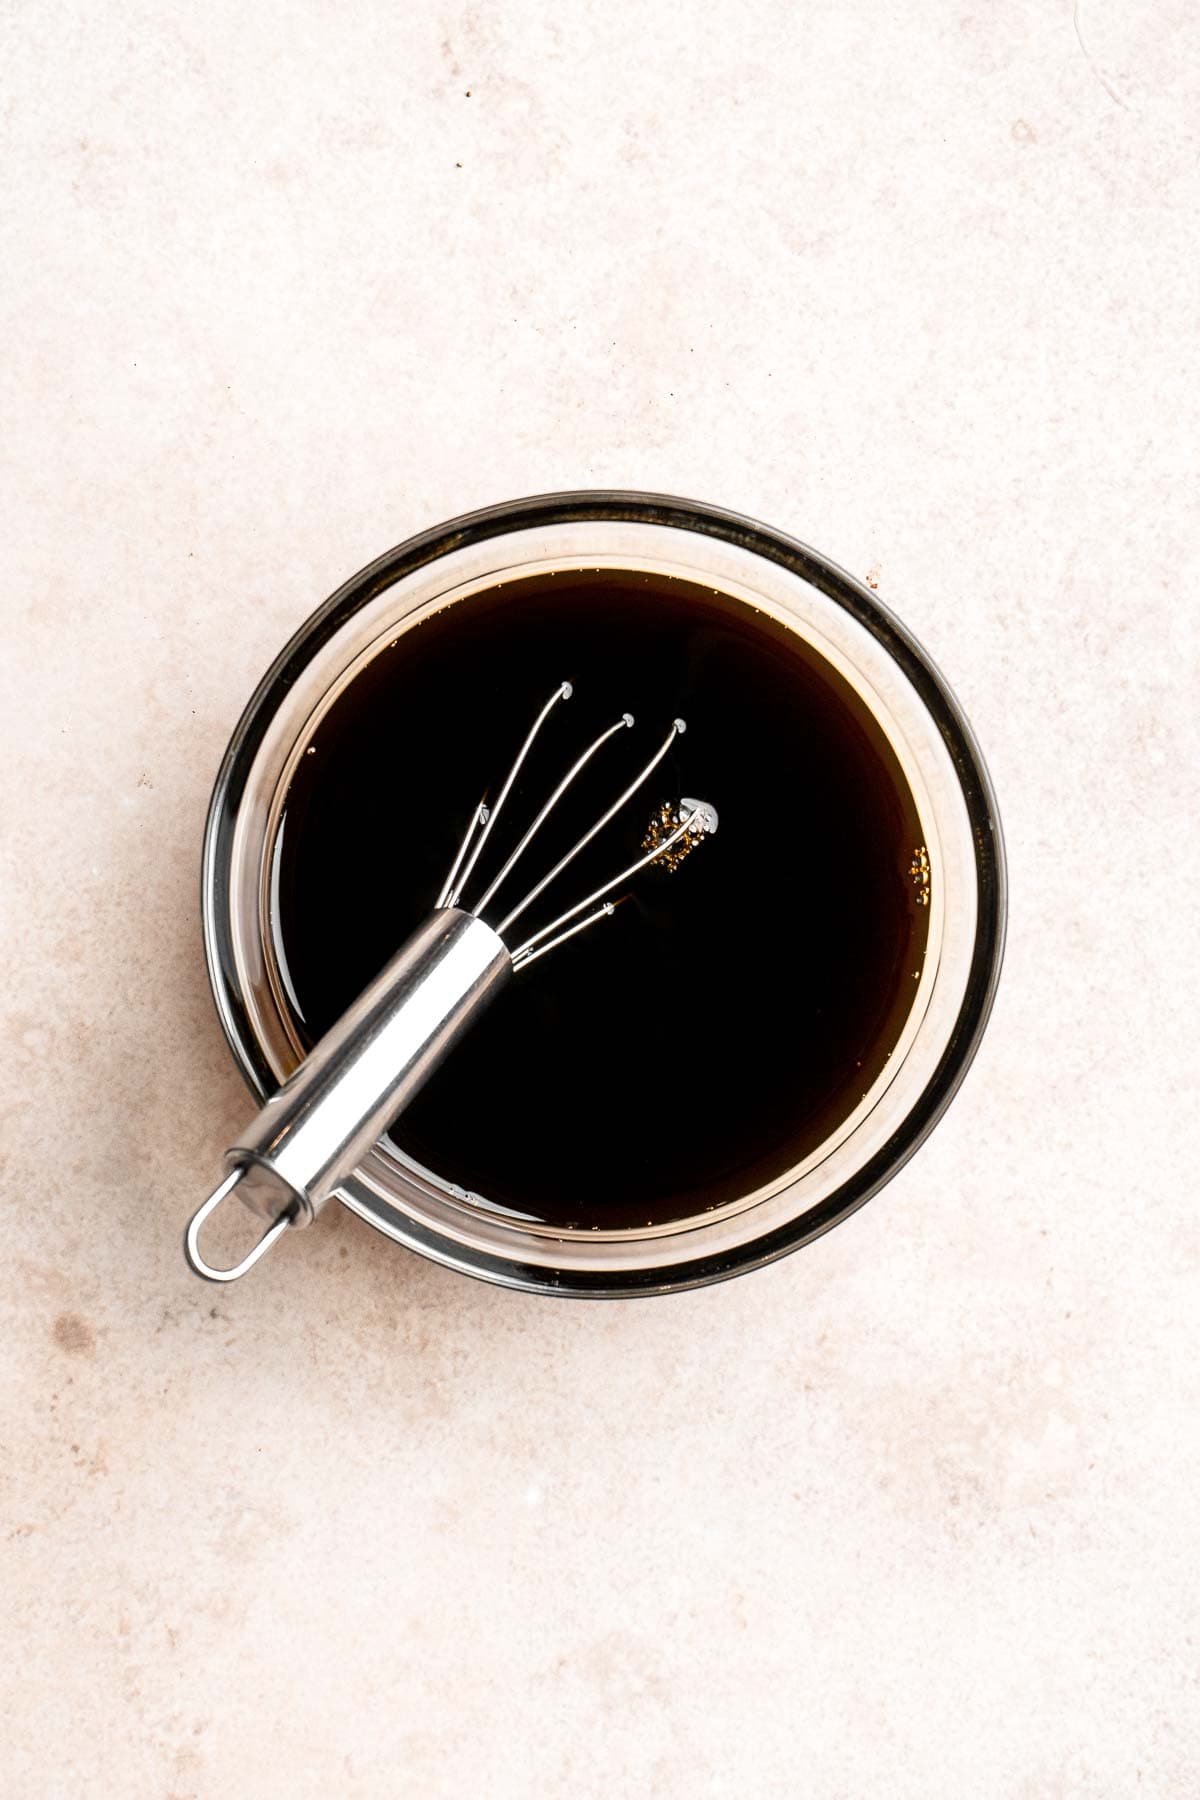
- Combine dry ingredients. In a large sized mixing bowl, add the flour, baking powder, salt, cinnamon, ginger, allspice, and cloves, then whisk together to combine.
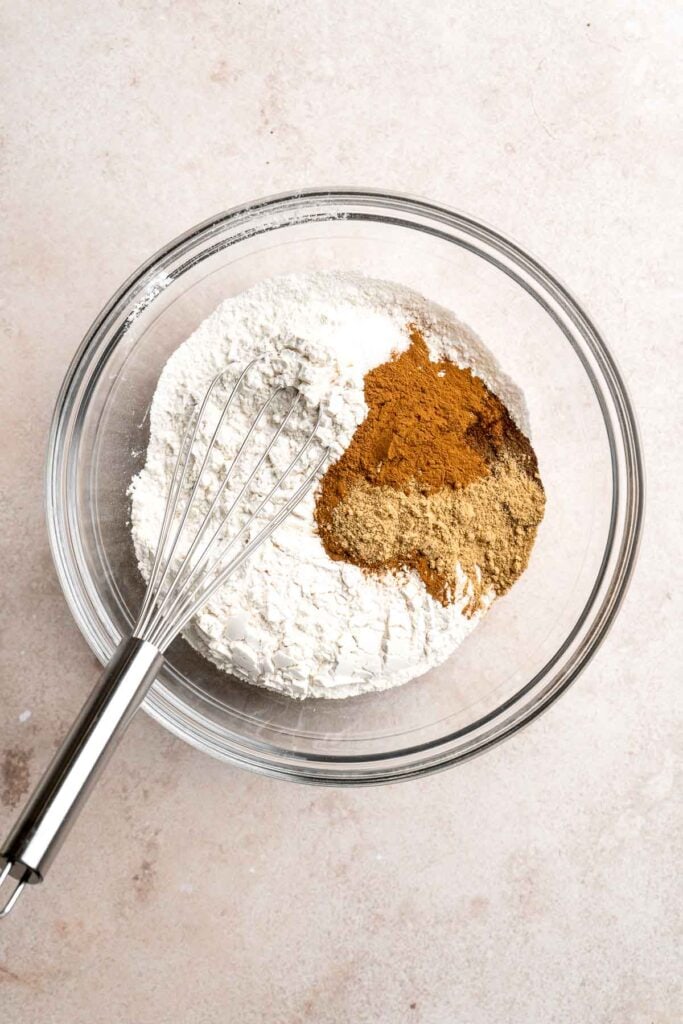
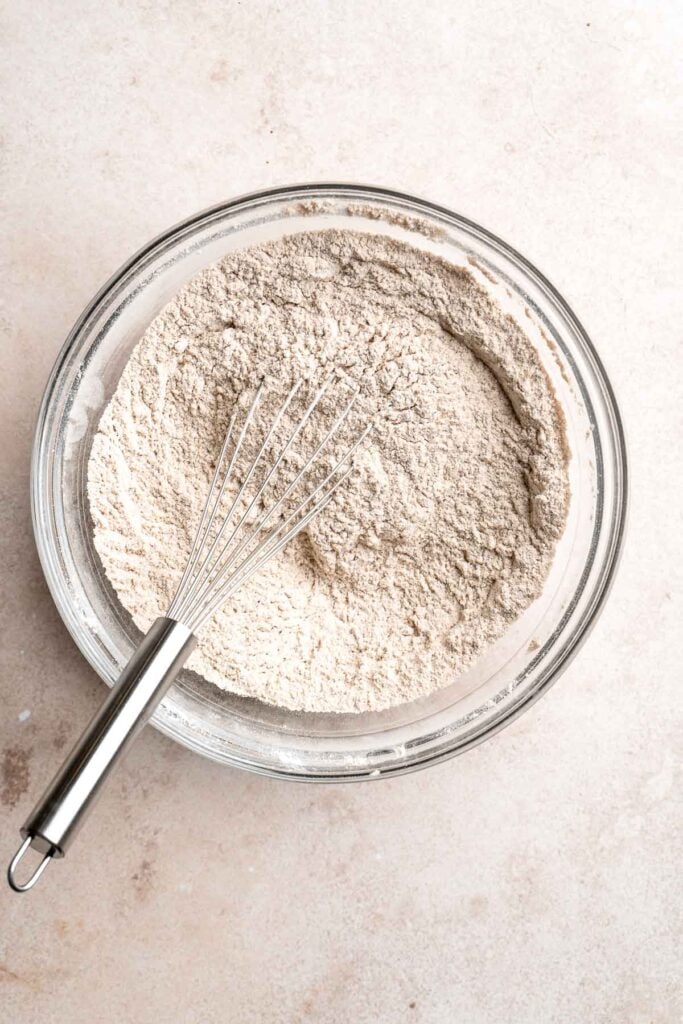
- Combine wet ingredients. In a stand mixer fitted with the paddle attachment, add eggs, brown sugar, and vanilla. Beat on high for around 5 minutes, the mixture should look thick, fluffy, and be tripled in volume. Scrape down the sides of the bowl and then slowly drizzle in the oil. After all the oil has been added, beat for an additional minute.
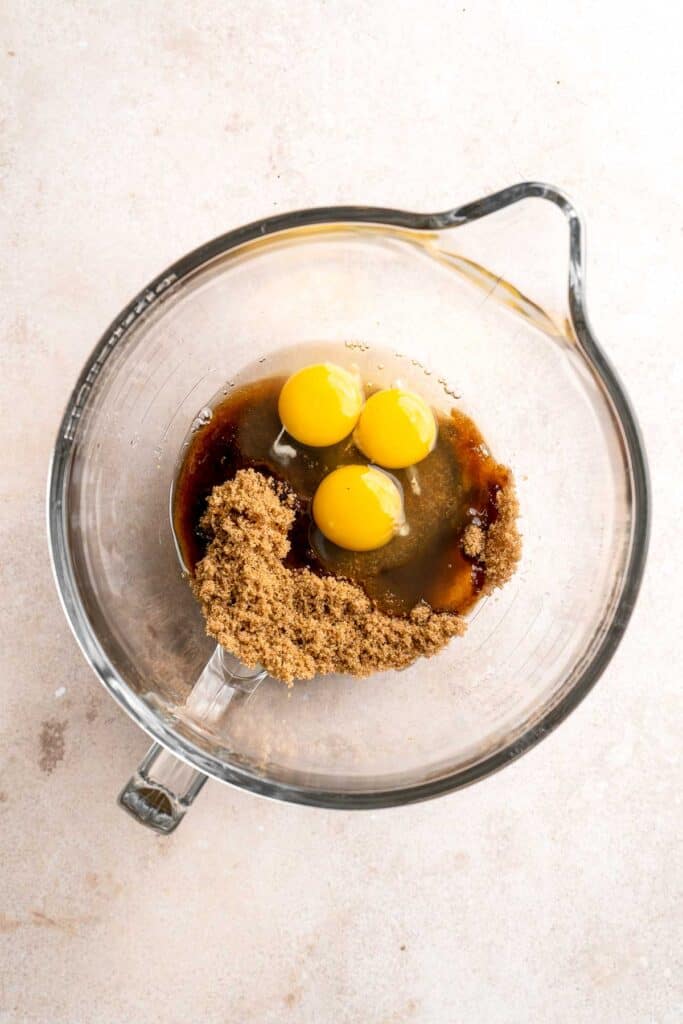
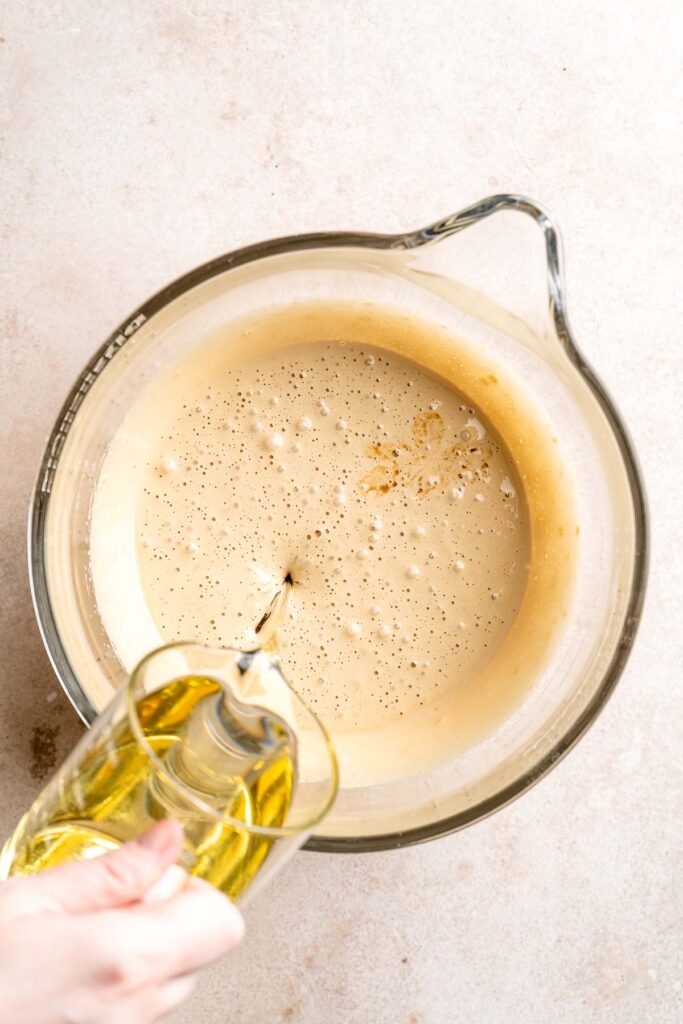
- Alternate adding ingredients to wet ingredients. On low speed, add the dry mixture to the stand mixer in 3 additions, alternating with the sour cream and water-molasses mixture. Beat only until the batter becomes smooth.
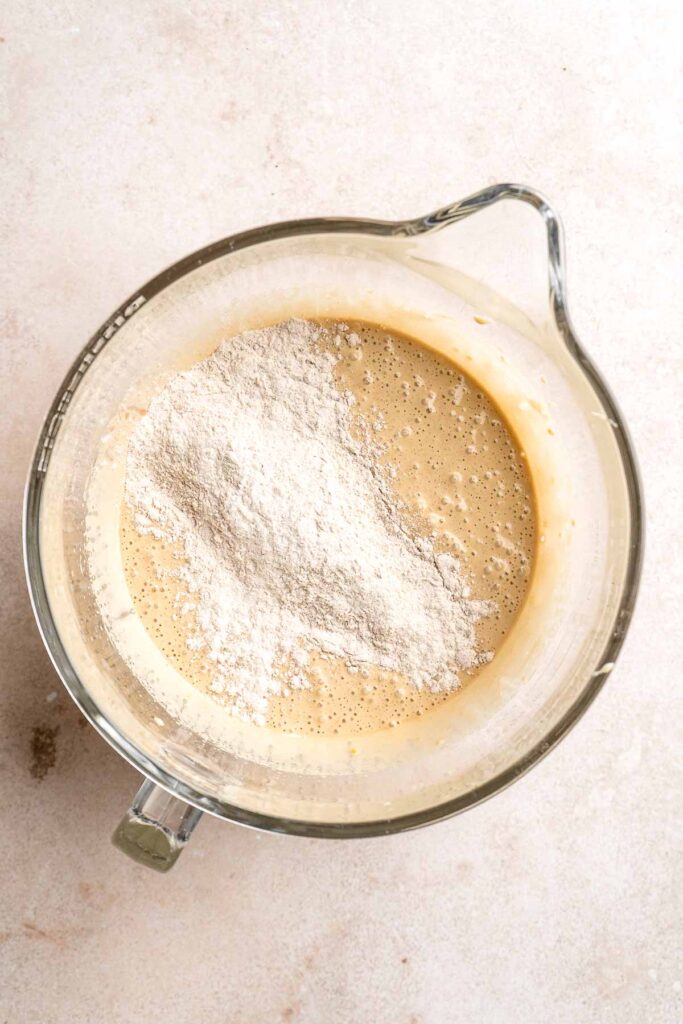
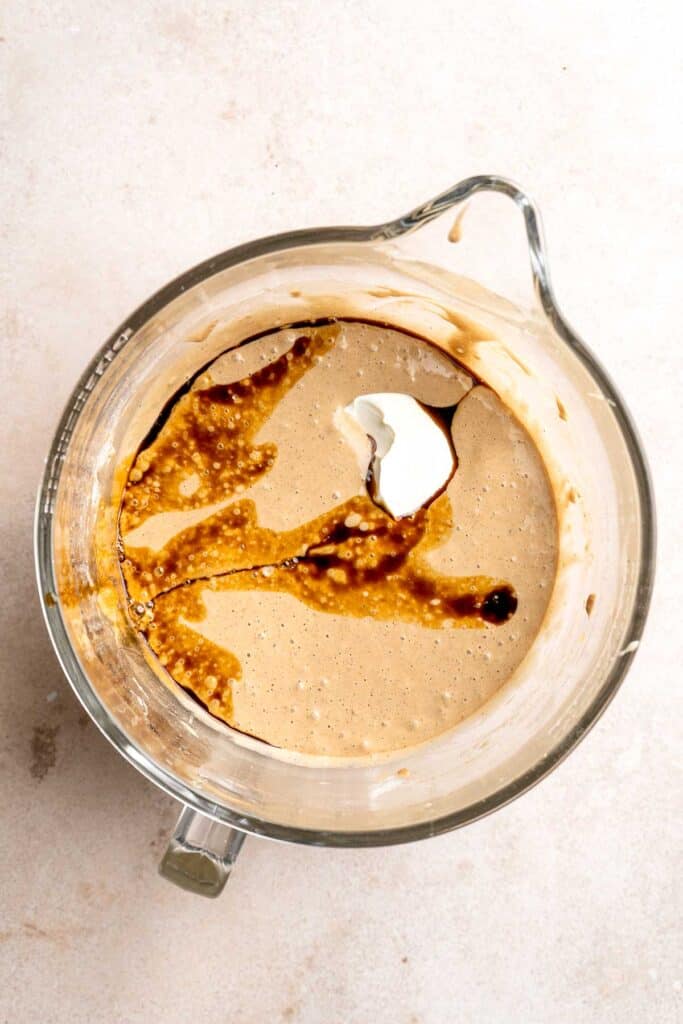
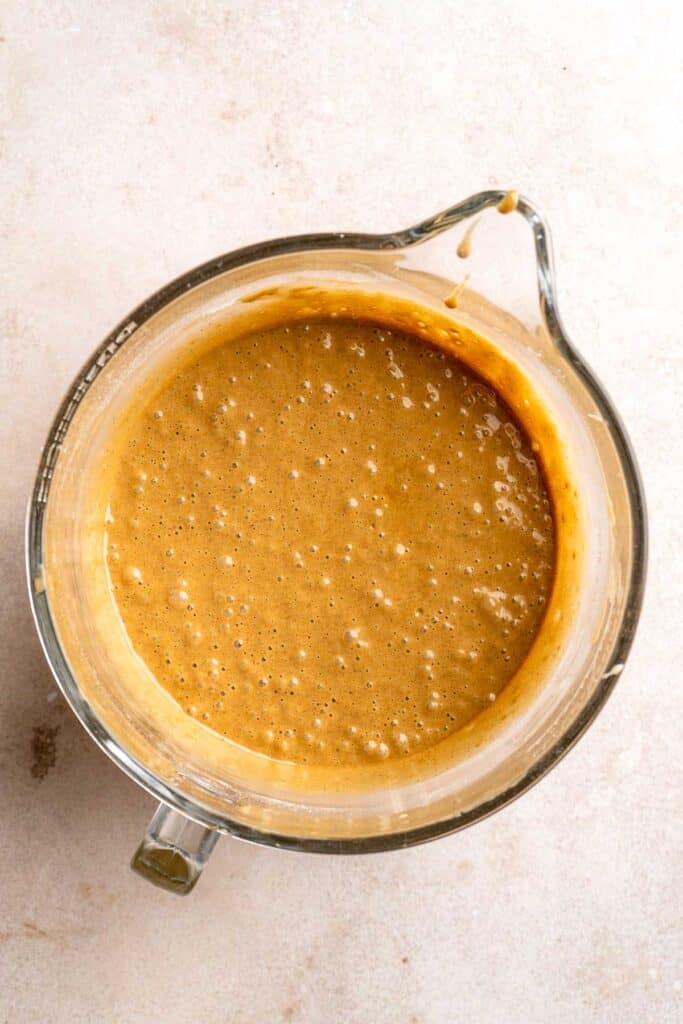
- Bake. Add the batter to the prepared cake pan. Bake in the oven for 30-35 minutes, or until a toothpick comes out clean. Allow to cool completely before frosting.
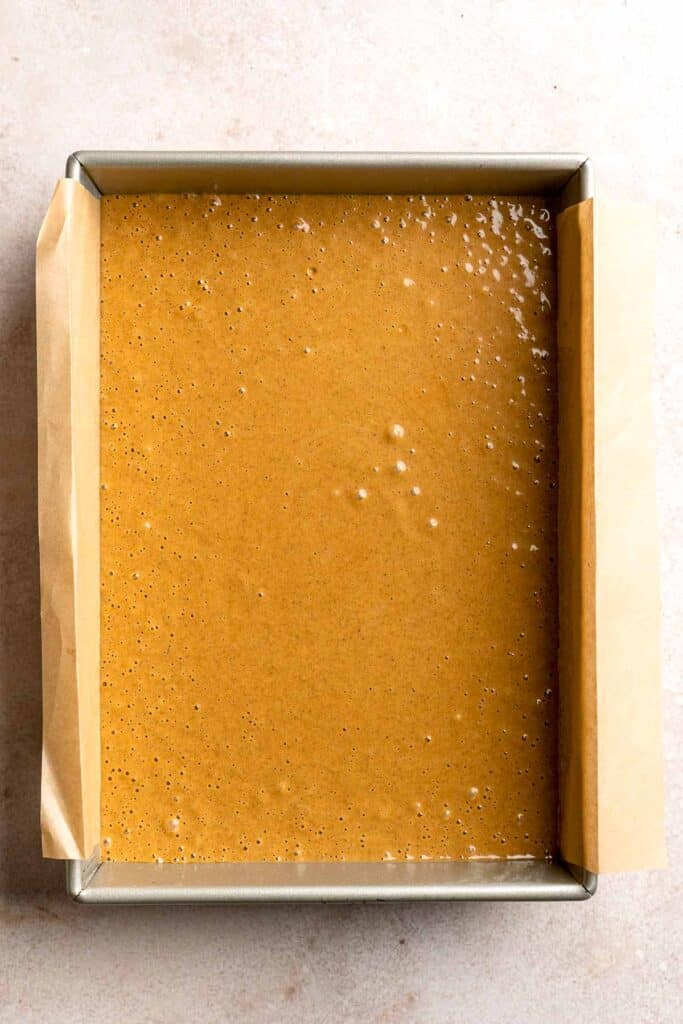
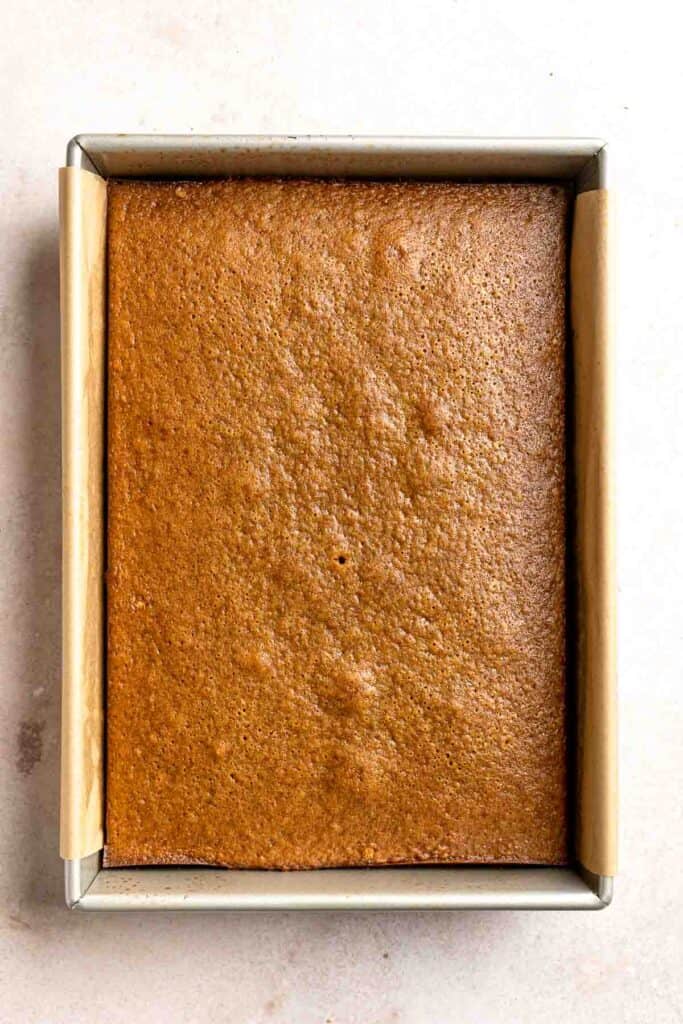
Now, make the brown butter cream cheese frosting.
- Brown the butter. Melt butter in a cooking pan over medium heat, bringing it to a bubble. Continue heating over medium heat, stirring constantly to prevent burning. The butter will start to foam and sizzle, then you will start to see milk solids on the bottom of the pan. Continuously stir until butter turns a golden brown colour and gives off a nutty aroma. Once the milk solids turn a nutty brown colour, immediately remove from heat and pour into a heat-proof bowl. This entire process will take about 8-10 minutes. Allow butter to cool to room temperature, about 5-10 minutes.
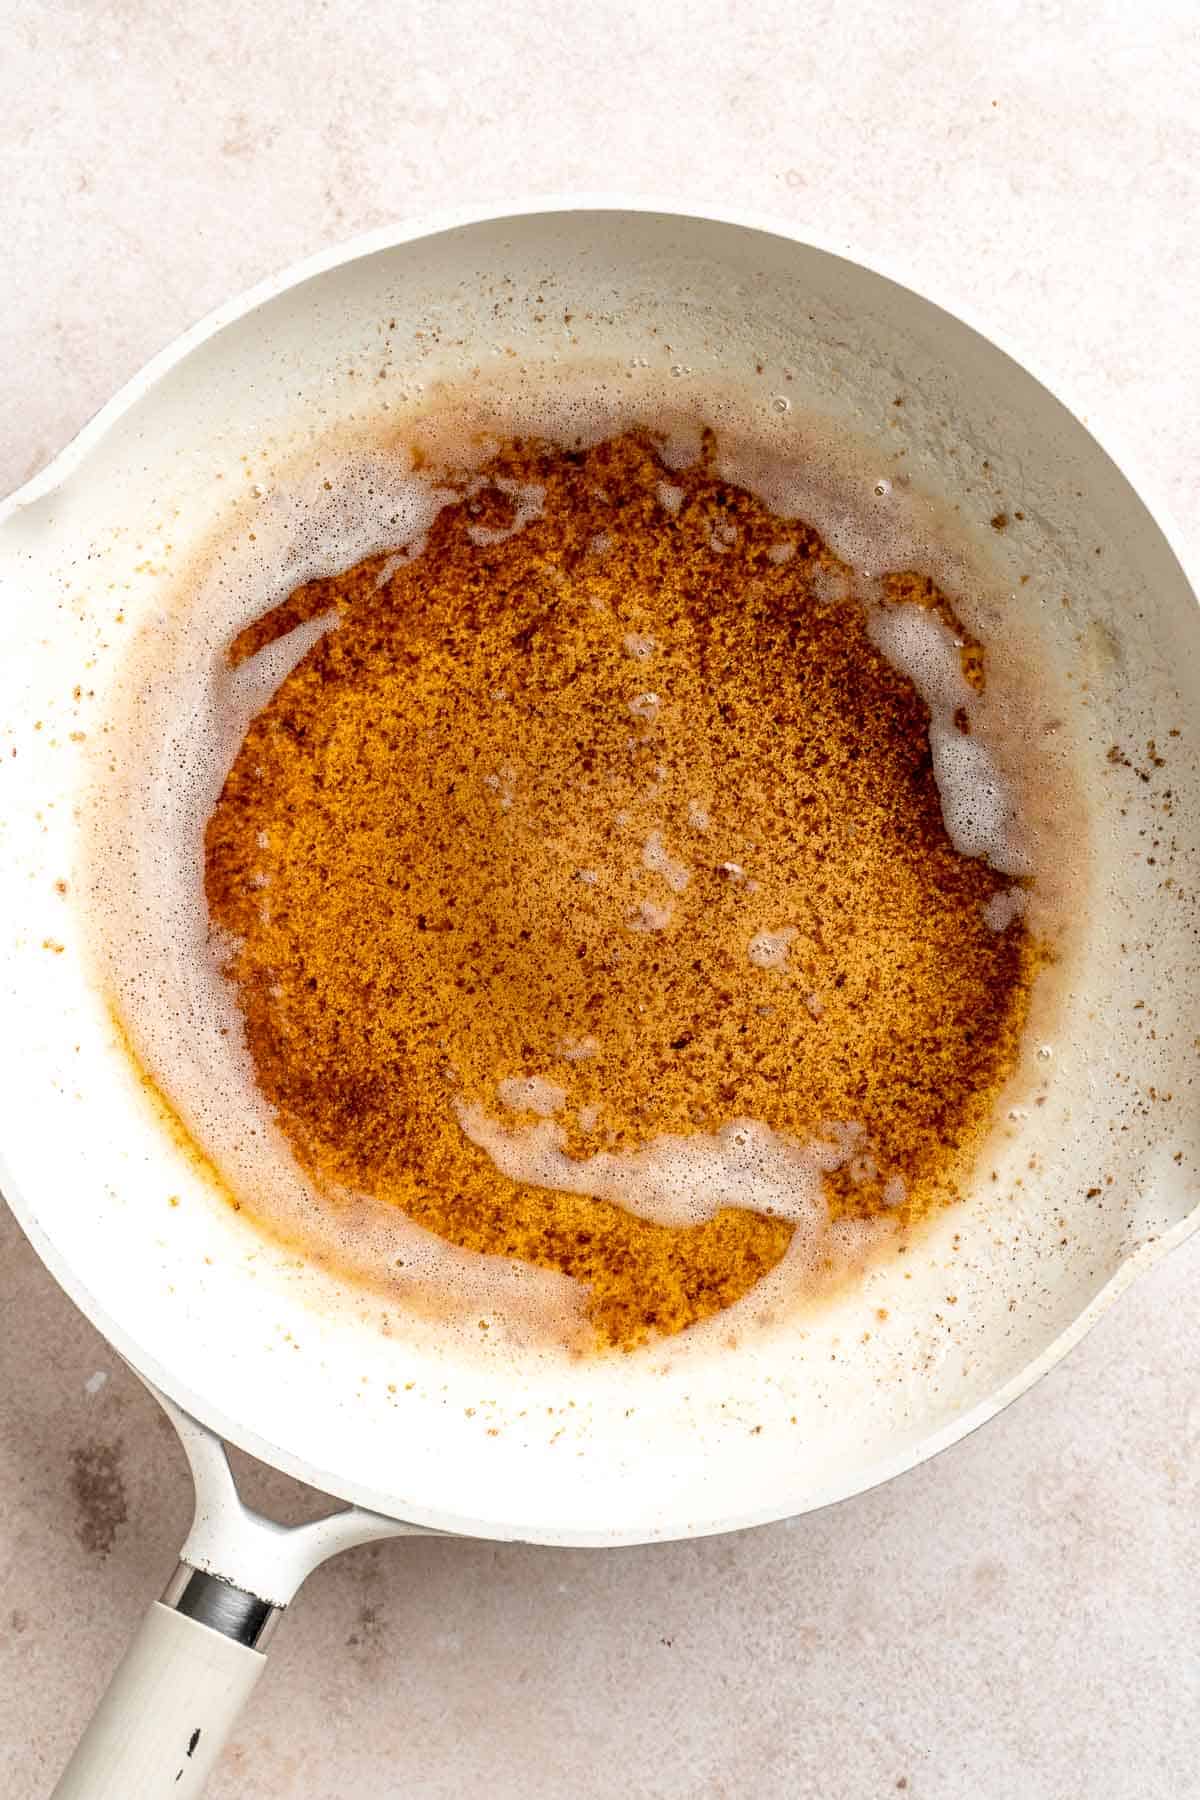
- Make frosting. When the brown butter is at room temperature, transfer the brown butter to a large mixing bowl and add the cream cheese. Beat with an electric hand mixer until smooth, creamy, and fluffy, about 2 minutes.
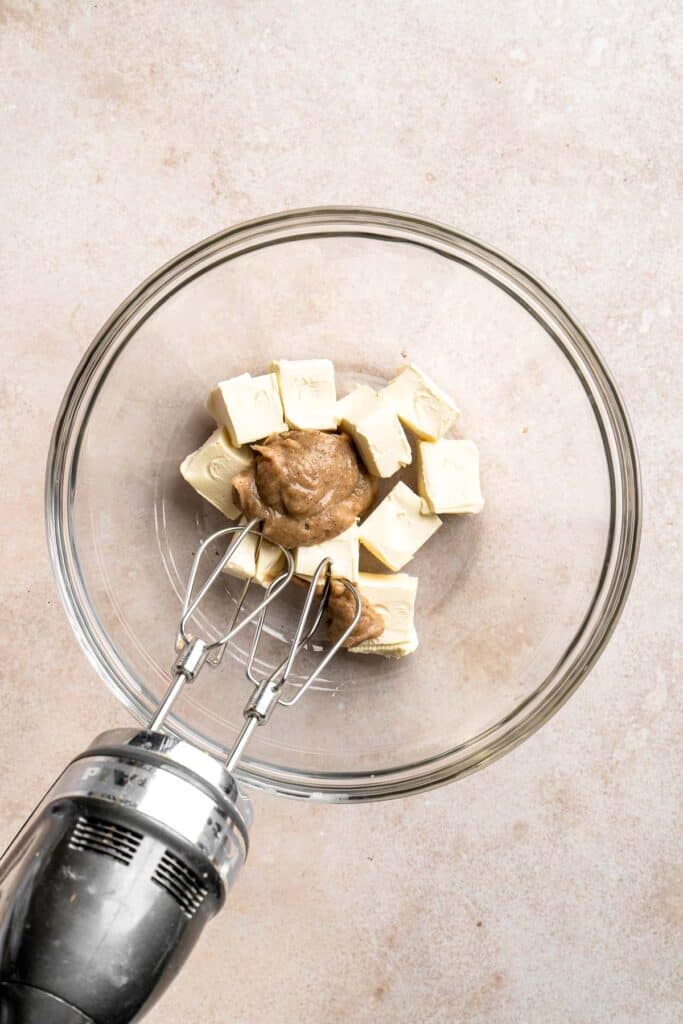
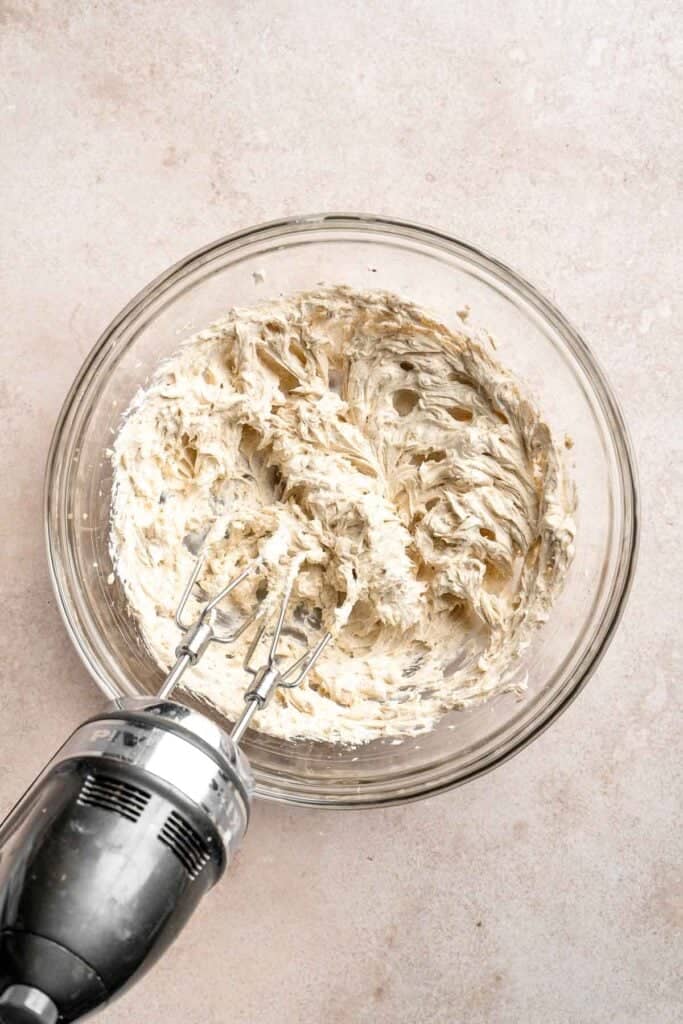
- Add sugar. Add in the confectioners' sugar and vanilla, then beat again with hand mixer until combined, and fluffy, about 2-3 more minutes.
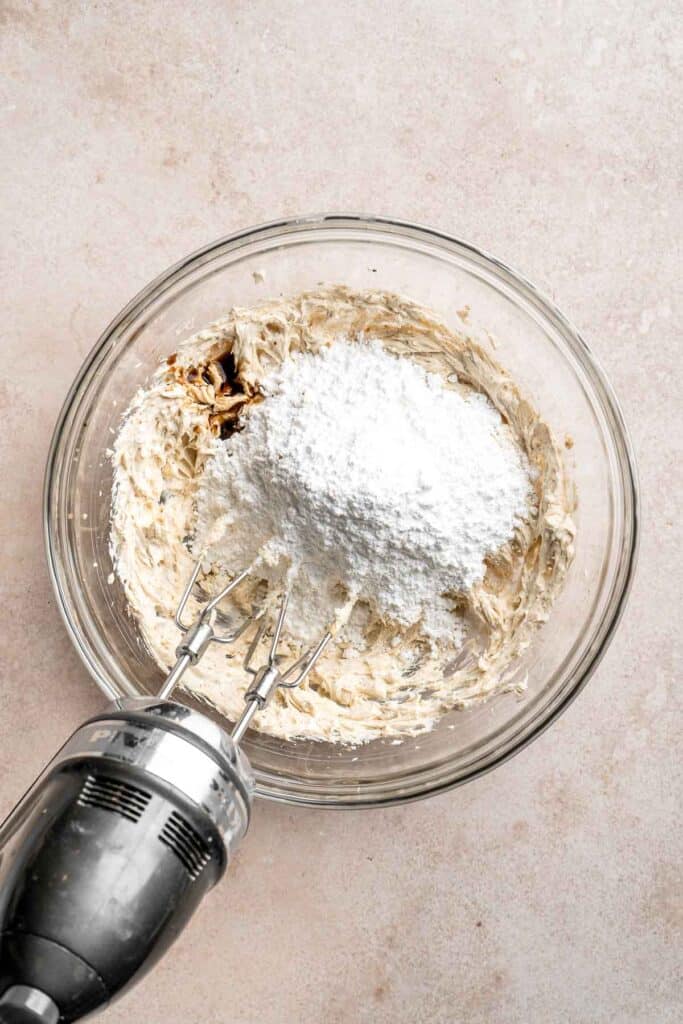
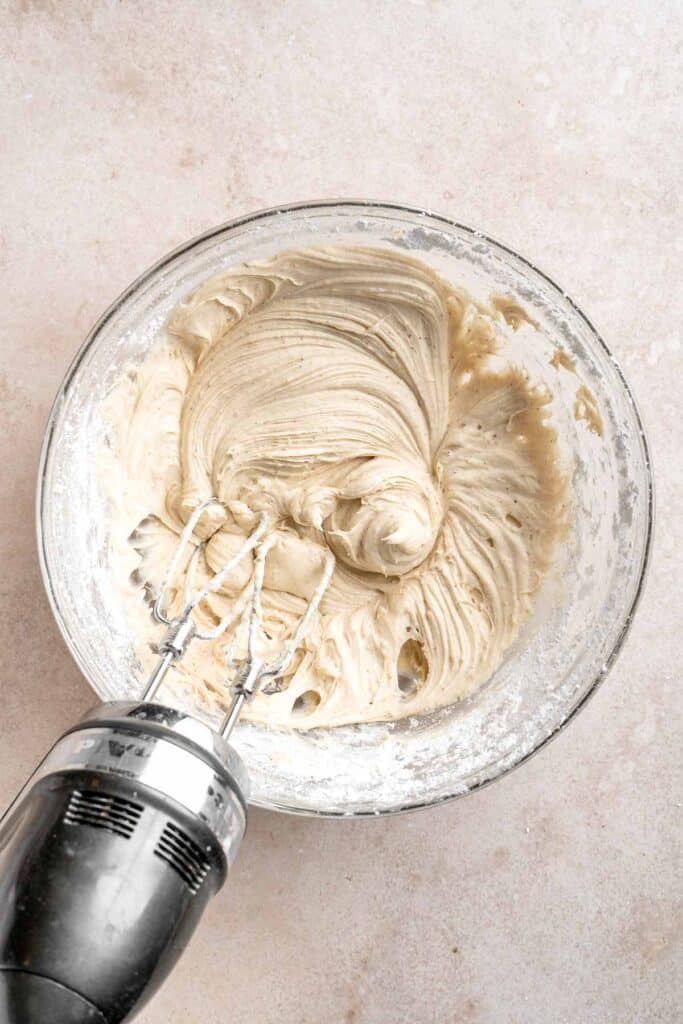
Finally, assemble and serve the cake.
Dollop the frosting onto the cooled cake, then spread it out with a spatula. Optionally, decorate with gingerbread sprinkles on top.
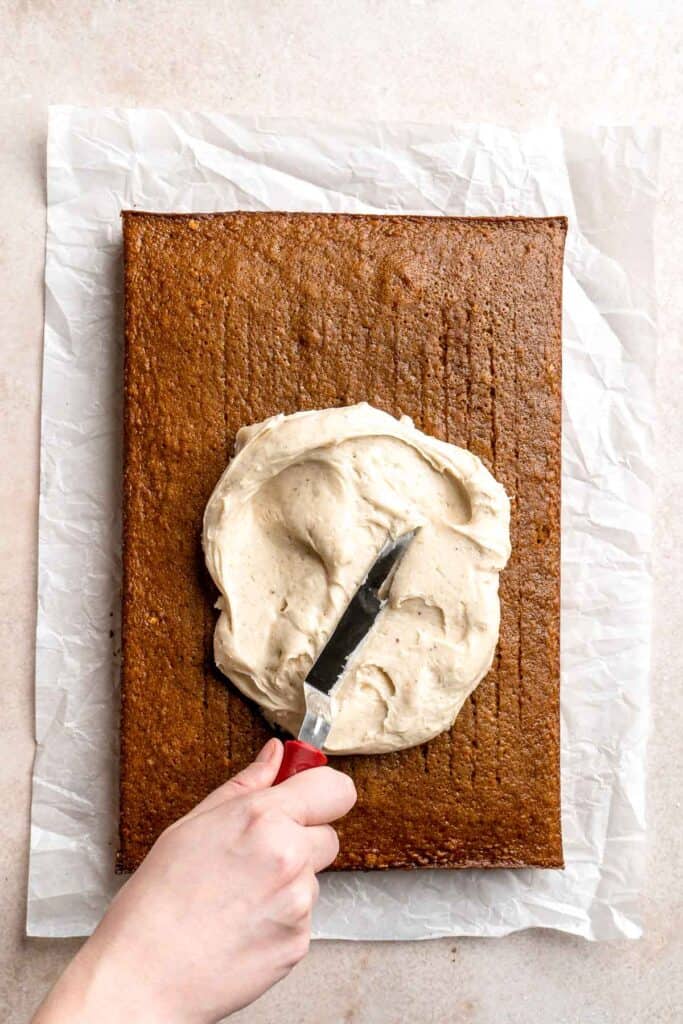
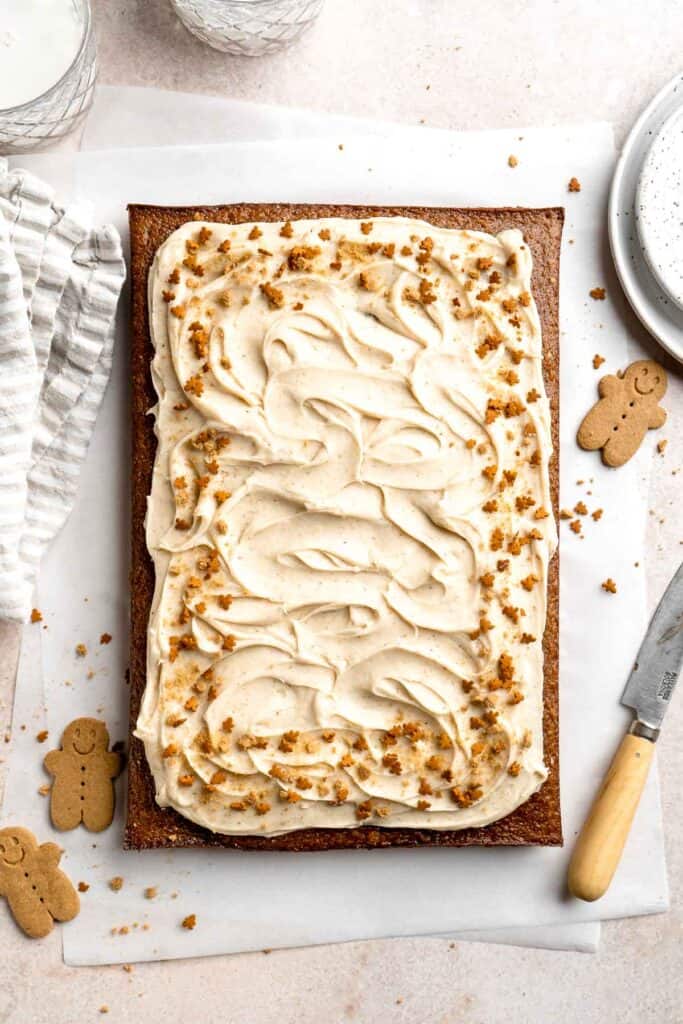
Recipe Variations
- Make a layered cake. If you'd prefer to make a layer cake, evenly divide the cake batter into two 9-inch cake pans and bake. Be sure to prepare the pans well and adjust the cooking time as needed.
- Bake gingerbread cupcakes. Line your muffin tin with cupcake liners and fill the cups ⅔ of the way. Bake for 20-25 minutes or until fully baked. Cool, then frost and decorate.
- Add more ginger. For an even stronger flavor, fold in candied ginger throughout this spiced molasses ginger cake before baking.
- Fold in nuts or chocolate. There are so many flavors that go well with gingerbread! Fold in ½ cup of dark chocolate shavings or chopped nuts for a little crunch and extra flavor.
How to Serve
This gingerbread cake is delicious served on its own, paired with a warm drink or some of my favorite holiday treats including:
- White Hot Chocolate
- Chai Tea Latte
- Christmas Cupcakes
- Golden Milk Turmeric Latte
- Chai Cookies
- Chocolate Peppermint Christmas Bark
For more recipes, see our 30 Best Christmas Dessert Recipes.
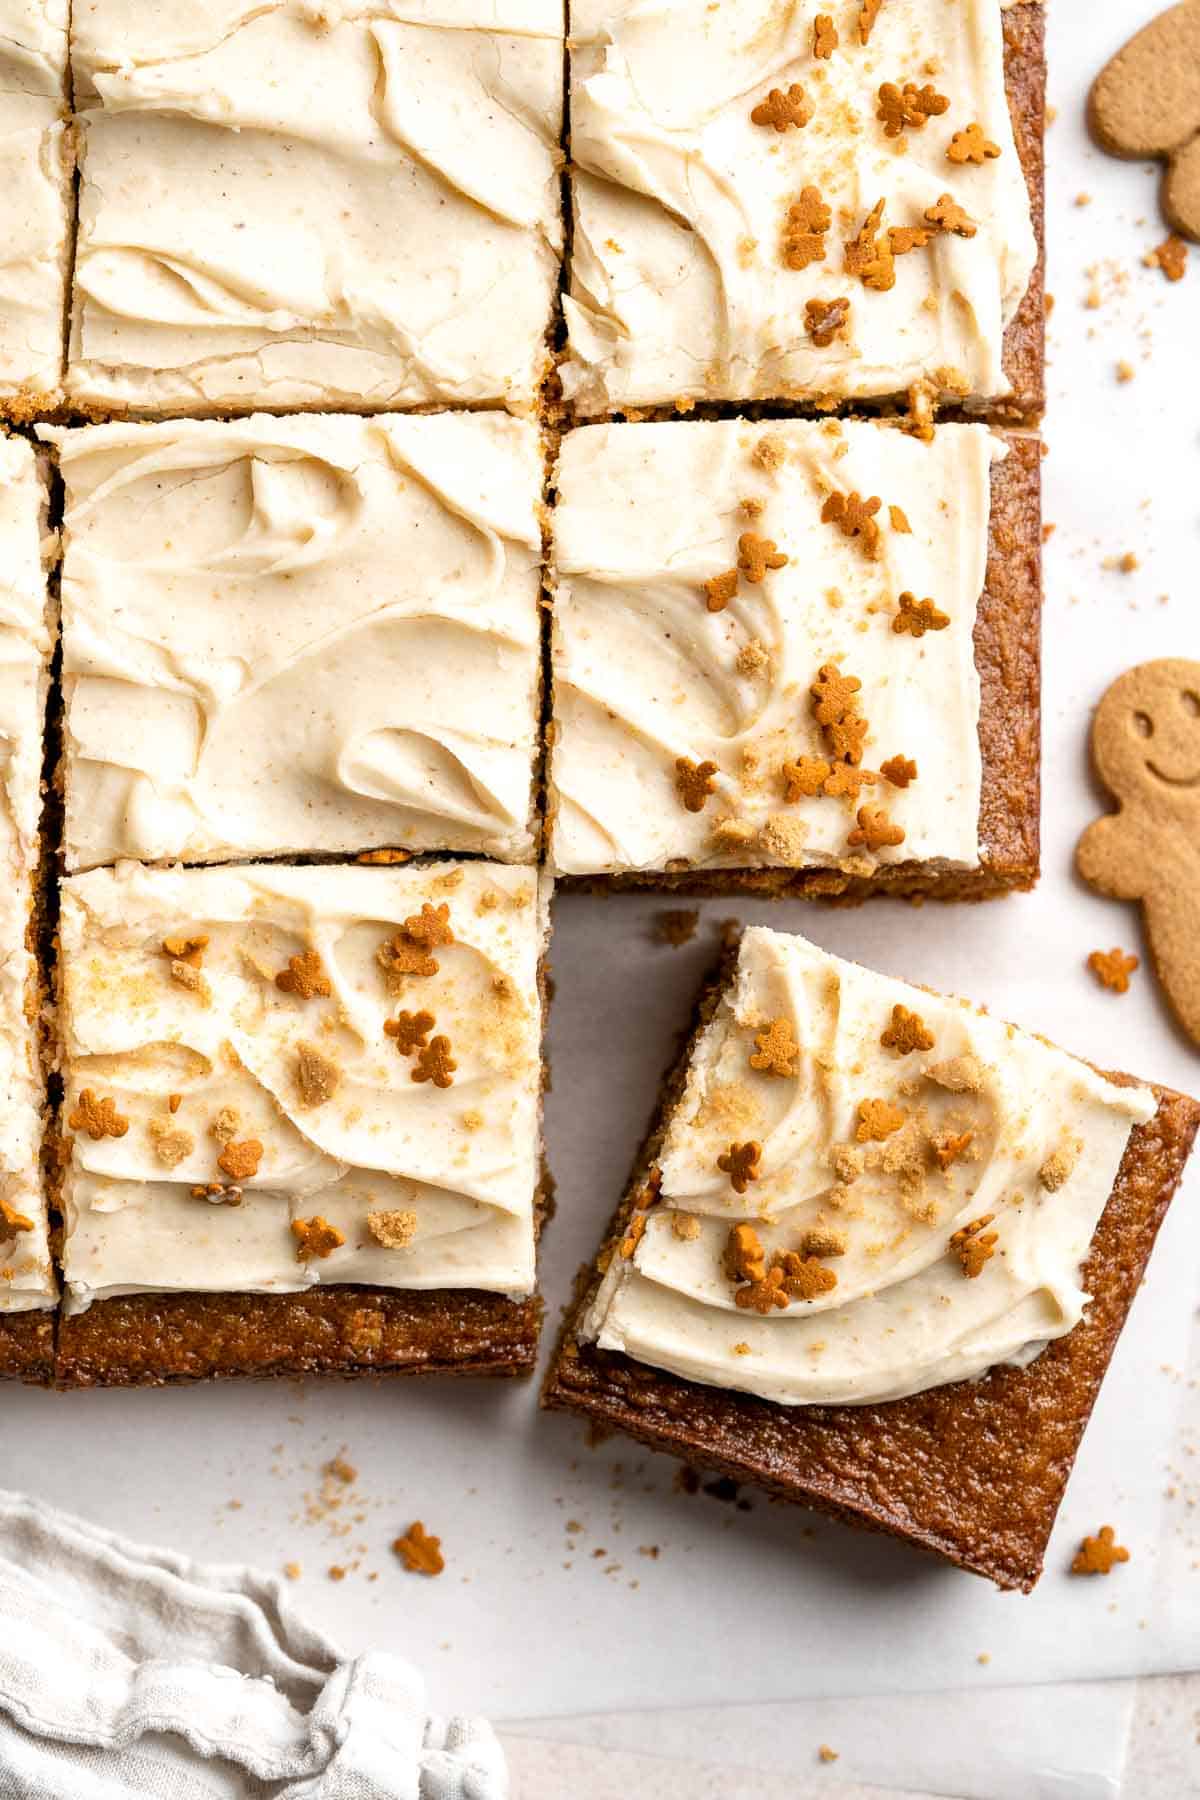
Recipe Tips and Tricks
- Use the right type of molasses. This recipe calls for fancy molasses, which may also be called light or regular molasses in your grocery store. Avoid very dark molasses, like blackstrap molasses, as it may be too strong for this cake.
- Use fresh spices. Fresh spices have so much more flavor than older ones. Either use freshly ground spices or add extra if you know your spices are more than a year old.
- Properly cream the sugar. Be patient, especially when creaming the butter and sugar. You're aiming for a rich, fluffy texture, but it's easy to undermix or overmix. Make sure the butter is completely softened before you start, and when the butter mixture has tripled in size, stop mixing.
Storing and Freezing Instructions
How to Store
Since this cake is frosted with fresh dairy, it needs to be stored in an airtight container in the fridge, where it will stay fresh for approximately 3-4 days.
How to Freeze
This cake can easily be frozen for later, either with the frosting or without. Be sure to let the cake cool to room temperature first, then wrap it well with foil or plastic wrap before storing the cake in a freezer-safe container for up to 1 month. If you are freezing an unfrosted cake, it will last closer to 3 months.
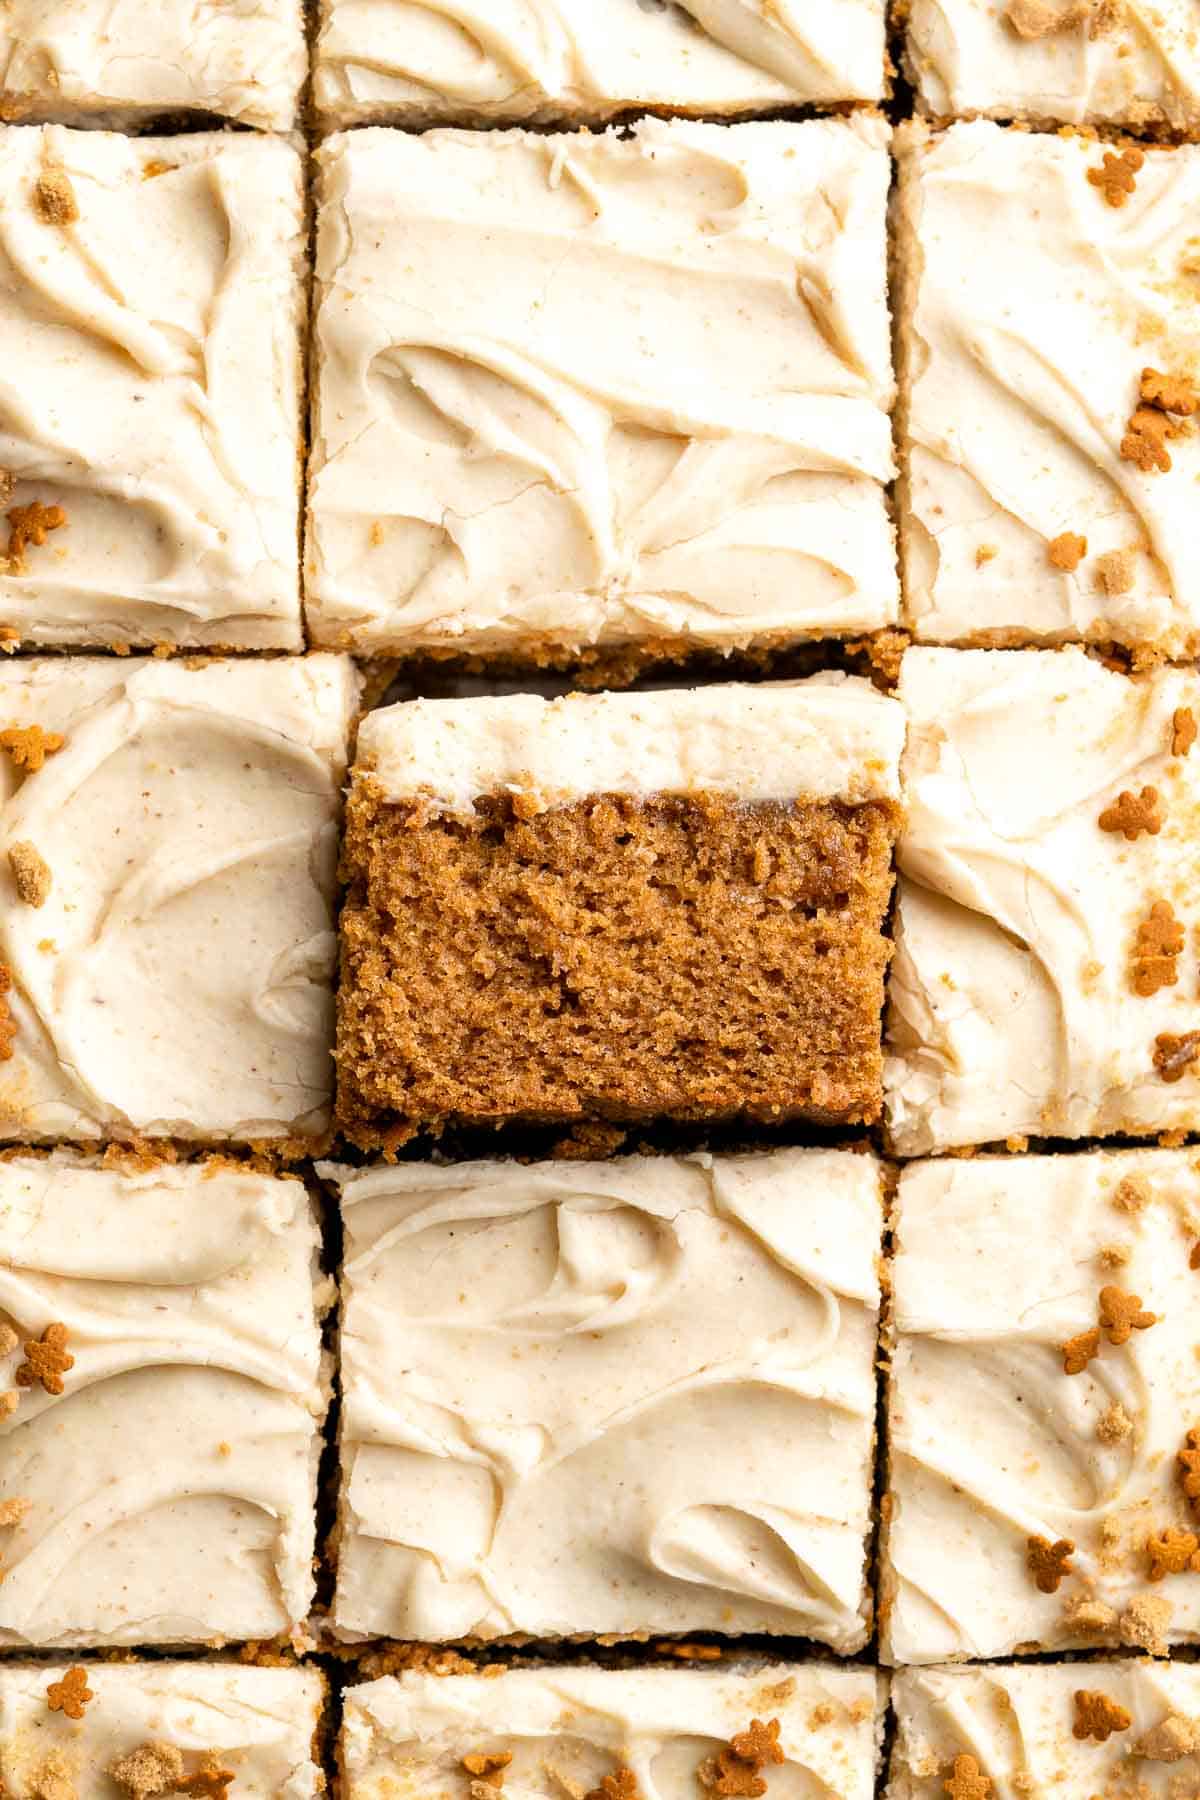
FAQ
The secret to a good gingerbread cake is molasses and lots of warm spices. These add that rich, dark color and flavor and a gentle warming effect that makes gingerbread so lovely to eat. To make this gingerbread cake recipe, you'll first need to cream the butter, sugar, and vanilla together. Then, gradually add the wet ingredients (sour cream, vanilla extract, and eggs). Alternate adding the flour, baking powder, and warm spices with a mixture of hot water and molasses until the batter is fully combined. Then, bake, cool, frost, and enjoy!
The warm spices and rich flavor of gingerbread can pair with so many other flavors, including even more ginger (like candied ginger), orange or lemon zest, cream cheese, dark chocolate, winter fruits like apples or pears, caramel, eggnog, pumpkin, coffee, maple syrup, toffee, and so much more! Feel free to use your favorite caramel frosting or add toffee pieces to the cake for extra flavor.
Although gingerbread and spice cakes seem quite similar, there is one key difference: molasses. Both cakes are known for having lots of warm spices, but gingerbread usually has more ginger, and a good gingerbread cake must have molasses, which gives it that lovely brown color and a rich flavor.
More Cake Recipes
- 50 Best Cake Recipes
- Gingerbread Bundt Cake with Maple Cinnamon Glaze
- Yogurt Fruitcake
- Pumpkin Dump Cake
- Apple Cake
- Carrot Bundt Cake with Cream Cheese Glaze
Tried this recipe?
I'd love to hear what you think! Leave a comment and rating below to share your feedback. Your reviews help others discover this recipe and help me keep creating more free recipes for you. Snap a photo and tag me on social media @aheadofthyme too.

Cauliflower Alfredo
This creamy Cauliflower Alfredo is the perfect way to enjoy your favorite comfort food dinner while sneaking in some extra veggies. You won't even be able to tell it's not the real thing! This homemade pasta sauce is made with tender pieces of cauliflower blended into a deliciously rich and creamy sauce that is so so good.
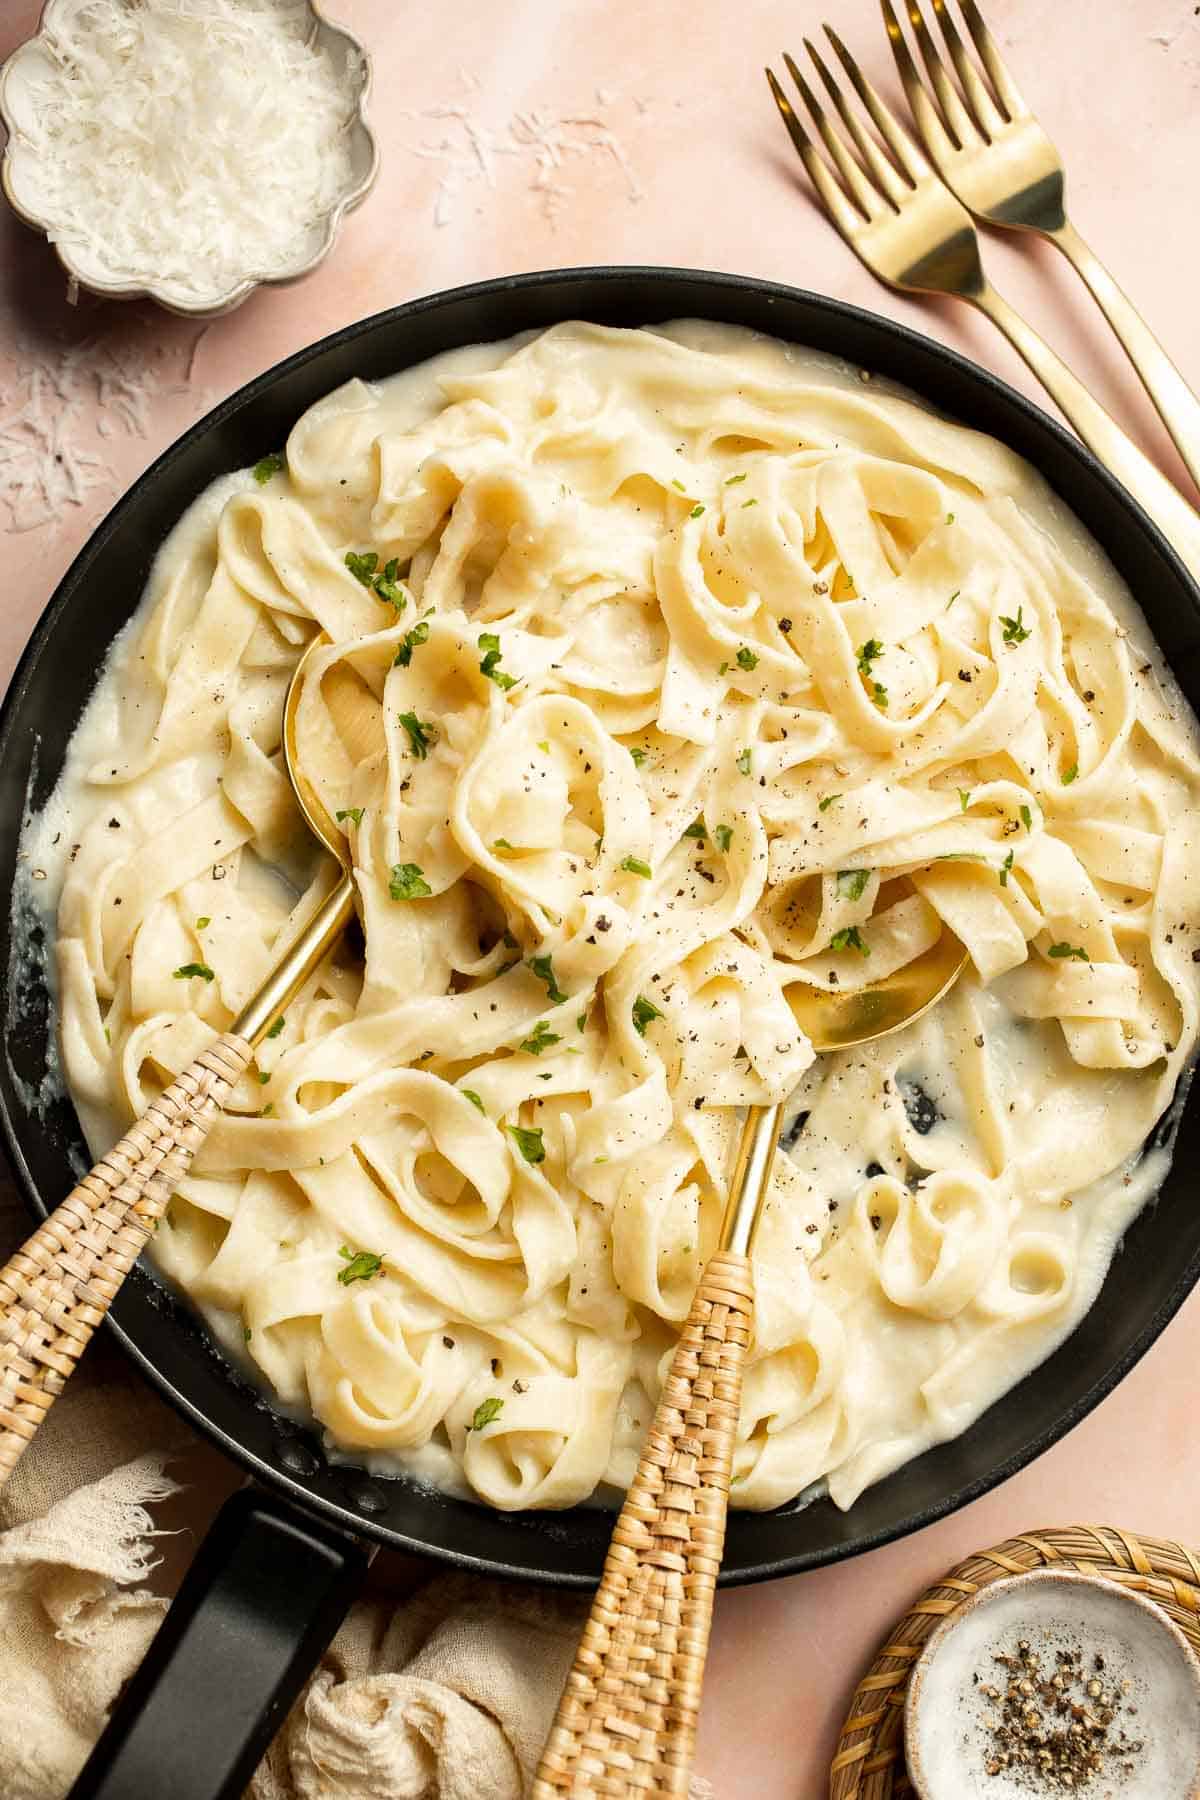
If you've never tried adding cauliflower to your alfredo sauce before, now's the time! The cooked cauliflower breaks down perfectly into a creamy cauliflower alfredo sauce, allowing you to get the same richness and flavor of real alfredo sauce without relying on heavy cream. Tender cauliflower hides in the rich, cheesy sauce while adding a wonderful texture. You'll want to keep cauliflower in your fridge just for this healthy alfredo sauce that's gluten-free!
Why You'll Love This Cauliflower Alfredo
- Sneak extra veggies. Most of us would benefit from eating a few more veggies here and there. The cauliflower puree in this sauce absolutely counts as a serving of vegetables, so it's a wonderful way to make your favorite dinner just a bit more nutritious.
- Rich, creamy flavor. The blended cauliflower disappears into the cheesy flavor of the pasta sauce. You won't really notice it's there, but it will add a great body and texture that coats every noodle. The whole family will love it!
- Ready in a flash. After steaming the cauliflower, puree it together with sauteed onions, garlic, milk, parmesan cheese, and more. Toss the creamy cauliflower sauce over your pasta, and dinner is served.
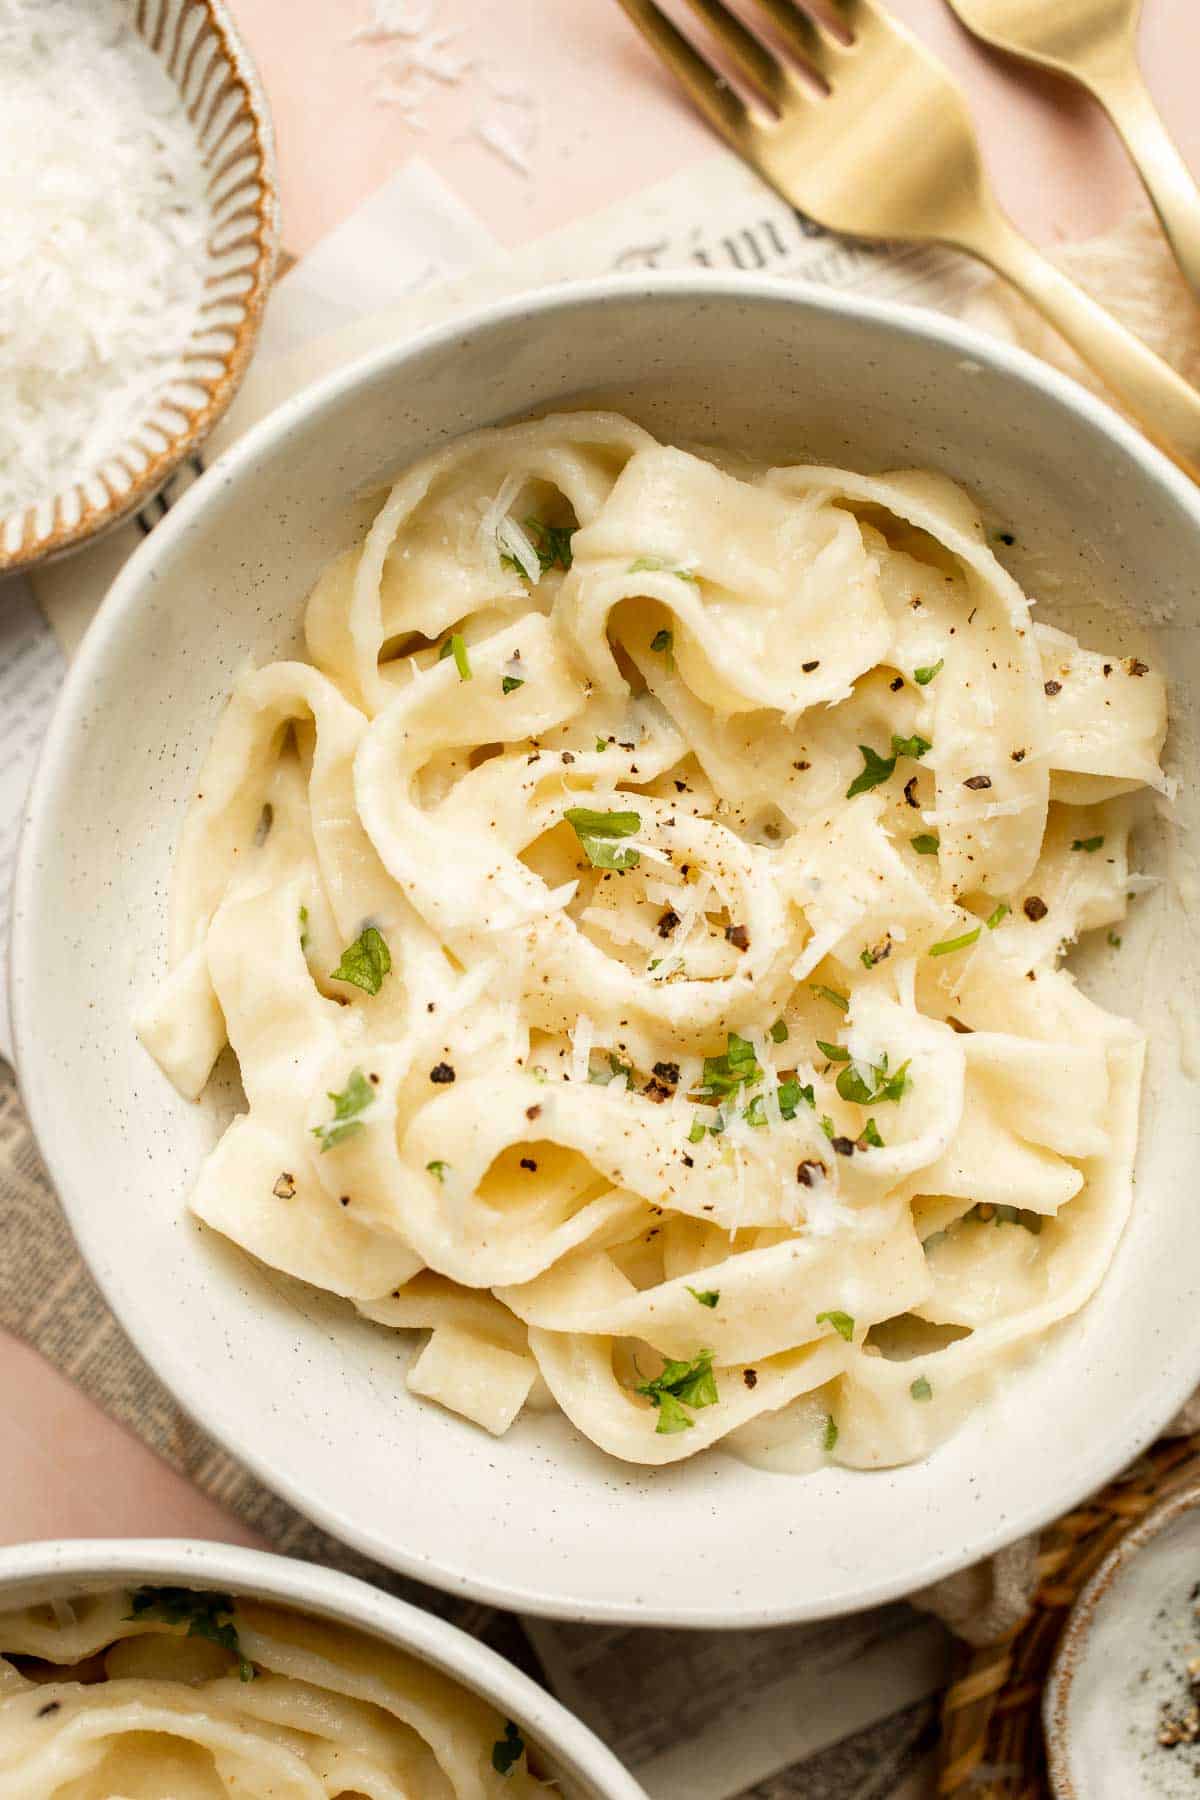
Ingredient Notes
To make this delicious Cauliflower Alfredo, you will need the following ingredients (full measurements in recipe card below):
- cauliflower - use either fresh or frozen cauliflower cut into florets.
- butter - this tenderizes the cauliflower while adding a rich, buttery flavor. Extra virgin olive oil works well too.
- onion - saute diced yellow onion for extra flavor.
- garlic - minced garlic has a wonderful savoriness that pairs perfectly with the natural sweetness of cauliflower.
- vegetable stock - use chicken or vegetable broth as part of the creamy base for the sauce.
- milk - milk adds a rich creaminess. Feel free to use a neutral-tasting non-dairy milk instead.
- parmesan cheese - grated Parmesan cheese has a salty, umami flavor that is key to traditional alfredo sauce.
- seasonings - season with Italian seasoning, sea salt, and black pepper.
- fettuccine - cook half a pound of fettuccine pasta to toss in the cream sauce.
- fresh parsley - sprinkle parsley for a little freshness.
You will also need a large cooking pot and lid, skillet, and a food processor (or immersion blender).
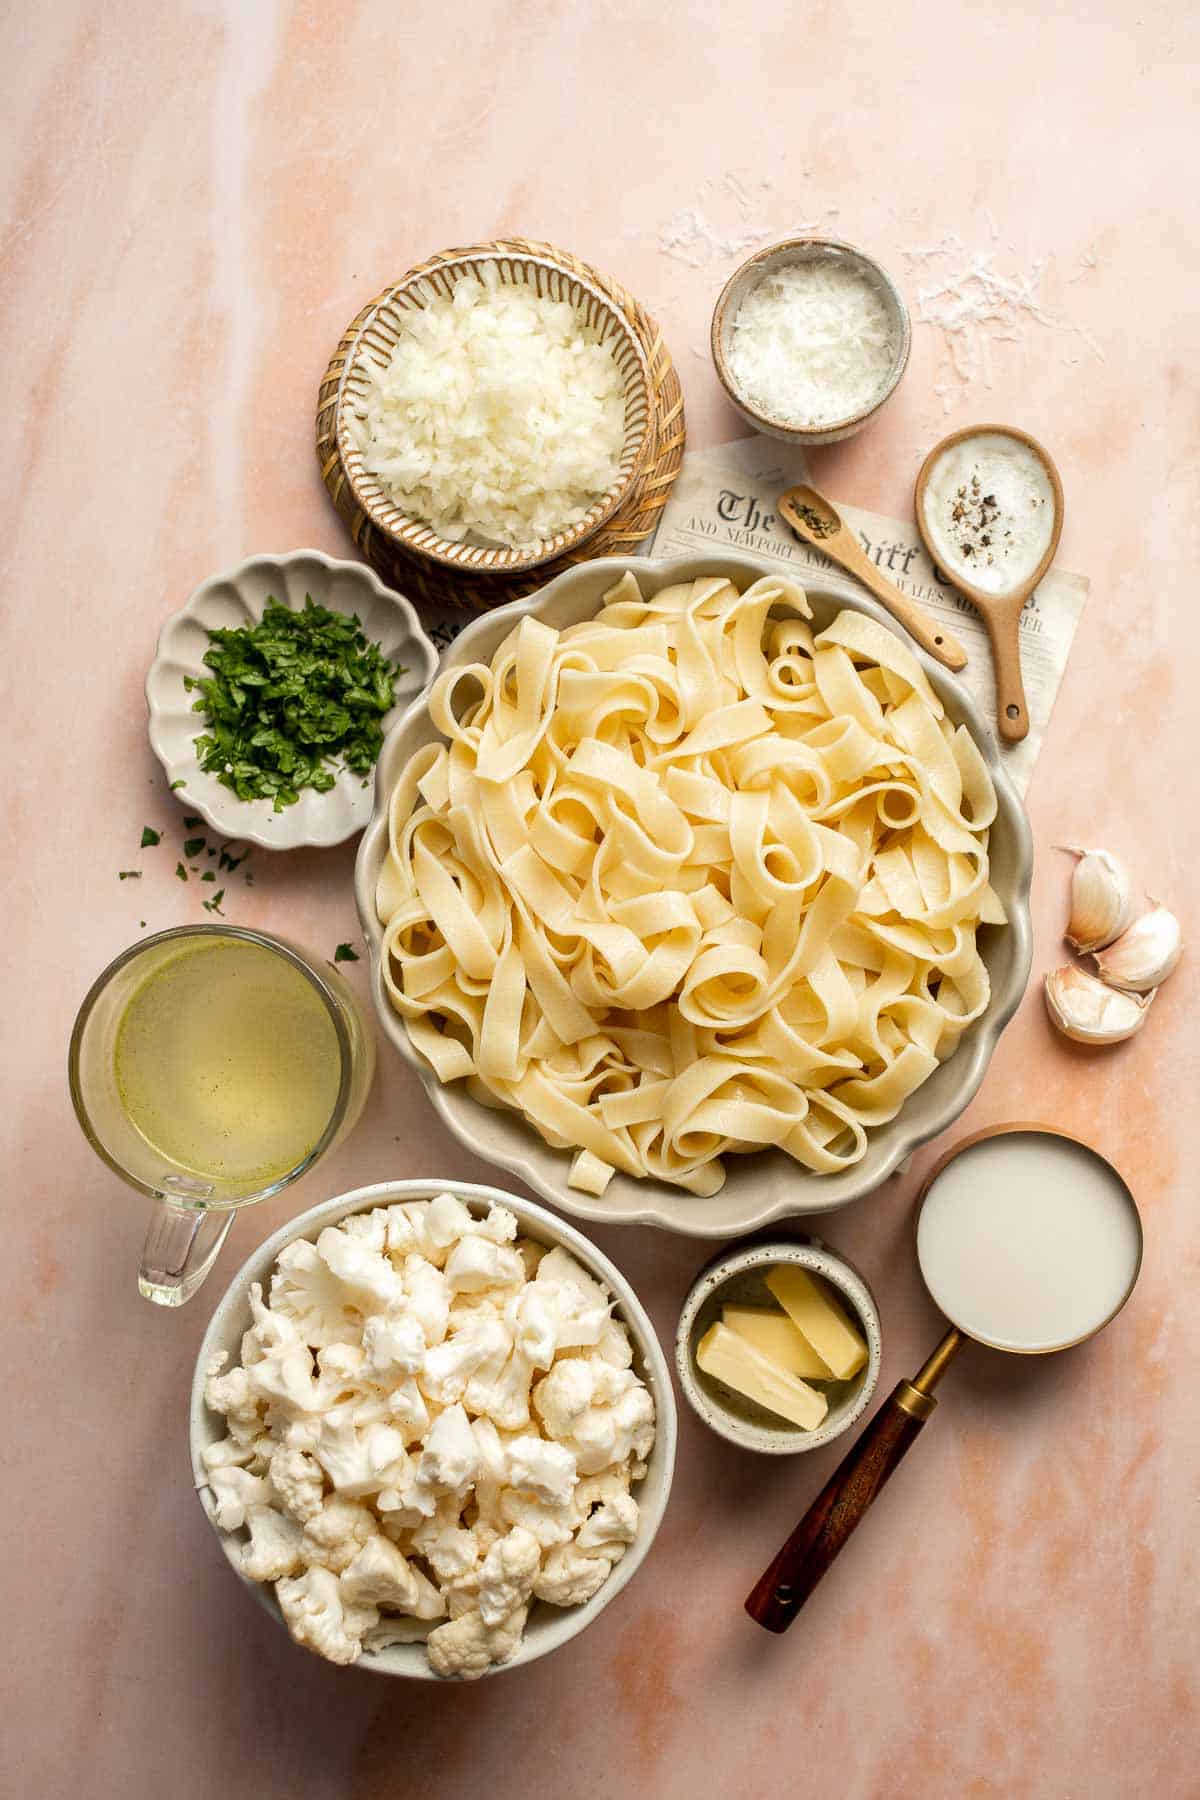
How to Make the Best Cauliflower Alfredo
- Cook cauliflower. Bring a large cooking pot of salted water to a boil. Add the cauliflower florets and turn the heat down to medium. Cook covered for 10 minutes until the cauliflower is soft and tender. When the cauliflower is ready, remove from heat and drain.
- Sauté aromatics. While the cauliflower is cooking, melt butter in a skillet over medium heat. Add onion and garlic and sauté until soft, about 2 minutes. Remove from heat and set aside.
- Puree. In a food processor, add the cooked cauliflower, sautéed onion and garlic, vegetable stock, milk, Parmesan cheese, Italian seasoning, salt and pepper. Puree until smooth and creamy. (You can also add everything in a pot and blend with an immersion blender until smooth).
- Serve. When ready to serve, transfer the cauliflower alfredo to saucepan or skillet and simmer over medium low heat, stirring occasionally. Add cooked fettuccine and toss well to coat. Top with chopped parsley and serve.

Recipe Variations
- Vegan cauliflower alfredo sauce. To make this creamy alfredo sauce plant-based, use unsweetened non-dairy milk like oat milk, replace the butter with a butter-flavored spread, and use nutritional yeast flakes instead of parmesan cheese. Be sure to use vegan pasta to avoid eggs.
- Roasted cauliflower sauce. To make the cauliflower flavor more intense, roast the head of cauliflower in the oven until golden brown and caramelized. You can also roast the onion and garlic cloves. Then, blend everything together like normal.
- Add veggies. Make this healthy fettuccine alfredo even more nutritious by adding sauteed or roasted carrots, peas, pearl onions, broccoli, kale or baby spinach, mushrooms, or green beans.
- Cauliflower mac. Use this creamy white sauce to make a rich, delicious mac and cheese. Add about a cup of shredded cheddar to the creamy sauce for a really cheesy flavor.
How to Serve
This cauliflower alfredo pasta is delicious served on its own, or paired with some of my favorite dishes including:
- Dutch Oven Whole Roast Chicken
- Easy Baked Meatballs
- Garlic Breadsticks
- Antipasto Skewers
- Tomato Bruschetta with Balsamic Glaze
For more recipe inspiration, see our 30 Side Dishes for Pasta.
Recipe Tips and Tricks
- Make sure the cauliflower is tender. If your cauliflower is not at least fork-tender before you pop it in your high powered blender, it will become gritty. Let it cook all the way to get a lovely, creamy sauce.
- Try different noodles. Although Alfredo is traditionally served with fettuccine, you can really use any pasta noodles. This makes a fun mac and cheese, too!
- Salt the pasta. To get the most flavor out of this creamy pasta dish, cook the noodles in a large pot of salted water.
Storing and Freezing Instructions
How to Store
Store leftover cauliflower alfredo sauce in an airtight container in the fridge for 4-5 days.
How to Reheat
Warm the chilled sauce in a small pan and add cooked pasta with a small splash of water. Stir well until the pasta and sauce are hot and serve.
How to Freeze
The sauce can be frozen, but it often separates after thawing. It's best to serve it fresh.
FAQ
There are several different ways to make cauliflower sauce. Some recipes use cauliflower puree, which is made with cauliflower, stock, and salt. Other recipes like this cauliflower alfredo recipe add extra richness and flavor by sauteing onions, roasting garlic, and adding milk and Parmesan cheese. This allows you to replace the heavy cream in Alfredo with cooked cauliflower, making it a little lighter but just as delicious.
Not always! You can easily make a delicious cauliflower alfredo with real milk and Parmesan cheese, but it's also easy to make it without dairy. To do this, replace the butter with a butter-flavored spread and replace the milk with a neutral milk alternative, like coconut milk. Don't forget to substitute nutritional yeast for the Parmesan. It can help to add a little Dijon mustard for extra flavor, too.
Store leftover pasta in the fridge for about 4-5 days. Keep it covered in an airtight container and reheat it in a small saucepan until hot.
More Cauliflower Recipes
- Cauliflower Mac and Cheese
- Cauliflower Tots
- Creamy Garlic Cauliflower Soup
- Mashed Cauliflower
- Cauliflower Tacos
- Baked Cauliflower Nuggets
Tried this recipe?
I'd love to hear what you think! Leave a comment and rating below to share your feedback. Your reviews help others discover this recipe and help me keep creating more free recipes for you. Snap a photo and tag me on social media @aheadofthyme too.
Cranberry Brie Grilled Cheese
This Cranberry Brie Grilled Cheese features the sweet and tart flavor of cranberry that pairs perfectly with the creamy, slightly funky flavor of brie. This is a wonderful way to use up that leftover cranberry sauce in a new way! The sandwiches are simple enough to tide you over between holiday meals yet fancy enough to serve at a casual holiday brunch. It's the perfect quick meal for fall!
If you haven't been adding cranberry sauce to your sandwiches, you absolutely should! It adds such a lovely fall flavor to any recipe and pairs really well with turkey breast or sliced ham. This cranberry grilled cheese sandwich is such a treat. It uses both regular cheddar and creamy brie cheese for a delicious combination of flavors that tastes like you turned your favorite baked brie appetizer into a sandwich.
Why You'll Love This Cranberry Brie Grilled Cheese
- Delicious flavor. Cranberry and brie are the perfect combination! They taste luxurious together, and you'll want to keep cranberry sauce on hand all year just for this sandwich!
- So quick to make. Just like making a regular grilled cheese, this recipe comes together with just moments of effort. You can even make a big batch in the oven to feed a crowd!
- Great use of leftovers. This leftover Thanksgiving grilled cheese sandwich is a perfect recipe to whip up when you have leftover cranberry sauce from a holiday party. We love repurposing our leftovers into something new. See all our favorites in our 15 Leftover Cranberry Sauce Recipes..
- Fancy enough for a holiday lunch. If you're hosting a brunch or an afternoon holiday meal, you can easily serve this brie sandwich with butternut squash apple soup for a quick, easy meal full of your favorite fall flavors.
Ingredient Notes
To make this delicious cranberry brie grilled cheese, you will need the following ingredients (full measurements in recipe card below):
- butter - apply unsalted butter to the outsides of the bread before cooking.
- sandwich bread - choose your favorite white sandwich bread.
- brie - thinly slice brie. Avoid the rind of the brie cheese, as it can have a very strong flavor.
- cheddar - we use another cheese, like shredded cheddar, to balance out the flavor of the soft brie. Feel free to substitute with another kind of melty cheese such as mozzarella, provolone, or smoked gouda.
- cranberry sauce - use either store-bought or homemade sweet cranberry sauce.
You will also need a skillet or griddle and a spatula.
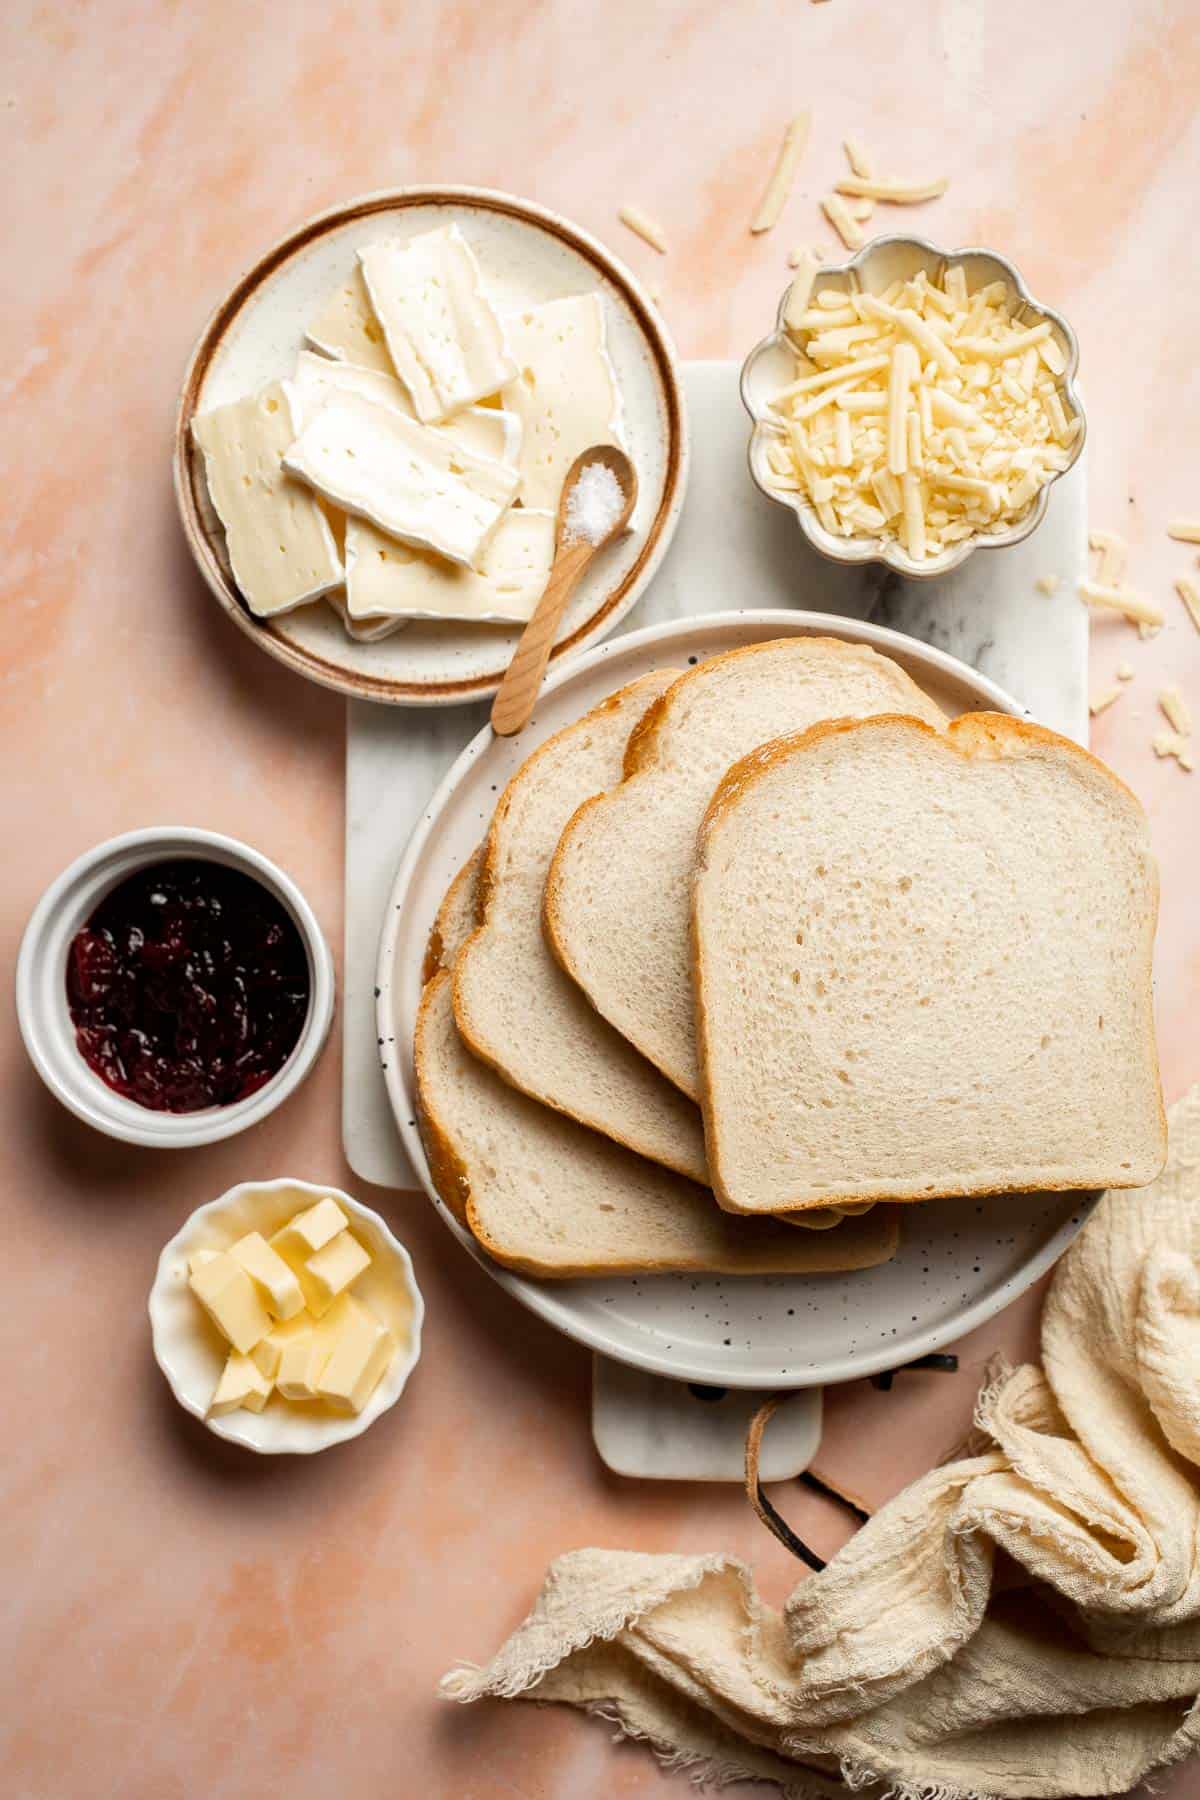
How to Make the Best Cranberry Brie Grilled Cheese
- Spread butter. Spread ½ tablespoon of butter on each of the 4 slices of bread and place them on a plate. Flip 2 of the slices over with the butter side facing down.
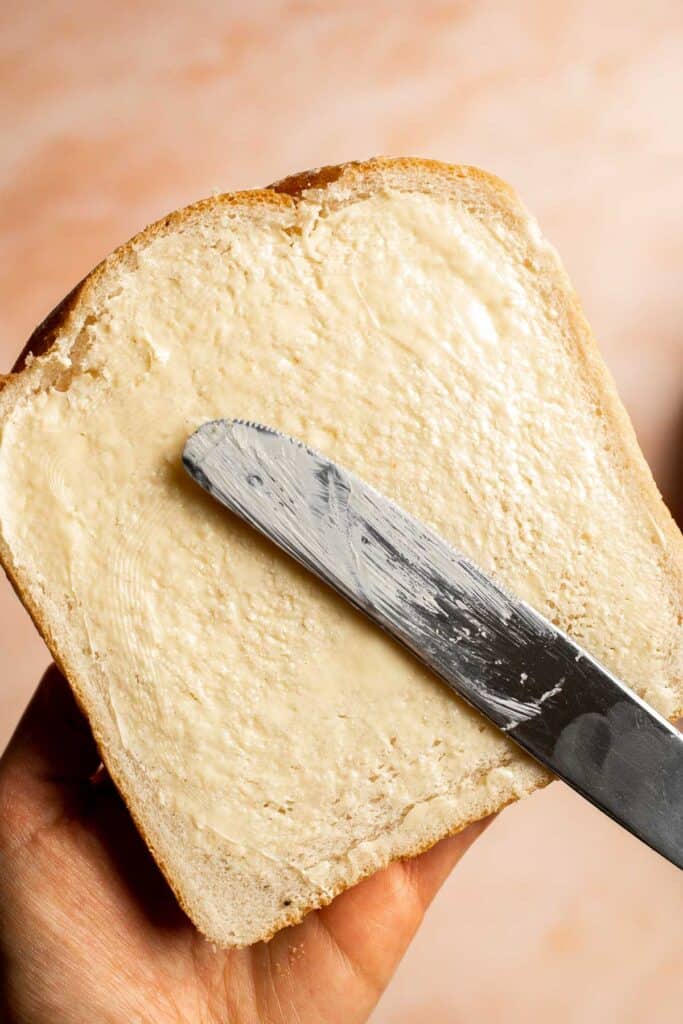
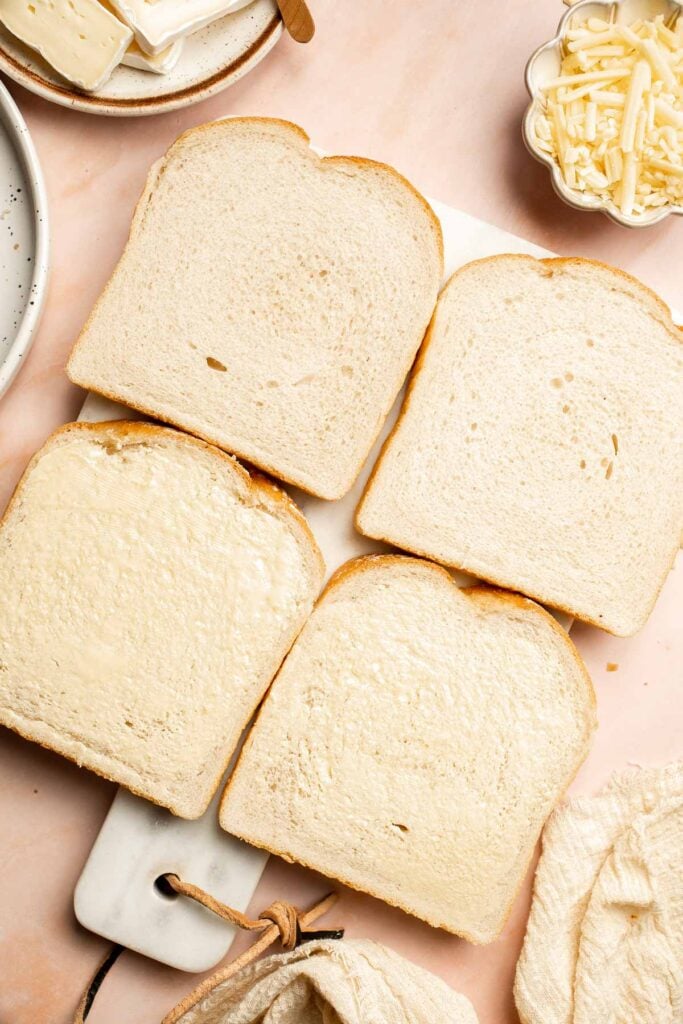
- Add toppings. Divide the sliced brie cheese evenly onto the 2 flipped over slices (unbuttered side) and top with an even layer of cranberry sauce and a pinch of salt. Top with shredded white cheddar. Place the remaining 2 slices on top (with the buttered side up) to make a sandwich.
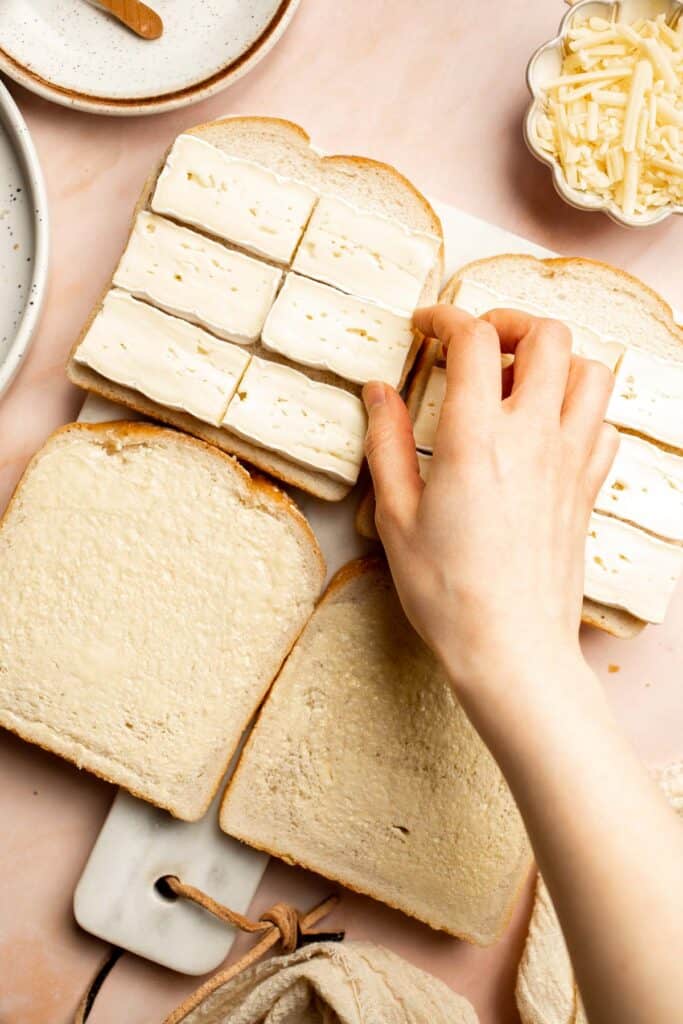
- Cook. Heat a skillet or griddle pan over medium-low heat. Add the sandwiches (you may have to do this in 2 batches) and cook until golden brown and the cheese has melted, about 3 minutes per side.
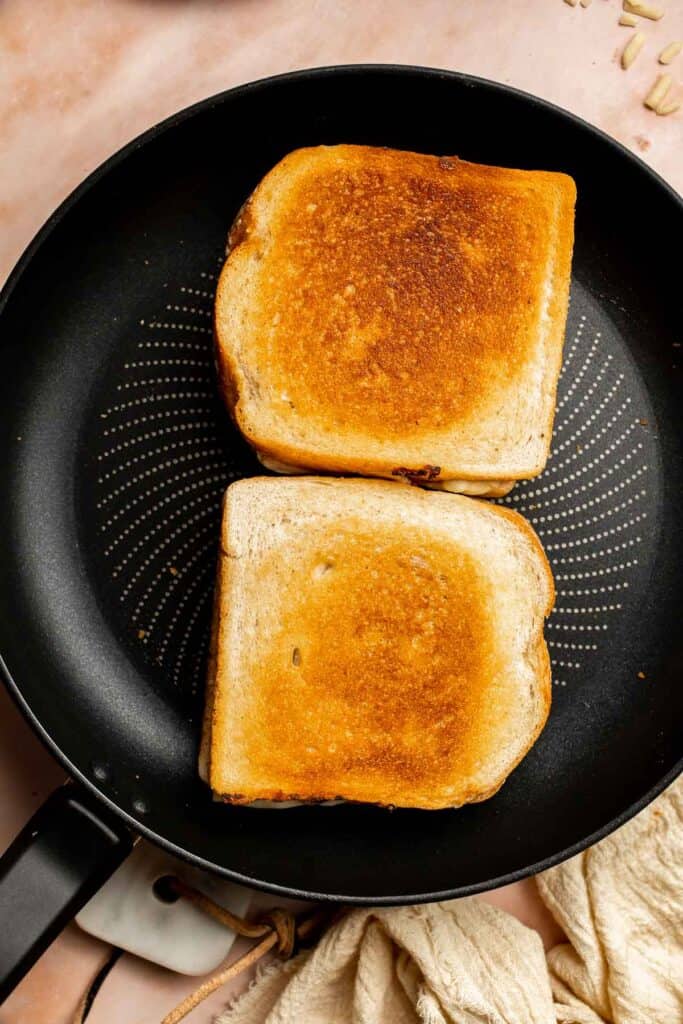
- Serve. Slice in half and serve immediately.
Recipe Variations
- Add meat. Add a few leftover turkey slices from Thanksgiving dinner to make these sandwiches even more substantial.
- Slice some apple. Slice a fresh, firm apple into very thin slices and add it between the layers of cheese for a little pop of flavor and extra crunch.
- Change the bread. This sandwich would taste wonderful with a tangy slice of sourdough, soft brioche, or even a crusty French baguette.
- Add mustard. A little whole grain mustard or Dijon would add a nice sharp flavor to contrast the tart cranberries and brie.
- Try a different cheese. The brie pairs perfectly with any type of melty cheese, like mozzarella cheese, gouda, or even goat cheese. Feel free to use the leftovers from your holiday cheese platter and use what you have!
How to Serve
This cranberry brie grilled cheese is delicious served on its own, or paired with a bowl of delicious soup on the side such as:
- Roasted Butternut Squash Soup
- Creamy Turkey Gnocchi Soup
- Pumpkin Soup
- Creamy Tortellini Soup with Sausage
- Potato Corn Chowder
For more soup recipes, see our 60 Best Soup Recipes.
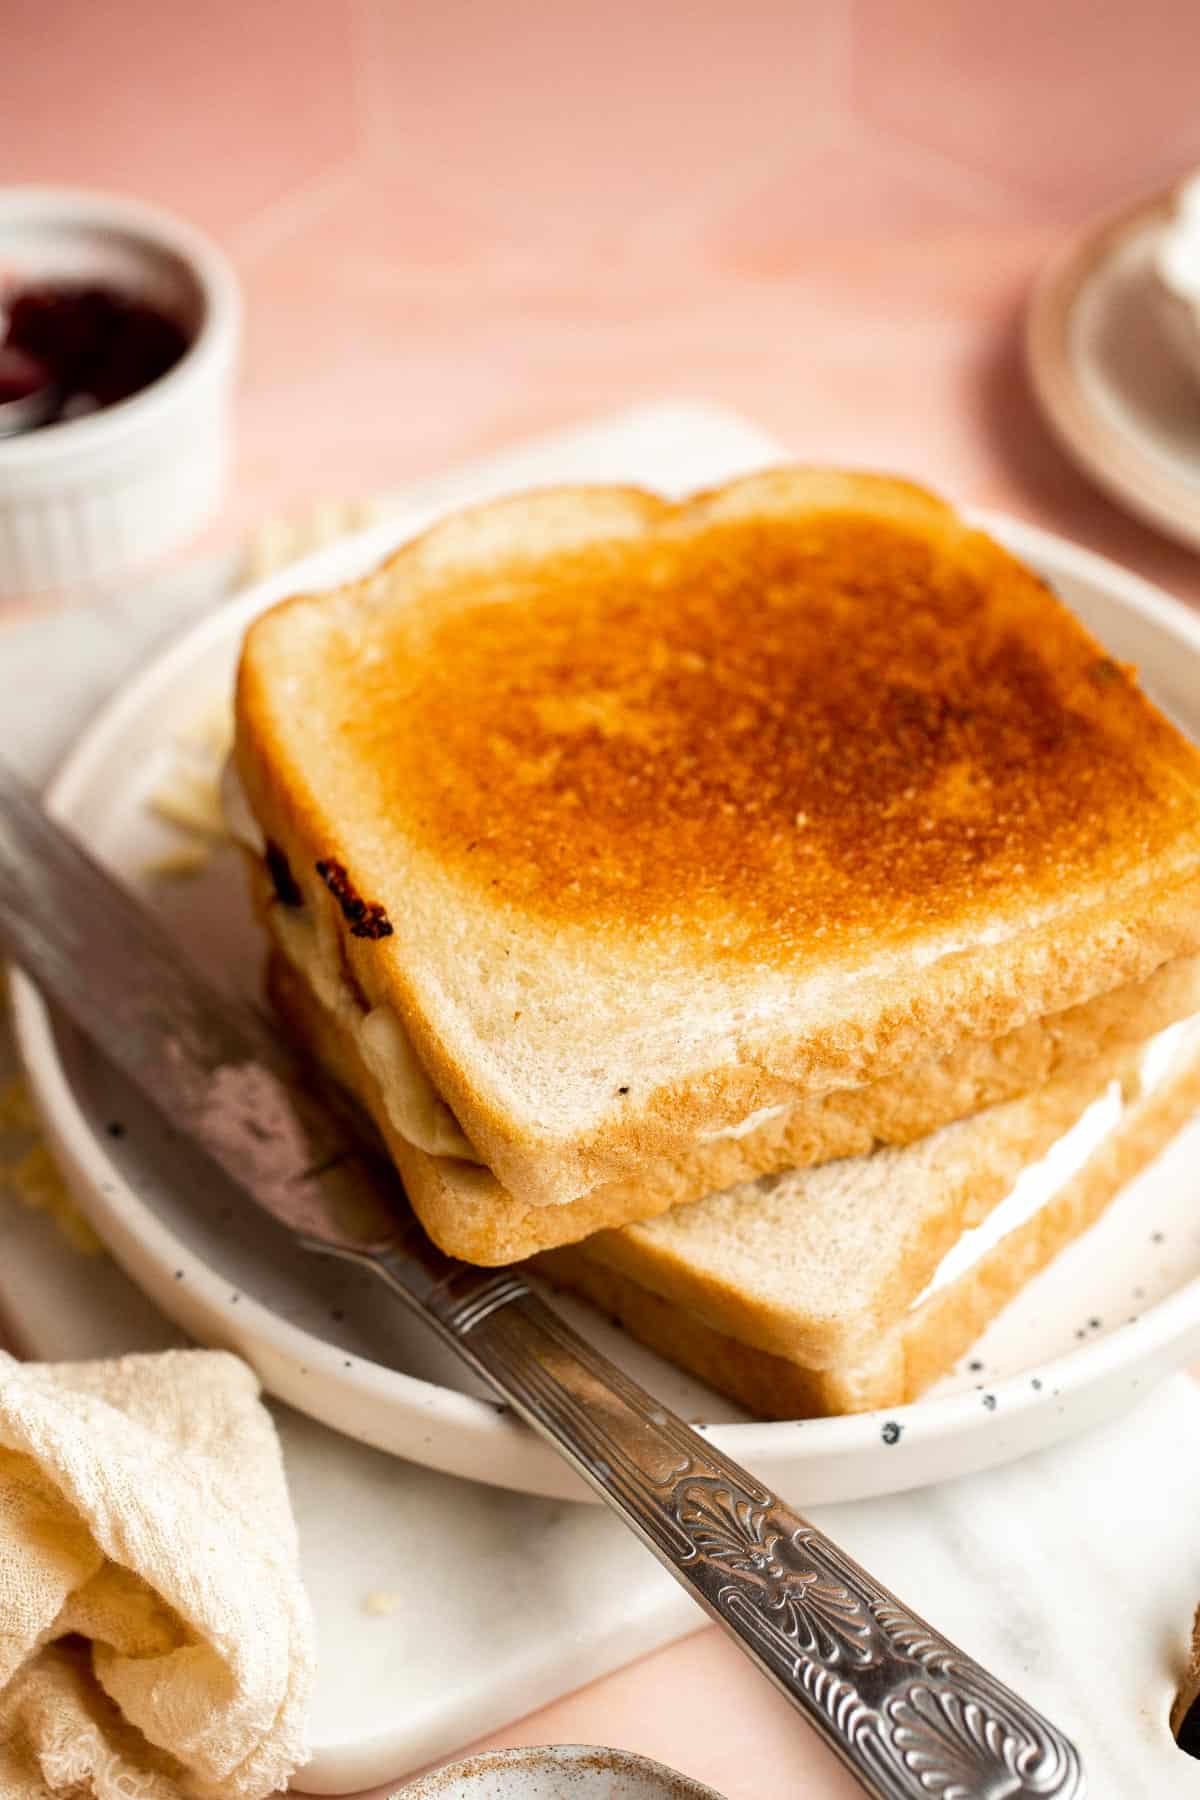
Recipe Tips and Tricks
- Warm the pan first. If your pan is too cold, the butter will melt instead of crisping up the bread. If the pan is too hot, the butter will brown immediately and burn the bread. Let the pan warm up over medium-low for a few minutes first for the perfect sandwich.
- Use shredded cheddar. Shredded cheese will melt faster than cheese slices, and it will sink into all the nooks and crannies for extra flavor.
- Adjust to taste. There are so many add-ins that can take this sandwich to the next level! Raid the fridge. Feel free to add bacon, ham, turkey, mustard, apple slices, and more.
Storing and Freezing Instructions
How to Store
Store any leftover sandwiches in an airtight container in the fridge for 2-3 days.
How to Reheat
Apply a little extra butter or olive oil to the sides of the sandwich, then either toast the sandwich in a hot skillet over medium heat or bake it in the oven at 350 degrees until the cheese melts and the bread becomes crispy again.
How to Freeze
Although this grilled cheese recipe is best served fresh, you can freeze the leftovers for about a month. Be sure to thaw them in the fridge before reheating.
FAQ
Yes! If you make a bunch of grilled cheese sandwiches for a party or meal, you can easily reheat the sandwich by toasting it in a large skillet or baking it in your oven (or air fryer). Add a little extra butter on each side and warm it until the cheese begins to melt.
The tart flavor of cranberry sauce pairs well with a variety of cheeses, especially funkier types that benefit from the sharp flavor of the fresh berries. For example, cranberry sauce tastes great with brie, sharp aged cheddar, feta, goat cheese, blue cheese, and other soft-ripened cheeses. It's also great with milder cheeses, like mozzarella, but the cheese flavor tends to hide behind the cranberry flavor.
There are so many different types of bread to choose from, but we prefer to use regular white sandwich bread. It has a soft, tender texture and mild flavor that pairs perfectly with the smooth melted brie cheese and cranberry sauce. Some other great options are sourdough bread, which has a crispy texture after toasting, or soft, sweet brioche slices. You can also use a French baguette, but it will be more like a panini than a grilled cheese. No matter which of these bread options you choose, it'll be a delicious sandwich to serve with those Thanksgiving leftovers!
More Sandwich Recipes
- Roasted Broccoli Grilled Cheese Sandwich
- Tuna Melt Grilled Cheese Sandwich
- Pita Grilled Cheese
- Grilled Cheese Roll Ups
- Caprese Sandwich
- Leftover Turkey Salad
Tried this recipe?
I'd love to hear what you think! Leave a comment and rating below to share your feedback. Your reviews help others discover this recipe and help me keep creating more free recipes for you. Snap a photo and tag me on social media @aheadofthyme too.
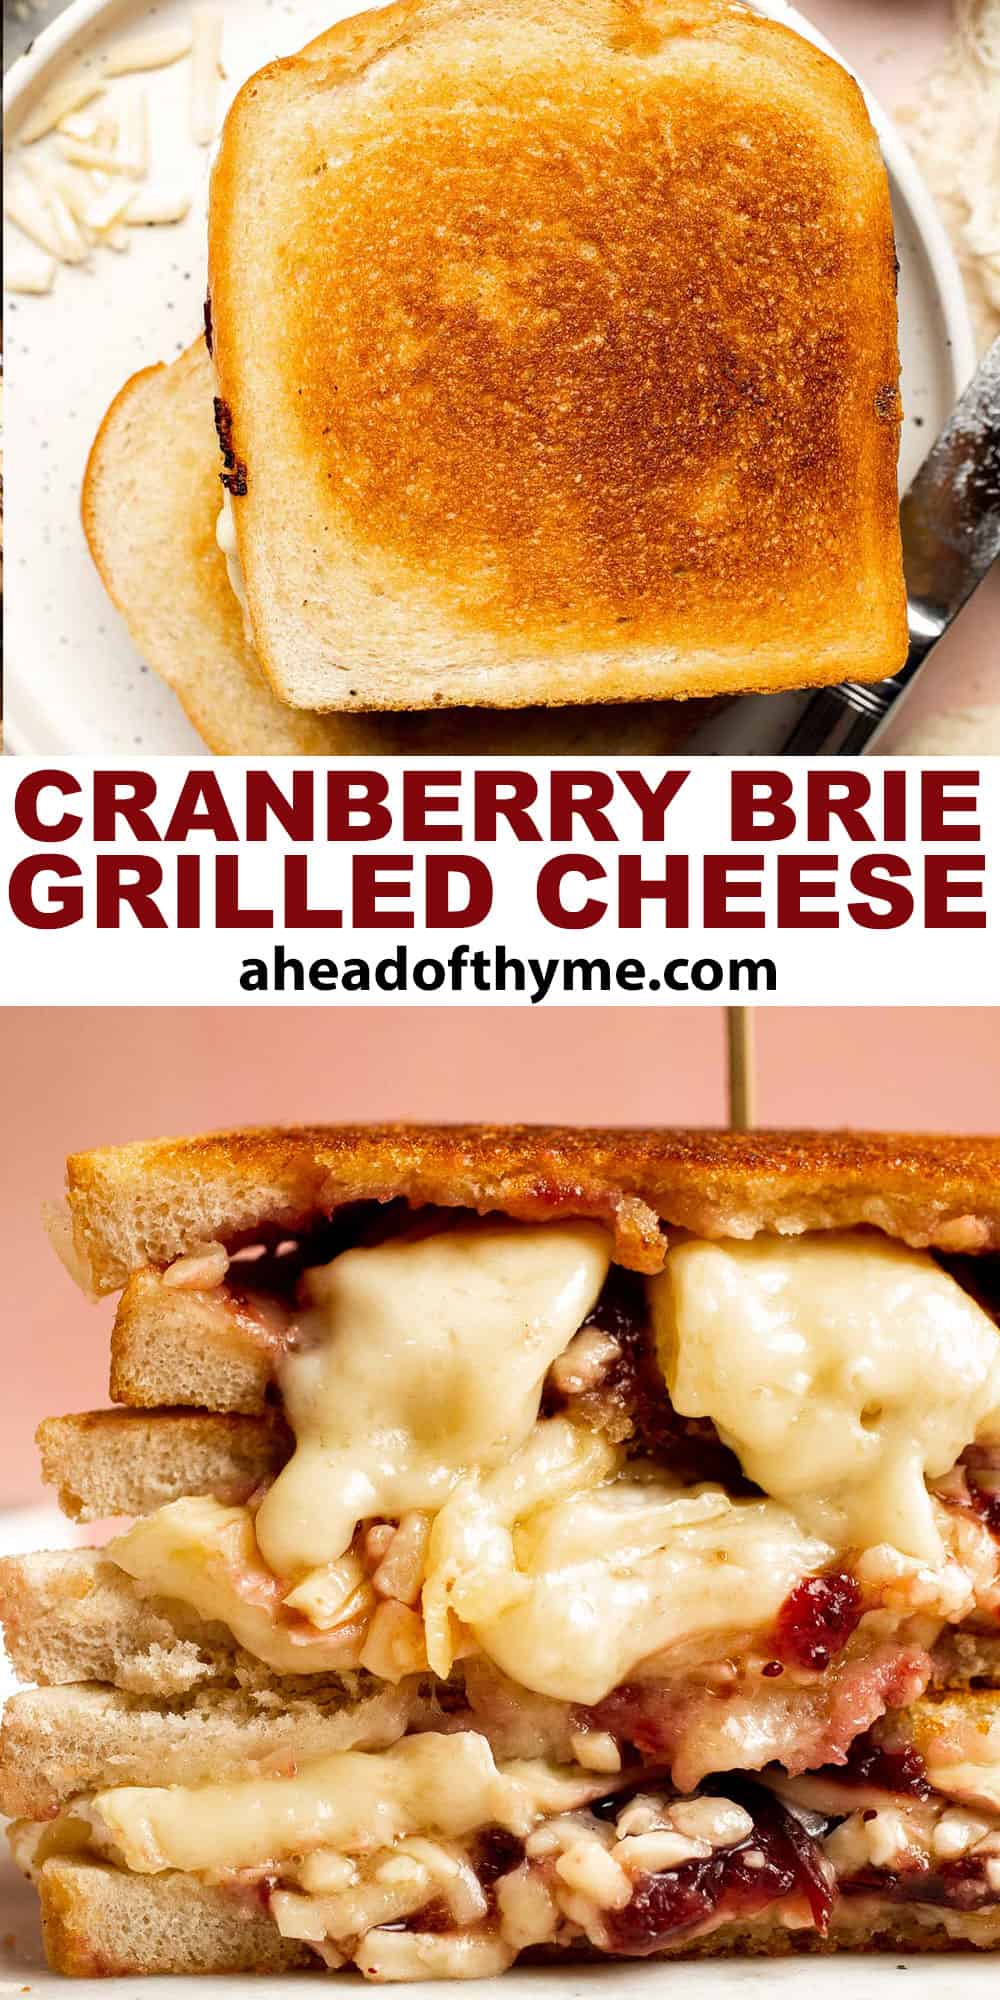
Baked Potato
This Baked Potato is a delicious, hearty side dish that pairs well with almost any main course. It's golden brown and crispy on the outside, fluffy and creamy on the inside, and just plain appetizing. Even better, it's incredibly easy to make and takes only a few minutes of prep work!
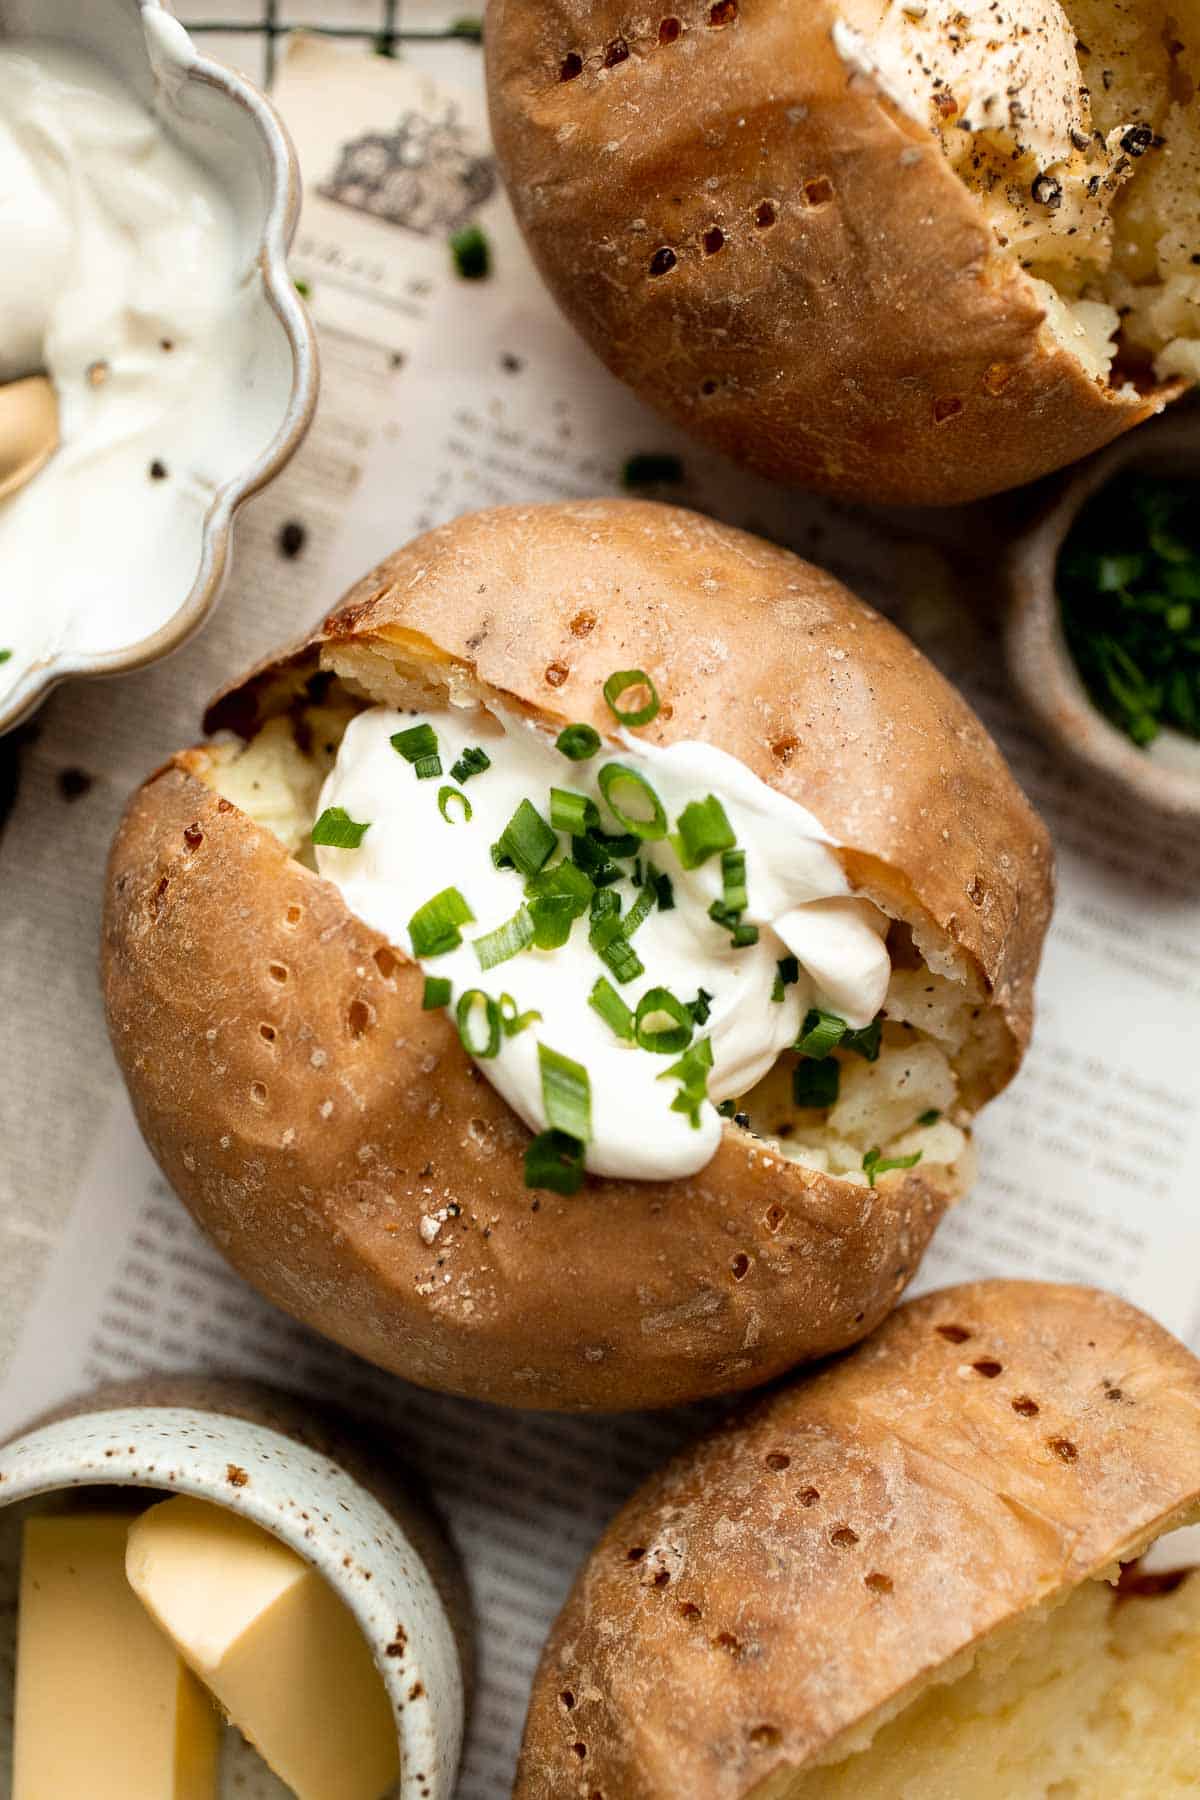
This classic baked potato recipe is a staple at any gathering, big or small. Everyone loves a good baked potato, and no matter how you dress it up, it always tastes amazing. Whether you top it with butter, sour cream, or bacon bits, the combination of crunchy, creamy, and savory makes it a wonderful companion to any meal. It's simply one of my favorite ways to spice up some plain old potatoes with just a few pantry ingredients, and it might just become one of yours too!
If all you have at home are sweet potatoes, make this baked sweet potato instead.
Why You'll Love this Baked Potato Recipe
- Super easy to make. Five ingredients, a little bit of prep time, less than an hour in the oven, and you've got a delicious, golden-brown baked potato. It's nothing complicated, but it does have some waiting time, so you're free to do other things while it bakes.
- Budget-friendly. Potatoes are incredibly affordable, so it's a great way to stretch your food budget. You don't need any fancy ingredients, and you can top the potatoes with whatever you have in your fridge or pantry.
- Healthy and filling. Whether you're trying to eat healthy or just looking for something filling and satisfying, this baked potato is packed with fiber, complex carbohydrates, vitamins, and minerals that will keep you full and fueled for hours. And since it's baked instead of fried, it's way better for you than traditional French fries or potato chips.
- Versatile. Whether you like your potatoes plain or loaded, it's easy to make them your own. Top them with butter, sour cream, cheese, bacon bits, chives, caramelized onions, jalapeños, and many more. It doesn't matter what main dish you're serving, a baked potato will go great with it!
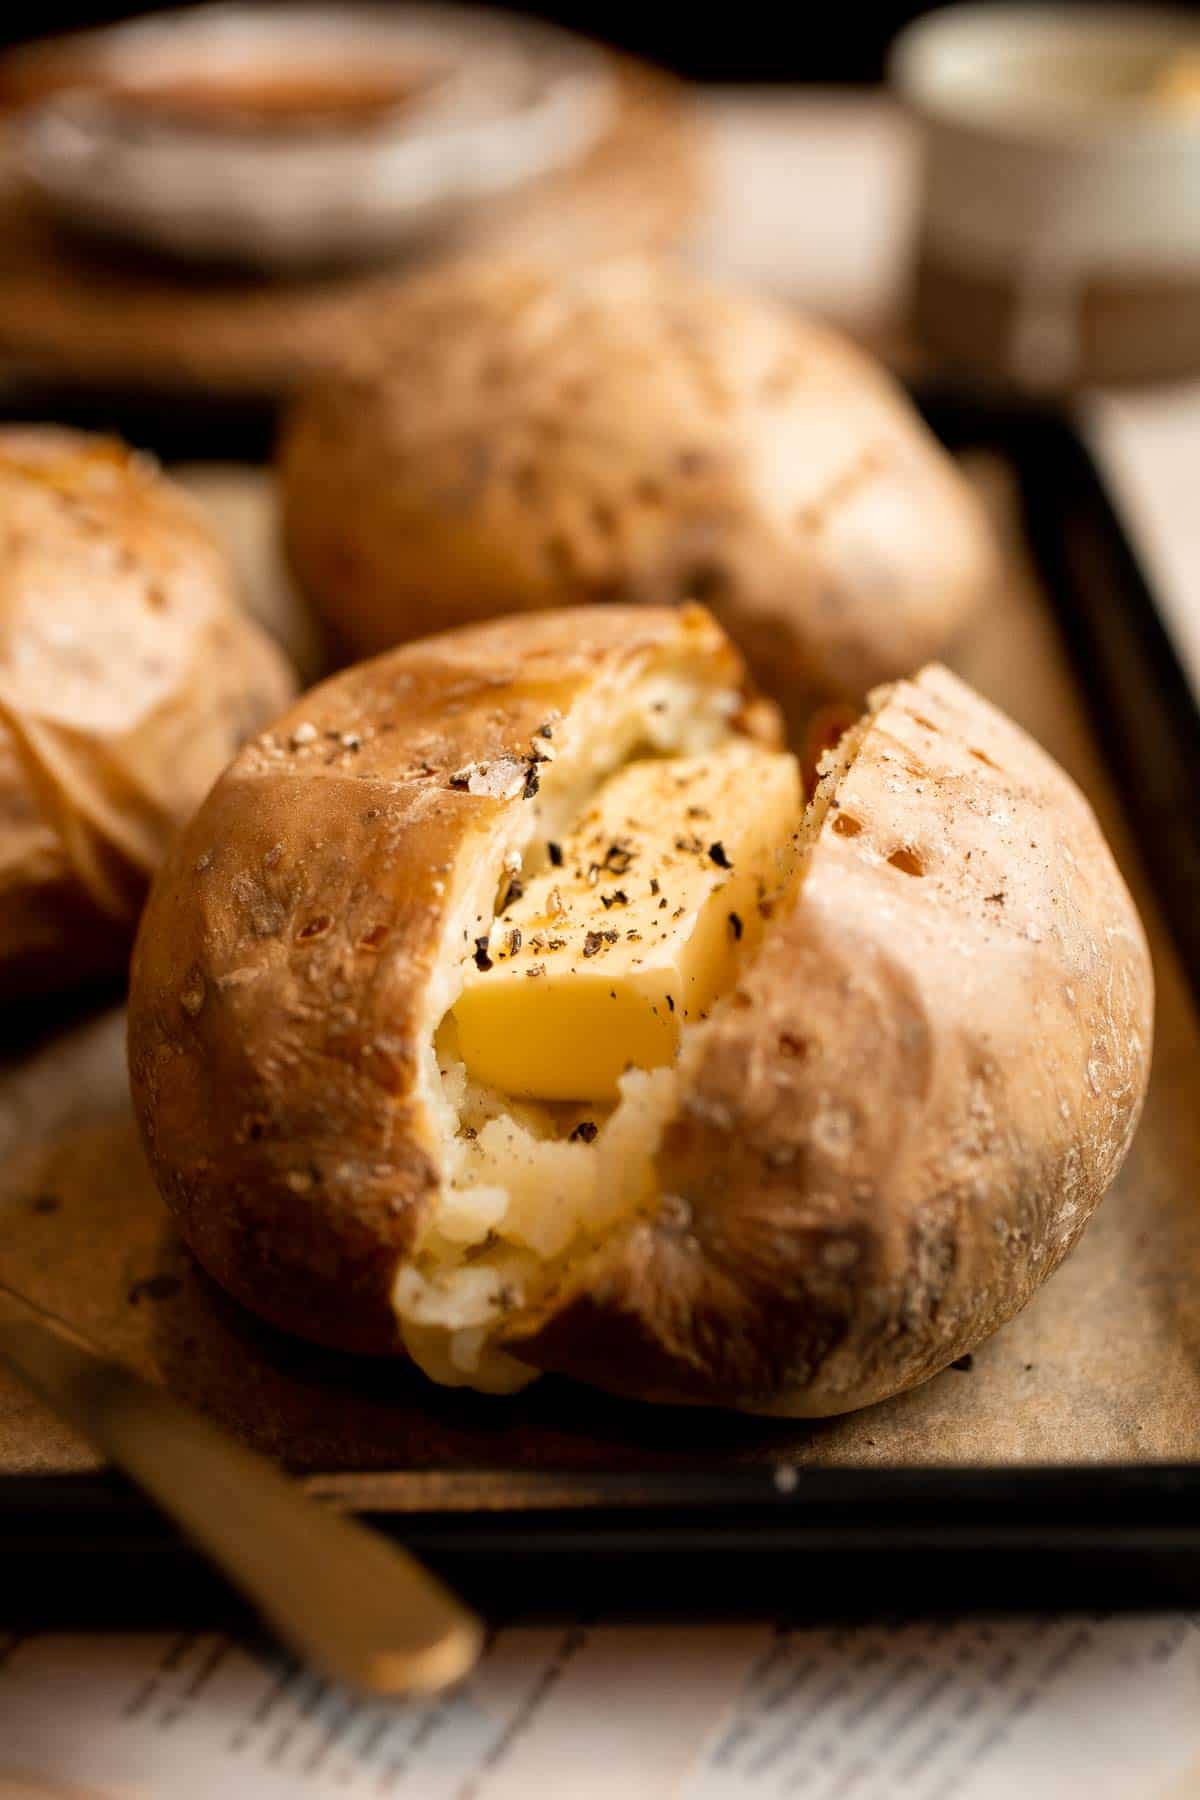
Ingredient Notes
To make this easy Baked Potato, you will need the following ingredients (full measurements in recipe card below):
- potatoes - although any potato can be used, I recommend using Russet. It has a high starch content and low moisture, making it super light and fluffy inside as it bakes. Its thick skin also crisps well. A great alternative would be Idaho, but it's okay to use other varieties like Yukon Gold.
- butter - gives a rich flavor while keeping it moist and creamy, so don't skip this.
Baked Potato Toppings
Top these baked potatoes with your favorite toppings. We used sour cream and chives, but you can feel free to use any toppings you like. Some popular options are:
- sour cream - adds a tangy flavor while providing another layer of creaminess.
- chives - adds flavor that complements the sour cream so well.
- bacon bits - adds crunch and smokiness
- cheese - add some melty cheese like cheddar or provolone and watch it melt into gooey deliciousness.
- shredded chicken - adds some protein by adding shredded chicken to the potatoes. See our BBQ Chicken Stuffed Baked Potatoes for more.
- salt and pepper - season generously to really bring out the flavors of the potatoes.
You will also need measuring spoons, a large baking sheet, and parchment paper.
How to Make the Best Baked Potato
- Prep potatoes. Poke a fork into the potatoes to make a few vents. Line a large baking sheet with parchment paper and place the potatoes on it.
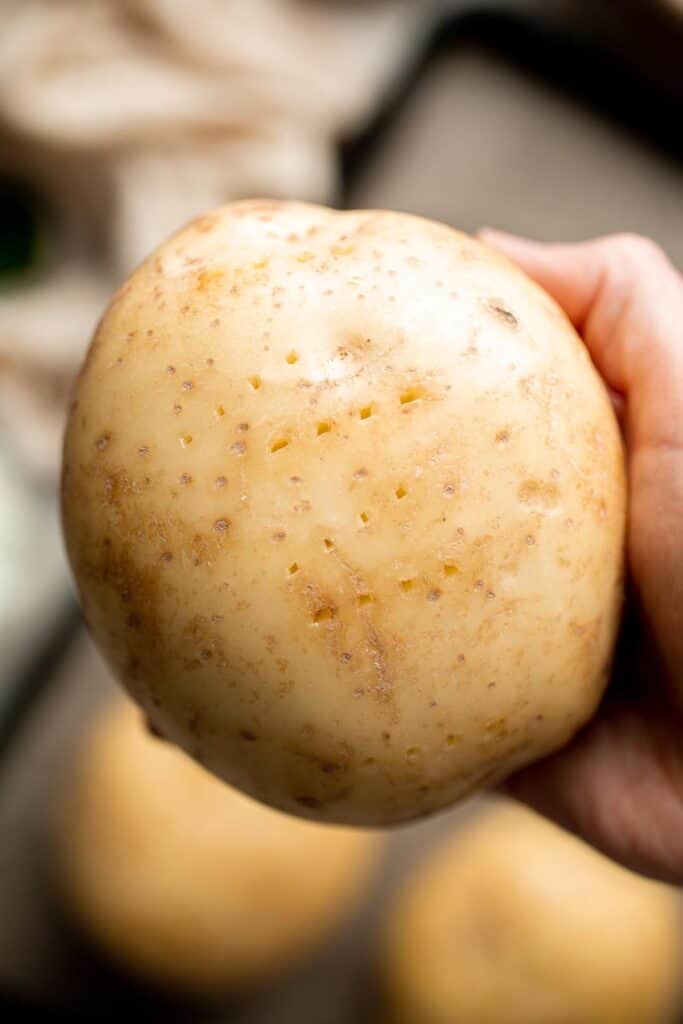
- Bake. Bake in a 425F preheated oven for 50-60 minutes until they are completely soft inside, and fork tender. If you can insert a fork easily into the flesh, then it is fork tender.
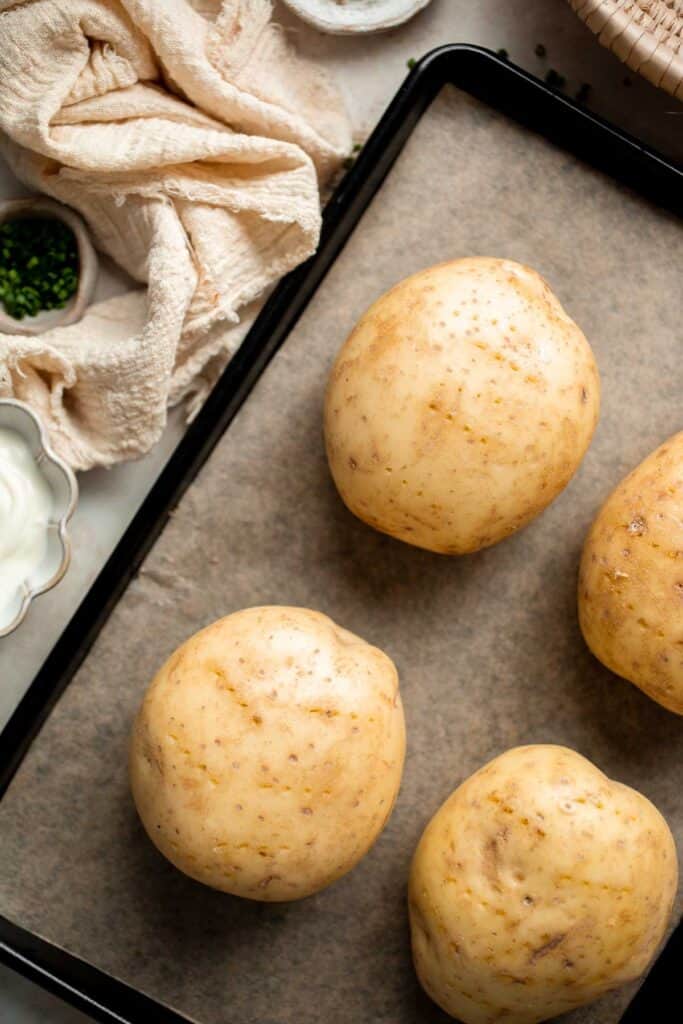
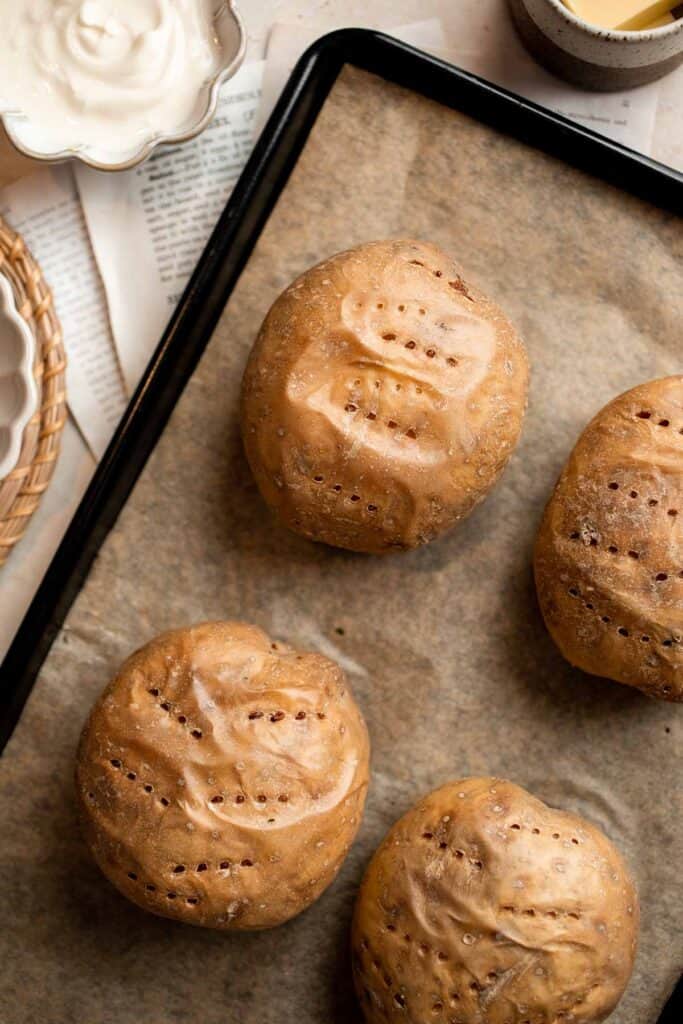
- Cool. Let cool for 10 minutes and cut the skin with scissors.
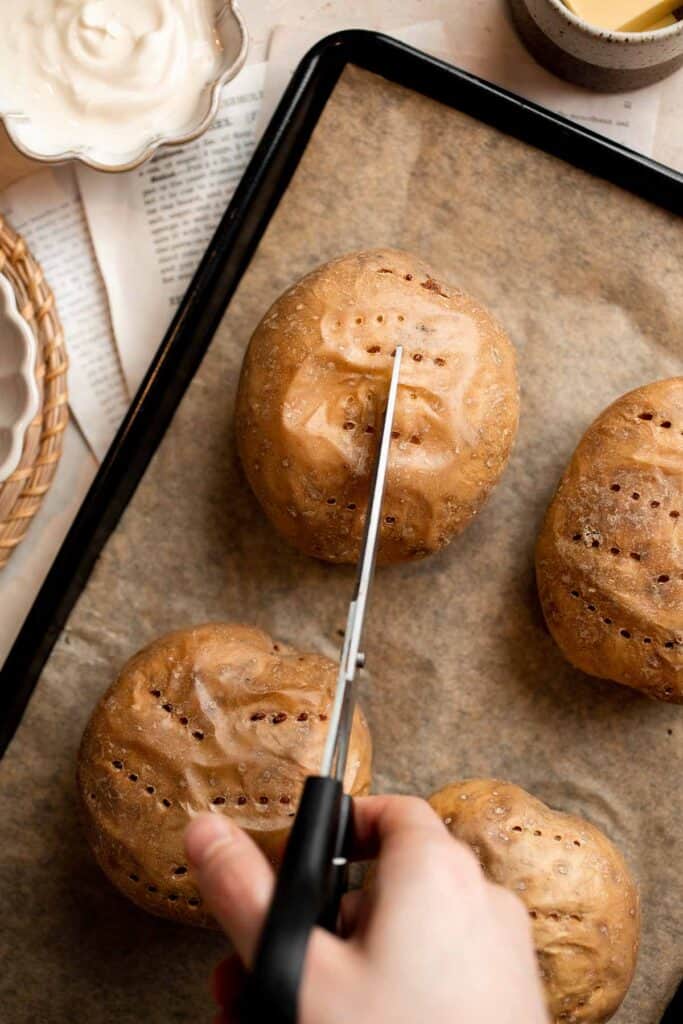
- Season. Top with butter and season with salt and pepper to taste.
- Add toppings. Top with a dollop of sour cream and chives, or your favorite toppings. Serve warm.
Recipe Variations
- Use olive oil. If butter isn't your thing, try olive oil instead. It's a healthier option and still gives the potato a great flavor and a nice texture.
- Make it cheesy. Finish it off with loads of cheese for some melty goodness. Some great options are cheddar, Parmesan, and Monterey Jack.
- Fill it up. Cut the potatoes halfway through baking and stuff some bacon and egg in the center to make a loaded potato dish that's perfect for breakfast or lunch.
- Mexican-style. Top it with some salsa, queso, chili, sour cream, or some guac for a delicious Mexican-style baked potato.
How to Serve
Enjoy this delicious Baked Potato on its own by loading it with your favorite toppings or serve it with meats, salads veggies, burgers, and seafood like:
- The Best Ribeye Steak
- Slow Cooker Beef Chili
- Lemon Kale Salad
- Honey Balsamic Brussels Sprouts
- Mediterranean Turkey Burgers
- Garlic Shrimp Skewers
Recipe Tips and Tricks
- Use medium-sized potatoes. Any smaller and they'll cook too quickly; any larger and they won't be cooked through. It's best to use medium potatoes as it has enough room for any topping or stuffing you want.
- Poke them enough. Poke different parts of the potato before baking to let the steam escape as it cooks in the oven. Otherwise, you're in for a nasty surprise once you cut into it!
- Skip the foil. What we want is a nice, crispy skin, and wrapping the potato in foil does the opposite. It traps in the moisture and that can make it very soft in the worst way.
- Season generously. Salt and pepper are essential for flavor, so make sure you season the potato well to achieve that perfect balance of flavors. Feel free to use other seasonings like garlic powder, chili powder, or paprika if you want to spice it up.
Storing and Freezing Instructions
How to Store
Store leftovers in an airtight container and keep it in the fridge for up to 5 days.
How to Reheat
Pop it in the oven at 350℉ for 15 minutes or in the air fryer for 10 minutes, or until warmed through. For faster reheating, you can use a microwave on high power for 2-3 minutes. Make sure it's covered to avoid any mess.
How to Freeze
Wrap each baked potato in aluminum foil and place them in a sealable freezer-safe bag or container. Store it in the freezer for up to 3 months.
More Potato Recipes
- 40 Best Potato Recipes
- Hasselback Potatoes
- Potato Stacks
- Baked Potato Wedges
- Crispy Smashed Potatoes
- Duchess Potatoes
Tried this recipe?
I'd love to hear what you think! Leave a comment and rating below to share your feedback. Your reviews help others discover this recipe and help me keep creating more free recipes for you. Snap a photo and tag me on social media @aheadofthyme too.
20 Best Thanksgiving Pie Recipes
Looking for a delicious homemade pie recipe to make for Thanksgiving this year? You are in the right place. Whether you are looking for a classic and nostalgic pie like pumpkin pie or something more creative and fun, we have you covered. We are sharing over 20 Best Thanksgiving Pie Recipes including pumpkin pie, pecan pie, cream pies, and more.
Making a Thanksgiving pie to serve after an epic holiday dinner is the perfect finale to your Thanksgiving celebration. So preheat that oven, stock up on seasonal ingredients, and get ready to whip up a mouthwatering pie for your Thanksgiving table this year.
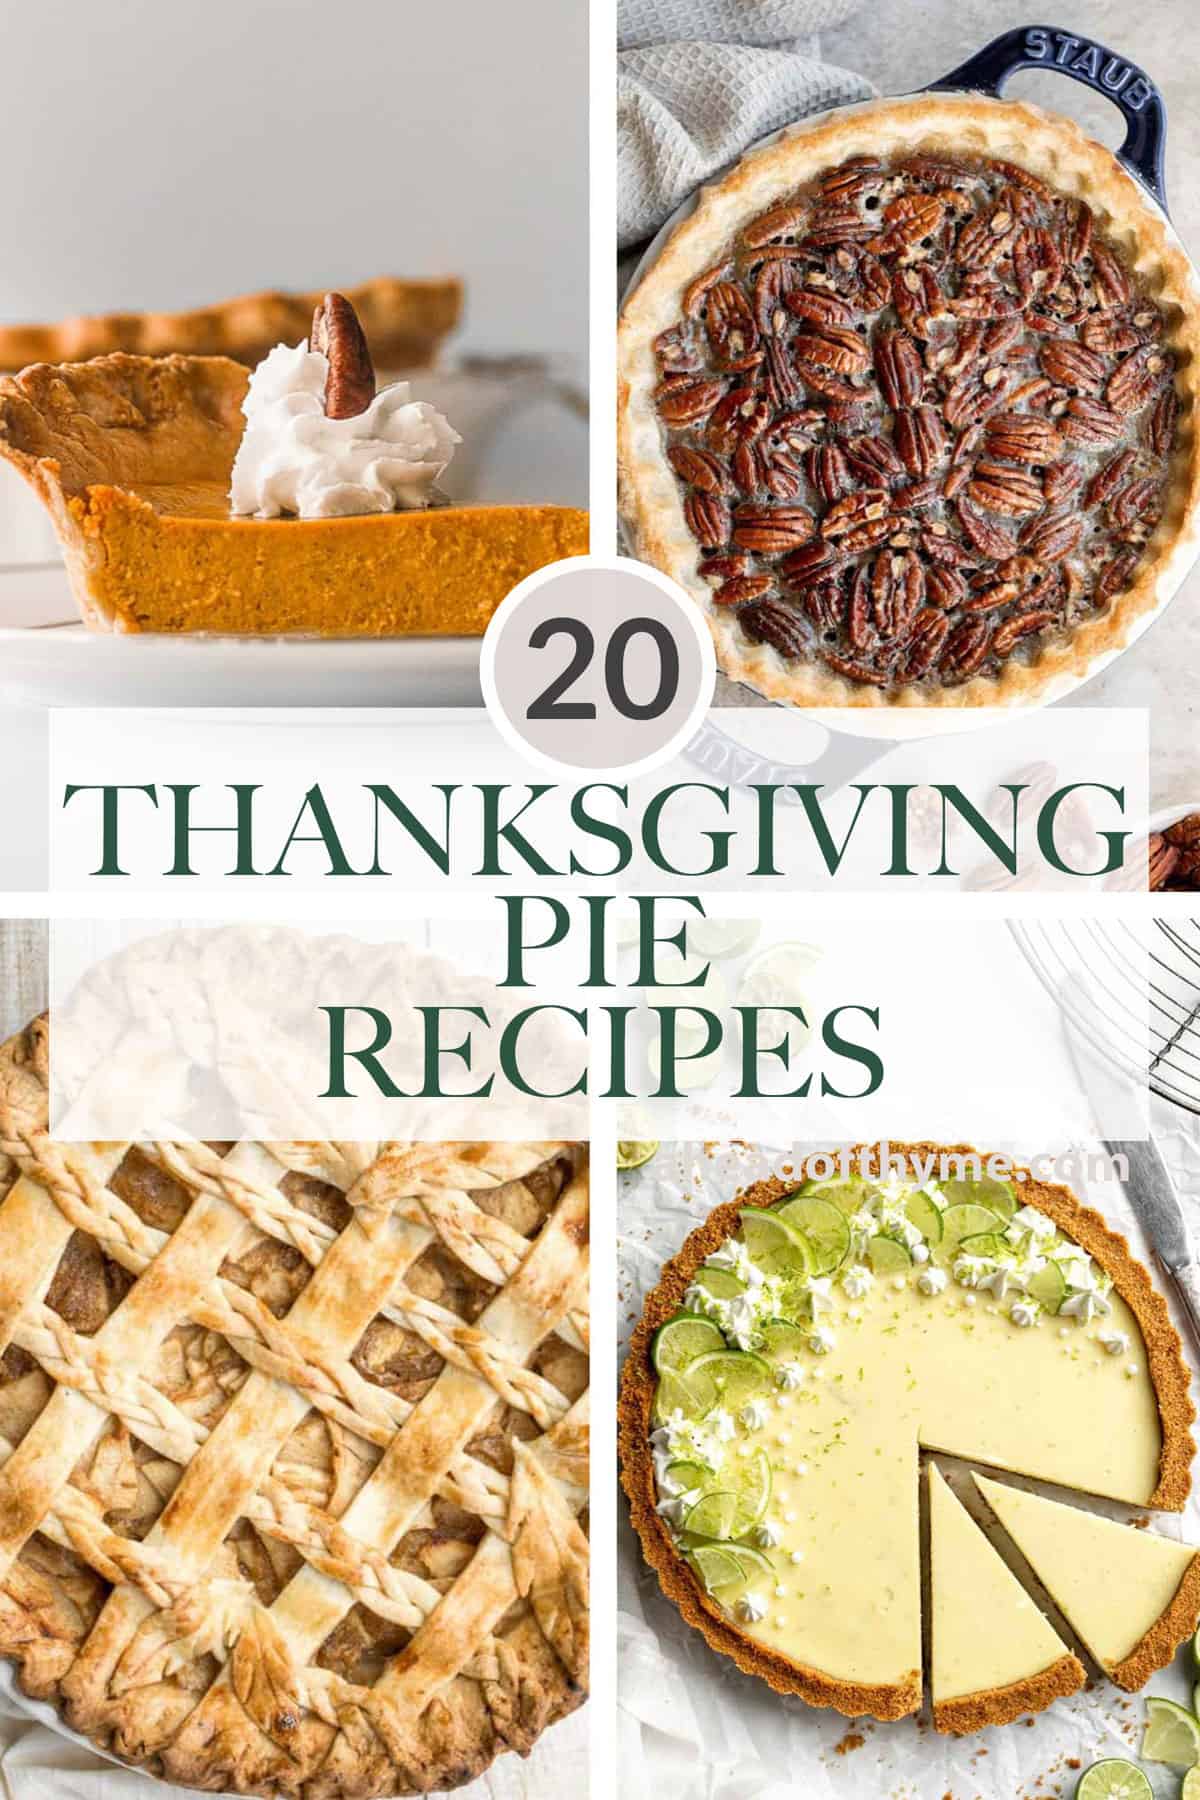
Best Thanksgiving Pies
Classic Thanksgiving Pumpkin Pie
Thanksgiving just isn't the same without a slice of classic Thanksgiving pumpkin pie. There is nothing better than a bite into that flaky crust and smooth pumpkin filling, full of those classic pumpkin spice flavours.
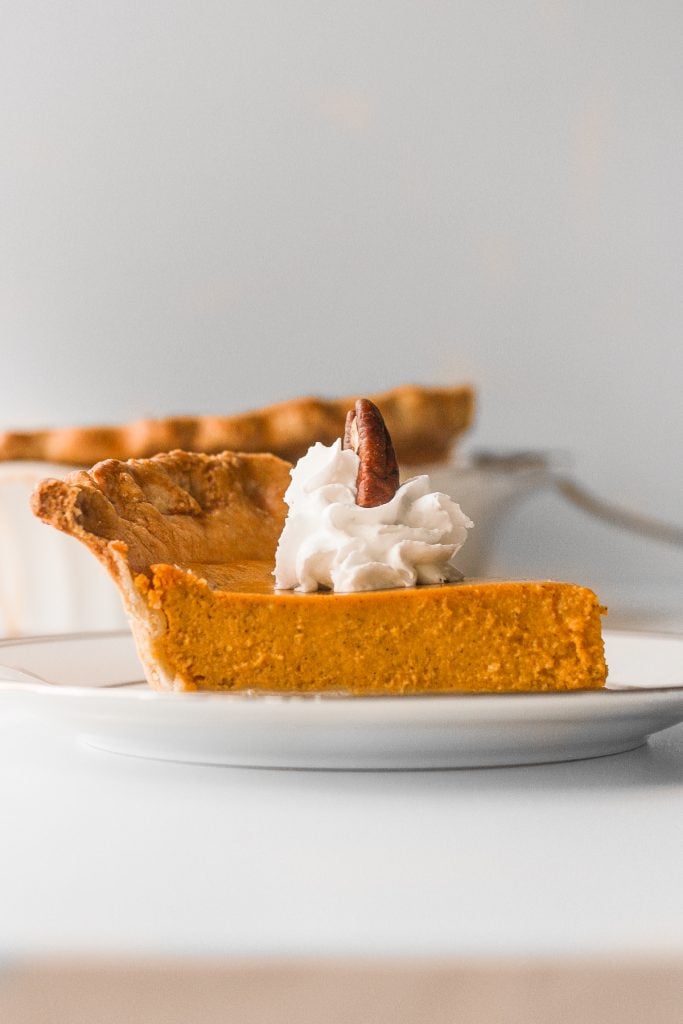
Old-fashioned pecan pie is a classic fall dessert with a homemade pie crust and sweet custard filling loaded with crunchy pecans - perfect for Thanksgiving. For such a fancy pie, it is actually embarrassingly easy to make.
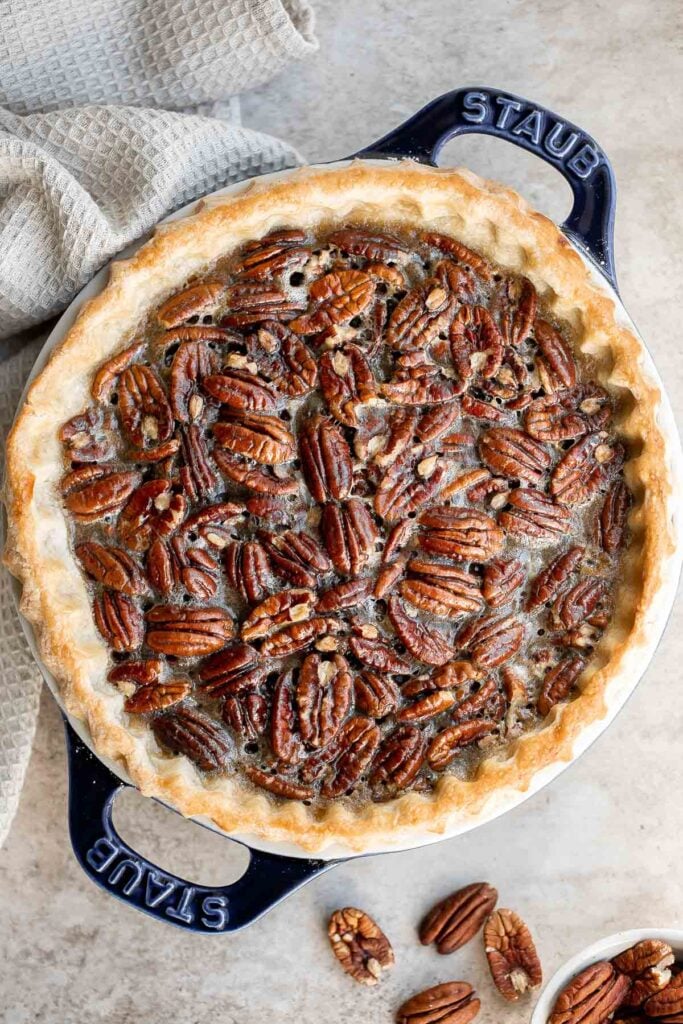
This braided lattice apple pie is packed with cinnamon apples tossed in a caramel sauce and sealed in a buttery, flaky pie crust with a braided lattice top. Serve it with a scoop of vanilla ice cream.
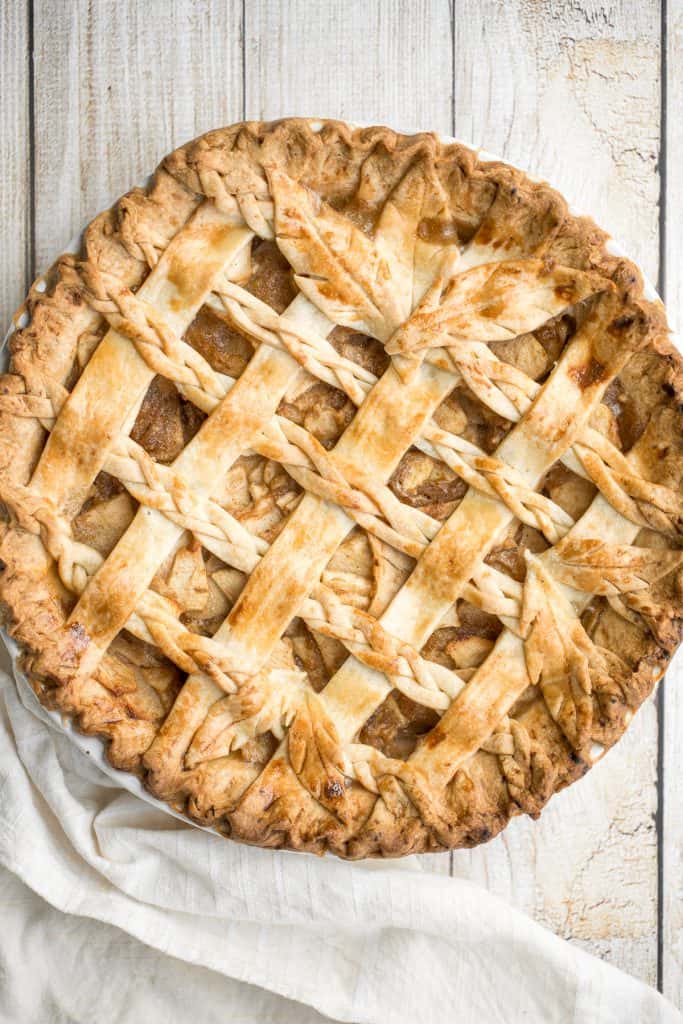
Homemade Banana Cream Pie is endlessly creamy with a buttery, flaky pie crust, a dreamy homemade vanilla custard, fresh banana slices, and whipped cream.
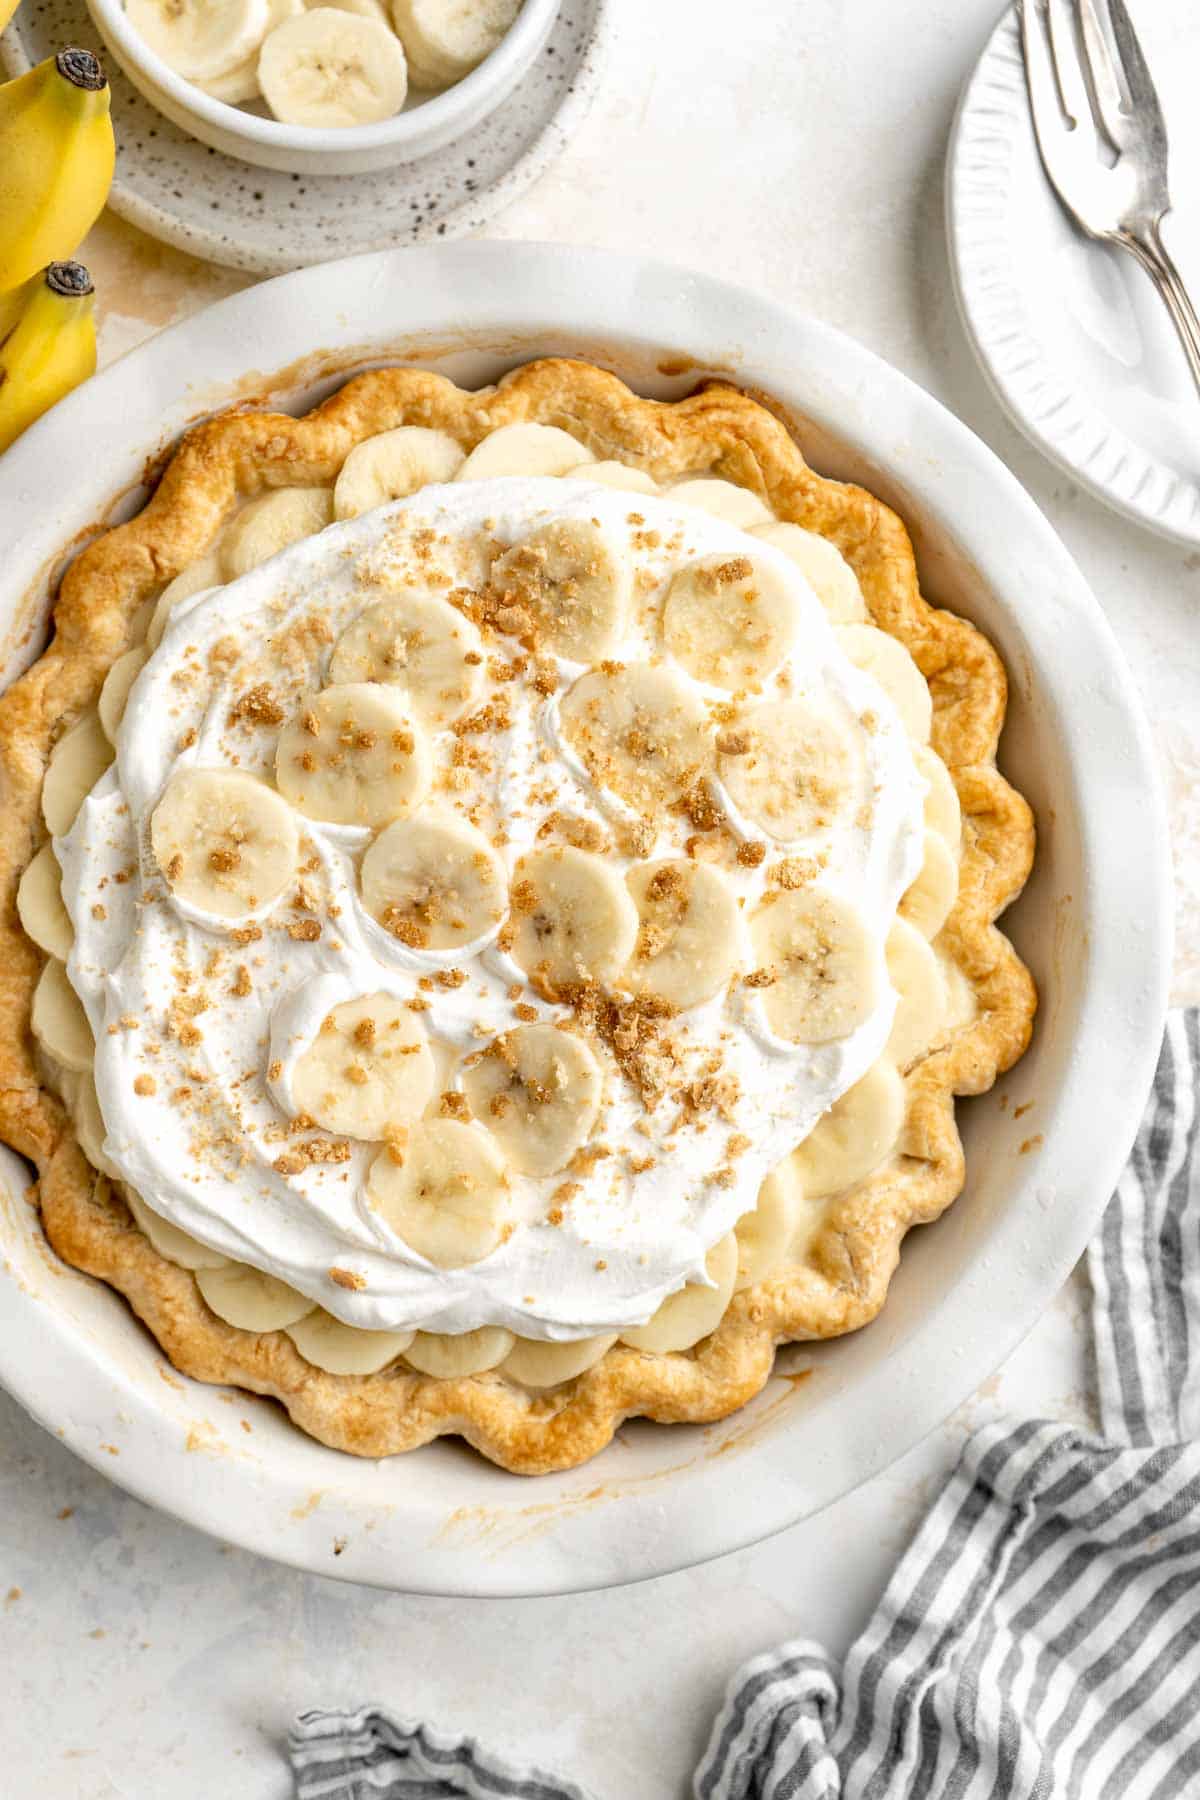
Perfectly creamy and tart with a buttery graham cracker crust, this easy Key Lime Pie is a classic for a reason. You won't need another pie recipe again!
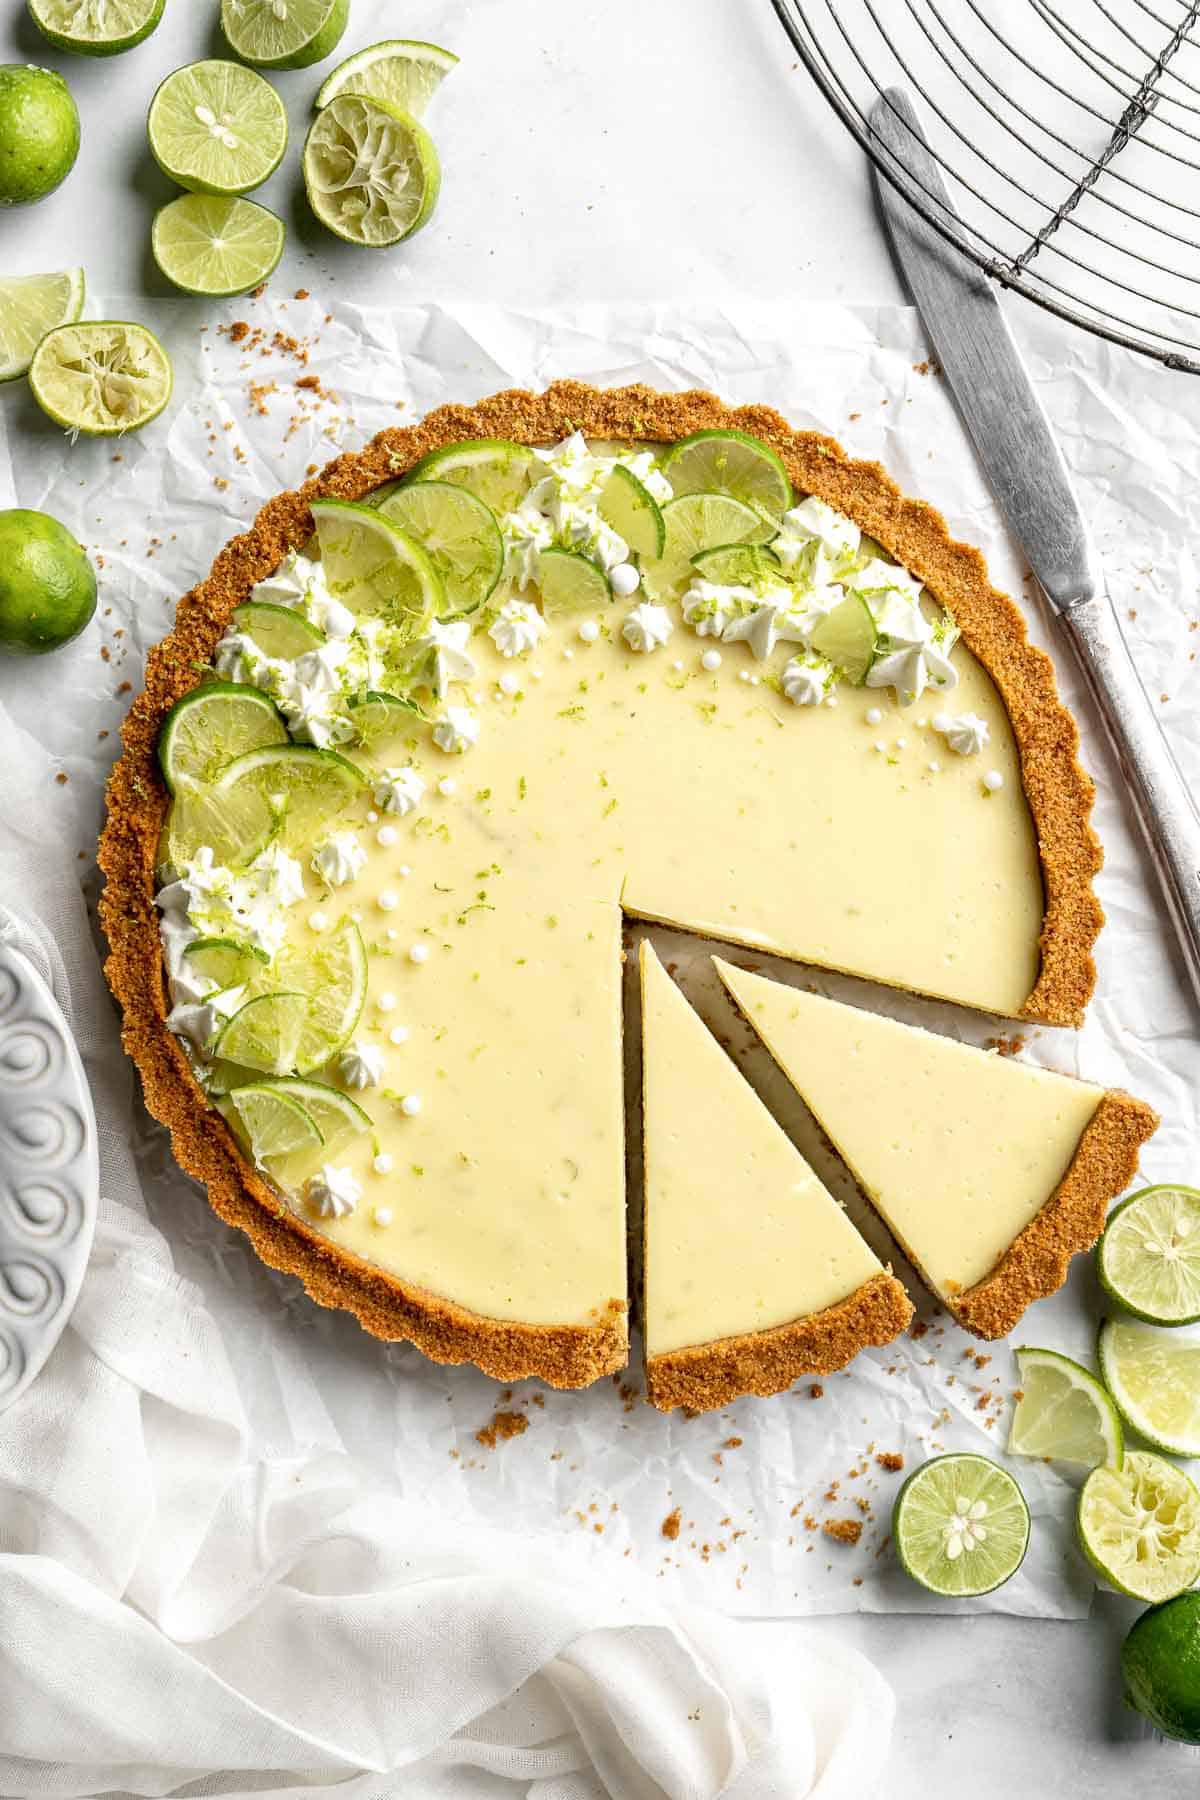
Pumpkin mascarpone pie is a warm and cozy holiday dessert that is incredibly easy to make with just minutes of prep work before popping into the oven.
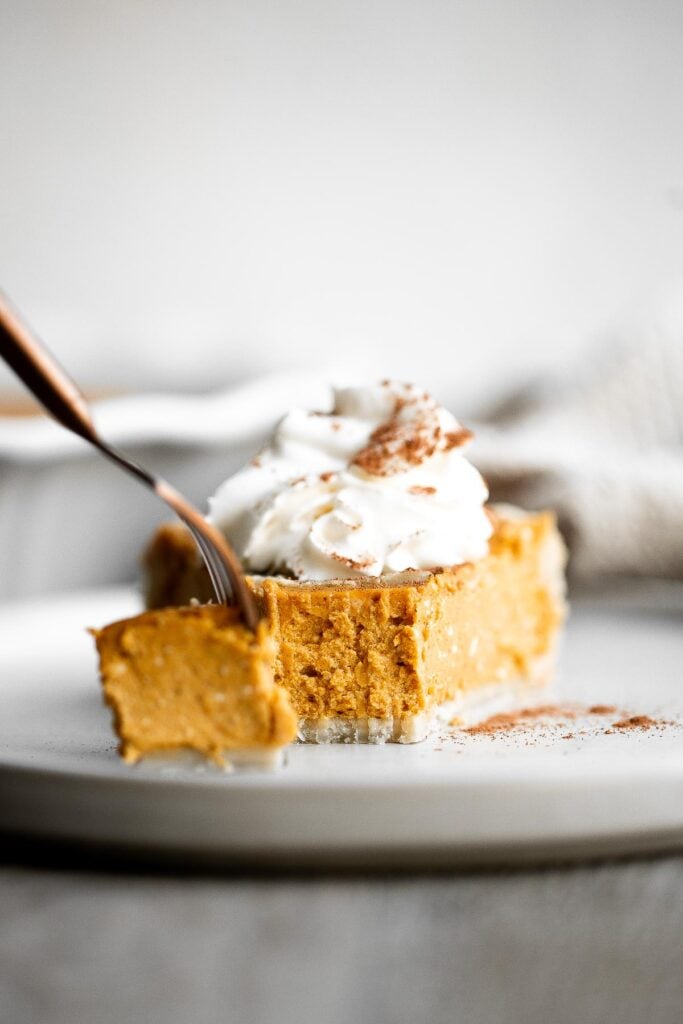
This decadent Chocolate Pecan Pie is a twist on the classic holiday pie with a rich, dark chocolate flavor that pairs wonderfully with toasted pecans.
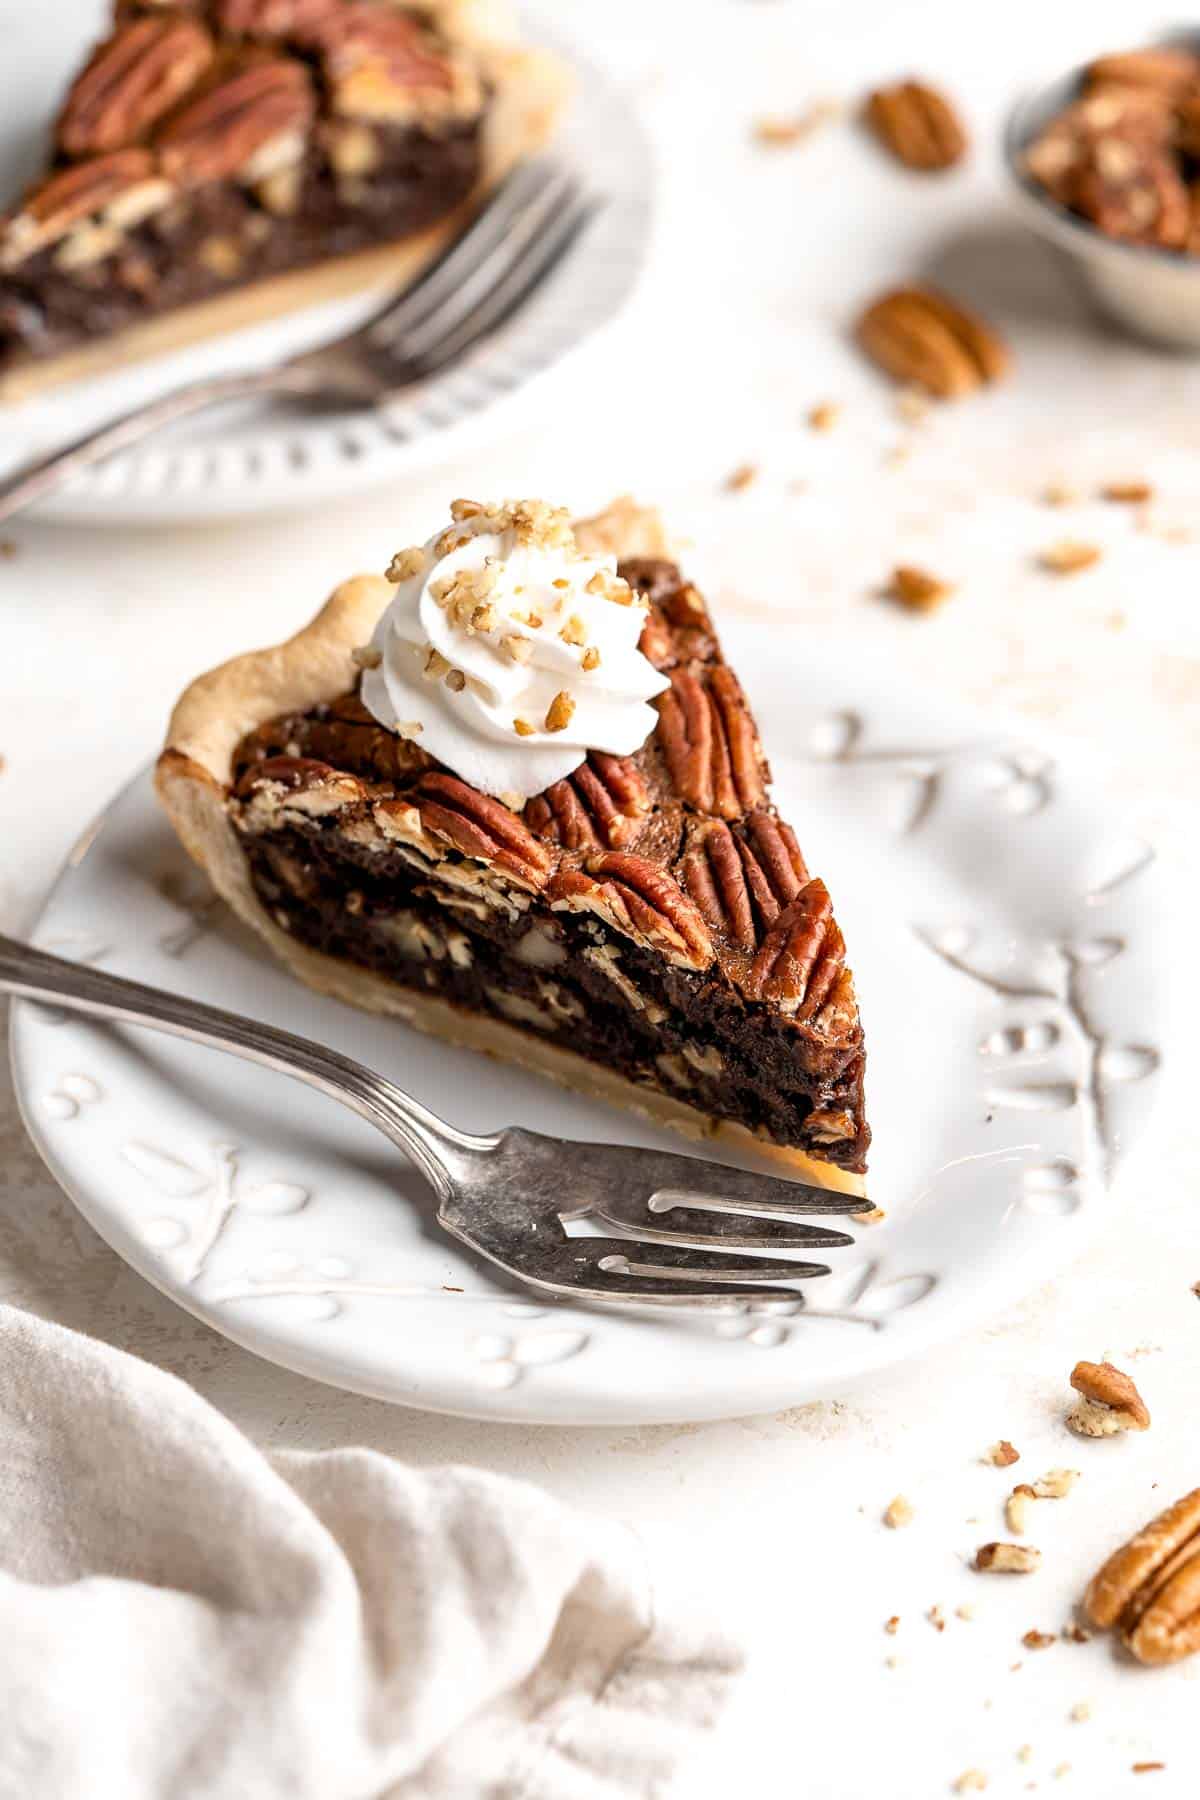
With a buttery, flaky crust and spiced sweet apple filling, these homemade Apple Turnovers are hands down one of the best ways to enjoy this seasonal fruit.
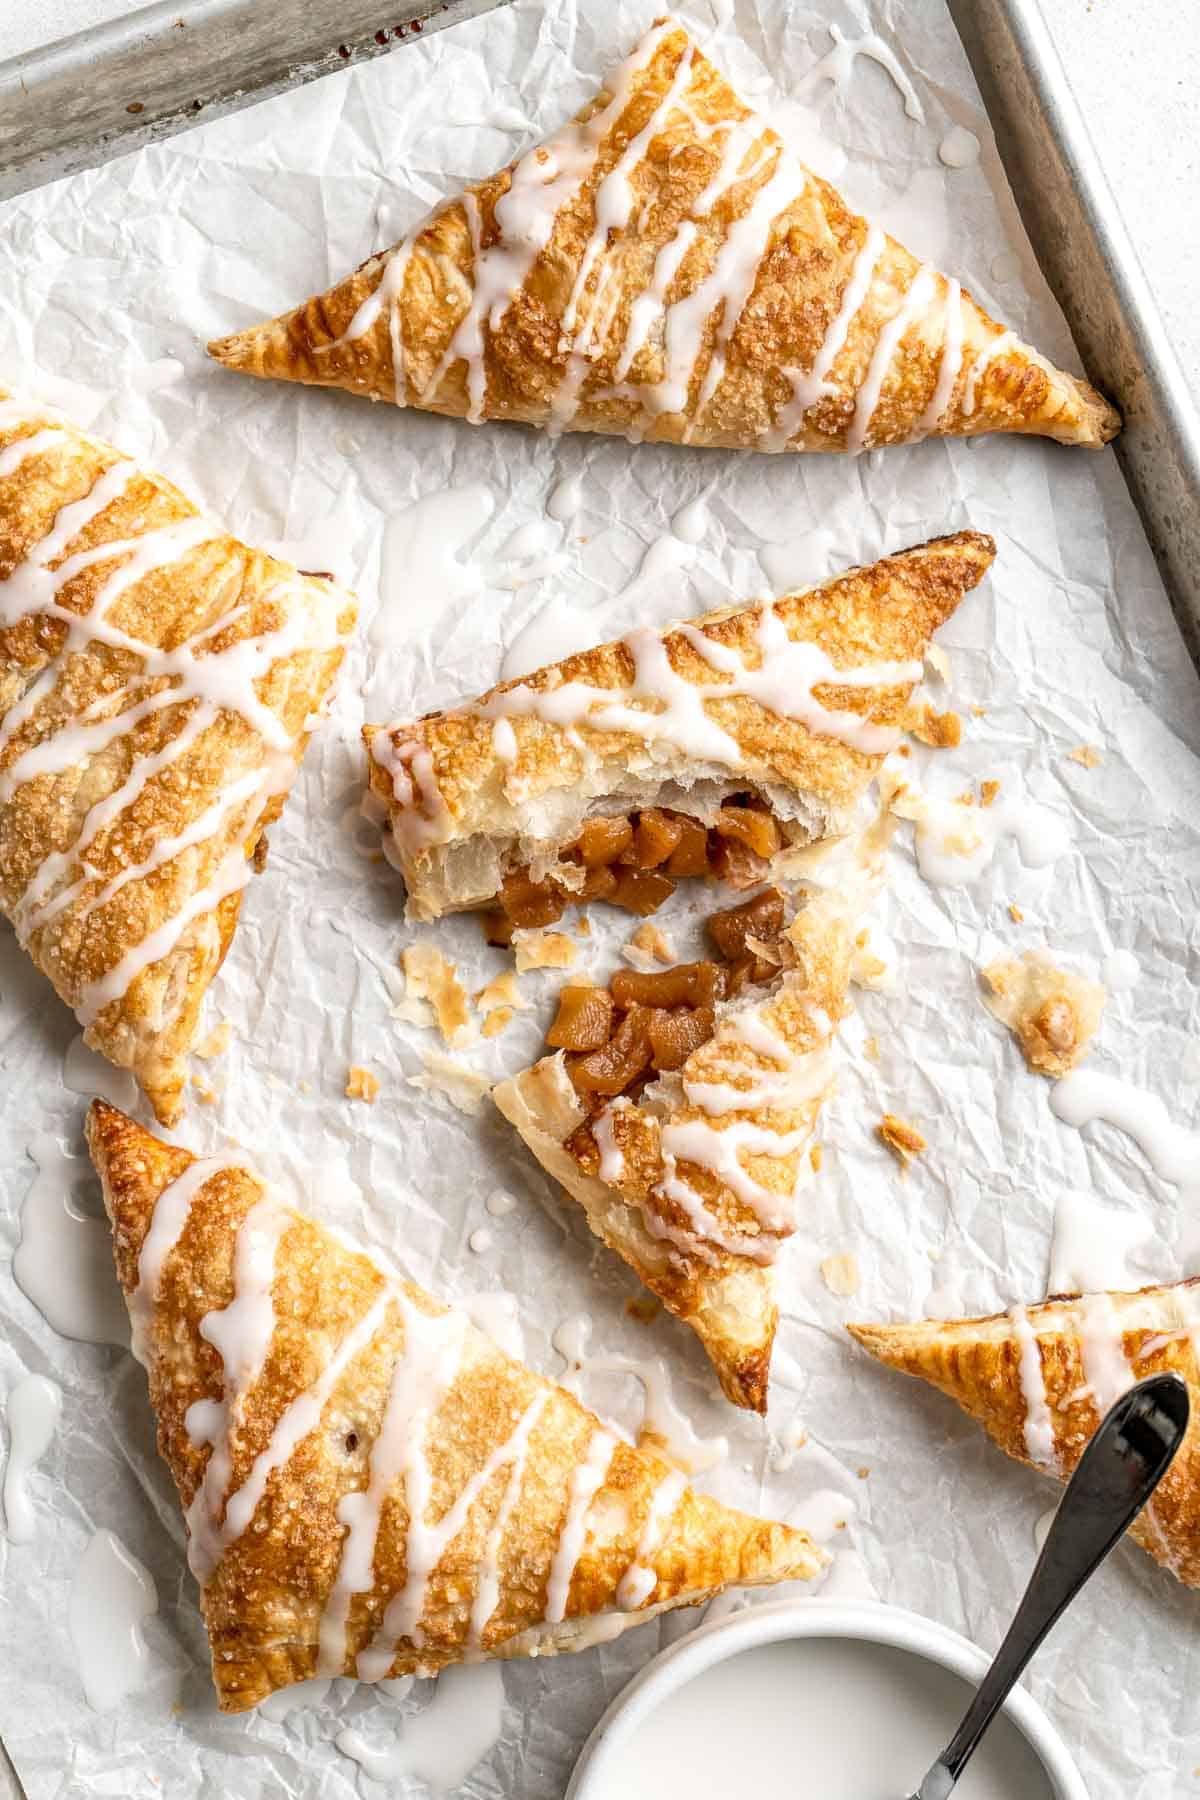
Small batch mini pumpkin pies with a flaky crust, delicious pumpkin pie filling, and cinnamon whipped cream, are perfect for a small Thanksgiving crowd.
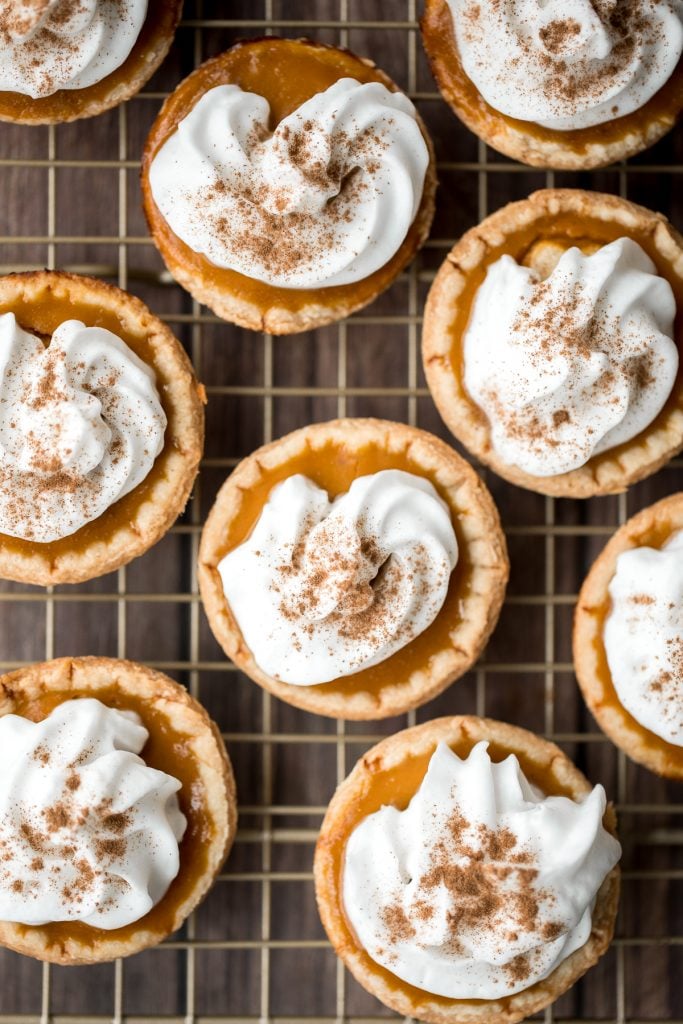
Sweet potato pie is warm and cozy, spiced with classic fall flavors, and delicious. Easy to make with cooked sweet potatoes or canned sweet potato puree.
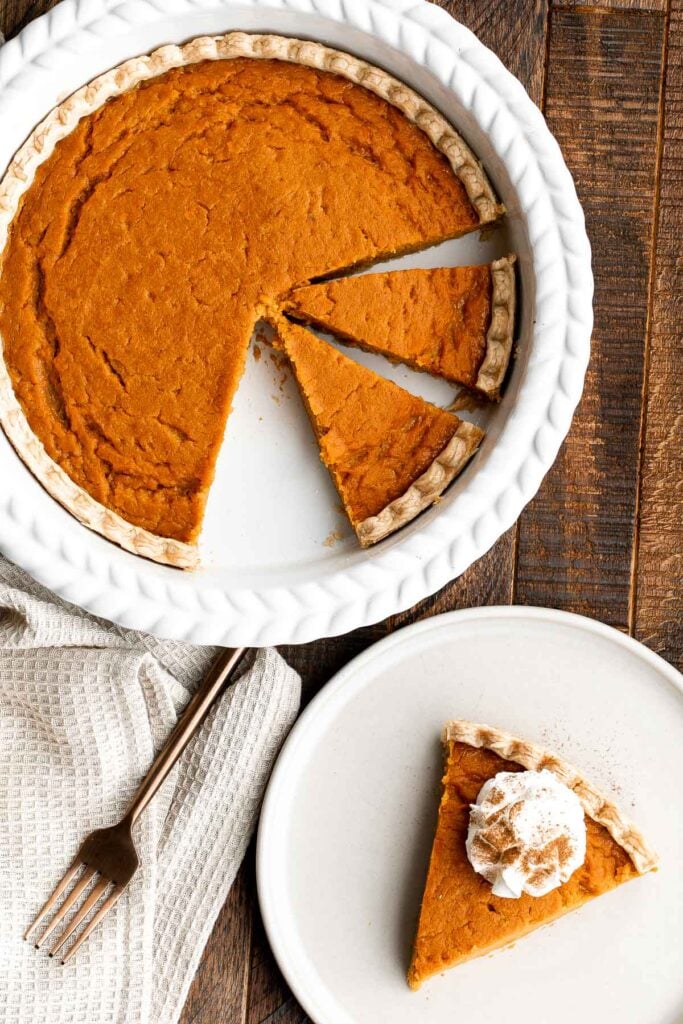
Give traditional pecan pie a twist this holiday season by using finely chopped pecans to create a smooth topping on this chopped pecan pie with a smooth custard filling. This pie is also ridiculously easy to make.
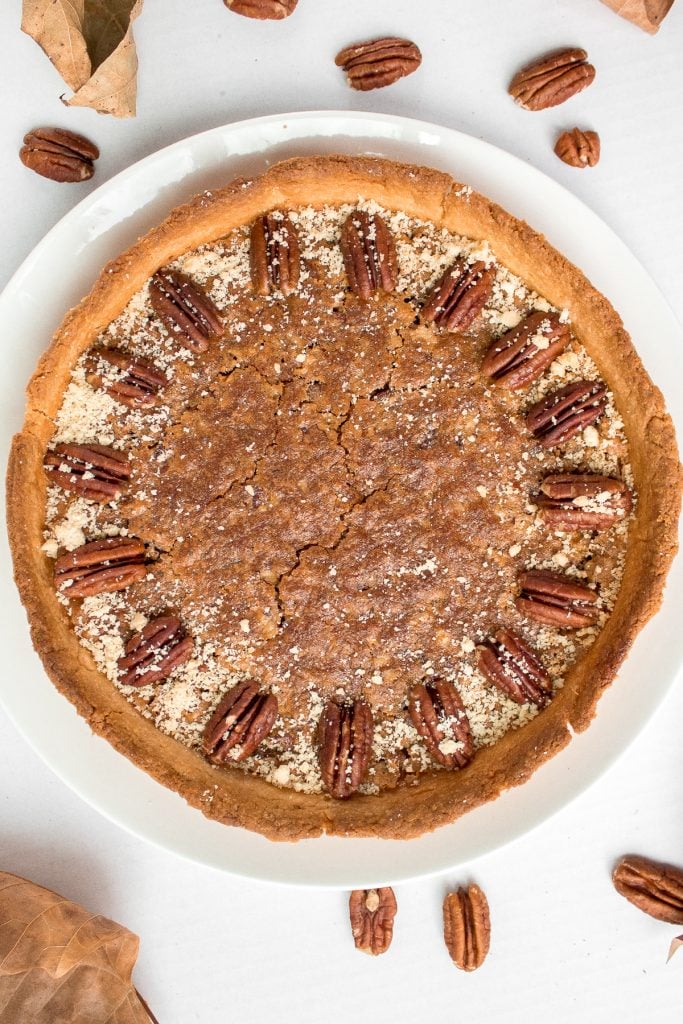
Beyond Thanksgiving Pie
Pecan pie bars are the best and easiest way to enjoy the flavors of pecan pie but with half the effort and in a handheld bite-sized form.
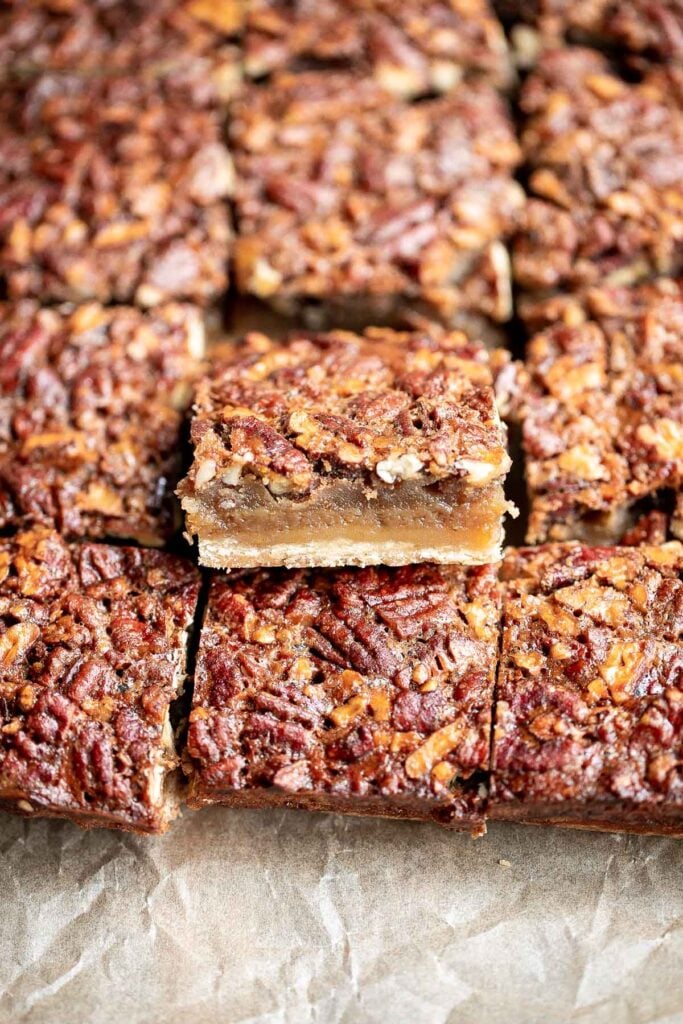
Baked Apples are soft, warm, and tender, with a crunchy sweet cinnamon oat filling. This cozy and comforting fall dessert is quick easy to make too.
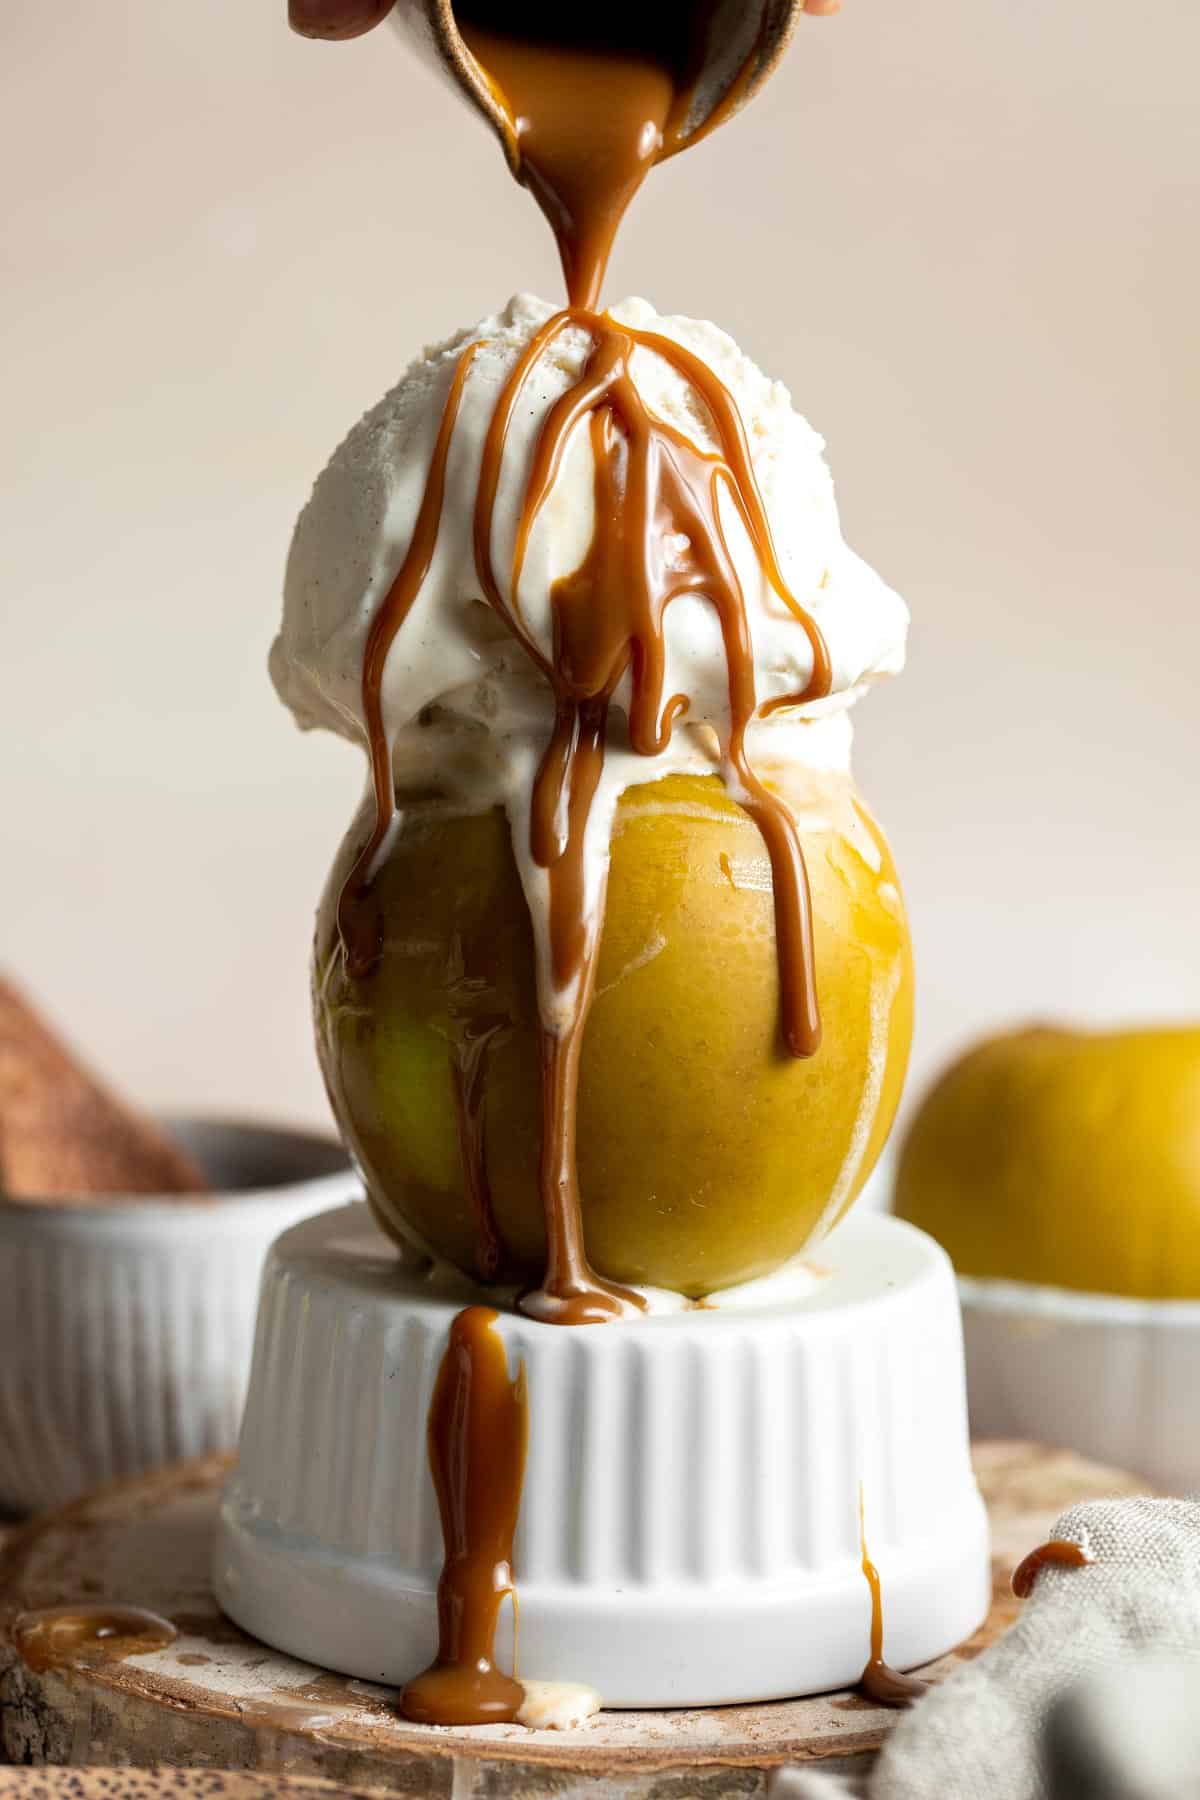
Individual apple crisp is a sweet tart fall dessert served in single-sized portions with all the crunchy corners of crumble. And so quick and easy to prep.
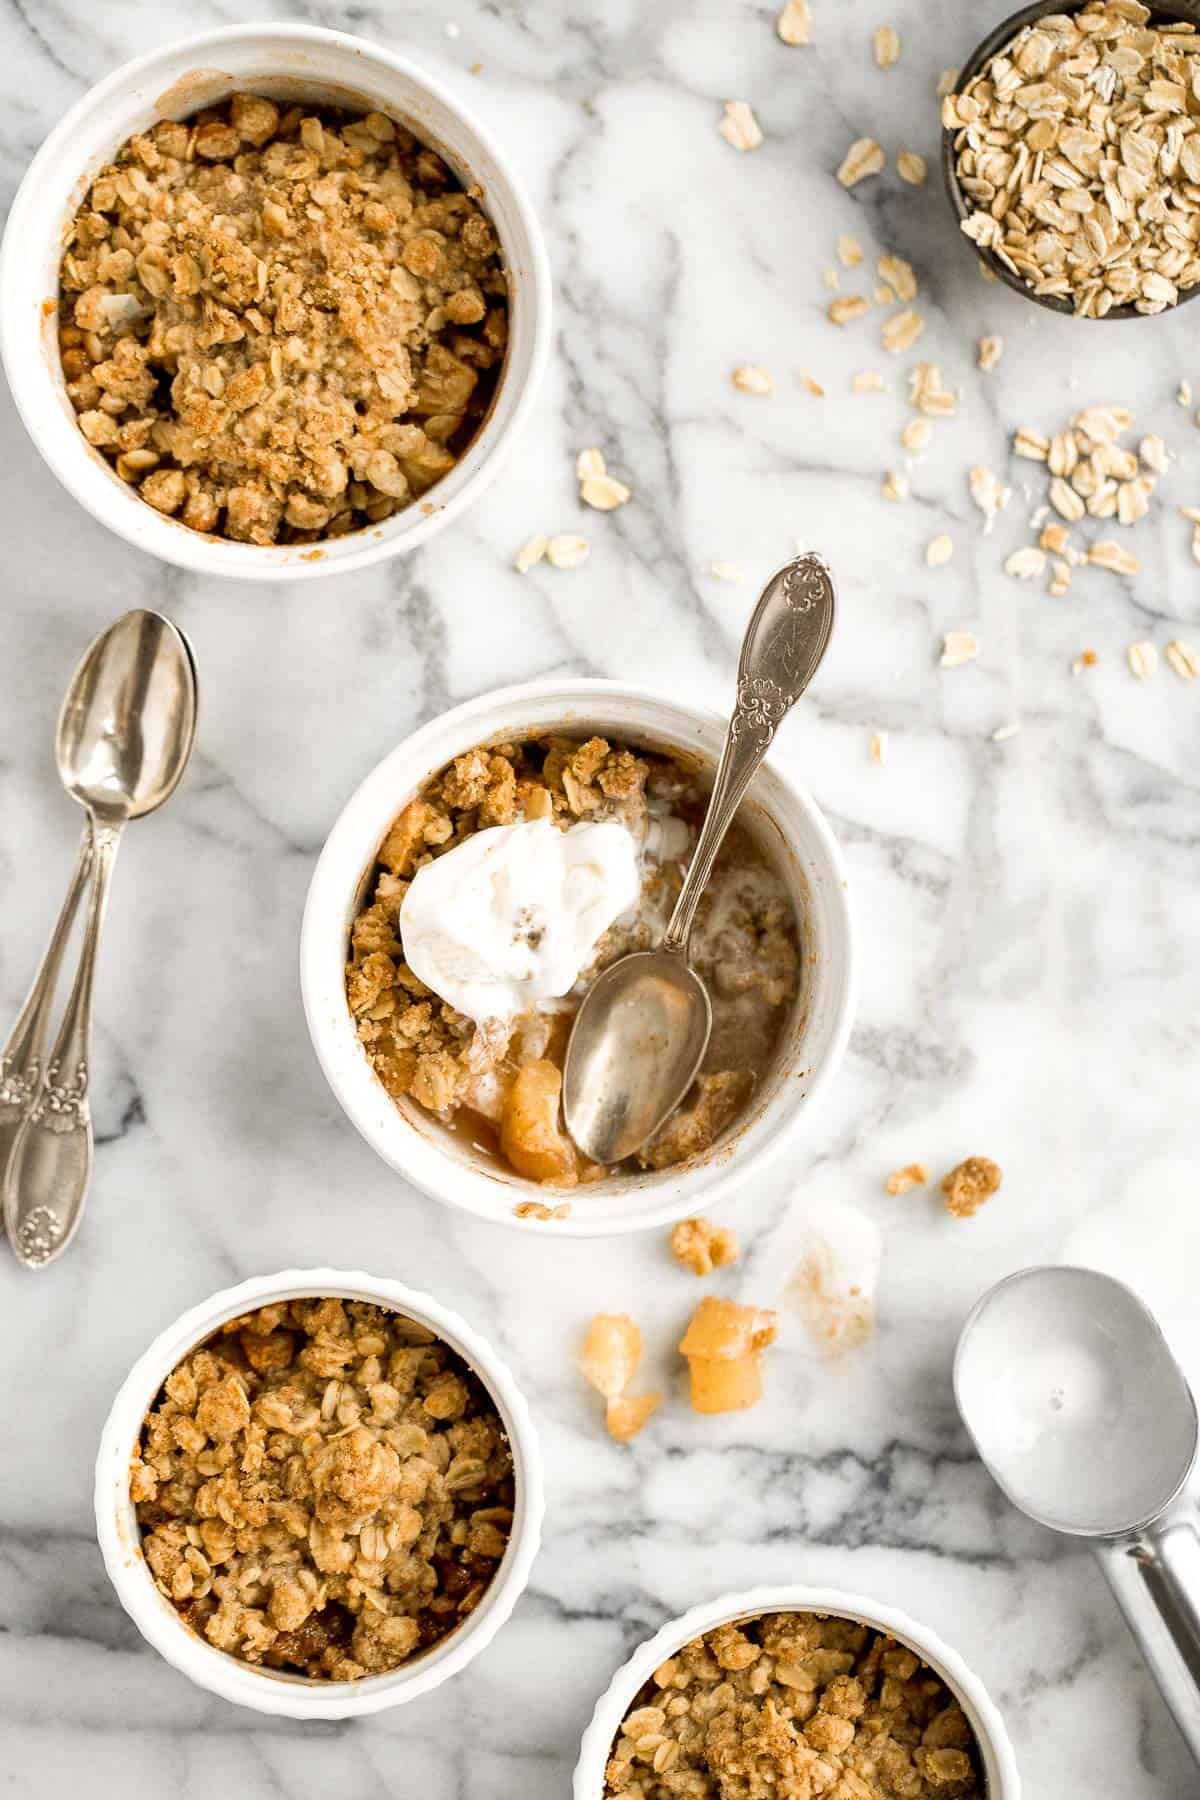
Homemade Apple Pie Bars are sweet, tart, and crumbly. With 3 delicious layers including a flaky pastry crust, cinnamon apple filling, and crumbly topping.
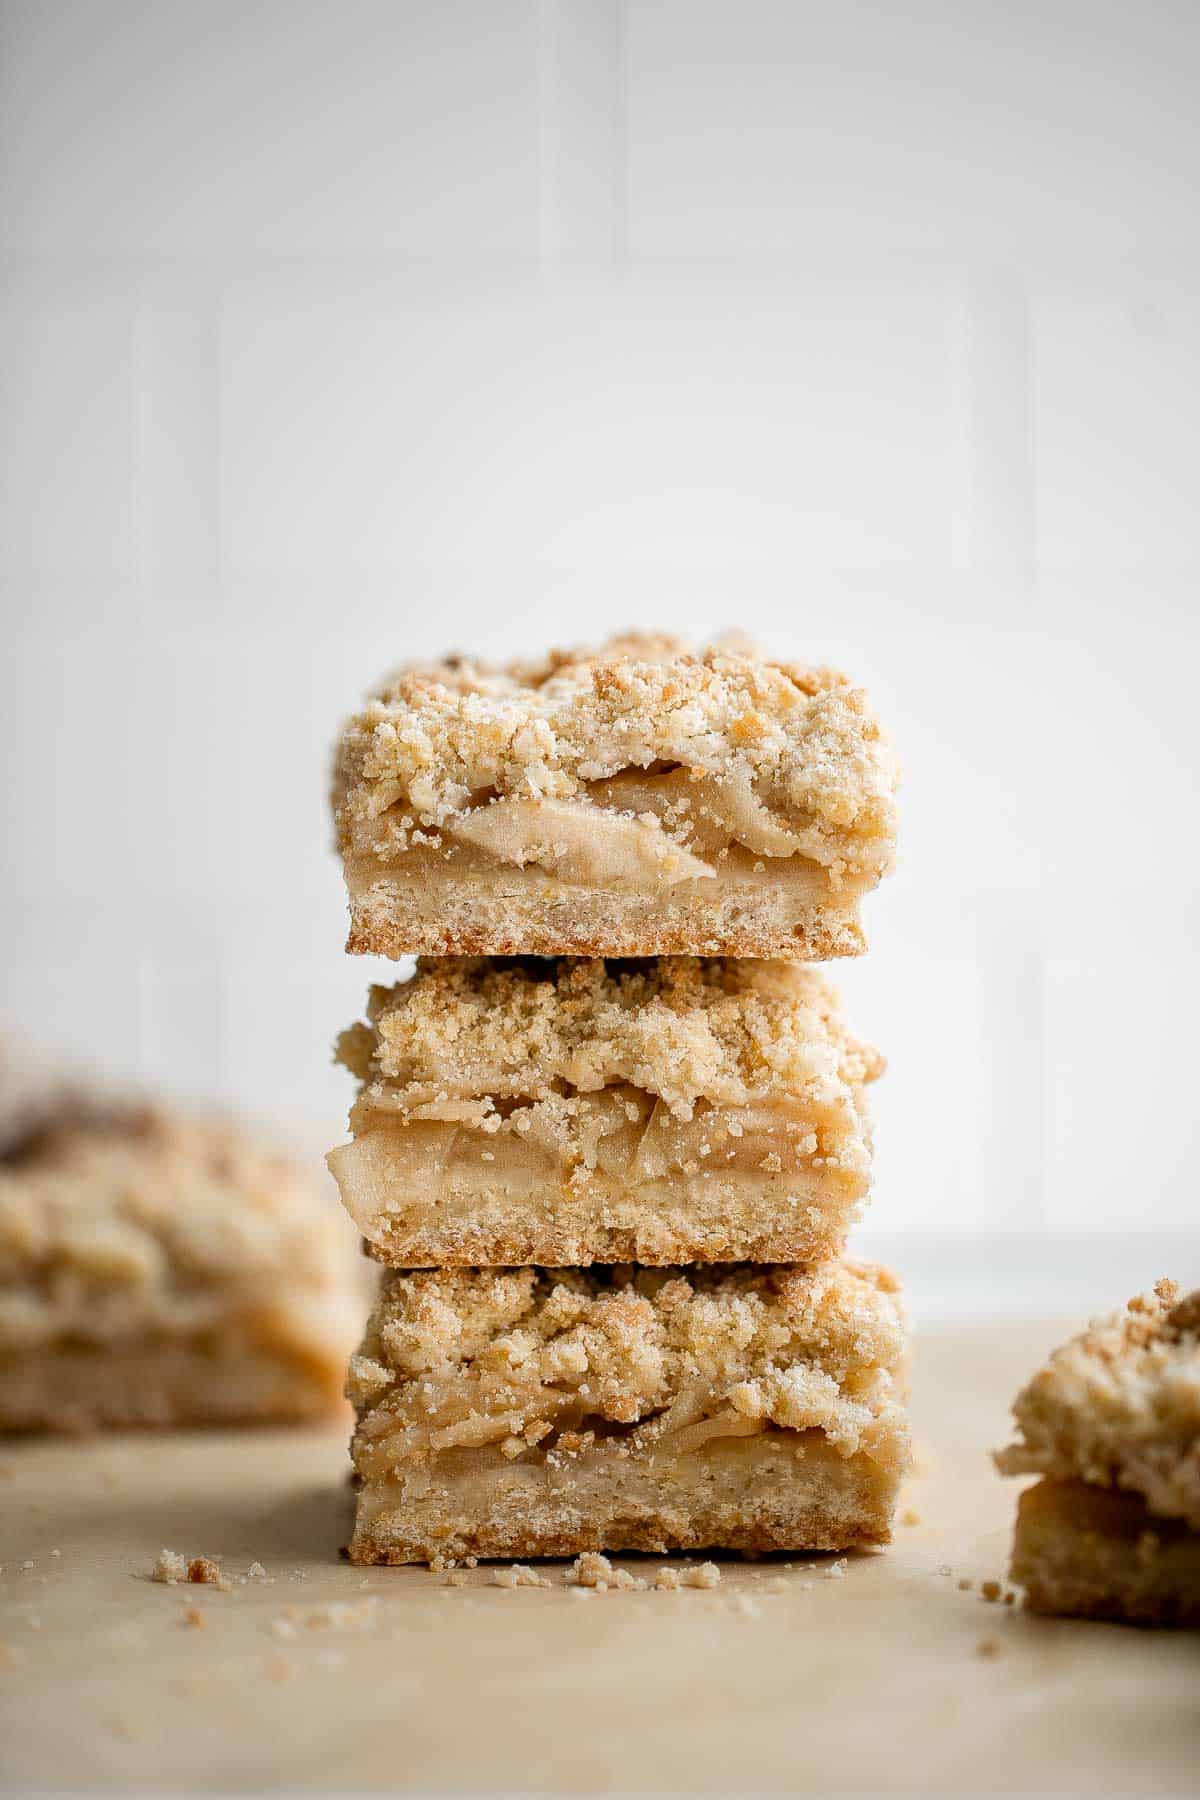
Why make pie or brownies when you can have them both at once? These Pecan Pie Brownies are the perfect fall treat for any occasion - rich, sweet, indulgent.
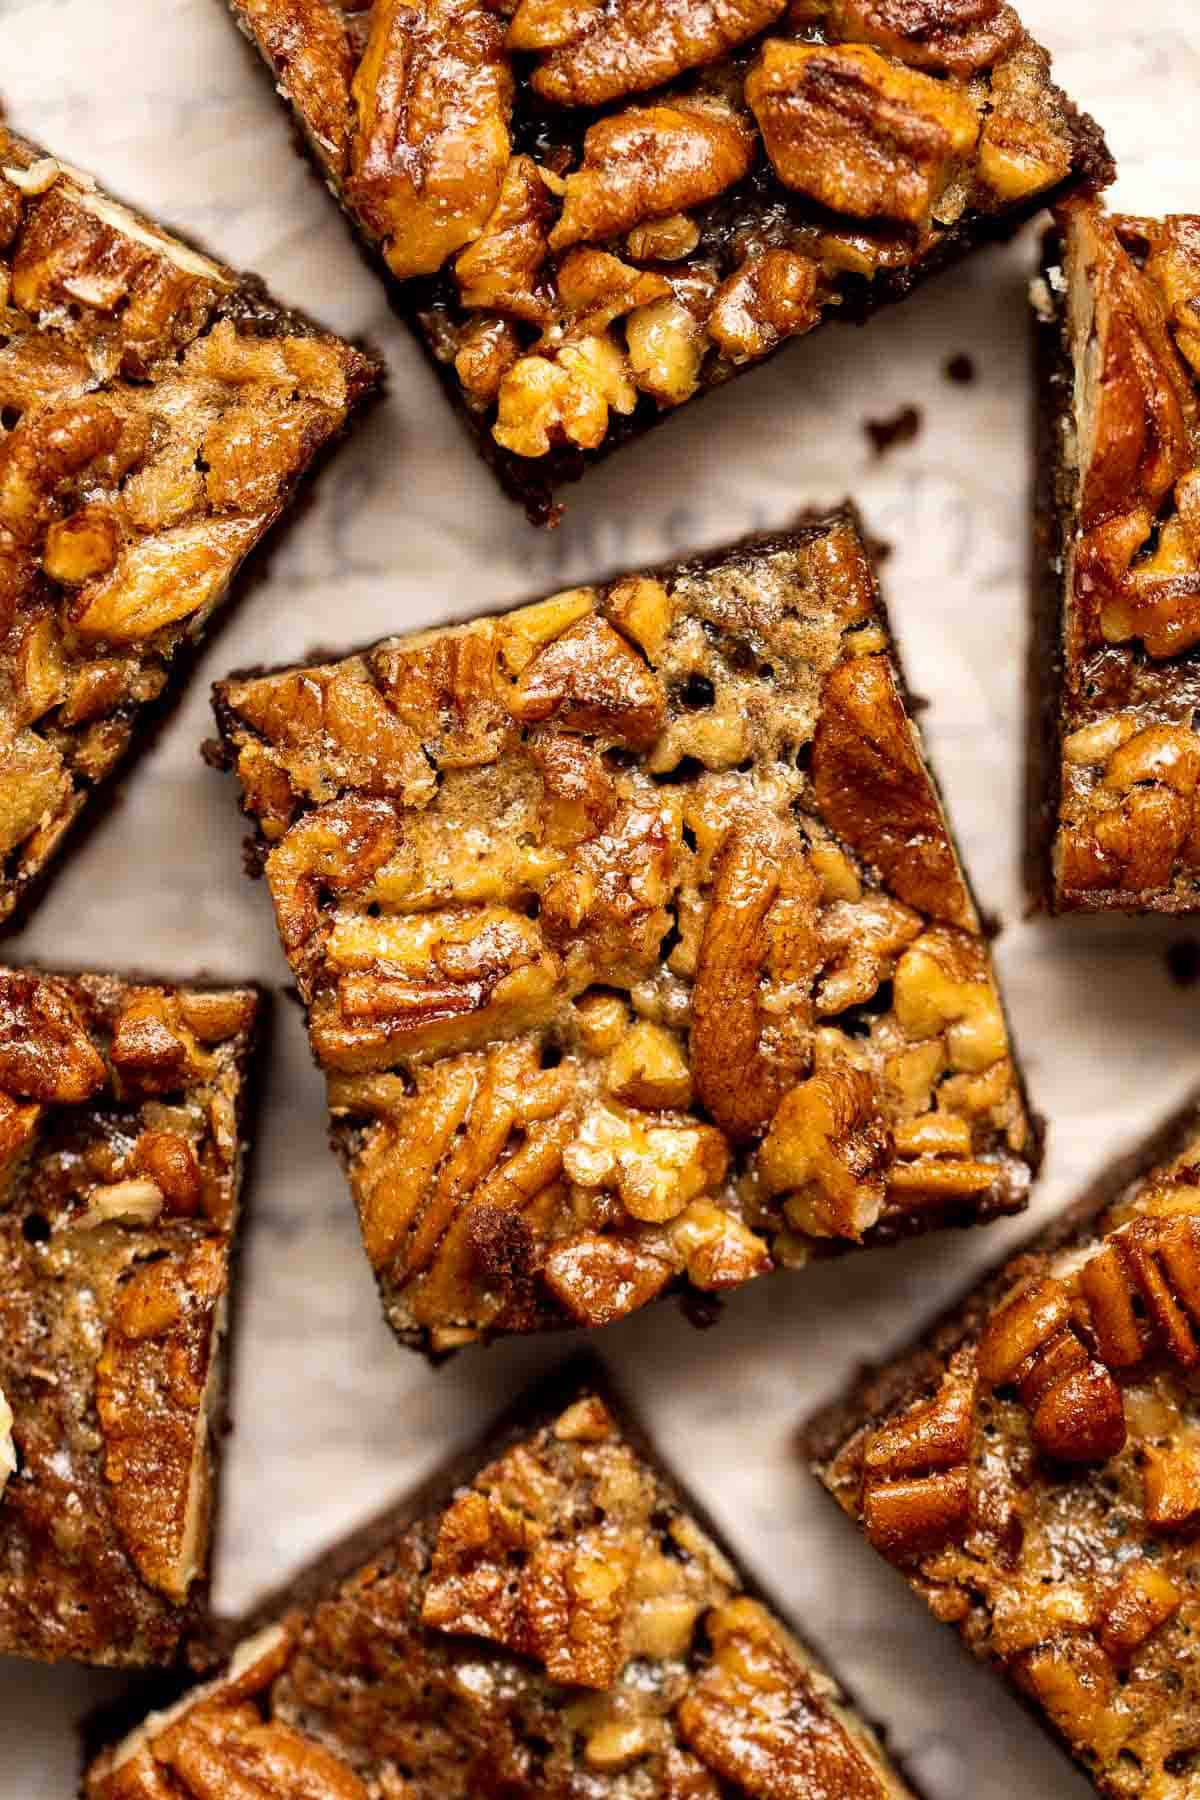
Easy homemade apple hand pies/turnovers are the perfect fall treat -- stuffed with tender apples and cinnamon and wrapped in crispy, flakey, buttery crust.
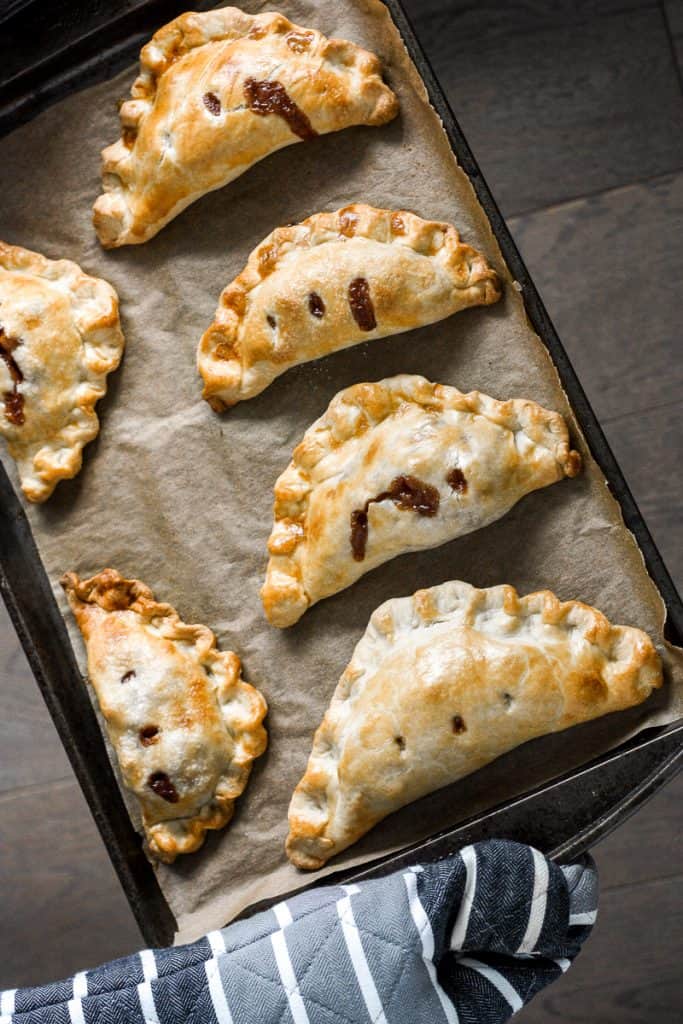
Apple crisp with tender cinnamon-sugar apples and crispy oat topping is sweet, tart, and just as delicious as an apple pie but takes a lot less effort.

Cranberry-Apple Cobbler with Biscuits
Sweet and tart cranberry-apple cobbler with biscuits is packed with fresh fruit and a buttery biscuit topping. This holiday favourite is easy to make.
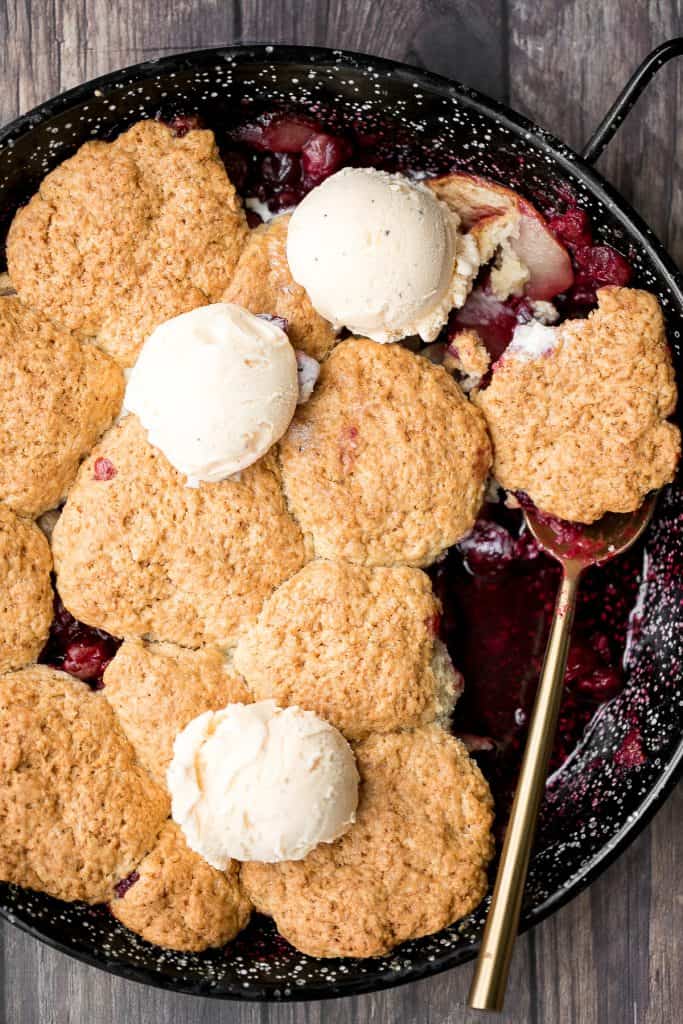
Nothing says fall better than Homemade Caramel Apples that are sweet, delicious, and fun to make. Chewy caramel made from scratch covers crisp juicy apples, topped with optional toppings.
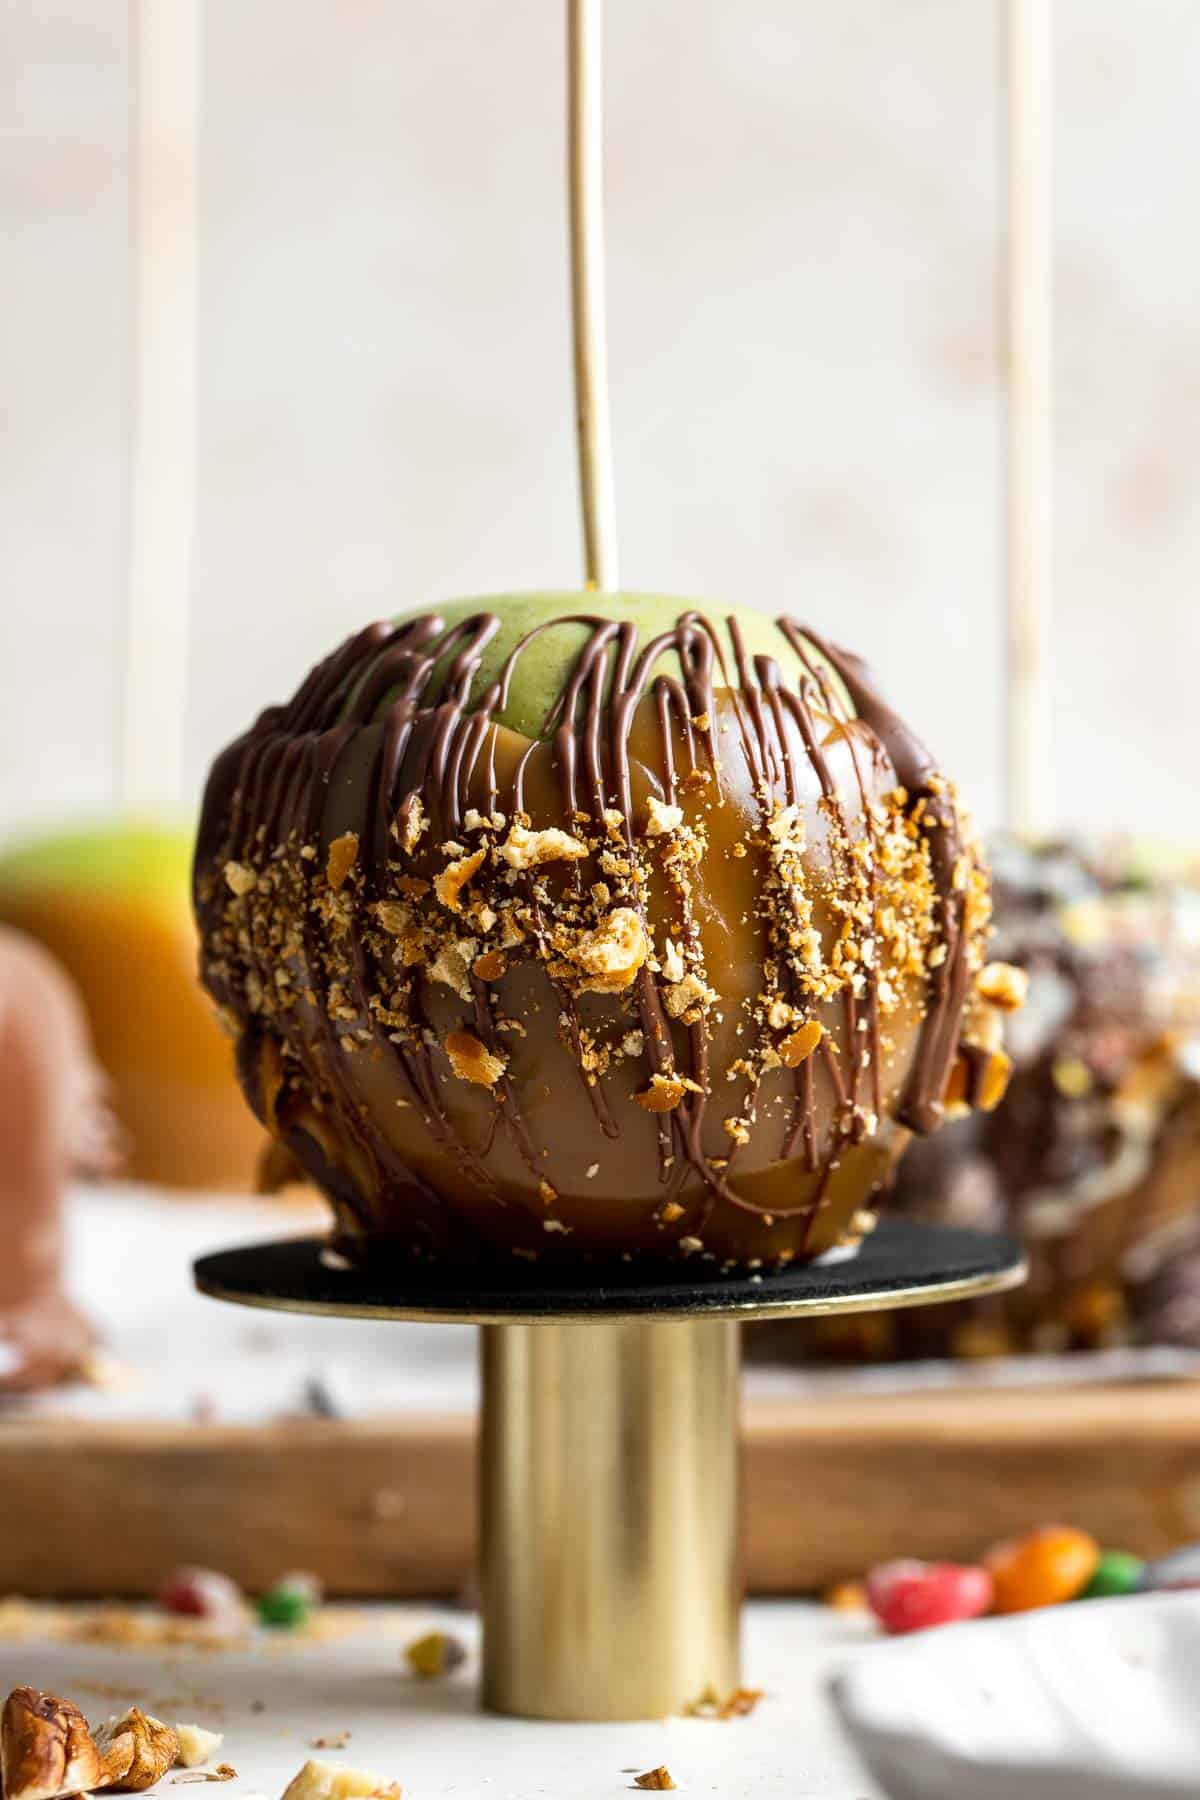
Got some leftover cranberry sauce from your holiday dinner? Revive them into delicious leftover cranberry sauce oat bars, perfect for breakfast or dessert.
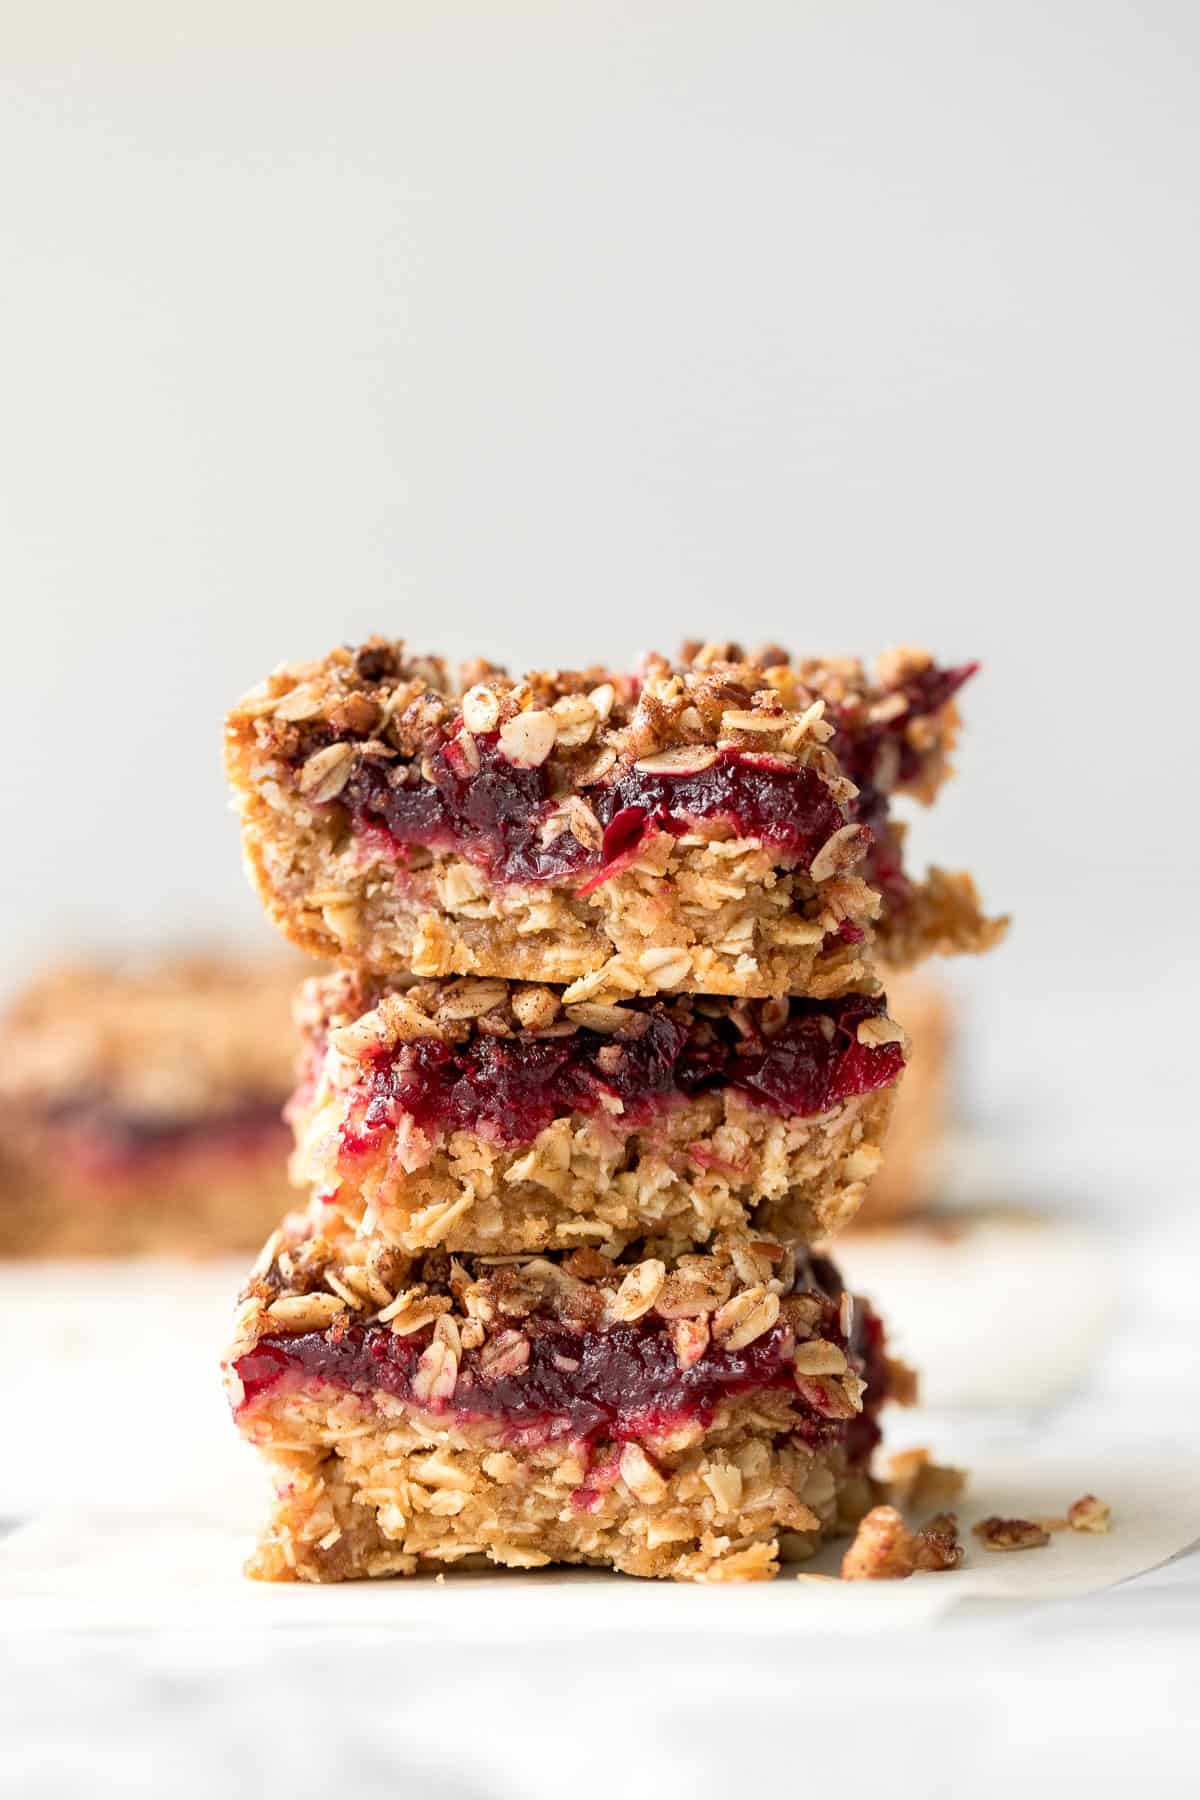
Did You Make Any of These Thanksgiving Pie Recipes?
Please leave a comment and rating below, and let me know what you thought of this round up of thanksgiving pies. Be sure to snap a picture and tag me on Instagram @aheadofthyme or share it on the Pinterest pin so that I can follow along.
HUNGRY FOR MORE? Don't forget to sign up for my email newsletter so that you don't miss any recipes. You can also follow along on Instagram and Pinterest for more recipe updates.
Easy Small Batch Ciabatta Rolls
We have been baking bread all week, so my home smells like a fresh bakery, and I ain't mad about it! The latest to come out of my kitchen are easy small batch Ciabatta Rolls. These rolls are soft and airy inside, with that perfect crunchy, crackly crust. They are also real easy to prepare, like 10 minute no-kneading kind of easy.
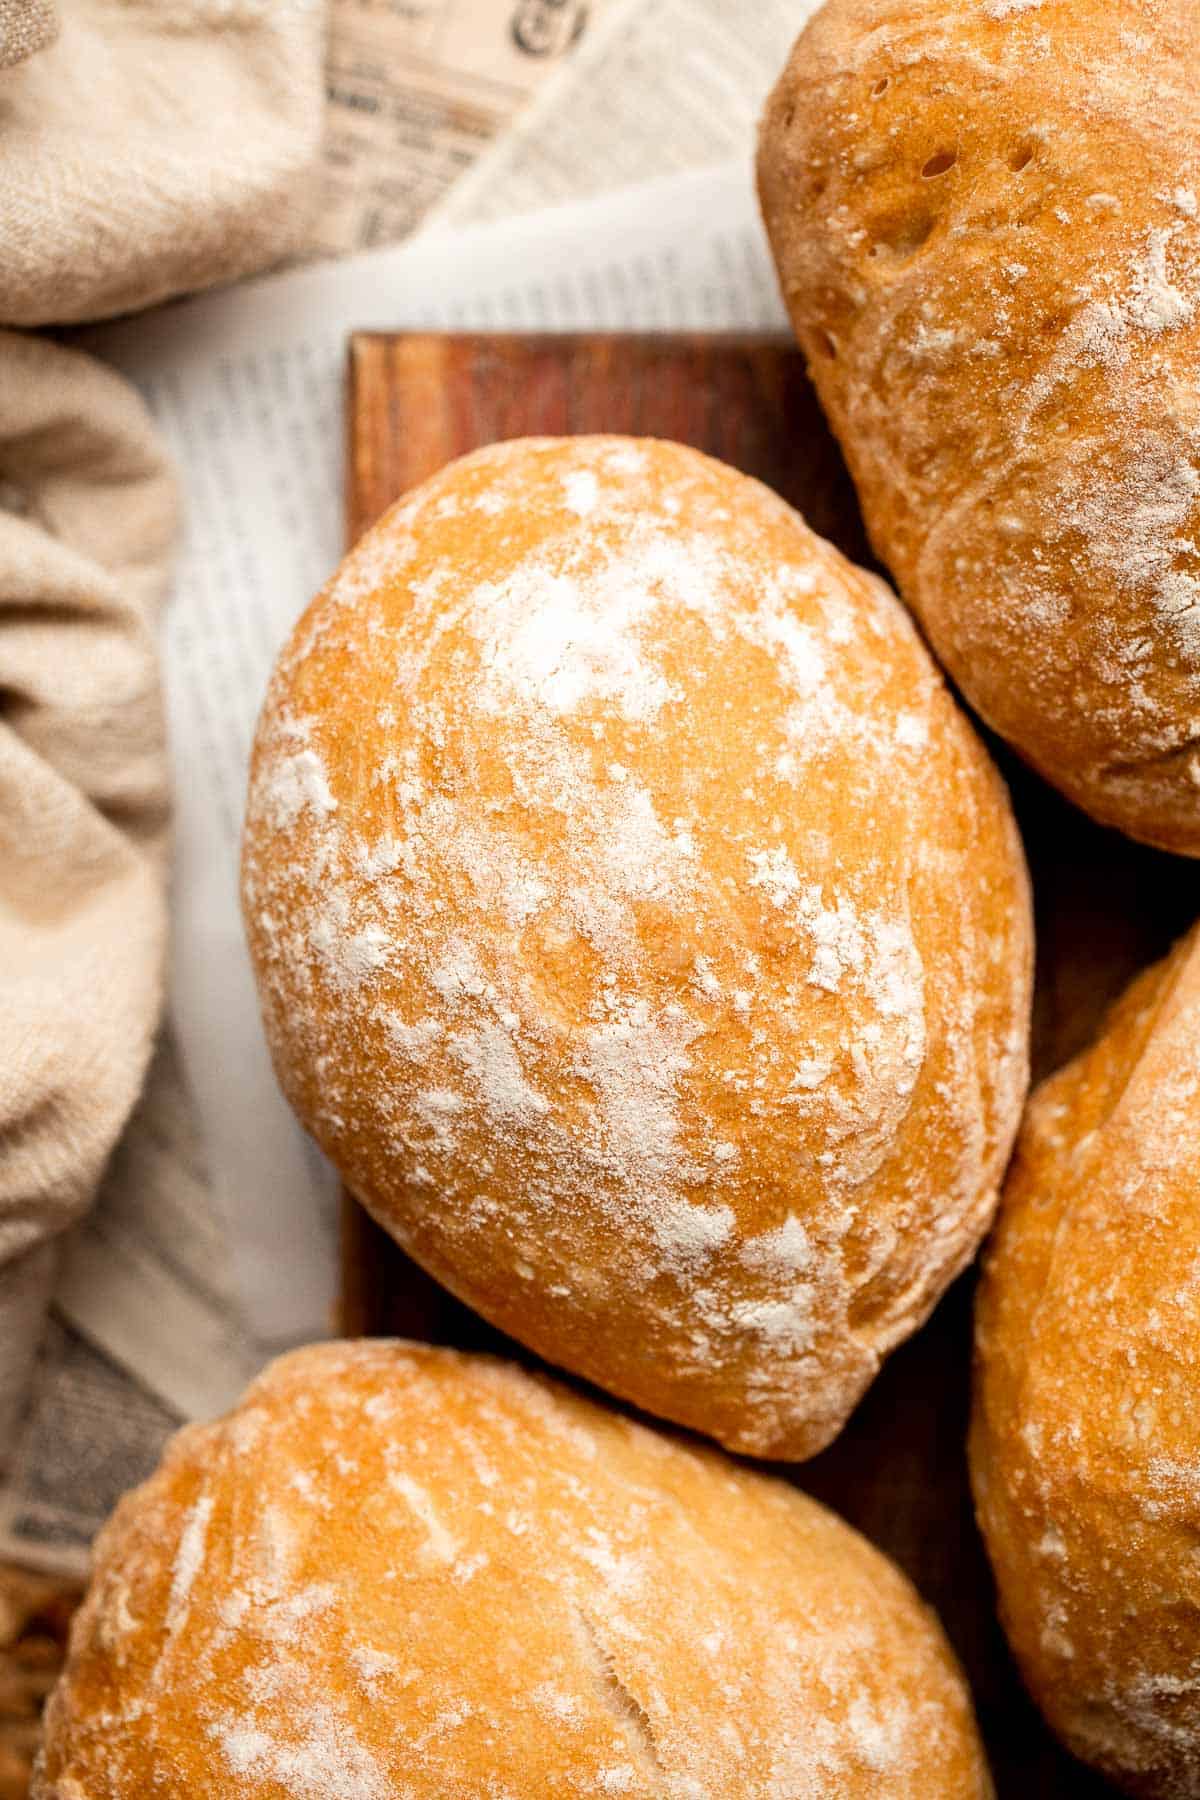
Why You'll Love this Ciabatta Roll Recipe
- Tried-and-true recipe. If you read through one of the hundreds of comments on this post, you will quickly realize just how popular this recipe is - it's truly everyone's ciabatta recipe! Try it once and you'll come back to this recipe over and over again.
- So light and fluffy. These easy ciabatta rolls are made with a really tender basic dough that has a high water content. As they're folded together, they create a natural pocket perfect for adding flavored butter or a drizzle of honey. They're so soft and so much fun to eat!
- Uses basic ingredients. With only 4 simple ingredients - flour, yeast, water, and salt - you can create these perfect Italian rolls. If you are a seasoned baker, you will already have everything you need on hand! We love pantry staple recipes!
- Easy to make. Although you need to be careful when handling the delicate dough, the actual dough comes together quick quickly without using any fancy tool or equipment.
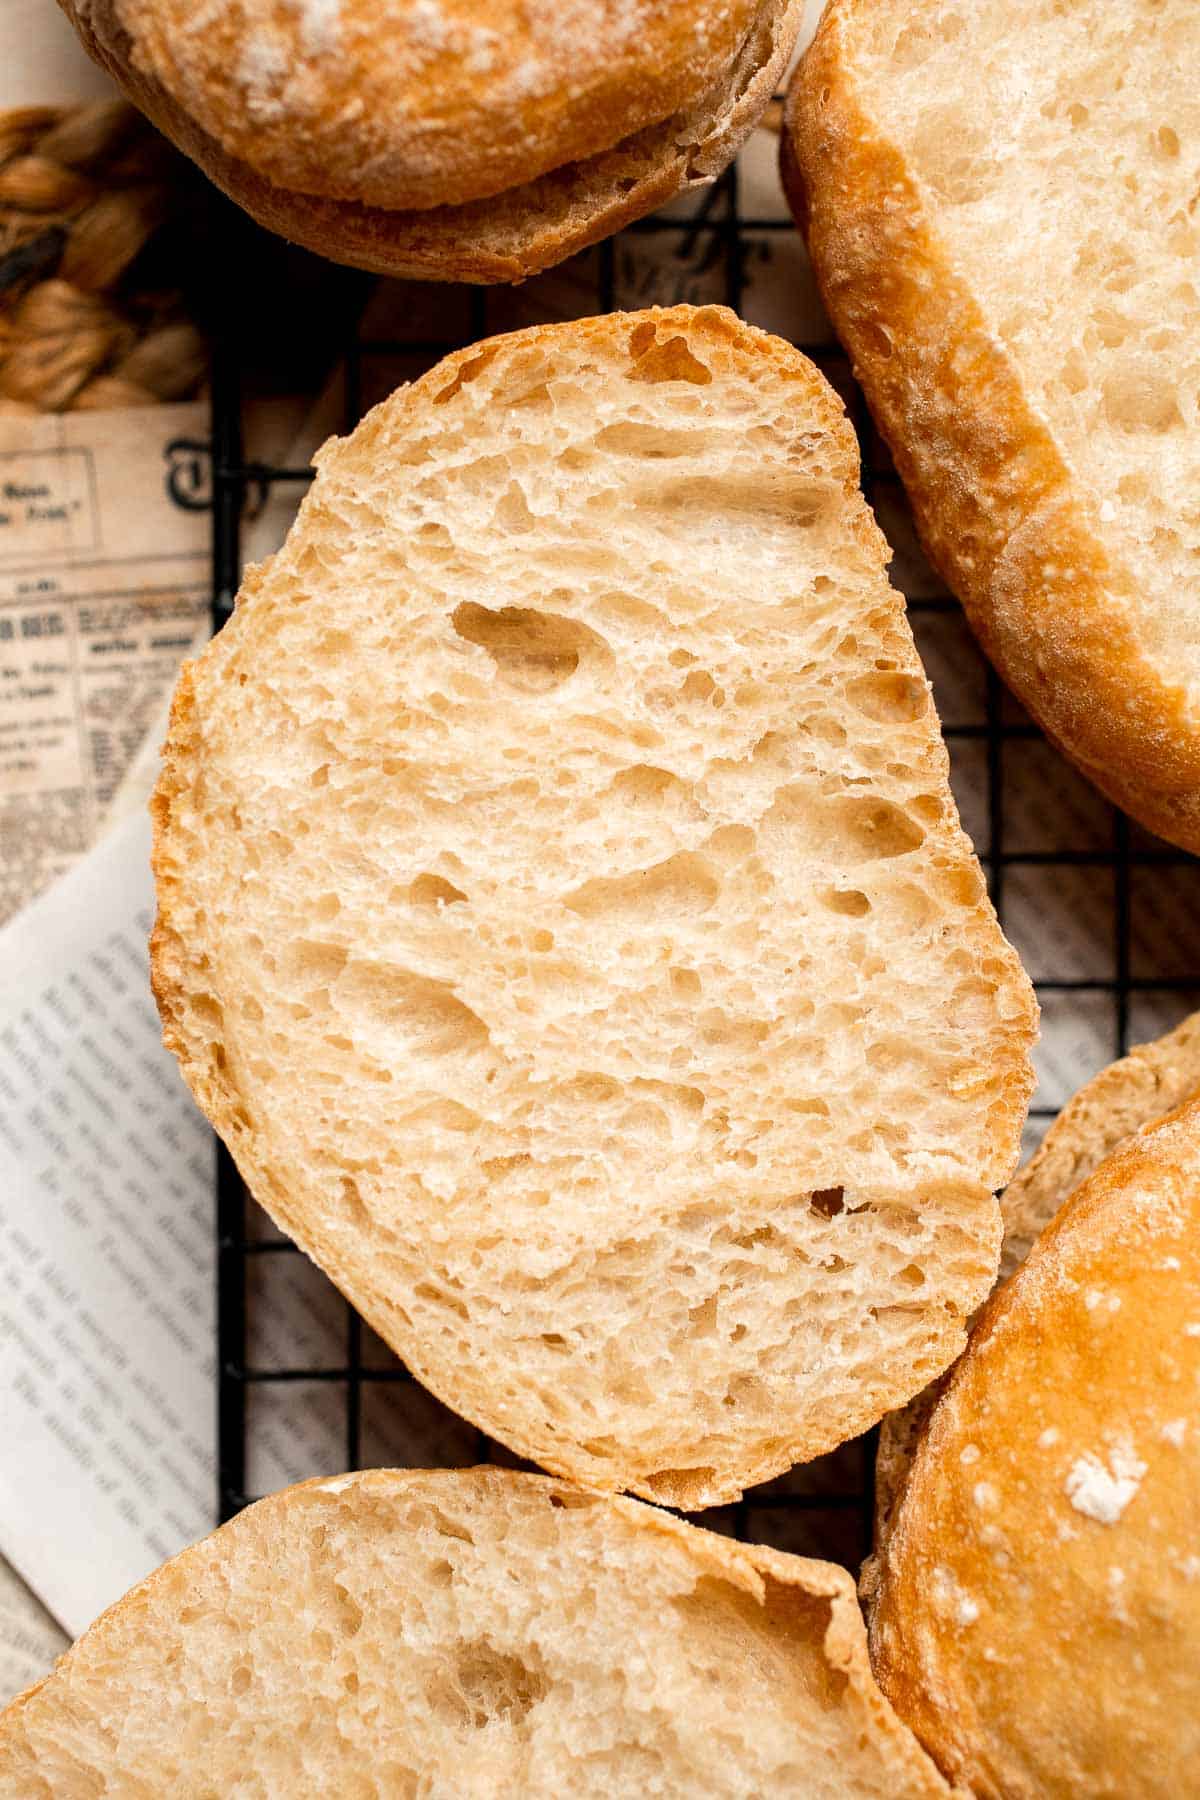
Ingredient Notes
What is in homemade ciabatta rolls? To make almost any rustic bread, you will just need the following 4 simple ingredients (full measurements in recipe card below):
- flour - we use all-purpose flour.
- yeast - we use instant yeast but you can use active dry yeast as well. You just need to wait about 10 minutes once mixed with water to allow it to activate first.
- water
- salt
You also need a baking tray to bake the bread in, and another baking pan to create steam in your oven.
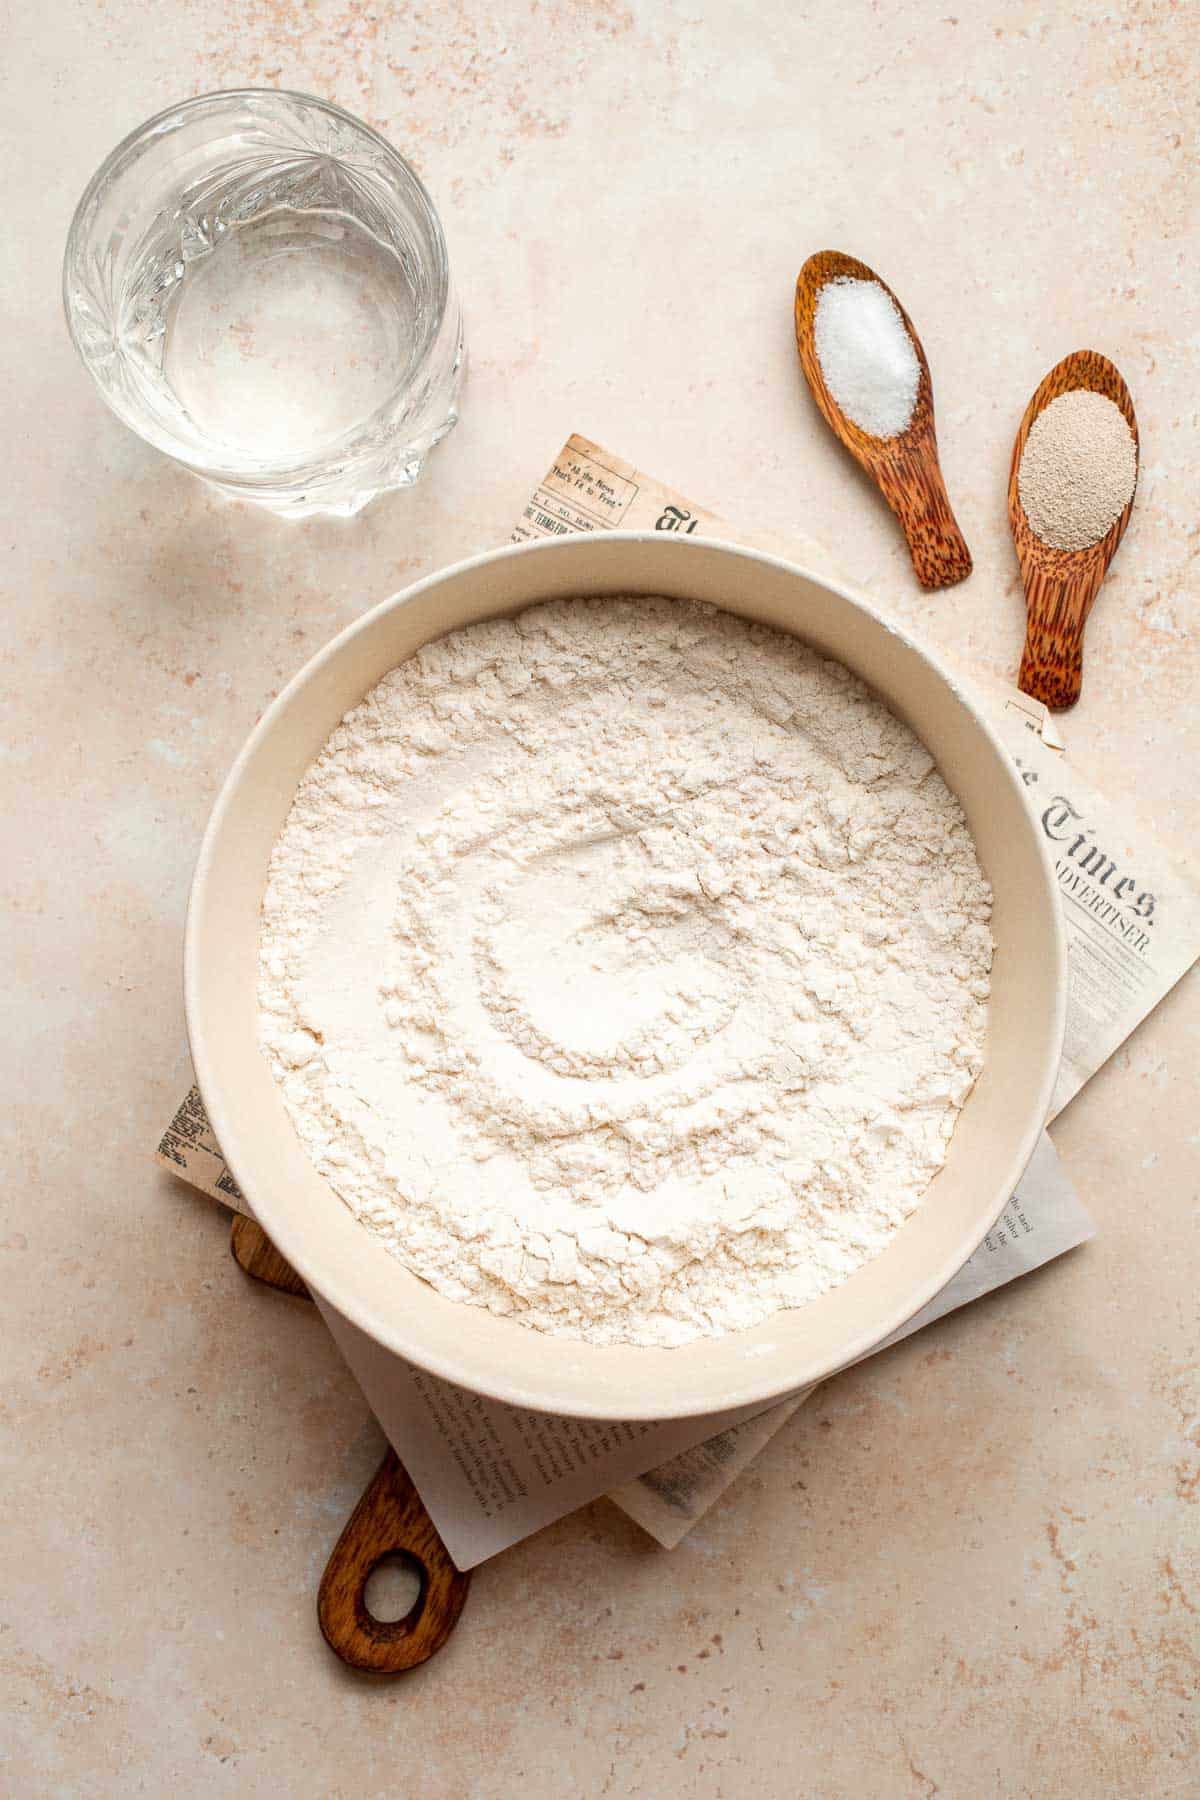
How to Make the Best Ciabatta Bread Rolls
There are 5 main steps in making a fresh batch of homemade artisan ciabatta rolls (See the full instructions in the recipe card below).
- Dissolve the yeast: Dissolve instant yeast in lukewarm water in a cup, stir until mixed together.
- Prepare dough: Combine flour and salt in a large bowl. Pour yeast liquid mixture in and whisk to combine.
- Allow dough to rise: Cover bowl with plastic wrap and let the dough sit at room temperature for 1 hour. Stretch and fold the dough every 30 minutes. After another hour and half, the dough will rise and approximately double in size.
- Divide the dough: Roll the dough into a log, and divide into 4 to 5 equal parts. Let the dough rest for another 40 minutes.
- Bake bread: Transfer the dough onto a parchment-lined baking tray. Preheat oven to 420°F and add steam. Bake for 20 minutes.
Instructions for Making Ciabatta Rolls
First, prepare the dough (1 hour rise time).
- Dissolve the yeast. In small cup, dissolve instant yeast in lukewarm water and stir to mix together (the mixture should start to bubble and develop a yeasty aroma). Let it sit for 2 minutes.

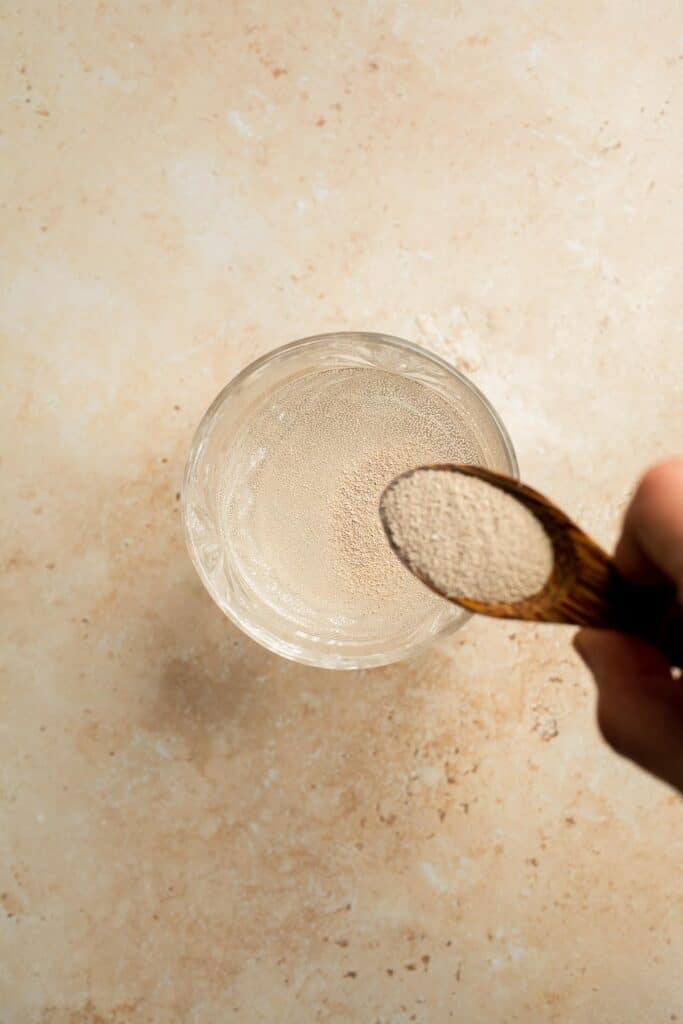

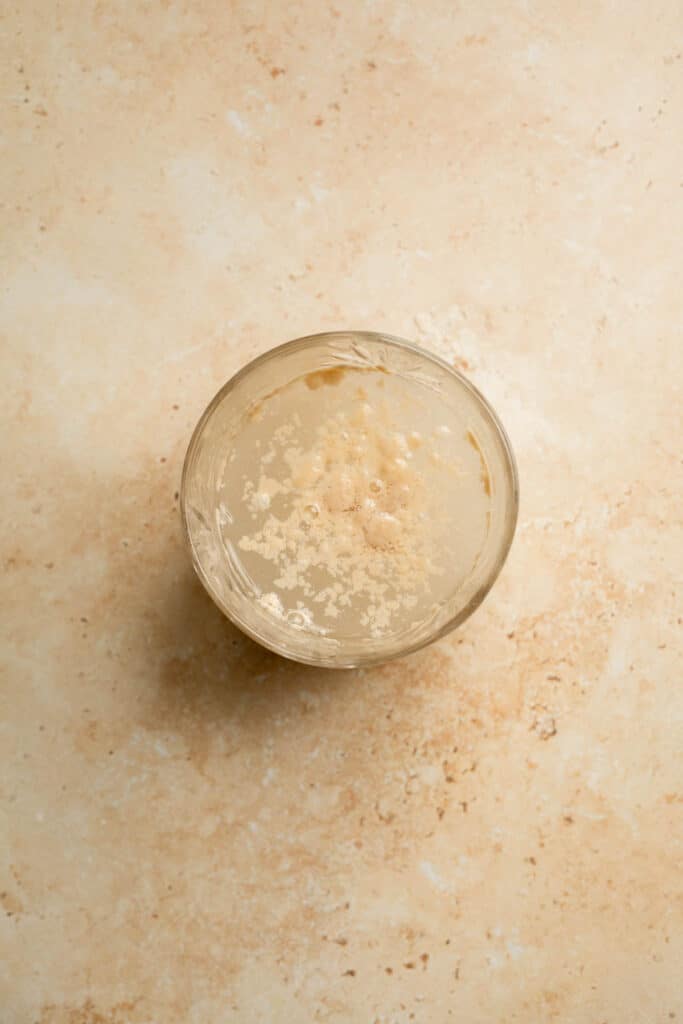
- Make dough. In a large mixing bowl, add flour and salt. Pour in yeast mixture and whisk until fully combined, scraping down the sides of the bowl (there should be no dry flour particles visible). The mixture is very sticky and wet, with an 80% hydration (flour to water ratio).
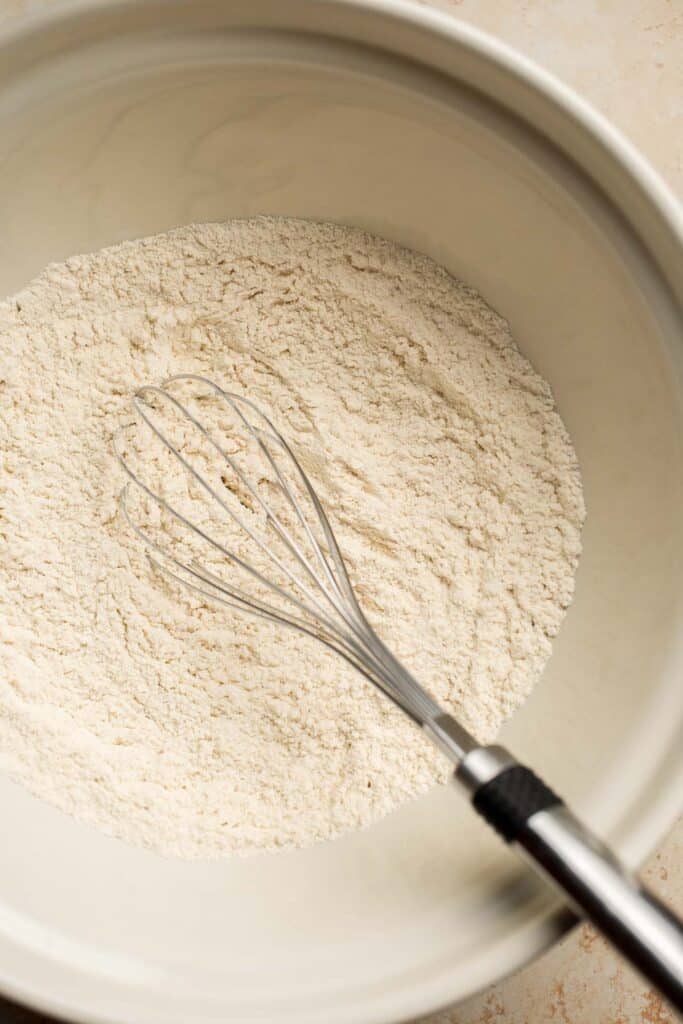
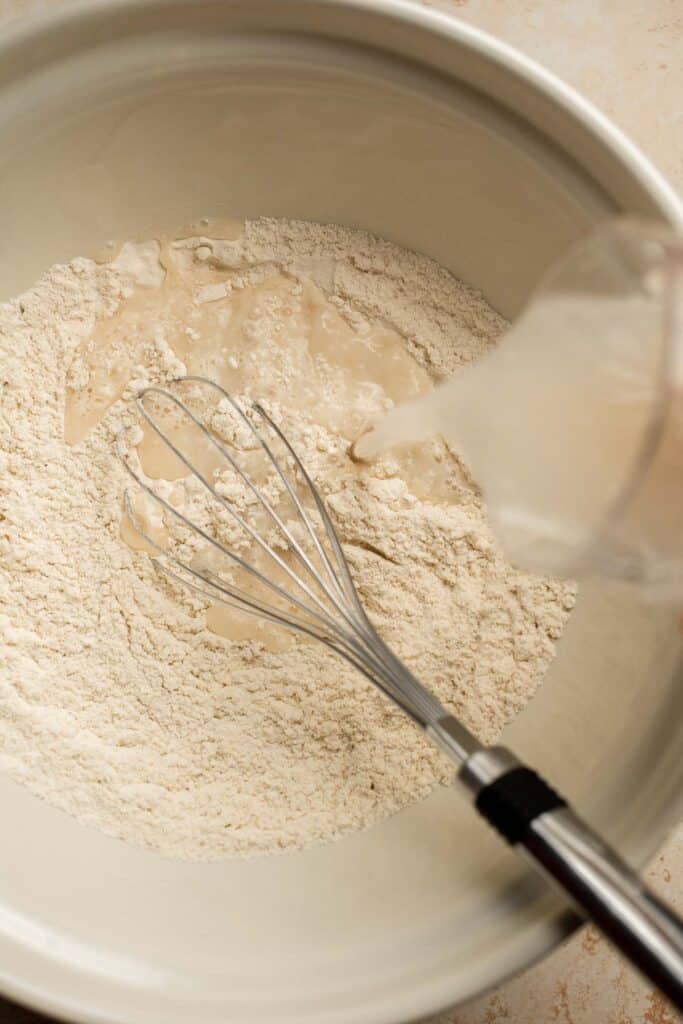
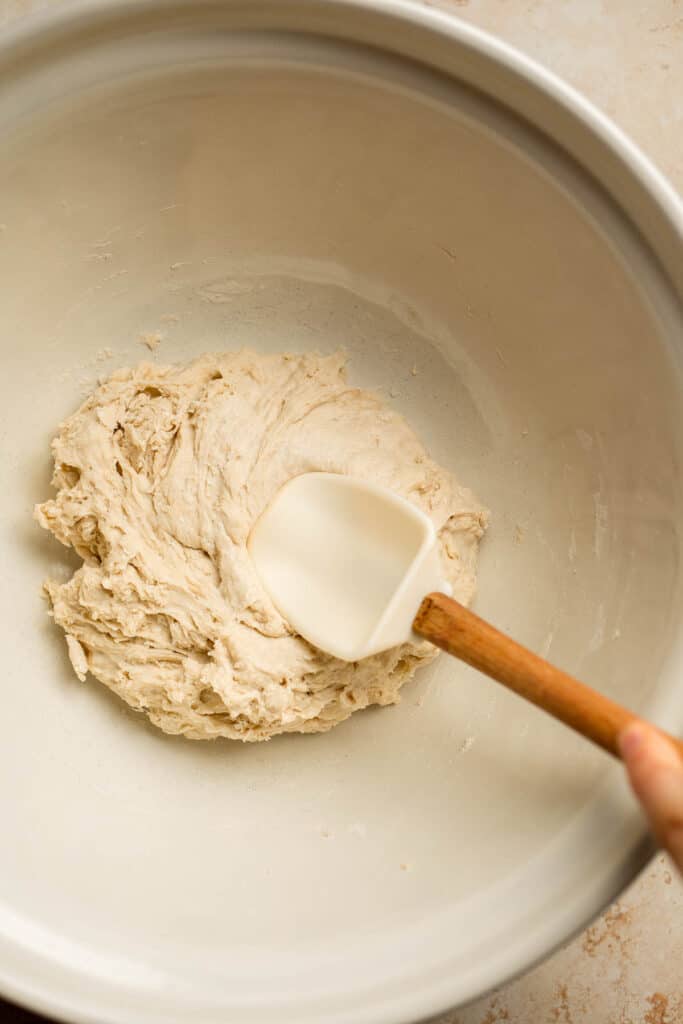
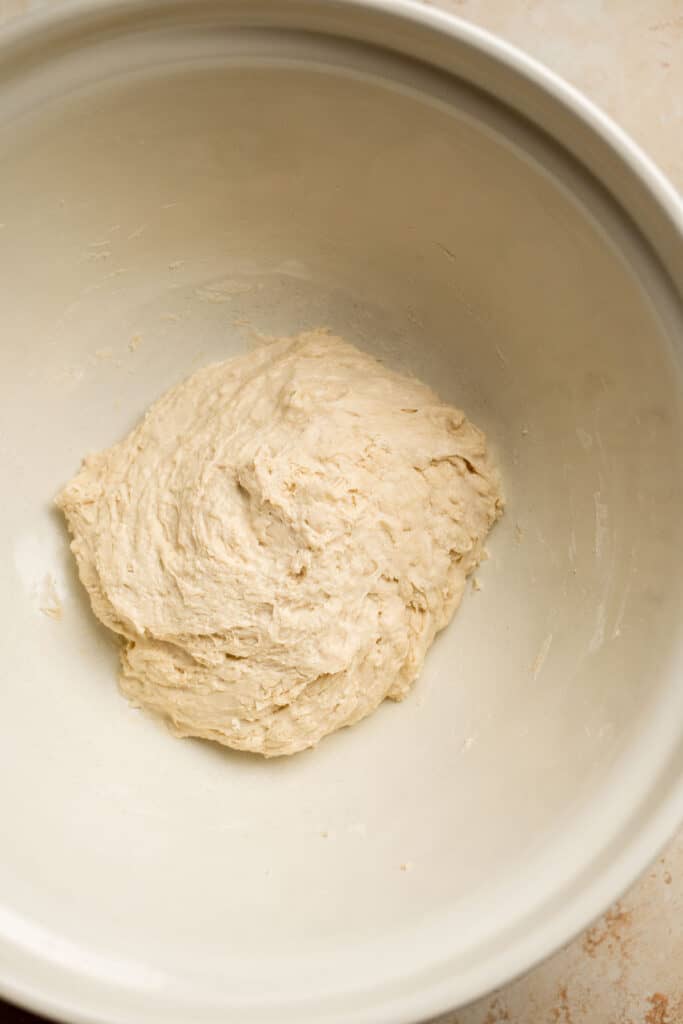
- Rest. Cover the bowl with plastic wrap and let it sit at room temperature for 1 hour (Note that a higher room temperature will speed up the fermentation process and will cause the dough to rise faster).
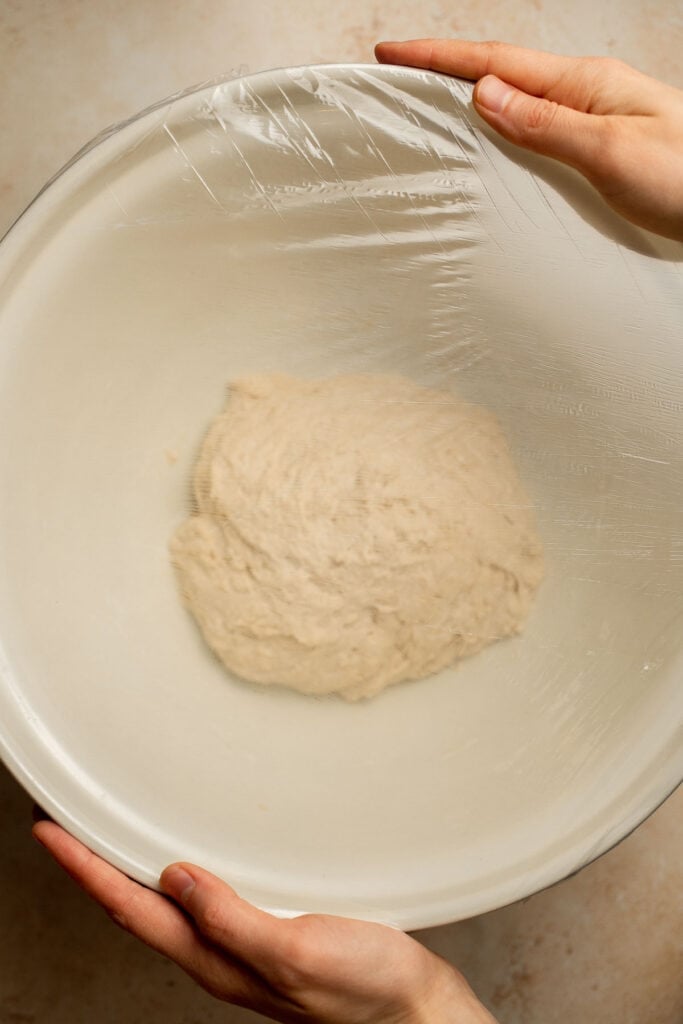
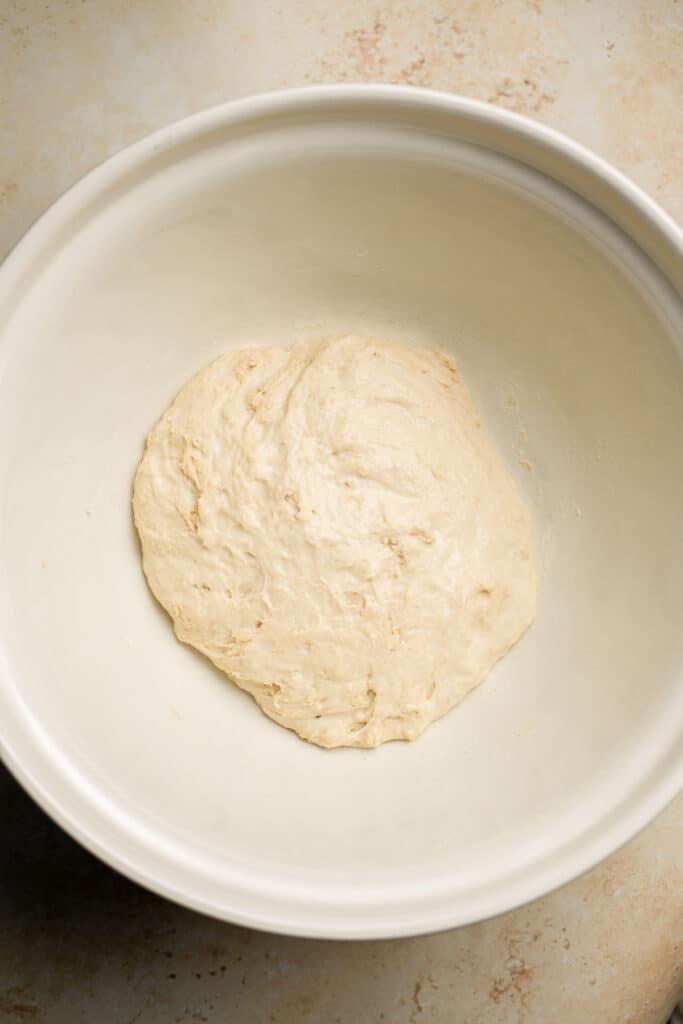
Next, stretch and fold the Dough (1.5 hour rise time).
- Stretch and fold. Apply some water onto your hands and stretch and fold the dough in the bowl by folding the edges into the centre, one edge at a time. Wet hands make it easier to work with the dough and it should take you less than a minute to fold all 4 sides.
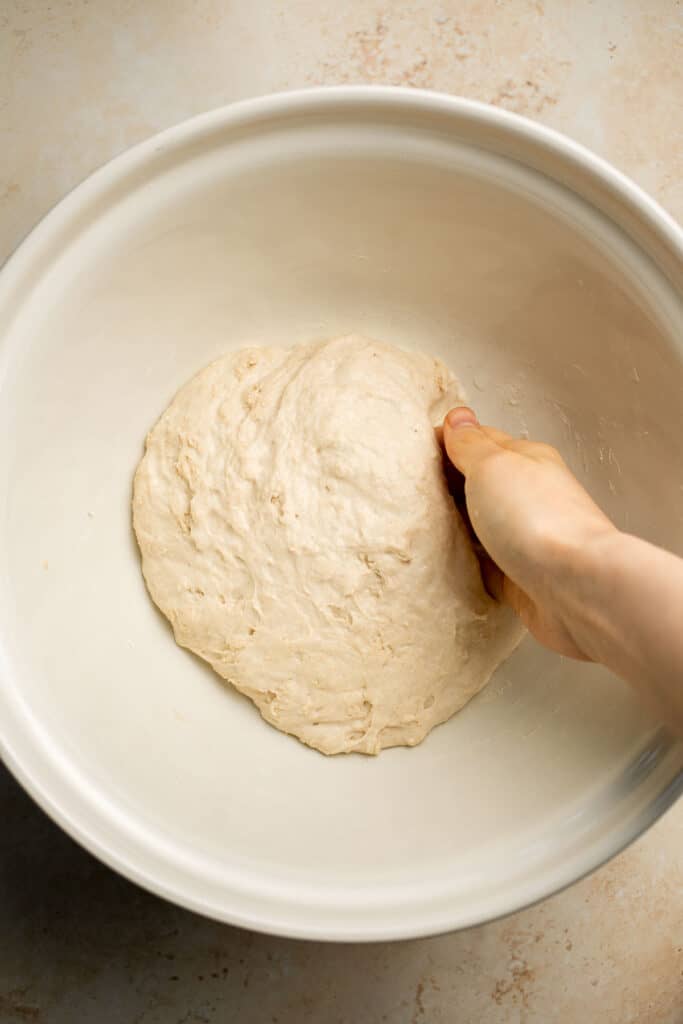
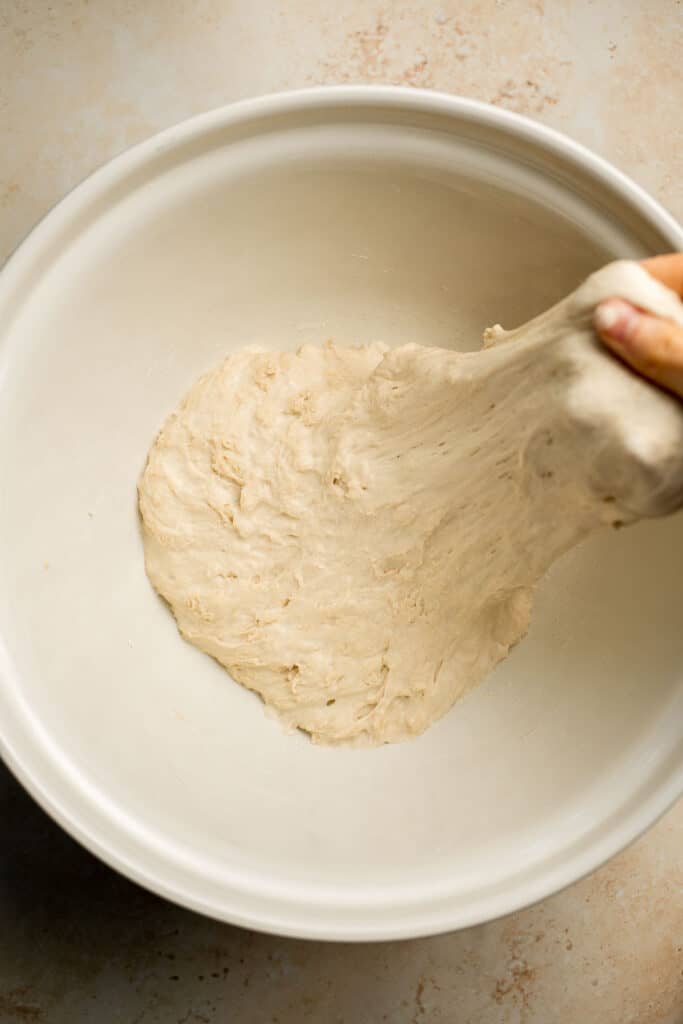
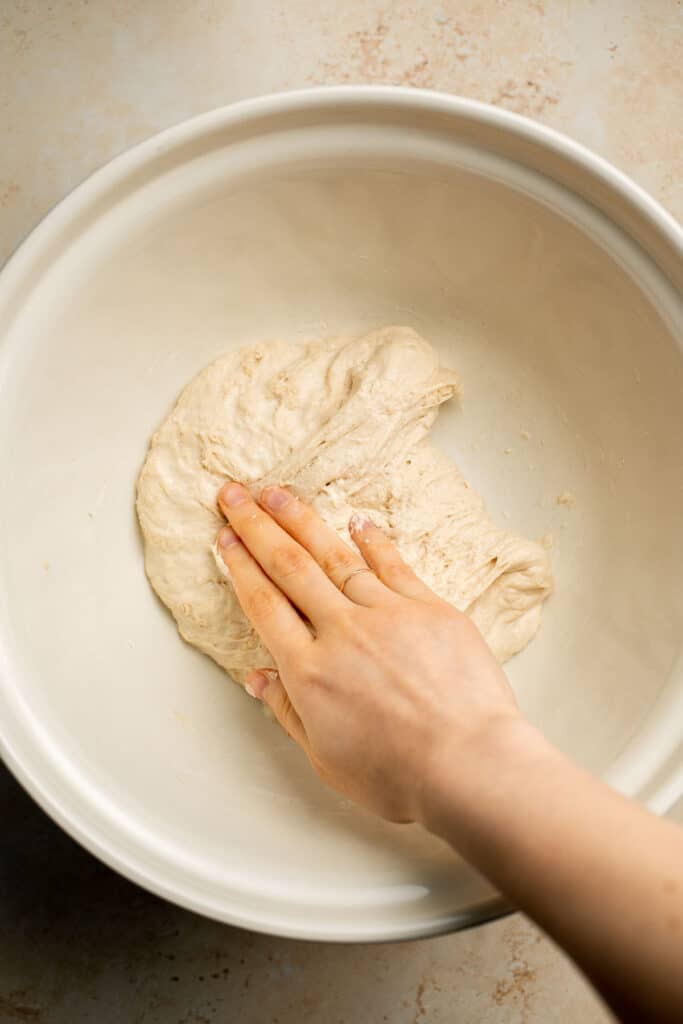
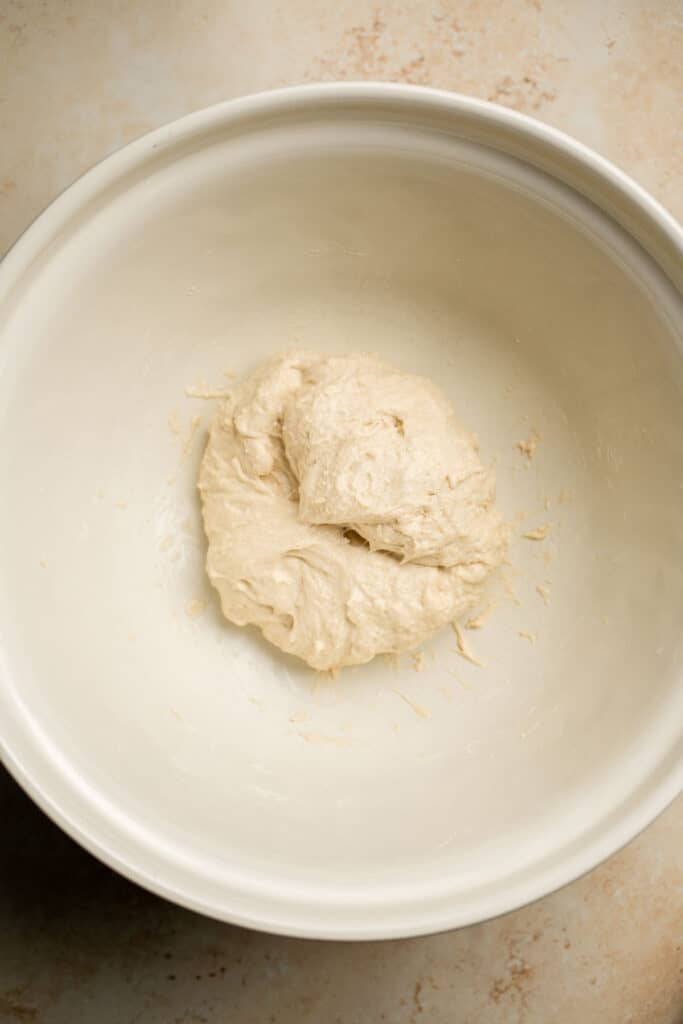
- Rest. Cover with plastic wrap and let the dough rest for 30 minutes.
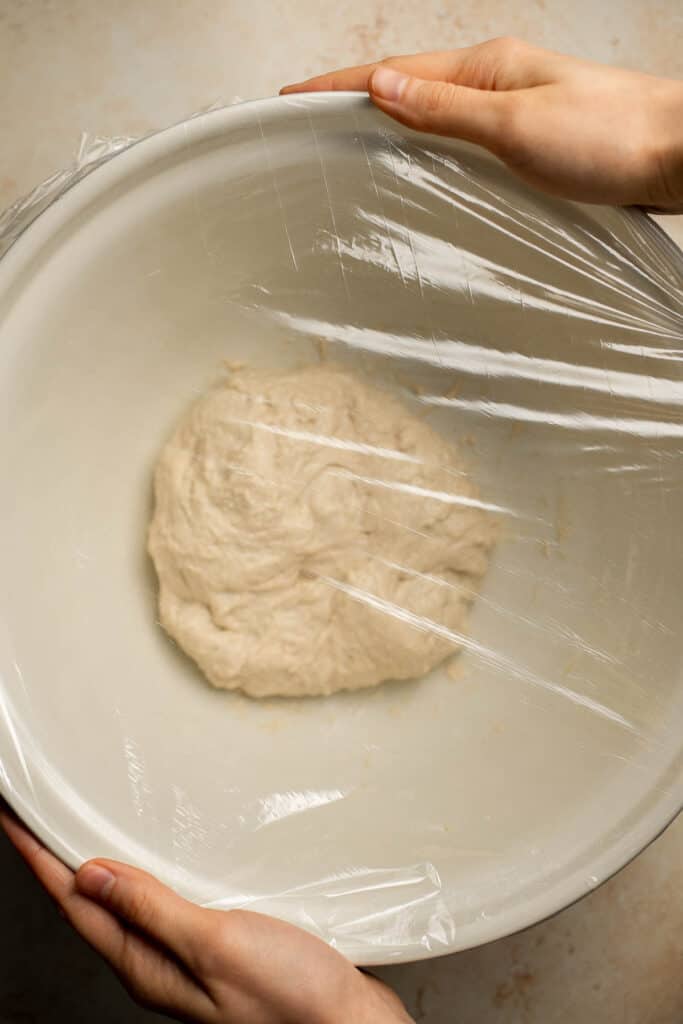

- Second stretch and fold. Repeat this stretch and fold step.
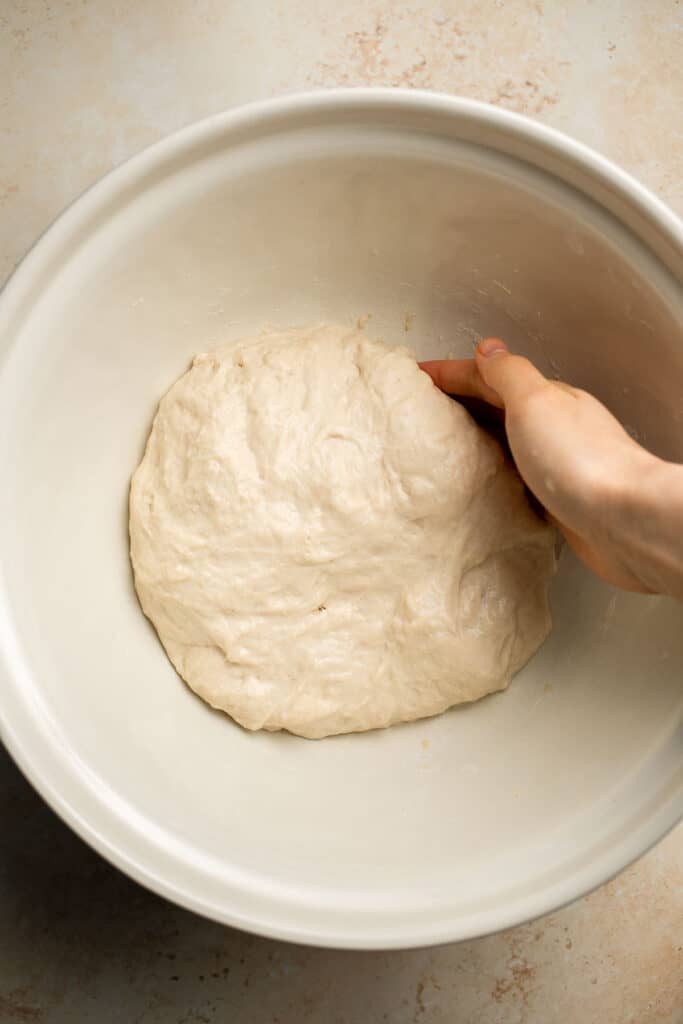
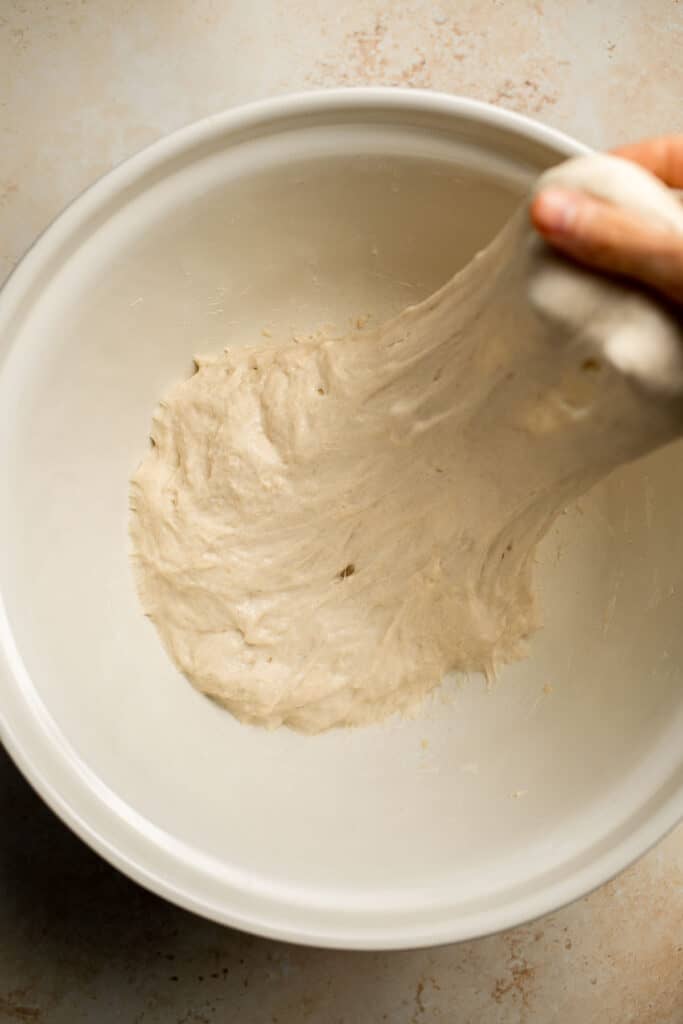
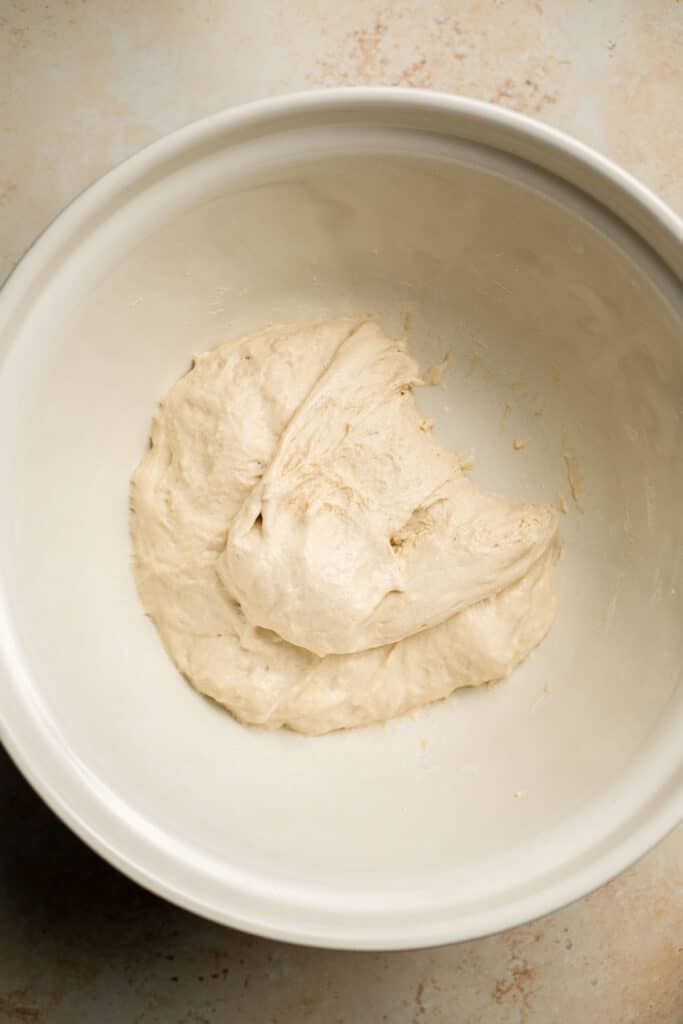
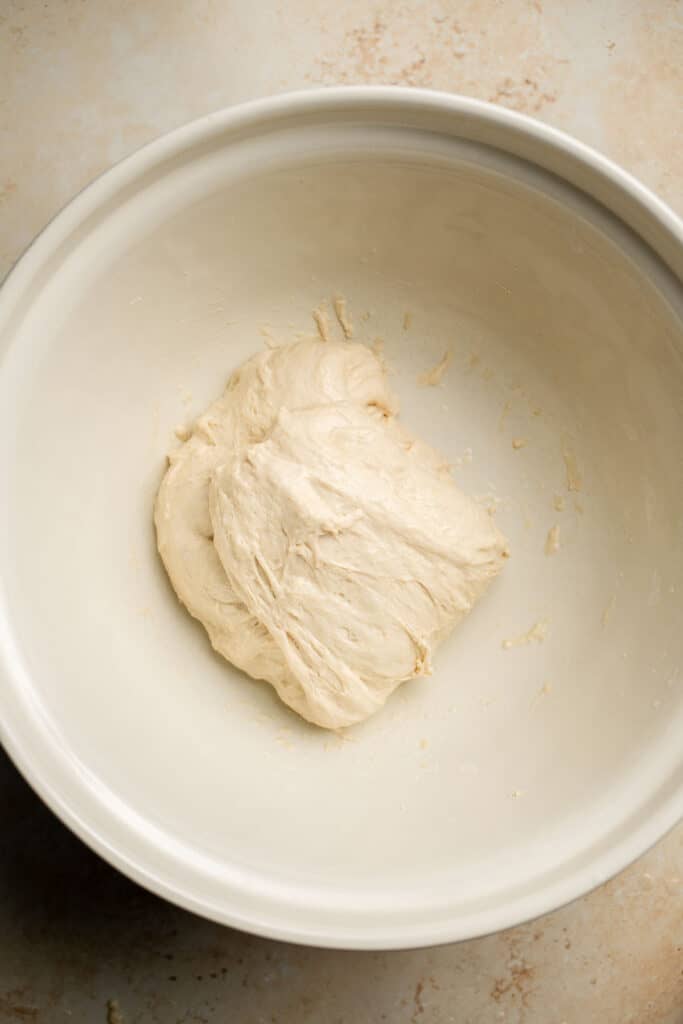
- Rest again. Cover with plastic wrap and let the dough rest for another 30 minutes.
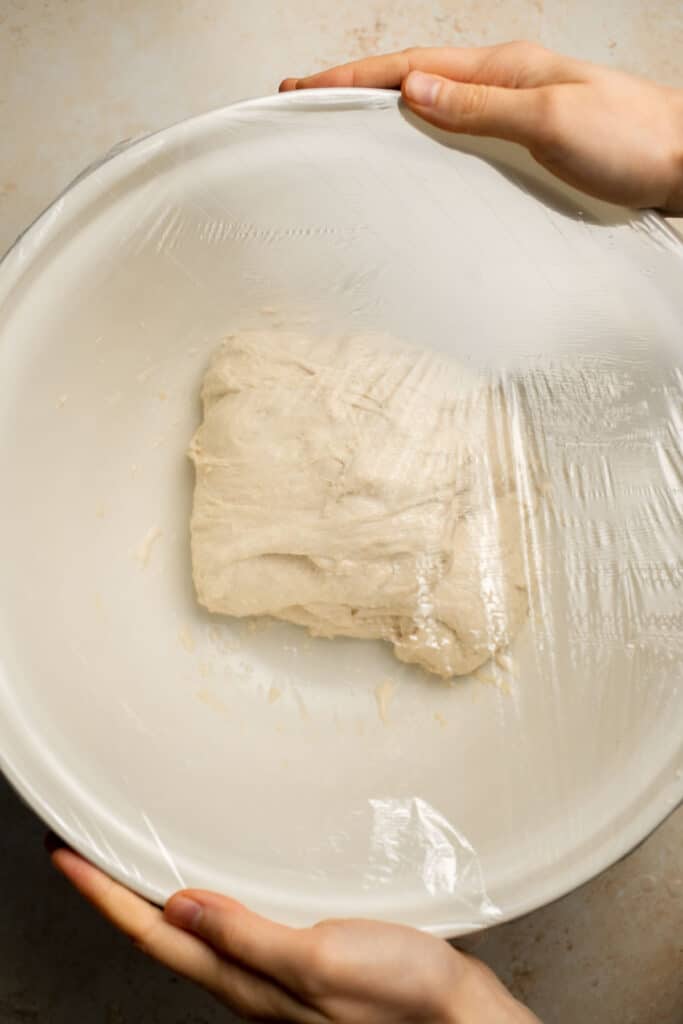
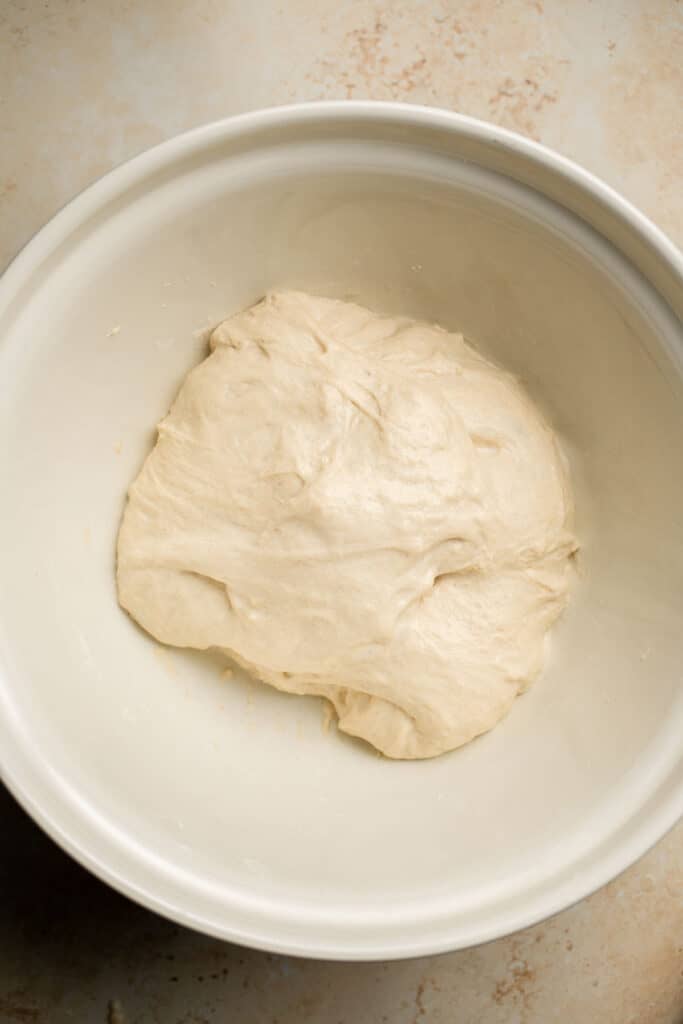
- Third stretch and fold. Then, repeat the stretch and fold step a final time.
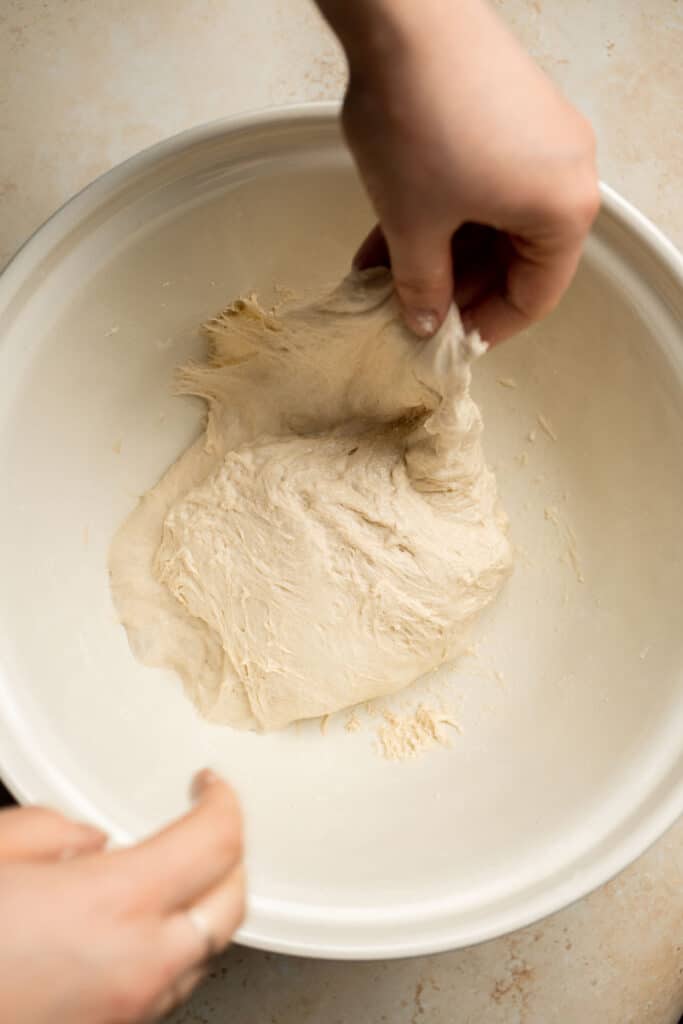
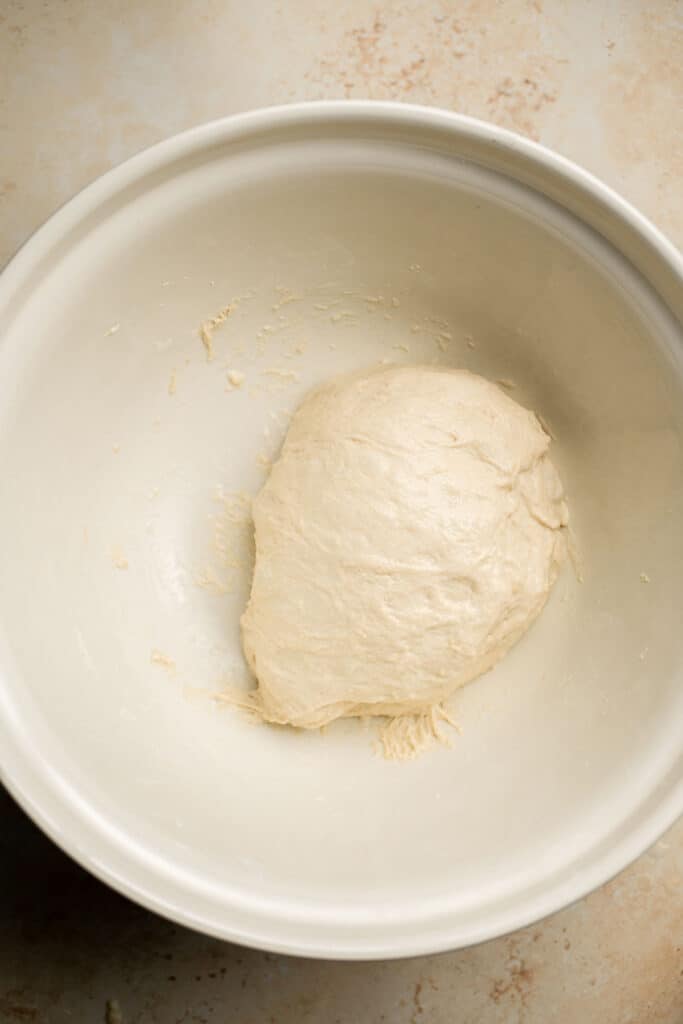
- Rest again. Let it rest for another 30 minutes. After 3 rounds of stretch and folds with 30 minute resting periods, the dough will rise and approximately double in size.
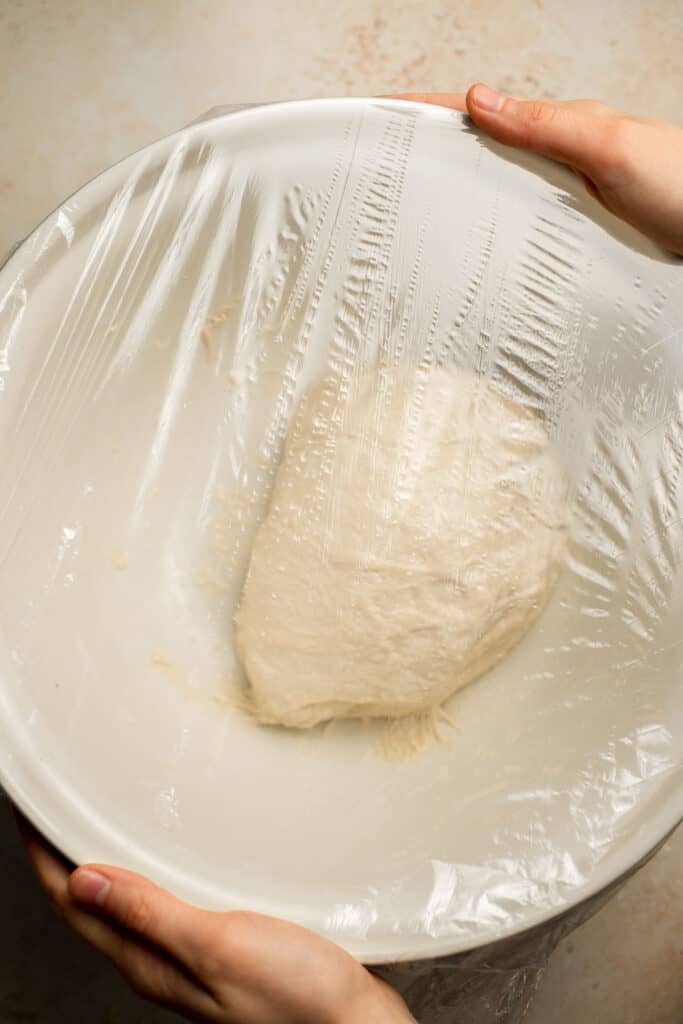

Now, let's shape the dough (40 minutes rise time).
- Shape. Transfer dough to a floured surface. Note that the dough will still be very sticky and that is okay. Sprinkle dough with a little flour and shape it into a rectangle by gently pulling the dough from underneath. Be careful not to press the dough because the air holes trapped inside might get squeezed out.
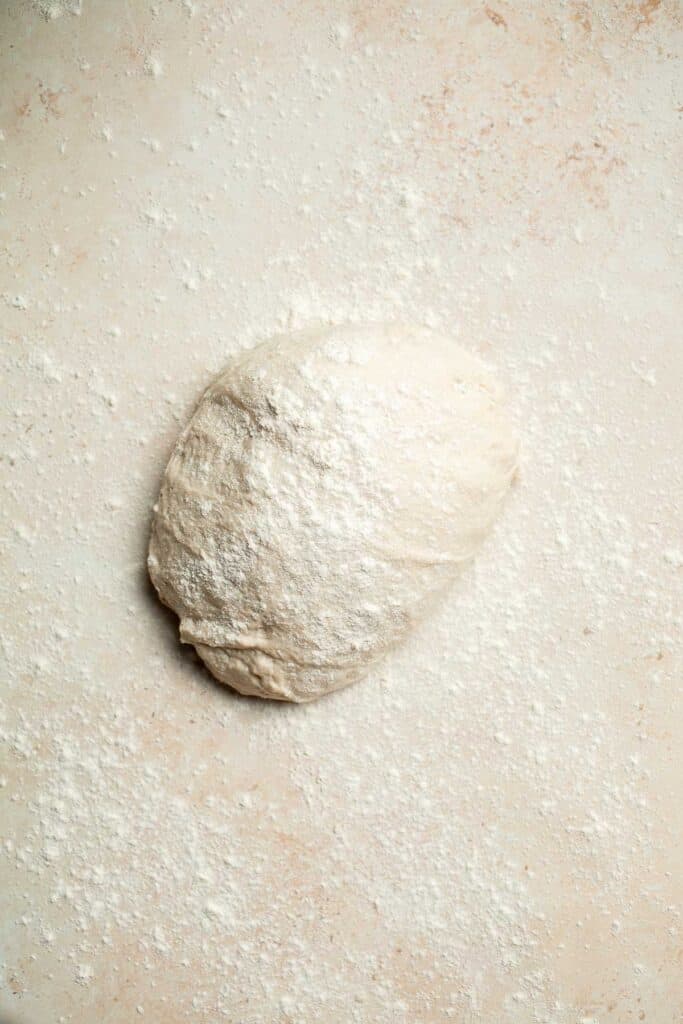
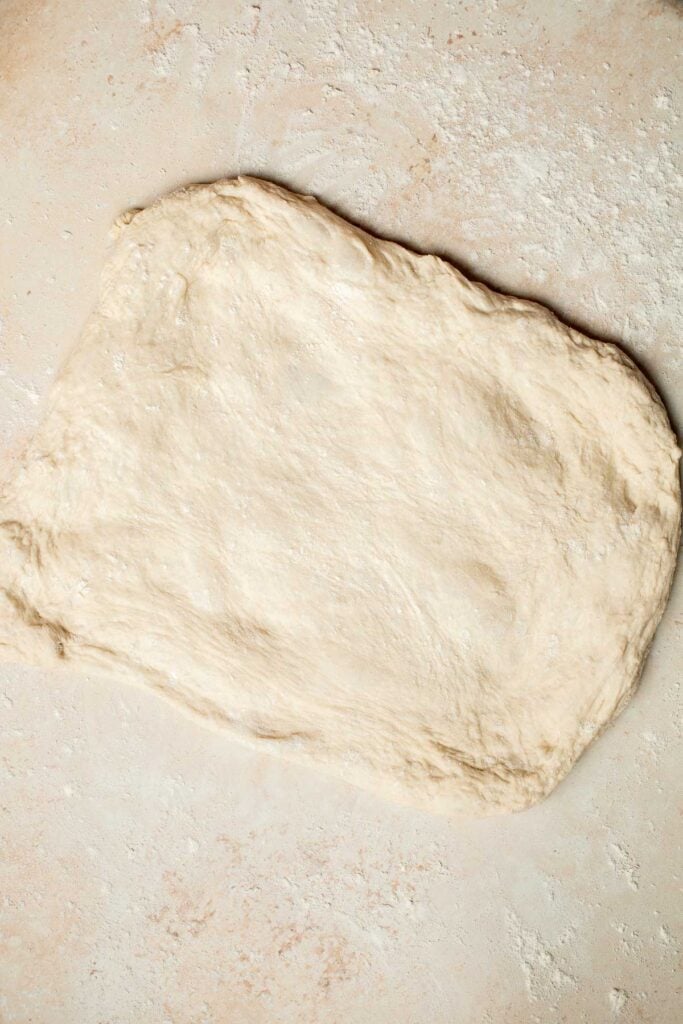
- Roll into a log. Roll the dough into a log and press the edge to seal.
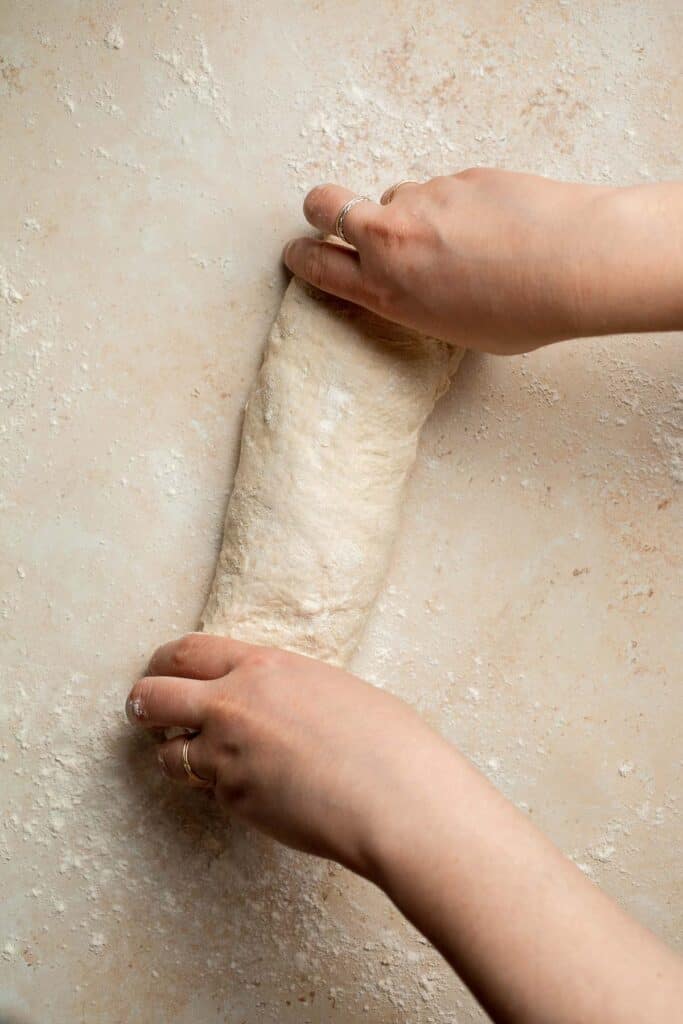
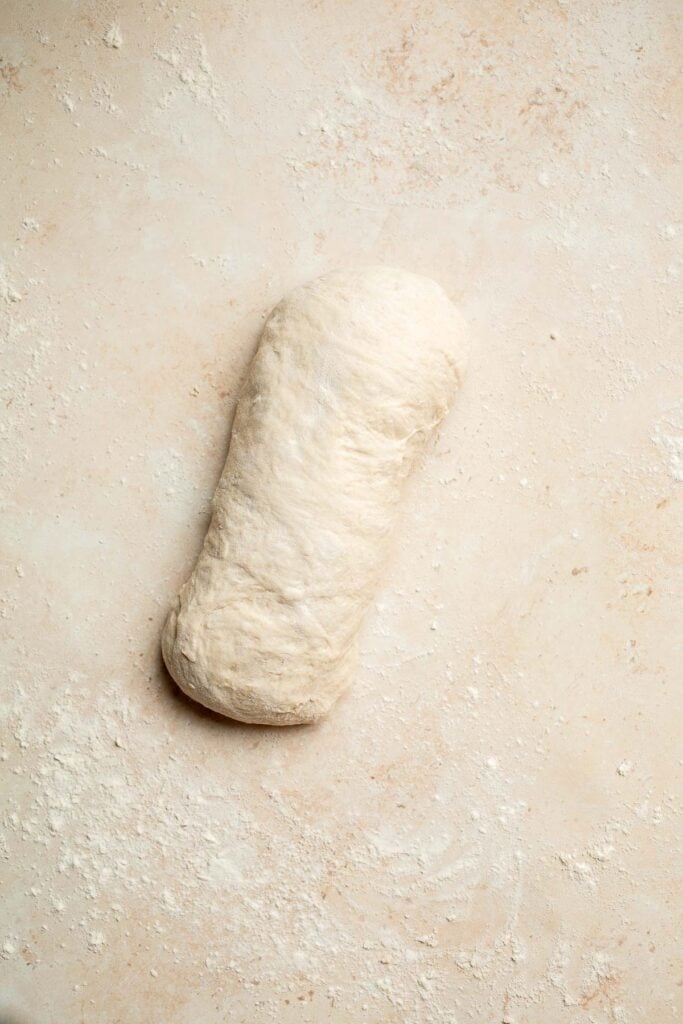
- Divide. Divide the rolled dough into 4-5 equal parts, and place each piece at least two inches apart, onto a well-floured work surface.
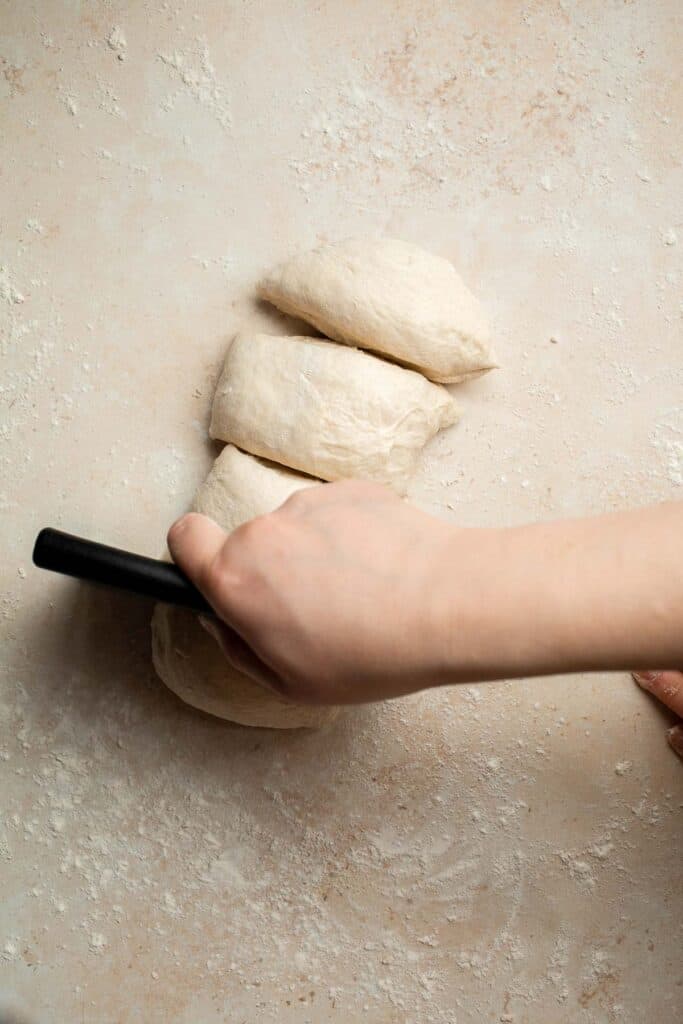
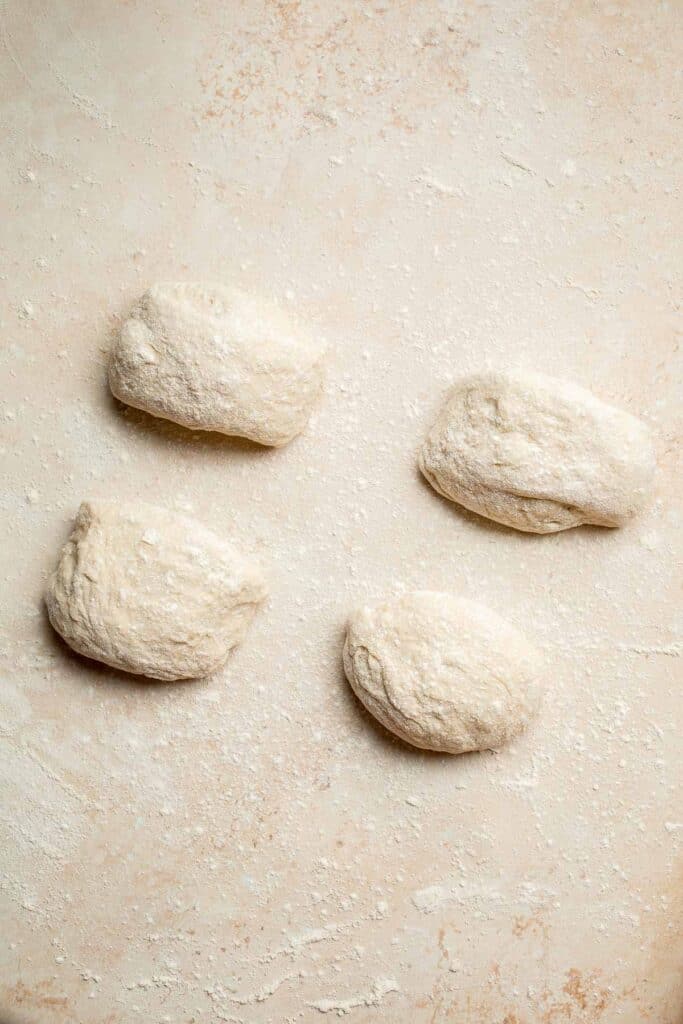
- Rest. Let the dough rest for about 40 minutes. This is called the final proofing.
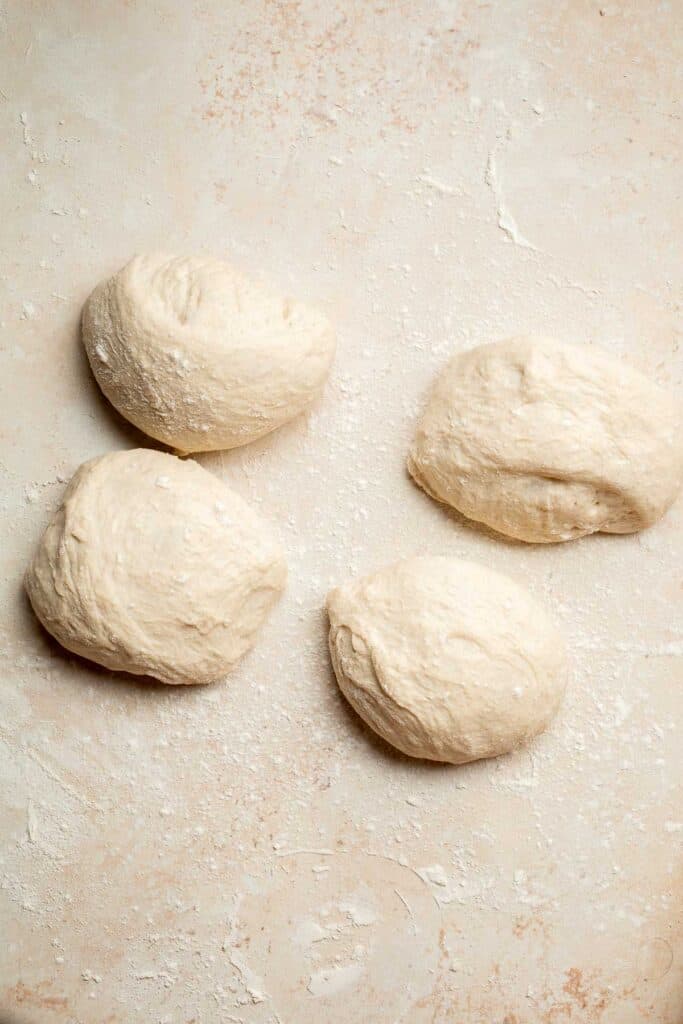
Time to bake the ciabatta rolls.
- Carefully transfer each dough onto a parchment-lined 9x13-inch baking sheet. Because the dough is still quite sticky, dust with flour to help with handling it. Set aside.
- Fill a baking pan with water and place it in the bottom of your oven. Preheat the oven to 420 F, and allow it to fill with steam from the water. When the oven is ready, slide the baking tray in and spray some water over the dough immediately. Bake for 20 minutes.
- Let the bread cool for 20 minutes. To check if the bread is done, you can tap the bottom of the bread with your finger. The bread will sound hollow when they are done.
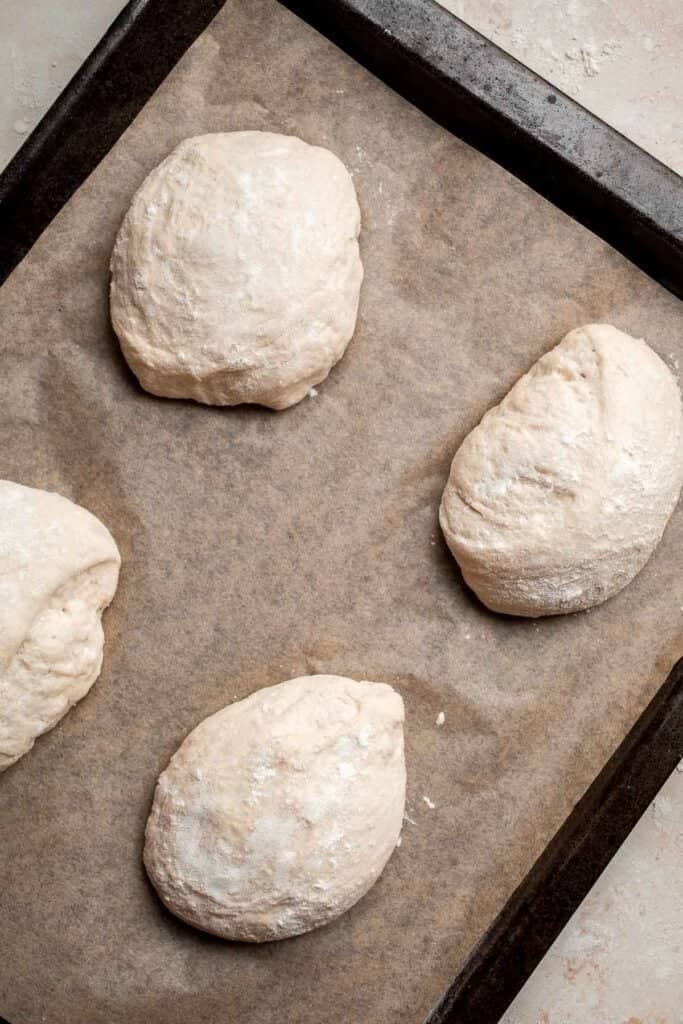
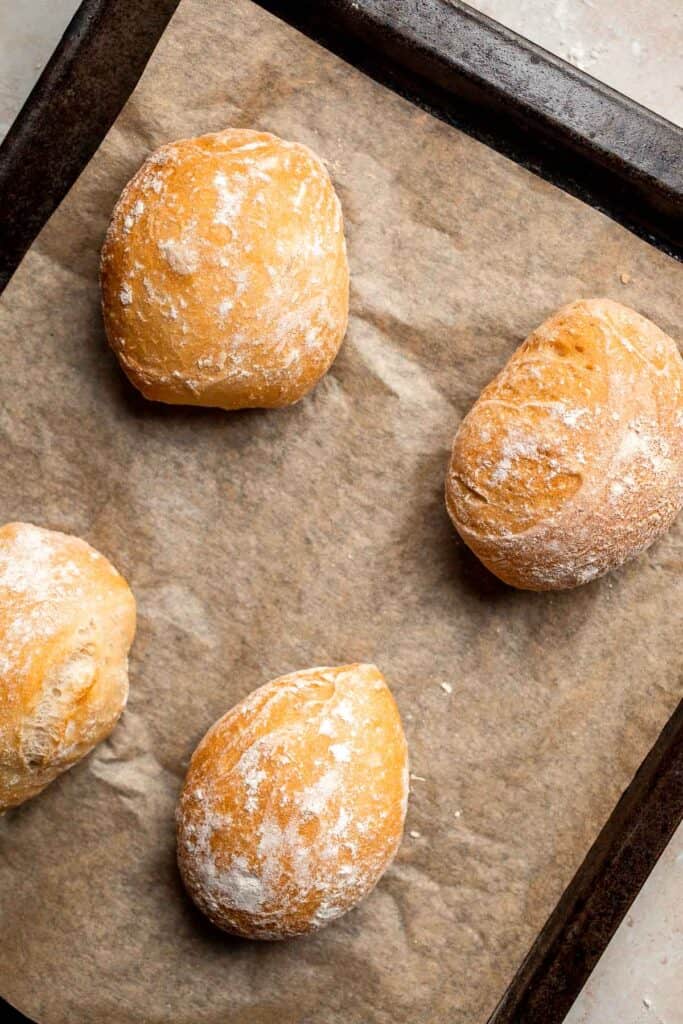
Recipe Tips for Baking the Perfect Ciabatta Bread
There are some key things to keep in mind to get the perfect ciabatta rolls.
- Use unopened and unexpired yeast that was stored int a cool and dry area - make sure the instant yeast is in an original, unopened package, and that it has not expired (note that instant yeast has a relatively shorter shelf life).
- The yeast mixture should start to bubble - when mixing the yeast in lukewarm water, the mixture should start to bubble and develop a yeasty aroma.
- Add steam to the oven - this is the key to getting the perfect crispy, crackly crust on ciabatta bread. You add steam to the oven by placing a baking pan with water on the bottom of the oven, and then preheating it.
- Use a bench scraper - ciabatta dough is very sticky with 80% hydration (flour to water ratio). So a bench scraper is very helpful to help handle and transfer the dough. You can also use flour if needed during transfer.
Recipe Variations
- Add herbs. Make a herbed ciabatta bread by adding in herbs into the dough. Try fresh herbs like chopped basil, chives, or parsley, or dry herbs like Italian seasoning, oregano, or thyme.
- Add olives. Who doesn't love a good olive bread? Add in some chopped or sliced olives (black olives or green olives) into the dough. See how we did it in our Artisan Green Olive Sourdough Bread.
- Make it whole wheat. For a healthier option with added fiber, replace some of the all purpose flour in the recipe with whole wheat flour. Note that the whole wheat ciabatta buns will be denser in texture though.
- Make it cheesy. Add in extra flavor by adding in some shredded cheese to the bread dough. Try shredded parmesan or asiago cheese. You can even take the flavor up a notch by adding. in some minced or pressed garlic.
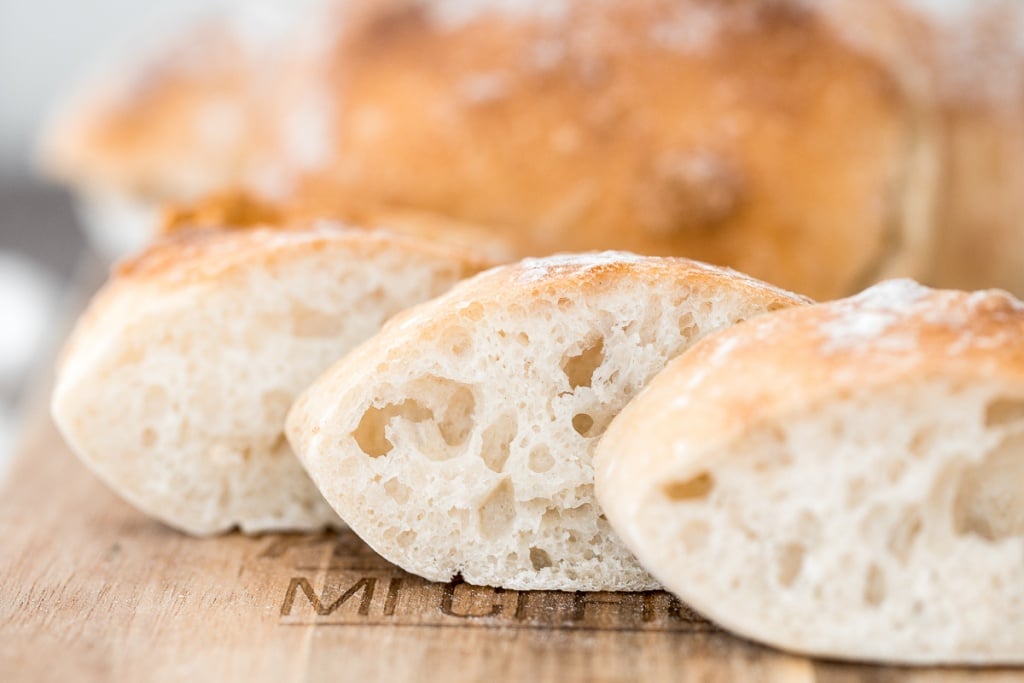
How to Serve Ciabatta Bread Rolls
These are many ways to enjoy these delicious Ciabatta Rolls inlcuding:
- With a simple spread. Ciabatta bread is delicious on it's own dipped in some olive oil and balsamic vinegar, or with a simple spread like butter and homemade small batch strawberry jam.
- As a sandwich bread. Some of my favourite sandwiches to make with them are breakfast sandwiches, lemongrass chicken sandwiches, and fish burgers.
- Alongside soup. A crusty on the outside, light and fluffy on the inside type of bread like this is perfect for dipping and sopping up soup. Find a soup to pair this with in our collection of 60 Best Soup Recipes.
Storing and Freezing Instructions
How to Store
Ciabatta rolls are best served and enjoyed on the day they are baked. You can store leftover ciabatta rolls in an airtight container at room temperature for up to 3 days. You can also store them in the fridge for up to 1 week. Note that once refrigerated, the texture will change and become more dry. You can always add in the moisture by reheating it before serving.
How to Reheat
The best way to reheat ciabatta bread is to bake them in the oven. Place on a baking tray in a 350F preheated oven and heat for 6-8 minutes, or until warm. You can also reheat in the air fryer at 350F for 3-6 minutes.
How to Freeze
Freeze baked ciabatta rolls in a freezer bag for 2-3 months. Allow the buns to thaw in the fridge overnight before serving or reheating.
More Homemade Bread Recipes
- 50 Best Bread Recipes
- Small Batch No Knead Bread
- Homemade No Knead French Baguettes
- Quick and Easy Pita Bread
- Easy Homemade Everything Bagels
- Quick and Easy Skillet Dinner Rolls
Tried this recipe?
I'd love to hear what you think! Leave a comment and rating below to share your feedback. Your reviews help others discover this recipe and help me keep creating more free recipes for you. Snap a photo and tag me on social media @aheadofthyme too.
Buckeyes
These peanut butter Buckeyes are a classic holiday dessert that's more like a truffle than a cookie, although they're a must-have on many Christmas cookie trays. They're soft and tender with a creamy burst of peanut butter enrobed in a crunchy chocolate shell. You won't be able to eat just one!
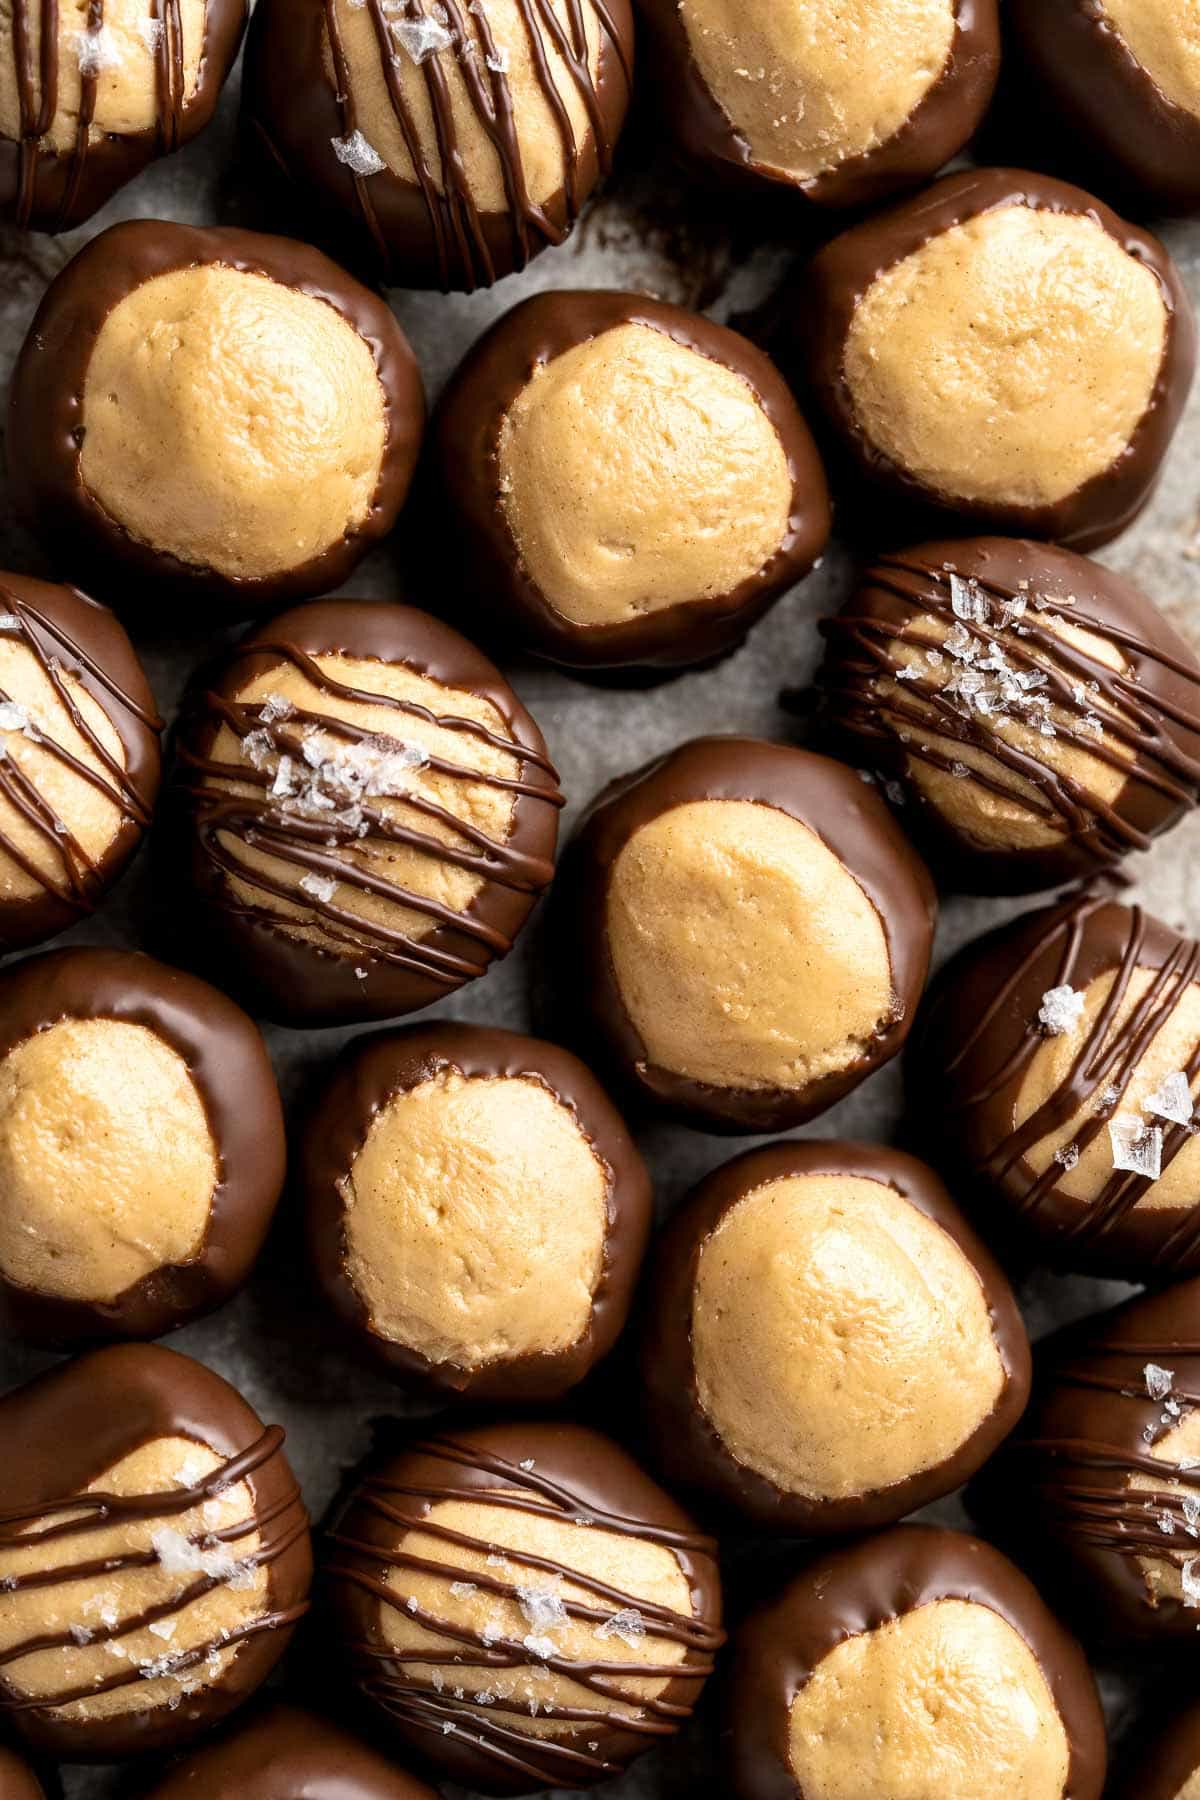
These homemade buckeyes are named after the buckeye nut, which has a glossy brown coat with a matte tan circle in the center. These sweet treats are made by first making sweet peanut butter balls, and then dipping them in a delicious dark chocolate coating. They look very similar to the buckeye nuts, but are the best no bake treats! They're perfect for any holiday table (and they last forever in the fridge)!
Why You'll Love These Buckeyes
- So easy to make. These buckeyes are a no-bake treat, so the only thing you'll need to heat up at all is the rich chocolate coating! They're incredibly easy to make and only require a handful of simple ingredients.
- A nostalgic holiday treat. Many families make these dipped buckeyes every year for the holidays! They're a classic holiday dessert that will look perfect on your Christmas cookie tray.
- Long-lasting. These buckeye balls last up to a month in the fridge, so they're an ideal treat to make at the beginning of December. Any time you get any visitors, you'll have a treat ready to serve right away. They can freeze for even longer!
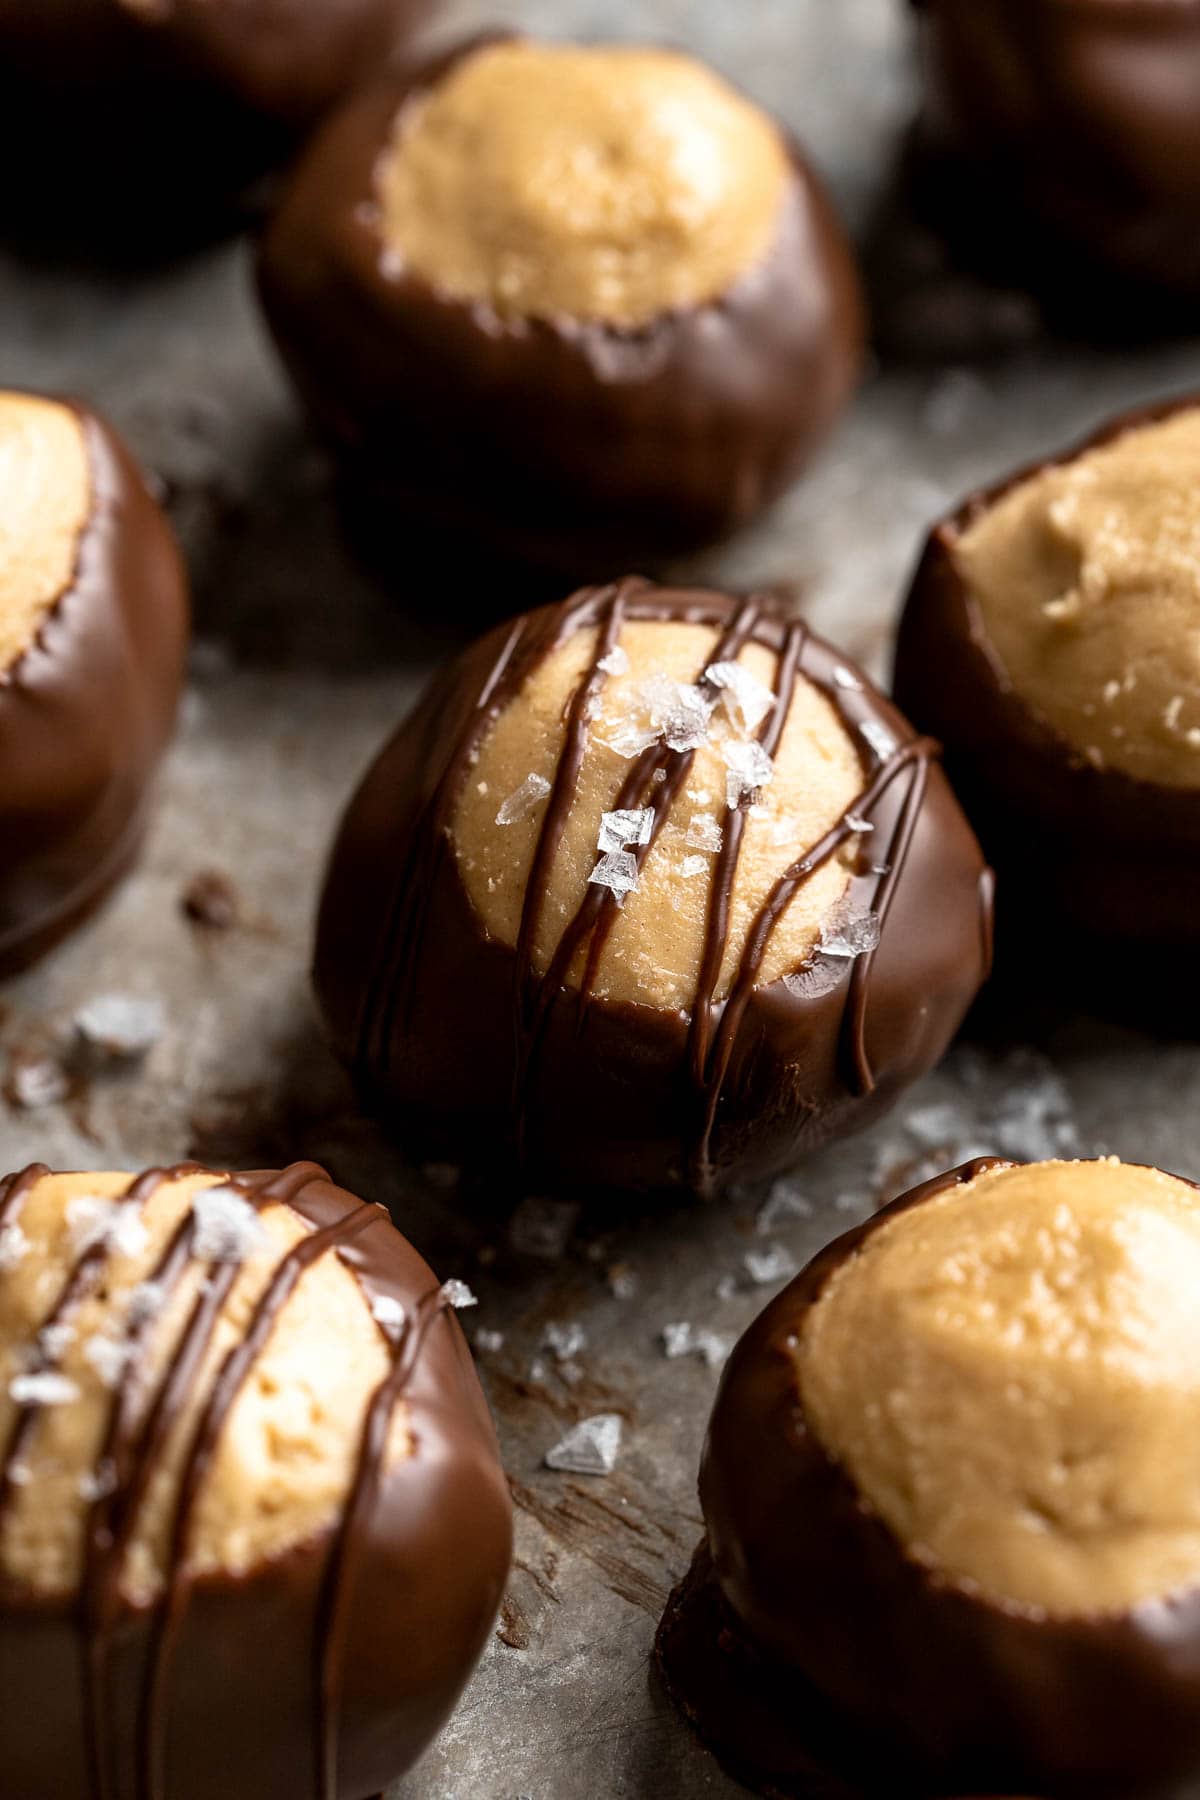
Ingredient Notes
To make these delicious buckeyes, you will need the following ingredients (full measurements in recipe card below):
- peanut butter - use creamy store-bought peanut butter for best results.
- butter - bring unsalted butter to room temperature to make it easy to mix into the peanut butter.
- vanilla extract - a little vanilla makes the peanut butter mixture taste and smell amazing.
- confectioners' sugar - this thickens the peanut butter into a thick paste.
- chocolate - use bittersweet or semi-sweet chocolate chips for the perfect shell. The dark chocolate is a perfect contrast for the sweet and creamy peanut butter center.
- coconut oil - coconut oil will help the chocolate melt and make the shell nice and crunchy.
You will also need a large baking sheet, parchment paper, a large mixing bowl, an electric hand mixer, a small cookie scoop, a microwave-safe bowl, and a toothpick.
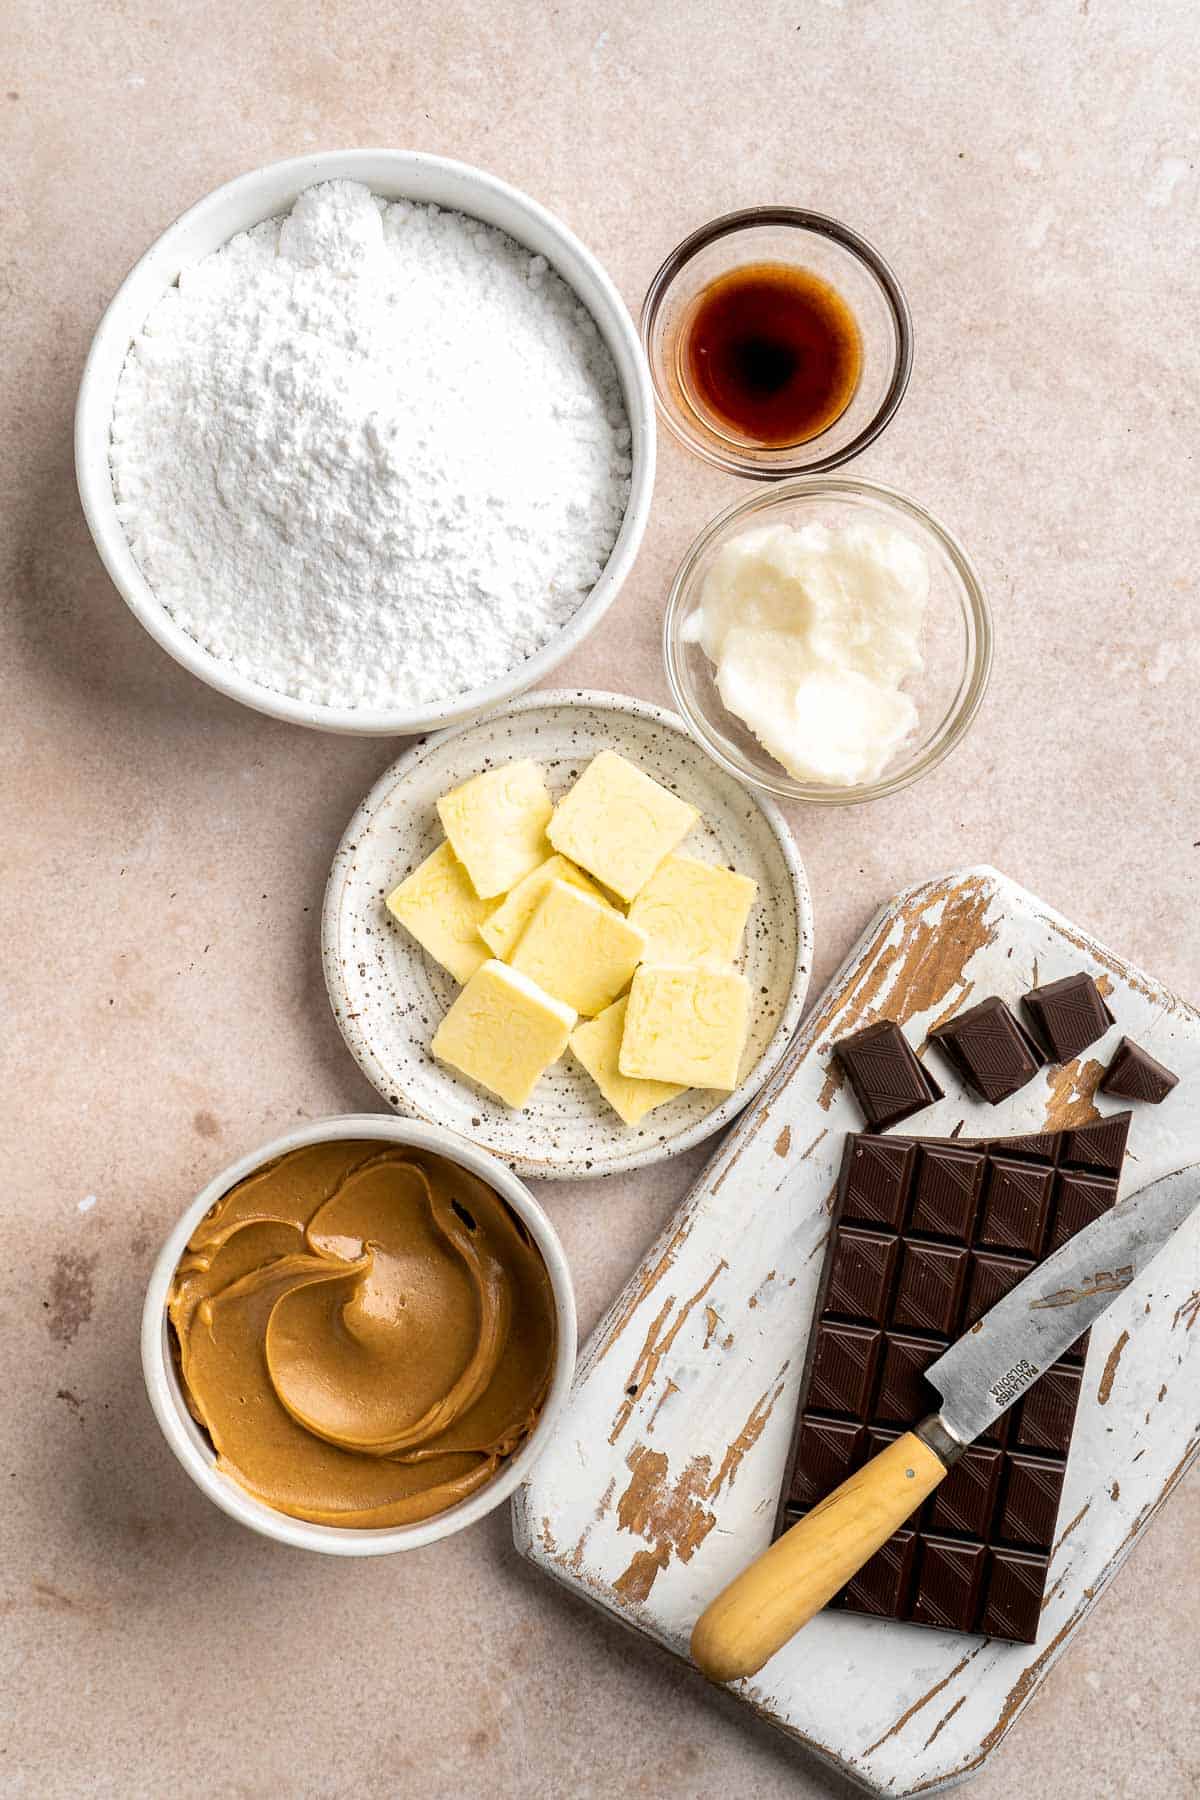
How to Make the Best Buckeyes
- Combine ingredients. Add peanut butter, butter, and vanilla to a large mixing bowl. Beat together with an electric hand mixer until smooth and creamy. Add in the confectioners' sugar, then beat again until a soft, playdough-like dough comes together.
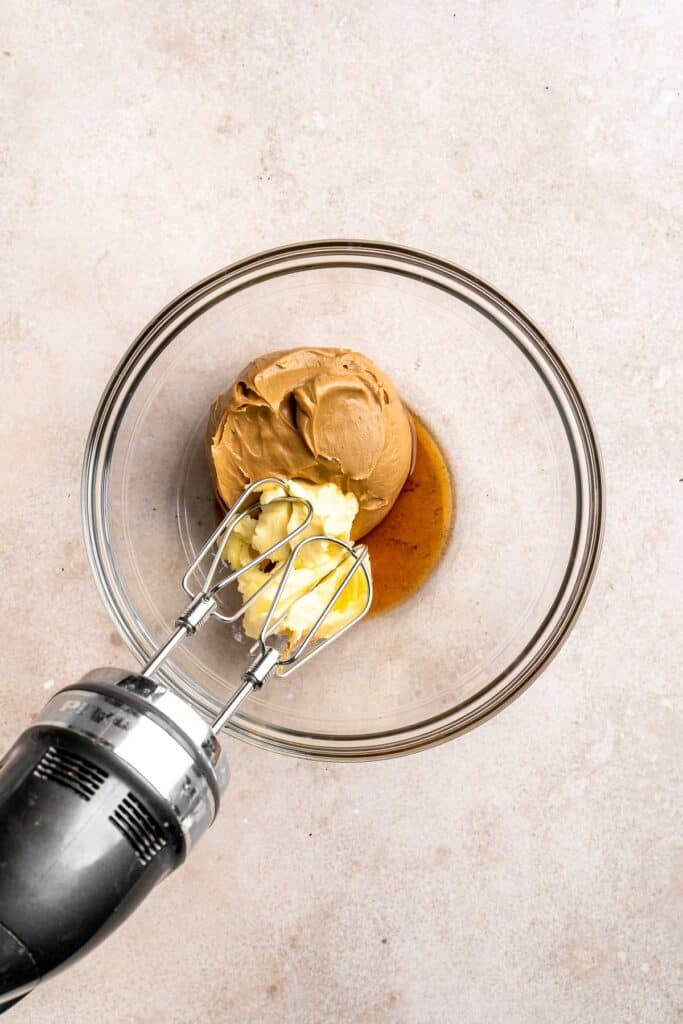
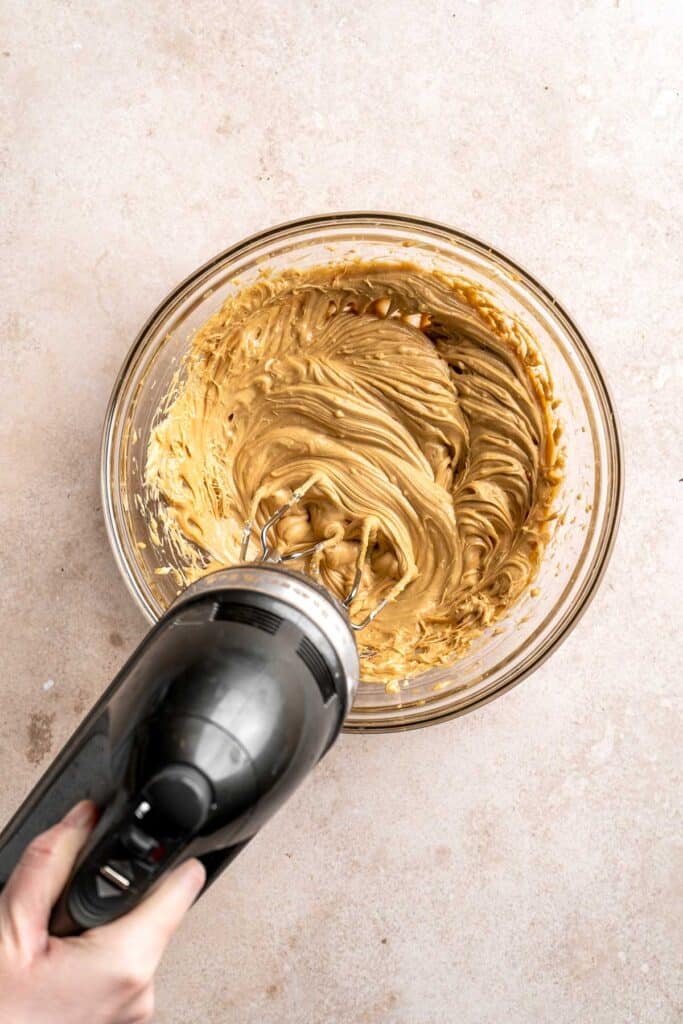
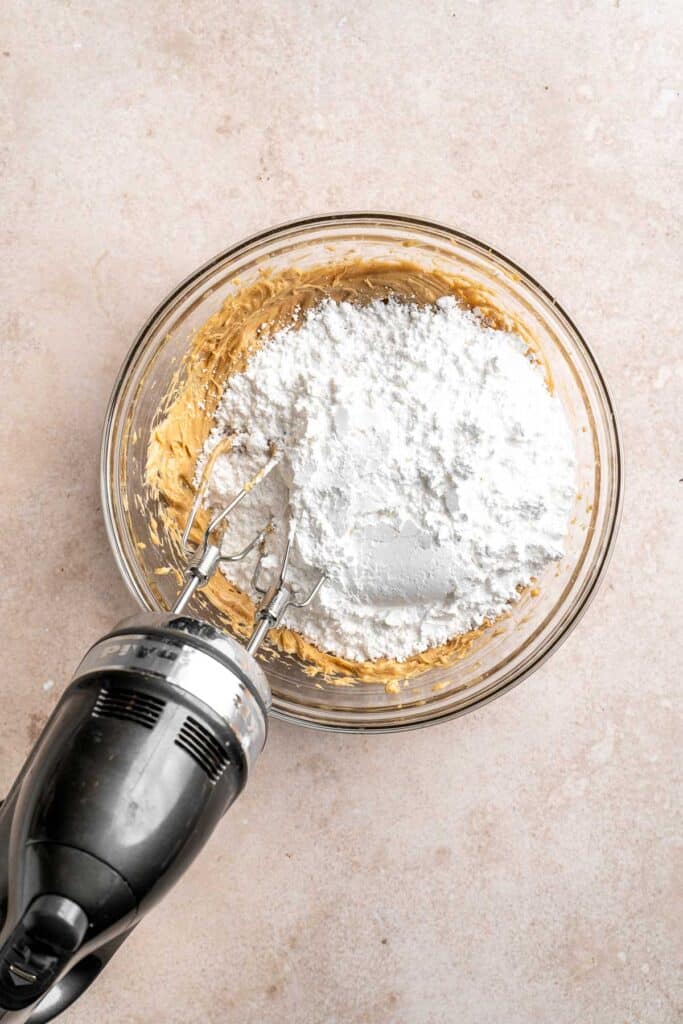
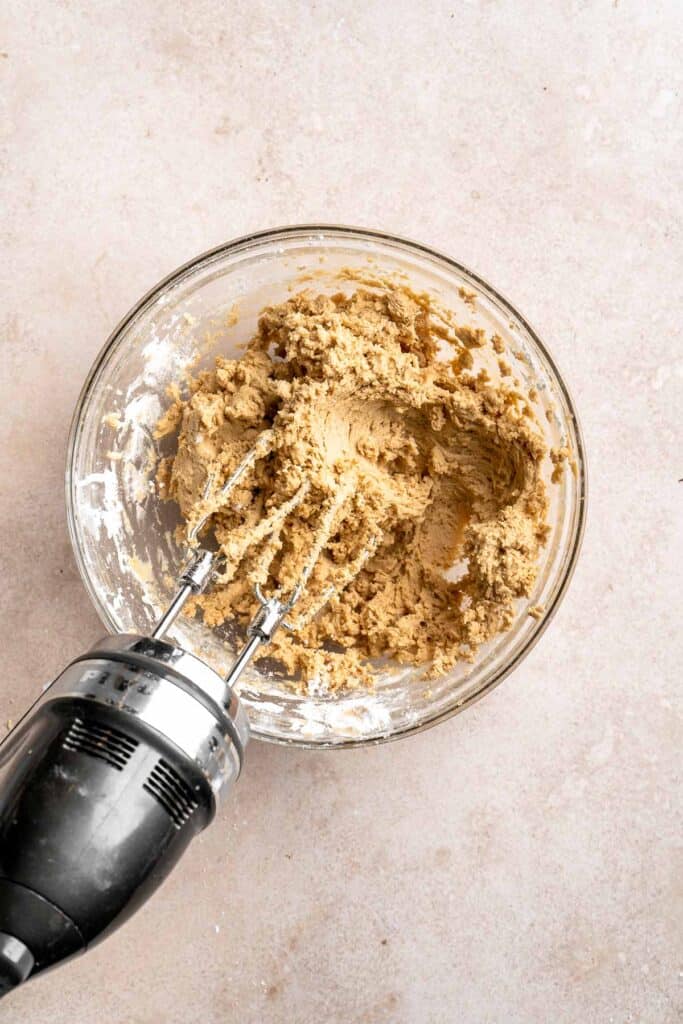
- Scoop balls. Prepare a large baking sheet with parchment paper. Using a small cookie scoop, scoop out the dough, then roll each scoop around in your hands to make it round. Place onto the prepared baking sheet and cover lightly with plastic wrap. Place into the fridge for 4 hours (up to overnight) to firm up.
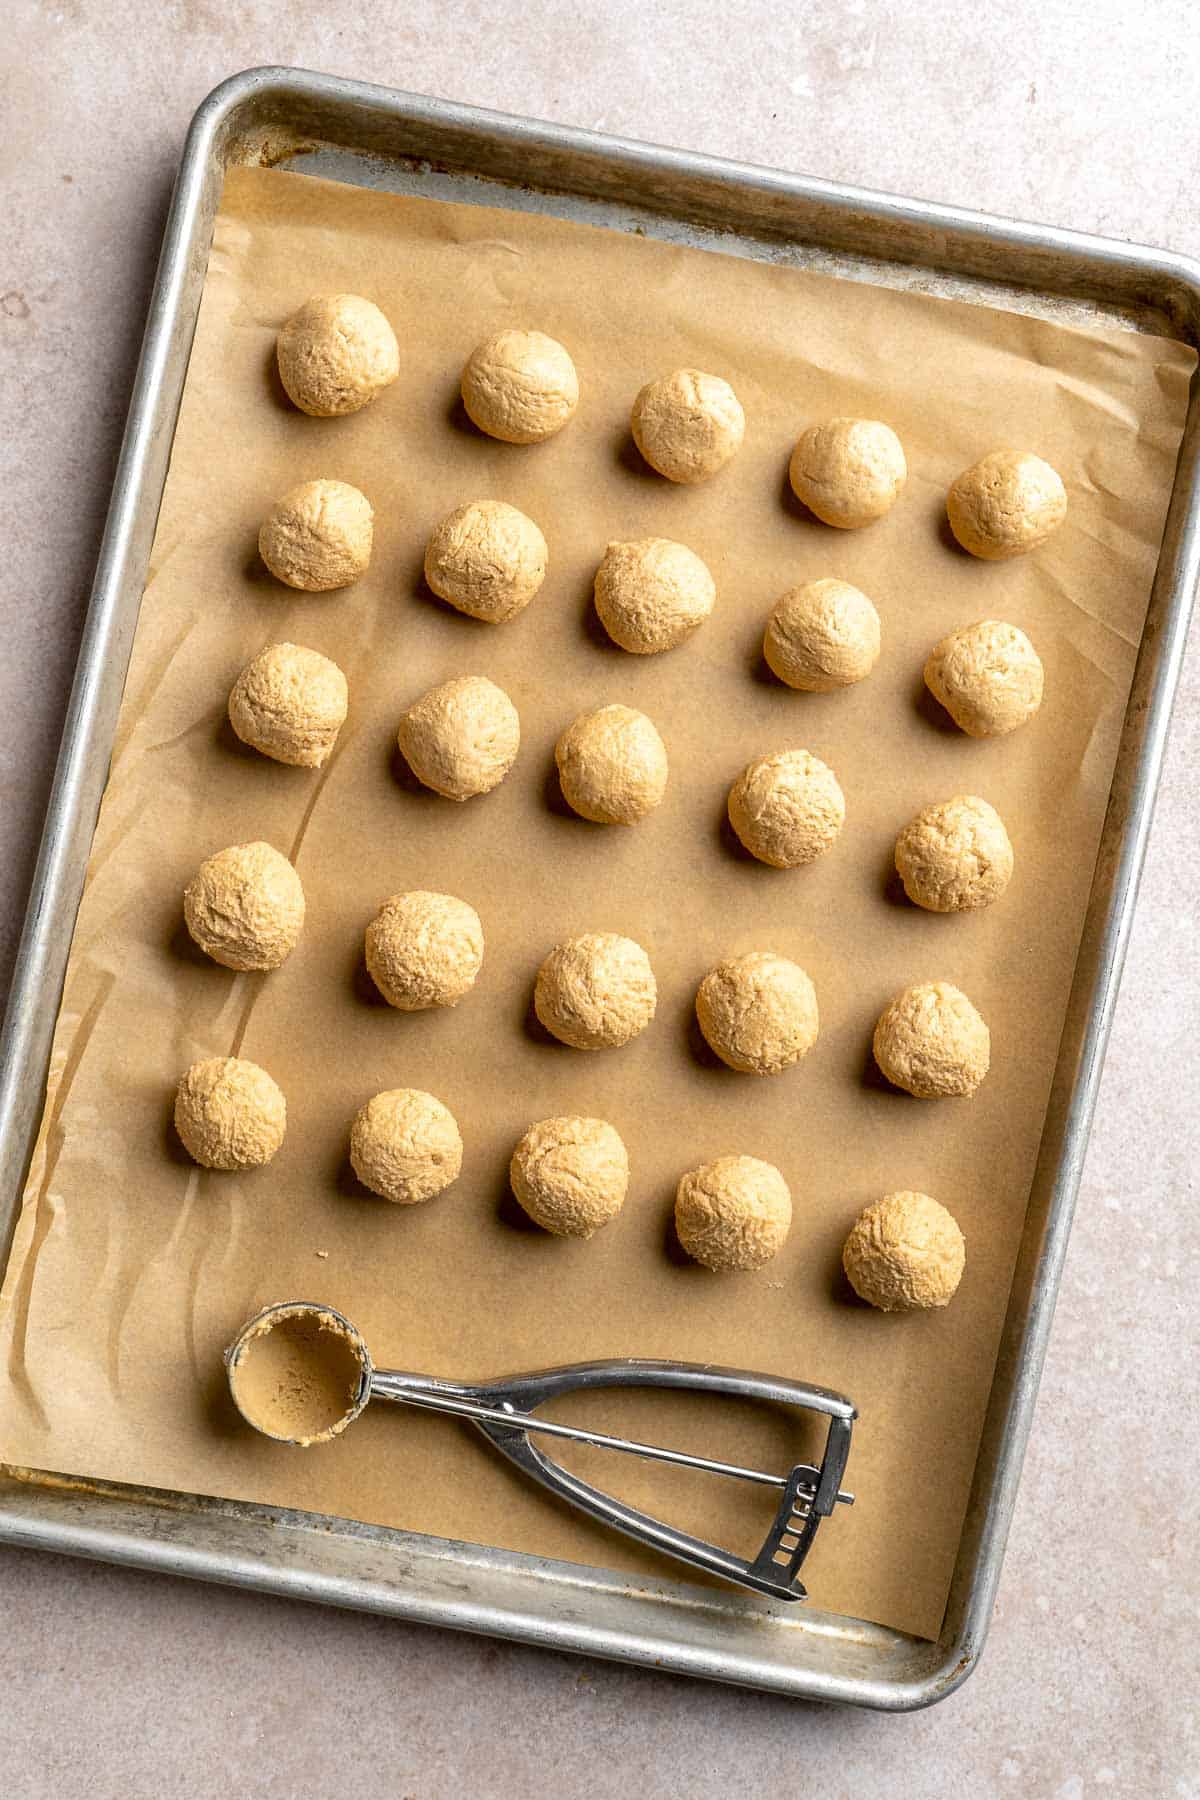
- Melt chocolate. After the balls have rested and chilled, add the chocolate and oil to a microwave-safe bowl. Place into the microwave and microwave in 30-second increments, stirring in between, until fully melted and smooth. Allow the melted chocolate to cool for 10-15 minutes, or until just slightly warm to the touch.
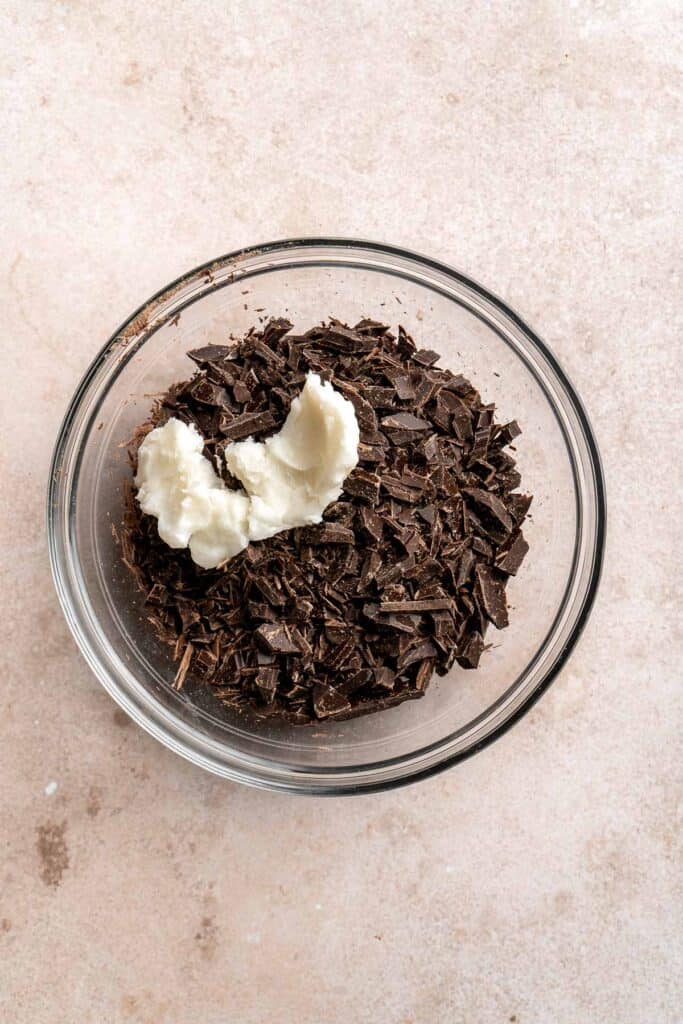

- Dip balls in chocolate. Place a toothpick into each of the chilled peanut butter balls, then dip each ball into the melted cooled chocolate, leaving a small amount of the peanut butter exposed at the top.
- Set. Return the buckeyes onto the parchment lined baking sheet, and allow the chocolate to harden. Remove the toothpicks from the buckeyes (you can use your finger or a knife to smooth over the holes). At this point, you can add a chocolate drizzle on top, if desired.
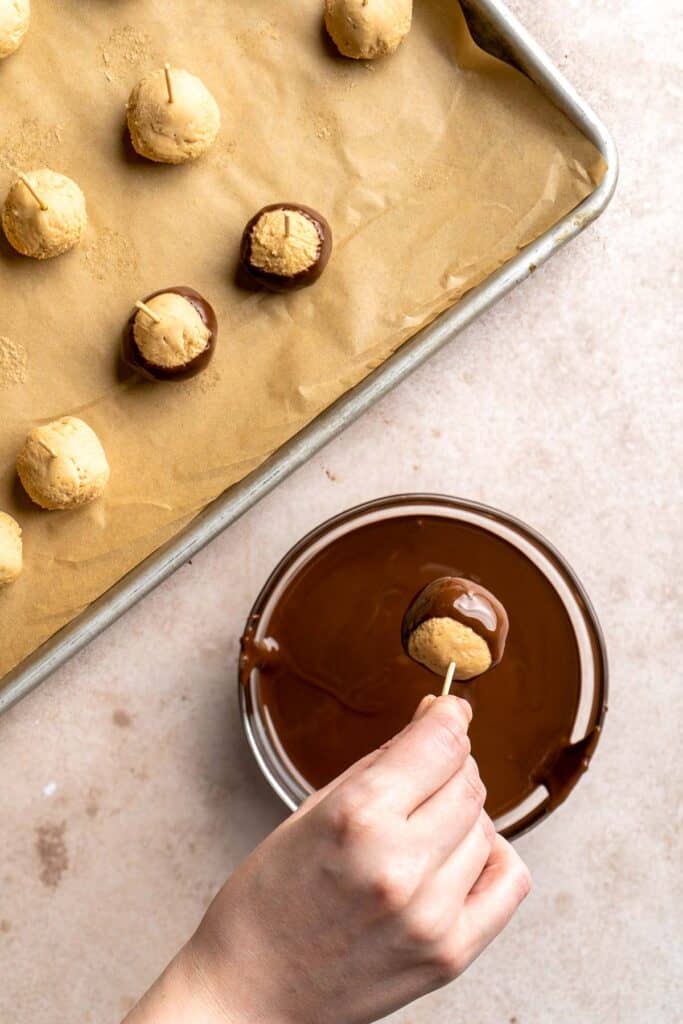
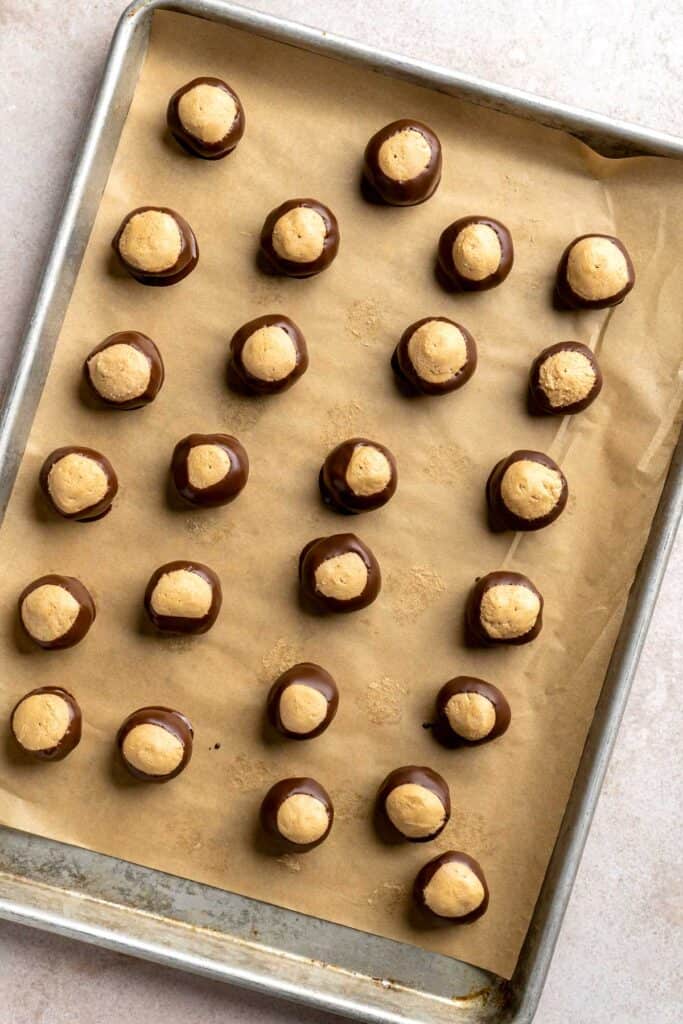
- Store. Place the buckeyes into the fridge until you're ready to enjoy. Feel free to leave as is or top with some flaked salt.
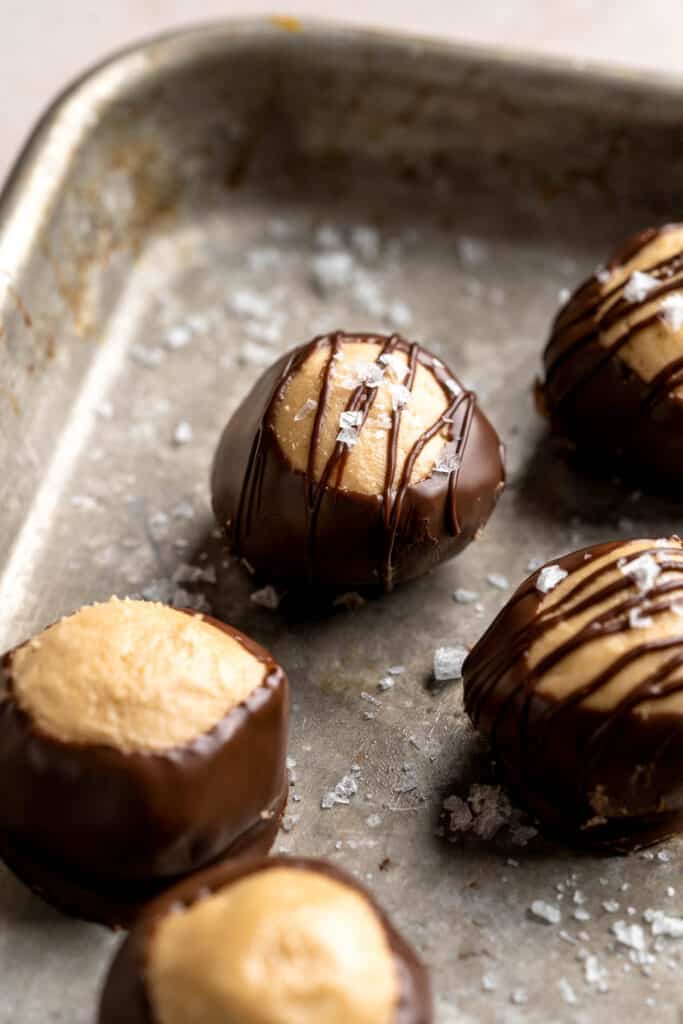
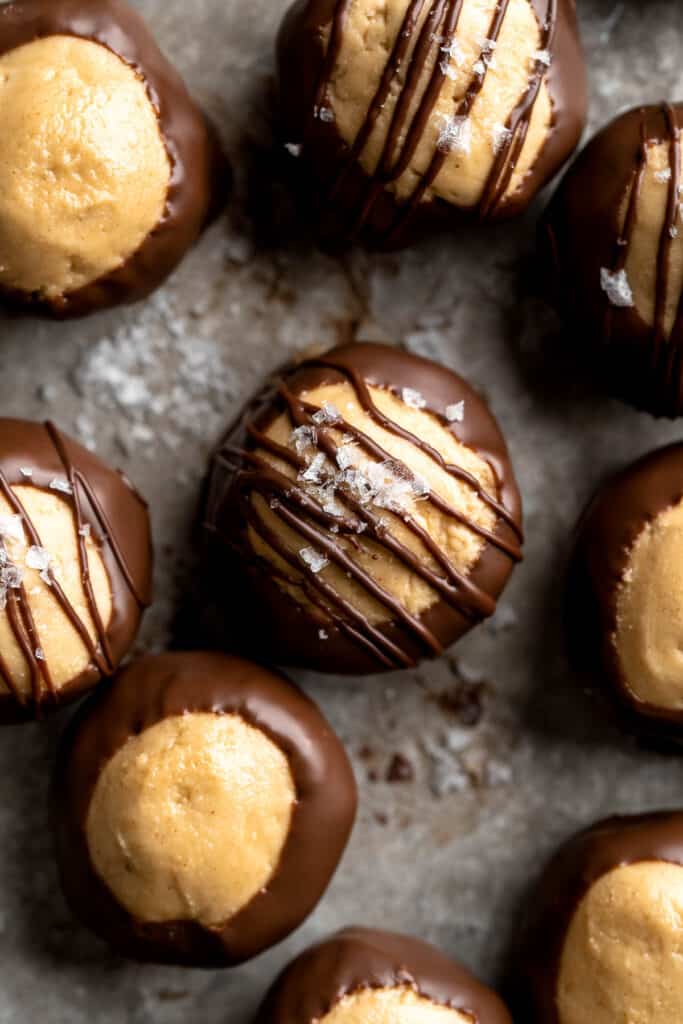
Recipe Variations
- Use natural peanut butter. Although it has a different texture and flavor, you can also use natural peanut butter. Just stir it well first and add more powdered sugar if needed.
- Make them crunchy. If you prefer crunchy buckeye candies, stir in chopped peanuts, rice krispies, or cornflakes, or use crunchy peanut butter instead of smooth.
- Try a different chocolate. Replace the dark chocolate with milk chocolate or even white chocolate for a different flavor profile. You can even add a white chocolate drizzle over the dark chocolate for a beautiful look.
- Roll the buckeyes. If you add nuts or cereal to your peanut butter mixture, reserve extra and roll the finished buckeyes in them to highlight what's inside.
How to Serve
These buckeyes are delicious served on their own, or paired with some of my favorite holiday treats as part of a Holiday Cookie Box including:
- Gingerbread Truffles
- Christmas Sugar Cookies with Royal Icing
- Oreo Truffles (Cookie Balls)
- Italian Christmas Cookies
- Dark Chocolate Raspberry Truffles
- Christmas Shortbread Cookie Bites
Looking for more holiday treats? Try these 30 Best Christmas Cookies.
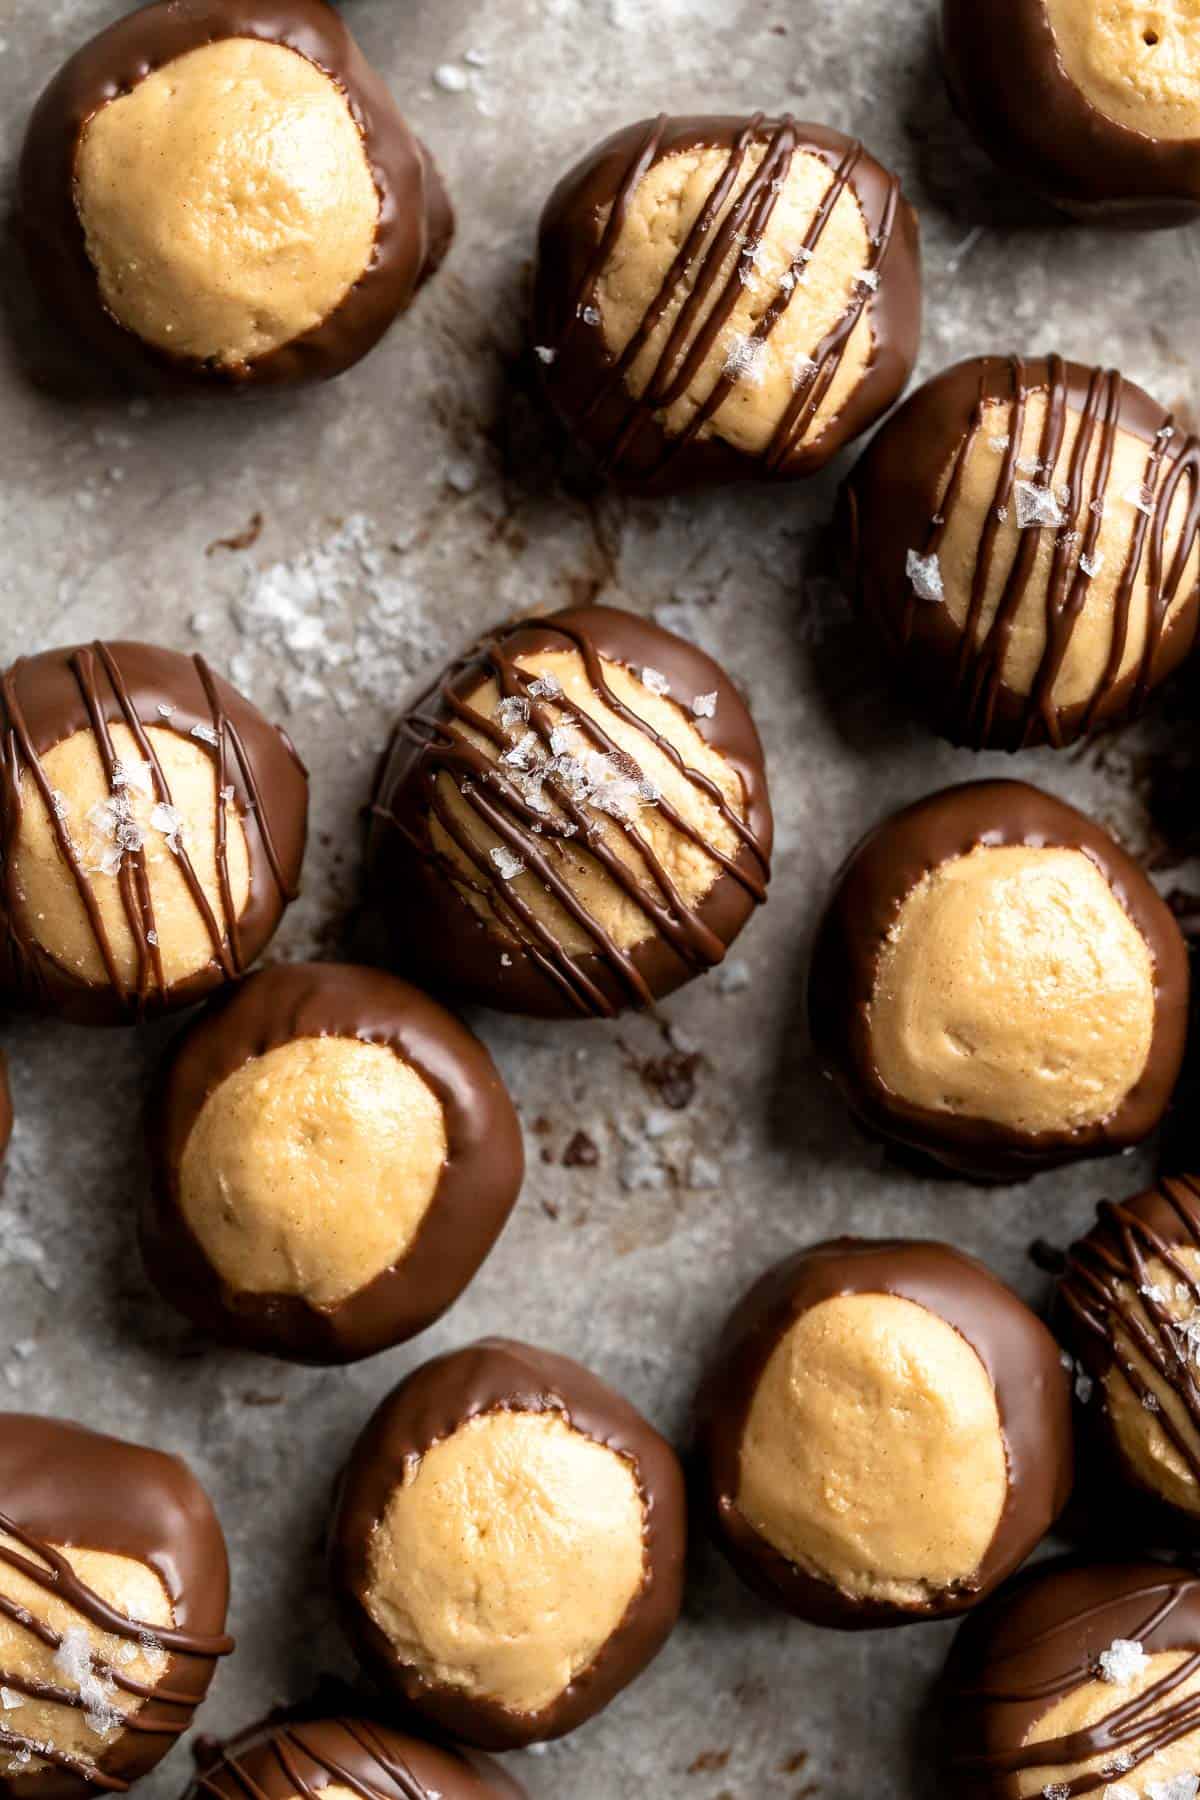
Recipe Tips and Tricks
- Chill the peanut butter balls. If you try to dip the peanut butter balls without chilling them first, they'll fall off the toothpick as you're dipping them. Refrigerate or even freeze them to make the dipping process quick and easy.
- Use a double boiler. If you have issues with the melted chocolate hardening, make a double boiler instead. Fill a small saucepan with water and add a glass or metal bowl on top. Heat up the water over medium heat and add the chocolate. It will melt gently from the heat of the water. Turn down the heat once the chocolate begins to melt.
- Line the tray. Any time you work with chocolate, use either a sheet of parchment or wax paper. The chocolate will not stick to it, so you'll get a beautiful, mess-free shell every time.
Storing and Freezing Instructions
How to Store
Store buckeyes in an airtight container in the fridge for up to 1 month. To keep the balls from sticking together, separate them with a sheet of wax paper.
How to Freeze
Store any remaining leftovers from this easy buckeye recipe in a freezer-safe container for up to 3 months. Separate the layers of buckeye candy with a sheet of wax paper.
FAQ
Chocolate buckeyes are made by mixing together peanut butter, butter, powdered sugar, and vanilla into a thick paste, rolling it into balls, then dipping them in melted chocolate. This gives you a nice crunchy chocolate shell with a soft, creamy peanut butter flavor in the middle.
One of the best things about this easy buckeyes recipe is how long they last! These simple treats can technically go bad, but it takes a while. For the best flavor and texture, store the buckeyes in the fridge for a month or freeze them for three months.
Yes! Not only does this preserve the buckeyes to help them last a long time, but it also gives them the perfect texture. They're more fun to eat when the peanut butter is firm. At room temperature, they're quite soft and a little messy.
More Peanut Butter Dessert Recipes
- Peanut Butter Blossoms
- Peanut Butter Eggs
- Chewy Peanut Butter Granola Bars
- Chocolate Chunk Peanut Butter Cookies
- Peanut Butter Thumbprint Cookies
- The Best Soft and Chewy Peanut Butter Cookies
Tried this recipe?
I'd love to hear what you think! Leave a comment and rating below to share your feedback. Your reviews help others discover this recipe and help me keep creating more free recipes for you. Snap a photo and tag me on social media @aheadofthyme too.

Green Beans with Pecans
Green Beans with Pecans is a delicious and nutritious way to dress up your green beans. Cooked until tender and crispy, these vibrant greens are tossed in butter together with slightly toasted pecans for a surprise crunch. With just four simple ingredients and 15 minutes, you can enjoy a side dish that's easy enough for weeknight dinners yet elegant enough for your holiday spread.
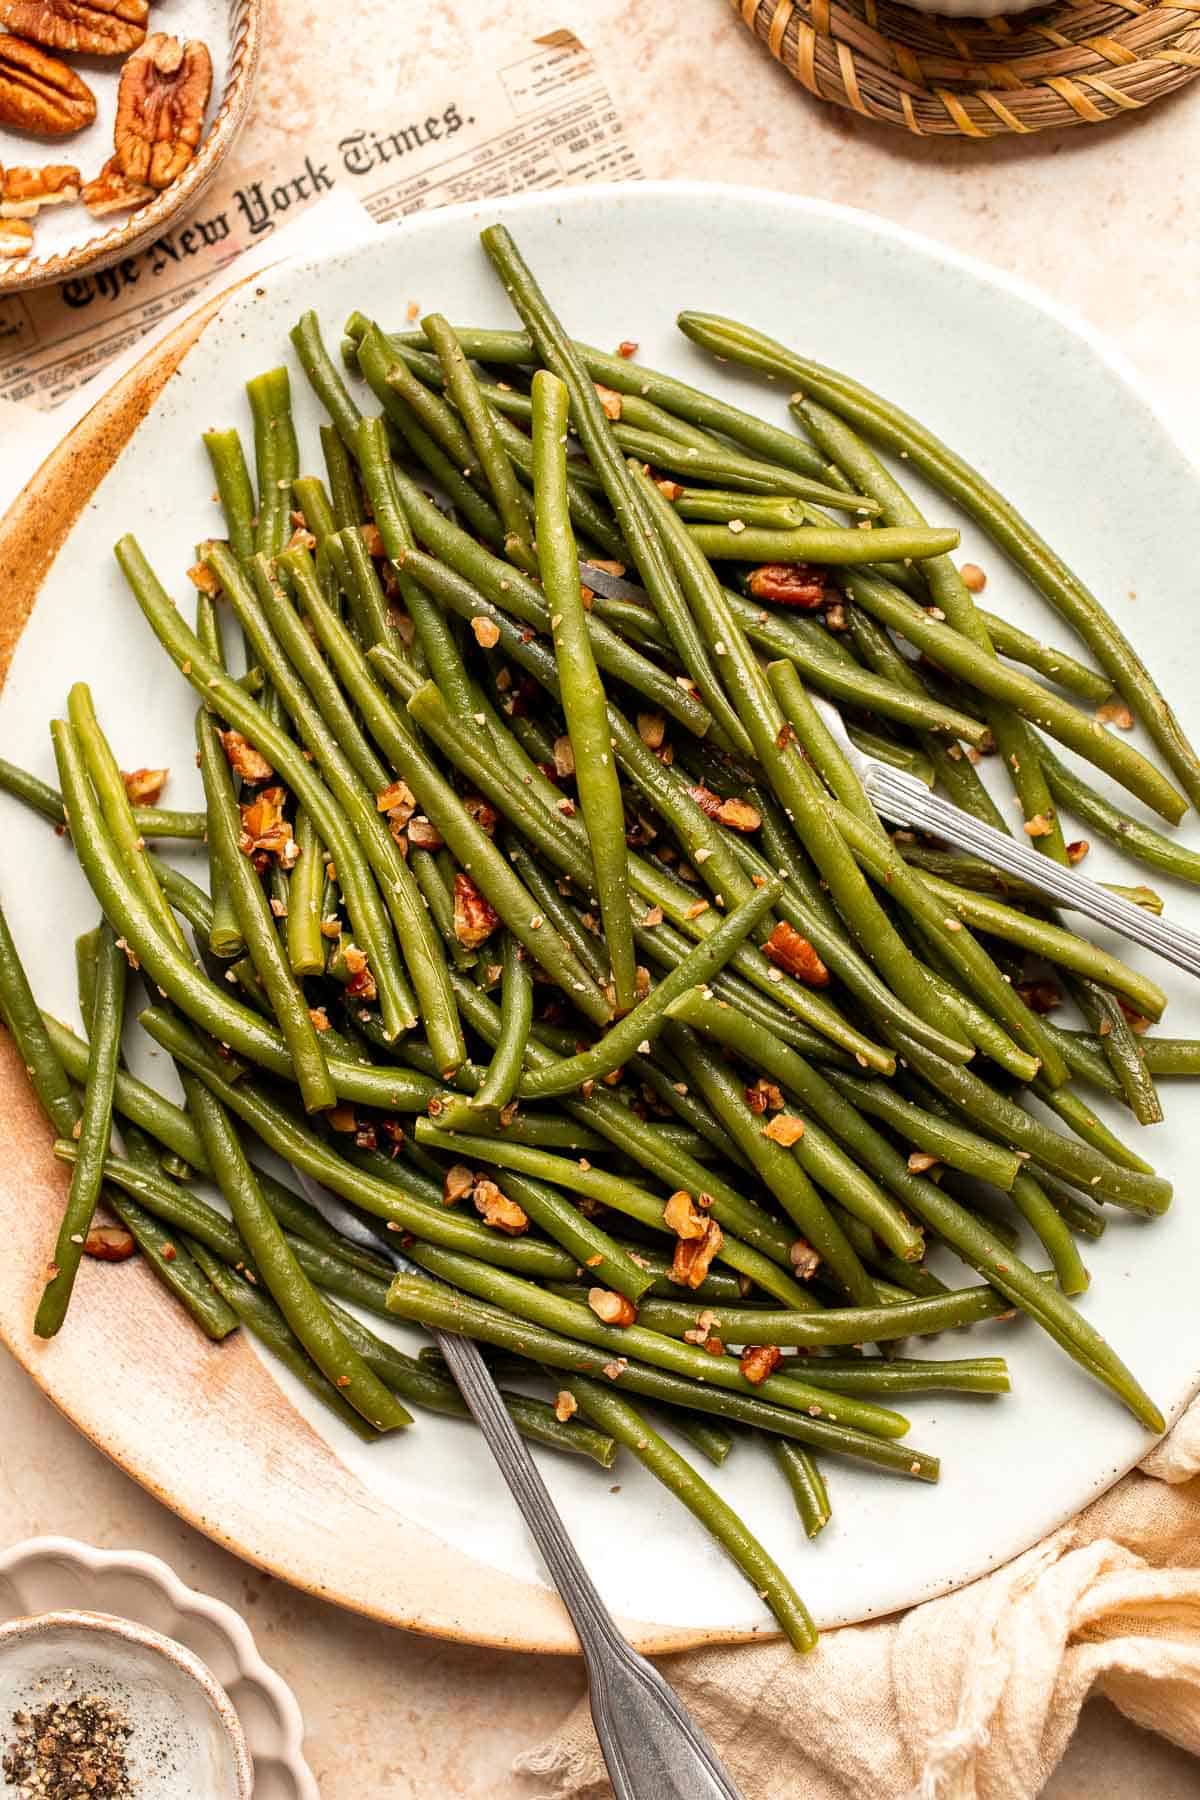
When a simple side dish gets a makeover, it can be just as exciting as the main course. Green beans, like many vegetables, can become plain and dull if cooked the same way each time. This recipe incorporates pecans to give the dish a nutty, crunchy texture that makes it different from the usual. These crispy and buttery green beans with pecans also pair well with a lot of your favorite pork, chicken, beef, or pasta dishes, so you can add them as your go-to side dishes for everyday meals and even the fanciest dinners.
Why You'll Love this Green Beans with Pecans Recipe
- Quick and easy. No need to stand over the stove for hours - these nutty green beans come together in 15 minutes! The only prep required is basically washing and trimming the green beans, and chopping up the pecans. Plus, you only need four ingredients, so it's not just a time-saver, but a money-saver too.
- So flavorful. With only a few ingredients, it is amazing how much flavour this dish produces. Earthy green beans perfectly balance with crunchy pecans, and are all coated with smooth buttery goodness. And the texture is just something else! The beans are tender, yet still slightly crispy, and the roasted pecans give it a crunchy smoky kick.
- Healthy and delicious. Some recipes can be heavy and greasy, but not this one! The addition of pecans and butter adds a decadent crunch while still keeping it light and flavorful. Green beans are also packed with vitamins, minerals, and fiber, so it's an easy way to get your veggies in.
- Simple yet appetizing. The bright green beans, lightly toasted pecans, and melted butter all come together to create a visually appealing side dish. It's one of those dishes that looks like you put in more time and effort than you actually did.
- Perfect for all occasions. Whether you're serving up green beans with pecans for a weeknight meal or a holiday dinner, this dish will fit right in. It pairs well with just about any main course and can easily be doubled or tripled for larger crowds.
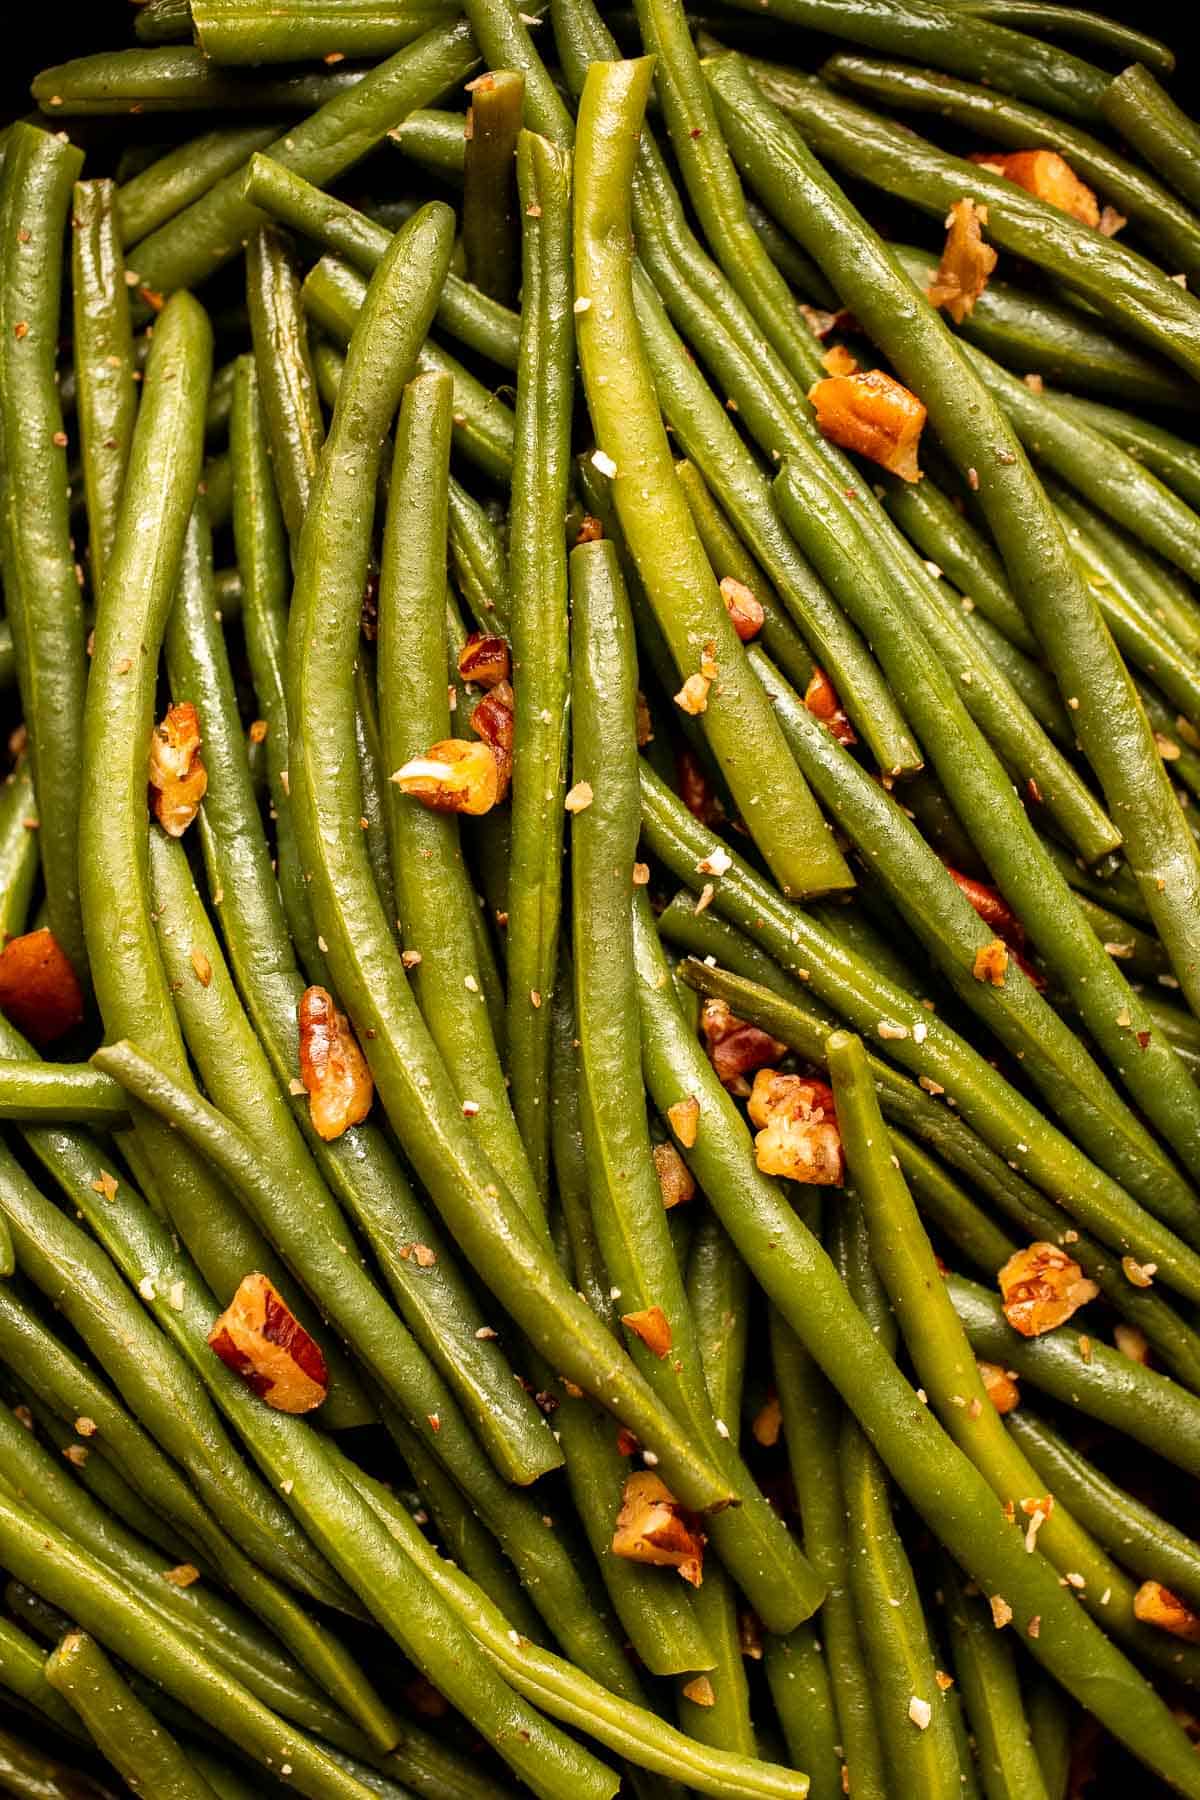
Ingredient Notes
To make these delicious Green Beans with Pecans, you will need the following ingredients (full measurements in recipe card below):
- green beans - I usually trim the ends of the beans to give them a cleaner look but you can leave them intact if you want.
- butter - use unsalted butter for better flavor control.
- pecans - add a nice crunch and flavor to the dish. You can use either medium or finely chopped pecans.
- salt - add to taste.
You will also need measuring cups and spoons, a large pot, and a large skillet.
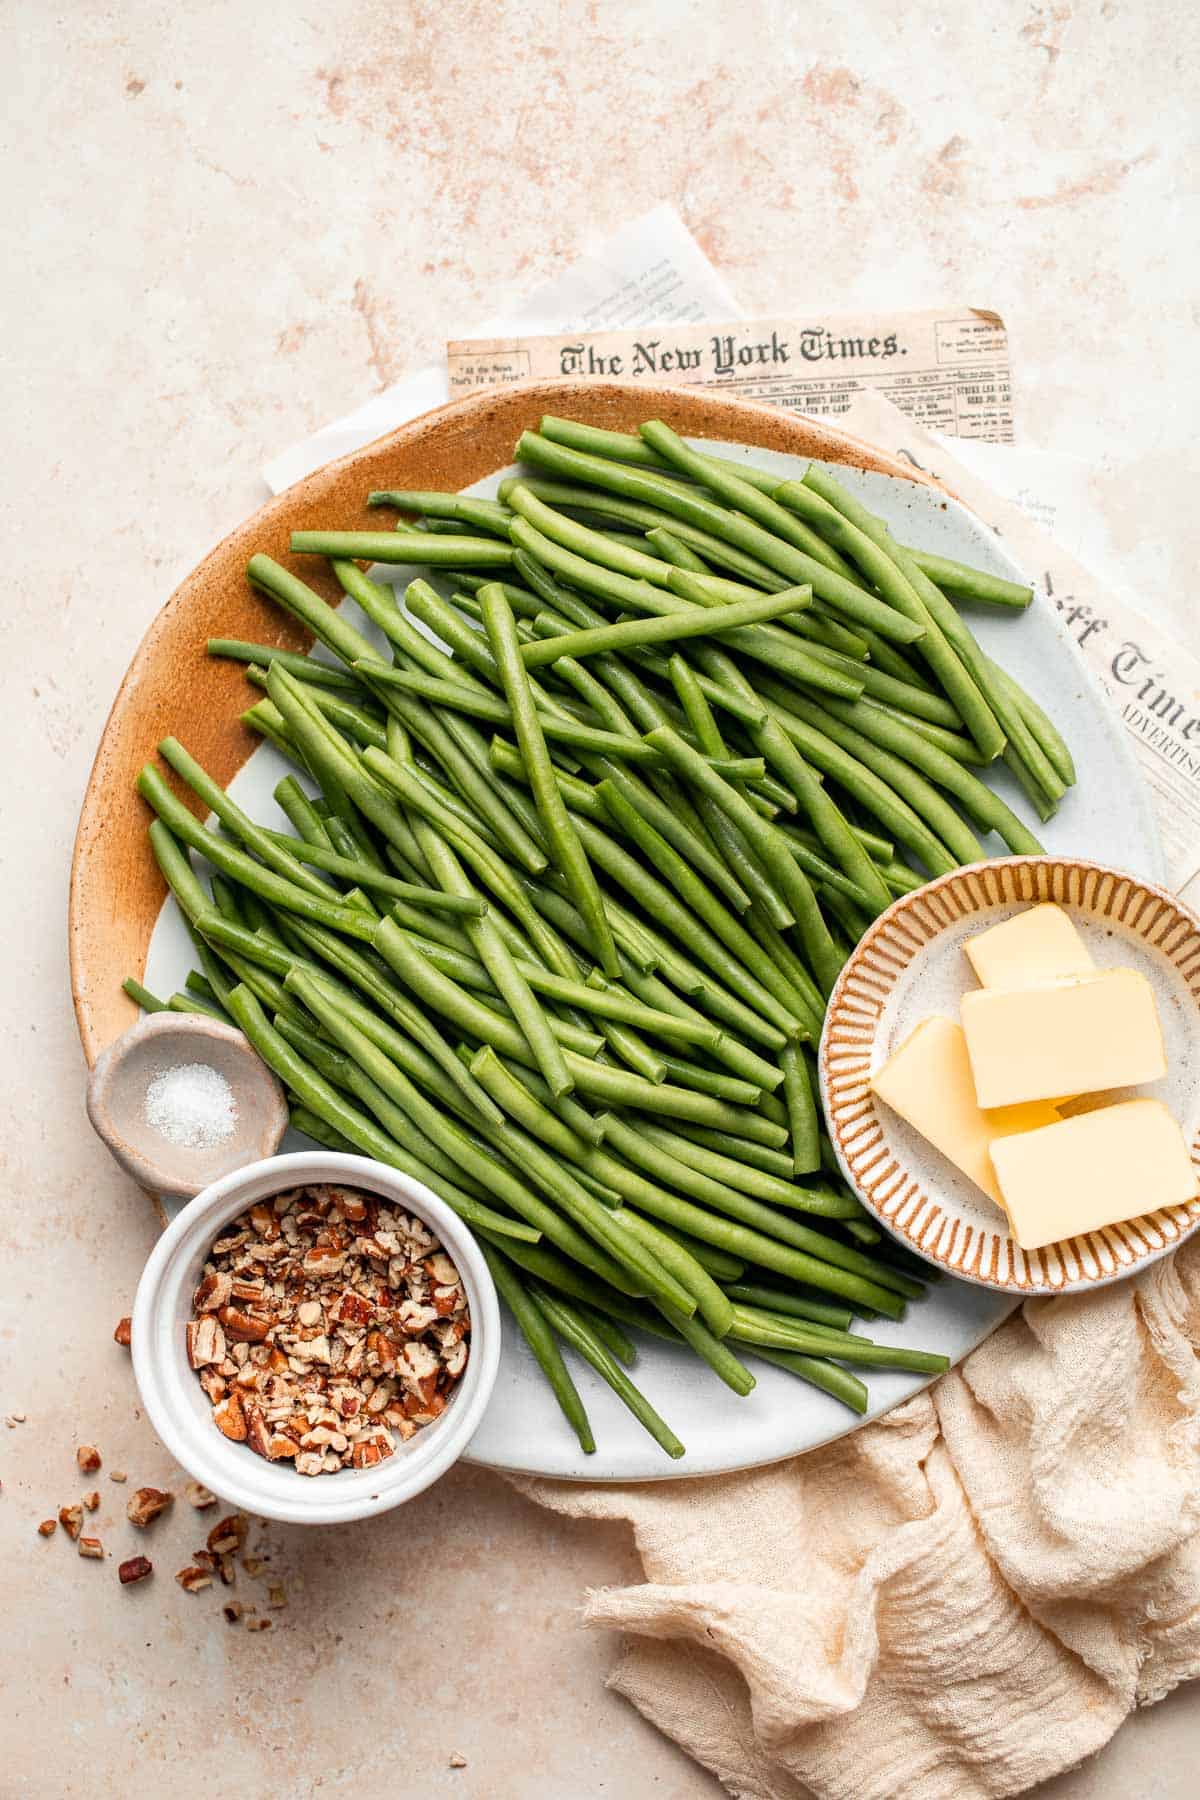
How to Make the Best Green Beans with Pecans
- Cook green beans. Bring a large pot of water to a boil. Add beans and cook uncovered until they are slightly tender but still crispy, approximately 5 minutes. Remove from heat and drain.
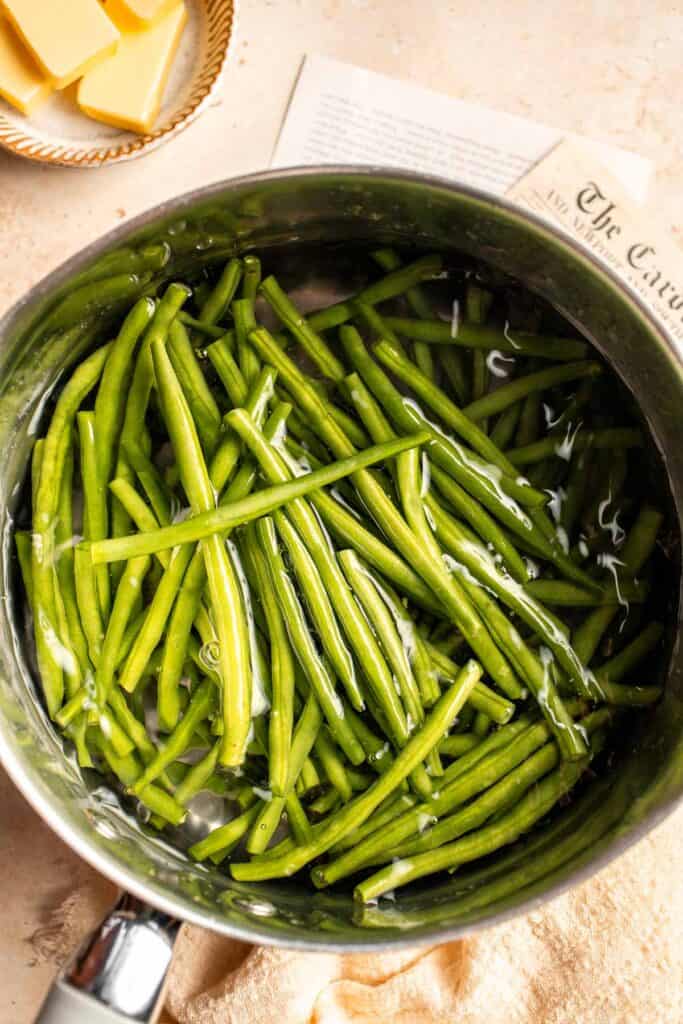
- Toast pecans. In a large non-stick skillet, heat butter over medium-high heat. Once the butter is just melted, add pecans. Cook until they are slightly toasted, about 3 minutes, stirring continuously.
- Toss together. Add green beans and salt, and cook for another 2 minutes. Remove from heat and serve.
Recipe Variations
- Add caramelized onions. Mix in some sliced onions while toasting the pecans in butter. This caramelizes the onions and gives a distinct mildly sweet, savory flavor to your side dish.
- Glaze with balsamic vinegar. Make a tangy and syrupy balsamic vinegar glaze to drizzle your side dish for a unique flavor. Reduce a few tablespoons of balsamic vinegar with brown sugar, and toss your green beans with pecans right in this sauce for a delicious coating.
- Lemon and garlic. Toast some garlic and pecans in butter for a strong, savory flavor and aroma, and add a squeeze of lemon juice at the end for a fresh, zesty twist.
- Enjoy with pesto. If you think that pesto makes everything better, you should make these Pesto Green Beans at home. Add a spoonful of your favorite store-bought or homemade pesto to the cooked green beans for a rich, creamy, herby flavor.
- Make it vegan. Replace butter with vegan butter or olive oil.
How to Serve
Enjoy these delicious Green Beans with Pecans as a side with some main dishes such as:
- Greek Lemon Garlic Whole Roast Chicken
- Glazed Honey Balsamic Pork Chops
- Roasted Pork Tenderloin
- The Best Ribeye Steak
- Roasted Garlic Parmesan Baby Potatoes
- Pesto Penne Pasta
- Roast Stuffed Chicken
Recipe Tips and Tricks
- Use fresh green beans. While you can use store-bought frozen French-cut green beans, fresh ones retain a natural, crispy texture and cook much faster.
- Use boiling water.Drop the green beans in vigorously boiling water so you can achieve that tender yet crispy texture. Avoid boiling them excessively as they will turn too soft and dull green.
- Toss around. While toasting the pecans, move them from time to time so they don't burn and instead, maintain a nice buttery, slightly caramelized texture.
- Serve immediately. Like many dishes, it is best to serve your green beans with pecans hot and fresh off the skillet. It will be the crispiest and most tender just after cooking.
Storing and Freezing Instructions
How to Store
Keep any leftover green beans in an airtight container and store them in the fridge for up to 3 days.
How to Reheat
Reheat the nutty green beans in a skillet over medium heat, adding a tablespoon of butter or olive oil to keep them from drying out.
How to Freeze
Place the leftovers in a freezer bag or freezer-safe container and freeze for up to 3 months. To thaw, transfer them in the fridge overnight and reheat in a skillet.
More Green Bean Recipes
- 15 Best Green Bean Recipes
- Green Beans Almondine
- Lemon Parmesan Green Beans
- Green Beans with Bacon
- Pesto Green Beans
- Sautéed Garlic Green Beans
Tried this recipe?
I'd love to hear what you think! Leave a comment and rating below to share your feedback. Your reviews help others discover this recipe and help me keep creating more free recipes for you. Snap a photo and tag me on social media @aheadofthyme too.

Twice Baked Potatoes
Twice Baked Potatoes are the absolute perfect side dish for your family dinners or as a game day appetizer. The tender baked potato boats have a crispy shell from the double baking process, and the gooey, cheesy filling oozes flavor into every bite. They're commonly served in sports bars and chain restaurants, but the homemade version is so much better!

These special potatoes are made by removing the fluffy insides of regular baked potatoes, then whipping them together with your favorite baked potato toppings like bacon, sour cream, cheddar, and green onions, before placing them back in the potatoes before baking once again. These loaded baked potatoes are a great side dish or appetizer for any party, and they're easy enough to make instead of mashed potatoes at your next event!
Why You'll Love These Twice Baked Potatoes
- Ultimate comfort food. The best part of baked potatoes is the toppings, which transform ordinary potatoes into something exceptional. Twice-baked potatoes bake the creamy, cheesy toppings you love inside the shell of a baked potato. They're warm, crispy, and salty, with a gooey, creamy, savory filling. You won't be able to eat just one.
- Easy to serve. Instead of setting up a loaded baked potato bar and having everyone choose their own toppings, these easy twice baked potatoes take care of all of that. Your guests can simply serve and go!
- Perfect textures. Since the potato gets cooked twice, the tender skin becomes nice and crispy in the oven. As you crunch through it, you find the creamy, cheesy potato filling on the inside. The balance of crisp skin and tender cheesy potato filling is a match made in heaven!

Ingredient Notes
To make these delicious twice baked potatoes, you will need the following ingredients (full measurements in recipe card below):
- Russet potatoes - stick with starchy Russets. Look for large, firm potatoes and wash them well.
- avocado oil - rub the oil over the potatoes before baking to help them develop a crispy crust. Olive oil is a good alternative.
- milk - this will thin out the potato filling to make it almost like creamy mashed potatoes. Use any type of milk.
- butter - use unsalted butter and cut it to 1-inch pieces.
- sour cream - sour cream adds a creamy, tangy flavor to these twice baked potatoes.
- cheddar cheese - add shredded cheddar to the creamy filling and sprinkle extra on top to melt in the oven.
- bacon - precook the bacon to add the bacon bits and leftover bacon fat to the creamy potato filling for extra flavor.
- green onions - finely chopped green onions are the perfect garnish.
- salt and black pepper
You will also need a fork (or knife), baking sheet, skillet, large mixing bowl, and spatula.
How to Make the Best Twice Baked Potatoes
- Bake potatoes. Scrub potatoes clean, then poke all over with a fork or knife, and rub the potatoes all over with oil. Place the potatoes in a large baking sheet and bake in a 400F preheated oven until cooked through and fork tender, about 1 hour.

- Cook bacon. While the potatoes are baking, add bacon in a skillet and cook over medium-high heat until browned on both sides and crisp, about 6-8 minutes. Reserve the bacon fat in a bowl and transfer the bacon onto a paper towel lined plate. Chop the bacon into small bits.
- Slice and scoop potatoes. Once cooked, allow the potatoes to cool for 15 minutes until cool enough to handle. Then, gently slice the baked potatoes in half lengthwise and scoop out the insides without tearing the shells. Leave about a ¼ inch border of potato flesh on the skin. Set the potato shells aside.
- Make filling. Transfer the potato flesh into a large mixing bowl and add milk, butter, sour cream, 1 cup cheddar cheese, salt, pepper, and reserved bacon fat. Stir well with a spatula until evenly combined. Stir in half of the bacon bits.
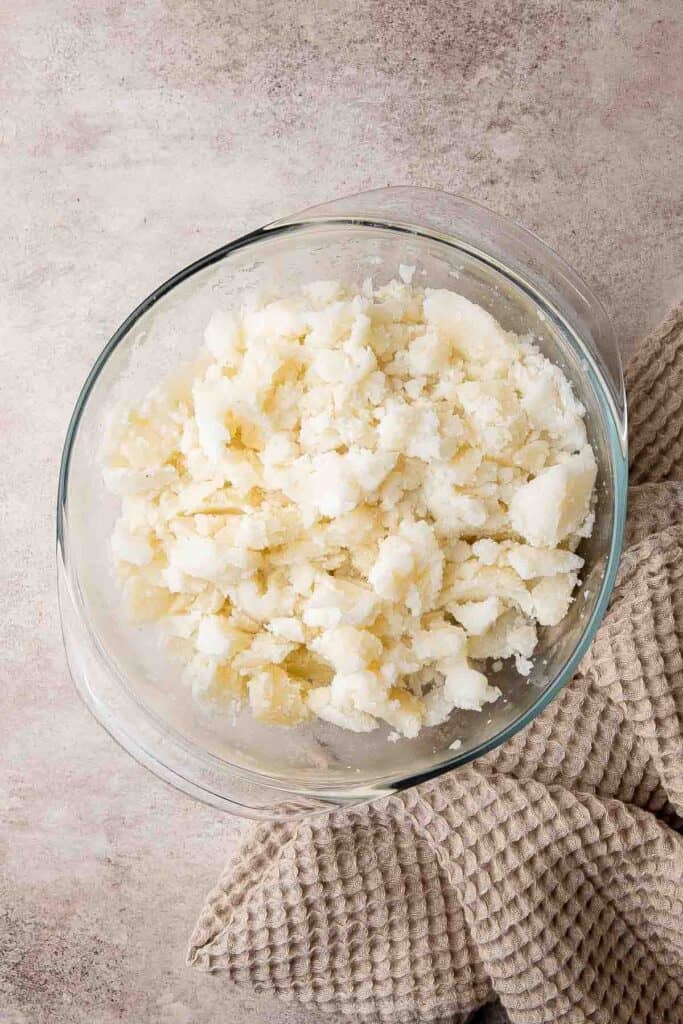
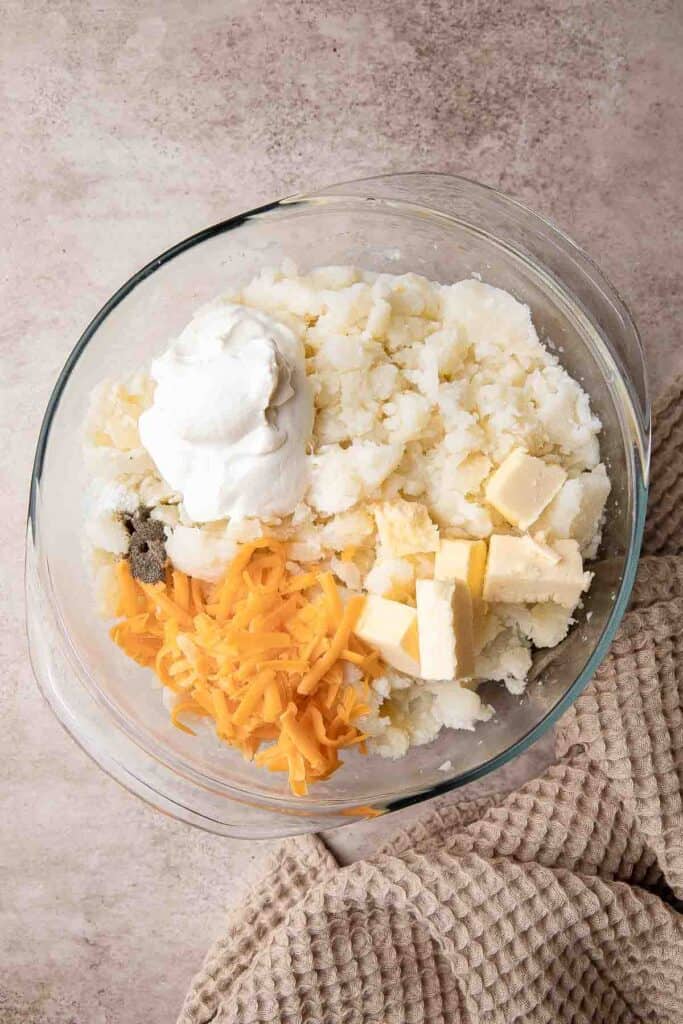

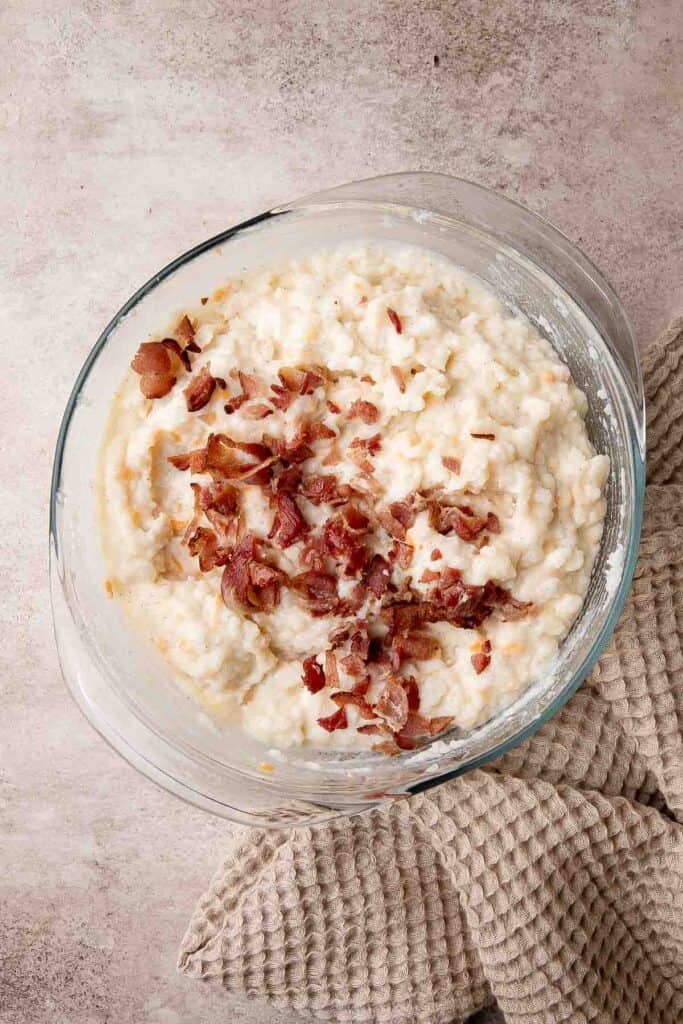
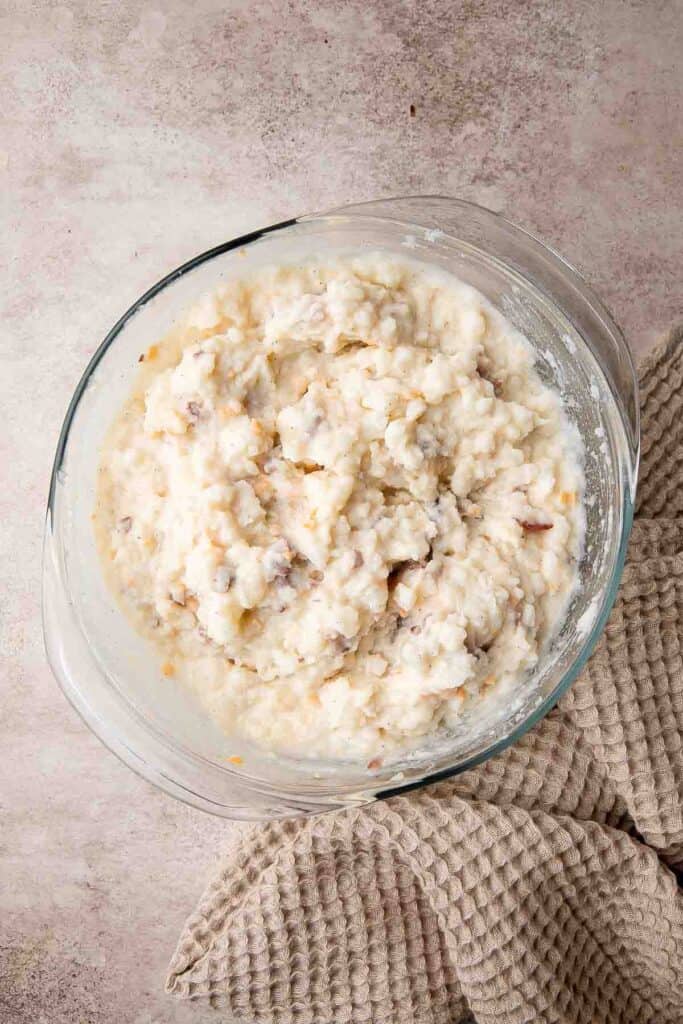
- Stuff potato skins. Fill the potato shells evenly with the mashed potato mixture and top with extra cheddar cheese and bacon bits.
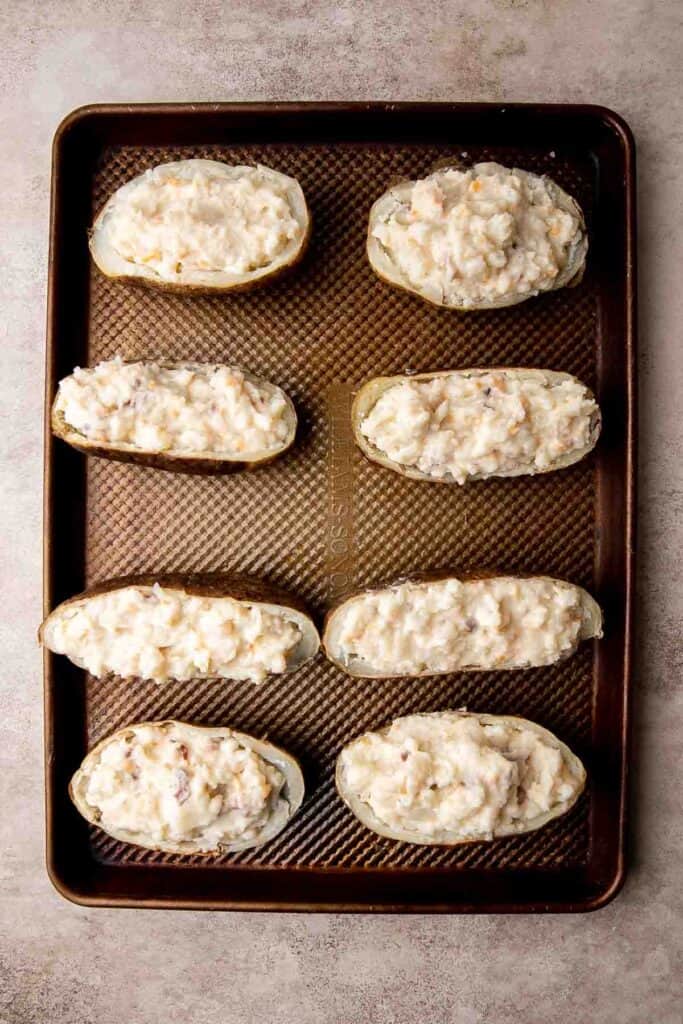

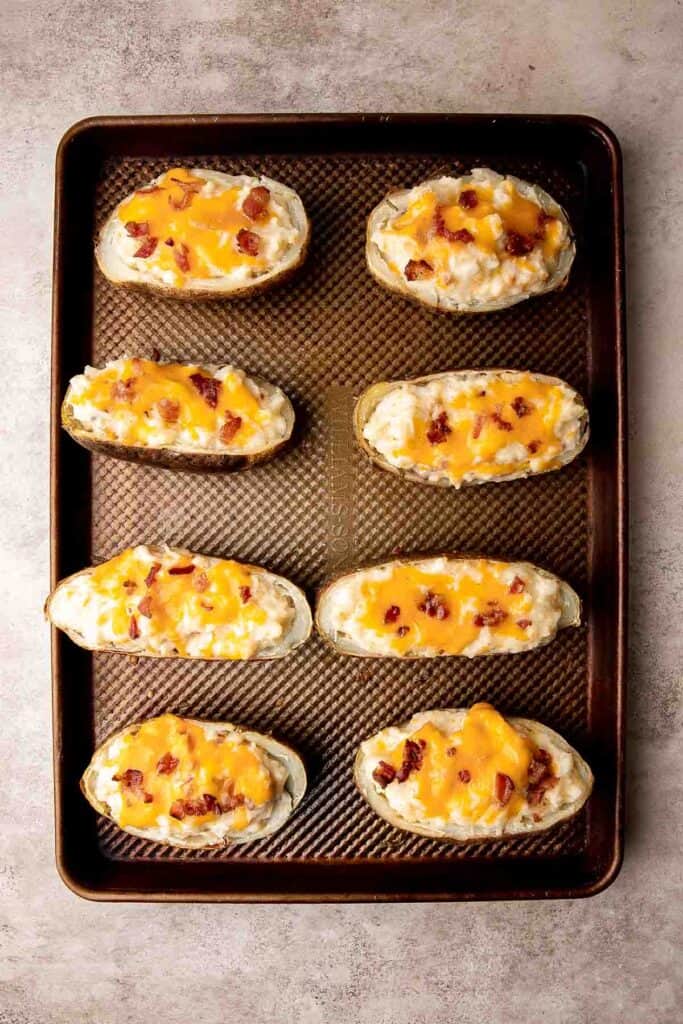
- Bake. Reduce the oven temperature to 350F and bake the stuffed mashed potatoes again for another 20 minutes until heated through and the cheese has melted.
- Serve. Sprinkle with green onions and serve warm.
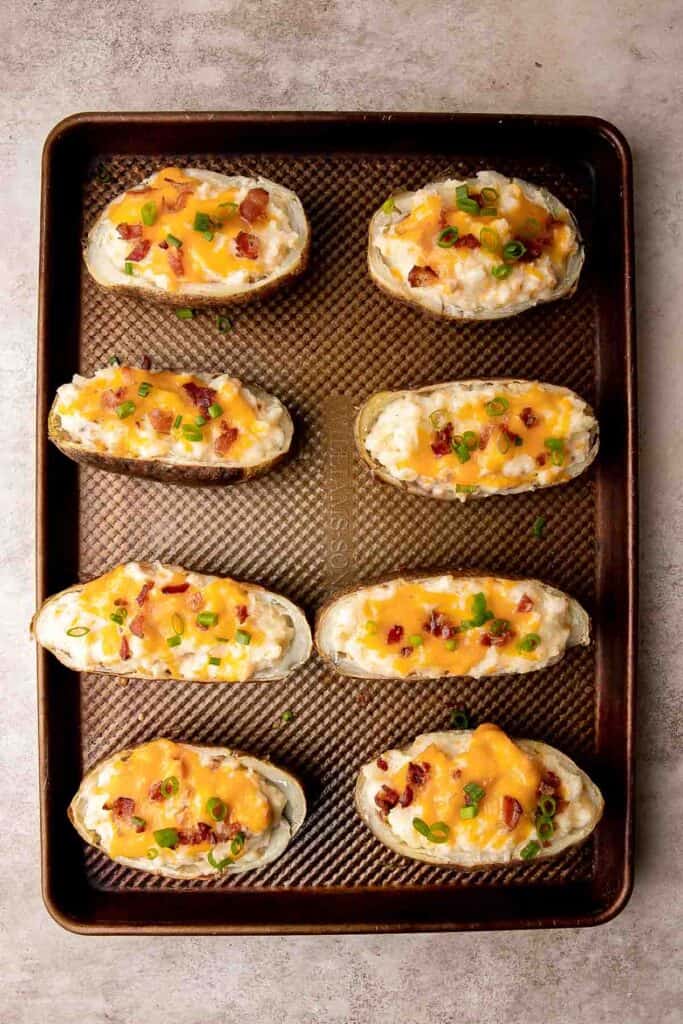
Recipe Variations
- Buffalo twice baked potatoes. Instead of cheddar cheese, add your favorite blue cheese crumbles and a few dashes of buffalo sauce for a hot wing-inspired side dish.
- Air fryer twice baked potato recipe. If your oven is busy, follow the same steps to bake your hot potatoes in the air fryer. Adjust the cook time to 40-45 for the baked potatoes and 10-15 minutes after adding the toppings.
- Broccoli cheese twice baked potatoes. Add some chopped steamed broccoli to the potato filling for an extra dose of color and veggies.
How to Serve
This twice baked potato recipe is delicious served on its own, or paired with some of my favorite main courses and sides including:
- Slow Cooker BBQ Ribs
- Classic Juicy Hamburgers
- Game Day Buffalo Hot Wings
- Jalapeño Poppers
- Spicy Mac and Cheese
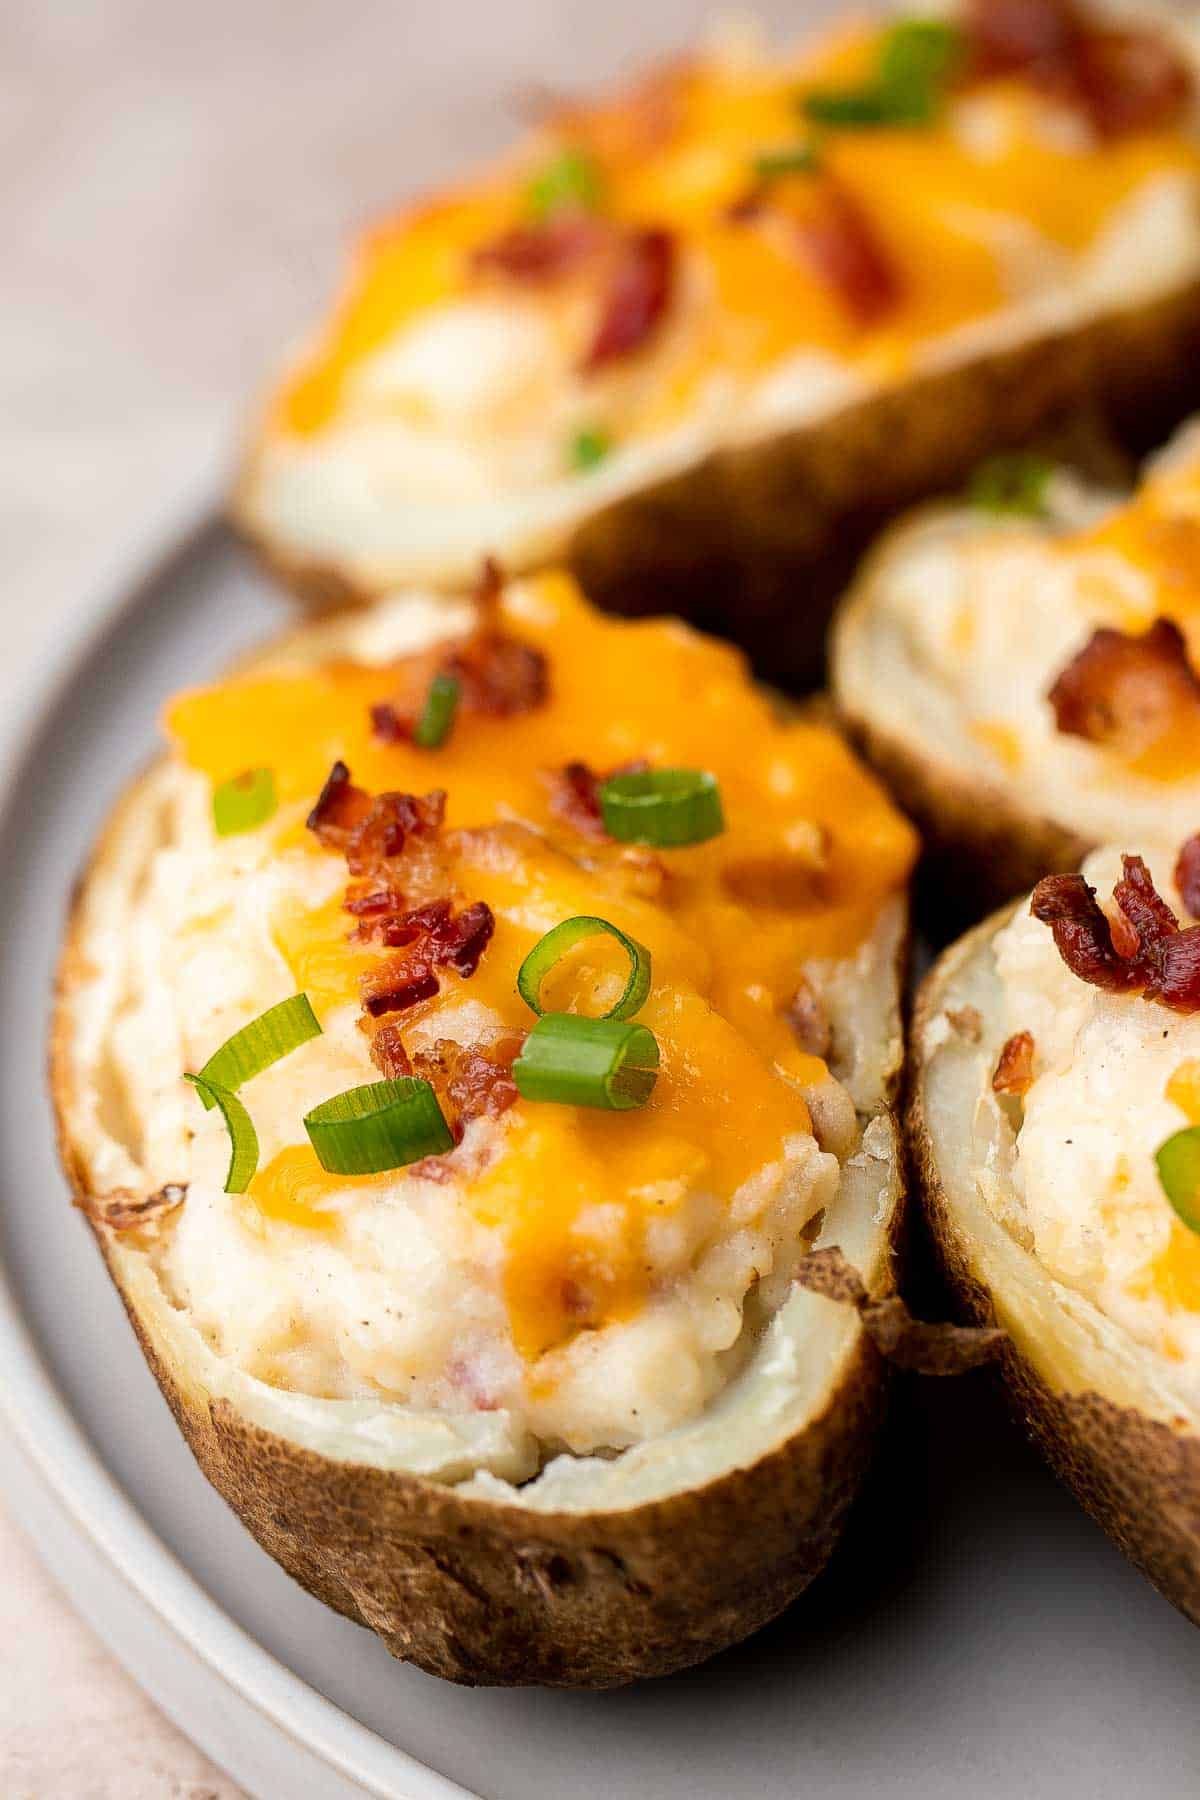
Recipe Tips and Tricks
- Use the right potatoes. You need a potato with a high starch content to get a fluffy texture. Russet potatoes are the best option.
- Don't rush the potatoes. This twice-baked potatoes recipe only works if the inside of your potatoes is light and fluffy. If you underbake the potatoes, they will be dense and hard. Make sure they are perfectly fork tender first.
- Adjust to taste. Feel free to season the filling with your favorite spices like garlic powder, onion powder, a little smoked paprika, etc. Make it your own!
- Season well. Potatoes are very bland on their own. If you want your potatoes to be really flavorful, you need to taste the filling and season them well.
Storing and Freezing Instructions
How to Store
Store leftover twice-baked potatoes in an airtight container or cover them well with plastic wrap. Store in the fridge for 3-4 days.
How to Reheat
Although you can microwave the twice-baked potatoes, the preferred method is to bake them in a 400 degree F oven for 10-15 minutes until nice and warm. You can also reheat them in the air fryer at 400F for about 7-10 minutes.
How to Freeze
After chilling, place the potatoes in a freezer-safe container. They'll store well for up to 3 months. Allow the potatoes to thaw overnight in the fridge to room temperature before reheating according to instructions above.
FAQ
Regular baked potatoes are made by baking whole potatoes in the oven. That's all they are - hot, tender potatoes with a fluffy inside. To make twice baked potatoes, you remove the fluffy center of the potatoes and mix it with your favorite baked potato toppings like sour cream, cheddar cheese, butter and more. Then, the filling is added to the halved potato skins and baked a second time.
It's really important to use good food safety practices, especially at parties or the holidays. Twice baked potatoes should only stay out for a maximum of 2 hours before the leftovers need to be stored in the fridge. At room temperature, the bacteria on the food can grow extremely fast. In the fridge, they grow much more slowly. If you need them to sit out longer, keep them warm in a crockpot or chafing dish. Just remember that they need to be kept above 140 degrees F to stay fresh.
Twice baked potatoes are the perfect side dish or appetizer! For your next game day, serve them as an app with your favorite wings, creamy dips, and other finger foods. They also pair well with your favorite roasts, burgers, pulled pork, or brats as a side dish. Basically, any time you'd serve French fries or baked potatoes, you can serve twice-baked potatoes!
More Potato Recipes
- 40 Best Potato Recipes
- Mashed Potato Casserole
- BBQ Chicken Stuffed Baked Potatoes
- Potato Leek Soup
- Baked Mashed Potatoes
- Duchess Potatoes
Tried this recipe?
I'd love to hear what you think! Leave a comment and rating below to share your feedback. Your reviews help others discover this recipe and help me keep creating more free recipes for you. Snap a photo and tag me on social media @aheadofthyme too.

Cheese Board
This easy Cheese Board is one of the most popular and classic appetizers you can serve at any gathering. With an assortment of cheese, bread and crackers, fresh fruit, and nuts, this spread is perfect for a dinner party, wine night, or just as a snack when you're feeling fancy. It's also a guaranteed way to brighten up your holiday table without spending too much time in the kitchen.

A quality cheese board typically consists of various kinds of cheese, fresh fruits, bread and crackers, some nuts, and a bowl of honey arranged in an aesthetically pleasing way. It brings a lot to the table, and no one will be able to resist digging in. We included four types of cheese in this recipe that have unique textures and flavors ranging from a hard, sharp-tasting cheddar to a soft, milky brie. The sweetness of the honey, jam, and fresh fruits perfectly balances out the saltiness of the cheese, while the crusty bread, crackers, and nuts provide a crunchy contrast that people are sure to love and enjoy.
Why You'll Love this Cheese Board Recipe
- Extremely simple to make. Anybody, and I mean, anybody can quickly put this cheese board together in 15 minutes. All you need is a selection of your favorite cheeses, fresh fruits, crackers and breads, honey or jam, and some nuts, neatly arranged on a large wooden cutting board or platter.
- Great for any occasion. From casual get-togethers and picnics to elegant dinner parties and holiday gatherings, a cheese board is the perfect way to add a bit of sophistication and style to the table without too much work. Plus, you and your guests can experience different flavors and textures, which makes it more interesting than just serving a plate of cheese.
- Stunningly beautiful. A nicely arranged cheese board is a treat for the palate and a feast for the eyes. The brightly colored fruits, the crunchy crackers and nuts, and the colorful jams and honey side by side with different cheese cuts certainly make it a work of art. Who wouldn't be impressed by that?
- Versatile. If you're going for a fancy cheese board, you can always add a few more ingredients like cured meats, fresh veggies, spreads, and even some fresh herbs. Or if you're looking for something simpler yet still delicious, just stick to the basics and you'll do just fine.
Ingredient Notes
To make this easy Cheese Board, you will need the following ingredients (full measurements in recipe card below), along with a knife and a large wooden platter:
Cheese
Use an assortment of 4 different types of cheese, ranging from soft, semi-soft, and hard cheese. We used:
- cheddar cheese - one of the classic hard cheeses for a cheese board. It has a strong, sharp flavor with a slightly hard texture.
- gruyère cheese - a semi-soft cheese with hints of saltiness and nuttiness. You can also use Comté or Gouda if you have them on hand.
- goat cheese - a soft, creamy cheese with mild tangy flavors that adds an interesting texture to the board. It's usually served in logs or rounds.
- brie cheese - another classic, this soft cheese has a mild, buttery, creamy, and slightly sweet flavor that's perfect for spreading on crackers or bread.
Crackers and/or Bread
Crackers or bread are the perfect vehicle for all those delicious cheeses. Some great optinos are water or saltine crackers, breadsticks, sliced ciabatta, French bread, sourdough, and pita chips. Potato chips work too!
Marinated items
I like to add a little tang to these cheese board with a bowl of olives. Kalamata olives or large green olives are great for a nice tangy contrast. You can also add in other marinated items such as marinated artichokes, pickles, or roasted red peppers.
Jams
We add a little sweetness with jam and honey. You can also add a bowl of maple syrup or fruit compote.
- jam - for a sweet, fruity flavor. You can use strawberry, raspberry, or blueberry.
- honey - has a nice, syrupy consistency for dipping.
Fruit
Add a few varieties of fresh fruit such as grapes, berries, apples, and pears.
- red grapes - I prefer this to be in a bunch so it won't roll over.
- apple - sliced into thin wedges or small cubes. You can switch this with pears too.
Nuts
Use different types of nuts like almonds, walnuts, pecans, pistachios, and hazelnuts for an added crunch.
How to Make the Best Cheese Board
- Arrange contained items. On a large platter, arrange the items that are in a bowl (including olives, jam, and honey), spacing them apart from each other in a non-symmetrical pattern.
- Place cheese. Arrange the cheese around the bowls, also spacing them away from each other to keep things pleasing to the eyes.
- Add crackers and bread. Arrange the crackers and bread around the bowls and cheese.
- Mix in some fruits. Arrange the fruit (grapes and apples) in gaps, also keeping them apart from each other).
- Fill gaps. Fill any large gaps with nuts.


Recipe Variations
- Add meats. Make a charcuterie board instead by adding a selection of cured meats like salami, prosciutto, or mortadella. The savory and umami flavors of the meats perfectly complement the rich, creamy cheese taste.
- Make a cheese fondue. Melt some cheese, put it in a bowl, and let everyone dip away! A warm, gooey cheese dip screams party time, and it's a great way to get the kids excited. You could also add a bowl of Queso Cheese Dip instead.
- Have some chocolate. Place pieces of dark chocolate into your cheese board for a sweet and salty combination. The rich, dark, and sweet chocolate flavors are always welcome on a cheese board, and I'm sure your guests will agree.
How to Serve
Serve this delicious Cheese Board as an appetizer or snack for your next gathering. It makes for a great centerpiece for any party or event. Serve it as part of an appetizer spread along with some other favorites like:
- Tomato Bruschetta with Balsamic Glaze
- Fried Goat Cheese Balls
- Mediterranean Flatbread
- Beet Hummus
- Toasted Ravioli
- Kale Chips
For more appetizer recipes, see our 75+ Easy Appetizer Recipes.
Recipe Tips and Tricks
- Soak fruit slices in lemon water. Apple and pear slices easily turn brown after you cut them, especially if you place them on the cheese board too soon. Keep them looking fresh by soaking them in water with lemon juice for a few minutes so they don't discolor.
- Serve cheese at room temperature. The flavor of cheese is at its best when served at room temperature, so take it out of the refrigerator 30-45 minutes before serving. Doing so allows the cheese to soften and fully develop its flavor.
- Vary sizes. Some cheeses can be served whole, especially soft ones like brie and camembert, while hard cheeses are best served in cubes or thin slices for easy handling. You can leave a cheese knife near the board so guests can cut their own slices.
Storing Instructions
Fully cover the entire cheese board with plastic wrap and keep in the fridge for up to 3 days. Make sure to take out the cheeses at least 30 minutes before serving. We also don't recommend putting the leftover crackers, bread, and nuts in the fridge, so place them in separate airtight containers and store at room temperature instead.
More Appetizer Platter Recipes
Tried this recipe?
I'd love to hear what you think! Leave a comment and rating below to share your feedback. Your reviews help others discover this recipe and help me keep creating more free recipes for you. Snap a photo and tag me on social media @aheadofthyme too.

Nutella Cookies
These homemade Nutella Cookies are heaven for chocolate lovers. The chewy Nutella cookies are tender and delicious with their chocolate chips and chopped hazelnut pieces, but the homemade Nutella chips take them over the top. They're perfect with a hot cup of coffee or dunked into a mug of hot cocoa!
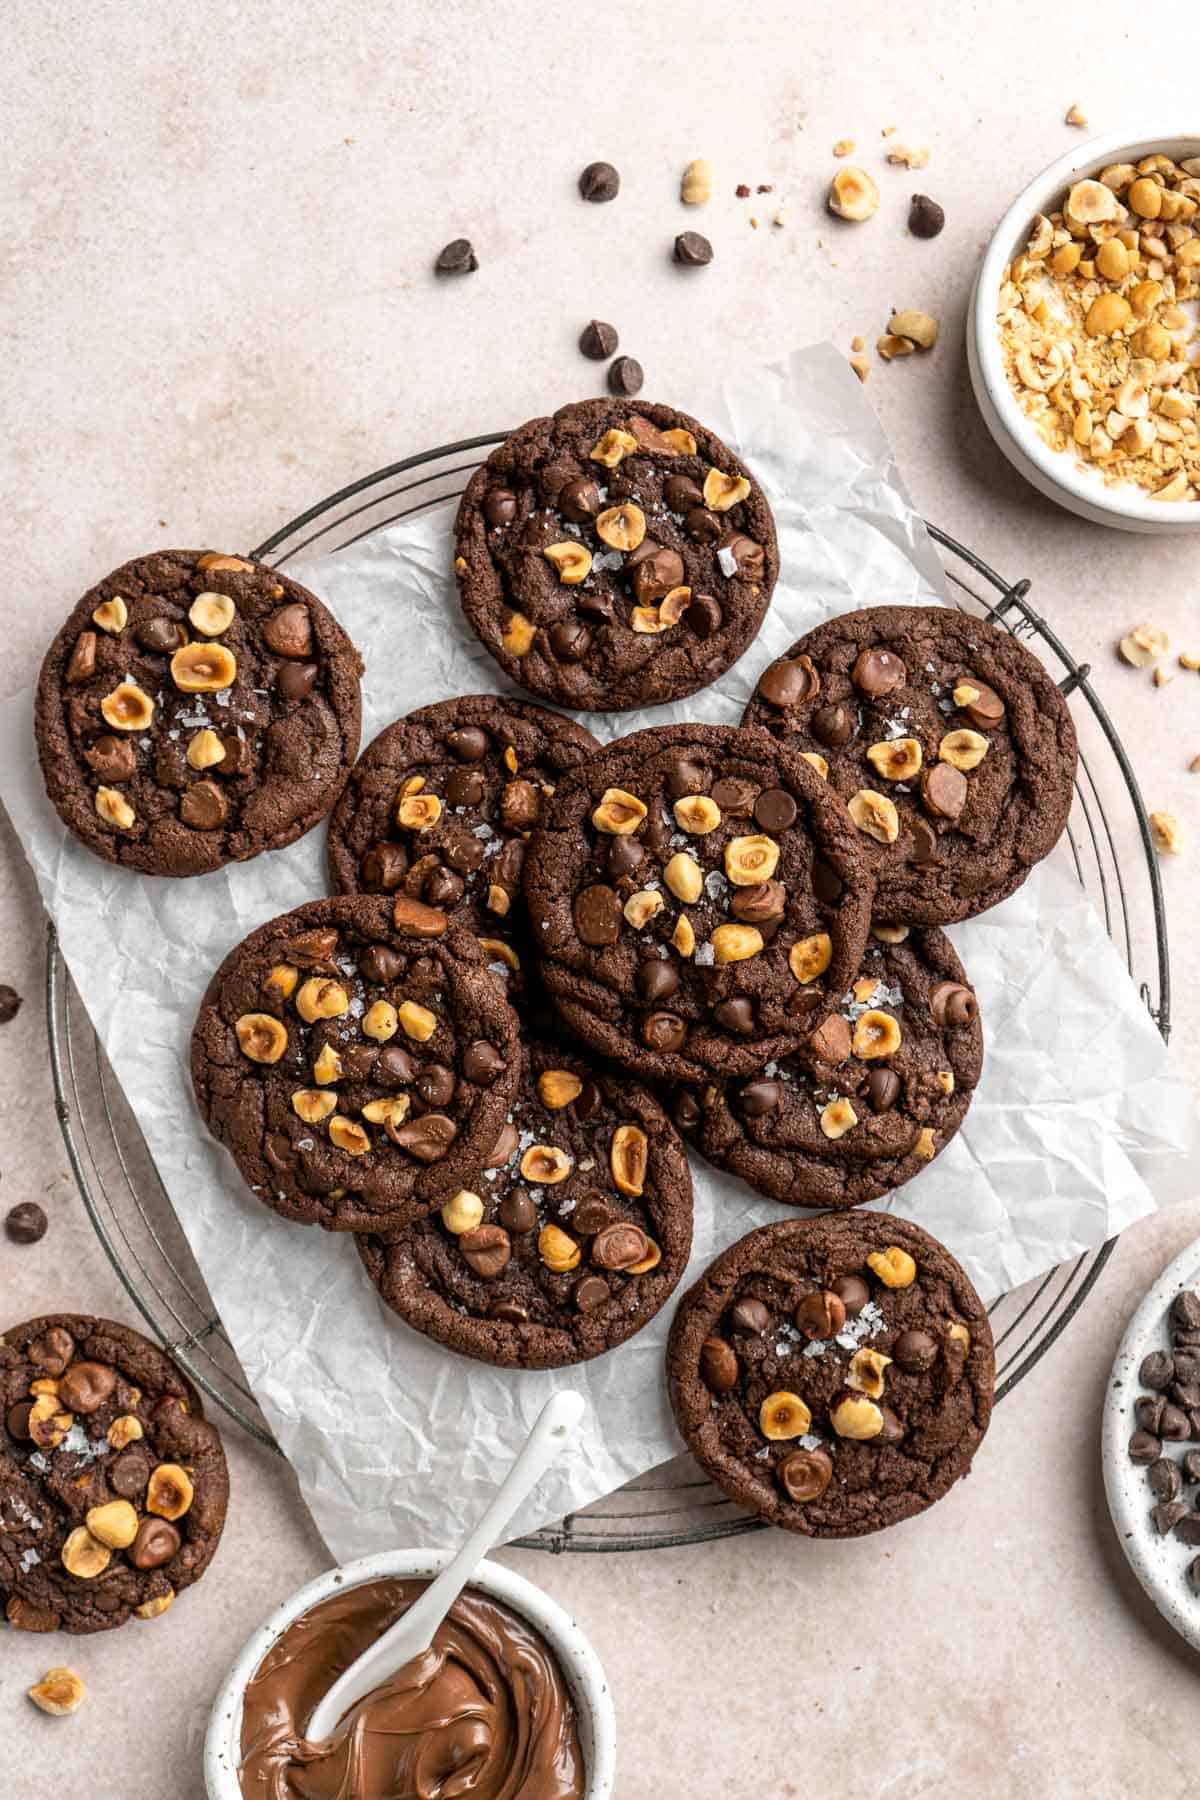
Nutella is an iconic chocolate hazelnut spread known for its creamy texture and sweet flavor. This makes it absolutely perfect for baking into your next batch of cookies! The creamy spread will add sweetness and a rich, tender texture that makes each cookie lovely and chewy. They just might become your new favorite cookie!
Why You'll Love This Nutella Chocolate Chip Cookie Recipe
- Crunchy and chewy. These cookies have a perfectly chewy texture and bakery-style look. The pieces of chocolate chips, chopped hazelnuts, and Nutella chips add extra texture that makes each one so much fun to eat!
- So much Nutella. These cookies are a Nutella lover's dream! There is Nutella baked into the cookie dough itself, complemented with cocoa powder and hazelnuts to highlight the traditional chocolate hazelnut flavor. There are actual frozen Nutella chips in the cookie dough as well, so you'll find pockets of warm, gooey Nutella in every bite.
- Double chocolate chip cookies. There is so much chocolate in this cookie dough! From the Nutella and the cocoa powder to the chocolate chips and the frozen Nutella bites, we might need to call these quadruple chocolate cookies.
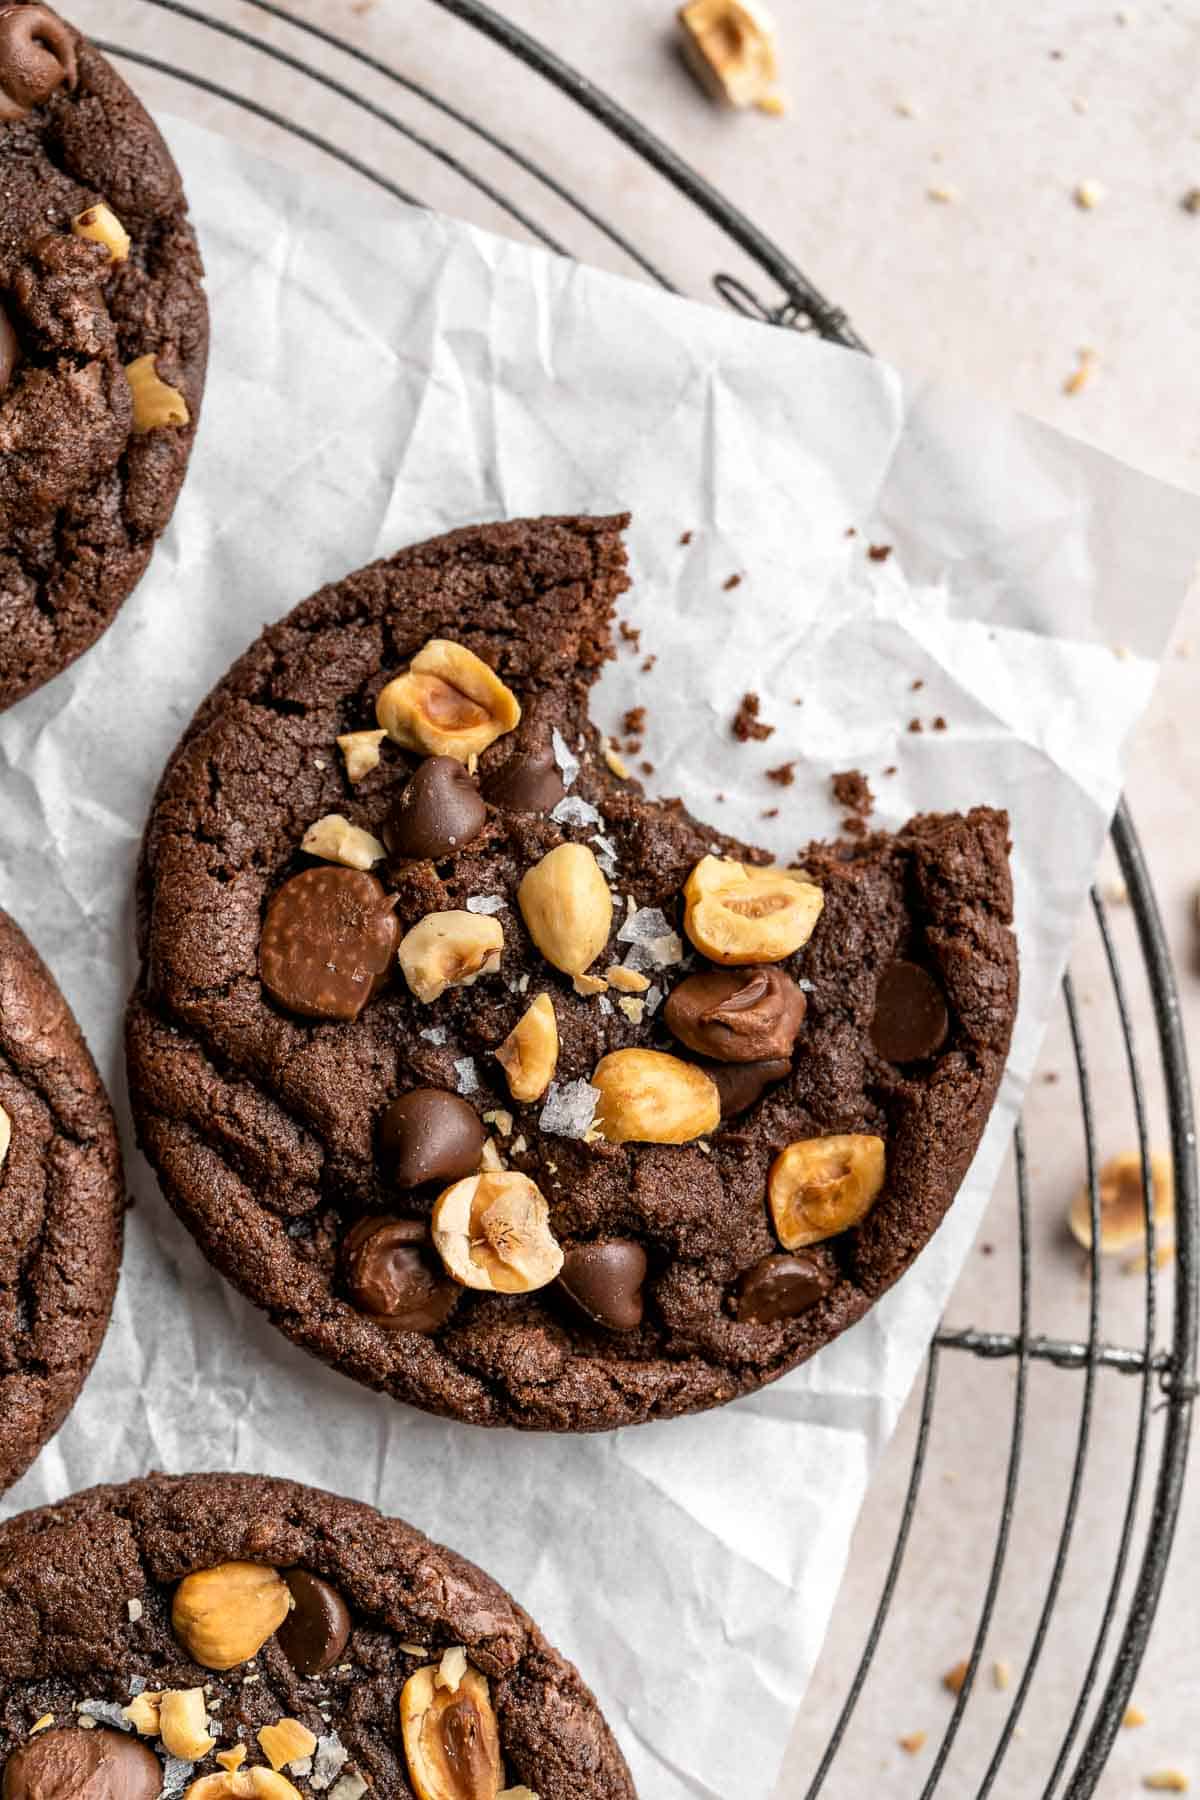
Ingredient Notes
To make these delicious Nutella cookies, you will need the following ingredients (full measurements in recipe card below):
- Nutella - we need Nutella to make the homemade Nutella chips. We also add real, creamy Nutella to the cookie dough to bake that flavor into every bite.
- flour - all purpose works perfectly for this recipe.
- cocoa powder - use natural cocoa powder for a rich chocolate flavor.
- baking soda - this will react with the cocoa powder for a gentle rise.
- baking powder - this helps leaven the cookies for a chewy, fluffy texture.
- salt
- butter - use unsalted room temperature butter.
- brown sugar - dark brown sugar has the richest flavor.
- white sugar - this will make sure your cookies have a fluffy texture and perfect sweetness.
- eggs - these bind the cookie dough together and help it rise.
- vanilla extract - pure vanilla extract adds a lovely aroma.
- chocolate chips - choose semi-sweet mini or regular chips.
- hazelnuts - use chopped roasted hazelnuts for an extra crunch.
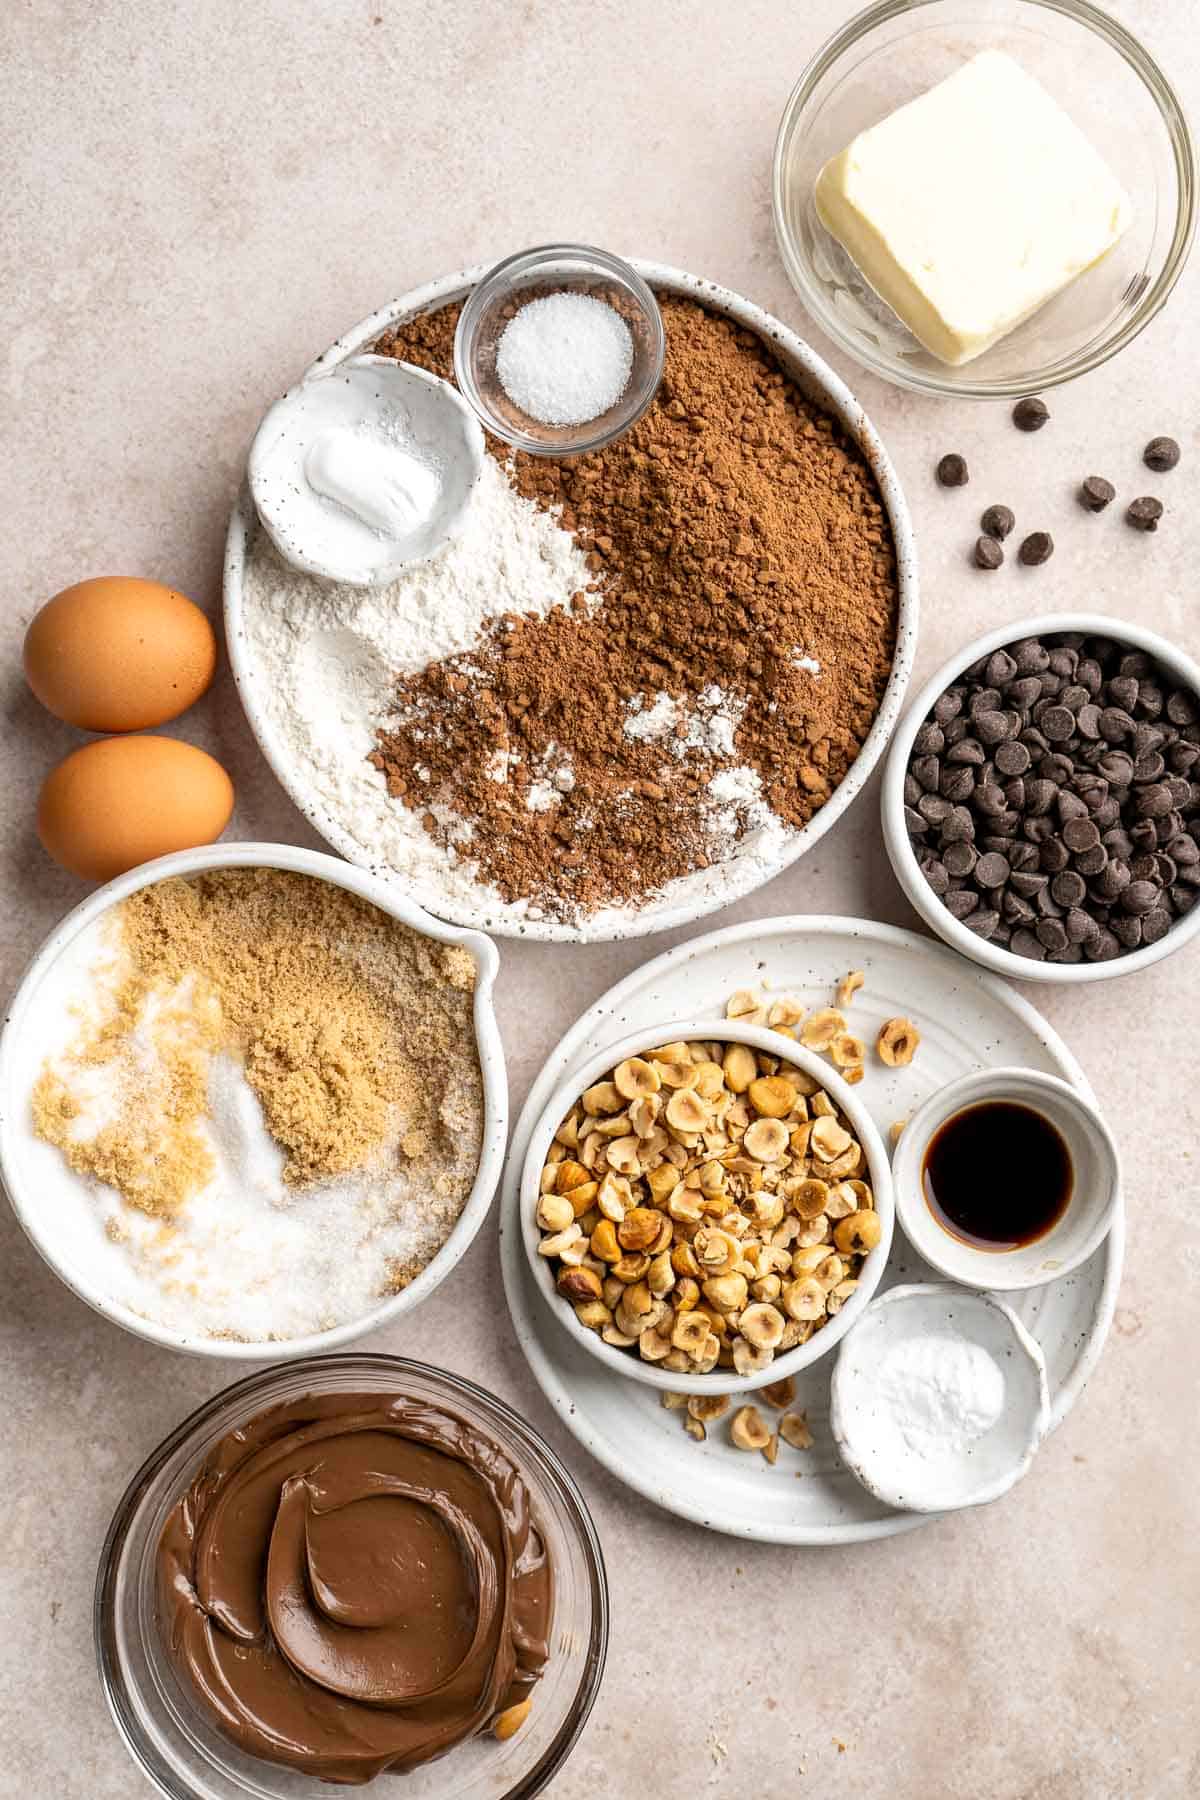
Equipment Needed
You will also need the following baking tools and equipment:
- baking sheets
- parchment paper
- piping bag
- medium or large mixing bowl
- whisk
- electric hand mixer
- spatula
- cookie scoop
- plastic wrap
- wire cooling rack
How to Make the Best Nutella Cookies
First, make the homemade Nutella chips.
These frozen dollops of Nutella take an already great cookie over the top. As they bake, they melt into little pockets of molten Nutella. To make them:
- Pipe the chips. Prepare a baking sheet with parchment paper. Place the Nutella into a piping bag, cut off the tip, then pipe small chocolate chip sized dollops onto the baking sheet.
- Freeze. Place into the freezer to harden for at least 2 hours. Do not remove until right before adding to the Nutella cookie batter.
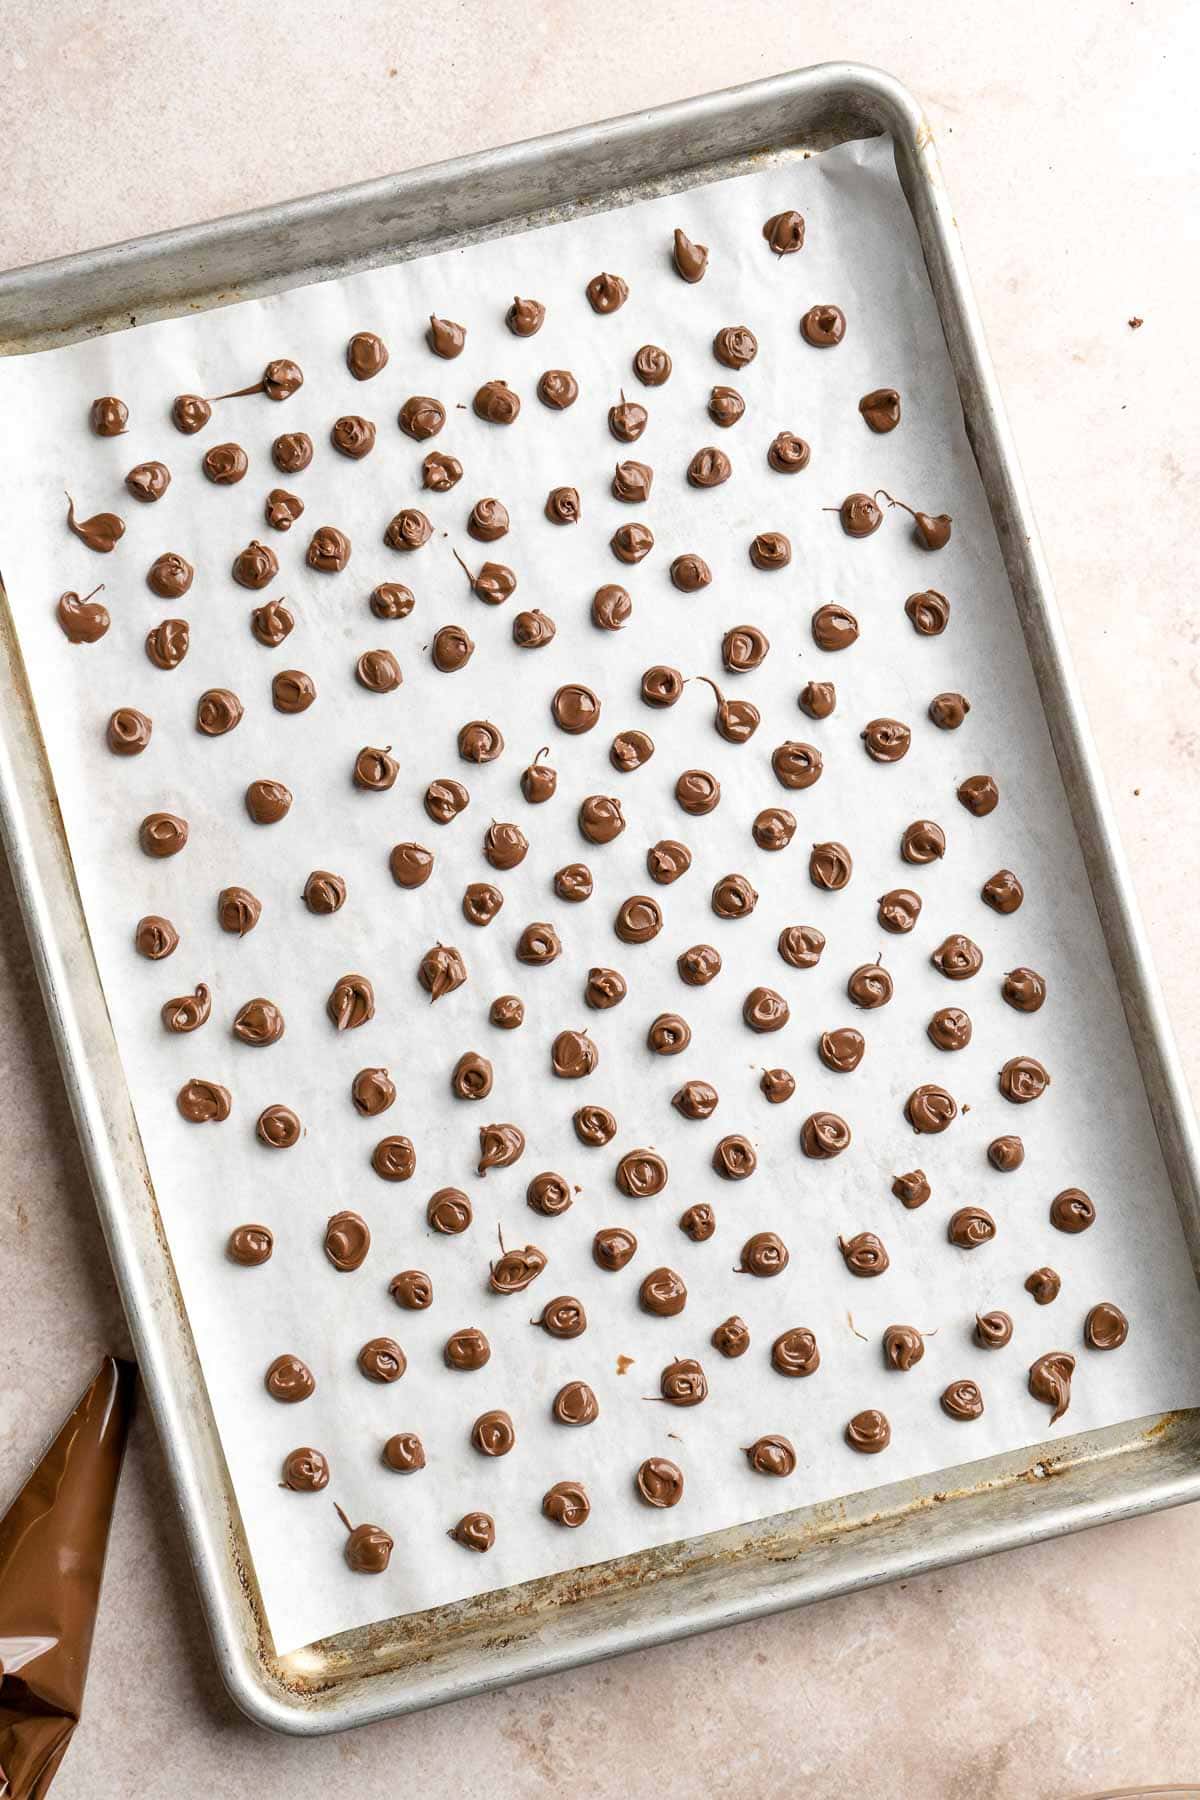
Now, let's make the Nutella cookies.
- Combine dry ingredients. In a medium to large mixing bowl, add flour, cocoa powder, baking soda, baking powder, and salt. Whisk well to combine, then set aside.

- Combine wet ingredients. In a large mixing bowl, add Nutella, butter, brown sugar, and white sugar, then beat with an electric hand mixer until fluffy, about 3-4 minutes. Add in the eggs and vanilla, then beat again until smooth.
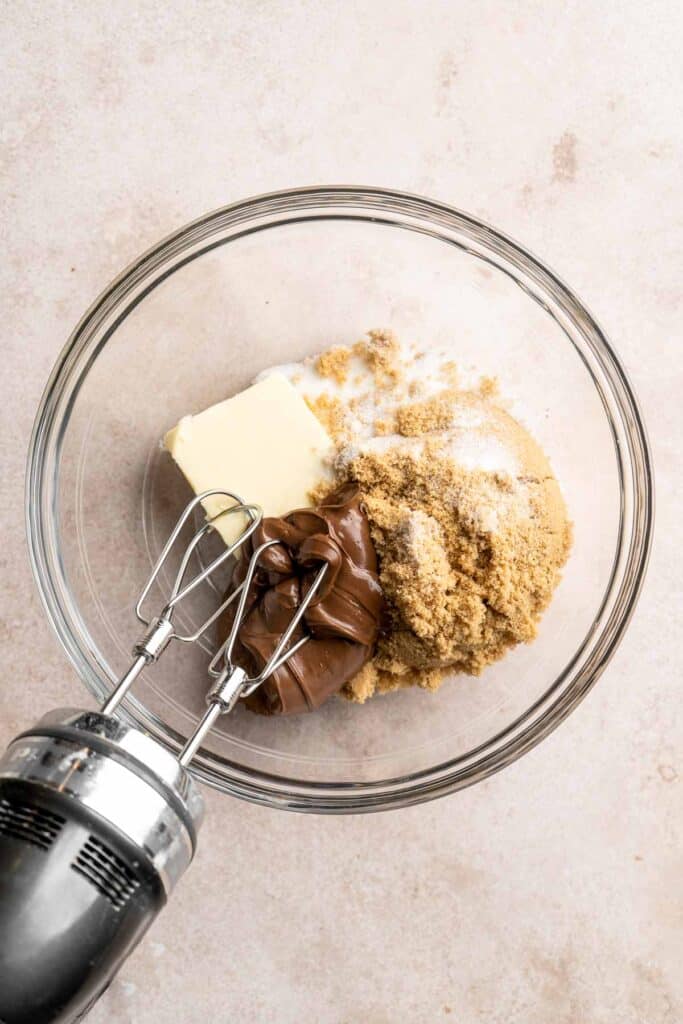
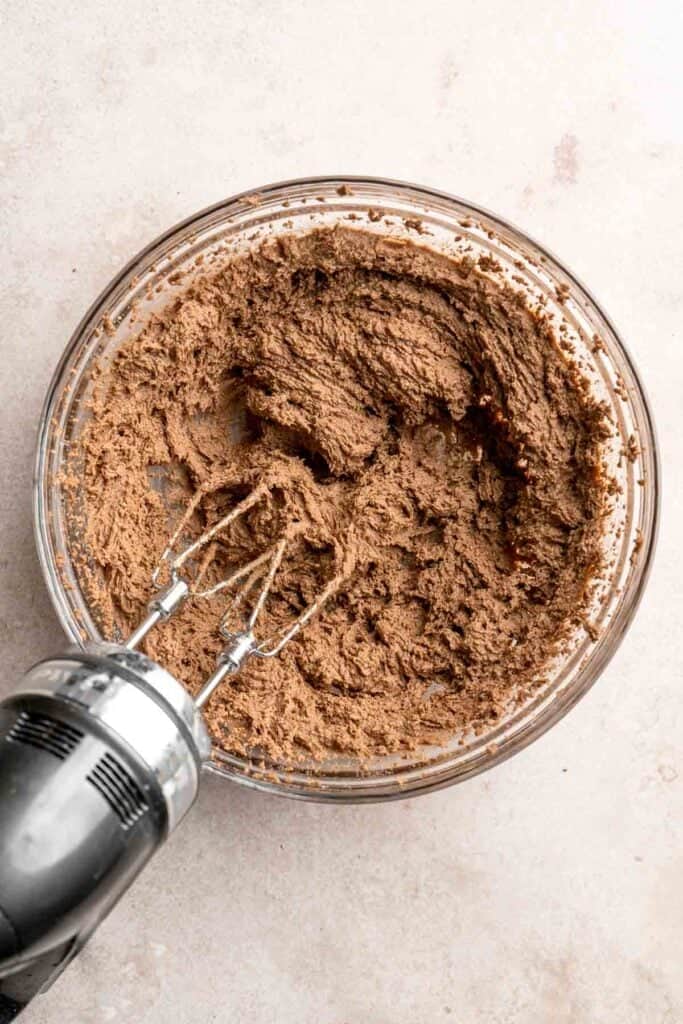
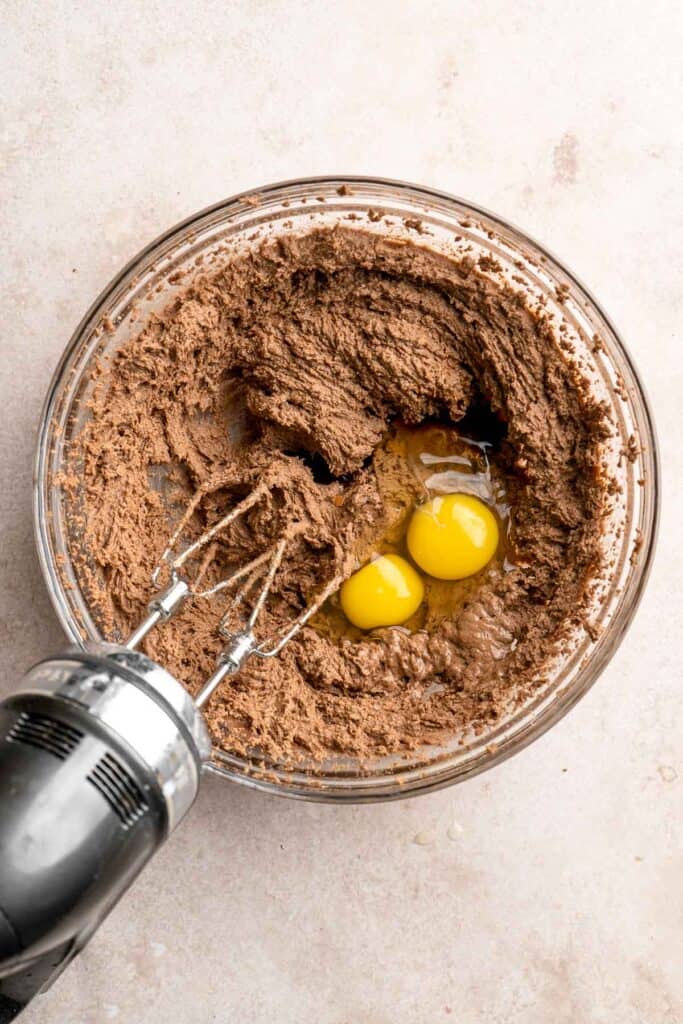
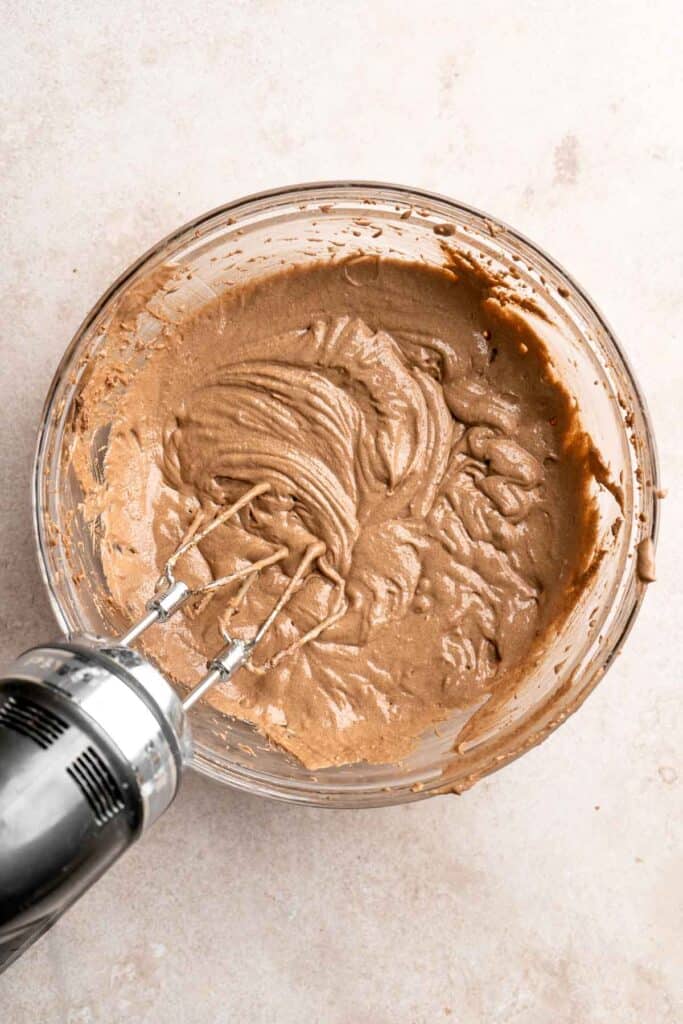
- Add dry ingredients to wet. Add in the flour mixture and fold together with a spatula until well-combined.
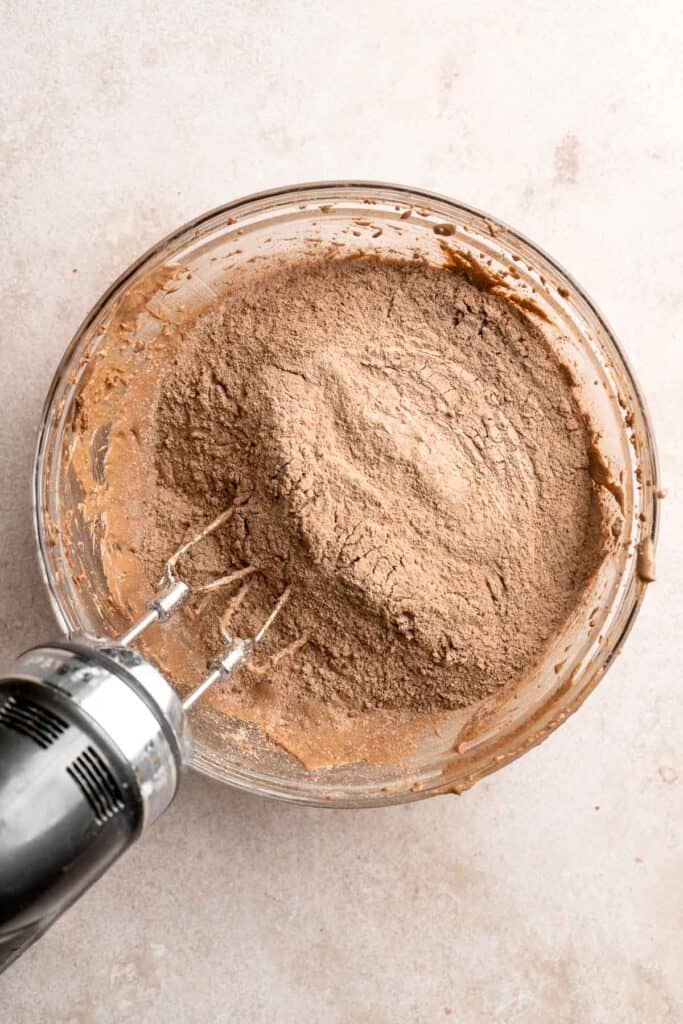
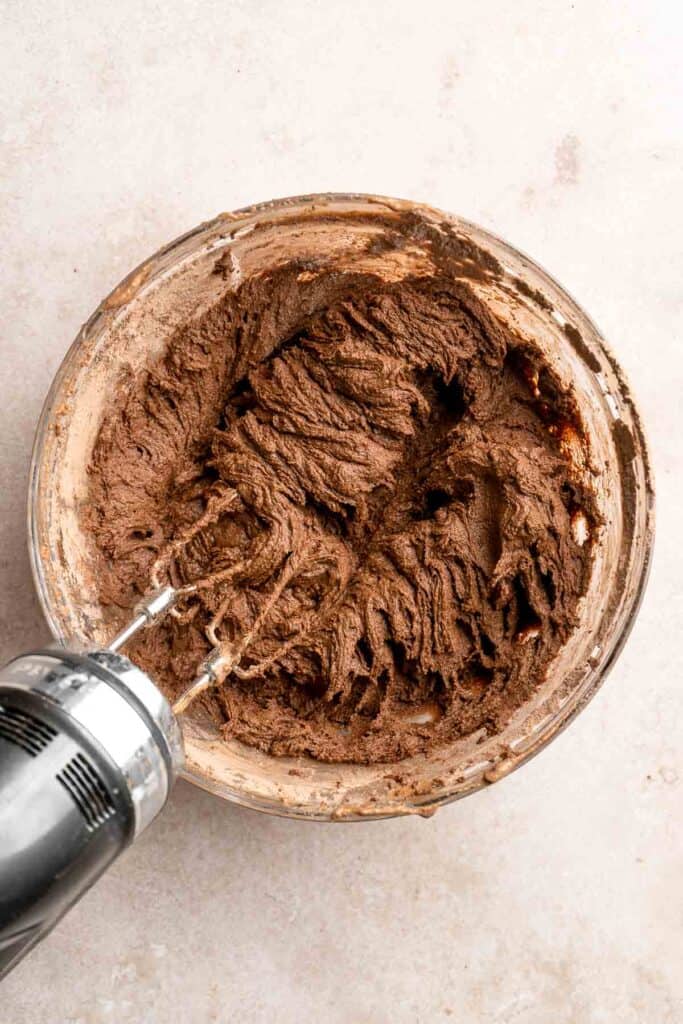
- Add mix ins. Add in the chocolate chips, chopped hazelnuts, and frozen Nutella chips, then quickly fold until well-dispersed.
- Scoop. Prepare a large baking sheet with parchment paper. Using a medium cookie scoop, scoop out your cookies onto the prepared baking sheet.
- Chill. Cover lightly with plastic wrap and place the cookies into the fridge to chill for 4 hours (up to overnight).
- Preheat. Preheat the oven to 350F. Line a large baking sheet with parchment paper or a silicone baking mat.
- Bake. Bake the cookies in batches by adding 6 cookie dough balls onto the lined baking sheet, spaced 2-3 inches apart. Bake for 13-14 minutes. Allow the cookies to cool for 5 minutes on the pan before transferring onto a wire rack to cool completely.
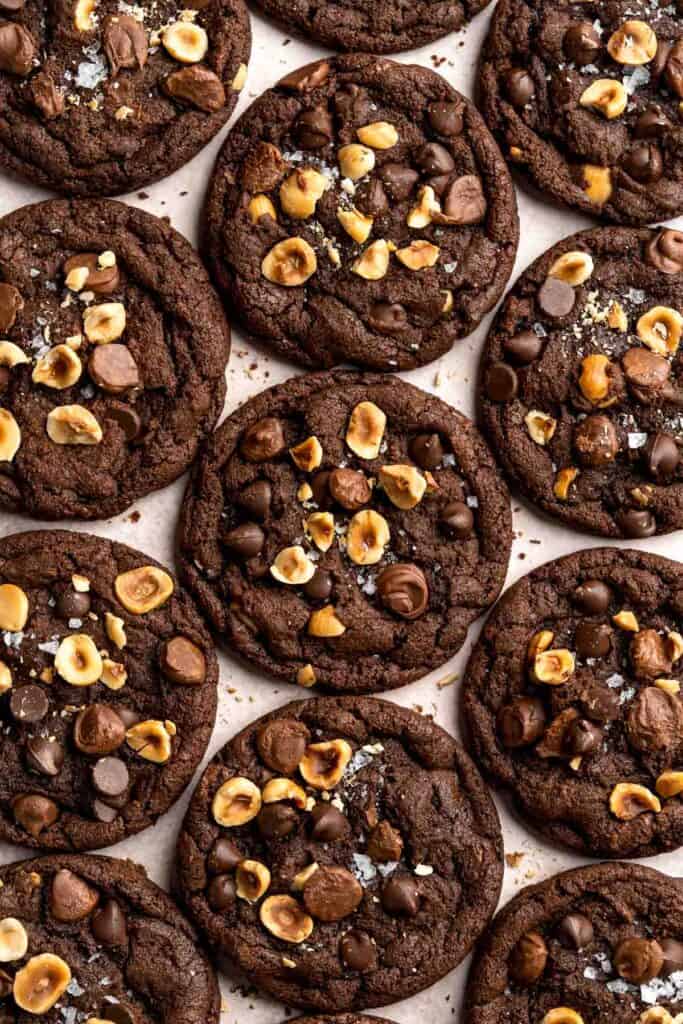
- Repeat. Repeat baking in batches with the remaining cookies.
Recipe Variations
- Make Nutella-stuffed cookies. Instead of making little chips, freeze balls of Nutella in a silicone tray. Press the frozen Nutella balls into the center of your cookie dough before baking. It'll melt into the most perfect gooey center!
- Use white chocolate chips. Replace the regular chips in these double chocolate cookies with white chocolate. They'll add a pop of color and extra sweetness.
- Sprinkle with sea salt. Since Nutella is so sweet, a little salt on top can balance out the sweetness.
- Nutella ice cream sandwiches. After baking, let the cookies cool and place a scoop of chocolate hazelnut ice cream between two cookies. Press gently and roll the edges in crushed hazelnuts and mini chips. Wrap in plastic wrap, freeze well, then serve.
How to Serve
These Nutella cookies are delicious served on their own, or as part of a cookie box paired with some of my favorite cookies including:
- Hot Chocolate Cookies
- Chai Cookies
- Slice and Bake Pecan Shortbread Cookies
- Butter Cookies
- Red Velvet Cookies
- Soft and Chewy Ginger Cookies
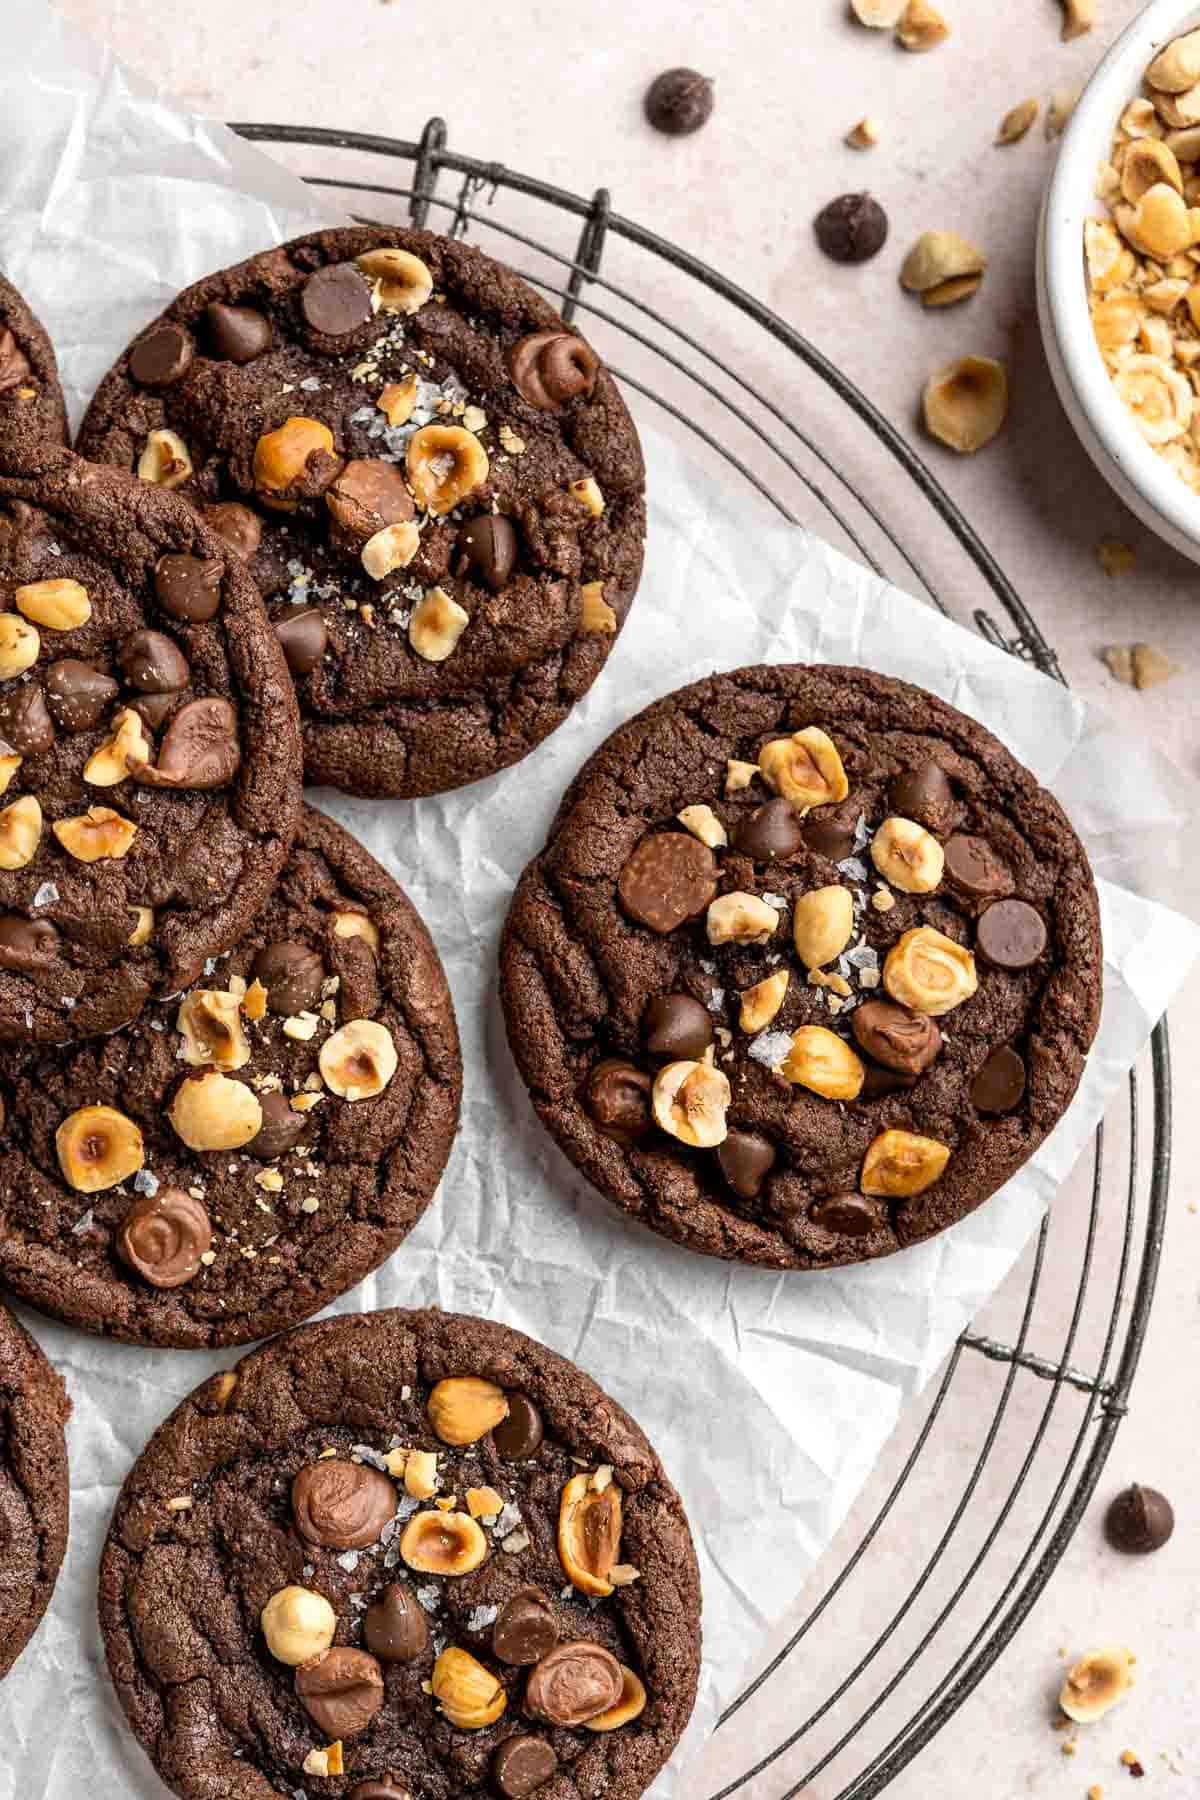
Recipe Tips and Tricks
- Chill the dough. For the best texture, use properly chilled cookie dough. It's worth the wait. Otherwise, the cookies will spread too much.
- Line your pan. Lay a piece of parchment on your cookie sheet to remove these Nutella chocolate chip cookies perfectly every time.
- Rest the cookies. The baking process doesn't end when the cookies leave the oven. Let them rest on the pan to continue baking slowly for at least 5 minutes.
- Make a double batch. If you know you love Nutella, make two batches. Freeze the extra dough for later to have cookies any time!
Storing and Freezing Instructions
How to Store
Store leftover cookies in an airtight container at room temperature for 4-5 days.
How to Reheat
If you prefer a warm cookie, pop it in the microwave for just 5-10 seconds.
How to Freeze
Baked cookies can be frozen in a freezer-safe bag for several months. You can also freeze the unbaked dough balls. Let them thaw in the fridge before baking like normal.
FAQ
Although we love the classic flavor of Nutella, you might prefer a different brand of chocolate hazelnut spread due to allergies or just flavor preferences. Feel free to use generic Nutella or any other brand of the spread. You can even use creamy chocolate hazelnut butter.
Nutella is incredibly versatile and can be used in so many ways! It's a great dip for fresh fruit, makes a wonderful crepe, and is absolutely heavenly served on top of pancakes, French toast, or waffles. It's also wonderful baked into your favorite sweet treats, like these chocolate Nutella cookies, creamy mousse cups, or your next batch of muffins. Whip it into a luscious frosting for cupcakes or muffins. You can even drizzle warm Nutella over a bowl of ice cream or add it to a milkshake!
Yes! Baked cookies freeze incredibly well. Just let them cool to room temperature, then pop them in a freezer-safe bag for 2-3 months. You can either eat them frozen for a really chewy cookie or let them soften at room temperature.
More Cookie Recipes
- 50 Best Cookie Recipes
- Monster Cookies
- Brownie Cookies
- White Chocolate Chip Cookies
- S'mores Cookies
- Oatmeal Raisin Cookies
Tried this recipe?
I'd love to hear what you think! Leave a comment and rating below to share your feedback. Your reviews help others discover this recipe and help me keep creating more free recipes for you. Snap a photo and tag me on social media @aheadofthyme too.

50 Best Thanksgiving Side Dishes

Let's be real, Thanksgiving dinner is all about the side dishes. From potato and sweet potato sides, to squash and pumpkin, green beans and brussels sprouts, to stuffing, salads and soup, I have got you covered. Today I am sharing my 50 most popular and favourite recipes for Thanksgiving side dishes, including classics like mashed potatoes and sweet potato casseroles, other favourites like creamy brussels sprouts and stuffed butternut squash, and healthy vegetable side dishes.
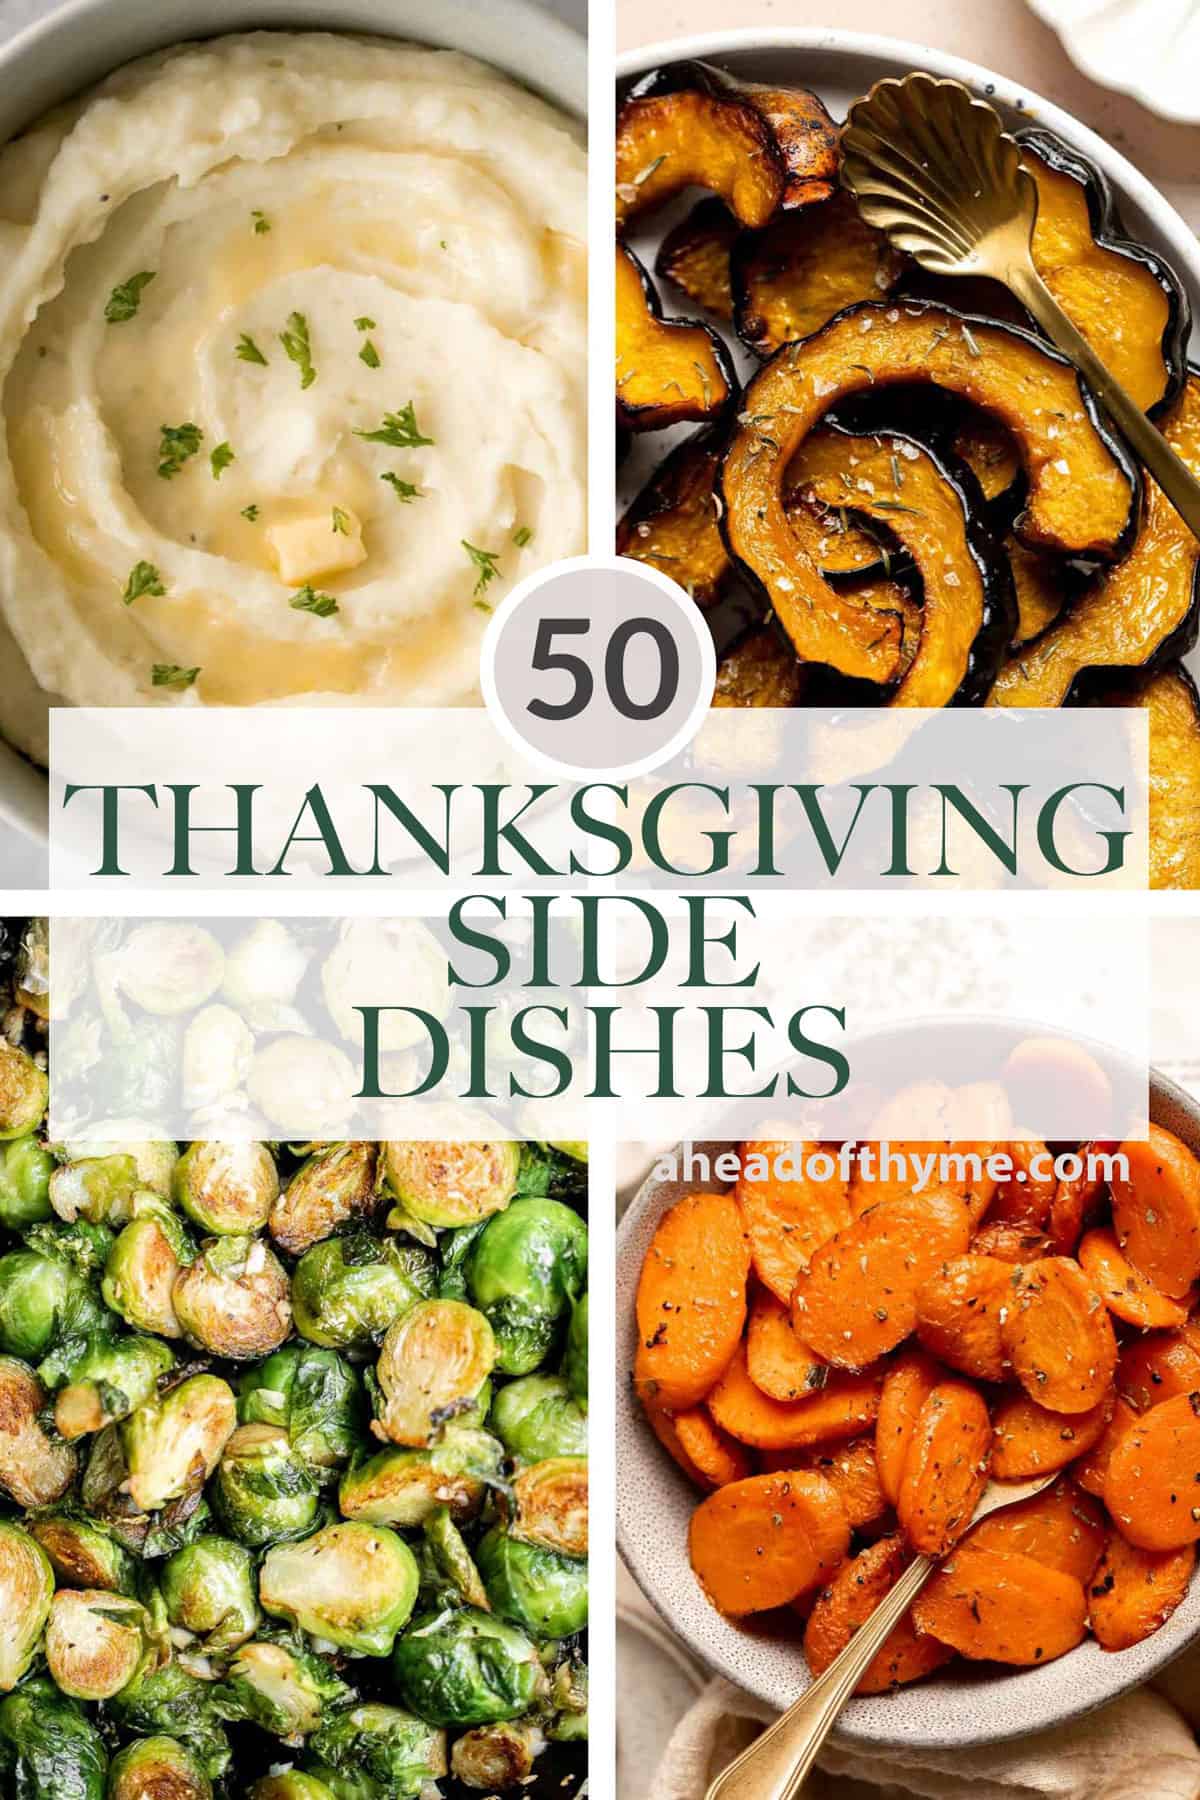
Potato and Sweet Potato Side Dishes
The Best and Creamiest Mashed Potatoes
Creamy, buttery, and delicious, this is the best and creamiest mashed potatoes recipe you will ever find. It's velvety, smooth, and melts in your mouth.
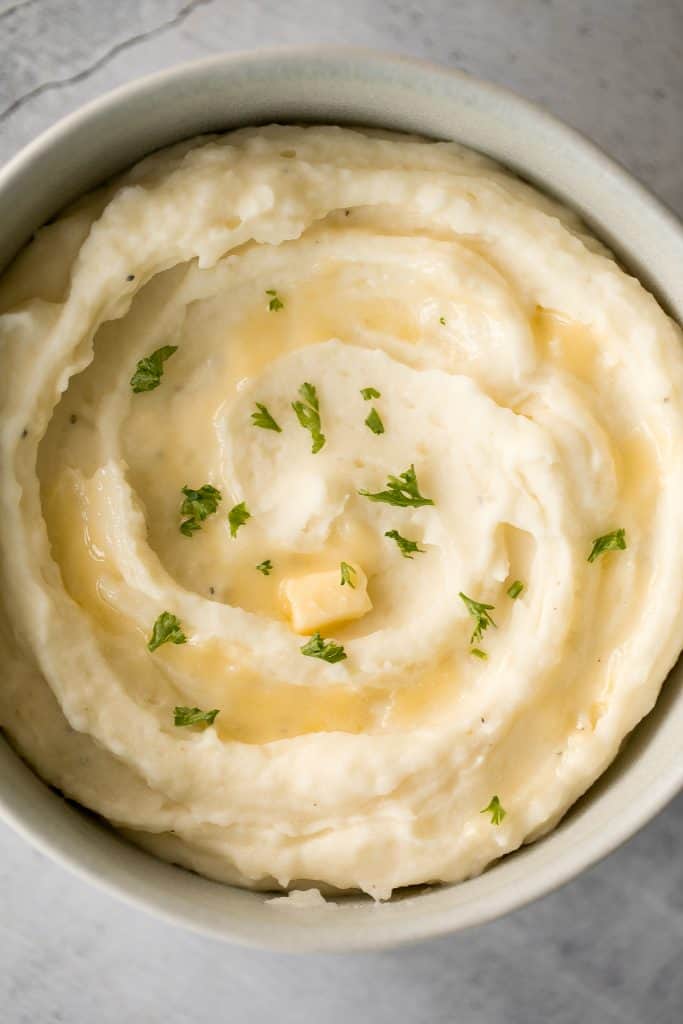
Rich and creamy potatoes au gratin is the ultimate comfort food made with sliced potatoes, cheese, and milk. It's the perfect side dish for the holidays.
Hasselback Potatoes are infused with garlic butter and feature signature cuts that make these potatoes crispy on the outside and tender on the inside.
Mascarpone mashed potatoes are creamy, smooth, and comforting. Classic mashed potatoes are given a twist resulting in a super silky and rich mash.

Stovetop Candied Yams are tender, buttery, tangy, and sweet with a delicious brown sugar glaze. This simple Thanksgiving side dish is quick and easy!
Crispy leaf potatoes are a delicious potato side dish made with layers of buttery, sliced potatoes that crisp up when baked. The perfect side dish.
Roasted Garlic Parmesan Baby Potatoes.
Quick and easy roasted garlic Parmesan baby potatoes are crispy on the edges and tender inside. They are delicious, flavourful and bakes in just 30 minutes.
Garlic Mashed Potatoes with Sour Cream
Velvety and smooth, garlic mashed potatoes with sour cream are the best, flavourful make-ahead side dish ever. Garlicky, buttery, creamy, and pure comfort.
Herb Roasted Sweet Potatoes are a quick easy side dish that's healthy, delicious, and flavorful. A perfect side for your holiday table or weeknight dinner.
These crispy smashed potatoes are the perfect side dish. They're easy to make, crispy on the outside, tender and fluffy on the inside, and so flavorful.
Velvety, smooth, and creamy, this savoury mashed sweet potatoes dish is quick and easy and can be made ahead of time -- it is the perfect side for your holiday meal.
Instant pot mashed potatoes are the quickest and easiest mashed potatoes you'll make in under 20 minutes (including prep!) in the pressure cooker.
Potato Stacks are crispy, cheesy, and flavorful, making them the perfect side dish with crunchy edges and soft gooey centers bursting with amazing flavor.
Greek Lemon Roasted Baby Potatoes
Quick and easy Greek lemon roasted baby potatoes are crispy on the outside and tender inside, packed with a Greek flavour blend of lemon, garlic and herbs.
Brown Butter Mashed Potatoes are the ultimate side dish for any meal. It's smooth and creamy with a rich, nutty flavor from the brown butter.
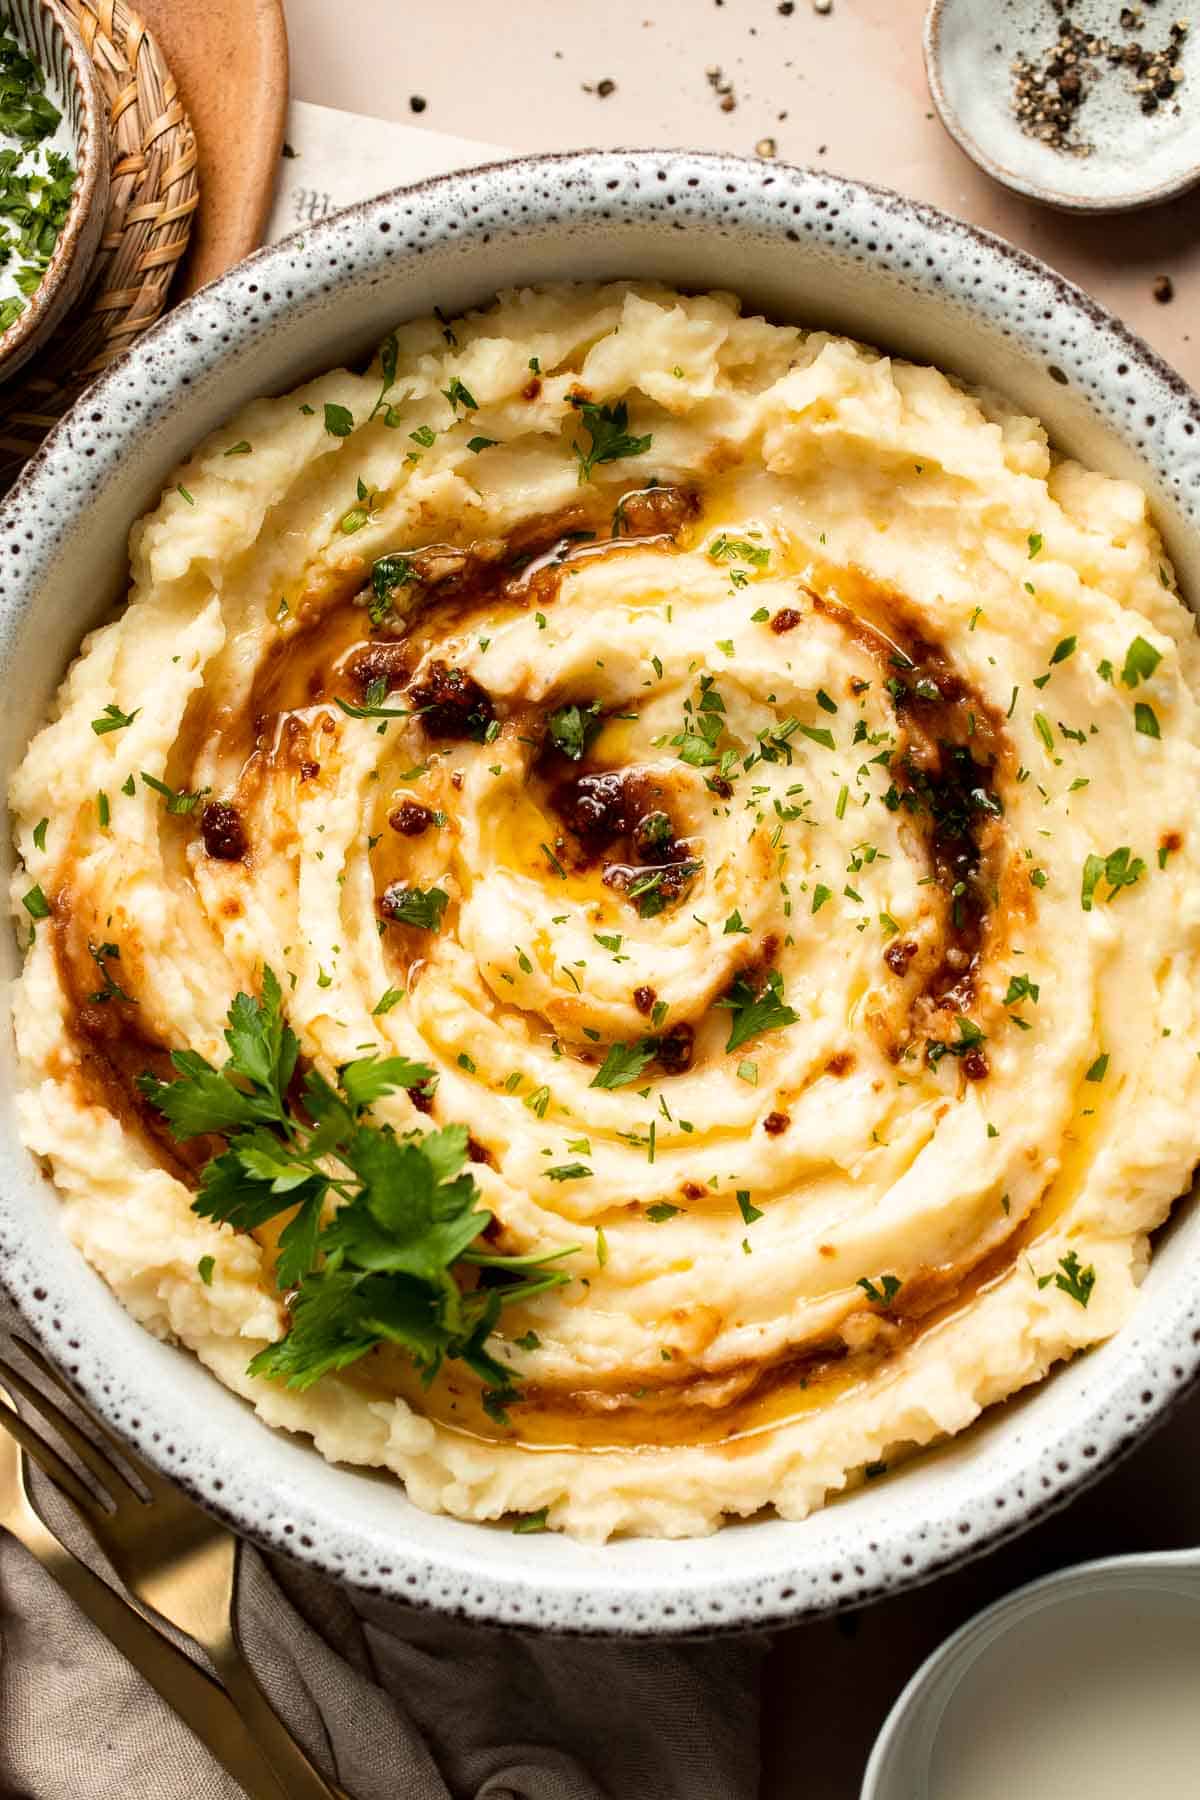
Scalloped potatoes are a creamy, cheesy, indulgent side dish that will make cheese lovers swoon. Every bite is savory, rich, comforting, and delicious.
Duchess Potatoes (Pommes Duchesse) are rich, creamy whipped bites of potatoes with crispy edges and a soft fluffy mashed potato centre. A fancy side dish!

Cheddar Mashed Potatoes are fluffy, creamy, and buttery. Loaded with cheese and hints of garlic, every bite of this classic side dish is flavorful.
Healthy mashed potatoes are velvety, creamy, and delicious, with a fraction of the calories. Substitute with low-fat milk, Greek yogurt and chicken stock.
Thanksgiving Stuffing
Skip the boxed mix and make your own Homemade Stuffing from scratch using a few common ingredients for a delicious, aromatic side dish this Thanksgiving.
Easy vegetarian cornbread stuffing is the perfect make-ahead side dish to serve this Thanksgiving. So flavourful, moist and soft, yet crispy golden on top.
Sausage Stuffing is a classic holiday side dish that's easy to make with a handful of ingredients. Flavorful and moist, it's perfect for Thanksgiving.
Cranberry Walnut Apple Stuffing
Cranberry walnut bread paired with sautéed apples, onions and rosemary is exactly what your holiday table needs! Hello cranberry walnut apple stuffing!
Thanksgiving Casseroles
Sweet Potato Casserole with Marshmallows
Sweet Potato Casserole with Marshmallows is a classic Thanksgiving side dish that is sweet and creamy with warm spices and molten, gooey marshmallows.
Green bean casserole is a classic holiday side dish packed with fresh green beans in a delicious creamy mushroom sauce, and topped with crispy fried onions.
Creamy corn casserole is a comforting side dish that is creamy, savory, slightly sweet, and filling - a classic and traditional Thanksgiving holiday side.
This Mashed Potato Casserole elevates an ordinary batch of creamy mashed potatoes into something divine topped with cheddar, bacon bits, and green onions.
Sweet Potato Casserole with Pecans
Sweet potato casserole with pecans packed with tender sweet potatoes and a buttery crunchy pecan topping is the best fall side dish for Thanksgiving dinner.
Squash Side Dishes
Stuffed Butternut Squash with Wild Rice
Healthy hearty and wholesome stuffed butternut squash with wild rice and mushrooms is an easy cozy vegetarian fall dinner or side. The best comfort food.
Roasted butternut squash is the easiest vegan side dish you need this fall. It has a ton of flavour with just a few simple pantry staples.
Maple Roasted Acorn Squash is savory and sweet, with its flavor intensified when tossed and roasted in a homemade maple glaze with a sprinkling of cinnamon.
One Pan Roasted Harvest Vegetables
One pan roasted harvest vegetables with butternut squash, brussels sprouts and baby potatoes is the best fall side dish. So easy to prep in just minutes.
Mashed butternut squash is the perfect side dish for fall - creamy, smooth, and delicious, with the perfect balance between sweet and savory fall flavors.

Roasted Pumpkin Wedges with Parmesan Cheese
Soft and tender, easy roasted pumpkin wedges with Parmesan cheese is the easiest and most delicious side dishes to make this fall. Prep it in just minutes.
Curried Chickpea Stuffed Acorn Squash
Wholesome, hearty, curried chickpea stuffed acorn squash with curry flavours is the perfect vegan and gluten-free fall comfort food for your holiday dinner.
Maple Roasted Brussels Sprouts and Butternut Squash
Maple Roasted Brussels Sprouts and Butternut Squash are a quick, easy, flavorful, and delicious Thanksgiving side dish that you need this holiday season.
Air fryer butternut squash is a healthy side dish that is crispy on the outside and soft inside. It's faster than roasting in the oven and needs less oil.
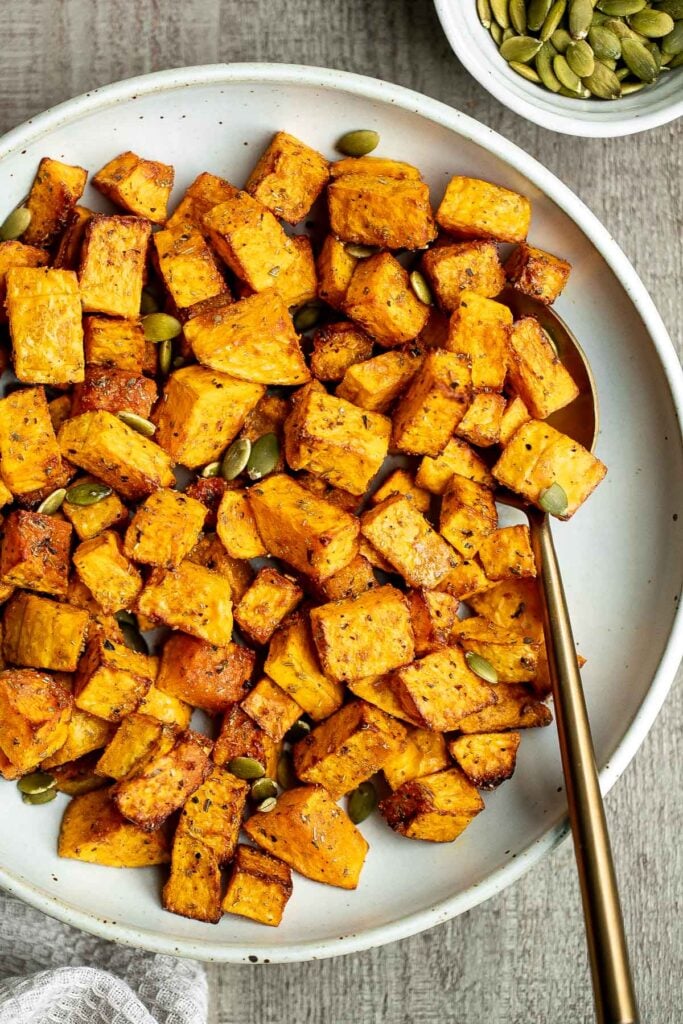
Brussels Sprouts Side Dishes
Tender and caramelized, these easy Roasted Brussels Sprouts tossed in balsamic vinegar and honey are a classic side dish to serve on your holiday table.
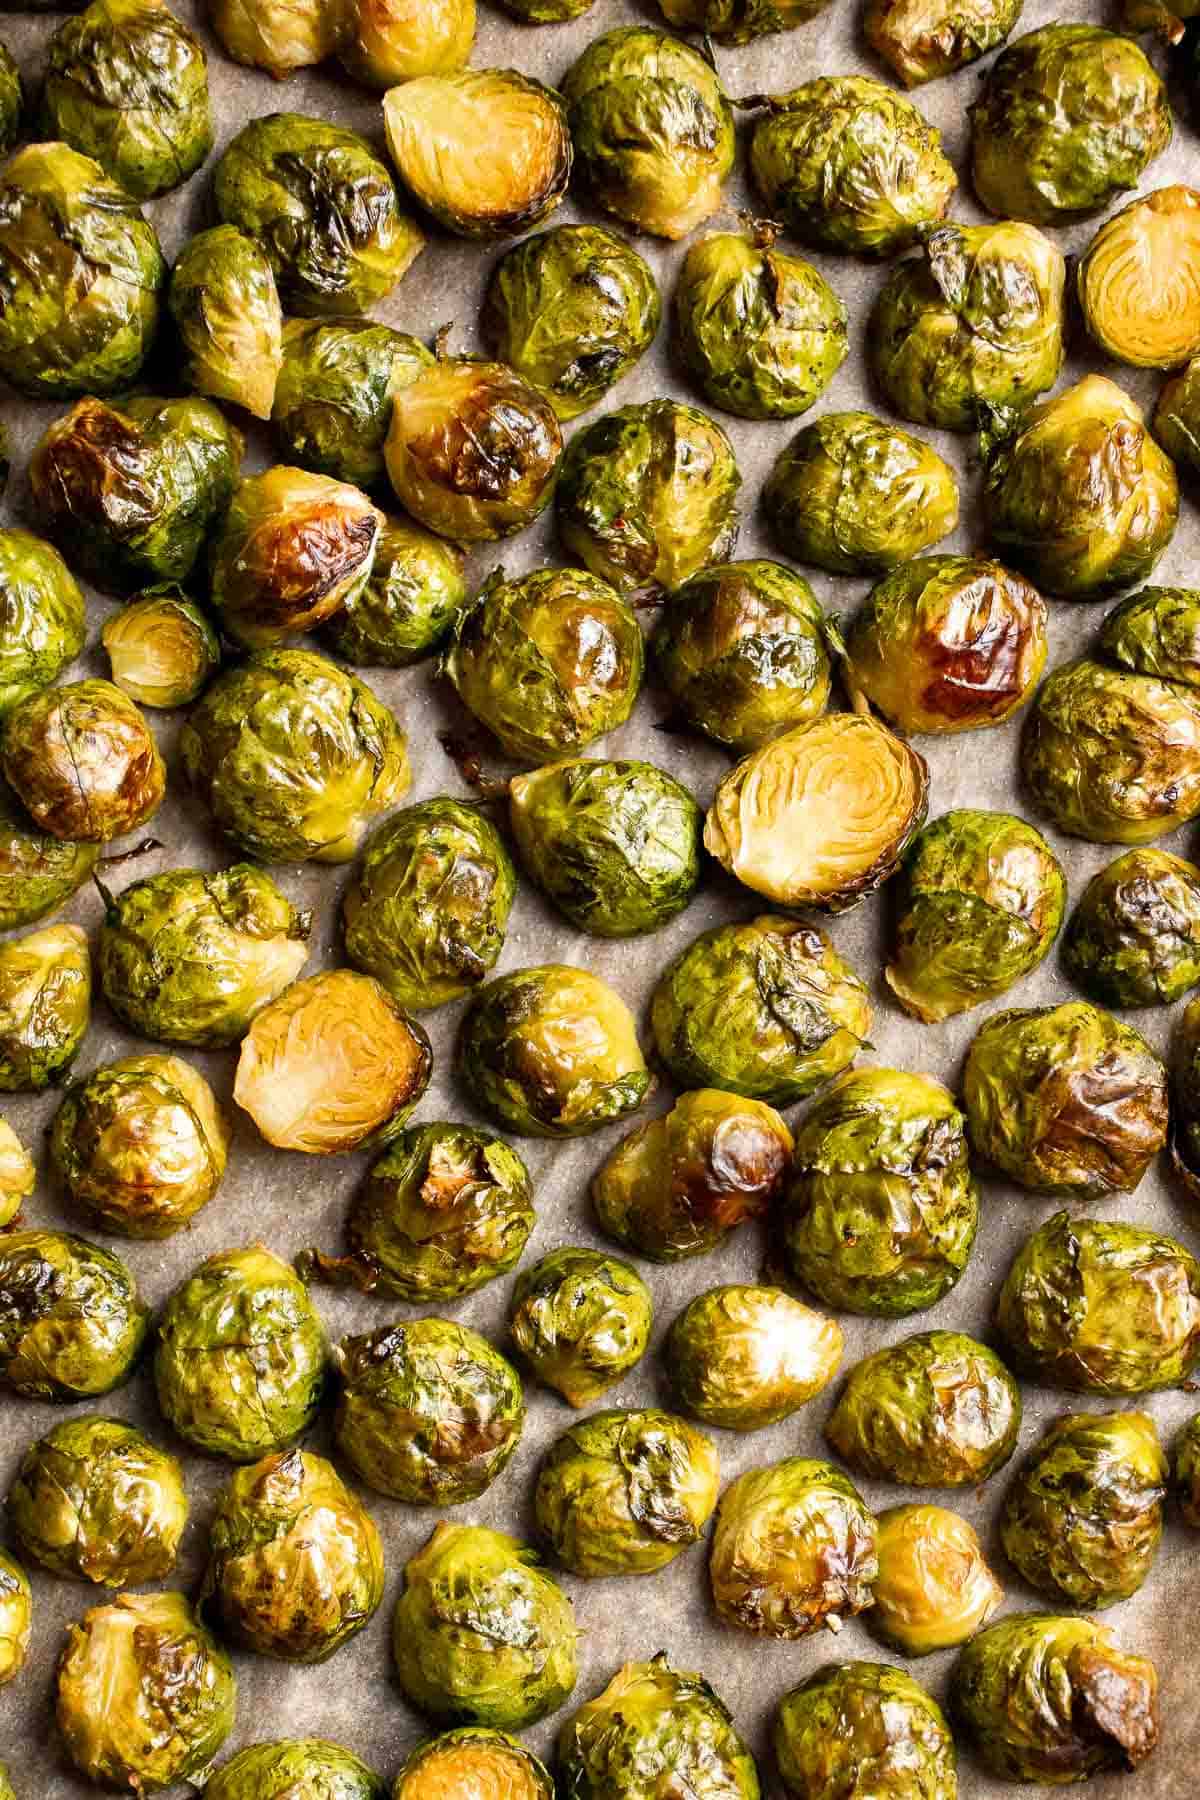
Delicious, garlicky, cheesy and creamy brussels sprouts bake is the ultimate comfort food side dish. So flavourful and the best way to eat brussels sprouts.
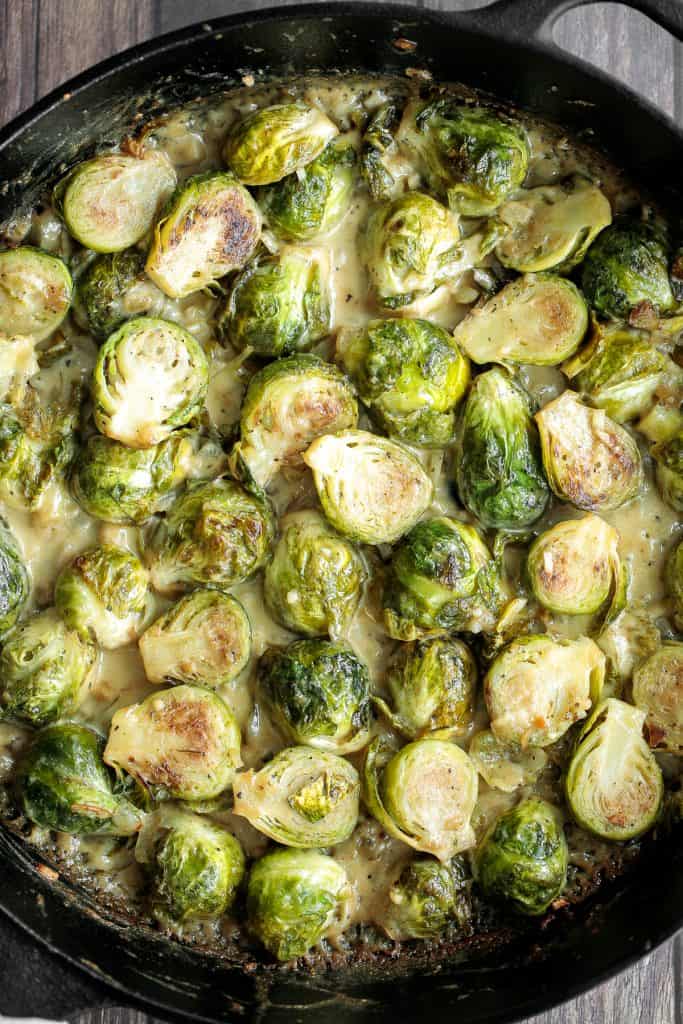
Brussels Sprouts with Bacon is a quick and easy side dish with the best flavor and texture. The best part? This holiday side is ready in under 15 minutes.
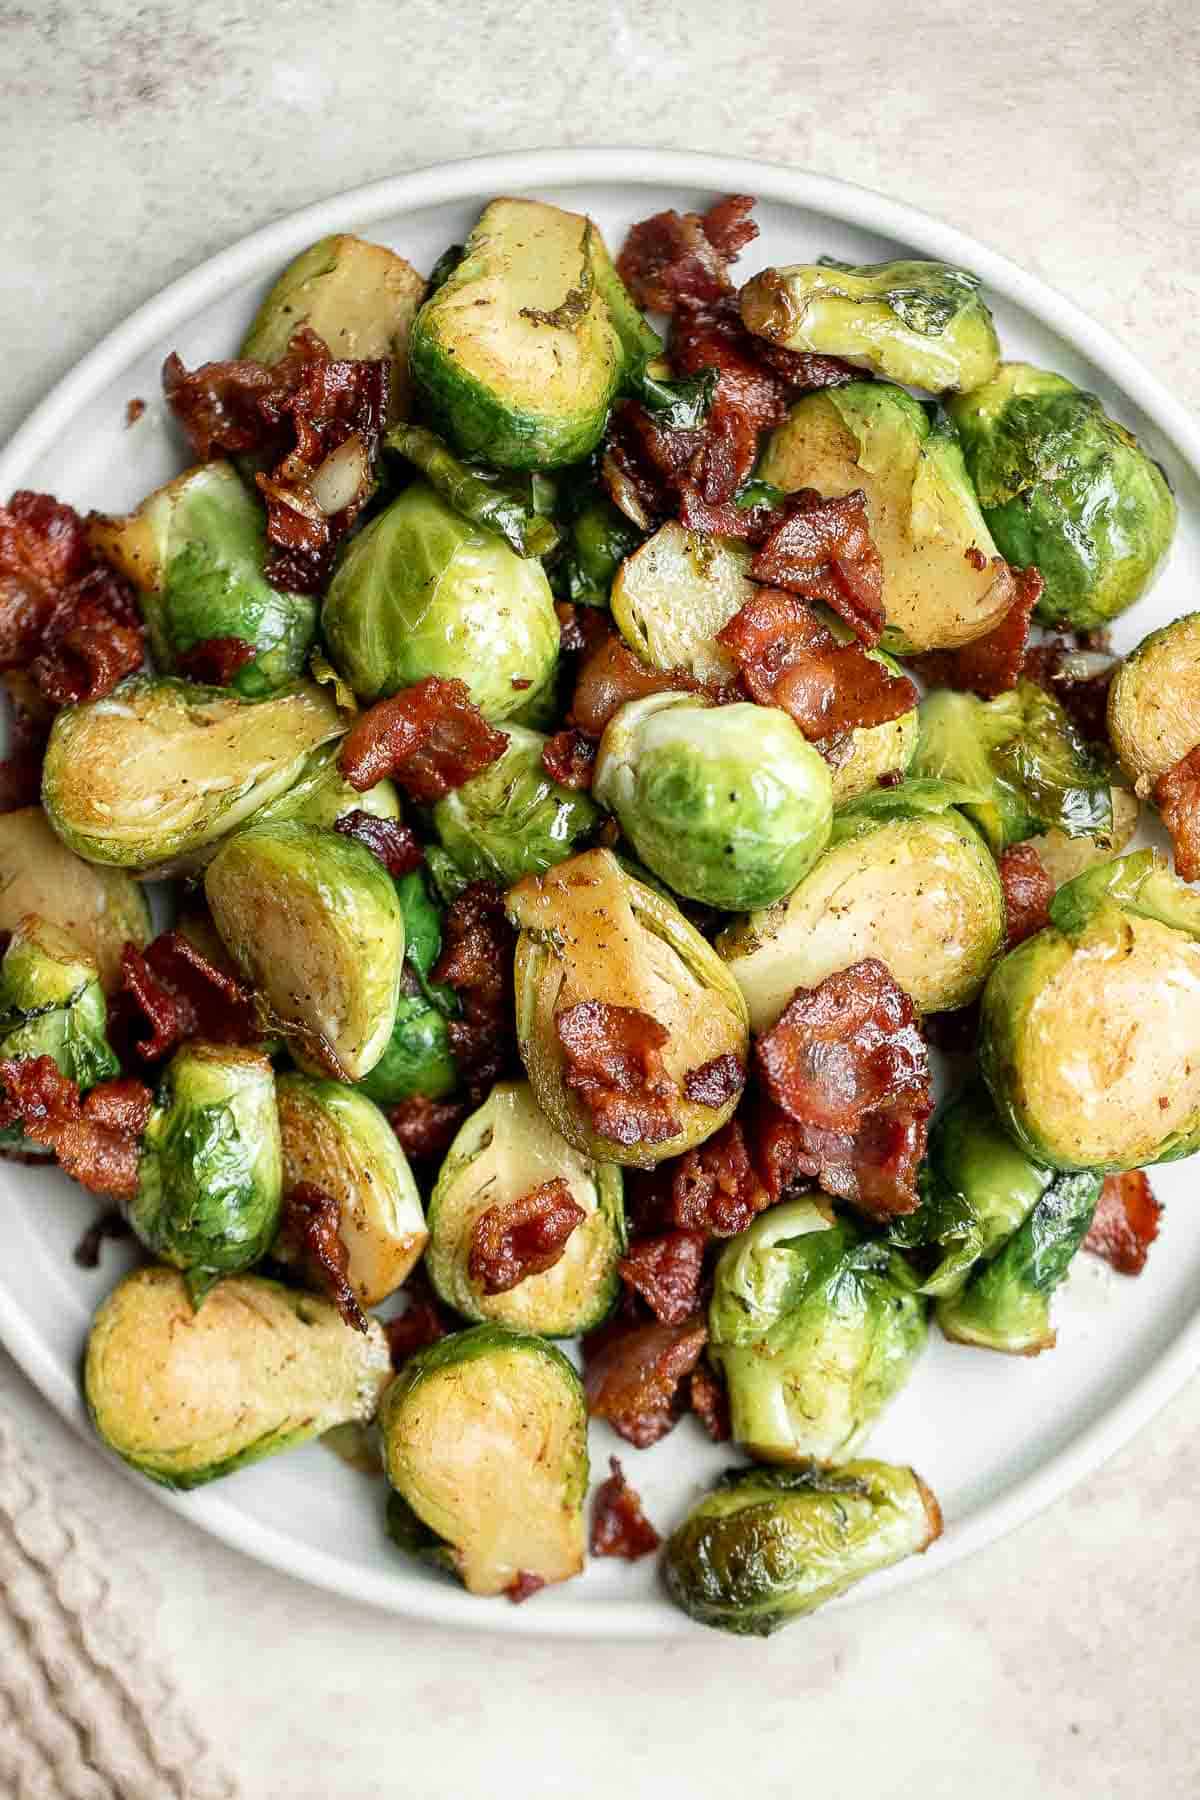
Sautéed Brussels Sprouts are a quick and easy side dish made with just 5 ingredients and ready to serve in only 15 minutes. They're vegan and keto too.

Honey Balsamic Brussels Sprouts
Easy honey balsamic Brussels sprouts are a sweet savory side dish that's roasted until tender and caramelized, and coated in a delicious flavourful glaze.
Crispy Roasted Air Fryer Brussels Sprouts
Tender and crispy roasted air fryer brussels sprouts cooks in less than 12 minutes with very little oil. It is a holiday table game changer.
Parmesan Crusted Brussels Sprouts
Parmesan crusted Brussels sprouts are a quick, easy, delicious side dish that's perfectly crispy outside and soft and tender inside. Ready in 30 minutes.

Cheesy Brussels Sprouts Bake is a comforting side dish made with sautéed garlic brussels sprouts, topped with bacon and cheese, and baked until bubbly.
Brussels Sprouts with Cranberries
Brussels Sprouts with Cranberries are a delicious, festive side dish that is easy to make with earthy Brussels sprouts and tart cranberries.

More Vegetable Side Dishes
Mashed Cauliflower is a fluffy and buttery side dish and a low carb, keto-friendly alternative to mashed potatoes. Plus, it's easier and quicker too!
Creamed spinach is a rich, creamy, and delicious side dish to make this fall. Easy to make ahead and reheats well - perfect for Thanksgiving holiday dinner.
Roasted Carrots are a healthy, delicious, and easy to make side dish with a slightly crispy interior and sweet and tender inside. Serve with any entree!
Green Beans Almondine is buttery, garlicky, and nutty. This classic French side dish is quick and easy to make, and loaded with flavor and texture.
Honey roasted carrots are a sweet, savoury, and salty side dish that pairs well with almost any entree. With these flavours, everyone will want seconds.
This buttery, garlicky Sautéed Spinach is the best way to enjoy this nutritious green. It's the ultimate healthy side dish and takes a few minutes to make!
Oven Roasted Vegetables are a delicious flavorful side dish that goes well with almost any dinner main. Customize it with whatever veggies you have on hand.
Buttery sautéed garlic green beans is a simple side dish that is quick, easy and delicious. Make these vibrant, crispy and tender green beans in 10 minutes.
Homemade Creamed Corn is creamy, delicious, and simple. It's quick and easy to make at home and so much better than store-bought canned creamed corn.
With only a few ingredients, it is incredible how much flavour are packed in these 10-minute nutty green beans. Earthy green beans balance perfectly with crunchy pecans.
Maple Roasted Carrots with Yogurt Sauce
These maple roasted carrots with yogurt sauce are not only stunning, but they get all caramelized and crispy around the sides from the maple syrup… pure perfection!
Green Beans with Bacon is a delicious, flavorful side dish that comes together quickly in 20 minutes (including prep!) with a handful of simple ingredients.
Quick and easy roasted cauliflower is a delicious, flavourful side dish that you throw on a sheet pan and into the oven. Plus, it's vegan and gluten-free.
Garlic and Herb Roasted Carrots
Garlic and herb roasted carrots are delicious and flavorful, easy to make, and the perfect vegan Thanksgiving side dish - or for any time of the year!
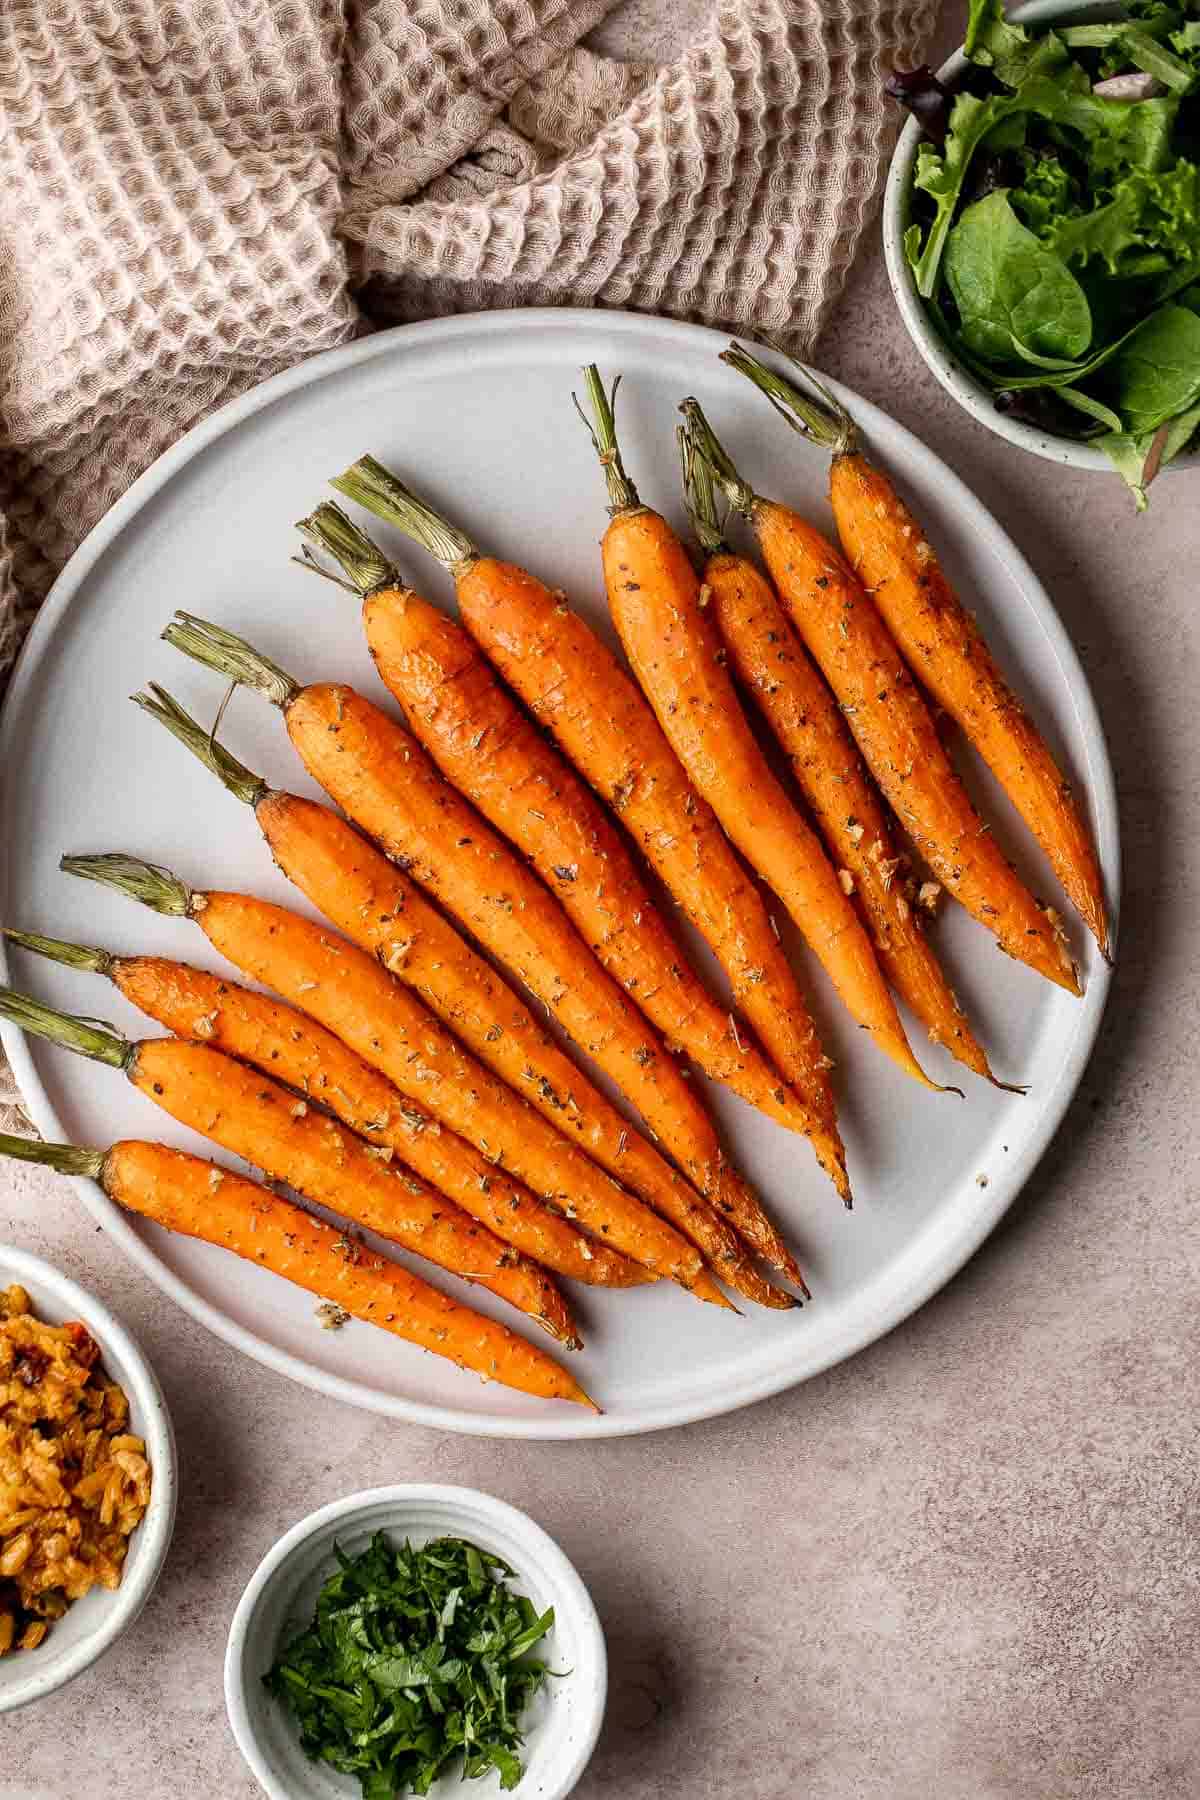
Pesto green beans is a simple side dish that is quick and easy to make in under 10 minutes, tossed in buttery toasted walnuts and pesto. So delicious.
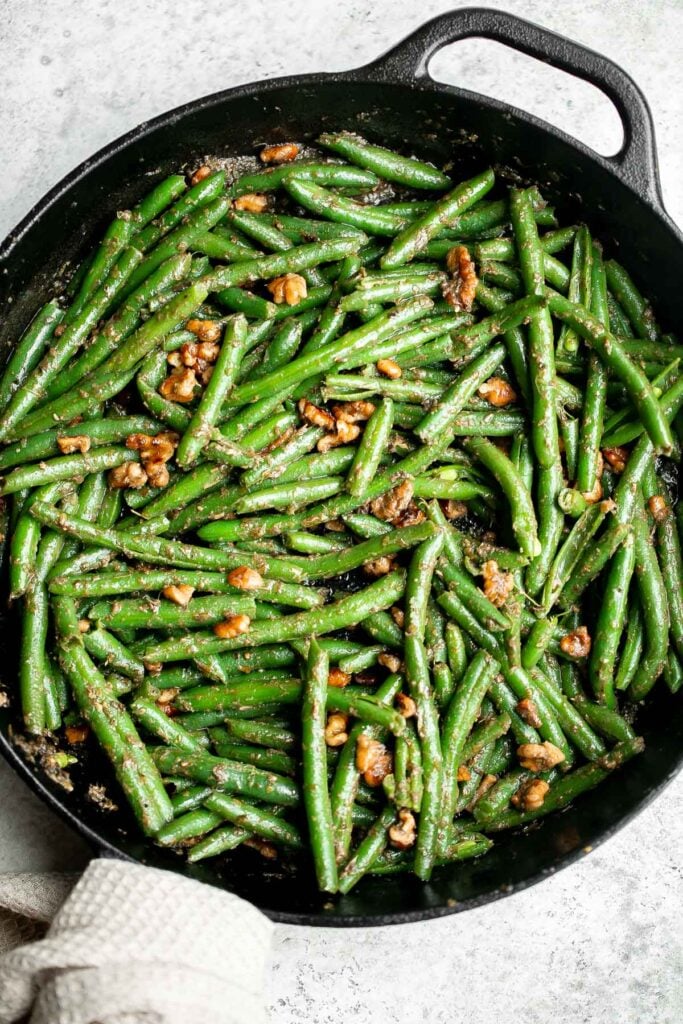
Oven-roasted corn on the cob with homemade garlic butter is buttery, juicy, crunchy, and perfectly charred on the outside - without a grill.
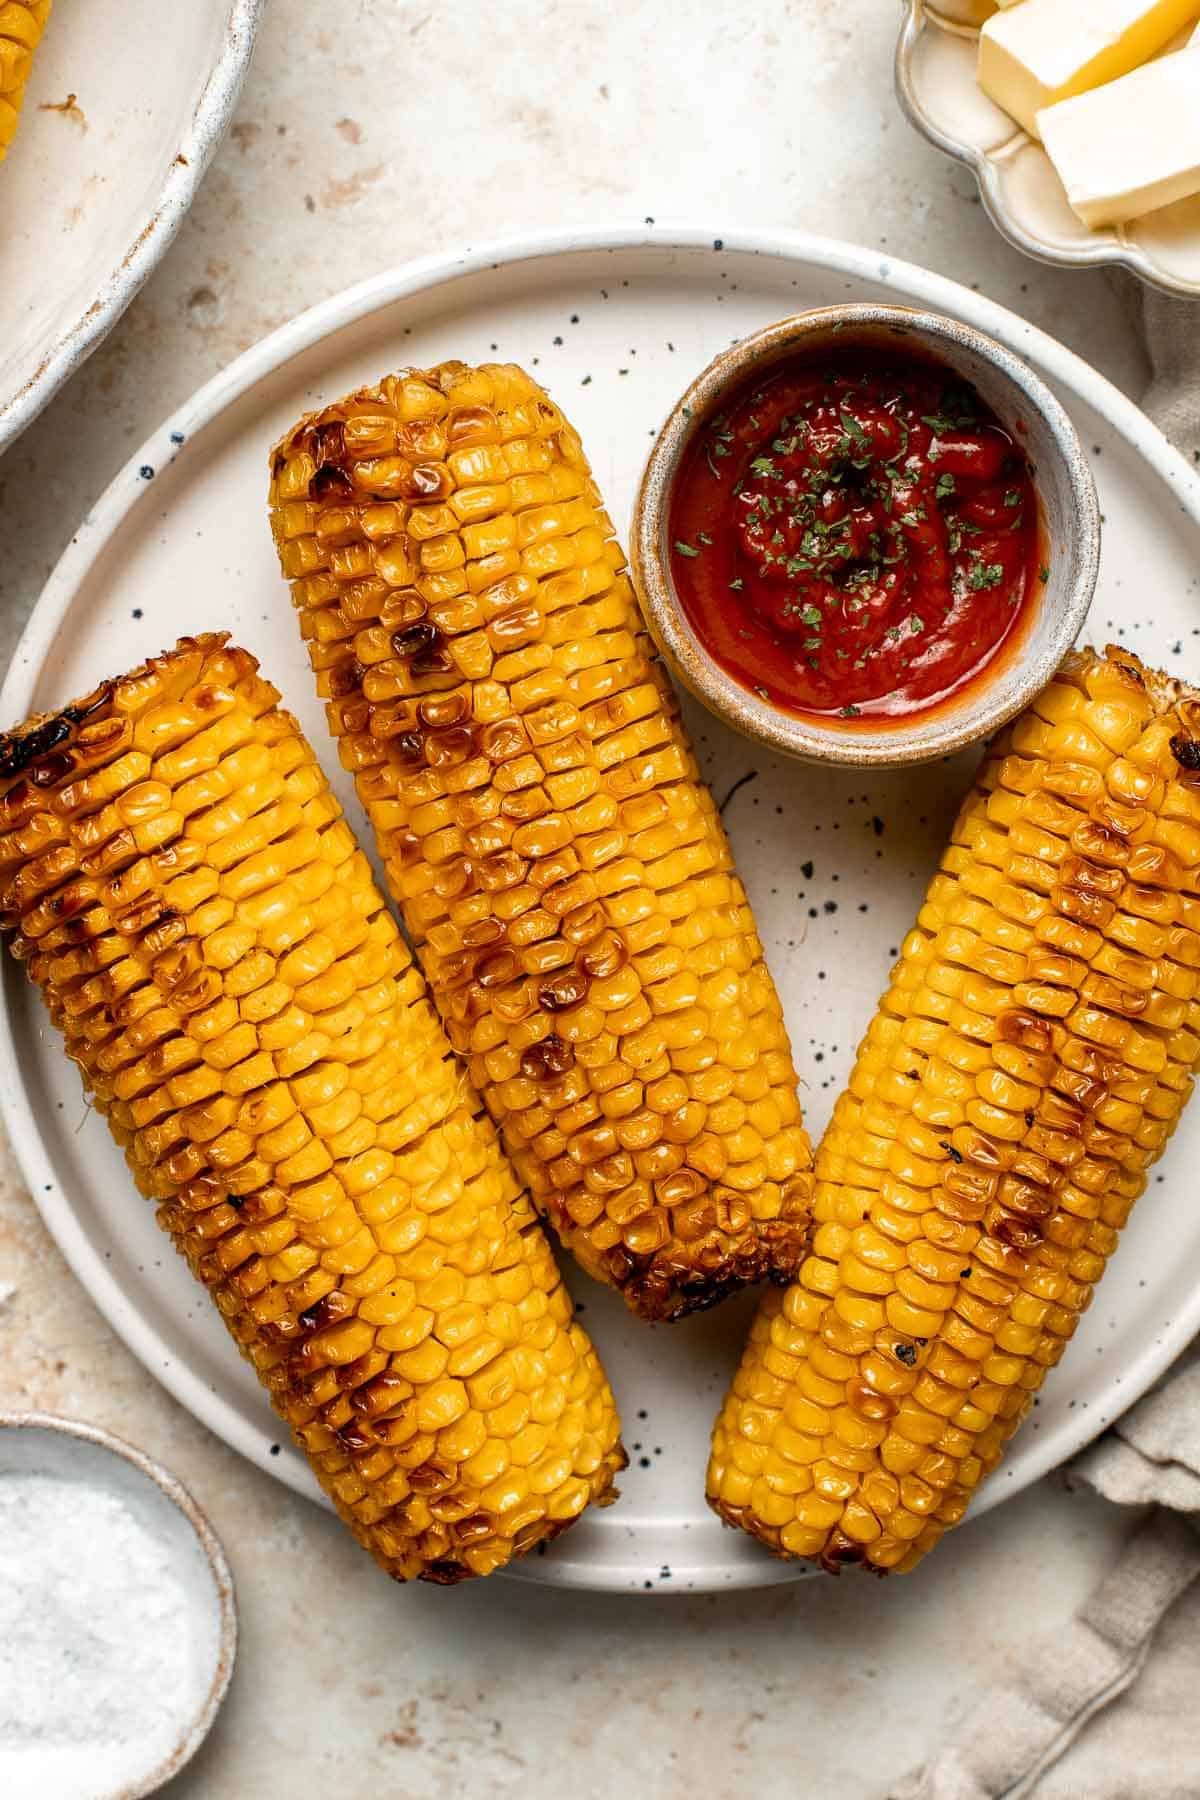
Buttery sautéed garlic mushrooms are silky smooth with an incredible caramelization and earthy rich flavour. A simple side dish in under 15 minutes.
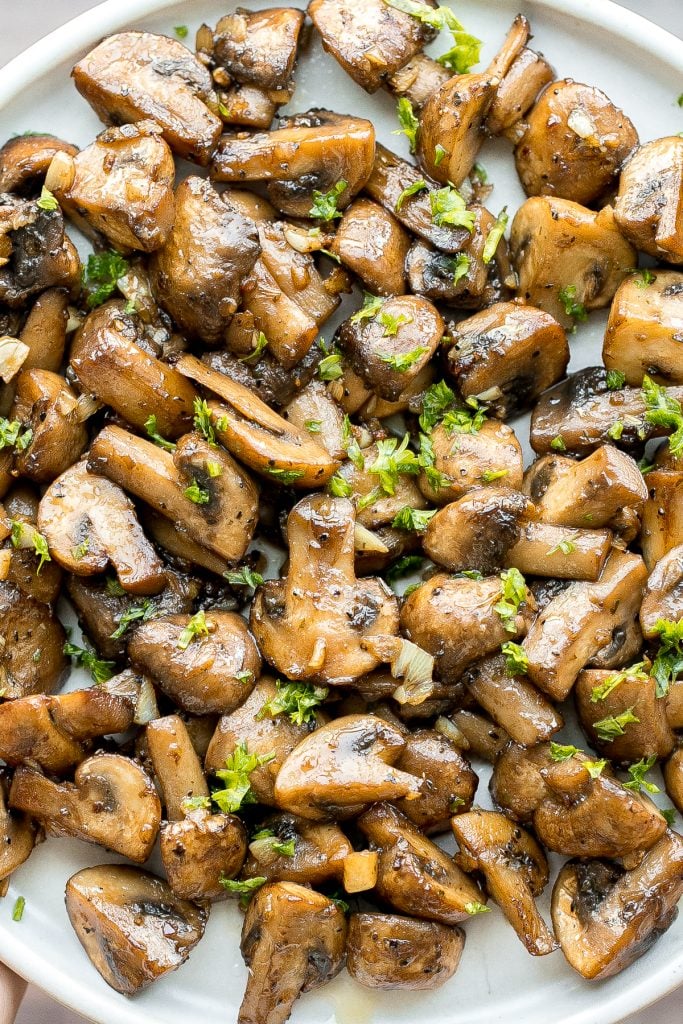
Roasted Garlic Green Beans (Air Fryer or Oven)
Quick easy roasted garlic green beans are tangy, sour, savoury, and sweet, with a tender and crunchy texture. Make them in the oven or air fryer in minutes.

Spinach gratin is a rich and creamy side dish with a layer of crispy melty cheese on top. This fancy side is easy to make ahead and freezer-friendly.
Vegetarian mushroom gravy is creamy, savory and thick, easy to make, loaded with flavor, and pairs well with everything! Make it vegan and dairy-free too.
Creamy Garlic Mashed Cauliflower
Craving a big serving of mashed potatoes but with a quarter of the calories? Now you can with creamy garlic mashed cauliflower. Ready in just 20 minutes.
Pasta Sides
Classic baked mac and cheese is the ultimate comfort food - creamy, cheesy, and cozy, topped with a crunchy breadcrumb topping. It's quick and easy too.
Stovetop Mac and Cheese with White Cheddar
Quick and easy, creamy stovetop mac and cheese with white cheddar is a delicious and comforting one pot 20-minute meal packed with three types of cheese.
Butternut Squash Mac and Cheese
Butternut squash mac and cheese is a flavorful and delicious fall twist on a classic, with a rich and creamy sauce that is secretly loaded with veggies.
This Spicy Mac and Cheese recipe is a spicy version of a beloved classic that takes this cheesy pasta to the next level with added spices for a kick.
Thanksgiving Salad
Fall Harvest Salad with Butternut Squash and Apple
Fall harvest salad with roasted butternut squash and apple is the only salad recipe you need this fall or winter. It's healthy, wholesome, and nourishing.

Apple Walnut Salad with Balsamic Vinaigrette
Throw together crisp apples, crunchy walnuts, and sweet cranberries for a taste of the holidays in this fall apple walnut salad with homemade balsamic vinaigrette.
Roasted Brussels Sprouts Salad with Dijon Vinaigrette
Roasted brussels sprouts salad with creamy potatoes, crispy string beans, tender brussels sprouts, is tossed in a delicious homemade dijon vinaigrette.
Butternut squash salad is a light meal that's loaded with fall flavors - roasted butternut squash, baby kale, walnuts, dried cranberries, and feta.
Arugula Salad with Apple and Pecan
Arugula salad with apple and pecan is a quick and easy fall salad made with fresh seasonal ingredients in just minutes. Perfect for a holiday dinner table.
This Butternut Squash Quinoa Salad is easy to make, ready in under an hour, delicious, and loaded with health benefits. It's the perfect fall salad.
Thanksgiving Soup
Savor the taste of fall with Roasted Butternut Squash Soup. This vegan soup is healthy, nourishing, and delicious comfort food in a bowl.

This Pumpkin Soup is perfectly smooth and creamy with aromatic vegetables and warm spices. Make it this fall from start to finish in about 30 minutes!
One pot sweet potato soup is super silky, creamy and vegan, and packed with fall flavours. Make this quick and easy fall and winter soup in 30 minutes.
Creamy Garlic Cauliflower Soup.
Creamy Garlic Cauliflower Soup is creamy and healthy. This vegetarian soup is ready in 45 minutes with a handful of wholesome ingredients and a few steps.
Instant Pot Butternut Squash Soup
Instant pot butternut squash soup is the perfect fall dish to cook in your pressure cooker - warm, cozy, comforting, and creamy. Make in 15 minutes.
Roasted Acorn Squash Soup is smooth and velvety, packed with veggies, and loaded with fall flavor. Serve for a cozy lunch, dinner, or on Thanksgiving.
Roasted Butternut Squash and Cauliflower Soup
Creamy roasted butternut squash and cauliflower soup has all the fall feels and is vegan and gluten-free. Plus, it's super easy to make in a sheet pan.
Coconut Curry Pumpkin Soup is rich, creamy, flavorful, and delicious. This vegan soup is ready just over 35 minutes with minimal prep and in one pot.
Butternut Squash Apple Soup is healthy and simple yet packed with so much flavour. Top this easy vegan soup with a layer of homemade toasted croutons.
Thanksgiving Bread
Sweet and savoury, buttery rosemary cornbread is soft and moist with golden crispy edges, flavourful and delicious, and so easy to make this holiday season.
Notoriously light and fluffy with a little fold in the middle, these Parker House Rolls are the perfect dinner roll. They're buttery and incredibly tender.
Easy Rosemary Garlic Focaccia Bread
No knead, easy rosemary garlic focaccia bread is thick with a perfect golden and crispy texture on the outside, but soft, fluffy and tender inside.
Quick and easy pumpkin dinner rolls are soft and fluffy, flaky and butter, and perfect to serve alongside a warm and cozy fall meal or Thanksgiving dinner.
Flaky Garlic Cheddar Biscuits are a simple but delicious and flavorful no yeast bread that is ready for the oven with less than 15 minutes prep.
Pumpkin Cornbread is a sweet and savory side dish loaded with real pumpkin, and is moist, fluffy, and crumbly with crisp edges.
Potato Dinner Rolls are soft, light, and fluffy. These quick and easy dinner rolls are loaded with leftover mashed potatoes and simple pantry staples.
Pumpkin Focaccia Bread with Fresh Herbs
Delicious, easy pumpkin focaccia bread with fresh herbs is soft, fluffy, and springy, yet so crispy on the outside. Just 15 minutes of actual prep required.
Easy Cornbread Muffins are moist, fluffy, tender, and sweet. They're the perfect side dish to serve with a Southern barbecue or Thanksgiving holiday dinner.
How to Make Ahead
You can make some of these Thanksgiving side dish recipes ahead of time and store in the refrigerator for a few days or in the freezer for up to 3 months. Check the individual recipes to see full make ahead instructions.
To reheat, place in the oven at 300F for 5-10 minutes until warmed through. If heating from frozen, let it thaw first and then reheat. If you can make any of these dishes a day or two before Thanksgiving, things will so much easier on the day of your holiday meal.
More Thanksgiving Recipes
Once you have selected the sides that you want to serve on your Thanksgiving dinner menu, don't forget the turkey, gravy, cranberry sauce, and of course dessert:
- The Best and Juiciest Whole Roast Turkey
- Easy Juicy Roasted Turkey Breast
- Easy Slow Cooker Turkey Breast
- Classic Homemade Turkey Gravy
- Easy Make-Ahead Cranberry Sauce
- Easy 2-Ingredient Turkey Gravy
- 40 Best Thanksgiving Main Dishes
- 15 Best Thanksgiving Bread Recipes
- 30 Best Thanksgiving Appetizers
- 25 Best Thanksgiving Dessert Recipes
Did You Make Any of These Thanksgiving Side Dishes?
Please leave a comment and rating below, and let me know what you thought of this round up of recipes. Be sure to snap a picture and tag me on Instagram @aheadofthyme or share it on the Pinterest pin so that I can follow along.
HUNGRY FOR MORE? Don't forget to sign up for my email newsletter so that you don't miss any recipes. You can also follow along on Instagram and Pinterest for more recipe updates.
Roasted Brussels Sprouts
These perfectly Roasted Brussels Sprouts are the ideal side for any meal. After roasting, they're tossed in a sweet and tangy mixture of balsamic vinegar and honey that takes them over the top. The best part? You just need a handful of simple ingredients and a hot oven for tender, caramelized, and crispy brussel sprouts any time.
Brussel sprouts are one of the best fall vegetables! These little green orbs look like miniature cabbages but are a lot easier to prepare. They really shine after roasting, which adds a crispy texture to the outside while making the inside soft and tender. The secret is to add a little acid (in the form of balsamic vinegar) and a bit of honey. The vinegar adds a rich, savory, tangy flavor, which gets rid of any cabbage funkiness, while the honey enhances the natural sweetness of the sprouts. This is hands down the best way to serve these greens, and it doesn't get much easier than this!
Why You'll Love These Roasted Brussels Sprouts
- So easy to make. I love roasting vegetables because it is the quickest and simplest way to make vegetables. For this recipe, it takes just a few moments of effort to get the sprouts on the pan. It will take longer to preheat the oven! Then, just let the oven do the rest of the work while you relax and kick your feet up!
- Incredibly flavorful. The roasting process concentrates the flavors of the sprouts and adds a wonderful contrast of textures. Brussels sprouts are a particularly good contender for roasting because roasting enhances the flavour tenfold and the roasting process creates an amazing balance between caramelized on the outside yet soft and tender on the inside. However, this recipe takes everything over the top by tossing the freshly roasted sprouts in balsamic vinegar with honey. You won't believe sprouts could taste this good!
- Perfect for fall and winter. Brussels sprouts are a seasonal crop typically available during the fall and winter. This recipe is ideal for serving with your favorite roast chicken, Thanksgiving turkey, or Christmas prime rib, and will be a hit as part of your holiday table.
Ingredient Notes
To make these delicious roasted Brussels sprouts, you will need the following ingredients (full measurements in recipe card below):
- brussels sprouts - trim down the base of the sprout, remove any browning outer leaves, and cut them in half lengthwise.
- olive oil - use regular extra virgin olive oil. This oil will give the outside of the sprouts a crispy texture, so don't skip it.
- salt and pepper - it's so important to season your sprouts well to keep them from tasting bland.
- balsamic vinegar - this rich vinegar has an incredible depth of flavor that complements the earthy flavor of the sprouts so well.
- honey - a little honey highlights the sweetness of the vinegar and the sprouts. It really balances the whole dish.
You will also need a baking sheet, parchment paper, large bowl, cutting board and knife, and serving spoon.
How to Make the Best Roasted Brussels Sprouts
- Combine. In a large mixing bowl, add the brussels sprouts, olive oil, salt and pepper. Toss to combine.
- Bake. Line a large baking sheet with parchment paper. Spread brussels sprouts evenly on the prepared pan, arranging most of the brussels sprouts with the flat side facing down. Place tray in oven and roast in a 400F preheated oven for 20-30 minutes, until crisp on the outside and tender inside, with slight charring on the edges.
- Toss. Once cooked, place cooked brussels sprouts back into a large mixing bowl and add balsamic vinegar and honey. Toss to combine and serve warm.
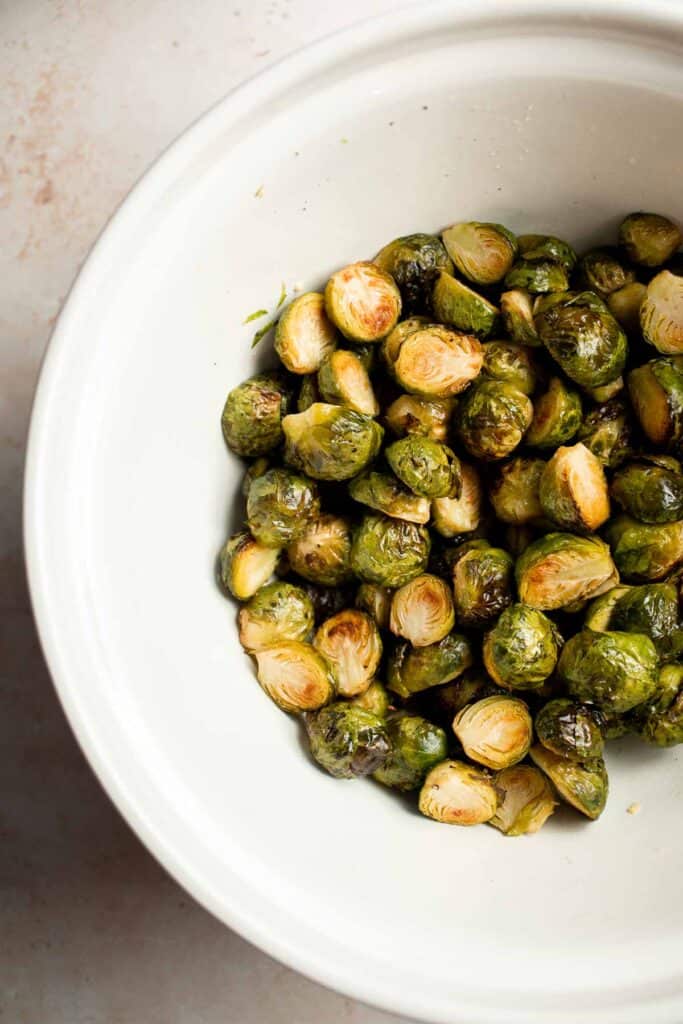
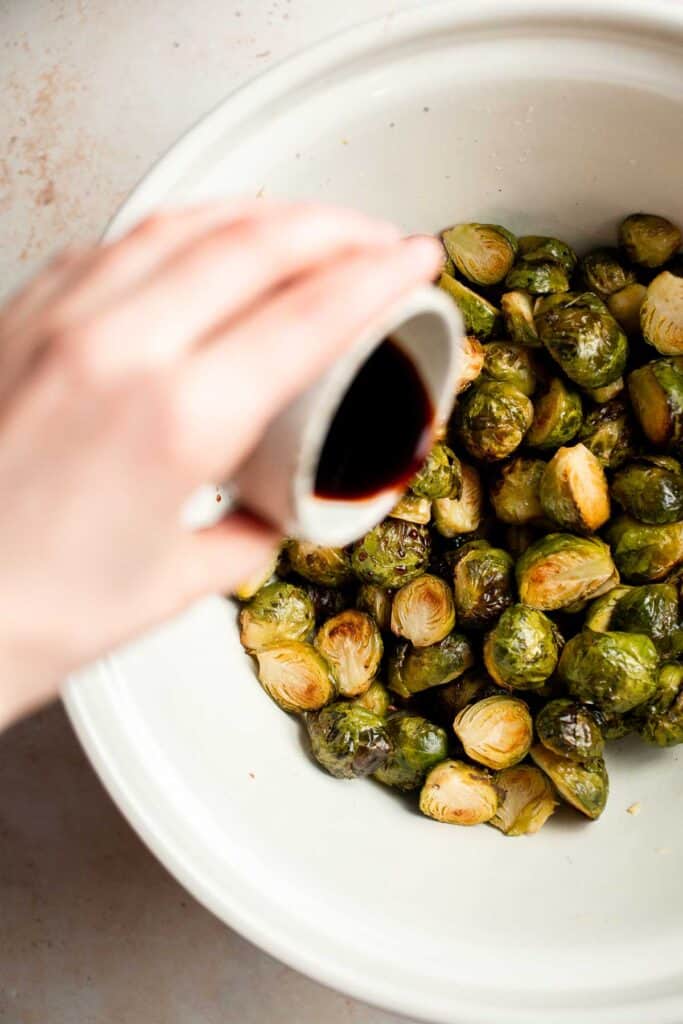
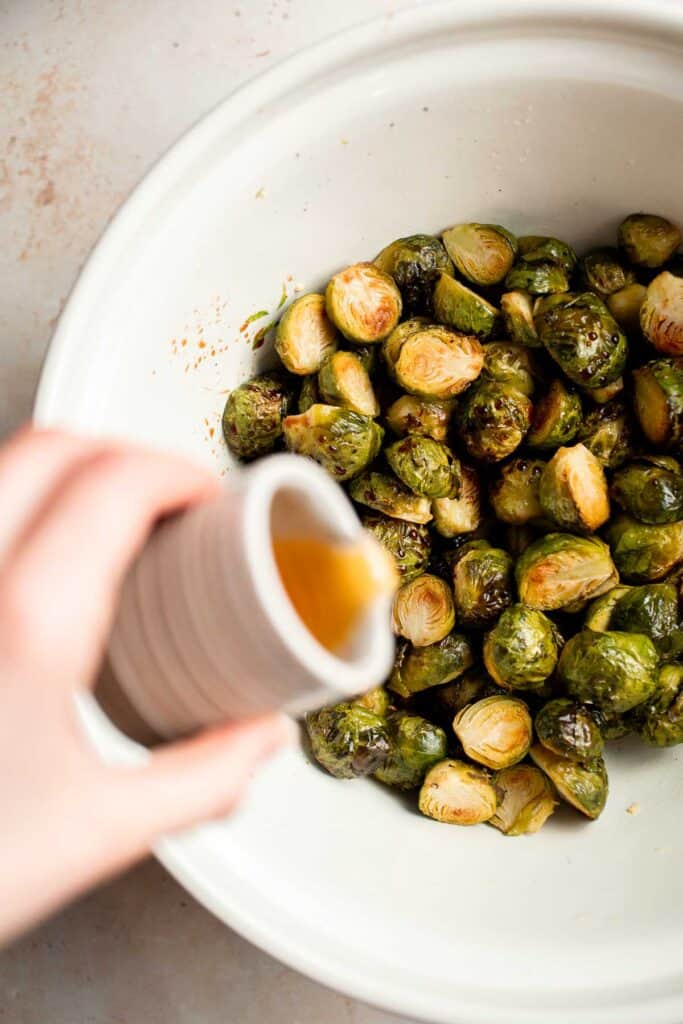
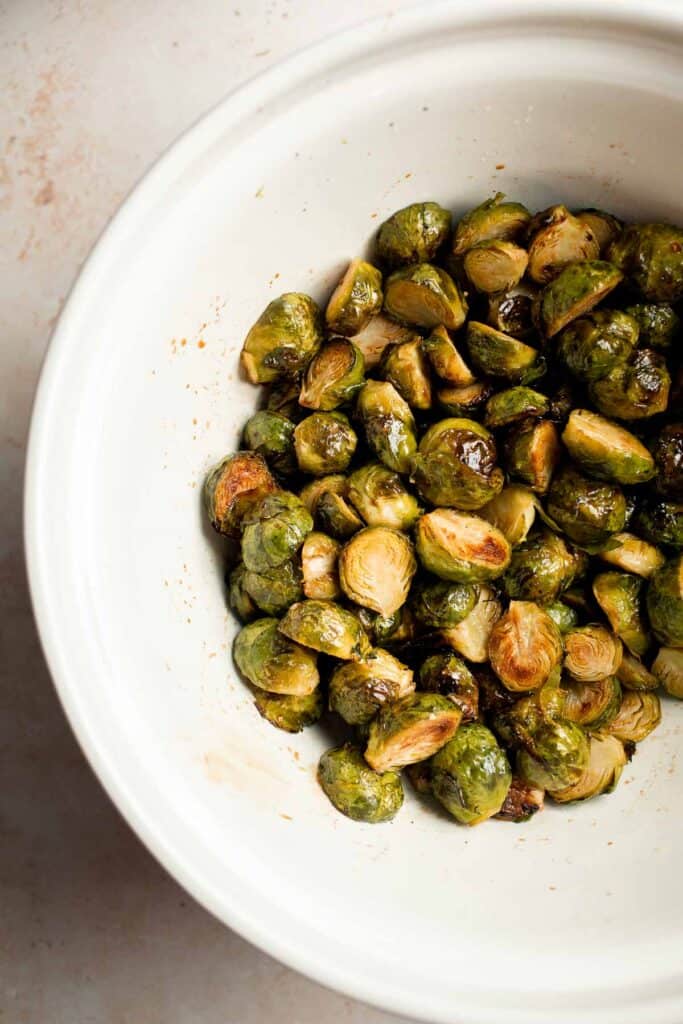
Recipe Variations
- Spicy roasted Brussels sprouts. If you prefer spicy flavors, add some red pepper flakes or use hot honey.
- Add lemon. Instead of the rich, complex flavor of balsamic, add a squeeze of fresh lemon juice and some lemon zest.
- Sprinkle with cheese. Toss your freshly roasted sprouts in shredded parmesan cheese for a salty, cheesy flavor.
- Air fryer roasted brussels sprouts. Ditch the oven and make air fryer brussels sprouts instead using the same simple seasonings we use here.
How to Serve
These roasted Brussels sprouts are delicious served with some of my favorite seasonal recipes including:
- Garlic Mashed Potatoes with Sour Cream
- Roast Stuffed Chicken
- Herb Roasted Sweet Potatoes
- Easy Make-Ahead Cranberry Sauce
- Caramelized Onion and Herbed Goat Cheese Flatbread
- Sautéed Garlic Green Beans
For more recipe inspiration, see our 60+ Fall Dinner Ideas.
Recipe Tips and Tricks
- Cut consistently. Since whole sprouts come in a variety of sizes, it's a good idea to cut each one to the same size. Smaller sprouts can be left whole, while larger ones should be sliced in half.
- Start with the flat side down. If you start with the flat sides down on the sheet pan, they'll get a chance to caramelize nicely while the outside crisps up. Feel free to stir once halfway through baking.
- Use high heat. If your oven is not fully preheated, your sprouts will become soggy instead of crispy.
- Don't crowd the pan. It's important to spread the sprouts in an even layer. They need space around them to properly roast and caramelize.
Storing and Freezing Instructions
How to Store
Store leftover roasted Brussels sprouts in an airtight container in the fridge for 3-4 days.
How to Reheat
To reheat, either microwave for 1-2 minutes, toast the sprouts in a hot skillet or bake them in a small dish at 350 degrees F until fully warmed.
How to Freeze
Allow cooked sprouts to cool to room temperature, then store them in a freezer-safe container. Freeze for 2-3 months. Thaw in the fridge before reheating.
FAQ
There are a few ways to make sure your sprouts come out crispy every time instead of soggy. First, use a sheet pan. The short sides will allow the moisture to evaporate quickly. Make sure your oven is completely preheated; don't rush ahead. It's also key to add enough oil. The sprouts need a thin layer of oil, which will fry up in the hot oven. It's also a good practice to spread the sprouts into an even layer with a little space around them so any moisture can evaporate right away.
Not at all. Although blanching can help cook the insides of the sprouts and make it easier to roast at a high temperature without burning the edges, it's a fussy extra step that isn't needed. Just follow good roasting techniques for perfectly crispy yet tender sprouts every time.
Yes. The firm ends of the sprouts should be trimmed down. They are edible, but they will take a while to soften, and they are often dried out anyway. It's a good practice to trim off the ends and remove any browning leaves before cooking your sprouts. Give them a good soak, too, to remove any dirt or bugs.
More Brussels Sprouts Recipes
- 15 Best Brussels Sprouts Recipes
- Brussels Sprouts with Cranberries
- Cheesy Brussels Sprouts Bake
- Sautéed Brussels Sprouts
- Maple Roasted Brussels Sprouts and Butternut Squash
- Parmesan Crusted Brussels Sprouts
Tried this recipe?
I'd love to hear what you think! Leave a comment and rating below to share your feedback. Your reviews help others discover this recipe and help me keep creating more free recipes for you. Snap a photo and tag me on social media @aheadofthyme too.
Baked Cranberry Sauce
This Baked Cranberry Sauce is an easy and flavorful twist on the classic Thanksgiving side dish. It has a thick, jam-like consistency with the right balance of tartness and sweetness that pairs perfectly with the traditional flavors of the holiday season. All made in the oven with just four ingredients, there is no reason not to try this delicious take on cranberry sauce.
A lot of holiday traditions start in the kitchen, and cranberry sauce is certainly a staple on Thanksgiving. This baked version is a simple upgrade from the canned and stovetop method. Baking cranberries allows them to burst and combine with orange juice and sugar to create a thicker sauce with complex flavors. It's certainly easier than making it on the stove as you don't have to monitor the cooking process, and you get a consistent texture every time. You literally can't go wrong with this recipe! It's sure to be one of the best parts of your Thanksgiving dinner.
Why You'll Love this Baked Cranberry Sauce
- Extremely simple to make. With only four ingredients, this baked cranberry sauce is one of the easiest recipes you'll make this Thanksgiving. All you have to do is mix all the ingredients in a baking dish and leave it to bake in the oven. No need to worry about boiling or stirring every few minutes!
- Deep, complex flavor. Any cranberry sauce will have that natural tart flavor, but baking it in the oven concentrates and enhances those flavors, creating an incredibly richer and more complex flavor. Plus, it gets nice and thick like a jam, so it's perfect for topping your favorite dishes or spreading on toast.
- Make-ahead option. Bake this cranberry sauce in advance and keep it in the refrigerator for later use. You can even freeze it if you're making a big batch. Serve it cold or warm, whichever way you like!
- Versatile. This baked cranberry sauce is perfect for Thanksgiving, but it can also be used in other dishes like roasted meats, pastries, and desserts year-round. Top your toast, pancake, or ice cream with a dollop of this sauce, or mix in some to a smoothie or oatmeal bowl.

Ingredient Notes
To make this easy Baked Cranberry Sauce, you will need the following ingredients (full measurements in recipe card below):
- orange juice - this adds a fresh tangy flavor that matches the tartness of cranberries. I prefer using fresh orange, but you can use bottled ones.
- cranberries - I use fresh cranberries, but you can always use frozen.
- granulated sugar - gives a sweet taste and a thick, syrupy texture to the sauce. You can also use brown sugar.
- cinnamon - for a nice warm fall flavor.
You will also need measuring cups, 1 quart baking dish, and oven.
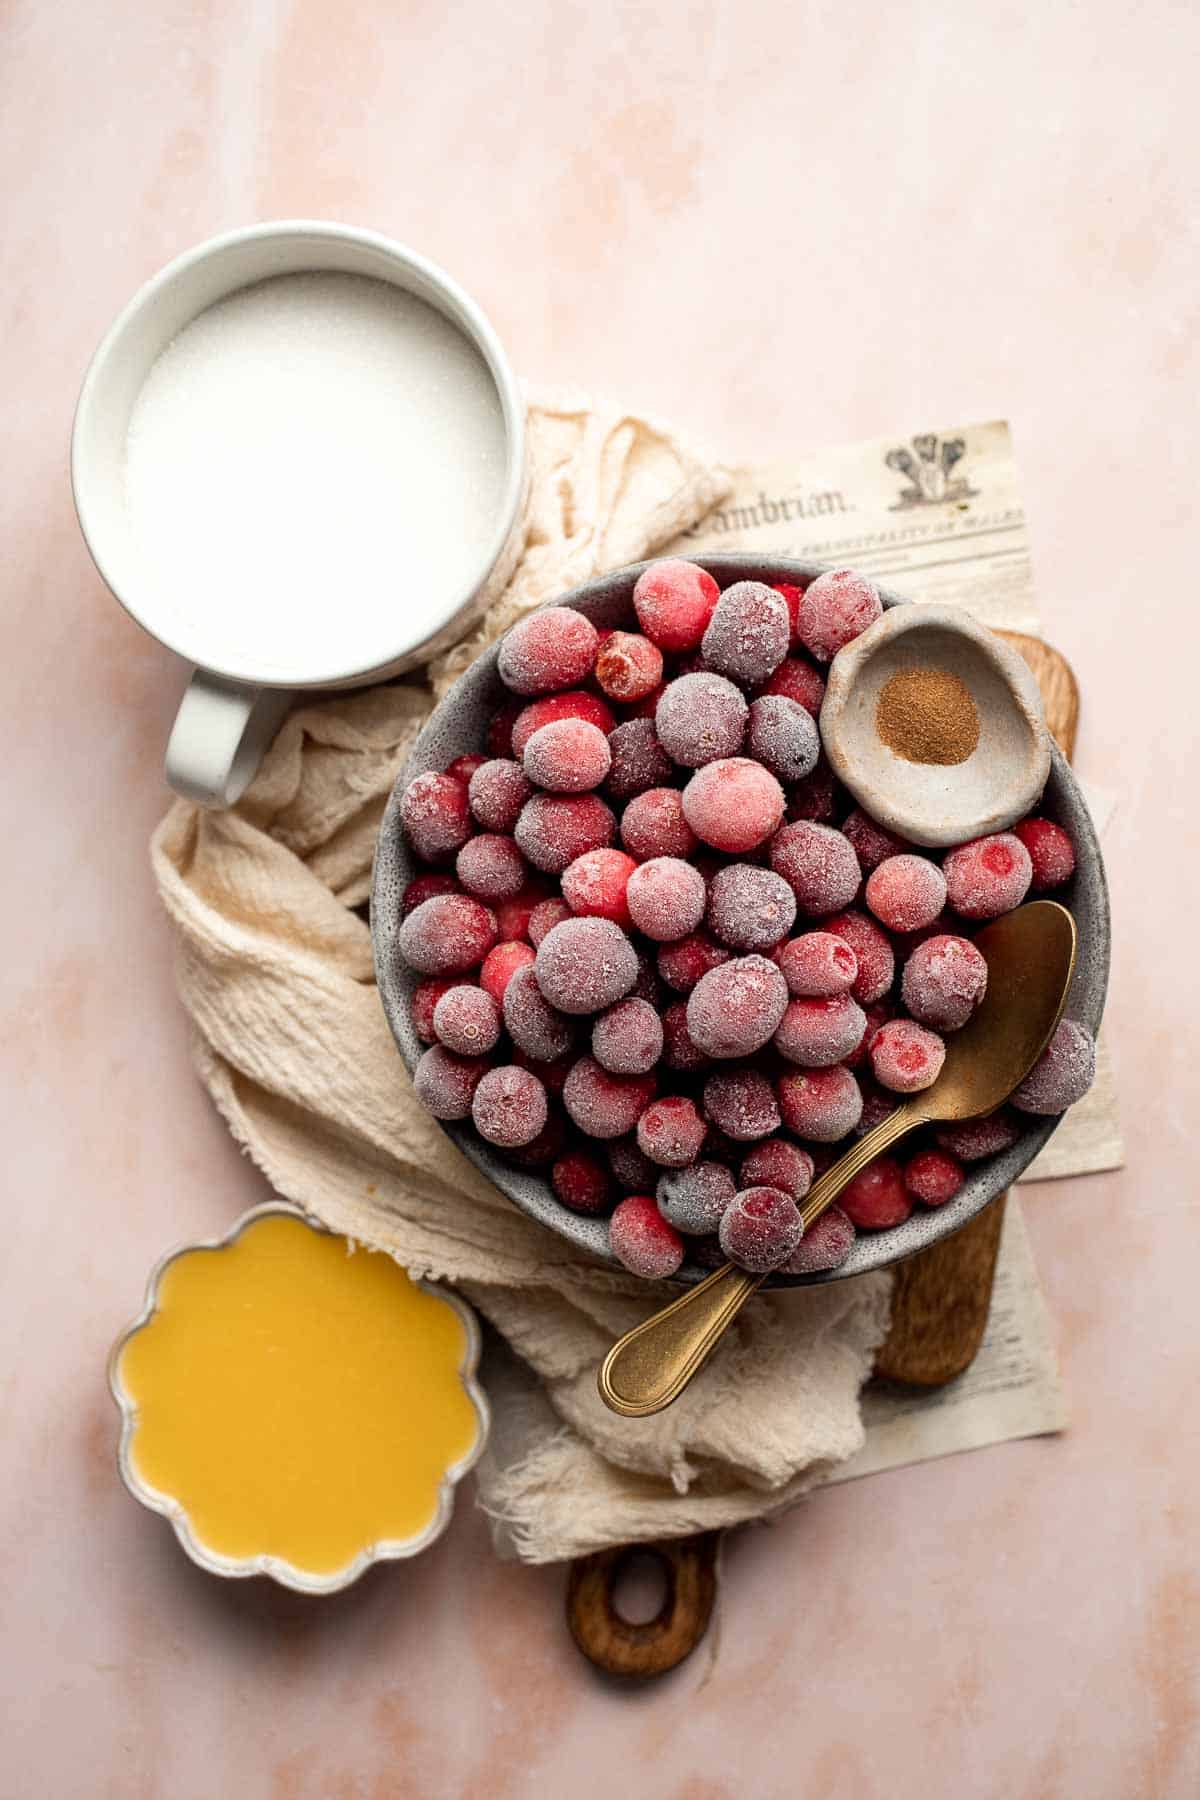
How to Make the Best Baked Cranberry Sauce
- Combine ingredients. In a 1-quart baking dish, add orange juice, cranberries, sugar and cinnamon. Mix well to combine.

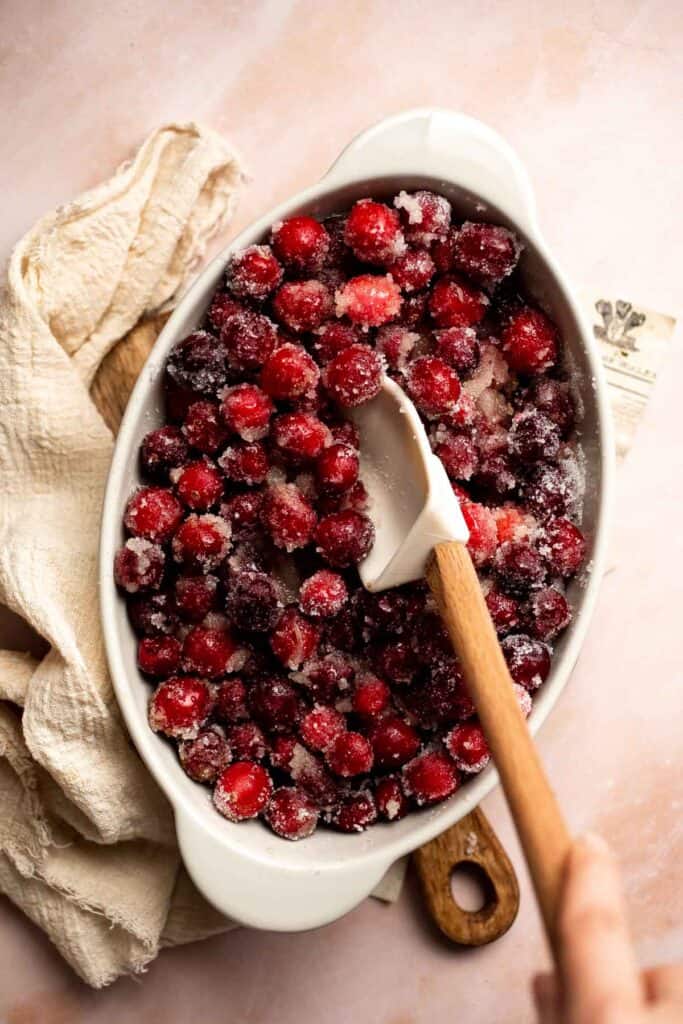
- Bake. Cover with aluminum foil and bake in a 350F preheated oven for 1 hour. Stir halfway through.
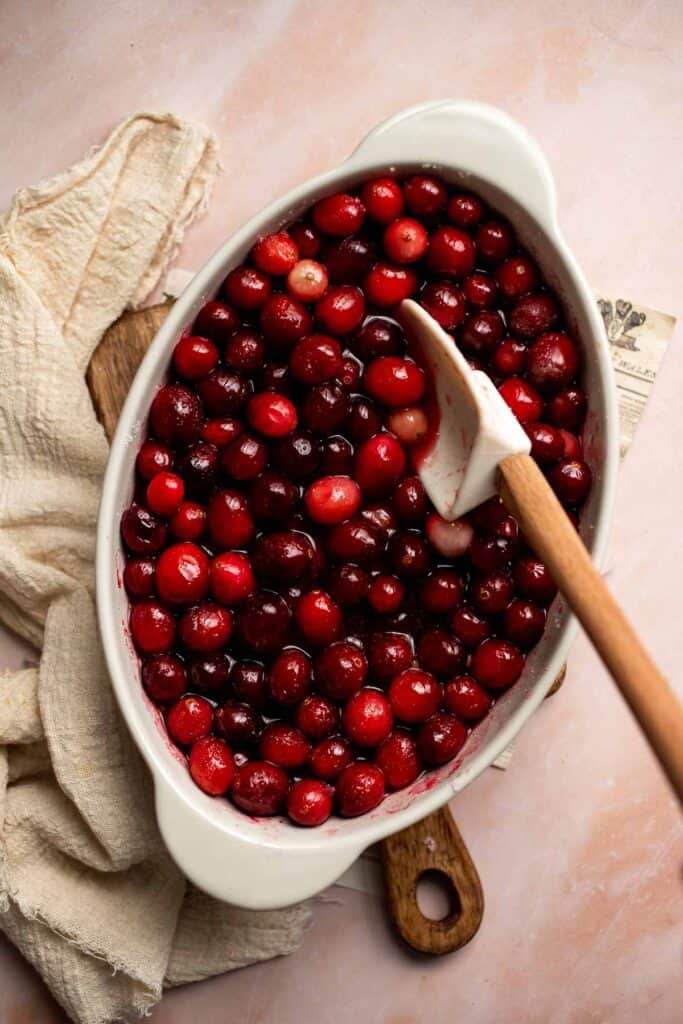
- Mash. Remove from the oven and mash with the back of a spoon until all the sugar has dissolved and the syrupy cranberry sauce reaches desired consistency.
- Chill. Let the sauce cool at room temperature. Then, transfer to an airtight container and refrigerate overnight.
Recipe Variations
- Add nuts. For an added crunch with a nutty flavor, throw in some almonds, pecans, or walnuts after baking.
- Add orange zest. If you're using fresh orange, you don't have to throw the peel away. Add in orange zest which brings a bright, zesty note to the sauce, complementing the tartness of cranberries.
- Incorporate pears. Add pears for a juicy and slightly grainy texture and sauce, which can be used as a filling for pies or a side dish for mildly flavored meat. Simply incorporate the diced pears halfway through baking.
- Use balsamic vinegar. Substitute orange juice with a few tablespoons of balsamic vinegar to make a sauce with more complex sweet and savory flavors. This perfectly complements a lot of roasted meats.
- Flavor with bourbon. For a unique twist, add bourbon for a strong, woody, alcoholic note that blends well with the sweet, tart flavor of the cranberry sauce. Just be cautious when adding this to the sauce-only when it's out of the oven and away from open flame.
- Switch up the sugar. Replace half of the granulated sugar in the recipe with another sweetener to give your sauce a different sweetness profile. You can use honey for a smooth, floral sweetness or brown sugar for a deep, caramel-like flavor.
- Experiment with spices. Swap cinnamon with other spices for a unique flavor and aroma. Cardamom will enhance the flavor of your sauce with its woody, citrusy notes while nutmeg gives an aromatic, warm flavor that makes your sauce extra special for the holiday.
How to Serve
Serve this delicious Baked Cranberry Sauce with Whole Roast Turkey, Homemade Gravy, Mashed Potatoes, and Oven Roasted Vegetables for Thanksgiving. Here are other great side dishes you can pair with it:
- Creamy Potatoes au Gratin
- Maple Roasted Acorn Squash
- Brussels Sprouts with Bacon
- Green Bean Casserole
- Honey Roasted Carrots
- Apple Walnut Salad with Balsamic Vinaigrette
For more recipe inspiration, see our 50 Best Thanksgiving Side Dishes.
Recipe Tips and Tricks
- Cover it properly. To prevent the sauce from burning, cover the entire baking dish with aluminum foil while baking.
- Adjust sugar. Change the amount of sugar to your liking. Taking away a few tablespoons of sugar from the recipe brings out the tartness of the sauce while adding more makes it sweeter. I find one cup of sugar to be the perfect balance for my taste. You can start with less and just add more sugar if needed after baking.
- Get creative with leftovers. Don't throw away those leftovers! Instead use it to create something new like Cranberry Meatballs, Leftover Cranberry Sauce Muffins, or Cranberry Brie Bites. See more ideas in our 15 Leftover Cranberry Sauce Recipes.
Storing and Freezing Instructions
How to Store
Let the cranberry sauce cool to temperature first, then store it in an airtight container in the refrigerator for up to 10 days.
How to Reheat
I prefer serving cranberry sauce cold, but if you like it warm or hot, reheat it on the stovetop for a few minutes.
How to Freeze
Store the cranberry sauce in an airtight freezer bag or container and keep it in the freezer for up to 3 months. Thaw overnight in the fridge before serving.
More Cranberry Recipes
- Cranberry Sauce Parfait
- Cranberry Scones with Orange Glaze
- Easy Make-Ahead Cranberry Sauce
- Cranberry Yogurt Muffins
- Cranberry Meatballs
- Cranberry Brie Bites
Tried this recipe?
I'd love to hear what you think! Leave a comment and rating below to share your feedback. Your reviews help others discover this recipe and help me keep creating more free recipes for you. Snap a photo and tag me on social media @aheadofthyme too.
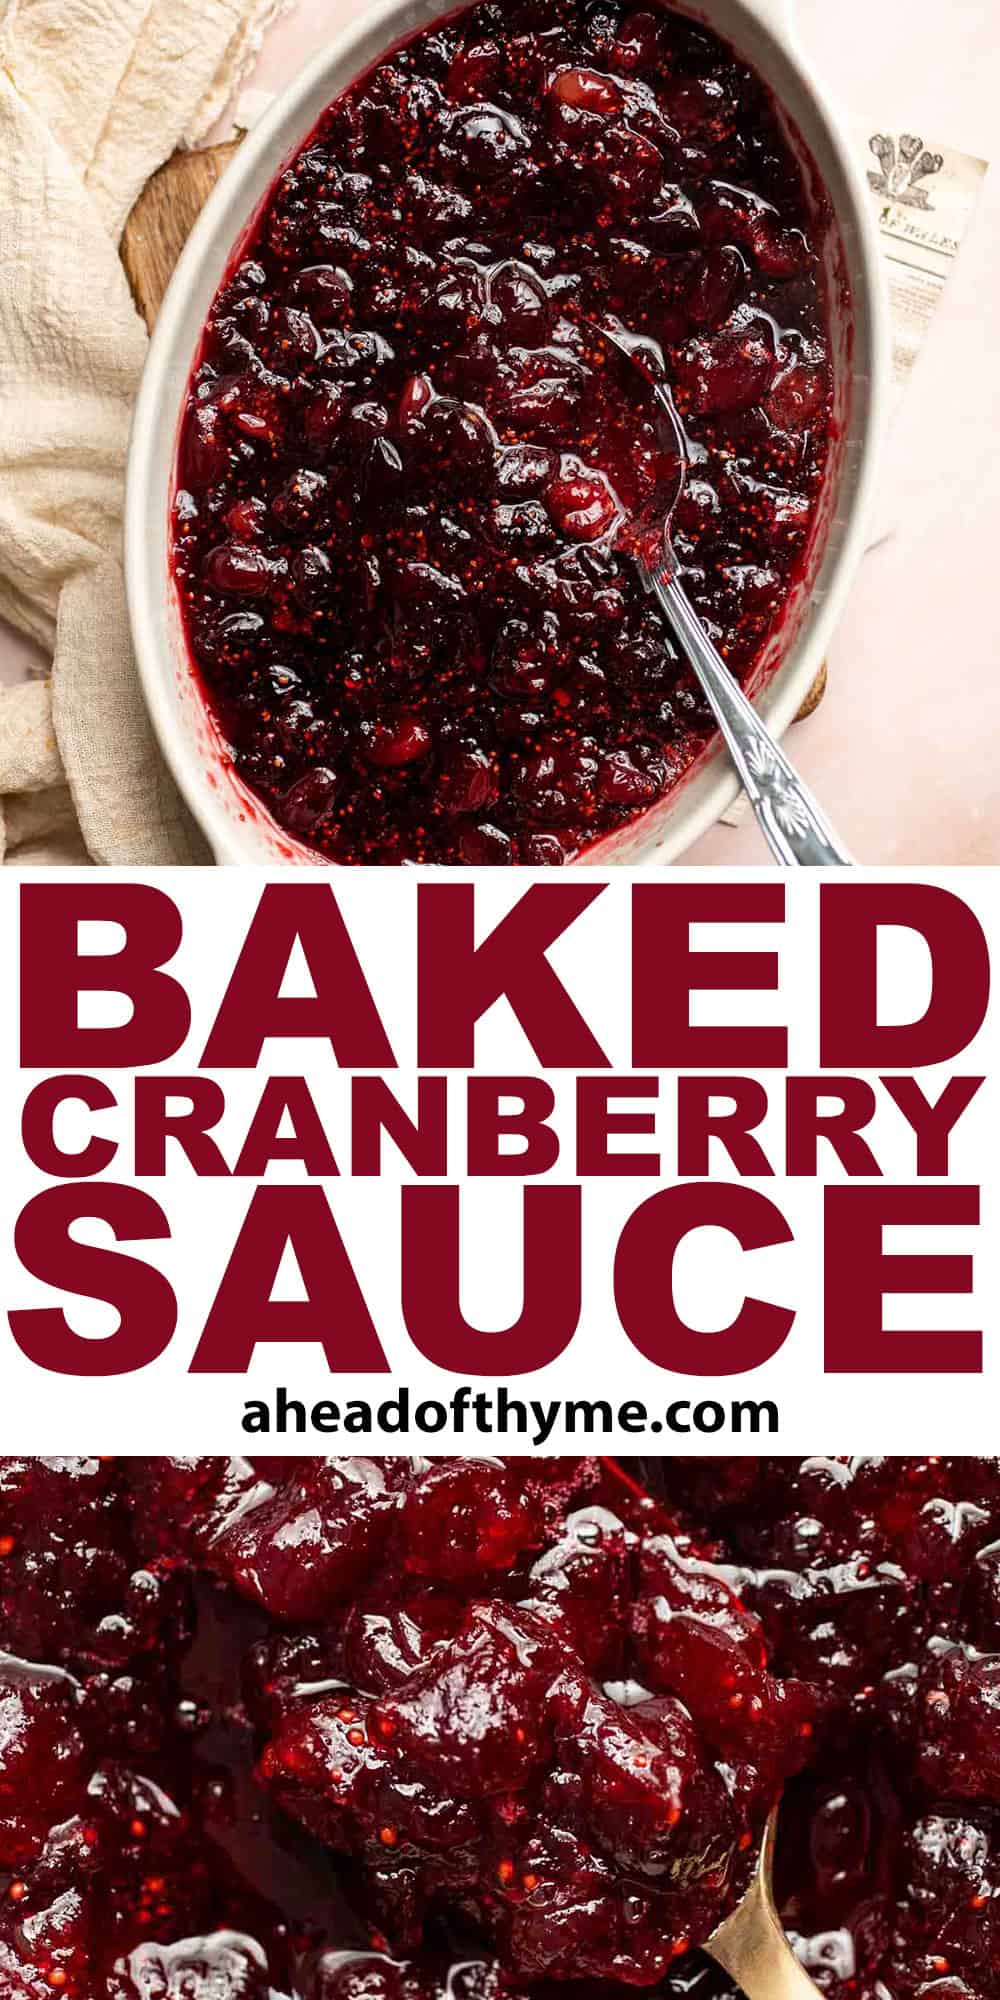
Candied Carrots
Candied Carrots are a delicious side dish that is incredibly easy to make. Just boil the carrots until tender, then sweeten them with a brown sugar mixture before serving them on your holiday table. It's really that simple!
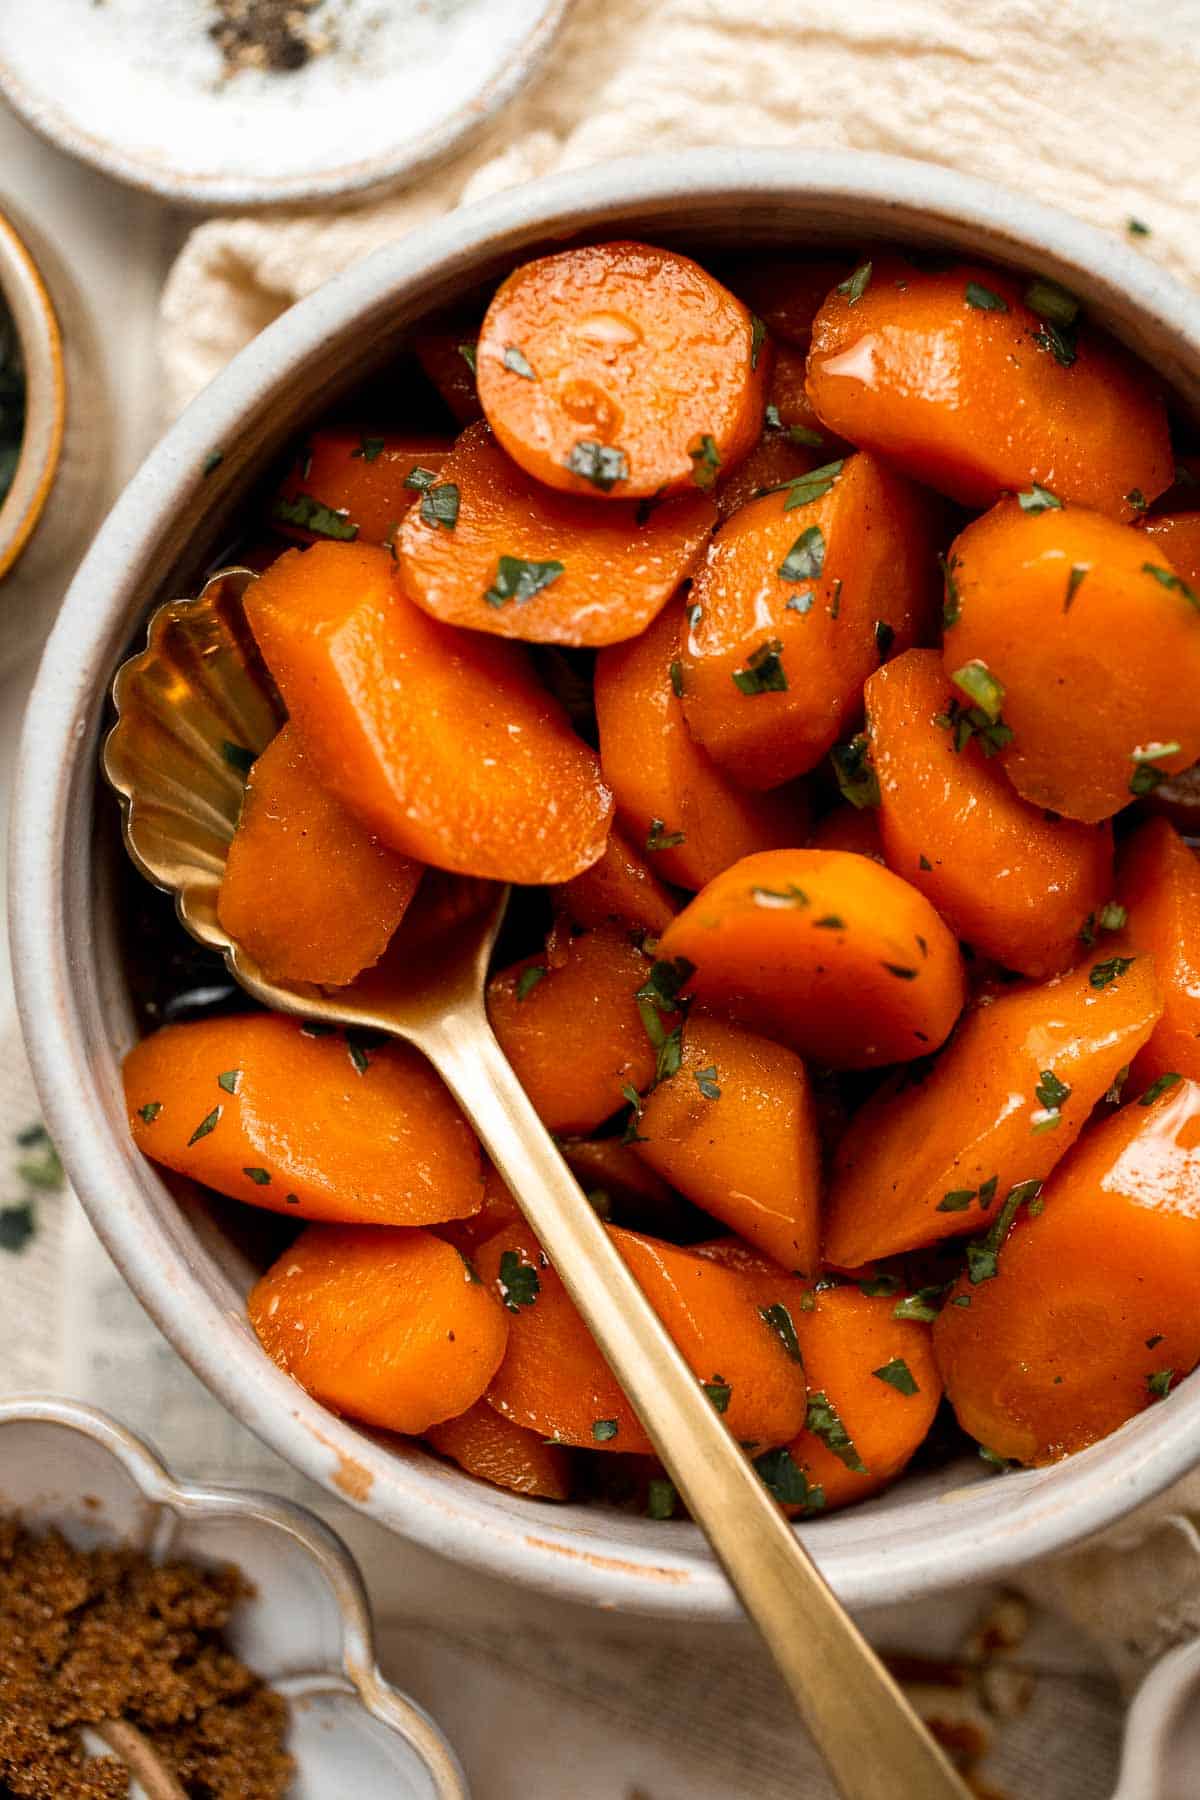
This classic Thanksgiving side dish is known for being overly sweet and rather mushy, but these easy candied carrots are anything but that. The perfectly cooked carrots are fork-tender, and they're coated in a buttery mixture of orange juice, brown sugar, cinnamon, and vanilla. This creates a delicious brown sugar sauce that highlights the natural sweetness of the yams without overpowering them. This is the best candied carrots recipe, and you'll see why once you give it a try!
Why You'll Love These Candied Carrots
- So easy to make. If you can boil carrots, you have all the skills you need to make your favorite Thanksgiving side dish from scratch. They're incredibly quick to prepare and will be done before you know it! Since they don't need to be baked, you can save the oven space for another dish as well.
- Absolutely delicious. Carrots have a natural sweetness and flavor that is often clouded by overly sweet syrup. This homemade version lets the flavor of the carrots shine through while adding just enough sweetness and flavor to make them sing.
- Perfect holiday side dish. It's not the holidays without this classic Southern side dish on the table! Surprise your friends and family with this delightful homemade version at your next special occasion (you'll want them more often than just Thanksgiving!).
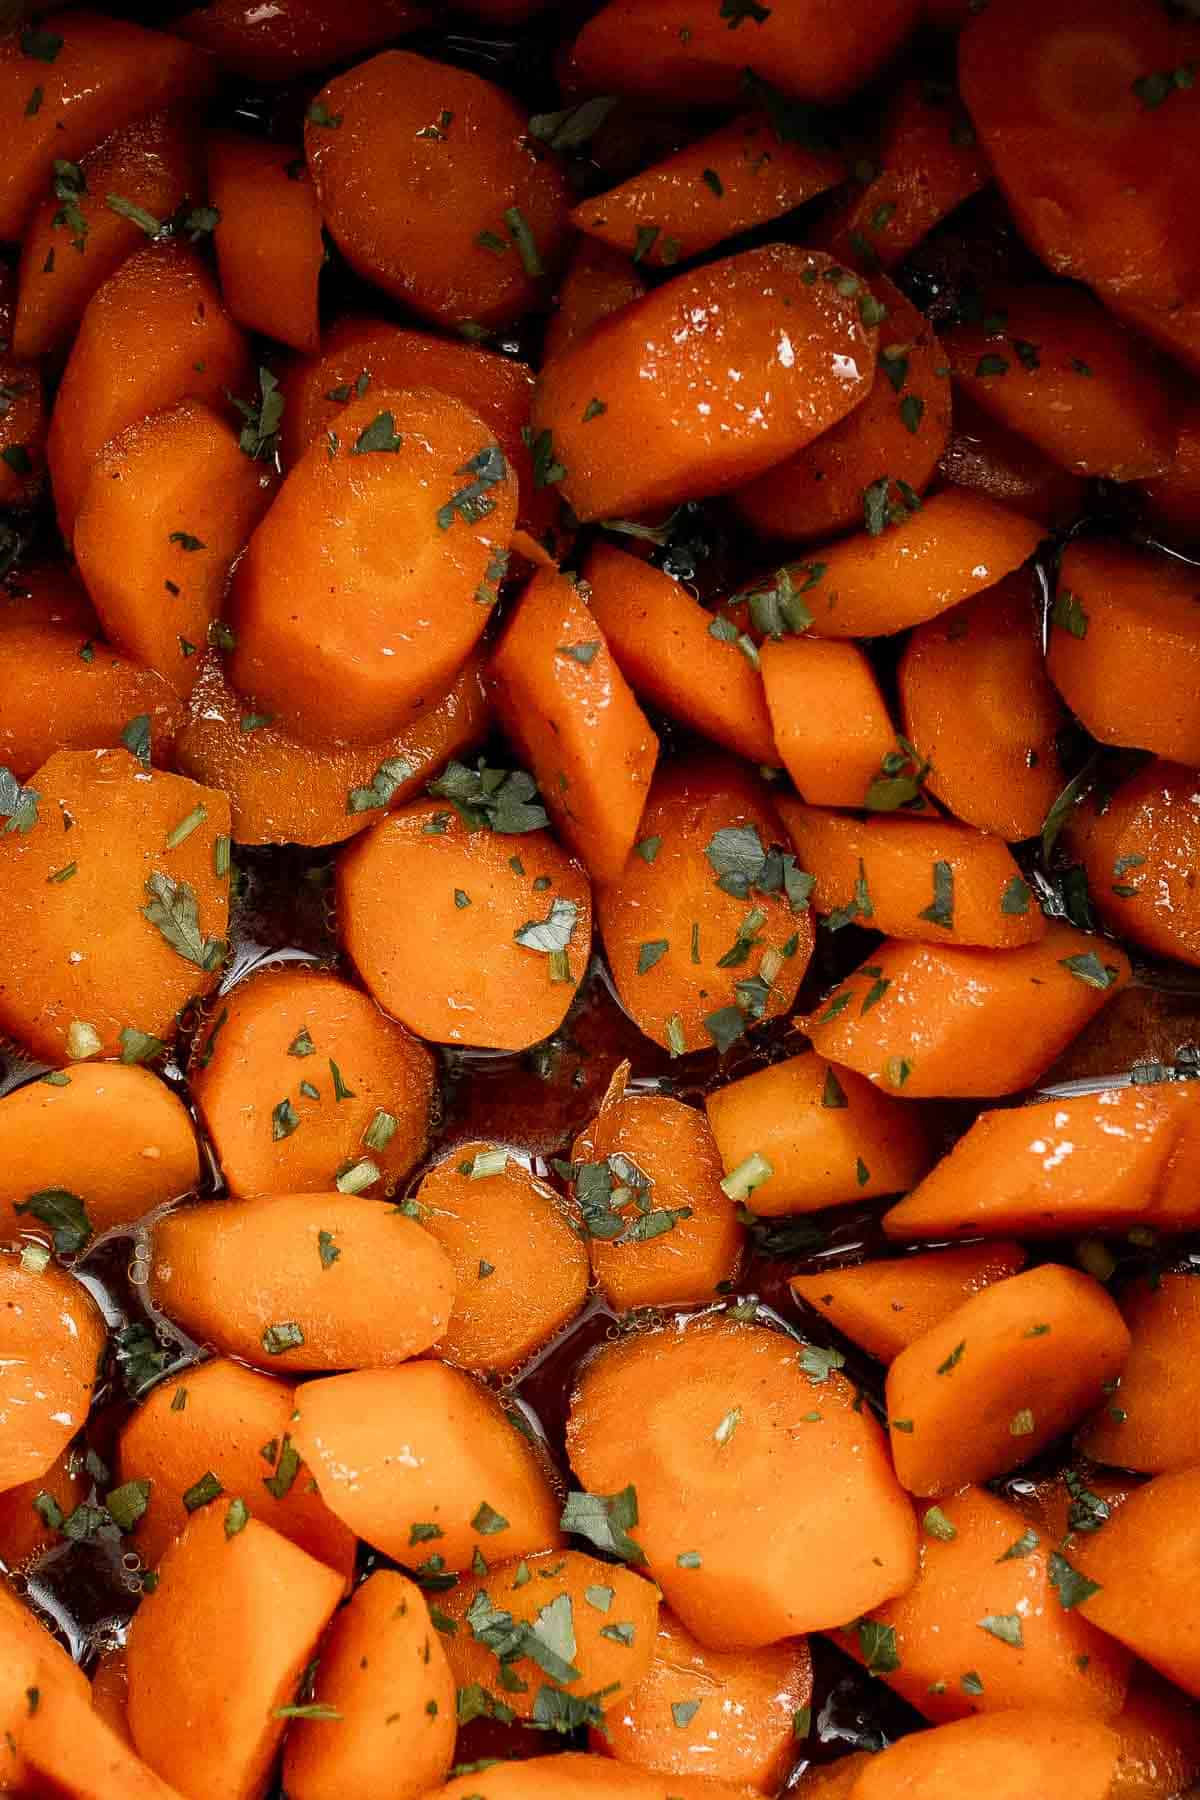
Ingredient Notes
To make these delicious candied carrots, you will need the following ingredients (full measurements in recipe card below):
- carrots - peel and slice carrots into ½-inch thick pieces.
- butter - this adds a buttery flavor that brings the sauce together.
- brown sugar - dark brown sugar offers a rich, sweet flavor that enhances the yam flavor. Light brown sugar works too.
- ground cinnamon - this adds a warm flavor to this classic holiday side dish.
- vanilla extract - a little vanilla adds an enticing aroma that smells like dessert every time.
- salt and pepper - season to taste to avoid bland carrots.
- parsley - optional, for serving.
You will also need a large pot, strained, wooden spoon, and serving dish.
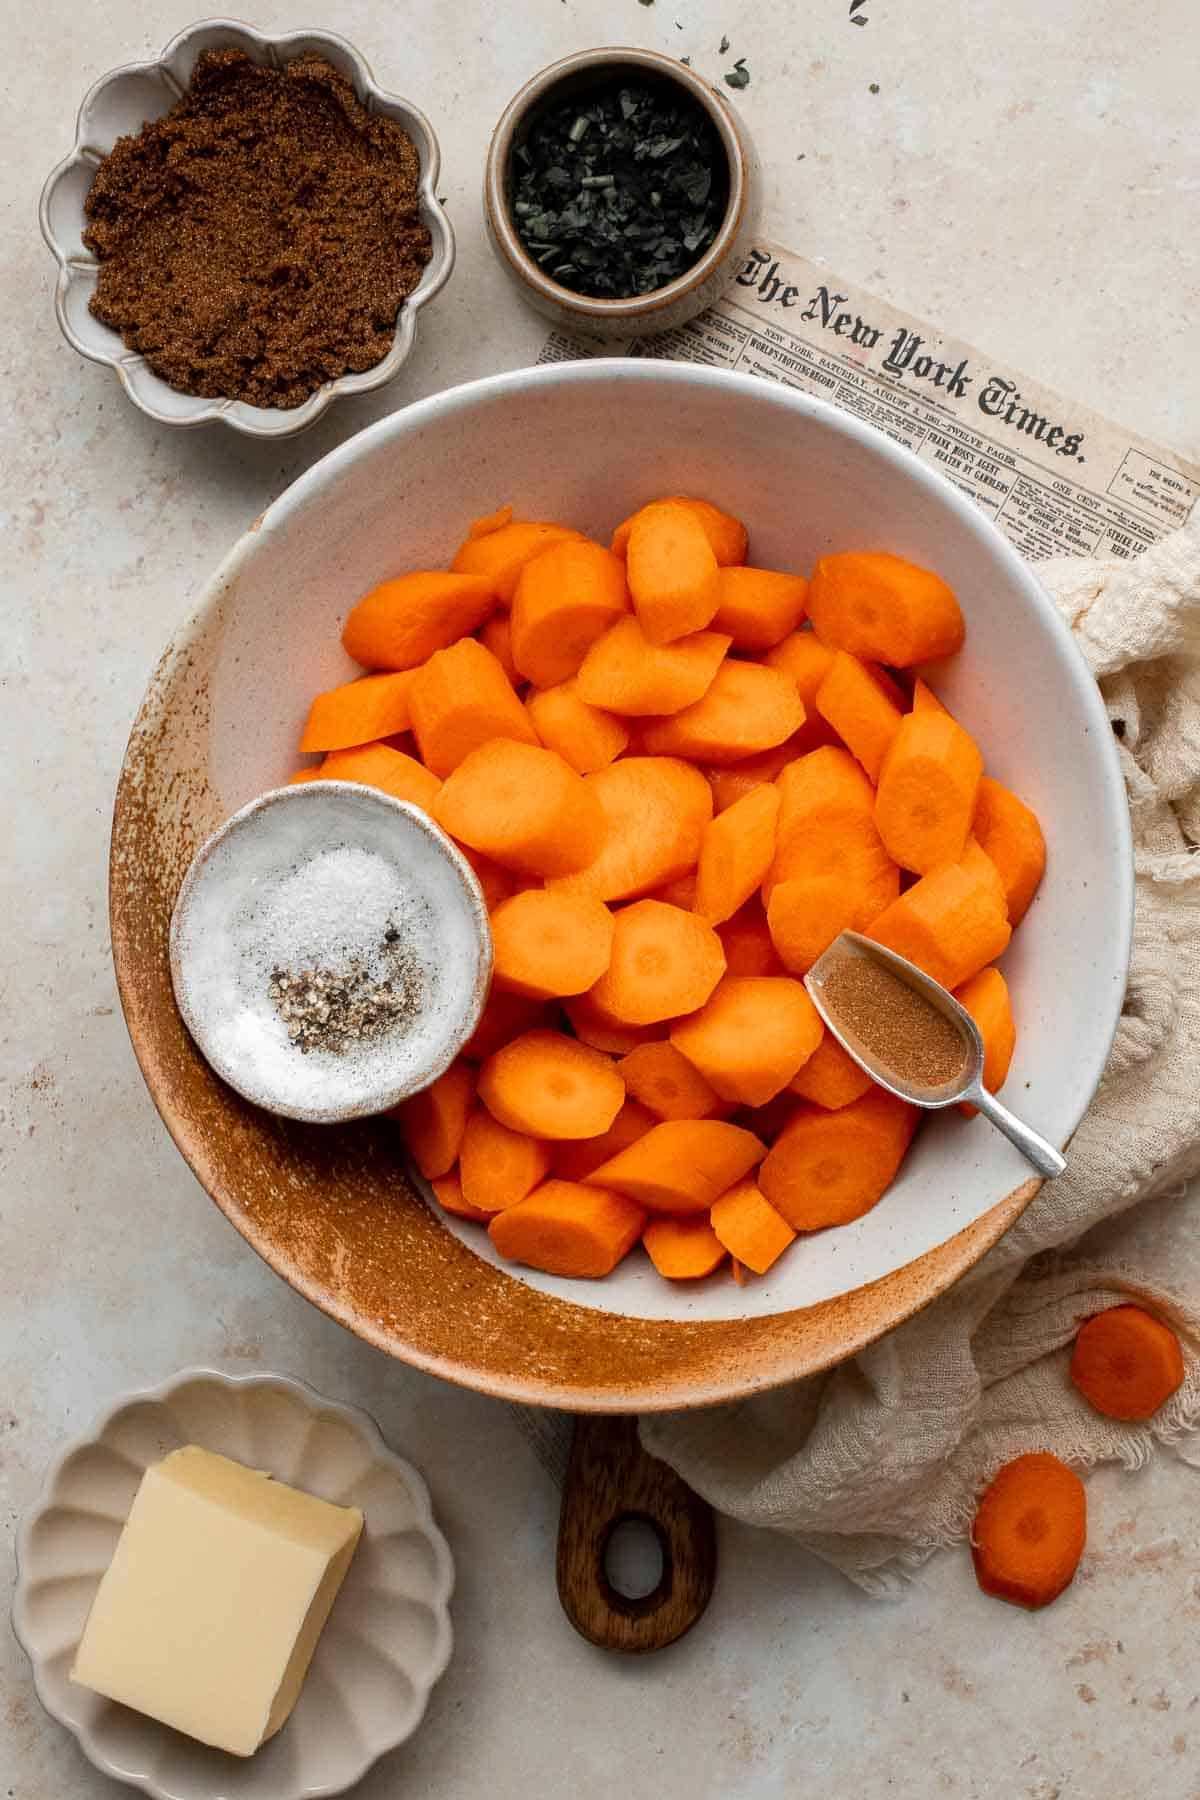
How to Make the Best Candied Yams
- Boil carrots. Place carrots in a large pot and cover with water to cover the carrots by about an inch. Heat over high heat and bring to a boil. Reduce heat to low and simmer until tender, about 6-8 minutes. Drain well and place the carrots back in the pot.
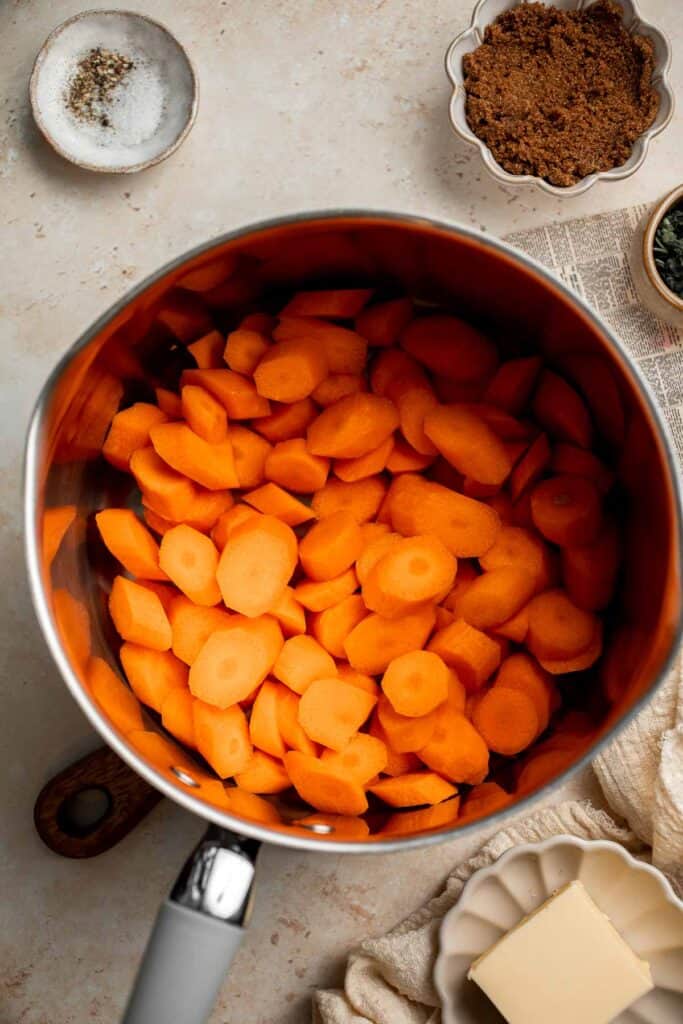
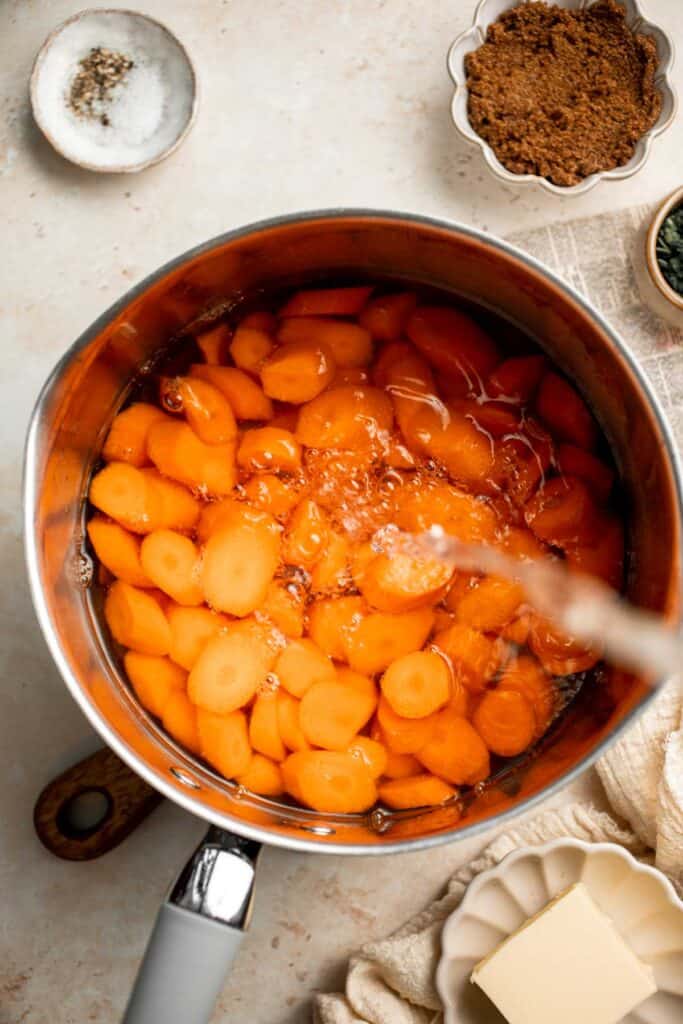
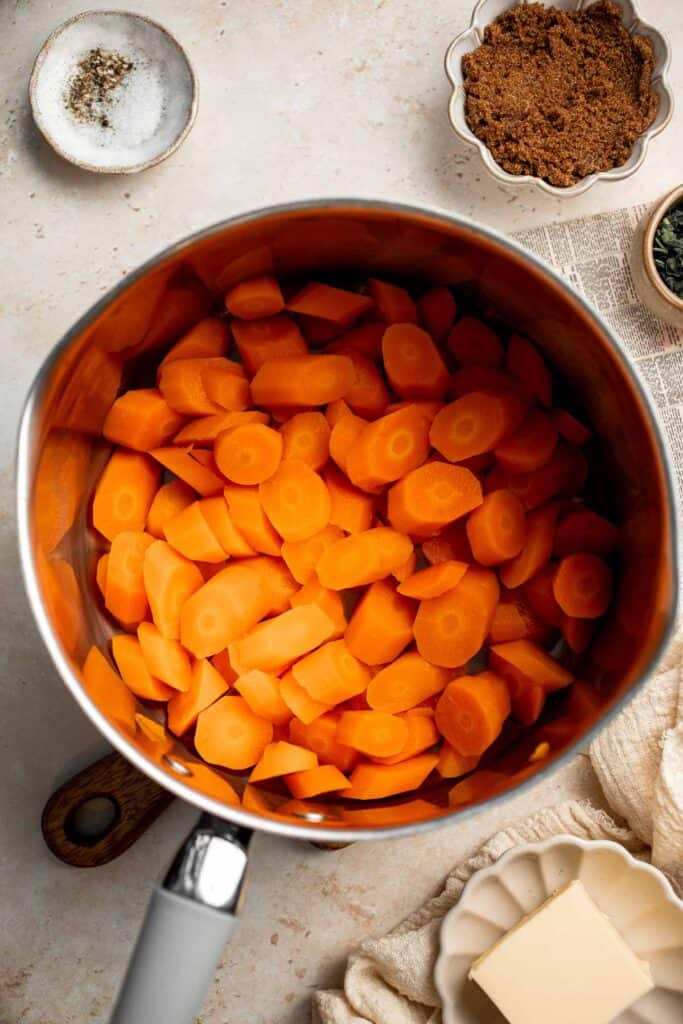
- Make sauce. In the same pot, add butter, sugar, cinnamon, salt and pepper. Stir well and cook until the butter and sugar has melted and the carrots are coated in the glaze, about 2-3 minutes.
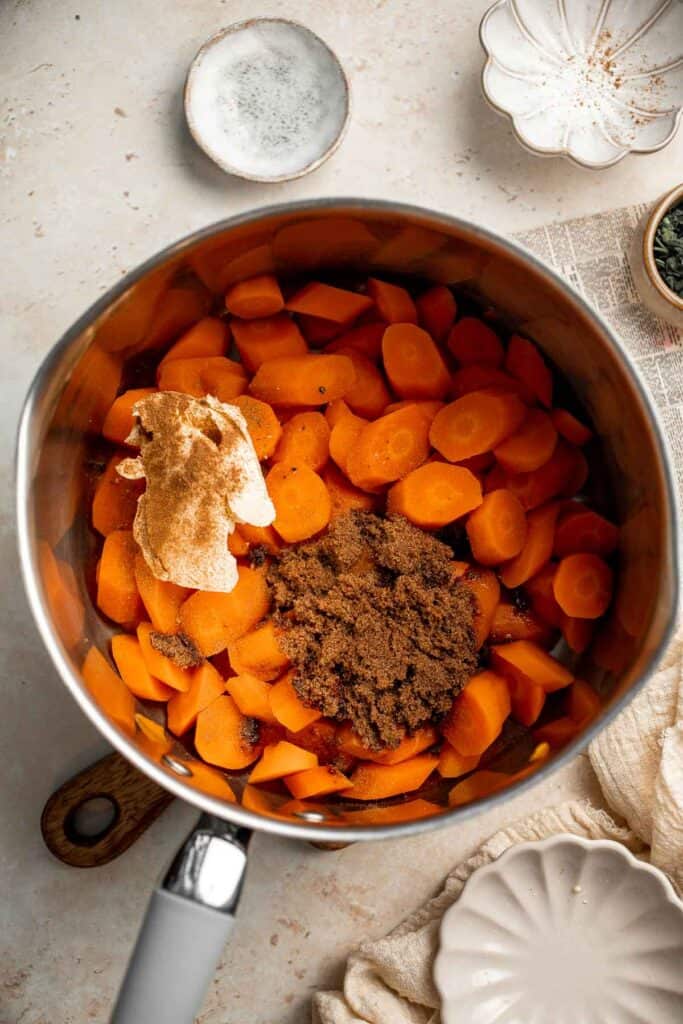
- Serve. Garnish with parsley and serve warm.
Recipe Variations
- Naturally sweetened carrots. Skip the dark brown sugar and use maple syrup for a natural sweetness.
- Add an orange twist. Add fresh orange juice and zest to the sauce mixture to give the carrots a citrus flavor.
- Experiment with seasonings. Instead of cinnamon, feel free to use pumpkin pie spice, ground nutmeg, allspice, or your favorite fall spices in this sweet side.
- Add toppings. We top these candied carrots with parsley and pecans. You can play around with the garnishes and add in your favorite toppings. Try fresh pomegranate seeds, chopped pistachios, or almonds.
How to Serve
This candied carrot recipe is delicious served as a side dish with dinner. It's especially good as a side dish during the holidays, paired with some of my favorite holiday recipes including:
- Green Bean Casserole
- Sweet Potato Casserole with Marshmallows
- Homemade Stuffing
- The Best and Juiciest Roast Turkey
- Easy Make-Ahead Cranberry Sauce
- Baked Mashed Potatoes
For more recipes, see our 50 Best Thanksgiving Side Dishes.
Recipe Tips and Tricks
- Slice evenly. To ensure even cooking, slice the carrots into even ½ inch pieces.
- Don't overcook. You want to have fork-tender carrots with a little texture, not a mash. Test the carrots and remove them from the heat when a fork slides through them.
Storing and Freezing Instructions
How to Store
Store leftover candied carrots in an airtight container in the fridge for 3-4 days.
How to Reheat
Either microwave the leftover carrots for a few minutes or bake them in a 350 degree F oven for 8-10 minutes until fully warmed.
How to Freeze
Place your cooled leftovers in a freezer-safe container and freeze them for 2-3 months. Allow them to thaw overnight in the fridge before reheating.
More Carrot Recipes
- 40 Best Carrot Recipes
- Garlic and Herb Roasted Carrots
- Roasted Carrots
- Maple Roasted Carrots with Yogurt Sauce
- Honey Roasted Carrots
- Carrot Pumpkin Soup
Tried this recipe?
I'd love to hear what you think! Leave a comment and rating below to share your feedback. Your reviews help others discover this recipe and help me keep creating more free recipes for you. Snap a photo and tag me on social media @aheadofthyme too.

Leftover Stuffing Meatballs
Turn leftover stuffing from your Thanksgiving dinner into delicious, tender meatballs! These Leftover Stuffing Meatballs are a great way to add the flavors of Thanksgiving to your next meal, and they couldn't get much easier to make. Serve them with a little leftover gravy for a delicious, savory meal you'll want long after the holidays end.
We've all had that moment after the holidays as you're standing in front of an open fridge with mountains of leftovers stacked on top of each other. Instead of just eating the same Thanksgiving dinner over and over again, turn those leftovers into something new! These leftover turkey stuffing balls are absolutely delicious. The stuffing adds so much flavor and is a great replacement for bread crumbs. You might want to keep a box of stuffing mix on hand just to make these!
Why You'll Love These Leftover Stuffing Meatballs
- Use up those leftovers. Deal with your leftovers before they go bad with this easy meatball recipe. They have a subtle holiday flavor from the seasoned stuffing, but you can easily tweak the flavors to take them in a new direction. This is such a simple way to give those leftovers a new life!
- Lots of flavor. Since the stuffing is already seasoned, each of these Thanksgiving meatballs will be so flavorful. Add extra salt and pepper, as well as Italian seasoning and parmesan cheese, for a really robust flavor that tastes great with marinara sauce.
- Lovely, tender texture. Breadcrumbs add a tender texture and absorb excess moisture in your homemade meatballs. The stuffing will serve the same purpose here, making sure your meatballs are absolutely delicious every time.
Ingredient Notes
To make these delicious leftover stuffing meatballs, you will need the following ingredients (full measurements in recipe card below):
- stuffing - use any kind of leftover stuffing. Try leftover Homemade Stuffing, Cornbread Stuffing, or Cranberry Walnut Apple Stuffing. The storebought stuff works, too!
- milk - this will hydrate the meatballs to keep them from being too dry.
- ground beef - use fully thawed ground beef. Ground turkey is another great option!
- egg - this will bind the meatball mixture together so they don't fall apart.
- parmesan cheese - use freshly grated Parmesan cheese for a salty, umami flavor.
- Italian seasoning - these dried herbs shift the flavor of the meatballs to keep them from tasting too much like Thanksgiving dinner.
- salt and black pepper
You will also need a large bowl, spoon, baking sheet, and parchment paper or cooking spray.
.
How to Make the Best Leftover Stuffing Meatballs
- Soak stuffing. In a large mixing bowl, add stuffing and milk. Stir well to combine and let it sit for 10 minutes so the stuffing absorbs all the milk.
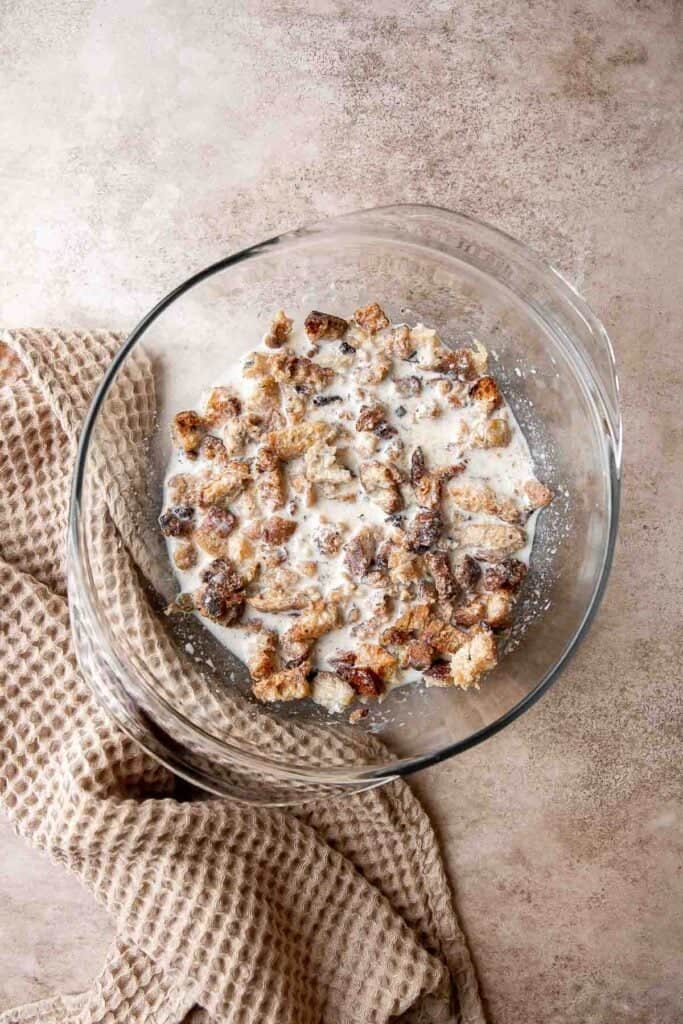
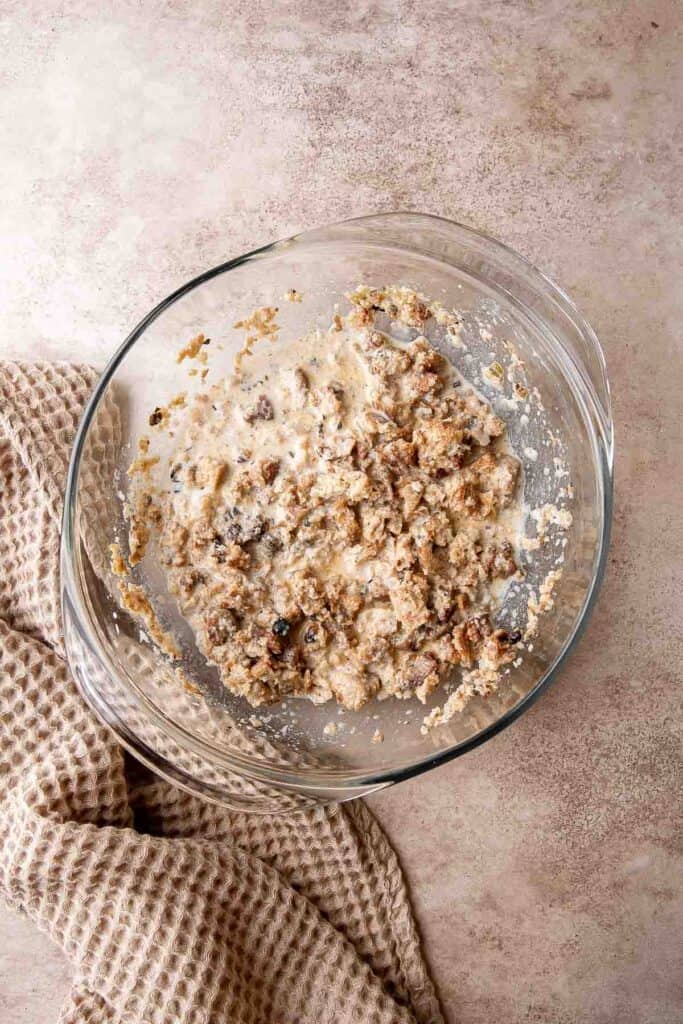
- Add remaining ingredients. Add beef, egg, parmesan cheese, Italian seasoning, salt, and pepper. Mix well until the mixture forms into a uniform consistency.
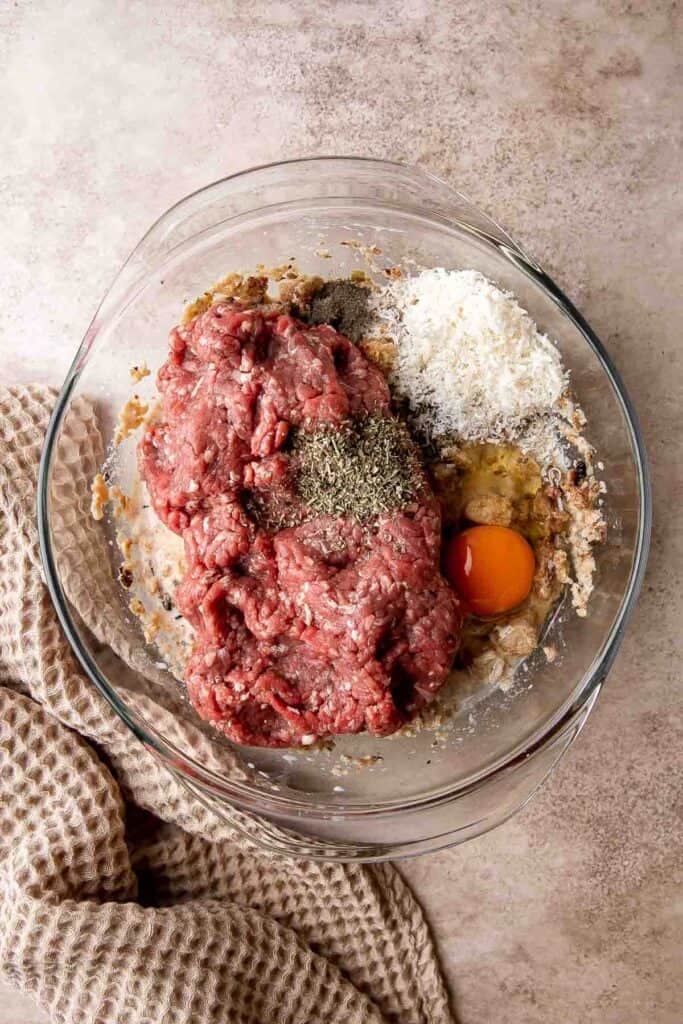
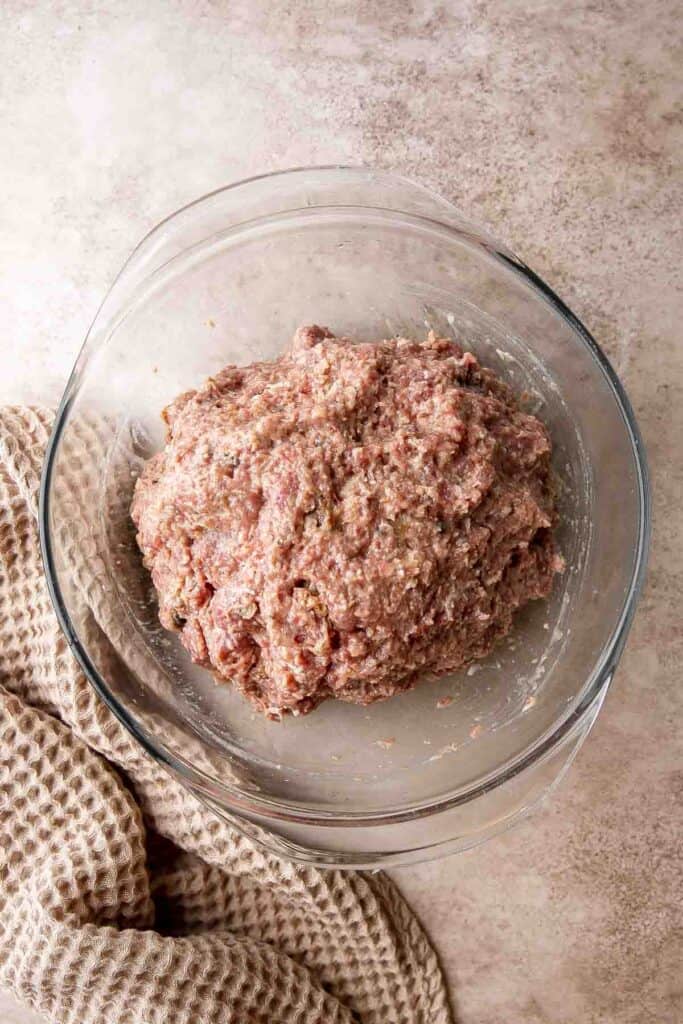
- Shape meatballs. Take 2 tablespoonfuls of the meat mixture at a time and roll them into meatballs. Wet your hands with water or oil to prevent sticking.
- Bake. Place the meatballs in a large parchment lined baking sheet and bake in a 400F preheated oven for 18-20 minutes until fully cooked through.
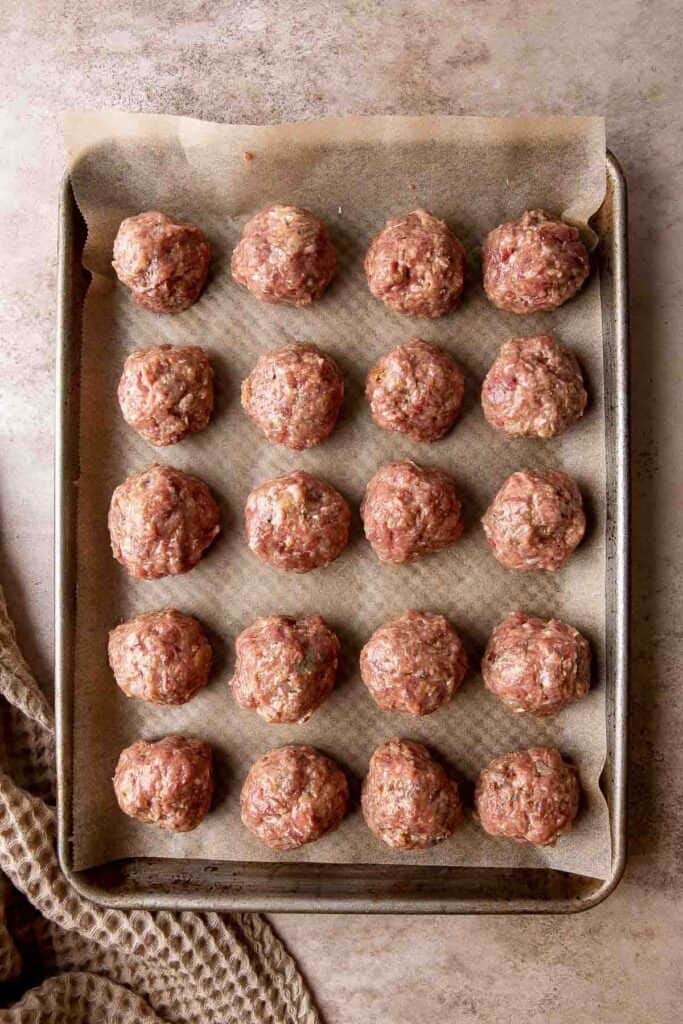
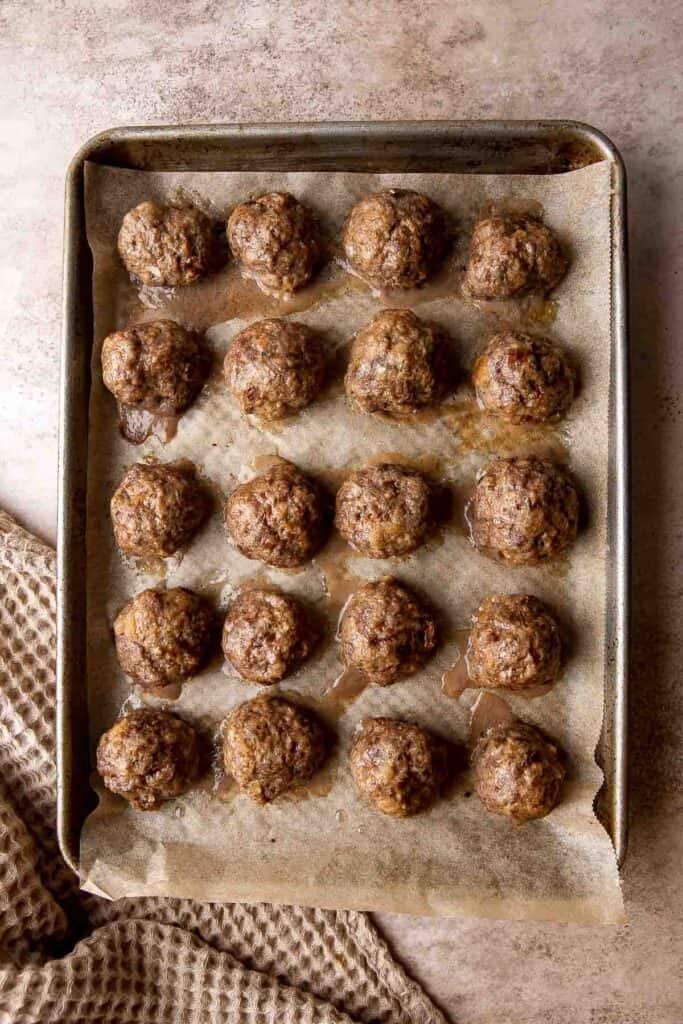
- Serve. Serve with a side of marinara sauce for dipping or over pasta.
How to Cook Stuffing Meatballs in the Air Fryer
Place the meatballs in a single layer in the air fryer basket (you may need to cook in batches). Air fry at 350F for 15 minutes until fully cooked through. The internal temperature should be at least 160F as read on an instant read thermometer.
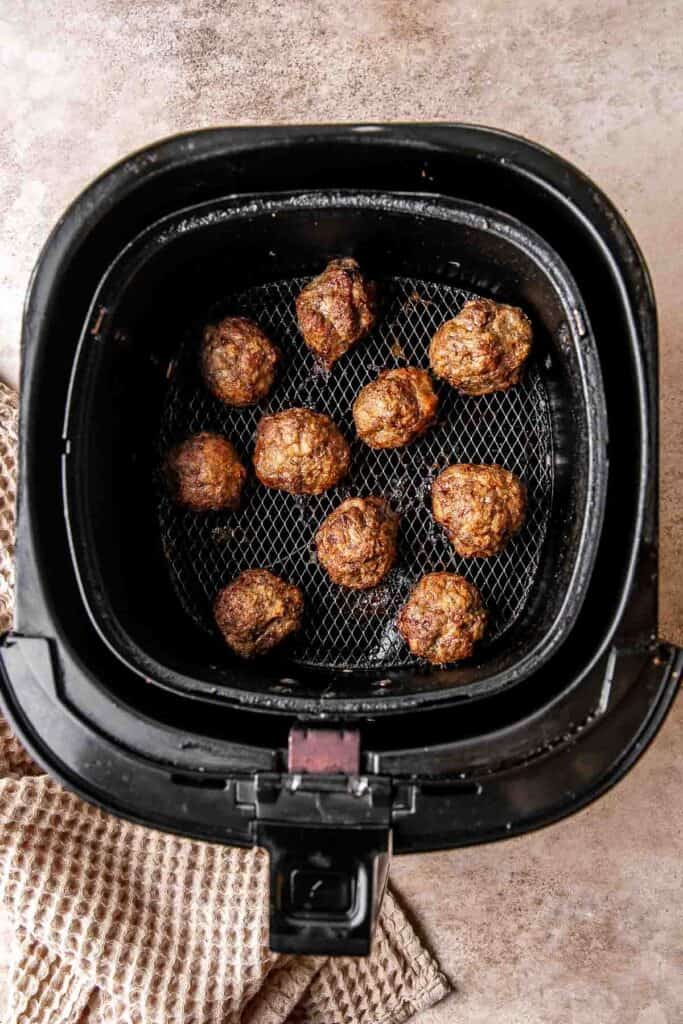

Recipe Variations
- Use different ground meat. Use ground turkey for turkey meatballs that taste just like your holiday dinner. Ground chicken or pork works great, too.
- Use cornbread stuffing. We love cornbread stuffing, and it works great in these Thanksgiving balls! Pretty much any type of stuffing can be used, although stuffing with apples or other fruits will change the overall flavor profile.
- Air fryer leftover Thanksgiving stuffing meatballs. Instead of baking these meatballs in the oven, bake a smaller batch in the air fryer. See the instructions above.
How to Serve
These leftover stuffing meatballs are delicious served on its own as an appetizer with a toothpick. Some other ways to serve these meatballs are:
- with a side of Marinara Sauce for dipping
- tossed in leftover Turkey Gravy
- tossed in leftover Cranberry Sauce (see our Cranberry Meatballs)
- serve in Marinara Sauce over a bed of spaghetti or Leftover Mashed Potato Gnocchi (see our Italian Meatballs)
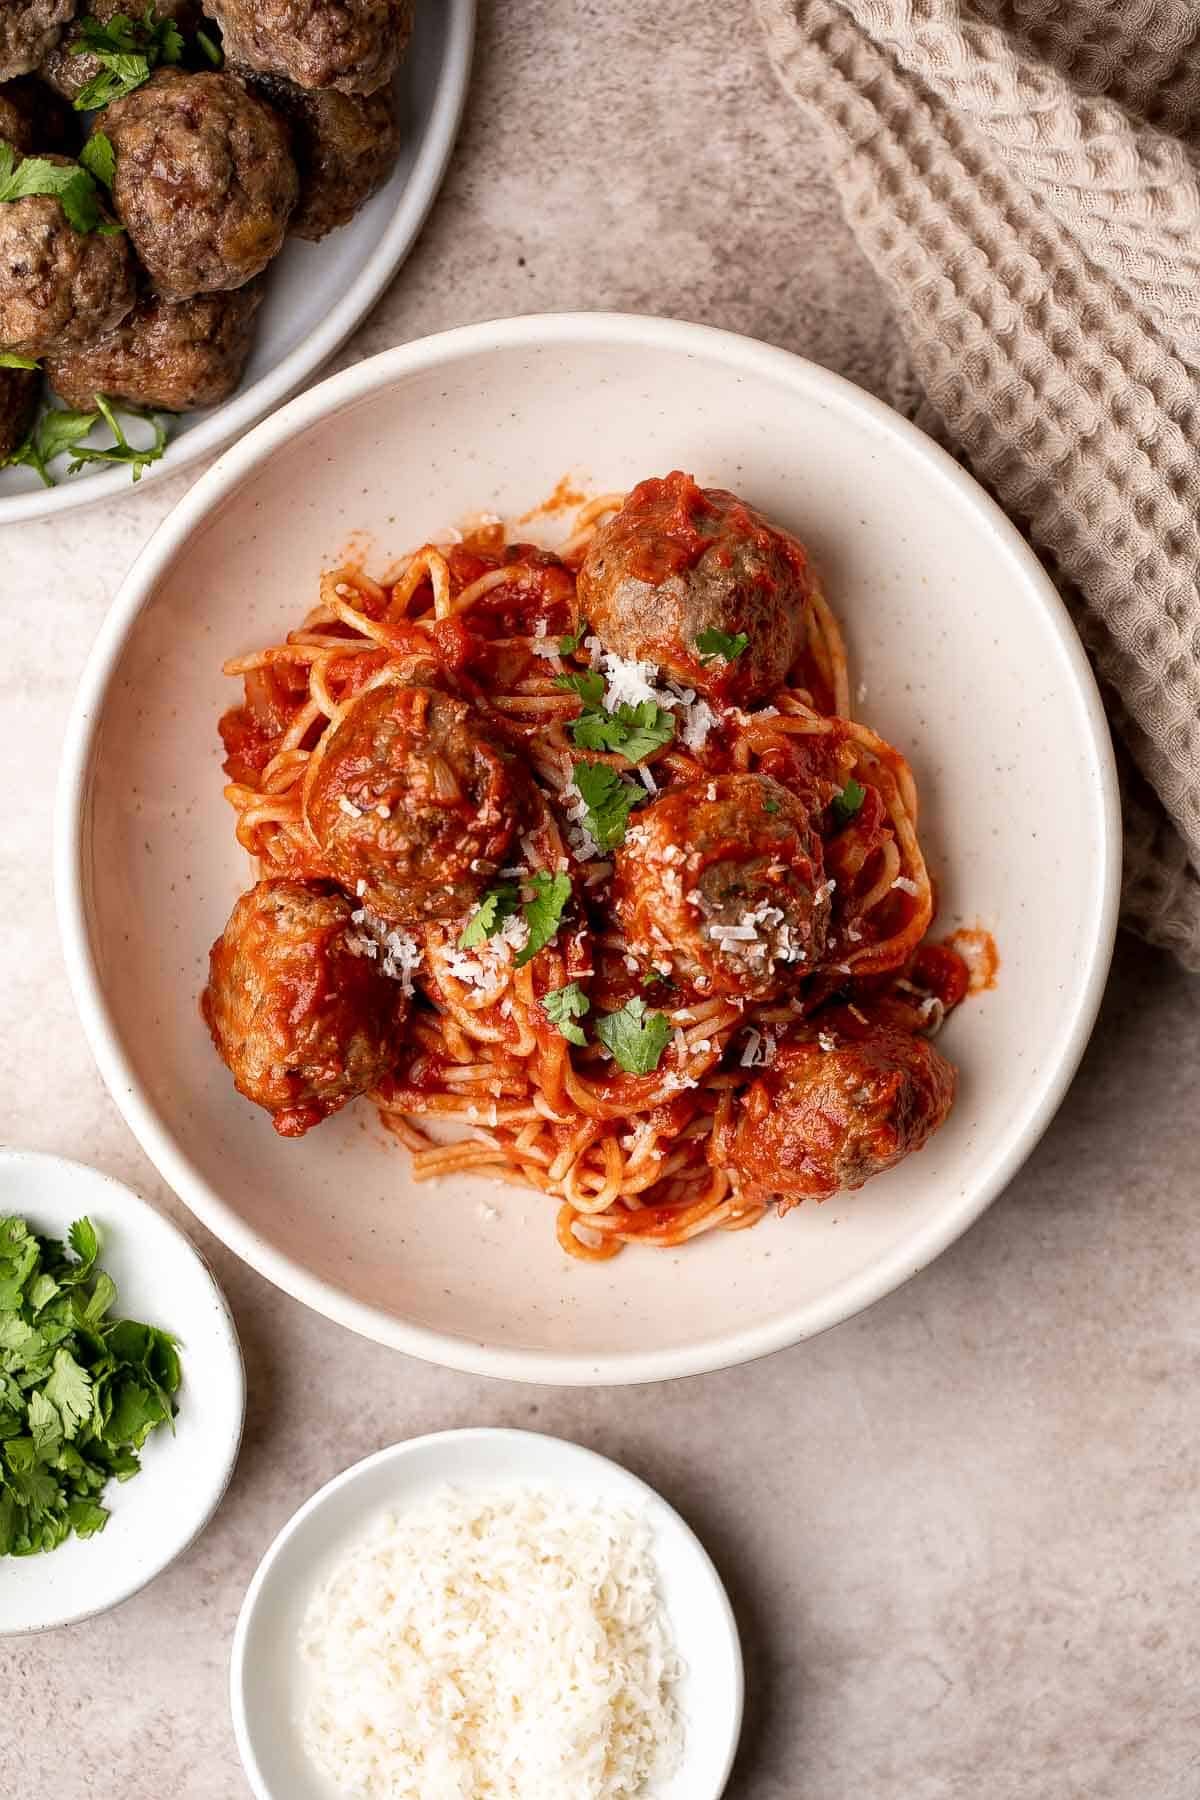
Recipe Tips and Tricks
- Don't overmix. To prevent tough meatballs, combine the meatball mixture just enough to bring it together.
- Adjust the size. You can make meatballs of any size. Just be sure to adjust the baking time to ensure they're fully cooked.
- Adjust the flavors. If you want Thanksgiving meatballs that have lots of holiday flavors, replace the Italian seasoning with more dried or fresh herbs, like sage, parsley, and thyme. You can even add dried cranberries and some chopped nuts!
- Use chicken broth. For really moist meatballs, bake the meatballs in a baking dish and add a thin layer of chicken broth.
Storing and Freezing Instructions
How to Store
Store leftover meatballs in an airtight container in the fridge for 3-4 days.
How to Reheat
Reheat leftover meatballs in a 350F preheated oven or in the microwave until warm. You can also saute them in a large skillet with your favorite sauce or leftover gravy.
How to Freeze
Cooked meatballs can be frozen in a freezer safe container for 2-3 months. Thaw frozen meatballs in the fridge for several hours before reheating.
FAQ
Yes, absolutely! Cooked stuffing will last for about 3-4 days in the fridge in an airtight container. Be sure to refrigerate it within two hours of cooking to avoid growing unsafe bacteria.
The best part about leftovers is that the flavors are typically stronger the next day! As the stuffing sits in the fridge, all the seasonings and oils get a chance to settle in. That leftover stuffing may taste even better the next day than fresh from the oven!
Although you can brown meatballs in a large skillet before baking, it's really not necessary! They'll bake just fine on a prepared baking sheet in the oven, and you'll have one less pan to clean. Browned meatballs do have a nice texture on the outside, but it's not really worth the extra effort.
More Meatball Recipes
- 15 Best Meatball Recipes
- Cranberry Meatballs
- Easy Baked Meatballs
- Thai Turkey Meatballs in Coconut Curry
- Teriyaki Meatballs
- Italian Meatballs
Tried this recipe?
I'd love to hear what you think! Leave a comment and rating below to share your feedback. Your reviews help others discover this recipe and help me keep creating more free recipes for you. Snap a photo and tag me on social media @aheadofthyme too.
Sausage Stuffing
Easy Sausage Stuffing is a classic holiday side dish made with Italian sausage, bread cubes, and tons of fresh herbs. Each spoonful is flavorful, moist, and comforting - perfect for sharing with family and friends on Thanksgiving dinner or any other special occasion.
Sausage stuffing is a timeless recipe that's been passed down through generations. It's an all-time favorite for holiday meals as the perfect accompaniment to your Thanksgiving turkey or Christmas ham, but it's also a quick and delicious side dish for any time of year. It only takes 20 minutes to prepare, and the rest of the cooking time is done in the oven, completely hands-off. You can even prep it a day or two before for stress-free holiday entertaining.
Why You'll Love this Sausage Stuffing Recipe
- Classic flavor. Out of all the stuffing recipes out there, this sausage stuffing is one of the most beloved with its classic flavor profile. The ingredients work so well together to create a familiar and nostalgic taste that everyone loves. You can never go wrong with this recipe!
- Filling and comforting. There's something about the combination of Italian sausage, bread cubes, sautéed vegetables, and aromatic herbs that just screams comfort food. The bread cubes soak up the delicious flavor of the sausage, while the veggies and herbs add a touch of freshness that brings the whole dish together.
- Meal-prep ready. This sausage stuffing is one of the easiest recipes you can whip up for any gathering, and it only takes 20 minutes to prepare and an hour to bake. It can be prepped in advance for your big dinner or when you want to have leftovers for the week - just double or triple the recipe, store in smaller portions, and pop in the oven for a quick, comforting meal.
- Great for any occasion. Whether you're serving it as a side dish during Thanksgiving or as a main course on a cozy family dinner, this sausage stuffing is nothing short of delicious. It goes well with all kinds of entrées, from Roasted Turkey Breast and Roast Beef to Holiday Glazed Baked Ham and Chicken Milanese.
Ingredient Notes
To make this delicious Sausage Stuffing, you will need the following ingredients (full measurements in recipe card below):
- dried bread cubes - you can use store-bought to lessen prep time, but if you're making your own, you can use Italian bread, French bread, or sourdough. Make sure to bake them in the oven until they're completely dry and crispy.
- butter - use unsalted for better flavor control.
- yellow onion - I usually use yellow onion, but you can opt for white.
- garlic - fresh is always better. You can also use ¾ teaspoon garlic powder if you don't have any fresh garlic on hand.
- celery - adds a slightly sweet herbal flavor and a nice color and texture.
- Italian sausage - use sweet or spicy, with casings removed. Feel free to use chicken sausage or pork.
- fresh herbs - use finely chopped herbs like thyme, rosemary, and sage for a fresh, complex flavor.
- chicken broth - you can also use vegetable stock.
- egg - holds up the stuffing and keeps it moist.
- salt and pepper
You will also need measuring cups and spoons, large skillet, large mixing bowl, and a 9x13-inch casserole dish.
How to Make the Best Sausage Stuffing
- Sauté aromatics. Melt butter in a large skillet over medium-high heat for 2 minutes. Add onion, garlic, and celery and sauté until tender, about 3-4 minutes. Set aside.
- Cook sausage. In the same skillet, add sausages and cook for 8-10 minutes until browned on all sides and cooked through. Break the sausages into small pieces using a spatula.
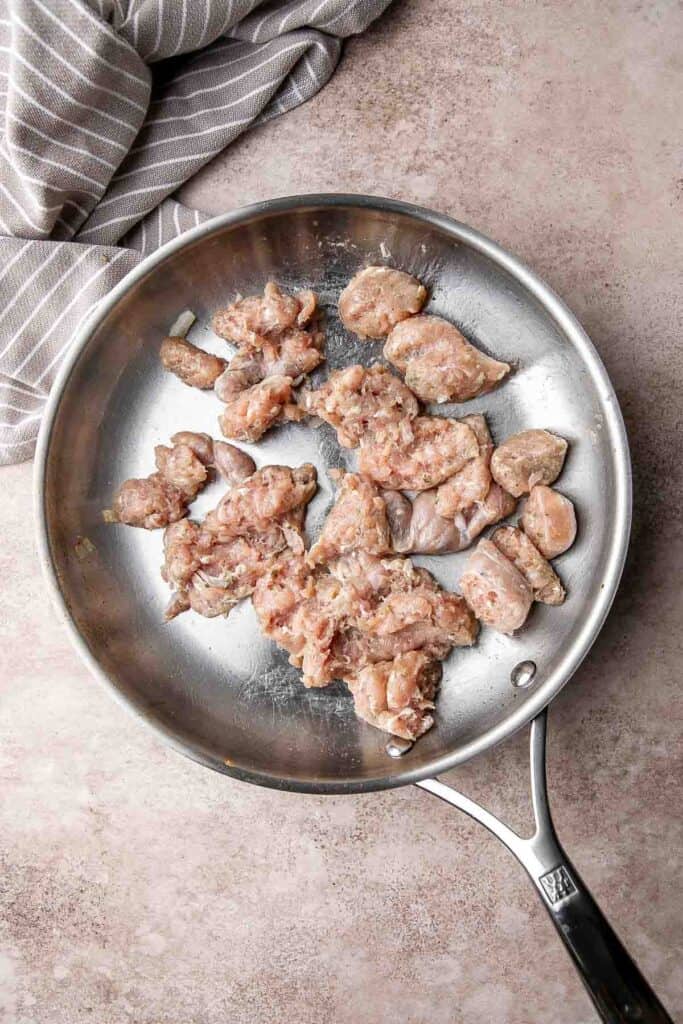
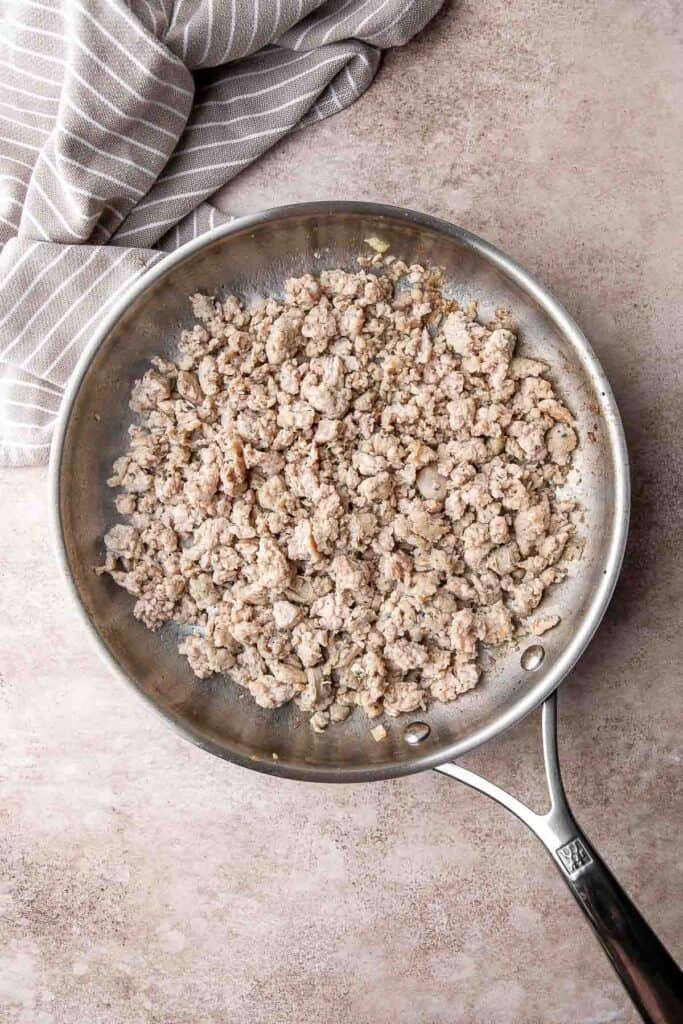
- Combine. In a large mixing bowl, add stuffing cubes, veggie mixture, and cooked sausage. Add thyme, rosemary, sage, chicken broth, egg, salt, and pepper to the bowl and toss well until evenly combined.

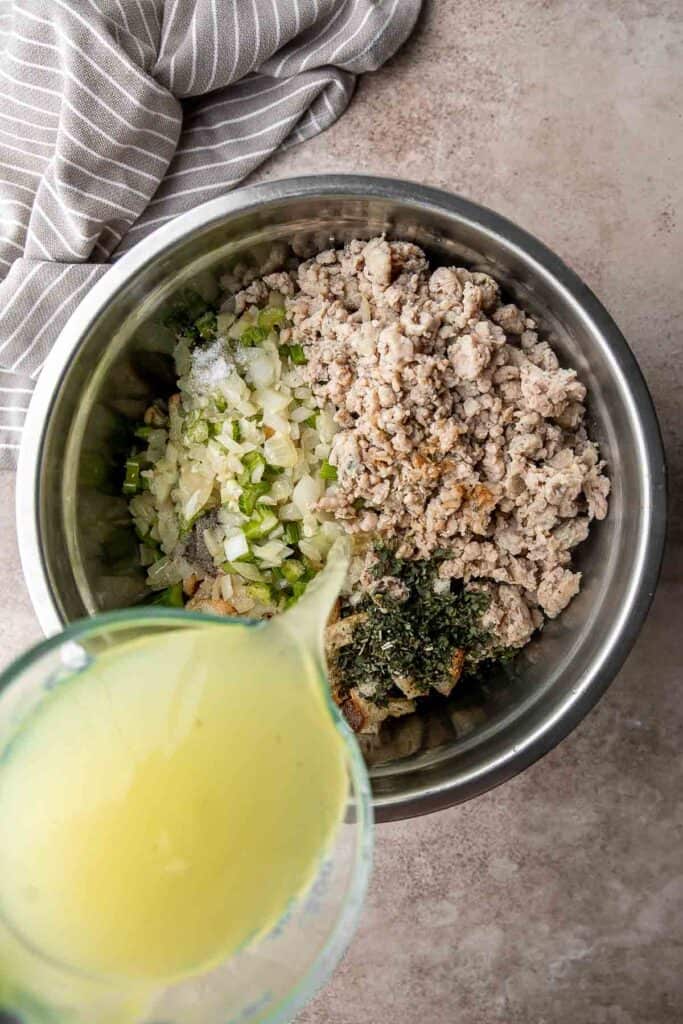
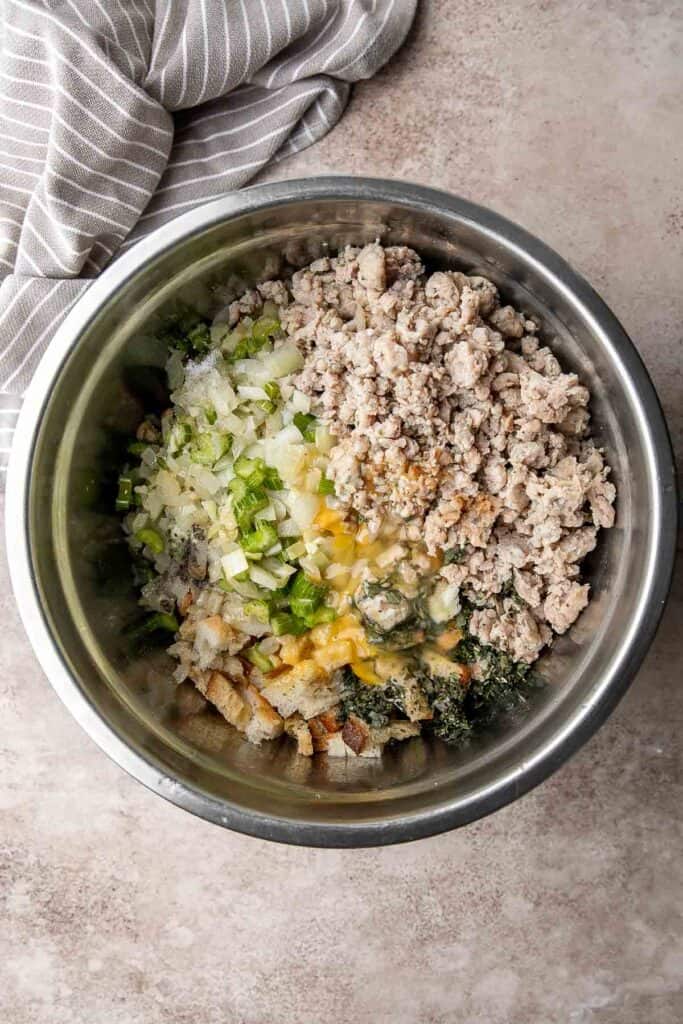

- Bake. Transfer the stuffing mixture into a 9x13-inch casserole dish and bake in a 350F preheated oven for 40-50 minutes until the top turns golden brown and crisp. Serve warm.
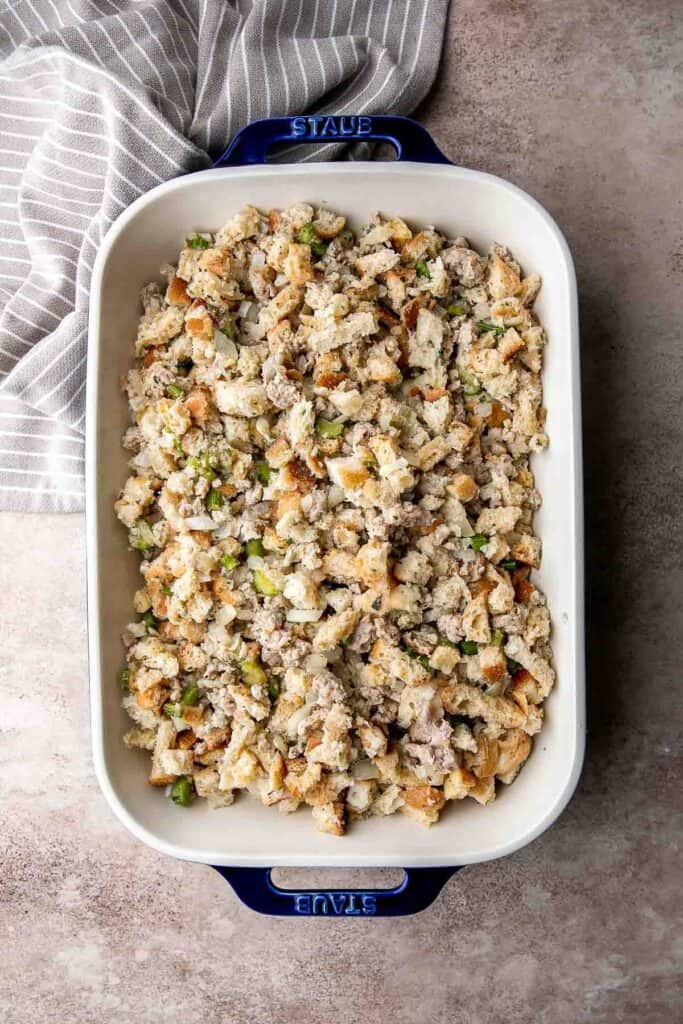
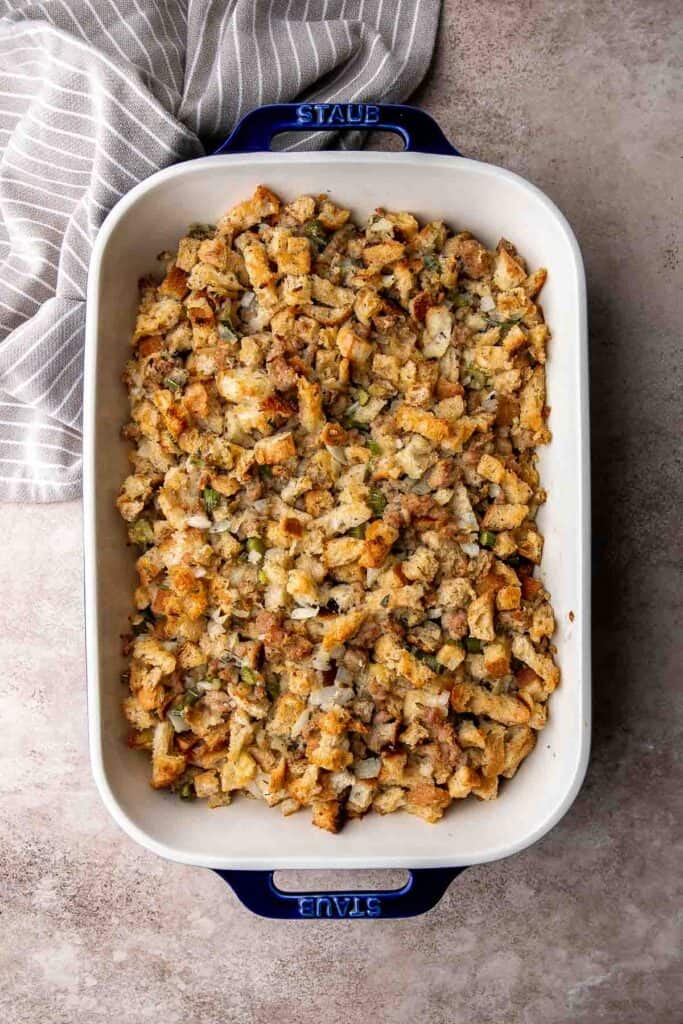
Recipe Variations
- Use plain sausage. While I prefer Italian sausage, you can also use plain chicken, pork, beef, or even turkey sausages. Just make sure to add some extra herbs and spices for more flavor.
- Add nuts or dried fruits. Try adding walnuts, pecans, cranberries, raisins, or even apricots for extra texture and flavor.
- Go vegetarian. Make a delicious stuffing even without the meat. Just use vegetarian sausage, mushrooms, nuts, dried fruits, and vegetable broth.
- Make it cheesy. Sprinkle some shredded cheddar or mozzarella cheese on top before baking. Make sure to cover the baking dish with aluminum foil to prevent burning.
How to Serve
Serve this delicious Sausage Stuffing on its own for a quick, hearty meal or with classic Thanksgiving dishes like:
- Easy Juicy Roasted Turkey Breast
- Easy 2-Ingredient Turkey Gravy
- The Best and Creamiest Mashed Potatoes
- Easy Make-Ahead Cranberry Sauce
- Green Bean Casserole
- Sautéed Garlic Mushrooms
Check out our Easy Thanksgiving Menu for more holiday recipes.

Recipe Tips and Tricks
- Choose the right sausage. Opt for a mild or sweet Italian sausage to keep the flavors balanced and subtle. You can also use a hot variety for an extra kick of flavor.
- Use store-bought cubes. If you don't have time to dry out your bread, look for unseasoned stuffing cubes in the grocery store.
- Use different types of bread. If you're making stuffing cubes from scratch, mix and match different types of bread for tons of wonderful textures in your stuffing. Try cubing baguette, sourdough, French bread, or even plain white bread.
Storing and Freezing Instructions
How to Store
Store the sausage stuffing in an airtight container and refrigerate for up to 4 days.
How to Reheat
Reheat in an oven or air fryer at 350°F for 4-5 minutes, or until warm. You can also pop it in the microwave for 30 seconds to 1 minute.
How to Freeze
You can store leftover stuffing in a freezer bag or freezer-safe container in the freezer for up to 3 months. Defrost overnight in the refrigerator and reheat in the oven until warmed through.
More Stuffing Recipes
- 50 Best Thanksgiving Side Dishes
- Homemade Stuffing
- Vegetarian Cornbread Stuffing
- Cranberry Walnut Apple Stuffing
- Roast Stuffed Chicken
Tried this recipe?
I'd love to hear what you think! Leave a comment and rating below to share your feedback. Your reviews help others discover this recipe and help me keep creating more free recipes for you. Snap a photo and tag me on social media @aheadofthyme too.
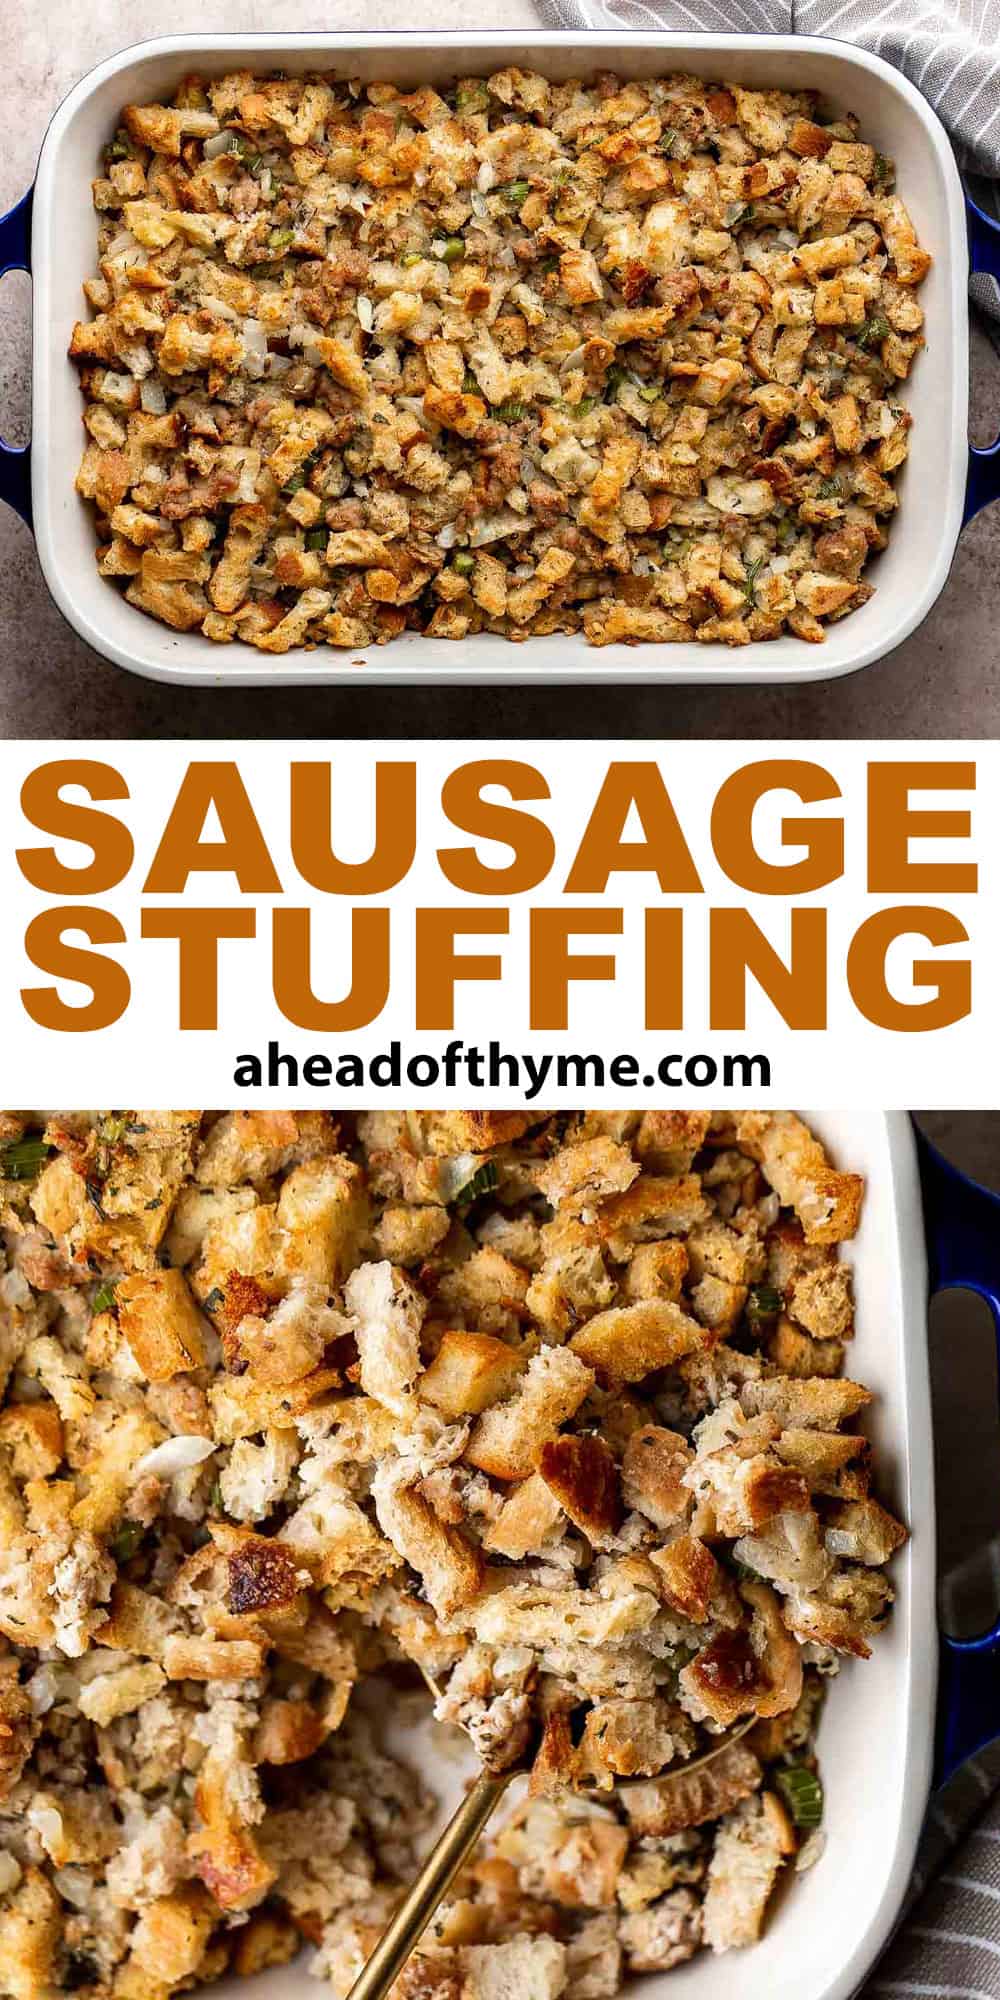
Potato Leek Soup
The traditional Potato Leek Soup recipe is a classic for good reason. The mellow, earthy onion flavor from the leeks pairs perfectly with hearty potatoes and fresh thyme. Blend it all together with heavy cream and top it off with fresh chives for a rich, satisfying potato soup that will stick to your ribs and warm you up from the inside out.
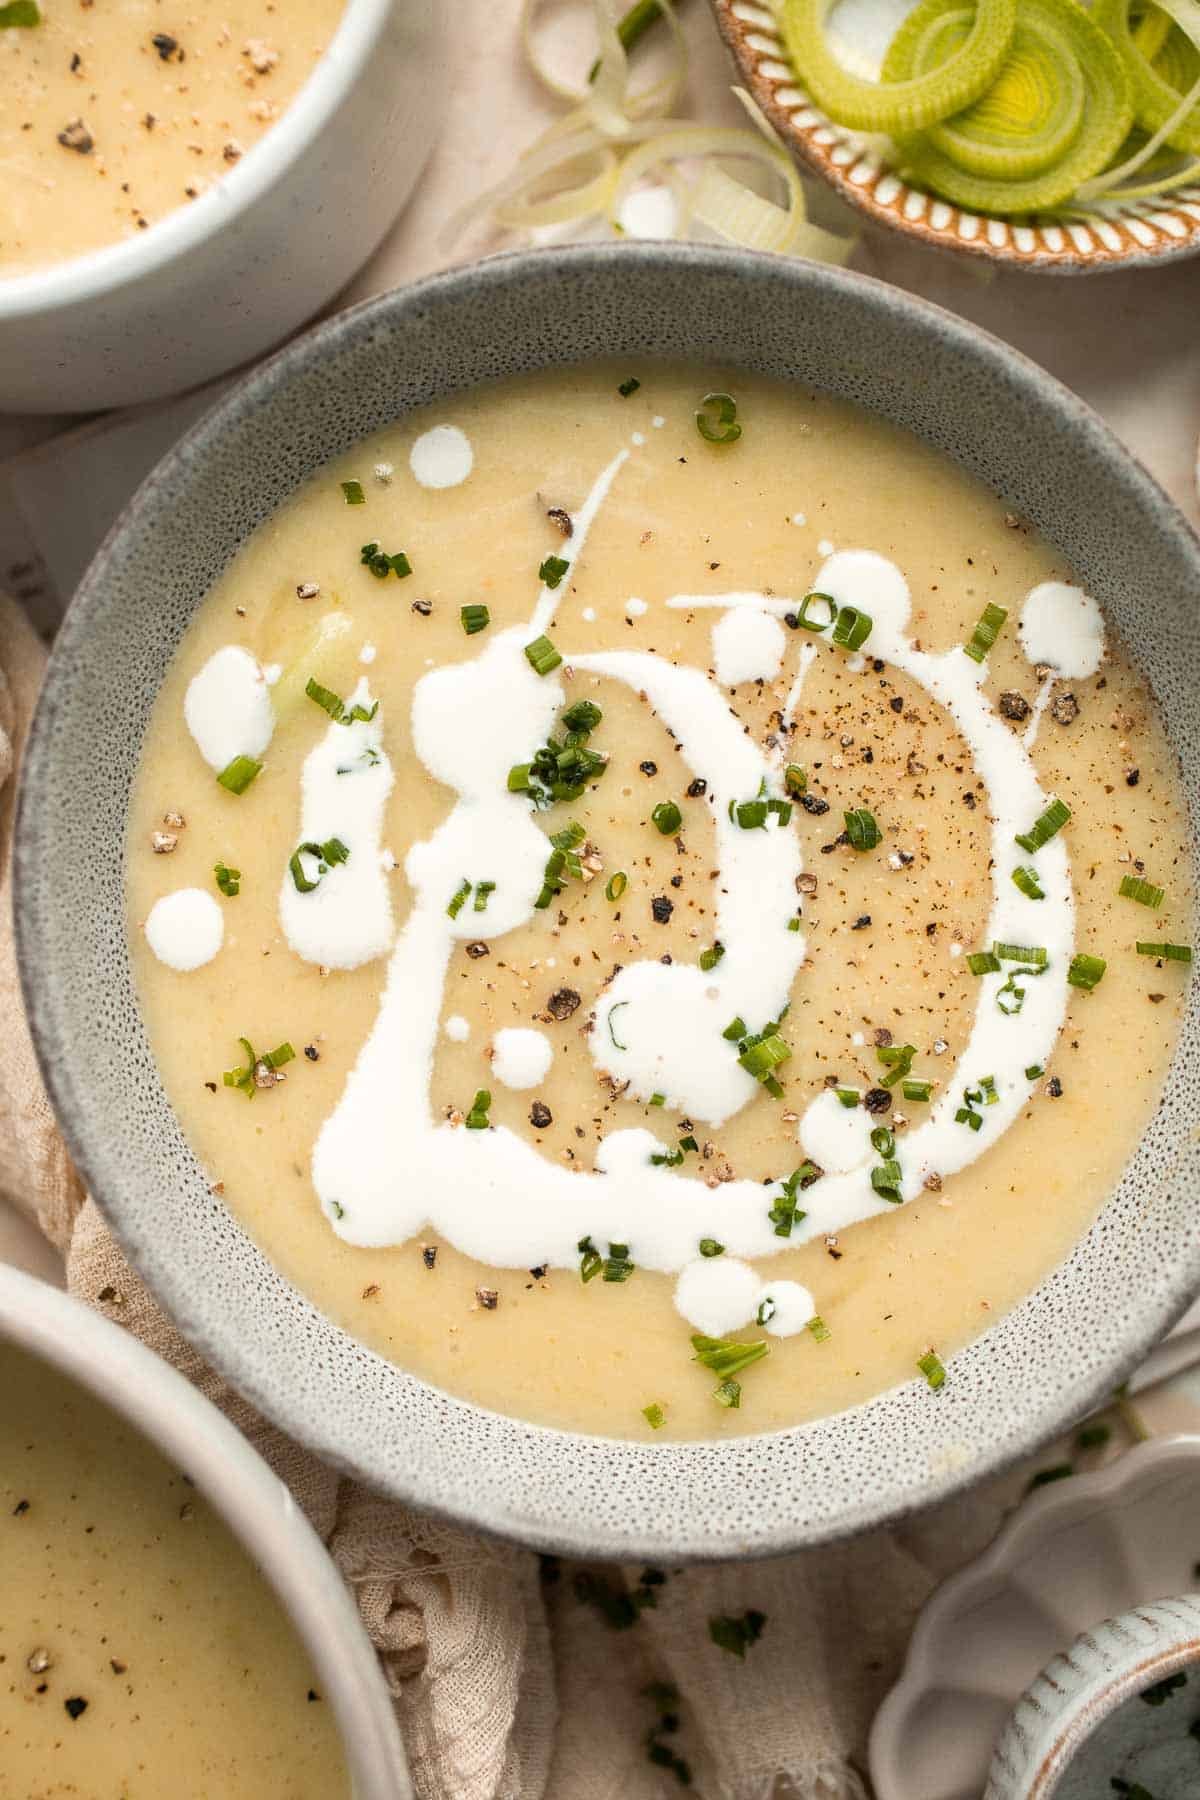
This creamy potato leek soup is such a comforting soup and couldn't get much easier to make. After sauteing the leeks in butter, they soften up and add a delicious oniony flavor that infuses the broth with flavor. The best part has to be the potatoes, which add a satisfying creamy texture that makes you want to take bite after bite. It's ready in just 30 minutes, making it an ideal lunch or dinner for those chilly days - and is just perfect with a hunk of crusty bread or a nice dinner roll.
Why You'll Love This Potato Leek Soup
- So easy to make. Got half an hour? This is one of those recipes that is so much easier than it seems! You only have two vegetables to clean and prepare. The rest comes together in the pot, making it a true one-pot supper, as well.
- Traditional recipe. Potato and leek soup is a soup popular across Europe during times of cold weather, which is when leeks are traditionally harvested. There are many ways to prepare this basic soup, but this traditional version follows the footsteps of the past with simple ingredients like chicken broth, heavy cream, and fresh herbs.
- So filling. Potatoes are incredibly satisfying and filling, so one bowl of this easy potato leek soup will hold you over for hours! It's great for an easy hot lunch or a light dinner.
Ingredient Notes
To make this delicious potato leek soup, you will need the following ingredients (full measurements in recipe card below):
- butter - let the hot butter soften and tenderize the leeks, drawing out their flavors. Olive oil works well, too.
- leeks - finely chop fresh leeks into consistent pieces. Remove the dark green parts and just use the light green and white parts for this simple potato leek soup.
- vegetable broth - use either chicken or vegetable stock for a mild, neutral flavor that lets the leek flavor shine.
- potatoes - starchy varieties, like Yukon golds or Russet potatoes, are best. Peel and cut them into ½ inch pieces
- heavy cream - add cream after pureeing the soup for a smooth, creamy texture.
- salt - potatoes are notorious for needing a lot of salt. Taste the soup often and season to taste.
- black pepper
- thyme - add finely chopped fresh thyme with the potatoes to allow the flavors to season the whole dish.
- fresh chives - reserve fresh chives or green onions for serving - this is totally optional though.
You will also need a large pot, immersion blender, and wooden spoon.
How to Make the Best Potato Leek Soup
- Sauté aromatics. Melt butter in a large pot or 4 quart Dutch oven over medium-high heat and melt until it starts to bubble, about 1 minute. Add leeks and sauté until fragrant and golden brown, about 5 minutes.
- Add more ingredients. Add broth, potatoes, and thyme.
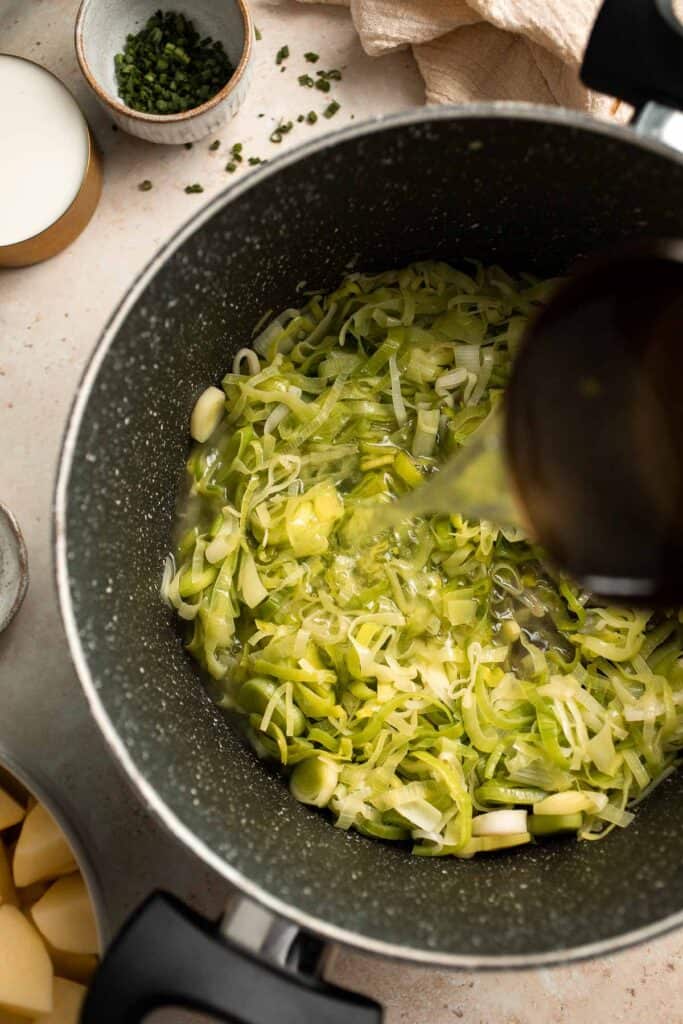
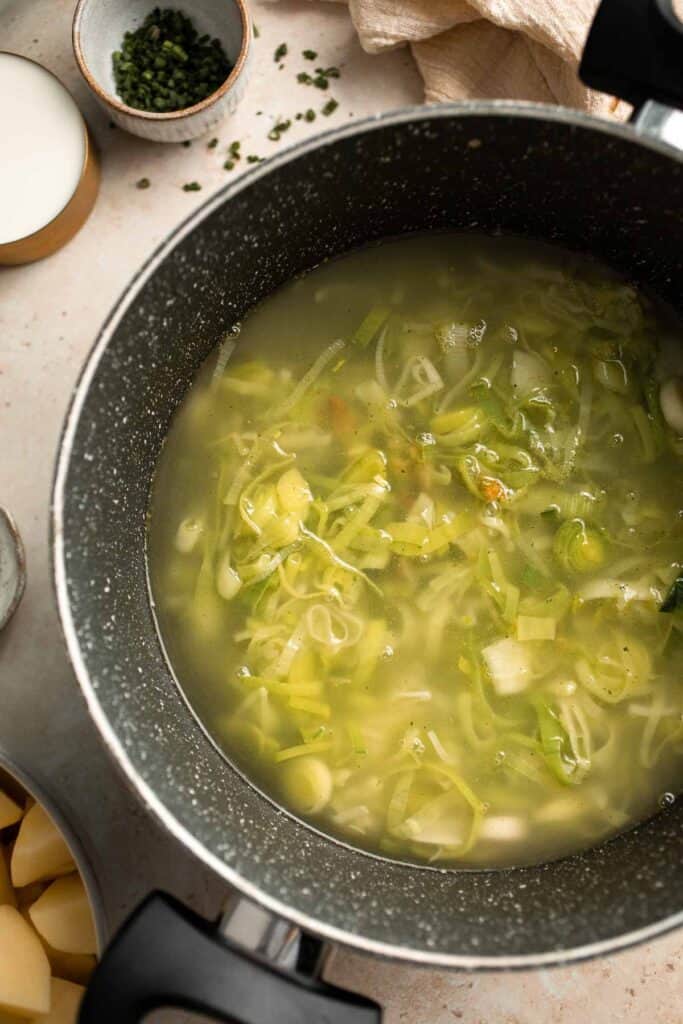
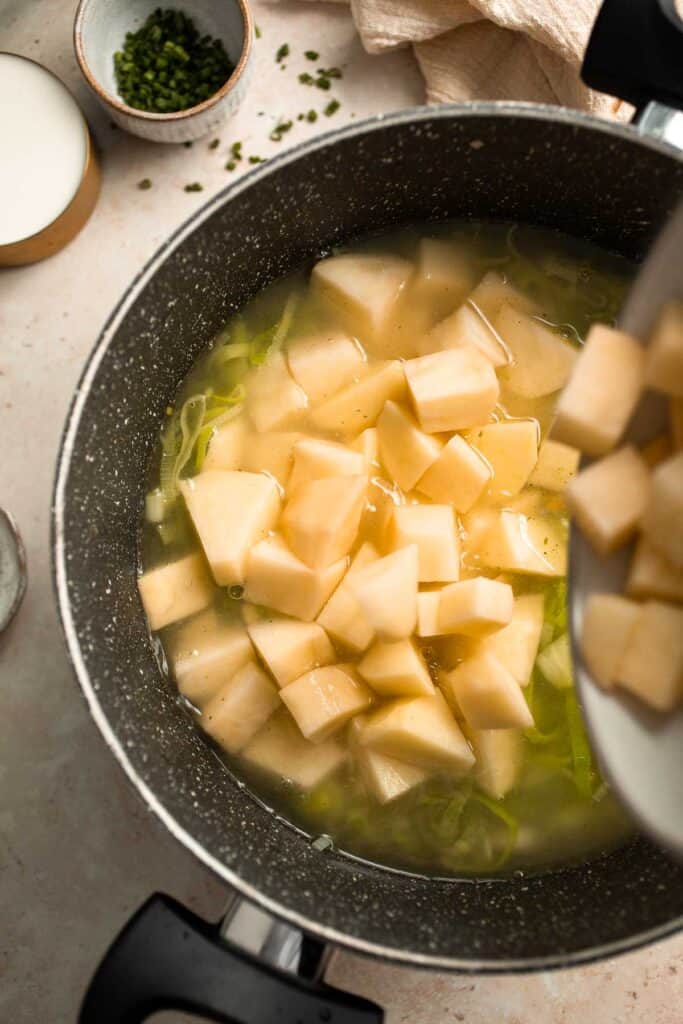
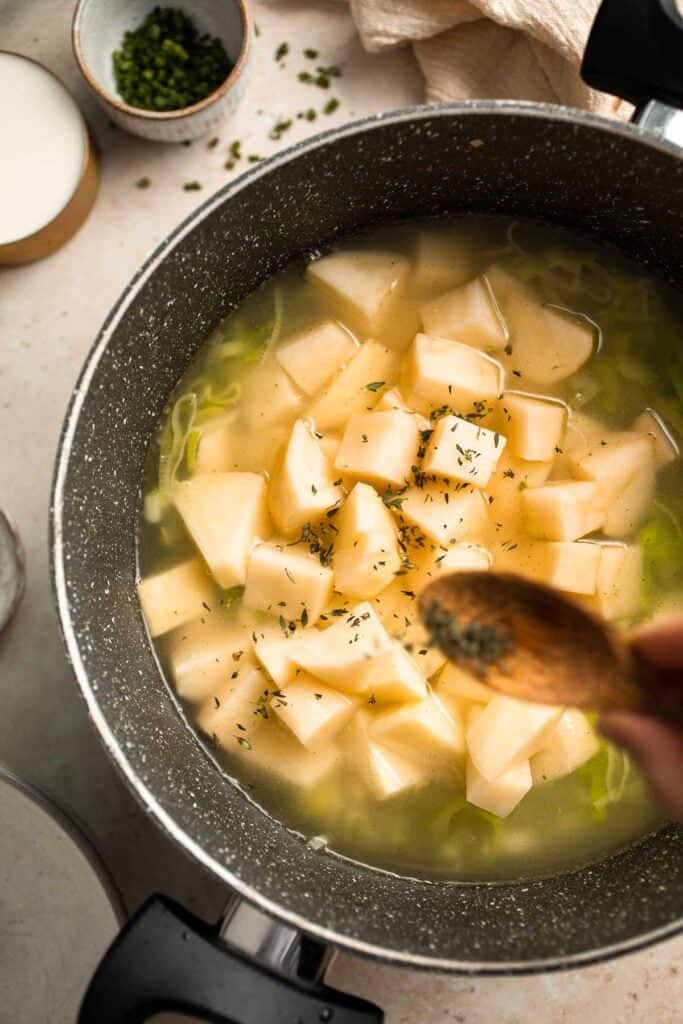
- Boil. Bring the soup to a boil. Cover and boil for 10-15 minutes until potatoes are fork tender (if you can easily insert a fork into the potatoes, then it is fork tender).
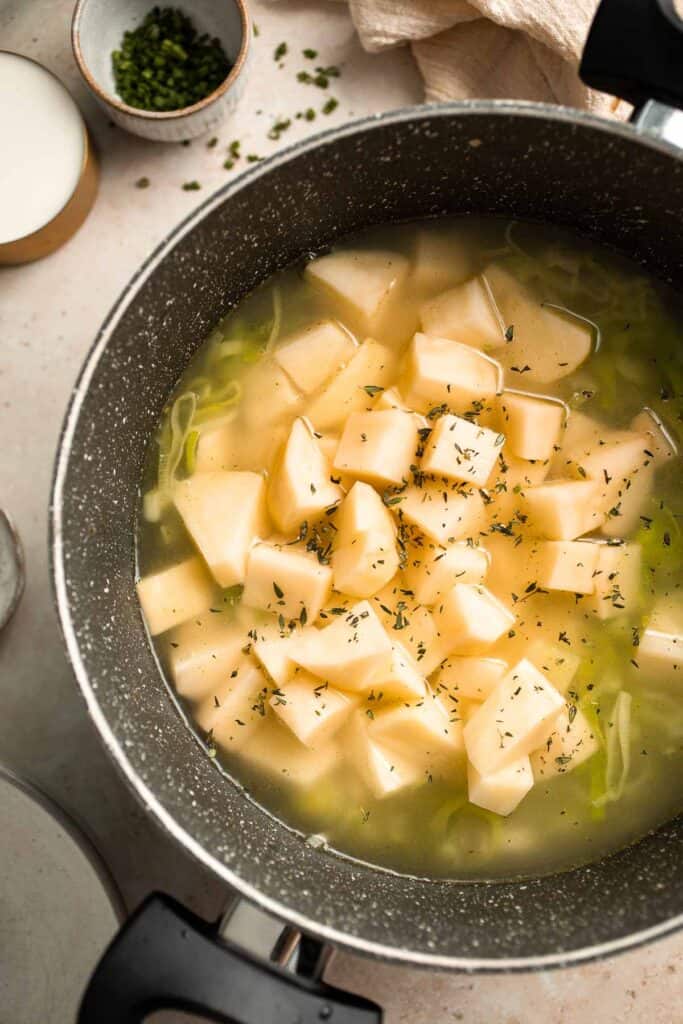
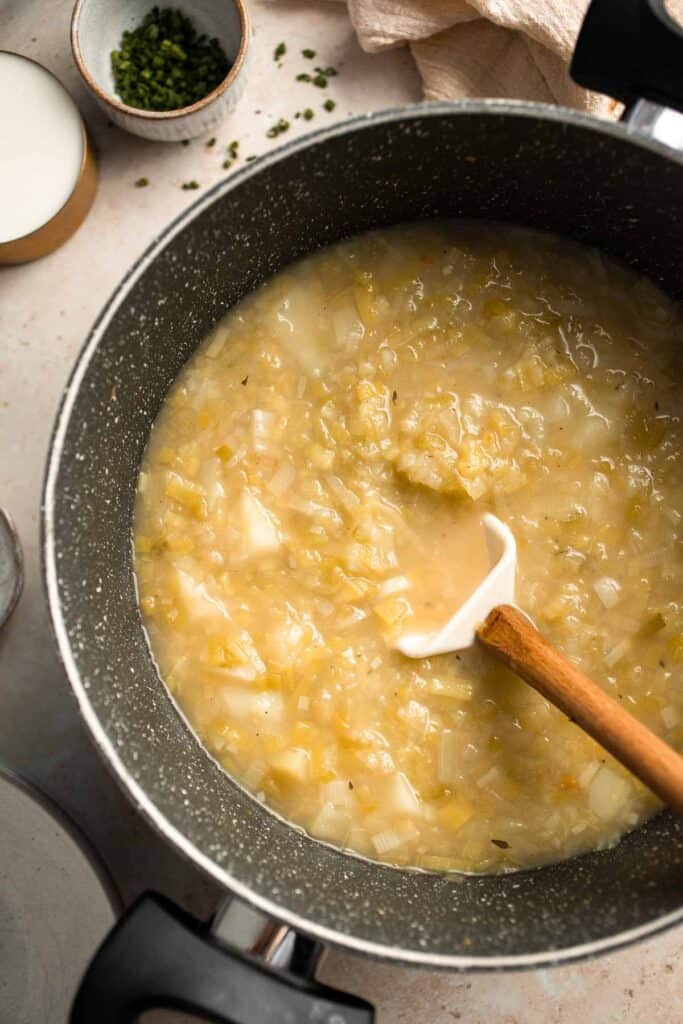
- Puree. Use a handheld immersion blender to puree the soup until smooth.
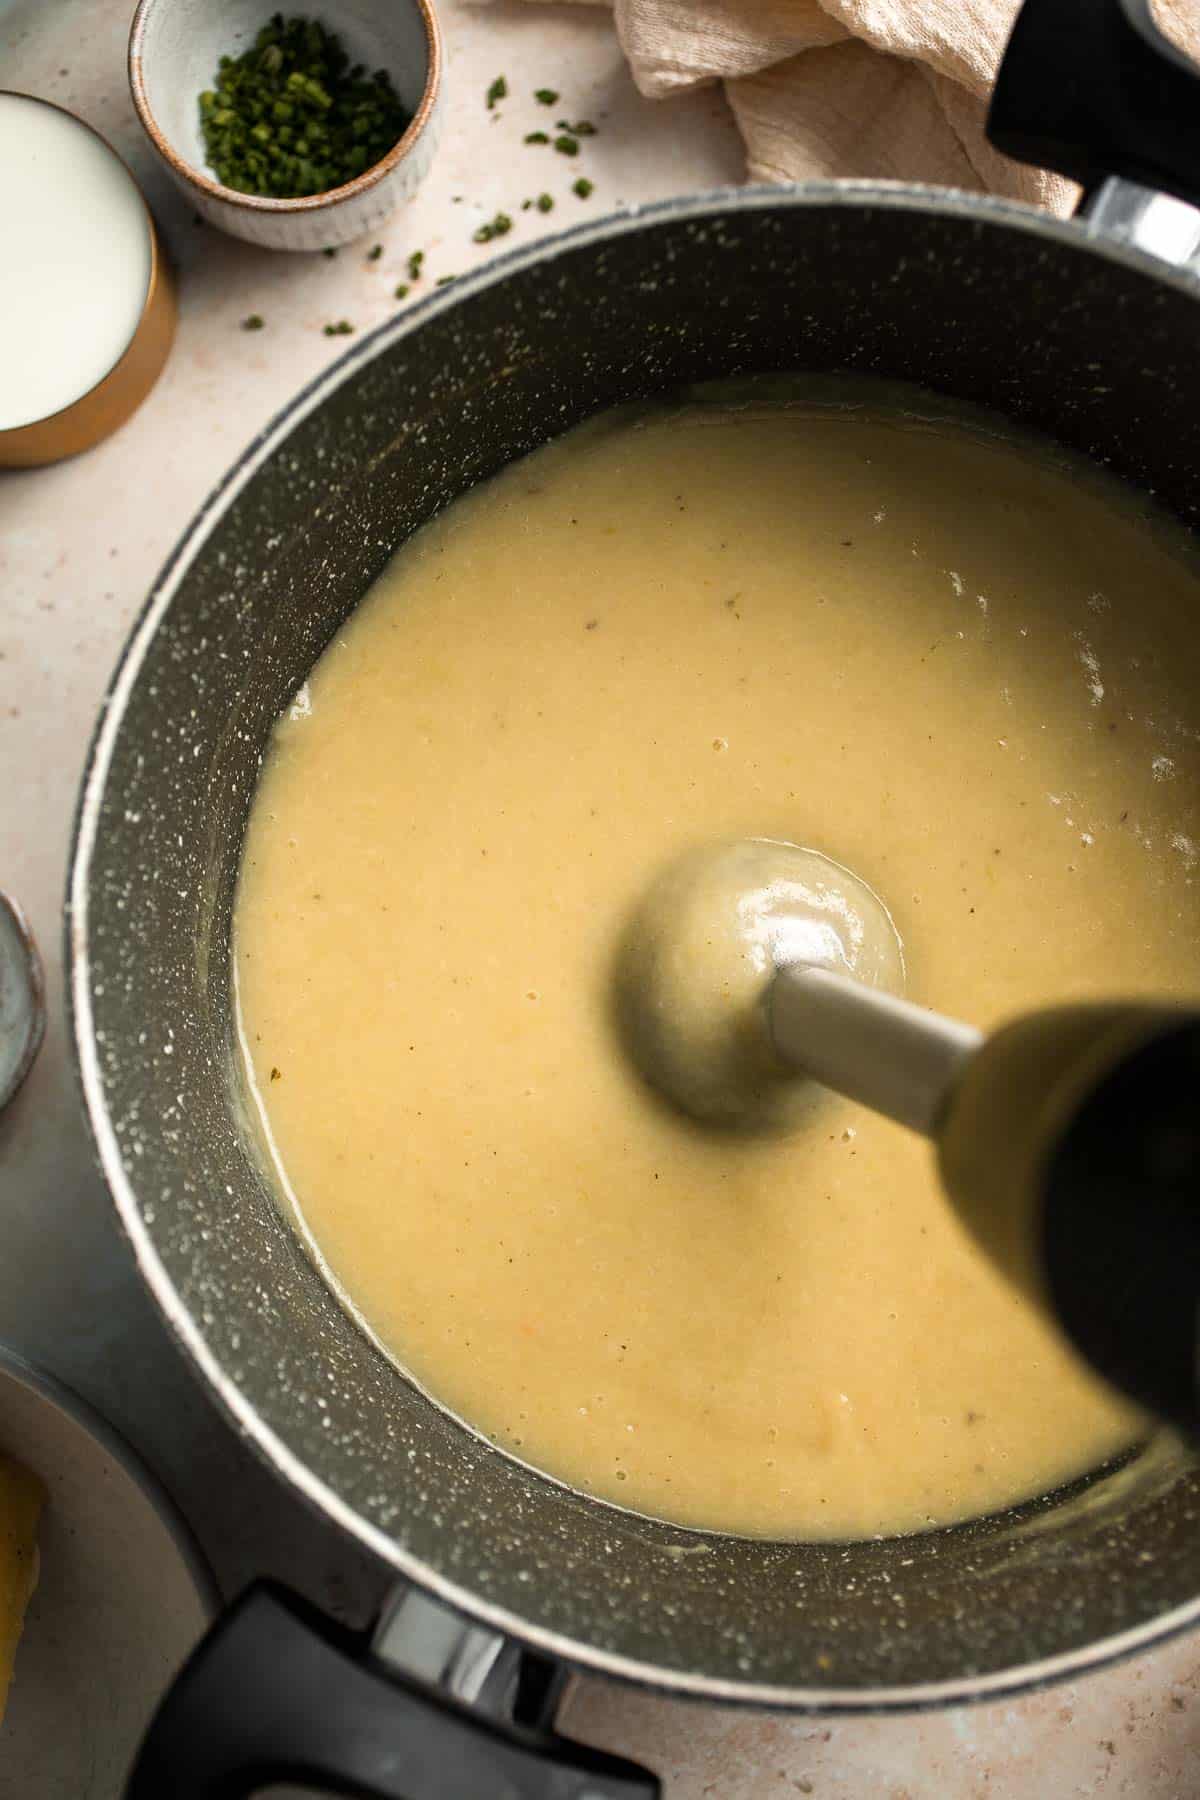
- Add cream. Stir in heavy cream and season with salt and pepper to taste.
- Serve. Sprinkle with chives and serve warm.
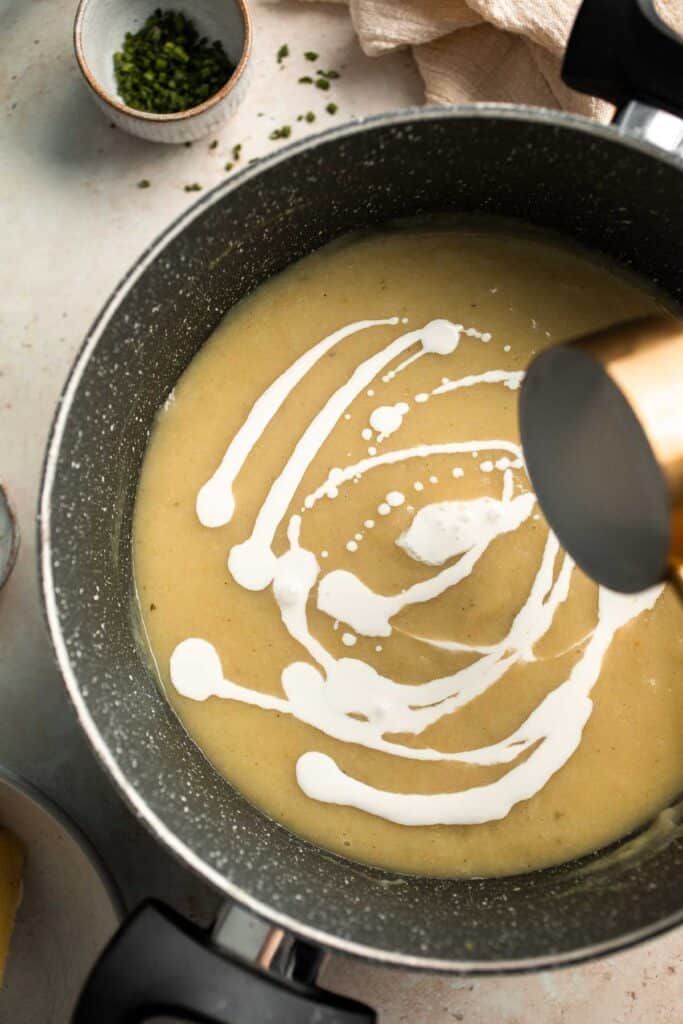
Recipe Variations
- Creamy vegan potato leek soup. Use vegetable broth and coconut milk or cream for a plant-based soup.
- Instant Pot potato leek soup. Follow the same steps for this recipe, but start by sauteeing the leeks in your instant pot (pressure cooker) using the saute function. Add the potatoes and broth, then set the soup to high pressure for 7 minutes. Allow it to release pressure naturally for 5-10 minutes before removing the lid and then pureeing.
- Add bacon. For a really savory flavor, either saute finely diced bacon in the pan before adding the leeks or use bacon grease instead of butter. So delicious!
- Serve with extra toppings. Keep it super simple with fresh chives or add other toppings, like bacon bits, cheddar cheese, Greek yogurt or sour cream, fresh parsley, hot sauce, a splash of white wine vinegar, or freshly cracked black pepper.
How to Serve
This potato leek soup is delicious served on its own, or paired with some of my favorite recipes including:
- Grilled Cheese Roll Ups
- Dutch Oven Whole Roast Chicken
- Fall Harvest Salad with Butternut Squash and Apple
- Pumpkin Focaccia with Fresh Herbs
- Easy Roasted Brussels Sprouts
For more recipe inspiration, see our 25 Side Dishes for Soup.
Recipe Tips and Tricks
- Use what you have. Although an immersion blender is handy, you can also use a food processor, regular blender, or even a potato masher to break the potatoes down.
- Make homemade chicken stock. Turn your veggie scraps and leftover chicken bones into a nutritious, flavorful broth.
- Clean the leeks really well. Leeks tend to hold dirt between each of the layers, which is not ideal for your creamy soup. Be sure to wash them well, cut them into pieces, then rinse them again to make sure they are clean.
- Don't overblend. Starchy potatoes are fantastic in this easy soup recipe, but be careful not to overmix, or they can become gluey.
Storing and Freezing Instructions
How to Store
Store leftover soup in an airtight container or jar in the fridge for 3-4 days.
How to Reheat
Either microwave the leftover potato and leek soup for several minutes, stirring halfway, or warm it up in a small pan on the stove over medium heat until fully heated.
How to Freeze
Let the soup cool completely in the fridge, then store it in freezer-safe containers or freezer bag for several months.
FAQ
Potatoes are notorious for needing a lot of additional salt to give them any flavor at all. Be sure to taste your soup several times while you are cooking and continue adding salt until it tastes delicious.
If you use starchy potatoes like Russets or Yukon gold potatoes, you should not need to thicken this soup. The potatoes will give it a lovely thick texture on their own, and the heavy cream will add a rich creaminess. If you find your soup too thin, you likely have not mashed the potatoes yet. Give that a try and see if it helps. If needed, you can always whisk 1-2 teaspoon cornstarch in a bowl with a spoonful of hot broth and add the slurry to the pot.
Absolutely! Just like any homemade soup, you can easily reheat it later as long as it is properly stored. Leftover soup should be refrigerated within 2 hours of removing it from the heat, and the leftovers will last for approximately 3-4 days in the fridge. Be sure to heat it thoroughly in the microwave or on the stove before serving.
More Soup Recipes with Potatoes
- 60 Best Soup Recipes
- Mashed Potato Soup
- Chicken Potato Soup
- Creamy Ham and Potato Soup
- Cheesy Potato Soup
- Creamy Tomato Potato Soup
Tried this recipe?
I'd love to hear what you think! Leave a comment and rating below to share your feedback. Your reviews help others discover this recipe and help me keep creating more free recipes for you. Snap a photo and tag me on social media @aheadofthyme too.

Air Fryer Pizza Rolls
These homemade Air Fryer Pizza Rolls will immediately take you back in time. They're like a grown-up version of Totino's pizza rolls and are perfect to serve as an appetizer, snack, or even a quick main dish! There's no rolling or kneading required as they're made with store-bought wonton wrappers for a perfect crunch in every bite.

If you grew up in the 90s, you probably know and love frozen pizza rolls. These microwaveable creations turned into molten lava in the microwave, but they were worth it for the flavor-packed tomato and cheese pizza filling. These homemade pizza rolls will remind you of your favorite after-school snack, but since they're homemade, you get to choose the quality of the ingredients!
Why You'll Love This Air Fryer Pizza Rolls Recipe
- Nostalgic flavor. These easy pizza rolls from scratch taste like your childhood! Just take one bite into these crispy pizza rolls, and you'll see exactly what we mean.
- Easy to customize. Although we make these crispy air fryer pizza rolls with cheese and pepperoni, you can easily adjust the ingredients to use your favorite flavors. Make ham and pineapple, meat lovers with bacon, or veggie packed.
- Semi-homemade. These air-fried pizza rolls are made at home using whichever ingredients you have on hand. You can use organic cheese, homemade pizza sauce, or adjust the ingredients to suit your preferences. So convenient!

Ingredient Notes
To make these delicious air fryer pizza rolls, you will need the following ingredients (full measurements in recipe card below):
- pizza sauce - choose either pizza sauce or marinara sauce to fill the rolls. Set half to the side for dipping.
- seasonings - season the filling with garlic powder, Italian seasoning, salt, and black pepper.
- cheese - this pizza roll recipe calls for cheddar cheese, mozzarella cheese, and parmesan cheese for the perfect melt.
- mini pepperoni - use thin pepperoni slices or chop them into small pieces.
- wonton wrappers - these raw wrappers are available at your grocery store. They're a lot easier than making homemade pizza dough.
- cooking spray - the cooking spray will help give the wonton wrappers the perfect, bubbly crust and texture.
You will also need a variety of mixing bowls and an air fryer.
How to Make the Best Air Fryer Pizza Rolls
- Make sauce. In a small mixing bowl, combine pizza sauce, garlic powder, Italian seasoning, salt and pepper. Mix well and set aside ¼ cup for serving.
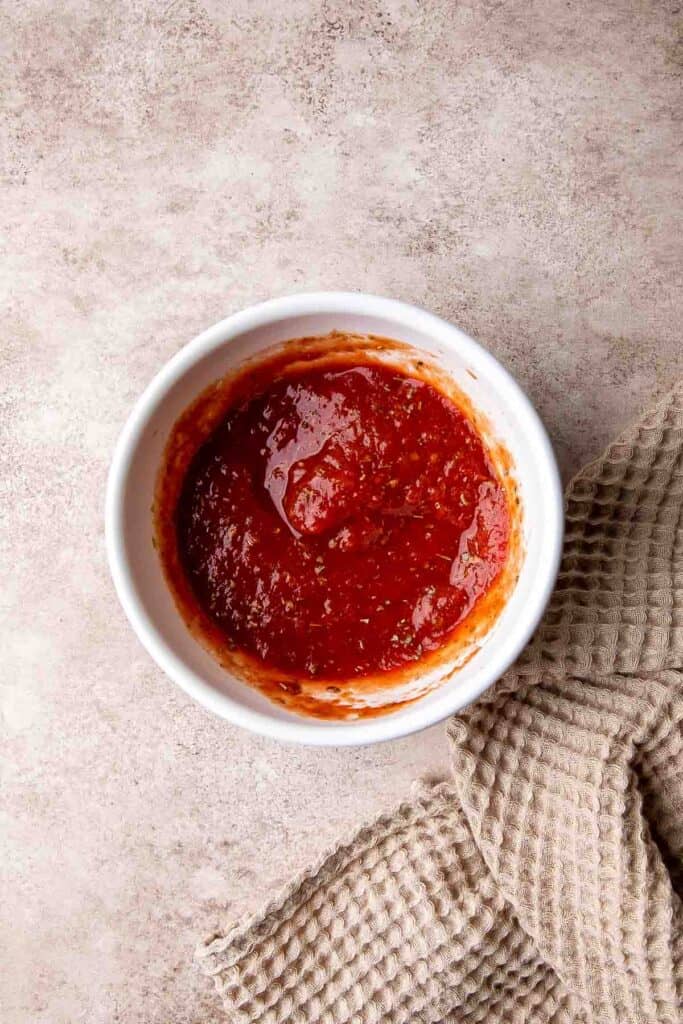
- Combine cheese. In a medium mixing bowl, combine cheddar cheese, mozzarella and parmesan. Mix well. You can chop the cheese into small pieces for even mixing.
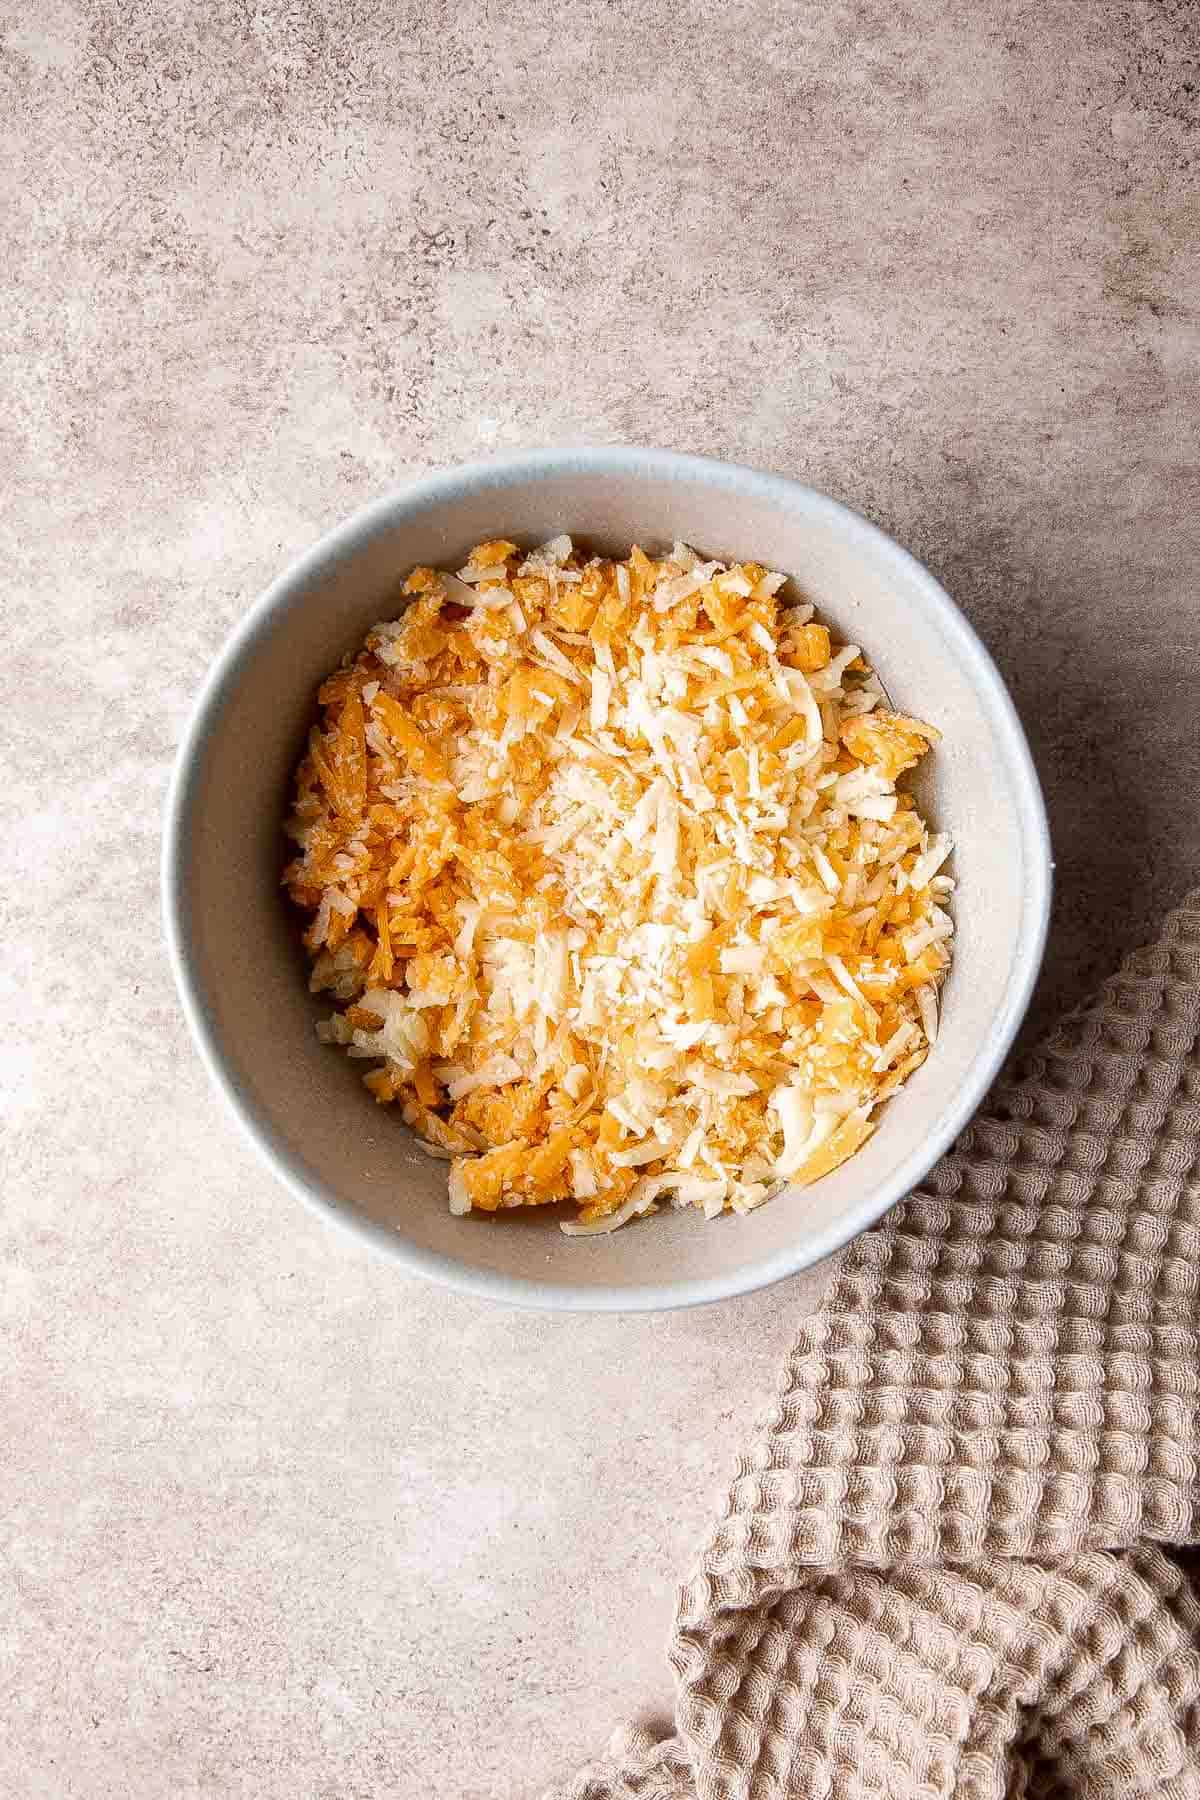
- Assemble. Prepare a small bowl of water for sealing the wonton wrappers. Take one wonton wrapper at a time and add 1 teaspoon of the pizza sauce mixture on the centre of the wonton wrapper. Top with 1 tablespoon of cheese mixture and 3-4 slices of pepperoni.
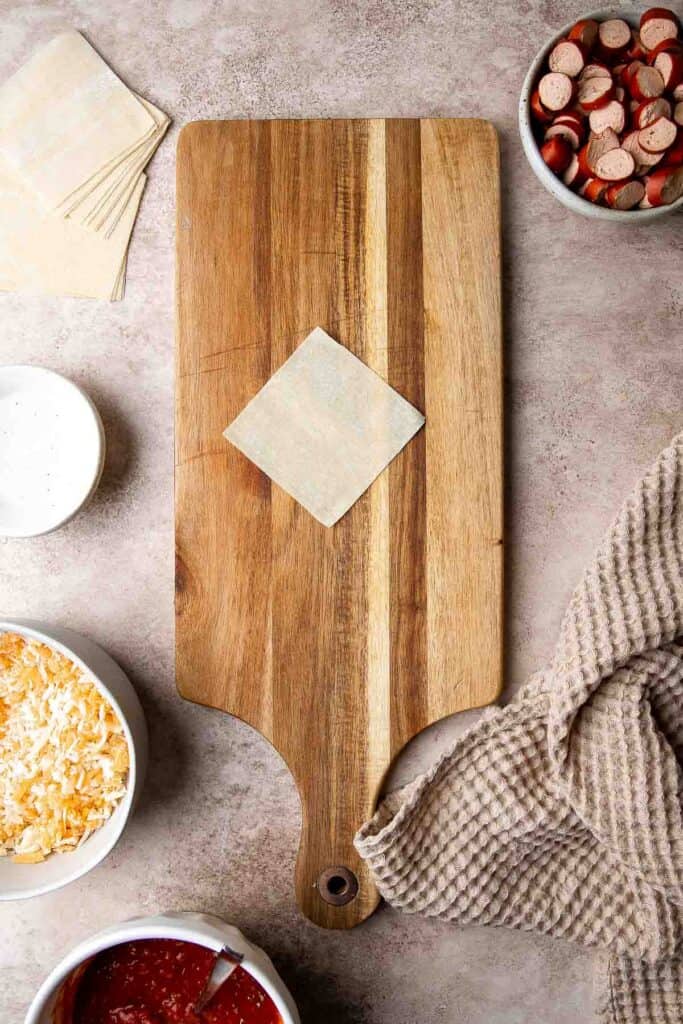
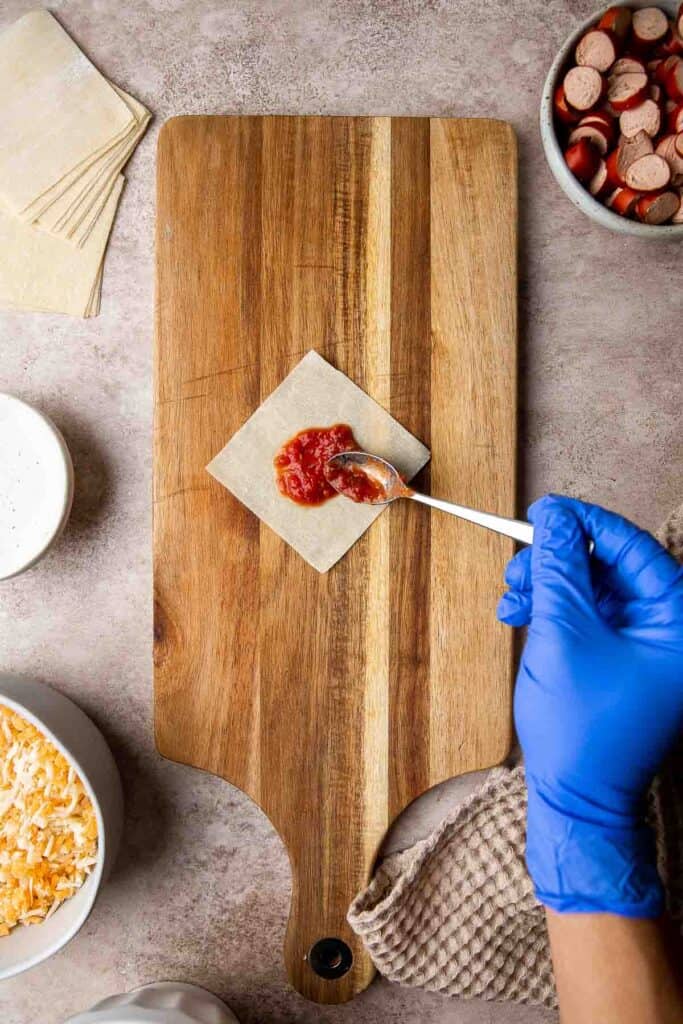
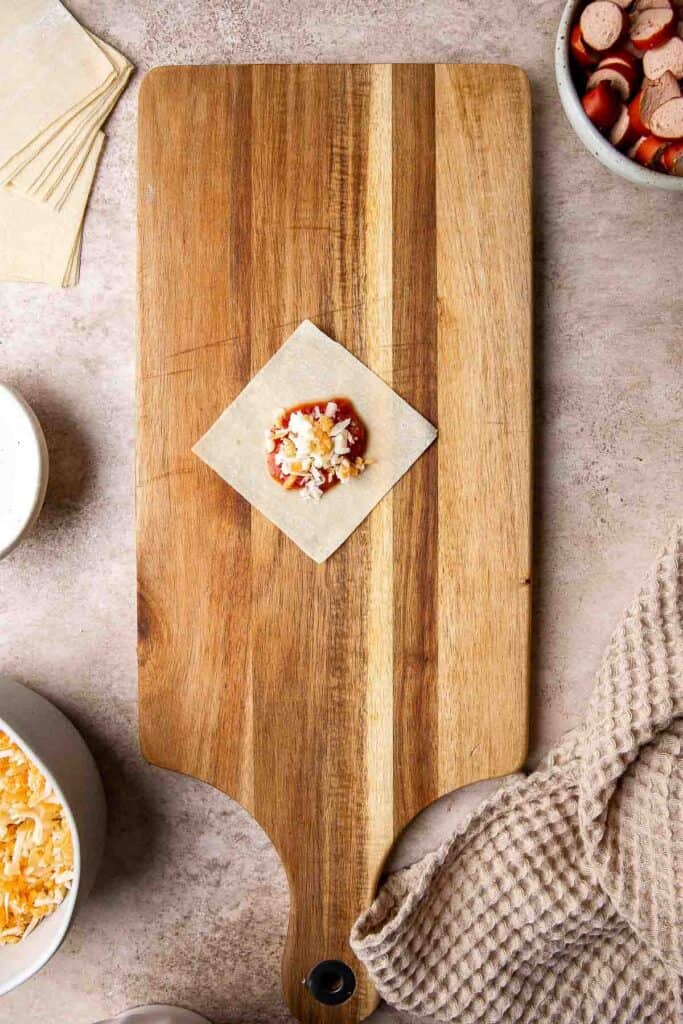
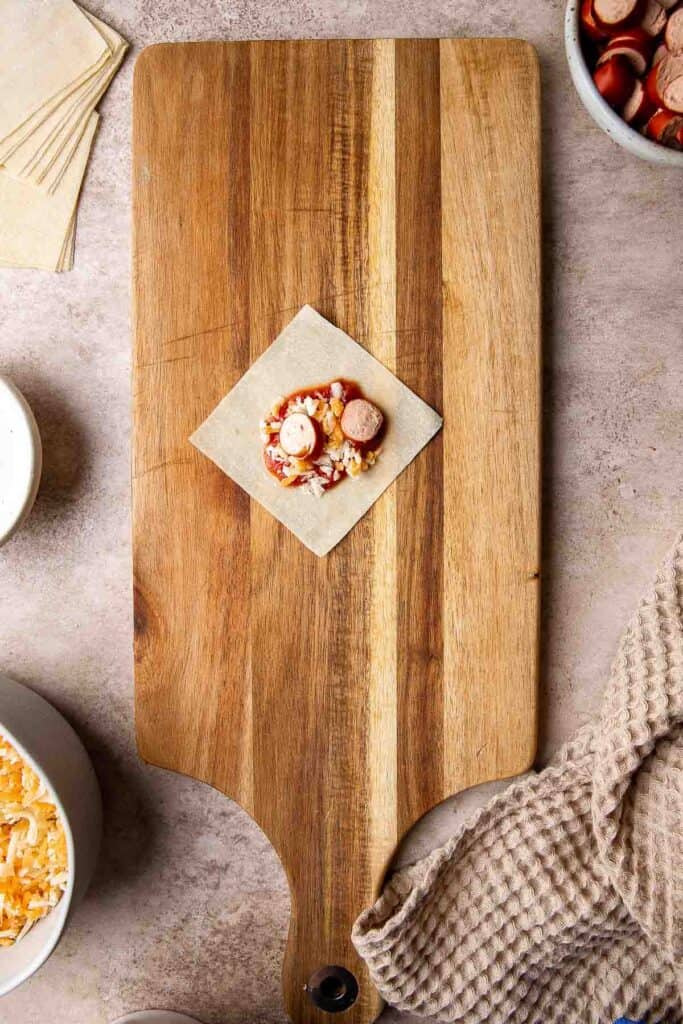
- Fold wontons. Dip your finger into the bowl of water and smear it along the edge of the wrapper. Fold each corner of the wrapper over to the centre like an envelope to seal the filling inside. Repeat with all the wrappers.
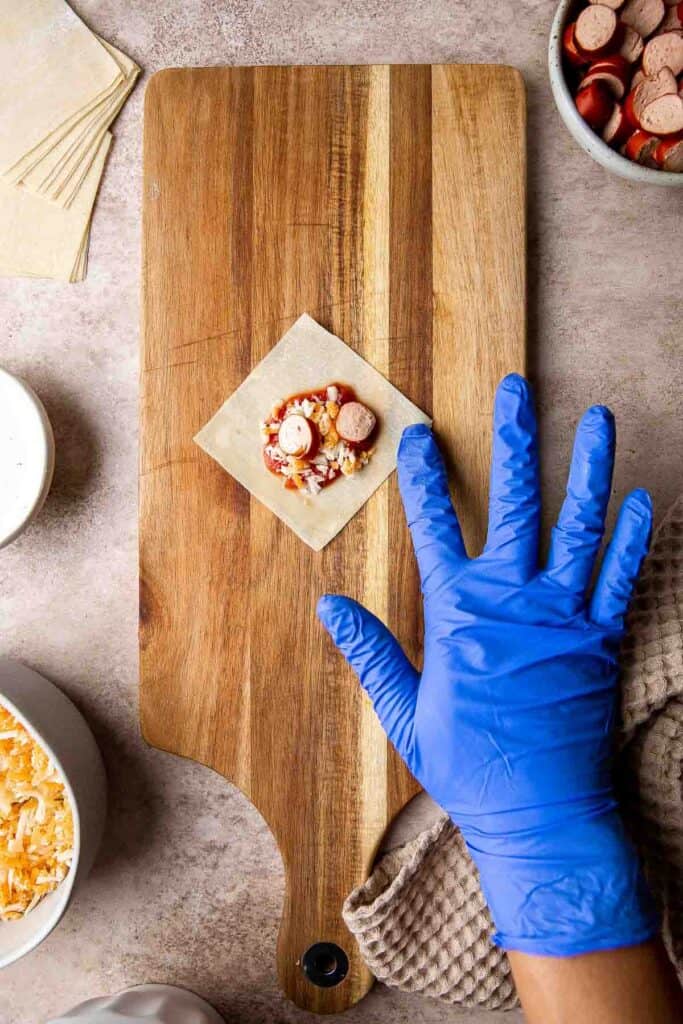
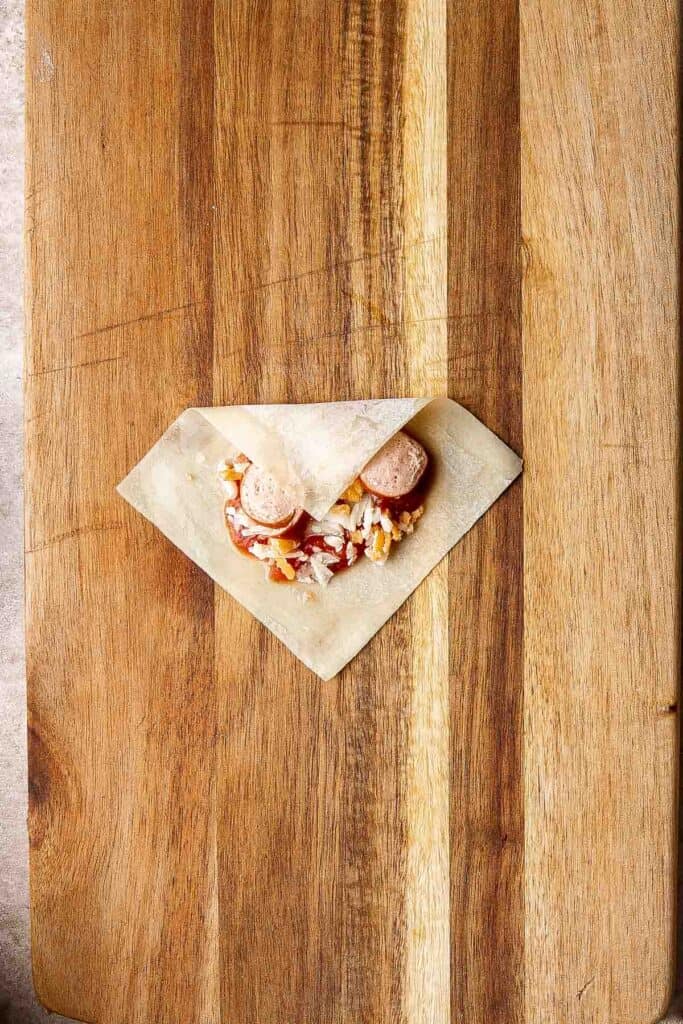
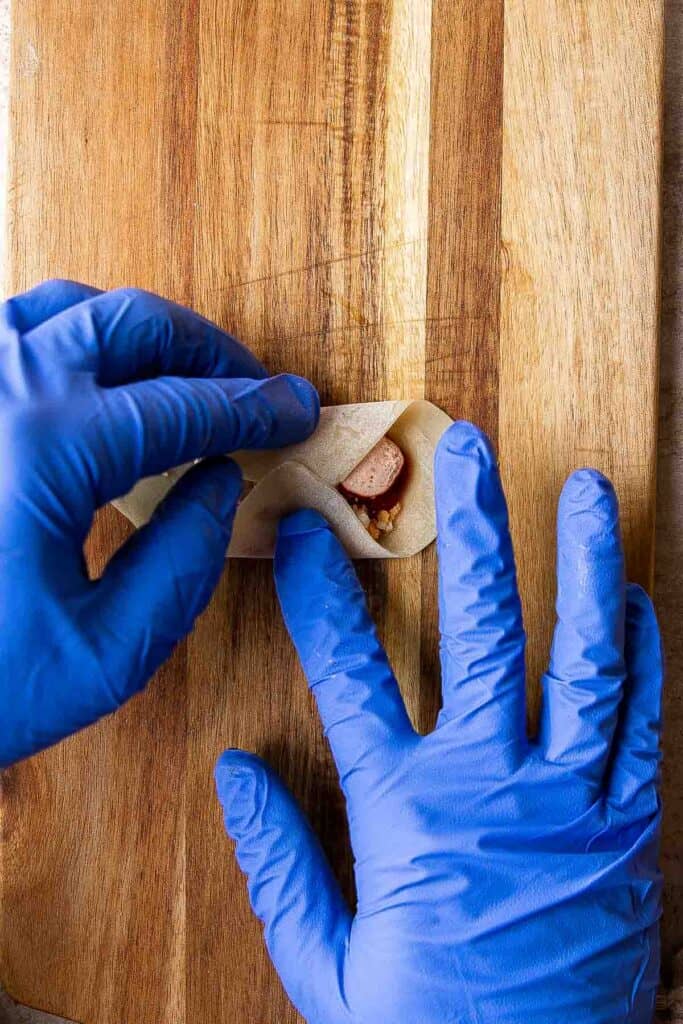
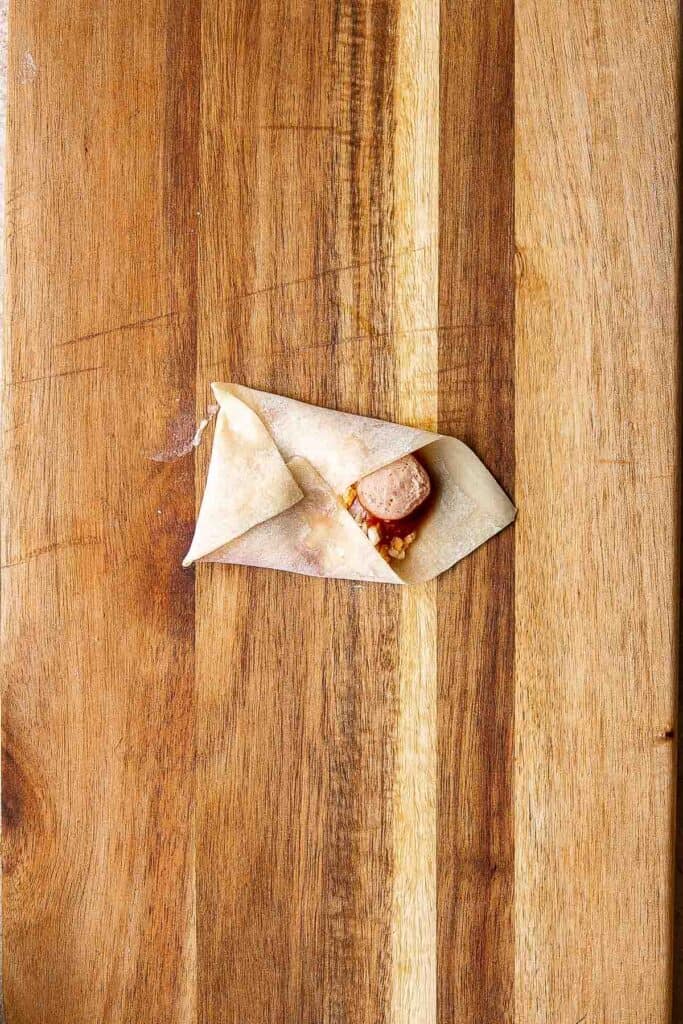
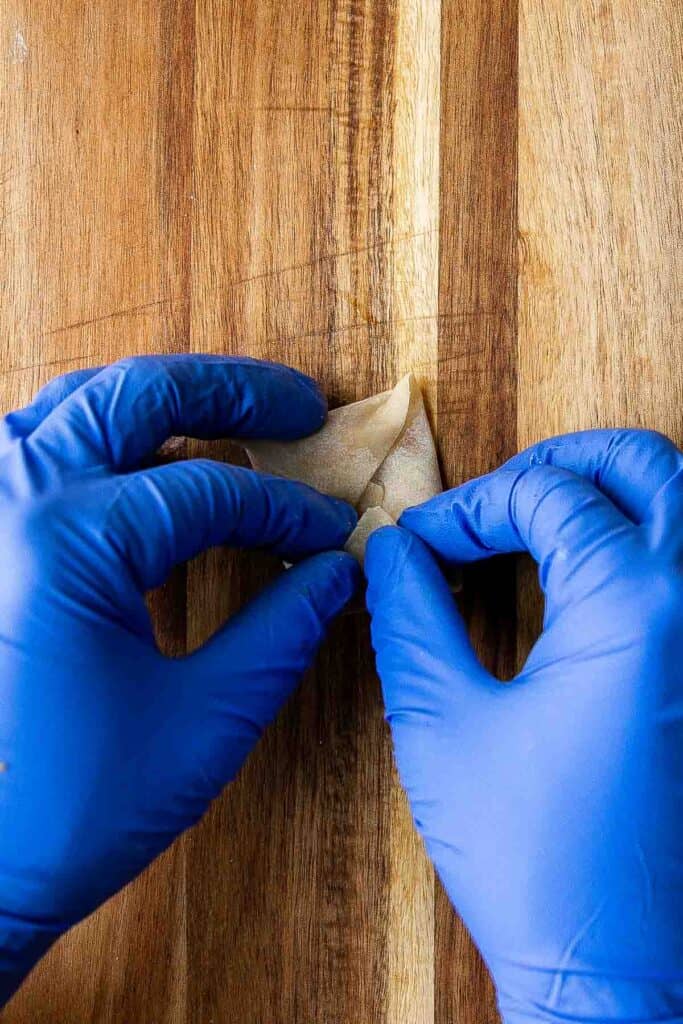
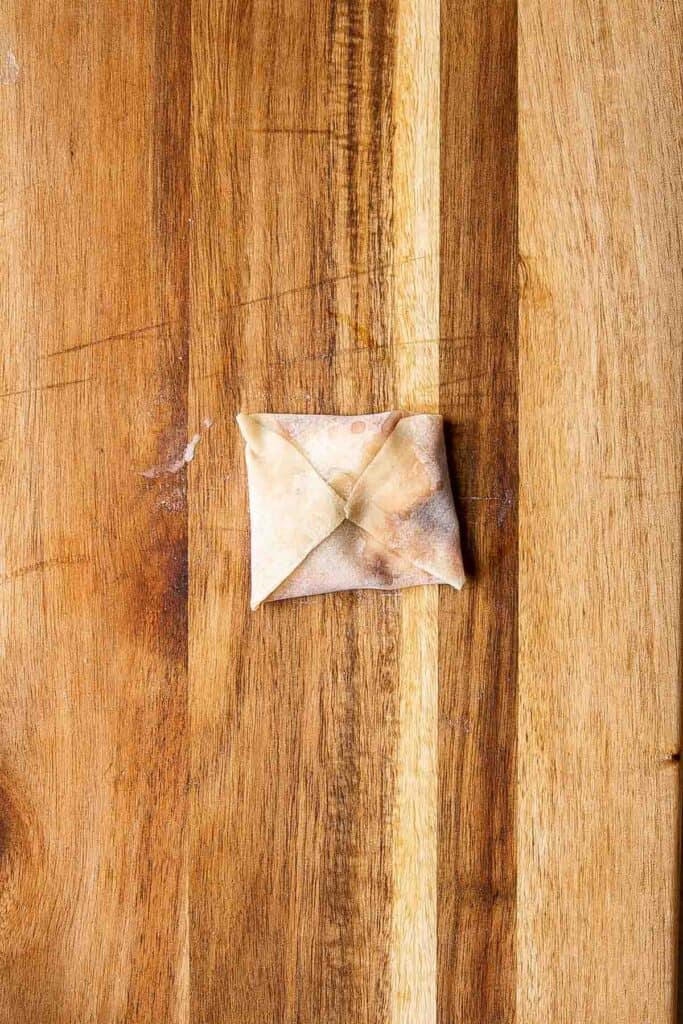
- Air fry. Place the pizza rolls (in batches) in an even layer in the air fryer basket and spray evenly with cooking oil spray. Cook at 350F for 8-10 minutes until golden brown.

- Serve. Serve with the extra pizza sauce mixture or your favorite dipping sauce.

Recipe Variations
- Pizza egg rolls. Use egg roll wrappers instead and roll them into little logs.
- Use pizza dough. Ditch the wonton wrappers and make your own pizza dough for tiny little pizza bites.
- Pizza crescent rolls. Fill store-bought crescent roll dough with the pizza toppings and bake them in our Pizza Crescent Rolls recipe!
- Make different fillings. Use your favorite pizza toppings to make air fry pizza rolls in a variety of flavors. Try ham and pineapple, vegetarian, meat lover's, or margherita.
- Deep fried pizza rolls. You can deep fry the pizza rolls in a pot filled with 2 inches of hot oil until golden and puffy, about 1-2 minutes. See our Homemade Taquitos recipe for instructions on how to deep fry.
How to Serve
This air fryer pizza roll recipe is delicious served on its own as a appy with a side of Marinara Sauce for dipping, or as a main meal paired with some of my favorite sides including:
- Italian Pasta Salad
- Pizza Dip
- Italian Meatballs
- Tomato Bruschetta with Balsamic Glaze
- Antipasto Skewers

Recipe Tips and Tricks
- Don't overfill. Just like making ravioli, overfilled pizza rolls will explode in the air fryer and cause a mess.
- Cool before eating. That molten, gooey cheese will burn your mouth. Let the pizza rolls cook for a few minutes before serving them with your favorite sauce, like Ranch dressing or marinara sauce.
- Get a good crust. One of the best parts of Totinos pizza rolls is the crust. To get that nice, crisp texture, spritz them with a little olive oil or cooking spray before baking.
Storing and Freezing Instructions
How to Store
Store leftover pizza rolls in an airtight container in the fridge for 2-3 days.
How to Reheat
The best way to serve leftover pizza rolls is by toasting them again in the air fryer. Bake them at 350 degrees F for 4-6 minutes or until nice and warm.
How to Freeze
Place the chilled mini pizza rolls in a freezer safe bag and freeze them for 2-3 months. Thaw them in the fridge before reheating.
FAQ
Technically, the air fryer circulates air around the pizza rolls, so they're already crisping up on every side. It can help to flip the rolls to make sure they cook evenly about halfway through the cooking time, but this is optional.
Pizza rolls are commonly eaten as a quick snack, but you can also serve them as an appetizer or as a light main course. Try serving them with some vegetables, like a large Italian salad or caprese skewers, for a more balanced meal. As an appetizer, they're wonderful with breaded chicken wings, French onion dip, or any of these other 75 easy appetizer recipes.
Although making pizza isn't hard, it can be tricky to make homemade pizza rolls that remind you of the frozen pizza rolls from your childhood. The secret is to use wonton wrappers! These thin wrappers have the perfect bite and texture, and they're already square, making them easy to mold and shape into little envelopes. Simply fill them with a mixture of cheese, sauce, and your favorite toppings, then seal and bake!
More Air Fryer Recipes
- 25+ Easy Air Fryer Recipes
- Air Fryer Cauliflower Bites
- Bacon Wrapped Jalapeño Poppers (Air Fryer)
- Air Fryer Chicken Tenders
- Air Fryer Short Ribs
- Crispy Air Fryer French Fries
Tried this recipe?
I'd love to hear what you think! Leave a comment and rating below to share your feedback. Your reviews help others discover this recipe and help me keep creating more free recipes for you. Snap a photo and tag me on social media @aheadofthyme too.

Banana Cream Pie
This homemade Banana Cream Pie is endlessly creamy with layers of real bananas and vanilla custard - absolutely perfect for banana lovers. It's made with a buttery, flaky pie crust, a dreamy homemade custard, fresh banana slices, and a layer of homemade whipped cream to take the whole thing to the next level. It just may be the perfect pie!
Whether you're a banana cream pie lover or not, there is no doubt that this pie has the perfect texture. The crunchy, flaky crust pairs perfectly with the rich pudding layer, and the fresh whipped cream adds a lightness that cuts through the rich vanilla custard. It's one of my all-time favorite pies, and it's perfect for serving anytime of the year- after a BBQ, as a holiday treat, for a birthday party, or just because!
Why You'll Love This Banana Cream Pie
- Easy to make. Although each layer of this old fashioned banana cream pie recipe is made from scratch, none of the steps are very challenging. It also only requires a handful of simple ingredients, but we'll also share some shortcut versions to make it even easier!
- So creamy. From the homemade custard filling to the whipped cream topping, this homemade banana cream pie recipe has such a smooth, creamy texture. It's just divine!
- Great make-ahead dessert. This easy banana cream pie recipe lasts 3 to 4 days, so you can easily make it a day or two before your event. Plus, it's always nice having leftover pie stashed away in your fridge for later!
Ingredient Notes
To make this delicious banana cream pie, you will need the following ingredients (full measurements in recipe card below):
- unbaked pie crust - you'll need a 9 inch pie crust. Feel free to use store-bought crust or make your own from scratch. Try our Homemade Pie Dough.
- egg - eggs will be used in an egg wash for the pie crust and as the base of the homemade custard.
- water
- sugar - use regular white sugar to highlight the flavors of the ripe bananas.
- milk - regular whole milk will give the custard a creamy texture.
- heavy cream - this adds a lovely richness. We also need heavy whipping cream to make the whipped cream topping.
- cornstarch - don't skip this step. As the cornstarch cooks, it will thicken the custard like a pudding.
- butter - cut unsalted butter into small cubes. Whisk this into the warm custard to give it a glossy, smooth texture.
- vanilla extract - this adds a lovely aroma to both the pie and whipped cream
- salt
- fresh bananas - slice firm, ripe bananas into rounds to add between the layers of custard and on top of the pie at the very end.
- confectioners' sugar - adds sweetness to our whipped cream. Feel free to adjust the sweetness to taste.
You will also need a 9-inch pie pan, rolling pin, parchment paper, pie weights, pastry brush, small bowl, baking sheet, large saucepan, electric mixer, sieve, plastic wrap, and a whisk.
How to Make the Best Banana Cream Pie
First, make the pie crust.
- Roll out dough. If using homemade pie dough, roll it out to be about 12 inches in diameter. Transfer the rolled dough into a 9-inch pie plate, and finish by fluting or crimping the edges.
- Add pie weights. Place a crumpled piece of parchment inside. Fill it with pie weights or dried beans.
- Bake. Place onto a baking sheet and into a 425F preheated oven to bake for 15 minutes. Remove the pie shell from the oven and carefully remove the parchment and weights.
- Add egg wash. In a small mixing bowl, whisk together the egg and water. Brush the pie with the egg wash.
- Prick and bake again. Use a fork to prick the crust all over. Return to the oven to bake for another 10 minutes. After 10 minutes, turn the oven down to 375°F, and bake for 15 more minutes. Finally, remove from the oven, and allow the crust to cool completely.

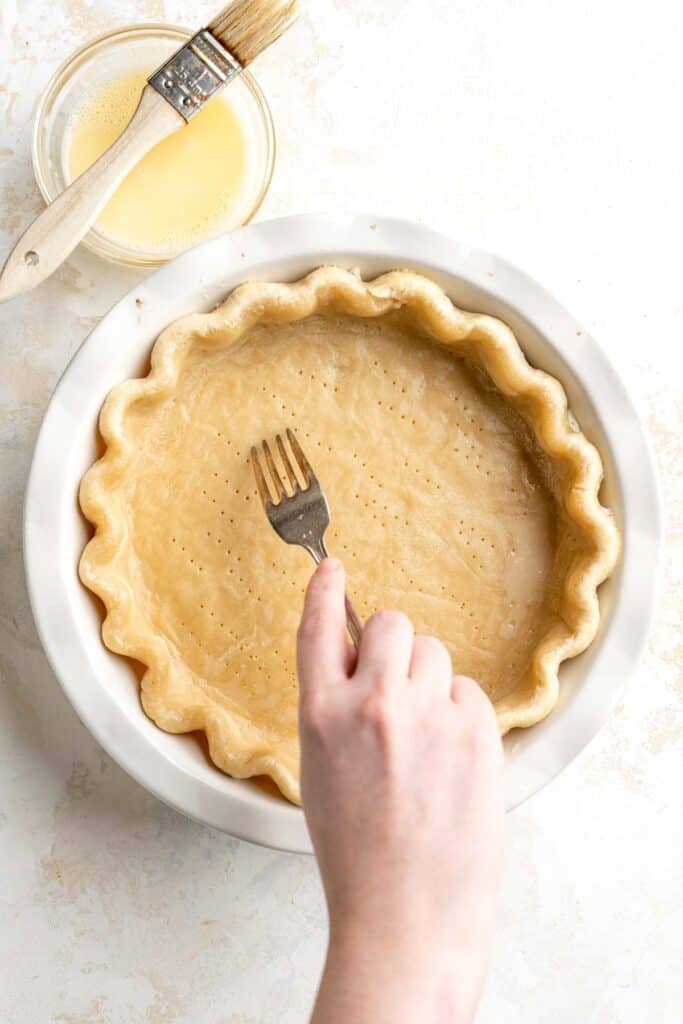
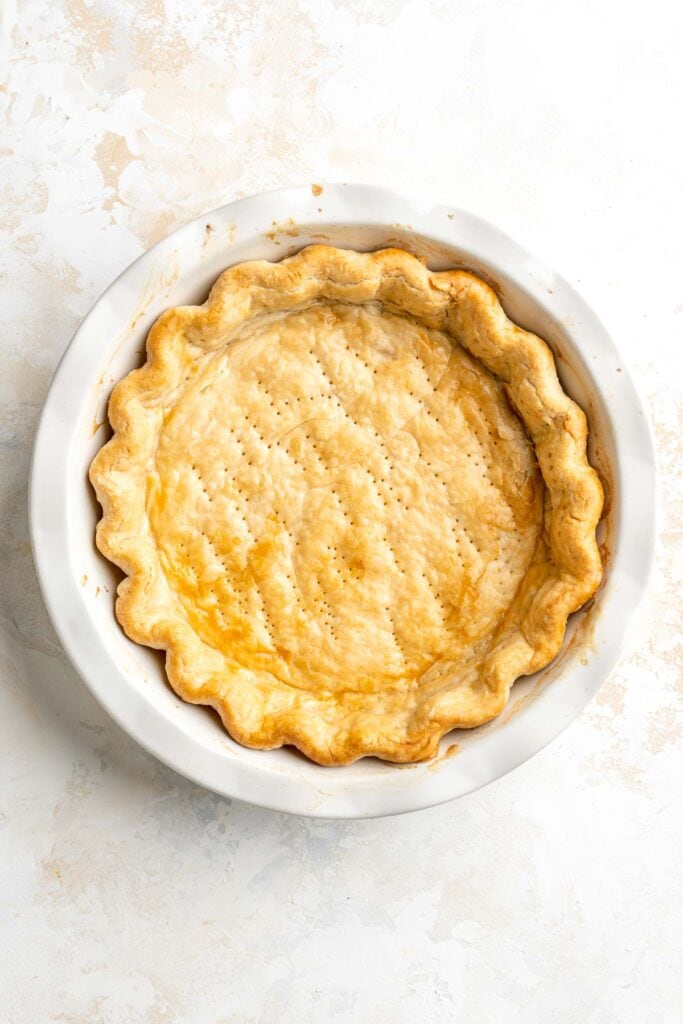
Next, make the banana cream pie filling.
- Combine ingredients. In a large mixing bowl, add the egg yolks, sugar, milk, heavy cream, and cornstarch, and whisk together until very smooth.
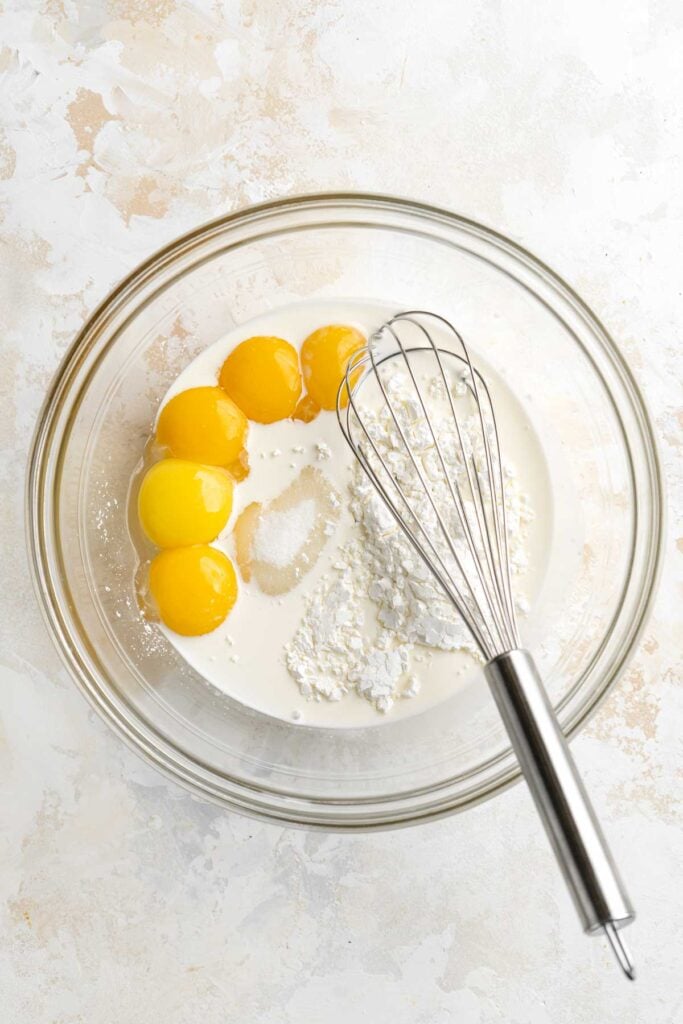
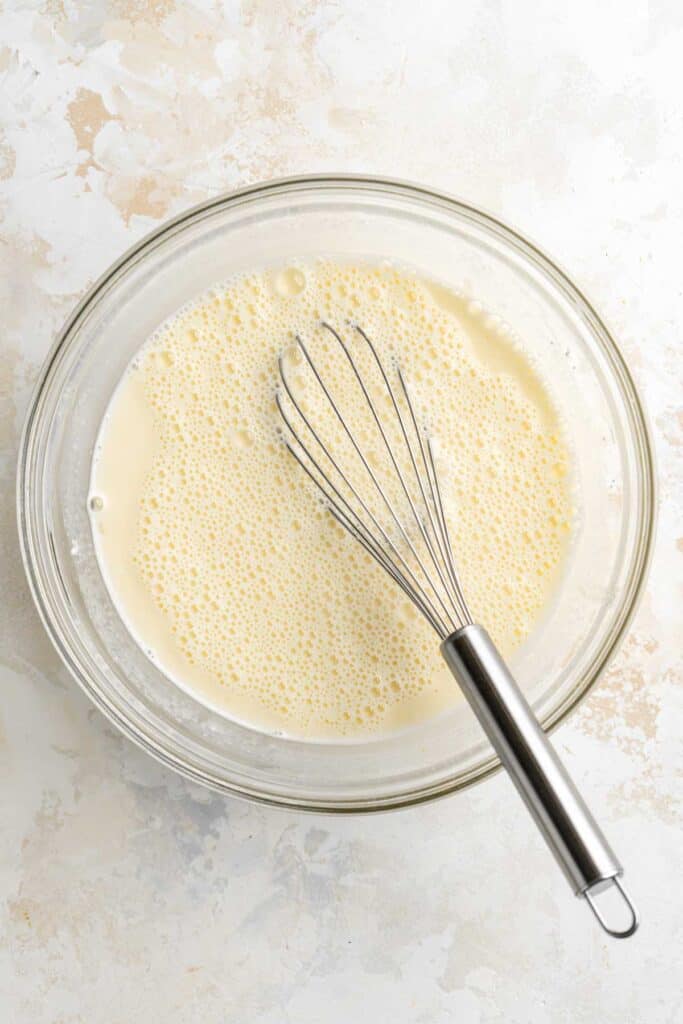
- Smooth. Place a sieve over a medium saucepan and pour the custard mixture over the sieve into the saucepan.
- Cook. Place the saucepan on the stove and heat over medium heat. While whisking constantly, bring the custard up to a simmer, then continue to cook until the custard has thickened like pudding, and begins bubbling and popping. Once bubbling, continue to stir and cook for exactly one more minute.
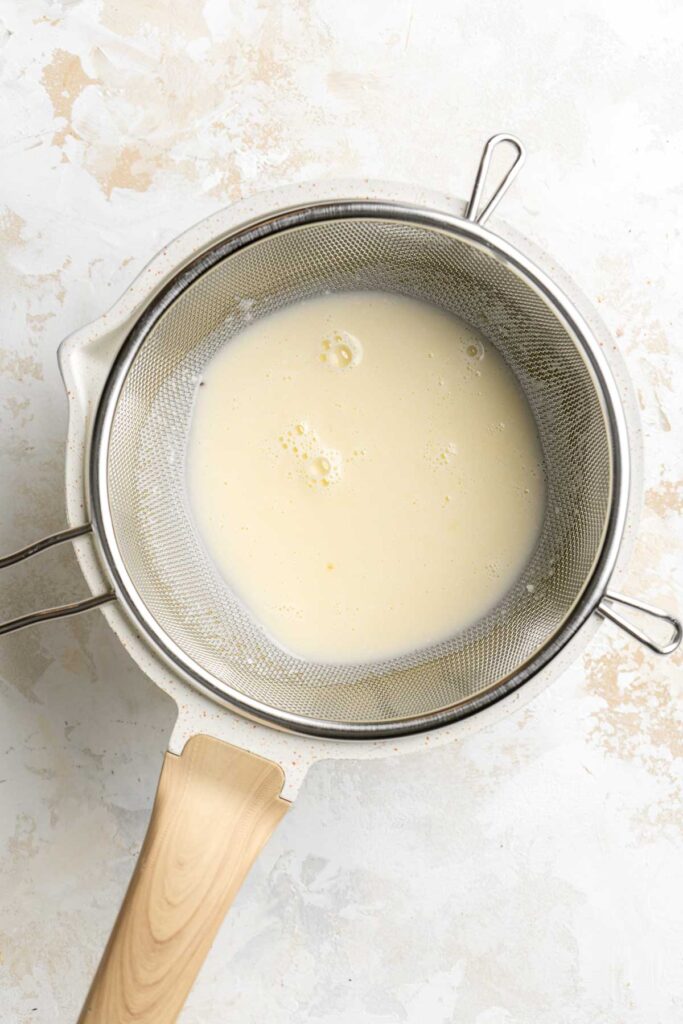
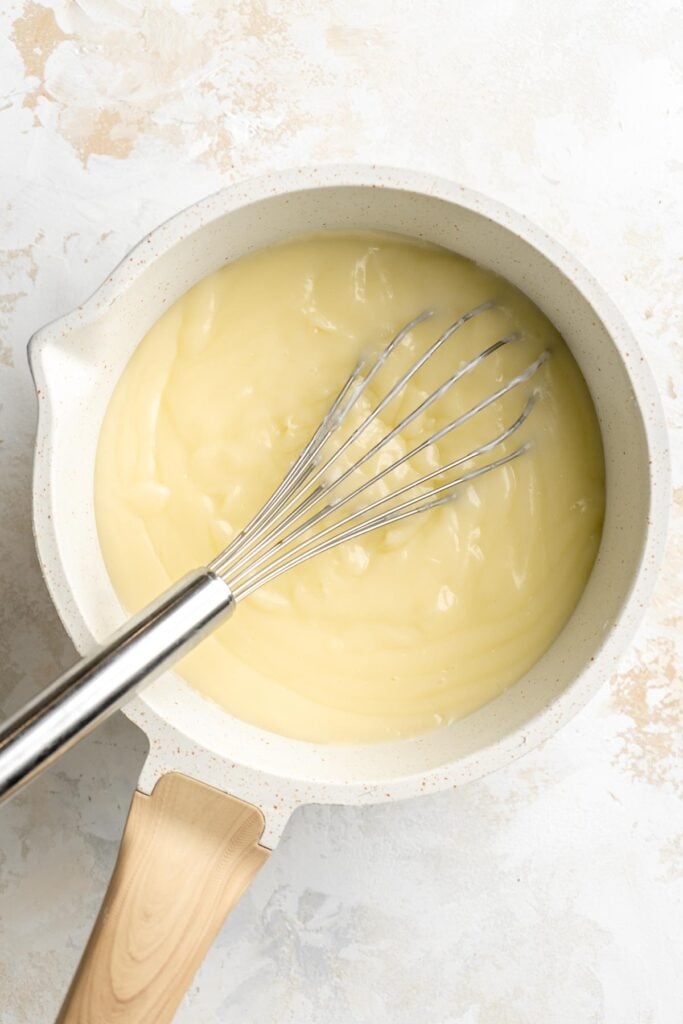
- Add remaining ingredients. Immediately remove from the heat, and stir in the butter cubes, vanilla, and salt.
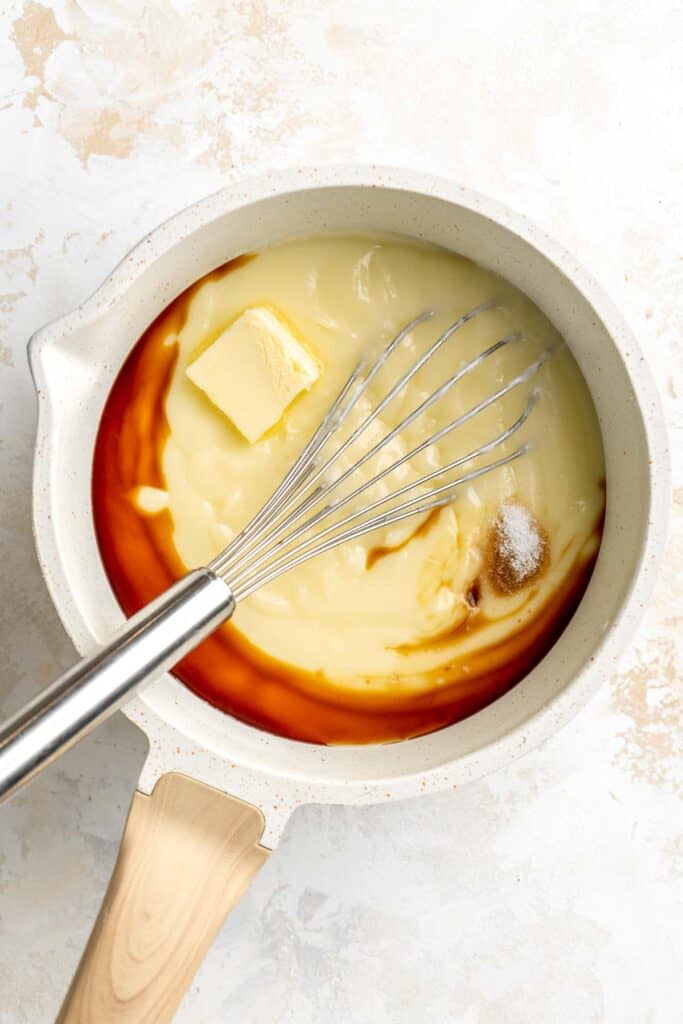
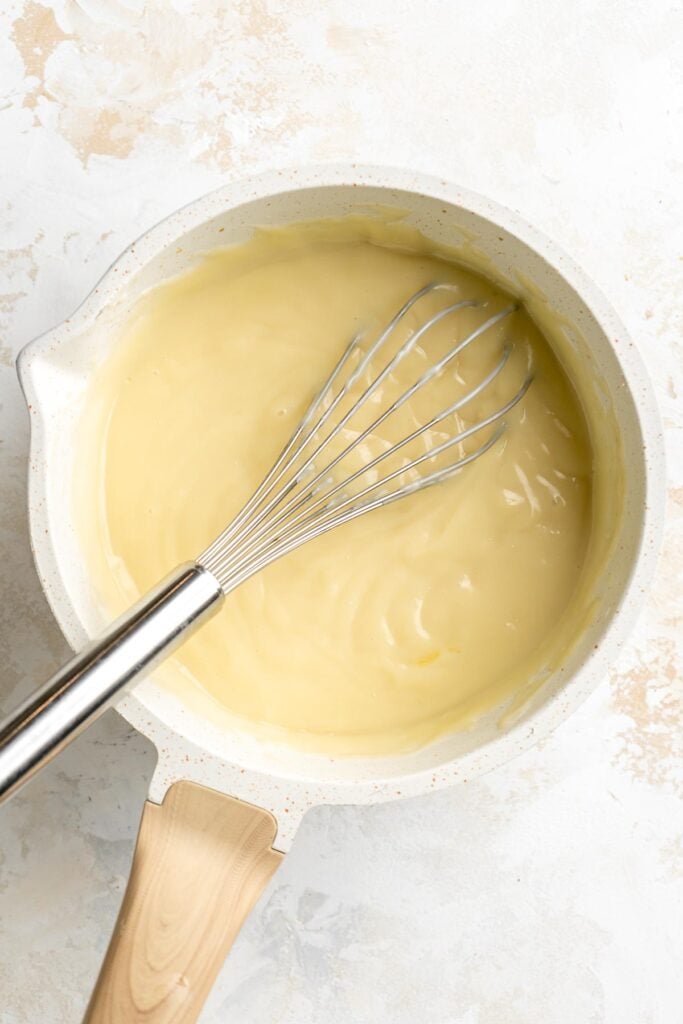
- Remove lumps. Place a sieve over top of a large mixing bowl, and pour the custard over the sieve to remove any lumps.
- Cool. Place a piece of plastic wrap over the surface of the custard and transfer to the fridge to cool to around room temperature.
Next, make the whipped cream.
Place the heavy cream, confectioners' sugar, and vanilla into a large mixing bowl. Beat with a whisk or an electric hand mixer until stiff peaks have formed. Cover and set aside in the fridge for later.
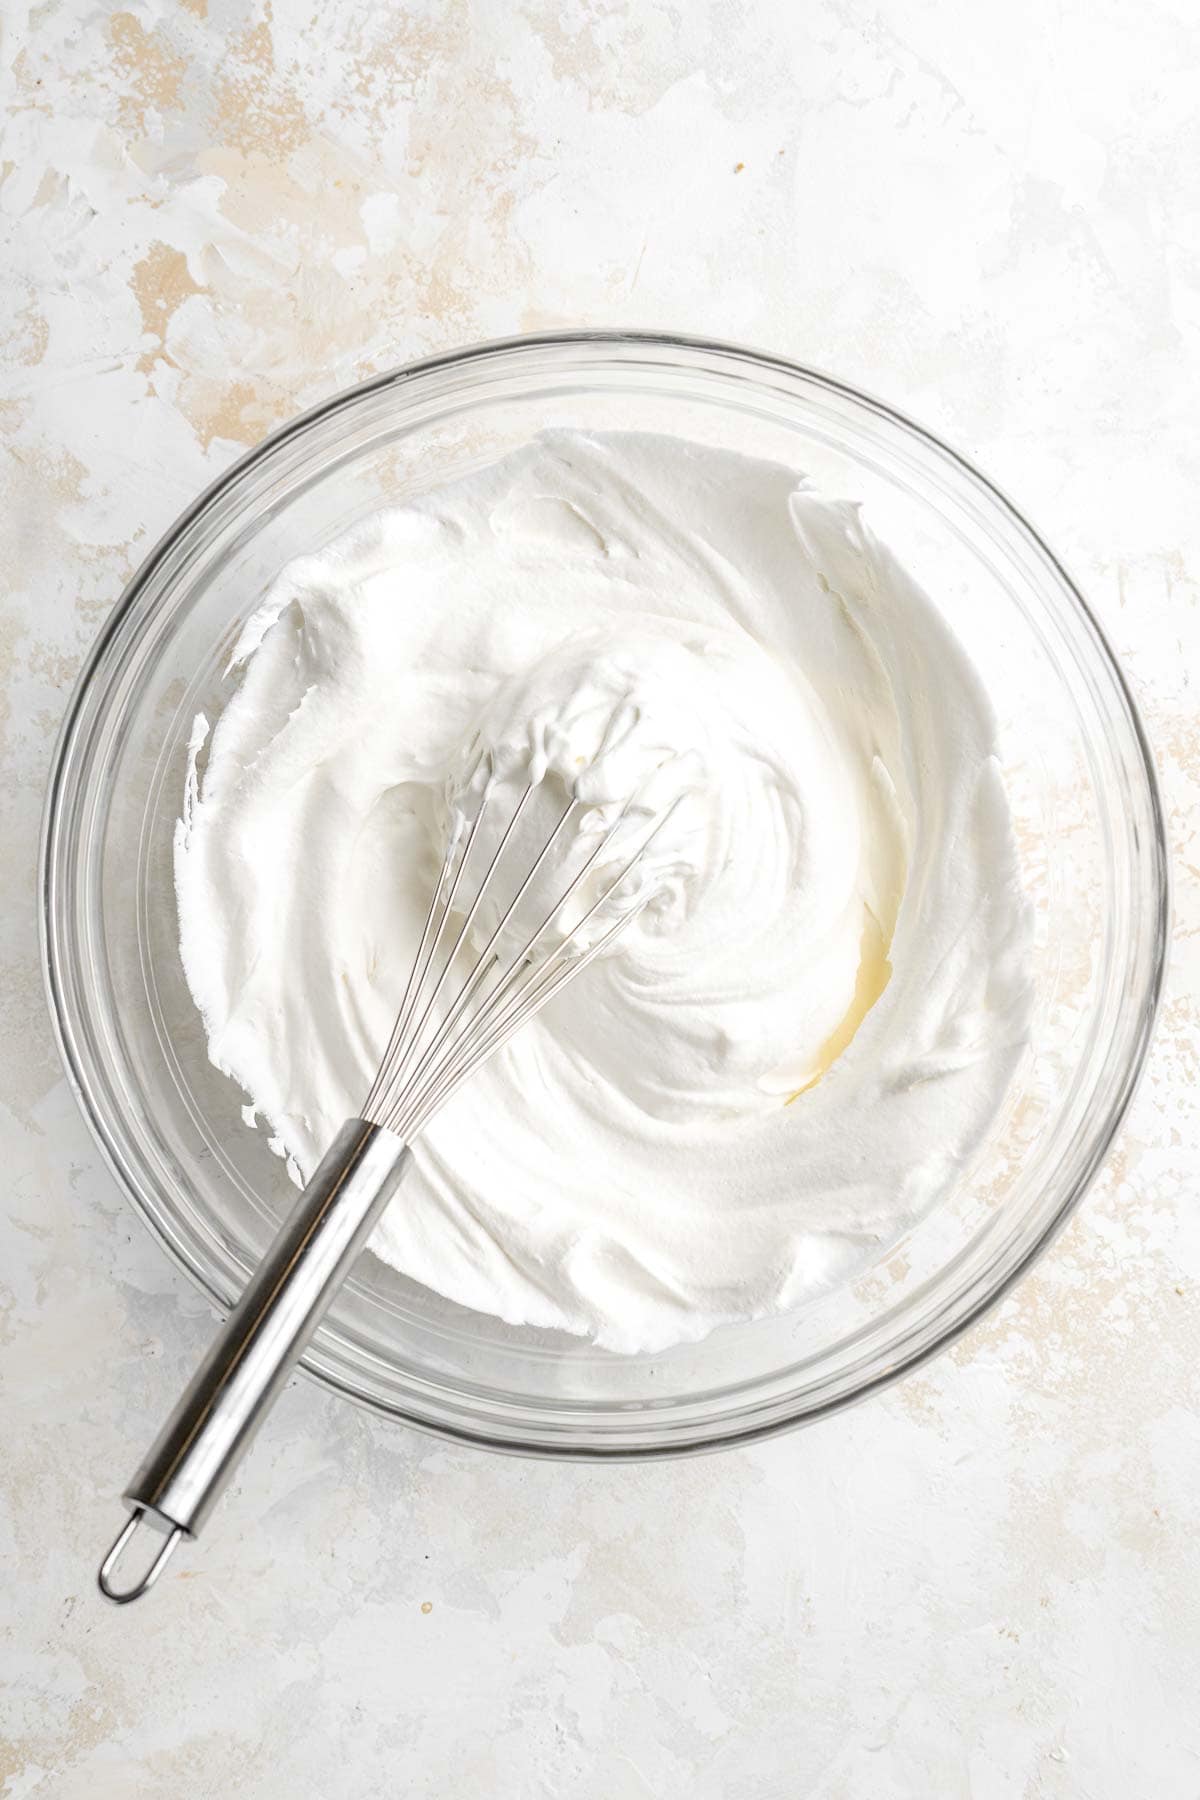
Finally, assemble the banana cream pie.
- Layer. Once the custard is at room temperature, spread a thin layer of the custard onto the bottom of the cooled pie crust. Add a layer of sliced bananas, then top with remaining custard.
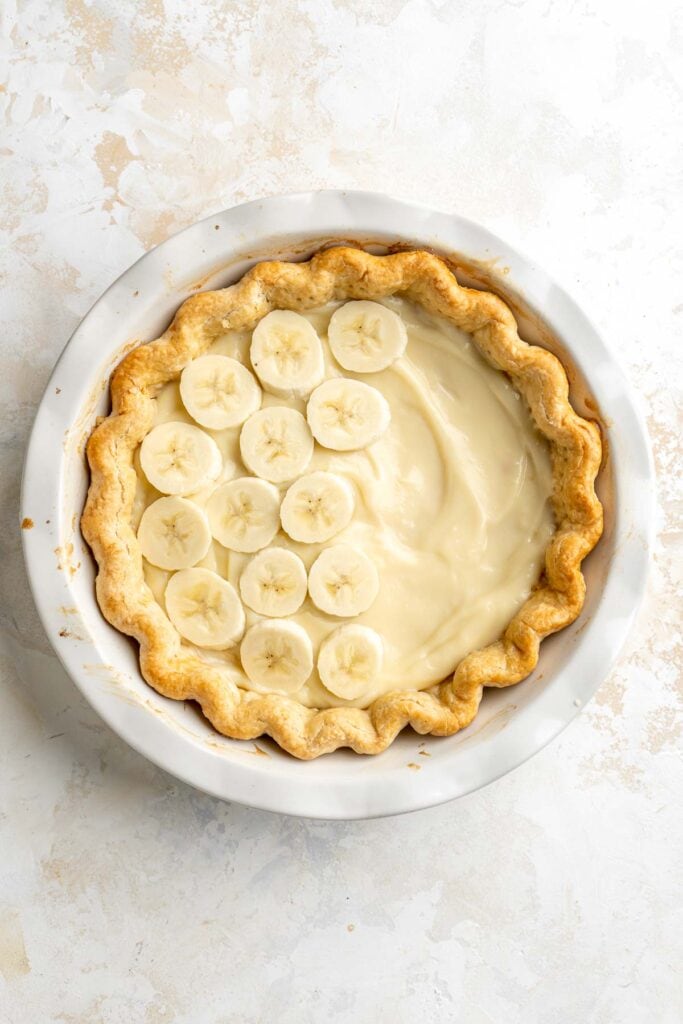
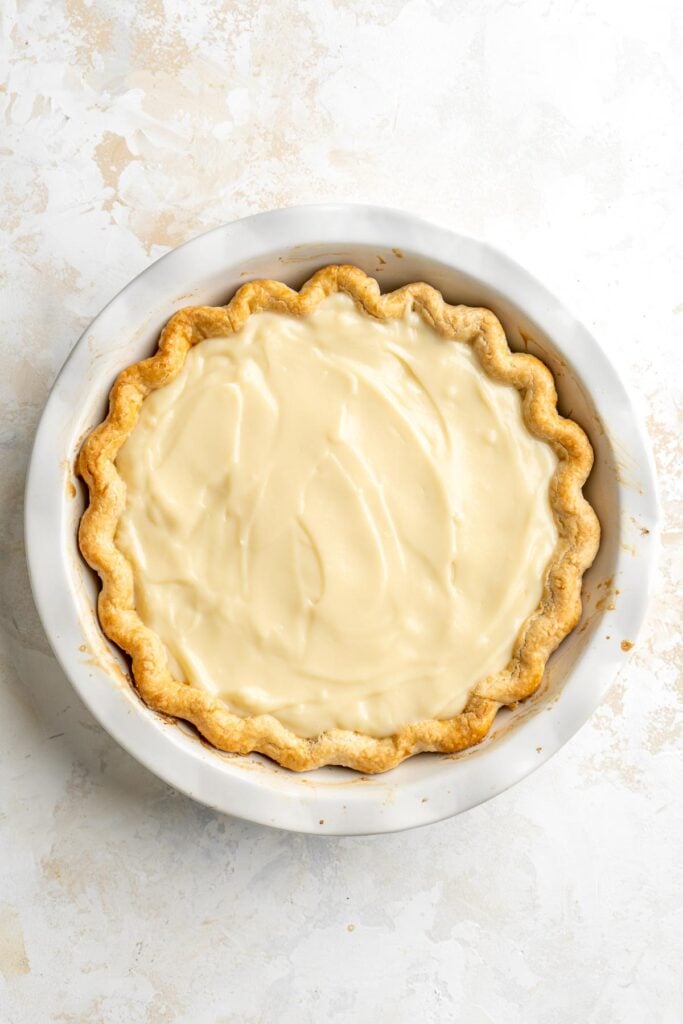
- Chill. Smooth out the custard, cover the surface with plastic wrap, then place into the fridge to fully cool - at least 4 hours but preferably overnight.
- Serve. At serving time, add the whipped cream on top of the custard, then top with more sliced bananas right before serving.
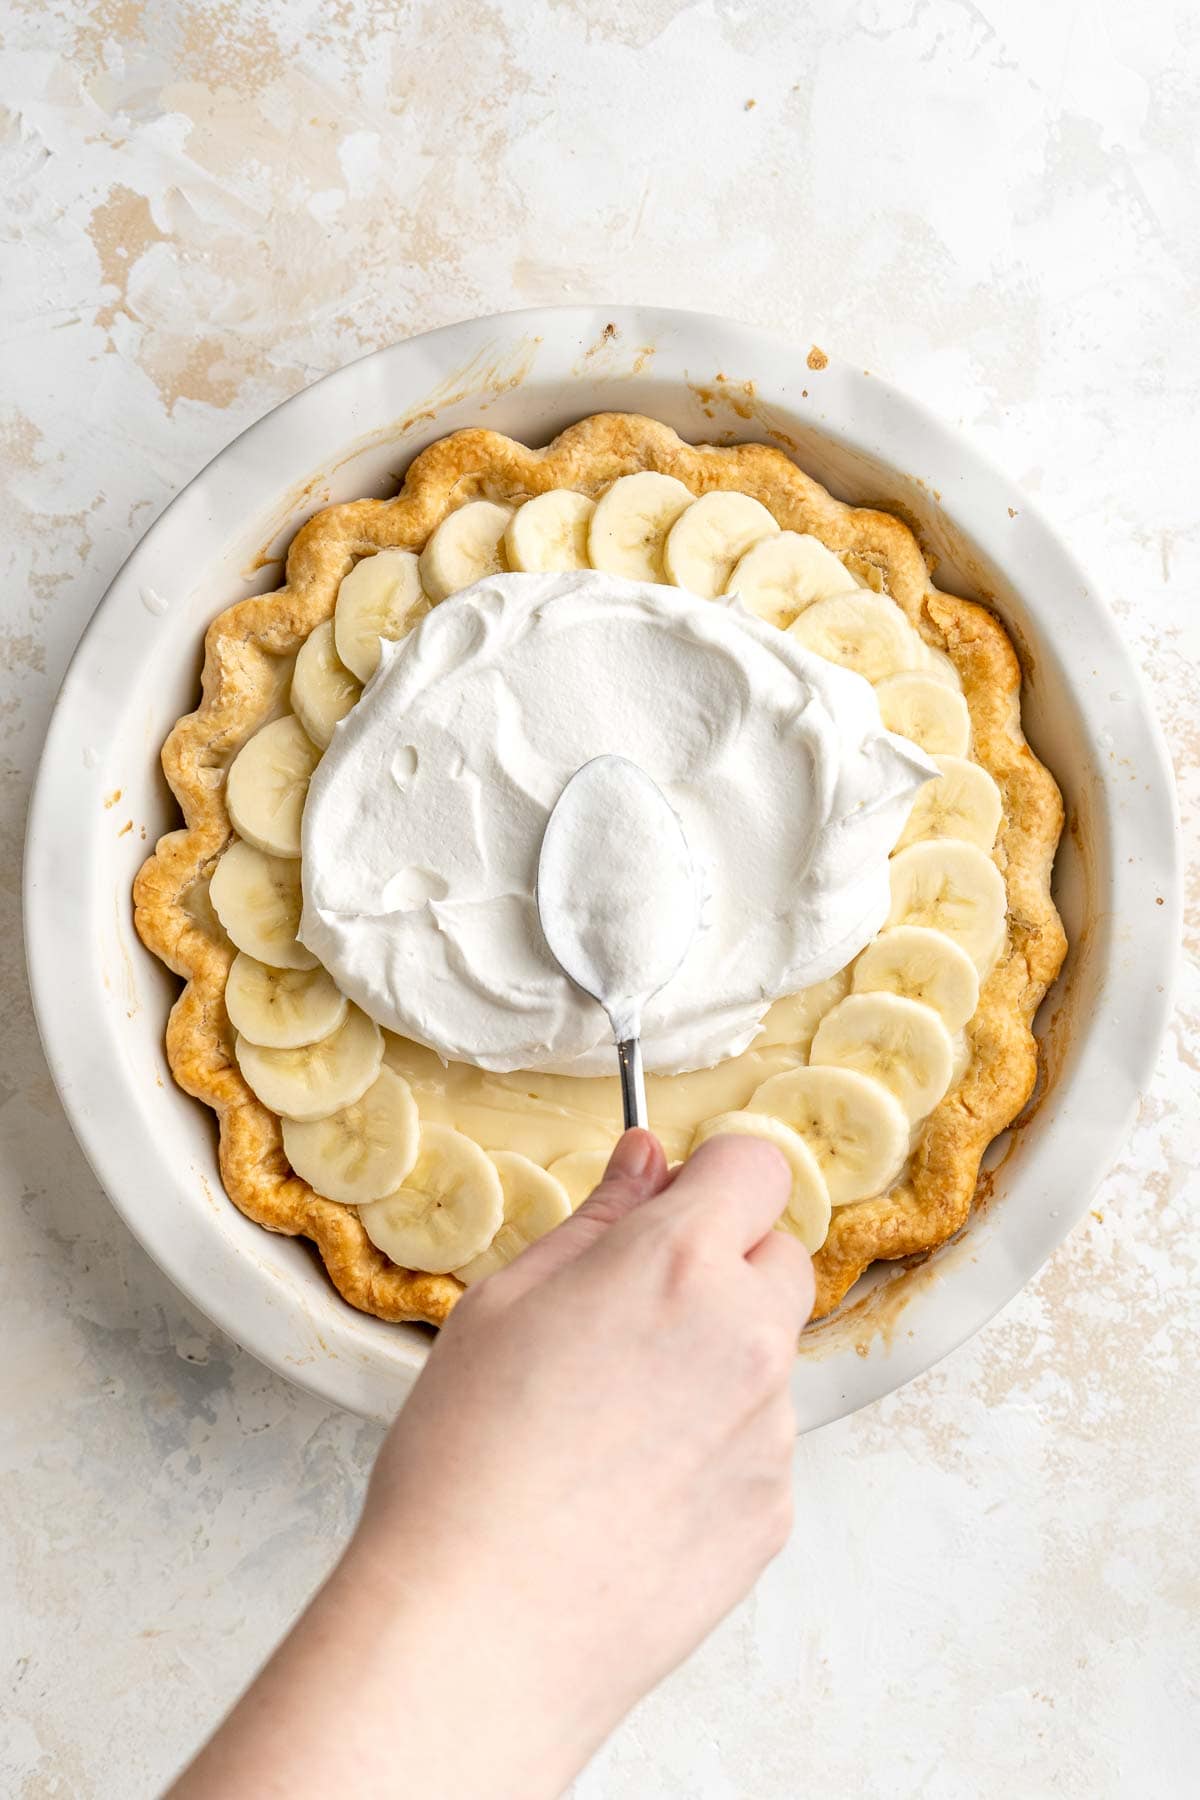
Recipe Variations
- Make homemade graham cracker crust. Although the pastry crust is traditional, you can easily combine graham cracker crumbs with melted butter for a quicker crust. Use vanilla wafers for a vanilla wafer crust that tastes like the best banana pudding.
- Use instant pudding. If you're in a rush and don't have time to make your own custard, use your favorite pudding mix instead. Choose either vanilla or instant banana pudding for extra banana flavor.
- Add banana extract. Add banana extract to the custard for a really flavorful banana pie.
How to Serve
This banana cream pie is delicious served on its own, or paired with some of my favorite desserts including:
- Flourless Banana Brownies
- Chocolate Chip Cookies
- Chocolate Chunk Peanut Butter Cookies
- Peanut Butter Blossoms
- Coffee Cookies
For more recipe ideas, see our 50 Easy Baking Recipes.
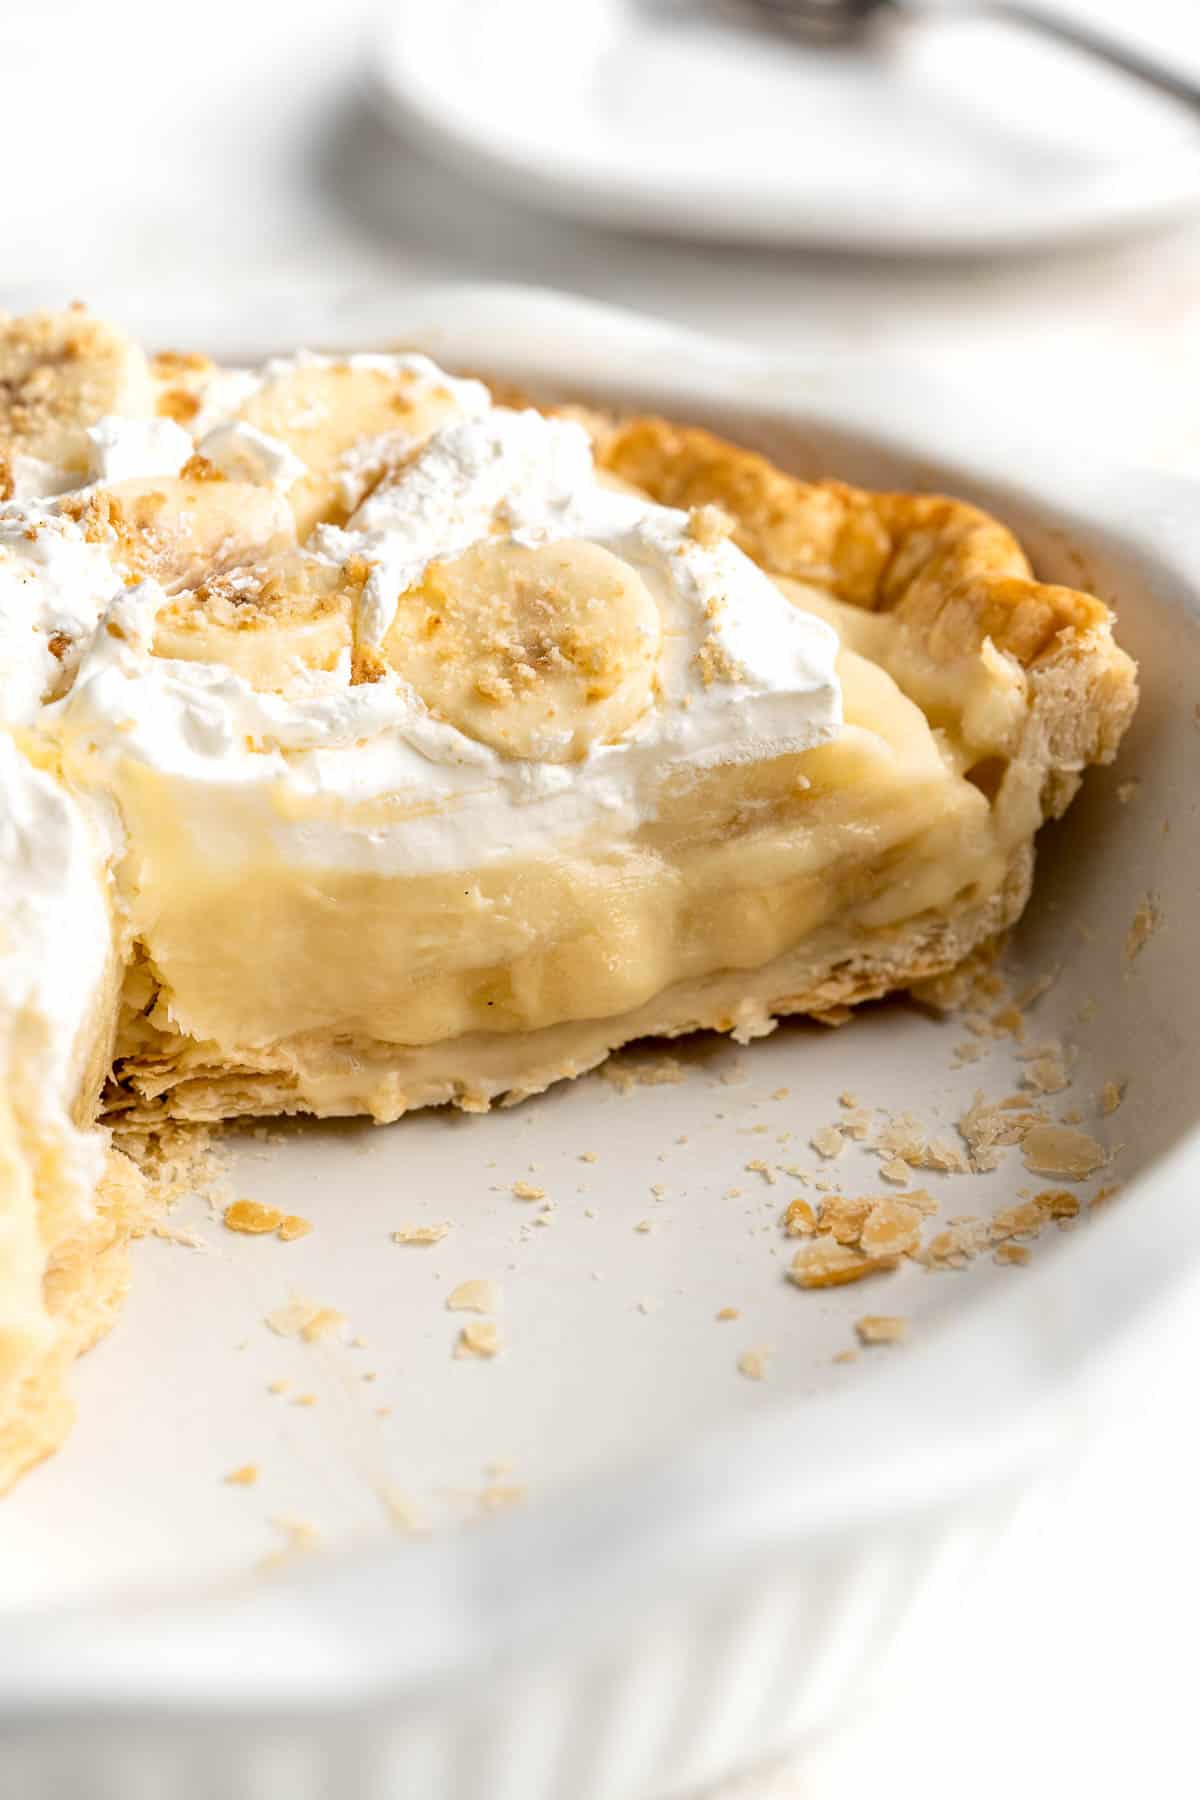
Recipe Tips and Tricks
- Avoid a soggy bottom. Since your buttery pie crust will be holding a layer of creamy custard, it will naturally begin to absorb a little moisture. Make sure your crust is fully baked to keep it fresh longer.
- Get the perfect whipped cream. There's a fine line between perfect whipped cream and not-so-great whipped cream. As soon as your mixer reaches soft peaks, slow down and watch carefully. The cream should stand upright when you remove the whisk without falling over. If you go too far, your cream will separate and start to become butter.
- Avoid custard skin. Whether you're making from scratch vanilla pudding or a rich custard, these fillings form a skin when stored in the fridge. To avoid this, place a layer of plastic wrap directly on top of the custard.
Storing and Freezing Instructions
How to Store
Store leftover banana cream pie in the fridge with a layer of plastic wrap or aluminum foil. It will stay fresh for approximately 3-4 days.
How to Freeze
You can freeze an entire banana cream pie or cut the pie into individual slices. Let the pie freeze partially, then cut and wrap individual slices in several layers of plastic wrap. Place them in a freezer safe bag or container for up to 2-3 months. Thaw in the fridge before serving.
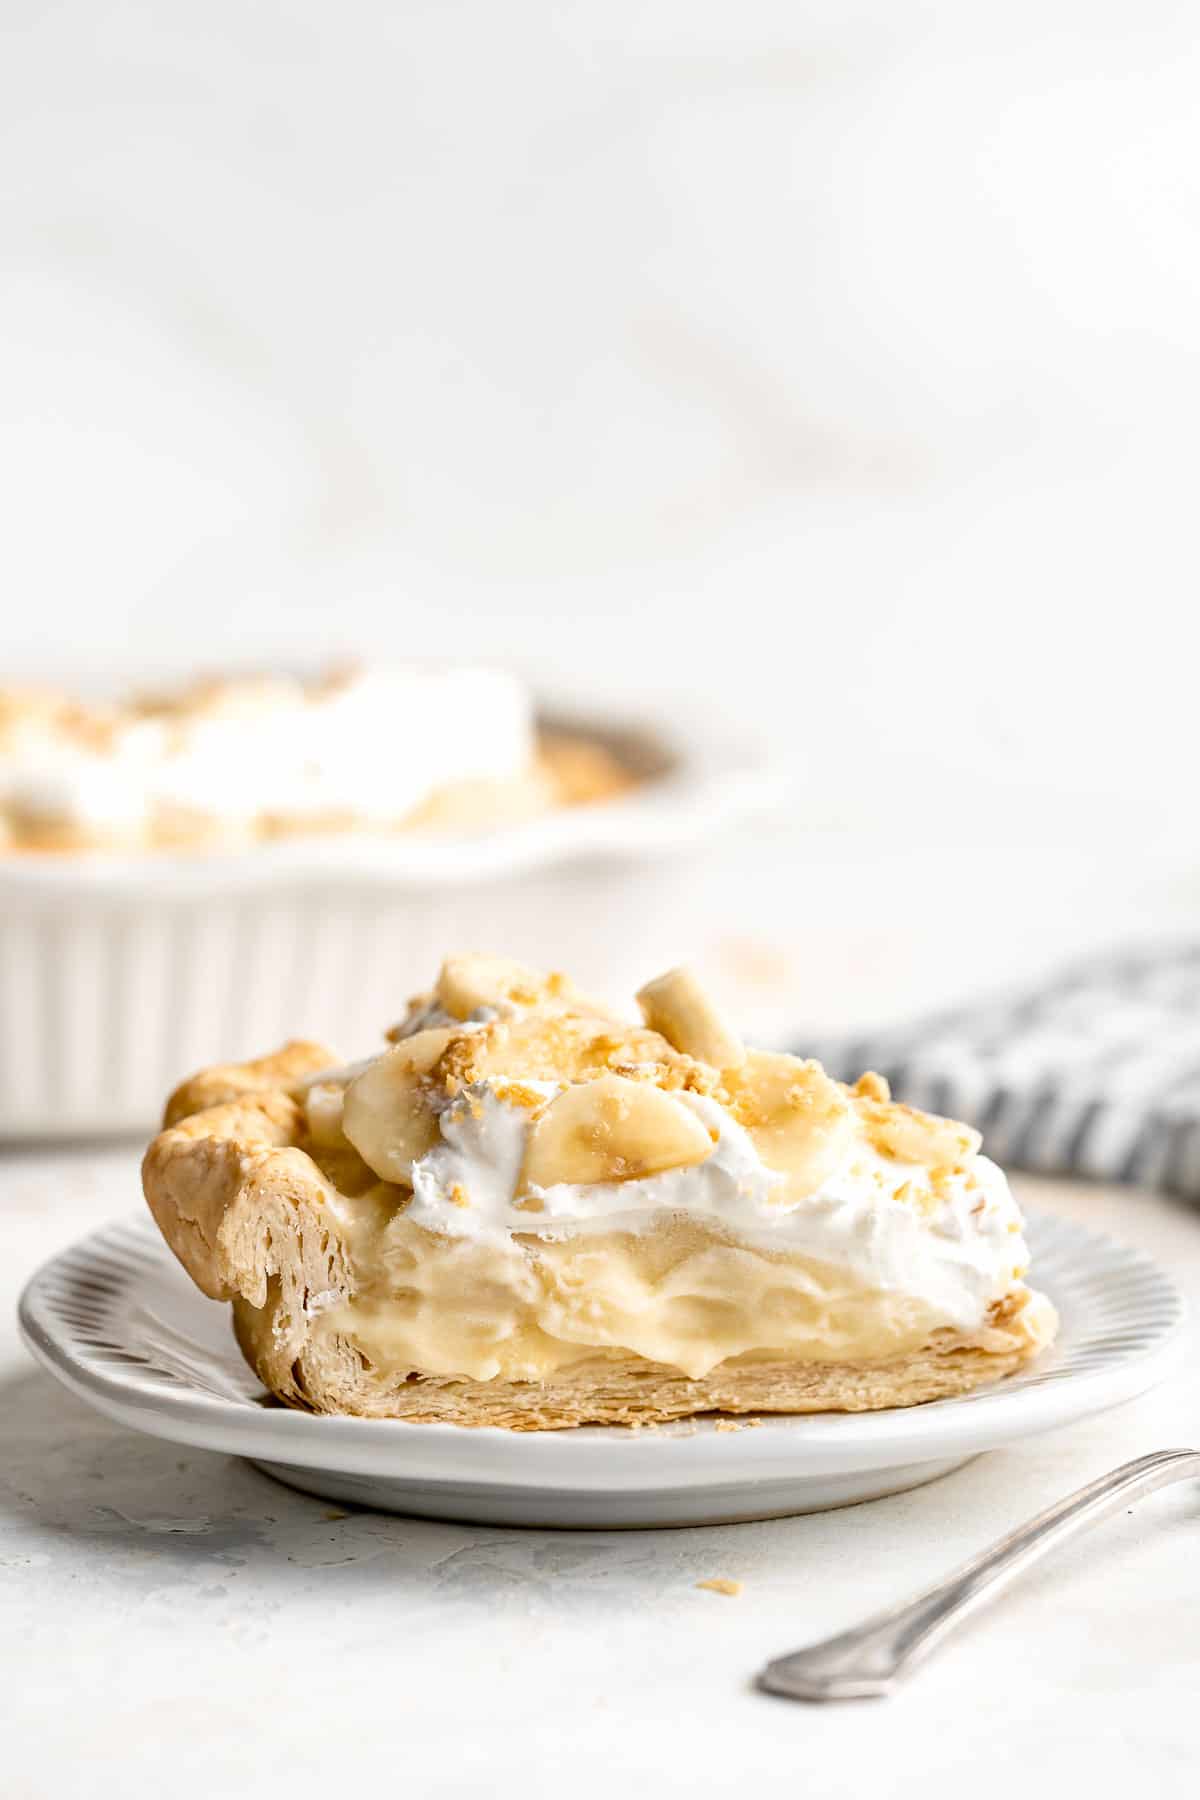
FAQ
Traditional banana cream pies are made with a flaky pastry crust, a homemade vanilla custard, a layer of bananas, and homemade whipped cream. There are many variations now but this version is a classic!
Most cream pie recipes can stay fresh for around 3-4 days. After that point, the crust starts to become soggy from the moisture in the custard, and the whipped cream starts to collapse and weep. You can always freeze individual slices for later if you have too much pie!
Since banana cream pie contains so much dairy and fresh fruit, it must be refrigerated. It can be stored on the counter or at room temperature for a maximum of 2 hours, but then it needs to go back in the fridge to avoid growing harmful bacteria that may make you ill.
More Banana Dessert Recipes
- Banana Chocolate Chip Muffins
- Healthy Banana Bread
- Flourless Banana Brownies
- Majoon (Banana and Date) Smoothie
- Banana Chocolate Chip Oatmeal Muffins
- Banana Bread Cookies
Tried this recipe?
I'd love to hear what you think! Leave a comment and rating below to share your feedback. Your reviews help others discover this recipe and help me keep creating more free recipes for you. Snap a photo and tag me on social media @aheadofthyme too.
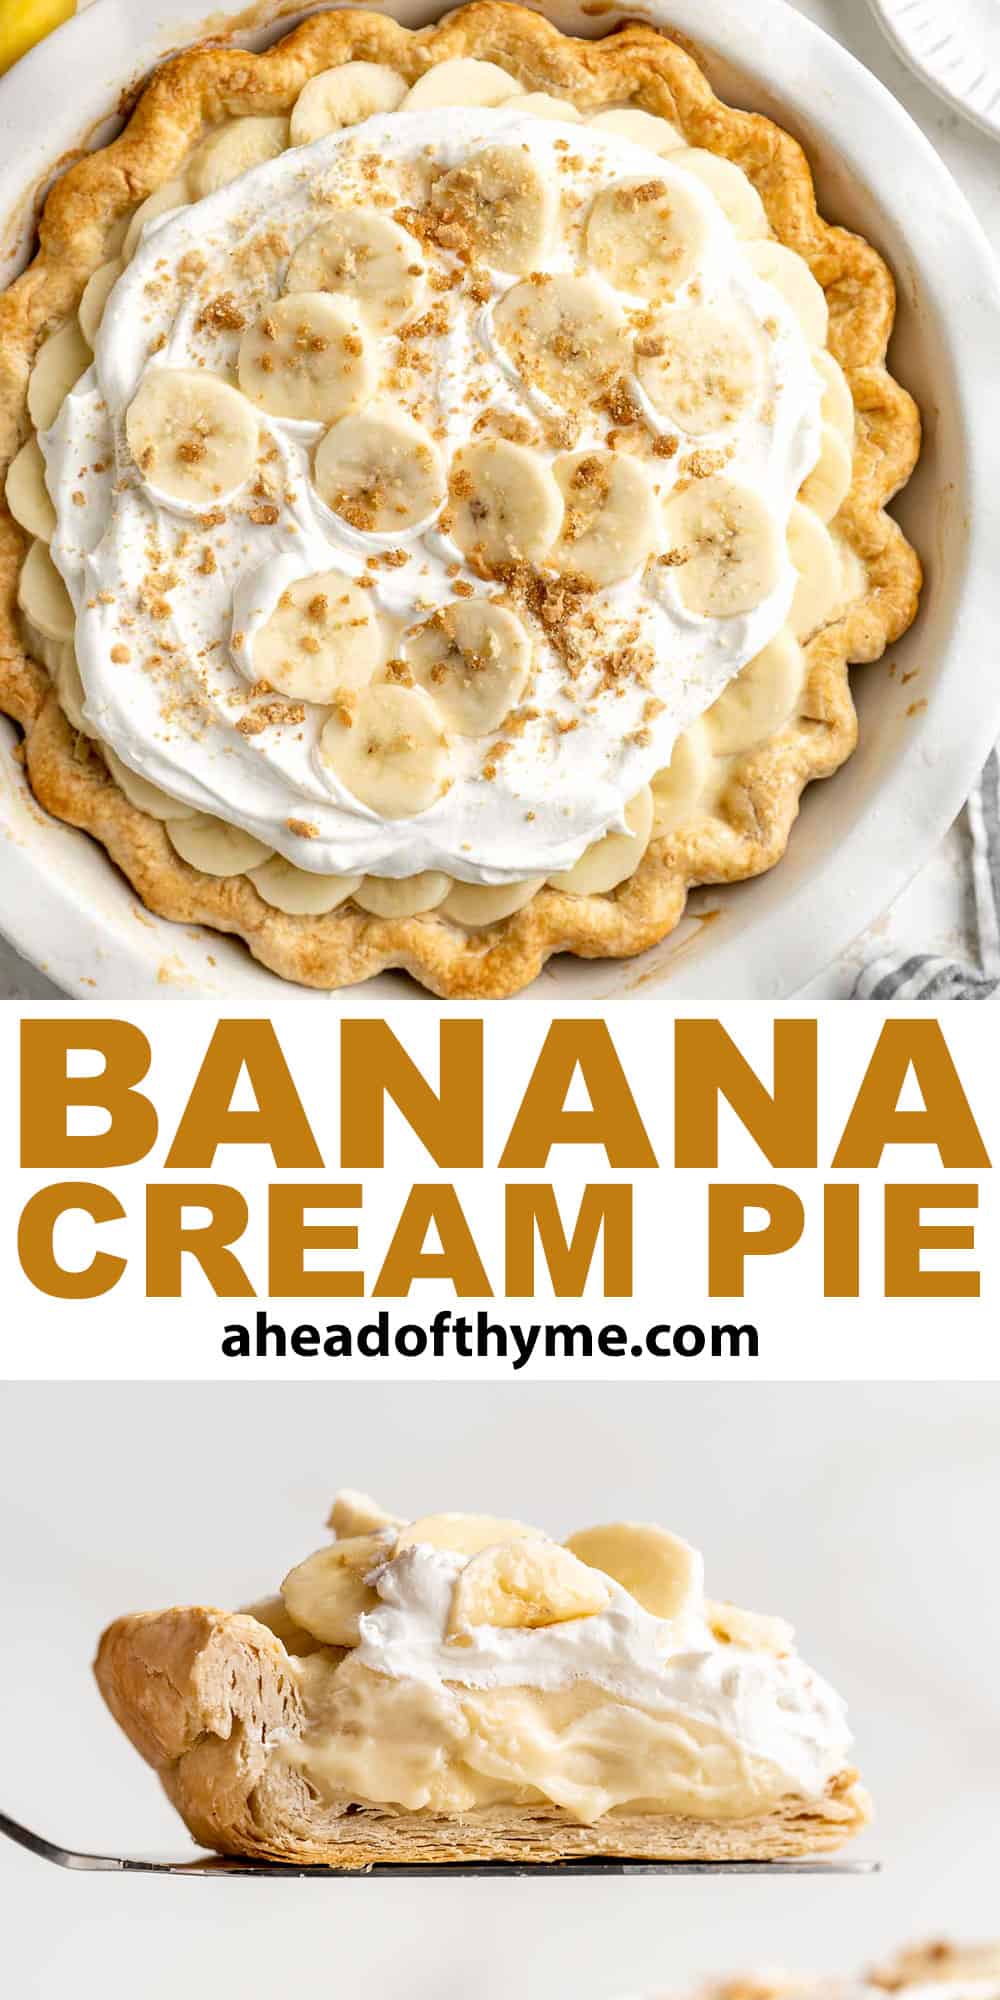
Vegetable Lasagna
This Vegetable Lasagna is possibly the tastiest and heartiest meatless dish you'll ever eat. Each layer is loaded with perfectly al dente noodles, rich tomato sauce with your fave veggies like zucchini and mushrooms, and a creamy three-cheese mixture that you won't be able to get enough of.
Lasagna is one of those dishes that just screams comfort food. It's warm, inviting, filling, and delicious. But if you're looking to make something a little lighter than the usual meat-filled lasagna, this vegetarian lasagna recipe is the way to go. It's a great meal to enjoy on a weeknight dinner, cook for a Sunday brunch, or share with family and friends during special occasions.
Why You'll Love this Vegetable Lasagna Recipe
- Vegetarian-friendly. It can be hard to come up with vegetarian meals that are both filling and delicious. But this recipe has all of that and more! Filled with layers of veggie-packed tomato sauce, it doesn't take much to fill up your plate. And don't worry if you're not vegetarian - this lasagna is so flavorful, you won't even miss the meat!
- Satisfying for everyone. Hearty and filling, this vegetable lasagna can be anyone's go-to comfort food. Doesn't matter if you're a vegetarian or just trying to cut back on meat, this lasagna won't let anyone down. It's a total crowd pleaser.
- Quick and easy. This veggie lasagna is so simple to make even if you don't have a lot of cooking experience. It takes a little over one hour to make, but most of that time is hands-off, so you can get on with your day while it bakes in the oven. I'd say it's definitely worth the wait!
- Great for meal prepping. Craving lasagna but don't feel like cooking? Cook a big batch once and you've got a a few days' worth of meals! You can even store them in individual portions and just pop one in the microwave when you're in need of a quick, comforting meal.
Ingredient Notes
To make this delicious, comforting Vegetable Lasagna, you will need the following ingredients (full measurements in recipe card below):
- lasagna noodles - you can try the whole grain version if you're up for a healthier alternative.
- olive oil - use high-quality extra virgin olive oil.
- avocado oil - it has a high smoke point, so it's perfect for sautéing the veggies. You can also use any vegetable oil that you have on hand.
- veggies - I use mushrooms, zucchini, and red bell pepper in this recipe. Feel free to substitute with what you have on hand.
- onion and garlic - always use fresh ones for the best flavor.
- tomato sauce - this forms the base of the sauce in this lasagna.
- tomato paste - enhances the umami flavor of the sauce.
- Italian seasoning - the perfect blend of spices for lasagna.
- cheese - we use a combination of ricotta, mozzarella, and parmesan for a creamy, melty, cheesy goodness.
- egg - binds the cheese mixture.
- parsley - mix in the sauce and cheese mixture for a fresh, herby punch. We also save some for garnishing the lasagna when serving.
- salt
You will also need measuring cups and spoons, large cooking pot, Dutch oven or another cooking pot, medium mixing bowl, 9x13-inch casserole pan, and aluminum foil.
How to Make the Best Vegetable Lasagna
First, cook the lasagna noodles.
Bring a large pot of water to a boil over medium-high heat. Add lasagna noodles, olive oil, and salt and cook until al dente (fully cooked but still firm), about 10 minutes or according to package directions. Rinse the noodles under cold water to cool off completely and set aside.
Next, prepare the vegetable sauce.
- Sauté veggies. Heat oil in a large pot or 4 quart Dutch oven for 2 minutes over medium-high heat until the hot oil sizzles. Add mushrooms, zucchini, and salt. Cook until most of the liquid has evaporated and vegetables are caramelized, about 7 minutes.
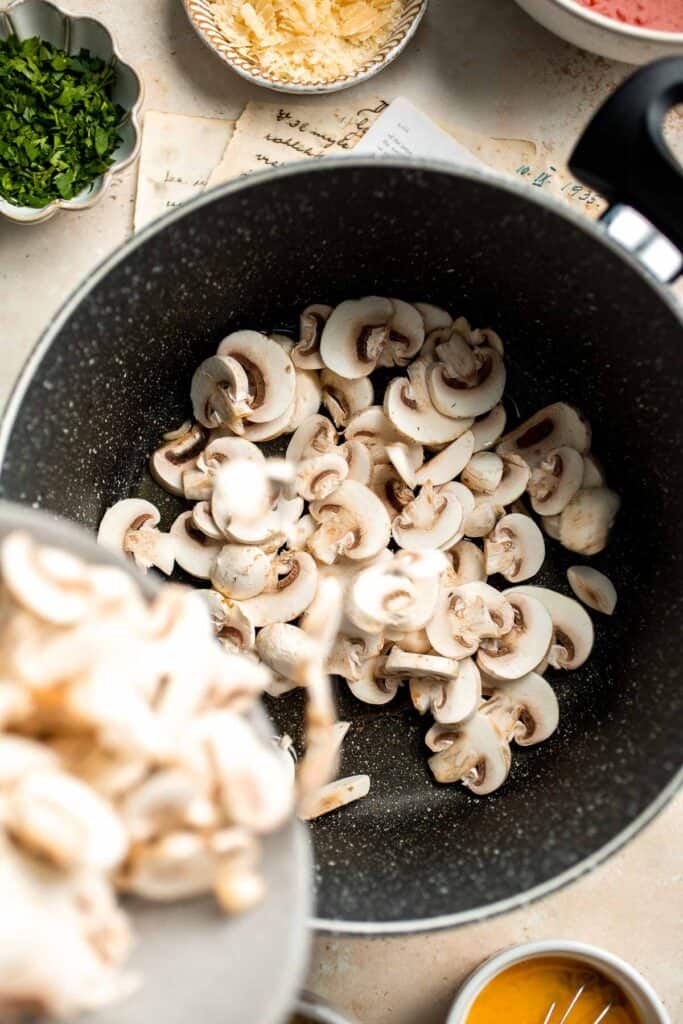
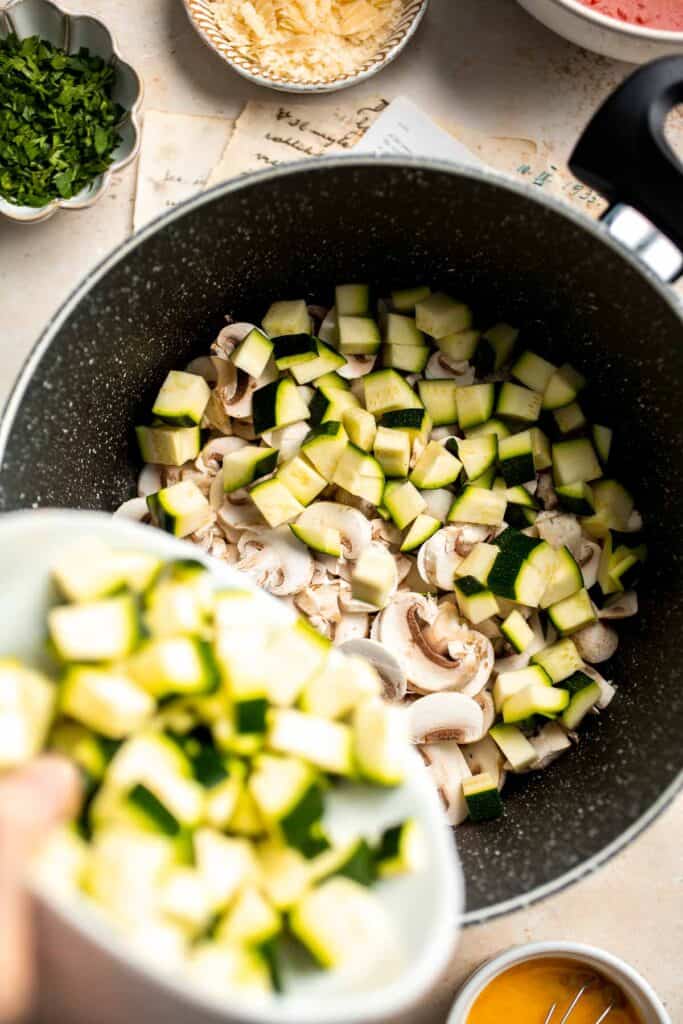

- Add remaining veggies. Add onion, garlic and bell pepper. Stir well to combine and continue cooking until tender, about 2-3 minutes.
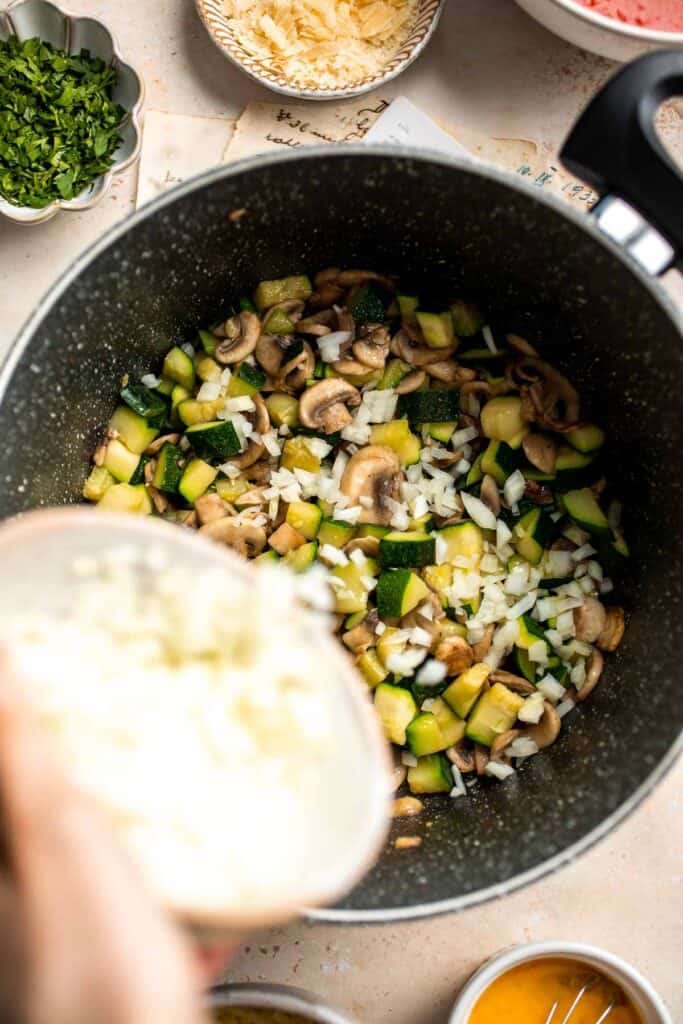
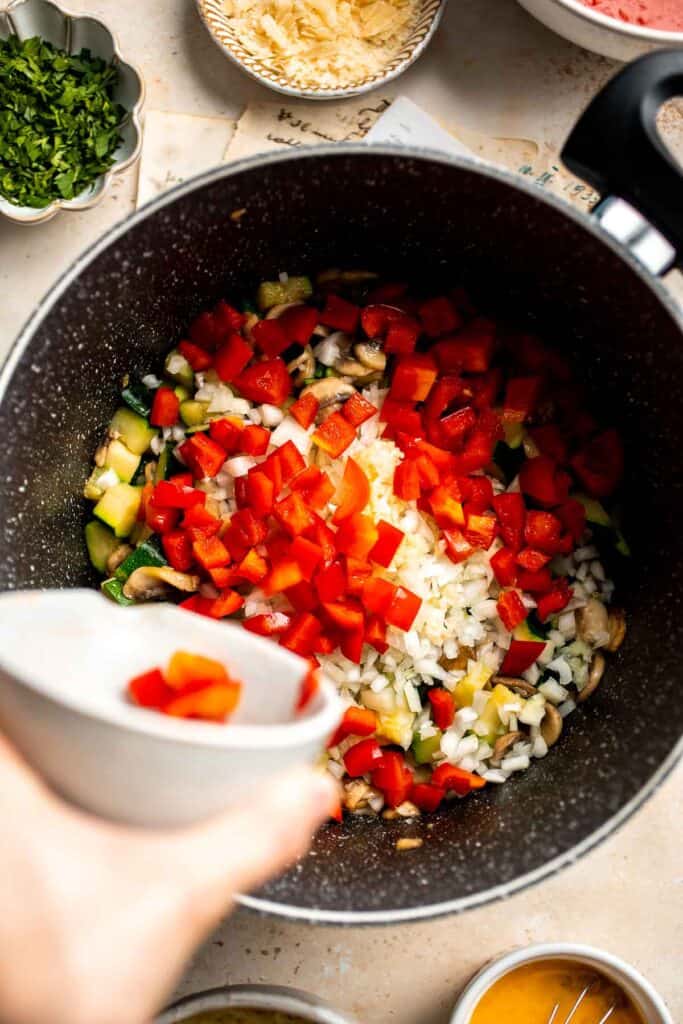
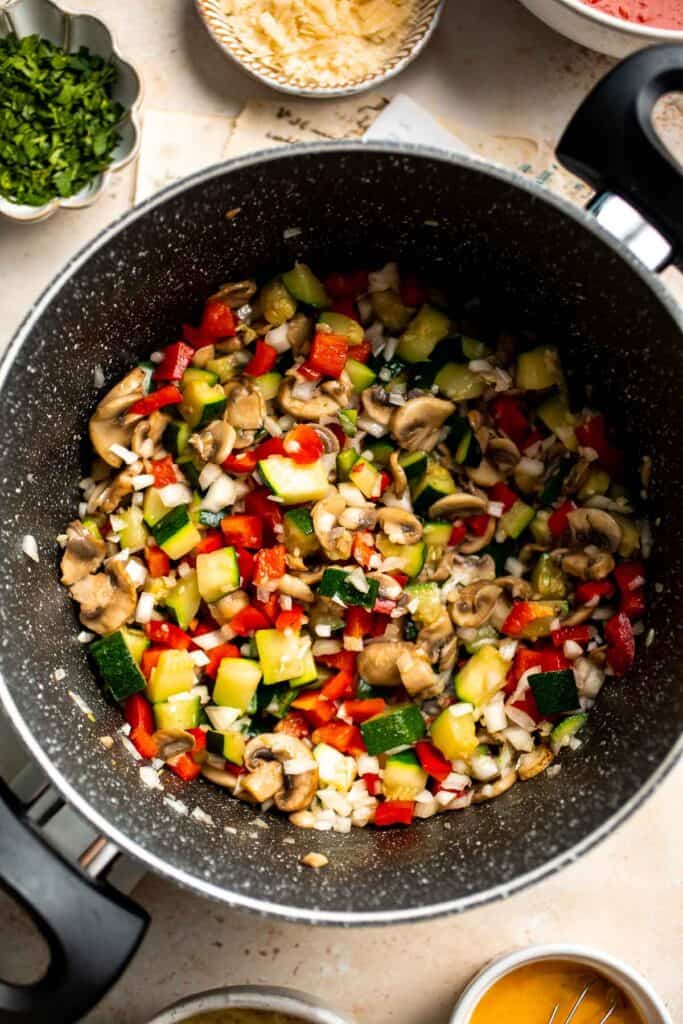
- Add sauce. Add tomato sauce, tomato paste and parsley. Stir well to combine and bring the sauce to a simmer. Turn off the heat and set aside.
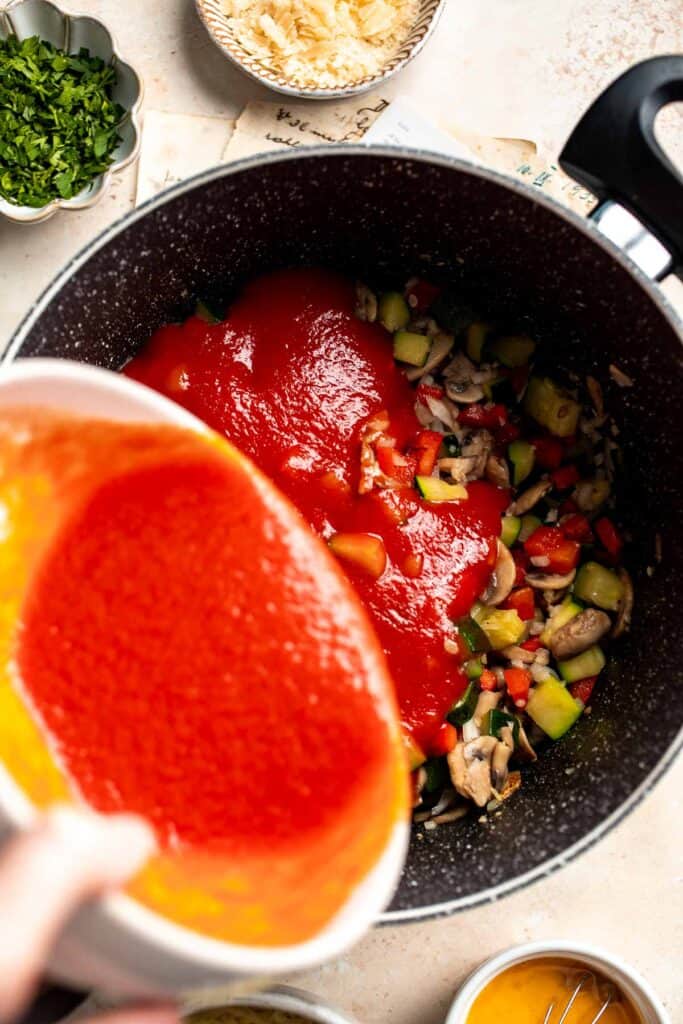
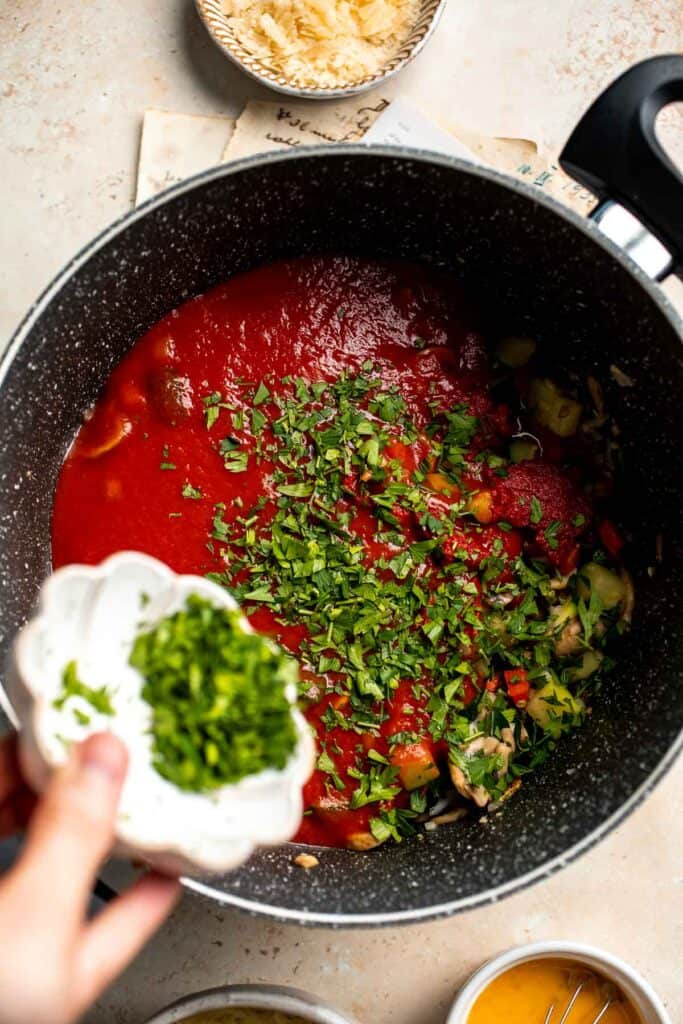
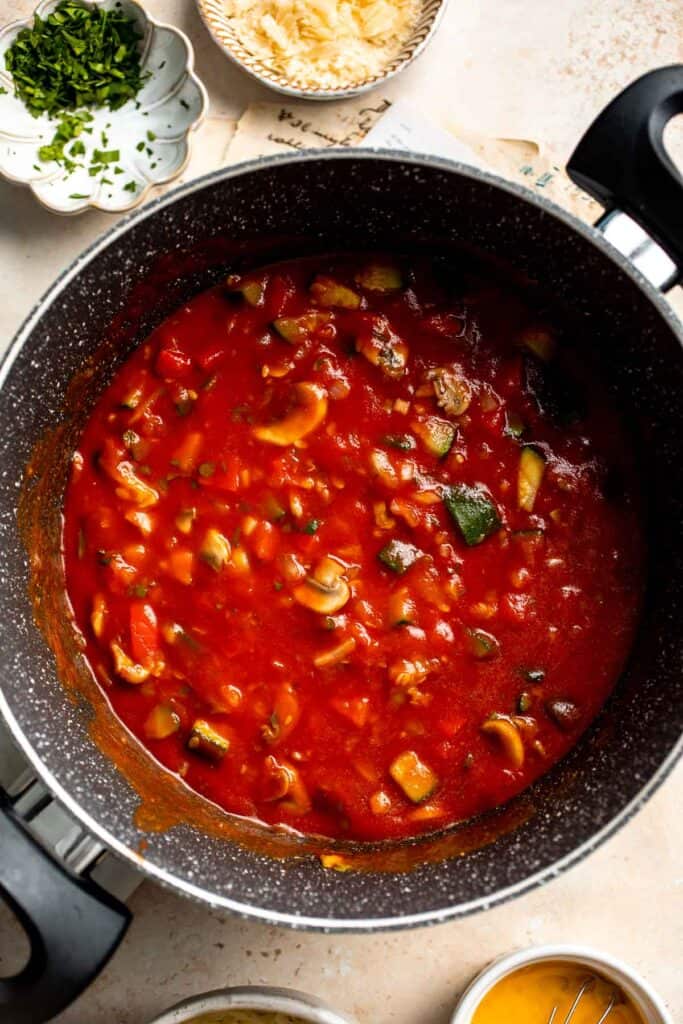
Next, make the cheese mixture.
In a medium mixing bowl, add ricotta cheese, 1 cup mozzarella cheese, and ¼ cup parmesan cheese, egg, and parsley. Whisk to combine.

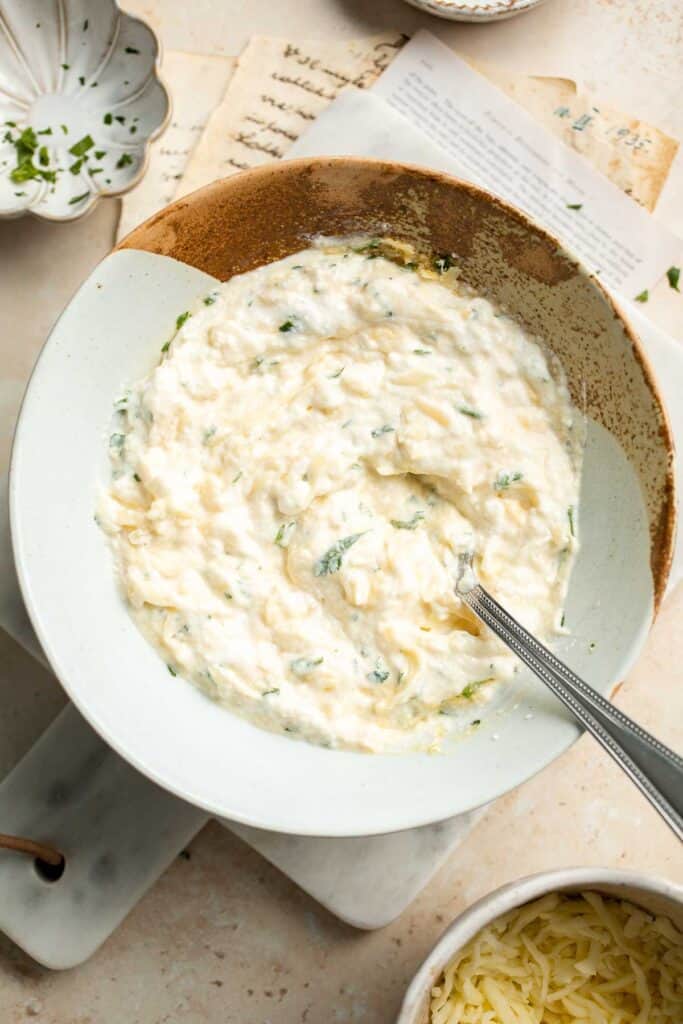
Now, assemble the vegetable lasagna.
Assemble the lasagna in the following order:
- Sauce: In a 9x13-inch casserole pan, evenly spread 1 cup of the vegetable sauce on the bottom.
- Noodles: Place a layer of 3 lasagna noodles evenly over the sauce.
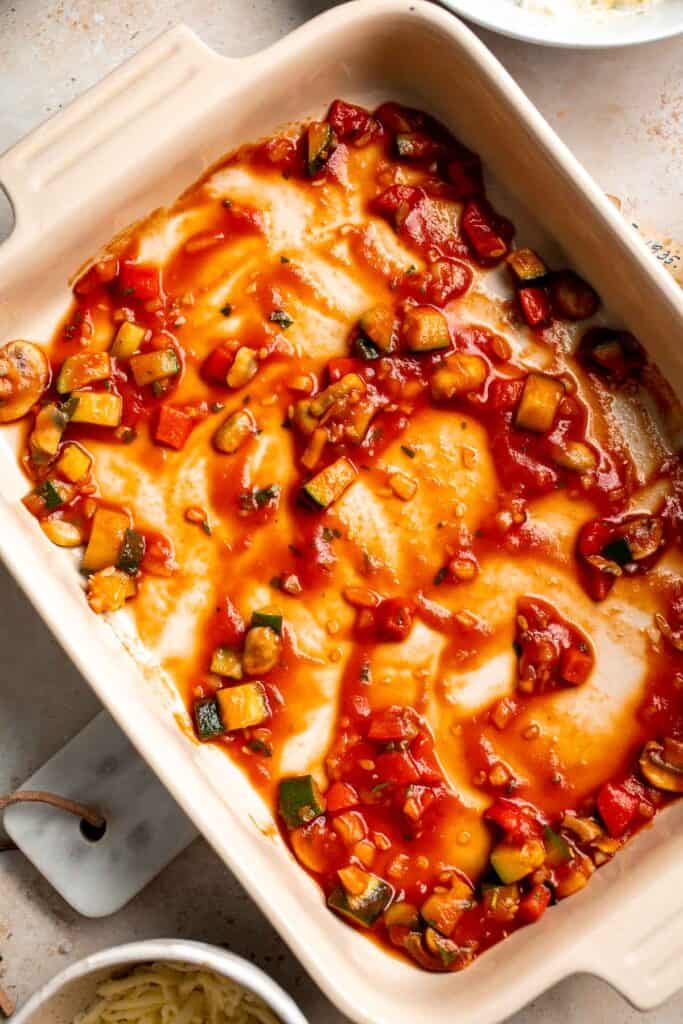
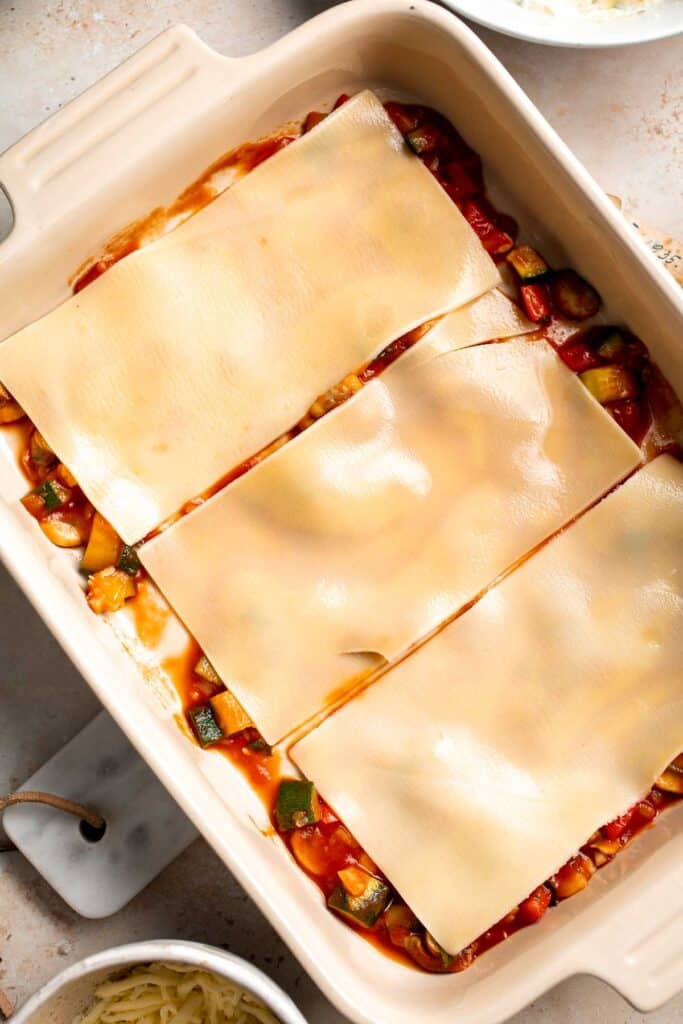
- Cheese: Spread half of the cheese mixture evenly over the noodles.
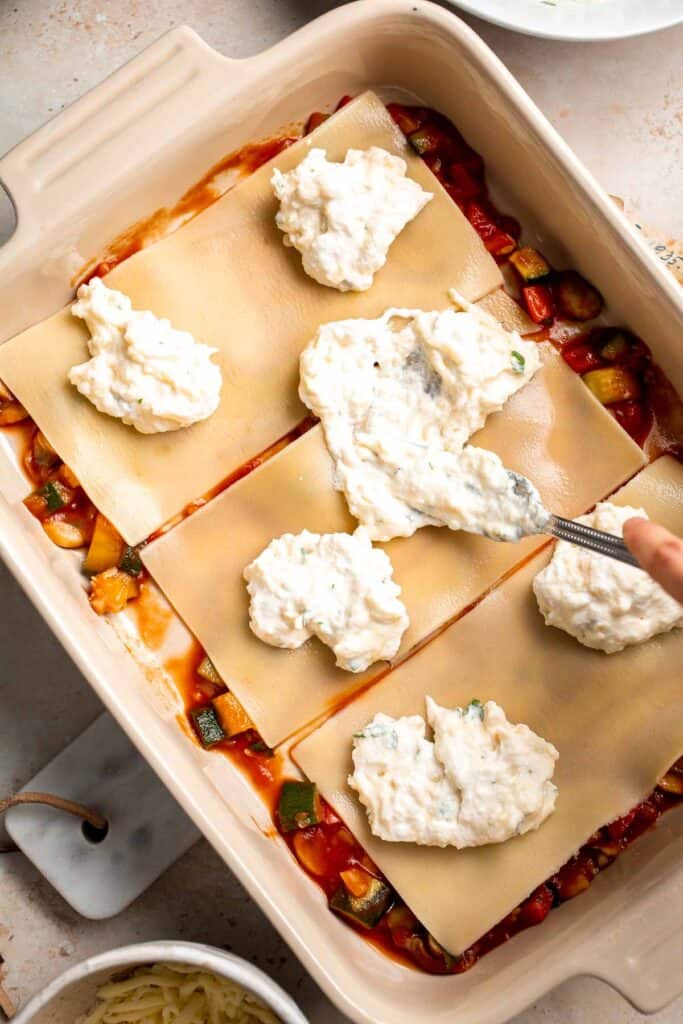
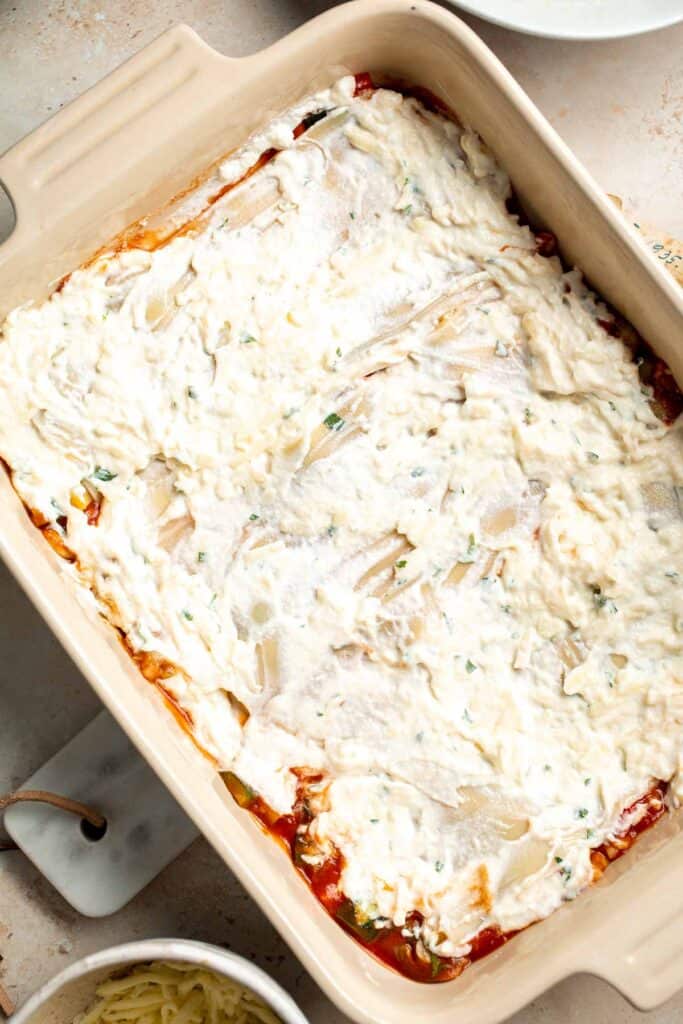
- Sauce: Spread half the remaining sauce on top.
- Noodles: Top with another layer of 3 noodles.
- Cheese: Spread remaining half of cheese mixture on top.
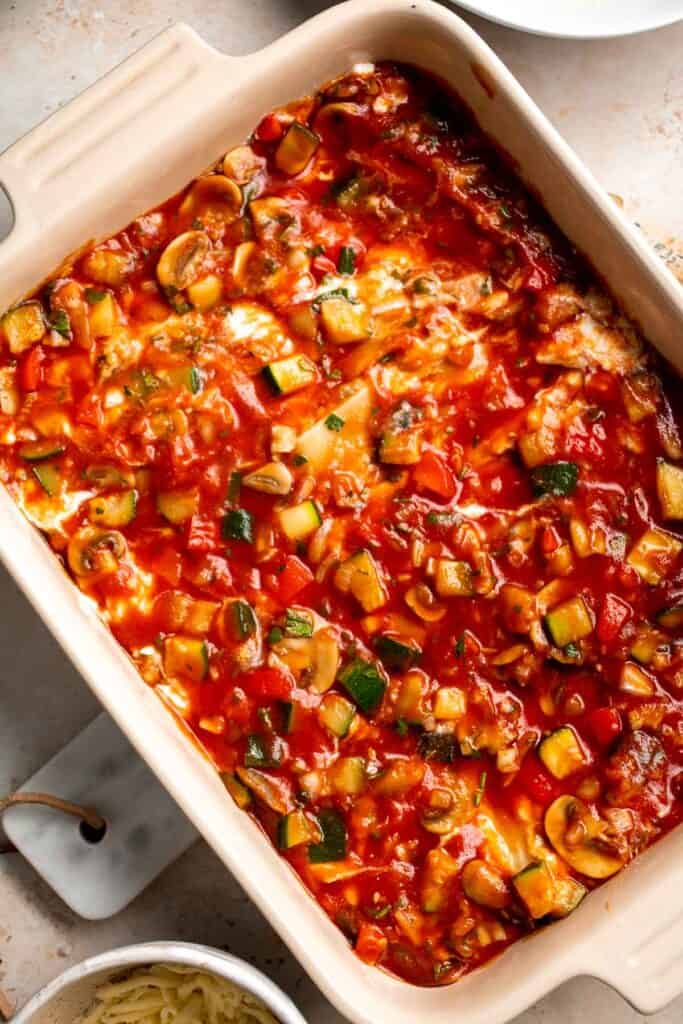
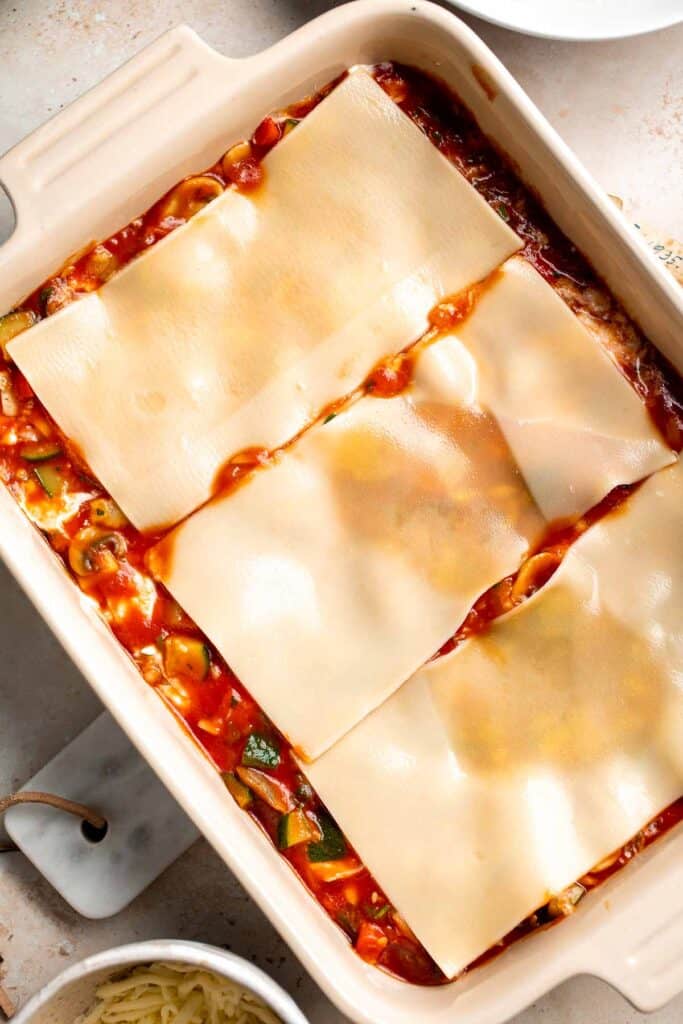
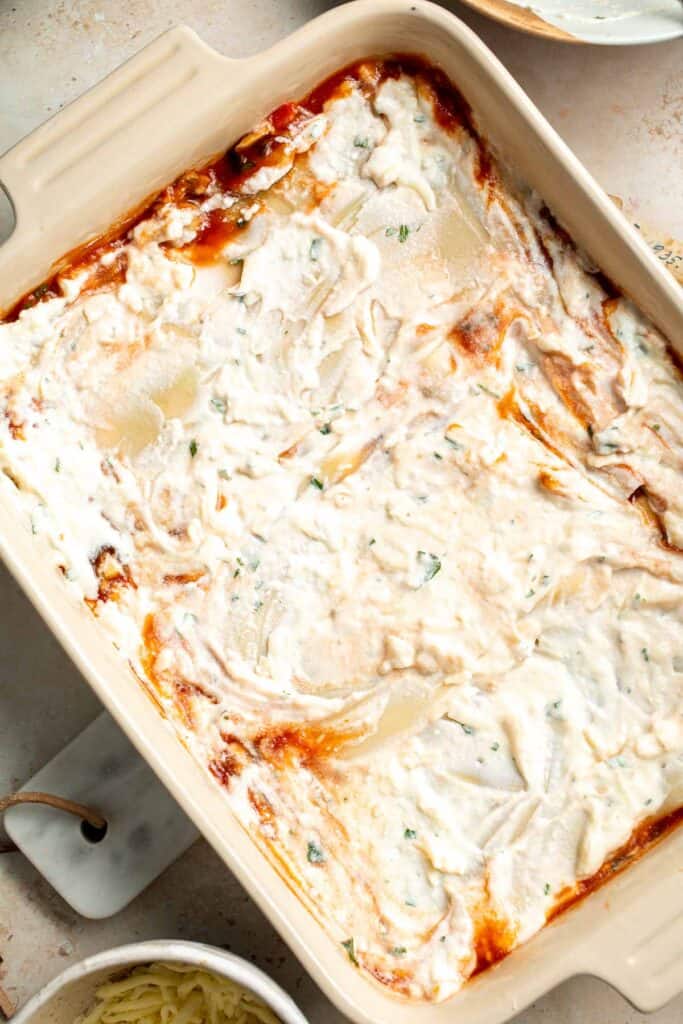
- Noodles: Top with the last layer of 3 noodles.
- Sauce: Add remaining sauce on top.
- Shredded cheese: Top with the remaining ½ cup mozzarella and ¼ cup Parmesan cheese.

Finally, bake the lasagna.
- Cover. Lightly grease a large piece of aluminum foil and cover the pan with the greased side inside. Greasing the foil prevents the melted cheese from sticking to the foil while baking.
- Bake. Bake the lasagna (covered) in a 375F preheated oven for 25 minutes. Then, remove the foil and bake uncovered for another 20 minutes or until the melted cheese turns golden brown and bubbly.
- Optional broil. Optionally, turn on broiler on high and broil for the last 3-4 minutes to get a crispy and brown cheesy crust. But keep a close eye on the broiler as things can burn quickly.
- Rest. Let the lasagna cool for 10 minutes. Slice and serve.
Recipe Variations
- Pack with spinach. Dump a bag of fresh or frozen spinach in the sauce for an extra boost of color and nutrition.
- Use other veggies. Swap out zucchini for other veggies like eggplant, carrot, butternut squash, and sweet potato.
- Make it saucy. Add an extra ¼ to ½ cup of vegetable sauce per layer if you like your lasagna extra saucy.
- Swap out the lasagna noodles. Make this gluten free by using gluten-free pasta or using sliced veggies like eggplant or zucchini. See our Zucchini Lasagna or Eggplant Lasagna for instructions.
How to Serve
Serve this delicious Vegetable Lasagna on its own or pair it with bread, salad, and other fresh and light side dishes such as:
- Garlic Breadsticks
- Caprese Skewers
- Parmesan Crusted Brussels Sprouts
- Cheesy Garlic Bread
- Tomato and Mozzarella Caprese Salad
- Rosemary Garlic Focaccia Bread
For more recipe inspiration, see our 30 Side Dishes for Pasta.
Recipe Tips and Tricks
- Cool before serving. Give it a bit of rest time to allow the layers to firm up and ensure neat, intact squares when serving.
- Don't overbake. Let the lasagna cook until it's heated through and the cheese layer is bubbly. Don't leave it in the oven for too long or you'll end up with a dry and tough dish.
- Use no-boil noodles. Save yourself the time and hassle of boiling noodles and use pre-cooked lasagna noodles that will cook to perfection in the oven.
Storing and Freezing Instructions
How to Store
Place the leftover lasagna in an airtight container and refrigerate for up to 4 days. You can also portion it out into individual servings for easy reheating throughout the week.
How to Reheat
Reheat each portion in the microwave for just over a minute. If heating multiple portions at a time, cover them with foil and bake in the oven at 375°F for about 15 minutes, or until heated through. If you'd like to crisp up the top, remove the foil and broil for an additional 3 minutes - but keep a close eye on the broiler because things can burn quickly in there.
How to Freeze
Wrap the entire pan with plastic wrap and use aluminum foil to cover it in another layer. You can also portion it out into individual servings and double-wrap each portion as well. Place the portions in a freezer-safe bag or container and freeze for up to 3 months.
To reheat from frozen, pop it straight from the freezer at 375℉ for 30 to 40 minutes, or until heated through. You can also reheat an individual portion in an air fryer at 375℉ for 15-20 minutes until heated through.
More Lasagna Recipes
- 10 Best Lasagna Recipes
- Vegetarian Lasagna with Spinach
- Eggplant Lasagna
- Easy Meat Lasagna
- Creamy White Chicken and Spinach Lasagna
- Skillet Lasagna
Tried this recipe?
I'd love to hear what you think! Leave a comment and rating below to share your feedback. Your reviews help others discover this recipe and help me keep creating more free recipes for you. Snap a photo and tag me on social media @aheadofthyme too.
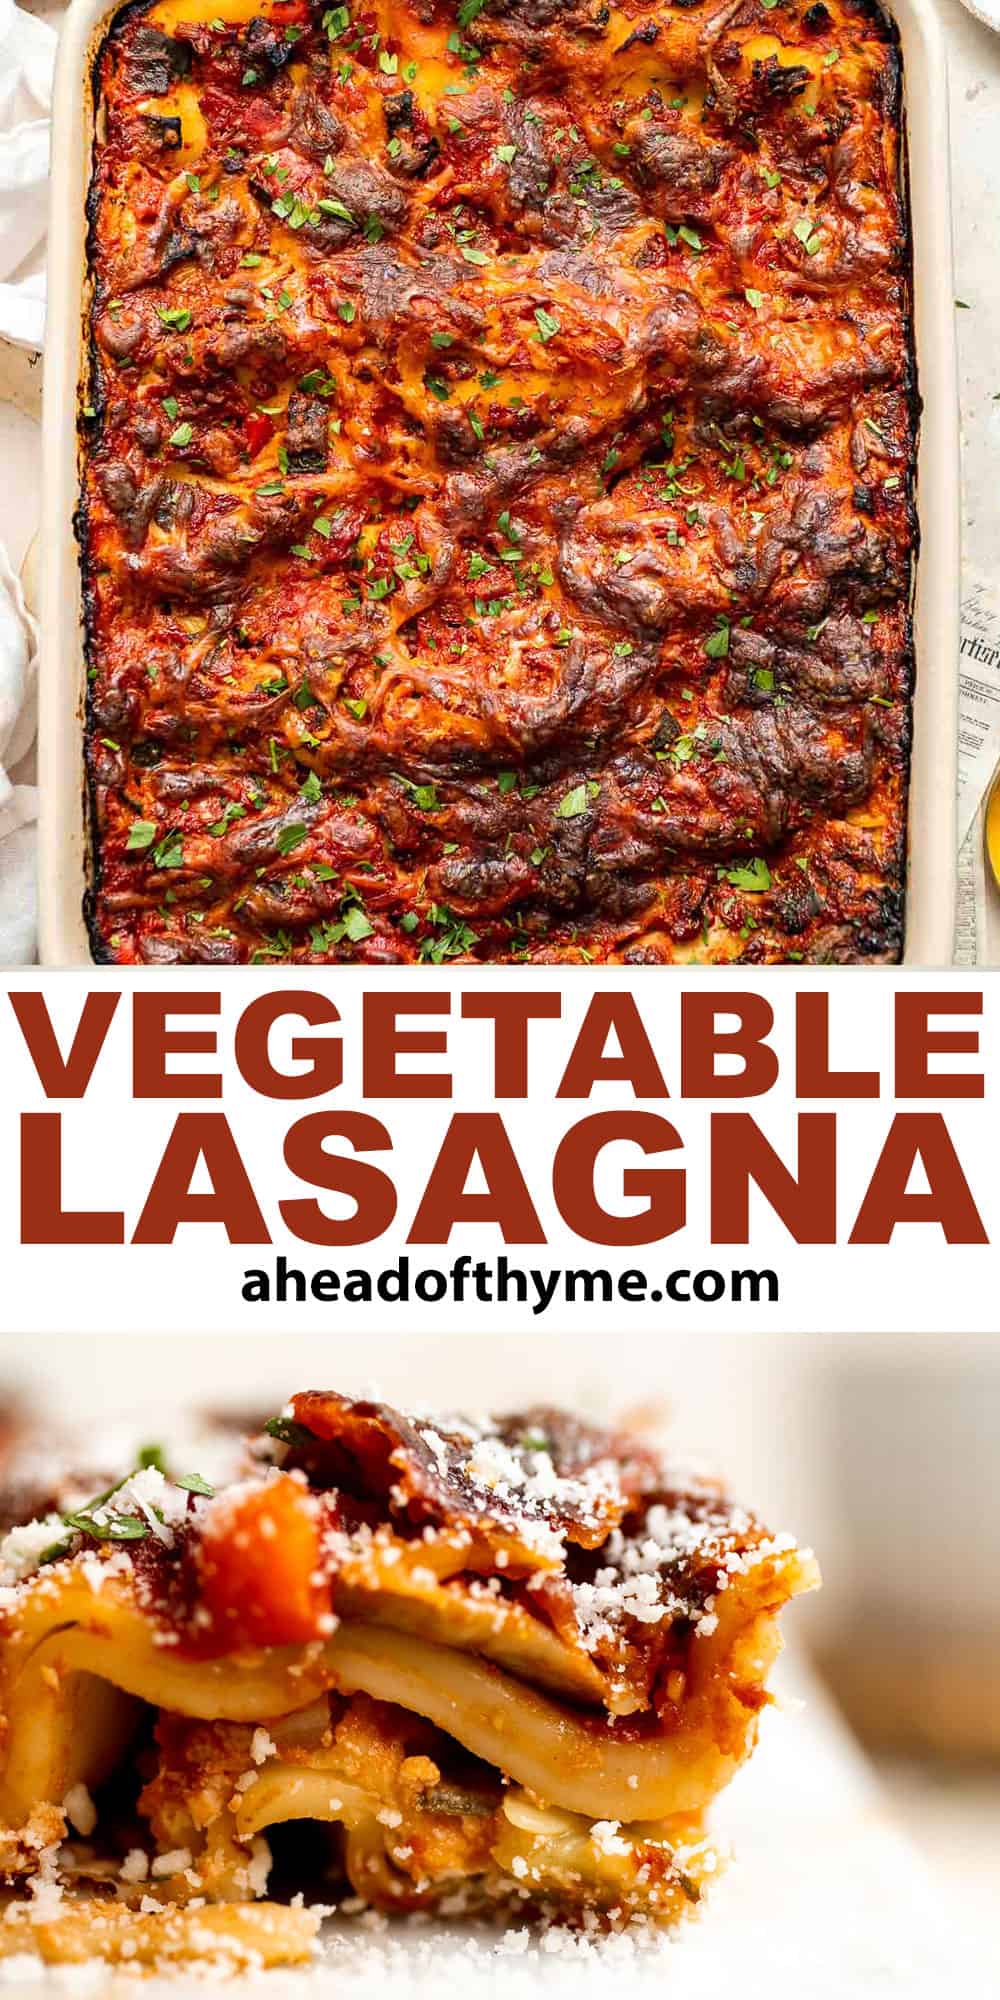
Leftover Mashed Potato Gnocchi
After Thanksgiving dinner, give your leftover potatoes new life by turning them into the most delicious homemade gnocchi! Once you realize how easy it is to make leftover mashed potato gnocchi from scratch, you'll want to make these little dumplings way more often!
Although we're all about eating our leftovers, sometimes you need to change things up. This leftover mashed potatoes gnocchi recipe is such a great alternative to reheating old mashed potatoes and gravy for every meal. Plus, they taste great with a wide variety of sides and toppings, and they only take a couple of minutes to make!
Why You'll Love This Leftover Mashed Potato Gnocchi
- So easy to make. The great thing about this recipe is that it's so simple to make! Since the mashed potatoes are already cooked, you don't even have to peel a single potato. Just add all of the ingredients to a bowl, knead it into a workable dough, then cut the gnocchi into 1 inch pieces.
- Fun to eat. I'm not sure which part is more fun - making the gnocchi or eating it! There's something so nice about popping a little perfectly seasoned gnocchi into your mouth. They have such a light, chewy texture, and they taste great with a variety of sauces.
- Finish your leftovers. Don't let those potatoes go to waste! This recipe will ensure every last bit of those mashed potatoes gets eaten. It's one of my favorite way to repurpose leftovers!
Ingredient Notes
To make this delicious leftover mashed potato gnocchi recipe, you will need the following ingredients (full measurements in recipe card below):
- leftover mashed potatoes - let your mashed potatoes rest overnight in the fridge until fully chilled. The next day, use them to create your dough.
- flour - use regular all purpose flour. Add half the flour first, then gradually add more.
- egg - you'll need one whole egg to bind the potatoes and flour together. This will also help the pillowy gnocchi float to the top of the water.
You will also need a large bowl, spatula, knife or pastry cutter, fork or gnocchi board, a large pot, and slotted spoon.
How to Make the Best Leftover Mashed Potato Gnocchi
- Make dough. In a large mixing bowl, add mashed potato, half of the flour, and egg. Stir well with a spatula until the flour is well incorporated. Add the remaining flour a little bit at a time and use your hands to mix together until all the flour is evenly combined. The dough should be soft but not sticky.
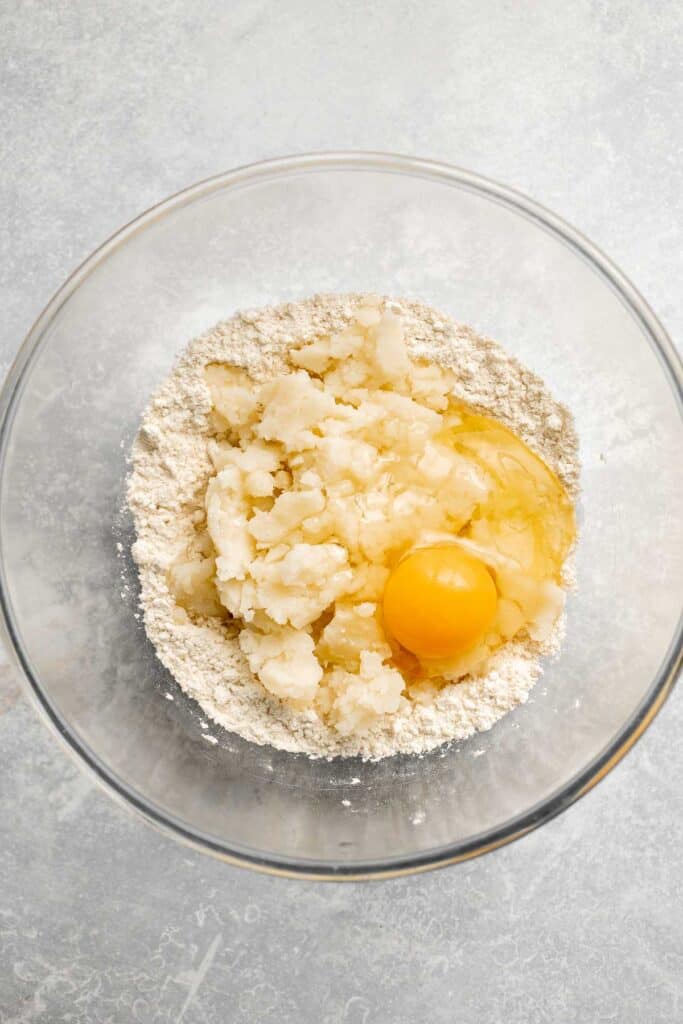
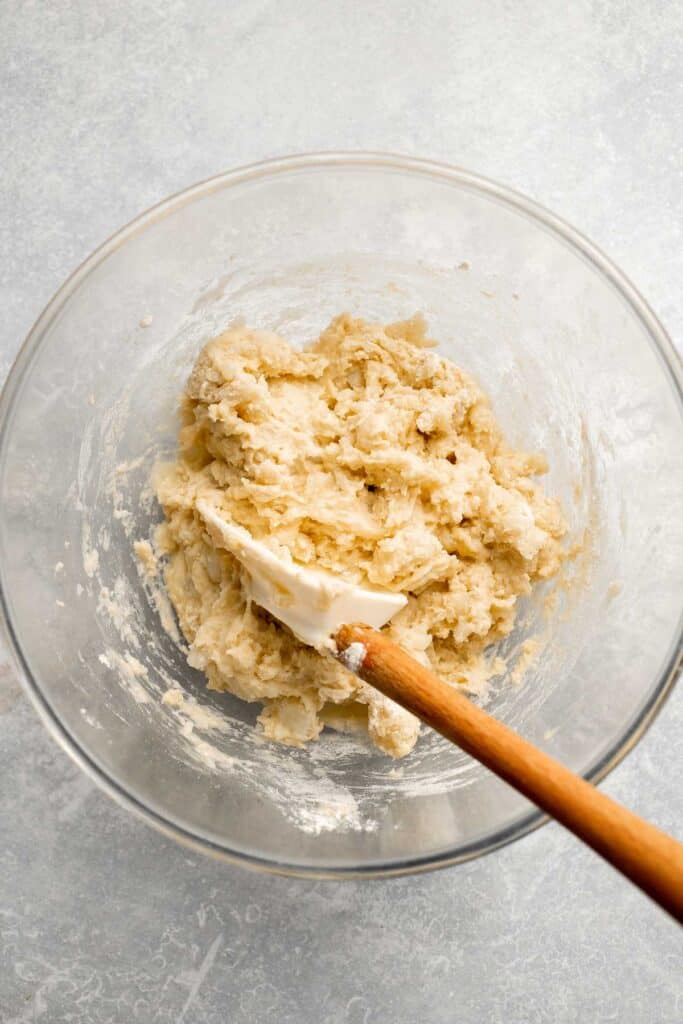
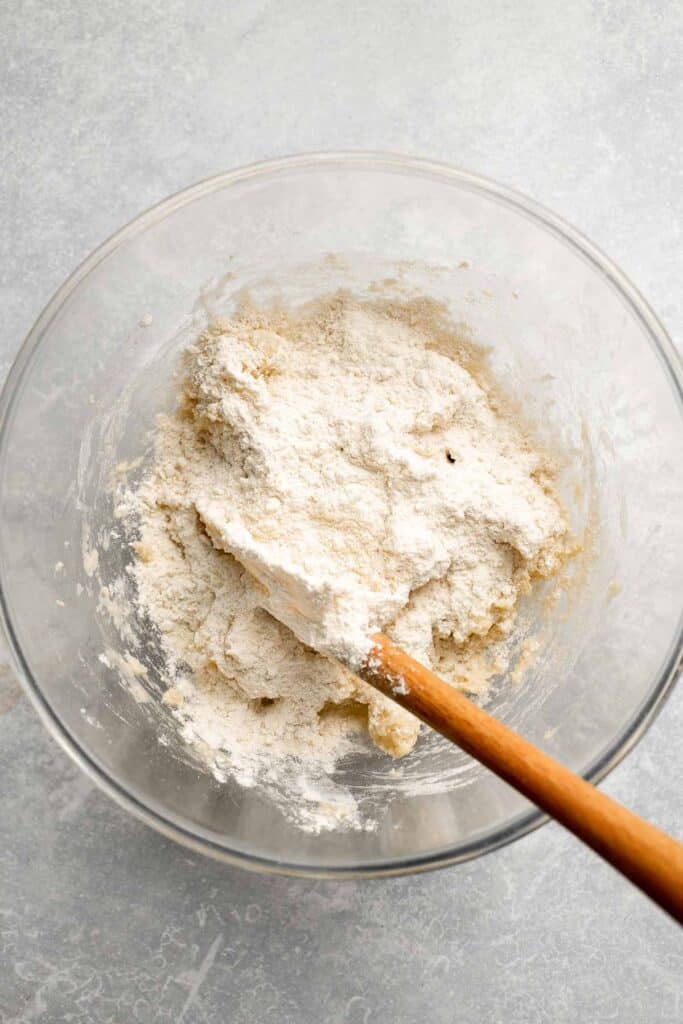
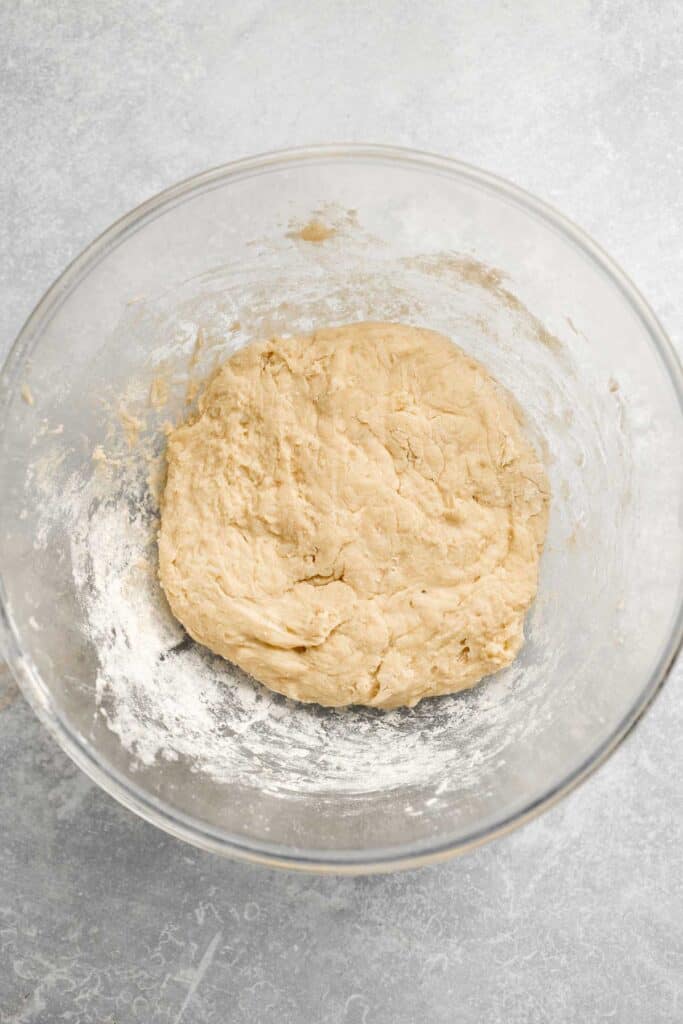
- Divide dough. On a lightly floured surface, divide the gnocchi dough into 4 pieces.
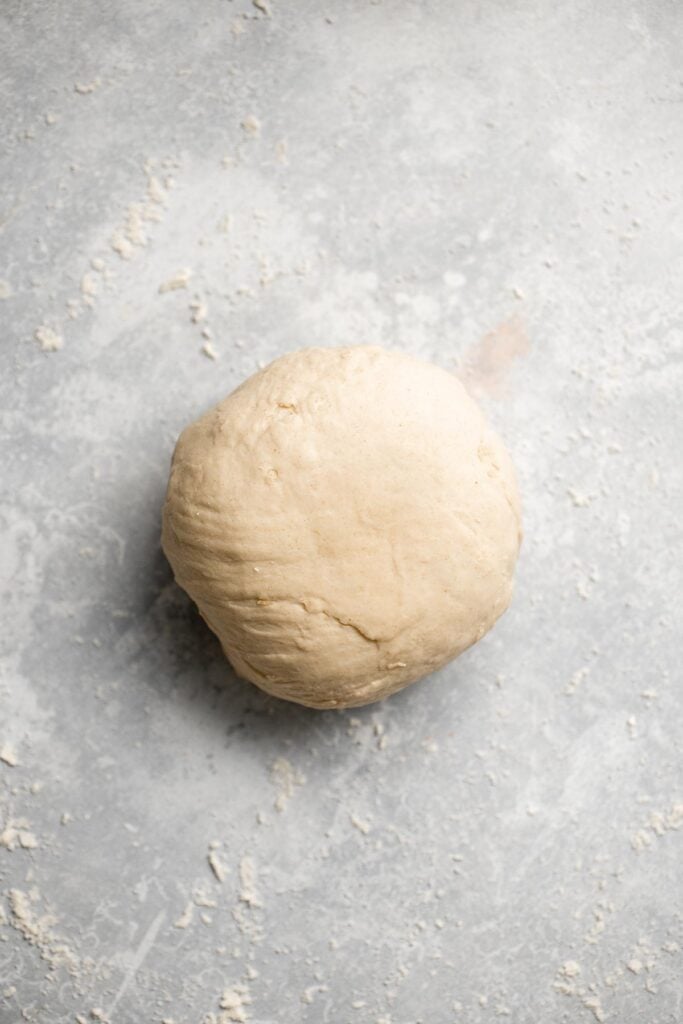
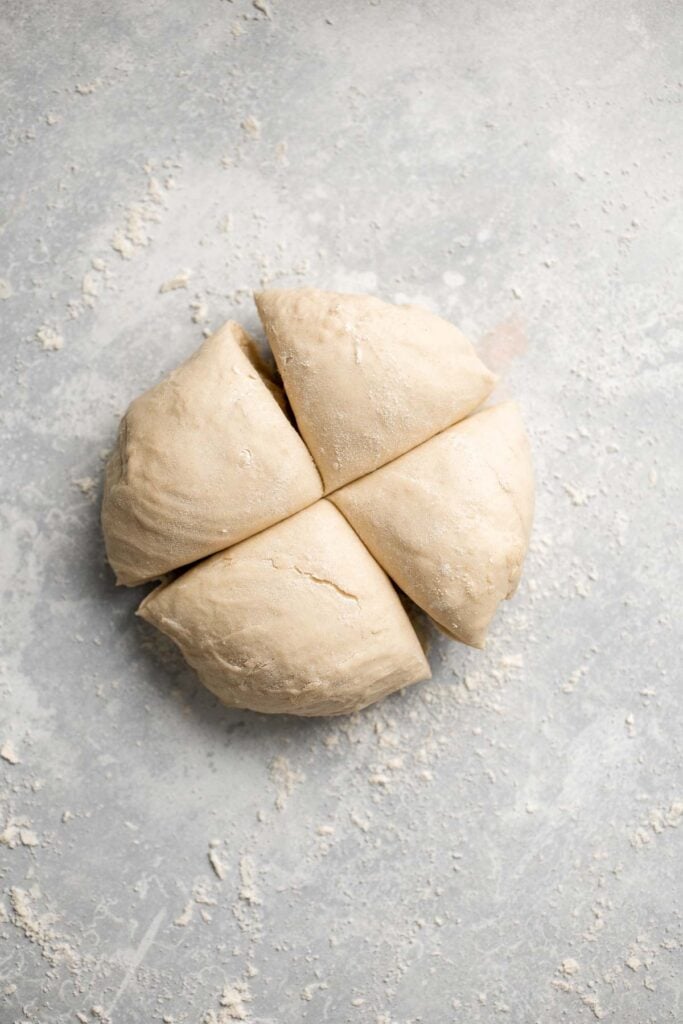
- Cut dough into pieces. Roll each piece into 1 inch thick rope. Cut each rope into 1 inch long pieces. Lightly sprinkle the gnocchi pieces with flour if needed.
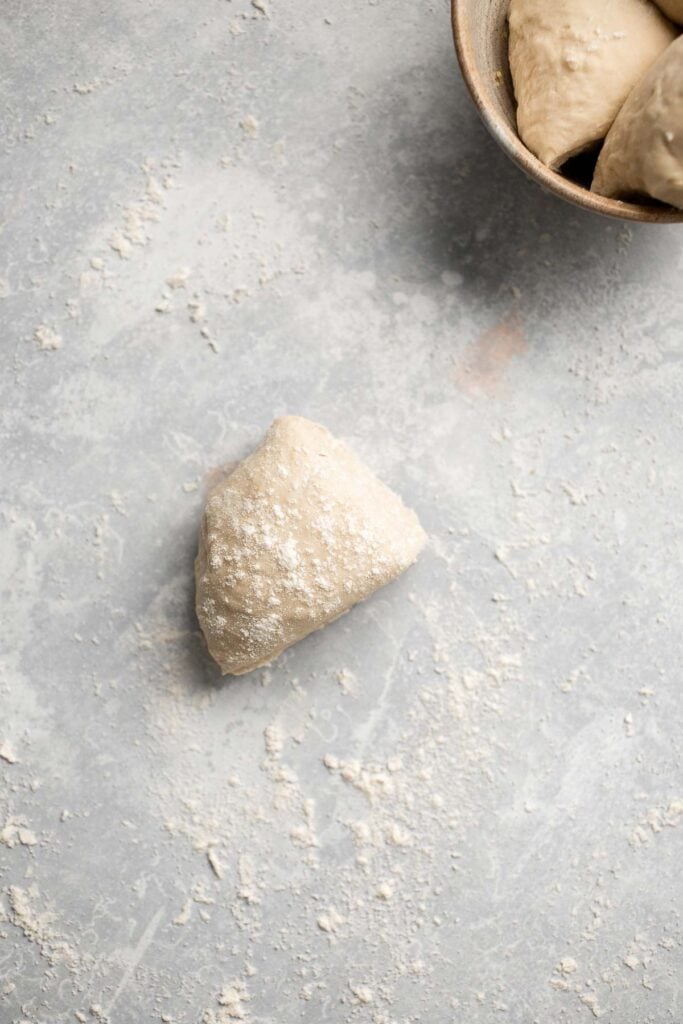

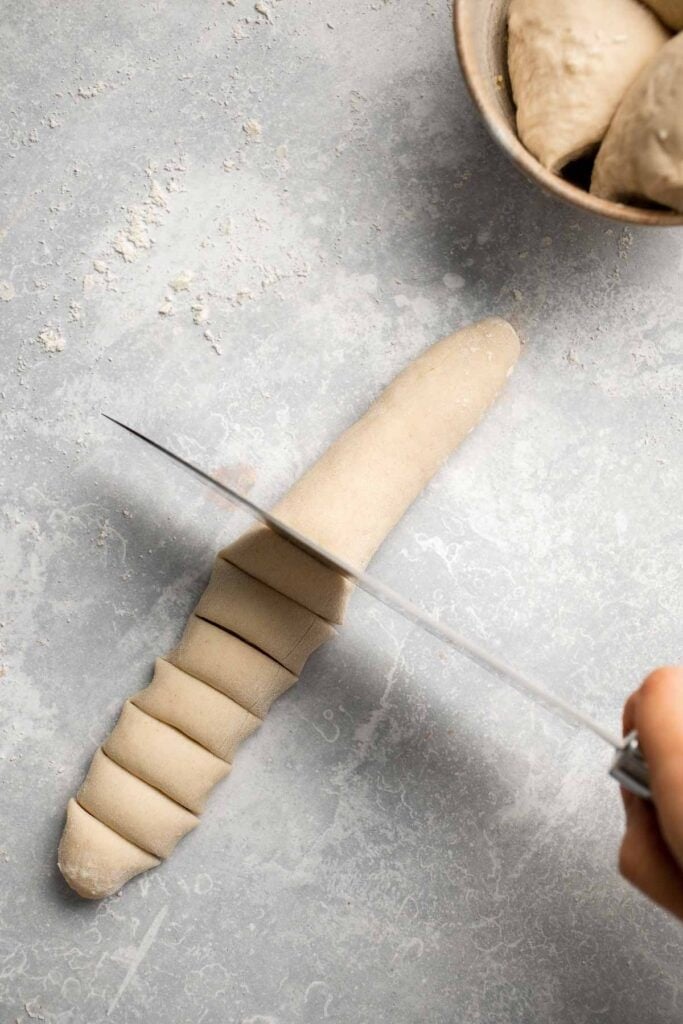
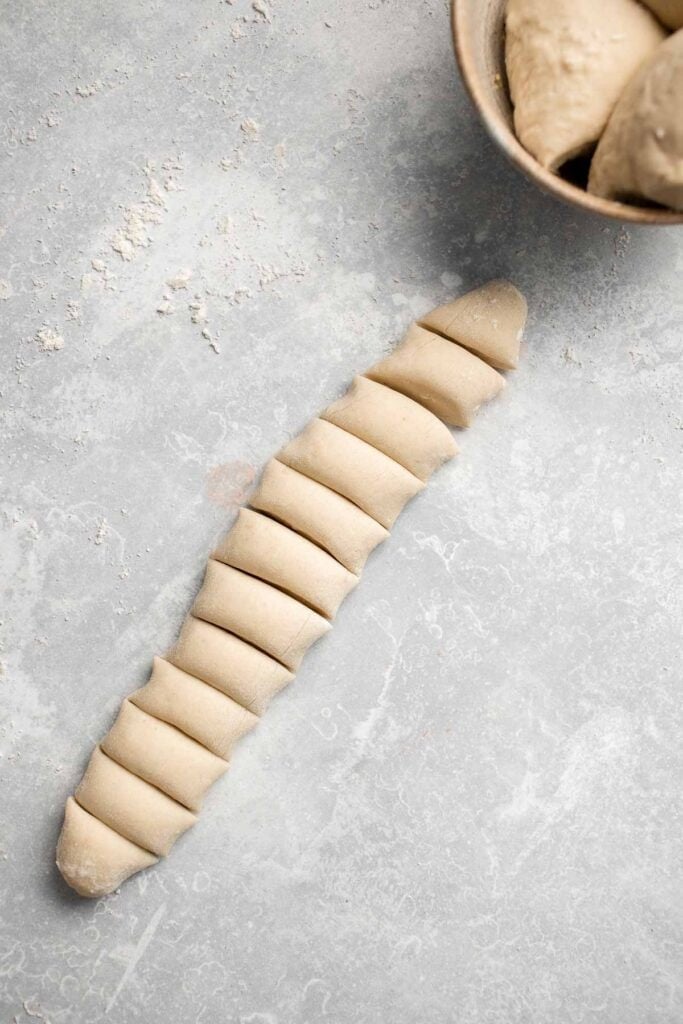
- Add pattern. Use the back of a fork or gnocchi board to shape each gnocchi piece with ridges.
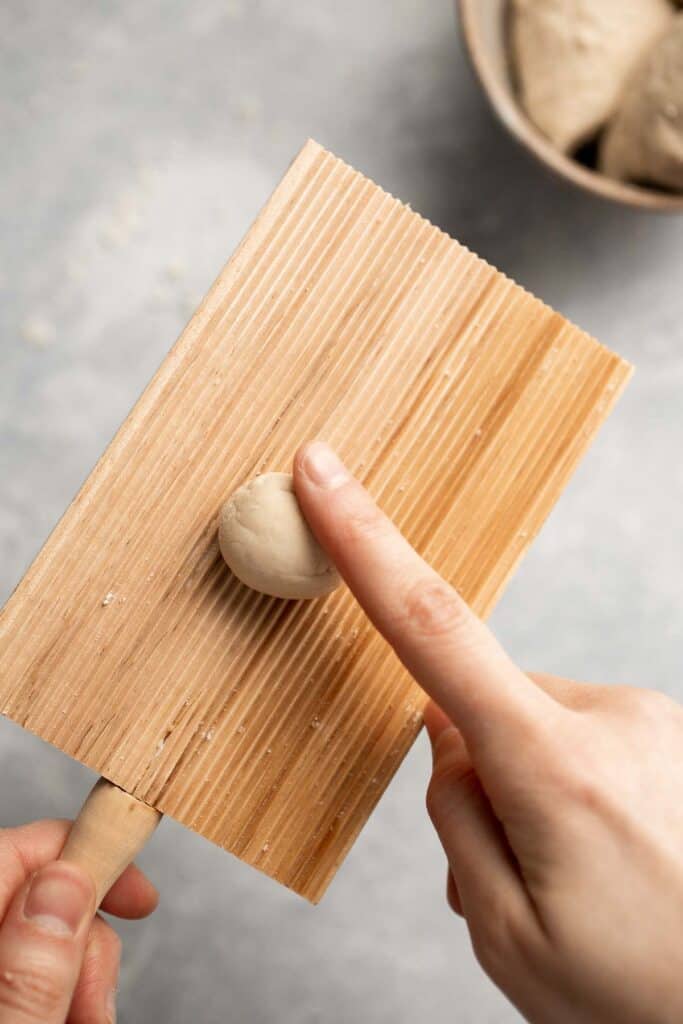
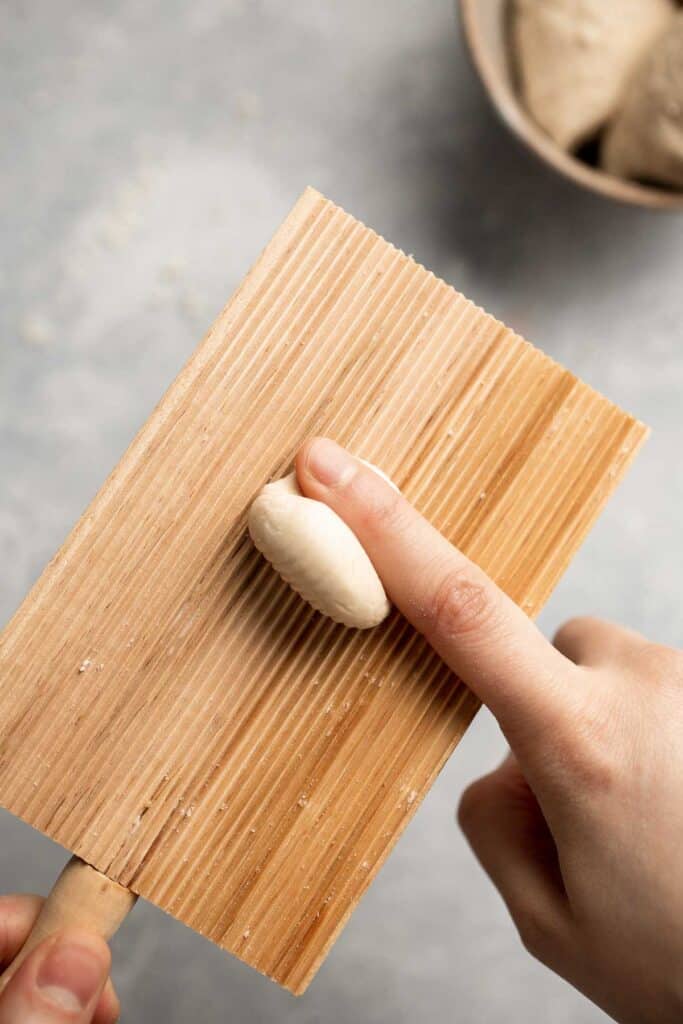
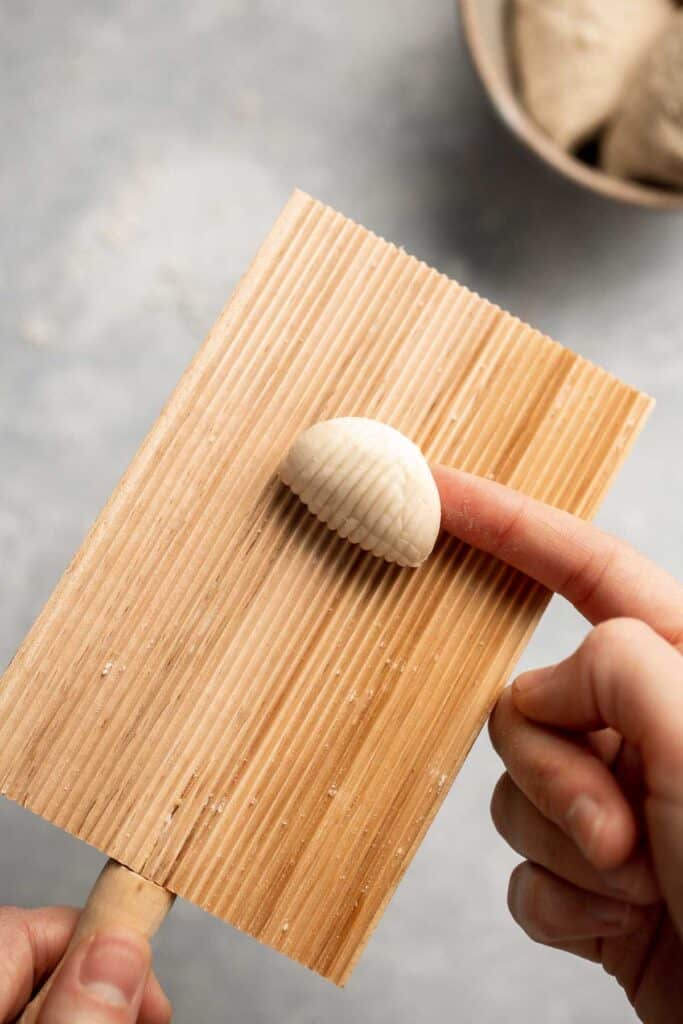

- Cook. Add gnocchi in a large pot of boiling water and sprinkle with a little bit of salt. Boil over medium heat for 2-3 minutes until the gnocchi floats.
- Serve. Remove with a slotted spoon and toss in your favorite pasta sauce, such as marinara.
Recipe Variations
- Make sweet potato gnocchi. Instead of regular Russet potatoes, use leftover roasted sweet potatoes. But skip the sweet potato casserole leftovers - it's far too sweet to convert into a savory dish.
- Butternut gnocchi. Transform leftover roasted butternut squash into gnocchi, following the same steps!
- Shape your noodles. The little grooves help the sauce adhere, so they're important to add! For the thumbprint version, place the gnocchi on top of the tines of a fork and gently press down and roll.
- Add herbs or spices. Since Thanksgiving mashed potatoes are so heavily seasoned and flavored, you don't usually need to add much to bring this recipe together. For extra flavor, feel free to add your favorite herbs like rosemary, parsley, sage, or thyme. They're also great with some roasted garlic!
How to Serve
This leftover potato gnocchi recipe is delicious served on its own tossed in some pasta sauce like Alfredo, Bolognese, or Marinara, or serve it as a complete meal paired with some of delicious mains and sides including:
- Butternut Squash Apple Soup
- Roast Beef
- Fall Harvest Salad with Butternut Squash and Apple
- Skillet Chicken with Lemon Garlic Sauce
- Cream of Mushroom Soup
For more recipe inspo, see our 30 Side Dishes for Pasta.
Recipe Tips and Tricks
- Add the flour gradually. If you add too much flour at once, it'll be hard to bring the dough together, and you'll make your gnocchi too dry. Start by adding half the amount of flour and add more as needed.
- Adapt the seasoning to your sauce. On their own, these gnocchi are quite neutral. They can be used with a range of different flavors and sauces, like brown butter, creamy cheese sauce, marinara sauce, and more. Adjust the seasonings to match the flavor of the sauce.
- Use salted water. Anytime you cook pasta, including traditional gnocchi, you always want to salt the water really well. This draws out lots of flavor to make sure every bite is flavorful.
Storing and Freezing Instructions
How to Store
Store leftover gnocchi in an airtight container in the fridge for 2-3 days.
How to Reheat
You can either microwave leftover gnocchi or reheat it in a skillet with more delicious sauce and toppings. It may help to add a splash of water as well to rehydrate the cooked gnocchi. Be careful not to overcook them, or they can become gummy.
How to Freeze
For best results, freeze uncooked gnocchi in a single layer on a parchment paper lined baking sheet. Once fully frozen, store the gnocchi dumplings in an airtight container or freezer bag for 2-3 months. Thaw in the fridge before cooking like normal.
FAQ
You certainly can fry gnocchi instead of boiling them in salted water, but you might notice that they are crispy on the outside and dense on the inside. When boiled, the dough becomes tender and light with a slightly chewy texture. For the best of both worlds, boil the gnocchi, strain them really well to avoid splatters, then pan-fry them in butter with sage leaves. So good!
Instead of just heating up the same old mashed potatoes, change things up! This homemade gnocchi recipe uses Christmas or Thanksgiving leftovers and transforms them into a totally different dish. It only requires 2 other ingredients, so it's a very simple technique that gives old potatoes new life! They can be seasoned in a variety of ways and served with the sauce of your choice and leftover turkey, pork roast, or roasted chicken.
If your gnocchi does not float, that's usually a sign that you haven't added enough flour or the water isn't hot enough. If you see some of your gnocchi floating and not others, you should remove them all at the same time. Some gnocchi may not float properly, but if others from the same batch are ready, it's best to remove them so you don't overcook them.
More Leftover Mashed Potato Recipes
- Mashed Potato Casserole
- Mashed Potato Soup
- Potato Dinner Rolls
- Mashed Potato Cakes
- Mashed Potato Balls
Tried this recipe?
I'd love to hear what you think! Leave a comment and rating below to share your feedback. Your reviews help others discover this recipe and help me keep creating more free recipes for you. Snap a photo and tag me on social media @aheadofthyme too.

Baked Mashed Potatoes
Baked Mashed Potatoes are buttery, cheesy, and crispy on the outside. Topped with chives and served warm, this is one side dish that will totally change your hosting game. Creamy baked mashed potatoes are easy to make and loved by the whole family. Serve it as a side dish during the holidays or on busy weeknights.
The magic happens when you bake mashed potatoes in the oven: all the flavors combine, the cheese melts, and the top of the mashed potatoes crisps up, forming a perfect crust. It makes the dish more rich and flavorful. Baked mashed potatoes also freeze well and can be made ahead of time, making them ideal for busy holidays!
Why You'll Love this Baked Mashed Potatoes Recipe
- Creamy, pillowy mashed potatoes with a crisp top. This recipe is the best of both worlds - a layer of crispy golden-brown potato peaks gives way to soft, buttery potatoes underneath. Every bite is bursting with flavor. You can't beat these baked mashed potatoes!
- Only 15 minutes of prep. It only takes a few minutes to prep the ingredients before the mashed potatoes go in the oven to transform into the ultimate potato side dish. The rest of the time is passive baking time, and they're still done in under an hour.
- Perfect for holiday hosting. Thanksgiving, Friendsgiving, and Christmas events are perfect for pulling out this next-level baked mashed potato recipe. It's a crowd-pleasing twist on classic mashed potatoes with a crispy top that can be made ahead of time to make day-of preparation easier, too!
Ingredient Notes
To make this delicious Baked Mashed Potatoes, you will need the following ingredients (full measurements in recipe card below):
- Yukon gold potatoes - Russet potatoes will also work, or any high starch potato. Red bliss potatoes or Idaho potatoes are good substitutes, too.
- milk - you can swap this for half and half, heavy whipping cream, or an unsweetened plant-based milk substitute of your choice.
- butter - if you don't have butter on hand, try an equal measure of olive oil, avocado oil, or cream cheese.
- cheddar cheese - you can substitute the cheddar for a similar cheese, like Colby Jack, Monterey Jack, or Asiago.
- sour cream - sour cream can be swapped for plain Greek yogurt or a vegan sour cream instead.
- chives - if you don't have chives, you can use other soft herbs like dill or basil, or try green onions instead.
- salt and pepper
You will also need measuring cups and spoons, large pot, potato masher or fork, and a 2-quart casserole dish.
How to Make the Best Baked Mashed Potatoes
- Cook potatoes. Place potatoes in a large pot and cover with salted water to cover potatoes by about an inch. Heat over high heat and bring to a boil. Reduce heat to low, cover, and simmer for 15-20 minutes, until potatoes are soft when you insert a fork.
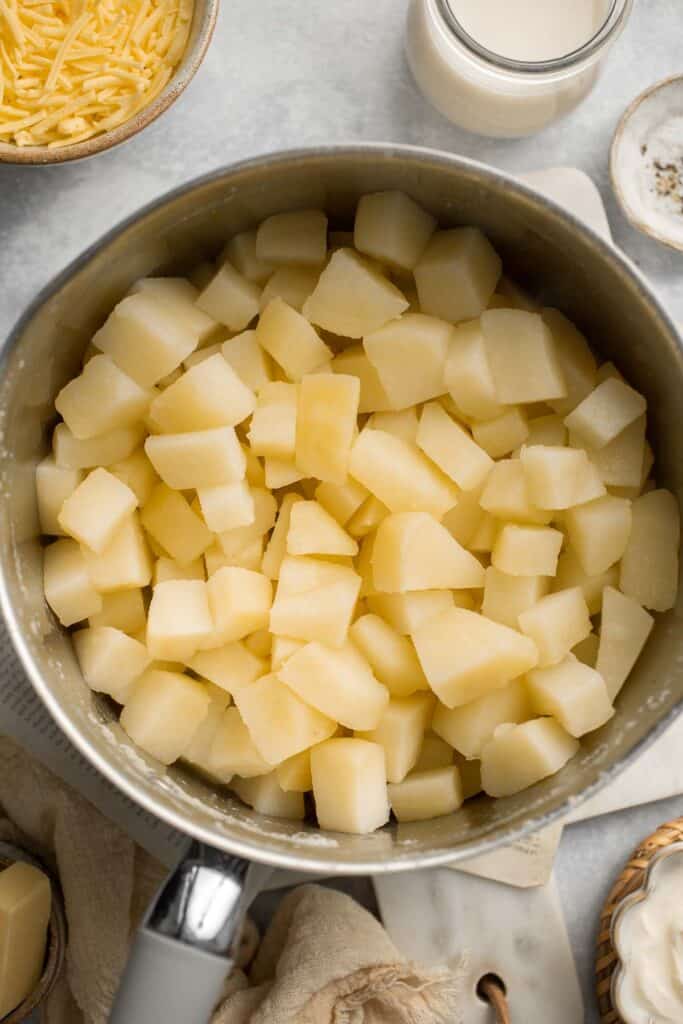
- Mash potatoes. Once the potatoes are ready, drain well and place back in the pot. Use a potato masher (or a fork) to mash the potatoes.
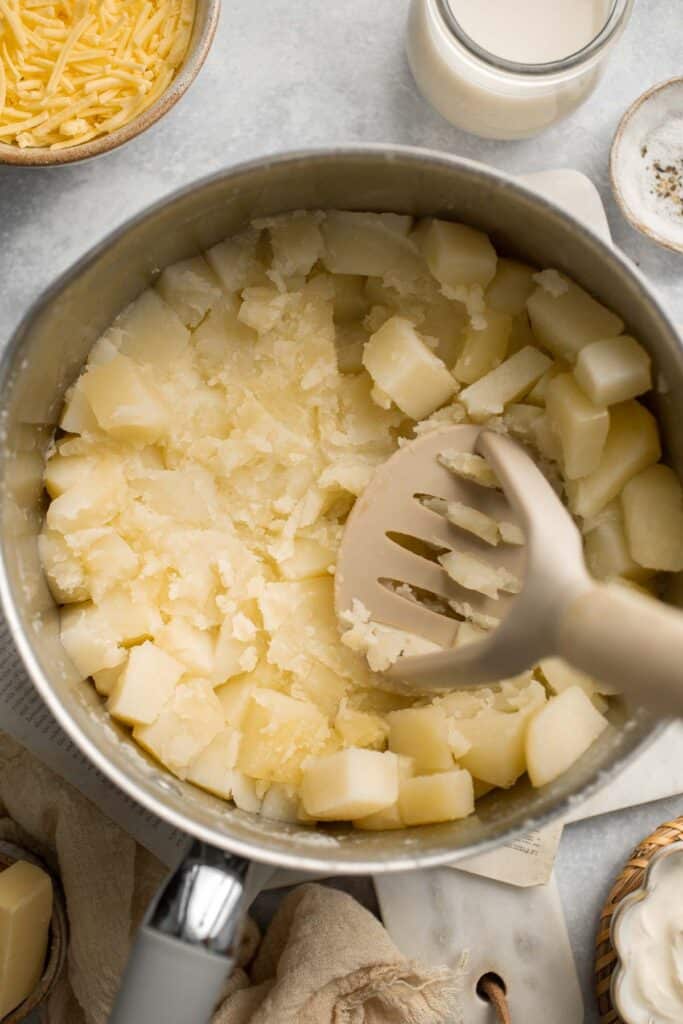
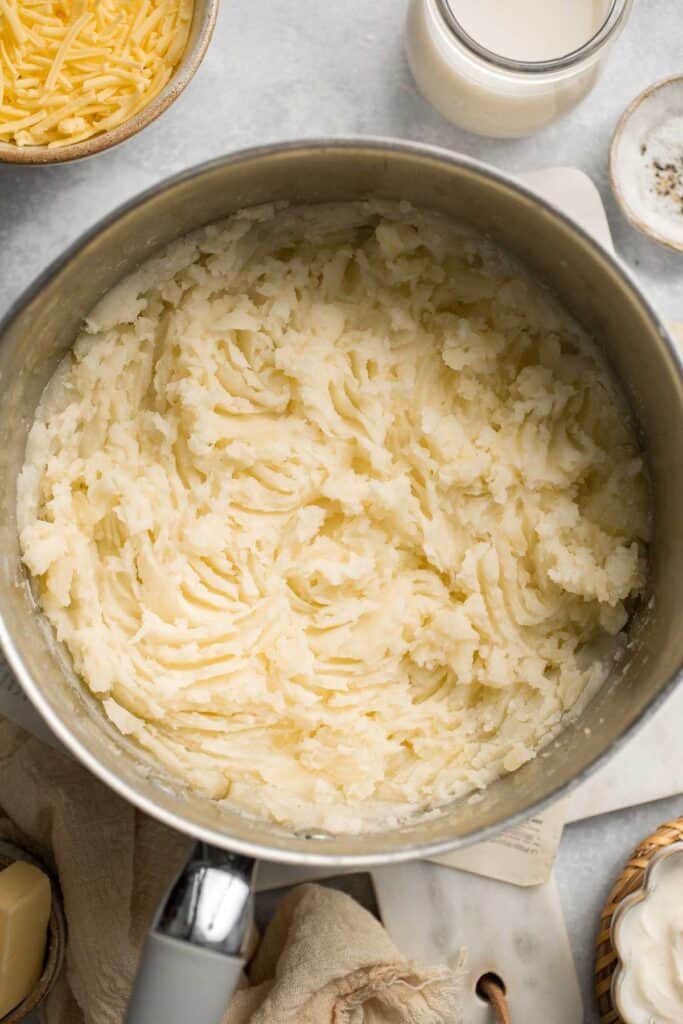
- Add ingredients. Add milk, butter, cheese, sour cream, salt, and pepper. Stir well with a spatula until evenly combined.
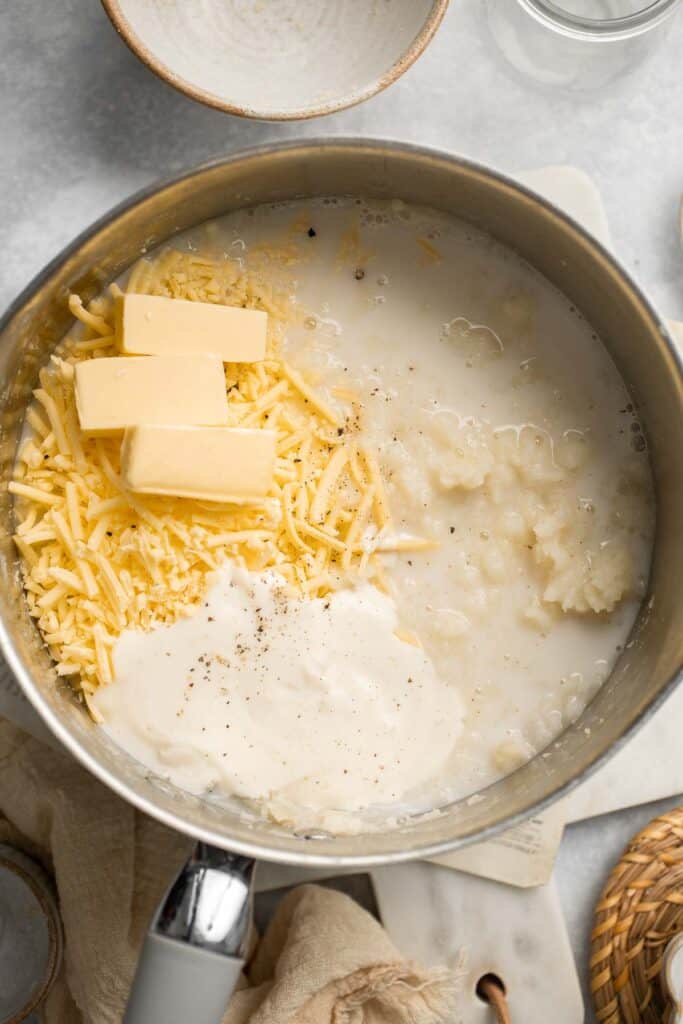
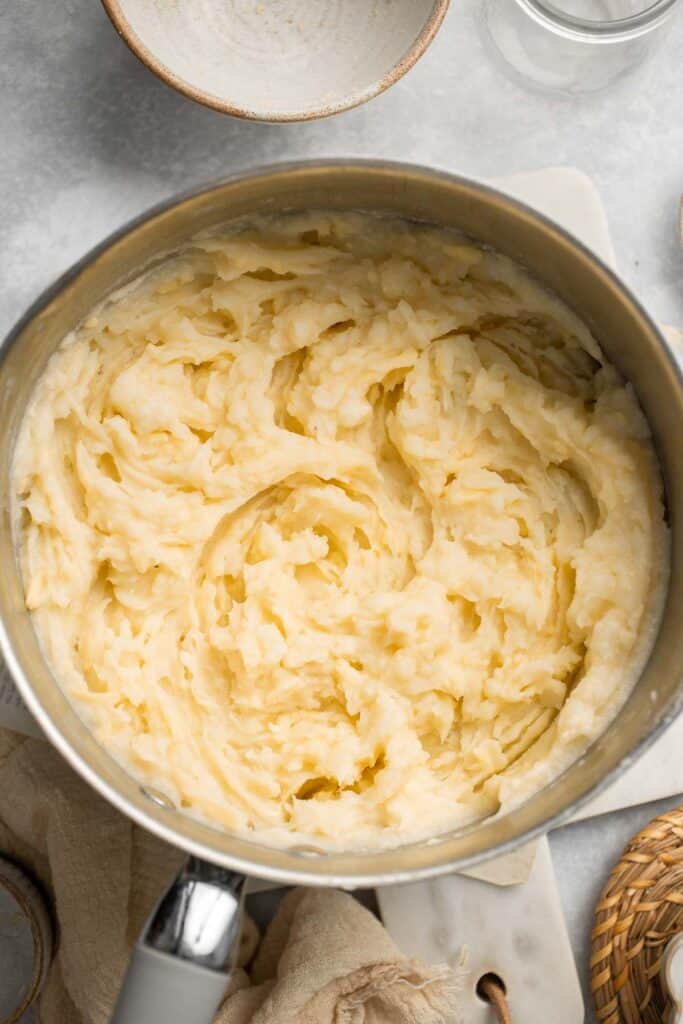
- Bake. Transfer the mashed potato into a 2-quart casserole dish and bake in a 375F preheated oven until the top turns golden brown, about 20 minutes. Optionally broil on HI for 2-3 minutes.
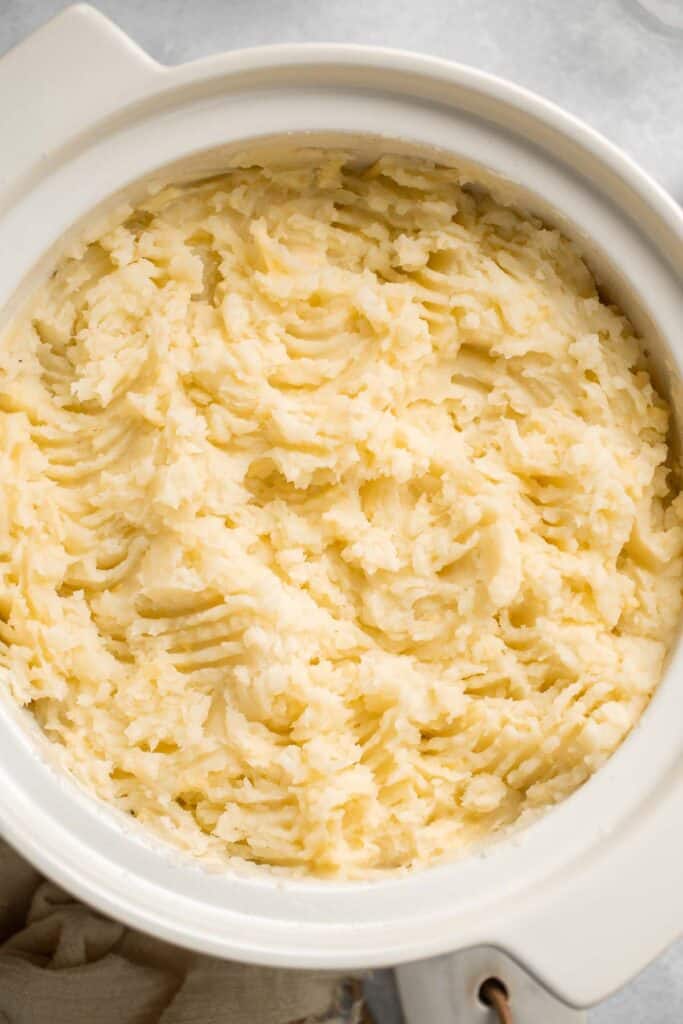
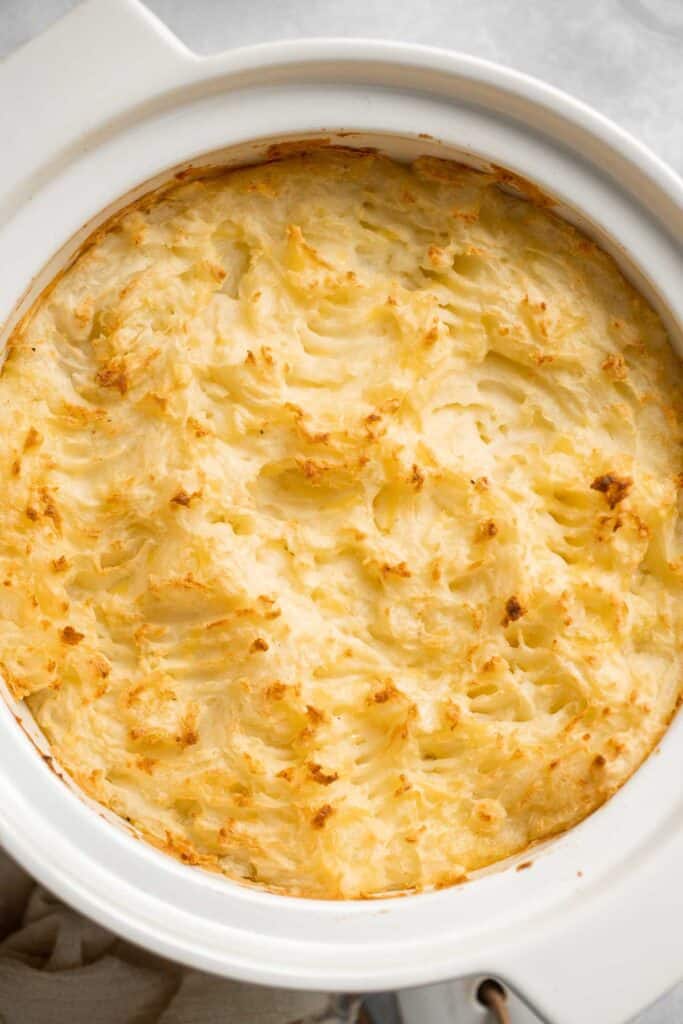
- Serve. Garnish with chives and serve warm.
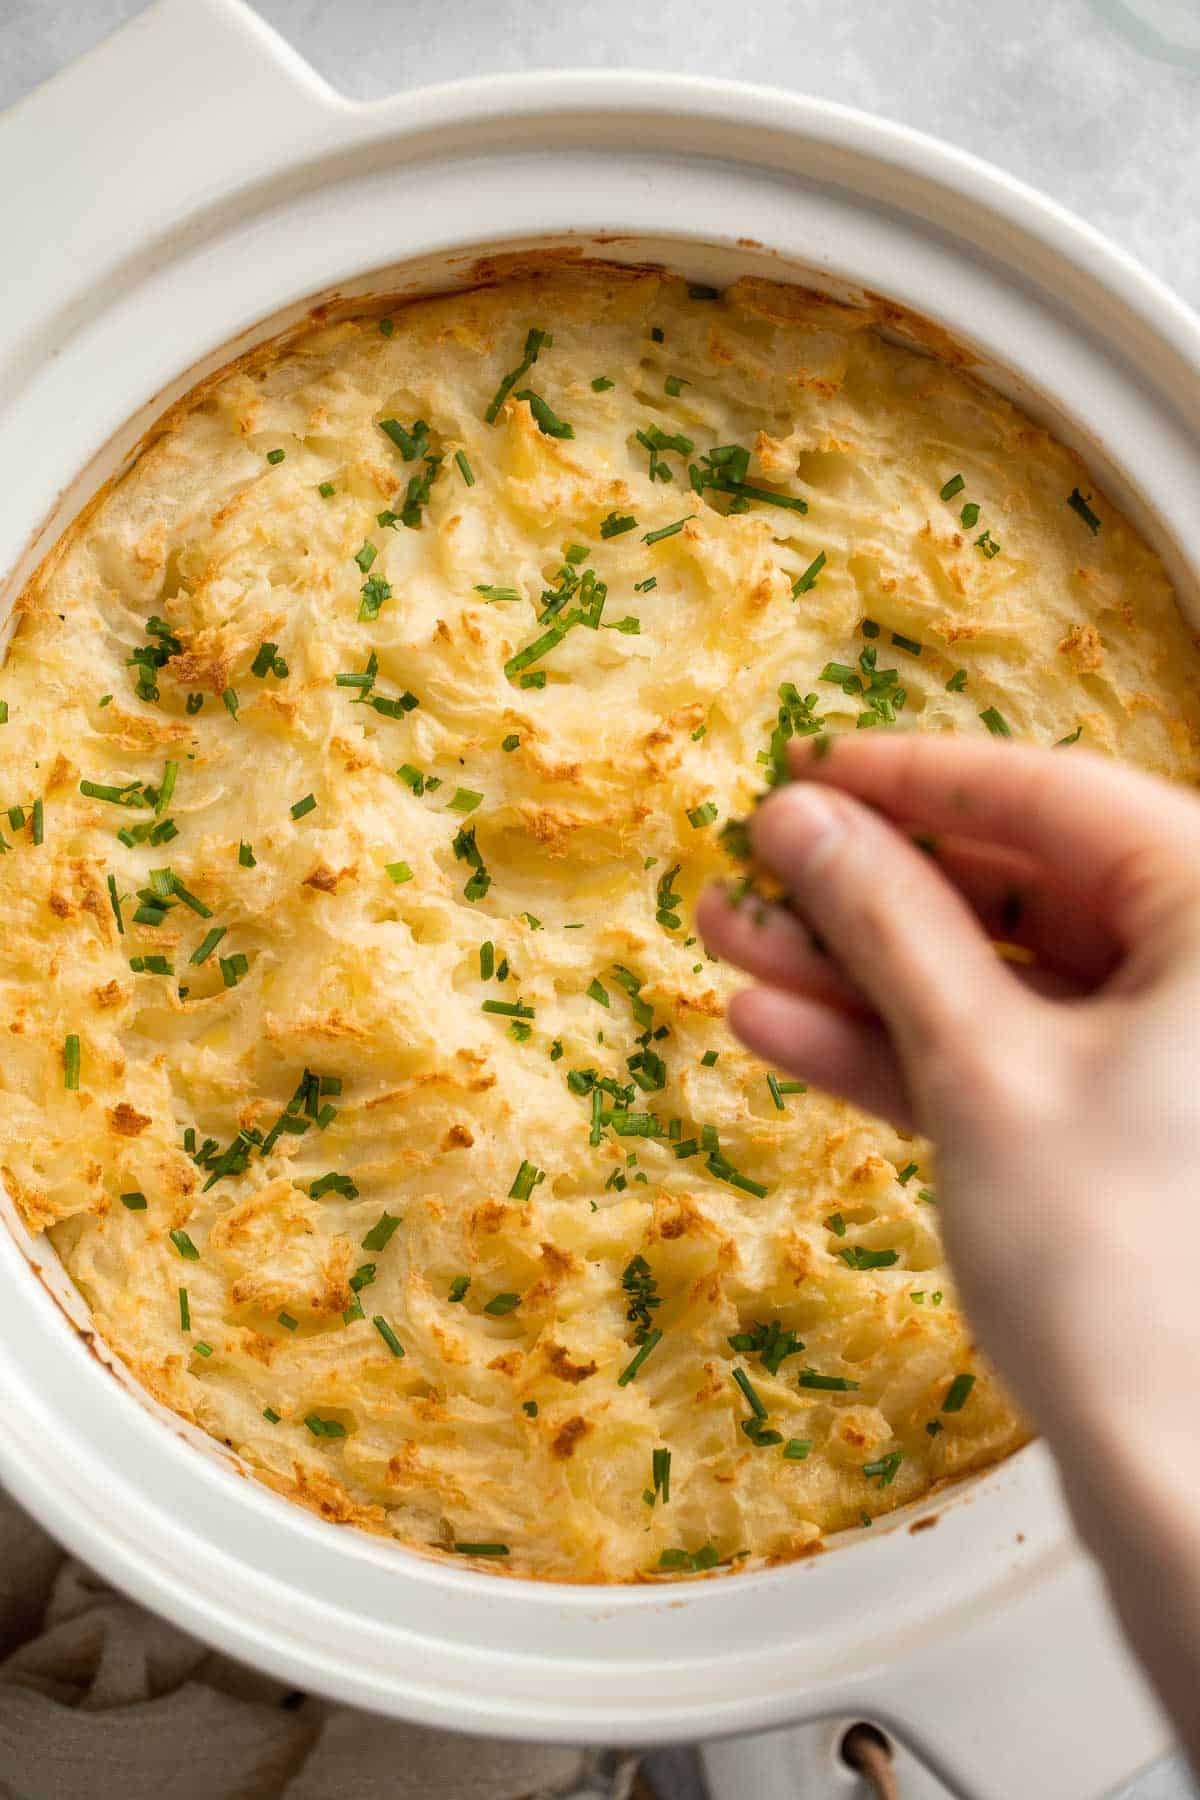
Recipe Variations
- Make baked mashed sweet potatoes instead. Switch it up by using sweet potatoes instead of Yukon golds! Follow the same steps to boil and bake the sweet potatoes, and you can choose from the original savory toppings or sweeten things up with a sprinkling of cinnamon and nutmeg instead with a drizzle of maple syrup.
- Load them up with toppings. Up the ante by making these loaded baked mashed potatoes! Top with even more cheese, chopped crispy bacon, green onions, sour cream, chives, roasted garlic, and anything else you usually add to your favorite loaded baked potatoes. See our Mashed Potato Casserole for instructions.
- Use buttermilk. Add a little extra tang by using buttermilk in place of the milk in this recipe. It also has a lower fat content than regular milk, so the resulting potatoes will be a little lighter in texture than full-fat milk mashed potatoes.
How to Serve
These Baked Mashed Potatoes are a delicious side served with almost any entree. Serve them with our holiday favorites such as:
- Roast Stuffed Chicken
- Asian Five-Spice Roast Turkey
- Prime Rib Roast
- Pineapple Glazed Ham Slices
- Roasted Pork Tenderloin
- Stuffed Butternut Squash with Wild Rice
For more recipe inspiration, see our 40 Best Thanksgiving Main Dishes.
Recipe Tips and Tricks
- Don't overmix the mashed potatoes. Want to avoid glue-like mashed potatoes? Don't overmix them! You just want the ingredients to be evenly distributed in the potatoes. Just keep an eye on them when you're stirring.
- Drain them well. Excess water in the potatoes can make the texture gummy instead of soft and pillowy. Allow them to drain thoroughly and let them sit for a few minutes before mashing to allow any extra water to evaporate off the hot potatoes.
- Use the right tool. A potato masher, ricer, immersion blender, food processor, hand mixer, or stand mixer can help you mash the potatoes quickly and efficiently. Stick to a low speed on blenders and mixers to prevent over-mixing.
Storing and Freezing Instructions
How to Store
Once the mashed potatoes have cooled completely to room temperature, cover the whole casserole dish tightly with plastic cling wrap or transfer the potatoes to an airtight container and refrigerate for up to 3 days.
How to Reheat
Reheat them in the oven by baking at 375℉ for about 10 minutes until they're warmed through and the top crisps up again.
How to Freeze
Transfer the mashed potatoes to a freezer-safe container or freezer bag and freeze for up to 3 months. You can make it easier on yourself by preparing them in an 8x8 aluminum pan and covering them tightly with foil and plastic wrap before freezing. Allow them to thaw overnight in the refrigerator before baking or bake straight from frozen (adding a few minutes to the cook time).
FAQ
The answer is yes, you can absolutely make these baked mashed potatoes ahead of time for busy holiday dinners or to save time on busy days. Just make them as directed in a freezer-safe dish (disposable aluminum pans work well!) and freeze as outlined above. Once you're ready, preheat your oven to 400℉ and bake for fifteen minutes or until completely heated through.
Both work well! You can use whatever consistency you usually like for your mashed potatoes. Mash out more chunks and add more milk for a creamier inner texture, leave them chunkier with pieces of skin for a more rustic baked mashed potato dish.
The recipe doesn't contain any eggs or meat, so you can easily make these baked mashed potatoes vegan by swapping the dairy products out for non-dairy alternatives like vegan butter, vegan sour cream, plant-based milk, and cheese substitutes.
More Mashed Potato Recipes
- 30 Potato Side Dishes
- Mashed Potato Casserole
- Brown Butter Mashed Potatoes
- Cheddar Mashed Potatoes
- Mashed Potato Balls
- Instant Pot Mashed Potatoes
Tried this recipe?
I'd love to hear what you think! Leave a comment and rating below to share your feedback. Your reviews help others discover this recipe and help me keep creating more free recipes for you. Snap a photo and tag me on social media @aheadofthyme too.
Candied Yams
Stovetop Candied Yams are tender, buttery, tangy, and sweet with a delicious brown sugar citrus glaze. Candied yams are a classic part of any holiday meal, and the homemade version is so much better than the canned option from the grocery store. This easy and simple Thanksgiving side dish is quick to prepare making it the perfect stress-free side.
Plus, you only need a handful of pantry staple ingredients to transform these sweet potatoes into something delicious and flavorful. Serve brown sugar glazed yams for holiday dinners or any night of the week you are craving a sweet side dish.
Why You'll Love the Candied Yams
- It's quick and easy. This sweet potato recipe is so easy to prepare, especially if you prep the sweet potatoes ahead of time. You literally throw them into your cooking pot, add a quick glaze with simple pantry staple ingredients, and then cook together until tender. It takes just over 30 minutes to make and serve on the table, with only 15 minutes of it being active prep time.
- Serve it on Thanksgiving or all season long. Although candied yams are a classic Southern side dish to serve at the Thanksgiving table, you don't have to limit yourself to the holidays. We make this recipe throughout the fall and winter season. I mean, why not? It's a great side for family dinners or fall dinner parties. Plus, leftovers are great in a soup or over a salad the next day.
- Sweet and savory flavor. Just because something takes little time and effort to prepare, doesn't mean that its lacking in other areas. This stovetop candied yam side dish is loaded with flavor in every bite. It's sweet, buttery, and tangy - all in one.
Ingredient Notes
To make delicious Candied Yams, you will need the following ingredients (full measurements in recipe card below):
- yams or sweet potatoes - you will need to peel and slice the yams (or sweet potatoes) into ½ inch slices. If you can't find true yams, use garnet sweet potatoes instead.
- butter - you can use salted or unsalted butter. If using salted, don't add in the extra salt that is called for in the recipe.
- orange juice - we add freshly squeezed orange juice to give the yams a citrus flavor. If you don't want an orange flavor, free free to leave these out and add in water instead.
- dark brown sugar - we prefer our candied yams less sweet so we only added in ⅓ cup. For traditional candied yams which are quite sweet, add in 1 cup of sugar.
- ground cinnamon
- pure vanilla extract
- salt
- pecans - optional to add on top when serving.
- rosemary - optional to add on top when serving.
You will also need measuring cups and spoons, a large pot, and a serving dish.
How to Make the Best Candied Yams
- Cook yams. Place yams in a large pot and cover with water to cover them by about an inch. Heat over high heat and bring to a boil. Boil until the yams are slightly soft, about 5 minutes. Drain well and place the yams back in the pot.
- Make sauce. In the same pot with the yams, add butter, orange juice, sugar, cinnamon, vanilla extract, and salt. Stir well and bring the sauce to a boil. Reduce heat to low and simmer for 10-15 minutes until the sauce becomes syrupy and the yams are fully cooked.
- Serve. Transfer to a serving dish and serve warm.
Recipe Variations
- Southern candied yams. Take the flavor to the next level by adding a splash of Bourbon. It pairs perfectly with the warm spices.
- Naturally sweetened yams. Skip the dark brown sugar and use maple syrup for a natural sweetness.
- Mashed candied yams. Instead of keeping them in large pieces, feel free to mash the yams in the buttery syrup. You can even bake them in a baking dish with mini marshmallows just like sweet potato casserole.
You can also customize these Candied Sweet Potatoes by adding some toppings such as:
- Marshmallows. Transfer the yams to a casserole dish and add a layer of marshmallows. Pop into a 375 F preheated oven and bake for 5 minutes, or until browned.
- Bacon. Top with cooked bacon bits for a delicious salty flavor that pairs with the sweet yams really well.
- Nuts. We topped our yams with crushed pecans but you can switch them up with other nuts such as walnuts, almonds, or hazelnuts.
- Streusel. Transfer the yams to a casserole dish and add a streusel (crumb topping) on top. To make a streusel, mix together ½ cup of flour, ¼ cup brown sugar, and 1 teaspoon of cinnamon. Add ¼ cup butter and use a fork to smash the butter into smaller pieces. Then, use your fingers to press the ingredients together until it forms crumbles. Bake in a 375F preheated oven for about 5 minutes, or until brown and crisp.
How to Serve
Candied Yams are typically served as a side dish with fall and winter dinners while sweet potatoes are in season. They're also the perfect side dish to serve on Thanksgiving.
Some holiday entrees that pair well with roasted acorn squash are:
- Roast Turkey
- Dutch Oven Roast Chicken
- Wild Rice Stuffed Butternut Squash
- Instant Pot Turkey Breast
- Roasted Pork Tenderloin
- Sheet Pan Thanksgiving Dinner
For more recipe ideas, see our 40 Best Thanksgiving Main Dishes.
Recipe Tips and Tricks
- Use the right potatoes. Although you can use either yams or sweet potatoes, not all sweet potatoes are a great fit. Purple Japanese sweet potatoes have a different texture and flavor profile. Jewel or Garnet sweet potatoes are best.
- Prep the yams in advance. The majority if the prep in this recipe comes from slicing up 4-5 yams. Make this recipe a little easier on Thanksgiving by slicing them up ahead of time (of to 2 days in advance). Store the sliced yams in a bowl covered in water until ready to cook.
- Don't overcook. The goal is to have fork-tender yams with a little texture, not a mash. Test the yams and remove them from the heat when a fork slides through them.
- How to test for doneness. The yams are done once they are fork tender. To test, insert a fork into a slice. If the fork comes out easily and the yams and the yams are tender, then they are done. If they are mushy, they have been overcooked.
- Cook in a casserole dish. You can make this recipe in the oven instead. Add the sliced uncooked yams into a 9x13-inch casserole pan greased with some oil or butter. Cook the sauce ingredients in a small saucepan over the stove by bringing to a boil and then simmering over low heat for about 2-3 minutes. Pour sauce over the yams and bake uncovered for 15 minutes. Cover with foil and continue baking for 30-35 minutes until tender.
How to Use Leftover Candied Yams
- Add leftover sweet potatoes to salads. Slices of brown sugar glazed sweet potatoes are delicious over a fall salad. Add it in place of butternut squash in the following salads: Butternut Squash Quinoa Salad, Fall Harvest Salad, or Thanksgiving Salad.
- Make soup with leftovers. Another option for leftovers is to throw it into a soup. This may be the better option as the yams get very soft, almost breaking apart. Add some chicken or vegetable stock, simmer, blend, and top with your favorite soup garnishes. You can also use it in your favorite soups to add sweetness and bulk.
Storing and Freezing Instructions
How to Store
Store leftover candied yams in an airtight container in the refrigerator for up to 4 days.
How to Reheat
Reheat leftover candied yams by roasting in a 350F preheated oven for about 10 minutes until warmed through, or in a 350F air fryer for 5 minutes until warm.
How to Freeze
Spread leftover candied yams on a parchment paper lined baking sheet and freeze for 2 hours. Then transfer them into a freezer bag and freeze for up to 3 months. Reheat your desired serving size straight out of the freezer by sautéing until heated through and crisped up. You can also bake it from frozen, microwave, or air fry.
FAQ
That's optional. We prefer to boil the yams and skip the baking process, but you can also bake them without boiling or boil them and then bake them! The boiling process makes sure each bite is perfectly tender and moist without drying out. It can also help you reduce the amount of time the dish needs to spend in the oven. If you do boil this yam recipe, be sure to remove them from the pot when they are fork tender to avoid overcooking.
Yams and sweet potatoes are different root vegetables, although the term is often used interchangeably in the United States. Yams have a thicker, denser texture than sweet potatoes, but they can be hard to find. For this recipe, you can use them interchangeably.
That's entirely up to you! Although sweet potato casserole is usually baked to melt and toast the marshmallows, candied yams do not need to be baked. It's much faster and easier to boil real yams (or sweet potatoes) until tender, then drain off the liquid and toss them in a flavorful brown sugar mixture. They can be served just like that, or place them in a baking dish and keep them warm in the oven.
More Side Dish Recipes
- 50 Best Fall Side Dishes
- Sweet Potato Casserole with Pecans
- Maple Roasted Acorn Squash
- Creamed Corn
- Instant Pot Mashed Potatoes
- Maple Roasted Brussels Sprouts and Butternut Squash
Tried this recipe?
I'd love to hear what you think! Leave a comment and rating below to share your feedback. Your reviews help others discover this recipe and help me keep creating more free recipes for you. Snap a photo and tag me on social media @aheadofthyme too.

- « Previous Page
- 1
- …
- 9
- 10
- 11
- 12
- 13
- …
- 41
- Next Page »