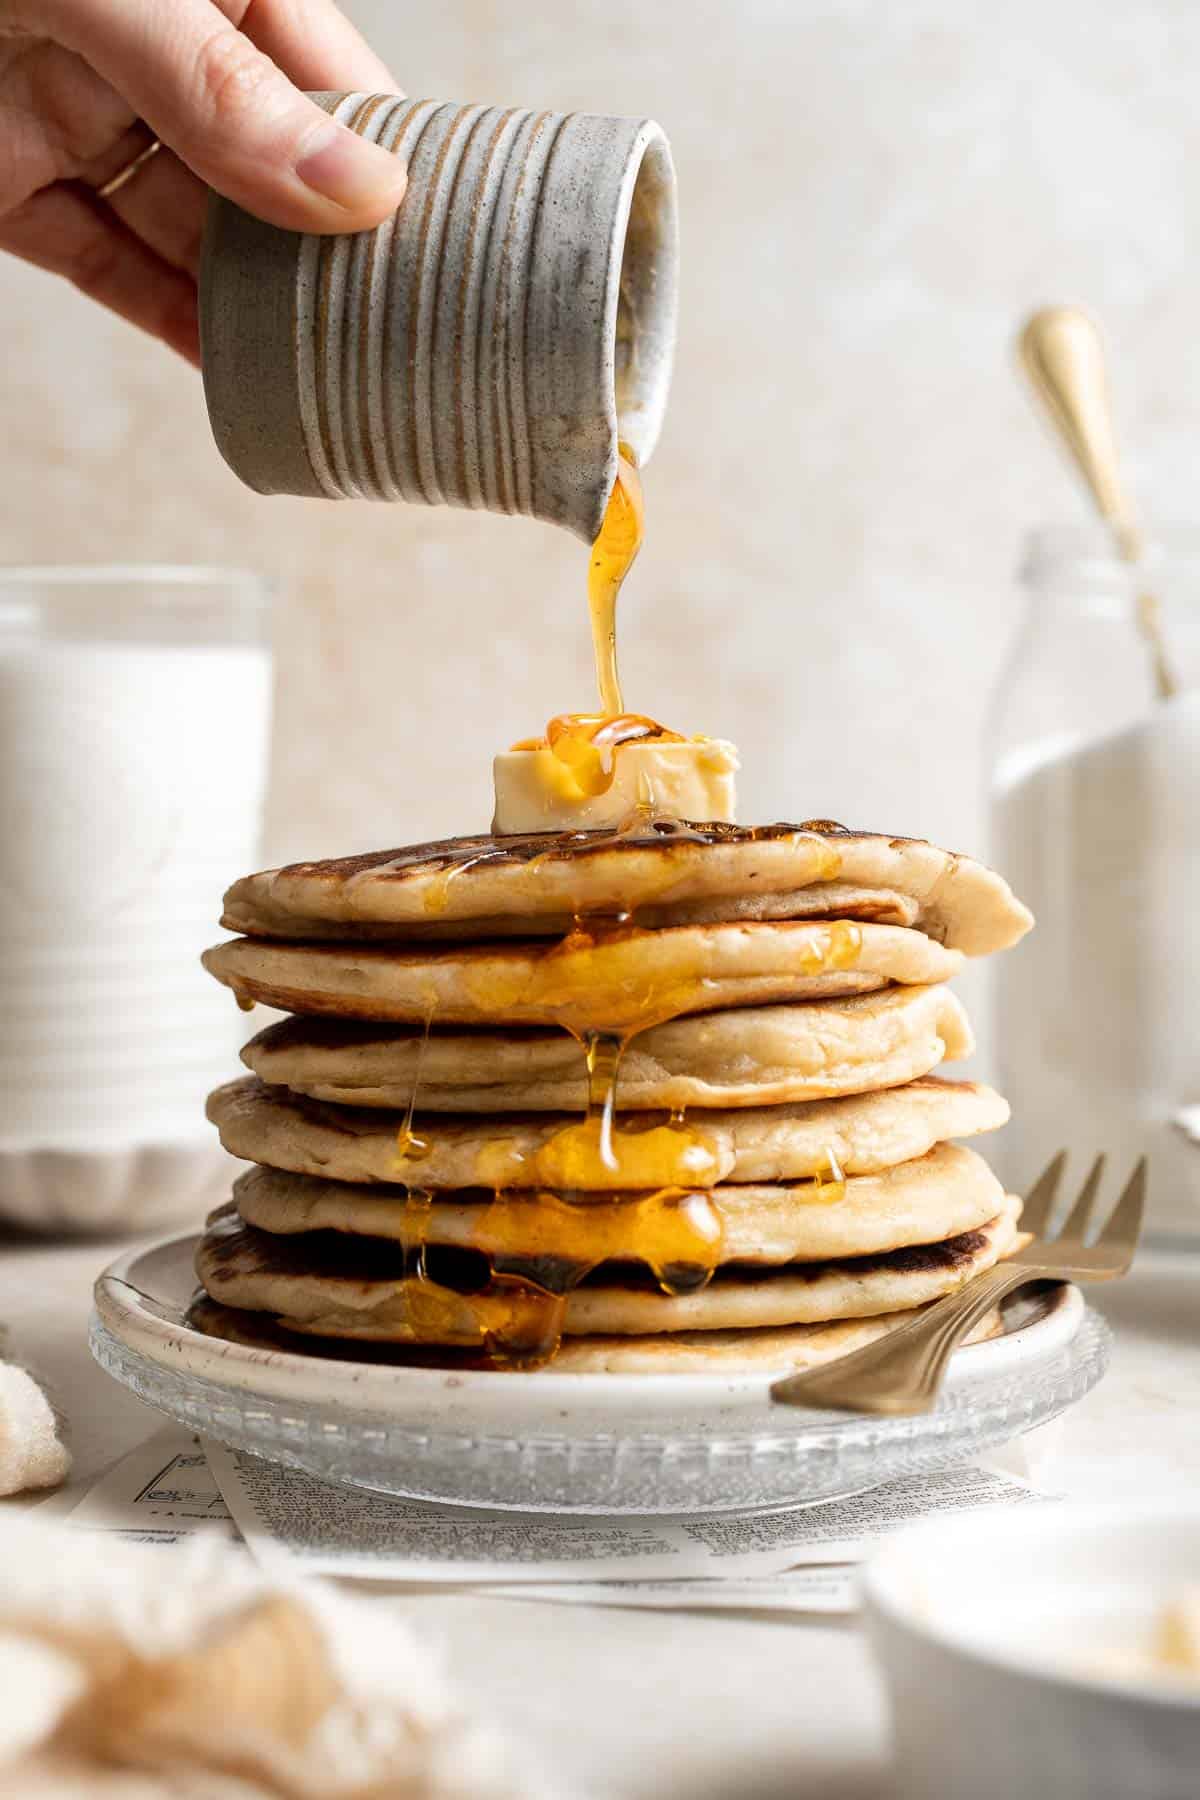
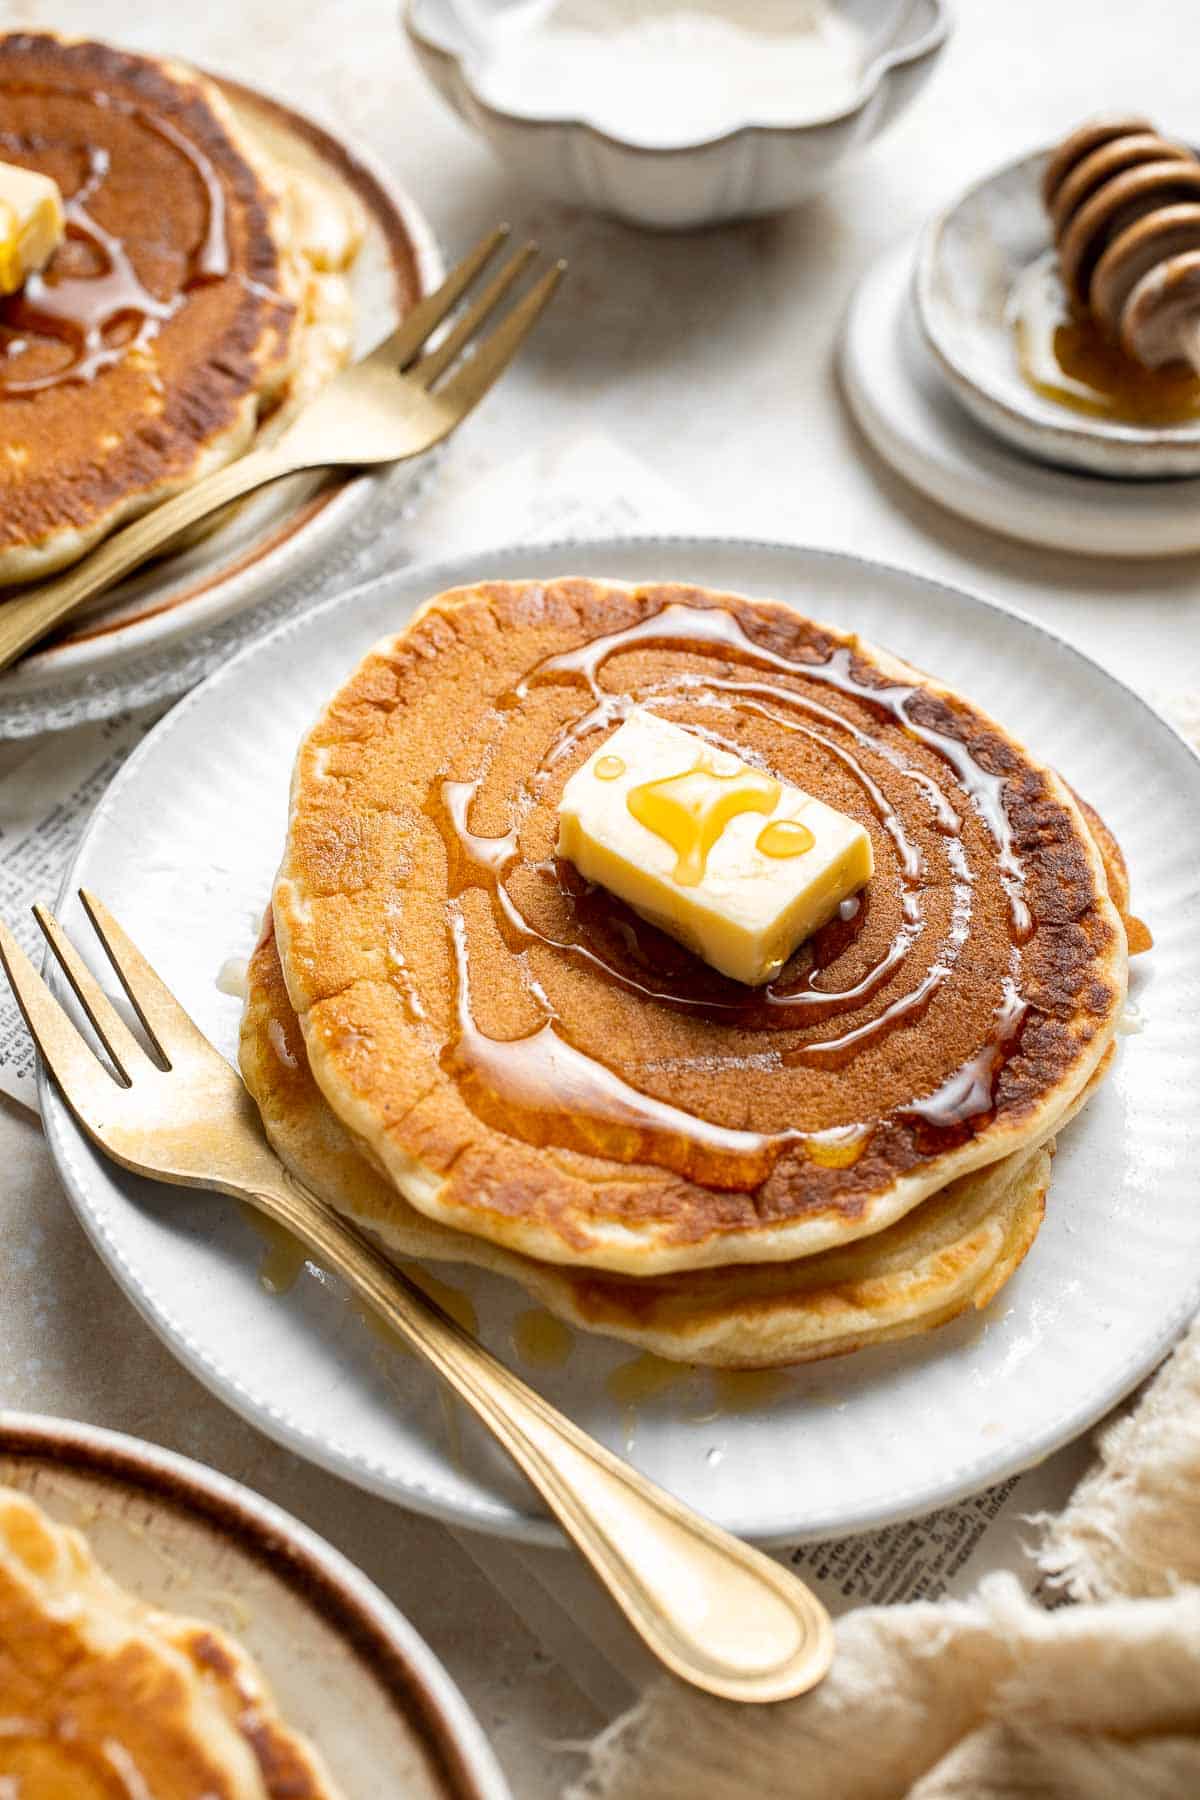
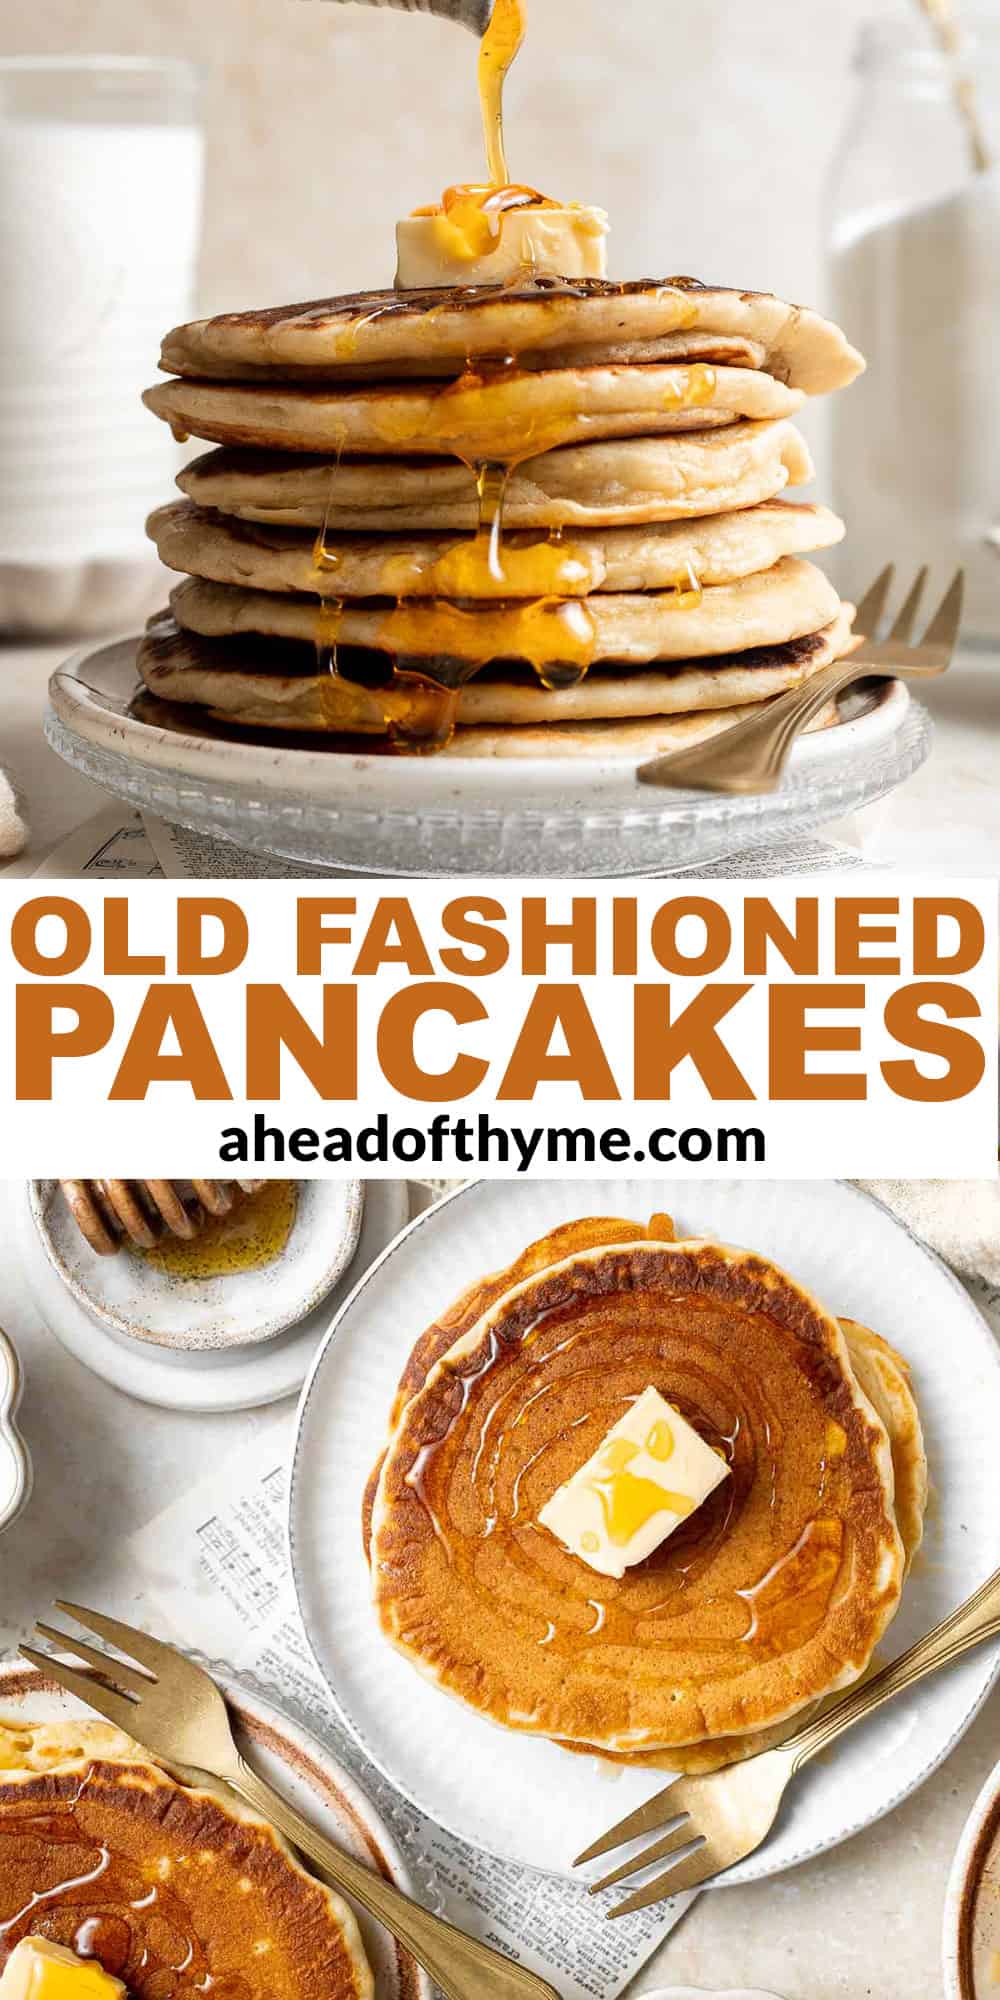
Made with common ingredients already hiding in your pantry, these Old Fashioned Pancakes are soft, tender, fluffy, and so easy to make! Just whisk the ingredients together, let the batter rest, then cook and serve the most perfect homestyle pancakes with a dollop of butter and a drizzle of maple syrup. Perfect for lazy Sunday mornings!
Weekends are all about that breakfast spread, am I right? And what breakfast spread is complete without a stack of the best, soft and fluffy, old fashioned pancakes? None. None at all. Ok, let's be real. You don't have to wait for the weekends to have pancakes, because they just about 15 minutes to prepare and make from scratch. So basically any day is pancake day, and I am all about it.
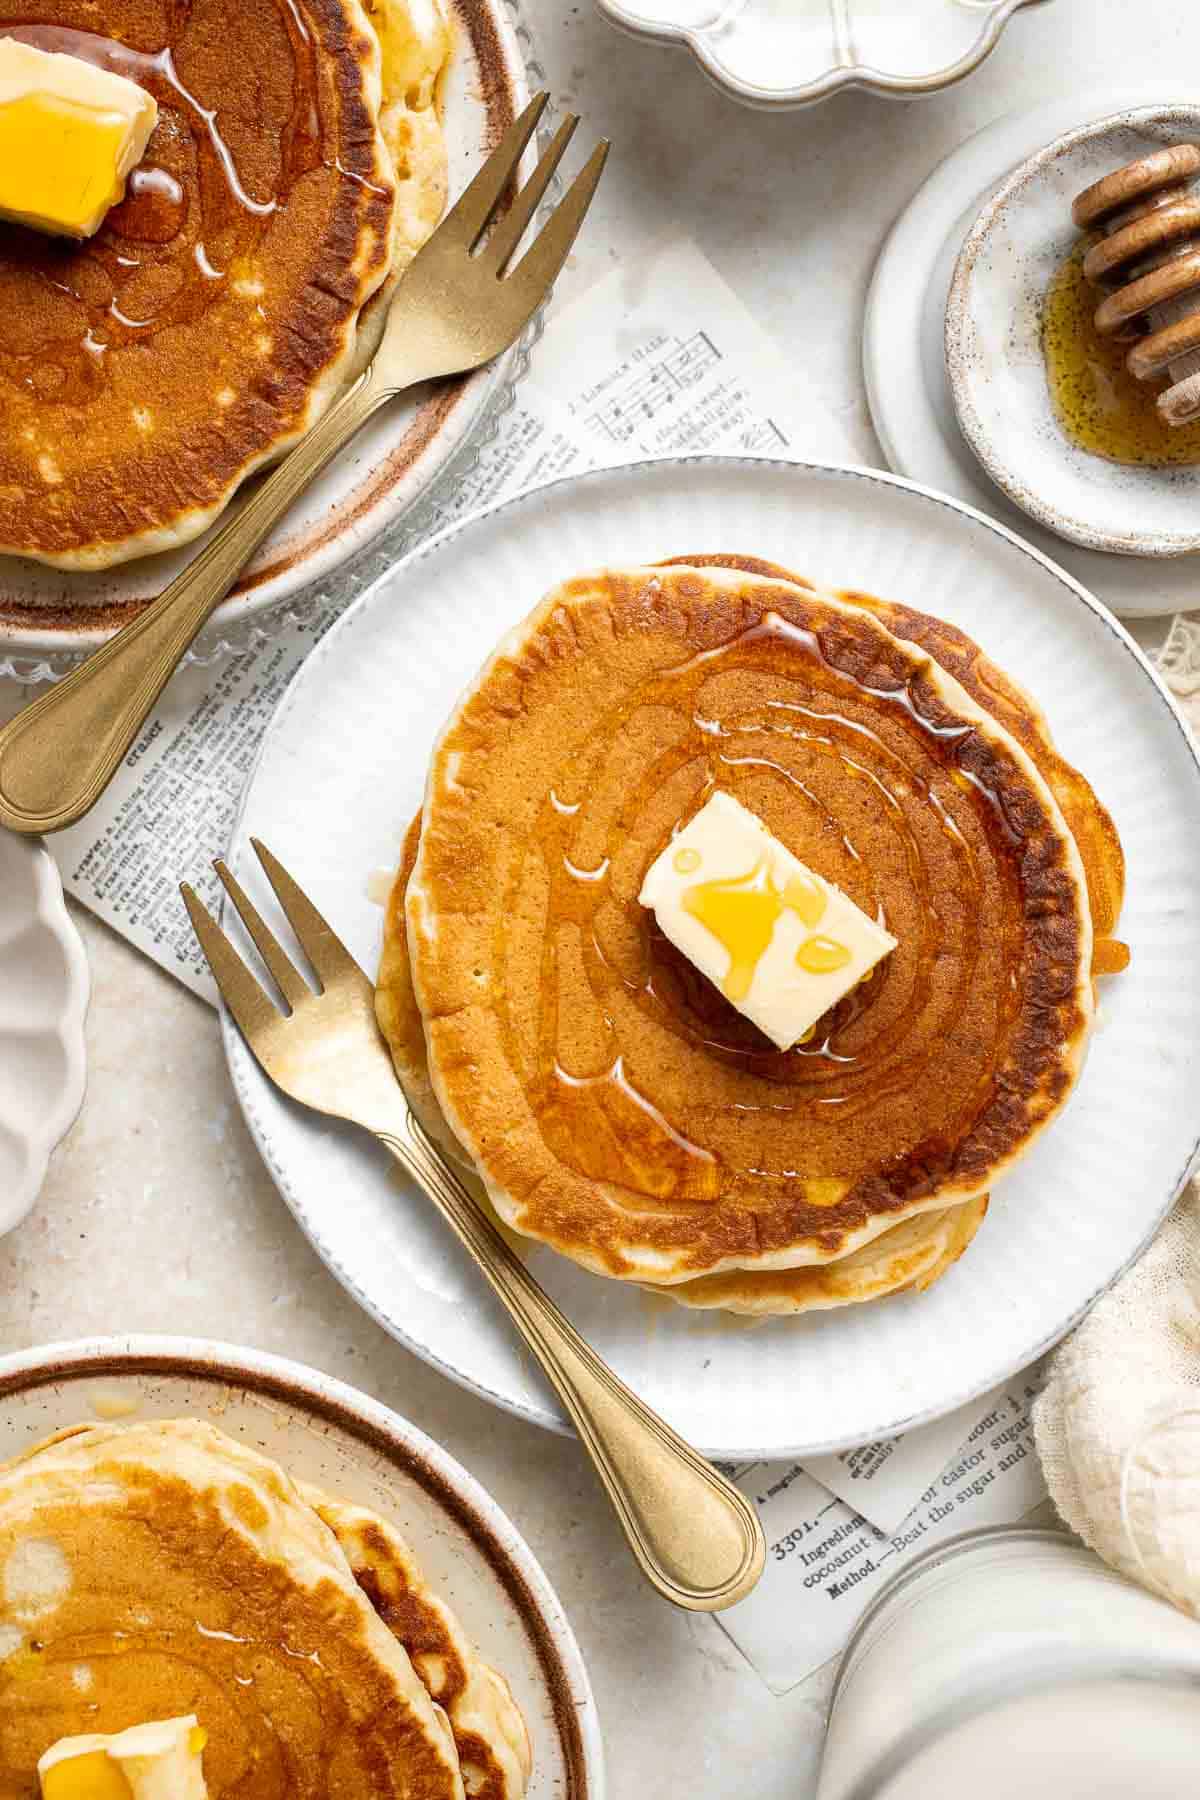
One of the best parts about making homemade pancakes is the balance of simplicity and flavor. They're so easy to make, yet they taste way better than you'd expect for such simple ingredients. Plus, pancakes made from scratch are leaps and bounds better than any boxed mixes. These good old-fashioned pancakes are the best pancakes: sky-high, so tender, and fluffy with just a hint of sweetness. They're absolutely delicious with some fresh fruit, your favorite toppings, and a nice hot cup of coffee!
Why You'll Love These Old Fashioned Pancakes
- Fluffy and delicious. The secret to tender, fluffy pancakes is to use real milk, melted butter, and a little egg. The fat in the milk and butter adds a soft, tender texture, and the egg will help hold the batter together. These are the real deal - no box of Bisquick here!
- Feeds a crowd. Heat up a large griddle and make several pancakes at the same time! You can easily feed a small army (or a hungry family) in a very short amount of time.
- So easy to make. This old-fashioned pancake recipe uses a two-bowl method. Just sift the dry ingredients together in one bowl, whisk the wet together in another, then mix them together. Give the mix a little time to relax, then griddle to perfection. Breakfast is served!
- Double the recipe. If you are serving this up for some guests or just for your own big family, consider doubling the recipe to feed more mouths. Sometimes I like to think that I won't be able to finish the whole batch of these and that I will be able to save half the batter for the next day. Unfortunately, this wishful thinking never pans out. Between my hubby and I, the whole batch gets devoured in one sitting.
Ingredients in Old-Fashioned Pancakes
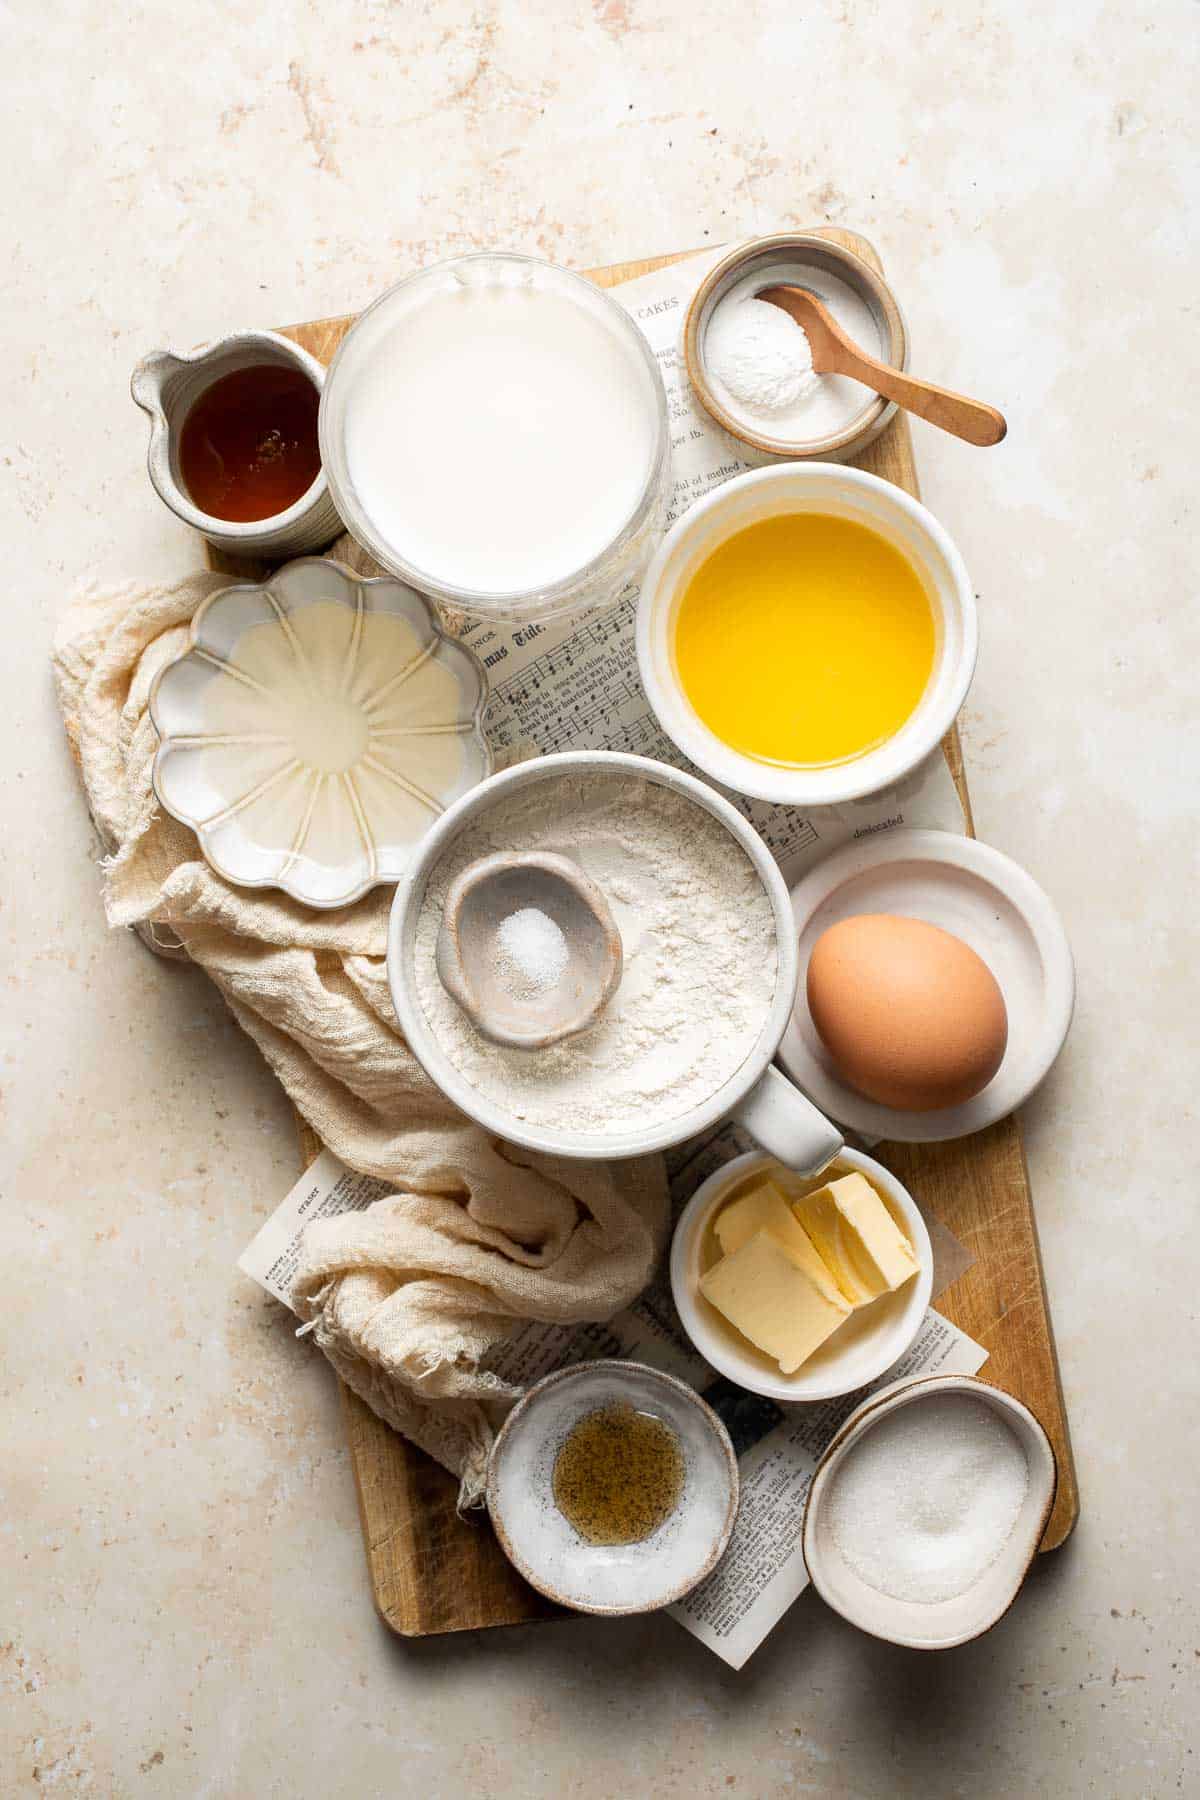
The good thing about making old-fashioned pancakes, is that it requires simple refrigerator and pantry staples, so you will most likely already have all the ingredients that you need. You will need the following ingredients (full measurements in recipe card below):
- all-purpose flour - keep it simple with regular all purpose. Other types of flour will not turn out quite the same.
- baking powder - this gives the pancakes a nice rise. Make sure it's fresh!
- white sugar - a little sweetness highlights that classic pancake flavor.
- salt - to bring out the flavor.
- whole milk - use either regular milk or buttermilk for the softest, fluffiest pancakes.
- unsalted butter - melted butter makes the batter silky smooth.
- vanilla extract
- egg - use a room temperature egg when possible.
- vegetable oil - to keep the pancakes from sticking to the pan. Cooking spray will work, too.
- butter and maple syrup - Serve with butter and pure maple syrup on the side.
You will also need measuring cups and spoons, a large mixing bowl, whisk, paper towel, and a large frying pan or your favorite griddle.
How to Make the Best Old Fashioned Pancakes
Pancakes are so easy to make. It takes 5 minutes to prep, 10 minutes to let the batter sit, and another 5 minutes to cook. Sure, you could use a box of prepared pancake mix, which takes about the exact same time, but the results will not be same. We all know that homemade from scratch is just so much better. You end up with tastier and fluffier pancakes! I seriously didn't realize what pancakes tasted like until I stopped using boxed mixes.
Here's all you need to do:
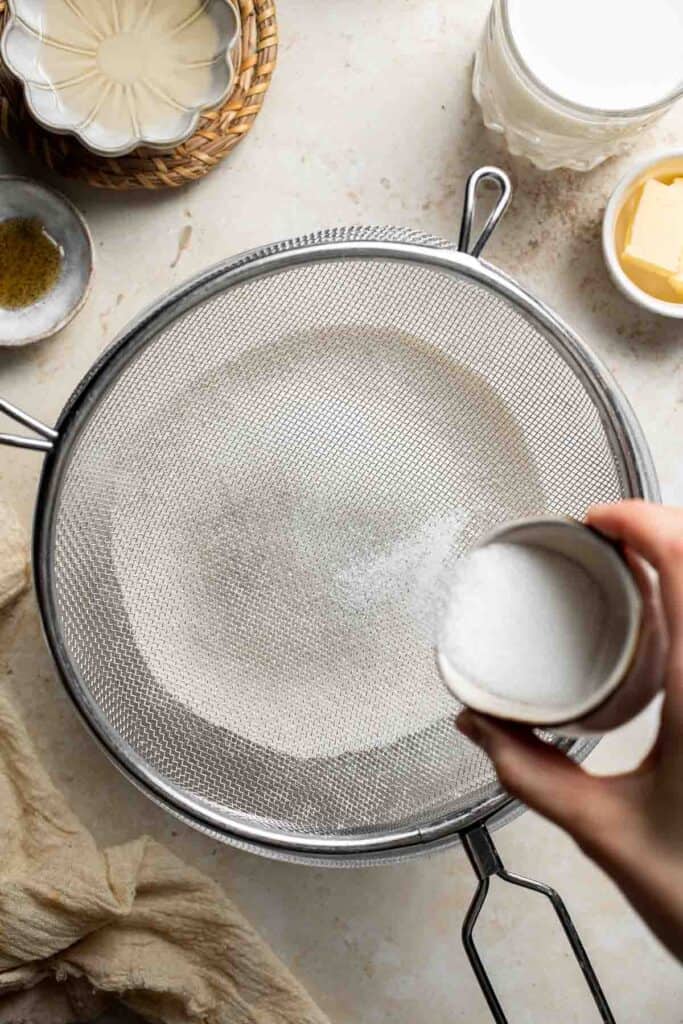
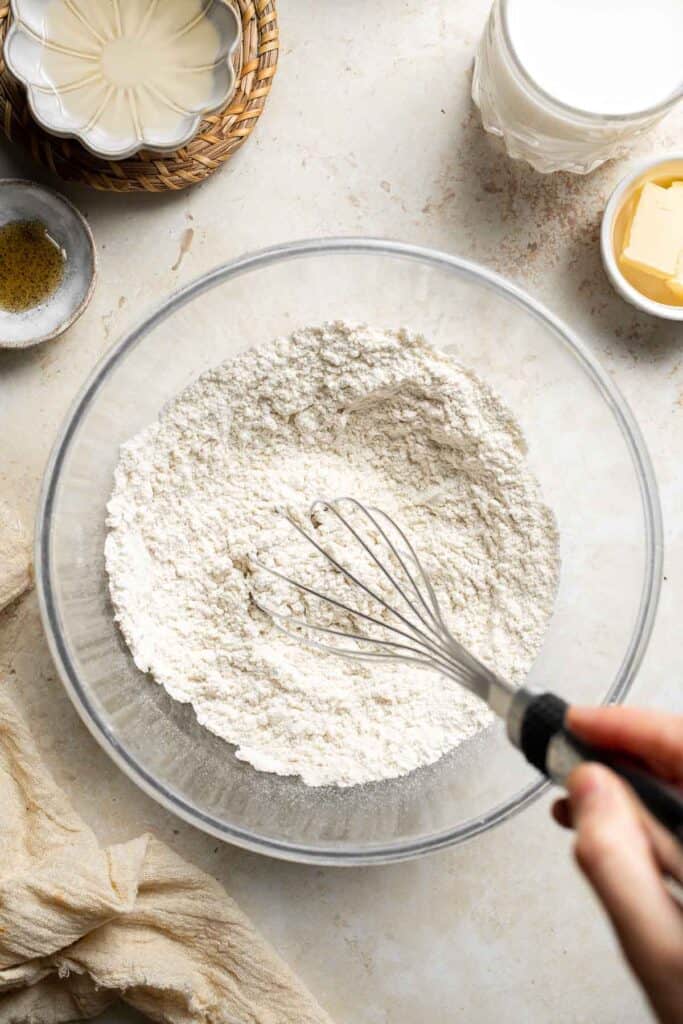
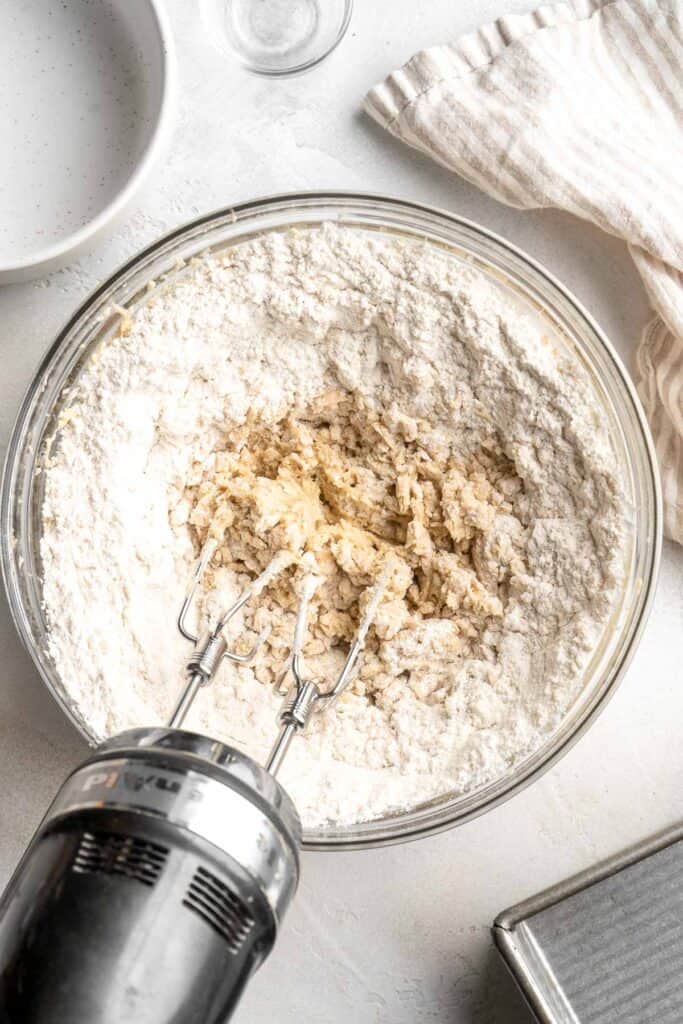
- Combine dry ingredients. In a large mixing bowl, sift together the flour, baking powder, sugar and salt.
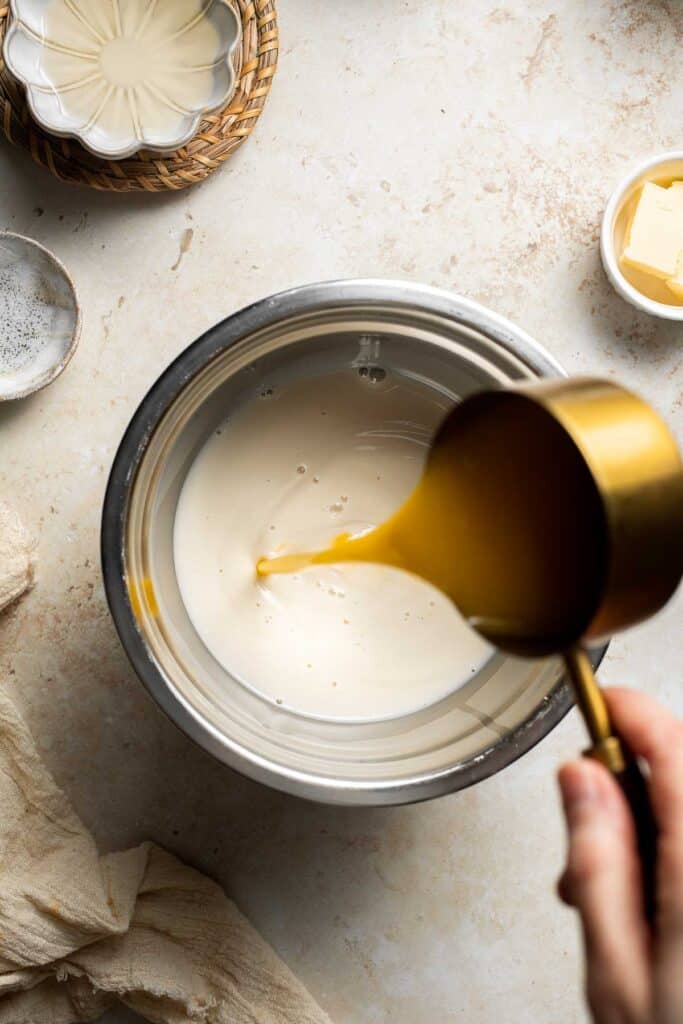
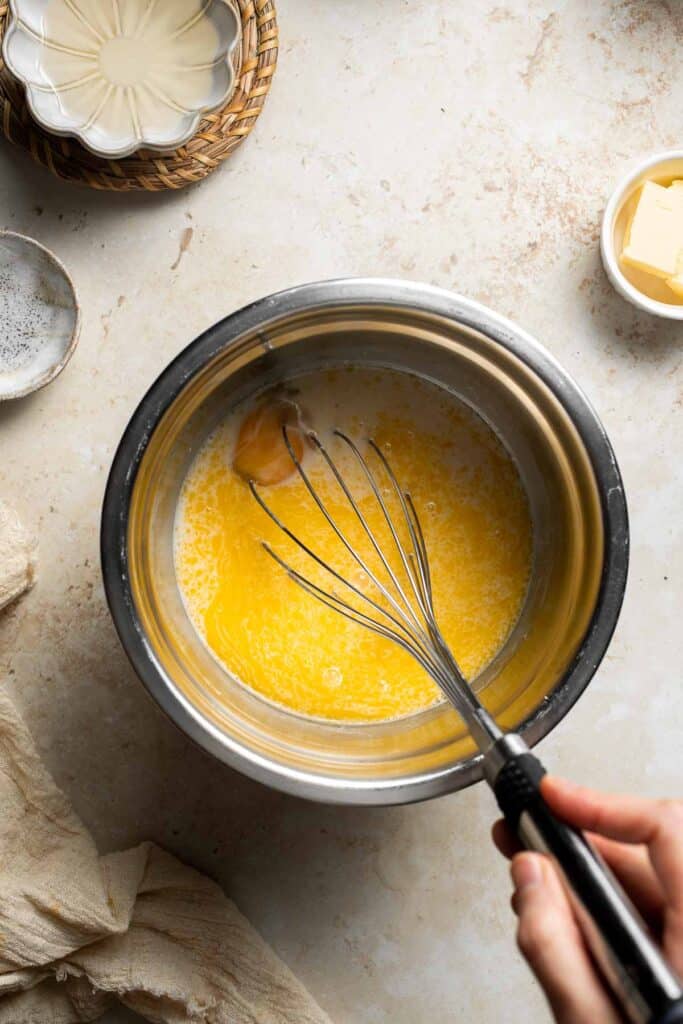
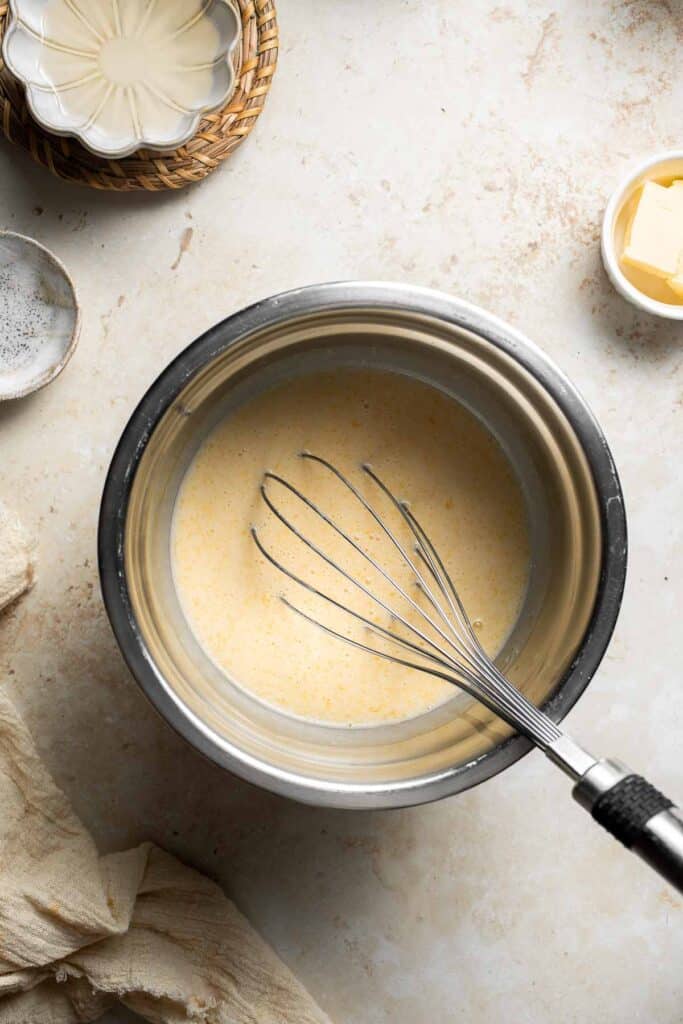
- Combine wet ingredients. In a medium mixing bowl, whisk together the milk, butter, vanilla and egg.
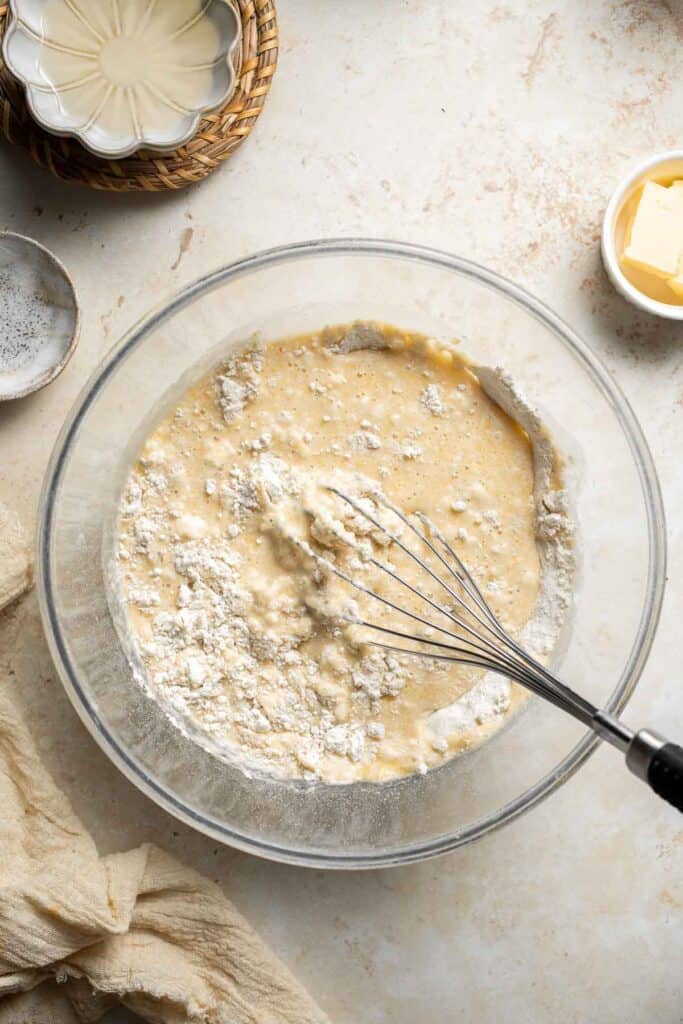
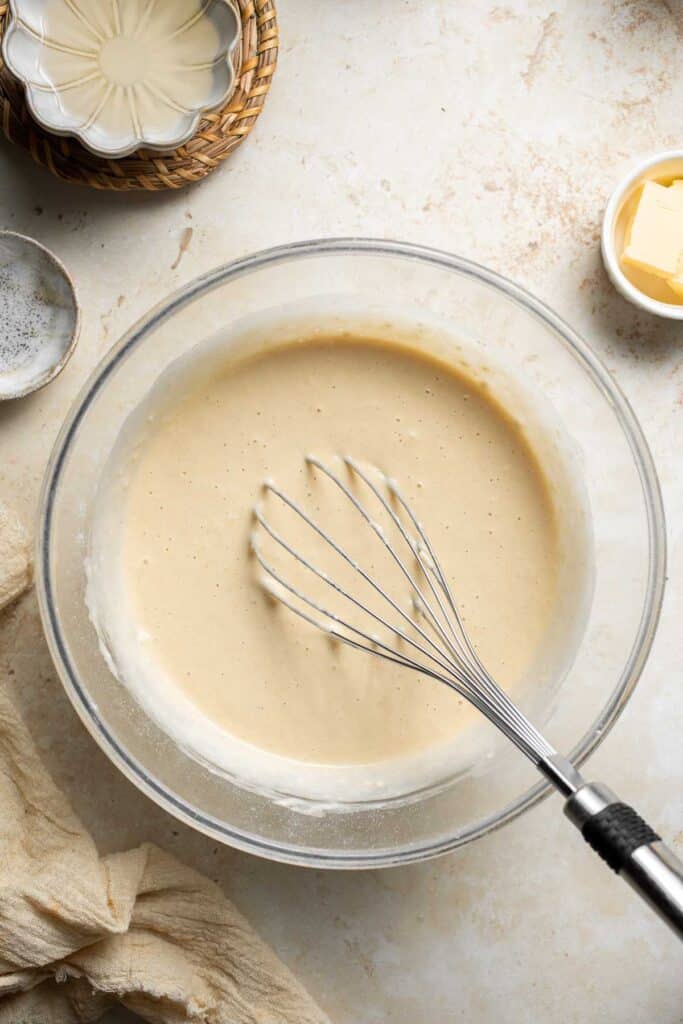
- Mix together. Add the wet ingredients to the dry ingredients and whisk until just combined (will be lumpy). Do not overmix. Let the mixture sit for about 10 minutes.

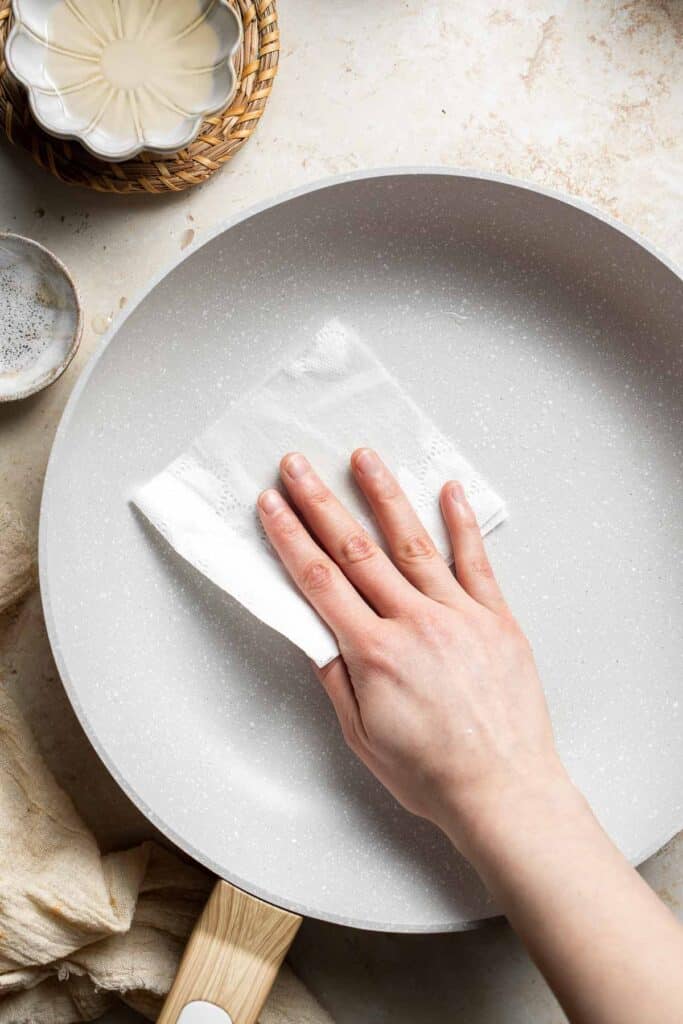
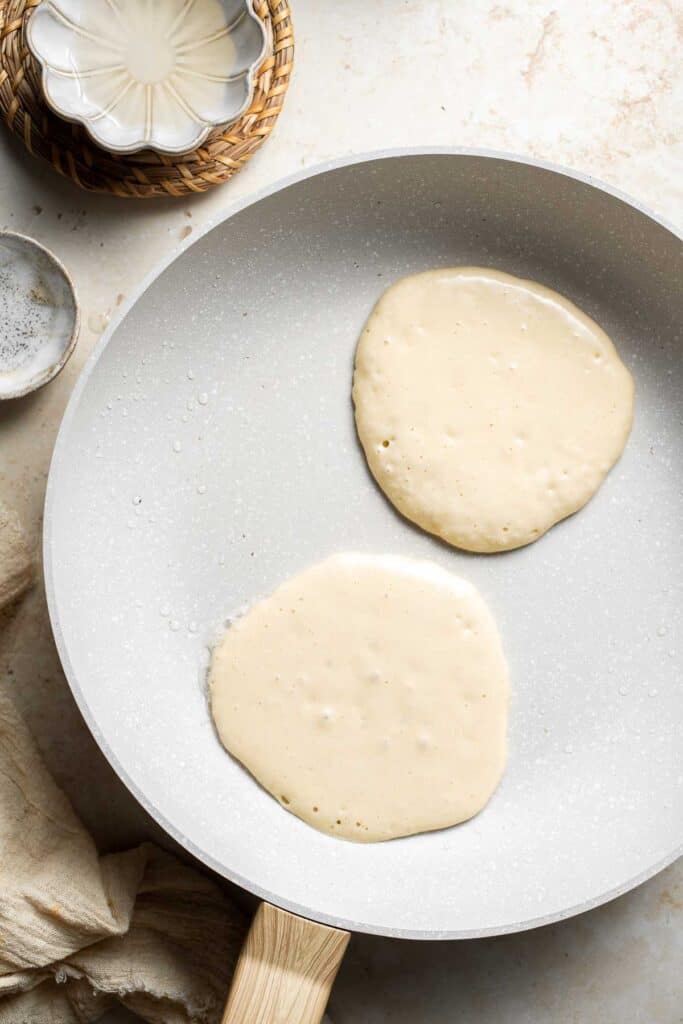
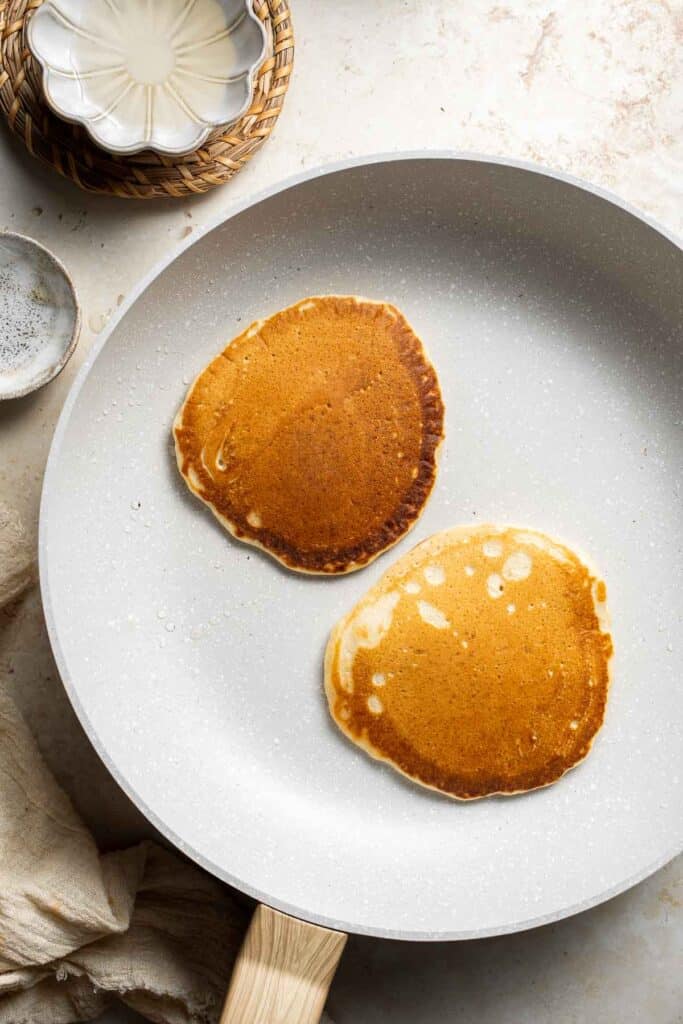
- Cook. Dampen a paper towel with vegetable oil and rub on a large frying pan or griddle. Heat pan over medium heat and add pancake batter using a ¼ measuring cup. Pour as many as fit in your pan or griddle. Cook for 1-2 minutes until small bubbles have begun to form on the surface and edges and the pancake is golden brown. Flip the pancake over and cook for another 1-2 minutes until the other side is also golden brown.
- Repeat. Repeat until batter is used up.
- Serve. Serve with pats of butter on top, a drizzle of maple syrup, and/or fruit.
Recipe Variations
- Use buttermilk. Buttermilk pancakes are extra fluffy, as the acid in the milk will react with the baking soda in the baking powder for an extra rise.
- Sprinkle some mix-ins. Once the first pancakes are on the griddle, sprinkle some fresh blueberries, chocolate chips, chopped nuts, or other mix-ins for extra flavor.
- Elevate the toppings. Instead of regular maple syrup, use an infused maple syrup or one aged in bourbon barrels. You can also cook down fresh or frozen blueberries for a homemade blueberry sauce. This option is especially great with a little whipped cream!
How to Serve Pancakes
These Old Fashioned Pancakes are delicious served on their own for breakfast or part of a bigger brunch spread. Pair them with some of my favorite breakfast dishes including:
- Egg and Potato Breakfast Casserole
- Hash Browns
- Glazed Lemon Blueberry Scones
- French Toast
- Quick and Easy Butter Croissants
- Mediterranean Scrambled Eggs
- Fruit Salad with Honey Lemon Dressing
For more brunch recipes, see our 40+ Best Brunch Ideas.
Recipe Tips and Tricks
- Don't overmix. It seems counter-intuitive, but you actually don't want to whisk out all the lumps in your pancake batter. The extra mixing can cause your batter to become dense and ruin the fluffy texture. Keep it a little lumpy!
- Let it rest. I highly recommend allowing the pancake mix to rest for at least 10 minutes after whisking. This really brings everything together and allows those lumpy bits to soften perfectly.
- Use a hot skillet. We've all accidentally poured the pancake batter too soon or too late, giving us either soggy, undercooked pancakes or scorched ones destined for the trash. Don't rush! Set the pan over medium or medium-high heat and hold your hand over it. You should feel the heat radiating up from the hot skillet. This is when you want to pour your first pancake.
Storing and Freezing Instructions
How to Store
Allow the pancakes to cool to room temperature, then store them in an airtight container in the fridge for 3-4 days. To keep them from sticking, you can set a small sheet of parchment paper between each one.
How to Reheat
There are several ways to reheat pancakes. If you need breakfast quickly, pop them in the microwave for about a minute. They can become overly soft or a little soggy like this, though. For a better texture, toast the pancakes in a large skillet over medium heat or bake them in the toaster oven at 350 degrees F for a few minutes.
How to Freeze
Leftover pancakes freeze really well! For best results, place a piece of parchment or wax paper between each one and stack them in an airtight container. Freeze for 2-3 months and thaw in the fridge before reheating.
FAQ
The tallest, fluffiest pancakes are made with milk or buttermilk. These liquids will make the batter quite thick, which leads to a really fluffy texture. Water will work, but you'll get a much lighter pancake without the tall, fluffiness of traditional pancakes. Since that's kind of the point, use either regular milk or non-dairy milk for the best results.
It's highly recommended! For the best pancakes, allow the batter to rest for 10-30 minutes before cooking your pancakes.
Although either can be used for cooking, butter burns at a much lower temperature than oil. If this happens, your pancakes will absorb the browned and burnt milk solids, which gives them a black, dirty look on the outside. They can still be eaten, but they aren't nearly as appetizing. Use either vegetable oil or a neutral cooking oil that can tolerate high temperatures, like coconut oil or avocado oil.
More Pancake Recipes
- Blueberry Pancakes
- Mini Pancakes (Silver Dollar Pancakes)
- Applesauce Pancakes
- Carrot Cake Pancakes
- Gingerbread Pancakes
- Pumpkin Pancakes
Tried this recipe?
I'd love to hear what you think! Leave a comment and rating below to share your feedback. Your reviews help others discover this recipe and help me keep creating more free recipes for you. Snap a photo and tag me on social media @aheadofthyme too.
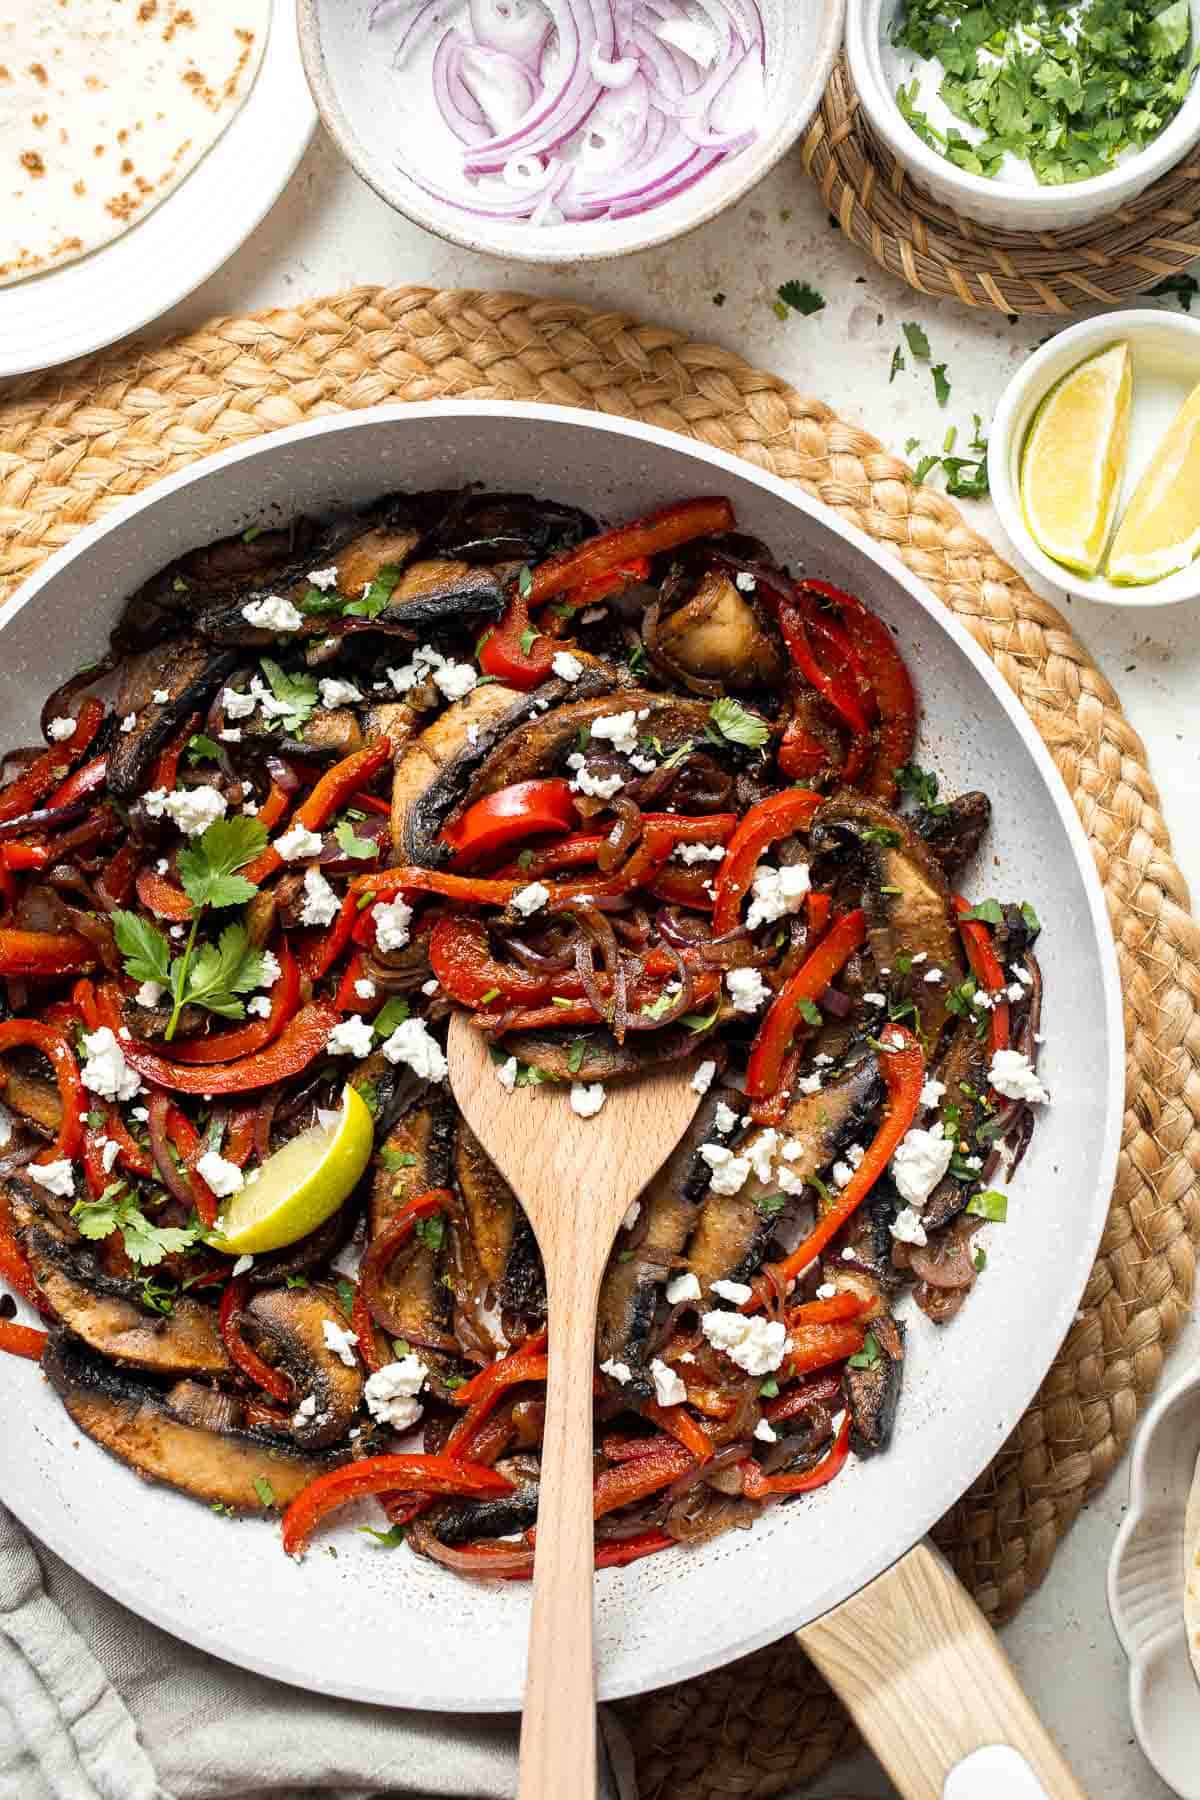
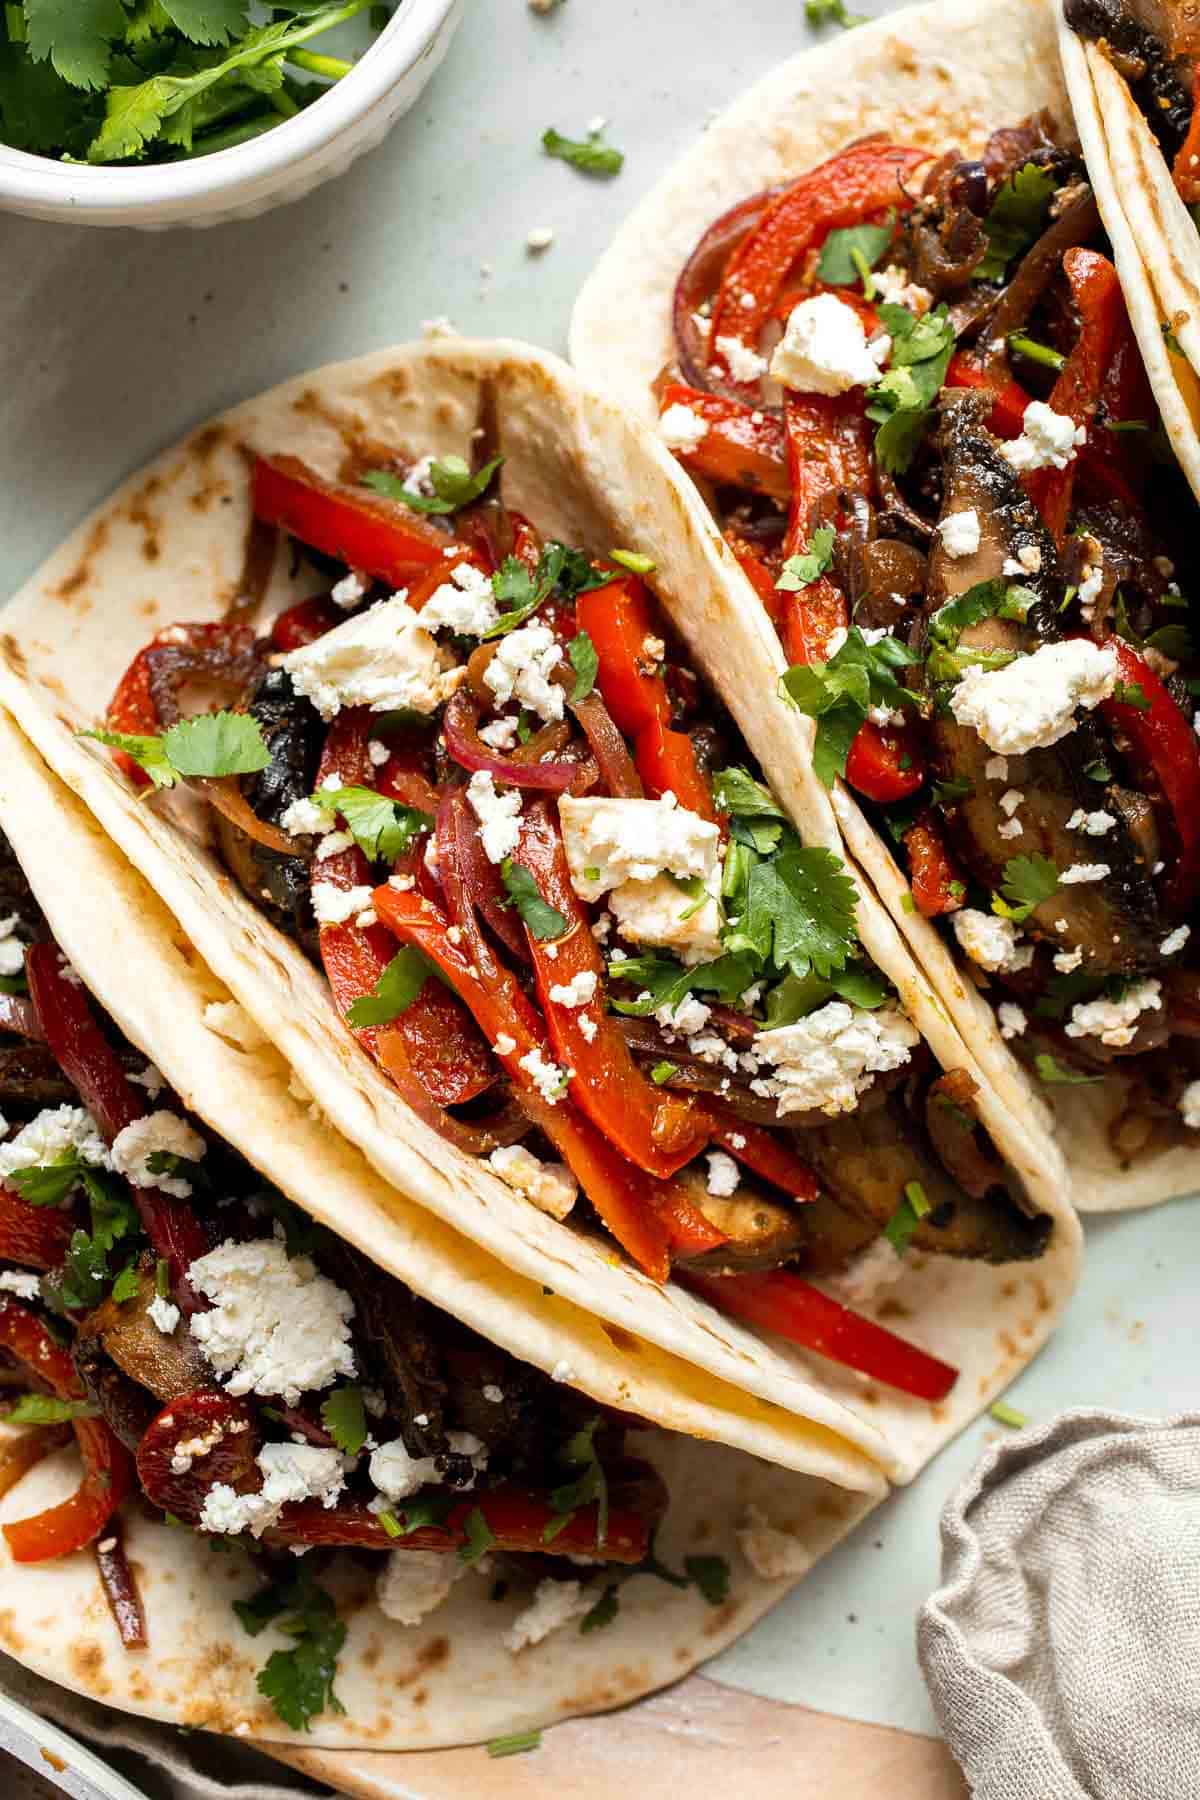
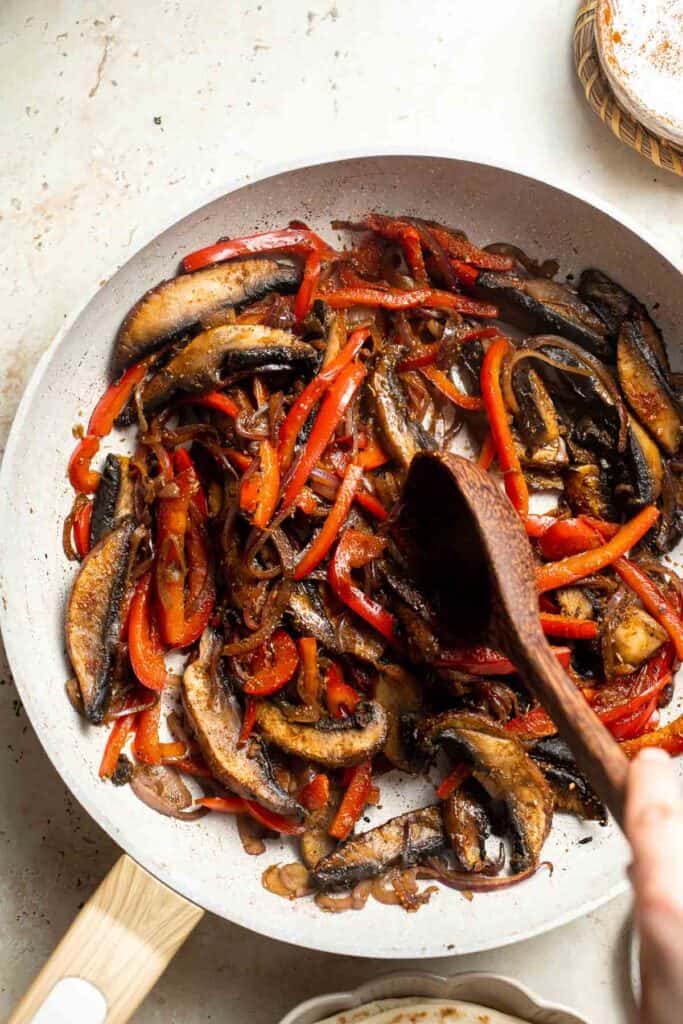
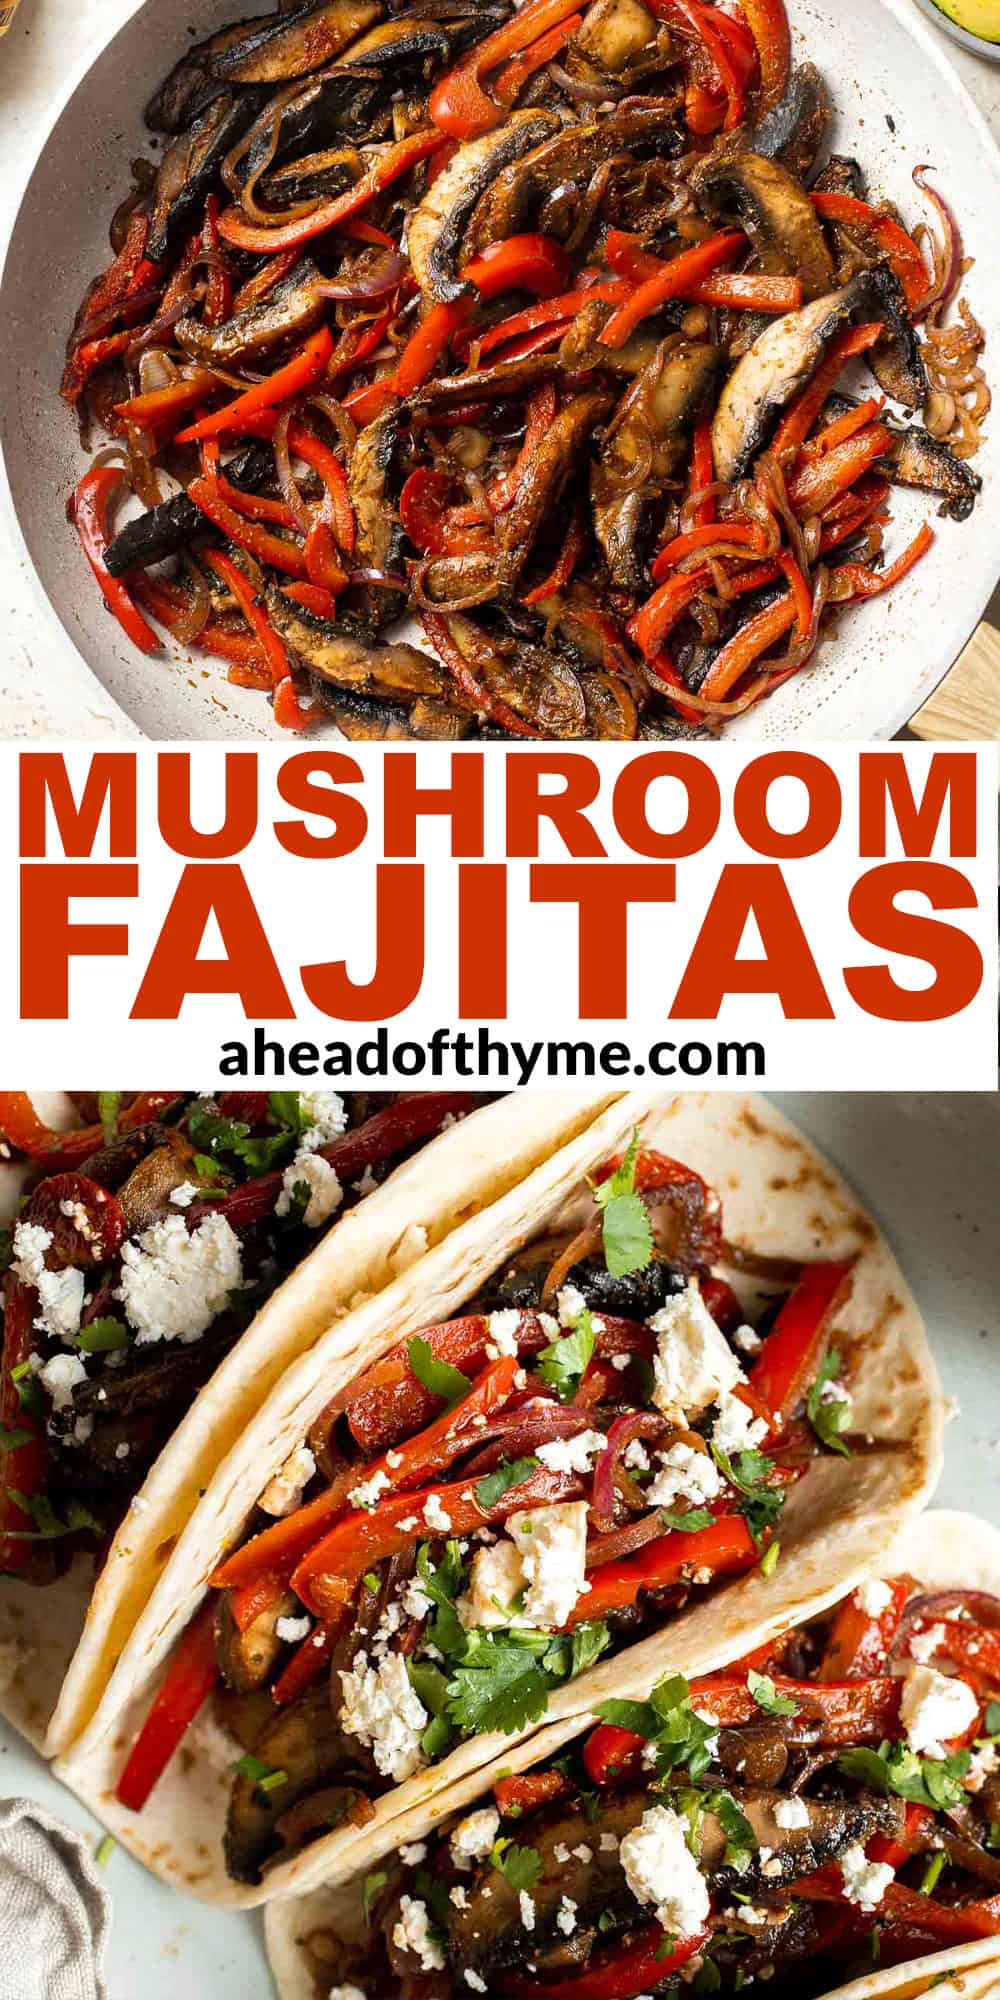
Mushroom Fajitas
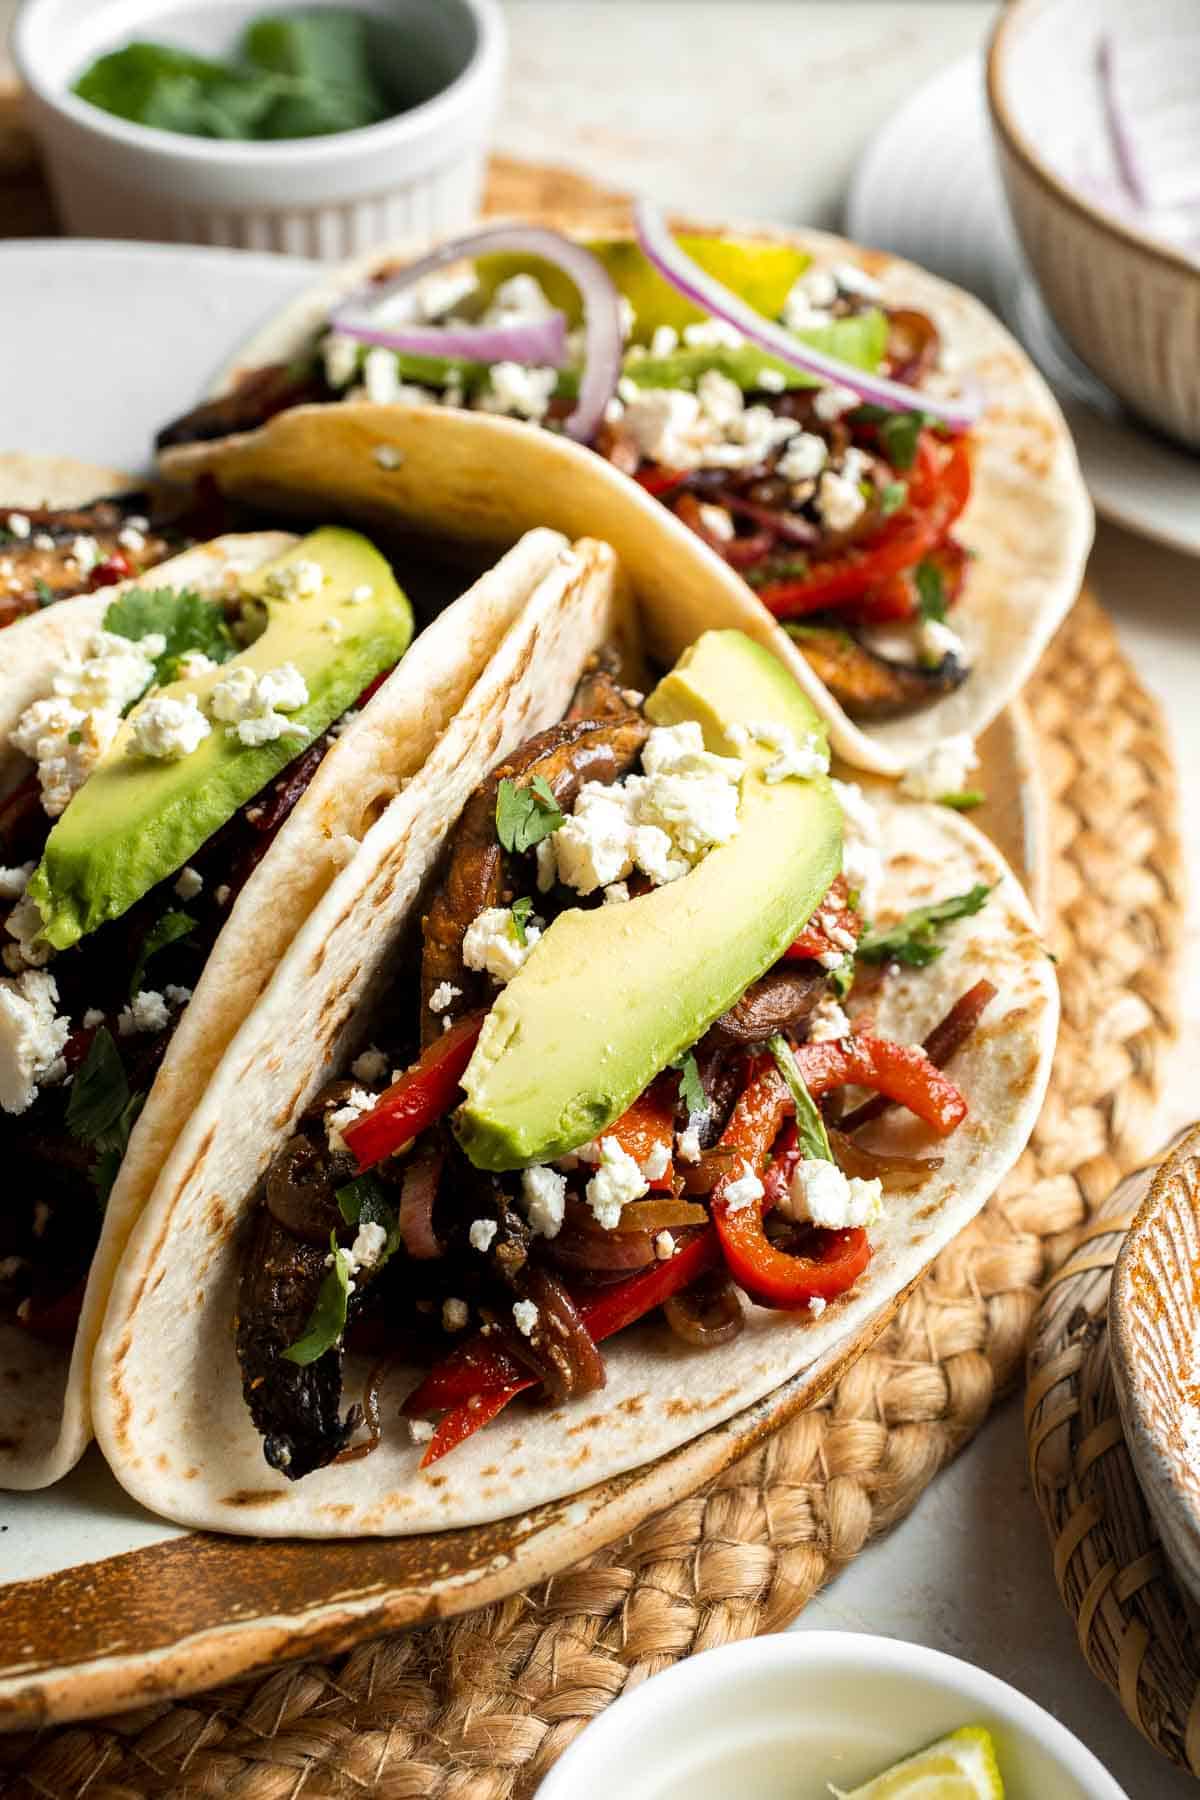
These Mushroom Fajitas have all the sizzle and flair of traditional fajitas without the meat! The thick slices of portobello mushrooms look just like skirt steak alongside the sautéed peppers and onions. The entire mixture is seasoned to perfection with a blend of Mexican spices and a squeeze of fresh lime juice. Wrap them up in tortillas with some cotija cheese, cilantro, and avocado for a perfect vegetarian meal any time!
In addition to being absolutely delicious, these portobello fajitas are also incredibly quick to make. The entire dish is ready in less than 30 minutes, and you'll have plenty of time to prep the peppers and onions while the mushrooms are cooking down. You'll want to save this recipe anytime you need a quick weeknight dinner! Pair them with tortilla chips and homemade Black Bean Salsa or some Vegan Queso to get a delicious meal the whole family will love.
Why You'll Love These Mushroom Fajitas
- Ready in a hurry. From start to finish, these easy vegetarian fajitas are ready in just 30 minutes! They're a perfect choice for an easy weeknight meal with lots of fresh veggies!
- Great for Meatless Mondays. Whether you're vegetarian or just trying to eat less meat, these easy portobello mushroom fajitas are the perfect swap. The meaty mushrooms will remind you of traditional beef fajitas without the meat. They're incredibly filling, too!
- Classic fajita flavors. The only thing missing here is the meat. Otherwise, these veggie fajitas are loaded with flavor! You've got the onions, bell peppers, lime juice, Mexican spices, and all your favorite toppings. It's like going out for dinner without having to leave the house!
Ingredient Notes
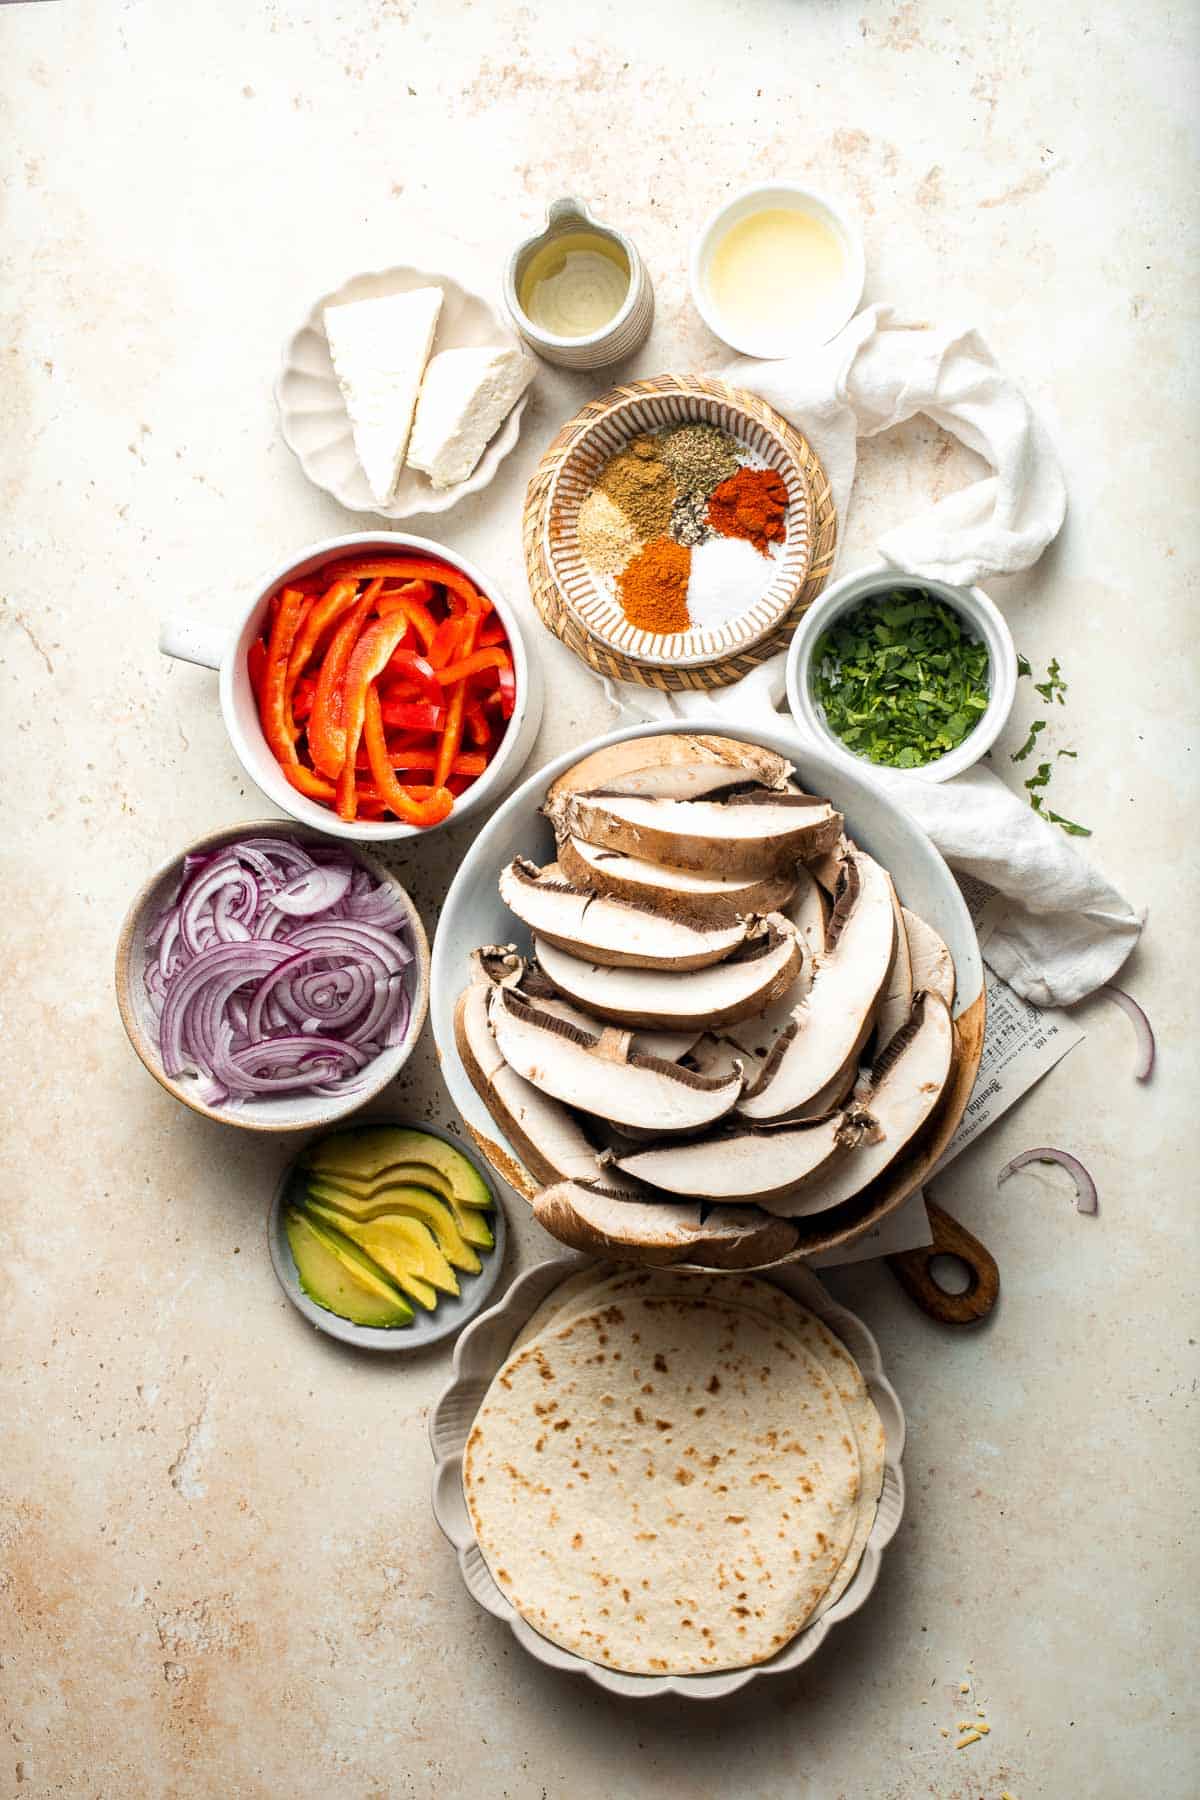
To make these delicious mushroom fajitas, you will need the following ingredients (full measurements in recipe card below):
- olive oil - to saute the mushrooms and veggies.
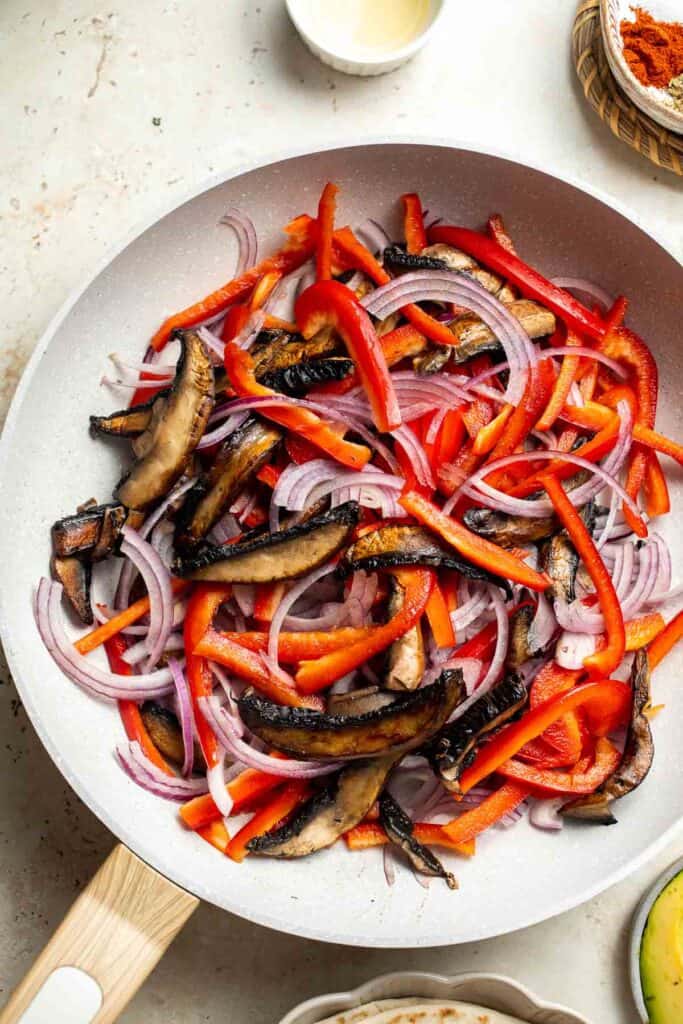
- portobello mushrooms - clean and trim the mushrooms into half-inch thick slices.
- red onion - slice the onion into thin slices.
- bell peppers - we picked red bell peppers but feel free to use any color of bell peppers to serve with this vegetarian fajita filling.
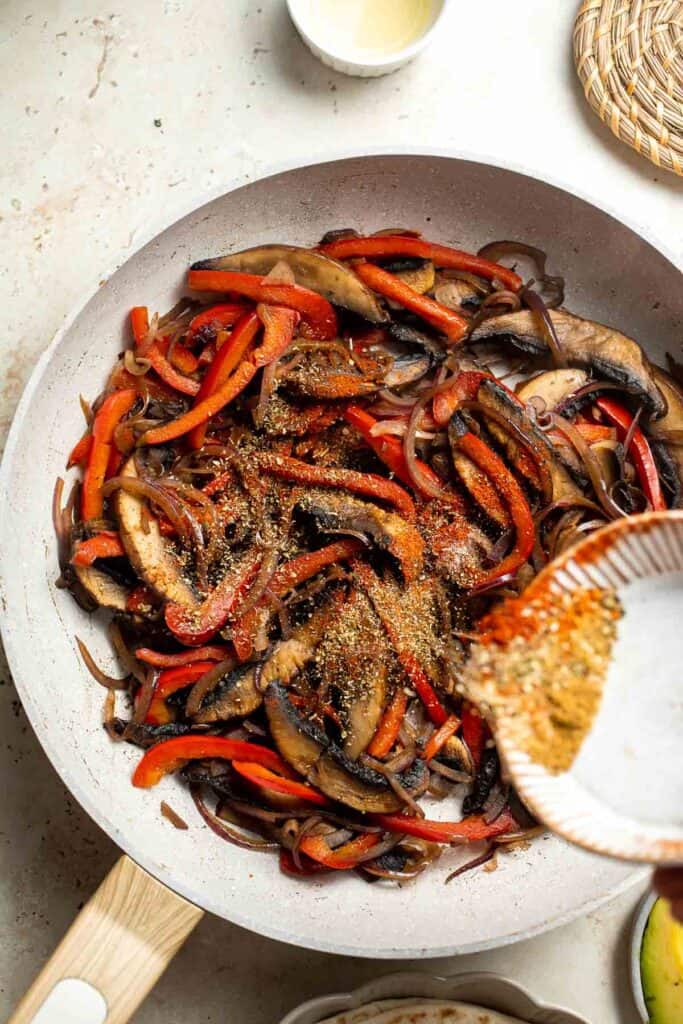
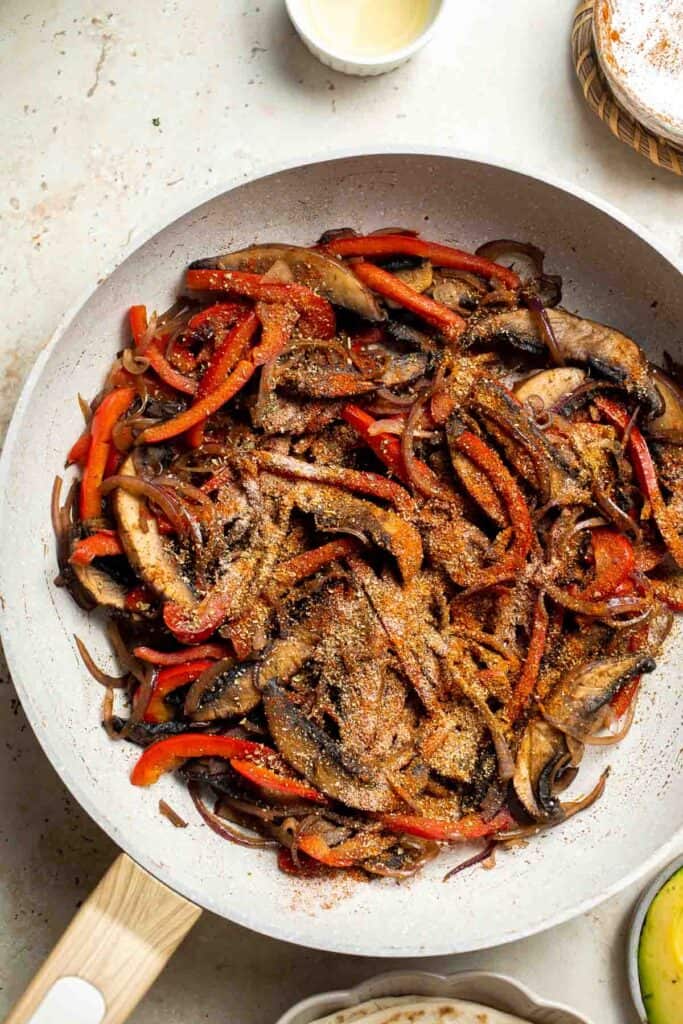
- spices - we use a homemade blend of Mexican seasoning including dried cumin, chili powder, paprika, garlic powder, dried oregano, salt, and ground black pepper.
- lime juice - a squeeze of fresh lime juice is the perfect finishing touch.
- small flour tortillas - warm these in the microwave to make them soft and pliable. Warm corn tortillas work great, too.
- cotija cheese - this mild, crumbly cheese is perfect for fajitas. Feel free to use shredded cheddar instead if you prefer.
- fresh cilantro - finely chop some cilantro for garnish.
- avocado - prep thin avocado slices to lay on top of each fajita. You can also top these with Guacamole or Pico de Gallo.
You will also need measuring cups and spoons, a cutting board and knife, a large skillet, and a spoon or spatula.
How to Make the Best Mushroom Fajitas
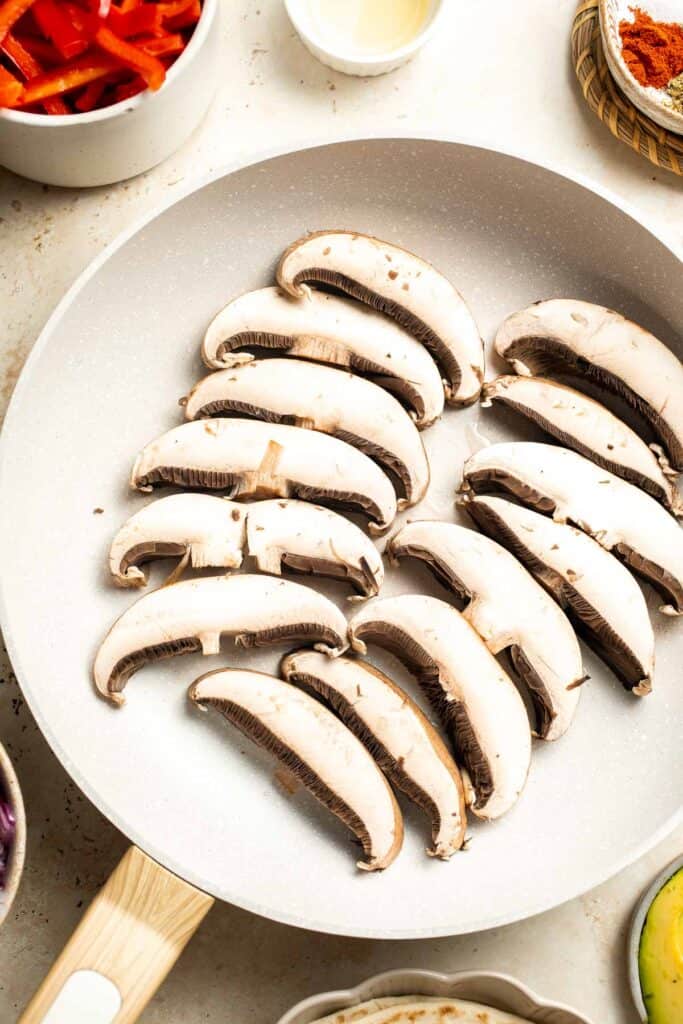
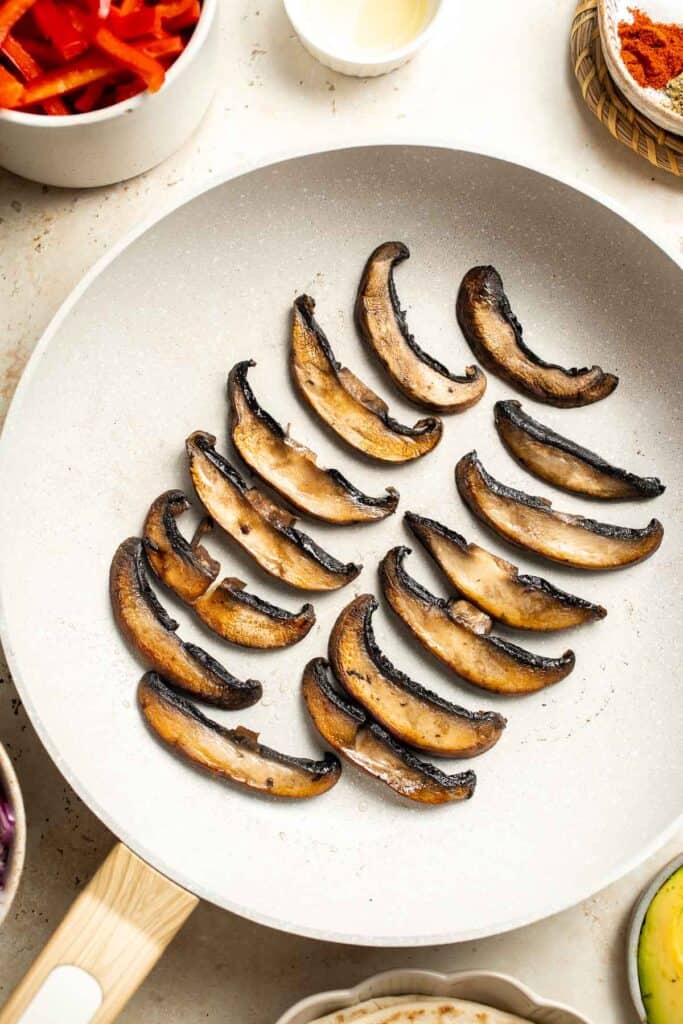
- Cook mushrooms. In a large skillet, heat oil over medium-high heat for 2 minutes until the hot oil is sizzling hot. Add mushrooms and sauté until browned on both sides and tender, about 10 minutes.
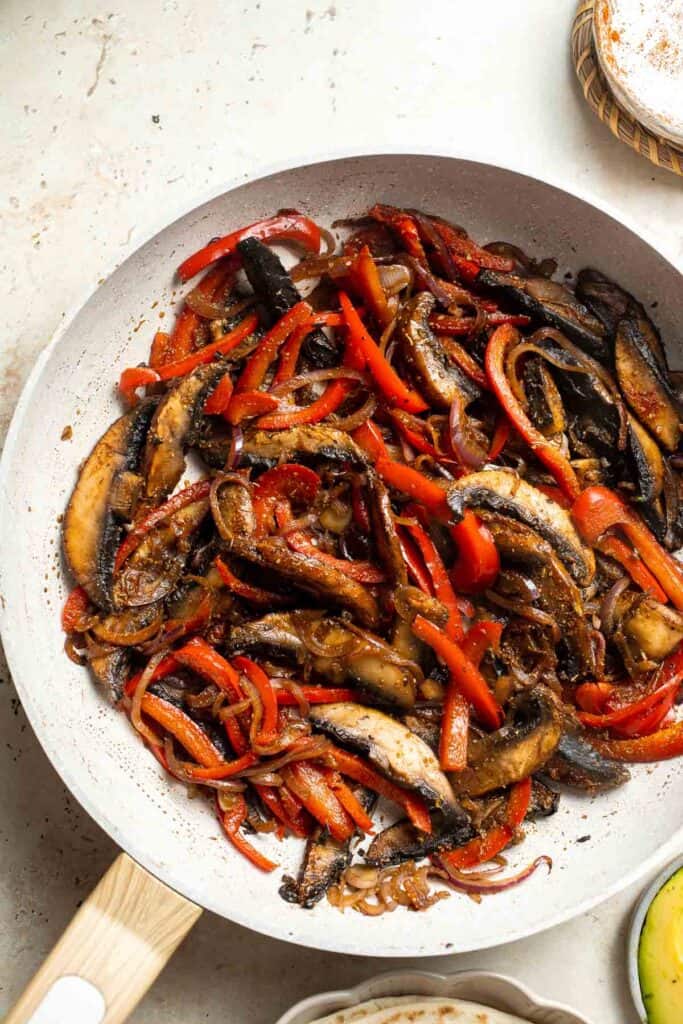
- Add veggies. Add onion and bell peppers and cook until tender, about 3-5 minutes.

- Add seasoning. Add cumin, chili powder, paprika, garlic powder, oregano, salt and pepper. Mix well until evenly combined.
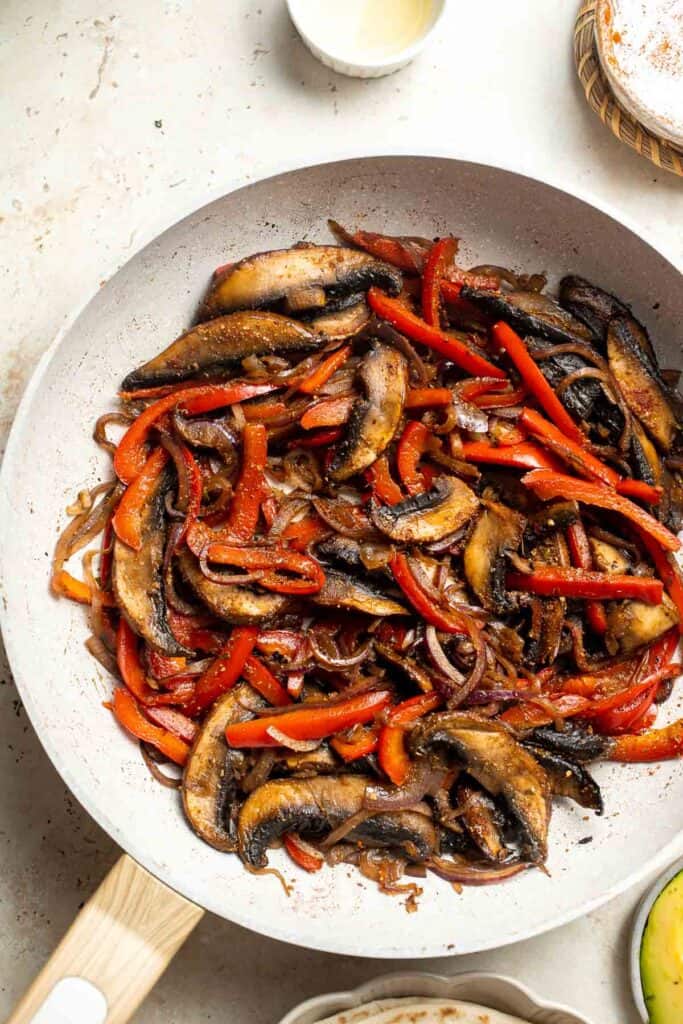
- Add lime juice. Stir in lime juice.

- Serve. Serve with tortillas, cheese, cilantro and avocado.
Recipe Variations
- Add additional protein. Add a layer of Refried Beans to each tortilla to hold the veggies. You can also prepare skirt steak or chicken for the meat eaters in the group.
- Grill them. If you have a grill pan or a nice cast iron skillet, you can prepare this easy mushroom recipe on the grill for a deliciously smoky flavor.
- Adjust the peppers. Bell peppers are a classic option in traditional fajita recipes, but you can easily use jalapeño peppers, poblano peppers, roasted green chiles, or any other type of pepper you like.
- Use taco seasoning. Don't want to measure out all the individual spices? Feel free to use store-bought taco seasoning or fajita seasoning instead.
- Make vegan fajitas. For a vegan recipe, skip the cotija cheese. Everything else is already plant-based!
How to Serve
These mushroom fajitas are wonderful served as a meal on their own or paired with my favorite vegetarian Mexican sides:
- Guacamole
- Vegetarian Tortilla Soup
- Mexican Street Corn (Elote)
- Cilantro Lime Rice
- Mango Salsa
- Creamy Mexican Corn Soup
For more recipe ideas, see our 25 Mexican Side Dishes.
Recipe Tips and Tricks
- Cook the mushrooms properly. Most people are a little shy when cooking mushrooms, and they stop too soon. For a really meaty texture, you need to cook the mushrooms at a pretty high heat until they brown on the outside and begin to dry out and soften.
- Don't overcook. Once the peppers are tender, remove the vegetables from the heat to avoid letting them get overly soft.
- Don't crowd the pan. If you want to make a double batch, be sure to use two pans to cook down the mushrooms, or they won't dry out properly.
Storing and Freezing Instructions
How to Store
Leftover fajita fillings can be stored in an airtight container in the fridge for 3-4 days.
How to Reheat
The best way to reheat is to warm up the veggies in a skillet on the stove over medium low heat. You may need to add a splash of water to soften them up.
How to Freeze
The leftover vegetables can be frozen, but they'll be quite soft after thawing. For best results, make this recipe fresh or reheat from refrigerated leftovers.
FAQ
You can use any kind of mushrooms you like, but I recommend keeping it simple with a thick, meaty variety like portabello mushrooms. They look the most like strips of meat, and they can take on flavors really well. Other great options include baby portobello, button, and king oyster mushrooms.
There are plenty of ways to stretch or adapt these plant-based fajitas. Serve them with seasoned pinto beans, refried black beans, pico de gallo, guacamole, seared skirt steak, homemade salsa, a little sour cream, and more. Because this recipe has so much flavor, I recommend keeping it simple so you can really taste the spices and fresh vegetables.
No, that's not a good idea. Mushrooms have a lot of moisture in them, and it takes time for them to dry out and cook down. This process also gives them a meaty texture. If you cook all of the vegetables at the same time, the mushrooms will likely become soggy and much less appetizing. Focus on the mushrooms first, then add the other veggies.
More Mushroom Recipes
- Mushroom Flatbread with Spinach
- Hungarian Mushroom Soup
- Mushroom Risotto
- Vegetarian Stuffed Mushrooms
- Roasted Asparagus and Mushrooms
- Sautéed Garlic Mushrooms
Tried this recipe?
I'd love to hear what you think! Leave a comment and rating below to share your feedback. Your reviews help others discover this recipe and help me keep creating more free recipes for you. Snap a photo and tag me on social media @aheadofthyme too.
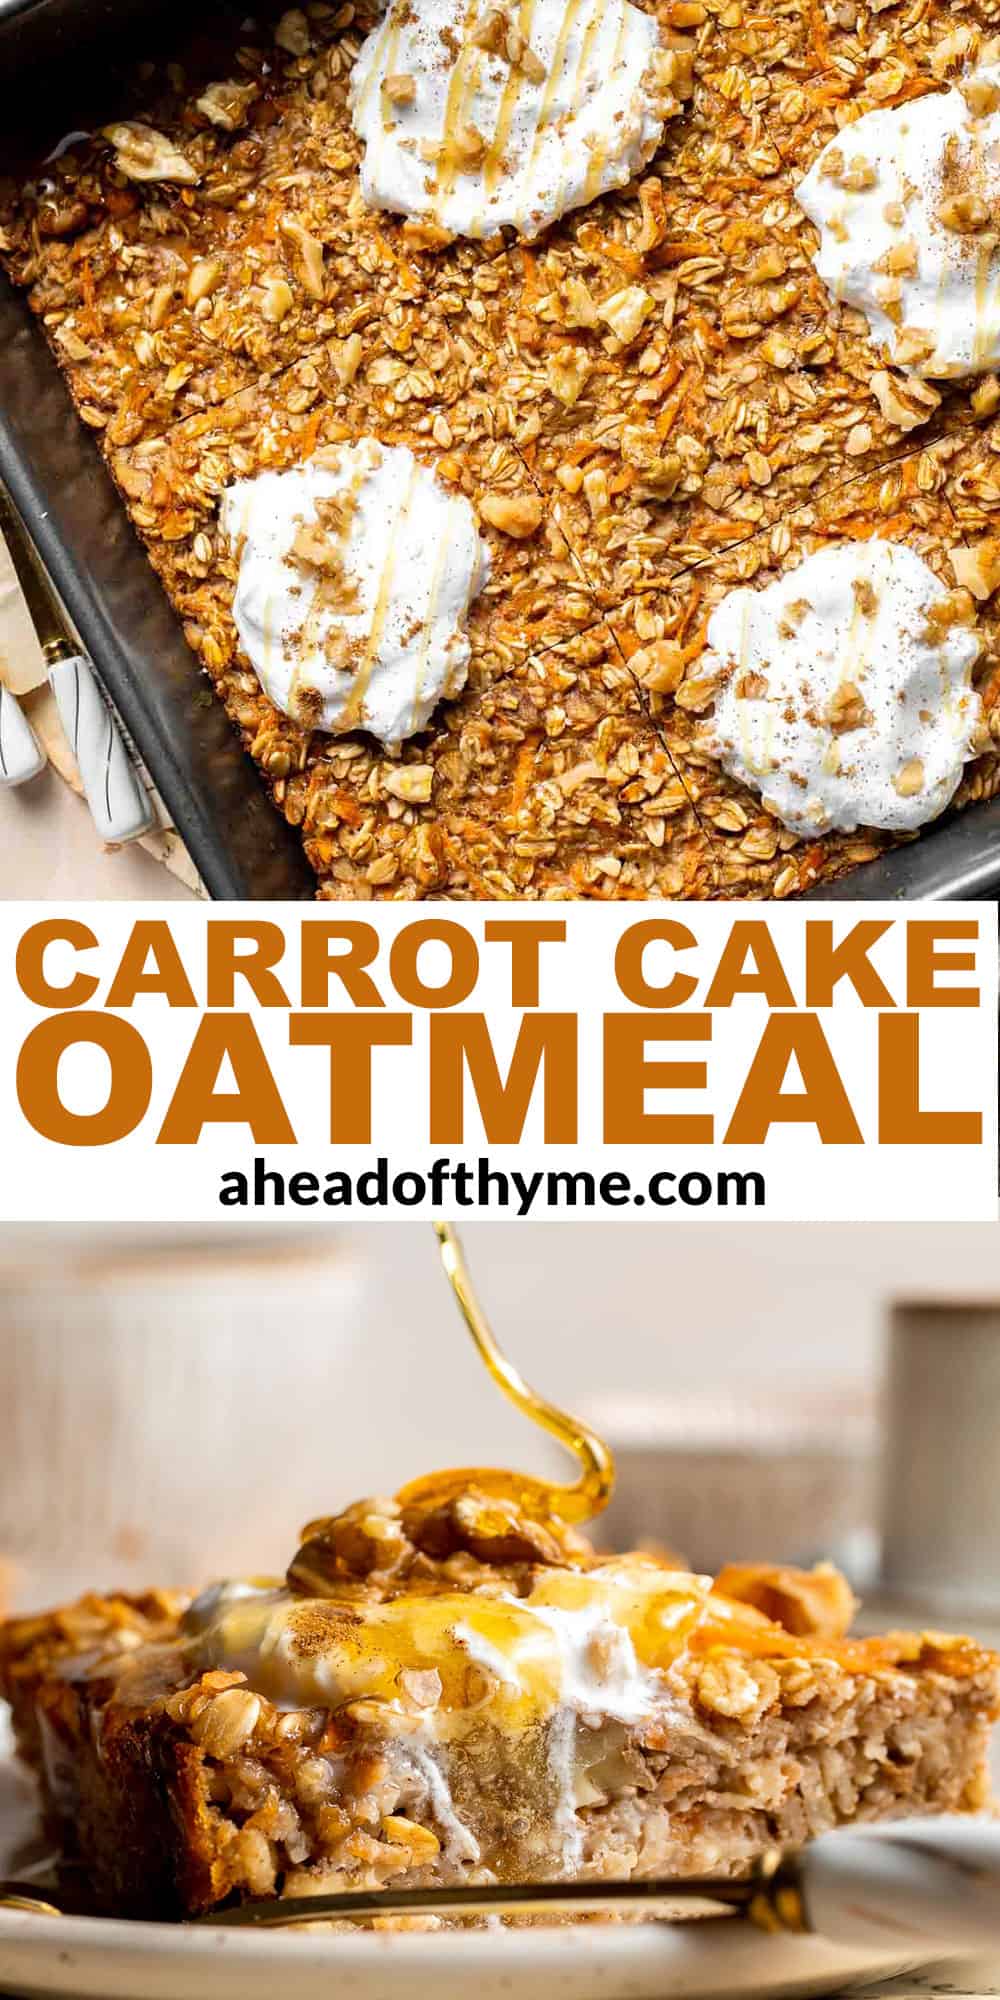
Carrot Cake Baked Oatmeal
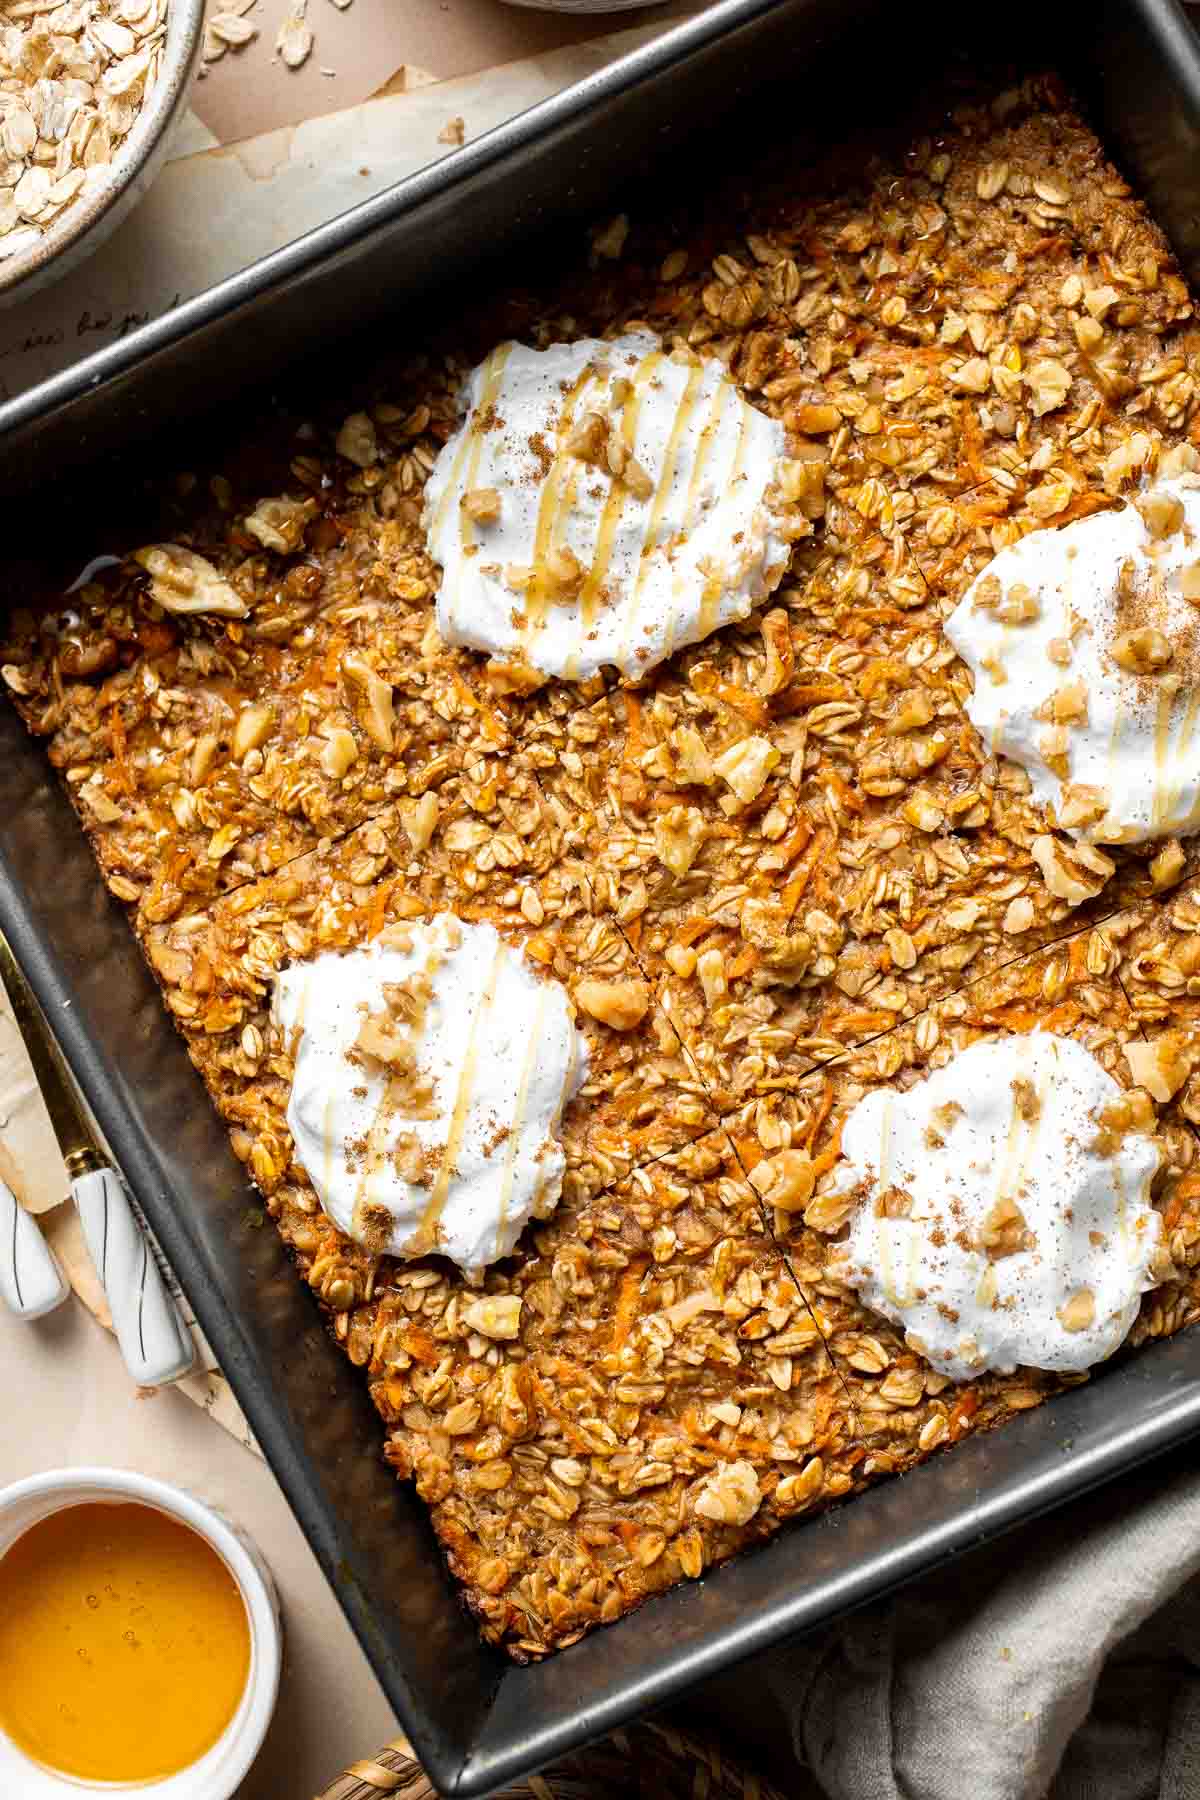
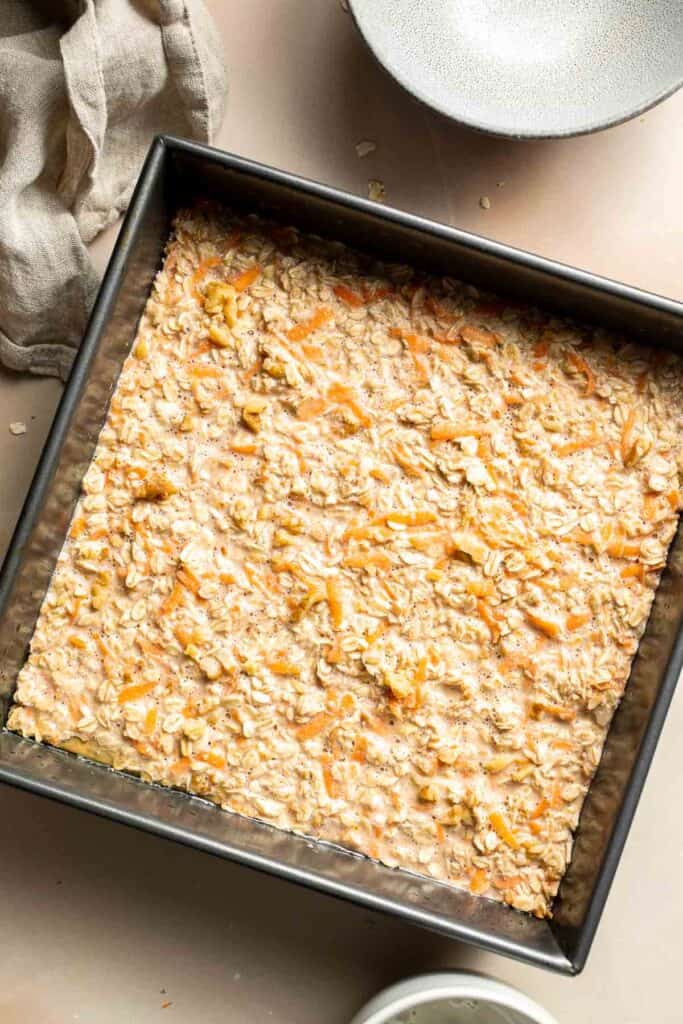
Start your day off right with the coziest Carrot Cake Baked Oatmeal, with all the flavors of the classic dessert - but for breakfast! Loaded with freshly grated carrots, warm spices, toasted walnuts, and maple syrup, it's the perfect delicious and filling breakfast for Easter brunch or any time of year!
One of the best things about this carrot cake oatmeal bake is that it's basically a healthy carrot cake that you can eat for breakfast! The oats give it more texture and fiber, but it still has all the spices and flavor you love. You'll be getting a nice dose of veggies first thing in the morning, too! Serve it as a standalone breakfast on its own or with your favorite Breakfast Strata or Hot Cross Buns on your Easter brunch menu!
Why You'll Love This Carrot Cake Baked Oatmeal
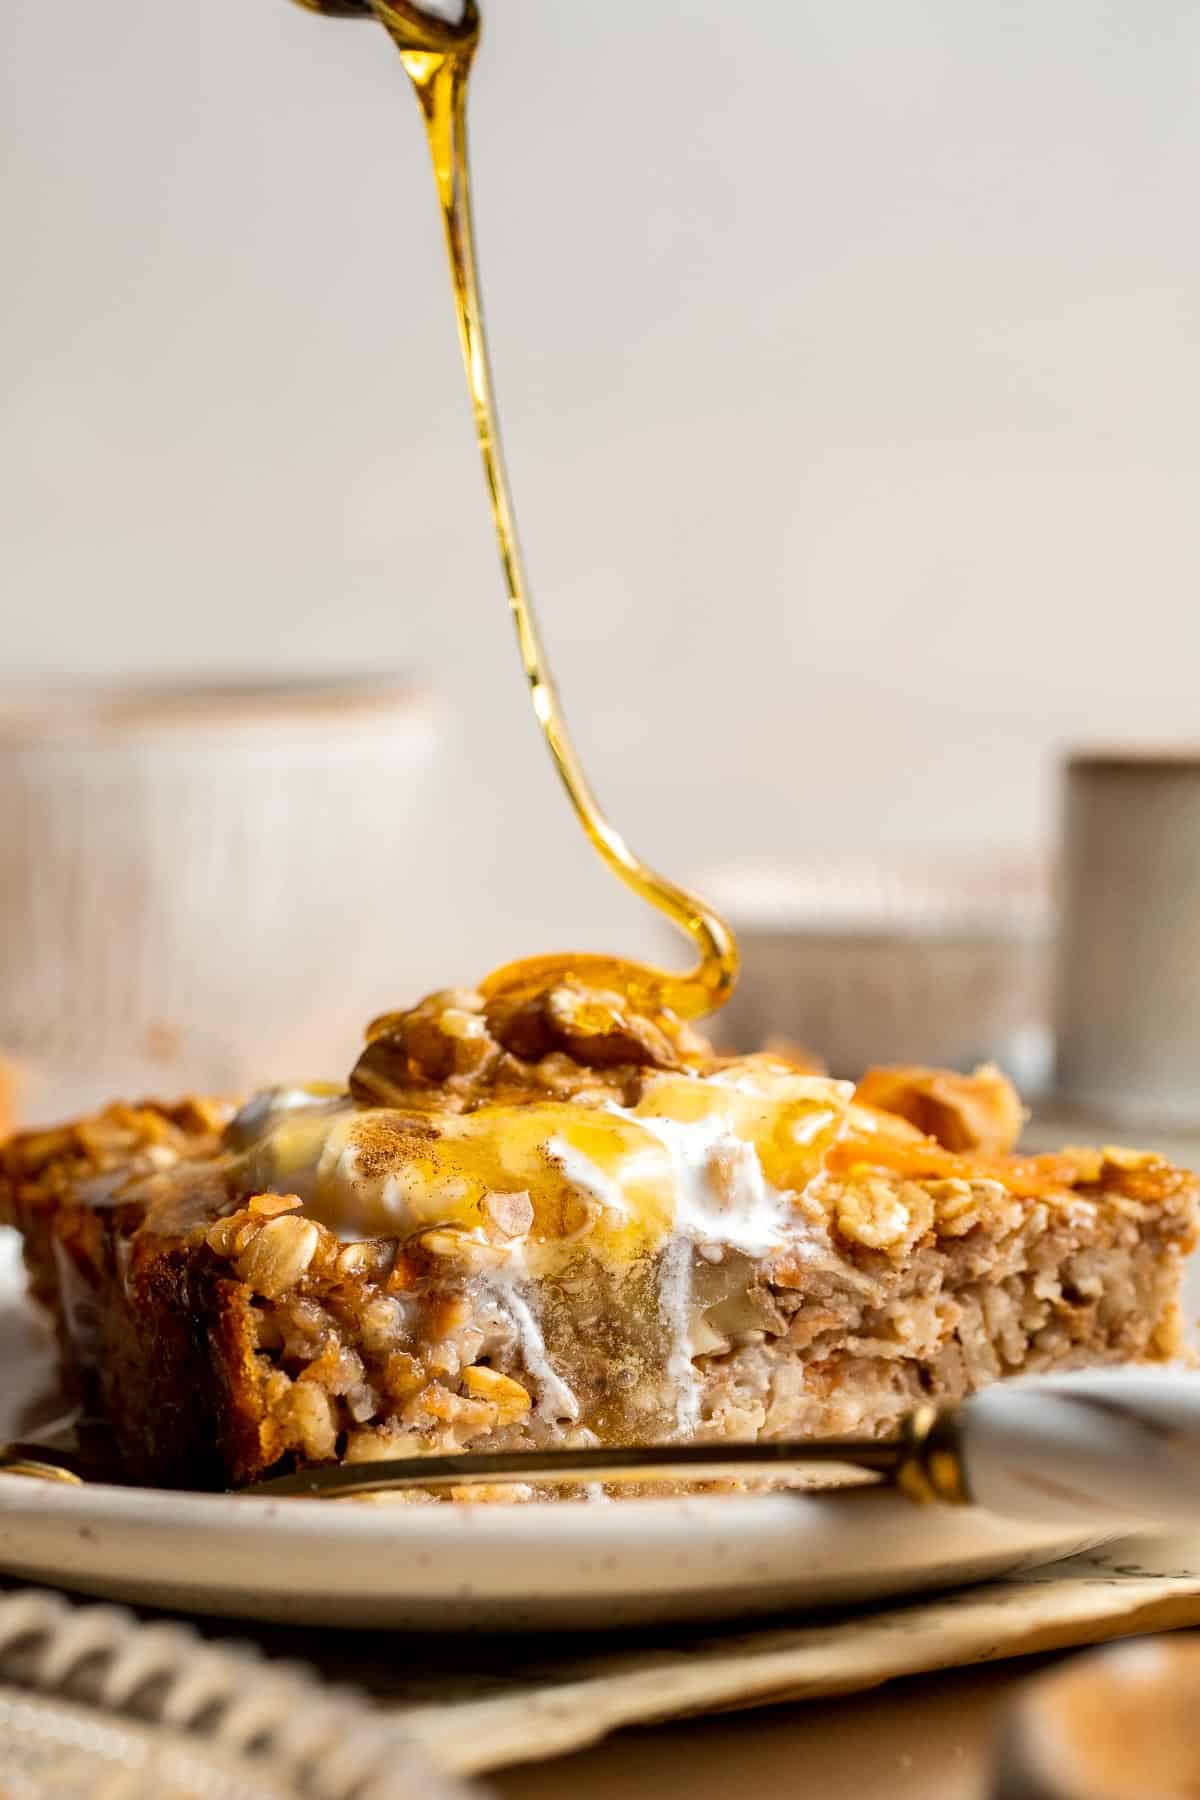
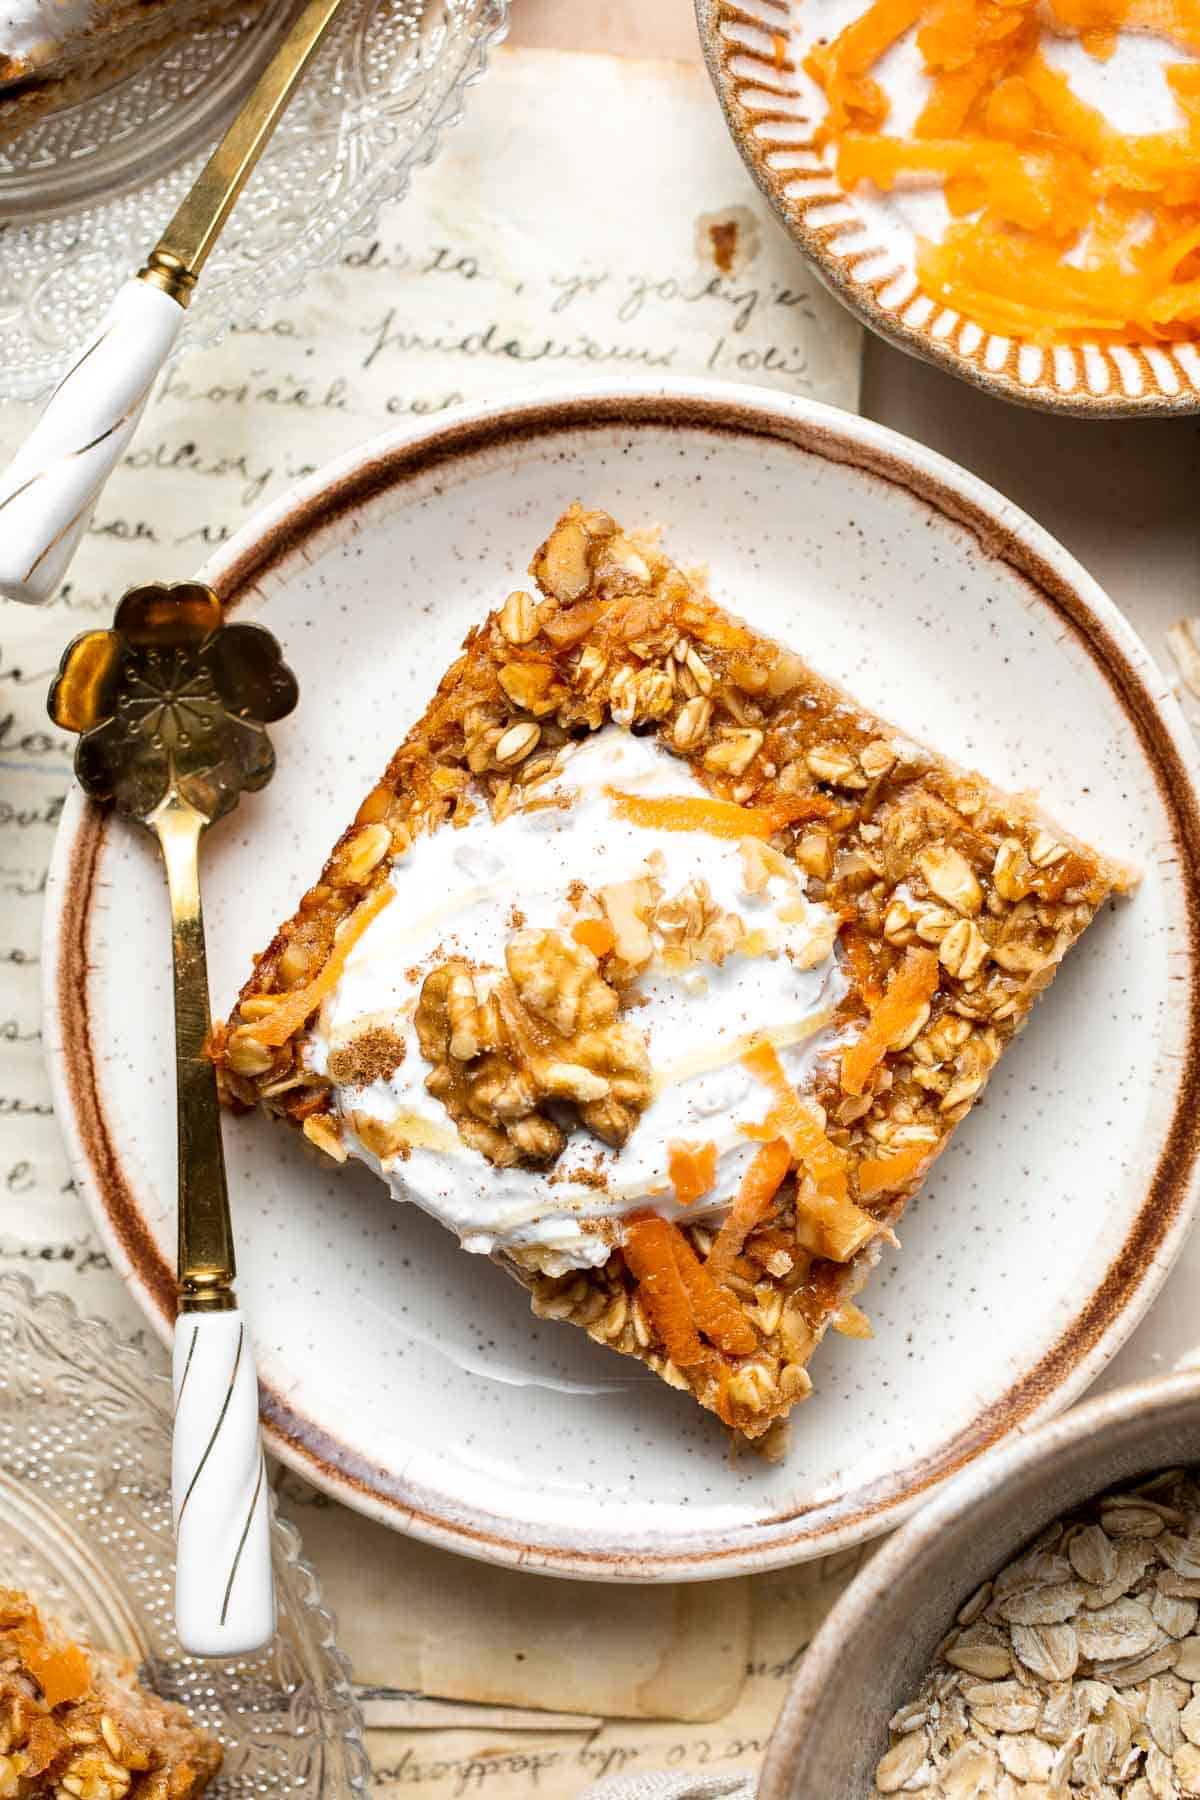
- Classic carrot cake flavor. The combination of carrots, walnuts, cinnamon, and maple syrup is so cozy and satisfying! Perfect with a little Greek yogurt and a touch of maple syrup (or maybe a little cream cheese frosting?).
- Feed the family. One batch of these baked oats makes enough to fill an 8-inch baking dish, so it's just the right size for a family for breakfast. They can either be served as the whole breakfast or as a sweet, filling side to go with more savory options.
- Perfect for Easter brunch. Carrot cake is one of the most popular Easter desserts, so it makes perfect sense to add this baked oatmeal to your Easter breakfast menu! Pair it with your favorite egg casserole, bacon, muffins, and fresh fruit for a satisfying start to the day.
Ingredient Notes
To make this delicious Carrot Cake Baked Oatmeal, you will need the following ingredients (full measurements in recipe card below):
- cooking spray - prepare the pan with some cooking spray or a little butter.
- old fashioned oats - be sure to use real traditional rolled oats, not quick oats.
- ground cinnamon - this adds that warm spiced flavor that makes carrot cake so satisfying.
- baking powder - this will raise the oatmeal mixture for a cake-like texture.
- salt - to bring out all the delicious flavors.
- fresh carrots - use freshly grated or shredded carrots. Tip: use the grater attachment on your food processor.
- chopped walnuts - for the best flavor, toast these in the oven first.
- milk - feel free to use your favorite type of milk (oat milk, regular dairy, etc).
- maple syrup - this adds a natural sweetness and an extra layer of flavor.
- eggs - eggs bind the oatmeal mixture together and help raise the baked oatmeal.
- vanilla extract
Optional Toppings
You can top this baked oatmeal with your favorite toppings including:
- whipped cream
- nuts - we added chopped walnuts, but any chopped nuts or seeds will be great!
- cinnamon - or any warm spices that you like including nutmeg, allspice, or a pumpkin spice blend.
- maple syrup or honey
You will also need measuring cups and spoons, an 8-inch square baking pan, medium and large mixing bowls, and a spatula or spoon.

How to Make the Best Carrot Cake Baked Oatmeal
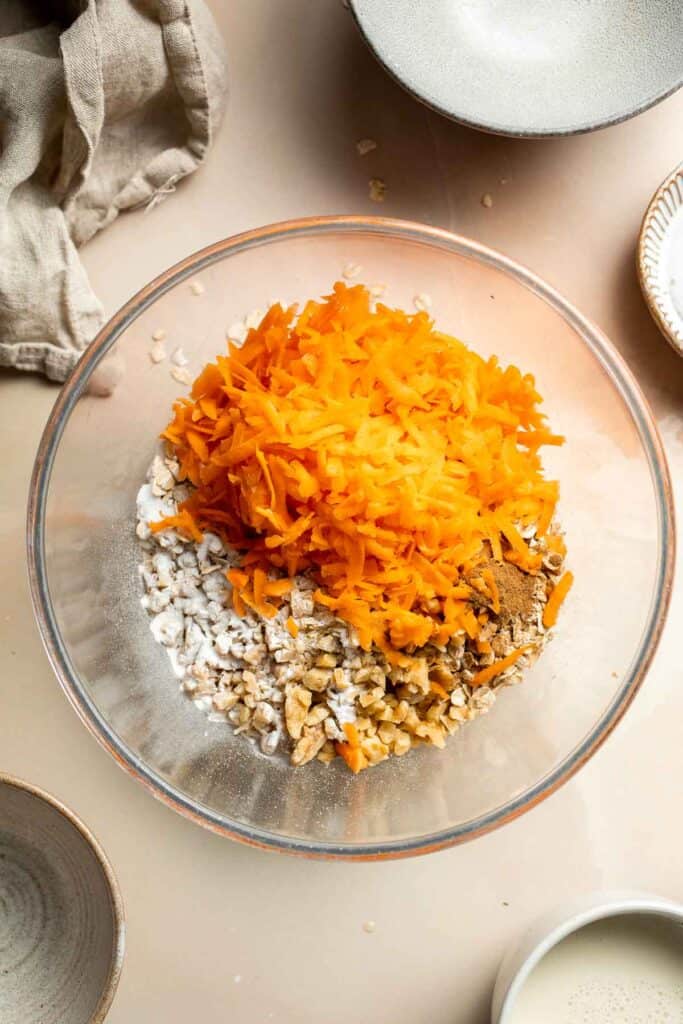
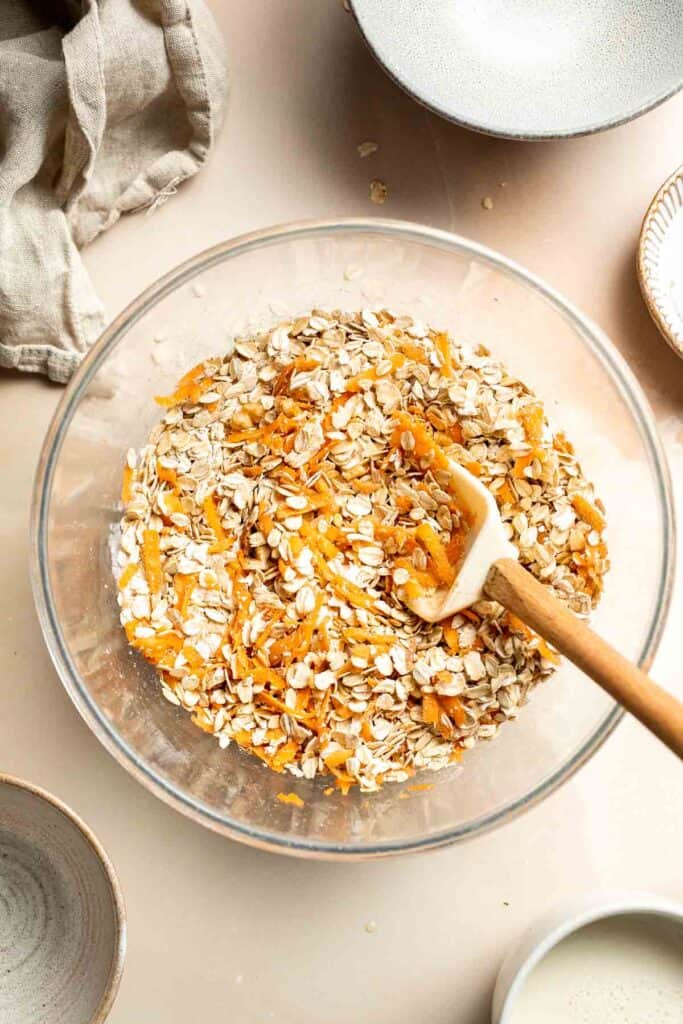
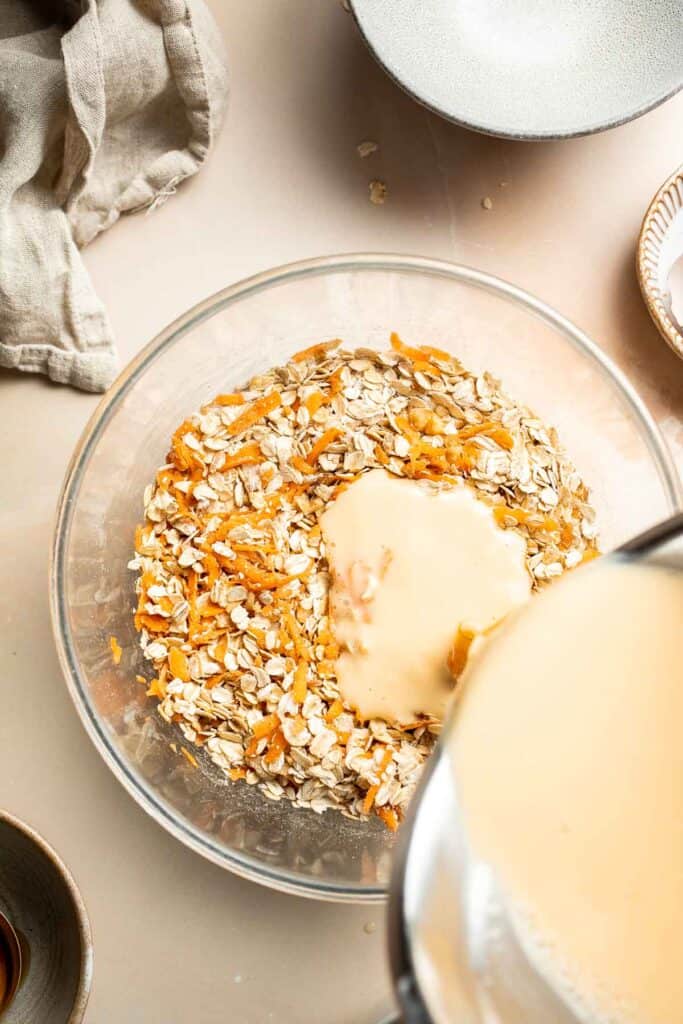
- Combine dry ingredients. In a large mixing bowl, combine the dry ingredients including oats, cinnamon, baking powder, salt, carrots, and walnuts.
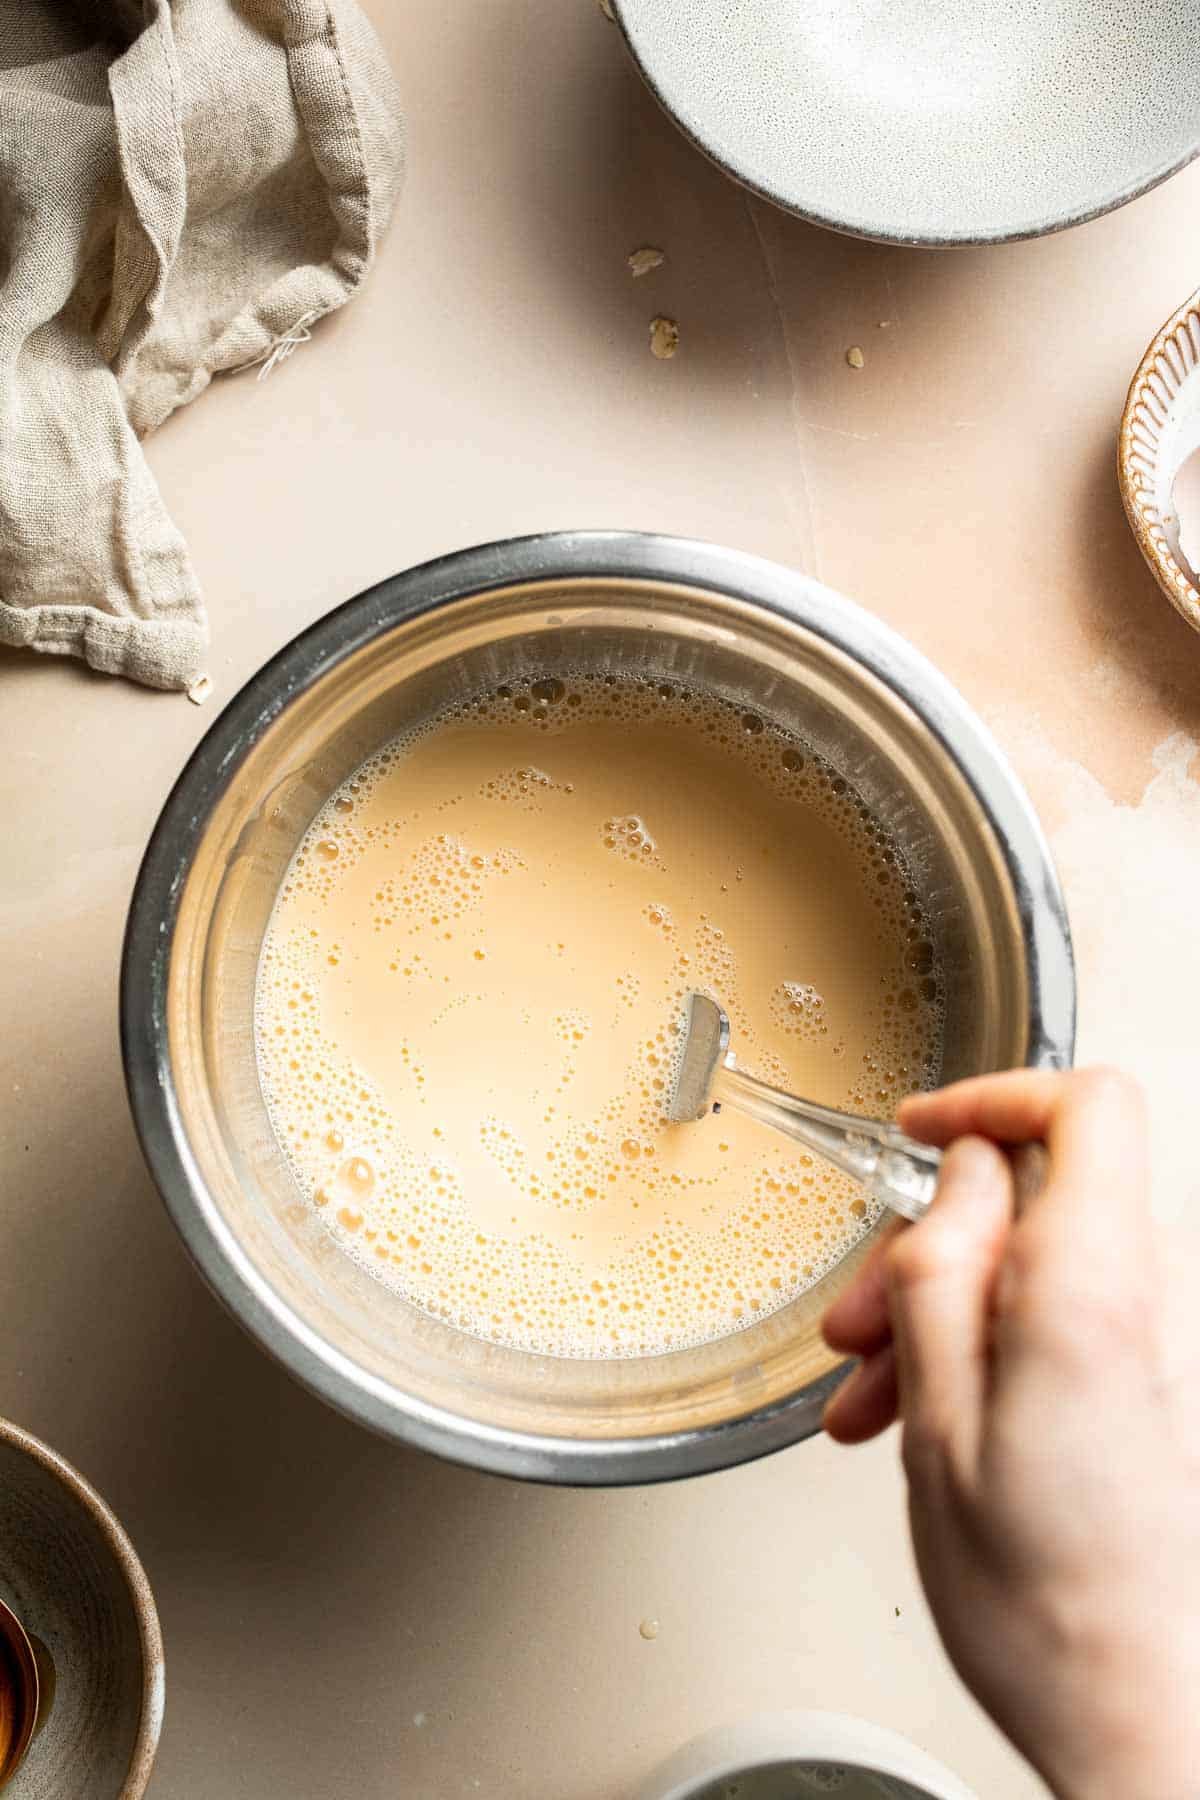
- Combine wet ingredients. In a medium mixing bowl, add milk, maple syrup, eggs, and vanilla. Stir until mixed evenly together.
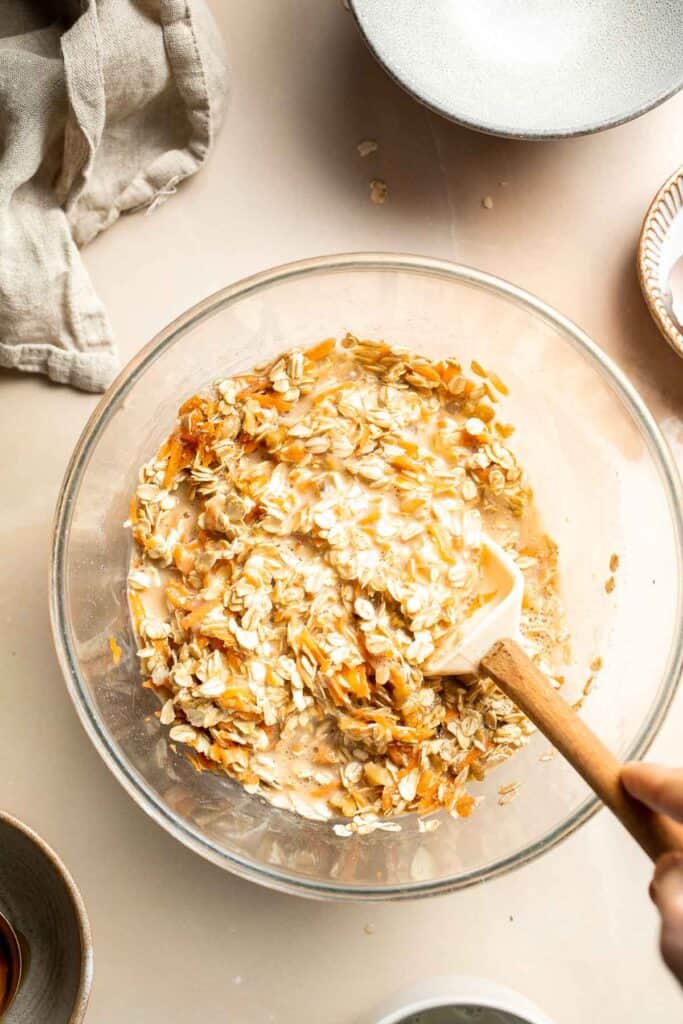
- Make batter. Transfer the wet mixture into the dry mixture. Stir until just combined. Do not overmix the batter.
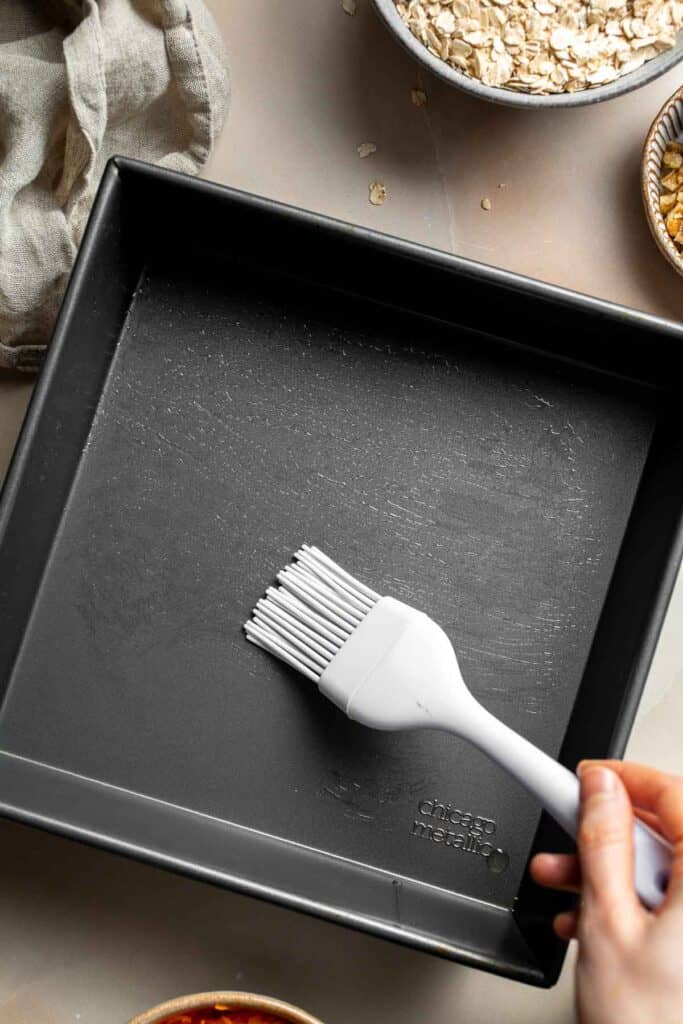
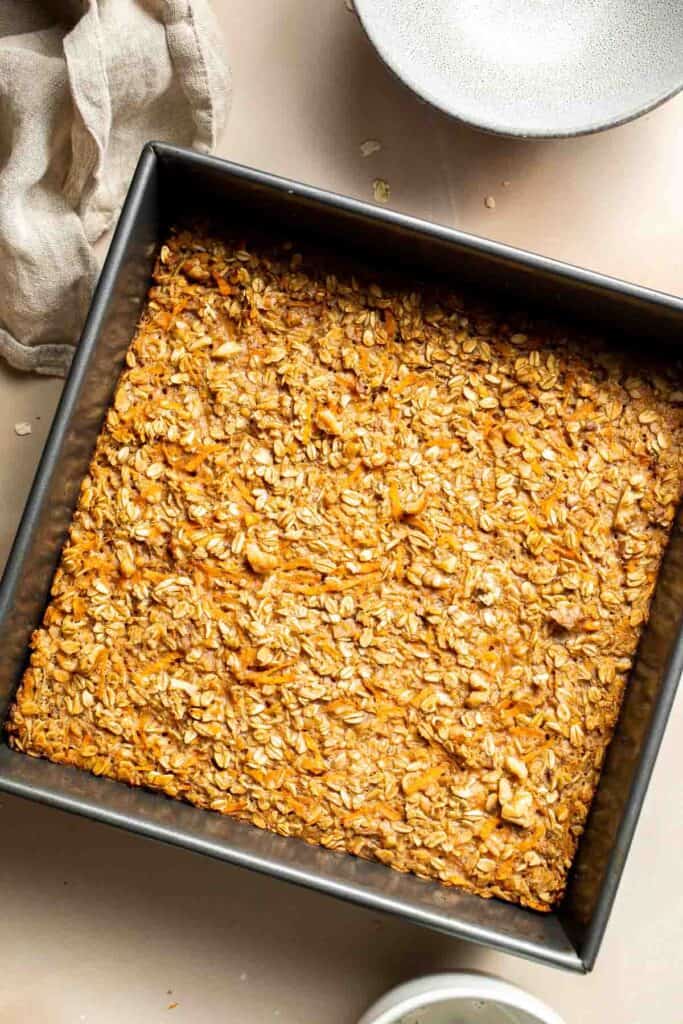
- Bake. Transfer the batter to an 8-inch square baking pan (2-quarts) greased with with butter or cooking spray. Bake in a 350F preheated oven for 40-45 minutes, or until oatmeal is set and golden brown.
- Serve. Let it cool for 5 minutes before serving. Slice into 9 squares and top with whipped cream, cinnamon, chopped walnuts, and a drizzle of maple syrup or honey, if desired.
Recipe Variations
- Top with cream cheese frosting. To make this baked oatmeal taste even more like regular carrot cake, top it with a maple cream cheese glaze. Whip room-temperature cream cheese with some maple syrup and a splash of milk until it's nice and fluffy. Spread over the top and serve!
- Add more mix-ins. Feel free to add some dried raisins or cranberries. It's also great with some drained crushed pineapple, but you may need to reduce the milk slightly to compensate for adding a wet ingredient.
- Bake carrot cake oatmeal cups. Spoon the batter into muffin cups and bake at 350 degrees F for 25-30 minutes or until fully baked.
How to Serve
This Carrot Cake Oatmeal Bake is delicious served on its own for breakfast or as an energy-boosting snack throughout the day. If serving as part of your Easter Brunch spread, include some other breakfast classics such as:
- Spring Vegetable Frittata
- Hash Browns
- Old Fashioned Pancakes
- Berry Smoothie Bowl
- French Toast
- Egg Muffins
For more recipe inspiration, see our 50 Best Breakfast Ideas.
Recipe Tips and Tricks
- Line the pan. If you don't spray it well, the oatmeal will stick to it. This makes it easier to serve individual portions and to clean your pan later!
- Use the right oats. Although you technically can use instant oats for carrot cake baked oatmeal, they absorb moisture much faster and can become quite soggy. It's much better to use traditional old-fashioned oats.
- Don't underbake. Baked oatmeal takes some time to bake and if you pull it out too early, it won't have the same fluffy texture you're looking for. It will take a full 40-45 minutes, and the oatmeal should feel set if you tap it in the middle. The top will also look golden brown. After you remove it from the oven, it needs to rest for a few minutes to finish baking.
Storing and Freezing Instructions
How to Store
Allow the baked oatmeal to cool to room temperature, then store the individual slices in an airtight container in the fridge for 5-7 days.
How to Reheat
The best way to reheat baked oatmeal is to bake it in the oven at 350 degrees for 5-10 minutes or until fully warmed. For a quicker breakfast, pop it in the microwave and heat for 1-2 minutes or until fully reheated.
How to Freeze
Once the carrot cake is cold from the fridge, wrap the individual slices with plastic wrap and store them in a freezer-safe bag for 2-3 months. This makes it easy to grab a single serving any time you need. Thaw the frozen baked oatmeal in the fridge before reheating like normal.
FAQ
Hands down, old-fashioned oats are the best. They are also called rolled oats, so you may need to check the packaging to find the right type. Instant oats are steamed after rolling to help them cook faster, which is great for a quick breakfast but not for your favorite baked oatmeal recipes! The oats will absorb too much liquid and become soggy or gummy in the oven. The traditional rolled oats will hold their texture better and will give you much better results.
Yep! It's more about adding a little creaminess to the recipe and hydrating the oats, so you can use any milk alternative you'd like. Just be sure it is unsweetened, as the maple syrup will add all the sweetness this recipe needs.
Baked oatmeal is great for meal prep because it makes a bunch at once, and you can easily store the leftovers for later. If you're intentionally making it for meal prep on a Sunday night or so, let the oatmeal cool and then store the individual slices in your meal prep containers. Keep them in the refrigerator until you need them. Some toppings, like chopped walnuts or a drizzle of maple syrup, can be added right to the container, but whipped cream or yogurt would be best stored on the side in separate containers.
More Recipes with Oats
- Cinnamon Apple Baked Oatmeal
- Homemade Granola
- Oat Porridge
- Oatmeal Raisin Cookies
- Blueberry Oat Squares
- Cinnamon Apple Oatmeal Muffins
Tried this recipe?
I'd love to hear what you think! Leave a comment and rating below to share your feedback. Your reviews help others discover this recipe and help me keep creating more free recipes for you. Snap a photo and tag me on social media @aheadofthyme too.
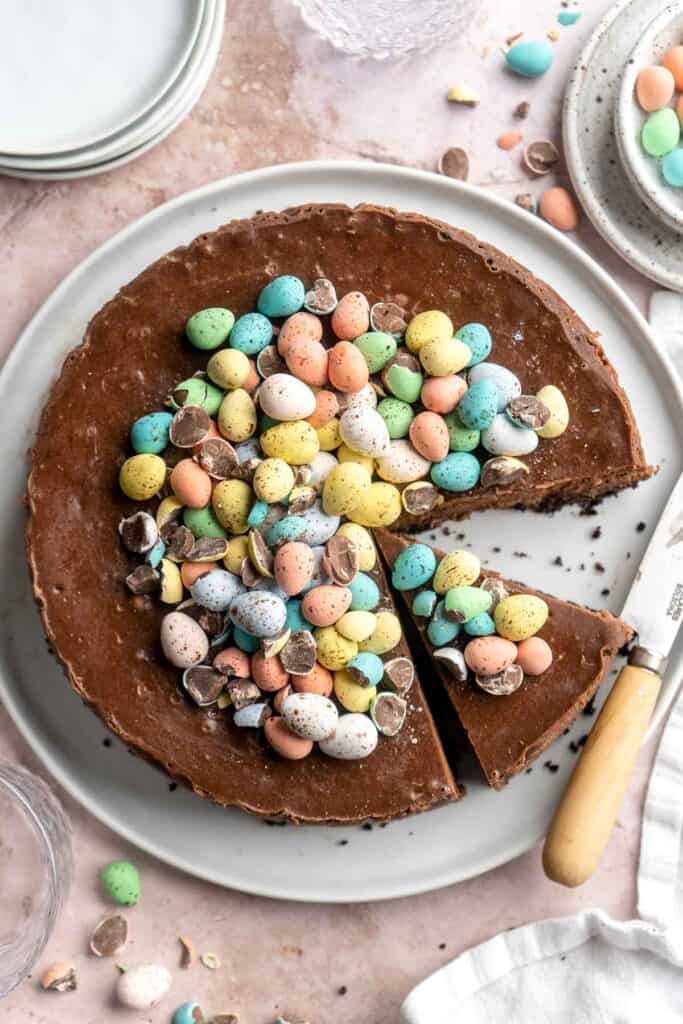
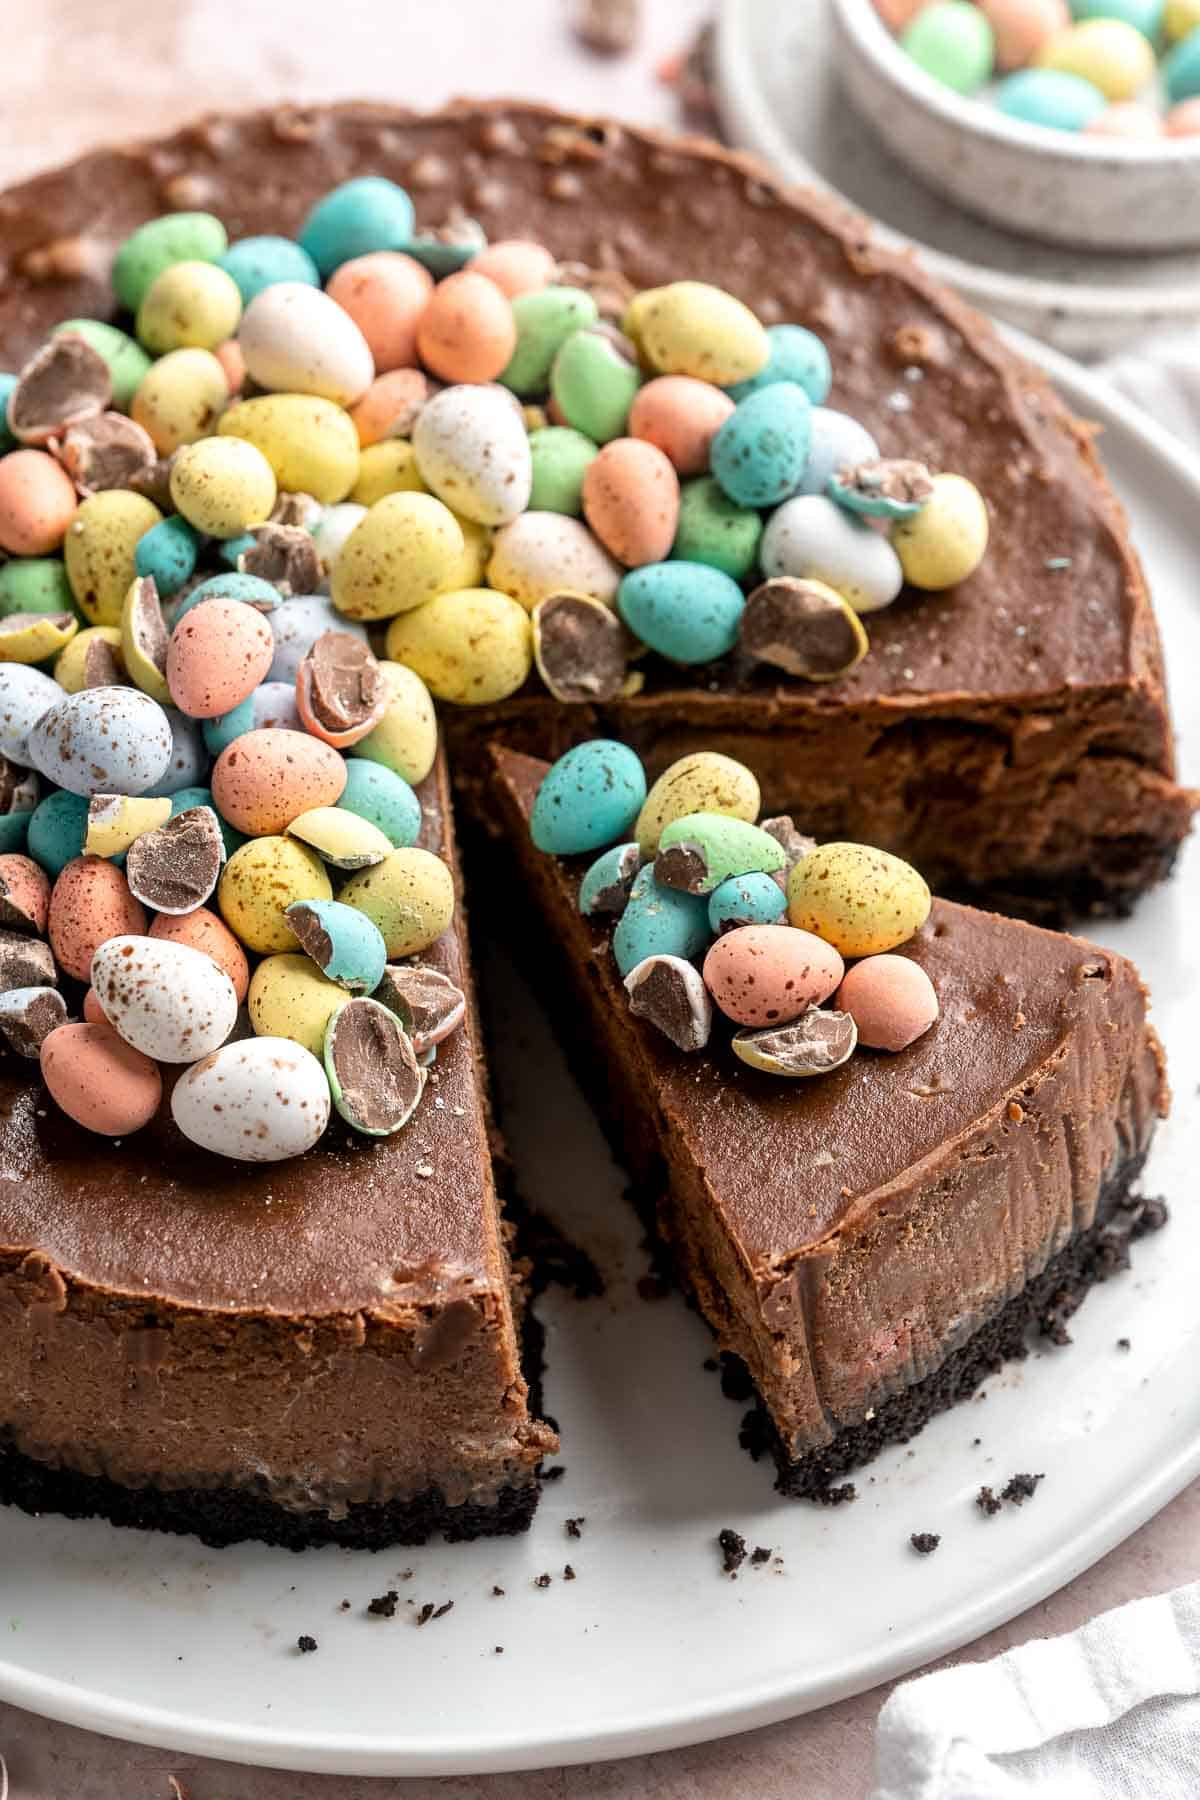
Mini Egg Easter Cheesecake
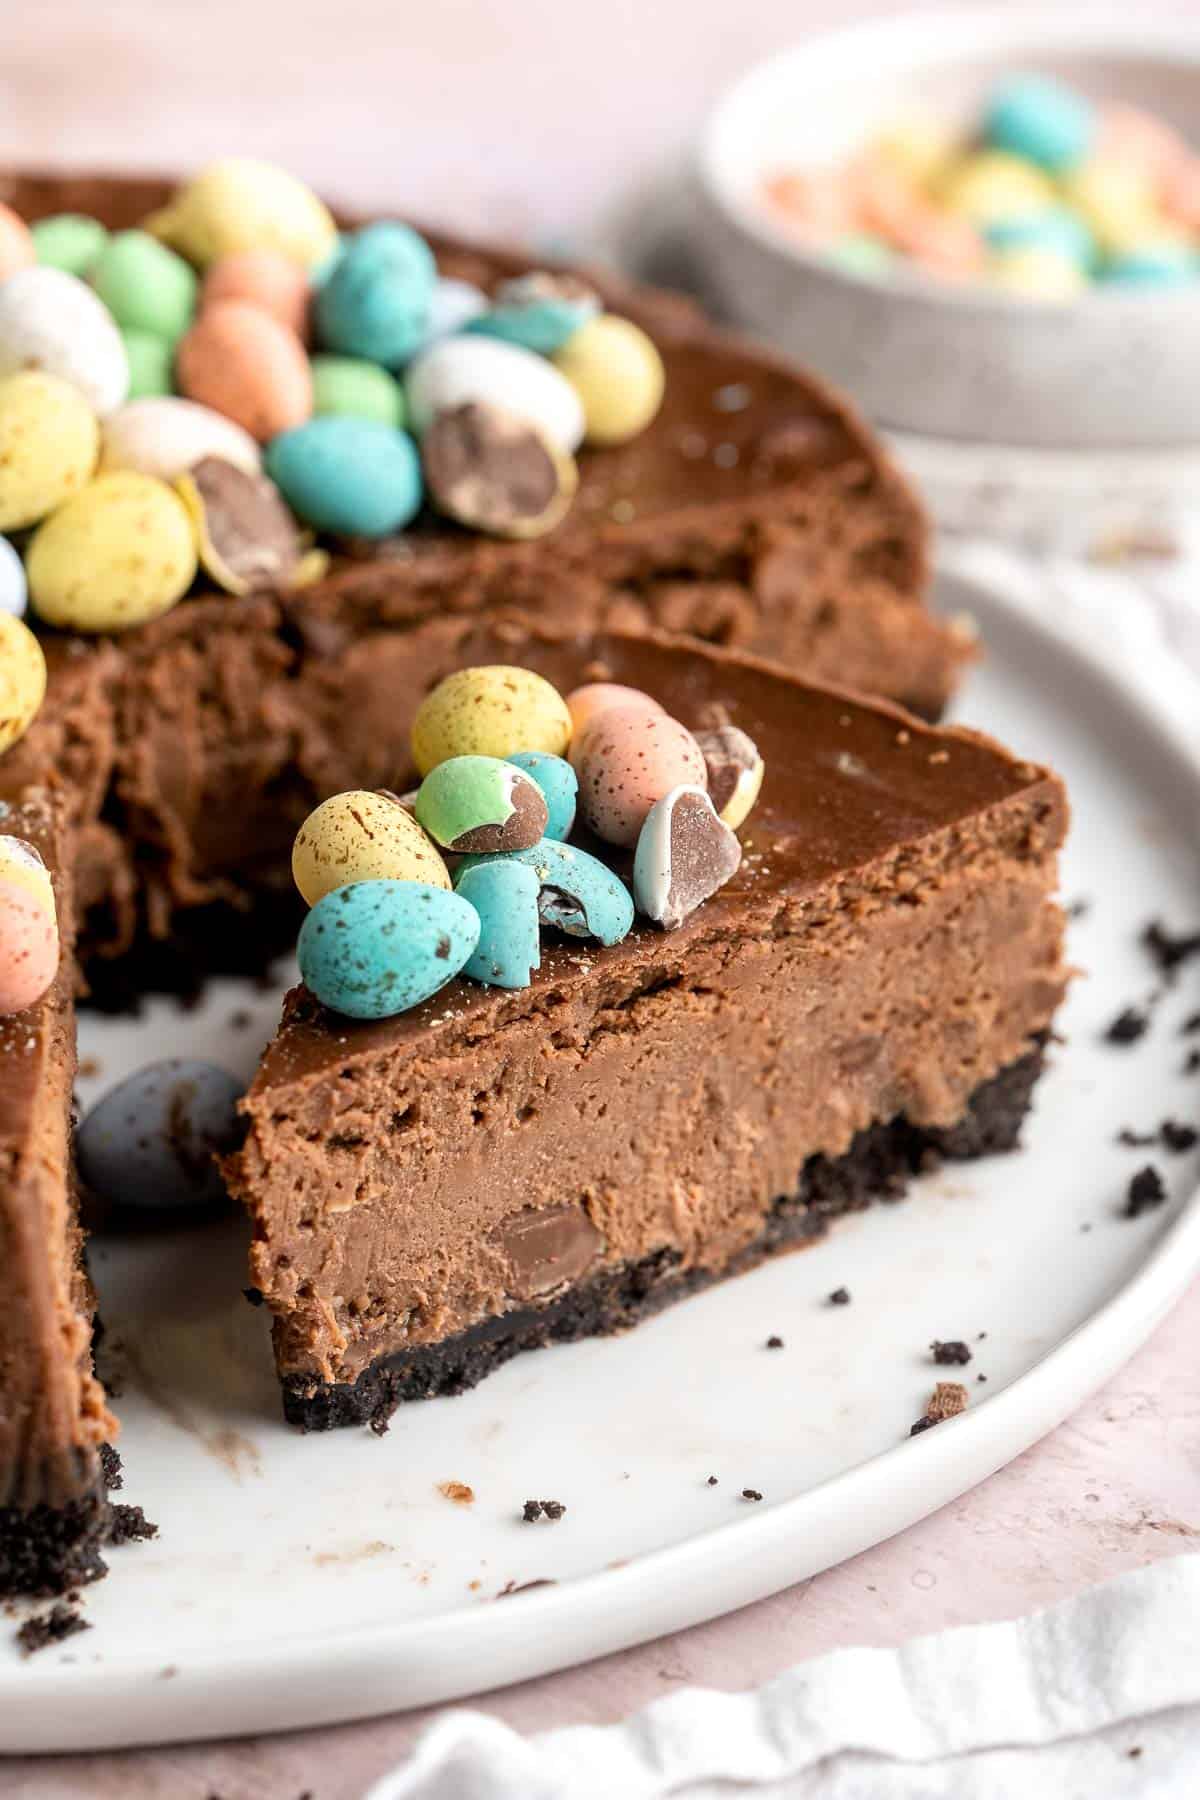
This Mini Egg Easter Cheesecake is a rich and decadent treat fit for your holiday table! This triple chocolate cheesecake is made with a crunchy Oreo crust, chocolate cheesecake filling mixed with crushed chocolate eggs, and decorated to the nines with heaps of extra mini eggs on top. Your whole family will love this recipe and demand it every year!
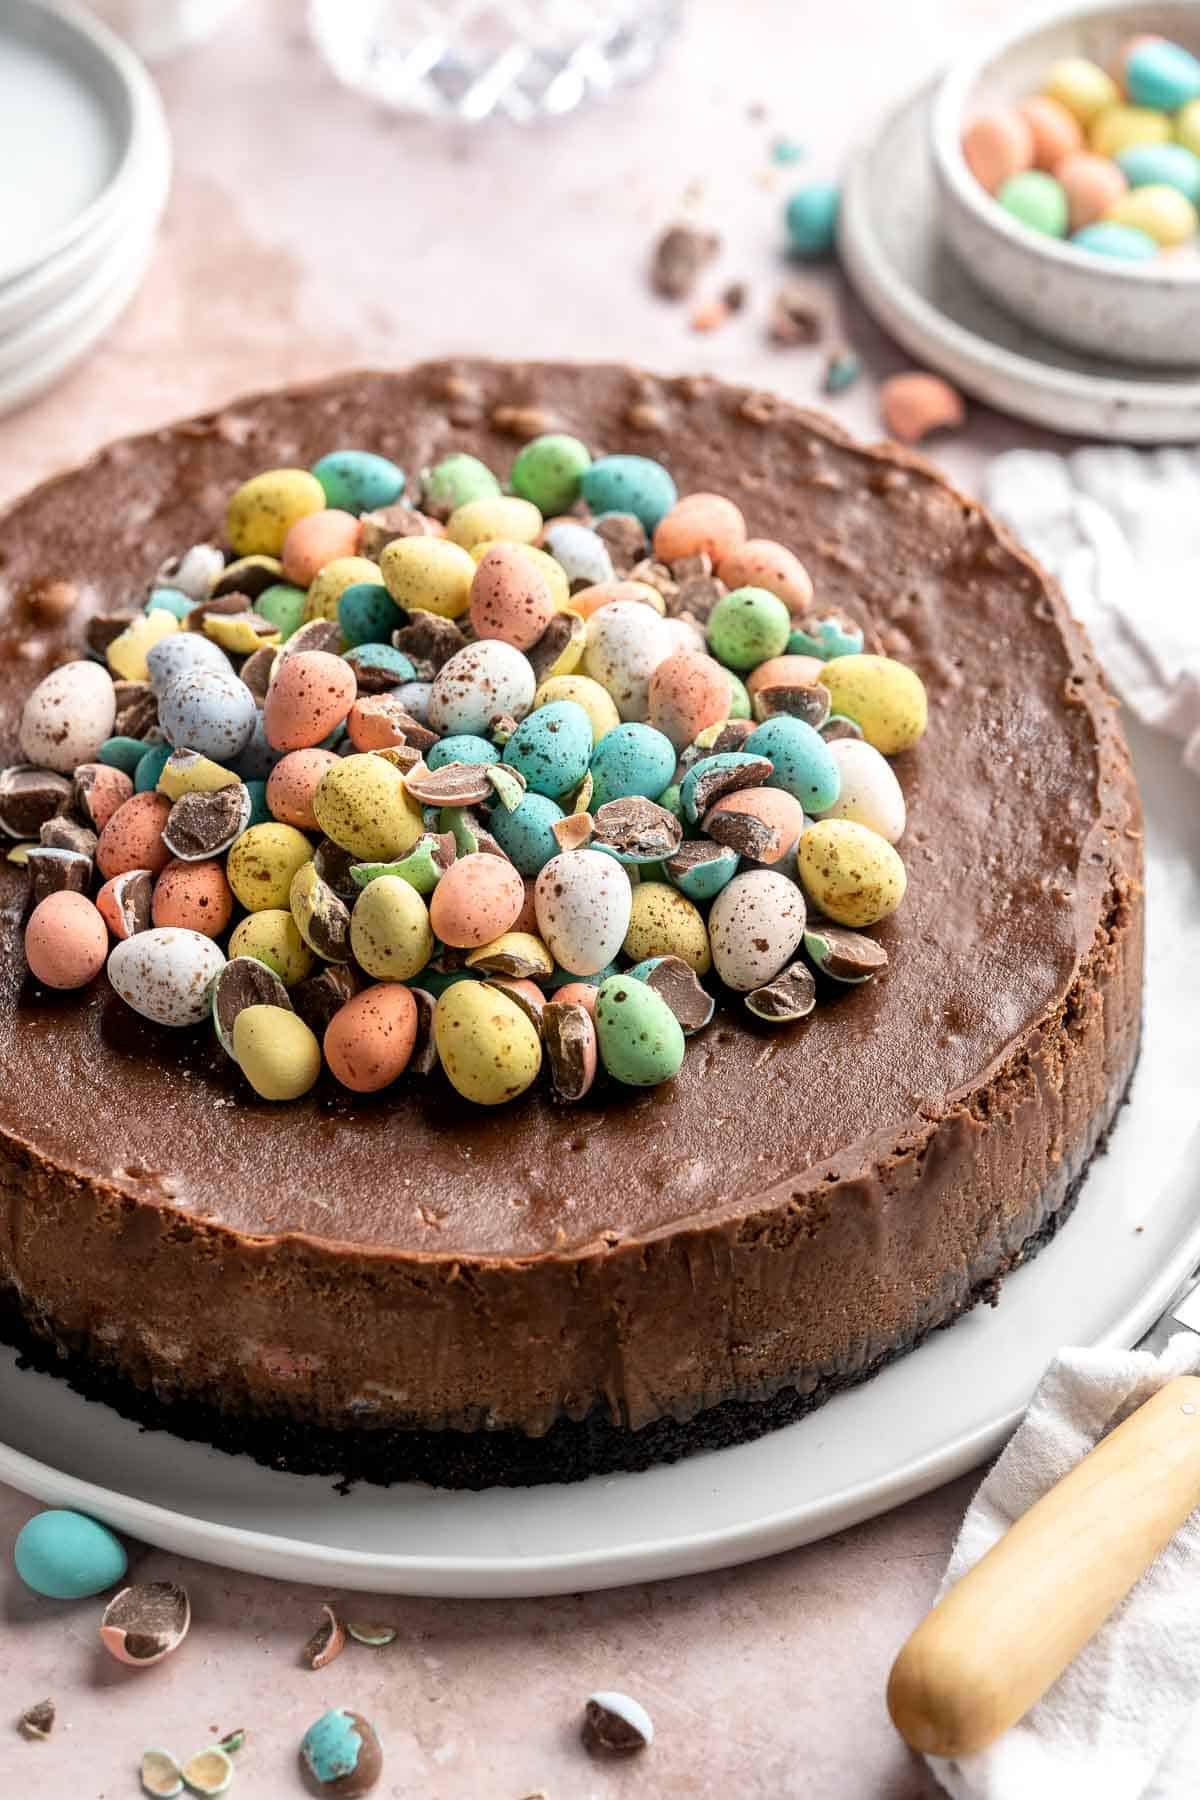
I love those little Cadbury mini eggs, don't you? The pale pastel shades are perfect for the season, and I love the crunch of the shell on the outside as you bite into the chocolate inside. This mini egg cheesecake is the best way to use these little treats! The chocolate Easter eggs are the perfect visual contrast to the dark chocolate cheesecake, and they add such a nice crunch and texture. It's a perfect match for your favorite Easter desserts, like Carrot Cake and Easter Egg Sugar Cookies, and will be perfect for your Easter menu!
Why You'll Love This Mini Easter Egg Cheesecake
- Our creamy cheesecake recipe. We're pretty well-known for our cheesecake recipes. We like to use a mixture of full-fat cream cheese and sour cream in this recipe for a dreamy, creamy texture without being too tart or tangy. This is a tried-and-true recipe you can trust to deliver!
- Layers of chocolate flavor. Who doesn't love chocolate? This delicious mini egg cheesecake has it in spades, from the Oreo base to the creamy cheesecake filling to the pieces of Cadbury mini eggs folded into the filling and sprinkled on top. We can't get enough of it!
- Perfect for Easter. Although we love the Easter Blondies and Mini Egg Easter Fudge, sometimes you just need a chocolate fix, and those hollow chocolate bunnies just won't do the trick! Mini Cadbury eggs add plenty of decoration to make this cheesecake fit for celebration, but the chocolate is the star of the show!
Ingredient Notes
To make this delicious Mini Easter Egg Cheesecake, you will need the following ingredients (full measurements in recipe card below):
- Oreo cookie crumbs - this will form the base of the crust. You can either crush the Oreo cookies yourself in the food processor or buy Oreo crumbs from the store.
- white sugar - we need sugar in the crust for a crisp crunch and a little extra sweetness; we also need sugar in the filling to balance the chocolate flavor and tangy cream cheese.
- melted butter - this will act like glue to hold the crust together.
- semi sweet or milk chocolate - finely chop the chocolate, then melt it to fold into the cheesecake mixture.
- cream cheese - it's very important to make sure the cream cheese is fully softened to room temperature.
- vanilla extract - for flavor.
- salt - to enhance the flavor.
- eggs - whole eggs and egg yolks will bind the cheesecake together and help it puff up in the oven.
- sour cream - for a smooth, creamy texture and to balance the flavor of the cream cheese.
- cornstarch - sifted cornstarch will absorb any excess moisture in the oven and help prevent cracking.
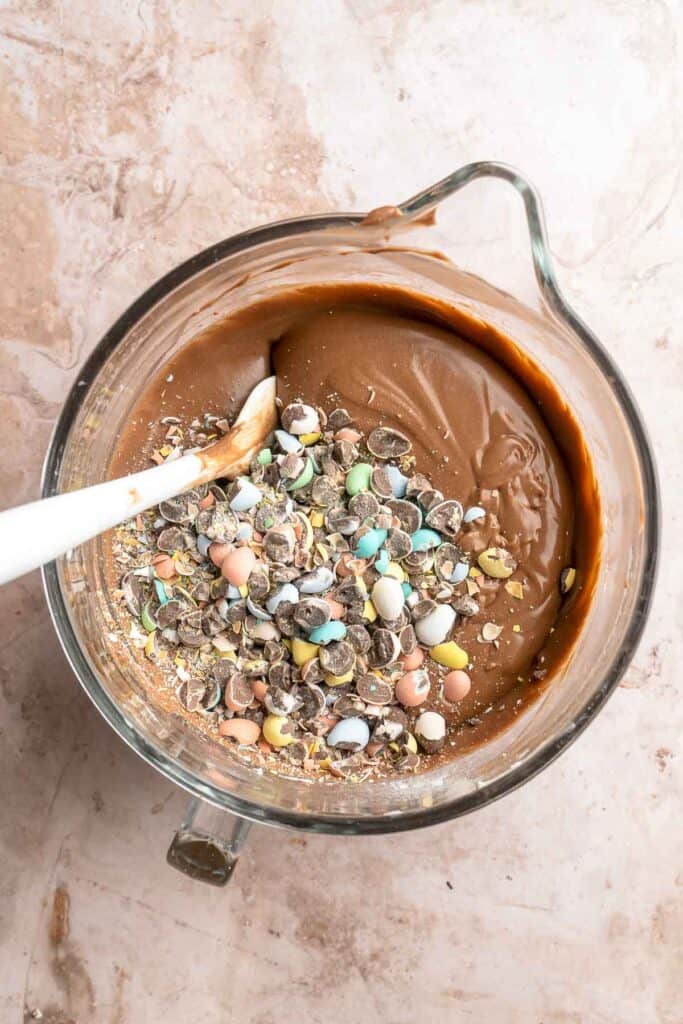
- mini eggs - leave some of these Easter chocolates whole for decorating and roughly chop or crush some to fold into the cheesecake before baking.

Baking Tools and Equipment
You will also need the following baking supplies:
- measuring cups and spoons (or a kitchen scale)
- medium mixing bowl
- whisk and fork
- 9-inch springform pan
- flat-bottomed measuring cup or other flat surface
- aluminum foil
- microwave-safe mixing bowl
- stand mixer or hand mixer and a large bowl
- spatula
- roasting pan
- plastic cling wrap
How to Make the Best Mini Easter Egg Cheesecake
First, make the oreo crust.
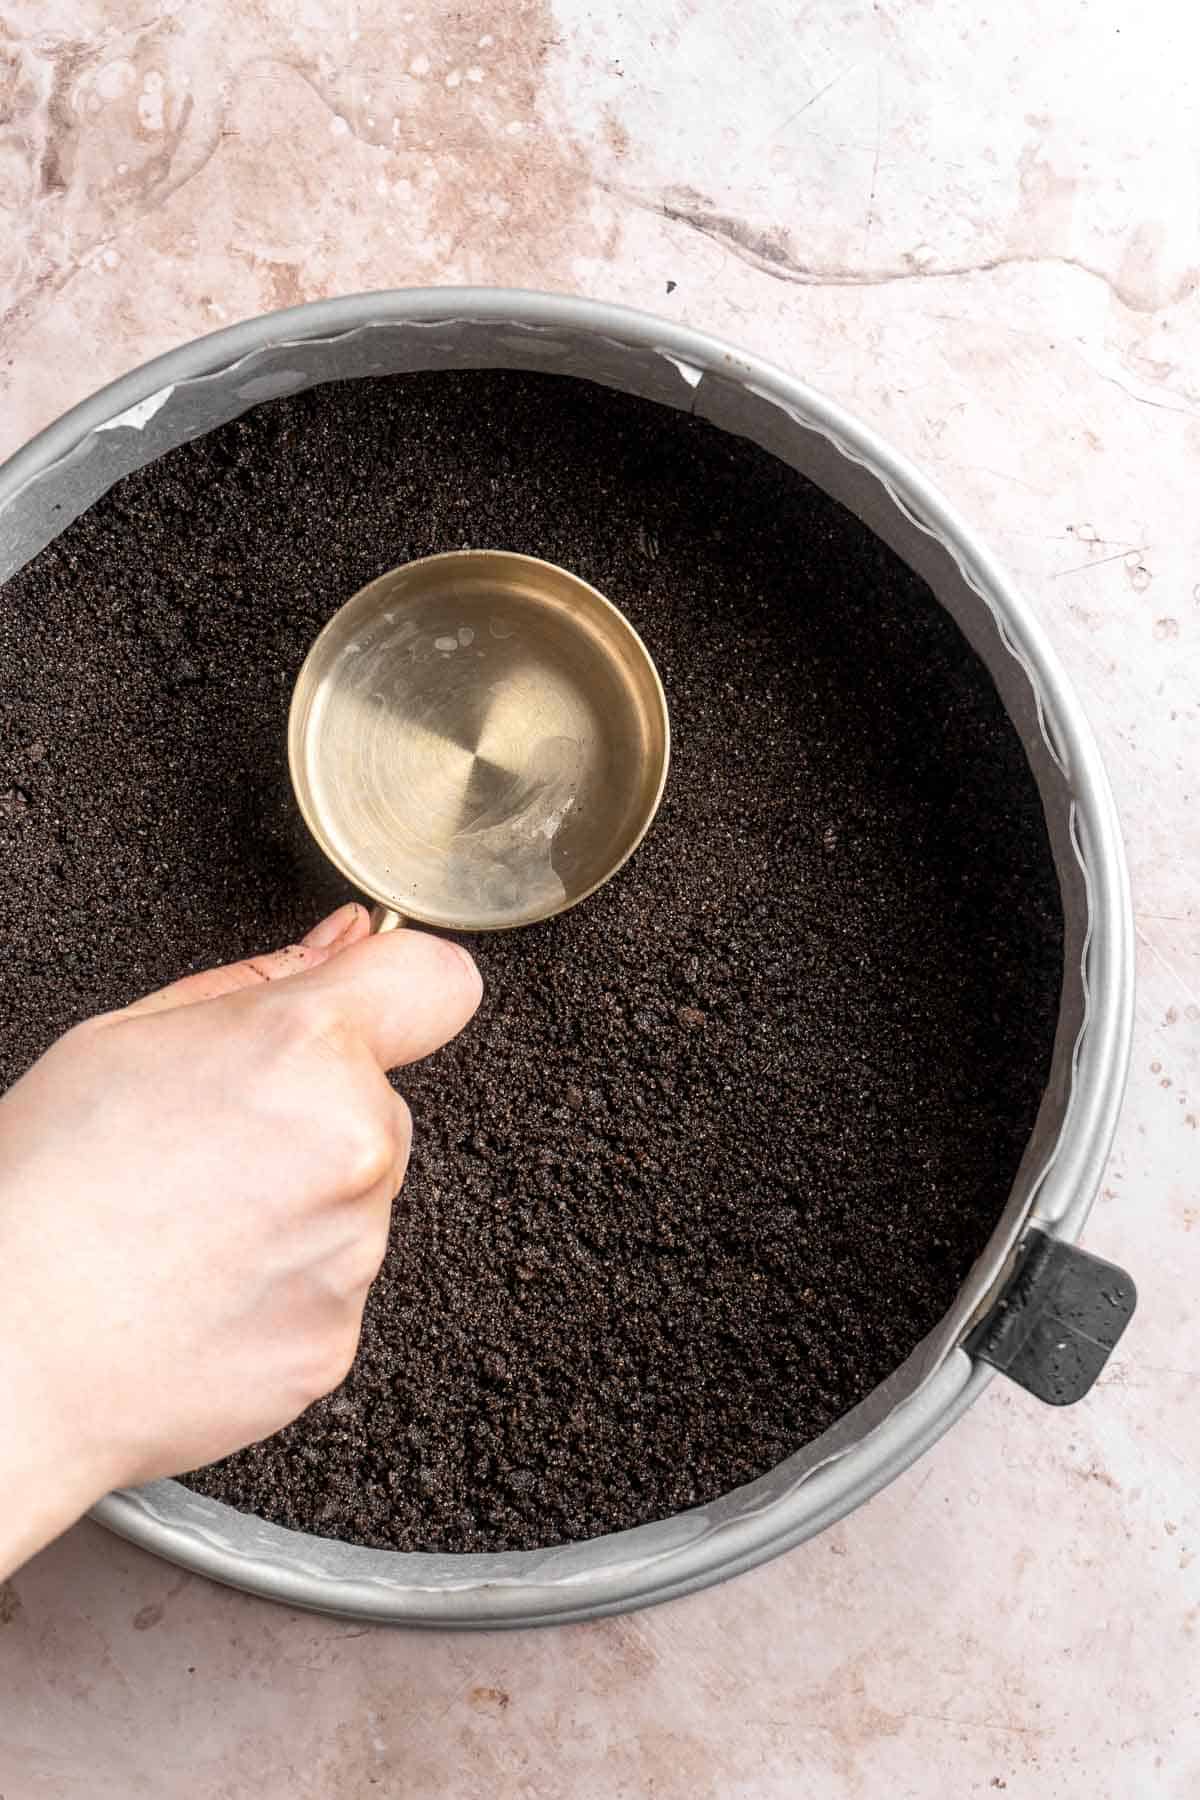
- Make crust. In a medium mixing bowl, add the oreo crumbs and sugar to a bowl. Whisk until well combined. Pour the melted butter into the bowl, then mix with a fork (or your hands) until the butter is well dispersed and the mixture resembles wet sand.
- Transfer to pan. Transfer the crust into a non-stick 9-inch non-stick springform cheesecake pan and press it down evenly into the bottom. Use a flat bottom measuring cup to really compact the crust down.
- Bake. Place the crust into a 350F preheated oven to bake for 11 minutes. Remove from oven and allow to cool to room temperature.
Next, make the mini egg chocolate cheesecake filling.
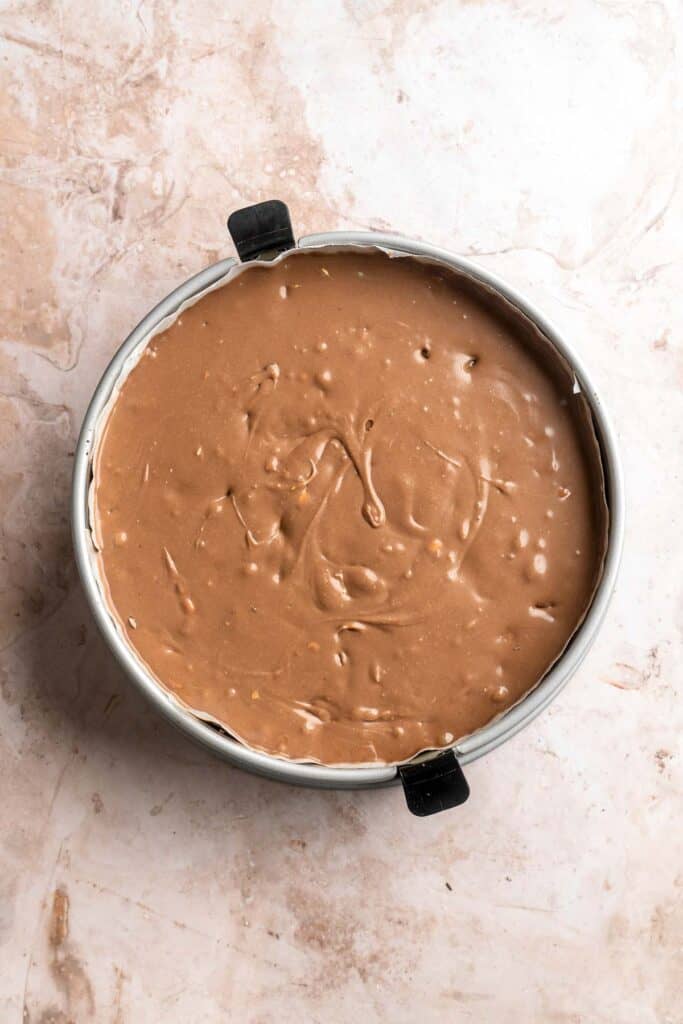
- Prep. Turn the oven down to 325F. Prepare the cooled springform pan (with the crust) by wrapping the bottom of the pan with 2 sheets of aluminum foil, then set aside for later.
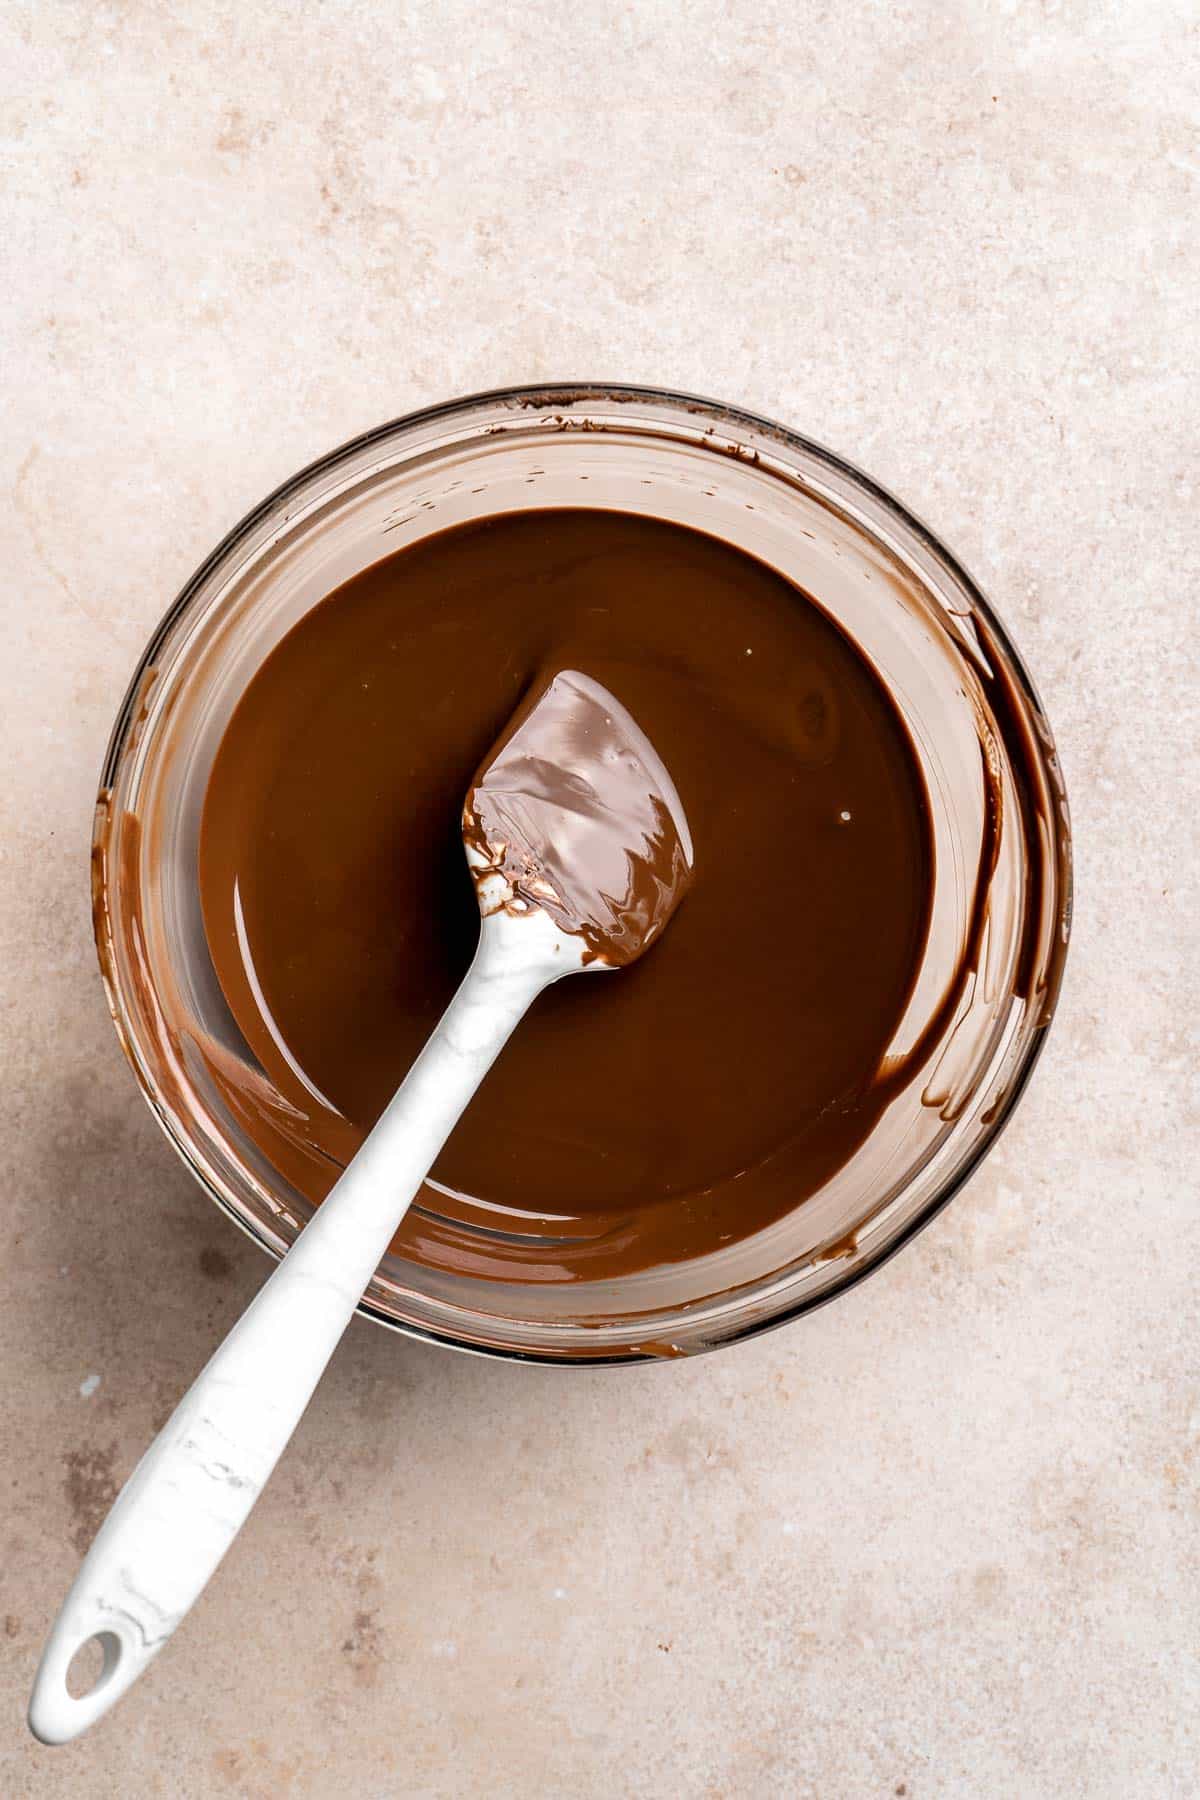
- Melt chocolate. In a large microwave-safe mixing bowl, add chopped chocolate, then microwave in 30 second intervals, stirring in between, until fully melted. Set aside to slightly cool while you make the cheesecake batter.
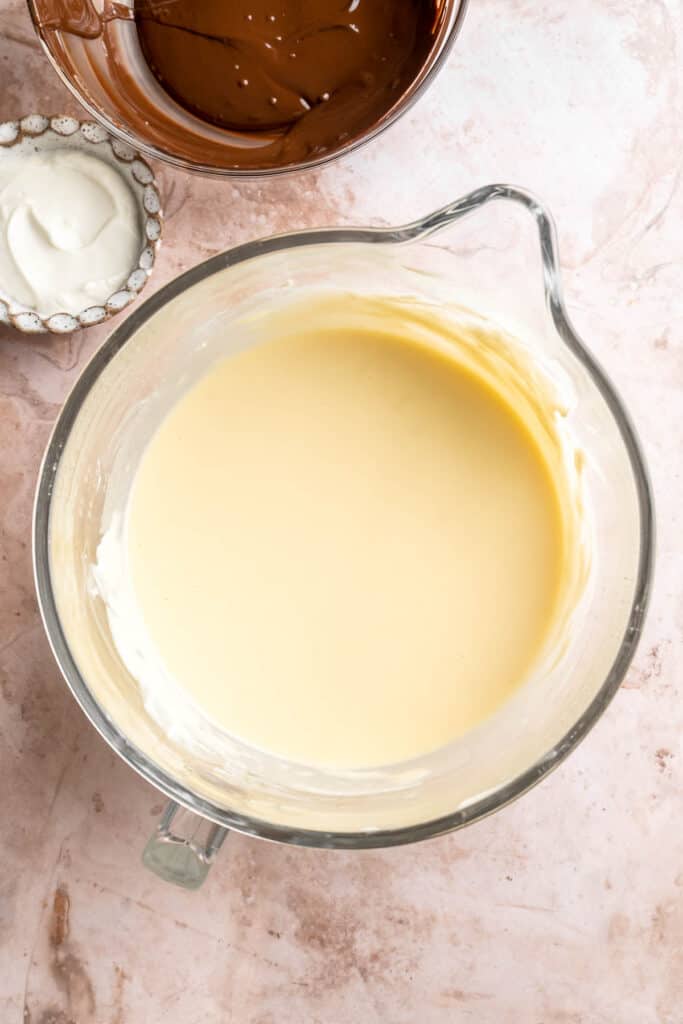
- Start cheesecake batter. In a stand mixer, add the softened cream cheese, sugar, vanilla, and salt. Secure the paddle attachment and beat on low until it looks soft, very creamy, and smooth, about 2 to 3 minutes.
- Add eggs. While still beating on low, add the eggs and yolks, one at a time, ensuring that each egg is fully incorporated before adding the next. Scrape the bowl well to ensure everything is well-mixed.


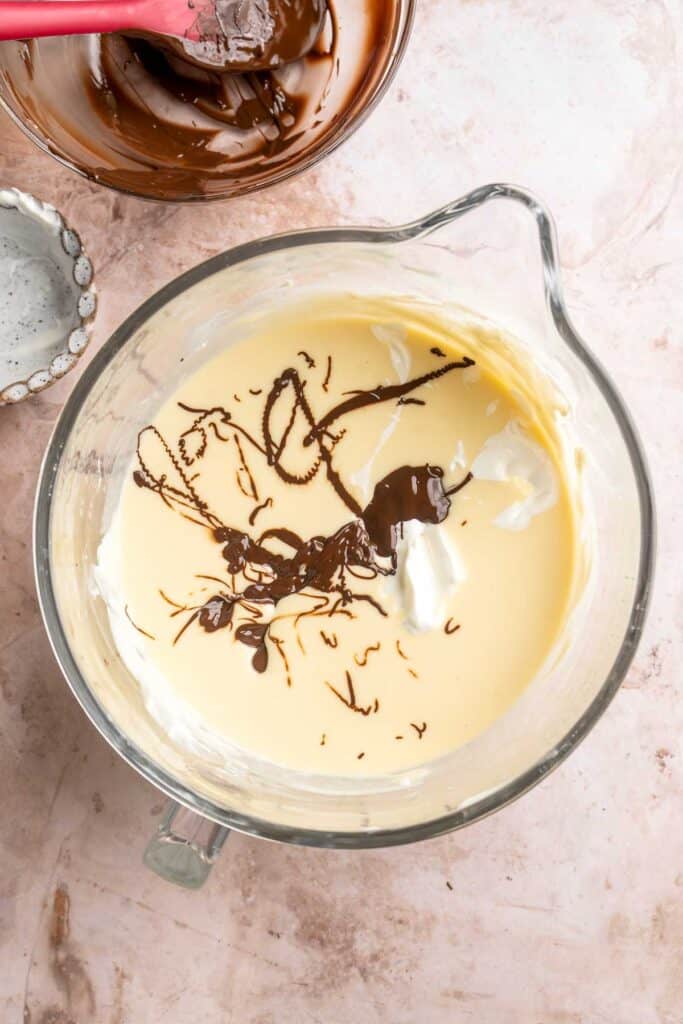
- Finish batter. Add the sour cream and melted chocolate, then beat on low until well-combined and smooth (ensure you're scraping after, as well). Add in the cornstarch, then beat again until incorporated and smooth.
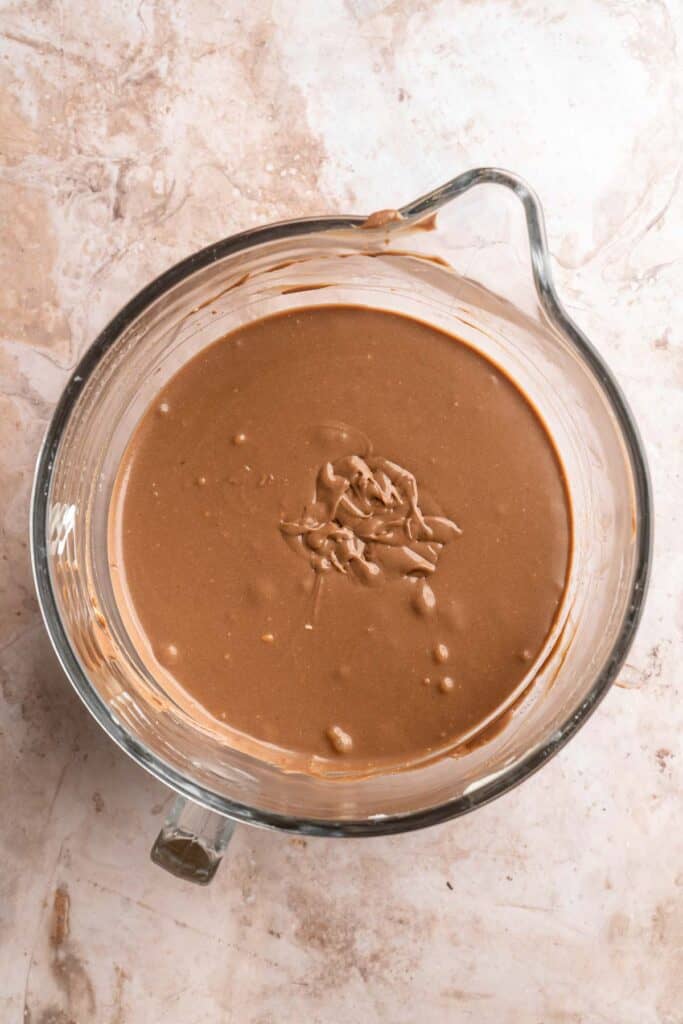

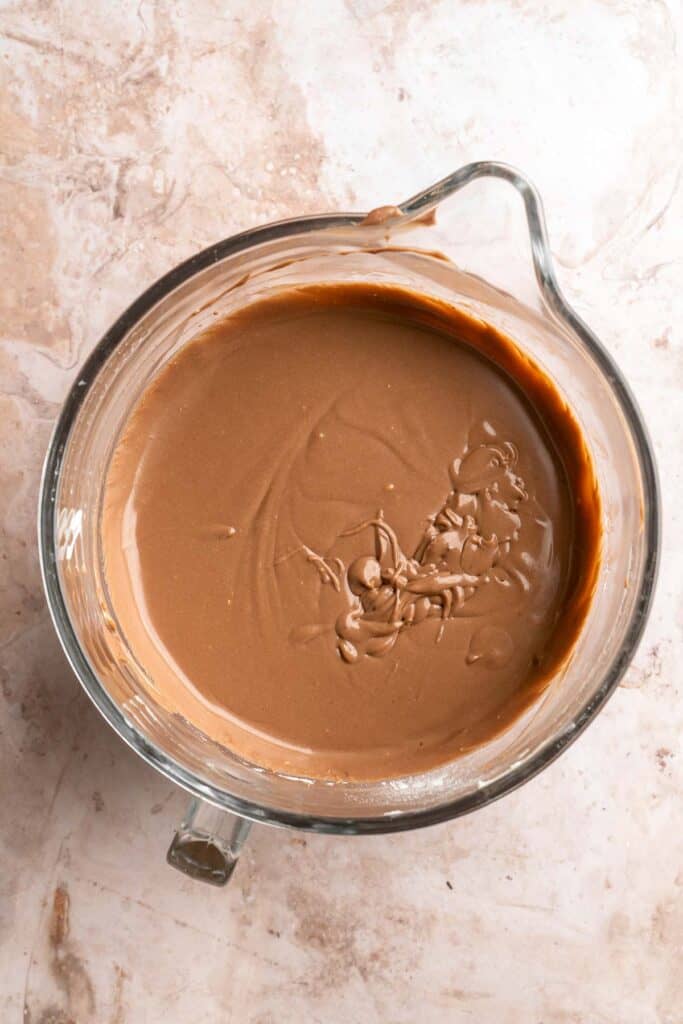
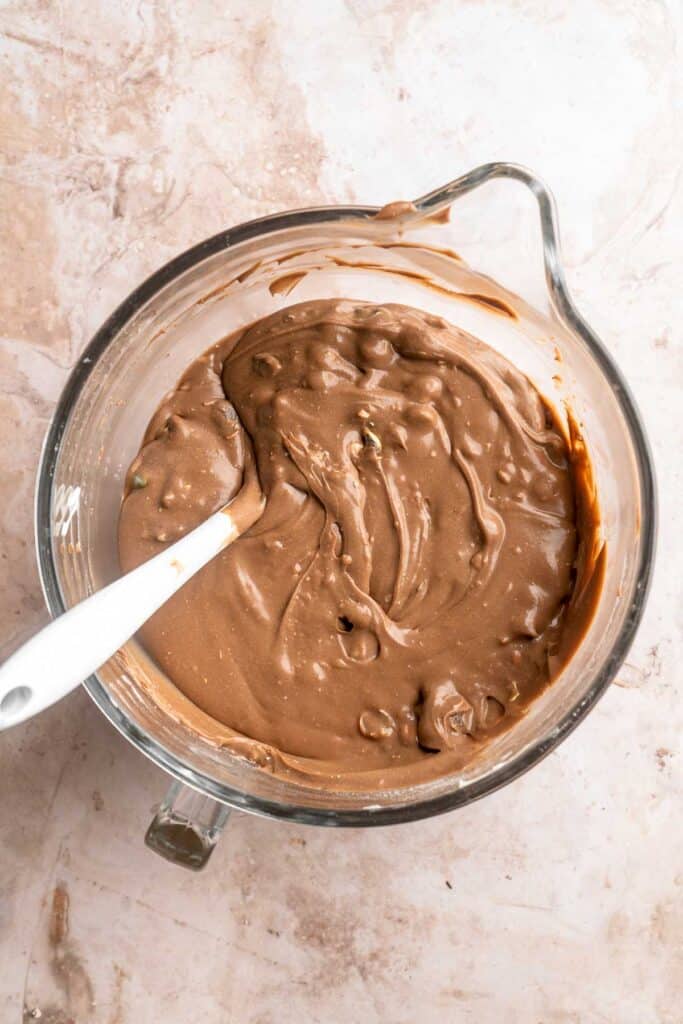
- Fold in mini eggs. Finally, add in the chopped mini eggs, and fold in to combine.
Now, let's get ready to bake the chocolate cheesecake.
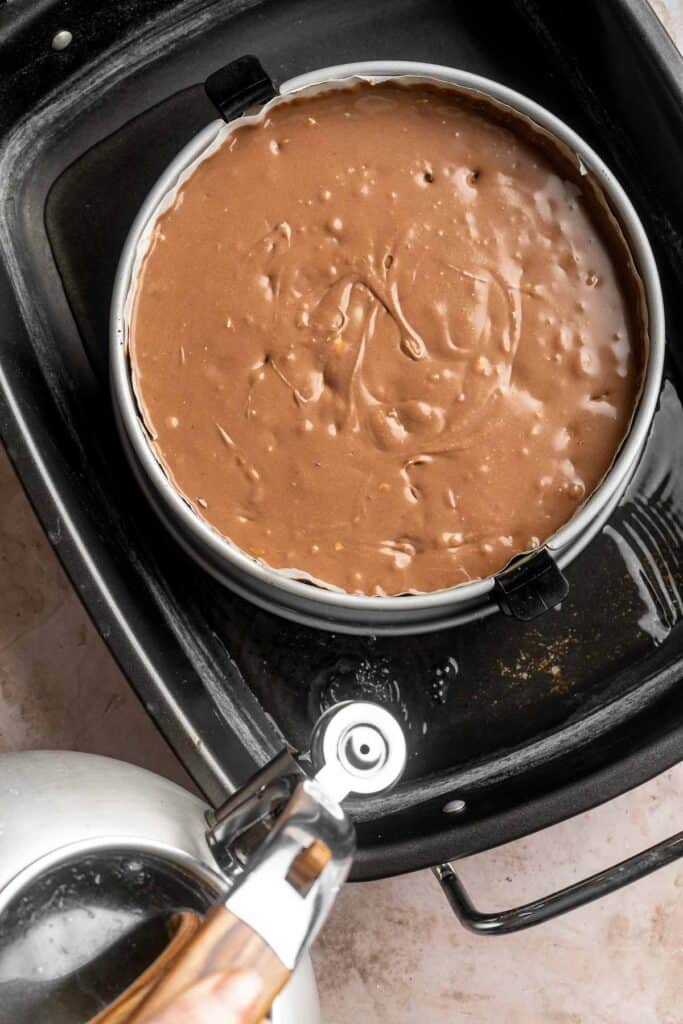
- Prepare hot water bath. Pour the cheesecake mixture over top of the cooled crust in the springform pan, and place the cheesecake into a large roasting pan. Pour enough boiling water into the roasting pan so that it reaches about halfway up the outside of the springform pan.
- Bake. Place into the oven to bake for about 1 hour and 25 minutes - begin checking at 1 hour 10 minutes to ensure you do not overbake. When the cheesecake is done it should still be a little jiggly in the centre, but set around the edges.
- Cool. When done, lightly crack the oven open to allow the cheesecake to slowly cool for about an hour and a half. After an hour and a half, remove the cheesecake from the oven and water-bath and place onto the counter to cool to room temperature.
- Chill. Once at room temperature, wrap with plastic wrap and place into the fridge for at least 6 hours or preferably overnight to fully set up.
- Serve. When ready to serve, top with whole mini eggs, and serve!
Recipe Variations
- Use a traditional cheesecake base. I'm in love with the chocolate cheesecake, but you can also use my Classic New York Cheesecake instead and fold in the crushed mini eggs into the batter at the end.
- Decorate to your heart's content. This Cadbury mini egg cheesecake looks perfect for your Easter brunch exactly as is, but there are simple ways to take the display over the top! Add a chocolate ganache drip over the undecorated cheesecake for another layer of chocolate flavor and to make the mini eggs pop! You can also pipe little swirls of whipped cream around the top of the cheesecake or arrange Mini Egg Easter Cookies, meringues, or French macarons for a really festive display.
- Change the crust. Instead of an Oreo cookie crust, feel free to use a regular graham cracker crust. See our Blueberry Cheesecake for the recipe.
- Add a fruity layer. This Easter egg cheesecake recipe is very chocolaty! You can play into that chocolate flavor by adding a swirl of raspberry puree like this White Chocolate Raspberry Cheesecake. Strawberries would taste great, too!
How to Serve
This Mini Egg Easter Cheesecake is a delicious dessert served on its own after dinner or whenever you are craving something sweet this spring. It also is a great centrepiece as part of an Easter dessert spread paired with some other holiday desserts such as:
- Carrot Bundt Cake with Cream Cheese Glaze
- Mini Egg Cookie Bars
- Robin's Egg Cupcakes
- Easter Bark
- Peanut Butter Eggs
- Hot Cross Buns
For more recipes, see our 30 Best Easter Desserts.
Recipe Tips and Tricks
- Use room temperature ingredients. This is a must! If you try to use the sour cream or cream cheese when they're still cold, you won't get that light, creamy texture.
- Cool slowly. Although a cracked cheesecake still tastes amazing, it doesn't quite look as nice! The secret to getting the perfect cheesecake without a canyon in the middle is to let it cool so slowly. Once it's done, barely crack the oven to allow the cheesecake to cool gradually before letting it cool all the way on the counter.
- Let it rest. Warm cheesecake really isn't a thing, and for good reason. Cheesecake requires plenty of time in the fridge to fully cool and set. This also gives the flavors a chance to mingle together and become more vibrant. Your cheesecake will taste significantly better after at least one night in the fridge! Just be sure to wrap it well with plastic wrap to avoid forming a skin.
Storing and Freezing Instructions
How to Store
Wrap the whole cheesecake with plastic wrap to store it in the fridge overnight. For best results, let it sit at room temperature for approximately an hour before serving. Any leftovers should be rewrapped in plastic and/or placed in an airtight container. The cheesecake will last for 5-7 days in the fridge.
How to Freeze
To freeze leftover cheesecake, make sure it is wrapped in several layers of plastic wrap. It's best to refrigerate the cheesecake before freezing, so don't skip the overnight rest. Once chilled and wrapped, place it in the freezer for 2-3 months. This works with slices or the whole cheesecake, as well. Be sure to let the cheesecake thaw in the fridge before serving.
FAQ
Yes, most cheesecake recipes call for eggs. They help give the cheesecake its creamy texture and also give it a subtle rise in the oven. They're essential to getting that classic cheesecake texture.
I like to place the mini eggs in a plastic Ziploc bag and then either roll them with a rolling pin or hit them gently. This works well!
Unless you are making a no bake cheesecake, it's a good practice to add cornstarch. It will absorb any excess liquid in the cheesecake batter while it bakes and also help prevent cracking! Just be sure to sift the cornstarch to avoid any clumps.
More Cheesecake Recipes
- Classic New York Cheesecake
- White Chocolate Raspberry Cheesecake
- Pecan Pie Cheesecake
- No Bake Pumpkin Cheesecake
- Cherry Cheesecake
- Caramel Pecan Pie Cheesecake Bars
Tried this recipe?
I'd love to hear what you think! Leave a comment and rating below to share your feedback. Your reviews help others discover this recipe and help me keep creating more free recipes for you. Snap a photo and tag me on social media @aheadofthyme too.

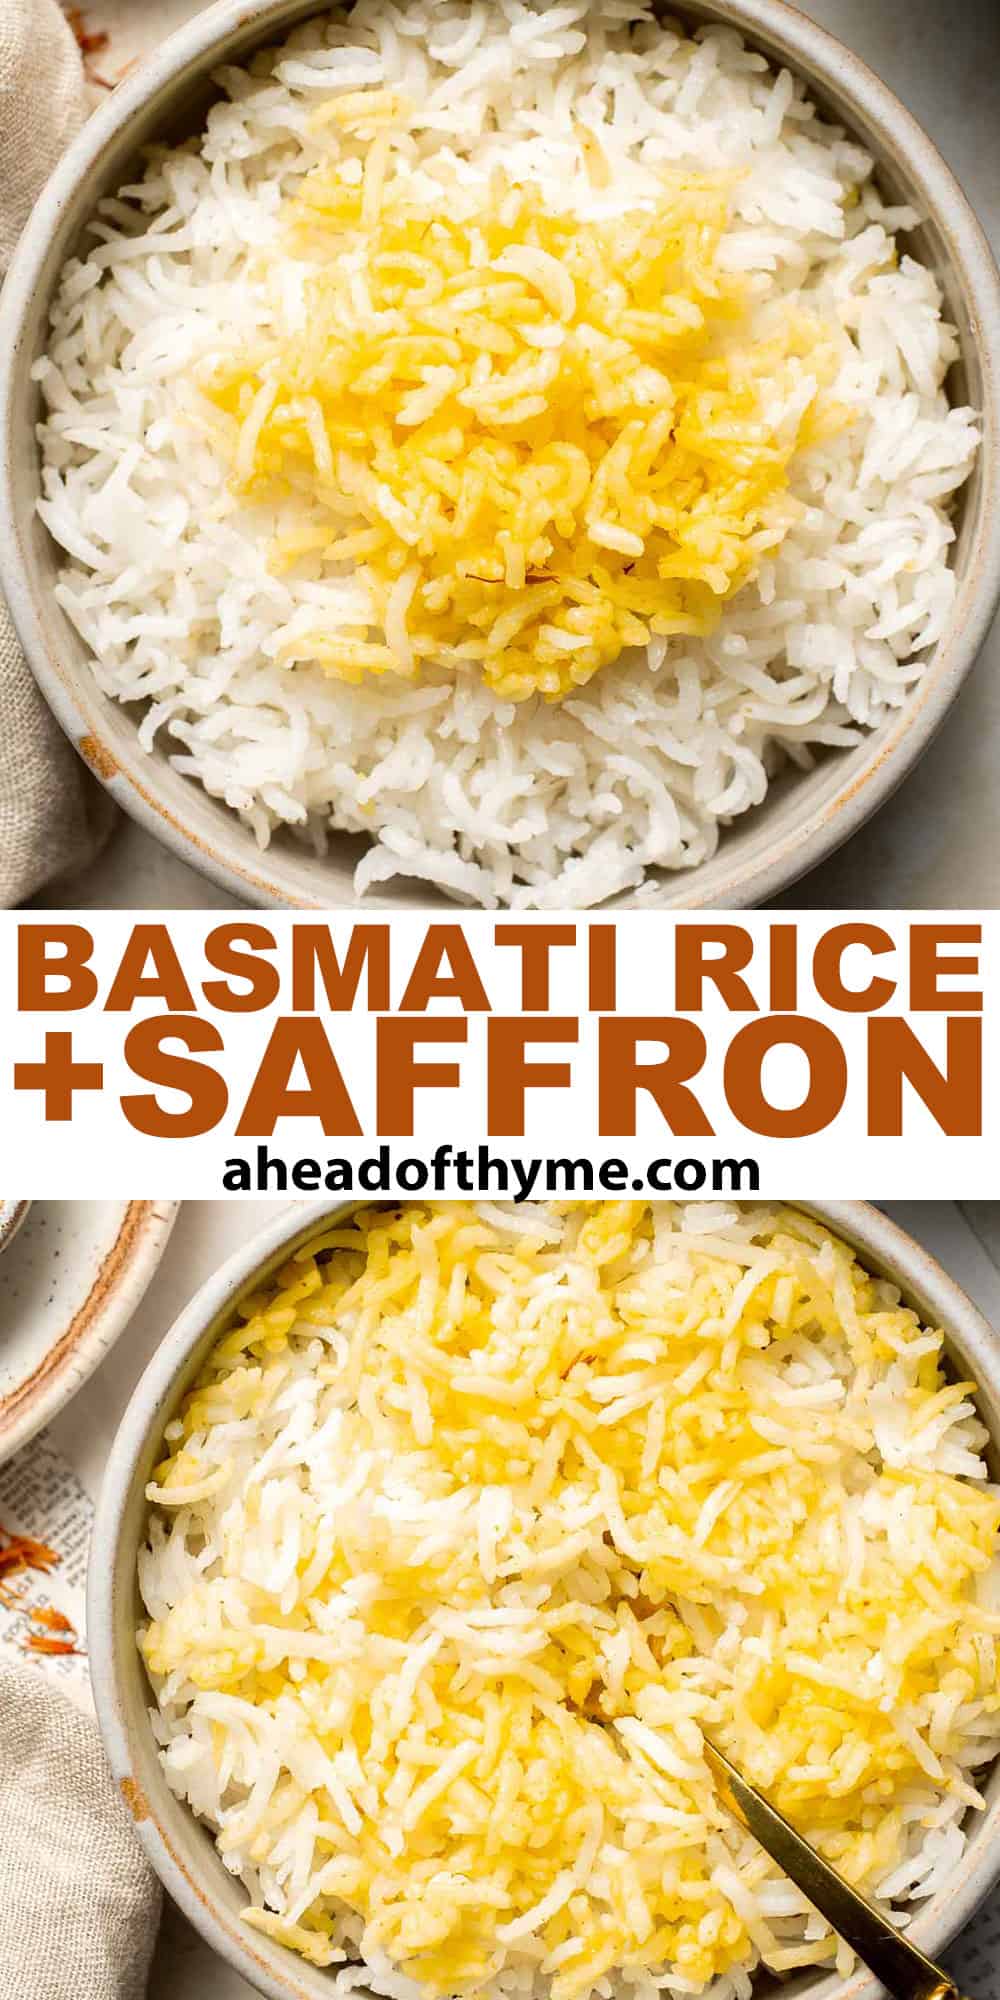
Basmati Rice with Saffron
Basmati Rice with Saffron is a traditional dish served in Persian cuisine and several cultures around the world. Often called "yellow rice" thanks to the bright color of the world's most expensive spice. This special side dish is perfect for pairing with stews, roast meats, kebabs, beans, or curries. It's surprisingly simple to make and quick, too!
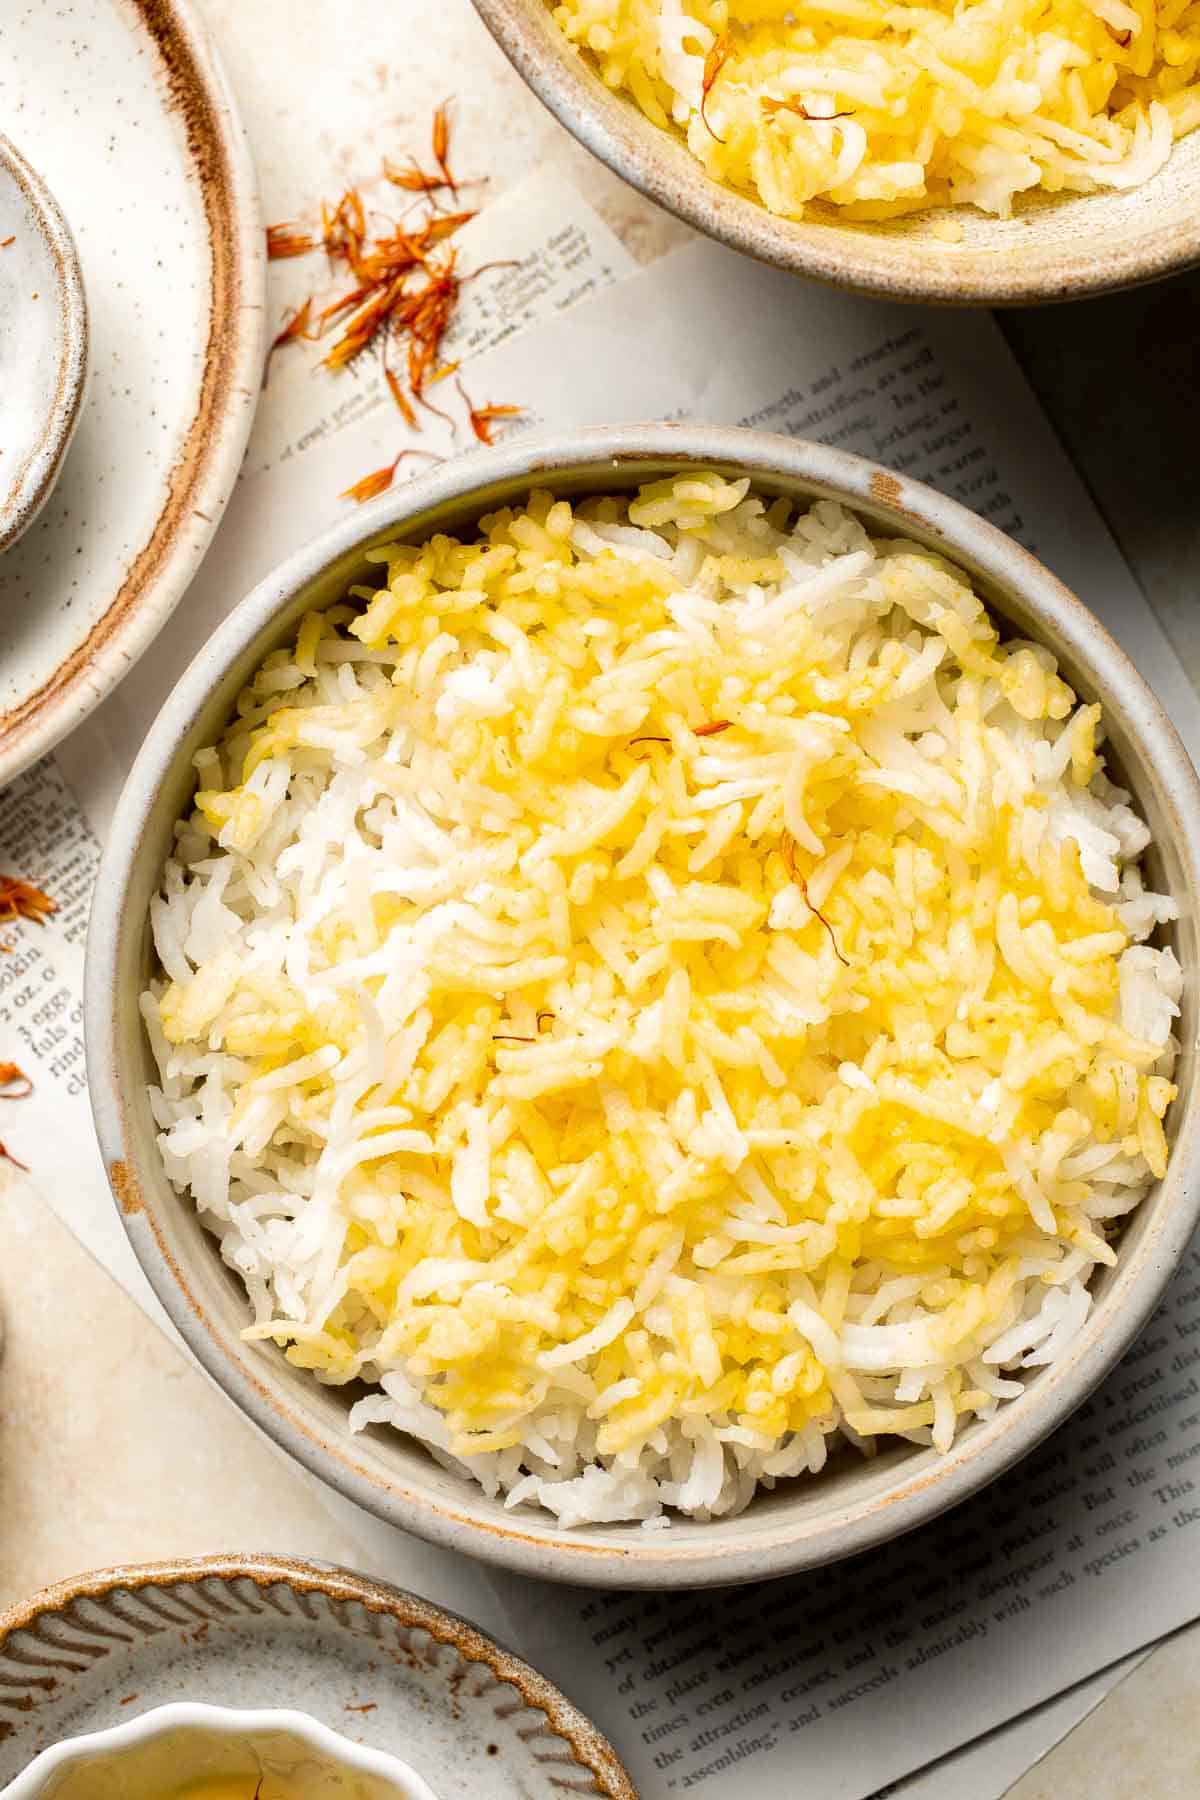
Saffron and basmati rice are absolute staples in Middle Eastern food! They're perfect for serving with any meal of the day and are a mainstay on the table. In this easy recipe, fluffy basmati rice is tossed with saffron for a vibrant color and a slightly floral, earthy flavor. It's a fun alternative to regular rice and a simple, flavorful side dish that looks special enough to serve even on special occasions!
Persian Rice
As a Persian, Basmati rice is a staple in our diet. We have rice with every, single meal! Sometimes we have plain rice served on the side of our stews or kabobs, other times rice is the main course and we create entire meals around it. We can dress it up with beans, vegetables or ground meat. There are unlimited choices in Persian cuisine when it comes to rice.
In Persian cuisine, plain basmati rice is made in 2 different ways: polow (regular rice) and kateh (simple rice). Polow basically means cooked rice and is considered the traditional "Persian way" of cooking rice where the rice is soaked and pre-boiled. It creates rice that is longer and leaner in shape. This is also the method that enables you to create delicious crispiness at the bottom of the pot called tahdig. (I will have to share that recipe with you another time!). Kateh is the easier and simpler method of cooking rice and it is the type that I am sharing with you today.
Why You'll Love This Basmati Rice with Saffron
- Easy to make. This saffron rice recipe couldn't get much easier! I'm teaching you a method called kateh, which we call "simple rice." It's faster and easier than regular rice (polow), yet it still has tender, separate grains and a satisfying flavor. I like to make it on the stove to keep things simple, and it has only five ingredients!
- A few simple steps. This recipe is probably one of the first recipes that I ever learned to make. It is made with roughly 1 part rice to 2 parts water. The method is simple. You cook the rice until the water is fully absorbed. Then you turn the heat on low and continue to cook for 30-40 minutes. Voila! You have a pot of rice.
- Bright yellow color. There's no yellow food coloring in this dish! That golden color comes completely from the threads of the saffron flower. It has a uniquely earthy yet slightly sweet flavor that gives this rice dish an extra bit of interest. For the best color, use a small amount of good quality saffron and follow the tips below to bring out its color.
- Versatile side dish. You can easily serve this rice side dish instead of regular steamed rice with any meal! The color makes it extra special, but it's simple enough to make any time you need a side.
Ingredient Notes
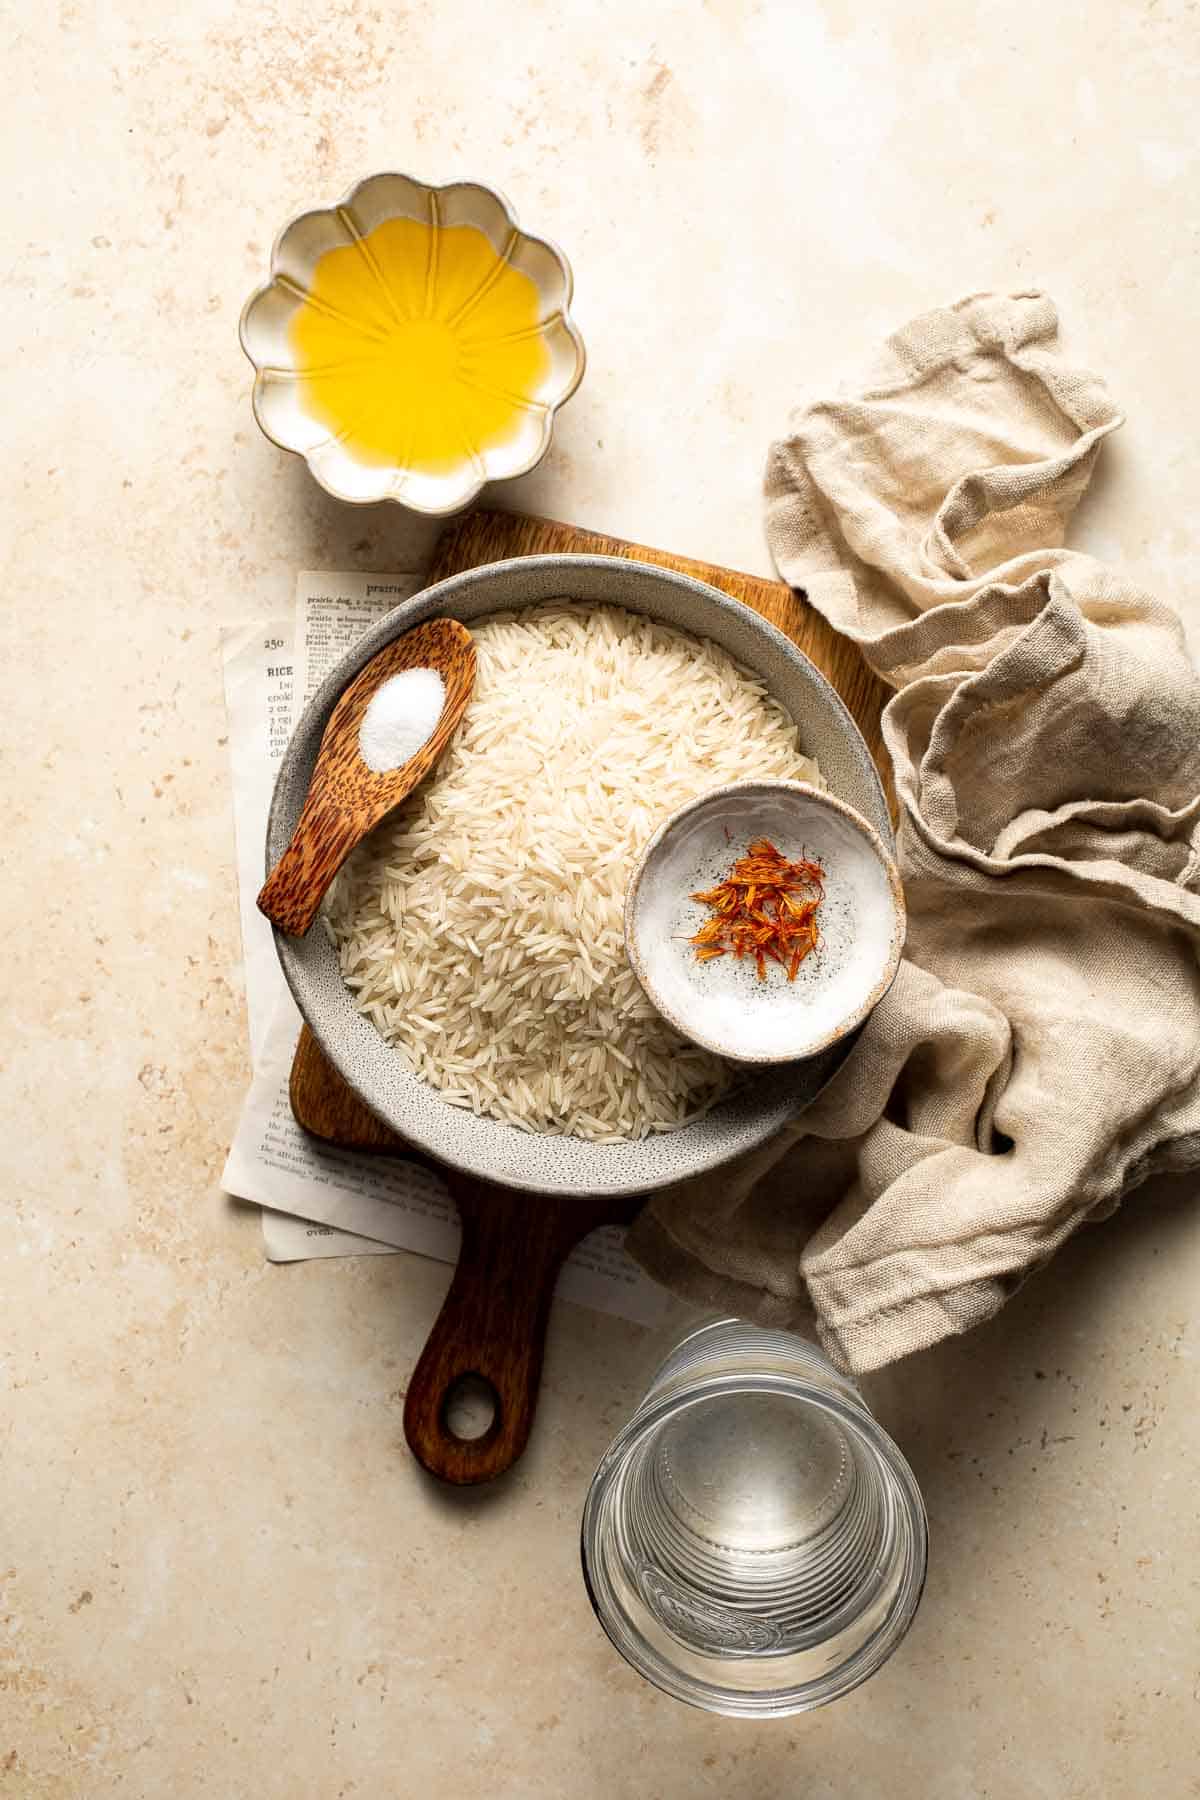
To make this delicious Basmati Rice with Saffron, you will need the following ingredients (full measurements in recipe card below):
- white basmati rice - this is a long-grain rice commonly eaten in Persian recipes and across the Indian subcontinent. It's known for having a distinct aroma somewhat similar to popcorn and a wonderfully nutty flavor.
- water - although I use water for this step, you can use chicken broth or vegetable stock instead.
- vegetable oil - a little oil or butter will give the long grain basmati rice a really tender, fluffy texture.
- salt
- saffron threads - saffron comes from the dried stigmas or a particular type of crocus. It is very expensive and potent, so you only need to use a little pinch.
You will also need measuring cups and spoons, a medium pot with a lid, a mortar and pestle, a small bowl and spoon, and a serving dish.
How to Make the Best Basmati Rice with Saffron
- Rinse the rice. Pour the rice into a medium-sized pot. Fill up the pot halfway and rinse the water. Discard the water. Repeat this step 2-3 times to rinse the rice unit the water becomes clear. Again, discard the water.
- Combine ingredients. Add water, vegetable oil and salt.
- Boil. Bring the pot to a boil over high heat. Allow the water to continue to boil until it has been absorbed by the rice and you no longer see any water over top of the rice (roughly 5 minutes).
- Turn down heat. Turn the heat down to low and cover the rice. Cook for 30-40 minutes.
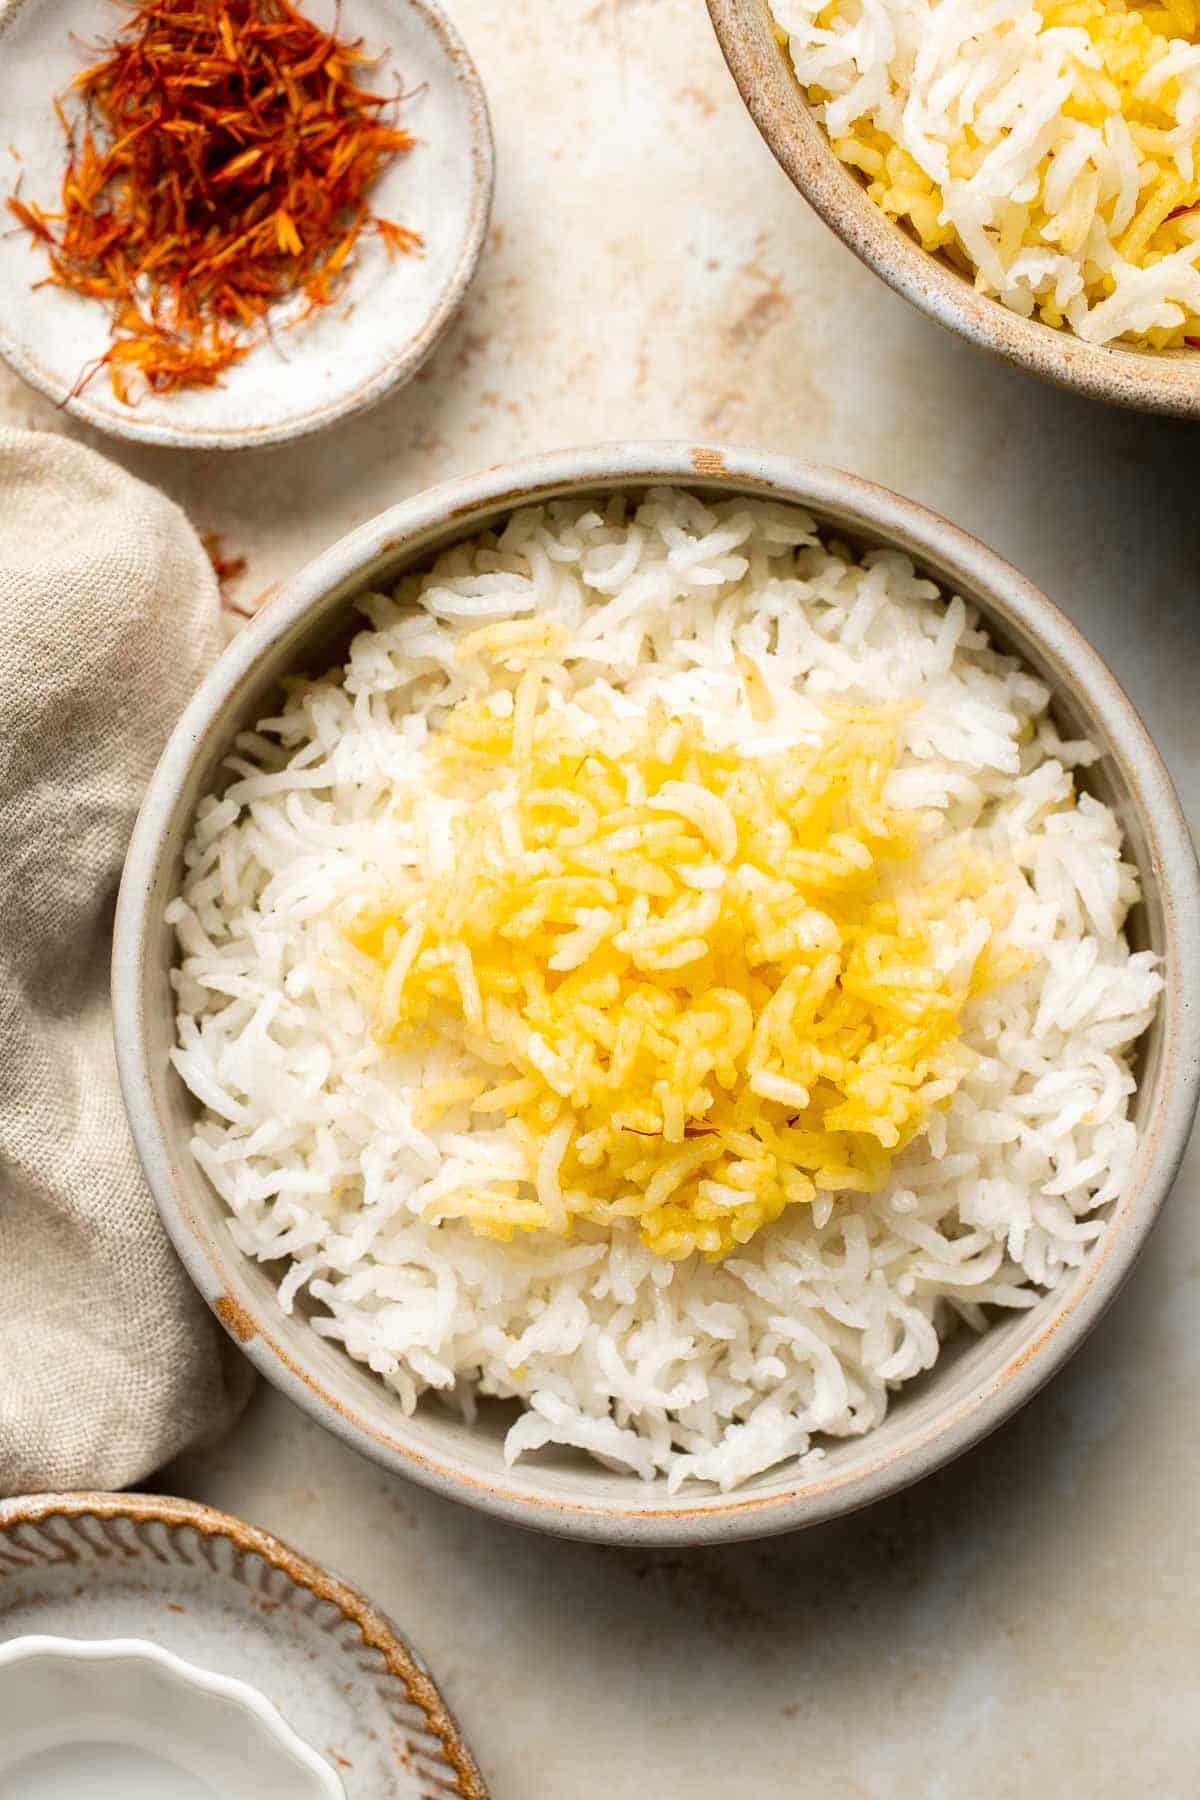
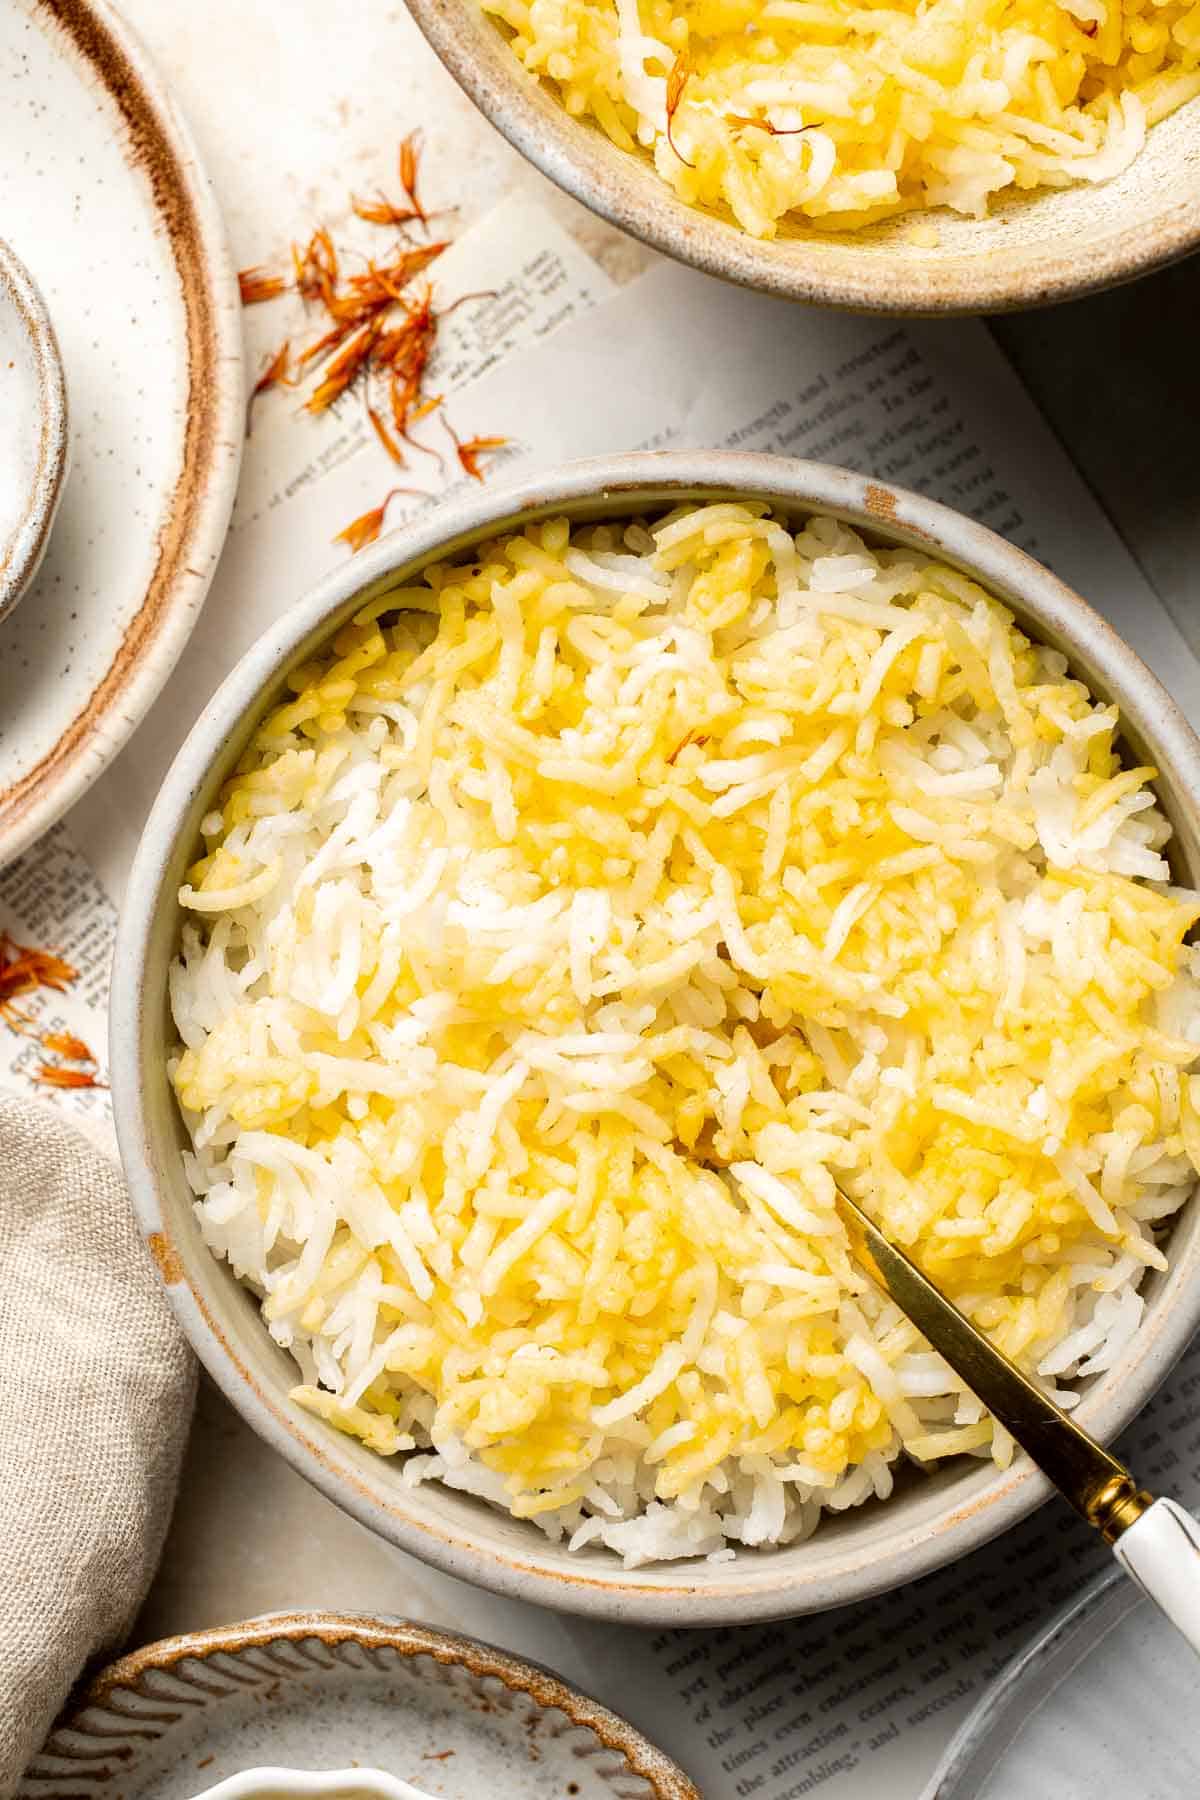
- Create saffron-infused rice garnish. Grind a pinch of saffron using a mortar and pestle. If you don't have one of those, just grind it in a small bowl using the back of a small spoon. Next, add a teaspoon of hot water and mix evenly. Take ½ cup of the cooked rice and add it in. Mix well until rice is fully combined and becomes a beautiful yellow colour.
- Serve. Serve the white rice in a serving platter and top with the yellow saffron rice.
Recipe Variations
- Use stock. For extra flavor, replace the water with chicken stock or vegetable broth. Bouillon paste or cubes work well, too. Simmer the rice with a bay leaf or two for a stronger aromatic flavor.
- Try coconut oil. For a hint of coconut flavour, use coconut oil in the rice instead of vegetable oil and skip the saffron-infused garnish on top. This will add a mild coconut flavor that pairs perfectly with Thai curries like Thai Sweet Potato Yellow Curry or Thai Coconut Red Curry with Prawns! You can also try this Coconut Rice using basmati rice for a slightly sweeter version that you may enjoy, as well.
- Garnish the rice. This is optional, but saffron rice tastes wonderful with some pine nuts, a squeeze of lemon juice, or a sprinkle of fresh herbs.
- Use a different rice. Although I prefer basmati, you can use another type of long grain rice. Jasmine rice is a great option!
How to Serve
This Basmati Rice with Saffron is a delicious side dish served with meats, stewy entrees, beans, or veggies. Some of my favorite Persian dishes to pair this with are:
- Ghormeh Sabzi (Persian Herb Stew)
- Persian Saffron Chicken Kebabs (Joojeh Kabab)
- One Pot Lentils
- Indian Butter Chicken
- Lentil Stew with Carrots and Potatoes
- Chicken Thighs with Green Beans and Potatoes in Tomato Sauce
- Persian Style Lamb Chops (Lamb Shashlik)
Recipe Tips and Tricks
- Rinse the rice properly. This will remove excess starch from the rice to help it separate into individual grains.
- Buy the best saffron you can afford. Since saffron is the most expensive spice on the planet, it can be tempting to buy the cheap stuff or ground saffron. These products are likely older and lower quality. If you really want to enjoy that savory saffron flavor and get a bold yellow color, use the best you can afford. You only use a little at a time, so it will last a while!
- Use a rice cooker. If you prefer to make rice in the rice cooker instead of on the stove, you won't need to worry about steps 3-4. Just add everything to the rice cooker and cook like normal. It's more traditional to use the stove top method I've described above and quite simple, too.
Storing and Freezing Instructions
How to Store
Allow the rice to cool to room temperature, then store the leftovers in an airtight container for 3-5 days. This saffron rice is great with leftovers, so tuck it straight into your meal prep containers for a quick meal the next day!
How to Reheat
For small servings, you can often get by by covering the dish of rice with a damp paper towel and microwaving for 1-2 minutes. The moisture from the paper towel will keep the rice from becoming dry or hard. For larger portions and a freshly cooked flavor, add 1-2 cups of leftover rice to a small saucepan and add about a teaspoon of water per cup of rice. Set the pan over low heat and cover for 5-10 minutes.
How to Freeze
Once chilled, the refrigerated rice can be frozen in a freezer-safe container for up to 6 months. Set the container in the fridge to thaw before reheating.
FAQ
Saffron rice is a simple side dish popular across the Middle East and India. There are many different variations depending on the location, with some regions preferring a more savory version and others making sweet saffron rice. This recipe is a savory version that pairs perfectly with roasted meats, kebabs, curries, beans, and much more. It's a simple way to elevate plain steamed rice into something more colorful and exciting. It's a great touch for a special occasion, but it's delicious enough to serve all the time!
This basmati rice with saffron is perfect for pairing for soaking up the flavors from roasted meats, veggies, curries, and more. I like to serve it with Persian Saffron Chicken Kebabs or Easy 20-Minute One Pot Lentils.
Technically, you do not have to cook saffron, but you won't get much color or flavor! Like other dried herbs and spices, saffron's flavor really blooms when heated and added to water. To make this basmati rice with saffron, crush the dried saffron threads in a mortar and pestle with some water to release the yellow color. Then, toss the warm rice with the saffron-infused water. The residual heat from the rice will bring out the flavor. It's quite simple but very effective.
More Rice Recipes
- 30 Best Rice Recipes
- Steamed Rice
- Easy Coconut Rice
- Broccoli Rice
- Cilantro Lime Rice
- Pineapple Fried Rice
Tried this recipe?
I'd love to hear what you think! Leave a comment and rating below to share your feedback. Your reviews help others discover this recipe and help me keep creating more free recipes for you. Snap a photo and tag me on social media @aheadofthyme too.
Vegetarian Tortilla Soup
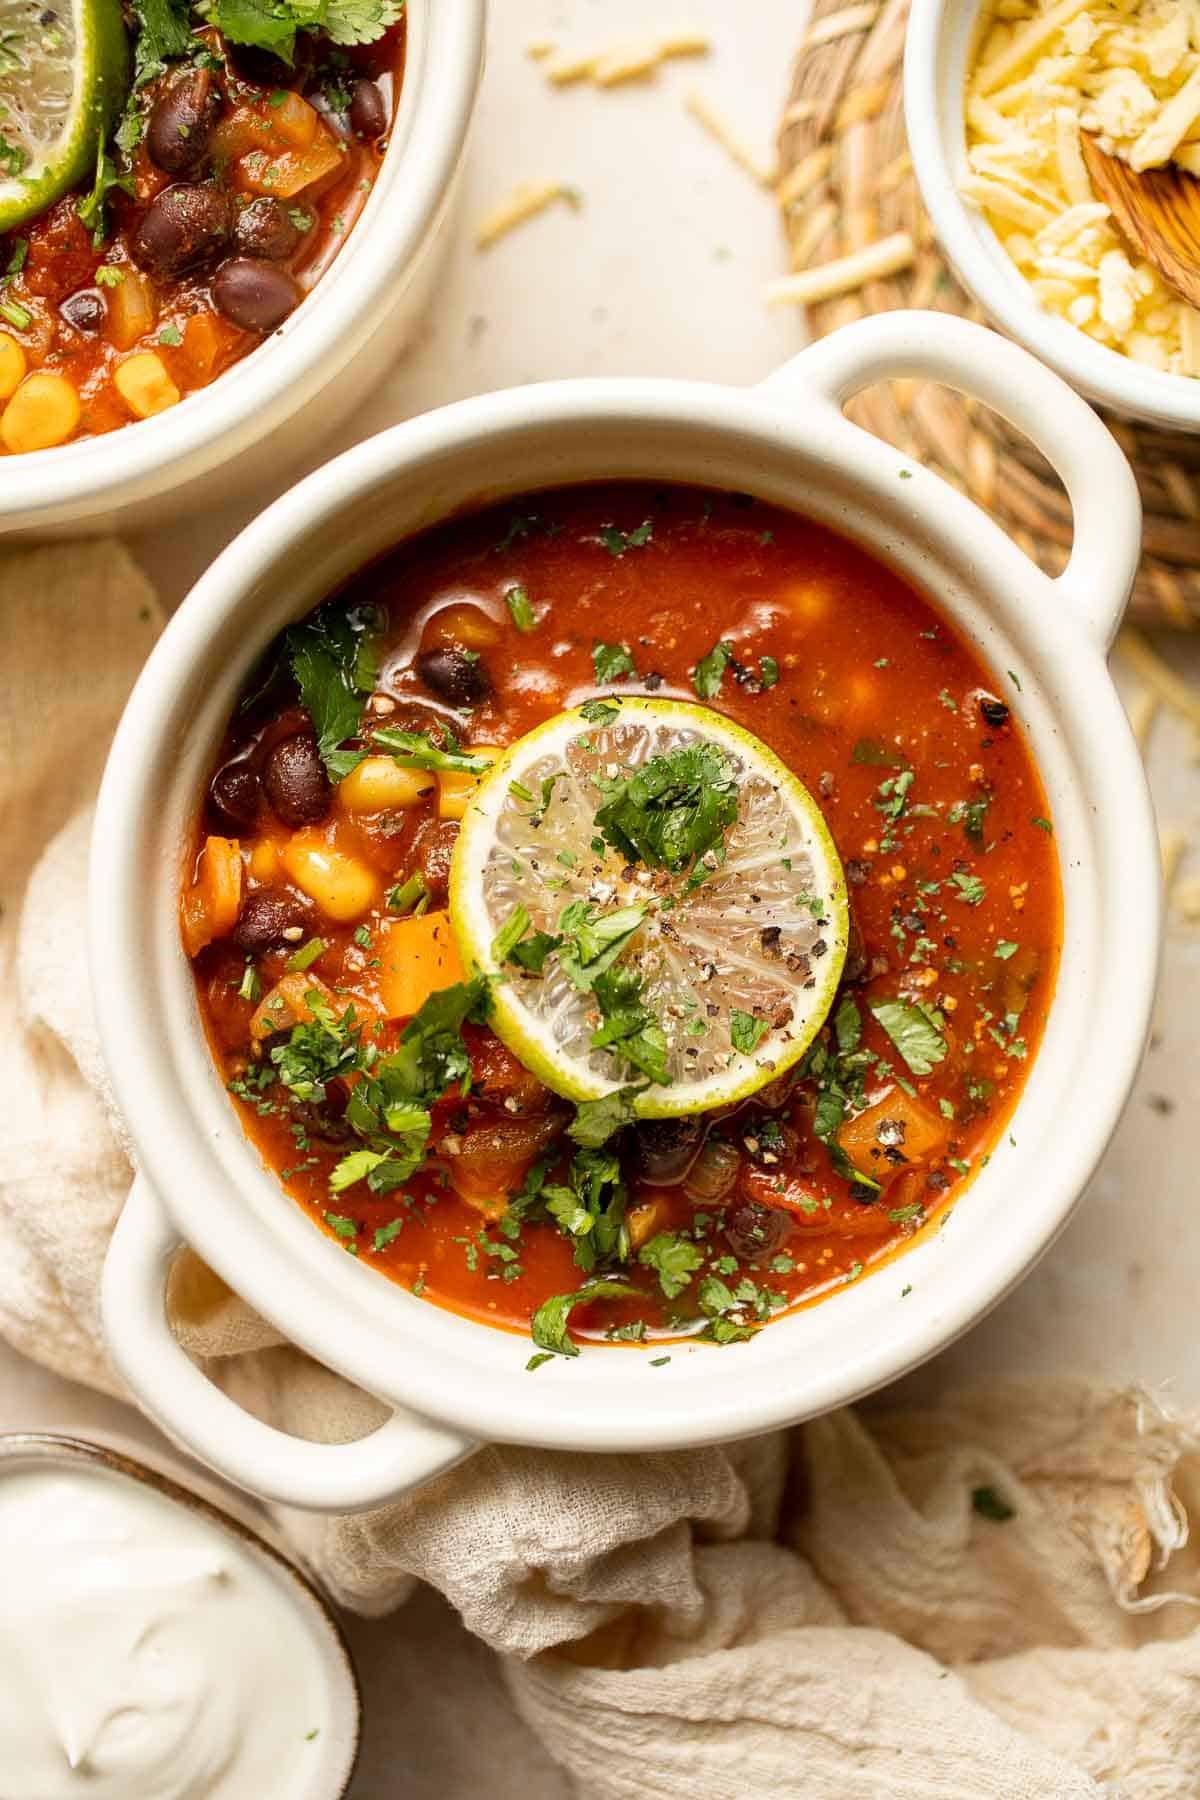
Vegetarian Tortilla Soup is loaded with all the savory spices and bold flavors of classic tortilla soup but without any meat! The rich and hearty tomato broth is delicious and balances so well with a handful of tortilla strips on top along with your favorite toppings. The best part? This Mexican veggie soup is ready in just 30 minutes making it perfect for a quick meal on those busy weeknights.

I'm always looking for flavorful meals that I can throw together on a busy night, and this plant-based twist on Chicken Tortilla Soup is just the thing! It's amazing how quickly the broth takes on a smoky, savory flavor from the aromatics, peppers, seasonings, and chipotle peppers. Gather the Tortilla Strips and other garnishes while the soup is cooking on the stove for easy assemble when dinner is served!
Why You'll Love This Vegetarian Tortilla Soup
- So quick and easy. Since you don't have to worry about cooking any meat, this soup is ready so really fast. Just saute the veggies, add the spices, then add the rest of the ingredients and simmer. While the soup is coming together, prep your garnishes and serve. It's way faster than takeout!
- Loaded with flavor. There is nothing bland about this vegetarian tortilla soup recipe. From the bold spices, fresh vegetables, and canned chipotles, it's incredibly flavorful even before you garnish your bowl with tortilla strips, cilantro, fresh lime, etc. It's ridiculously tasty for so little effort!
- Crowd-pleasing flavor. The whole family loves this tortilla soup, kids and adults included! The spiced broth tastes amazing with black beans, corn, and a suite of garnishes. It's tasty and filling enough to serve as your main meal, too!

Ingredient Notes
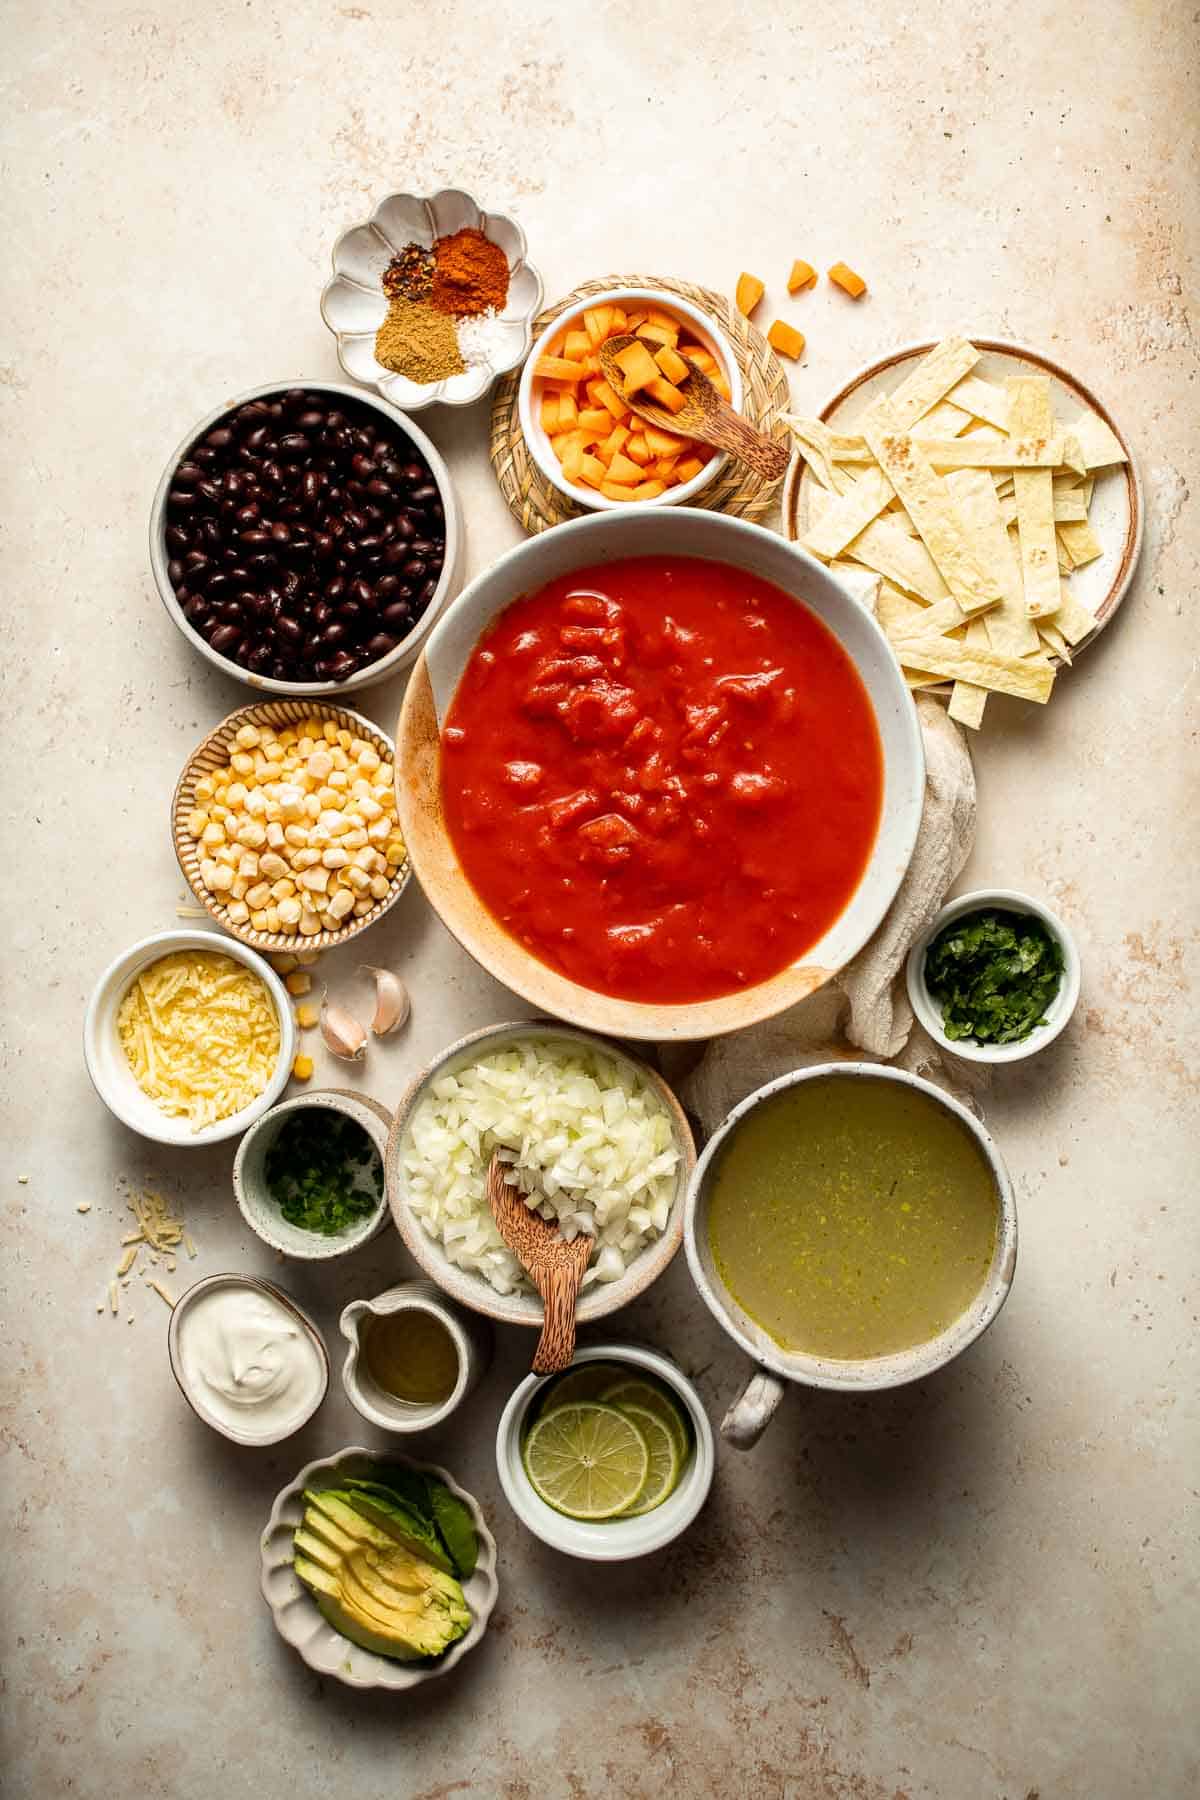
To make this delicious vegetarian tortilla soup, you will need the following ingredients (full measurements in recipe card below):
- avocado oil - you need just a little avocado or olive oil to cook down the veggies.
- vegetables - finely chop a white or yellow onion, garlic, and jalapeño, and dice the carrot.
- seasonings - season thoroughly with salt, paprika, ground cumin, and crushed red pepper (optional).
- chipotle in adobo - this is optional for an even spicier kick. Highly recommended!
- crushed tomatoes - these add a nice heartiness to this vegan tortilla soup.
- vegetable broth - feel free to make your own vegetable stock or grab some at the local grocery store.
- canned black beans - drain the beans before adding them to the soup.
- frozen corn - these can easily be kept on hand to make this soup anytime.
- tortilla strips - either buy tortilla strips at the store or easily make your own using corn tortillas!
Optional Toppings
- cilantro - finely chop some fresh cilantro for a fresh garnish.
- lime - set out a bowl of fresh lime wedges for a touch of acid.
- sour cream - leave this out if you want to keep the soup vegan.
- avocado - avocado slices add a nice creamy, mild flavor to balance the bold soup.
- cheddar cheese - also leave this out to keep the soup vegan.
You will also need measuring cups and spoons, a cutting board and knife, a heavy bottom pot or 4 quart Dutch oven, and a large spoon.
How to Make the Best Vegetarian Tortilla Soup
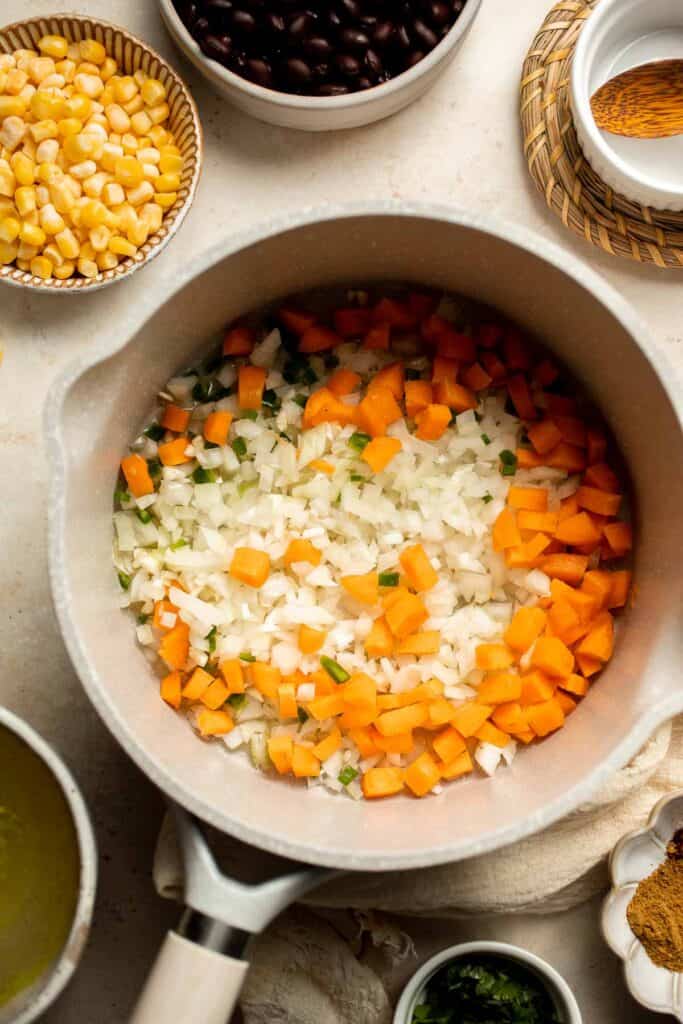
- Sauté veggies. In a medium stockpot (or Dutch oven), heat oil over medium-high heat for 2 minutes until the hot oil is sizzling hot. Add onions, garlic, jalapeño and carrot. Sauté until fragrant, about 2 minutes.

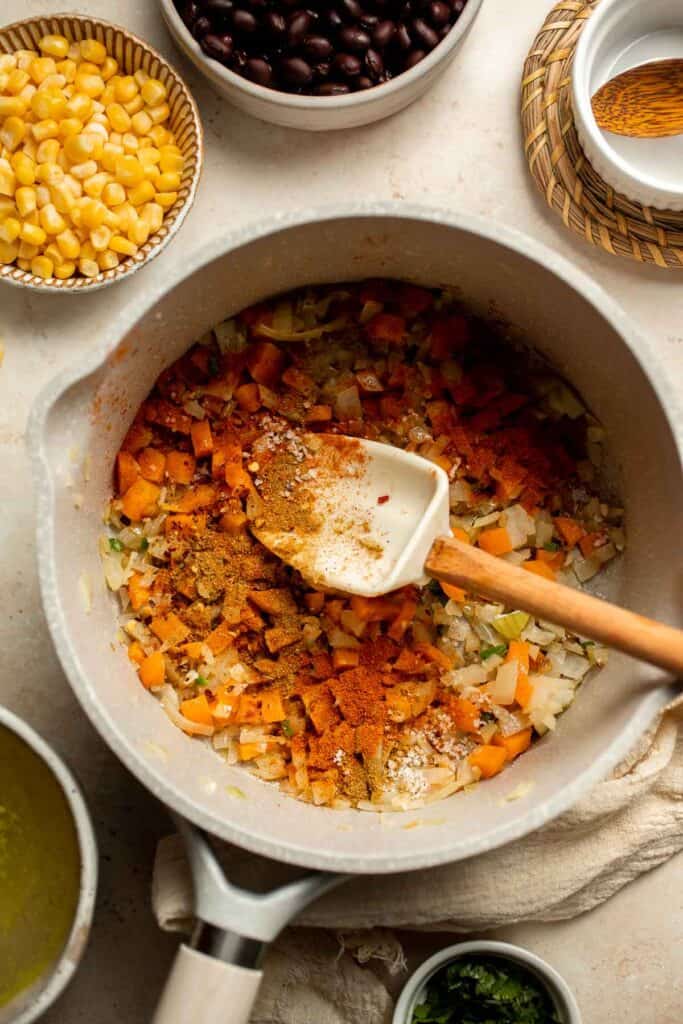
- Add seasoning. Stir in salt, paprika, cumin, and crushed red pepper (if using).
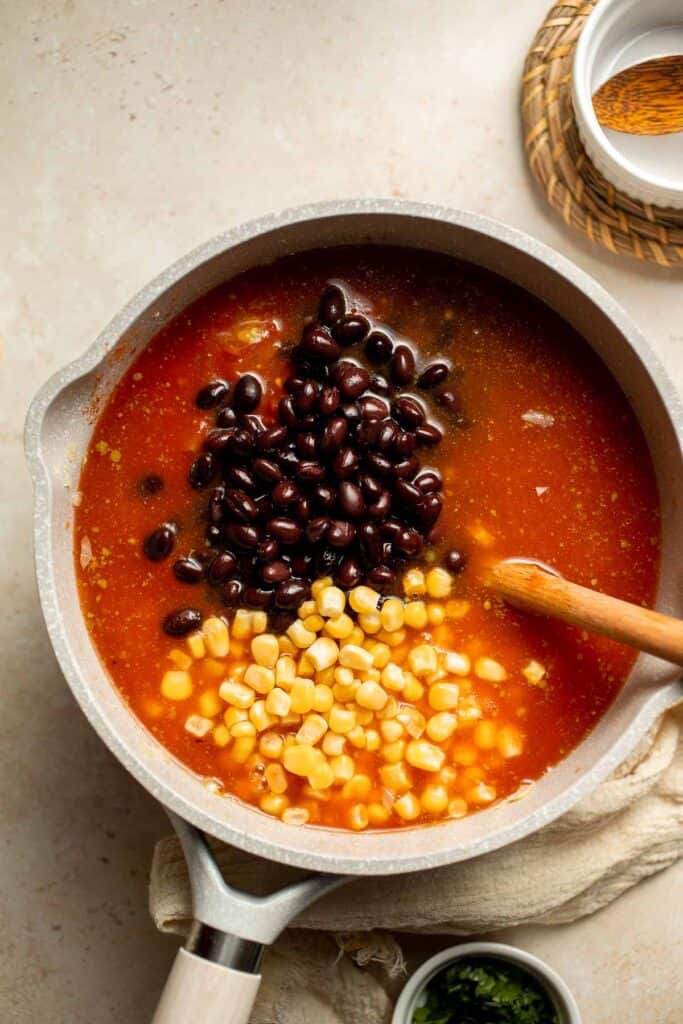
- Add soup base. Add chipotle, canned tomatoes, vegetable broth, black beans, and corn. Stir occasionally and bring the soup to a boil, about 5 minutes.
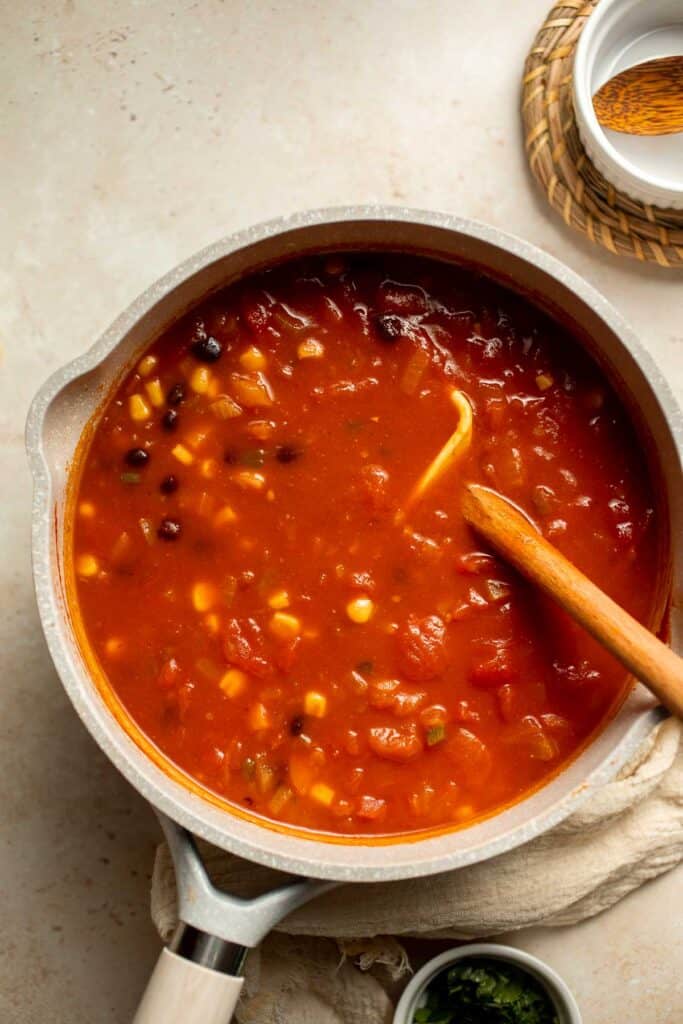
- Simmer. Reduce heat to medium and simmer uncovered for 10 minutes, stirring occasionally.
- Serve. Serve immediately in a soup bowl and top with tortilla strips and any other toppings that you like including cilantro, lime, sour cream, avocado, and cheddar cheese.
Recipe Variations
- Make it spicy. Add a can of chipotle peppers, chili powder, or cayenne pepper for a really spicy soup.
- Adjust the ingredients. There are lots of little ways to tweak this vegetable tortilla soup. Use pinto beans instead of black beans, throw in some hominy for extra texture, add more fresh veggies like red bell pepper or sweet potatoes, and add even more garnishes like green onion, diced cherry tomatoes, red onions, etc.
- Go vegan. For a vegan tortilla soup, ditch the sour cream and cheddar cheese in the toppings and either use plant-based alternatives or skip them.
- Make homemade tortilla strips. Turn regular corn tortillas into perfectly crispy strips with this easy recipe for Tortilla Strips.They're great on soup, salads, wraps, and more!
How to Serve
This Vegetarian Tortilla Soup is delicious served on its own, or paired with some of my favorite plant-based Mexican sides including:
- Mexican Street Corn (Elote)
- Vegetarian Quesadillas
- Mexican Street Corn Salad
- Vegetarian Enchiladas
- Cauliflower Tacos
- Cilantro Lime Rice
For more recipe ideas, see our 25 Mexican Side Dishes.
Recipe Tips and Tricks
- Add a smoky flavor. Feel free to use fire-roasted tomatoes or smoked paprika to add an extra smokiness to the recipe.
- Let it simmer. This recipe is very quick, but you'll get so much more flavor if you let it simmer for at least 10-15 minutes. The flavors will mingle together and make the whole dish even better.
- Make your own tortilla strips. It's funny how such a small thing can make a difference, but homemade tortilla strips have a fresher flavor and a better crunch. This is also a great way to use up your extra tortillas!
Storing and Freezing Instructions
How to Store
Allow the soup to cool to room temperature, then store the leftovers in an airtight container in the fridge for 3-4 days. For best results, store the garnishes and crispy tortilla strips separately.
How to Reheat
Place the soup in a medium saucepan on the stove and set it over medium heat until it is fully warmed through. Add fresh toppings and tortilla strips right before serving.
How to Freeze
The broth-based soup can be frozen in a freezer-safe container for several months. Just thaw in the fridge before reheating!
FAQ
The broth is the key to this whole recipe! It starts with a sofrito mixture of garlic, onion, and diced jalapeno pepper sauteed until tender. Then, add the spices to bring out their flavors. Next, add the black beans, frozen corn, crushed tomatoes, and chipotle peppers. Let the mixture simmer while you prepare the garnishes and serve. It's seriously that easy, and you'll be amazed at how much flavor the broth can have in such a short period of time!
To speed this recipe up even faster, feel free to use frozen diced onions and store-bought minced garlic! You can even use canned or frozen jalapenos if you can find them. Although the fresh veggies will have the best flavor, this can be a nice workaround on those nights when you need dinner ready ASAP.
Although you certainly can make this recipe in an Instant Pot, there's really no need! It's really quick to make, so you don't want or need to put it under pressure for a long time. If you do want to make it in a pressure cooker, just be sure to use the saute function and follow the instructions in the recipe card. It can be helpful to use a pressure cooker or slow cooker to keep the soup warm for parties. Just be sure to leave your favorite toppings on the side to keep them nice and fresh!
More Hearty Vegetarian Soup Recipes
- 40 Best Vegetarian Soup Recipes
- Vegetable Soup
- Black Bean Soup
- Minestrone Soup
- White Bean Soup with Kale
- Creamy Wild Rice Soup
Tried this recipe?
I'd love to hear what you think! Leave a comment and rating below to share your feedback. Your reviews help others discover this recipe and help me keep creating more free recipes for you. Snap a photo and tag me on social media @aheadofthyme too.

Balsamic Roasted Carrots
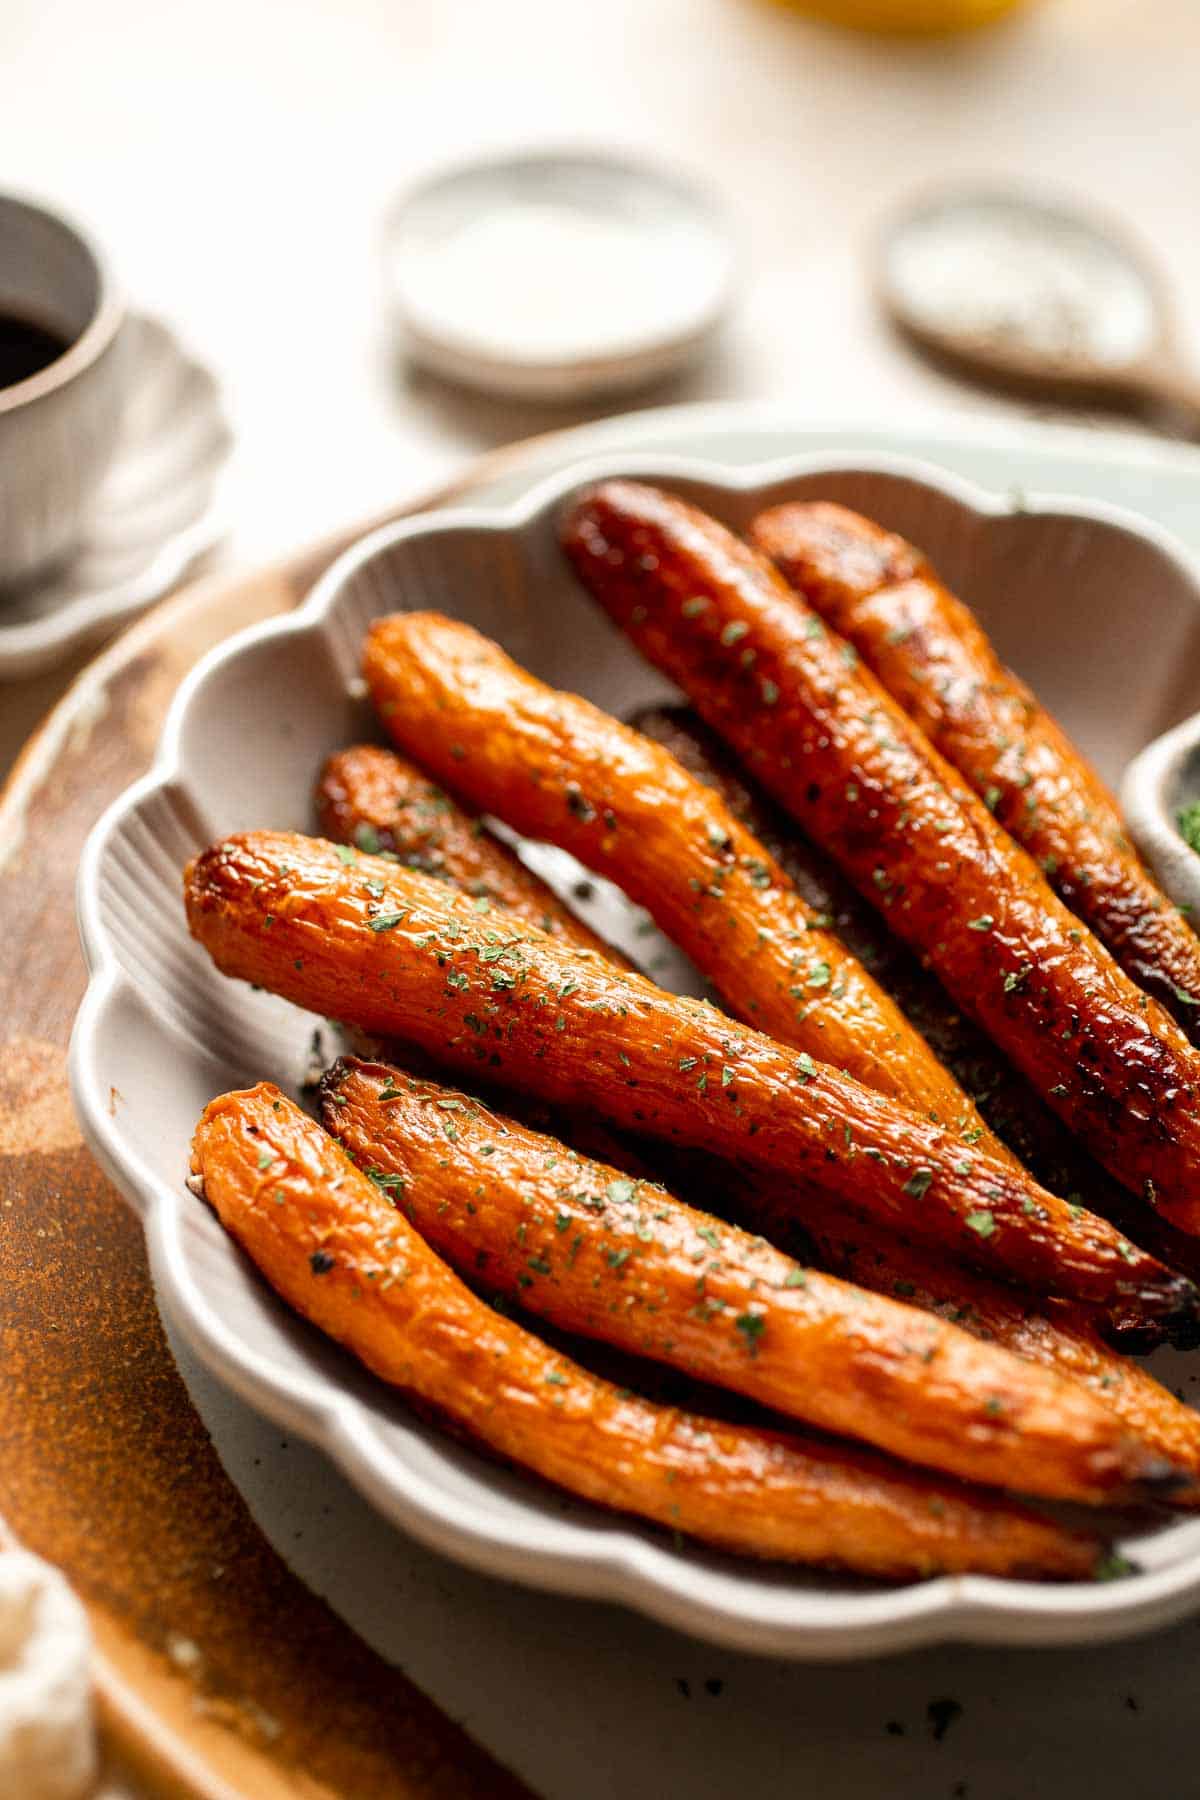
Balsamic Roasted Carrots are an easy side dish to make with a handful of simple ingredients that creates a complex blend of flavors in every bite. They are slightly crisp on the outside while sweet and tender inside. So delicious and unbelievable satisfying! These baked carrots are the perfect side for any occasion, whether that's a quick weeknight dinner, a fancy dinner party, or a holiday meal.

This simple glazed carrot recipe is perfect because of two things: the flavors and the roasting process. The tangy, bold flavor of balsamic is the perfect balance to the earthy carrots, transforming a simple root veggie into something absolutely delicious. And roasting root vegetables is the very best way to prepare them. Roasting evaporates moisture, concentrating the rich, earthy flavor of carrots and highlighting their natural sweetness. As the vinegar bakes down, the flavor concentrates and coats each carrot with a sweet, tangy glaze that you just can't stop eating.
Why You'll Love This Balsamic Roasted Carrots Recipe
- Easy to make. These tender balsamic glazed carrots are a classic side dish for a reason! This version uses whole carrots, so you don't even have to worry about peeling or slicing the fresh carrots into strips. They take minimal effort to prepare and can also roast at the same time with other vegetables, so you can make a bunch of roasted veggies at once!
- Perfect fall or winter side dish. Carrots are extra sweet after the first frost, and roasting concentrates their earthy flavor even more. They're the perfect side dish for any roast dinner or social gathering, including your holiday meals and more. Serve these roast carrots with your Easter meal, Sunday dinner, or any special occasion for a vegan side dish you'll want to snack on all night!
- Simple yet sophisticated. These caramelized carrots are simple fare, requiring minimal ingredients. However, the balsamic glaze adds so much flavor! They're always a stand-out hit at any meal, fancy or not.

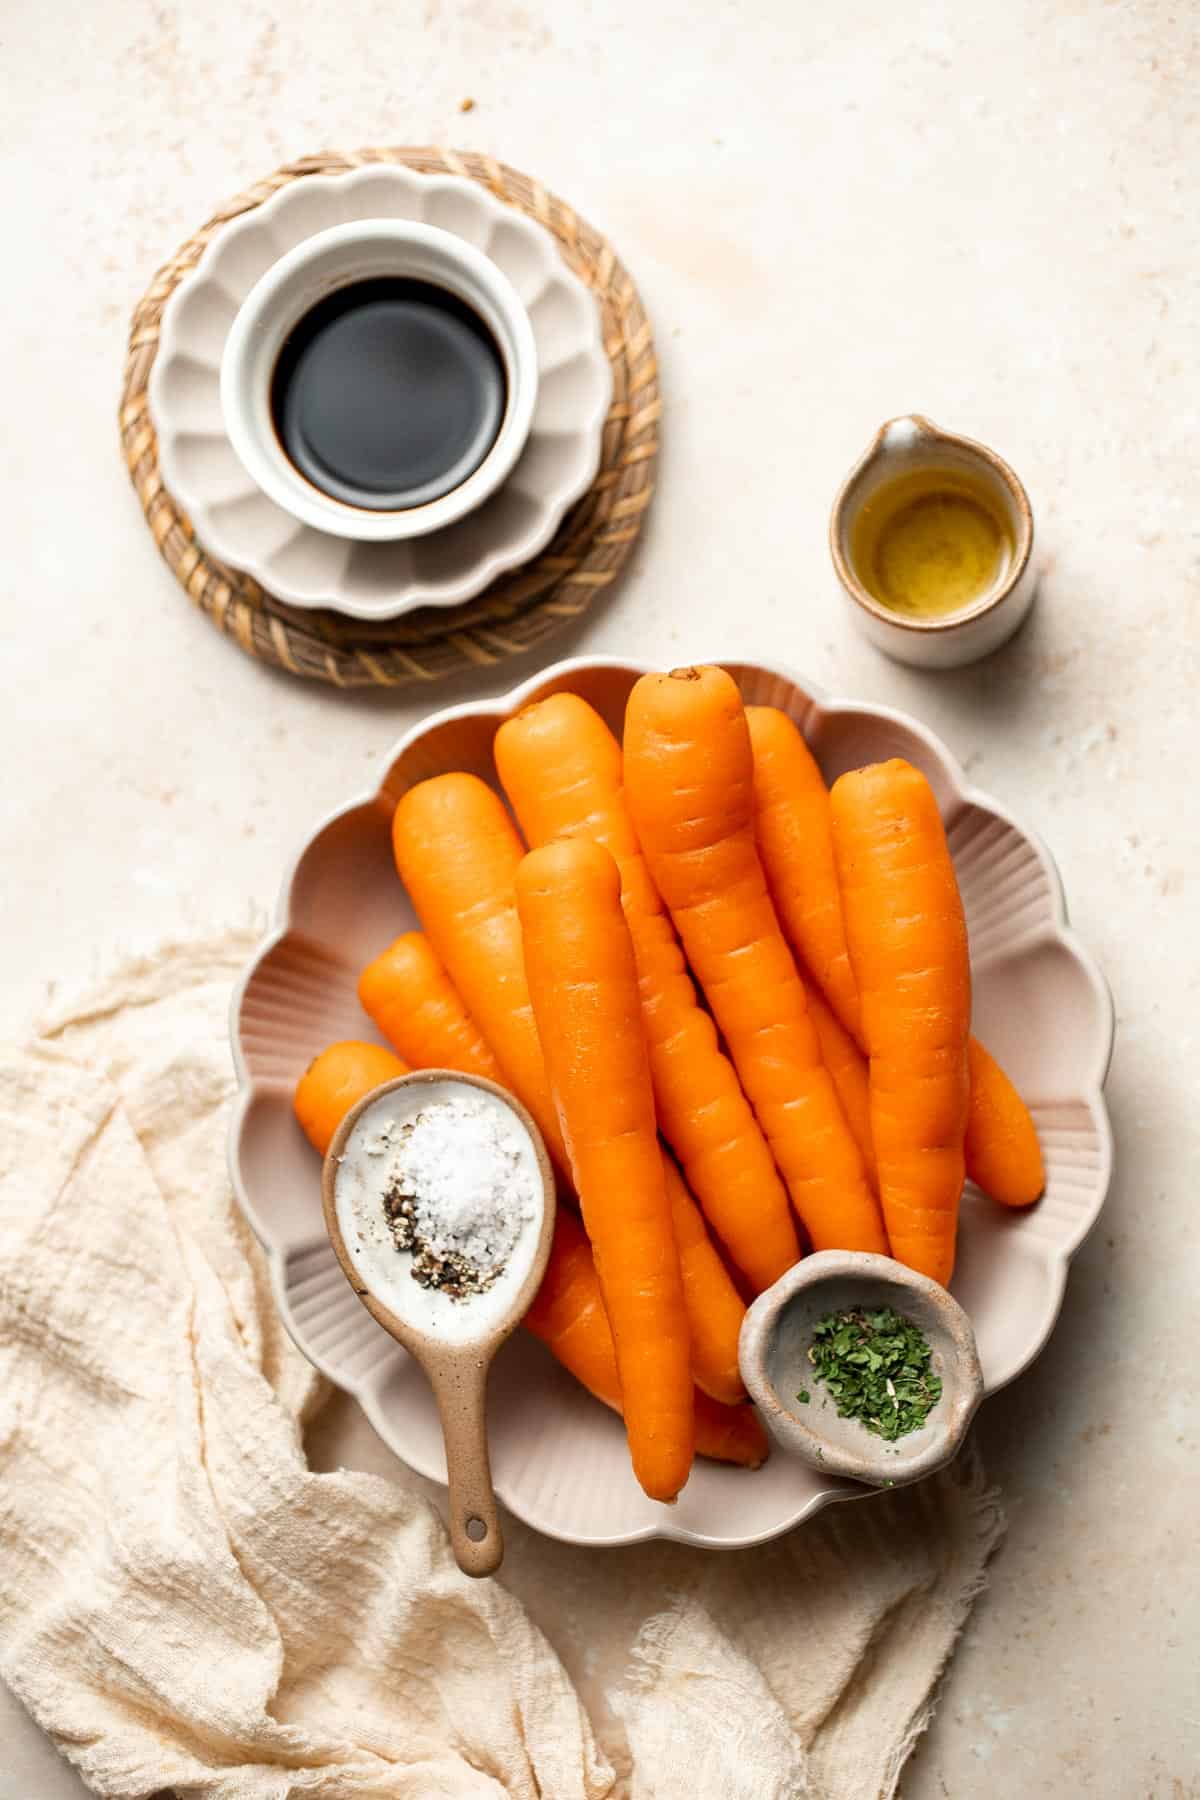
Ingredient Notes
To make these delicious Balsamic Roasted Carrots, you will need the following ingredients (full measurements in recipe card below):
- baby carrots - rinse them well and trim down the tops.
- olive oil - this will help develop that delicious crust on the outside.
- Italian seasoning - For a fresh, herby flavor.
- salt and pepper
- balsamic vinegar - this will give your balsamic carrots incredible flavor. Balsamic vinegar comes in a broad range of quality, but use whatever you have on hand.
You will also need measuring spoons, a large baking sheet, a cutting board, and a knife.
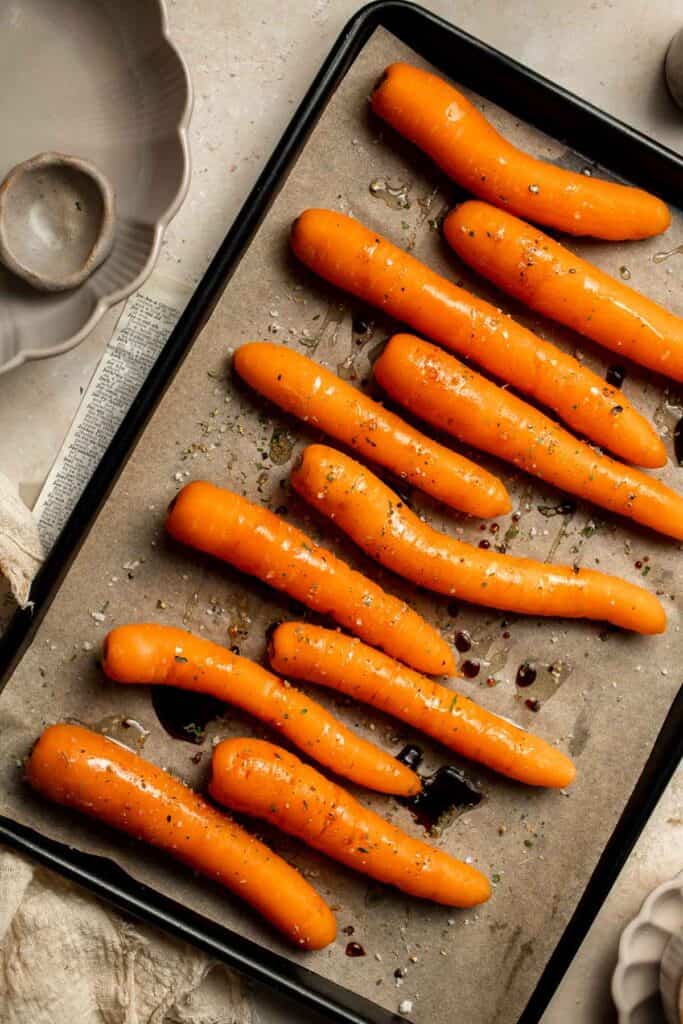
How to Make the Best Balsamic Roasted Carrots
- Season. Place carrots on a large half sheet baking pan and add olive oil, Italian seasoning, salt, pepper and balsamic vinegar. Toss to combine.
- Bake. Arrange the carrots in a single layer on the pan and bake in a 375F preheated oven for 35-40 minutes until tender. Note that you will need to increase the cook time if using larger carrots.


Recipe Variations
- Add some sweetness. As the carrots roast in the oven, the natural sugars in the balsamic and carrots will become more concentrated in flavor. If you prefer a little extra sweetness, add some brown sugar, a little splash of maple syrup, or even some honey for honey balsamic roasted carrots.
- Add some heat. Add some red pepper flakes or a dash of cayenne pepper for extra warmth.
- Incorporate more veggies. This method works with essentially any root vegetables or hearty veggies, including Brussels sprouts, parsnips, sweet potatoes, and more. Feel free to slice some sprouts in half to roast both veggies at the same time!
- Use whole carrots. If you don't have baby carrots, peel and trim your carrots into evenly-sized sticks.
- Sprinkle with fresh herbs. Add some fresh thyme or fresh parsley for extra color and flavor.
How to Serve
This balsamic glazed carrots are best paired with some of my favorite entrees and sides including:
- Roast Beef
- Dutch Oven Whole Roast Chicken
- Garlic Butter Salmon
- Sunday Pot Roast
- Instant Pot Turkey Breast
- Garlic Mashed Potatoes with Sour Cream
- Fall Harvest Salad with Butternut Squash and Apple
For more recipe inspiration, see our 50 Sunday Dinner Ideas.
Recipe Tips and Tricks
- Make an extra tray. Roasting vegetables takes a while, and they shrink down quite a bit in the oven! If you make an extra tray, you'll have plenty for leftovers. Roasted carrots also taste great on salads the next day! Try it on our Arugula and Roasted Carrot Salad. You can also throw them in any soup for extra flavor.
- Use any color of carrots. Although regular orange carrots are standard, feel free to use white, yellow, or purple carrots instead.
- Don't crowd the tray. Roasting is all about evaporating the moisture from the vegetables. If the carrots are too close together, they won't roast properly. Make sure there is space between each carrot!
Storing and Freezing Instructions
How to Store
Store any leftover roasted carrots in an airtight container in the fridge for 3-4 days.
How to Reheat
The easiest method is to microwave the carrots for 2-3 minutes, which will warm them up quickly. You can also bake them in the oven for 5-10 minutes, but they may soften from the high heat.
How to Freeze
Store the chilled carrots in a freezer-safe container for 3-6 months. Thaw in the fridge before reheating.
FAQ
Roasting vegetables can be a little bit tricky sometimes. You need to roast at the right temperature, space the carrots in an even layer, and add enough oil on the outside to get the perfect texture. If any of these components are off, the carrots won't come out right.
Not necessary! Parboiling requires quite a bit of extra work, and this balsamic glazed carrots recipe has a great texture even without that extra step.
No, and in fact, covering them can prevent them from getting the caramelized crust you love! It's best to keep the roasting pan uncovered for the best results.
More Carrots Recipes
- 40 Best Carrot Recipes
- Garlic and Herb Roasted Carrots
- Roasted Carrots
- Maple Roasted Carrots with Yogurt Sauce
- Honey Roasted Carrots
- Candied Carrots
Tried this recipe?
I'd love to hear what you think! Leave a comment and rating below to share your feedback. Your reviews help others discover this recipe and help me keep creating more free recipes for you. Snap a photo and tag me on social media @aheadofthyme too.

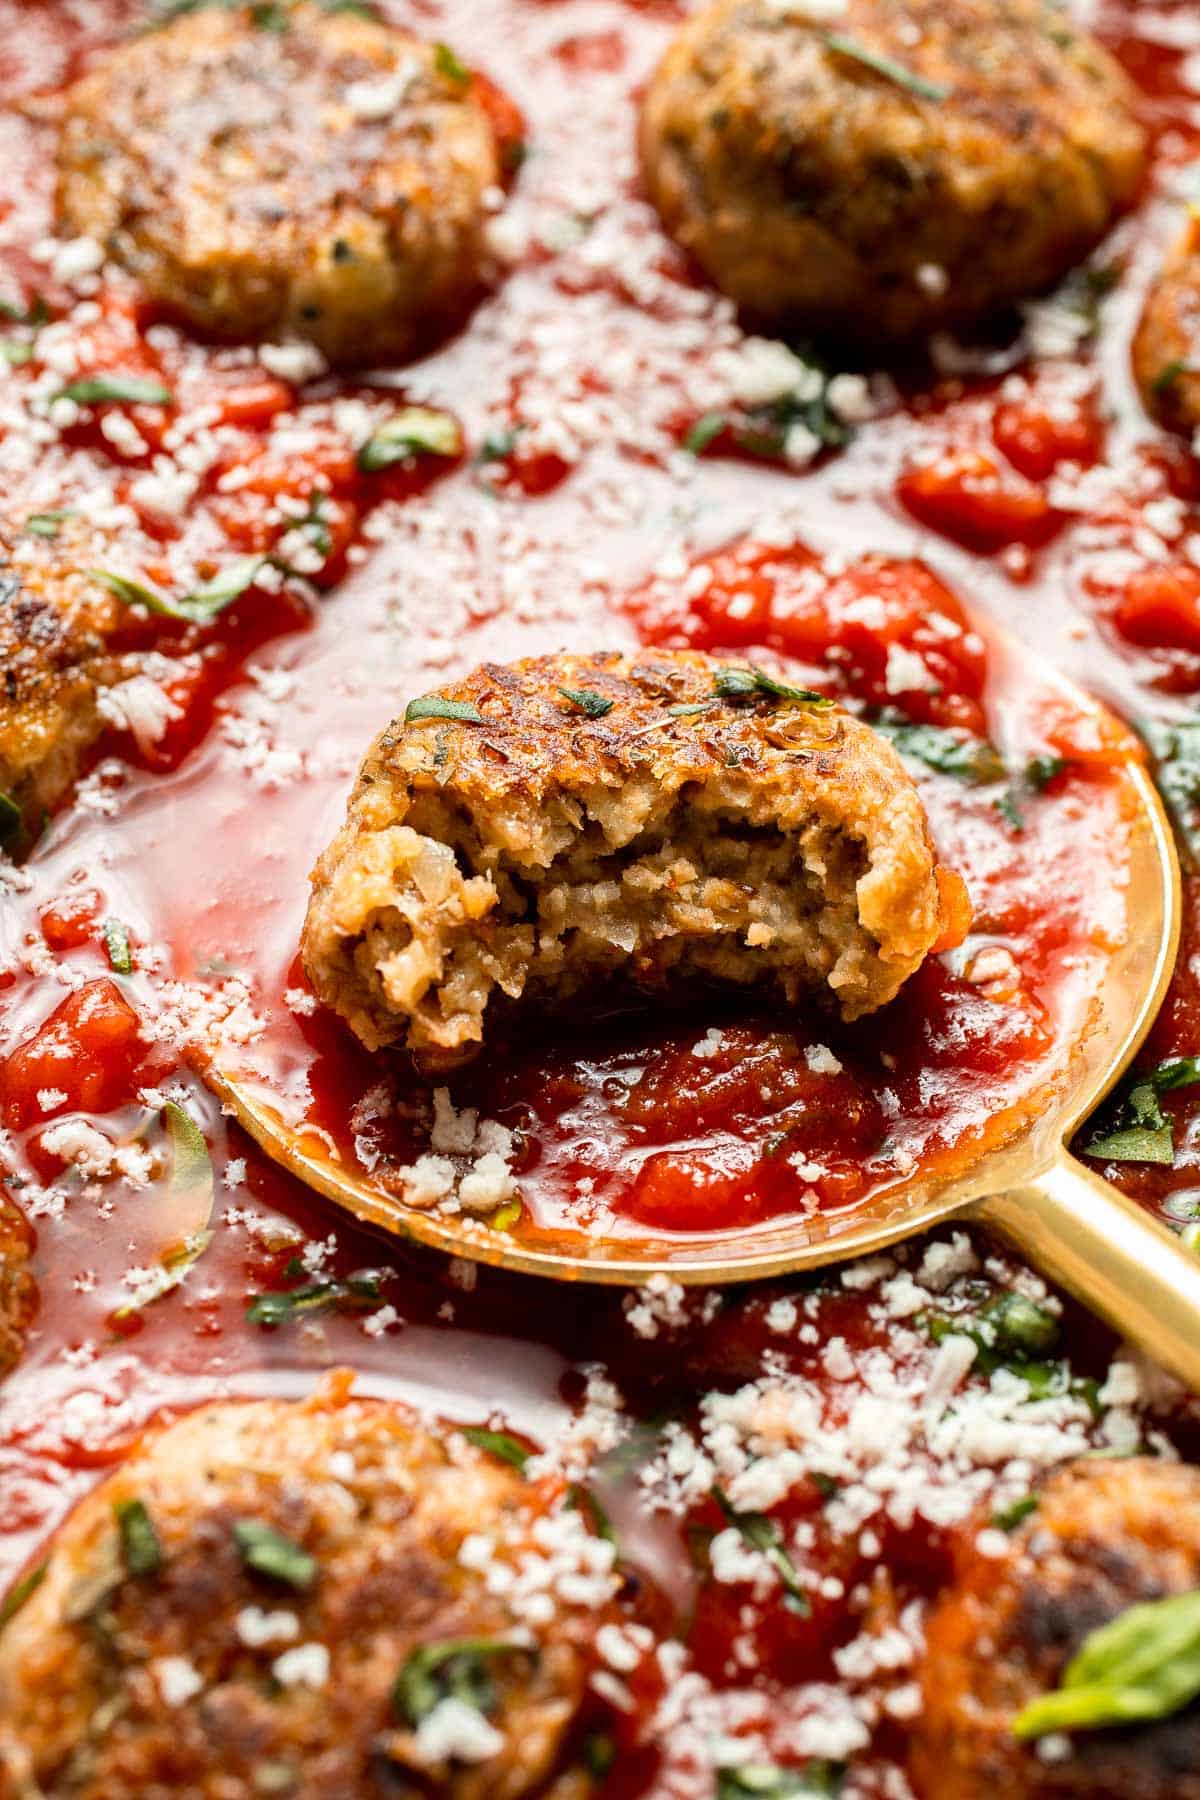
Lentil Meatballs
These homemade Lentil Meatballs are made with a satisfying mixture of breadcrumbs, cheddar cheese, aromatic ingredients, and delicious seasonings for a perfect vegetarian entree for any dinner. Even better? They're ready in just over 30 minutes! How's that for an easy weeknight dinner?

One of the easiest ways to eat more beans is to transform them into meatballs! They make the perfect burger patties and meatballs to serve over pasta, on salads, or in sandwiches, and they taste so satisfying that you won't even miss the meat! These vegetarian lentil meatballs are loaded with lentils yet have a meaty, toothsome texture you'll want to snack on. They quickly become the star of any meal!
Why You'll Love These Lentil Meatballs
- Easy to prepare. Once you've sauteed the onion and garlic, add all of the ingredients to the bowl of a food processor and pulse everything together. Roll the meatball mixture into balls, then cook them however you'd like (pan-fry, bake in the oven, or air fry). The canned beans really speed up the process!
- Delicious flavor. Lentils are like a blank slate; they take on the flavor of whatever they're cooked with. These little beans are packed with flavor from the sauteed garlic and onion, cheddar cheese, savory Worcestershire sauce, and delicious spices. They're definitely not bland!
- Great for meal prep. Once you've got the hang of it, make a double or triple batch to add to your lunches during the week, or freeze them for later! It's so handy to have a pack of them ready to go anytime you need them.
Ingredient Notes
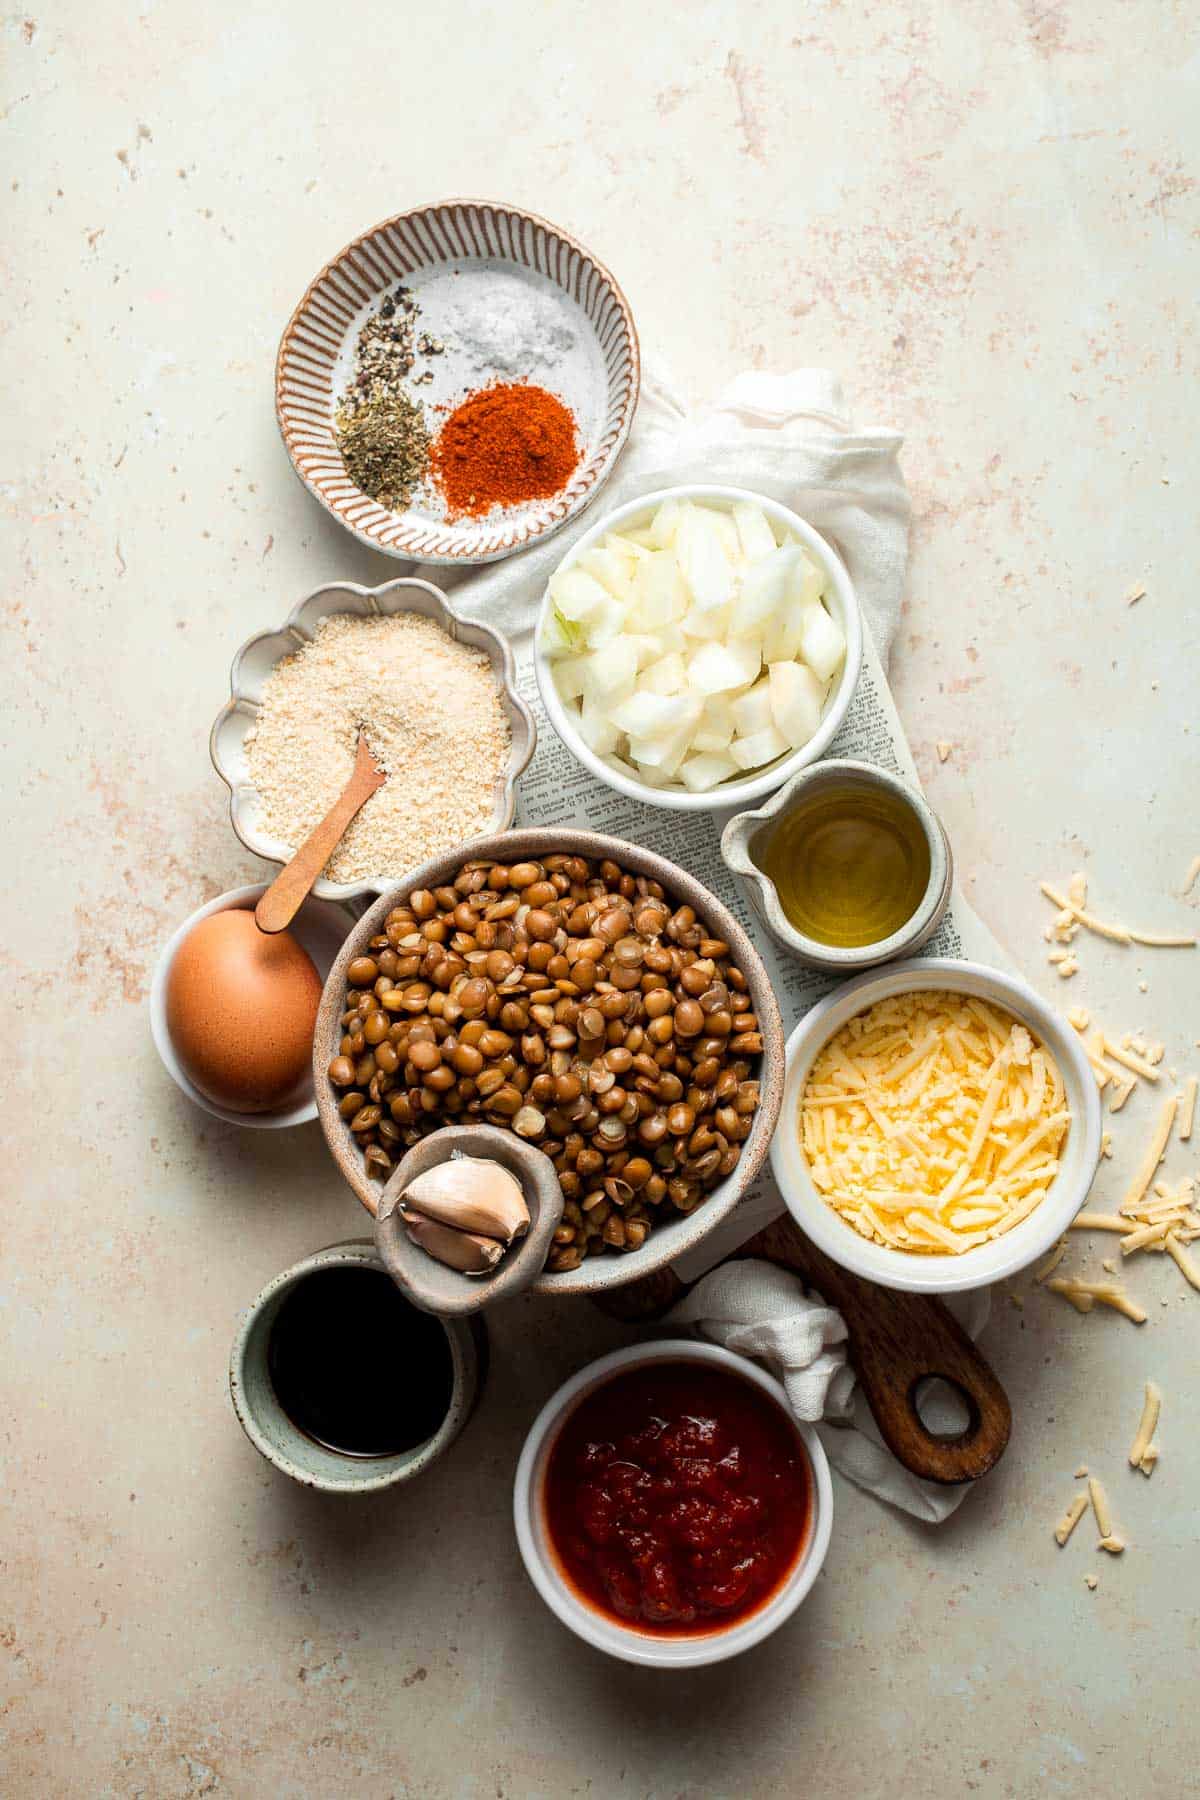
To make these delicious lentil meatballs, you will need the following ingredients (full measurements in recipe card below):
- olive oil - to sautee the aromatics.
- garlic & onion - sautee these first to bring out their flavor.
- lentils - use either canned or homemade lentils that have been cooked and drained.
- breadcrumbs - these soften the texture of the meatballs and absorb any excess liquid.
- cheddar cheese - shredded cheese will melt into the lentil breadcrumb mixture and add a cheesy flavor.
- egg - to bind the meatballs together.
- Worcestershire sauce - this has a strong umami flavor. Look for a vegan Worcestershire sauce when possible. Soy sauce is a good alternative.
- seasonings - season with a mixture of Italian season, paprika, sea salt, and ground black pepper.
- marinara sauce - warm your favorite marinara sauce for serving.
You will also need measuring cups and spoons, a large skillet, paper towel, food processor or a large bowl and potato masher, large baking sheet, and a spatula or tongs.
How to Make the Best Lentil Meatballs
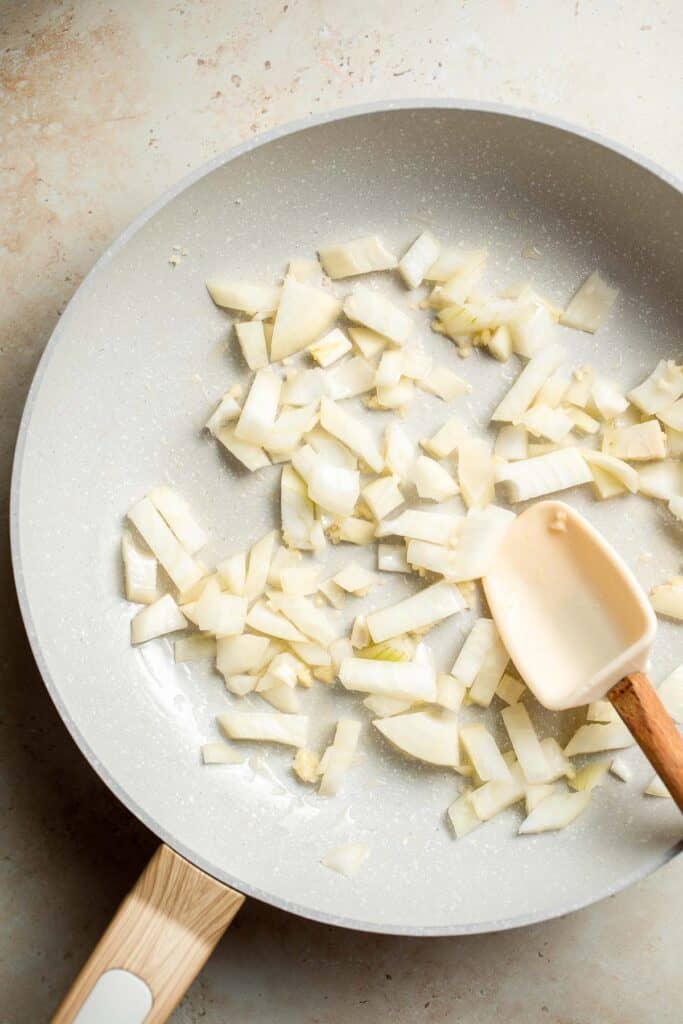
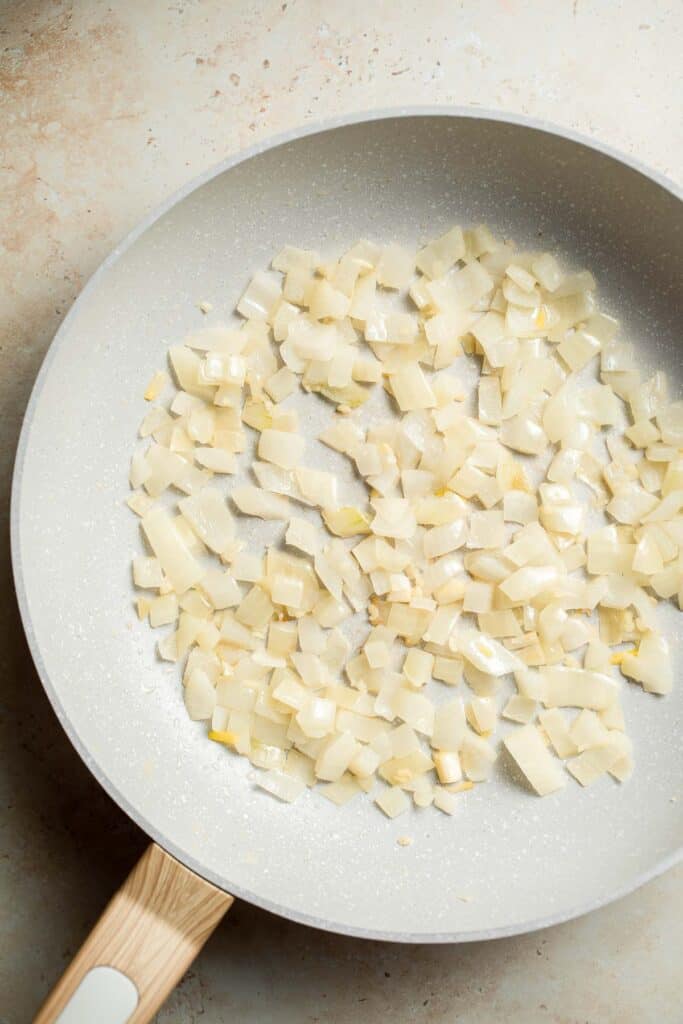
- Sauté aromatics. In a large skillet, heat oil over medium-high heat for 1 minute. Add onions and garlic and sauté until tender, about 2-3 minutes. Let cool for 5 minutes.
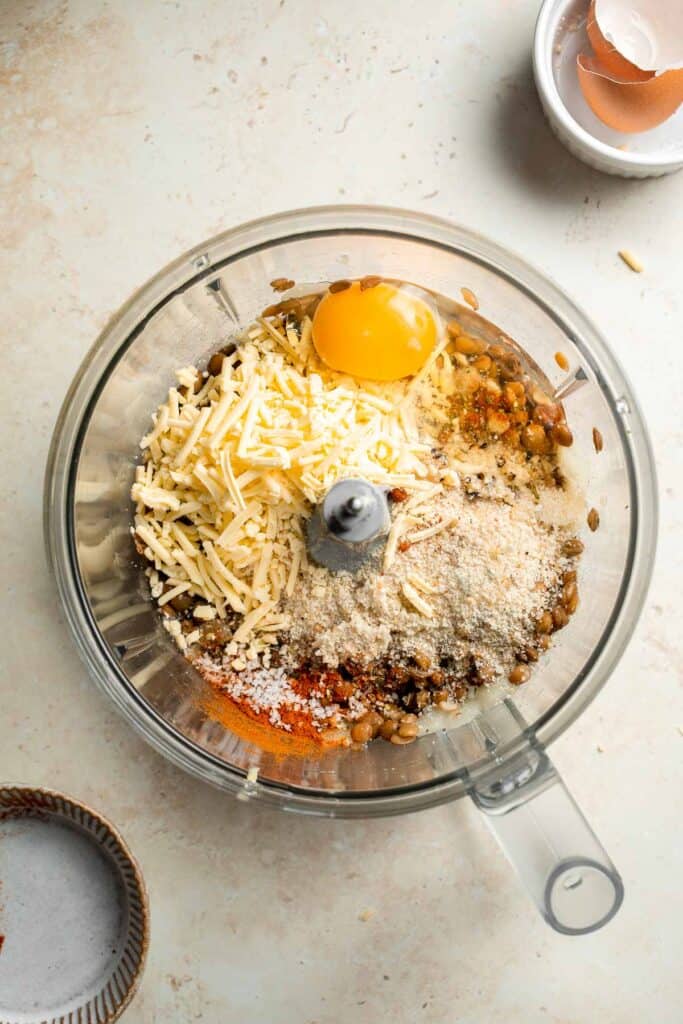
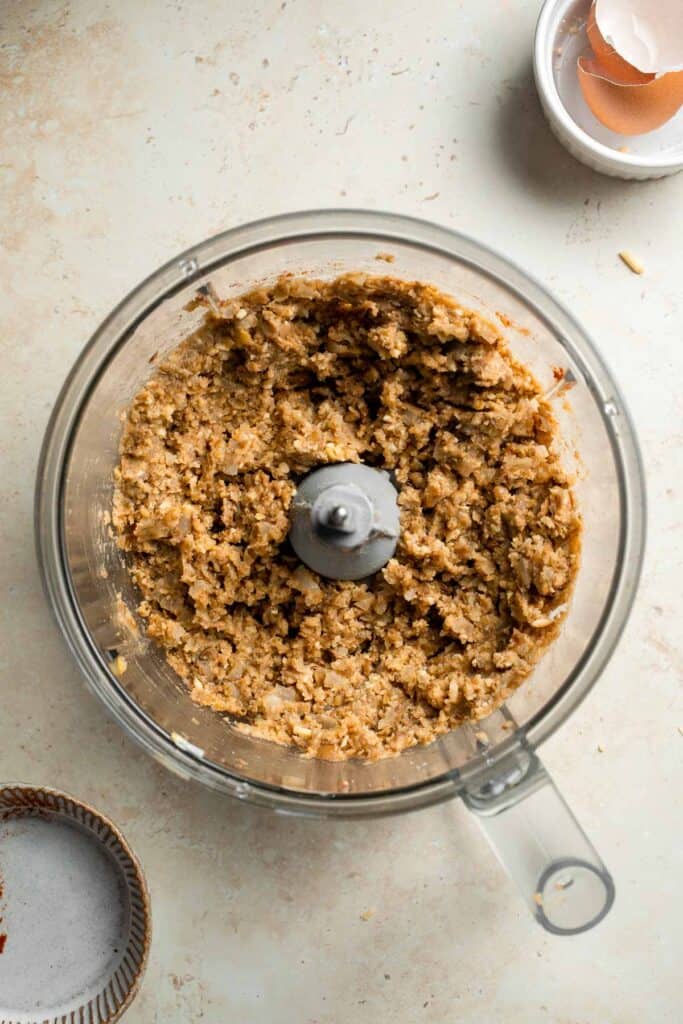
- Process. Use a paper towel to pat the rinsed and drained lentils dry. Then, transfer into a food processor and add sauteed onion mixture, breadcrumbs, cheddar cheese, egg, Worcestershire sauce, Italian seasoning, paprika, salt, and pepper. Pulse mix on and off for 1 minute until well combined. Alternatively, you can mash everything with a fork or potato masher in a large mixing bowl until evenly combined.
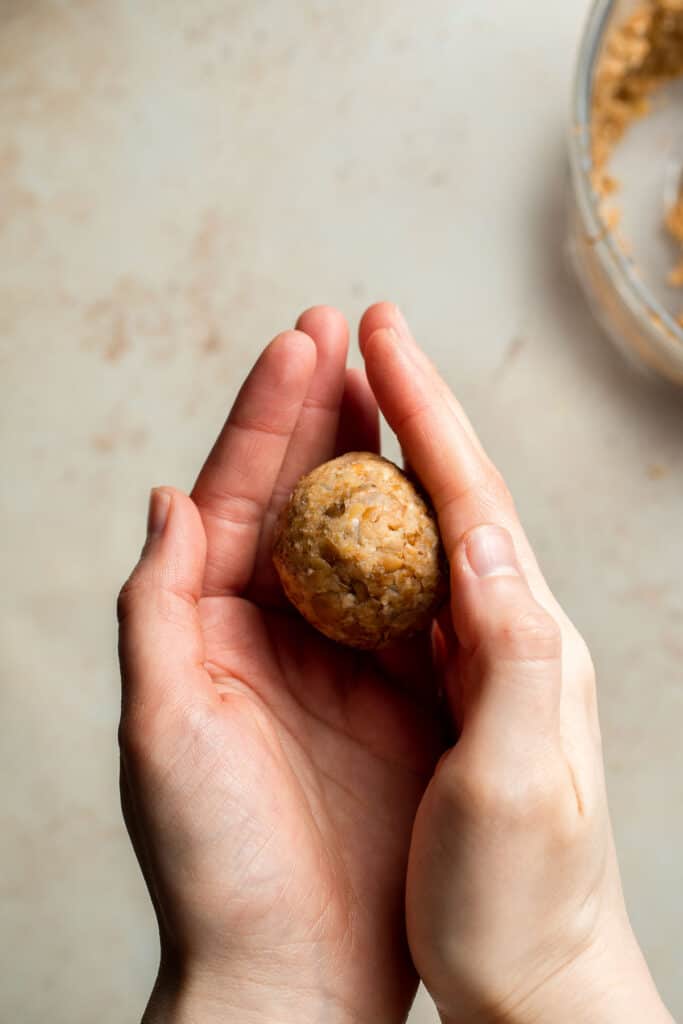
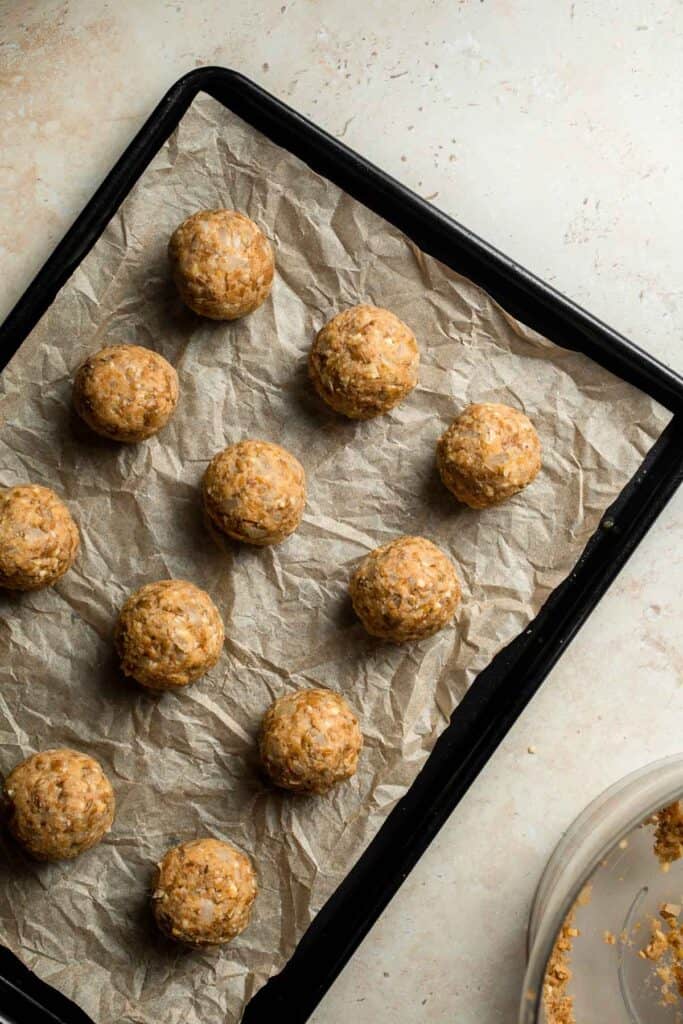
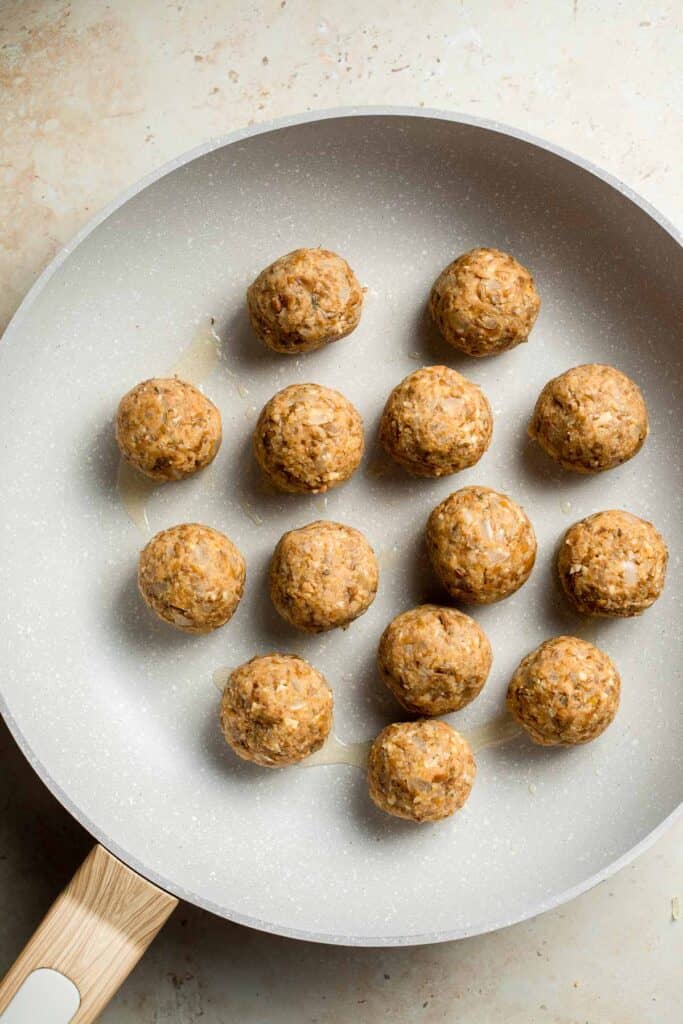
- Shape. Take 2 tablespoonful lentil mixture at a time and shape into meatballs. Set aside on a large baking sheet.
- Cook. To cook, you can pan fry, bake or air fry the meatballs.
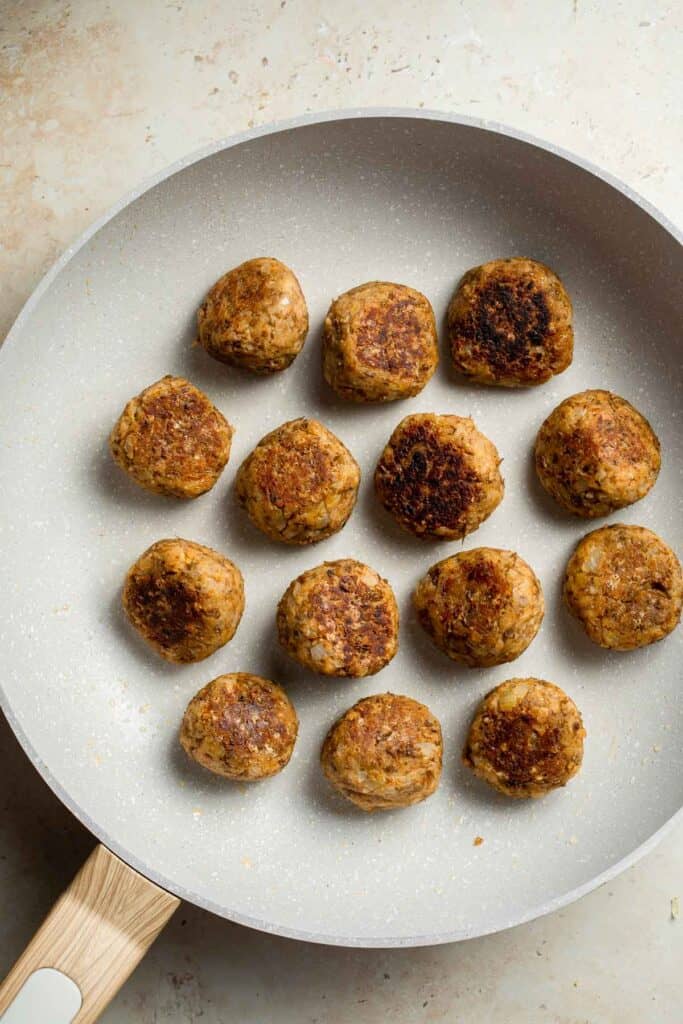
- To pan fry: Heat 1 tablespoon of oil in a large skillet over medium heat until sizzling hot, about 2 minutes. Arrange the meatballs on the skillet and cook until browned on all sides, about 7-10 minutes.
- To bake: Preheat the oven to 375F. Place the meatballs on a large parchment-lined baking sheet and bake until golden brown, about 12-15 minutes. Flip once halfway through baking.
- To air fry: Add meatballs in batches to the air fryer basket and cook at 350F for 10-12 minutes until browned. Shake the basket gently once during cooking to help cook evenly.
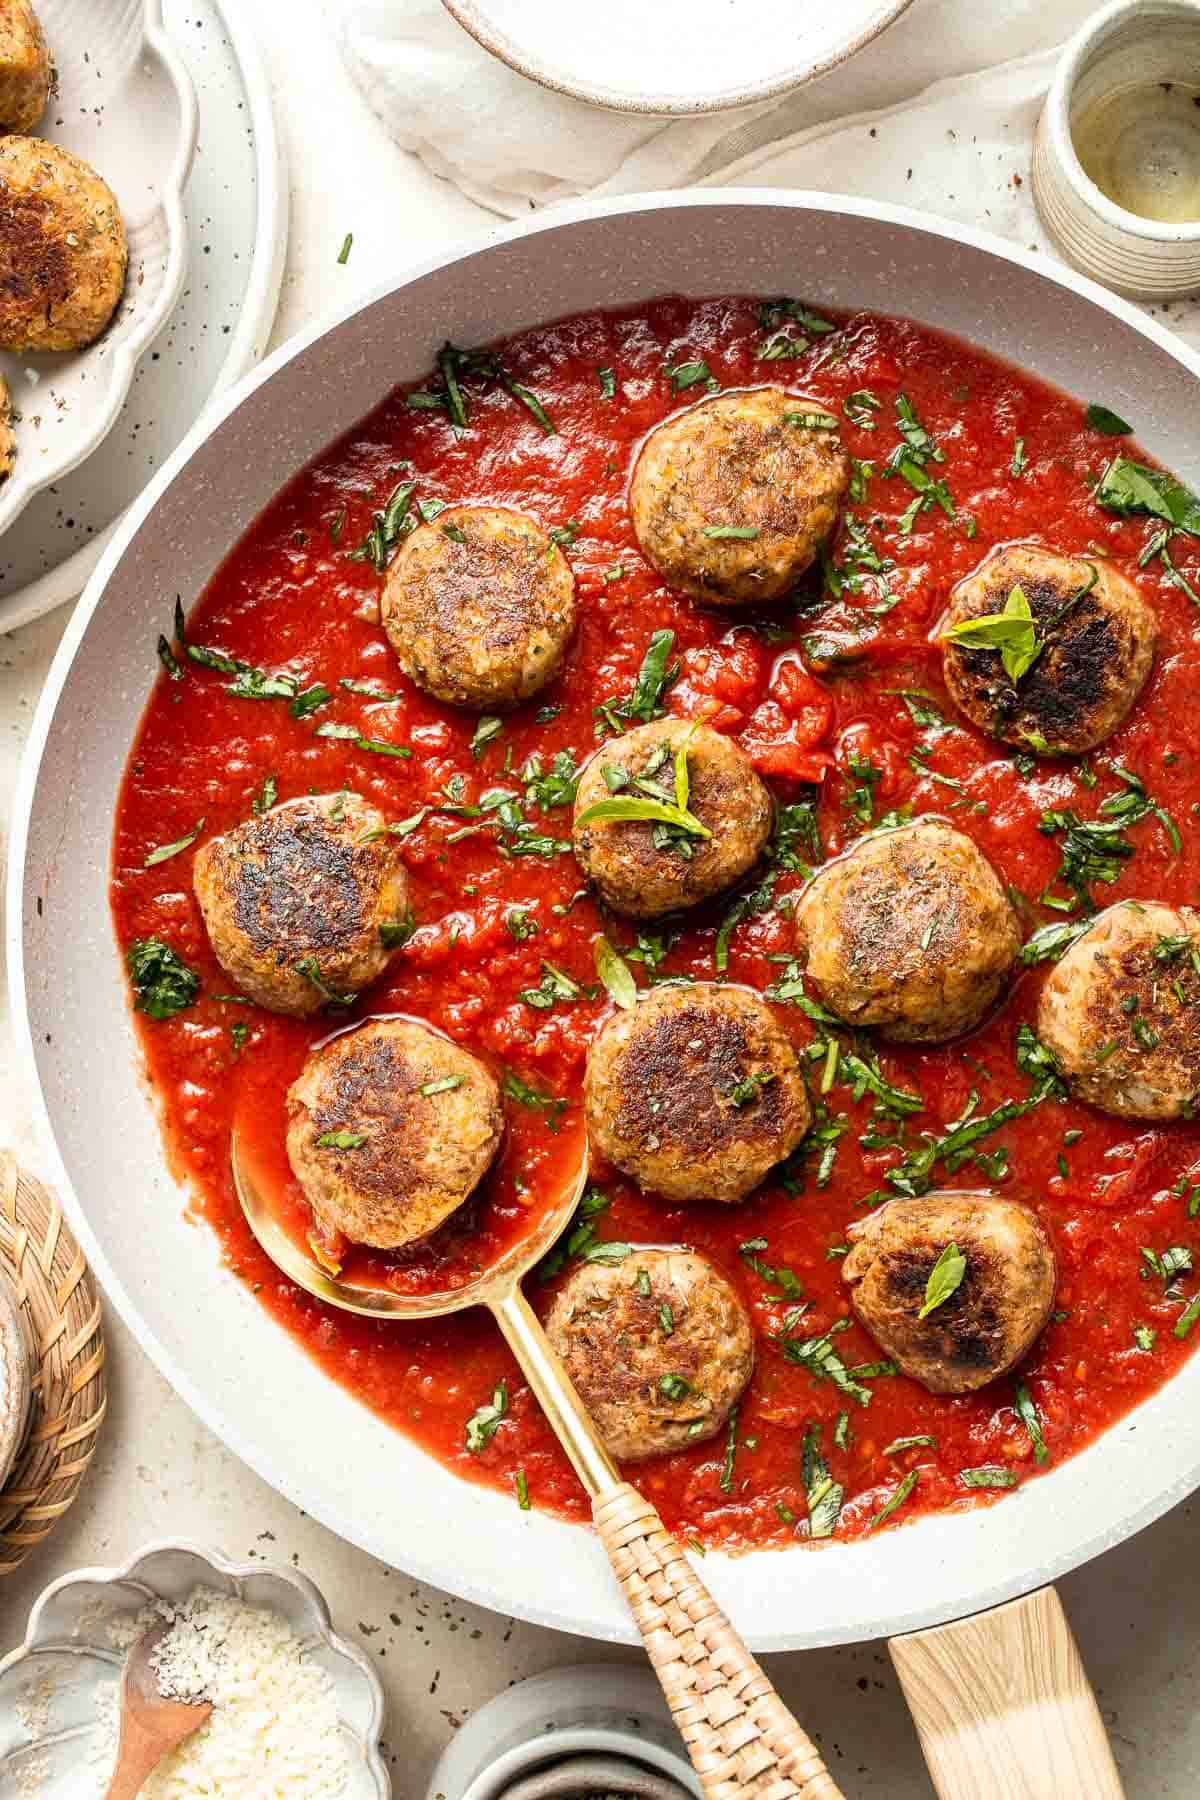
- Serve. Serve warm with marinara sauce.
Recipe Variations
- Try different lentils. This recipe works great with regular brown lentils, but you can also use green or red lentils as well. Just make sure the cooked lentils have been cooled and drained first, and be careful not to overcook them.
- Use a flax egg. Make a mixture of water and ground flaxseed for an egg replacement in these meatless meatballs.
- Adjust the size. These are hearty meatballs with about two tablespoons of filling each. Feel free to make smaller meatballs to add to salads or wraps or press them into large patties for sandwiches or burgers.
- Make them gluten free. Replace the bread crumbs with a gluten-free option.
- Adjust the seasonings. There are so many ways to adapt this recipe to fit different flavor profiles. Liquid Smoke is a great way to add a smoky flavor. For a spicy kick, add some red pepper flakes. Nutritional yeast will amp up the cheesy flavor, too.
How to Serve
These lentil meatballs are delicious served with a little marinara sauce or added to a variety of salads, sandwiches, and other meals including:
- Wraps. Wrap them up in pita bread like falafel or chicken gyros with some tzatziki sauce
- Salad. Add them to taco salad with homemade pico de gallo and guacamole
- With dip. Offer them as an appetizer with your favorite dips, like this homemade queso or roasted red pepper hummus
- Pasta. Use them as a plant-based alternative to the meatballs in this spaghetti and meatballs recipe
- Sandwiches. Drizzle them with marinara sauce and Parmesan cheese for a plant-based twist on meatball subs.
Recipe Tips and Tricks
- Don't overmix the filling. For these easy lentil meatballs, you just want to pulse the ingredients together. This keeps some of the lentils whole, which gives the meatballs a nice, toothsome texture.
- Make them ahead of time. Instead of making this lentil meatballs recipe all at once, you can easily mix the meatballs together, shape them, and keep them in the fridge for a day or two before baking or cooking them. You can also cook them a day or two before you need them to have them ready to go for whenever!
- Dry off the beans. To get the best texture, avoid adding any extra liquid to the meatball mixture. Pat the cooked lentils with a paper towel to dry them off as much as possible.
Storing and Freezing Instructions
How to Store
Allow the leftover lentil meatballs to cool to room temperature, then store them in an airtight container in the fridge for 3-4 days.
How to Reheat
For a quick meal, microwave the meatballs for 30 seconds at a time until they are cooked through. For the best flavor, toast them in a hot skillet with a little oil to crisp up the outside.
How to Freeze
I prefer to freeze any extra meatballs on a sheet pan lined with parchment paper for a couple of hours. Once they've frozen, place them in a freezer-safe bag for 3-6 months. Thaw in the fridge before reheating.
FAQ
You can really use any type of lentil for lentil meatballs! Brown or green lentils are a classic choice, and the brown ones even resemble meat after cooking. Red lentil meatballs are great, too!
There isn't a big difference. The dried lentils are already soft and tender, so you can make this easy recipe much faster. However, they don't have quite as much flavor as you can get from cooking dry lentils, and they often cost more. It really depends on the time you have available and what you have on hand.
This great recipe uses Italian flavors, like Italian seasoning, garlic, and onion, and I love to serve them with marinara sauce! However, that's just the start. You can certainly use Mexican spices like dried oregano, chili powder, and cumin and add the meatballs to a taco salad or treat them like falafel with cumin, cardamom, fresh parsley, and other herbs. They're wonderful with some tahini sauce!
More Lentil Recipes
- Easy 20-Minute One Pot Lentils
- Persian Lentil Soup
- Lentil Stew
- Coconut Curry Lentil Soup
- Warm Lentil Salad with Butternut Squash and Shiitake Mushrooms
Tried this recipe?
I'd love to hear what you think! Leave a comment and rating below to share your feedback. Your reviews help others discover this recipe and help me keep creating more free recipes for you. Snap a photo and tag me on social media @aheadofthyme too.

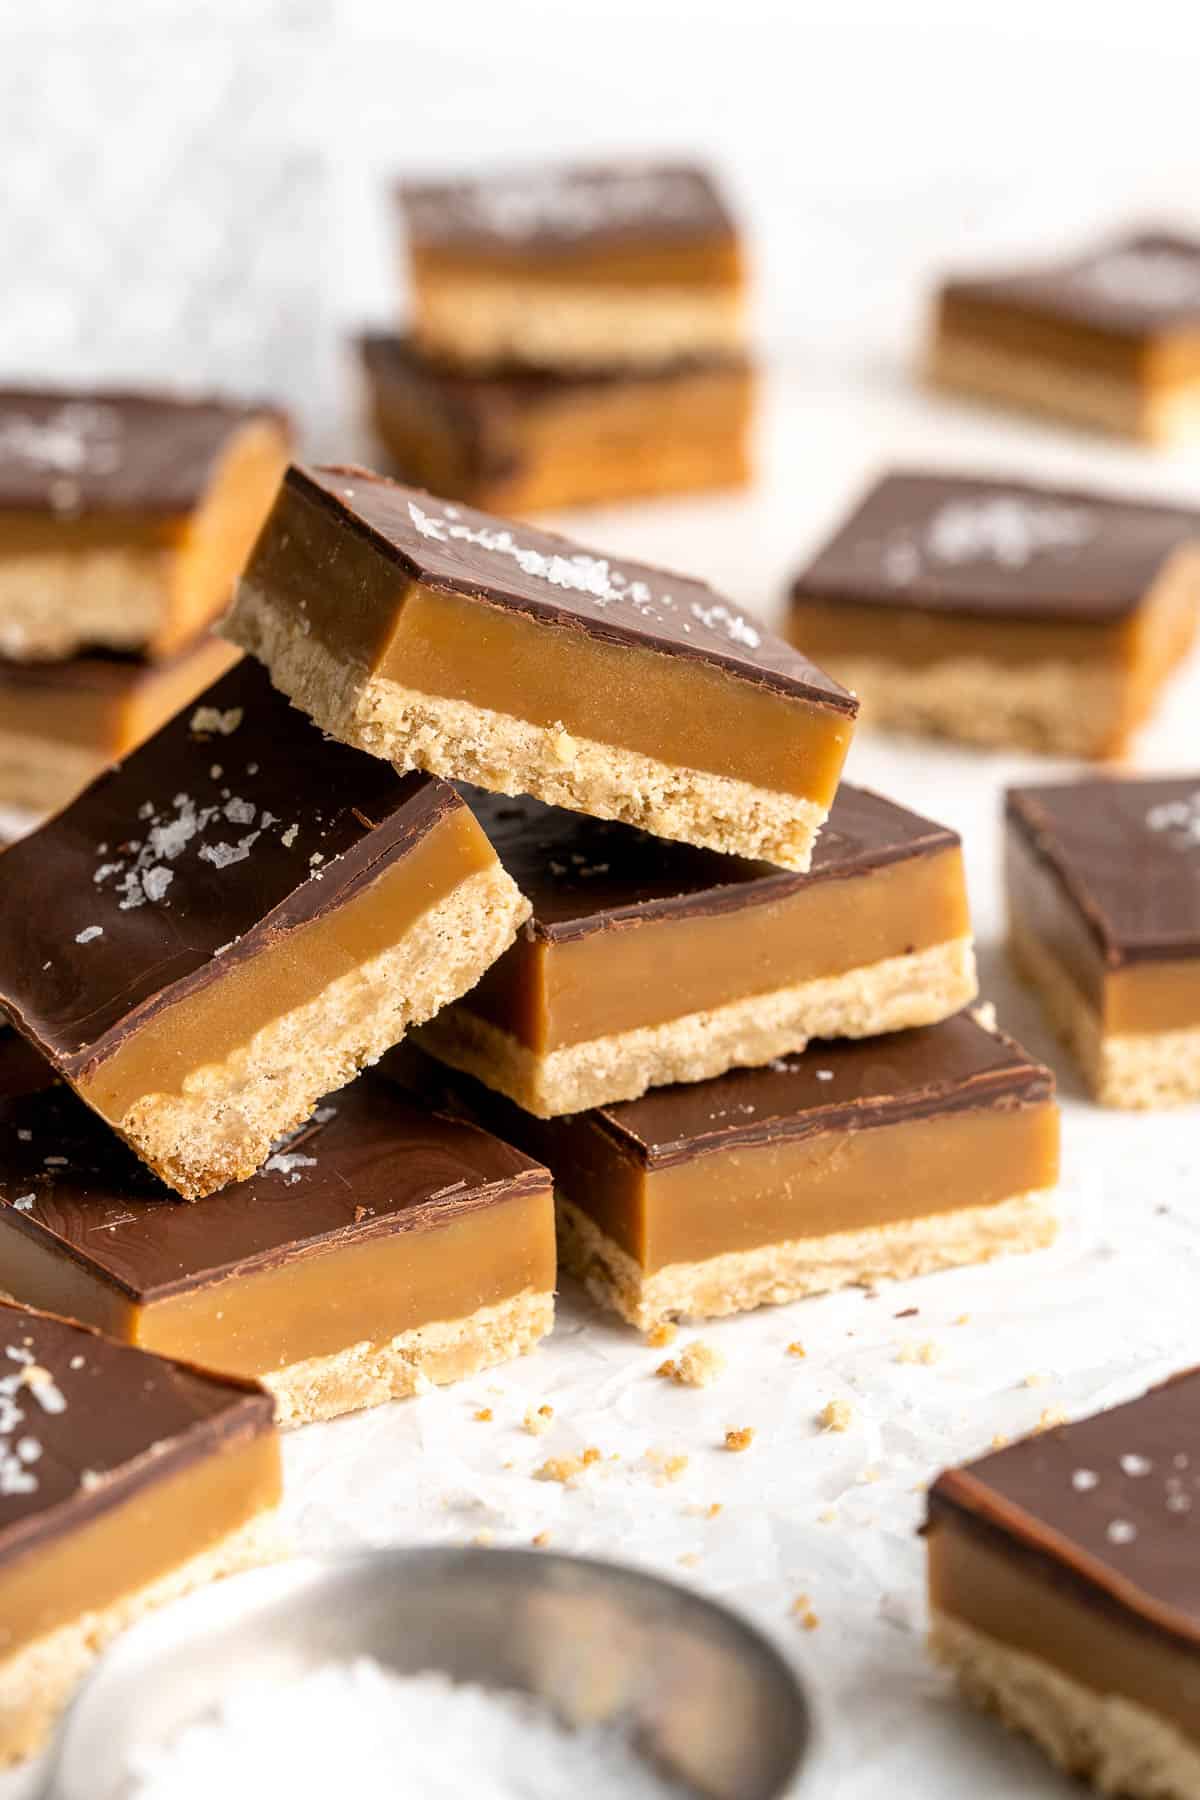
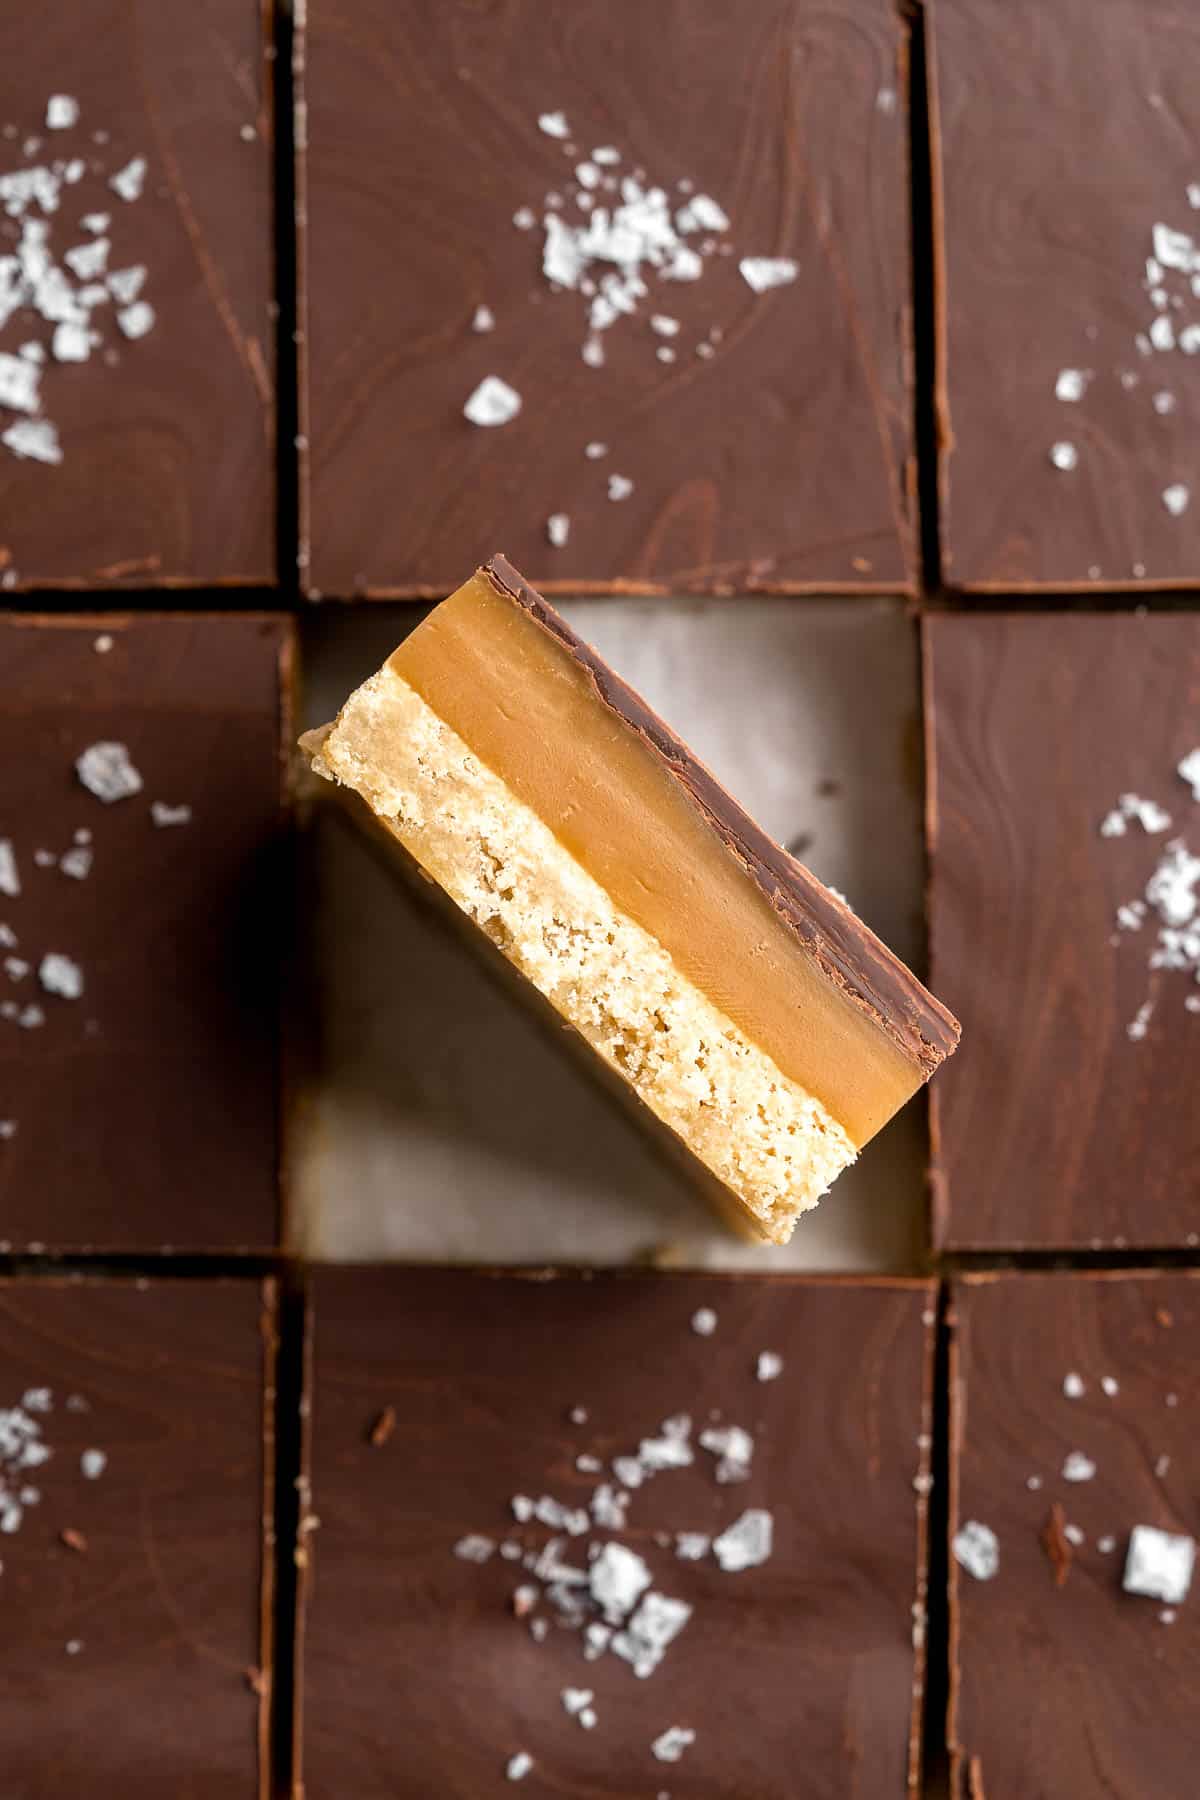
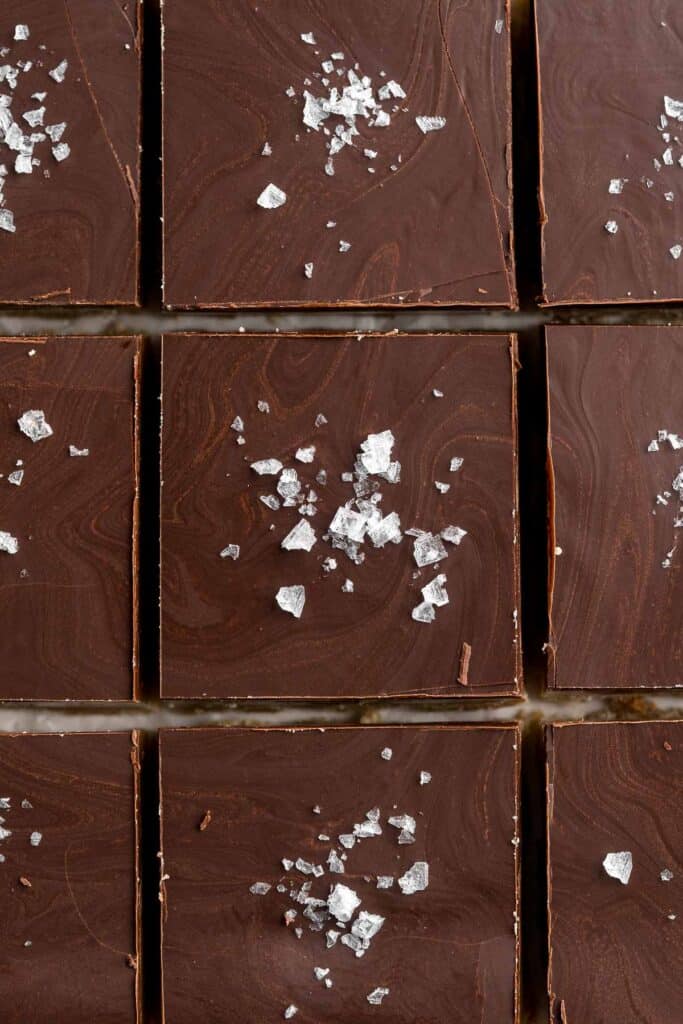
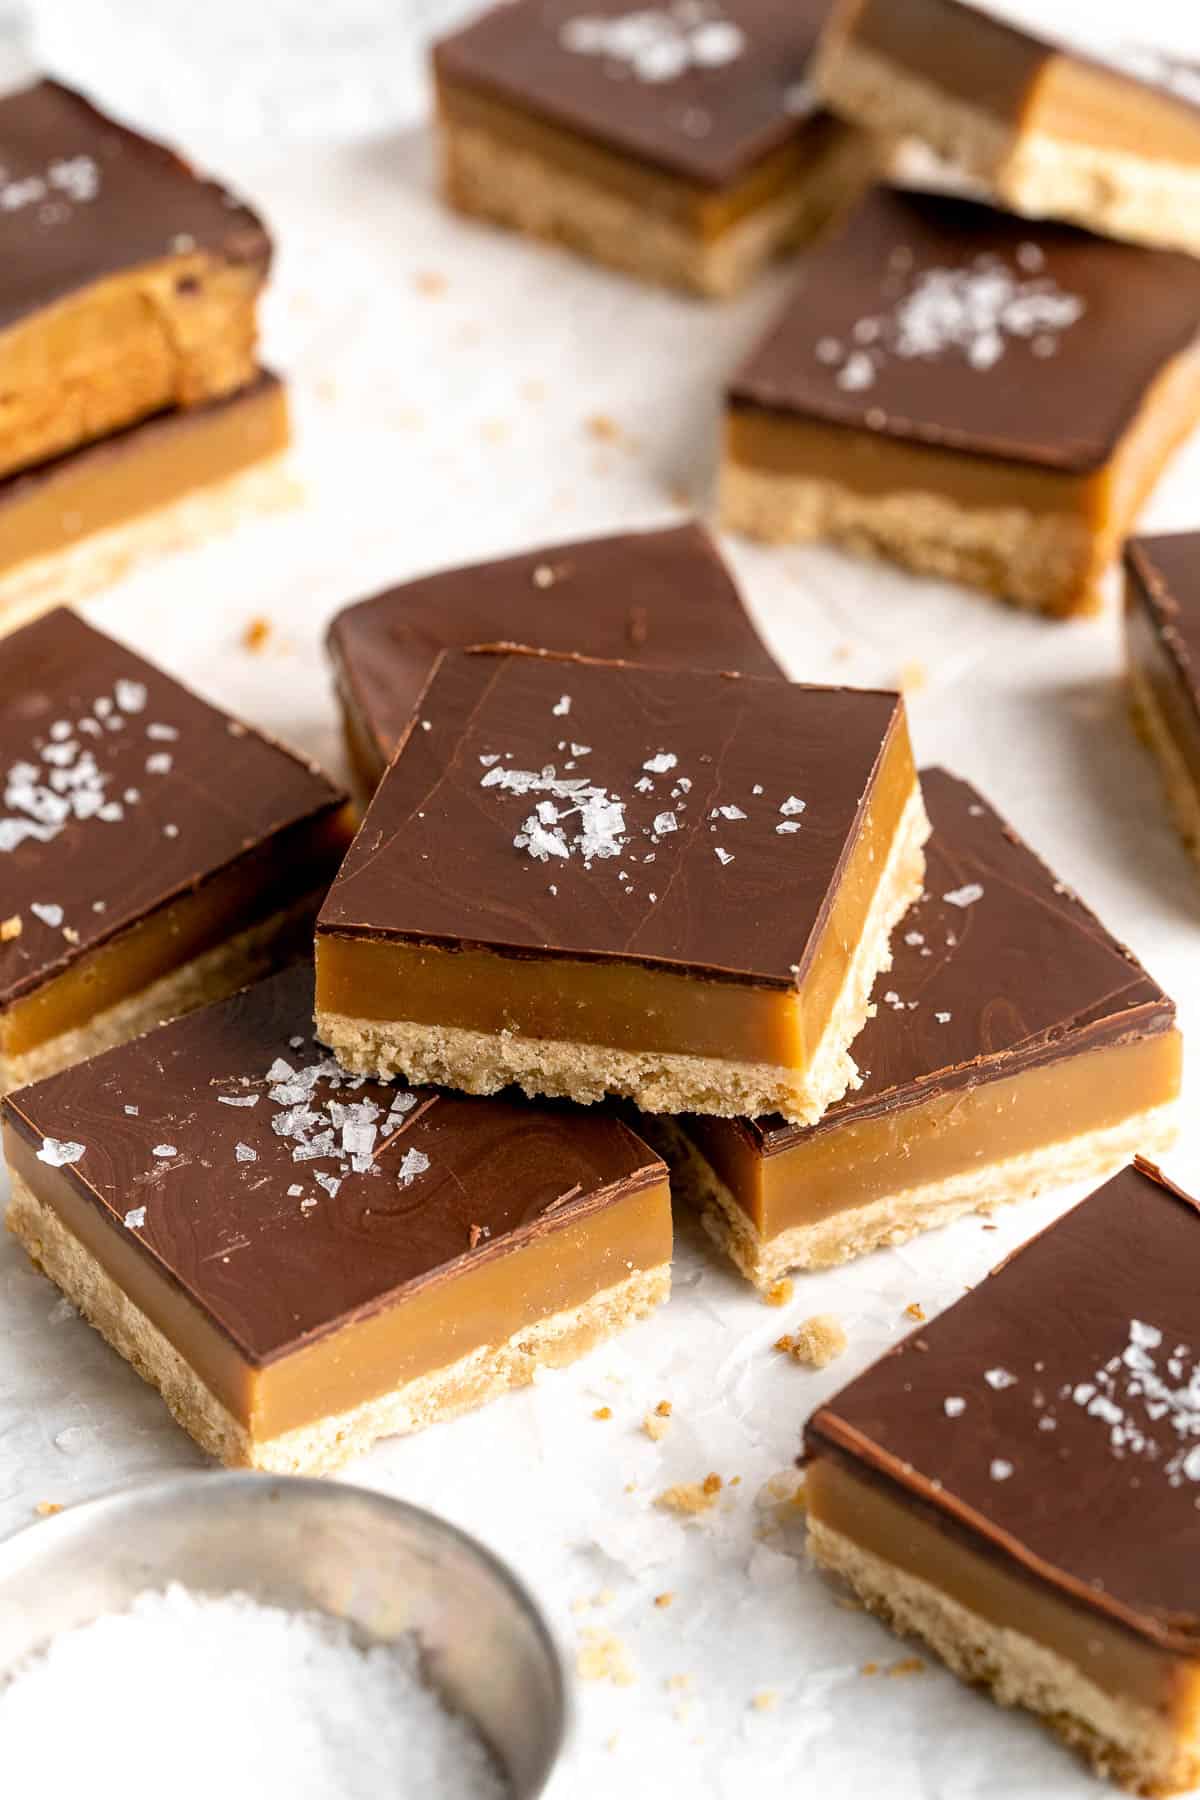
Millionaire's Shortbread
Millionaire's Shortbread are a triple-layered treat with the perfect balance of textures and flavors. These bars are made with a layer of buttery shortbread topped with chewy homemade caramel and a layer of decadent chocolate on top. They're like a Twix bar but better - rich, buttery, and sweet.
With such a luxurious name, you'd expect millionaire shortbread bars to be exceptional, and these decadent bars deliver. Millionaire's shortbread hails from Scotland, where it's often served in cafes or tea rooms. Over the years, this delicious treat has gained in popularity and is now available worldwide. Although it's made with just three layers, each component must be just right to get the full effect. Not to worry! I've broken each step down with simple, step-by-step instructions to help you get the perfect caramel slice every single time.
Why You'll Love This Millionaire's Shortbread Recipe
- Perfectly balanced. The magic behind millionaire's shortbread is the balance of textures and flavors. The crunchy shortbread layer adds texture and salt, while the creamy caramel layer adds a wonderful tenderness and rich sweetness. The dark chocolate mellows out the caramel to keep it from taking over. When eaten all together, the elements sing together!
- Foolproof technique. We're sharing our go-to shortbread base recipe, which is ready in just a few minutes of effort. Many people are intimidated by making caramel, as sugar is notoriously fussy. Fortunately, this version is extra easy since we use corn syrup to keep it from becoming too hard. Just follow the photos and simple steps below!
- Great for parties or events. This millionaire shortbread recipe is a real crowd-pleaser! I find it tends to go quickly, whether you're making it for people who have tried it before or not. The combination of shortbread, caramel, and chocolate is always a hit!
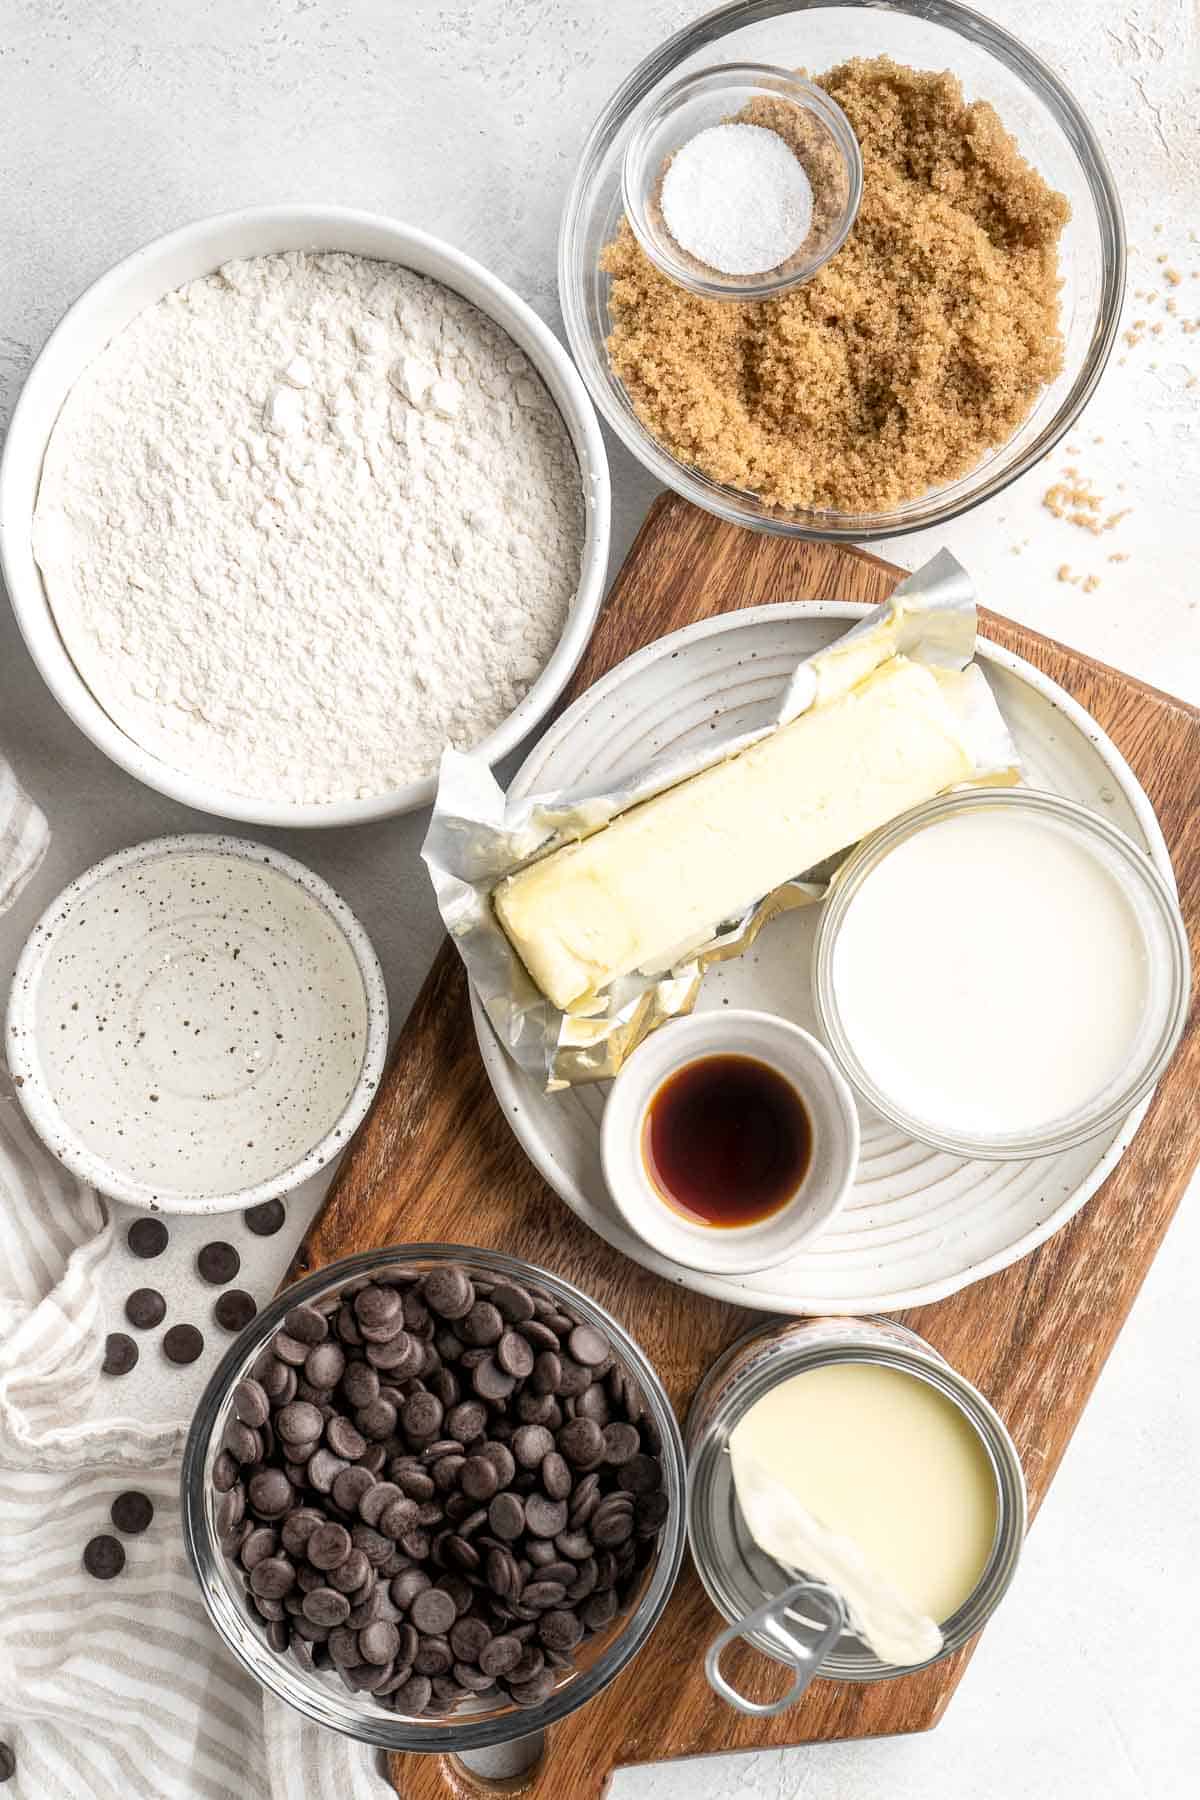
Ingredient Notes
To make this delicious Millionaire's Shortbread, you will need the following ingredients (full measurements in recipe card below):
- butter - you will need butter for all three layers. For the shortbread crust, allow unsalted butter to soften at room temperature first. For the caramel layer, cube the butter and allow it to also come to room temperature. For the chocolate layer, butter (or a neutral oil) will thin out the chocolate and make it easier to slice.
- brown sugar - light will add a wonderful texture and a little extra flavor to the crust, while light or brown sugar is used in the caramel layer.
- vanilla extract - add a splash to the shortbread dough and caramel for a little extra flavor.
- all-purpose flour - traditional all purpose flour is perfect for the shortbread crust.
- salt - salt highlights sweetness and will naturally balance the flavor of the chewy caramel. We add it to both the crust and caramel.
- corn syrup - corn syrup is very important in the caramel as it helps keep the caramel sauce from setting too hard. Golden syrup is a traditional alternative.
- heavy cream - this will make the caramel richer and thicker.
- semi-sweet chocolate - finely chop the chocolate or use chocolate chips. You can also substitute with dark chocolate or milk chocolate if you prefer, although milk chocolate will be much sweeter.
Baking Equipment
You will also need the following baking tools and equipment:
- measuring cups and spoons (or kitchen scale)
- 9-inch square baking pan
- parchment paper
- mixing bowl
- electric hand mixer
- spatula
- wire cooling rack
- saucepan
- candy thermometer
- sharp knife
How to Make the Best Millionaire's Shortbread
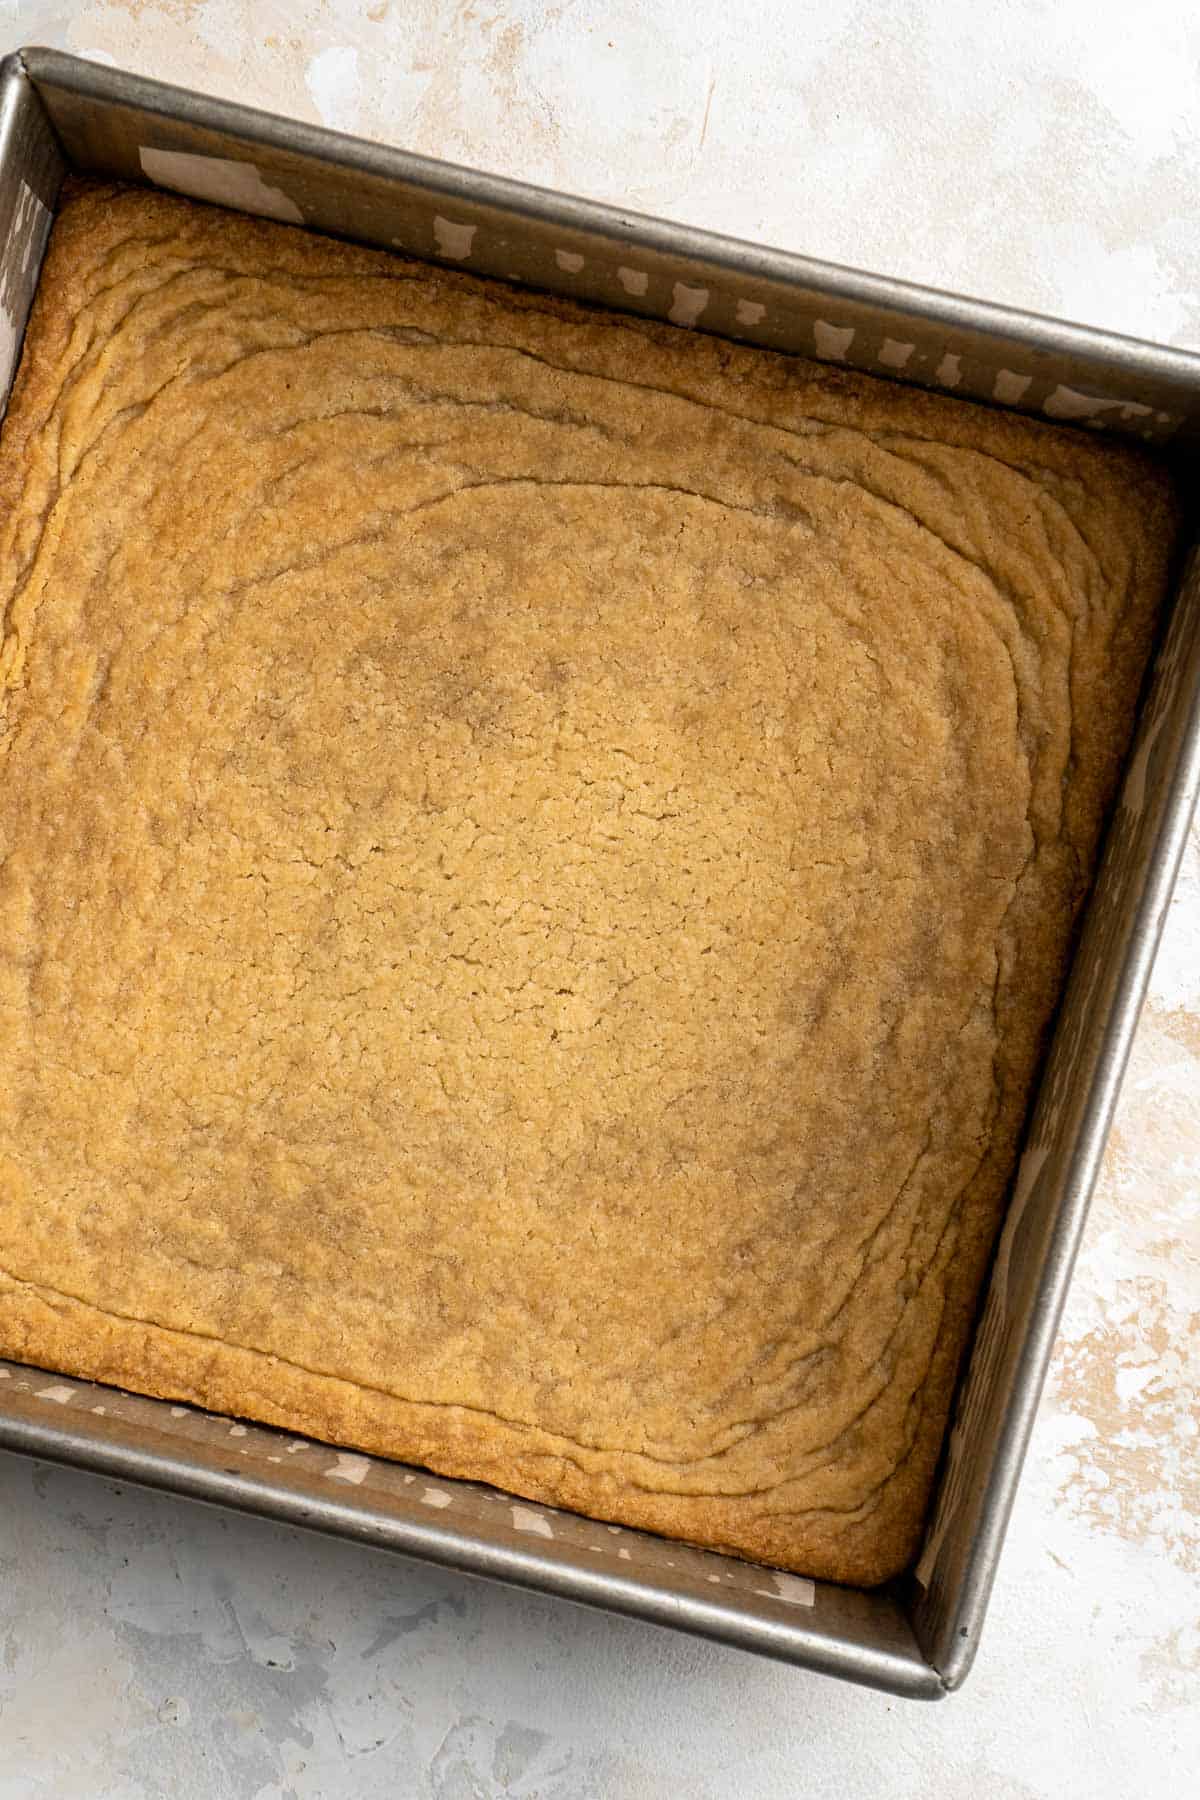
First, make the shortbread crust.
- Prep. Preheat oven to 350°F. Prepare a 9-inch square baking pan with cooking spray. Then, line with 2 sheets of parchment to cover all sides of the pan, leaving an overhang on 2 of the edges for easy removal.
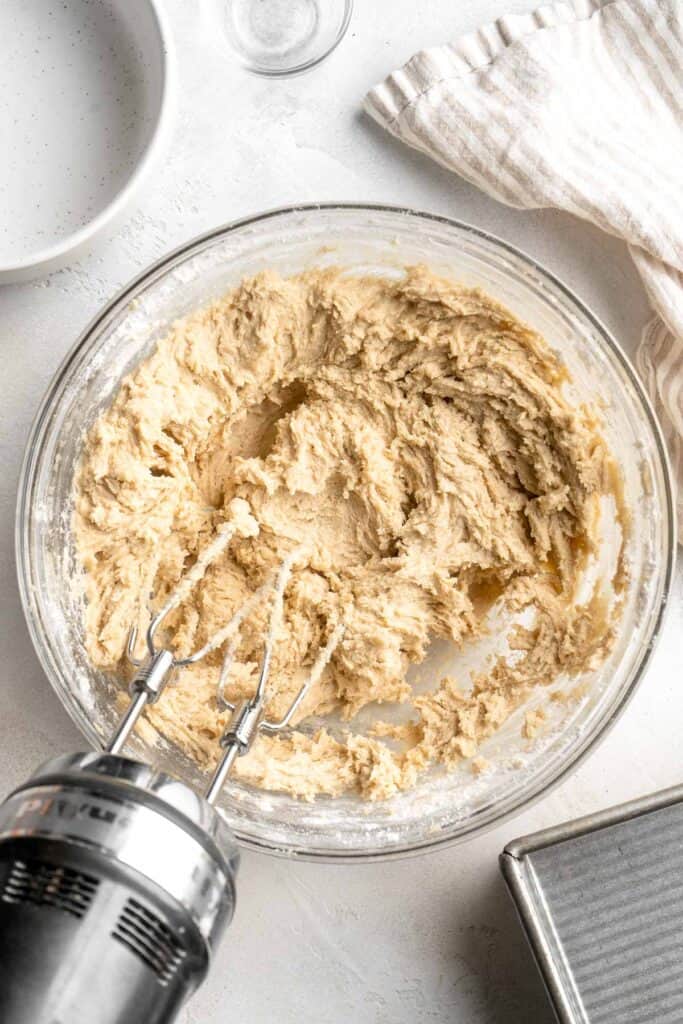
- Cream butter and sugar. In a large mixing bowl, add butter, brown sugar, and vanilla. Using an electric hand mixer, beat the ingredients together until it looks fluffy, about 2 minutes.
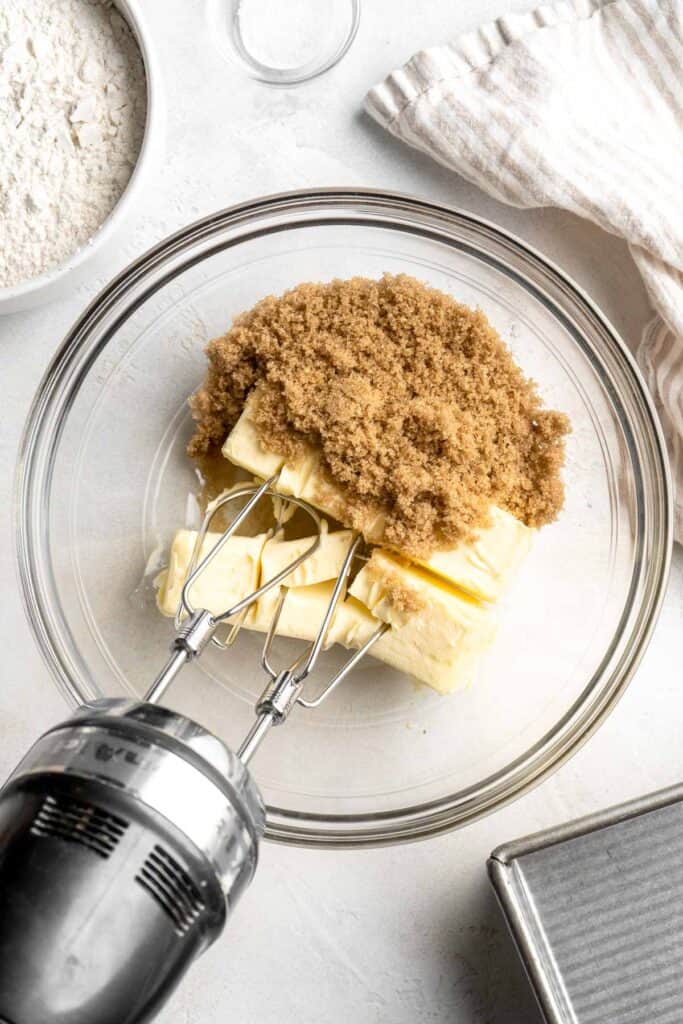
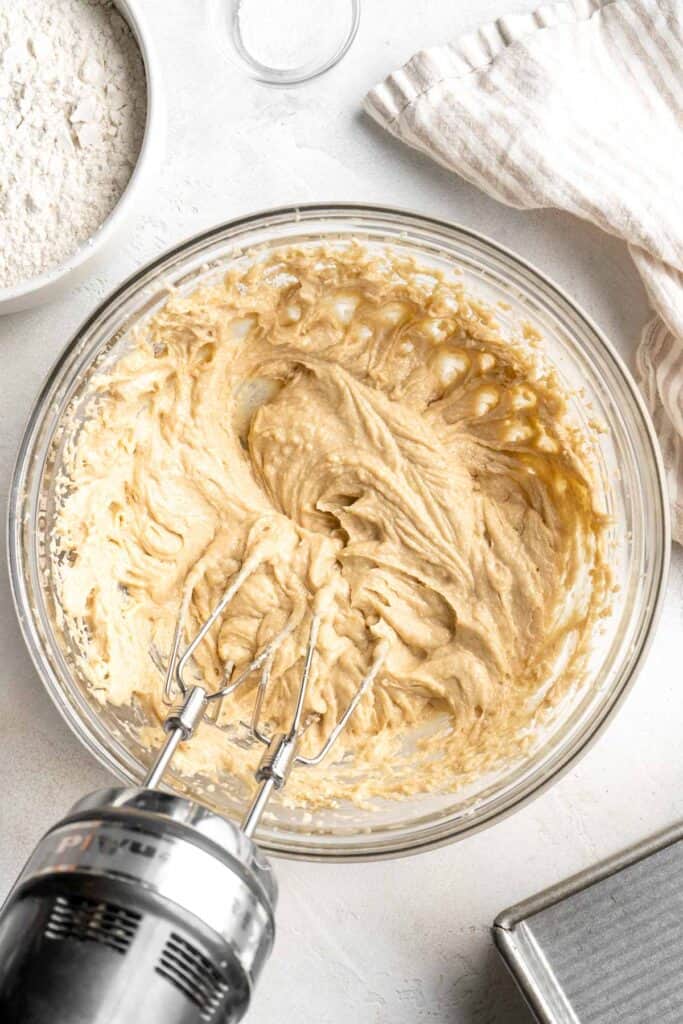
- Add dry ingredients. Add flour and salt to the bowl and beat in until smooth and well-combined.
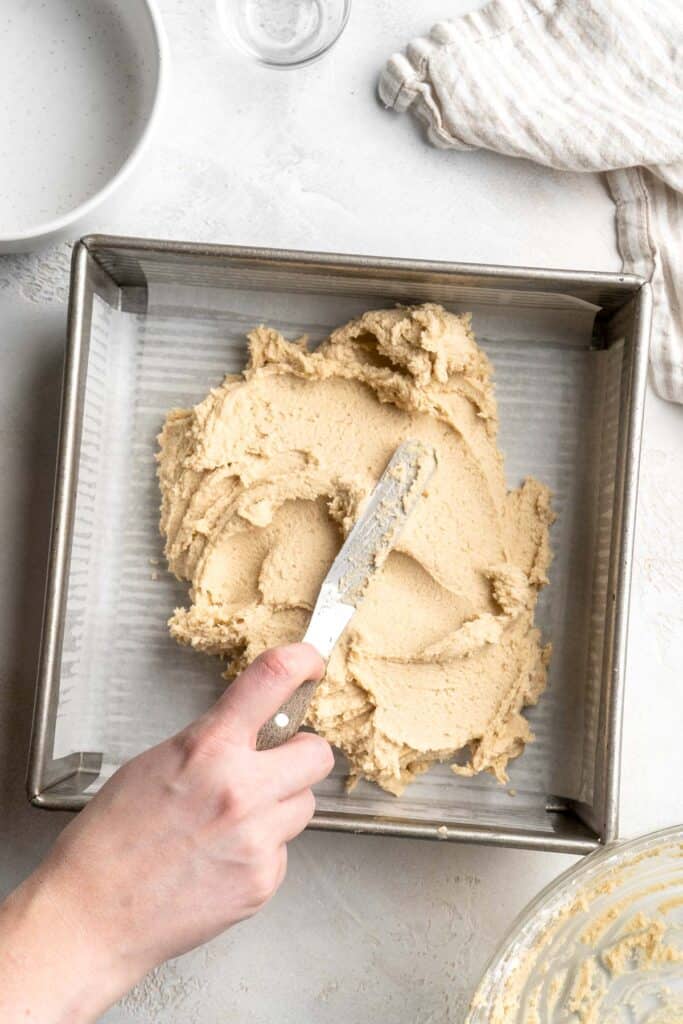
- Bake. Place into the prepared baking pan then spread out evenly with your hands or a spatula. Place into the oven for 35 minutes.
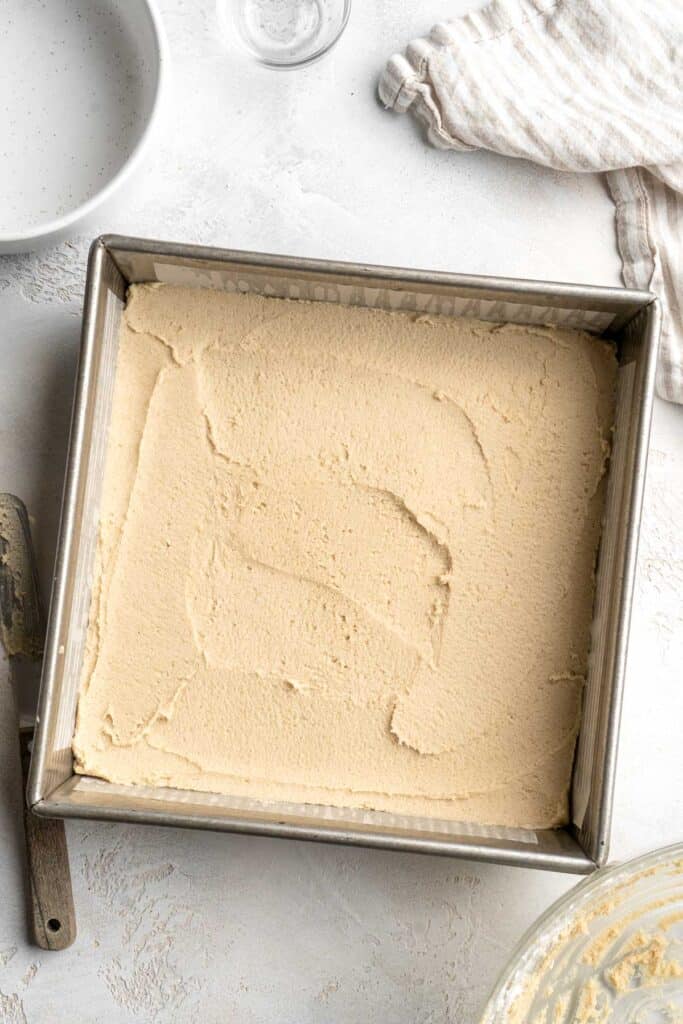
- Cool. Remove from the oven and gently press down any puffed up parts. Transfer pan to a cooling rack and allow to cool completely.
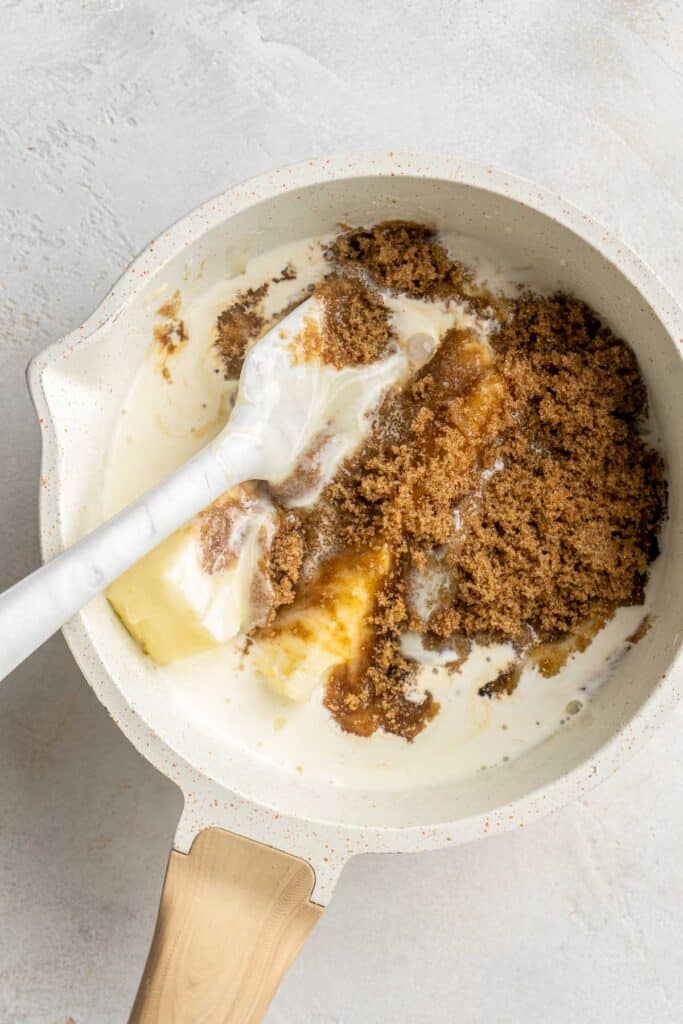
Next, make the caramel layer.
- Combine ingredients. Add butter, sweetened condensed milk, brown sugar, corn syrup, and heavy cream to a medium to large saucepan. Heat over medium heat and, stirring constantly, bring the mixture to a bubble. Continue to stir vigorously, while the mixture bubbles, until it reaches 236F on a candy thermometer. It may seem like the caramel gets stuck at around 220-225F for a while, but just power through and it will eventually come up to temperature.

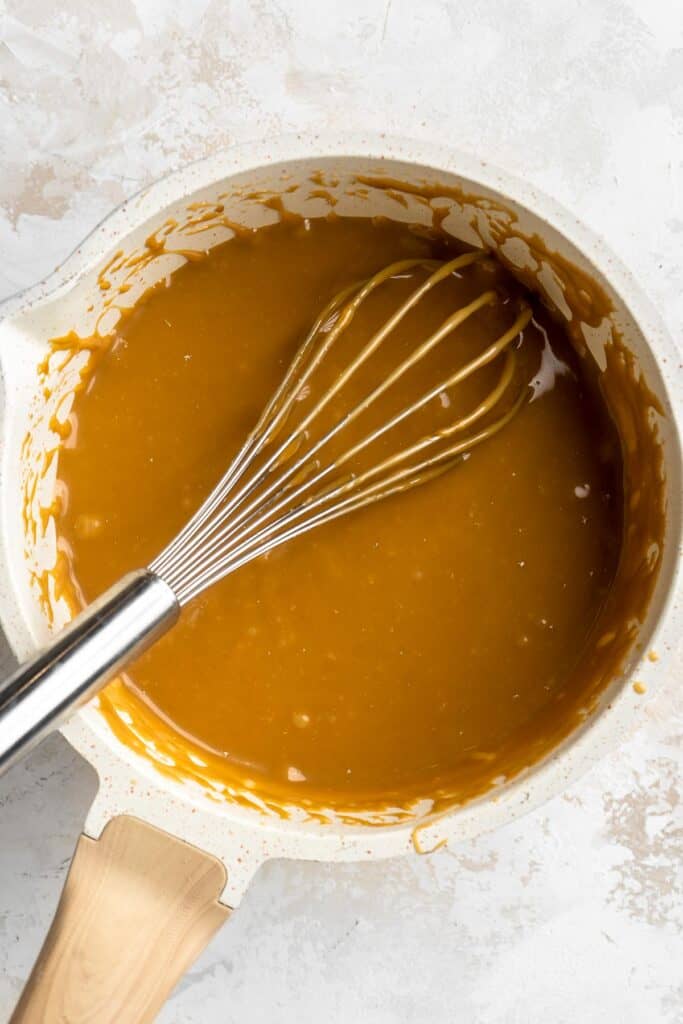
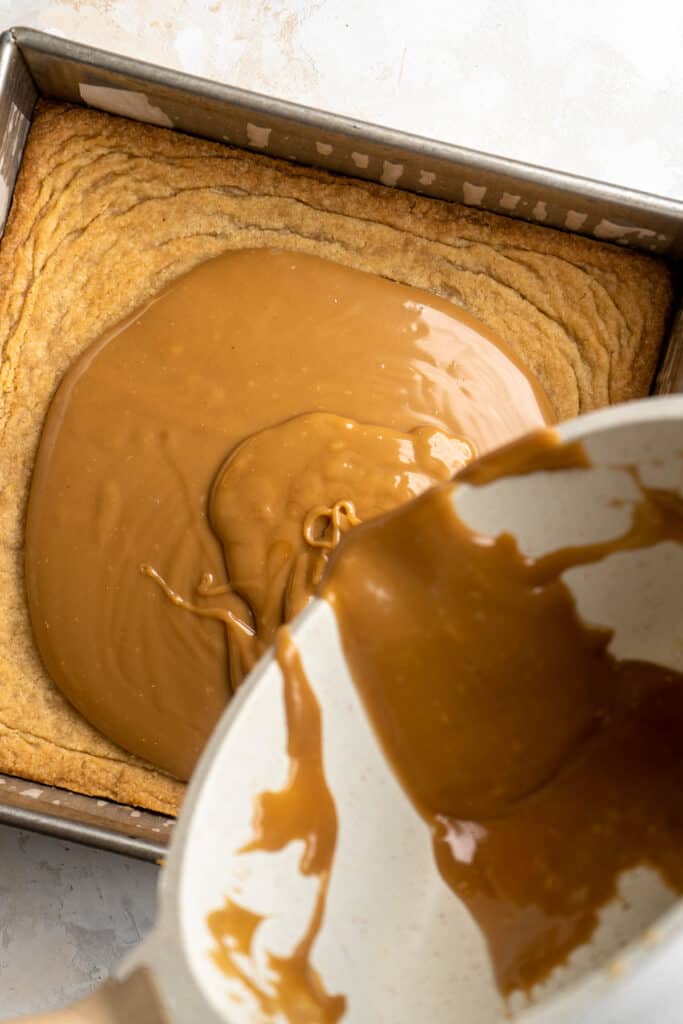
- Add caramel layer. Remove the pan from the heat, add in the vanilla and salt, then stir to combine. Immediately pour the hot caramel over the slightly cooled shortbread base. Place into the fridge to fully cool and set, at least 2 hours.

Finally, add the chocolate topping.
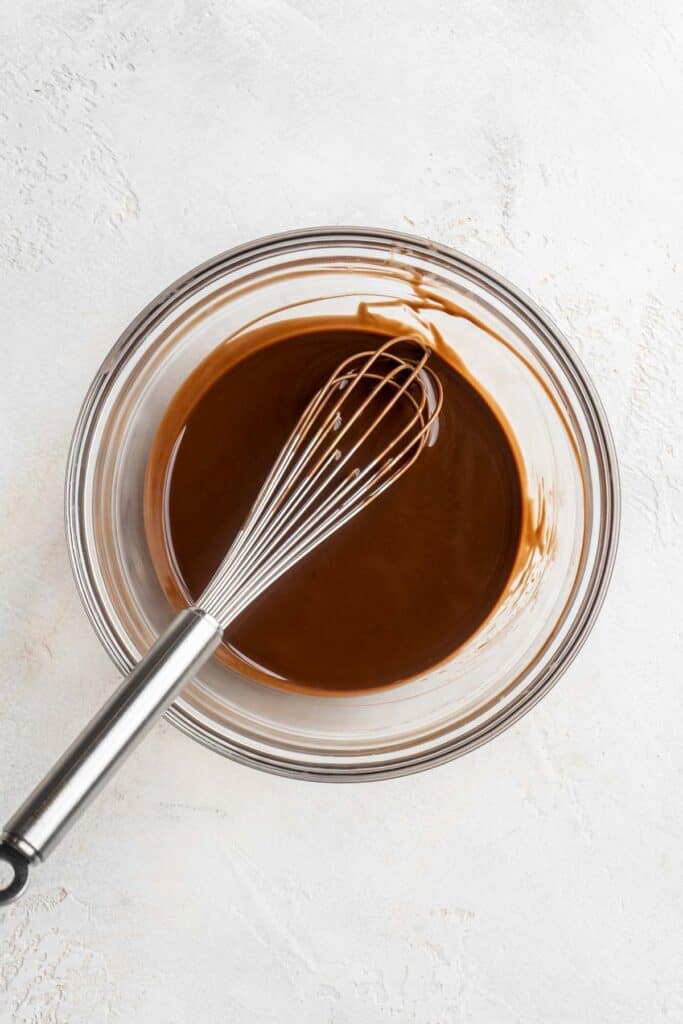
- Melt chocolate. Add chocolate and oil into a medium microwave-safe mixing bowl. Microwave in 30 second intervals, stirring in between, until fully melted.
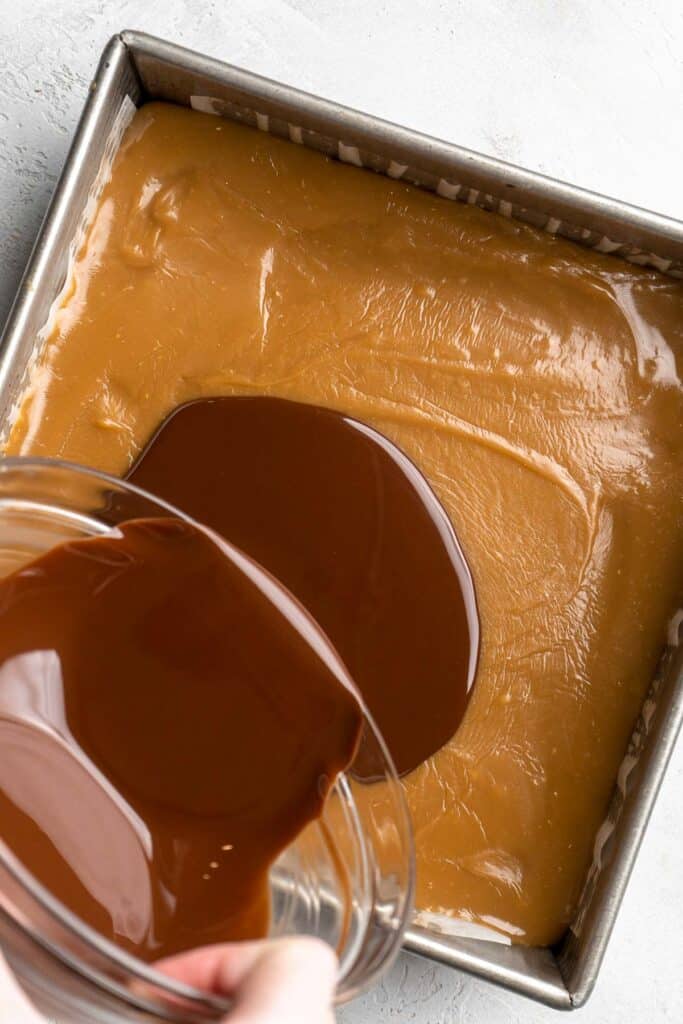
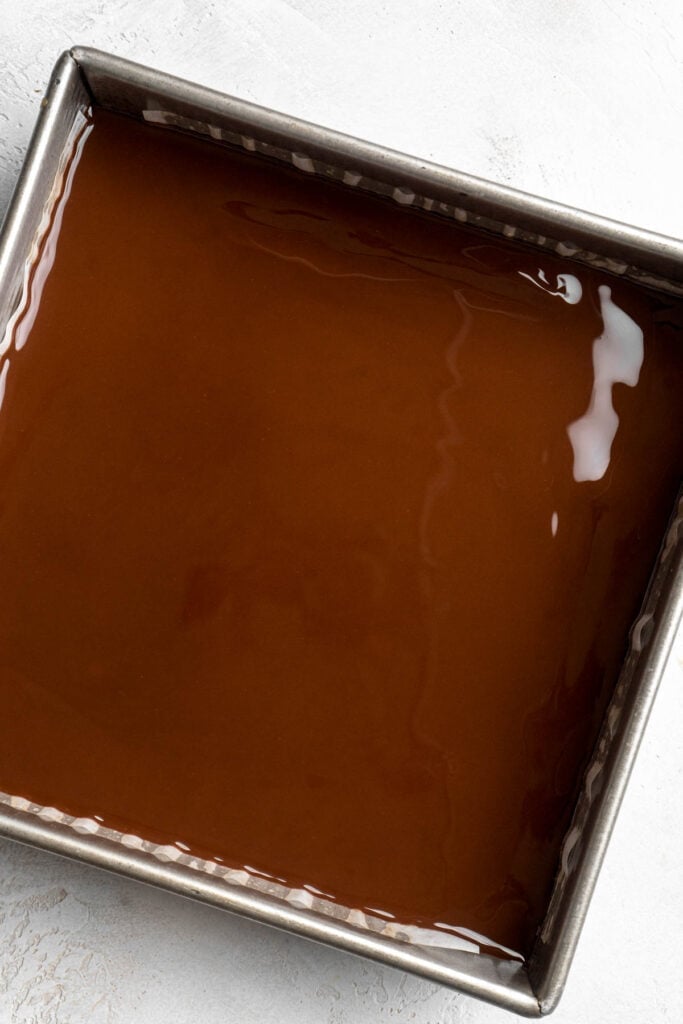
- Add chocolate layer. Pour the melted chocolate over the cooled caramel layer. Place back into the fridge for another 2 hours to harden and set.
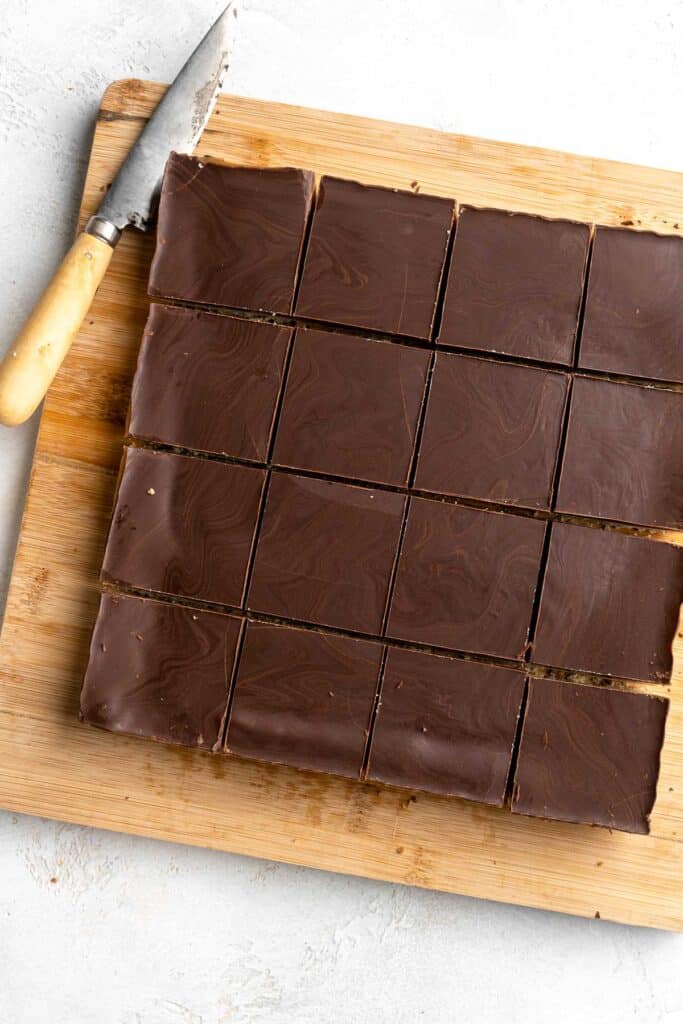
- Slice. When chocolate is hardened, remove from the pan, then slice into 16 slices with a very sharp knife. Top with flaked salt, if desired.
Recipe Variations
- Billionaire's shortbread: For a fun twist on millionaire bars, replace the regular caramel layer with salted caramel! You can do this yourself by adding a little sea salt to the caramel sauce while you're making it. So good!
- Zillionaire's shortbread: Use a creamy dulce de leche filling instead of caramel for this luxurious alternative.
- Add a sprinkle of salt. Add a little sprinkle of flaky sea salt on top to balance the sweetness.
- Use a different type of chocolate. It's important to use dark, bittersweet chocolate that can balance the intense sweetness of the caramel. Regular semisweet, bittersweet, or even a high percentage dark chocolate will all work for these caramel squares.
- Add a twist. Feel free to add a little orange zest to the chocolate, fold mini chocolate chips into the shortbread dough, sprinkle cinnamon in the caramel sauce, or replace the vanilla extract with a little bourbon or whiskey! A little smoked sea salt would add a layer of complexity that takes these millionaire bars to the next level.
How to Serve
This Millionaire's Shortbread is delicious served on its own for a sweet treat, or paired with some other desserts are part of a larger dessert spread including:
- Classic New York Cheesecake
- Chocolate Whoopie Pies
- Homemade Glazed Donuts
- Peanut Butter Balls
- Palmiers
- Caramel Brownies
For more recipe inspiration, see our 50 Easy Baking Recipes.

Recipe Tips and Tricks
- Use room temperature ingredients. It's very important to bring the ingredients to room temperature, especially the butter. If not, the shortbread won't have the same crispy, buttery texture.
- Don't burn the caramel. One mistake new bakers often make is trying to eyeball the color for the caramel. You need to stop the caramel from cooking earlier than you'd expect. Since you need the layer of caramel to stay put when you slice it (and not just stick to your teeth), it must reach the right stage. Keep it simple! Just use an instant-read or candy thermometer and stop when it reaches 236 F.
- Add oil to the chocolate. To make the layer of chocolate easy to slice, you need to make a chocolate ganache. This can be made with heavy cream like traditional ganache, or just add a little butter or oil to the chocolate instead.
Storing and Freezing Instructions
How to Store
Millionaire shortbread should be stored in an airtight container in the fridge for 5-7 days. For the best texture, be sure to let the slice come to room temperature first. Otherwise, the caramel may be too hard to chew.
How to Freeze
Wrap the sliced bars in several layers of plastic wrap and then freeze them in a freezer-safe bag for several months. Thaw in the fridge, then let them warm up at room temperature before eating.
FAQ
If you've gone through all this effort to make your millionaire's shortbread bars, the last thing you need is to crush them while cutting! I highly recommend using a very sharp knife, like a carving knife. These can glide through the thick layers without a lot of effort. Another great tip is to let the bars come to room temperature. The chocolate will be less prone to crack at this stage, although the caramel can get a little messy!
Have you ever sliced a bar of chocolate with a knife? It likely shattered or broke into pieces. If you don't add oil to the chocolate for these millionaire shortbread bars, you're likely to experience the same problem. If the chocolate shatters on top, it'll be hard to cut the bars evenly, and they won't have the same beautiful presentation. Fortunately, it just takes a little oil to make the chocolate slightly softer without distracting from the delicious dark chocolate flavor.
Absolutely! Millionaire bars actually freeze very well. Be sure to let the whole mixture set and cool first. After slicing the bars, wrap them with several layers of plastic wrap and/or foil, then tuck them away in a freezer safe bag for 3-6 months. When you're ready to serve them, let them thaw in the fridge then warm up to room temperature.
More Cookie Bar Recipes
- Chocolate Chip Cookie Bars
- S'mores Bars
- Oreo Brownies
- Sugar Cookie Bars
- Almond Cranberry Granola Bars
- Pecan Pie Bars
Tried this recipe?
I'd love to hear what you think! Leave a comment and rating below to share your feedback. Your reviews help others discover this recipe and help me keep creating more free recipes for you. Snap a photo and tag me on social media @aheadofthyme too.

Cauliflower Curry
This creamy Cauliflower Curry is a quick and easy, one pot vegan meal that is ready in just 25 minutes! The tender cauliflower pieces are simmered in a flavorful mixture of aromatics, red curry paste, and coconut milk for an all-in-one meal you won't be able to stop eating. Start a batch of steamed rice at the same time for the perfect meal ready on those busy weeknights!
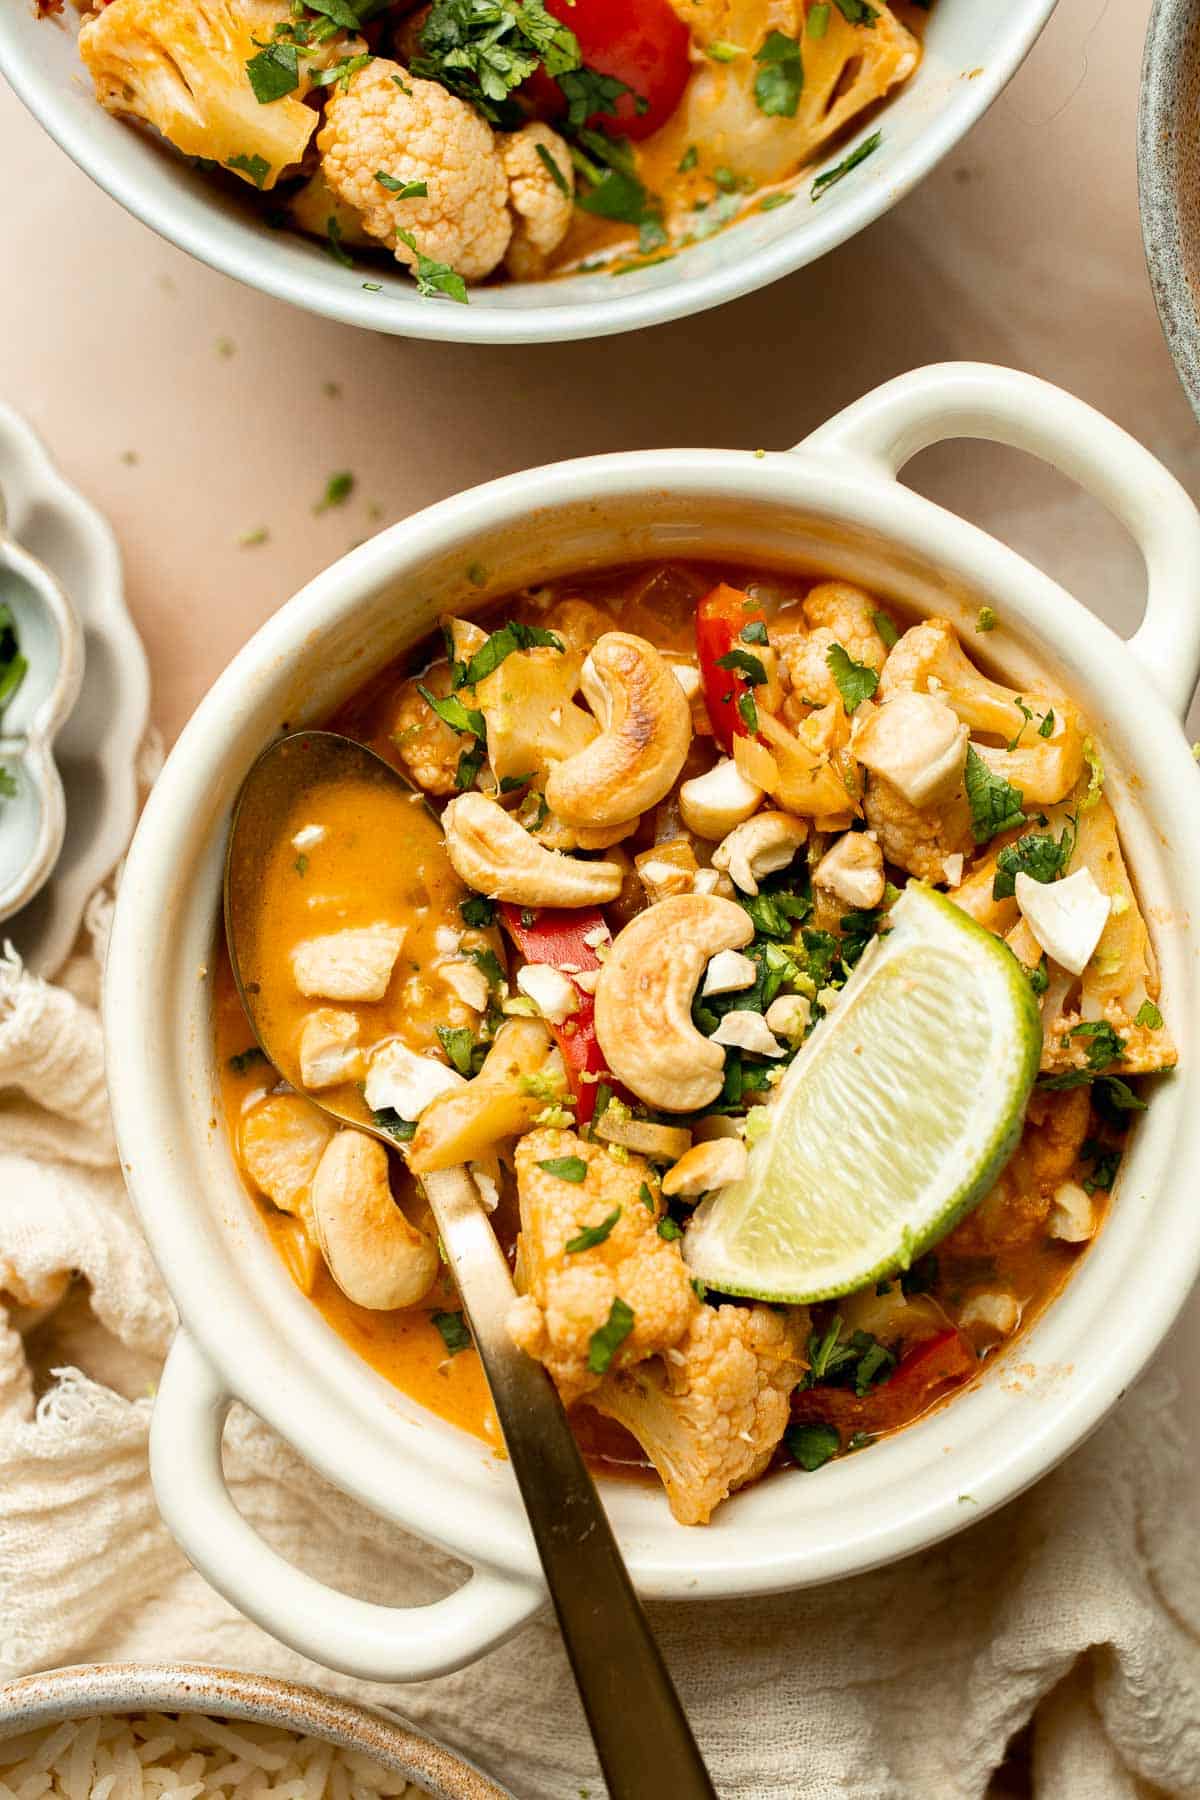
If you love flavor and easy weeknight dinners, you need to keep curry paste on hand at all times. It's such an easy way to add a ton of flavor quickly, and it's much faster than making the curry paste from scratch! This homemade cauliflower curry tastes like you splurged on takeout, yet it's an easy meal you can have ready way faster than delivery. It's a keeper!
Why You'll Love This Cauliflower Curry
- Easy to make. Ditch the takeout because this cauliflower curry recipe has just a few simple steps. Start by sauteeing the aromatics, then warm up the curry paste, add the liquids, and simmer the bell pepper and cauliflower. It's a mostly hands-off recipe once it gets started, so you'll have time to gather any garnishes or make any sides while you're waiting for it to cook!
- Incredibly flavorful. This coconut curry recipe is like a masterclass of flavor. Each ingredient adds so much flavor, from the bright red curry paste to the fresh ginger and garlic, fish sauce, and more. The entire recipe has such a delicious balance of sweet, sour, creamy, salty, umami, and more. So satisfying!
- Perfect one pot recipe. You only need a couple of basic kitchen supplies to make this easy Thai curry. That means clean-up will be a breeze, too!
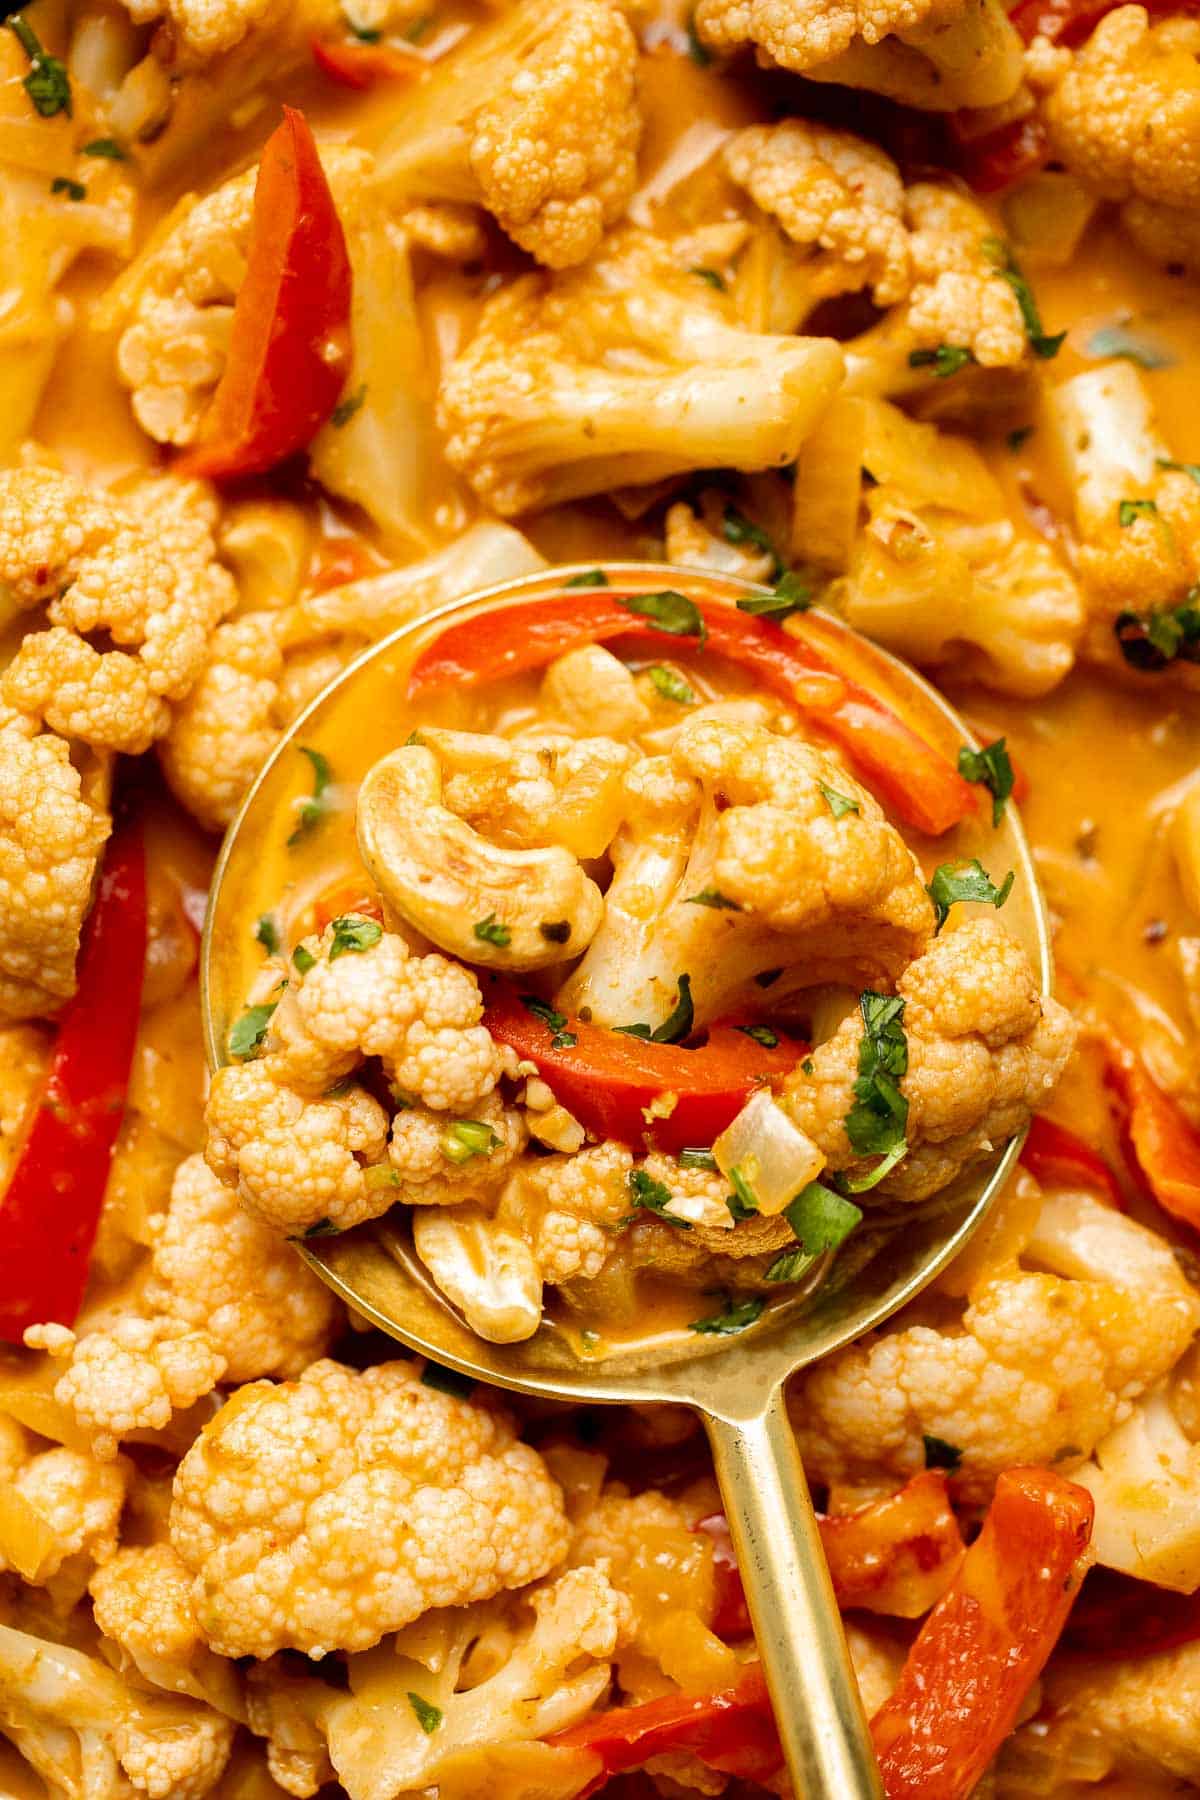
Ingredient Notes
To make this delicious cauliflower curry, you will need the following ingredients (full measurements in recipe card below):
- avocado oil - olive oil and coconut oil are good substitutes, if that is what you have on hand.
- aromatics - dice the onion, finely chop the garlic, and grate the fresh ginger.
- red curry paste - it's easiest to use a prepackaged curry paste from the store. You can also make it at home if you have all the ingredients.
- tomato paste - the concentrated tomato flavor adds so much depth of flavor! Tomato puree can also work as a good substitute.
- coconut milk - you can use either light or full-fat coconut milk.
- fish sauce - this will add a savory flavor that makes the curry more complex. It is however optional, so leave it out if you want to keep this recipe vegan.
- lime - use the zest and fresh lime juice for a punch of flavor.
- whole head of cauliflower - rinse the cauliflower well and slice it into florets.
- red bell pepper - slice the pepper into strips. You can also substitute with green bell pepper
- fresh cilantro - sprinkle chopped cilantro or Thai basil for garnish.
You will also need measuring cups and spoons, a skillet, spatula or spoon, cutting board, and knife.
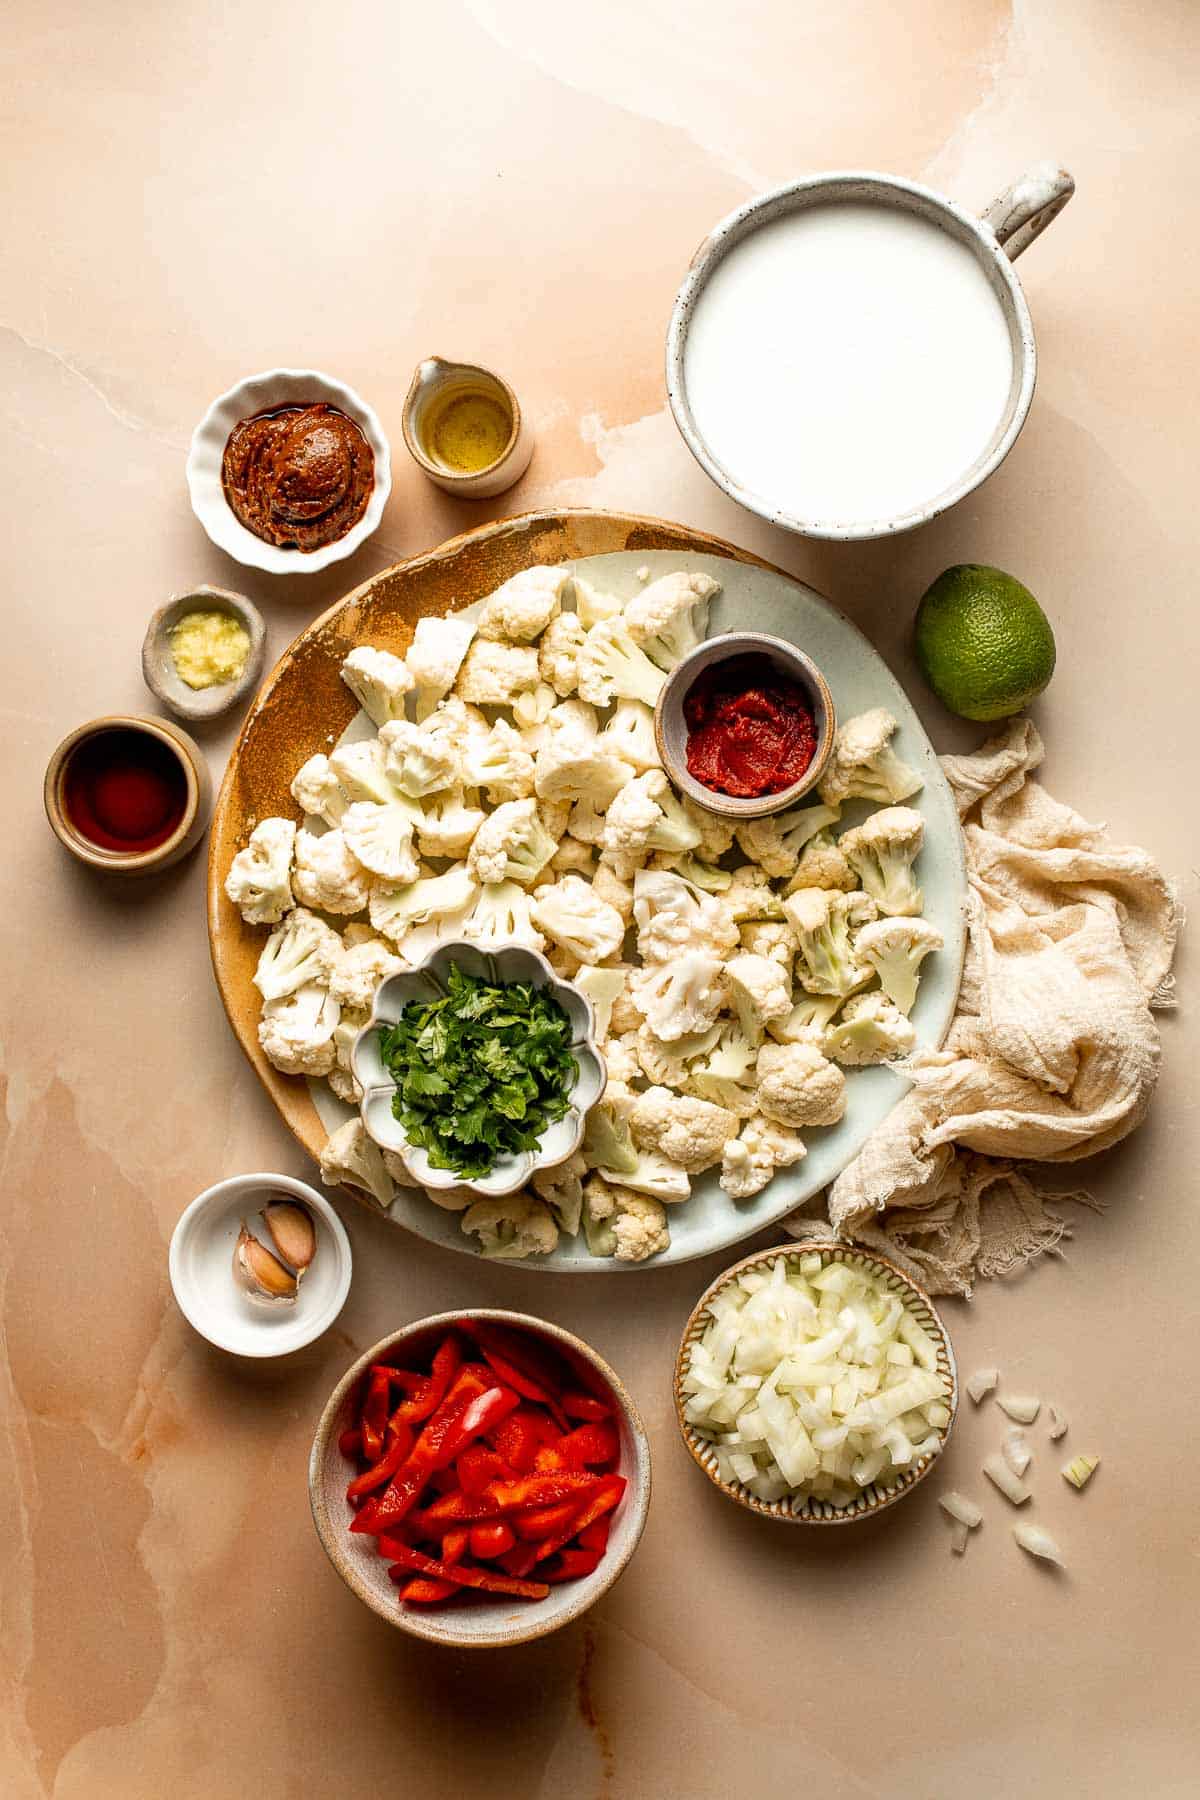
How to Make the Best Cauliflower Curry
- Sauté aromatics. In a large skillet, heat oil over medium-high heat until the hot oil sizzles, about 1 minute. Add onion, garlic and ginger. Sauté until tender, about 2-3 minutes.
- Add paste. Stir in red curry paste and tomato paste and cook until evenly combined, about 1 minute.
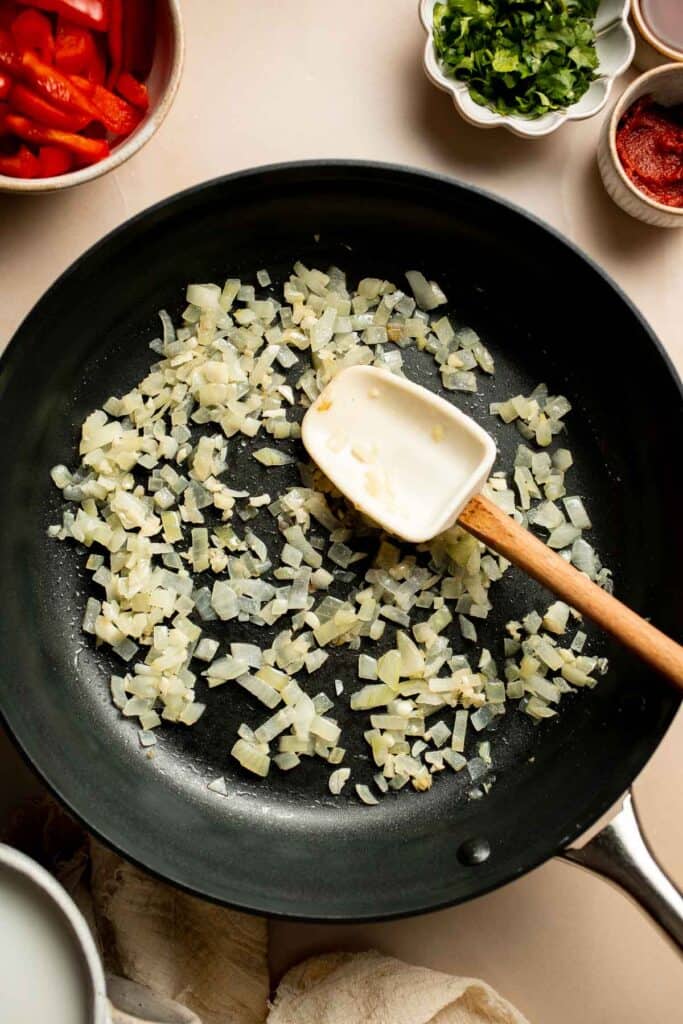
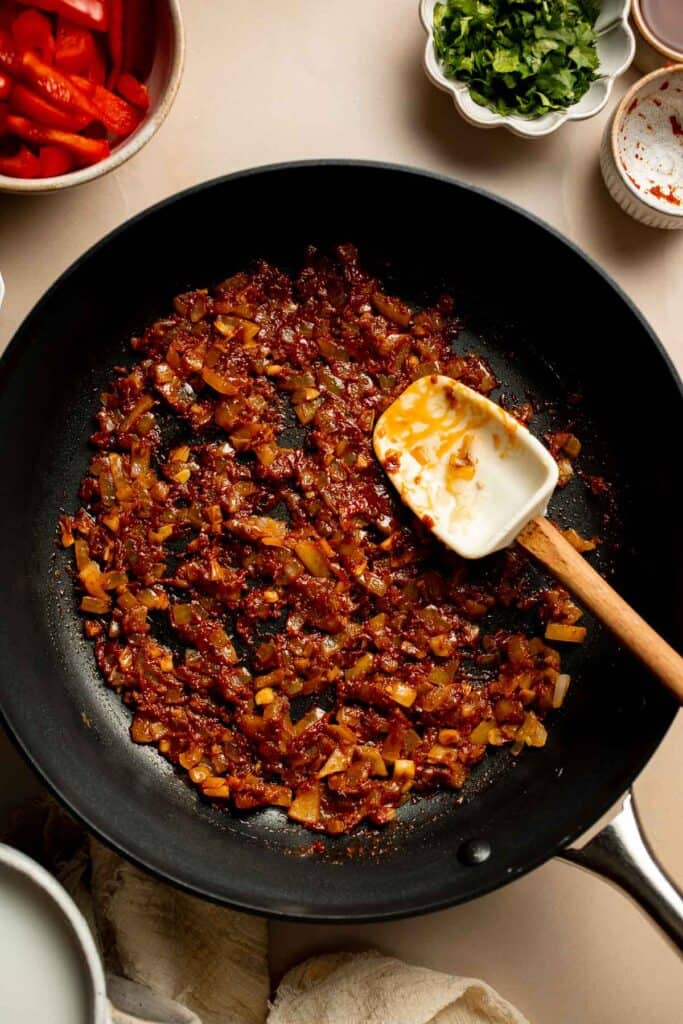
- Add liquids. Add coconut milk, soy sauce (or fish sauce), lime zest, and lime juice. Mix well and bring the sauce mixture to a boil.
- Add veggies and simmer. Add cauliflower florets and bell pepper. Reduce heat to medium low and cover the lid. Simmer until tender, about 3-5 minutes.
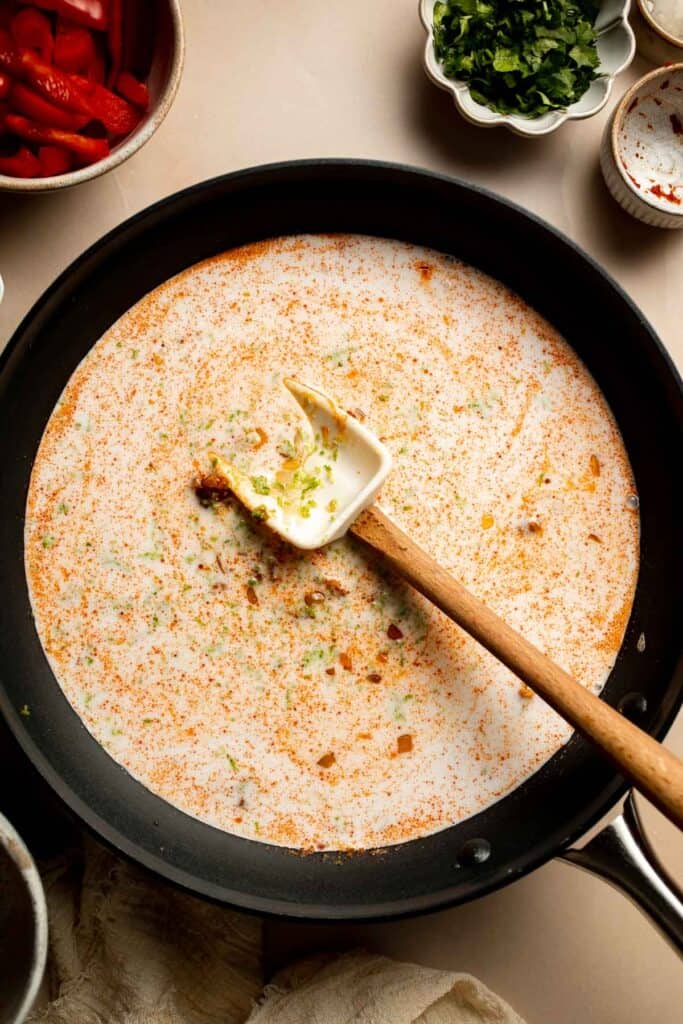
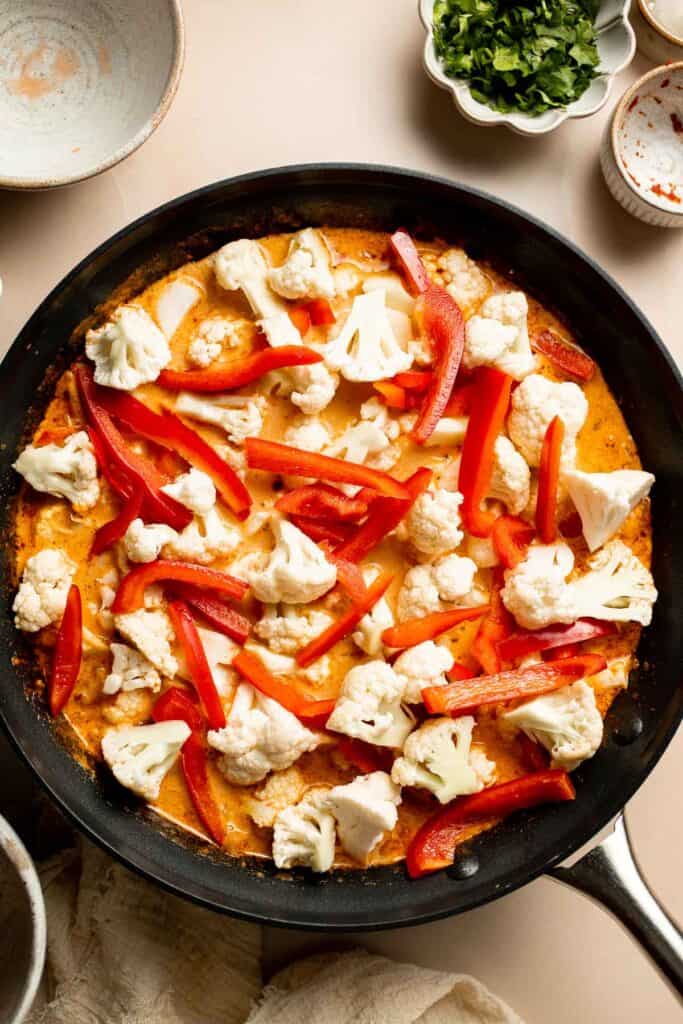
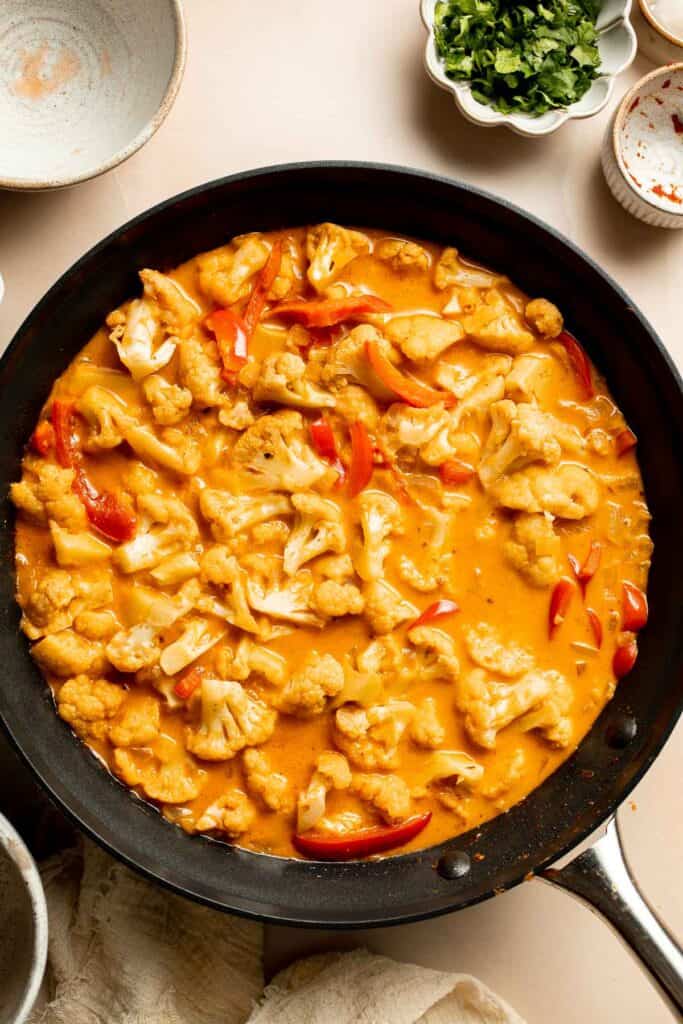
- Serve. Garnish with cilantro or basil on top and serve warm with steamed rice.

Recipe Variations
- Add meat. You can easily add shrimp or cooked chicken to this easy coconut cauliflower curry for more protein.
- Make vegan cauliflower curry. If you prefer to make this recipe completely plant-based, ditch the fish sauce and use a certified vegan curry paste.
- Adjust the spices. Any kind of curry that would work in this recipe. I like to use red curry sauce for Thai-inspired meal, but it'd also be great with green curry or yellow curry. You can also add some red chili powder or red pepper flakes for a really spicy curry.
- Make cauliflower chickpea curry. For extra fiber and protein, rinse and drain a can of garbanzo beans and add them at the same time as the cauliflower pieces. Red lentils are another great option! They'll need to cook in the liquid for a while before you add the cauliflower.
- Add more veggies. The red bell pepper and cauliflower are just the start! Feel free to add your favorite veggies, like roasted eggplant, green beans, zucchini, broccoli, sweet potatoes, green peas, and more. Be sure to adjust the cooking time until each of the veggies is tender.
How to Serve
This homemade Cauliflower Curry is delicious served on with something starchy to soak up all that saucy goodness. Some of my favorite sides to serve with curry are:
- Easy Coconut Rice
- Small Batch Garlic Naan Bread
- Basmati Rice with Saffron
- Rice Pilaf
- Homemade Pita Bread
- Crispy Smashed Potatoes

Recipe Tips and Tricks
- Taste the broth. Before you add the cauliflower pieces, taste the broth. The flavors will concentrate as it cooks down, but it should already taste flavorful and well-seasoned at this time. If not, add a little salt.
- Give it a little time. This is a quick meal, but it tastes even better as the flavors sit! This delicious cauliflower curry makes fantastic leftovers, too.
- Use frozen cauliflower. Fresh cauliflower will cook faster and have a slightly firmer texture, but frozen cauliflower can work in a pinch! Thaw it first to release any extra moisture, which can water down the dish.
Storing and Freezing Instructions
How to Store
Allow the curry to cool to room temperature, then store the leftovers in an airtight container in the fridge for 3-4 days.
How to Reheat
It's very easy to microwave this curry for 5-6 minutes to serve over leftover rice. You can also warm it up in a saucepan or skillet with a splash of extra water as needed.
How to Freeze
Place the freezer-safe containers in the freezer for 3-6 months. Thaw the curry in the fridge before reheating.
FAQ
There are so many different types of curry out there that you really have a lot of options! I prefer to use a red curry paste for that warm, spicy flavor that pairs perfectly with the subtle nutty sweetness of cauliflower. This is more Thai-inspired in flavor, but it'd also be great with Indian spices.
I prefer to cook the cauliflower directly in the broth, as the florets will absorb the flavor all the way through. Other versions call for steaming the cauliflower first, which isn't a great idea. The cauliflower will absorb water instead of all the delicious flavor from the broth!
Technically, yes, but you really don't need to! This recipe cooks in just 25 minutes. It'd probably take longer for your pressure cooker to get to high pressure than just to make it on the stove.
More Cauliflower Recipes
- Cauliflower Alfredo
- Cauliflower Mac and Cheese
- Mashed Cauliflower
- Creamy Garlic Cauliflower Soup
- Cauliflower Tots
- Cauliflower Tacos
Tried this recipe?
I'd love to hear what you think! Leave a comment and rating below to share your feedback. Your reviews help others discover this recipe and help me keep creating more free recipes for you. Snap a photo and tag me on social media @aheadofthyme too.
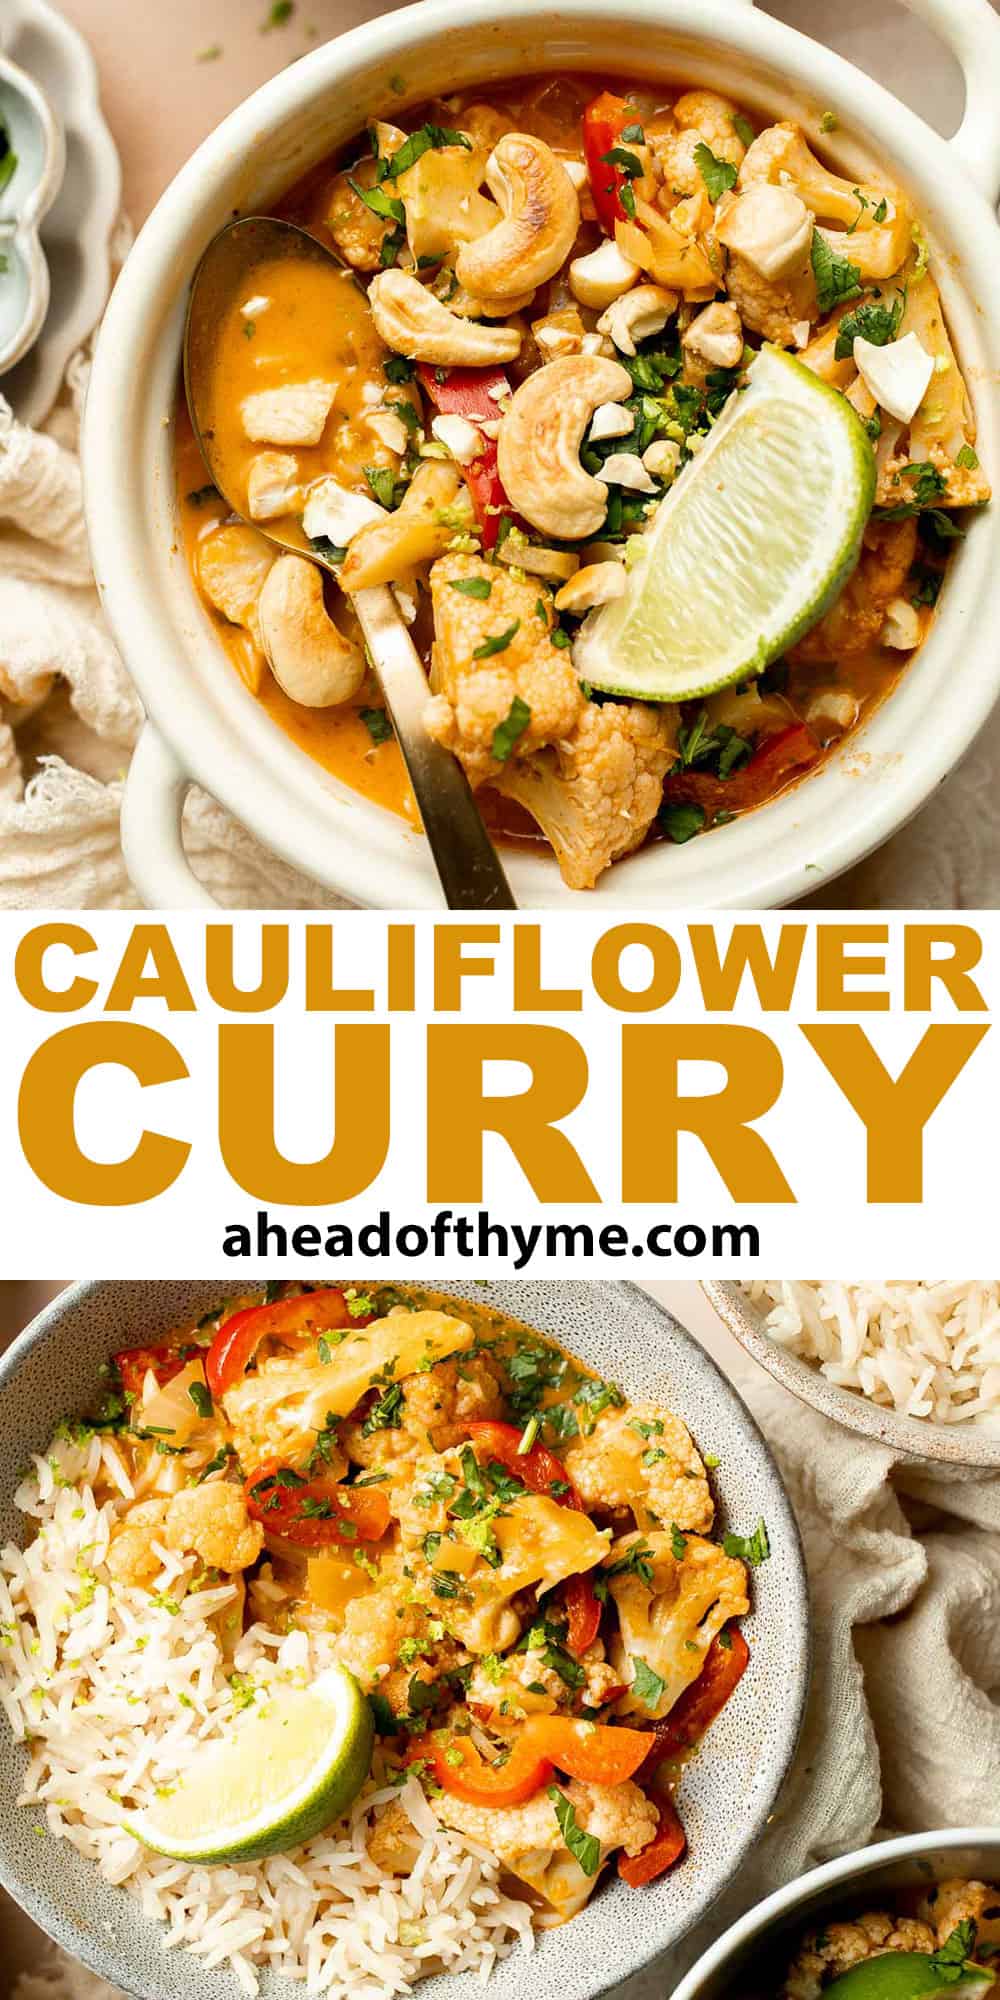
Pull Apart Garlic Bread
Ditch the foil-wrapped packages of garlic bread from the store and elevate your next meal with this homemade Pull Apart Garlic Bread. It's fluffy, buttery, flavourful, melts in your mouth, and tears easily for optimal sharing. The homemade dough is rolled and sliced into individual bites, tossed in homemade garlic butter, and baked until tender and fluffy.
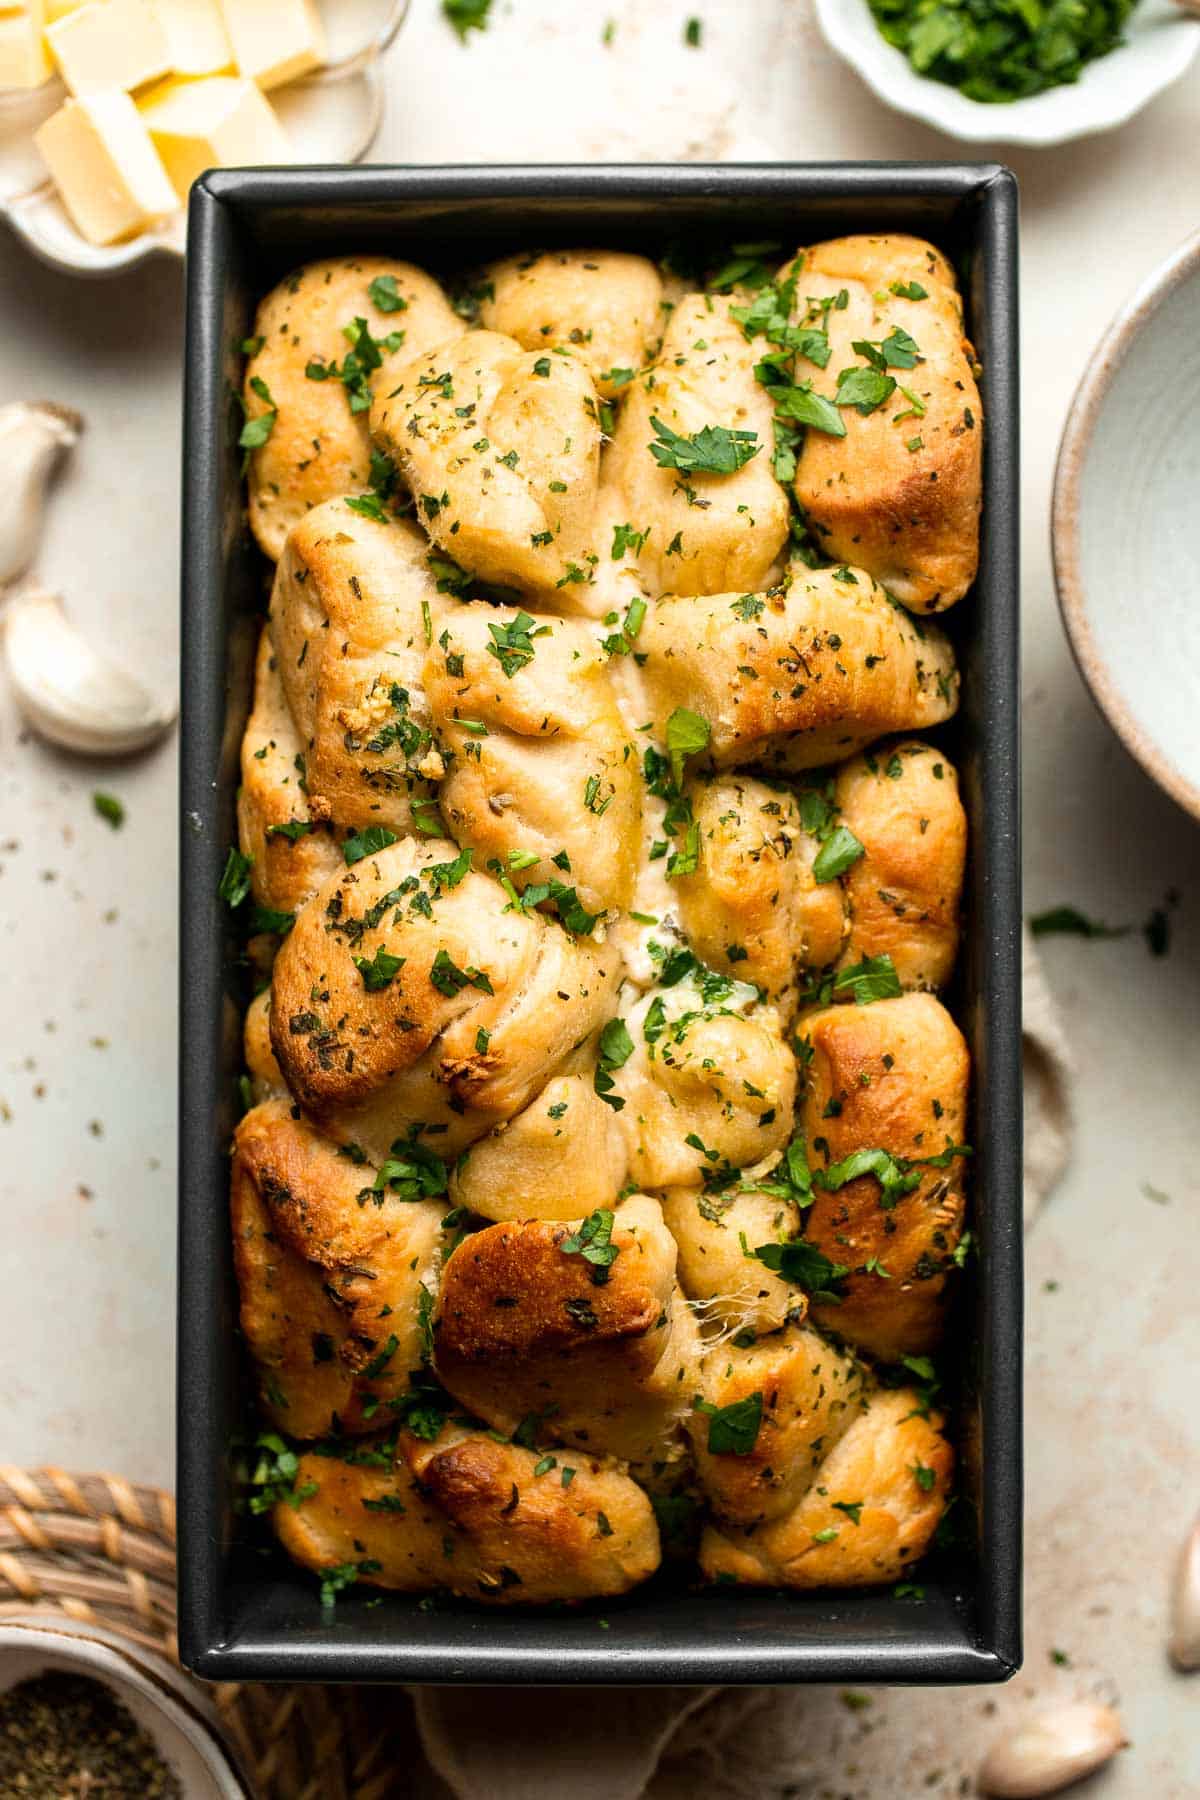
There is just something about garlic bread that brings a whole new level of comfort to your dinner table. But freshly made, warm, right from the oven garlic bread? Well, that is the best. Not to mention the amazing aromas that float around your kitchen as it bakes in the oven. As the little dough bites bake in the oven, they take on a golden brown crust fused with flavor from the garlic butter. It's the most snackable, grabbable version of garlic bread ever. You won't be able to stop grabbing little bites of warm bread and dipping them in Marinara Sauce or homemade Pizza Dip!
So, whether you are serving up this pull apart garlic bread on a busy weeknight, or making them for your guests on Thanksgiving, keep this recipe handy for years and years to come!
Why You'll Love This Pull Apart Garlic Bread Recipe
- Completely homemade. Unlike store-bought versions that include preservatives and additives and taste like it, this is the best garlic bread! It's made entirely from scratch, using simple ingredients you probably already have on hand.
- Easy to make. What I also love about these rolls is that they are actually quite simple to make. You would think that making pull apart bread would take a lot of effort, but surprisingly it doesn't. To get the garlic bread to pull apart, you just need to cut up the dough into small pieces, layer them in a loaf pan, and bake.
- The garlic butter topping. Typically, when you make garlic bread, you would slather on some butter and top with garlic and herbs. However, the secret to getting the tastiest topping is to infuse the flavours into the butter. So we cook the garlic and herbs with the butter for a few minutes and boy does it make a difference.
- Flavor in every bite. So since the little pieces of dough are tossed in our homemade garlic herb butter, you'll be able to taste the buttery, garlicky flavor in every single bite! So flavorful and delicious!
- Perfect for sharing. This homemade pull-apart garlic bread is truly made for sharing. Serve it as an easy appetizer during the holiday season, or offer it as a side dish with this Easy Meat Lasagna or Spaghetti and Meatballs!
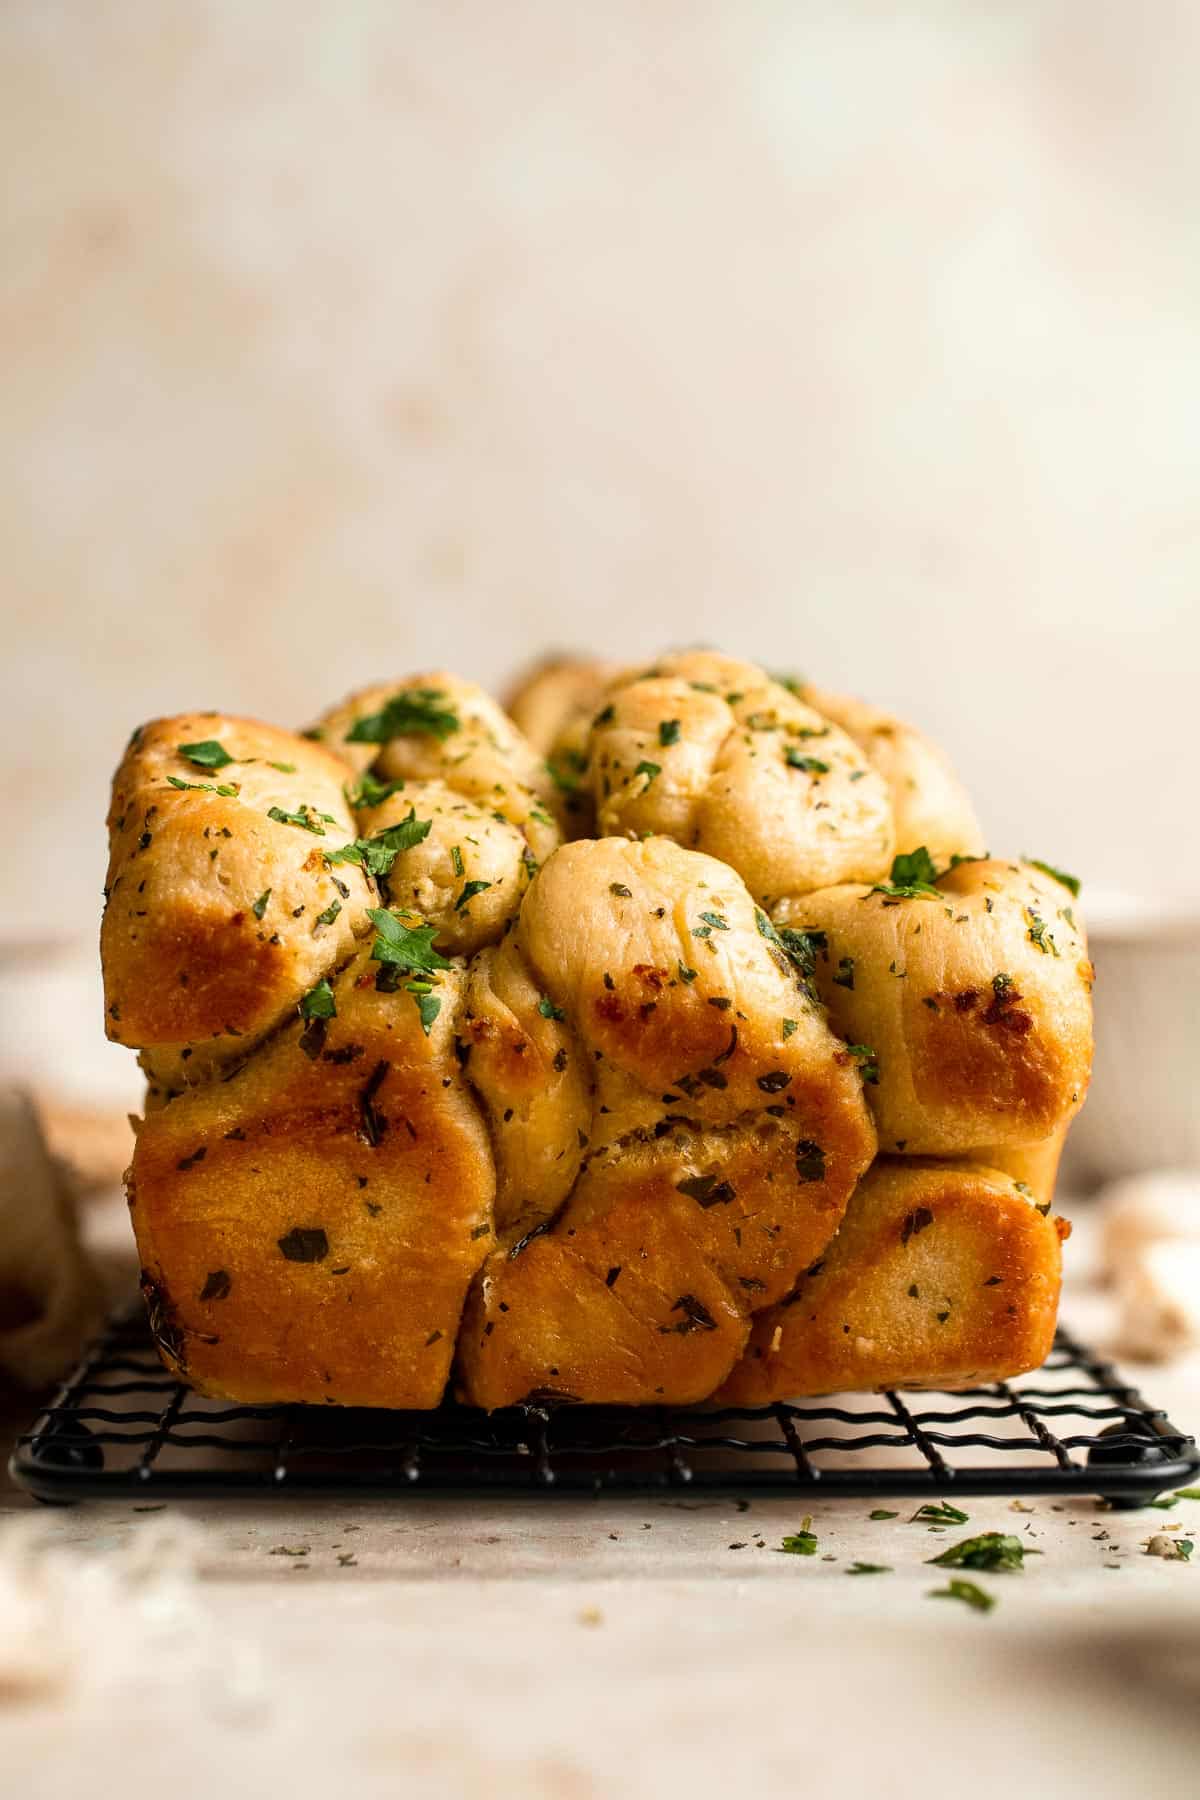
Ingredient Notes
To make this delicious pull apart garlic bread, you will need the following ingredients (full measurements in recipe card below):
- water - this will hydrate the dough and make it very flexible.
- active dry yeast - this yeast will begin working right away, making it easy to serve this garlic bread in under 2 hours. Instant yeast is a good substitute.
- honey - honey will feed the hungry yeast and add a mild sweetness to the bread.
- all-purpose flour - you can make deliciously tender homemade bread with all purpose flour. If you have it handy, feel free to substitute bread flour instead. You can also substitute 1.5 cups of the flour with whole wheat flour, if desired.
- butter - a little softened butter will add a soft texture and buttery flavor to the dough. You also need butter for the garlic butter topping.
- salt - always salt your bread dough to bring out its full flavor.
- garlic - use finely grated or minced garlic. Garlic powder can work in a pinch, but it won't have the same depth of flavor.
- fresh parsley - a little finely chopped parsley sprinkled on top will add a pop of color and a refreshing flavor. Some chives or thinly sliced green onions would work great, too.
- Italiano seasoning - the mixture of dried herbs will soften in the butter and release their flavors.
You will also need measuring cups and spoons, a large mixing bowl or stand mixer, saucepan, dishcloth, a knife, and a loaf pan.
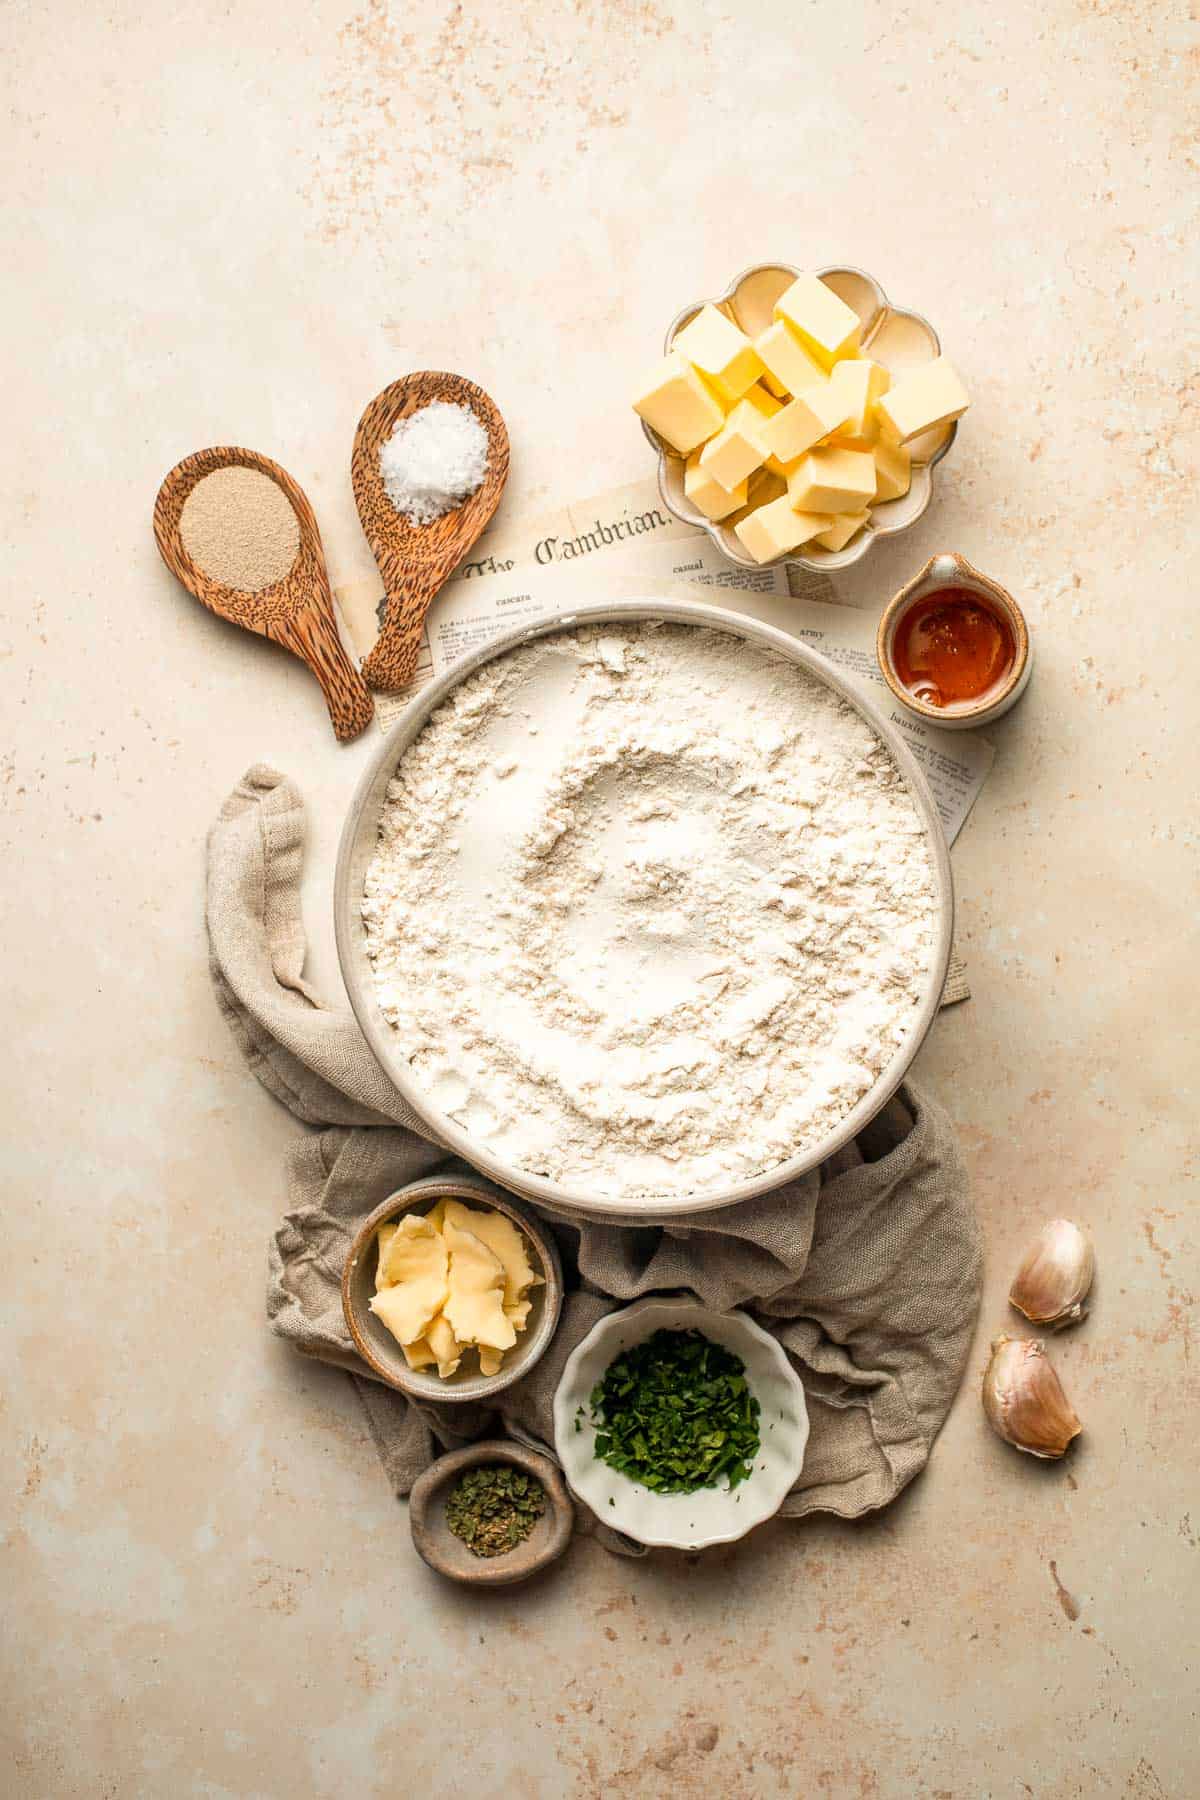
How to Make the Best Pull Apart Garlic Bread
First, make the dough.
- Activate yeast. In a large mixing bowl, stir together ½ cup warm water, yeast, and honey. Let rest 5-10 minutes until foamy.
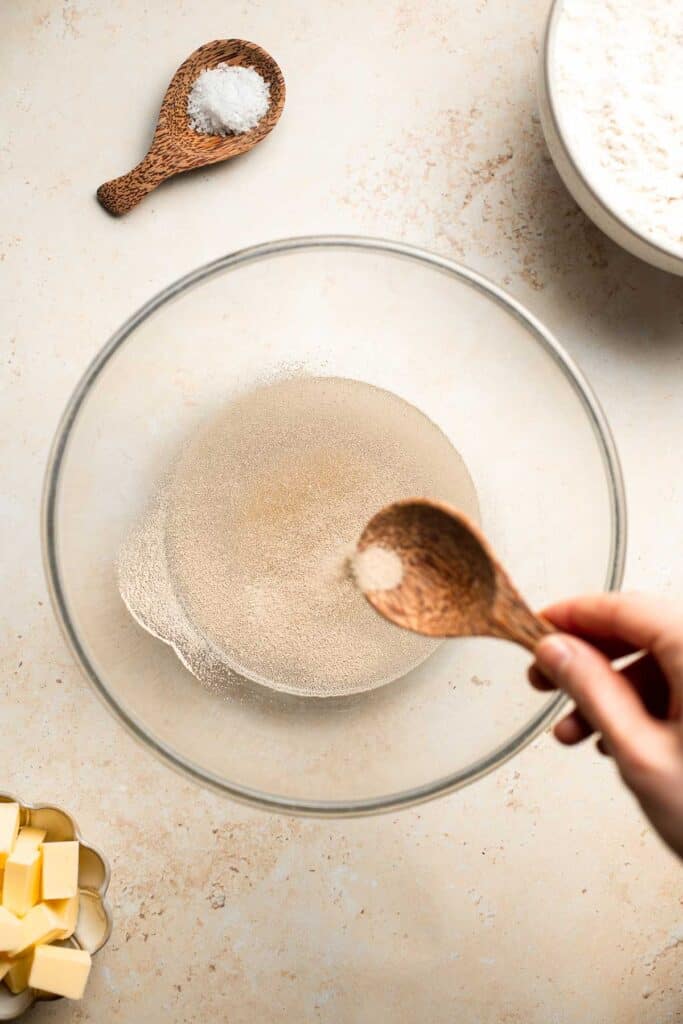
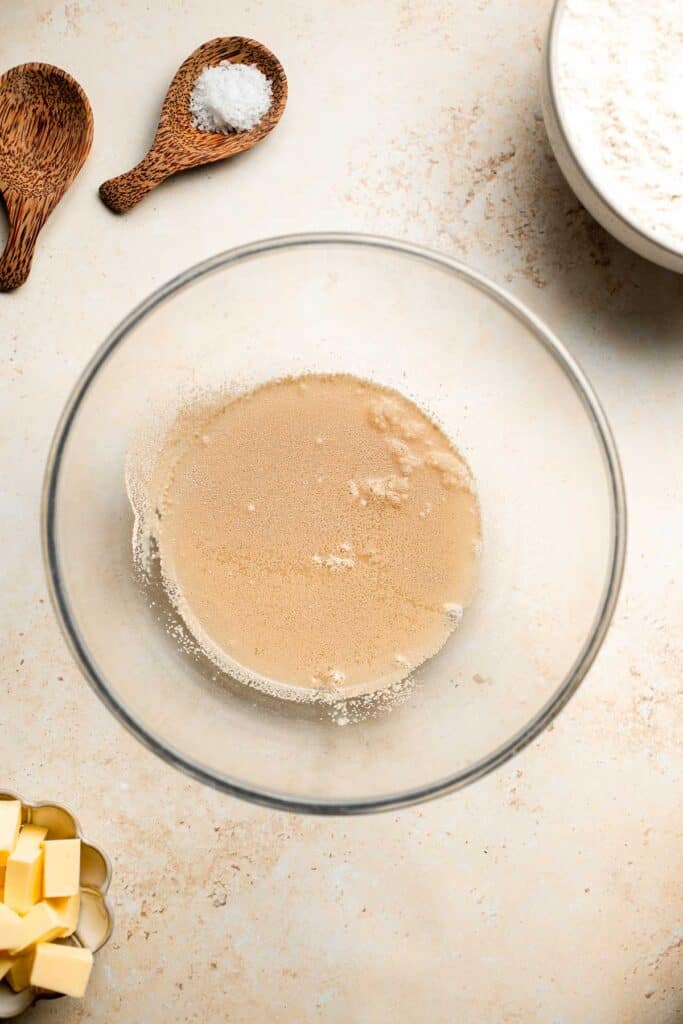
- Add remaining ingredients. Add in flour, butter, and salt, and mix until combined. Gradually add in the remaining ½ cup water, stirring between each addition until completely combined, and until the dough comes together into a ball. The dough will be soft but slightly sticky. If it is too sticky, you can add a little more flour.
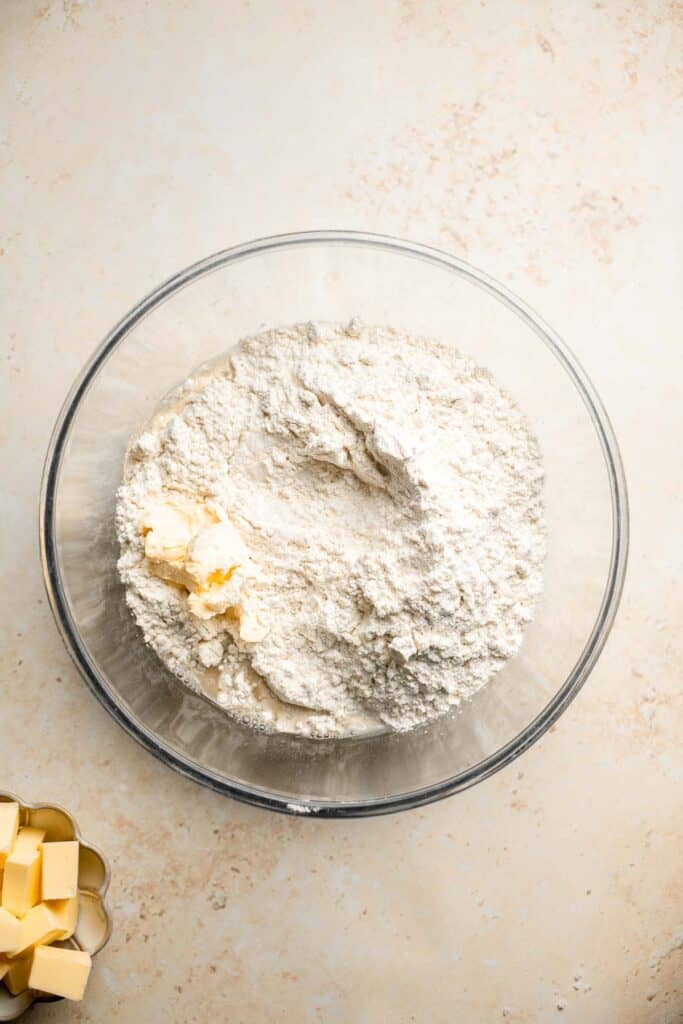
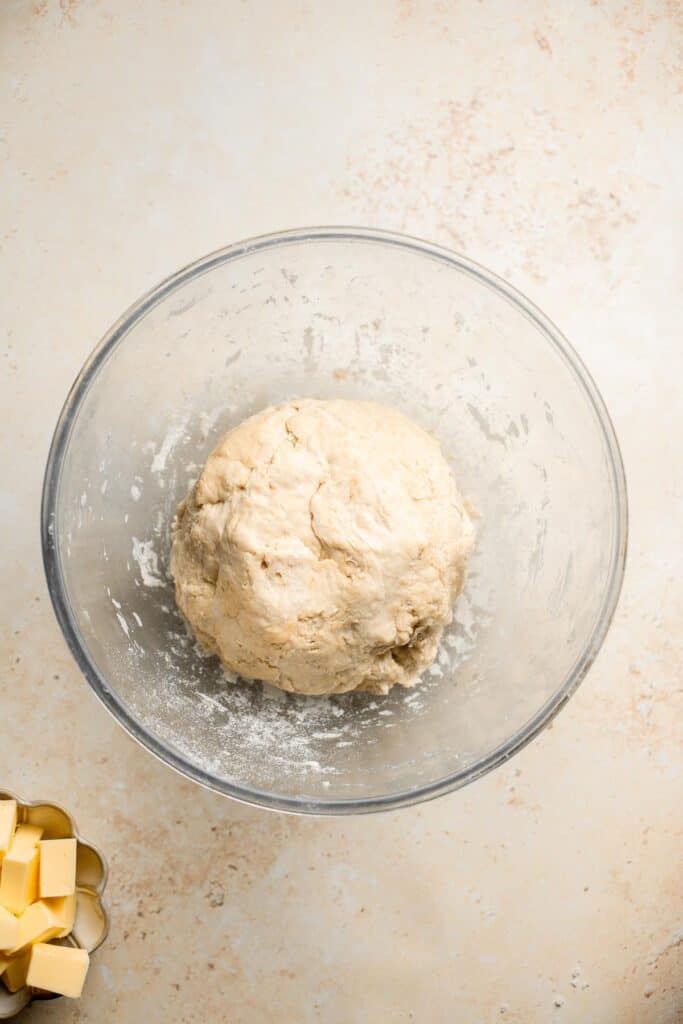
- Knead. Knead for 7-10 minutes (by hand or in a stand mixer) until the dough is smooth and elastic. You can test the dough for readiness by pressing into the dough with your thumb. If it bounces back, then it is ready.
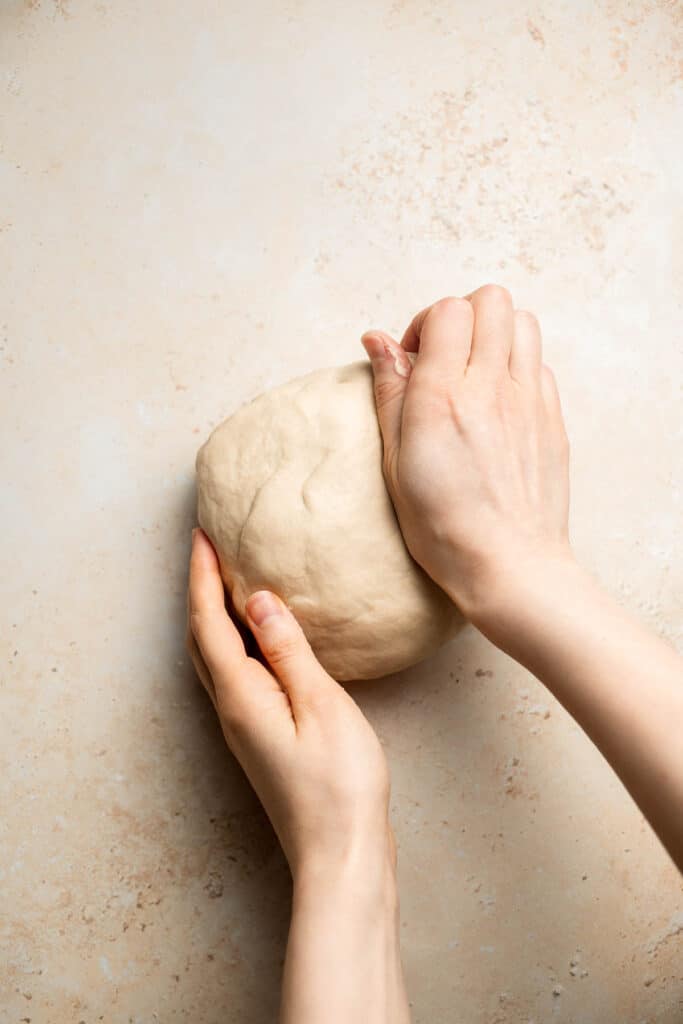

- Rest. Cover the bowl with a dish cloth, and let dough rest at room temperature until doubled in size, about one hour.
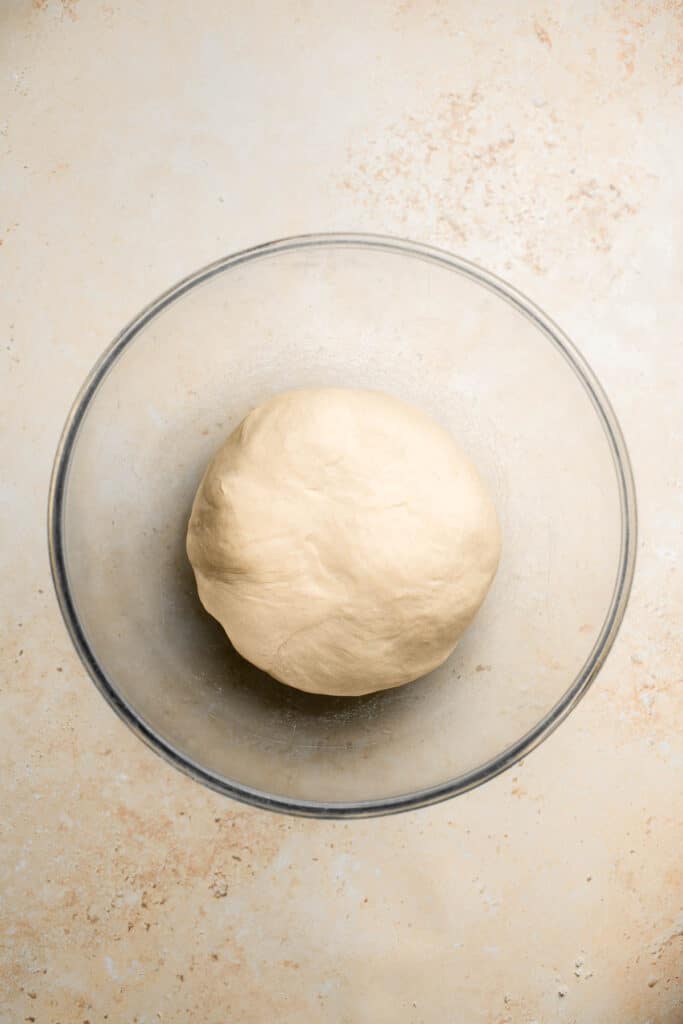
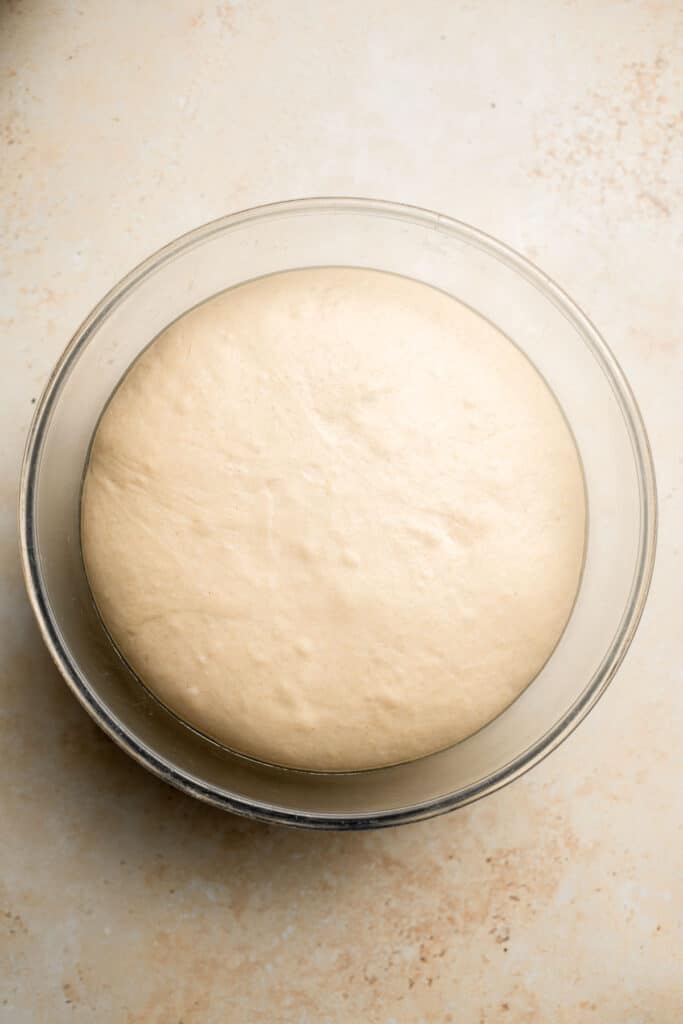
Next, make the garlic butter.
In a small saucepan, melt butter over low heat. Once just melted, add garlic, parsley, and Italian seasoning. Stir to combine and continue to cook over low heat for 2 minutes, to allow the flavours to infuse into the butter. Remove from heat.
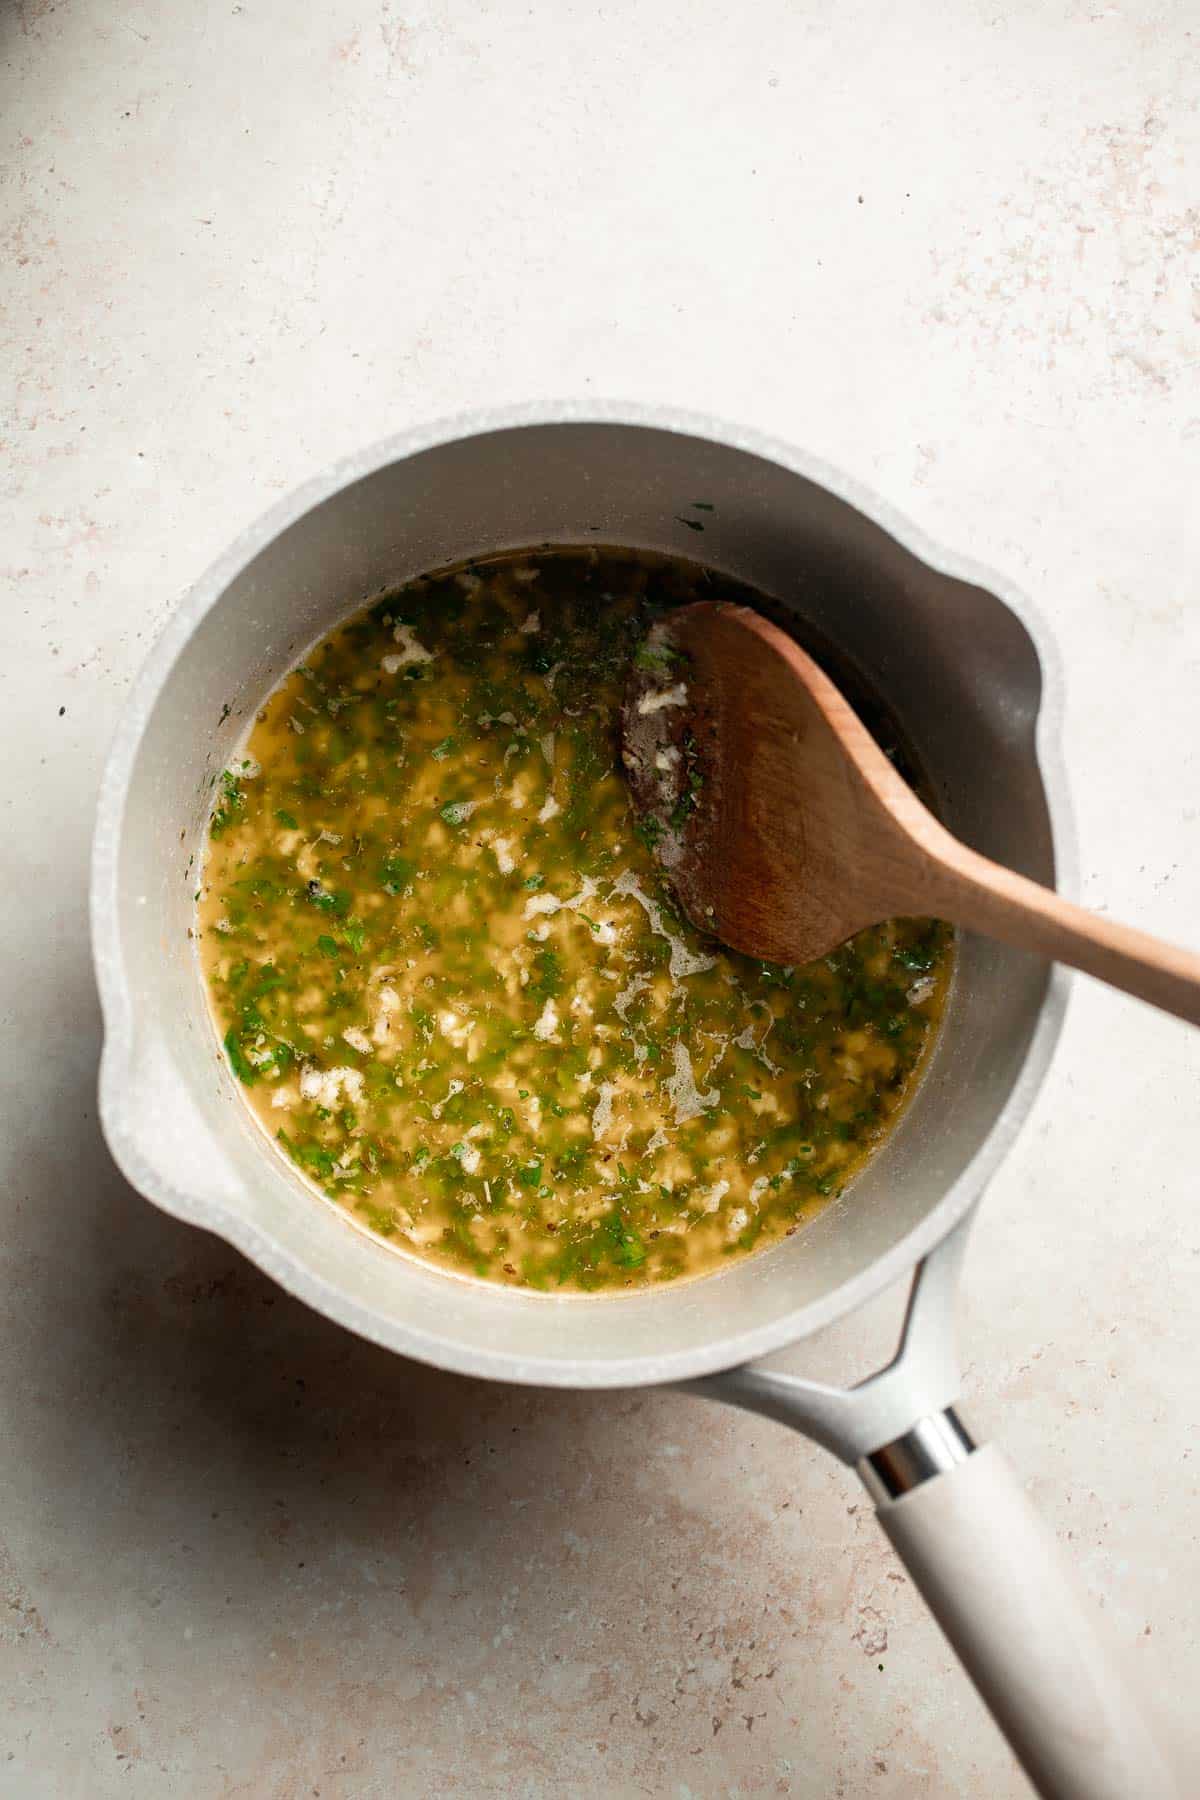
Finally, let's shape and bake.
- Shape. Once the dough is ready, shape it into a long tube, 1-inch in diameter. Then, cut into small 1-inch pieces.
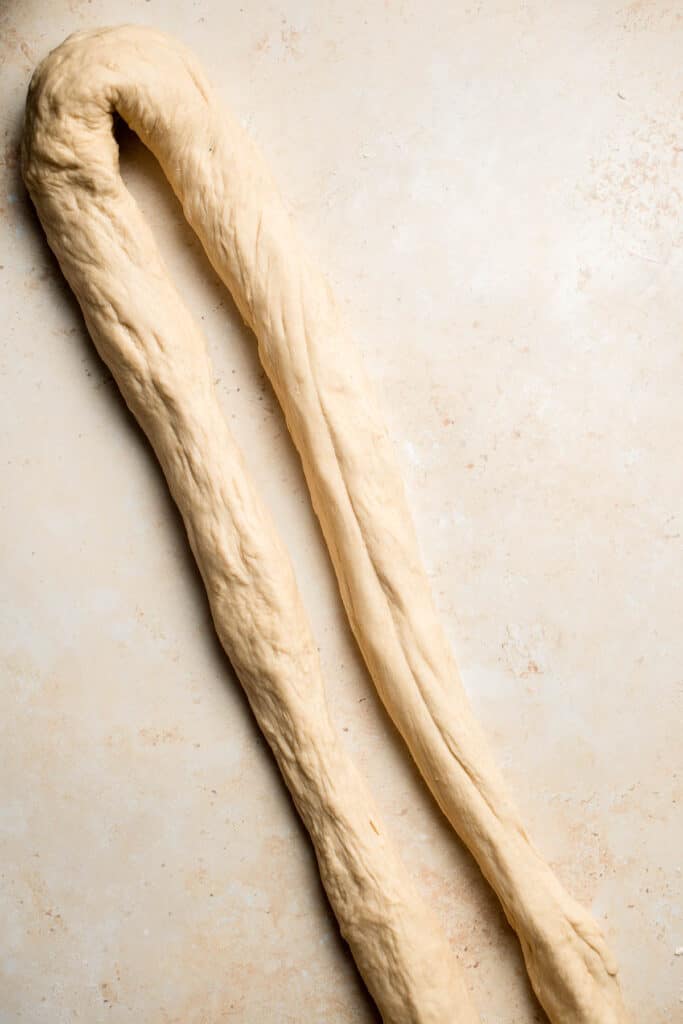
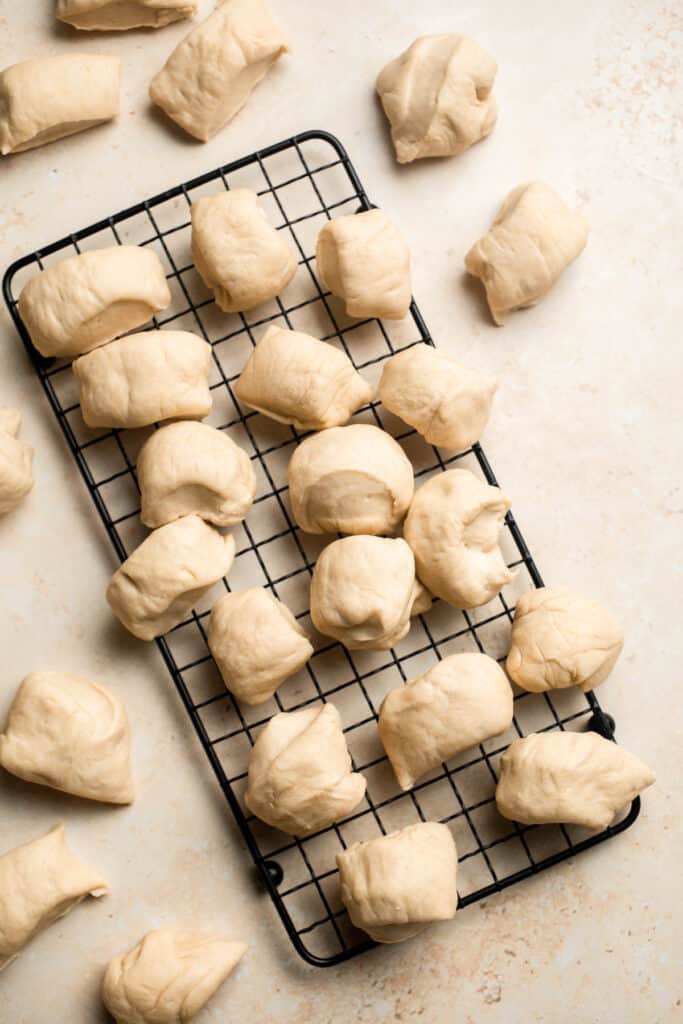
- Toss. Place the pieces into the saucepan with the garlic butter and toss to fully coat.
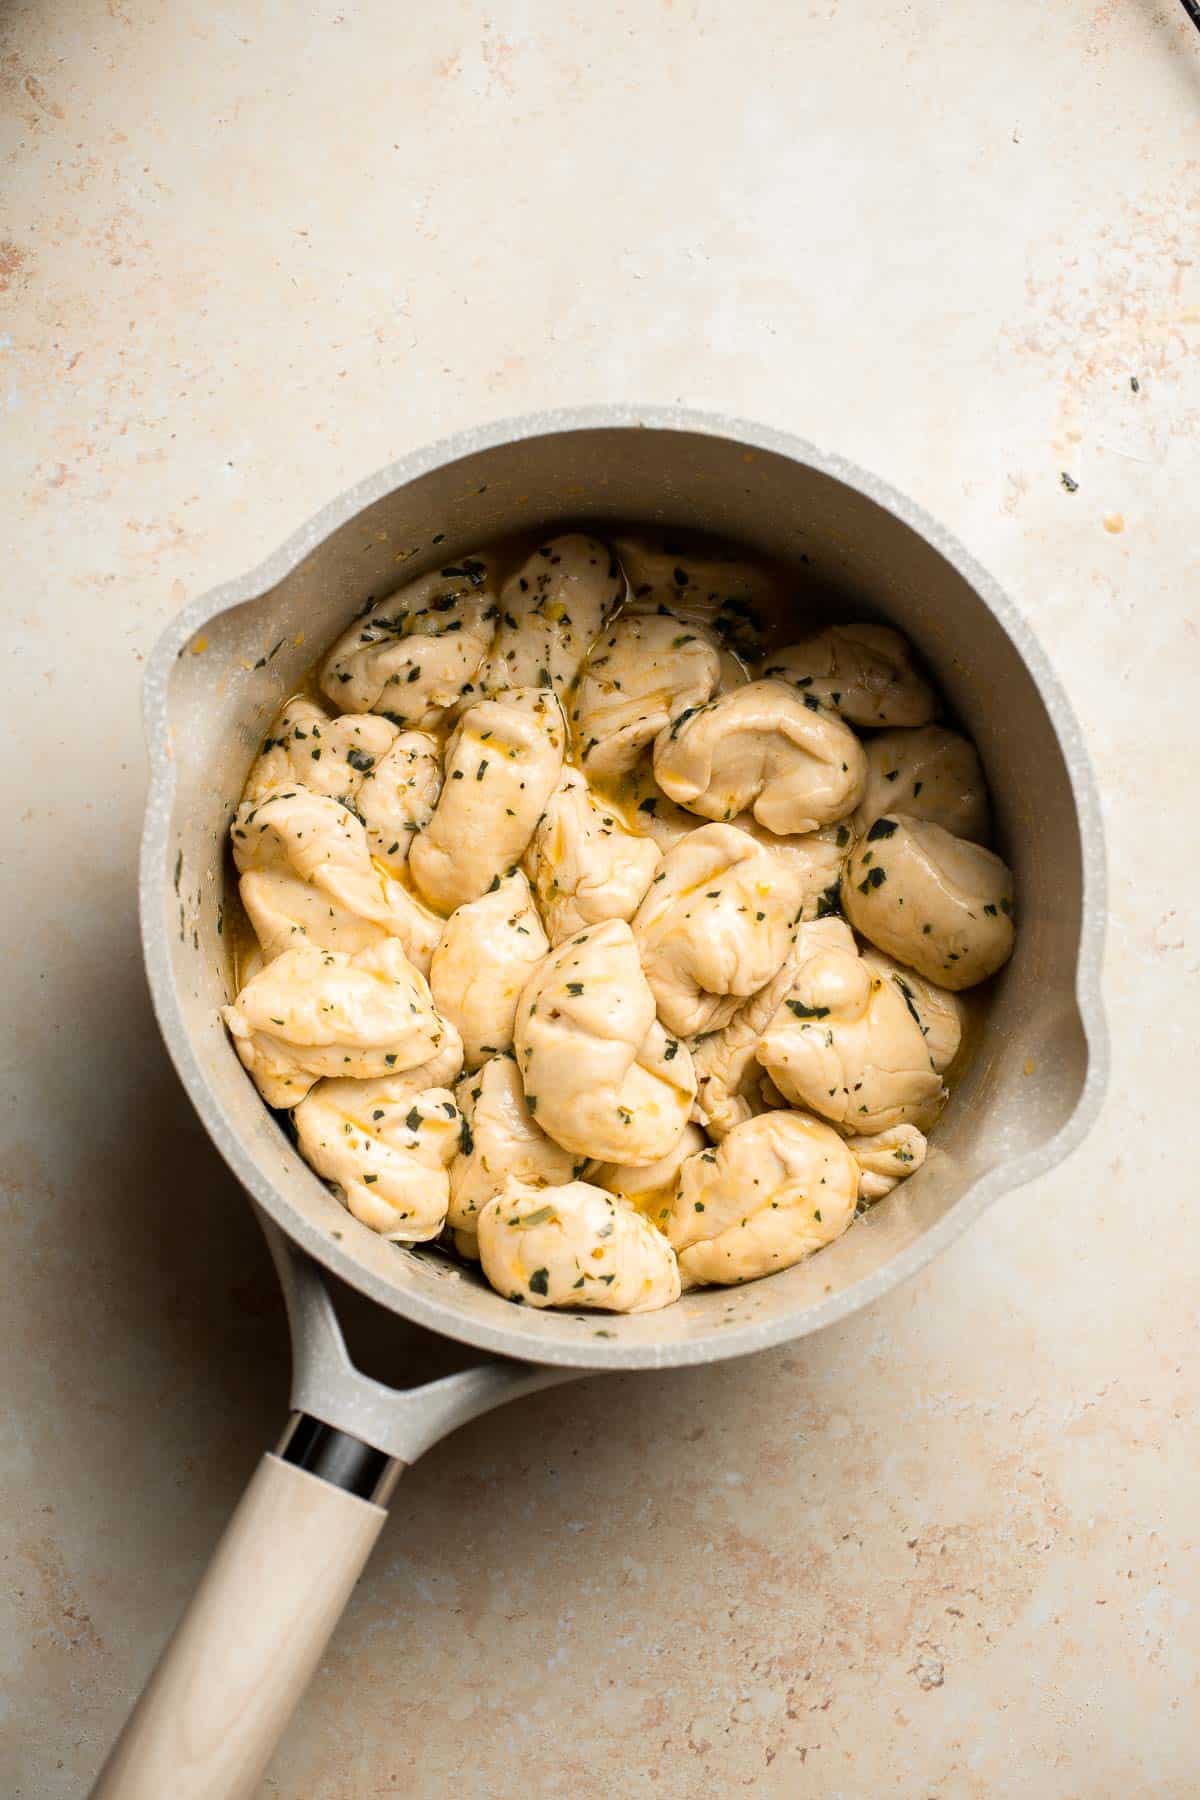
- Bake. Transfer the coated pieces into a 8 x 4 inch loaf pan and bake in a 375 F preheated oven for 20-25 minutes or until golden brown. Garnish with additional fresh parsley on top (optional).
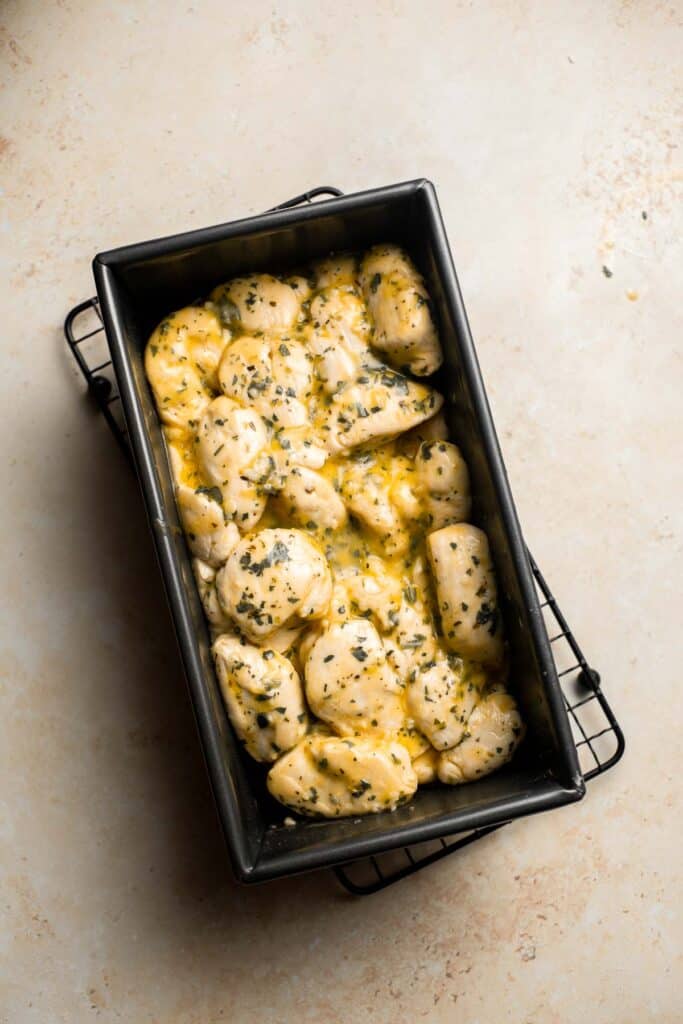
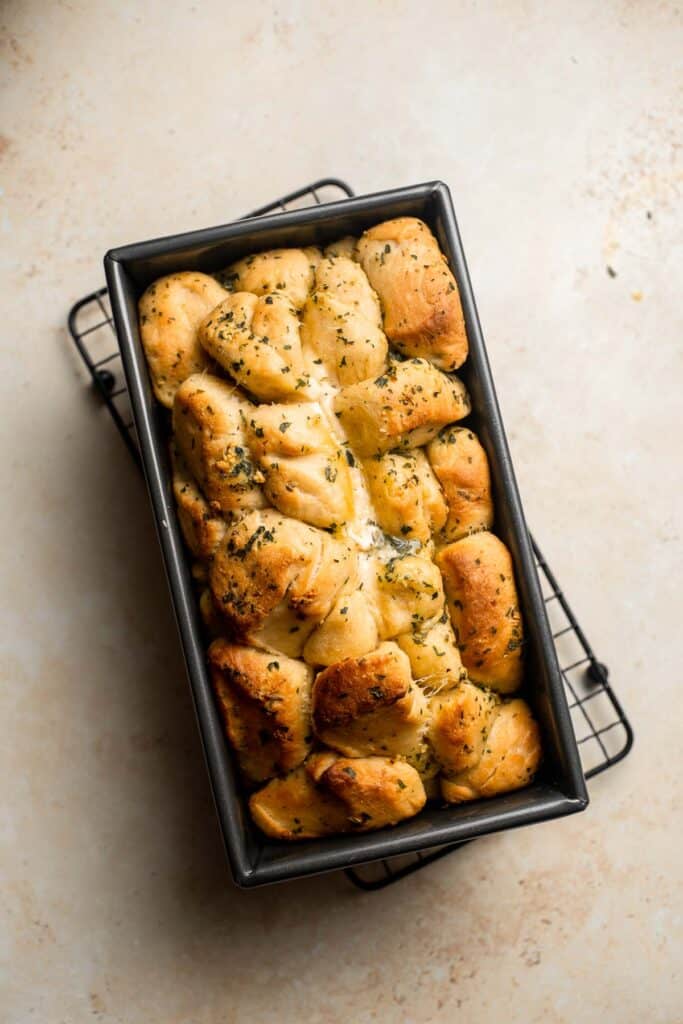
Recipe Variations
- Make cheesy pull-apart garlic bread. Sprinkle shredded or grated parmesan cheese between the bites as you're assembling the dough bites. They'll melt into a savory crust that tastes amazing!
- Use storebought pizza dough. In a hurry? Use store-bought pizza dough to speed up the process.
- Make mini bites. Instead of baking a large, delicious loaf, add 4-5 of the little bites to a prepared muffin tin. They're a fun alternative to dinner rolls and way more exciting than serving a slice of regular garlic bread. Just be sure to reduce the baking time!
- Change the shape. This recipe is especially great for any upcoming holiday dinners or special events. You can even arrange the dough bites in a bundt pan for a fun wreath shape. Serve the bread with a bowl of Pizza Dip in the middle for easy dipping!
How to Serve
This Pull Apart Garlic Bread is fancy enough to be served as an appetizer at your next dinner party or as a side dish to serve with lasagna, spaghetti, and so much more. Some of our favorite entrees to serve this garlicky bread with are:
For more recipe inspiration, see our 60+ Easy Dinner Ideas.
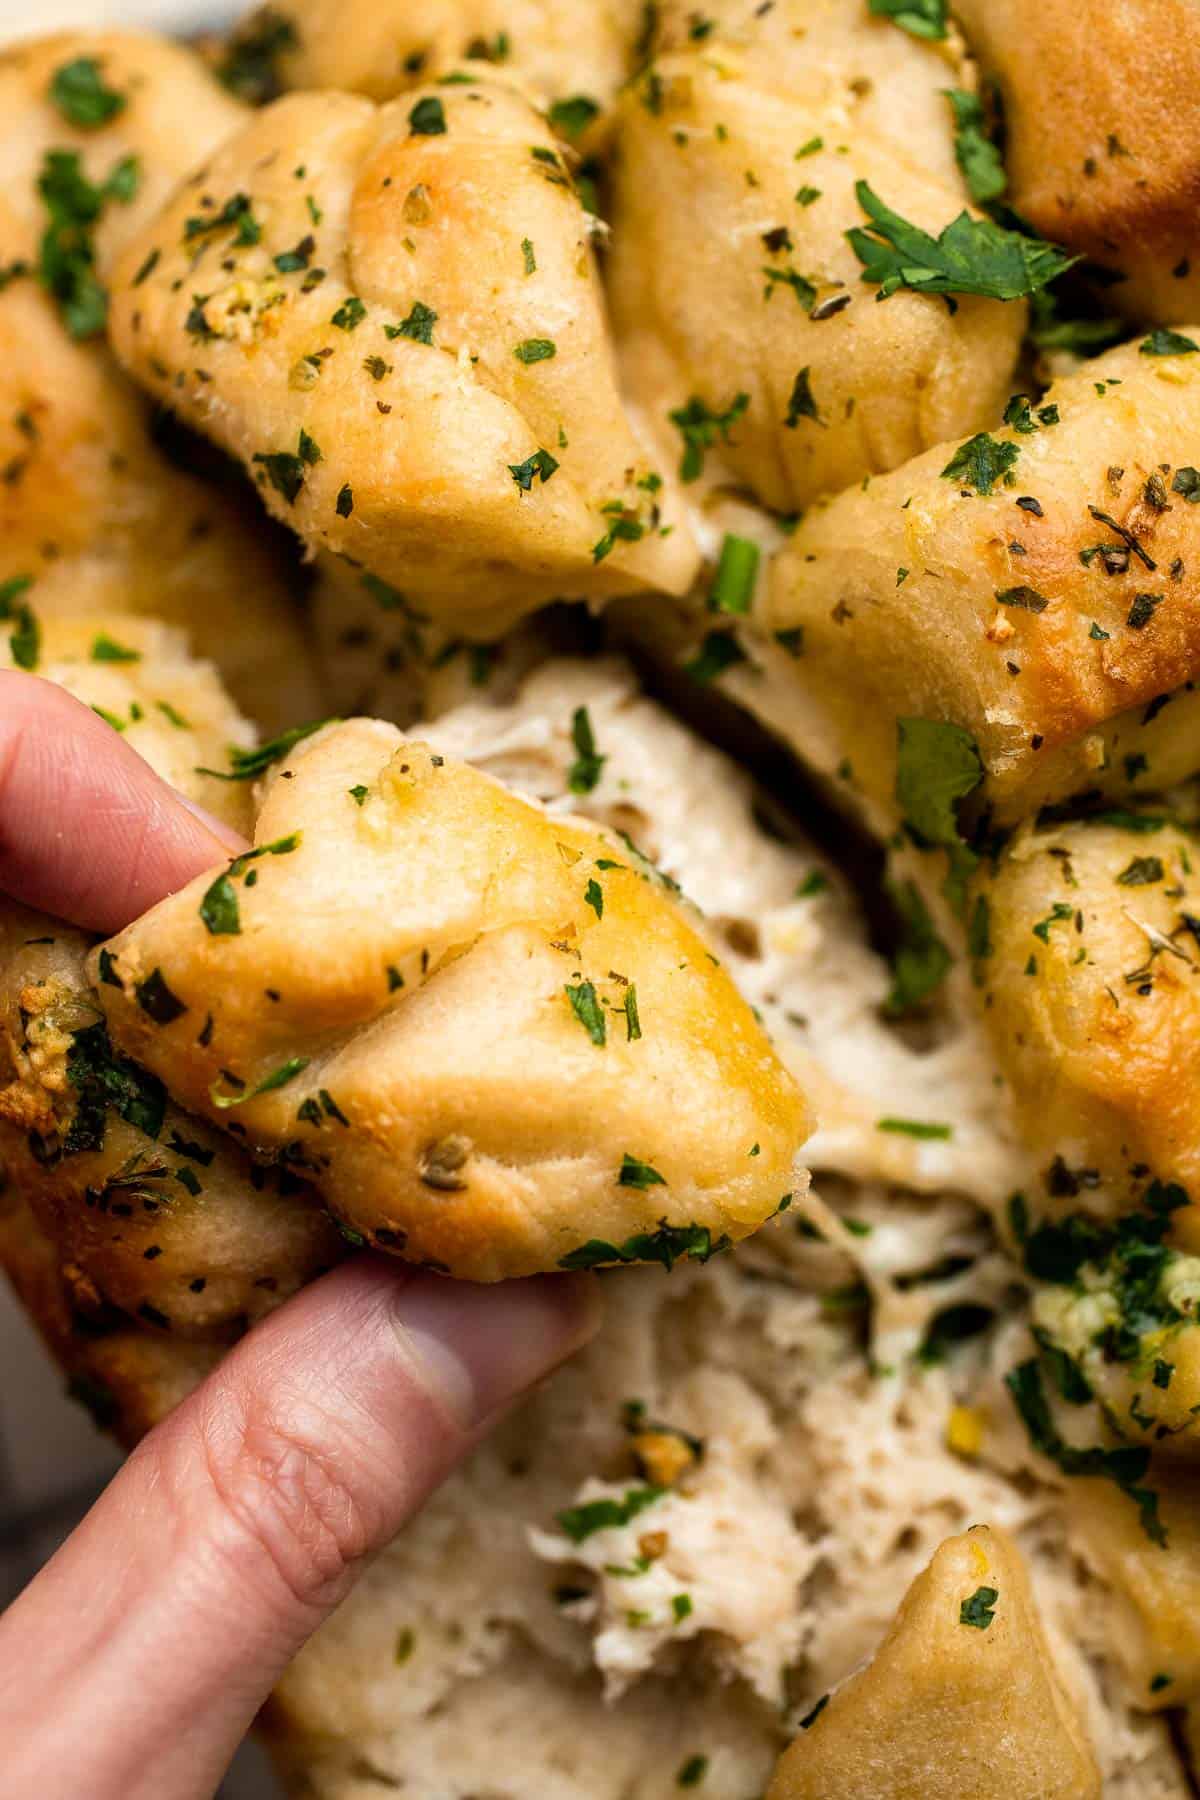
Recipe Tips and Tricks
- Don't rush the dough. Dough rises at different speeds depending on the temperature of your kitchen and the ingredients. Give it time to fully double before punching it down and shaping the dough bites for the best texture in the end.
- Keep the butter melted. To coat the dough bites in butter, it might be fully melted. I recommend preparing the butter right at the end of the first rise so it will be ready when you need it. Be careful not to overcook the garlic or accidentally burn the butter.
- Knead the dough properly. The most important thing is to fully activate the gluten. When the dough is properly kneaded, it won't seem loose, sticky, or shaggy anymore. Instead, it will have a smooth, elastic texture with a little bounce. Feel free to make the dough in the bowl of a stand mixer with a dough hook attachment if that's easier.
Storing and Freezing Instructions
How to Store
Allow the bread to cool to room temperature, then store it in plastic wrap or an airtight container at room temperature for 2-3 days. It can also be refrigerated for longer, but the bread may begin to dry out.
How to Reheat
The best way to reheat this garlic bread is to warm it in the oven. Place it in the oven or countertop toaster oven at 350 for 5-6 minutes, or in the air fryer for 3-4 minutes. You can also reheat individual sections for about 15 seconds in the microwave just to warm them up.
How to Freeze
You can freeze leftover bread by wrapping it well with plastic wrap and aluminum foil, but you probably won't have enough leftovers to bother with this! The bread tends to get eaten quickly.
FAQ
There are many different recipes for pull apart garlic bread out there, including quite a few that start with a loaf of bread from the store. This easy version is completely from scratch, including the bread. It's a simple slightly enriched dough with a tender texture, which is perfect for this purpose. I like to cut it into small pieces, then toss them in melted garlic butter seasoned with a little Italian seasoning. Assemble them in the pan, similar to Monkey Bread, then let them rise and bake! Your whole family will love sneaking little bites from the loaf!
This recipe is ready from start to finish in just under 2 hours, including making the dough, two rises, shaping, and baking. That's pretty quick for homemade bread!
You'd need to make a few substitutions for this option, starting with the butter. Look for a vegan butter to keep that rich, buttery flavor. Replace the honey with white sugar or a little agave syrup. The rest of the ingredients are naturally plant-based.
More Bread Recipes with Garlic
- 50 Best Bread Recipes
- Cheesy Garlic Bread
- Garlic Breadsticks
- Garlic Knots
- Small Batch Garlic Naan Bread
- Cheesy Garlic Dinner Rolls
Tried this recipe?
I'd love to hear what you think! Leave a comment and rating below to share your feedback. Your reviews help others discover this recipe and help me keep creating more free recipes for you. Snap a photo and tag me on social media @aheadofthyme too.
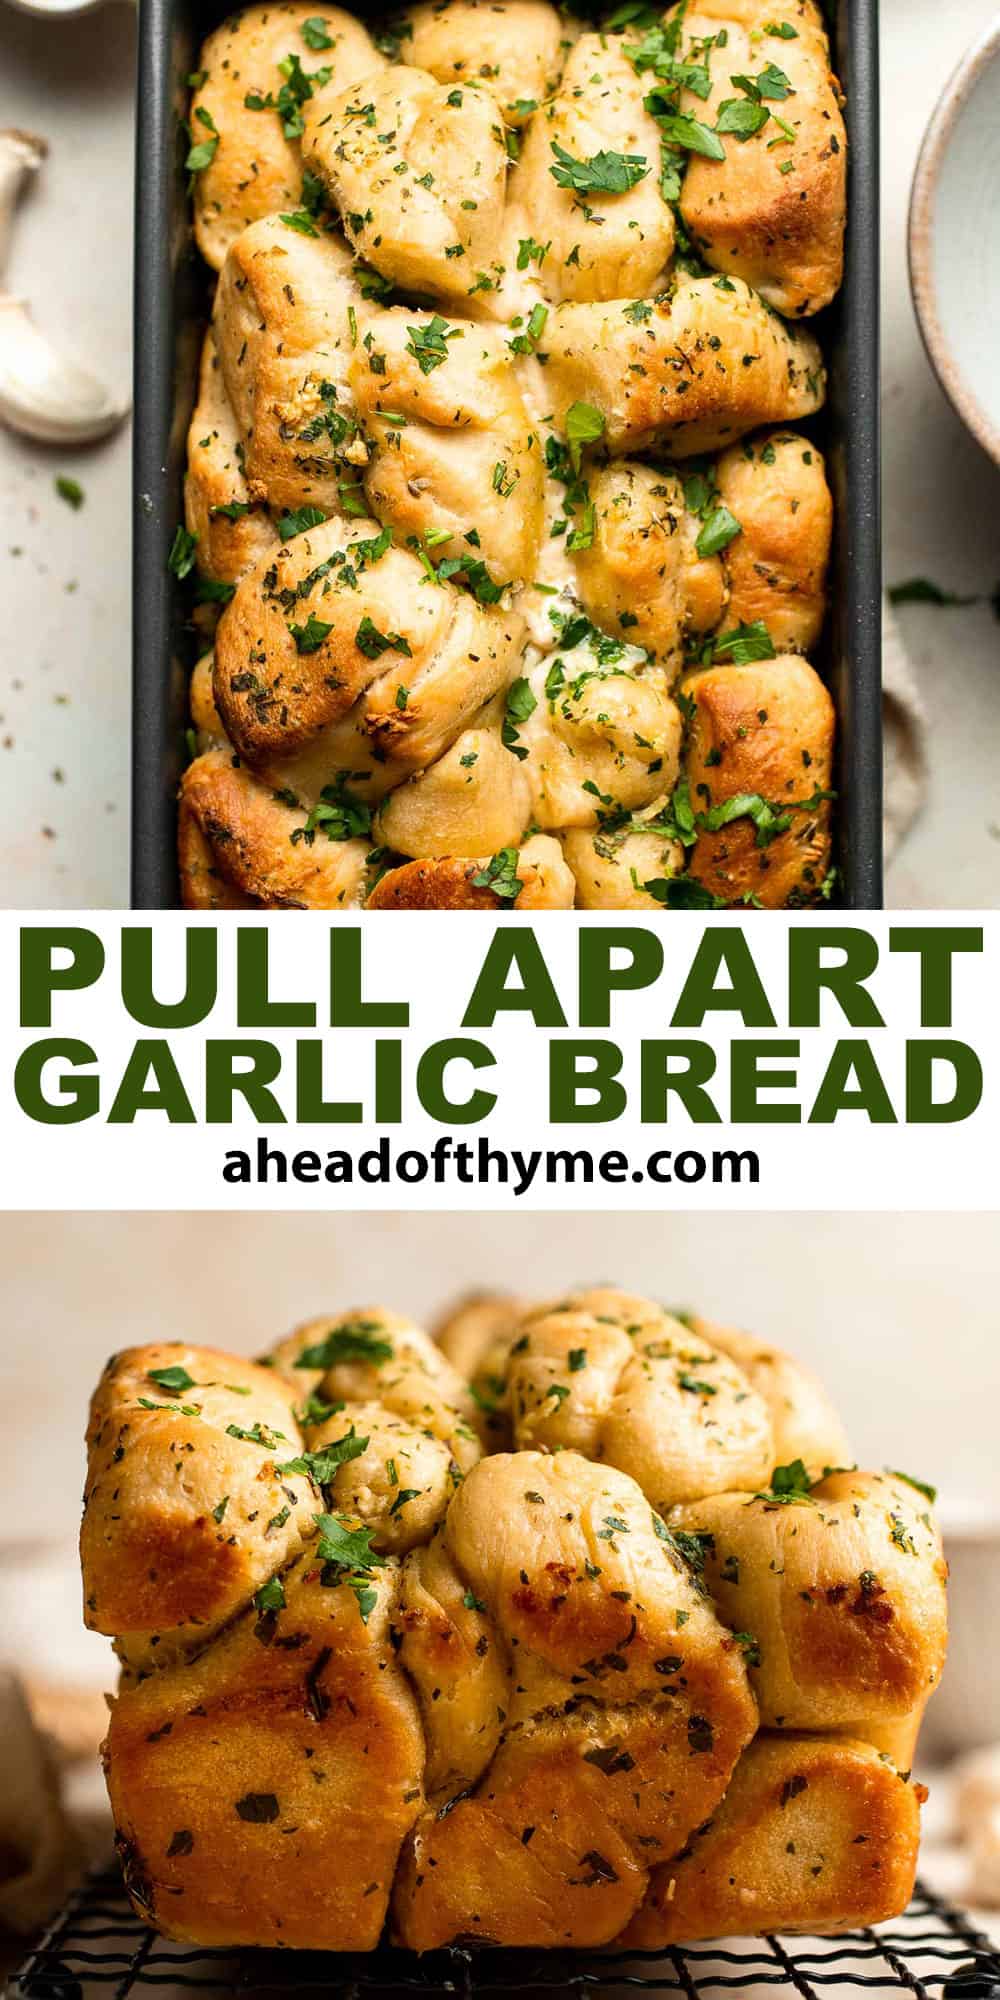
Broccoli Pesto Pasta
This delicious Broccoli Pesto Pasta recipe is a fun twist on traditional pesto that is ready to serve in under 30 minutes. Perfectly cooked broccoli is blended with fresh basil, garlic, pine nuts, and parmesan for a creamy, flavor-packed sauce for your favorite pasta. It's a great way to serve some extra veggies and is such a satisfying, healthy, and cozy meal for any night of the week!
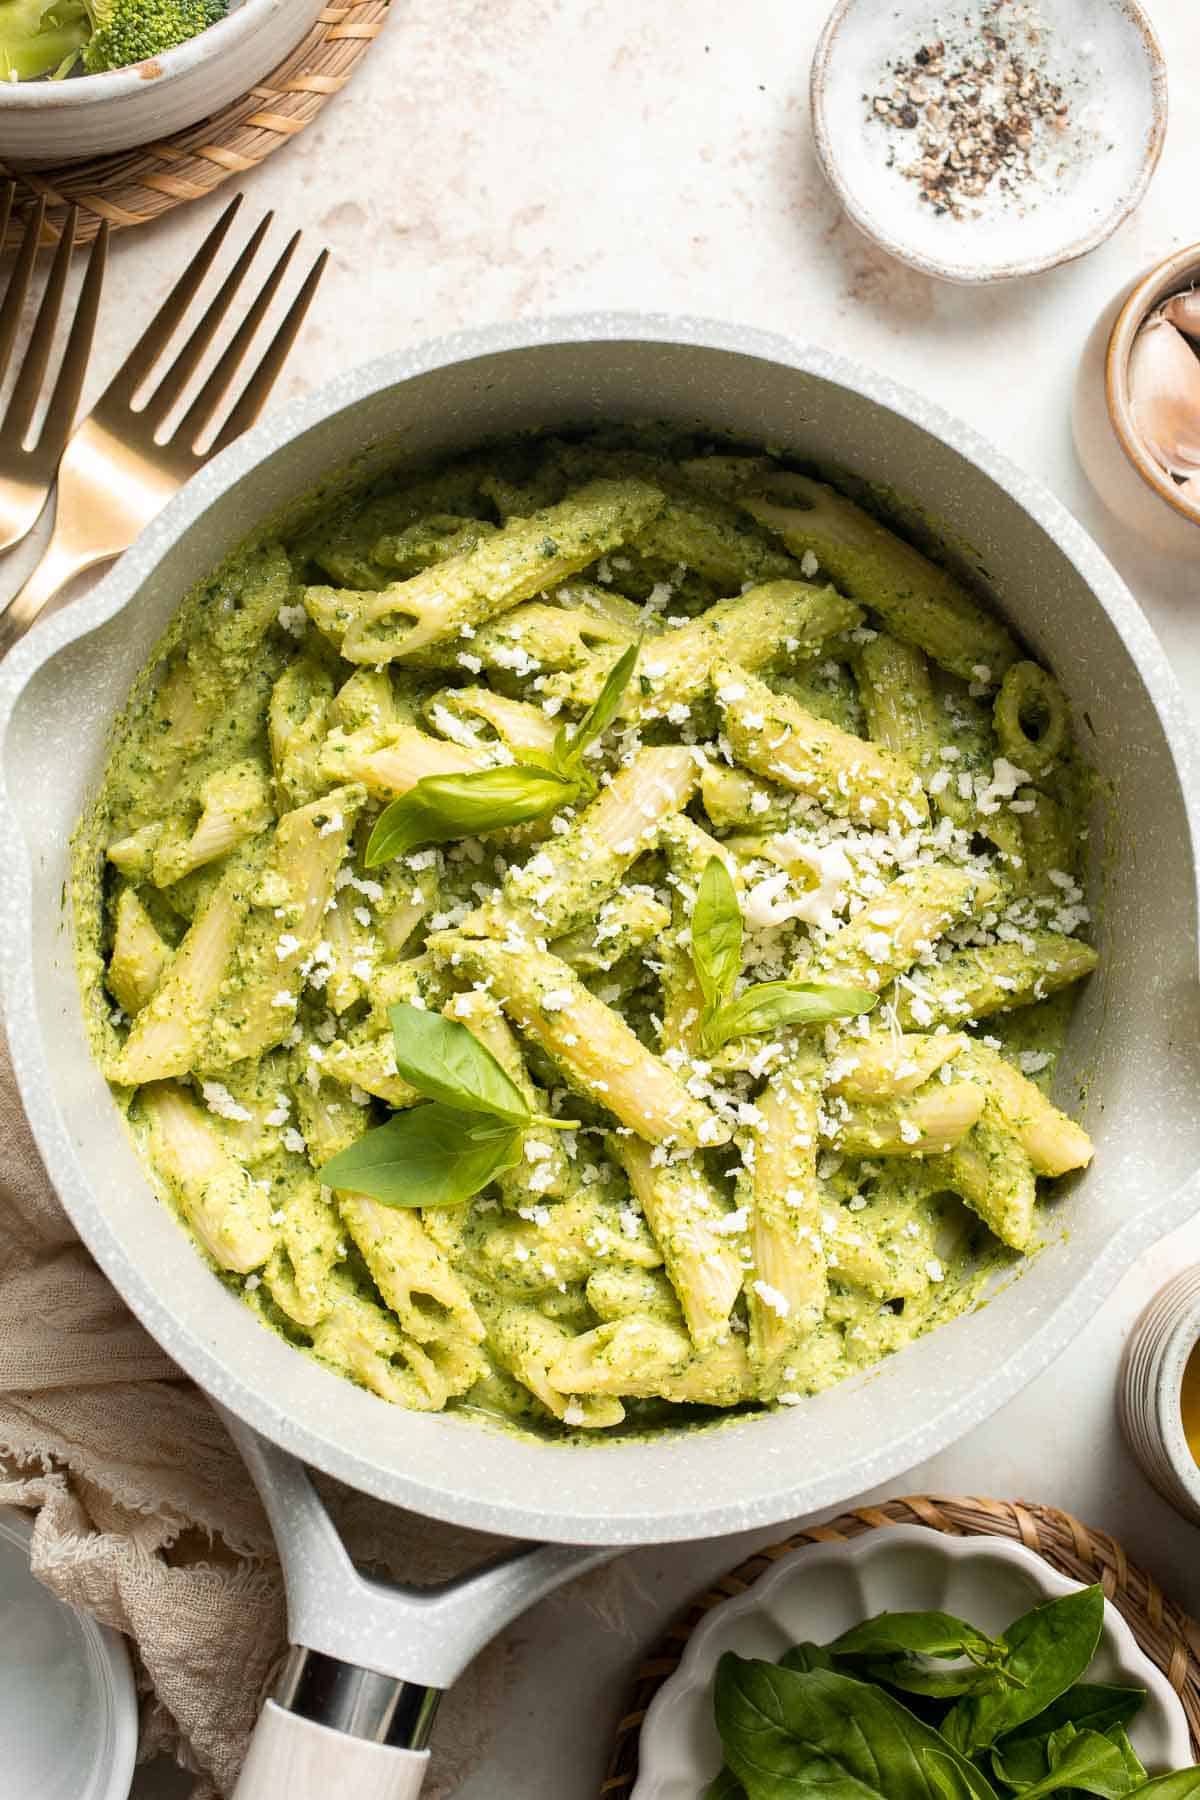
Whether you need a quick dinner recipe for busy weeknights or want to get more vegetables on your plate, this easy recipe is a great choice! The bold, fresh flavor of basil pesto pairs perfectly with steamed broccoli, creating a creamy pesto sauce that coats each and every noodle in a brilliant shade of green. We love making it during the spring but it'll quickly become a go-to you'll want to make all year long!
Why You'll Love This Broccoli Pesto Pasta
- Easy to make. Thanks to the food processor, this homemade broccoli pesto recipe is almost as easy as heating up a jar of Marinara Sauce. You'll steam the broccoli in one pan (which is very easy), then strain it off and blend it in the bowl of a food processor with the basil pesto ingredients. Combine the two together and serve!
- So much flavor. Traditional Basil Pesto is one of the most intensely flavored ingredients available, and it's the key to making many delicious pasta dishes! The combination of broccoli and pesto is so wonderful that you'll wonder why you didn't combine the two together sooner. The basil really brings the broccoli to life!
- Naturally vegetarian. It's always nice to find a recipe that can accommodate a variety of eating preferences. The only animal product in this broccoli pesto pasta is Parmesan cheese, which adds a salty, umami flavor to the pesto. It's incredibly satisfying!
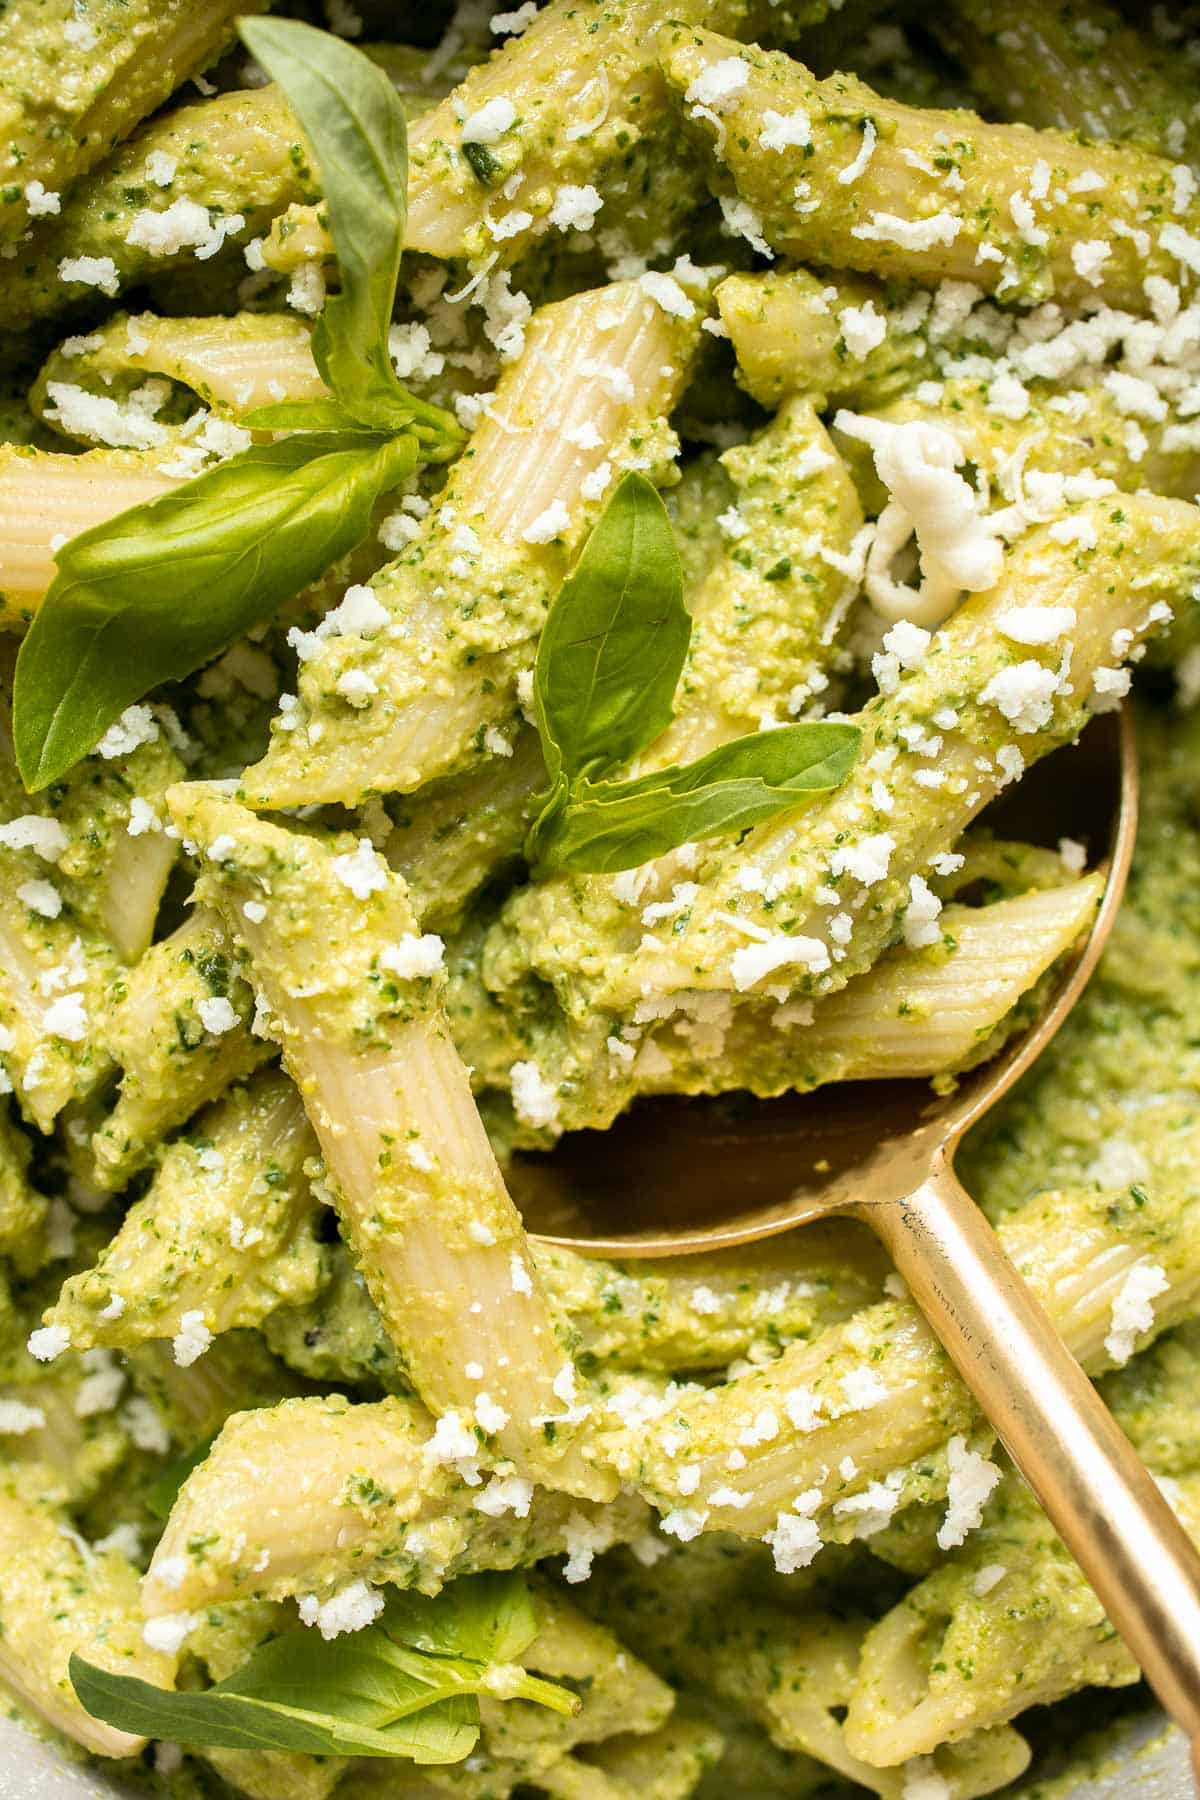
Ingredient Notes
To make this delicious broccoli pesto pasta, you will need the following ingredients (full measurements in recipe card below):
- broccoli - start with fresh, raw broccoli florets. It steams quickly in the boiling water.
- basil - you will need fresh basil leaves just like in our traditional Basil Pesto.
- garlic - just peel the garlic because it will blend down in the food processor.
- pine nuts - pine nuts are a classic option, but cashew nuts or blanched almonds work well too.
- Parmesan cheese - grate the Parmesan before blending.
- salt and pepper
- lemon juice - fresh lemon juice adds a bright flavor to lift the whole dish. Feel free to add the lemon zest, too.
- extra virgin olive oil - use this for a glossy, creamy sauce.
- penne pasta - choose the best quality pasta you can afford. Feel free to use whole wheat pasta for extra fiber.
You will also need measuring cups and spoons, a large pot, a slotted spoon, and a food processor.
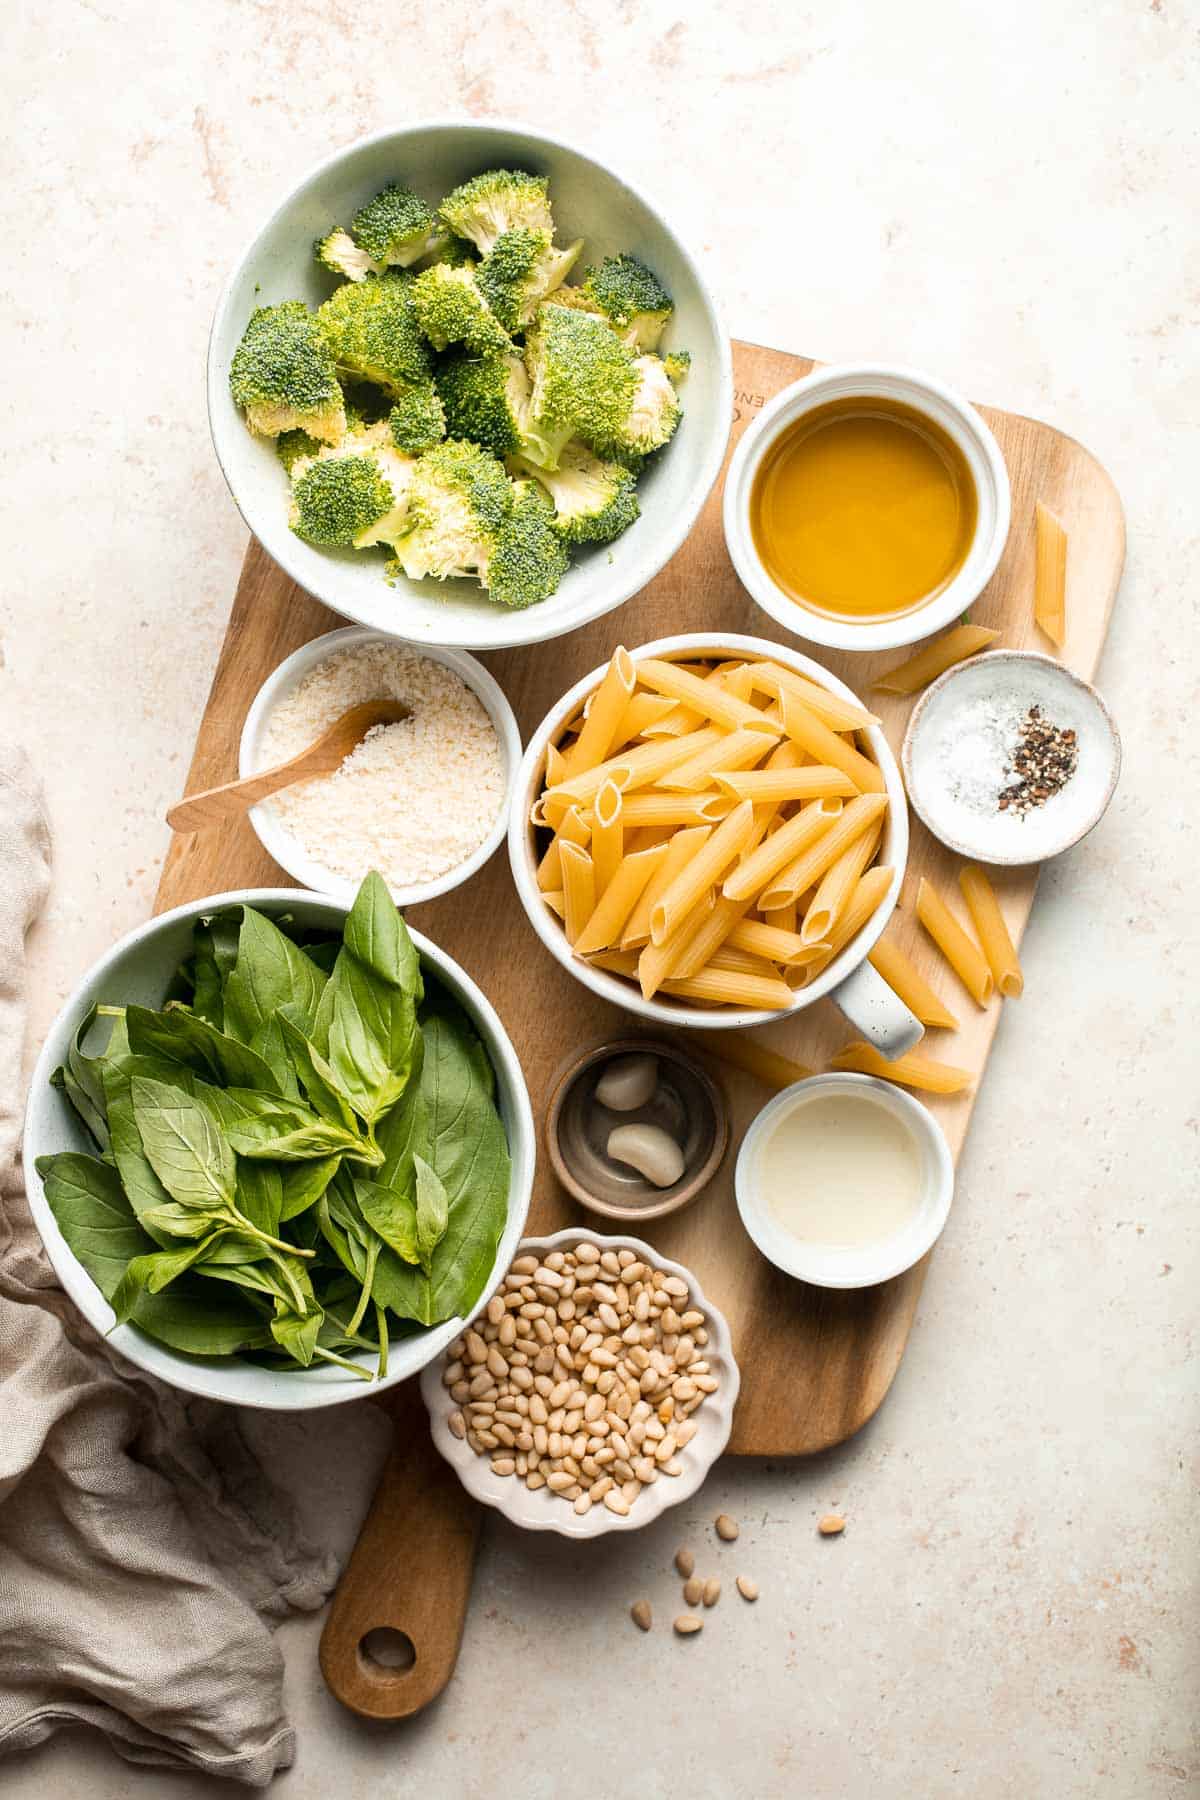
How to Make the Best Broccoli Pesto Pasta
- Cook broccoli. Bring a large pot of salted water to a boil over medium-high heat. Add broccoli florets and cook until tender, about 2 minutes. Use a slotted spoon to remove the broccoli and set aside.
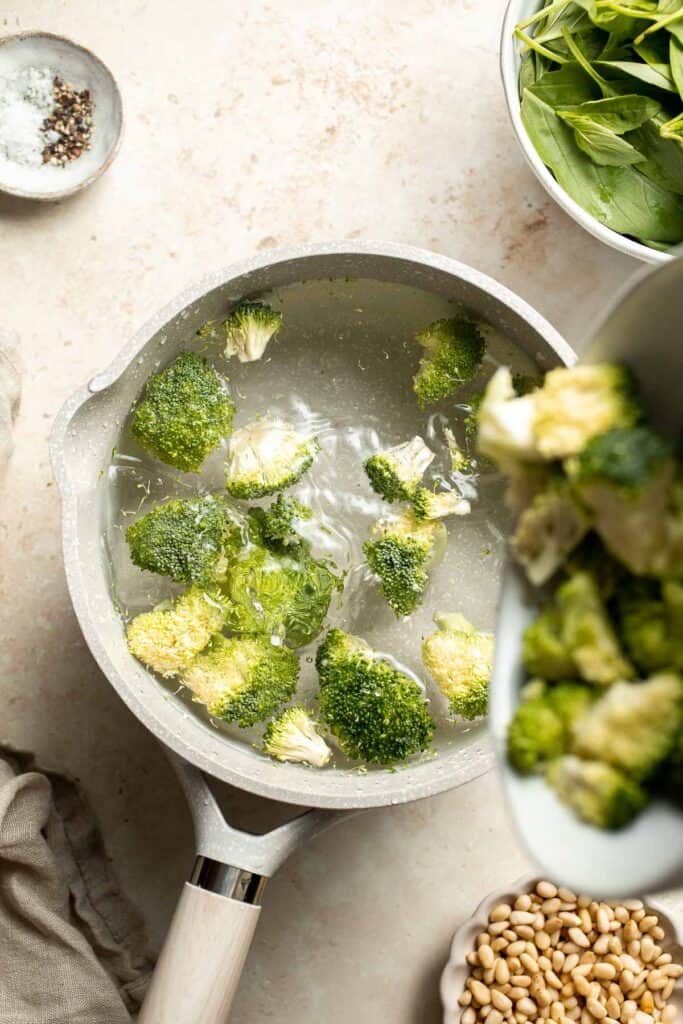
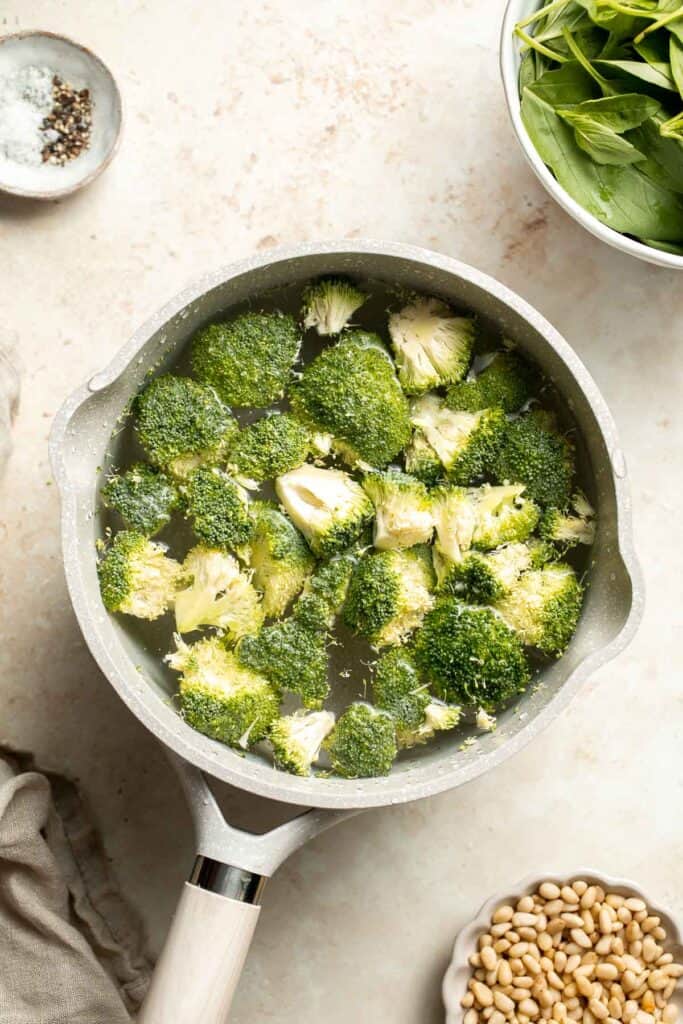
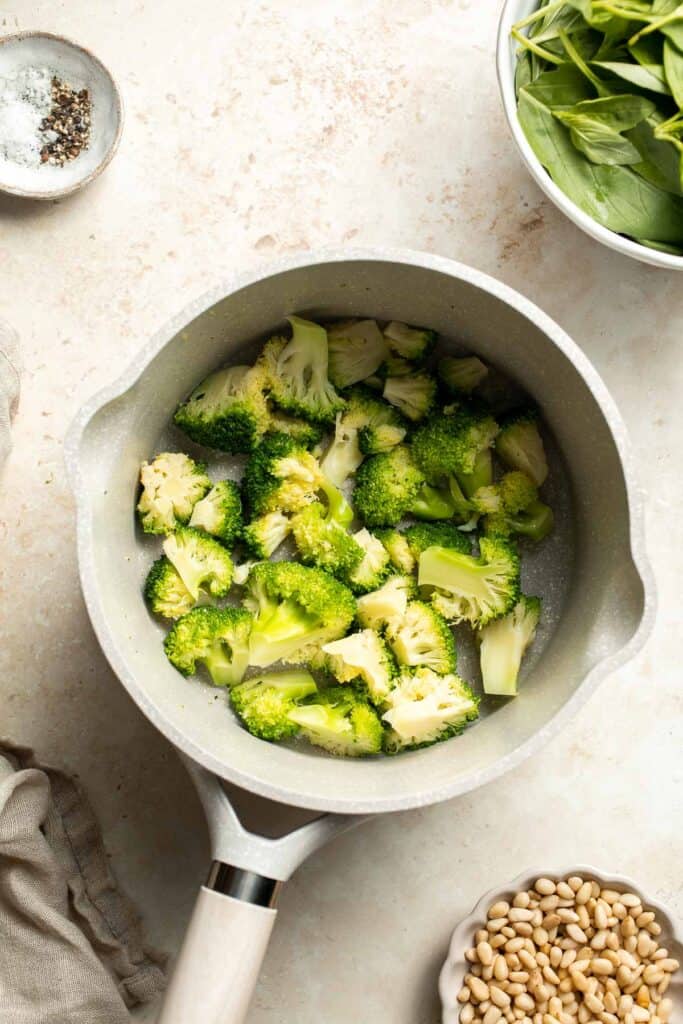
- Cook pasta. Add penne pasta in the same pot of boiling water and cook until al dente according to package directions, about 8-10 minutes. Reserve ¼ cup of the hot pasta water in a bowl. Drain the pasta and set aside in the pot.
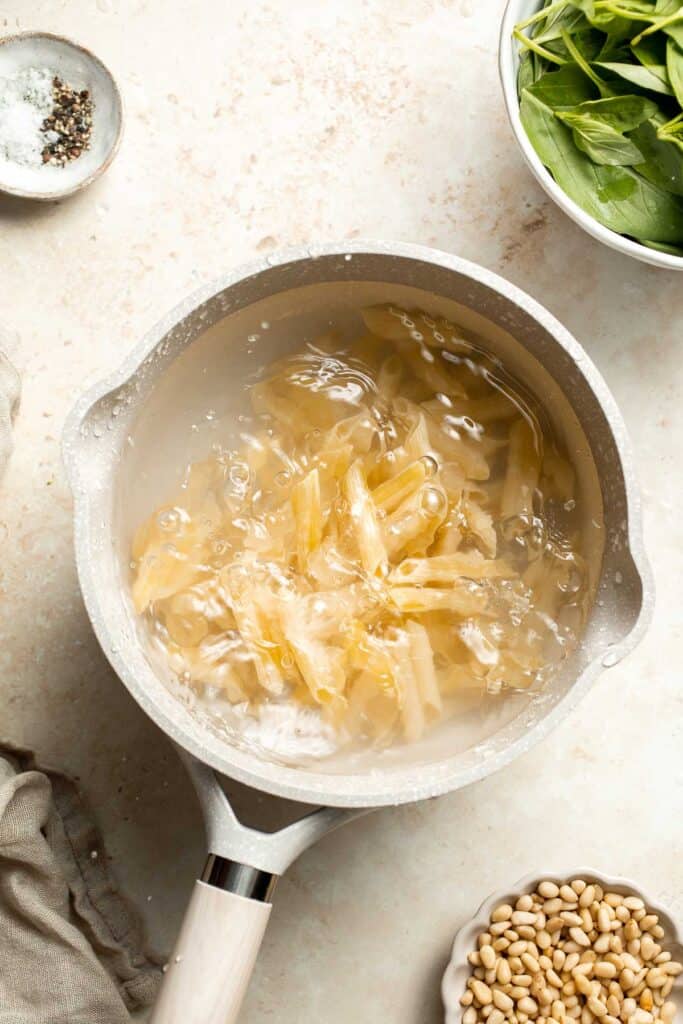
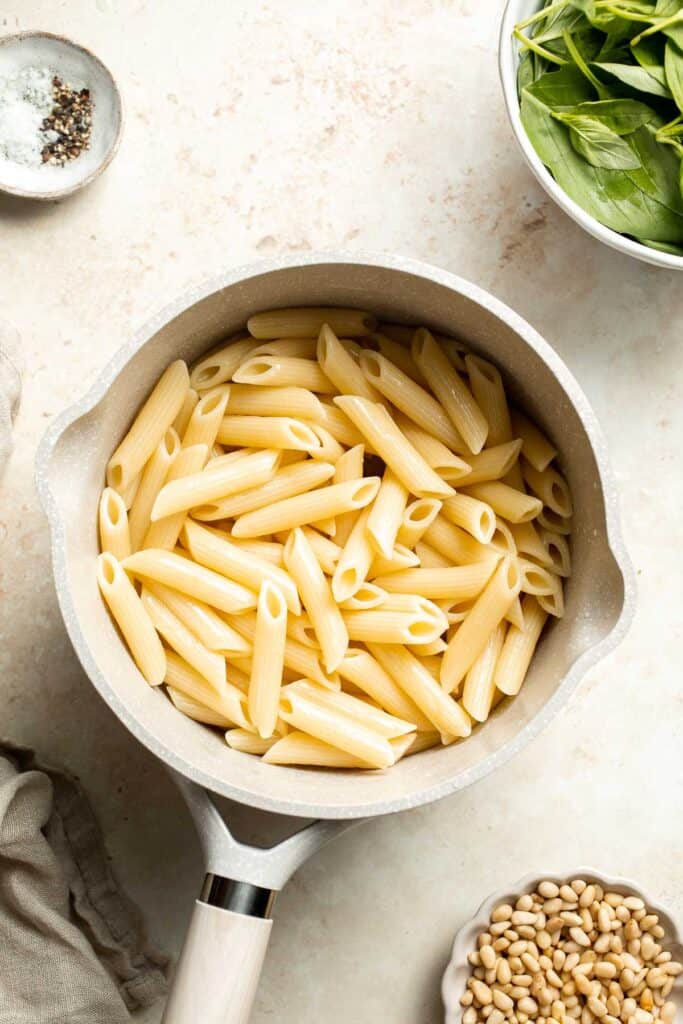

- Make pesto. In a food processor, add cooked broccoli, basil, garlic, pine nuts and Parmesan. Pulse mix until well combined, about 1 minute. Then, add salt, pepper and lemon juice.
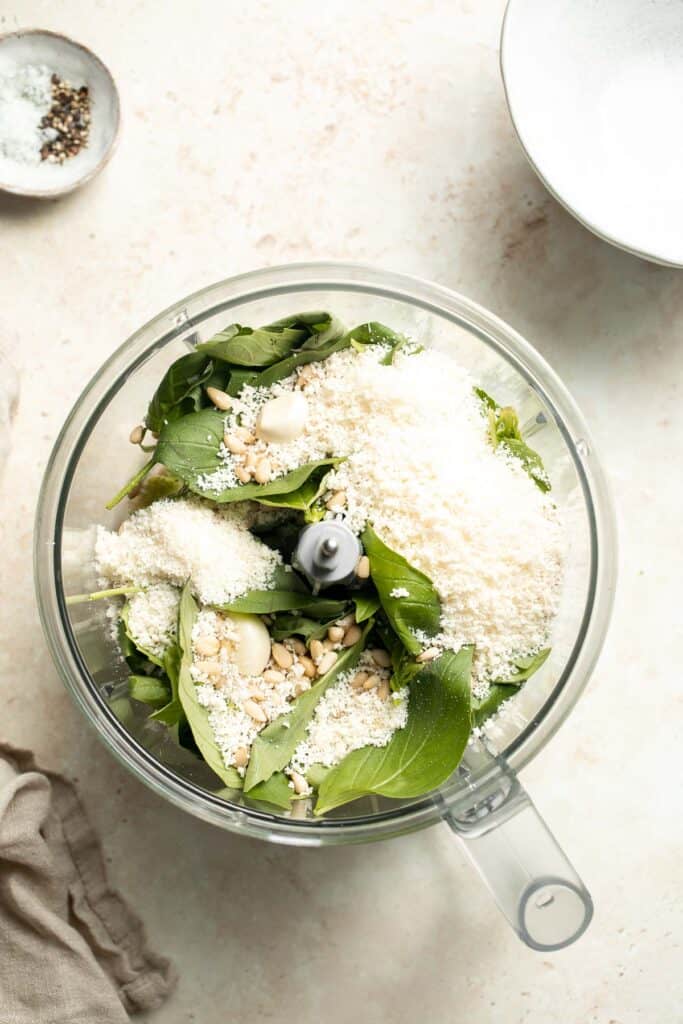
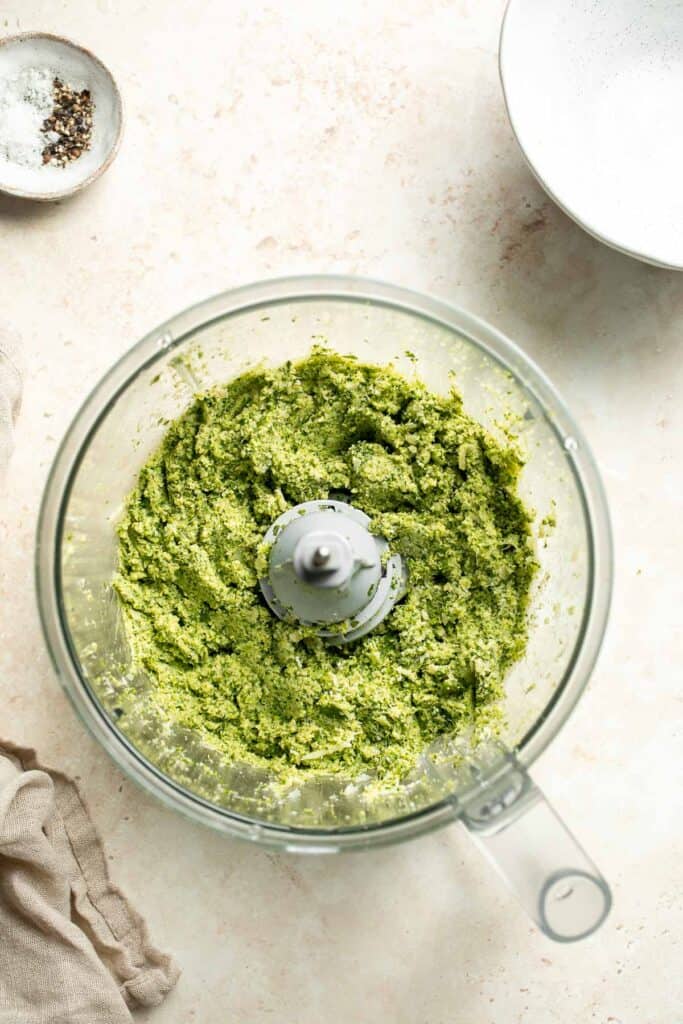
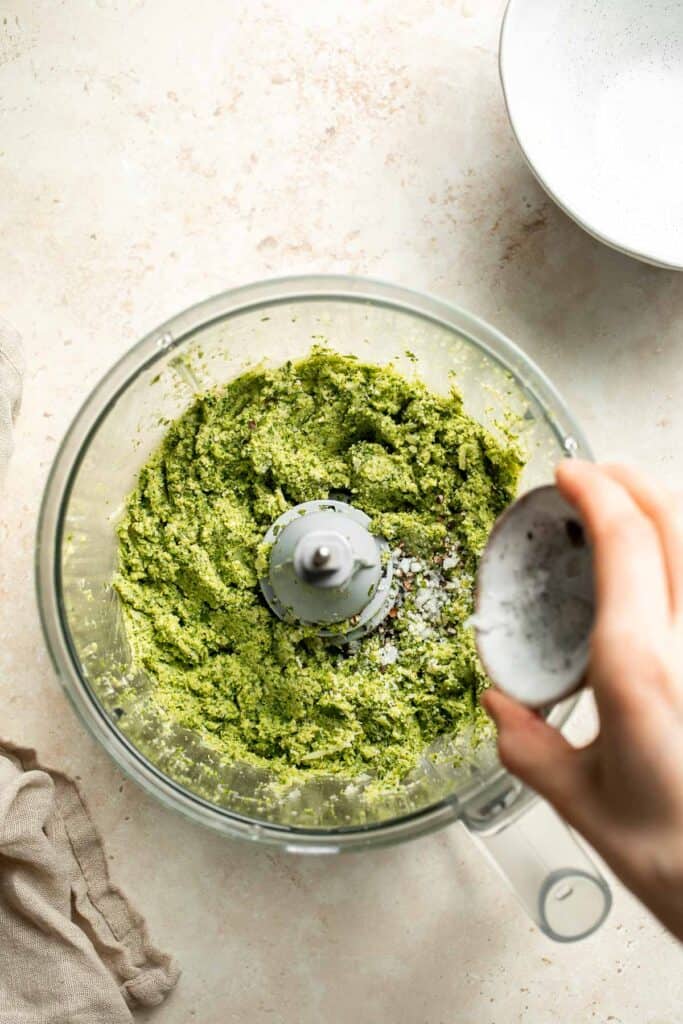
- Add olive oil. Slowly pour in olive oil while mixing on low speed until fully combined. You can scrape down the sides of the food processor occasionally to help mix evenly.
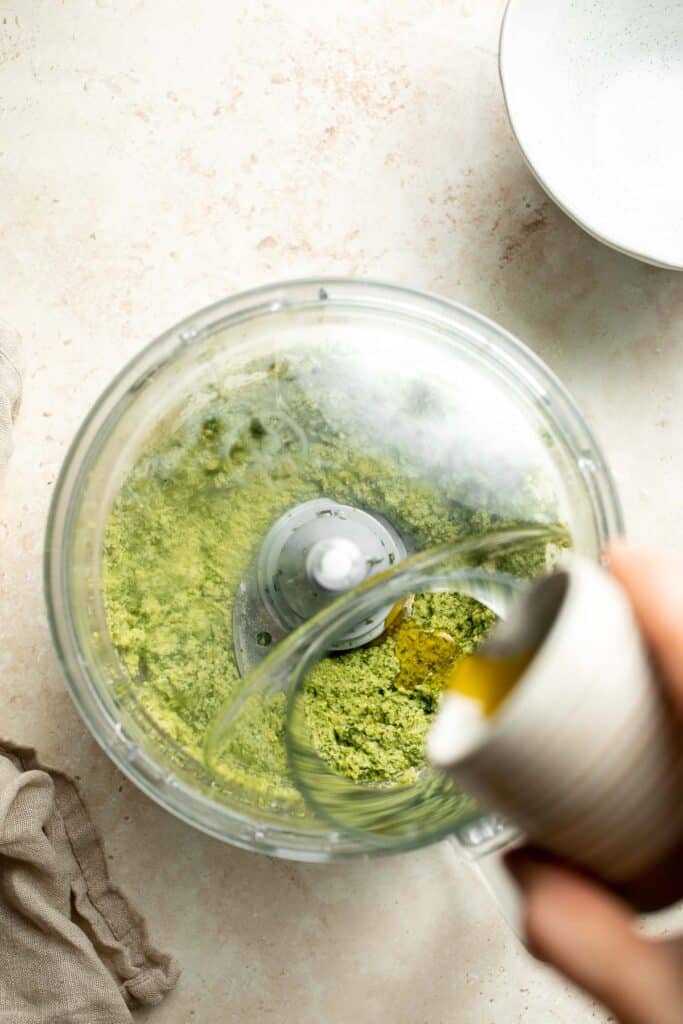
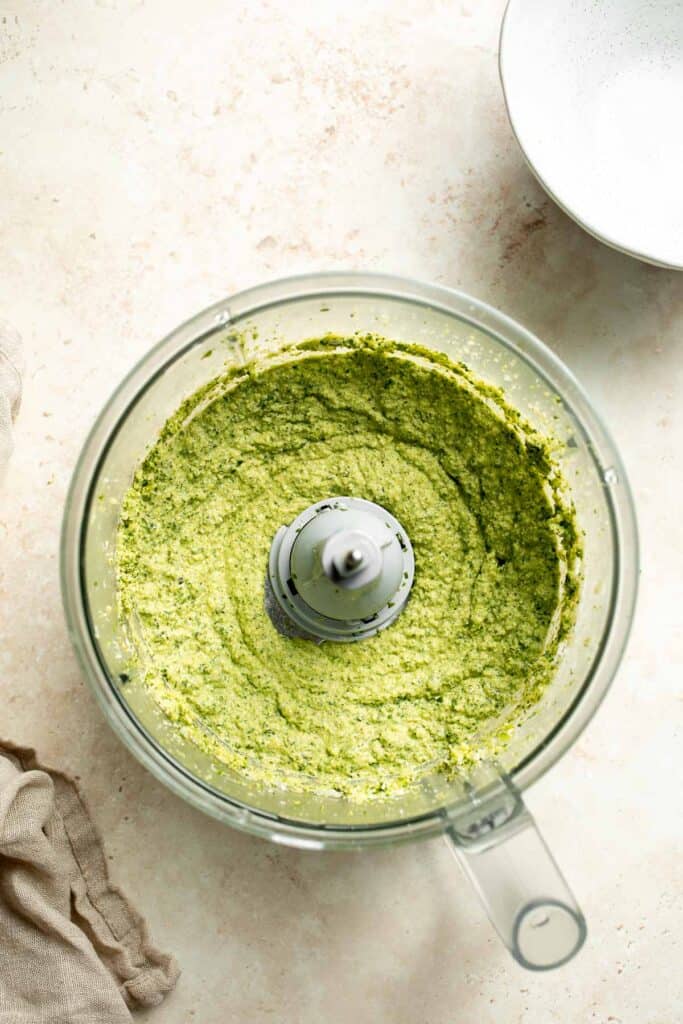
- Add pasta water. Slowly pour in reserved pasta water and blend until smooth and creamy.
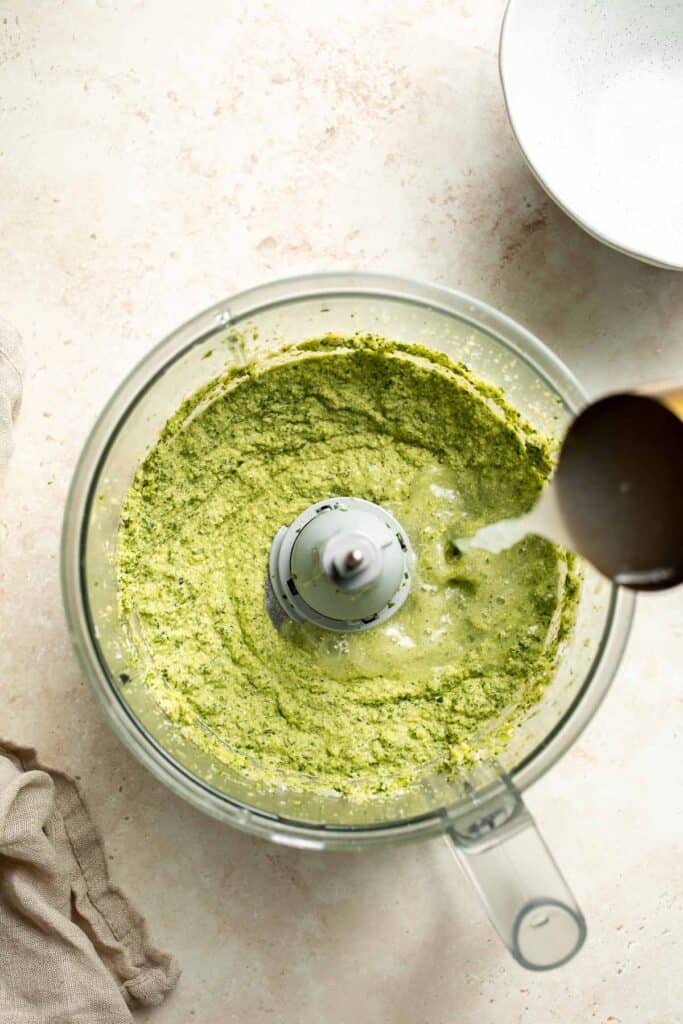
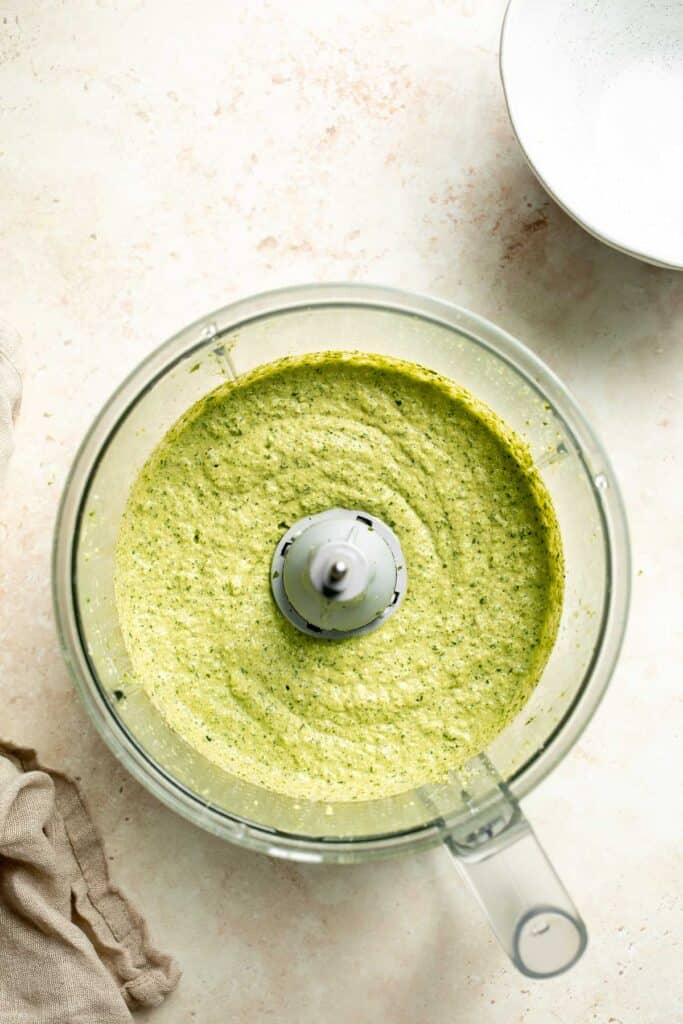
- Toss. Add the creamy broccoli pesto sauce to the pasta and toss well to coat.
- Serve. Serve warm with extra parmesan cheese if desired.
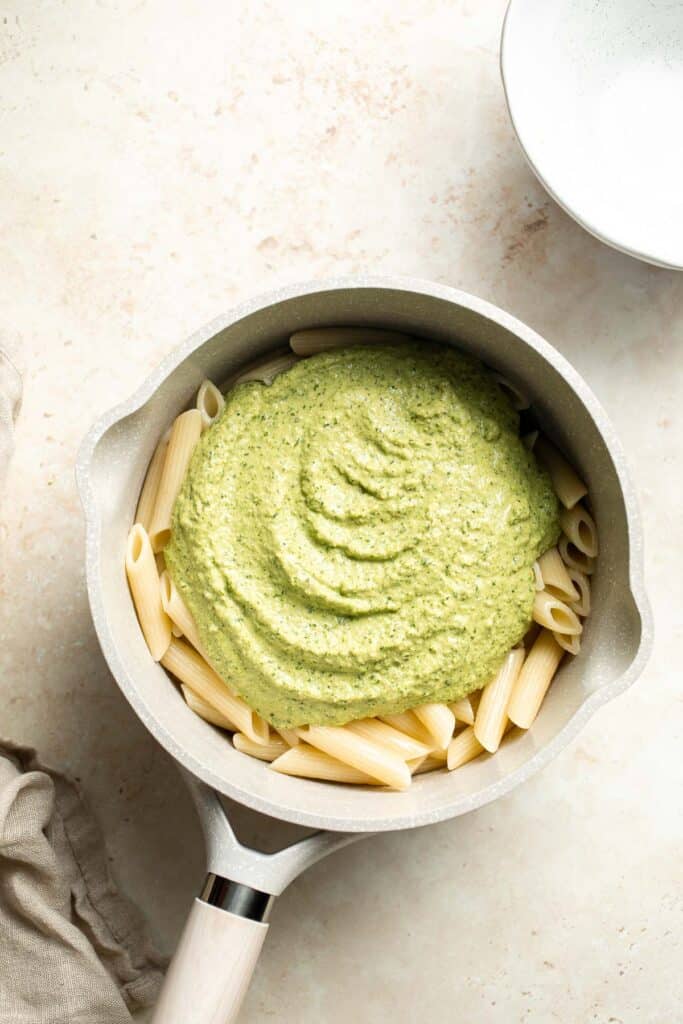
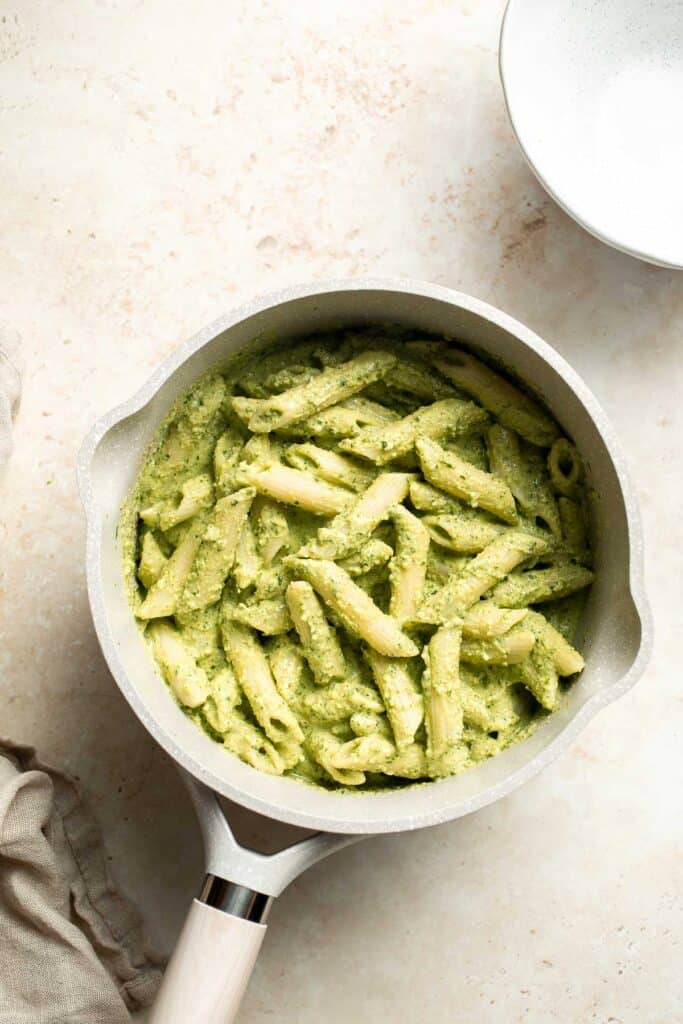
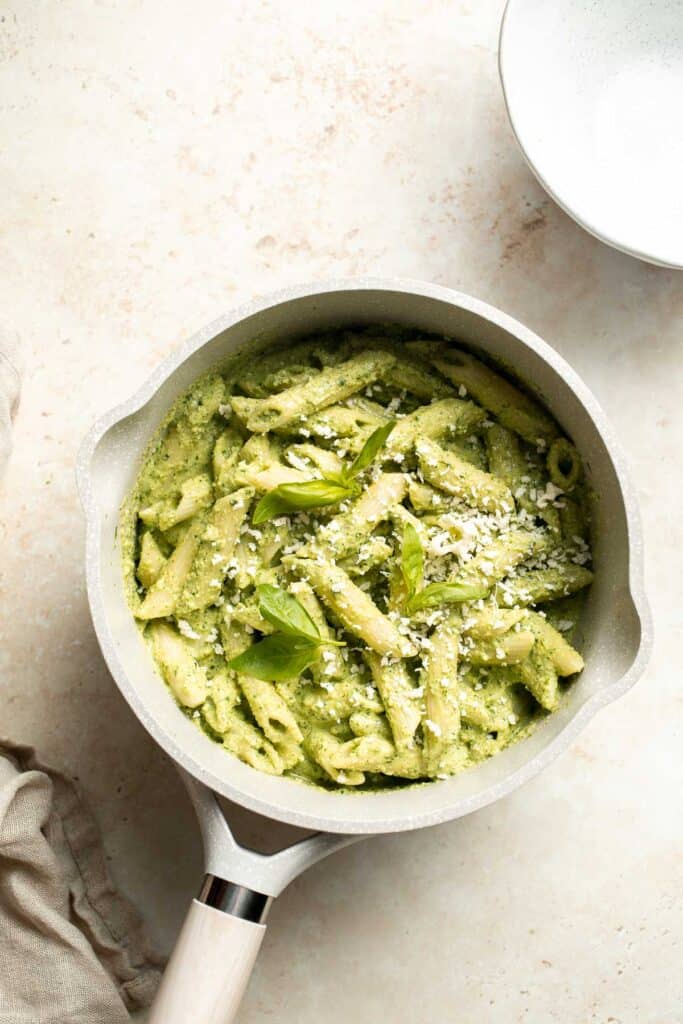
Recipe Variations
- Nut free version. Instead of pine nuts, use sunflower or pumpkin seeds.
- Make a vegan pesto. Replace the Parmesan with nutritional yeast powder. Adjust to taste.
- Make it spicy. Add some red pepper flakes for a bright, warm flavor.
- Change the pasta. Although penne is a great option for this recipe, there are so many wonderful pastas that can hold sauce well. Try rigatoni, rotini, farfalle pasta or your favorite type.
- Add some toppings. This recipe would taste wonderful with some sun-dried tomatoes, diced tomatoes, green olives, or roasted vegetables served on top.
How to Serve
This broccoli pesto pasta is delicious served on its own, or paired with some of my favorite sides including:
- Garlic Breadsticks
- Vegetarian Stuffed Mushrooms
- Easy Tomato Bruschetta with Balsamic Glaze
- Caprese Salad
- Antipasto Platter
Want some more side dish inspiration? Try these 30 Side Dishes for Pasta.
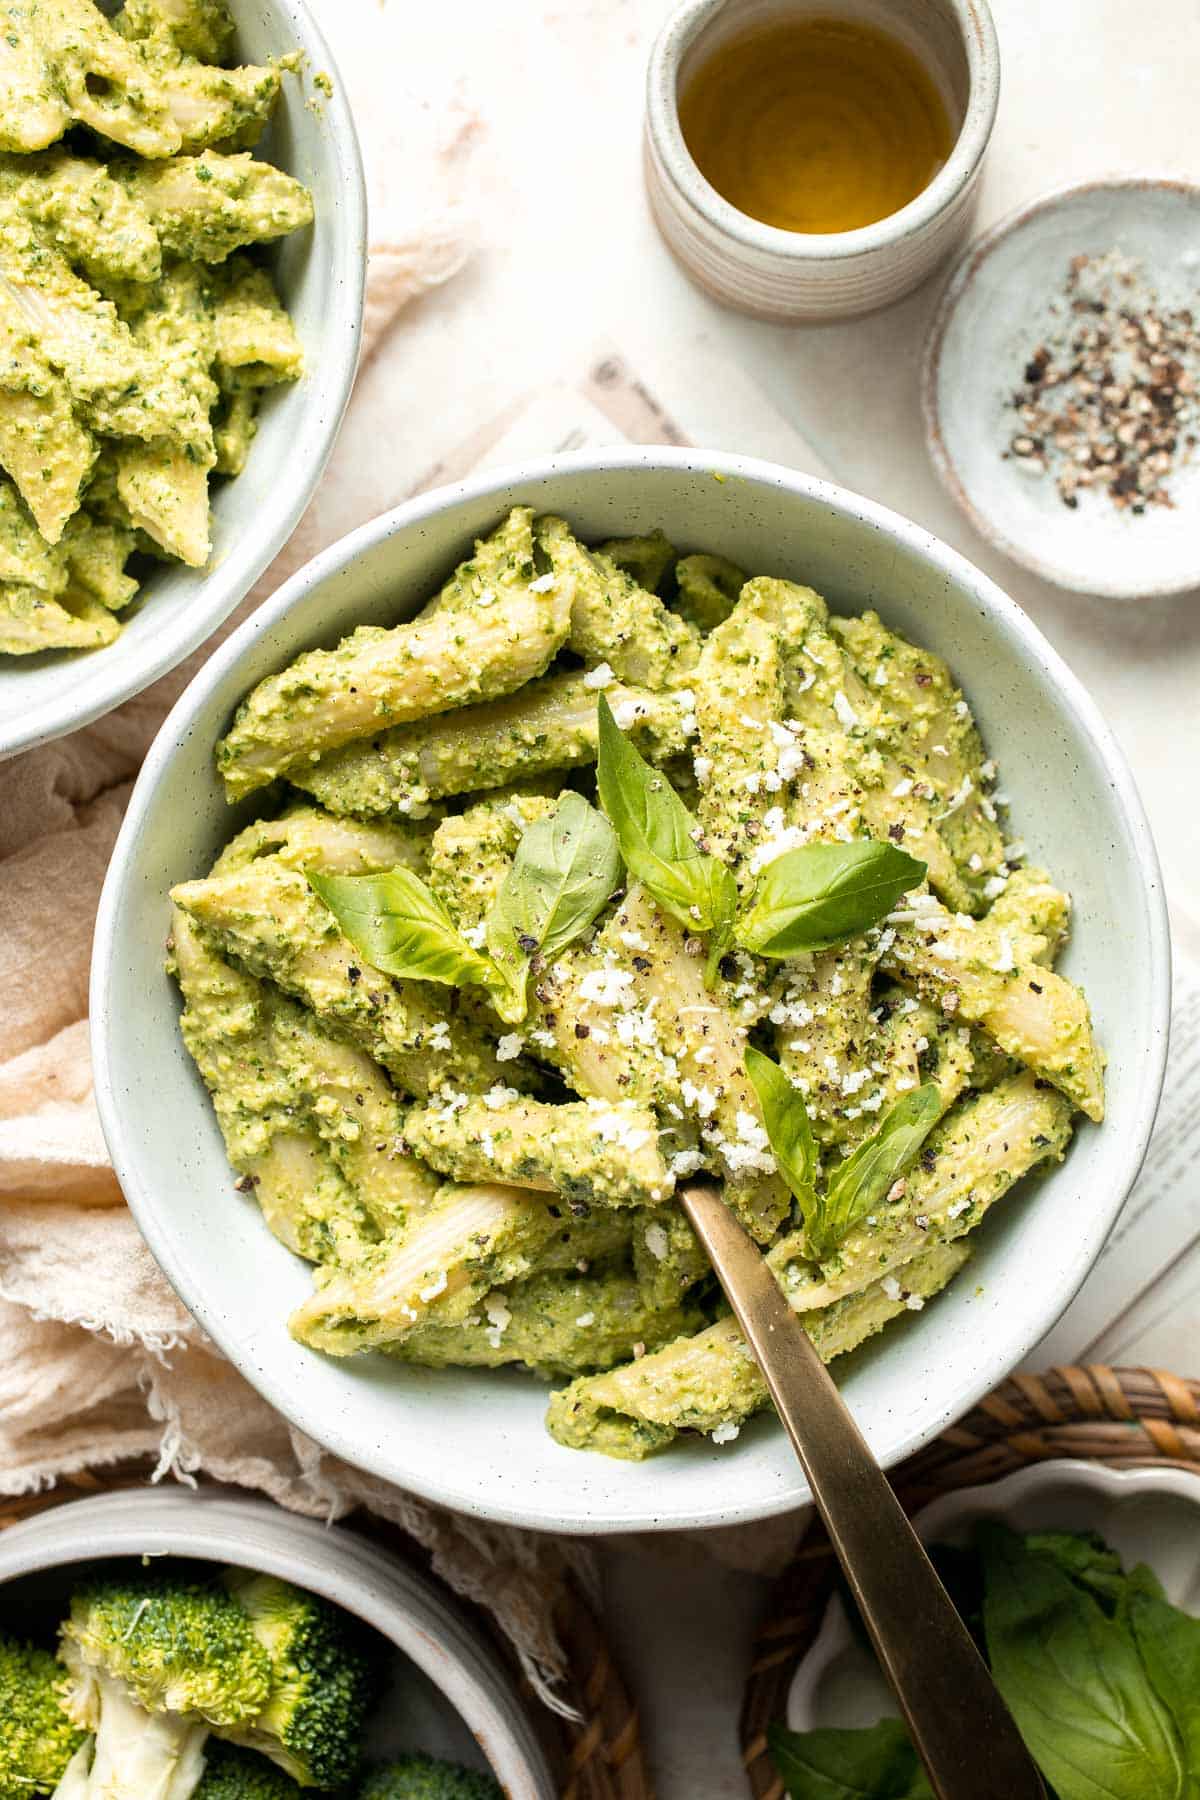
Recipe Tips and Tricks
- Don't overcook the broccoli. There's a fine line between crunchy and mushy, and you want it to be just fork-tender.
- Serve quickly. After it is blended together, the pesto sauce does not need to be cooked any further. Just toss the noodles in the sauce and go! Otherwise, it can thicken, and the delicate basil flavor can disappear.
- Adjust the taste. Feel free to taste the pesto while you're making it. Add a little more lemon juice or a little extra cheese if you'd like. Make it your own!
Storing and Freezing Instructions
How to Store
Store the leftover pesto pasta in an airtight container in the fridge for 3-4 days.
How to Reheat
Either microwave your leftovers for a few minutes or rewarm the pasta in a skillet on the stove. It may help to add a little splash of water to loosen the sauce.
FAQ
Yes! You just need tender, warm broccoli, and that can easily be made with steamed frozen broccoli instead. Just make sure it is fork-tender and not overcooked.
Yes! If you can't find fresh basil around or are in a rush, you can definitely substitute premade pesto sauce. However, you may need to eyeball the amount and adjust to taste.
This simple recipe is absolutely delicious exactly as written, but feel free to change it up! Blend in a can of rinsed and drained white beans for extra protein. You can also add some fresh greens to the pesto, like fresh arugula, spinach, or baby kale. There are many different garnishes you can try, including a sprinkle of Parmesan, diced or sun-dried tomatoes, crumbled bacon, diced olives, roasted veggies, and more.
More Pasta Recipes
- 40 Best Pasta Recipes
- Pesto Penne Pasta
- Creamy Chicken Pesto Pasta
- Mascarpone Pesto Pasta
- Spring Pesto Pasta with Asparagus
- Creamy Tomato Pasta
Tried this recipe?
I'd love to hear what you think! Leave a comment and rating below to share your feedback. Your reviews help others discover this recipe and help me keep creating more free recipes for you. Snap a photo and tag me on social media @aheadofthyme too.

Kung Pao Tofu
This homemade Kung Pao Tofu, made with perfectly crispy pan-fried tofu tossed in the most delicious sauce with peppers and onions, tastes way, way better than takeout. Since it's loaded with protein and veggies, this vegetarian version of kung pao chicken is an all-in-one meal with no need for any sides. Serve it over a bed of fluffy steamed rice to soak up the spicy sauce, and you'll have a perfect meal for any night of the week. Ready in just 25 minutes!
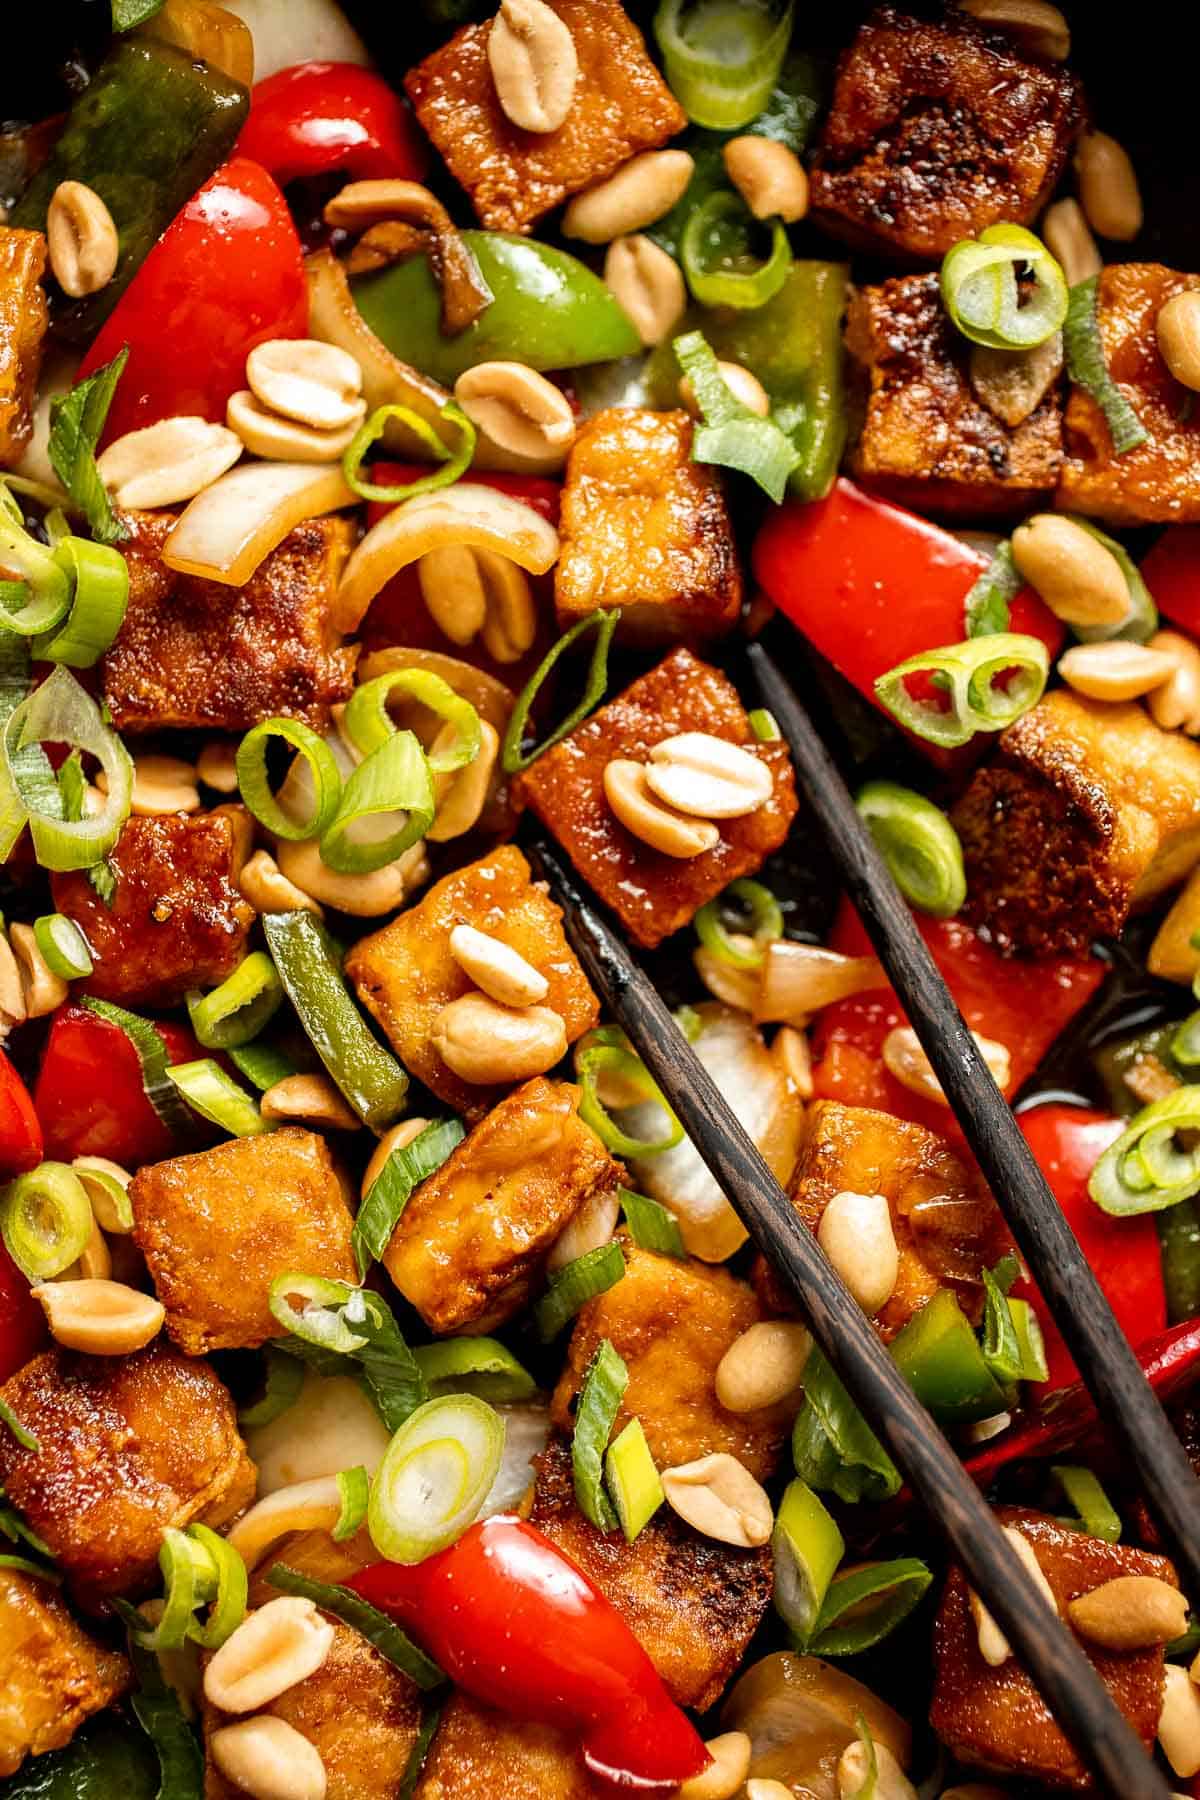
This kung pao recipe is one of my favorite dishes of all time. The kung pao sauce is made from scratch with a mixture of simple but intensely flavorful ingredients like soy sauce, vinegar, cooking wine, sesame oil, and more - which give it incredible flavor. It's sweet, salty, savory, tangy, and spicy all at the same time! My family can't get enough of it, and I'm always shocked by how much flavor you can add in such a short period of time. It's a keeper!
Why You'll Love This Kung Pao Tofu
- Lightning fast. One of my favorite things about working with tofu is how quickly it's ready to eat. You don't have to worry about it being undercooked in the middle like chicken, and it fries in about 10 minutes. It'll take longer to cook the rice than the entree! This is a fantastic weeknight dinner you'll be glad to have in your back pocket!
- Traditional flavors. Kung pao comes from the Sichuan province in China and has stood the test of time for a reason. There are many different variations, including some that use Sichuan peppercorns for their unique numbing sensation. It's a spicy, delicious dish that is especially popular around Chinese New Year. You don't have to wait for a special occasion, though. It's great any time of the year!
- All-in-one meal. Although it's not exactly a one-pot meal since you'll need to cook the rice separately, this dish is pretty close! You'll fry the tofu in the same pan you use to cook the sauce and veggies, then spoon the whole mixture over a bed of steamed rice. It's wonderful with some egg rolls or garlic cucumber salad for a restaurant-quality meal at home.
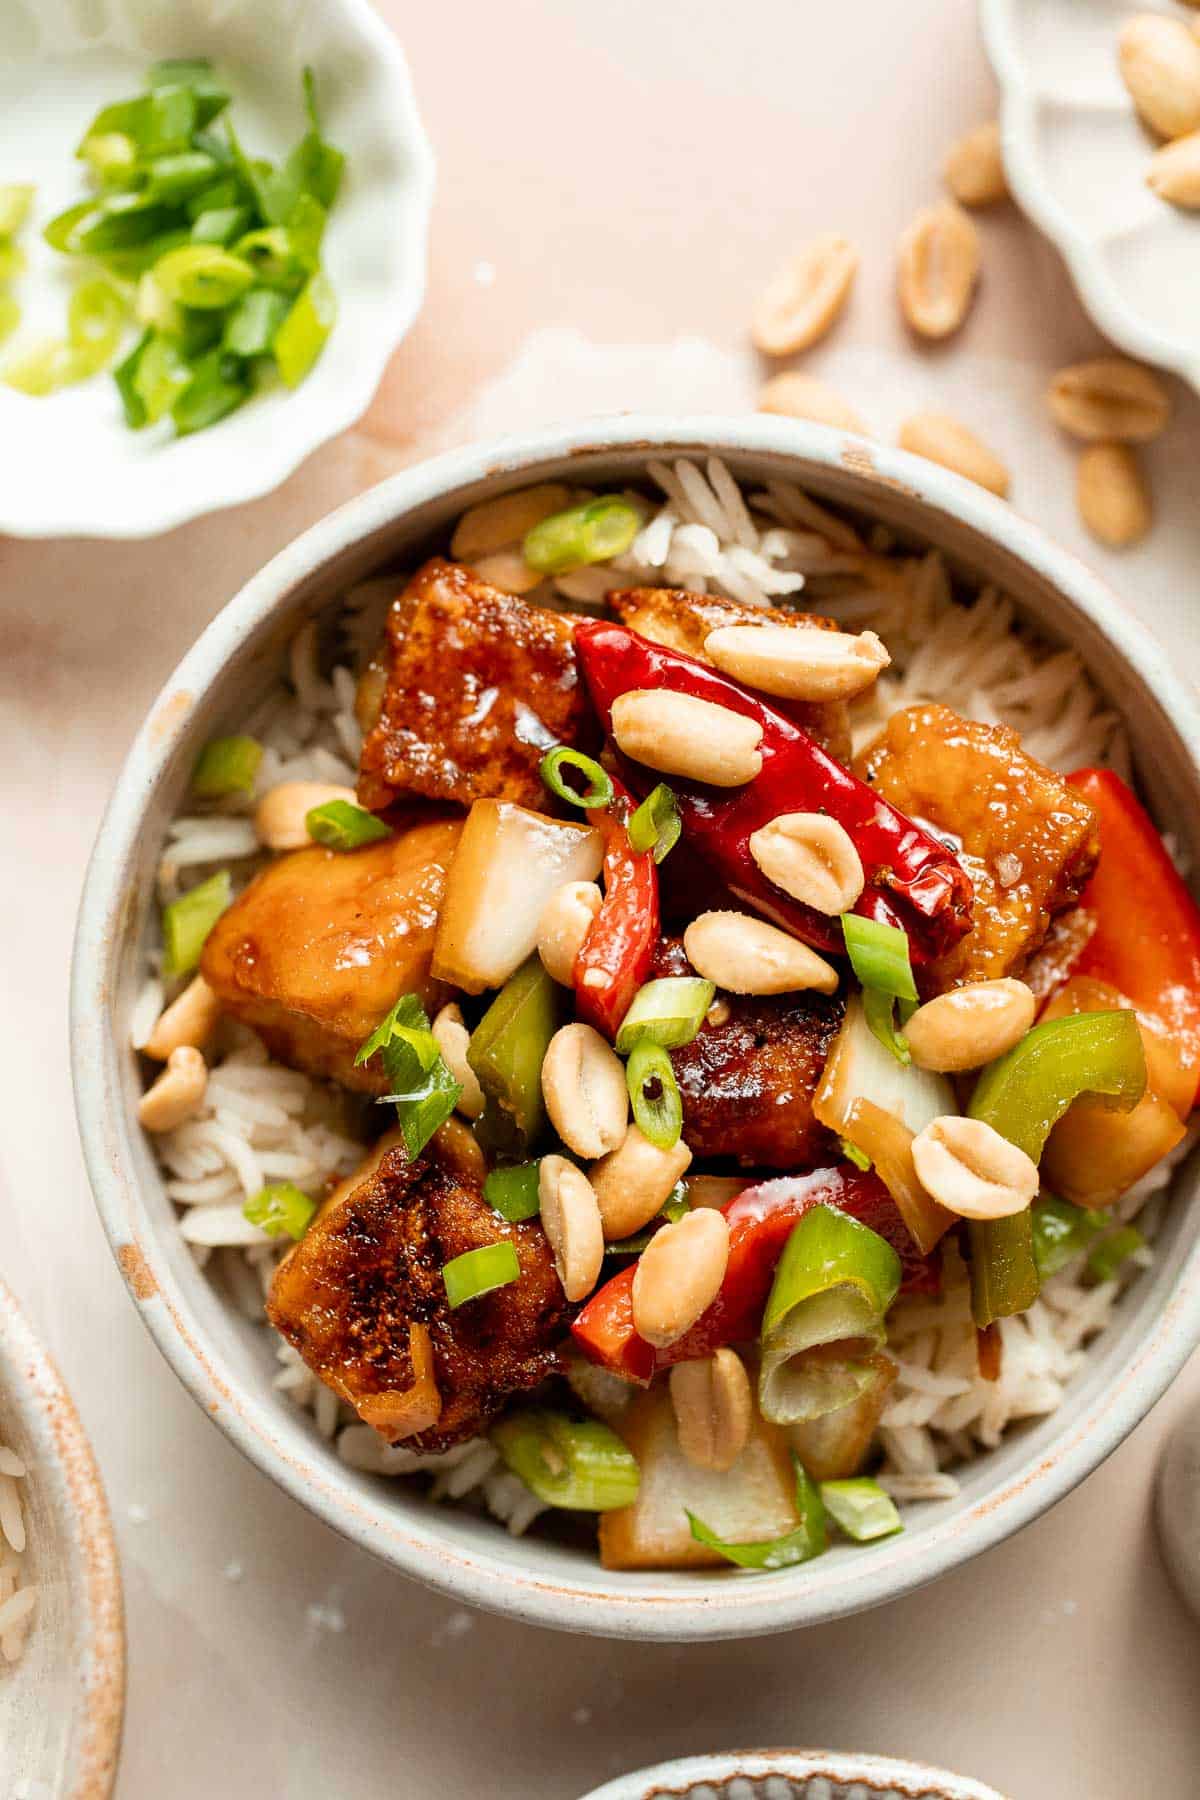
Ingredient Notes
To make this delicious kung pao tofu, you will need the following ingredients (full measurements in recipe card below):
- extra-firm tofu - dried and cut into cubes.
- cornstarch - for a crispy shell and also to thicken the kung pao sauce.
- avocado oil - this oil can handle the high heat needed for frying. You can substitute with other vegetable oils as well.
- soy sauce
- vinegar - black vinegar is best if you can find it. I also like rice vinegar.
- Chinese Shaoxing cooking wine - mirin is a good alternative.
- sesame oil - this adds a nice nuttiness.
- granulated sugar - for just enough sweetness to balance the savory flavors. Brown sugar or maple syrup are great alternatives.
- bouillon powder - chicken or vegetable bouillon powder (to keep it vegan) has a concentrated savoriness that's perfect for sauces.
- ground white pepper - pepper is a must. I like the flavor of white pepper, but black pepper works great too.
- vegetables - diced onion and red and green bell peppers.
- aromatics - minced fresh ginger and garlic for lots of flavor.
- dried red chili peppers - these dried chilies add a bold, warm heat.
- roasted peanuts - adds the perfect crunch to contrast with the texture of the tender tofu and veggies.
- green onion - add the finely chopped green onions right at the end.
You will also need measuring cups and spoons, paper towels or a clean kitchen towel, two mixing bowls, a whisk, a large non-stick pan, and a spatula or tongs.
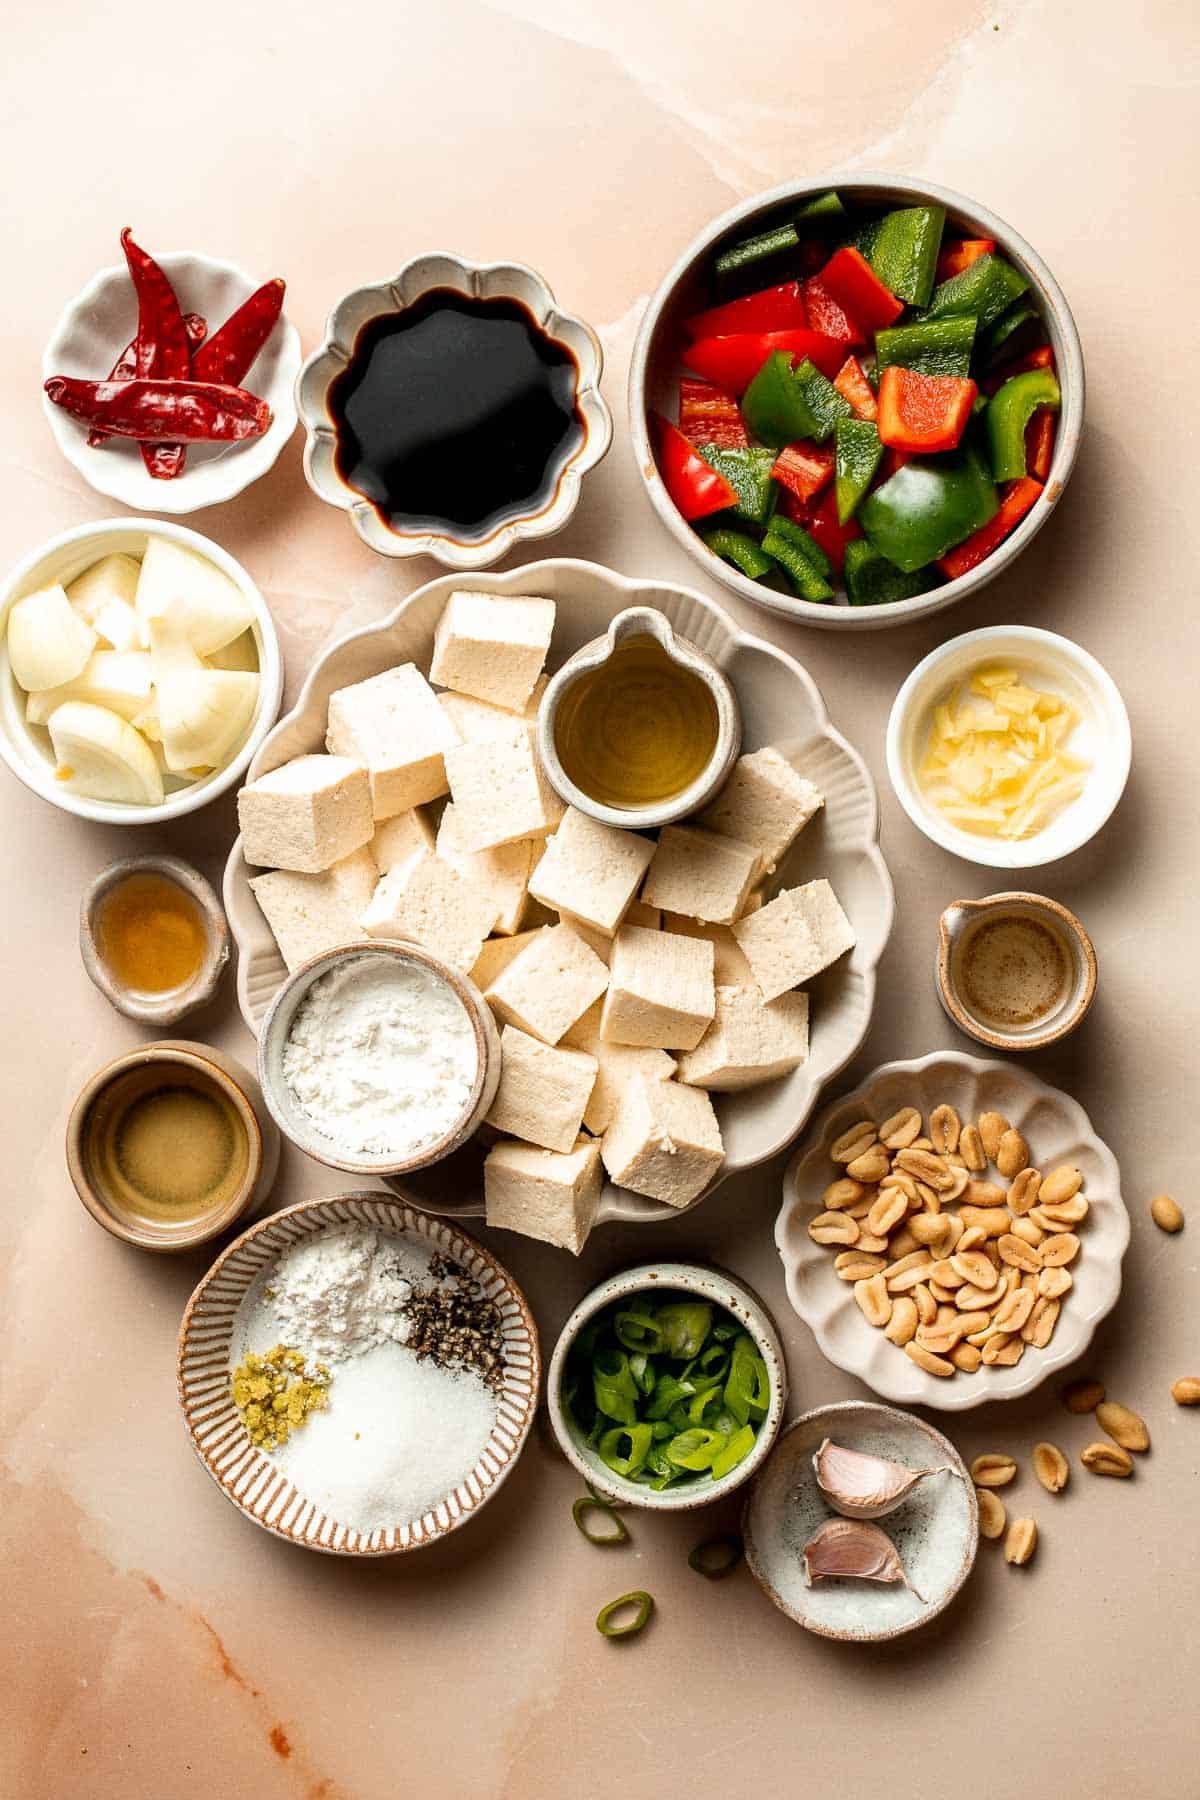
How to Make the Best Kung Pao Tofu
- Prepare tofu. Drain excess water out of the tofu and cut into 1 inch cubes. Use a paper towel to gently pat the tofu dry.
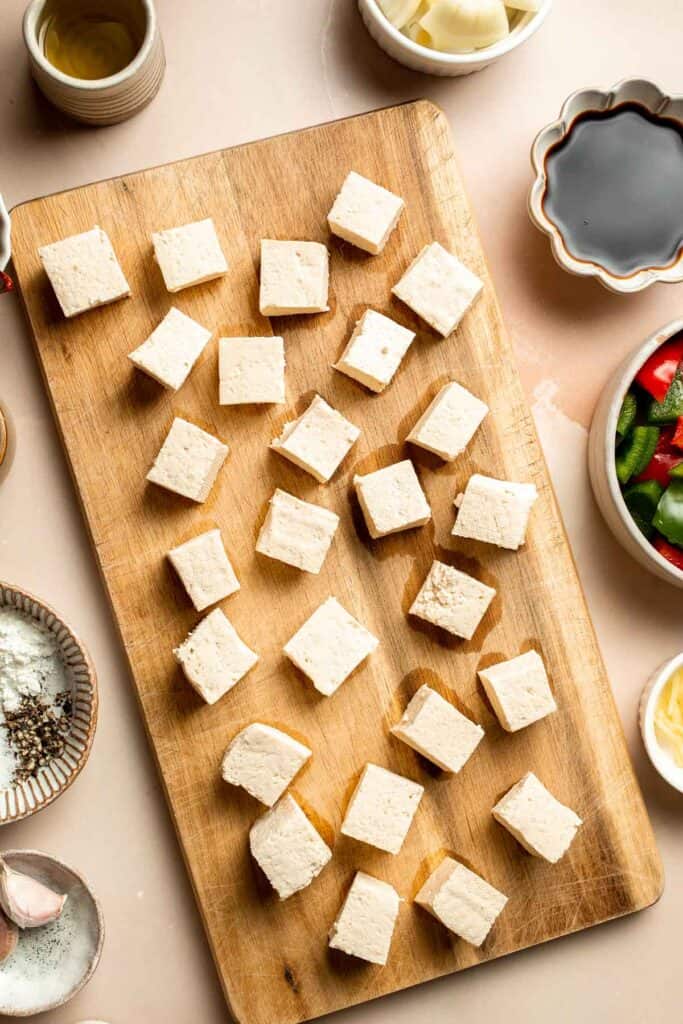
- Coat tofu. In a medium mixing bowl, add the tofu and cornstarch. Toss well to completely coat. Set aside.
- Make sauce. In another mixing bowl, add all the sauce ingredients including soy sauce, vinegar, Shaoxing cooking win, sesame oil, sugar, chicken bouillon powder, pepper, and cornstarch. Mix well until smooth.
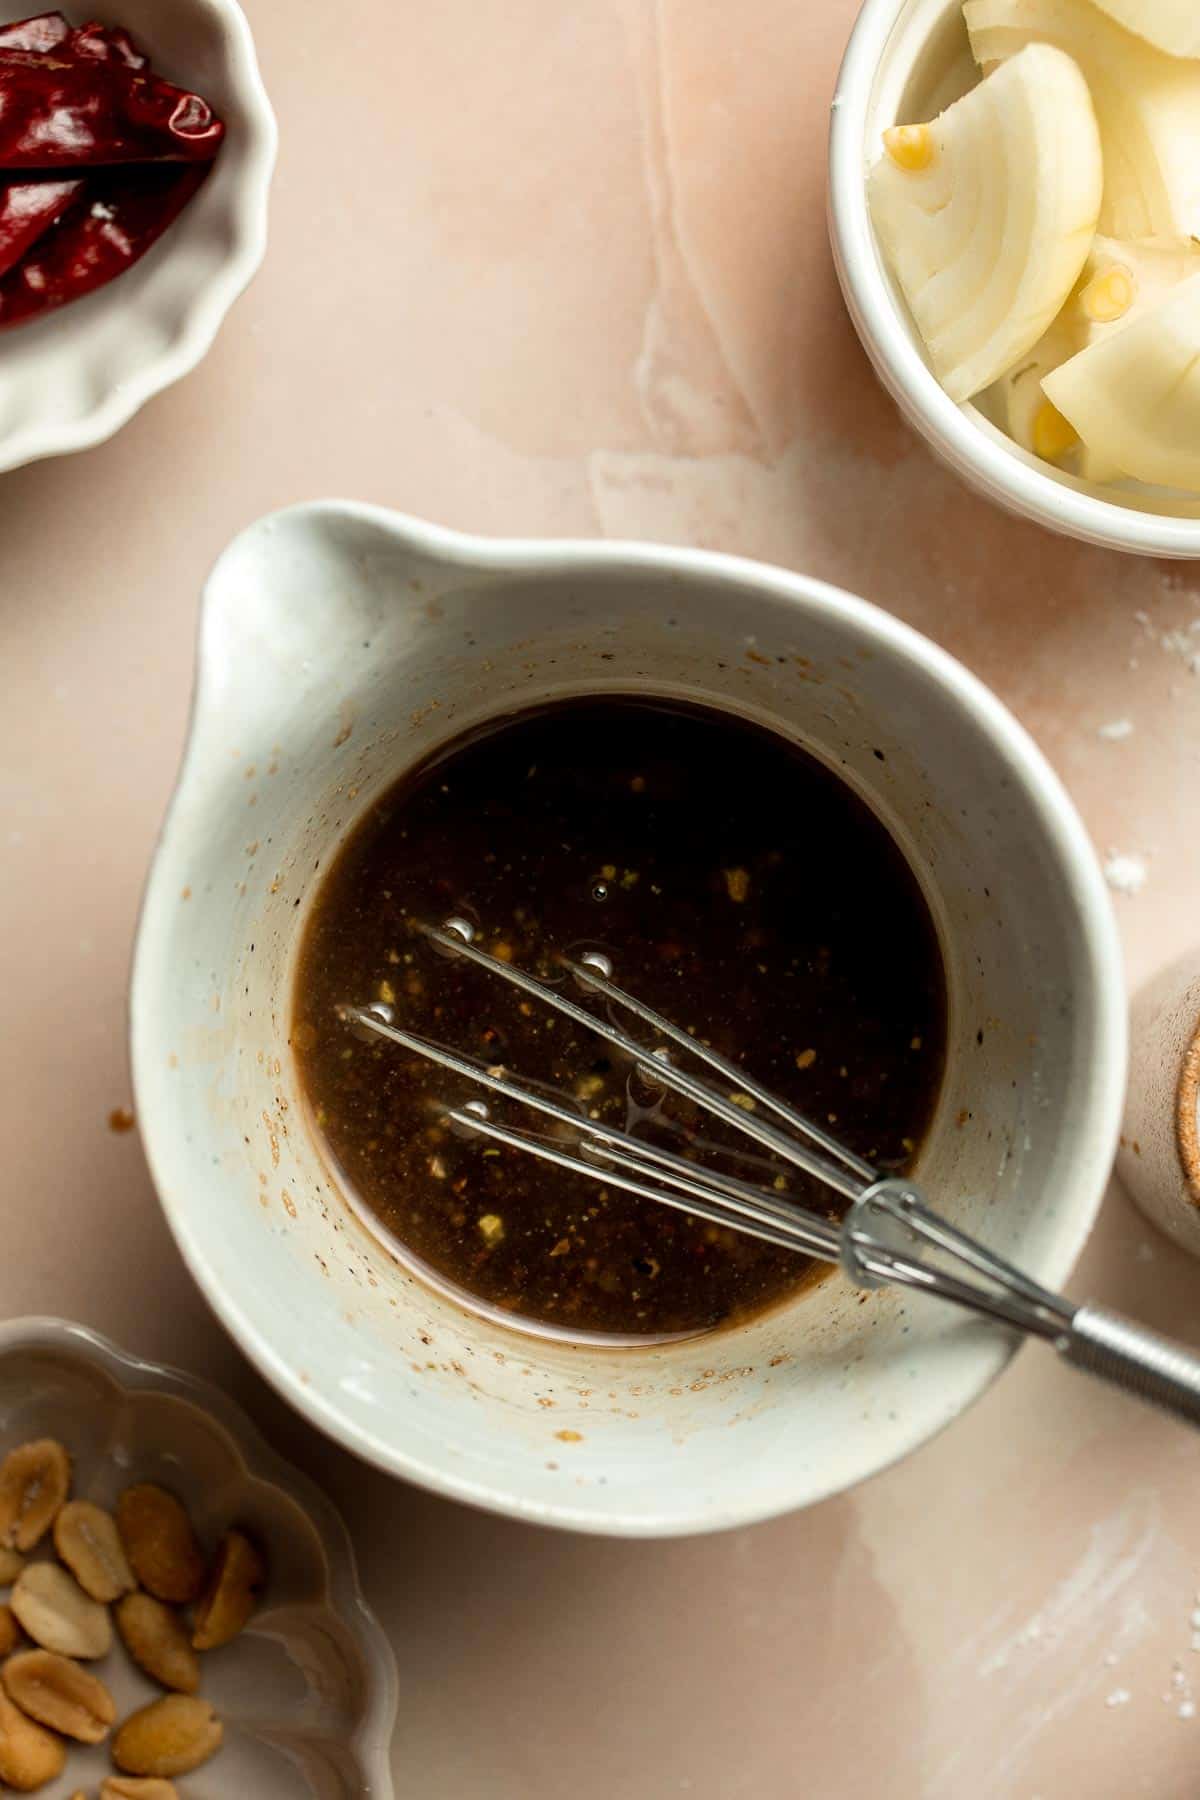
- Cook tofu. Heat oil in a large skillet until the hot oil sizzles, about 2 minutes. Add tofu and ensure they are evenly spaced apart. Sauté until browned on all sides, about 10 minutes. You might need to cook the tofu pieces in 2 batches to ensure they don't stick to one another. Once cooked, set them aside on a plate.

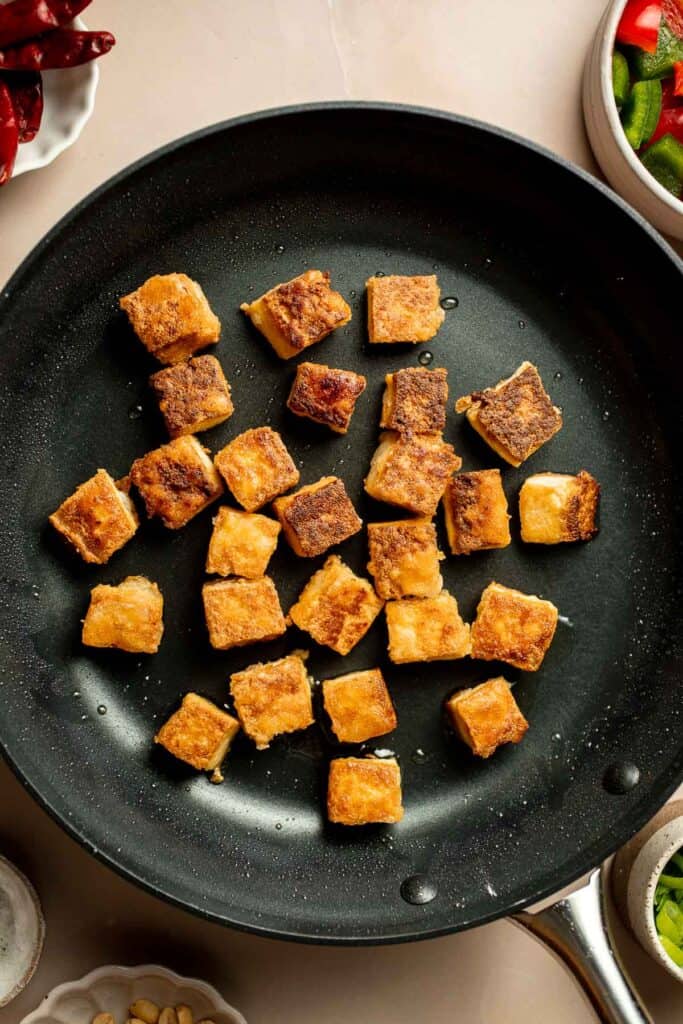
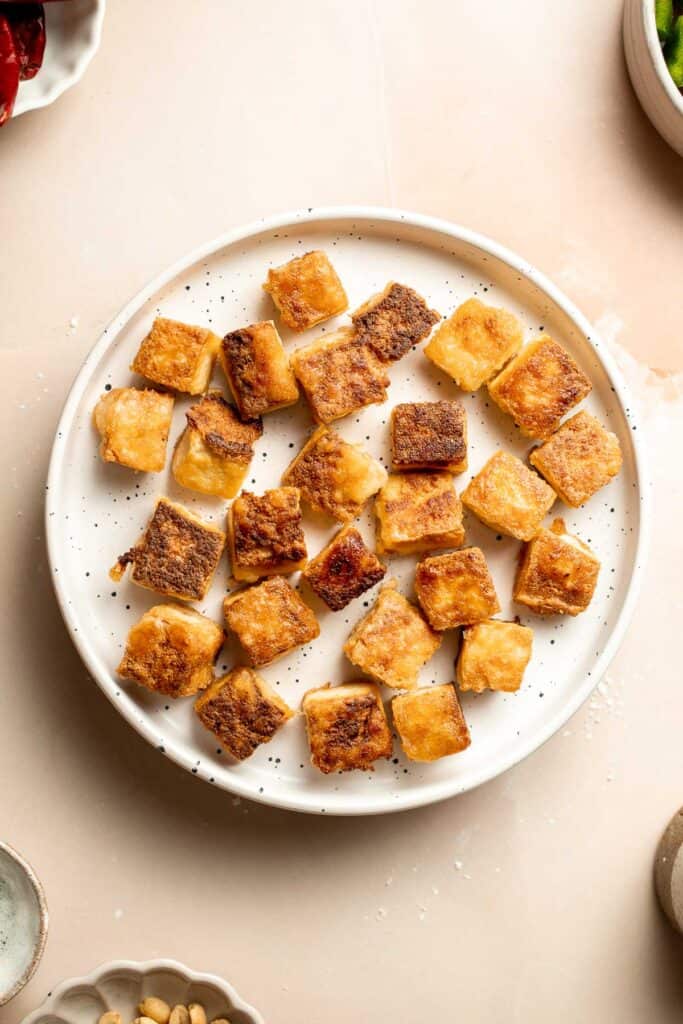
- Sauté veggies. In the same skillet, add onion, bell peppers, dried chili pepper, garlic, and ginger. Cook over medium-high heat until the vegetables are tender, about 3 minutes.
- Add remaining ingredients. Add the sautéed tofu and sauce mixture. Stir well until the sauce thickens to your desired consistency and the tofu and vegetables are evenly coated with the sauce. about 3 minutes. Stir in peanuts and green onions.
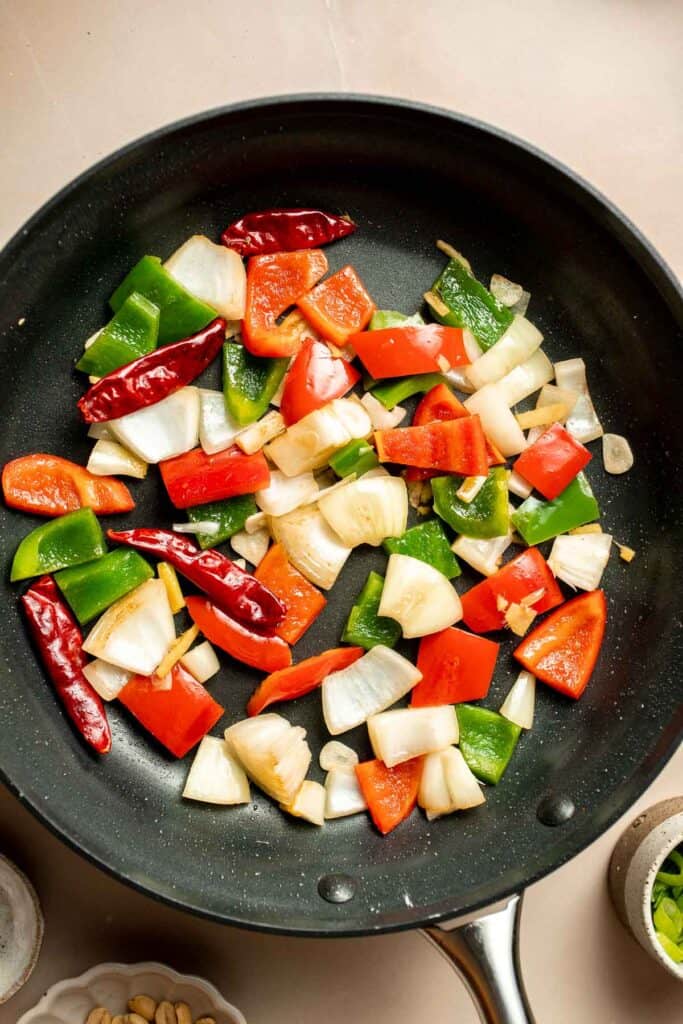
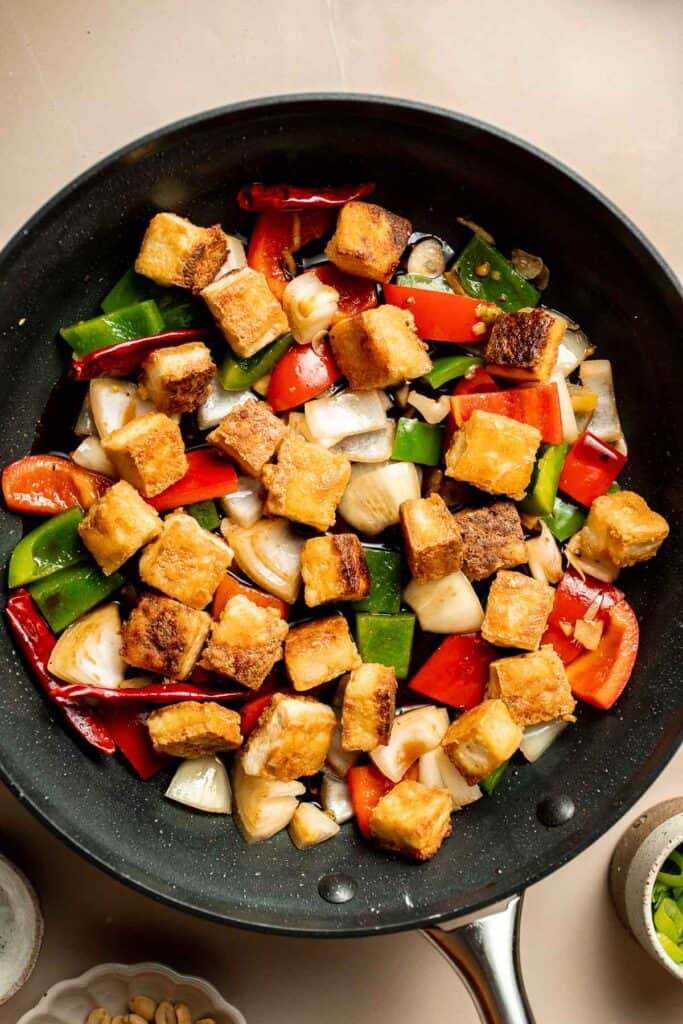
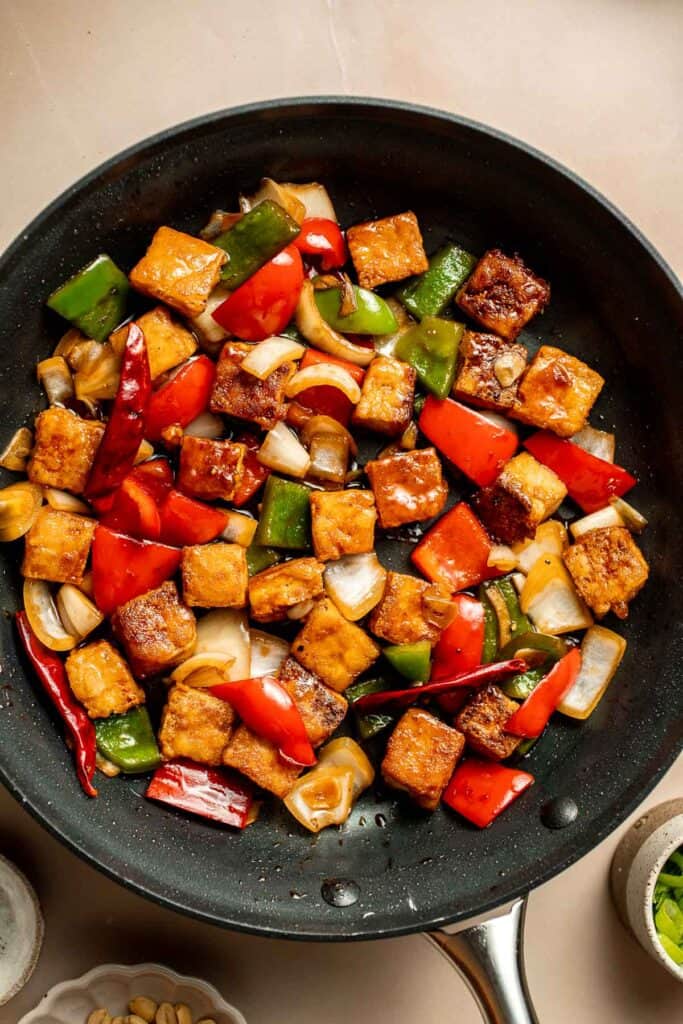
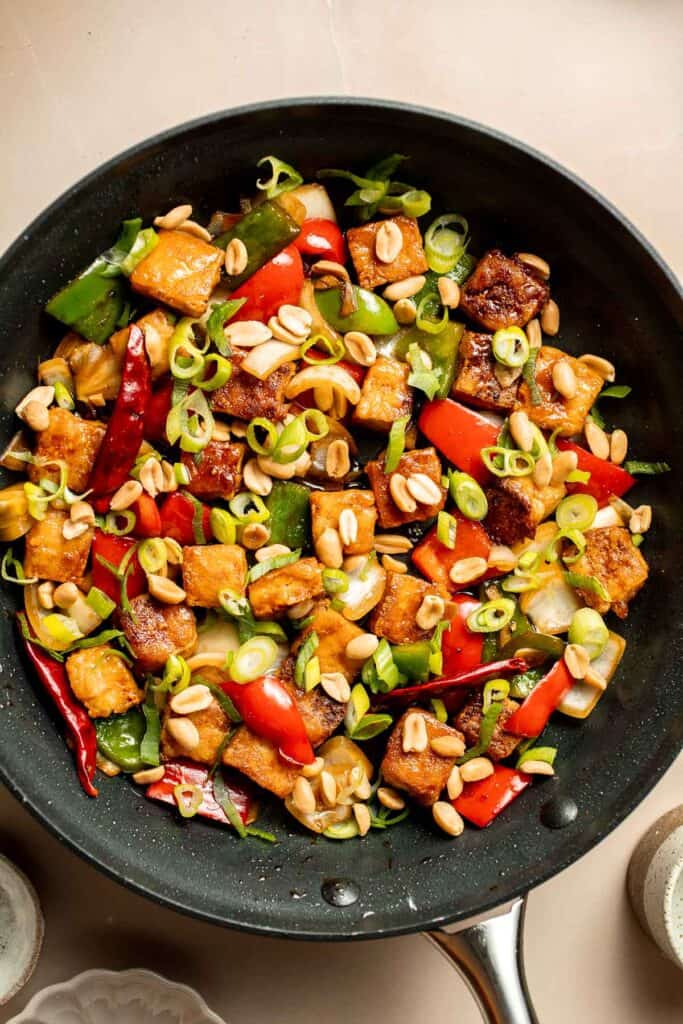
- Serve. Serve warm with steamed rice or fried rice.
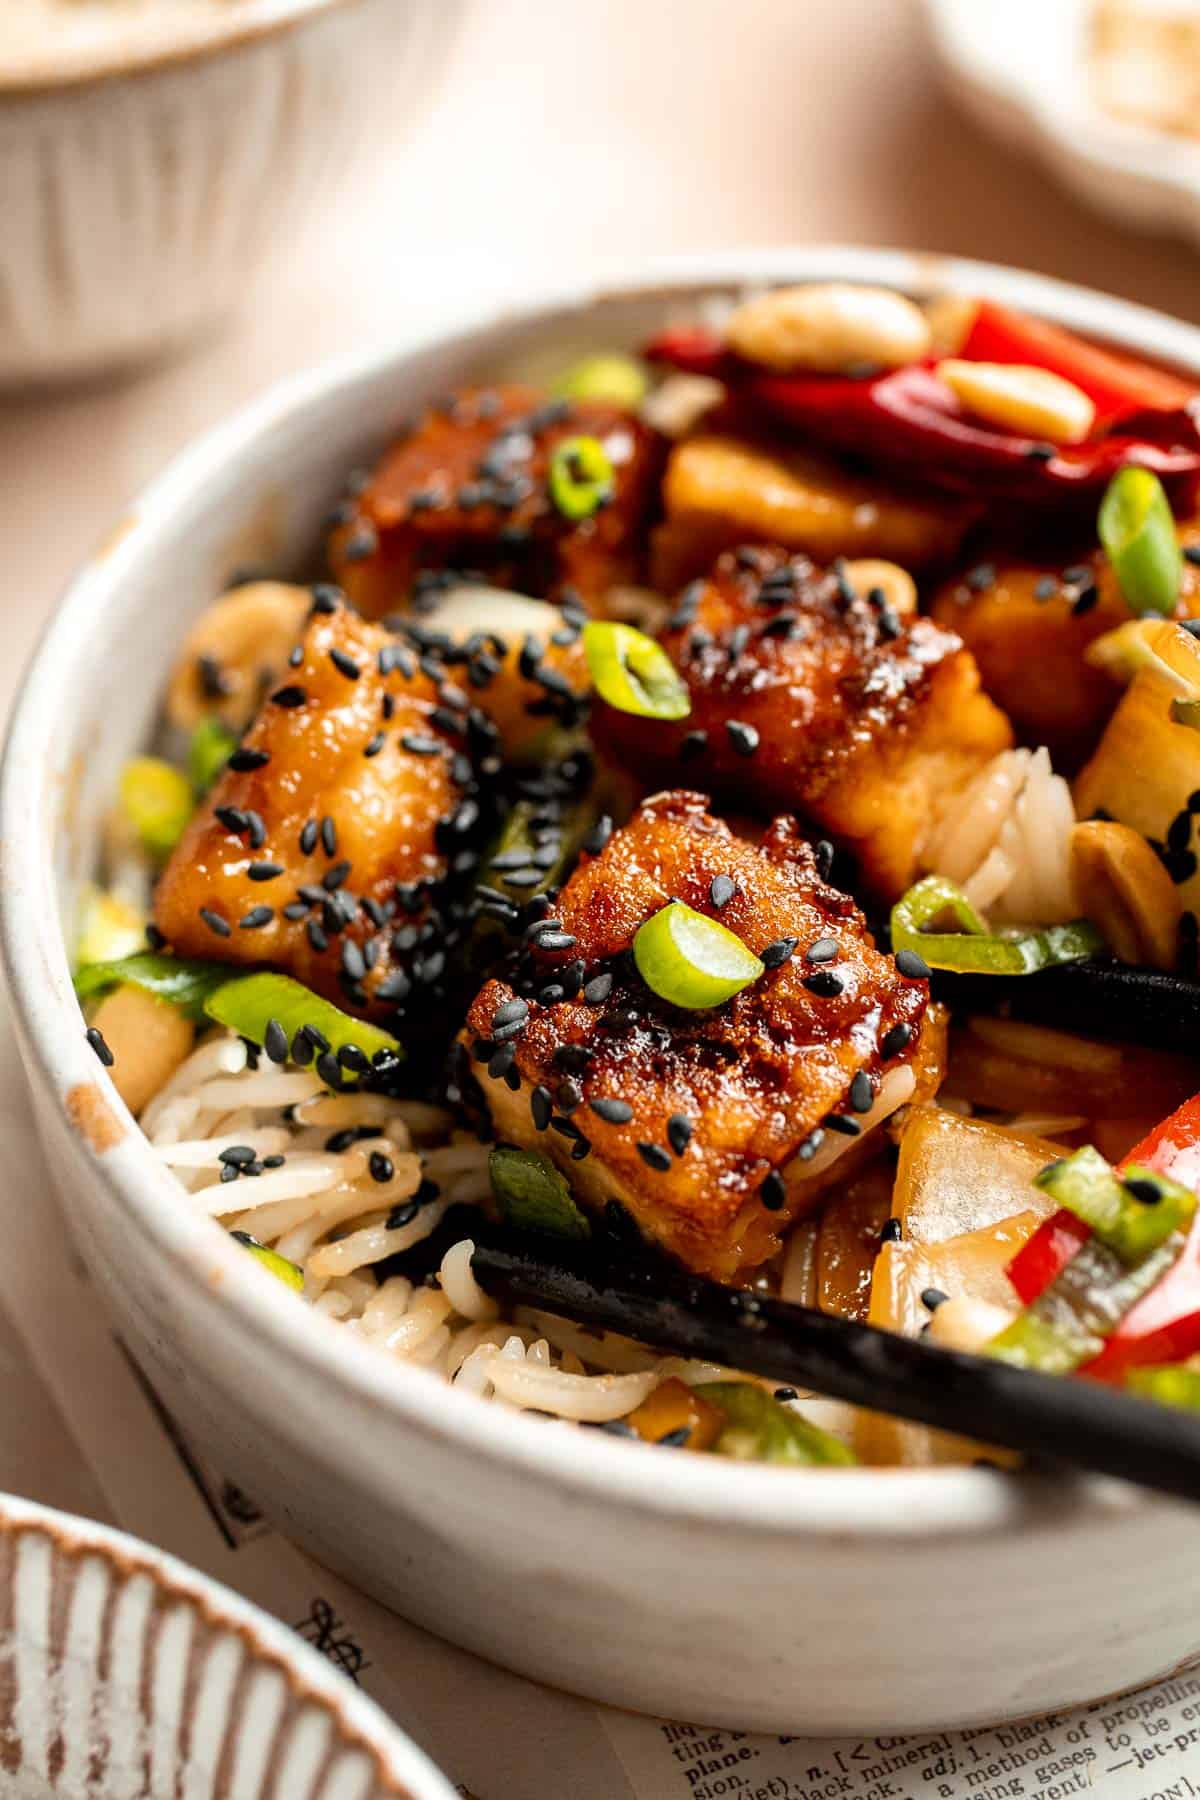
Recipe Variations
- Make it hot. This kung pao recipe has a little heat as it is, but you can easily make it scorching hot if you'd like. Add some cayenne pepper, sriracha paste, or sambal oelek for a super spicy sauce.
- Use Szechuan peppercorns. Traditional kung pao sauce uses these numbing peppercorns that will give your mouth a tingly sensation. Look for them at Asian grocery stores or search online.
- Add more veggies. You can easily load up on the stir-fried veggies if you'd like! Bok choy, broccoli, snow peas, and carrots would all taste great in this dish.
- Make it vegan. For a vegan kung pao tofu recipe, use vegetable bouillon paste instead of chicken. The rest of the ingredients are already vegan!
- Kung Pao Chicken. If you're feeding meat eaters, you can also use chicken instead of tofu and make Kung Pao Chicken for a classic takeout option.
How to Serve
This kung pao tofu is delicious served on its own, or paired with some of my favorite Chinese side dishes including:
- Vegetarian Fried Rice
- Vegetarian Chow Mein
- Steamed Buns
- Roasted Garlic Green Beans
- Spring Vegetable Stir Fry
Ditch the delivery fees and make your own delicious Chinese food at home with these 60 Chinese Takeout Recipes.
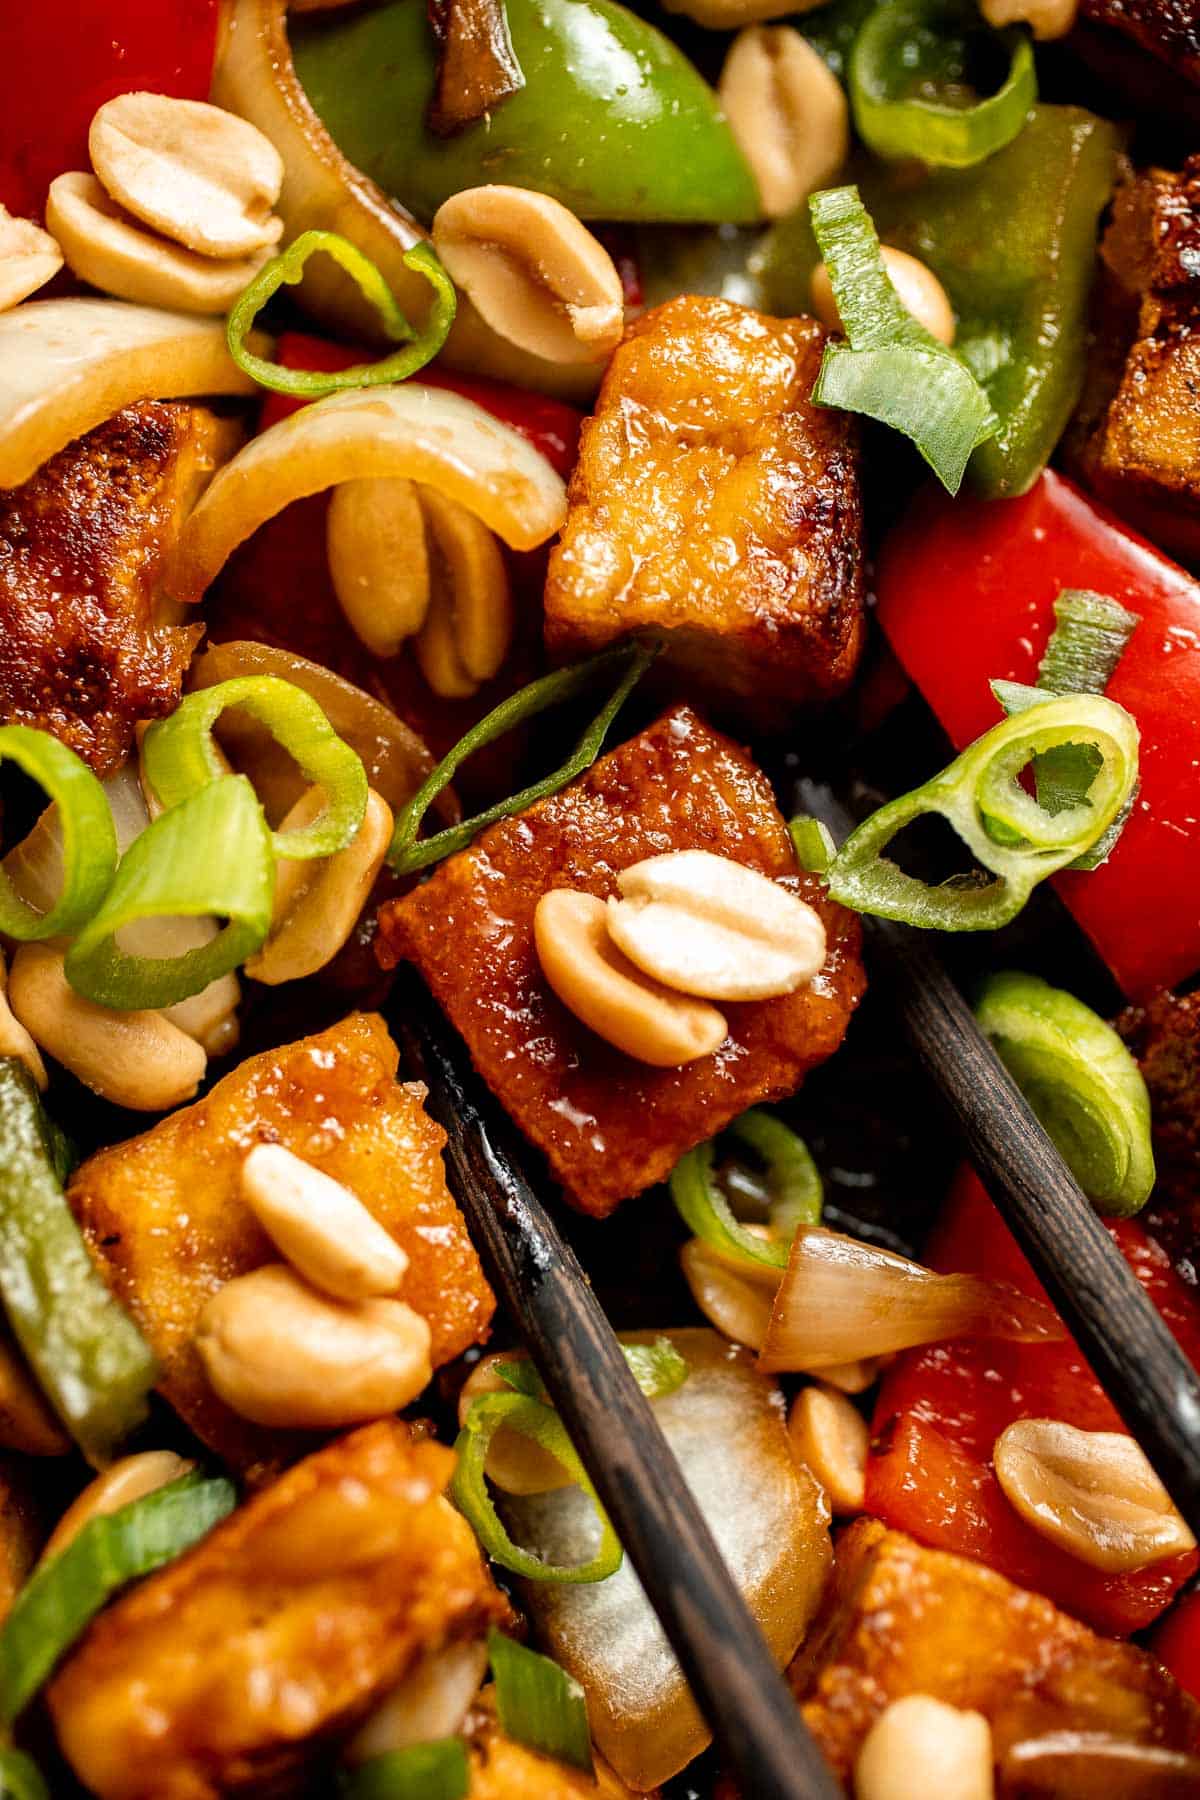
Recipe Tips and Tricks
- Dry the tofu well. The secret to really crispy tofu is drying it off to remove any excess liquid. If you have a little extra time, you can wrap the tofu and gently press it with a plate to remove any extra moisture.
- Don't overcook. It's very easy to overcook the veggies and make them too soft, which isn't very pleasant to eat. Only let them cook until they're just almost done; they'll finish cooking to perfection when you add the tofu bites back in.
- Adjust the sauce. The cornstarch in the sauce will give it a glossy, smooth texture, perfect for spilling over your rice. It's very easy to adjust the thickness to your preference. If you prefer a thinner sauce, don't let the sauce cook very long. If you like it thicker, just keep stirring until it thickens up, but if it gets too thick, just add a splash of water to thin it back out.
Storing and Freezing Instructions
How to Store
Allow the kung pao tofu to cool to room temperature, then store it in an airtight container in the fridge for 3-4 days.
How to Reheat
I prefer to heat the leftovers in a skillet on the stove for 5-10 minutes. If the sauce has thickened, you can add a little extra water.
FAQ
Hands down, you always want to use extra firm tofu for frying. It has the least amount of moisture out of all the different types, which keeps it from becoming too soft or crumbly in the frying pan. It's perfect for this spicy kung pao tofu!
Although we certainly love both of these dishes, kung pao has a reputation for being pretty fiery. Both recipes call for very similar ingredients, but General Tso is usually a little sweeter and just a little bit less spicy. Of course, you can always adjust the heat level by varying the amount of spices and peppers you use.
Tofu usually needs plenty of time to soak up a marinade to have any noticeable flavor, but not for this great recipe! The fried shell will absorb the flavorful sauce, making every bite delicious without having to make a marinade at all.
More Vegetarian Chinese Recipes
- 30 Vegetarian Chinese Recipes
- Tofu and Mushroom Stir Fry
- Asian Chopped Salad
- Vegetarian Chow Mein
- Crispy Bottom Pan-Fried Vegetable Buns (No Yeast)
- Vegetarian Spring Rolls
Tried this recipe?
I'd love to hear what you think! Leave a comment and rating below to share your feedback. Your reviews help others discover this recipe and help me keep creating more free recipes for you. Snap a photo and tag me on social media @aheadofthyme too.

Cannellini Beans
One pot Cannellini Beans are naturally creamy, butter, and nourishing. This easy white bean recipe will transform dry beans into tender bites loaded with flavor. Serve them as a simple vegan side dish or as a delicious addition to hearty soups, salads, dips, and more.
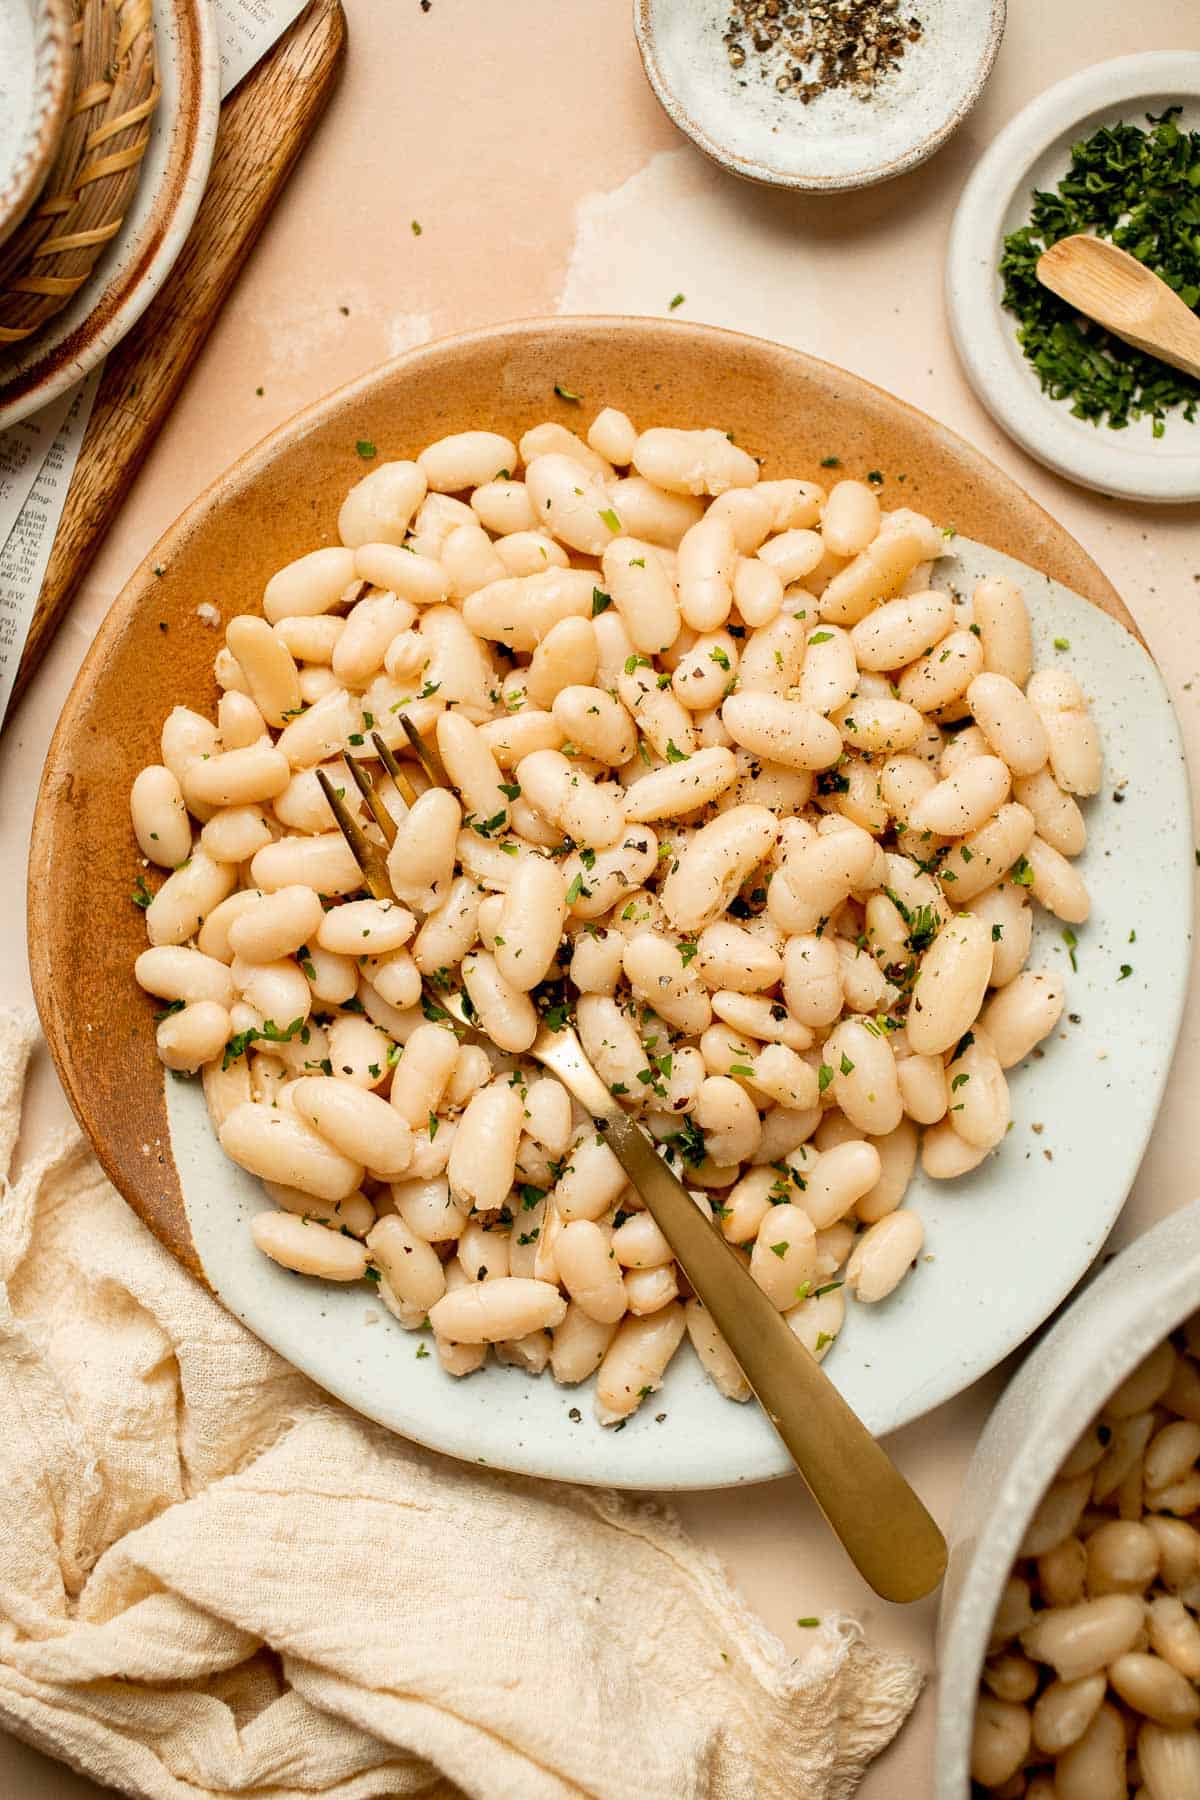
There are so many great reasons to keep dry beans in your pantry, including cost and flavor. One bag of dried cannellini beans (also known as white kidney beans) costs as much as about two cans yet will feed you twice as much. As the creamy white beans cook in the mixture of aromatic veggies and seasonings, they'll infuse layers of flavor in ways canned beans just can't. They're one of the best types of beans available for their flavor, texture, and versatility, and are especially popular in Italian cuisine.
Why You'll Love These Cannellini Beans
- Easy, inexpensive side. Cooking dried beans is not a complex process, although it does require a little patience as you let the beans simmer slowly to plump up. Since this recipe calls for dried beans and a handful of simple pantry staples, you'll be able to feed a crowd for a very low cost.
- Healthy option. White beans are a good source of fiber, and the US Dietary Guidelines recommend eating approximately 3 cups of beans per week! They can also support heart health, increase longevity, and more. This cannellini bean recipe is a great way to sneak more beans into your diet all week long.
- Filling meal prep option. This vegan side dish offers plenty of plant-based protein to keep you full. It also freezes and stores well so it is great to meal prep for lunches throughout the week or frozen for an easy dinner another day.
- So versatile. Once you have a pot of cannellini beans, you'll find yourself adding them to everything. They're especially wonderful in hearty soups, like Minestrone, or you can sautee them with some garlic, swiss chard, and lemon juice. They're flavorful enough to serve on their own as a side with some grated Parmesan cheese and crusty bread, or pop them in the food processor with some olive oil and fresh lemon juice to make your own white bean hummus!
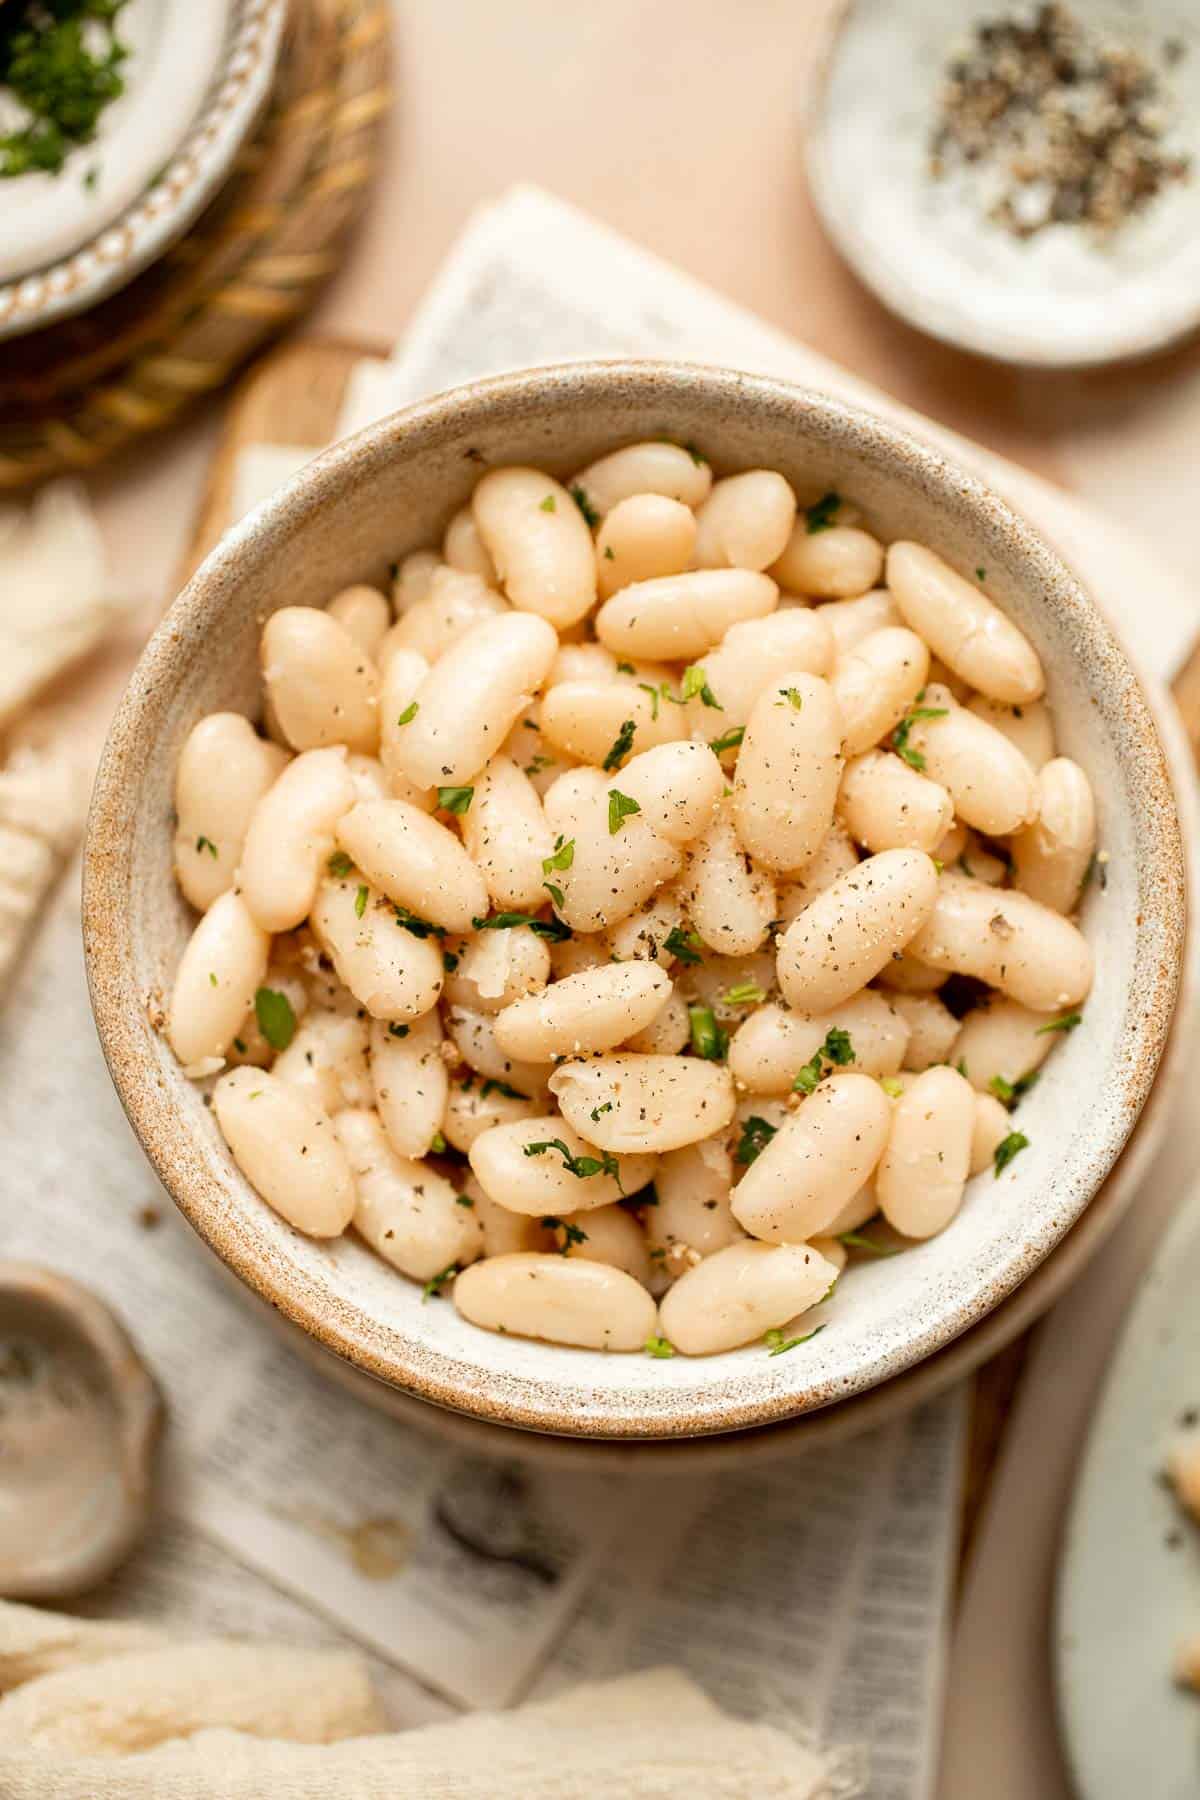
Ingredient Notes
To make these delicious cannellini beans, you will need the following ingredients (full measurements in recipe card below):
- cannellini beans - start with dried beans to make sure they're delicious all the way through.
- olive oil
- aromatics - add diced yellow onion and minced fresh garlic cloves for a savory flavor.
- Italian seasoning - cook the dried herbs with the aromatics to release their flavor oils.
- water
- salt and pepper - be sure to season well right before serving.
- parsley - fresh herbs for serving add a pop of color and extra flavor.
You will also need a large mixing bowl, strainer, cutting board, knife, slotted spoon, and a large pot or Dutch oven.
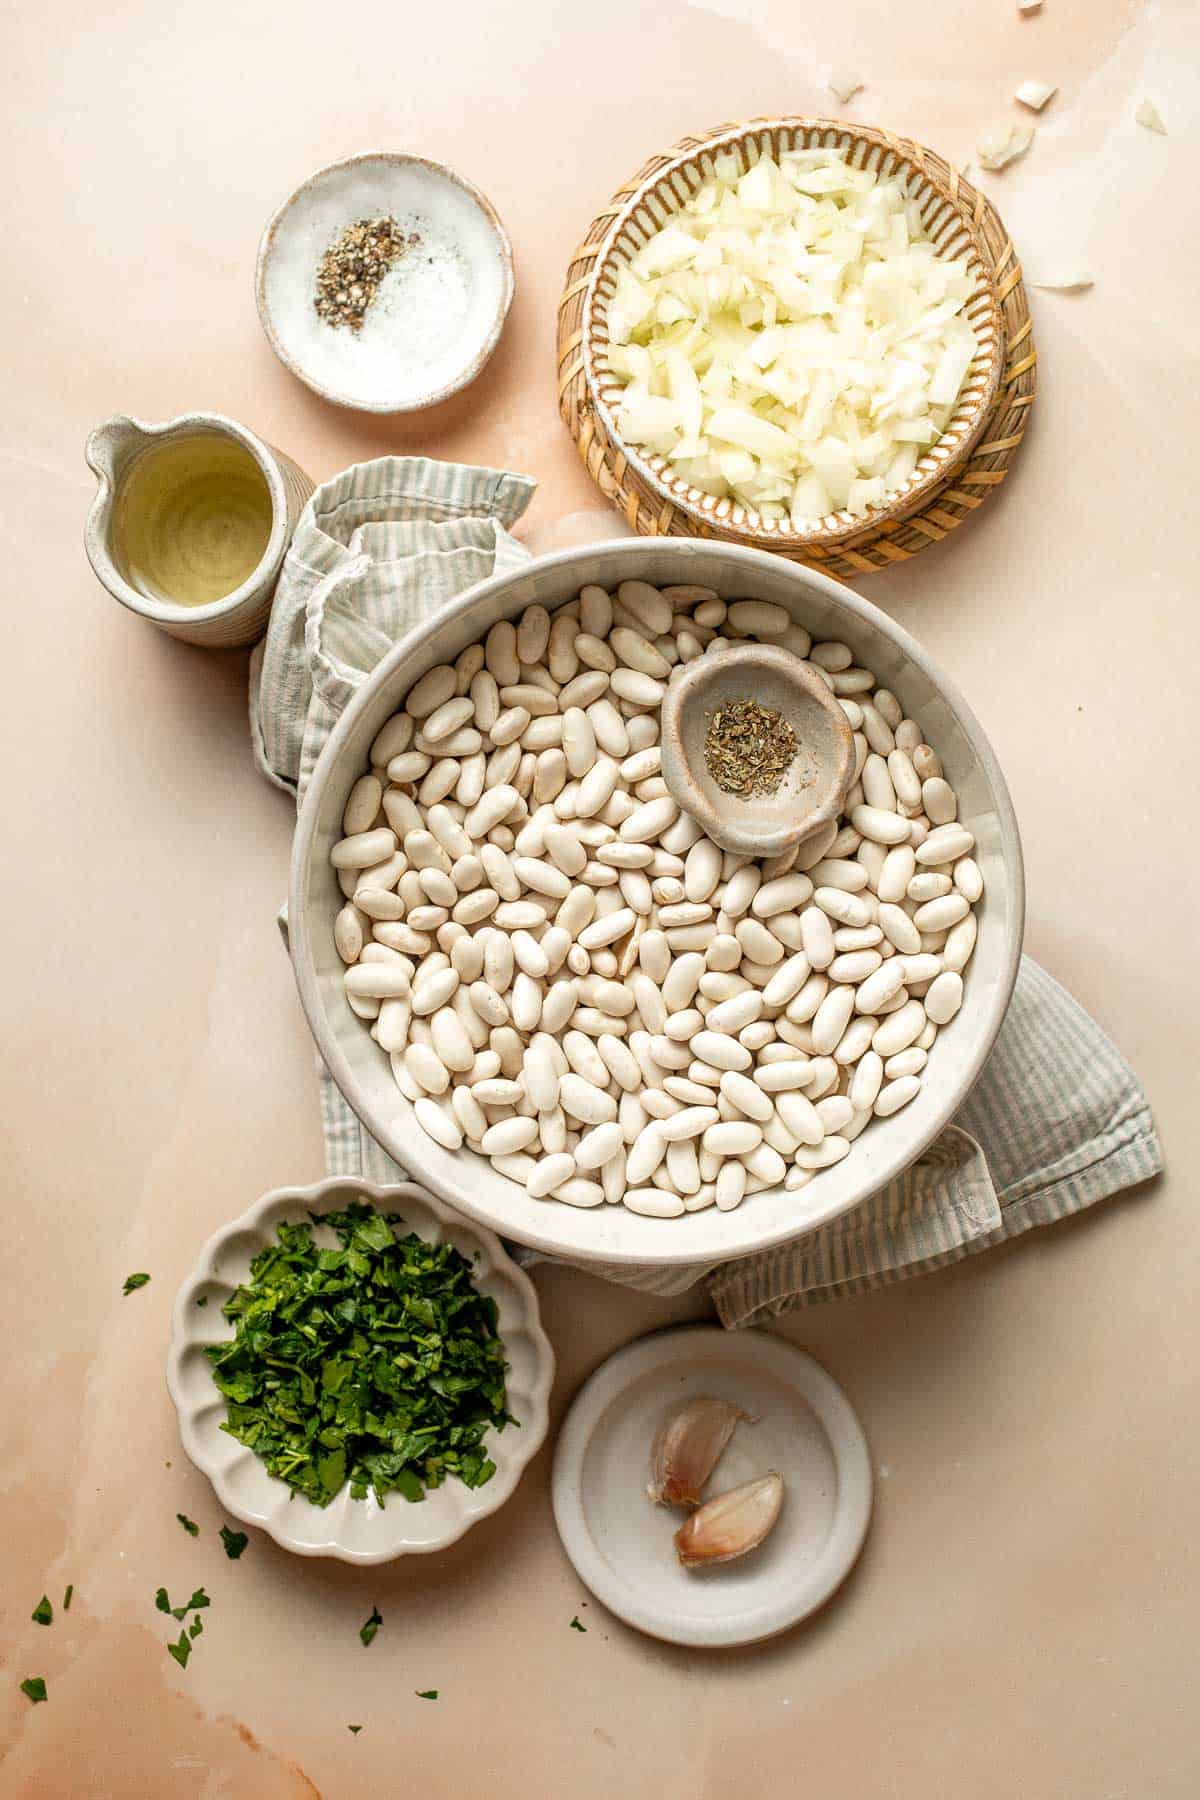
How to Make the Best Cannellini Beans
- Soak beans. Place the cannellini beans in a large bowl and fill with water (covering the beans by at least 2 inches). Soak the beans overnight, then rinse and drain well.
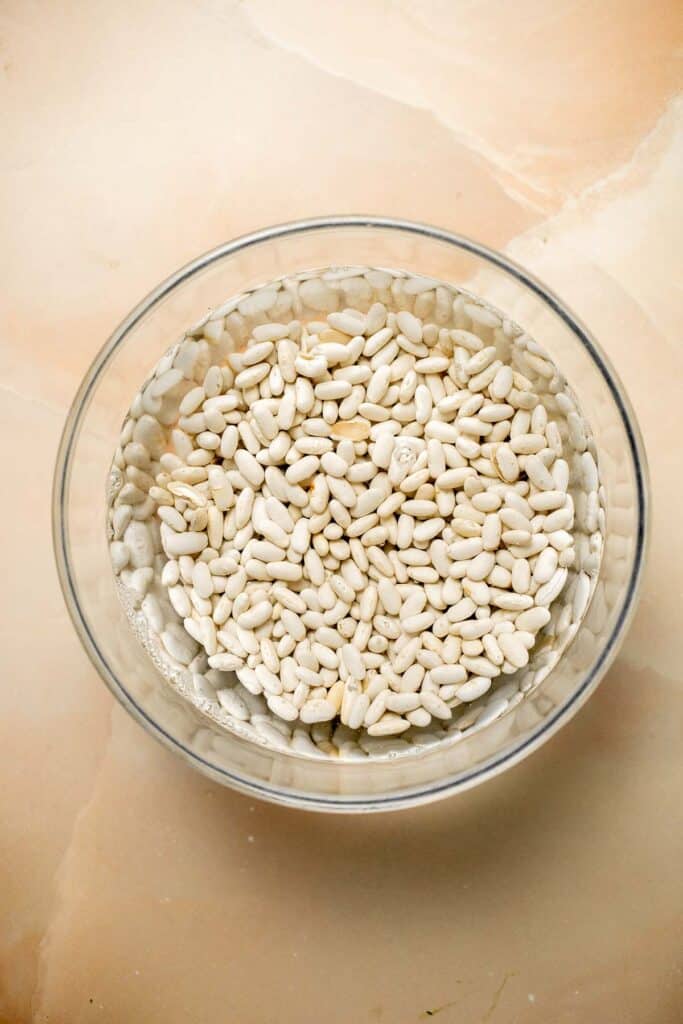
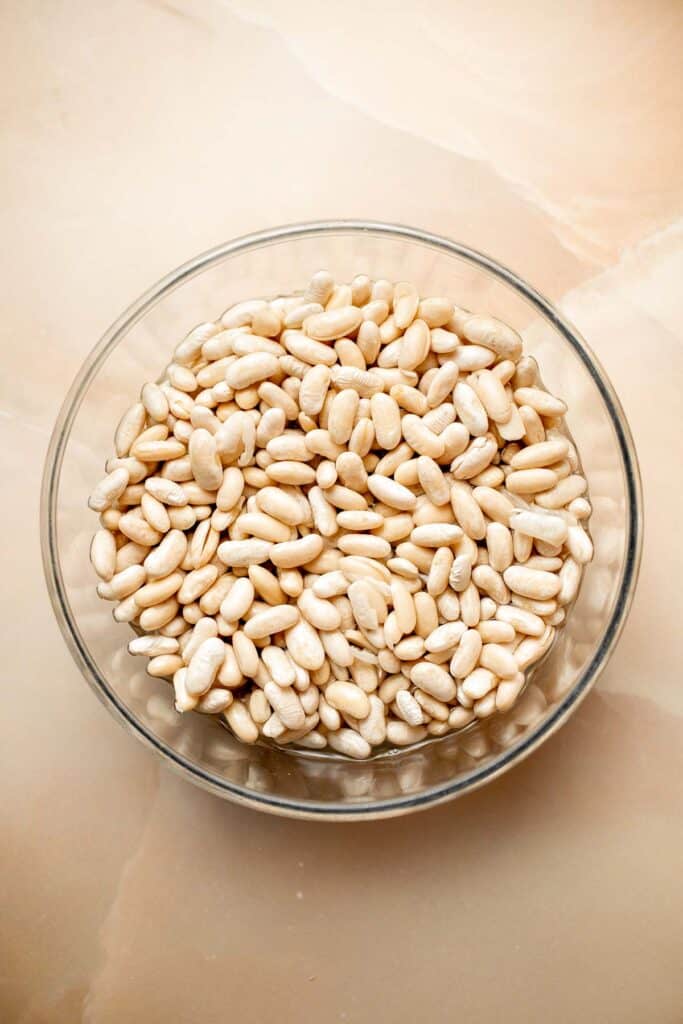
- Sauté aromatics. Heat oil in a large stockpot or Dutch oven over medium-high heat until the hot oil sizzles, about 1 minute. Add onion, garlic, and Italian seasoning. Sauté until tender, about 2-3 minutes.
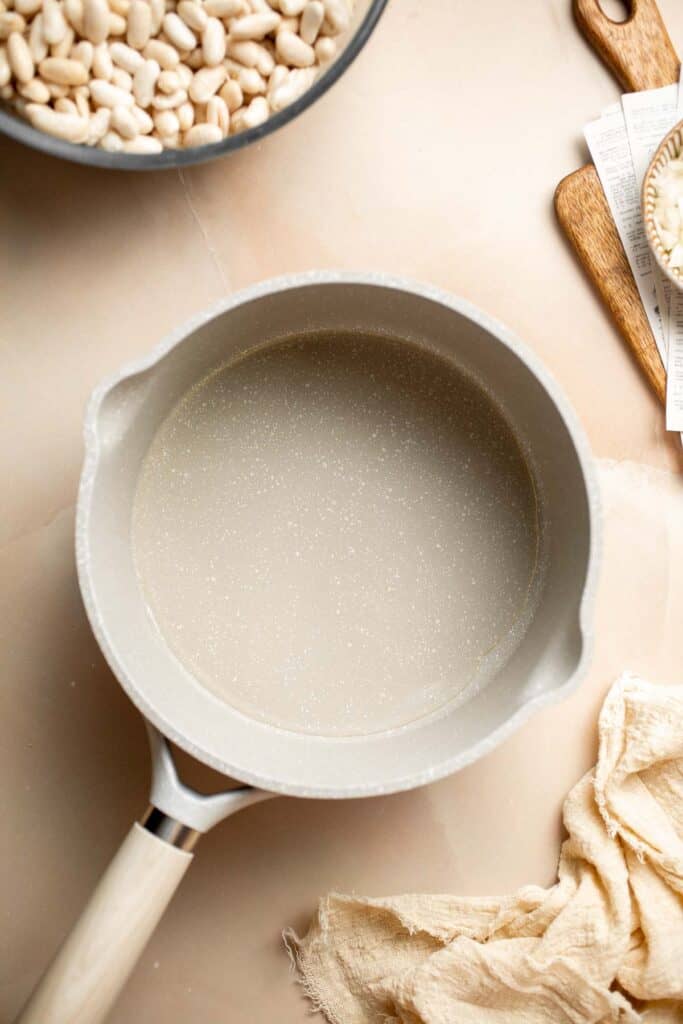
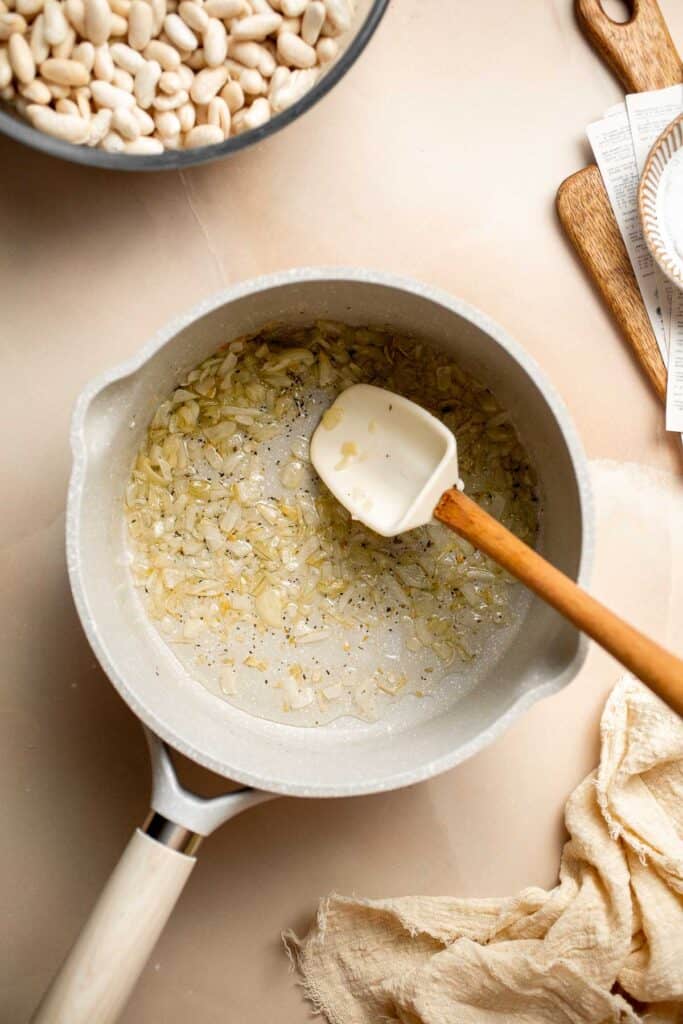
- Add beans and simmer. Add the drained, soaked beans and water. Bring it to a boil. Reduce heat to low and simmer for 2 hours until the beans are fully cooked through and tender, stirring occasionally. Skim off any foam during simmering and add more water if needed.
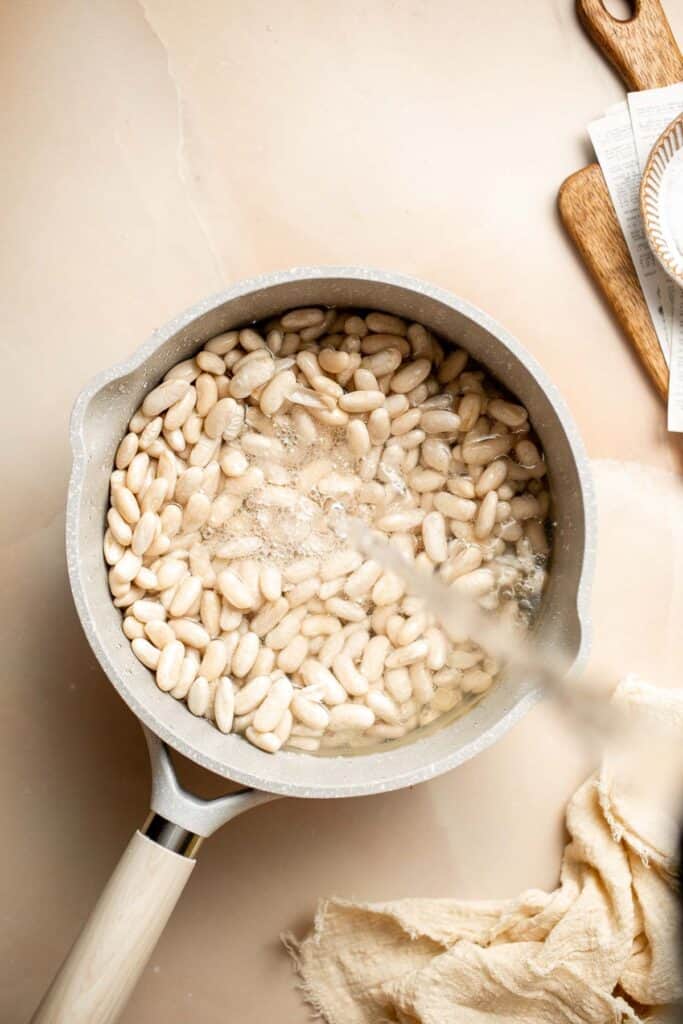
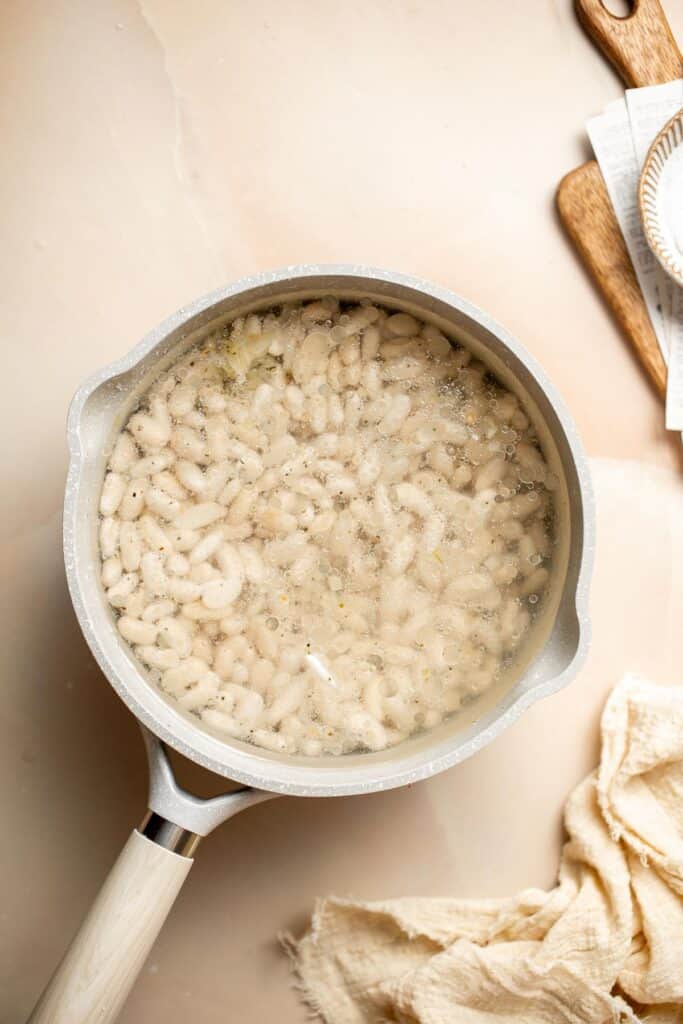
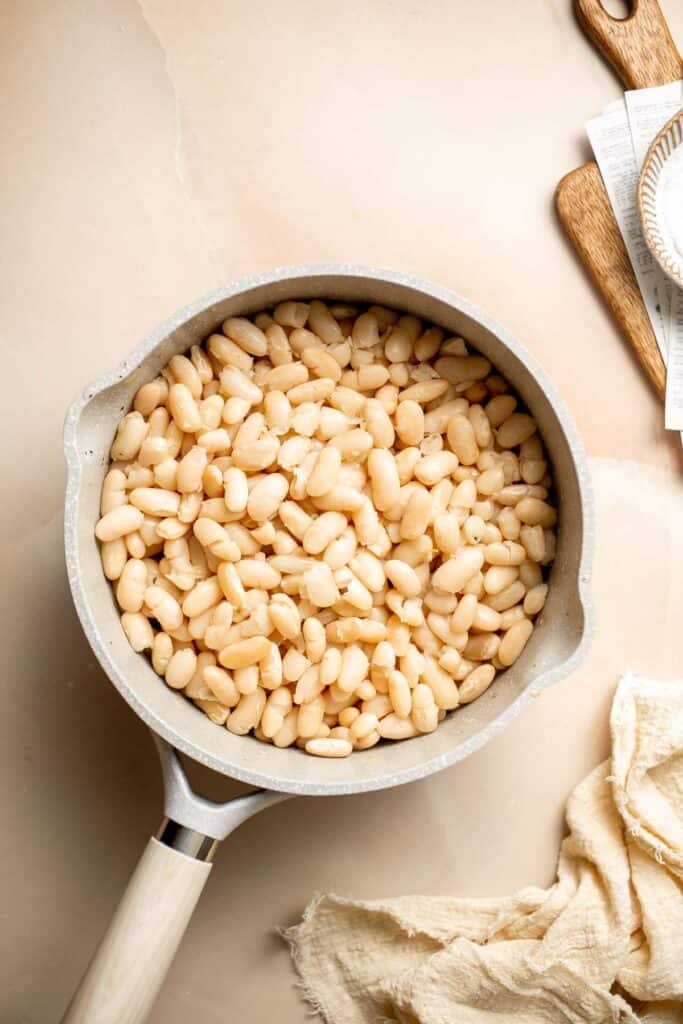
- Season. When the beans are tender and almost all the liquid has evaporated, add salt and pepper to taste. Sprinkle with parsley and serve warm.
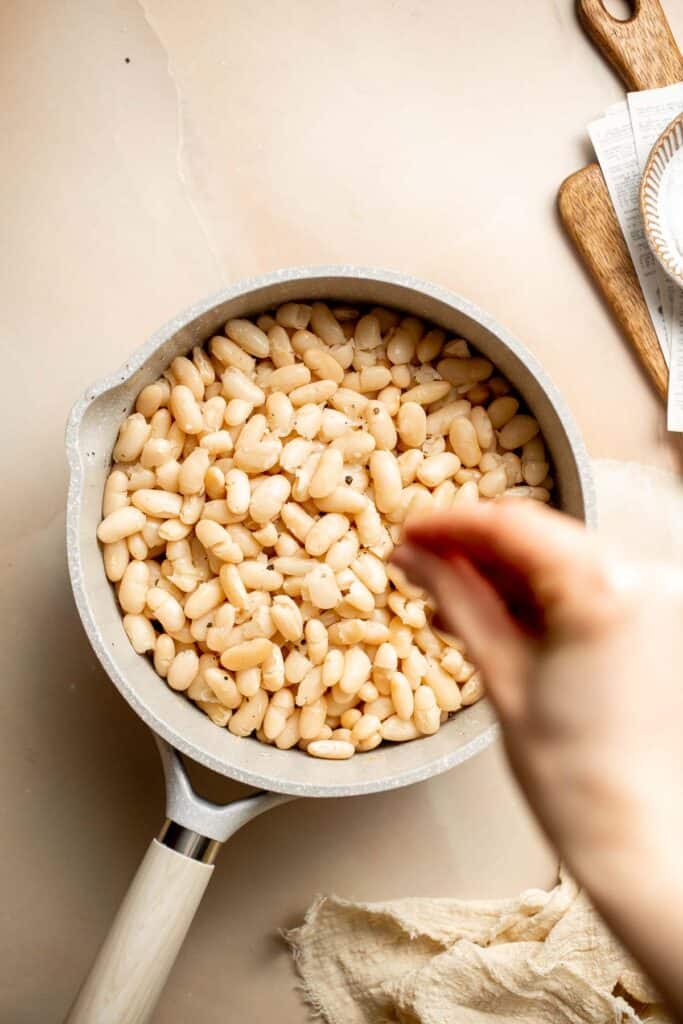
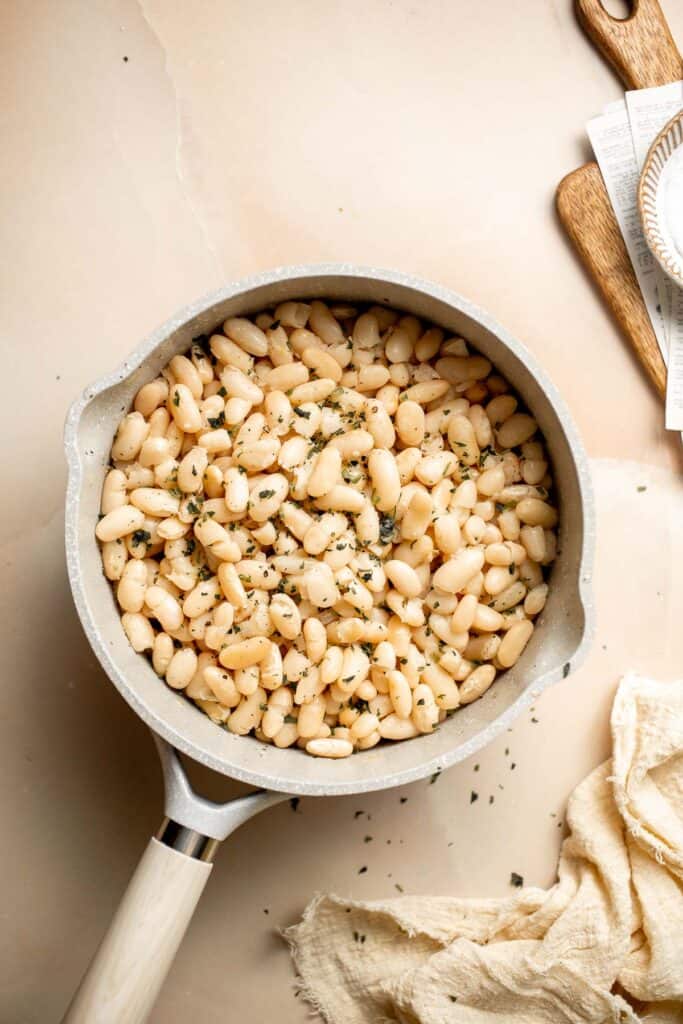
Recipe Variations
- Adjust the seasonings. Feel free to add more or different herbs while you're cooking these creamy white beans. They'd be lovely with popular dried herbs like basil, oregano, marjoram, thyme, bay leaf, rosemary, etc. Some red pepper flakes would add a nice kick of heat, too.
- Use chicken broth. Add even more flavor during the cooking process by cooking in chicken stock. Just be sure to use less salt.
- Upgrade canned cannellini beans. If you want to make canned beans taste way better, give them a rinse, then sautee them with the oil, onion, garlic, and spices like normal. You can skip the slow simmer and serve them right away!
- Use the pressure cooker. If you want to prepare your beans a little faster, prepare the aromatics using the saute function of your pressure cooker, then cook the soaked beans for about 20-25 minutes until high pressure. Release the pressure quickly.
How to Serve
These Cannellini Beans are delicious served on their own as a side dish, or as part of another recipe that calls for cooked white beans including our favorites:
- White Bean Salad
- Minestrone Soup
- Curried White Bean Crostini with Toasted Pepitas
- White Bean Soup with Kale
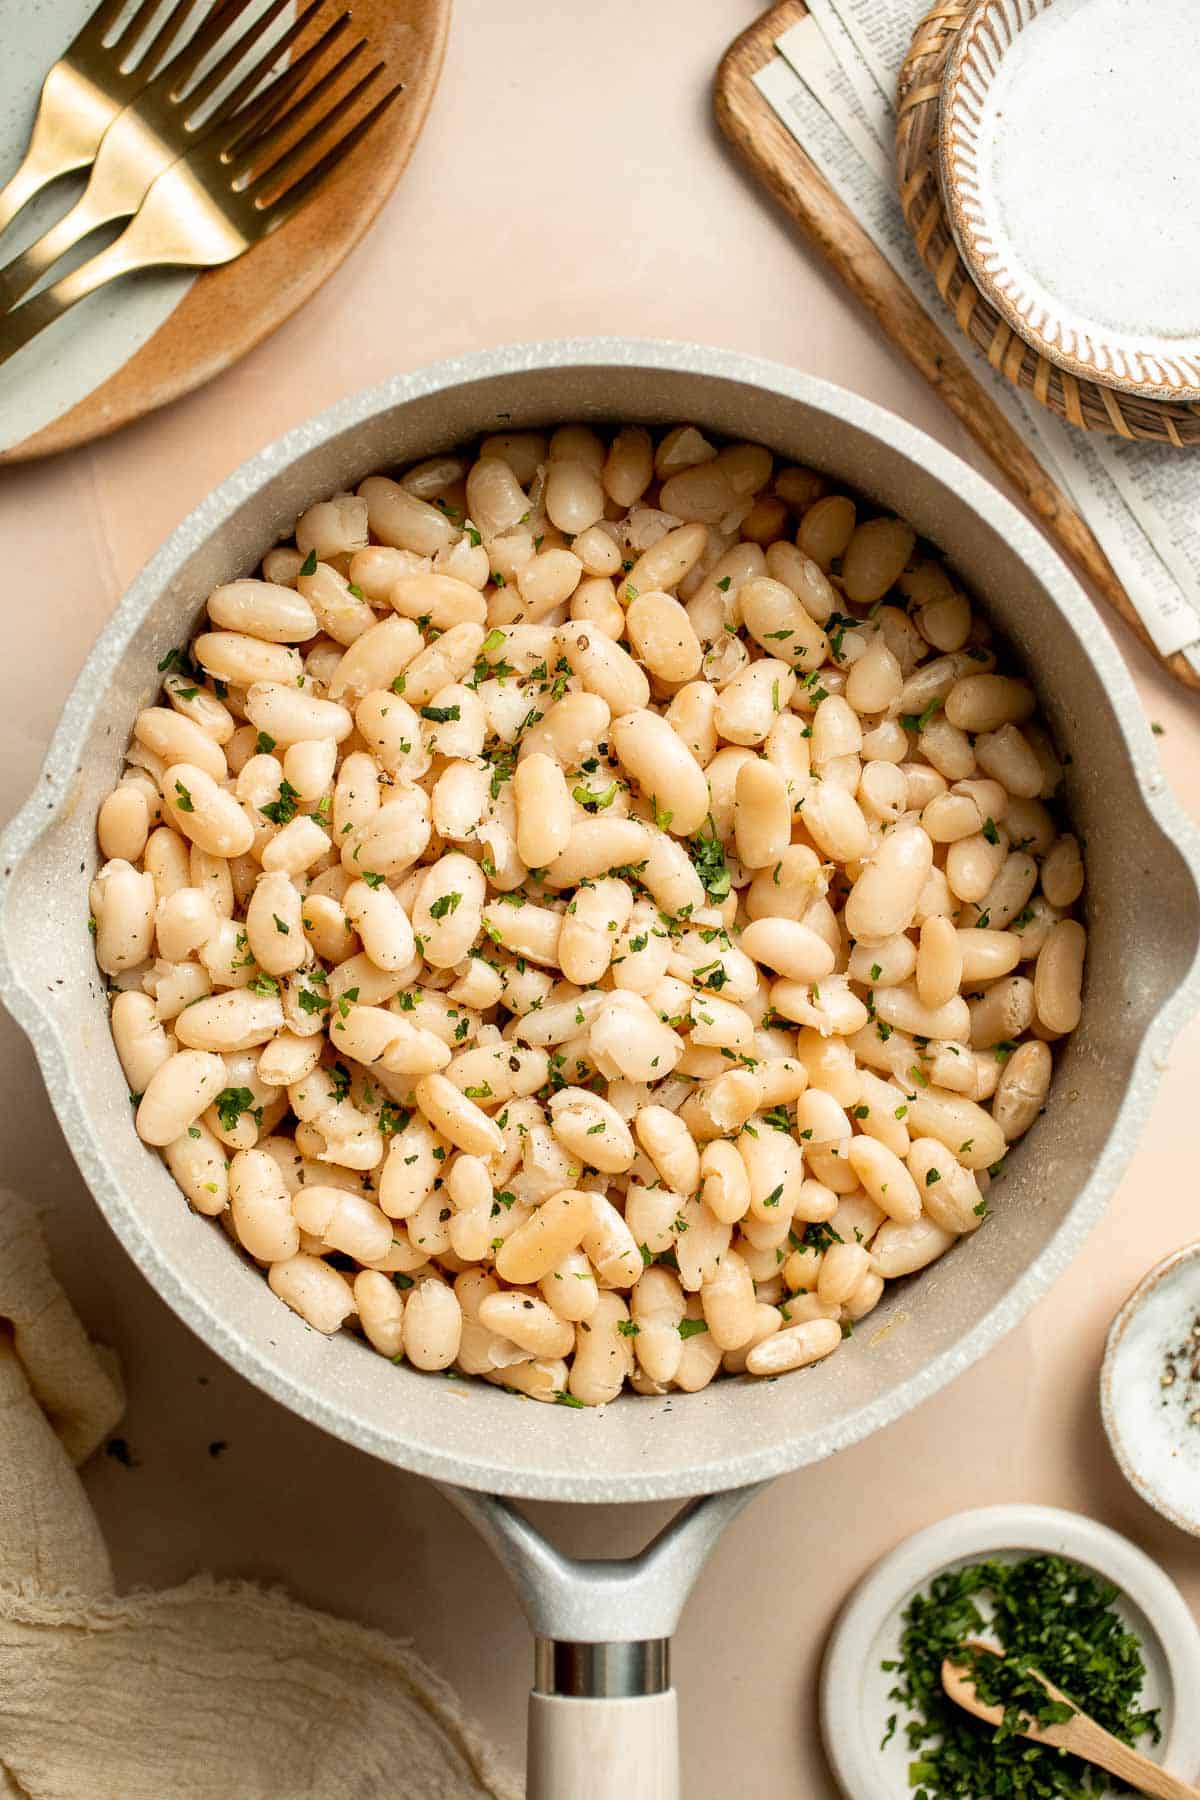
Recipe Tips and Tricks
- Salt at the end. If you salt the beans before or during cooking, they may not soften up. Wait until they're already tender before adding the seasoning.
- Soak overnight. This will help the beans absorb moisture, reducing your overall cooking time. An overnight soak can also help prevent burst beans.
- Rinse well. It's a good practice to rinse your dried beans thoroughly to remove any dust or dirt.
- Scale down. This recipe makes an entire pound of dried beans, which is equivalent to approximately four cans. If you don't need that many beans, feel free to cut the ingredients in half.
Storing and Freezing Instructions
How to Store
Once cooked, let the beans cool to room temperature, then store them in an airtight container in the fridge for up to 5 days.
How to Reheat
Either microwave the beans to heat up a single serving or place them in a small saucepan with a little water. Place them over medium heat and stir often until they are fully reheated.
How to Freeze
Freeze the leftover beans in a freezer-safe container for up to 3 months. Thaw in the fridge before reheating.
FAQ
Cannelini beans are also often called white kidney beans and can often be used interchangeably with great northern beans, navy beans, and more. They're a great substitute for butter beans, too.
Not exactly. They are both white beans, but navy beans are much smaller. Cannellini beans are known for having a wonderfully creamy texture and a nutty flavor. They can often be used interchangeably in many white bean recipes.
Although there are quite a few different types of white beans, they're all slightly different. Cannellini beans are known for their relatively thin skin, plump, creamy texture, and mildly nutty flavor. They're one of the larger varieties of white beans, and they're great at keeping their shape. Because of this, they're often served on their own, added to soups, or even turned into white bean hummus or puree.
More Bean Recipes
Tried this recipe?
I'd love to hear what you think! Leave a comment and rating below to share your feedback. Your reviews help others discover this recipe and help me keep creating more free recipes for you. Snap a photo and tag me on social media @aheadofthyme too.
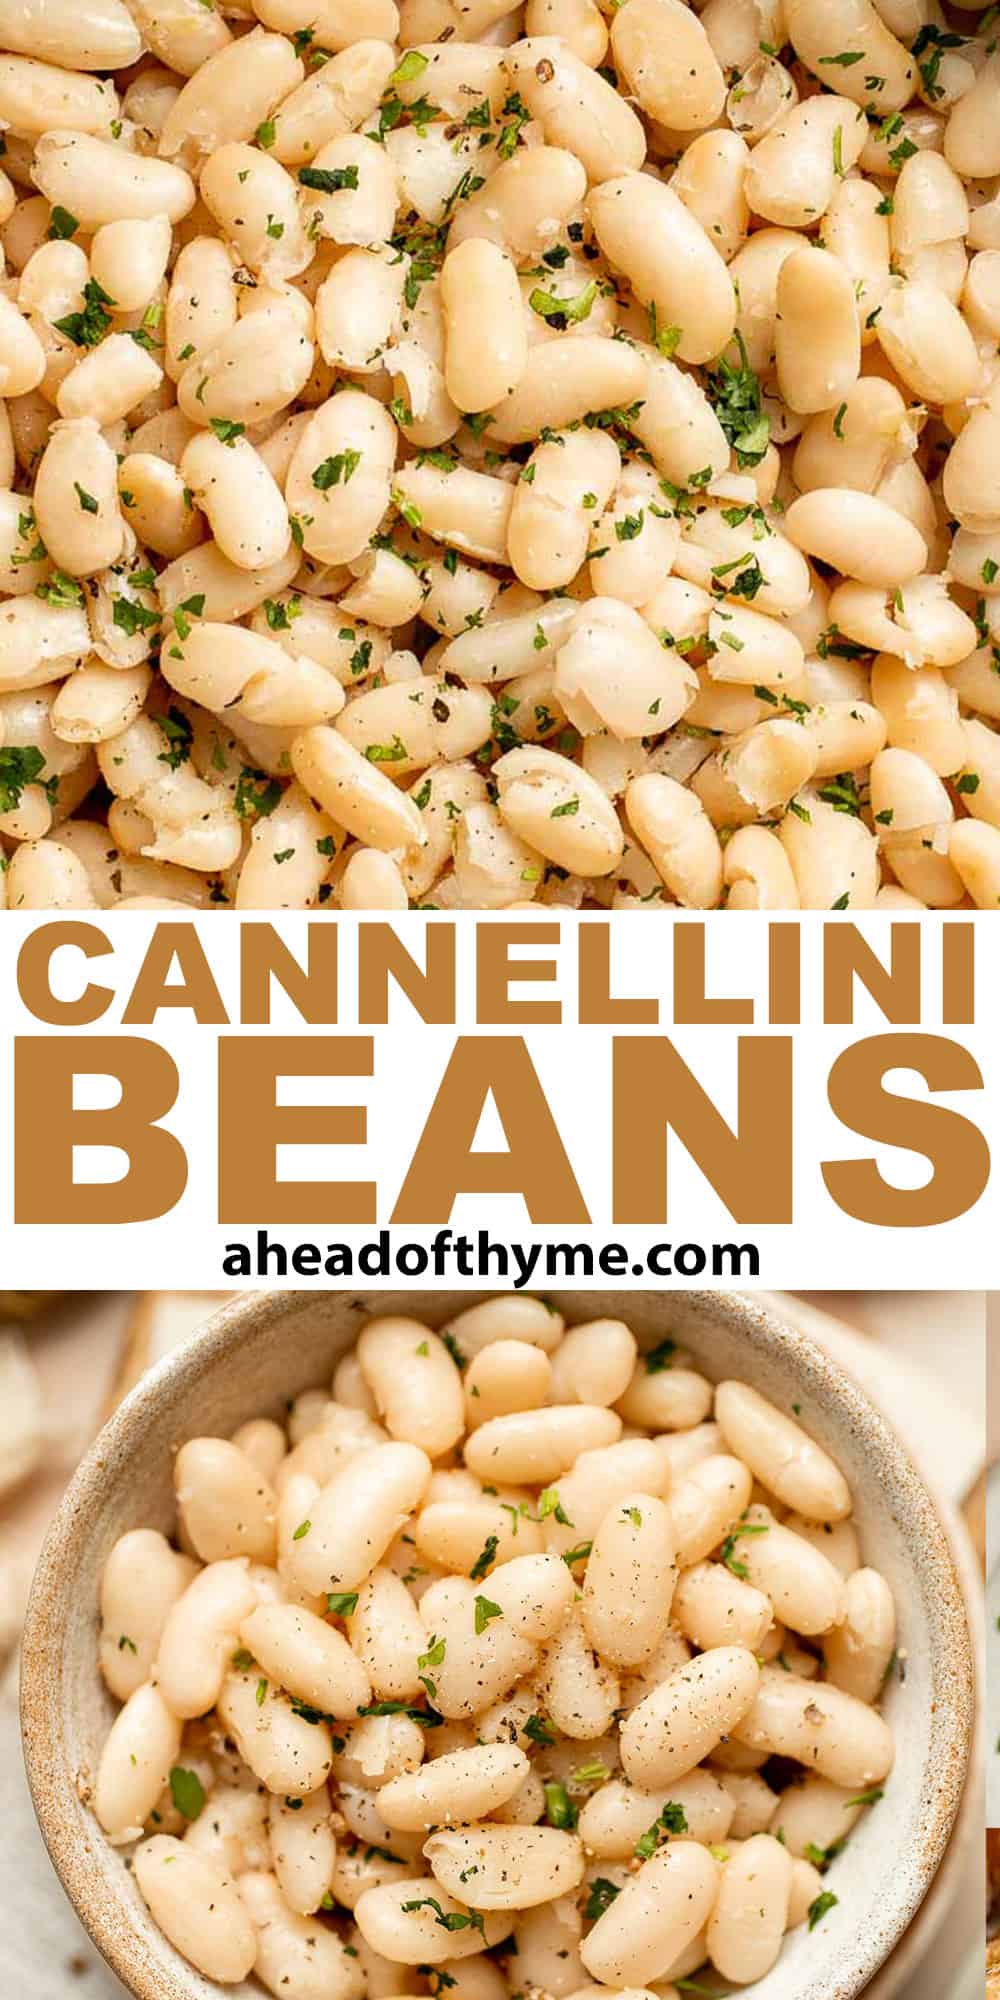
White Chocolate Raspberry Cheesecake
This homemade White Chocolate Raspberry Cheesecake is so decadent, made with melted white chocolate folded into the creamy cheesecake batter, then swirled with homemade raspberry sauce for a stunning two-tone presentation. These two flavors balance each other perfectly - tart, fruity, sweet, creamy, and so smooth.
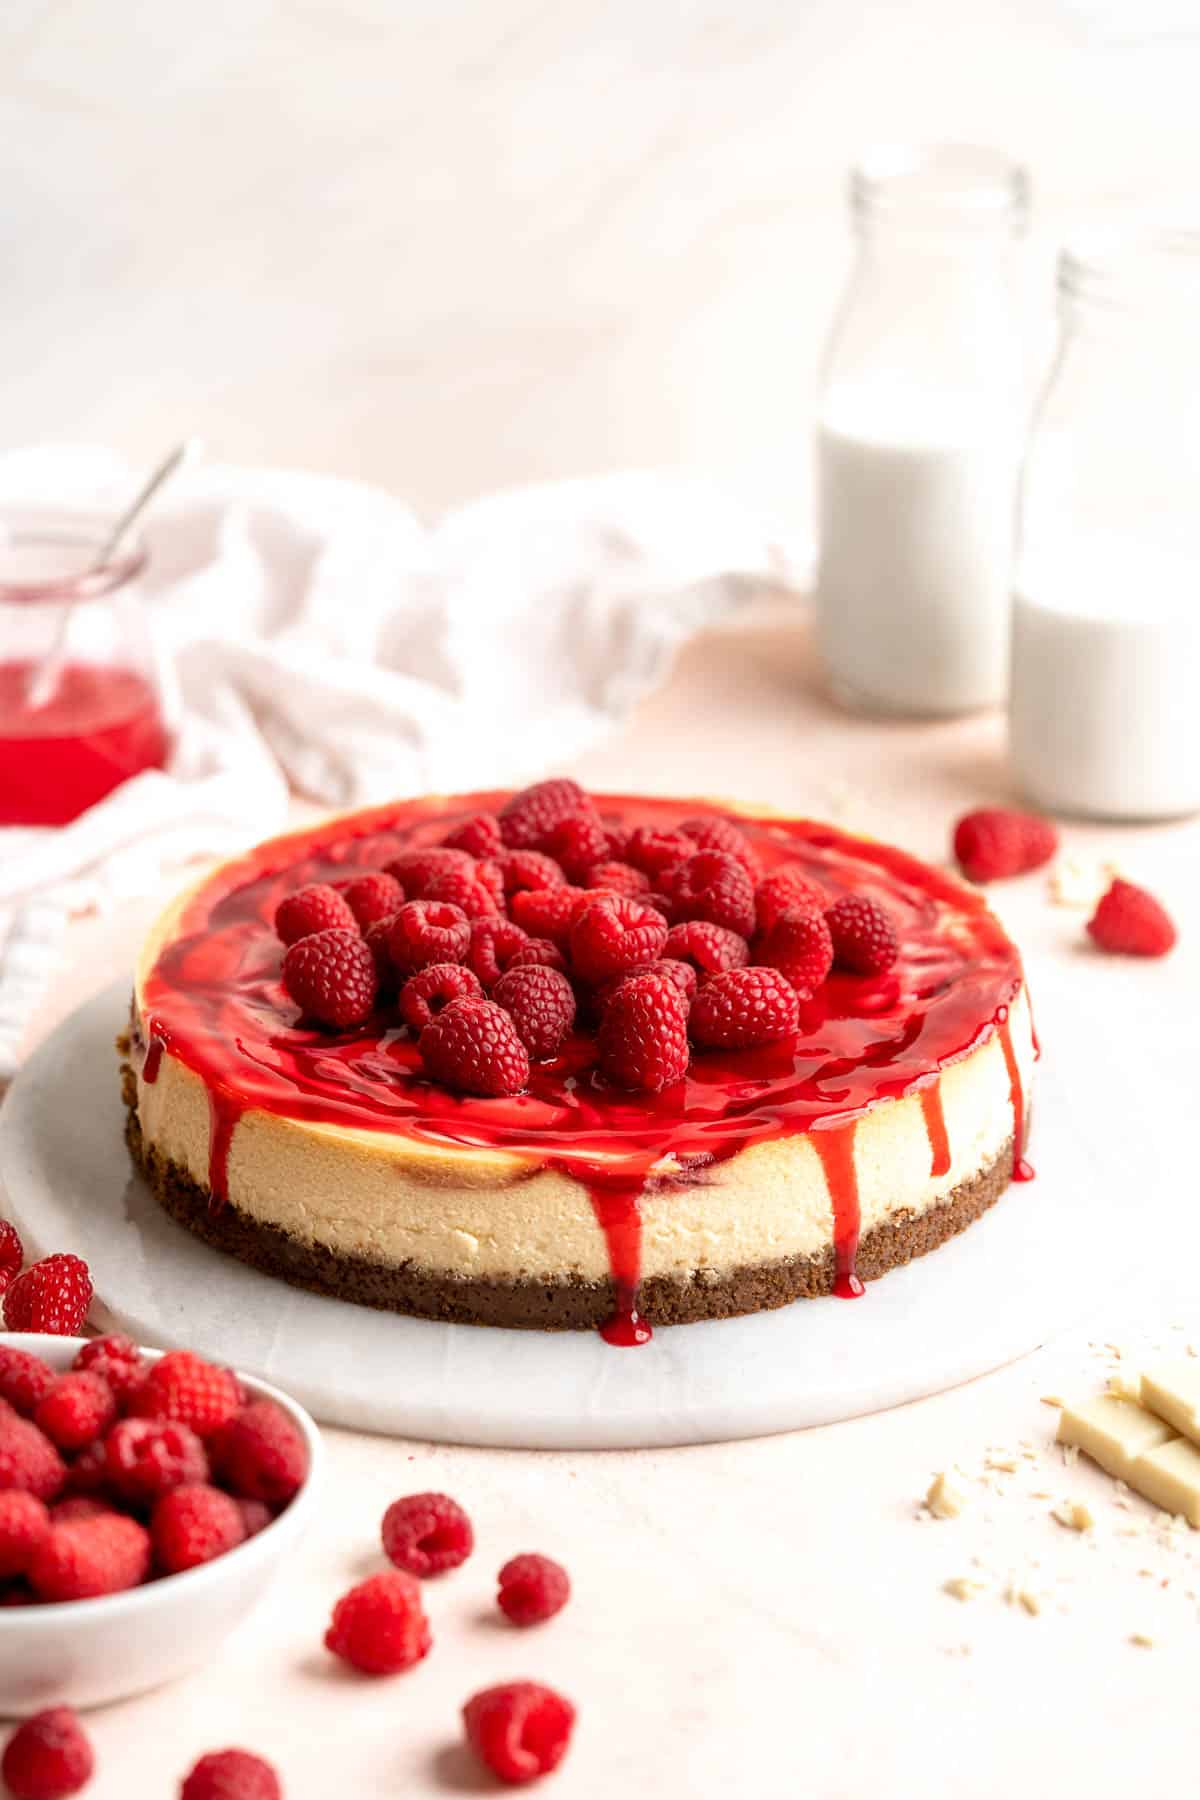
I'm a big believer that anything with raspberry and white chocolate is a match made in heaven. Raspberries are so tart with such a bright, straight-from-the-field summery flavor and white chocolate has the richest, creamiest, sweetest flavor of all the chocolates. This white chocolate raspberry cheesecake recipe is made completely from scratch (except the graham crackers), and the contrast between the red and the white is incredibly eye-catching! It's simple enough to make just because yet beautiful enough to serve on a special occasion, like an anniversary, Valentine's Day, or birthday party. Just follow the simple step-by-step directions for cheesecake perfection every time.
Why You'll Love This White Chocolate Raspberry Cheesecake
- Perfect balance of flavors. This creamy white chocolate cheesecake would be delicious on its own, but the homemade raspberry sauce takes it over the top. You'll taste little pops of sweet raspberry with a subtle note of white chocolate baked into the cheesecake itself. It's such a treat!
- Smooth and creamy. After making many different cheesecake recipes over the years, we've found the most deliciously creamy cheesecake filling that pairs perfectly with any fillings or topping. It's the real deal: smooth, creamy, and tangy without being too rich or sour. Just be sure to follow the baking and cooling instructions for the perfect bake every time!
- Great for celebrations. Cheesecake is one of the best desserts for special occasions like birthdays and anniversaries, and this creamy white chocolate raspberry cheesecake is exceptionally beautiful with swirls of homemade raspberry sauce baked directly into the cheesecake. It doesn't even need any decorations - just add a little extra raspberry sauce and some fresh raspberries on top to finish it off.
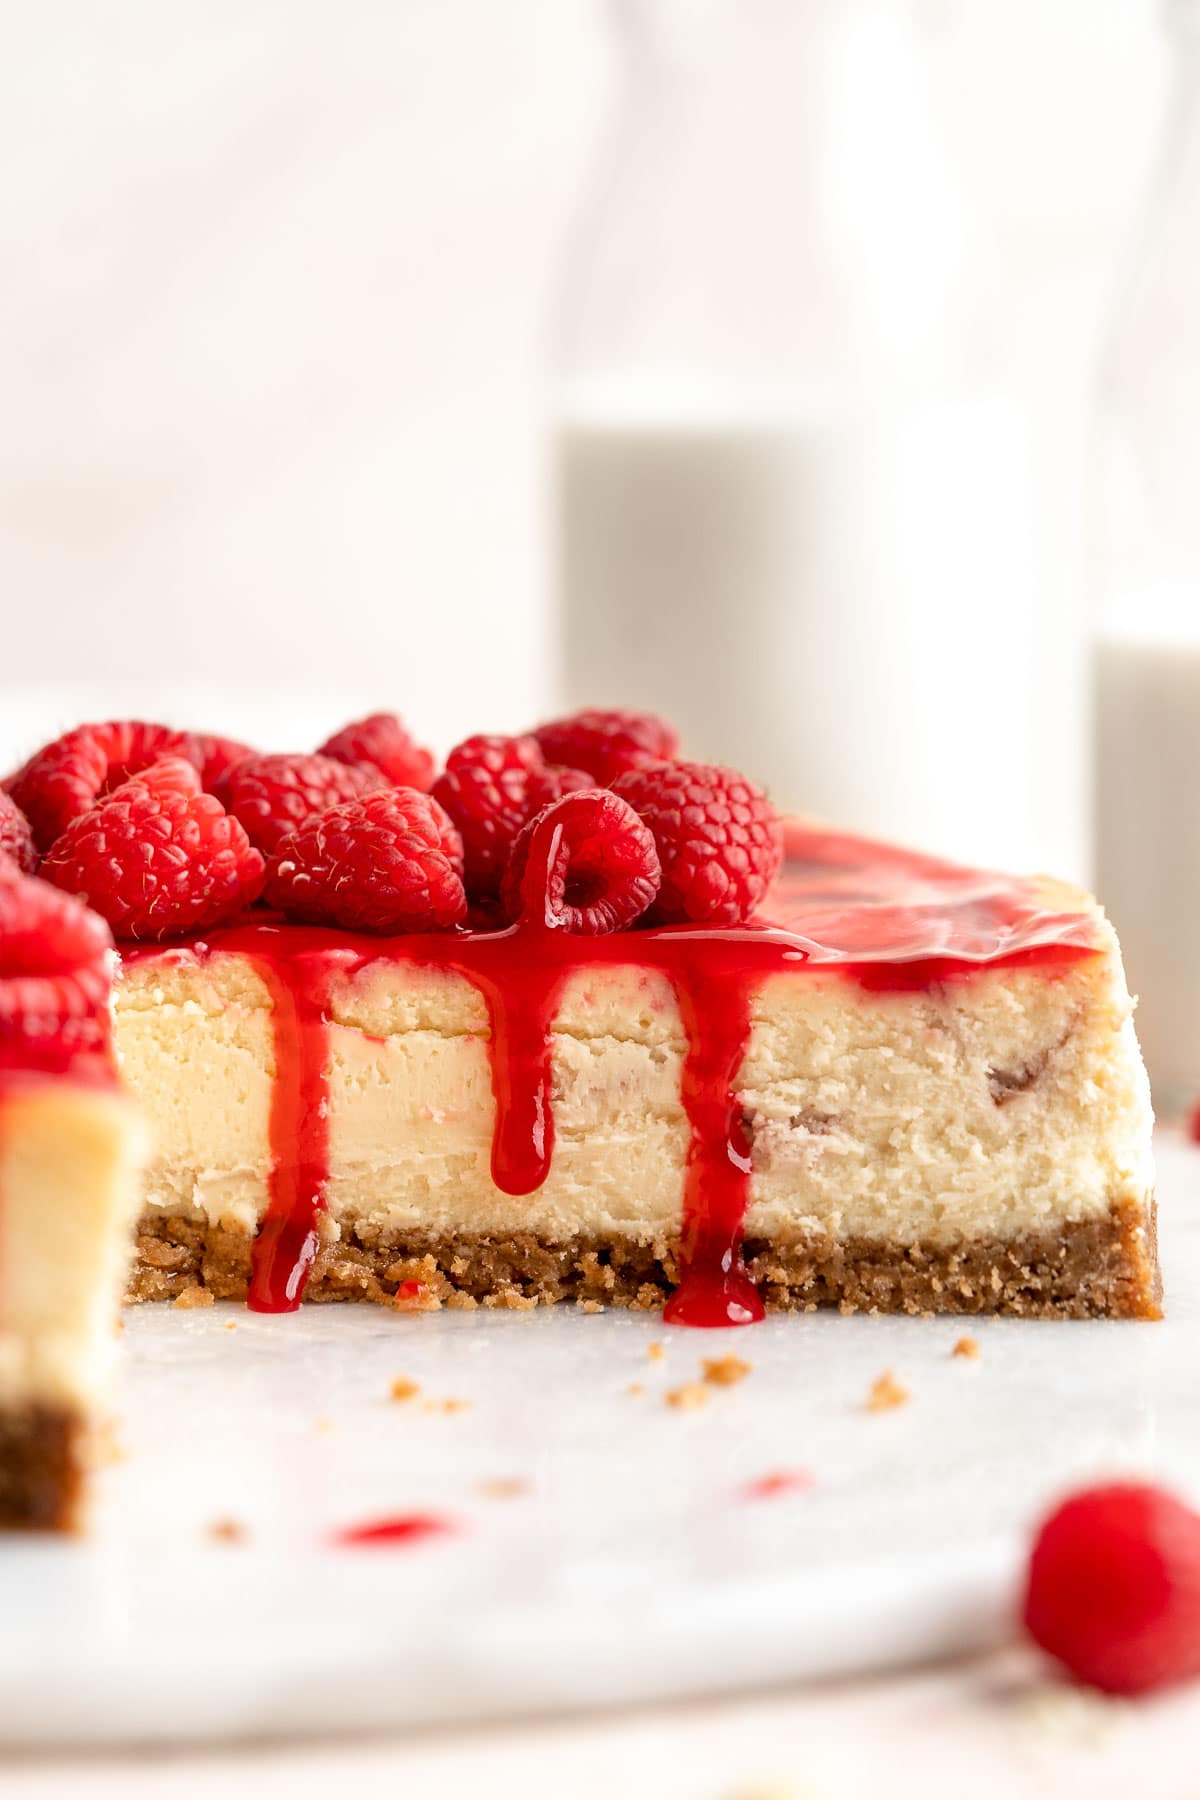
Ingredient Notes
To make this delicious white chocolate raspberry cheesecake, you will need the following ingredients (full measurements in recipe card below):
- raspberries - use either fresh or frozen raspberries for the homemade sauce, depending on availability. You can also add fresh berries on top of the cheesecake after baking (optional).
- white sugar - this will balance the tartness of the berries.
- water
- cornstarch - cornstarch will thicken the fruit sauce for the perfect texture. You also need a little sifted cornstarch in the batter to help will absorb excess liquid in the batter to avoid graininess or cracking.
- graham cracker crumbs - either crush graham crackers in your food processor or buy pre-crushed crumbs from the store.
- white sugar - this will give your crust a little extra sweetness and a delicious crunch.
- unsalted butter - bind the crust together with melted butter.
- white chocolate - either finely chop a white chocolate bar or use real white chocolate chips.
- cream cheese - it's extremely important to let your cream cheese come to room temperature first.
- vanilla extract - for a little extra flavor.
- salt
- eggs - I like to add a mixture of whole eggs and egg yolks to bind the cheesecake together and make it extra creamy.
- sour cream - this balances the cream cheese flavor while adding extra richness.
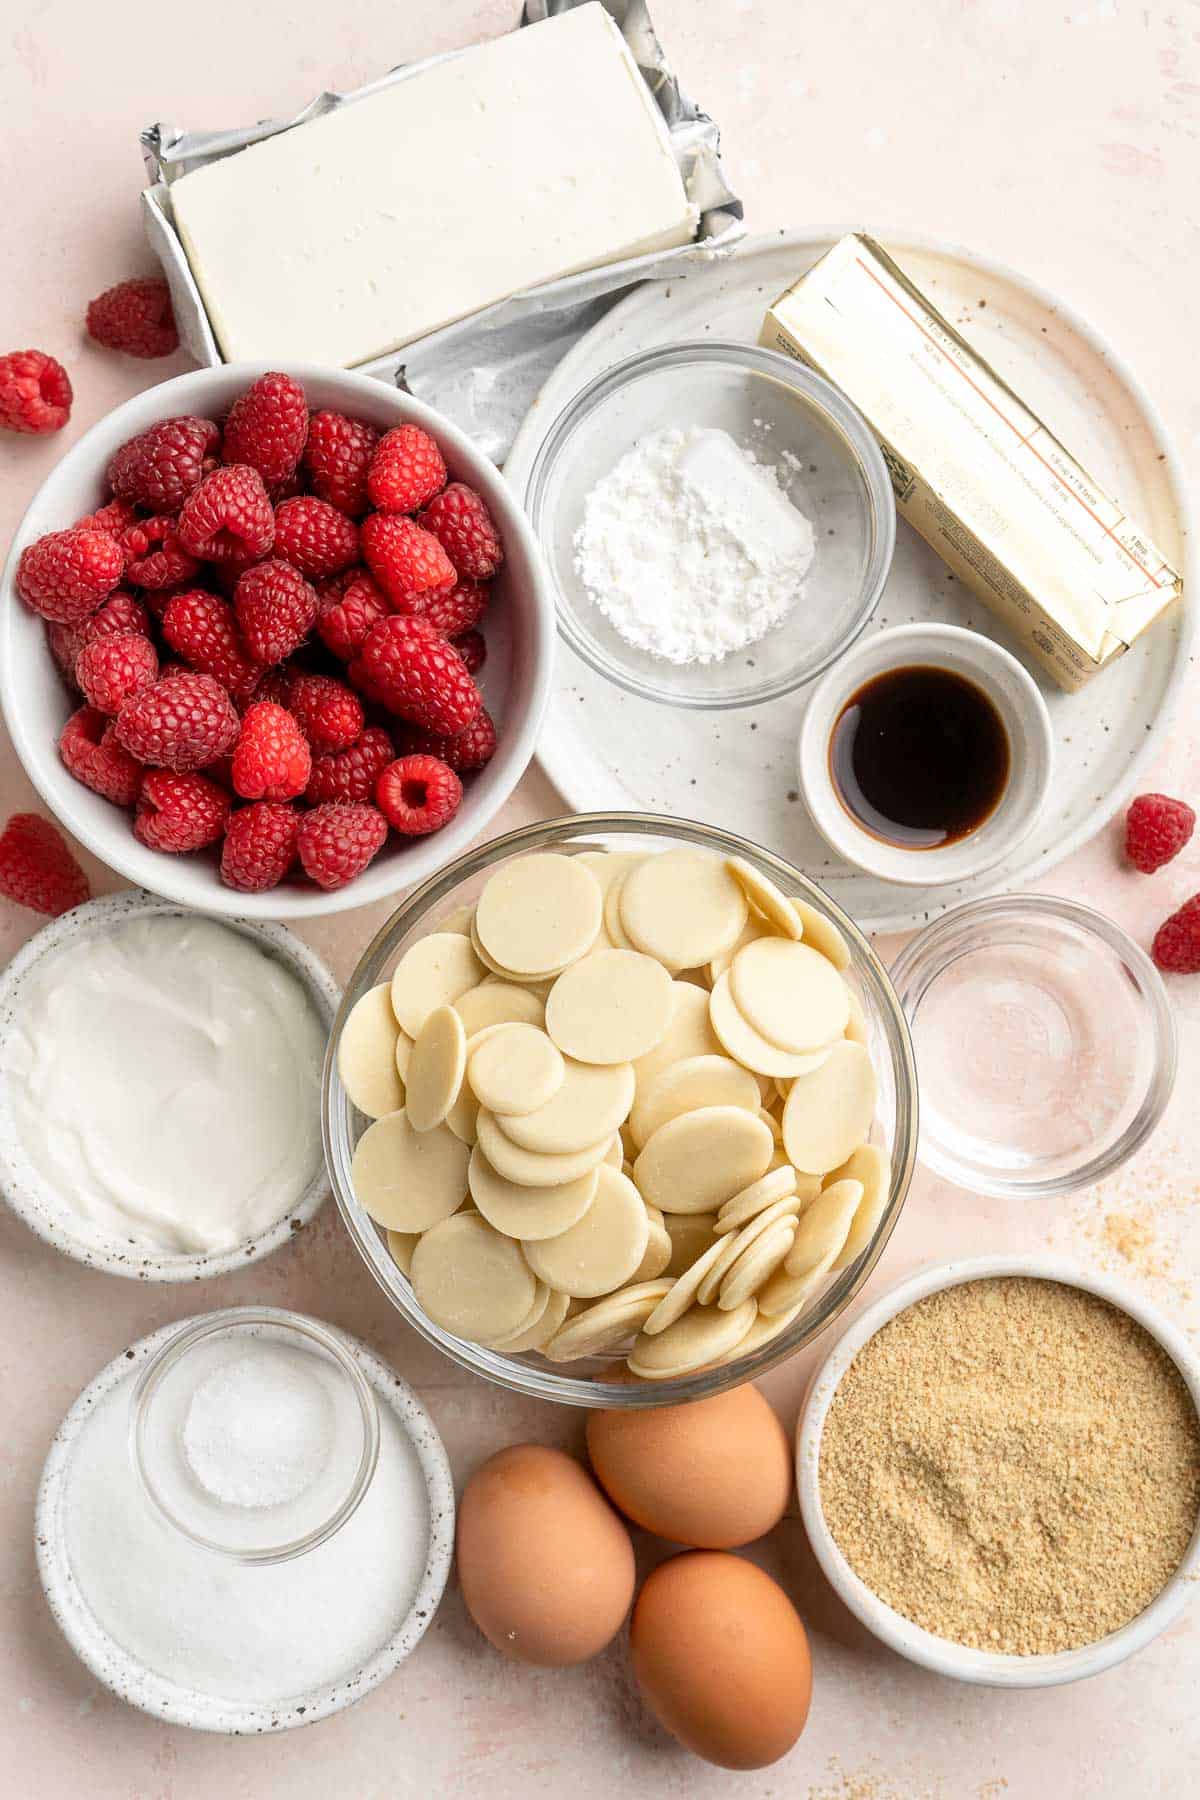
Baking Tools and Equipment
You will also need the following baking tools and eqiupment:
- measuring cups and spoons (or kitchen scale)
- saucepan
- several mixing bowls
- a fine-mesh sieve
- whisk
- plastic wrap and aluminum foil
- 9-inch springform pan
- stand mixer
- large roasting pan
How to Make the Best White Chocolate Raspberry Cheesecake
First, make the raspberry sauce.
- Combine ingredients. In a small saucepan, add the raspberries, sugar, and 1 teaspoon water. Heat over medium-low heat and cook, while continuously stirring to break up the raspberries, until the mixture begins to simmer.
- Thicken. Once simmering, take a small mixing bowl and combine the remaining water and cornstarch together to make a slurry. Pour the slurry into the simmering sauce and stir to combine. Simmer, while continuously stirring, for 3-4 minutes. Then, remove from heat.
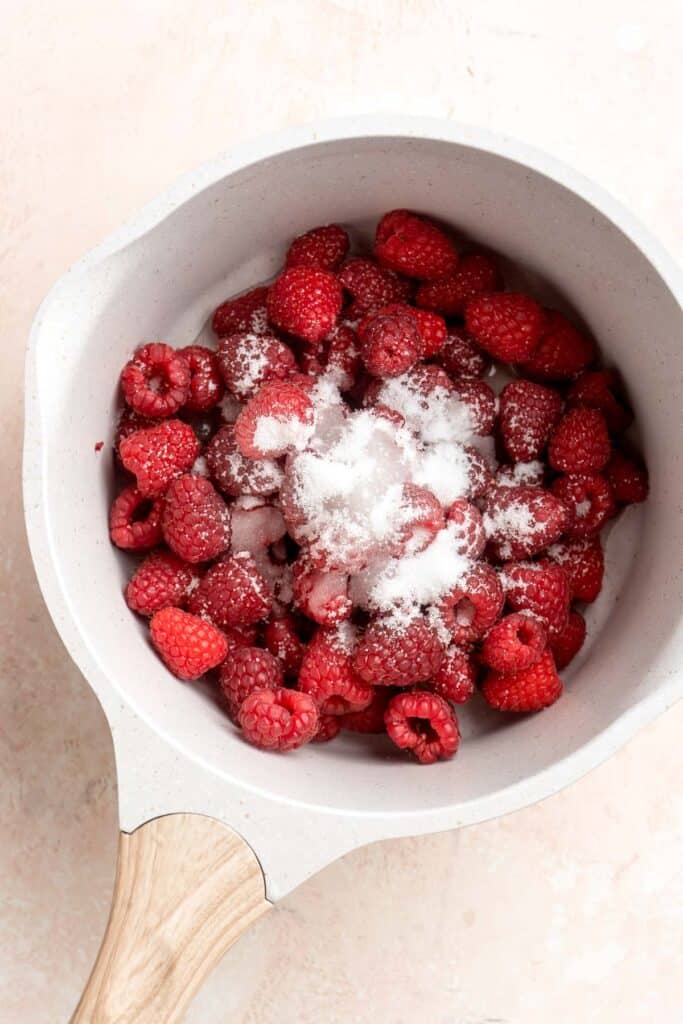
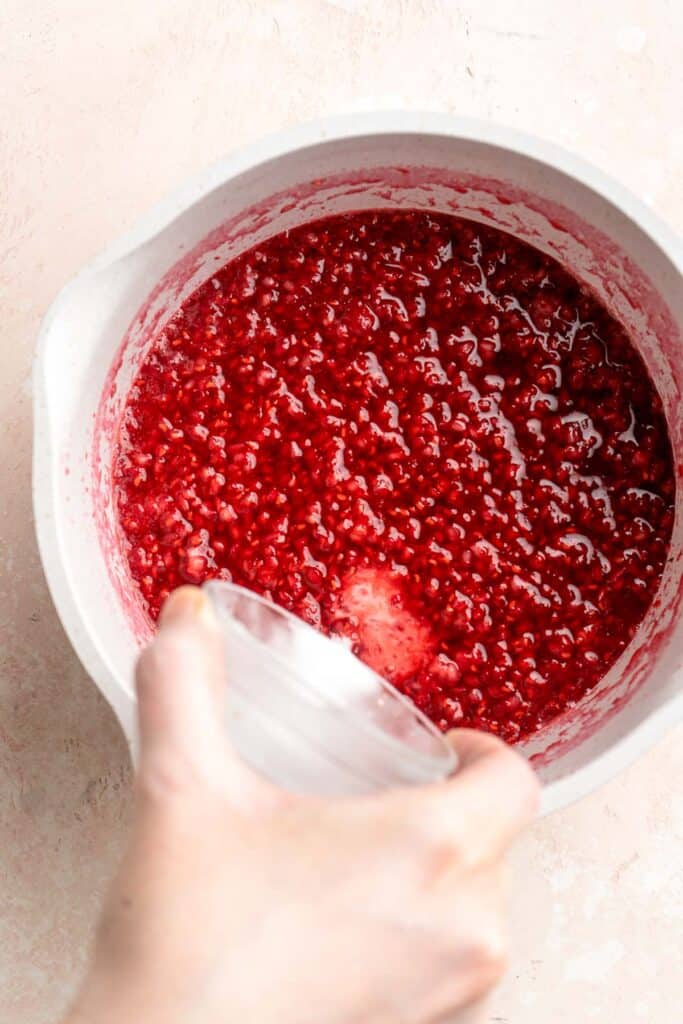
- Smooth it out. Place a fine-mesh sieve over a mixing bowl. Pour the sauce through the sieve to remove any seeds, while pressing on the sauce to allow all the juices through.
- Cool. Cover the top of the raspberry sauce with plastic wrap, then place into the fridge to FULLY cool before making the cheesecake.
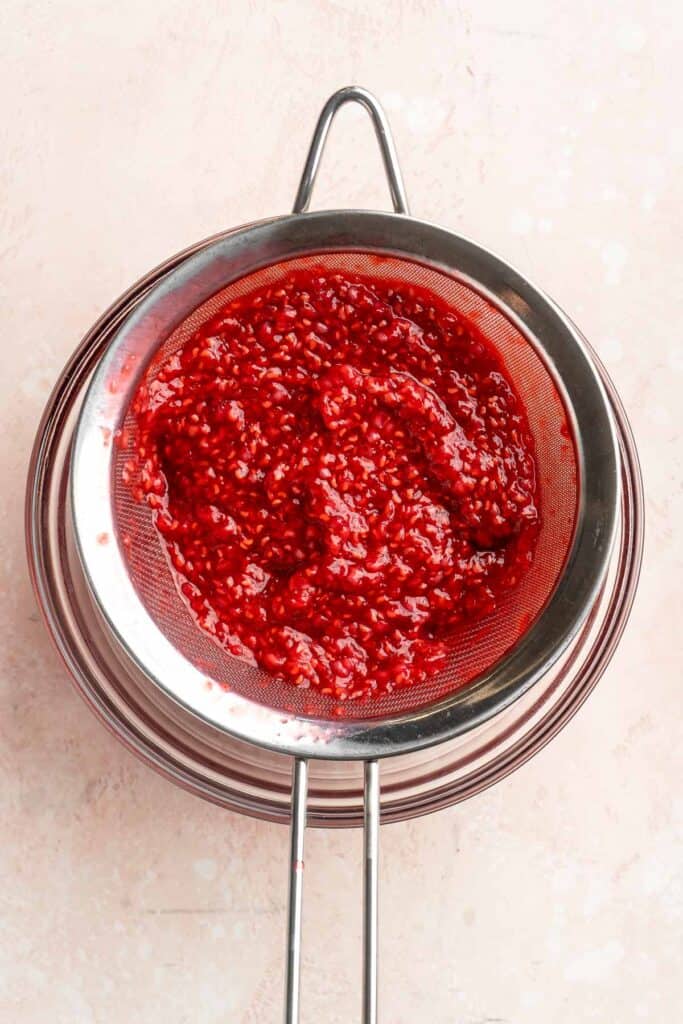
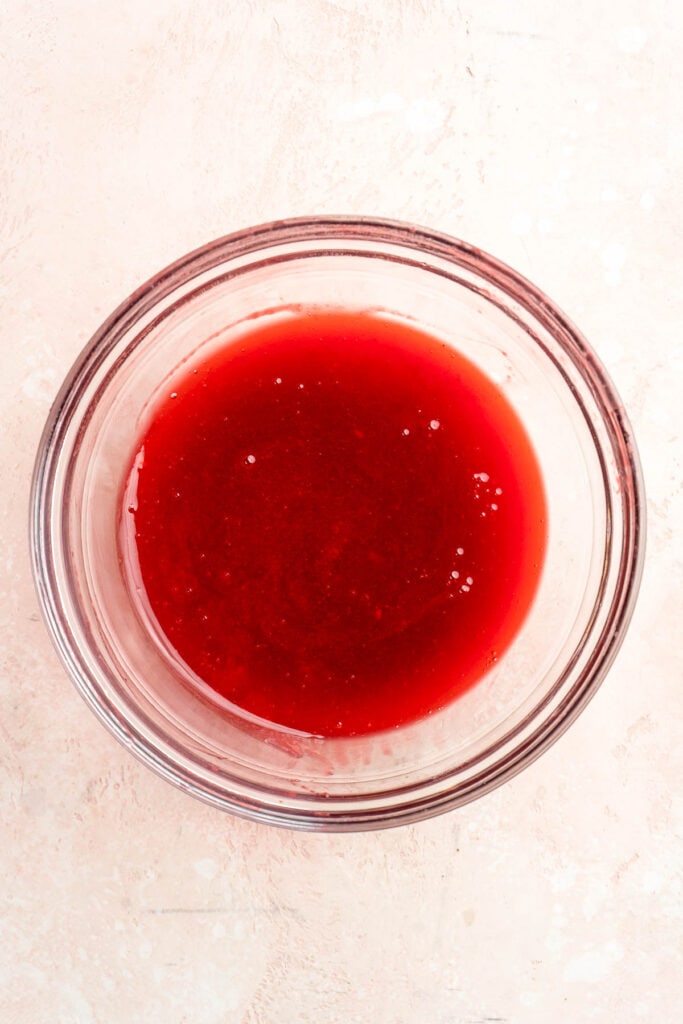
Next, prepare the graham cracker crust.
- Combine. In a mixing bowl, add the graham cracker crumbs and sugar and whisk until well combined. Pour the melted butter into the bowl, then mix with a fork (or your hands) until the butter is well dispersed and the mixture resembles wet sand.
- Shape. Add the crust into a 9-inch non-stick springform cheesecake pan and press it down evenly into the bottom. Use a flat bottom measuring cup to really compact the crust down.
- Bake. Place the crust into a 350F preheated oven to bake for 11 minutes. Remove from oven and allow to cool to room temperature.
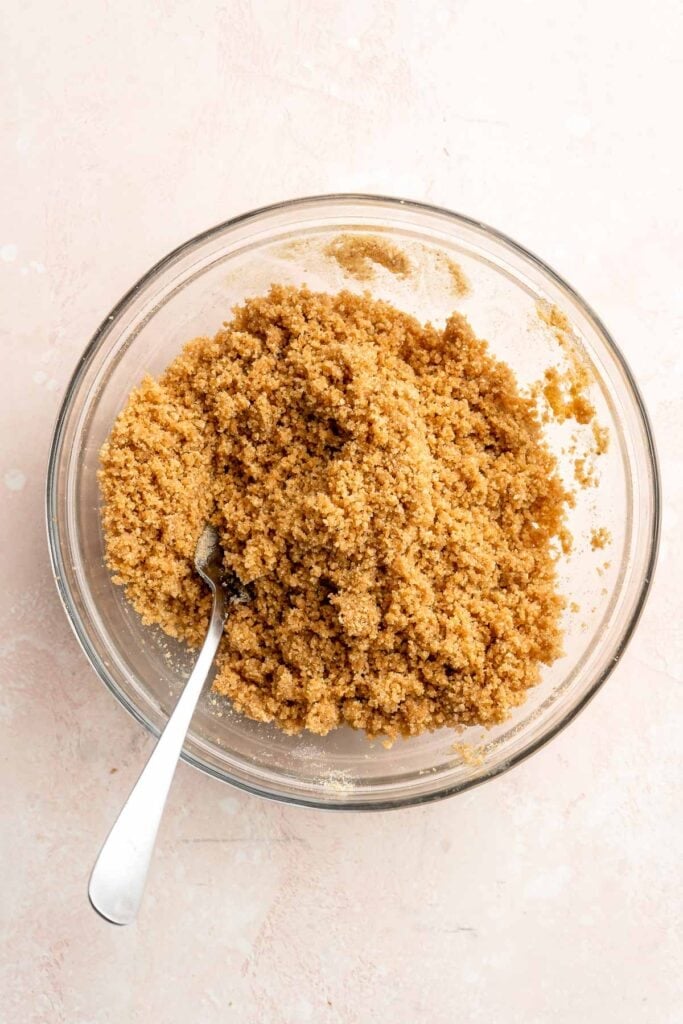
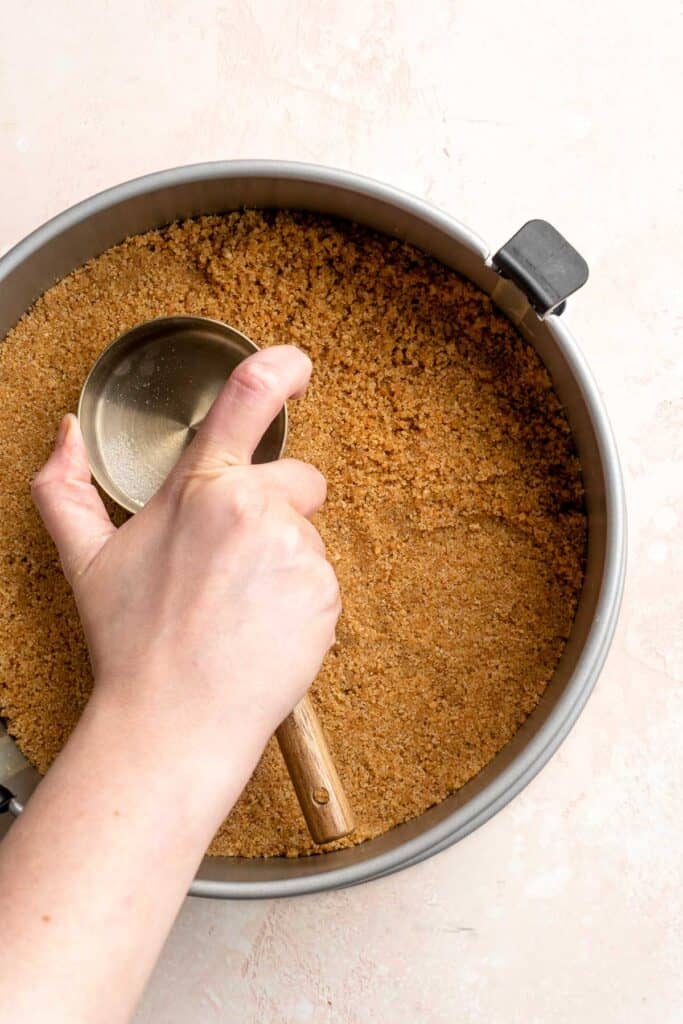
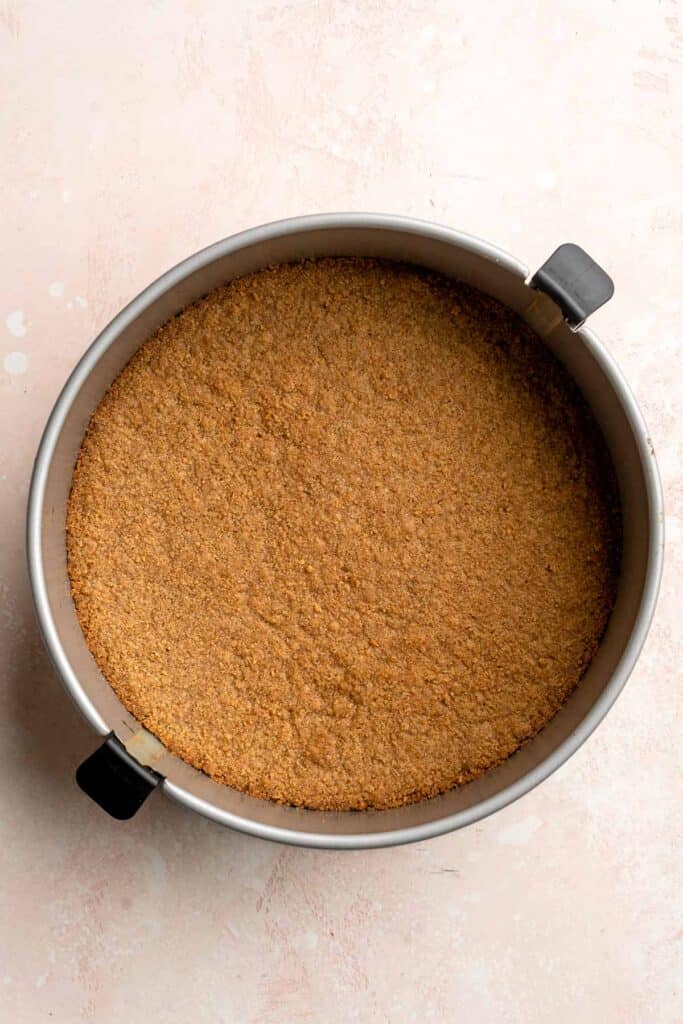
Now, let's make the cheesecake filling.
- Prep. Prepare the cooled springform pan (with the crust) by wrapping the bottom of the pan with 2 sheets of aluminum foil and set aside for later.
- Melt chocolate. In a large microwave-safe mixing bowl, add chopped white chocolate. Place into the microwave and heat in 30 second intervals, stirring in between, until fully melted. Set aside to slightly cool while you make the cheesecake batter.
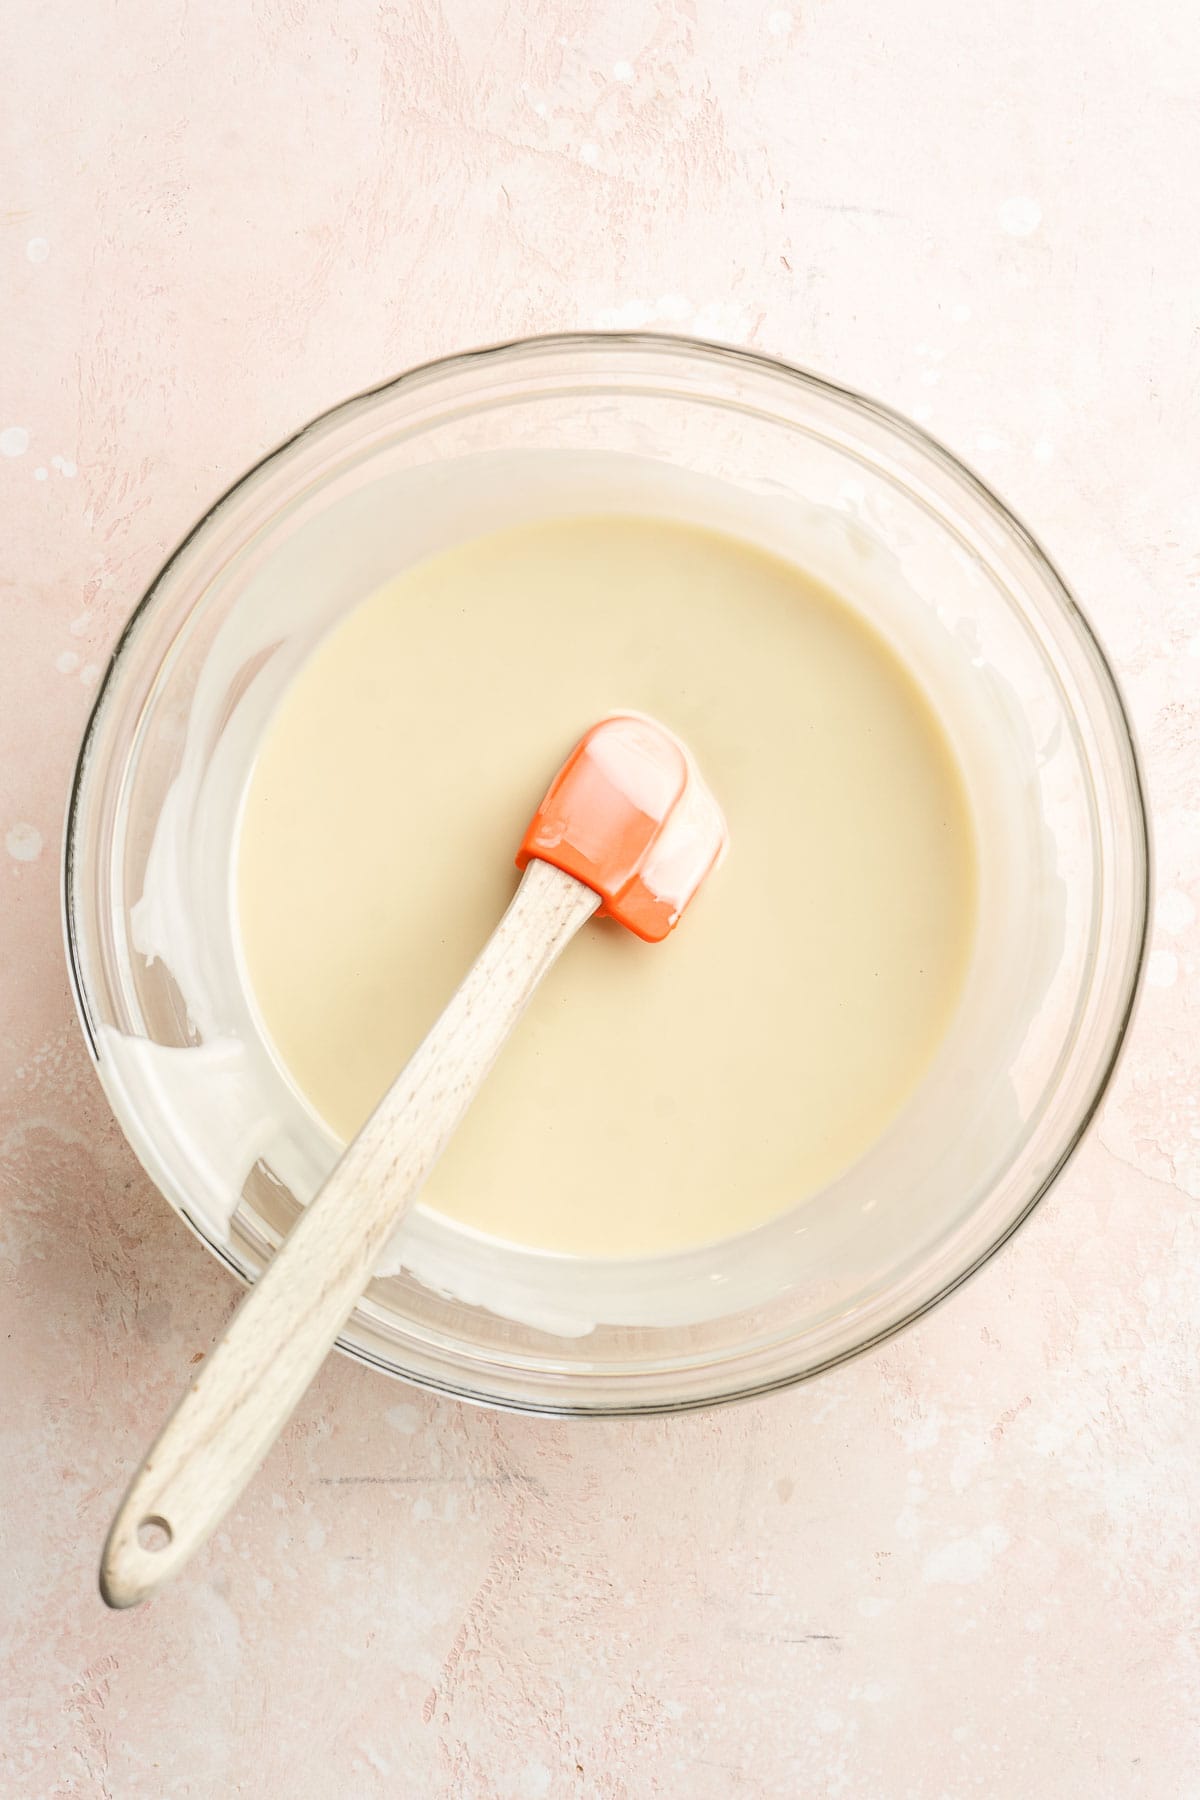
- Make batter. In the bowl of a stand mixer, add the softened cream cheese, sugar, vanilla, and salt. Secure the paddle attachment on and beat on low until it looks soft, very creamy, and smooth, about 2 to 3 minutes. While still beating on low, add the eggs and yolks, one at a time, ensuring that each egg is fully incorporated before adding the next. Scrape the sides of the bowl well to ensure everything is well-mixed.

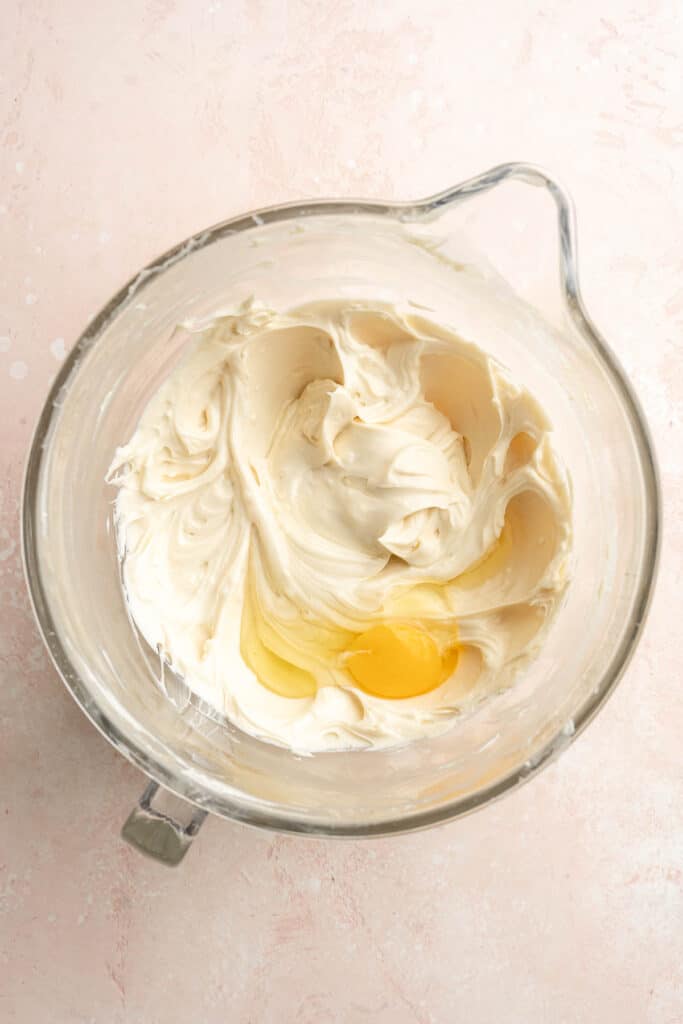
- Add final ingredients. Add the sour cream and melted white chocolate, then beat on low until well-combined and smooth. Finally, add in the cornstarch, and beat again until incorporated and smooth.
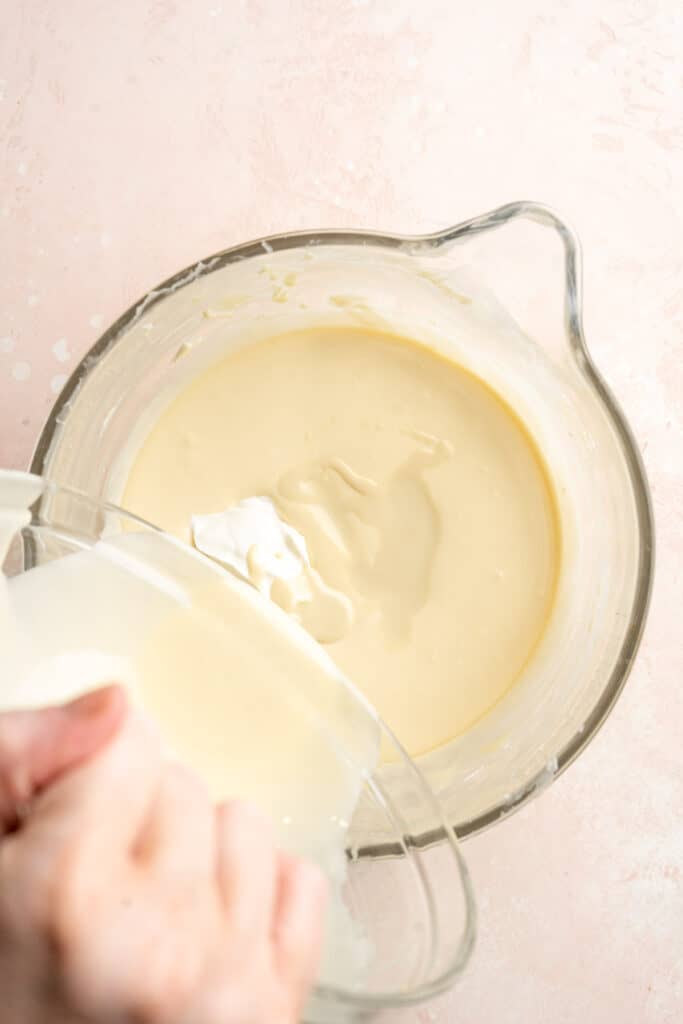
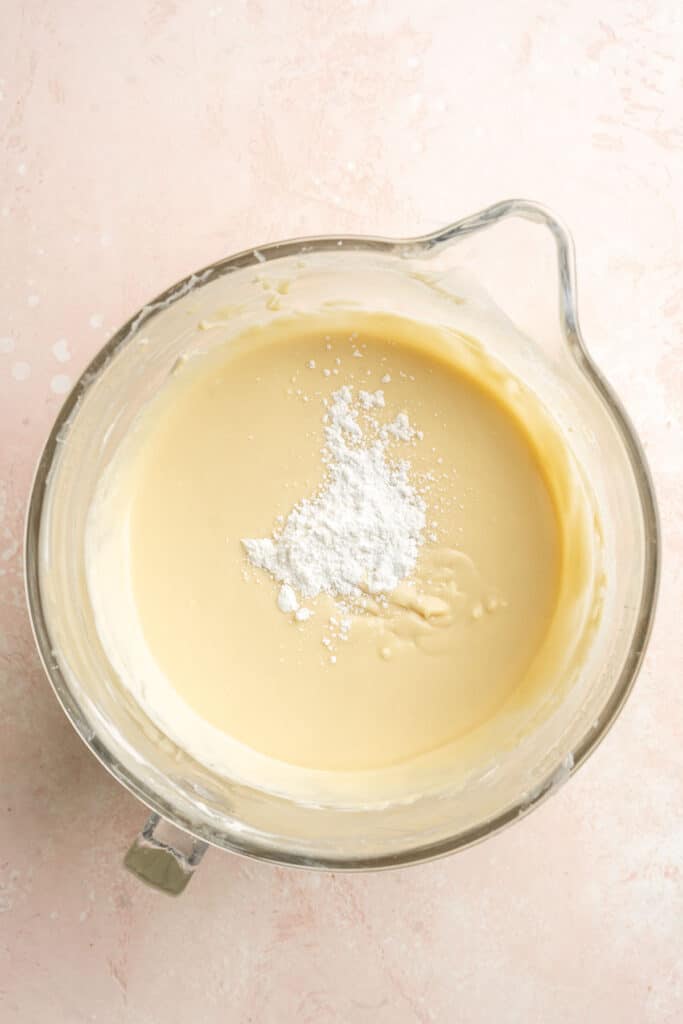
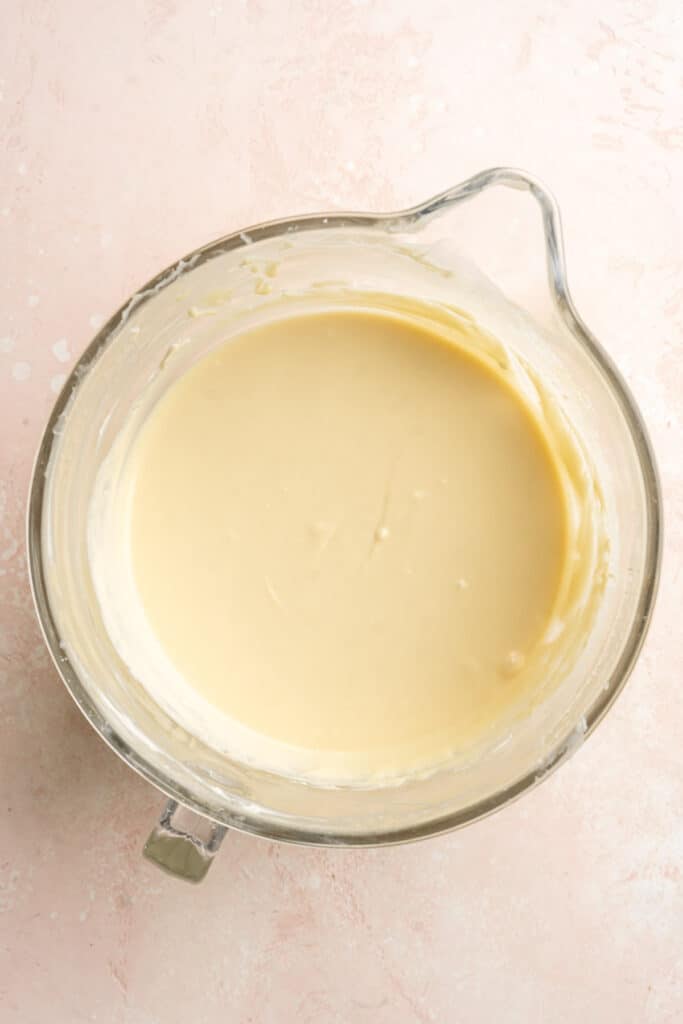
Assemble the white chocolate raspberry cheesecake.
- Assemble. Pour half of the cheesecake batter over top of the cooled crust in the springform pan. Drizzle with ⅓ of the raspberry sauce. Pour the remaining cheesecake batter on top. Then drizzle with another ⅓ of the raspberry sauce. Use a wood skewer to swirl the sauce into batter, creating a nice design.
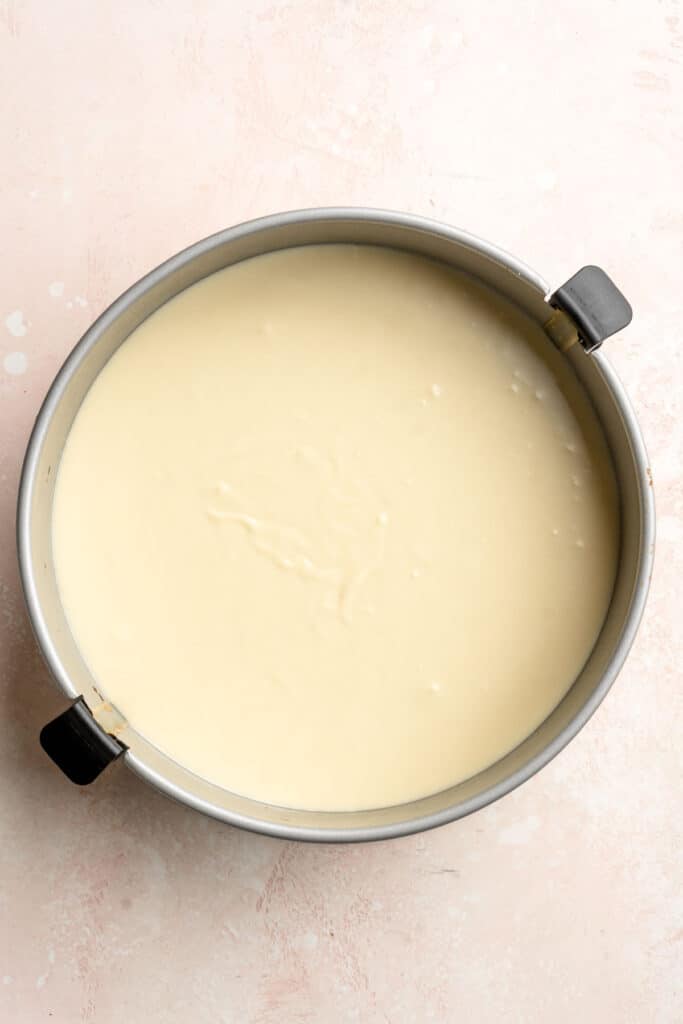
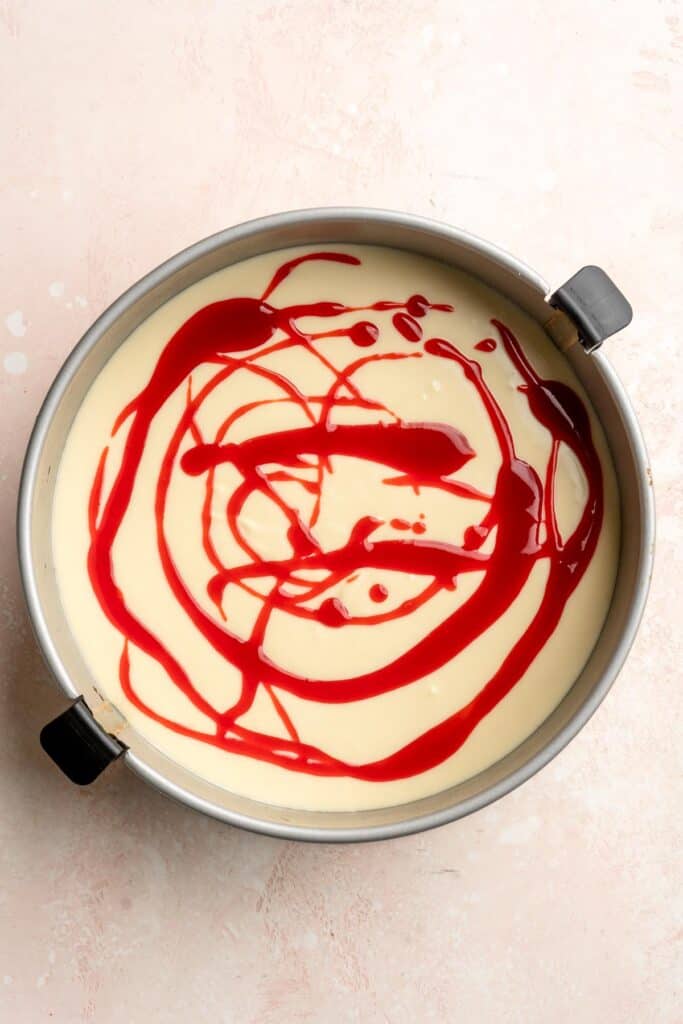
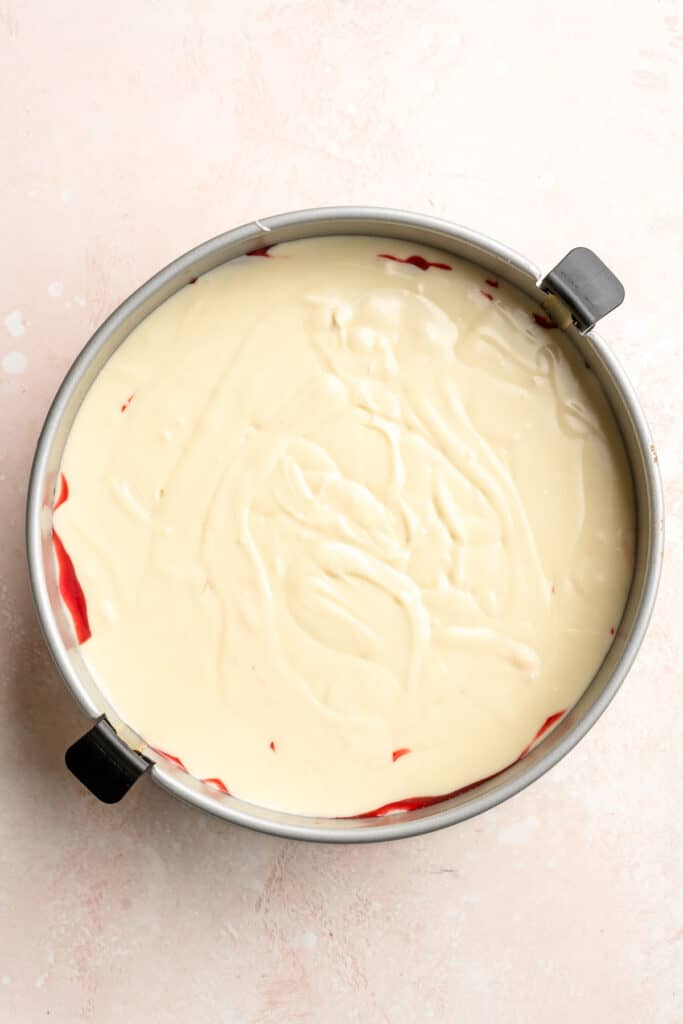
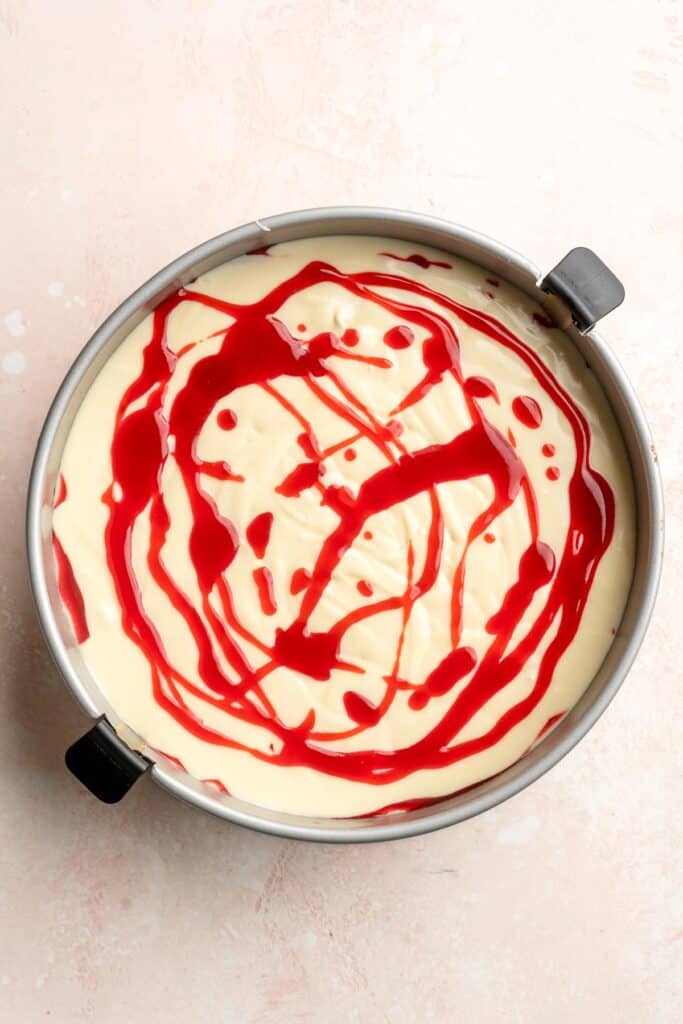
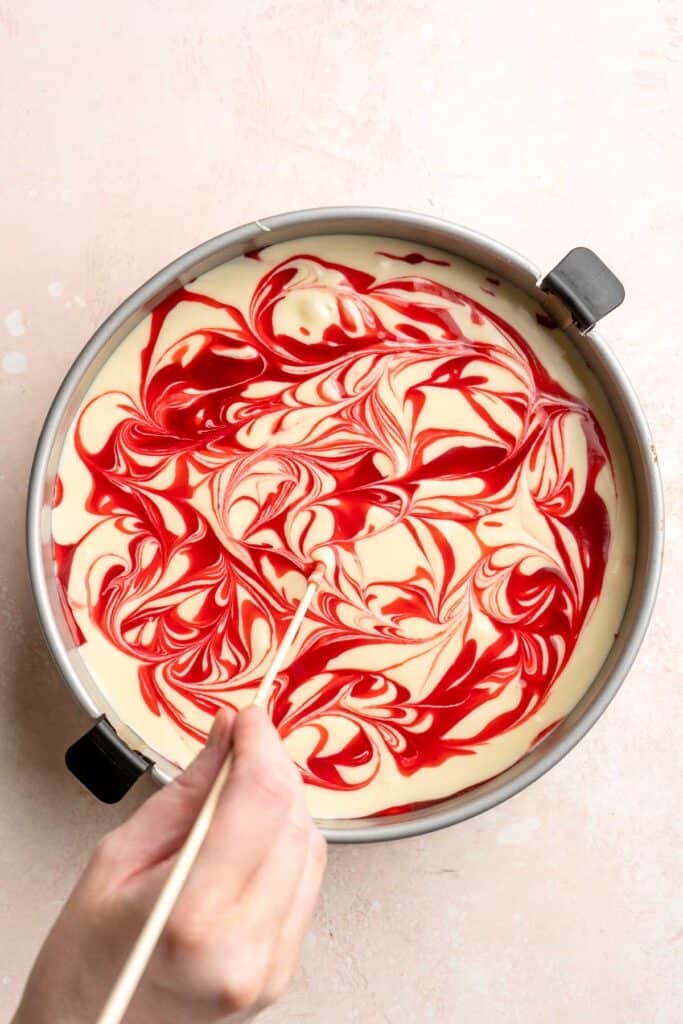
- Make hot water bath. Place the cheesecake into a large roasting pan. Pour enough boiling water into the roasting pan so that it reaches about halfway up the outside of the springform pan.

- Bake. Place into the 325F preheated oven to bake for about 1 hour and 20 minutes - begin checking at 1 hour 10 minutes, to ensure that you do not overbake the cheesecake. When the cheesecake is done it should still be a little jiggly in the centre, but set around the edges.
- Rest. When done, lightly crack the oven open to allow the cheesecake to slowly cool for about an hour and a half. After an hour and a half, remove the cheesecake from the oven and water-bath and place onto the counter to cool to room temperature.
- Chill. Once at room temperature, wrap with plastic wrap and place into the fridge for at least 6 hours or preferably overnight to fully set up.
- Serve. At serving time, top with remaining ⅓ of raspberry sauce, and optionally add fresh raspberries on top!
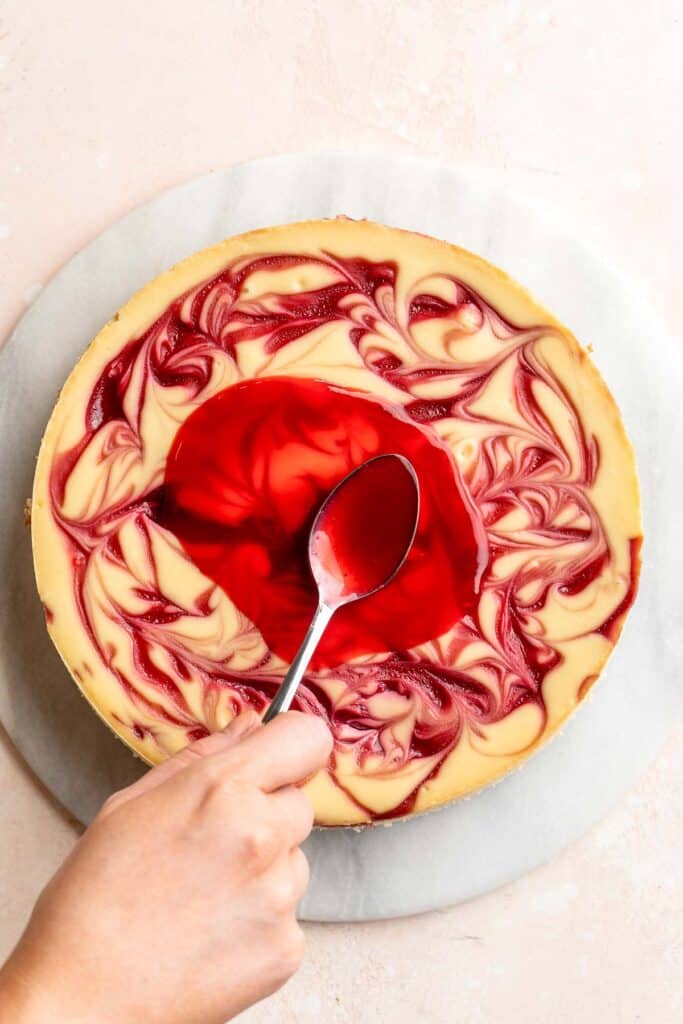
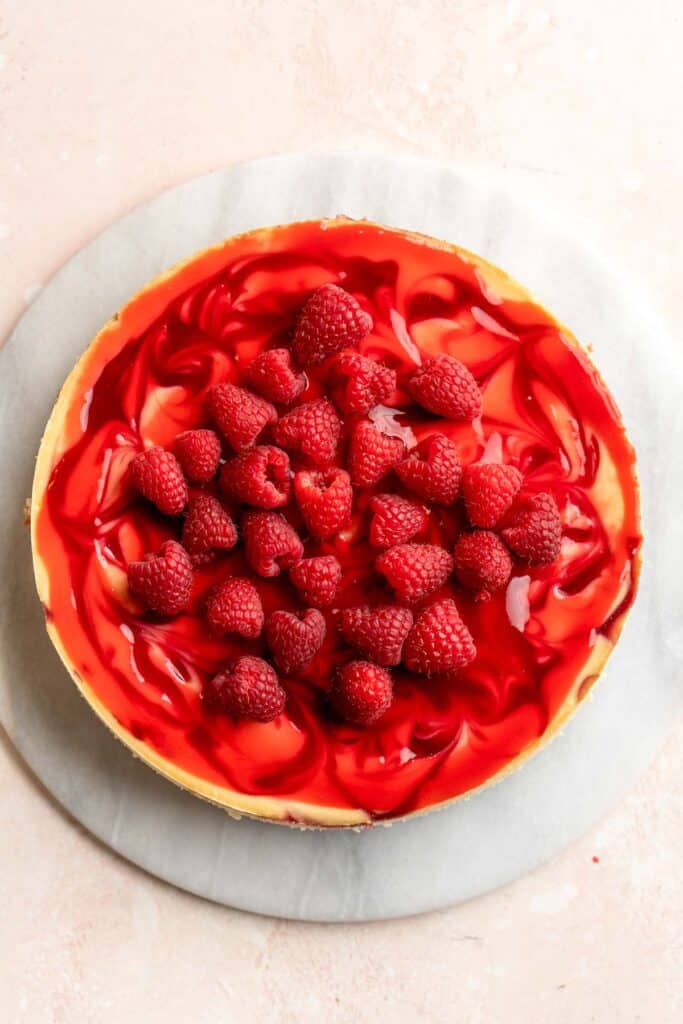
Recipe Variations
- Make an Oreo crust. Chocolate and raspberry are great friends, and crushing Oreo cookies for the crust can add an extra layer of chocolate flavor. Just skip the extra sugar!
- Use different berries. This cheesecake recipe would work well with other berries, too, like blueberries, strawberries, etc. I recommend choosing a tart berry like strawberries or raspberries to balance the sweetness of the white chocolate.
- Go wild with decoration. This cheesecake is beautiful with the raspberry swirl and a little extra drizzle of raspberry sauce on top, but you can easily add a few extra garnishes for a spectacular display. First, start with some fresh berries to bring the raspberry theme to life. Make some white chocolate shavings or curls for extra movement and a contrast of white. You can even pipe a ring of whipped cream around the top edge, and add some homemade macarons or dark chocolate raspberry truffles with a little edible gold leaf for a truly decadent dessert.
- Gluten-free cheesecake. This recipe is easy to make gluten-free by using gluten-free graham crackers instead.
How to Serve
This White Chocolate Raspberry Cheesecake is delicious served on its own, or served as part of a dessert spread with some of my favorite desserts including:
- Red Velvet Macarons
- Madeleines
- Vanilla Cake Pops
- Butter Cookies
- Chocolate Covered Oreos
- Lemon Drop Cookies
For more red inspired desserts, see our 40 Best Valentine's Day Dessert Recipes.
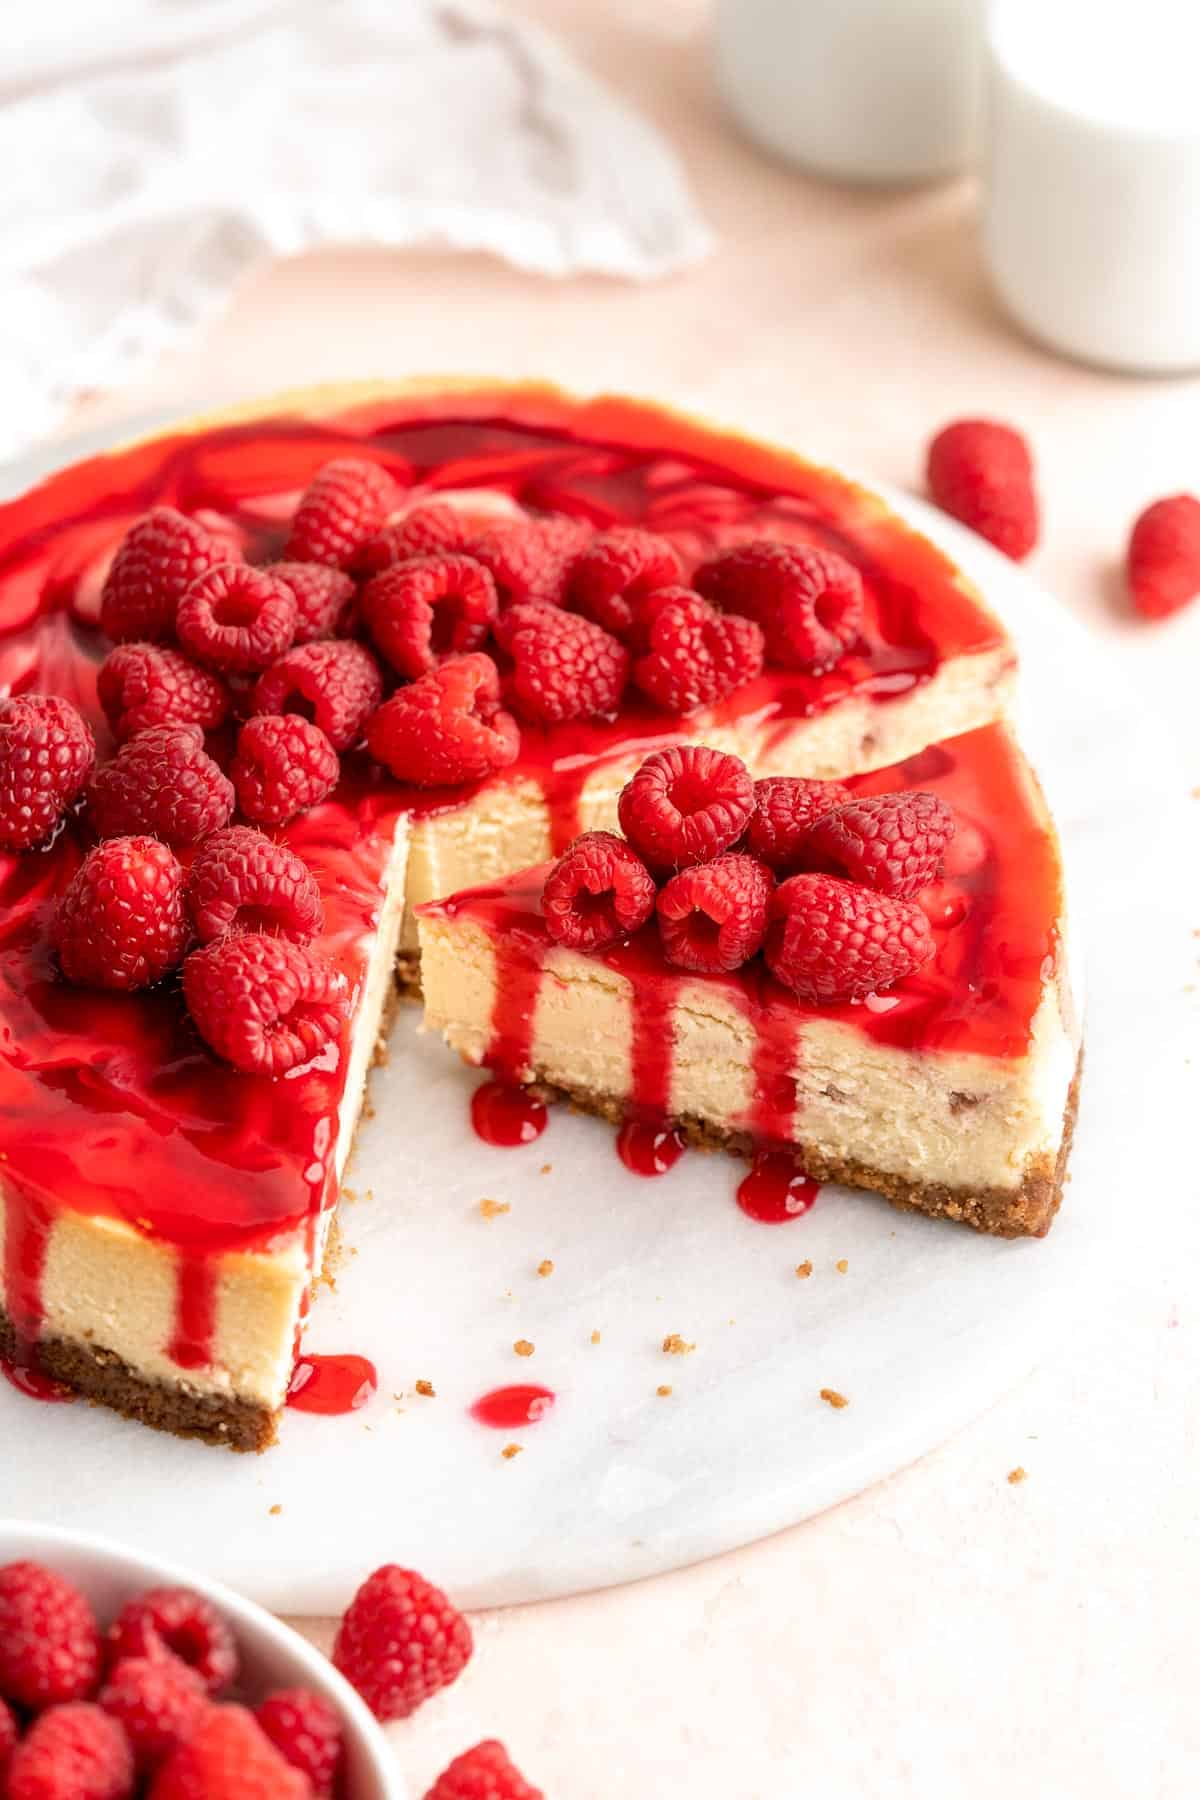
Recipe Tips and Tricks
- Use the right chocolate. Baking chips and white chocolate chips are not the same thing. Either use a bar of white chocolate or chips that specifically say "white chocolate." The ingredients should also include cocoa butter, not emulsified palm kernel oil.
- Be patient. There's no rushing when it comes to baking cheesecakes. Let it bake exactly as explained in the instructions, and give it plenty of time to cool. This will help it get the perfect creamy texture and avoid cracking. It's best to bake it the day before you need it and let it chill in the fridge overnight.
- Don't skip the water bath. If you've never used a water bath or bain marie before, it can seem intimidating. Really, it's very simple, and it makes a tremendous difference in the quality of your cheesecake. The best cheesecake is always baked in a water bath! To avoid any seeping, wrap the springform pan with a layer or two of aluminum foil before placing it in the larger pan. You can also add the water right after you place the pan in the oven; this tends to make it easy to avoid sloshing the water around.
- Use the proper pan. This recipe works great for springform pans that are either 8-9 inches in diameter. Pans that are smaller or larger will not bake properly following the instructions as written.
Storing and Freezing Instructions
How to Store
Store your leftover raspberry white chocolate cheesecake in an airtight container in the fridge for up to 7 days.
How to Freeze
For longer storage, wrap the leftover cheesecake in several layers of plastic wrap, then freeze solid. Freeze for 2-3 months and thaw in the fridge before serving.
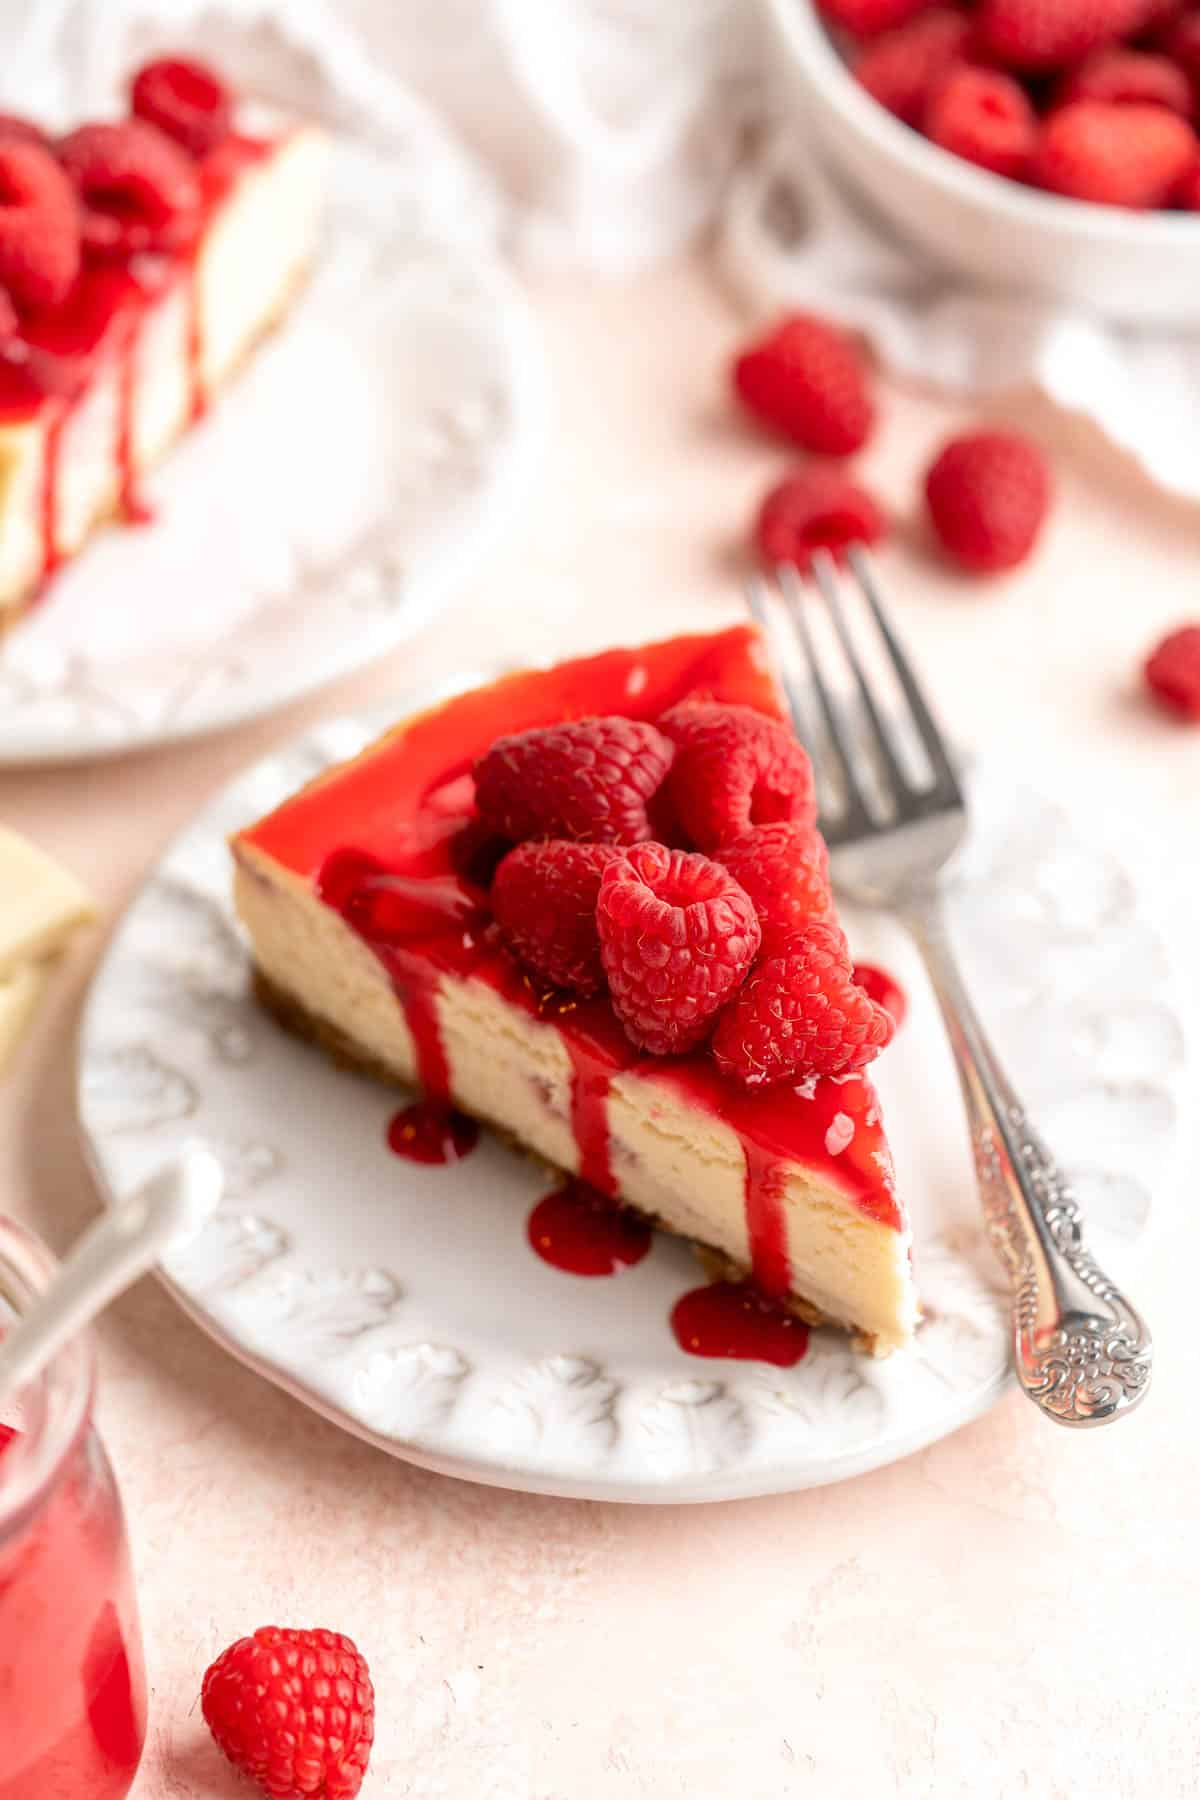
FAQ
There are a couple of reasons for this, but cheesecakes usually split if they aren't properly cooled. It's very important to avoid any drastic temperature changes. Be sure to follow the recipe and cooling instructions precisely for the best results.
Cheesecake is very particular. If it does not cool slowly, it will split like the Grand Canyon. Although split cheesecake still tastes great, it doesn't look that nice! Plus, it's easy to avoid splitting if you're patient. First, you want to let the heat from the oven dissipate slowly. Once the cheesecake is baked, turn off the oven and crack open the oven door. Wait at least an hour and a half, then move the tray to the counter, remove the cheesecake from the water bath, and let it cool to room temperature. Don't rush it; let it cool all the way (usually a couple of hours). Then, it needs to rest in the fridge for a minimum of 6 hours, but ideally overnight.
The cheesecake needs to be fully set and chilled before you attempt to remove it from the springform pan. Wait until after it's been refrigerated for at least 6 hours.
More Cheesecake Recipes
- 50 Best Cake Recipes
- Classic New York Cheesecake
- Blueberry Cheesecake
- No Bake Strawberry Cheesecake
- Cranberry Sauce Swirl Cheesecake
- Pecan Pie Cheesecake
Tried this recipe?
I'd love to hear what you think! Leave a comment and rating below to share your feedback. Your reviews help others discover this recipe and help me keep creating more free recipes for you. Snap a photo and tag me on social media @aheadofthyme too.

Sweet Potato Tater Tots
These homemade Sweet Potato Tater Tots are the perfect appetizer or side dish that is easy to make using a few simple ingredients. They're oven-baked, meaning they are much lower in oil than the deep-fried tots from the grocery store, and that sweet and salty flavor will pair perfectly with your favorite sauces and dips. Serve them with chicken wings, burgers, sausages, and more.

If you've never made homemade tater tots before, it might seem a little daunting. Fortunately, this easy recipe makes it so simple! This sweet potato tater tot recipe uses shredded sweet potatoes to give you a crispy texture, and is perfectly seasoned with just a little garlic powder, paprika, Italian seasoning, and parsley for the best flavor. Shape them into little cylinders, then bake and broil for the perfect texture. Homemade tots taste so much better than regular tater tots from the store. You'll never go back!
Why You'll Love These Sweet Potato Tater Tots
- Sweet and savory. The magic of sweet potato fries and tots is the balance between sweet and salty flavors. This sweet potato tot recipe has that classic sweetness, but it's also seasoned with savory spices to pair them with your favorite entrees.
- Three ways to cook. Although our main recipe uses the oven baking method, you can also make air fryer sweet potato tots or deep fry them in oil. Follow whichever method you're the most comfortable with!
- Naturally vegan tater tots. Since this recipe only uses sweet potatoes, flour, and spices, it's naturally vegan and vegetarian! It's also dairy-free, egg-free, and lower in fat than deep-fried frozen tots from the store. For a gluten-free version, use cornstarch instead of flour.

Ingredient Notes
To make these delicious sweet potato tater tots, you will need the following ingredients (full measurements in recipe card below):
- sweet potatoes - start by peeling the sweet potatoes. Some will be boiled and others will be grated and strained.
- all-purpose flour - this will absorb any excess moisture and give you a crisp shell on the outside. Use cornstarch as a gluten-free alternative.
- seasonings - season well with garlic powder (or nutritional yeast), paprika, Italian seasoning, salt, and ground black pepper for extra flavor.
- fresh parsley - this will add a nice fresh herb flavor to balance the sweet potatoes and spices.
You will also need measuring spoons, a large pot, box grater, cheesecloth or dish towel, parchment paper, baking sheet and cooking spray. If cooking in the air fryer or deep fryer instead, then you will need an air fryer or large Dutch oven or pot for frying.
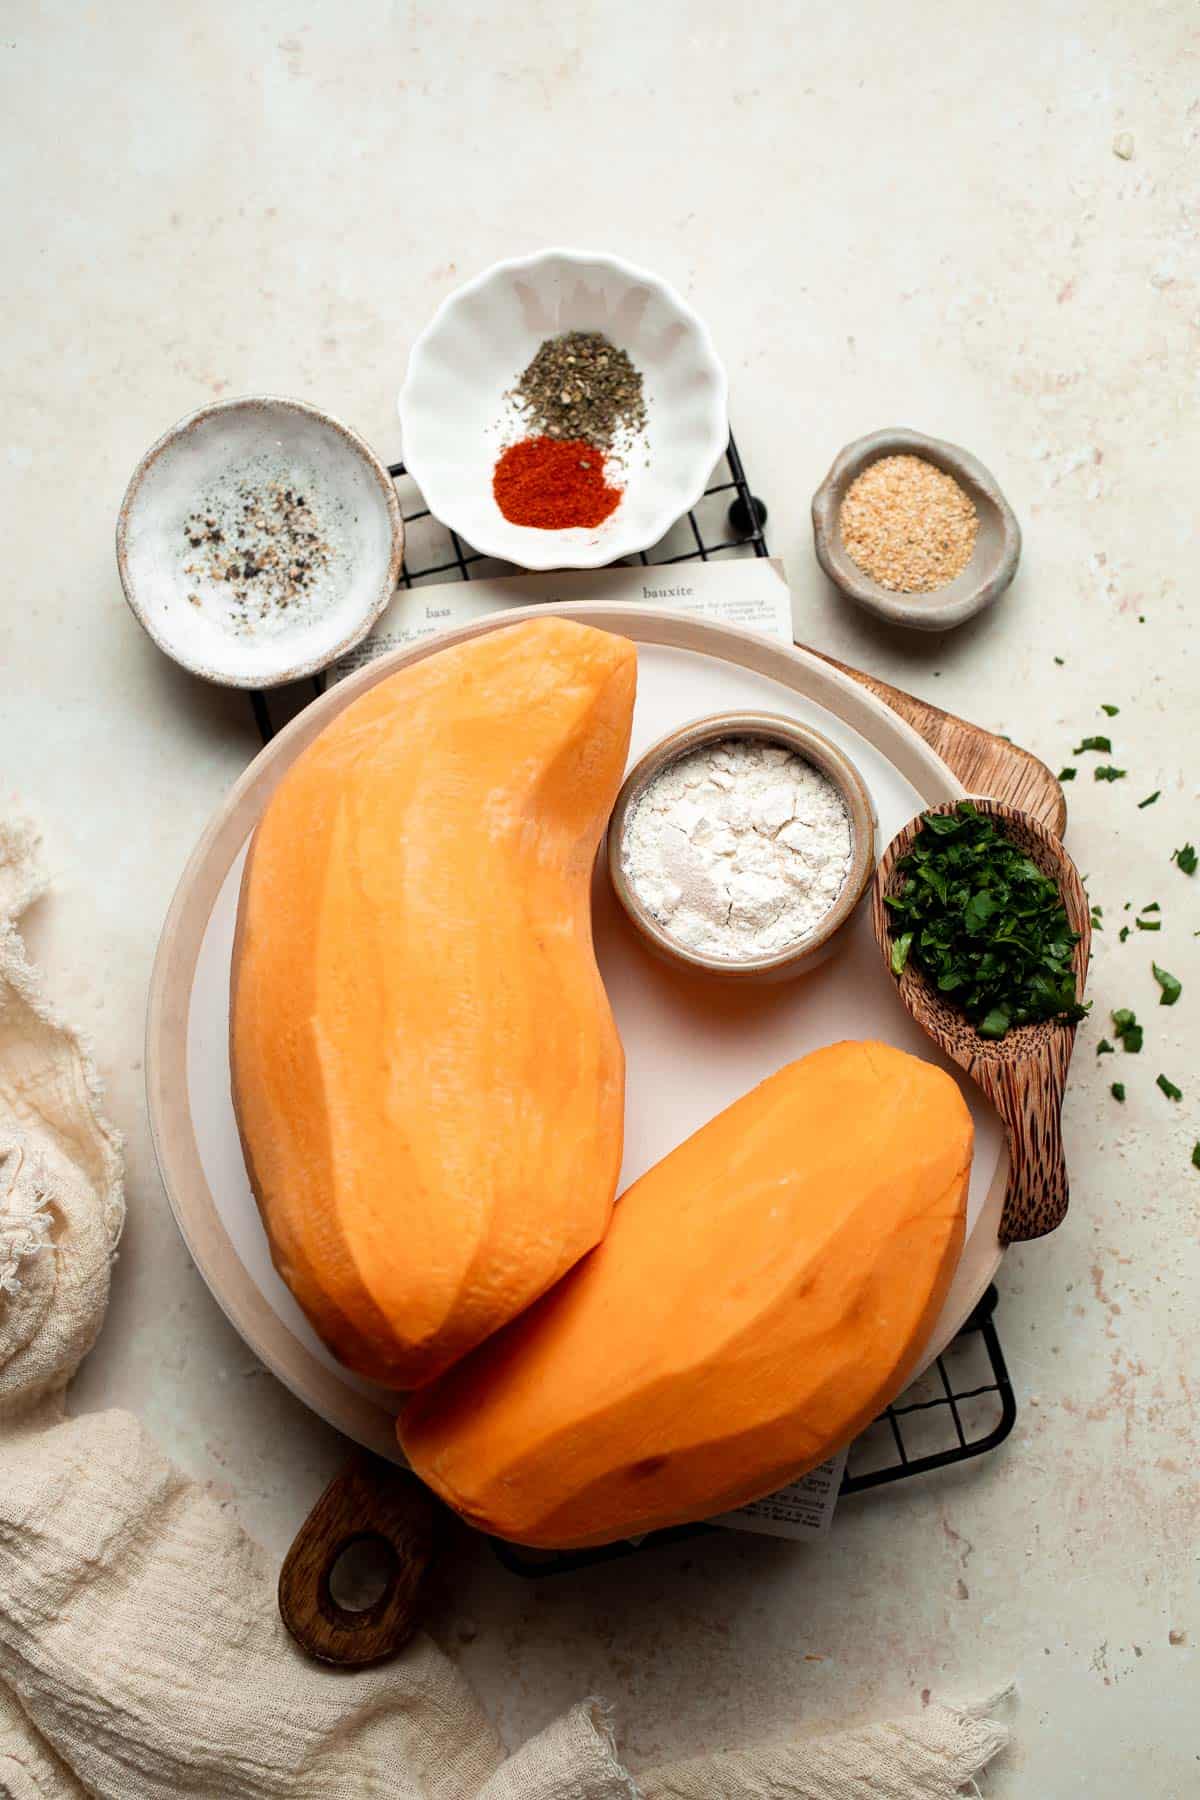
How to Make the Best Sweet Potato Tater Tots
- Boil sweet potatoes. Place sweet potatoes in a large pot of cold water and bring to a boil over medium-high heat. Reduce heat to low and let it simmer for 8-10 minutes until softened. Drain well and let cool.

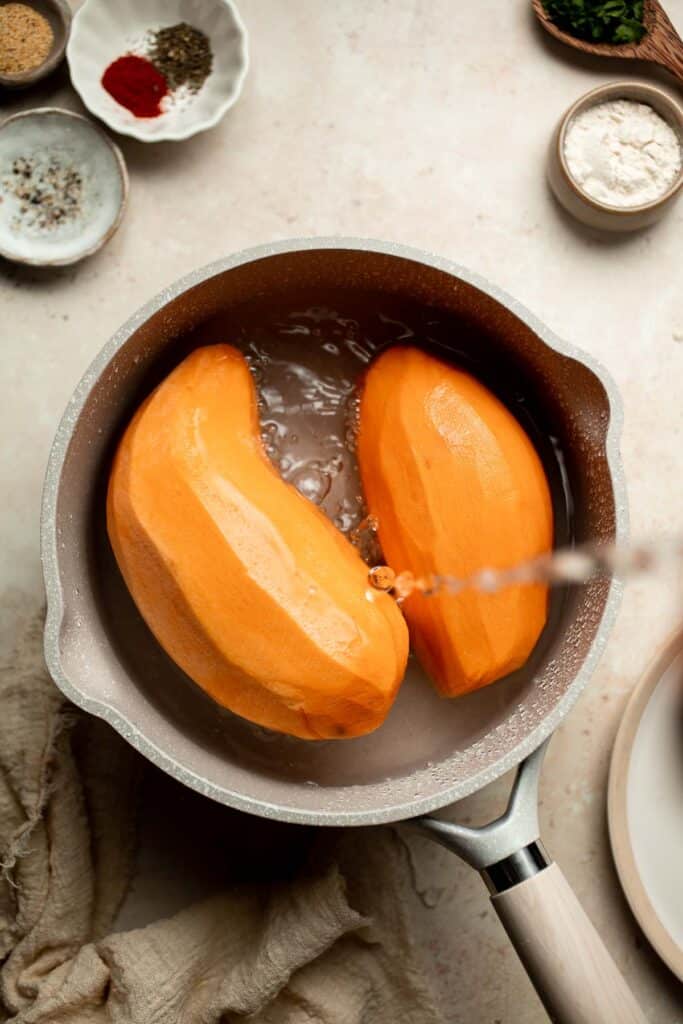
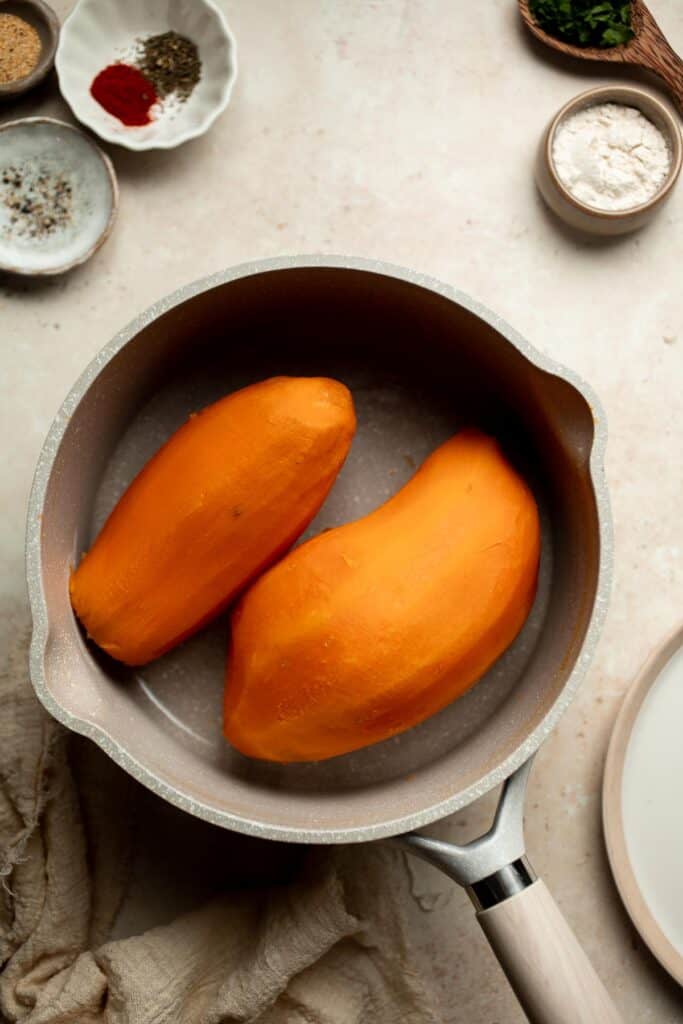
- Shred. Use a box grater to shred the sweet potatoes into thin strips. Use a cheesecloth or dish towel to squeeze out any excess water and place the shredded sweet potato into a large mixing bowl.
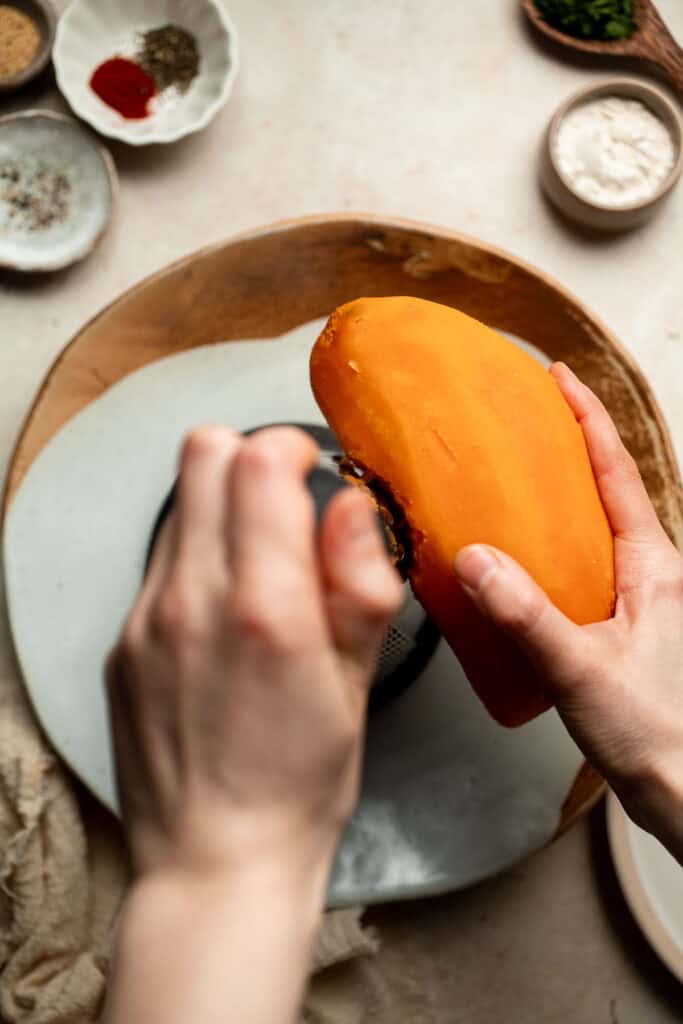
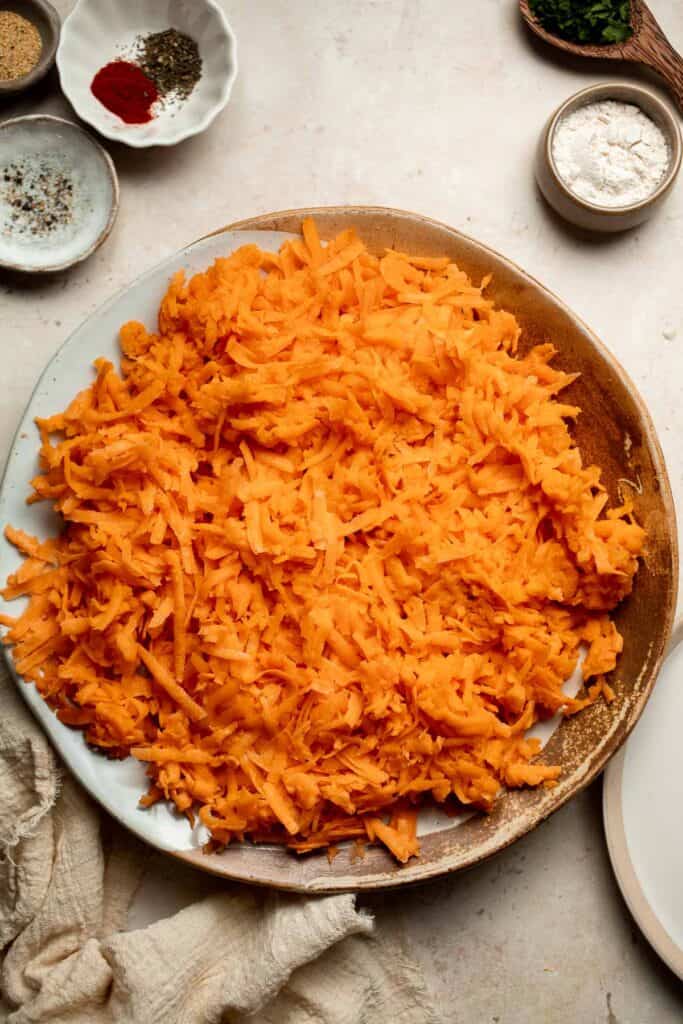
- Make tater tot mixture. Add flour, salt, pepper, garlic powder, paprika and Italian seasoning. Mix until well combined.
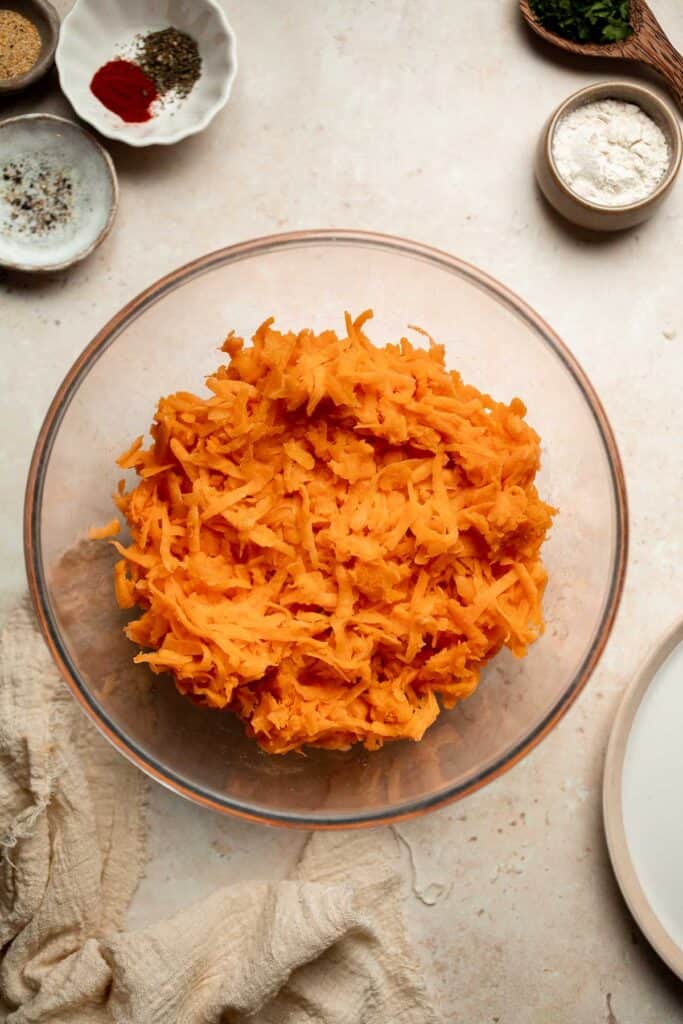
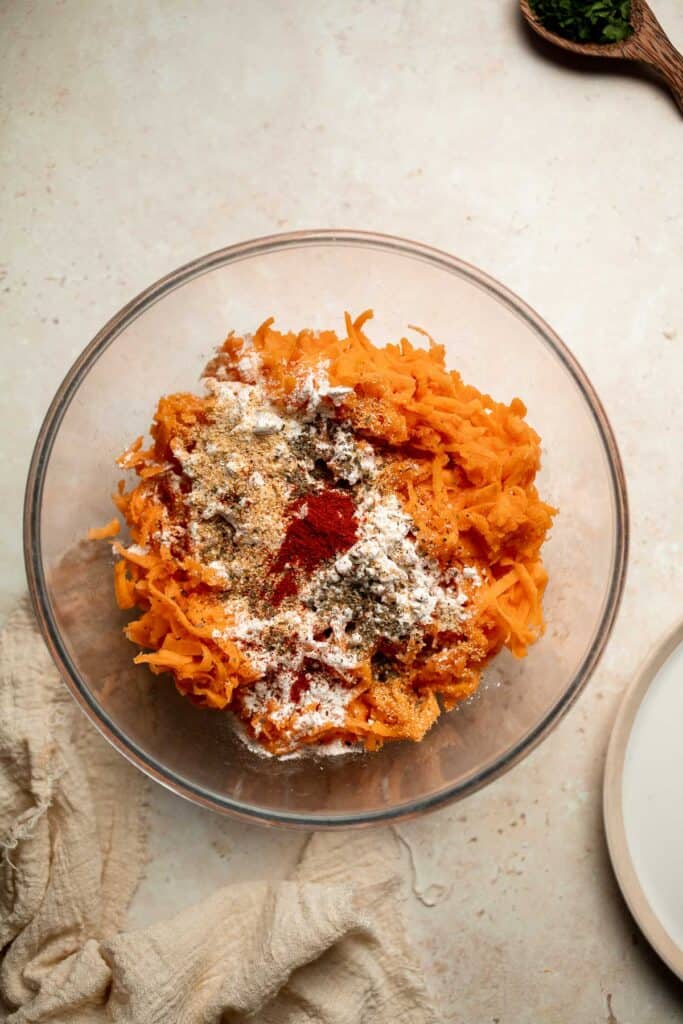
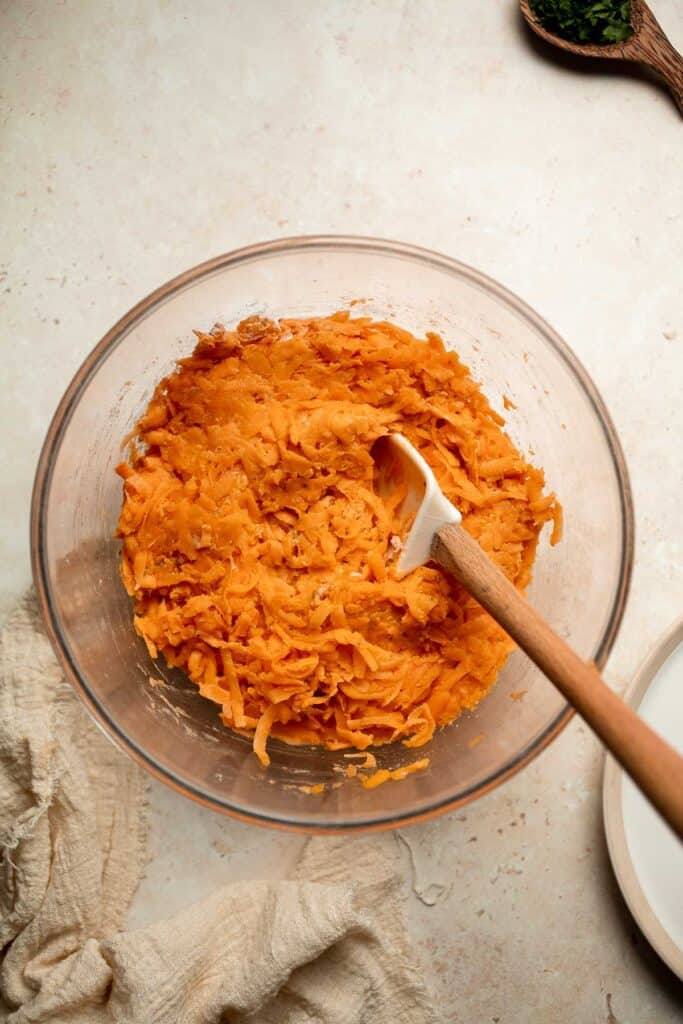
- Shape. Shape the sweet potato mixture into tater tots and arrange them in a single layer on a parchment-lined baking sheet, spaced evenly apart.
- Bake. Apply cooking oil spray evenly over top of the tots. Bake in a 400F preheated oven until golden brown, about 25 minutes, turning the tots halfway through baking.


- Broil (optional). Broil on HI for additional 4-5 minutes to achieve extra crispy brown tater tots, if desired.
- Serve. Serve immediately with your favorite dipping sauce.
How to Make Tater Tots in the Deep Fryer or Air Fryer
- To deep fry: Add 2 inches of oil into a large cooking pot and heat over medium-high heat until shimmering hot, about 3-4 minutes. Add the tots in batches and cook until golden brown and crispy, about 3-4 minutes.
- To air fry: Add the tots in the air fryer basket and cook for 12-15 minutes until golden brown and crispy. Gently shake the basket halfway during cooking to achieve even color.
Recipe Variations
- Add your favorite toppings. We add a drizzle of spicy mayo and a spinkle of sesame seeds on top. Another great option is to sprinkle some grated Parmesan cheese for a salty, savory, cheesy flavor.
- Stir in breadcrumbs. For extra crunchiness, replace part of the flour with panko bread crumbs or regular bread crumbs.
- Mellow out the sweetness. Replace half of the mashed sweet potatoes with mashed potatoes to make the tots a little less sweet.
- Gluten-free sweet potato tater tots. Use cornstarch instead of flour for gluten-free tots. Arrowroot powder is typically interchangeable with cornstarch, too.
- Add a little heat. Stir in a small dash of cayenne pepper, chili powder, or some red pepper flakes for a warming heat.
How to Serve
These Sweet Potato Tater Tots are a delicious appetizer served on their own with a dipping sauce on the side. It's also a great side dish paired with some of my favorite entrees and appetizers including:
- Quarter Pound Burgers
- Homemade Chicken Nuggets
- Salmon Bites
- Baked BBQ Chicken Wings
- Buffalo Turkey Wraps
- Baked Crispy Chicken Strips

Recipe Tips and Tricks
- Strain off any excess liquid. Whether you have excess water from boiling or moisture from the shredded sweet potatoes, you want to remove as much as possible. If the sweet potato mixture is too wet, it'll fall apart while baking.
- Let them rest. You can easily make these tots the day before, then wrap them in plastic wrap and store them in the fridge. This will keep them nice and cold and help you get them in the oven faster.
- Don't forget to flip. Flip the tots over halfway through the baking time to make sure they crisp up on both sides.
Storing and Freezing Instructions
How to Store
Allow the tots to cool to room temperature for an hour or two, then store the leftovers in an airtight container in the fridge for 2-3 days.
How to Reheat
To reheat the tots, preheat the oven or toaster oven to 375-400 degrees F, then place them on a baking tray lined with parchment paper. Bake them until they're crispy on the outside and fully heated on the inside.
How to Freeze
Freeze the baked tots on a freezer tray, then transfer them to a freezer bag for approximately 1 month.
FAQ
Homemade sweet potato tots are made with simple ingredients, like sweet potatoes, flour, a variety of seasonings, and some fresh herbs. If you have some sweet potatoes on hand and a little fresh parsley, you probably have everything else you need!
Depending on the supplies you have at home, you can try several different methods. First, try rolling the tater tot mixture into a long cylindrical shape and then slicing it down into bite-sized pieces. You can also individually form each tot by rolling and shaping the mixture. If you have sturdy pastry bags, you can also try piping the mixture into a long tube and then slicing it into pieces. Try whatever method works best for you!
Homemade tater tots can definitely be crispy if you prepare them right. Most store-bought tater tots are deep-fried, then we bake them at a relatively high temperature to re-crisp that outer shell. Since you can cook your homemade tots in the oven, air fryer, or fryer, the level of crispiness may vary. For the crispiest texture, you'll want to use a fryer, but we find that even oven baking will give you a nice bite.
More Sweet Potato Recipes
- Baked Sweet Potato Wedges
- Sweet Potato Croquettes
- Herb Roasted Sweet Potatoes
- Baked Sweet Potato
- Sweet Potato Rolls
- Thai Sweet Potato Yellow Curry
Tried this recipe?
I'd love to hear what you think! Leave a comment and rating below to share your feedback. Your reviews help others discover this recipe and help me keep creating more free recipes for you. Snap a photo and tag me on social media @aheadofthyme too.

Red Velvet Macarons
Homemade Red Velvet Macarons with their bold red color and a hint of cocoa flavor, are just like the beloved cake but in bite-sized form. These delicate French cookies are filled with tangy cream cheese frosting for a classic flavor pairing and results in a chewy, melt-in-your-mouth experience that elevates the classic red velvet to new heights. Serve these cookies for special occasions - they're perfect for Valentine's Day or on your holiday dessert table!

I'm a big fan of red velvet cake over here. It's moist and tender with the perfect pairing of flavors. You can see a bit of my obsession with red velvet in our Red Velvet Cookies or Red Velvet Cupcakes - and these macarons are no exception! The mild chocolate macaron shells are delicious and stunning with their bright red color, and the flavors balance out well with the rich cream cheese frosting. You can't help but nibble them to savor every bite!
Why You'll Love These Red Velvet Macarons
- Tried-and-true recipe. I don't really want to toot my own horn, but I'm pretty well known for baking the best, most incredible French macarons. They are delicate and crispy outside and chewy inside. My basic macaron recipe follows the French method and has been tested many, many times. It always results in the most perfect little macarons with adorable feet. The ingredients are too expensive to waste on a half-baked recipe, so set yourself up for success with the right one!
- Fun twist on red velvet. Isn't red velvet such a fun option? The deep red color is stunning, and the chewy texture of macarons adds an extra element to the classic red velvet flavor in the best way possible. They honestly may even be better than the cake!
- Great for special occasions. The red color makes these macarons picture-perfect for Christmas or Valentine's Day, although they're certainly great any time of the year! Either add them to your dessert table or package them up in neat little boxes for a sweet gift anyone will love. You can even drizzle them with a little melted chocolate for a little extra flair. They're always stunning!

Ingredient Notes
To make this delicious red velvet macaron recipe, you will need the following ingredients (full measurements in recipe card below):
- almond flour - it's very important to use superfine blanched almond flour. You can also make your own almond flour at home if you want by finely grinding blanched almonds until you have a grainy powder.
- confectioners' sugar - this finely powdered sugar will blend into the batter without adding any grittiness. We also need powdered sugar for the cream cheese filling.
- dutch-processed cocoa powder - red velvet is traditionally made with this specific cocoa powder for a hint of chocolate flavor.
- egg whites - room temperature eggs will be whipped with the sugar until stiff peaks have formed. You can bring the eggs up to room temperature faster by placing the whole egg in a bowl of warm water for a few minutes before cracking and separating them.
- super fine white sugar
- red gel food coloring - this will give you that bold red color!
- cream cheese - for the cream cheese frosting. Let the cream cheese come to room temperature first.
- butter - use unsalted butter to keep the filling from becoming too salty.
- vanilla extract
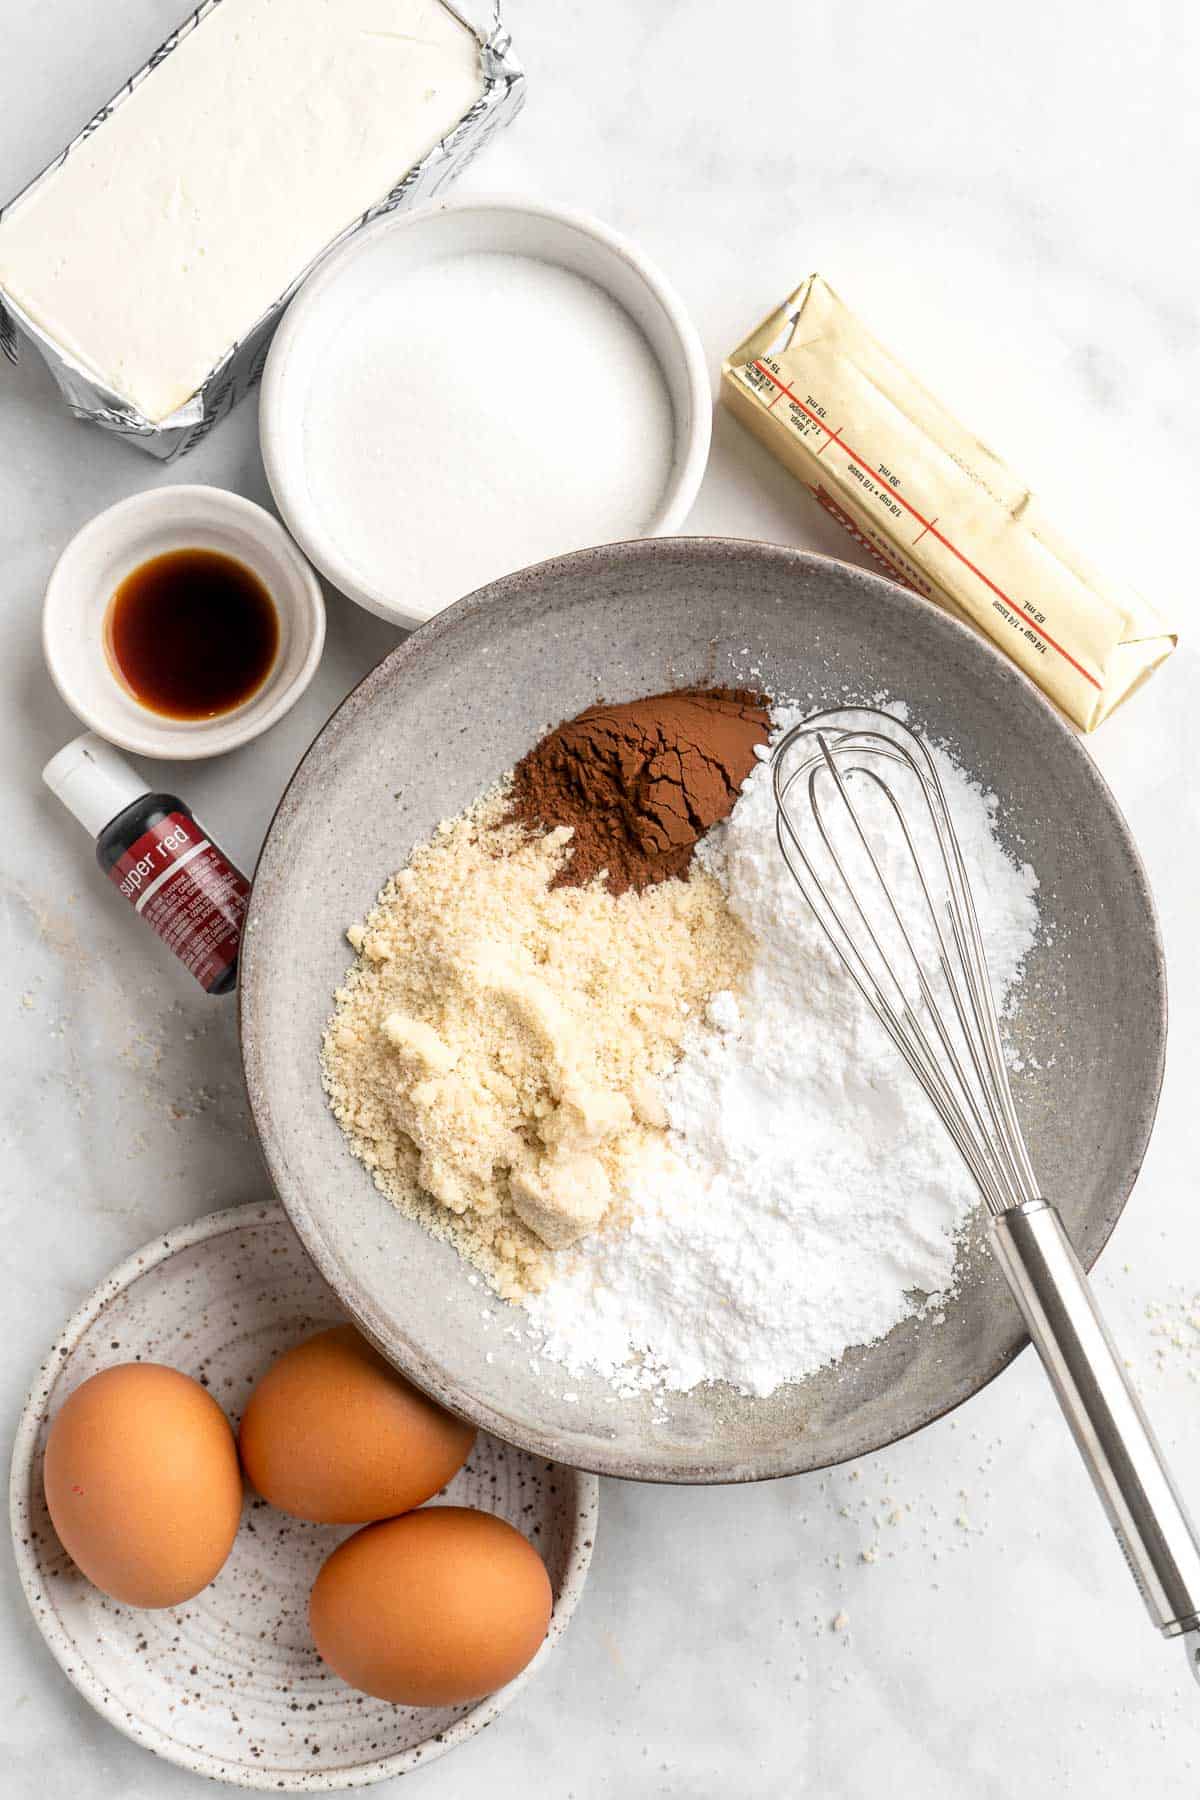
Baking Tools and Equipment
To make red velvet macarons, you will need the following baking tools and equipment
- measuring cups and spoons or a kitchen scale
- two large mixing bowls
- whisk
- stand mixer with a whisk attachment
- silicone spatula
- piping bag and large ½ inch round tip
- macaron silicone baking mat or a regular silicone baking mat (or parchment paper)
- large half sheet baking pan
- wire cooling rack
How to Make the Best Red Velvet Macarons
First, make the macaron batter.
- Prep. Prepare a baking sheet with a silicone baking mat (or if you have enough, prepare 2 baking sheets).
- Combine dry ingredients. Using a fine mesh sieve over a large mixing bowl on a scale, sift almond flour until you reach 140 grams. Discard any large pieces of almond flour. Repeat with the confectioners' sugar and cocoa powder. Whisk together the dry ingredients until very well combined. Set aside.
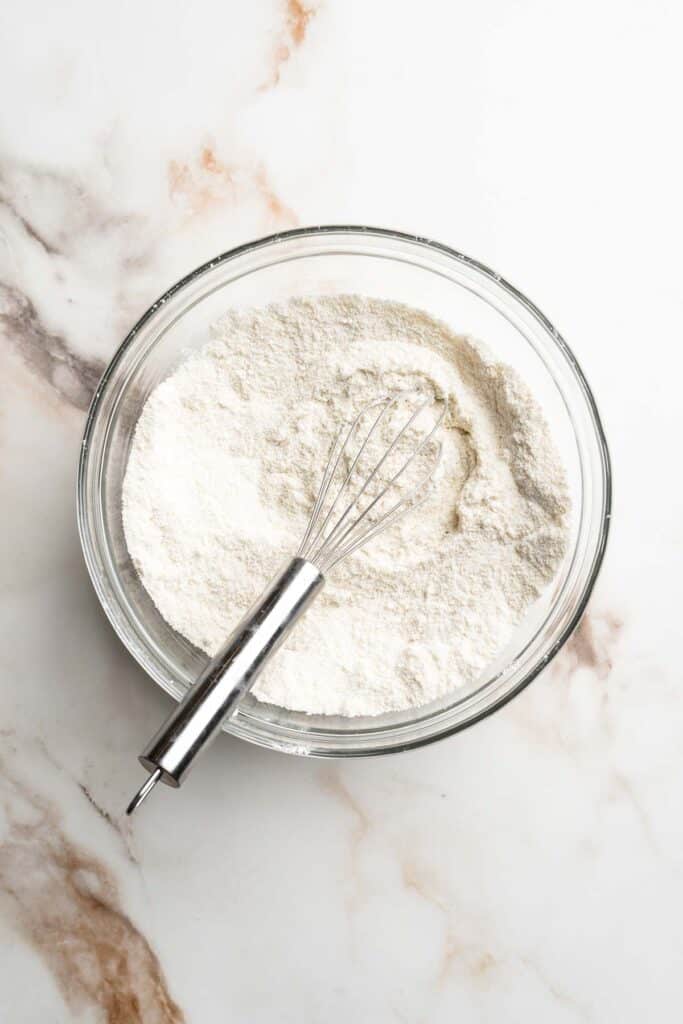
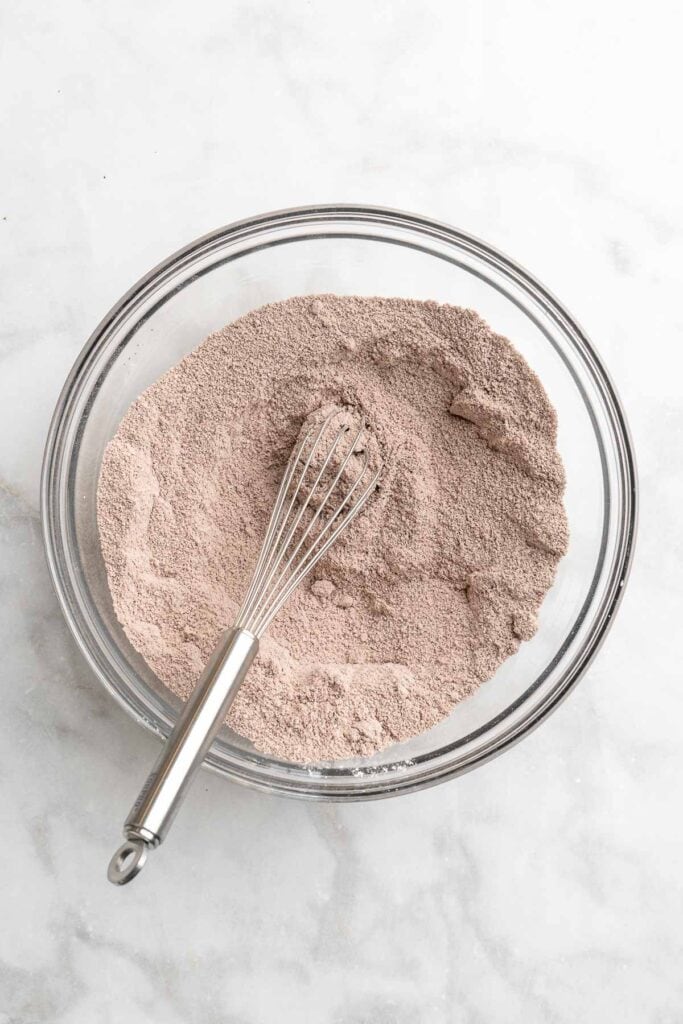
- Beat egg whites and sugar. Add egg whites to the bowl of a stand mixer. Using a whip attachment, beat the mixture, starting on low. Once soft peaks have been formed (about 2 minutes), add the sugar and increase the speed to medium. Once medium peaks are achieved, increase the speed to high. Beat on high until stiff glossy peaks have formed, about 2 minutes.
- Color. Add in the red food coloring and beat until just combined.
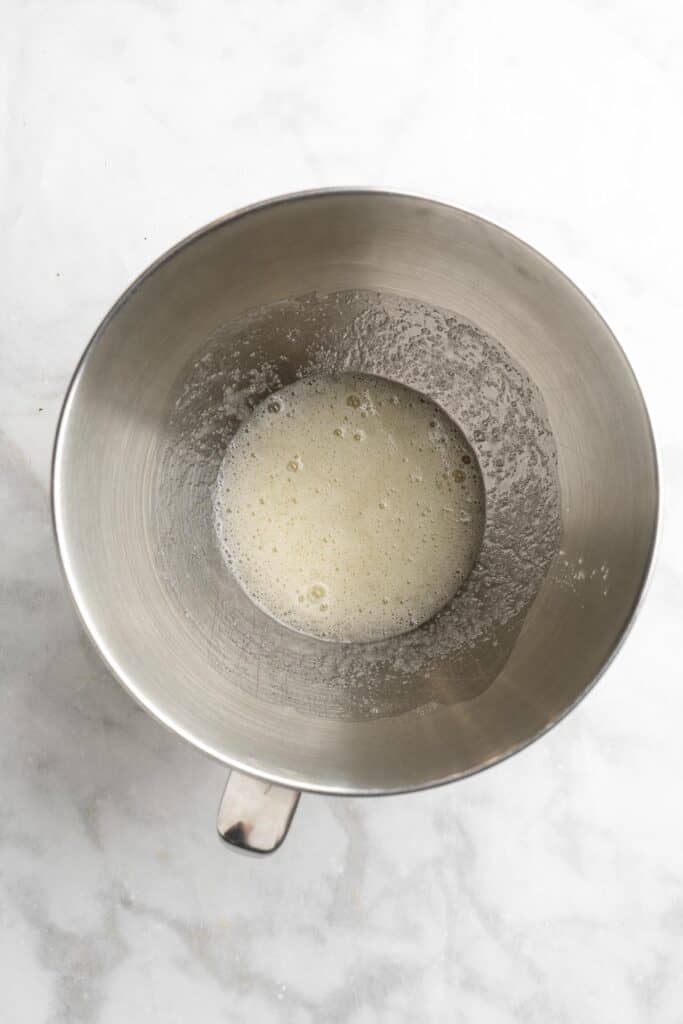
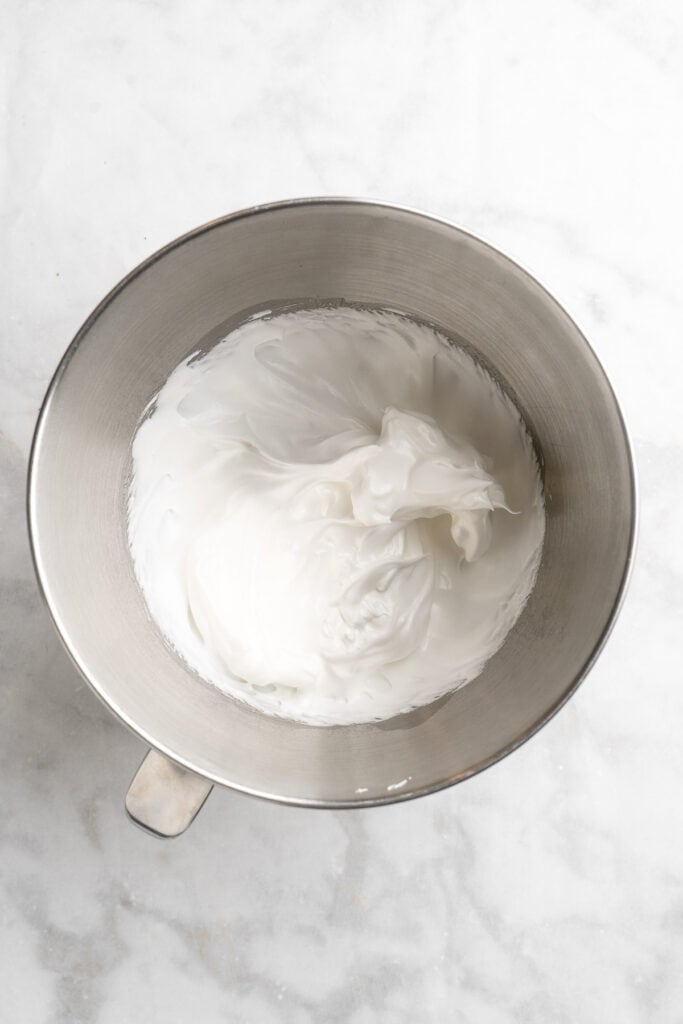
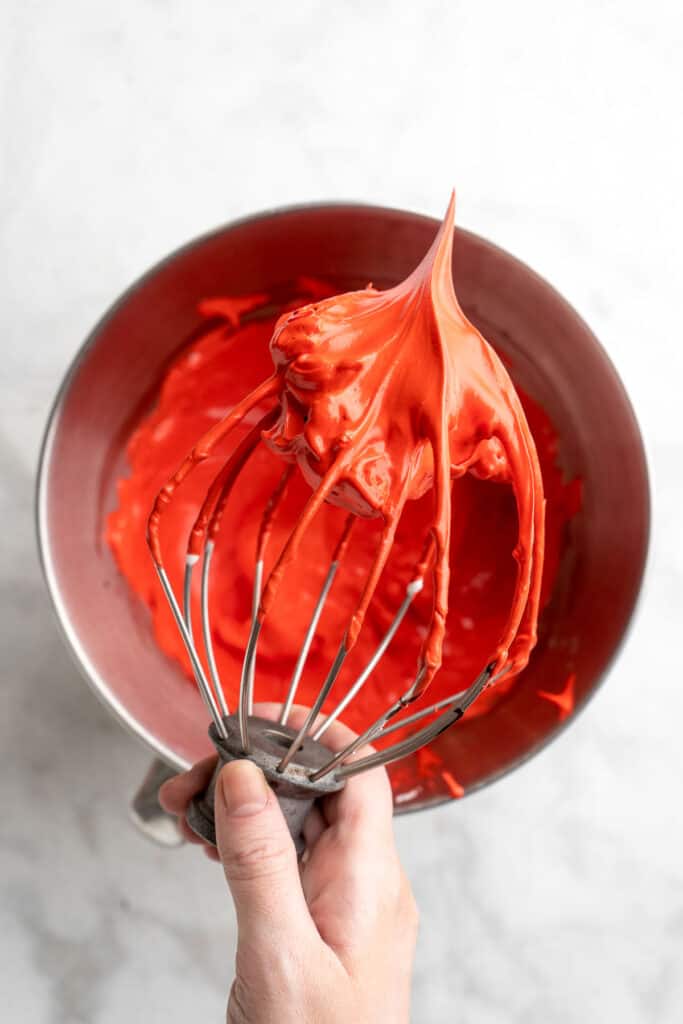
- Add dry ingredients to wet ingredients. Remove the bowl from the stand mixer, and place a sieve over top. Pour the dry mixture into the sieve, then sift the dry ingredients into the meringue.
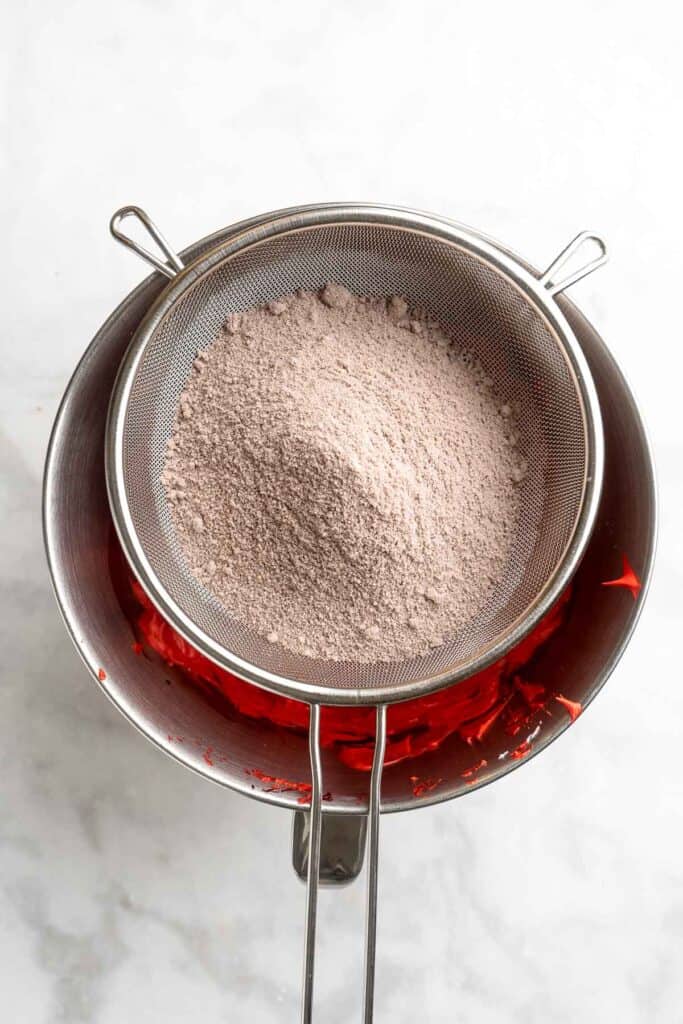
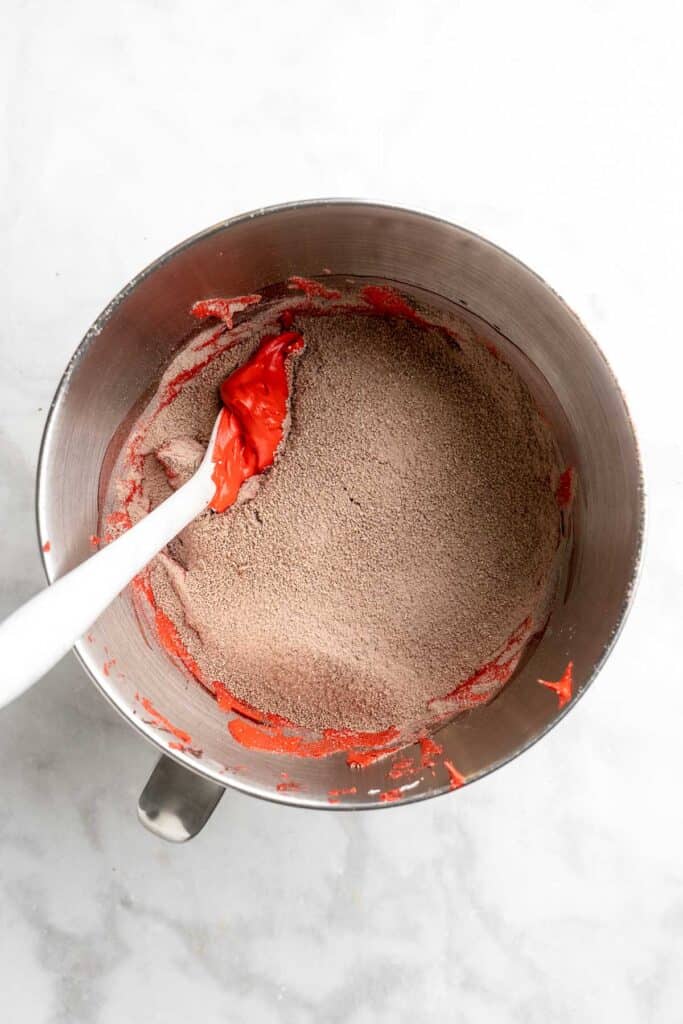
- Fold. Use a rubber spatula to fold the dry ingredients into the meringue. Be careful not to overmix and over-deflate the meringue.
- The mixture is ready to be piped when it ribbons off your spatula. The batter, when lifted with a spatula, should keep flowing off the spatula in ribbon shapes nonstop, without drizzling off too quickly. If it is coming off in large V shaped chunks it needs to be folded more.
- Another test is the figure 8 test: If you can lift some batter up and use it to draw several figure 8's without the stream breaking, it is ready!
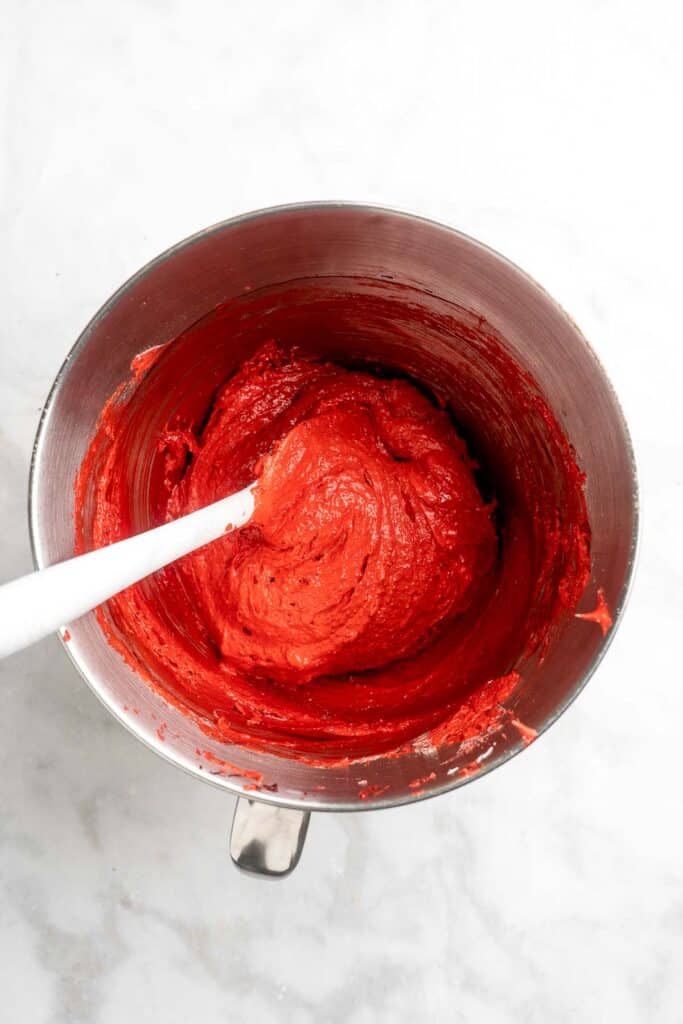
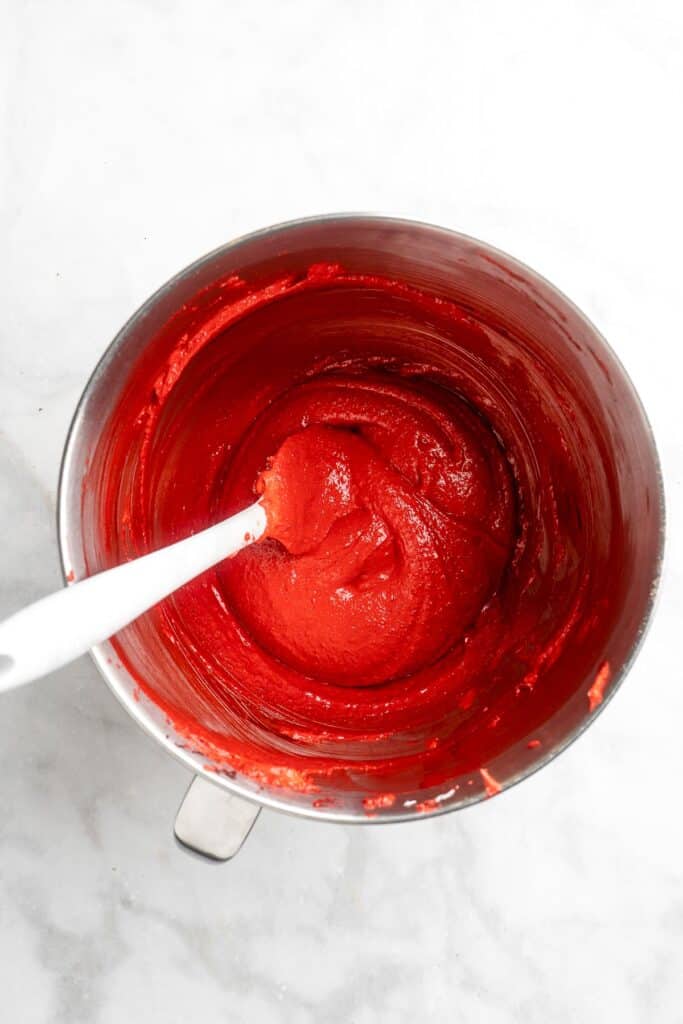
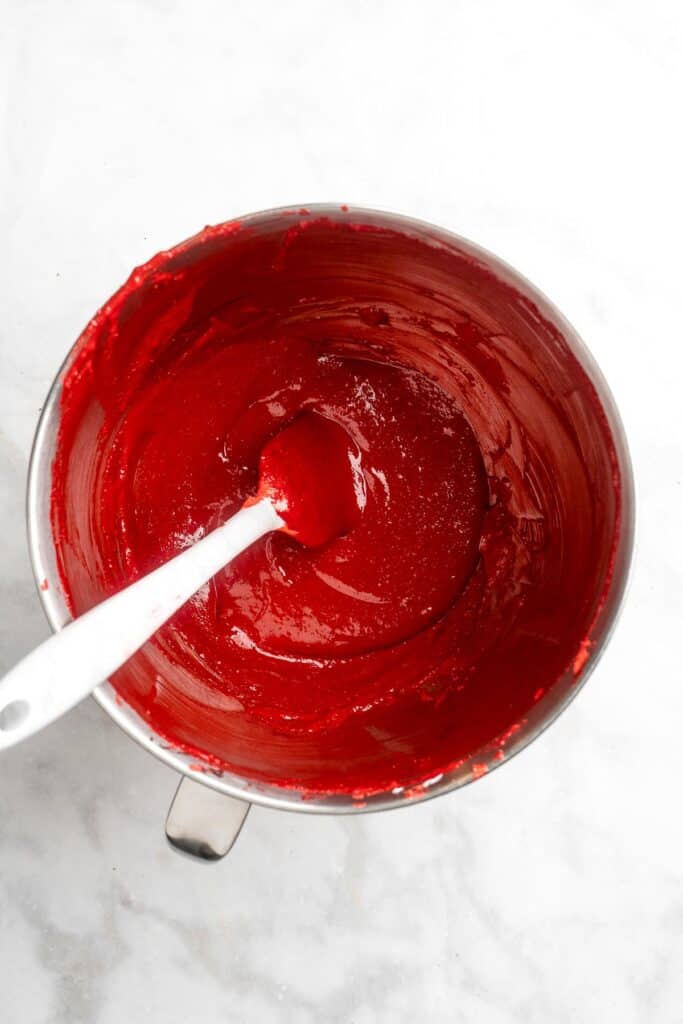
Now, let's make the macaron shells.
- Pipe macaron shells. Add batter to a piping bag with a medium to large-sized round tip (I recommend a large ½-inch top). Pipe 1 to 1 ½-inch small circles of batter onto the prepared baking sheet. Make sure the piping bag is held straight up and perpendicular to the baking sheet.
- Tap. After you've piped all the macarons, gently tap the baking sheet multiple times against the counter to remove any air bubbles from the macarons. If some air bubbles still remain, use a toothpick to gently poke them out.
- Rest. Preheat oven to 300°F. While the oven is preheating, allow the macarons to sit and form a "skin". This "skin" should form anywhere from 8 minutes to an hour. You know the macarons are ready to be baked when you can touch them lightly without having the batter stick to your finger. Keep checking them periodically to see if they have formed a skin.
- Bake. Bake macarons for 15-20 minutes. Check at 15 minutes, and if they are not ready then keep checking every minute. The macarons are ready when the tops are firm and do not move around their base at all. Allow the macarons to cool completely before attempting to remove them from the silicone mat.
- Cool. Allow the shells to fully cool on the silicone mat. Once fully cooled, peel all of the macaron shells off the mats.
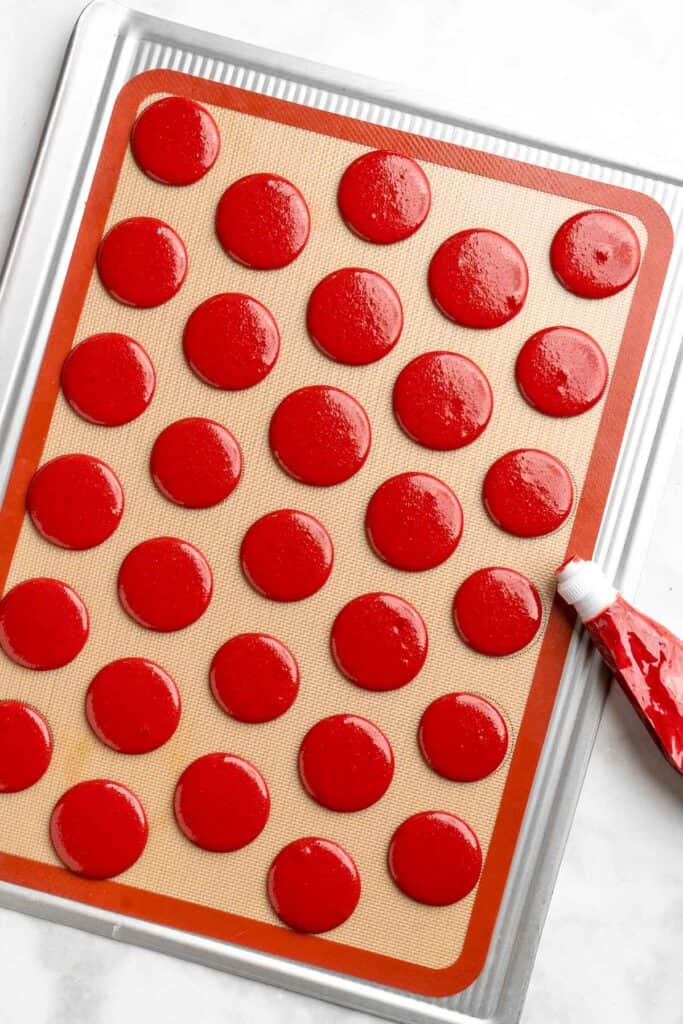
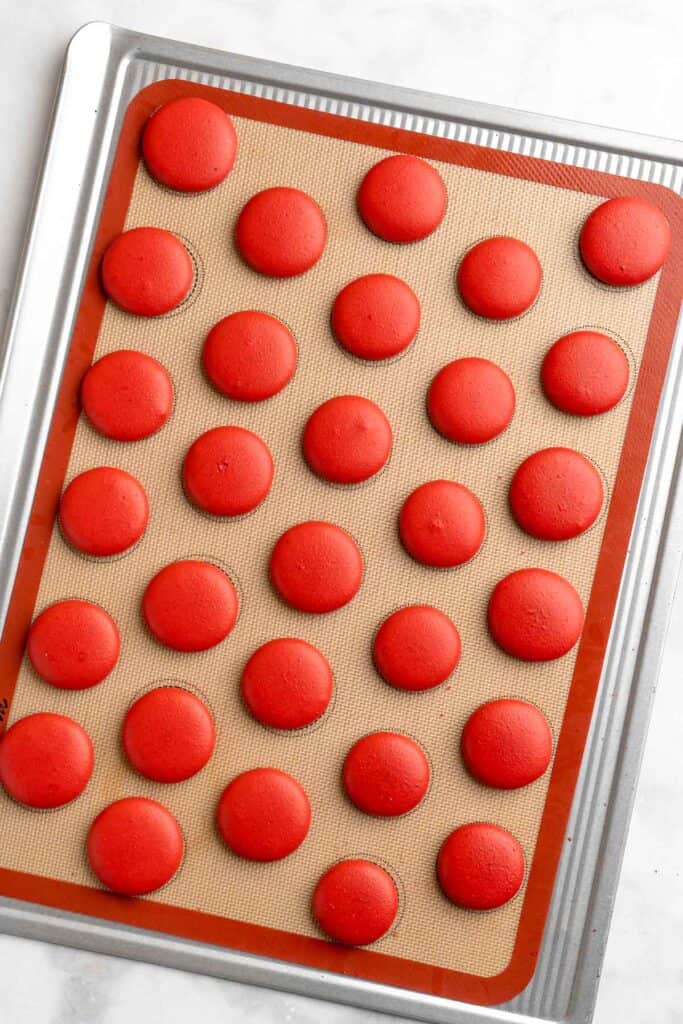
How to Make Cream Cheese Frosting Filling for Macarons
In a large mixing bowl, add butter and cream cheese. Use an electric hand mixer to beat until fluffy, about 2 minutes. Add in the confectioners' sugar and vanilla, then beat again until smooth and well combined.
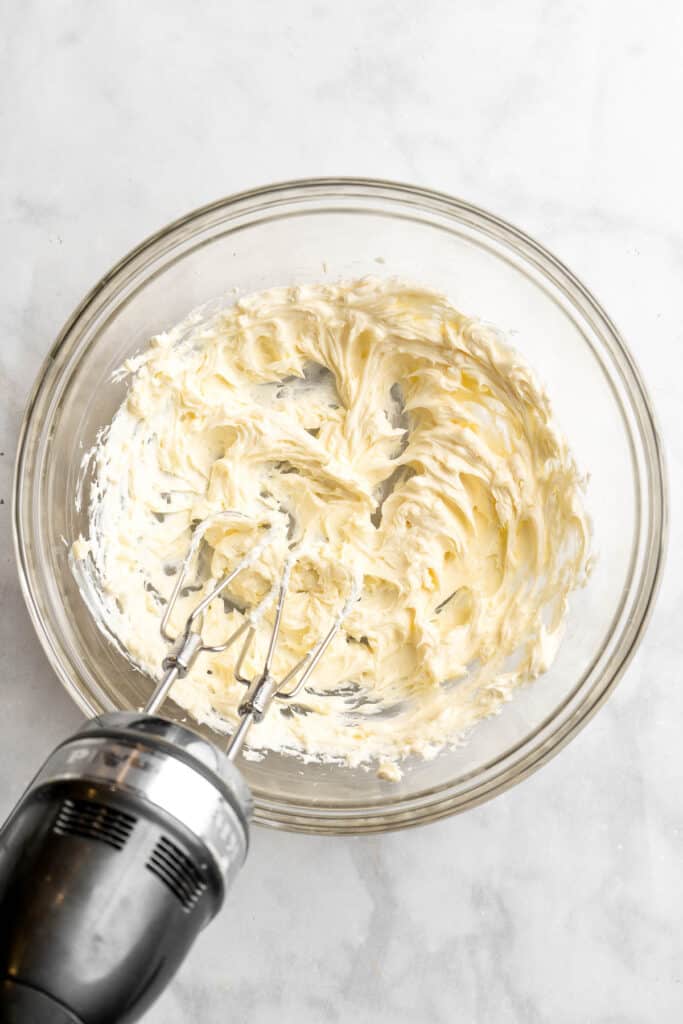
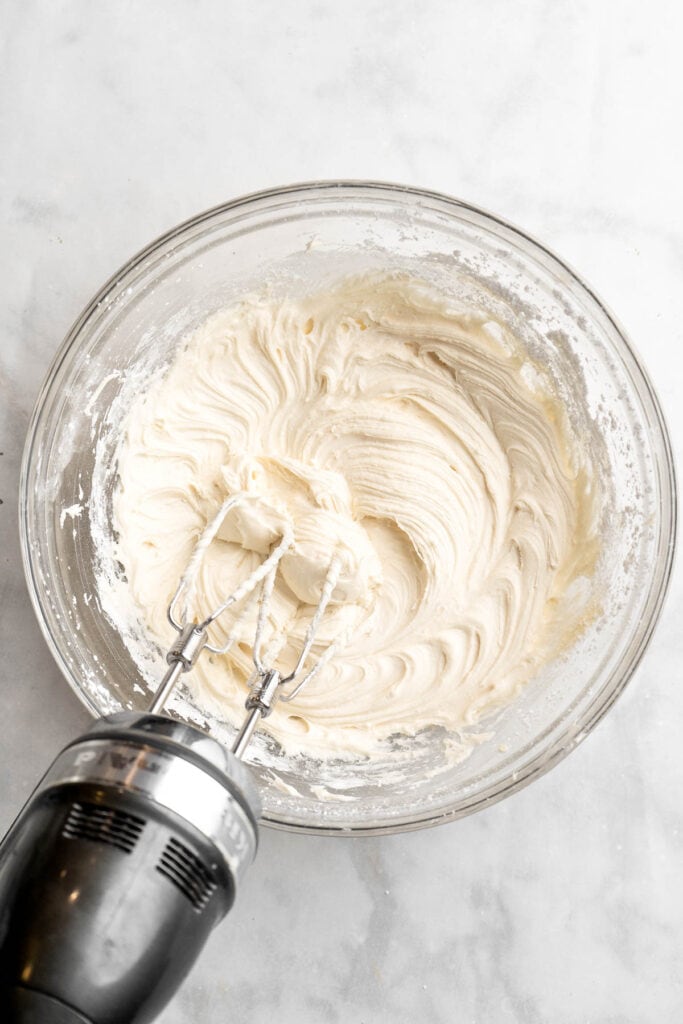
How to Assemble Macarons
- Place the cream cheese frosting into a piping bag fitted with a large ½ inch round tip.
- Pipe the frosting onto half of the macaron shells.
- Top each piped shell with a similar sized top-shell.
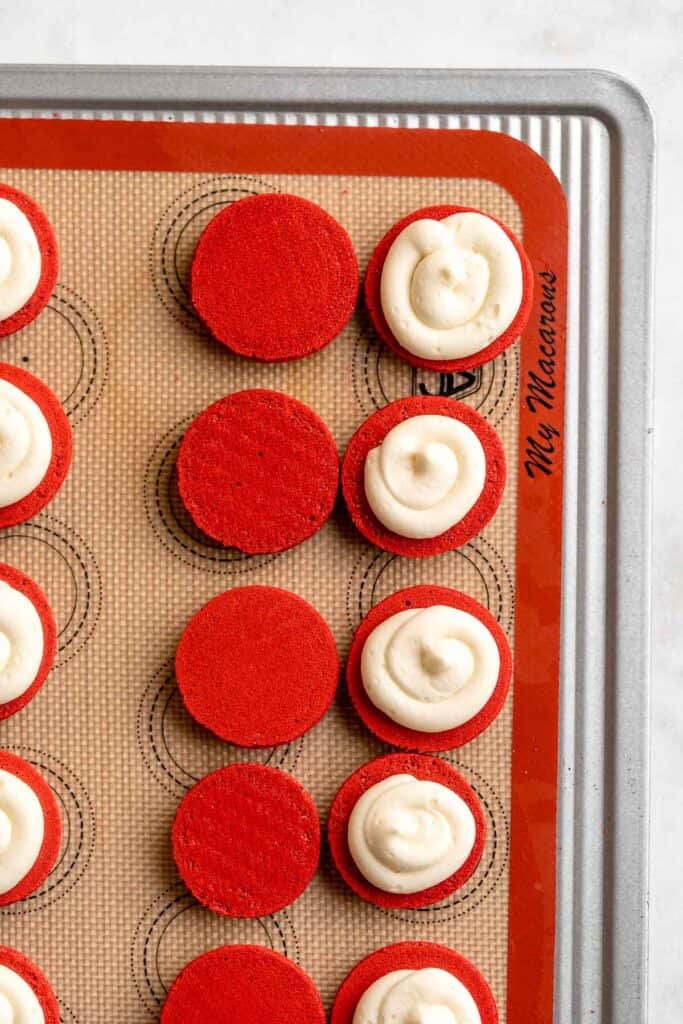
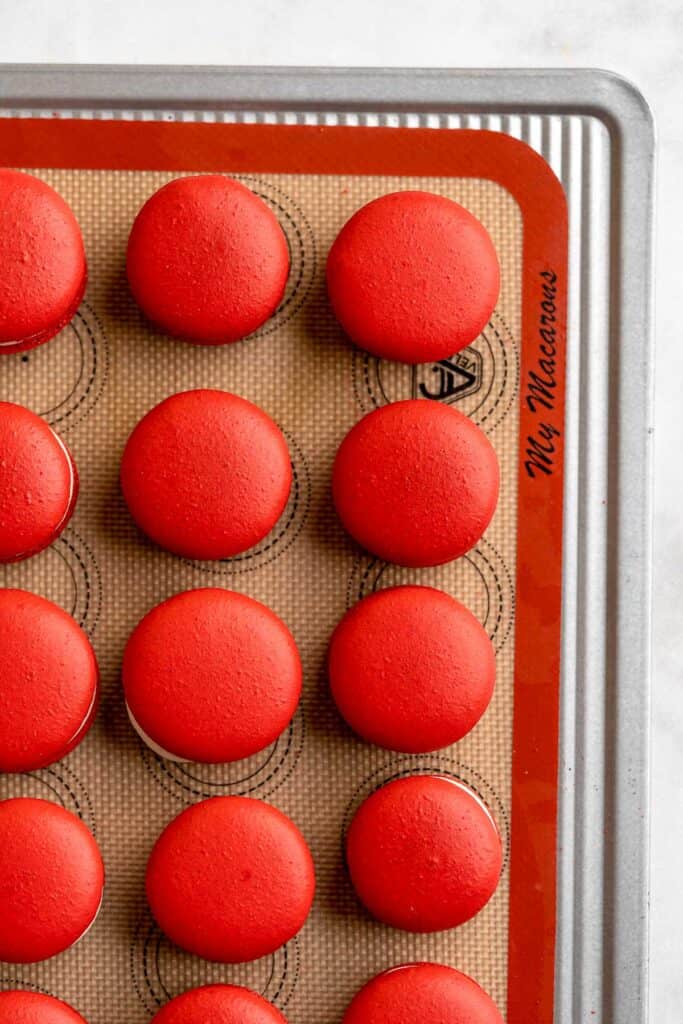
- Place into the fridge overnight to mature and meld together for the best results.

Recipe Variations
- Pipe a special shape. If you want to serve this red velvet macaron recipe for Valentine's Day, pipe the shells like little hearts! They'll look adorable arranged in a little gift box or on a dessert tray.
- Decorate the outside. For a little extra color, drizzle a thin stream of melted white chocolate on top of the macarons. You can even sprinkle on some colorful sprinkles or brush on a little edible gold leaf to complete the look. See how we decorated our Pistachio Macaron tops for an idea.
- Adjust the size. Prefer teeny tiny one-bite macarons? Pipe them into 1-inch circles for the perfect size. You can also make much larger shells, like 4-inch rounds, if you prefer fewer, larger macarons.
How to Serve
We love serving these Red Velvet Macarons during the holidays, especially during Valentine's Day. Serve them on their own or pair them as part of a bigger dessert spread along with:
- Valentine's Day Heart Sugar Cookies
- Chocolate Covered Strawberries
- Oreo Brownies
- Strawberry Shortcake
- Chocolate-Dipped Shortbread Heart Cookies
- Raspberry and White Chocolate Shortbread Cookies
For more recipe ideas, see our 40 Best Valentine's Day Dessert Recipes.

Recipe Tips and Tricks
- Prep your trays. It's much easier to pipe the macaron batter into perfect circles with using a macaron silicone baking mat (the silicone mats that have the circle measurements on them). However, you don't have to buy any fancy gear. Use a pencil and some sort of stencil to make your own macaron template on a piece of parchment paper. Flip the parchment over to be able to pipe the rounds without getting any pencil on the batter. Easy!
- Don't rush. Macarons are notoriously fussy, and I think they can smell your fear. If you're patient and follow the steps as written, you'll do fine! The most important thing is to let the macaron batter develop a skin. This requires letting the piped shells rest for up to an hour before baking. Don't focus on the time as much as the texture. If you can touch them without getting batter on your finger, they're ready.
- Cool completely. Please do not add cream cheese frosting to warm macaron shells! The heat will melt the cream cheese and cause a big, soggy mess.
Storing and Freezing Instructions
How to Store
Since the filling contains dairy, you'll need to store these macarons in the refrigerator. Package them up in an airtight container and chill for up to 3 days.
How to Freeze
Although it's always risky to freeze dairy products, cream cheese frosting typically freezes quite well. Refrigerate the macarons first, then freeze for up to 2-3 months. Let them thaw in the fridge before eating. You may notice a little separation in the cream cheese frosting, but it should be minimal.
FAQ
Almond meal and almond flour are different ingredients, although they have similar names. Almond flour is blanched to remove the skins and then blended into a very fine powder. Almond meal has a coarser texture with larger individual pieces, and the skins have not been removed. Only use super fine, blanched almond flour for macarons.
The easiest option is to use a high-quality gel food coloring. Regular liquid-based food coloring is too wet, and gel coloring is the best for adding a really rich color. For red velvet macarons, you can certainly add just red food coloring, or you can deepen the color by adding small amounts of black.
Just like any macaron recipe, your shells need to develop a skin. This can take up to an hour, with the shells resting at room temperature. Gently touch the shells with your finger. If you can touch them without any of the batter sticking to your finger, they're ready to bake.
More Macaron Recipes
- 50 Best Cookie Recipes
- French Macarons with Vanilla Buttercream
- Chocolate Macarons with Chocolate Buttercream
- Peppermint Macarons
- Pistachio Macarons
Tried this recipe?
I'd love to hear what you think! Leave a comment and rating below to share your feedback. Your reviews help others discover this recipe and help me keep creating more free recipes for you. Snap a photo and tag me on social media @aheadofthyme too.

Mac and Cheese Soup
This decadent Mac and Cheese Soup is everything you love about macaroni and cheese turned into a rich and creamy soup you'll want to curl up with on a cold winter's night. Ready in just 30 minutes, it only takes slightly longer to make than the boxed stuff and will feed the whole family! Serve it with some crusty bread and a sprinkle of green onions for a delicious meal you'll be thinking of long after the bowl is empty.

If you've ever felt like a bowl of mac and cheese doesn't last long enough, this is the recipe for you! The pasta swim in the creamy, cheesy broth that's made with two types of cheese for so much flavor. No powdery cheese packets here! It's a fun twist on traditional cheesy macaroni, which also makes it a tremendous hit with kids. Make it your own by adding your favorite toppings or mac and cheese mix-ins, and you'll have a new family favorite recipe to enjoy this soup season.
Why You'll Love This Mac and Cheese Soup
- Quick and easy. This cheddar cheese soup is very similar to regular mac and cheese! The main difference is that you cook the elbow macaroni in broth and don't strain it! The starches from the pasta will help thicken the soup to make it smooth and silky. It's so satisfying and ready in just 30 minutes!
- Creamy and filling soup. Creamy soups are especially great in the winter when you need something that will keep you full and warm all day. This macaroni and cheese soup does just that! It's a wonderful option for a chilly day, yet it's still quick enough for those busy weeknights!
- Very versatile. Although I like to serve this macaroni soup with some sliced green onions and cracked black pepper, there are so many options. Just like regular mac and cheese, you can add your favorite mix-ins for extra flavor, like roasted broccoli, crumbled bacon, cubed ham, and more.

Ingredient Notes
To make this delicious macaroni and cheese soup, you will need the following ingredients (full measurements in recipe card below):
- broth - you can use either vegetable or chicken broth.
- macaroni pasta - the uncooked elbow macaroni noodles will be cooked in broth for extra flavor.
- unsalted butter - melt the butter to make a roux.
- all-purpose flour - the flour will be cooked in the melted butter to create a paste called a roux which is what helps thickens the soup.
- whole milk - thin out the roux with milk. This will create a thick, creamy sauce.
- sharp cheddar cheese - I like to use grated yellow cheddar has that classic orange color and cheesy flavor. White cheddar is also a good option.
- parmesan cheese - the salty, savory flavor of parmesan adds extra depth of flavor.
- garlic powder - use a little garlic powder for a savory note.
- mustard powder - dry mustard gives this recipe a little extra tang and bite which you find in all classic mac and cheese recipes.
- green onions - slice green onions for a colorful garnish.
- black pepper
You will also need measuring cups and spoons, a large pot or Dutch oven, a large saucepan, and a whisk.
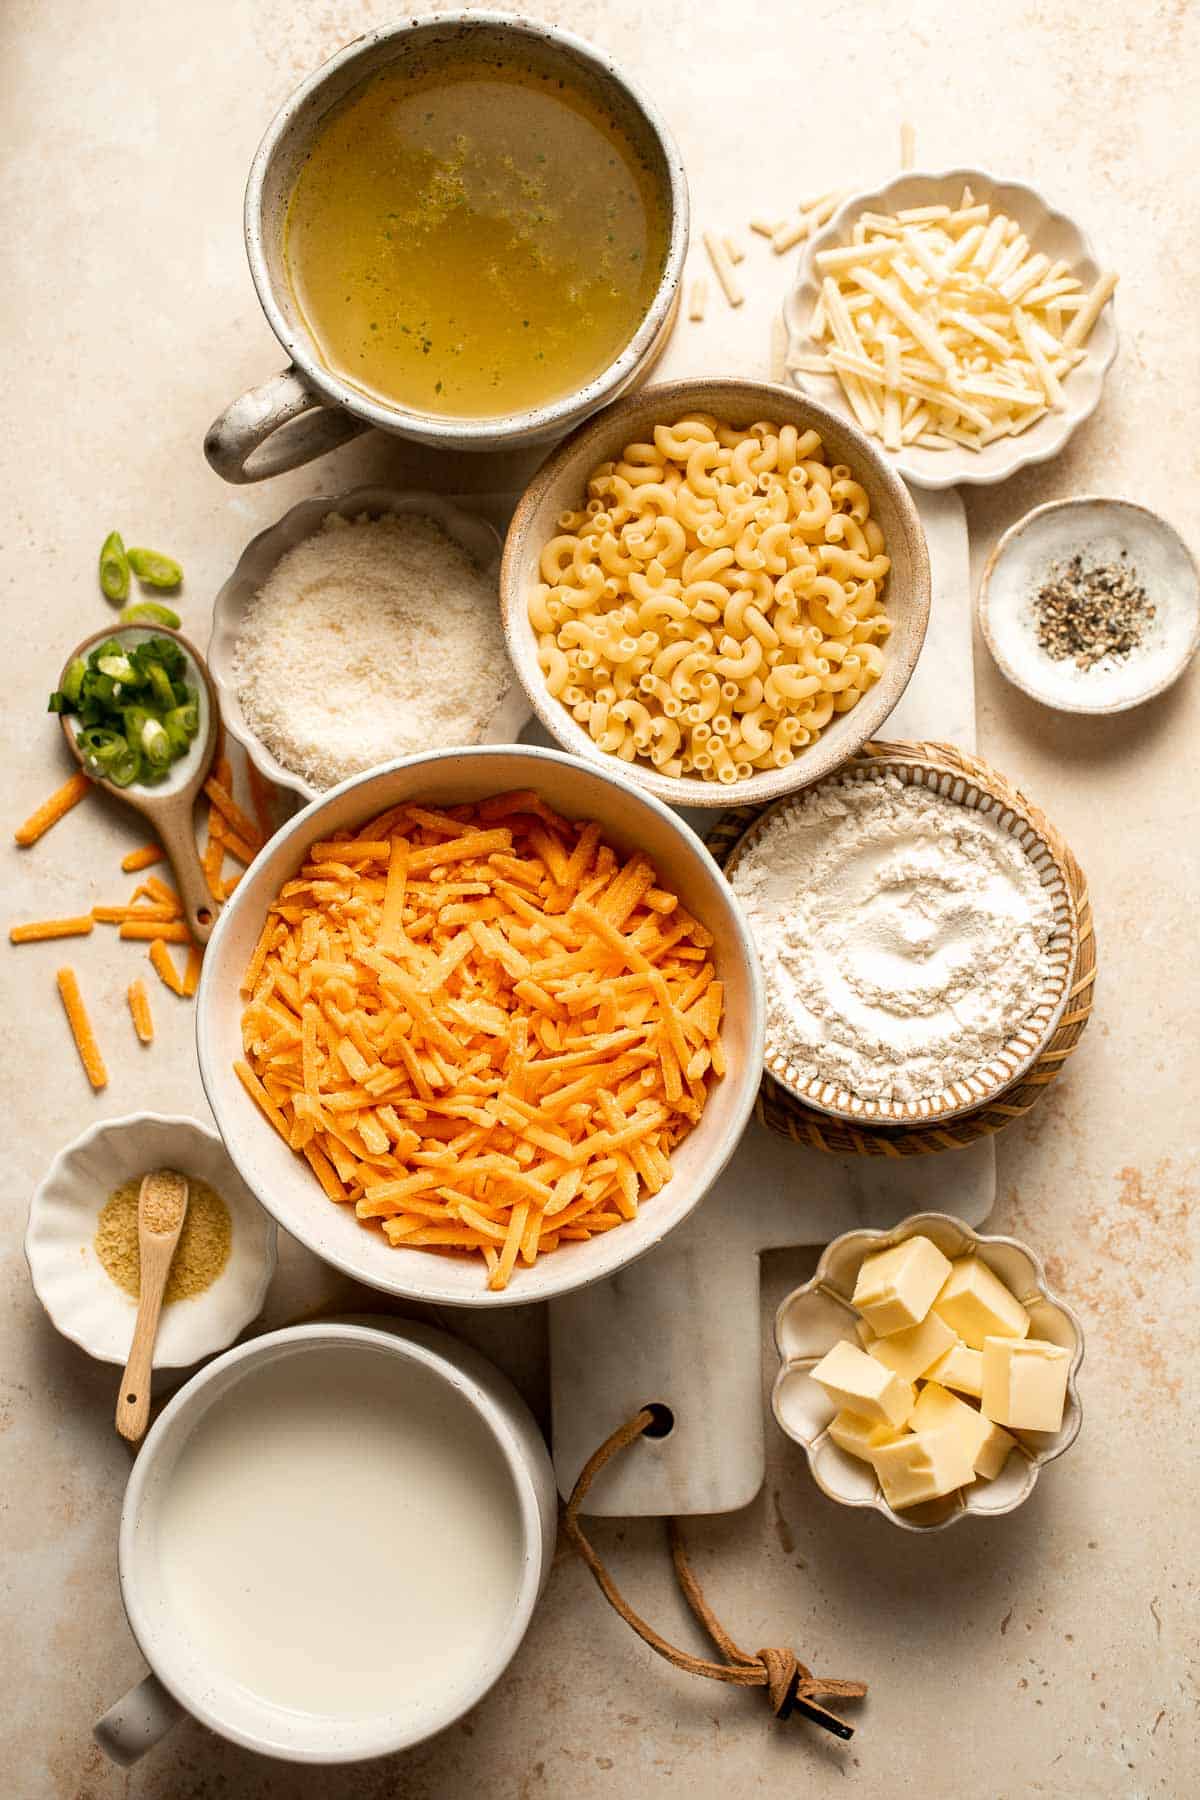
How to Make the Best Macaroni and Cheese Soup
- Cook pasta. In a large pot, add broth and bring it to a boil over medium-high heat. Add macaroni pasta and cook just until al dente, about 8-10 minutes. Set aside.
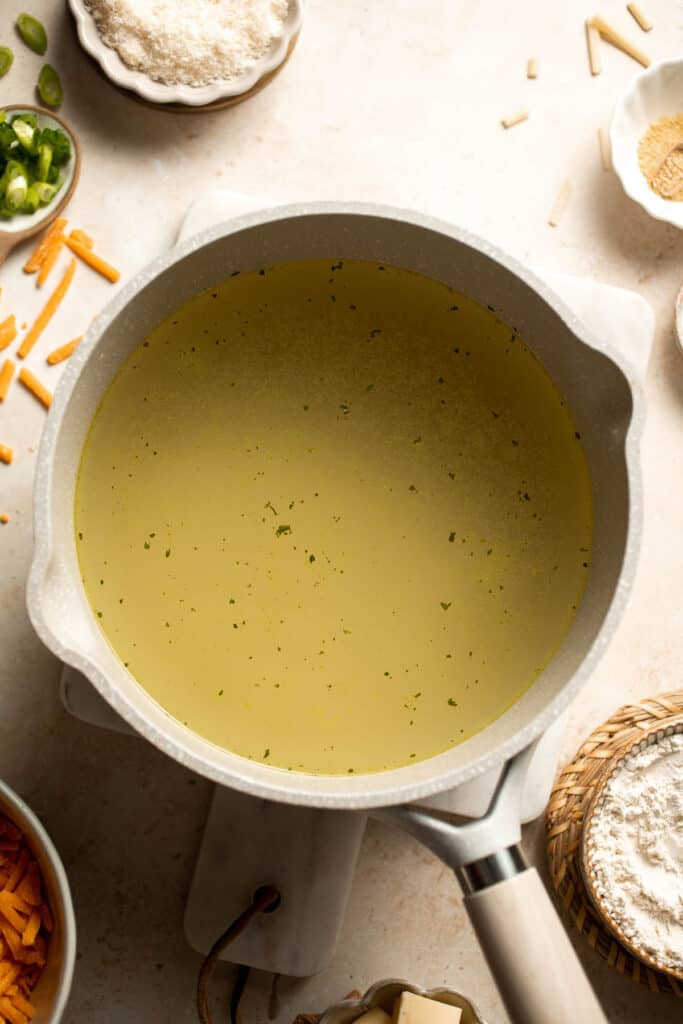
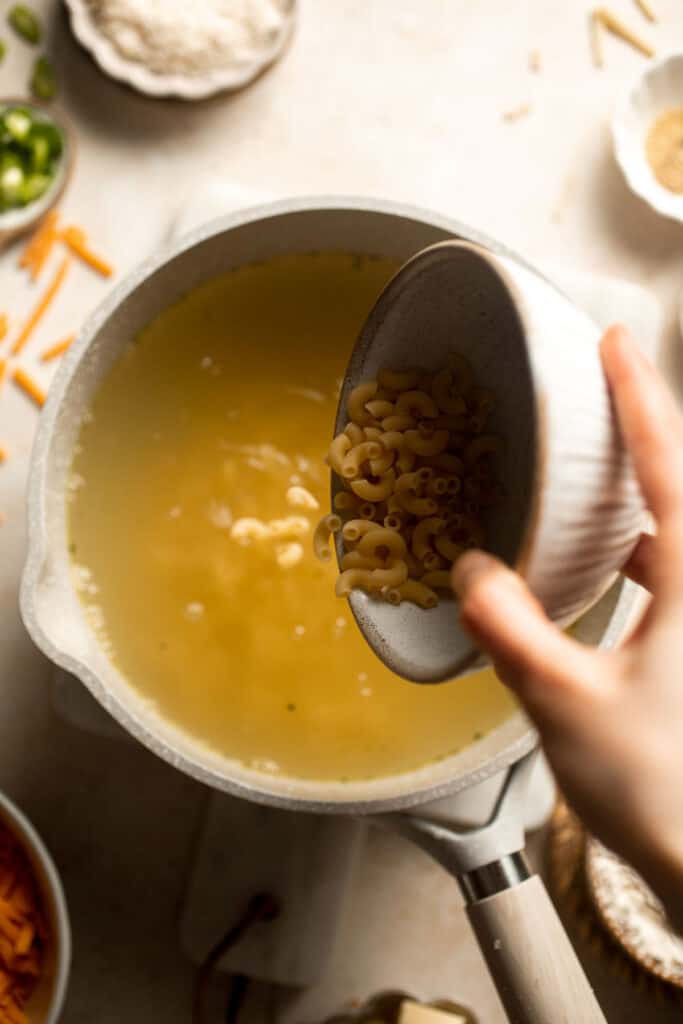
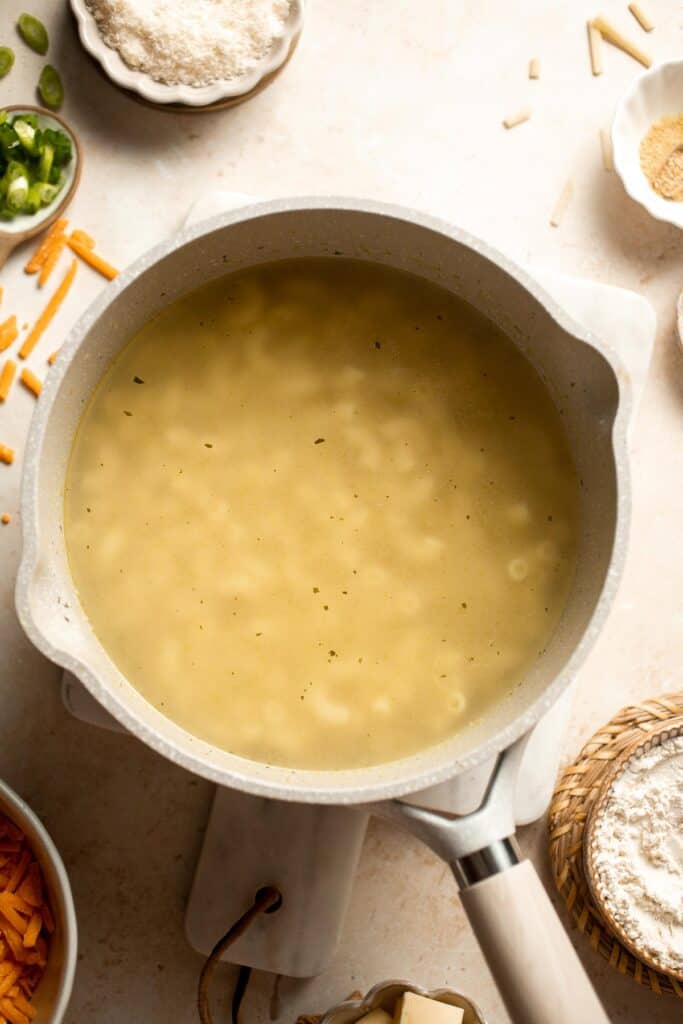
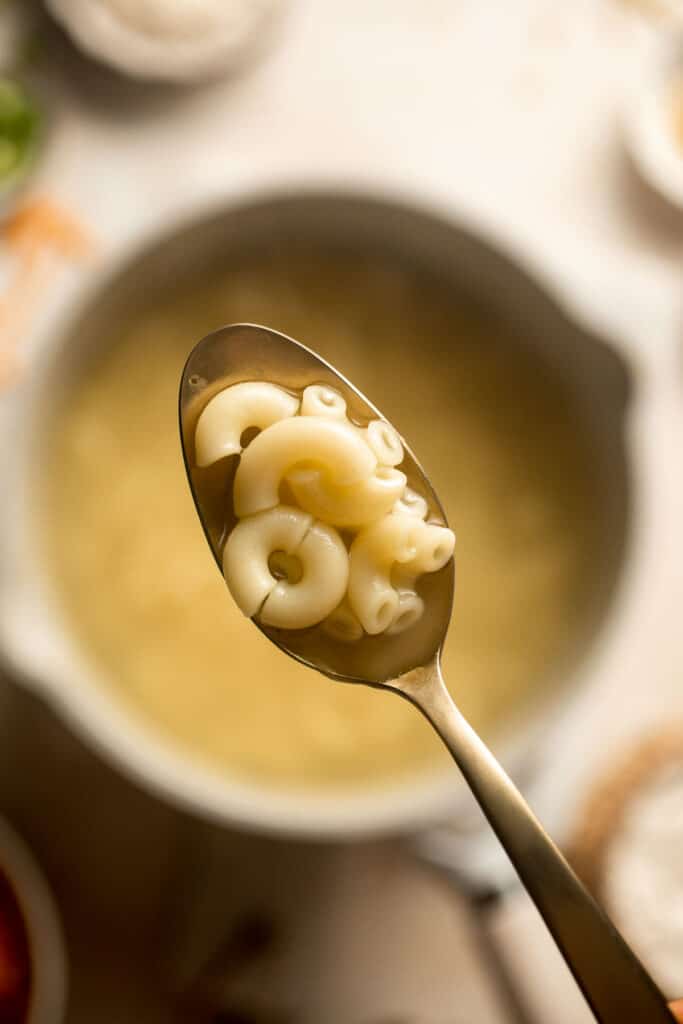
- Make roux. While the pasta is cooking, melt butter in a large saucepan over medium heat. Add flour and whisk constantly to make a roux, about 1-2 minutes until smooth and thickened.

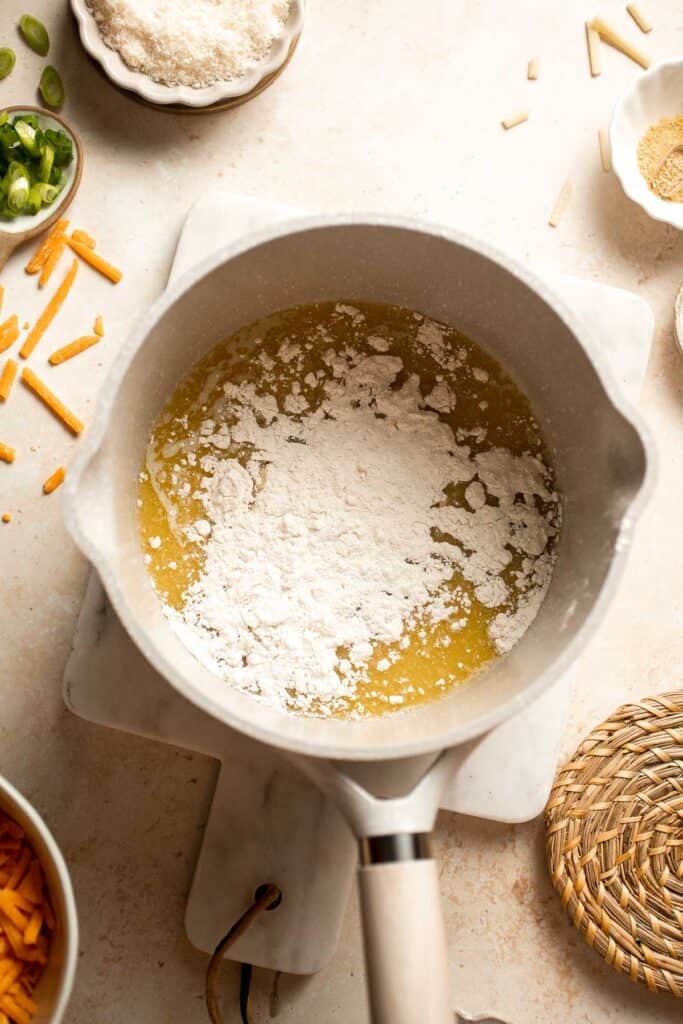
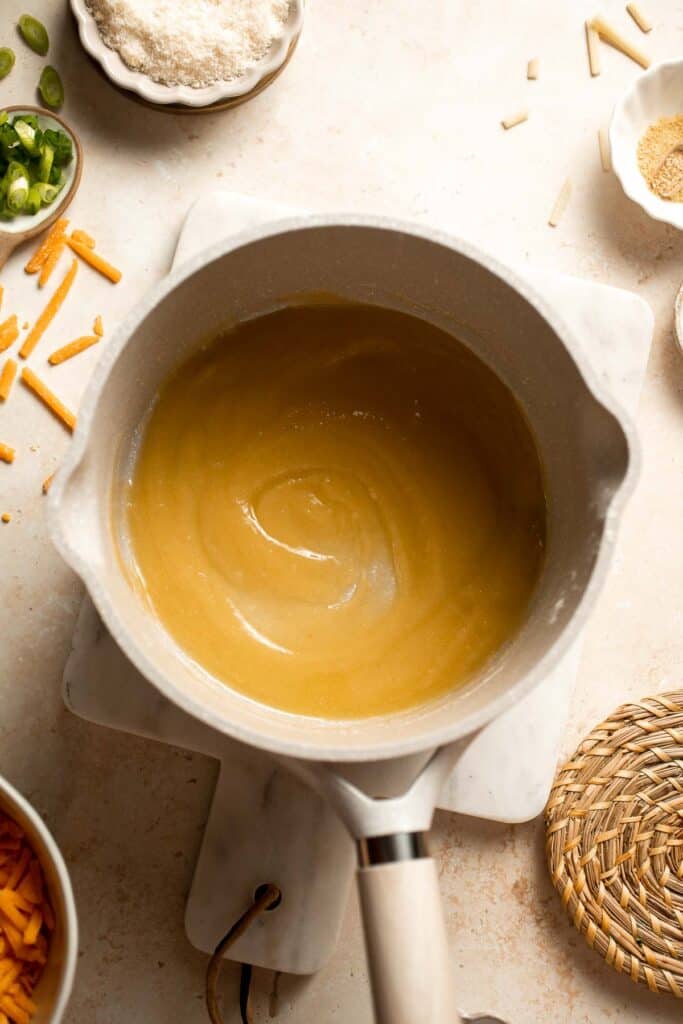
- Add milk. Gradually add in milk, whisking constantly to combine. The sauce will thicken and clump in the beginning but once you add in more milk, it will smoothen out again.
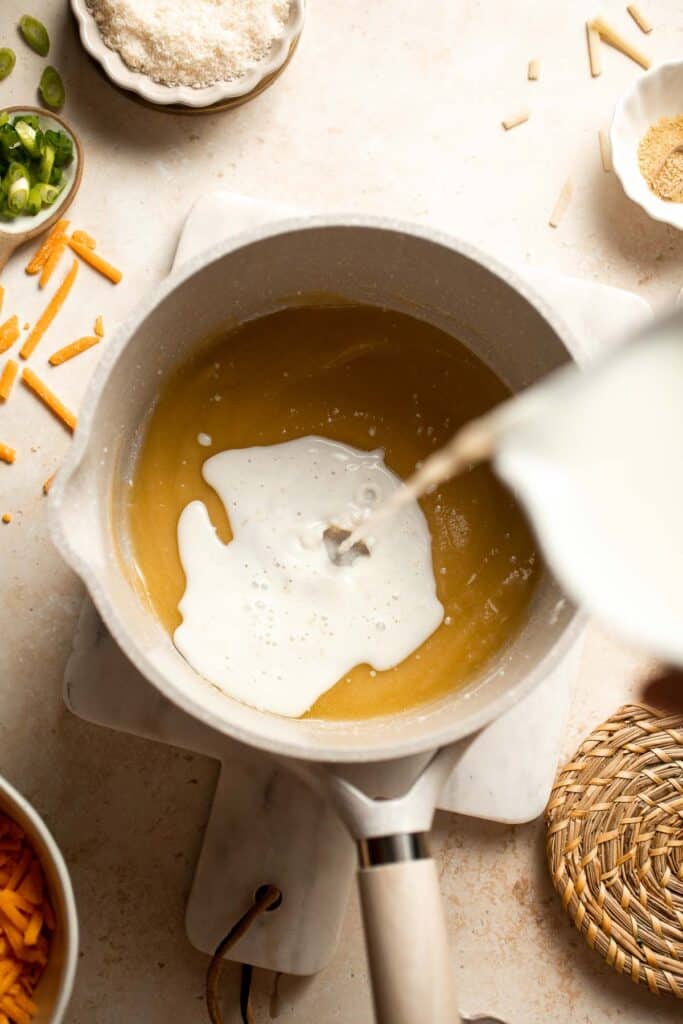
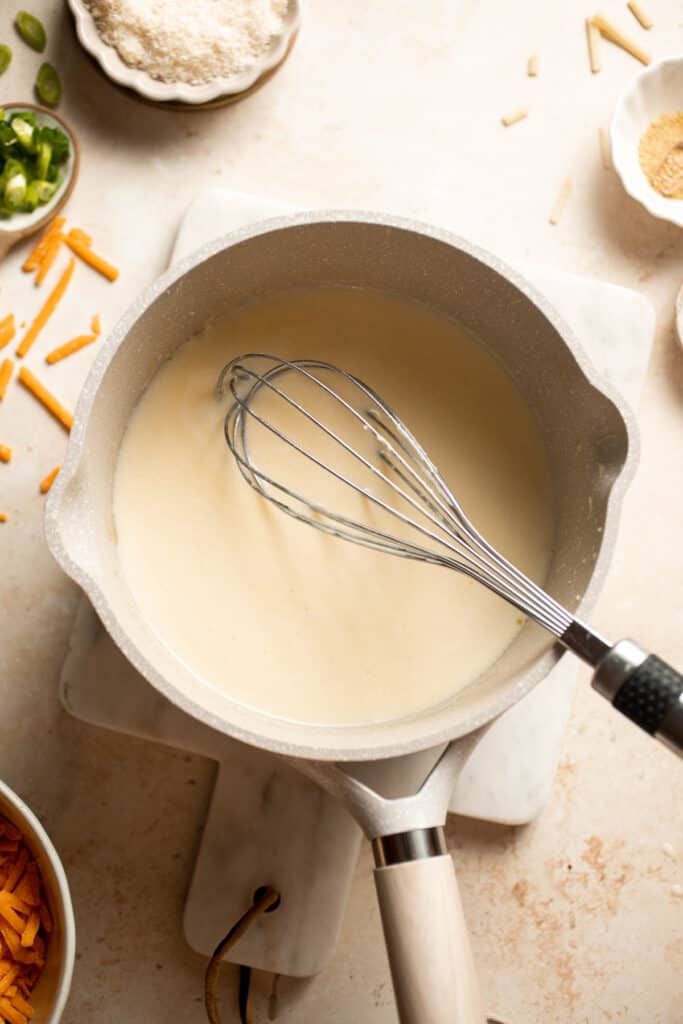
- Add cheese. Add in cheddar cheese, Parmesan cheese and mozzarella cheese and reduce the heat to low. Stir in the garlic powder and mustard powder. Mix well until smooth.
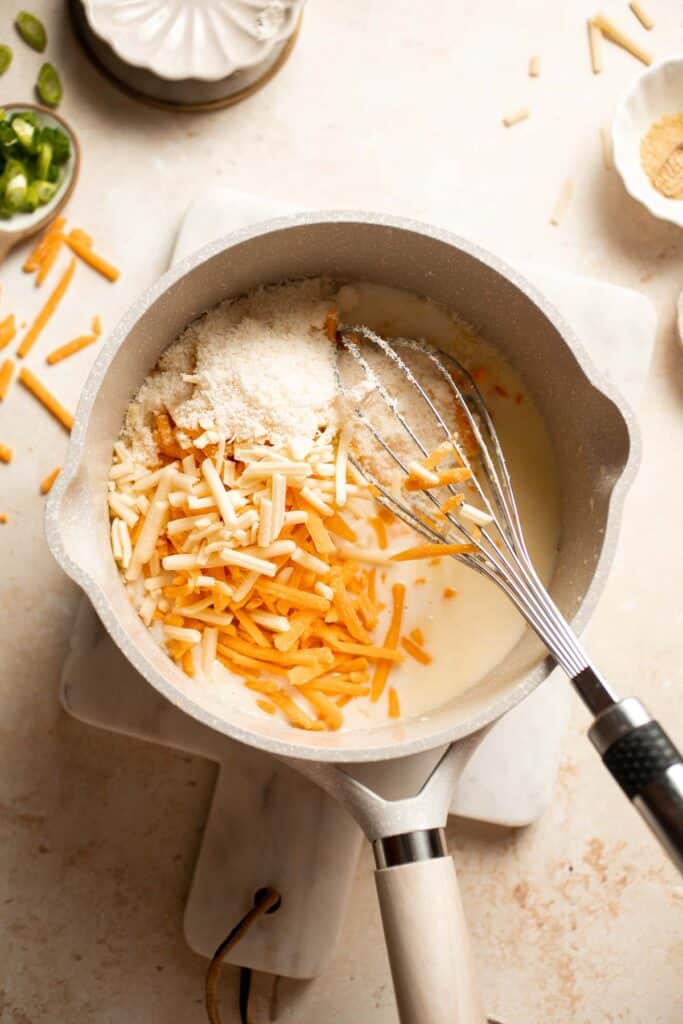
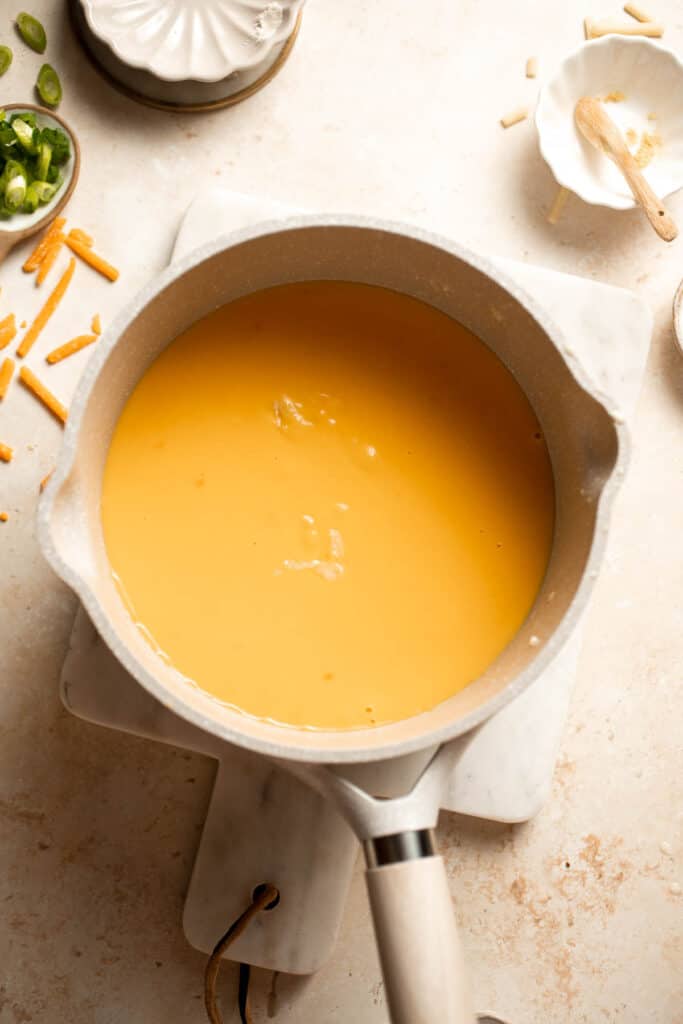
- Combine. Slowly pour the cheese mixture into the macaroni soup and mix well until combined.
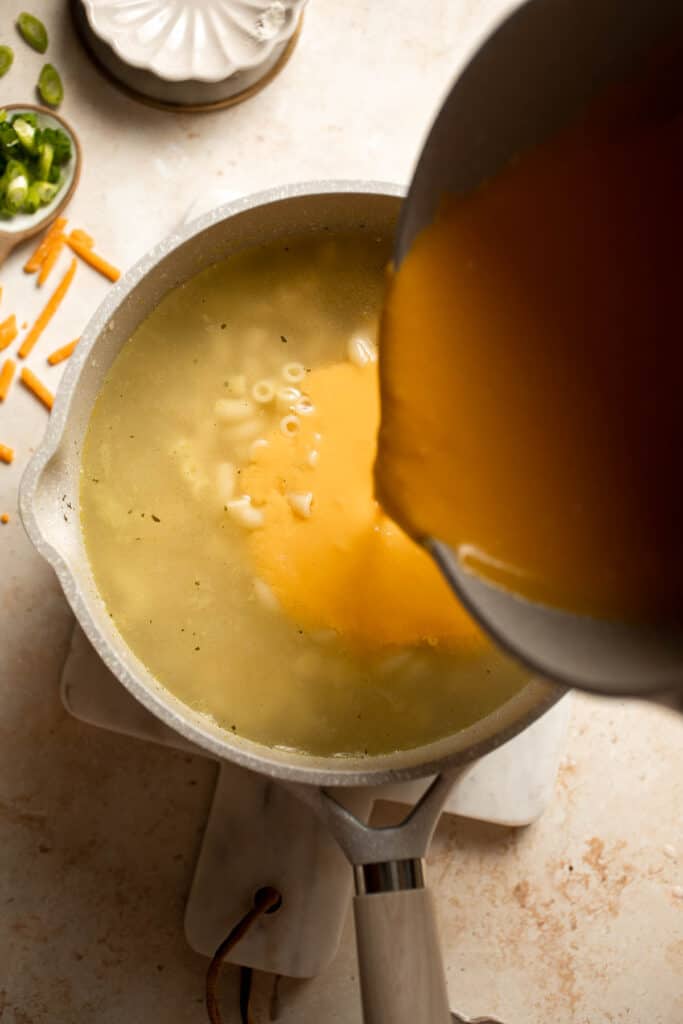
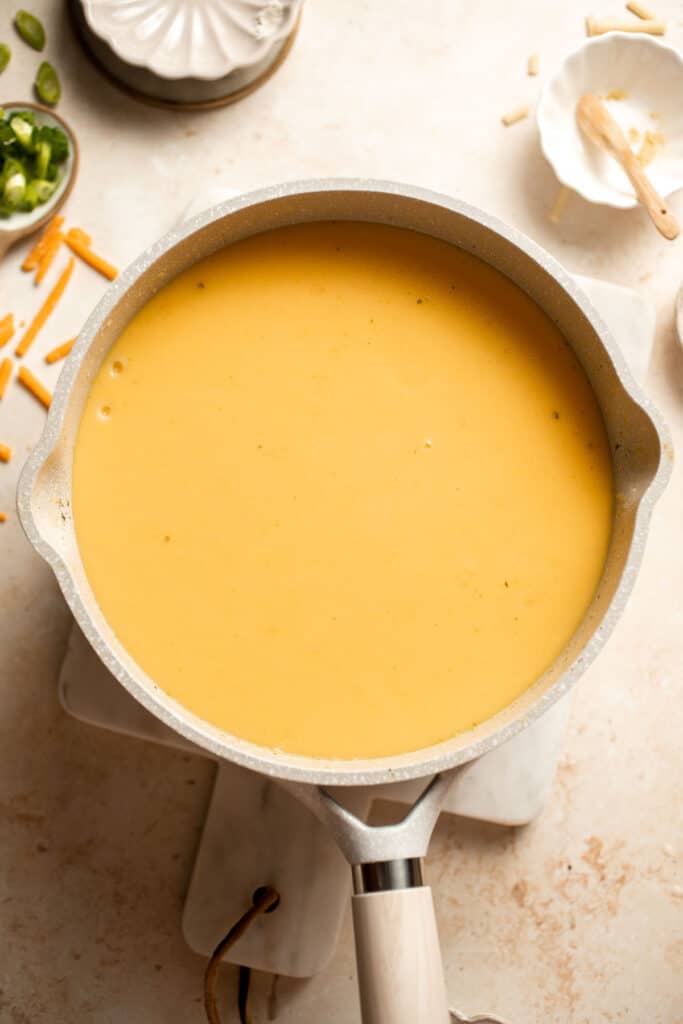
- Serve. Garnish with green onions and freshly cracked black pepper. Serve warm.
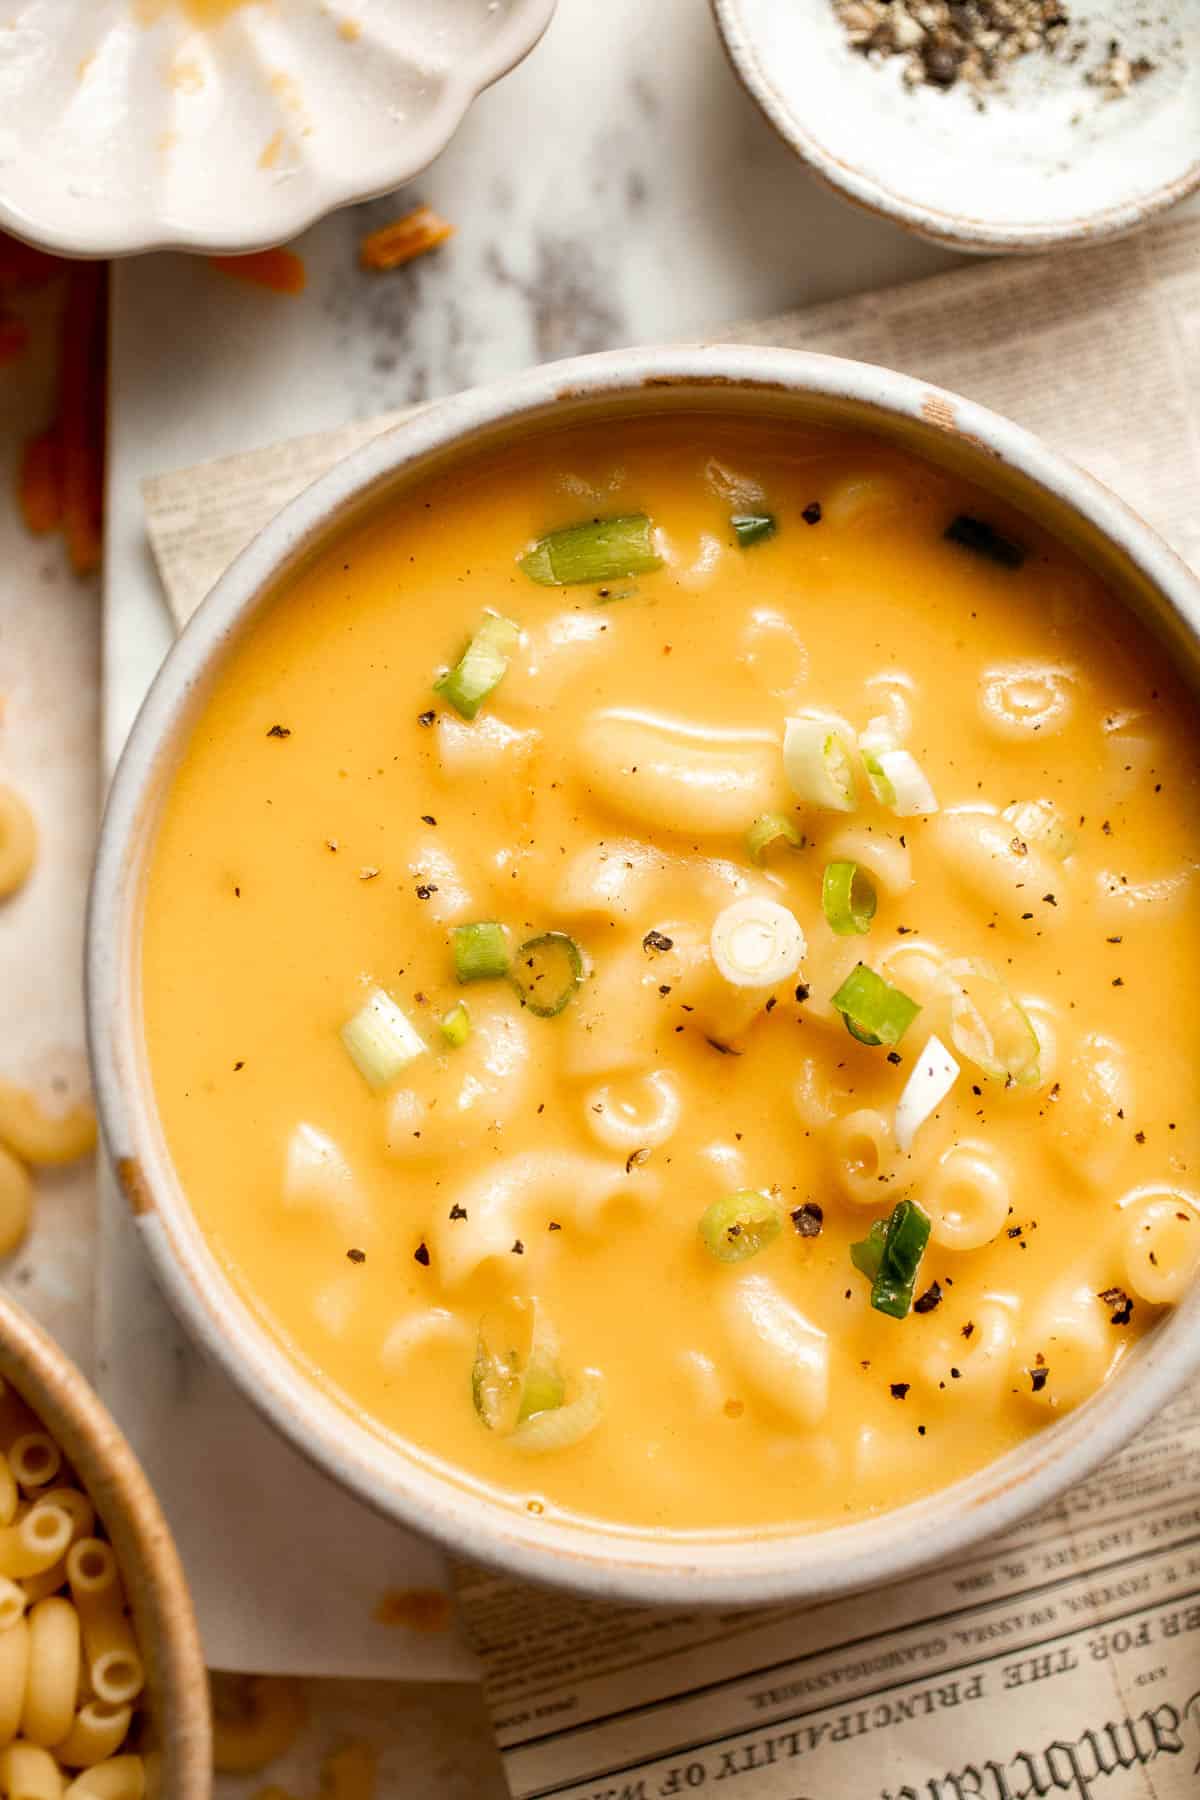
Recipe Variations
- Adjust the cheese. Feel free to use a different combination of cheeses, but stick with traditional melting cheeses like Gruyere, fontina, or provolone. You can also add a few spoonfuls of cream cheese for extra tanginess.
- Stir in some add-ins. There are so many options for add-ins! Try adding diced ham, crispy bacon, ground beef or leftover taco meat, roasted broccoli, sauteed peppers, diced fresh tomatoes, and so much more. Try making a toppings bar for everyone to make their bowl their own!
- Make it spicy. Shake in some red pepper flakes and some hot sauce for a spicy, cheesy soup that packs a punch.
- Try a different noodle. Classic mac and cheese uses elbow macaroni noodles, but you can definitely try other options! Look for noodles that can hold sauces really well, like cavatappi, rotini, orecchiette, and more.
How to Serve
This macaroni and cheese soup is delicious served on its own or with a nice hunk of bread to soak up the sauce. Some of my favorites to pair with this are:
- Buttermilk Biscuits
- Skillet Dinner Rolls
- Homemade No Knead French Baguettes
- Garlic Cheddar Biscuits
- Parker House Rolls
- Cornmeal Cheddar Biscuits
For more recipe ideas, see our 50 Best Bread Recipes.
Recipe Tips and Tricks
- Don't overcook the noodles. The noodles will continue to cook in the hot soup, so it's important to remove them from the heat as soon as they reach the al dente stage. Otherwise, they can become overly soft in the soup.
- Whisk the roux well. The secret to a really creamy soup is the roux. This is made by cooking melted butter and flour in a pan until it forms a paste, then thinning it out gradually with a liquid. Whisk very well to break up all those clumps for the smoothest, creamiest soup.
- Don't strain the pasta. You'll be tempted to strain the noodles since that's a habit, but don't! You need the starchy broth to thicken the soup.
Storing and Freezing Instructions
How to Store
Allow the leftover mac and cheese soup to cool to room temperature for 1-2 hours, then store it in an airtight container in the fridge.
How to Reheat
Place the leftovers in a saucepan on the stove or reheat a serving in the microwave. Be sure to stir well and avoid overheating to keep the noodles from becoming soggy.
How to Freeze
Unfortuantely, cheesy soups do not freeze very well. It's best to make this mac & cheese soup fresh or reheat the leftovers.
FAQ
The secret is to cook the noodles until they are barely al dente. In general, you strain or even rinse noodles to stop the cooking process before adding them to soup, but we don't want to strain the liquid for this recipe because the broth becomes part of the soup itself. The noodles will continue cooking in the hot broth, but that's okay. Since you don't really need to cook the soup very long after you combine the brothy noodles and cheese mixture together, they won't have long to overcook.
If you've ever tried to blend cheese into the soup, you've probably noticed how it clumps and falls to the bottom! It's best to whisk it really well into the roux before you add any extra liquid. It will melt into the creamy roux much better than it will dissolve in broth. You can also use an immersion blender, but that's unnecessary for this easy mac and cheese soup.
Technically, you can use the slow cooker, but it isn't entirely necessary or helpful. You need to be able to boil water in one pot and then make a roux in another. The slow cooker can't do either of those things (unless you have a saute function), and even then, you'd still need a second pot. It makes the most sense to use the slow cooker to keep the soup warm, especially for a party. Otherwise, keep it simple and use the stove.
More Soup Recipes with Pasta
- 60 Best Soup Recipes
- Hamburger Soup with Macaroni (Goulash Soup)
- Alphabet Soup
- Minestrone Soup
- Creamy Tortellini Soup with Sausage
- Chicken Noodle Soup
Tried this recipe?
I'd love to hear what you think! Leave a comment and rating below to share your feedback. Your reviews help others discover this recipe and help me keep creating more free recipes for you. Snap a photo and tag me on social media @aheadofthyme too.

Vegetarian Meatballs
These easy Vegetarian Meatballs are made with cheesy black beans and a mixture of aromatic spices, making them the perfect way to add protein and texture to pasta dishes, salads, roasted veggies, and more. They also freeze well, so make a double batch and enjoy homemade meatless meatballs any time!
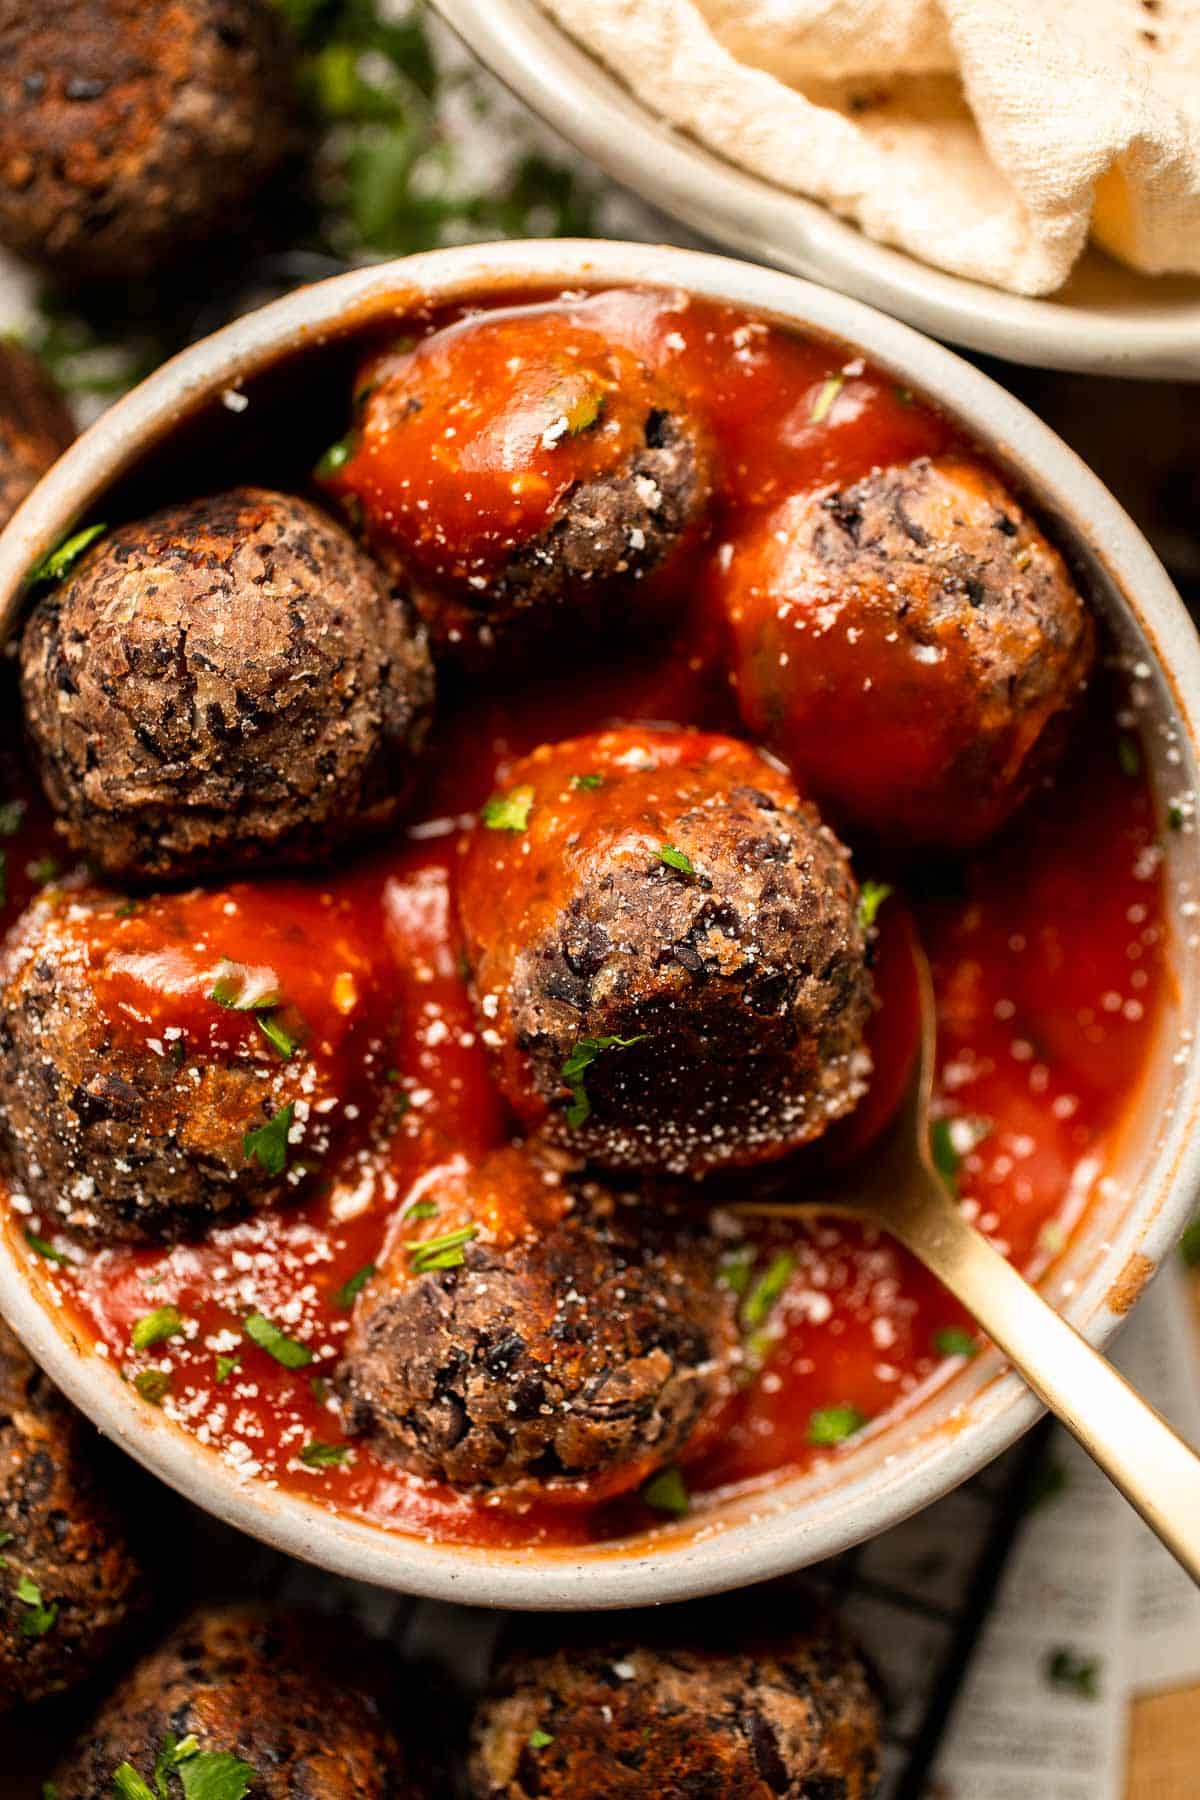
There are so many reasons to make this vegetarian meatball recipe, but first, we have to start with the flavor. The mixture of black beans, aromatic vegetables, cheese, and spices is incredibly satisfying, and - the texture is fantastic. The beans give these meatballs a little texture and height, so you get the sensation of eating something meaty without any animal products. I like to think of these black bean meatballs as a fun twist on falafel, too. They're delicious with a bold tomato sauce or your favorite marinara sauce for a savory, saucy entree to serve over rice or nestled into pitas or wraps. Even the meat eaters will love these!
Why You'll Love These Vegetarian Meatballs
- Easy to make. These veggie balls are made with canned black beans, which helps speed up the process dramatically. Just saute the aromatics, then blend everything into a paste in the food processor. Form the mixture into balls, then cook! Your veggie meatballs will be ready in just 45 minutes.
- Great for meal prep. One batch makes six hearty black bean meatballs, which can then be added to an array of recipes during the week. Make a double (or triple) batch to add them to salads or wraps all week, or freeze the extras for a quick meal starter another time!
- Customizable. This recipe is full of flavor on its own, but you can easily adjust the ingredients for a different flavor profile. They can also be cooked in three different ways, so you have a lot of flexibility with both flavor and technique.

Ingredient Notes
To make these delicious vegetarian meatballs, you will need the following ingredients (full measurements in recipe card below):
- olive oil - heat a little bit of oil to release the flavors in the aromatics.
- onion and garlic - these aromatics add a savory flavor.
- black beans - use canned beans, and be sure to rinse and drain them very well. You can also use 1 cup dried beans but will have to soak them overnight first and then cook. See How to Cook Dried Beans for instructions.
- cheddar cheese - a little shredded cheddar will help hold the meatballs together and add a pleasing, cheesy flavor.
- egg - egg is a great binder to hold the mixture together.
- Worcestershire sauce - look for a vegan Worcestershire sauce to avoid the fish in the regular version.
- seasonings - season to taste with paprika, salt, and pepper.
You will also need a measuring cups and spoons, skillet, food processor, mixing bowl, and a skillet, baking sheet, or air fryer (depending on cooking method).
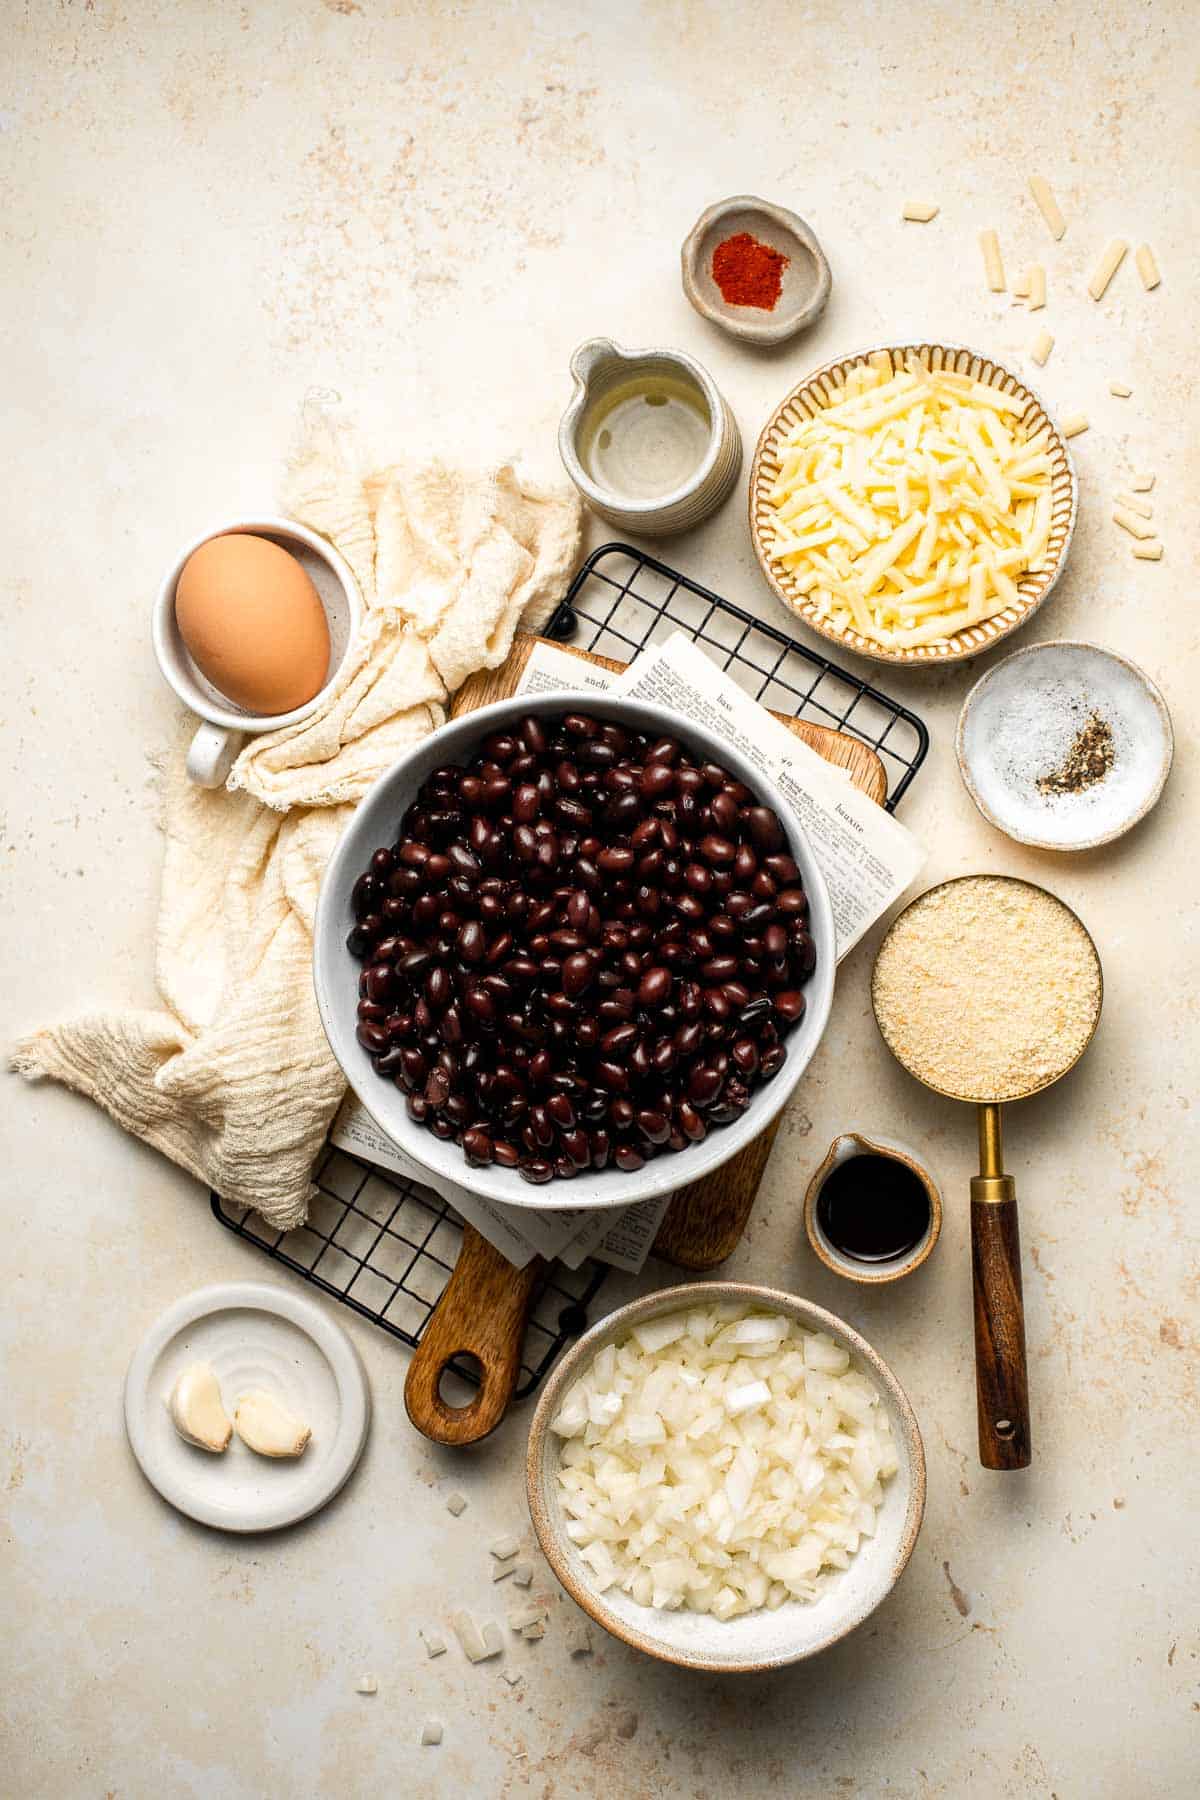
How to Make the Best Vegetarian Meatballs
- Sauté aromatics. In a large skillet, heat oil over medium-high heat for 1 minute. Add onions and garlic and sauté until tender, about 2-3 minutes. Let cool for 5 minutes.
- Combine ingredients. Use a paper towel to pat the rinsed and drained black beans dry. Then, transfer into a food processor and add sauteed onion mixture, breadcrumbs, cheddar cheese, egg, Worcestershire sauce, paprika, salt, and pepper. Pulse mix on and off for 1 minute until well combined. Alternatively, you can mash everything with a fork or potato masher in a large mixing bowl until evenly combined
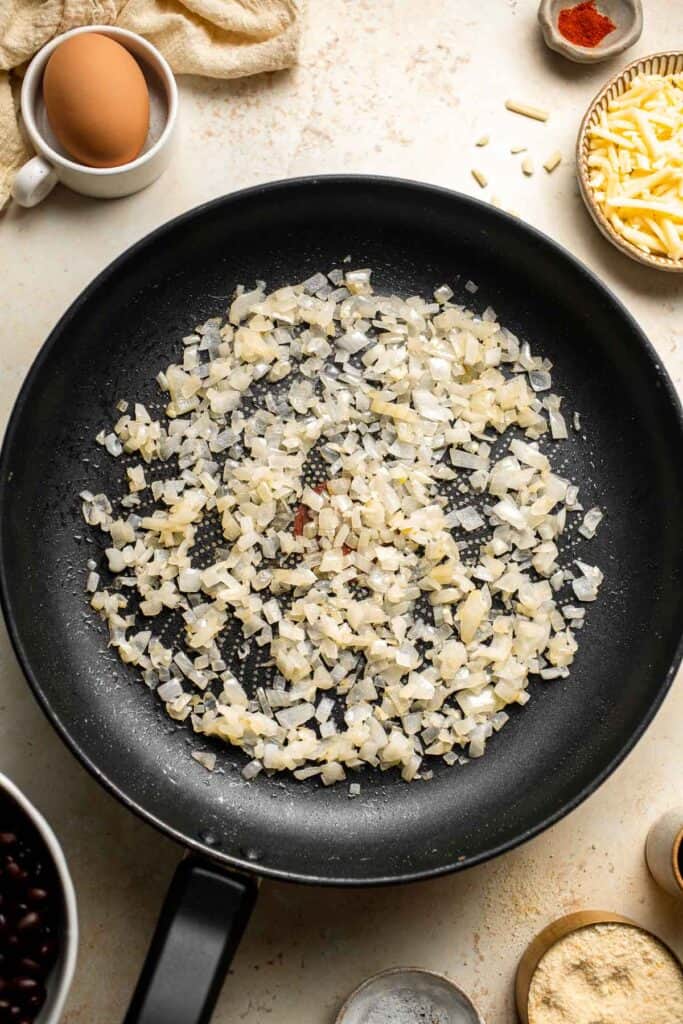
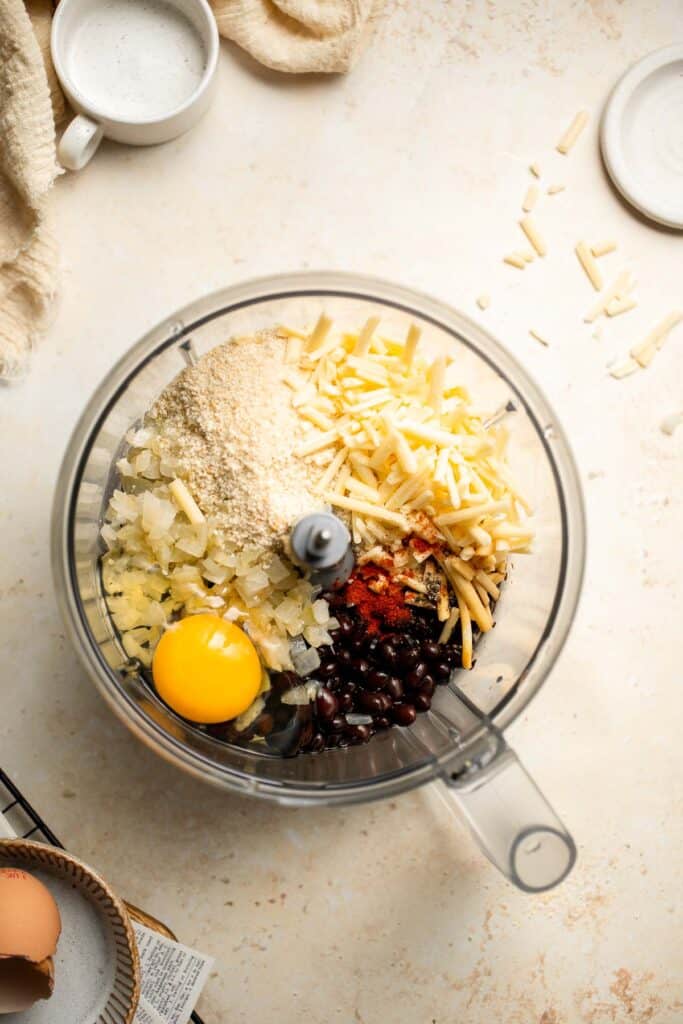
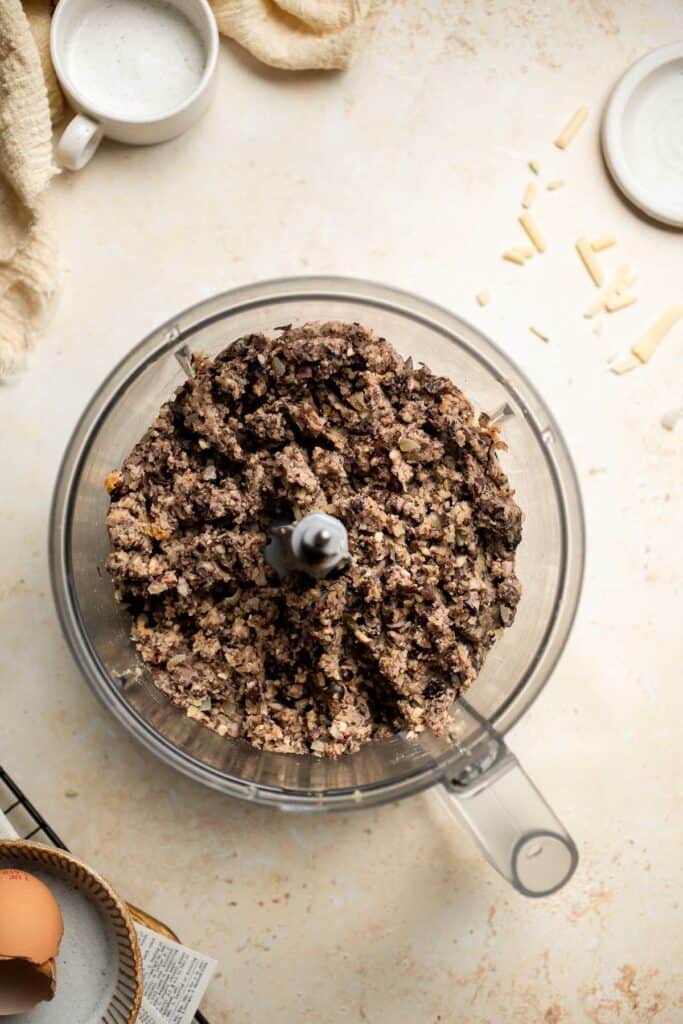
- Shape. Take 2 tablespoonful bean mixture at a time and shape into meatballs. Set aside on a large baking sheet.
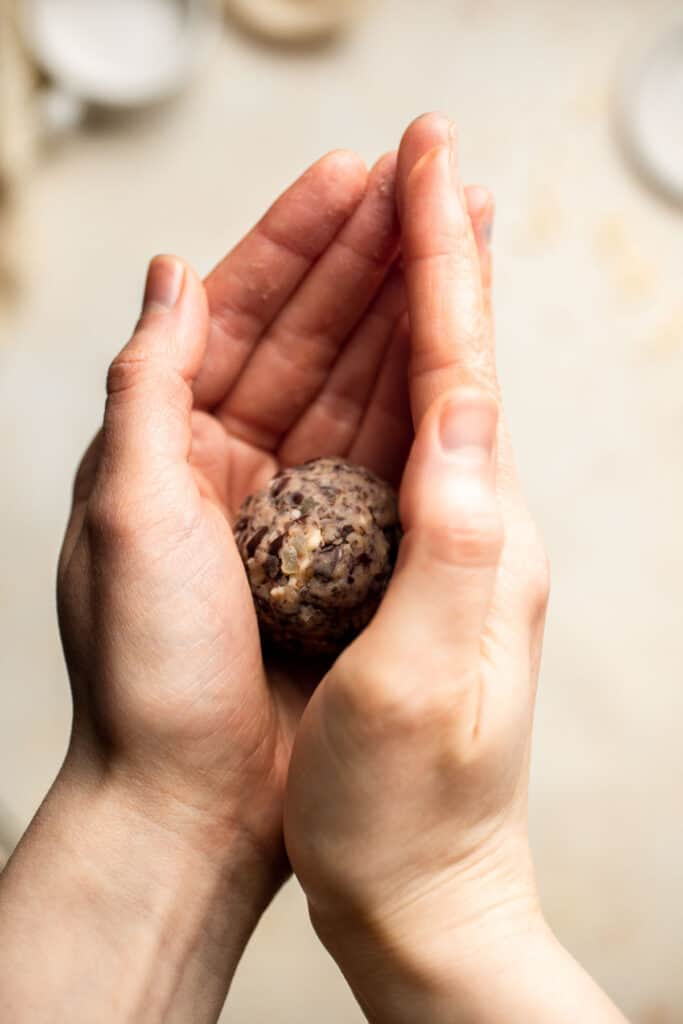

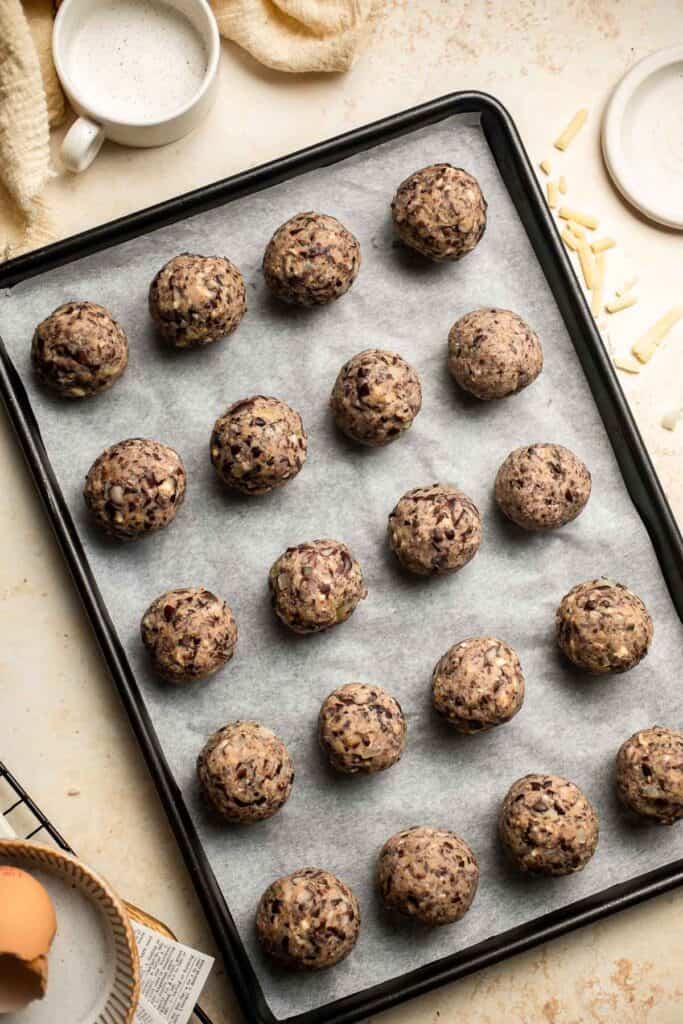
- Cook. To cook, you can pan fry, bake or air fry the meatballs.
- To pan fry: Heat 1 tablespoon of oil in a large skillet over medium heat until sizzling hot, about 2 minutes. Arrange the meatballs on the skillet and cook until browned on all sides, about 7-10 minutes.
- To bake: Preheat the oven to 375F. Place the meatballs on a large parchment-lined baking sheet and bake until browned, about 12-15 minutes. Flip once halfway through baking.
- To air fry: Add meatballs in batches to the air fryer basket and cook at 350F for 10-12 minutes until browned. Shake the basket gently once during cooking to help cook evenly.
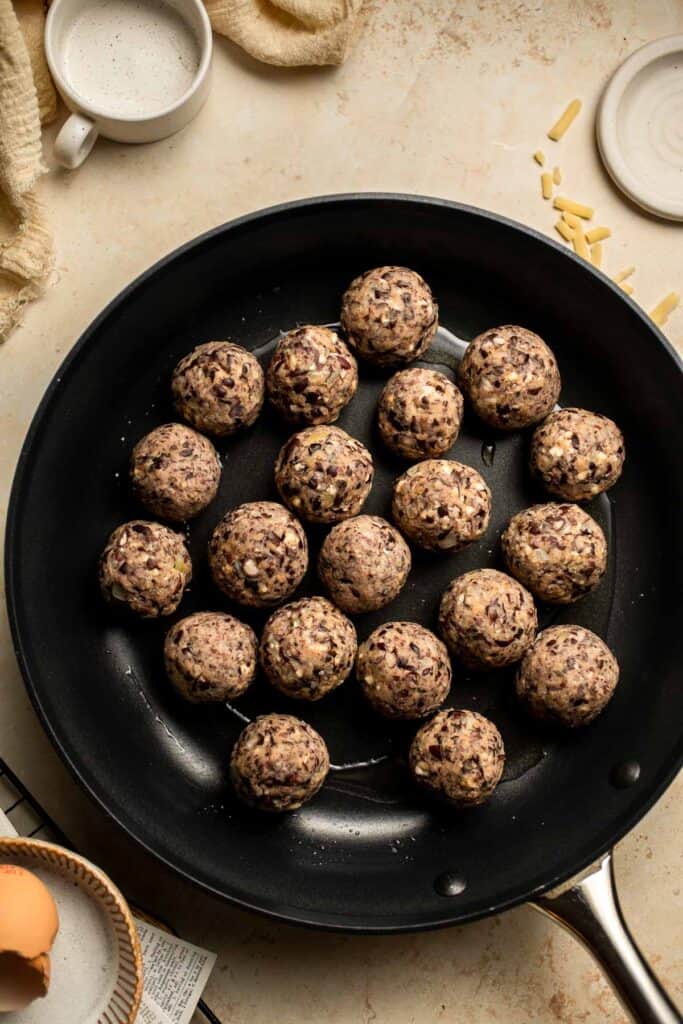
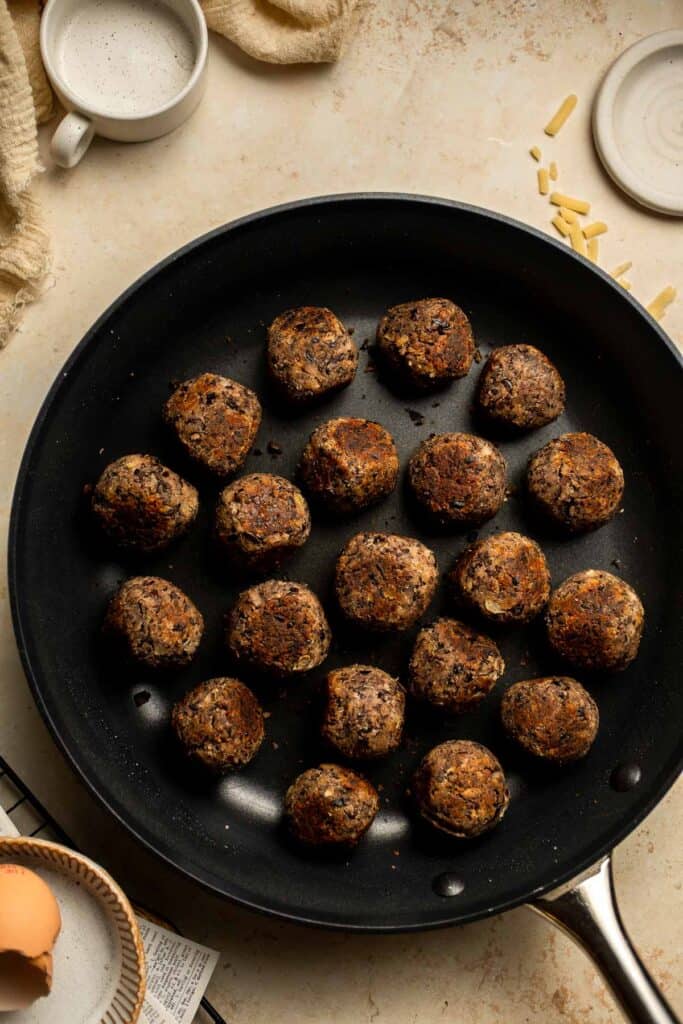
Recipe Variations
- Make Italian meatballs. Replace the paprika with Italian seasoning, add a little garlic powder and onion powder, and use Parmesan cheese instead of cheddar.
- Try different beans. Use pinto beans for homemade meatballs with a lighter color and different flavor.
- Press them into veggie burger patties. Instead of making meatballs, form the bean mixture into burger patties! Just be sure to adjust the baking time to let them cook all the way through. See our Black Bean Burgers for tips.
- Make mini meatballs. Use half as much of the meatball mixture for smaller bites you can add to salads and more!
- Make easy vegan meatballs. For a vegan alternative, use a flax egg, non-dairy cheese, and vegan Worcestershire sauce.
How to Serve
There are so many delicious ways to serve these Vegetarian Meatballs. Here are some of our favorite ways to serve these veggie bites:
- Drizzle with Tzatziki Sauce and make vegetarian gyros or shawarmas.
- Use them as a ground beef replacement in this Taco Salad.
- Serve them over pasta like this Pesto Penne Pasta, Spaghetti and Meatballs, or Creamy Tomato Pasta for extra texture and protein.
- Top them them over salads like this Southwest Salad or Sweet Kale Salad for a more filling meal.
- Serve as an appetizer with Marinara Sauce or Homemade Ranch Dip for dipping.
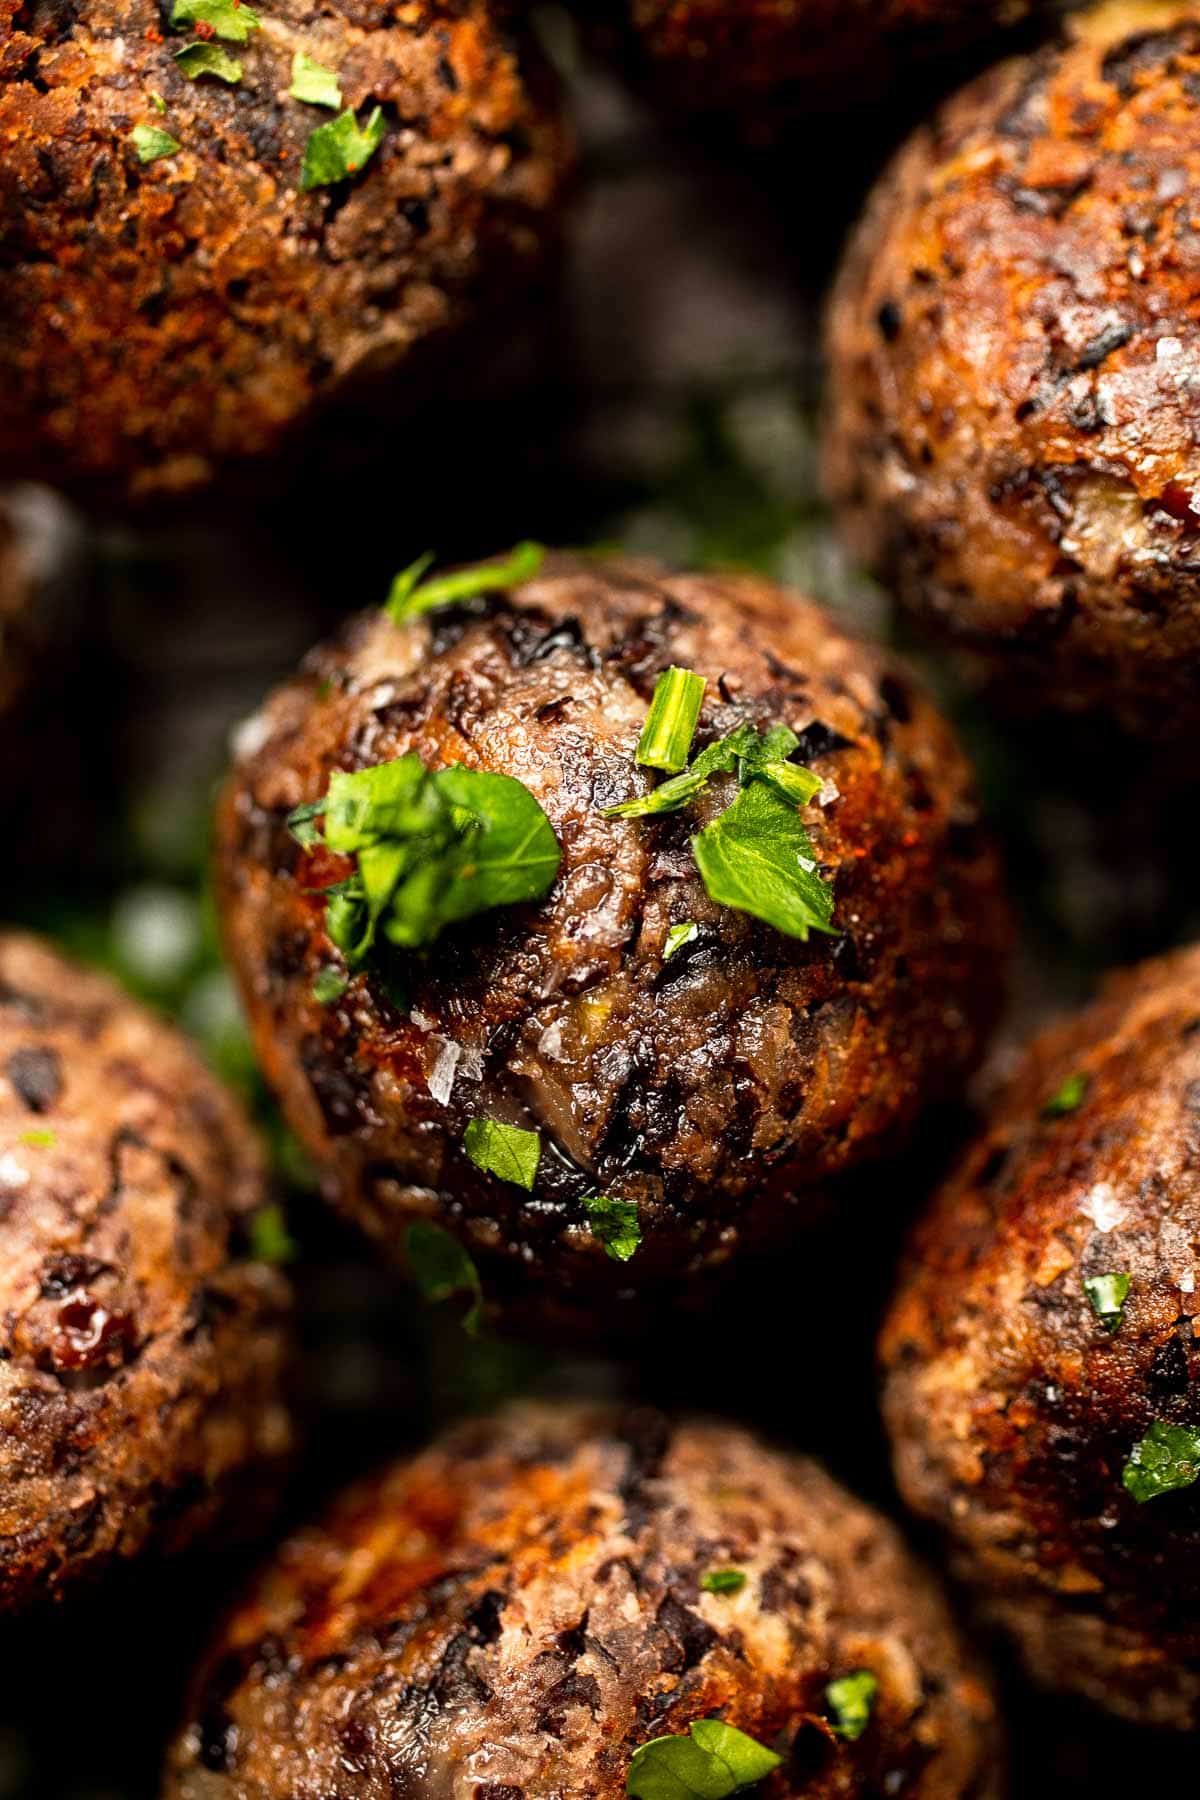
Recipe Tips and Tricks
- Dry off the beans. The secret to vegetarian meatballs with the perfect texture is to minimize the amount of moisture. If the beans are too wet, the meatballs can be soggy and fall apart. Pat them dry with a paper towel, or let them dry on a kitchen towel for an hour or so.
- Freeze them. The cooked meatballs freeze incredibly well, so set some to the side for an easy family dinner later next time.
- Mash the beans just enough. The beans help hold these meatballs together, so they need to be mashed the right amount. For best results, pulse the mixture until it starts to stick together on its own.
Storing and Freezing Instructions
How to Store
Allow the meatballs to cool to room temperature, then store them in an airtight container in the fridge for 3-4 days.
How to Reheat
The easiest way to reheat these meatballs is to microwave them in 30-second bursts. For the best texture, heat some oil in a skillet over medium heat, then toast the meatballs in the pan to crisp up the outside.
How to Freeze
Place the leftover meatballs on a sheet pan lined with parchment paper, and place the whole batch in the freezer for 1-2 hours. Store them in a freezer bag and freeze for 3-6 months. Thaw the meatballs in the fridge before reheating to preserve their texture.
FAQ
The main ingredients I use to bring these vegetarian meatballs together are egg and cheddar cheese. The egg is a classic binder, and as the cheese melts, it will hold the bean mixture in place. For delicious vegan meatballs, you'll want to use a flax egg and non-dairy cheese or nutritional yeast. The proportions may need to be adjusted to get the proper consistency.
This is a sign you have too much moisture in your recipe. It's really important to dry off the beans. The only real moisture should come from the egg and a little Worcestershire sauce. The cheese also holds the meatballs together, so if you skipped that or used a substitute, you might not get the same result.
There are many different recipes out there with a variety of ingredients, but I prefer to keep it simple! Use a mixture of canned beans, egg, cheddar cheese, aromatic herbs, Worcestershire sauce, and spices for a flavorful, tender meatball that holds its shape really well. With the right ingredients, you don't really need to bother with any bread crumbs, flour, or anything else!
More Vegetarian Recipes
- 60 Easy Vegetarian Dinner Recipes
- Vegetarian Shepherd's Pie
- Vegetarian Bolognese
- Vegetarian Stuffed Peppers
- Vegetarian Enchiladas
- Vegetarian Chili
Tried this recipe?
I'd love to hear what you think! Leave a comment and rating below to share your feedback. Your reviews help others discover this recipe and help me keep creating more free recipes for you. Snap a photo and tag me on social media @aheadofthyme too.

Homemade Glazed Donuts
There's nothing quite like Homemade Glazed Donuts freshly cooked and warm. These delicious doughnuts are made with a tender, pillowy dough and topped with a sweet glaze made from scratch. Plus, this donut recipe is made the traditional way by deep frying to give them the perfect texture and bite. It's impossible to eat just one! Make them for your next brunch, special occasion, or just because. Your family will thank you!

If you're intimidated by the thought of making glazed doughnuts at home, you don't need to be! There are a few steps that can be scary to new bakers, like making yeast dough and frying. However, the process is so much easier than you'd expect, and we've prepared careful, step-by-step instructions (with pictures) to support you along the way. Once you see how easy and fun it is to make from scratch, you'll make homemade donuts all the time!
Why You'll Love These Homemade Glazed Donuts
- So soft and tender. The secret to the best donuts is the dough. It needs to be soft and tender, not hard or chewy. This enriched donut dough has butter, milk, and egg to give you the perfect texture. Just follow the tips for rising and shaping the doughnuts, then fry to perfection! They're delicious every time.
- Donut shop flavor. This particular recipe tastes so much like Krispy Kreme doughnuts or the classic glazed donuts from your local donut shop. They'll take you right back to your childhood!
- Great for brunch or special occasions. Wouldn't it be fun to make donuts for special occasions in your life? They'd be such a sweet birthday breakfast treat. They'll disappear instantly at any gathering!

Ingredient Notes
To make these delicious homemade glazed donuts, you will need the following ingredients (full measurements in recipe card below):
- all purpose flour - you don't need fancy flour to make this doughnut recipe. Regular all purpose works great.
- whole milk - warm milk will make the donut dough soft and flexible.
- butter - use unsalted and melted butter to give your dough a rich, tender texture.
- white sugar - sweeten the dough just a little. The glaze will add most of the sweetness.
- egg - eggs make yeast doughs lighter, fluffier, and more flexible.
- instant yeast - this yeast will start working instantly so you can enjoy your glazed donuts quickly. Active dry yeast is a good alternative.
- salt - salt balances sweetness and is an important part of any dough.
- boiling water - to create a warm environment when oven proofing the dough.
- neutral oil - use a neutral option, like canola oil or vegetable oil.
- homemade glaze - you will need confectioners' sugar (also known as powdered sugar, this will thicken the glaze and make it sweet), butter (to keep the glaze soft and reduce cracking) hot water, milk, and vanilla (for flavor).
You will also need measuring cups and spoons (or a kitchen scale), stand mixer, mixing bowls, plastic wrap, baking sheets, parchment paper, rolling pin, donut cutter, whisk, paper towels, rubber tongs, large pot or Dutch oven, and wire rack.
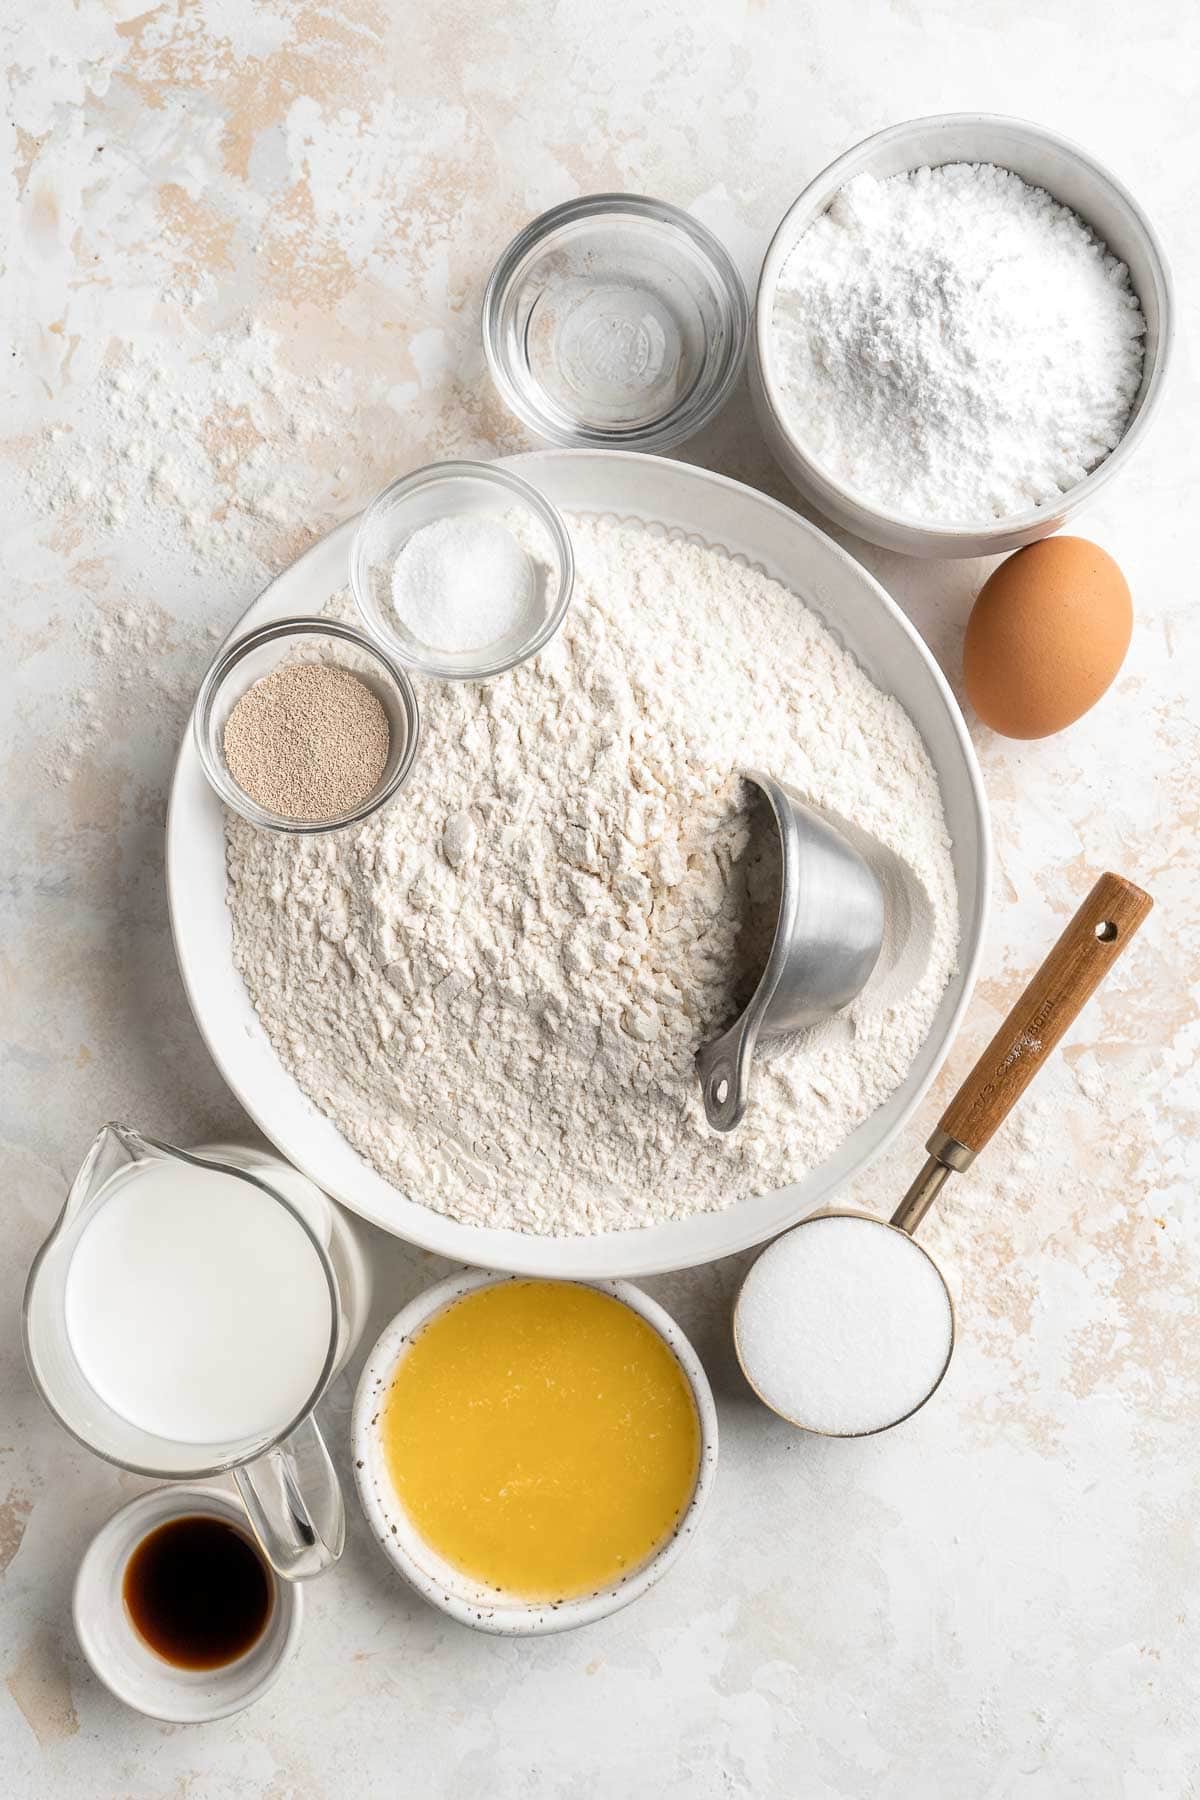
How to Make the Best Homemade Glazed Donuts
First, make the dough.
- Combine ingredients. Add flour, warm milk, melted butter, sugar, egg, instant yeast, and salt to the bowl of a stand mixer. Attach the dough hook attachment onto the stand mixer, and turn the mixer on to medium-low speed. Mix for around 5-10 minutes for the dough to form. When ready, the dough should be smooth, elastic, and a little bit sticky and tacky to the touch.
- Rise. Transfer the dough to a large greased bowl, cover with plastic wrap, then place in a warm place to rise for about 1-2 hours, or until the dough is doubled in size.
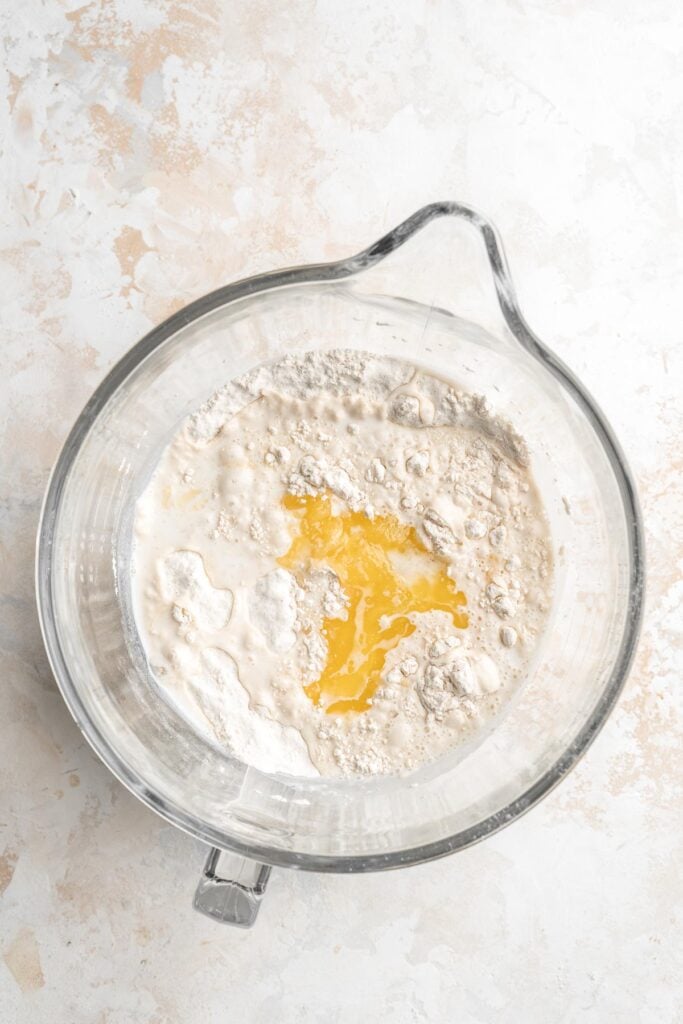
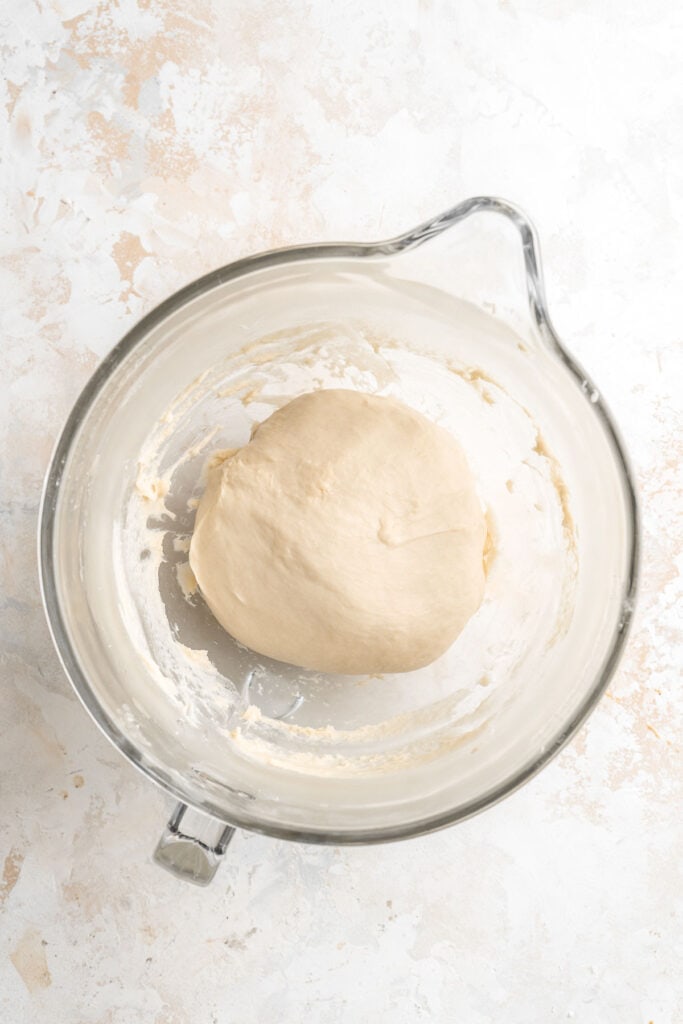
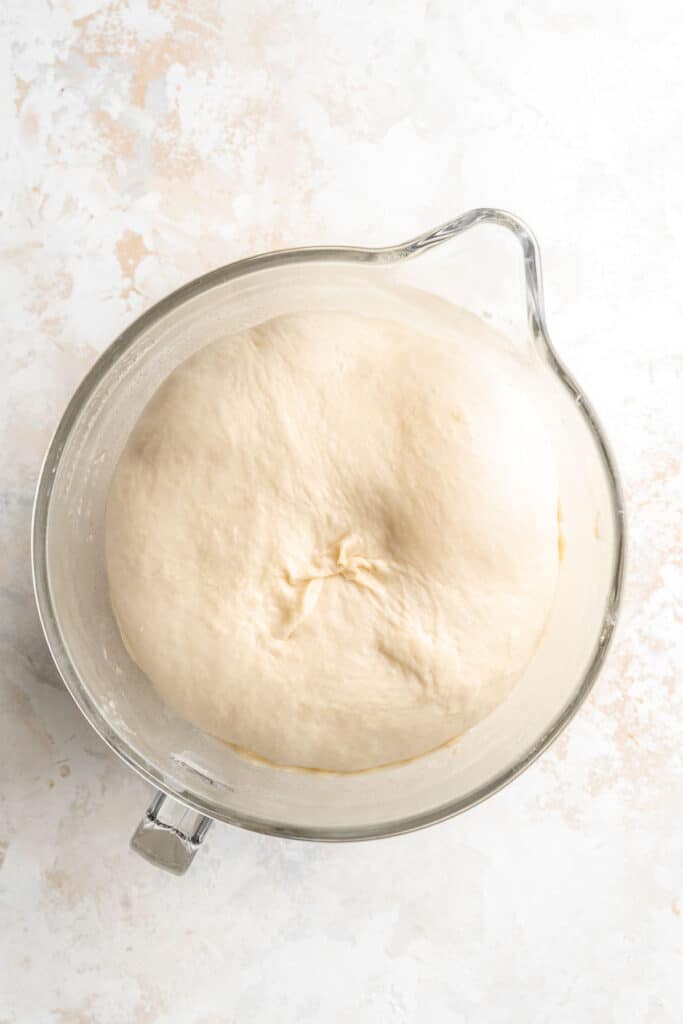
Now, let's shape into donuts.
- Prep work. Meanwhile, prepare 2 large baking sheets with 12 small parchment squares about 4x4-inches in size). You can buy these or cut them out of 2 large sheets of parchment paper. Also, prepare your oven for proofing by adding a rimmed baking sheet or a large cake pan to the bottom rack, and filling it with boiling water. This humid and warm environment is crucial for the final rise.
- Roll dough. Turn the proofed dough out onto a lightly floured work surface and roll out to be about ½-inch thick.
- Cut dough. Using a donut cutter (or a large 3-inch cookie cutter coupled with a small 1-inch cookie cutter) cut out your donuts, then transfer each donut onto a parchment square.
- Rise. Transfer the baking sheets into your humid oven, and allow it to rise for about 20 minutes. They should look risen but not doubled in size.
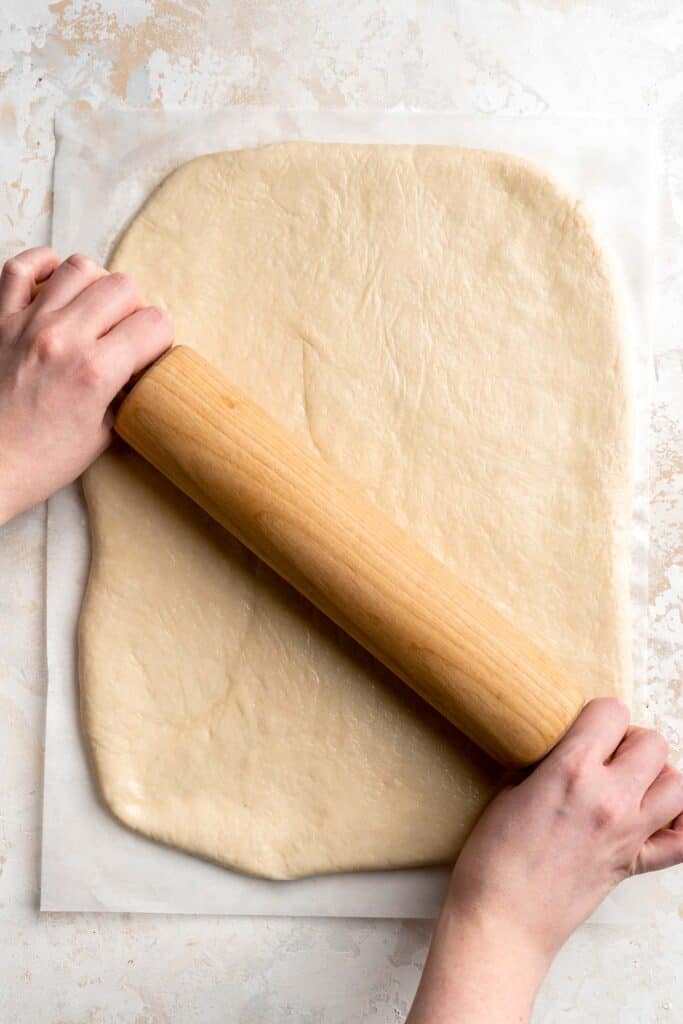
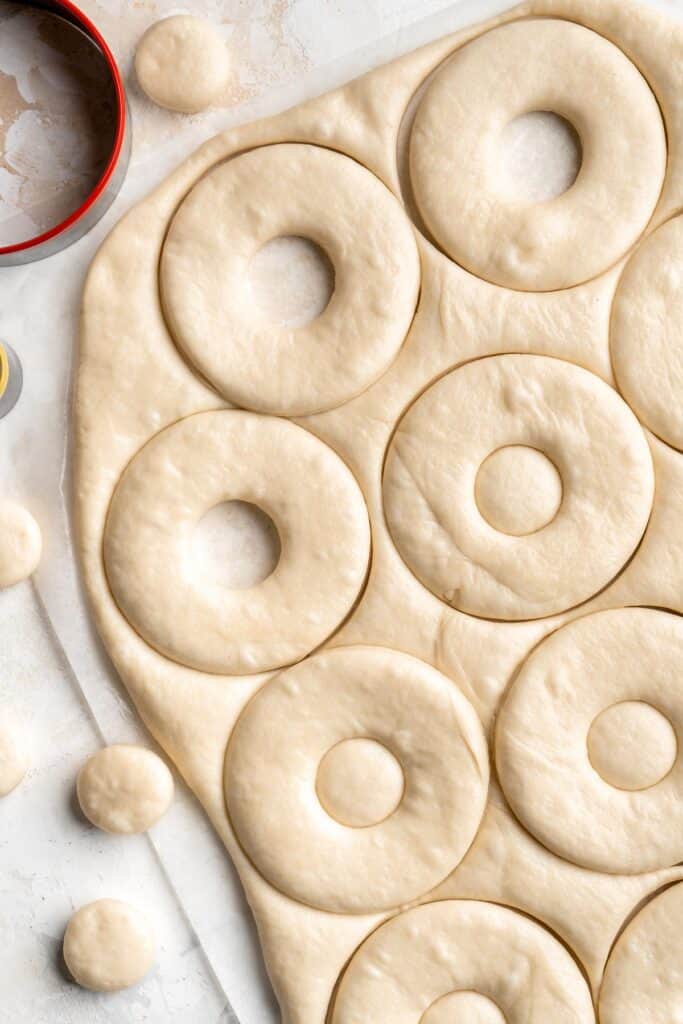
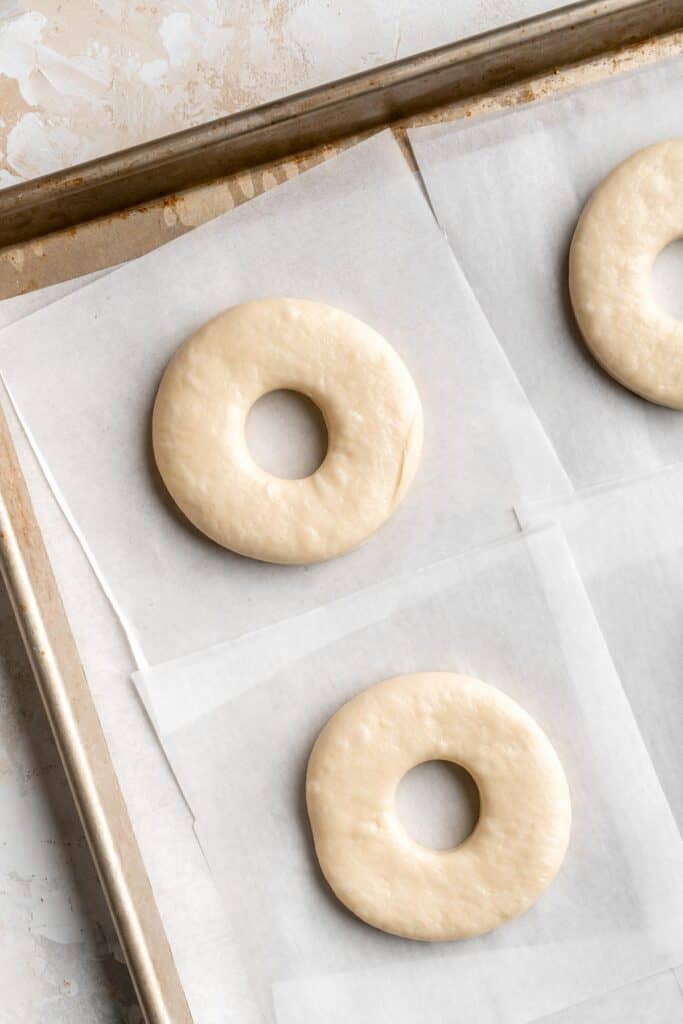
Now, make the sweet glaze.
In a medium mixing bowl, add the confectioners' sugar, melted butter, milk, hot water, and vanilla. Whisk until smooth and set aside for later.

Let's fry the donuts.
- Heat oil. When the donuts are ready, add oil to a large wide pot, such as a Dutch oven, filling it about halfway. Heat the oil over medium-high heat until it reaches between 350°F as read on a cooking thermometer, about 3-4 minutes.
- Fry. Pick up the donuts with the parchment paper attached, and carefully place them into hot oil. Use rubber tongs to remove the parchment papers from the oil. Fry the donuts for about 60-90 seconds per side, or until golden. It is best to fry in batches - I fried mine in 3 batches, as to not drop the oil temperature too much.
- Cool. Place the fried donuts onto paper towel-lined baking sheet to cool off.
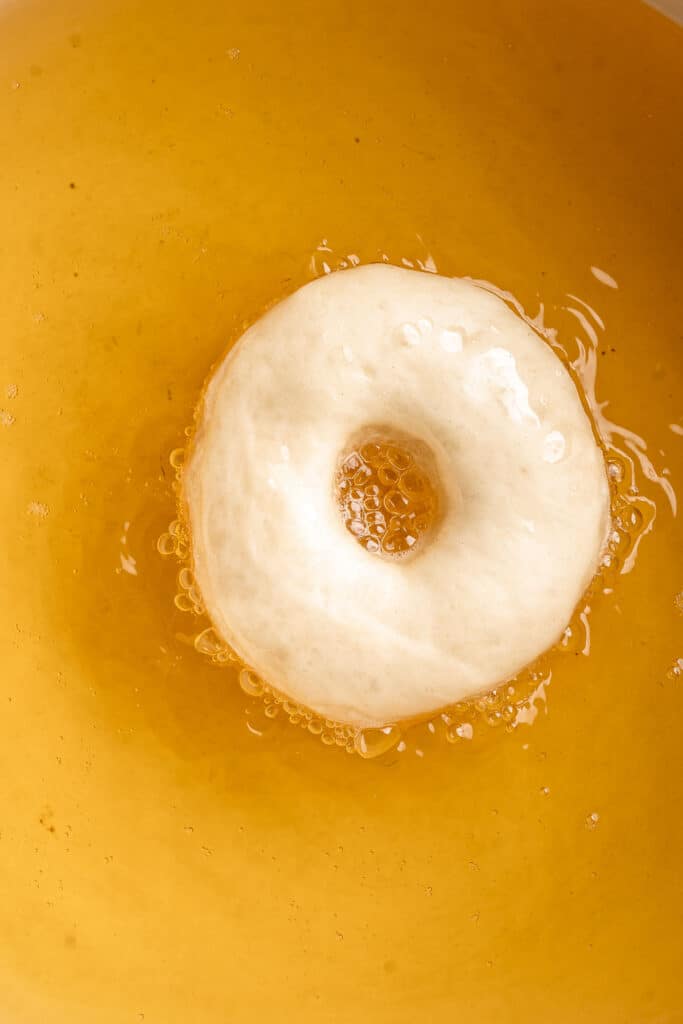
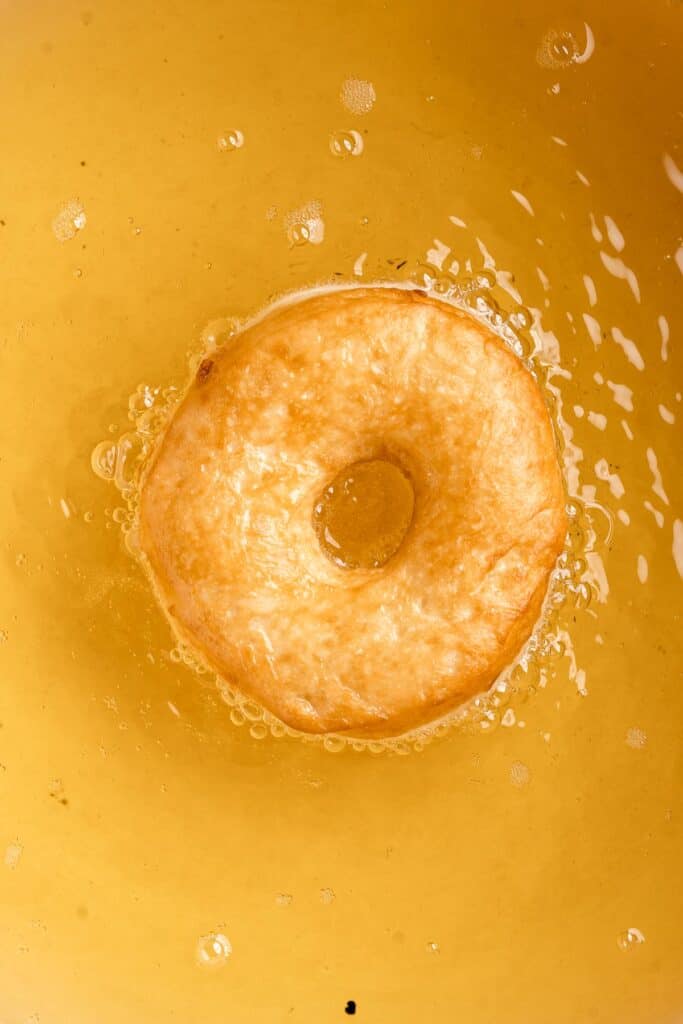
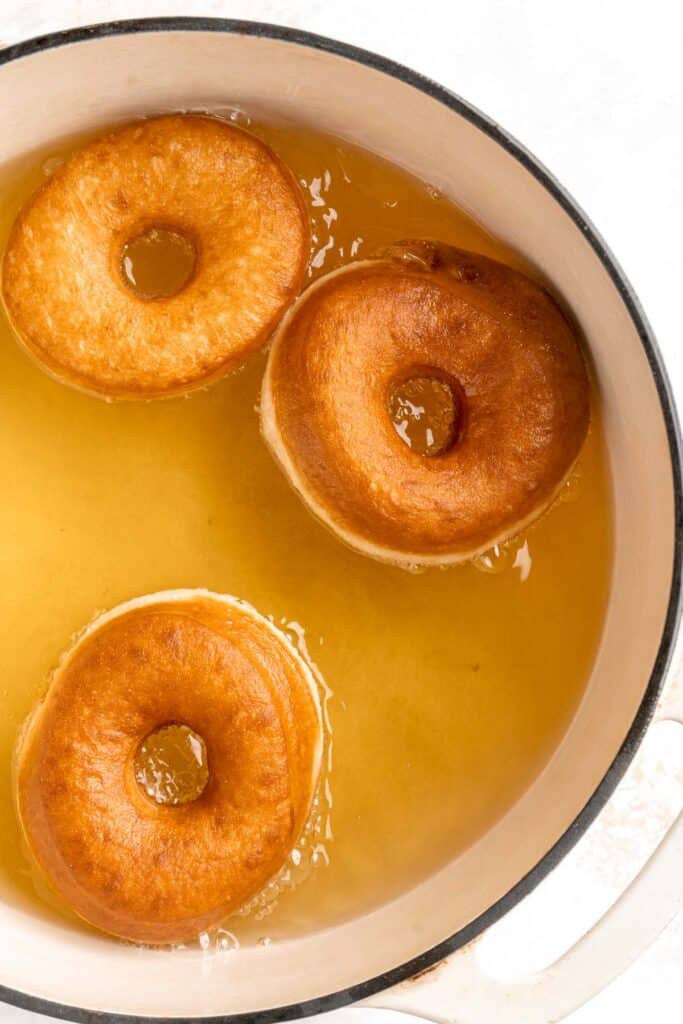
Finally, coat with glaze.
While the donuts are still warm, dunk each donut into the glaze, then place onto a wire rack for the excess to drip off. Allow the glaze to fully harden before enjoying.

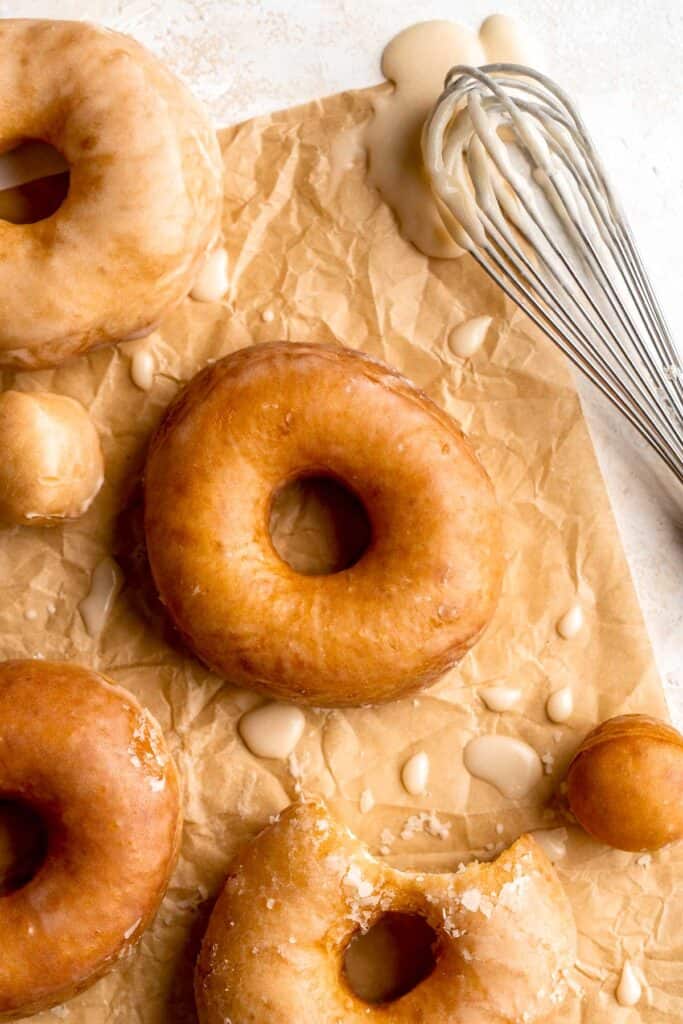

Recipe Variations
- Make doughnut holes. Instead of cutting out rounds, cut out lots of small donut holes for a bite-sized treat. Be sure to adjust the frying time to avoid overcooking them.
- Adjust the glaze. This creamy milk glaze is wonderful on a warm donut, but you can easily adjust it or replace it with something different. Try changing the extract, adding a little citrus zest, or shaking some cinnamon. You can also use a chocolate glaze with sprinkles for a fun throwback treat.
- Decorate them. Add some chopped nuts, coconut shreds, sprinkles, orange zest, crushed cookies, or other toppings to make this glazed donut recipe your own.
- Use bread flour. You absolutely do not have to use bread flour, but it can be a game-changer for making the perfect donuts, pizzas, and other breads. Look for regular white bread flour.
How to Serve
These homemade glazed donuts are a delicious treat on their own or pair them with some of my favorite drinks such as:

Recipe Tips and Tricks
- Let the dough rise fully. This is the secret to that perfect bite. Make sure you let the dough fully double, then punch it down, shape, and rise again. Underproofed donuts will be dense and chewy instead of soft and pillowy.
- Don't overfry. Watch the dough as it's frying. It should turn a beautiful golden brown shade when it's ready. If it starts to overcook, the donuts can take on a burnt taste.
- Glaze properly. Glazing donuts can be a messy business! Set a wire rack on your sheet pan to catch any drips. Use two forks or a slotted spoon to carefully lift the donuts in and out of the glaze. Be careful not to puncture the donuts or drop them!
- Work in batches. If you add too many donuts to the pan, the temperature will drop, and you'll get soggy, greasy donuts. Focus on deep-frying just 3-4 at a time.
Storing and Freezing Instructions
How to Store
Leftover donuts should be stored in an airtight container at room temperature for 1-2 days. You can also refrigerate them for longer, but they may begin to dry out.
How to Reheat
The best donuts are warm! Microwave your donut for 15-30 seconds to make it taste fresh from the fryer.
FAQ
Absolutely! As the glaze hardens, it'll hold any toppings in place, so it's best to decorate right after glazing. There are tons of options, too. Keep it simple with sprinkles, chopped nuts, citrus zest, or shredded coconut, or get a little more creative. Try crushing cookies, freeze-dried fruits, and other sweet snacks for a fun topping. You can also add dried, edible flowers like rose petals or lavender for a floral note. If you want to add a fun topping, consider adding an extract to support that flavor in the glaze. For example, you can add a little lemon juice or extract to the glaze and top with lemon zest. Sweet donuts are also wonderful with a sprinkle of flaky sea salt.
That really depends on the type of donut! Cake donuts and baked jelly donuts taste amazing fresh out of the oven, but frying produces a crust that adds a wonderful bite. Some varieties, like yeast donuts, are generally best when fried.
The best flour is the one you have on hand. You can very easily make wonderful, tender donuts with the all purpose flour already hanging out in your pantry. However, as a yeasted dough, bread flour can be a wonderful addition that will give you a softer dough with an impossibly tender texture. Just skip the cake flour. It doesn't have enough protein for yeasted doughs.
More Dessert Recipes
- 50 Easy Baking Recipes
- Baked Jelly Donuts with Strawberry Jam
- Moist Vanilla Cupcakes
- Madeleines
- Strawberry Muffins
- Classic Shortbread Cookies
Tried this recipe?
I'd love to hear what you think! Leave a comment and rating below to share your feedback. Your reviews help others discover this recipe and help me keep creating more free recipes for you. Snap a photo and tag me on social media @aheadofthyme too.

Spanakopita
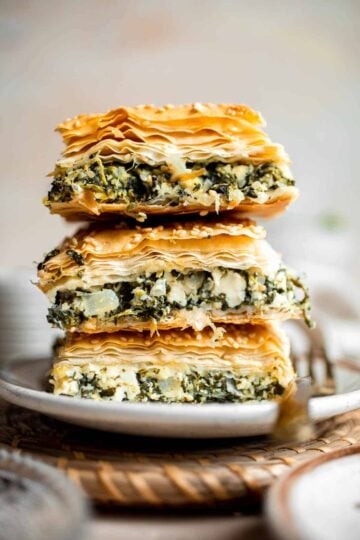
Spanakopita is a much beloved traditional Greek savory pie famous worldwide for its cheesy spinach filling nestled between layers of phyllo dough. Although it looks (and tastes) luxurious, it's also fortunately easy to make, especially with the help of some store-bought filo dough. Bake and serve warm from the oven for a deliciously savory appetizer or side dish for your next gathering.
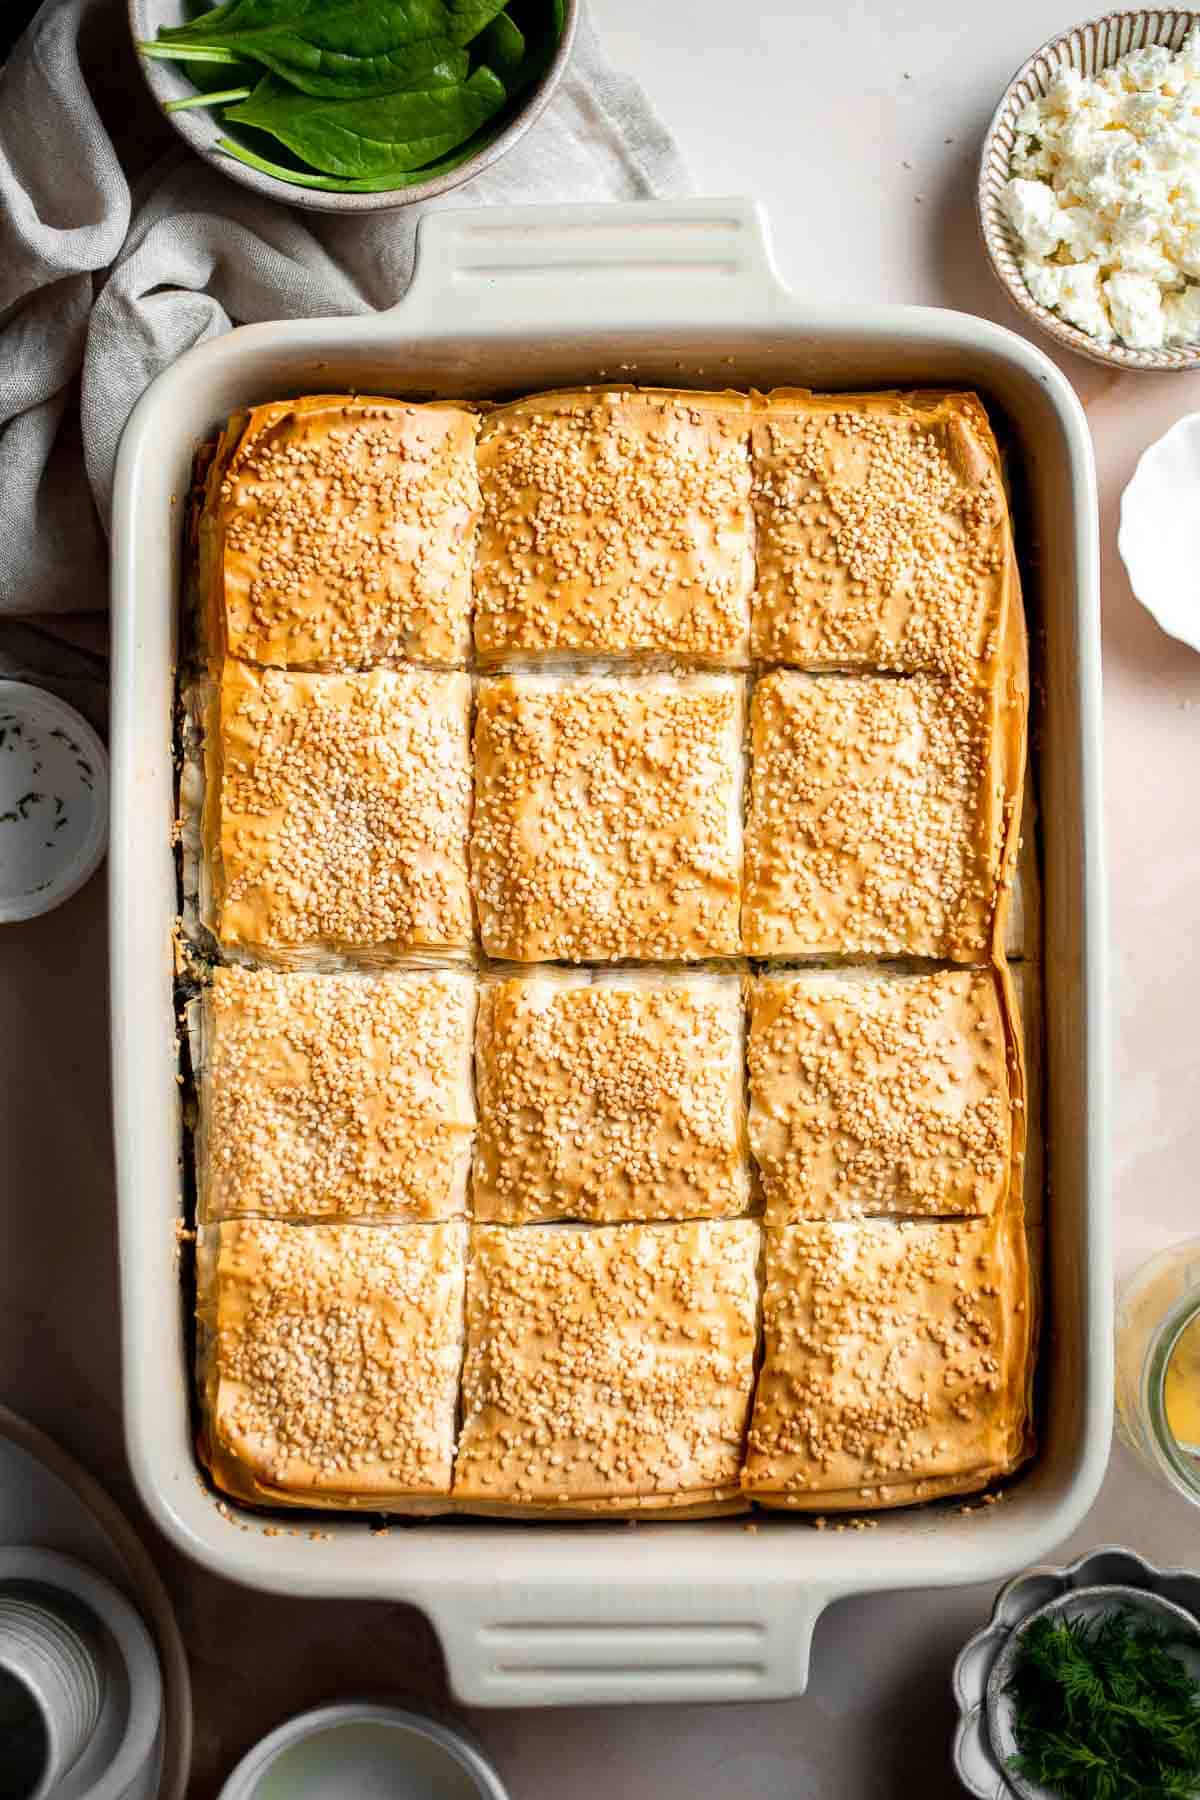
With spanakopita's incredibly long history, there are many variations on this classic dish with subtle changes in the greens, cheese, and more. This authentic spanakopita recipe uses the layering process, which adds sheets of crunchy phyllo pastry between the hearty spinach and cheese filling. Even if you aren't a spinach fan, the aromatics, herbs, and briny feta cheese will quickly convert you. Serve this traditional Greek spinach pie to celebrate special occasions, like Easter or the holidays, or use it to sneak some extra greens into your diet in the most delicious way.
Why You'll Love This Spanakopita
- Easier than you'd expect. If you've ever made lasagna before, this easy spanakopita recipe is similar but even easier than that! Mix the spinach, veggies, herbs, and cheese together, then layer the spinach mixture between sheets of phyllo dough. Cut into pieces, then bake and serve!
- Incredible flavor. Although spinach is at the heart of the rich filling, it takes on the flavors of the onion, garlic, fresh herbs, and feta cheese. When served warm, all those flavors meld together in a savory, cheesy note that's stood the test of time for a reason. It's such a warm, comforting dish!
- Perfect for entertaining. One batch of this simple recipe makes enough for 12 servings! Offer it at a dinner party with a nice Greek salad and fresh pita bread for a satisfying Mediterranean meal.

Ingredient Notes
To make this delicious spanakopita, you will need the following ingredients (full measurements in recipe card below):
- spinach - you can use either fresh or frozen chopped spinach. Thaw it and drain it very well, as the excess liquid can make your phyllo soggy.
- aromatics - diced onion and minced garlic will add deep flavor to the spinach filling.
- fresh herbs - finely chop fresh dill and parsley for traditional Greek flavor.
- feta cheese - crumble feta for a salty, creamy flavor that melts into the spinach.
- egg - this will bind the feta filling together as the spanakopita bakes.
- salt & ground black pepper
- phyllo dough sheets - be sure to thaw the phyllo dough before attempting to assemble this dish.
- melted butter & olive oil - brush the melted butter and oil mixture over each sheet of phyllo dough for a crispy, crunchy texture and flaky layers.
- white sesame seeds - sprinkle sesame seeds on top of the spanakopita right before baking.
You will also need measuring cups and spoons, a 9x13-inch casserole dish, mixing bowl, large pot, whisk, pastry brush, and a sharp knife.
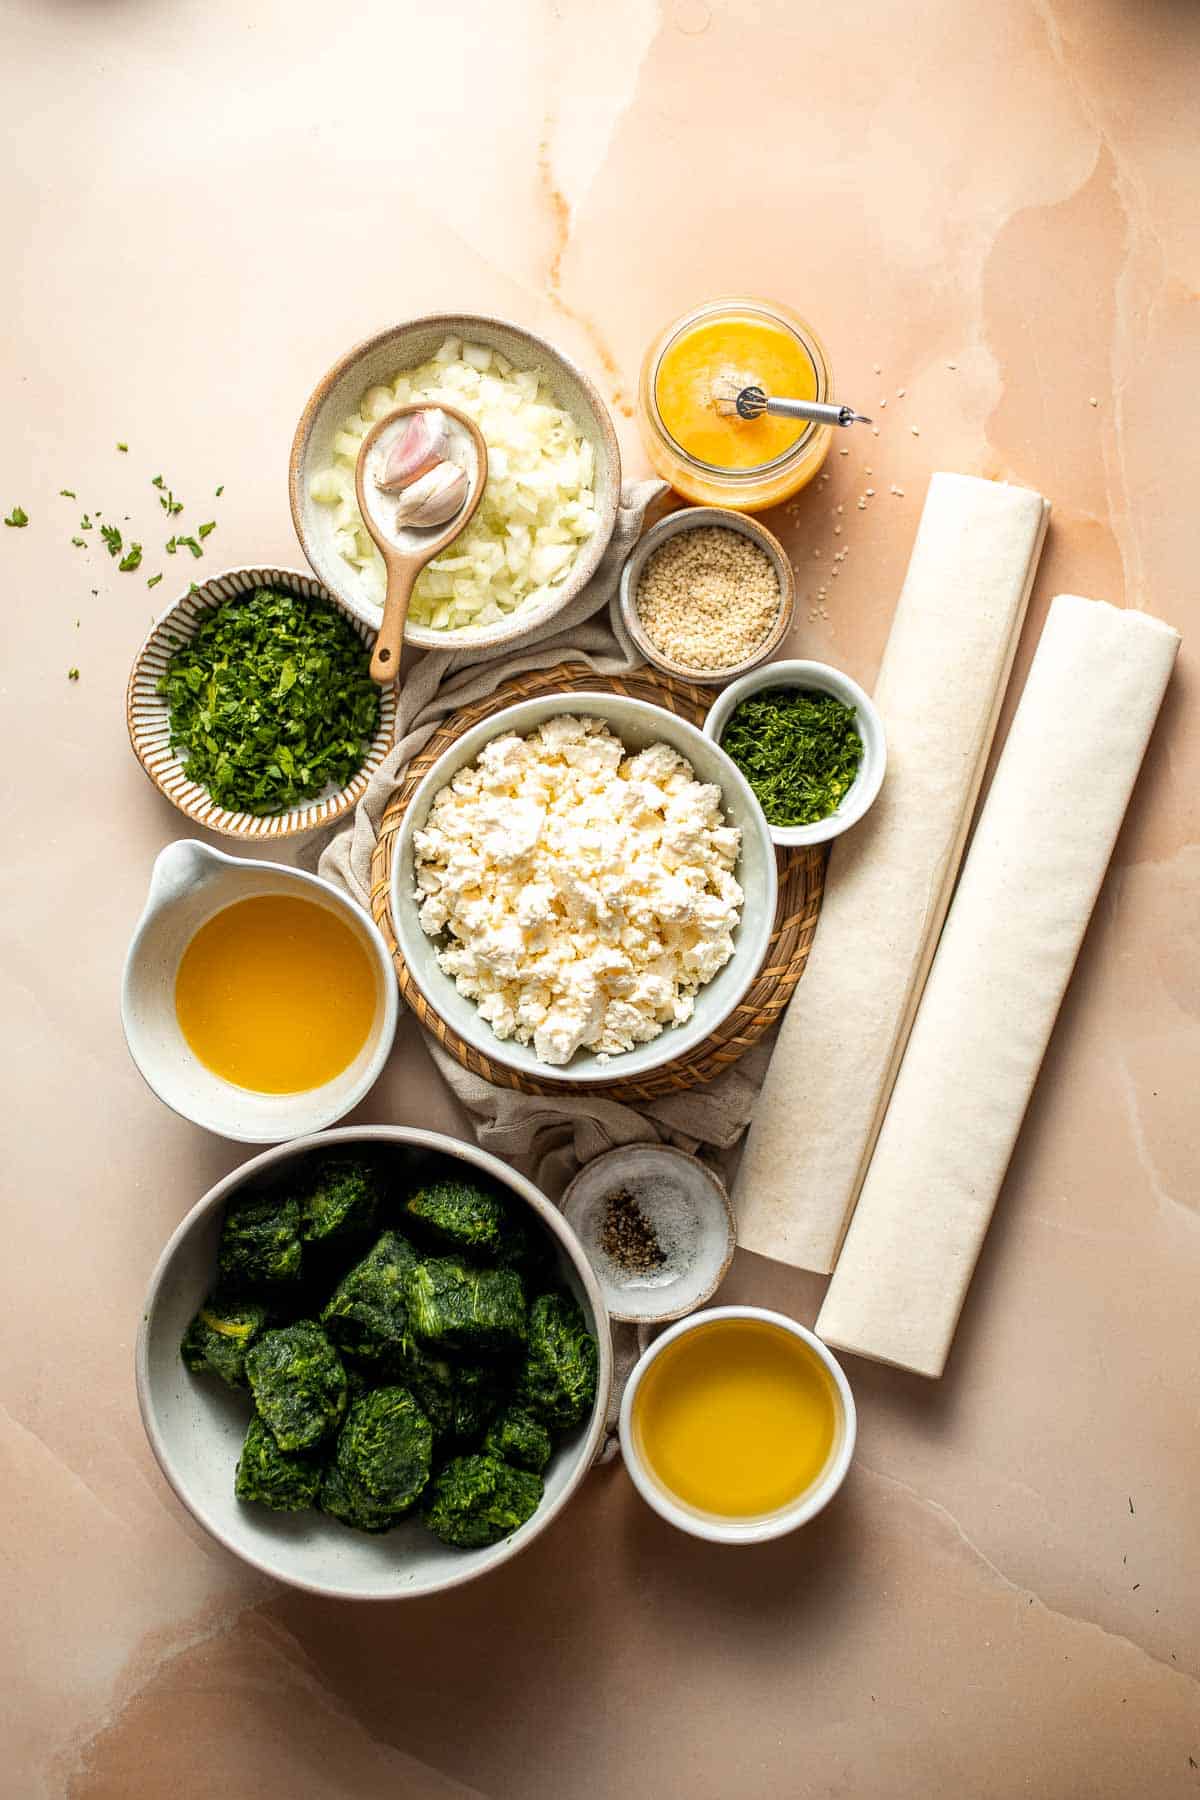
How to Make the Best Spanakopita
- Make the spinach filling. In a large mixing bowl, combine spinach, onion, garlic, parsley, dill, feta cheese, eggs, salt, and pepper. Mix well until evenly combined. (If you use fresh spinach, cook them in a large pot of boiling water for 30 seconds until wilted. Rinse the spinach under running cold water until cool to handle. Drain it in a colander and squeeze out excess water).
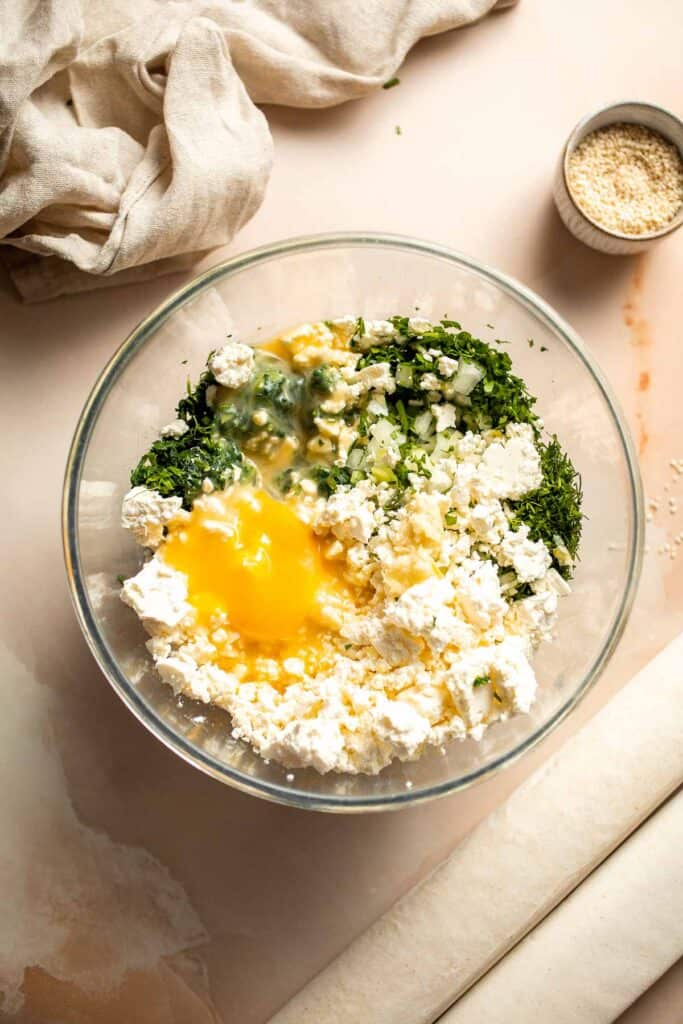
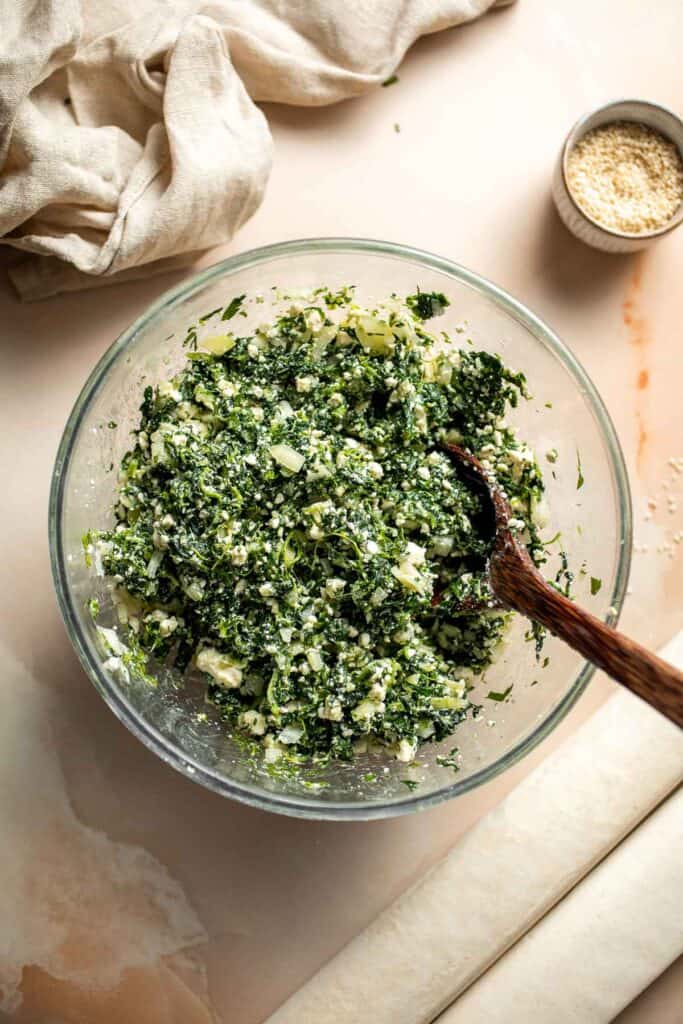
- Assemble the bottom layer. In a small mixing bowl, whisk together melted butter and olive oil. Lightly grease a 9x13-inch casserole dish. Place 2-3 sheets of phyllo dough at a time on the prepared greased pan and tuck in any excess dough. Generously apply the butter mixture over the first layer of dough until evenly covered. Place another 2-3 sheets of phyllo dough and spread the butter mixture over evenly. Repeat until half of the phyllo dough and butter mixture is used. This creates the laminated puff pastry dough, which is made up of many layers of alternating dough and butter mixture.
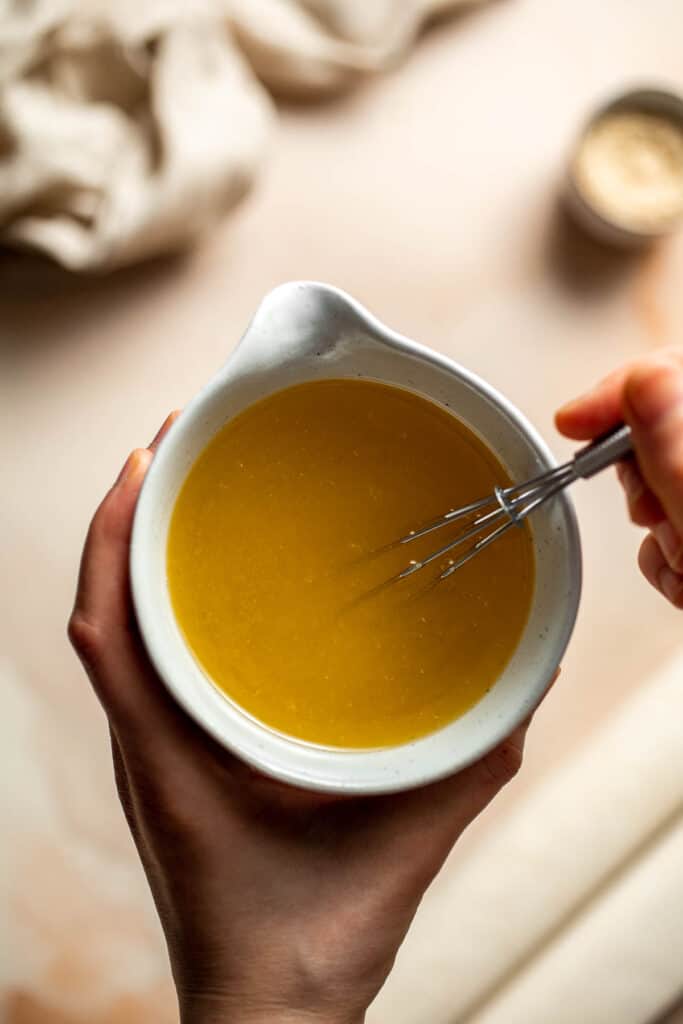
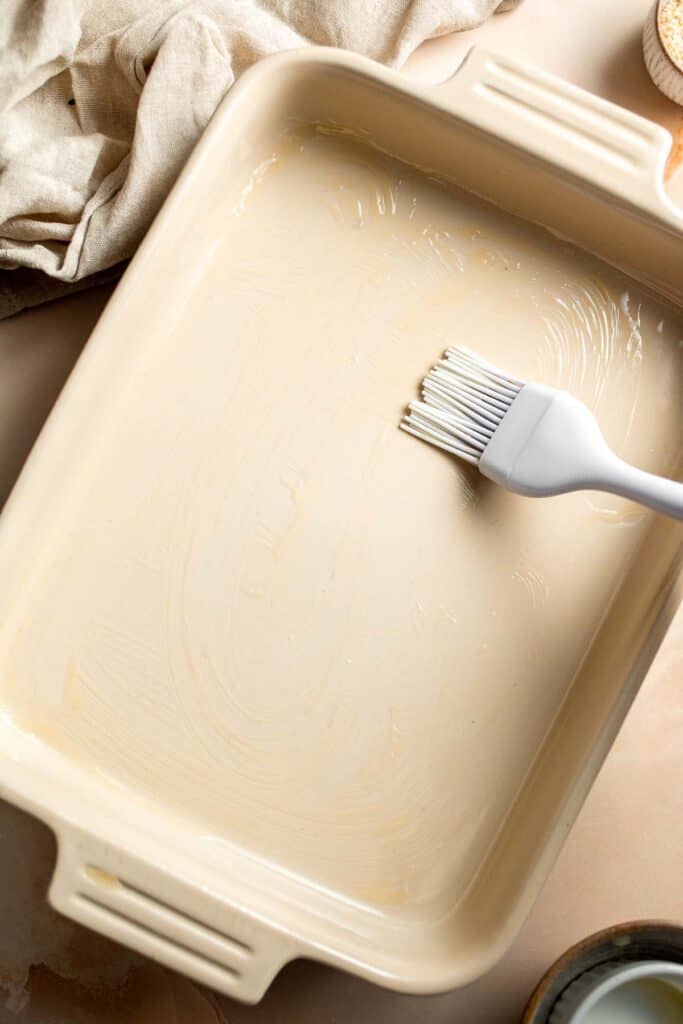
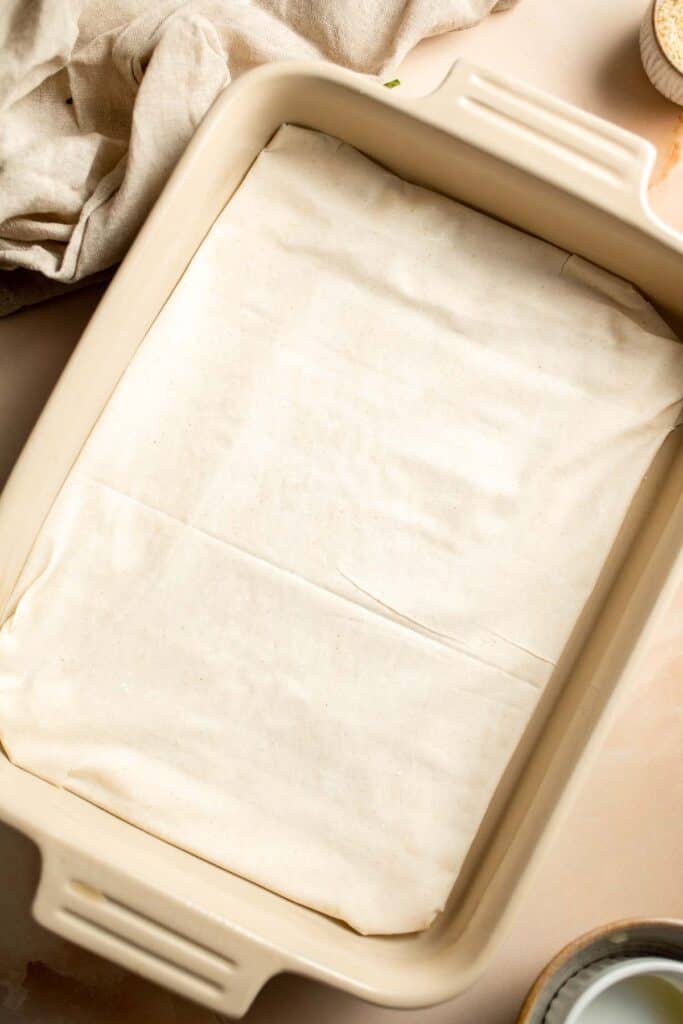
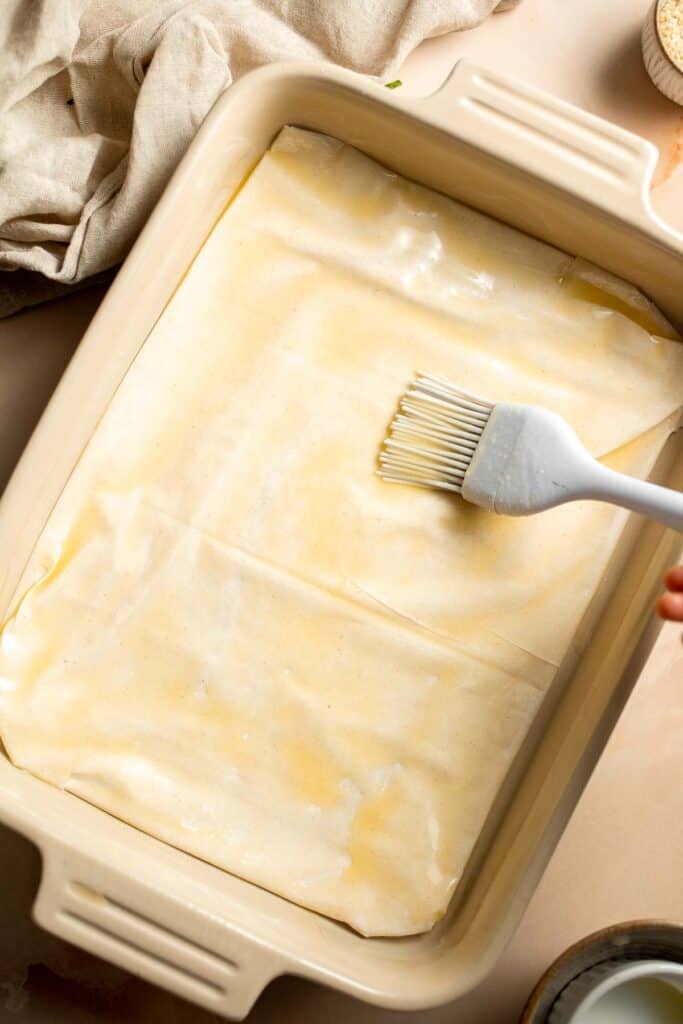
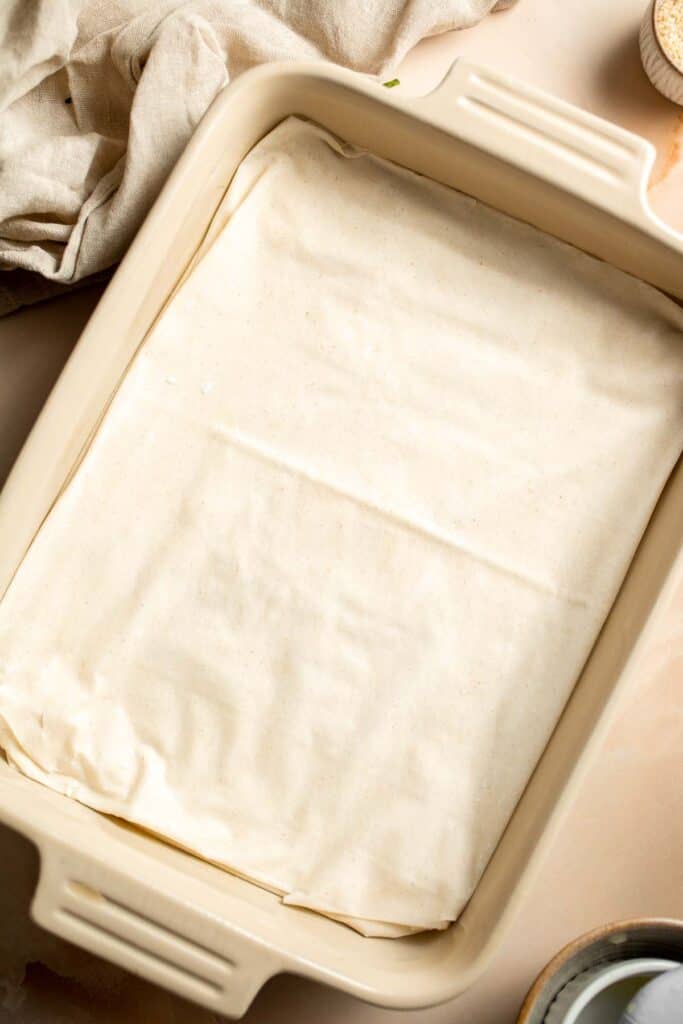
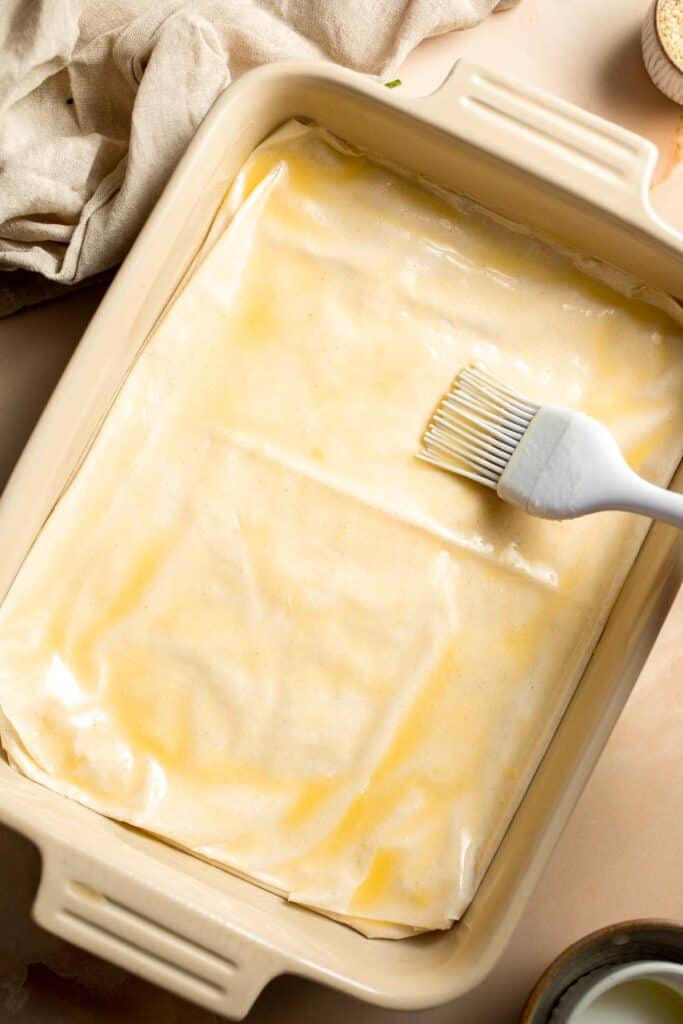
- Add spinach filling. Add and evenly spread the spinach filling over the phyllo sheets.
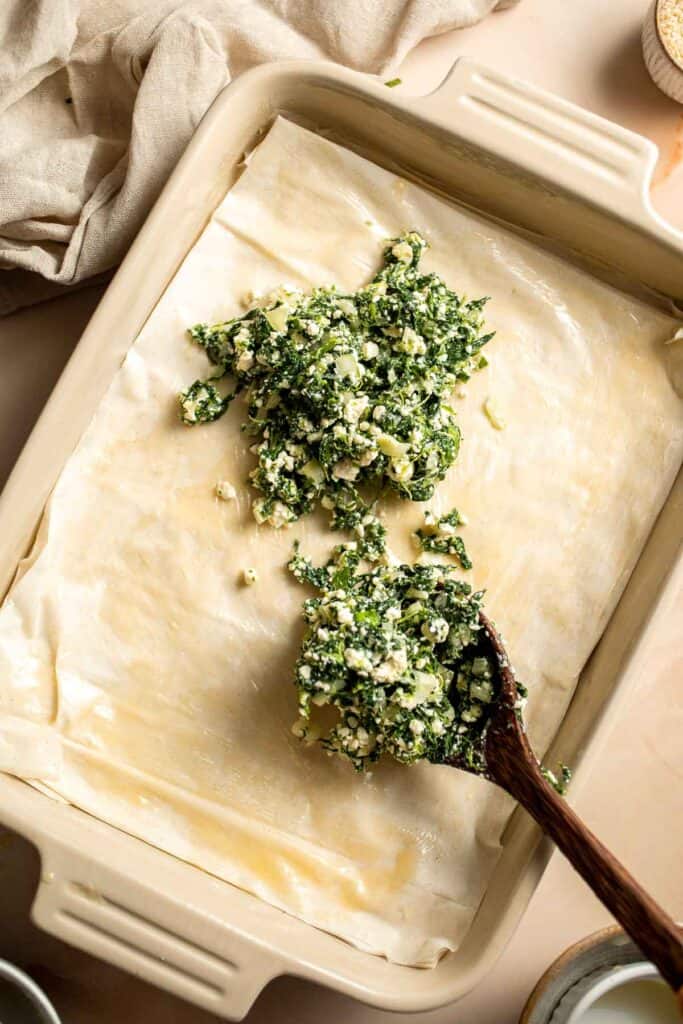
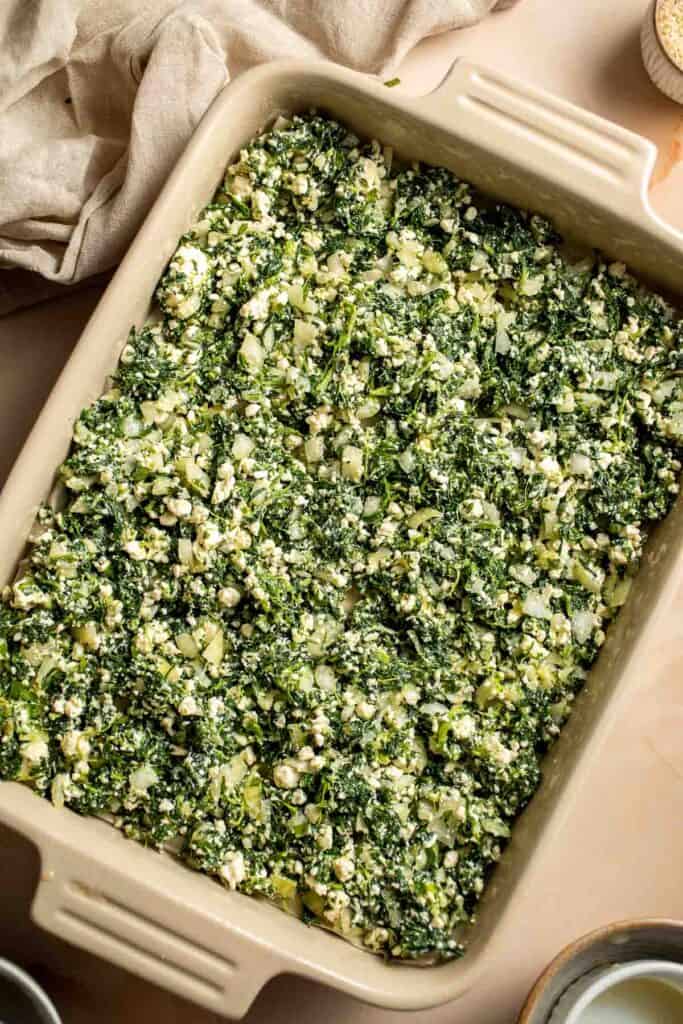
- Assemble top layer. Repeat the same steps as with the bottom layer with the remaining phyllo dough and butter mixture.
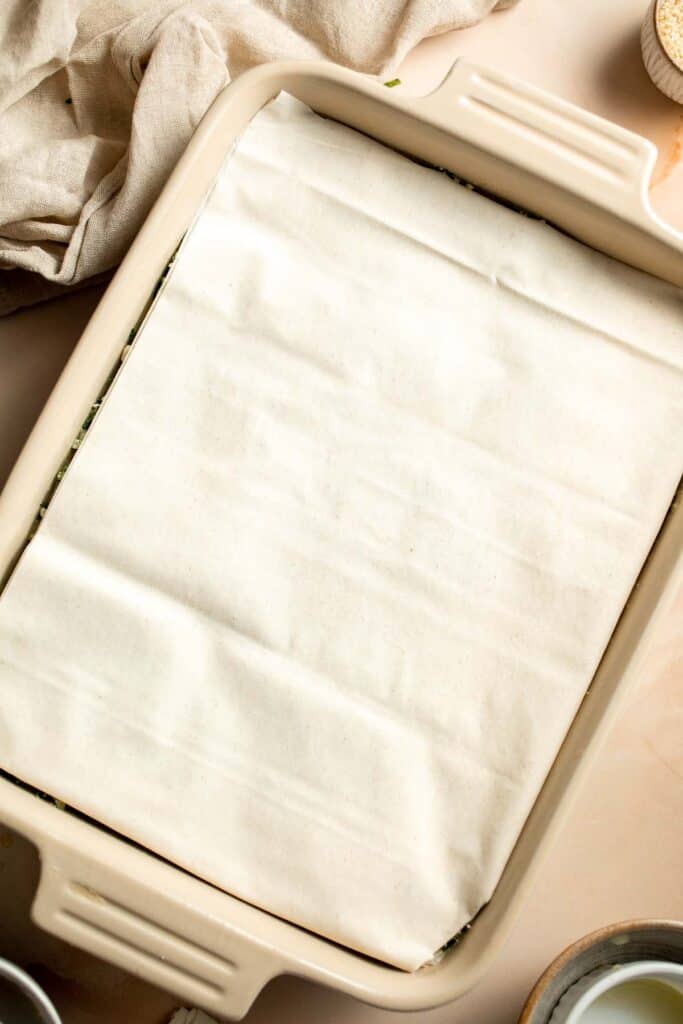
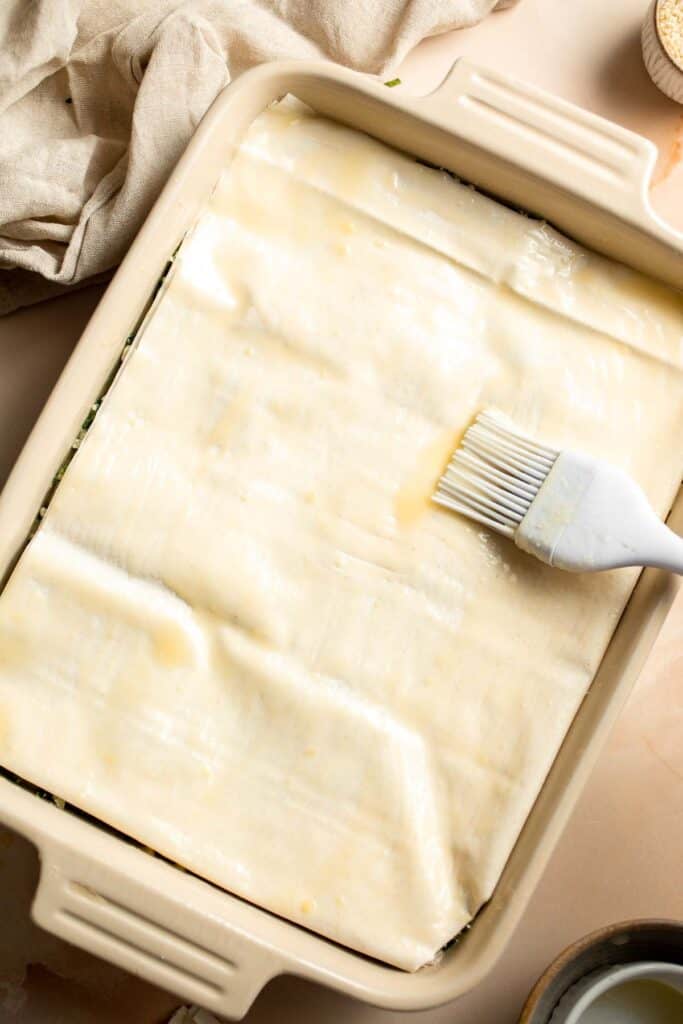
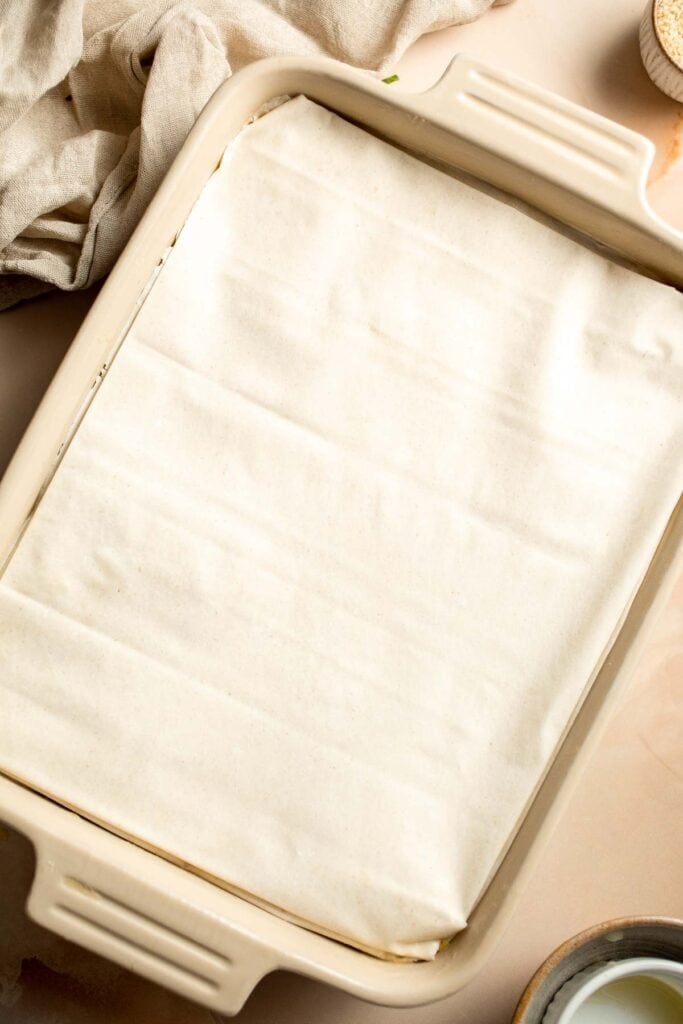
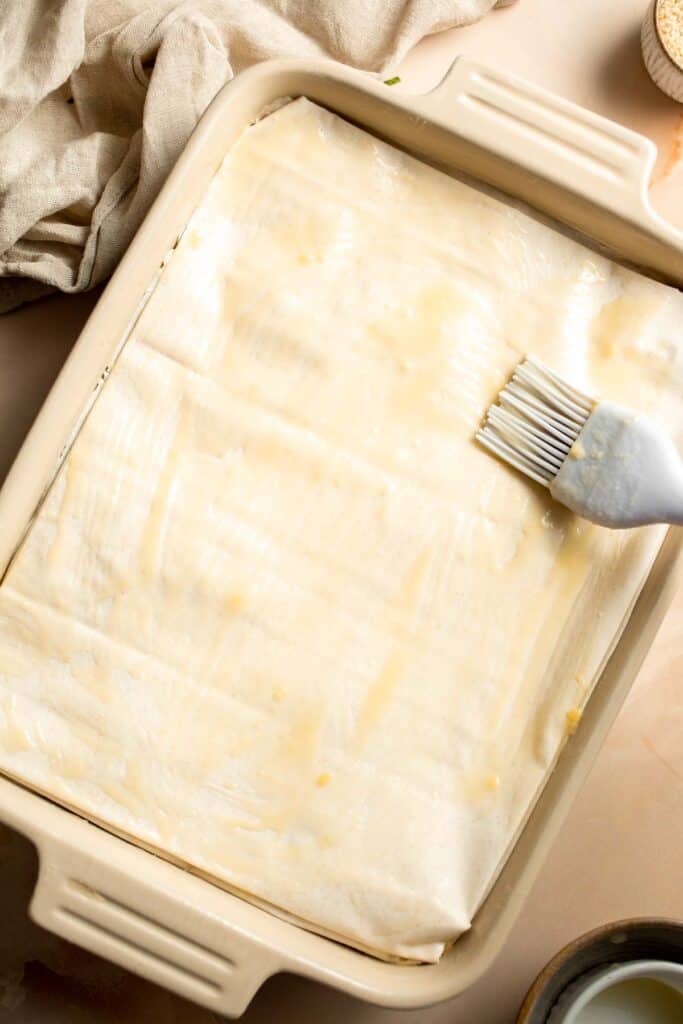
- Cut. Use a sharp knife to cut the phyllo pie into 12 even pieces. Sprinkle with sesame seeds.
- Bake. Bake in a 350F preheated oven until golden brown, about 45 minutes. Let cool for 5-10 minutes before serving.
Recipe Variations
- Adjust the greens. Traditionally, the ingredients for spanakopita vary across Greece. It's best to always use some spinach, but you can also add chard, kale, sorrel, or other wild or foraged greens for an authentic flavor.
- Add more herbs & mix-ins. It's common to use parsley and dill, but consider adding fresh mint as well. You can also add a little lemon zest for a bright, lemony flavor. Green onions are a great alternative to regular onions, too.
- Slice into triangles. If you want to serve this spanakopita as an appetizer, slice it into small triangles similar to baklava.
- Try another cheese. Salty, briny feta cheese is perfect in this classic Greek dish, but if you're lucky enough to find kefalotiri, it's a fantastic and traditional alternative.
How to Serve
This spanakopita is delicious served on its own as an appetizer or vegetarian main course, orp paired on the side of some of my favorite Greek recipes including:
- Greek Meatballs
- Baked Greek Chicken Breast with Souvlaki Marinade
- Chickpea Greek Salad
- Greek Salmon
- Souvlaki Beef Shish Kebabs
- Mediterranean Chicken Patties
Serve up a Mediterranean feast with these 30 Best Greek Recipes.
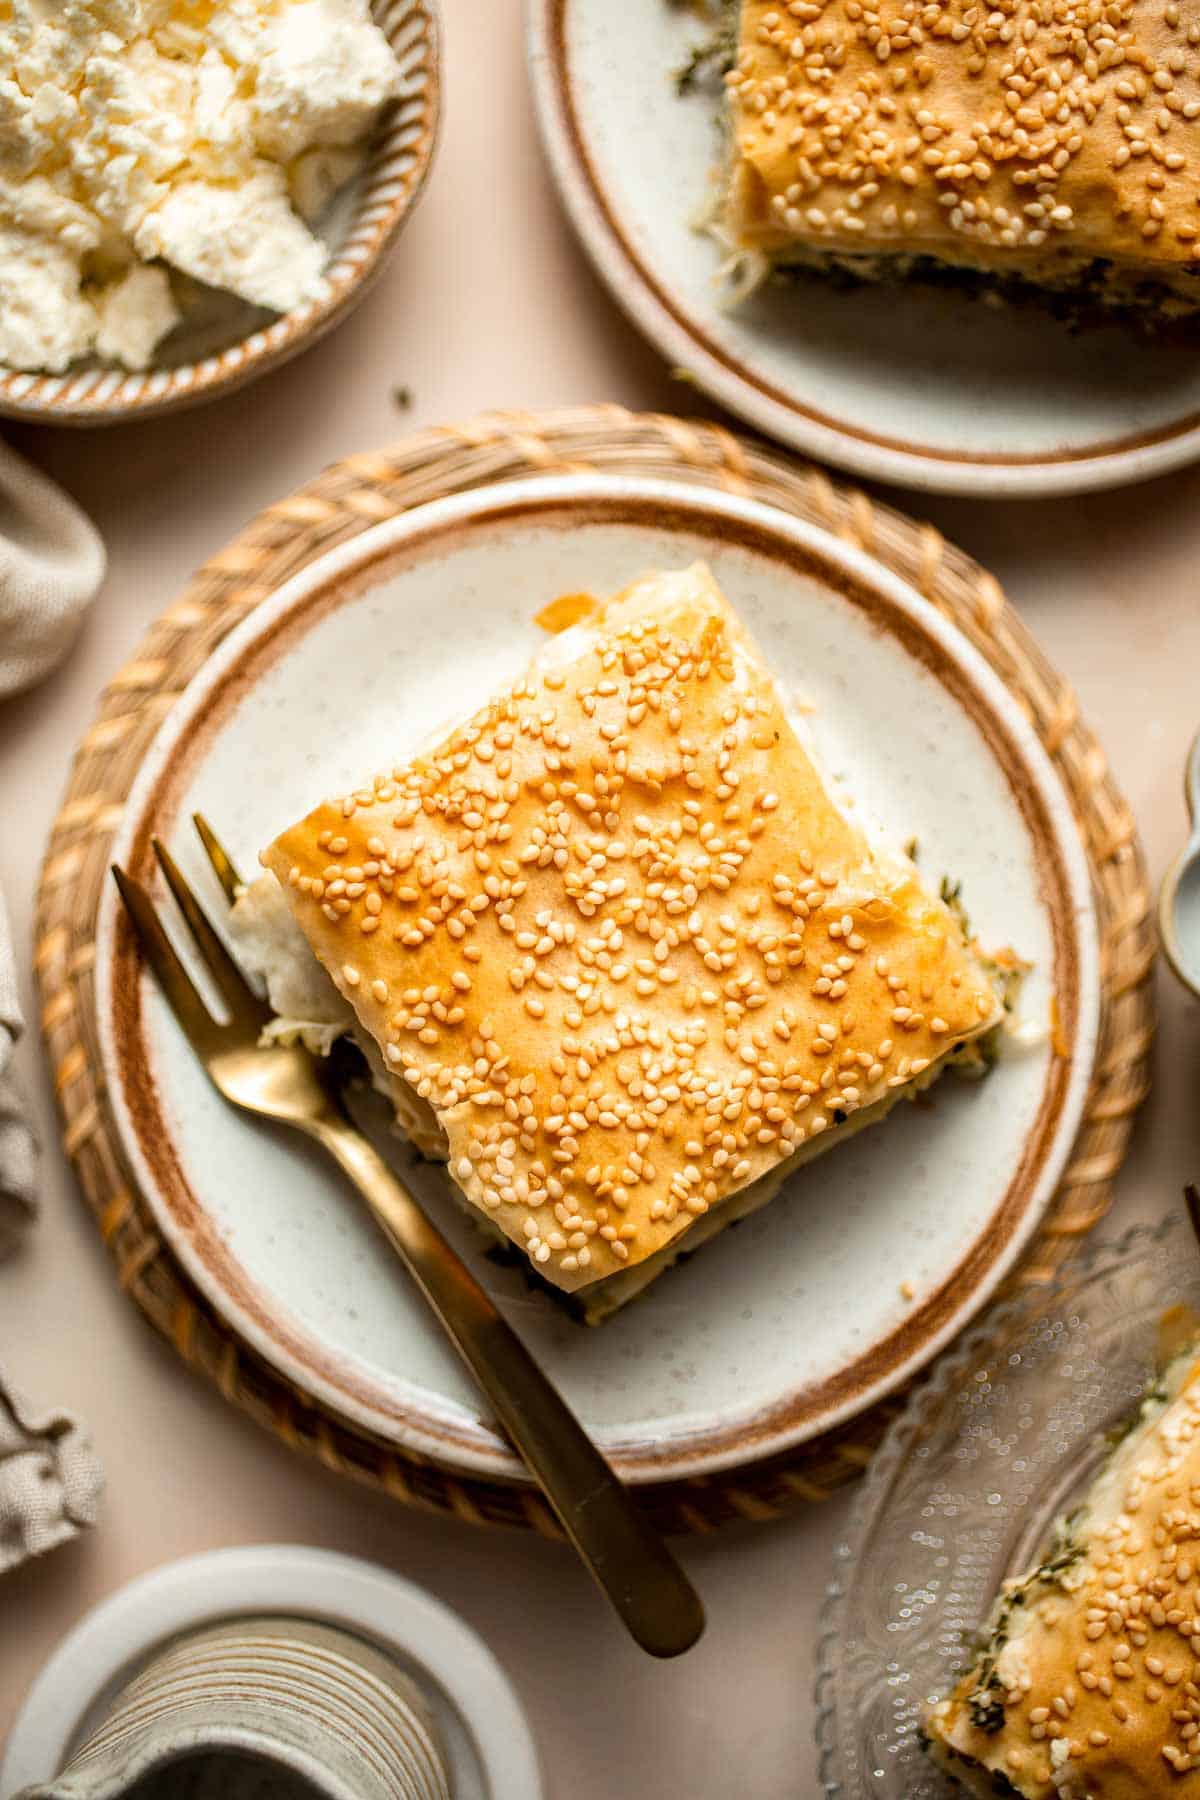
Recipe Tips and Tricks
- Strain the spinach very well. It's very important to minimize the excess liquid in the spanakopita, especially if you want crispy, flaky phyllo dough layers. Wring out the spinach very well.
- Brush the phyllo. On its own, phyllo can be dry and crackly. Add butter or oil to get those beautiful laminated layers that crunch in your mouth. Don't skip the step or skimp on the oil!
- Adjust your schedule. Although this recipe doesn't take that much time, this is a great tip when planning for a dinner party or event. Assemble the entire recipe the day before, store it unbaked in the fridge, then bake it right before your event.
Storing and Freezing Instructions
How to Store
After baking, let the spanakopita cool to room temperature within 2 hours, then wrap the baking dish with plastic wrap or store it in an airtight container in the fridge for 2-3 days. Make sure it is cooled to avoid condensation.
How to Reheat
Spanakopita is best served warm or hot. You can quickly microwave a serving for about 2-3 minutes or bake it in the oven for a few minutes at 350 degrees F.
How to Freeze
You can freeze either baked or unbaked spanakopita! If baked, wrap the cool leftovers in plastic wrap or foil and stash them in a freezer bag for 2-3 months. Thaw before reheating If unbaked, wrap the entire baking dish several times with plastic wrap or foil and freeze for 1-2 months. Thaw overnight in the fridge and then bake in a preheated oven like normal.
FAQ
The cheesy, herby flavors in spanakopita really shine when served warm or hot. We recommend serving your spanakopita pie straight from the oven or freshly reheated.
It's very important to make sure your spinach feta cheese filling isn't too wet. Remove as much excess moisture from the spinach as possible, or it will cause the phyllo pastry dough to become soggy in the oven.
Like any cooked food, spanakopita can sit at room temperature for a maximum of 2 hours. After that, it should be stored in an airtight container in the fridge for up to 3 days.
More Spinach Recipes
- Sautéed Spinach
- Vegetarian Lasagna with Spinach
- Spinach and Pea Soup
- Spinach Cheese Rolls
- Creamed Spinach
- Baked Spinach Dip
Tried this recipe?
I'd love to hear what you think! Leave a comment and rating below to share your feedback. Your reviews help others discover this recipe and help me keep creating more free recipes for you. Snap a photo and tag me on social media @aheadofthyme too.
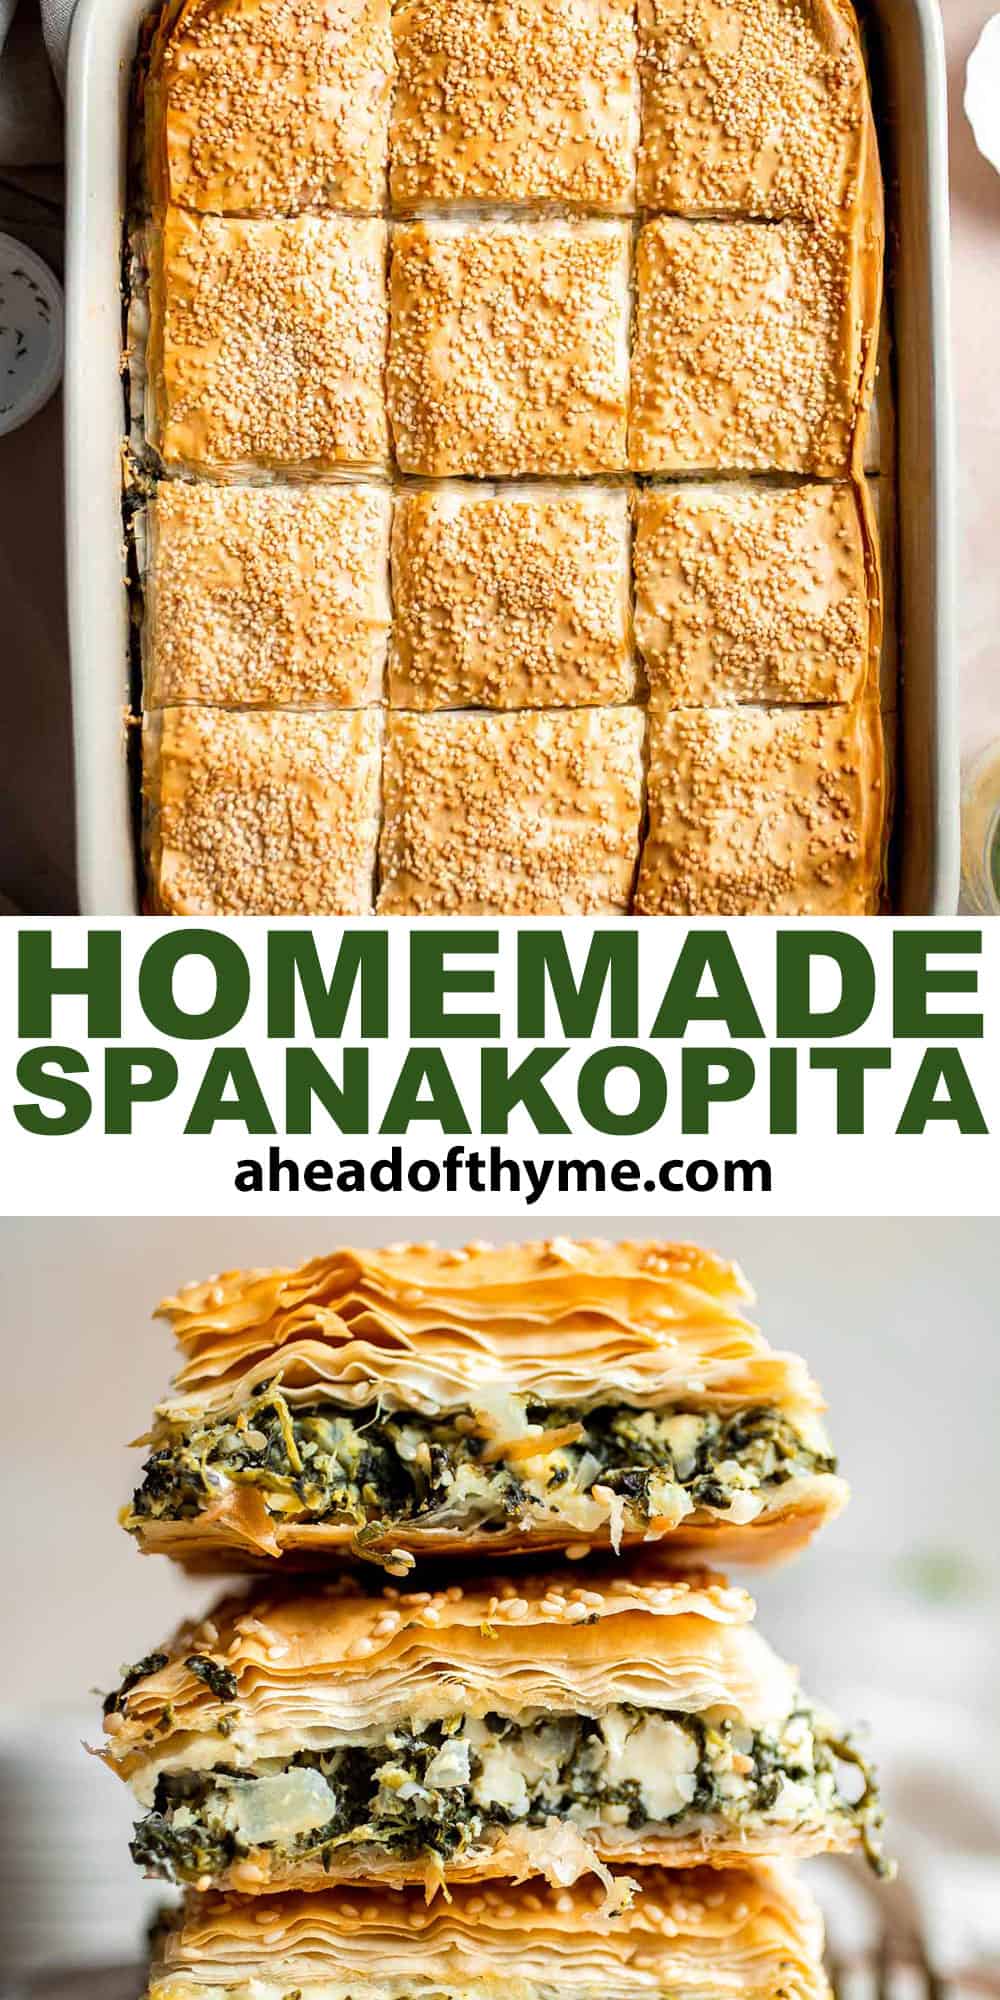
Peanut Butter Banana Toast
Peanut Butter Banana Toast is an incredibly simple yet healthy breakfast that's ready in a hurry. Peanut butter and banana are a classic flavor combo, and this version adds granola, honey, and chia seeds for a little sweetness and crunch. It's one of my favorite ways to start the day without turning the stove on at all!
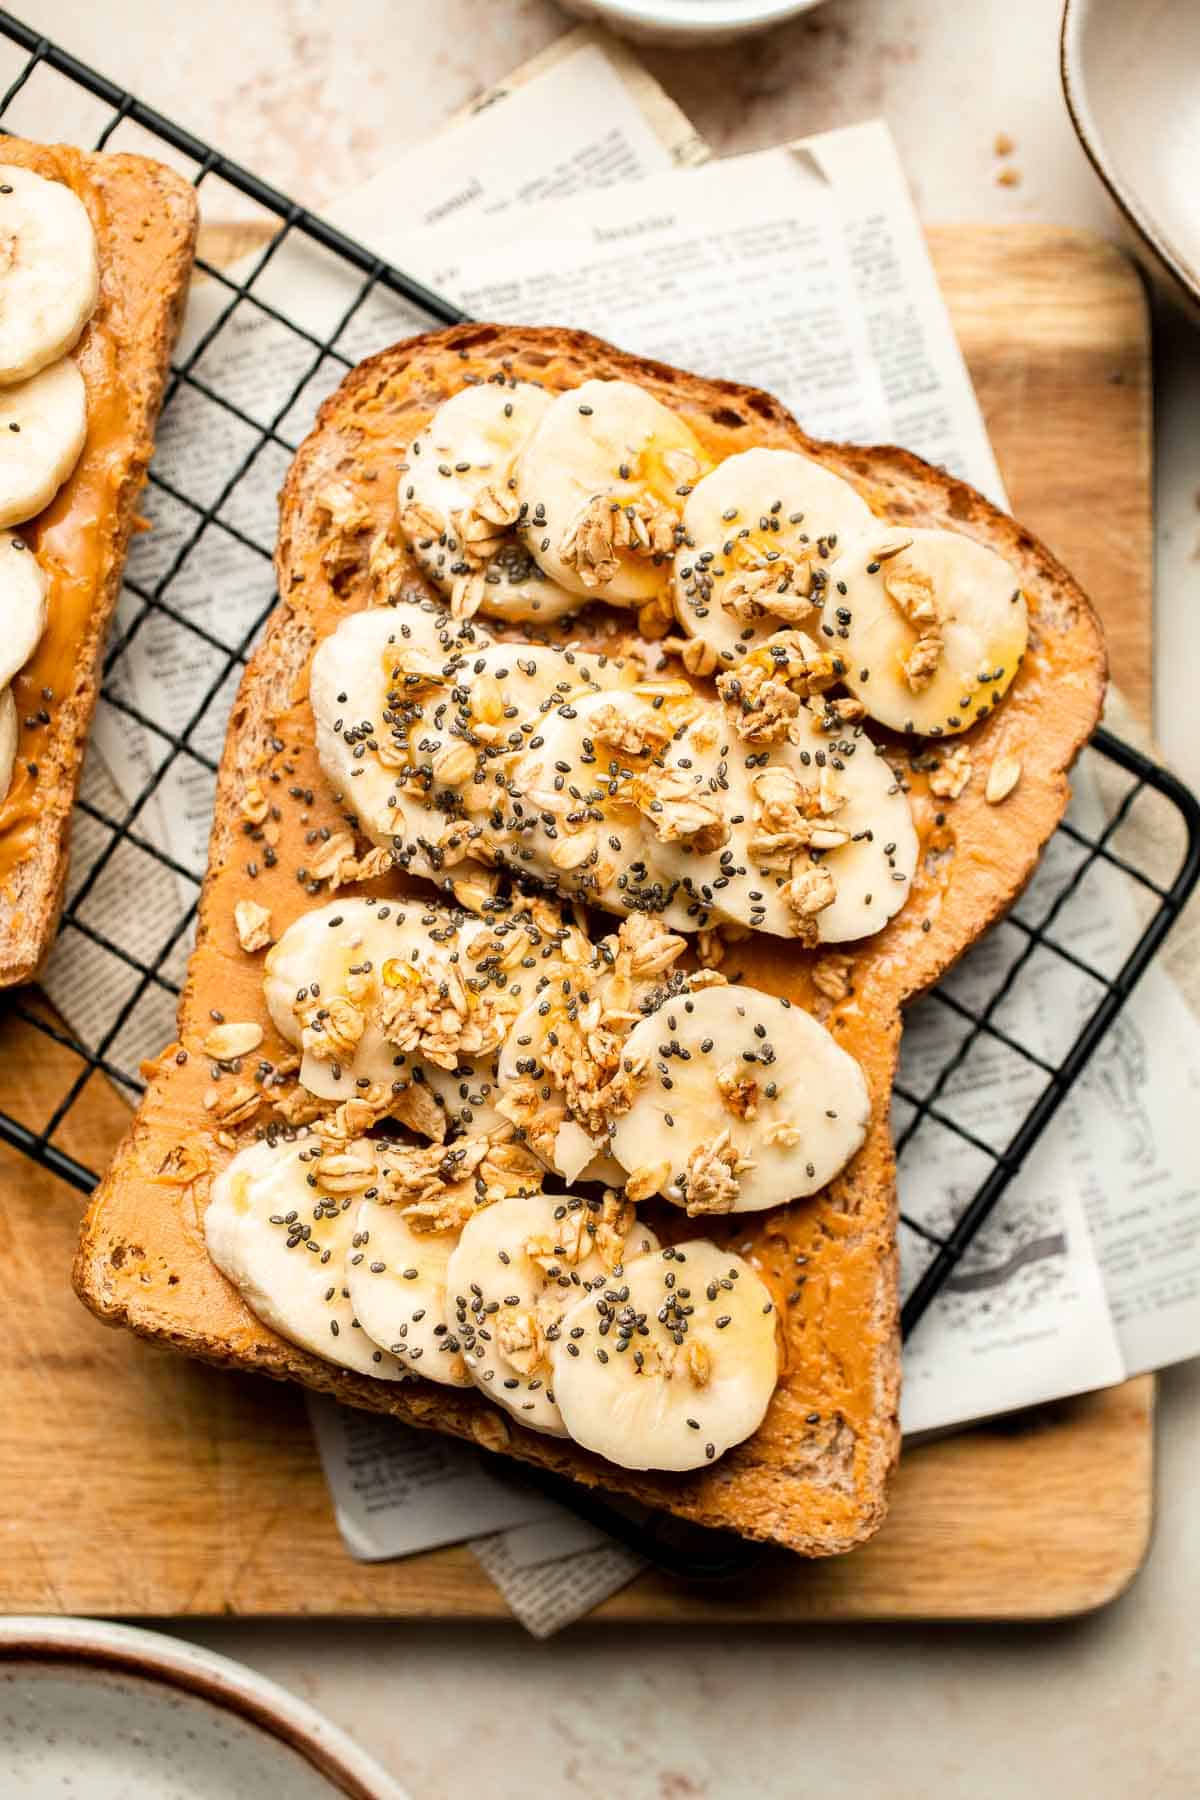
If you need a quick, satisfying breakfast that will actually tide you over, this is it! Take your average weekday toast up a notch and create this protein-packed meal by pairing regular toast with bananas and your favorite nut butter. The flavors are a match made in heaven. The sweet banana mellows out the peanut butter, the honey adds sweetness, and the crunch of granola and nutrient-dense chia seeds keep every bite interesting - and will keep you full until lunch time. It's also incredibly fast and easy to prepare, making healthy eating much more convenient. You just need a few minutes to toast the bread, then add your toppings for a quick breakfast or delicious treat any time of the day.
Why You'll Love This Peanut Butter Banana Toast
- Extremely easy to make. Just grab a slice of toast, brush on the nut butter, add the bananas, and then garnish with your favorite toppings on top of the sliced banana. You can enjoy a healthy, homemade breakfast with just a few moments of effort that's tasty enough to enjoy on a daily basis.
- Delicious and filling. The fiber from the bread, peanut butter, banana, and chia seeds will stick to your ribs, and the protein from the peanut butter will give you the energy to start your day off right. This is also a delicious way to refuel any time you need a little extra energy. It'd be a great post-workout snack!
- Plant based breakfast. If you're trying to eat plant-based and ditch the eggs and bacon, this banana peanut butter toast is a perfect option with lots of health benefits. It's full of healthy fats, fiber, and plant-based protein to fuel your day. It's a fun alternative to any other kind of toast, like avocado toast, yet it is still just as convenient!
- Versatile. This recipe is kind of my new go to for breakfast toast because it is so versatile. The possibilities for toppings are endless. You can pair this with all different types of nut butters, sliced fruit, and granola. And if you are having friends over for brunch, you no longer have to stress over the menu. Just set up a toast bar with various nut butters, sliced fruit, granola, and seeds. Just watch how quickly the food disappears!
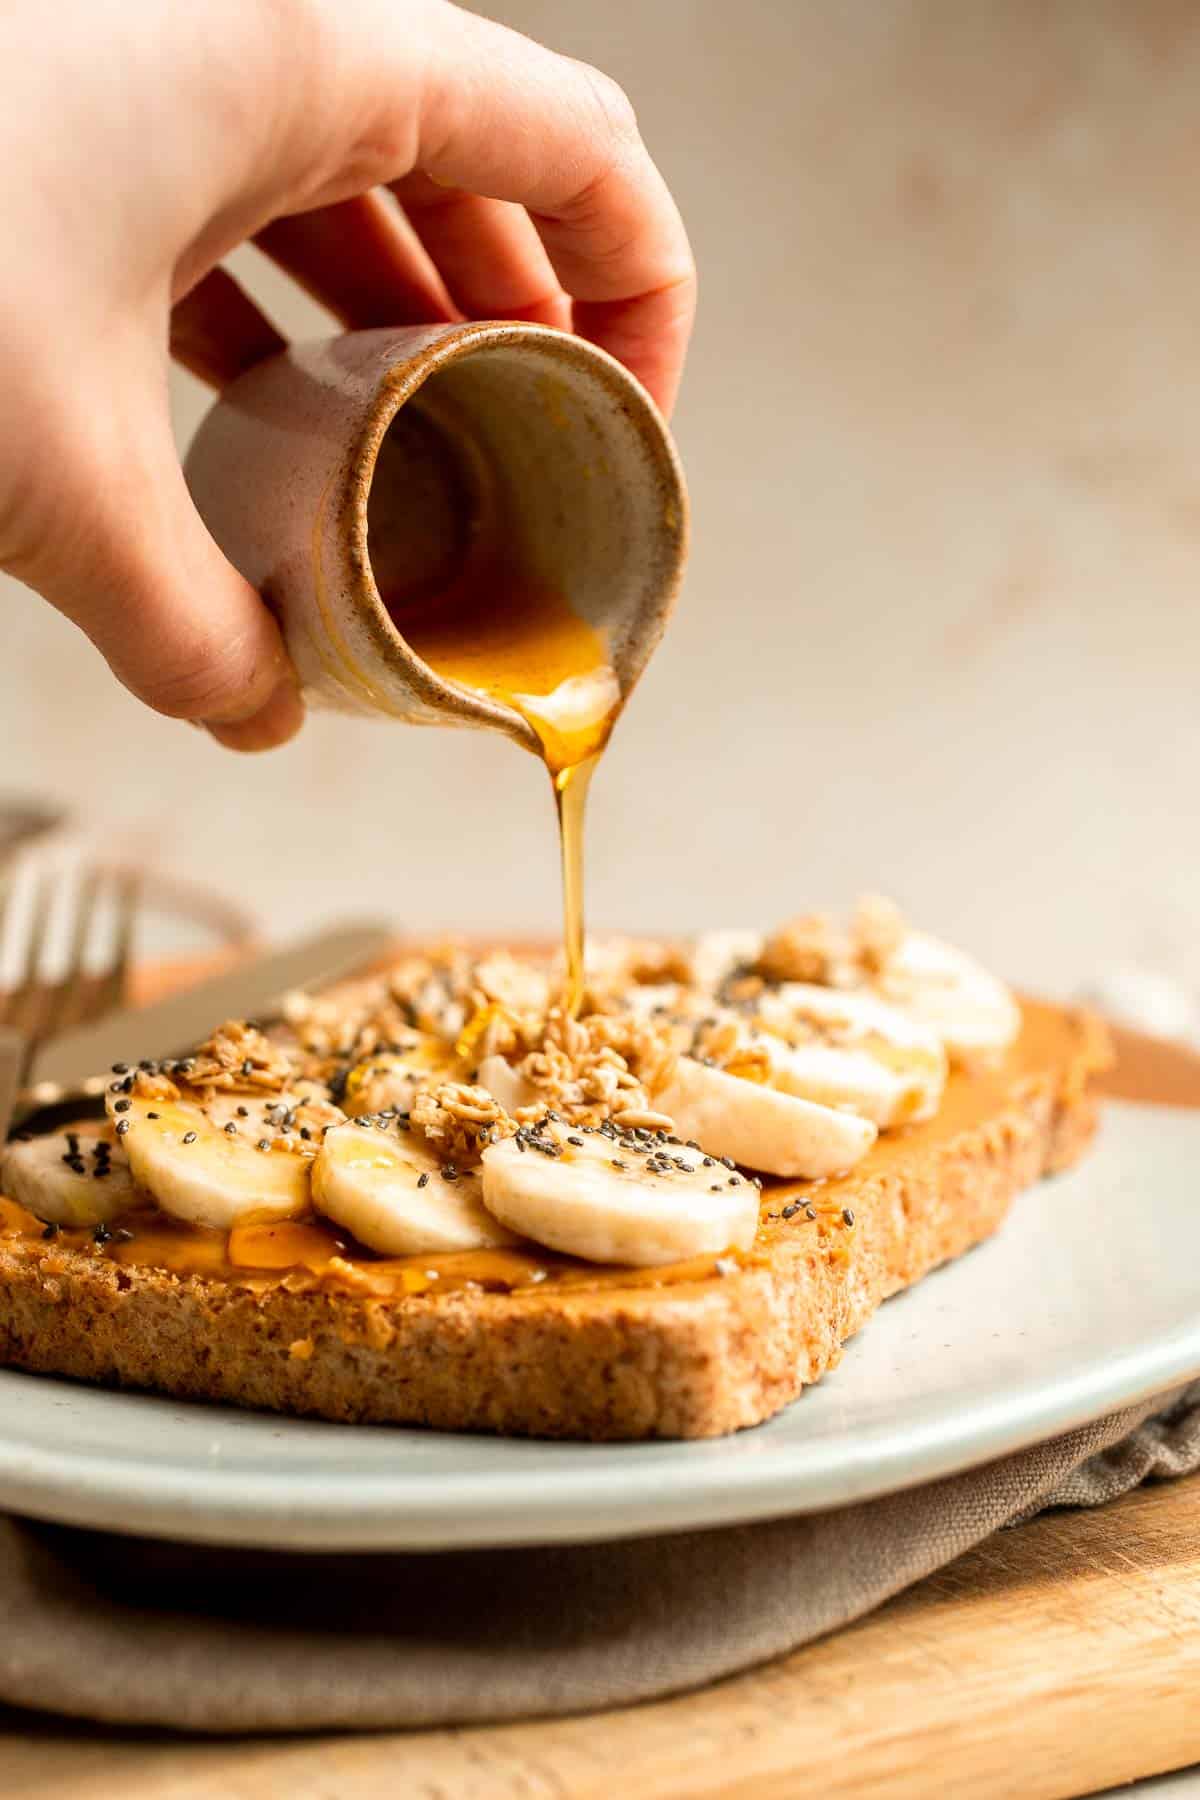
Ingredient Notes
To make this delicious peanut butter banana toast, you will need the following ingredients (full measurements in recipe card below):
- toast bread - choose any kind of toast bread that you like, whether it's whole grain bread for a little extra fiber and flavor, sourdough, or white bread.
- peanut butter - choose your favorite natural creamy peanut butter. You can also substitute for other nut butters such as almond butter.
- bananas - add fresh ripe banana slices on top of the nut butter layer.
- granola - feel free to use storebought or homemade granola.
- honey - a little drizzle of honey will bring this banana toast recipe together. Maple syrup is a great plant-based option.
- chia seeds - these add a nice crunch and extra fiber.
You will also need measuring spoons, a toaster or oven, a butter knife, and a cooling rack.
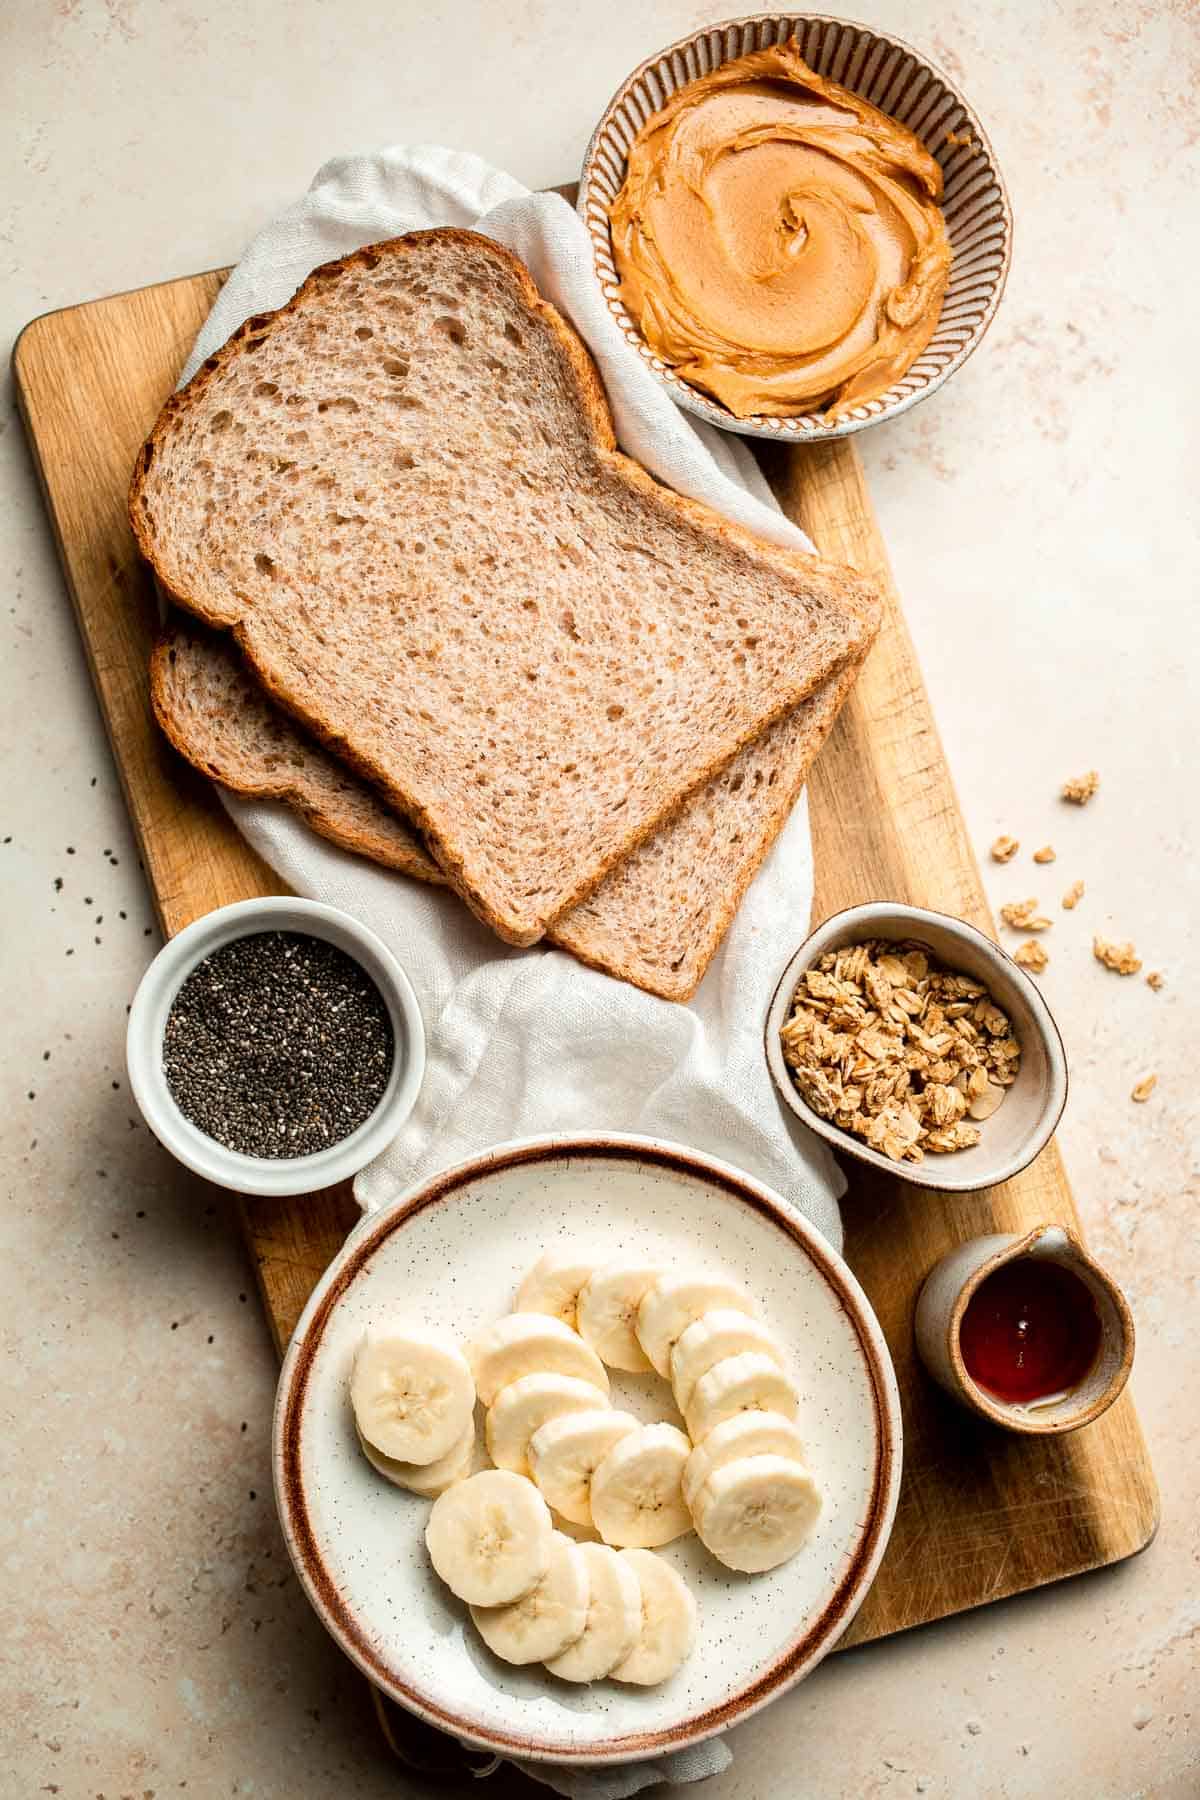
How to Make the Best Peanut Butter Banana Toast
- Toast. Toast the slice of bread in a toaster or oven until golden brown, then immediately place them on a cooling rack. (Note: If you put the toast straight on a plate, the bottom will steam and it will become soggy).
- Spread peanut butter. Once slightly cooled, spread the nut butter evenly across bread.
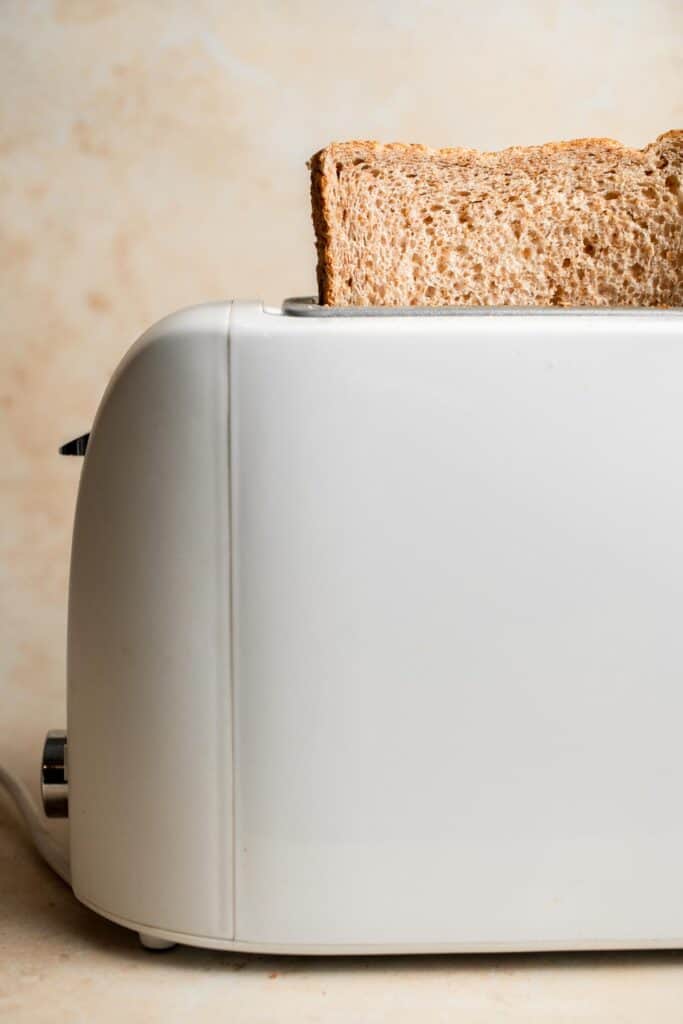
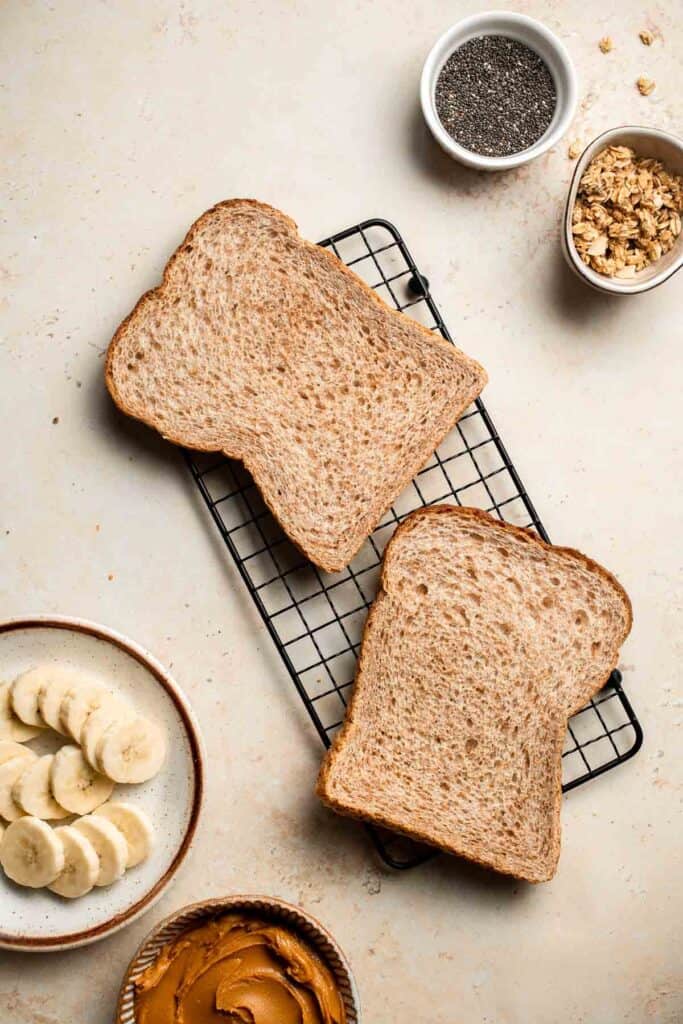
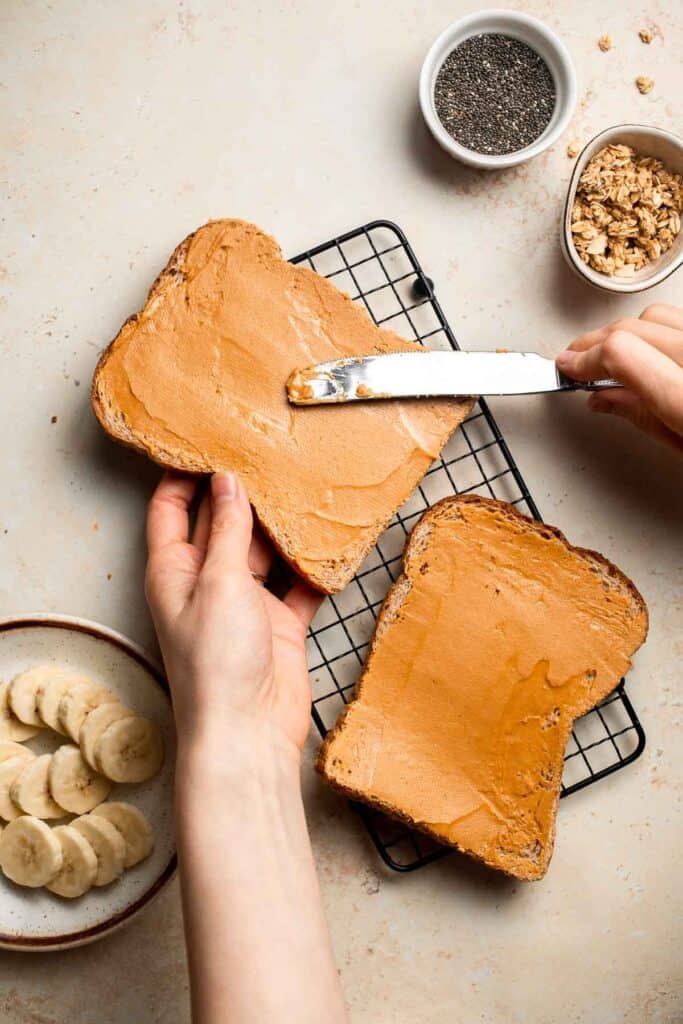
- Add toppings. Top with sliced banana and granola, then drizzle with honey and sprinkle with chia seeds.
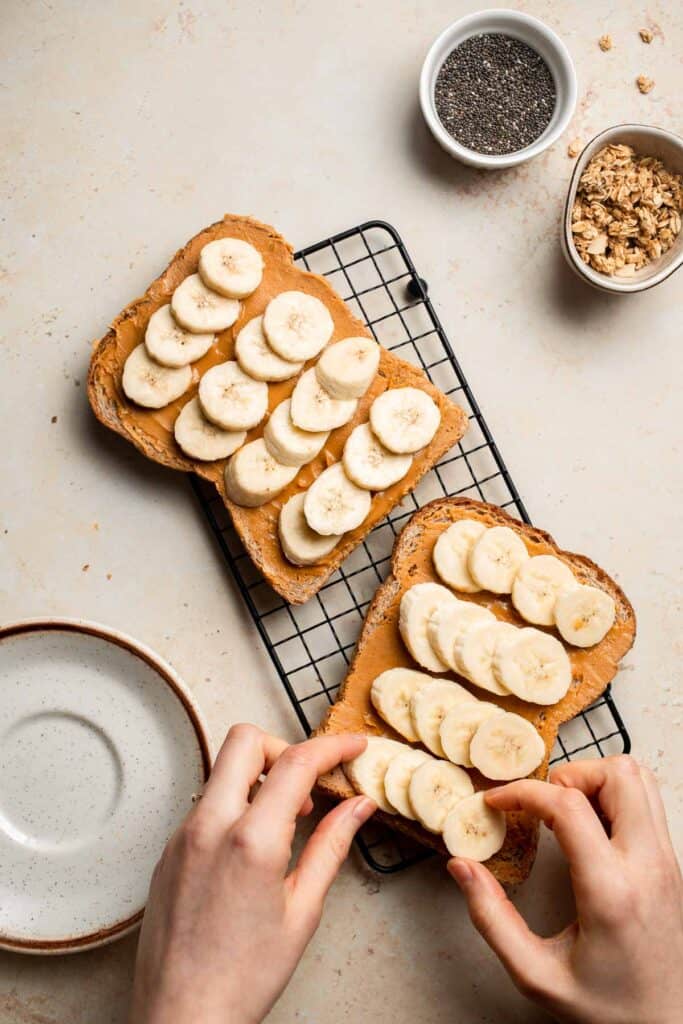
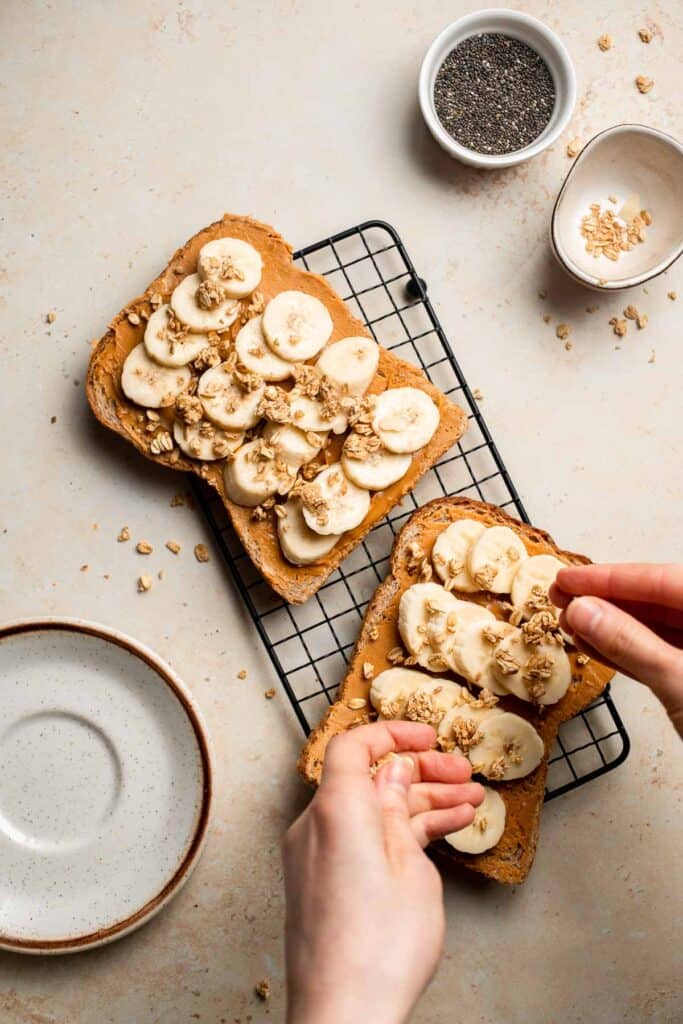
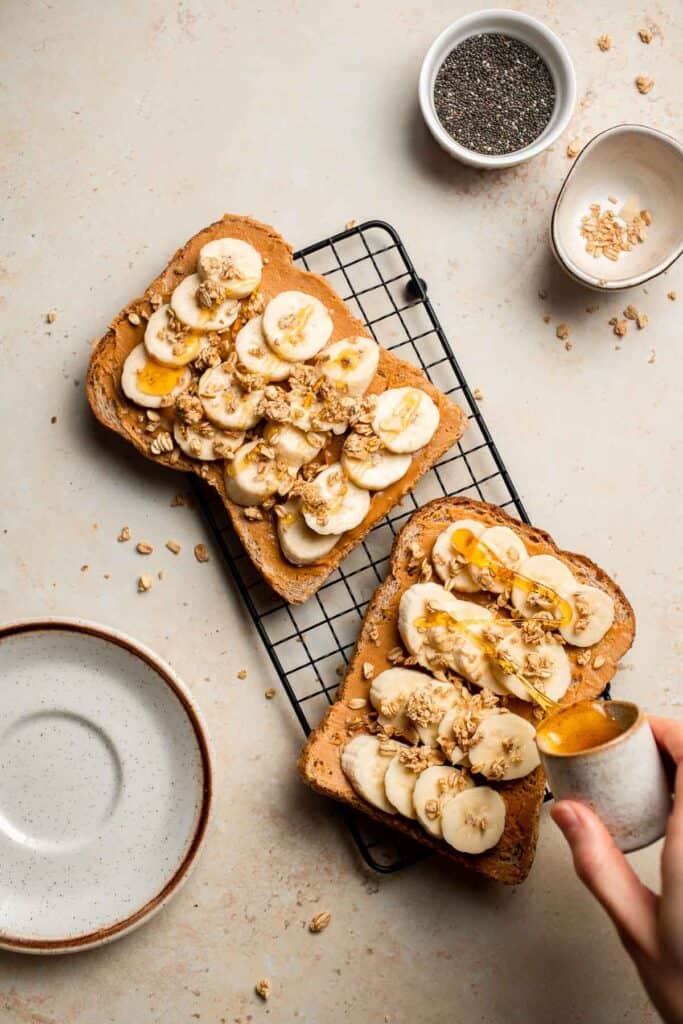
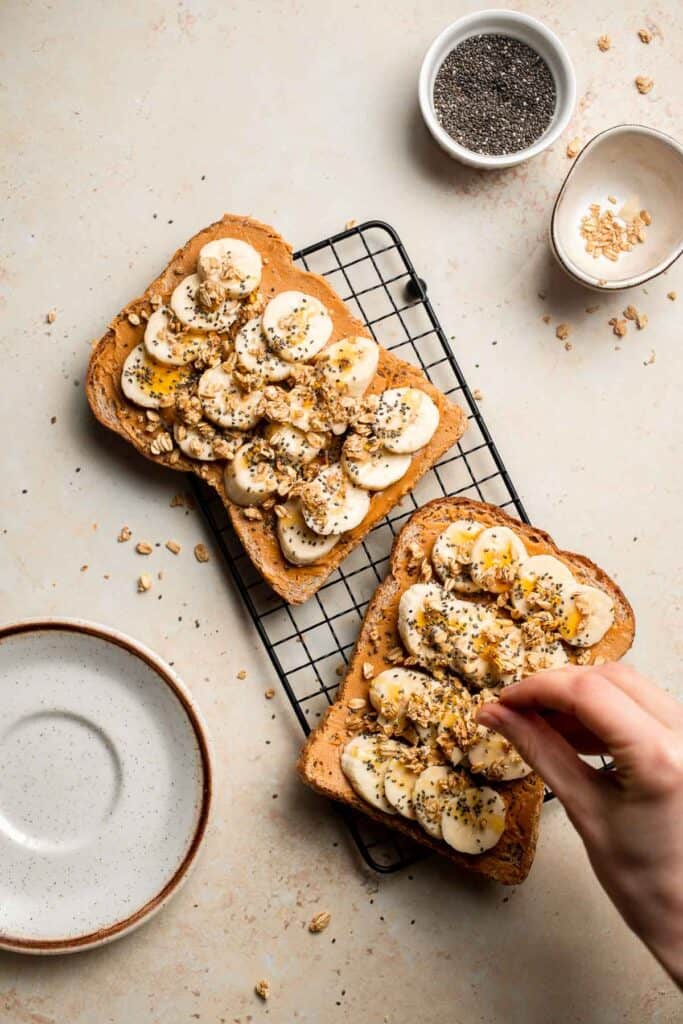
Recipe Variations
- Make peanut butter banana French toast. For a really luxurious treat, make a batch of your favorite French toast, then add the peanut butter, sliced bananas, and granola like normal. Such a great brunch option!
- Adjust the toppings. There are many different ways to top your toast. Feel free to add ground flax seeds, coconut flakes, a little salt, ground cinnamon, or a sprinkle of chocolate chips.
- Try chocolate peanut butter. Although natural peanut butter is the best choice for a healthy breakfast, a little chocolate-flavored nut butter or Nutella would make a wonderfully decadent treat.
How to Serve
This peanut butter banana toast is delicious served on its own, or paired with some of my favorite healthy breakfast recipes including:
- Strawberry Banana Smoothie
- Egg Muffins
- Mango Pineapple Tropical Smoothie Bowl
- Fruit and Yogurt Parfait with Granola
- Caprese Frittata
For more recipes, see our 50 Best Breakfast Ideas.
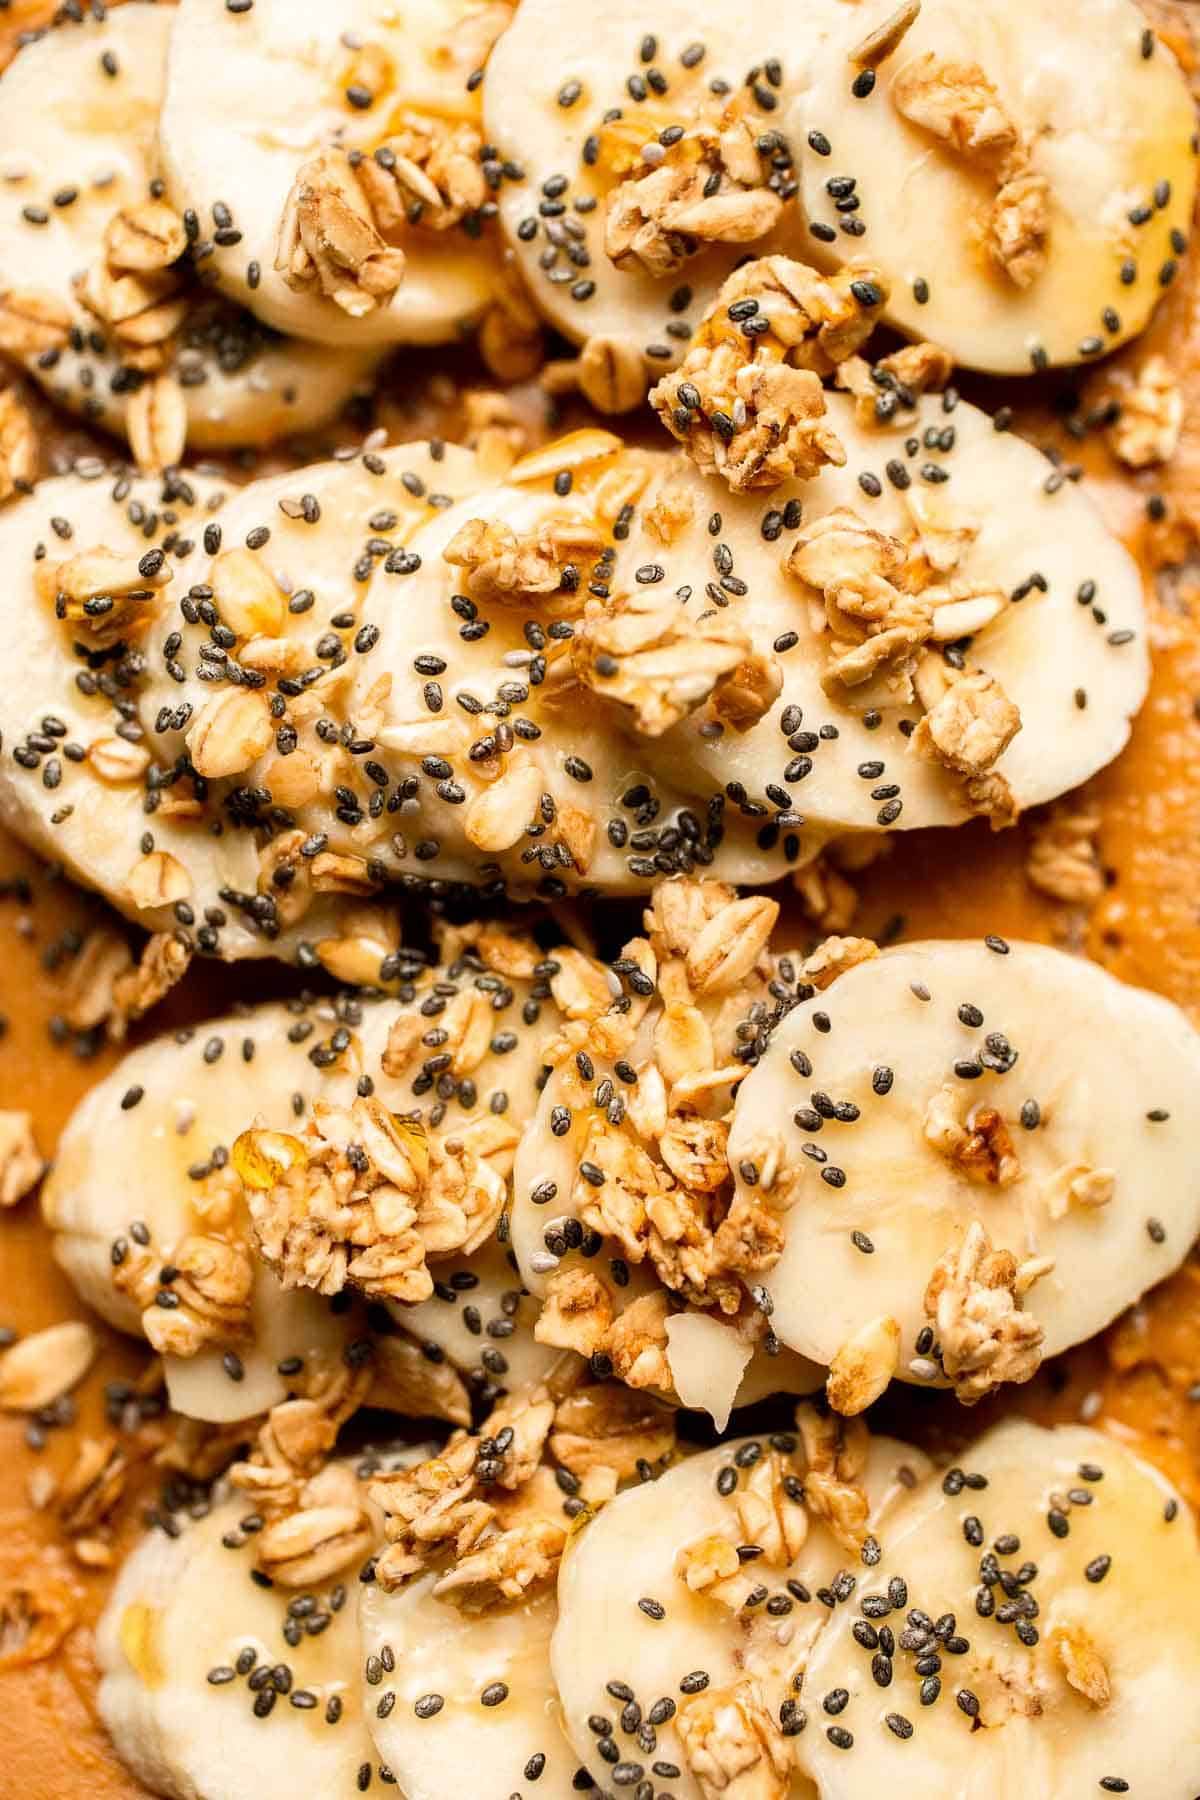
Recipe Tips and Tricks
- Serve it hot. When the bread is still warm, the peanut butter takes on an ooey, gooey texture that's just delicious.
- Keep it simple. Store your topping ingredients in little jars and just pull them all out quickly when you need to make your morning toast.
- Change it up. Try different nut butters, breads, and toppings to keep this healthy breakfast interesting!
Storing Instructions
This easy breakfast toast is best served fresh. After reheating, the toast can become soft or soggy.
FAQ
Technically, you can use any type of bread for this quick recipe. We recommend using whole grain because it pairs so well with the flavors of banana and peanut butter, and it's also higher in fiber. This will help make sure it fills you up for longer! Feel free to choose whichever bread you prefer.
Believe it or not, peanut butter banana toast is a great way to fill up for breakfast! It has fiber from the whole wheat bread, bananas, peanut butter, and chia seeds, and healthy fats to keep you full. It tends to be satisfying for most people, but you can always serve it with a little yogurt or an egg muffin if you need something extra.
That's entirely a matter of personal preference, but we don't find it necessary. The peanut butter will soften on the melted bread, and there is plenty of moisture in the fresh banana to keep the toast from becoming too dry. Plus, nut butters are high in fats, so adding butter would add unnecessary calories. If you prefer it buttered, go for it!
More Breakfast Recipes with Toast
- Avocado Toast with Poached Egg
- French Toast
- Breakfast Bagel
- Baked Gingerbread French Toast Casserole
- Egg Salad Sandwich
Tried this recipe?
I'd love to hear what you think! Leave a comment and rating below to share your feedback. Your reviews help others discover this recipe and help me keep creating more free recipes for you. Snap a photo and tag me on social media @aheadofthyme too.

Creamy Wild Rice Soup
This homemade Creamy Wild Rice Soup is one of my all-time favorite soups and the best way to warm up on a cold winter night! It's a simple recipe made with everyday pantry staples prepared to release as much flavor as possible. The mushrooms, nutty wild rice, and yellow potatoes offer a variety of textures and flavors, while a generous swirl of heavy cream adds the perfect finishing touch. It's the ultimate choice for soup season, especially with a chunk of crusty bread.
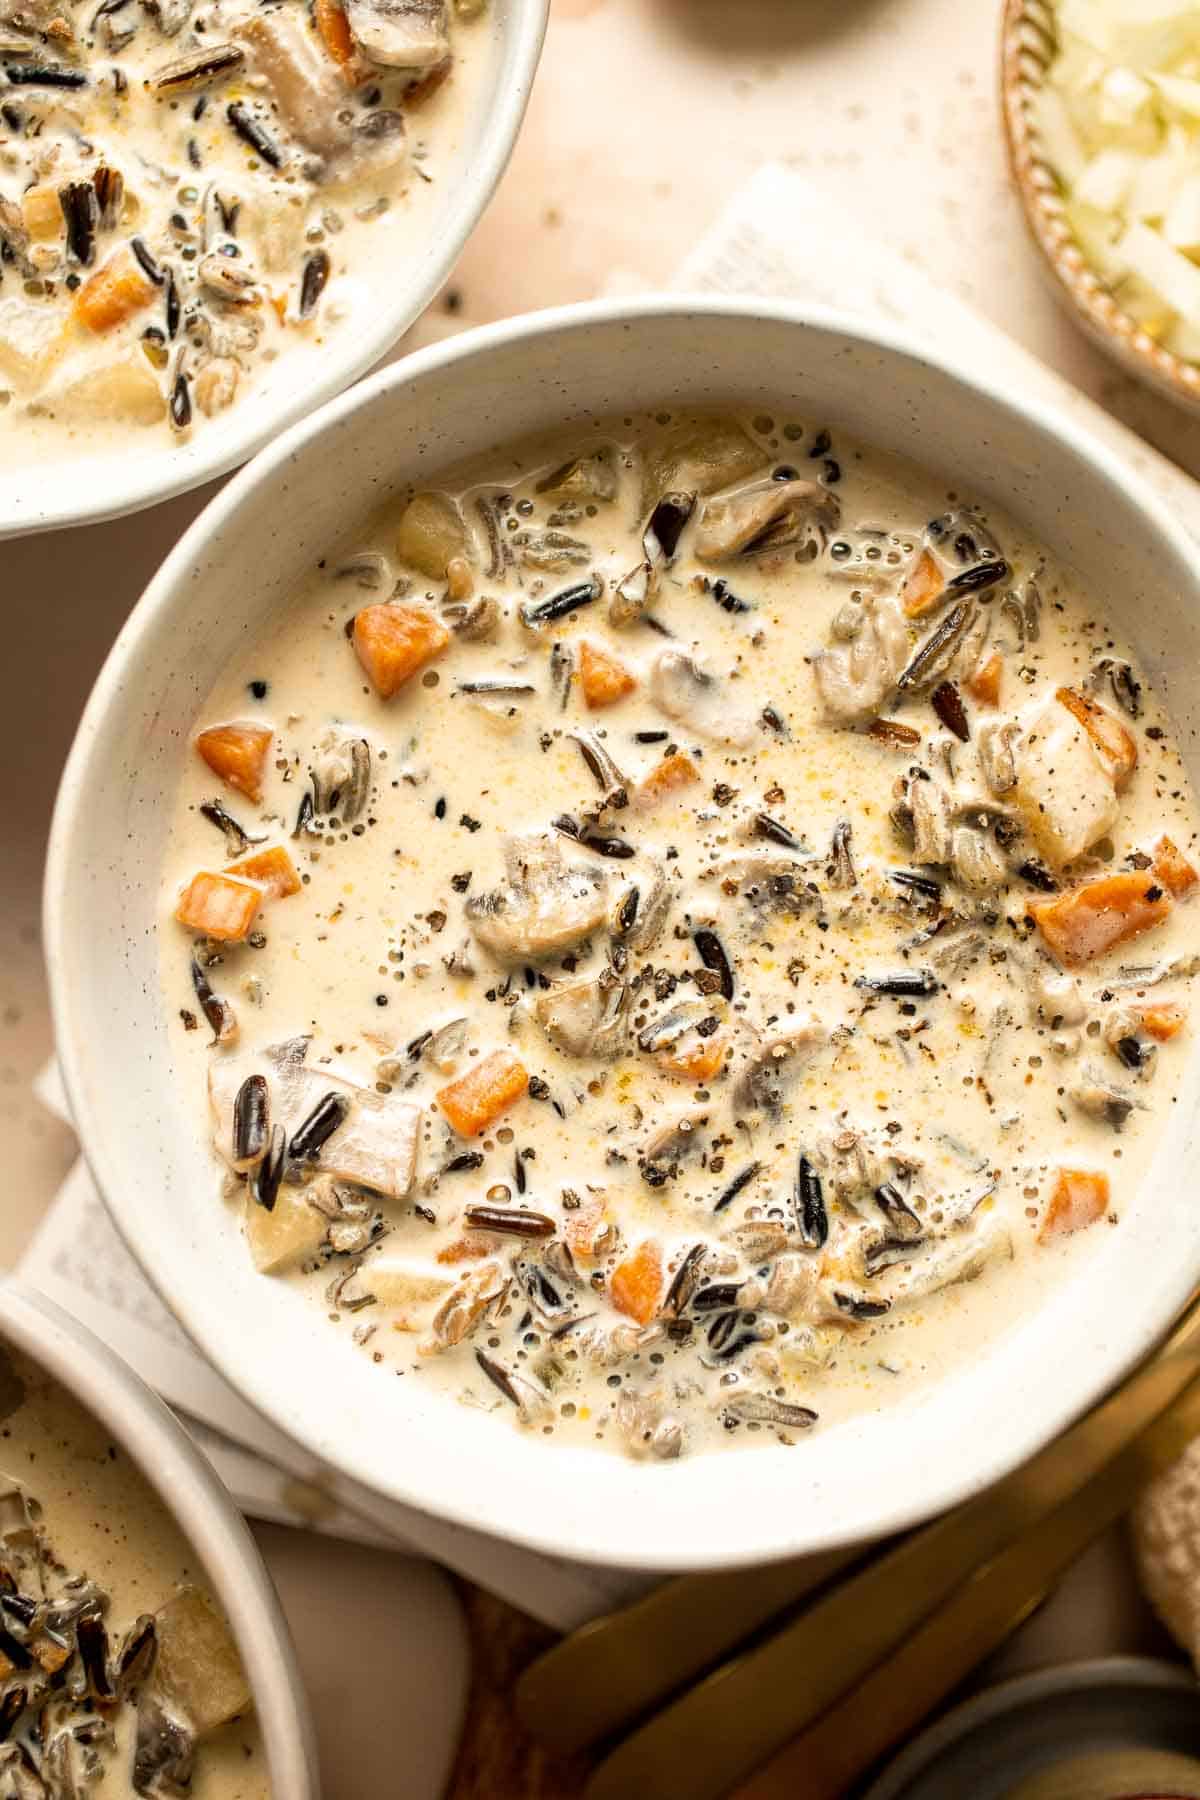
The secret to a great soup is patience, but that doesn't mean this wild rice soup recipe will take all day. In fact, this wild rice mushroom soup is ready from start to finish in less than an hour. It's all about allowing the flavors to bloom and build and giving each ingredient time to soften up before adding the next one. Just be sure to make a batch of these quick skillet dinner rolls to sop up every last drop!
Why You'll Love This Creamy Wild Rice Soup
- Easy to make. This creamy soup comes together with just a little effort, mostly from prepping the veggies. Just follow the simple step-by-step instructions below, and you'll get delicious results every time.
- Rich and creamy. There's something about cream-based soups this time of year! They really stick to your ribs, and this hearty wild rice soup is no exception. The mushrooms offer a meaty flavor and texture, and the rice and potatoes make it so hearty and filling. A little goes a long way!
- Perfect for a cold day. Creamy soups are a heavier, more satisfying option during the coldest stretches of the year. This is the perfect soup to shake off the frost and warm up after a long day outside.
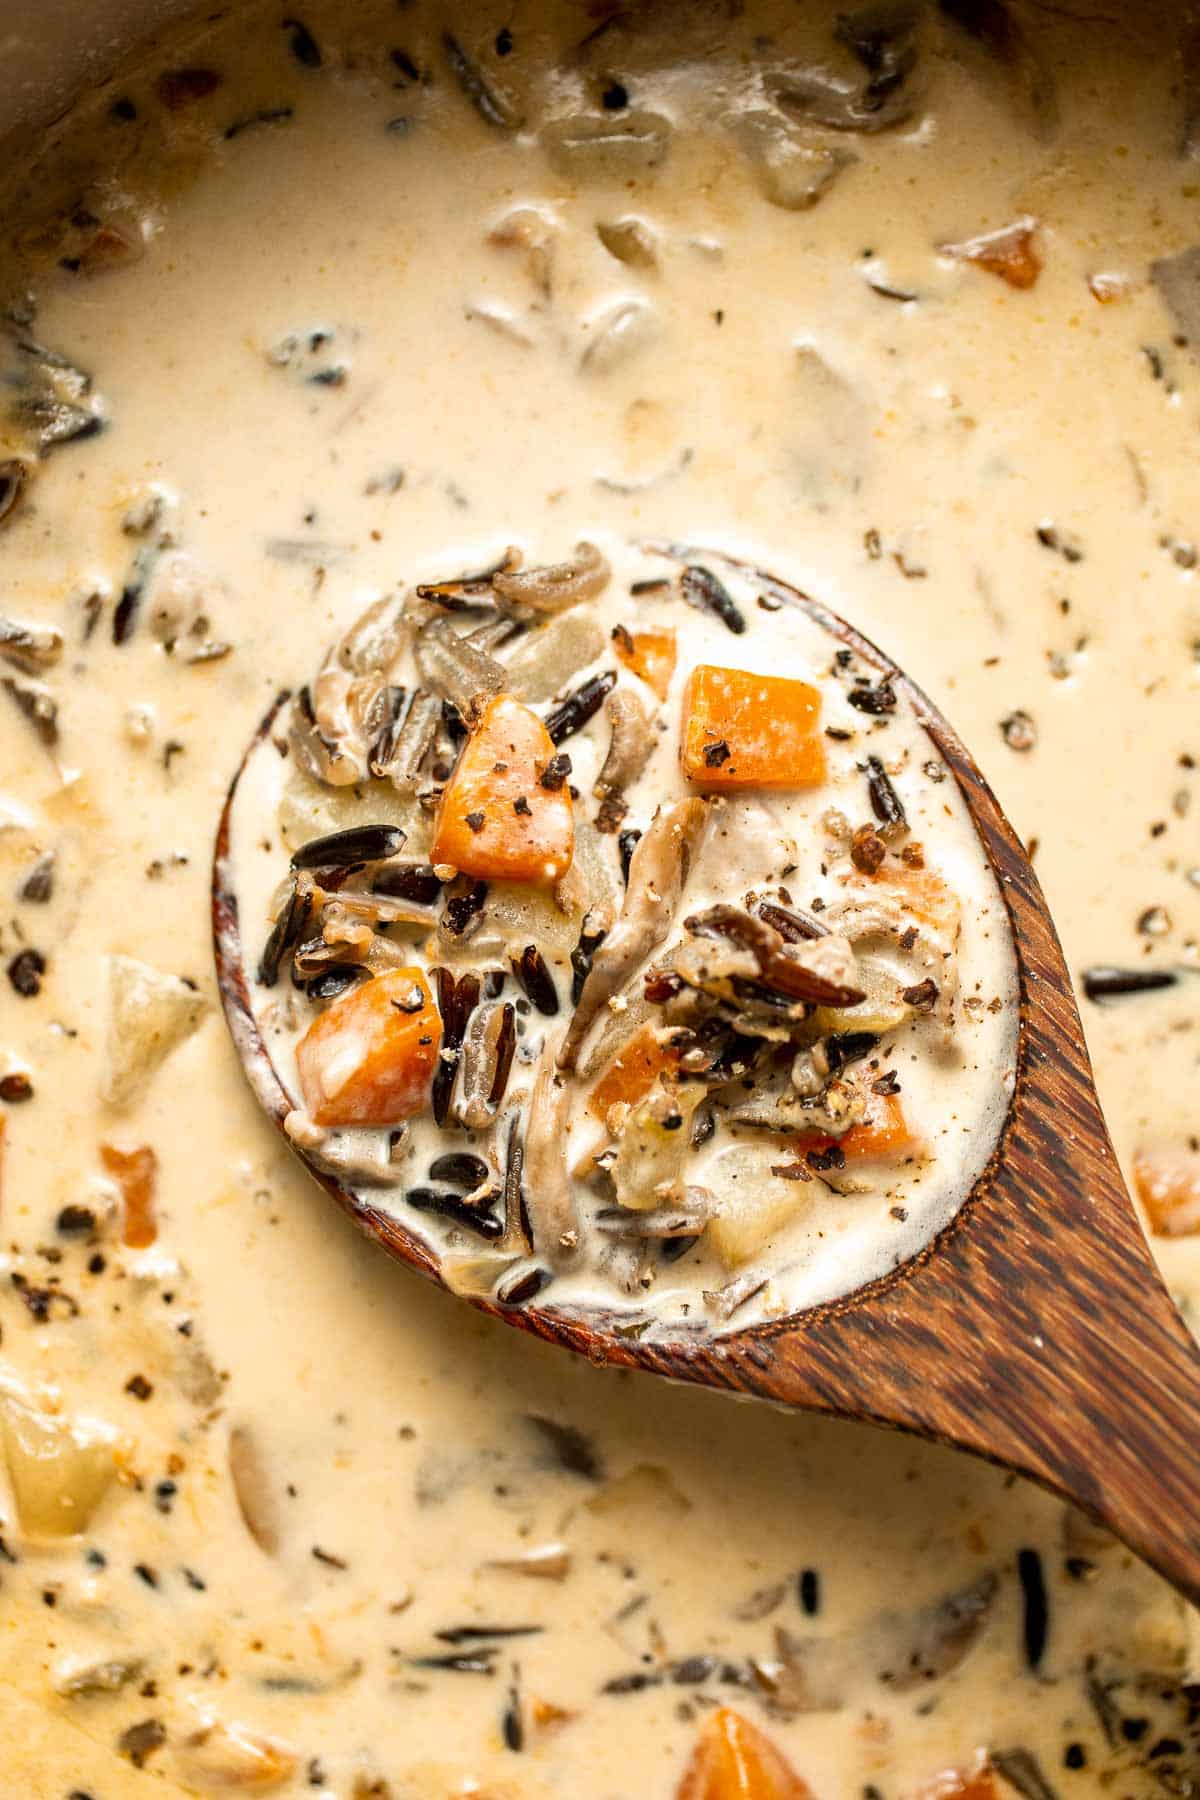
Ingredient Notes
To make this delicious creamy wild rice soup, you will need the following ingredients (full measurements in recipe card below):
- butter - start by melting the butter to release the flavor from the aromatics. Feel free to use olive oil.
- aromatics - prepare the onion, carrots, celery sticks, and garlic and allow them to cook until tender.
- Italian seasoning - as you cook the vegetables, the dried herbs will rehydrate and add an herby flavor.
- mushrooms - thinly slice white or brown mushrooms.
- wild rice - start with raw, uncooked wild rice. You can use a wild rice blend if you prefer.
- vegetable stock - this will hydrate the rice, mushrooms, and potatoes. Feel free to use chicken broth instead.
- yellow potatoes - starchy potatoes, like yellow potatoes, will become soft and tender without falling apart.
- heavy cream - this will be added right at the end for a creamy broth.
- salt and pepper - season to taste throughout the cooking process.
You will also need measuring cups and spoons, a cutting board, knife, vegetable peeler, and a stockpot or Dutch oven.
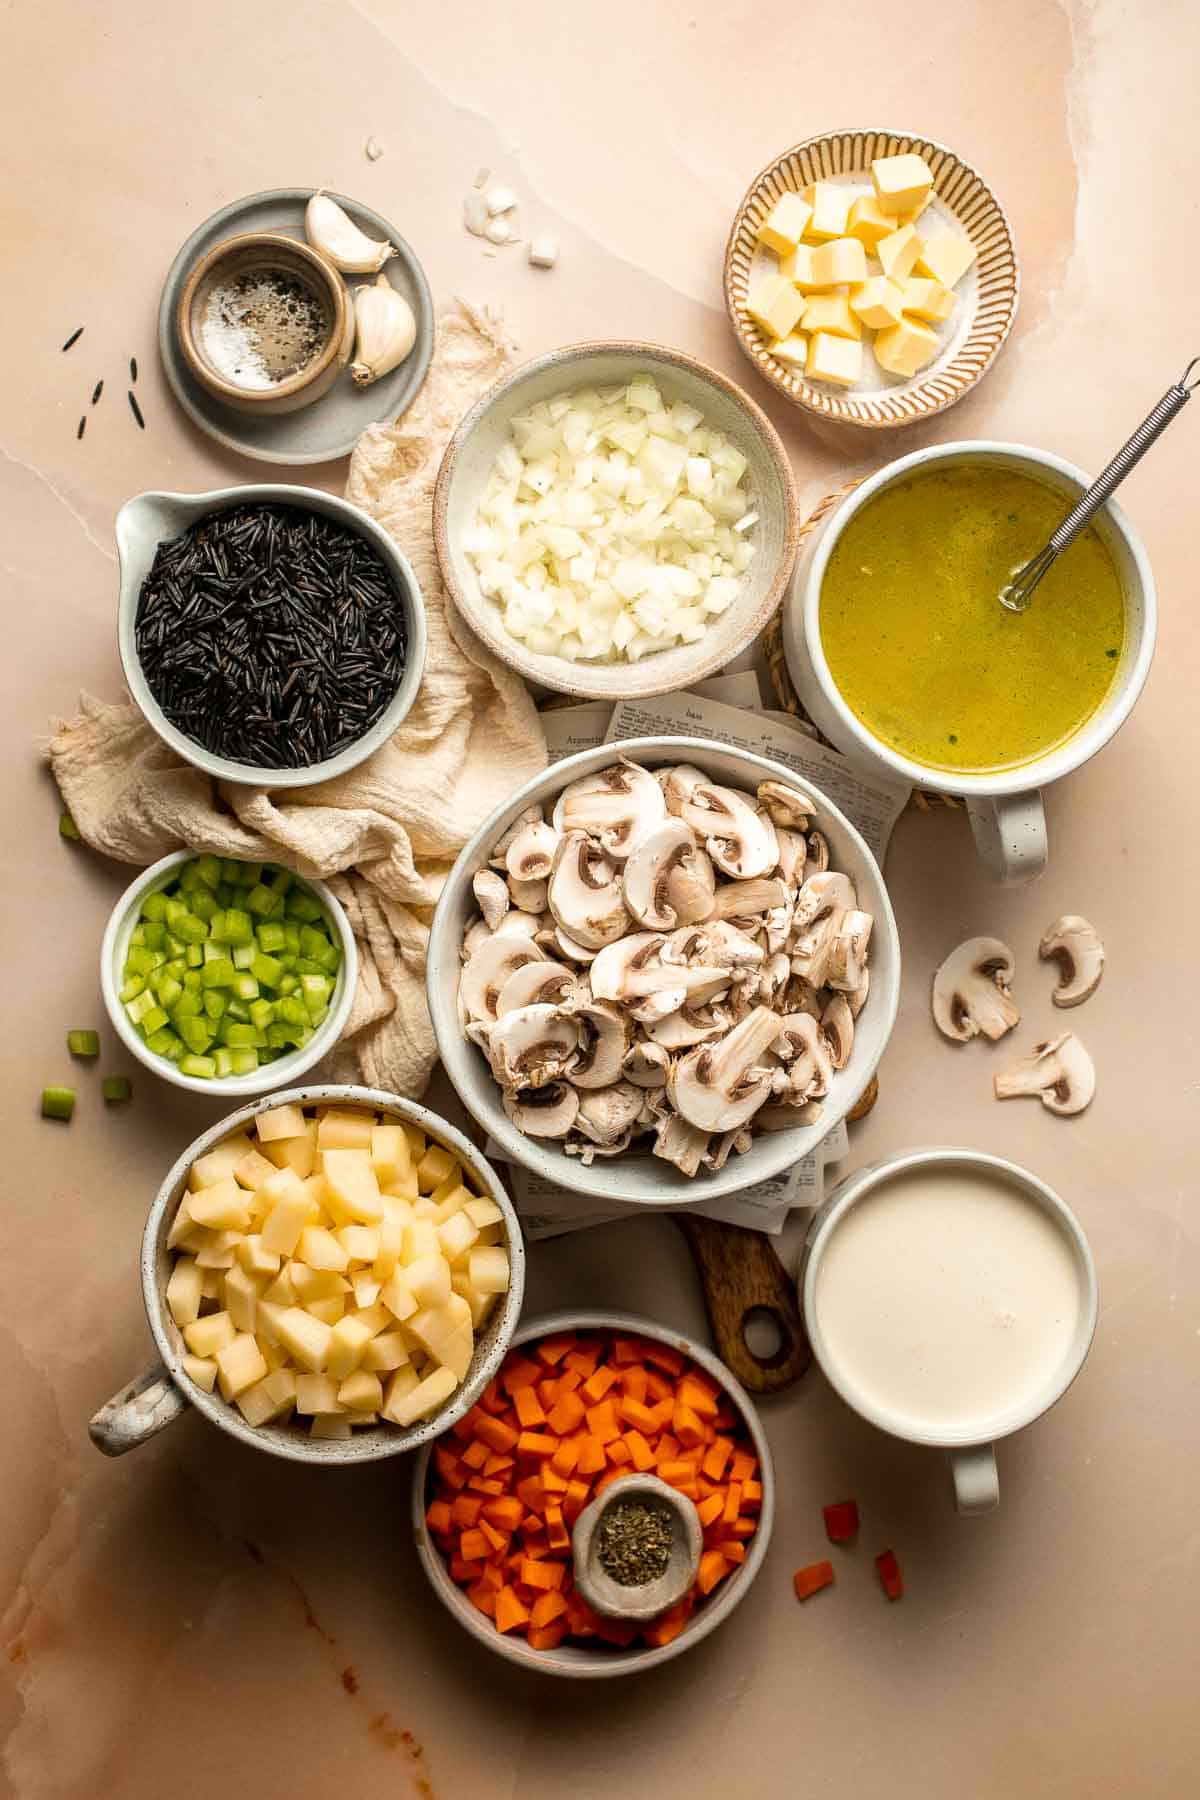
How to Make the Best Creamy Wild Rice Soup
- Sauté aromatics. Melt butter in a large stockpot or 5.5 quart Dutch oven over medium-high heat until the melted butter bubbles, about 2 minutes. Add onion, carrots, celery, garlic and Italian seasoning. Sauté until tender, about 2-3 minutes.
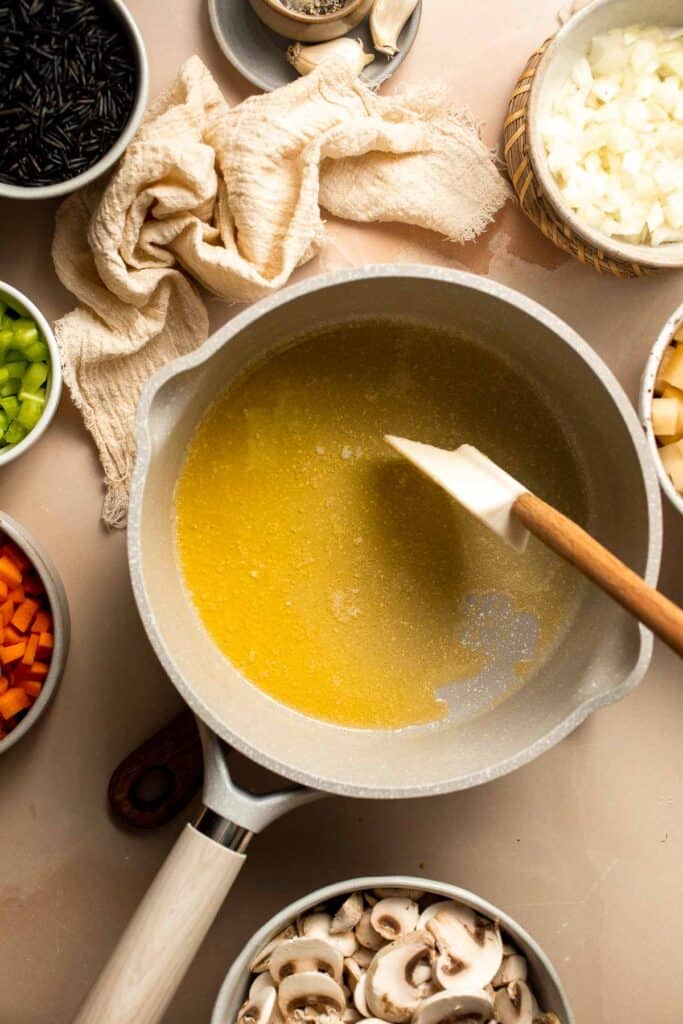
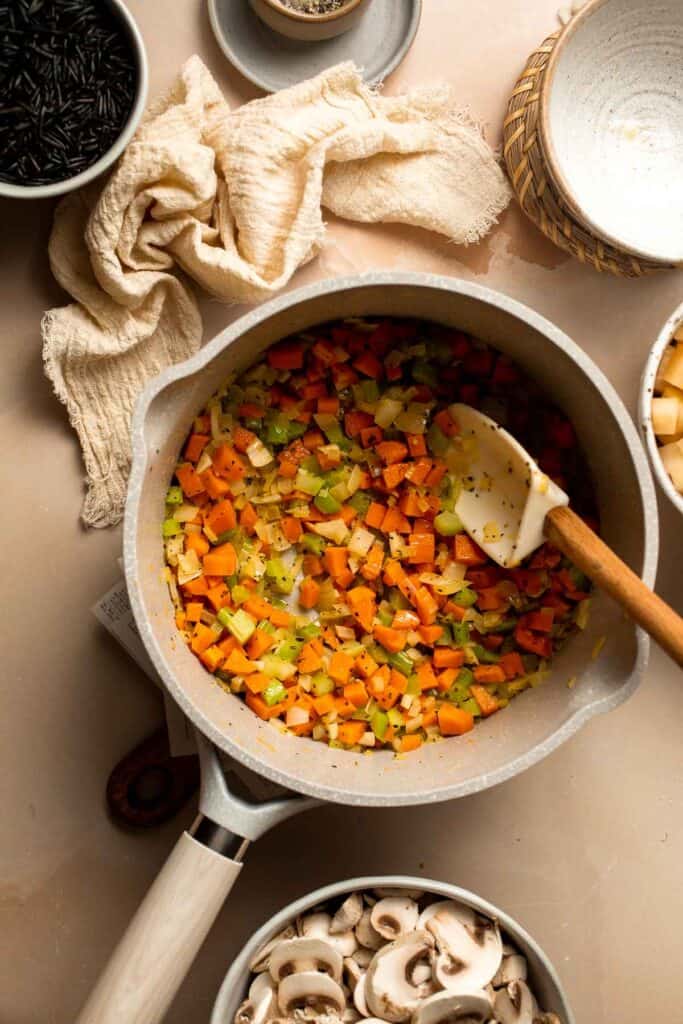
- Add mushrooms and rice. Add mushrooms and wild rice. Stir well and cook until the mushrooms soften a bit, about 3-5 minutes.
- Add liquid and simmer. Slowly pour in the vegetable stock and bring it to a boil. Reduce the heat to low and cover with the lid. Simmer for 30 minutes, stirring every 10 minutes to ensure the rice does not stick to the bottom of the pot.

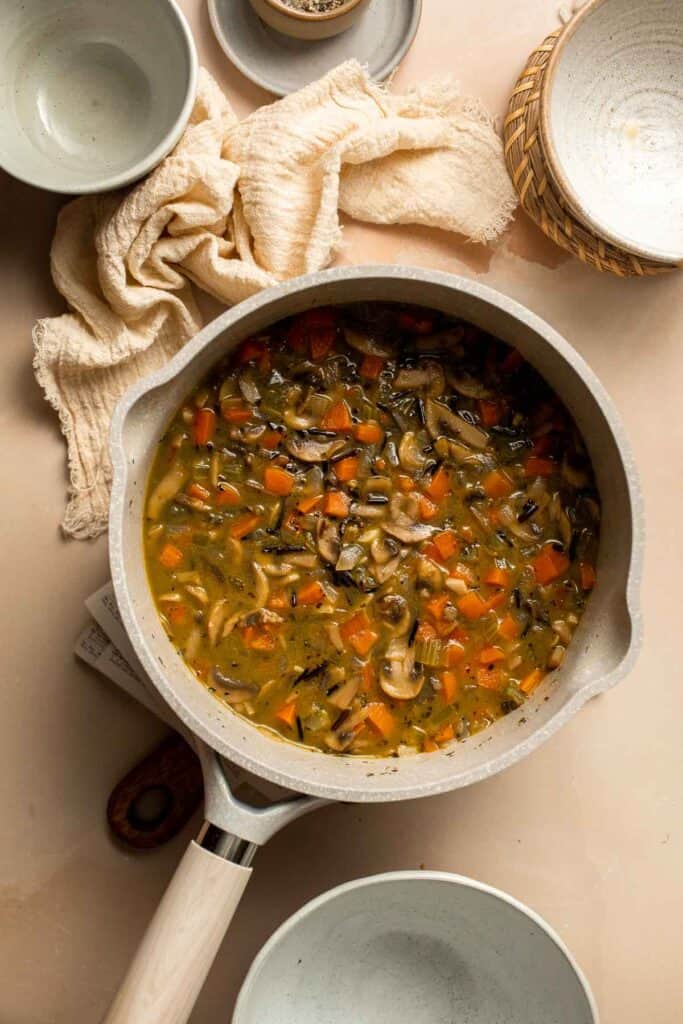
- Add potatoes. Add potatoes and continue cooking for another 10 minutes until tender.
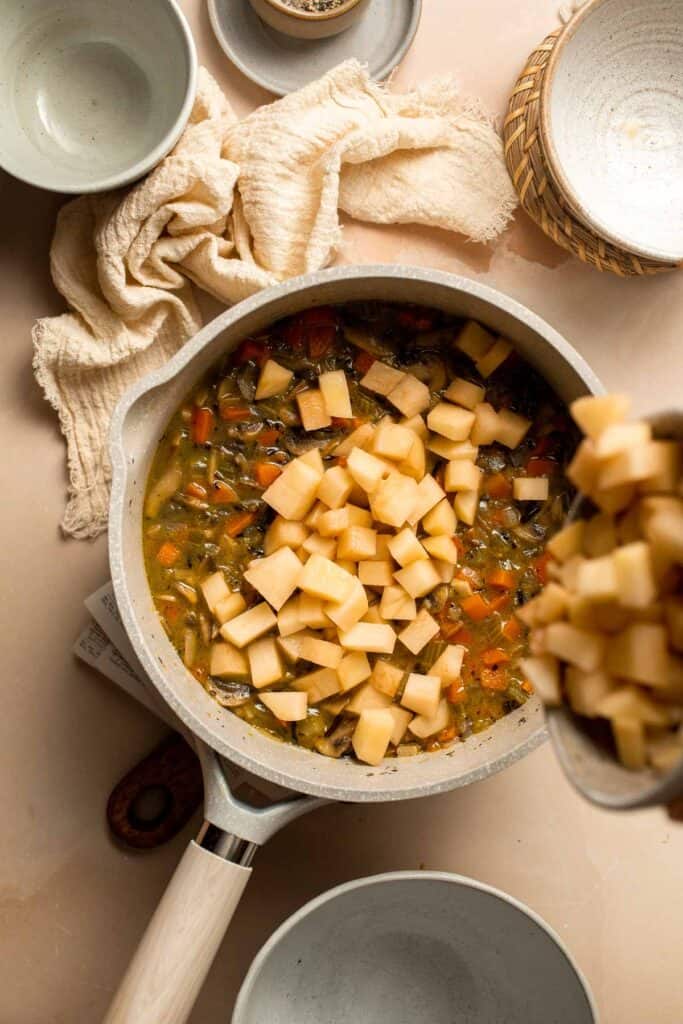
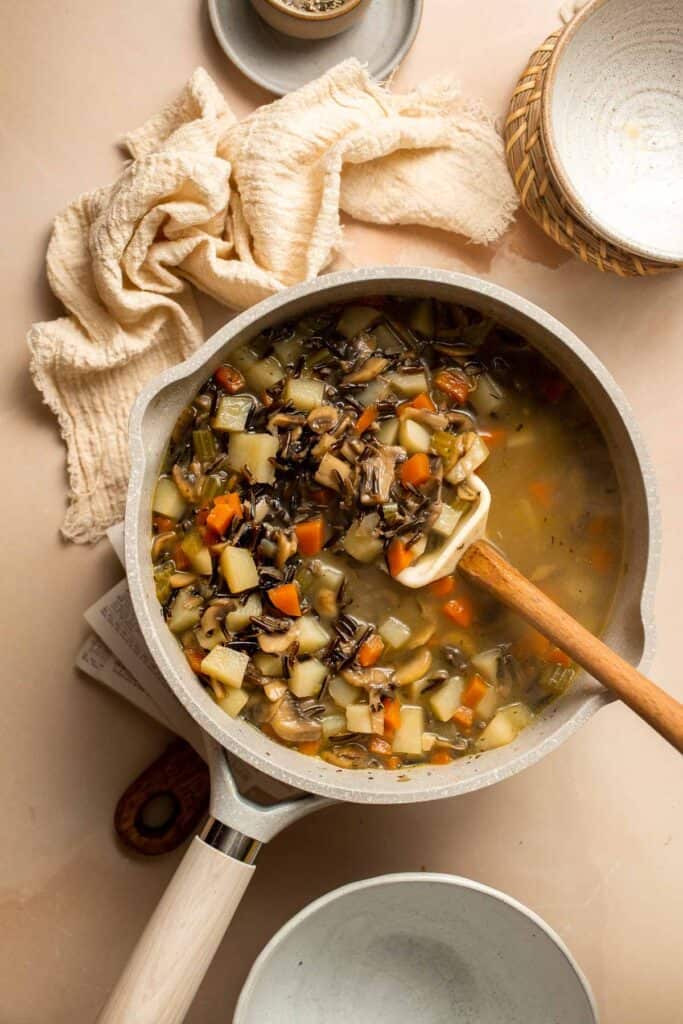
- Add cream. Add heavy cream and stir well to combine. Cook for another 3 minutes until warmed through. Season with salt and pepper to taste, and serve warm.
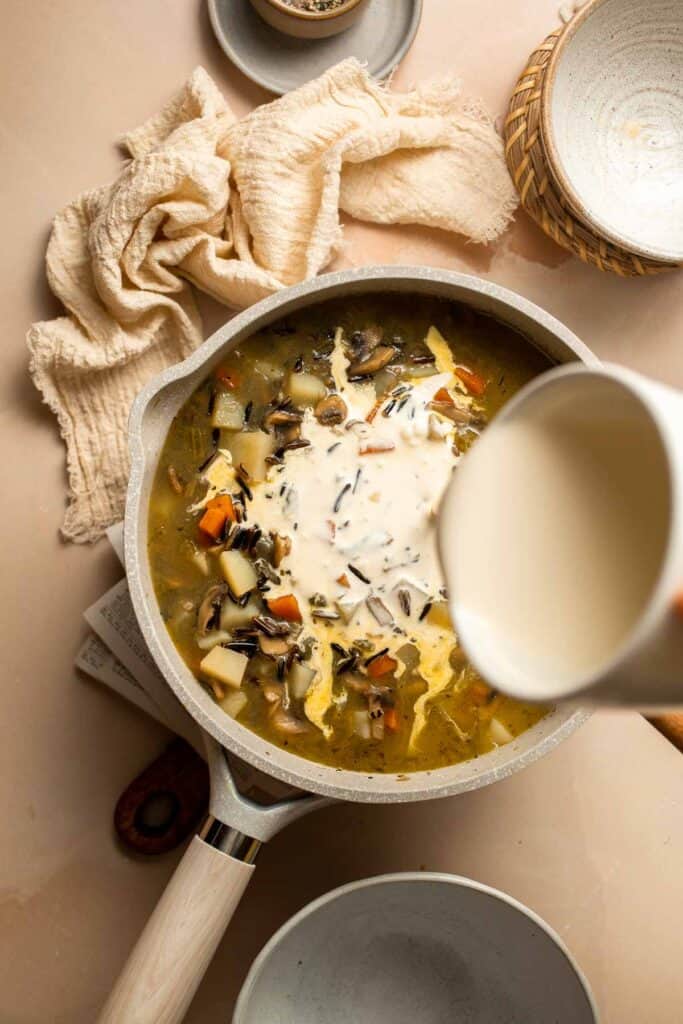
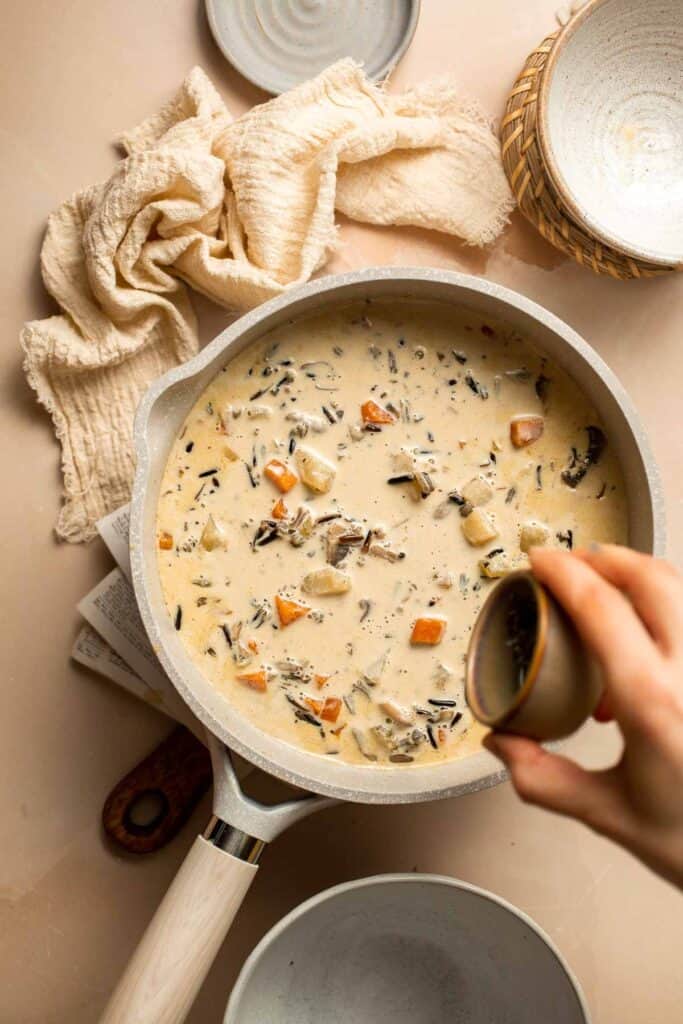
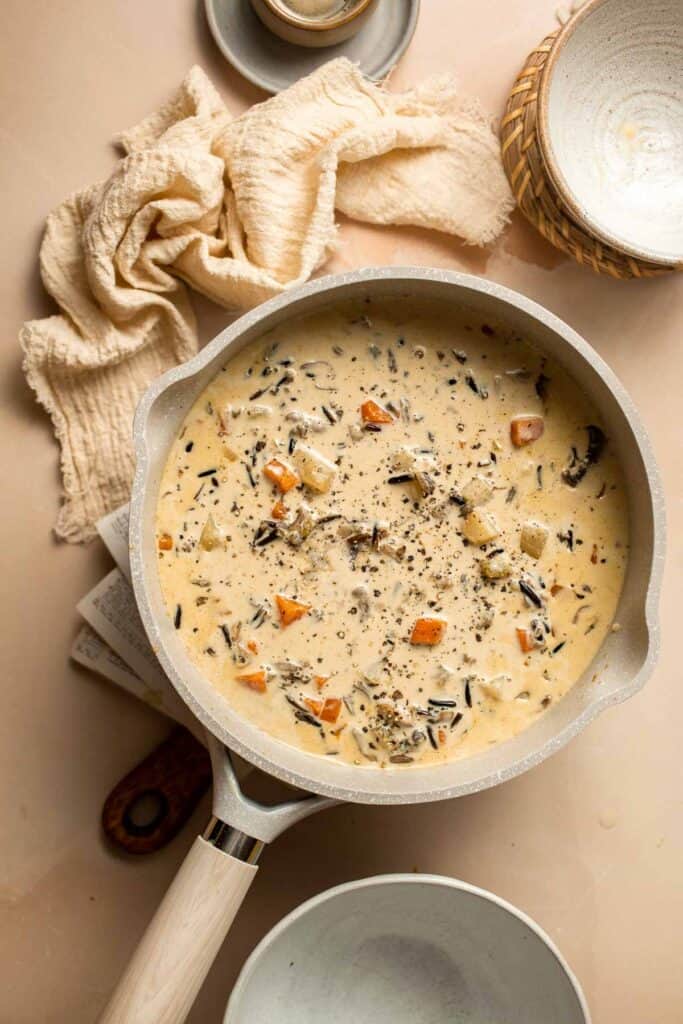
Recipe Variations
- Add meat. Either cook some chicken breasts or use leftover shredded chicken to give your soup some extra protein. You can also use chicken stock as the liquid. Cooked ground sausage would taste great, too.
- Adjust the cream. Look for a neutral-tasting, non-dairy cream for a dairy-free version.
- Use the slow cooker. Either follow the first four steps in a large soup pot on the stove or use the saute function for your Instant Pot. Once you add the potatoes, set it to slow cook and let the soup gently cook until the potatoes are tender. This will also keep it warm for hours, great for a long day playing in the snow or skiing.
- Add fresh herbs. Some fresh thyme or parsley would taste wonderful in this delicious soup.
How to Serve
This creamy wild rice soup is delicious served on its own, but it's especially great paired with some freshly baked bread including:
- Easy Homemade Biscuits
- Ciabatta Rolls
- Cornmeal Cheddar Biscuits
- Parker House Rolls
- Homemade No Knead French Baguettes
For more recipe ideas, see our 50 Best Bread Recipes or 25 Side Dishes for Soup.
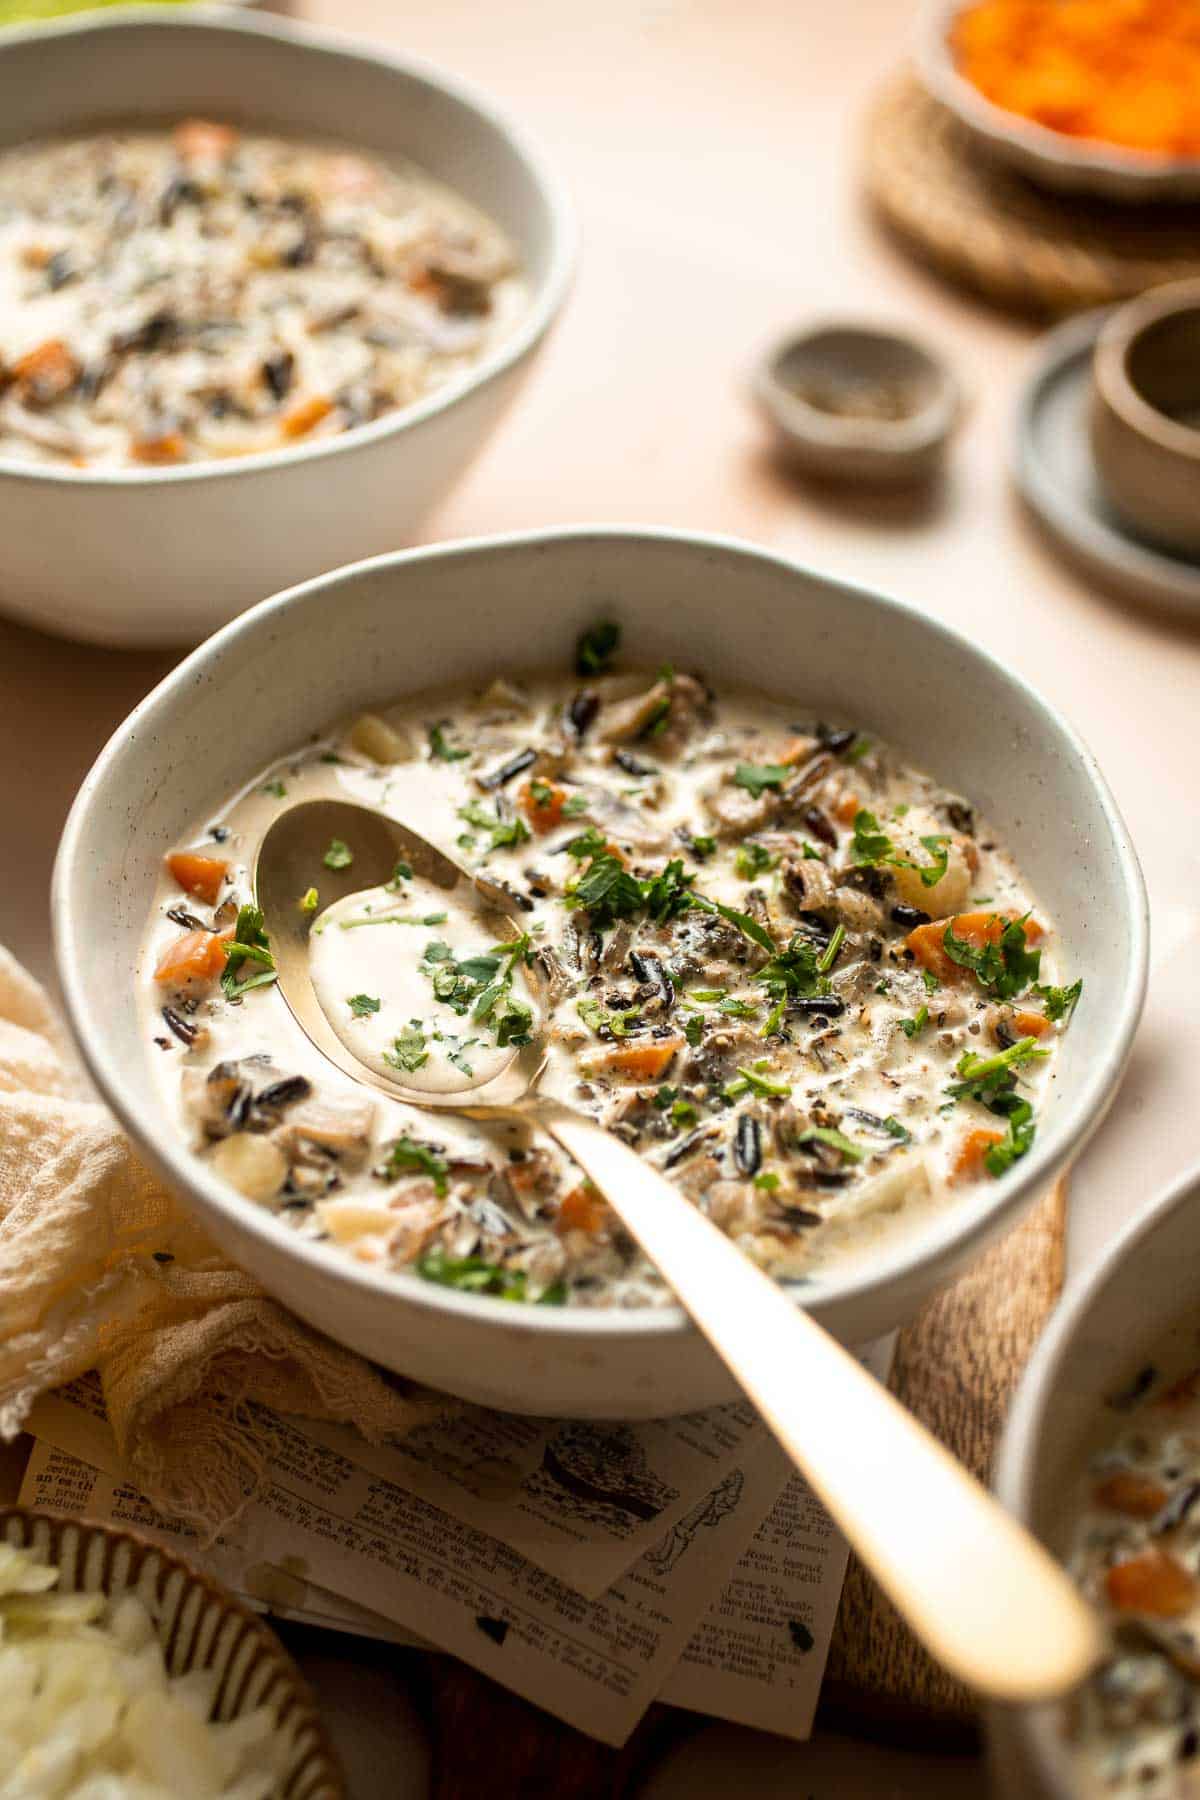
Recipe Tips and Tricks
- Be patient. It's really important to let the veggies cook down at the beginning, as this releases a lot of delicious flavors that will infuse into the other ingredients.
- Add the cream at the end. If you're in a rush, it might be tempting to add the cream earlier, but it will likely separate from the heat. Add it just at the end for the best results.
- Season well. Rice and potatoes usually don't have a ton of flavor on their own. If you want your homemade soup to be really delicious, taste it several times while cooking and add more salt and pepper as needed.
Storing and Freezing Instructions
How to Store
Allow the leftover wild rice soup to cool to room temperature within 2 hours, then store the leftovers in an airtight container in the fridge for 3-4 days.
How to Reheat
Either microwave your bowl of soup, stirring every minute, or reheat it gently in a pan on the stove.
How to Freeze
It's not recommended to freeze cream-based soup recipes, as the cream will separate when you reheat it. If you want to make this soup to freeze, don't add the cream. Freeze like normal, then add the cream after you reheat it.
FAQ
One of the most important skills in soup making is learning to season as you go. You want to give the salt time to work its way into the ingredients and release their full flavors. If your soup feels bland, it needs some more. The right amount of salt can make even the most simplistic soup recipes taste delicious.
Wild rice is a fantastic option for soups because it tends to hold its texture much longer than regular white rice or brown rice. If it's cooked at a high temperature for too long, it can become soft, but it typically keeps its slightly chewy texture.
Although most creamy soups require you to make a roux out of butter and all purpose flour, this simple recipe does not. The potatoes will soften as they cook, adding starch to thicken the soup naturally, and the cream will help, too.
More Soup Recipes
- 60 Best Soup Recipes
- Hungarian Mushroom Soup
- Beef Wild Rice Soup
- Chicken Potato Soup
- Vegetable Soup
- Potato Leek Soup
Tried this recipe?
I'd love to hear what you think! Leave a comment and rating below to share your feedback. Your reviews help others discover this recipe and help me keep creating more free recipes for you. Snap a photo and tag me on social media @aheadofthyme too.

Homemade Pizza Sauce
Take your pizza night to the next level with the best Homemade Pizza Sauce recipe. Made with just a handful of ingredients, this easy recipe comes together in just moments and doesn't even need to be cooked! The flavor is so much better than the jarred stuff from the store, too. You'll never go back!
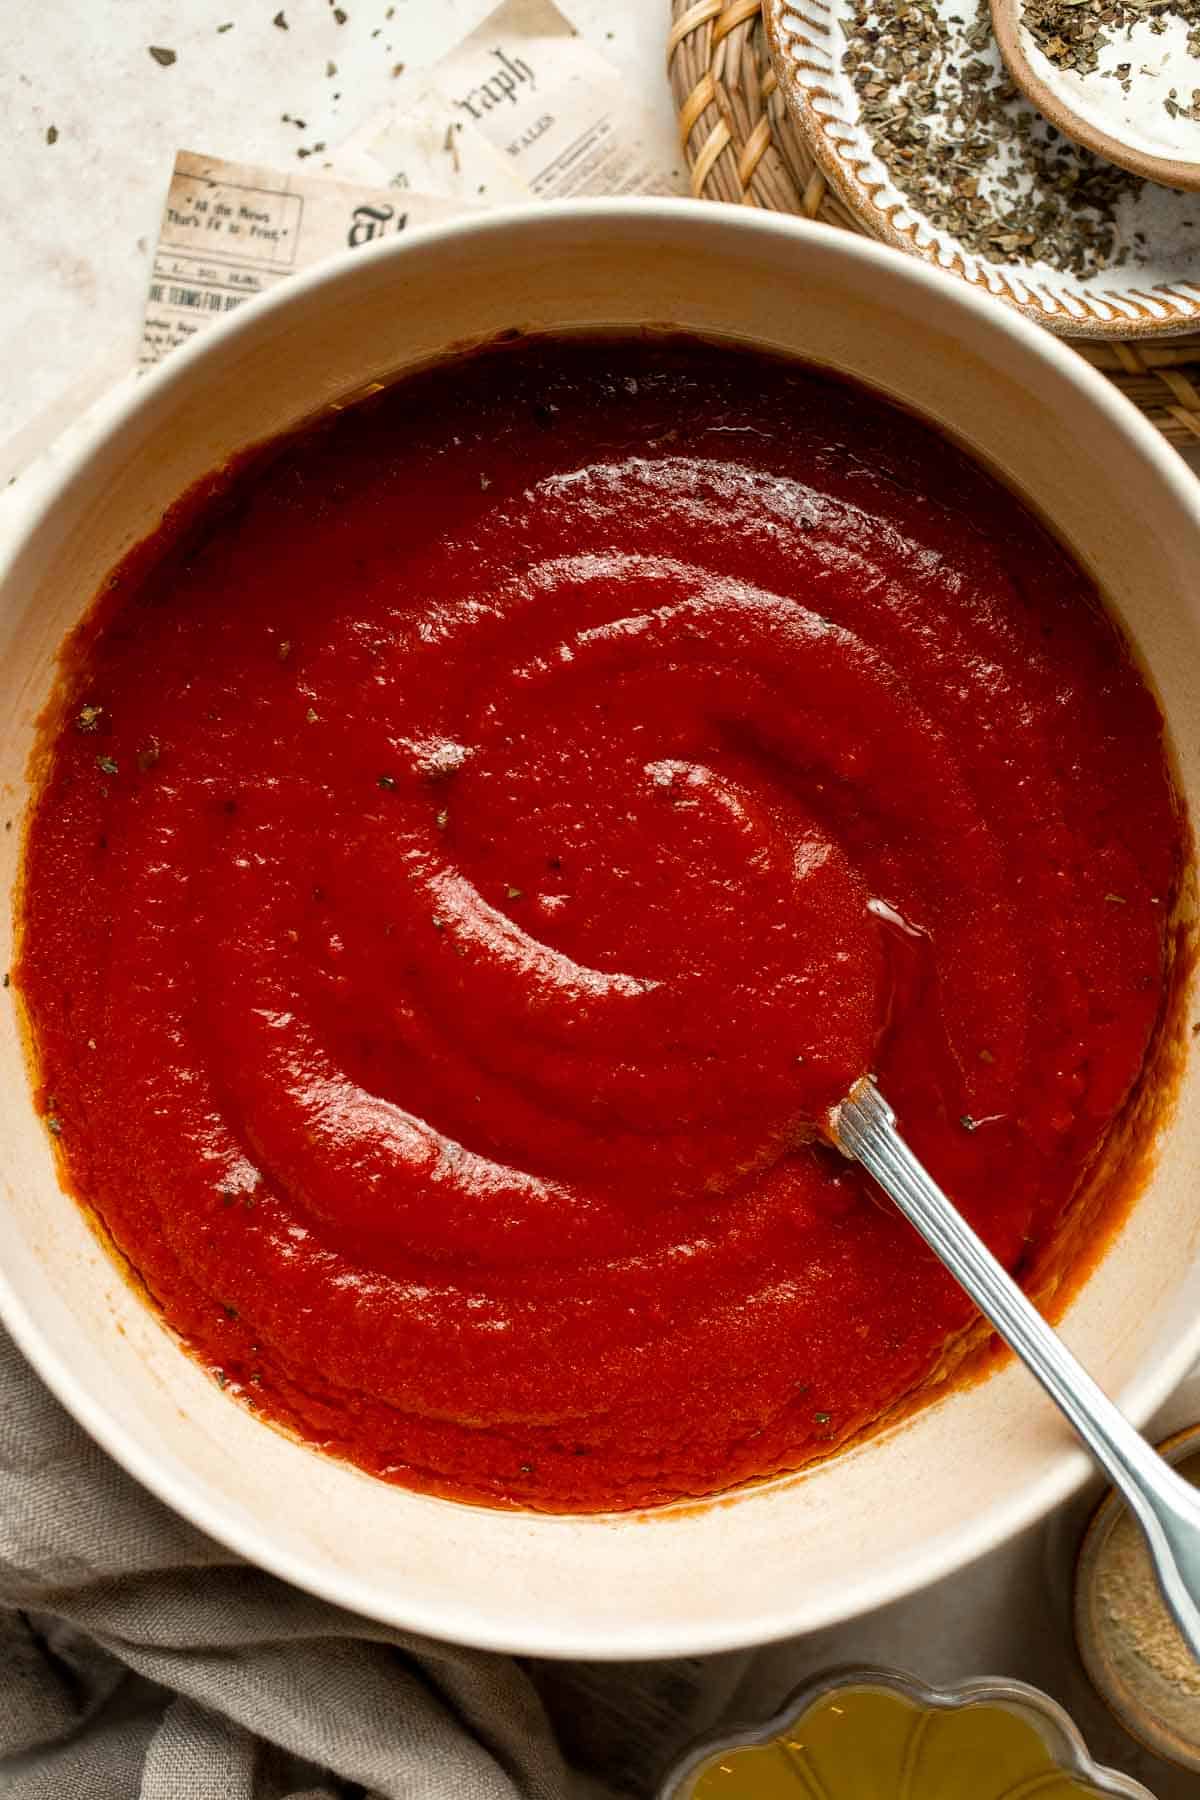
We love pizza nights around here. It's such a nice time to connect while stretching the homemade pizza dough, slathering on some sauce, and decorating each one with your favorite toppings. If you've never made homemade pizza sauce before, you're about to be shocked by just how easy it is to make from scratch. This no cook pizza sauce is ready in just moments and makes any homemade pizza taste amazing!
Why You'll Love This Homemade Pizza Sauce
- No cooking needed. Instead of processing a bunch of fresh tomatoes and cooking them down for hours, this easy homemade pizza sauce recipe uses canned tomato sauce and tomato paste for a rich tomato flavor without the fuss. It's seriously easy!
- Common ingredients. There's a good chance you already have all the basic ingredients you need for this sauce in your pantry right now! Since it is so easy to make, you can even upgrade to all organic ingredients without blowing your budget.
- Freeze for later. If you don't have homemade pizza often, freeze the leftover sauce in a freezer bag or jar and thaw it the night before. You can even make a double batch for later!
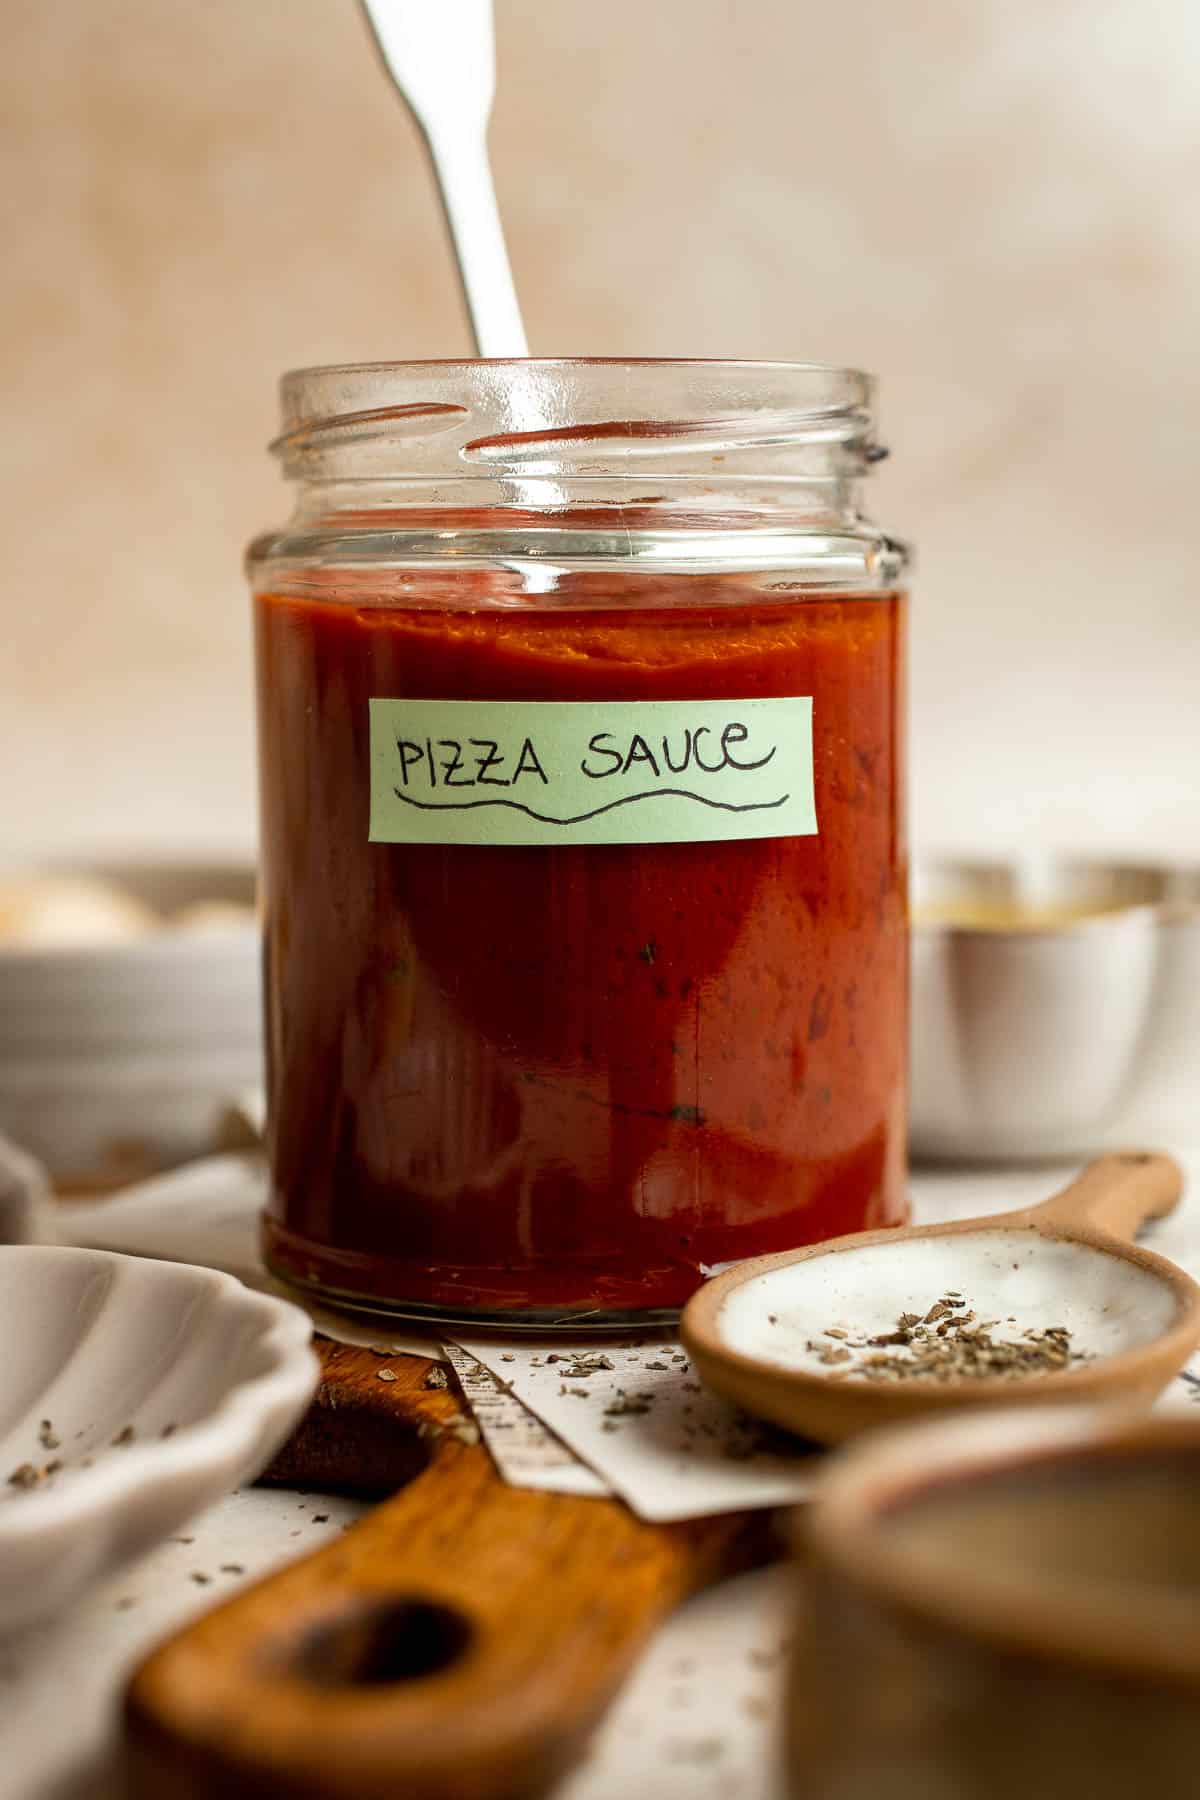
Ingredient Notes
To make this delicious homemade pizza sauce, you will need the following ingredients (full measurements in recipe card below):
- tomato sauce - use canned tomato sauce, not regular marinara or spaghetti sauce.
- tomato paste - canned tomato paste is very thick and has a rich, concentrated tomato flavor.
- extra virgin olive oil - this oil adds a smooth texture and the perfect flavor.
- sugar - the sweetness of sugar mellows out the pizza sauce. Adjust to taste.
- seasonings - season with a mixture of Italian seasoning, garlic powder, salt, and black pepper. You can also substitute the Italian seasoning with dried oregano.
You will also need measuring cups and spoons, a medium mixing bowl, and a spoon.
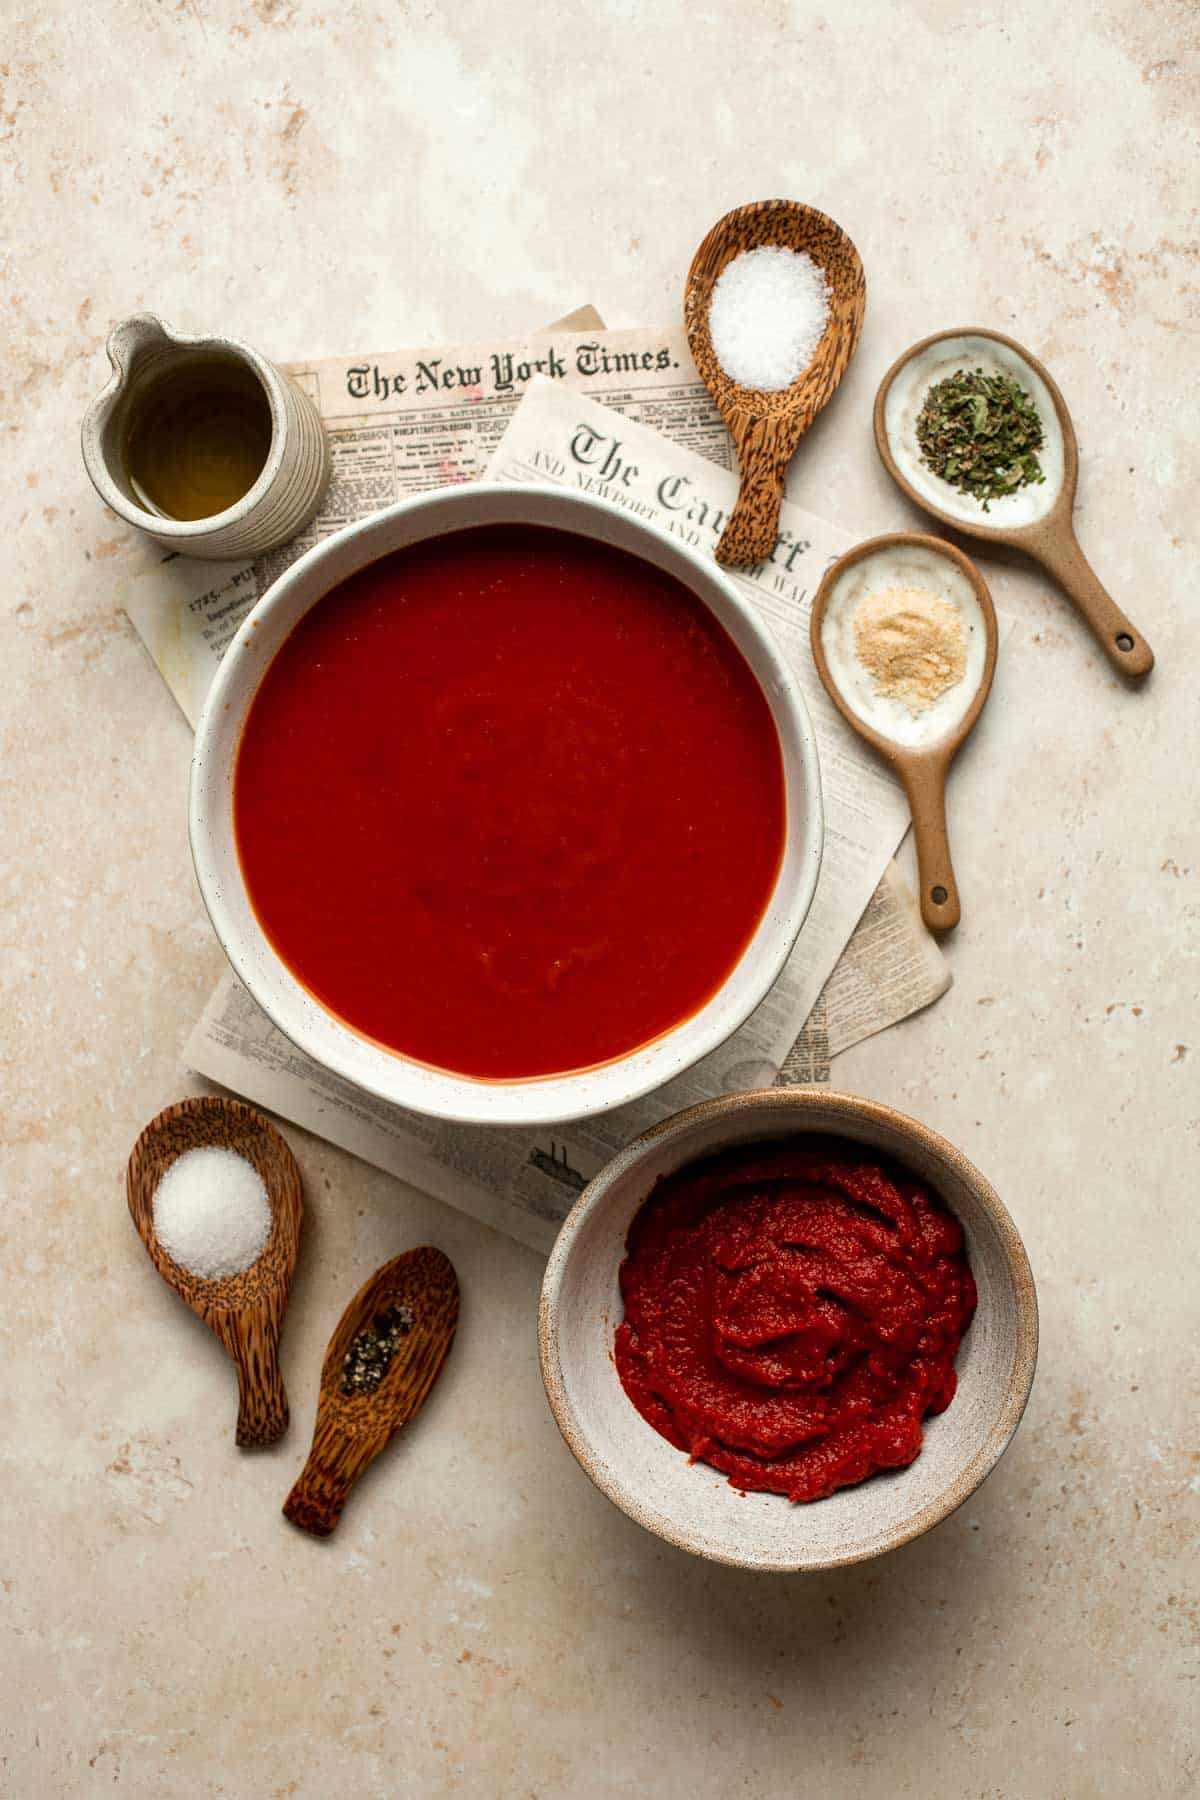
How to Make the Best Homemade Pizza Sauce
- Combine ingredients. In a medium mixing bowl, combine tomato sauce, tomato paste and olive oil. Mix well with a spoon until smooth.
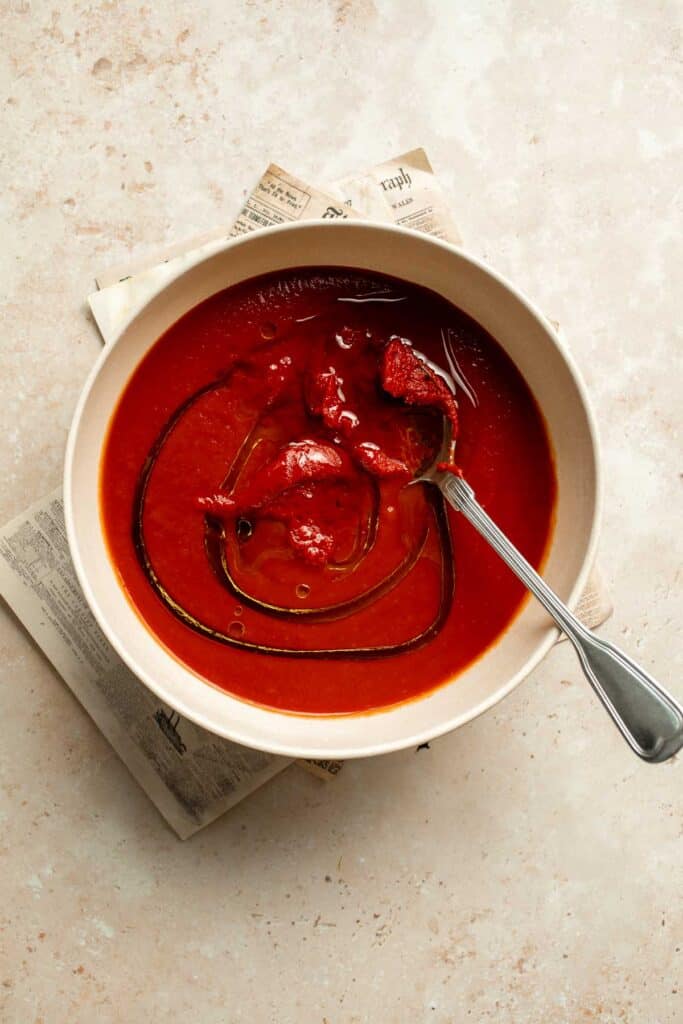
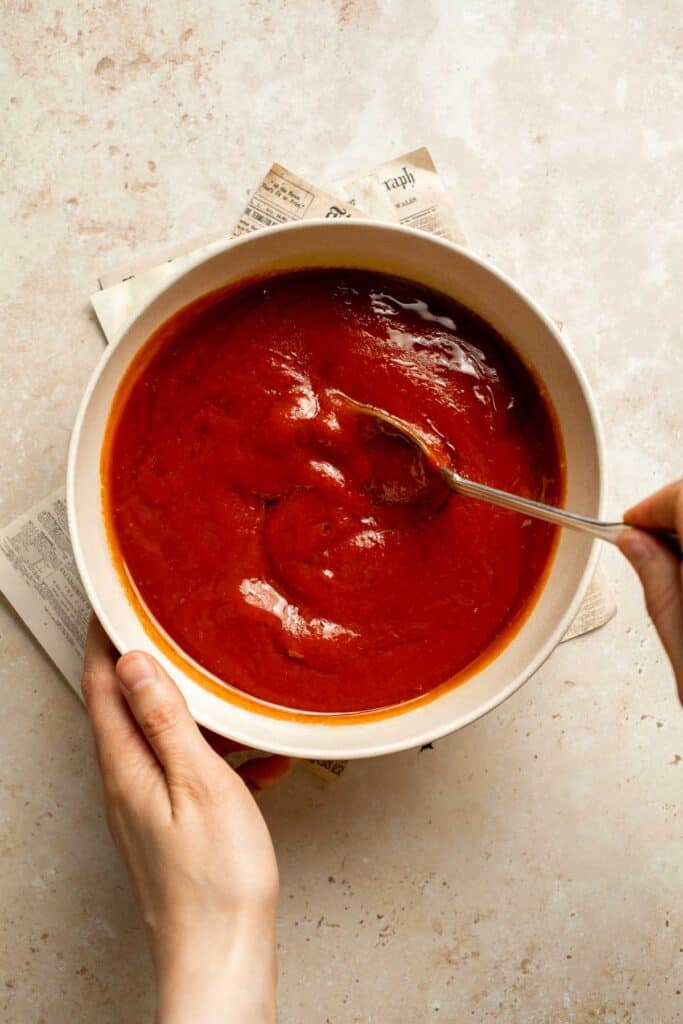
- Season. Stir in sugar, Italian seasoning, garlic powder, salt and pepper.
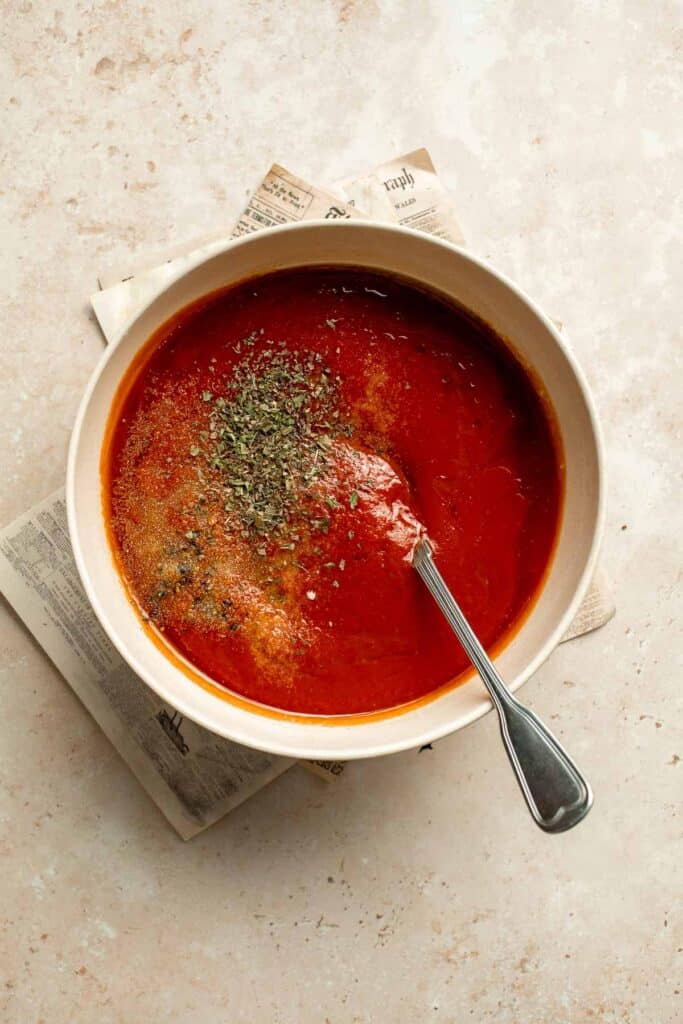
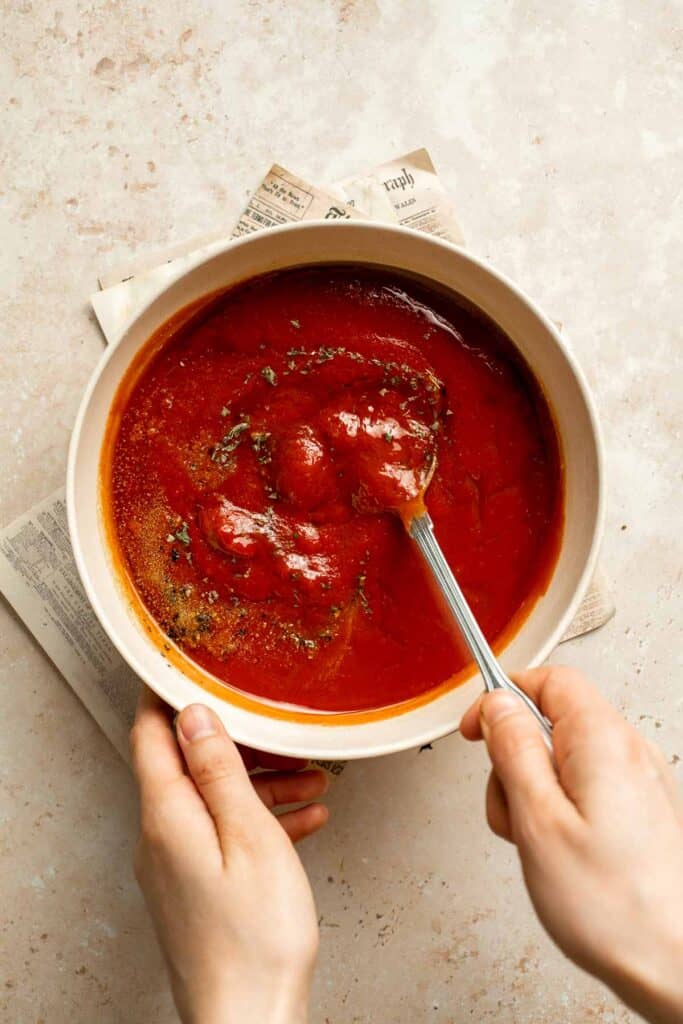
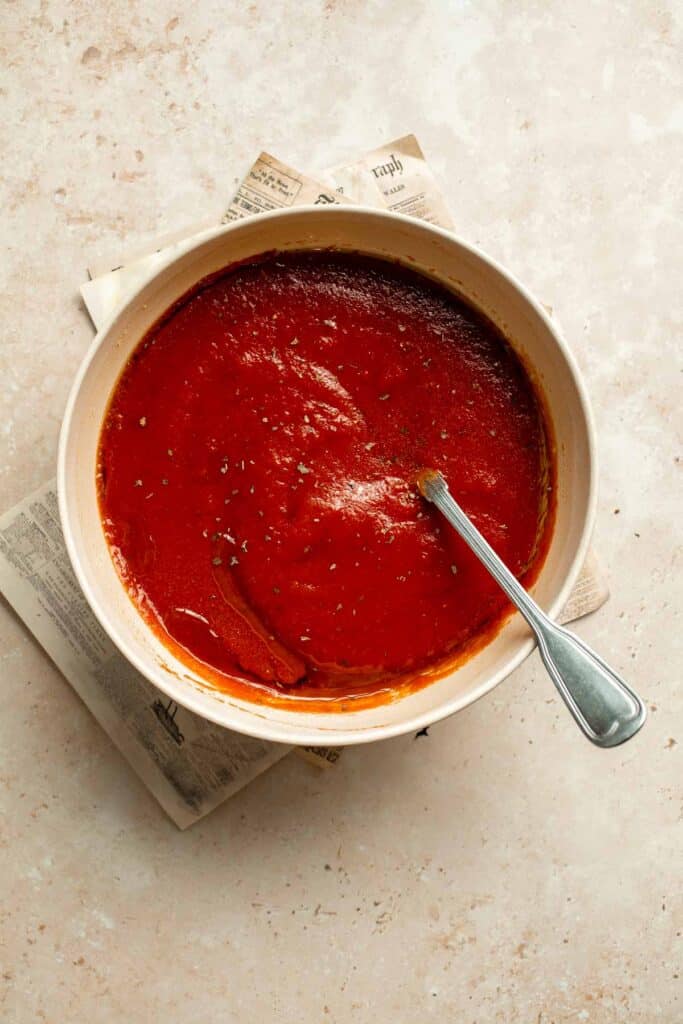
- Use. Spread on pizza dough or serve as a dipping sauce. You can store the pizza in an airtight container in the refrigerator for 5 days or in a freezer for 3 months.
Recipe Variations
- Make it organic. Use organic canned tomatoes, sugar, olive oil, and spices for a completely organic pizza sauce!
- Adjust the seasonings. Prefer a spicy sauce? Add red pepper flakes. You can also add fennel seed, dried basil, onion powder, or other spices for extra flavor.
- Cook down fresh garlic. If you have a little extra time, saute a freshly minced garlic clove in olive oil and heat the sauce on the stove. You can also use fresh herbs, if you'd like.
- Use Italian tomatoes. For a more authentic flavor, use canned San Marzano tomatoes or Roma tomatoes in your sauce.
How to Serve
This homemade pizza sauce is delicious served on its own as a dip with chips on the side, or used with some of my favorite pizza recipes including:
- Small Batch Sourdough Pizza Dough
- Salami and Mushroom Skillet Pizza
- Homemade Calzones
- Pepperoni Pizza Rolls
- Pizza Dip
- Skillet Neapolitan Margherita Pizza
- Pizza Fries
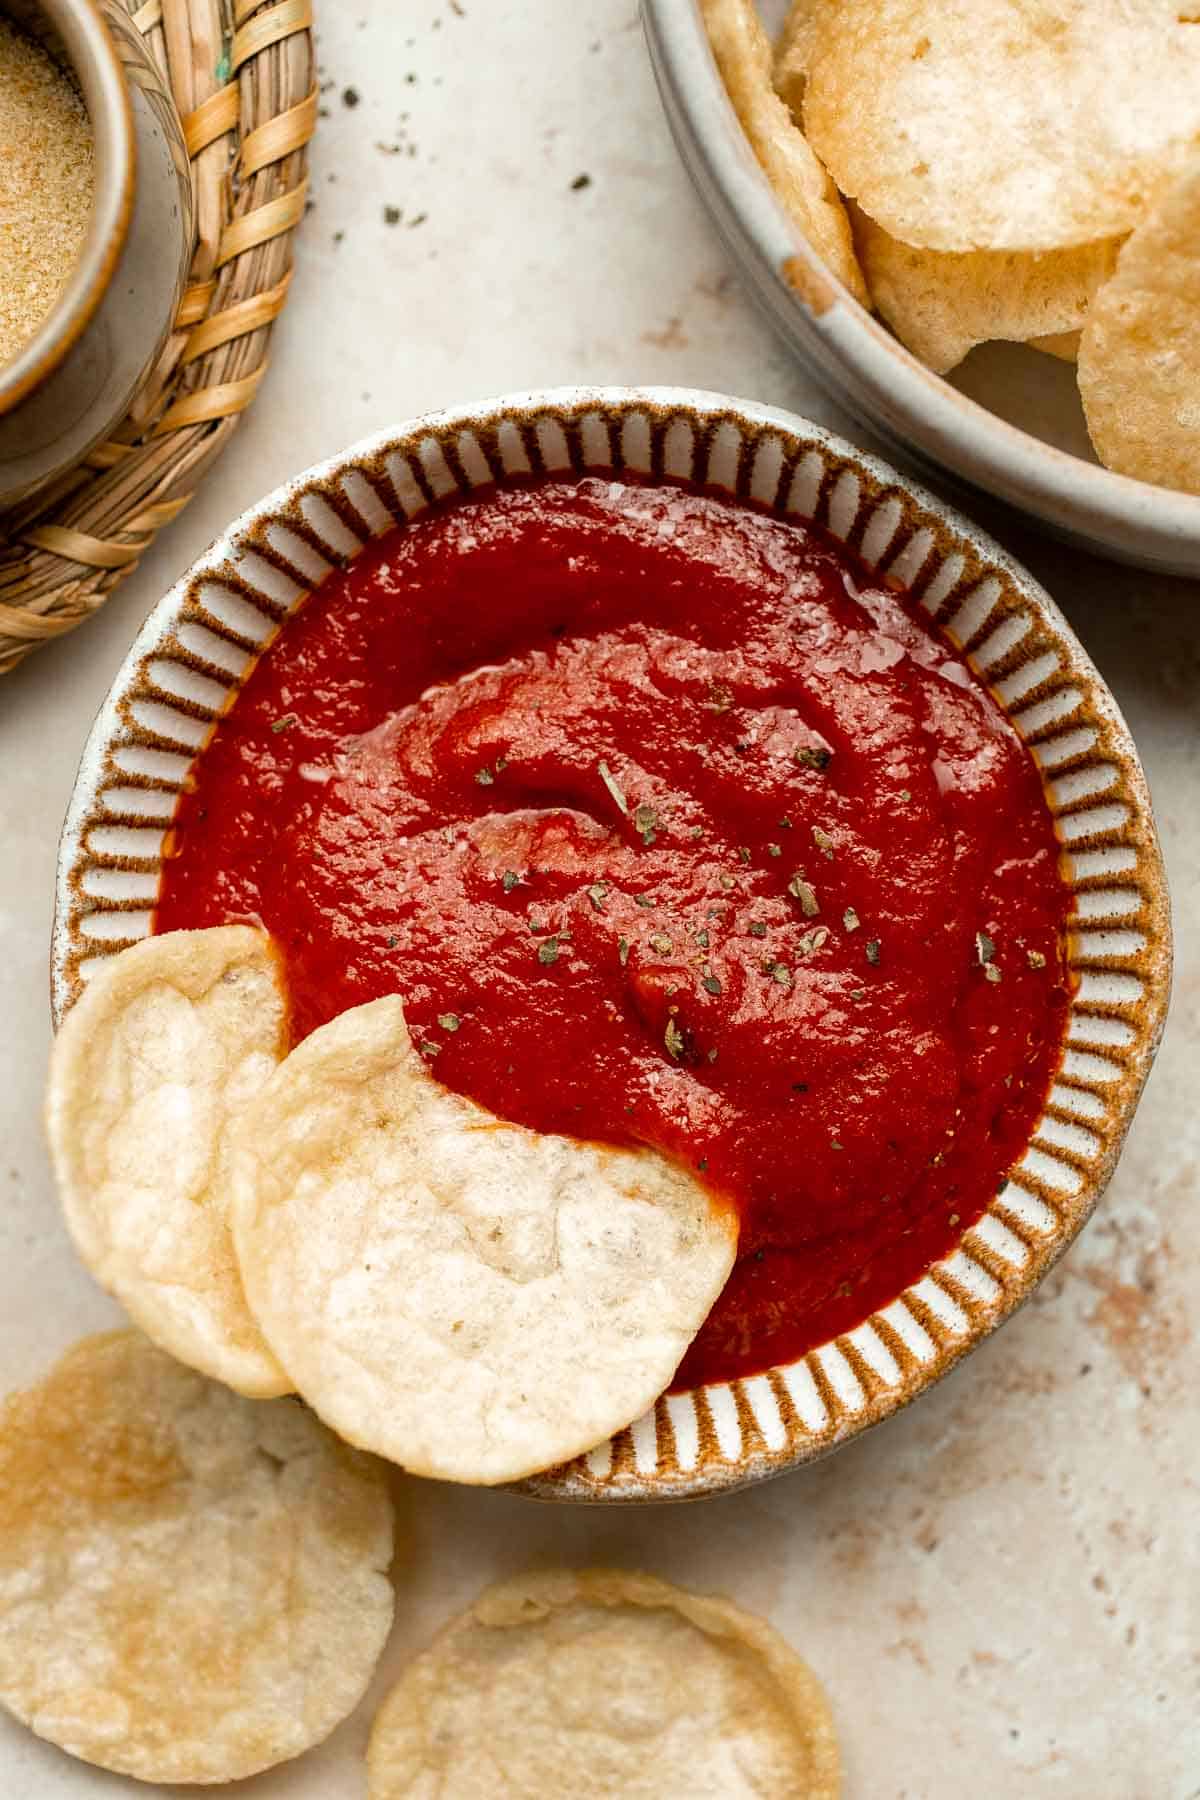
Recipe Tips and Tricks
- Use the right canned tomatoes. There are so many different types of canned tomatoes; it gets overwhelming sometimes! This recipe keeps it simple with tomato sauce and tomato paste. This is different from canned tomatoes, diced tomatoes, or tomato puree. so double-check your cans.
- Let the sauce rest. Although you can use this easy pizza sauce recipe right away, it will taste even better if you let it rest in the fridge for a few hours. This lets all the herbs and spices mingle together.
- Add salt. The salt helps to neutralize the acidity of the tomatoes to make this sauce even more delicious.
Storing and Freezing Instructions
How to Store
Store leftover pizza sauce in a glass jar in the fridge for 4-5 days.
How to Freeze
To save this great pizza sauce for later, fill a small freezer container like a glass mason jar. If freezing glass, leave an inch of headspace to allow for expansion. Store any jars of pizza sauce in the freezer for up to 3 months. Thaw in the fridge before adding to your favorite pizza dough recipe.
FAQ
If you're in the middle of pizza night and don't have any store-bought pizza sauce in your pantry, try making your own sauce with tomato sauce, tomato paste, sugar, olive oil, and a handful of spices. You don't even have to heat the mixture before using it! If you prefer a tomato-y sauce and don't have those ingredients on hand, cook down marinara sauce until it's really thick and use that instead. You can also try substituting different sauces, like BBQ sauce, alfredo, or pesto, or skip the sauce completely and brush on olive oil with garlic salt and your favorite toppings.
You absolutely do not have to use pizza sauce on your pizza, but for many people, it isn't pizza unless it has sauce! The tangy tomato flavor is a great contrast to the cheese, and this uncooked pizza sauce is so easy to make you can have it ready to go in no time at all.
Yes! This homemade pizza sauce is safe to eat, even as an uncooked sauce. However, it tastes even better heated up! Try warming it up in the microwave for a delicious dip for garlic breadsticks or cheesy garlic bread.
More Sauce Recipes
- Marinara Sauce
- Homemade Enchilada Sauce
- Tahini Sauce
- Mushroom Gravy
- Sweet and Sour Sauce
- Homemade Teriyaki Sauce
Tried this recipe?
I'd love to hear what you think! Leave a comment and rating below to share your feedback. Your reviews help others discover this recipe and help me keep creating more free recipes for you. Snap a photo and tag me on social media @aheadofthyme too.
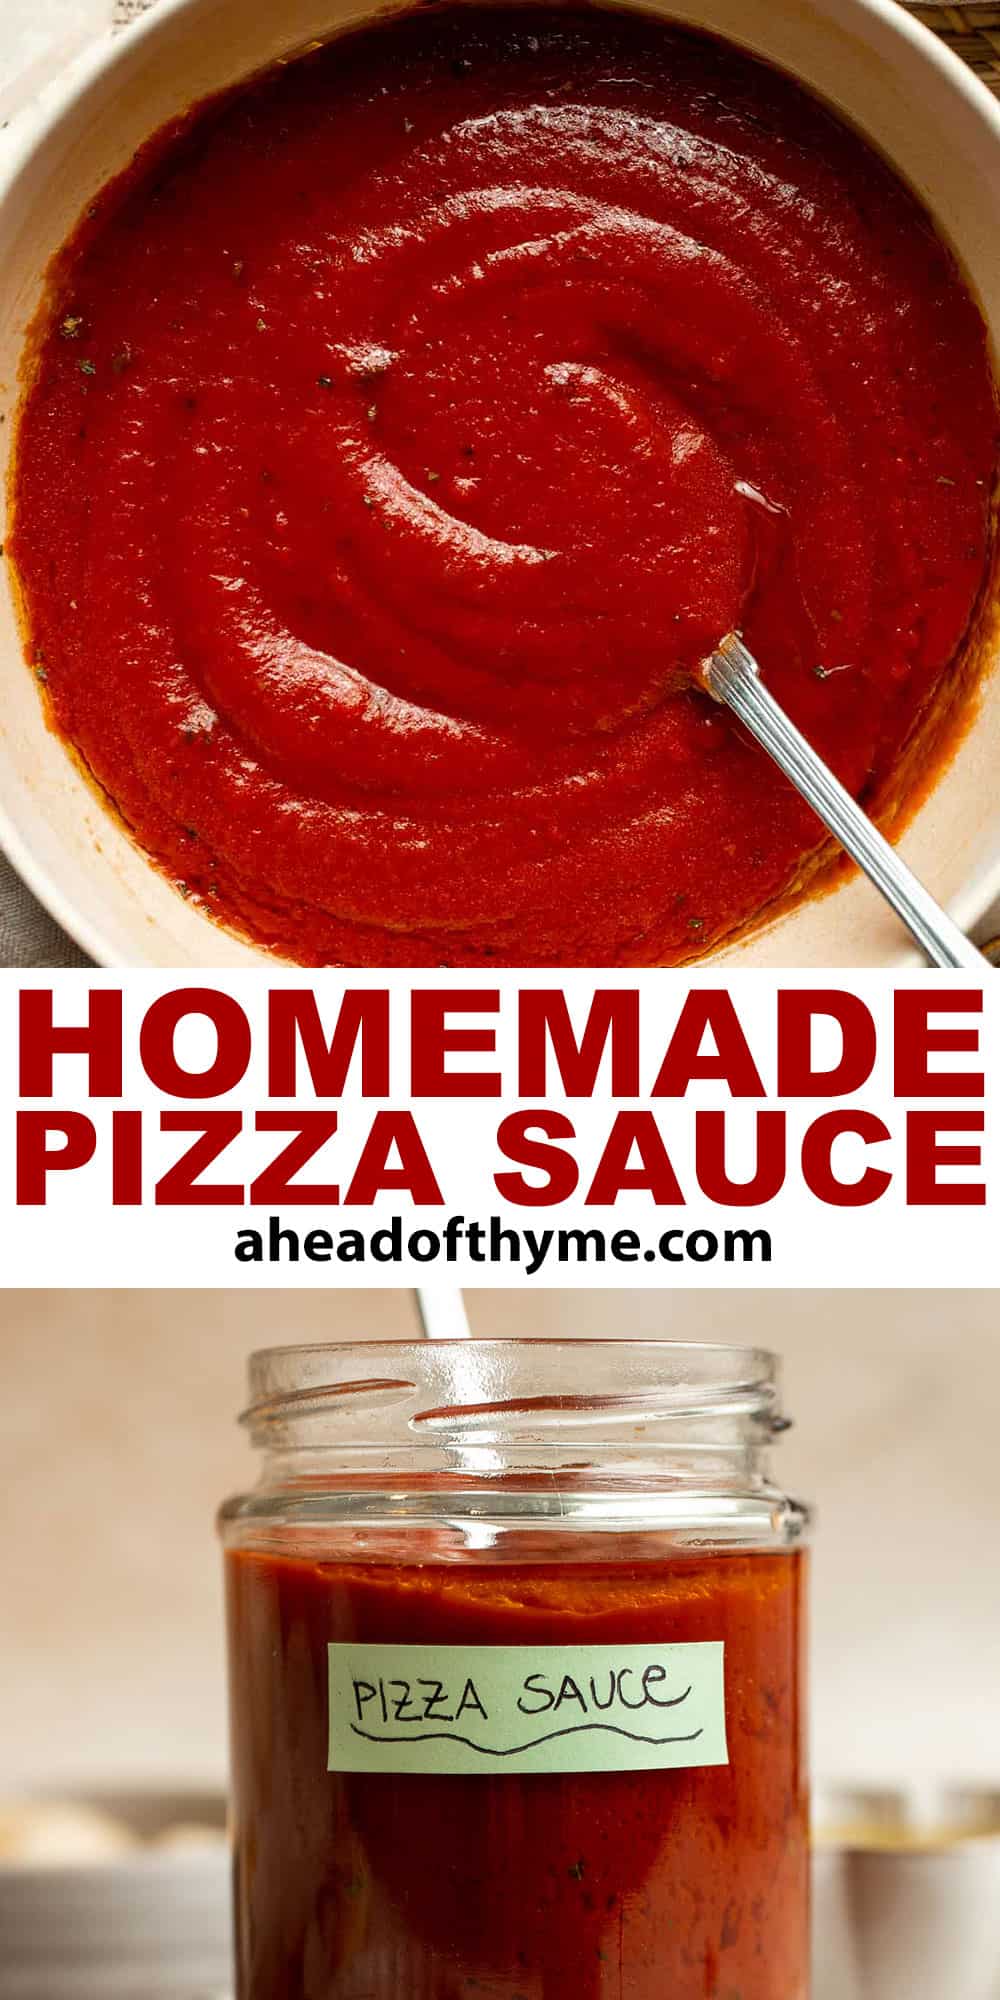
Homemade Baked Potato Chips
With a perfectly crisp crunch and a slightly salty flavor, these Homemade Baked Potato Chips are so much better than the prepackaged chips at the store. Since they're baked, they're also lower in fat, making them a healthier alternative to serve with your favorite burgers or sandwiches without compromising on taste!
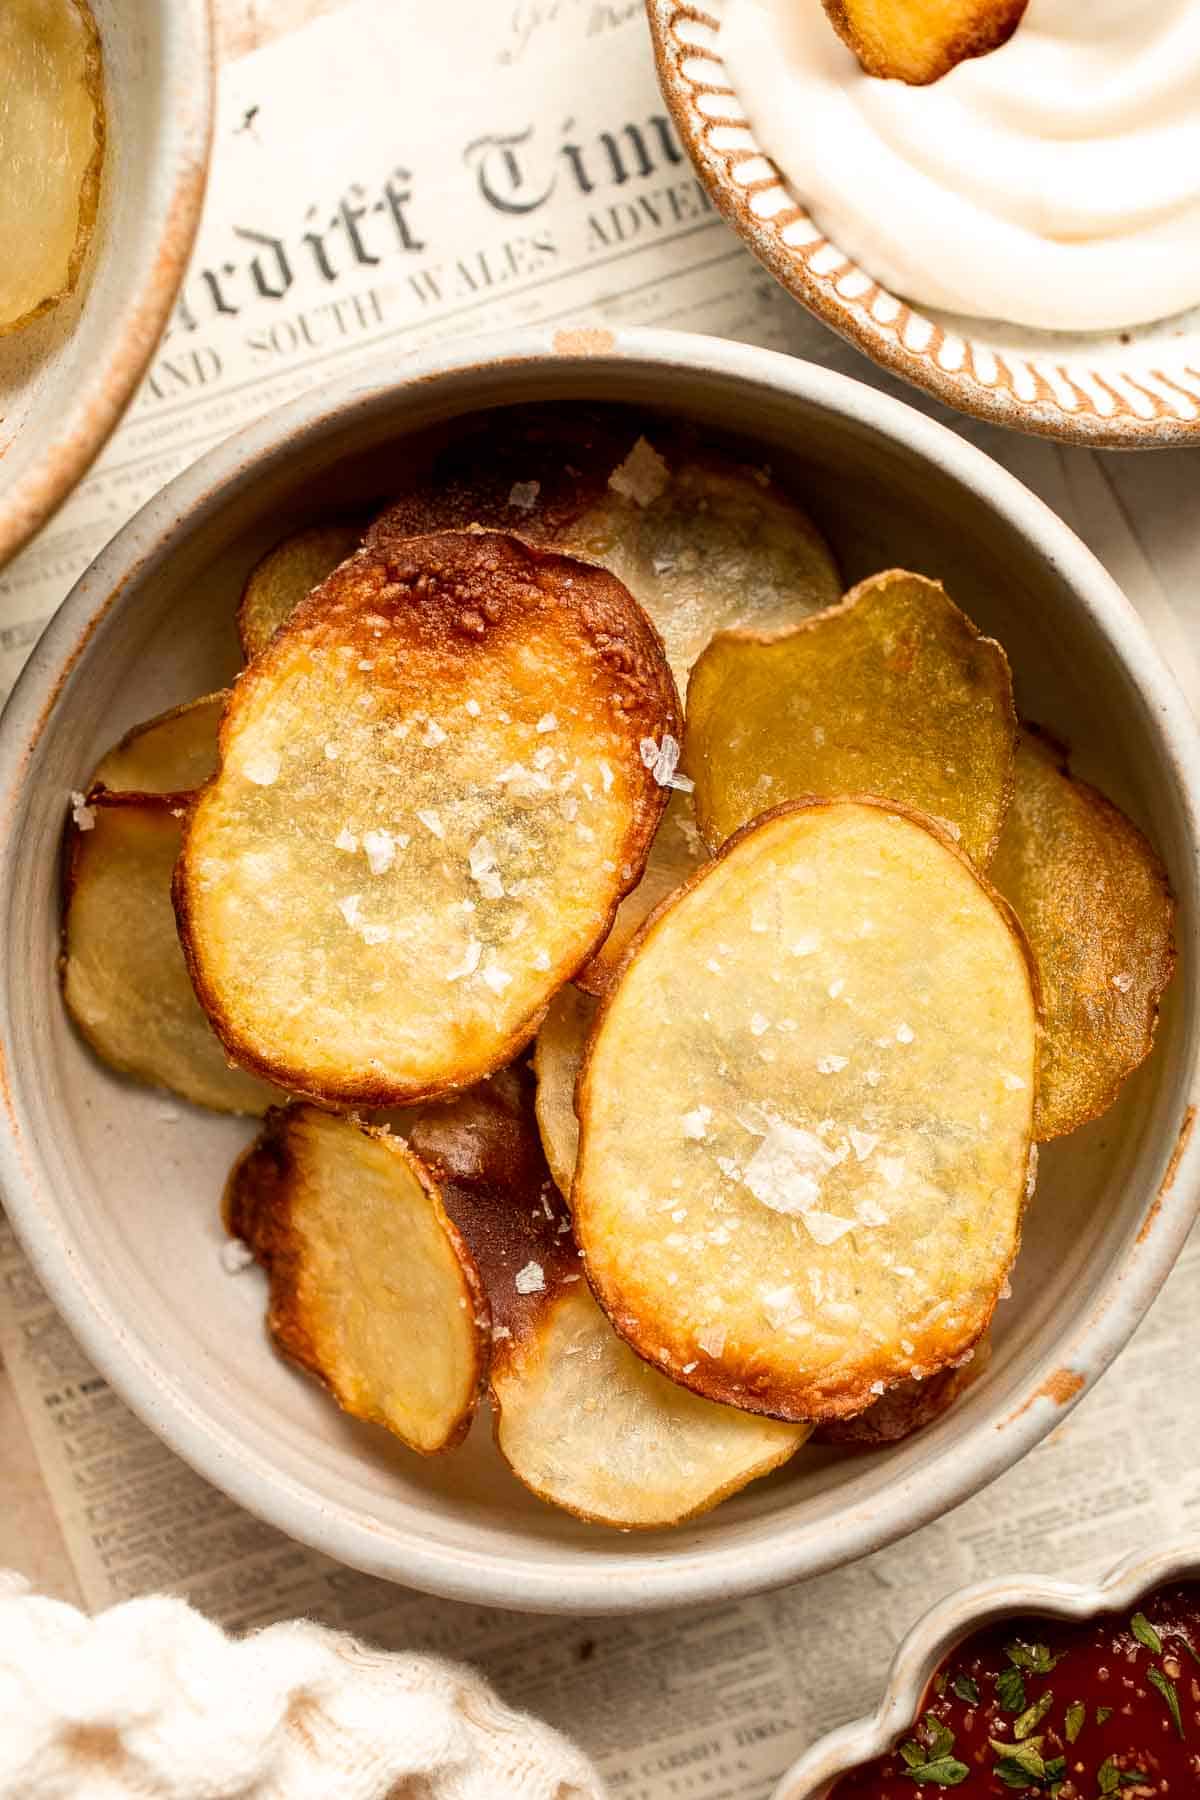
If you've never made your own potato chips before, this is the perfect time to start! You'll be surprised at how easy it is to make homemade potato chips, especially since these ones don't even require a deep fryer. Plus, that crispy crunch is so satisfying, and the seasoning options are endless. Once you get the hang of the process, you'll want to make them all the time!
Why You'll Love These Homemade Baked Potato Chips
- Easy to make. Traditional potato chips require quite a bit of effort. These ones don't even need to be soaked in cold water, so they're ready to bake almost instantly. Just make sure you have a mandolin to slice them really thin!
- Not fried. Instead of standing over a hot fryer waiting for your fries to turn golden brown, these crispy chips are baked to perfection. This makes them healthier, too! Don't worry - they're still perfectly crunchy.
- So crispy. The oil gently fries the potato chips in the oven, so although they are not fried traditionally, they still have the crispy, crunchy texture you love.
- Better ingredients. Most potato chips from the store are cooked in seed oils. This homemade version is much healthier because again, it's not deep fried, and we use olive oil to bake them. Avocado oil is also great healthier alternative to seed oils.
Ingredient Notes
To make these delicious homemade baked potato chips, you will need the following ingredients (full measurements in recipe card below):
- potatoes - use medium-sized yukon gold or russet potatoes for their high starch content.
- olive oil - choose olive oil or avocado oil to crisp up the potatoes in the oven.
- salt - it's very important to season well, as homemade chips can be bland without enough salt.
- garlic powder - this gives the chips a slightly sweet, savory flavor that takes them over the top.
You will also need measuring spoons, a large baking sheet, parchment paper, a mandoline slicer (or a sharp chef's knife), paper towels, and a large mixing bowl.
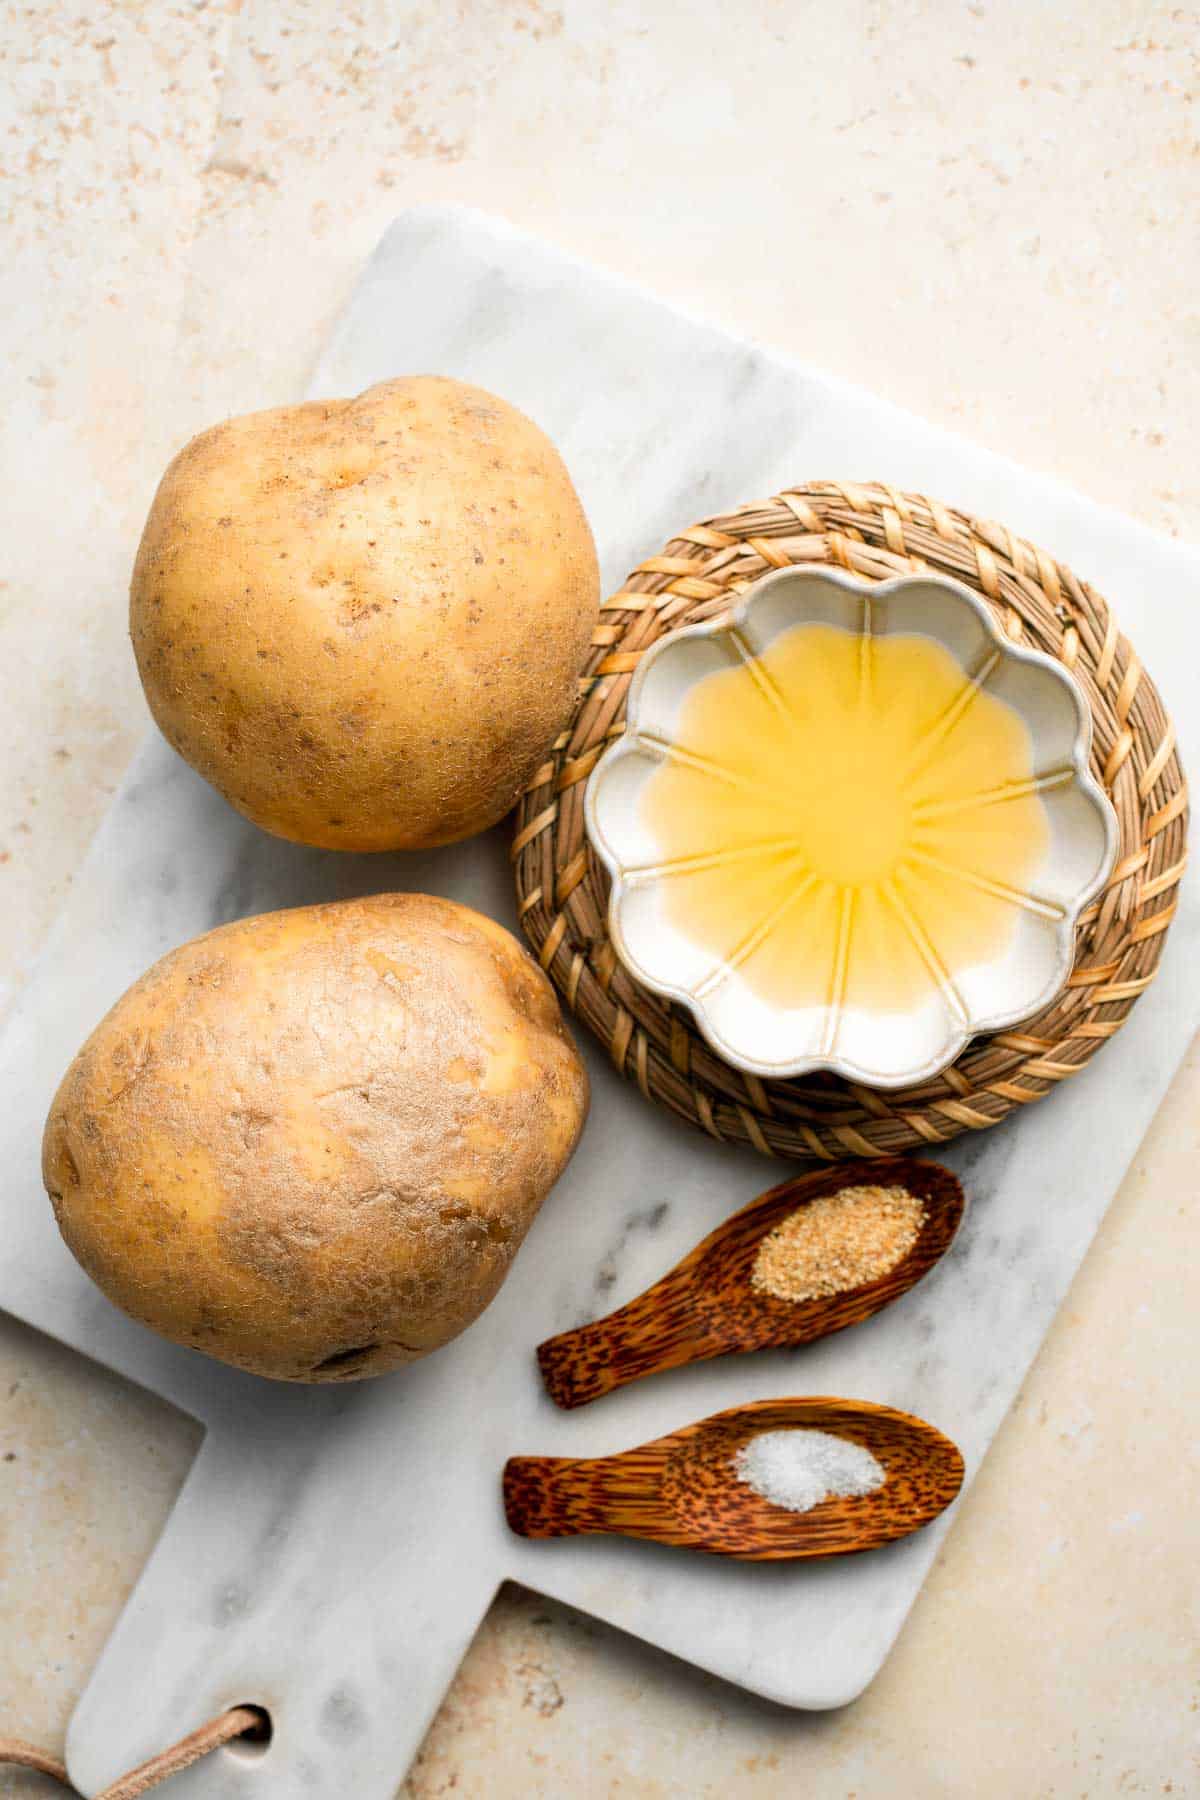
How to Make the Best Homemade Baked Potato Chips
- Slice potatoes. Use a mandolin slicer or a knife to slice potatoes into very thin slices, about ⅛ thick. Use a paper towel to pat the potato slices completely dry.
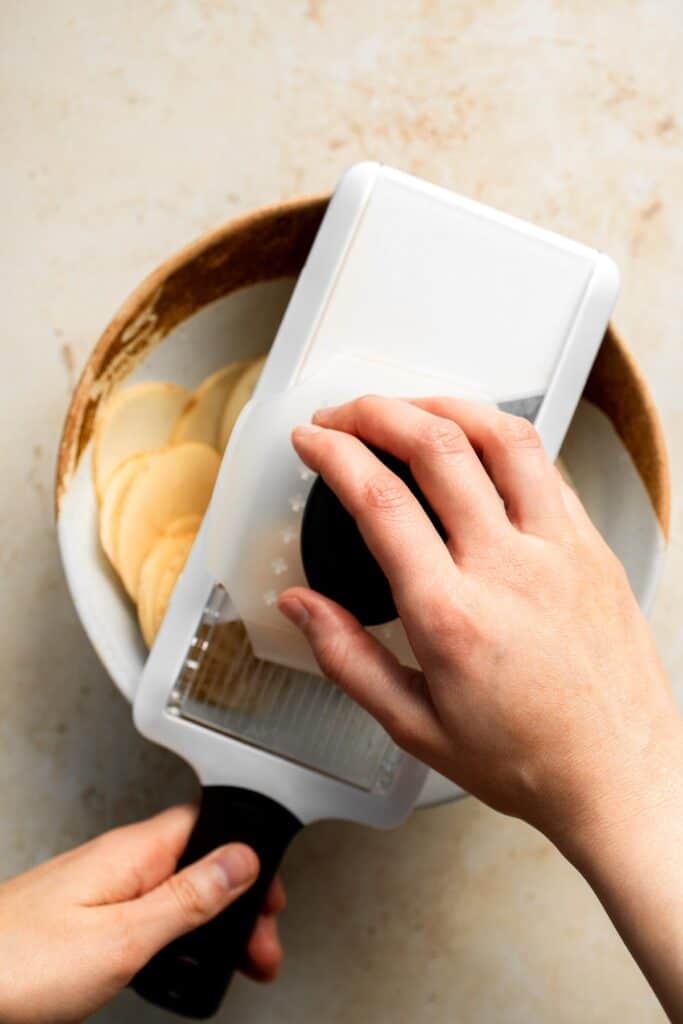
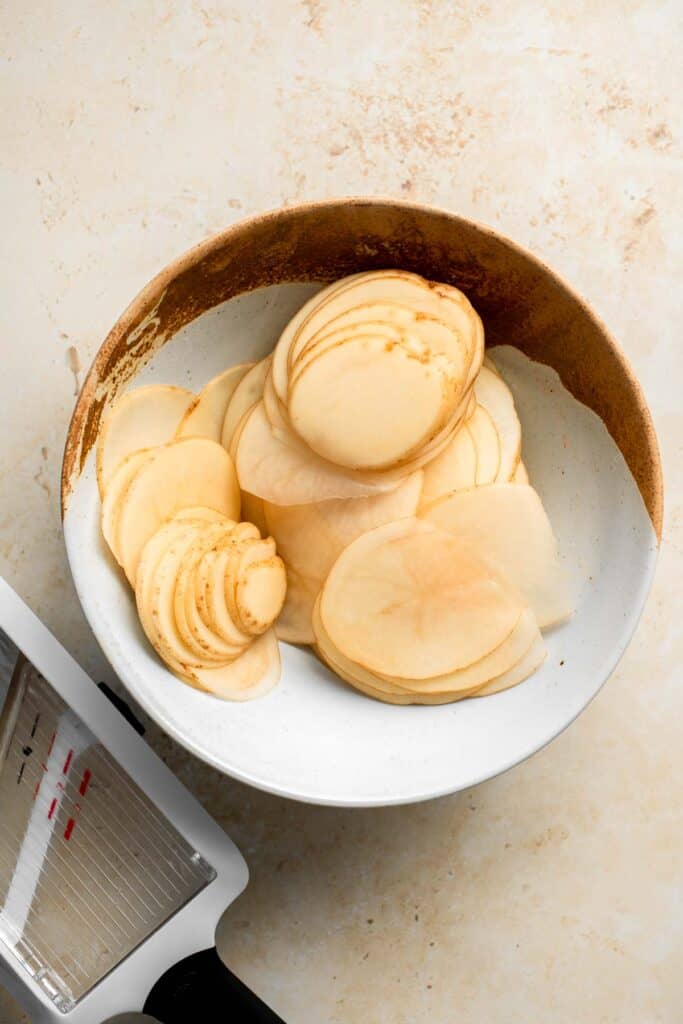
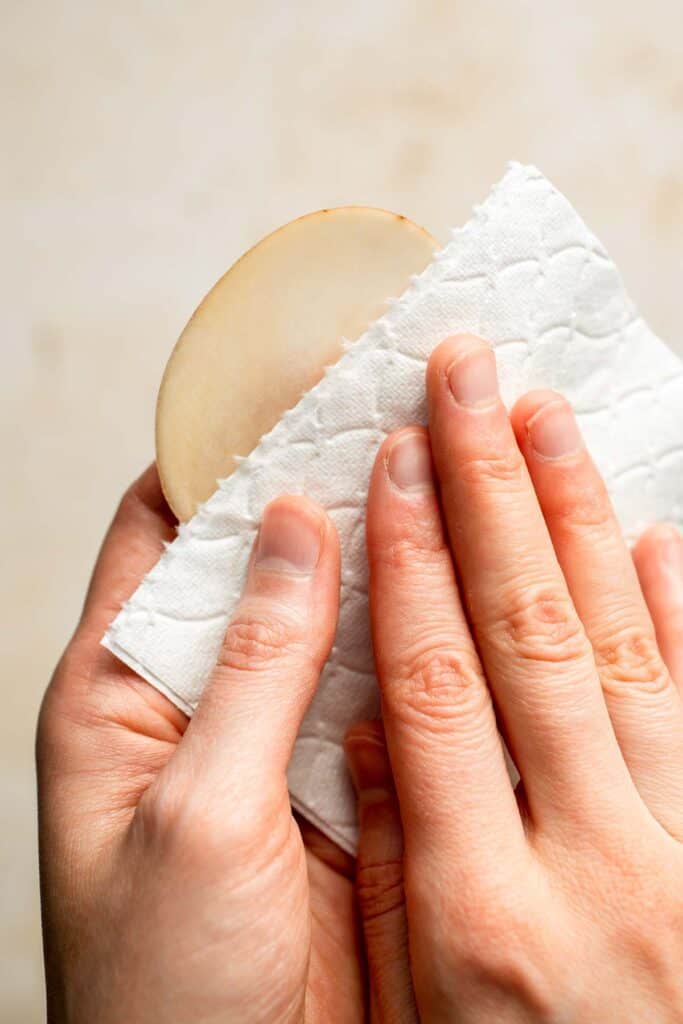
- Season. In a large mixing bowl, add potato slices, olive oil, salt and garlic powder. Toss well to coat evenly.
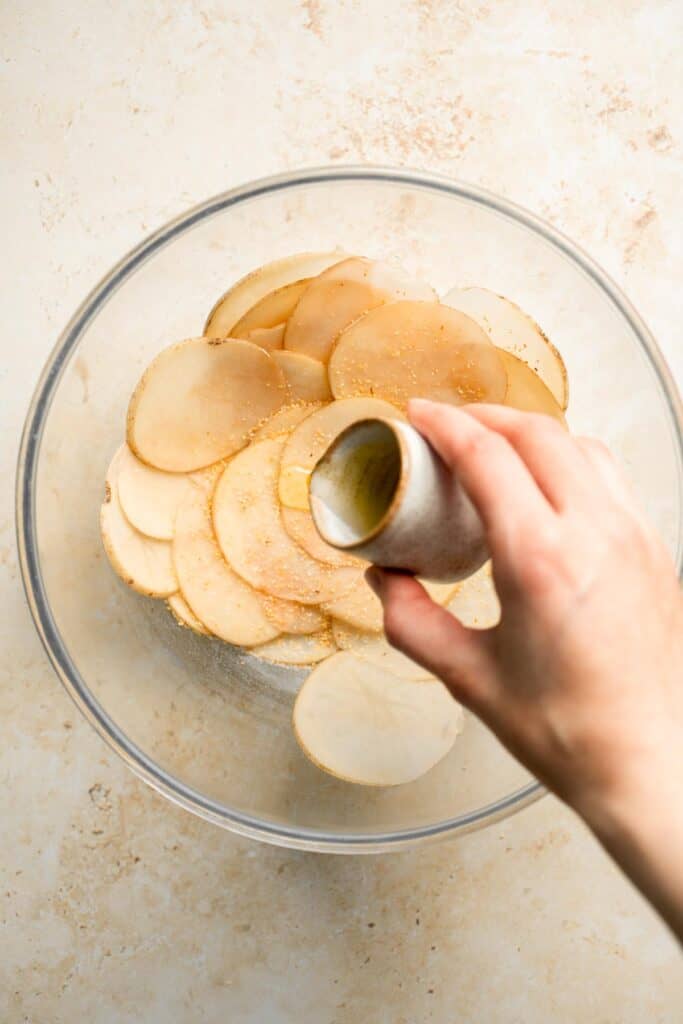
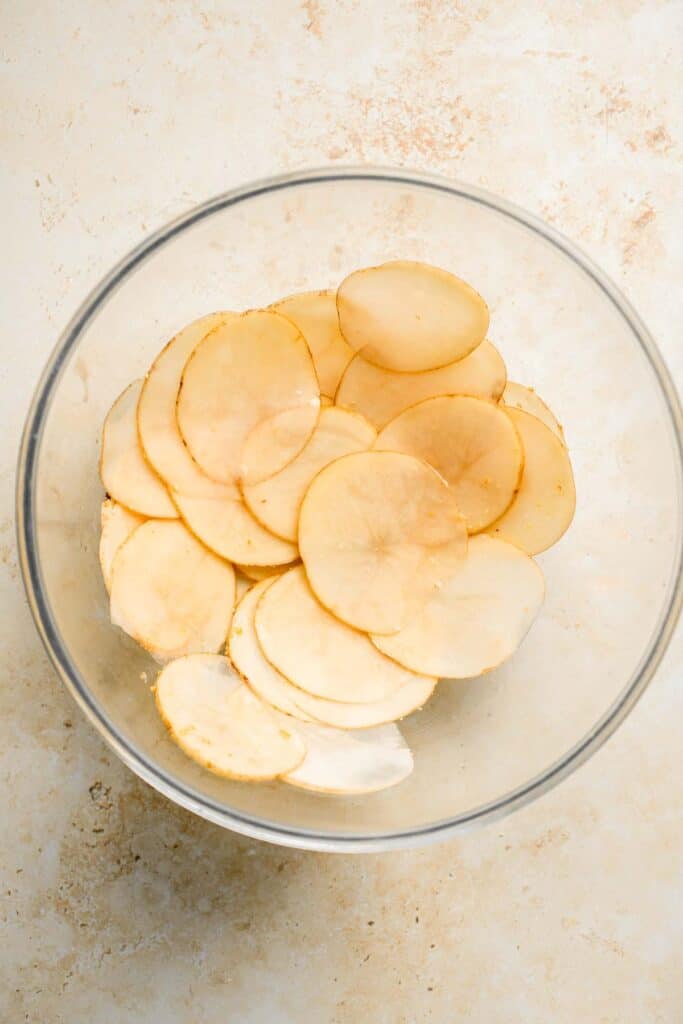
- Bake. Line a large baking sheet with parchment paper. Arrange the potatoes in a single layer on the prepared baking sheet and bake in a 400F preheated oven until golden brown and crispy, about 25 minutes. Flip them once halfway through baking.
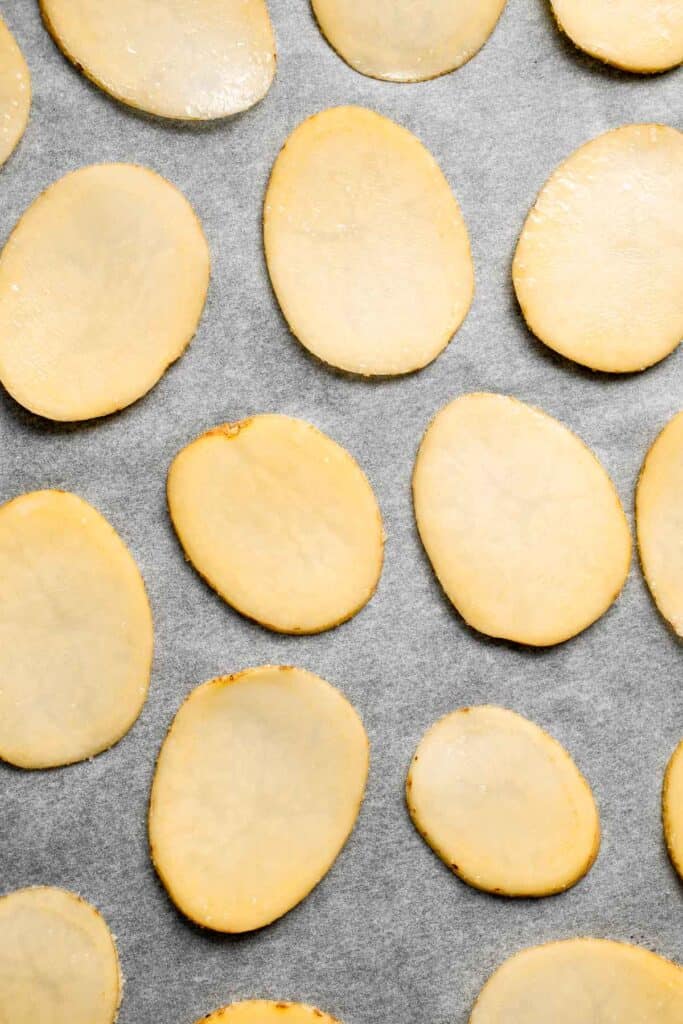
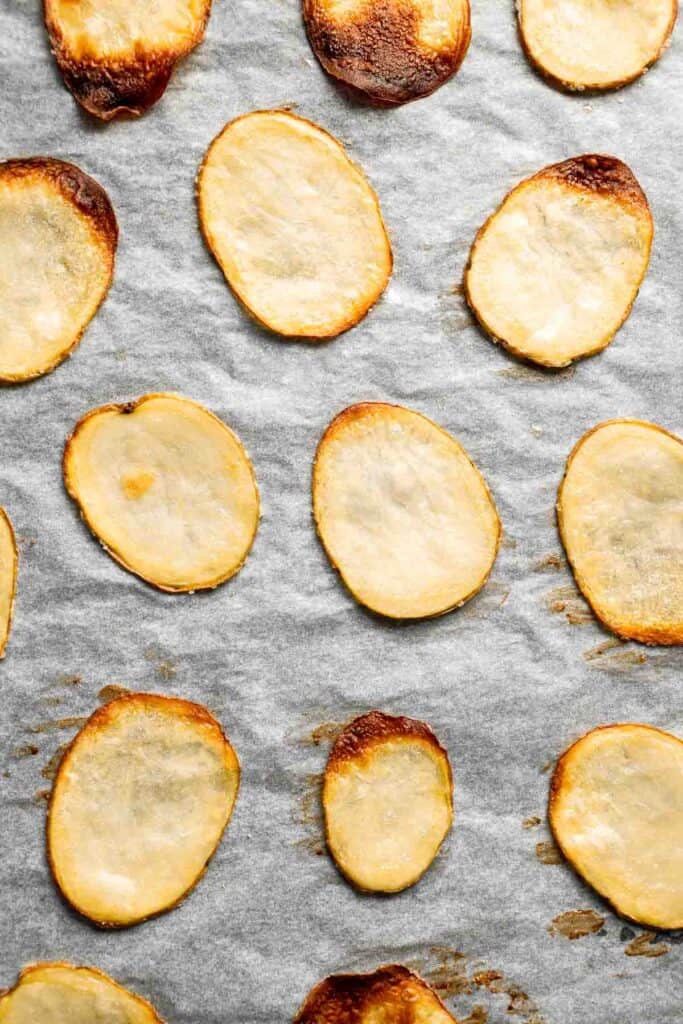
Recipe Variations
- Adjust the seasoning. Raid your spice rack to play with new flavors! Keep it simple with your favorite seasoning blend, like Old Bay seasoning, or dig deeper for the lemon pepper, BBQ dry rub, yellow curry powder, smoked paprika, chili powder, or make a custom blend. Have fun with it!
- Try a different vegetable. This recipe is also great for sweet potatoes or butternut squash. They both make delicious chips!
- Use the air fryer. Prepare the chips like normal, but bake them in the air fryer at about 325 degrees F for 15-20 minutes, then increase the temperature to 400 for the last 4-5 minutes to crisp them up. Watch carefully to avoid burning the chips.
How to Serve
These homemade baked potato chips are delicious served on their own as a snack, or served on the side of some of my favorite sandwiches or burgers including:
- Breakfast Bagel
- Caprese Sandwich
- Cranberry Brie Grilled Cheese
- Salmon Burgers
- Lemongrass Chicken Banh Mi Sandwich
- Egg Salad Sandwich
- Roasted Broccoli Grilled Cheese Sandwich
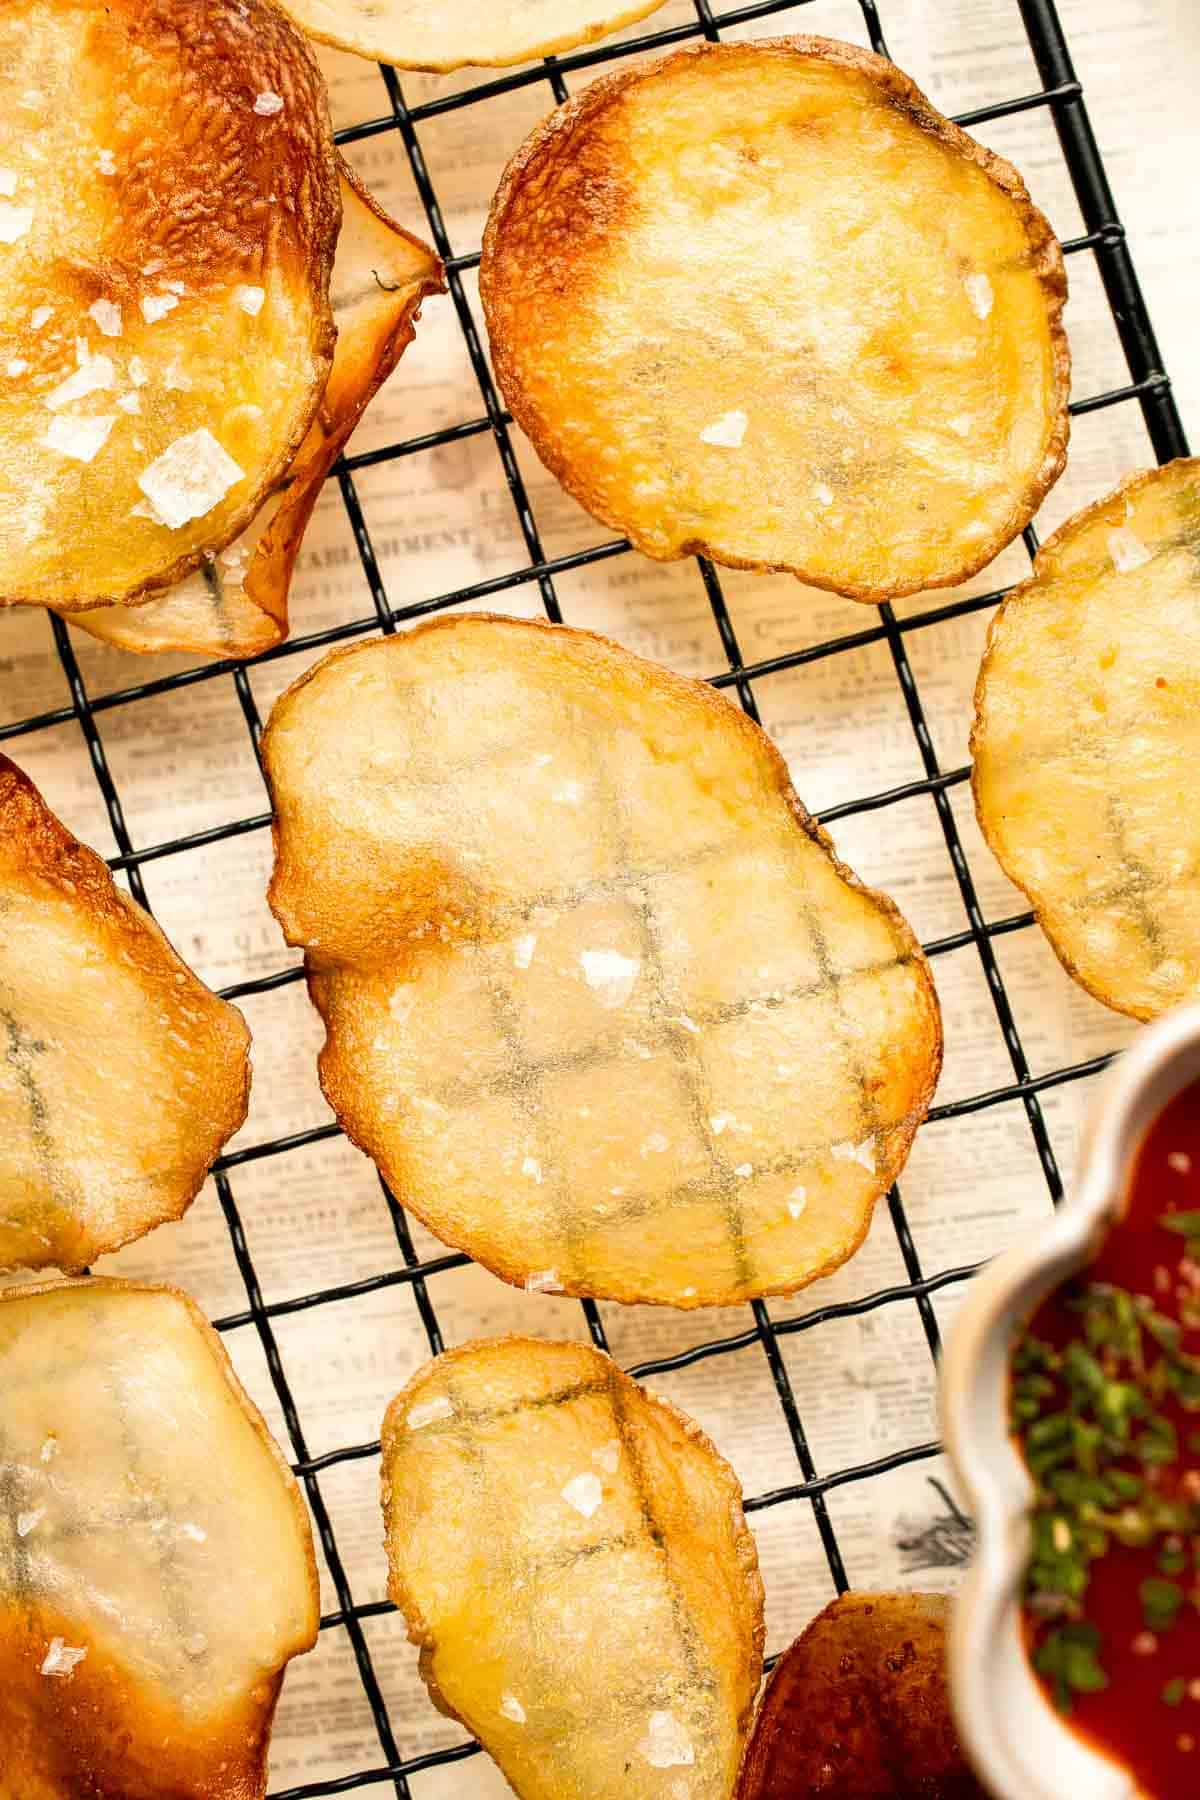
Recipe Tips and Tricks
- Use the right kind of potatoes. Yukon golds and russet potatoes have the perfect texture for French fries and crispy baked potato chips. Avoid using low-starch potatoes, like red potatoes.
- Use a mandolin slicer. It's very hard to cut thin slices of potato perfectly with just a sharp knife. Use a mandoline slicer or a food processor attachment to slice very thin rounds quickly.
- Dry the potatoes. It's essential to get rid of all that excess starch before adding the cooking oil to make sure the chips are nice and crispy. Pat the sliced potatoes with a kitchen towel or paper towels, and you're good to go.
Storing and Freezing Instructions
How to Store
Store leftover chips in an airtight container at room temperature for 2-3 days. Cool completely first to avoid steam, which will cause the chips to become soft.
How to Reheat
If you prefer warm chips, bake the leftovers on a sheet tray at 350 degrees F for 3-5 minutes to make them hot and crispy again.
FAQ
Just like the store-bought variety, homemade chips need to be stored in an airtight container to avoid absorbing moisture. Otherwise, they'll become soft and soggy instead of crunchy. Freshly baked homemade chips will stay fresh for approximately 2-3 days in an airtight container, although they taste best fresh from the oven. Just make sure the chips are completely cool before storing them to avoid steam (and excess moisture) in the container.
If you want crispy chips, you do need to add some oil. However, you don't always have to fry chips to get the best texture. Instead, you can easily bake them in the oven for a healthy snack. However, even oven baked potato chips should have some oil as it will help to crisp them up in the oven. You don't need a ton, but a little bit can make a huge difference!
If you've ever seen all the chip flavors at the grocery store, you know there are tons of ways to season them to make them delicious! We like to keep it simple with salt and garlic powder, but you can also add onion powder, cayenne pepper, parmesan cheese, nutritional yeast, BBQ dry rub, your favorite seasoning salt, or a ton of other options. Get creative with it and try something different!
More Snack Recipes
- 50 Best Finger Foods
- Homemade Popcorn
- Kale Chips
- Air Fryer Zucchini Chips
- Homemade Granola
- Rice Croutons
Tried this recipe?
I'd love to hear what you think! Leave a comment and rating below to share your feedback. Your reviews help others discover this recipe and help me keep creating more free recipes for you. Snap a photo and tag me on social media @aheadofthyme too.

Whipped Goat Cheese
This Whipped Goat Cheese is a delicious and creamy appetizer dip or spread you can easily make at home in 5 minutes. It has a distinct mild, tangy flavor with a light, fluffy, and spreadable texture that goes perfectly with your favorite snacks and savory dishes. There's no easier way to add some zing to your meals than with this simple dip.
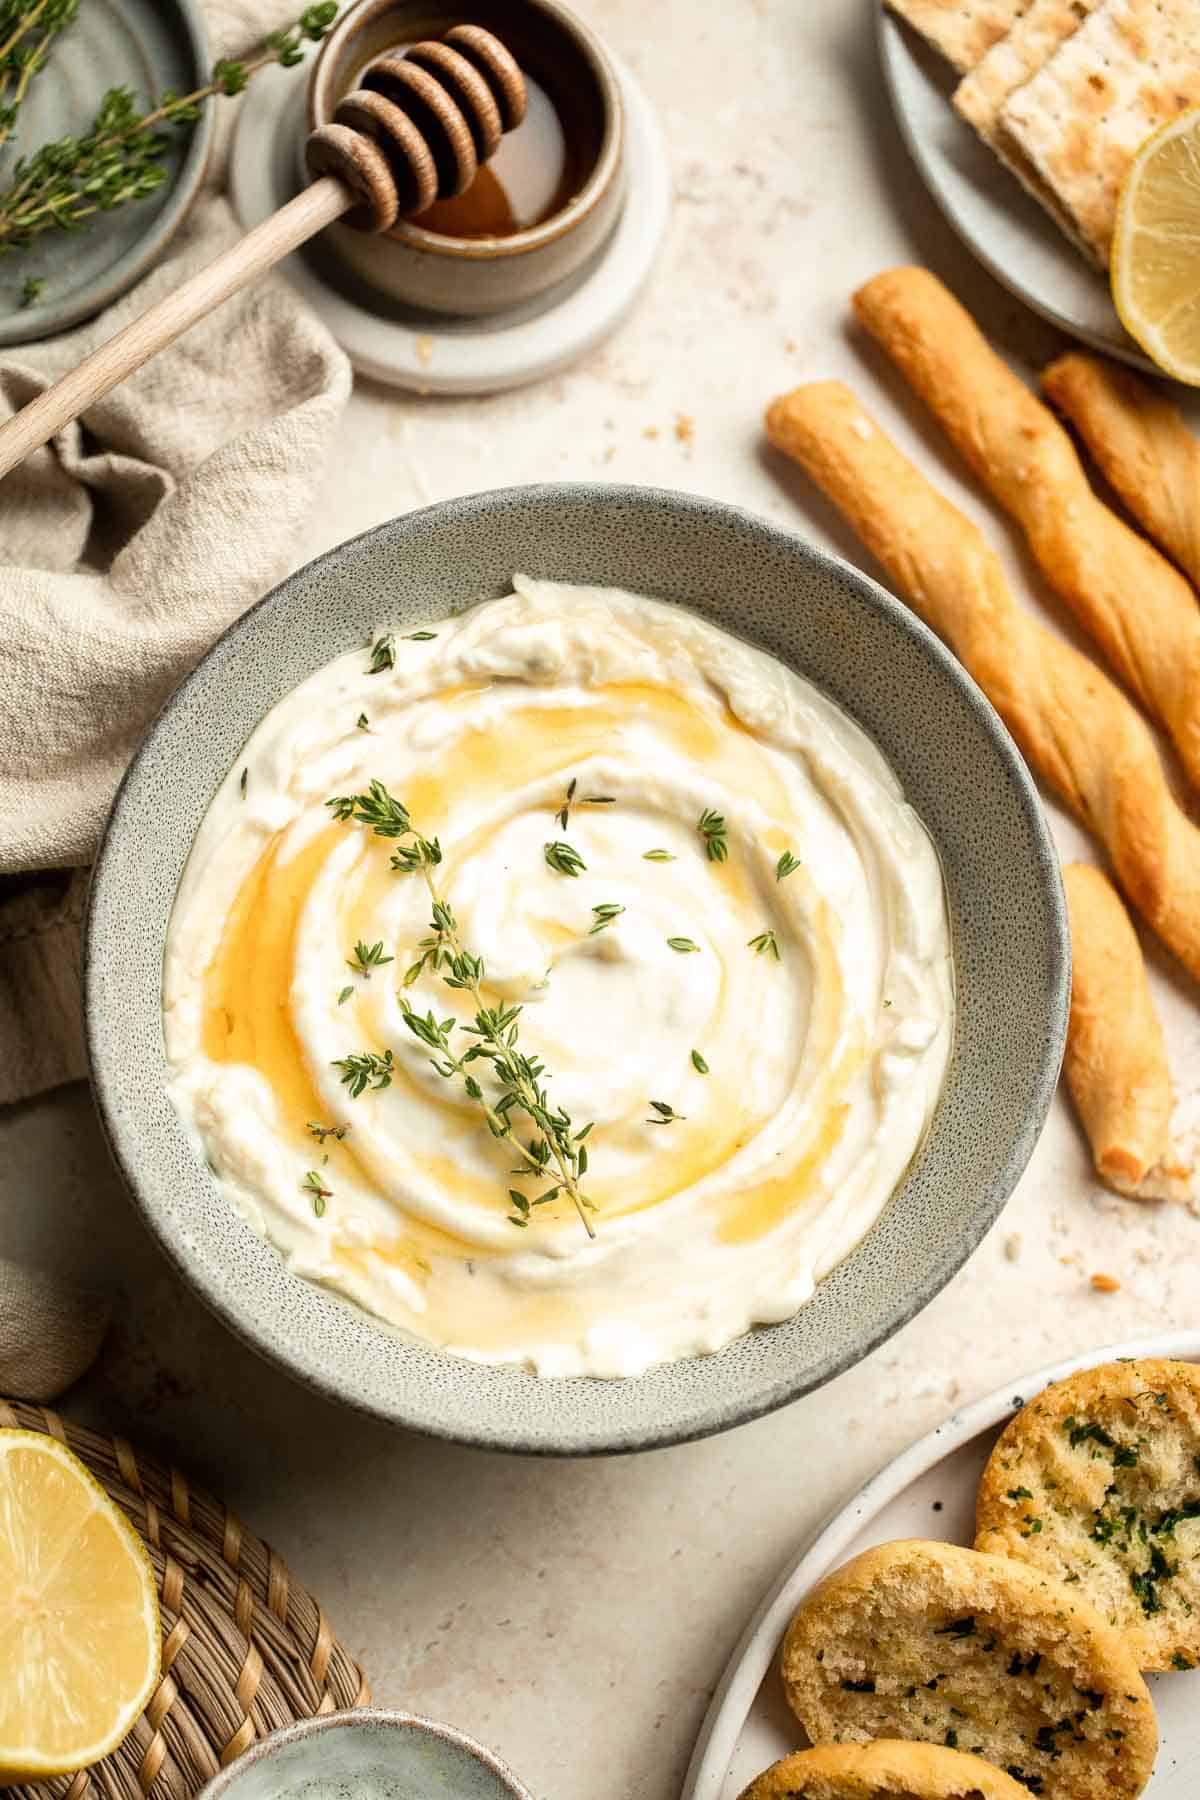
Once this whipped goat cheese goes into your mouth, it's hard to enjoy a plain store-bought cheese spread ever again. This version with cream cheese, garlic, and thyme packs a lot of creaminess in every bite and it honestly already tastes so good on its own. Paired with salty crackers, crunchy veggies, or even roasted meat, it elevates any dish with a bright and tangy kick that makes another scoop so hard to resist. Don't worry, you won't be alone in reaching for more, as it's a surefire favorite at any party or gathering!
Why You'll Love this Whipped Goat Cheese Recipe
- Quick and easy to make. If you can spare 5 minutes of your time, this whipped goat cheese is one of the best spreads you can make. Stock it in your fridge for those quick snack cravings or last-minute appetizers when you're entertaining. You can literally whip this deliciousness up in a few minutes!
- Rich and creamy. Goat cheese, on its own, has a unique tangy flavor and creamy texture. But when you add other ingredients like cream cheese and blend them together, the flavor and texture become even more luxurious. This light and smooth spread is simply the perfect way to bring a gourmet touch to your snacks and dishes.
- Spreadable. Isn't it great when a cheese spread is actually spreadable? This whipped goat cheese can be easily slathered into your favorite crackers, bagels, or toast. You can also dip your favorite chips, fries, breadsticks, or fresh veggies in it, which is excellent for those charcuterie boards. Talk about a versatile spread!
- Easy to customize. If you want to put your own spin on this goat cheese spread, you can try adding garlic and other fresh herbs like parsley, rosemary, and green onions for an extra depth of flavor. A squeeze of lemon can also help to balance all the herby and tangy flavors. You can even add bacon bits to make it more savory.

Ingredient Notes
To make this delicious Whipped Goat Cheese, you will need the following ingredients (full measurements in recipe card below):
- goat cheese - although it smells a bit funky, I love the earthy and tangy flavors of goat cheese. I prefer slightly aged ones since it's softer and more spreadable.
- cream cheese - adds a mildly sweet and salty taste while providing lots of creamy goodness. It also makes the resulting spread smoother.
- garlic + lemon juice - for the perfect flavor to compliment the natural tangy goat cheese.
- thyme - one of my favorite herbs. Fresh thyme gives an earthy yet slightly sweet flavor.
- salt and pepper - balances the overall flavor
- honey - gives a hint of sweetness that goes well with dairy products. - optional
You will also need measuring cups and spoons, food processor, and serving bowl.
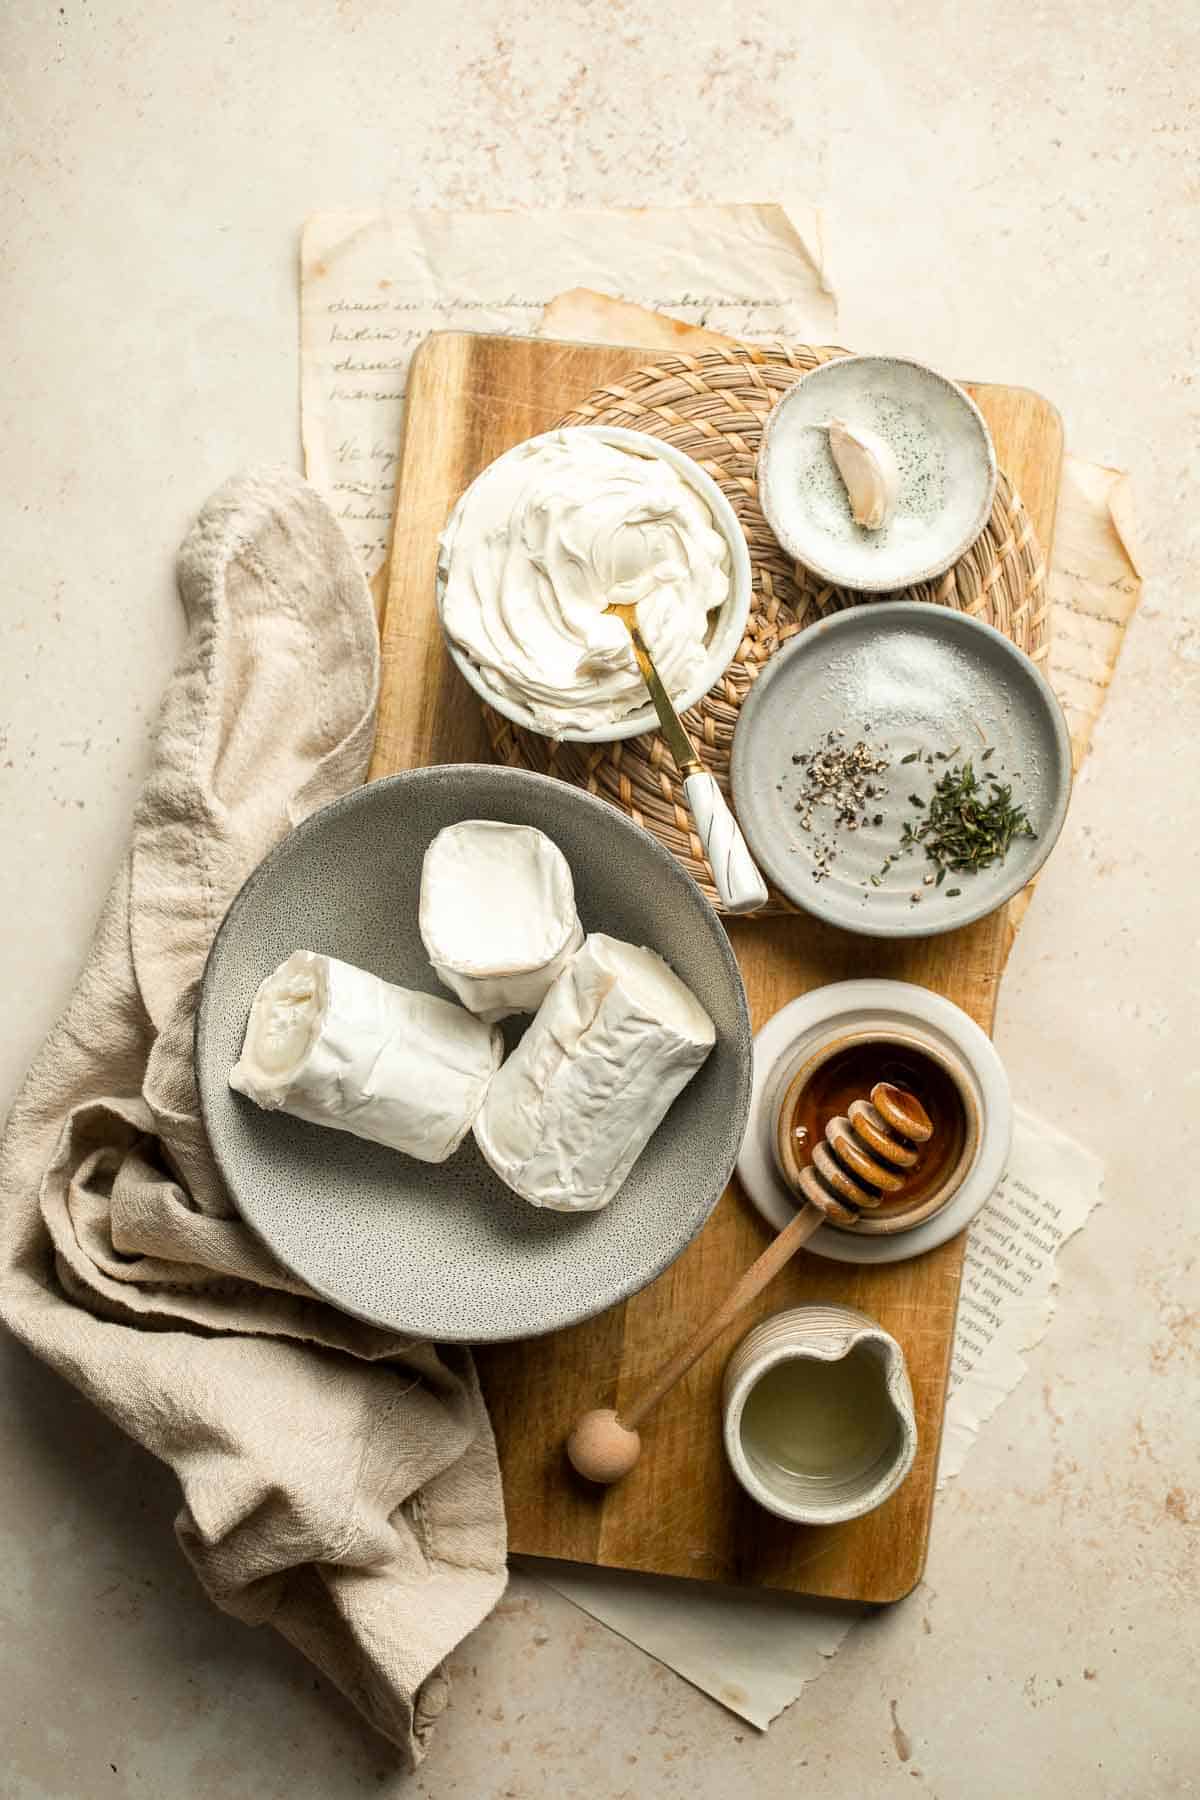
How to Make the Best Whipped Goat Cheese
- Blend. Crumble goat cheese into the bowl of a food processor. Add cream cheese, garlic, lemon juice, and black pepper. Pulse blend until smooth and creamy, scraping down the sides of the food processor as needed.
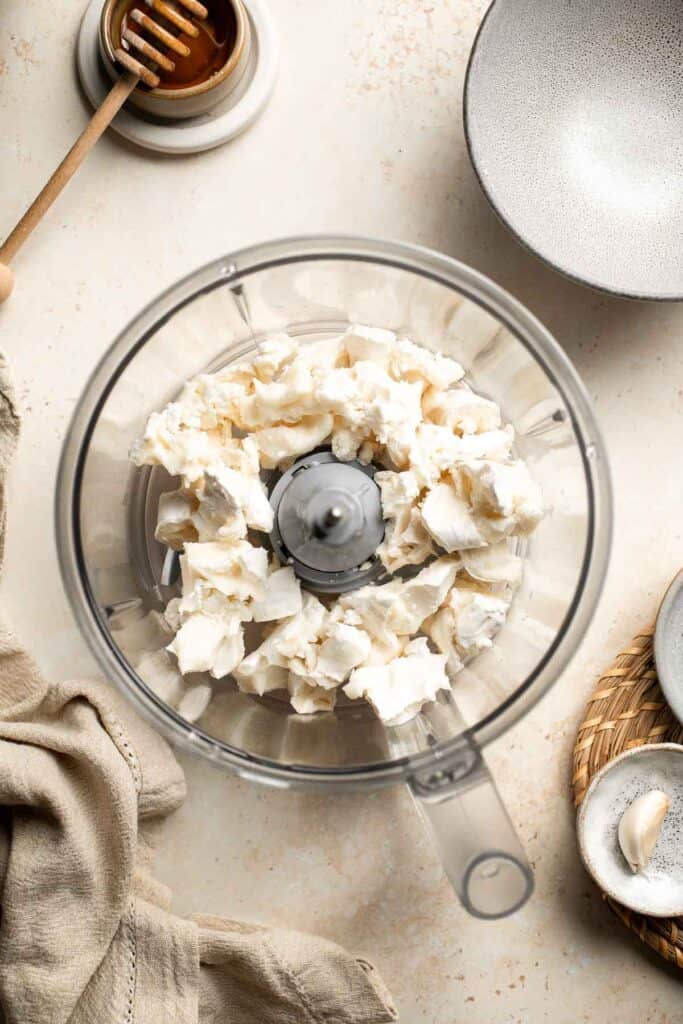
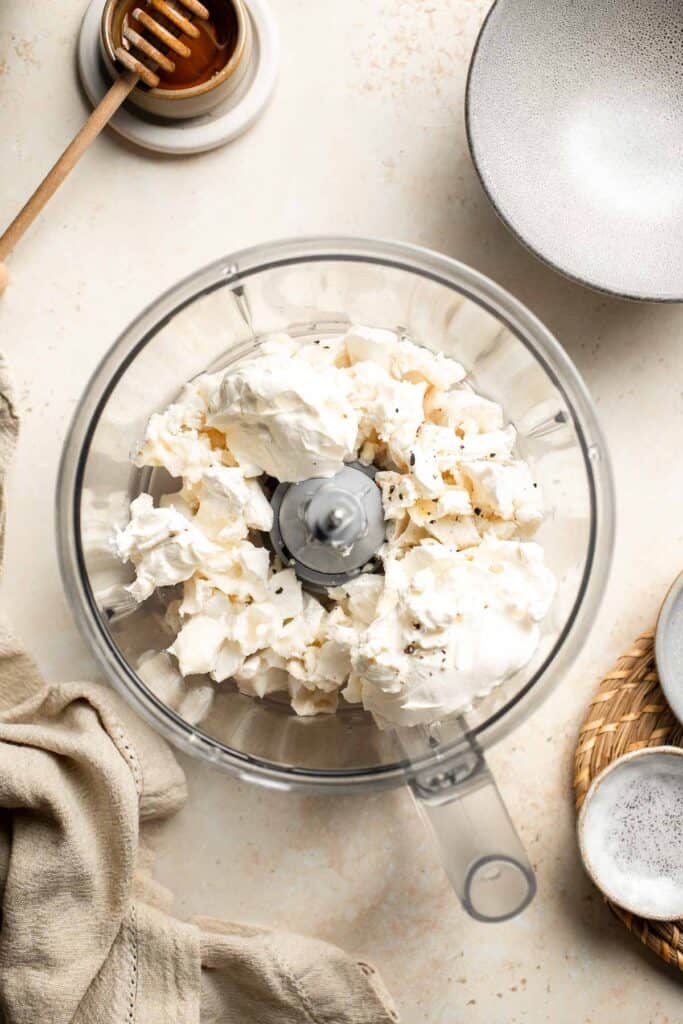

- Serve. Transfer to a serving bowl and top with chopped thyme and drizzle with honey, if desired. Serve with bread, chips, crackers, or fresh veggies.
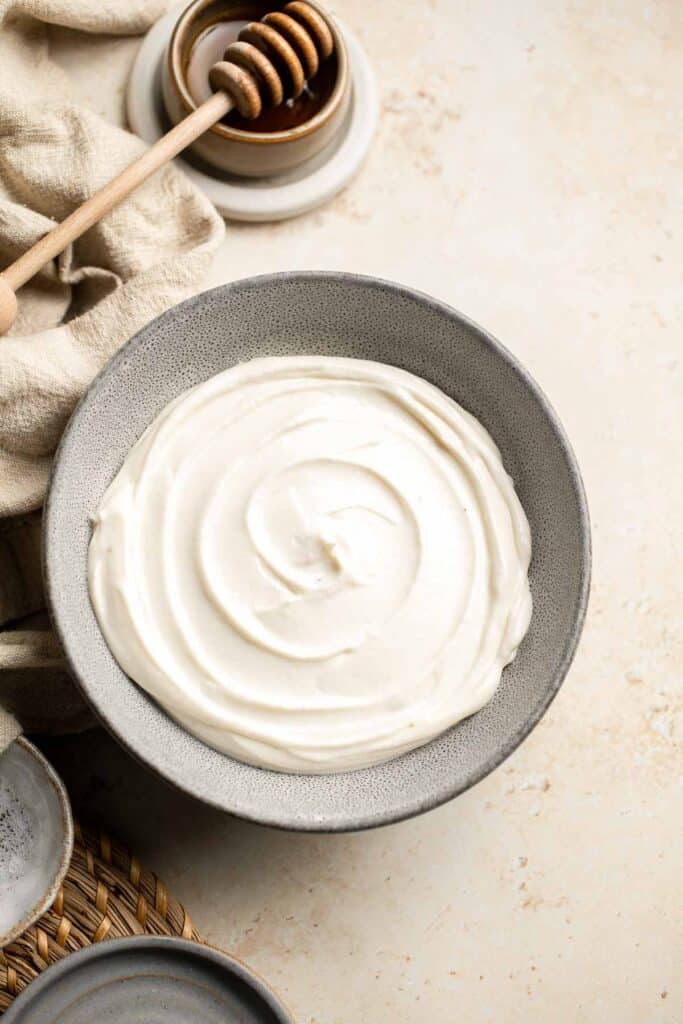
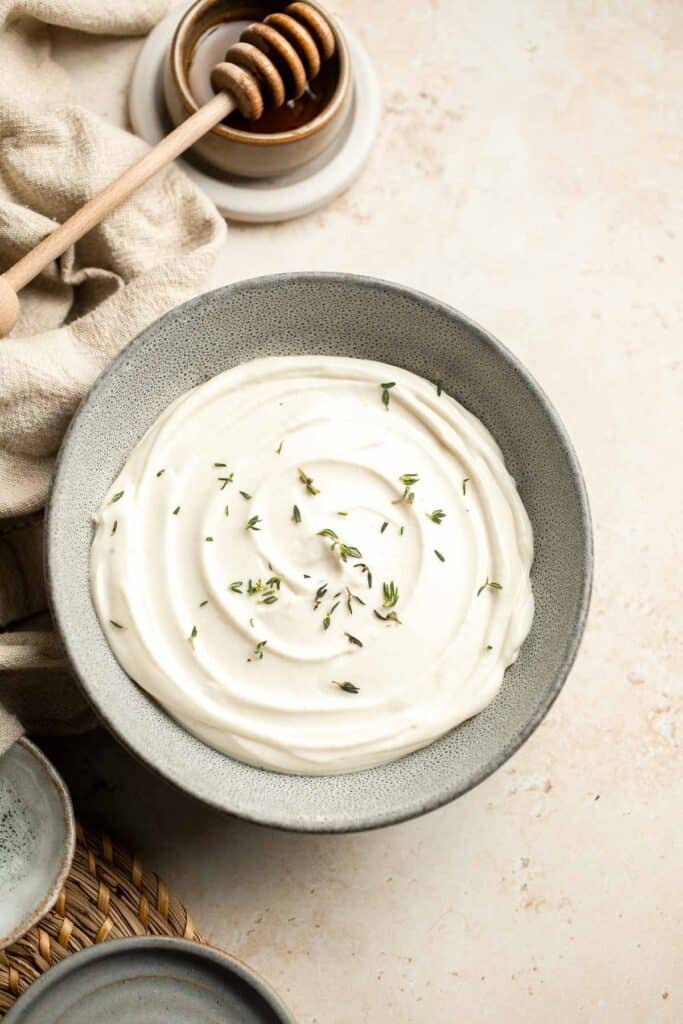
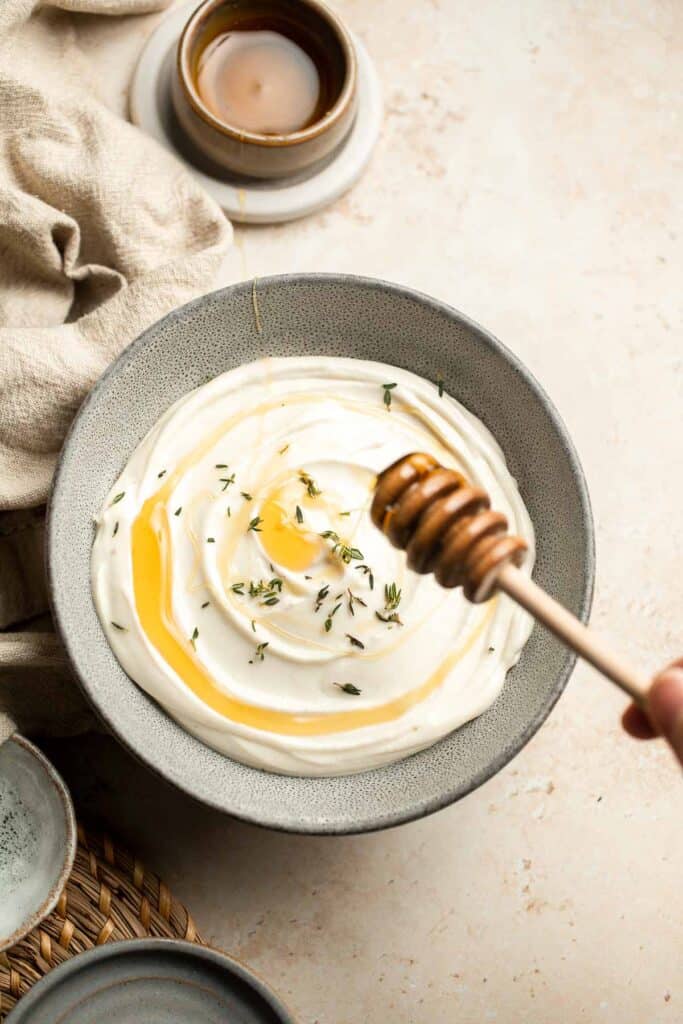
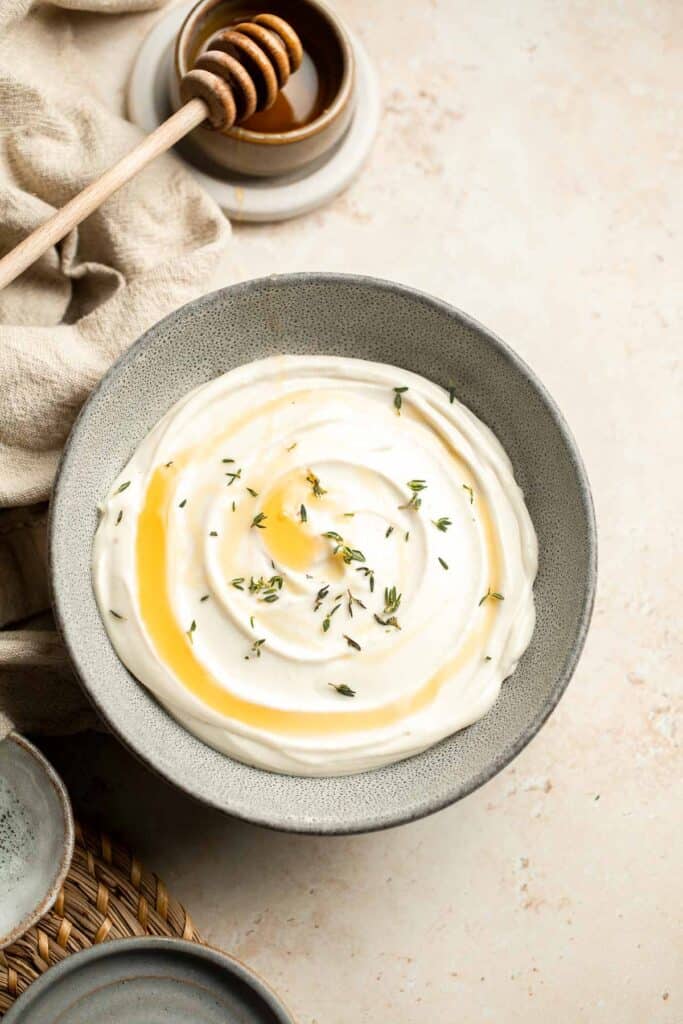
Recipe Variations
- Add nuts. For a surprise crunch, you can add walnuts, pecans, or almonds to your goat cheese concoction. Simply incorporate chopped nuts during blending for a delightful texture in every bite. You can use roasted or candied nuts along with bacon if you have the time.
- Use maple syrup. Make a fall-inspired appetizer by drizzling maple syrup instead of honey. It's a little bit sweeter than honey with a rich, caramel-like taste that would go well with your favorite fall dishes.
- Flavor with dried tomato and basil. If you're feeling fancy, go for a Mediterranean-inspired version by adding sun-dried tomatoes and chopped basil to enjoy complementing rich and savory flavors.
- Drizzle with balsamic. A drizzle of reduced balsamic sauce and a few tablespoons of berry sauce goes well with goat cheese. You can also top it with dried fruits for a pop of color and flavor.
- Garlic and rosemary. Garlic may have a strong pungent smell, but it definitely upgrades this dish with its distinct aromatic and robust flavor. Add some minced garlic and chopped rosemary during blending for an earthy and savory taste.
- Use other types of goat cheese. Try exploring different varieties of goat cheese, from fresh to aged, to add a unique flavor and complexity to your dish.
How to Serve
Enjoy this delicious Whipped Goat Cheese as a spread or dip with your favorite crackers, breads, or veggies. You can use plain crackers, crusty bread, pita bread, and crunchy veggie sticks like carrots and cucumber.
Whipped goat cheese also pairs wonderfully with other meals and appetizers like:
- How to Make a Charcuterie Board
- Cheese Board
- Veggie Tray
- Air Fryer Pizza Rolls
- Salmon Burgers
- Fried Zucchini
For more recipe ideas, see our 75+ Easy Appetizer Recipes.
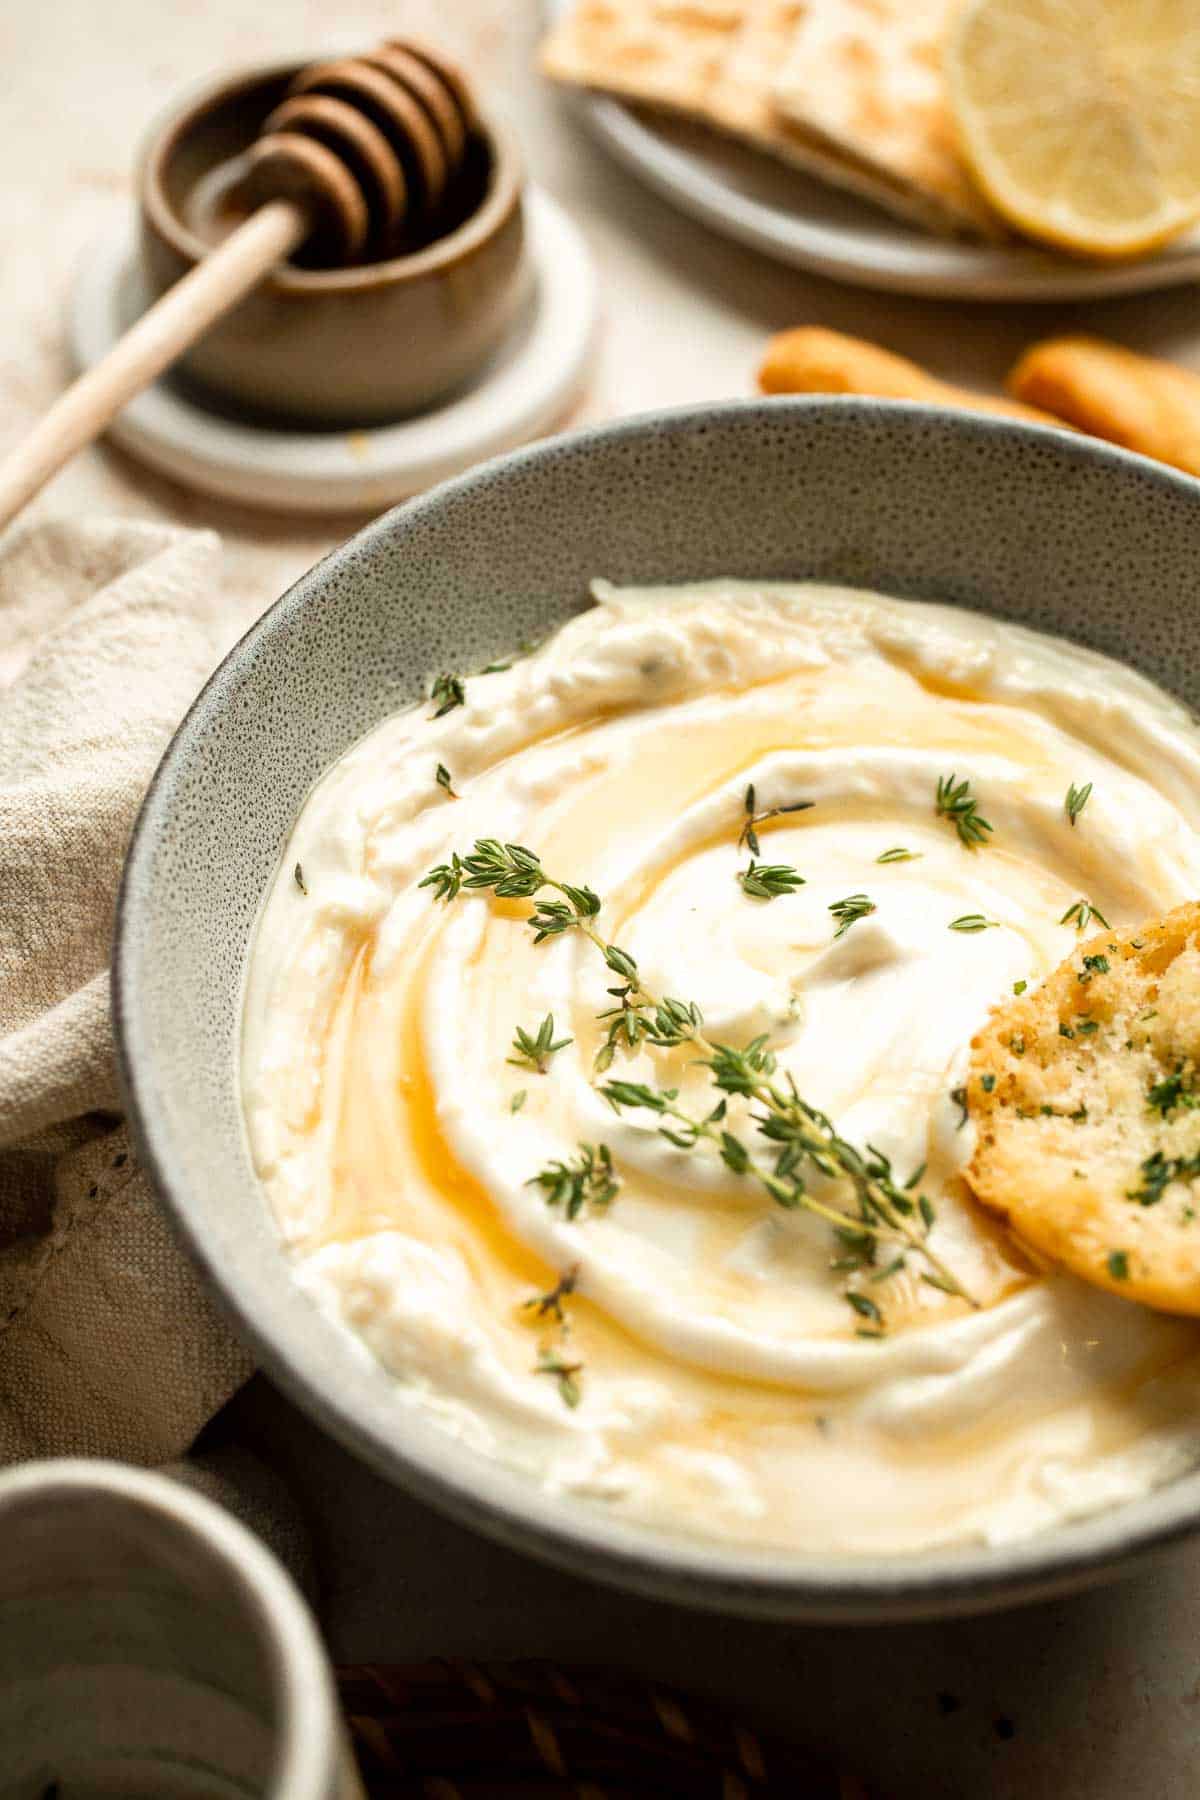
Recipe Tips and Tricks
- Soften cheese. Your life would be so much easier if you use softened to room temperature goat cheese and cream cheese. Just place the cheese in a plate-covered bowl on your counter for 30 minutes before whipping it up, or you can also pop it in a microwave for a few seconds.
- Adjust flavors. Make this whipped goat cheese your own by adding or removing some ingredients. If you prefer a more intense flavor, add garlic or more fresh herbs. For a sweeter version, you can add more honey or candied bacon and nuts if you have the time.
Storing Instructions
Transfer the spread to an airtight container like a small jar or covered bowl and store in the fridge for up to 4 days.
More Cheese Dip Recipes
- 20 Best Dip Recipes
- Whipped Feta
- Whipped Ricotta Dip
- Cheese Fondue
- Queso Mexican Cheese Dip
- Baked Spinach Dip
Tried this recipe?
I'd love to hear what you think! Leave a comment and rating below to share your feedback. Your reviews help others discover this recipe and help me keep creating more free recipes for you. Snap a photo and tag me on social media @aheadofthyme too.

Mediterranean Chickpea Salad
Full of bright flavors and the most delicious balsamic vinaigrette, this Mediterranean Chickpea Salad is the ultimate healthy salad. It comes together almost instantly and is absolutely perfect for a leisurely lunch or light dinner to enjoy on the patio. It's great for meal prep, too!
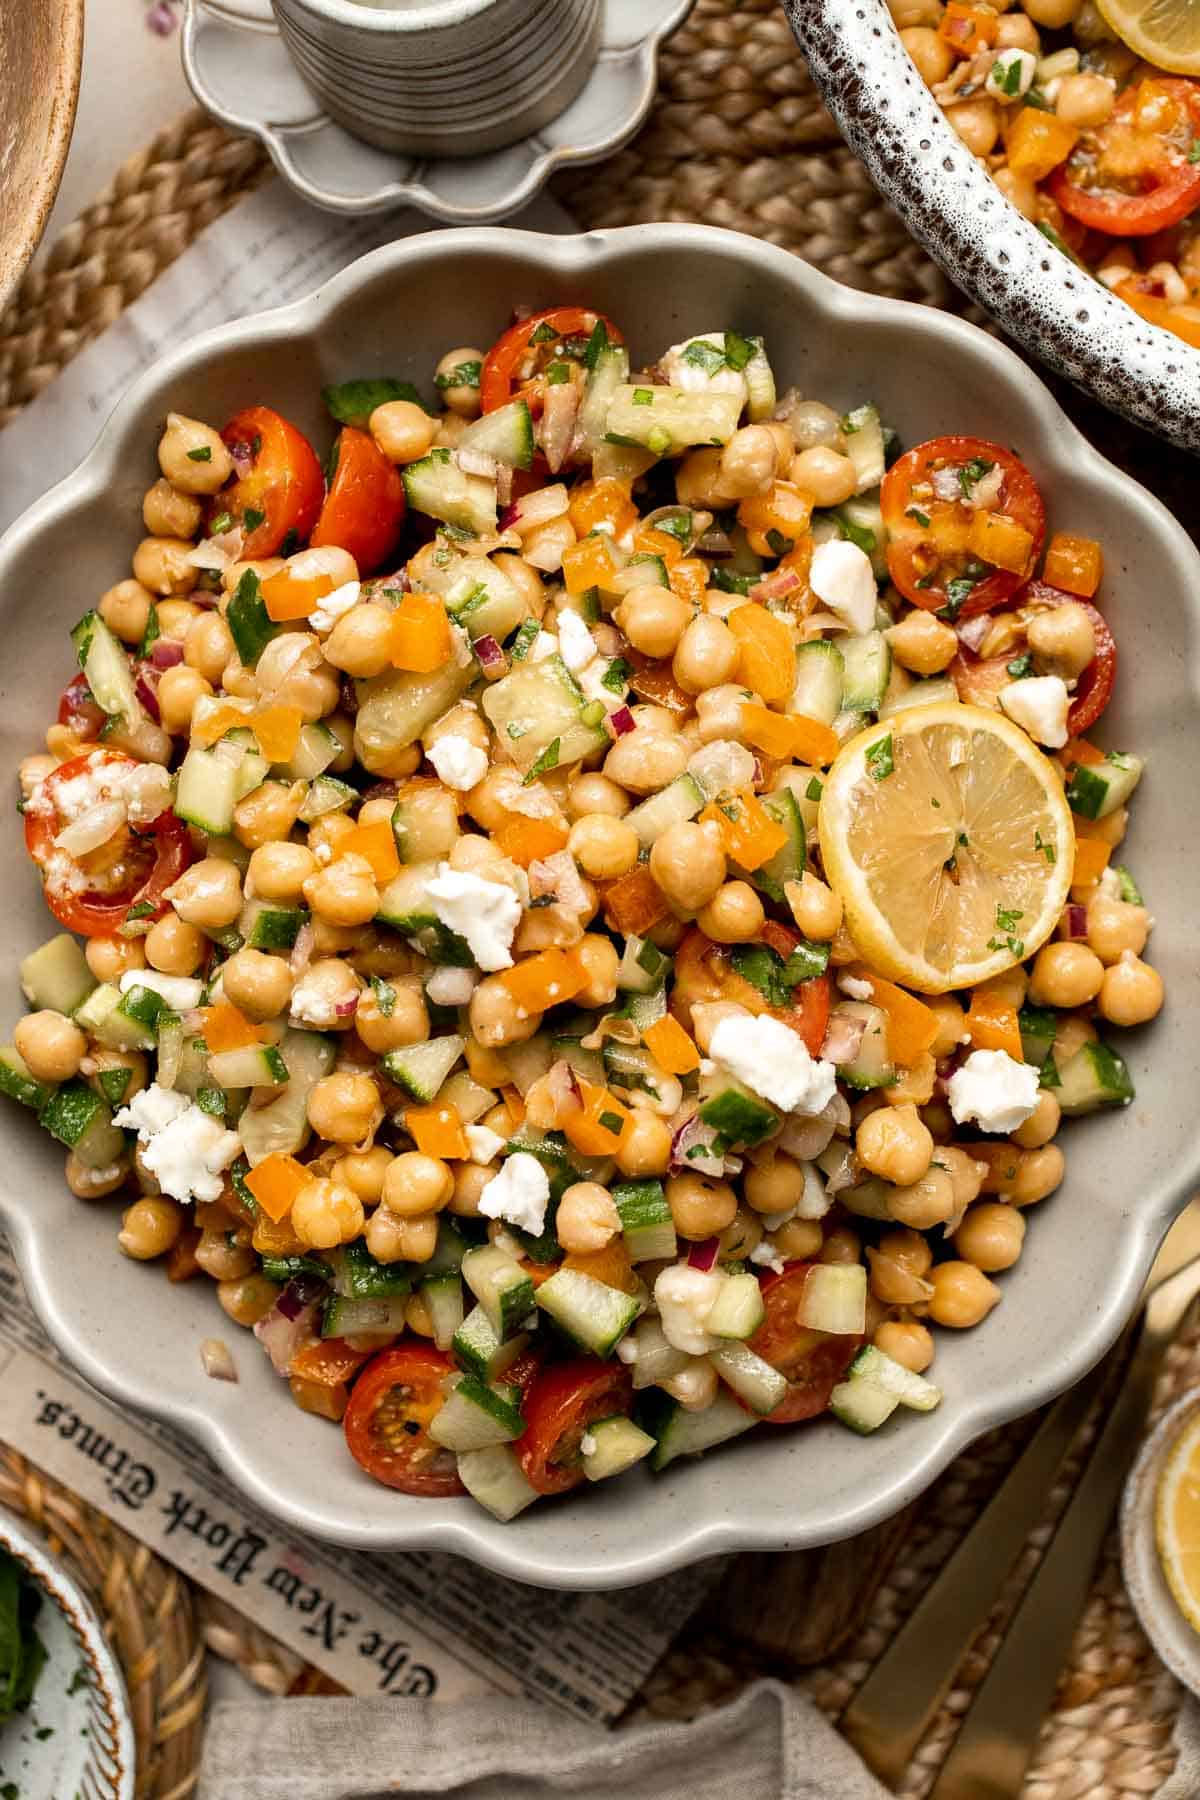
This salad is so incredibly fresh and bright, you'll want to eat it on repeat all season long. Fortunately, it stores really well, so you can make it once and enjoy it all week long. It's quick, too. You'll spend most of your time preparing the bell peppers, cucumbers, and other fresh veggies, which takes just a few minutes. Whisk together a quick vinaigrette to pour on top, and lunch is served!
Why You'll Love This Mediterranean Chickpea Salad
- Bright and refreshing. The briny feta cheese, red onion, fresh herbs, and tangy vinaigrette add so much flavor to this easy chickpea salad recipe. It's incredibly fresh and tastes like summer in a bowl!
- So simple. There's a good chance you already have a can of chickpeas and the ingredients for the simple dressing on hand. Just grab a few summer vegetables, and your salad will be ready in no time.
- Lots of vegetables. If you've been trying to eat more vegetables, this is the salad for you. This Greek chickpea salad is loaded with bell peppers, cucumbers, tomatoes, fresh herbs, and onions, making it a perfect healthy side dish for people trying to eat more veggies!
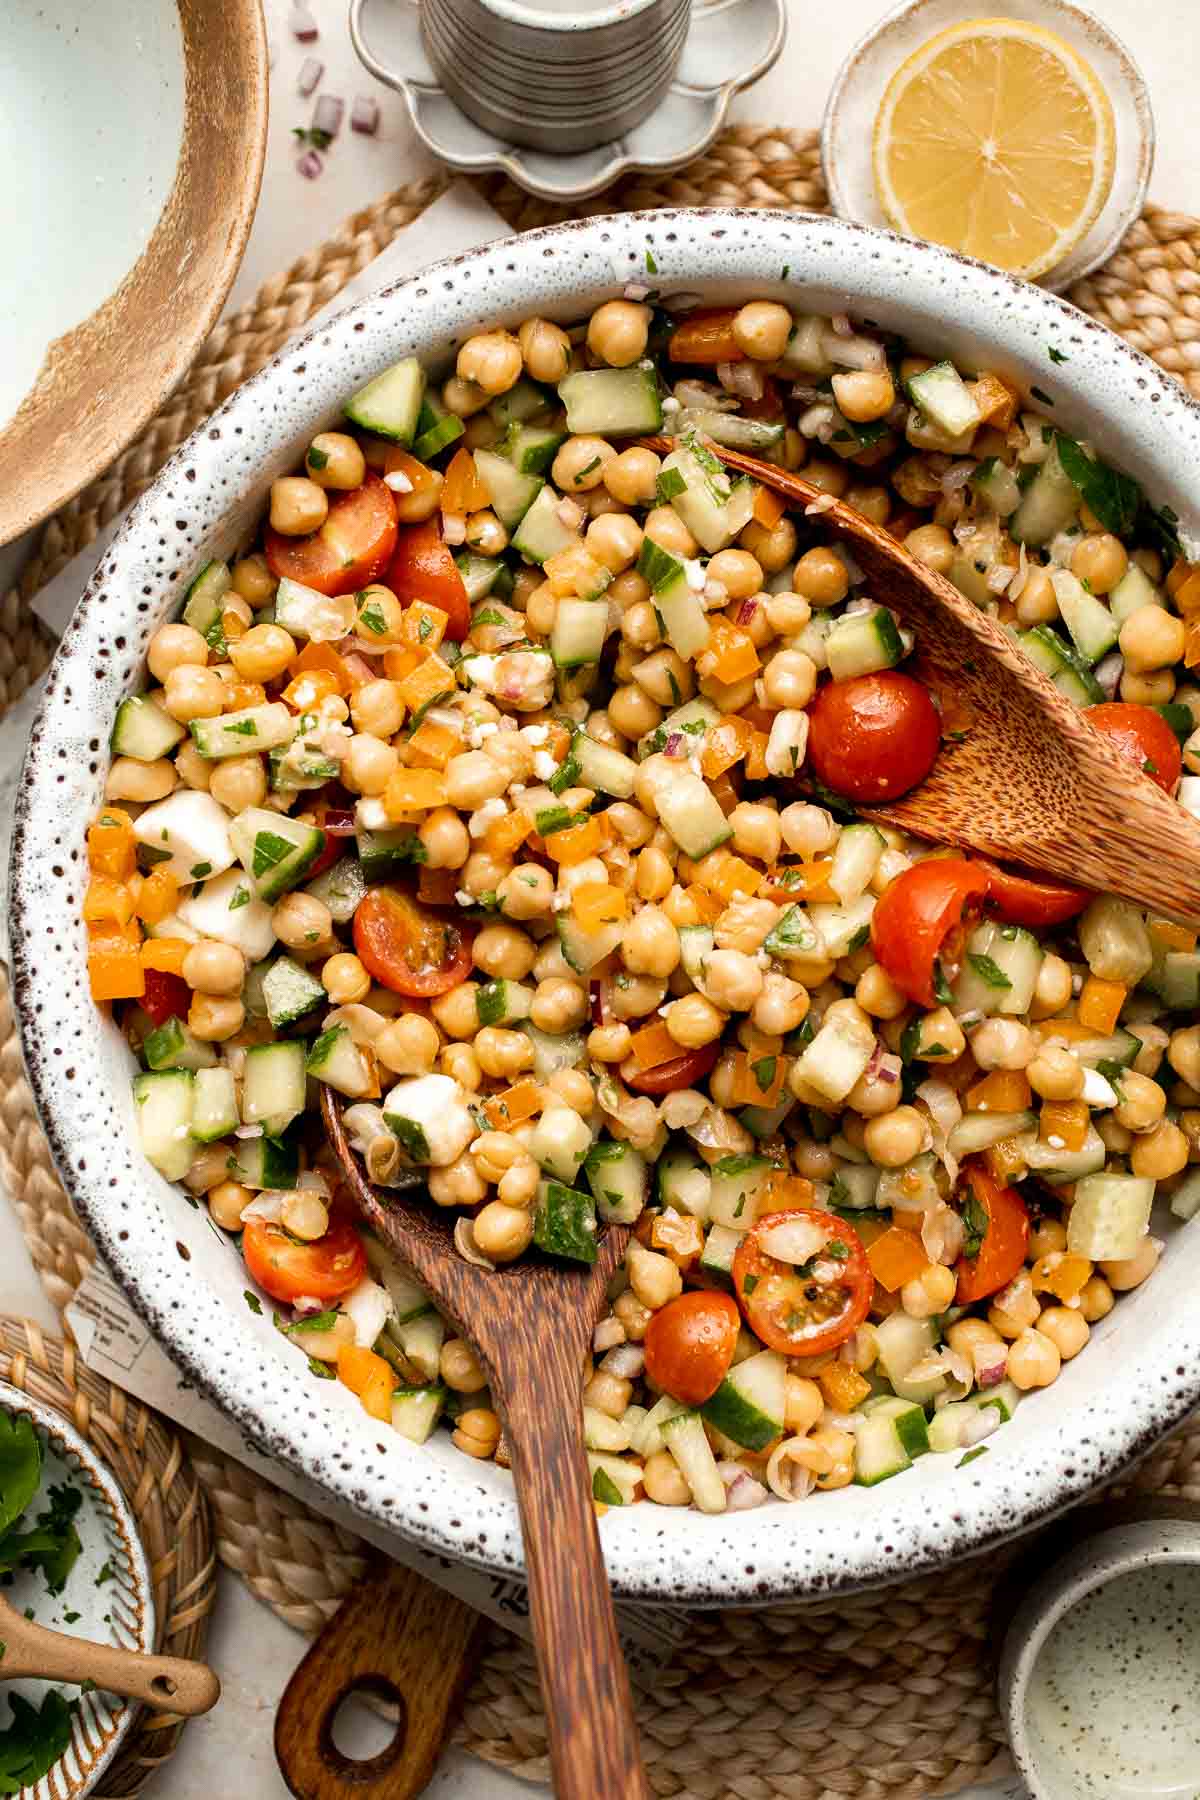
Ingredient Notes
To make this delicious Mediterranean chickpea salad, you will need the following ingredients (full measurements in recipe card below):
- chickpeas - drain and rinse a can of chickpeas to add some plant-based protein.
- yellow bell pepper - remove the stem and seeds, then dice the pepper. You can also use red bell pepper or any other color if you prefer.
- english cucumber - quarter and dice the English cucumber into the same size as the pepper.
- cherry tomatoes - cut the tomatoes in half for easy serving. Grape tomatoes work well, too.
- red onion - dice red onion for a spicy crunch.
- fresh parsley - finely chop fresh parsley to add extra flavor to the salad.
- feta - crumbled feta adds a creaminess that pairs really well with the vegetables. Goat cheese is a great alternative.
- olive oil - use extra-virgin olive oil or a neutral salad oil.
- balsamic vinegar - balsamic has a rich flavor that pairs perfectly with the Mediterranean flavors in the salad.
- lemon juice - fresh squeezed lemon juice brightens the salad.
- dijon mustard - this is optional, but Dijon mustard emulsifies the vinaigrette to make it creamy.
- salt and black pepper - season to taste.
You will also need measuring cups and spoons, two mixing bowls, and a whisk.
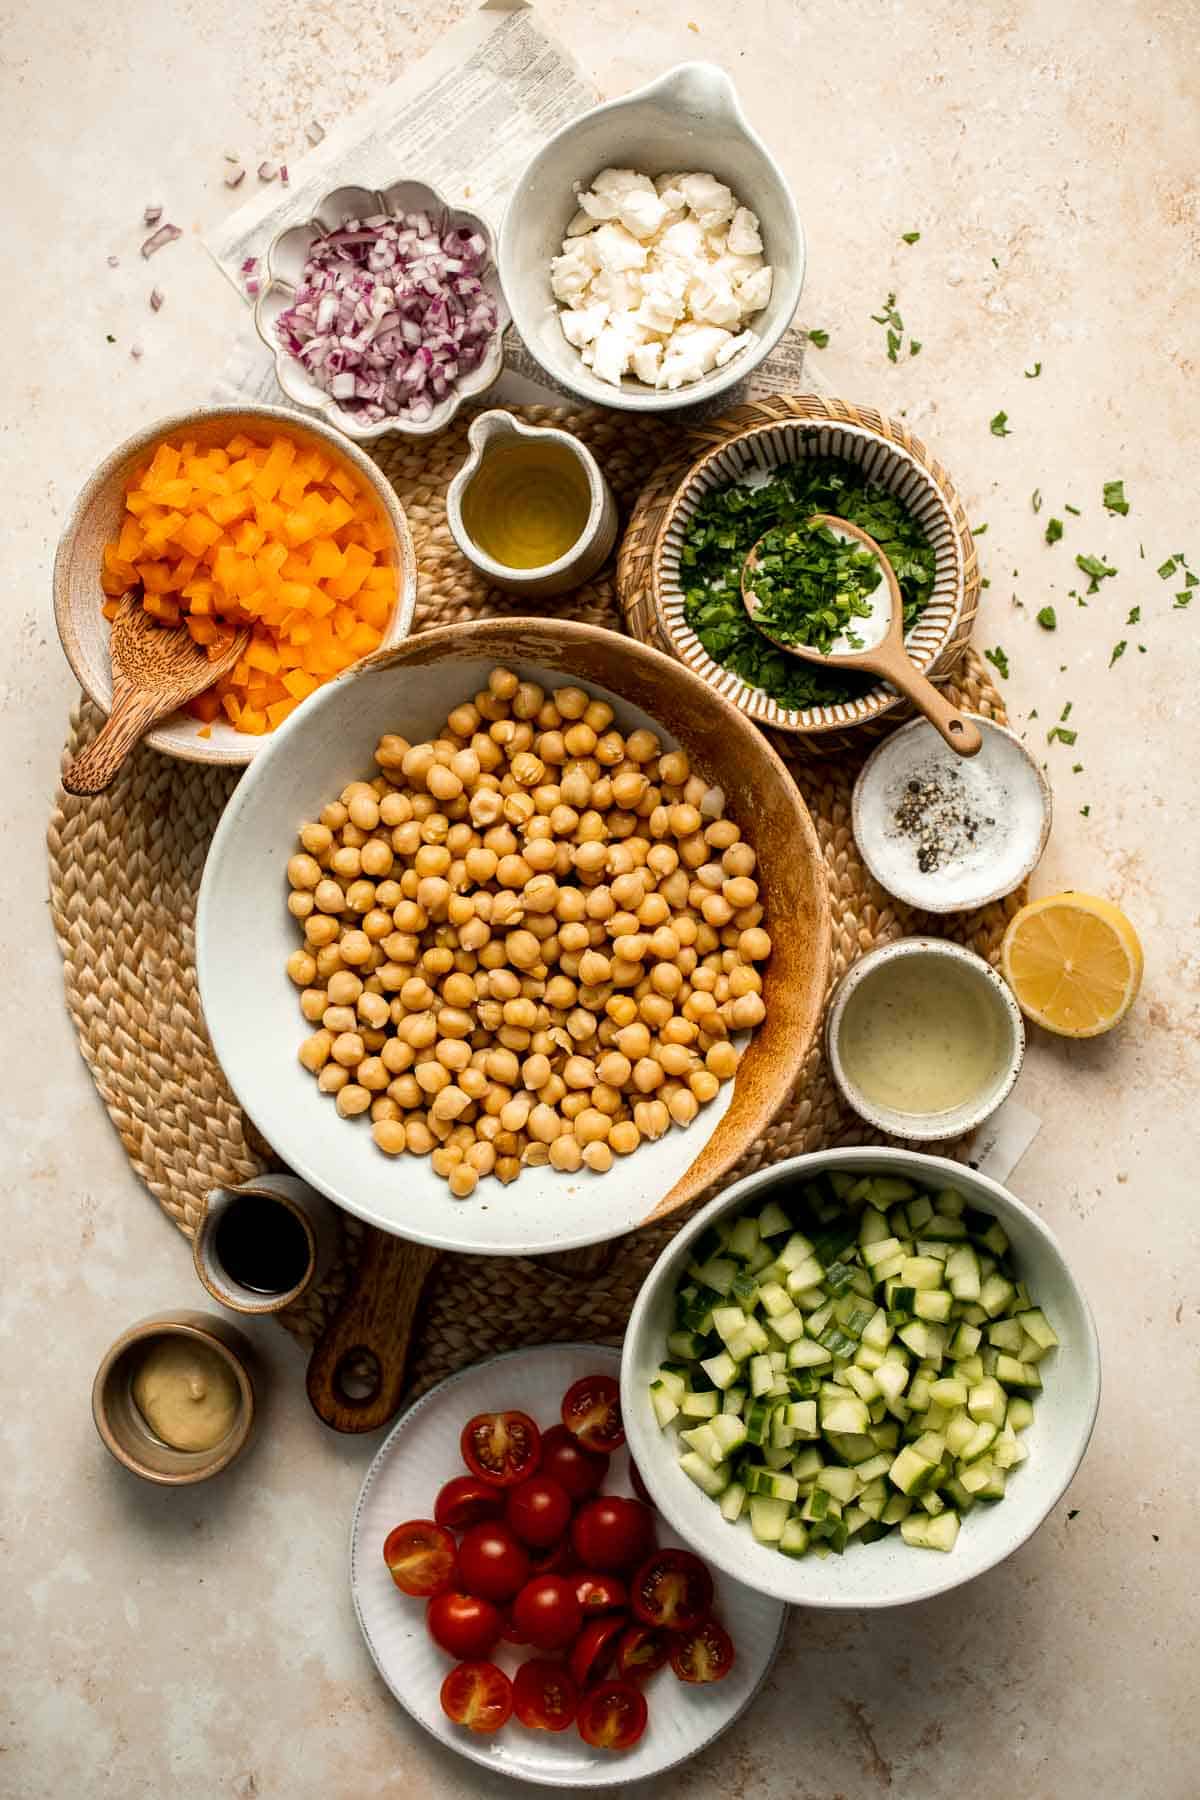
How to Make the Best Mediterranean Chickpea Salad
- Combine ingredients. In a large mixing bowl, add chickpeas, bell pepper, cucumber, tomatoes, onion, parsley, and feta cheese.
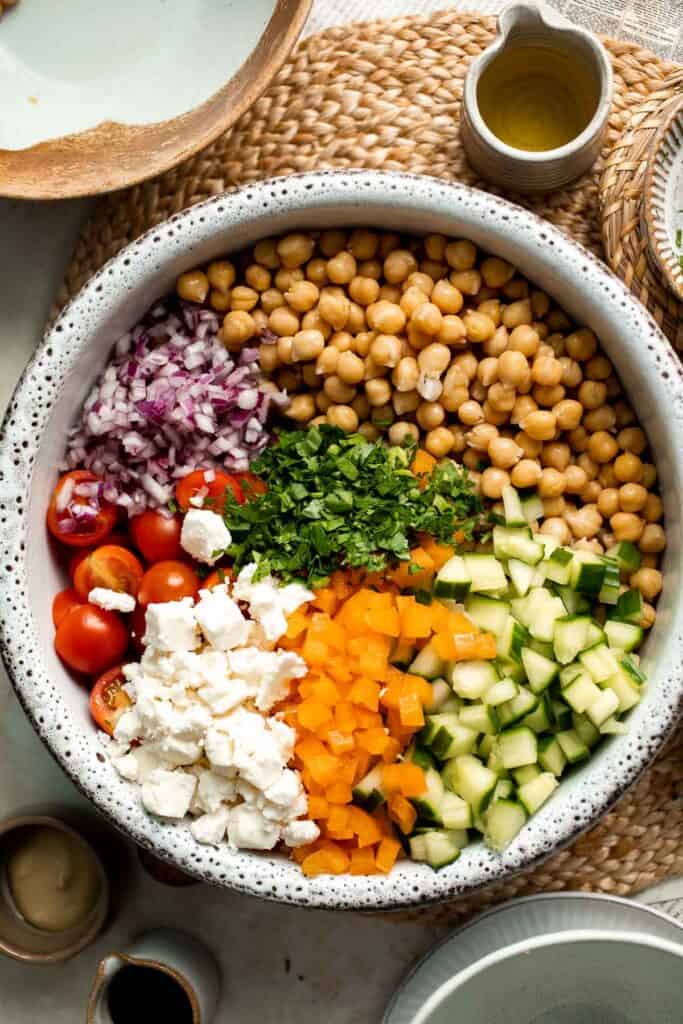
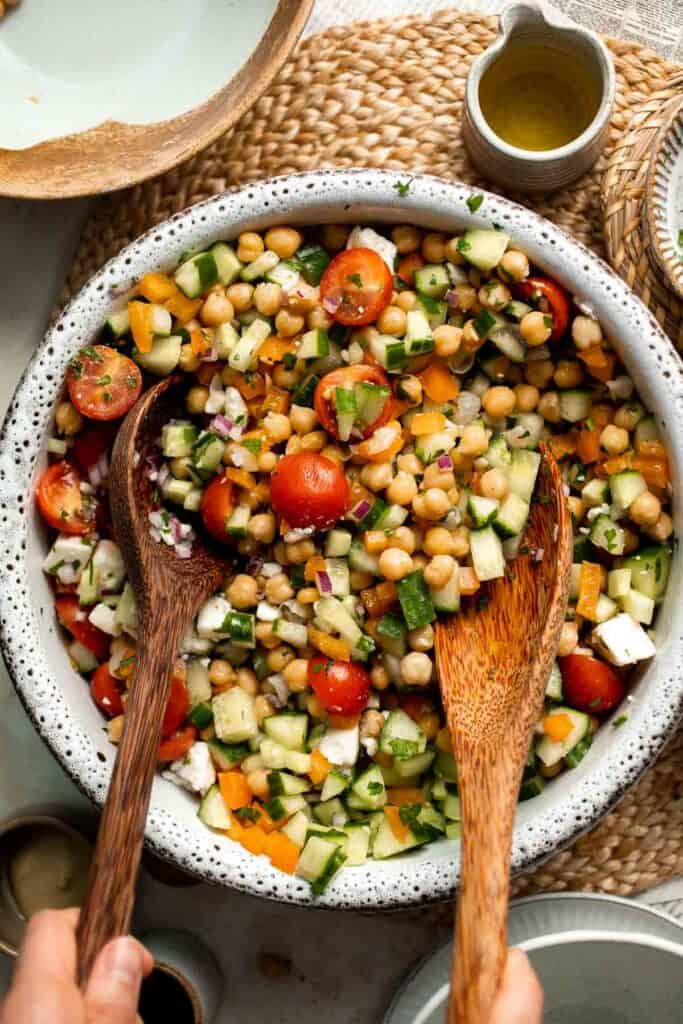
- Make dressing. In another mixing bowl, whisk together oil, balsamic vinegar, lemon juice, dijon mustard (if using), salt, and pepper until smooth.
- Toss. Add the dressing to the chickpea salad and toss well to combine. Serve immediately.
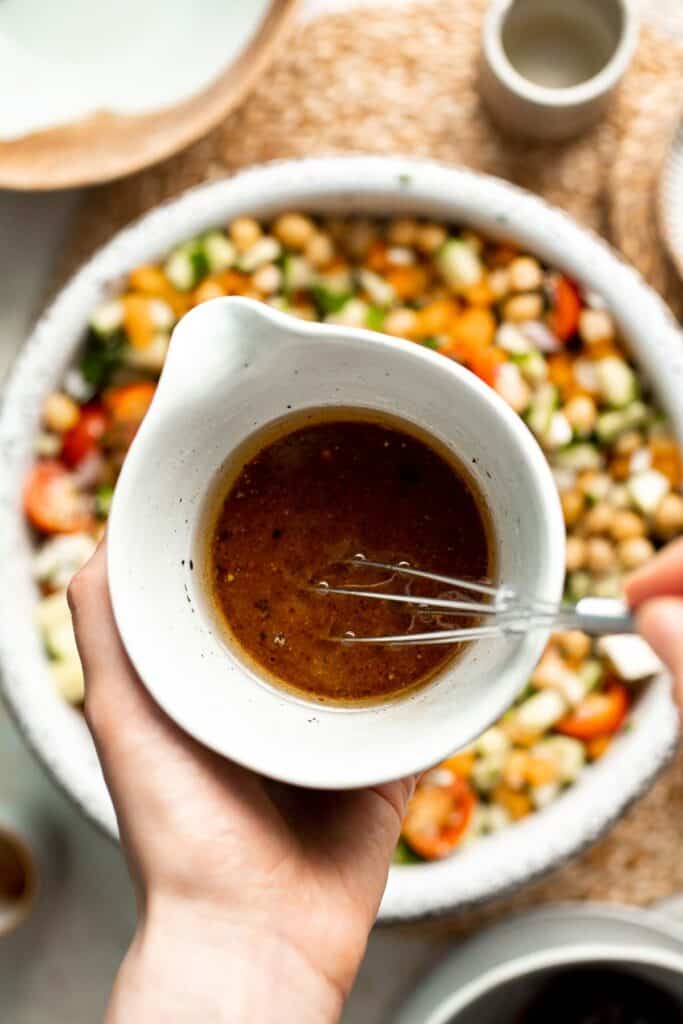
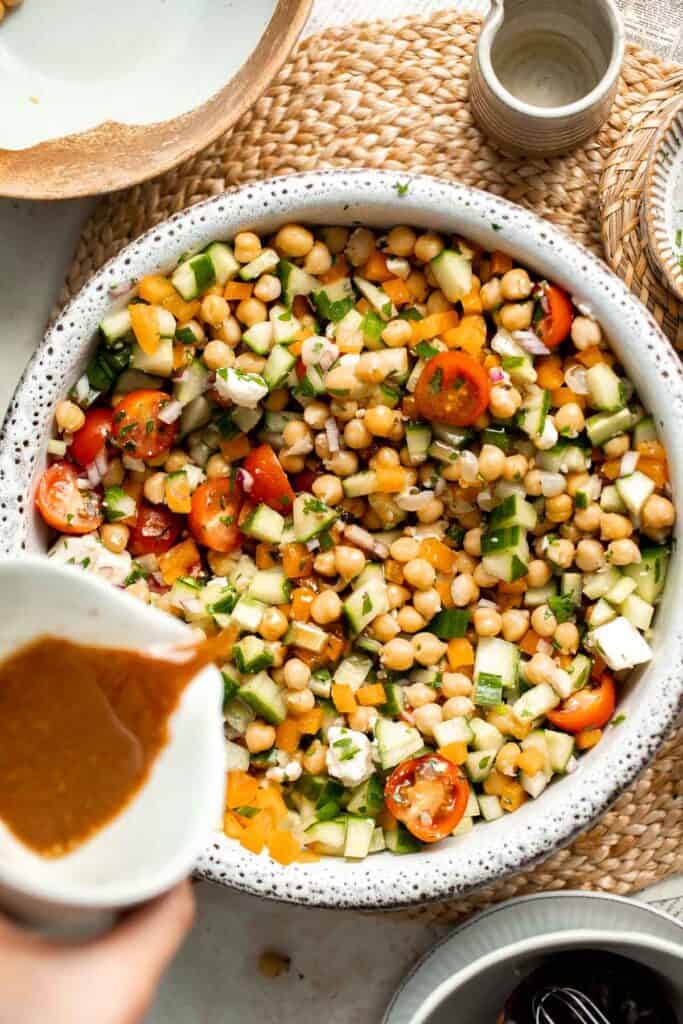
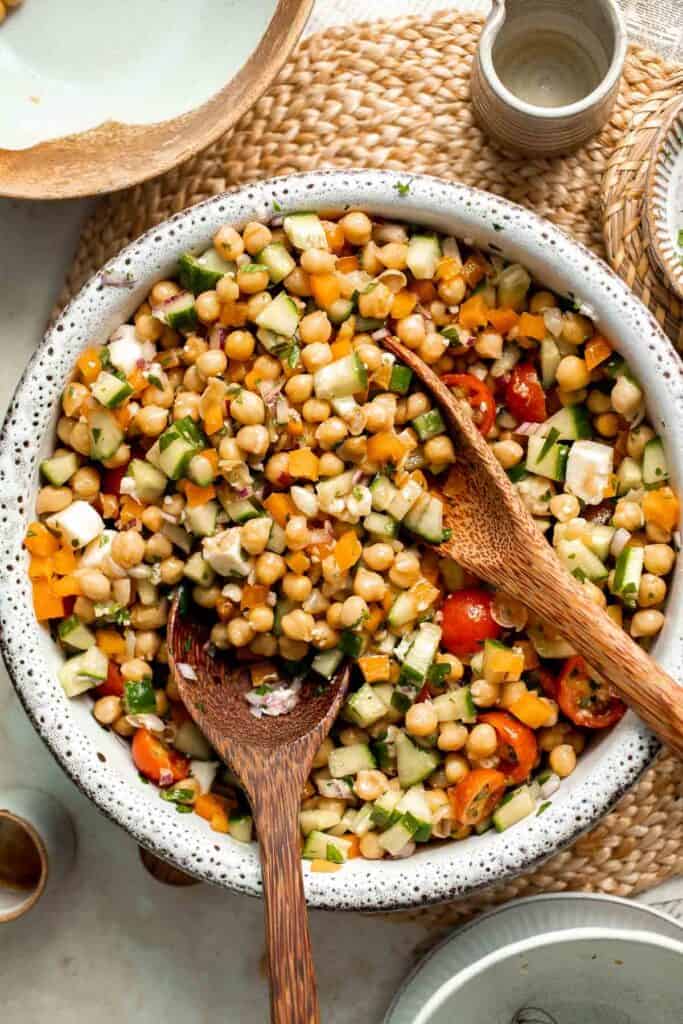
Recipe Variations
- Make a Greek salad. For a Greek salad, add some kalamata olives, fresh dill, and fresh mint for a bright pop of flavor.
- Add beans. White beans, like cannellini beans, are a wonderful addition to this Mediterranean salad. They can replace the garbanzo beans or serve them with both.
- Serve it over greens. Although you can easily eat this easy Mediterranean chickpea salad like a chopped salad, it's also wonderful served over leafy greens or chopped romaine as well. It's great with warm pita bread, too!
How to Serve
This Mediterranean chickpea salad is delicious served on its own, or paired with some of my favorite proteins including:
- Greek Salmon
- Greek Chicken Souvlaki Skewers
- Greek Meatballs
- Greek Chicken Gyros with Tzatziki
- Greek Lamb Souvlaki Skewers
For more recipe inspiration, see our 30 Best Greek Recipes.
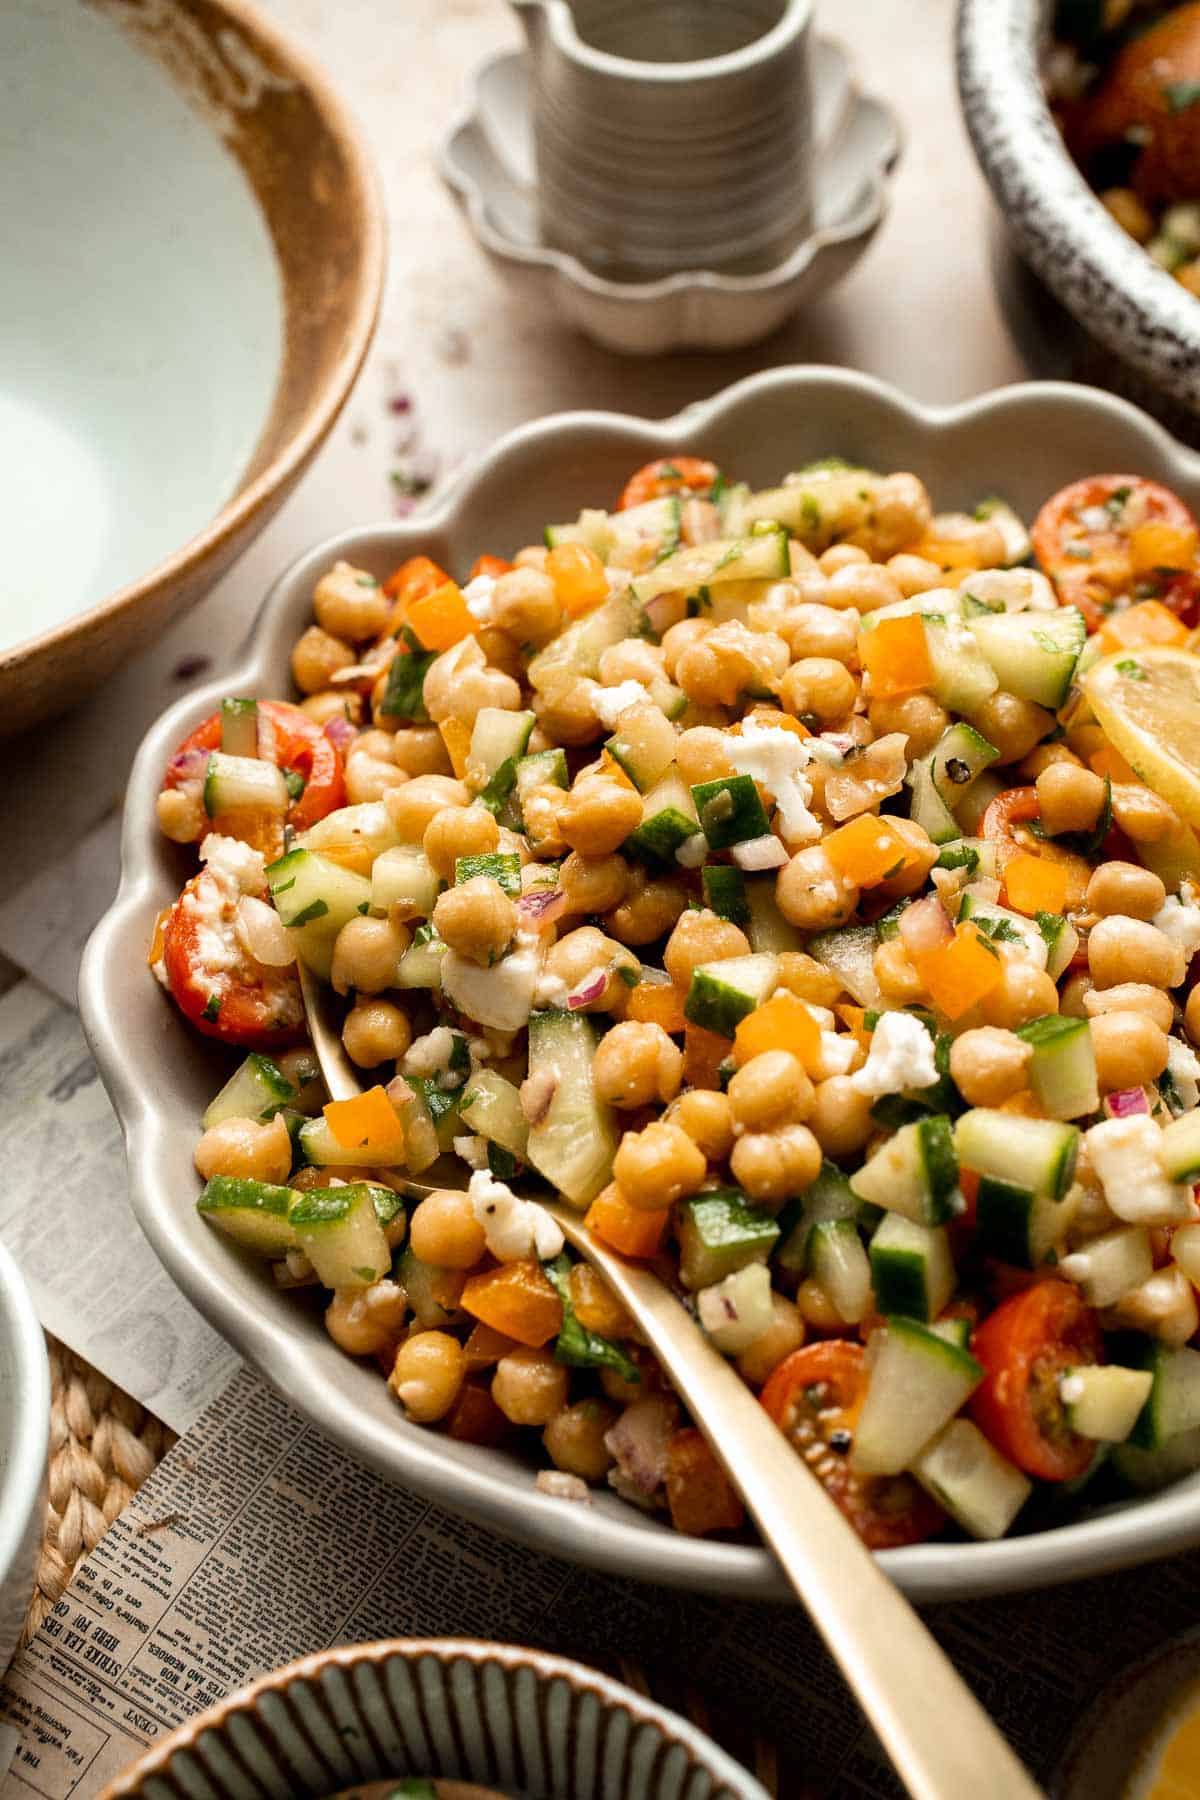
Recipe Tips and Tricks
- Cut everything the same size. Cut all the different vegetables in a similar size. You can even use a food chopper for easy prep!
- Don't freeze. If you have an icy spot in your fridge that likes to freeze things, keep your salad away from that, or the vegetables will become soggy and watery.
- Marinate. This salad can easily be served immediately, but I love to let it sit until the next day. The vegetables will soak up the chickpea salad dressing and take on so much flavor.
- Cut the tomatoes quickly. Instead of individually slicing the cherry tomatoes, place the tomatoes on a dinner plate, then place another dinner plate with the serving side down directly on top of the tomatoes. Use a sharp knife to slice through the gap between the plates to cut all of the tomatoes at once.
Storing and Freezing Instructions
How to Store
Store the leftover salad in an airtight container in the fridge for 3-4 days. If serving over greens, store those separately to keep them fresh.
FAQ
This Mediterranean chickpea salad recipe contains lots of fresh ingredients, like bell peppers, red onion, tomatoes, cucumbers, and fresh herbs, with canned chickpeas and a simple vinaigrette made with extra virgin olive oil, balsamic vinegar, mustard, fresh lemon juice, and more. It's a simple summer recipe that's light enough for a quick lunch yet hearty enough for a main course.
Yes! This is part of why protein-packed chickpeas are one of my favorite pantry staples. They are already fully cooked, so you just need to drain and rinse them to add them to a colorful salad, homemade hummus, chickpea soup, or anything else.
Yes! This delicious salad tastes wonderful fresh, but as it sits, the vegetables soak up the delicious vinaigrette. Feel free to make it a day or two before your gathering or store it in meal prep containers for 3-4 days for a delicious, easy lunch.
More Salad Recipes
- 40 Best Salad Recipes
- Israeli Couscous Salad
- Arugula Salad
- Southwest Quinoa Salad
- Mediterranean Couscous Salad
- White Bean Salad
Tried this recipe?
I'd love to hear what you think! Leave a comment and rating below to share your feedback. Your reviews help others discover this recipe and help me keep creating more free recipes for you. Snap a photo and tag me on social media @aheadofthyme too.

Mushroom Flatbread with Spinach
This Mushroom Flatbread with Spinach, made with homemade pizza dough, delicious truffle Italian cheeses, and perfectly cooked shiitake mushrooms, makes a perfect appetizer or simple dinner for a cozy night in. The earthy mushrooms balance the nutty cheese so well, and the fresh thyme takes the whole thing over the top! Just try this simple recipe once, and you'll want to make mushroom flatbread pizzas all the time.
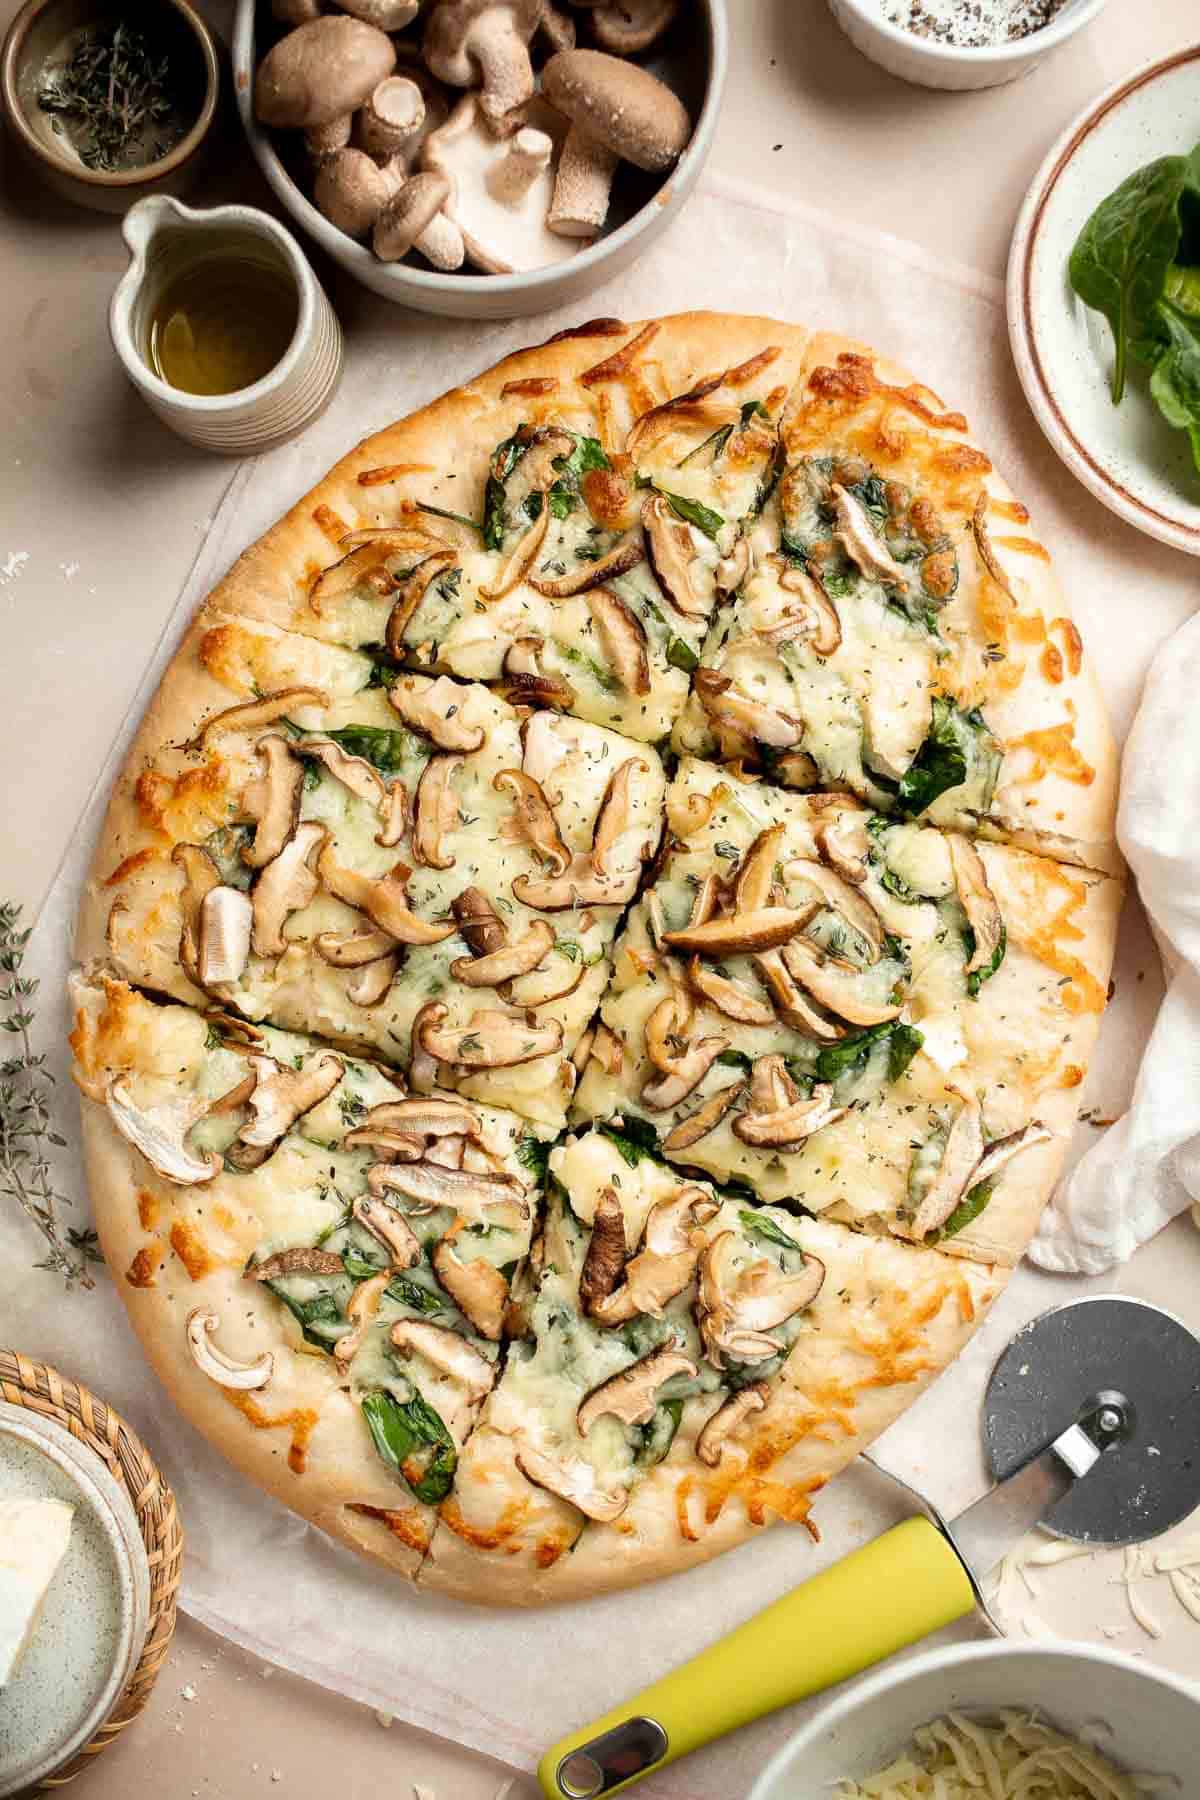
Although we love traditional pizza with its rich tomato sauce, sometimes it's nice to have something a little different. This flatbread pizza recipe has the same crunchy-chewy crust you love, but instead of slathering on pizza sauce, dress it with a mixture of truffled Italian cheeses with mozzarella, baby spinach, and thinly sliced mushrooms. As they cook together, the spinach shrinks, and the mushrooms concentrate their flavor. It's such a decadent, flavorful option for your next pizza night, or serve it as a flatbread for your next party!
Why You'll Love This Mushroom Flatbread with Spinach
- Easy to make. Throw together your favorite pizza dough or pick up some fresh dough from the store, then stretch it out, add the olive oil, cheese, and toppings, then bake. Sprinkle with fresh thyme, then slice and serve. It's that simple!
- Amazing flavor. If you love the rich, earthy flavor of mushrooms, you'll absolutely love the balance between the fresh shiitake mushrooms on the pizza and the truffled cheese. It's rich and fragrant without becoming overwhelming. Perhaps consider making two of these at a time, because they are simply that delicious! This flatbread is the ultimate umami flavor bomb, and will leave you completely satisfied and longing for more.
- Stunning display. This spinach mushroom flatbread always gets an "oooh" when you add it to your appetizer spread! It has a gorgeous, sophisticated appearance that looks amazing at any event.
- Customizable. You can easily switch up the toppings for any alternatives that you have on hand. For instance, if you don't like shiitake mushrooms, use any type of fresh mushrooms. Can't get your hands on some truffled fontina cheese? Use any melty cheese as an alternative.
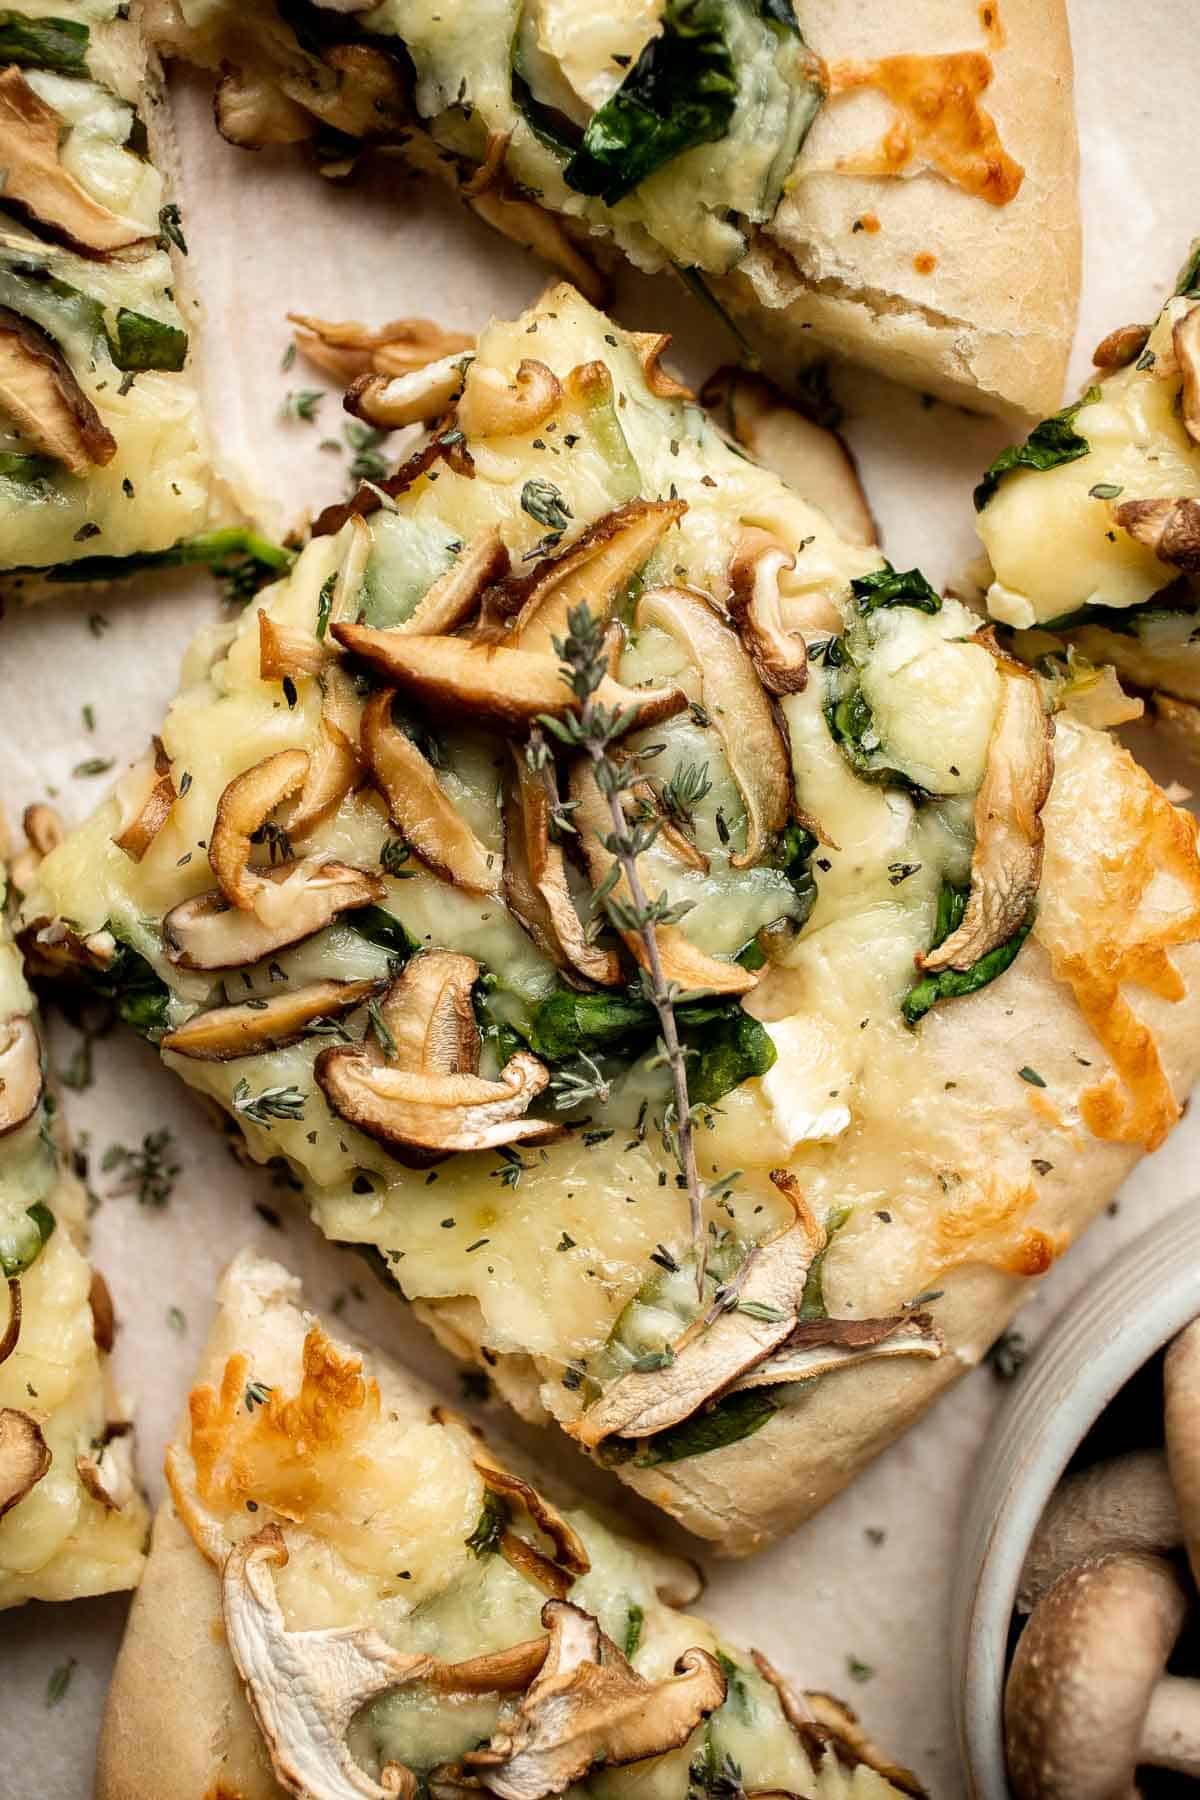
Ingredient Notes
To make this delicious mushroom flatbread with spinach, you will need the following ingredients (full measurements in recipe card below):
- pizza dough - use your favorite homemade pizza crust or pick up a ball of dough from the grocery store. You can even use a premade flatbread to make things easier.
- extra virgin olive oil - use olive oil to brush the crust and then drizzle extra over the mushrooms and cheese before baking.
- italian seasoning - this adds an extra layer of flavor that ties the Italian cheeses with the mushrooms.
- taleggio or fontina cheese - use a melty Italian cheese, preferably with mushrooms or truffles. Fontina is great because it melts beautifully, and the truffles compliment the already earthy flavors of the shiitakes. It literally tastes like heaven on a plate.
- fresh spinach - tender baby spinach will wilt almost instantly in the oven, adding a pop of color and flavor.
- mozzarella cheese - use shredded mozzarella to help the other cheeses melt to perfection.
- shiitake mushrooms - remove the stems and thinly slice the mushrooms. Baby Bella mushrooms are great, too.
- thyme - fresh herbs are a gorgeous garnish, and they add a wonderfully complex flavor.
You will also need measuring cups and spoons (or a kitchen scale), a large baking sheet and parchment paper.

How to Make the Best Mushroom Flatbread with Spinach
First, make the flatbread dough.
- Prepare the dough. In a large mixing bowl, combine flour, yeast, water, oil, sugar, and salt. Stir well with a silicone spatula to combine until it forms a shaggy dough and no dry flour is visible in the bowl. Make sure to scrape down the sides of the bowl with the spatula.
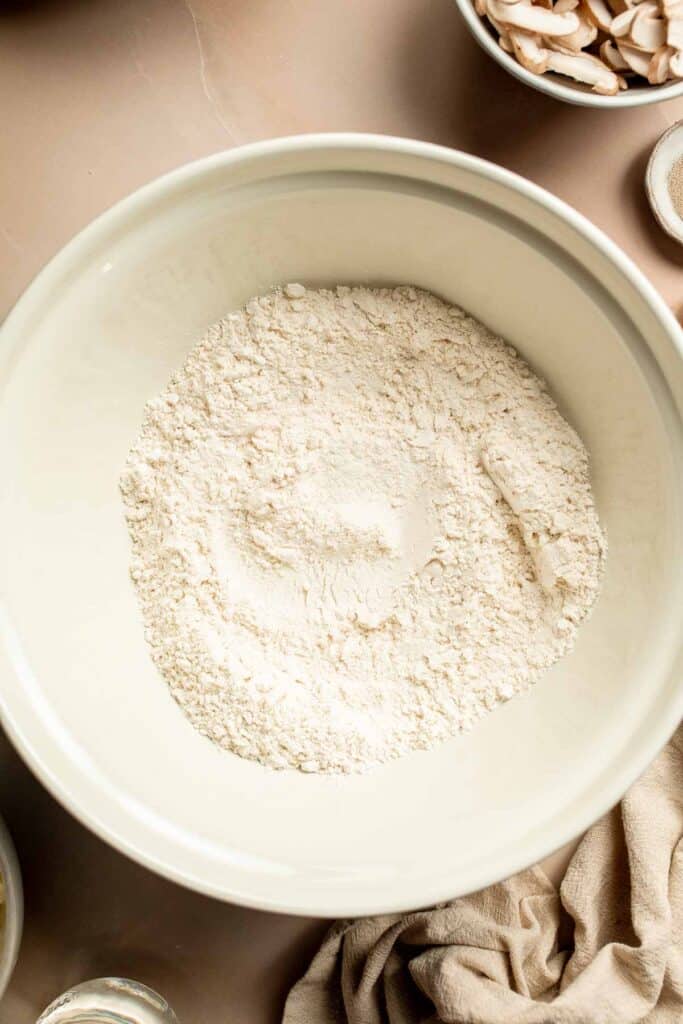
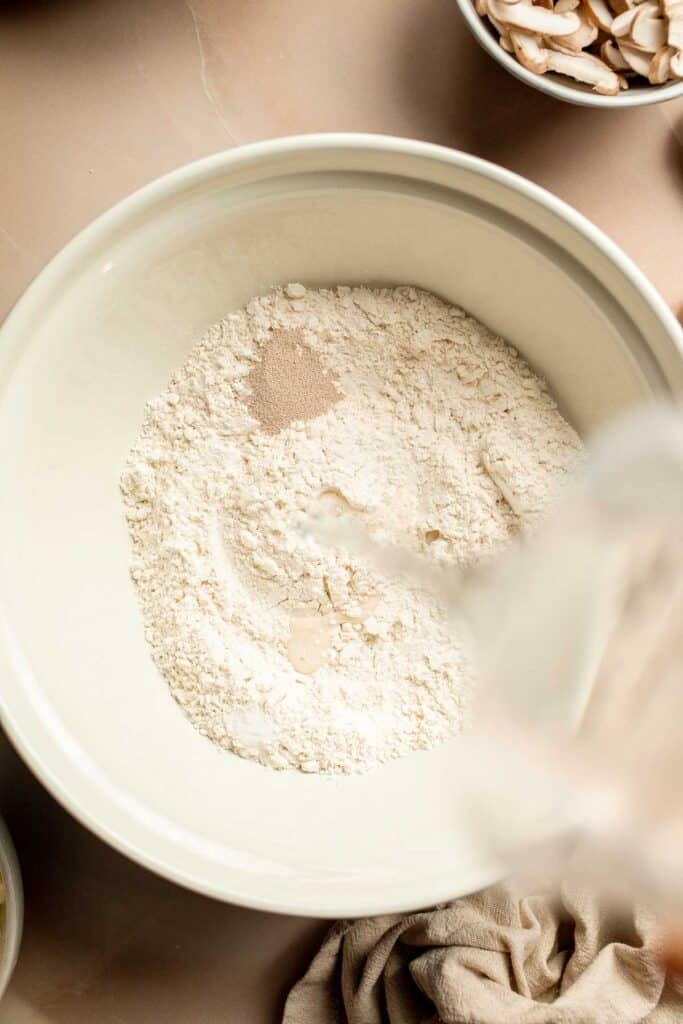
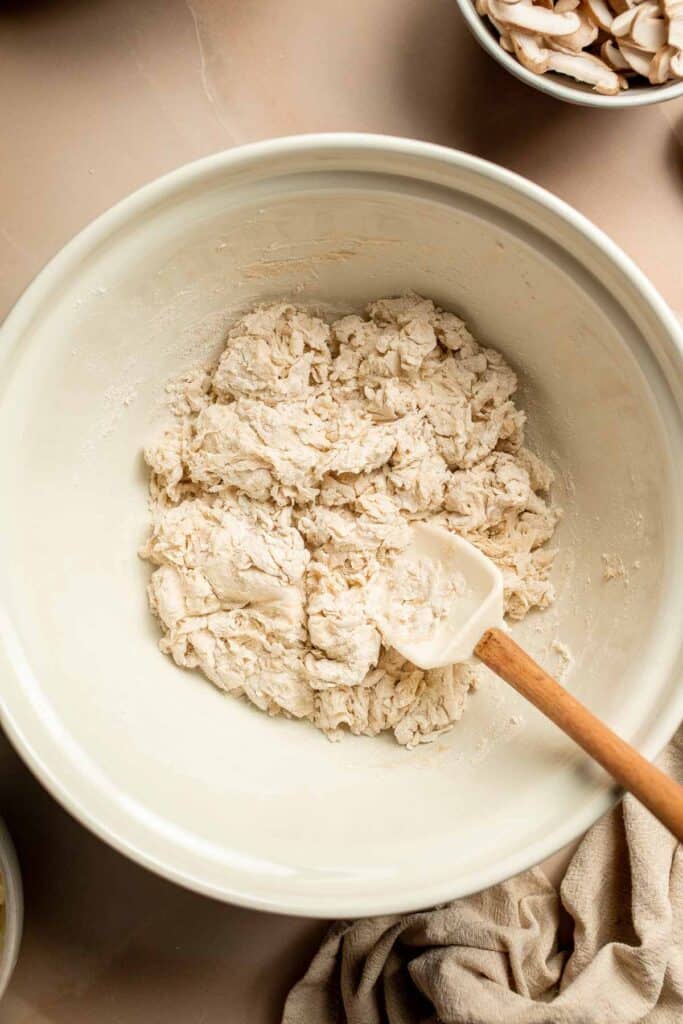
- Knead the dough. Knead the dough on a clean surface for 10 minutes until the surface of the dough is smooth. You can also knead the dough in a stand mixer with a dough hook attached on medium speed for 5 minutes.
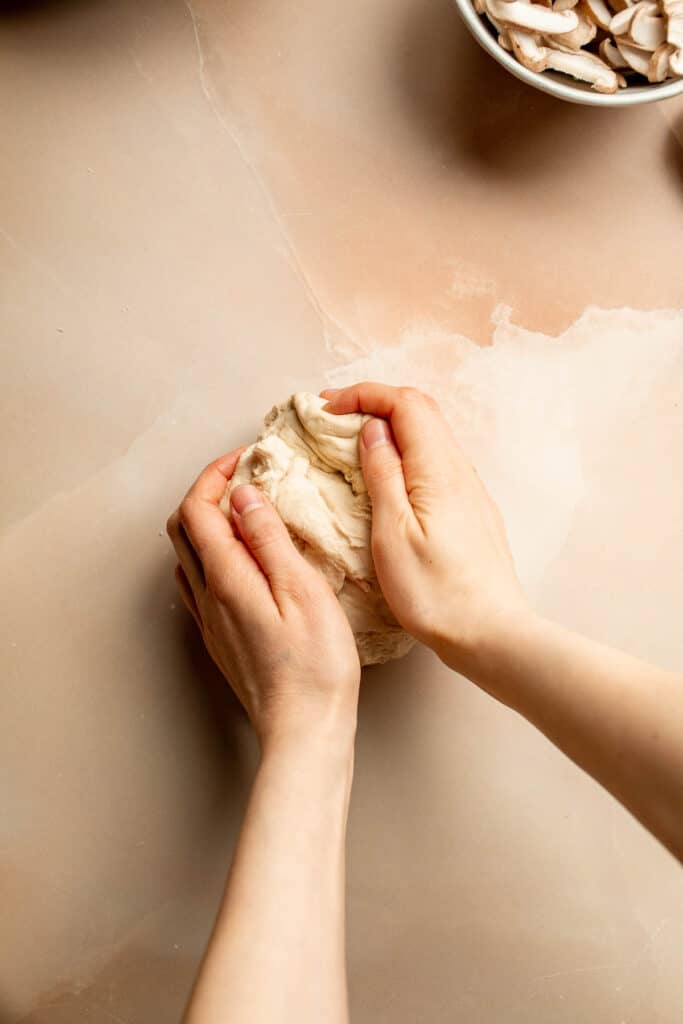
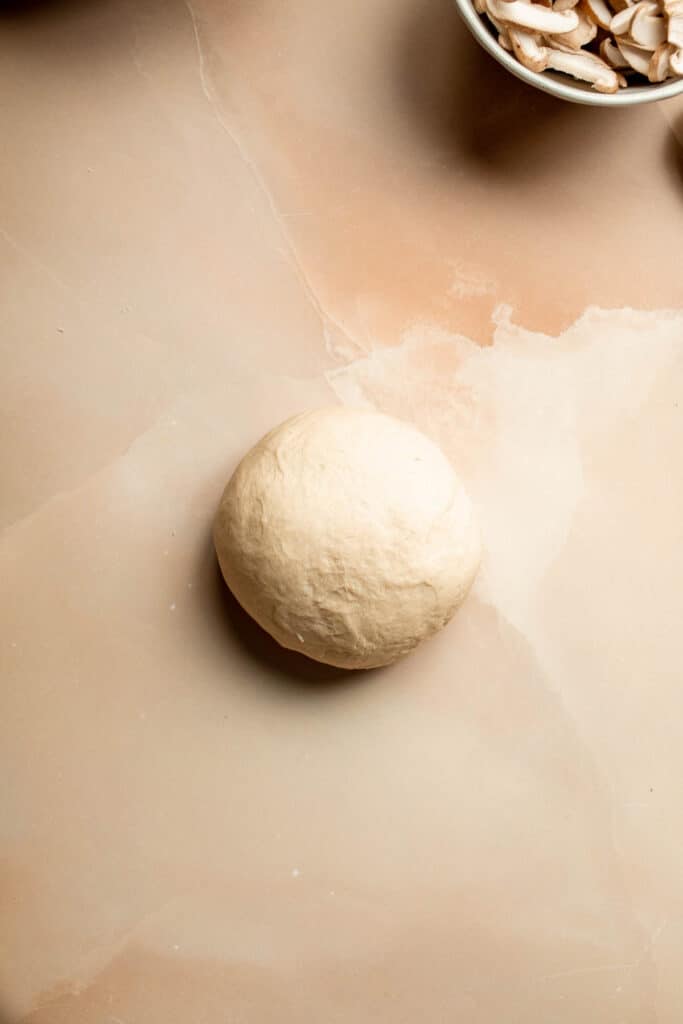
- Rise. Transfer the dough back into the bowl and cover with cling wrap. Let it rest for up to 1 hour at room temperature until the dough doubles in size.
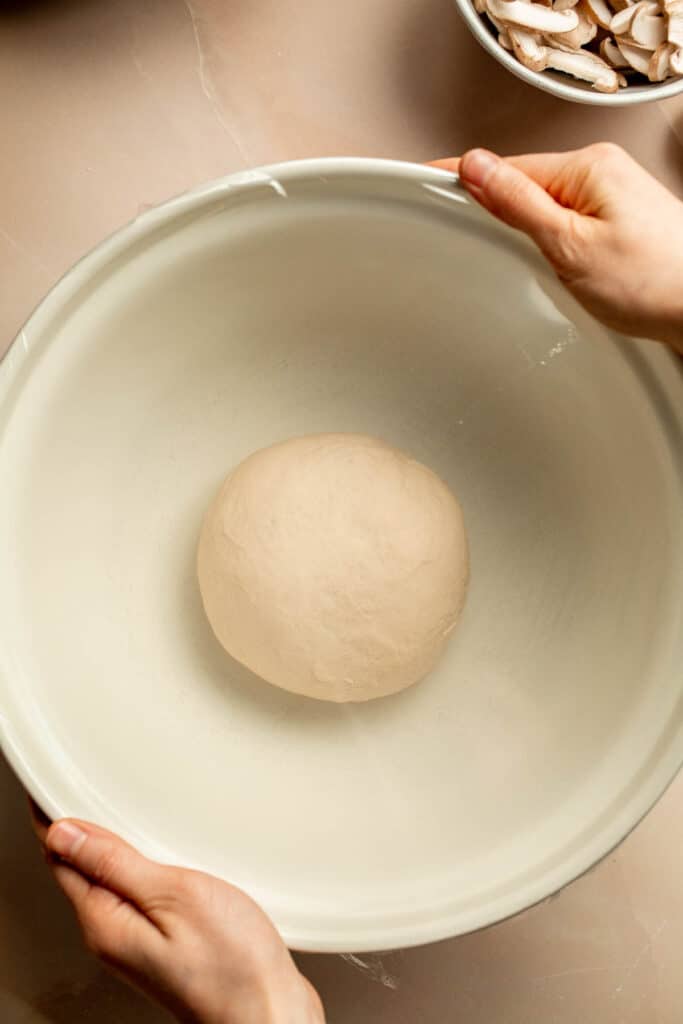
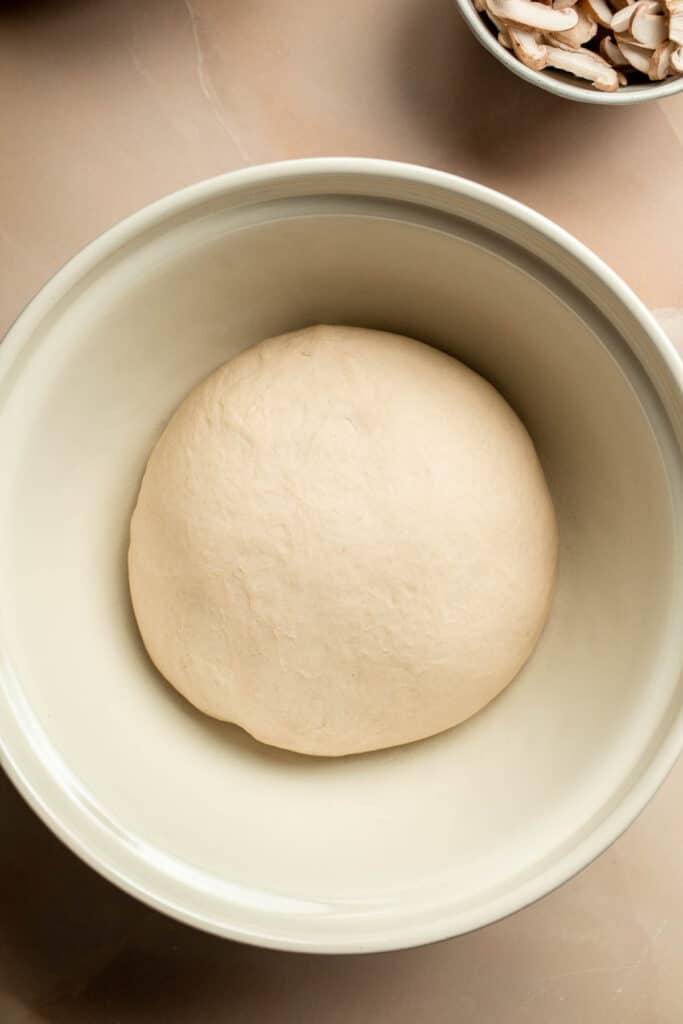
Now, let's add toppings and bake.
- Shape dough. Transfer the dough to a floured surface. Gently roll into a 12-inch circle or oval. Transfer the rolled dough to a large baking sheet lined with parchment paper. Let the dough rest for 5 minutes and use your hands to stretch out the dough a bit more if needed.
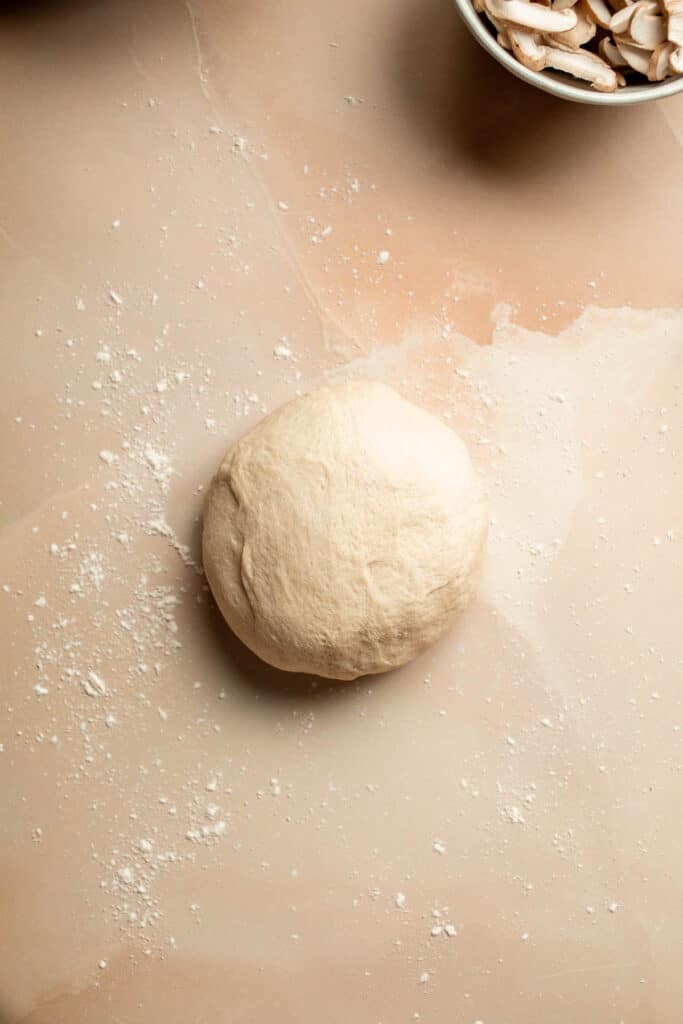

- Add toppings. Drizzle the dough with 2 tablespoons olive oil. Sprinkle Italian seasoning on top. Scatter taleggio or fontina (or other cheese) evenly on top, then add baby spinach. Top with shredded mozzarella and shiitake mushrooms. Drizzle with another tablespoon of olive oil.
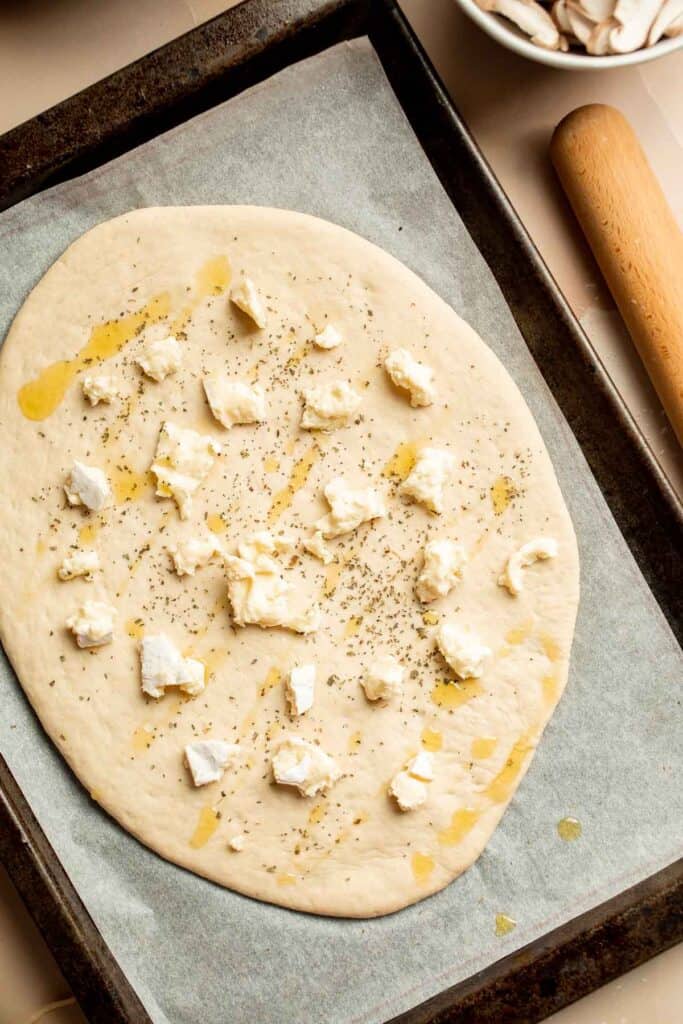
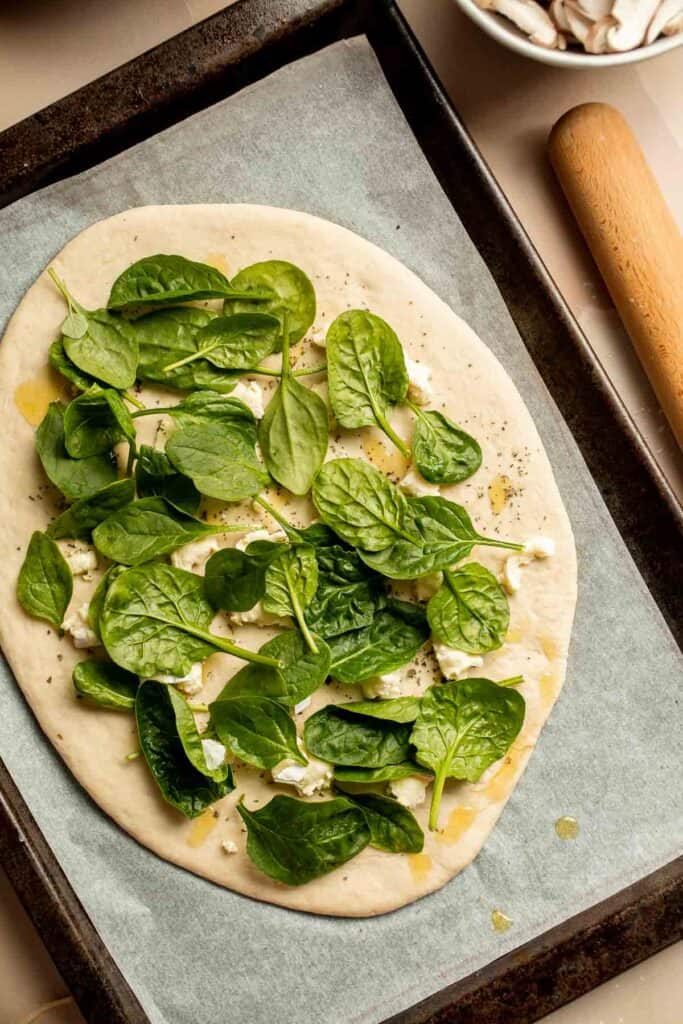
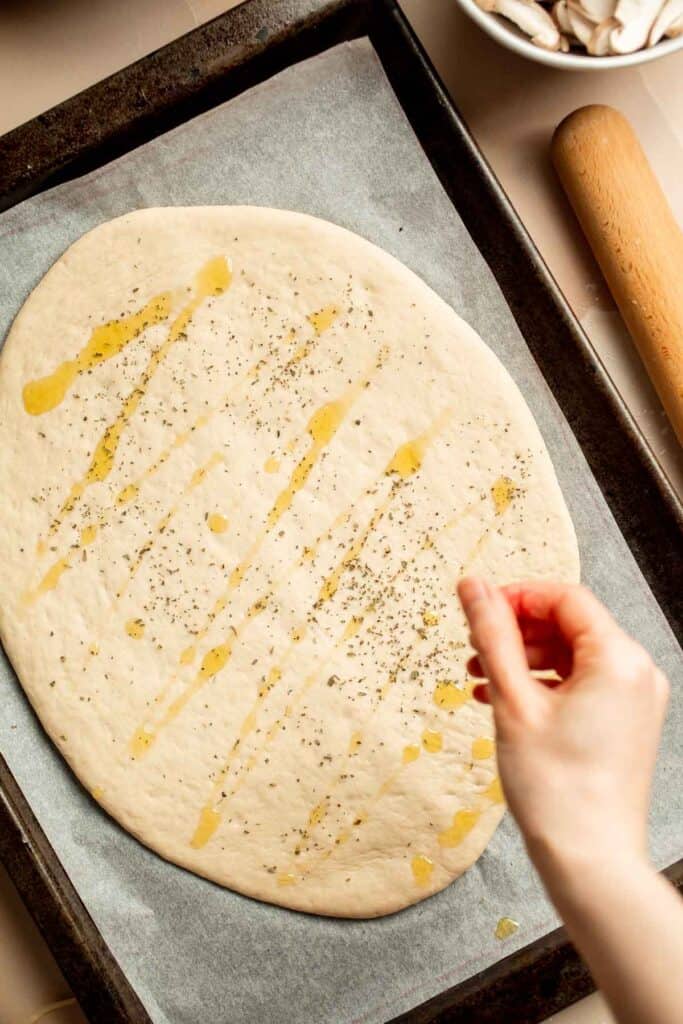
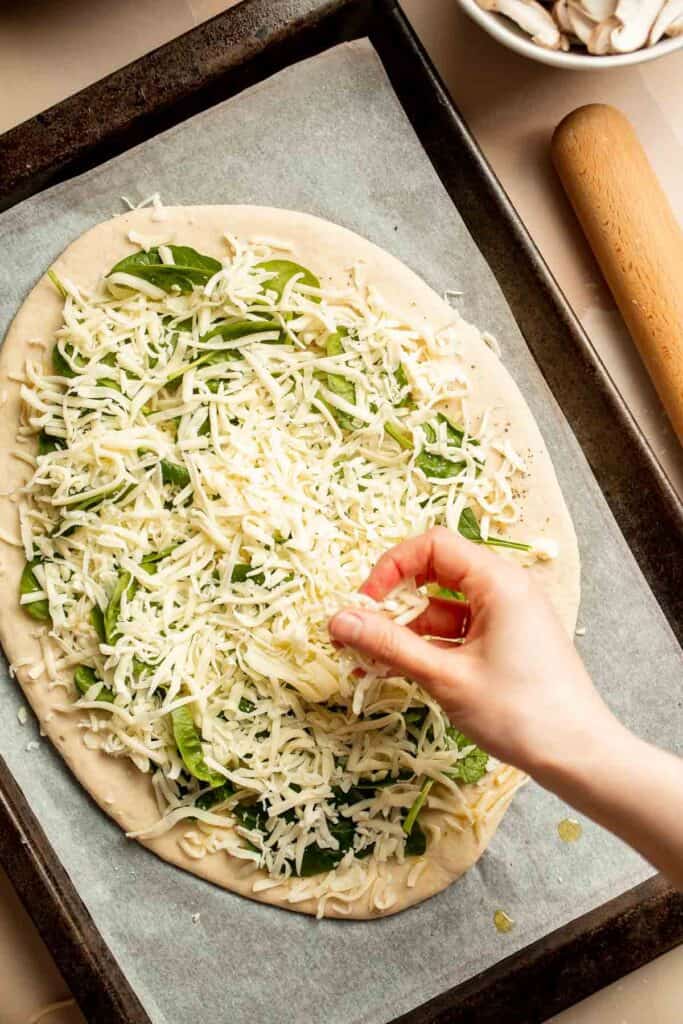

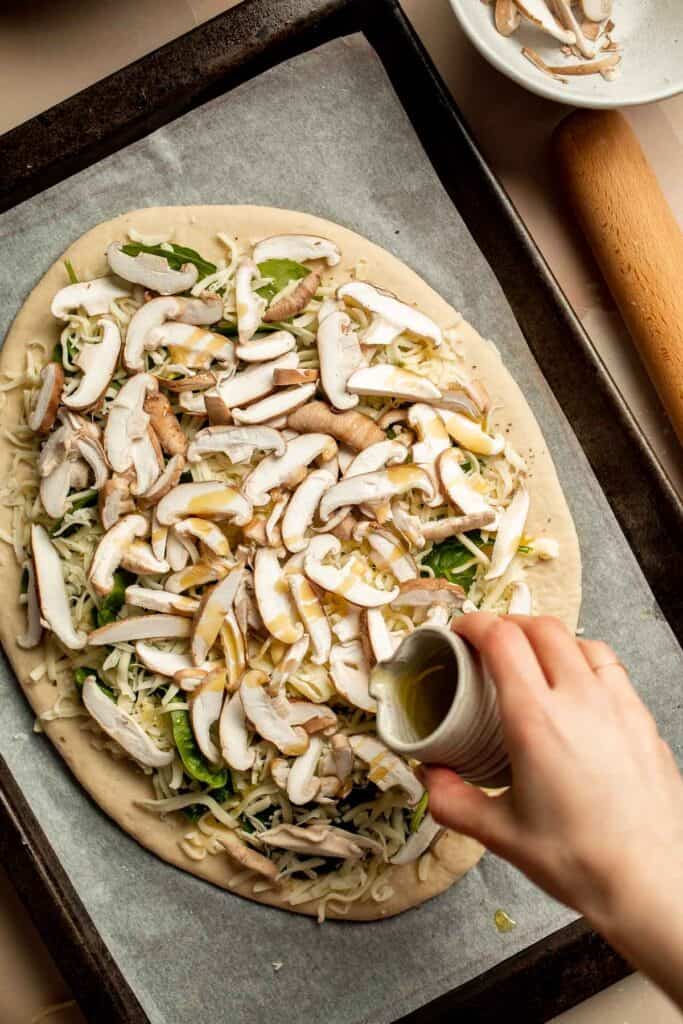
- Bake. Bake in a 425F preheated oven for 12-15 minutes, or until flatbread is crispy on the bottom and cheese has melted and browned a little on top. Let cool about 5 minutes before slicing. Serve topped with fresh thyme.
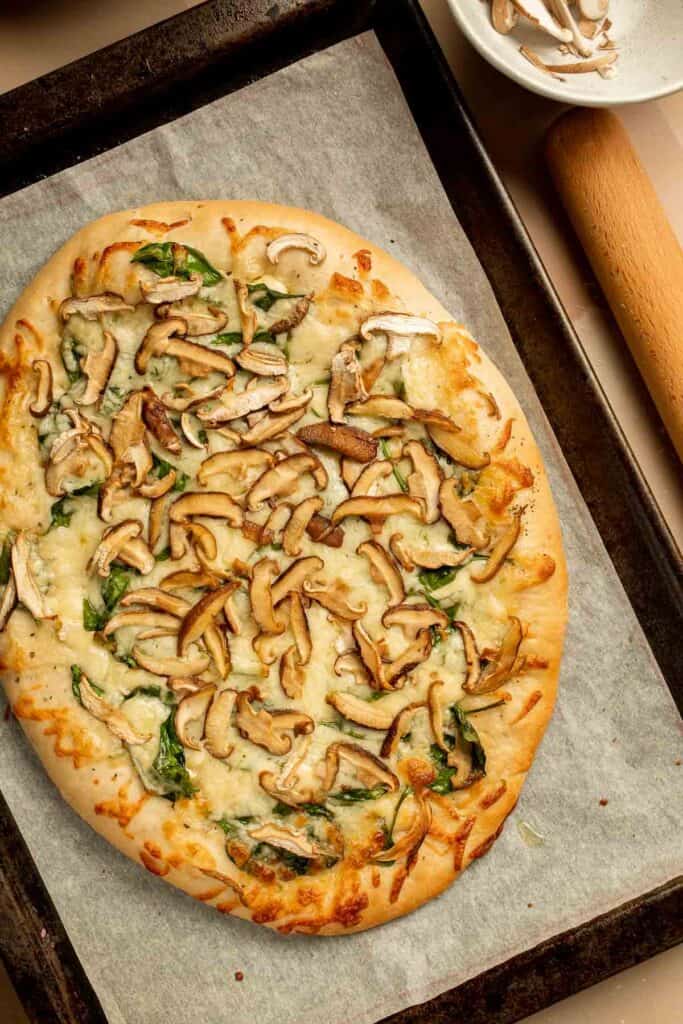
Recipe Variations
- Add meat. Bacon tastes amazing with mushrooms and spinach! Add crumbled pieces of bacon or crisp-up lardons to sprinkle over the top.
- Slice some onions. Thinly slice sweet yellow onions or make quick caramelized onions to add a rich sweetness to the pizza. Thinly sliced red onion works well, too!
- Top with creamy cheese. Add little dollops of cream cheese or goat cheese for a creamy, tangy pop of flavor.
- Sprinkle with pine nuts. Pine nuts will add a buttery, nutty flavor that tastes wonderful with the cheeses and mushrooms.
- Try different mushrooms. Although shiitakes have a wonderful flavor, you can use your favorite mushrooms. Sautéed mushrooms or leftover roasted mushrooms work wonderfully as well.
- Use a premade flatbread. You can speed up this recipe by an hour by using store- bought pizza dough or a premade flatbread. Use ½ pound of pizza dough or a large herbed flatbread approximately 12-14 inches round. Add toppings and bake for same amount of time.
How to Serve
This mushroom and spinach flatbread is delicious served on its own as an appetizer or for lunch on dinner. I recommend serving it with fresh thyme (trust me, thyme and mushrooms are perfection). For a bigger spread, pair it with some of these delicious dishes:
- French Onion Soup
- Baked Beans
- Israeli Couscous Salad
- Italian Meatballs
- Turkey Tetrazzini with Spinach
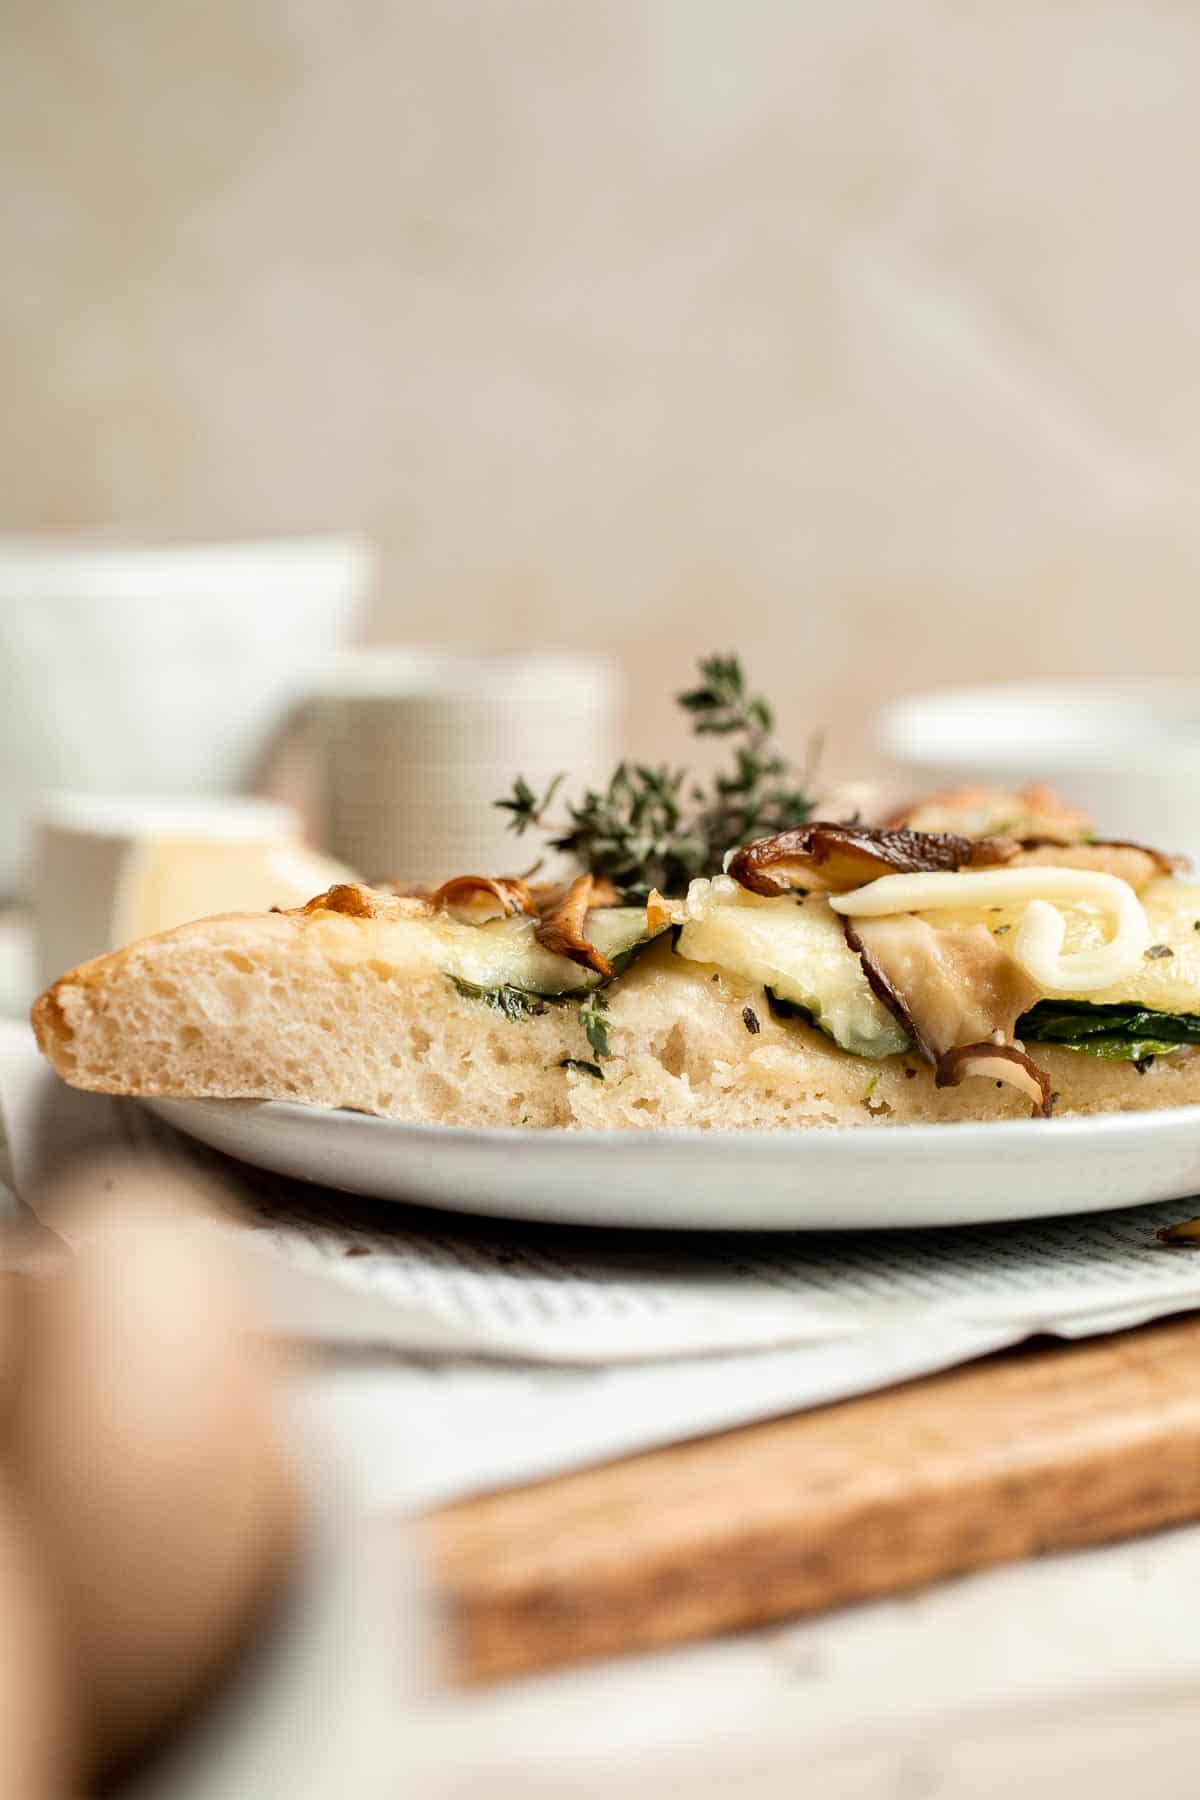
Recipe Tips and Tricks
- Use the best quality ingredients. The secret to a great pizza is to use great ingredients, especially cheese, but don't go overboard. Balance more expensive taleggio or fontina with cheaper mozzarella to get the same great flavor for less. If you can't find or afford fresh shiitakes, get the freshest-looking baby bellas at the grocery store.
- Add a pinch of salt. A sprinkle of salt can help bring out all the wonderful flavors in this mushroom spinach flatbread recipe. A little black pepper or red pepper flakes can be nice, too.
- Be generous with the oil. You'll notice that this mushroom spinach pizza adds olive oil twice, once to coat the crust and another drizzle of olive oil before baking. This makes sure the crust has a flavorful, crispy texture, and the extra drizzle at the end helps to give the mushrooms a great color while also marrying the flavors together.
- Get creative with leftovers. The leftovers are perfect for a lazy breakfast topped with a fried egg!
Storing and Freezing Instructions
How to Store
Store leftover flatbread in an airtight container or wrap them in plastic wrap and store them in the fridge for 2-3 days.
How to Reheat
The best way to reheat pizza is to either bake it at 350 degrees F for a few minutes in a toaster oven or heat it in a large skillet over medium heat until the crust is hot and the cheese begins to melt.
How to Freeze
Wrap the leftovers with several layers of plastic wrap, then store them in a freezer-safe bag for 2-3 months. Thaw in the fridge before reheating.
FAQ
Earthy mushrooms pair well with a variety of cheeses, but they're especially perfect with slightly funky cheeses, like washed-rind talleggio. If the cheese has a nutty flavor at all, like fontina, it will almost always pair well with mushrooms. You can also serve mushrooms with Swiss cheeses, like gruyere or Emmentaller, and Italian cheeses, like pecorino, provolone, or mozzarella. They're also perfect with a sharp white cheddar.
This easy flatbread can be served as an appetizer or as a delicious pizza. As an appetizer, we like to cut it into little squares and serve it with our other favorite apps, like our Antipasto Platter or Tomato Bruschetta with Balsamic Glaze. As a pizza, they can be served as individual, personal-sized pizzas sliced into traditional wedges or paired with a hearty Tomato and Mozzarella Caprese Salad or even a simple bowl of Minestrone Soup for a complete meal.
You definitely do not need to precook the mushrooms for your favorite pizza unless you like to eat a type of mushrooms that must be cooked before eating. Most of the mushrooms in the grocery store are safe to eat raw, like baby bellas, buttons, shiitakes, and more. For pizza or homemade flatbread, just slice them thinly, and they'll cook just enough from the heat of the oven. If you have leftover cooked mushrooms or even roasted mushrooms on hand, they taste wonderful on pizza, too! This is a great way to use them up and enjoy a quick dinner at the same time.
More Pizza and Flatbread Recipes
- Mediterranean Flatbread
- BBQ Chicken Pizza
- Easy Skillet Neapolitan Margherita Pizza
- Garlic Mushroom Focaccia Pizza
- Greek Salad Hummus Flatbread
- Mushroom and Arugula Skillet Pizza
Tried this recipe?
I'd love to hear what you think! Leave a comment and rating below to share your feedback. Your reviews help others discover this recipe and help me keep creating more free recipes for you. Snap a photo and tag me on social media @aheadofthyme too.
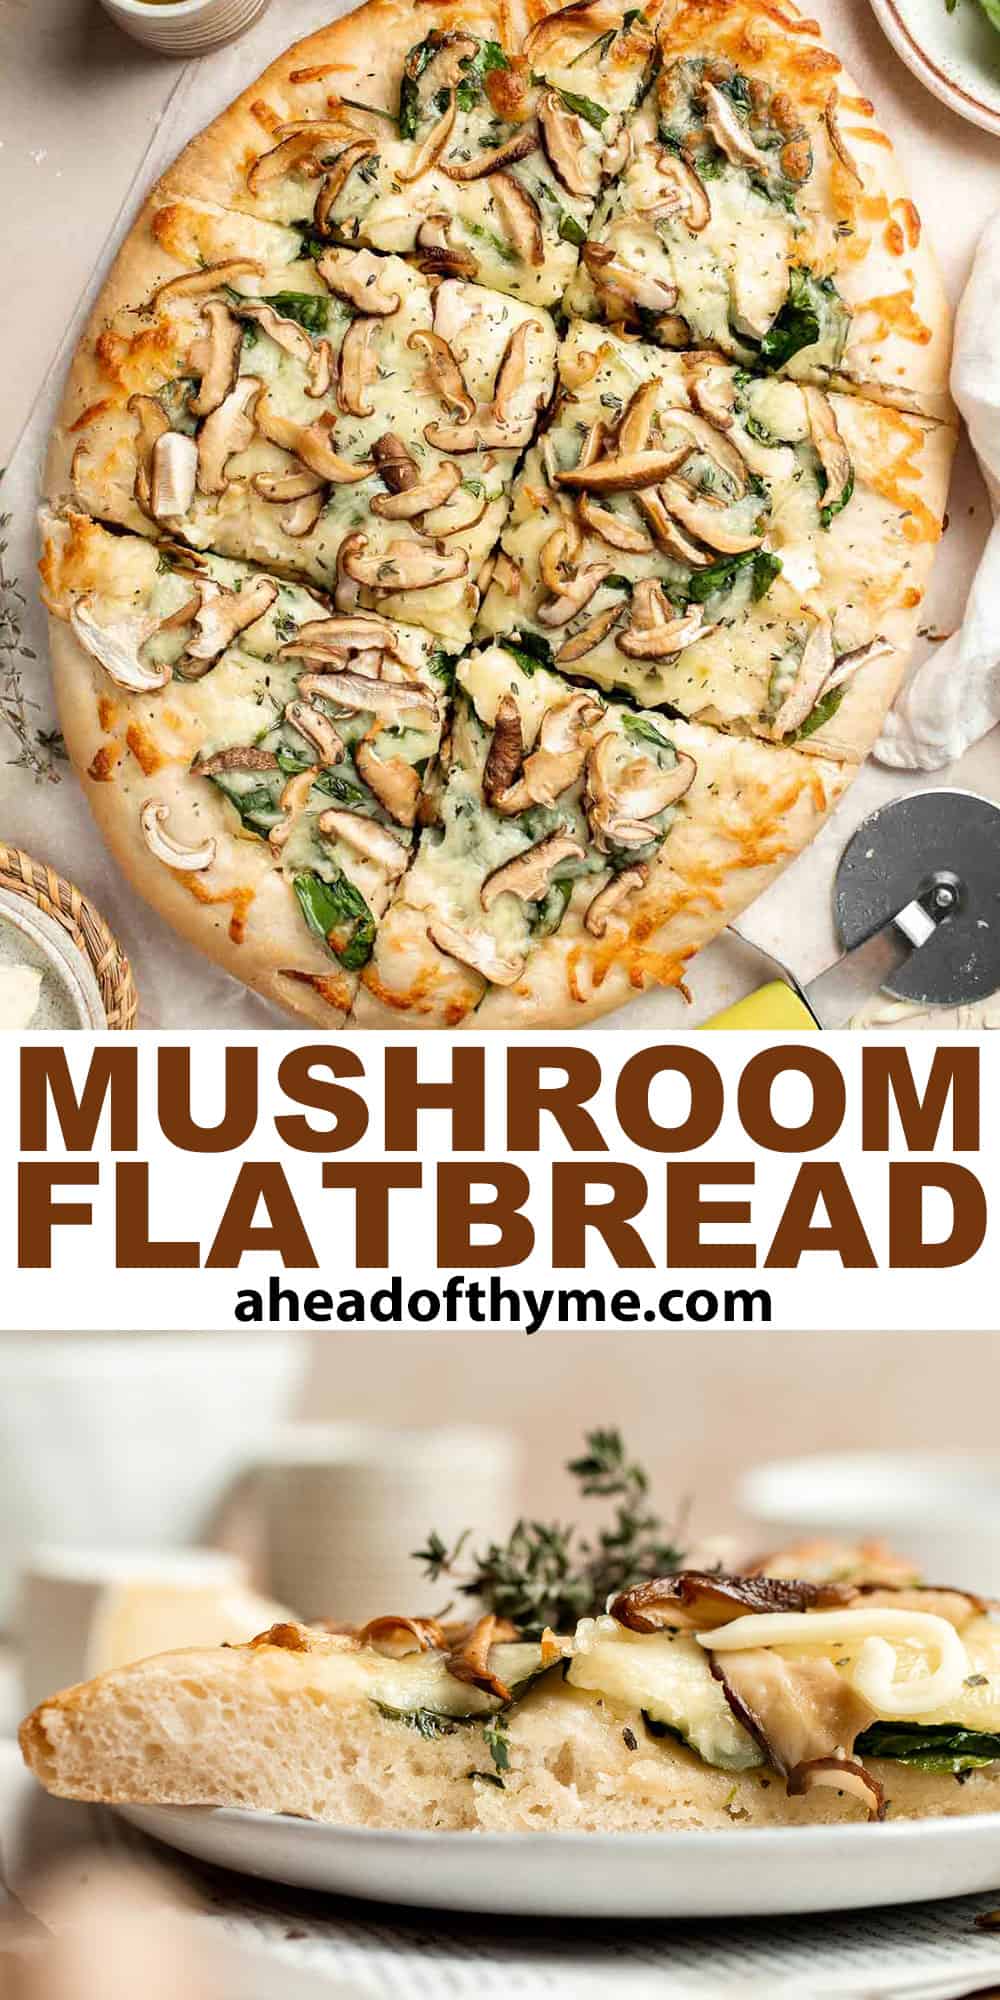
Homemade Almond Butter
Skip the store-bought stuff and make this delicious Homemade Almond Butter with just one simple ingredient. It's so much easier than you'd expect. You just need some freshly toasted whole almonds and a high-power food processor to blend them smooth. This creamy homemade almond butter is endlessly customizable, too!
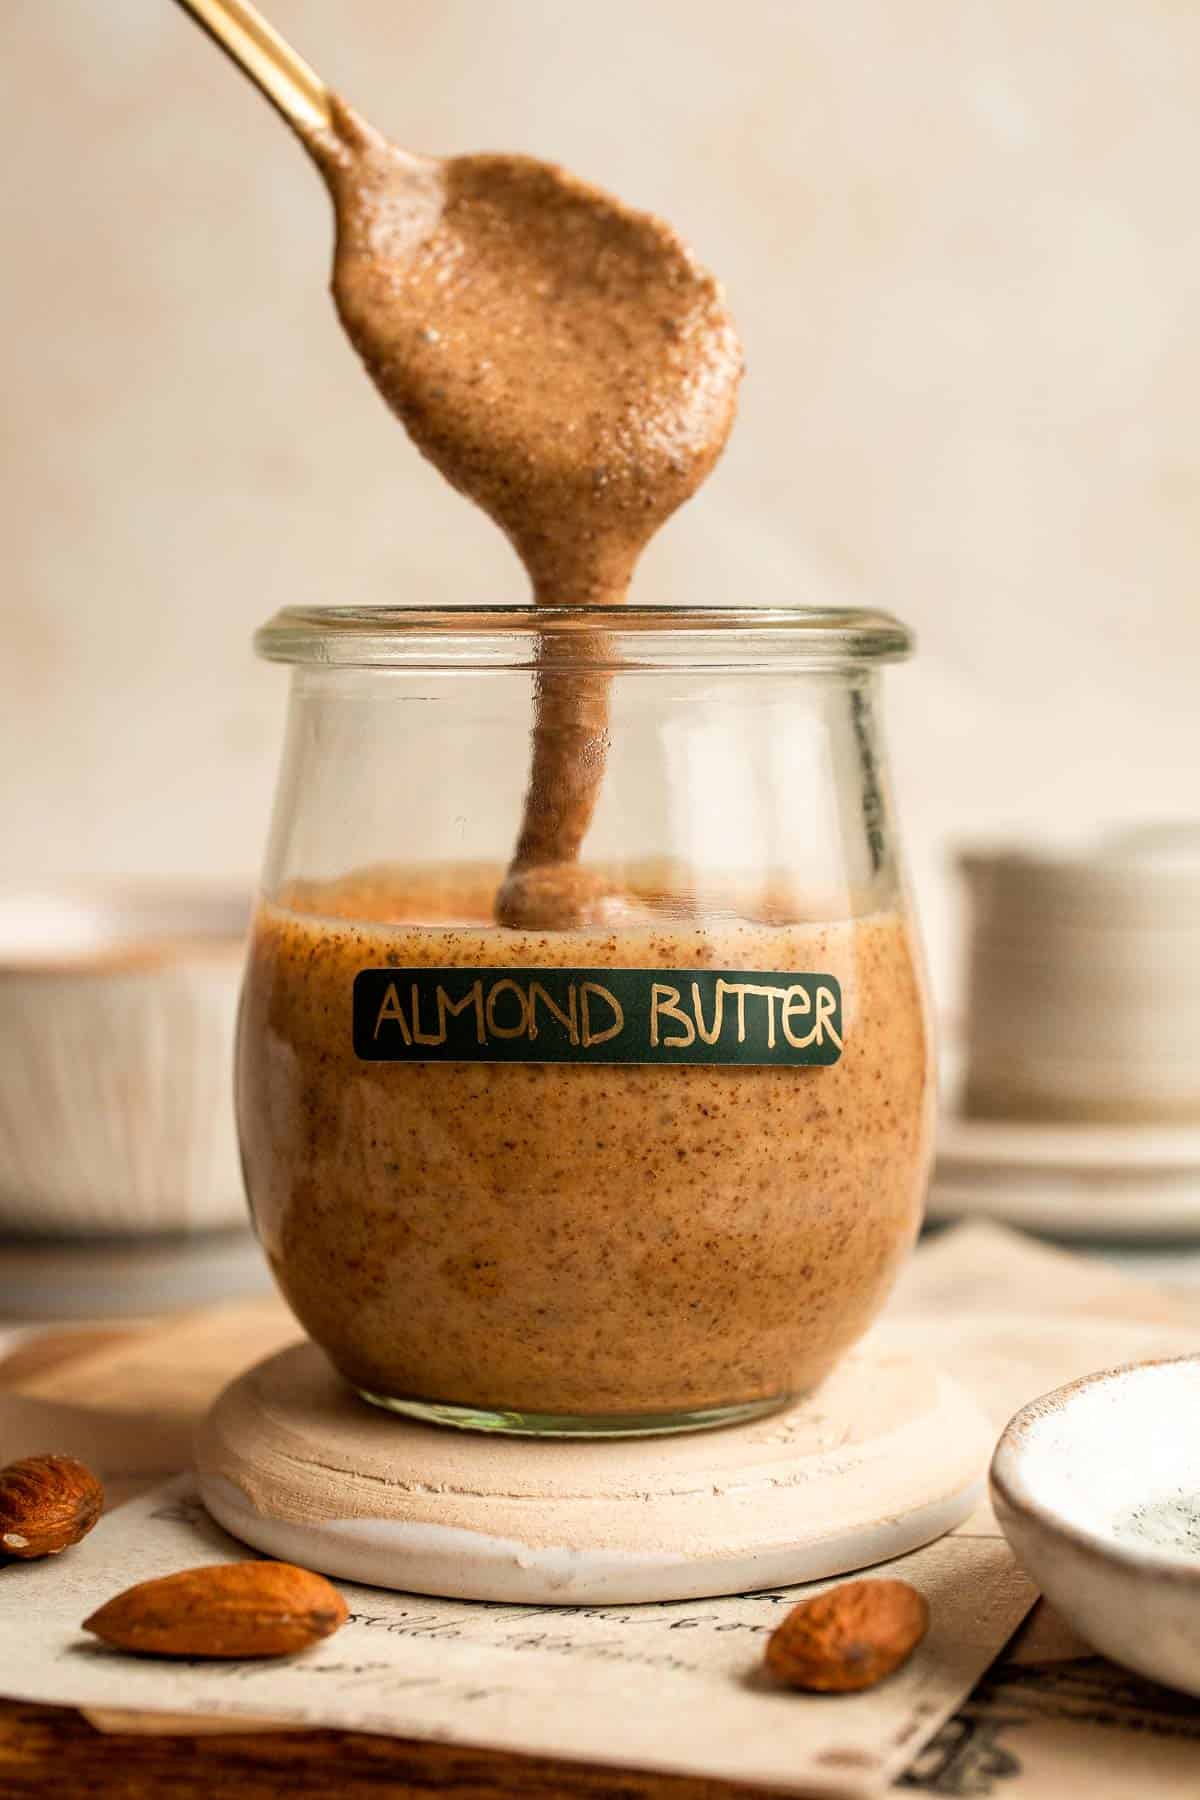
Making your own homemade almond butter from scratch can seem a little intimidating, but I promise you, it's worth it. Once you have freshly roasted almond butter, you'll quickly realize how much better it is than the cold, oily stuff at the store. The toasted flavor of the nuts comes out so much more, making it perfect for a healthy snack with apple slices and celery or using as a peanut butter alternative. Plus, it's a great way to use up some older almonds hanging out in your pantry, and it's often cheaper than buying creamy almond butter at the store!
Why You'll Love This Homemade Almond Butter
- Seriously easy to make. There are two phases to making this homemade almond butter recipe. First, toast the unsalted almonds in the oven. Then, blend them into a paste. That's it. It's so simple!
- So much flavor. After toasting the almonds, their nutty flavor really comes out. You'll be surprised at just how much fresher and more flavorful this creamy nut butter is.
- Endlessly customizable. This is a great classic creamy almond butter, but you don't have to stop there. Adjust the texture and make crunchy almond butter. Add honey or maple syrup for sweetness. Stir in some cinnamon, apple pie spice, or an assortment of other spices for extra flavor. Have fun with it!
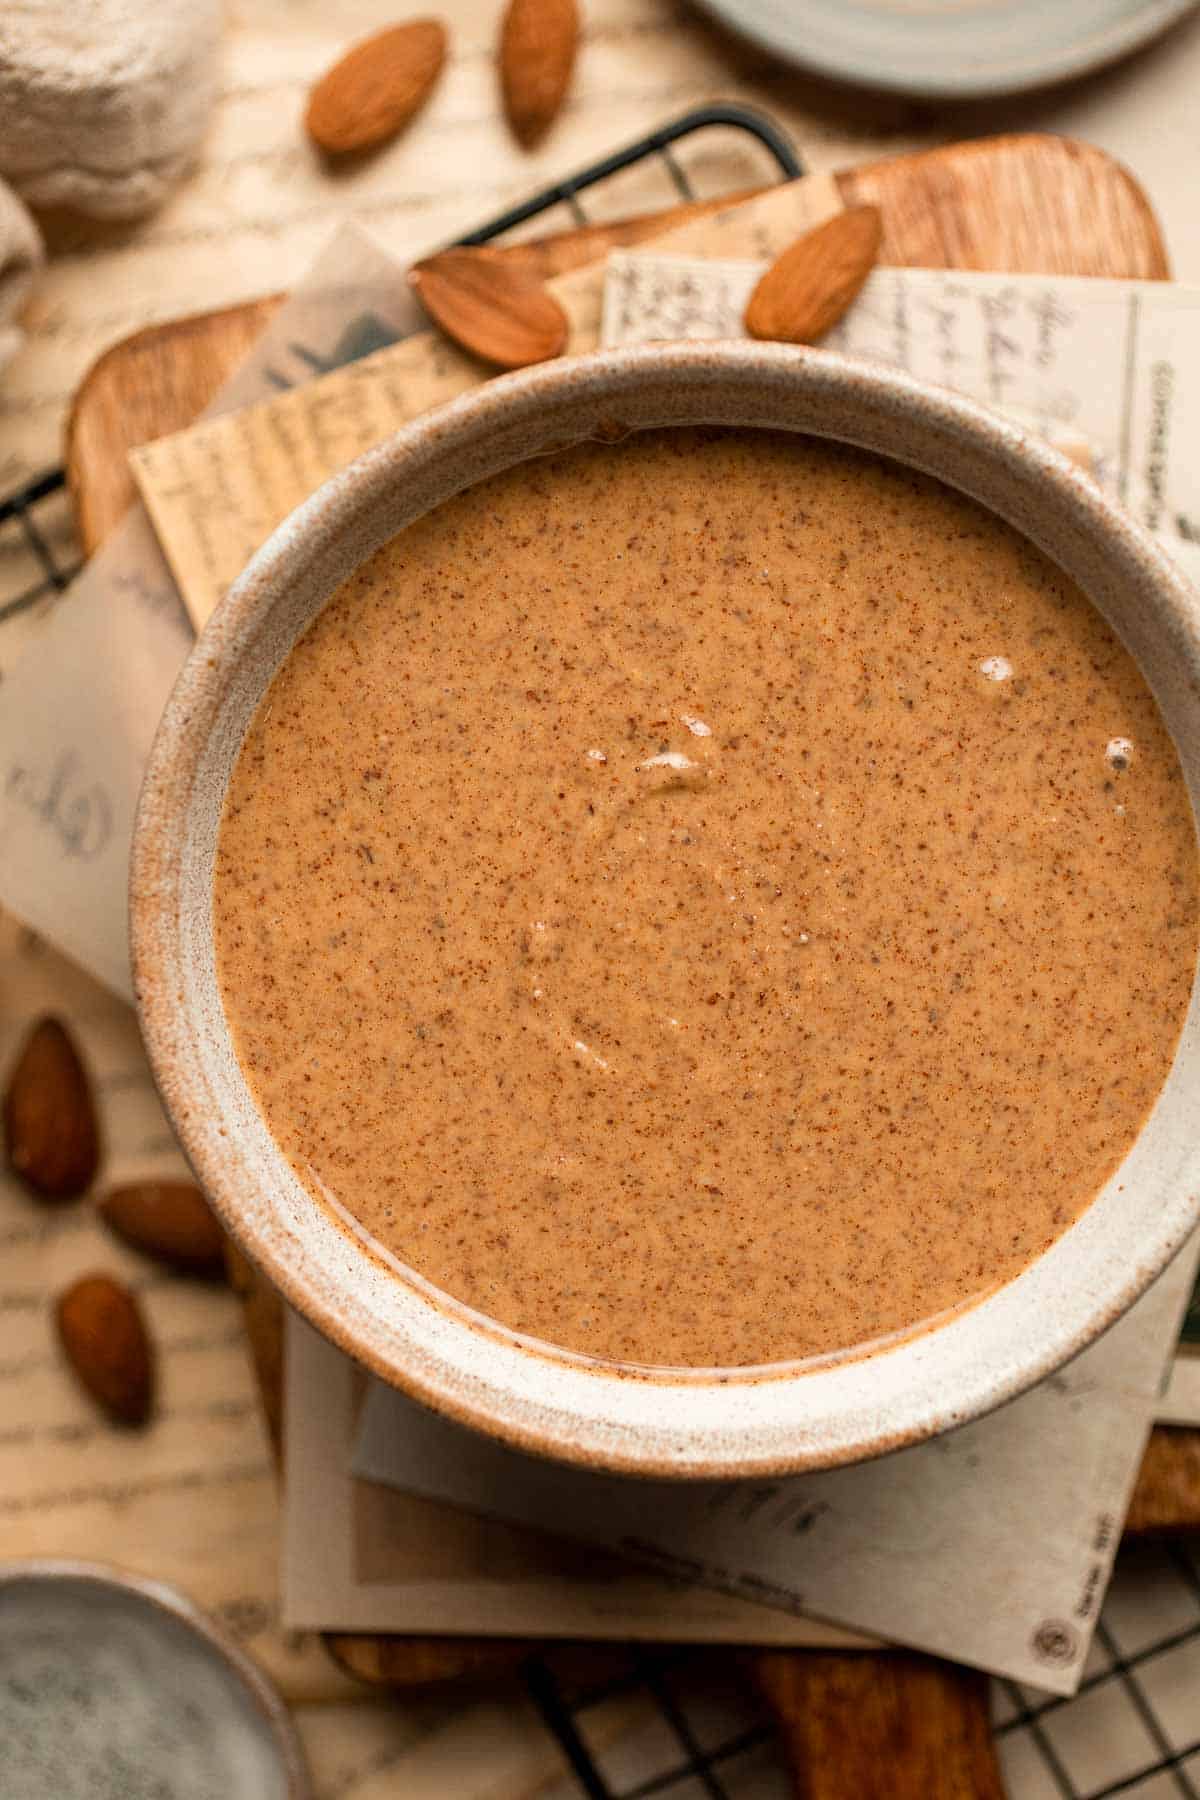
Ingredient Notes
To make this delicious Homemade Almond Butter, you will need the following ingredients (full measurements in recipe card below):
- raw almonds - this is the key ingredient. It's best to use raw almonds since they haven't already been toasted.
- avocado oil - this is entirely optional as the nuts have their own natural oils, but adding a neutral oil like avocado oil or coconut oil will speed up the blending process if you are in a hurry.
You will also need a baking sheet, parchment paper, a high-speed blender or a good food processor, a rubber spatula, and an airtight container.
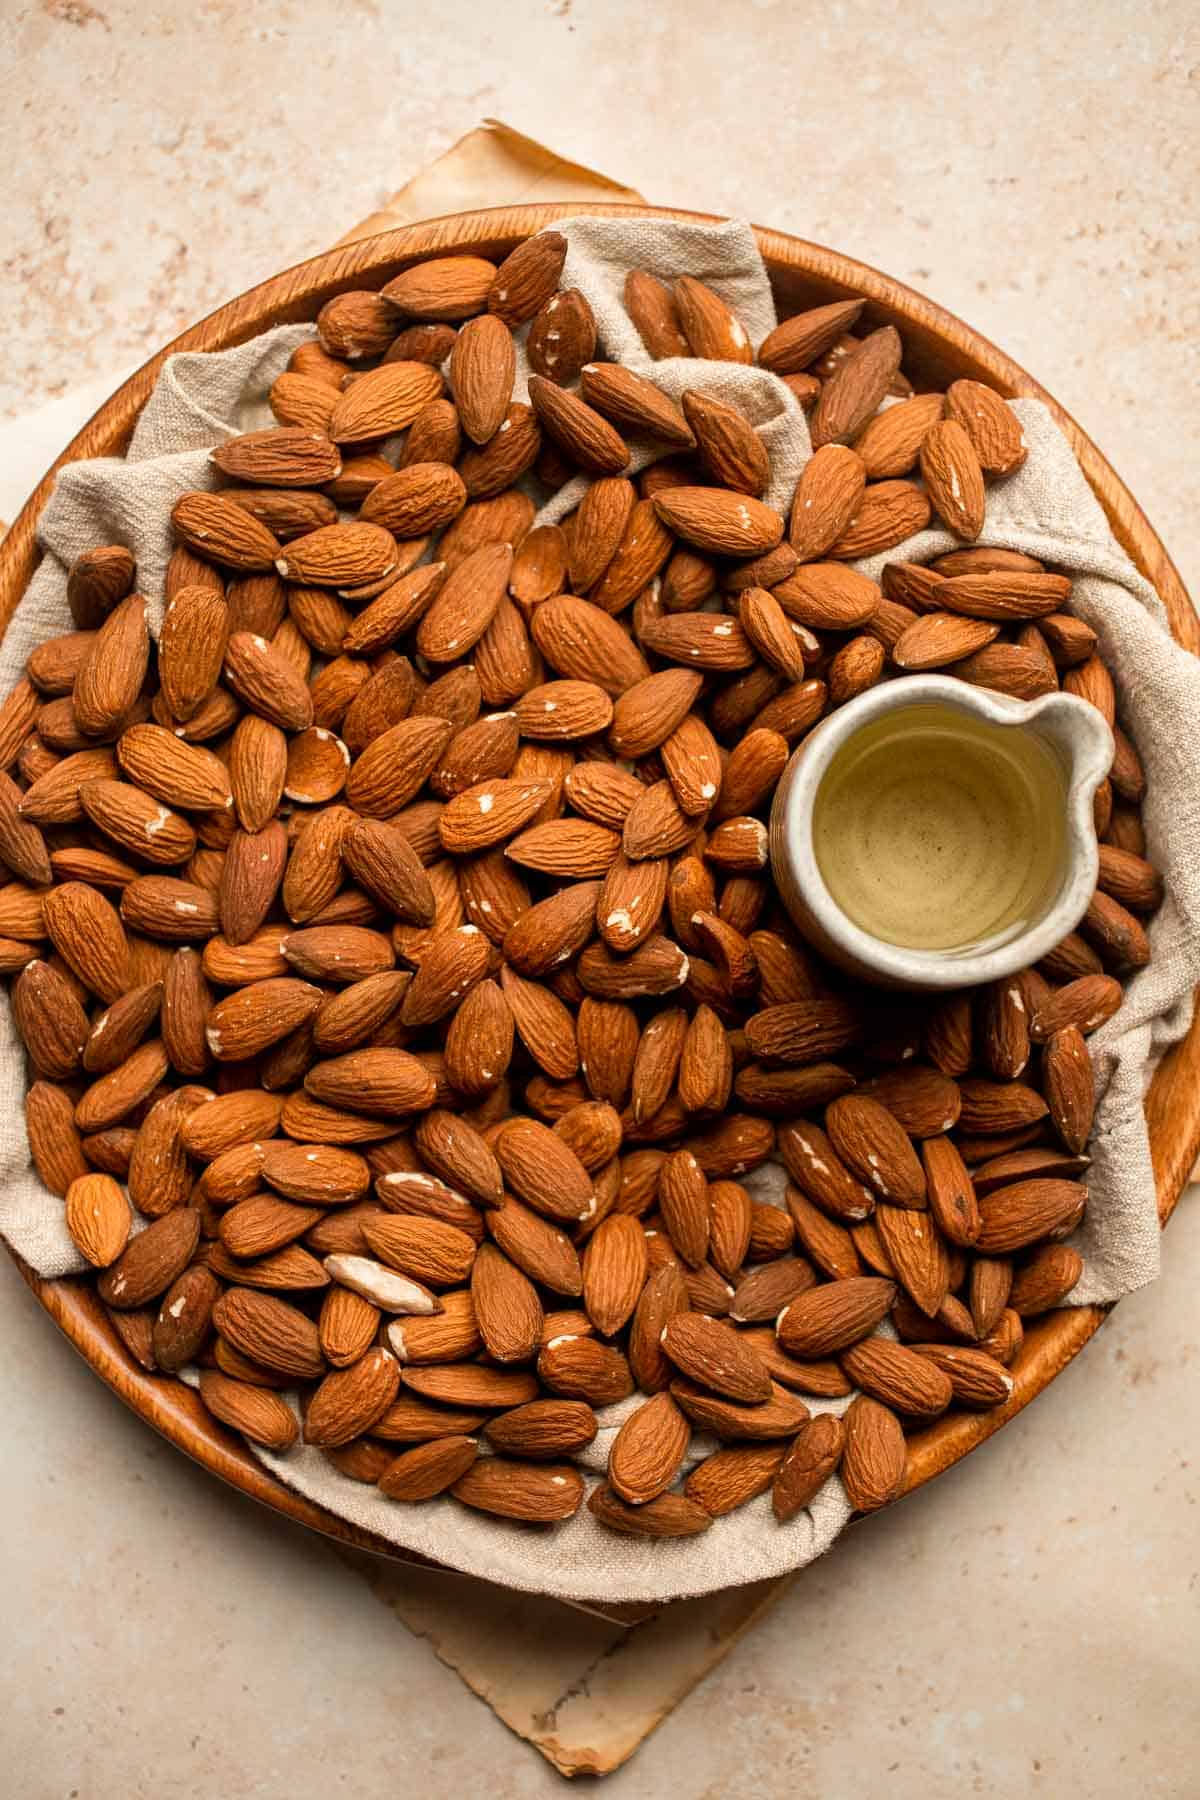
How to Make the Best Homemade Almond Butter
- Toast almonds. Preheat the oven to 350F. Add and spread almonds in a single layer on a large parchment-lined rimmed baking sheet. Bake for 10 minutes and allow to cool for 5 minutes.
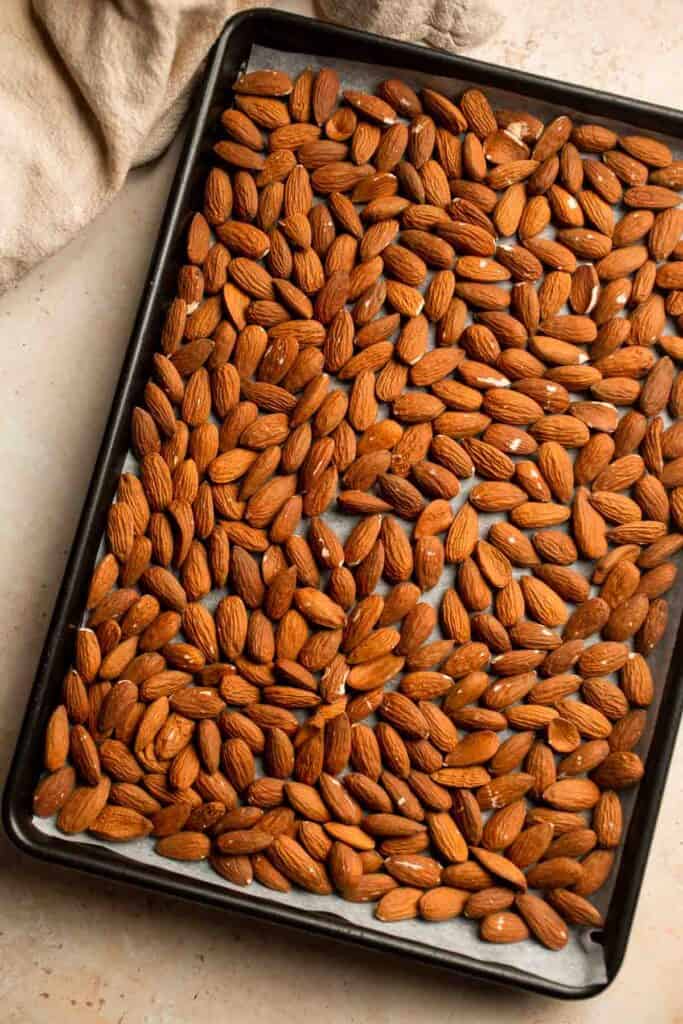
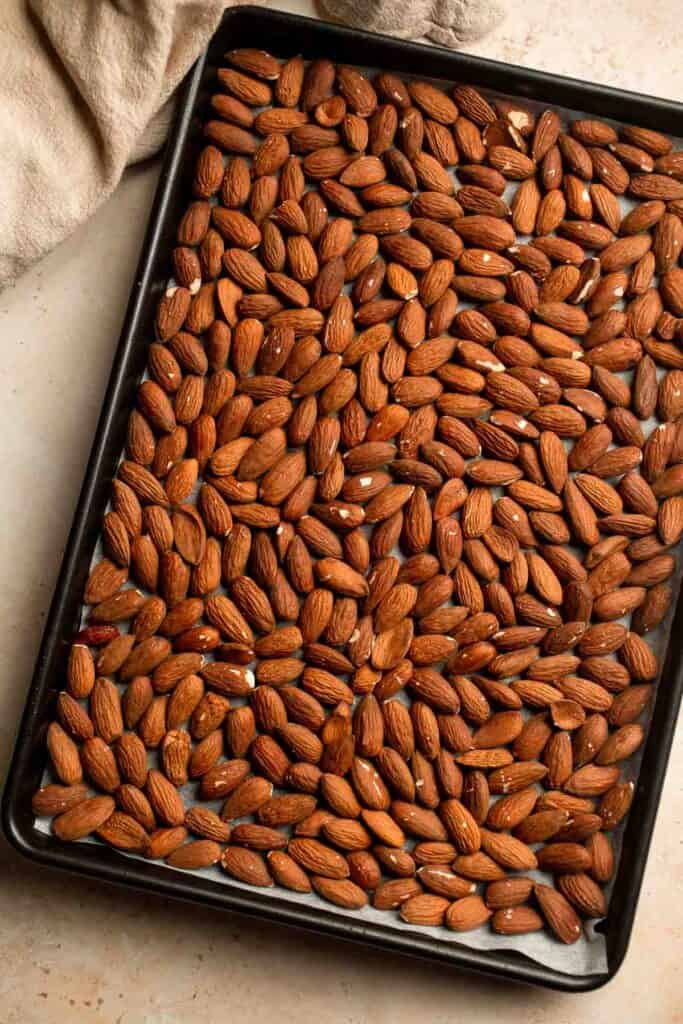
- Blend. Add almonds to a food blender. Pulse mix for 1 minute and stop, allowing the blender to cool down. Use a rubber spatula to scrape down the sides of the blender to mix evenly. Blend in 1-minute increments until creamy and smooth, about 15 minutes. After 15 minutes of mixing, the almonds will turn from lumpy into a desired consistency.
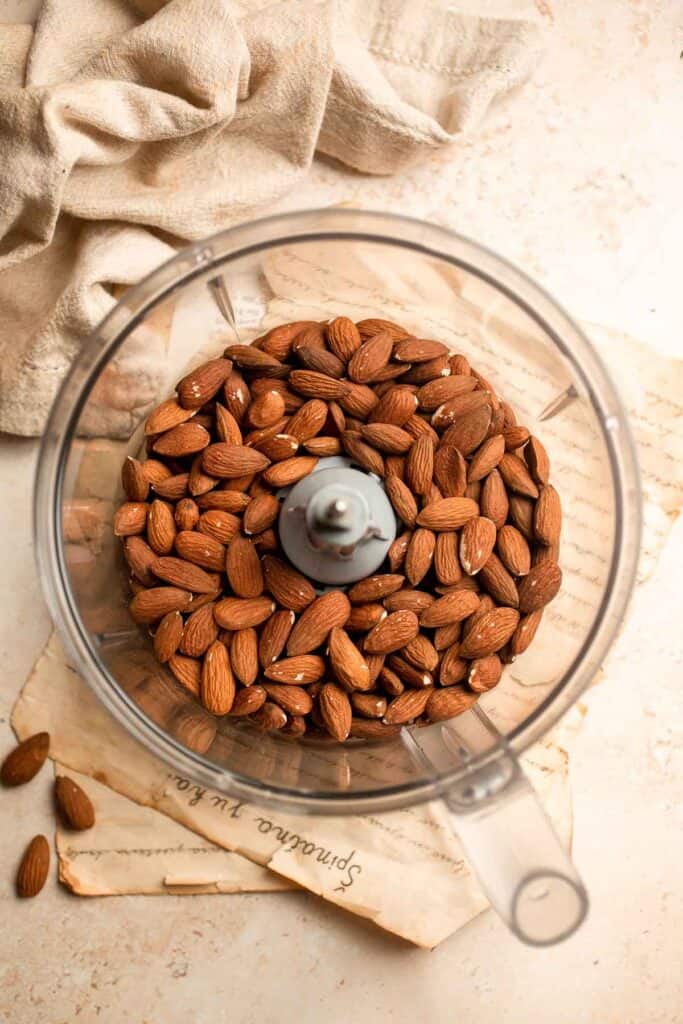
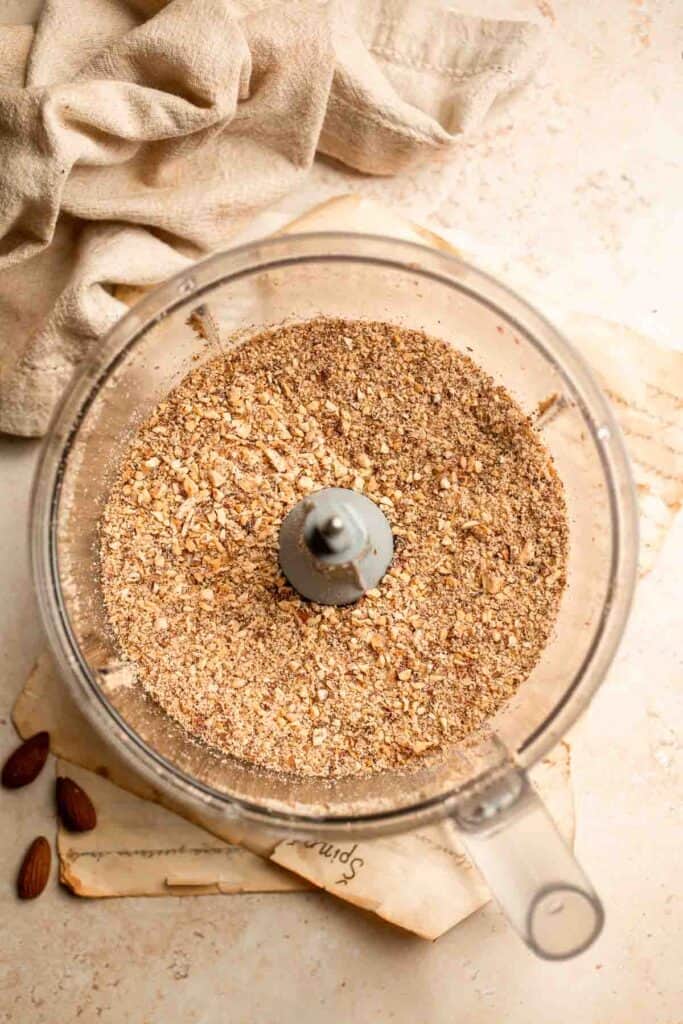
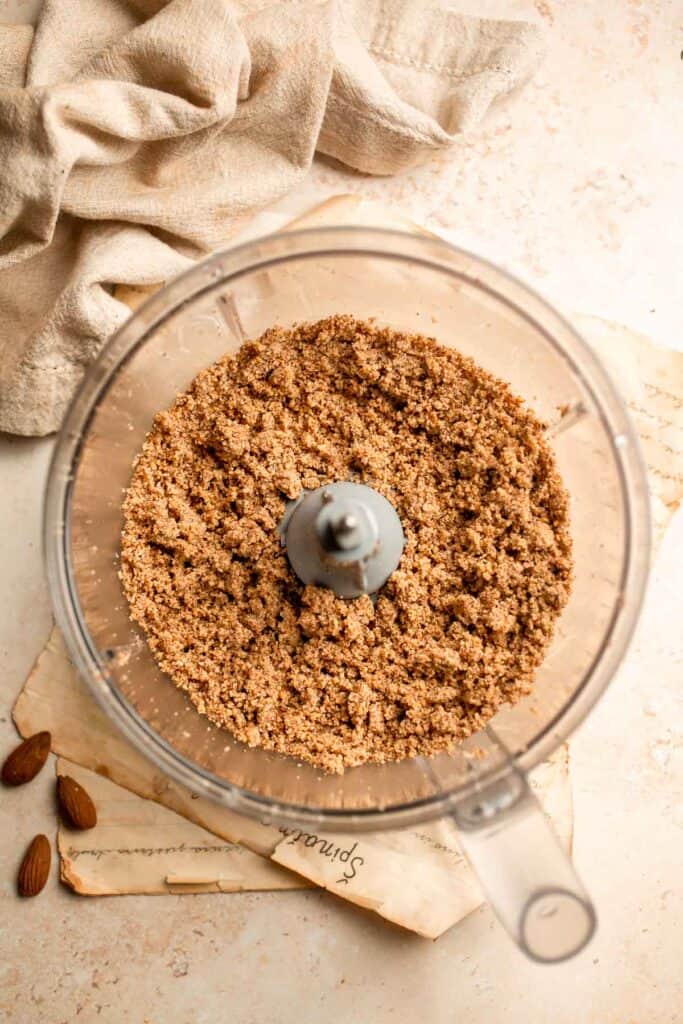
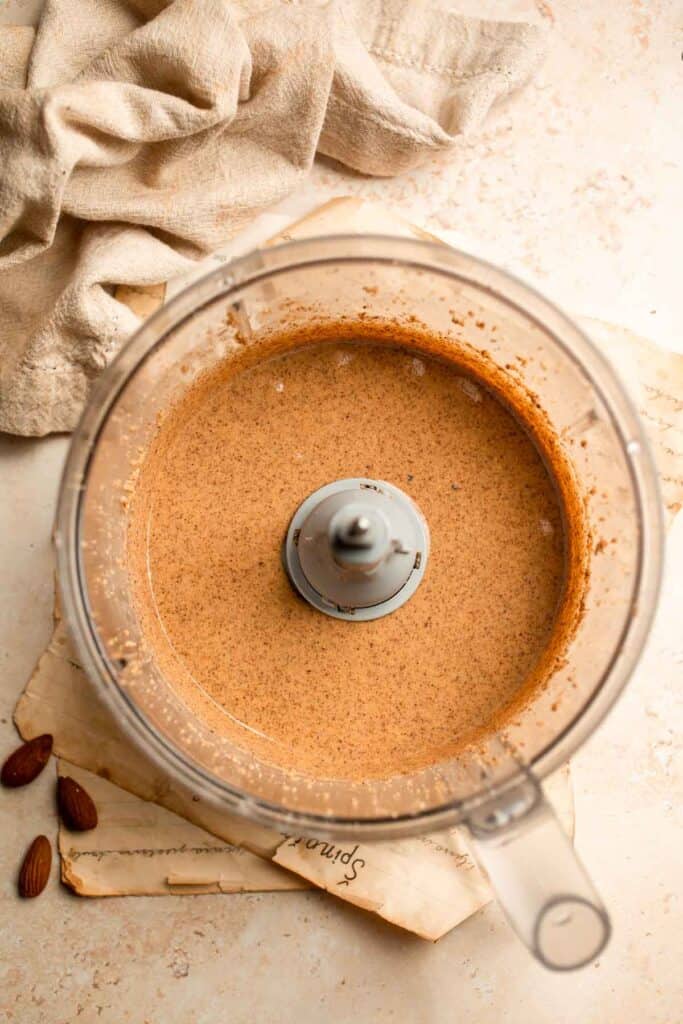
- Add oil. Optionally, add avocado oil and pulse mix for 1 minute to help dilute a bit.
- Store. Transfer the almond butter into an airtight container. You can store it in the refrigerator for up to 2 weeks.
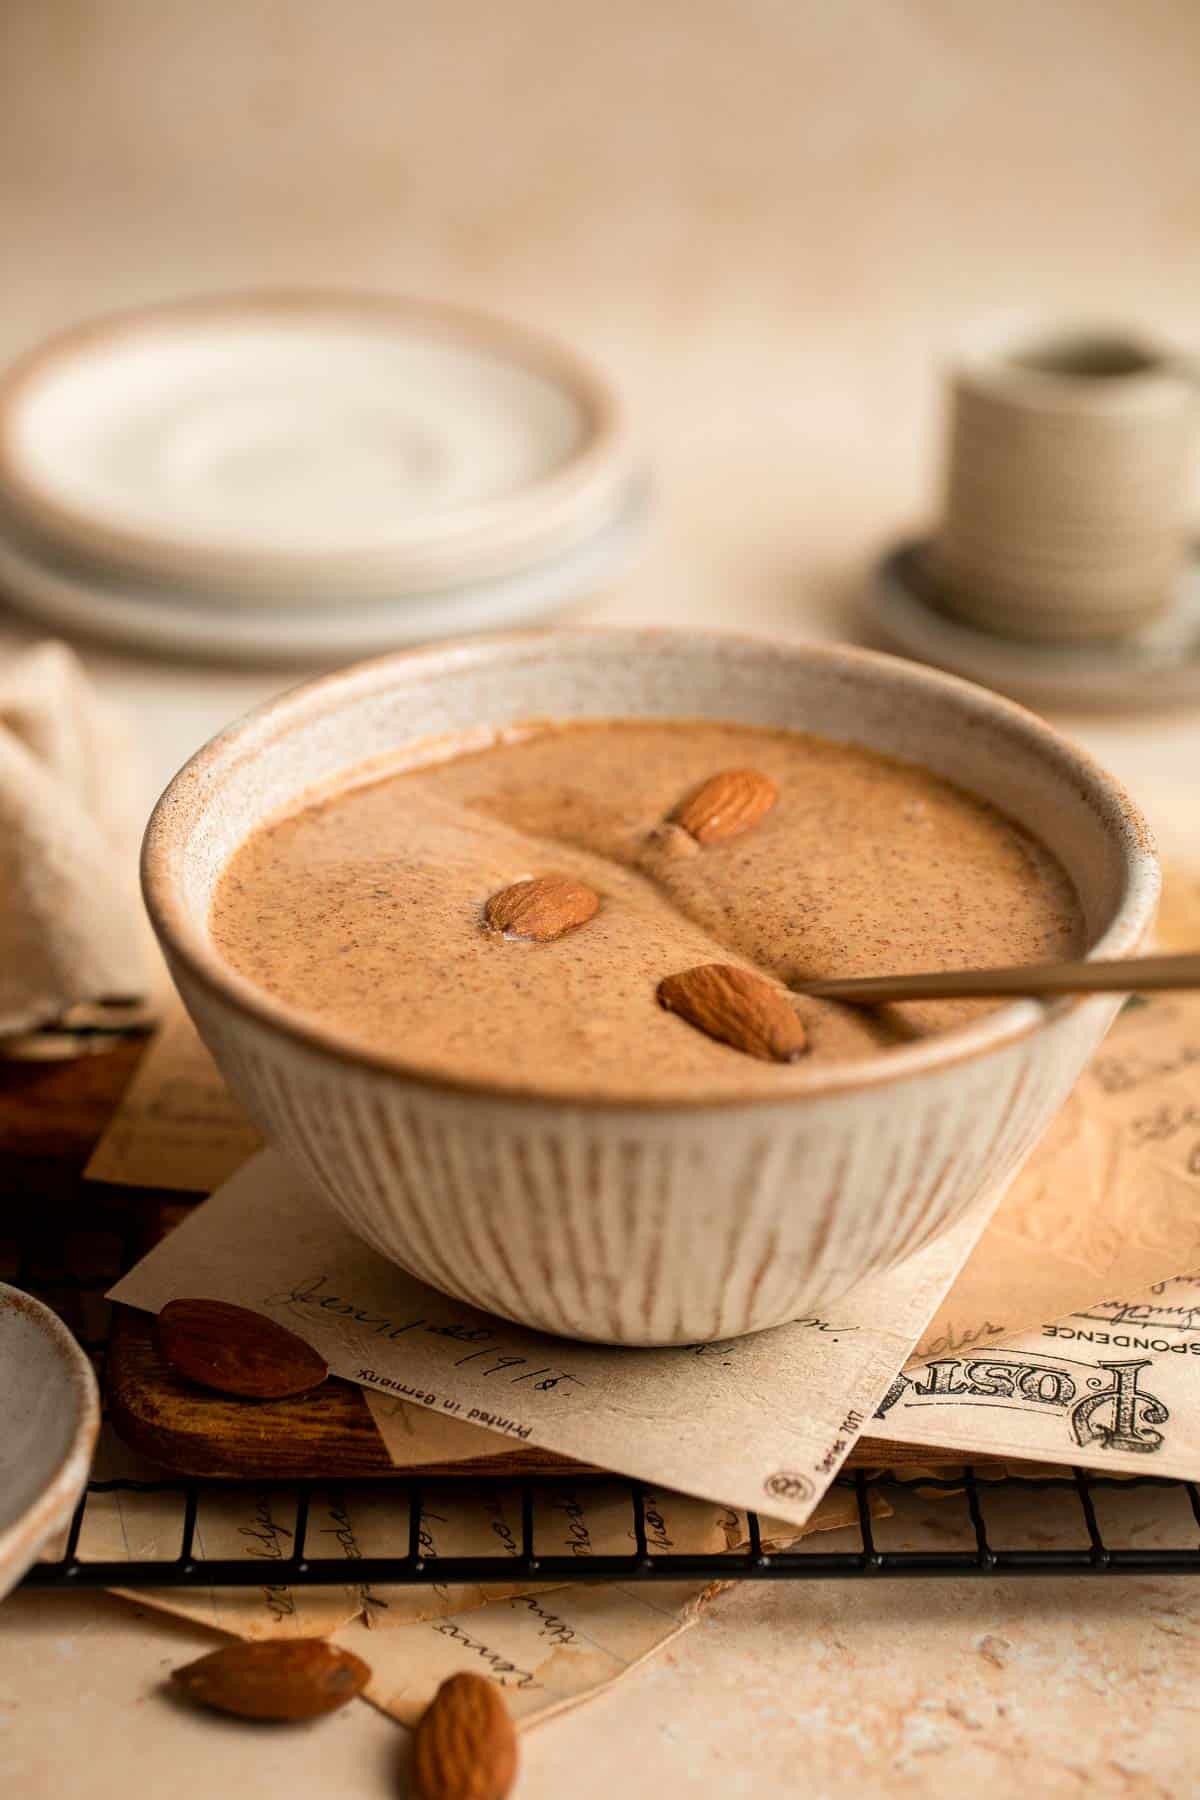
Recipe Variations
- Maple cinnamon almond butter. Add ground cinnamon and a glug of pure maple syrup for a sweet, spicy flavor.
- Organic almond butter. Making your own nut butter is a great way to control the quality of your ingredients. You can use certified organic nuts and oil for organic almond butter on a budget.
- Keep it crunchy. If you prefer homemade nut butters with a little crunch, stop blending before the almonds are perfectly smooth or reserve some of the warm almonds to add right at the end. You can also add a little flax seed or chia seeds, too.
- Try a mix of nuts. You use the exact same method to make homemade peanut butter. Substitute all or some of the almonds with peanuts or another favorite nut. Homemade cashew butter or pecan butter is amazing, too!
How to Serve
This homemade almond butter is delicious served on its own over a bowl of yogurt with granola, or over toast. It's also delicious drizzled over some of my favorite snacks including:
- Almond Cranberry Granola Bars
- Peanut Butter Banana Toast
- Berry Smoothie Bowl
- Healthy Banana Bread
- Baked Apples
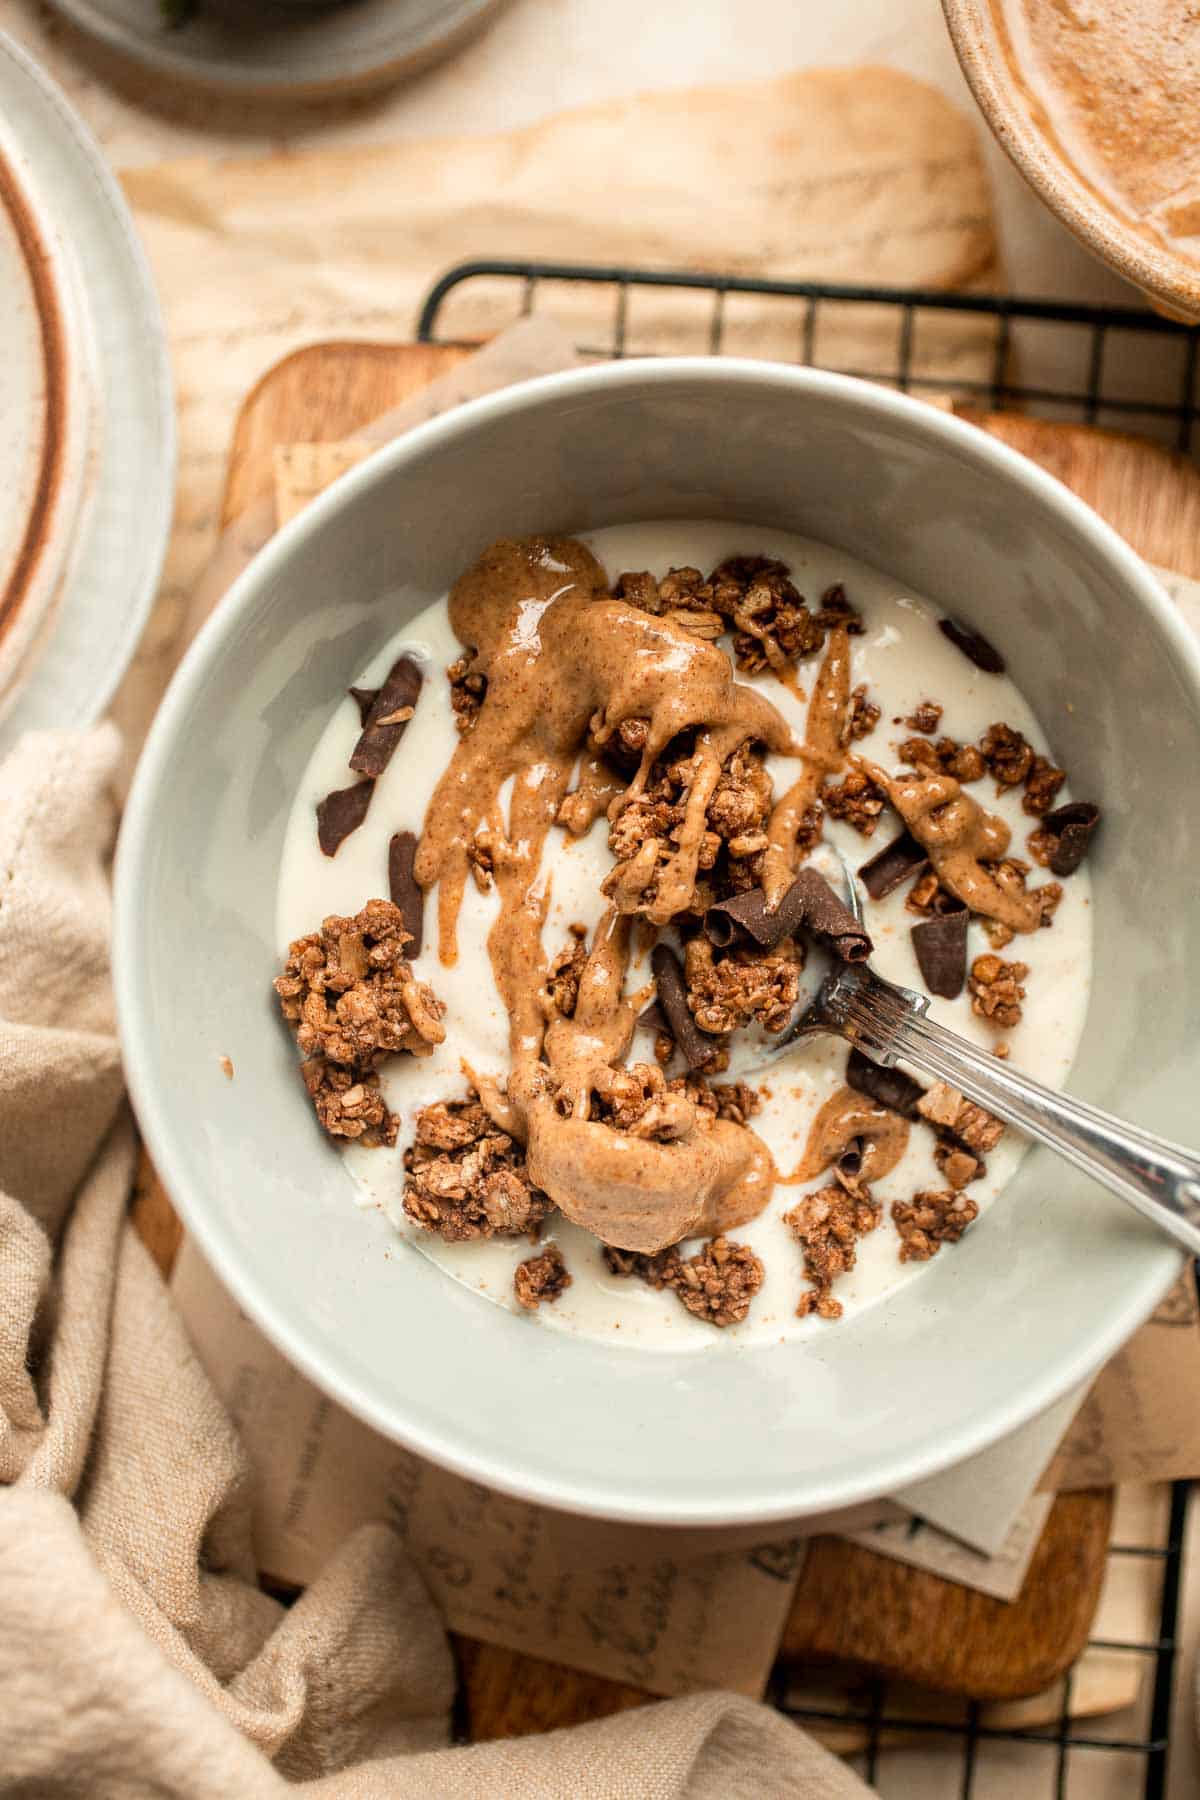
Recipe Tips and Tricks
- Toast the nuts first. To make the best almond butter, you really need to toast the nuts. This draws out their natural oils and will give your nut butter tons of flavor. You can use pre-roasted almonds, but even those should be warmed up to get the best flavor.
- Add a pinch of salt. Salt draws out the flavor and makes this almond butter so much tastier.
- Use blanched almonds. This is entirely optional, but if you want a really beautiful, smooth almond butter with no clumps, try using blanched almonds instead. These have been quickly boiled to remove the peels, so the final product will have a lighter color, too.
Storing and Freezing Instructions
How to Store
Store the leftover almond butter in an airtight container, like a glass jar, at room temperature for about a week or in the fridge for 2 weeks.
How to Freeze
For best results, don't freeze your homemade almond butter. This can affect the texture and cause the oil to separate out too much.
FAQ
That depends on a lot of different factors, like the quality of ingredients and where you live. In many situations, making this homemade version of almond butter will be cheaper than buying store-bought almond butters, but not always.
It's really important to grind warm almonds to get the best texture. The heat helps the almonds break down faster, giving you a much smoother texture. It's also very important to use a high-speed blender or food processor. A weak appliance can burn up from the effort. If you really can't get your almond butter to blend down, try drizzling in a little extra oil to speed up the process.
Although almond butter from the grocery store can last in the pantry for a long time, fresh almond butter made from raw almonds only lasts about two weeks in the fridge.
More Almond Recipes
- Almond Horns
- Cinnamon Raisin Challah Bread with Almonds
- Green Beans Almondine
- Easy Small Batch Almond Biscotti
- Almond-Crusted Halibut with Lemon Garlic Butter
- Almond Cranberry Granola Bars
Tried this recipe?
I'd love to hear what you think! Leave a comment and rating below to share your feedback. Your reviews help others discover this recipe and help me keep creating more free recipes for you. Snap a photo and tag me on social media @aheadofthyme too.
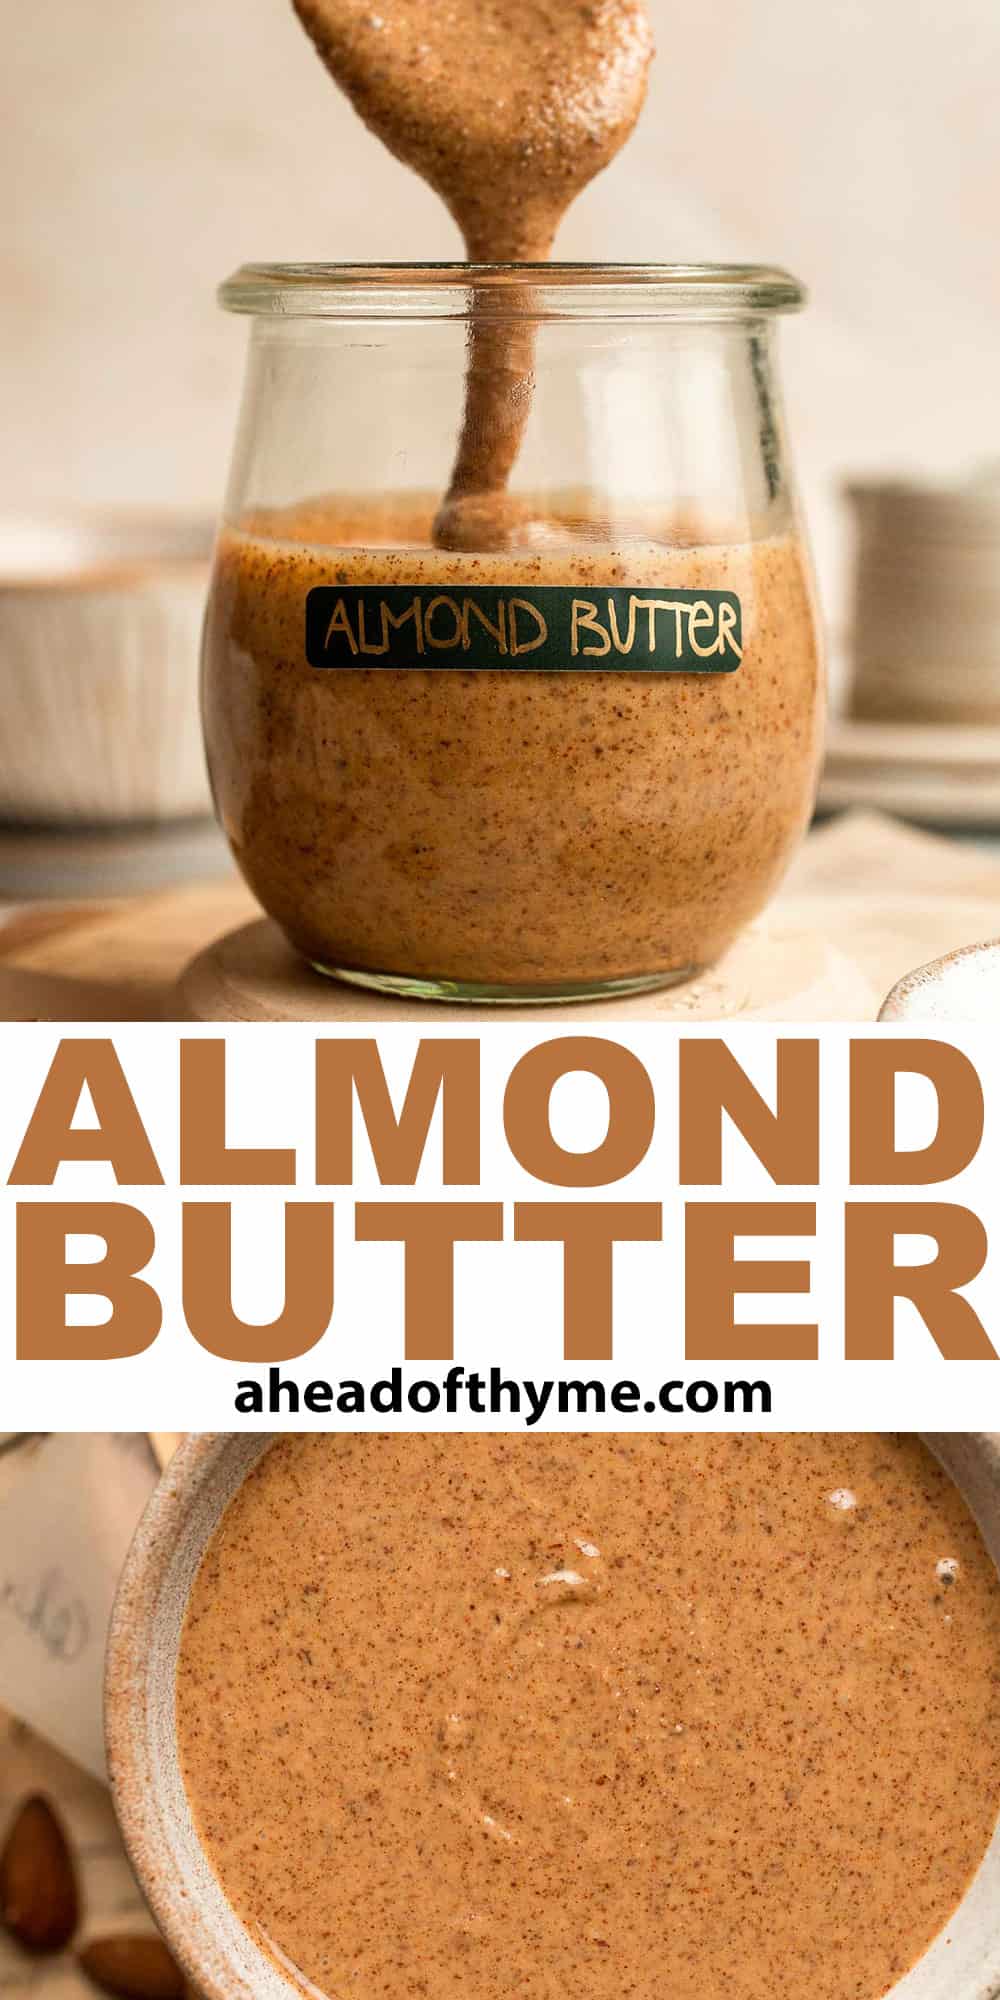
Breakfast Bagel
With layers of scrambled eggs, melty cheese, fresh tomato, creamy avocado, and peppery arugula, this Breakfast Bagel is a perfect, veggie-packed way to start your day. Although it starts as a cheddar cheese bagel breakfast sandwich, the veggies and mayo take it over the top. This will become your absolute favorite breakfast sandwich, and you'll be thinking about these flavors all day long!
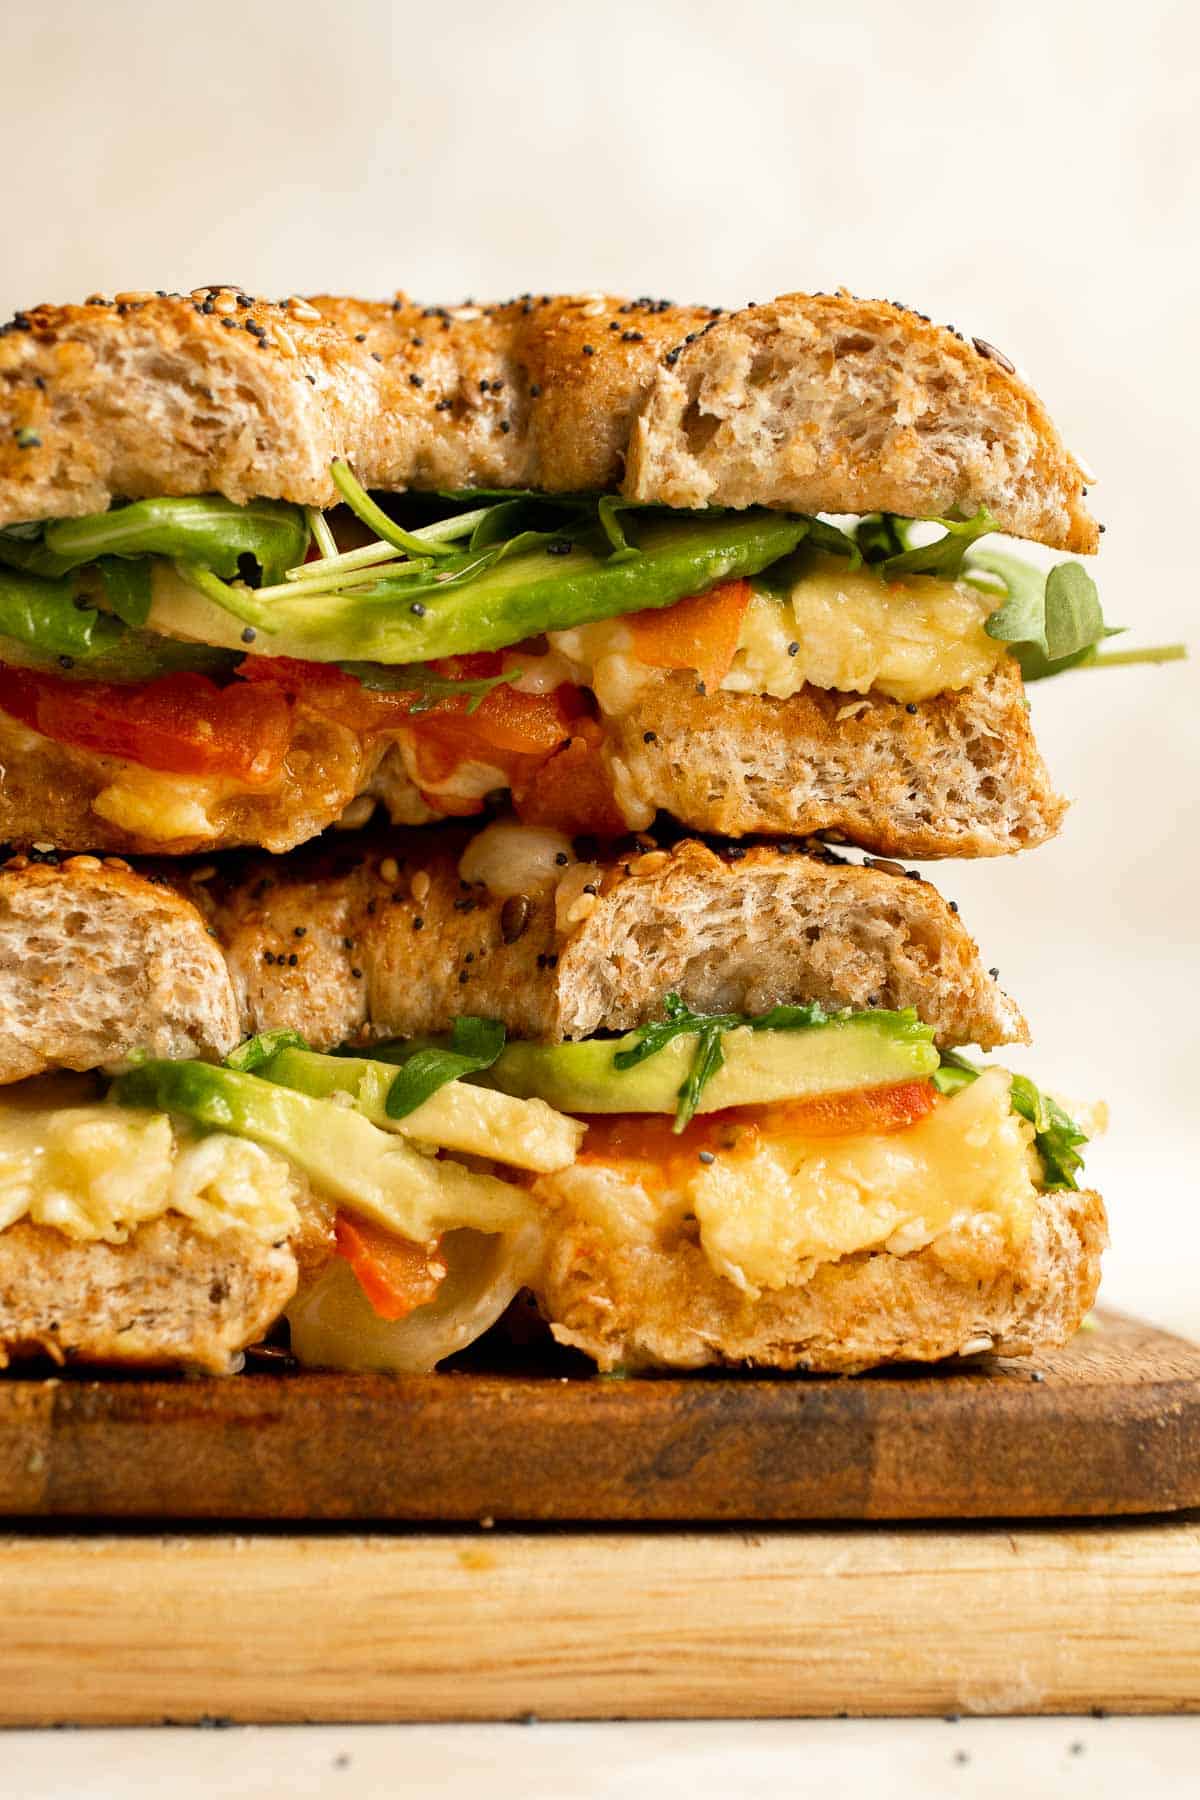
Breakfast is my favorite meal of the day, and there's something so satisfying about biting into a toasted bagel for breakfast. This is especially true when you add warm scrambled eggs topped with molten cheese and layers of wonderful vegetables. This version is really the ultimate breakfast sandwich, but it doesn't have to stop there! It's filling enough to enjoy as a nice lunch or a simple dinner, and the avocado and arugula make it fancy enough to serve at your next brunch. It's truly the perfect way to start your day!
Why You'll Love This Breakfast Bagel
- Easy to make. If you can toast a bagel and scramble some eggs, you can make these bagel breakfast sandwiches! The other ingredients are layered on after you add the eggs and just require a little slicing. Breakfast will be ready in just moments!
- Lots of veggies. This egg and cheese sandwich has tomato, avocado, and arugula, which add three different textures and flavors. The avocado has a fresh, creamy flavor, the tomato is bright and firm, and the peppery arugula has a wonderful bite. They're such a good combination (and a great way to sneak in some extra veg).
- So much flavor. Every element of this simple ELT (egg lettuce tomato) sandwich has flavor, from the everything bagel and mayo to the cheesy eggs and veggies. This is one of my all-time favorite breakfast recipes, and it definitely will not disappoint!
- Take it on the go. Enjoy it as part of your sit down breakfast or brunch, or take it on the go if you are in a hurry! You can easily wrap it up in plastic wrap and take it "to go" to eat in the car or at work.
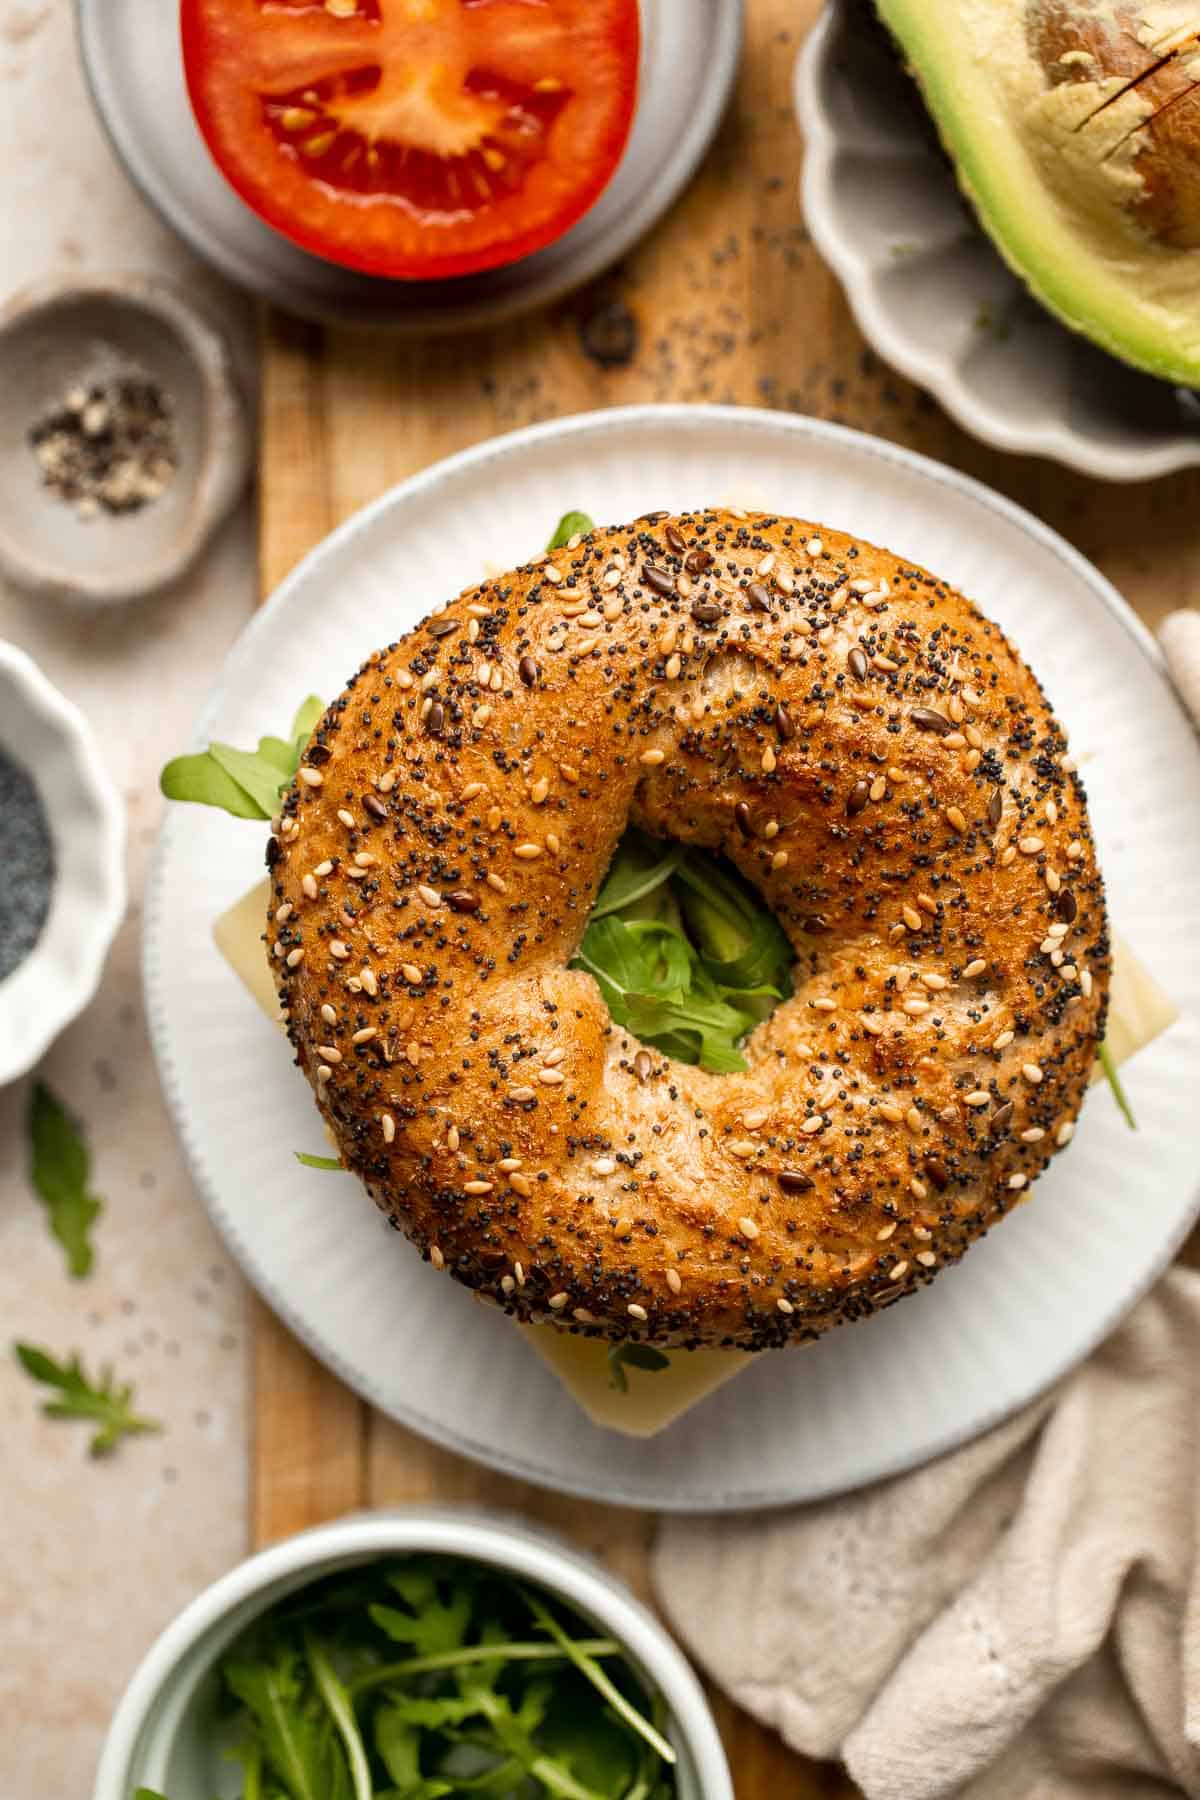
Ingredient Notes
To make this delicious breakfast bagel, you will need the following ingredients (full measurements in recipe card below):
- everything bagel - these Homemade Everything Bagels are topped with poppy seeds, black and white sesame seeds, onion flakes, and salt for lots of flavor. You can also substitute with any kind of bagel that you like!
- mayonnaise - a little mayo adds a tangy creaminess that brings everything together.
- vegetable oil - heat a little oil to cook the eggs.
- eggs - whisk and scramble your eggs. You can also cook a fried egg instead for this bagel.
- salt and pepper - season the egg well to bring out the flavor.
- cheese - use a sharp cheddar cheese to melt over the egg. Feel free to add a slice of American cheese if needed, but sharp cheeses have more flavor.
- tomato - add a slice or two of freshly sliced tomato.
- avocado - cut the avocado into thin slices. Sprinkle a little salt for extra flavor
- arugula - add arugula on top to keep it from melting from the heat of the cooked egg.
You will also need measuring cups and spoons and a skillet to cook the eggs in.
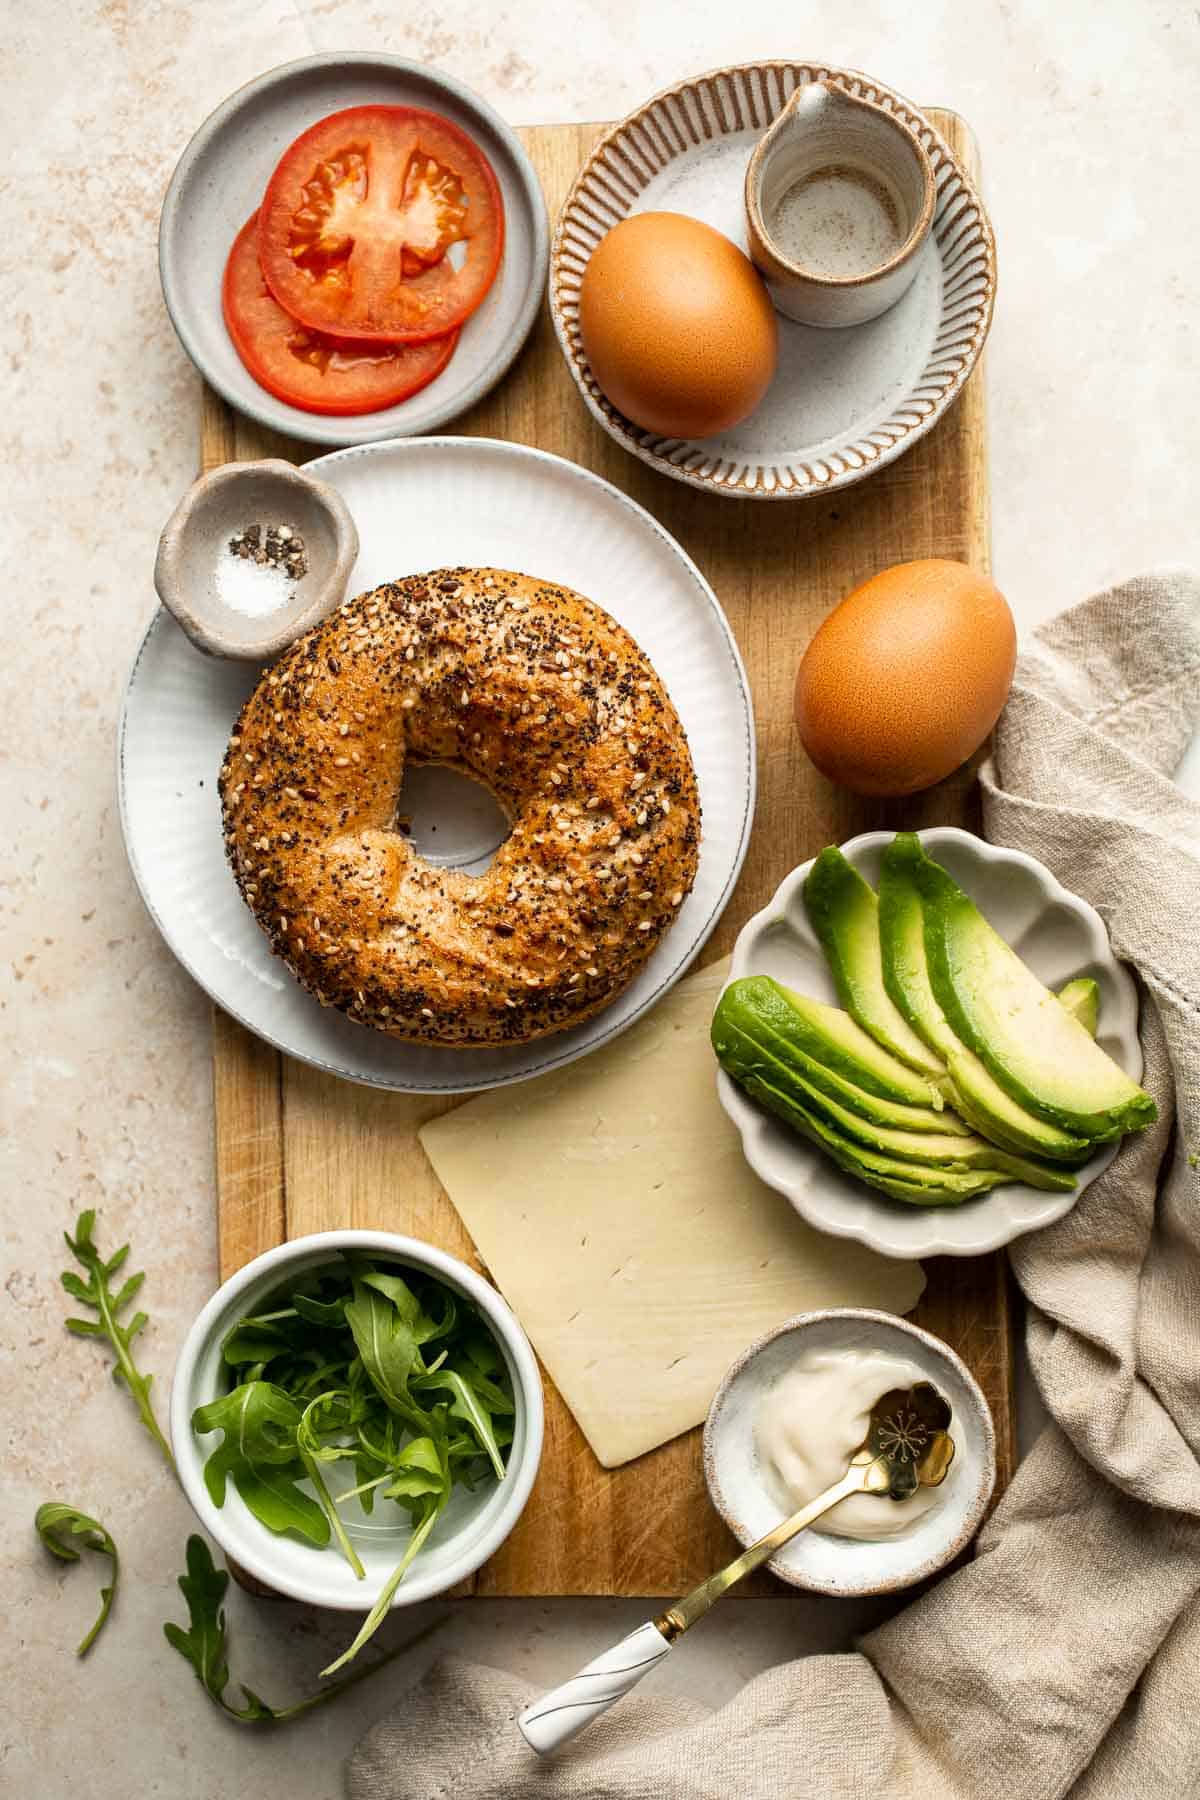
How to Make the Best Breakfast Bagel
- Slice. Cut the bagel in half (2 slices) and place in your toaster. Spread mayo on the top slice. Set aside.
- Cook eggs. Heat a non-stick frying pan with oil over medium heat. Add the eggs and scramble. Try not to break up the eggs too much, instead scramble the eggs and cook them into sheets, then fold them up for easy serving.
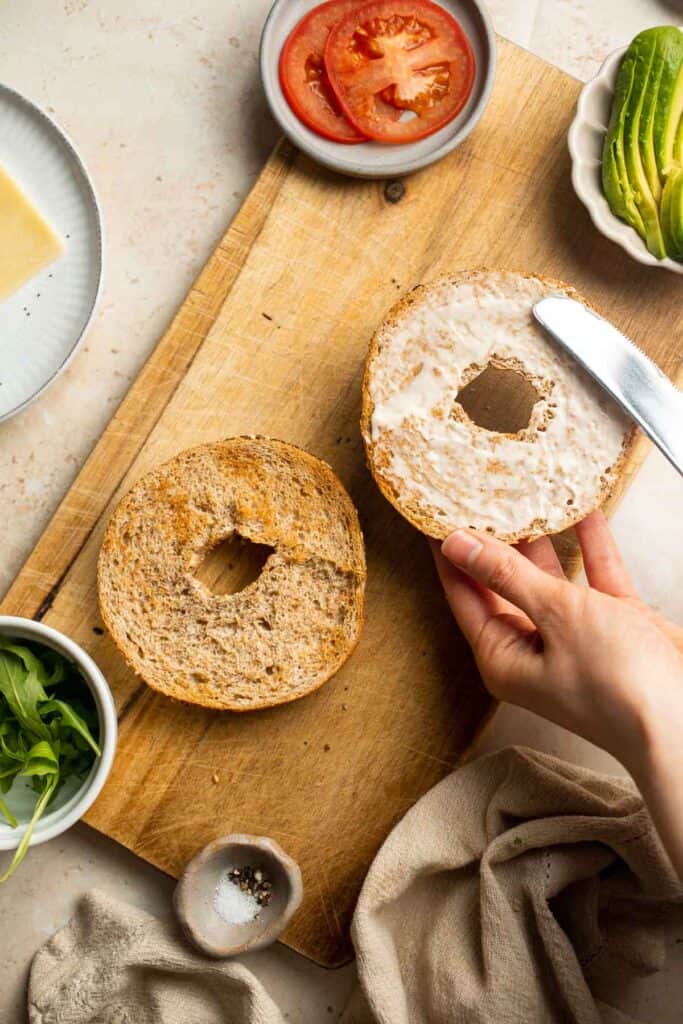
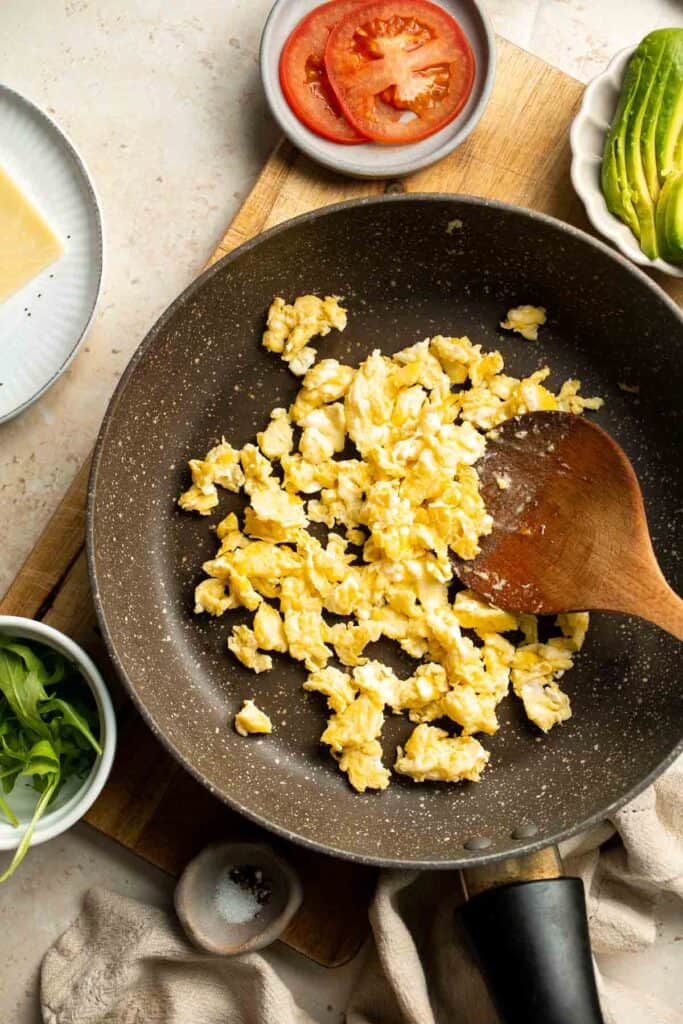
- Assemble. Place the cooked, scrambled eggs onto the bottom slice of your toasted bagel. Shake some salt and pepper on top to taste.
- Add cheese. Add the slice of cheese on top of the eggs.

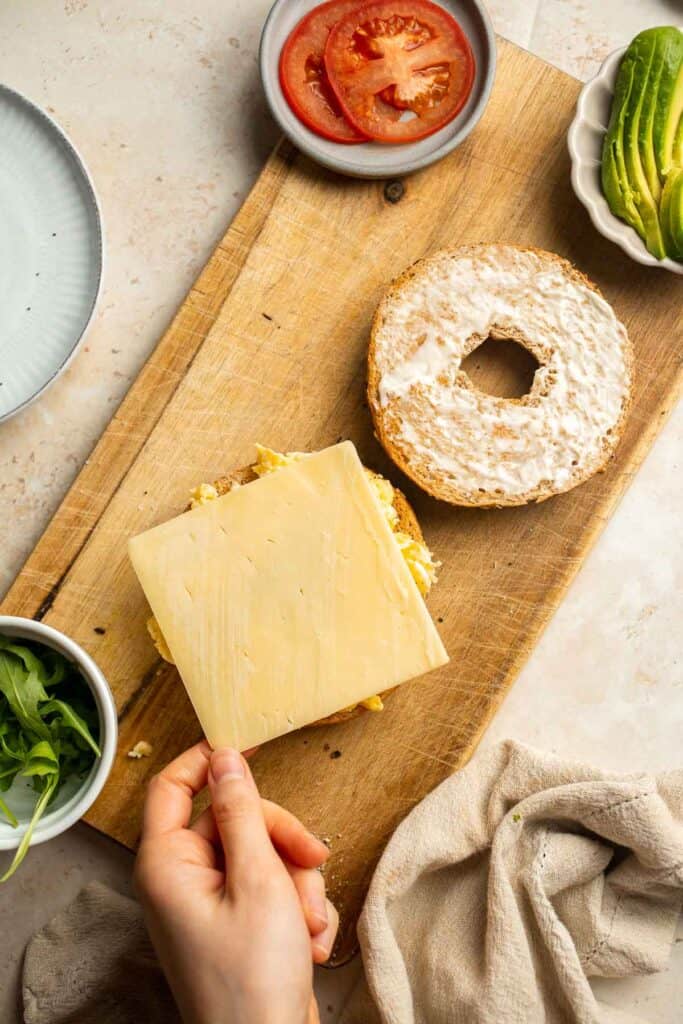
- Add veggies. Add sliced tomato, sliced avocado on top of the cheese. Top with arugula.
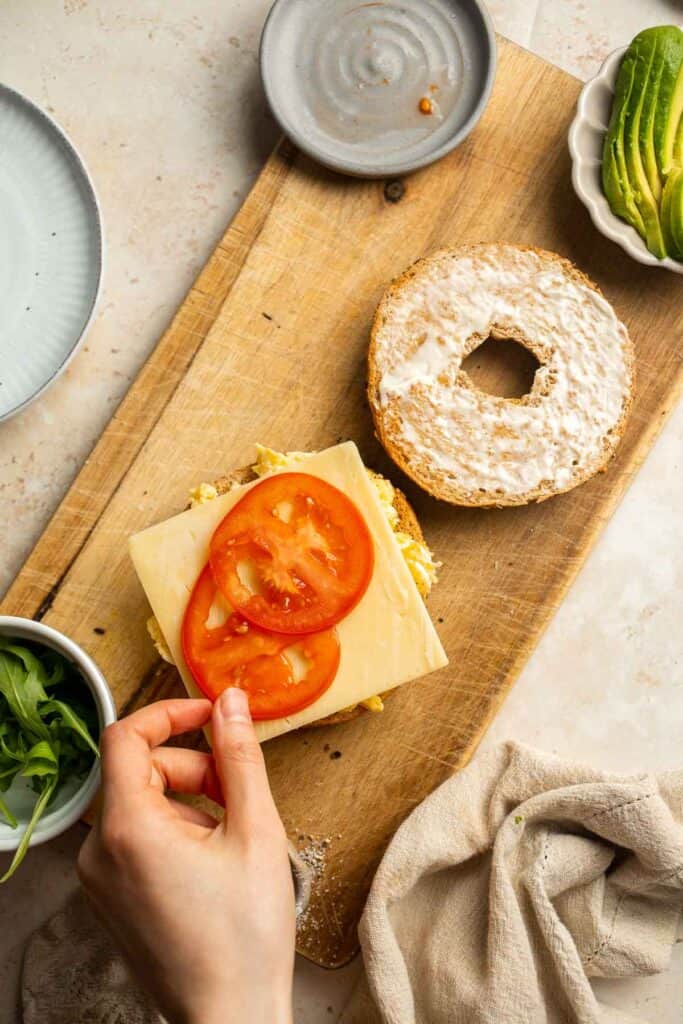


- Serve. Place the top of the bagel over the arugula. Slice down the middle (if desired) and enjoy.
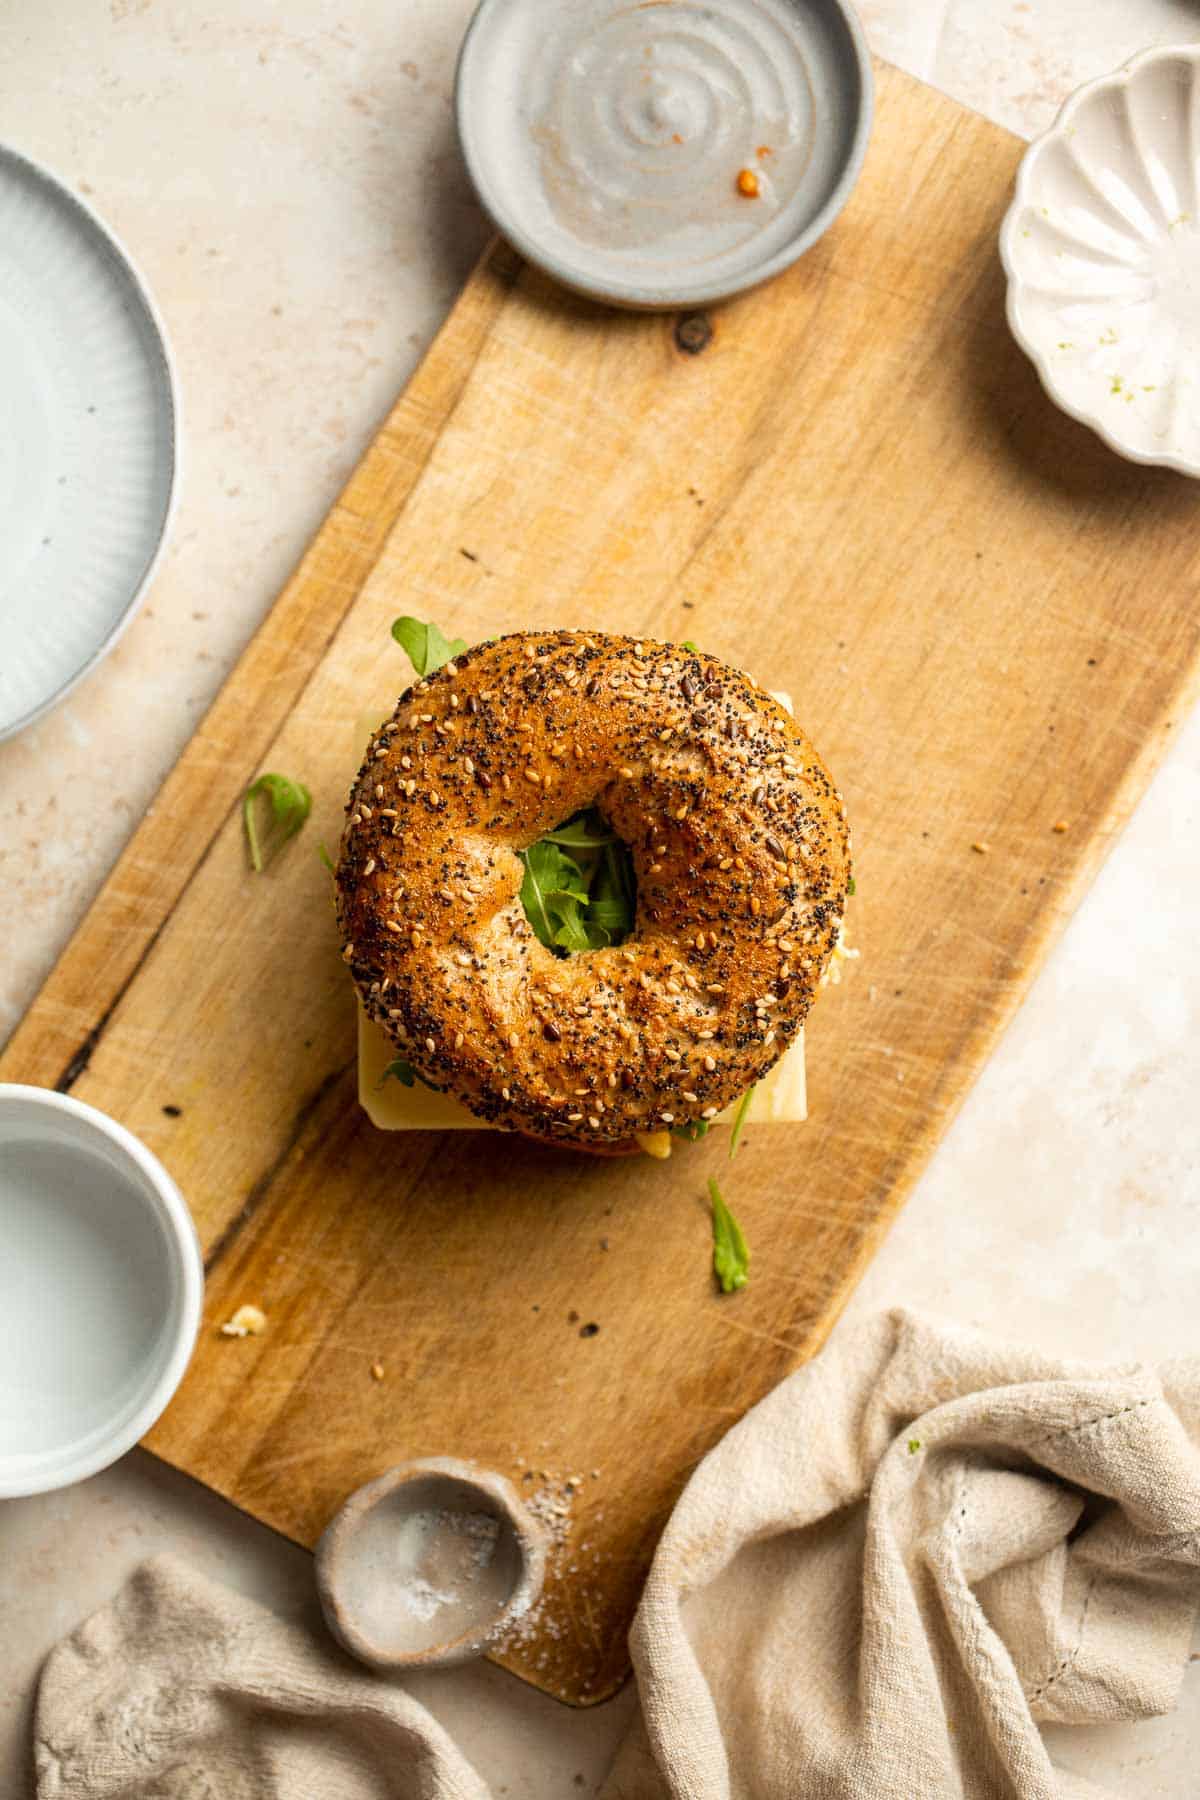
Recipe Variations
- Make an open-faced sandwich. Add a little bit of everything on each bagel half for an even bigger sandwich you might want to eat with a fork and knife. It's the perfect breakfast when you need something really substantial!
- Change the bagels. It's important to use fresh bagels, but you can easily use a plain bagel or cheesy bagel instead of an everything bagel. You can even use any sandwich bread that you like! This recipe is really good with Ciabatta Rolls or Sourdough Bread too.
- Give it some bite. If you want a really savory sandwich, add some sliced red onions.
- Add more protein. Stick a slice of crispy bacon (to make a B.E.L.T. bagel), a turkey sausage patty, deli ham, or toasted Canadian bacon on the mayo for extra protein and a savory flavor. You can also scramble egg whites instead of regular eggs for a protein-packed breakfast.
- Add other veggies. Add any vegetables that your heart desires in between those two slices of bread. Mushrooms? Green peppers? You got it. Go for it!
- Change the egg. Instead of scrambled eggs, you can easily add a fried egg instead. If you like a runny egg, cook a fresh-cracked egg until the egg is just slightly firm, or you can pop the egg yolk and cook it medium or hard.
How to Serve
This Breakfast Bagel is delicious served on its own for breakfast, lunch, or dinner! We like to serve it for breakfast and pair it with some delicious breakfast sides for a super filling start to the day. Some of our favorites include:
- Fruit and Yogurt Parfait with Granola
- Hash Browns
- Healthy Mango Yogurt Smoothie
- Strawberry Muffins
- Breakfast Potatoes
- Fruit Salad with Honey Lemon Dressing
For more recipes, see our 50 Best Breakfast Ideas.
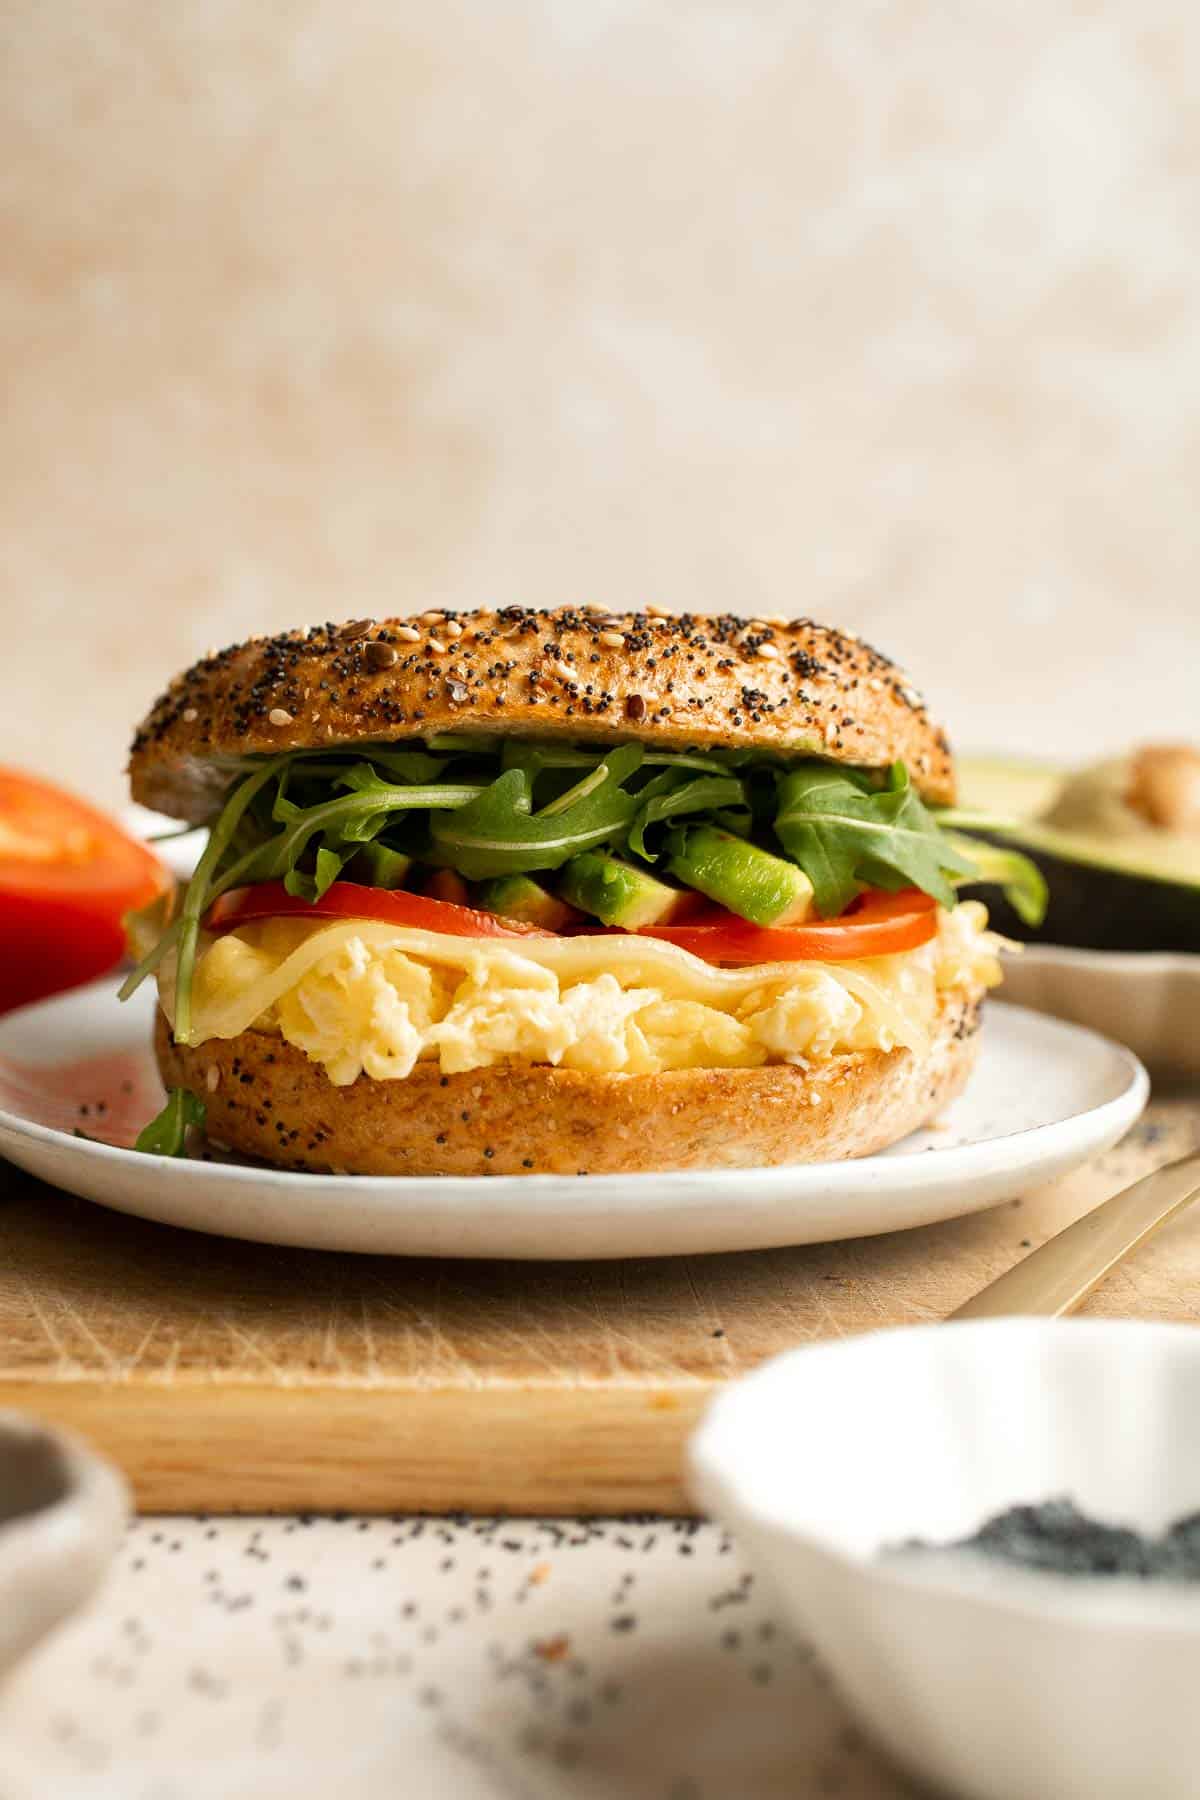
Recipe Tips and Tricks
- Don't stir too much. To get the scrambled eggs to rest neatly on the bagel, you want larger pieces of scrambled eggs. Be careful not to break the eggs up too much. You can also scramble the eggs and cook them into sheets, then fold them up for easy serving.
- Season everything. Add a pinch of salt to the eggs, tomato slices, and avocado to make every bite shine.
- Layer strategically. There's a reason why the vegetables are layered on these breakfast bagels as they are. The tomato can take a little warmth from the hot eggs, which is why they are added first. Then, add the tender avocado and the arugula last. The arugula will wilt quickly, so adding it at the end keeps it crisp and fresh.
Storing and Freezing Instructions
How to Store
The bagel breakfast sandwiches are best served fresh as the vegetables will soften and wilt over time. If you want to prep these sandwiches in advance, wrap the untoasted bagels with the cheesy eggs in foil and store the vegetables separately. When you're ready to eat, toast the entire bagel sandwich and add the veggies right before serving.
How to Reheat
Although you can microwave the sandwich (without the veggies), these sandwiches taste much better toasted in the toaster oven or air fryer. This will crisp up the bagel and reheat the eggs and cheese. Add the vegetables after toasting and serve right away.
How to Freeze
For longer storage, wrap the untoasted bagels with the mayo, cooked eggs, and cheese in foil and freeze for 1-2 months. Thaw overnight before reheating following the instructions above.
FAQ
There are so many ways to top a bagel for a great breakfast! Keep it classic with fried eggs, cheddar cheese slices, and bacon or sausage or add a layer of cream cheese, lox, and capers. I love to take the cheesy egg theme to the next level by adding a little mayo, tomato, avocado, and arugula. The vegetables give it a light, fresh flavor, and the eggs will keep you full for a while. It's such a good combination!
Sauces can take an ordinary bagel sandwich to the net level, and there are so many options! Keep it simple with mayonnaise, or add a punch of flavor with hollandaise sauce, hot sauce, sriracha, pesto, guacamole, aioli, and more. Get creative with it!
If you want to make this delicious recipe before you need it, there are a few things to keep in mind. First, the vegetables should be stored separately, or they'll become soft and wet when you reheat the sandwiches. Add the mayo to an untoasted everything bagel, then add the cooked eggs and cheese. Let the sandwiches cool completely before you wrap them with plastic wrap or foil then freeze for 1-2 months. When you need one, place it in the fridge to thaw overnight. The next morning, toast the whole bagel sandwich in the toaster oven and add the fresh vegetables right before serving.
More Sandwich Recipes
- Caprese Sandwich
- Egg Salad Sandwich
- Tuna Melt Grilled Cheese Sandwich
- Turkey and Cheese Sliders
- Pita Grilled Cheese
- Chicken Salad
Tried this recipe?
I'd love to hear what you think! Leave a comment and rating below to share your feedback. Your reviews help others discover this recipe and help me keep creating more free recipes for you. Snap a photo and tag me on social media @aheadofthyme too.

Baked Beans
Homemade Baked Beans are the perfect side dish with their sweet and savory flavor, tender beans, and glossy sauce. They're right at home with hot dogs and burgers and are a must-have at any potluck or barbecue. These old fashioned baked beans are an incredibly easy to make one pot recipe and have so much more flavor than the canned baked beans from the store!
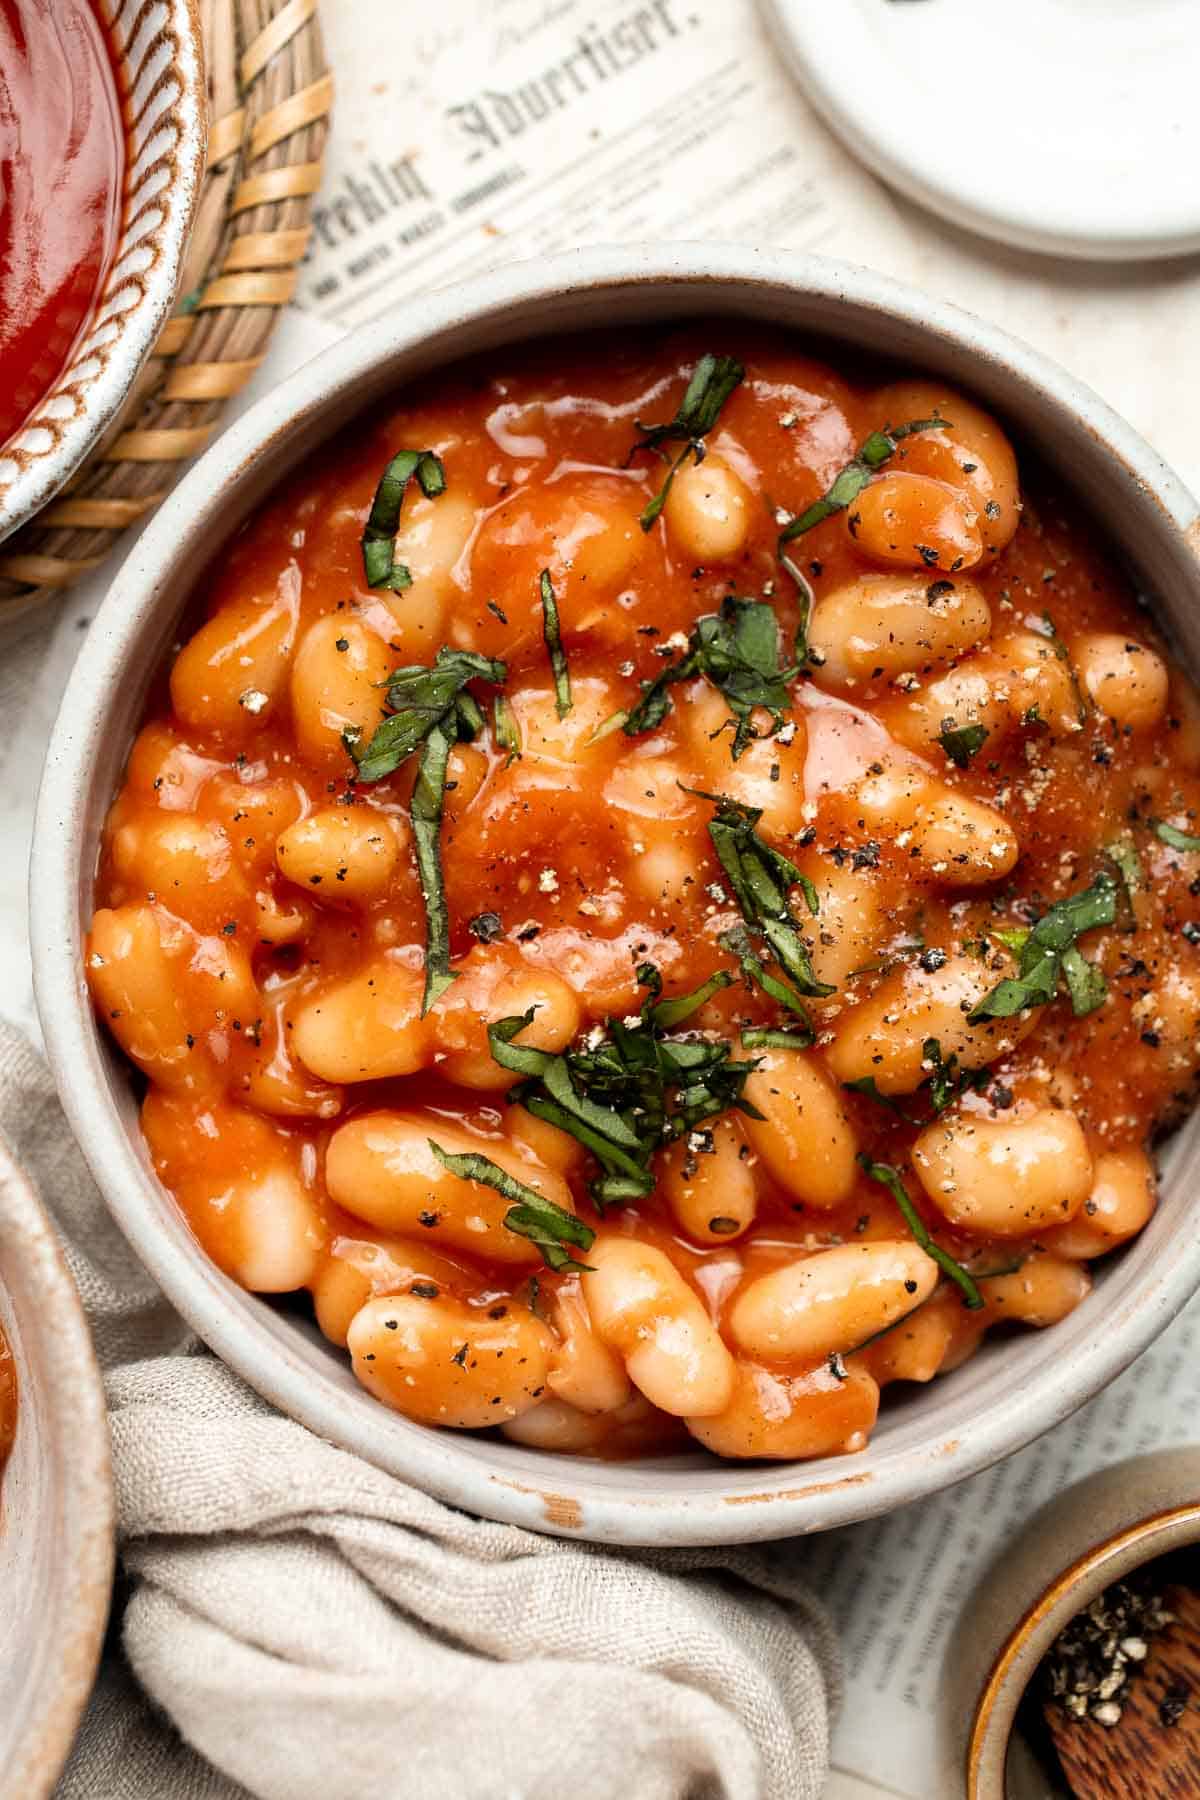
Although store-bought baked beans are good, they're incredibly sweet and have so many preservatives and additives! It's surprisingly easy to make homemade baked beans from scratch, and this is a great way to control the quality of your ingredients. You just need a few simple ingredients and a little patience, and you'll be rewarded with incredible flavor. Try this recipe once, and you'll be in charge of baked beans for every family reunion or barbecue going forward!
Why You'll Love These Homemade Baked Beans
- Quick and easy. This one pot baked bean recipe is seriously fast! The trick is to start with canned beans, and the entire batch will come together in about 20 minutes. Plus, you probably already have many of these ingredients on hand already!
- Rich, savory flavor. Baked beans have a classic mix of sweet and savory, which is why they pair so well with barbecue sauce and smoked meats. There are some flavor powerhouses in this recipe, including tomato paste and Worcestershire sauce. You'll be shocked by how quickly you can get a really bold flavor!
- Easy to adapt. This a great, classic recipe. You can easily tweak it to your flavor preferences by adding meat or liquid smoke, or you can use vegan Worcestershire sauce for a completely vegan side dish. Make it your own!
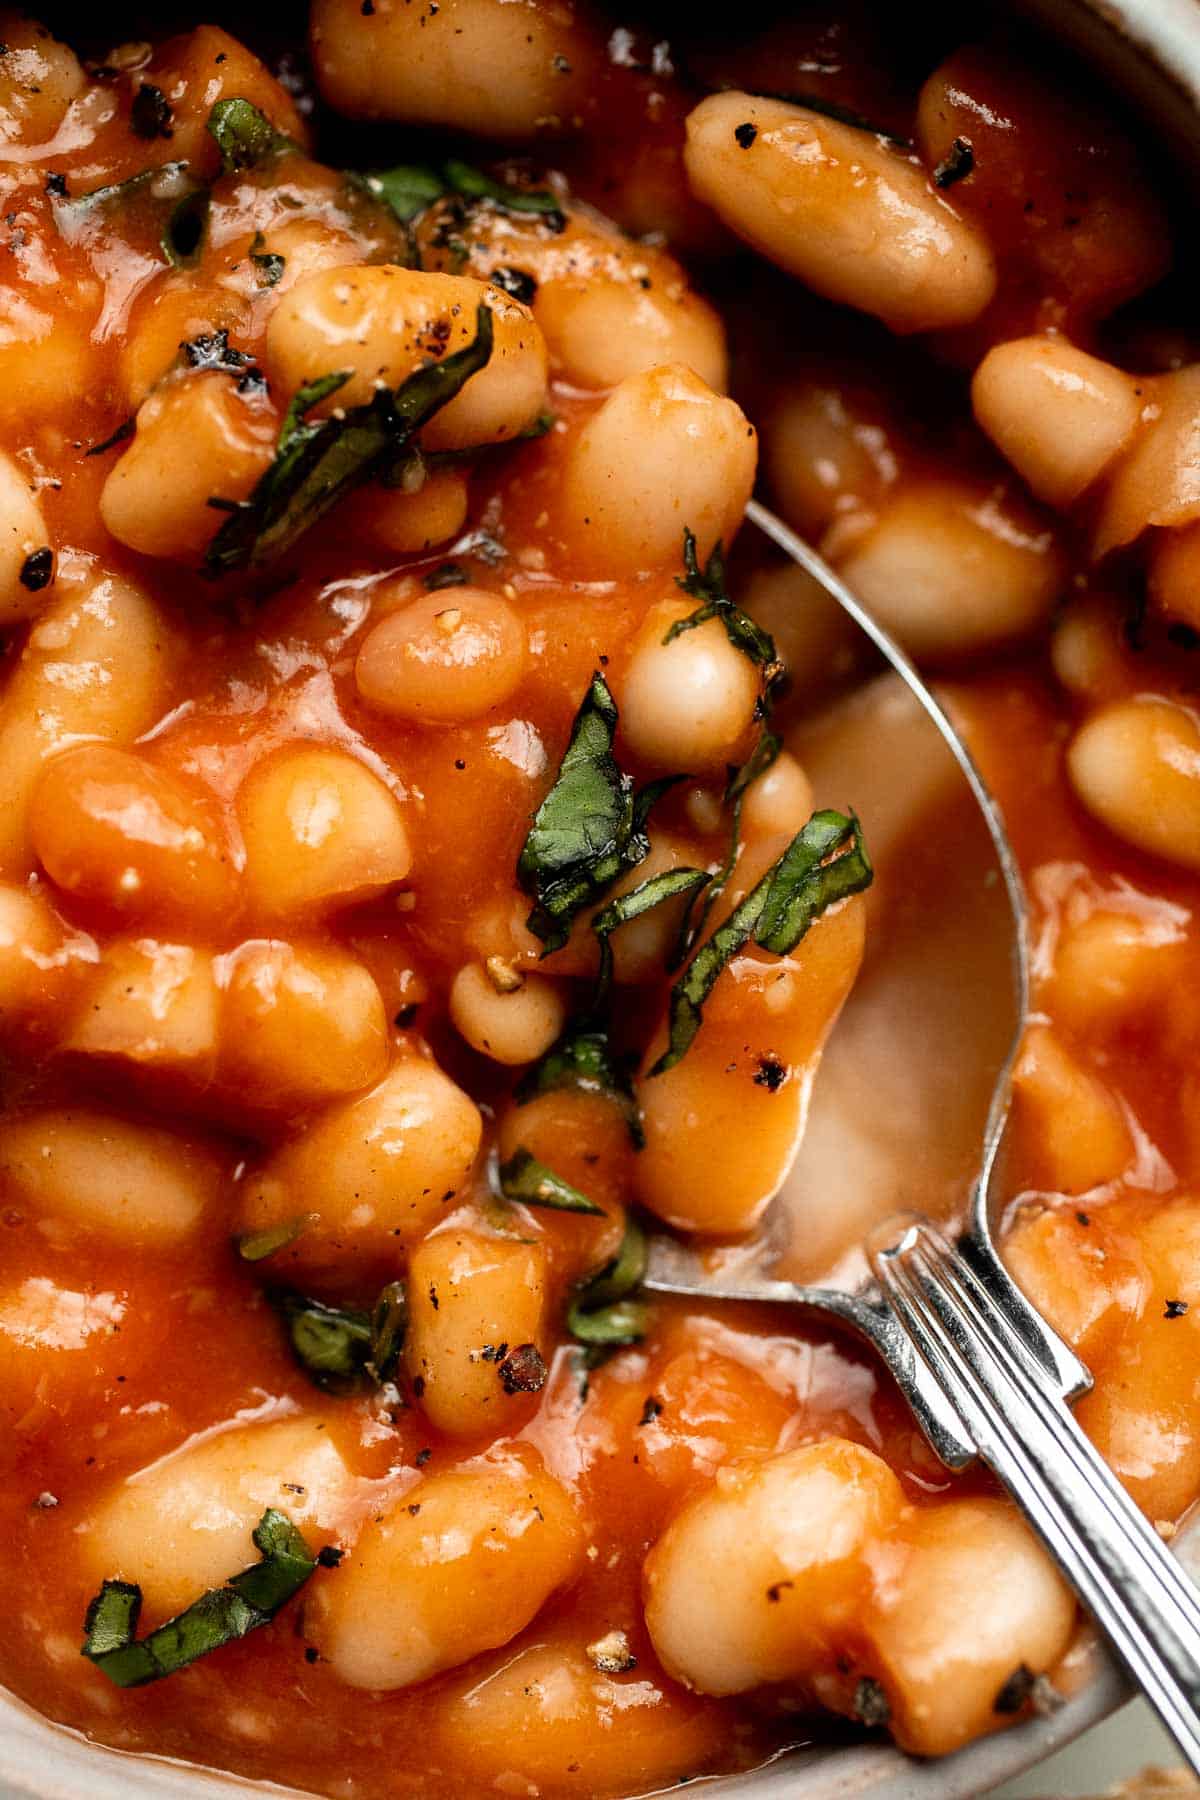
Ingredient Notes
To make these delicious Baked Beans, you will need the following ingredients (full measurements in recipe card below):
- navy beans - rinse and drain canned navy or cannellini beans. You can also make dried beans by soaking 1 cup dried beans overnight and then cooking them before preparing this recipe. See How to Cook Dried Beans for instructions and tips.
- vegetable stock - this is the body of the sauce. You can also use water in a pinch.
- ketchup - ketchup adds a little sweetness and a rich tomato flavor.
- tomato paste - tomato paste has a very concentrated flavor that makes these beans taste like they've been simmering all day.
- Worcestershire sauce - this is a great way to add a bold, savory taste quickly.
- sugar - the best homemade baked beans are a little sweet. Feel free to use brown sugar or even honey or maple syrup instead.
- seasonings - use a mixture of garlic powder, salt, and black pepper and adjust to your personal preference.
- cornstarch slurry - whisk together water and cornstarch to thicken the beans quickly.
You will also need measuring cups and spoons, a large pot, and a small mixing bowl.

How to Make the Best Baked Beans
- Add the ingredients. In a large pot, add canned beans, vegetable stock (or water), ketchup, tomato paste, Worcestershire sauce, sugar, garlic powder, salt, and pepper. Mix well and bring it to a boil over medium-high heat.
- Simmer. Reduce heat to low and simmer for 10 minutes.
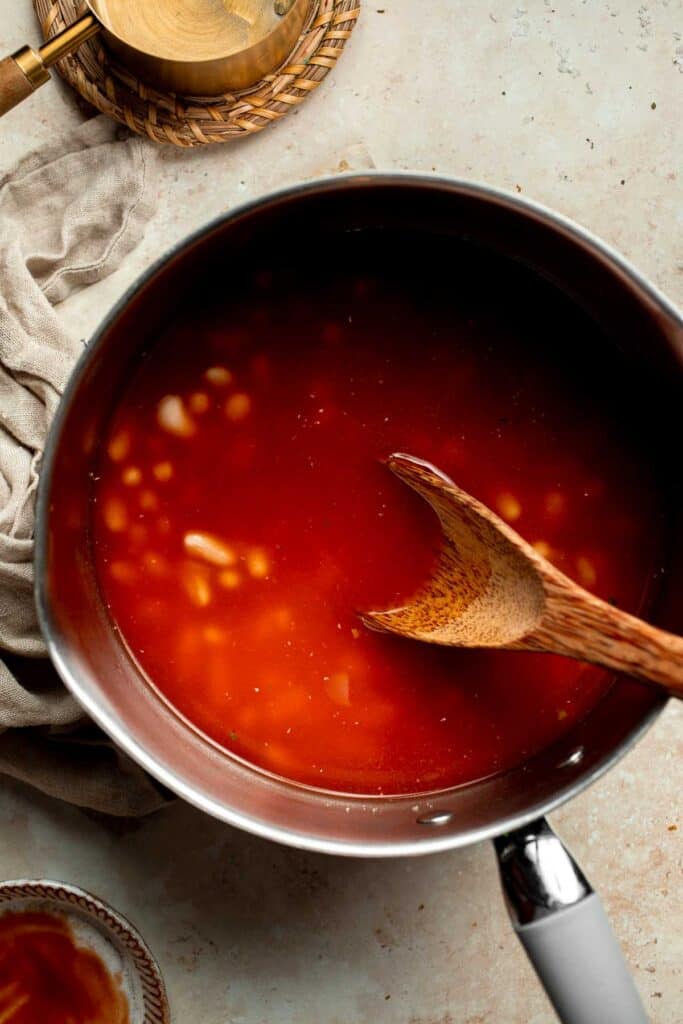
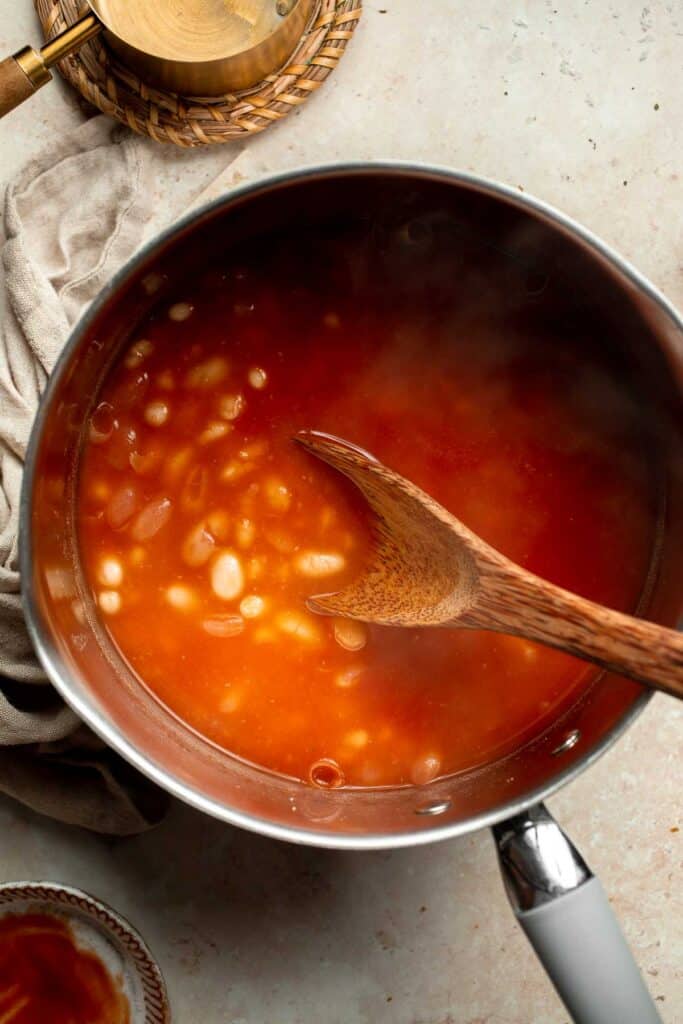
- Make cornstarch slurry. In a small mixing bowl, combine water and cornstarch. Stir in the cornstarch slurry.
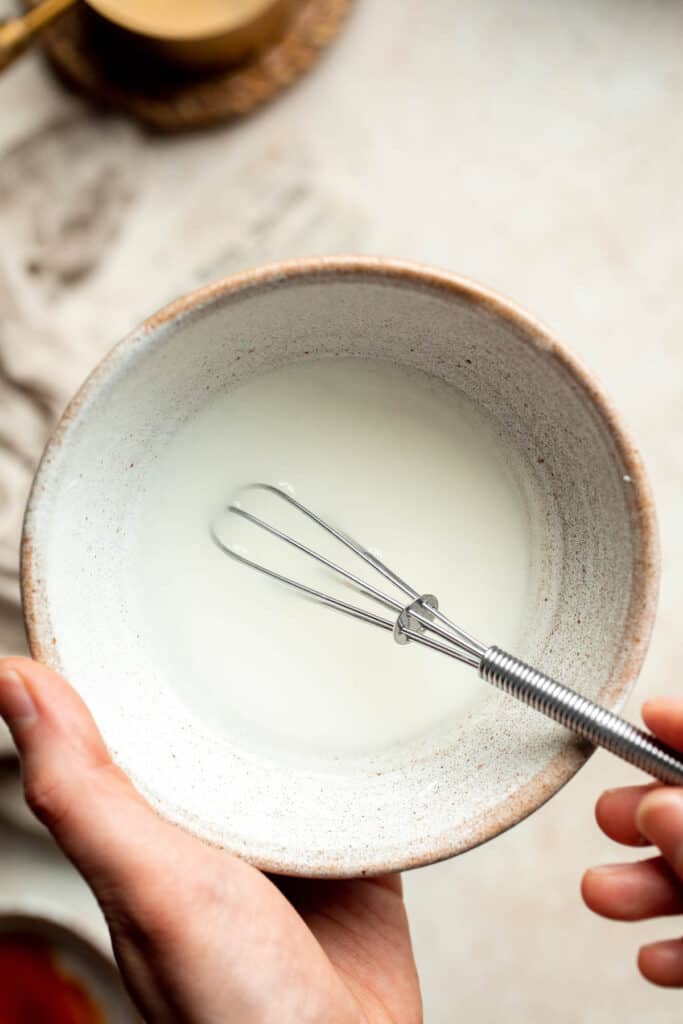
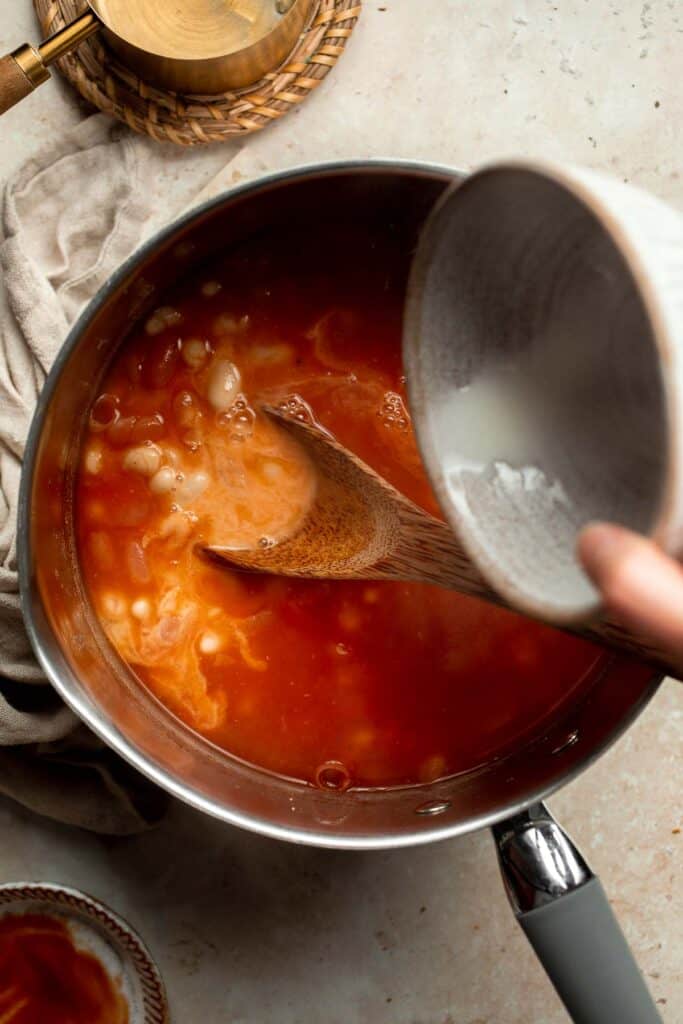
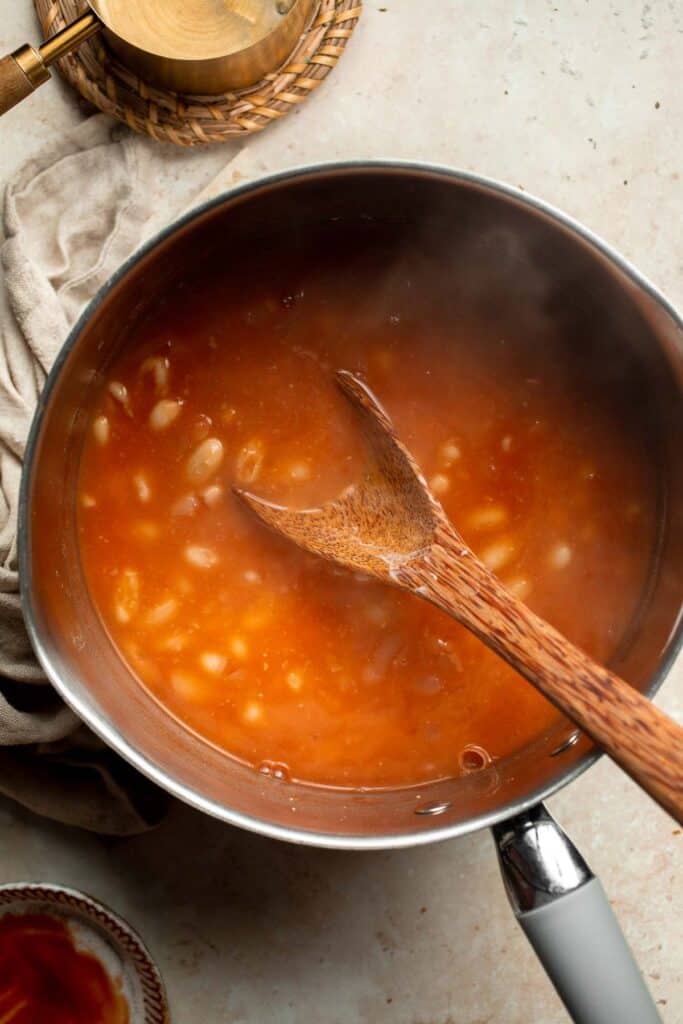
- Thicken. Cook until thickened to a desired consistency, about 5 minutes. Serve warm.
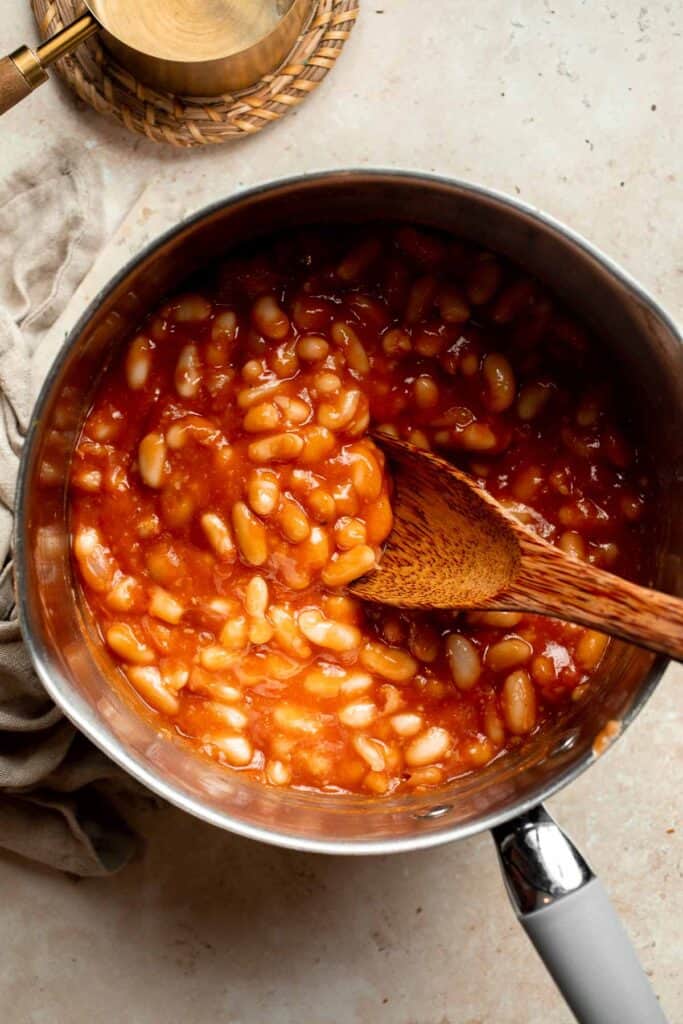
Recipe Variations
- Add meat. Many people love to include bacon, ground beef, or even a leftover ham bone in their baked beans to add extra flavor. You can always crisp up a few slices of bacon in the pan, then cook the other ingredients in the bacon grease.
- Make it smoky. For a BBQ flavor, add some liquid smoke or replace some of the tomato sauce with a spicy BBQ sauce.
- Add mustard. The sharpness of mustard pairs really well with the savory sauce in this easy baked beans recipe. Add dry mustard or squeeze some of your favorite yellow mustard to taste.
- Try different beans. Baked beans are traditionally made with navy or great northern beans, but they're great with any creamy, tender beans. Cannellini, pinto, or pink beans are a great alternative.
- Use the slow cooker: Not in a rush? Add all of the ingredients to the slow cooker and let them simmer on low for hours.
How to Serve
These baked beans can be served in many different ways. In the UK, they are traditionally served as a breakfast items on a plate with a side of toast and eggs. They are also delicious served on their own for dinner or lunch with some crusty bread for dipping or over a plate of rice. Some of our favorites to pair with this are:
- Easy Small Batch Ciabatta Rolls
- Steamed Rice
- Easy Coconut Rice
- Popovers
- Buttermilk Biscuits
- Broccoli Rice
Baked beans are also delicious served with some classic BBQ side dishes including:
- Slow Cooker BBQ Ribs
- Grilled Corn on the Cob
- Classic Coleslaw
- Baked BBQ Chicken Wings
- Classic Potato Salad
For more recipe ideas, see our 25+ Best BBQ Side Dishes.
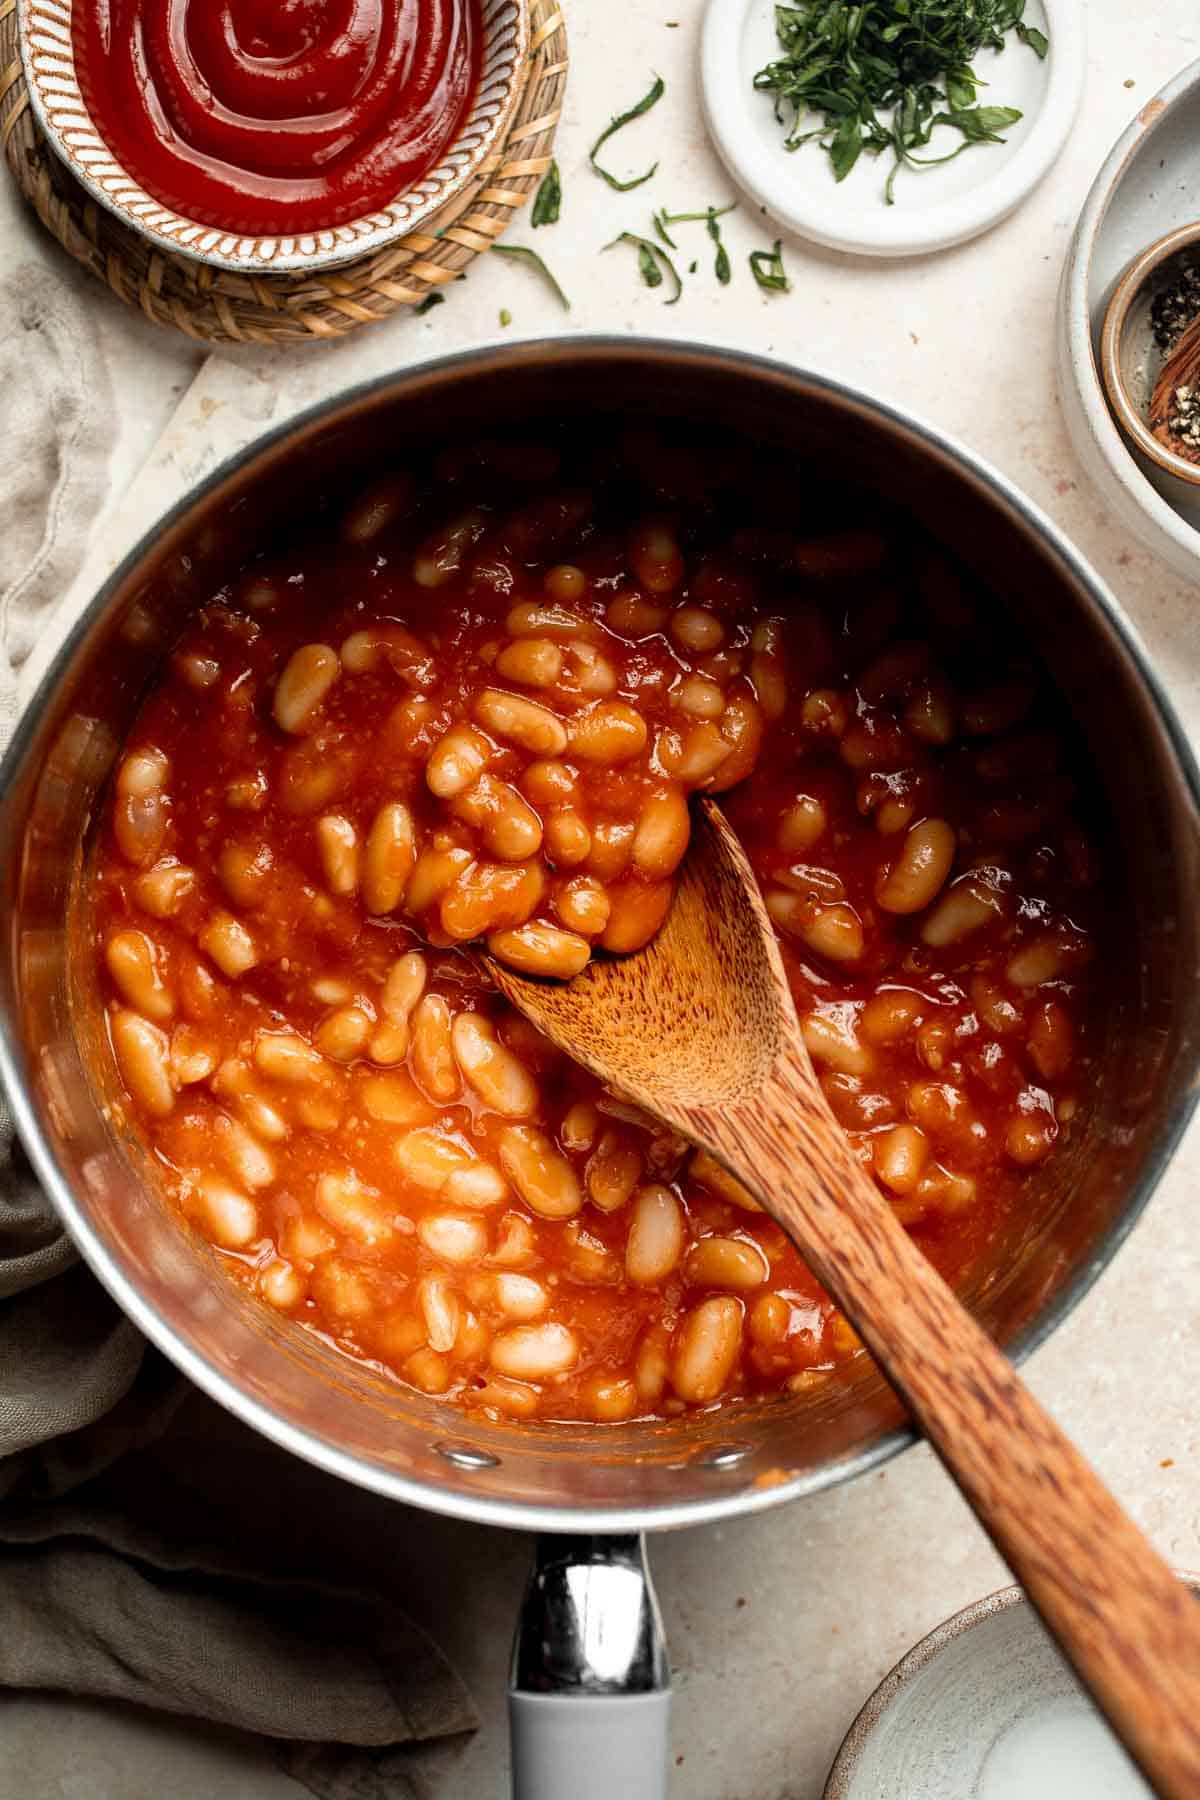
Recipe Tips and Tricks
- Build flavor. This is a quick and easy recipe, so you're using super flavorful ingredients to build flavor quickly. If you're not in a rush, slow down the process. Griddle up some strips of bacon and cook minced onion in the bacon grease. Let the beans slowly cook before you add the slurry. Take your time!
- Adjust to taste. There are so many baked bean recipes out there! Everyone has their own spin on this classic side dish. Feel free to adjust the seasonings to your preference. You can easily make them sweeter, add more veggies, drizzle in some molasses, or even replace the vegetable stock with beer!
- Don't burn. Since the sauce is so sweet and we're cooking on medium-high heat, it'd be easy to burn the beans. That scorched flavor doesn't taste too great! Stir often and lower the heat if needed.
Storing and Freezing Instructions
How to Store
Store leftover baked beans in an airtight container in the fridge for 4-5 days.
How to Reheat
You can easily microwave leftover beans for 30 seconds to a minute, but they may explode or burst. It's easier to warm the leftovers in a small saucepan on the stove, but only heat as much as you plan to eat in that sitting. It's not good to rewarm leftovers more than once.
How to Freeze
Allow the beans to cool completely, then portion them up in freezer-safe containers. Freeze for up to 3 months and thaw in the fridge before reheating.
FAQ
There are so many different types of baked beans out there, and each one is a little different depending on where you live. This particular recipe is more like British-style baked beans, as the beans are served in a slightly sweet, tomato-y sauce. American-style baked beans usually contain some sort of meat, like bacon, and they have a rich, sweet flavor, often using brown sugar, molasses, honey, or other add-ins. There is no one "right" way to make beans, so feel free to adapt the flavors to your own preferences.
If you love BBQ-style baked beans with a rich, smoky flavor, look for some Liquid Smoke at the grocery store. This will add a clear smoky flavor that pairs perfectly with the tomato sauce and bold flavors. You can also consider adding smoky mix-ins, like roasted green chile or smoked paprika. These will both add a little bit of smokiness and allow that BBQ flavor to build over time.
Since it can take so long to make baked beans with dry beans, we really prefer to start with cans of beans. The beans are already perfectly tender, so you can focus on making that flavorful, syrupy sauce instead of waiting forever for the beans to cook. If you are averse to the canned stuff, you can definitely soak and cook dry navy beans or great northern beans, but be careful not to overcook the beans, or they'll become mushy.
More Bean Recipes
- One Pot Red Kidney Beans
- White Bean Soup with Kale
- Easy 20-Minute One Pot Lentils
- Southern Black Eyed Peas
- Refried Beans
- White Bean Salad
Tried this recipe?
I'd love to hear what you think! Leave a comment and rating below to share your feedback. Your reviews help others discover this recipe and help me keep creating more free recipes for you. Snap a photo and tag me on social media @aheadofthyme too.

Monkey Bread
Monkey Bread might have a silly name, but it's one of the most delicious breakfast foods ever made. This version starts with a super soft dough that is rolled into little balls, coated in cinnamon sugar, and then pressed together in a bundt pan. Pour homemade caramel sauce over the top to glue the dough balls together, and you end up with a pull apart treat that tastes like gooey cinnamon rolls. They're a show-stopping option for any gathering and will quickly become a new family tradition.
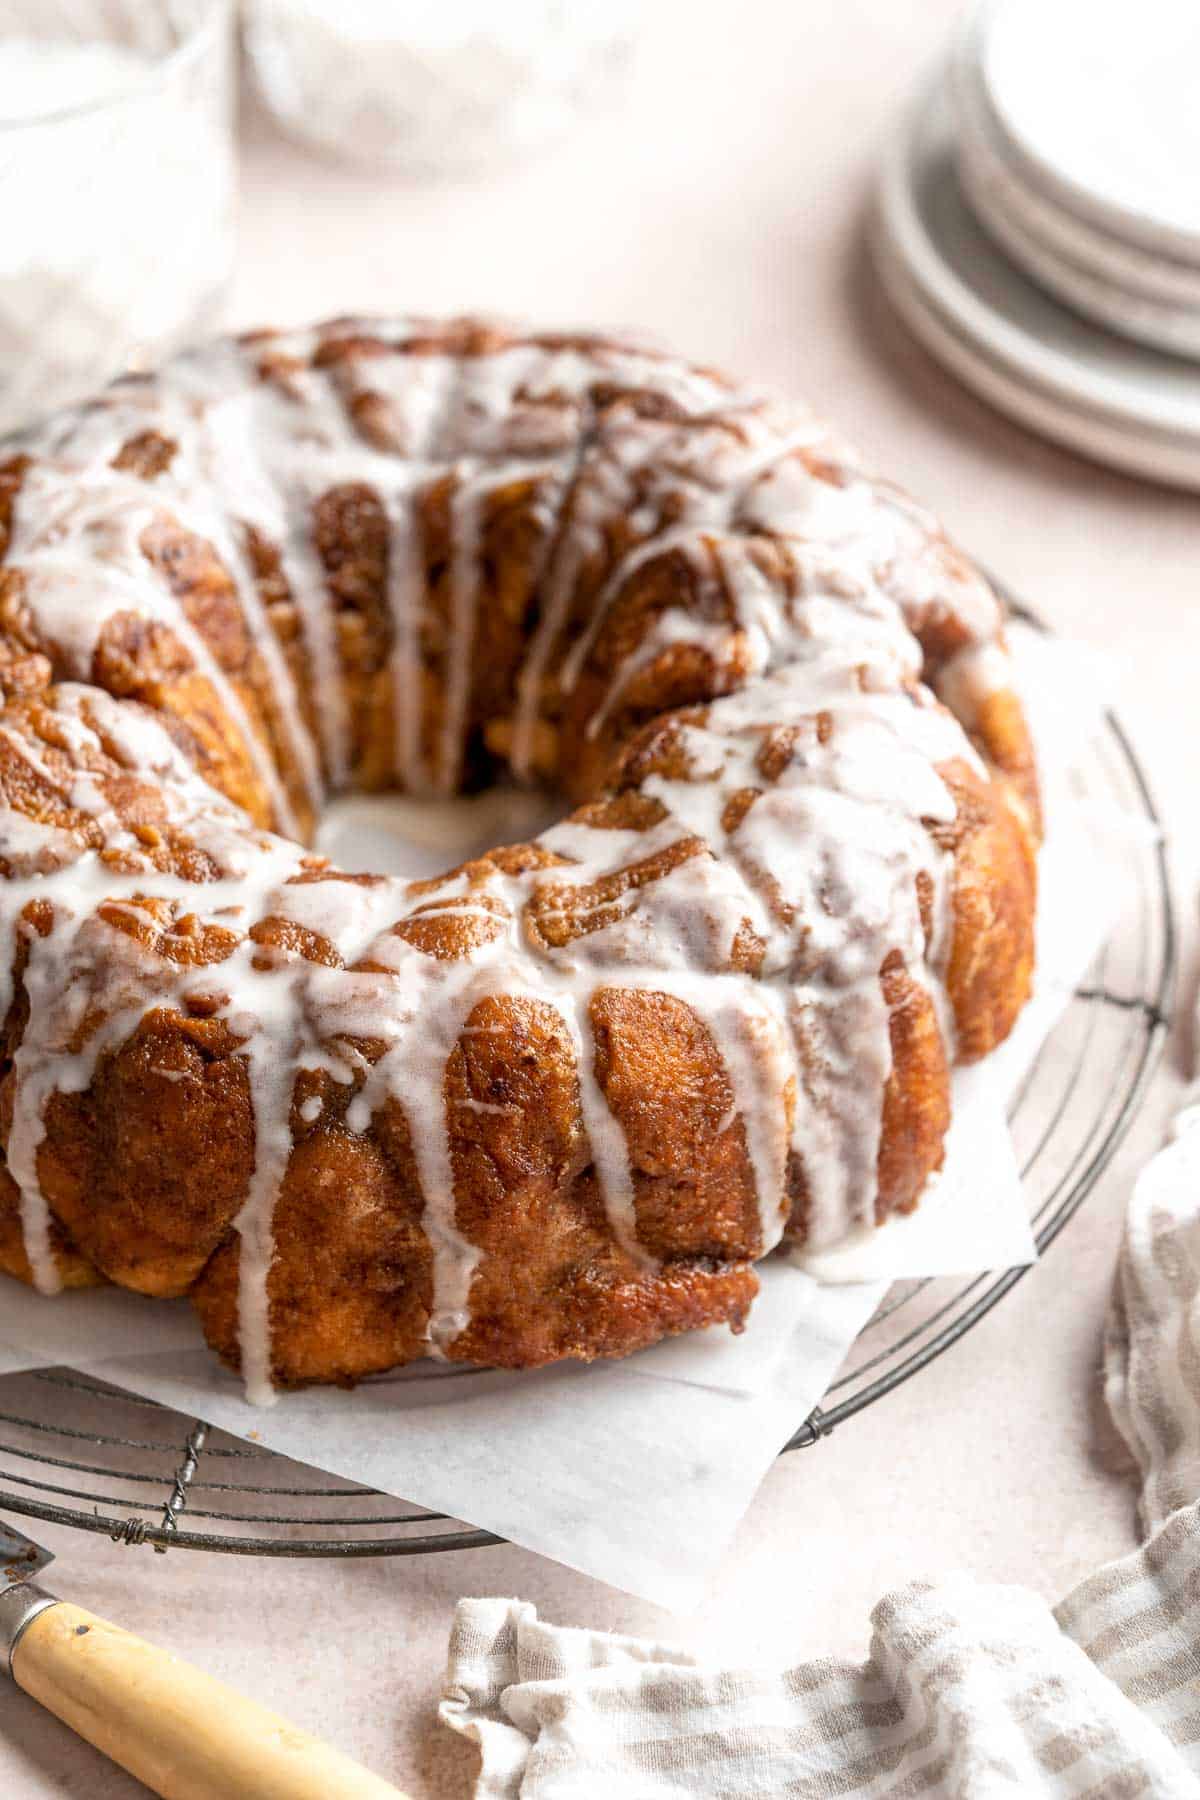
If you've never made homemade monkey bread before or have only used canned biscuit dough, don't be intimidated! This is the best monkey bread recipe. It's a bit labor intensive, but your efforts will be rewarded with the most wonderful sweet breakfast pastry. Once you see how delicious and straightforward it is, you'll want to make this delicious monkey bread every year (and you'll get requests for it every week). It's especially perfect for Christmas morning, a special occasion, or a cozy brunch.
Why You'll Love This Monkey Bread
- Perfect for special occasions. Since this traditional monkey bread recipe uses 64 bite-sized pieces of dough, it's fantastic for a crowd. Serve it like an appetizer, or enjoy larger servings as part of a meal. It's a must-have option for many Christmas breakfasts!
- Super soft and tender. This easy monkey bread recipe uses the tangzhong method. Basically, you cook some water, milk, and flour together on the stove until they form a paste, and then you mix it into the homemade dough with the other ingredients. This process makes your dough much softer and way more flexible. It's a handy trick that sounds complicated but really isn't!
- Classic cinnamon roll flavor. After you roll out the small balls of dough, dip them in butter and then a cinnamon-sugar mixture. This makes each bite of the monkey bread taste like the inside of a cinnamon roll! Serve it warm with a pot of fresh coffee or a nice Chai Tea Latte.
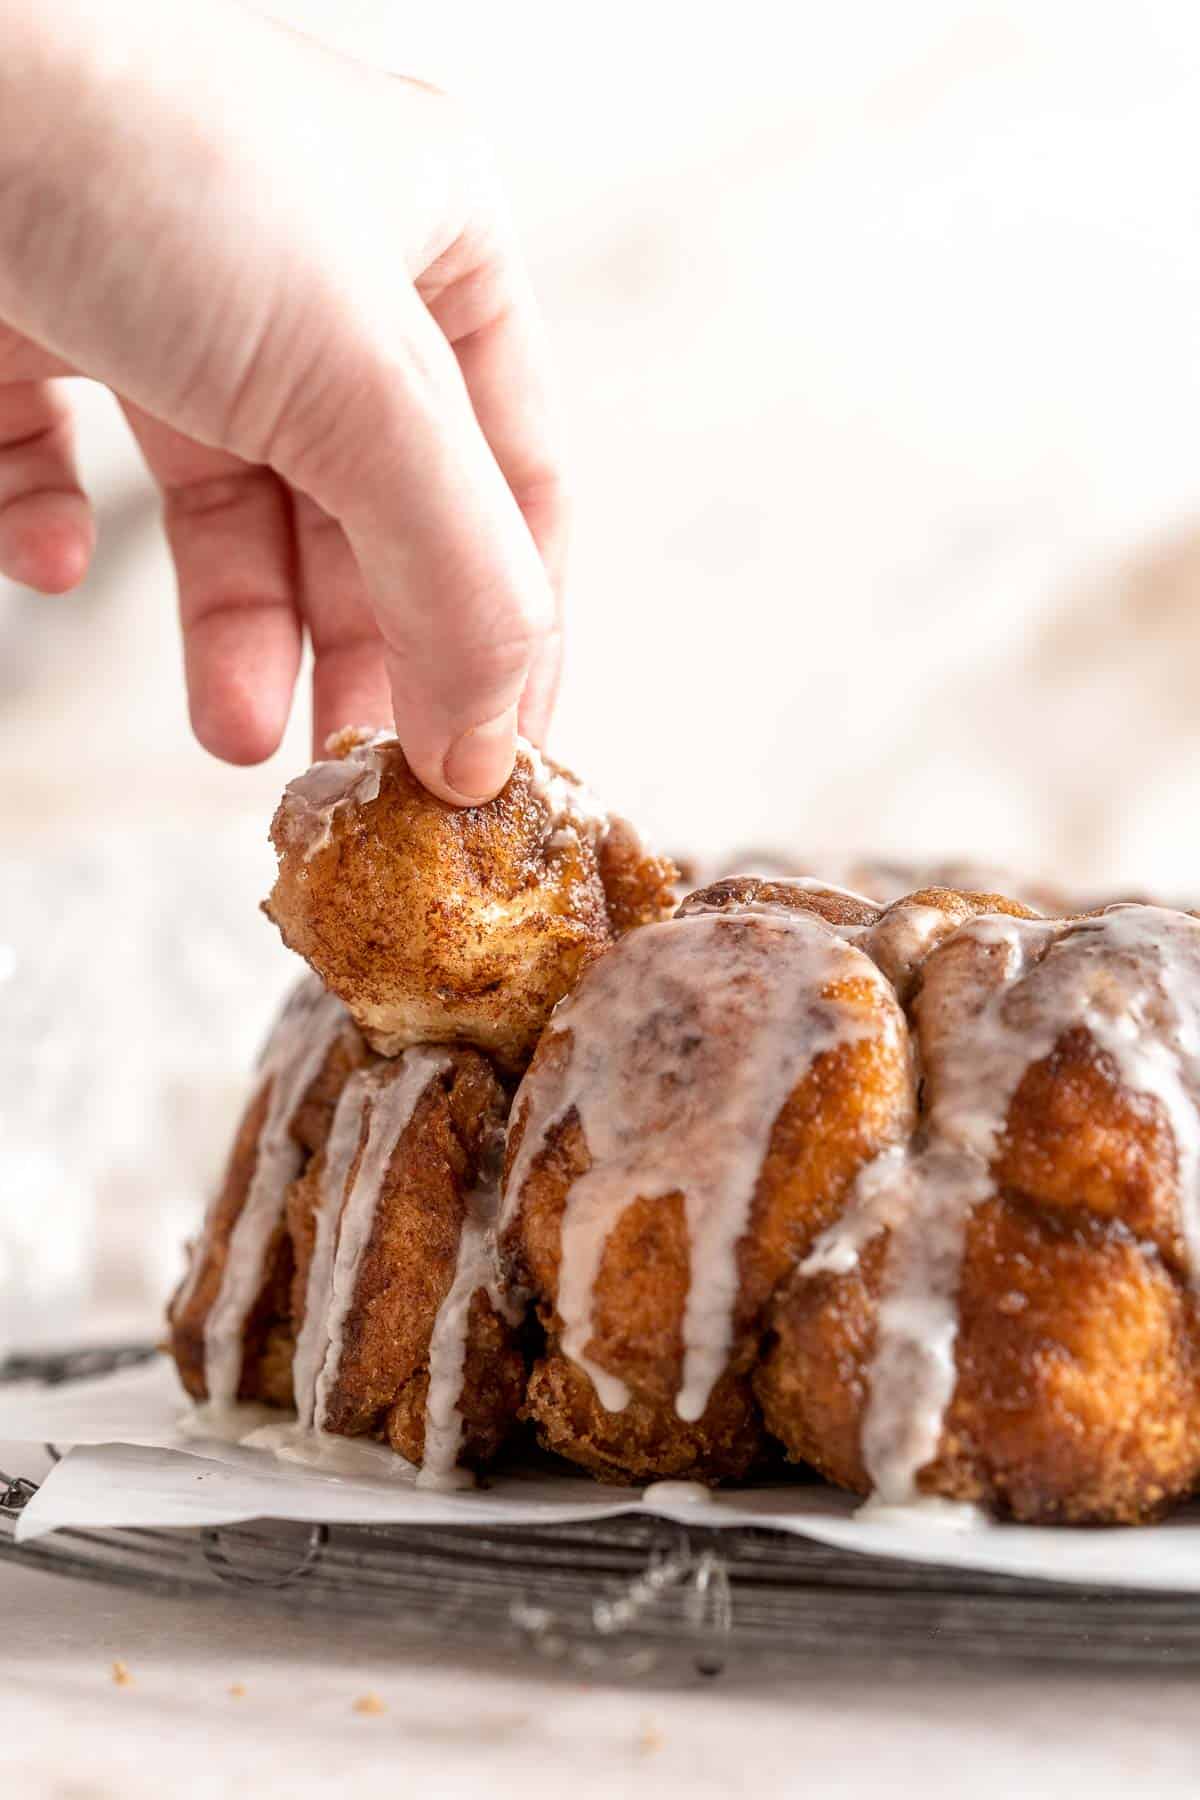
Ingredient Notes
To make this delicious monkey bread, you will need the following ingredients (full measurements in recipe card below):
For the cinnamon sugar coating
- white sugar - use regular granulated white sugar to highlight the cinnamon flavor.
- cinnamon - keep it simple with regular cinnamon. Any variety will do.
- unsalted butter - dip the dough balls in melted butter to give the cinnamon sugar something to hold on to.
For the tangzhong:
- milk - for best results, use regular dairy milk.
- water
- all purpose flour - this will be cooked until it turns into a thick paste, which gives the dough a soft, pliable texture.
For the dough:
- all purpose flour
- white sugar
- salt
- instant yeast - this yeast starts rising right away, so you can enjoy the monkey bread in just a few hours.
- whole milk - the whole milk will make your dough incredibly soft and tender.
- eggs - eggs bind the dough together and give it a pale yellow color.
- melted butter - the fat will help make the dough incredibly soft and plush.
- cooking oil spray - spray the bottom of the bundt pan very well to avoid any sticky messes.
For the caramel sauce:
- brown sugar - melt brown sugar with the butter in a saucepan until it liquefies and starts to bubble.
- unsalted butter
For the glaze:
- confectioner's sugar - you'll also see this called powdered sugar.
- heavy cream - whisk the sugar into the cream for a final touch.
You will also need several mixing bowls, a whisk, small and medium saucepans, a stand mixer with hook attachment, plastic wrap, a bundt pan, a pizza cutter or sharp knife, and a cooling rack or serving platter.
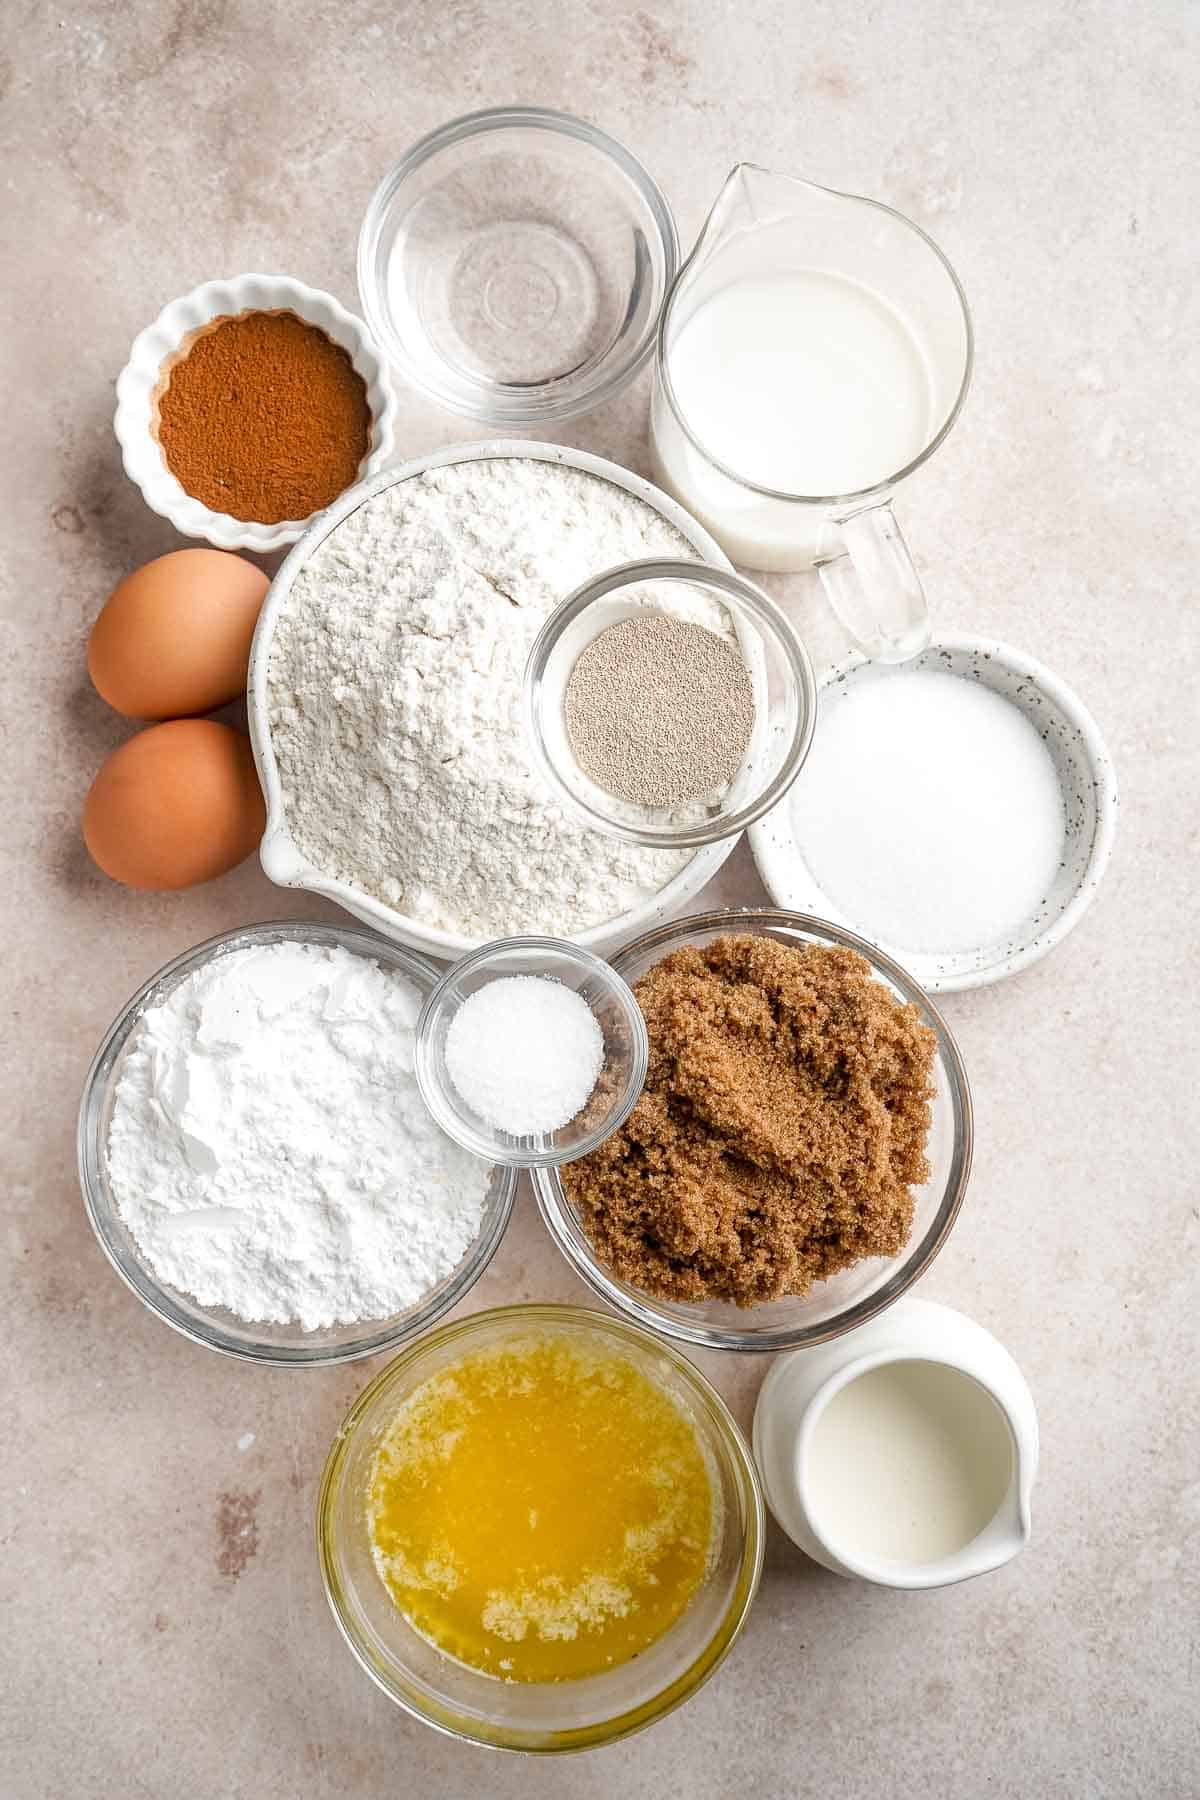
How to Make the Best Monkey Bread
First, make the cinnamon sugar.
- In a small to medium sized mixing bowl, whisk together the sugar and cinnamon until well incorporated. Set aside.
- Place the melted butter in a bowl that is large enough to accommodate a small ball of dough for dipping. Set aside for later.

Next, prepare the tangzhong.
In a small saucepan, add the flour, water, and milk, and whisk until smooth. Turn the heat to medium and continue whisking while it heats. Once the tangzhong has thickened (it should be thick enough that whisking leaves streaks), remove it from the heat to cool until just warm.
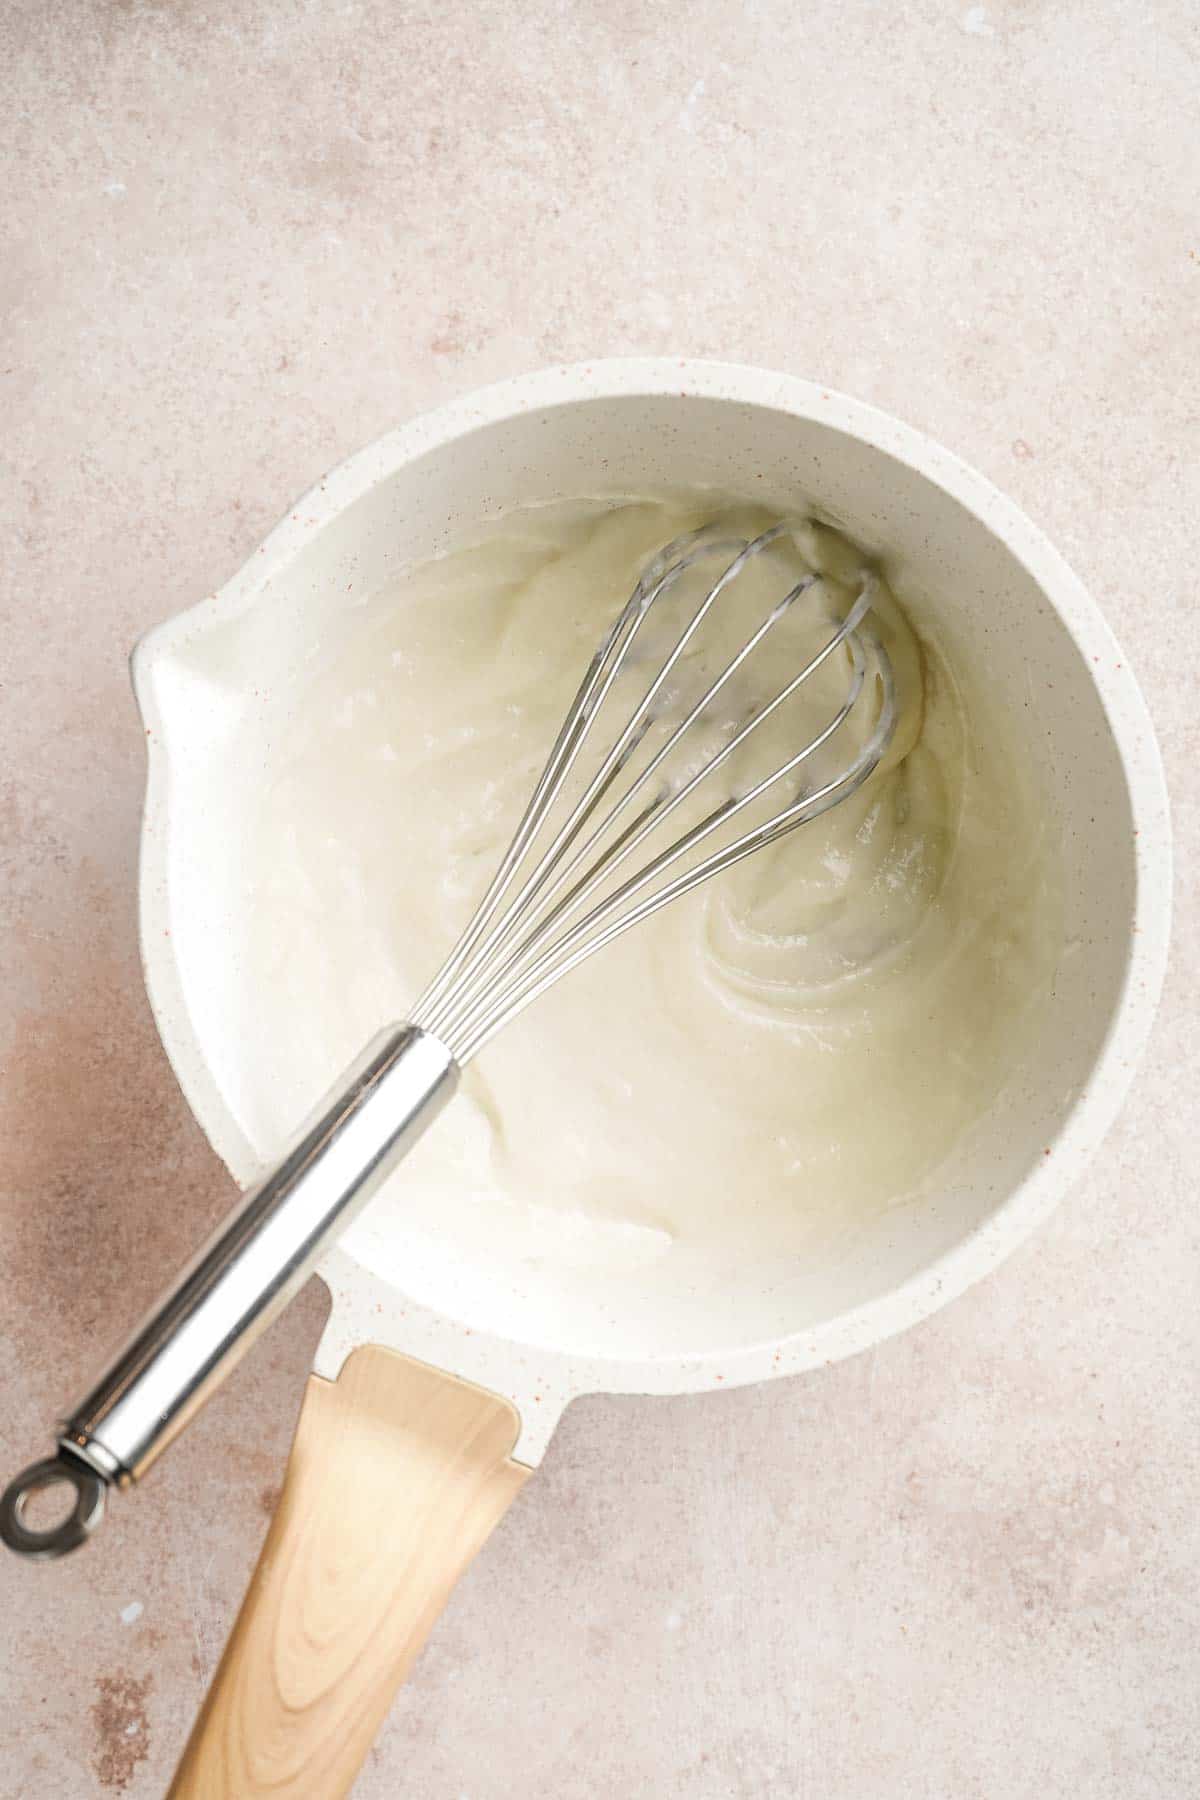
Now, let's make the dough.
- Combine ingredients. In the bowl of a stand mixer with the dough hook attachment secured, add the flour, sugar, salt, yeast, milk, eggs, melted butter, and tangzhong. Knead with hook attachment for 15-20 minutes. The dough should be smooth but will also be very soft and slightly sticky.
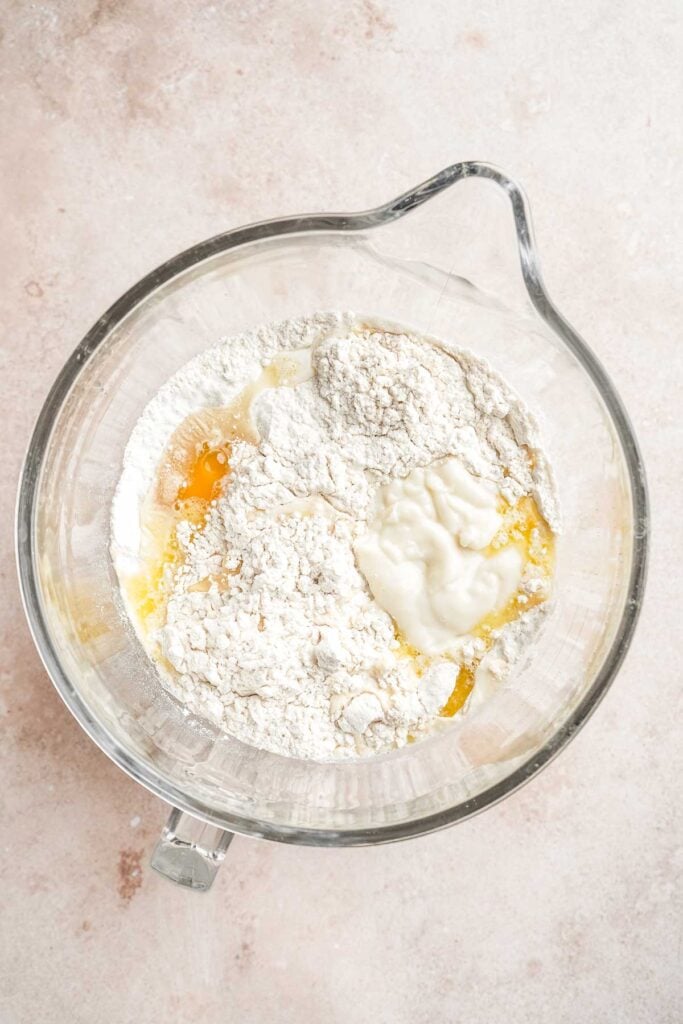
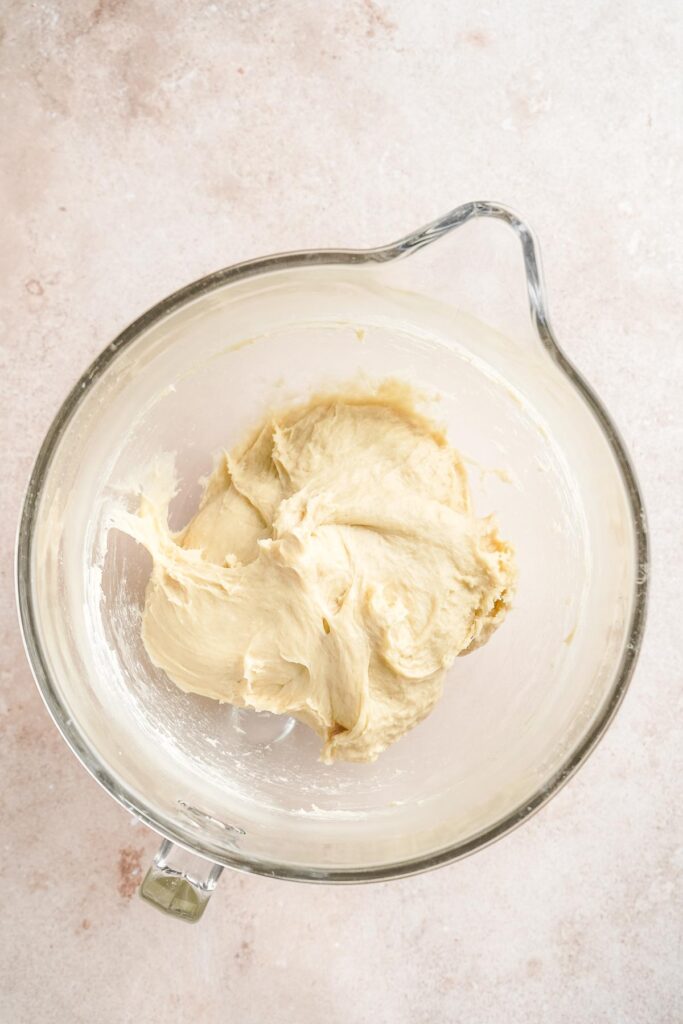
- Rise. Grease a mixing bowl with oil and place the dough inside, cover with plastic, and place into a warm place to rise for an hour or until doubled in size.
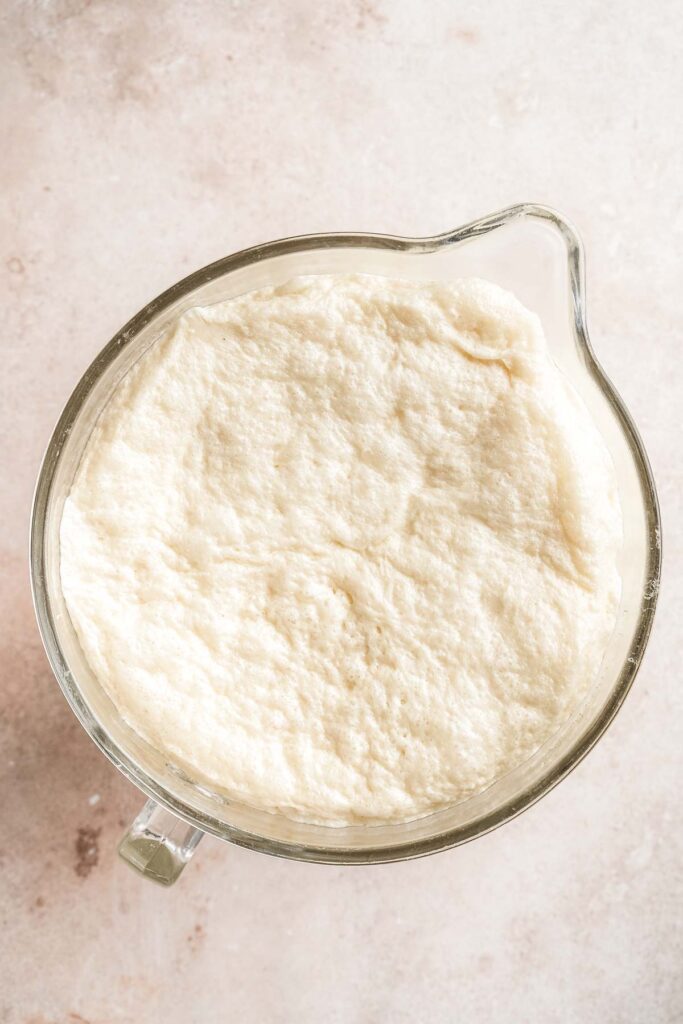
- Cut dough. After the dough has doubled in size, sprinkle a few tablespoons of the previously prepared cinnamon sugar onto a work surface. Next, punch the dough down, then invert it out of the bowl onto the sugared work surface. Press the dough into an 8 or 9-inch square, then use a pizza cutter to slice the dough into 64 pieces (8 rows and 8 columns).
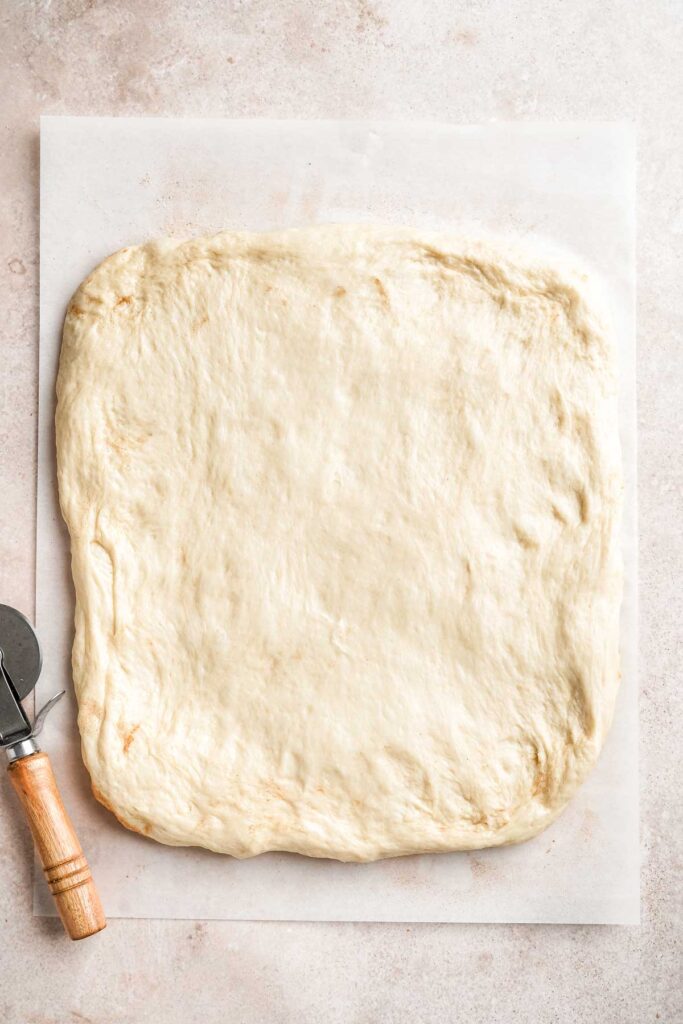
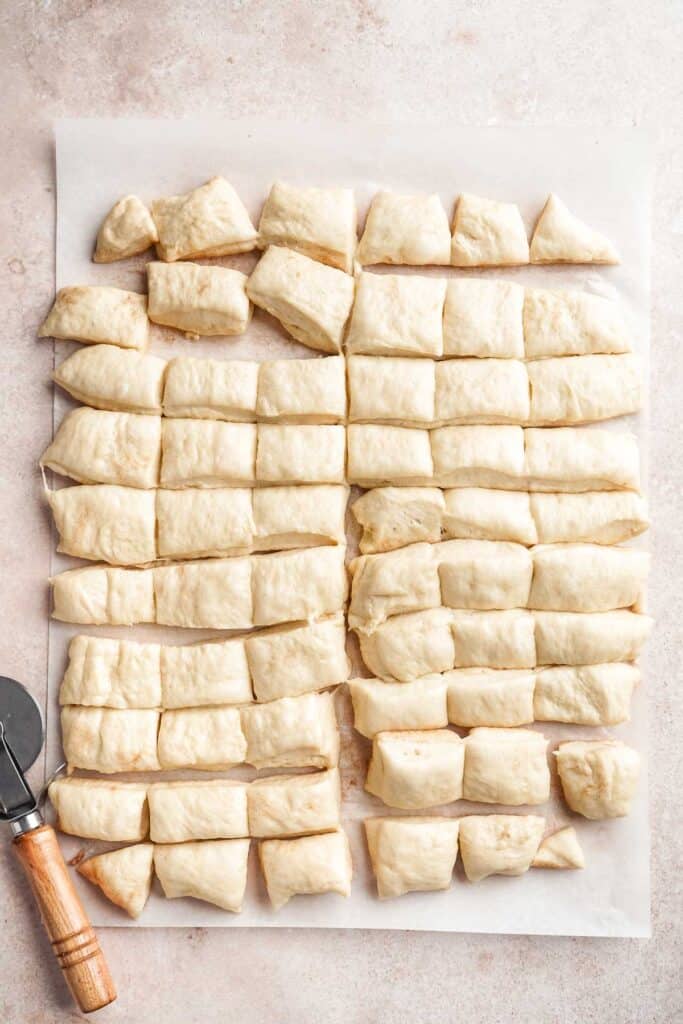
- Coat dough balls. Prepare a 10-inch bundt pan with a generous amount of cooking spray. Roll each piece into a ball, dip into the melted butter, and then roll in the cinnamon sugar. Transfer into the prepared bundt pan. Repeat with the remaining pieces of dough. After all the dough has been added to the pan, lightly cover it with plastic cling wrap.

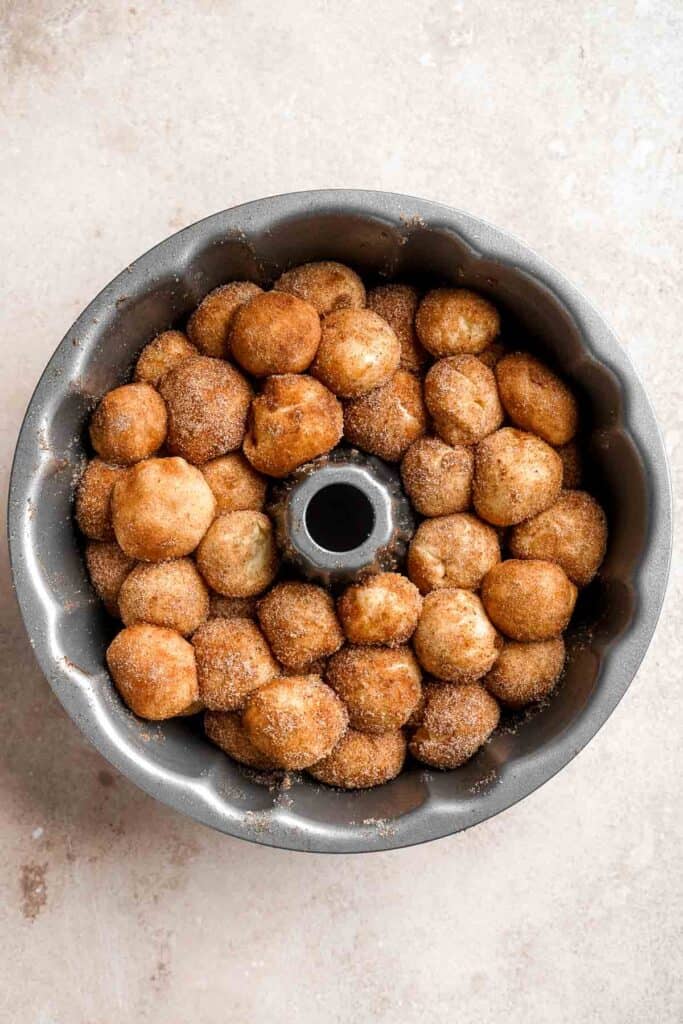
Make the caramel sauce.
- Heat. Place the brown sugar and butter into a medium saucepan. Heat over medium heat, continuously whisking, until the mixture comes together and begins to lightly bubble.
- Add caramel. Remove the plastic wrap from the bundt pan and immediately pour the hot caramel on top of the dough balls.
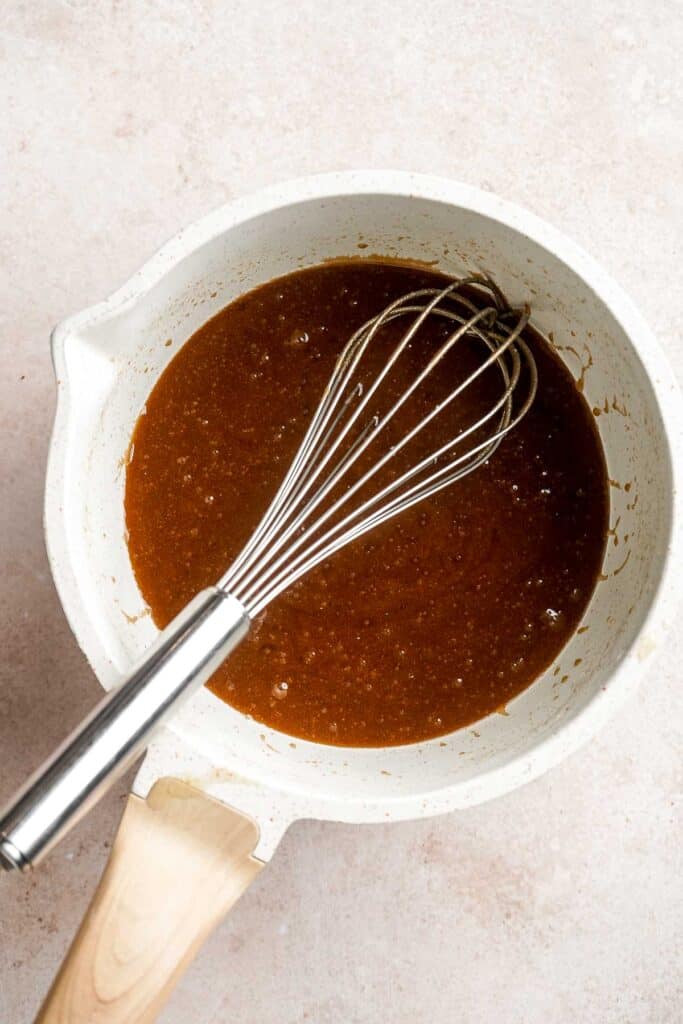

- Bake. Place into a 350F preheated oven to bake for 35-45 minutes. When finished, allow the cake to cool in the pan for 5 minutes, then transfer out of the pan by inverting it onto a cooling rack or serving plate.
Finally, add the glaze.
In a medium mixing bowl, add the confectioners' sugar, and enough heavy cream to achieve glaze consistency, starting with 1 tablespoon at a time. Whisk until smooth, then drizzle over the warm monkey bread.
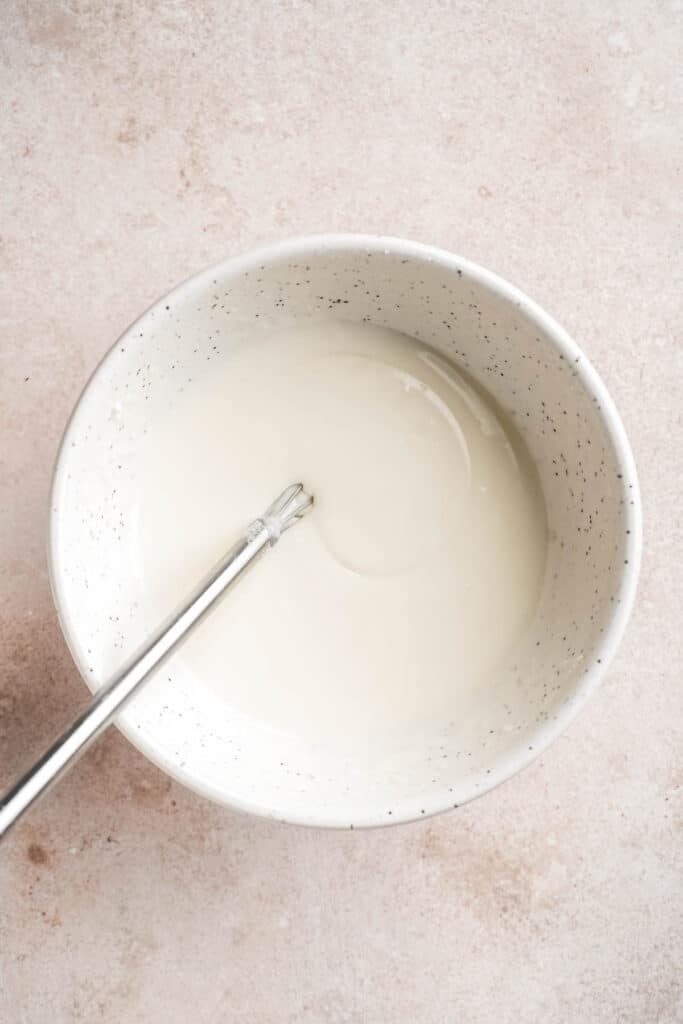
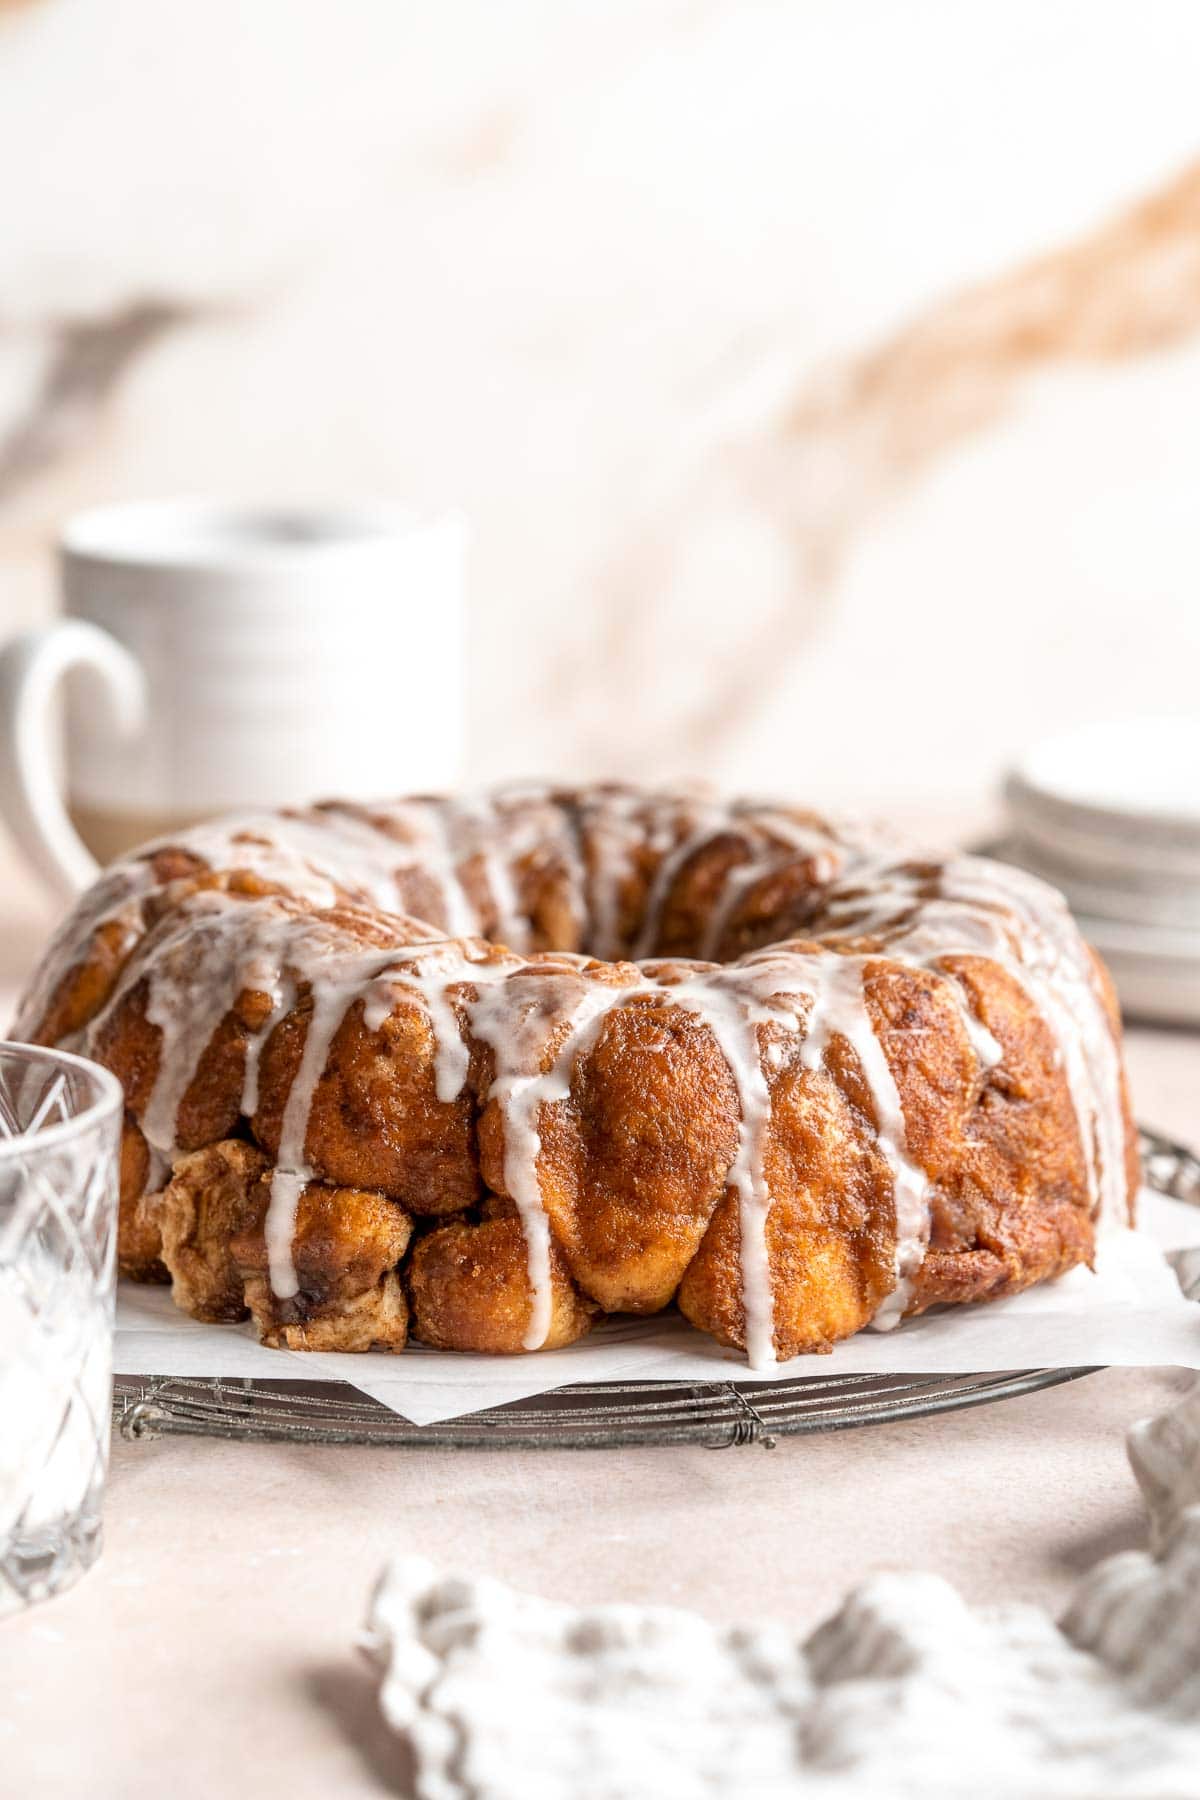
Recipe Variations
- Make the night before. If you want to save some time in the morning, cover the pan of prepared dough balls with a piece of plastic wrap and place them into the fridge before their final rise. They'll rise slowly in the fridge overnight, and then you can add the caramel sauce and bake like normal in the morning.
- Apple monkey bread. Replace the cinnamon with apple pie spice and add tiny little minced pieces of green apple into the pan with the dough balls. They'll cook in the oven and absorb the cinnamon butter mixture!
- Use canned biscuits. Although we recommend making the monkey bread dough from scratch, you can use store-bought biscuit dough. Cut it into bite-sized pieces and roll them into little balls before following the other steps like normal.
- Adjust the ingredients. For a deeper flavor, use dark brown sugar in the caramel. You can also add some orange zest to the dough for a light, citrus flavor. This monkey bread would also be great with some toasted walnuts or pecans!
How to Serve
This monkey bread is delicious served on its own, or paired with some of my favorite breakfast sides including:
- Breakfast Potatoes
- Fruit Salad with Honey Lemon Dressing
- Egg and Potato Breakfast Casserole
- Breakfast Strata
- Turkey and Cheese Sliders
Complete your brunch menu with our 40+ Best Brunch Ideas.
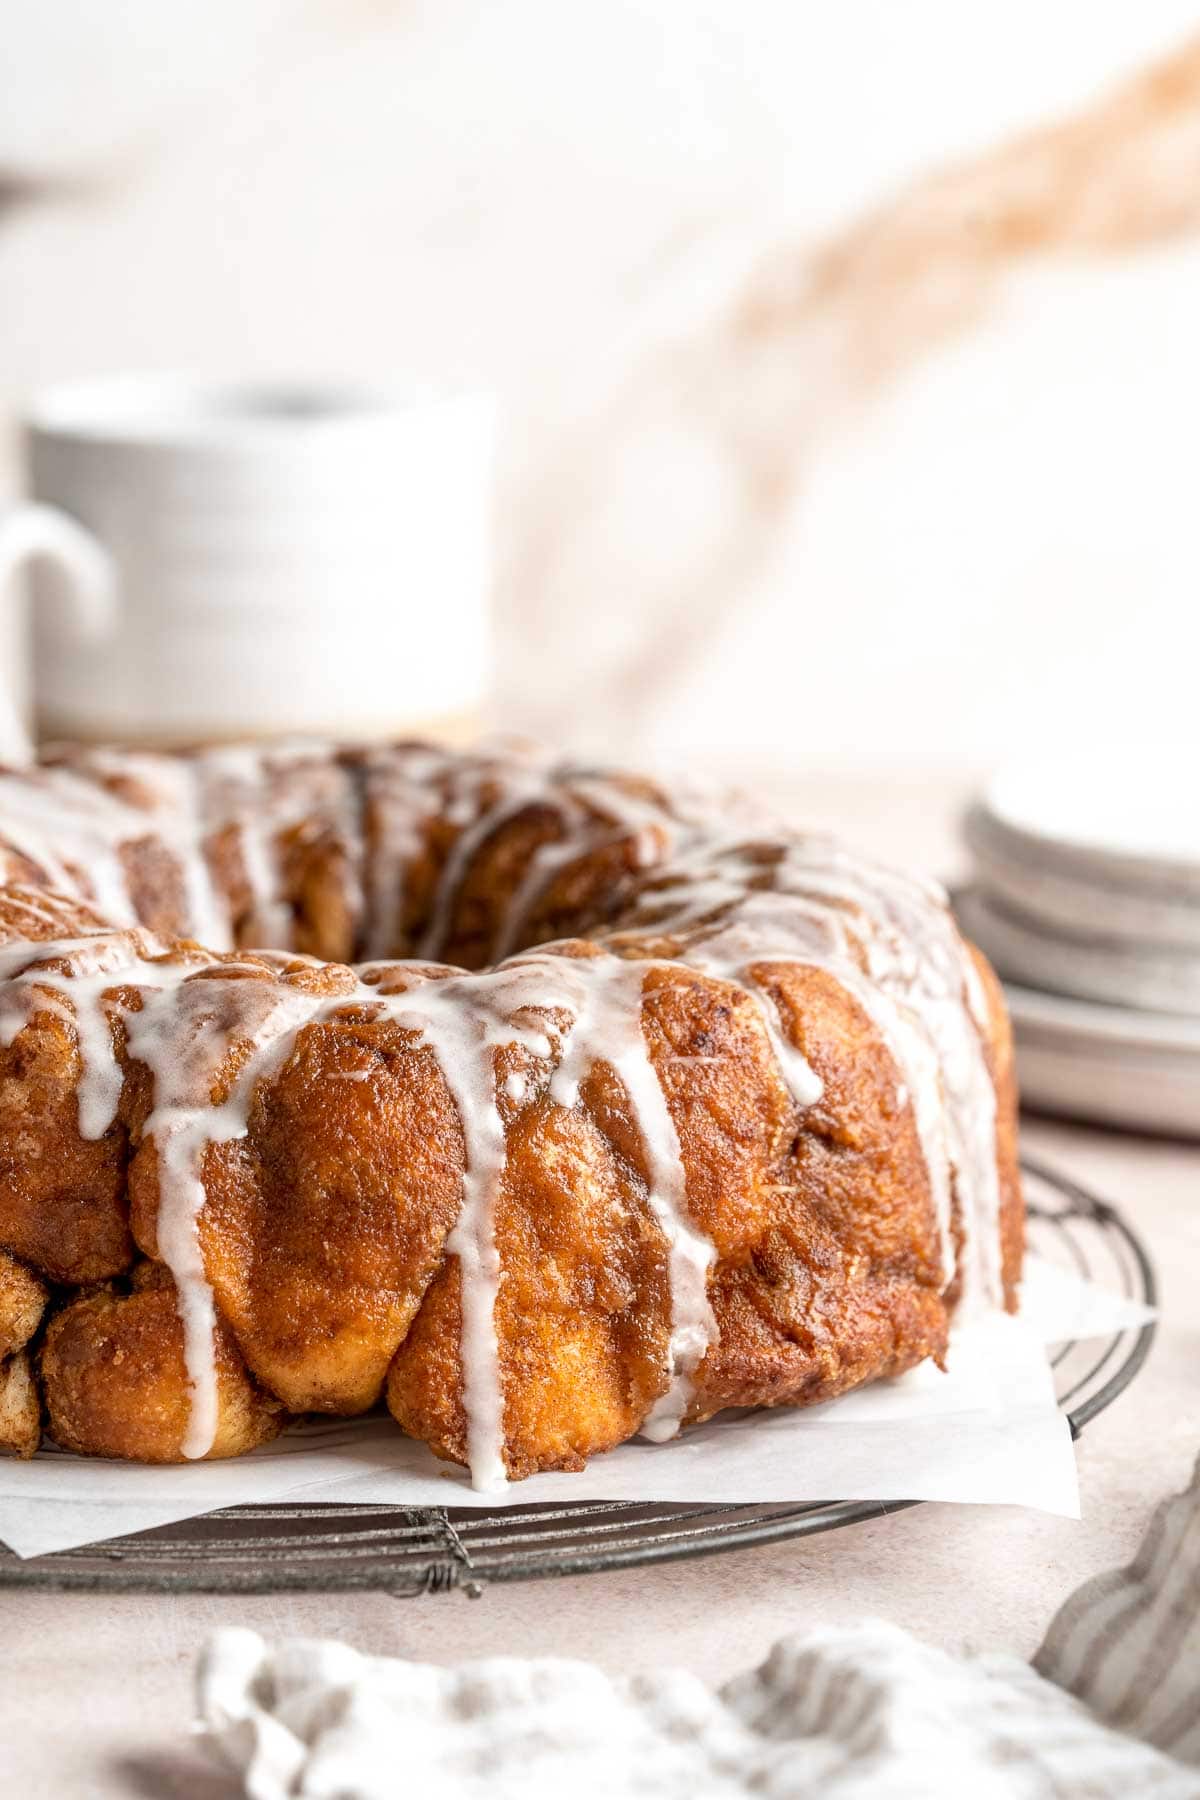
Recipe Tips and Tricks
- Watch the dough. Especially if you're making this monkey bread for a holiday breakfast, your dough may rise slower or faster than you expect depending on the temperature in your kitchen. It's better to wait for your dough to double instead of setting a timer.
- Roll with sugar. One unusual step you might have missed is that the dough balls are rolled in the cinnamon sugar mixture - not a lightly floured surface. It's a little different than you might be used to, but it gives each dough ball a second layer of cinnamon sugar.
- Don't overcook the caramel. If you've never made caramel before, it's good to know that sugar is tricky. If you heat it too much, it will harden and have a very chewy texture. Just watch for the mixture to liquefy together and then form little bubbles. Remove from the heat right away and pour it over the dough balls.
Storing and Freezing Instructions
How to Store
If you somehow have leftover monkey bread after breakfast, place it in an airtight container at room temperature for a day or two. It can also be refrigerated, but it will have a firmer texture.
How to Reheat
Monkey bread tastes best warm, so pop a plate of leftovers into the microwave for 15-20 seconds just to warm them up.
How to Freeze
You can typically freeze fully baked monkey bread in an airtight container for up to 3 months. Thaw in the fridge overnight, then warm in the oven before adding the drizzle.
FAQ
According to the Smithsonian Center for Folklife & Cultural Heritage, this unusually named pastry treat hails from Hungary, where it originated in the 1880s. The traditional name is aranygaluska, which translates to "the golden dumpling," although it is often called bubble loaf, pinch-me cake, cinnamon pull-apart bread, and more. Immigrant bakers brought the recipe to Hollywood in the 1940s, and it was sealed into American history when Nancy Reagan served it at the White House. Since then, it's become an iconic breakfast often served on holiday mornings.
The main reason for doughy bread is underbaking. This is usually a sign that your bread isn't fully baked and needs more time in the oven. It can be hard to tell exactly when this pull-apart bread is ready. Use an instant-read thermometer and check the very center of the dough balls. If the temperature is between 180-190 degrees F, it's ready to be pulled from the oven. If not, keep baking!
That's up to you. Refrigerating breads or pastries will give them a dry, firm texture that isn't always pleasant to eat. However, this is a good way to keep them fresh for a few extra days. You can always reheat the leftover pieces in the microwave for a few seconds to warm them up before eating.
More Sweet Brunch Recipes
- 40+ Best Brunch Ideas
- Skillet Cinnamon Rolls
- Sourdough Cinnamon Roll Twist Bread
- Nutella Crepes
- Apple Turnovers
- The Best Lemon Loaf with Lemon Glaze (Starbucks Copycat)
Tried this recipe?
I'd love to hear what you think! Leave a comment and rating below to share your feedback. Your reviews help others discover this recipe and help me keep creating more free recipes for you. Snap a photo and tag me on social media @aheadofthyme too.

Popovers
Whether you call them Popovers or Yorkshire pudding, these light, puffed rolls "pop over" the top of the pan and are a must-have to serve with your Sunday roast or holiday meal! They're also quite easy to make, requiring just a handful of common ingredients (and a very hot oven). They're a show-stopping side dish, and you'll get requests for them every time!
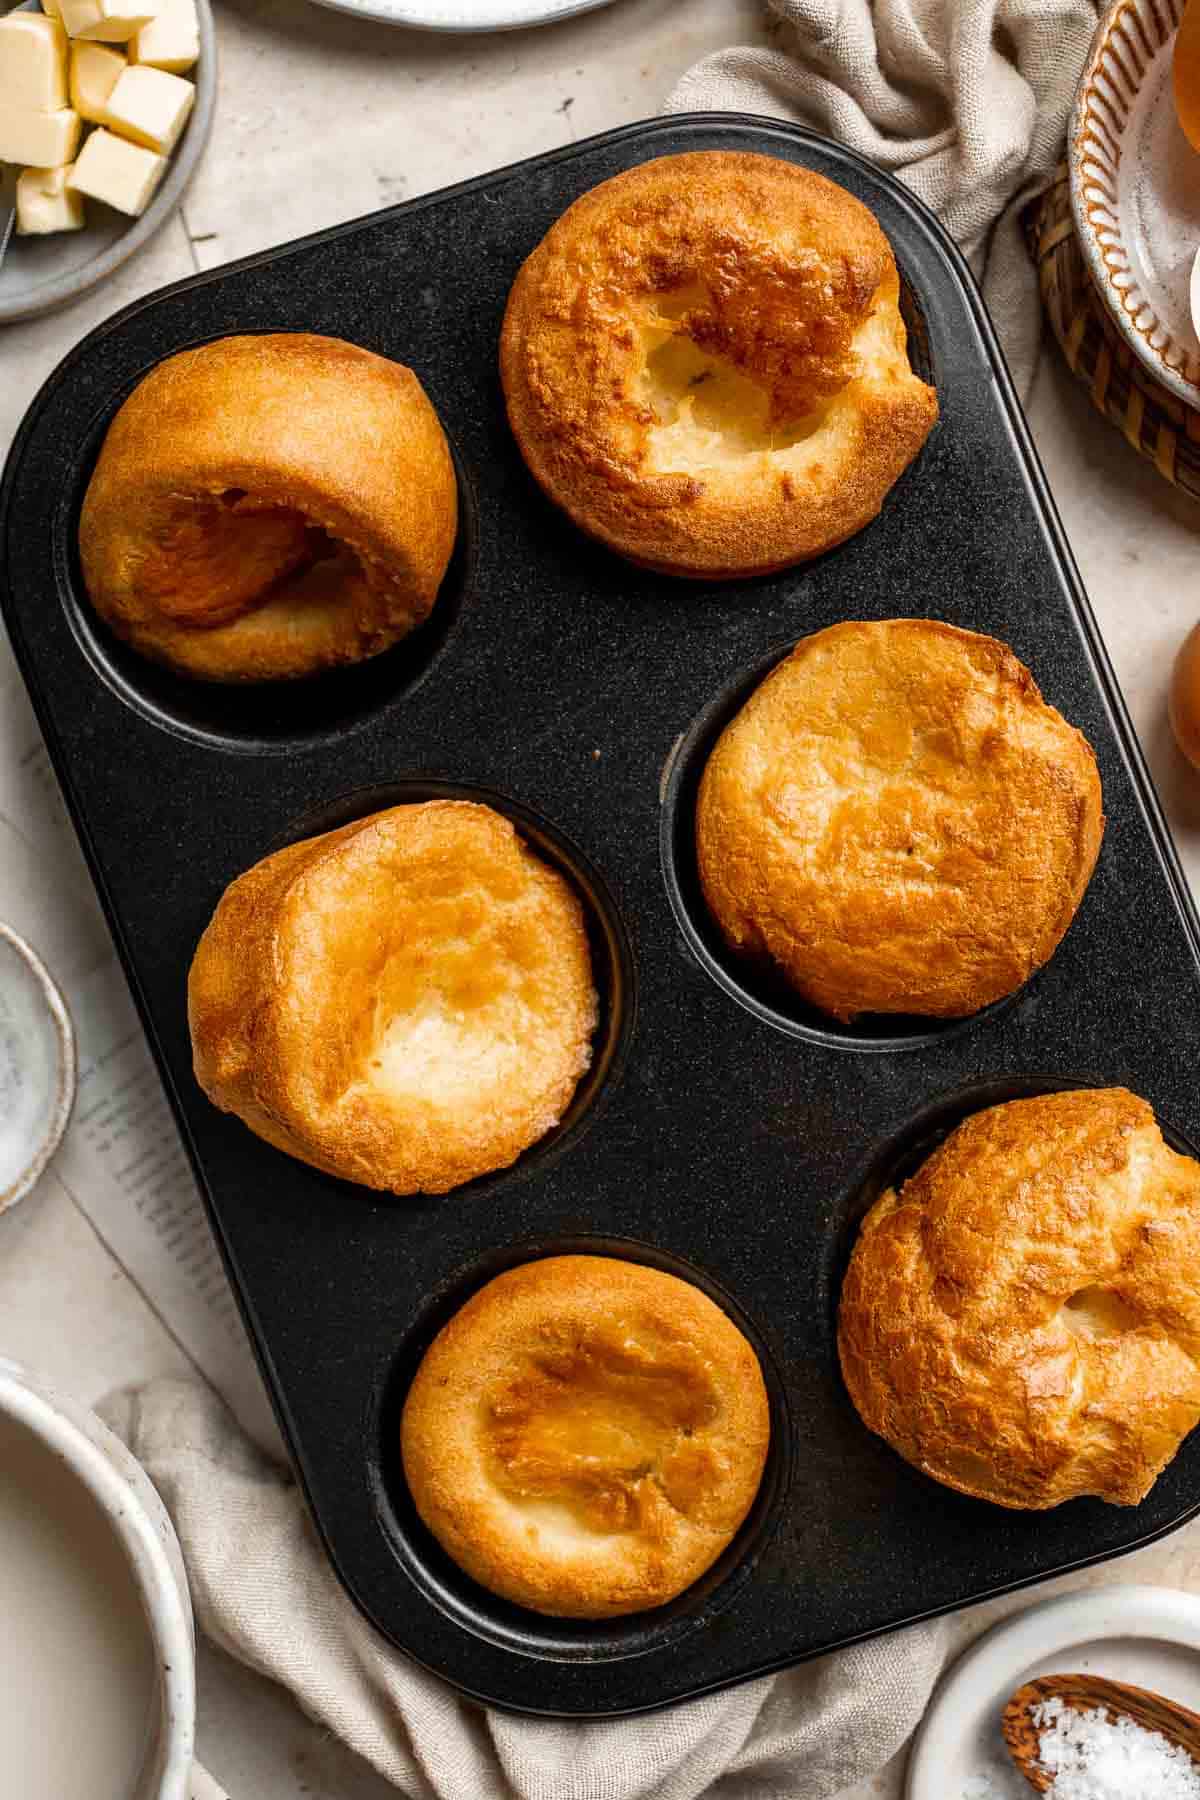
If you grew up with popovers, there's nothing quite like them. They are similar to Dutch baby pancakes, which puff up dramatically in the oven. Since they are hollow on the inside, they're great for sopping up gravy or savory sauces alongside a nice hearty roast or special dinner or as a special breakfast treat. This easy popover recipe is simple enough for beginners and is the only recipe you'll ever need!
Why You'll Love These Popovers
- Easy to make. Although there are a few key things to remember about making and baking the popover batter, they're really quite simple, and we'll share our tried-and-true tips to help you out!
- Traditional flavor. For many people, popovers or Yorkshire puddings are a must-have for their Sunday roast beef or holiday dinner. It's not a roast dinner without them! They're also wonderful with some butter and jam at breakfast. However you serve them, they're always a big hit.
- Show-stopping side dish. If you're serving guests who've never had popovers, you'll certainly get a big reaction! The puffy, expansive rolls look amazing and taste great too.
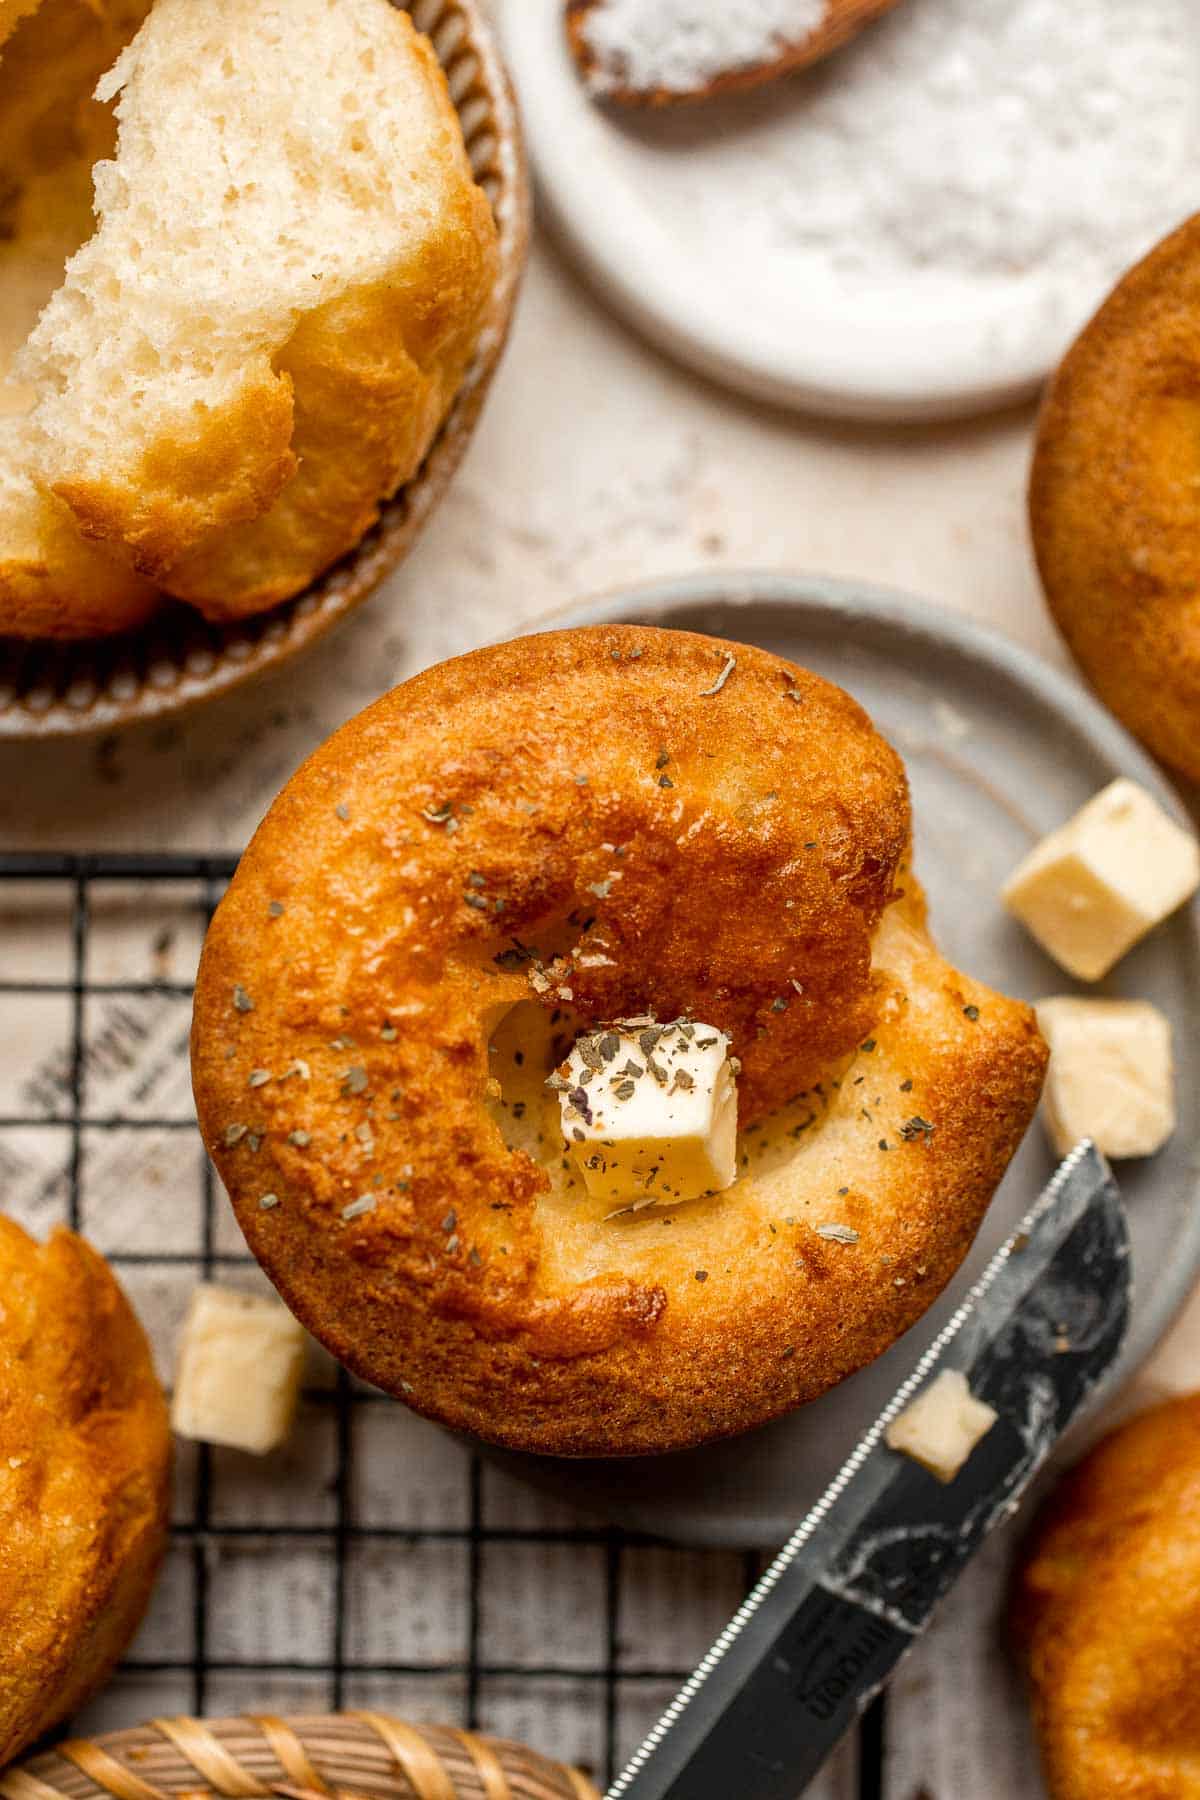
Ingredient Notes
To make these delicious popovers, you will need the following ingredients (full measurements in recipe card below):
- eggs - let your eggs come to room temperature before you prepare the batter.
- milk - it's very important to use room-temperature milk.
- salt - season the batter well to get the best flavor.
- all-purpose flour - keep it simple with regular all-purpose flour.
- butter - a little butter tastes amazing over a hot, fresh popover.
- cooking oil spray - prepare the muffin pan very well by spraying it liberally with the cooking spray.
You will also need measuring cups and spoons, a large mixing bowl, whisk or hand mixer, muffin tin (or 6 slot popover pan), wire rack, and a paring knife.
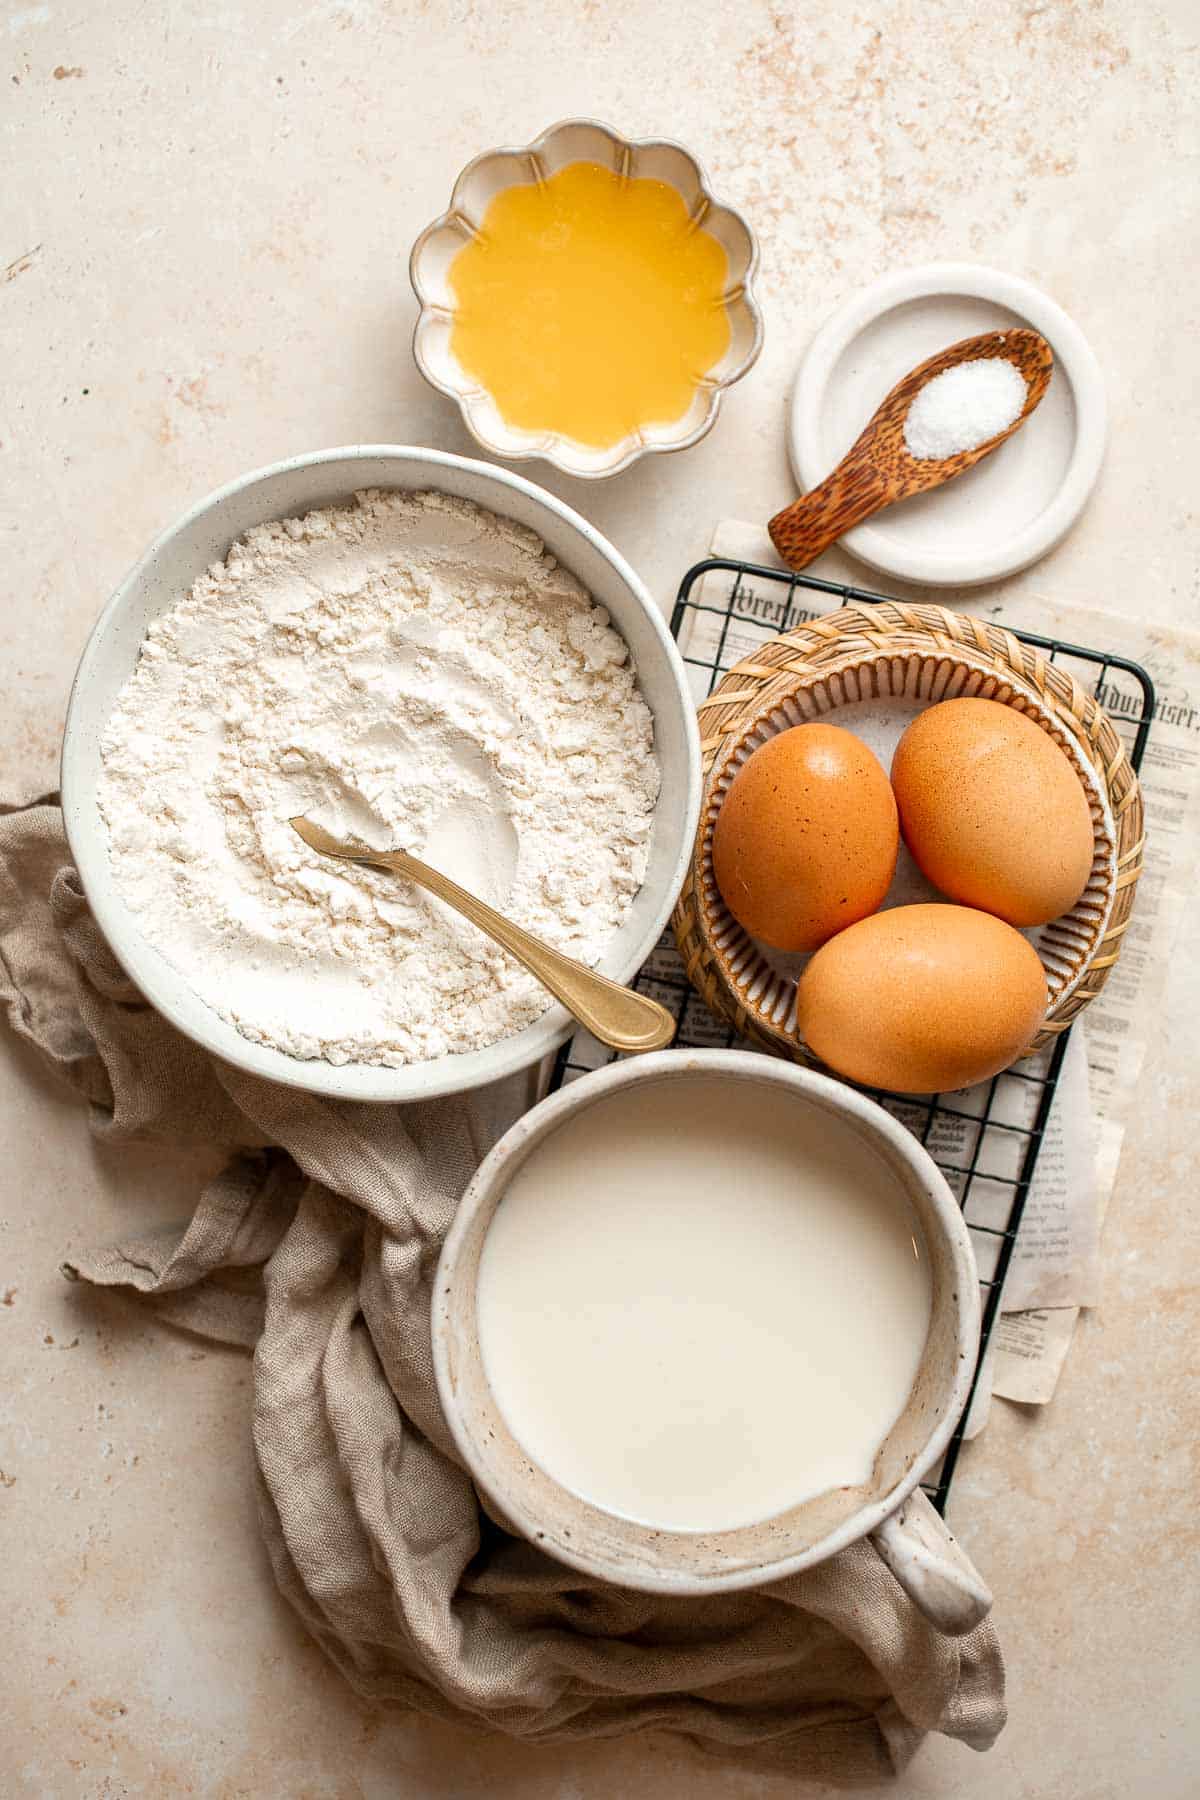
How to Make the Best Popovers
- Make the batter. In a large mixing bowl, add eggs, milk, and salt. Whisk well until smooth, about 1 minute. You can also use a hand mixer to blend the ingredients together. Add flour and melted butter. Whisk until it turns into a smooth batter.
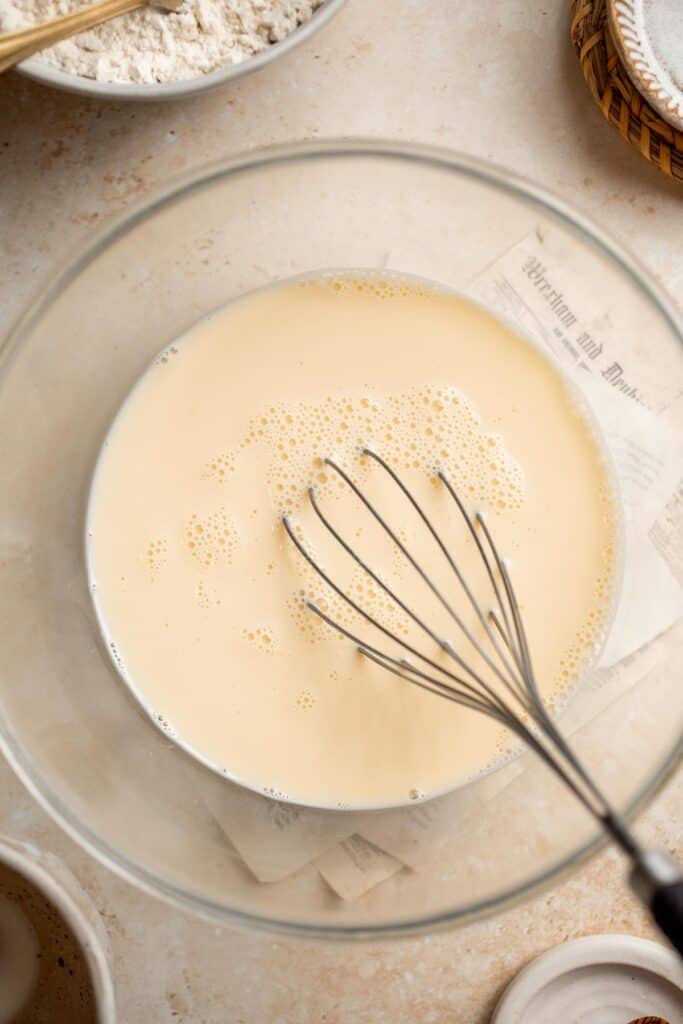
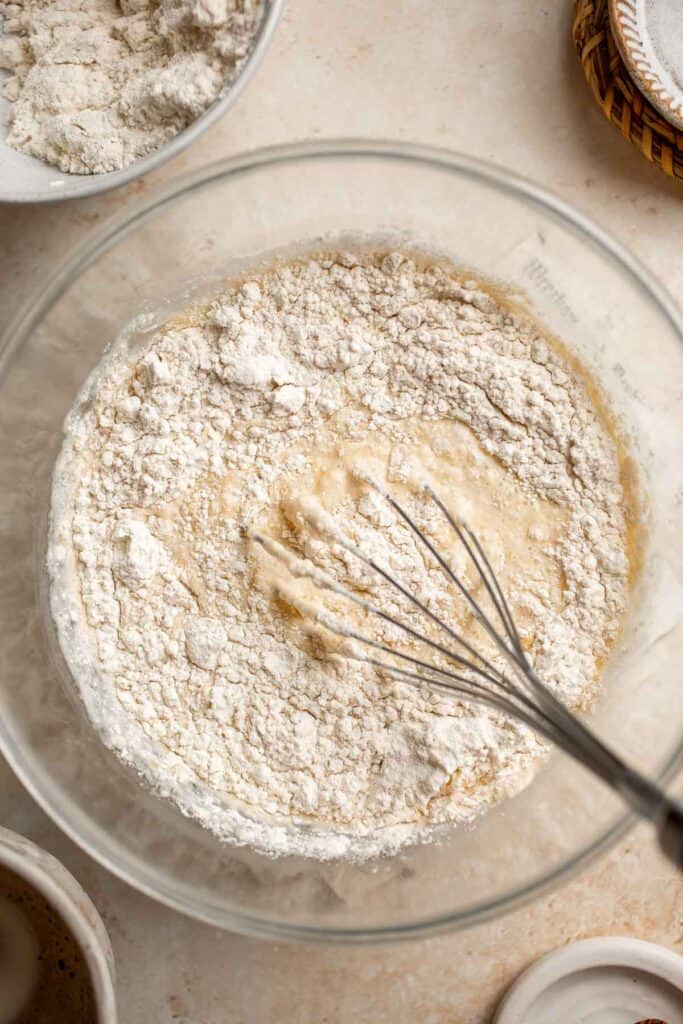
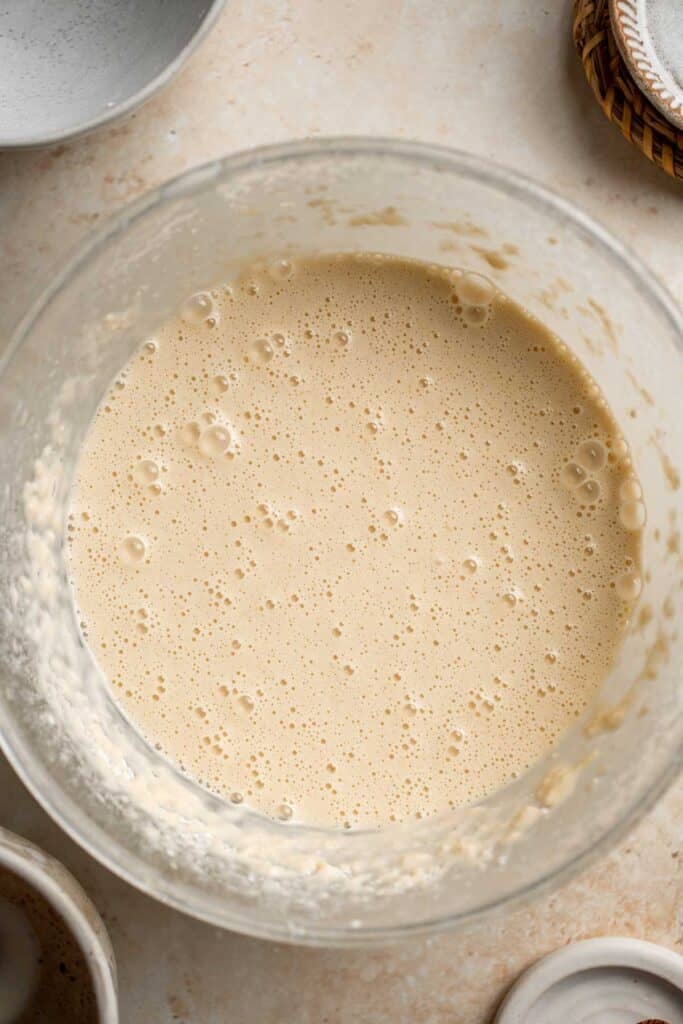
- Divide batter. Lightly spray cooking oil spray over a muffin tin or 6-slot popover pan evenly until each cup is greased. Carefully divide the batter evenly into each cavity. The batter should be no more than ¾ full.
- Bake. Bake in a 425F preheated oven for 20 minutes, then lower the oven temperature to 350F. Continue baking for another 10 minutes until golden brown.
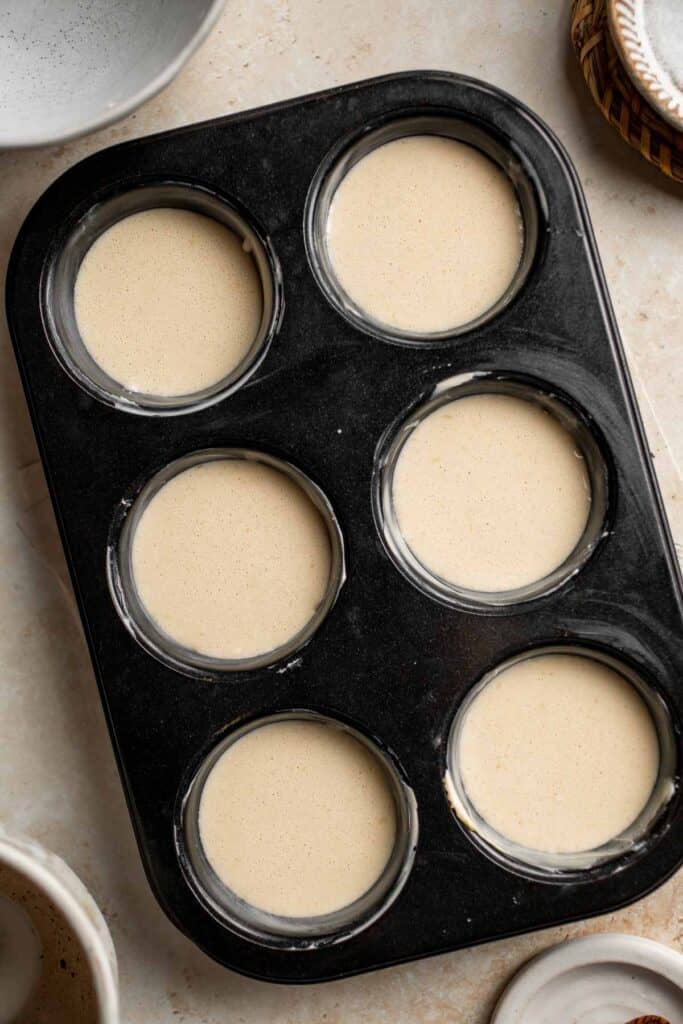

- Cool. Transfer the popovers onto a wire rack to cool and use a paring knife to create a little slit on each popover. This helps release the steam inside and preserve the shape a bit longer.
- Serve. Serve on its own with butter or jam, or as a side dish with dinner.
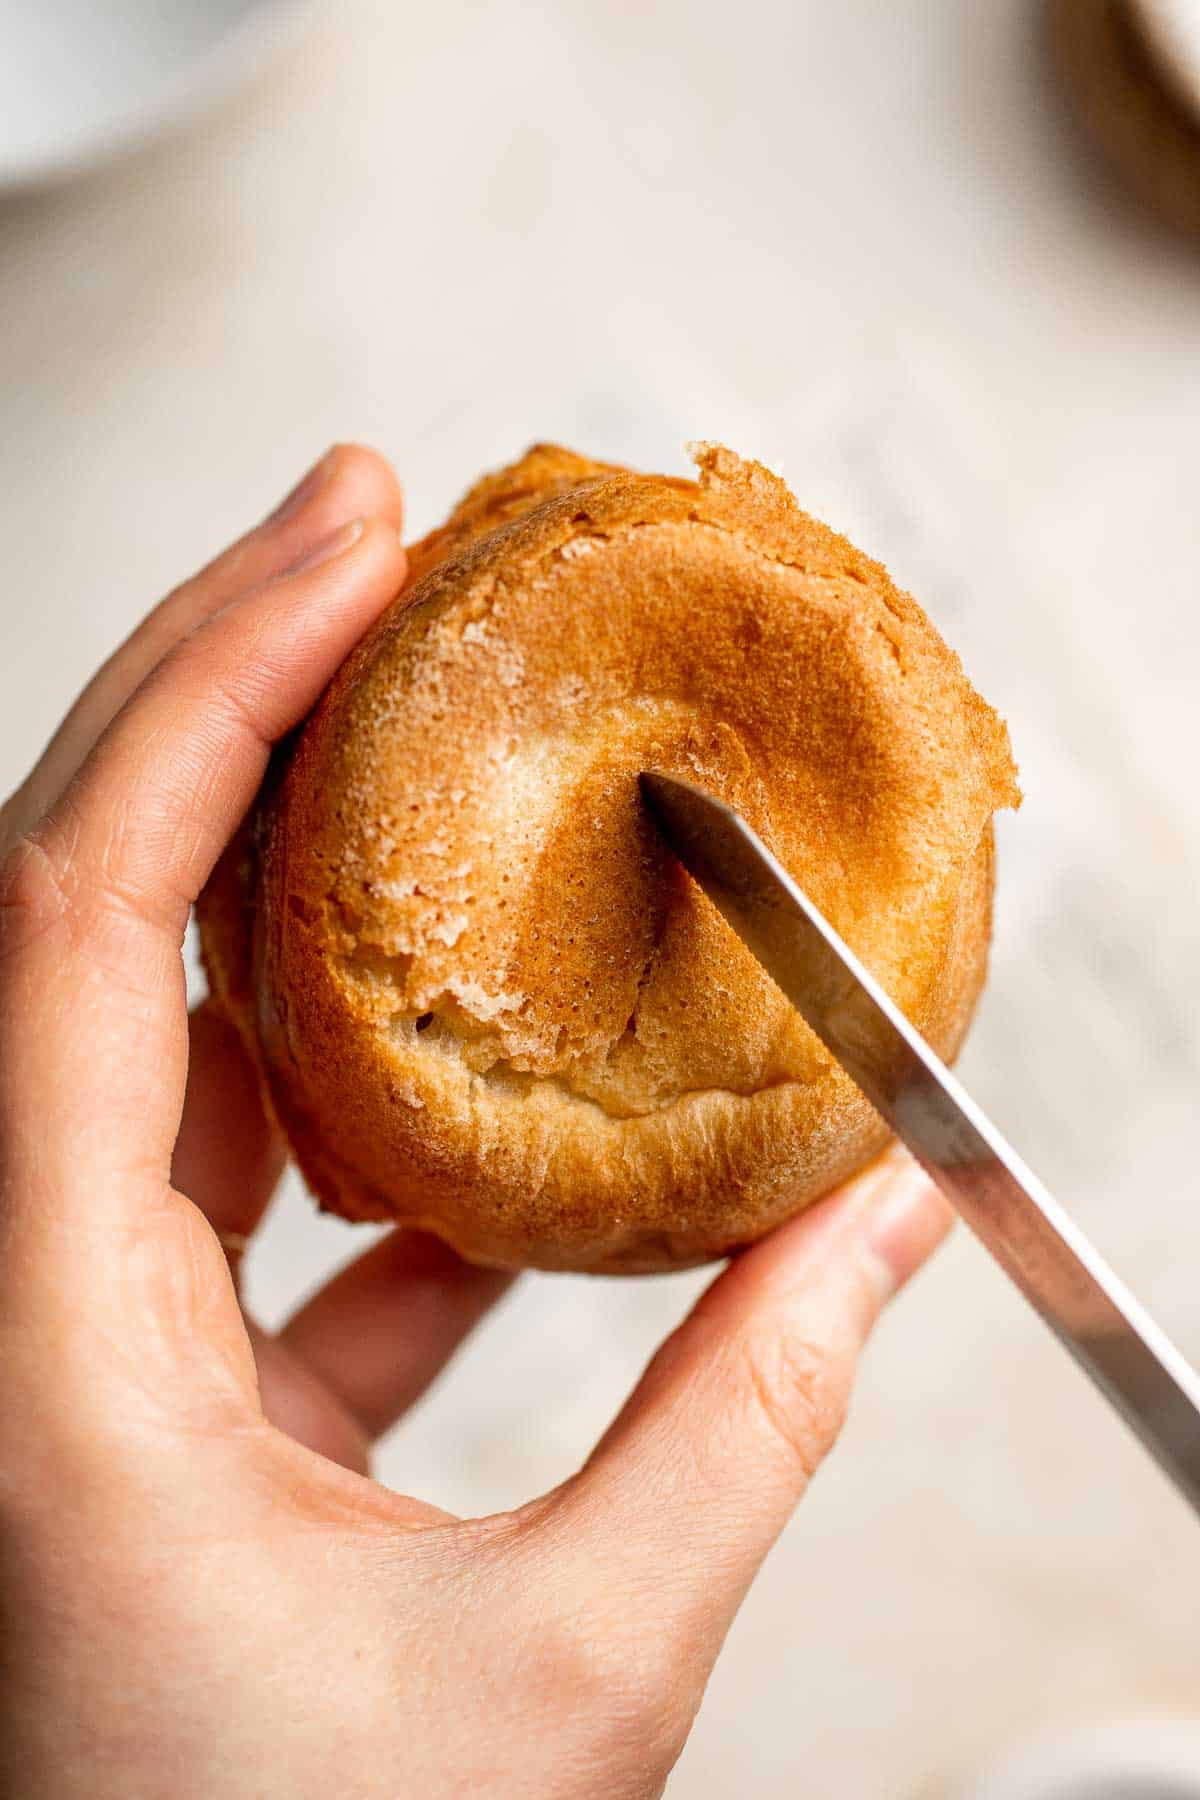
Recipe Variations
- Try a different fat. Although we use regular cooking spray, many people prefer to use melted beef drippings or tallow, especially for Yorkshire puddings.
- Add shredded cheese. Grate a dry cheese like Parmesan and stir it into your batter for an extra savory flavor.
- Make them sweet. Sprinkle extra powdered sugar over the popovers when they come out of the oven. Crack open and serve with jam and butter.
How to Serve
These popovers are delicious served on their own as a snack or breakfast with a pat of butter and jam, or paired with some of hearty main course entrees including:
- Sunday Pot Roast
- Roast Stuffed Chicken
- Prime Rib Roast
- Honey Glazed Roast Pork with Vegetables
- Instant Pot Turkey Roast
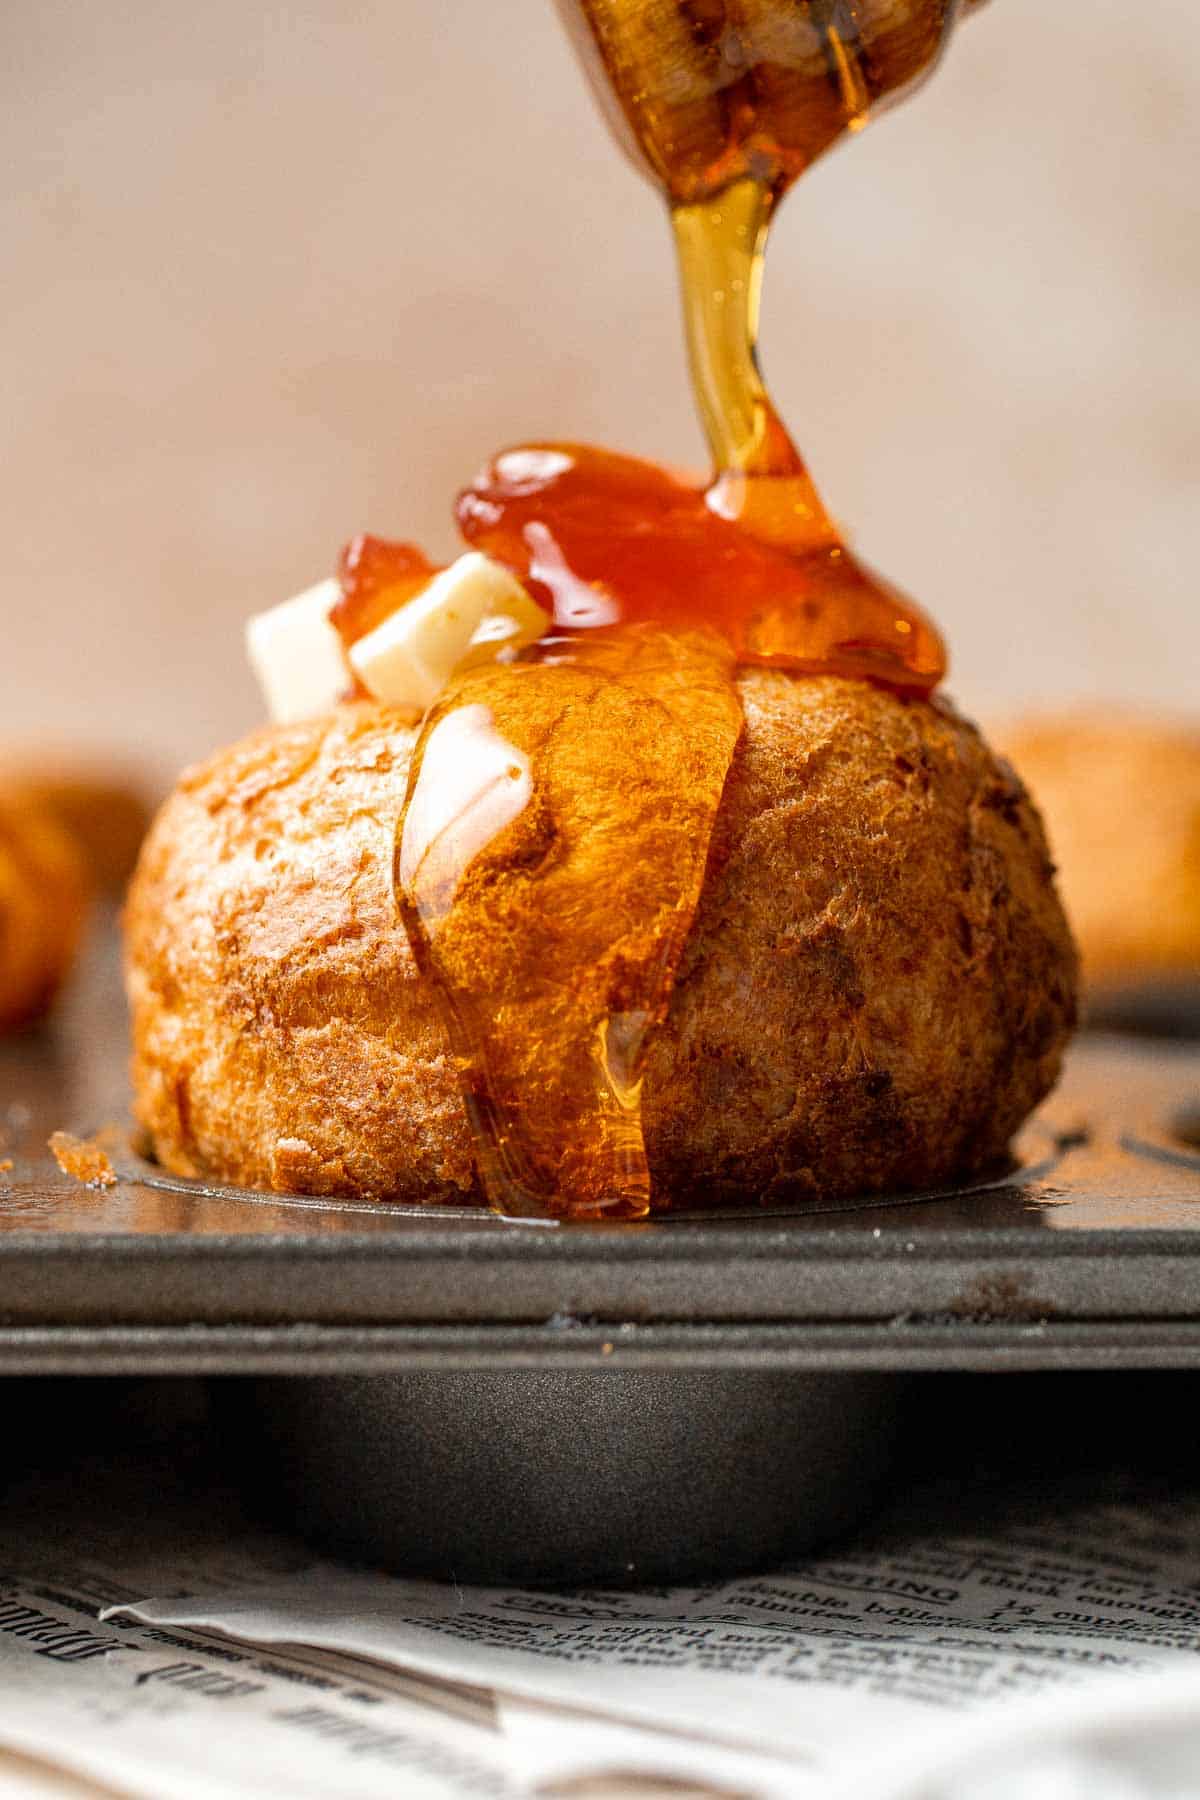
Recipe Tips and Tricks
- Use room-temperature dairy. The secret to great popovers is to get the batter to rise as quickly as possible. For best results, use room temperature ingredients and a very hot oven.
- Keep it simple. Although it's tempting to splurge on a special pan, it's not necessary! You can get wonderful popovers from a regular muffin pan.
- Skip the stand mixer. Unless you're making a larger batch of popovers, you can get a great rise by whisking the ingredients together in a bowl or using your trusty hand mixer. If you do use a stand mixer, use the whisk attachment.
Storing and Freezing Instructions
How to Store
Store leftover popovers in an airtight container at room temperature for a few days, but they never last that long.
How to Reheat
You can either microwave the leftover popover for about 30 seconds or brush it with a little melted butter and bake it in the oven at 350 degrees to warm it back up.
How to Freeze
If you want to make a few batches at once and freeze them for later, you can. Be sure to let the rolls cool completely first before tucking them away in a freezer-safe bag. Let them thaw before reheating.
FAQ
You'll often hear popovers called Yorkshire pudding in the UK. Although they don't seem anything like pudding to Americans, they're a must-have side dish to serve with Sunday roast or other special meals.
Popovers are traditionally served instead of a roll or biscuit and can be eaten at any meal of the day. For early meals like breakfast, you might serve them with your favorite butter and jam, but for dinner, you'll often serve them with roast beef, turkey, chicken, or ham. Their hollow center is perfect for soaking up gravy.
If your popovers are staying short and squat, there are likely a few things going on. First, rest the batter. If you overmix it, the gluten in the flour will become activated, which will keep it from growing nice and tall. You also need a nice, hot oven to get a good rise, and if your oven isn't fully preheated or you've opened the oven door to check on the popovers, they may collapse. Stick with well-rested, room-temperature batter, get the oven nice and hot, and keep the door closed!
More Bread Recipes
- 50 Best Bread Recipes
- Buttermilk Biscuits
- Pretzel Bites
- Garlic Cheddar Biscuits
- Skillet Dinner Rolls
- Cornmeal Cheddar Biscuits
Tried this recipe?
I'd love to hear what you think! Leave a comment and rating below to share your feedback. Your reviews help others discover this recipe and help me keep creating more free recipes for you. Snap a photo and tag me on social media @aheadofthyme too.

Gingerbread Cinnamon Rolls
There's really nothing better than warm cinnamon rolls, and these Gingerbread Cinnamon Rolls are no exception. The tender dough rolls around a rich gingerbread filling loaded with warm spices, and each one is frosted with a cream cheese frosting. They're a must-have on Christmas Day and would be a fantastic brunch option during the holiday season!
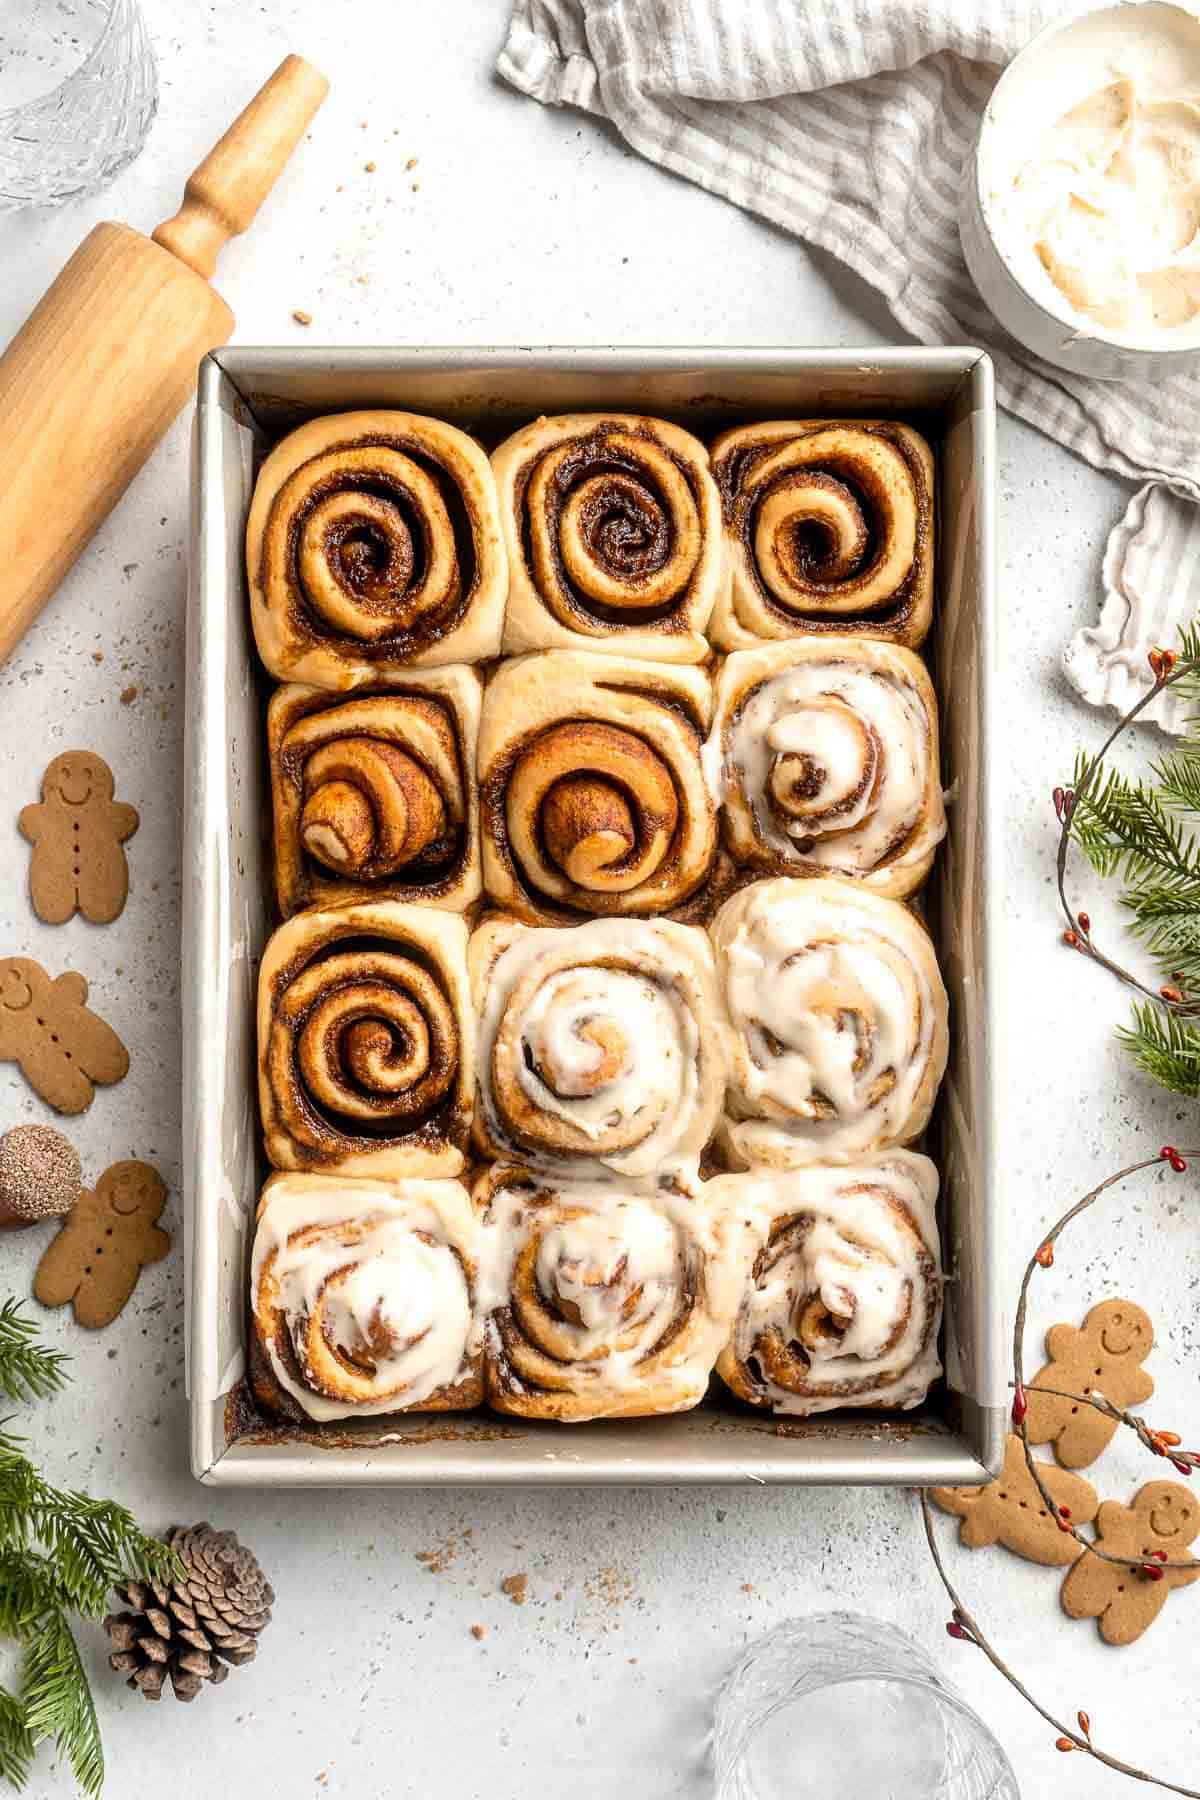
Gingerbread is the perfect filling for these seasonal cinnamon rolls! The filling is similar to that of classic cinnamon rolls, except you add molasses and warm holiday spices to give it that dark brown color and festive flavor. It takes a little time to properly prepare the dough, but it's so worth it. You'll love sinking your teeth into these gingerbread rolls at your holiday celebrations, and your guests will, too!
Why You'll Love These Gingerbread Cinnamon Rolls
- Real gingerbread flavor. The filling is made with real molasses and warm gingerbread spices to give you the flavor of gingerbread cookies in cinnamon roll form. So good!
- Perfect Christmas morning breakfast. Traditional cinnamon rolls are a great option for a special breakfast, and this holiday version takes the experience to the next level. The entire house will smell amazing. You'll definitely want to make this a new holiday tradition!
- Easy to make. Although it can be intimidating to work with yeast doughs, don't worry! This recipe has simple, step-by-step directions to guide you every step of the way. They're much easier than you'd think!
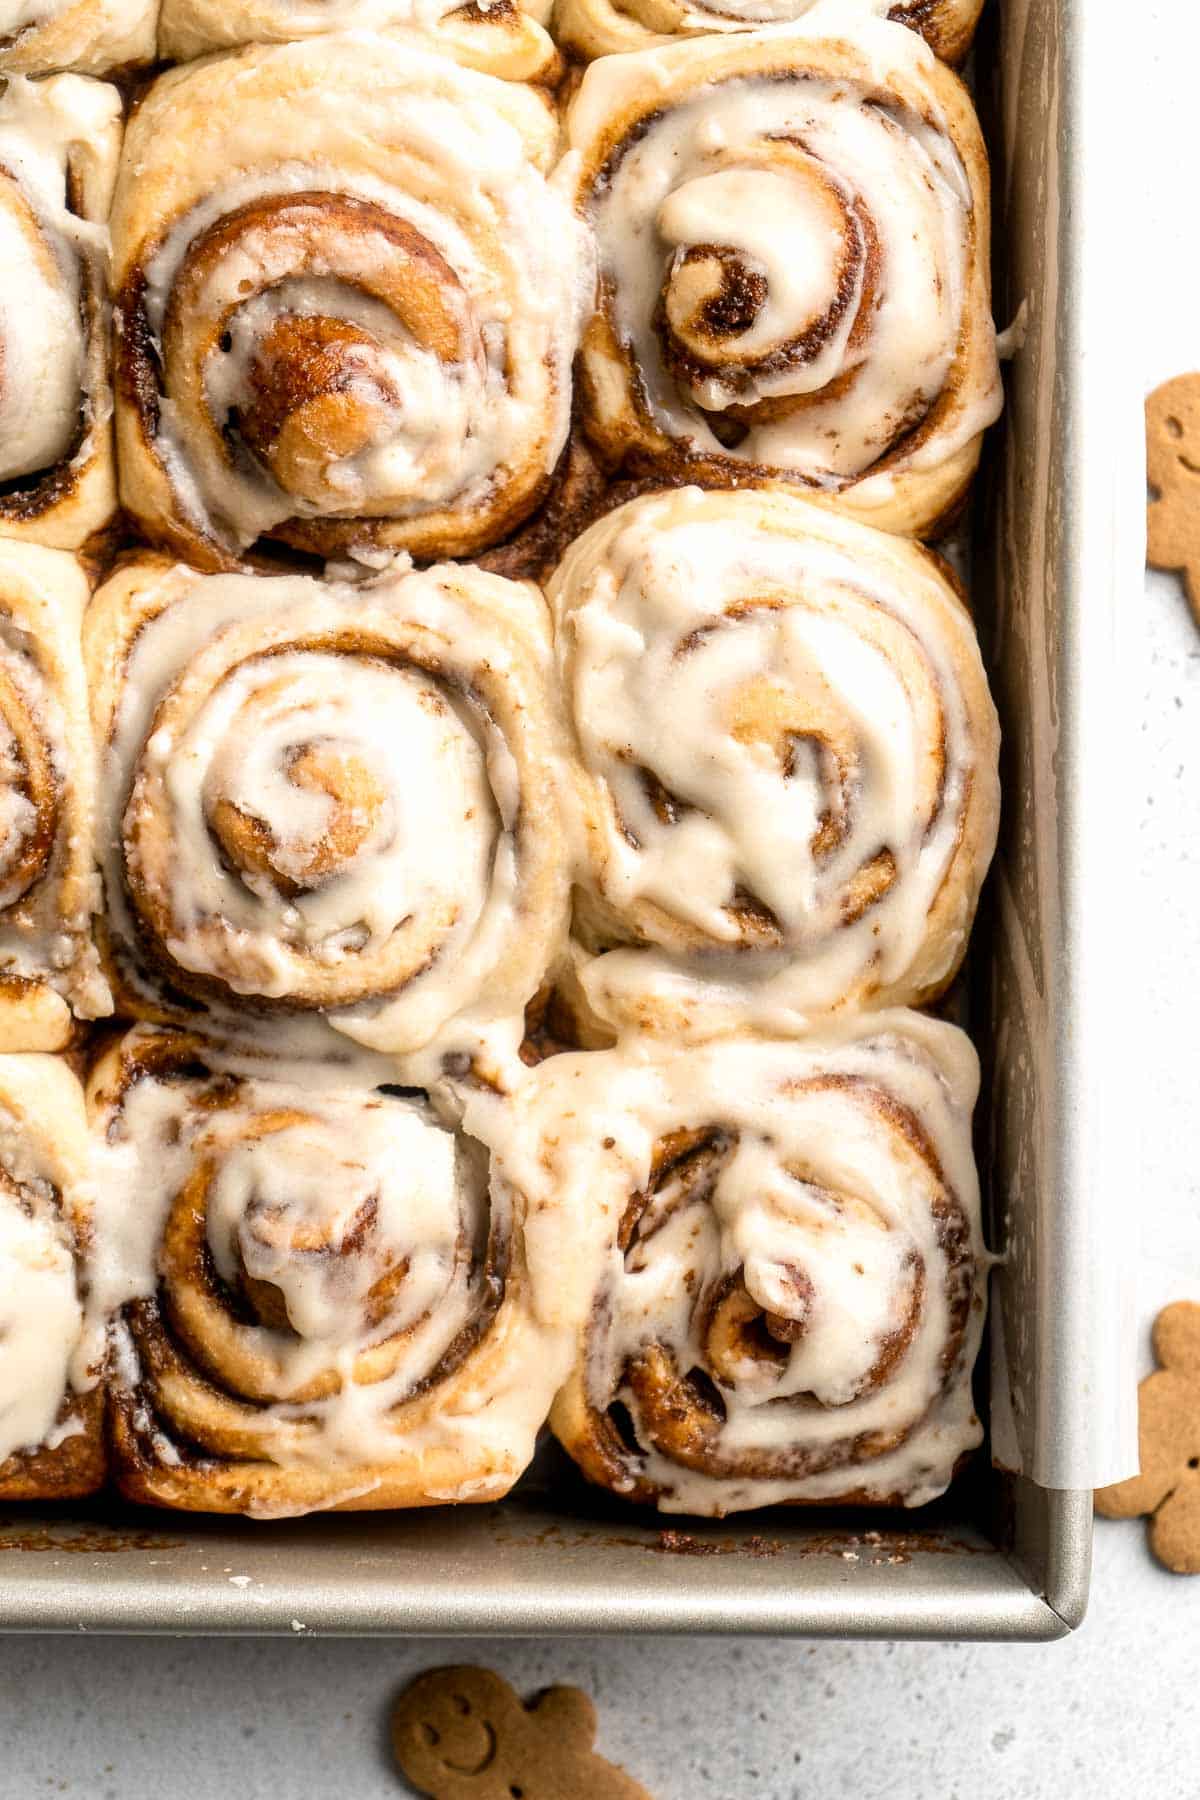
Ingredient Notes
To make these delicious gingerbread cinnamon rolls, you will need the following ingredients (full measurements in recipe card below):
For the dough:
- tangzhong - a homemade roux made with flour, milk, and water. It is used traditionally in Asian bread baking to make dough softer and prevents it from getting stale as quickly as usual. It is perfect for these gingerbread rolls!
- all-purpose flour - keep it simple with regular flour or try bread flour.
- milk - let your milk rest at room temperature before starting your cinnamon roll dough.
- brown sugar - this will add a mellow sweetness to the dough to let the flavorful filling shine.
- instant yeast - this yeast will begin rising right away.
- salt - this highlights flavor, so don't skip it!
- egg - egg will help hold the dough together and give it a rich, tender texture.
- butter - melt the butter before mixing into the dough.
- vegetable oil - for greasing the mixing bowl.
For the gingerbread filling:
- unsalted butter - softened butter will whip up perfectly.
- molasses - molasses will add a dark color and a deep sweetness. It's a must to get that classic gingerbread flavor.
- brown sugar - the rich flavor of brown sugar pairs well with the molasses and spices.
- spices - use a mixture of ground ginger, cinnamon, and nutmeg.
For cream cheese frosting:
- cream cheese - be sure to soften at room temperature first.
- butter
- confectioners' sugar - also known as powdered sugar, this is the perfect sweetener for this fluffy frosting.
- vanilla - adds a hint of flavor.
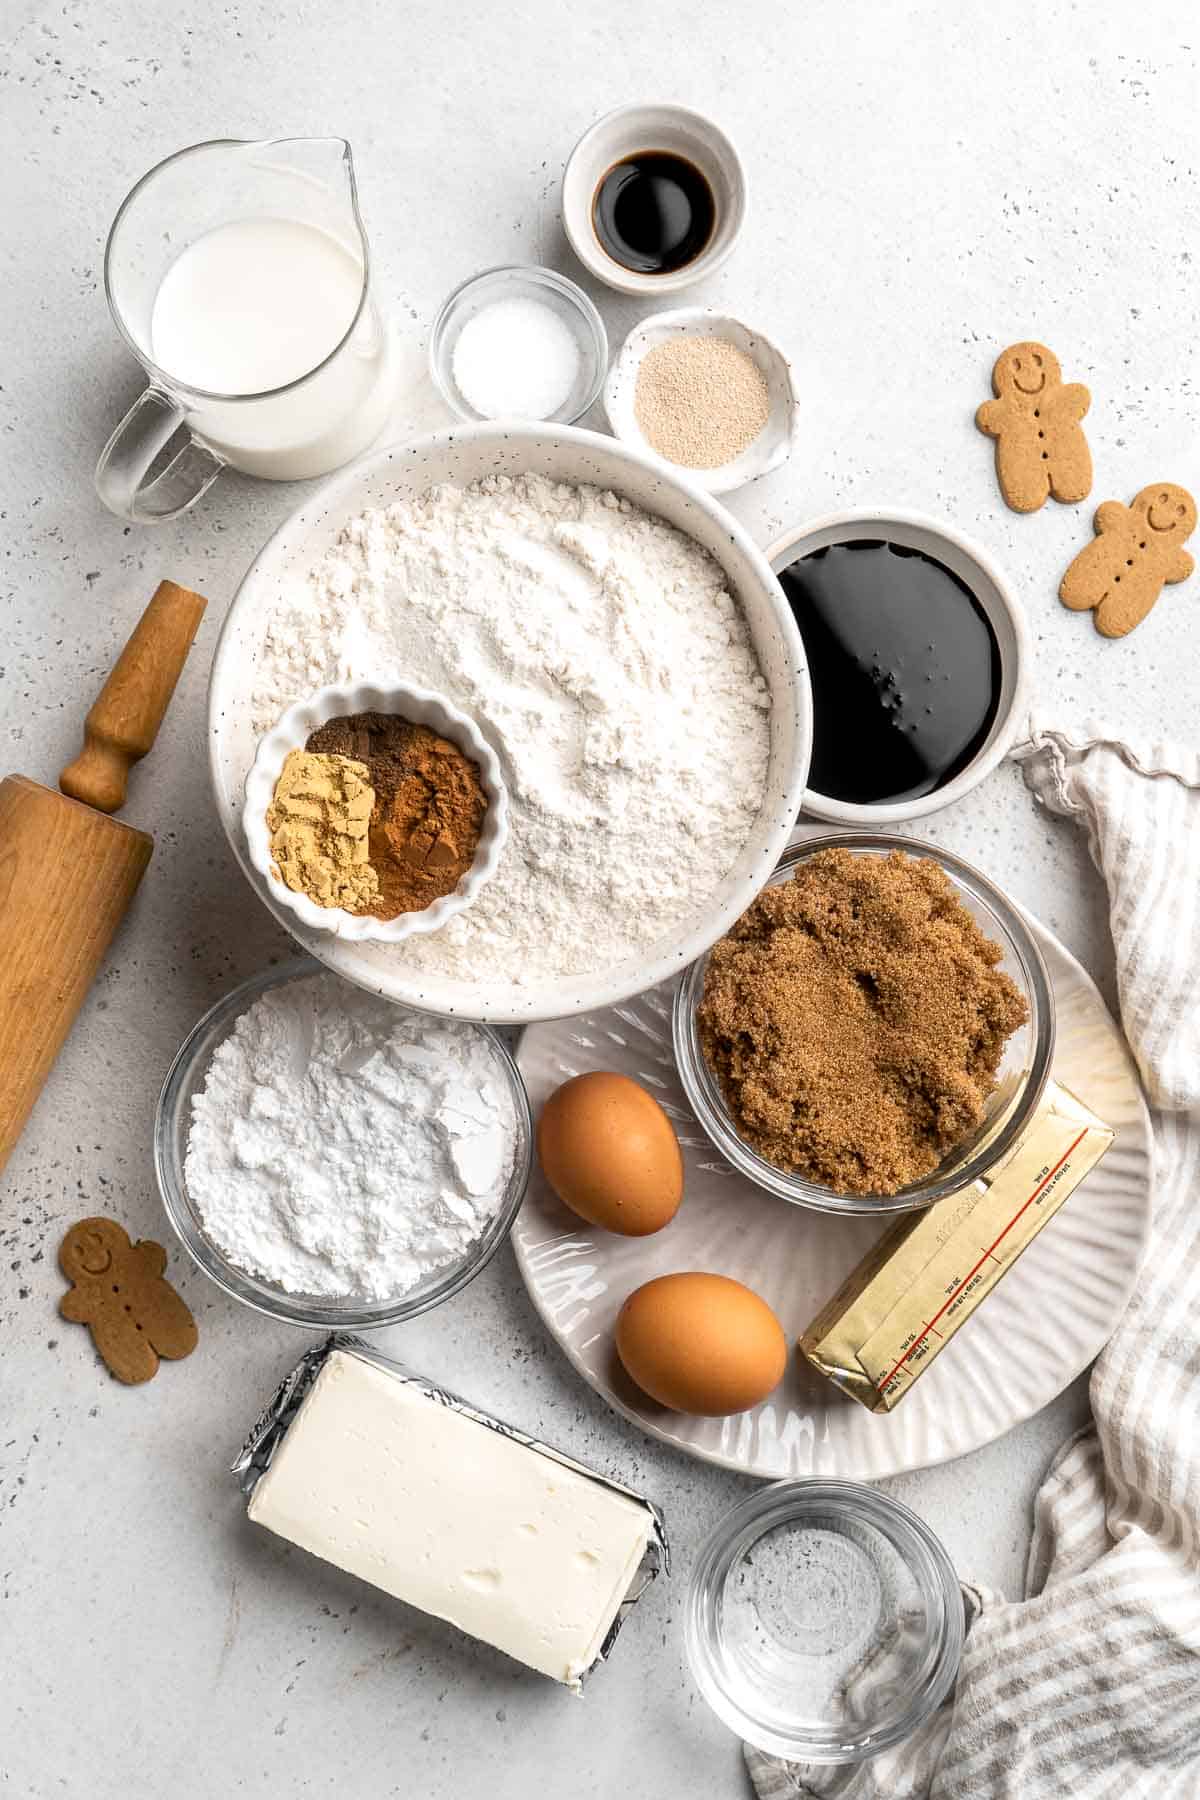
Baking Tools and Equipment
You will also need the following baking equipment:
- measuring cups and spoons or kitchen scale
- small, medium, and large mixing bowls
- spatula
- rolling pin
- bench scraper
- 9x13 casserole pan
- large Ziploc bag or plastic wrap
- aluminum foil
- stand mixer with dough hook attachment and paddle attachment or electric mixer (optional).
How to Make the Best Gingerbread Cinnamon Rolls
First, prepare the dough.
- Make the tangzhong. Add the flour, water, and milk to a small saucepan, and whisk until smooth. Turn the heat on to medium and continue whisking while it heats. Once the tangzhong has thickened (it should be thick enough that whisking leaves streaks), remove it from the heat to cool until just warm.
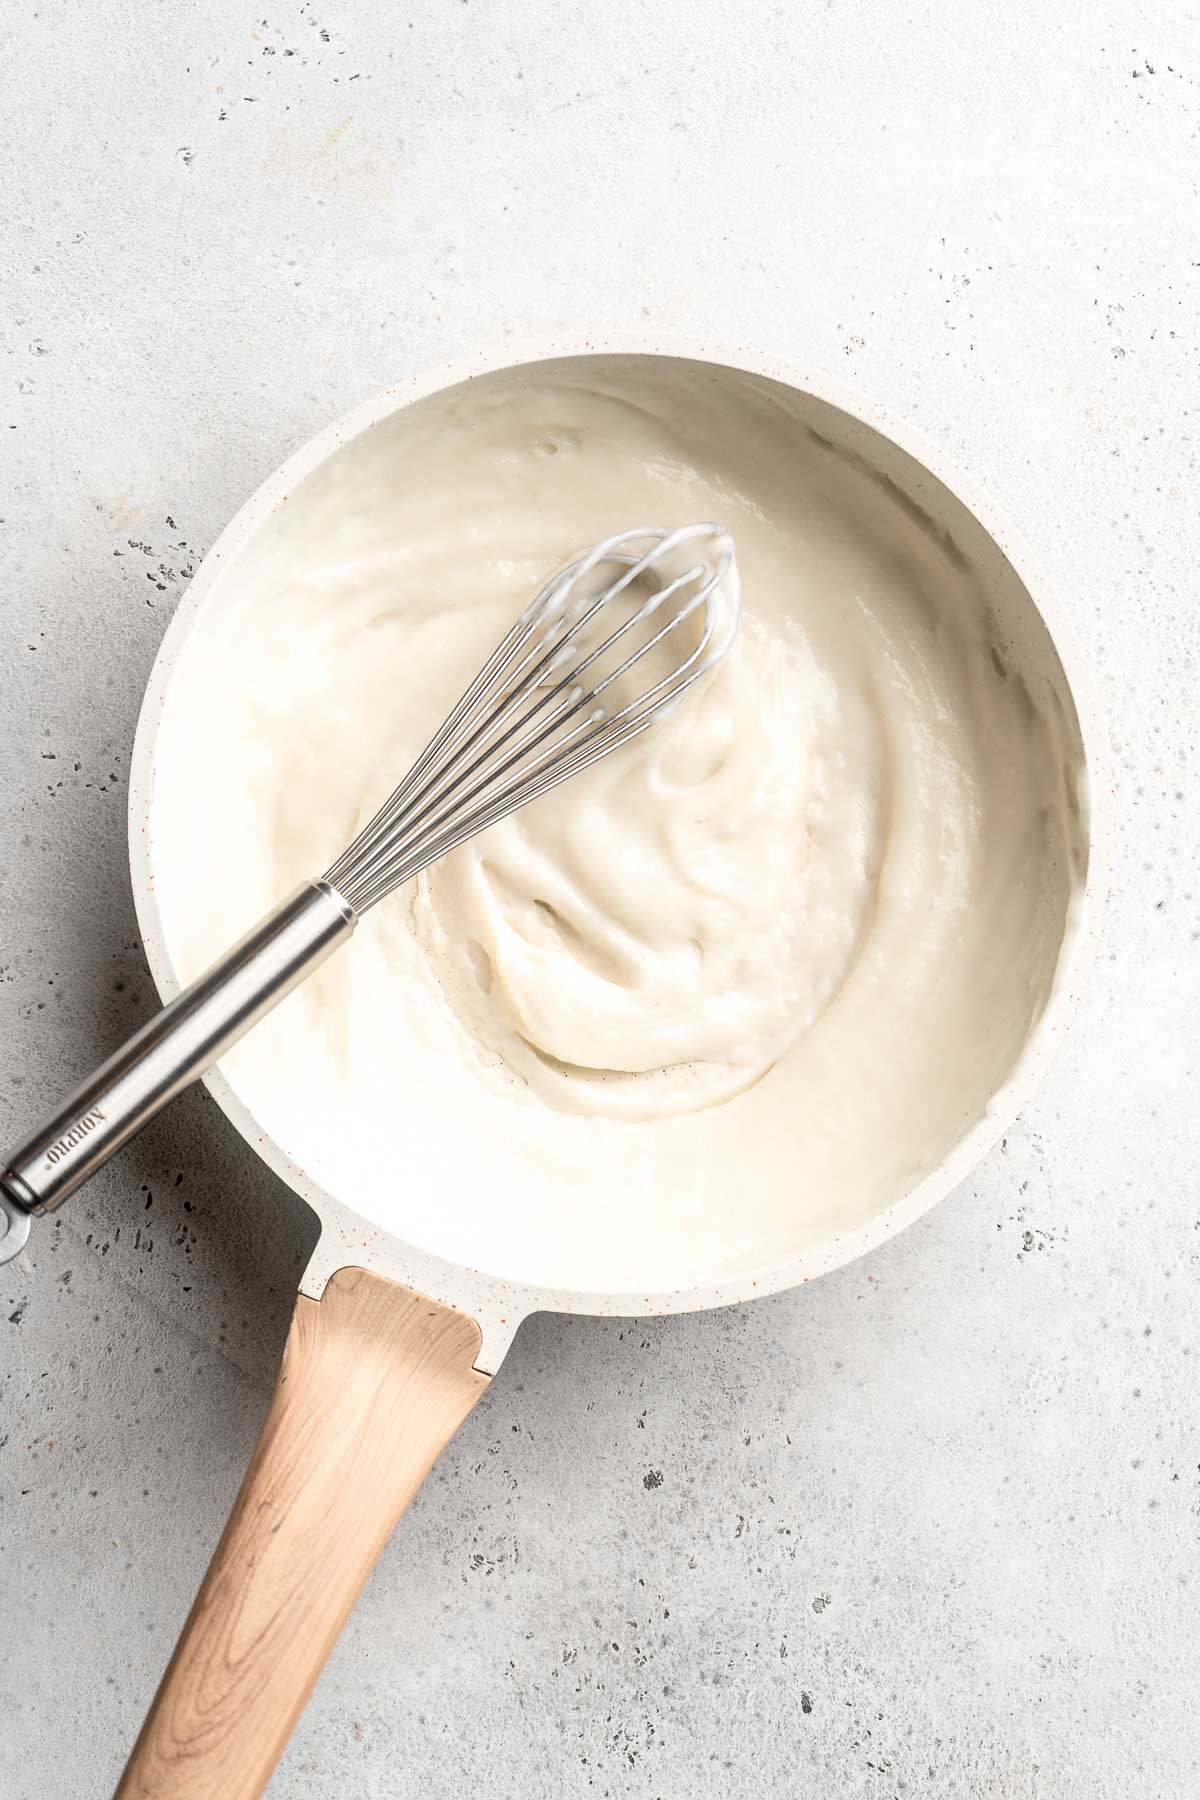
- Make dough. In the bowl of a stand mixer, add the flour, sugar, salt, yeast, milk, eggs, butter and tangzhong to a stand mixer.
- Knead. Knead with the hook attachment for 5-10 minutes. The dough should be smooth but will also be very soft and slightly sticky. You can also knead by hand by transferring the dough mixture onto a clean and dry surface and kneading for 5-10 minutes until it turns into a soft and smooth dough ball.
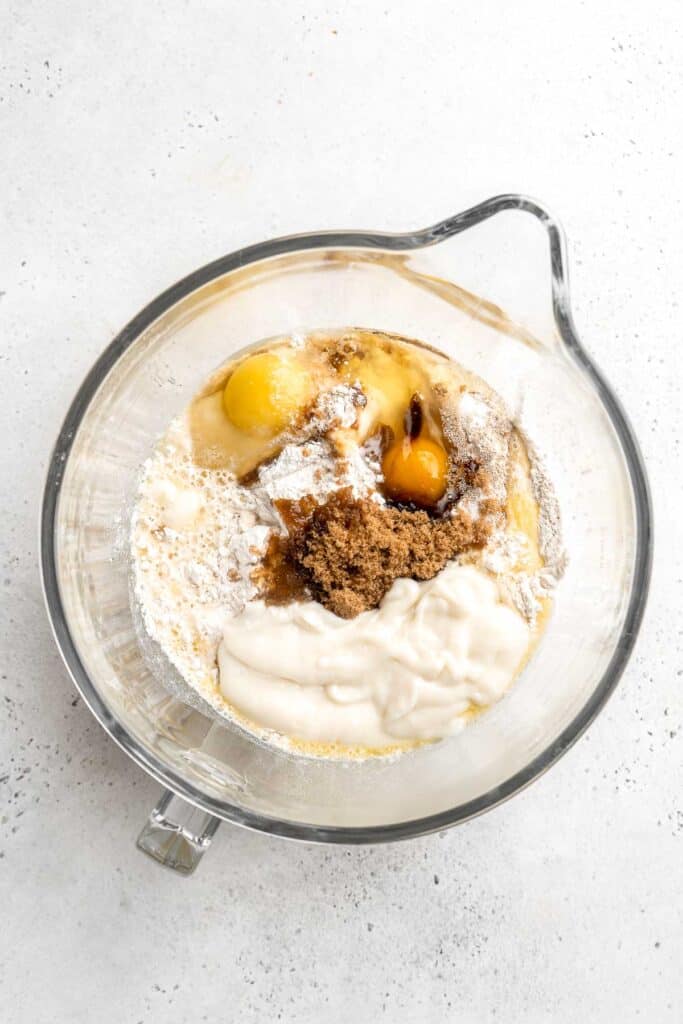
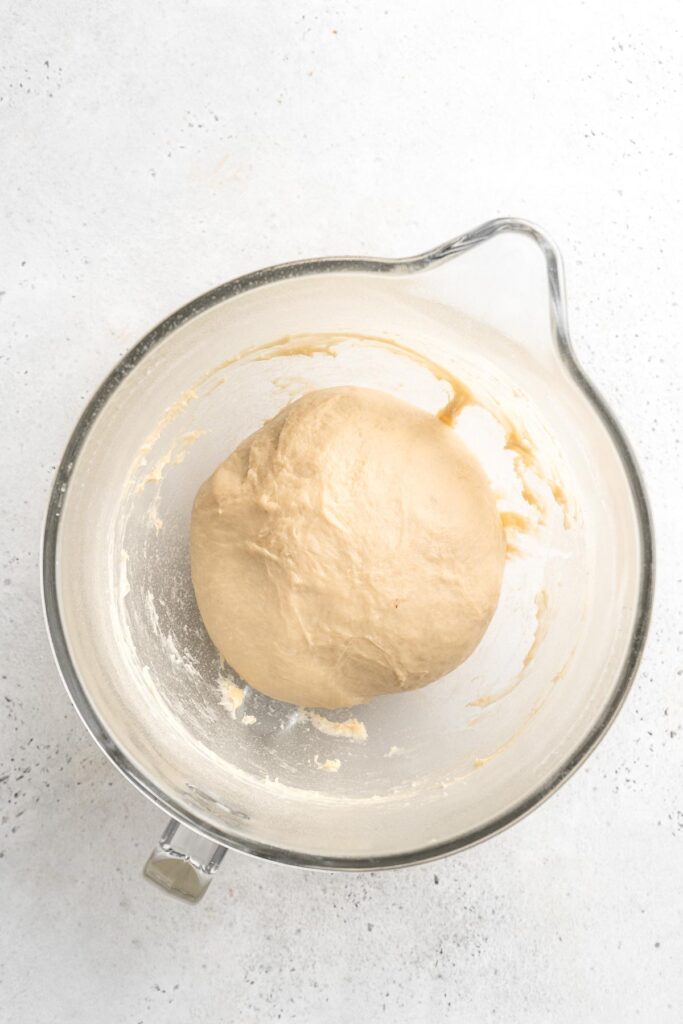
- Rise. Place the dough in an oiled mixing bowl, cover with plastic cling wrap, and place into a warm place to rise for 1 hour or until doubled in size (or overnight in the refrigerator).
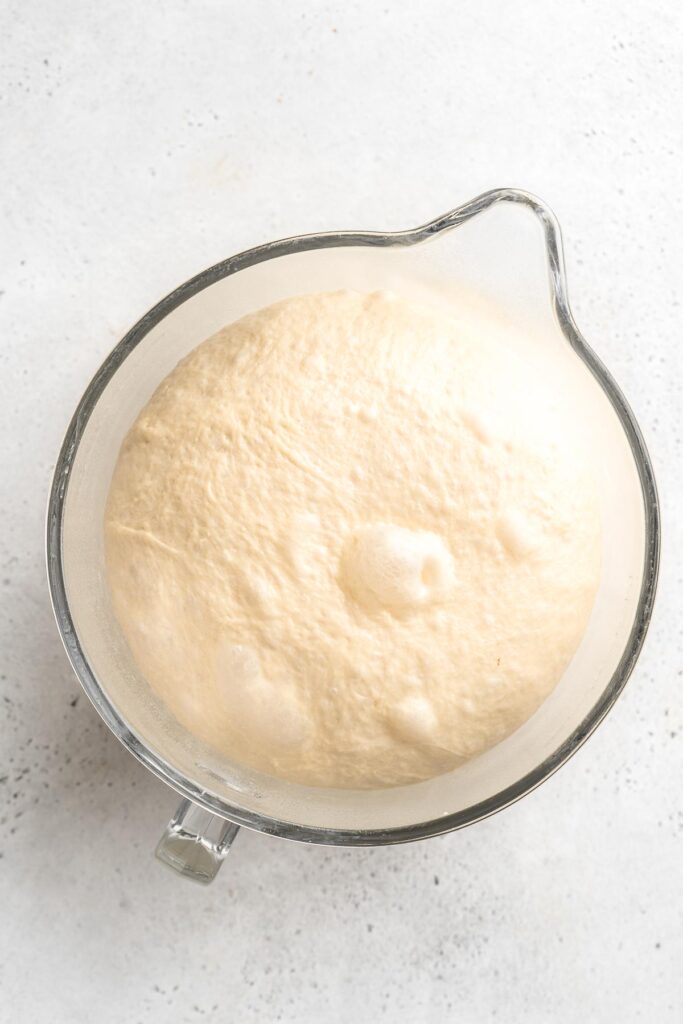
Next, make the gingerbread filling.
- In a small mixing bowl, mix together the softened butter and molasses until smooth and combined. Set aside.
- In a separate small mixing bowl, whisk together the brown sugar, cinnamon, ginger, and allspice until well-combined. Set aside, as well.
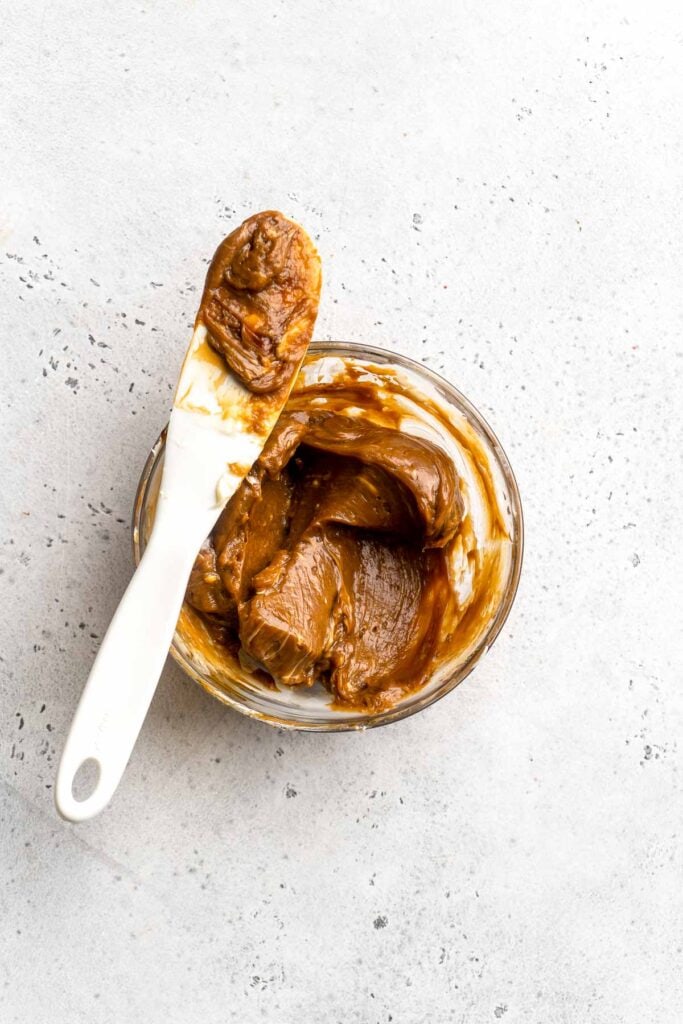
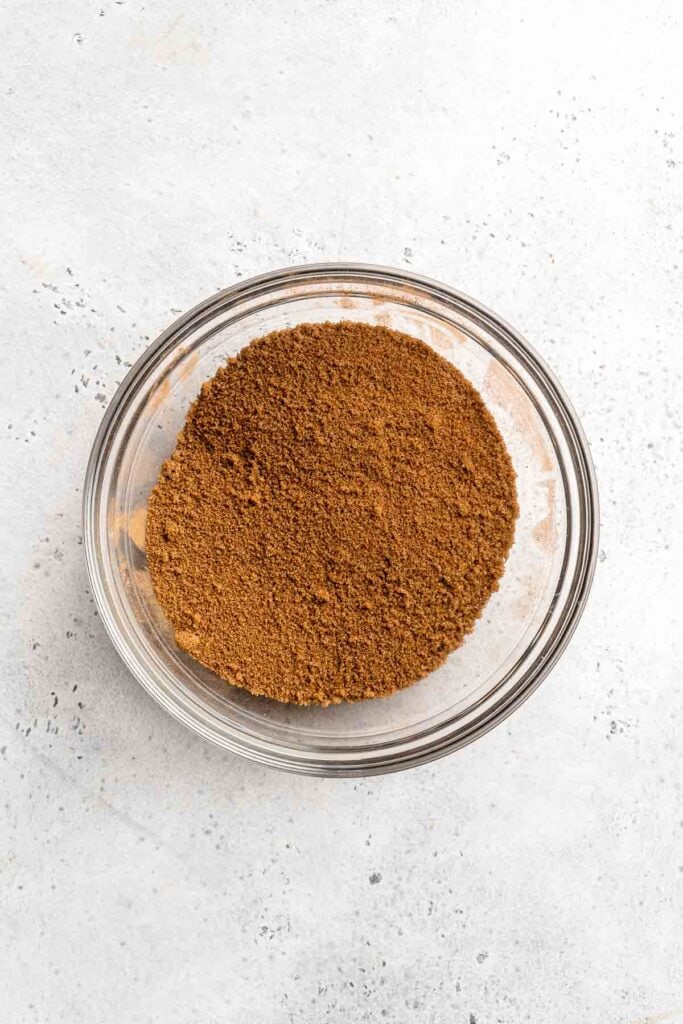
Now, assemble the gingerbread rolls.
- Deflate. After the dough is doubled, use your hand to punch it down.
- Roll out dough. Turn the dough out onto a lightly floured surface and use a rolling pin to roll it into a rectangle approximately 12x16-inches in size, with the long side facing you.
- Add filling. Gently spread the molasses-butter across the dough, leaving a ½-inch strip bare along the top. Then sprinkle the spiced brown sugar evenly over top of the butter.
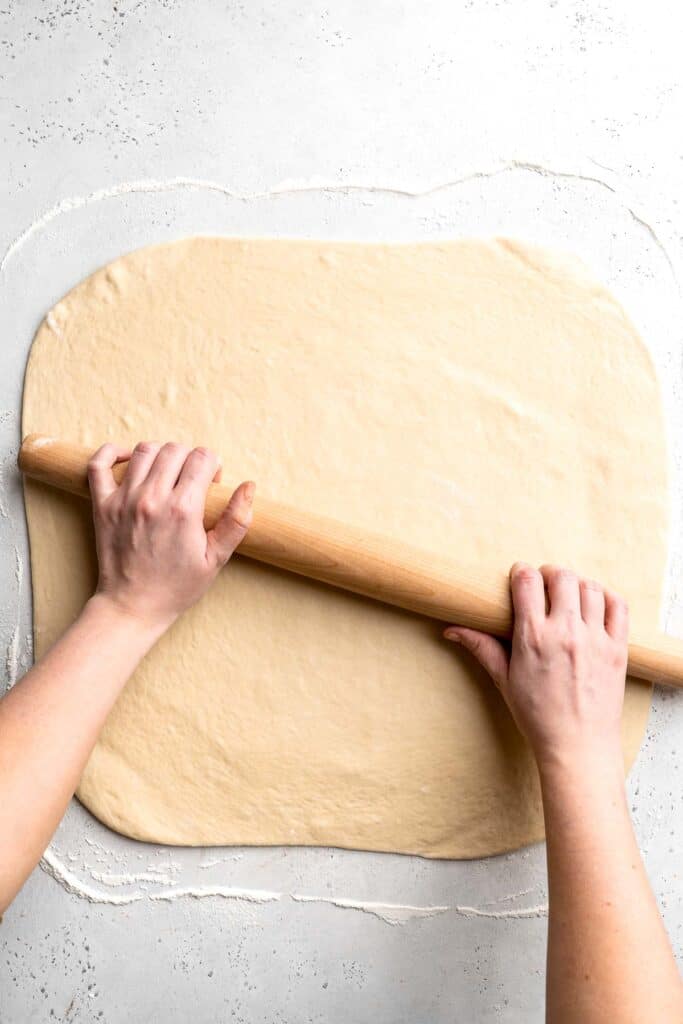
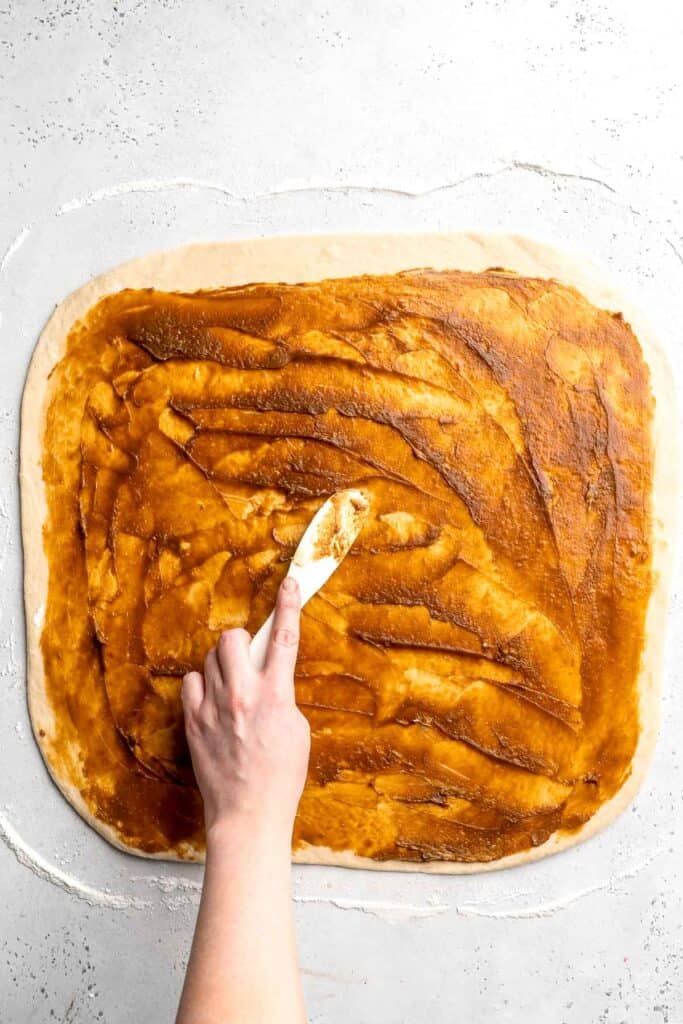
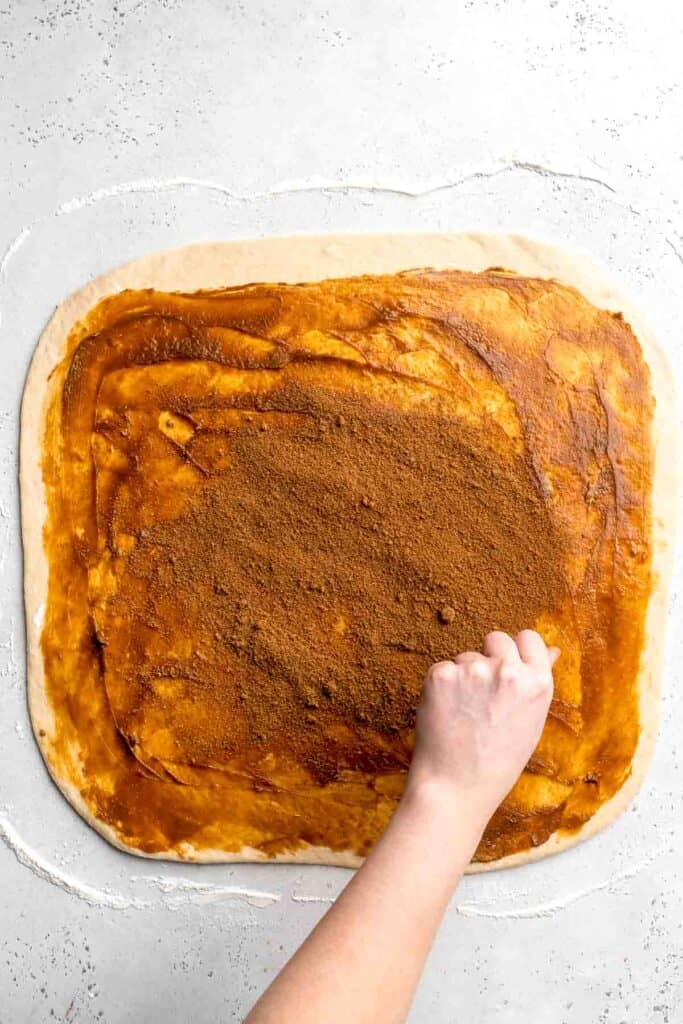
- Roll and slice. From the longside (side closest to you), roll the dough up into a tight log. Use string, floss, or a sharp serrated knife to slice it into 12 even rolls.
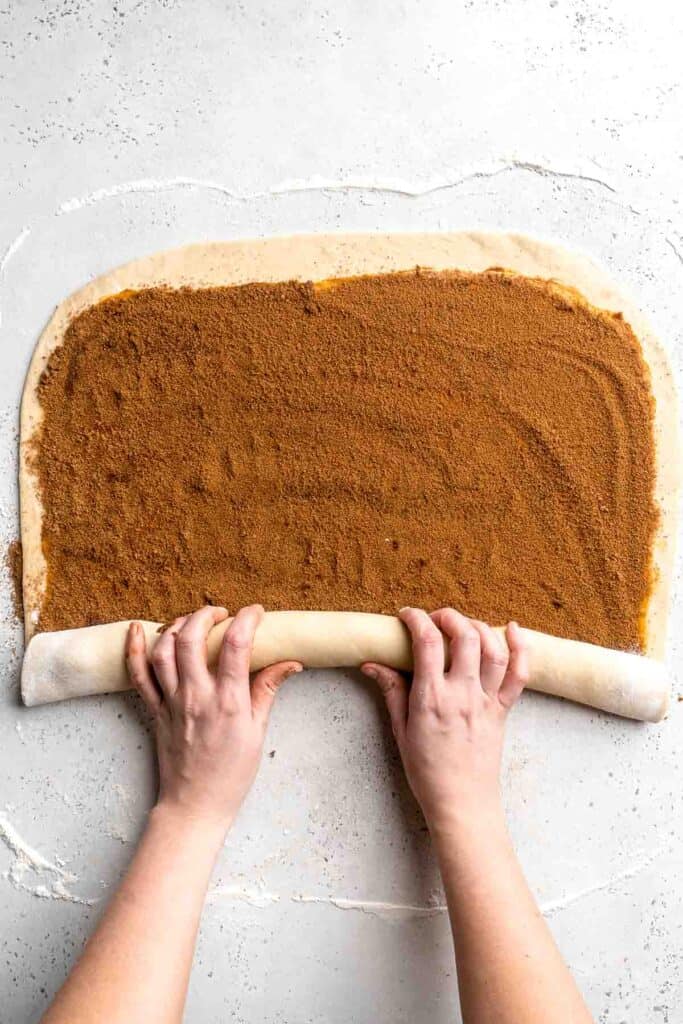
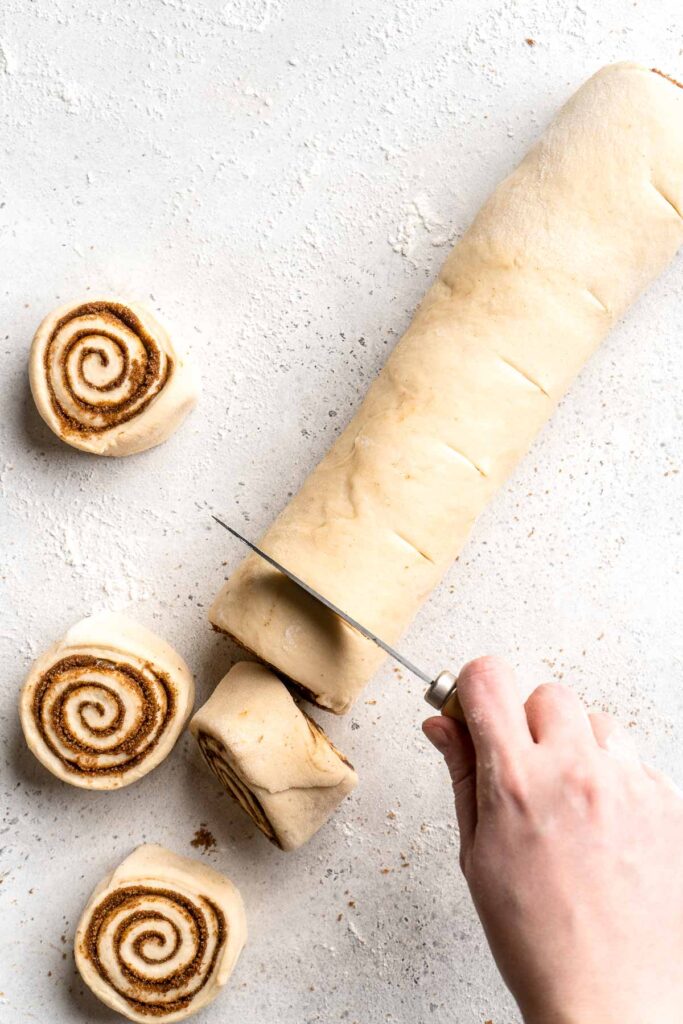
- Second rise. Spray a 9x13-inch baking pan with cooking spray and line with parchment paper. Place the rolls into the prepared pan, cover with plastic wrap, and place back into a warm place. Allow it to rise for about 20-30 more minutes, or until doubled in size.

Finally, bake the gingerbread rolls.
Remove the plastic cling wrap and place the risen rolls into the oven to bake in a 350F preheated oven for 20-25 minutes. Allow the rolls to cool slightly but note that you will want to frost the rolls while they're still warm.
Lastly, make the cream cheese frosting.
- Combine. Add all of the cream cheese frosting ingredients to a medium mixing bowl and beat together using a hand mixer on medium speed until smooth. (You can also mix together using a whisk and spatula).
- Spread. Spread the cream cheese frosting onto the rolls while they're still very warm. Serve immediately.
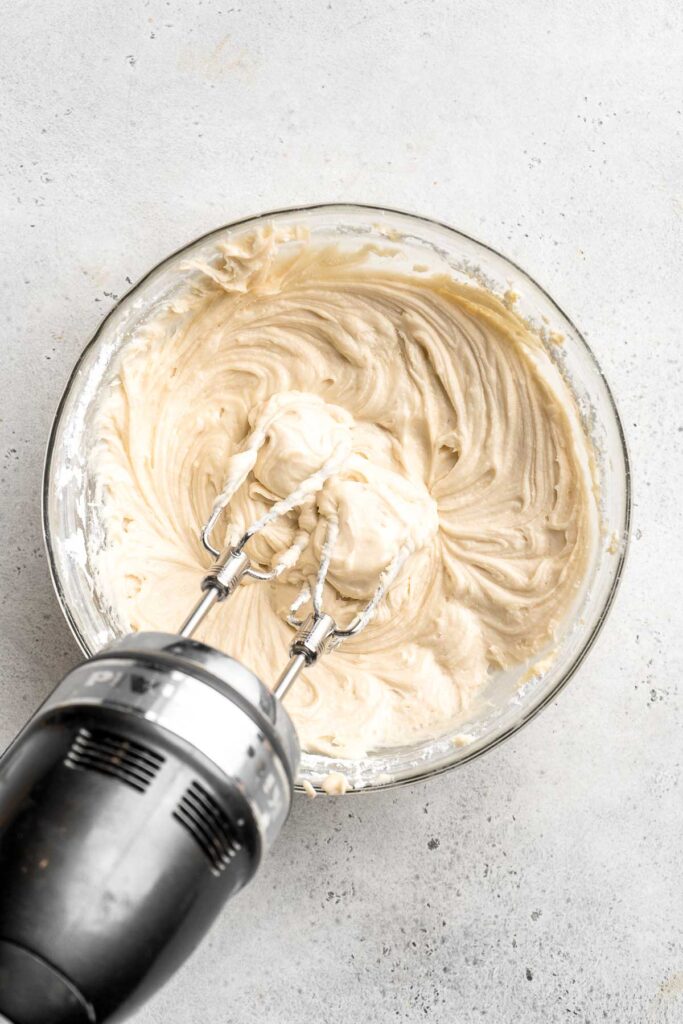
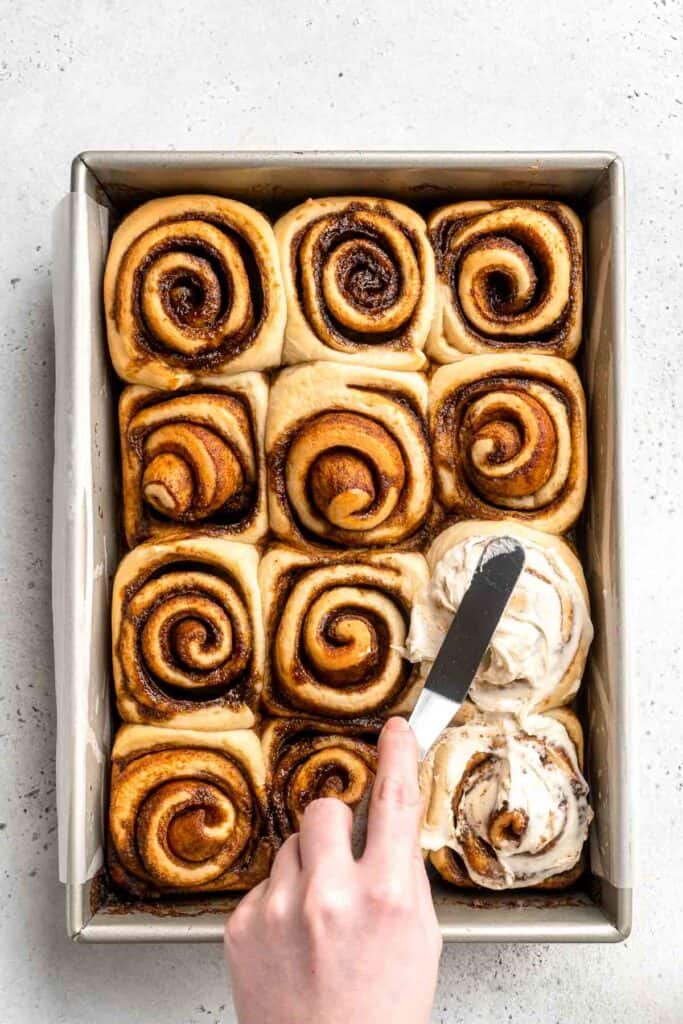
Recipe Variations
- Add nuts. Sprinkle some chopped nuts over the cinnamon roll dough before rolling.
- Adjust the size. If you want mini rolls, roll the soft dough into a much longer rectangle before rolling. Want huge rolls to share with your family? Roll the dough from the short side and cut into 3-4 large pieces. Let the rolls double before baking and adjust the baking time as needed.
- Add a hint of citrus. Give the cream cheese frosting a citrus twist by adding in lemon juice or orange juice.
How to Serve
These gingerbread cinnamon rolls are delicious served on their own for a snack, breakfast, or dessert. If including it as part of a holiday brunch spread, pair it with some of these classics breakfast recipes:
- Egg and Potato Breakfast Casserole
- Baked Gingerbread French Toast Casserole
- Breakfast Strata
- Gingerbread Pancakes
- Hash Browns
- Egg Muffins
Need more ideas? Try these 50 Best Christmas Breakfast and Brunch Recipes.
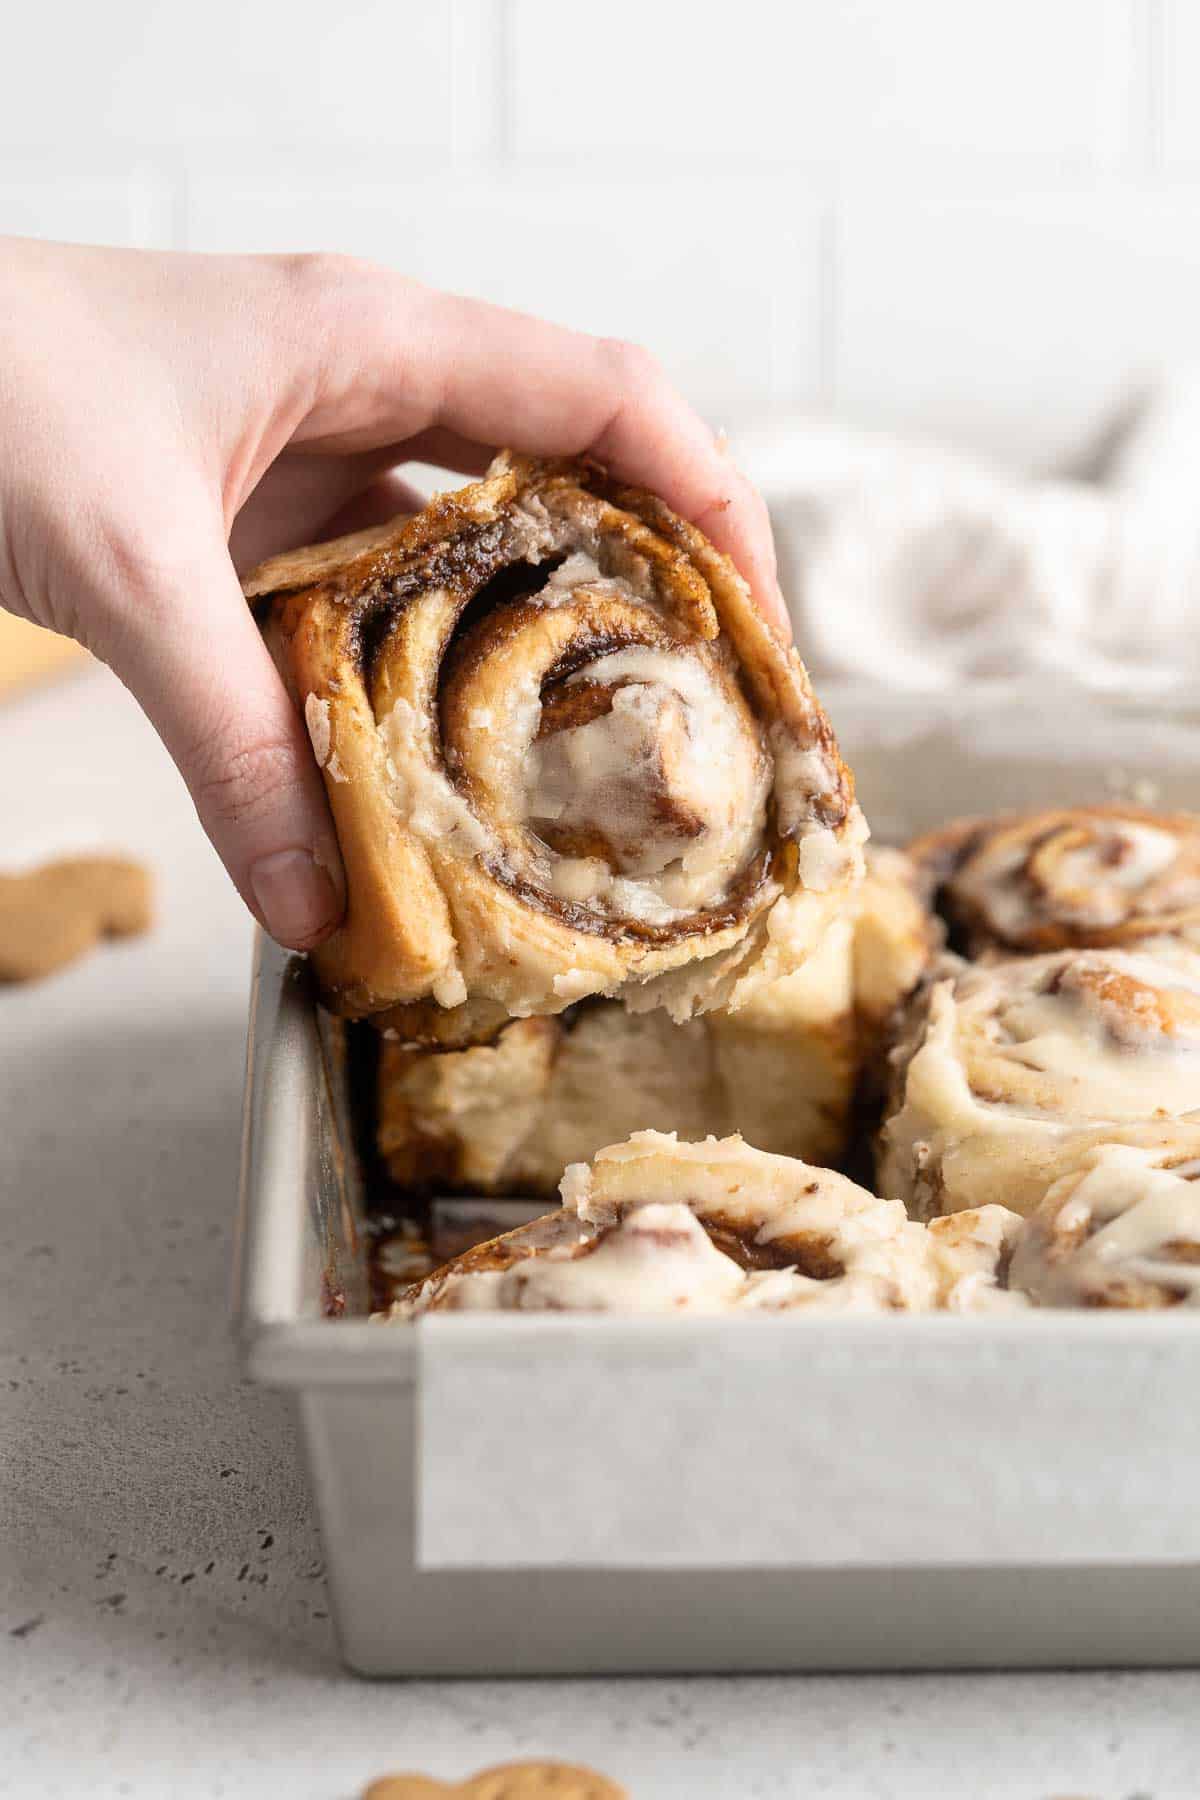
Recipe Tips and Tricks
- Use the right yeast. This gingerbread cinnamon roll recipe calls for instant yeast, which begins working immediately. Active dry yeast can be substituted, but it may take slightly longer to finish its rise. They're typically interchangeable.
- Adjust to your holiday schedule. If you're trying to make these rolls for Christmas morning, start the dough on Christmas Eve. After mixing the dough together, let it complete the first rise in the fridge overnight. The next morning, roll out the dough, add the filling, cut out the individual rolls, and let them complete the second rise before baking. You'll still have perfectly baked cinnamon rolls, but you'll get to sleep in a little longer!
- Keep it moist. If the dough dries out during the first or second rise, your cinnamon rolls will have a dry, wrinkled appearance. Make sure you cover the dough with plastic wrap, a plastic bag, or a damp kitchen towel at all times.
- Use the right knife. It'd be a shame to drag the wrong knife through the dough to cut out the rolls. You need to use a very sharp knife, ideally a long carving knife.
Storing and Freezing Instructions
How to Store
Store leftover cinnamon rolls in an airtight container in the fridge for 3-4 days.
How to Reheat
The easiest way to reheat a cinnamon roll is to microwave it for about 30 seconds. Be careful to microwave for too long as it can harden the dough and cause the cream cheese frosting to melt.
How to Freeze
You can easily freeze the baked cinnamon rolls for later, but store the frosting separately. After thawing and reheating the rolls, spoon on the icing right before serving.
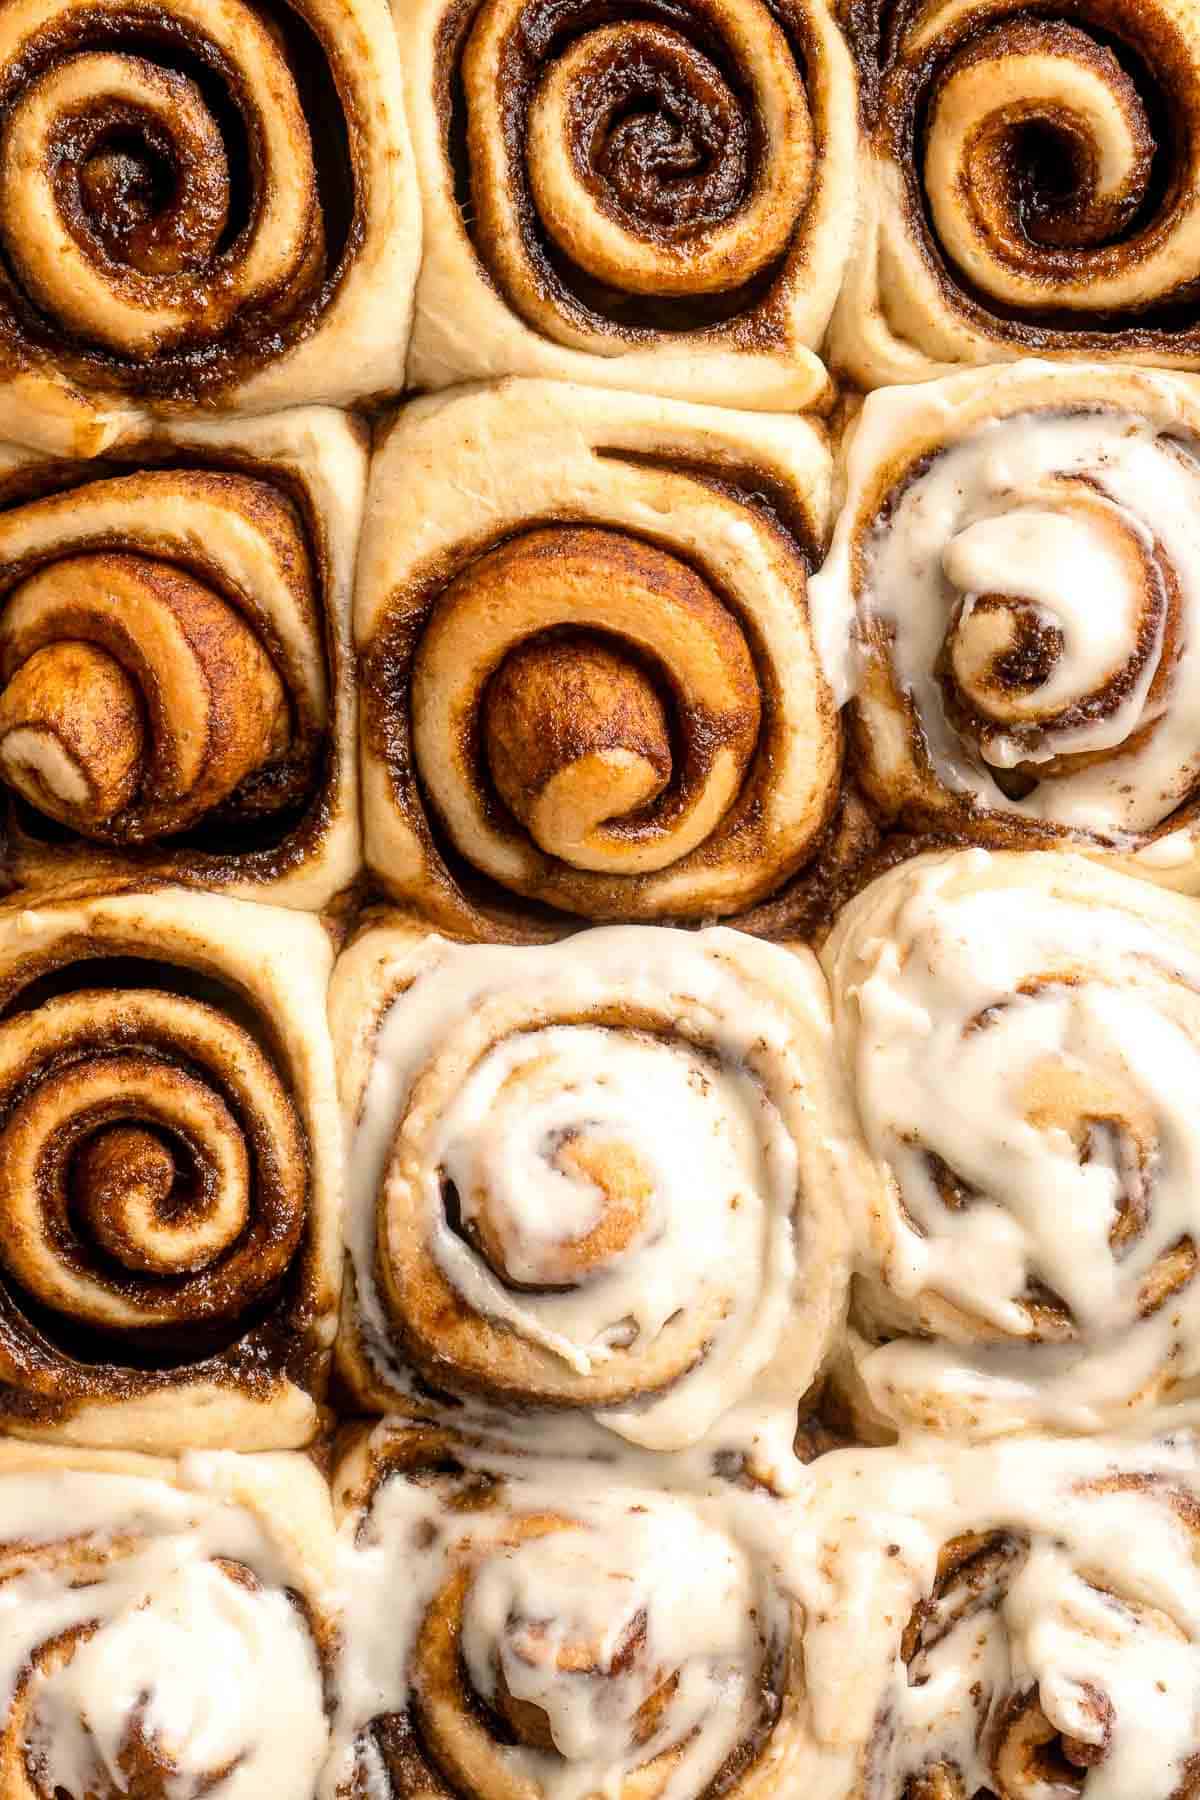
FAQ
Cinnamon rolls are very easy to adapt into gingerbread rolls! They already have a tender enriched dough filled with a warm, spiced brown sugar and butter mixture. To make gingerbread cinnamon rolls, tweak the filling by adding molasses and even more warm spices. This will meld into a warm, gingerbread-spiced mixture that tastes amazing. Take the holiday flavor to the next level by topping the warm rolls with a cream cheese frosting. They taste like the holidays in every bite!
Mot cinnamon roll recipes call for two rises. In the first rise, you're just waiting for the dough to double in size. This also relaxes the dough after kneading to make sure it isn't too firm or dense. Once the dough springs back when you poke it, it's ready to roll and fill. After you place the rolls into the prepared baking dish, let them rise a second time. Make sure the rolls are fully doubled before you bake them in the oven, but be careful not to overproof them, or they may collapse after baking.
Every part of the cinnamon roll can be adapted from the dough to the filling and the glaze. You can add chopped nuts, extracts, zest, and spices to any part of the recipe, although you want to be careful not to weigh down the dough. The filling is a great part to tweak. Add different spices, dried or fresh fruits, mini chocolate chips, and more. You can also adapt the glaze by adding maple syrup, bourbon, citrus zest, and so much more. Just make sure you start with a strong basic recipe before you change things to get the best results!
More Cinnamon Roll Recipes
- Skillet Cinnamon Rolls
- Sourdough Cinnamon Roll Twist Bread
- Lemon Sweet Rolls
- Pumpkin Cinnamon Rolls
- Blueberry Cinnamon Rolls
Tried this recipe?
I'd love to hear what you think! Leave a comment and rating below to share your feedback. Your reviews help others discover this recipe and help me keep creating more free recipes for you. Snap a photo and tag me on social media @aheadofthyme too.
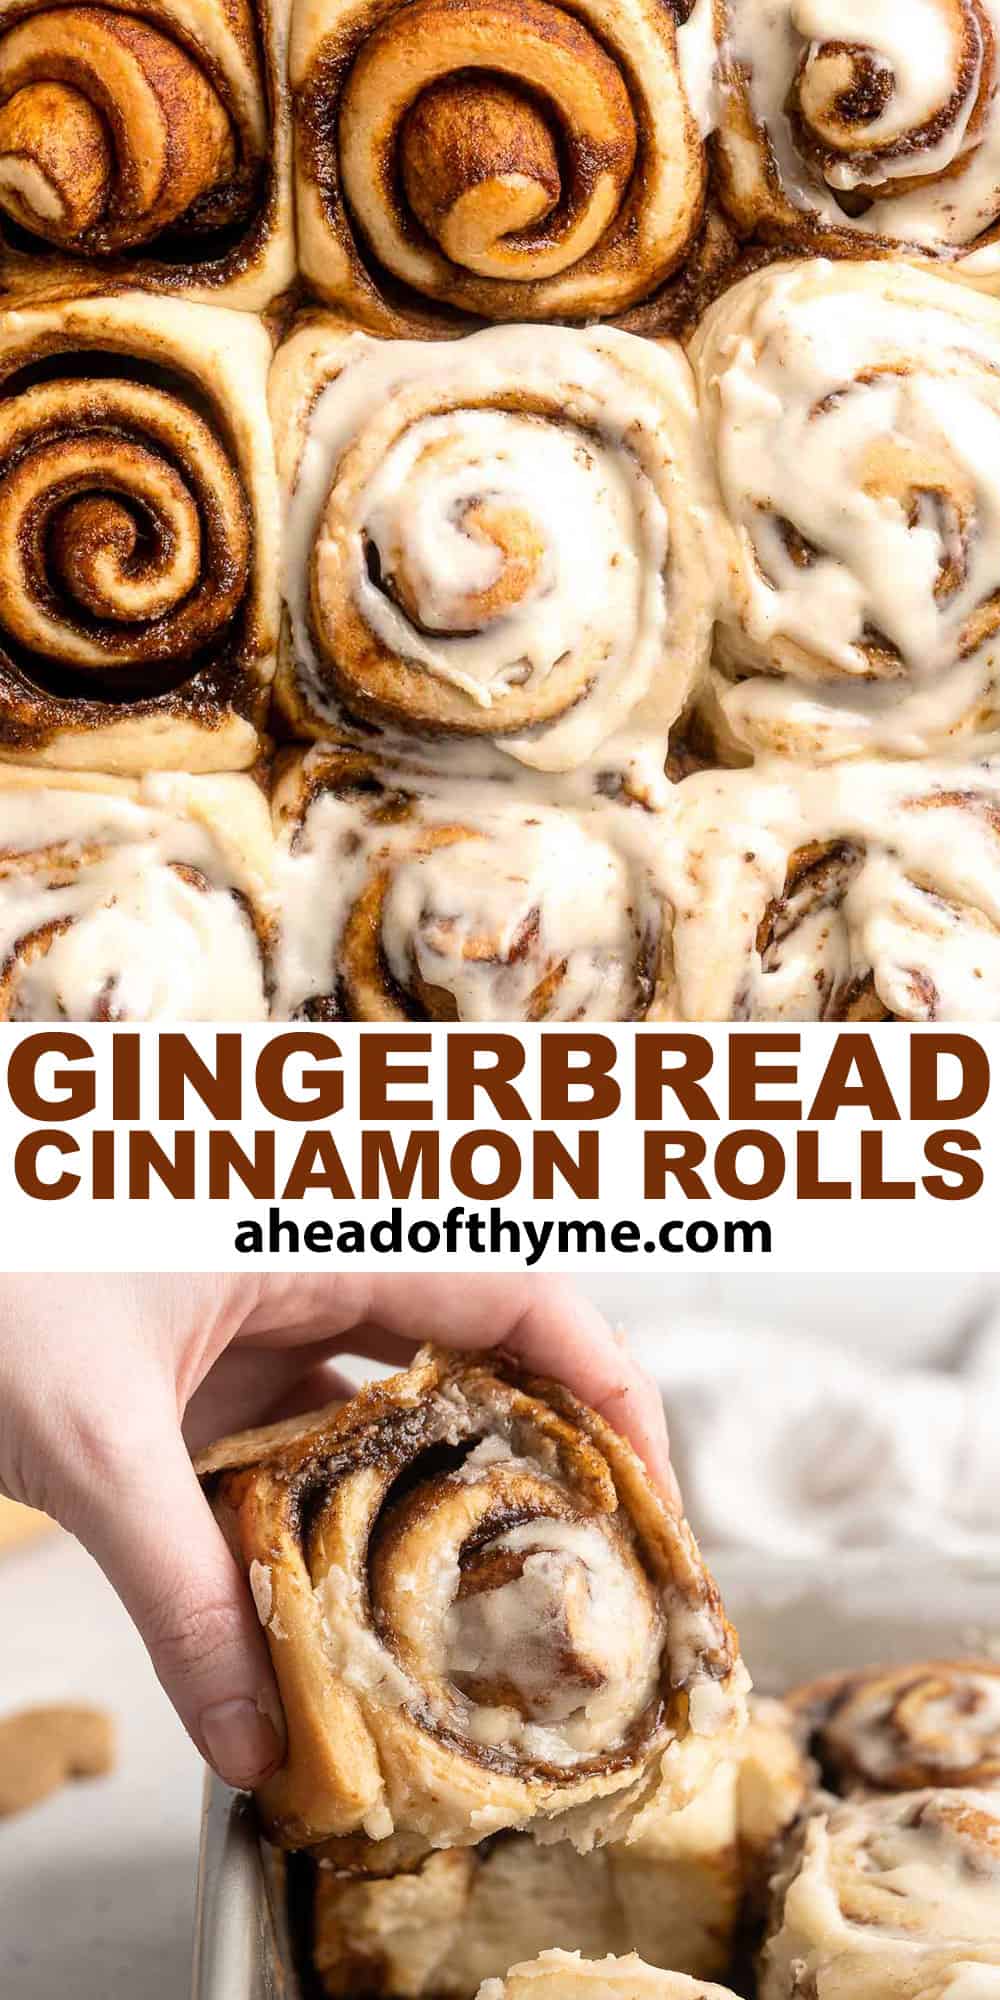
Pretzel Bites
These tender, chewy homemade Pretzel Bites taste professionally made but are a beginner-friendly recipe you can easily make in the comfort of your own home. Dip them in cheese sauce, mustard, or your favorite creamy dips as a delicious game day appetizer or special treat. Just be warned - you'll be on the hook for making them for every party!

There's something so perfect about soft pretzels in general, and these soft pretzel bites are the best. They're surprisingly easy to make, requiring just a handful of simple ingredients, and they're boiled in a baking soda bath for that authentic texture and flavor. Think of these homemade pretzels as a blank canvas. They're just as good with savory toppings as they are with sweet ones. They're such an easy appetizer and you even up with perfect soft pretzels every time!
Why You'll Love These Pretzel Bites
- Great texture and flavor. Making pretzel dough isn't hard, but many recipes rush you through the process. You need to give the dough plenty of time to rise and puff up, and you need to boil them just right. Your efforts will be rewarded with the most perfectly chewy homemade soft pretzel bites that taste absolutely amazing!
- Perfect party food. We love to serve these easy pretzel bites as a fun appetizer at casual parties. They're seriously good with a beer cheese dip or even fondue! They also make a nice snack to serve with a cold beer or just because.
- Easy to customize. Toss these little pretzel bites in coarse sea salt for a classic flavor or try bagel seasoning, your favorite spice blend, or shredded Parmesan cheese and Italian herbs. Every combination tastes delicious with these hot, chewy dough bites!

Ingredient Notes
To make these delicious Pretzel Bites, you will need the following ingredients (full measurements in recipe card below):
- active dry yeast - this instant yeast has a rapid rise, so you can bake pretzel bites quickly.
- water
- brown sugar - the sugar helps feed the yeast and gives these pretzels a little sweetness.
- all-purpose flour - although this is a yeasted dough, you can still get a deliciously chewy texture with regular flour.
- salt - this is key for highlighting the flavors in the pretzel dough.
- butter - add melted butter to the dough for a tender, fluffy texture.
- egg - brush egg wash on top of each piece of dough before baking.
- salt flakes - sprinkle with coarse salt for that classic pretzel flavor.
- water bath - you will also need water and baking soda for the water bath. The baking soda will give the pretzels that classic brown color and a nice crust.
You will also need measuring cups and spoons, a large mixing bowl, silicone spatula, stand mixer with dough hook (optional), plastic wrap, bench scraper, baking sheet, and a wire cooling rack.
How to Make the Best Pretzel Bites
First, prepare the dough.
- Activate yeast. In a large mixing bowl, combine yeast, water, and sugar, and stir to dissolve. Let the yeast mixture rest for 5 minutes until it turns foamy.
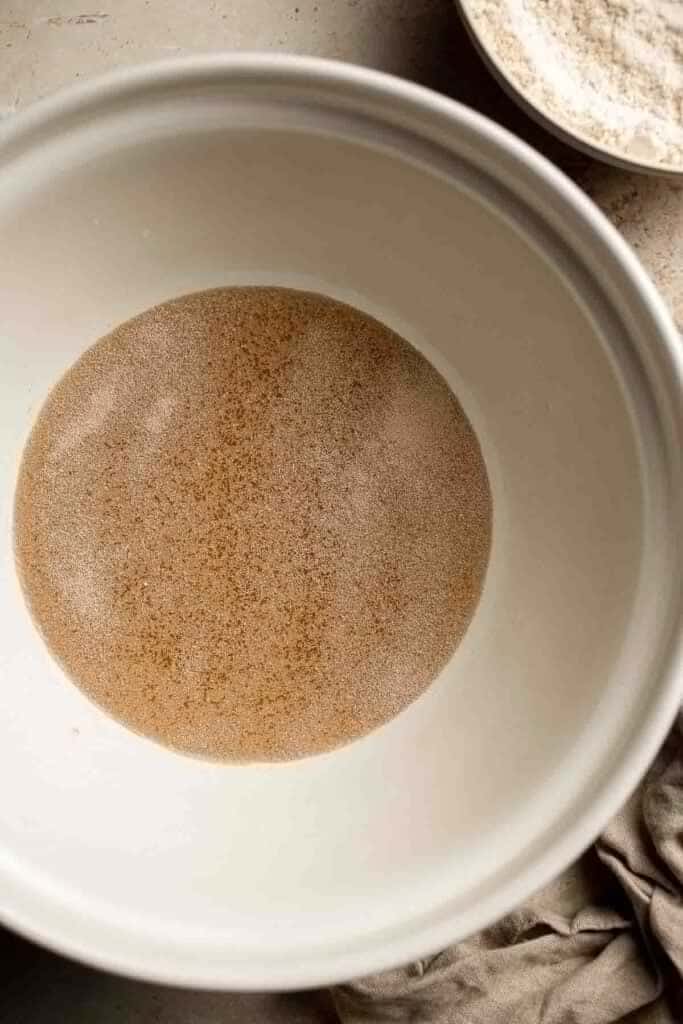
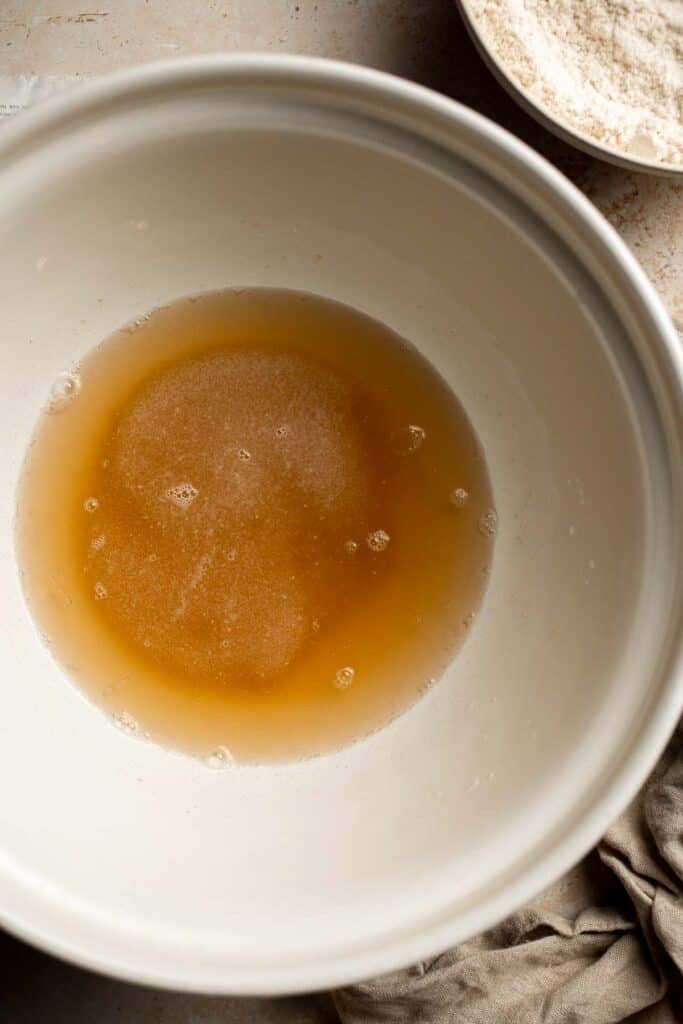
- Make dough. Add flour, salt, and melted butter. Use a silicone spatula to stir well to combine until it forms a shaggy dough and no dry flour is visible in the bowl. Make sure to scrape down the sides of the bowl with the spatula.
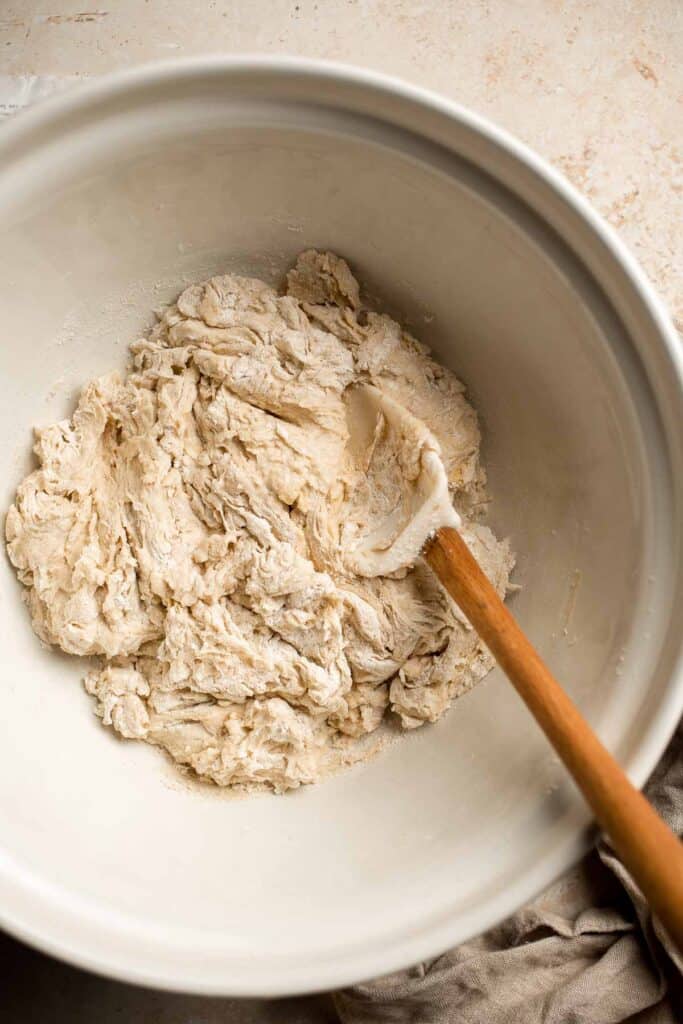
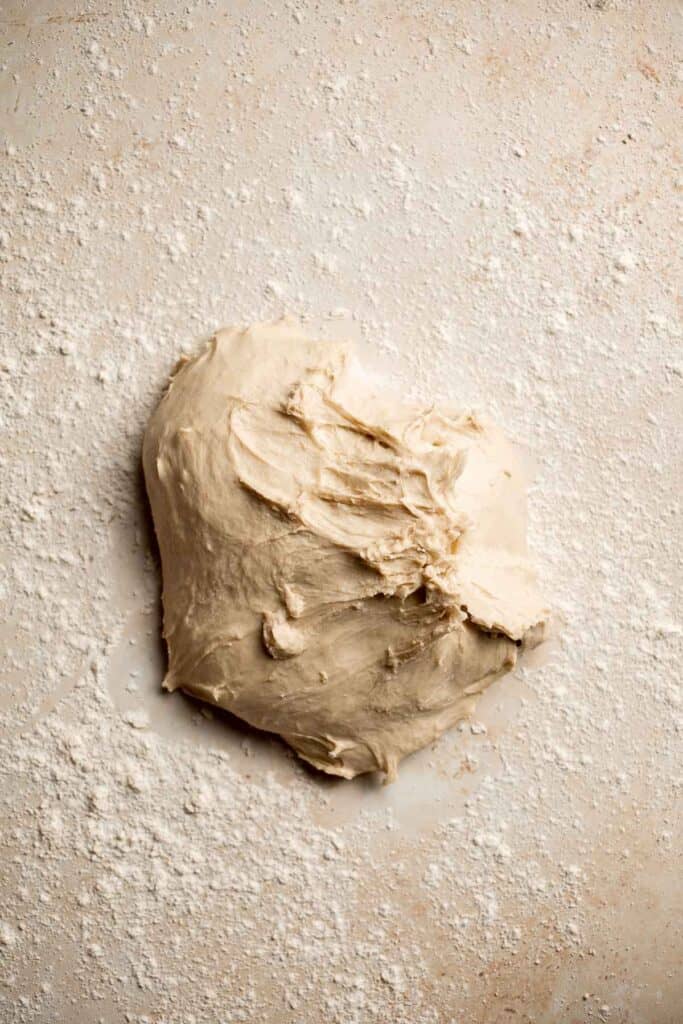
- Knead. Knead the dough on a clean surface for 5 to 7 minutes until the surface of the dough is smooth. You can also knead the dough in a stand mixer with the dough hook attached on medium speed for 3-5 minutes.
Tips for Kneading Dough
- How to knead dough: Knead the dough by pushing it down and outward using the palms of your hands. Fold the dough in half toward you and press down. Repeat this motion by pushing the dough down and outward, and then folding over towards you. This helps build up gluten strength in dough that is responsible for making the bread fluffy.
- How to test if dough is well-kneaded: A well-kneaded dough is smooth and can hold its shape. You can test the dough by giving it a firm poke with your finger. The indentation should bounce right back. If it doesn't bounce back and stays like a dimple, keep kneading for a few more minutes.
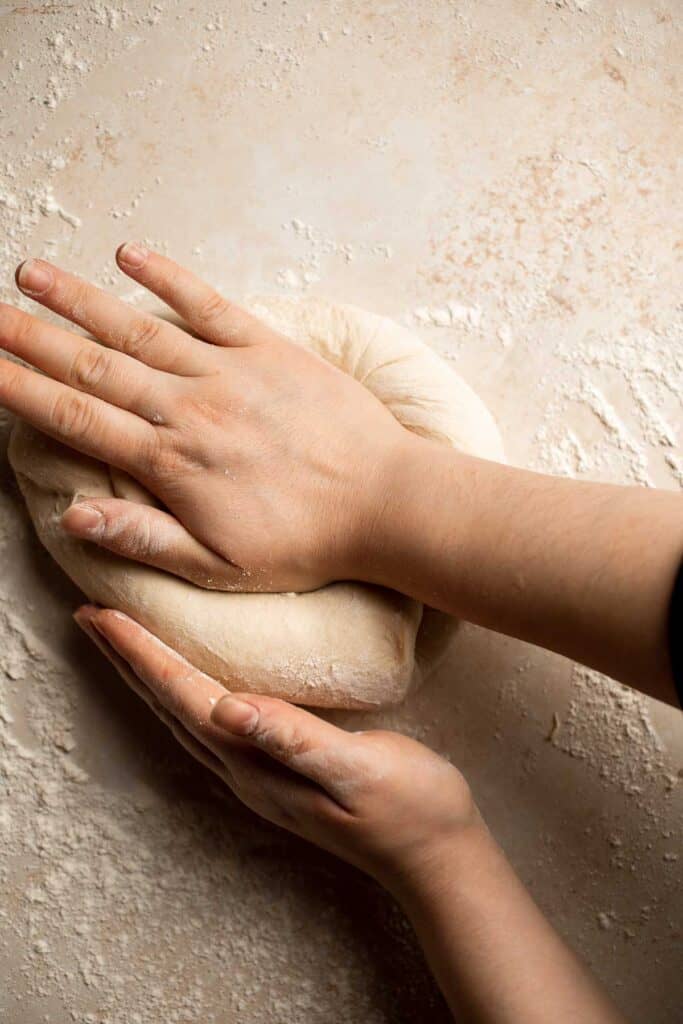
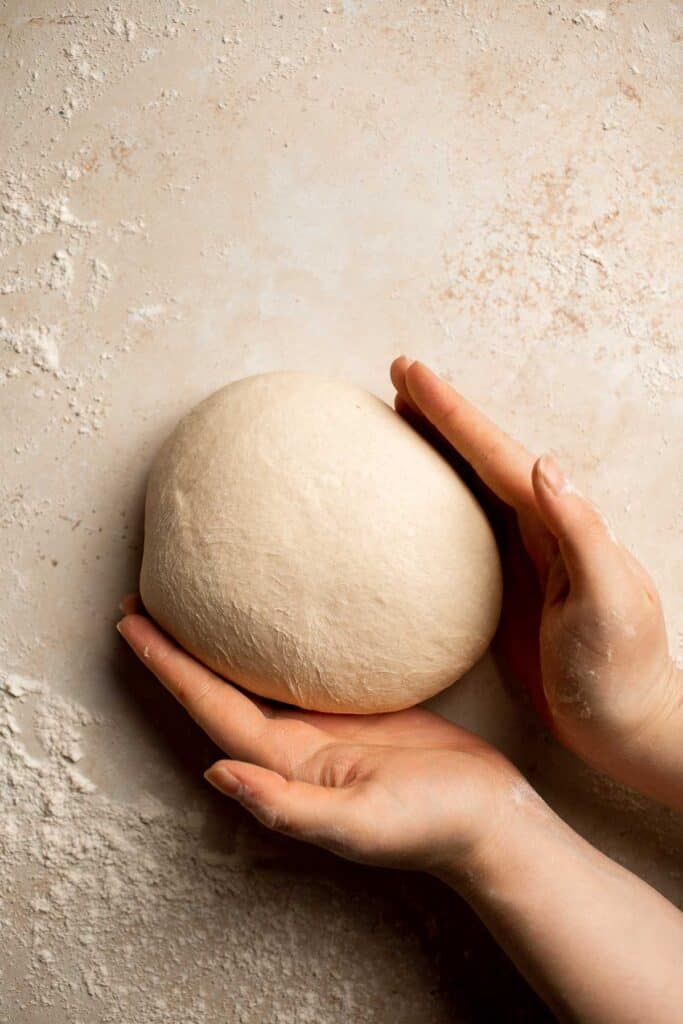
- Rest. Transfer the dough back into the bowl and cover with plastic cling wrap. Let it rest for up to 1 hour at room temperature until the dough doubles in size. Tip: Lightly brush some oil over the dough ball to prevent it from losing moisture.

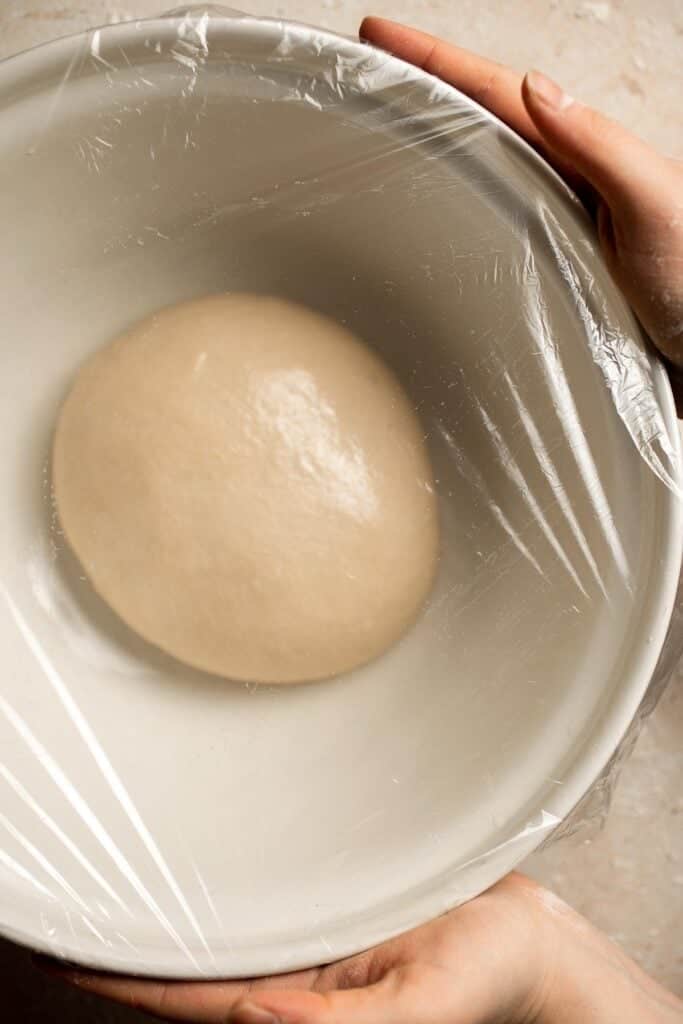
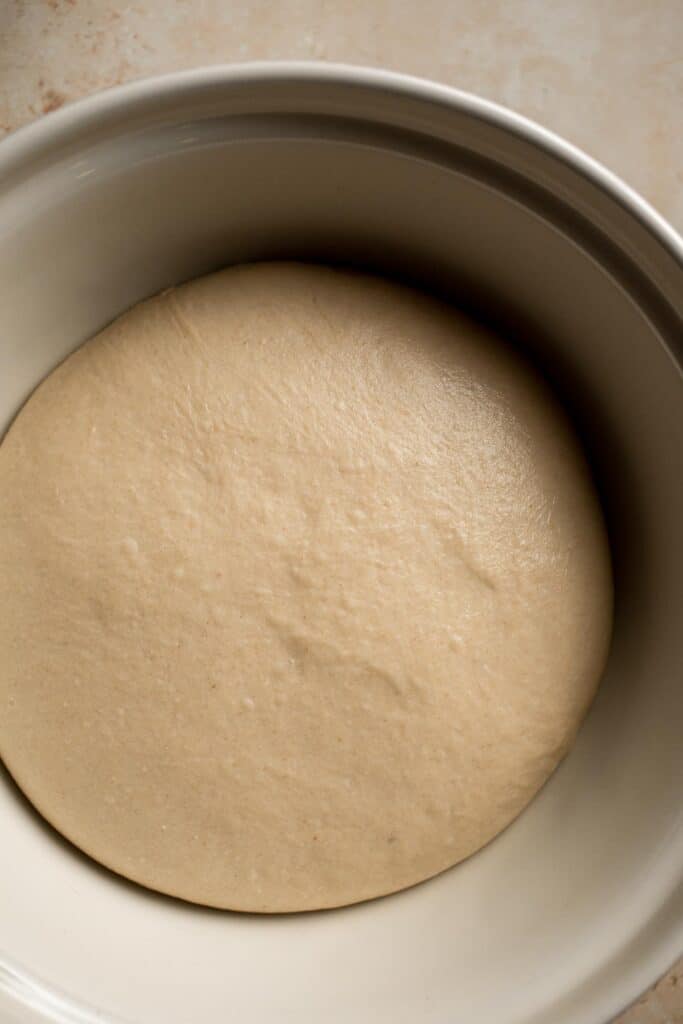
Next, shape the pretzels.
- Divide dough. Use a bench scraper to divide the dough into 6 equal pieces.
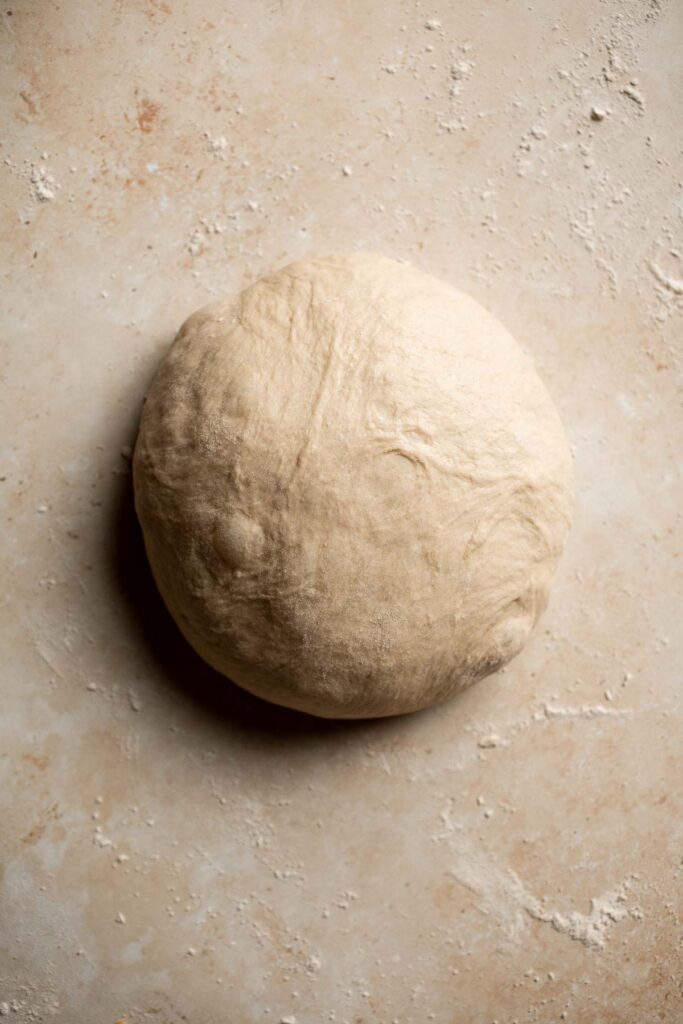
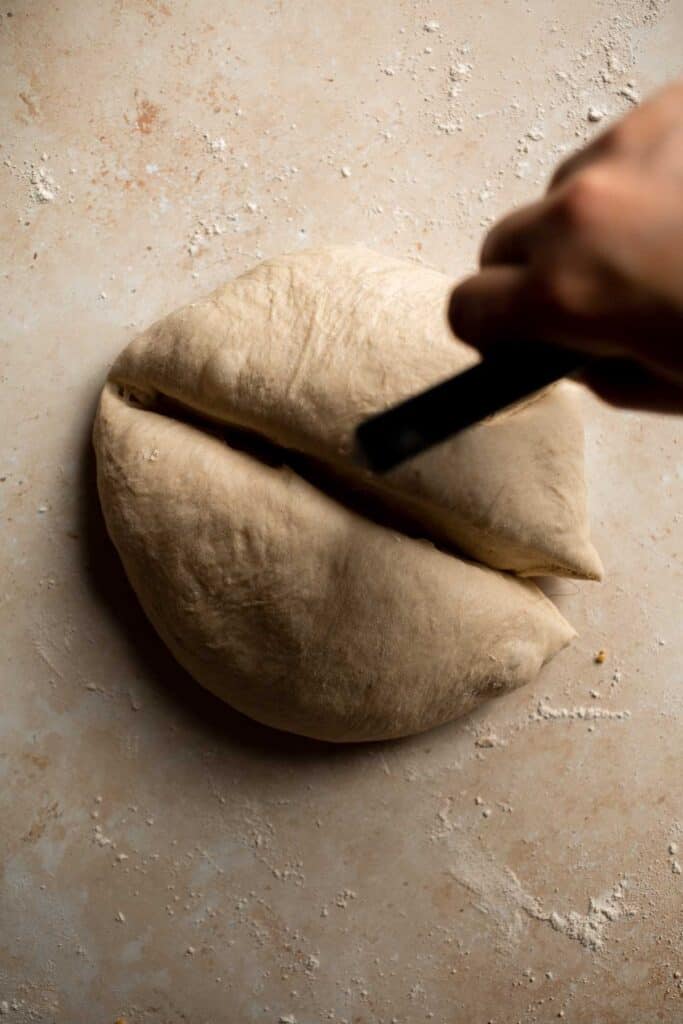

- Roll. Use your hands to shape each piece into a ball. Then, roll each dough ball into a long rope approximately 20-inches long. Cut each rope into 2-inch pieces. Cover the shaped pretzels with plastic cling wrap, as you prepare the water bath. Lightly flour the dough pieces if needed.

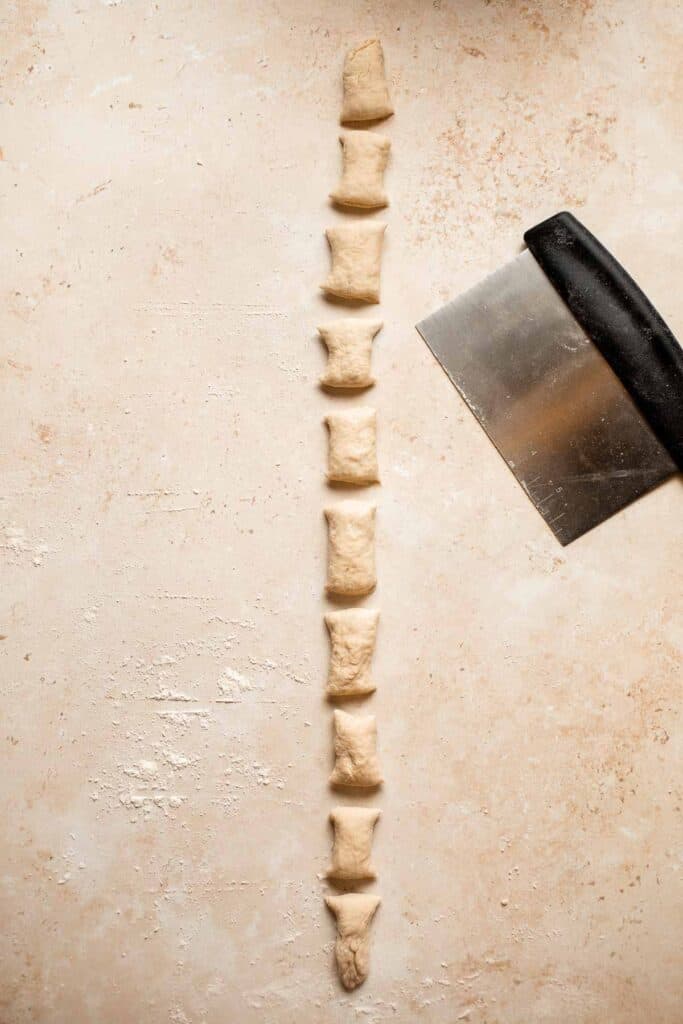
Boil in the water bath.
- Boil. Add water and baking soda in a large pot and bring it to a boil. Drop 5 pretzel bites into the boiling water at a time, making sure that they have enough room to float around. Boil the pretzel bites for about 20 seconds. The longer you boil the pretzels, the chewier and browner the pretzels get after baking.
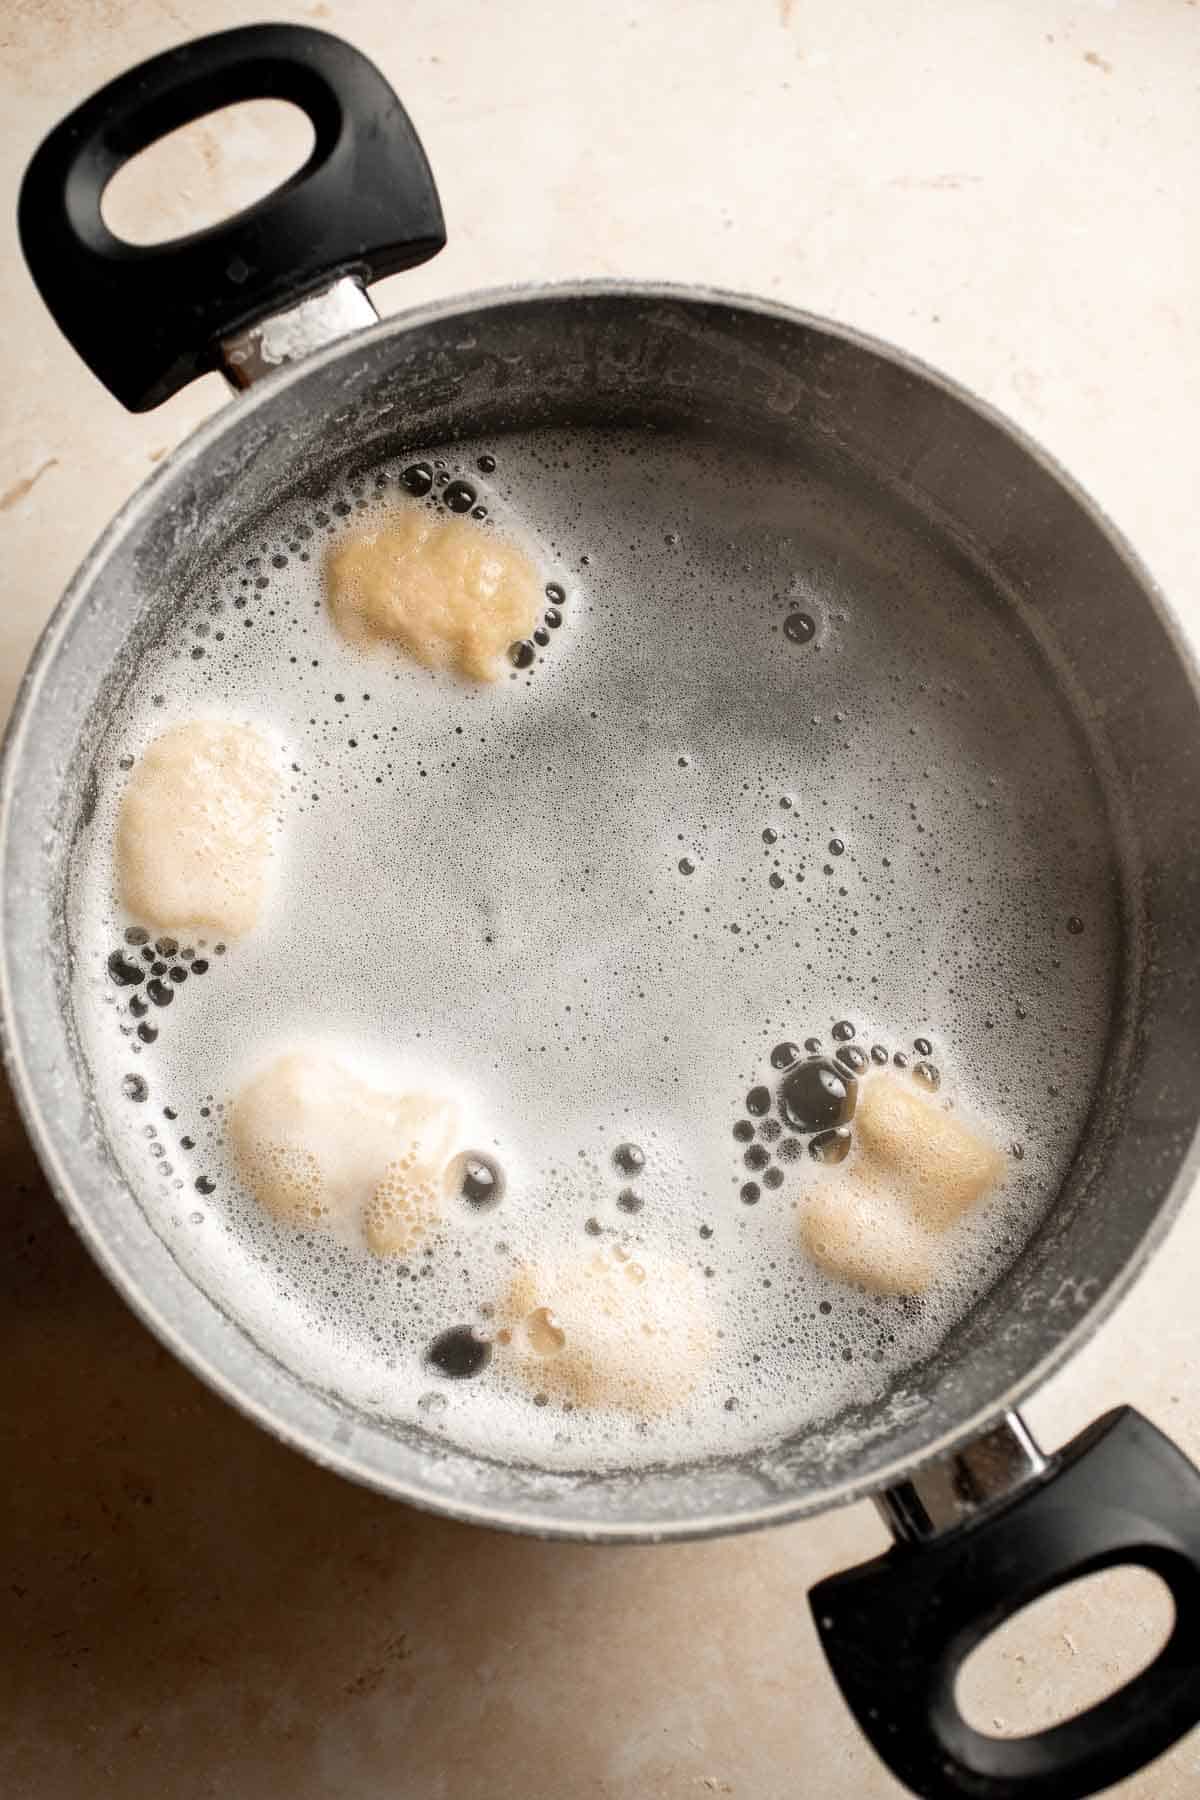
- Remove. Use a slotted spoon to remove the pretzel bites. Transfer them onto a large baking sheet lined with parchment paper, slightly spaced apart to prevent sticking. Let them dry for 5 minutes.
- Add egg wash and salt. Brush the egg wash over each piece and sprinkle salt flakes on top. Egg wash makes the pretzels brown during baking and also helps the salt flakes stick to the pretzels.
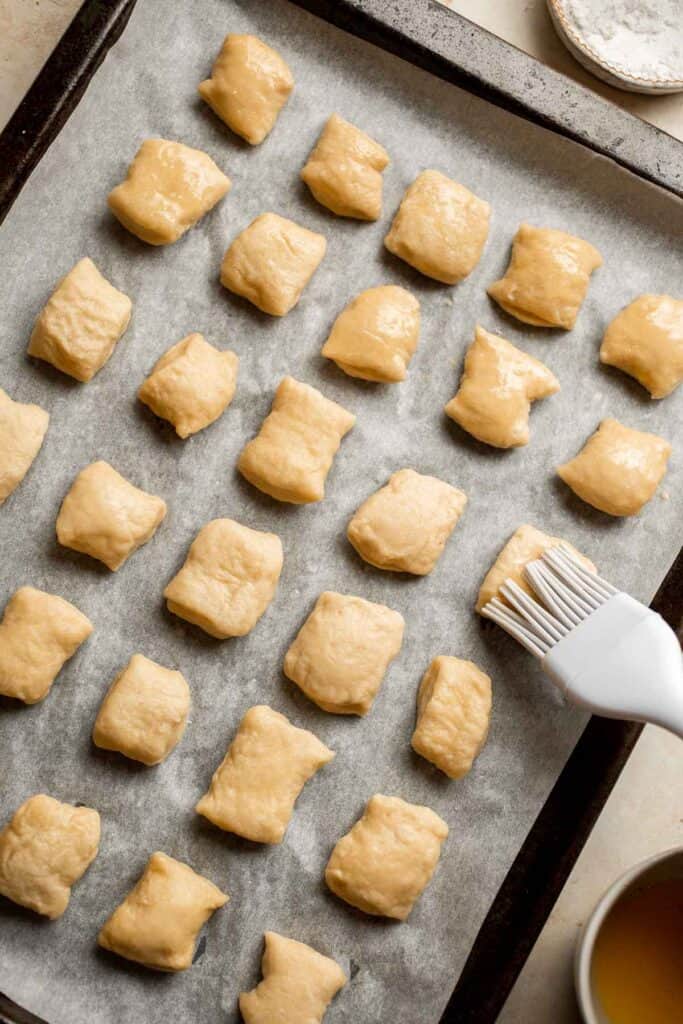
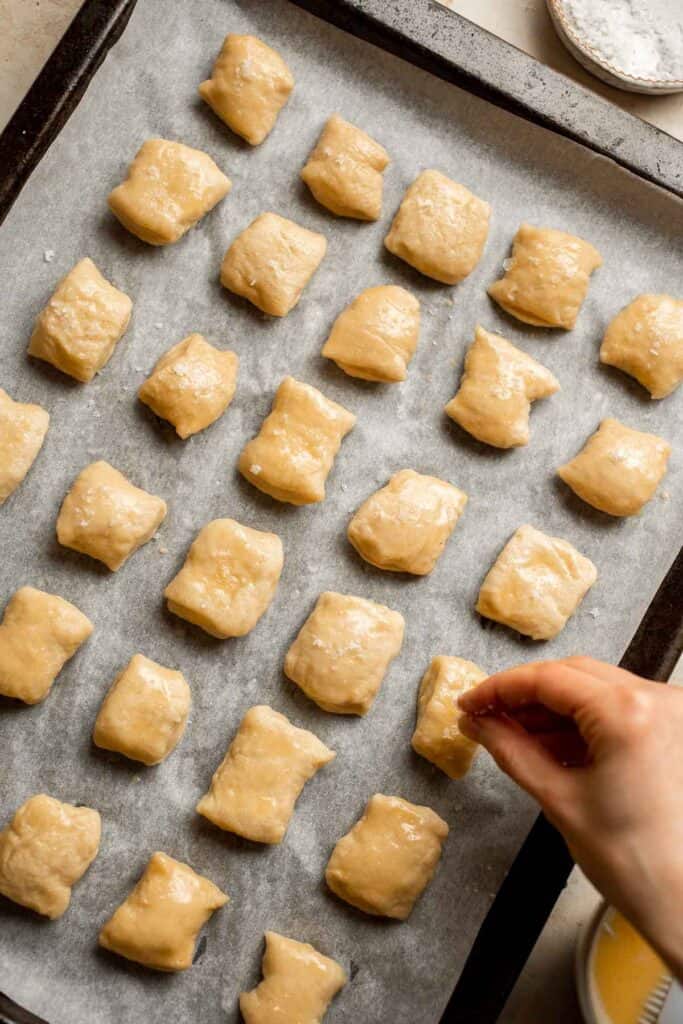
Finally, bake the pretzel bites.
Bake the pretzels (in batches) in a 400F preheated oven for 15 minutes until golden brown. Then, transfer the pretzels to a wire rack to cool completely.
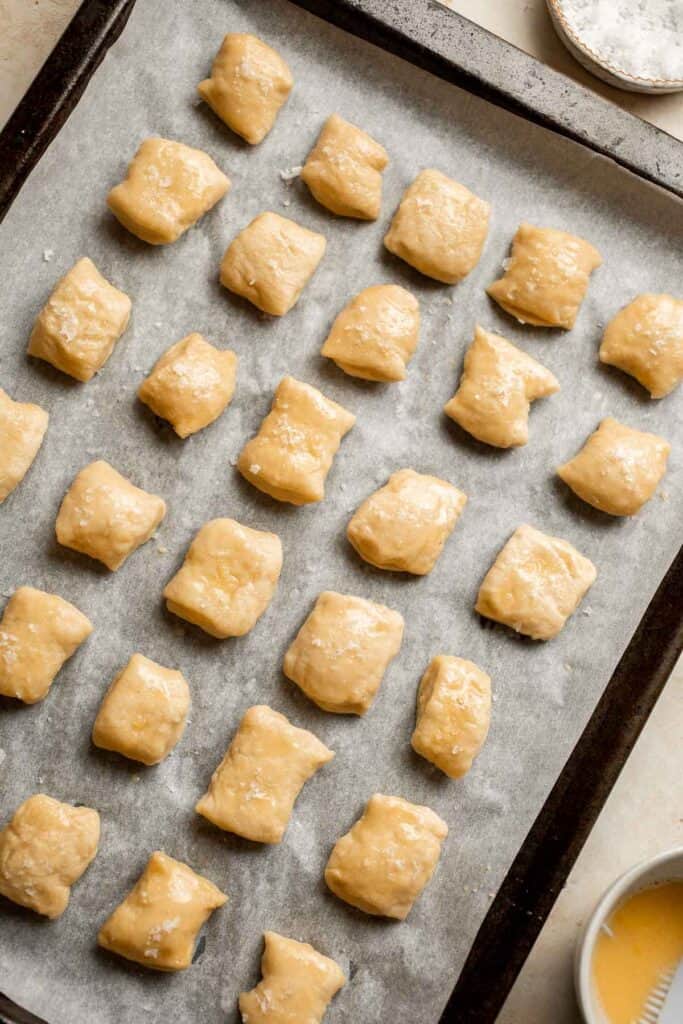
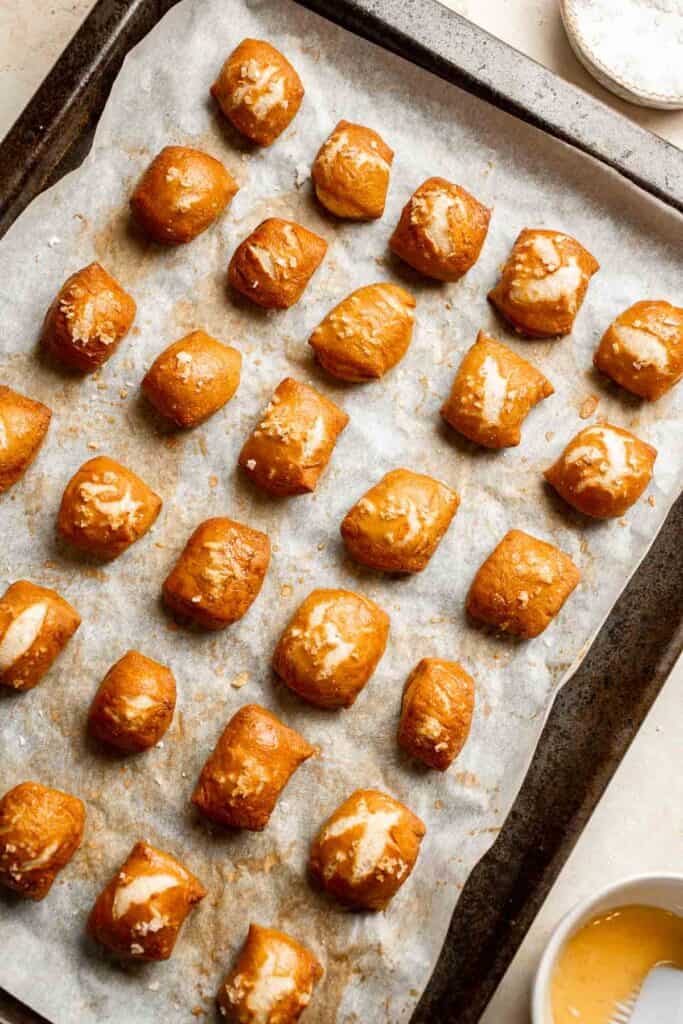
Recipe Variations
- Make cinnamon sugar pretzels. Toss the warm pretzel bites in a mixture of cinnamon and sugar for a snickerdoodle-like flavor.
- Bake pretzel sticks. Cut the pretzel dough into larger strips before baking. They're perfect for dipping!
- Use bread flour. This is entirely optional, but the higher protein content in bread flour can give you more professional tasting results.
How to Serve
These pretzel bites are delicious served on their own, or paired with a creamy dip for dipping. Some of my favorite dips to serve with these soft bread bites are:
- Cheese Fondue
- Creamy Artichoke Dip
- Pizza Dip
- Queso Mexican Cheese Dip
- Baked Spinach Dip
- French Onion Dip
For more ideas, see our 20 Best Dip Recipes.
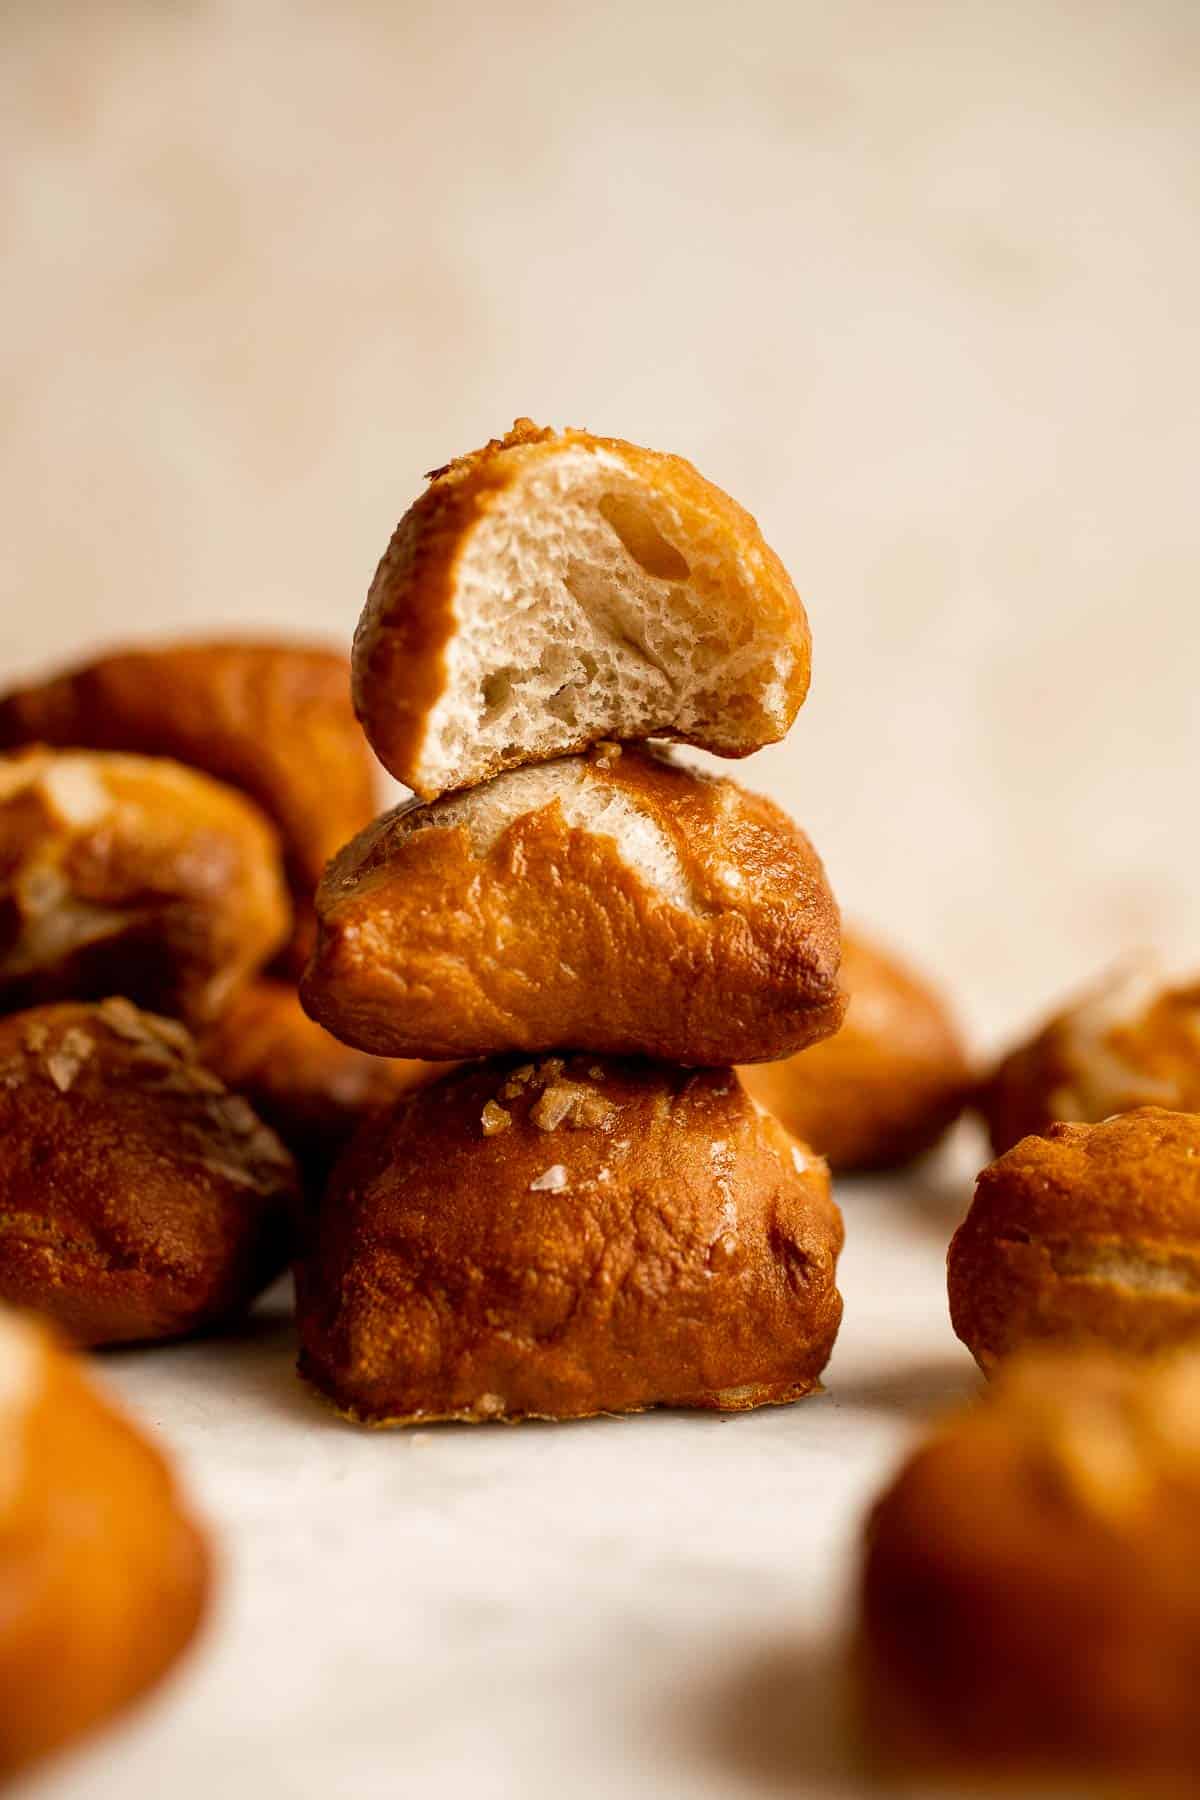
Recipe Tips and Tricks
- Let the dough rise. To get the best texture, you must let the dough double before you punch it down. If you roll too soon, they'll have a dense texture.
- Boil carefully. It's very easy to over-boil dough, which leads to soggy pretzels instead of nice chewy ones. Pull them out right after 20 seconds and shake off as much of the excess water as possible.
- Don't skip the egg wash. Although this is somewhat of an optional step, it makes such a big difference! The egg wash really gives you a wonderfully golden color and a fantastic texture.
Storing and Freezing Instructions
How to Store
Store leftover pretzel bites in an airtight container at room temperature for 3-4 days.
How to Reheat
To keep that chewy, delicious crust, wrap the pretzel bites it a damp paper towel and microwave for 30 seconds. They'll taste freshly baked!
How to Freeze
Allow the pretzels to cool completely, then freeze them in a freezer-safe bag for several months. Thaw in the fridge before reheating.
FAQ
Pretzel dough is a very simple dough made from flour, sugar, salt, yeast, water, and butter. After kneading and raising the dough, roll it into a log, then cut it into little bites. The secret to great pretzels is to boil them in a hot baking soda water bath. We like to brush them with an egg wash, then sprinkle a nice flaky salt for that traditional salty pretzel flavor.
Like bagels, pretzels need to be boiled. The boiling process gives the dough that deliciously chewy texture on the outside while preserving the light and fluffy dough on the inside. Without it, the pretzel bites will still taste great, but they'll have the texture of little rolls instead.
We highly recommend that you don't skip the boiling process. If you don't boil the dough, your pretzels won't have the same color or texture and really won't look or feel like pretzels at all. It's a crucial part of the pretzel-making process.
More Bread Recipes
- 50 Best Bread Recipes
- Easy Salted Soft Pretzels
- Garlic Knots
- Buttermilk Biscuits
- Parker House Rolls
- Garlic Breadsticks
Tried this recipe?
I'd love to hear what you think! Leave a comment and rating below to share your feedback. Your reviews help others discover this recipe and help me keep creating more free recipes for you. Snap a photo and tag me on social media @aheadofthyme too.

French Onion Dip
French Onion Dip is a classic savory dip perfect for serving at any gathering. This homemade version is made with caramelized onions and a luscious mixture of cream cheese, sour cream, and mayonnaise for a perfectly smooth texture and lots of onion flavor. It'll quickly become your new go-to!
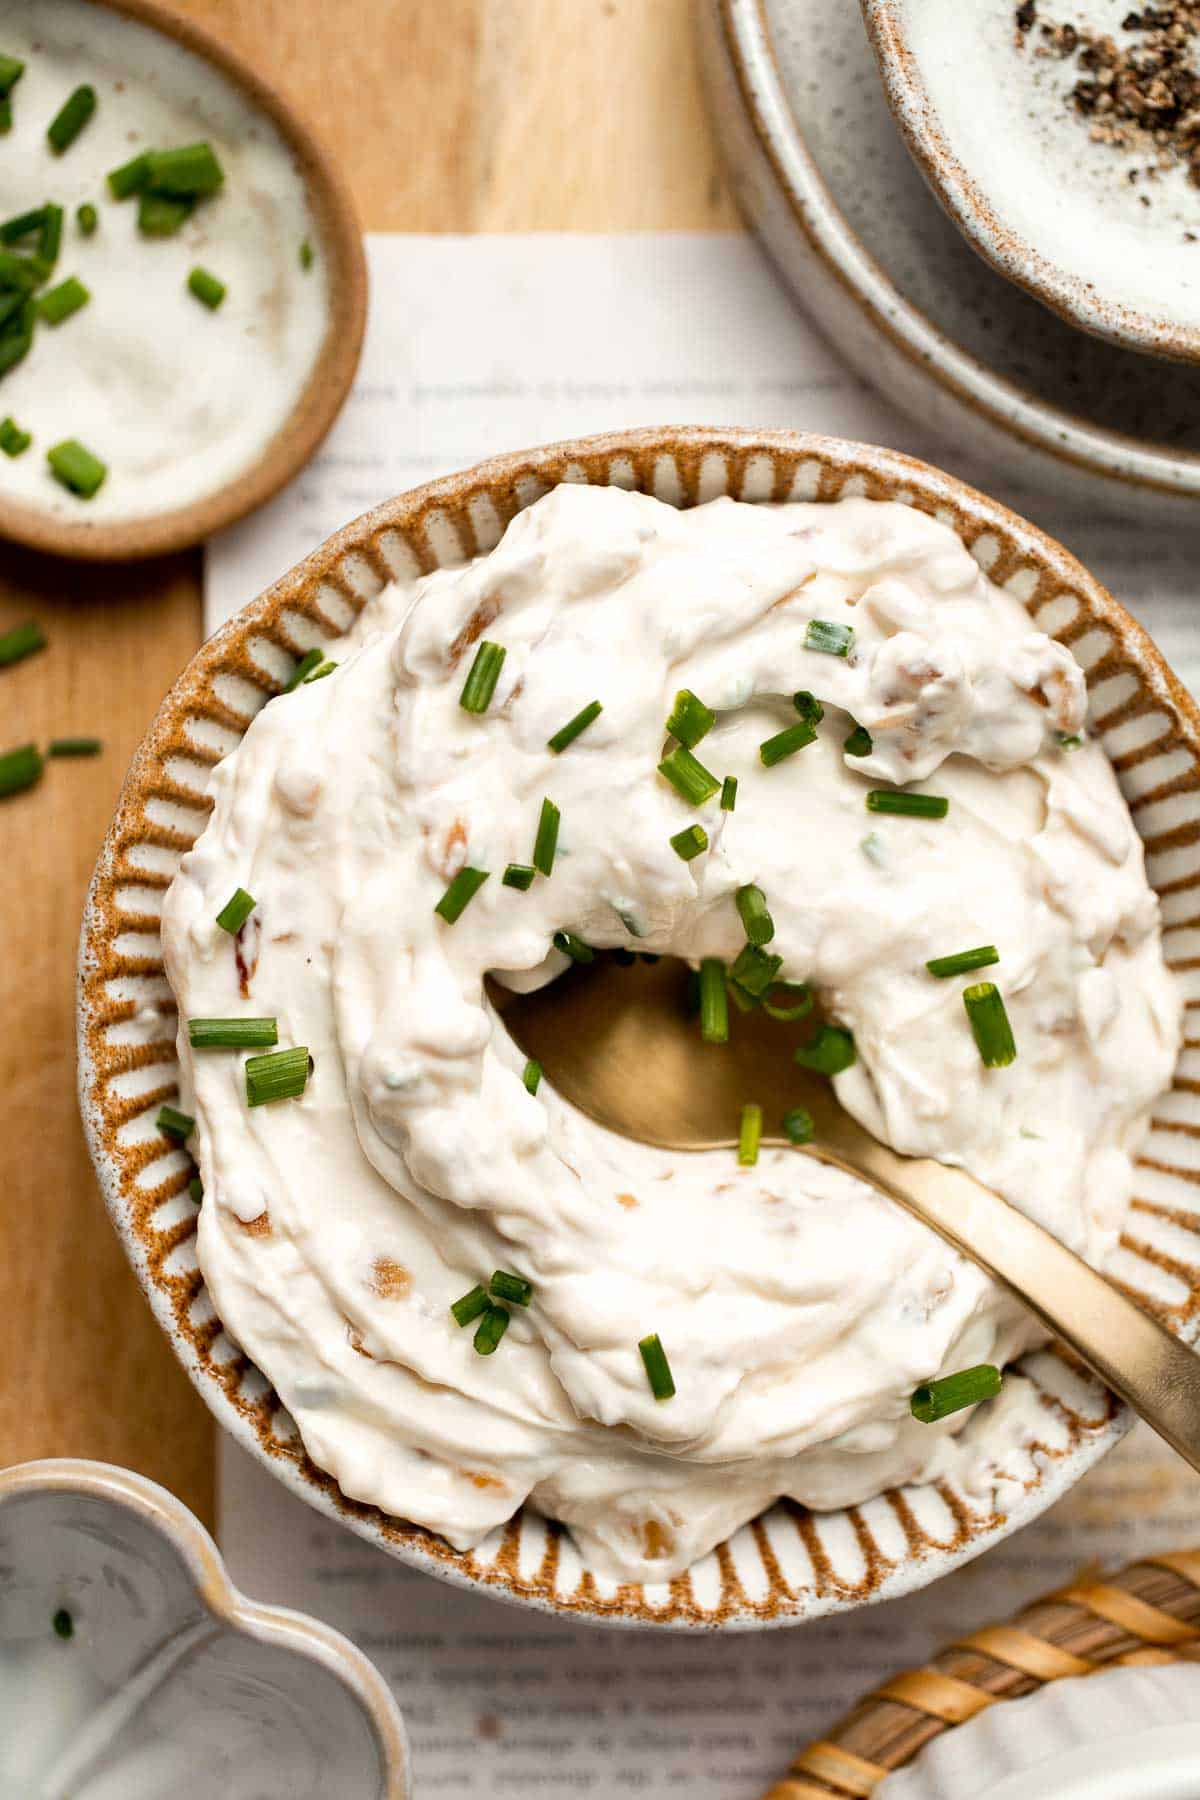
This homemade French onion dip recipe starts by caramelizing onions to release their flavors. The caramelization process adds a rich brown color and a bold flavor that's so much better than the prepackaged mixes from the store. There's no soup mix in this dip! It's the perfect dip to pair with salty potato chips, bagel chips, or fresh veggies as a quick snack or a homemade game day app!
Why You'll Love This French Onion Dip
- Completely from scratch. Unlike many recipes that call for French onion soup mix, this homemade version uses real onions cooked to a deep golden brown instead of onion powder. This adds a richer, more intense flavor you've probably never had before!
- Perfect for parties. Make a big batch of this cream dip and offer it with pita chips, potato chips, or a selection of fresh vegetables. Your guests will be floored by how much better it tastes than the soup mix version!
- Great make-ahead appetizer. It's so nice when you can make the recipes for your event the day before! This creamy dip needs to rest in the fridge for at least an hour to let the flavors mingle together. Make it the day before for easy prep on the day of your party.
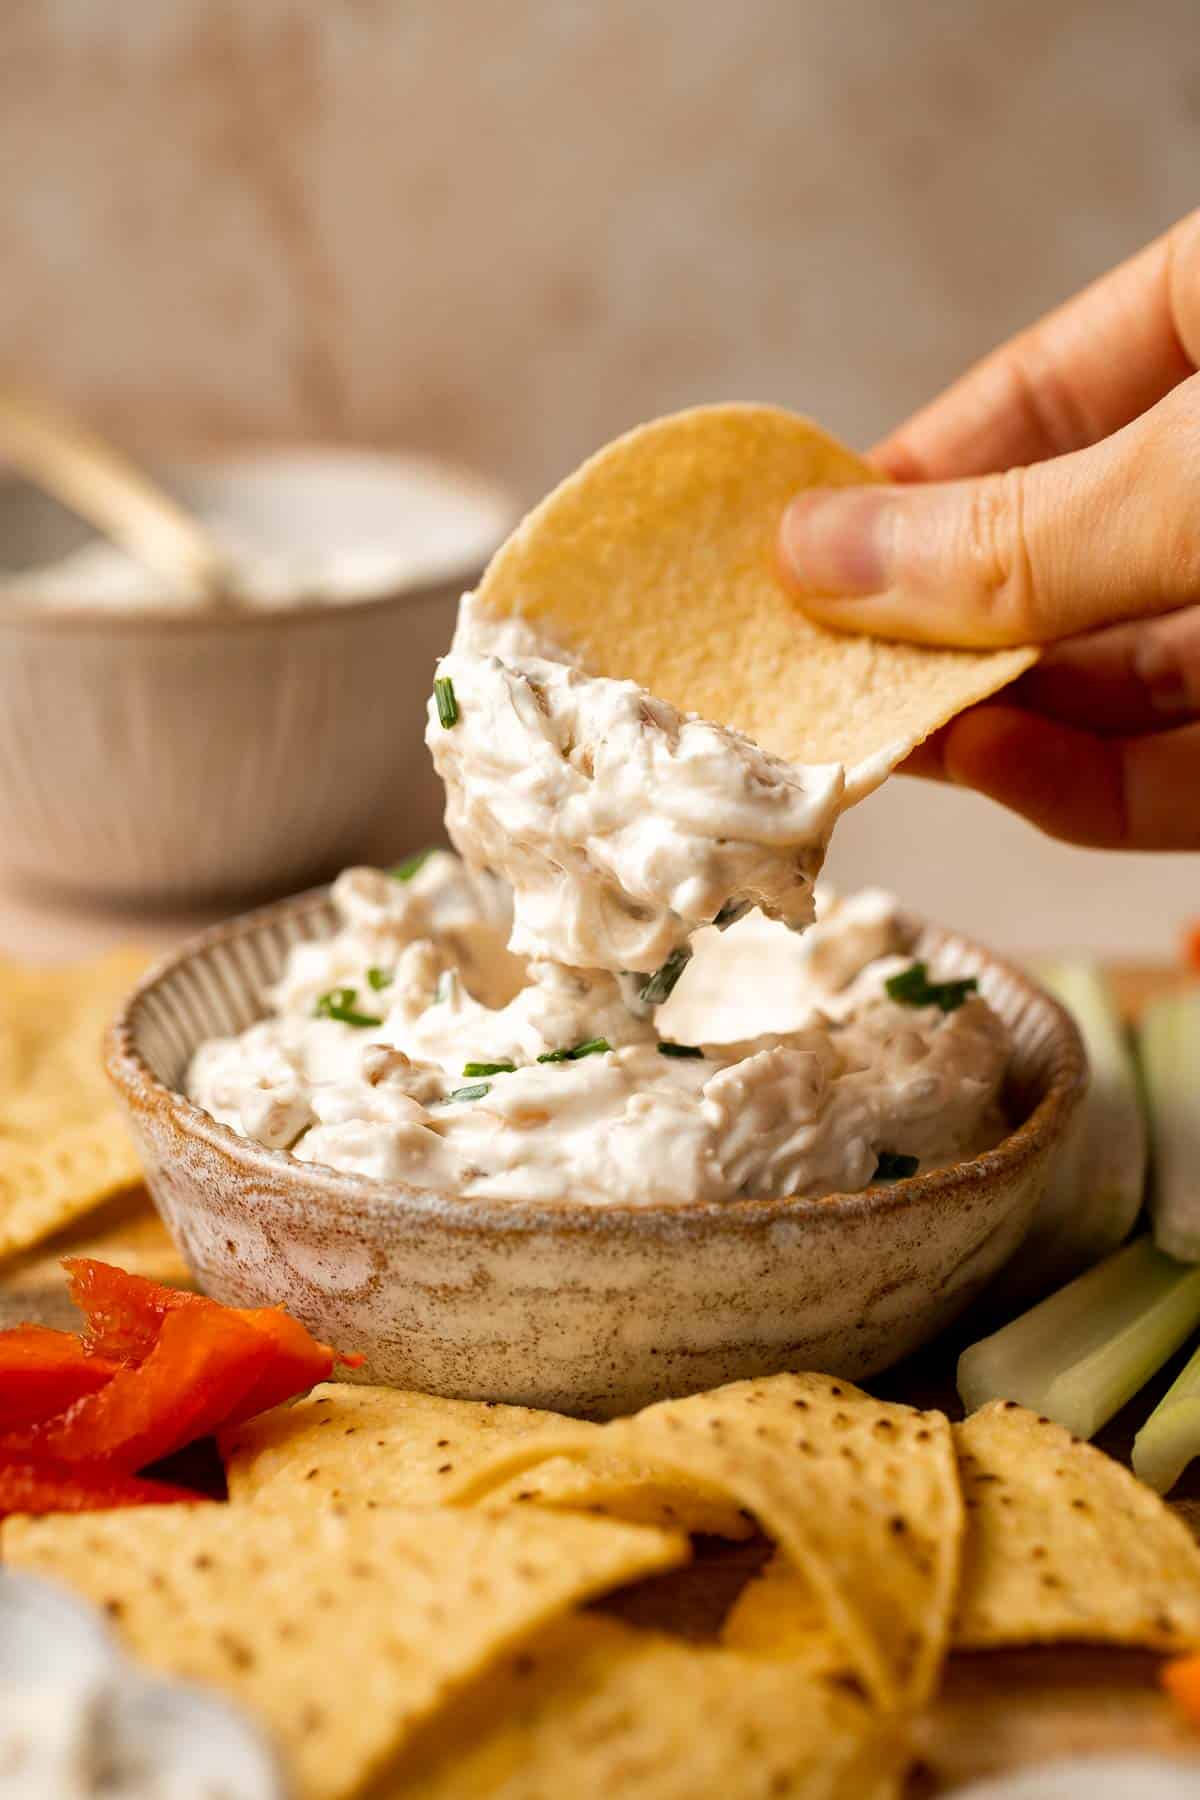
Ingredient Notes
To make this delicious French onion dip, you will need the following ingredients (full measurements in recipe card below):
- butter - melt real butter to saute the onions until golden brown.
- olive oil - the oil will keep the butter from browning too quickly, allowing you to really get a rich flavor.
- onion - dice a yellow onion and caramelize it until golden brown for a robust umami flavor.
- cream cheese - softened cream cheese adds a rich texture, mild tanginess, and fluffy texture.
- sour cream - this soft, tangy cream mellows out the cream cheese. Plain Greek yogurt also works well instead.
- mayonnaise - mayo makes any dip taste more rich and satisfying.
- parmesan cheese - freshly grated Parmesan adds a salty, savory flavor to this homemade caramelized onion dip. You can also substitute with a similar cheese like asiago cheese or grana padano.
- black pepper
- fresh chives - finely chopped chives or green onions add a little color and a nice bright flavor.
You will also need a large skillet, a spoon, and a large mixing bowl.
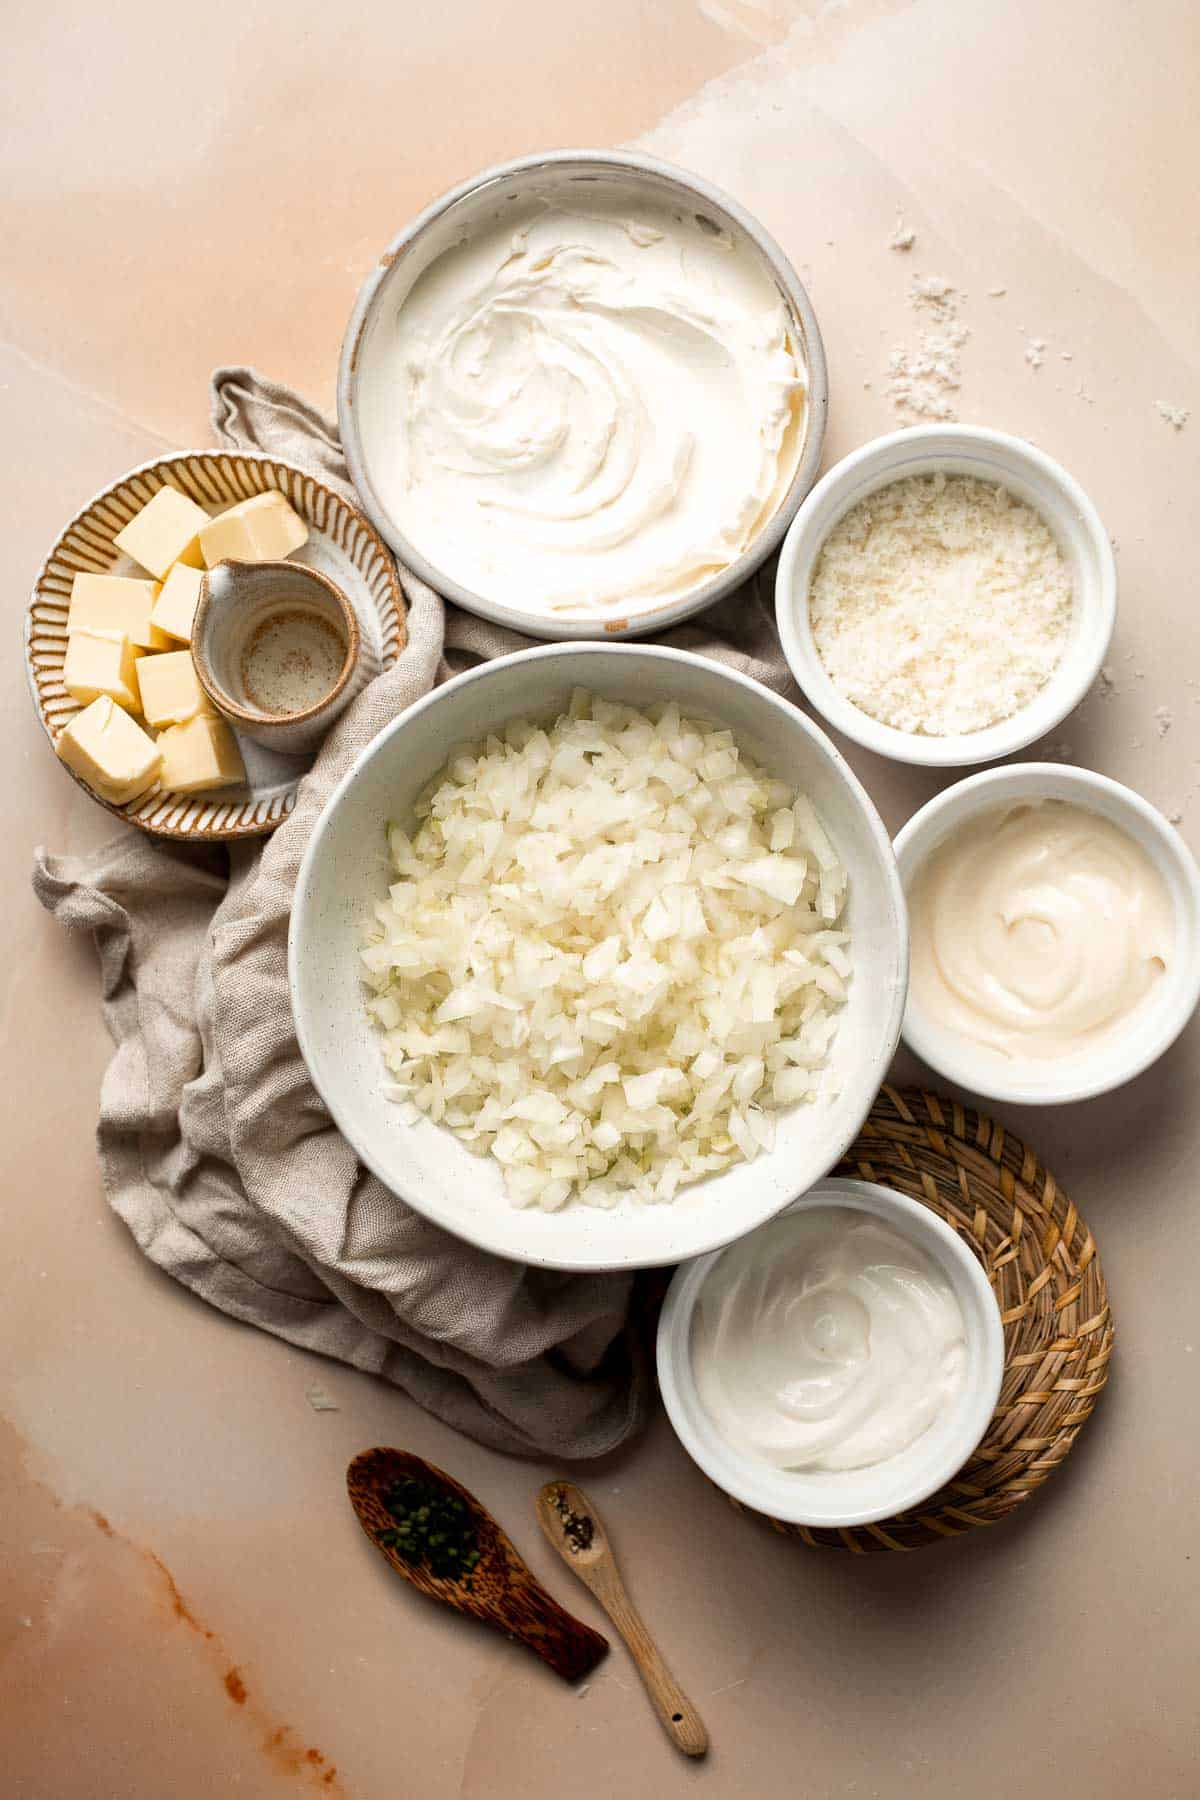
How to Make the Best French Onion Dip
- Caramelize onions. Heat butter and oil in a large skillet over medium-high heat and cook until it starts to bubble, about 1-2 minutes. Add onion and sauté until tender and caramelizing brown, about 20-25 minutes, stirring occasionally.
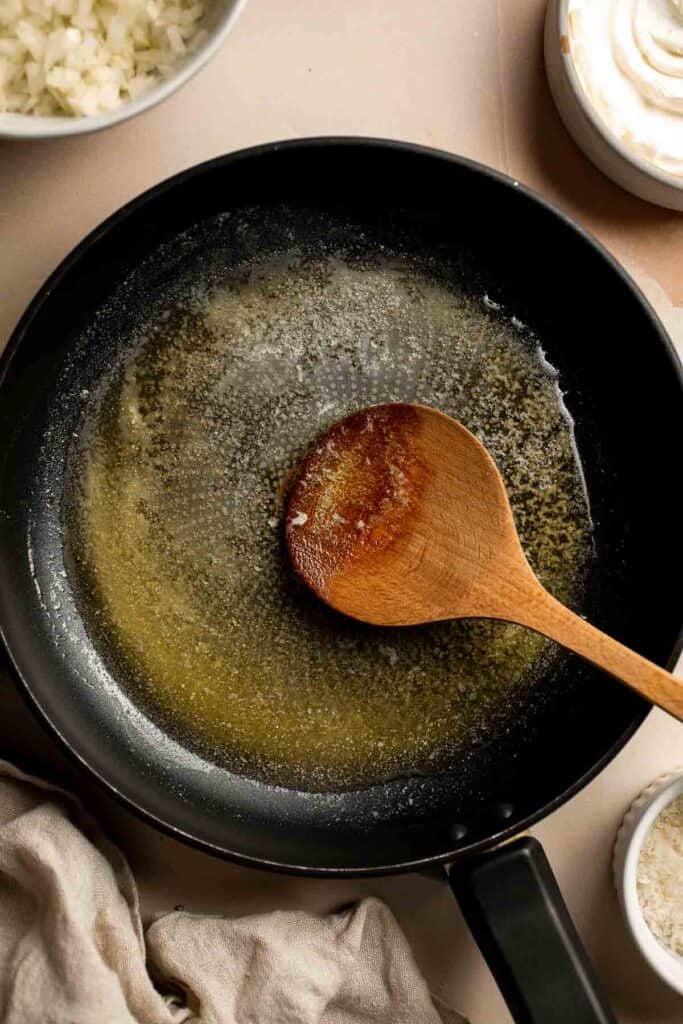
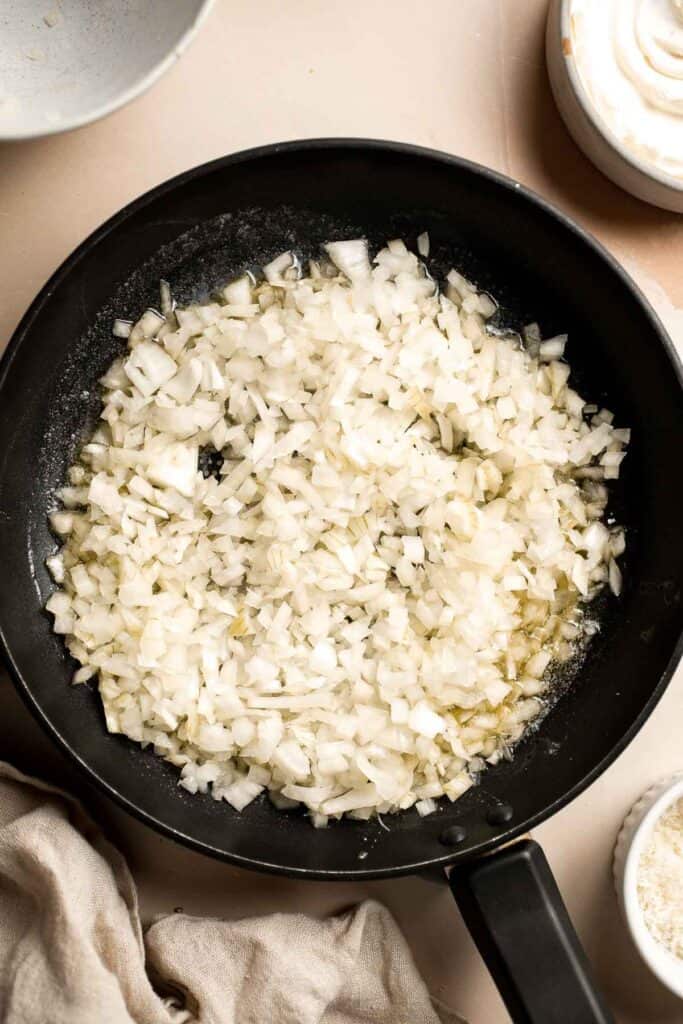
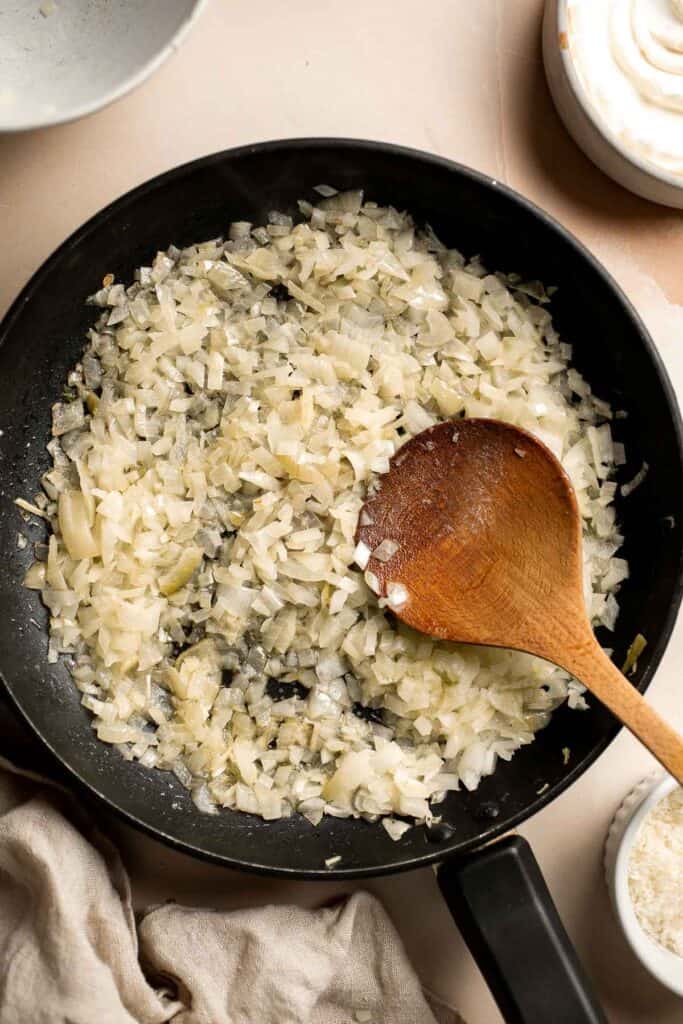
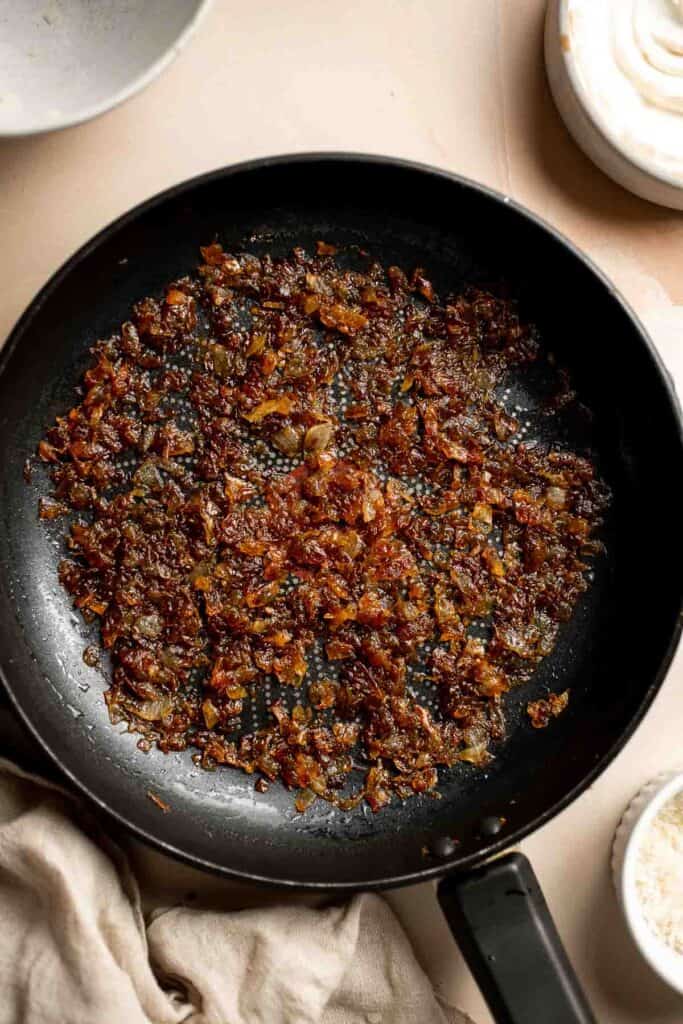
- Combine ingredients. In a large mixing bowl, combine cream cheese, sour cream, mayonnaise, parmesan, and black pepper. Stir until evenly combined.
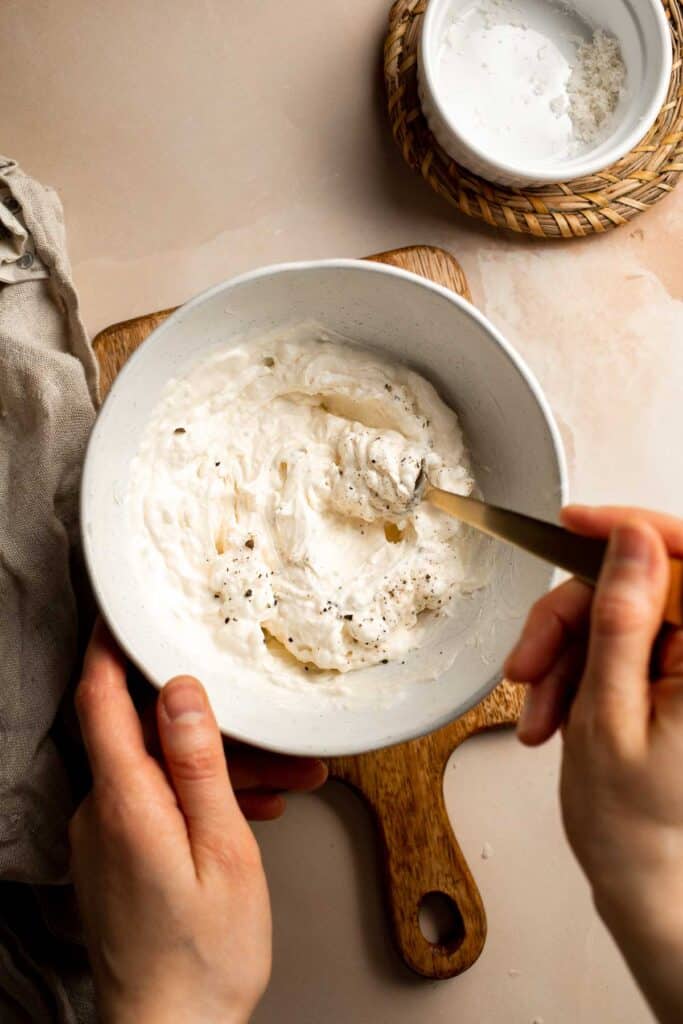
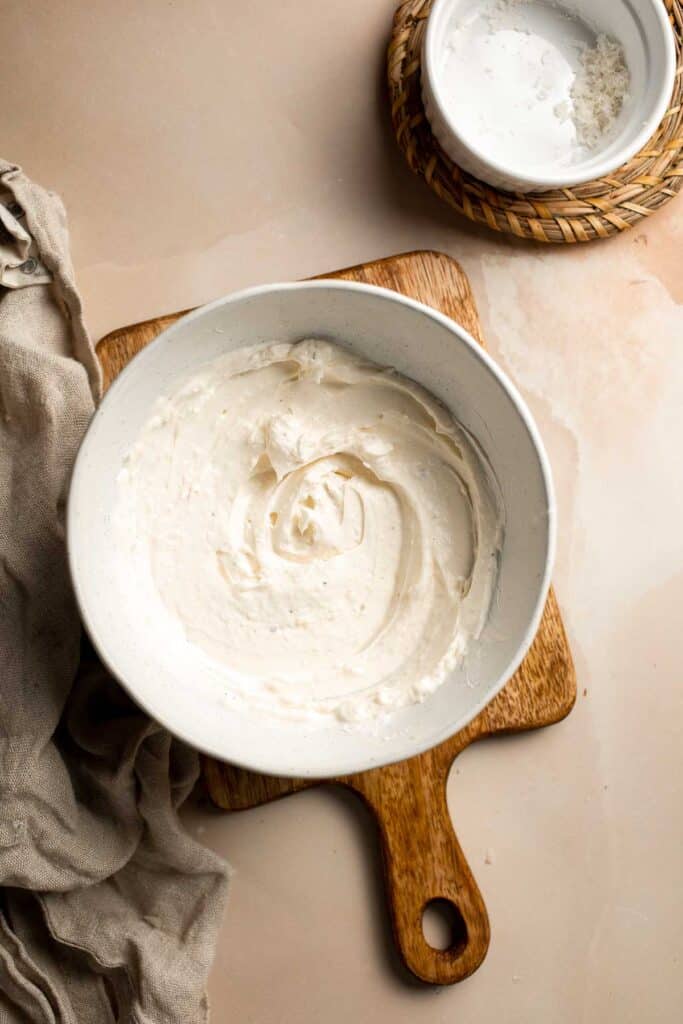
- Add onions. Add the caramelized onions to the cream cheese mixture and mix well.
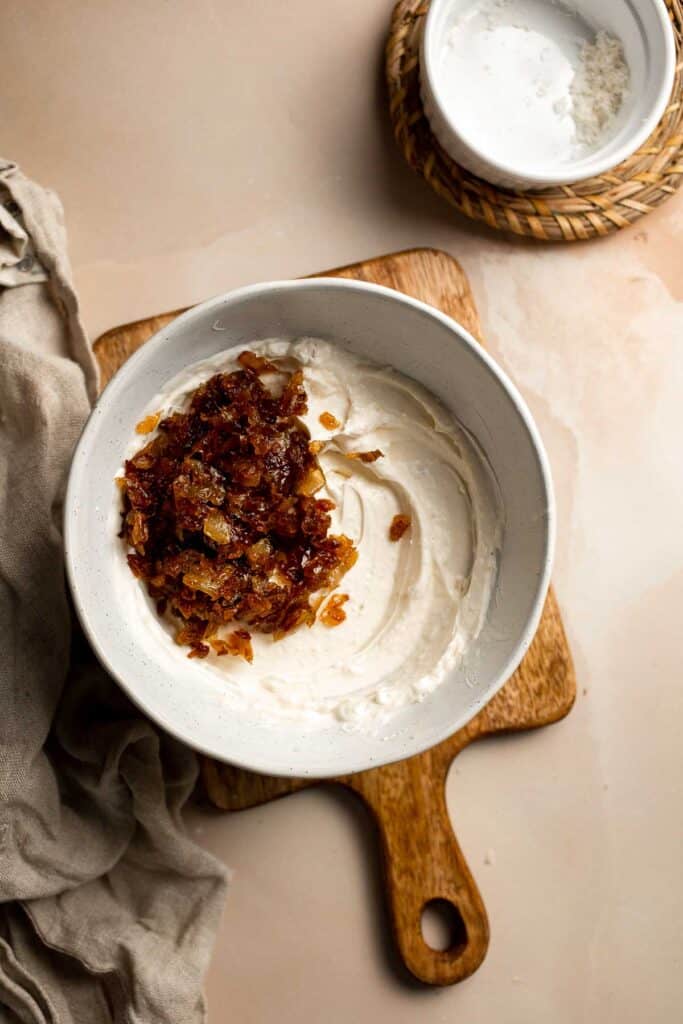
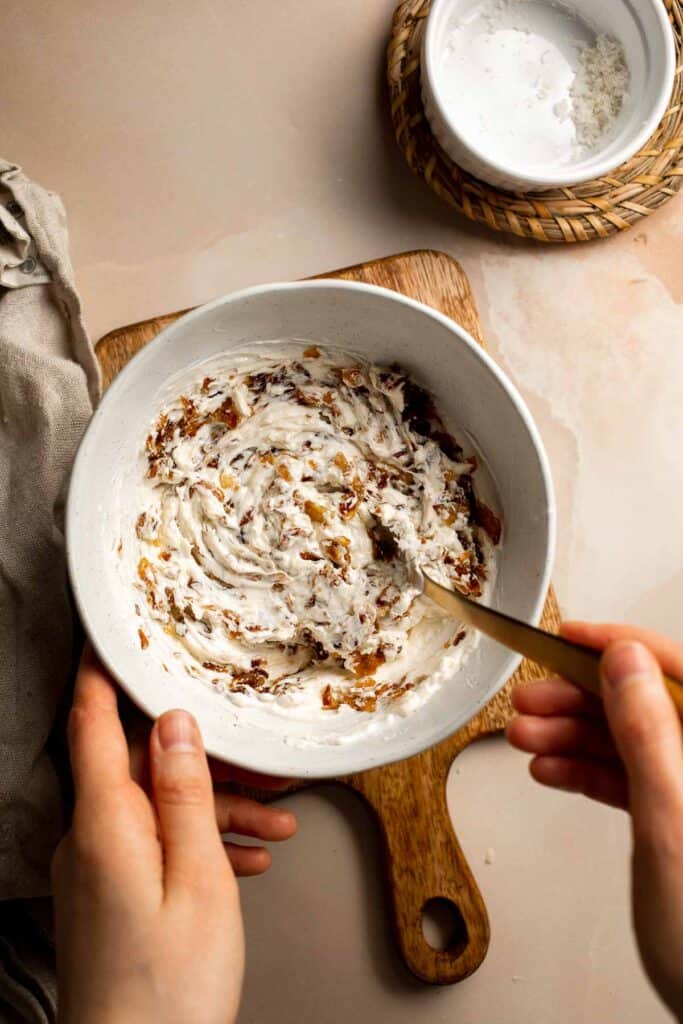
- Chill. Chill in the fridge for 1 hour.
- Garnish. Garnish with chives and serve with chips, crackers, and veggies.
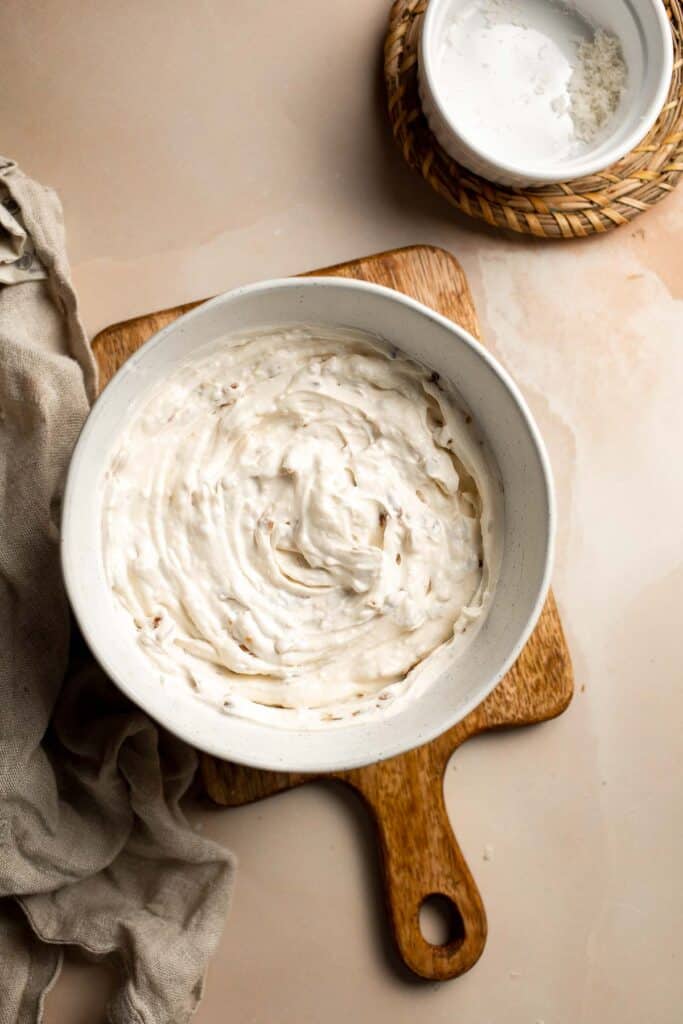
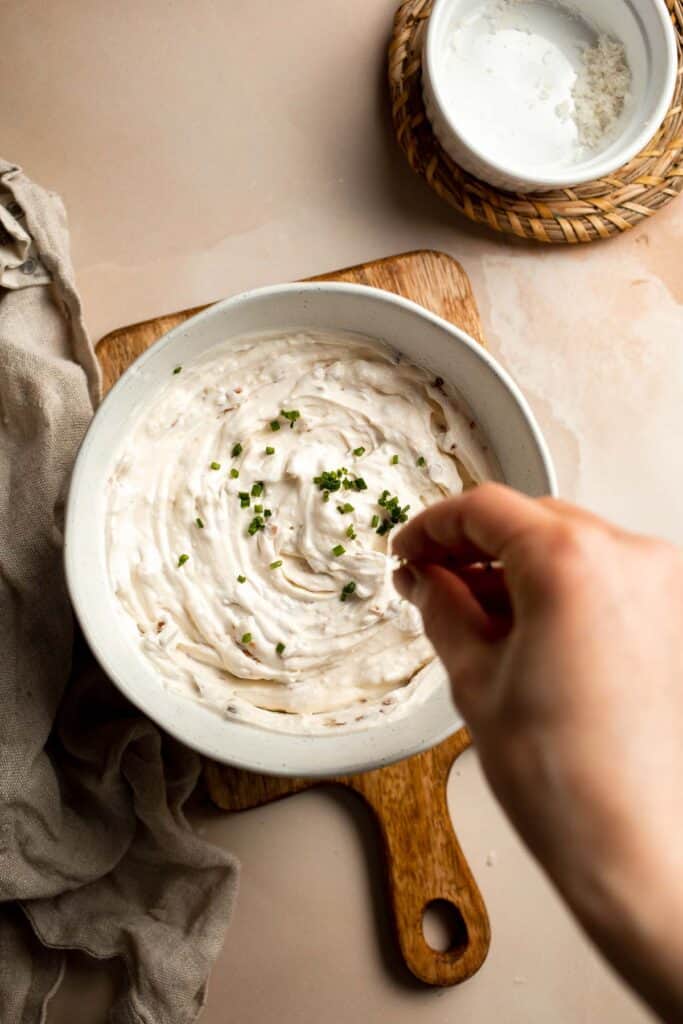
Recipe Variations
- French onion soup mix dip. If you don't have time to make sweet caramelized onions, you can use a packet of French onion soup mix instead. It's not quite the same, but it works in a pinch.
- Add vinegar. Right at the end of caramelizing your onions, add a splash or two of balsamic vinegar to the pan and let it cook down. This will add an extra layer of flavor to this caramelized onion dip recipe.
- Bake it. This creamy party dip can easily be served cold or warm! As it heats, the flavors will infuse together and make the parmesan cheese really melty and gooey. So good!
- Add bacon. Give this dip even more savory flavor by adding crumbled bacon bits. A dash of Worcestershire sauce works, too!
- Spicy French onion dip. Add a shake or two of cayenne pepper and some red pepper flakes for a little kick.
How to Serve
Serve this creamy cheesy dip on its own with a side of chips (plain potato chips, kettle chips, etc), bagel chips, crackers, and veggies.
If serving it as part of a larger appetizer spread, pair it with some of these popular appetizers:
For more recipe ideas, see our 75+ Easy Appetizer Recipes.
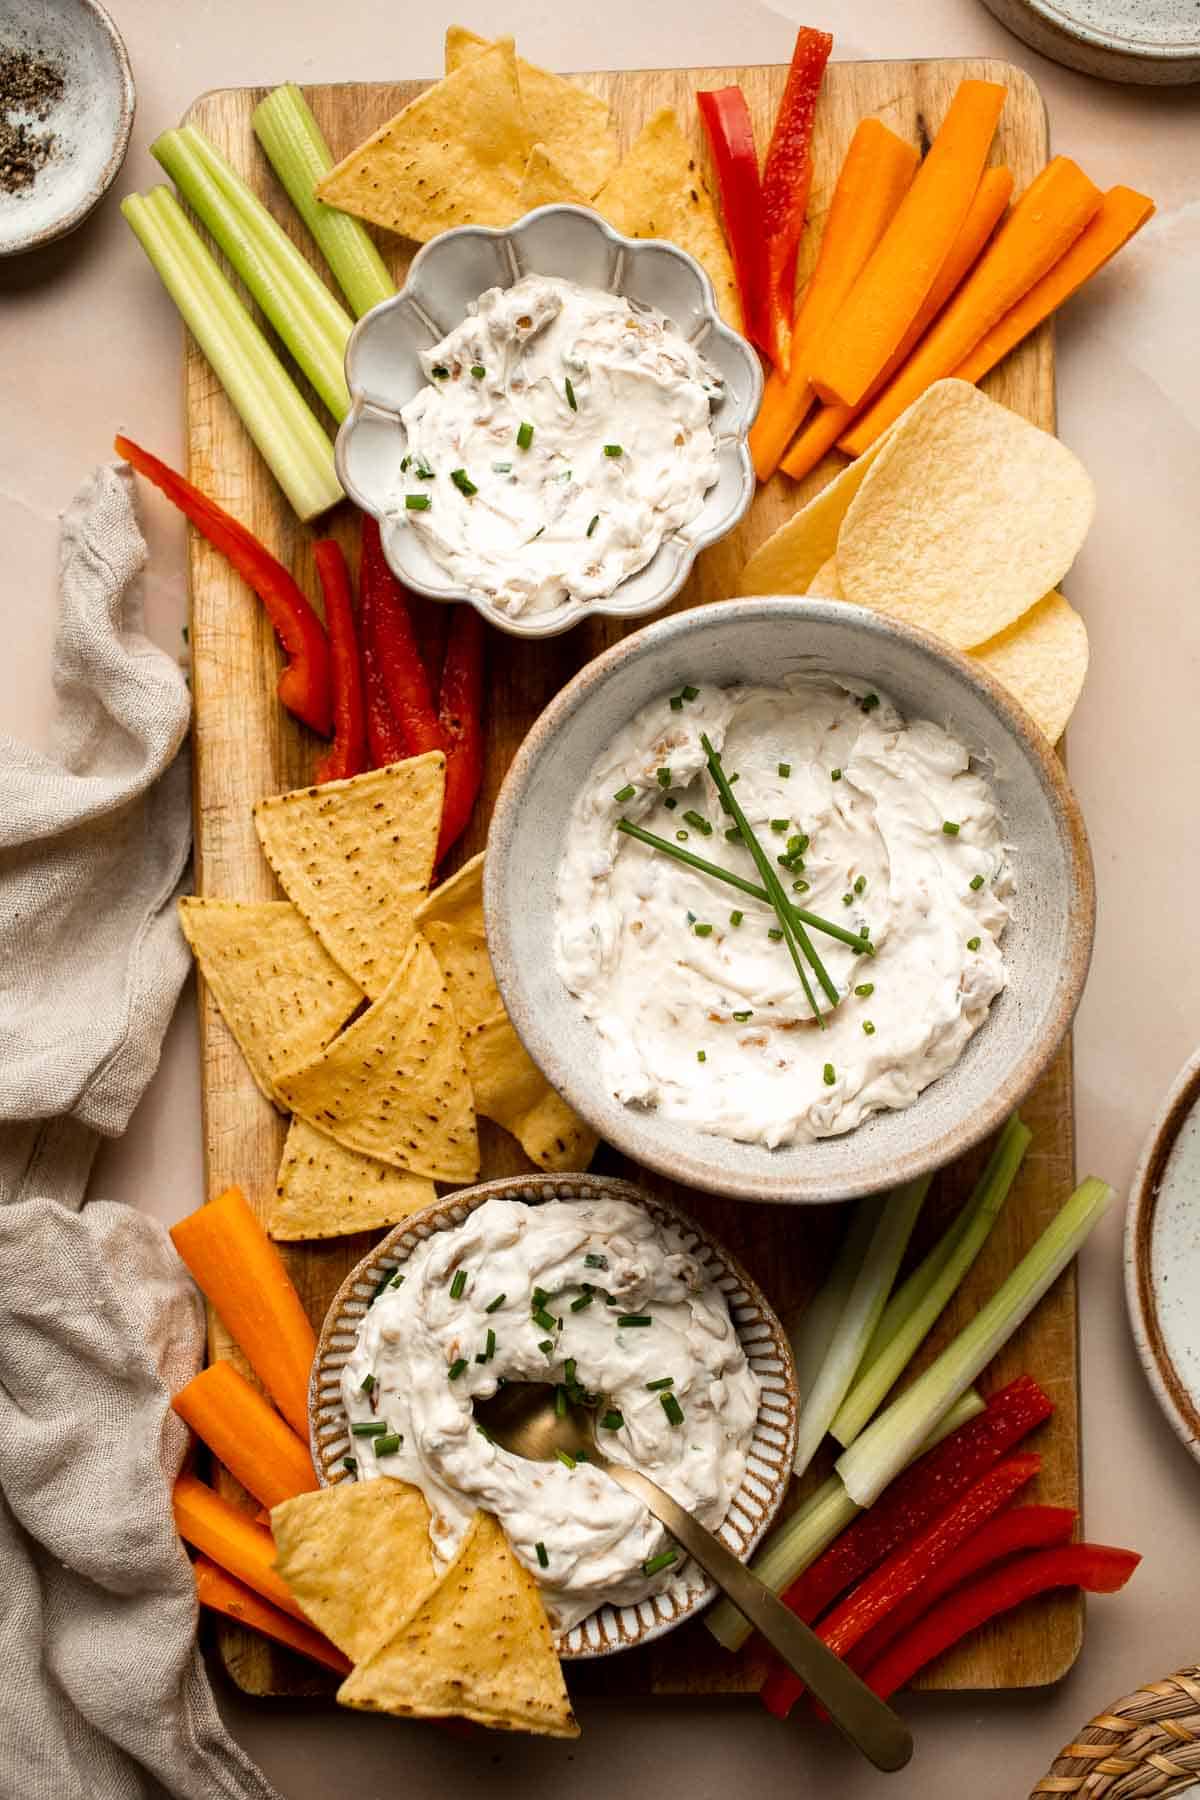
Recipe Tips and Tricks
- Use the right onions. It's best to use yellow onions, like classic French onion soup. Sweet Vidalia onions are a great option, too.
- Let it chill. The creamy base really needs time to infuse with the sweet onions. Let them chill in the fridge for at least 1 hour, if not overnight.
- Don't skimp on the fat. There is a lot of fat in this classic onion dip due to the mayo, sour cream, and cream cheese, but fat means flavor. You can use low-fat or fat-free dairy if needed, but the flavor won't be quite as satisfying.
- Season to taste. Taste the dip about an hour after making it, and add kosher salt, garlic powder, or black pepper to taste.
Storing and Freezing Instructions
How to Store
Store leftover dip in an airtight container in the fridge for 3-4 days. If you need to keep it at room temperature for a party, place the bowl of dip in a container of ice to keep it below 40 degrees F.
How to Freeze
This recipe can be frozen, but it does not thaw very well. It's best to eat it fresh from the fridge.
FAQ
Butter gives your onions a lovely buttery flavor, but it can brown or burn easily. On the other hand, oil will allow your onions to caramelize nicely, but it won't add that buttery flavor. The solution is to use both! The oil will help the onions cook at a higher heat, and the butter will add that delicious butteriness that pairs perfectly with the sweetness of the onions.
Homemade French onion dip can either be made with real caramelized onions or dehydrated French onion soup mix. Either of these ingredients is then mixed with sour cream, mayo, and sometimes cream cheese. Add some fresh chives and a little seasoning to complete the dip, and let it chill for a few hours before serving.
As the dip sits, it may begin to weep or separate. If this happens, stir well to incorporate the ingredients together.
More Dip Recipes
- 20 Best Dip Recipes
- Caramelized Onion Dip
- Homemade Ranch Dip
- Creamy Artichoke Dip
- Whipped Ricotta Dip
- Cheese Fondue
Tried this recipe?
I'd love to hear what you think! Leave a comment and rating below to share your feedback. Your reviews help others discover this recipe and help me keep creating more free recipes for you. Snap a photo and tag me on social media @aheadofthyme too.

Christmas Crack Candy
This Christmas Crack Candy is the simplest and most delicious holiday treat you'll ever make! It's sweet, salty, crunchy, and chocolatey - perfect for snacking all season long. Plus, it's quick and easy to make so you are just a few ingredients and minutes away from making the perfect Christmas candy!

Christmas crack is made with the indulgent combination of chocolate and saltines but it's the toffee layer that takes it over the top. The result is a chocolatey, caramelized candy that's sweet, salty, crunchy, and just downright delicious. You can enjoy it as is or dress it up with toppings such as pretzels, toffee bits, chopped nuts, sprinkles, and more. If you're looking for an easy yet impressive treat to share with family and friends this holiday season, this is it! Plus, it's impossible to eat just one piece of this festive dessert, so you'll want to make a big batch so everyone can get in on the sweet and salty goodness.
Why You'll Love this Christmas Crack Recipe
- Easy to make. If you're not into baking, then this recipe will be your saving grace. While the toffee layer needs to be baked for 5 minutes tops, the rest of the layers are just a matter of stirring, melting, and pouring. It only takes about 10 minutes to make the layers and all there's left to do is let it set in the fridge before you crack into it!
- Deliciously sweet and salty. Isn't it the best when you get a mix of sweet and salty in one bite? That's exactly what you'll get with this Christmas crack candy. The base has a hint of saltiness that perfectly complements the sweet toffee and chocolate layers. It's just a match made in heaven!
- Fun to customize. Don't like pretzels? Leave them out! Prefer a different type of chocolate? Swap it out! Want to add more chocolate? Go for it! It's up to you how you want this treat to look and taste.
- Perfect for gifting. Everyone loves getting homemade gifts, especially edible ones. You'll be sure to get a lot of thank yous when you gift this one! Put it in a festive holiday tin or package it in a little box for an easy and thoughtful present. It's also great as part of a Holiday Cookie Box.

Ingredient Notes
To make this delicious Christmas Crack Candy, you will need the following ingredients (full measurements in recipe card below):
- saltine crackers - these crackers for the base of the candy. It gives a satisfying crunch and a subtle saltiness that balances the overall sweetness of the crack candy. You can also use whole-wheat crackers for added texture.
- butter - use unsalted butter for better flavor control. It provides a creamy, toffee flavor when melted with brown sugar.
- brown sugar - adds a deep, caramel flavor that gives the candy its distinct brown color. You can use light brown sugar for a subtle taste of molasses.
- light corn syrup - also used to add deep flavor to the homemade caramel.
- chocolate - use semi-sweet chocolate chips or chopped chocolate for easy melting. I prefer semi-sweet chocolate because it has the right balance of sweetness and bitterness, but you can opt for dark ones for a bittersweet chocolatey taste.
- white chocolate - add a white choclate drizzle on top of this Christmas crack for flavor and presentation, or leave it out if you prefer.
- toppings - we topped this candy with pretzels and toffee bits. You can also use candies, sprinkles, or M&Ms as toppings for a festive look. Chopped nuts like pecans and almonds also add a sophisticated touch and a delicious crunch to the candy.
You will also need measuring cups and spoons, large baking sheet, parchment paper or silicone mat, spatula, and microwave.
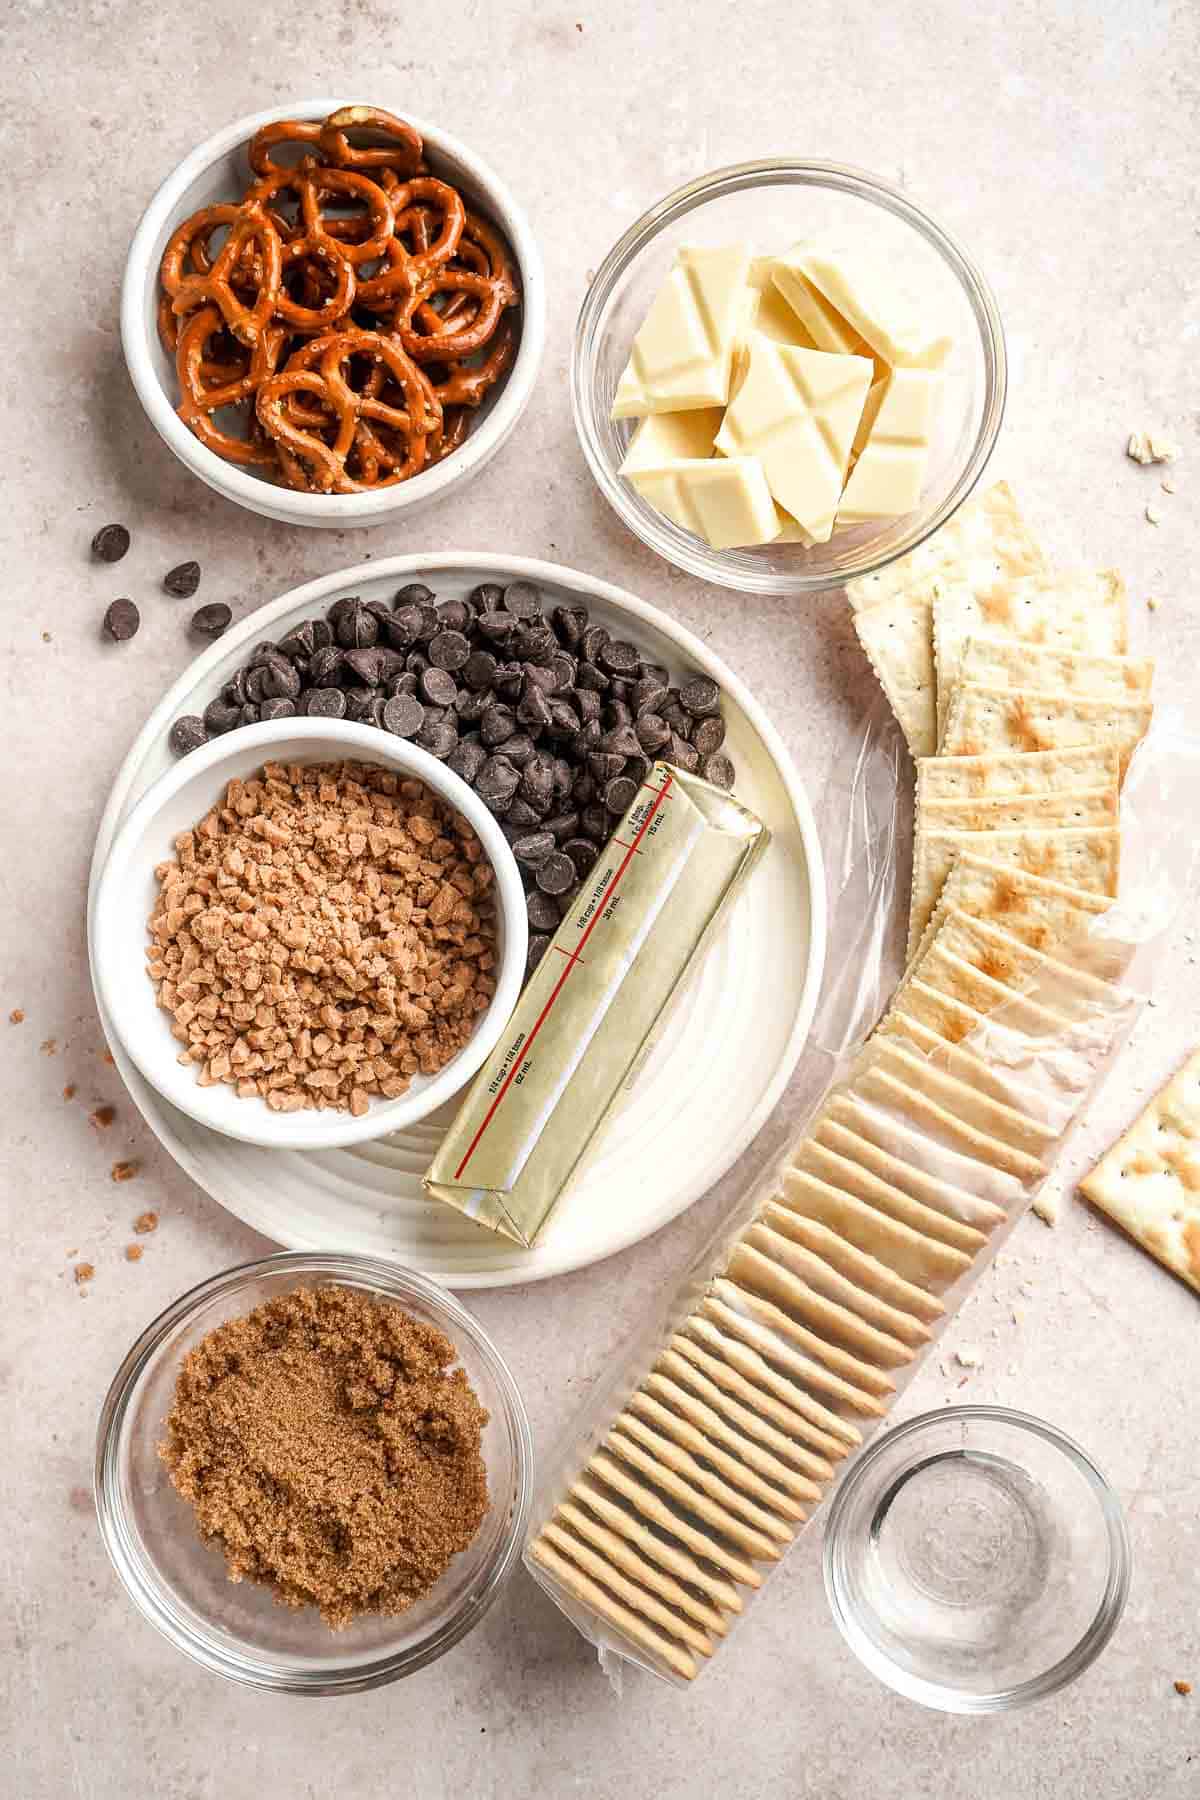
How to Make the Best Christmas Crack Candy
- Add crackers. Line a large baking sheet with parchment paper. Line the pan with the saltine crackers. Set aside.
- Cook caramel. In a medium saucepan, add the butter, brown sugar, and corn syrup, and heat over medium heat. Stir with a rubber spatula until the butter has melted and the mixture begins to bubble. Continue cooking, while stirring, until all of the brown sugar has dissolved and is no longer grainy, about 5 minutes (if using a candy thermometer, the mixture should reach 280F).
- Add caramel. Pour the hot caramel evenly over the saltine crackers, then spread evenly out with a spatula. Place into a 350F preheated oven to bake for 3-4 minutes, or until the caramel begins to bubble. Remove the pan from the oven.
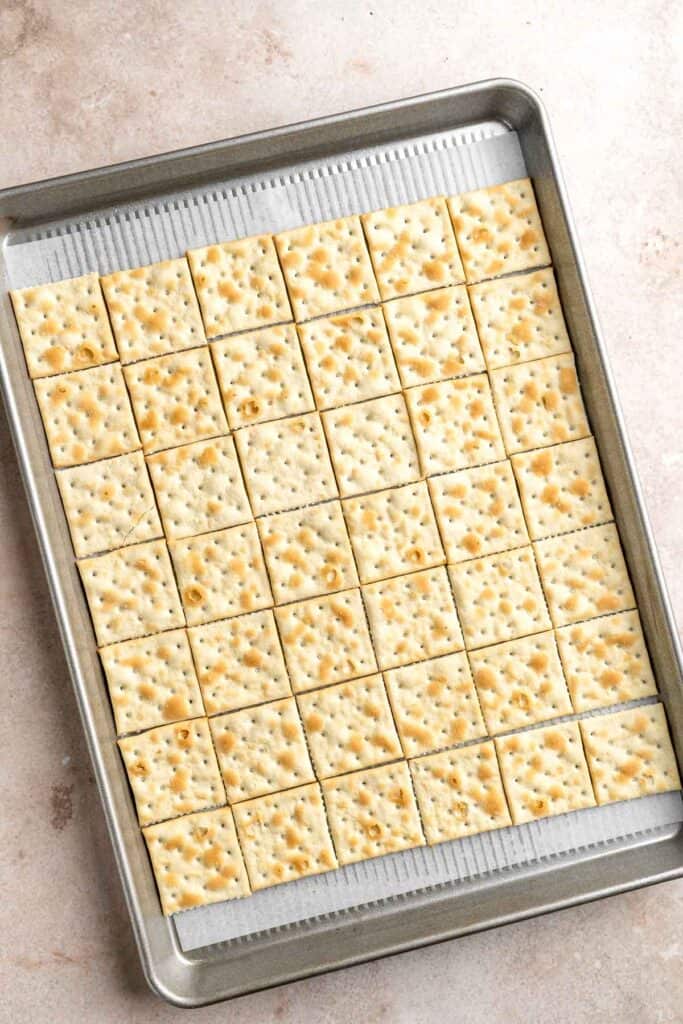
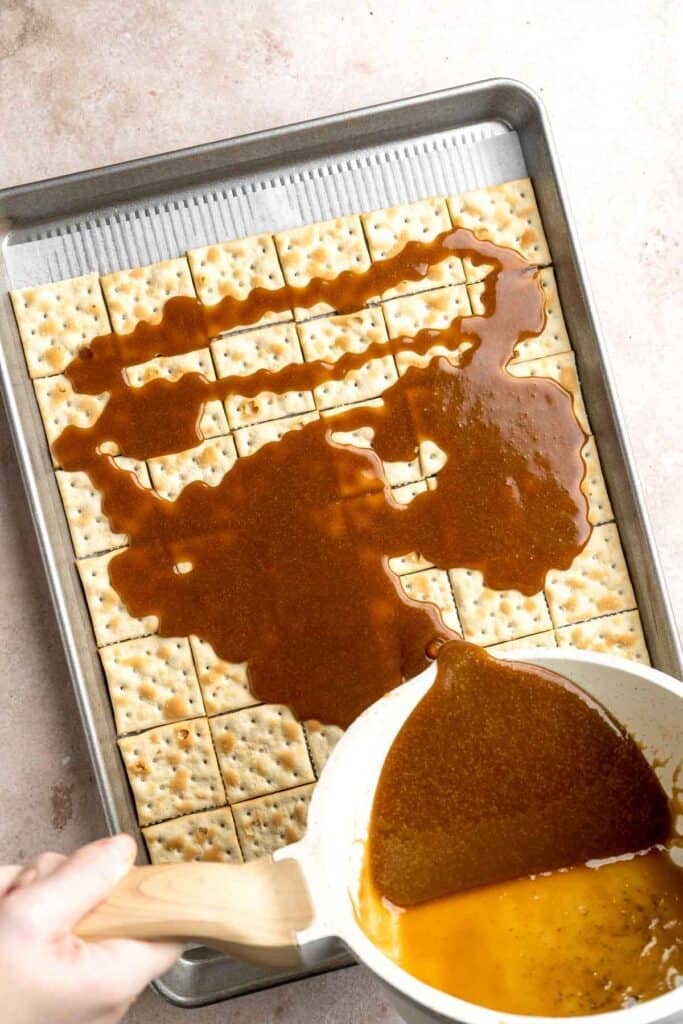
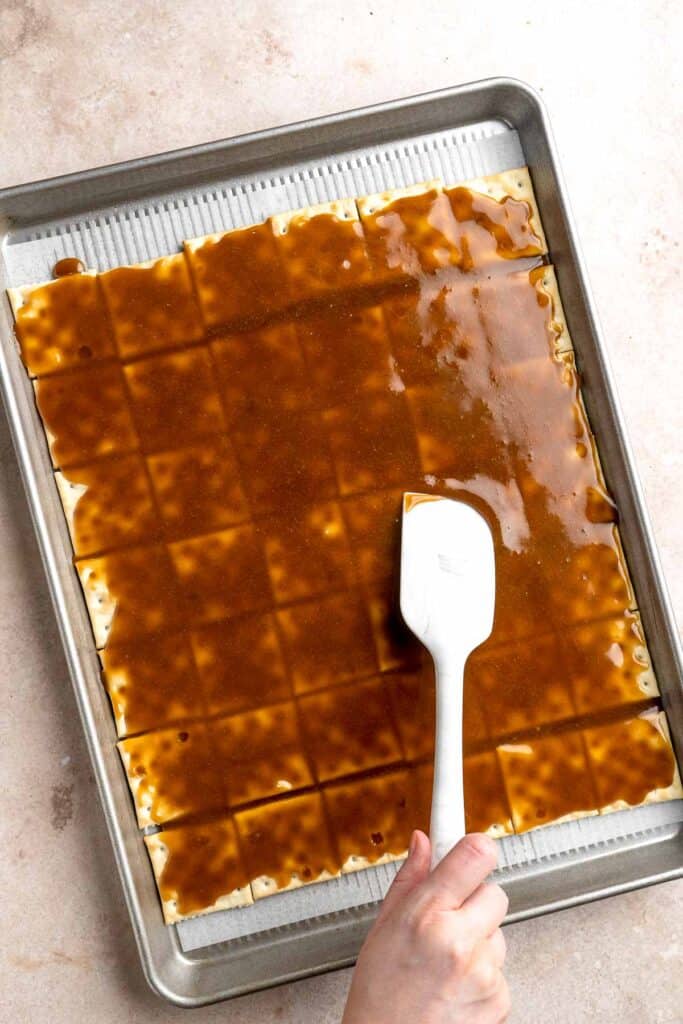
- Add chocolate. Sprinkle the chocolate chips over the hot cracker toffee and place back into the oven for 1 minute. Then remove from the oven and use a spatula to evenly spread the now melted chocolate over the toffee.
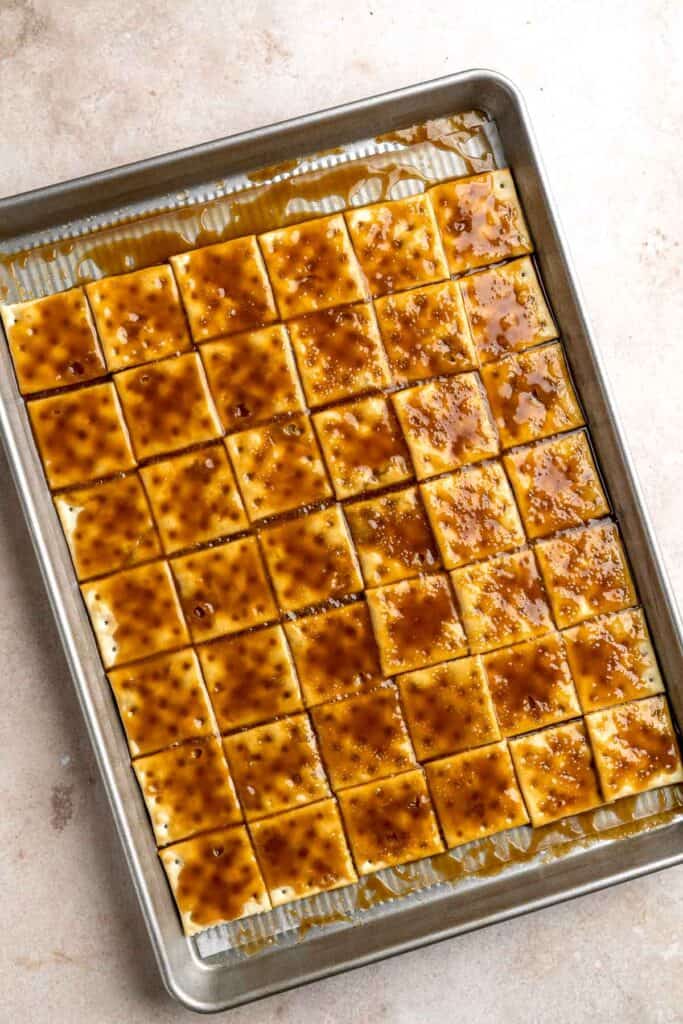
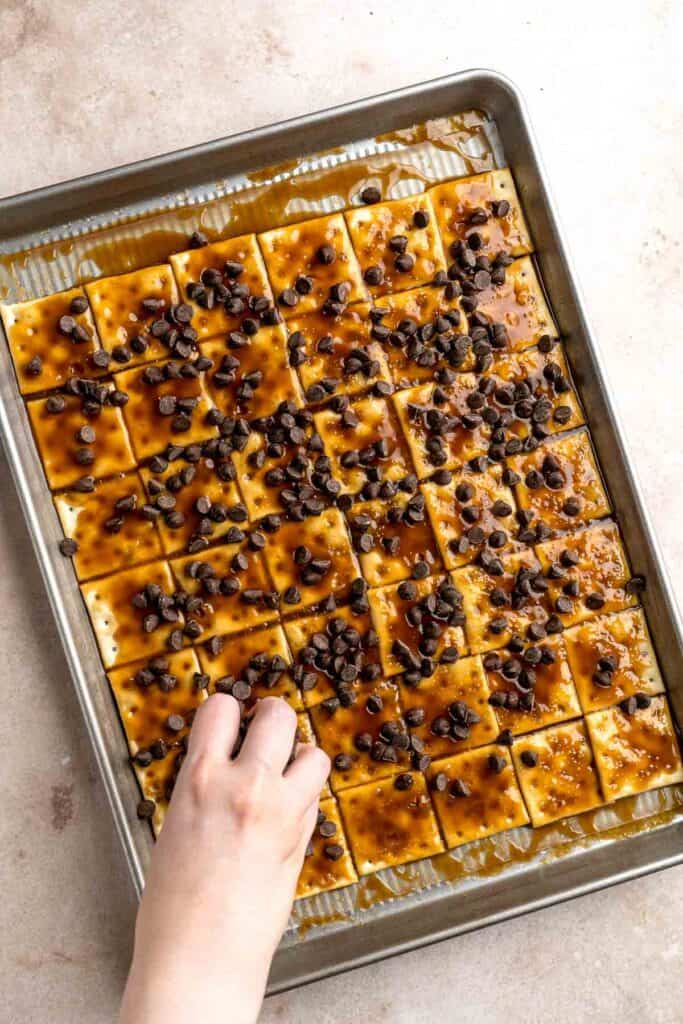
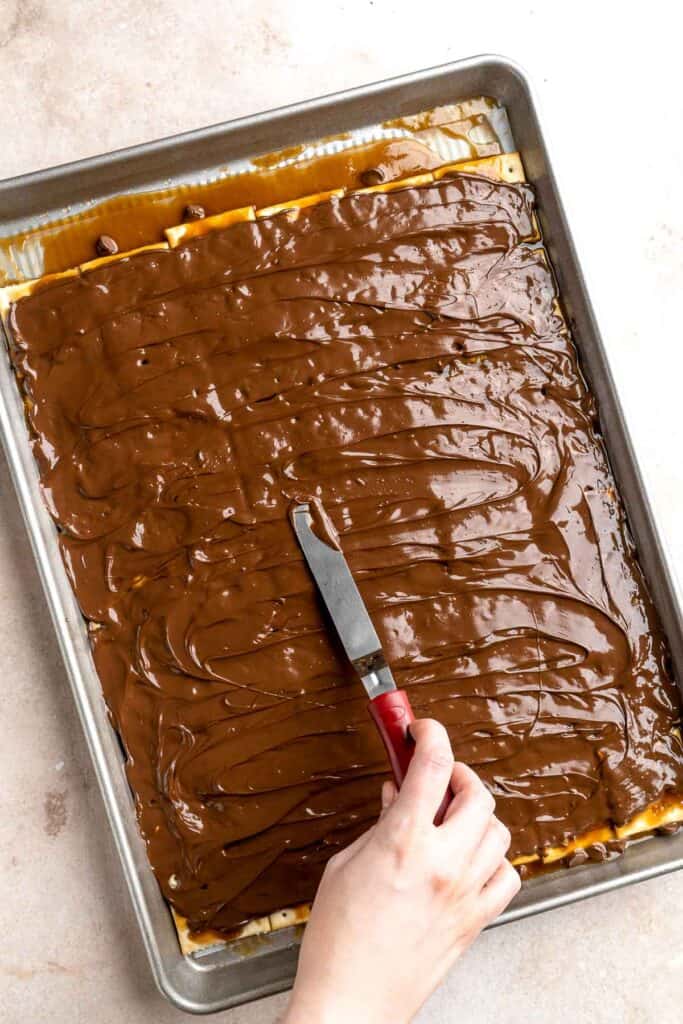
- Add white chocolate. Place the white chocolate into a microwave-safe bowl and microwave in 30 second intervals, stirring in between, until fully melted. Drizzle the melted white chocolate over the chocolate layer.
- Swirl. Use a wooden skewer to swirl it into the chocolate in alternate directions by placing the skewer in the top left and moving it in a horizontal line from left and right, then moving down an inch and going from right to left, repeating in alternate directions.
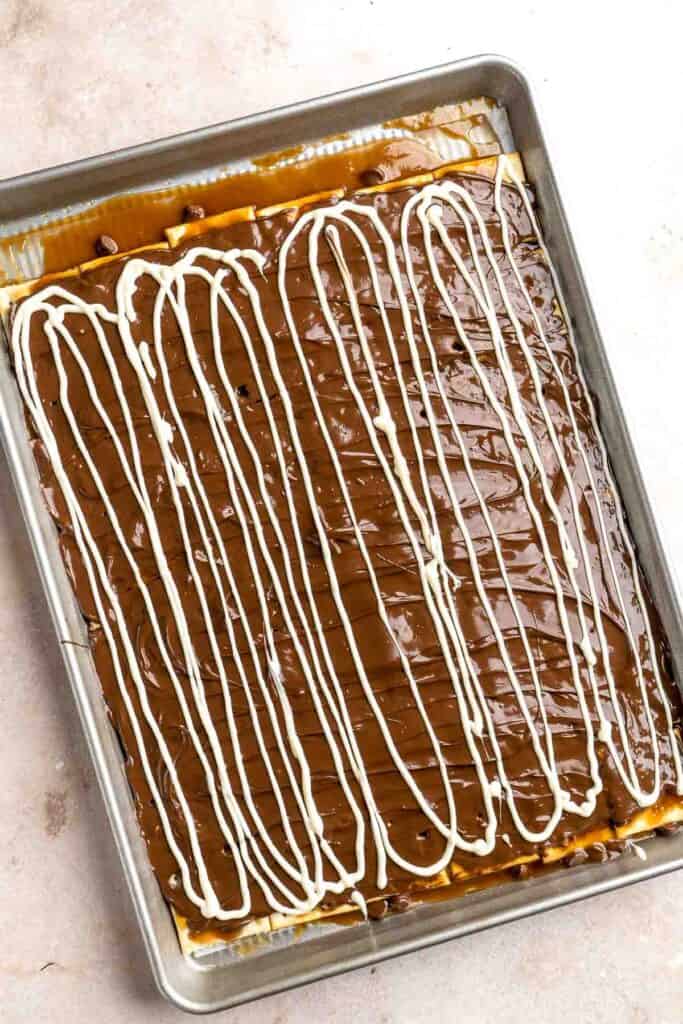
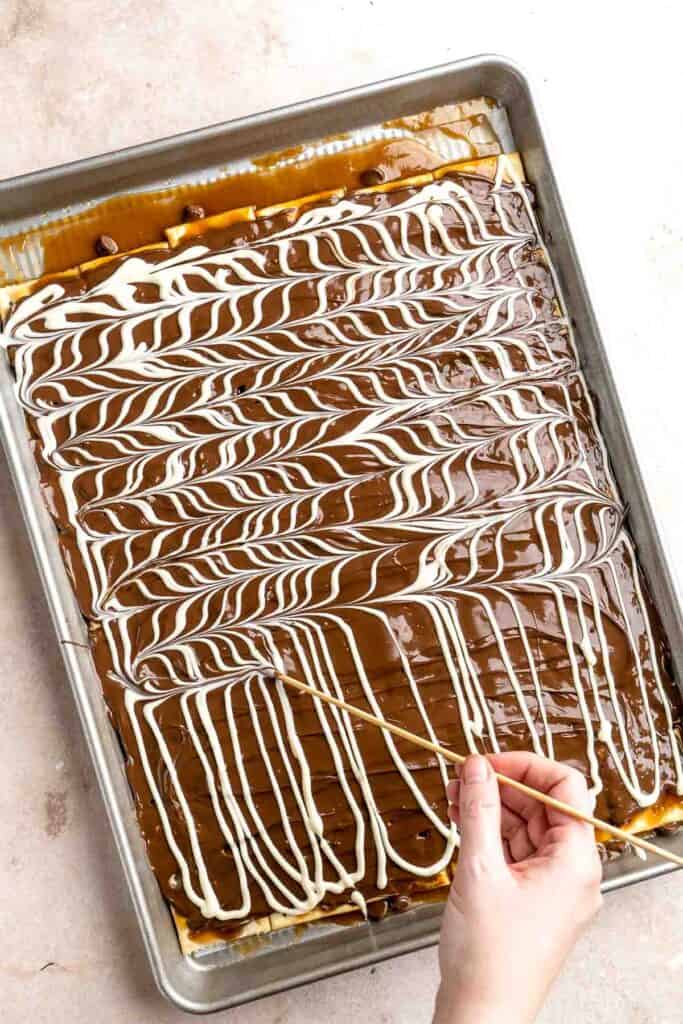
- Add pretzels and toffee. Lastly, top the melted chocolate layer with the pretzels and toffee bits.
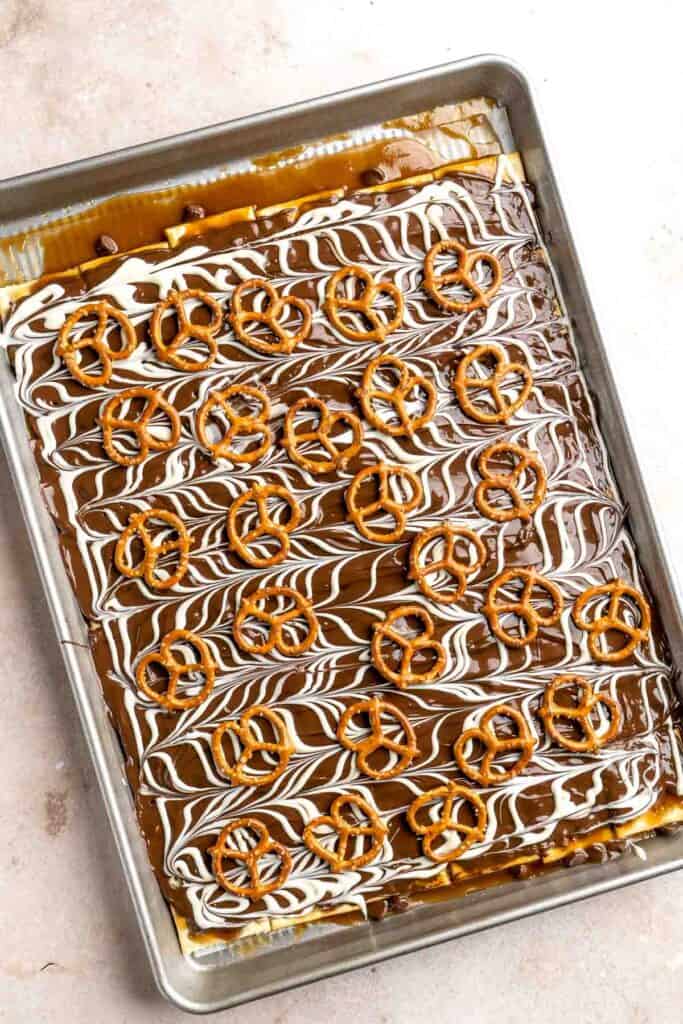
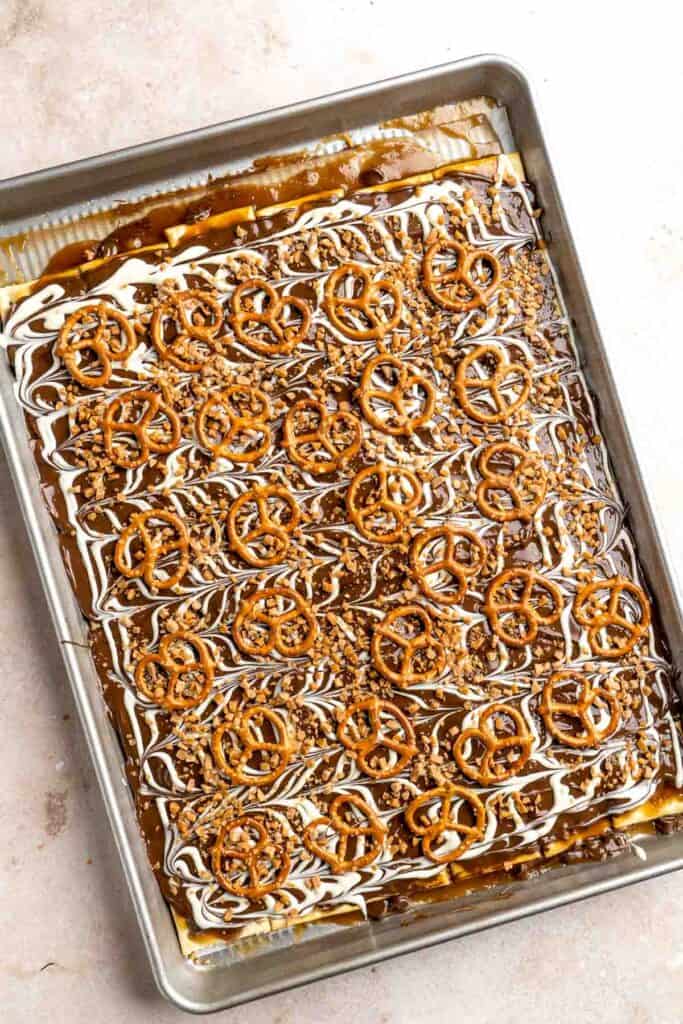
- Chill. Place the sheet pan into the fridge until fully hardened (1-2 hours), or into the freezer for 20 minutes.
- Slice. Remove the candy from fridge or freezer and peel off the parchment paper on the bottom. Place the candy on a cutting board and slice into squares or triangles, or simple break into pieces with your hands.
- Serve. Enjoy immediately or keep in an airtight container in the fridge until you're ready to enjoy.

Recipe Variations
- Make it white. Substitute the semi-sweet chocolate with white chocolate chips for a creamier taste. Not only will it give your Christmas crack candy a unique milky flavor, but also make it much more stunning with the brightly colored toppings.
- Use gingerbread flavors. Bring the warm, classic Christmas flavors to your crack candies by adding ground ginger, cinnamon, and nutmeg to the homemade caramel mixture.
- Top with dried fruits. For a fruity twist, you can top the crack candy with pieces of dried fruits like blueberry, strawberry, and cranberry. This complements the sweetness of the candy with tangy flavors and adds a nice chewy texture.
- Add orange zest. Mix grated orange zest with the toffee mixture for a bright and refreshing taste. Plus, it also adds a citrusy aroma that is sure to pair nicely with the sweet, caramelly smell.
- Sprinkle with sea salt. Add a sprinkle of coarse salt on top of the chocolate before it sets completely. This adds a gourmet flair and complements well with the sweetness of candy.
- Make it festive. Make this Christmas crack more festive by topping it with Christmas colored sprinkles, M&M's, or crushed candy canes.
How to Serve
Enjoy this delicious Christmas Crack Candy with other holiday treats or festive drinks such as:
- Easy Peppermint Hot Chocolate
- Golden Milk Turmeric Latte
- Starbucks Copycat Frappuccino
- Chai Tea Latte
- White Hot Chocolate
- Slow Cooker Apple Cider
For more recipe ideas, see our 30 Best Christmas Cookies.
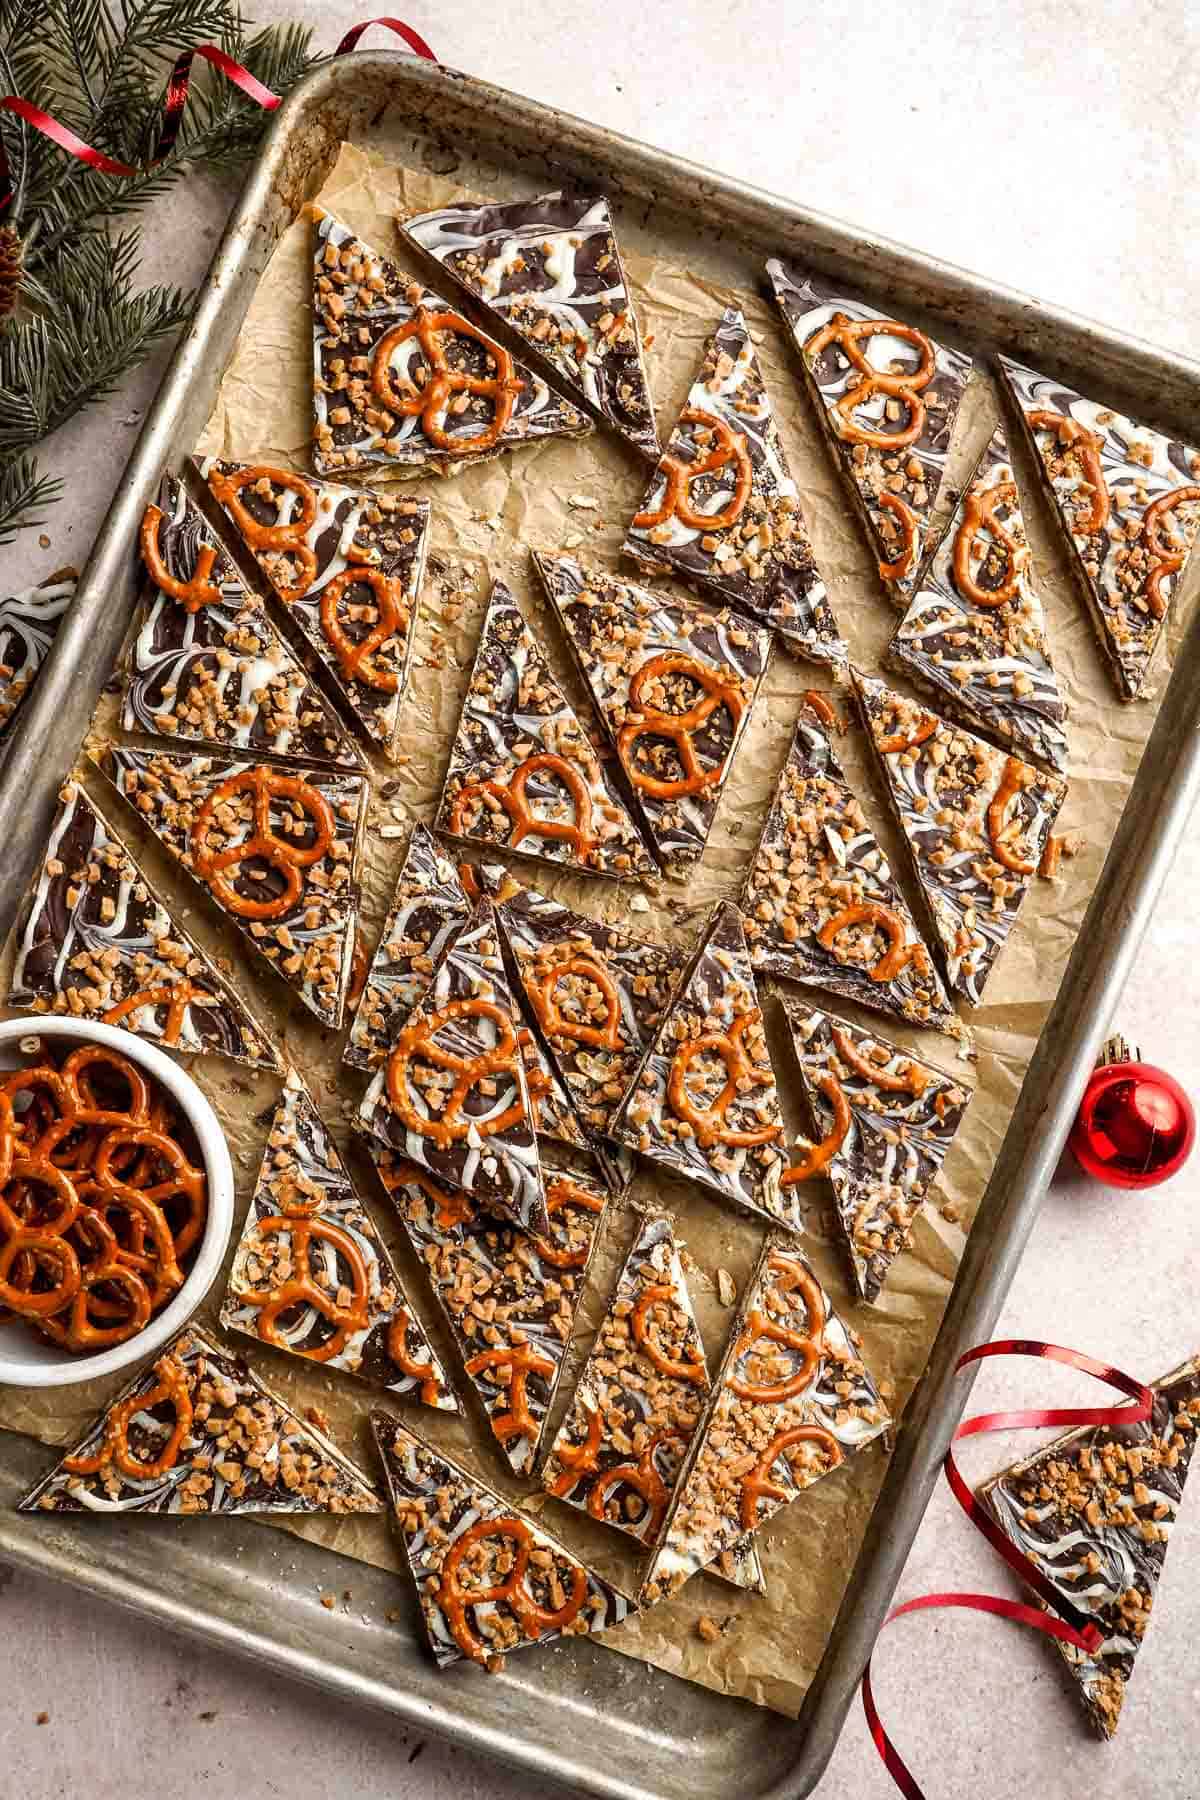
Recipe Tips and Tricks
- Cool to room temperature. If you are not in a rush, you can cool your Christmas crack candy to room temperature for a while before placing it in the refrigerator. This prevents big water droplets from forming on the surface of melted chocolate, which will form white "blooms" once it's stored.
- Cut with a hot knife. Breaking this crack candy by hand is easy but a little bit messy. With the use of a hot, sharp knife, cutting it becomes much easier and neater. Simply dip a knife in hot water and then slice through the candy. Wipe in between cuts to prevent anything from sticking to the blade.
- Distribute toppings evenly. Sprinkle the toppings evenly on top of the melted chocolate. Pressing them gently against the warm chocolate ensures they adhere properly.
Storing and Freezing Instructions
How to Store
Place the crack candy pieces in an airtight container for up to 5 days at room temperature if your house isn't too warm. Otherwise, keep them in the fridge for about 2 weeks.
How to Freeze
Store the crack candy pieces in a freezer-safe bag or container and keep them in the freezer for up to 3 months. Make sure to use a piece of parchment paper in between the layers for easier access, and to prevent them from sticking together.
More Christmas Dessert Recipes
- 30 Best Christmas Dessert Recipes
- Peppermint Fudge
- Gingerbread Cake
- Christmas Cupcakes
- Holiday Yule Log Cake (Bûche de Noël)
- Peppermint Kiss Cookies
Tried this recipe?
I'd love to hear what you think! Leave a comment and rating below to share your feedback. Your reviews help others discover this recipe and help me keep creating more free recipes for you. Snap a photo and tag me on social media @aheadofthyme too.

Sweet Potato Rolls
These fluffy Sweet Potato Rolls are made with perfectly cooked sweet potato, which adds a tenderness and sweet flavor that takes them over the top! They're the perfect homemade rolls to serve with pot roast, your Thanksgiving turkey, or any recipe in between. They're also our favorite way to sop up a bowl of soup and taste like heaven with a pat of homemade honey butter. They're a family favorite!
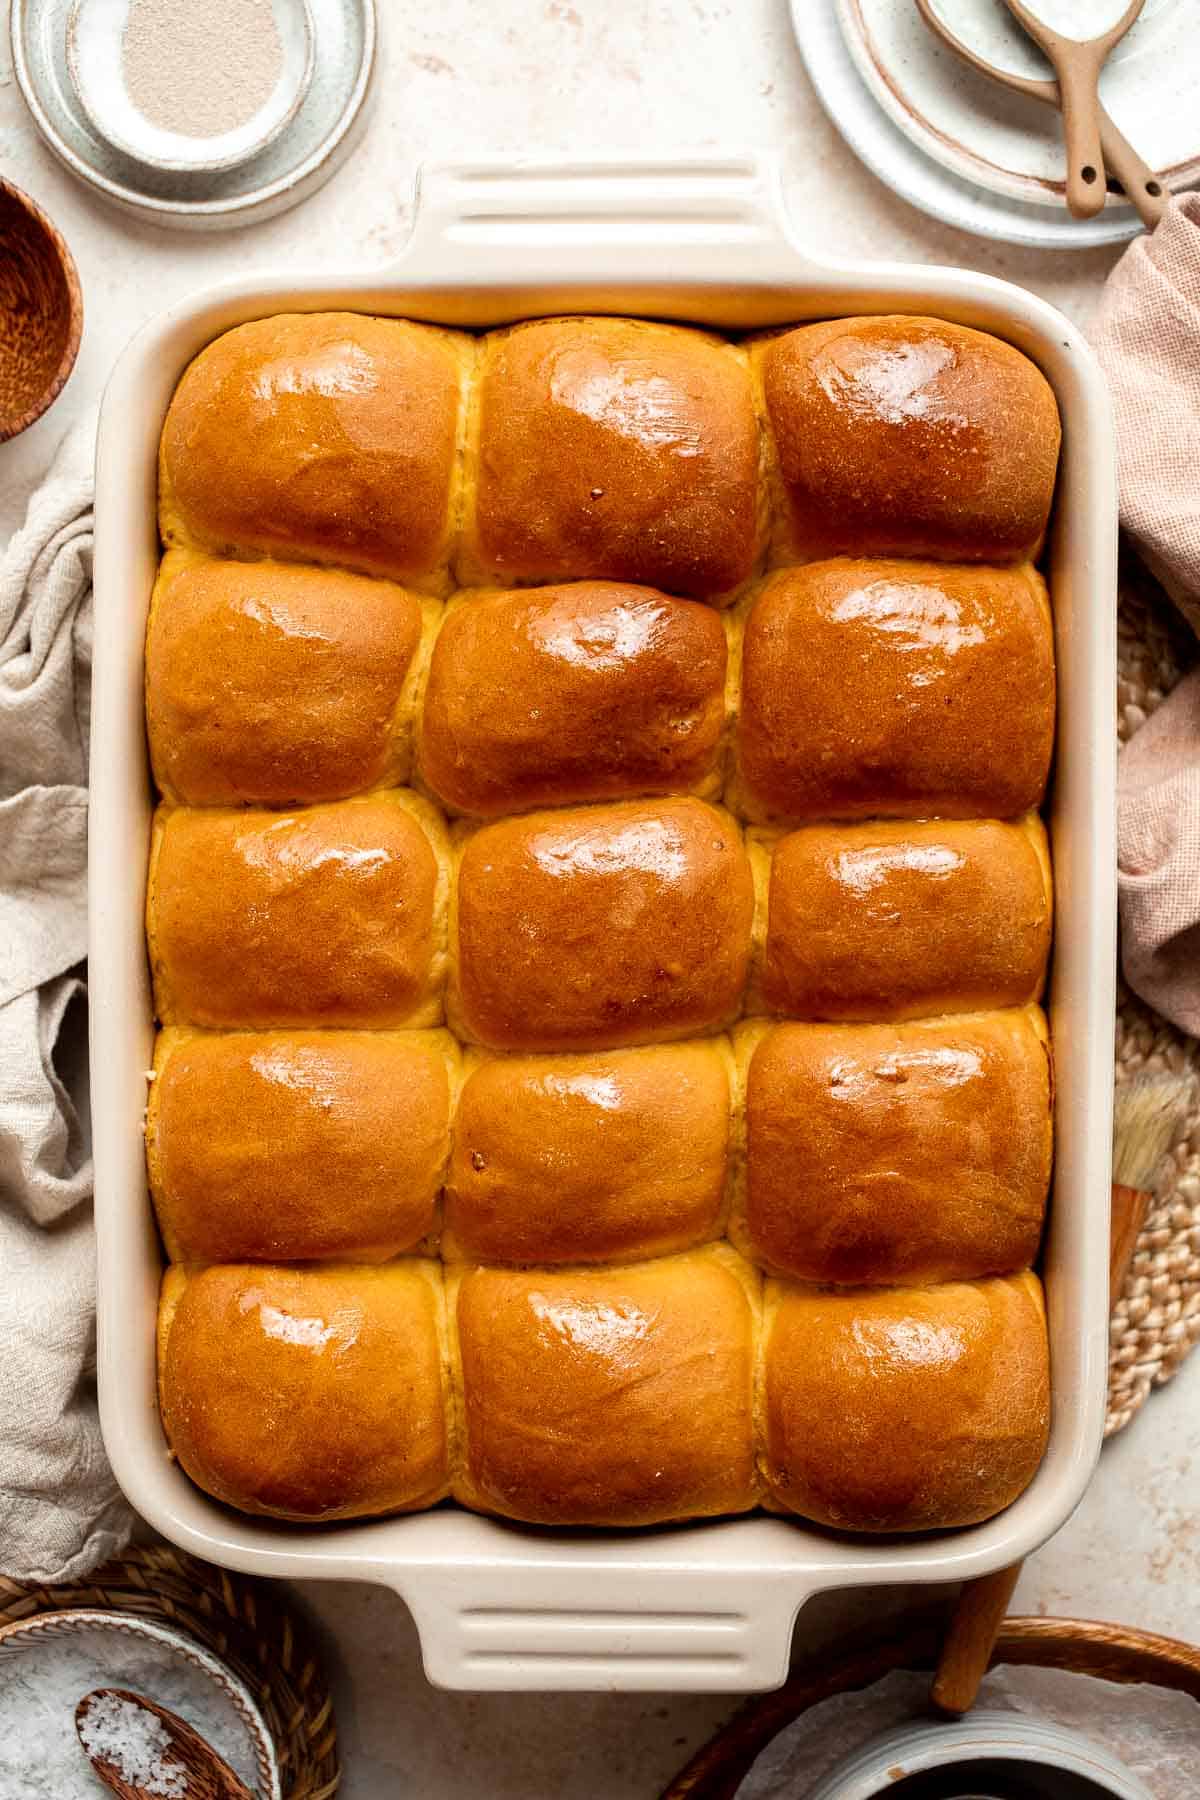
If you've ever made potato rolls before, you know that the cooked potato gives the dough a softer, fluffier texture. The same goes for these sweet potato dinner rolls! The tender sweet potato puree is the perfect addition. It adds extra moisture and a soft, pliable texture that's unbelievable. The mild sweet potato flavor gives them a slightly sweet flavor similar to Hawaiian rolls. They're truly the best!
Why You'll Love These Sweet Potato Rolls
- Easy to make. The dough for these soft sweet potato rolls is very straightforward. After cooking the sweet potatoes, mash them together and then mix them in with a few simple ingredients like flour, butter, milk, egg, yeast, etc. They're also a great way to use leftover sweet potatoes after the holidays!
- Perfect texture. The cooked sweet potatoes are the perfect way to make the softest, fluffiest rolls ever. They're also enriched with butter, milk, and eggs, so the dough is very similar to ultra tender, pillowy brioche.
- Delicious flavor. The mashed sweet potato has a natural sweetness with a rich depth of flavor that makes these delicious rolls taste amazing. We add a little extra sugar to highlight that natural sweetness and a little butter for the best buttery sweet potato rolls ever. They'll become a must-have for your Thanksgiving or Christmas dinner menu!
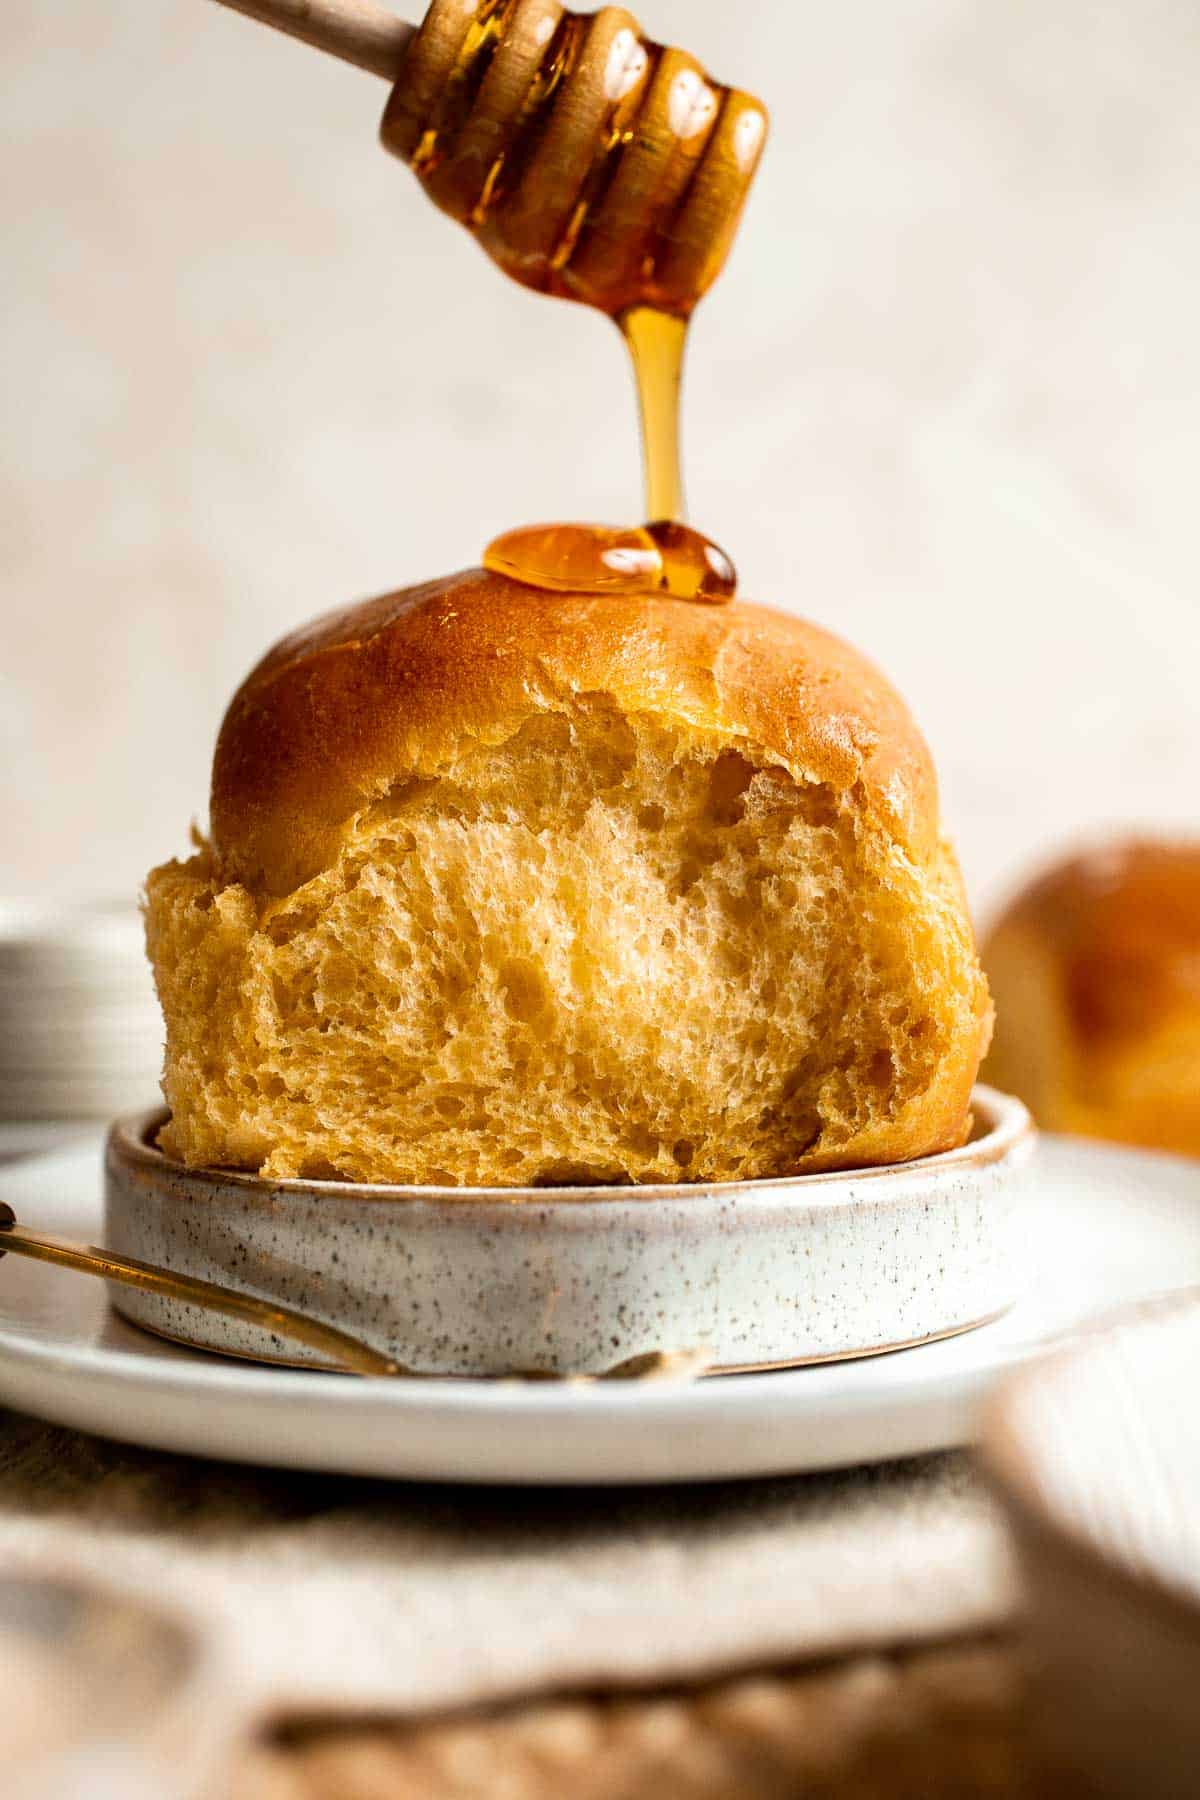
Ingredient Notes
To make these delicious Sweet Potato Rolls, you will need the following ingredients (full measurements in recipe card below):
- sweet potatoes - peel and cut the sweet potatoes into 1-inch pieces.
- butter - the butter will add a softness and a rich buttery flavor to these rolls.
- milk - milk will give the rolls a soft, tender texture.
- water - use warm water to activate the yeast.
- granulated sugar - this will support the active dry yeast and add a hint of sweetness. Brown sugar works, too.
- active dry yeast - you'll need one package of yeast (or 2 teaspoons). Instant yeast works well, too, although it may rise much faster.
- all-purpose flour - regular all purpose flour works very well for these rolls. You can use bread flour if you prefer a chewier texture.
- eggs - eggs will help bind the dough together and give the rolls an extra softness and lift.
- salt - it's so important to season the rolls to highlight their full flavor.
You will also need a large pot, fork and/or potato masher, small mixing bowl, large mixing bowl, stand mixer (optional), bench scraper, 9x13 baking pan, plastic cling wrap, and a wire cooling rack.

How to Make the Best Sweet Potato Rolls
First, prepare the sweet potatoes.
- Cook the sweet potatoes. Place sweet potatoes in a large pot and cover with water by about an inch. Bring to a boil over high heat. Reduce heat to medium-low and simmer uncovered until tender and soft when you insert a fork, approximately 10-15 minutes.
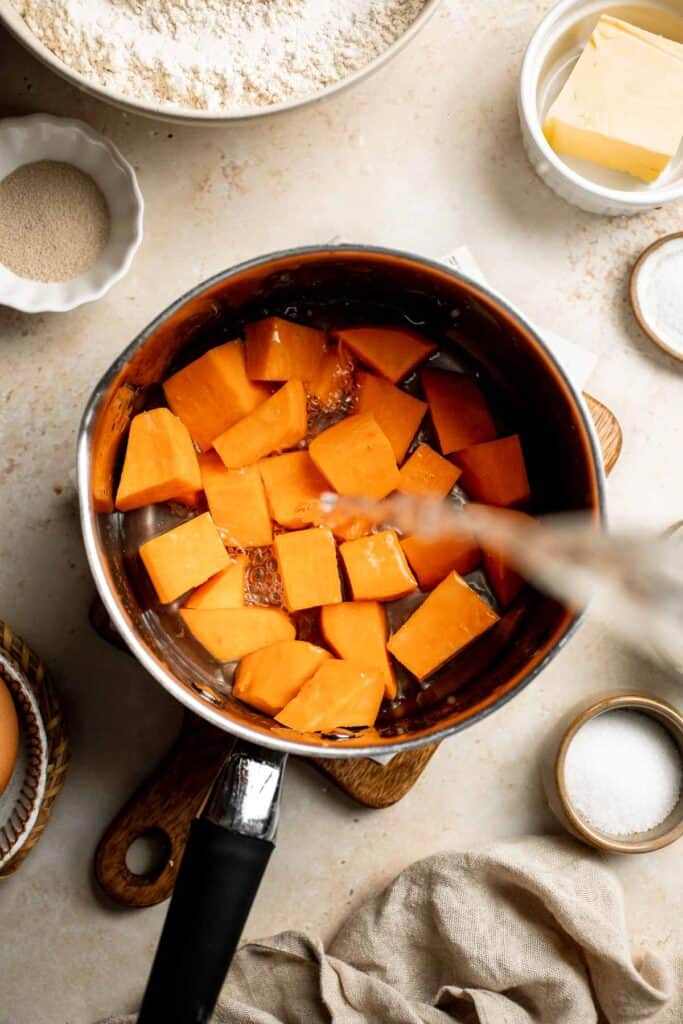
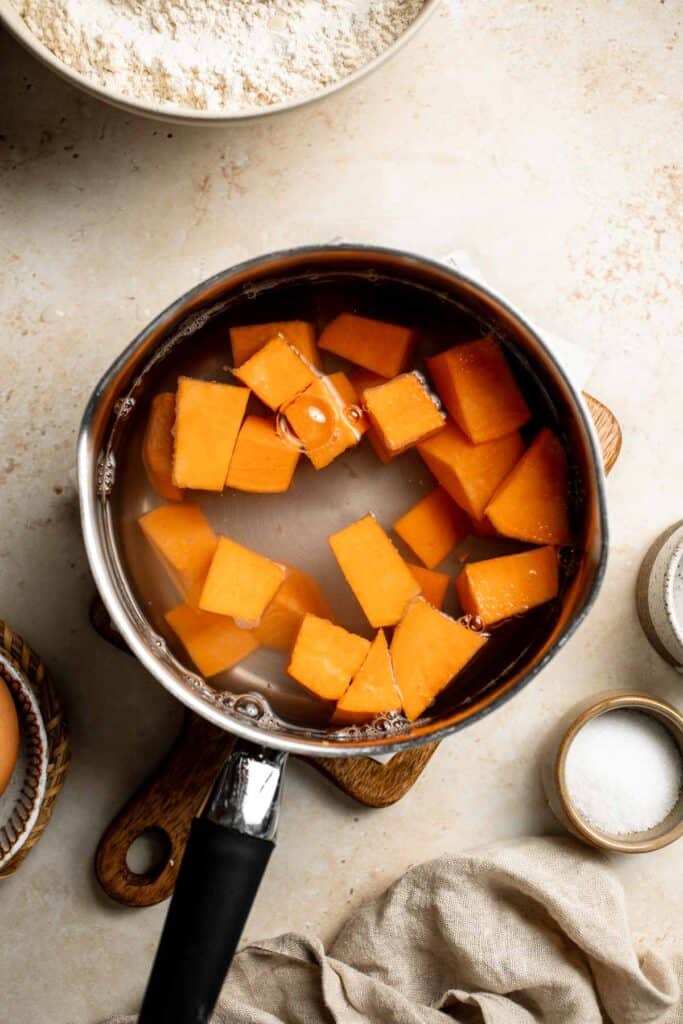
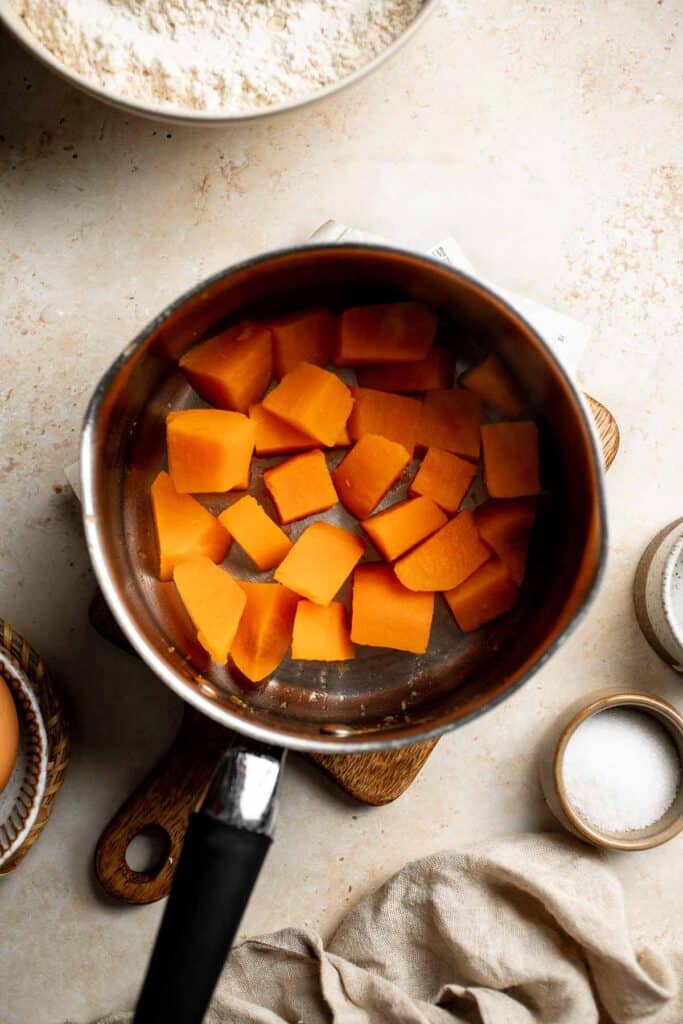
- Mash the sweet potatoes. Drain well and place the sweet potatoes back in the pot. Mash them using a potato masher (or a fork).
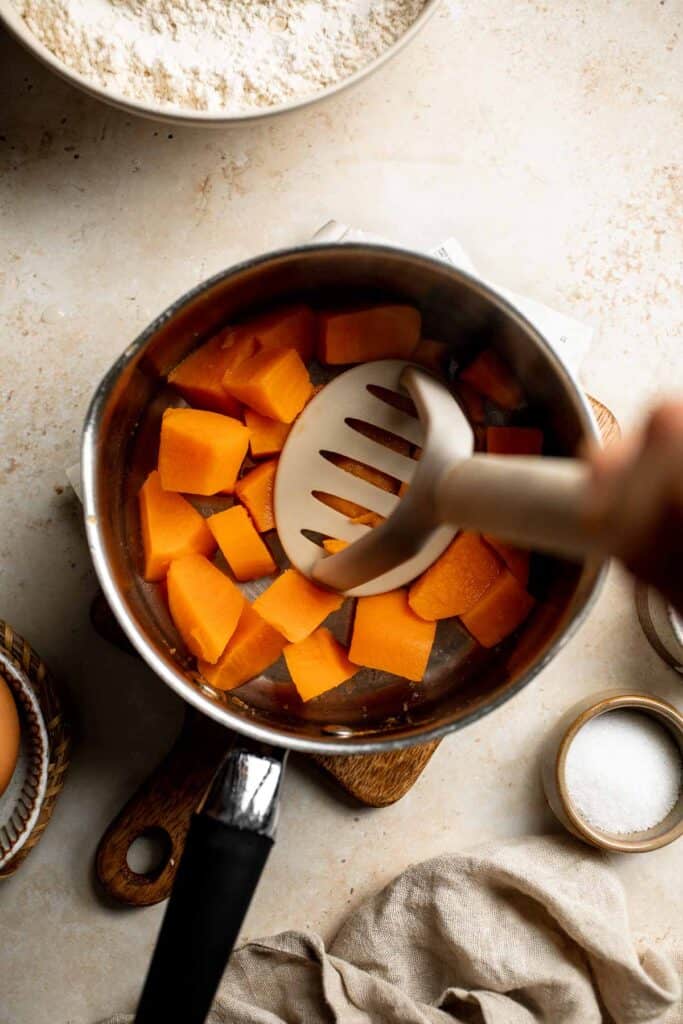

- Make it creamy. Add butter and and milk. Mix well until smooth. Set aside and let cool completely, about 20 minutes.

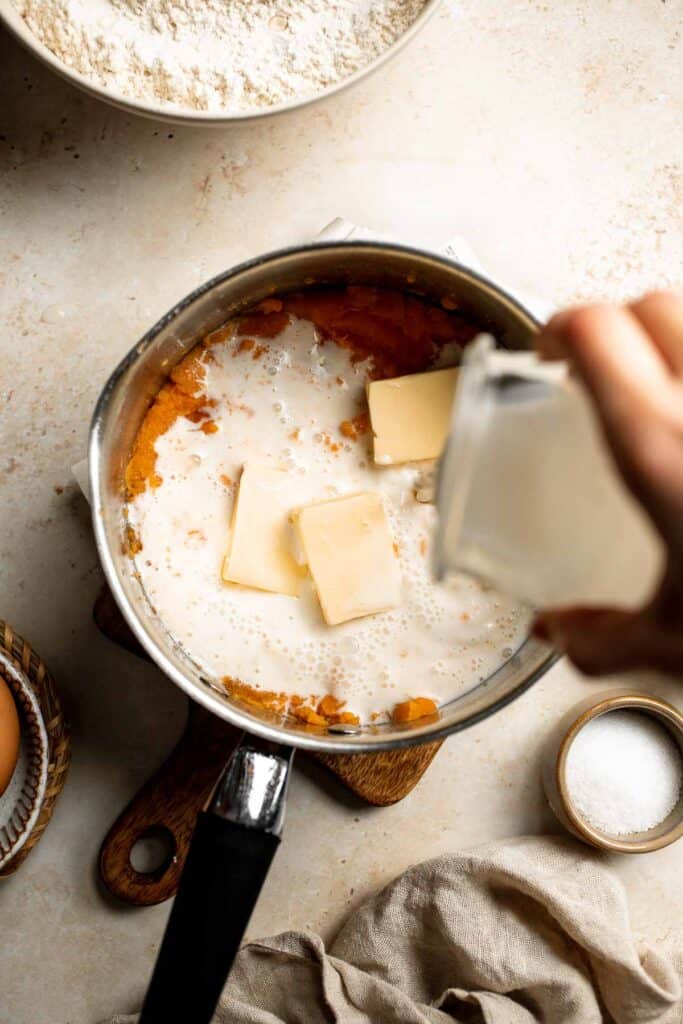
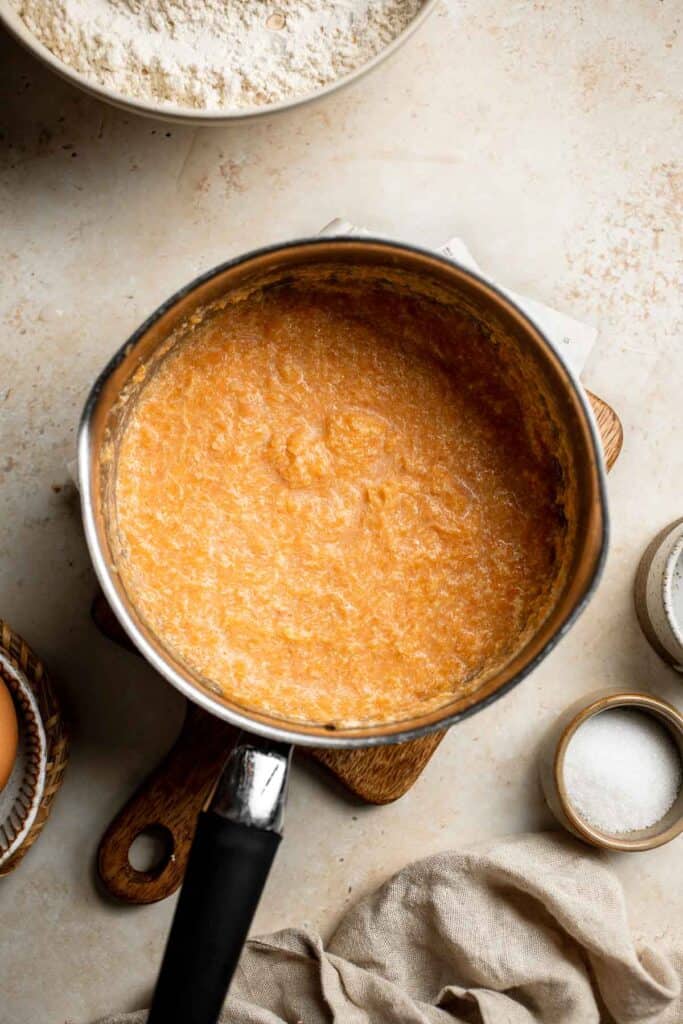
Next, prepare the dough.
- Activate yeast. In a small mixing bowl, stir together water, sugar and yeast until fully dissolved. Set aside for 5 minutes until bubbles form on top.
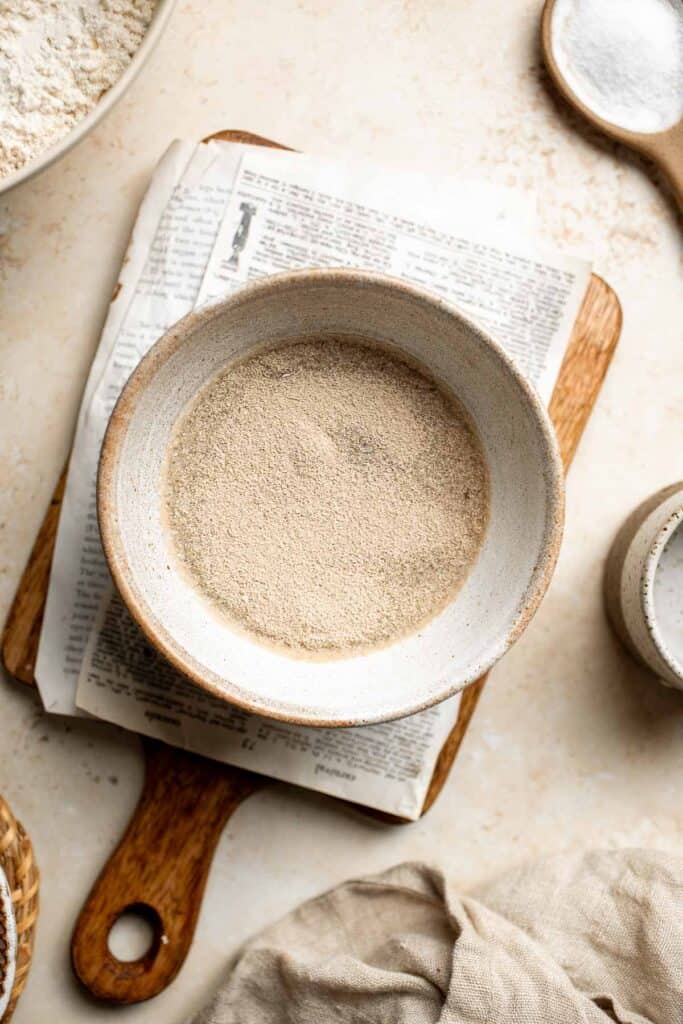
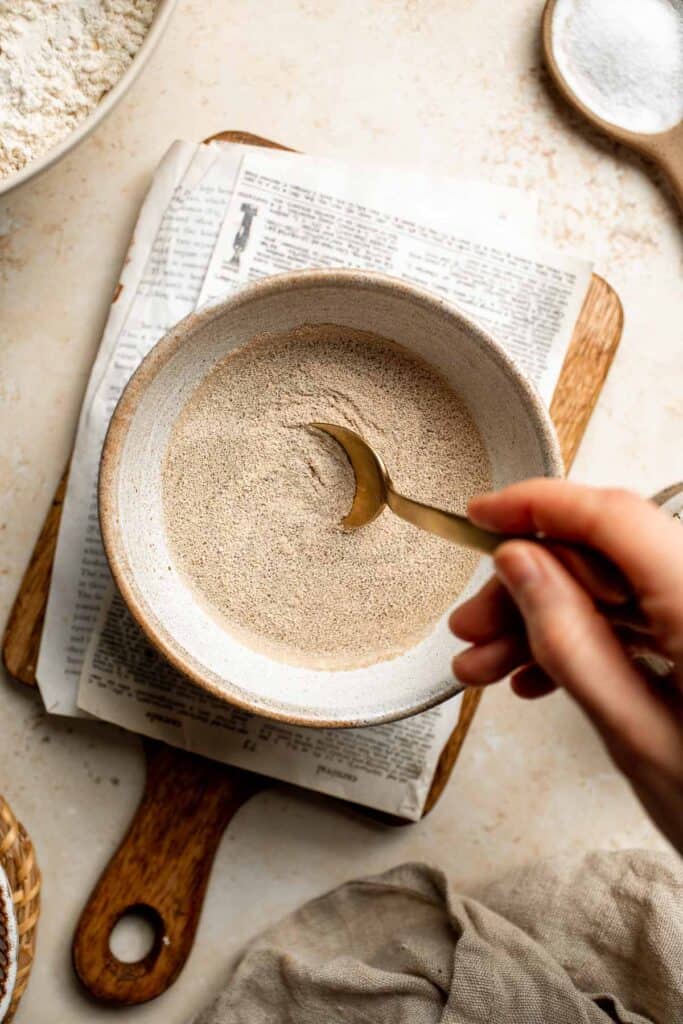
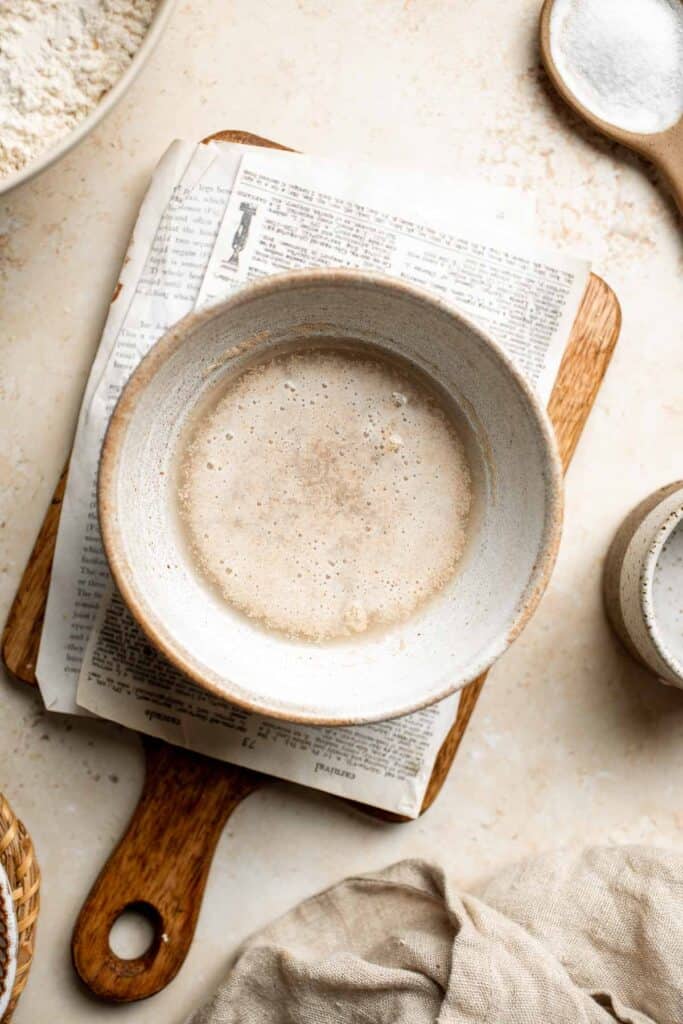
- Combine ingredients. In a large mixing bowl, combine flour, eggs, salt, mashed sweet potatoes, and yeast mixture. Mix well until it forms a shaggy dough, scraping down the sides of the bowl (there should be no dry flour particles visible).

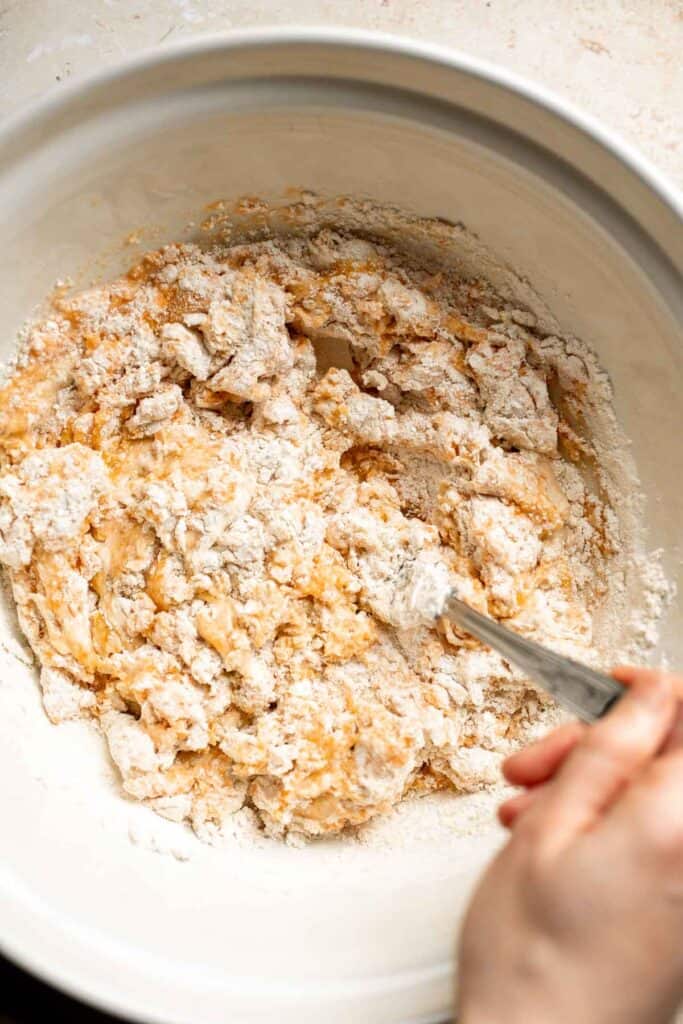
- Knead. Use your hands to knead the dough for 8-10 minutes until a smooth and soft dough ball is formed. You can also knead the dough in a stand mixer with the dough hook attachment on medium speed for 5 minutes until smooth dough ball is formed.
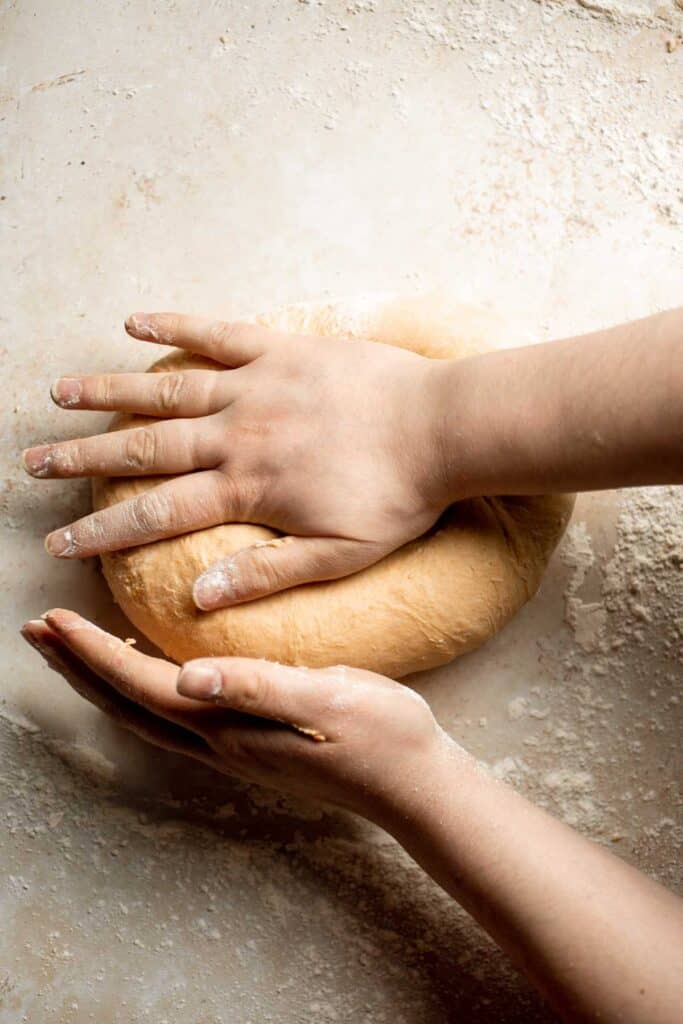
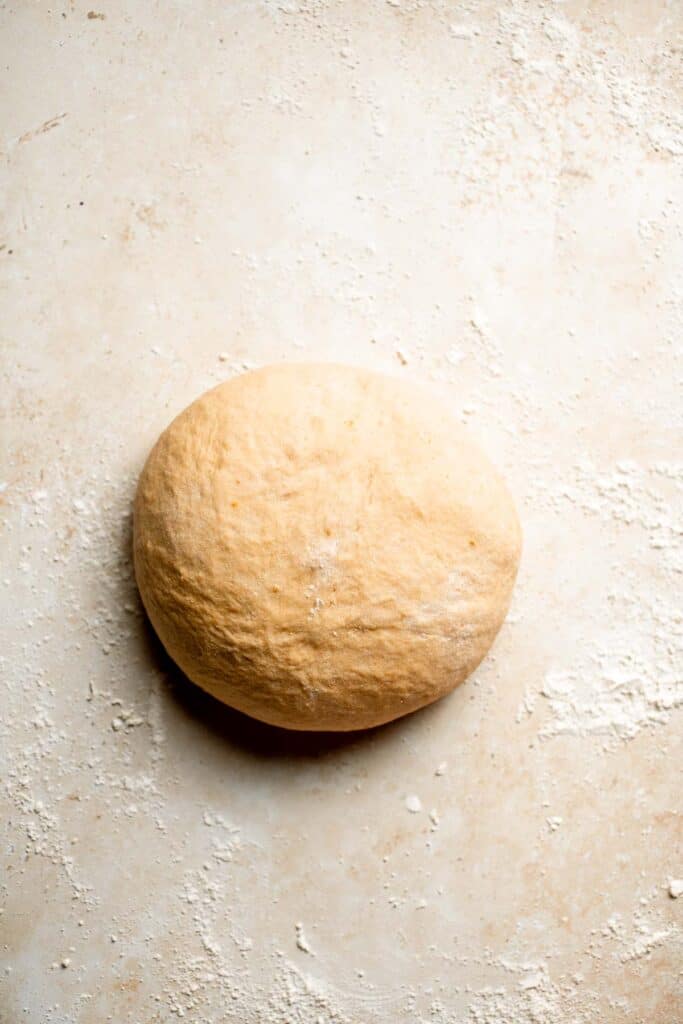
- Rest. Cover the bowl and let the dough rise until doubled in size, about 1 hour. You can lightly oil the dough ball to prevent sticking.
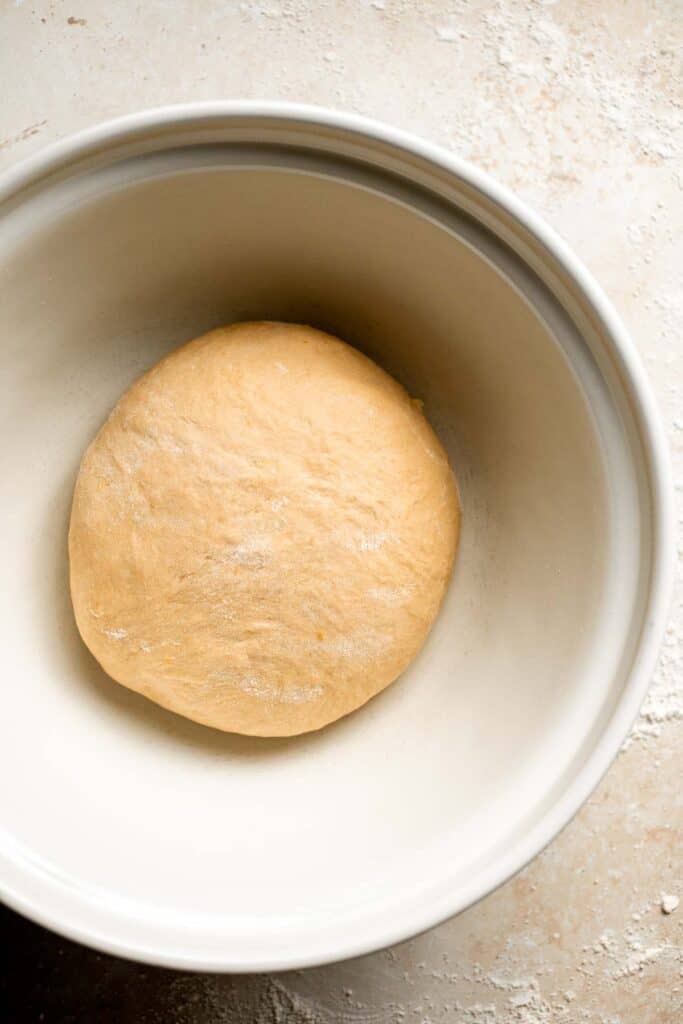
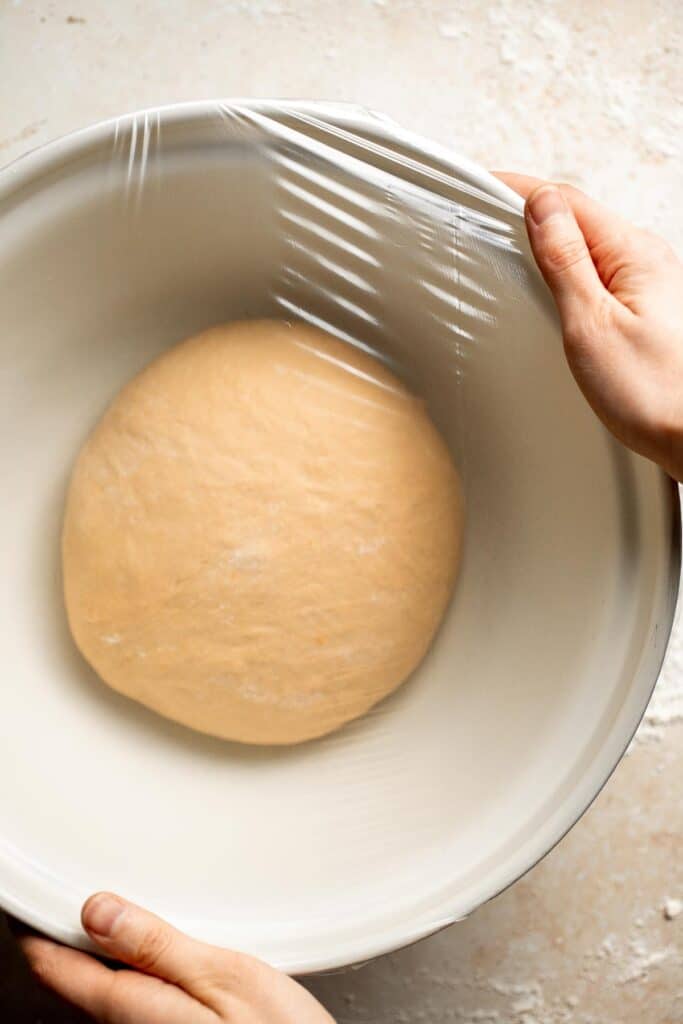
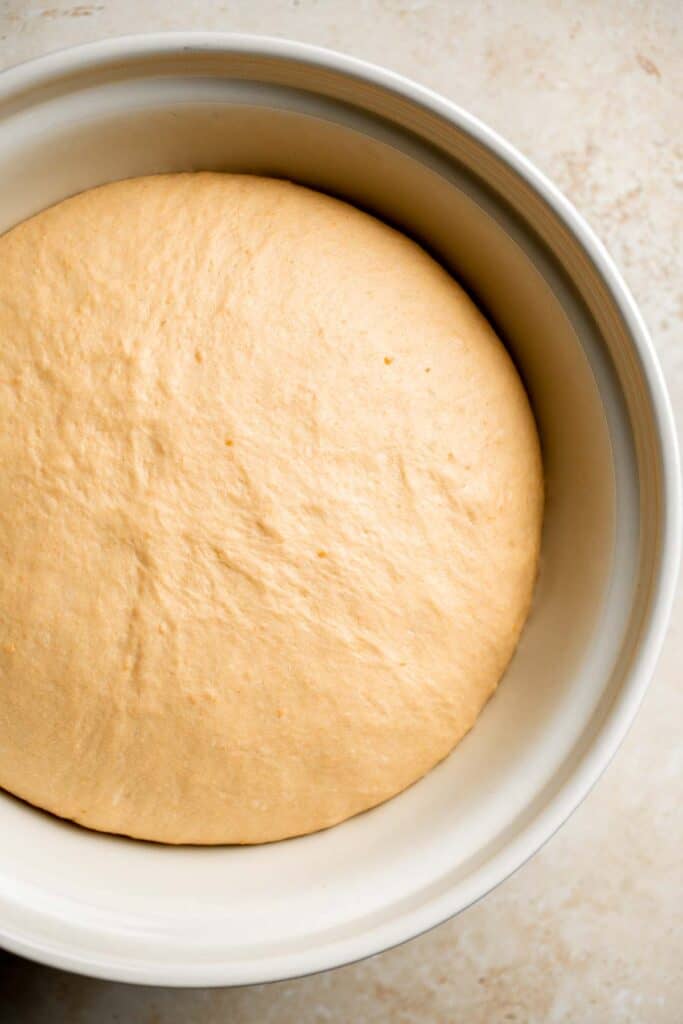
Now, it's time to shape the rolls.
- Divide dough. Deflate the dough and roll the dough into a log. Use a bench scraper to divide it into 15 equal pieces. Cover the dough with a damp cloth or plastic cling wrap to prevent it from drying.


- Shape. Take one piece of dough at a time and shape into a smooth ball. Use the palms of your hands to flatten each dough, then fold and press all edges into the centre. Turn it over and cup the dough in the palm of your hand, making circular motions until you create a ball. It should take less than 30 seconds to roll each piece into a smooth ball.
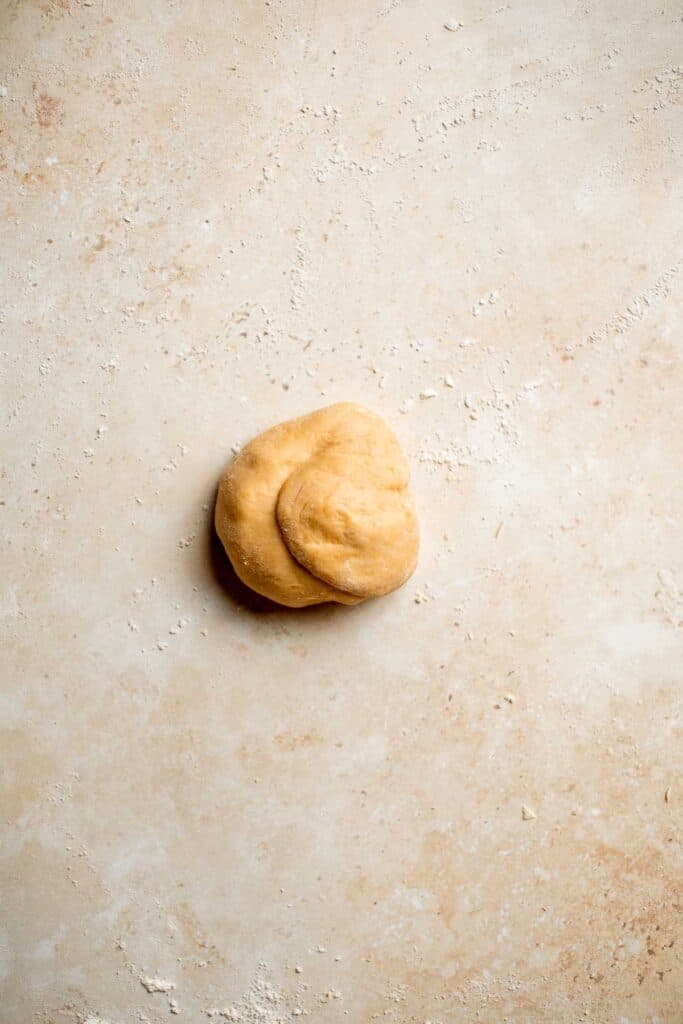
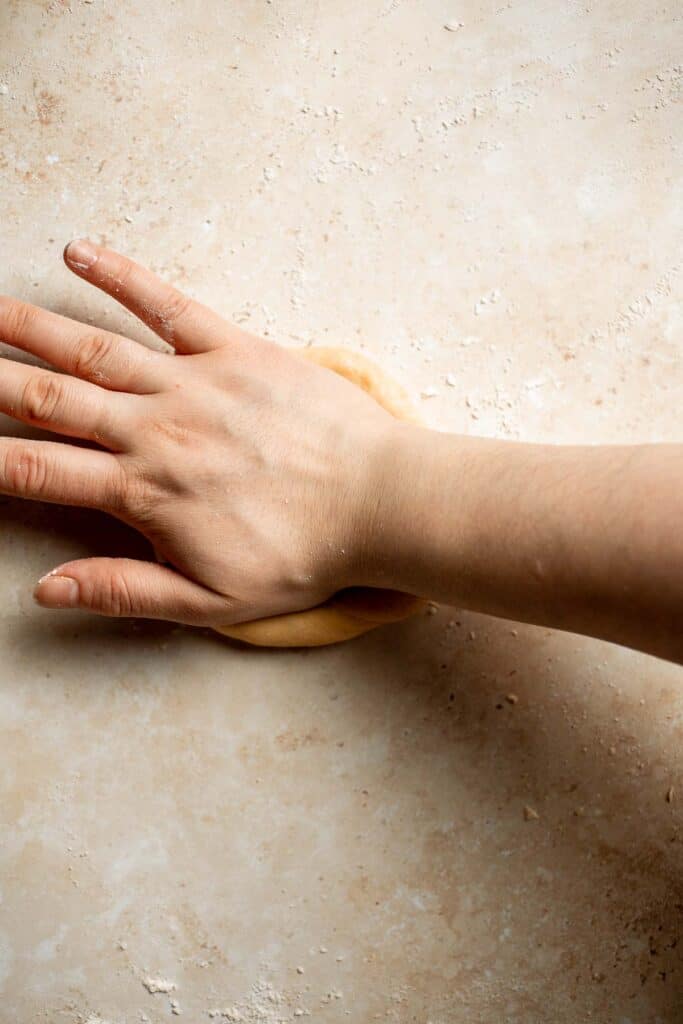
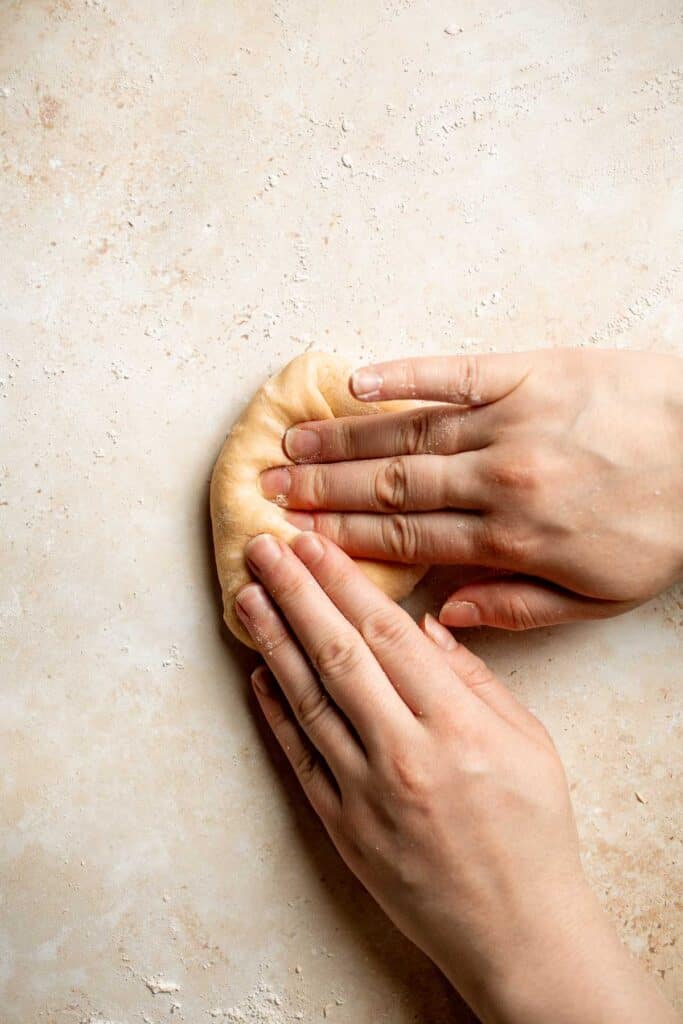

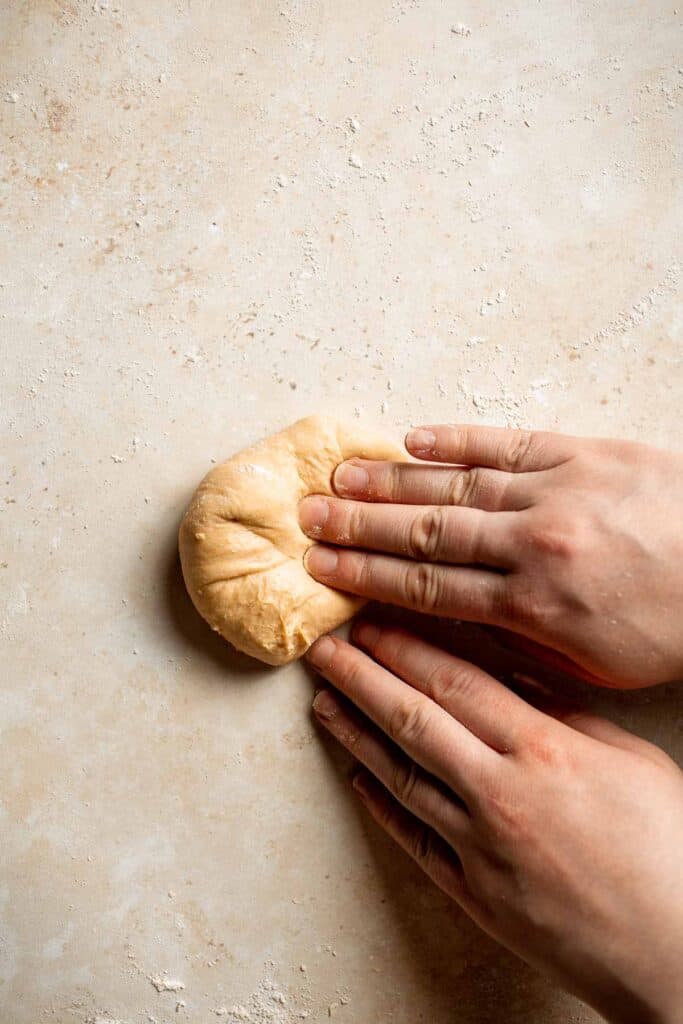

- Rest. Arrange the dough balls into a 9x13-inch baking pan, spacing them evenly into 5 rows and 3 columns. Cover the pan loosely with plastic cling wrap and let the rolls rise until almost doubled in size, about 45 minutes.
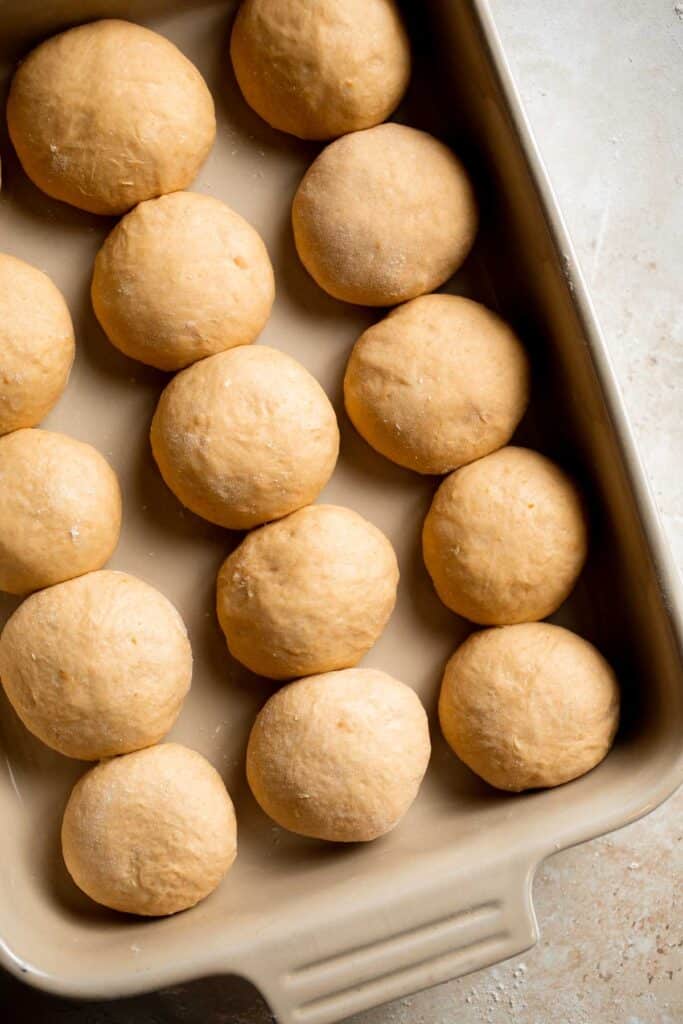
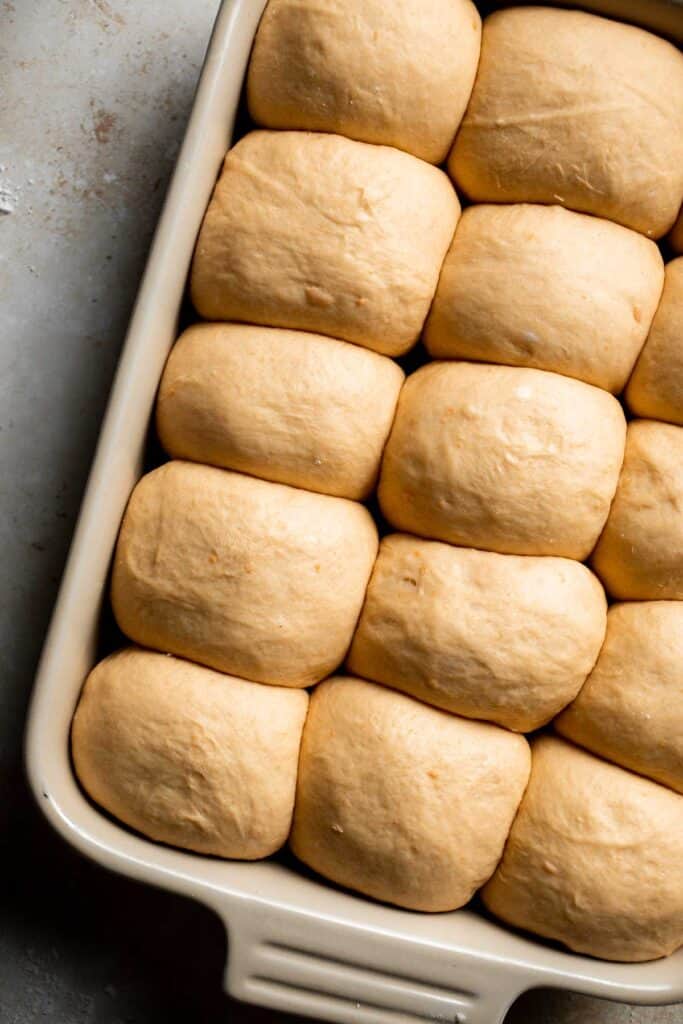
Finally, bake the rolls.
Bake the sweet potato rolls in a 350F preheated oven for 22-25 minutes until golden brown.
Brush the top with some melted butter (if desired) and let the rolls cool on a wire rack for 15 minutes before serving.
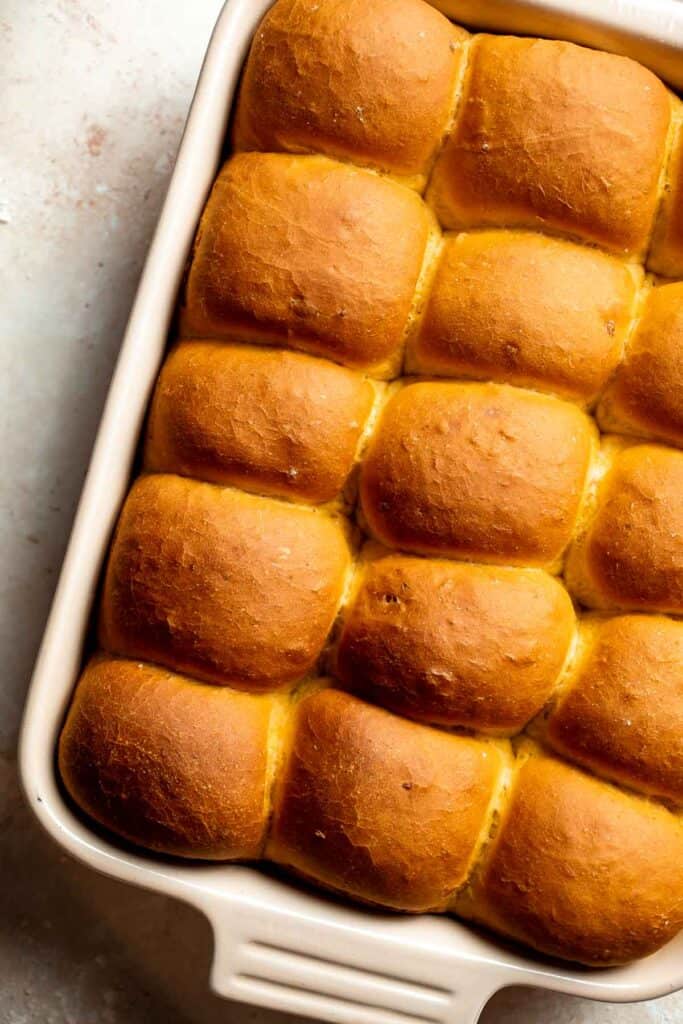
Recipe Variations
- Try a different vegetable. These sweet potato buns are so easy to adapt! Try using pumpkin puree, mashed acorn squash, or pureed carrots instead.
- Sprinkle with seeds. Sprinkle white sesame seeds on top of the rolls just before baking.
- Form burger buns. Instead of dinner rolls, mold the dough into larger bun-sized pieces. They'd be wonderful for burger patties! Be sure to adjust the baking time as needed.
How to Serve
These Sweet Potato Rolls is delicious served on their own, or paired with some of my favorite recipes including:
- White Bean Soup with Kale
- Sunday Pot Roast
- Roast Stuffed Chicken
- Butternut Squash Salad
- Creamy Turkey Orzo Soup
These rolls are amazing with soup. For more ideas, see our 60 Best Soup Recipes.

Recipe Tips and Tricks
- Don't rush. Working with yeast is an art. It's pretty easy, but only if you're patient. Follow the visual cues, like seeing the dough double, instead of focusing on the timer. This is especially true in the winter when your kitchen is likely cooler.
- Use fresh yeast. If you have old yeast in your pantry, it might already be dead. If your yeast doesn't bubble up, start fresh with a new batch.
- Don't kill the yeast. When you're activating the yeast, make sure you use water below 120 degrees F, or the yeast will die. A temperature between 100-110 degrees F is just right.
Storing and Freezing Instructions
How to Store
Store leftover rolls in an airtight container or wrapped in plastic wrap at room temperature. They'll stay fresh for 4-5 days.
How to Reheat
There's nothing like a warm roll! Either microwave your roll for 15-30 seconds or bake them at 350 degrees F for 4-5 minutes until nice and warm.
How to Freeze
Wrap the cooled rolls in several layers of plastic wrap, then store them in a freezer bag or container for up to 3 months. Thaw in the fridge before reheating.
FAQ
These sweet potato rolls are made with an enriched dough. This means it contains a lot of heavy ingredients like cooked sweet potatoes, eggs, milk, and butter, all of which can slow down the yeast from rising. If you rush the rise, you'll end up with dense, heavy rolls. For fluffy rolls, it's really important to monitor how much the dough is growing and be patient, especially with the first rise.
We prefer to use active dry yeast instead of instant yeast for our roll recipes. They are both interchangeable, but instant yeast starts rising immediately. Active dry yeast can take about 20 minutes to really wake up. This is a better pace, especially for home bakers, and we find the dough tastes better when you give it time to rise slowly.
Although there are many different roll recipes out there, there's something so special about potato rolls, especially sweet potato rolls! The added moisture and sweetness from the sweet potatoes gives them a really soft, tender texture that can be hard to achieve in regular rolls. The recipe is much closer to brioche, especially this version that includes milk, eggs, and butter as well. They're a special option that's especially perfect for your Thanksgiving dinner or fall soups!
More Dinner Rolls Recipes
- 50 Best Bread Recipes
- Potato Dinner Rolls
- Parker House Rolls
- Garlic Knots
- Skillet Dinner Rolls
- Easy Small Batch Ciabatta Rolls
Tried this recipe?
I'd love to hear what you think! Leave a comment and rating below to share your feedback. Your reviews help others discover this recipe and help me keep creating more free recipes for you. Snap a photo and tag me on social media @aheadofthyme too.

Peppermint Fudge
This Peppermint Fudge is a delicious holiday treat that combines the sweetness of chocolate with the refreshing flavor of peppermint. The crunchy texture of the crushed candies gives this fudge an extra festive feel. It's one of the easiest ways to bring a bit of Christmas cheer into your home while having little goodies you can give away to family and friends. Be sure to make extra because you might not have enough to go around.
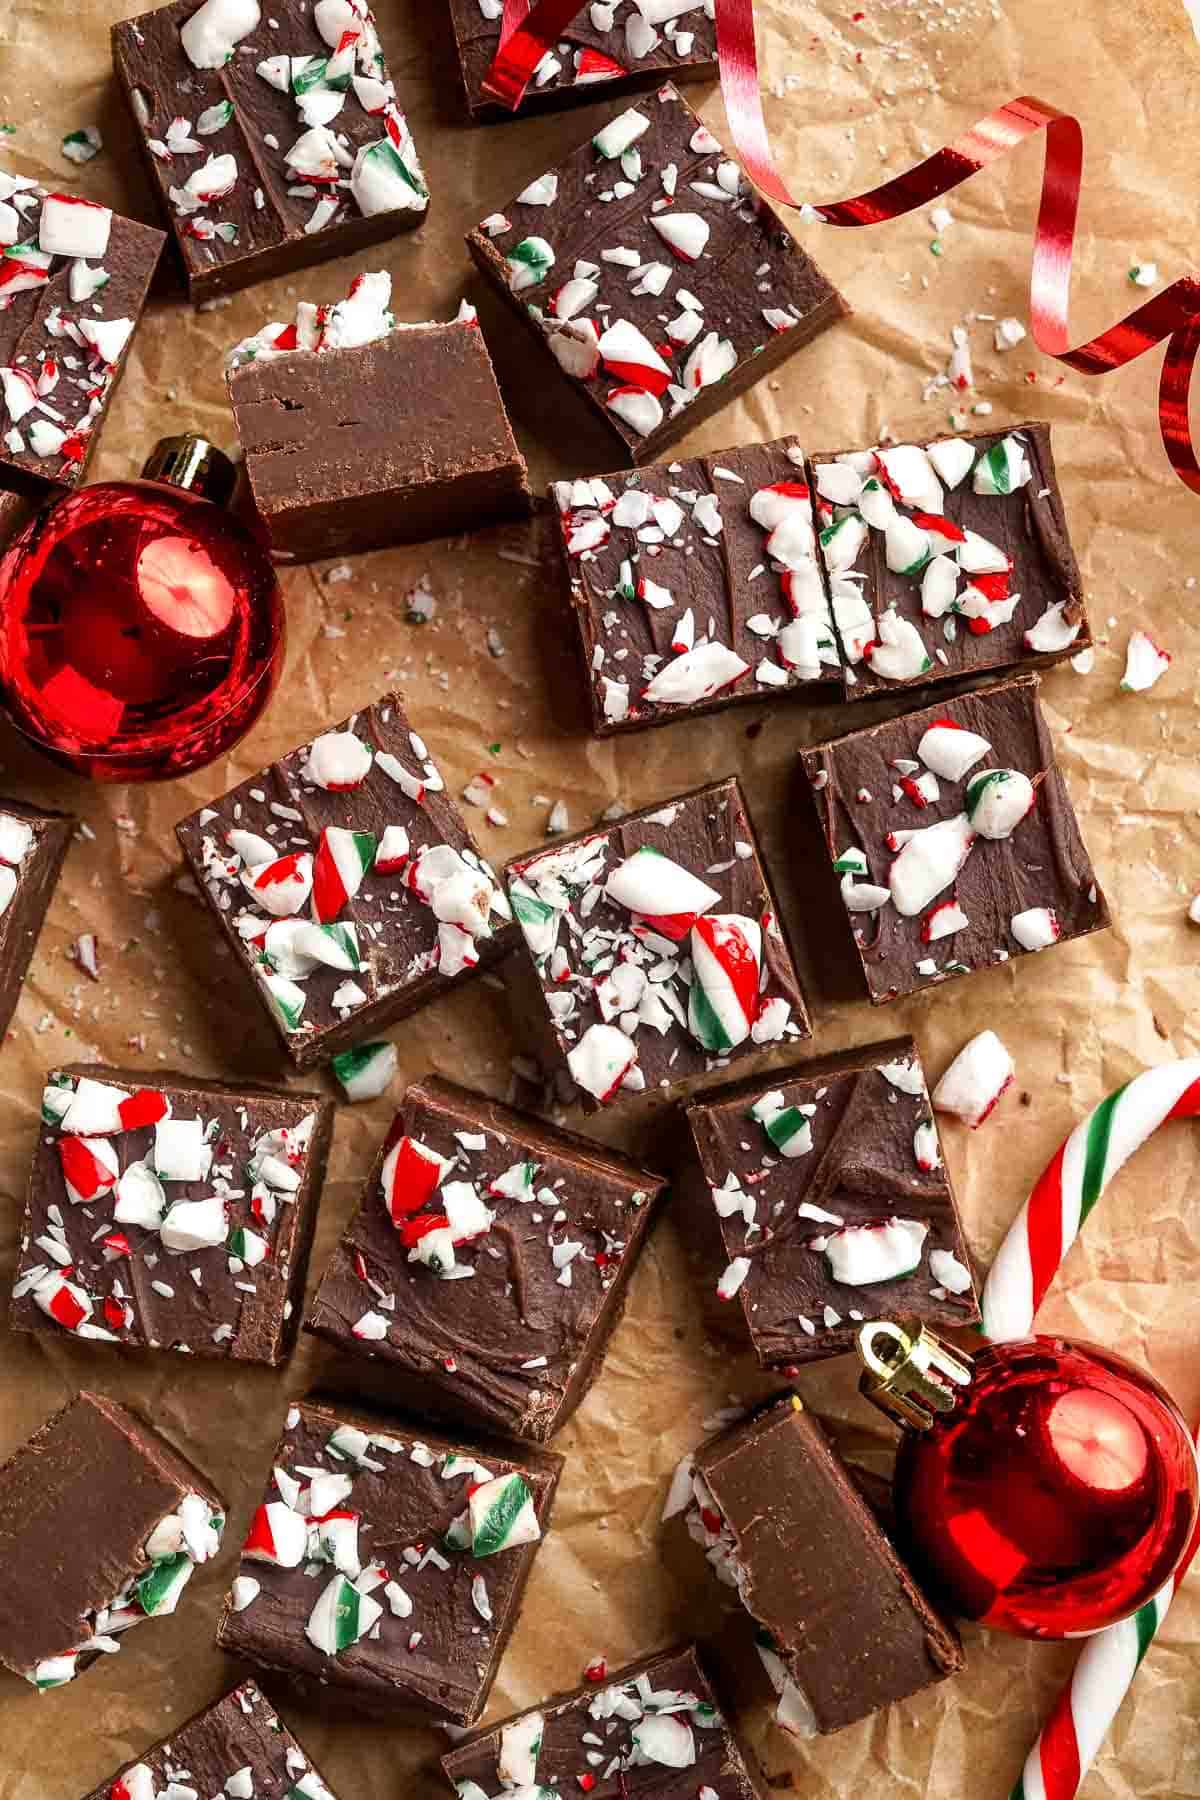
Fudge is typically made from chocolate and sweetened condensed milk, but the addition of peppermint extract and crushed candy canes makes this one extra special. Having a piece of this peppermint fudge is like taking a bite out of the festive season itself. The rich, creamy chocolate is the perfect base for the sweet, minty flavor of peppermint, so it's an absolute delight to have after a holiday feast or with a cup of tea. Often served in small, bite-sized squares, it's easy to take one or more of these fudge pieces with you wherever you go. Plus, they're so pretty that you can even put them on display as part of your holiday decorations.
Why You'll Love this Peppermint Fudge
- Super quick and easy to make. If you need a last-minute holiday treat, this peppermint fudge only takes about 30 minutes to prep using three simple ingredients. Plus, you're free to customize the recipe however you'd like by adding different flavors or colors.
- Gorgeous festive treat. This peppermint fudge tastes like Christmas in your mouth. The combination of creamy chocolate and refreshing peppermint makes it look like a winter wonderland, which is sure to get everyone into the holiday spirit. It's perfect to serve during holiday gatherings or just to have around the house during the "ber" months.
- Great holiday gift. Baking for the holidays is a great way to show your love and appreciation, but this no-bake peppermint fudge can be just as special. It makes the perfect present for family and friends, or even co-workers if you're feeling generous. Put some in cute little boxes or just put a plate of these out for your guests to enjoy.
- Make-ahead option. Do you have a holiday dinner party coming up? Or maybe you're just looking for something to keep around the house during the festive season? This peppermint fudge is perfect for busy holiday schedules since it can be made up to two weeks in advance and stored in the fridge until needed.
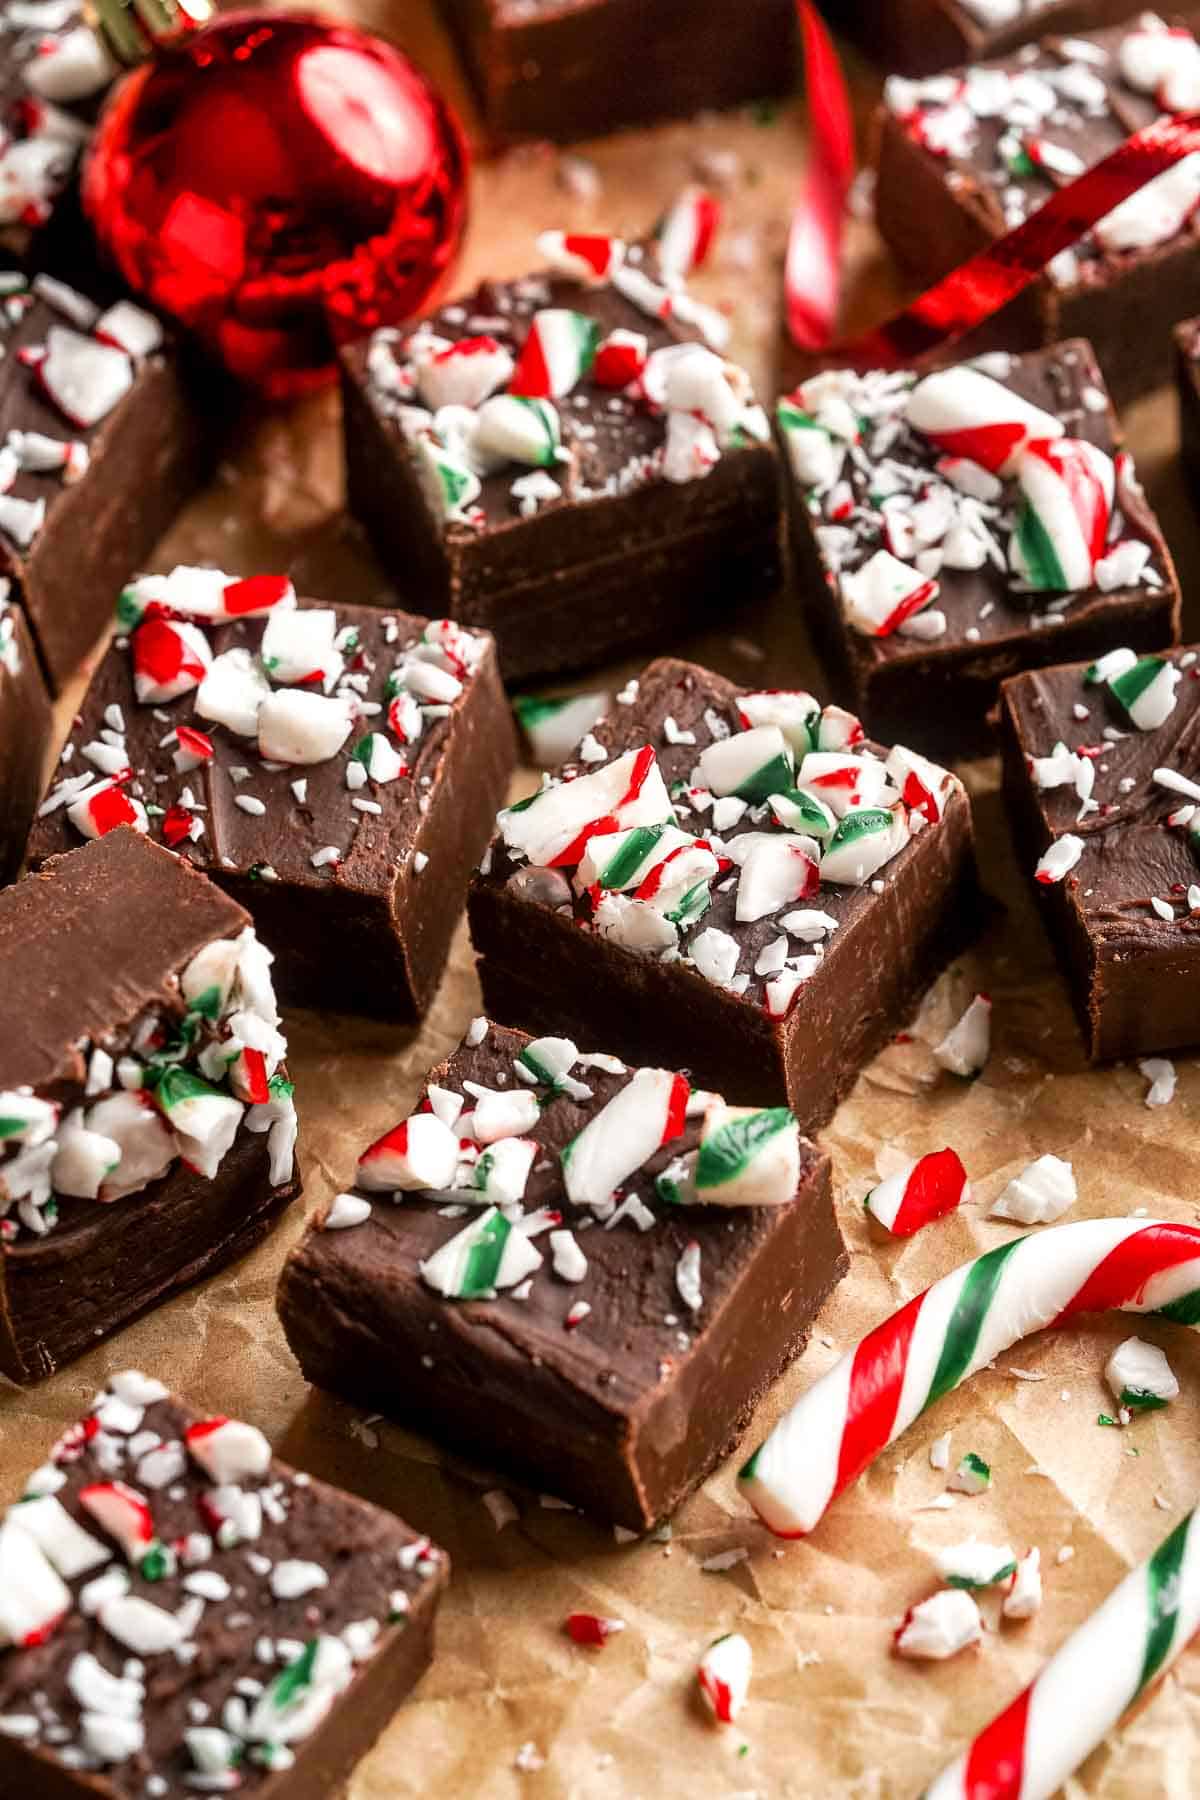
Ingredient Notes
To make this delicious Peppermint Fudge, you will need the following ingredients (full measurements in recipe card below):
- chocolate chips - chocolate forms the body of the fudge as it cools. I prefer semi-sweet chocolate so the fudge won't be overly sweet. You can also use dark chocolate chips for a deep and slightly bitter flavor, or even white chocolate.
- sweetened condensed milk - makes the fudge creamy while adding extra sweetness.
- butter - use unsalted butter for the best flavor control.
- peppermint extract - this adds an extra layer of mint flavor. You can leave it out if you prefer a slightly more subtle flavor.
- vanilla - adds flavor but is optional.
- candy canes - this adds a festive look, flavor, and crunch. Simply put the candies in a resealable bag and crush them using a mallet or a heavily bottomed glass. You can also use crushed peppermint candies
You will also need measuring cups and spoons, baking pan, cooking spray, parchment paper, mixing bowl, microwave, and silicone spatula.
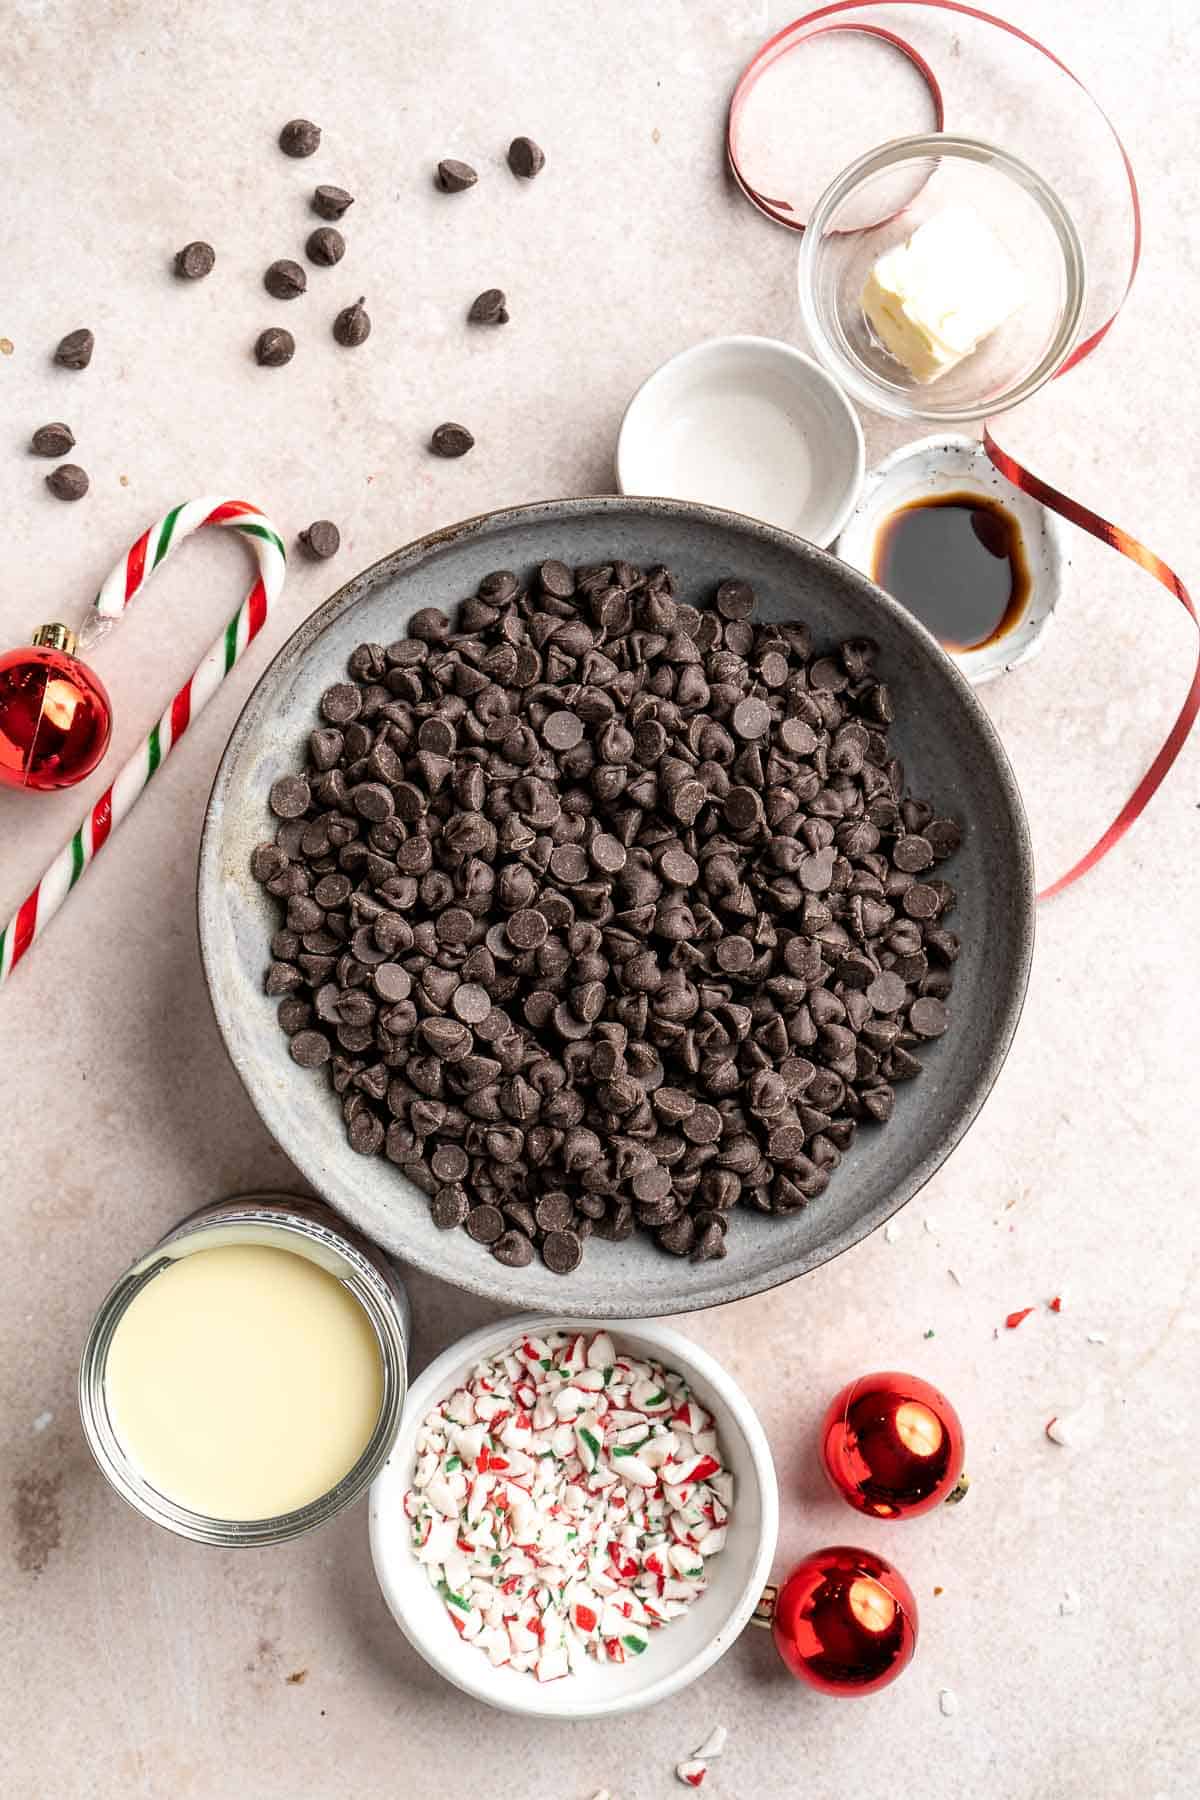
How to Make the Best Peppermint Fudge
- Prep. Prepare an 8x8-inch square baking pan with cooking spray. Line 2 sheets of parchment paper on all the sides of the pan, leaving an overhang on 2 sides for easy removal.
- Heat ingredients. In a medium saucepan or cooking pot, add the chocolate chips, sweetened condensed milk, and butter. Heat over low heat and fold together with a spatula. Continue to heat the mixture over low heat, stirring and folding with the spatula frequently, until the all of the chocolate chips have fully melted, and the fudge is well-combined, smooth, and thick.
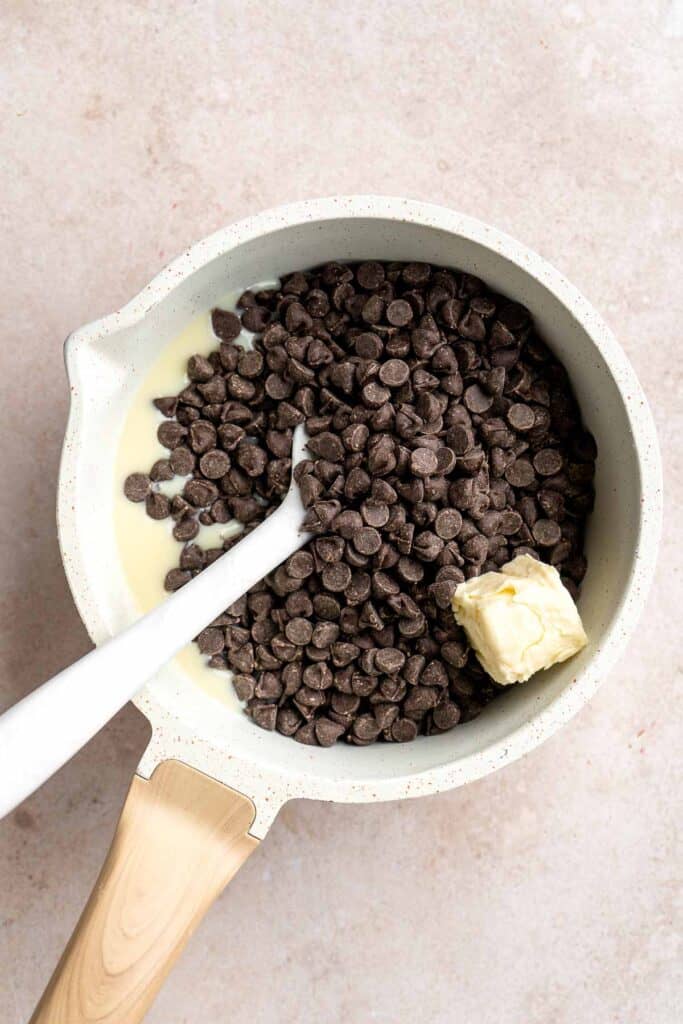
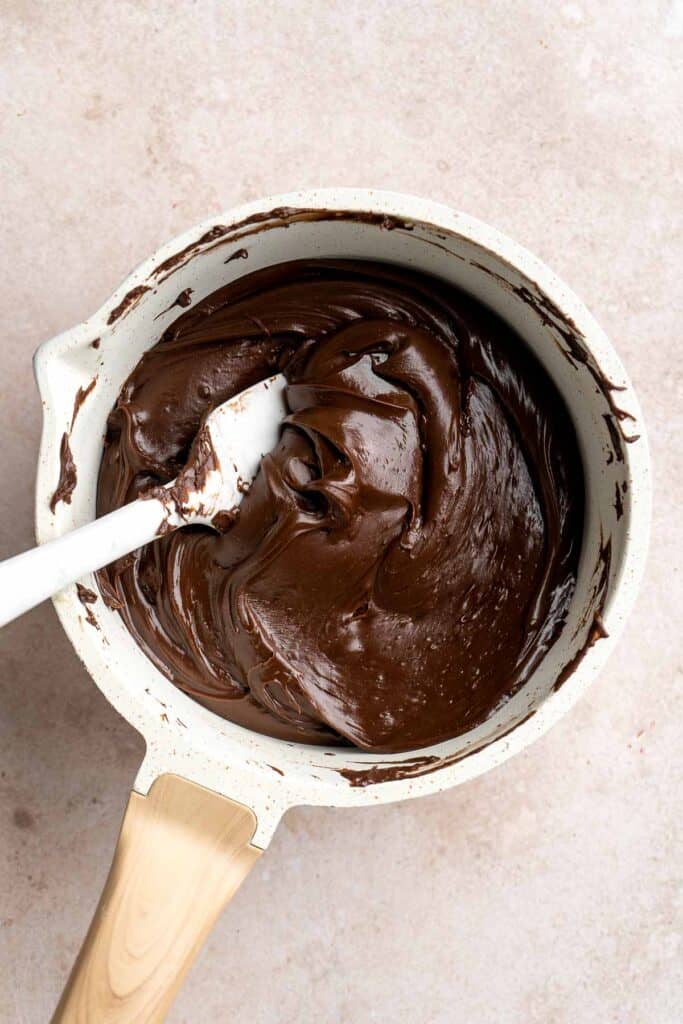
- Add extracts. Add in the peppermint extract and vanilla. Mix and fold them into the fudge until combined.
- Pour. Immediately pour the fudge into the prepared baking pan and quickly smooth it out with a spatula. Top with the crushed candy canes.
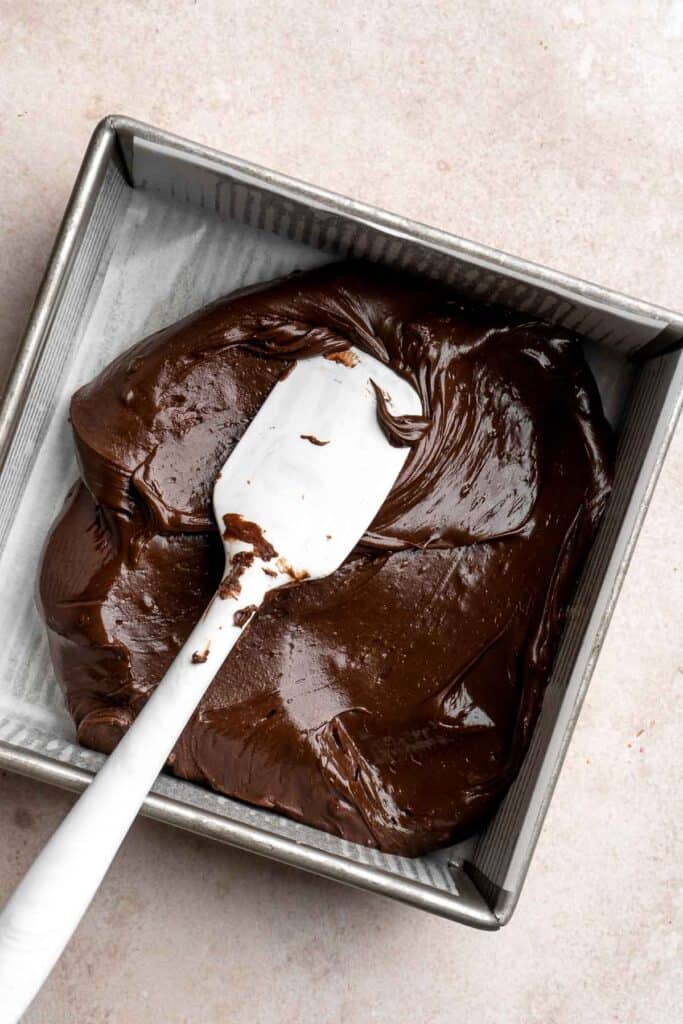
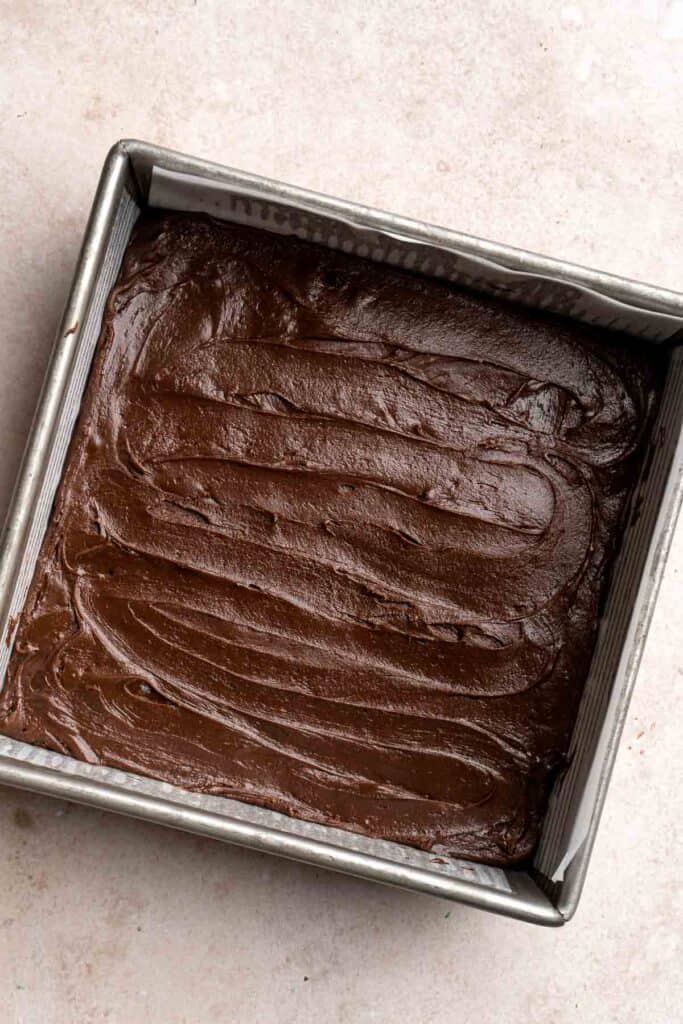
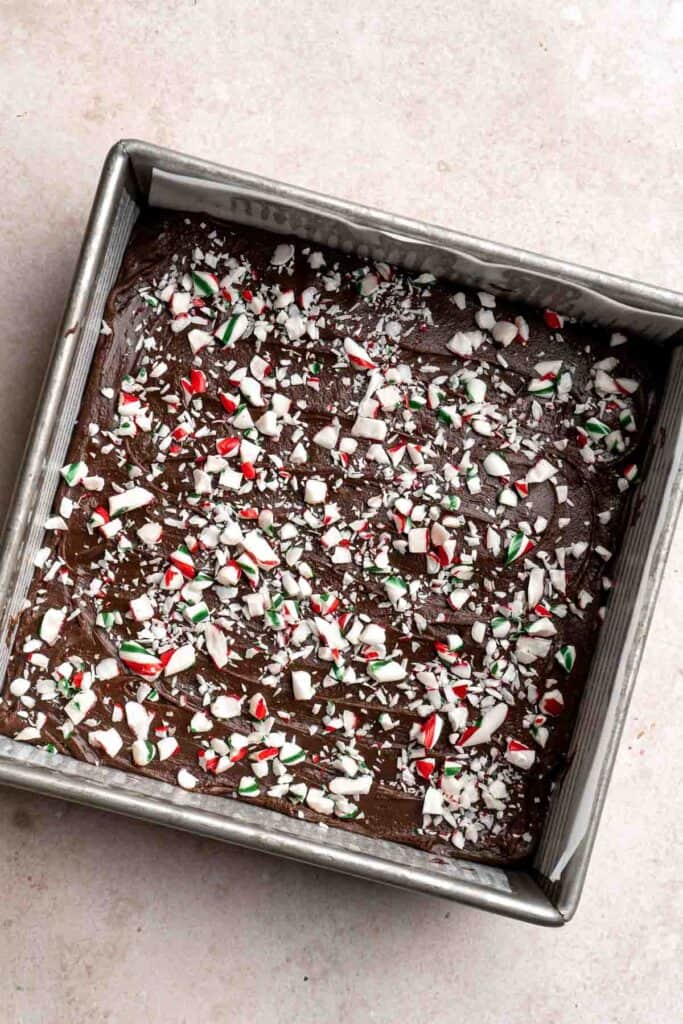
- Chill. Transfer to the fridge to set for at least 2 hours, or preferably overnight. When set, remove the fudge from the pan, then slice into 36 pieces.
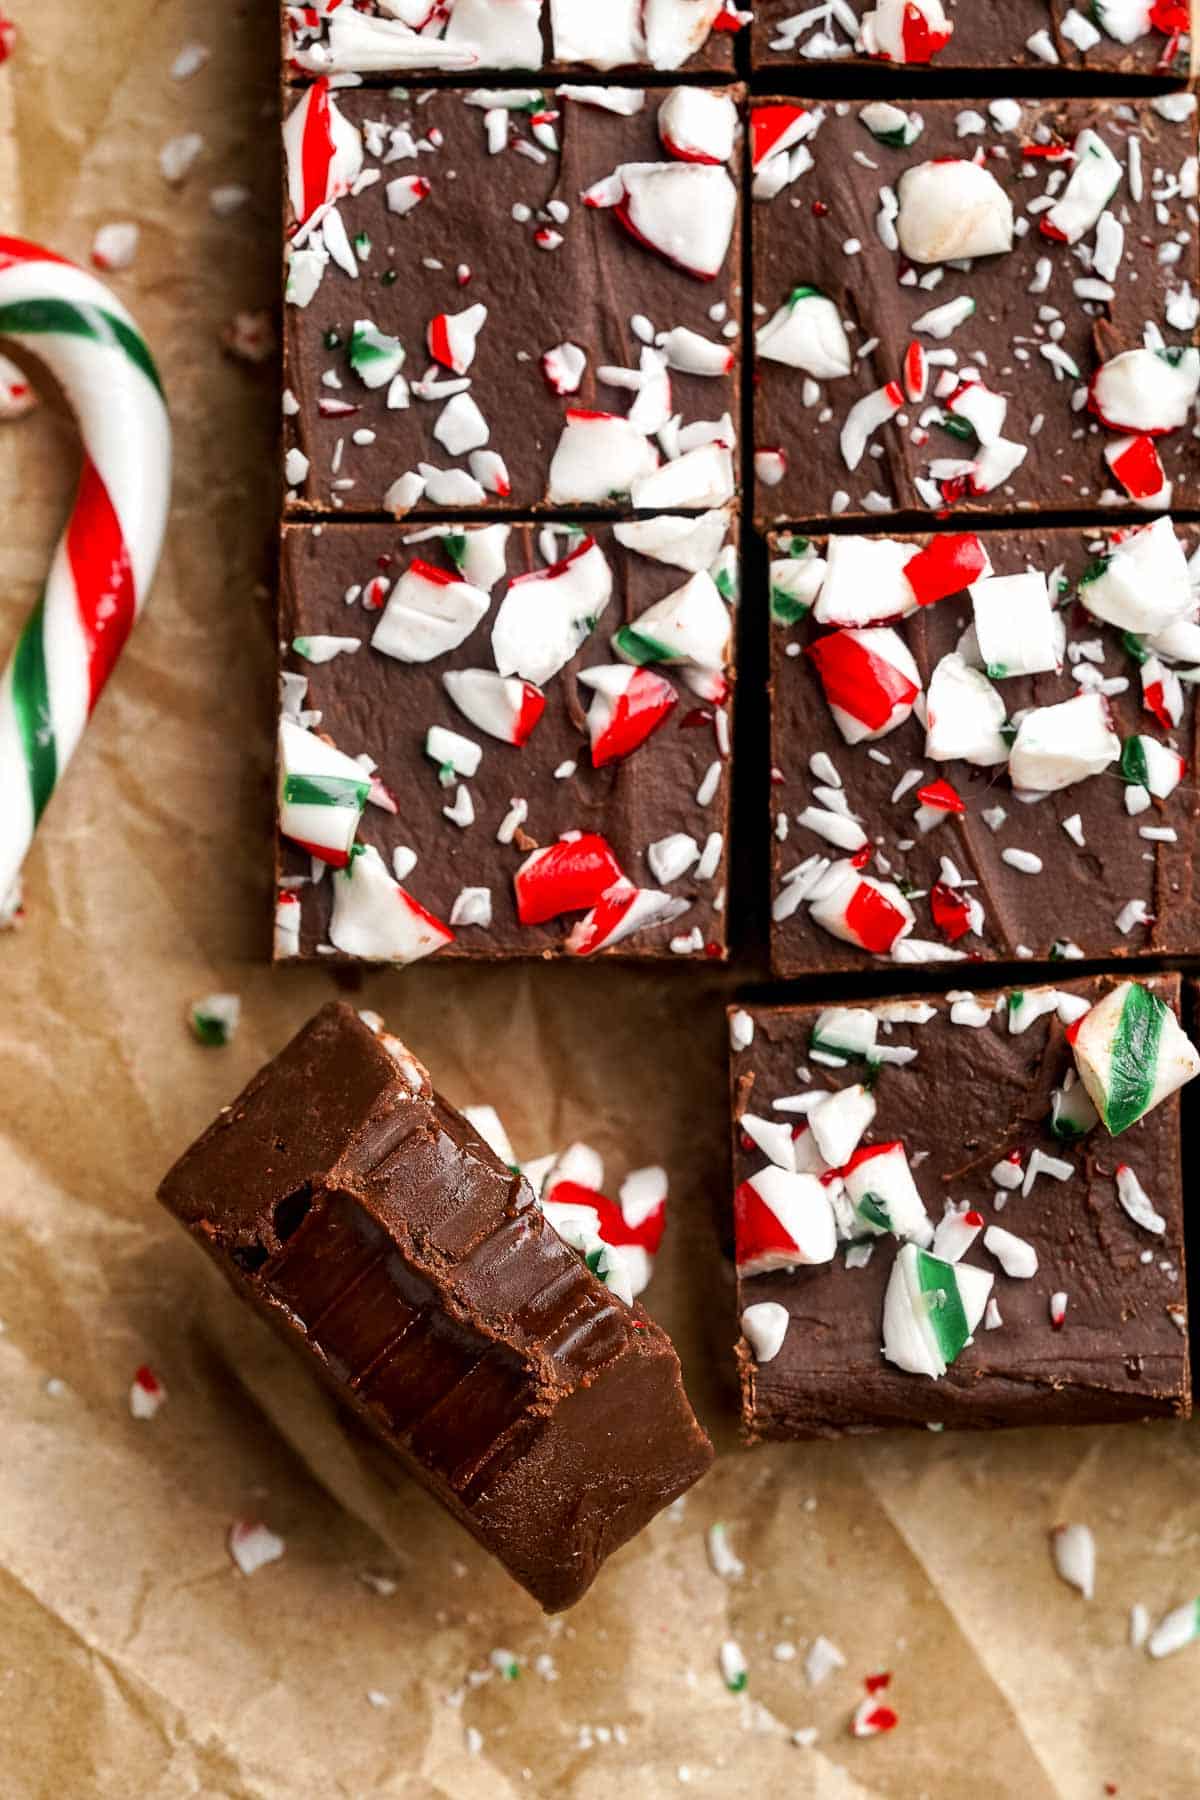
Recipe Variations
- Make it white. Instead of semi-sweet chocolate chips, use white chocolate for a different look and flavor. Make it more festive by adding a tinge of red or green food coloring and creating a swirl on top.
- Use dark chocolate. Substitute dark chocolate chips for a deep and slightly bitter flavor that complements the sweet peppermint candies.
- Layer fudges. Create a two-tone effect by preparing two fudges, one regular milk chocolate, and one white chocolate. Then, pour one of the mixtures first followed by the other.
- Mix some nuts. For a satisfying crunch, incorporate nuts into the fudge mixture while mixing. Use either chopped almonds, pecans, or walnuts for added flavor and texture. Toasting these nuts beforehand also adds a robust flavor and a crunchier bite.
How to Serve
Enjoy this delicious Peppermint Fudge with a hot holiday beverage or other festive desserts such:
- Non-Alcoholic Homemade Eggnog
- White Hot Chocolate
- Chai Tea Latte
- Gingerbread Cake
- Almond Horns
- Chocolate Spritz Cookies
For more recipe inspiration, see our 30 Best Christmas Dessert Recipes.
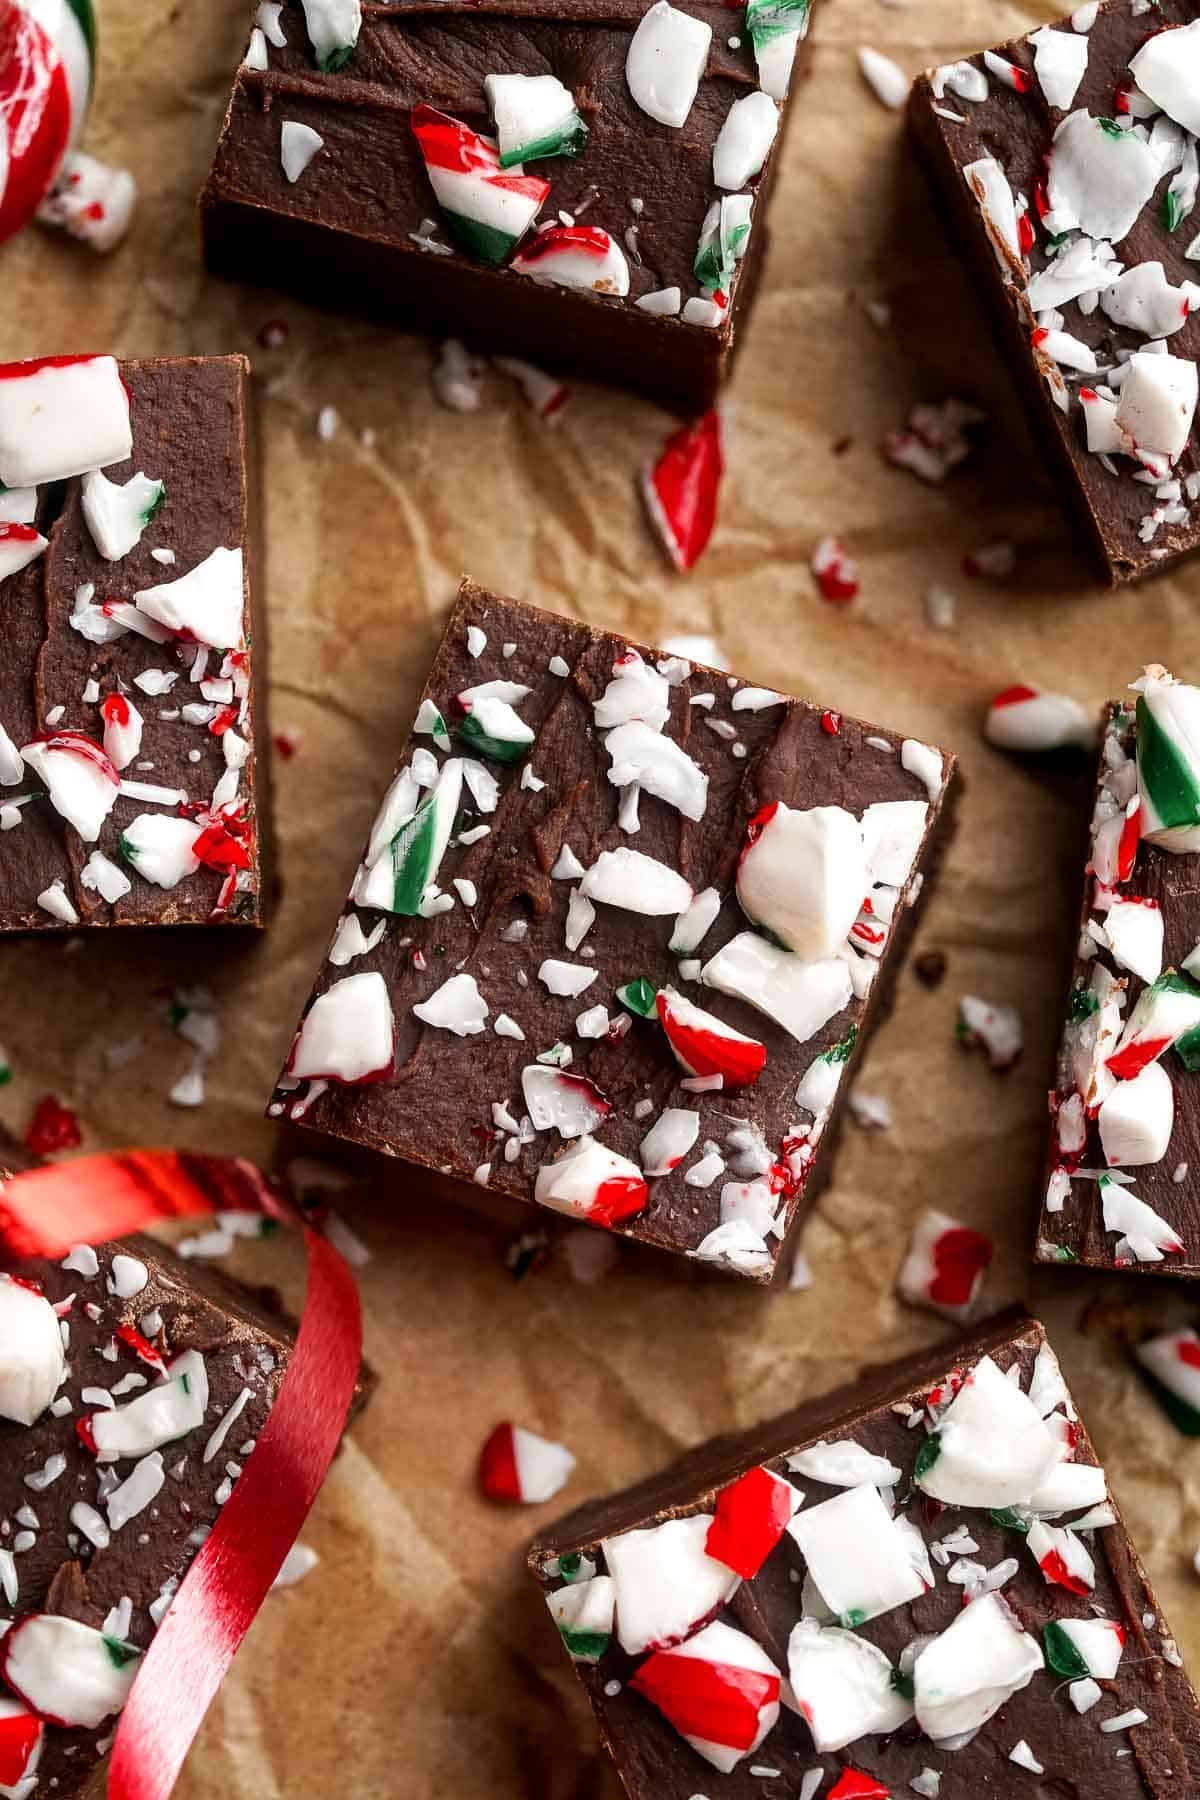
Recipe Tips and Tricks
- Use good quality chocolate. Always use chocolate chips that are made from cocoa liquor or butter as they have a richer taste and flavor than those made from vegetable oils.
- Balance the sweetness. With all the sweet ingredients in this recipe, peppermint fudge can sometimes be too sweet. Adjust the sweetness by substituting the chocolate chips with darker ones. The amount of sweetened condensed milk can also be adjusted to your preference.
- Cut with a warm knife. Simply dip a knife in a bowl of hot water before slicing the fudge. Wipe the blade in between cuts to make sure that the edges are even and the fudge doesn't stick to the knife.
- Serve at room temperature. Allow the fudge to warm to room temperature before serving for a creamier and softer treat.
Storing and Freezing Instructions
How to Store
Place the cut peppermint fudge pieces in an airtight container and store in the fridge for up to two weeks.
How to Freeze
Keep the pieces in a freezer bag or container and store in the freezer for up to a month.
More Peppermint Recipes
- 30 Best Christmas Dessert Recipes
- Peppermint Kiss Cookies
- Chocolate Peppermint Christmas Bark
- Peppermint Macarons
- Peppermint Brownies
- Candy Cane Cookies
Tried this recipe?
I'd love to hear what you think! Leave a comment and rating below to share your feedback. Your reviews help others discover this recipe and help me keep creating more free recipes for you. Snap a photo and tag me on social media @aheadofthyme too.
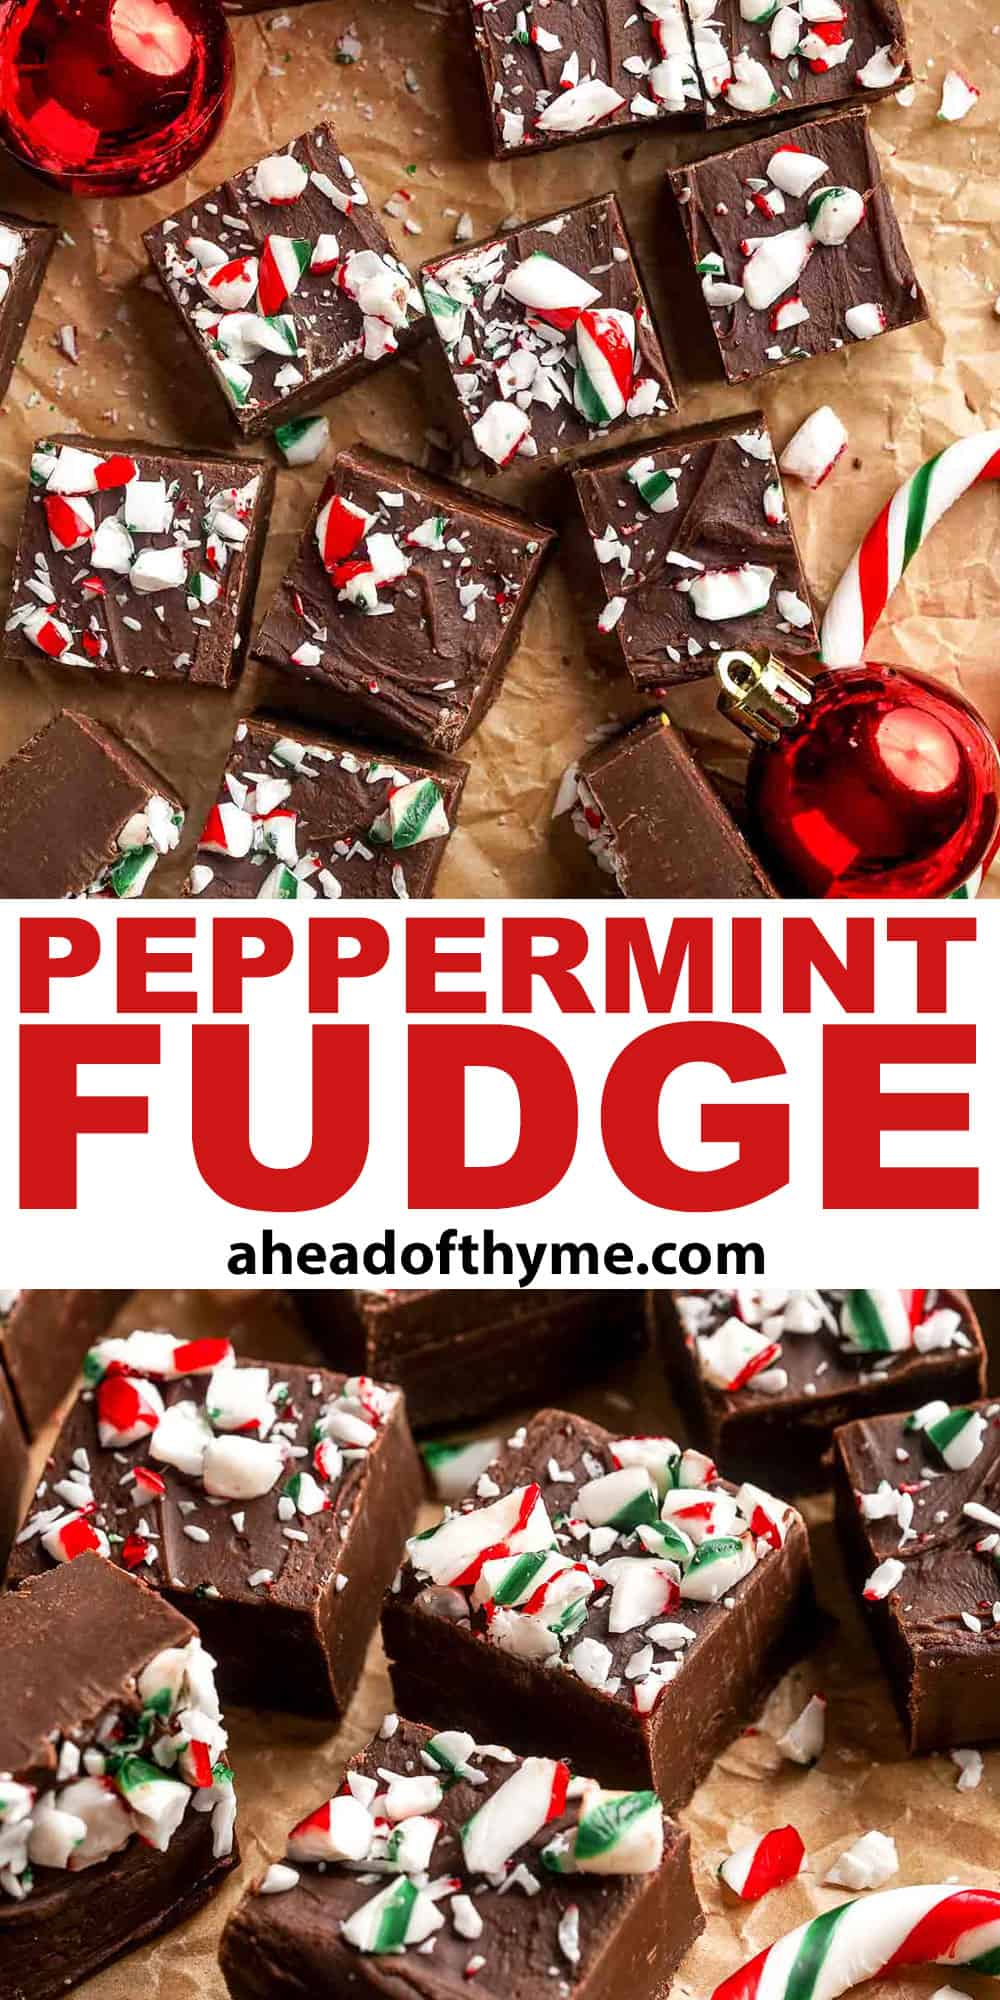
Vegetable Biryani
This Vegetable Biryani recipe is one of the most warming and comforting recipes ever! Every bite is full of flavor and so many different textures, making it the ultimate vegetarian side dish. It's easy enough for a busy weeknight, but it's heaven for special occasions or dinner parties. This is pure celebration food - luxurious, decadent, and incredibly delicious.

Although the history of biryani is contested, the name comes from Persian, and it translates to "fried rice." Typically, it is made with meat, but this easy vegetable biryani is naturally vegetarian, making it suitable for any occasion. There are a wide variety of biryani recipes from across Iran, India, and South Asia, but this vegetarian biryani is a combination of several different types. You'll absolutely love it!
Why You'll Love This Vegetable Biryani
- Easy to make. After slicing and preparing the vegetables, gently sautee them in oil and spices until they are tender. Then, add the tomato paste, stock, and dry rice. Let the whole mixture cook until the rice grains are perfectly fluffy and tender, then serve!
- Naturally vegetarian. Unlike traditional biryani recipes that use meat like chicken or lamb, this version is naturally vegetarian with lots of fresh vegetables and vegetable stock. It's suitable for all of your guests, and no one will even miss the meat!
- Loaded with vegetables. Biryani is so much more than just a side dish! There are nine different vegetables in this recipe, not including the tomato paste. It's a fantastic way to sneak in some extra veggies and is suitable for all kinds of special occasions!

Ingredient Notes
To make this delicious Vegetable Biryani, you will need the following ingredients (full measurements in recipe card below):
- avocado oil - you need a little oil, ghee, coconut oil, or butter to sautee the aromatic ingredients.
- aromatics - start with a base of yellow onion, garlic, and ginger for an incredible depth of flavor.
- vegetables - Prepare carrots, a red bell pepper, cauliflower florets, russet potato, frozen green peas, and green beans. Be sure to add them following the instructions in the recipe card for the best texture and color.
- spices - use a mixture of garam masala, chili powder, paprika, turmeric powder, cumin seeds, salt, and black pepper for layers of incredible flavor. Don't skimp on the spices!
- tomato paste - the rich flavor of tomato paste will tie the whole recipe together.
- vegetable stock - use vegetable stock or water to hydrate the rice.
- long grain basmati rice - rinse and drain white basmati rice, which has the perfect fluffy texture for biryani.
You will also need a Dutch oven or large pot and a stirring spoon.
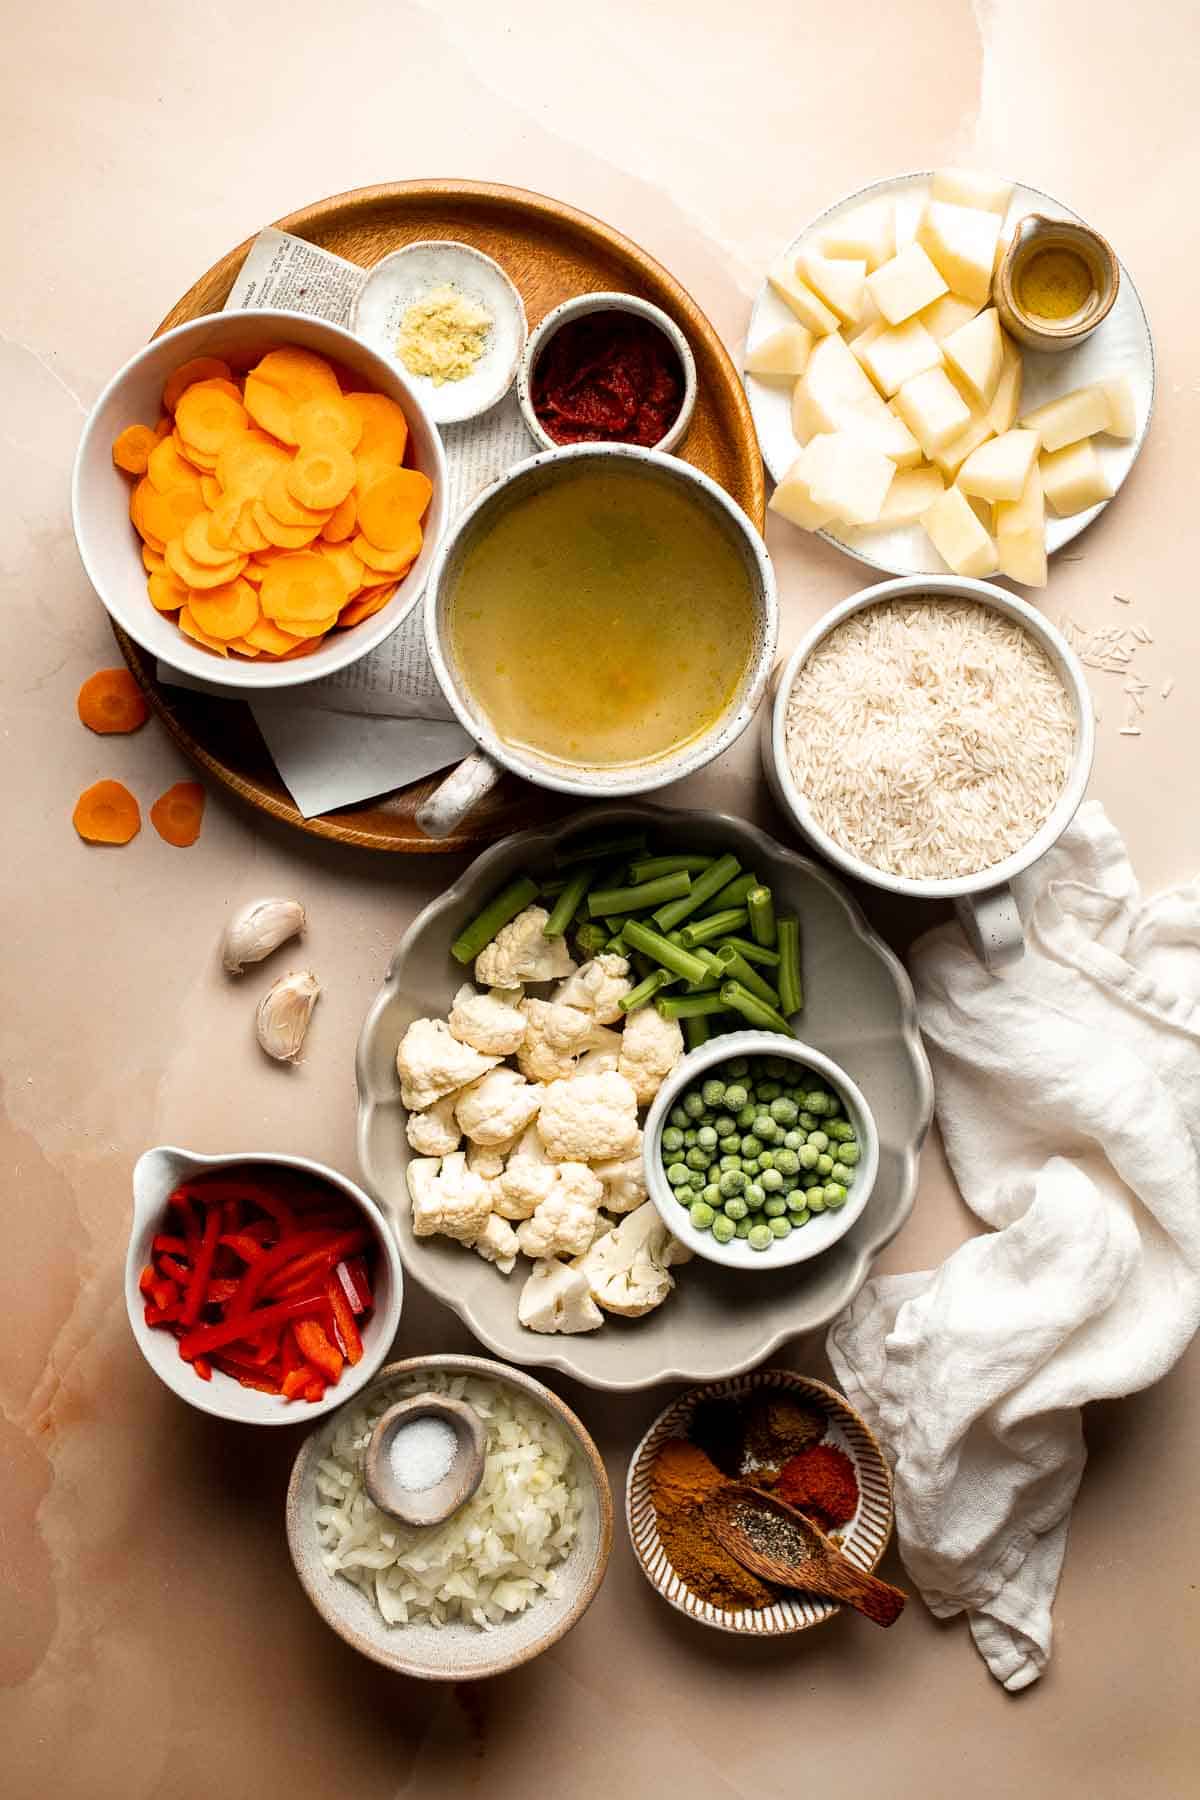
How to Make the Best Vegetable Biryani
- Sauté aromatics. Heat oil in a Dutch oven or large pot over medium-high heat until the hot oil is sizzling hot, about 1-2 minutes. Add onion, garlic and ginger and sauté until fragrant, about 1-2 minutes.
- Add veggies. Add carrots, bell pepper, cauliflower, potato, peas, and green beans and cook until slightly softened, about 5-7 minutes.
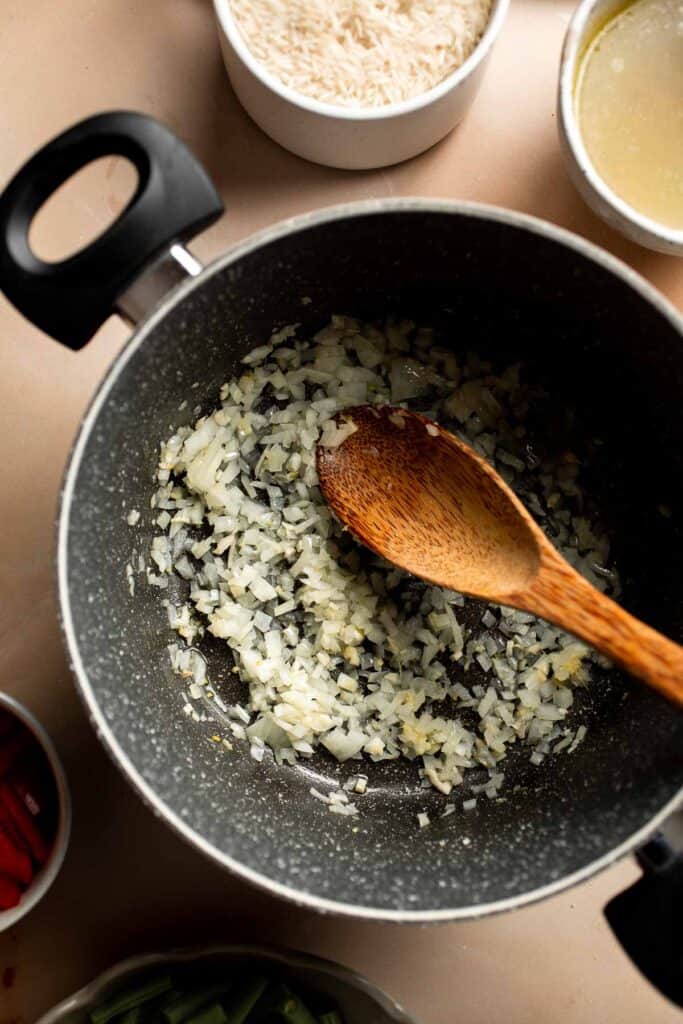
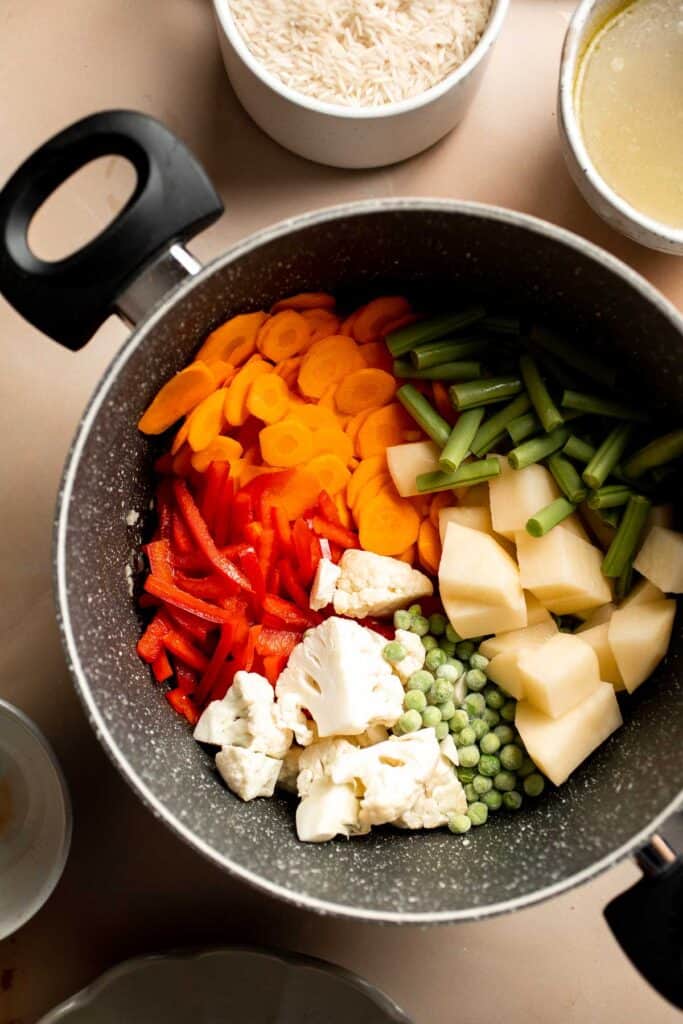
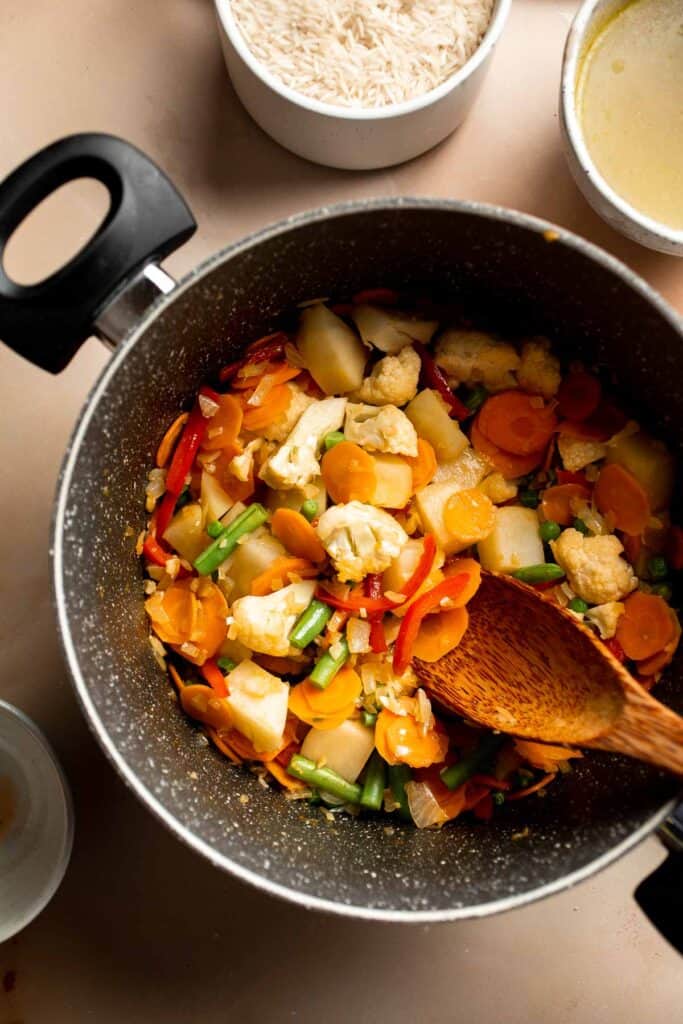
- Add seasoning. Stir in all seasonings and tomato paste. Mix well until evenly distributed.
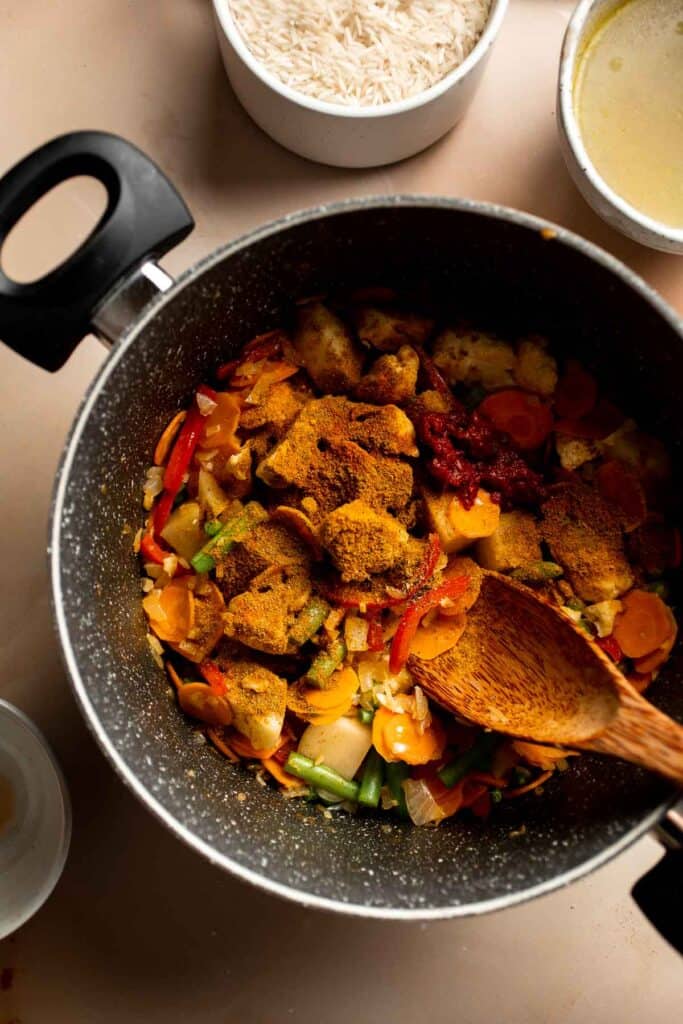
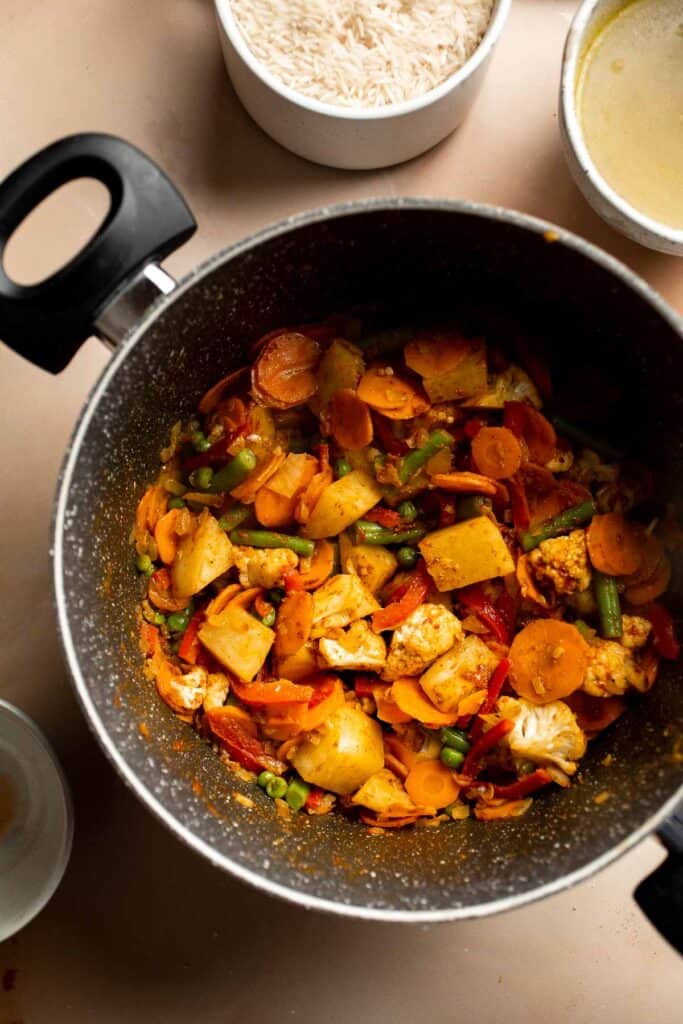
- Add stock and rice. Slowly pour the vegetable stock into the pot and add rice. Stir gently until the rice is evenly distributed in the vegetable mixture.
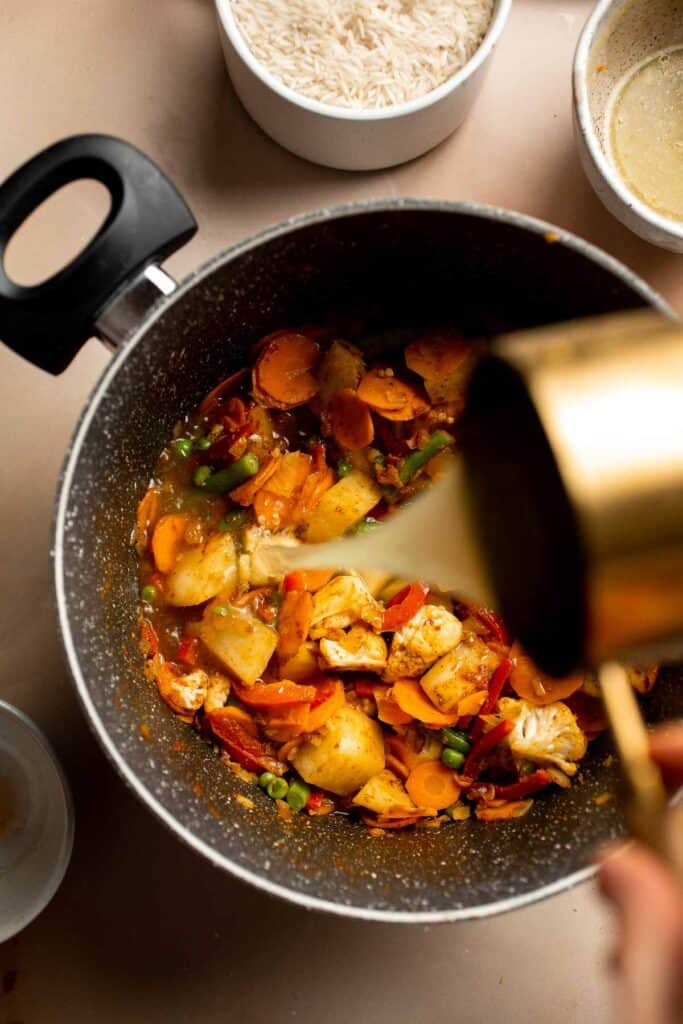
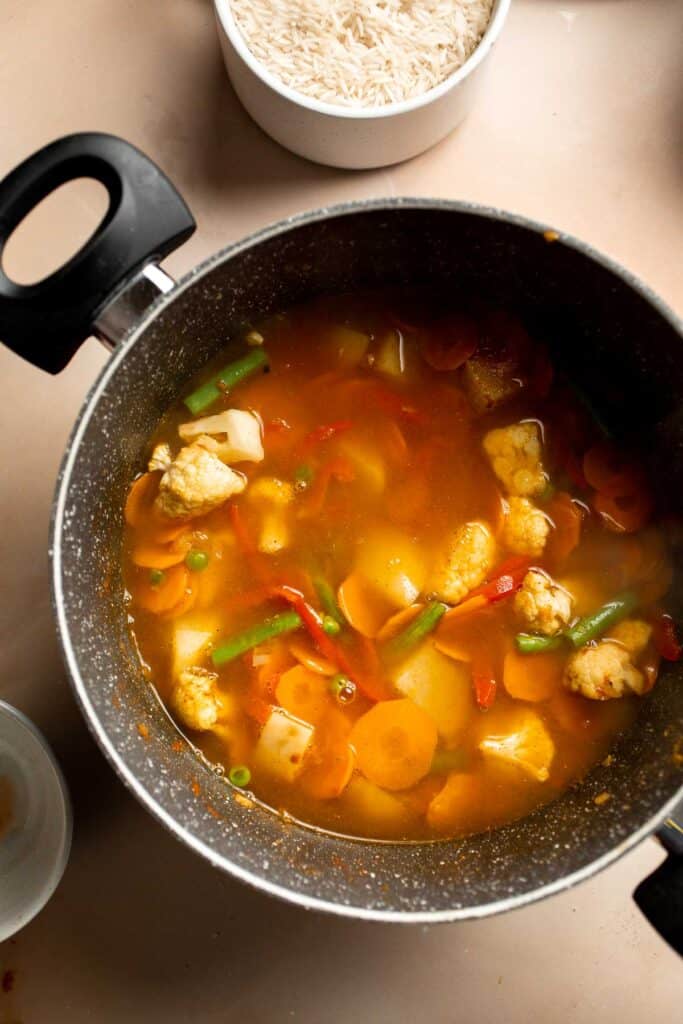
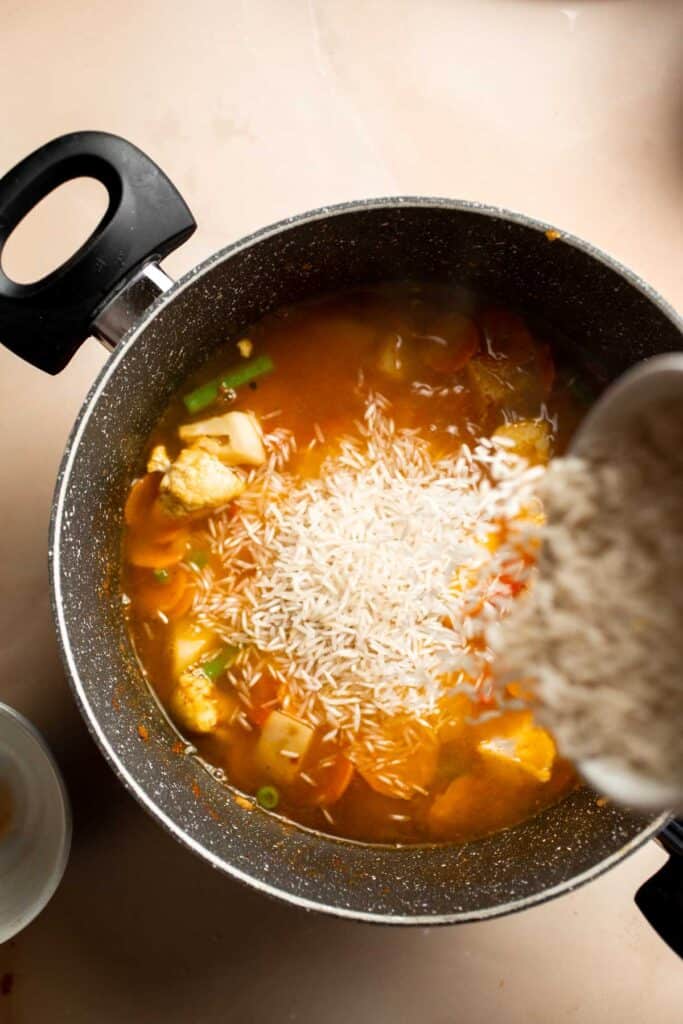
- Cook. Bring the pot to a boil over medium-high heat. Reduce heat to low and cover the lid. Cook covered until the rice has absorbed all the liquid, about 15-18 minutes
- Rest. Turn off the heat and let it rest for 10 minutes. Serve warm.
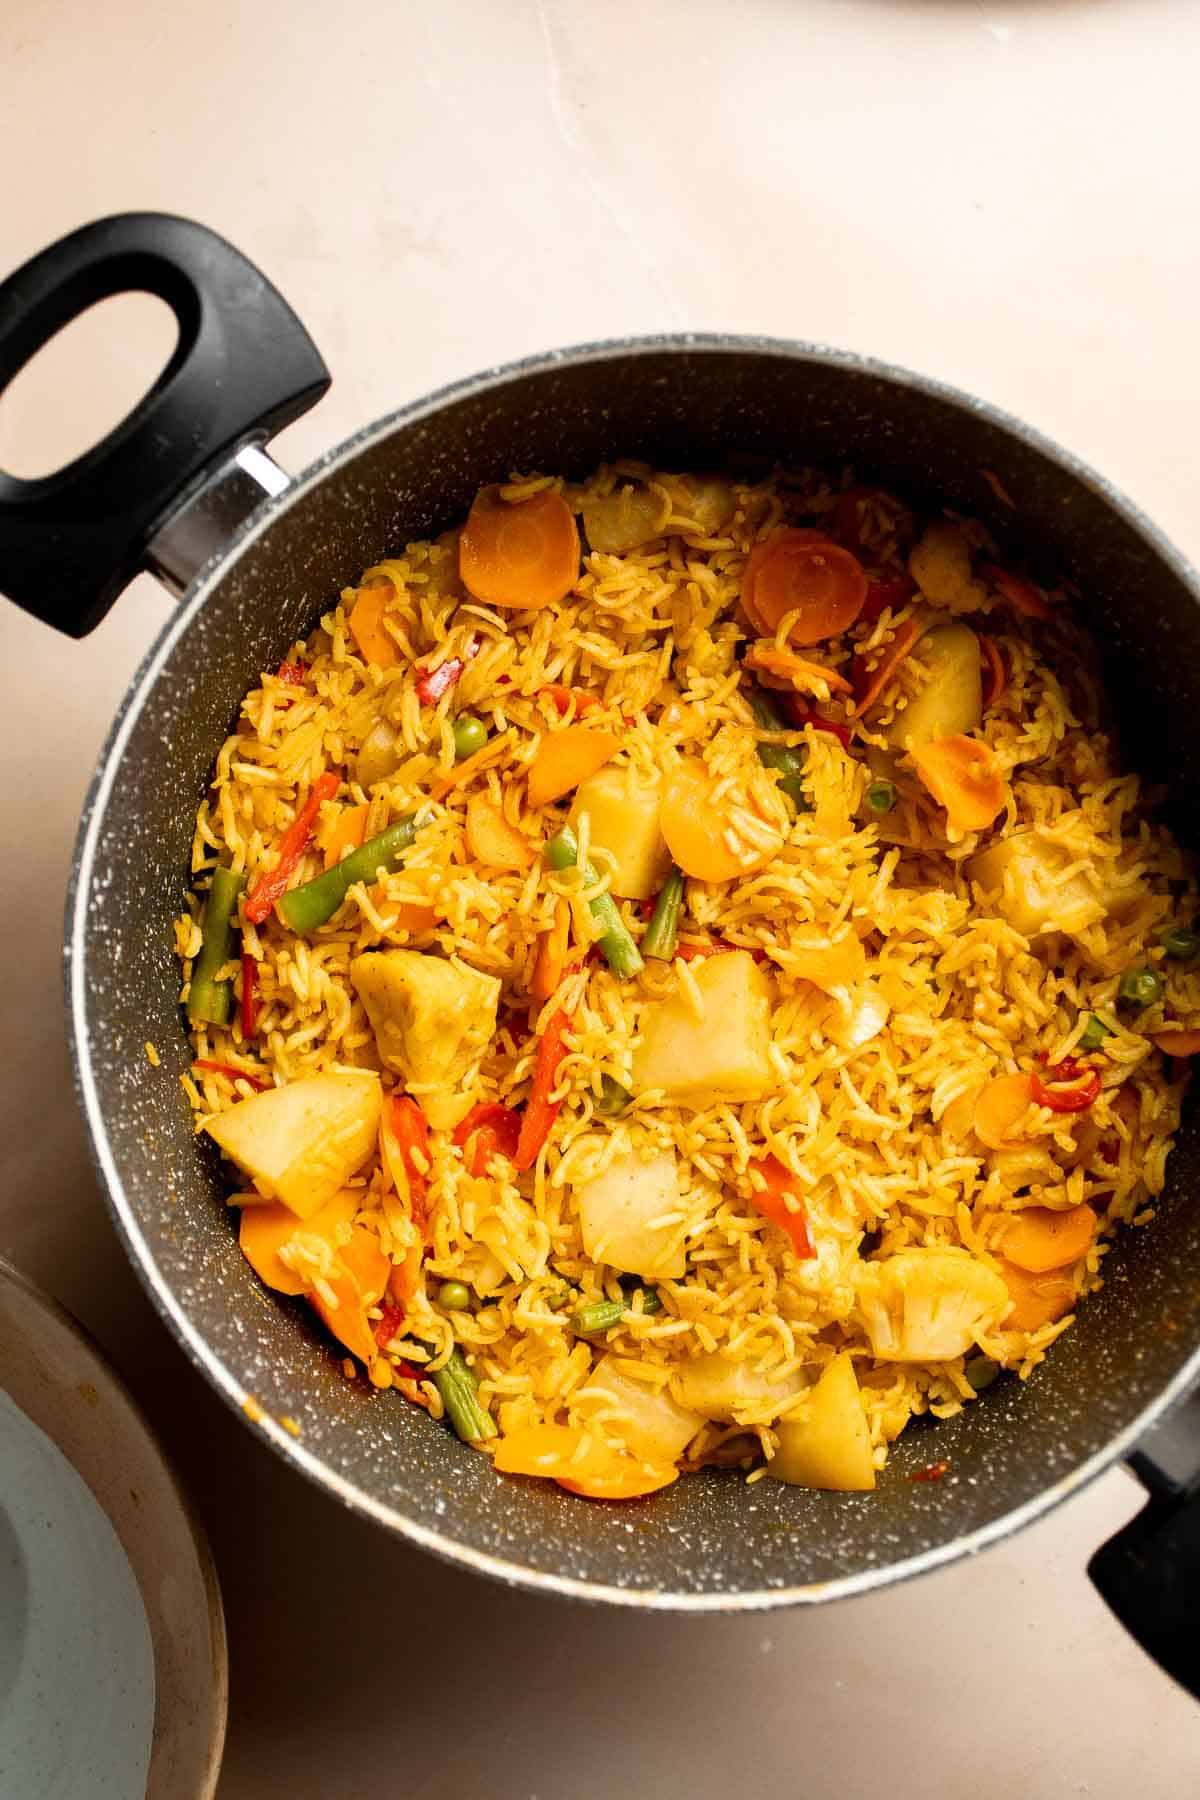
Recipe Variations
- Adjust the spices. There are so many ways to make biryani! Some varieties use even more spices like cinnamon stick, bay leaves, star anise, coriander powder, saffron, red chili powder, green cardamom pods, poppy seeds, and more. Try this veg biryani as is, then adapt it to your preferences.
- Instant pot vegetable biryani. Use the sautee function of your instant pot to soften the vegetables. Once you add the rice, set it to high pressure for 6 minutes. Let it release pressure naturally for 5-8 minutes.
- Garnish. This vegetarian biryani tastes amazing with a dollop of plain yogurt and some fresh herbs, like mint leaves or fresh coriander leaves, as well as fresh green chili slices or fried onions.
How to Serve
This Vegetable Biryani is delicious served on its own, or paired with some of my favorite recipes including:
- Indian Butter Chicken
- Persian Style Lamb Chops (Lamb Shashlik)
- Tandoori Chicken Drumsticks
- Persian Lentil Soup
- Tandoori Chicken Skewers

Recipe Tips and Tricks
- Grind fresh spices. You'll get so much more flavor by grinding fresh, aromatic whole spices than the old ground spices from the store.
- Make your own stock. Homemade stock will have so much more flavor than store-bought stock! It's a great way to use up veggie scraps, too.
- Use the right rice. A good biryani requires fluffy, long-grain rice like basmati. Skip the shorter grain varieties, which tend to be starchier.
Storing and Freezing Instructions
How to Store
Store leftover biryani in an airtight container in the fridge for 3-4 days.
How to Reheat
You can either microwave leftover biryani or warm it on the stovetop. To microwave, cover the rice with a damp paper towel and microwave in 30-second increments until hot. Or, you can warm it in a large skillet over low heat with the lid on. Add a splash or two of water to make the rice fluff up.
How to Freeze
Chill the leftovers in the fridge before placing them in the freezer for up to 2-3 months. Thaw in the fridge before reheating.
FAQ
Since vegetarian biryani isn't traditional, you can add a wide variety of vegetables based on your preferences and seasonal availability. This biryani recipe uses a mixture of vegetables, including onions, garlic, ginger, carrots, bell peppers, peas, potatoes, green beans, and more. You'll also need a good cooking oil, lots of fresh biryani spices, vegetable stock, and long-grain basmati rice for the best flavor.
There are several key ingredients to add to your biryani, but without the right rice, you won't get the proper texture and flavor. We recommend using long-grained rice, like white basmati rice, for the best results.
Although some recipes have you cook the rice separately, we prefer to cook the rice with the cooked vegetables and spices/ This ensures that every bite has a ton of flavor, and you get that wonderful golden brown crust that's so delicious.
More Rice Recipes
- 30 Best Rice Recipes
- Broccoli Rice
- Vegetarian Paella
- Pineapple Fried Rice
- Curry Chicken Fried Rice
- Cilantro Lime Rice
Tried this recipe?
I'd love to hear what you think! Leave a comment and rating below to share your feedback. Your reviews help others discover this recipe and help me keep creating more free recipes for you. Snap a photo and tag me on social media @aheadofthyme too.

Cheese Fondue
This Swiss Cheese Fondue is a classic for a reason. Traditionally enjoyed in Switzerland during the winter, the warm, melty cheese is the perfect accompaniment for bread, potatoes, and so much more. Make your own pot of fondue for a holiday party, a New Year's celebration, or to celebrate any special occasion.

Transport your guests to a Swiss chalet by melting the best cheeses with white wine and lemon juice in your handy fondue pot! It's quick and easy to make too. Fondue makes a great appetizer before a dinner party, but a fondue dinner is always so much fun. No matter how you serve it, this easy fondue recipe will quickly become the centerpiece of any event!
Why You'll Love This Cheese Fondue
- So easy to make. This classic fondue recipe is incredibly simple to make. Start by adding the wine to your fondue pot, then stir in the flour to create a thick gravy. Add the cheese and let it melt before you season it with lemon, salt, and garlic powder. Once it's all melted together, grab your favorite cheese fondue dippers and go!
- Delicious flavors. Fondue is the national dish of Switzerland, so it's essential to use the best Swiss cheese! The white wine and lemon juice mellow out the cheese's earthy flavor to make it perfectly creamy.
- Warm and cozy. Although you can technically make fondue any time of the year, it's wonderful on a cold night. Serve it on Christmas Eve or New Year's Eve for a wonderfully cozy meal!
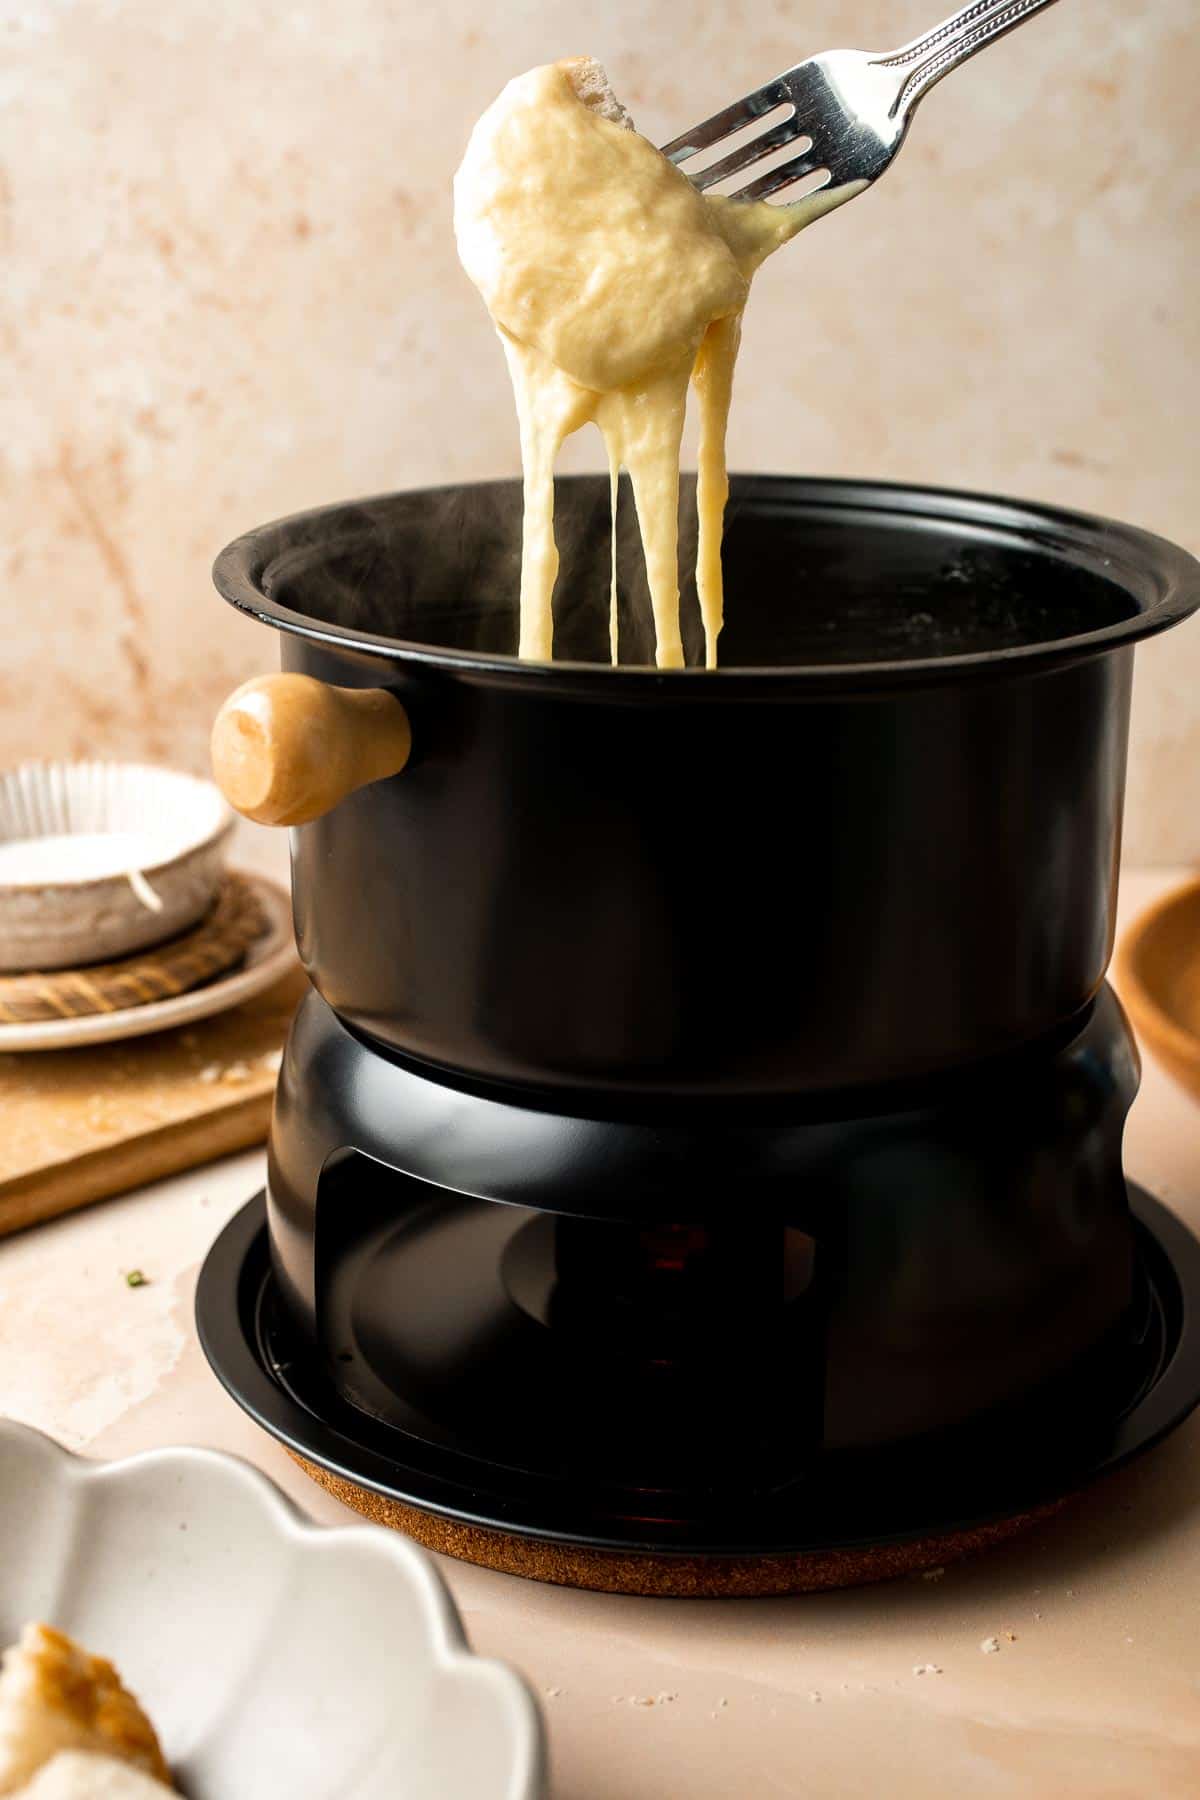
Ingredient Notes
To make this delicious cheese fondue, you will need the following ingredients (full measurements in recipe card below):
- swiss cheese - shred your favorite Swiss cheese. You can also use Jarlsberg, Emmental, Appenzeller, or other options.
- gruyère cheese - gruyère has a nutty, creamy flavor that is perfect for a Swiss fondue.
- cornstarch - use corn starch or flour to give the fondue the perfect creamy texture and to avoid clumps.
- garlic powder - a little garlic powder adds an extra savory note that brings the fondue to life.
- dry white wine - choose a dry wine, like sauvignon blanc, to balance the earthy flavor of the Swiss cheeses.
- lemon juice - the tart, bright flavor of lemon juice contrasts the rich cheeses. The citric acid will also help emulsify the cheese for the perfect consistency.
- nutmeg - add nutmeg to taste.
- french bread - cut a fresh French baguette loaf into 1-inch cubes. Serve as is or bake until dry. Sourdough bread or Italian bread work well, too.
You will also need a fondue pot, a spoon, and fondue forks or skewers.

How to Make the Best Cheese Fondue
- Combine cheese. In a mixing bowl, combine cheese, garlic powder and cornstarch. Toss well to coat and set aside.
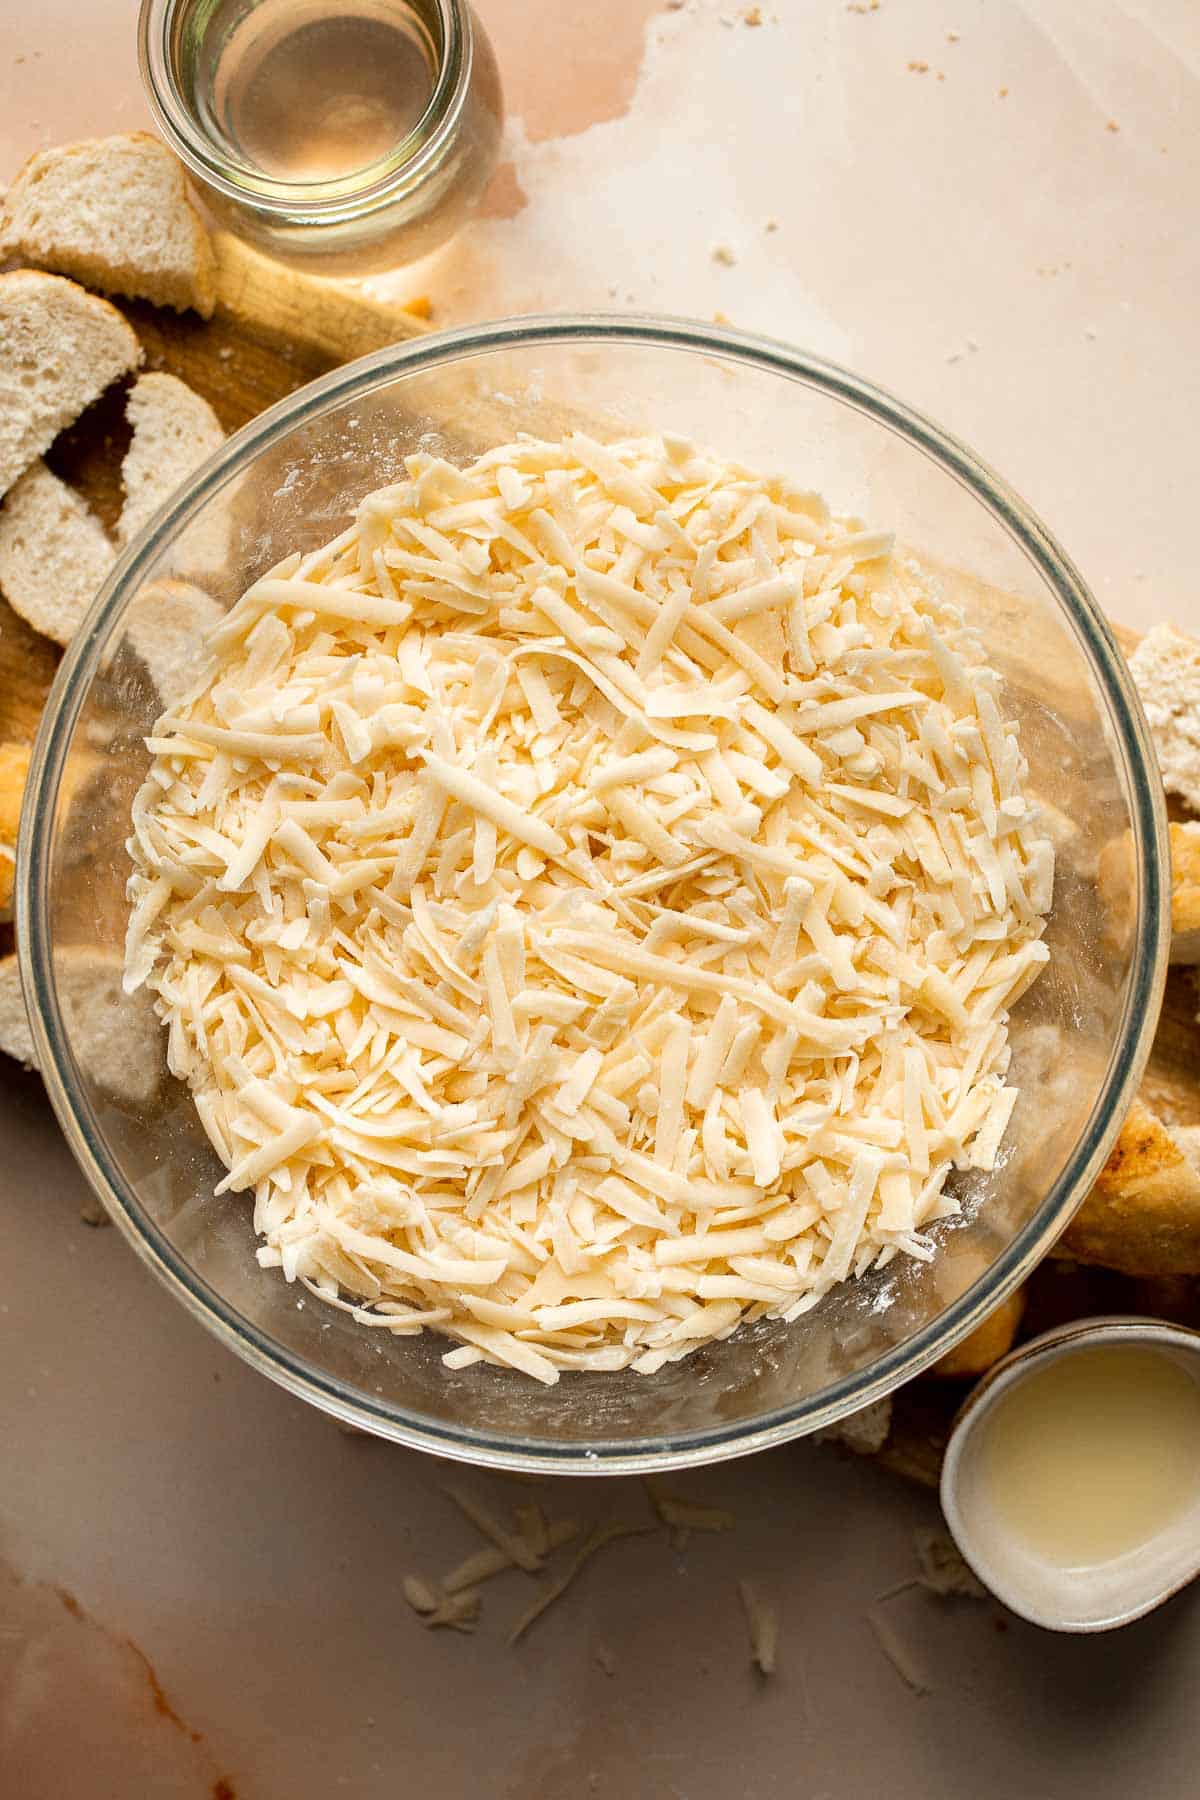
- Heat. In a medium saucepan or fondue pot, heat wine over medium heat and bring it to a simmer.
- Add cheese. Gradually stir in cheese mixture, one cup at a time. Mix constantly until melted and smooth, about 5 minutes.
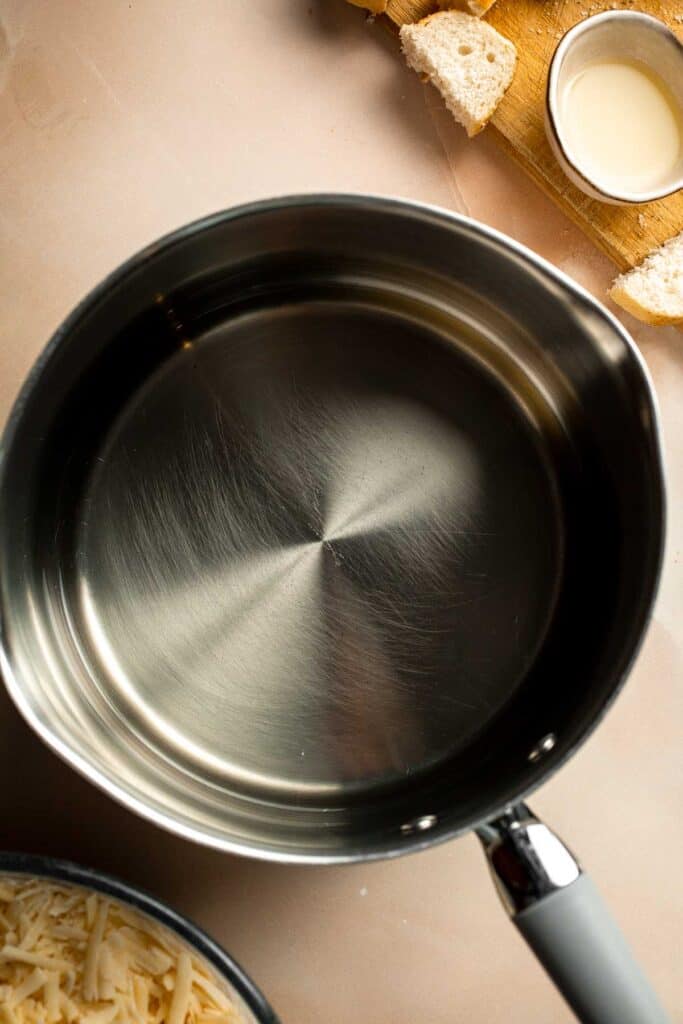
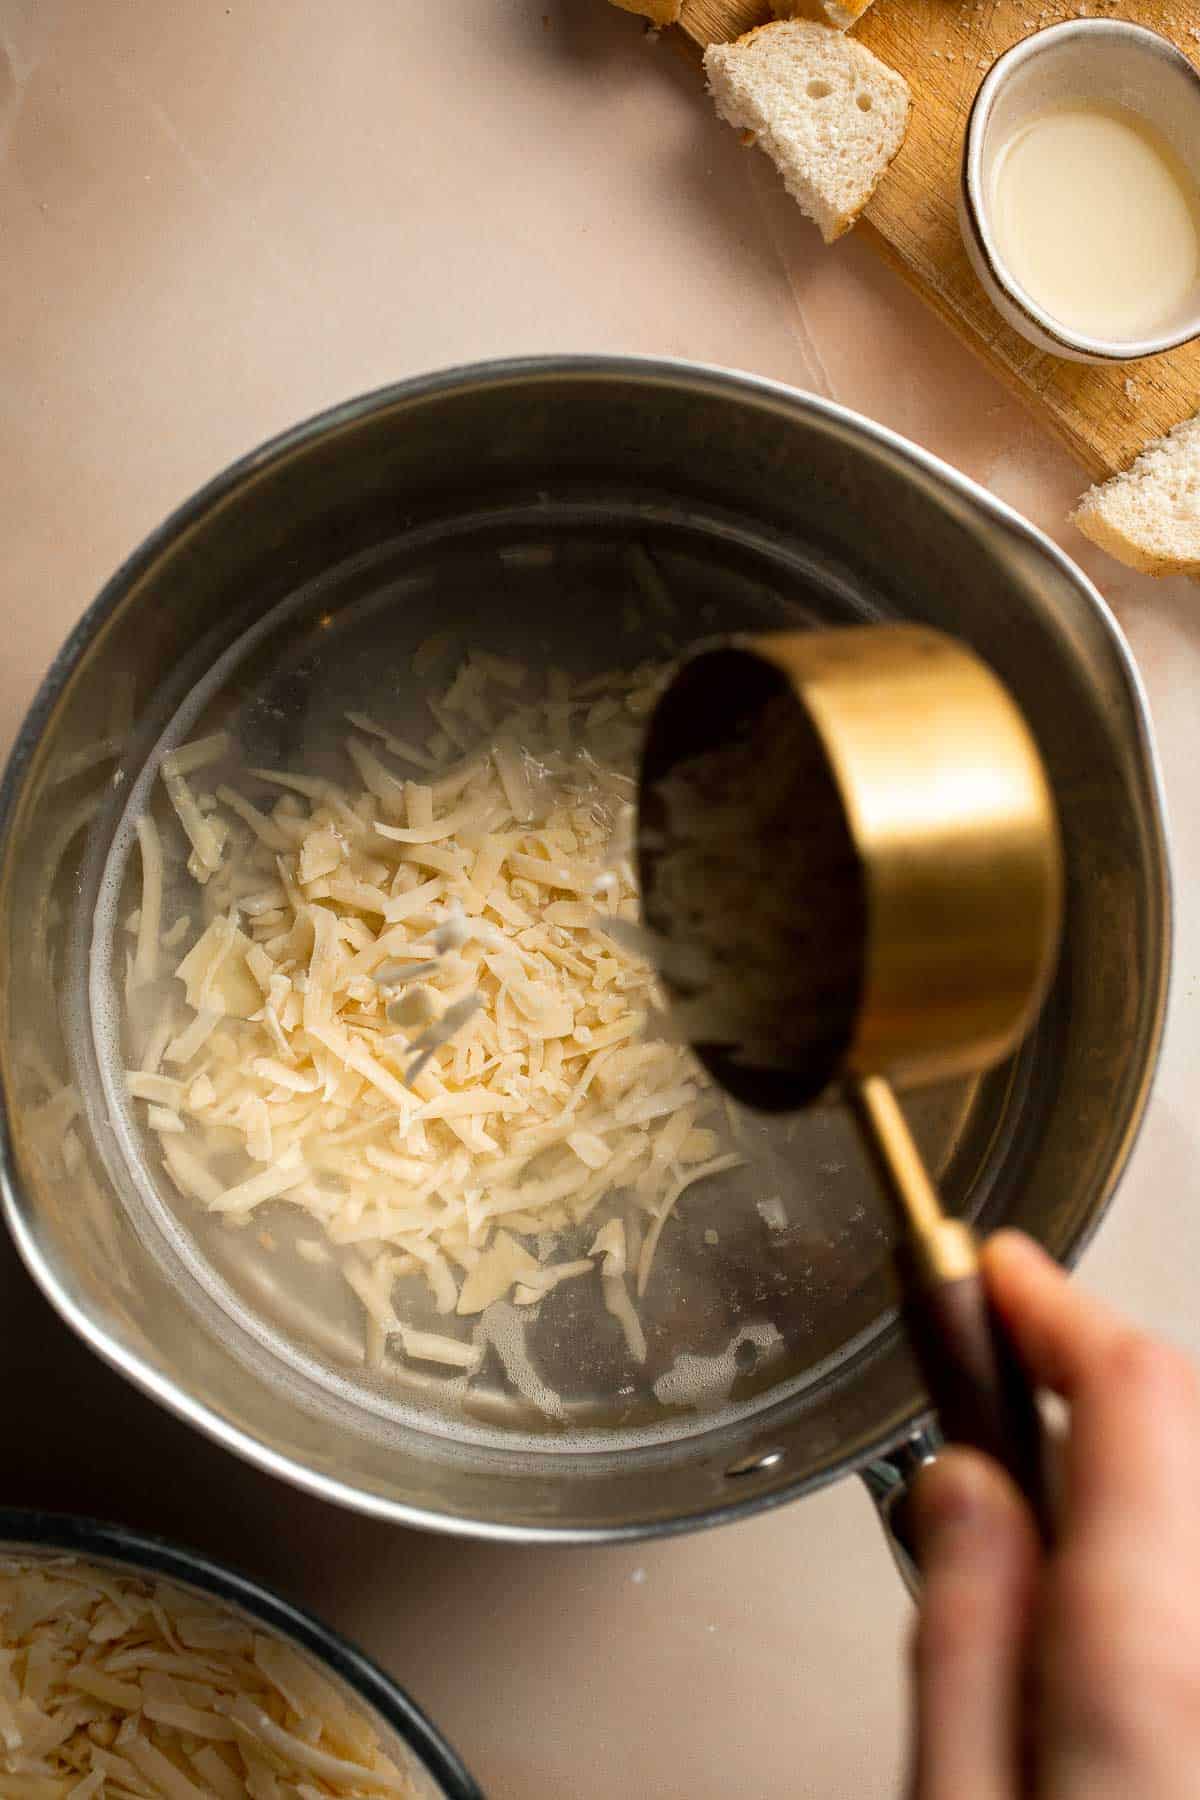
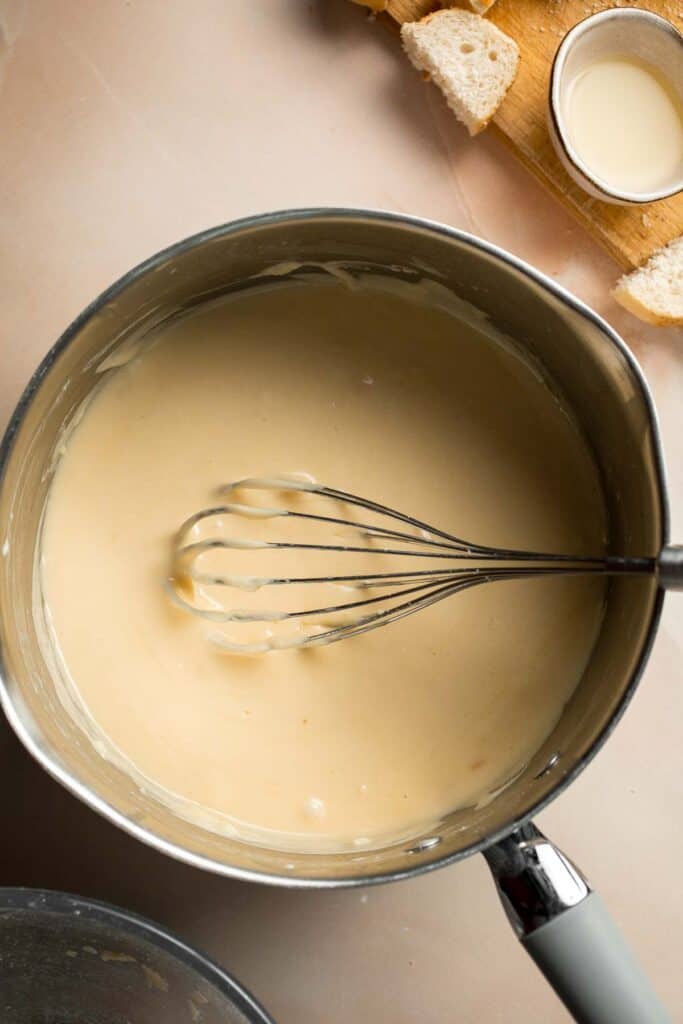
- Add seasoning. Once the melted mixture is smooth, stir in lemon juice and nutmeg.
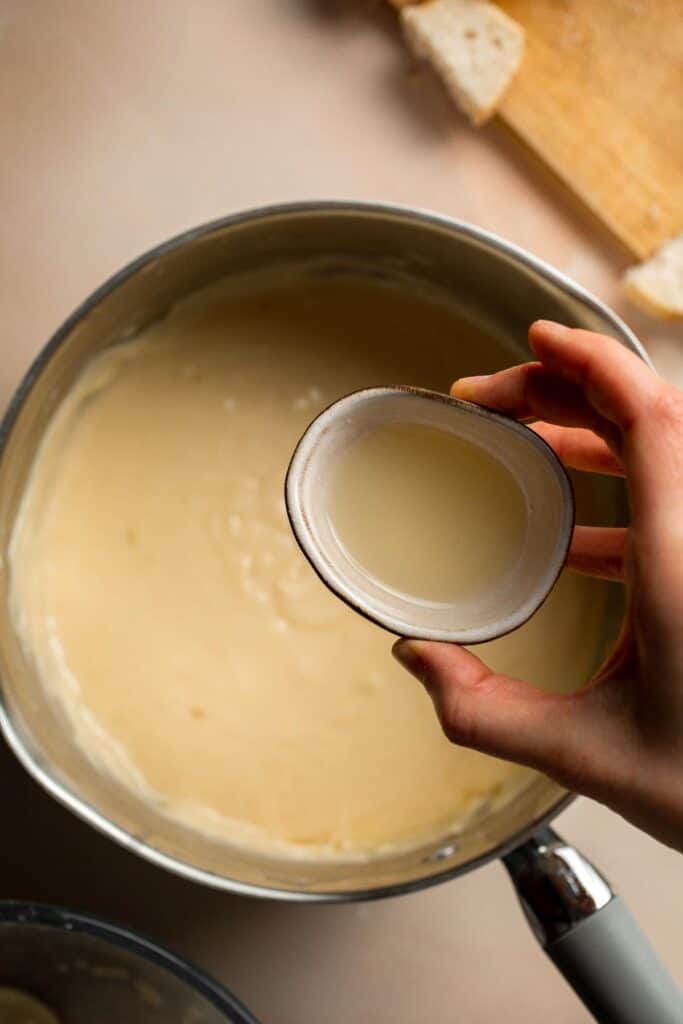
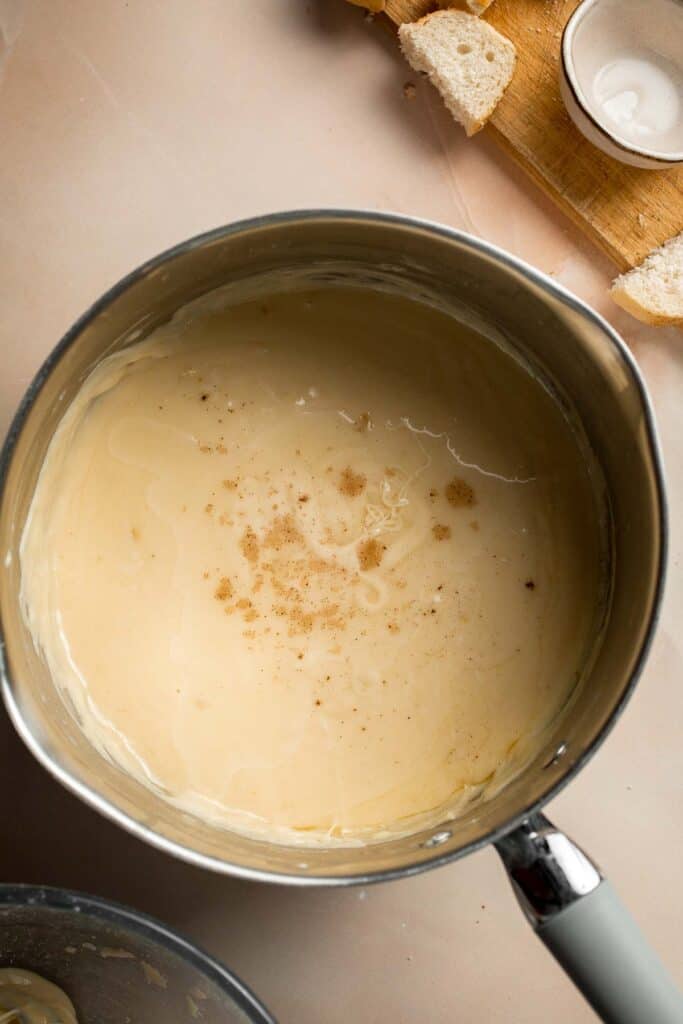
- Serve. Serve the fondue in a fondue pot with cubed french bread.
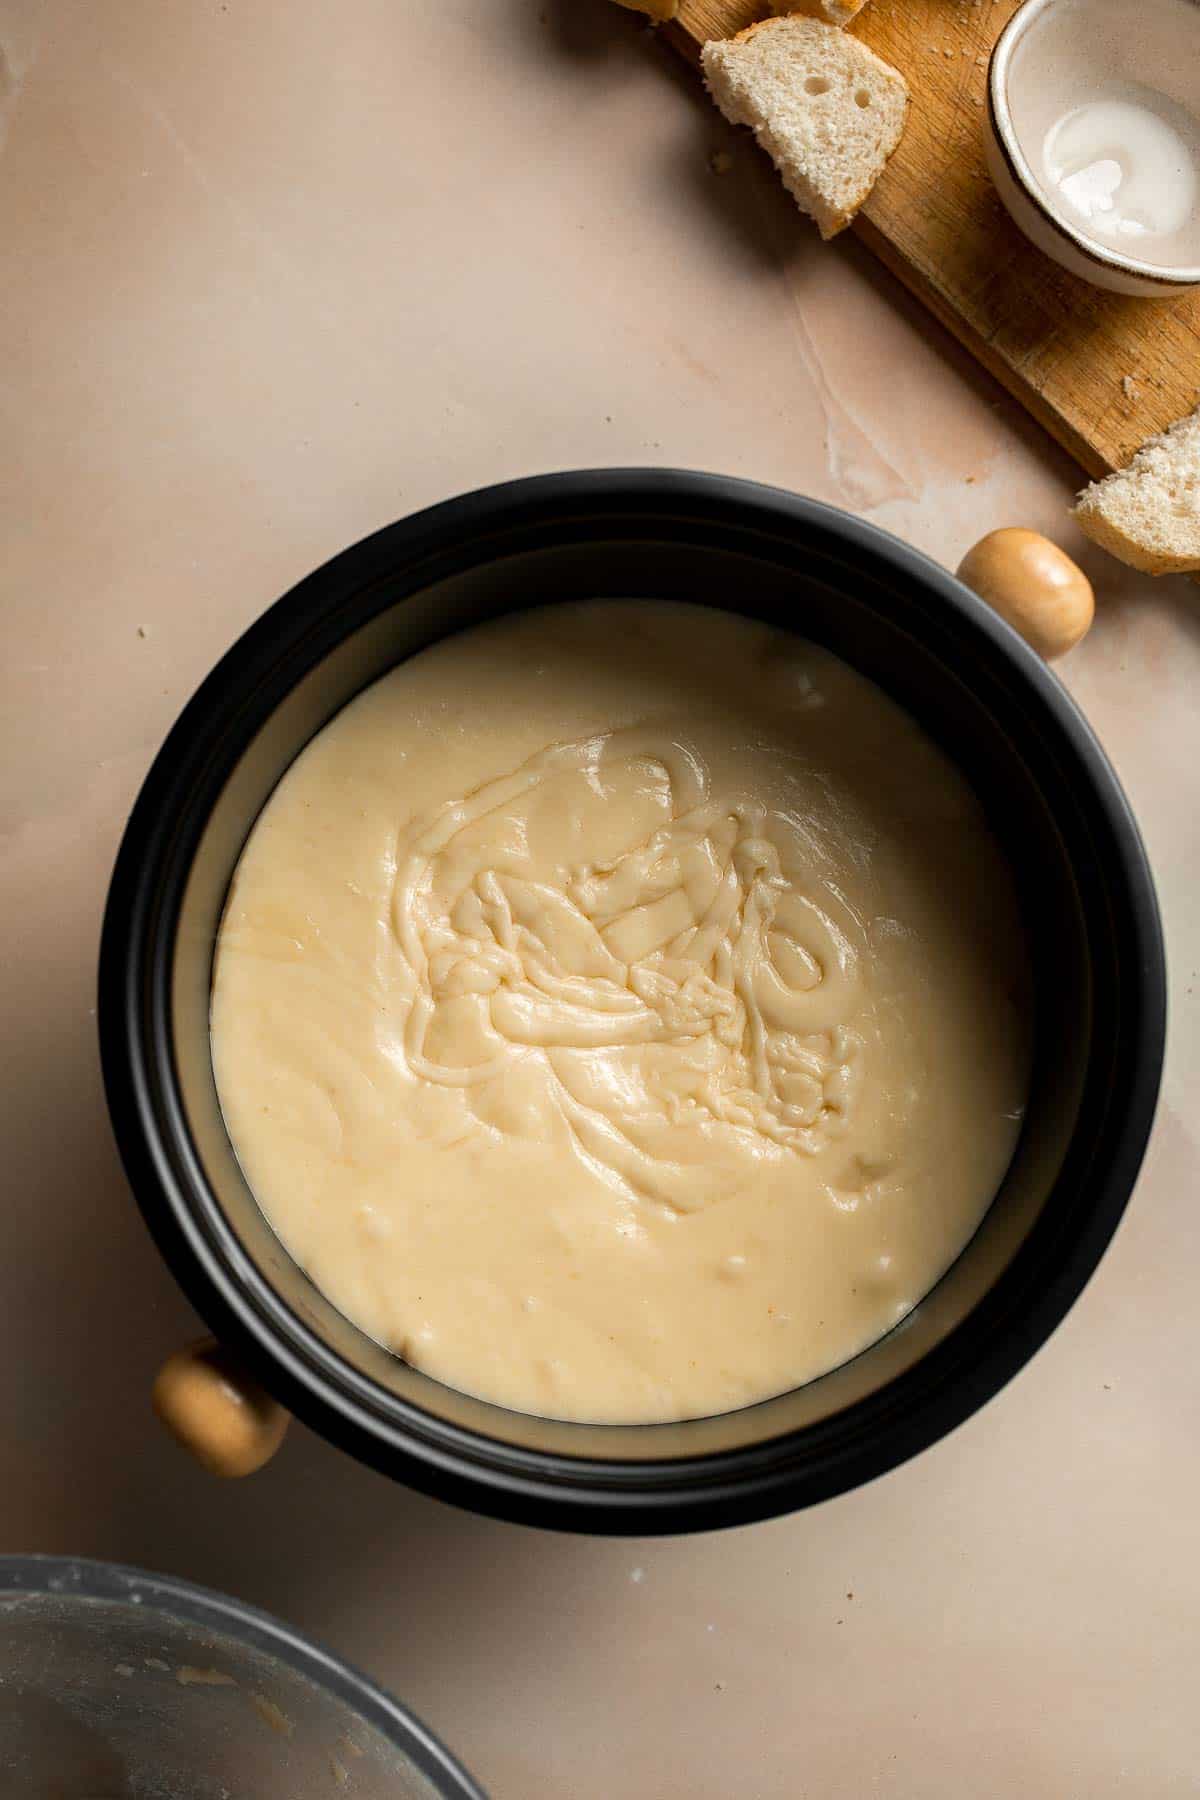
Recipe Variations
- Use a double boiler. If you don't have a traditional fondue pot, fill a saucepan with 2-3 inches of water, then add a glass or metal bowl on top to make a double boiler. Start over medium heat, but drop the temperature lower if needed.
- Adjust the cheeses. This is a Swiss cheese fondue, but you can easily use different kinds of cheeses. Aged cheddar cheese tastes amazing with gruyère!
- Offer different sides. It's traditional to serve fondue cheese with stale bread, which holds the melty cheese really well. Pair this easy cheese fondue recipe with apple slices, sausages, meatballs, crispy potatoes, and more.
- Use a slow cooker. If you're serving this cheese fondue as an appetizer at a party, keep it warm in a slow cooker.
- Use apple cider. Instead of white wine, use a dry, hard apple cider for a wonderfully light flavor.
How to Serve
This cheese fondue is delicious served on its own, or paired with some of my favorite sides for dipping including:
- Easy Salted Soft Pretzels
- Small Batch Sourdough Bread
- Easy Baked Meatballs
- Roasted Brussels Sprouts
- Roasted Garlic Parmesan Baby Potatoes
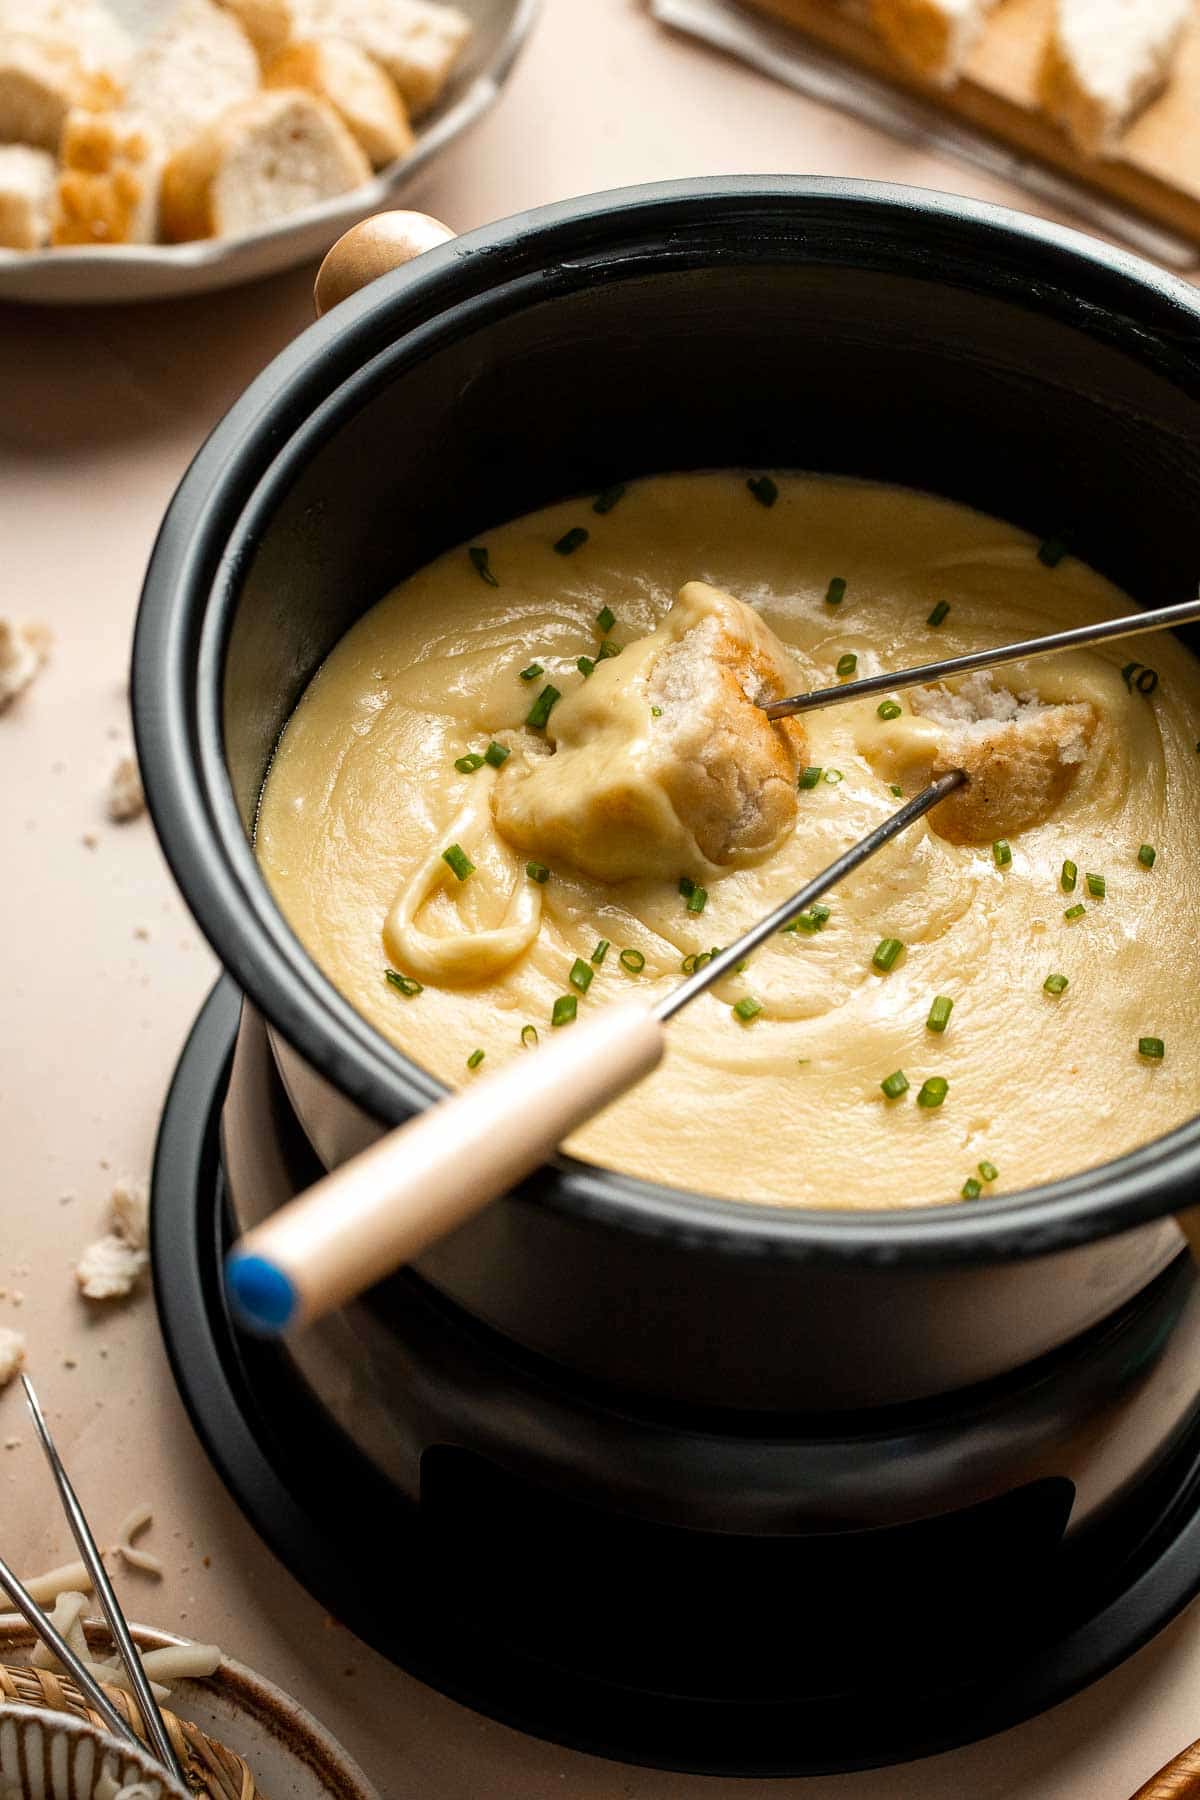
Recipe Tips and Tricks
- Keep it warm. It's important to keep your cheese at just the right temperature. If it's too low, the cheese will thicken. If it's too high, the cheese will brown on the side of your fondue pot. Keep the cheese over medium-low heat and drop it lower if needed.
- Gather the right equipment. Make sure you have some skewers or dipping forks to keep the bread cubes and slices of apples from falling into the pot of cheese.
- Don't skip the acids. There's a reason why fondue has both lemon juice and a splash of white wine. The citric acid from the lemon and the tartaric acid from the wine help the cheese stay perfectly smooth and melty.
- Shred the cheese. Did you know that chopped cheese doesn't melt as well as shredded cheese? Grate the cheese first before melting for the best results.
Storing and Freezing Instructions
How to Store
Let your leftover cheese cool to room temperature, then store it in an airtight container in the fridge for 2-3 days.
How to Reheat
Add the leftover cheese to a small pan on the stove and stir in a splash of milk. Let the cheese warm up until it is soft and creamy again.
How to Freeze
Although you can freeze fondue, the cheese will likely become grainy after thawing. It's best to serve it freshly melted or reheated from the fridge.
FAQ
Fondue is a classic Swiss food, and they traditionally use a variety of Swiss cheeses to get the perfect texture and flavor. We recommend using Gruyère, Emmentaler, or Appenzeller for a traditional flavor. Raclette cheese is not traditional, but it's wonderfully melty and would taste amazing in your fondue pot.
No fondue is complete without a variety of dippers, like cubes of crusty bread, soft pretzels, grapes, tomatoes, crispy potatoes, apple slices, sausage, meatballs, crackers, and more.
If you're hosting a fondue night and aren't sure about serving alcohol to children or other groups, don't worry! The alcohol in the wine will cook out by the time the fondue is ready. If you're still unsure about it, you can make a non-alcoholic fondue by using alcohol-free wine or beer.
More Cheesy Dip Recipes
- 20 Best Dip Recipes
- Queso Mexican Cheese Dip
- Baked Ricotta
- Cranberry Baked Brie
- Creamy Artichoke Dip
- Pizza Dip
Tried this recipe?
I'd love to hear what you think! Leave a comment and rating below to share your feedback. Your reviews help others discover this recipe and help me keep creating more free recipes for you. Snap a photo and tag me on social media @aheadofthyme too.

Hash Browns
These crispy Hash Browns have a crisp, golden exterior and are soft inside - the defining features of a good hash brown. A hot pan transforms hand-grated potatoes with a simple blend of seasonings into the most delicious homemade hash browns you'll ever have.

Making hashbrowns from scratch are a lot easier to make than you'd think! In no more than 20 minutes, you can create these foolproof hash browns and serve them hot alongside eggs, bacon, and other breakfast favorites. Read until the end for tips to make and serve the perfect hash browns!
Why You'll Love this Hash Brown Recipe
- Simple ingredients. These no-fuss hash browns are made with 4 real ingredients, plus salt and pepper and oil for frying, but deliver excellent flavor and the perfect hash brown crunch. Great for when you're low on groceries but still need satisfying breakfast or snack options!
- Healthier than store-bought. Because these shredded hash browns are homemade using potatoes, cornstarch, and a few simple seasonings, they're better than the typical hash brown or tater tot you would find in the freezer aisle (which tend to have filler ingredients).
- They're freezer friendly. These hash browns are the perfect addition to your freezer stash - they reheat beautifully and are just as crisp and fresh the second time around!

Ingredient Notes
To make these delicious crispy Hash Browns, you will need the following ingredients (full measurements in recipe card below):
- Russet potatoes - Yukon Golds or other low-moisture potatoes can be swapped for the Russets.
- cornstarch - adding a little cornstarch to the hashbrowns helps hold everything together instead of getting mushy when cooked. You can also substitute with all-purpose flour.
- garlic powder - you can also use dried minced garlic, but fresh garlic or canned minced garlic may add too much moisture and prevent the hash browns from getting crisp.
- onion powder - an equal measure of dried minced onion will also work, but it will result in a chunkier texture than using powder.
- salt and pepper
- vegetable oil - olive oil or another oil with a high smoke point and a neutral taste sych as avocado oil will work in place of the vegetable oil. You can also cook them in butter for a richer flavor.
You will also need measuring spoons, a box grater, mixing bowl, and skillet.
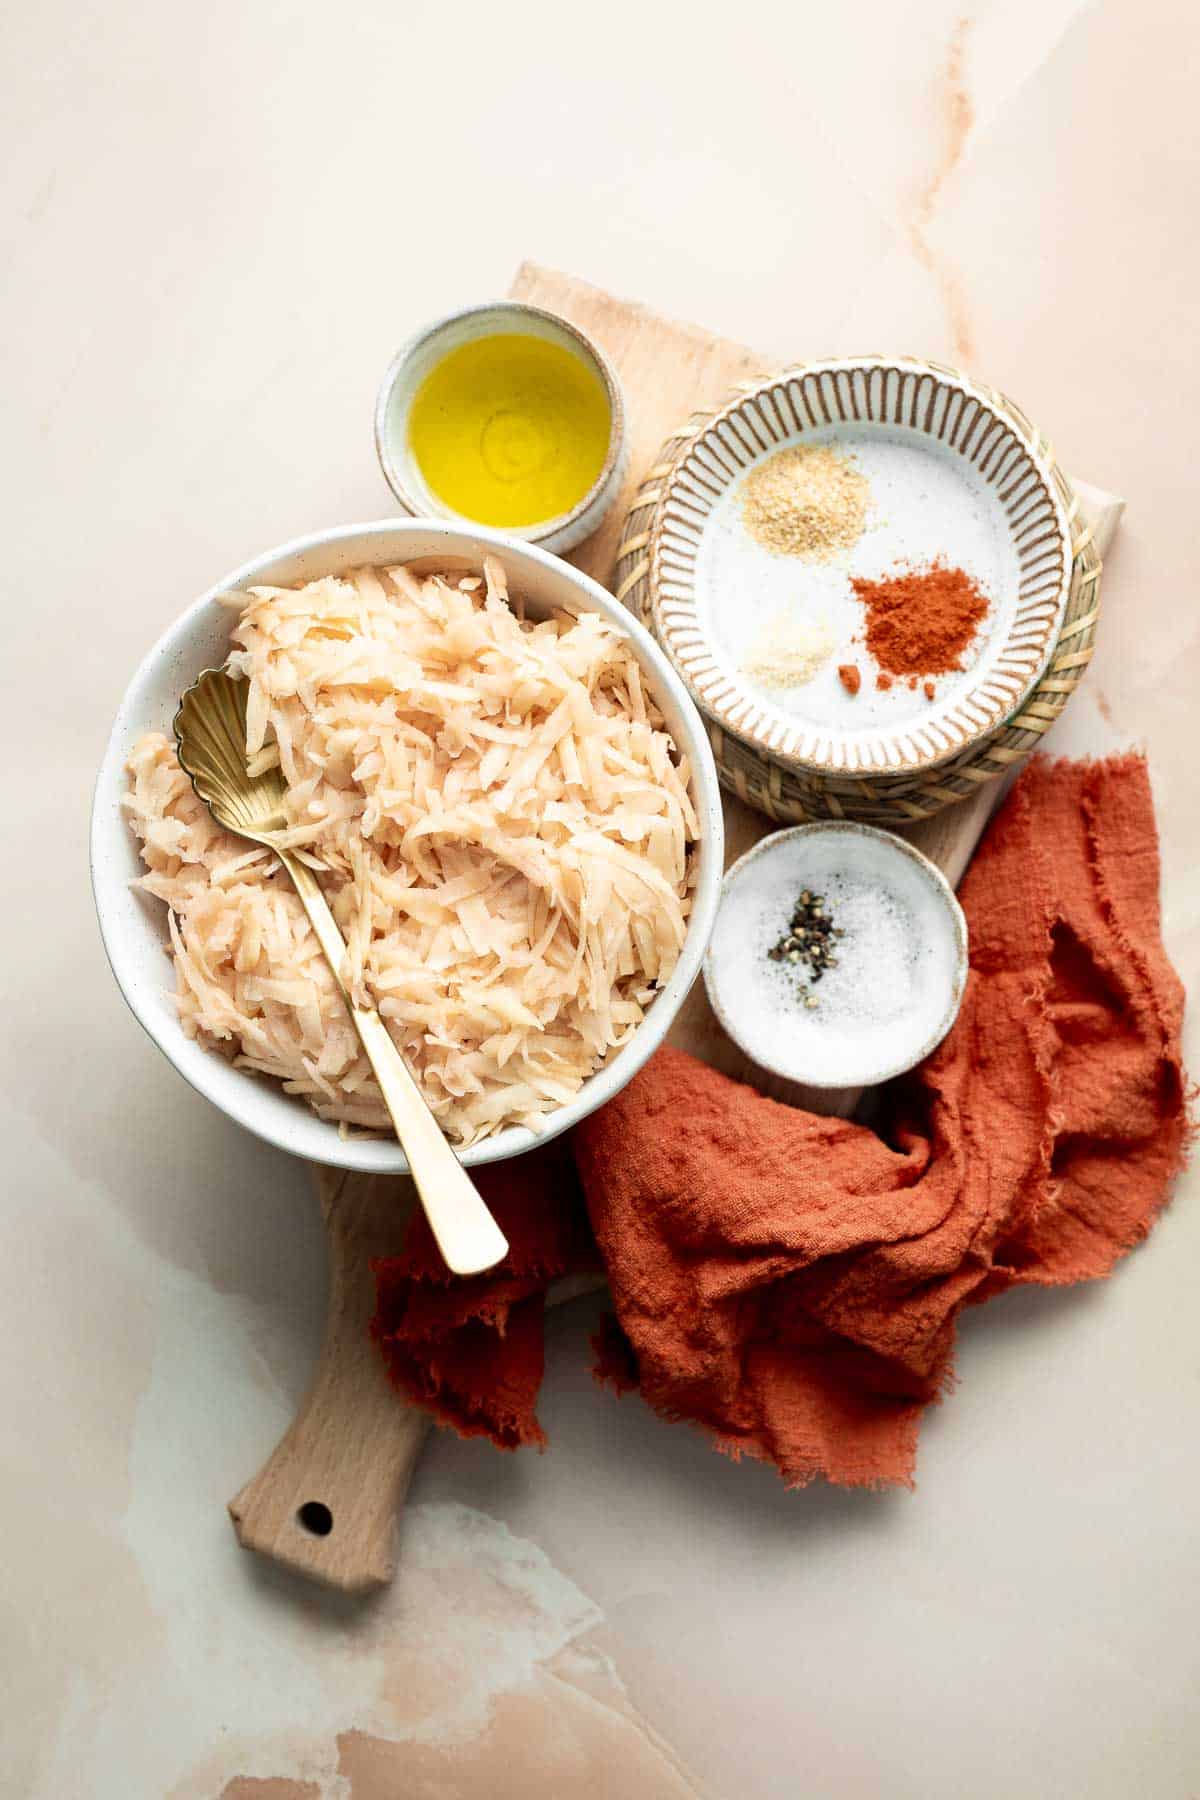
How to Make the Best Hash Browns
- Grate potatoes. Using a box grater, grate the peeled potatoes on the the largest holes. Use your hands or a cheese cloth to squeeze out as much of the moisture as you can, then pat dry with a paper towel.

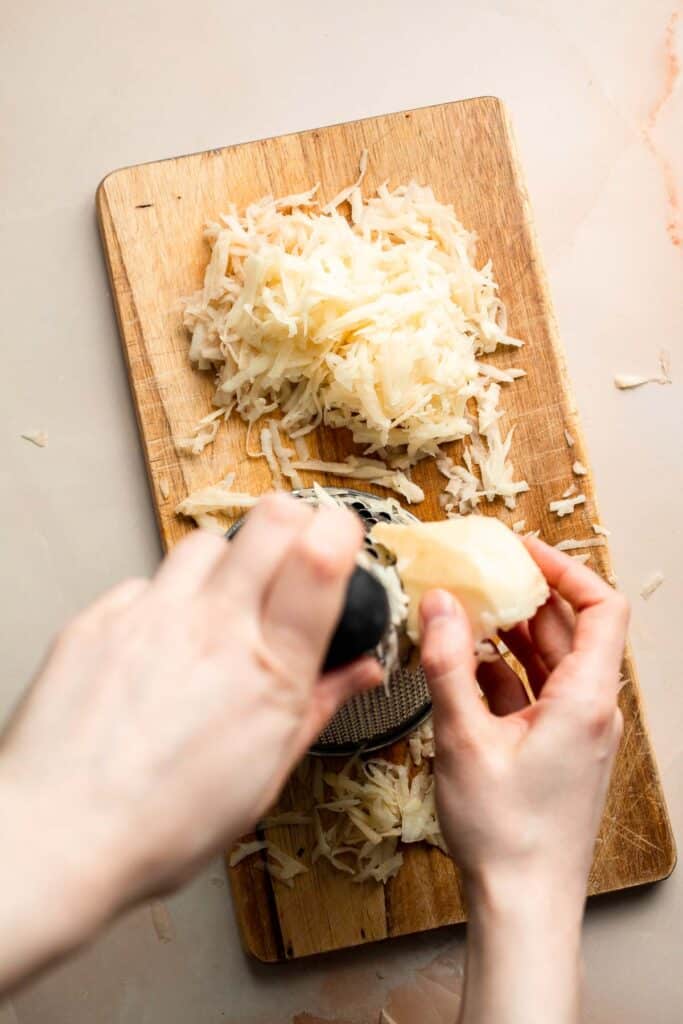
- Combine ingredients. Add the shredded potatoes in a large mixing bowl. Sprinkle with cornstarch, garlic powder, onion powder, salt, and pepper, and toss well to coat.
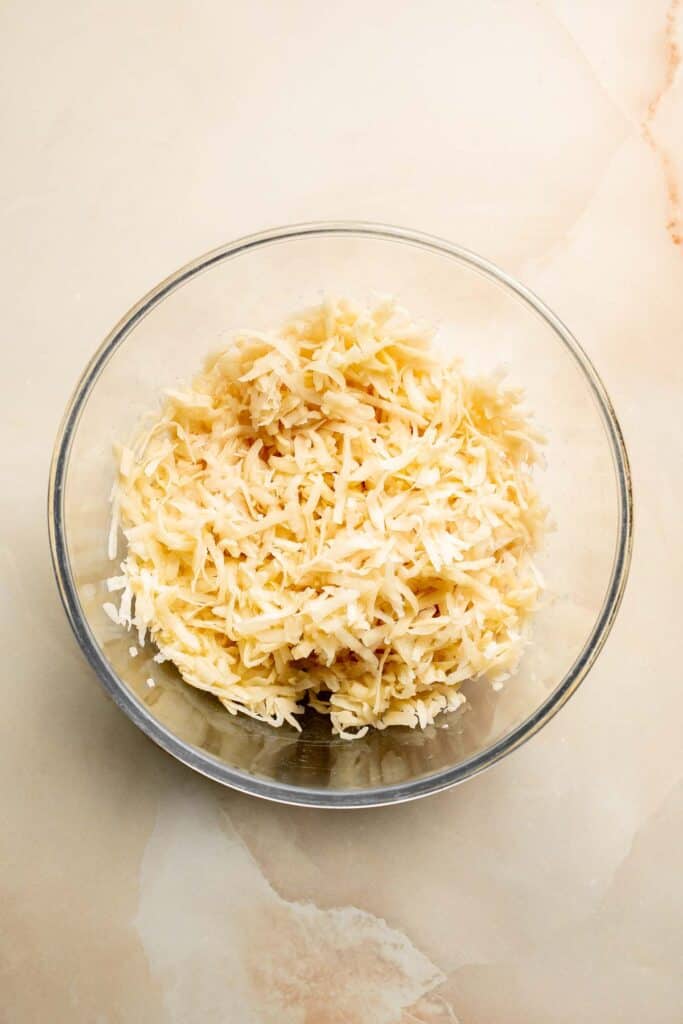
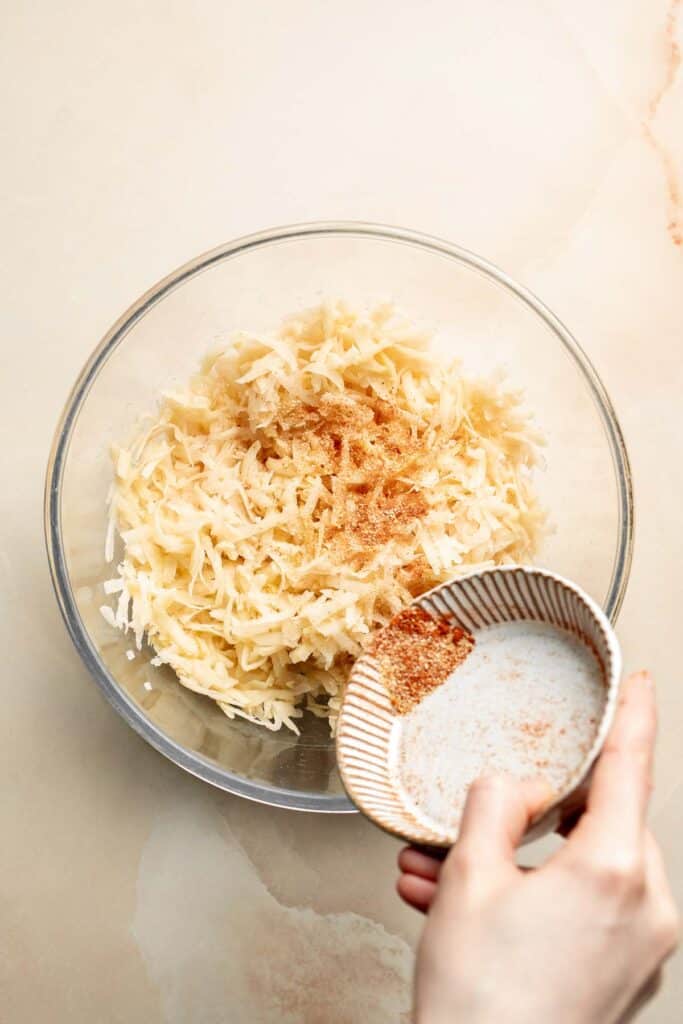
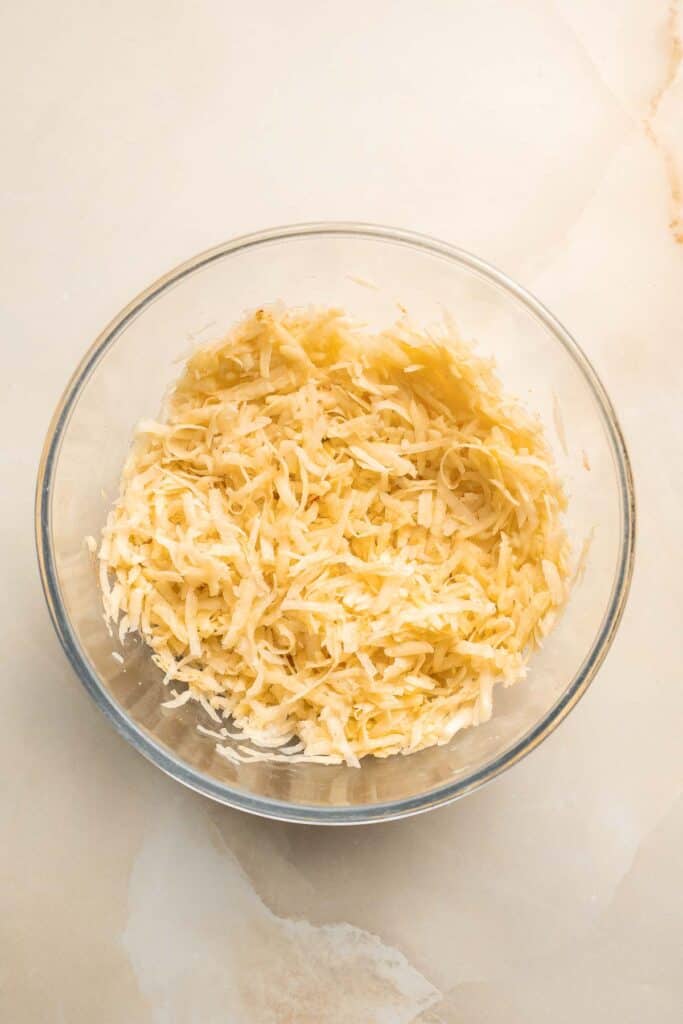
- Cook hash browns. Heat oil in a large skillet over medium heat until the hot oil sizzles, about 1-2 minutes. Take a handful of the potato mixture at a time with your hands and gently press together into a ball. Place them in batches in the skillet (about 3 per batch) and gently press down into about a disk ¼ to ⅓-inch thick. Cover with a lid and cook without stirring until golden brown on the bottom, about 5 minutes. If it gets too browned too quickly, reduce the heat to medium low.
- Flip. Use a flat spatula to flip the hash brown over. Cook uncovered until golden brown on this side too, about 3-4 minutes. Serve warm.
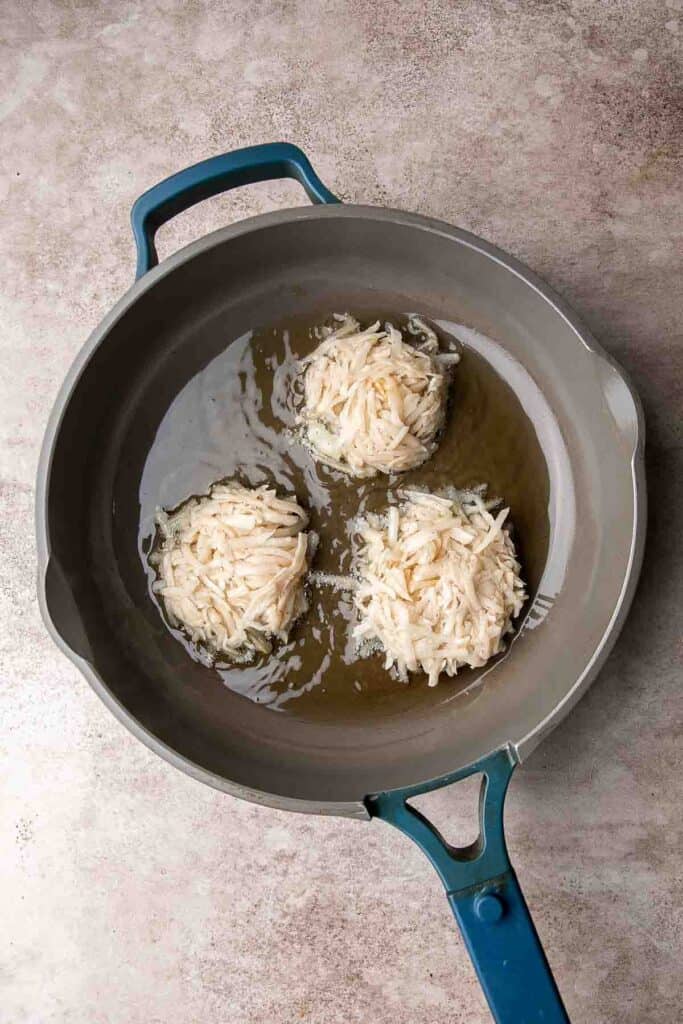
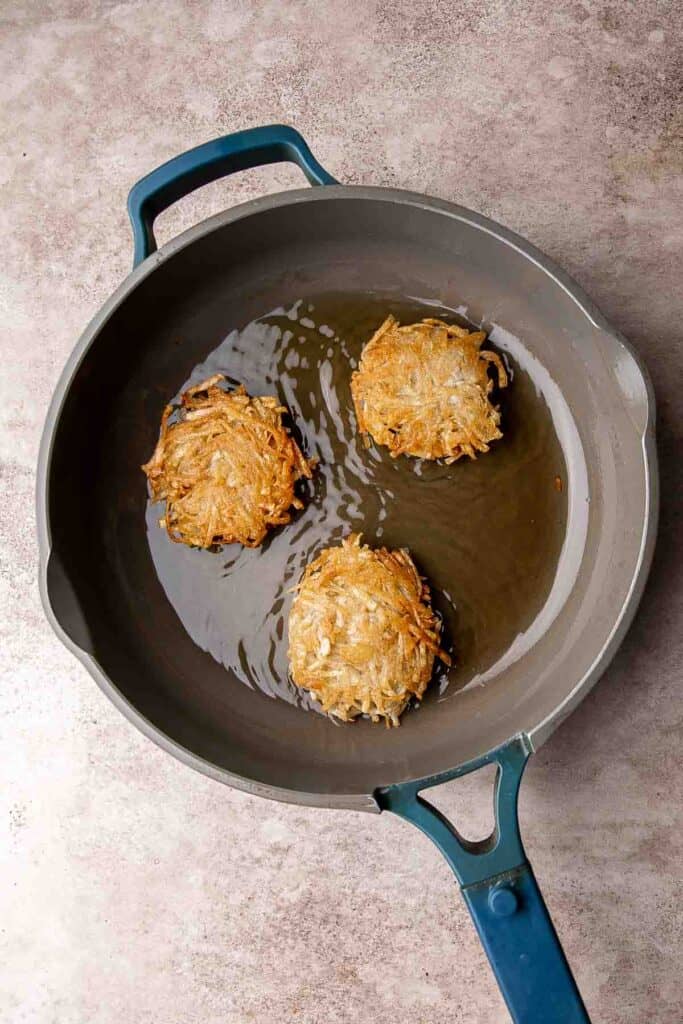
Recipe Variations
- Loaded hash browns. Instead of serving the hash browns as is, load them up with your favorite baked potato toppings including grated cheddar cheese, sour cream, green onions, and bacon bits.
- Low carb hash browns. Substitute some or all of the shredded potatoes with grated zucchini or grated cauliflower for a low carb option.
- Add veggies. Add in some spinach leaves, sautéed veggies like bell peppers or onions, or to your potato mixture for extra nutrients.
- Make them cheesy. Add in some of your favorite cheese to the potato mixture including shredded cheddar, Parmesan cheese, or feta.
- Sweet potato hash browns. Switch out the potatoes with sweet potatoes for a different flavor.
- Use different seasoning. Change the flavor of these hash browns by experimenting with different seasonings. Try paprika, cumin, or fresh herbs like chives, parsley, or dill.
- Make them spicy. Make spicy hash browns by adding some red pepper flakes, cayenne pepper, or hot sauce to the potato mixture.
How to Serve
Serve these shredded Hash Browns on its own as a snack with ketchup for dipping or as part of your breakfast plate. Some of our favorite breakfast foods to pair with this are:
- Mediterranean Scrambled Eggs
- Avocado Toast with Poached Egg
- The Best Old Fashioned Pancakes
- Huevos Rancheros
- Caprese Frittata
- French Toast
For more recipe inspiration, see our 50 Best Breakfast Ideas.

Recipe Tips and Tricks
- Use a cast iron skillet. If you have a cast iron skillet available, put it to good use with these hash browns! Cast iron is beloved for its ability to maintain even, radiant heat and a natural nonstick finish-perfect for making golden-tan hash browns with a crunchy exterior!
- Batch prep for easy breakfasts. Because these freeze so well and can be reheated straight from frozen, they're perfect for hectic early-morning meals! Make a double batch and freeze them to make weekday mornings a little bit easier.
- Get creative with leftover hash browns. Did you know that even simple hash browns can be incredibly versatile? Use them as the "bread" to build breakfast sandwiches, press them in a waffle iron, or as a dipping vessel for hearty soups and dips. The possibilities are endless!
Storing and Freezing Instructions
How to Store
Allow the hash browns to cool completely before transferring to an airtight container and refrigerating them for up to 5 days.
How to Reheat
Reheat on the stovetop over medium-high heat until heated through and crisp or in the air fryer at 400℉ for 15 minutes.
How to Freeze
Place leftover hashbrowns on a lined baking sheet and freeze uncovered for 1 hour or until solid, then transfer to a freezer-safe container or Ziploc bag. Freeze for up to 3 months.
More Potato Recipes
- 40 Best Potato Recipes
- Breakfast Potatoes
- Mashed Potato Cakes
- Potato Stacks
- Baked Potato Wedges
- Mashed Potato Casserole
Tried this recipe?
I'd love to hear what you think! Leave a comment and rating below to share your feedback. Your reviews help others discover this recipe and help me keep creating more free recipes for you. Snap a photo and tag me on social media @aheadofthyme too.

- « Previous Page
- 1
- …
- 8
- 9
- 10
- 11
- 12
- …
- 41
- Next Page »