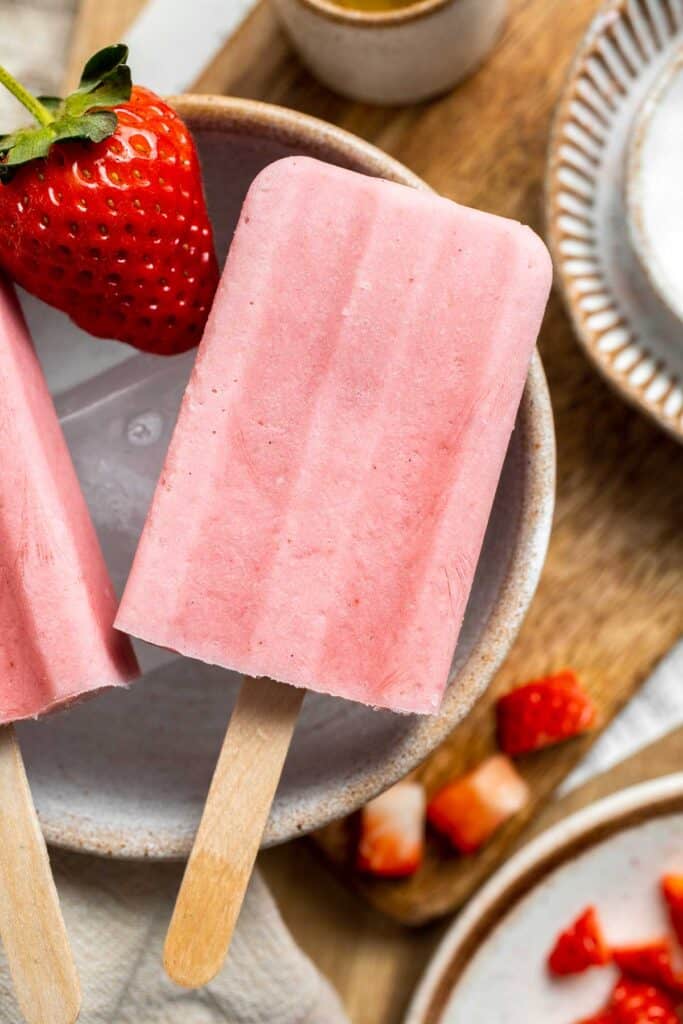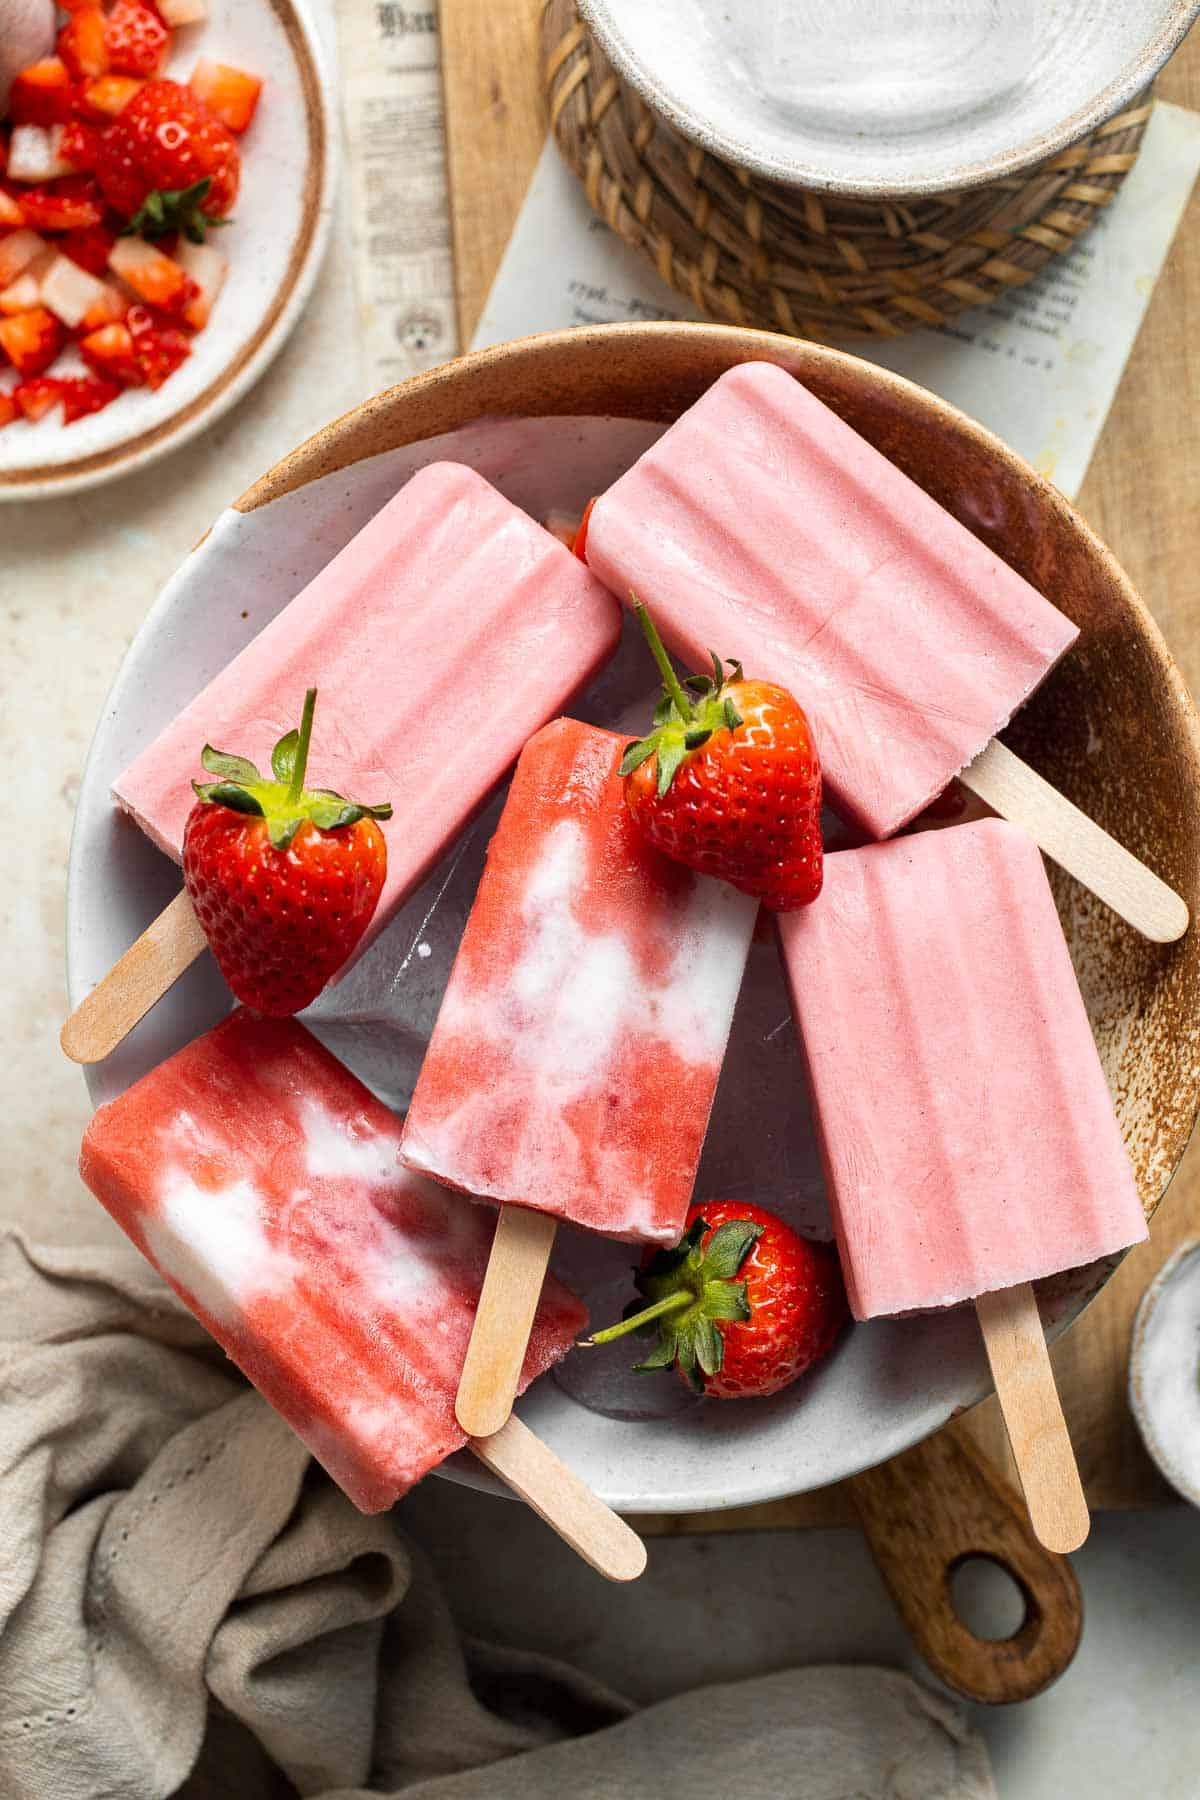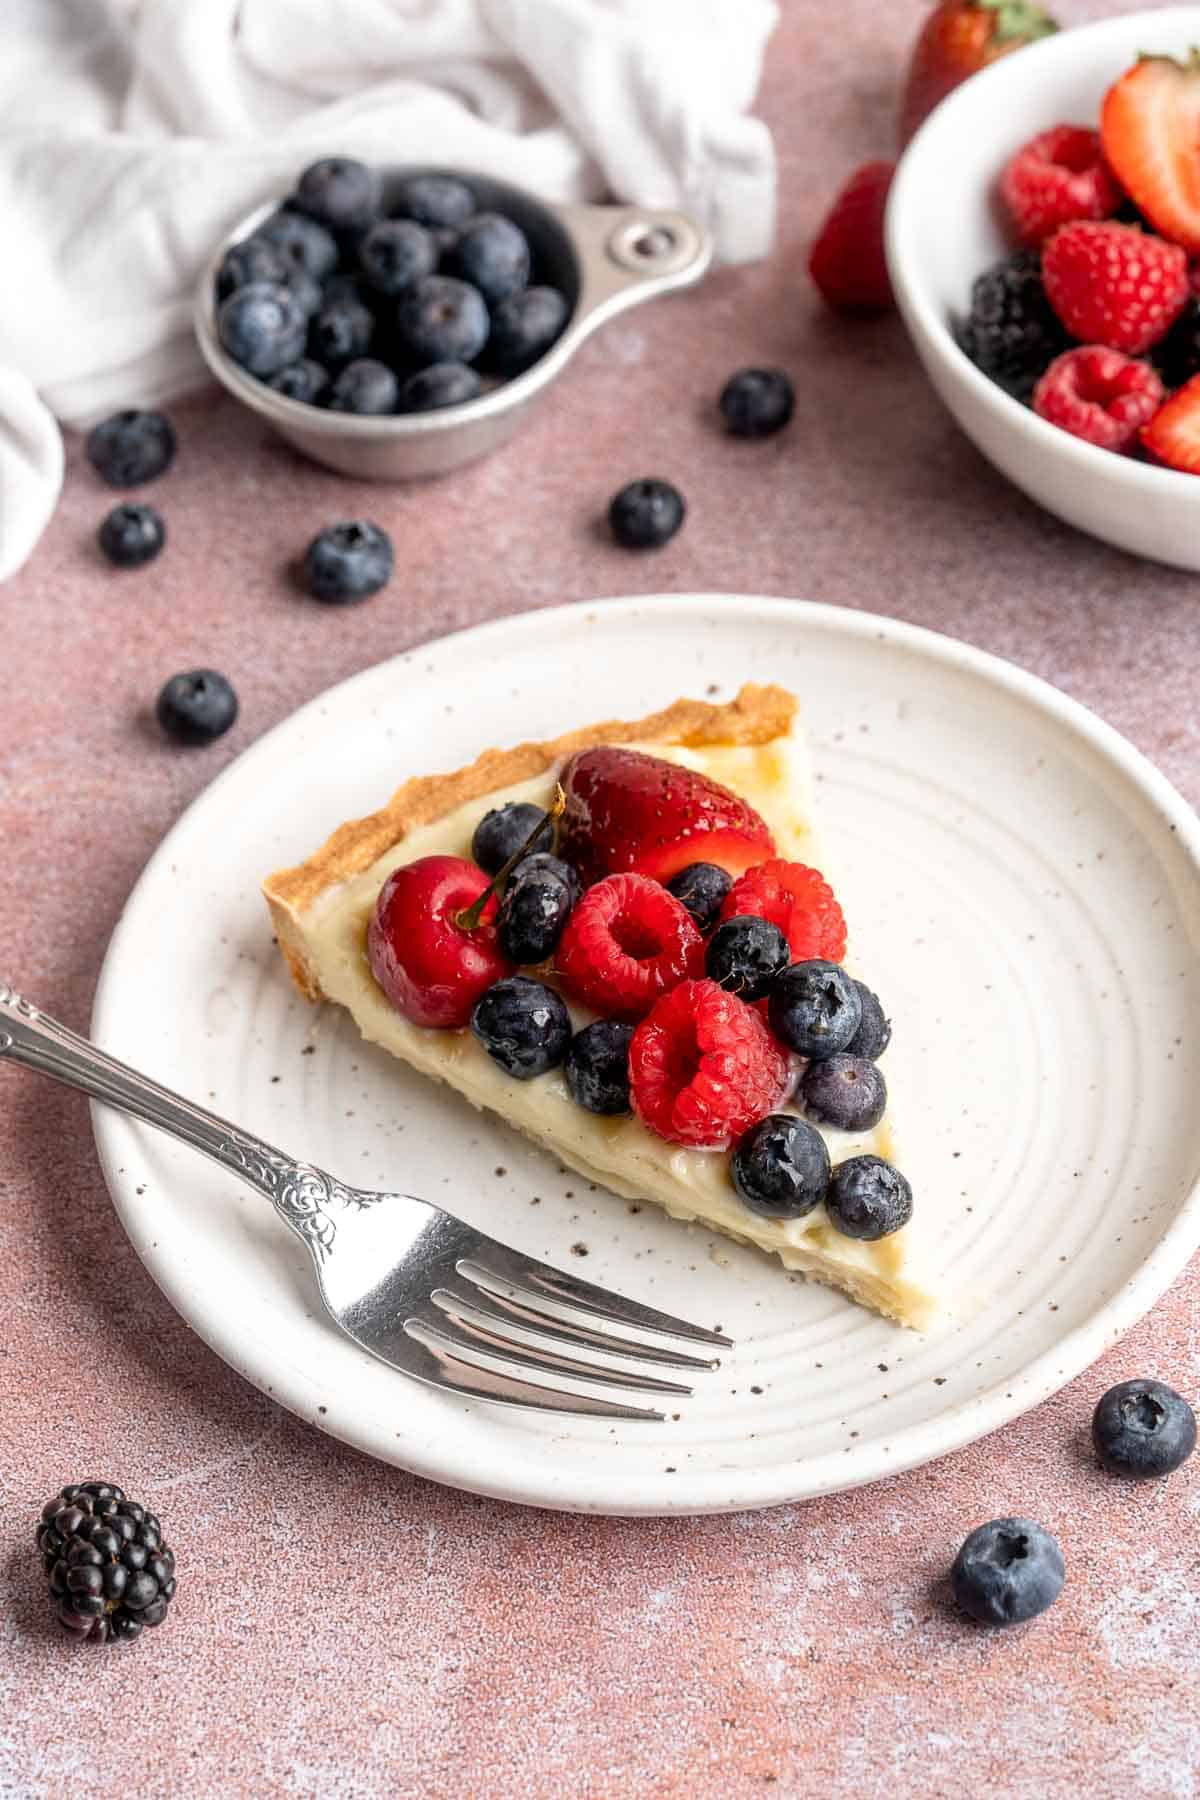
These Homemade Pop Tarts buttery, flaky, and filled with sweet strawberry jam - a major upgrade on the store-bought kind! Drizzle them with a pink vanilla glaze and add a few sprinkles to complete the look. In a hurry? Use pre-made pie crust and store-bought jam for a lightning-fast breakfast treat!

Making your own pop-tarts from scratch at home may seem overly fussy or complicated, but believe me when I say it is worth it. Homemade is always better, especially when it comes to any type of pastry dough. This homemade pop tarts recipe makes the best breakfast treat or after-school snack, but you don't have to stop there. Serve them warm with a little whipped cream or vanilla ice cream for a melty, berries-and-cream-inspired summer dessert. So good!
Why You'll Love These Homemade Pop Tarts
- Completely homemade. Store-bought pop tarts are delicious in their own right, but nothing compares to homemade pie crust and jam made with fresh berries. The flavor doesn't even compare! These are so much better than the real thing, and you only need a handful of basic ingredients. Easy!
- Special breakfast treat. If you want to serve a breakfast your family will remember forever, these homemade strawberry pop tarts are such a special treat! They're great for special occasions, like birthdays or holidays, or to wow your guests at a special Mother's Day brunch or Valentine's Day feast.
- Easy to adapt. Think of this as your standard pop tart recipe and adapt it as needed. Change the fruit in the jam, use storebought jam, make your own pie crust, or buy some from the store...there are lots of ways to make it your own.

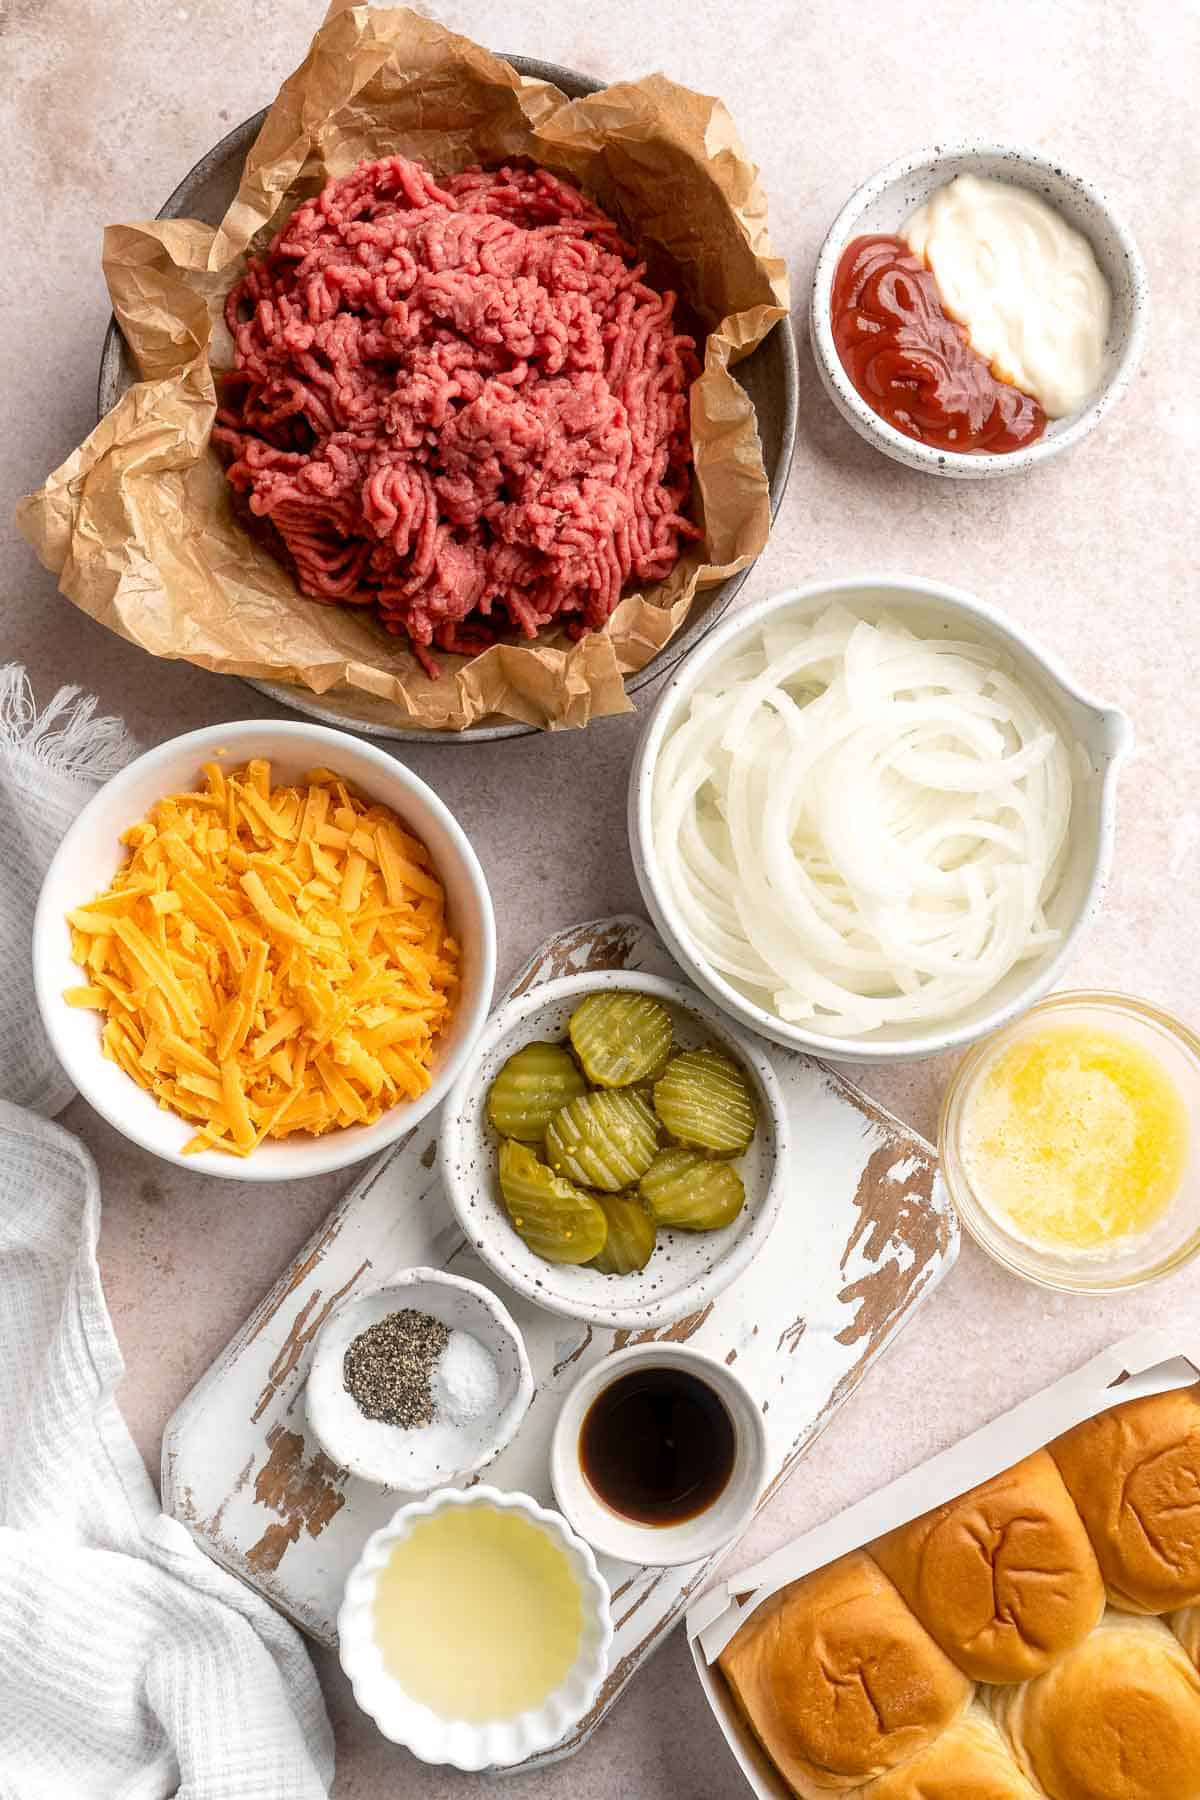
Ingredient Notes
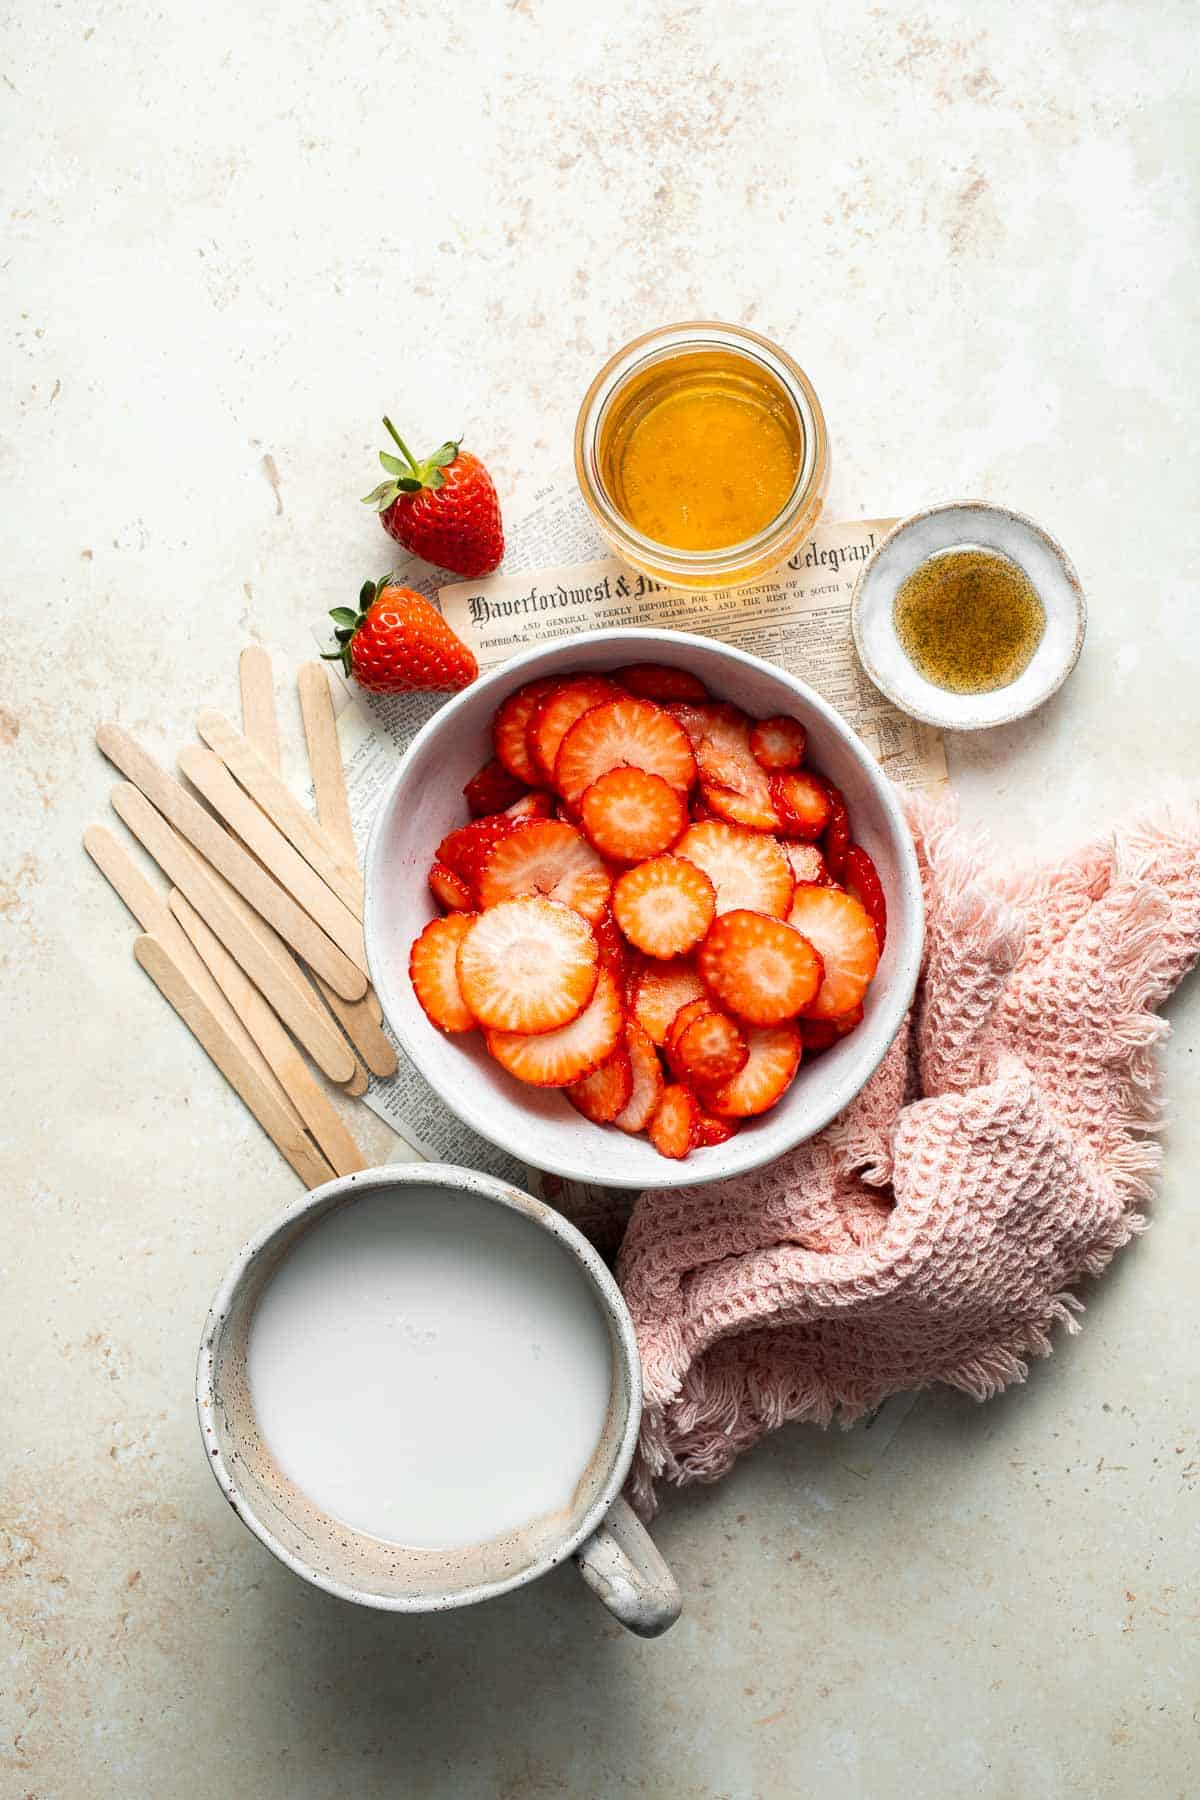
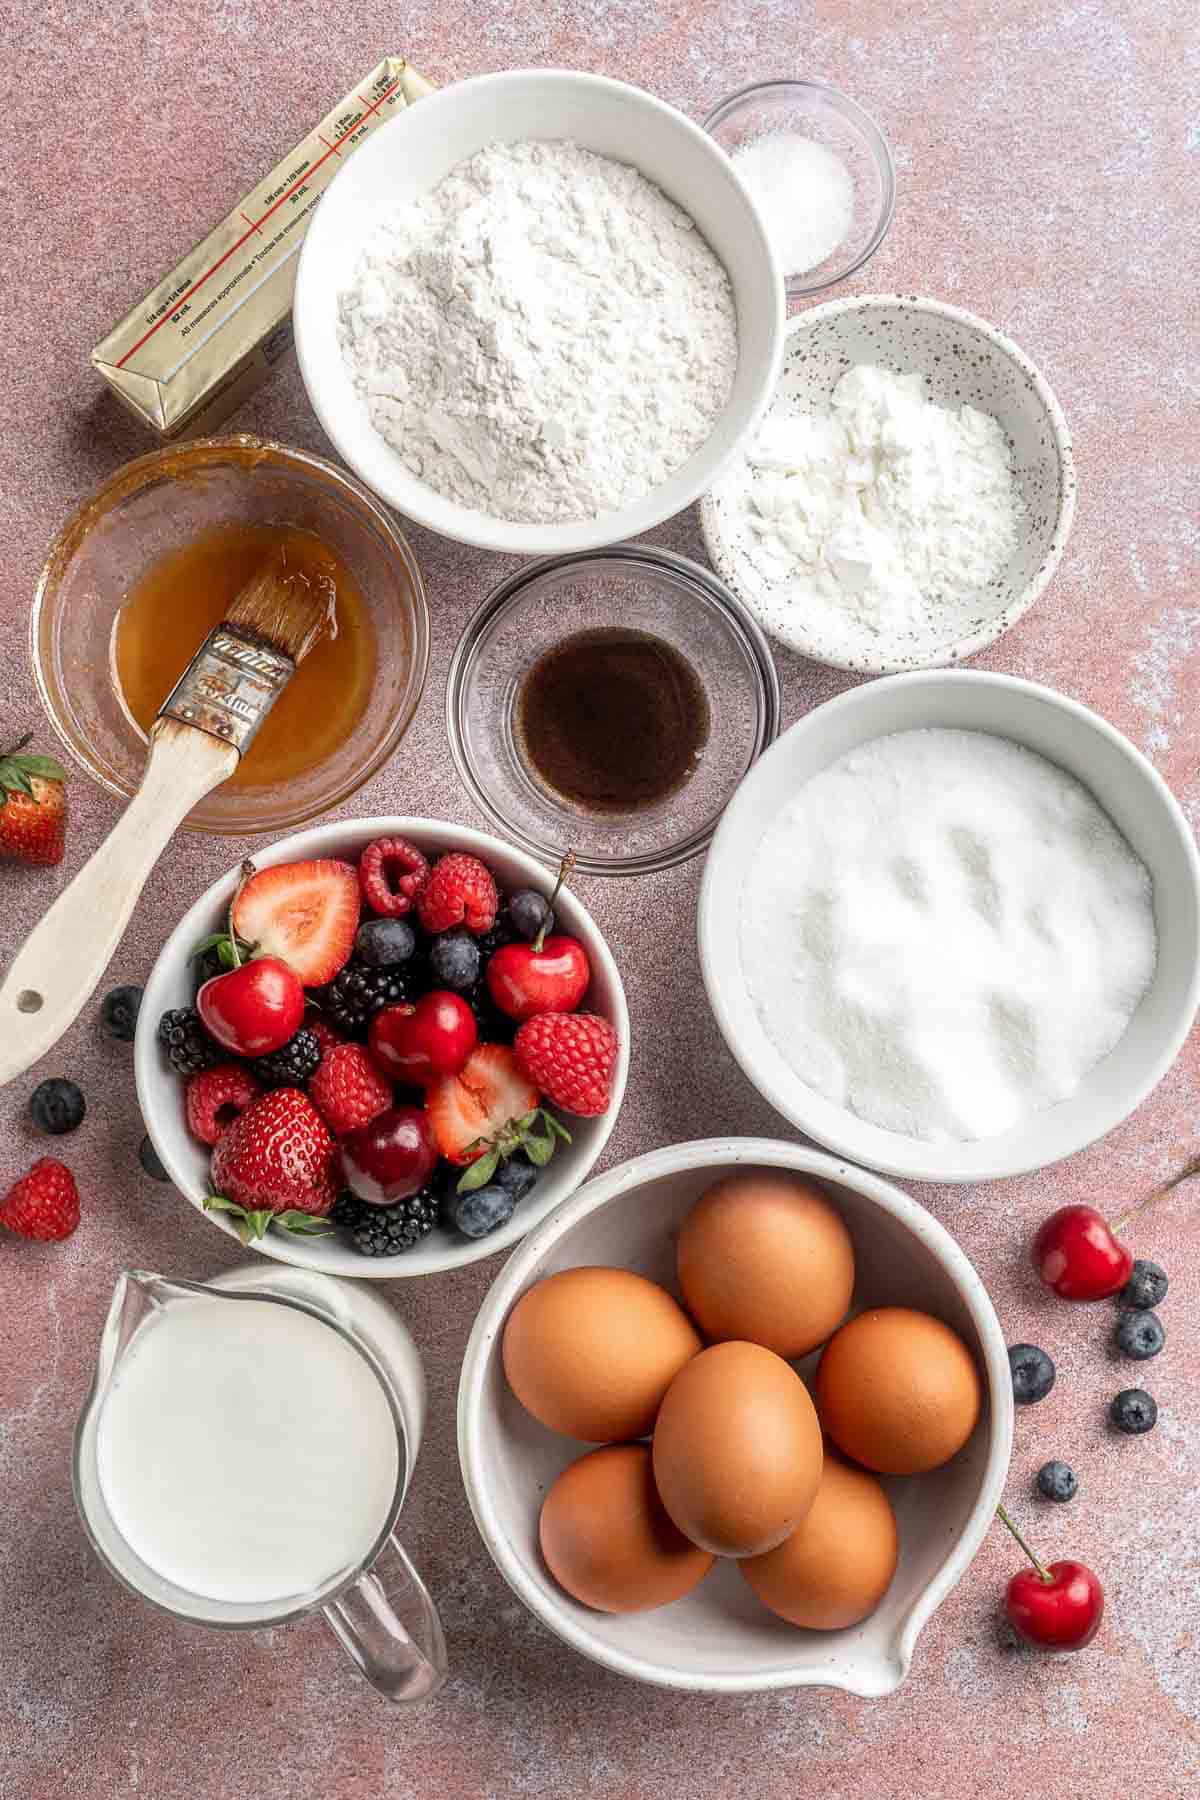
To make this delicious Homemade Pop Tarts, you will need the following ingredients (full measurements in recipe card below):
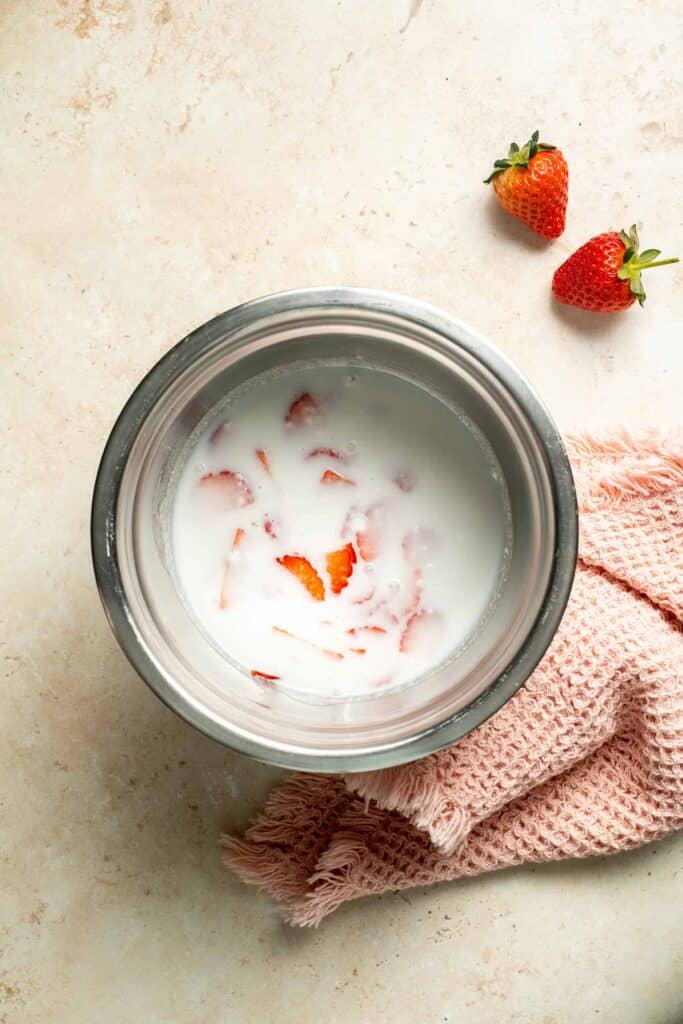
strawberry jam - we made homemade strawberry jam using fresh strawberries, white sugar, and lemon juice. You can also substitute these ingredients for storebought jam.
- pie crusts - use either homemade or store-bought pie crust.
- egg - mix this with water to make an egg wash.
- confectioners' sugar - powdered sugar will thicken the glaze and add a little extra sweetness.
- heavy cream - for the glaze. Regular milk or half and half work well, too.
- vanilla extract - for flavor.
- liquid food colouring - we use pink food coloring to make the glaze pink, but you can substitute with any color that you like.
- sprinkles - white or rainbow look best with the pink glaze.
You will also need measuring cups and spoons, mixing bowls, a large pan, potato masher, candy thermometer, heat-proof bowl, plastic wrap, baking sheet, parchment paper, rolling pin, tape measure, sharp knife, whisk, pastry brush, and fork.

How to Make the Best Homemade Pop Tarts
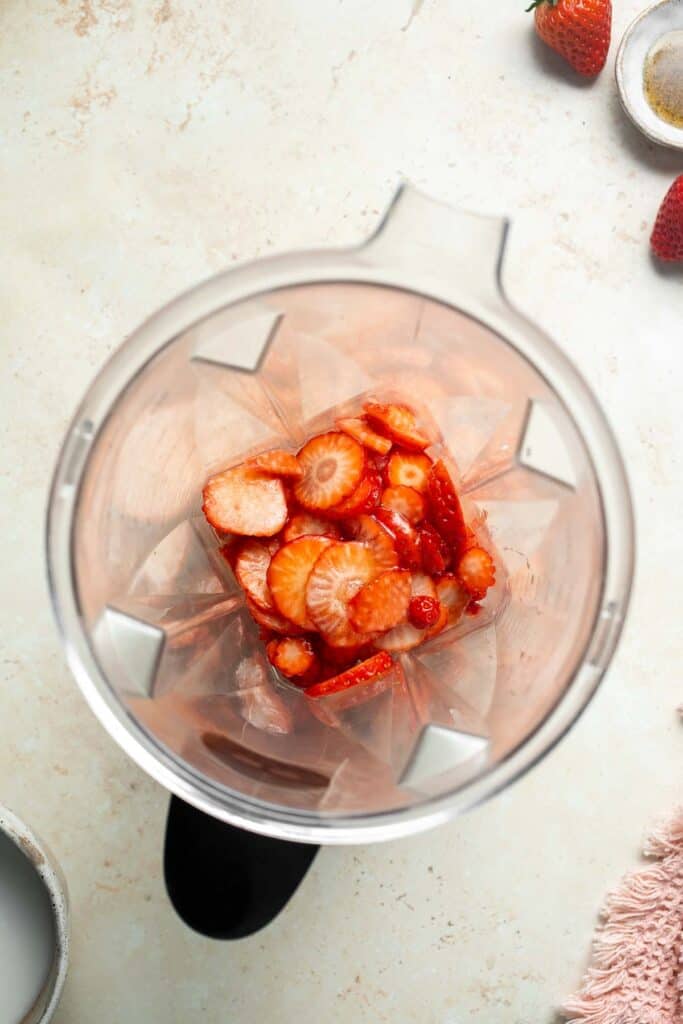
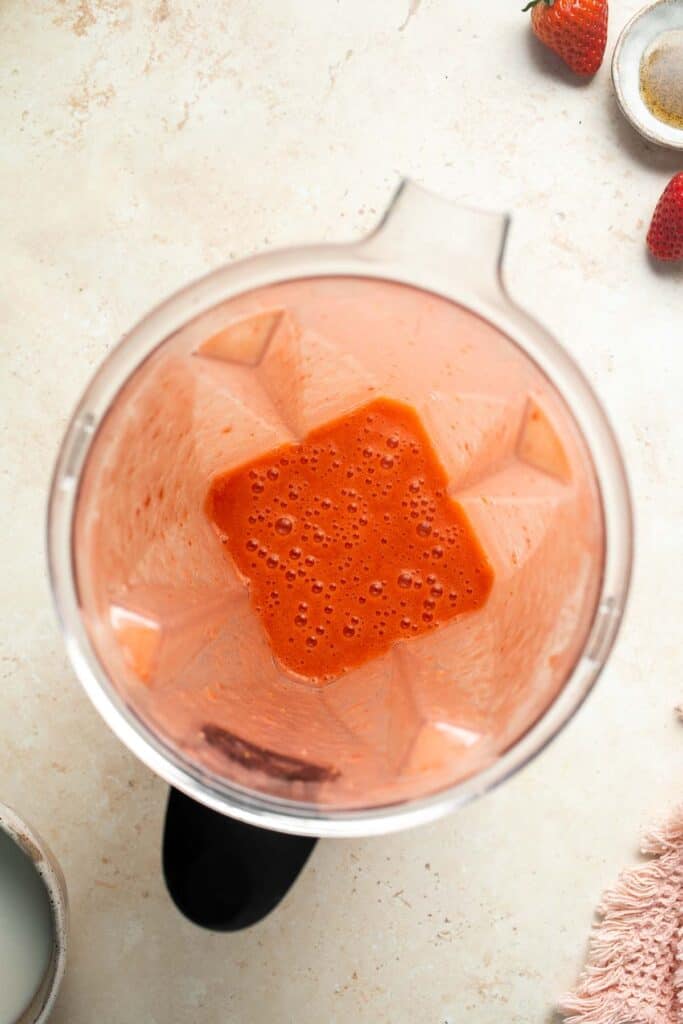
First, make the jam filling.
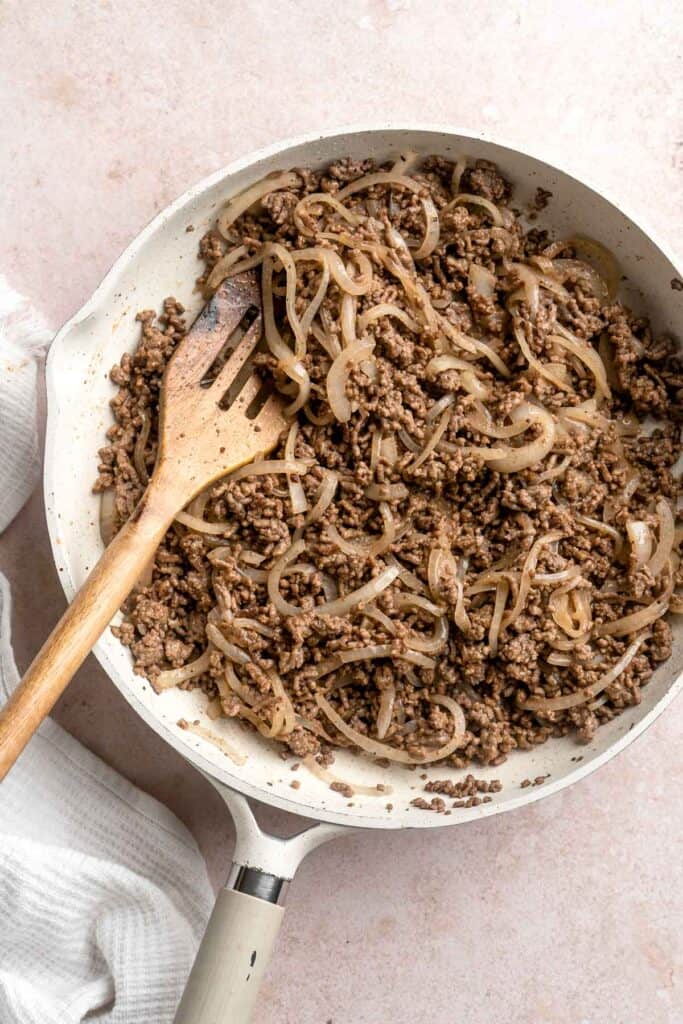
- Boil. Place the strawberries, sugar, and lemon juice into a medium to large size pot over medium-high heat. Stir together and bring to a boil.
- Simmer. Once boiling, reduce the heat to medium, then allow the jam to simmer for 10 minutes, stirring occasionally.
- Mash. After 10 minutes, use a potato masher to mash the berries up. Allow the mashed berries to continue simmering until thick and jammy, about 5-10 more minutes, or until the jam reaches 220F on a candy thermometer.
- Cool. Transfer the jam to a heat-proof bowl, cover with plastic cling wrap, and place in the fridge to fully cool, at least 4 to 5 hours, or preferably overnight.


Next, assemble the pop tarts.
- Prep. When jam is cold, preheat the oven to 400F, and prepare a baking sheet with parchment paper.
- Roll pie crust. Prepare your pie crusts by rolling both pie crusts into about 13x9-inch rectangles each.
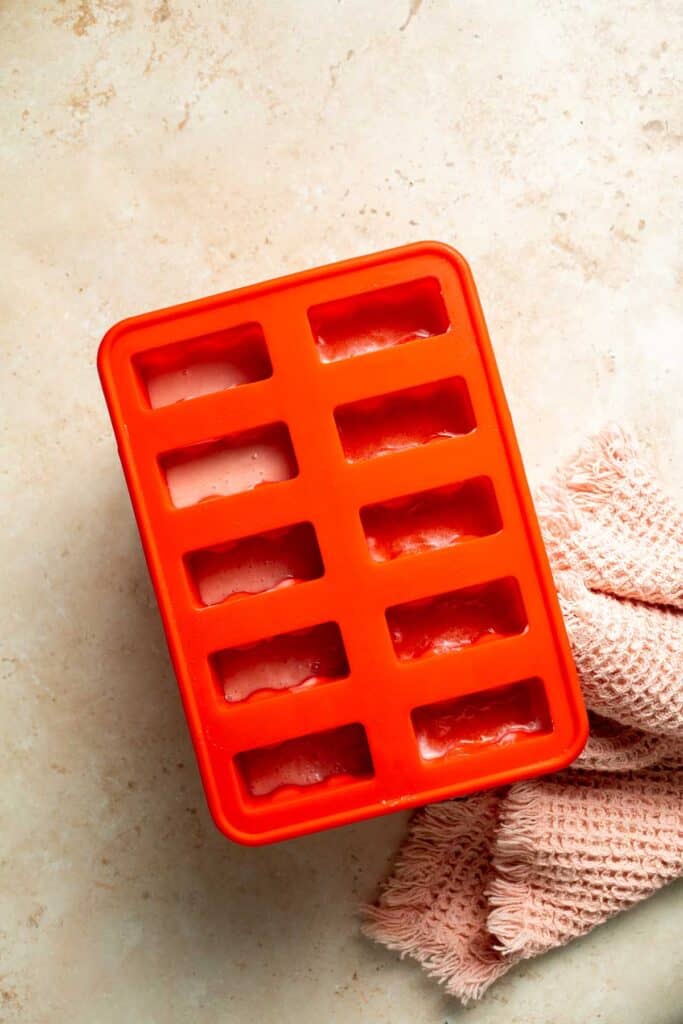
- Cut pie dough. Cut each rectangle into 8 equal rectangles (4 rectangles across x 2 rectangles high), creating 16 total rectangles.

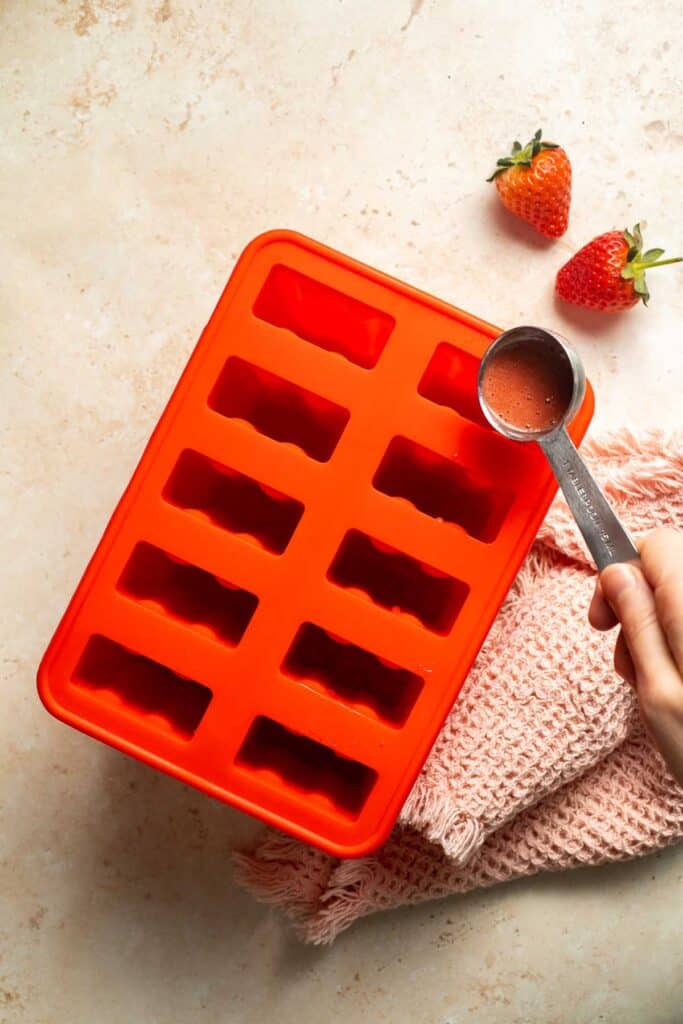
- Make egg wash. In a small mixing bowl, whisk together egg with 1 teaspoon water.
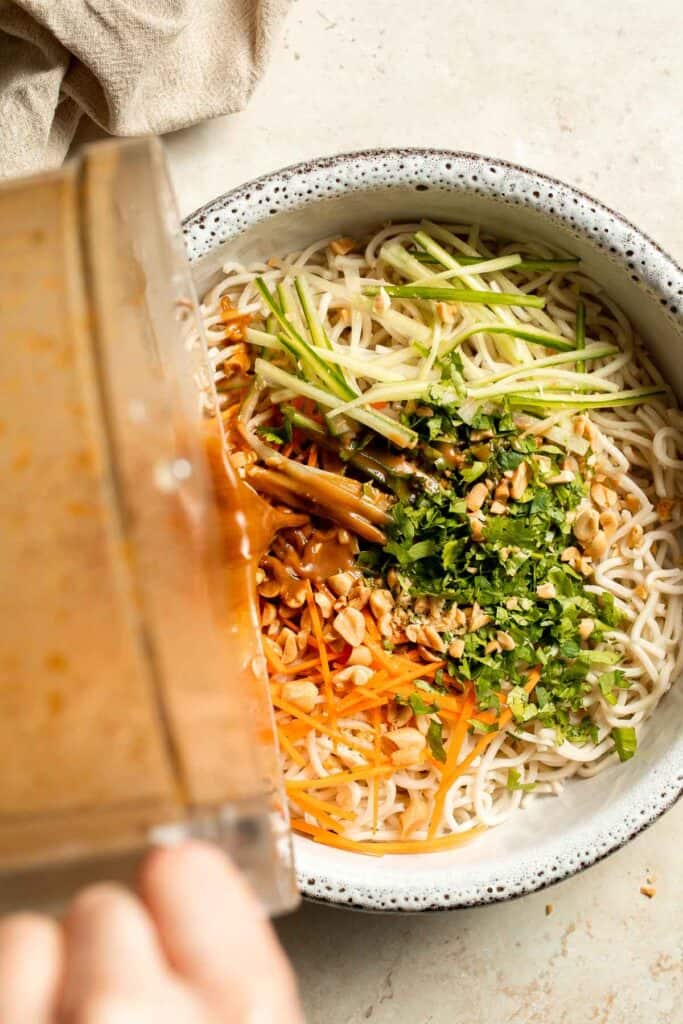
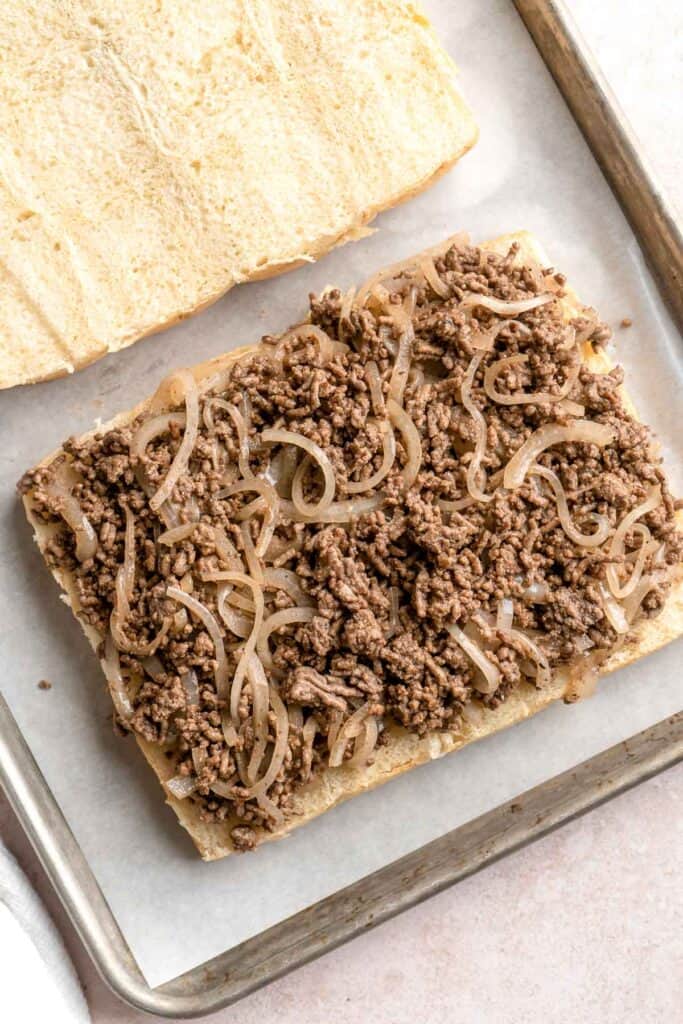
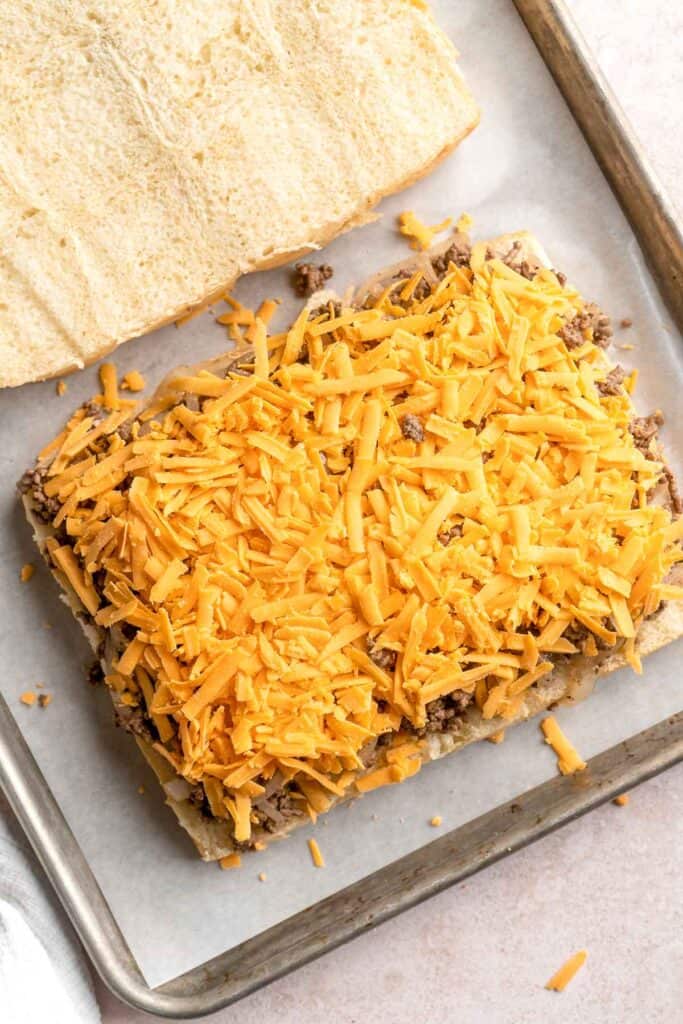
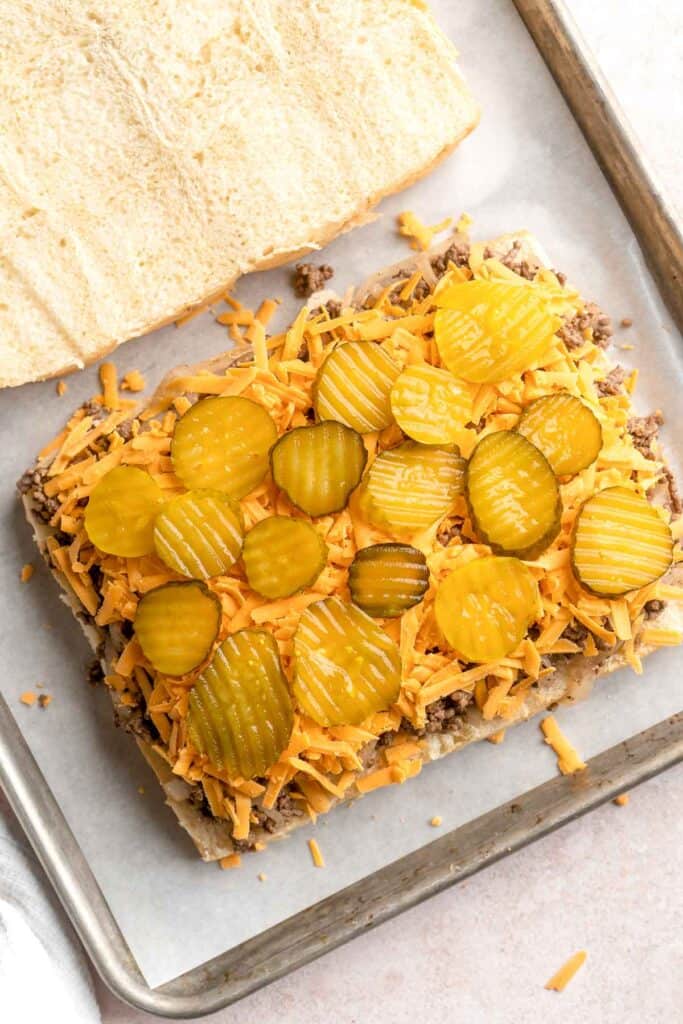
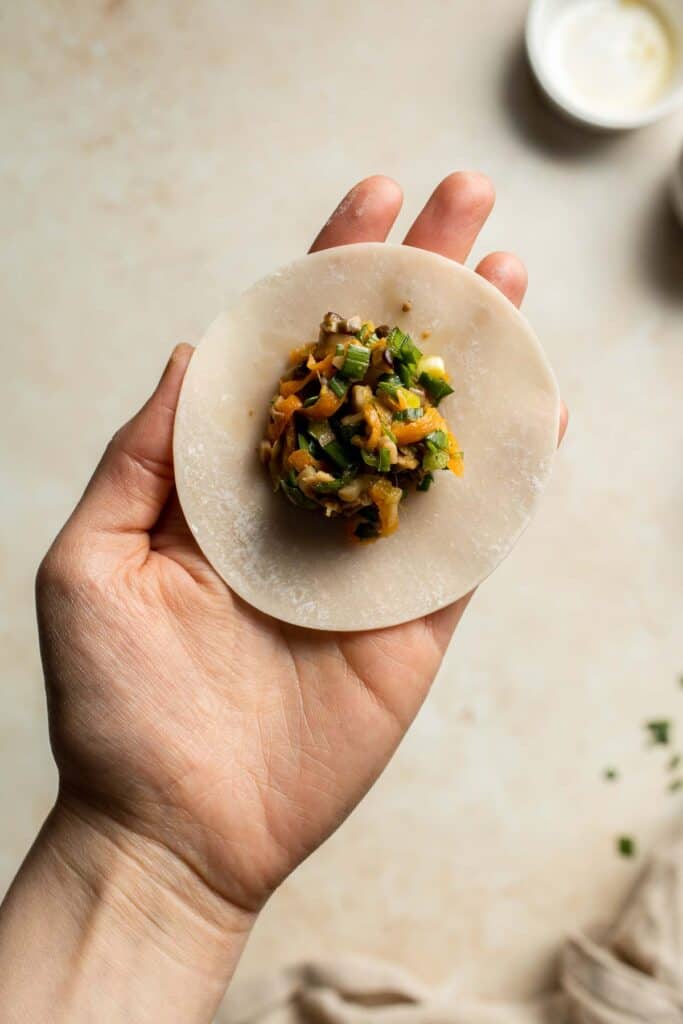
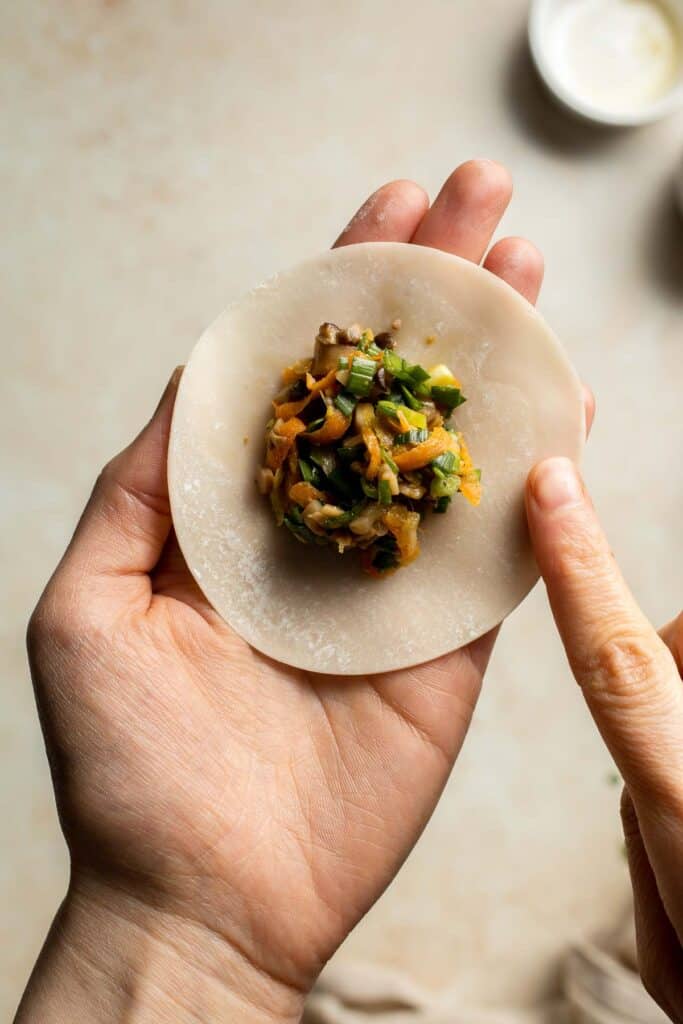
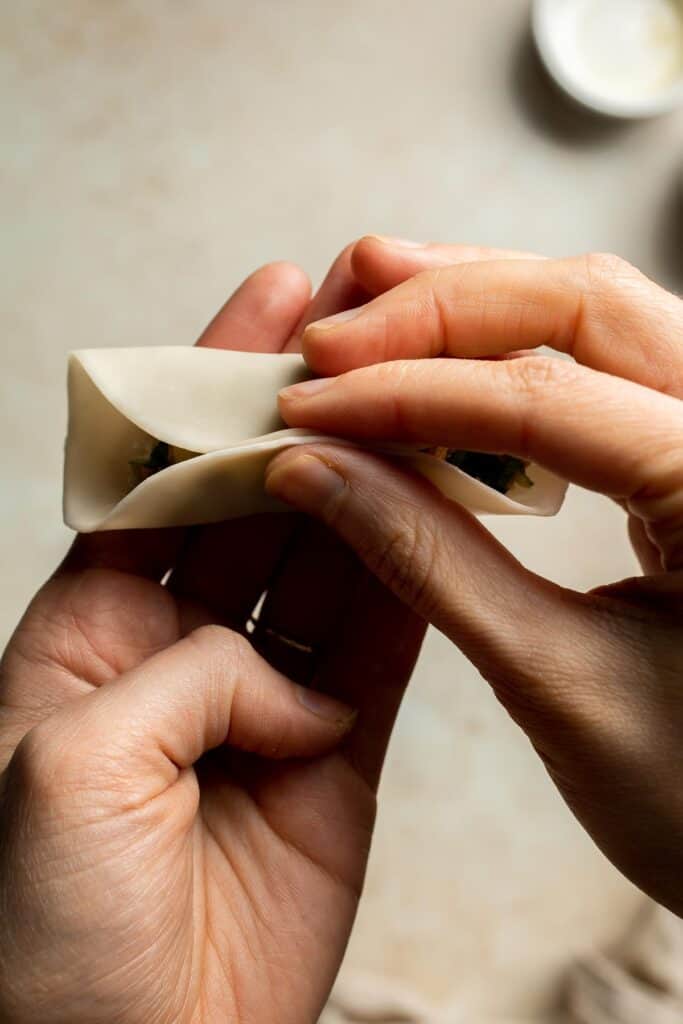
- Assemble the pop tarts. Add about 1 tablespoon of cold jam into the center of half of the rectangles. Brush the perimeter of the filled rectangles with egg wash, then place the plain rectangles on top of the jam-topped rectangles.


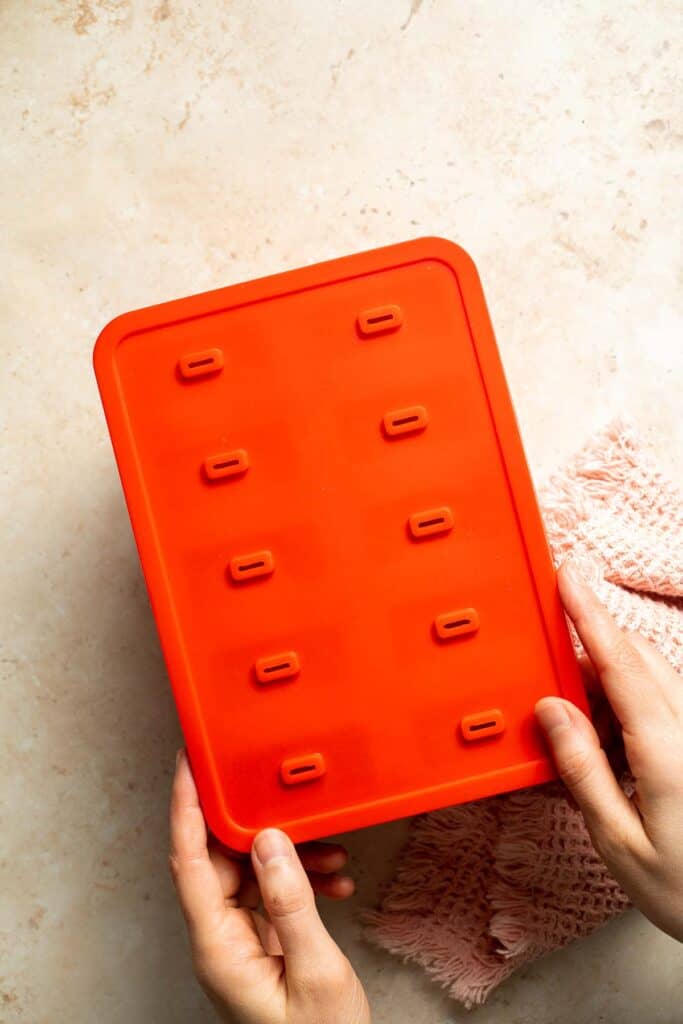
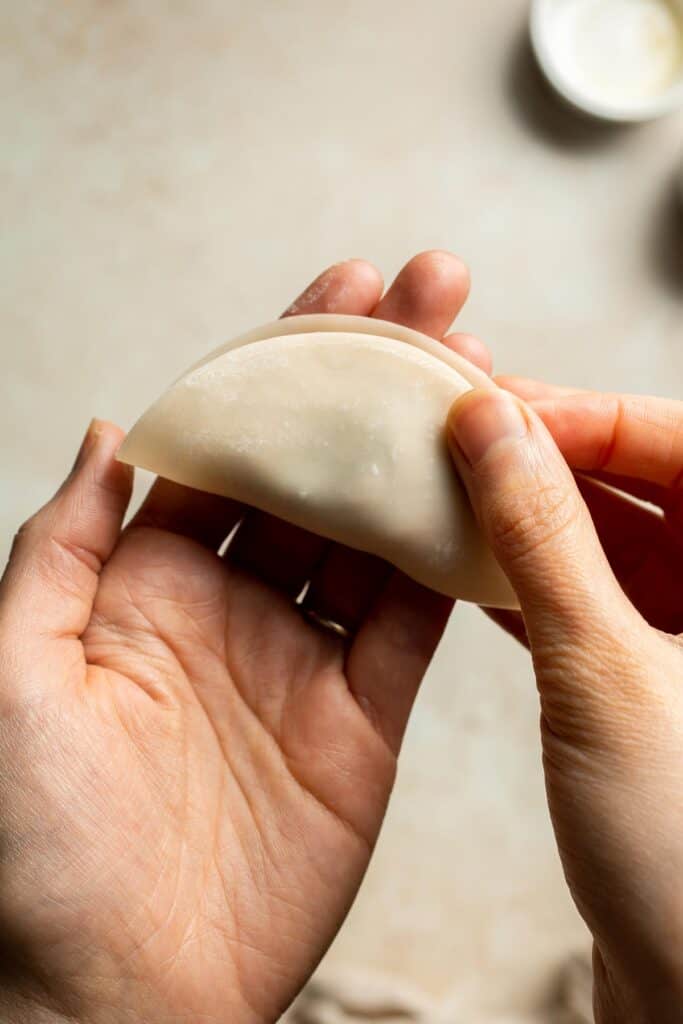
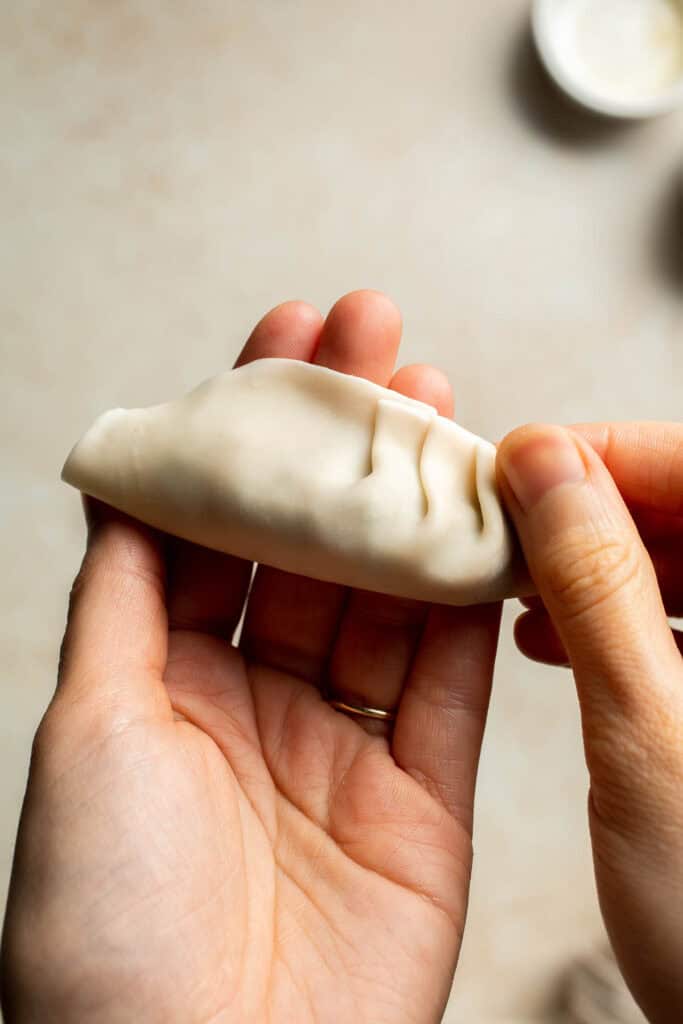
- Seal edges. Use your fingers to firmly press the dough down around the filling, then use the tines of a fork to seal the edges of each pop tart. Use the fork to also prick the top of each pop-tart.

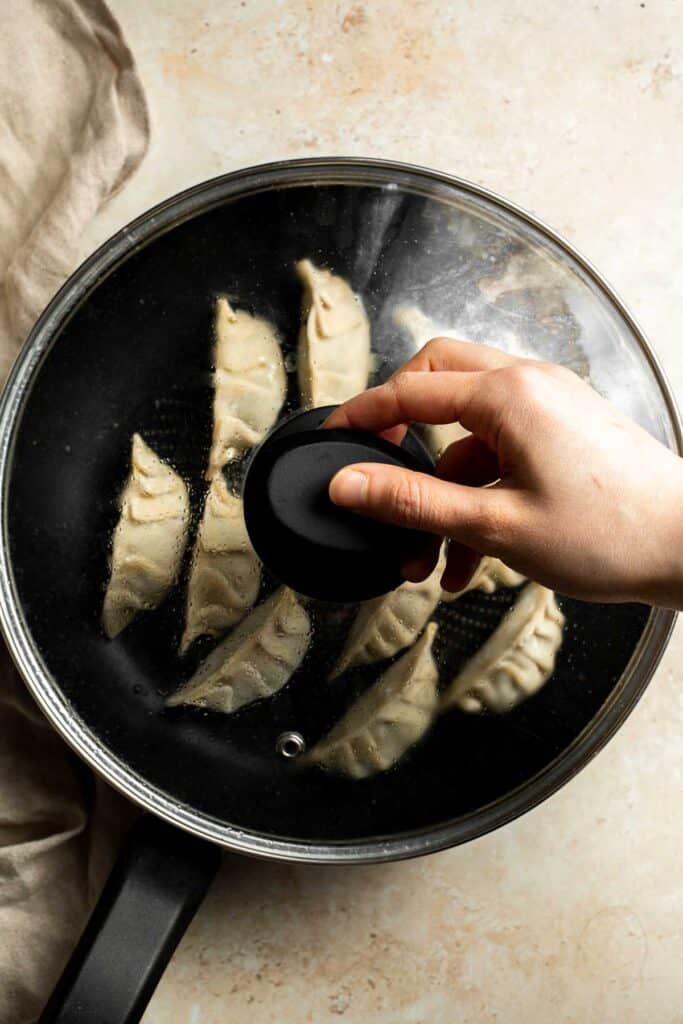
- Bake. Carefully transfer the pop tarts onto the parchment-lined baking sheet and brush the top of your pop tarts with the remaining egg wash. Place into the oven to bake for 15-20 minutes, or until golden brown. Transfer to a cooling rack, and allow to cool fully to room temperature before glazing.


Finally, glaze the pop tarts.
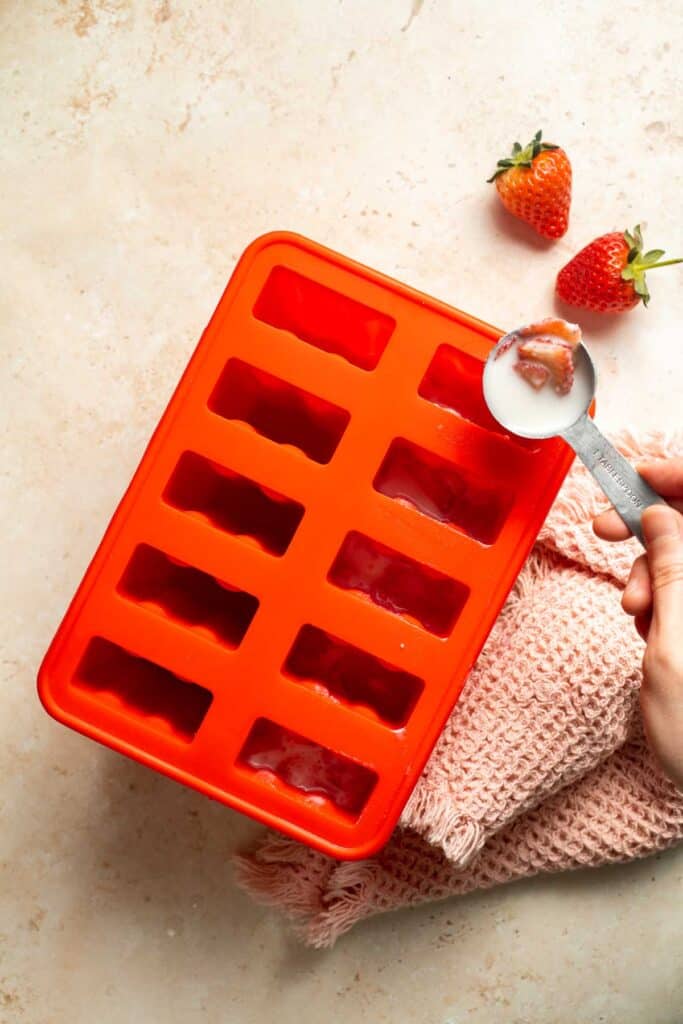
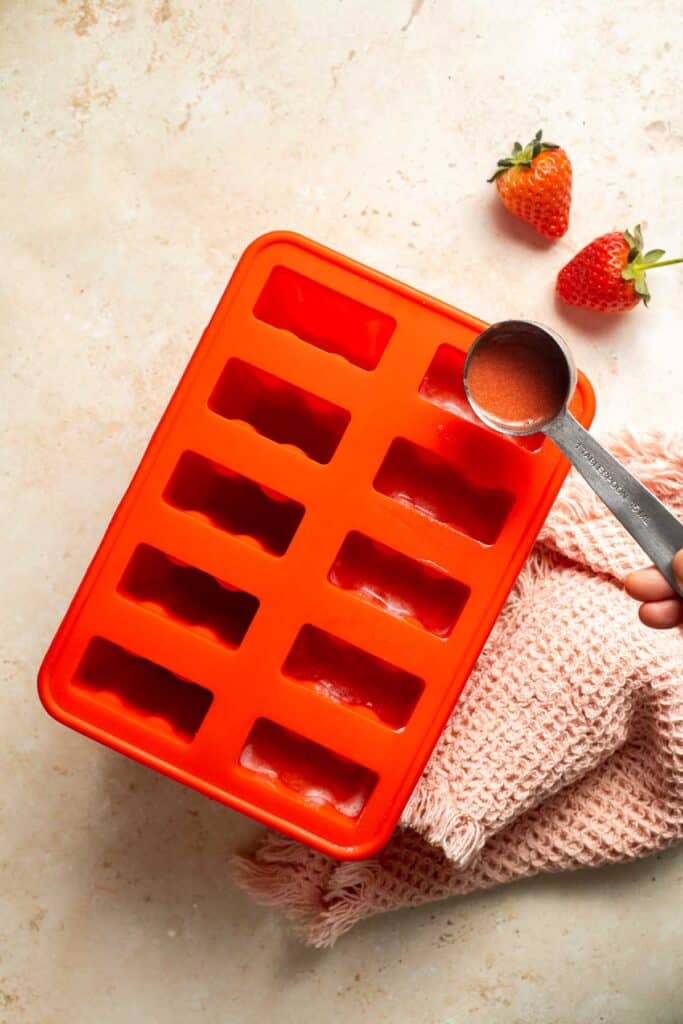
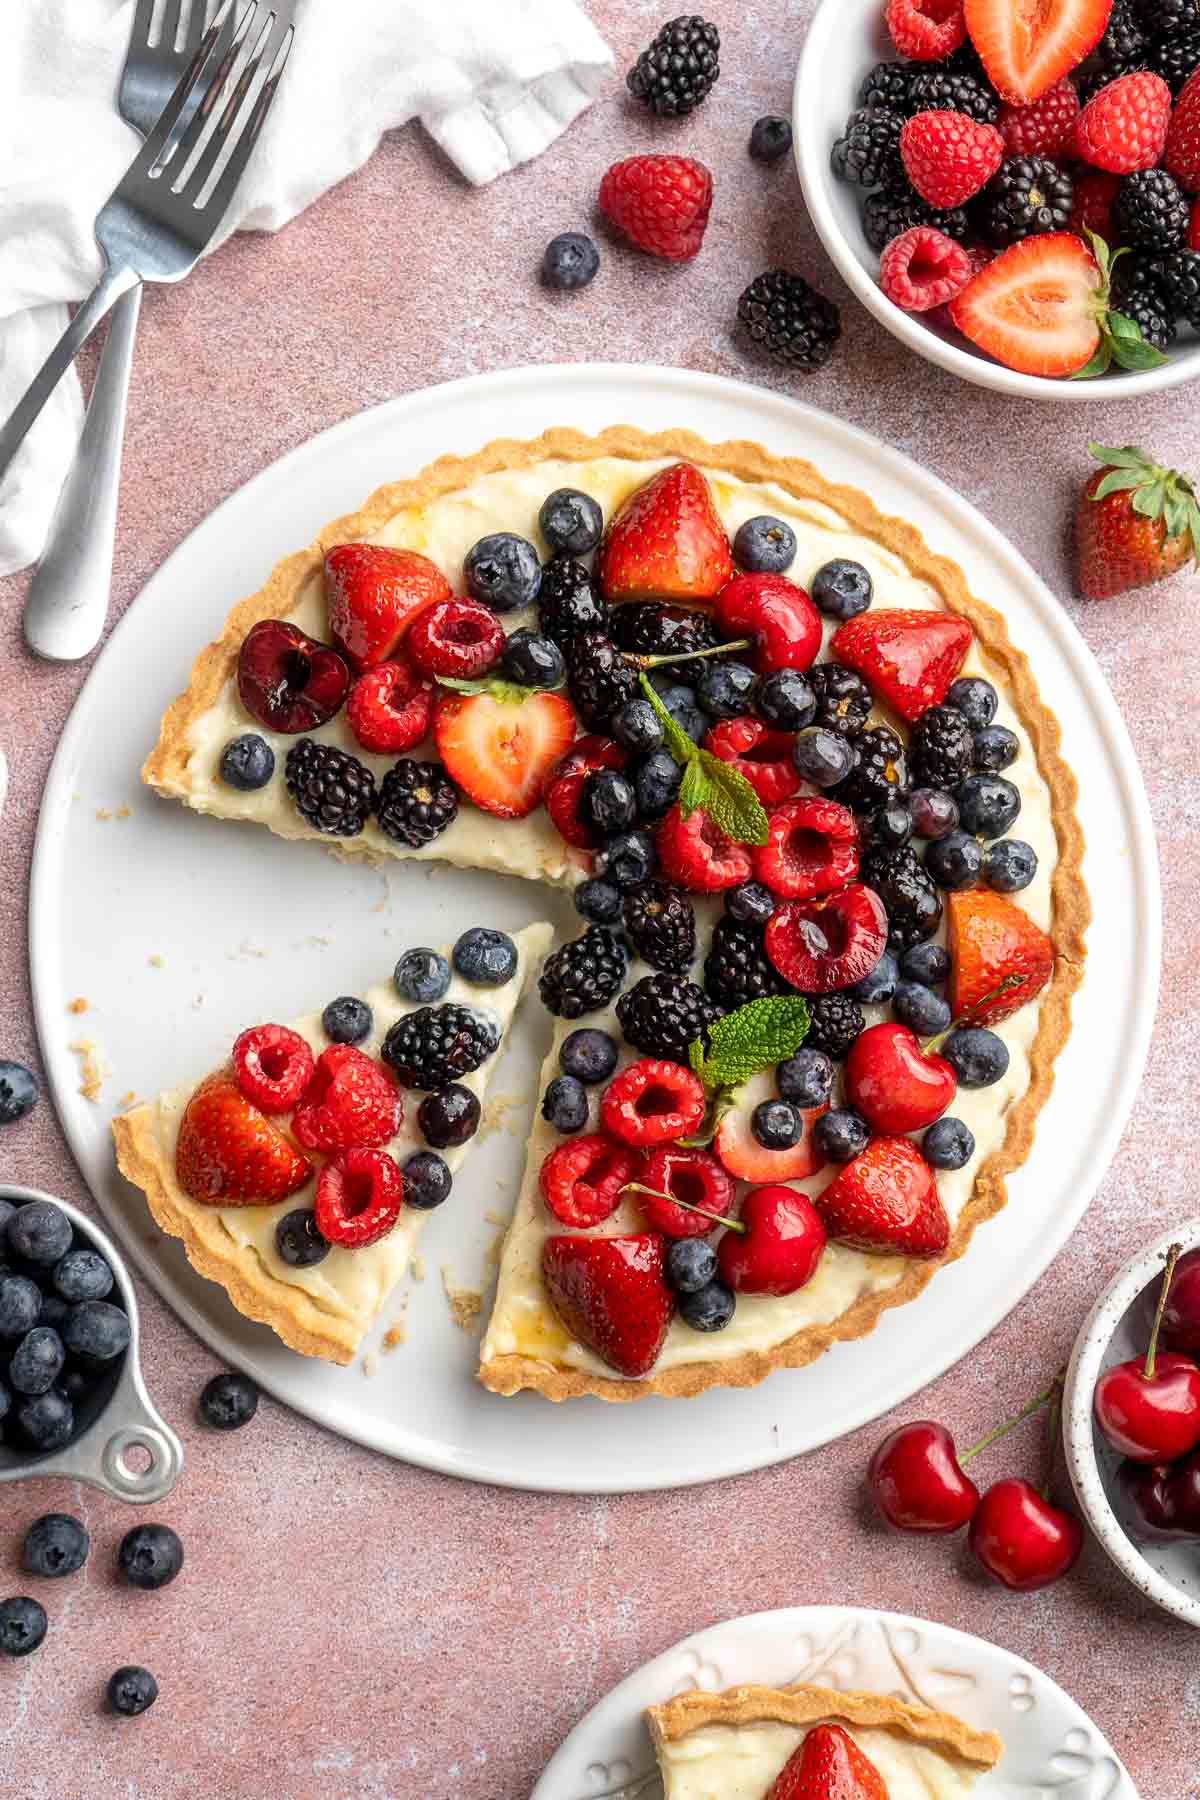
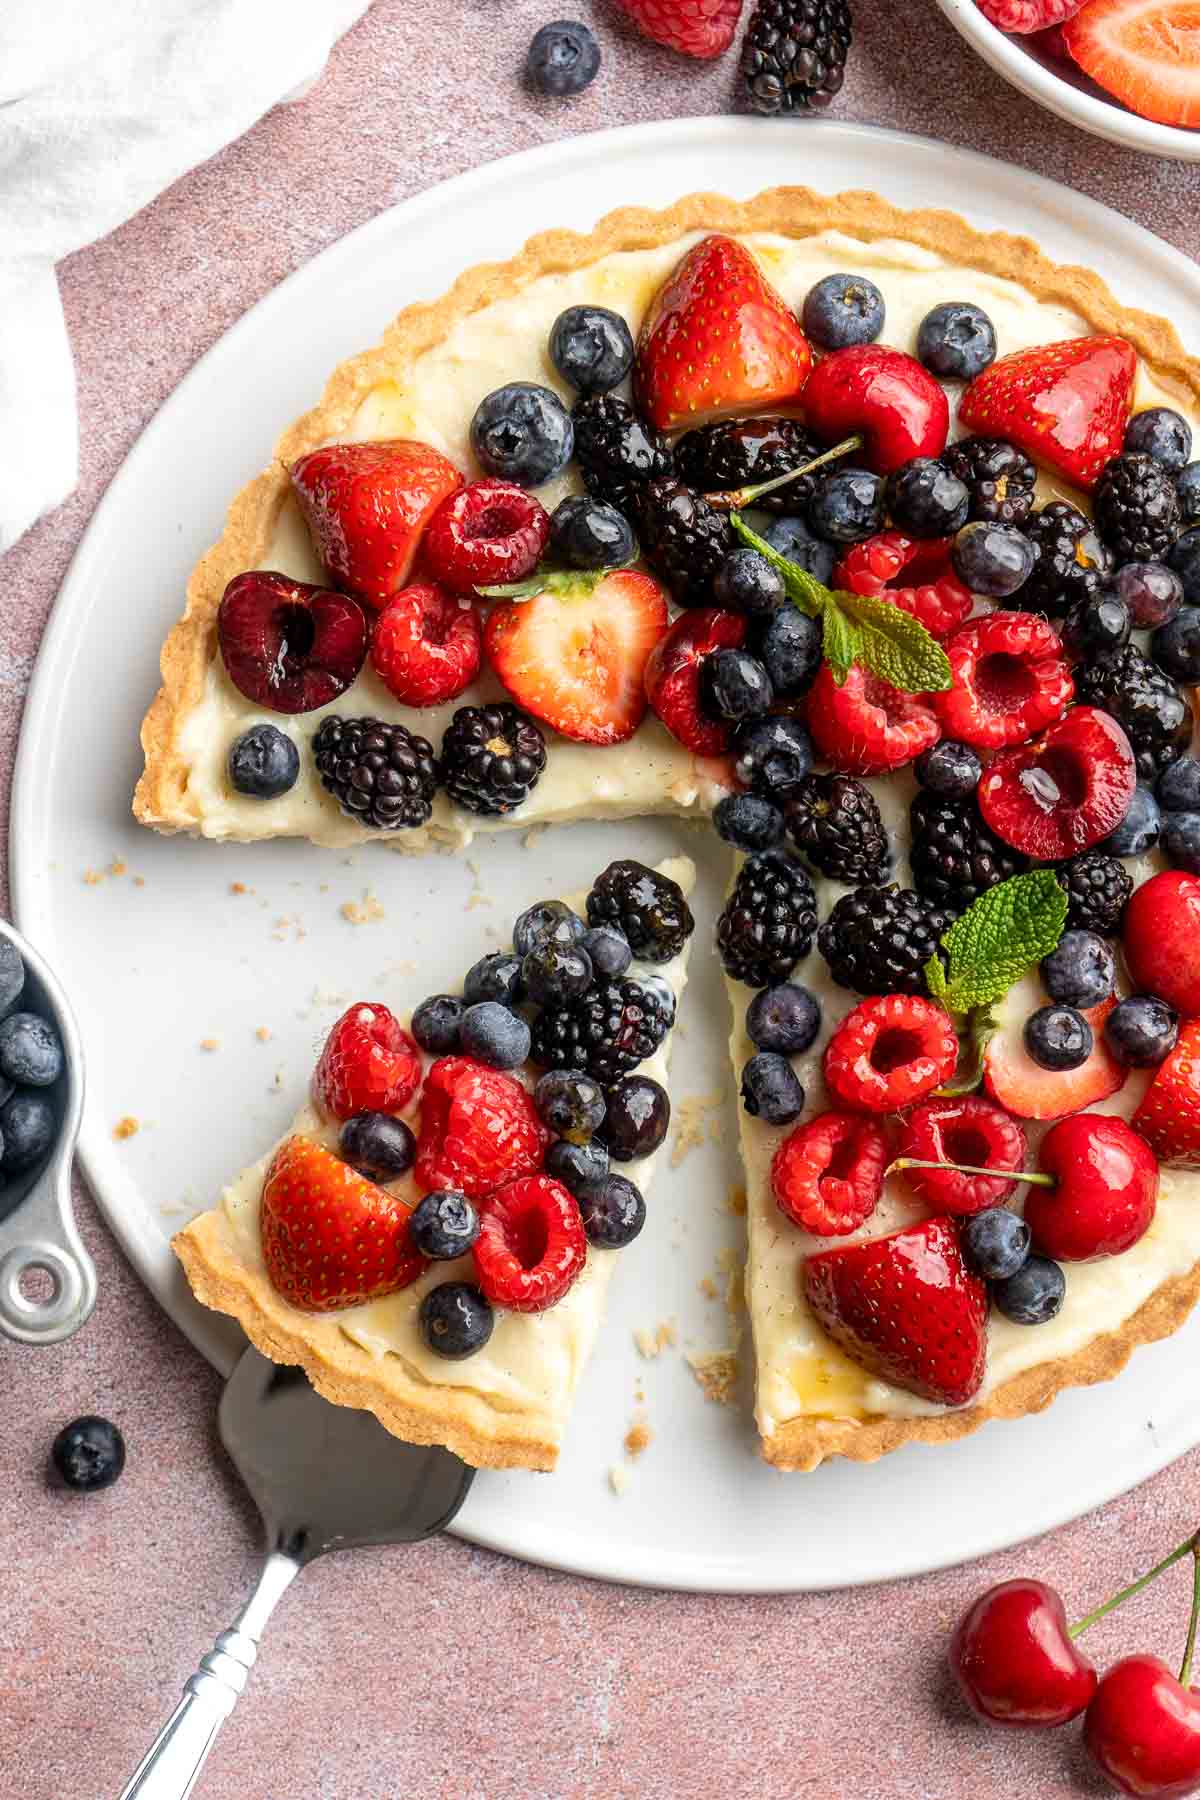
- Make glaze. When fully cooled, add confectioners' sugar, heavy cream, vanilla, and pink food colouring to a medium mixing bowl, then whisk together until smooth.
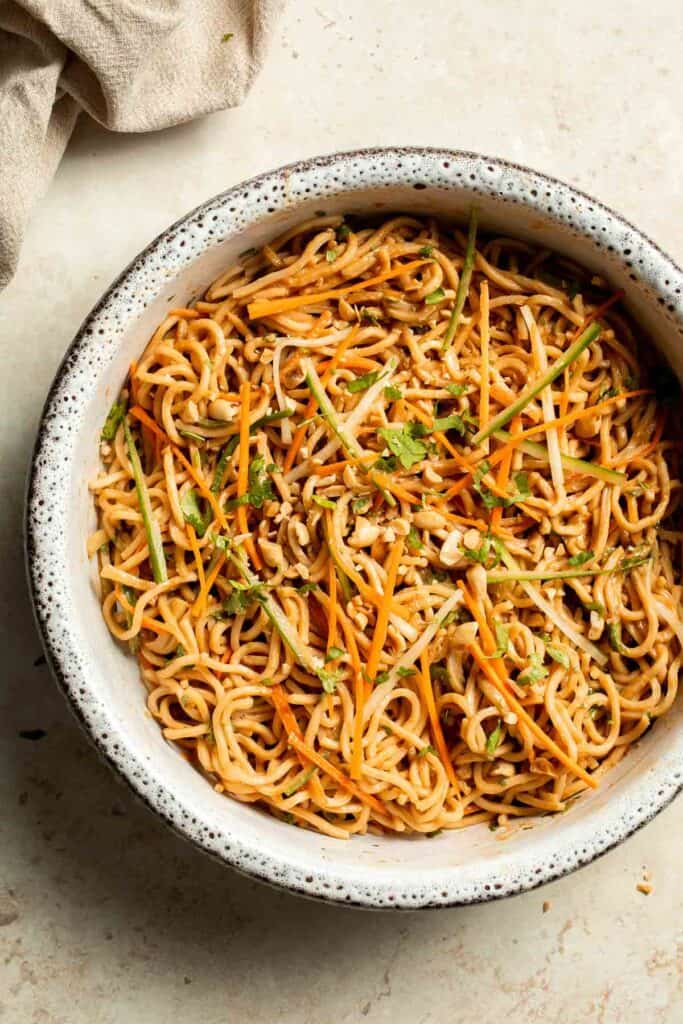
- Add glaze. Use a spoon to spread the glaze onto each cooled pop tart.
- Add sprinkles. Immediately, top with sprinkles. Allow the glaze to fully set before enjoying.


Recipe Variations
- Change the filling. Replace the strawberry jam with your favorite flavor, like blueberry jam, apple butter, raspberry jam, and more.
- Adjust the topping. Make a chocolate glaze for strawberry chocolate pop tarts, or add a splash of your favorite extract to give the simple vanilla icing a different flavor profile.
- Change the shape. Use a cookie cutter to make stars, hearts, flowers, or various other designs. This can get a little tricky when it comes to crimping the edges, but it's so much fun!
How to Serve
These Strawberry Pop Tarts are delicious served on their own for breakfast, or paired with some other kid-friendly morning recipes including:
- Best Old Fashioned Pancakes
- Egg Muffins
- Hash Browns
- Oat Porridge
- Almond Cranberry Granola Bars
- Banana Chocolate Chip Oatmeal Muffins
For more recipes, see our 45+ Breakfast Ideas for Kids.

Recipe Tips and Tricks
- Chill before baking. Your crust should always be as cold as possible before baking. Otherwise, the butter can melt out and leave you with a crumbly mess. If your pastry dough seems soft or flexible, pop it in the fridge to chill before baking. Trust me!
- Don't rush the jam. It might sound impossible to wait hours for the jam to cool, but if it's too warm, it will melt the butter in your dough and ruin your work. Make it the day before, if you can.
- Cut evenly. There's a little room for forgiveness since you will sandwich the layers of dough together, but your delicious homemade pop tarts will look a lot neater if each rectangle of dough is precisely the same size. I like to use a long, sharp knife or a pizza cutter along a flat edge.
Storing and Freezing Instructions
How to Store
Once baked, store pop tarts in an airtight container in the fridge for 3-4 days.
How to Reheat
These homemade pop-tarts are best served still slightly warm from the oven. If you have extras, pop them in a toaster oven or air fryer to warm up at 350 F for a few minutes.
How to Freeze
The pop tarts can be frozen before or after baking. To freeze and bake later, freeze them on a sheet pan lined with parchment paper, then transfer them to an airtight container or wrap them in plastic wrap. Bake from frozen. Leftover baked pop tarts can also be frozen and then rewarmed in a toaster oven.

FAQ
Yes, they should be. This homemade pop tart recipe has a strawberry filling and a dairy-based glaze. They must be stored in an airtight container in the fridge to stay fresh.
Yes! This is a fun, flaky alternative to regular pie crust. Follow the rest of the instructions like normal, but replace the pie crust with puff pastry. Make sure the oven is fully preheated and that the dough is very cold before baking. This will get you the best rise and the flakiest pastry.
Yes! You can freeze the pop tarts either before or after baking. If you want that freshly baked flavor, freeze the pop tarts on a cookie sheet before baking, then store them in an airtight container. Bake from frozen in a fully preheated oven. You may need an extra minute or two to compensate for the cold jam. If you know you want to freeze the pop tarts to bake later, leave the glaze off and decorate with a fresh batch right before serving. Baked pop tarts can also be frozen and stored for later. Since they've already been baked, they just need to be reheated.
More Sweet Breakfast Recipes
- 50 Best Breakfast Ideas
- Skillet Cinnamon Rolls
- Strawberry Muffins
- Nutella Crepes
- Glazed Lemon Blueberry Scones
- Quick and Easy Butter Croissants
Tried this recipe?
I'd love to hear what you think! Leave a comment and rating below to share your feedback. Your reviews help others discover this recipe and help me keep creating more free recipes for you. Snap a photo and tag me on social media @aheadofthyme too.

What Recipes to Cook in September
Are you wondering what to cook in September? Browse our collection of 51 best September recipes to cook for breakfast, lunch, dinner, and dessert!

It's September which in our house means it's officially fall! The weather is cooler, the kids are back in school, and our lives fall back into a normal routine. Our new collection of in season recipes to make this month starts to incorporate comfort foods, fall soups and salads, and dishes that incorporate in season fruits and veggies like apples and squash. Our round up of the 51 best recipes to cook in September includes fall breakfast and brunch recipes, cozy lunch recipes, comforting dinners, nostalgic appetizers and snacks, and warm baked desserts.
What is in Season in September
There are still an abundant of fruits and veggies in season during the month of September, and we start to see some fall produce showing up in our grocery stores or farmer's markets. Keep your eyes out for these fruits and vegetables in the month of September (click on the links below to see the recipes we have using that ingredient):
Holidays in September
The big holiday in September in both Canada and the US is Labor Day. If you are throwing a party to end off the summer, check out our collection of 60 Best Labor Day Recipes for ideas on what to include on your menu. We are also back in school this month so you may need some ideas for packing the kid's lunchboxes. Check out our 25 School Snacks or 30 School Lunch Ideas.
September Breakfast Recipes
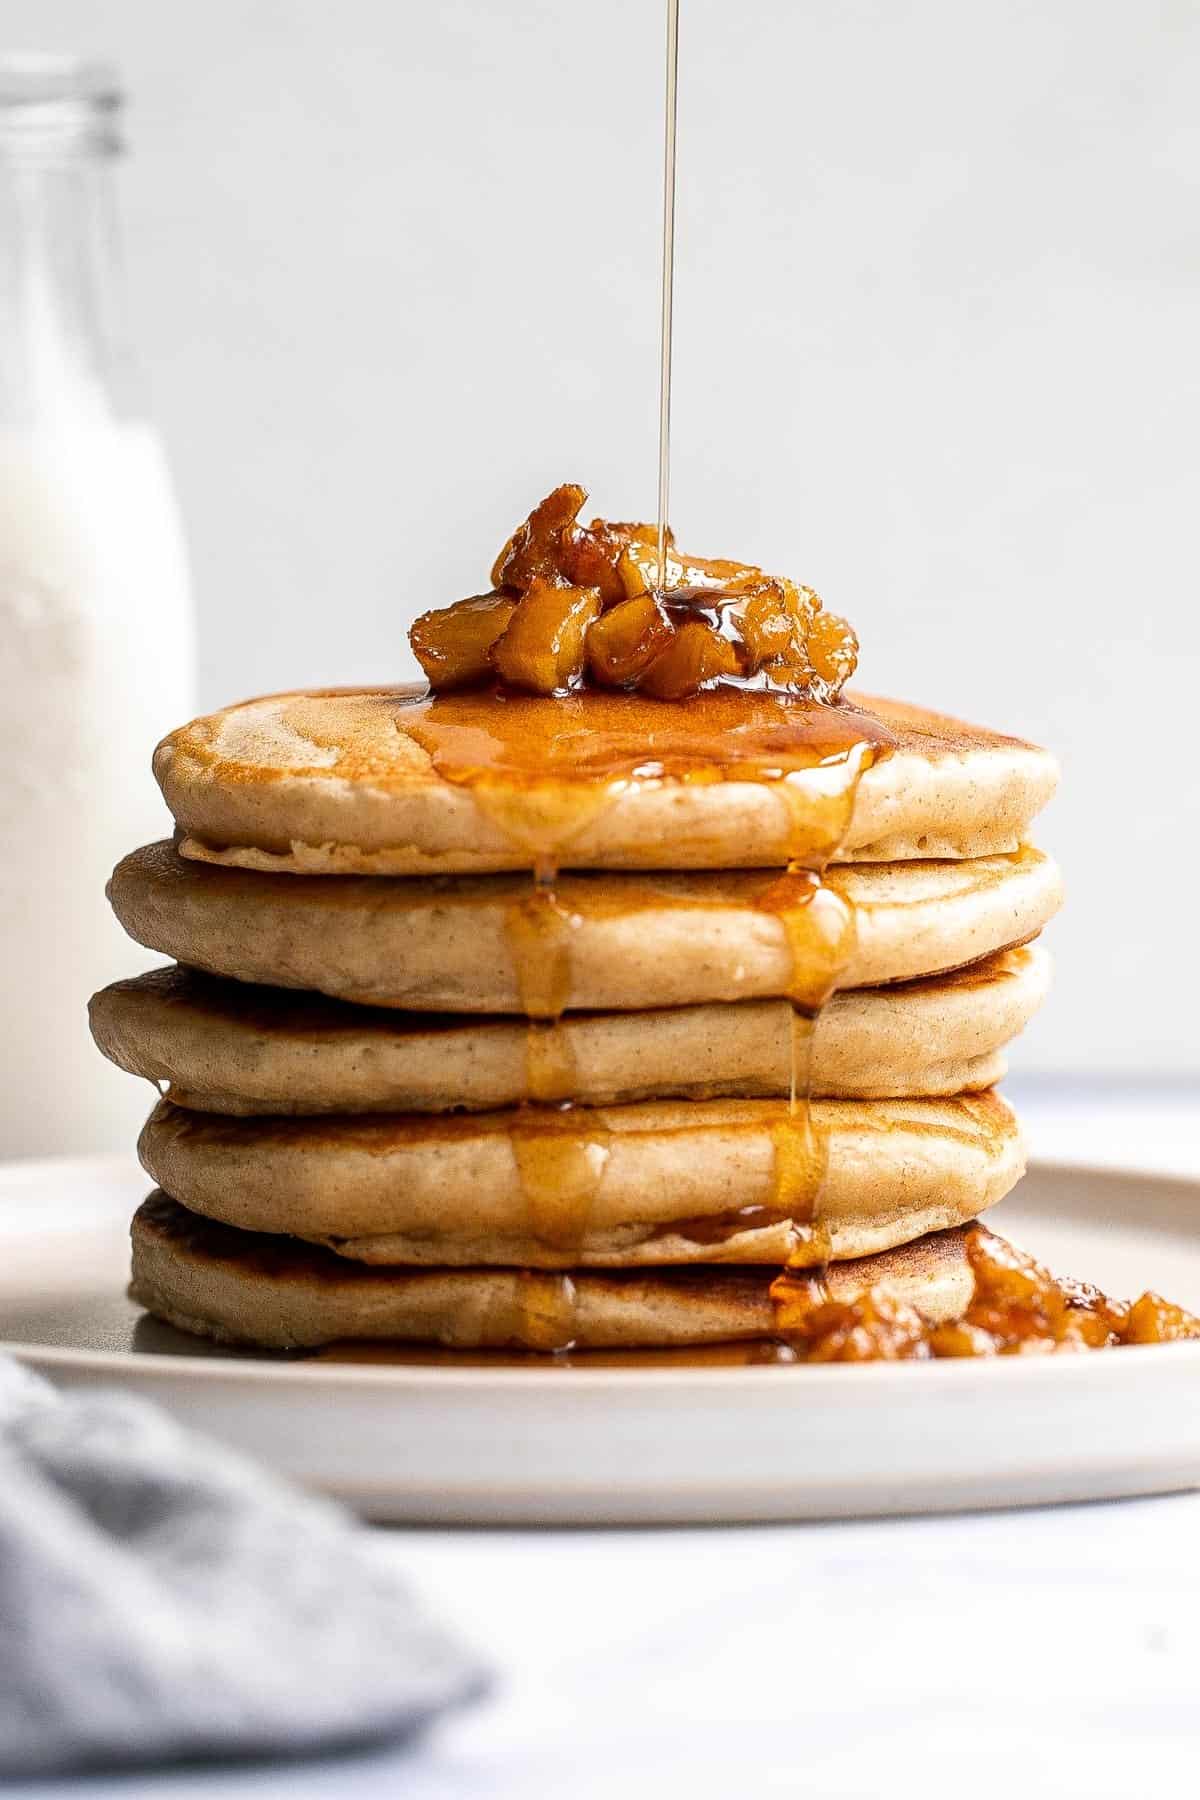
- Applesauce Pancakes. Soft fluffy applesauce pancakes is the best fall breakfast, loaded with leftover applesauce, hint of cinnamon, and a delicious caramel apple topping.
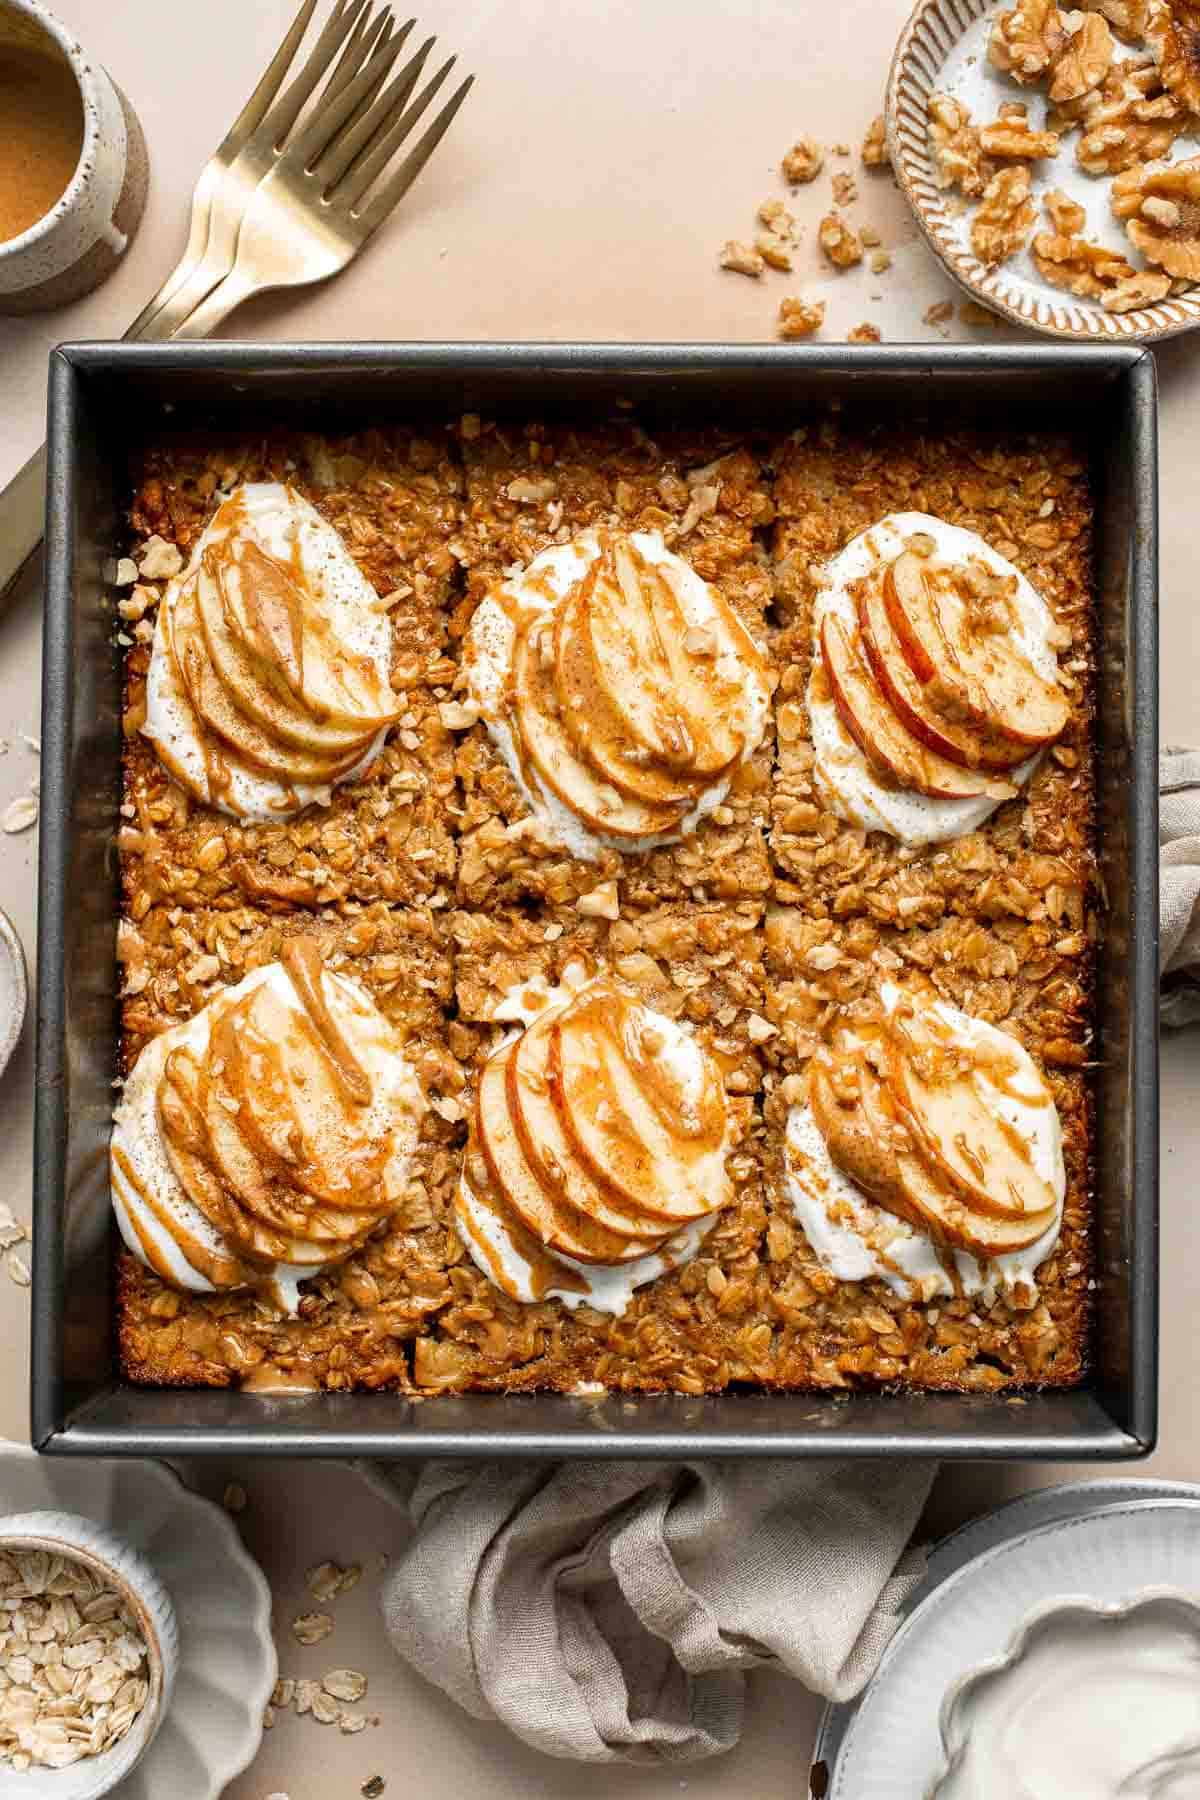
- Cinnamon Apple Baked Oatmeal. Cinnamon Apple Baked Oatmeal is a delicious, filling make-ahead breakfast for fall - loaded with chewy oats, tender apples, crunchy walnuts, and cinnamon.
- Egg and Potato Breakfast Casserole. Egg and Potato Breakfast Casserole is an easy vegetarian breakfast bake loaded with veggies. It is completely customizable and can be made ahead of time.
- Apple Pie Fall Smoothie. Healthy Apple Pie Fall Smoothie is quick and easy to make in minutes, delicious and nutritious, and tastes like apple pie - without the calories.
- Peanut Butter Banana Toast. Peanut Butter Banana Toast is an incredibly simple yet healthy breakfast that's ready in a just 5 minutes. It's quick, satisfying, and protein-packed.
- Egg Muffins. Egg muffins are a quick and easy way to meal prep breakfast on-the-go, loaded with cheddar cheese, bacon or salami, and green onions. Make 12 in 30 minutes.
- Cinnamon Apple Oatmeal Muffins. Cinnamon Apple Oatmeal Muffins are fast, easy and delicious- loaded with apples, oats, and fall spices. A quick nutritious bite for breakfast or snack time.
- Herb Roasted Sweet Potatoes. Herb Roasted Sweet Potatoes are a quick easy side dish that's healthy, delicious, and flavorful. A perfect side for your holiday table, weeknight dinner, or brunch spread.
- Cinnamon Apple Granola. Cinnamon Apple Granola is quick and easy to make, tastes like apple pie, and is much better than store-bought - plus easier to make than you think!
- Butternut Squash Bread. Move over pumpkin, there is a new loaf in town! Butternut Squash Bread is moist, fluffy, flavorful, and brings the pumpkin spice season to your home.
September Lunch Recipes
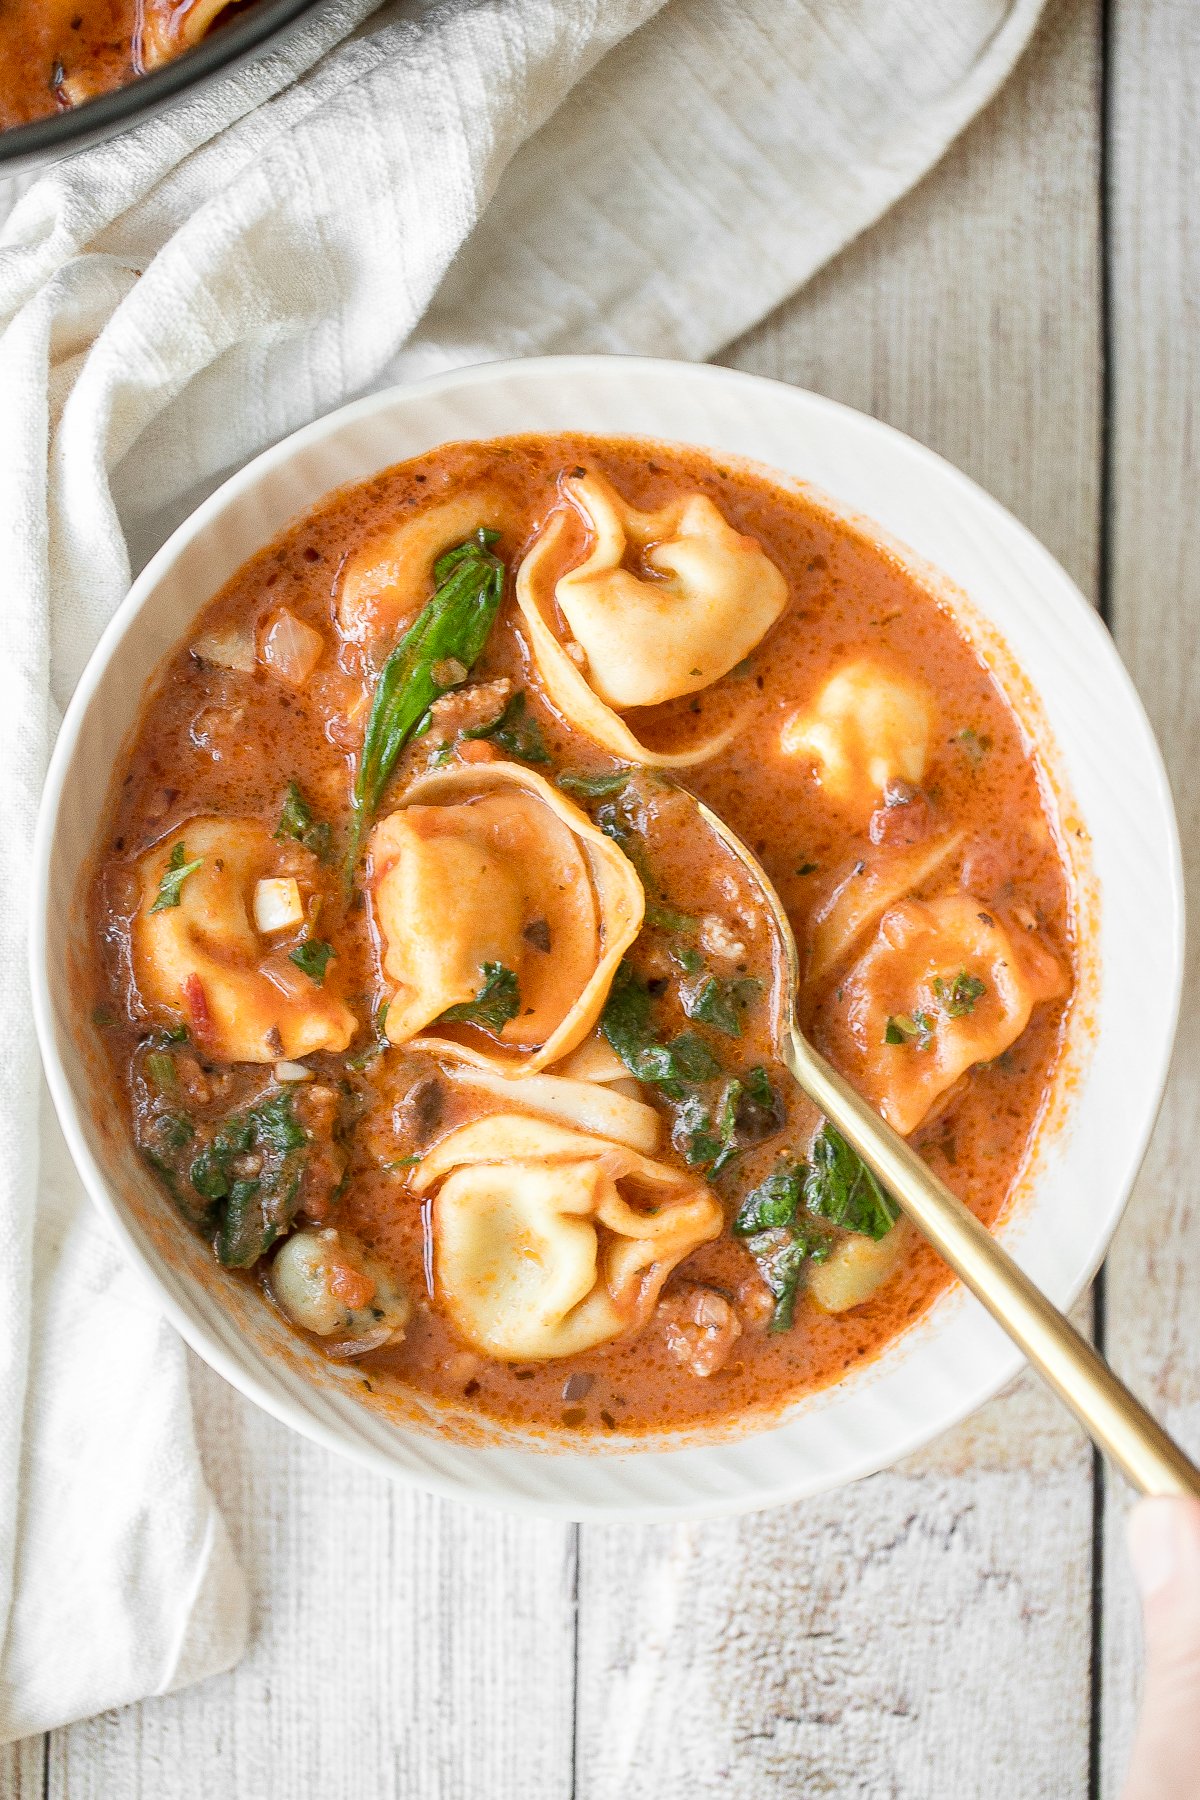 |  |
- Creamy Tortellini Soup with Sausage. Hearty and creamy tortellini soup with sausage, spinach and kale is total comfort food in a bowl. Make this flavourful one pot meal in under 30 minutes.
- Arugula Salad with Apple and Pecan. Arugula salad with apple and pecan is a quick and easy fall salad made with fresh seasonal ingredients in just minutes. Perfect for a holiday dinner table.
- Baked Chicken Quesadillas. Baked Chicken Quesadillas are cheesy, crispy, flavorful, and delicious. This family-friendly recipe is quick and easy to make in just 30 minutes!
- Tiktok Ramen. Tiktok ramen is savory, sweet and loaded with umami flavor. It's a quick and easy viral ramen hack with instant noodles, eggs, butter, garlic and soy sauce.
- Homemade Calzones. Homemade calzones are delicious little pizza pockets filled with cheese and toppings and baked until golden. This Italian favourite is easy to make at home.
- Ham and Cheese Pinwheels. Freshly baked from the oven, these Ham and Cheese Pinwheels are warm and tender with gooey melty cheese and sweet ham. Perfect for lunch or dinner!
- Spicy Mac and Cheese. This Spicy Mac and Cheese recipe is a spicy version of a beloved classic that takes this cheesy pasta to the next level with added spices for a kick.
- Spinach Salad. This Spinach Salad is a healthy and easy to make fall recipe with spinach, apples, cranberries, pecans, and feta tossed in homemade balsamic vinaigrette.
- Lemon Chicken Orzo Soup. Smooth, hearty and light, one pot lemon chicken orzo soup is pure comfort in a bowl. This family favourite is like chicken noodle soup with a major upgrade.
- Beef and Bean Burritos. Hearty and filling beef and bean burritos are easy to make ahead, freezer-friendly, and take just 30 minutes for restaurant-quality Mexican food at home.
September Dinner Recipes
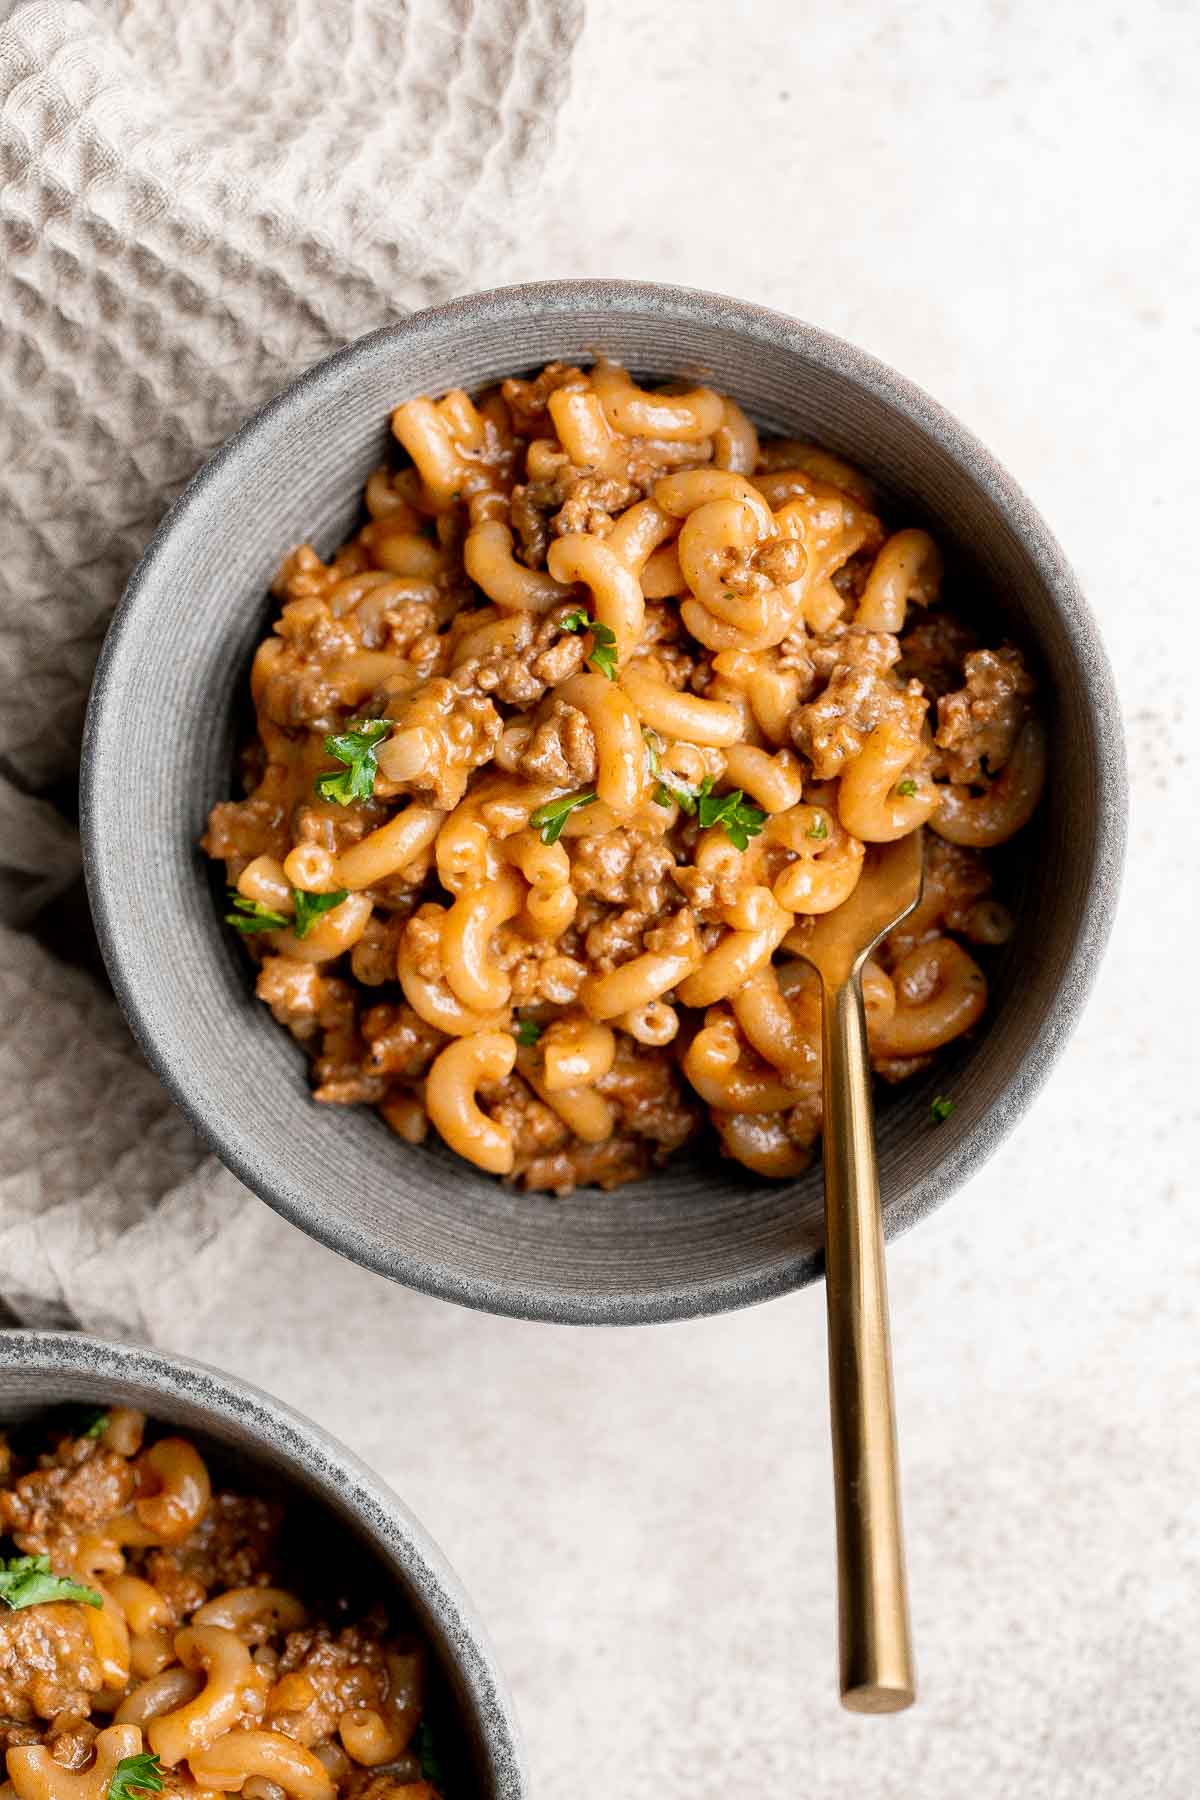 |  |
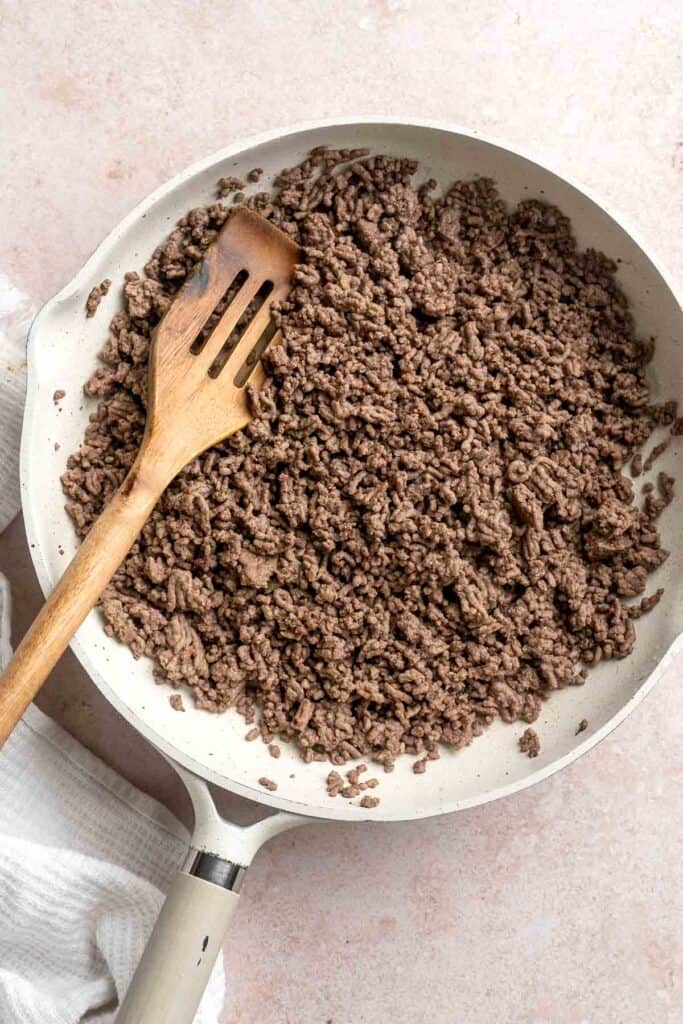
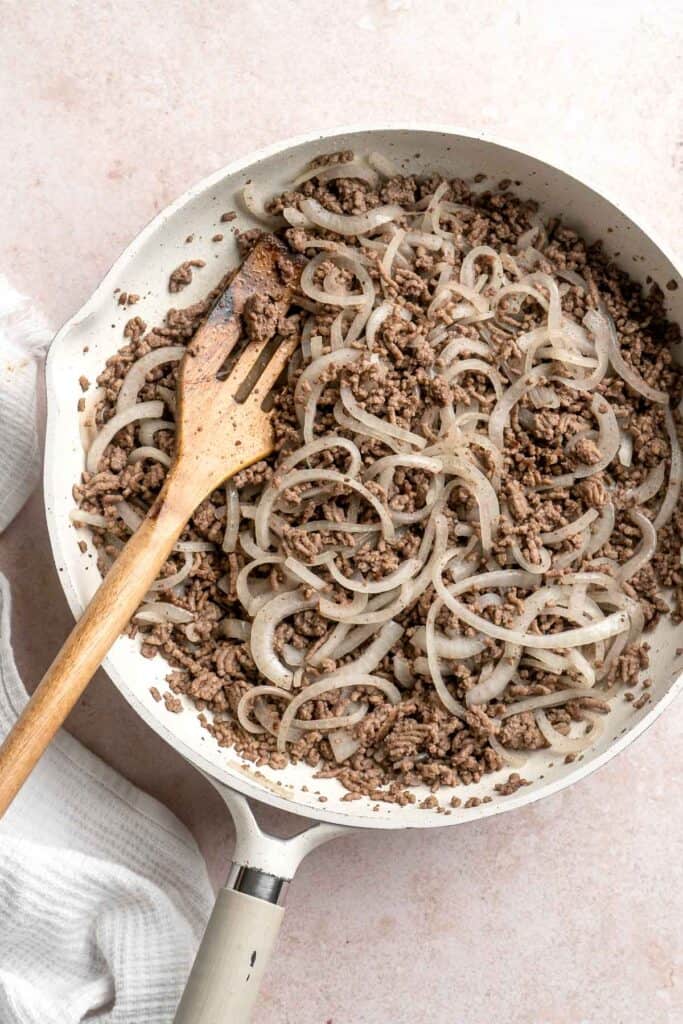
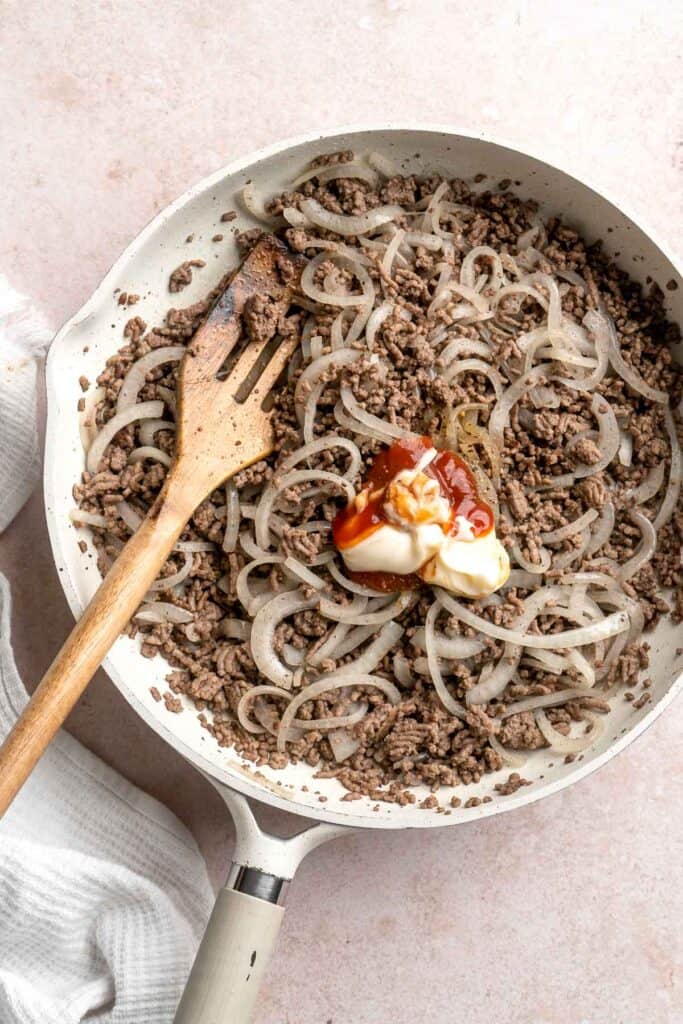
- Homemade Hamburger Helper. Homemade hamburger helper is a family favorite but you can make a cheaper, healthier, and way tastier version at home, ready in just 30 minutes.
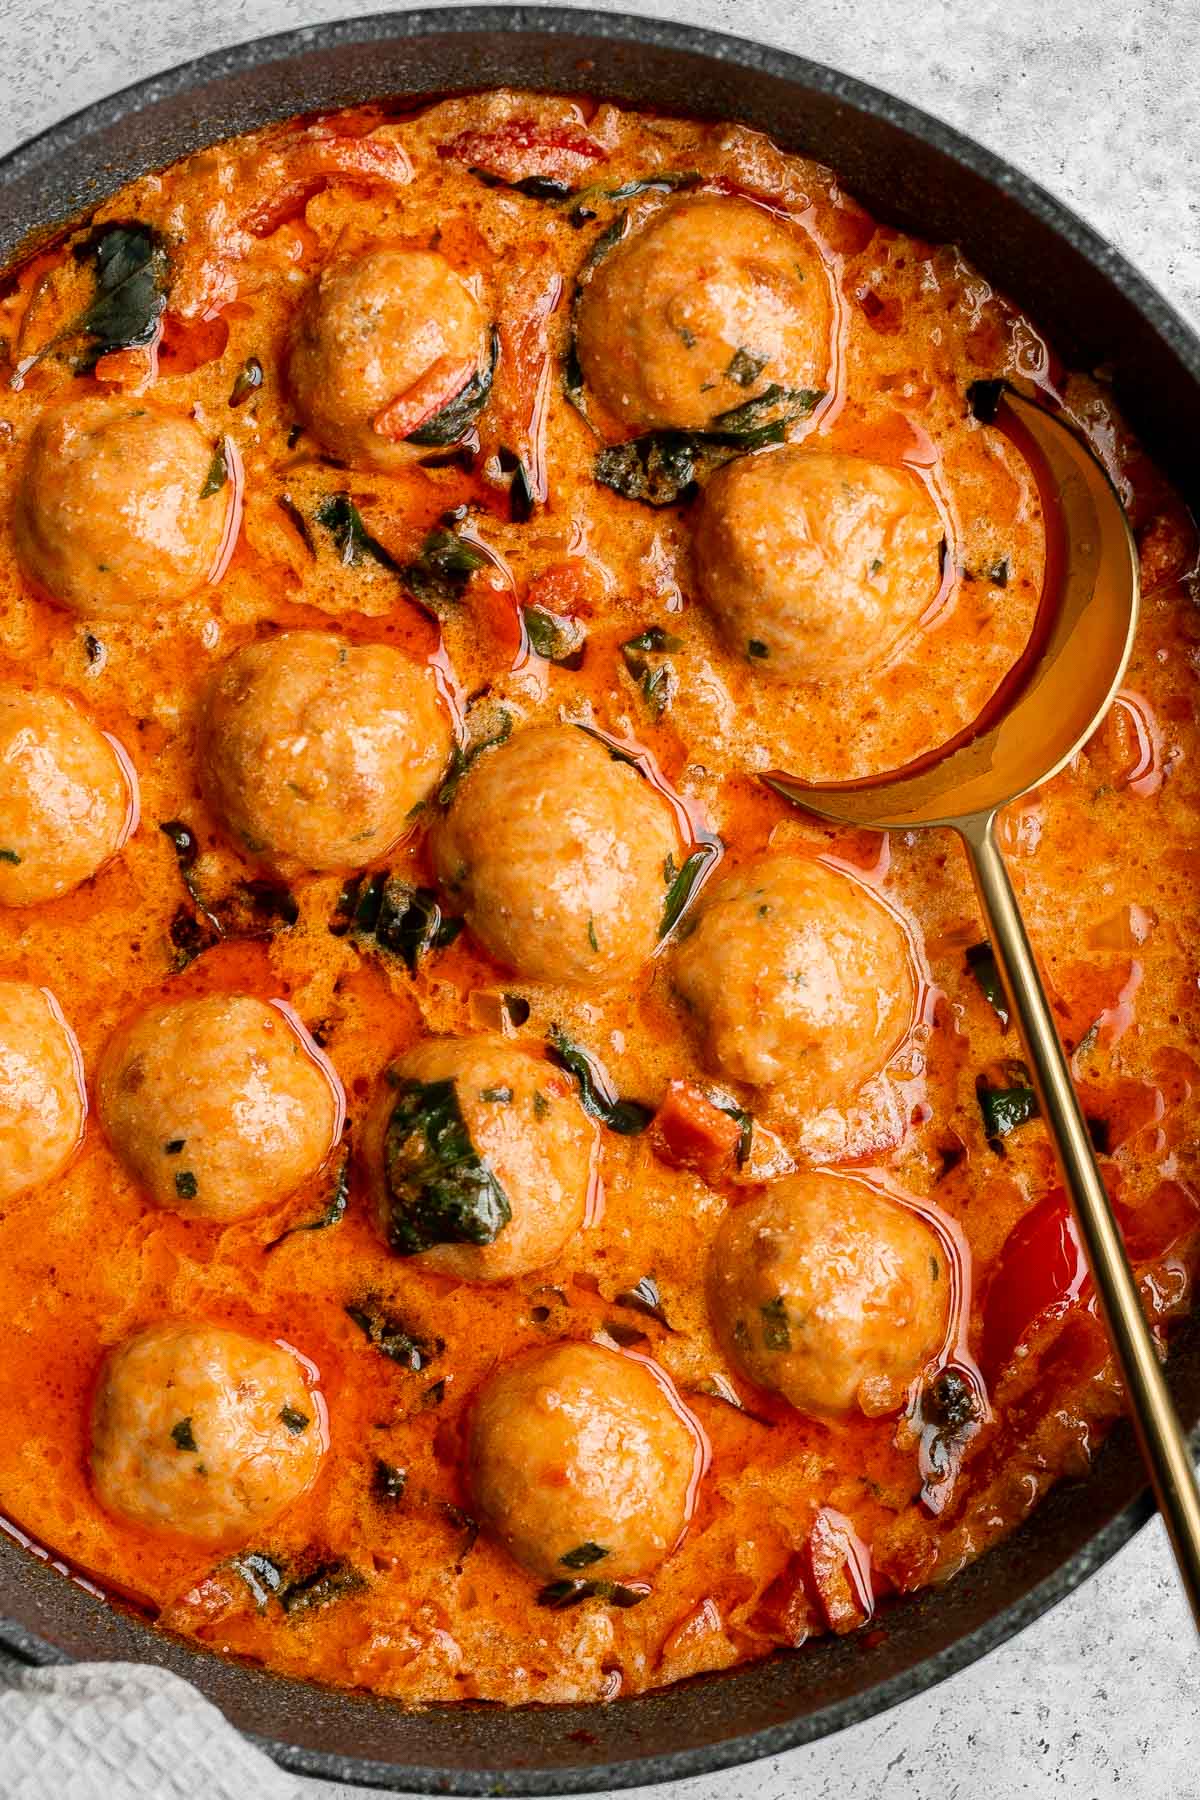
- Thai Turkey Meatballs in Coconut Curry. Thai turkey meatballs in coconut curry are the perfect weeknight dinner when you want something delicious, healthy, flavorful, and satisfying.
- Apple Cider Chicken with Butternut Squash. Quick, easy, one pan apple cider chicken with butternut squash, apples, and thyme, cooked in an apple cider sauce. Serve this fall meal in just 40 minutes.
- Vegetable Curry. This Vegetable Curry is a quick, delicious, and nutritious meal for the whole family to enjoy - loaded with veggies and chickpeas in a homemade curry sauce.
- Honey Glazed Roast Pork with Vegetables. Easy one pan honey glazed roast pork is moist, tender, and juicy, coated with an irresistible honey glaze and packed with potatoes, green beans and apples.
- Tater Tot Casserole. Tater Tot Casserole is classic comfort food that incorporates delicious layers of crispy tater tots, melted cheese and a creamy beef and vegetables mixture.
- Chicken Penne Pasta. Chicken penne pasta is a quick and easy dinner that is delicious, rich, creamy, and flavorful. It's a family favorite that's ready in under 30 minutes.
- Creamy Garlic Salmon. Creamy garlic salmon is a quick easy one-pan meal ready in under 30 minutes, with seared flaky tender salmon tossed in a delicious creamy garlic sauce.
- One Pot Lentils. Easy 20-Minute One Pot Lentils are a healthy, nourishing, and delicious vegan meal that is easy to make in a few simple steps. Make a big batch and freeze!
- Pecan Crusted Chicken. Pecan Crusted Chicken is a simple, delicious, and flavorful, quick and easy dinner ready in 40 minutes that can be baked in the oven or air fryer.
- Easy Meat Lasagna. Classic easy meat lasagna is the ultimate Italian comfort food with layers of tender lasagna, meaty tomato sauce, cheese filling and melted cheese on top.
September Appetizers and Snacks
 |  |
- Pizza Dip. Pepperoni pizza dip is creamy, rich, comforting, and delicious. This appetizer is easy to make, easy to prepare ahead of time, and easy to eat.
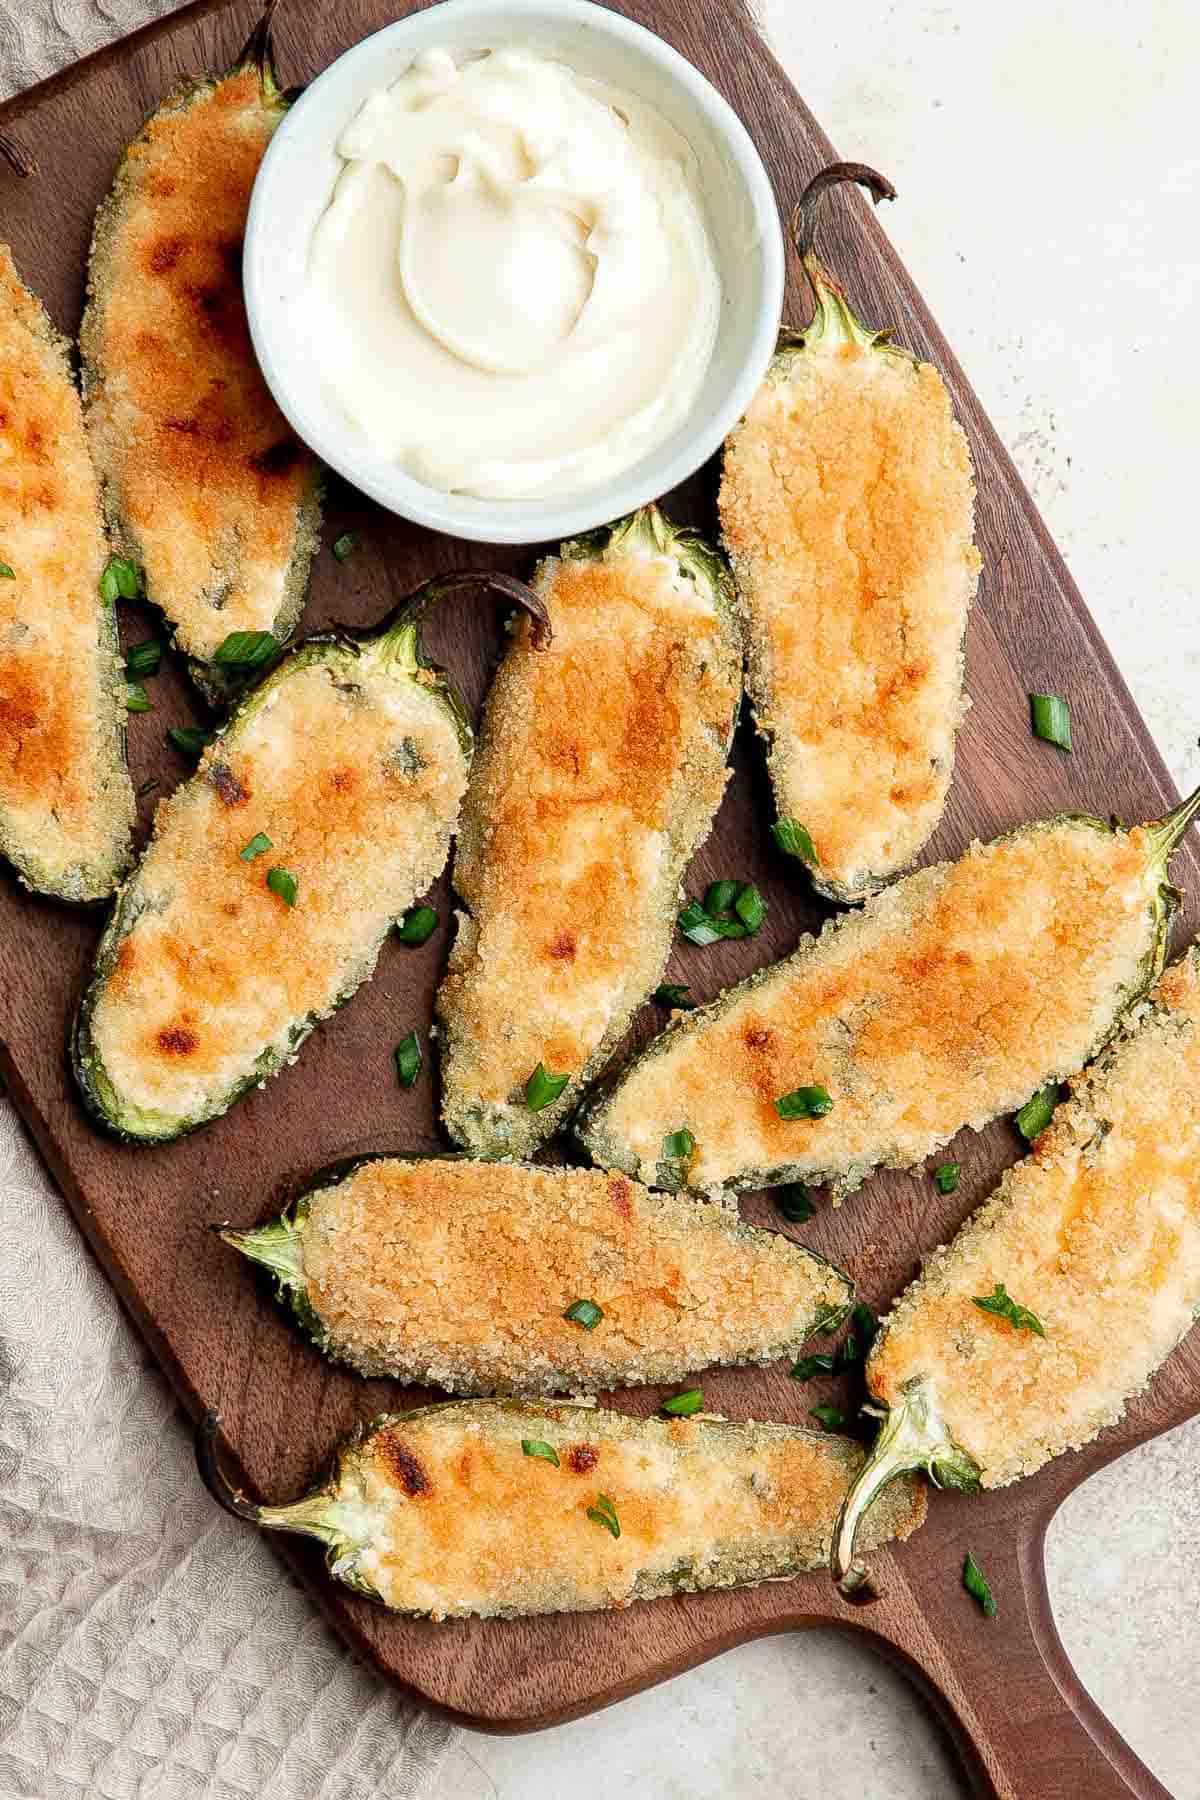
- Jalapeño Poppers. Jalapeño poppers are the perfect appetizer - spicy, crispy, cheesy, and creamy, toasted to golden brown perfection. Plus easy to make ahead and freeze well.
- Apple and Arugula Flatbread. Crisp apples, peppery arugula, crunchy pecans and warm, melty aged cheddar cheese … you seriously cannot go wrong with apple and arugula flatbread.
- Homemade Kettle Corn. Say goodbye to store-bought popcorn and hello to homemade Kettle Corn - sweet and salty, loved by all, and quick and easy to make with just 4 ingredients.
- Pepperoni Pizza Rolls. Easy pepperoni pizza rolls are crispy on the bottom, tender and chewy inside, packed with pepperoni and cheese, and baked until bubbly.
- Pesto Hummus. Smooth and creamy pesto hummus is a healthy, delicious and flavourful dip that is easy to make in just 5 minutes. It's vegan and gluten-free.
- Baked Apple Chips. One-ingredient homemade baked apple chips are healthy, light, crispy and so addictive. They contain no added sugar and are so easy to make at home.
- Fried Mac and Cheese Balls. Fried mac and cheese balls are crispy on the outside, creamy and cheesy on the inside, and have the perfect crunch. Best way to use leftover mac and cheese.
- Homemade Tater Tots with Bacon. Homemade tater tots with bacon are golden and crispy on the outside, yet soft and tender inside. They're packed with flavour and a total family favourite.
- Baked Mozzarella Sticks. Crunchy, cheesy, and paired with an awesome dipping sauce, these baked mozzarella sticks are just as amazing as what you would find in a restaurant.
September Desserts
 |  |
- Apple Turnovers. With a buttery, flaky crust and spiced sweet apple filling, these homemade Apple Turnovers are hands down one of the best ways to enjoy this seasonal fruit.
- Baked Apples. Baked Apples are soft, warm, and tender, with a crunchy sweet cinnamon oat filling. This cozy and comforting fall dessert is quick easy to make too.
- Chocolate Chip Cookies. Homemade chocolate chip cookies are soft and chewy, have perfectly crisp edges, and are loaded with chocolate chips. This classic cookie is quick and easy.
- Braided Lattice Apple Pie. This braided lattice apple pie is packed with cinnamon apples tossed in a caramel sauce and sealed in a buttery, flaky pie crust with a braided lattice top. Serve it with a scoop of Vanilla Ice Cream.
- Glazed Brown Sugar Bundt Cake. No one will be able to resist this perfectly sweet and moist, glazed brown sugar bundt cake. Made with Greek yogurt for major decadence and richness.
- Apple Crisp. Apple crisp with tender cinnamon-sugar apples and crispy oat topping is sweet, tart, and just as delicious as an apple pie but takes a lot less effort.
- Healthier Caramel Apple Fall Cheesecake. Decadent and light, homemade healthier caramel apple fall cheesecake is made with a graham cracker crust, topped with caramel apples and caramel sauce. It's fall heaven
- Pecan Sandies. Pecan Sandies are easy, slice and bake shortbread cookies loaded with pecans and literally melt in your mouth. They're sweet, buttery, nutty, and delicious.
- Applesauce Bread. Homemade applesauce bread is fluffy, moist, and delicious. Loaded with fall flavors that transforms your favorite snack into a loaf cake.
- Apple Cake. Easy Apple Cake has a dense and moist crumb and is loaded with fresh apples, cinnamon sugar, and nuts. It's quick, easy, and ready to eat in under an hour
More Fall Recipes
- 60+ Fall Dinner Ideas
- 50 Best Fall Side Dishes
- 50 Best Fall Desserts
- 40 Best Fall Appetizers
- 15 Best Fall Salad Recipes
- 40+ Cozy Fall Soup Recipes
Did You Make Any of These September Recipes?
Please leave a comment and rating below, and let me know what you thought of this round up of delicious recipes to cook this September. Be sure to snap a picture and tag me on Instagram @aheadofthyme or share it on the Pinterest pin so that I can follow along.
HUNGRY FOR MORE? Don't forget to sign up for my email newsletter so that you don't miss any recipes. You can also follow along on Instagram and Pinterest for more recipe updates.
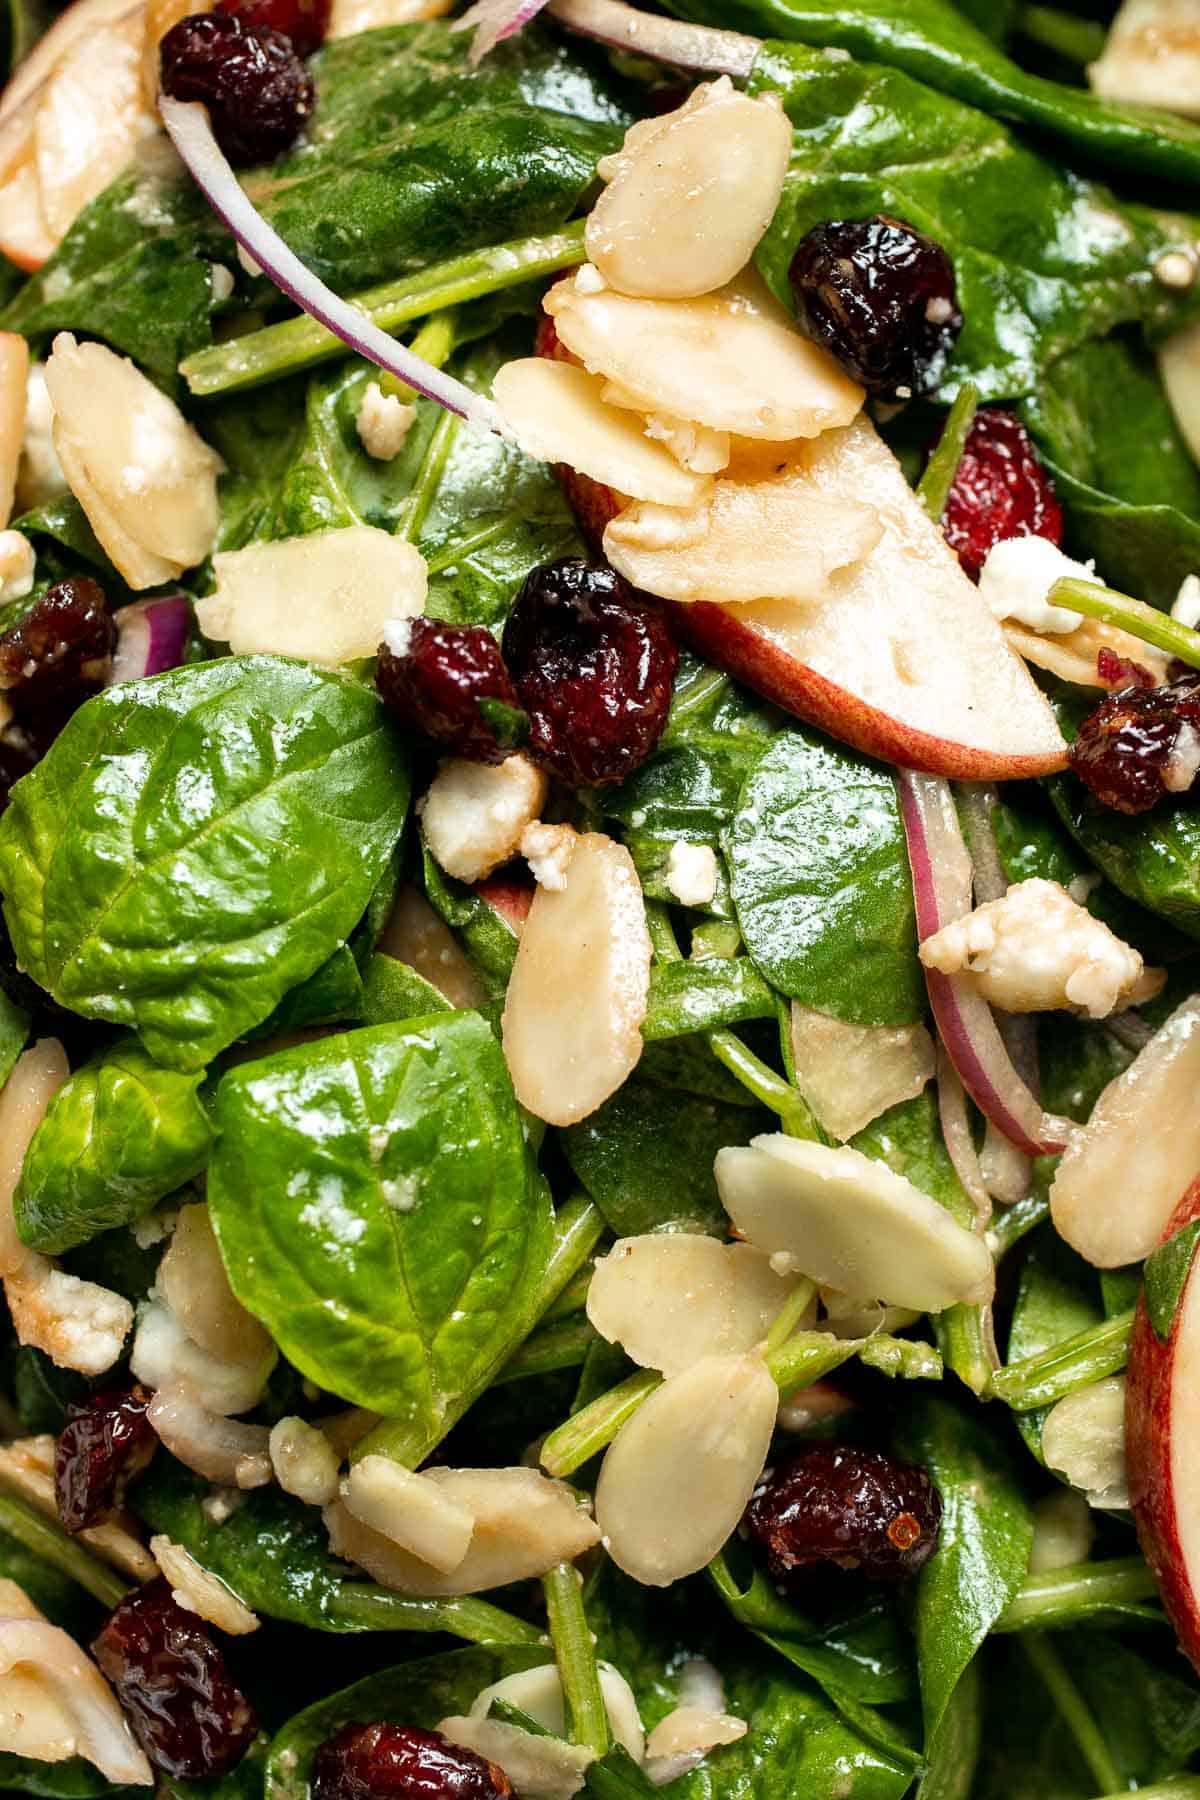
Spinach Salad
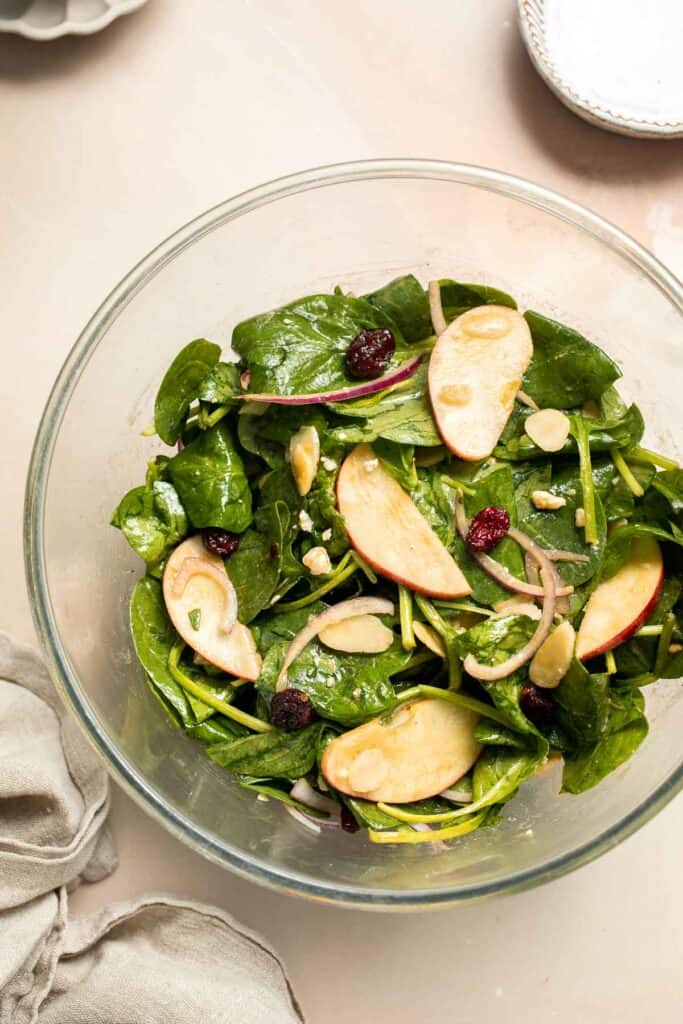
This Spinach Salad is hearty, healthy, and quick and easy to make. This fall recipe pairs tender baby spinach with crisp apples, red onion, dried cranberries, pecans, and feta in a super simple homemade balsamic vinaigrette. It takes just moments to prepare, makes a filling lunch, or pairs well with any main course. It will quickly become a new family favorite!
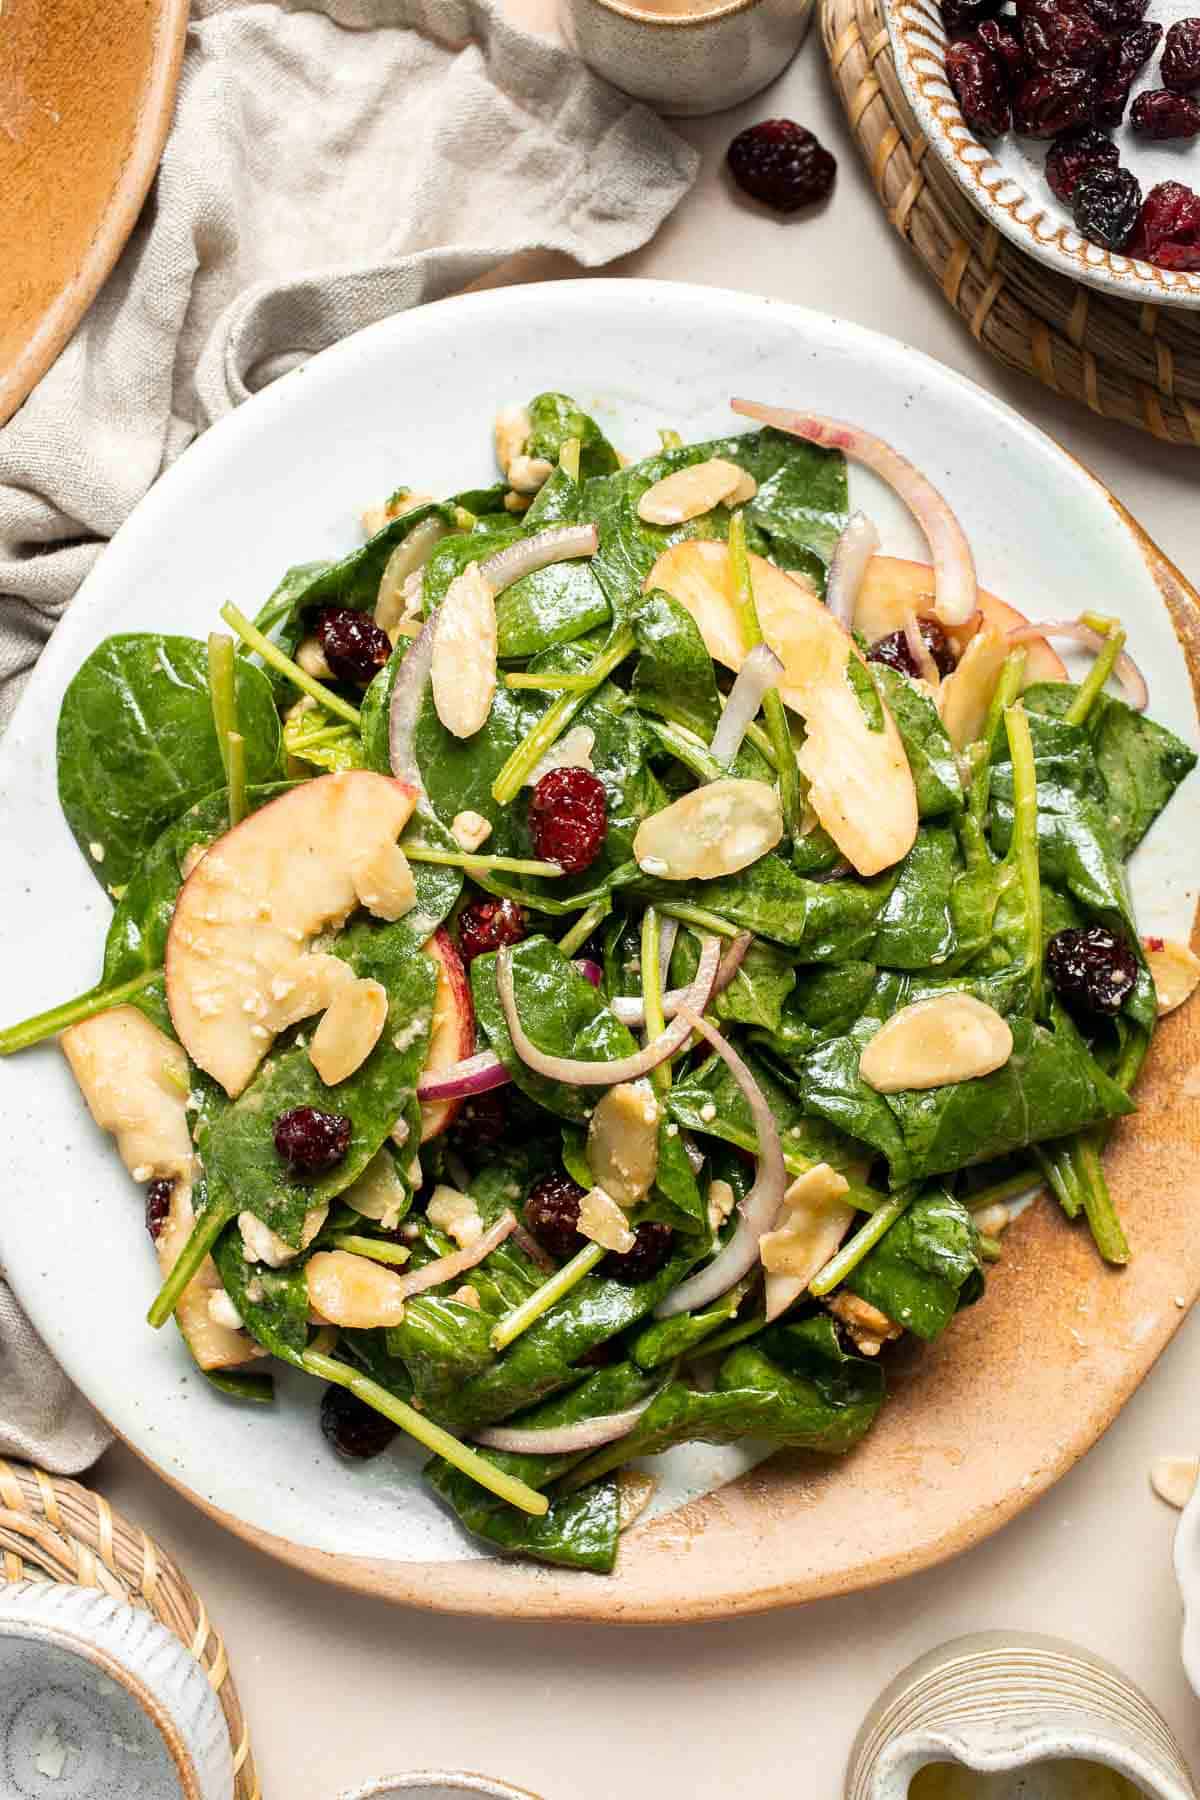
I'm all about quick side dishes, especially during the week, and this easy spinach salad recipe is one of the best. It has delicious flavors my whole family enjoys, but it relies on ordinary ingredients I always keep in my pantry. It doesn't taste simple, though. All of the flavors really sing together, especially during the cool fall months. Pair it with everything from simple baked chicken to your favorite holiday feast. It's a keeper!
Why You'll Love This Spinach Salad
- Simple simple side dish. My favorite thing about this recipe is how easily it comes together. You only need a few simple pantry staples, like pecans, onions, and cranberries, and the ingredients for the dressing. This makes it a great option even when the pantry looks a little bare.
- Great fall flavors. Although you can make this salad any time of the year, the apples, onions, cranberries, and nuts are right at home in the fall and winter. It's a great healthy lunch for meal prep and is the perfect side salad for Thanksgiving or to serve with your holiday meal!
- Easy to adapt. Since this healthy spinach salad is such a simple recipe, there are many ways to adjust it to suit your flavor preferences. Change the fruits or greens, use a different dressing, or add protein to make it a main dish. See my suggestions below to really make it your own. You'll see why it's become a staple in our home!
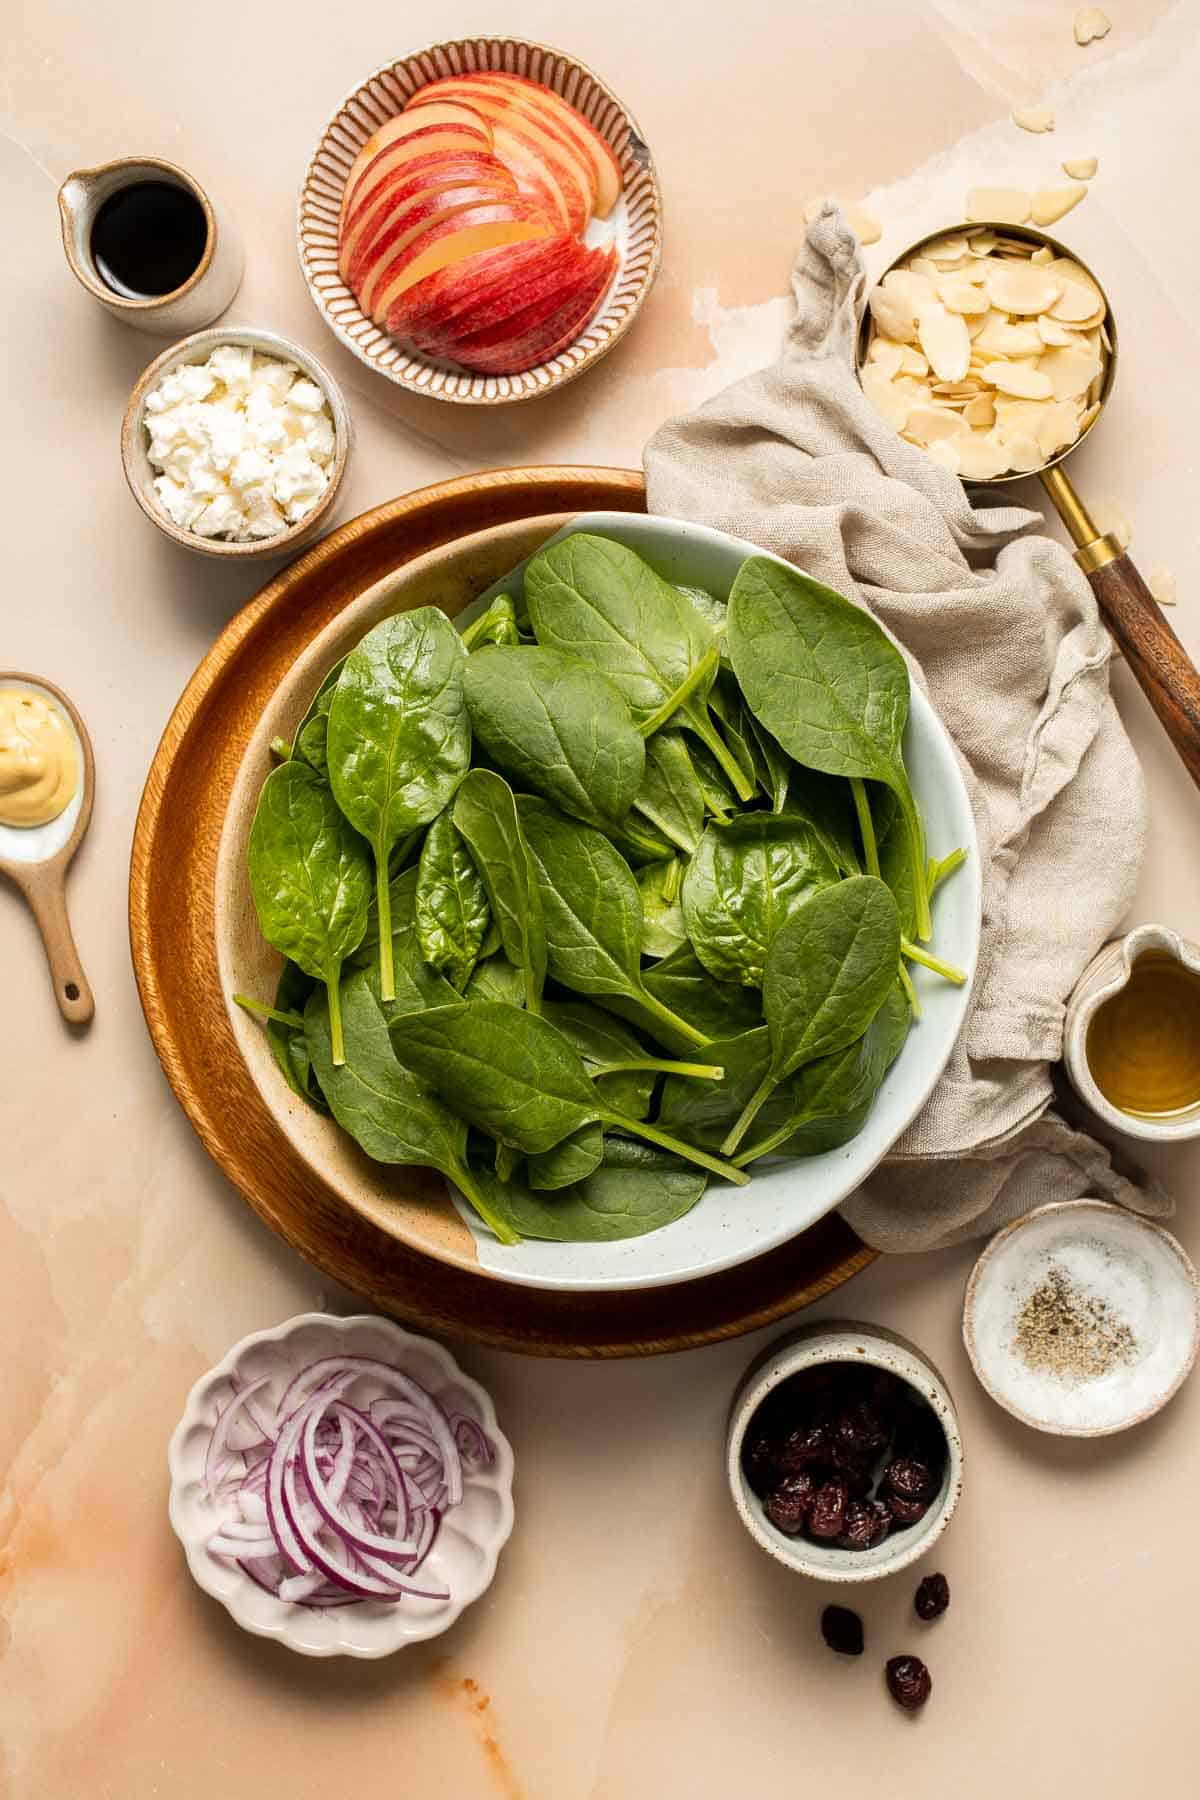
Ingredient Notes
To make this delicious Spinach Salad, you will need the following ingredients (full measurements in recipe card below):
- baby spinach - use pre-washed baby spinach.
- apple - use any color you like, but cut it into thin slices. If you want to keep them from turning brown, dip the apple slices in lemon juice.
- red onion - thinly sliced onion adds a nice crunch and bite.
- pecans - rough chop pecans or use sliced almonds.
- dried cranberries - for a little sweetness. Dried cherries are a good substitute.
- feta cheese - crumbled into small pieces.
- balsamic vinegar - for a rich, tangy flavor.
- extra virgin olive oil - or your favorite neutral salad oil.
- Dijon mustard - to emulsify the vinaigrette.
- salt & ground black pepper - to taste.
You will also need measuring cups and spoons, mixing bowls, a whisk, and serving utensils.
How to Make the Best Spinach Salad
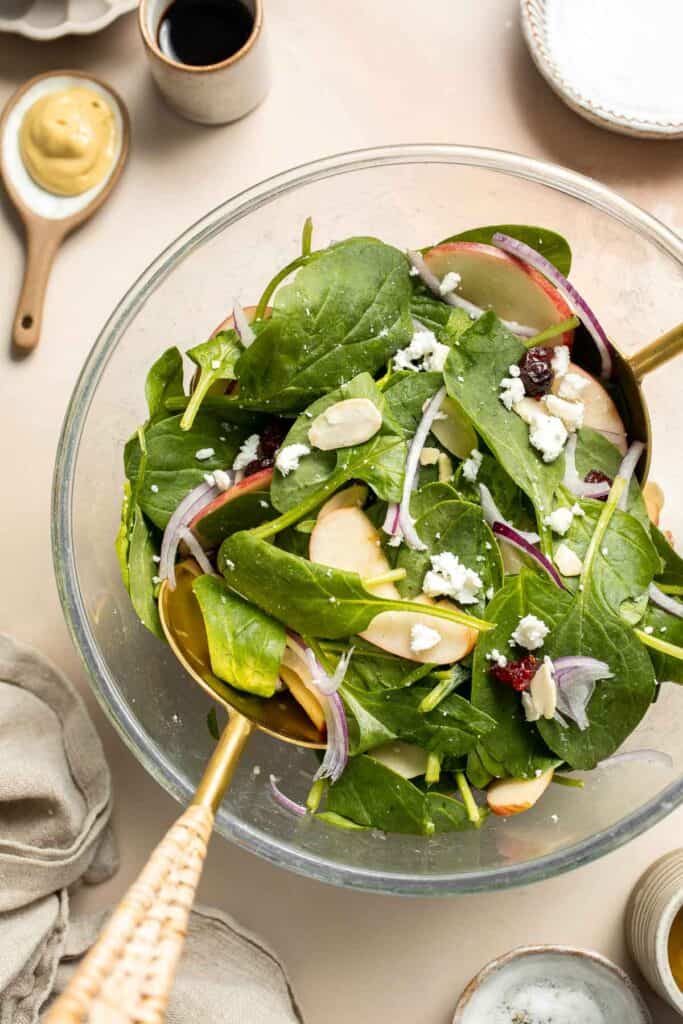
- Assemble. In a large mixing bowl, add spinach, sliced apple, onion, pecan, dried cranberries, and feta cheese.
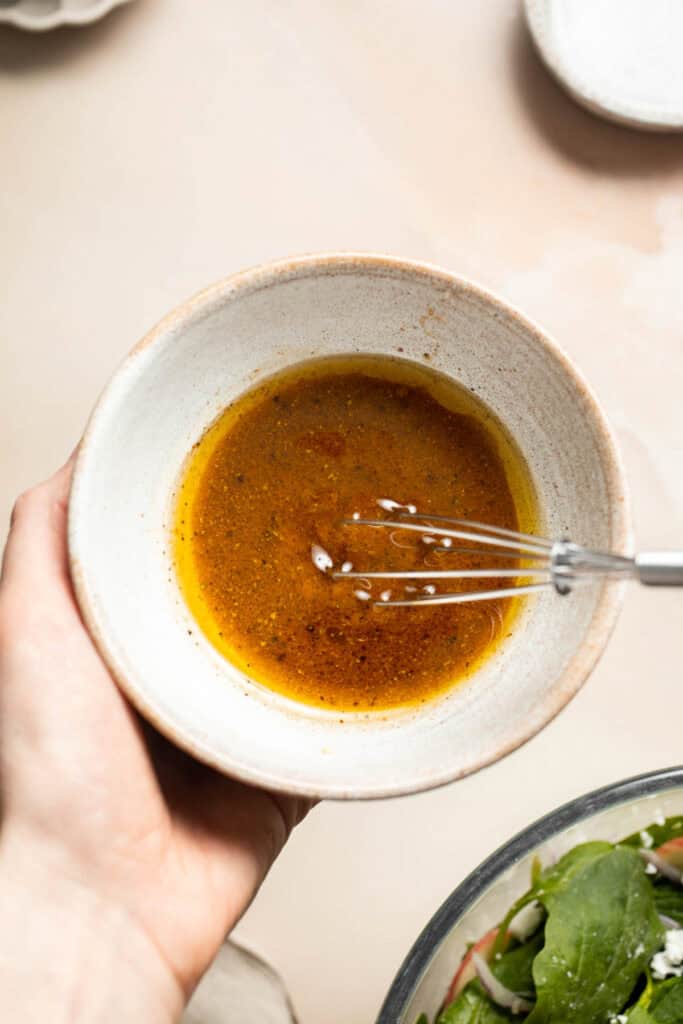
- Make dressing. In a small mixing bowl, whisk together balsamic vinegar, olive oil, Dijon mustard, salt, and pepper until smooth.
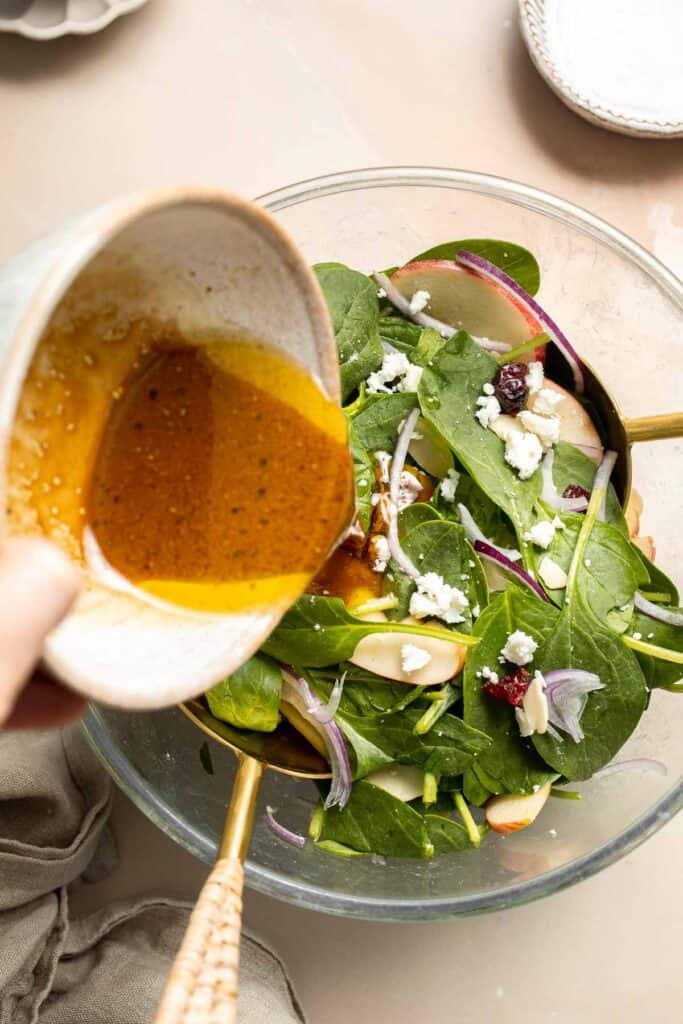
- Toss. Add the dressing to the salad and toss well. Serve immediately.
Recipe Variations
- Play with the ingredients. Use dried cherries or apricots and candied pecans for extra sweetness. Replace the apple with pear and use blue cheese crumbles or creamy goat cheese instead of feta! It's also great with roasted butternut squash or sweet potatoes.
- Add protein. For extra protein, pair this simple spinach salad with crumbled bacon, sliced roasted turkey, hard-boiled eggs, garbanzo beans, or grilled chicken.
- Use your favorite dressing. Balsamic is the perfect vinegar to pair with spinach's earthy flavor, but I also enjoy using dressings made with red wine vinegar or apple cider vinegar.
- Change the greens. The spinach can be mixed with or replaced by another leafy green, like arugula, salad greens, or lettuce.
- Add a little sweetness. Drizzle a little maple syrup or honey into the vinaigrette for a sweet, fall flavor.
- Make a strawberry spinach salad. Replace the apple with fresh strawberries, add slices of grilled chicken, and use a creamy poppy seed dressing.
How to Serve
This Spinach Salad is delicious served on its own for lunch, or paired on the side of some of my favorite dinner entrees including:
- Butternut Squash Apple Soup
- Roast Stuffed Chicken
- Homemade Hamburger Helper
- Rice Pilaf with Carrots
- Chicken Penne Pasta
- Sheet Pan Thanksgiving Dinner
For more recipes, see our 60+ Fall Dinner Ideas.

Recipe Tips and Tricks
- Serve right away. Spinach is a very delicate green and will start to break down quickly once tossed in dressing. The leftovers should be stored with the dressing on the side and the salad right before serving.
- Rinse the salad well. Fresh spinach wilts quickly in the fridge. Rinsing the salad again in your salad spinner can perk it back up and ensure that it is nice and fresh.
- Make your own dressing. You need 5 simple ingredients to make your own salad dressing, which adds so much more flavor than the storebought stuff. It's worth the extra few seconds!
Storing Instructions
Spinach salad is best served right away. If you want to make enough for leftovers, place the salad in an airtight container and store the dressing on the side. The leftover salad will stay fresh for 3-4 days.
FAQ
Yes! Fresh spinach leaves can be eaten raw or cooked. Spinach salads are a great way to eat more leafy greens, and spinach tastes especially great with nuts, fresh and dried fruits, and a little cheese. Most people prefer to eat baby spinach in salads and reserve the larger leaves for cooking, like in this creamed spinach.
Spinach has an earthy flavor that pairs especially well with the sweetness of balsamic vinaigrette.
If you aren't a big fan of spinach, try using baby spinach instead of full-sized leaves. They have a milder flavor and texture and can be eaten just like your favorite salad greens.
More Fall Salad Recipes
- 15 Best Fall Salad Recipes
- Arugula Salad with Apple and Pecan
- Apple Walnut Salad
- Fall Harvest Salad with Butternut Squash and Apple
- Sweet Kale Salad
- Thanksgiving Salad
Tried this recipe?
I'd love to hear what you think! Leave a comment and rating below to share your feedback. Your reviews help others discover this recipe and help me keep creating more free recipes for you. Snap a photo and tag me on social media @aheadofthyme too.

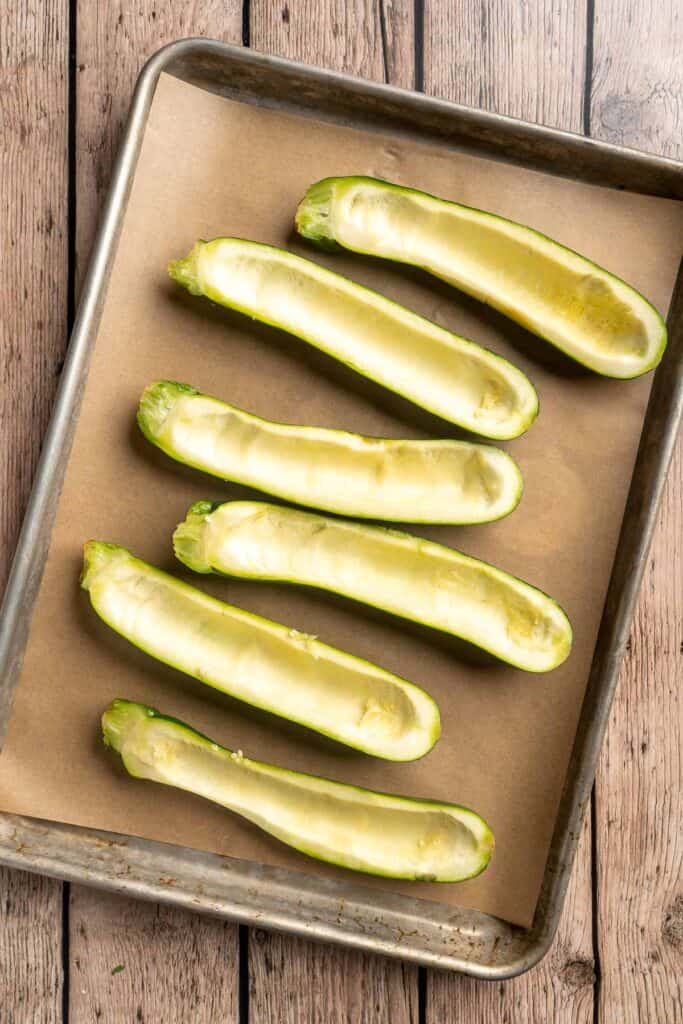
Roasted Zucchini
Roasted Zucchini is a light and healthy summer veggie side dish. This recipe is easy to make using a handful of simple ingredients including herbs, Parmesan, and balsamic to give it lots of fresh flavor. It's my favorite way to use the extra zucchini from the garden! Serve it alongside your favorite pasta dishes, grilled meats, and more.

During the summer months, we go through a lot of zucchini. Although I also like to make Zucchini Bread or Zucchini Fritters, sometimes you need something simple. This easy roasted zucchini recipe requires minimal effort: toss the zucchini slices with the olive oil and seasonings, roast in a hot oven, then sprinkle with freshly grated Parmesan cheese and a drizzle of vinegar for a little acidity. It's the perfect weeknight side, or you can meal prep several trays to add to your lunches through the week!
Why You'll Love This Oven-Roasted Zucchini
- Incredibly easy side dish recipe. This easy recipe has only 4 basic steps: preheat the oven, season the zucchini, bake, and serve. It's done from start to finish in about 40 minutes, most of which is hands-off. What's not to love?
- Roast a lot of zucchini at once. One batch uses about a pound of zucchini, but you can certainly make a double or triple batch, then add the extras to pasta dishes or save them in the fridge for leftovers. It's a great way to use pounds of zucchini quickly!
- Buttery and fragrant. The best thing about roasted zucchini is how it cooks down. When properly roasted, it has a slightly nutty, buttery flavor that moves from veggie mode into meaty, savory mode, similar to roasted eggplant or mushrooms. It tastes more like a main dish than a side! I can't help but sneak bite after bite.

Ingredient Notes
To make this delicious Roasted Zucchini, you will need the following ingredients (full measurements in recipe card below):
- fresh zucchini - rinse and trim the squash into one-inch wide rounds. You can use any type of summer squash.
- extra virgin olive oil - this is essential to help the seasonings stick to the sliced zucchini and develop the skin on the outside.
- fresh thyme or oregano - finely chopped.
- seasonings - stick with salt, garlic powder, and ground black pepper.
- Parmesan cheese - Grate a little fresh Parmesan over the top for a savory, salty flavor.
- balsamic vinegar - You can use balsamic glaze, but just a little drizzle of high-quality balsamic vinegar will wake up the zucchini and offer a nice contrast of flavor.
You will also need a measuring cups and spoons, a large bowl, baking sheet, parchment paper, and a kitchen knife.

How to Make the Best Roasted Zucchini
- Season zucchini. In a large mixing bowl, combine zucchini, oil, thyme, garlic powder, salt, and pepper. Toss well until evenly coated.


- Bake. Transfer the zucchini to a large baking sheet and spread in an even layer. Bake in a 400F preheated oven until tender and golden brown on the edges, about 25-30 minutes.


- Serve. Sprinkle with parmesan cheese and drizzle with balsamic vinegar.


Recipe Variations
- Adjust the seasonings. Feel free to use dried herbs instead of fresh (about ⅓ as much) or to substitute dried Italian seasoning.
- Change the cut. This recipe results in nice, slightly thick rounds of tender zucchini. If you prefer smaller bites, trim the zucchini into thinner rounds, make zucchini spears, or cut the half moons into little wedges. Just adjust the baking time if you use a smaller cut, and always cut evenly sized pieces regardless of the shape you choose.
- Roast some extra veggies. Add sliced onion, fresh garlic, and halved tomatoes on the same tray before roasting. They'll all taste amazing together and you can serve them as a topping for pasta or as a simple summer side.
- Try a different squash. This recipe can be made with any type of summer squash, like yellow squash, different types of zucchini, etc. Use a few different varieties for a range of colors and textures.
- Use the air fryer. Instead of the oven, cook the zucchini slices in the air fryer. Shake the basket several times to get a nice skin and let the air fryer preheat for 5-10 minutes before adding the slices.
How to Serve
This Roasted Zucchini is delicious served on the side of a late summer or early fall dinner such as:
- Greek Chicken Souvlaki Skewers
- Garlic Butter Salmon
- Ribeye Steak
- Avocado Pesto Pasta
- Honey Garlic Shrimp Skewers
- Creamy Pesto Chicken
For more recipes, see our 60+ Summer Dinner Ideas.

Recipe Tips and Tricks
- Preheat the oven. For the best texture, you need to expose the zucchini to high heat quickly. Otherwise, you can end up with soggy zucchini, which isn't very appetizing. Let the oven get nice and hot first.
- Don't rush. The amount of time your zucchini needs to roast will depend on the heat of your oven and the zucchini's size and moisture content. Focus more on what the zucchini looks like, not what the timer says.
- Use a sheet pan. You need a shallow, flat sheet for roasting, not a baking dish. Zucchini has a lot of moisture, and it needs to evaporate quickly. A regular sheet pan is ideal for this.
Storing and Freezing Instructions
How to Store
Store any leftover roasted zucchini in an airtight container in the fridge for 3-4 days.
How to Reheat
The best way to reheat zucchini is to pop it in the microwave for a minute or two or bake it in a 350 F oven for 5-10 minutes until heated through. Sprinkle with extra parmesan.
How to Freeze
Freeze a container of roasted zucchini for up to 3 months. Thaw in the fridge before adding the cooked squash to pasta or other dishes. Just remember that after thawing, the zucchini will be even softer than usual.
FAQ
When cut into 1-inch thick slices, zucchini takes about 25-30 minutes to roast at 400 F.
Yes. However, the thawed, cooked zucchini will be quite soft. It's best to add to dishes that don't require much additional cooking, as the squash will begin to break apart pretty quickly.
Yep! Zucchini roasts incredibly well. Although it is a tender vegetable, it gets a nice skin in the oven and takes on a golden brown color. The inside of the zucchini becomes tender and buttery, which pairs wonderfully with Parmesan cheese, fresh herbs, and balsamic vinegar. It's a quick and easy way to prepare an abundance of zucchini quickly!
More Zucchini Recipes
- Stuffed Zucchini Boats
- Fried Zucchini
- Baked Zucchini Fries
- Lemon Zucchini Bread
- Zucchini Lasagna
- Air Fryer Zucchini Chips
Tried this recipe?
I'd love to hear what you think! Leave a comment and rating below to share your feedback. Your reviews help others discover this recipe and help me keep creating more free recipes for you. Snap a photo and tag me on social media @aheadofthyme too.

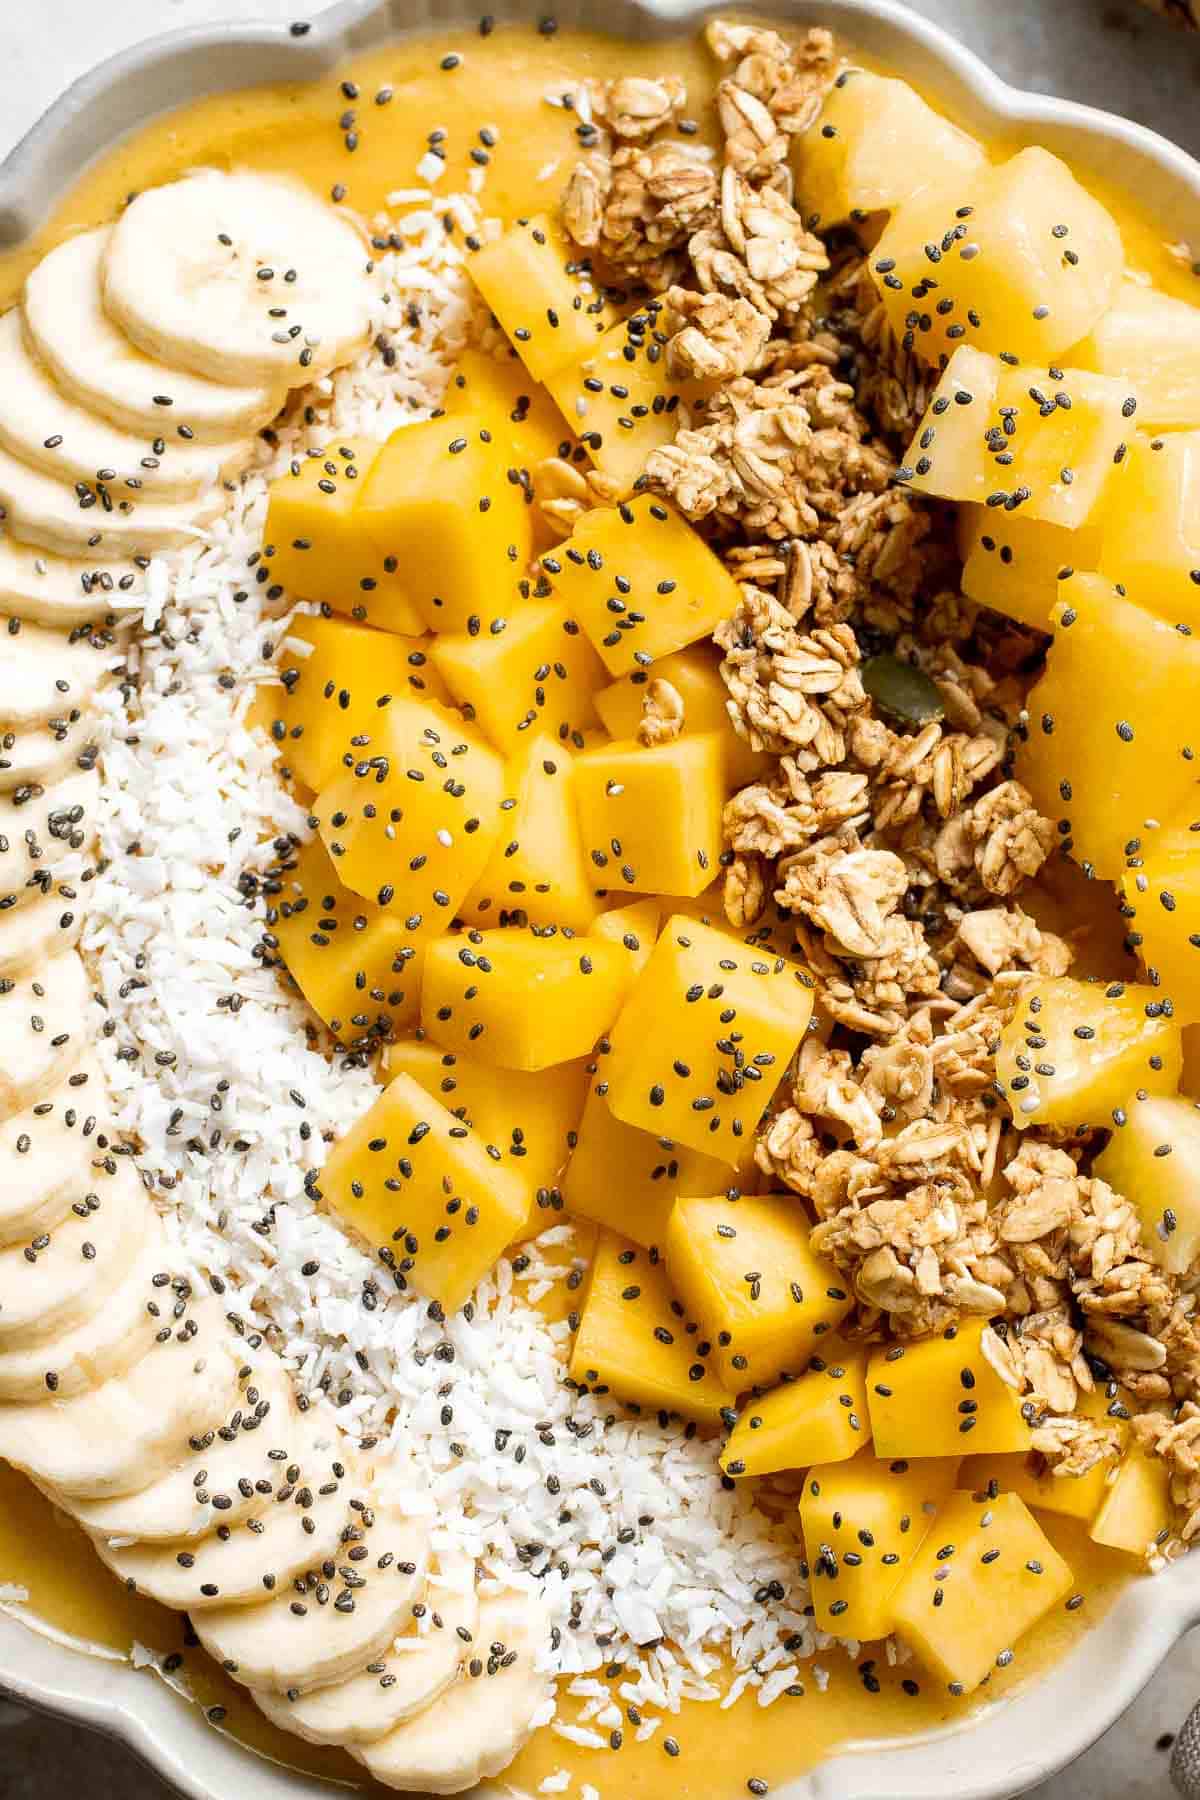
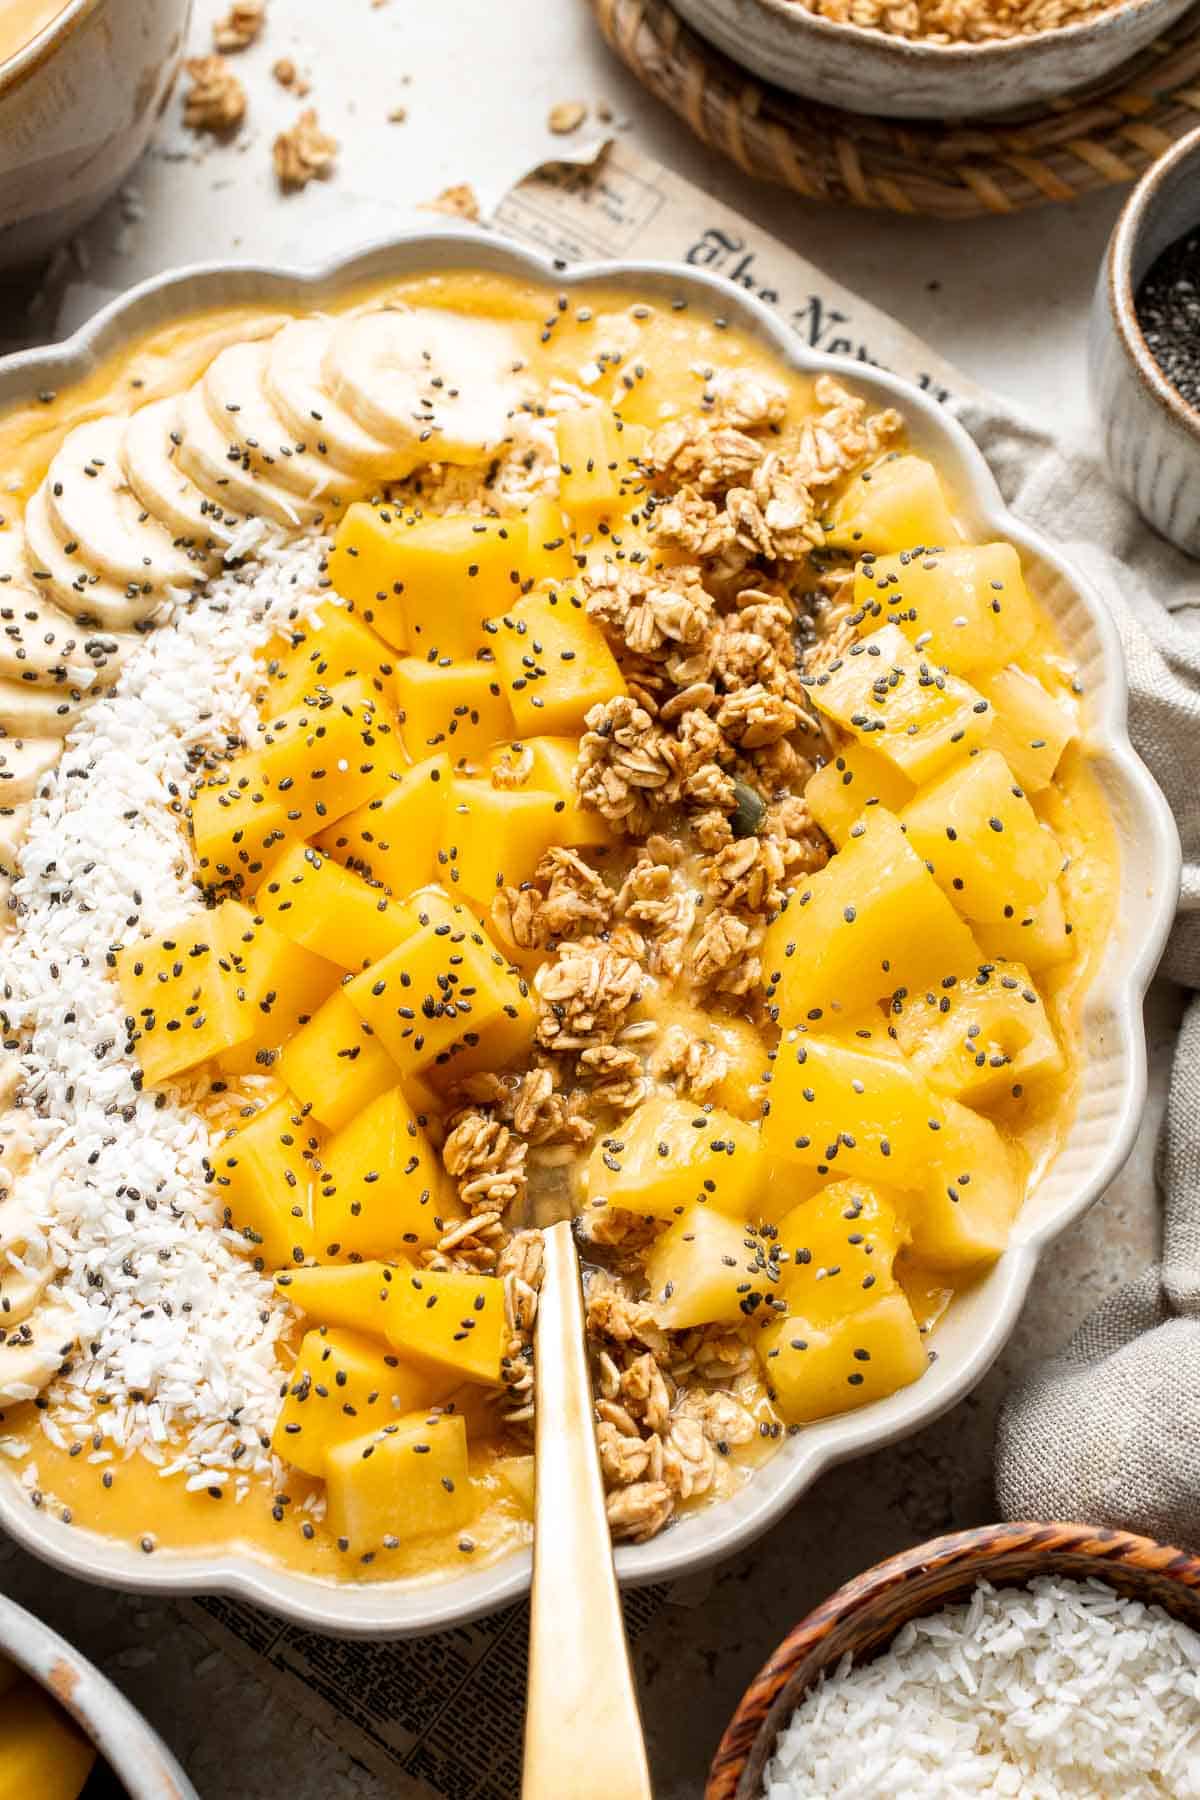
Mango Pineapple Tropical Smoothie Bowl
Loaded with tropical fruits and flavors, this Mango Pineapple Tropical Smoothie Bowl is the most refreshing way to start the day. A mixture of tropical fruits transform into a thick, sorbet-like filling that pairs perfectly with extra fruit, coconut flakes, and granola sprinkled on top. This summer bowl is way more fun to eat than a smoothie, is ready in just 5 minutes, and tastes like a tropical vacation!
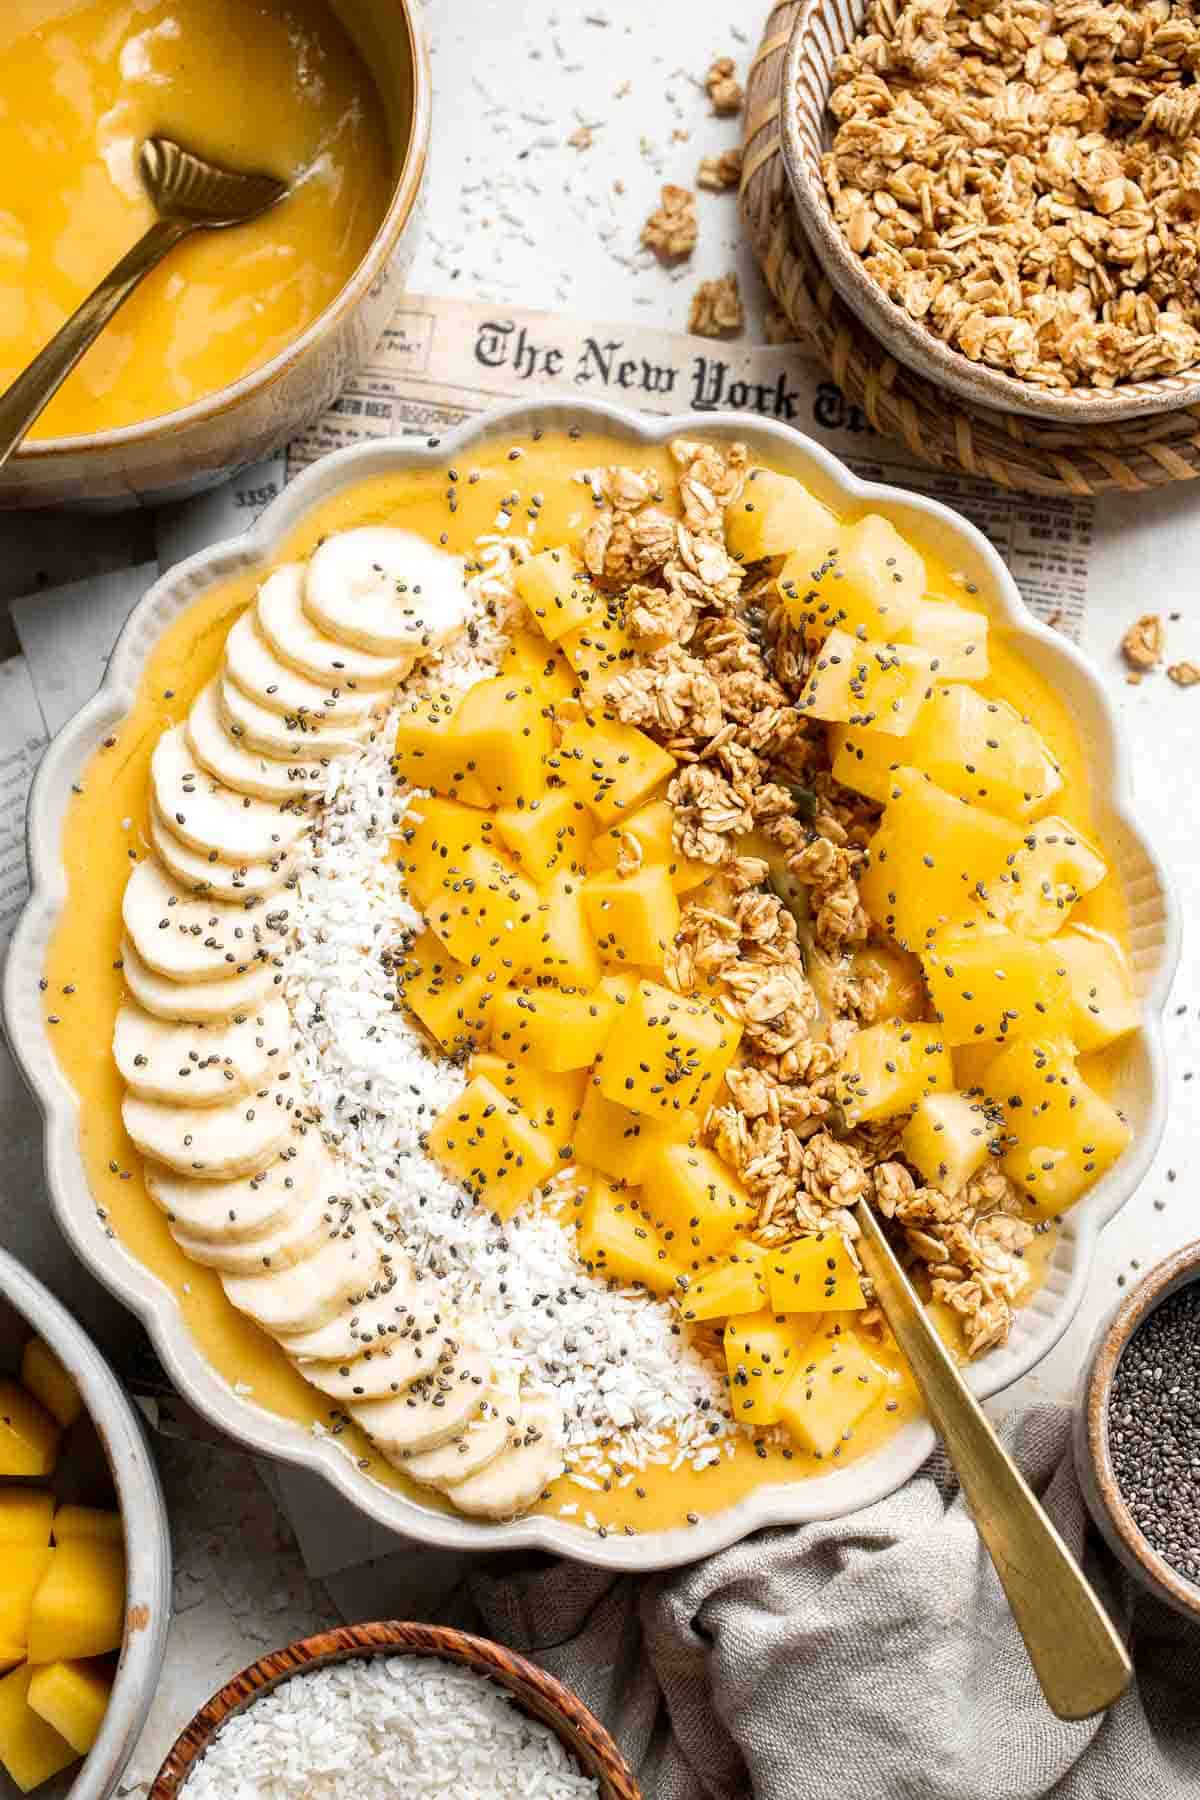
Smoothies are so quick and easy to make, but sometimes you want something a little heartier for breakfast. Smoothie bowls are the perfect solution! Since the smoothie has such a thick consistency, it's more like eating a fruity dessert for breakfast! Plus, this tropical fruit smoothie bowl relies on frozen fruit, so it's easy to enjoy its summery taste even in the coldest months of the year. Delicious!
So, we are spending the week at an airbnb in Hawaii, which puts me in a tropical mood. So of course we have to do as the Hawaiians do and smoothie bowl! Yes, I just used that as a verb. This tropical smoothie bowl is refreshing and light. So perfect for summer!
But, in all seriousness, who says you have to be in Hawaii to enjoy this delicious blend of heaven? I could eat this back in Canada any time of year.
Why You'll Love This Tropical Smoothie Bowl
- More satisfying than a regular smoothie. Smoothie bowls have a much thicker consistency, which holds up the chia seeds, granola, and other toppings similar to yogurt or pudding. This makes it feel much more filling and satisfying than sipping a regular smoothie.
- Ready in 5 minutes. It takes just 5 short minutes to prepare two servings of this recipe! That's fast enough to make even on those days you're rushing out the door.
- Tons of tropical flavor. The frozen pineapple, mango, and pineapple add plenty of sunny tropical flavor for a bright start to the day.
- Easy way to eat more fruits. If you struggle to eat enough fruits and veggies each day, start by sneaking extra into your breakfast! Each bowl contains pineapple, mango, and banana, plus anything else you add on top. It feels nice to get a few servings of fruit first thing in the day!
Ingredient Notes
To make this delicious Mango Pineapple Tropical Smoothie Bowl, you will need the following ingredients (full measurements in recipe card below):
- frozen pineapple & mango - these are easy to keep on hand any time of year and give the smoothie mixture a creamy consistency.
- banana - fresh banana makes any smoothie extra creamy and adds a nice sweetness.
- almond milk - to thin out the creamy smoothie. Coconut milk is a good alternative, but you can really use any milk you like or even fruit juice.
Smoothie Bowl Toppings
Our favorite things to top this smoothie bowl with are:
- granola - try our homemade granola!
- fruit - we use cubed mango and pineapple and banana slices.
- shredded coconut
- chia seeds
You will also need a high-powdered blender and two shallow serving bowls.

How to Make the Best Tropical Smoothie Bowl
- Blend. Combine pineapple, mango, banana and almond milk in a blender. Blend until smooth. Note that the mixture will be very thick.


- Serve. Pour into two shallow bowls and arrange the toppings on top. Serve immediately.


Recipe Variations
- Add protein. Add a scoop of your favorite protein powder to increase the protein content. Vanilla works great with the tropical flavors.
- Make a tropical green smoothie bowl. Add ½ cup of fresh spinach (or more) to sneak some greens into your day.
- Make it creamy. Add a few spoonfuls of your favorite Greek yogurt for an even creamier texture.
- Play around with healthy mix-ins. There are plenty of ways to top these delicious smoothie bowls, depending on your favorite flavors. Add more fresh fruit, like some fresh blueberries or kiwi slices, drizzle some vanilla yogurt, sprinkle flax meal or hemp seeds, etc.
- Make a drinkable smoothie. Love the tropical flavor but in a rush to get out the door? Add extra non-dairy milk or even a splash of pineapple juice or orange juice until the smoothie reaches the right consistency.
How to Serve
This Mango Pineapple Tropical Smoothie Bowl is delicious served on its own for breakfast or as a snack. You can also pair it as part of a large breakfast spread including some classics:
- Best Old Fashioned Pancakes
- Mediterranean Scrambled Eggs
- Hash Browns
- French Toast
- Caprese Frittata
- Breakfast Strata
For more, see our 50 Best Breakfast Ideas.

Recipe Tips and Tricks
- Freeze your own fruit. It's pretty easy to find frozen mango and frozen pineapple in the grocery store, but you can certainly freeze your own. Cube the fresh fruits into even-sized pieces, then spread them on a sheet pan lined with parchment and freeze until solid. Transfer to a freezer-safe container and use as desired.
- Use a food processor. Due to the thicker consistency of the smoothie bowl smoothie, it may be easier to blend the frozen fruits in a food processor instead of a regular blender.
- Use fresh fruits. If you have fresh mango or pineapple on hand, feel free to use frozen banana slices for the frozen element. It's important to use at least some frozen fruit to get the right thickness, though.
Storing and Freezing Instructions
How to Store
Just like a regular smoothie, smoothie bowls are best served fresh. If needed, you can usually refrigerate the bowl for an hour or two or keep it cold in the freezer, but the frozen fruits will soften pretty quickly at room temperature.
How to Freeze
Since these smoothies are so thick and loaded with frozen fruit, they freeze quite well. Portion any leftover smoothie into a freezer-safe container, then freeze solid for up to 2-3 months. To serve, thaw the smoothie in the fridge for a few hours or let it soften at room temperature for a bit. Stir to incorporate any liquids and add any mix-ins right on top.
FAQ
A smoothie bowl is basically a thick smoothie with fun toppings, so you can use all the same smoothie ingredients but adjust the thickness. To do this, you want to use as much frozen fruit as possible and the least amount of milk you can. The frozen fruit will stay nice and thick even after blending, and you only need a little liquid to bring the mixture together. This works great in this pineapple mango smoothie bowl recipe.
In other recipes, you may find that need to make other adjustments. Consider adding a teaspoon of flax meal, a tablespoon of chia seeds, or a dollop of nut butter for that thick, creamy consistency.
Since this smoothie bowl is made with just a few simple ingredients, it's pretty easy to make to order. But it also freezes wonderfully for easy meal prep! Just freeze the smoothies in individual serving sizes using freezer-safe containers. Let them thaw in the fridge overnight, then stir or blend as desired in the morning. Be careful not to let them thaw for too long, or the mixture will be loose and runny.
To stick with that tropical vibe, focus on adding more tropical flavors on top, like fresh banana slices, coconut flakes, and extra fresh mango and/or pineapple. Granola adds a nice crunch and tastes great with the tropical flavors. I also like to add nuts and seeds for extra fiber and healthy fats, like chia seeds, hemp seeds, etc.
That's just the start, though! Feel free to use whatever toppings you like, like fresh raspberries, kiwis, blackberries, yogurt, sliced almonds or cashews, and more. Make it your own!
More Smoothie Recipes
- Berry Smoothie Bowl
- Green Smoothie Bowl
- Healthy Mango Yogurt Smoothie
- Strawberry Banana Smoothie
- Majoon (Banana and Date) Smoothie
- Green Detox Smoothie
Tried this recipe?
I'd love to hear what you think! Leave a comment and rating below to share your feedback. Your reviews help others discover this recipe and help me keep creating more free recipes for you. Snap a photo and tag me on social media @aheadofthyme too.

Coconut Cream Pie
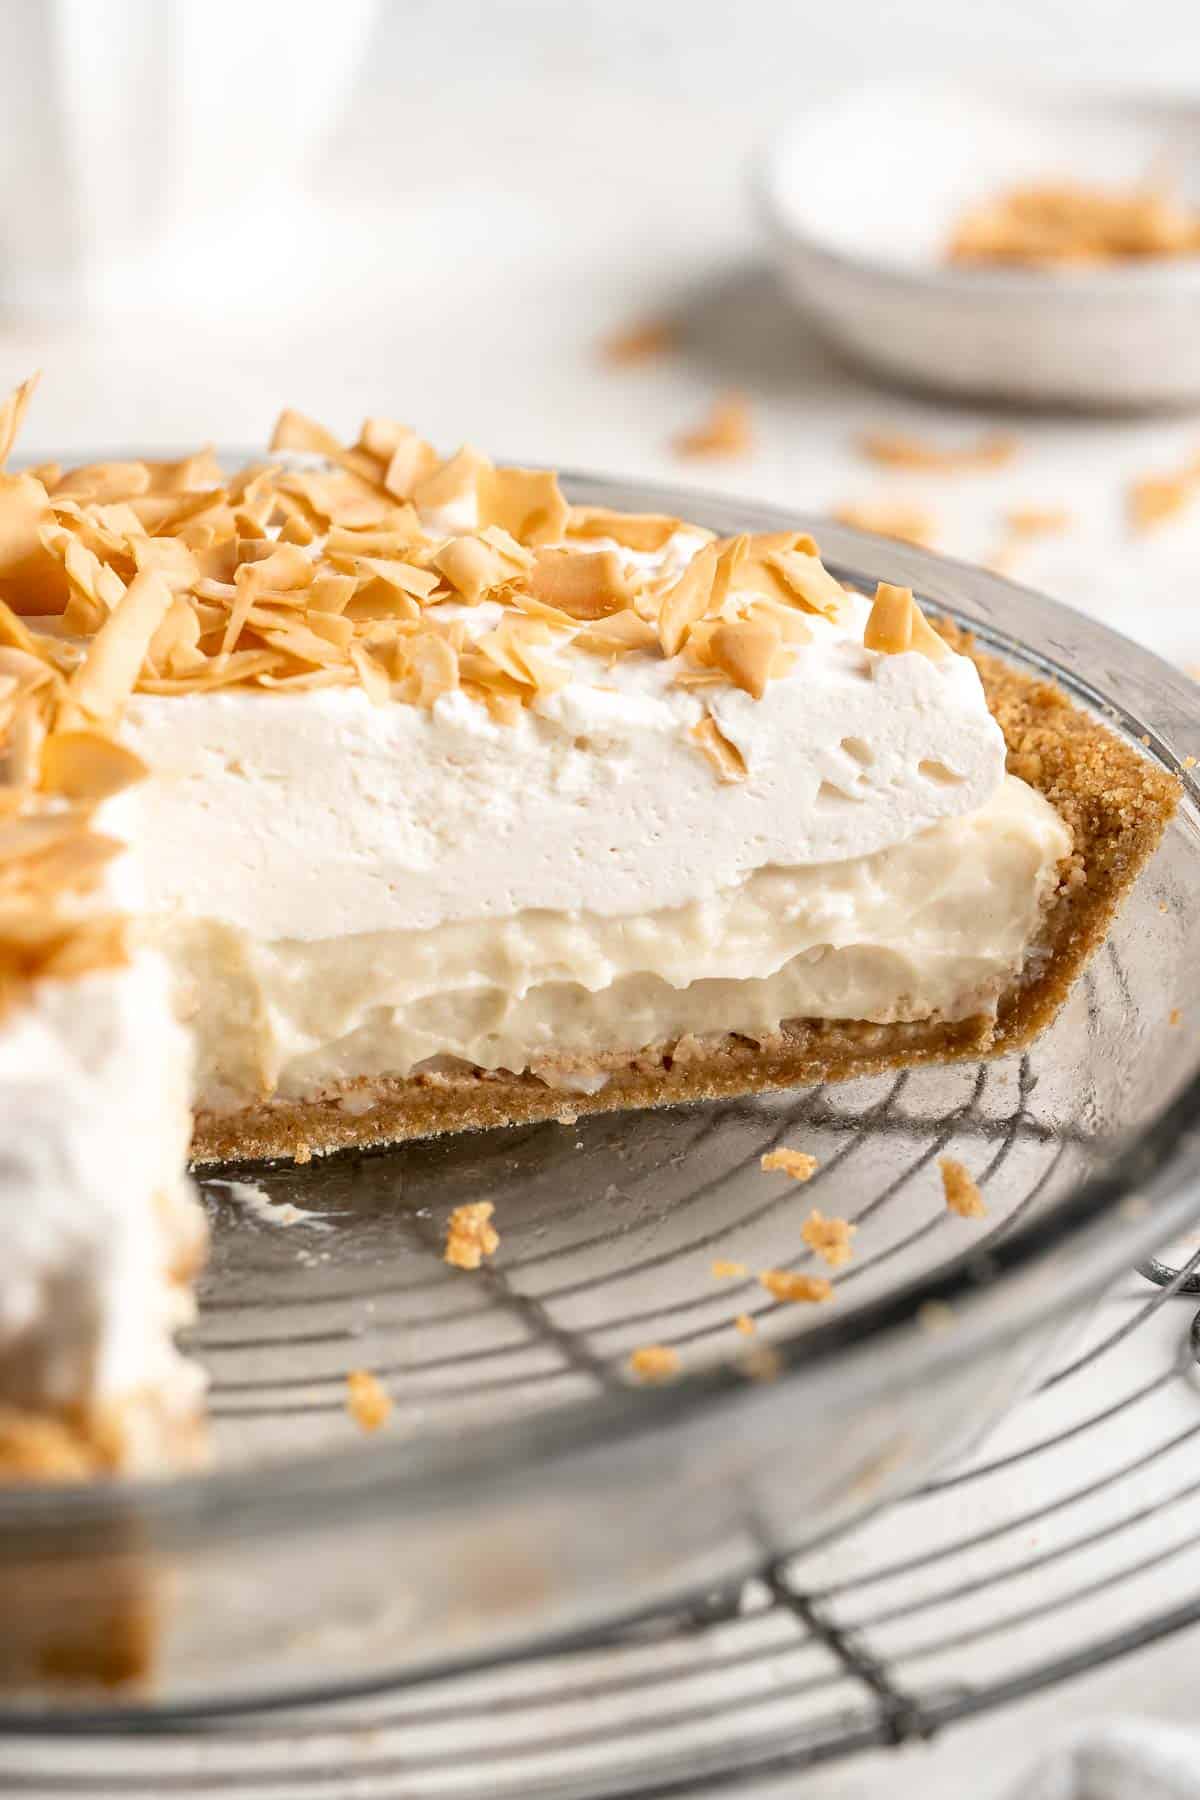
This Coconut Cream Pie made from scratch features a graham cracker crust topped with a creamy homemade coconut pudding filling and freshly whipped cream. It tastes (and looks) like heaven on earth.

If you're a coconut fiend just like me, you already know that coconut cream pie towers over other options. That rich, creamy coconut filling is loaded with real coconut shreds, coconut milk, and coconut extract, so there's no shortage of coconut flavor here! It's the best dessert for the hottest days of summer, but since it uses mostly pantry staples, it's just as easy to make in the dead of winter, too.
Why You'll Love This Coconut Cream Pie
- Completely homemade. The only ingredient you won't be making yourself is the graham crackers for the crust. Everything else is completely homemade, and you can feel the love in every bite. It tastes just like grandma used to make!
- The best coconut pudding. Many recipes compromise on the filling, opting for instant pudding mix instead of making it from scratch. Homemade pudding is so easy to make and this one pulls out all the stops. The egg yolks add a rich, custard-like flavor and I like to add coconut shreds and coconut extract for lots of coconut flavor in every bite. It's truly the star of the show and honestly, I could eat it by the spoonful all on its own!
- The graham cracker crust. I love coconut cream pies so much and this graham cracker twist on the traditional homemade pie crust is amazing. It adds plenty of stability, required no rolling, and provides a crunchy texture and sweet flavor that I look forward to in every bite. What's not to love?
- Easy to follow recipe. It sounds complicated, but it's not. As the graham cracker crust cools from the oven, heat the creamy filling on the stove, then refrigerate overnight. The next day, dollop mountains of pillowy whipped cream, sprinkle toasted coconut flakes, and serve.

Ingredient Notes
To make this delicious Coconut Cream Pie, you will need the following ingredients (full measurements in recipe card below):
- graham cracker crumbs - to speed up the process, either buy preground graham cracker crumbs or blitz them up in a food processor.
- white sugar - a small amount of sugar adds a little extra sweetness and a nice crunch that gives this coconut pie some needed texture. We also need sugar in the filling.
- melted butter - unsalted butter is the perfect glue to bind the no bake pie crust together.
- coconut milk - shake or mix the can well first.
- whole milk - for a little extra richness.
- shredded coconut - for real pieces of coconut in every bite.
- salt
- egg yolks - to add a creamy richness and custard-like flavor.
- cornstarch - this will thicken the filling to help it hold its shape when slicing.
- unsalted butter - for a glossy, creamy filling.
- coconut extract - to play up the coconut flavors.
- vanilla extract - adds flavor to the filling and whipped cream topping.
- heavy cream - only use high-fat heavy cream intended for whipping.
- confectioners' sugar
- toasted coconut flakes - optional, but recommended for an eye-catching garnish.

Baking Tools
You will also need the following baking tools and equipment:
- measuring cups and spoons
- mixing bowls
- 9-inch pie pan
- medium saucepan,
- sifter
- whisk
- plastic wrap
- electric mixer for the whipped cream topping.
How to Make the Best Coconut Cream Pie
First, make the graham cracker crust.
- Combine ingredients. In a medium mixing bowl, add the graham cracker crumbs, sugar, and melted butter. Use a fork to mix well until well combined.
- Fill pie pan. Pour the crumb mixture into a 9-inch pie pan. Use a flat-bottomed measuring cup to press the mixture into the bottom and sides of pan.
- Bake. Place into a 350°F preheated oven to bake for 11 minutes. Remove from the oven and allow to cool a bit while you make the filling.


Next, make the coconut cream pie filling.
- Heat milk. Add coconut milk, milk, shredded coconut, and salt into a medium saucepan. Heat over medium heat, until simmering.
- Combine other ingredients. Meanwhile, while milk is heating up, add eggs and sugar to a large mixing bowl, and whisk until smooth. Sift in the cornstarch, then whisk again until smooth.


- Add hot milk. Once the milk is hot and simmering, remove from heat and slowly drizzle the hot milk into the egg mixture, while whisking simultaneously. After all of the milk has been added, pour the custard back into the pot.


- Continue to heat. Place the pot (with custard) back on the stove and heat over medium heat, while constantly stirring until lightly bubbling. Once bubbling, continue to cook and stir for exactly 45 seconds, then remove from the heat.
- Add remaining ingredients. Add in the butter, vanilla, and coconut extract, and whisk to combine.


- Chill. Pour the custard into the cooled crust, cover the surface of the custard with plastic wrap, then place into the fridge for at least 8 hours or preferably overnight.

Then, make the whipped cream topping.
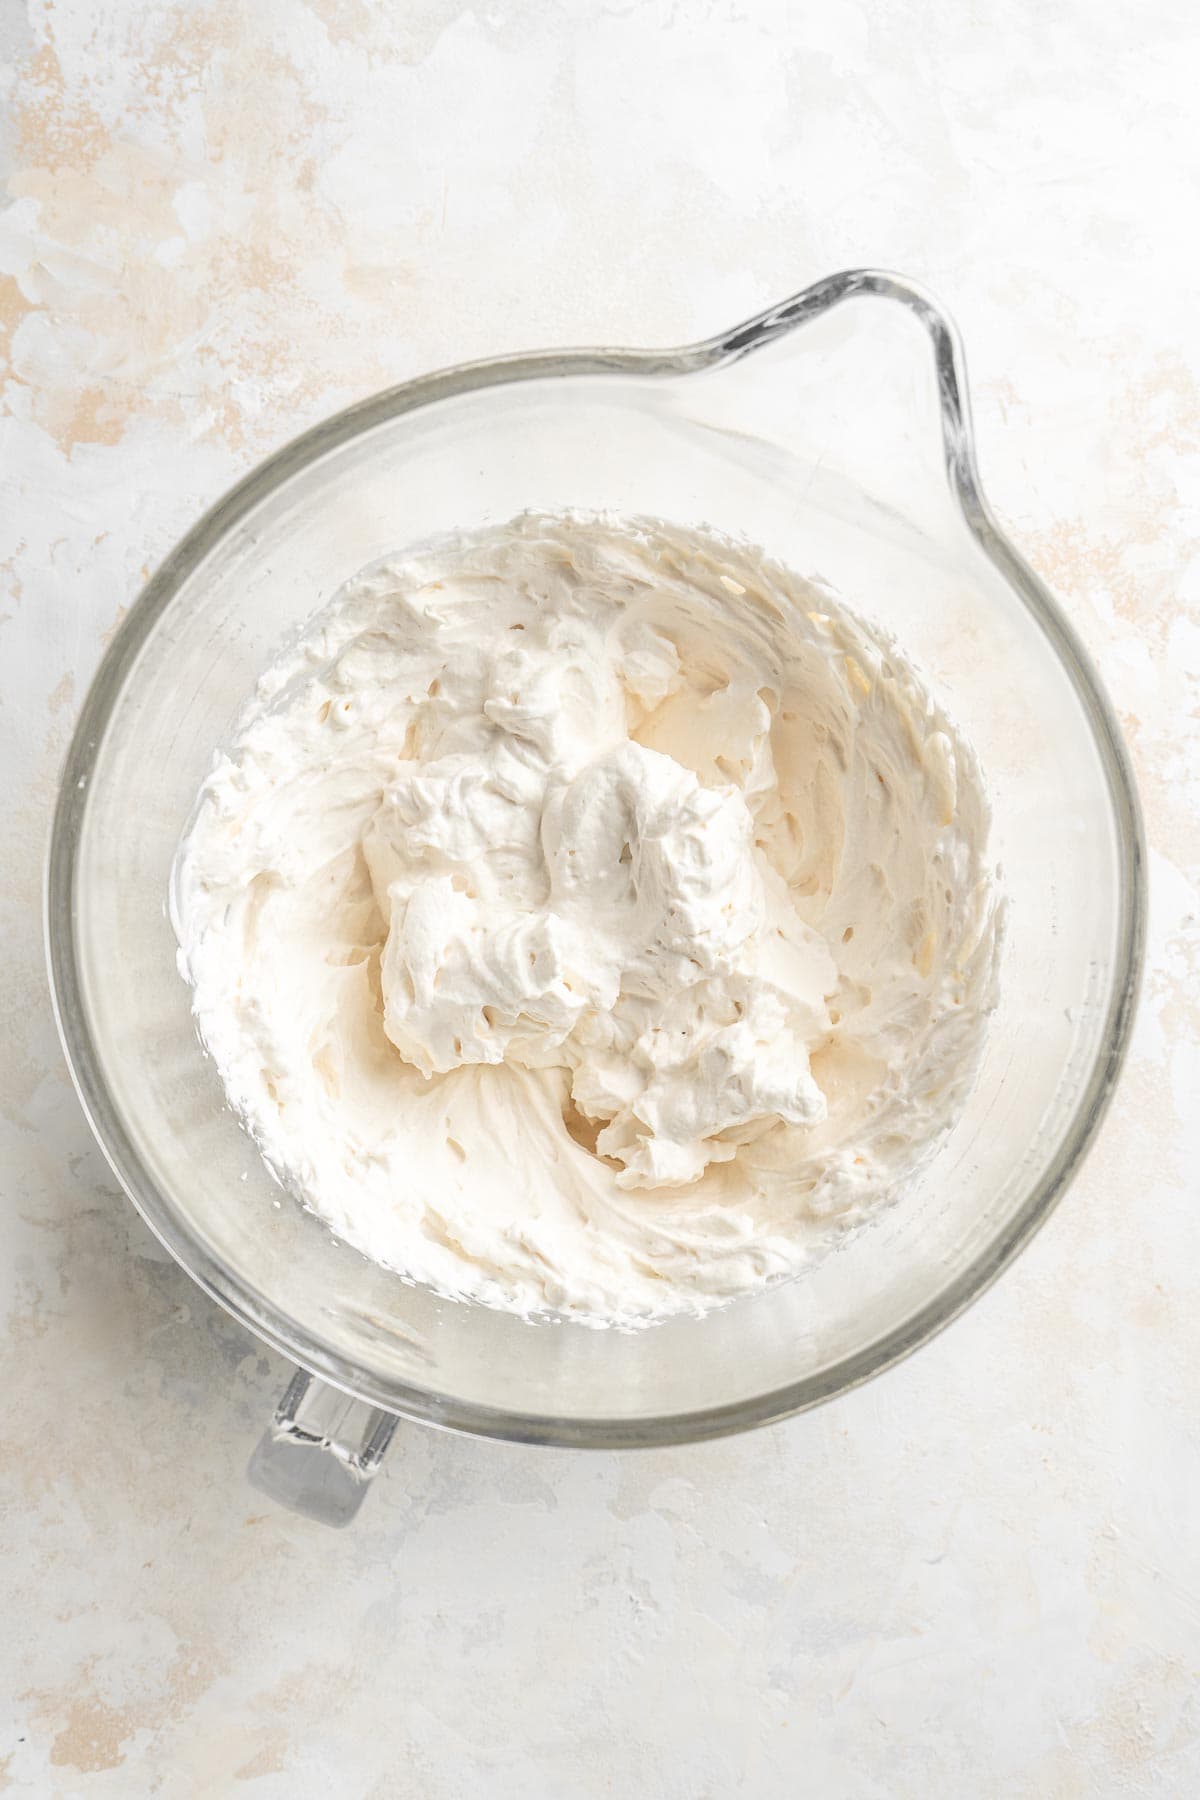
When ready to serve, prepare the whipped cream by adding the heavy cream, confectioners' sugar, and vanilla to a large mixing bowl. Beat with a whisk or electric hand mixer until stiff peaks are achieved.
Finally, assemble the coconut cream pie.
Dollop whipped cream onto cool pie, then garnish with toasted coconut flakes (if using). Serve immediately or keep in fridge until ready to enjoy.


Recipe Variations
- Make it dairy-free. Despite all the milk in the filling, this recipe is surprisingly easy to make dairy-free. First, replace the whole milk with unsweetened coconut milk (I like the boxed stuff) and use chilled coconut cream for the whipped topping. If you need to avoid butter, use butter-flavored shortening or coconut oil in the crust as well. That's it!
- Use a flaky pie crust. If you prefer a baked pie crust with your coconut cream pie, I totally understand. My Puff Pastry Pie Dough is my go-to for hand pies, lattice pies, and more. Be sure to blind bake and cool it completely before adding the cream filling.
- Use a cookie crust. Give this classic pie a twist by making a crust out of Nilla Wafers, Oreos, or your favorite type of cookie.
- Add a meringue topping. If you love that mountain of fluffy meringue on Lemon Meringue Pie, you can certainly use that instead.
How to Serve
This Coconut Cream Pie is delicious served on its own, or paired with a warm or hot drink. Some of my favorites to pair with this are:


Recipe Tips and Tricks
- Don't rush the process. The number one mistake bakers make with cream pie recipes like this one is that they try to make it all at once. If the cookie crust is still warm when you add the filling, it will become soggy. If you add the whipped cream to the warm pie filling, it will melt into a puddle. Everything needs to be nice and cold.
- Double-check your ingredients. There are so many variations of coconut products out there that it's easy to grab the wrong thing. If you use sweetened coconut products, the pie will be way too sweet, and if you don't add enough fat, it won't have enough flavor. Use full-fat canned coconut milk, not coconut cream or the thinner coconut milk from the refrigerator section. The coconut shreds should be unsweetened, too.
- Watch the whipped cream. It's very easy to over-whip the cream, which causes it to curdle and then eventually split into butter. When it starts to thicken up, slow down and stop right at stiff peaks.
Storing and Freezing Instructions
How to Store
This easy coconut cream pie recipe should always be stored in the fridge when not being served. For the best flavor, let it sit on the counter for about 30 minutes before serving.
How to Freeze
For longer storage, freeze this homemade coconut cream pie recipe on a sheet pan. Once the whipped cream is firm to the touch, wrap it in several layers of plastic wrap and freeze for 1-2 months. Before serving, place the whole pie in the fridge and thaw completely. The whipped cream might separate slightly, and the crust may become a little bit soggy, but it will still taste great!
FAQ
There are many different variations of coconut cream pie out there, but I like to keep it simple with fluffy homemade whipped cream made with heavy whipping cream, powdered sugar, and a little vanilla extract. It's pillowy, creamy, and not too sweet, which lets that creamy coconut filling shine.
The baking world is divided about this. Traditionally, coconut cream pies are made with a flaky crust. However, this type of crust tends to absorb moisture from the filling without adding much texture or flavor. Plus, you have to mess with making dough, rolling it out, and blind baking it as well. Meanwhile, graham cracker crusts add texture, flavor, and extra sweetness and only require minimal effort to assemble and bake. Plus, I love the way the graham cracker crust tastes with the coconut filling, which makes it a clear winner in my book.
The creamy coconut pie filling is basically a rich pudding made with egg yolks similar to custard. It must be heated on the stove until the mixture thickens. If your filling is runny, it means you likely did not cook the milk mixture long enough before pouring it into the pie shell. You'll know when it's ready -- the thin, milky mixture will become thick and harder to stir, producing bubbles that pop and splat open. When done, the thickened mixture should also coat your spoon, and if you swipe your finger across the back of your spoon, it should leave a line.
More Pie Recipes
- 25 Easy Pie Recipes
- Banana Cream Pie
- Lemon Meringue Pie
- Key Lime Pie
- Braided Lattice Apple Pie
- Classic Blueberry Pie with Lattice Top
Tried this recipe?
I'd love to hear what you think! Leave a comment and rating below to share your feedback. Your reviews help others discover this recipe and help me keep creating more free recipes for you. Snap a photo and tag me on social media @aheadofthyme too.

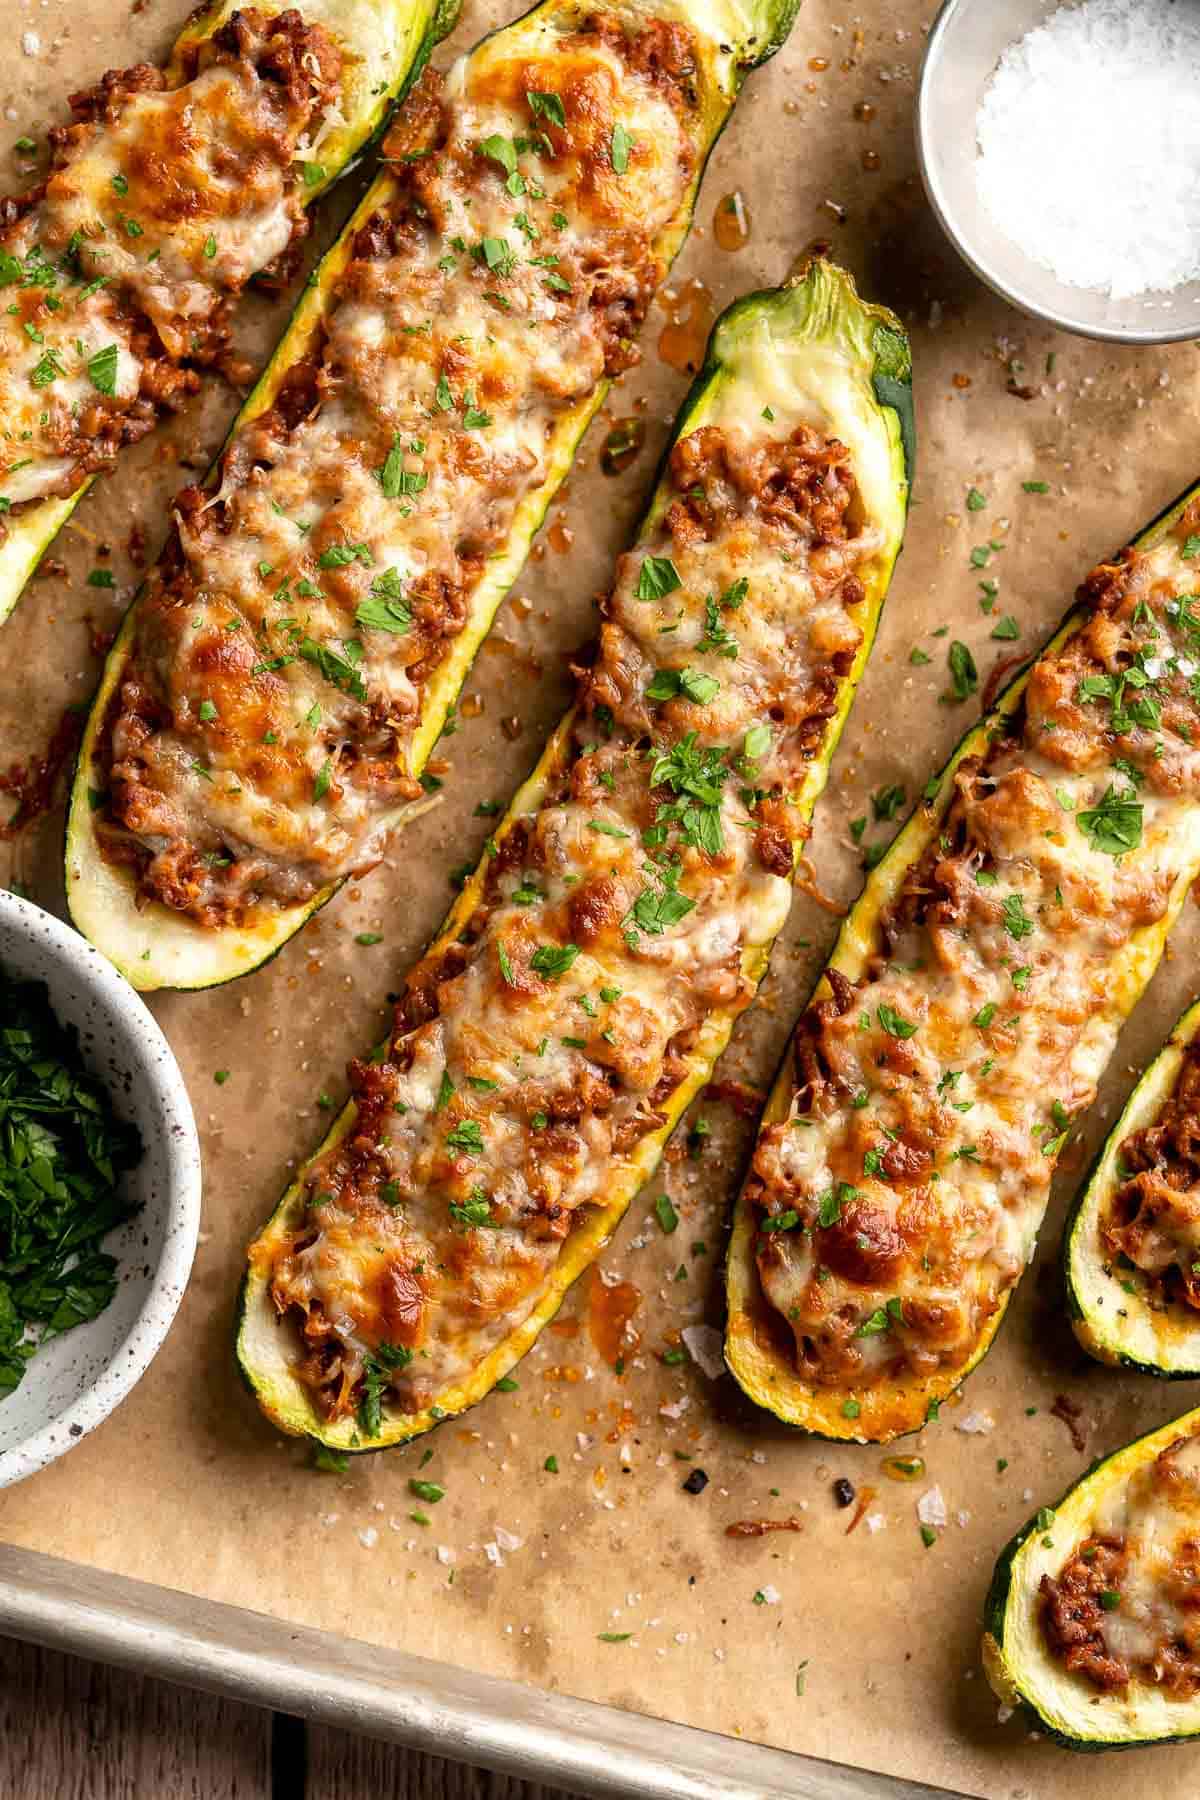
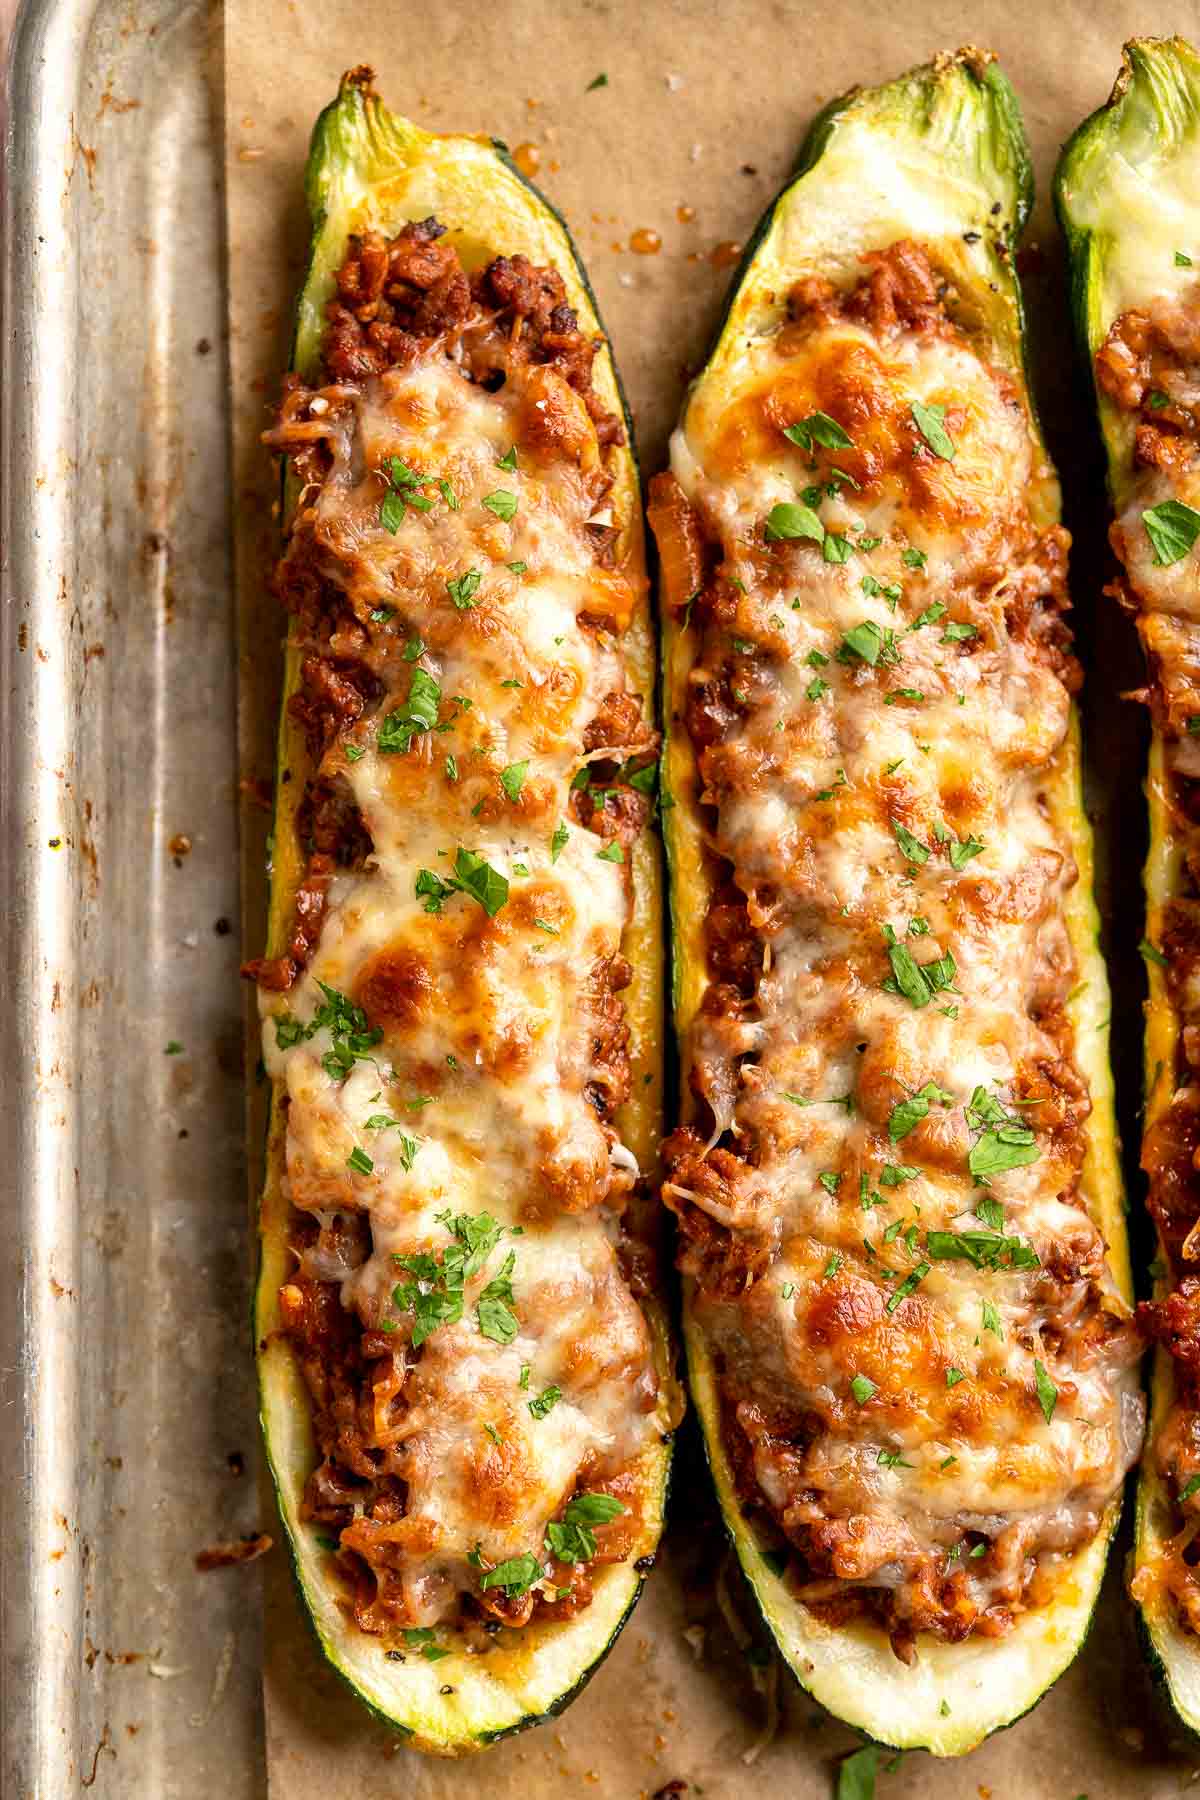
Stuffed Zucchini Boats
Stuffed Zucchini Boats are a fun, low carb dinner filled with a hearty meat sauce, topped with cheese, and baked until melty and bubbly. This classic dish is perfect for the height of zucchini season, and a true family favorite!
Fresh zucchini is one of the most versatile late summer veggies, working well in everything from Zucchini Bread to Zucchini Muffins to Zucchini Fries. These delicious zucchini boats let this vegetable show off its versatility. After roasting, the zucchini flesh is soft and tender, similar to al dente pasta, and soaks up all the flavors in the meaty sauce. It's low in carbs, high in veggies, and loaded with flavor - what's not to love?
Why You'll Love These Stuffed Zucchini Boats
- Naturally low carb. If you're trying to watch your carbs or sneak more veggies into your life, this recipe is a great option! Tender zucchini stands in for pasta, and you won't even miss it, thanks to all the flavors in the sauce and the ooey gooey cheese on top.
- Family-friendly flavors. Meaty tomato sauce tends to be a hit with people of all ages, and the melted cheese certainly helps. Even picky eaters will make an exception when they realize just how much flavor each of these stuffed zucchini boats has.
- Great for meal prep. While roasting the zucchini halves, make a big pot of the filling, then assemble, bake, and store your leftovers in meal prep containers. Serve them with a simple side salad, and you'll have a healthy, microwave-friendly main course to enjoy the next day!
Ingredient Notes
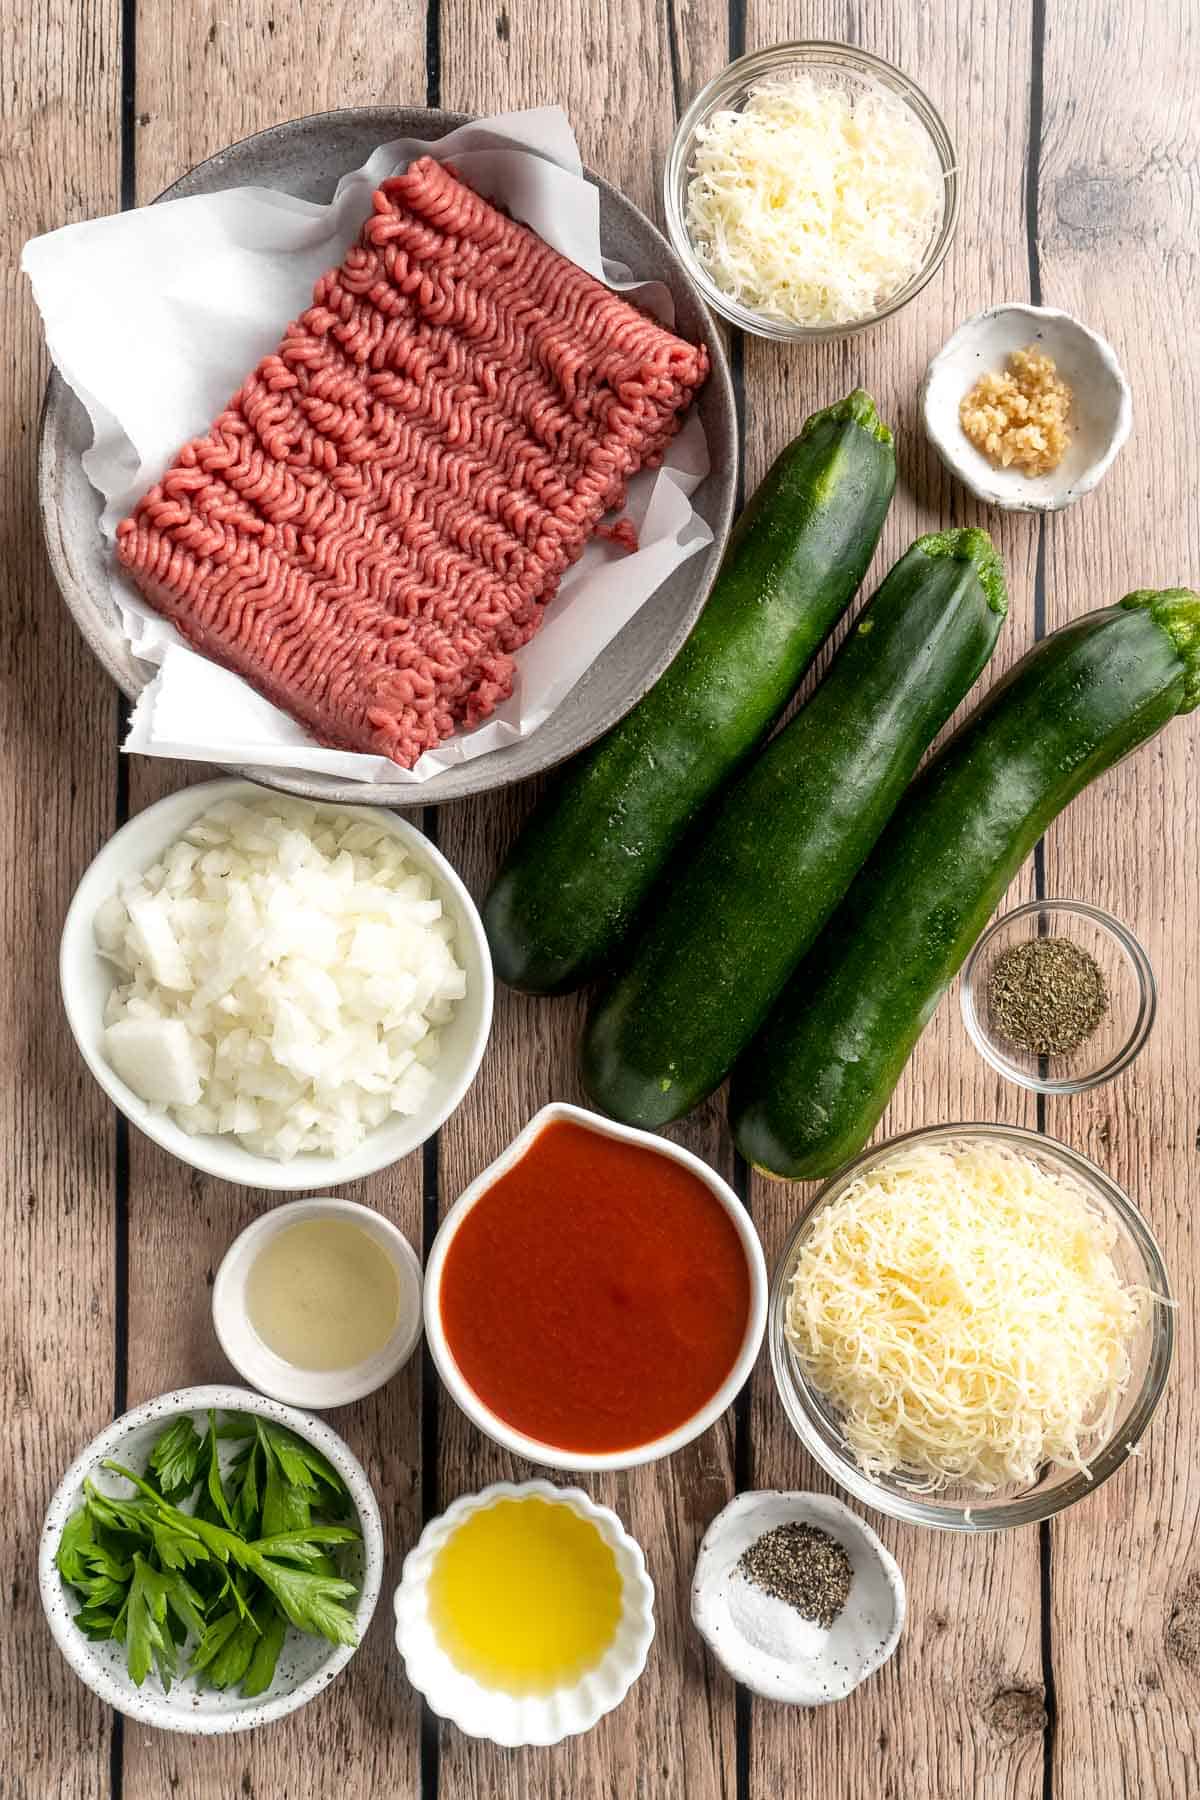
To make these delicious Stuffed Zucchini Boats, you will need the following ingredients (full measurements in recipe card below):
- zucchini - these need to be halved lengthwise. Remove any seeds.
- oil - you need olive oil to drizzle on the zucchini, and vegetable oil to brown the meat.
- ground beef - choose whichever percentage of fat you prefer or substitute with a different ground meat such as ground lamb, ground turkey, or Italian sausage.
- onion and garlic
- tomato sauce - use canned or jarred tomato sauce.
- seasonings - keep it simple with a little bit of Italian seasoning, salt, and ground black pepper. Salt and pepper adds flavor early on to ensure the zucchini tastes great, too (not just the filling and topping).
- cheese - shredded mozzarella cheese will melt really well while the Parmesan adds a rich flavor.
- parsley - chopped for garnish.
You will also need measuring cups and spoons, a sharp knife, melon baller or spoon, a large pan, a large saucepan, and a spatula.
How to Make the Best Stuffed Zucchini Boats
- Prep the zucchini. Cut each zucchini in half lengthwise and use a spoon to carefully scoop out the flesh to create a thick shell or "boat", about ¼ inch to ½ inch thick. Place the zucchini in a row, cut side up, on a large sheet pan or casserole dish. Drizzle with olive oil and sprinkle with salt and pepper, to taste. Bake in a 375F preheated oven for 15 minutes.


- Prepare the filling. Heat oil in a saucepan over medium-high heat until the oil is sizzling hot, about 1 minute. Add ground beef and cook until browned on all sides, about 5 minutes. Use a spatula to break up the beef into small pieces to help even browning. Add onion, garlic, Italian seasoning, salt, and pepper. Stir well and cook until fragrant, about 1 minute. Stir in tomato sauce and reduce heat to low. Simmer for 5-10 minutes until thickened, then remove from heat. If it is too watery, continue to simmer until thickened.


- Assemble. Fill each zucchini shell with equal amounts of meat sauce and top with equal amounts of mozzarella and parmesan cheese.


- Bake. Bake for another 15 minutes, until zucchini is tender and cheese is melted and golden brown. You can also pop it into the broiler on high for 2-3 minutes at the end until the cheese melts and is golden brown and bubbly.
- Serve. Sprinkle chopped parsley on top and serve warm.

Recipe Variations
- Change the protein. Feel free to use any ground meat you prefer. For zucchini pizza boats, use precooked Italian sausage crumbles or sliced pepperoni.
- Make vegetarian zucchini boats. For a vegetarian meal, replace the meat with extra veggies, plant-based crumbles, cooked lentils, or rinsed and drained black beans.
- Make a taco filling. Once you have roasted the zucchini boats, you can fill them with anything! They're wonderful with taco meat and cheddar cheese on top. Serve with sour cream, green onion, salsa, and your favorite taco fixings.
- Make a zucchini casserole. Arrange the zucchini boats in a baking dish and cover with a little extra sauce before adding the cheese on top. The zucchini will wick up the flavor from the sauce on the outside and become even softer.
- Add more veggies. Add bell peppers, spinach, or roasted mushrooms to the filling for an extra dose of veggies. You can also use yellow summer squash instead of traditional green zucchini.
How to Serve
These Zucchini Boats are delicious served on its own for a low carb lunch or dinner, or paired with a soup, salad, or carb heavy side dish for a more filling option including:
- Roasted Red Pepper and Tomato Soup
- Quinoa Spinach Power Salad
- Twice Baked Potatoes
- Greek Rice
- Simple Italian Salad
- Garlic Knots
For more recipes, see our 30 Side Dishes for Pasta.

Recipe Tips and Tricks
- Choose the right size zucchini. There is a wide range in zucchini sizes, and technically, you can use any size, but you want to aim for medium zucchini that still have immature seeds inside. The flesh and zucchini skin will be nice and tender after roasting, and the meat will have a mild, slightly buttery flavor. Look for zucchini between 1.5 - 3 inches in diameter.
- Salt the zucchini. This will help remove the excess liquid that can make most zucchini recipes soggy. Simple, but important!
- Add flavor to every layer. Zucchini, on its own, is very mild and can easily be bland. Season every layer from the zucchini boats to the meat filling! It makes a big difference.
Storing and Freezing Instructions
How to Store
Store any leftover zucchini boats in an airtight container in the fridge for 3-4 days.
How to Reheat
The microwave is the quickest way to reheat your zucchini boats, but you can also bake them at 350 F for 5-10 minutes or until fully heated.
How to Freeze
Chill and freeze the zucchini boats on a sheet pan, then transfer to an airtight container and freeze for up to 3 months. Thaw in the fridge overnight before reheating. Keep in mind that the zucchini will be even softer after thawing and reheating.
FAQ
It depends on the size of the zucchini, but the shells should be baked for 15 minutes at 375 F, then baked with the filling and cheese for an additional 15-20 minutes or until the zucchini is tender and the cheese is melted and bubbly.
Yes, but roasted or baked zucchini will be even softer after cooking, thawing, and reheating. Your boats might not be quite as boat-shaped if you do this, but they will still taste great.
There are many variations, but I like to make lasagna-like zucchini boats with a meaty marinara sauce and lots of melted cheese on top. Try replacing the tomato filling mixture with taco meat, buffalo chicken, Sloppy Joe's, and more. Get creative with it!
More Zucchini Recipes
- Cheesy Baked Zucchini with Marinara
- Lemon Zucchini Bread
- Zucchini Lasagna
- Air Fryer Zucchini Chips
- Zucchini Bites
- Zucchini Fritters
Tried this recipe?
I'd love to hear what you think! Leave a comment and rating below to share your feedback. Your reviews help others discover this recipe and help me keep creating more free recipes for you. Snap a photo and tag me on social media @aheadofthyme too.

Lemon Zucchini Bread
This glazed Lemon Zucchini Bread is moist and tender with a burst of lemon. It's amazing how a little fresh lemon zest and a simple lemon glaze can transform ordinary zucchini bread into something zesty and bright - and the glaze makes it taste more like a cake than a quick bread. Plus, just like the classic, we still sneak in veggies with a ton of fresh zucchini, but you can't even tell when you taste it!

Zucchini bread is one of the best ways to use up all excess zucchini - which we seem to have a ton of at the end of the summer season. I love classic zucchini bread, but sometimes you need something a little different. This lemon zucchini loaf has become my new go-to zucchini bread recipe, and it always disappears quickly! Serve it at breakfast with a cup of coffee or as a simple summer dessert.
Why You'll Love This Lemon Zucchini Bread Recipe
- Fun twist on a classic. Traditional zucchini bread has a hearty, buttery flavor and is usually seasoned with a bit of cinnamon for warmth. Some even add nuts or chocolate chips. This zucchini lemon bread has a brighter, summery flavor, and the sweet lemon glaze completely changes the flavor profile. Instead of warm and cozy, it's light with a bright citrus flavor. It tastes like summer!
- So moist and tender. Thanks to the fresh zucchini, eggs, and vegetable oil, this delicious lemon zucchini bread has a very soft, tender texture. Plus, it's a fantastic way to use up a lot of zucchini quickly!
- Great for brunch and breakfast. Quick breads can be served any time of day, and this one would fit right in with any weekend breakfast, brunch, or afternoon snack. It's lovely with a cold glass of homemade lemonade or a warm cup of tea.
- Freezer-friendly. If you don't know what to do with all that zucchini in your vegetable garden this summer, just bake an extra loaf or two of this lemon zucchini bread and freeze it for a taste of summer in the middle of winter.

Ingredient Notes
To make this delicious Lemon Zucchini Bread, you will need the following ingredients (full measurements in recipe card below):
- all purpose flour - scoop and level regular all purpose flour.
- granulated sugar - for just enough sweetness.
- baking powder - always use fresh baking powder and sift out any clumps.
- baking soda - using both baking powder and soda ensures your zucchini bread will bake thoroughly.
- ground cinnamon
- salt
- grated zucchini - this is essential. You can use small, tender zucchini or remove the seeds from a large zucchini before grating.
- vegetable oil - regular vegetable or canola oil will keep this bread extra soft and tender.
- eggs
- vanilla extract - for a delicious flavor in both the zucchini bread and the lemon glaze.
- lemon zest - added to the cake to complement the lemon flavor in the glaze.
- lemon juice - fresh is best, but you can use bottled in a pinch.
- powdered sugar - this will thicken the glaze and make it easy to pour.
You will also need measuring cups and spoons, a 9-inch loaf pan, a large bowl, a whisk, a medium mixing bowl, a spatula, a toothpick, a wire rack, a whisk, and a small bowl.

How to Make the Best Lemon Zucchini Bread
- Combine dry ingredients. In a large mixing bowl, combine all the dry ingredients including flour, sugar, baking powder, baking soda, cinnamon, and salt. Whisk together until evenly distributed.


- Add zucchini. Add grated zucchini and mix well until evenly combined.


- Combine wet ingredients. In a medium mixing bowl, combine all the wet ingredients including vegetable oil, eggs, vanilla extract, and lemon zest. Whisk well until smooth.


- Add wet to dry. Pour the wet mixture into the dry ingredients and use a spatula to mix together until just combined and no dry ingredients are visible. Do not overmix the batter.


- Pour batter. Lightly grease a 9x5-inch loaf pan with some cooking oil or butter. Pour the batter into the prepared loaf pan and smooth out the top with a spatula or the back of a spoon.
- Bake. Bake in a 350F preheated oven for 55-60 minutes on the middle rack until golden brown and a toothpick inserted into the center of the cake comes out clean.


- Cool. Let cool for 10-15 minutes, then invert to remove the loaf. Place on a wire cooling rack to cool completely.
- Make lemon glaze. In the meantime, whisk together lemon juice, powdered sugar, and vanilla extract until smooth.


- Serve. Drizzle the glaze over the loaf. Slice and serve.


Recipe Variations
- Glaze (or don't). The lemon glaze adds a light, summery flavor to this zucchini bread recipe, but if you're trying to eat less sugar, you can certainly do without it. In that situation, consider adding a little extra lemon zest to the bread and replacing the vanilla extract with lemon extract.
- Add poppy seeds. Lemon poppyseed is a classic combination! Add 2 tablespoons of edible poppy seeds to the batter before baking. After glazing, sprinkle an extra pinch or two on top for a garnish.
- Make lemon zucchini muffins. Bake the batter in muffin cups (20-30 mins) for a smaller, bite-sized treat.
How to Serve
This Lemon Zucchini Bread is delicious served on its own for brunch or as a dessert. We like it paired with a hot or cold drink such as:

Recipe Tips and Tricks
- Make a double batch. This lemon loaf freezes really well and is a lovely dessert to enjoy in winter.
- Fully bake. One of the trickiest things about baking quick breads is being patient and letting the bread bake all the way. This loaf needs essentially an entire hour. Test the middle with a toothpick, and if it comes out clean, it's ready.
- Let the glaze harden. Before you wrap up the loaf, let the tart lemon glaze firm up. It will be much easier to wrap and will look way nicer when you slice it later!
- Use the food processor. Instead of using a box grater, try the grater attachment on your food processor to speed up the grating process.
Storing and Freezing Instructions
How to Store
Store the leftover zucchini bread at room temperature in an airtight container or wrapped with plastic wrap for 3-4 days.
How to Reheat
The easiest way to reheat a slice of zucchini bread is to pop it in the microwave for 20-30 seconds.
How to Freeze
Wrap the cooled loaf in several layers of plastic wrap or aluminum foil, then store in the fridge for several months. Thaw in the fridge before slicing and serving.
FAQ
Yes! Lemon lifts the flavor of zucchini and hides any veggie flavor, making it an easy way to convince picky eaters to eat more veggies. The zucchini flavor takes a backseat to the bright lemon flavor, which is the most prominent flavor, especially with that mouthpuckering lemon glaze.
You can generally replace all purpose flour with a 1:1 gluten-free flour replacement in most quick bread recipes. The flavor and final texture may change depending on the brand, and be careful to measure carefully to make sure there are enough dry ingredients to absorb all the moisture.
It depends on your particular recipe. Some recipes are formulated to use the excess water from the zucchini, while others need you to remove as much as possible. Be careful to read the recipe card fully and follow the instructions.
More Zucchini Recipes
- Fried Zucchini
- Zucchini Lasagna
- Cheesy Baked Zucchini with Marinara
- Zucchini Fritters
- Air Fryer Zucchini Chips
- Zucchini Bread
Tried this recipe?
I'd love to hear what you think! Leave a comment and rating below to share your feedback. Your reviews help others discover this recipe and help me keep creating more free recipes for you. Snap a photo and tag me on social media @aheadofthyme too.

Taro Bubble Tea
Homemade Taro Bubble Tea is cold and creamy with a nutty vanilla flavor, a vibrant purple color, and little pops of chewy boba pearls. It's the perfect cold drink for hot days! The best part? This milk tea shop favorite is a lot easier to make at home than you think!
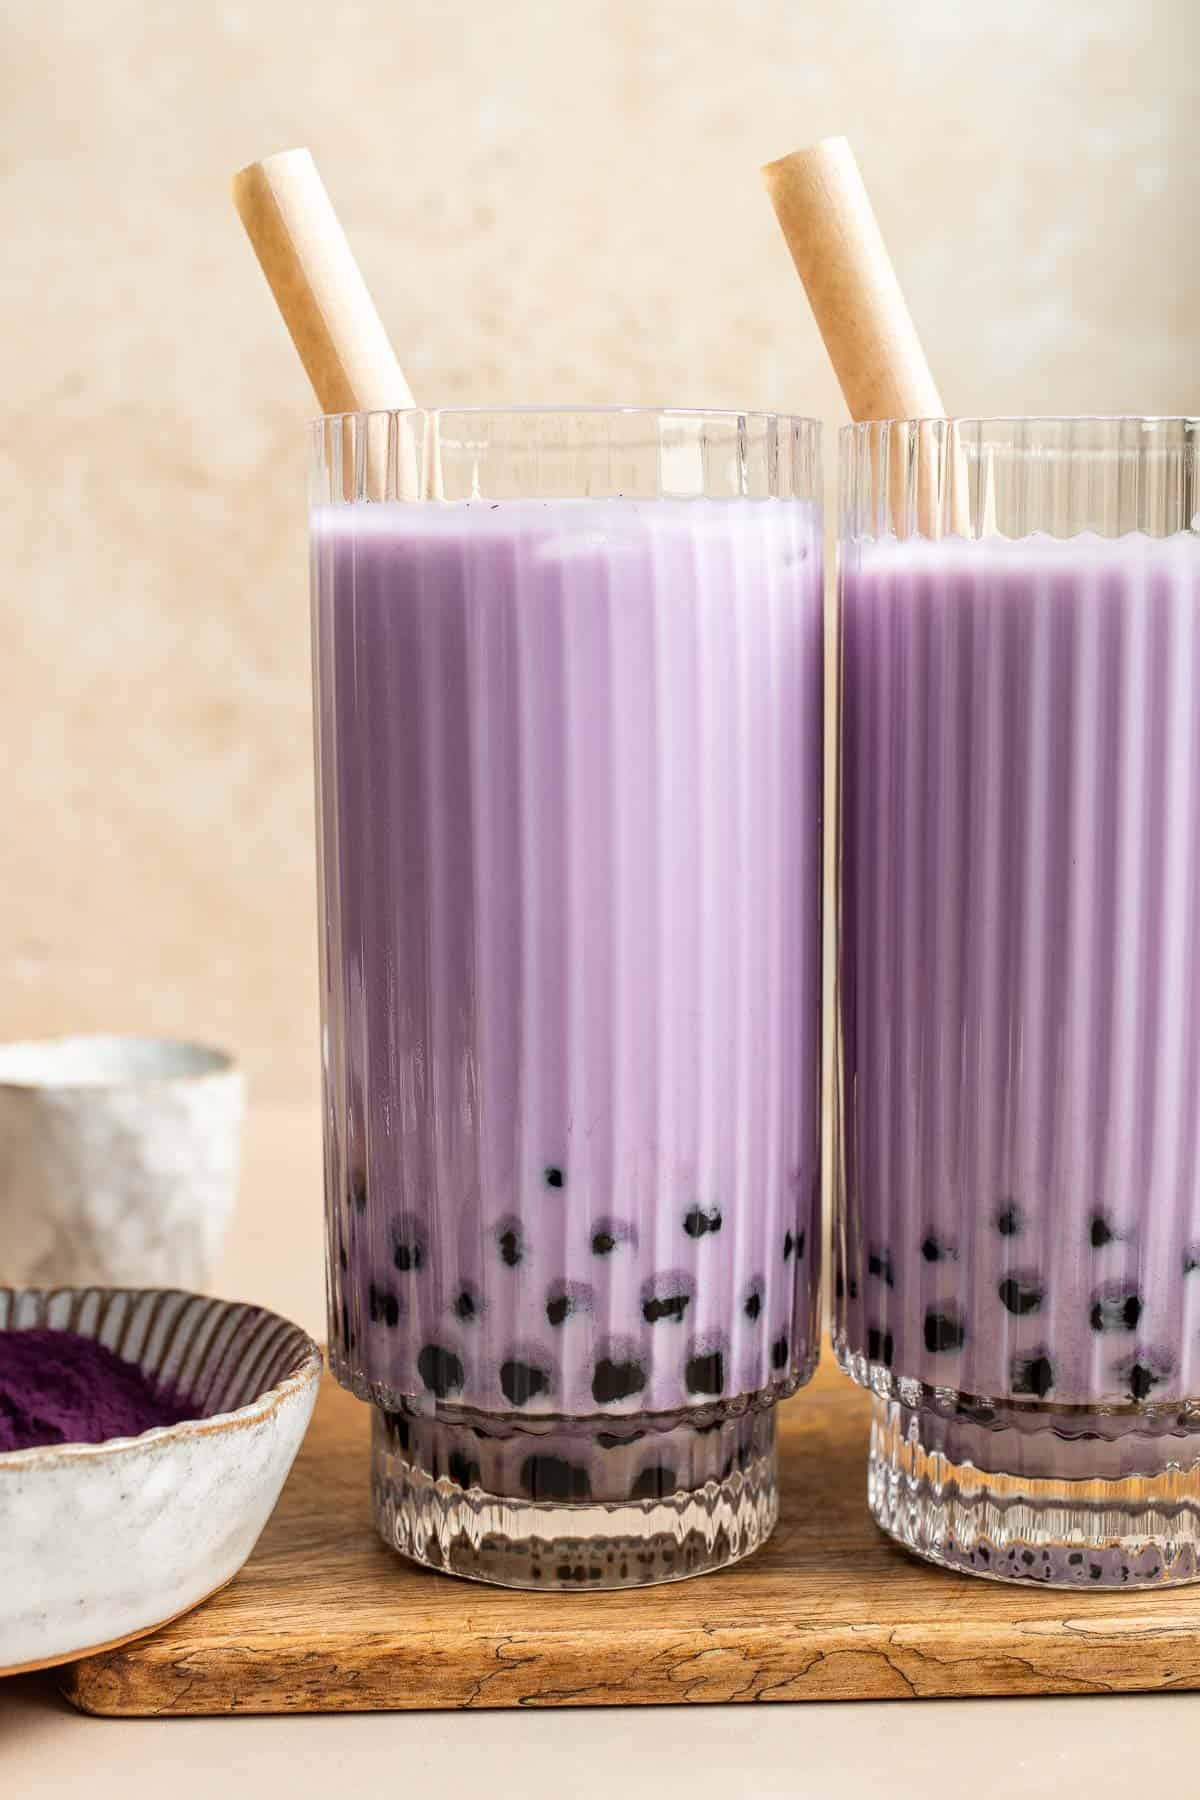
Taro is a starchy root vegetable common in Southeast Asia. Although the root looks brown and hairy on the outside, the white interior is speckled with little pops of purple. When it cooks down, taro root has a beautiful purple color and a creamy, vanilla-like flavor that reminds me of a vanilla milkshake or horchata. This taro milk tea recipe uses taro powder instead of fresh taro root, which makes it very easy to prepare. Just grab a few basic supplies from your local Asian market and make it any time you want!
Why You'll Love This Taro Bubble Tea
- Easy to make. This homemade bubble tea is made by steeping your favorite dried tea, then mixing it with taro powder, milk, and a little sweetener, then adding the chewy tapioca balls. So easy!
- Ready in one hour. I know that sounds like a long time for a beverage, but that includes the time it takes to rehydrate the boba pearls and chill the tea. Make the most of this time by preparing a double or triple batch and you'll be able to serve homemade boba tea any time!
- Sweet and creamy. Even if you're not familiar with taro root, don't skip this recipe! The powdered root adds a nutty, sweet flavor and creamy texture that is refreshing and comforting. Plus, that purple hue is just so pretty!
- Save some money. If you're a regular at your local bubble tea shop, you know how much those sweet drinks add up! When you prepare your tea at home, you'll save money in the long run. This will also allow you to control the quality of your ingredients, too!

Ingredient Notes
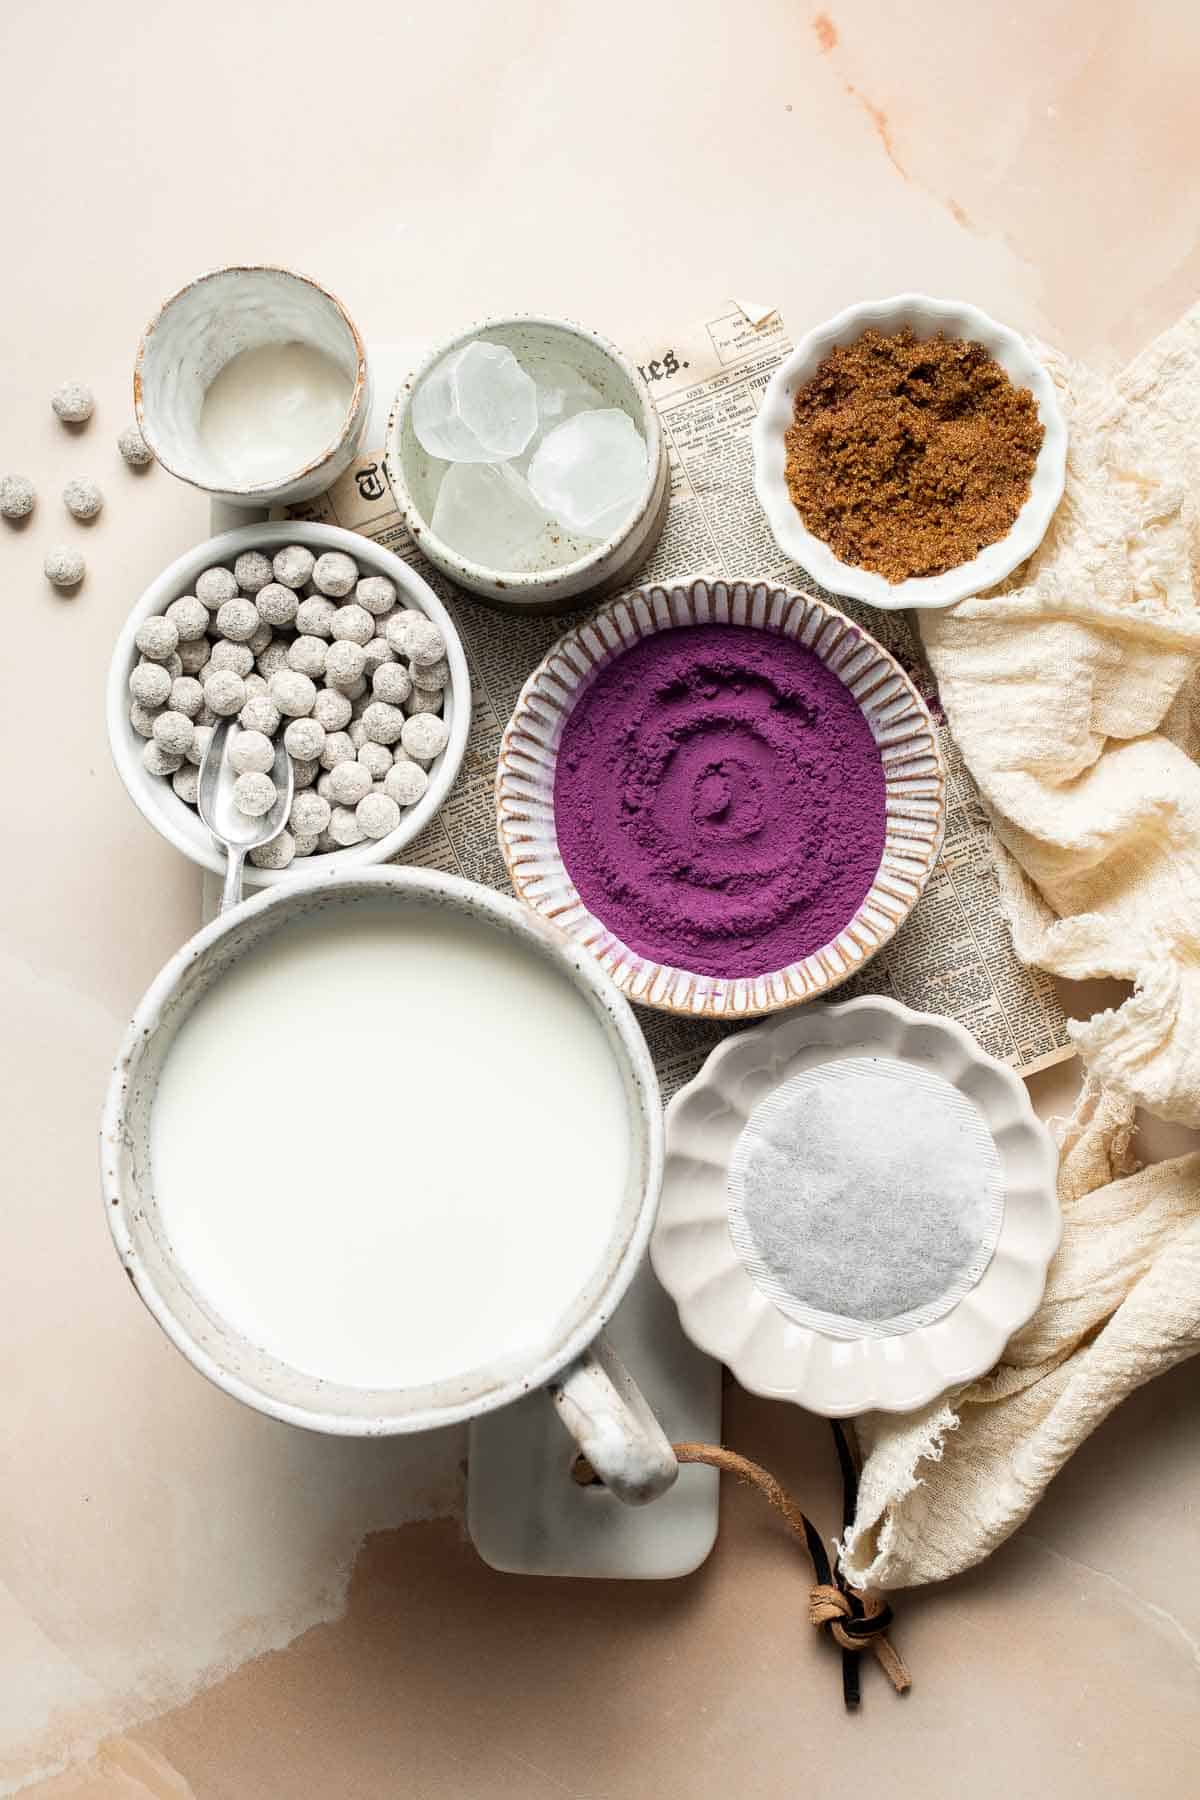
To make this delicious Taro Bubble Tea, you will need the following ingredients (full measurements in recipe card below):
- tea - use your favorite type of unflavored tea, like black tea or regular green tea.
- taro powder - this powder adds lots of taro flavor quickly and easily.
- water
- milk - or full-fat coconut milk.
- sweetened condensed milk - or honey, to taste.
- ice cubes - optional.
- boba tapioca pearls - these are easy to find in Asian grocery stores or online.
- brown sugar - or honey to sweeten the boba syrup.
You will also need measuring cups and spoons, a medium mixing bowl, whisk, medium pot with lid, fine mesh sieve, and 2 serving glasses with wide straws.
How to Make the Best Taro Bubble Tea
- Steep tea. In a medium mixing bowl, add teabag and boiling water. Allow the tea to steep for 5 minutes.


- Make milk tea. Remove the tea bag and add taro powder, milk and condensed milk. Mix well until smooth and transfer to the fridge to chill completely, about 30 minutes.


- Make tapioca pearls (boba). In the meantime, bring 4 cups of water to a boil over high heat in a pot. Add tapioca pearls and turn the heat down to medium-low. Cook for 20-25 minutes, stirring occasionally to prevent them from sticking to the bottom of the pan.
- Rest. Turn off the heat. Cover the lid and let the tapioca pearls rest in the hot water for another 20-25 minutes.
- Drain. Drain the pearls through a fine mesh sieve and return to the saucepan.


- Add sweetener. Add in brown sugar and 2-3 tablespoons of water. Stir well and heat over medium heat until the sugar dissolves and the syrup starts to thicken a bit, about 4-5 minutes. When the pearls are fully cooked through, they should be soft and chewy.


- Assemble the bubble tea. Divide the cooked tapioca pearls into two tall glasses. Add 2 ice cubes and add taro milk tea over top. Give the drinks a quick stir and serve with wide straws.


Recipe Variations
- Play up the purple color. Most taro powders add food coloring to give you a distinct purple color. If you choose one without that, you can always add a few drops of your favorite food dye.
- Make dairy-free taro tea. If you can't tolerate dairy or are vegan, look for non-dairy milk, like coconut milk or almond milk, and use non-dairy sweetened condensed milk.
- Make a taro latte. Ditch the tapioca pearls and the ice, and make a hot taro latte! Infuse the tea in hot water, but then stir in the sweetened condensed milk and taro powder directly in the mug. Steam the milk, stir it in, and pour a little foam on top. Such a lovely way to start the day!
How to Serve
This Taro Bubble Tea is delicious served on its own, or paired with some of my favorite cookies including:
For more recipes, see our 50 Best Cookie Recipes.

Recipe Tips and Tricks
- Make extra. If you're a fan of bubble teas, you might want to double or triple this recipe! The leftovers store well in the fridge, so you can enjoy a purple bubble tea every day.
- To boba or not. Consider the boba pearls optional. If you don't like them, don't make them! The taro milk tea is delicious without them, too.
- Use fresh boba pearls. If your dried tapioca pearls are old, they may take a long time to plump up. For the best results, use a fresh package and let them cook until they're tender and chewy.
- Check the ingredients. Some store-bought taro powders already contain sugar, so you may not need to add any extra.
Storing and Freezing Instructions
How to Store
Once prepared, your taro tea can be stored in an airtight container in the fridge for 5-7 days. The leftover boba can last in a separate container for 2-3 days. When you're ready, simply serve the chilled tea with your homemade boba.
How to Freeze
The pearl milk tea, including the boba pearls, can be frozen in ice cubes or any freezer-safe container for 1-2 months. Allow the mixture to thaw in the fridge, then shake well before serving.
FAQ
Taro root powder itself is naturally caffeine-free, but most taro milk tea is made with either black or green tea bags, which do contain caffeine. If you prefer to avoid caffeine, use decaffeinated tea bags instead.
Taro milk tea is starchy and creamy with a buttery, nutty flavor with hints of vanilla. It tastes a little bit like coconut, and it's especially lovely when sweetened! The boba pearls add a little extra sweetness and a pleasantly chewy texture that makes this drink really fun to eat.
Taro boba is made by infusing iced green or black tea with milk, sweetener, taro starch powder, and chewy tapioca pearls.
More Drink Recipes
- Matcha Milk Tea
- Mango Bubble Tea
- Homemade Peach Iced Tea
- Strawberry Milk Tea
- Blackberry Milkshake
- Iced Mocha
Tried this recipe?
I'd love to hear what you think! Leave a comment and rating below to share your feedback. Your reviews help others discover this recipe and help me keep creating more free recipes for you. Snap a photo and tag me on social media @aheadofthyme too.

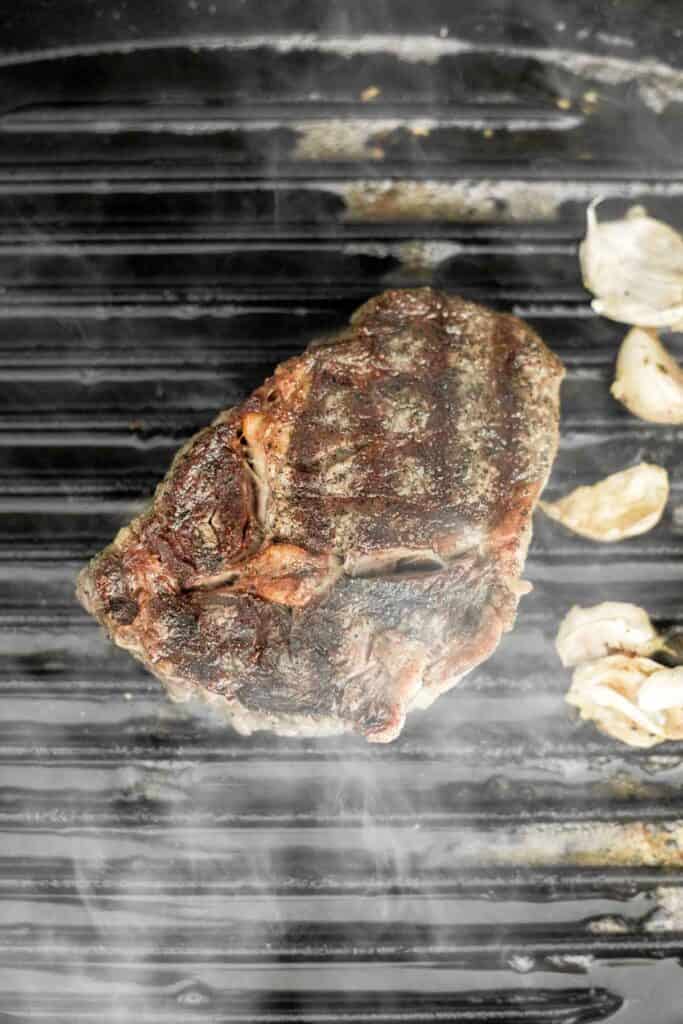
Ribeye Steak
Better than the steakhouse, tender and juicy Ribeye Steak with a perfect seared crust is garlicky, buttery and packed with so much flavour. All it takes is a few simple ingredients and a cast-iron skillet or grill pan. It is surprisingly super quick and easy to make at home in under 30 minutes! Complete the meal with a side of Creamy Mashed Potatoes and Roasted Vegetables.

It can be intimidating to cook a big piece of steak, especially when good ribeye steaks cost so much! But I promise that you can enjoy the perfect ribeye steak at home, even if you're a total novice. Follow the simple step-by-step directions below and use a meat thermometer to check for doneness. It's so easy and ensures you get the perfectly cooked steak every time. You'll be a pro in no time!
Why You'll Love This Ribeye Steak Recipe
- Adapt to any cut of steak. Once you know the secrets to cooking ribeye steak, you can apply the same technique to other cuts. It's a tried-and-true method you can stand by again and again.What You Need to Make Ribeye Steak
- Simple but effective. You don't need to use any special gadgets or fancy ingredients to make a good steak. This recipe uses the simplest of seasonings-salt and black pepper-to draw out the flavor and get a great crust. Then, you baste in garlic butter to lock in moisture and the ribeye's rich flavor. It's heaven every time!
- Ready quickly. The best thing about this ribeye recipe is how quickly it comes together. It's done from start to finish in just 30 short minutes. That's quick enough for a busy weeknight when you're starving as you walk through the door, but it's so flavorful that you'll want to make it for dinner parties or special occasions, too.

Ingredient Notes
You really don't need a whole lot to make a delicious and juicy steak. To make this delicious Ribeye Steak, you will need the following ingredients (full measurements in recipe card below):
- ribeye steak - make sure to get good quality steaks about 1-inch thick and weighing ½ pound each.
- salt and pepper
- olive oil - for brushing the grill pan or cast-iron skillet.
- butter - for basting on the steak during the cooking process.
- garlic - for flavour.
And don't forget an indoor grill pan (if you are not using an outdoor grill) and tongs to flip the steaks over. You can also cook these steaks on a cast-iron skillet.
How to Make the Best Grilled Ribeye Steak
First, prepare the steaks by transferring them out of the fridge 20-30 minutes before you begin, and let them rest at room temperature. Then, pat the steaks dry and season with salt flakes and pepper.
Now it's time to grill. Brush olive oil over a grill pan or skillet and heat over medium high heat for 3-4 minutes. Place steaks on the grill and cook for 1 minute, then rotate it 90 degrees to create criss cross grill marks and cook for another minute.
Add butter and minced garlic and baste the steaks by repeatedly pouring the butter and garlic mixture over the steaks with a spoon. Cook until level of desired doneness is reached (see below), then let it rest for 5 minutes before serving.

What is the Difference Between Medium-Rare, Medium, and Well-Done Steak?
- For rare, cook until the internal temperature reaches 130-135 F. A rare steak will be charred and brown on the outside but completely red in the inside. The meat is very soft.
- For medium rare, cook until the internal temperature reaches 135 F. A medium rare steak is tender, soft, and moist with warm red center.
- For medium done, cook until the internal temperature reaches 140 F. has a hot center with almost no pink.
- For medium-well, cook until the internal temperature reaches 155 F. A medium-well steak is cooked fully through with no pink inside. It is more fleshy and resistant.

Recipe Variations
- Increase the quality. Since this steak is so simple, quality makes a big difference. Splurge on a nice dry aged ribeye or wagyu, and use high-quality butter, freshly ground black pepper, and fresh garlic.
- Use different cuts of meat. Use this recipe to cook your favorite steaks, like sirloin steak, New York strip steak, filet mignon, etc. This recipe also works just as well for bone-in or boneless ribeye steaks, but be sure to temp along the bone to gauge doneness.
- Try a compound butter. Compound butters are made by incorporating fresh herbs, garlic, lemon zest, and any of your favorite aromatic ingredients into fresh butter. Use garlic herb butter, roasted garlic butter, or your favorite compound butter for maximum flavor.
How to Serve
My favorite way to serve Ribeye Steak is with an assortment of complimentary side dishes including:
- Garlic Mashed Potatoes with Sour Cream
- Baked Sweet Potato Wedges
- Mediterranean Roasted Vegetables
- Baked Potato
- Sautéed Asparagus
- Balsamic Roasted Carrots
For more recipes, see our 40 Best Vegetable Sides.

Recipe Tips and Tricks for Making the Perfect Steak
- Season generously. The only need salt and pepper to season these steaks before grilling. For this recipe, you will need a full teaspoon of each.
- Make sure the grill or skillet is hot. To get the perfect sear on your steak, it is important that your pan is hot before you place the steaks inside.
- Baste the steak. Once you add your butter and garlic, make sure to baste the steak by repeatedly pouring the butter and garlic mixture over the steaks with a spoon. This adds to much more depth of flavour, adds a beautifully seared crust, and really enhances the taste and texture of the meat.
- How to check for doneness. Check for doneness by inserting a digital meat thermometer into the center of the meat to get a quick measurement. This tool is very useful when cooking meat for checking doneness.
- Let the steak rest. Once your steak is done, let it rest for 5 minutes before serving. Giving it a rest helps the flavours to develop even further.
Storing and Freezing Instructions
How to Store
Store any leftover steak in an airtight container in the fridge for 3-4 days.
How to Reheat
The secret to reheating steak is to heat it gently. Ditch the microwave and warm the steak in a cast iron skillet or bake it in the oven at 250 F until it is warm all the way through.
How to Freeze
Cooked steak can be frozen for up to 3 months in an airtight container.
FAQ
Preheat the pan over medium-high heat first, then sear the first side of the steak for about 2 minutes. Flip it, give the second side a good sear, and add your favorite butter and garlic. Baste the steak in the butter mixture, and let it cook until the inside of the steak reaches the proper internal temperature. The cooking time will vary depending on the thickness of the steak. Let the steak rest for 5-10 minutes before slicing and serving however you'd like.
That really comes down to personal preference. There are lots of ways to cook ribeyes, and they each have their own unique pros and cons. Grilling is a great option and I love how it adds a smoky flavor, but you can also use an indoor grill pan or a regular cast iron pan. The most important part is to season the steaks well and sear them in a hot pan (or on a hot grill) to get a nice crust. Basting in butter adds lots of extra flavor, but don't be tempted to cut too early - steak needs a chance to rest to redistribute the juices.
For best results, I like to use a mix of both. Butter will brown and burn very quickly, so it is not a great candidate for searing. However, butter adds great flavor that brings out the richness of the steak. Start by searing the steak in oil, then add butter, garlic, and any other seasonings to baste the steak. It's the best of both worlds.
More Beef Steak Recipes
- Souvlaki Beef Shish Kebabs
- Korean Beef Steak Tacos
- Korean Beef Steak Rice Bowl
- Surf and Turf Steak and Lobster Tails
- Easy Summer Grilling Recipes
Tried this recipe?
I'd love to hear what you think! Leave a comment and rating below to share your feedback. Your reviews help others discover this recipe and help me keep creating more free recipes for you. Snap a photo and tag me on social media @aheadofthyme too.

Watermelon Popsicles
Watermelon Popsicles are exactly what you need to weather the hot summer months: they're fruity, refreshing, and sweet without being overly sugary. Plus, they only take five minutes to prep before freezing! Made with real watermelon and only two other ingredients, these popsicles can't be beat.
Homemade popsicles don't require any special skills or equipment either, besides a basic popsicle mold and a standard blender. Just blend the ingredients, fill the molds, and freeze -then repeat all summer long for an easy and craveable treat you won't think twice about offering to adults and kids alike.
Why You'll Love These Watermelon Popsicles
- Made with real fruit. Not all popsicles are created equal-some are made of artificial colors and flavorings. These fantastic watermelon popsicles don't contain any of that! The main ingredient is real, fresh watermelon, so you can serve them guilt-free.
- Only 3 ingredients. Watermelon popsicles are incredibly easy to make because the ingredients are so simple! Just watermelon, honey, and lemon juice-that's all you need to turn five minutes into delicious frosty popsicles.
- Better than store-bought! You may never have to buy popsicles again! This recipe is so fast and convenient-plus, you can control exactly what goes into them, adjusting them to your tastes or accommodating allergies and dietary preferences as needed!

Ingredient Notes
To make these delicious Watermelon Popsicles, you will need the following ingredients (full measurements in recipe card below):
- watermelon - if you don't have watermelon on hand, you can try to replicate this recipe with similar melons like cantaloupe and honeydew or a fruit of your choice.
- honey - you can also use agave nectar or maple syrup at a 1:1 ratio in place of the honey. You can also use an equal measure of sugar, simple syrup, or sugar alternatives like stevia or coconut sugar.
- lemon juice - fresh-squeezed lemon juice is best, but you can use concentrate if that's all you have. Lime or orange juice will also work in a pinch, but will change the flavor of the popsicles slightly.
You will also need measuring cups and spoons, a blender or food processor, popsicle mold, and popsicle sticks.

How to Make the Best Watermelon Popsicles
- Blend. Add cubed watermelon, honey, and lemon juice in a blender or food processor. Blend until smooth, about 2-3 minutes.


- Fill mold. Slowly pour the watermelon mixture into the popsicle molds until it almost fills to the top, leaving about a ½-inch space from the rim. Close the lid and add popsicle sticks.


- Freeze. Transfer the filled mold to the freezer until the popsicles are frozen completely, about 4 hours (or up to overnight).
- Serve. To serve, run the popsicle mold under hot water for a few seconds to loosen and release from the mold.
Recipe Variations
- Make creamy popsicles. For pale pink watermelon popsicles with a creamy texture, add ½ cup full-fat coconut milk or Greek yogurt.
- Play with the flavor. Swap out the lemon for fresh lime juice! The acidity really balances the sweetness of the fresh fruit.
- Try different fruits. This method works great for other fruits as well. Try replacing some of the watermelon with honeydew, cantaloupe, fresh strawberries, peaches, and more. Don't strawberry watermelon popsicles sound lovely?
- Add herbs. A little fresh mint will make these fun treats even more refreshing on a hot summer day!
How to Serve
These Watermelon Popsicles are a refreshing treat to enjoy on a hot day. If serving as part of a larger dessert spread, try including some of our other favorite summer treats such as:
- Fresh Fruit Tart
- Strawberry Shortcake
- Blueberry Cupcakes
- Key Lime Pie
- S'mores Bars
- Cherry Cheesecake
For more recipes, see our 40 Best Summer Desserts.

Recipe Tips and Tricks
- Pick the right watermelon. The perfect watermelon should be heavy and have a big yellow or orange spot where it sat in the field to grow. Large webbing is also considered a plus, but bruises and dents in your watermelon are a no-no.
- Give it a boost. Because these watermelon popsicles are so simple, you can jazz them up or give them an extra healthy edge. Add chia seeds or toss in greens or berries to sneak in more nutrition!
- Use fun molds. Presentation matters! Kids will love these watermelon popsicles, but they might be even more excited to see them come in different shapes like stars, dinosaurs, or even fish.
Storing Instructions
Keep them in the popsicle mold in the freezer for up to 3 months. You can also transfer them (once frozen solid) into a Ziploc freezer bag and store them in a single layer for up to 3 months.
FAQ
Yes! Watermelon is so sweet and sugary that you can skip the sugar completely, but you'll get a better texture and flavor if you add a little sweetener. When foods are cold, we can't taste nearly as much sweetness, which is why most ice creams and popsicles have lots of extra sugar. Plus, honey is a type of inverted sugar, which will help prevent the popsicles from being overly icy. You only need a little bit to make a big difference!
Since the watermelon will be blended in the food processor, you don't need to worry about cutting perfect slices. The easiest method is to trim the top and bottom of the watermelon to make it sit flat on your cutting board. Then, use your knife to shave away the green rind. This will leave just the bright red fruit inside, which you can cube or chop however you'd like.
Yes! Most fresh fruits and veggies get mushy after freezing, which is why you want to eat these homemade watermelon popsicles while they're still nice and cold. This will preserve the texture and prevent you from dealing with any mushiness. They're very refreshing!
More Frozen Dessert Recipes
- Strawberries and Cream Popsicles
- Watermelon Sorbet
- No Churn Vanilla Ice Cream
- Strawberry Popsicles
- Mango Frozen Yogurt
- Strawberry Sorbet
Tried this recipe?
I'd love to hear what you think! Leave a comment and rating below to share your feedback. Your reviews help others discover this recipe and help me keep creating more free recipes for you. Snap a photo and tag me on social media @aheadofthyme too.

Shrimp Tacos with Lime Crema Slaw
These Shrimp Tacos with Lime Crema Slaw are made with soft tortillas, juicy and tender shrimp seasoned with classic Mexican spices, and a delicious cabbage and cilantro slaw tossed in homemade lime crema sauce. It's the perfect summer weeknight meal, ready on your table in about 20 minutes. Backyard patio, these soft tortilla tacos are waiting for you!

I rely on this easy shrimp tacos recipe way more than you'd expect! It's such a great recipe -quick, easy, and full of flavor - and the whole family loves it. We can easily eat this dish every night of the week, especially during the hot summer months! The lime-infused cabbage slaw adds extra texture and flavor that pairs perfectly with the savory, spicy shrimp. It's a real crowd pleaser!
Why You'll Love These Shrimp Tacos
- Ready in less than 30 minutes. We all need a few easy weeknight dinner recipes we can keep in our back pocket for busy nights, and these spicy shrimp tacos are the perfect choice. While the shrimp cooks, you can prepare the slaw and warm the tortillas to have the entire meal ready at once. It's my favorite way to get dinner on the table quickly!
- Light and summery. Just like my fish tacos, these zesty shrimp tacos are packed with flavor without being over the top. They're light and refreshing yet loaded with so much flavor, thanks to the homemade taco seasoning and fresh ingredients. It's perfect for the warm summer months, but we like to make them all year long.
- Minimal ingredients required. No one wants to shuttle arms full of ingredients to the counter to throw together dinner. This recipe looks like it has a lot of ingredients, but most of those are spices! The other ingredients are super simple pantry staples most of us already have on hand.
Ingredient Notes
If you love my fish tacos, then you will love these. To make this delicious Shrimp Tacos, you will need the following ingredients (full measurements in recipe card below):
- shrimp - I used large white shrimp. Prepare the shrimp by peeling, deveining and removing the tails.
- seasoning for the shrimp - made with a combination of cumin, garlic powder, cayenne pepper, paprika, lime juice, oil, and salt.
- lime crema slaw - made with a combination of shredded cabbage, cilantro, garlic, sour cream (or Greek yogurt), mayonnaise, lime juice, and salt. For the cabbage, you can use regular cabbage or purple cabbage. I used both.
- soft taco tortillas - corn tortillas or flour tortillas. Use corn tortillas if you want to keep this dish gluten-free.
- toppings - I topped these tacos with avocado. You could also top it with guacamole or pineapple salsa.
You will also need measuring cups and spoons, and mixing bowls.
How to Make the Best Shrimp Tacos
- Make the lime crema slaw. In a small mixing bowl, combine sour cream, mayonnaise, lime juice, and salt. In a medium mixing bowl, toss together cabbage, cilantro, and garlic. Pour in half the lime crema sauce into the slaw and toss to combine. Save the rest of the sauce to drizzle on top.
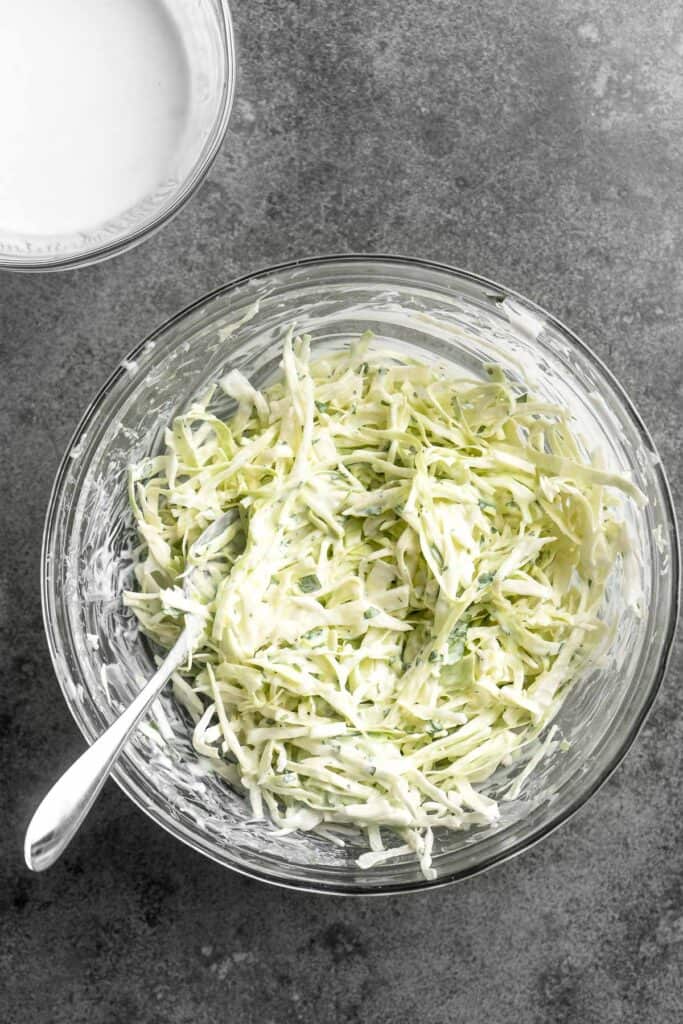
- Prep the shrimp. Peel and devein the shrimp and remove the tails. Use a paper towel to pat the shrimp completely dry.
- Cook the shrimp. You can cook the shrimp in a skillet over the stove, in the air fryer, or on the grill.
- To pan-fry: Heat oil in a large skillet over medium-high heat until hot, about 1-2 minutes. Add shrimp and cook until it turns orange and opaque, about 4-5 minutes. Add seasoning including lime juice, cumin, garlic powder, paprika, cayenne, and salt. Toss to coat evenly. Cook for another 2 minutes and remove from heat.
- To air fry: In a medium mixing bowl, combine shrimp, olive oil, lime juice, cumin, garlic powder, paprika, cayenne, and salt. Toss to combine and let it sit for a few minutes. Then, transfer to the air fryer basket and air fry at 350F for 13 minutes, shaking the basket halfway.
- To grill: In a medium mixing bowl, combine shrimp, olive oil, lime juice, cumin, garlic powder, paprika, cayenne, and salt. Toss to combine and let it sit for a few minutes. Then, thread the seasoned shrimp onto skewers and place them on a grill over medium-high heat. Cook for 2-3 minutes per side until shrimp and pink and cooked through.
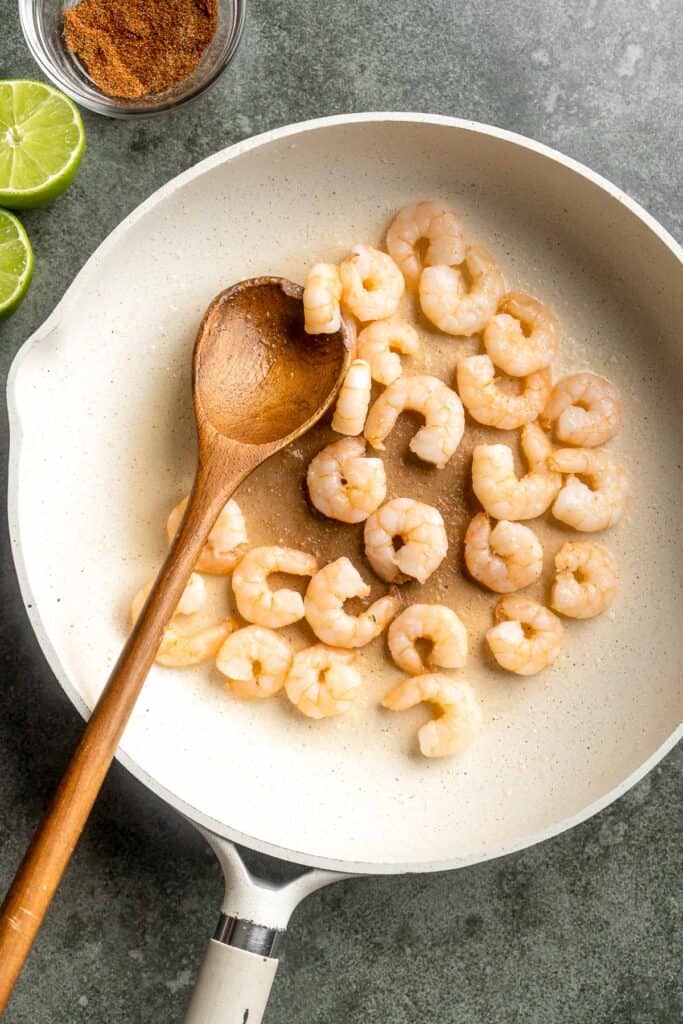
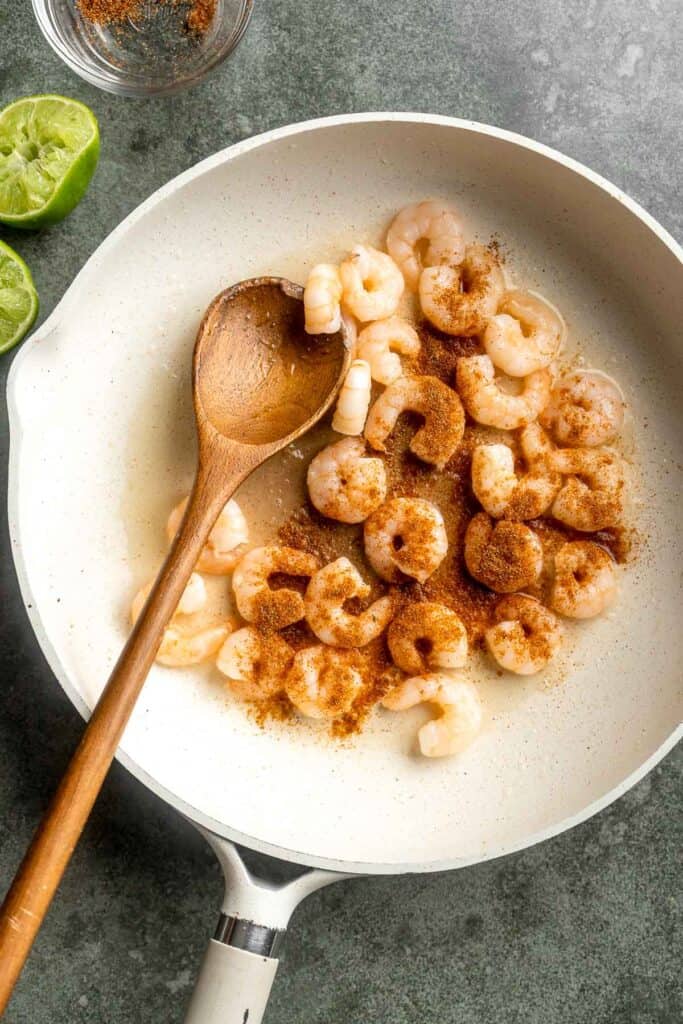
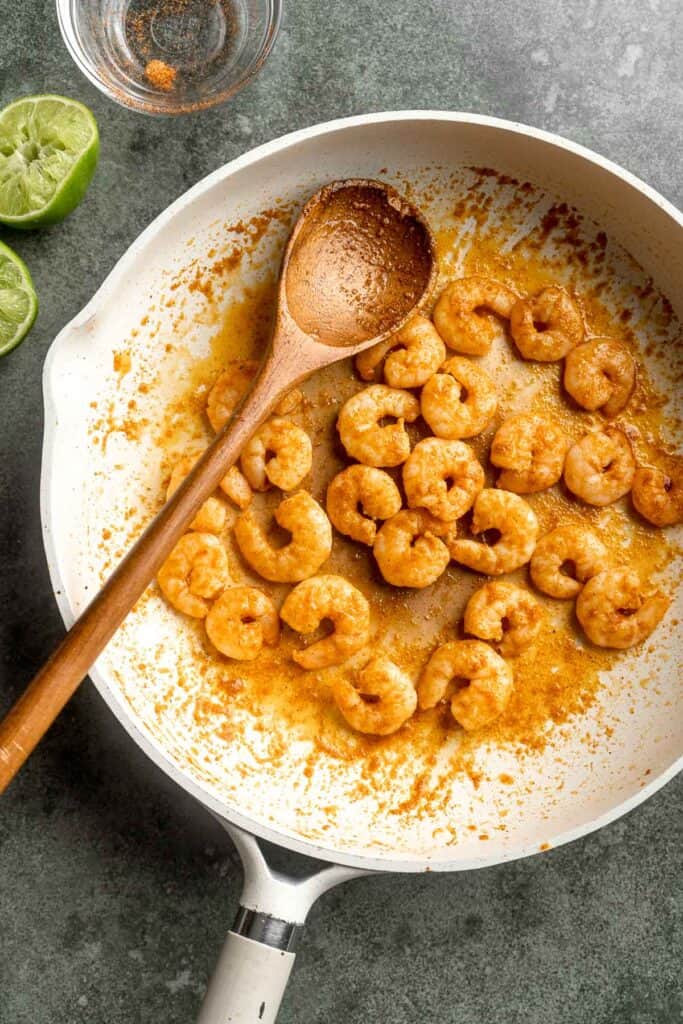
- Heat tortillas. Heat the soft tortillas according to the package instructions, or heat in an ungreased skillet over medium heat for 30 seconds per side. You can also heat it directly on a gas burner for a few seconds to get char marks on the edges.

- Assemble the tacos. Add a spoonful of slaw to each taco, top with 4 shrimp and sliced avocado. Drizzle a spoonful of lime crema sauce on top. Serve with lime wedges on the side, if desired.


Recipe Variations
- Mellow the heat. My seasoning mix includes cayenne pepper, which gives these tacos a kick of heat. Feel free to skip it to tone them down or replace it with a mild chili powder to keep the flavor without the heat.
- Play around with toppings. I love the combination of fruit salsas and seafood! This easy shrimp taco recipe pairs wonderfully with pineapple salsa, mango salsa, and more.
How to Serve
These homemade Shrimp Tacos with Lime Crema Slaw are delicious served on its own with some classic Mexican sides:
- Guacamole
- Pico de Gallo
- Refried Beans
- Mexican Street Corn (Elote)
- Pinto Bean Soup (Sopa Tarasca)
- Black Beans and Rice
For more recipes, see our 25 Mexican Side Dishes.
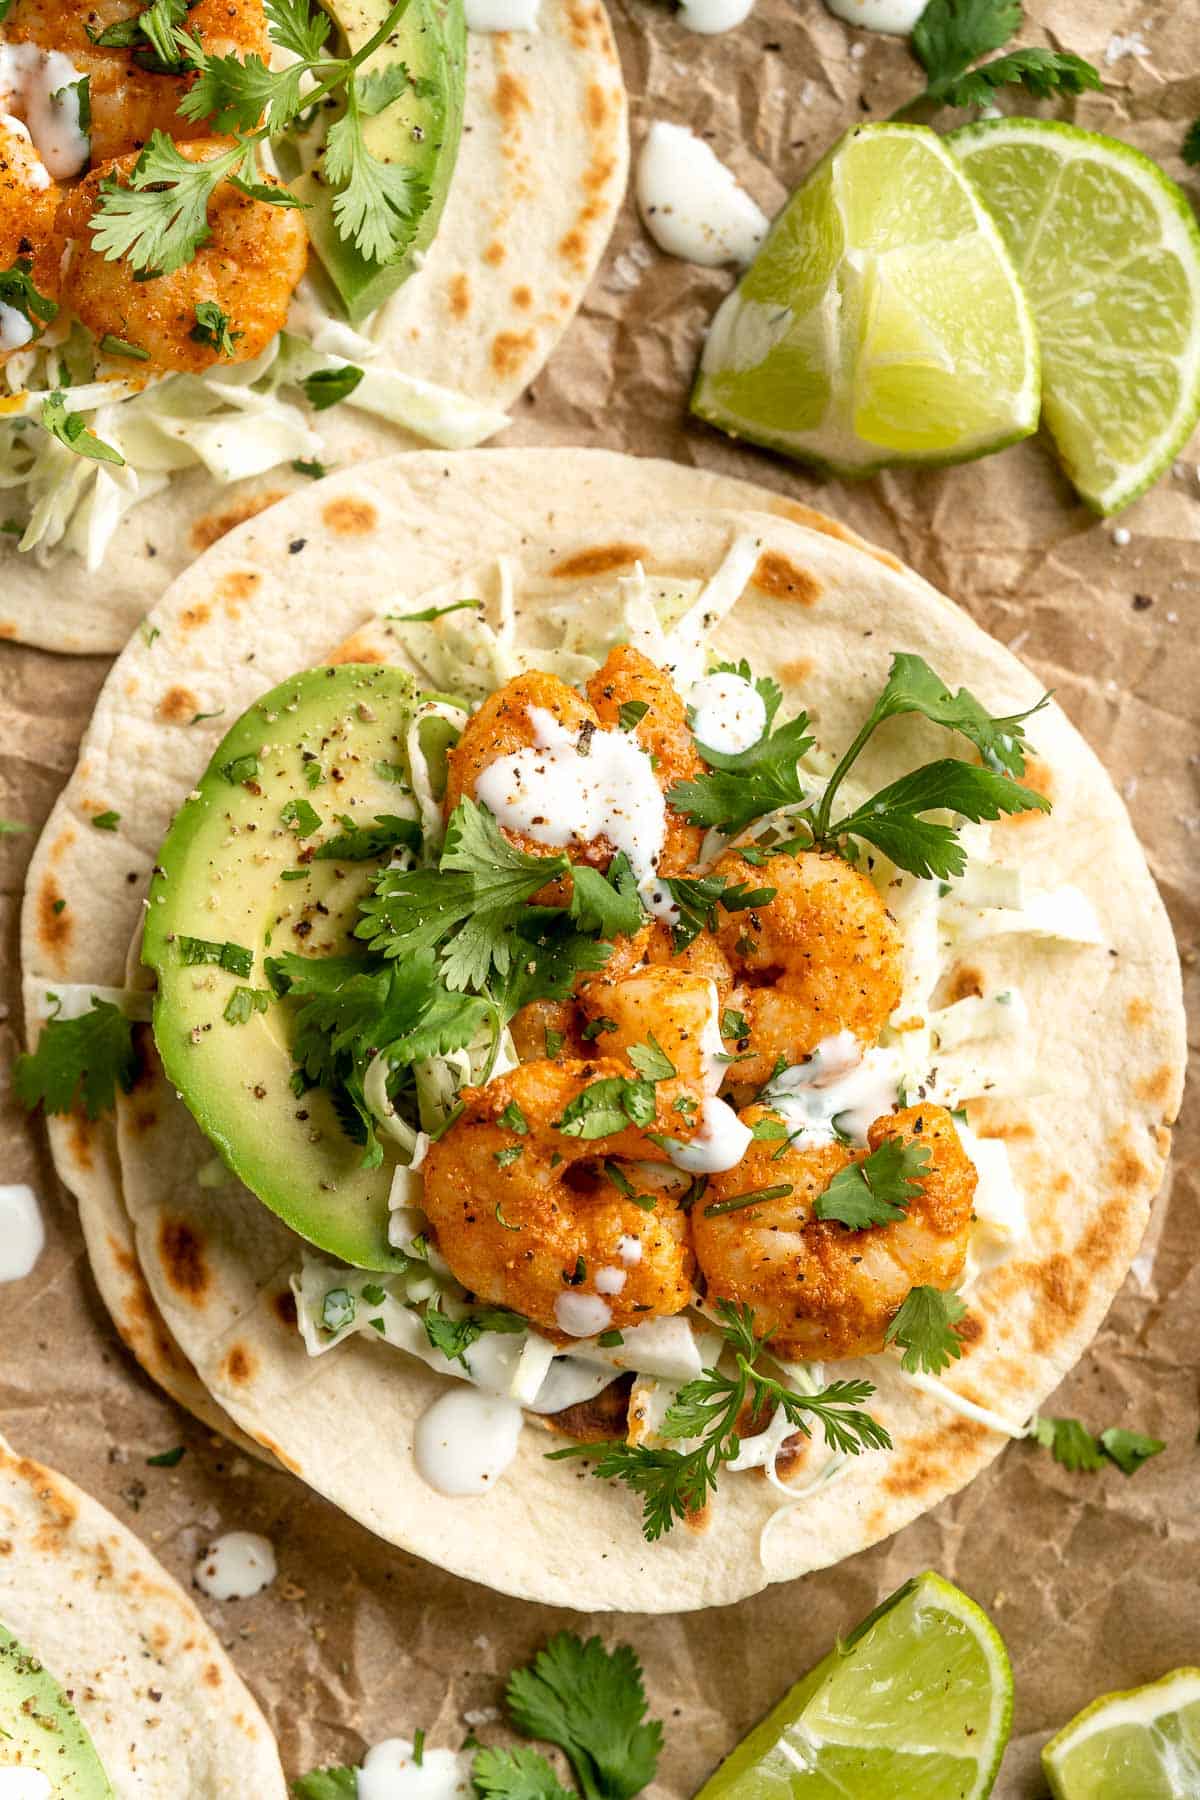
Recipe Tips and Tricks
- Make a shrimp taco salad. Serve the crunchy slaw and cooked shrimp over a bed of greens, and add a handful of tortilla chips and a drizzle of extra crema sauce. Feel free to add your favorite toppings, like slices of avocado, fresh cilantro, sliced red onion, a little lime juice, slices of jalapeño pepper, and more.
Storing Instructions
How to Store
Once prepared, store the leftover shrimp and slaw in separate containers in the fridge for 3-4 days.
How to Reheat
I prefer to lightly microwave the shrimp or warm it in a skillet on the stove while I warm the tortillas in the microwave. Place the cold slaw on top and serve!
FAQ
You can use any type of raw shrimp, but I prefer to use large shrimp whenever possible. The larger size keeps them from overcooking and gives you a little more bite. Either use fresh shrimp or thaw frozen, uncooked shrimp in the fridge.
Typically, shrimp is served warm in a warm tortilla with cold sauces, slaws, and toppings. Corn tortillas are prone to breaking, so it's important to warm them before folding.
It's optional. Many people avoid pairing seafood and cheese, but to each their own! If you do add cheese, opt for something creamy or tangy, like cotija, or feta cheese.
More Taco Recipes
- 15 Best Taco Recipes
- Fish Tacos with Lime Crema
- Crispy Refried Bean Tacos
- Carne Asada Tacos
- Chicken Tacos
- Fish Stick Tacos
Tried this recipe?
I'd love to hear what you think! Leave a comment and rating below to share your feedback. Your reviews help others discover this recipe and help me keep creating more free recipes for you. Snap a photo and tag me on social media @aheadofthyme too.

Quinoa Spinach Power Salad
This Quinoa Spinach Power Salad is made with tender quinoa, vibrant tomatoes, crunchy cucumbers, and raisins dressed in a homemade lemon vinaigrette. It's refreshing, colorful, and healthy - packed with so many nutrients to keep you full and feeling good.
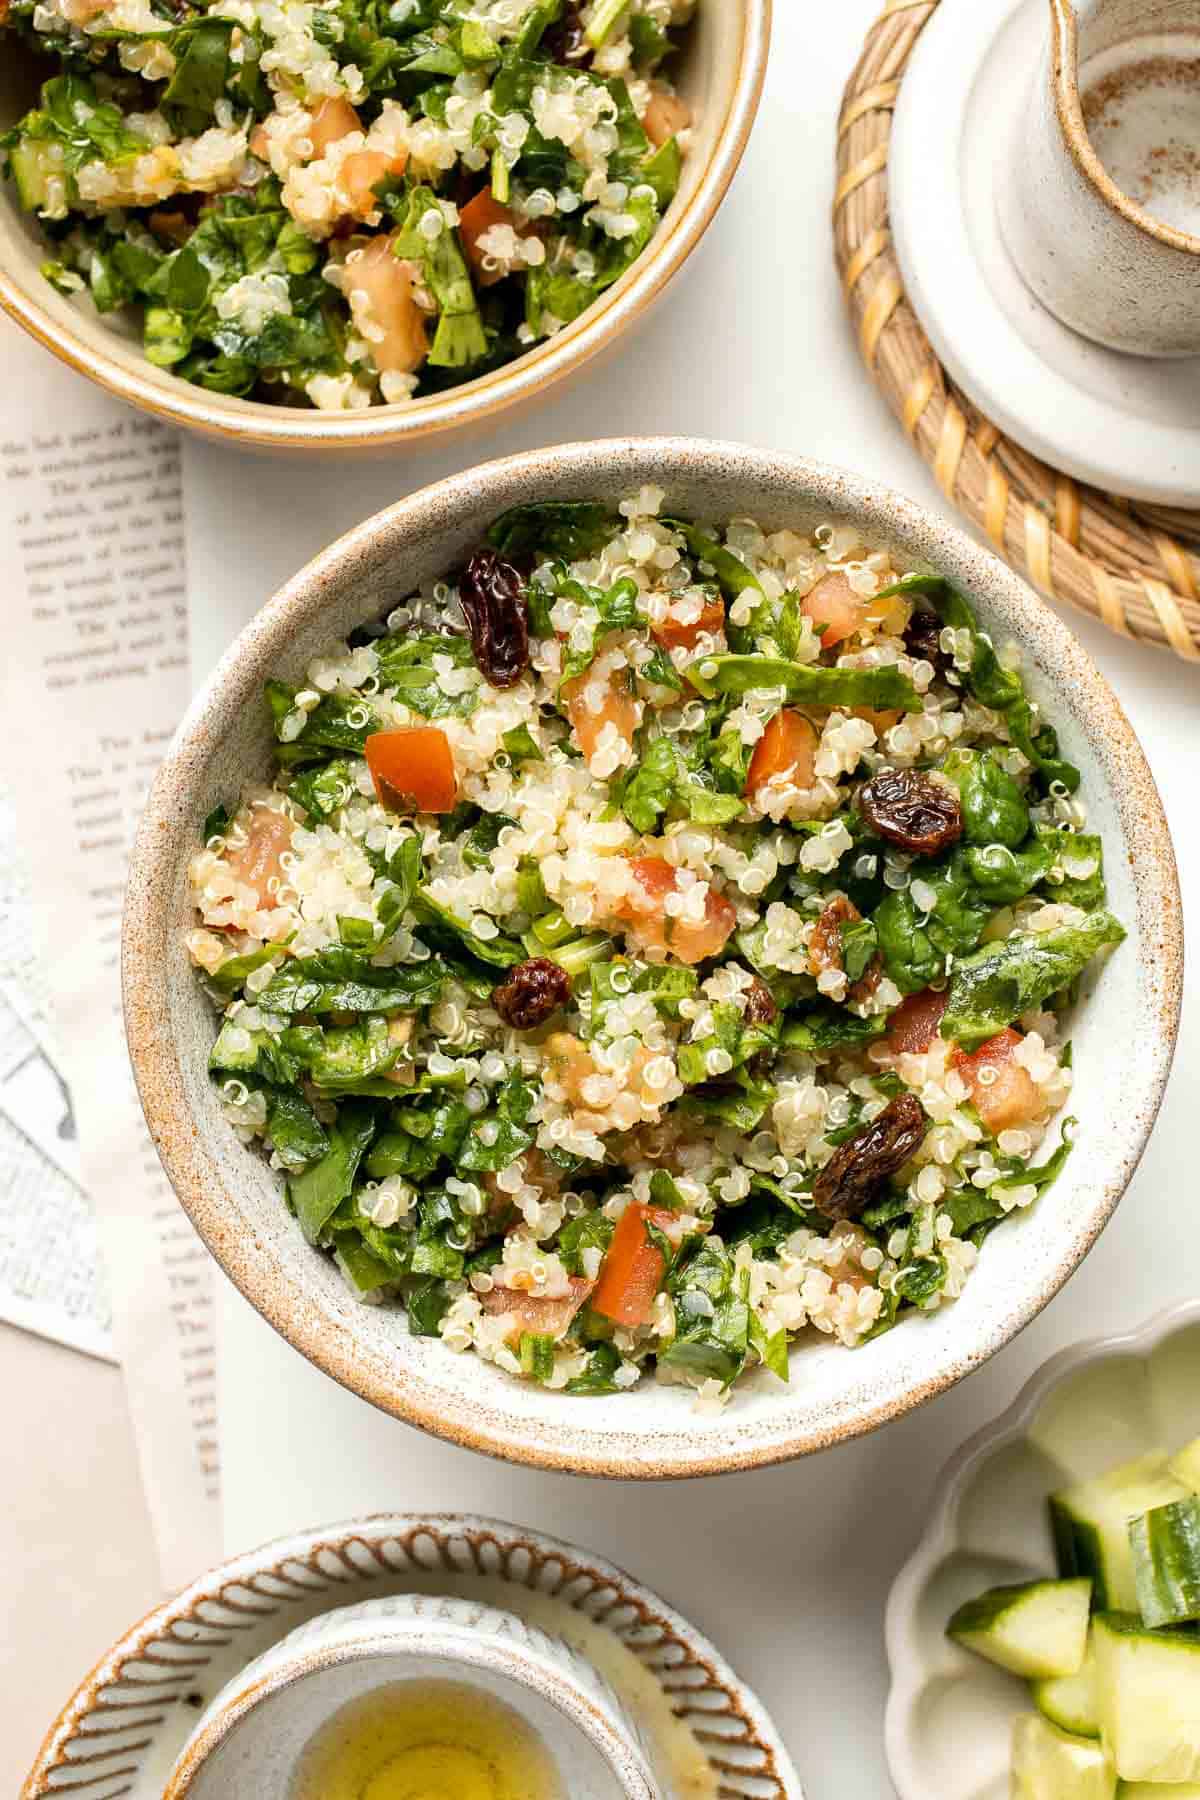
Happy Sunday! Sundays are my day for prepping lunches for work throughout the week. My criteria for meal prep basically comes down to this: easy, quick and nutritious. One of my favourite go-to meals to prep is this quinoa spinach power salad. It's a fit-for-all salad tht satisfies almost every diet. It's gluten-free, dairy-free, vegan - you name it! So is that why I call this a power salad? Nope. The reason is because it is packed with so many nutrients that is it truly a powerhouse.
Why You'll Love This Quinoa Spinach Salad
- Packed with nutrients. From the spinach to the quinoa, tomatoes, cucumbers, and more, this easy quinoa salad recipe is full of good-for-you, nutrient-dense ingredients you'll feel glad to put in your body! The quinoa provides plant-based protein, fiber, and healthy fats, and the spinach and veggies offer lots of fiber and antioxidants. It's a real powerhouse of nutrition!
- Super simple ingredients. You only need about a handful of ingredients for this recipe, and I mean it! Once you have some fluffy cooked quinoa, add the spinach, raisins, tomatoes, cucumbers, and the homemade lemon vinaigrette (4 ingredients). Stir and serve. It's the perfect last-minute healthy side dish, but it also makes a nice light lunch on those hot days!
- Perfect for meal prep. Once assembled, this hearty salad can last in the fridge for about three days! It's so nice to grab a container and go.
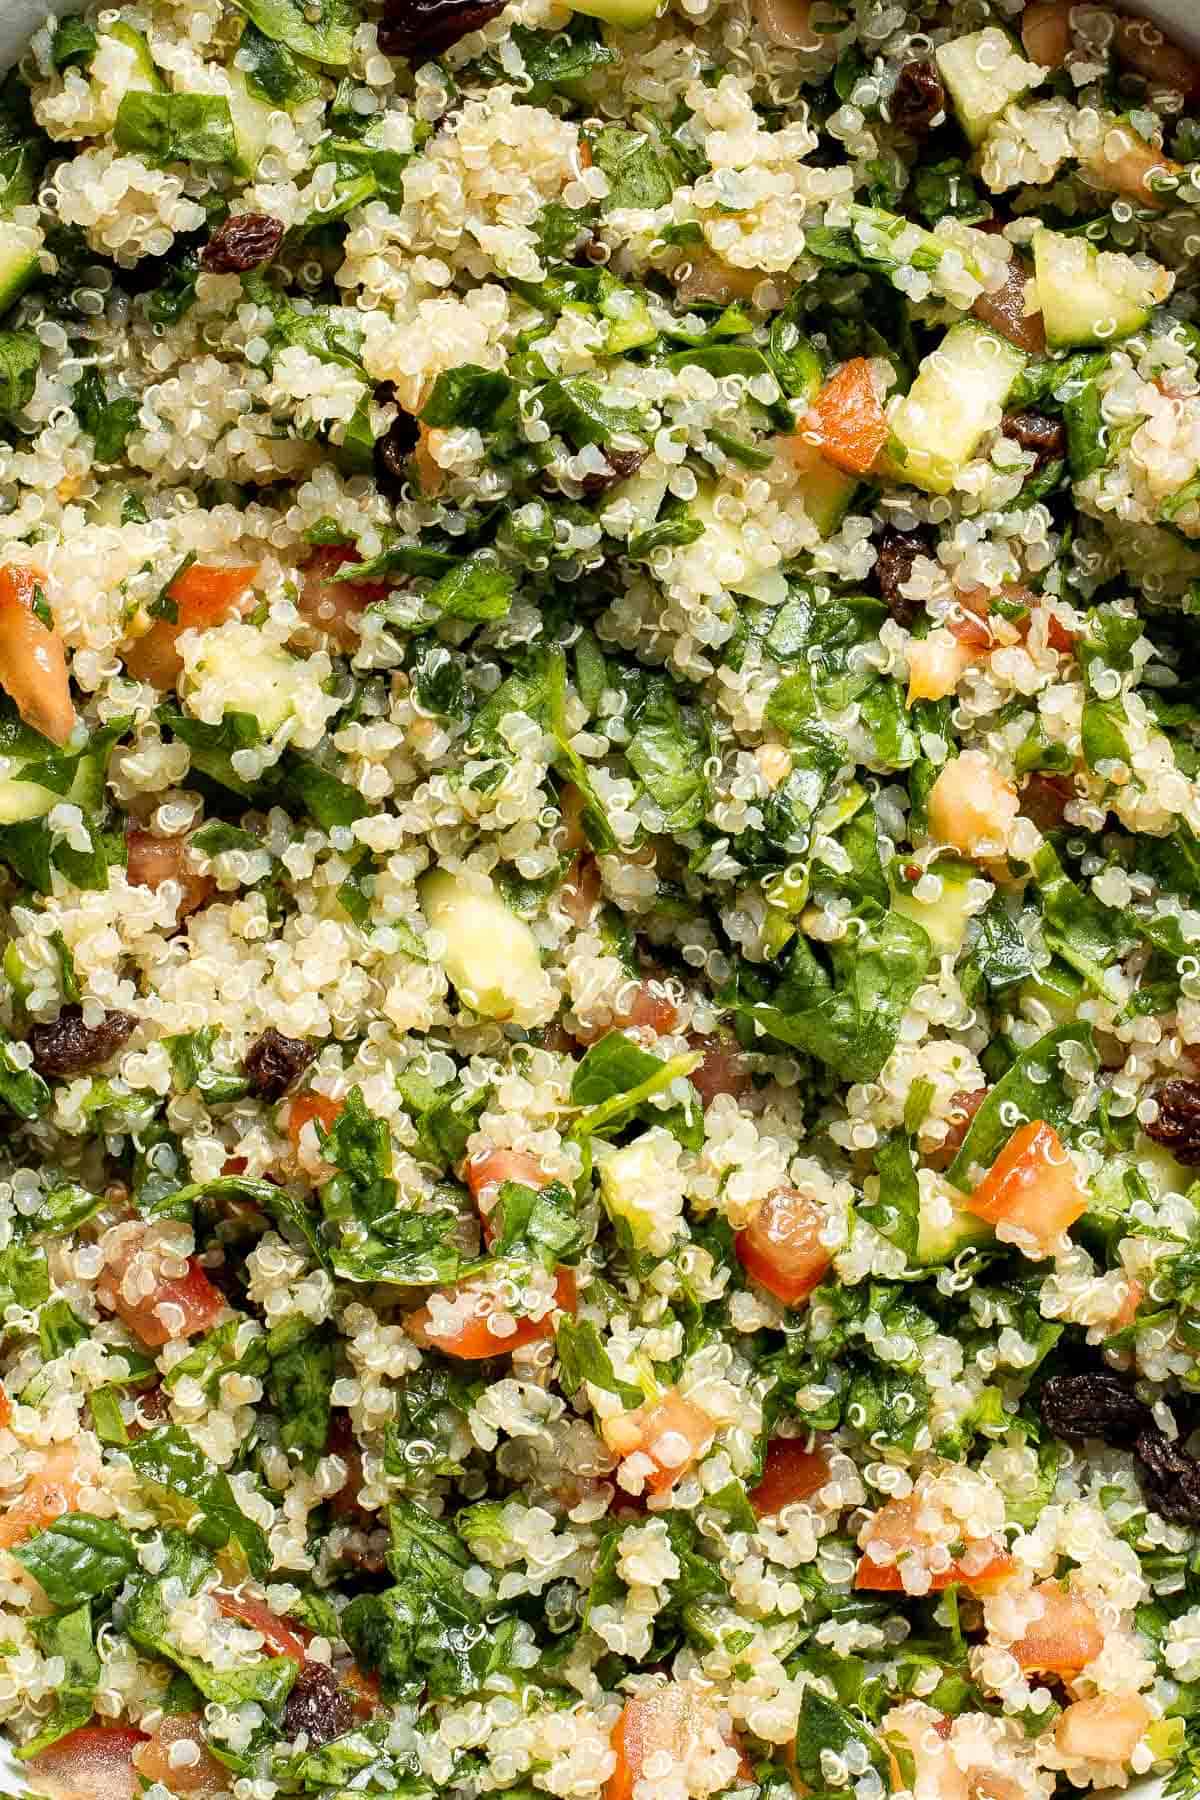
What is in Quinoa Spinach Salad?
This salad pretty much makes for a complete meal. And although it is complete in itself, you can consider this a base salad. Add any ingredients that you want to it (See our Recipe Variations section below for ideas). Just remember that if you are adding lots of ingredients, you may need to double up on the vinaigrette.
To make this delicious Spinach Quinoa Power Salad, you will need the following ingredients (full measurements in recipe card below):
Quinoa
Quinoa is a super food (or power food). It is a tiny grain that is extremely nutrient dense. It completely stands out from any of the other traditional grains and does not even compare. Although termed a grain, quinoa is gluten-free and is not even part of the same plant family as wheat, oats, barley, or rye.
There are so many health benefits to quinoa consumption that to list them all would take up this entire blog post! So I will keep it brief. One of the main features of quinoa is its high protein content. It contains all the essential amino acids required and thus serves as a complete protein source. It is also a great source of healthy fats, fiber, B vitamins and other minerals.
Spinach
But quinoa is not the only super food in this salad. That's right, there is not just one super food, but two!! Spinach is another amazing super food. I list the many health benefits of spinach in my gomae spinach salad post.
Other Ingredients
- tomato - feel free to chop up some tomates, or use cherry tomatoes or grape tomatoes cut in half.
- cucumbers
- raisins - you can substitute with other dried fruits such as cranberries, dried figs, or dried apricots.
- lemon vinaigrette - made in just seconds by combining lemon juice, extra-virgin olive oil, salt, and pepper.
You will also need measuring cups and spoons, mixing bowls, and a cooking pot (for cooking the quinoa).

How to Make the Best Quinoa Spinach Power Salad
- Cook the quinoa. In a medium bowl, rinse the quinoa a few times. In a medium saucepan, boil 2 cups of salted water. Add the quinoa and continue to boil for about 10 minutes until the quinoa is tender. Drain the quinoa and let it cool.
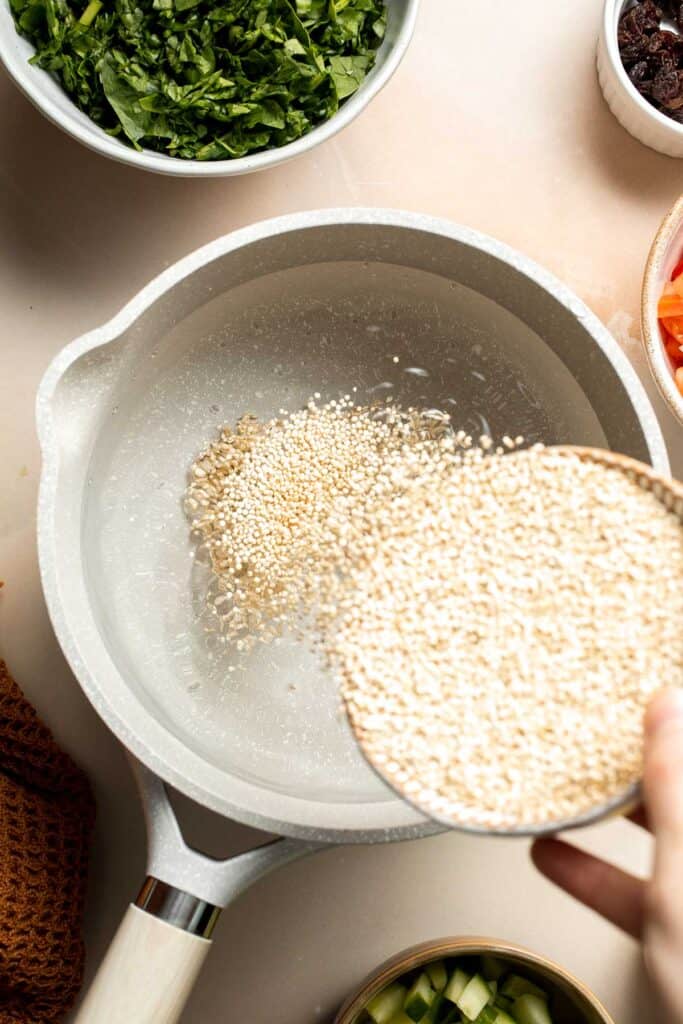
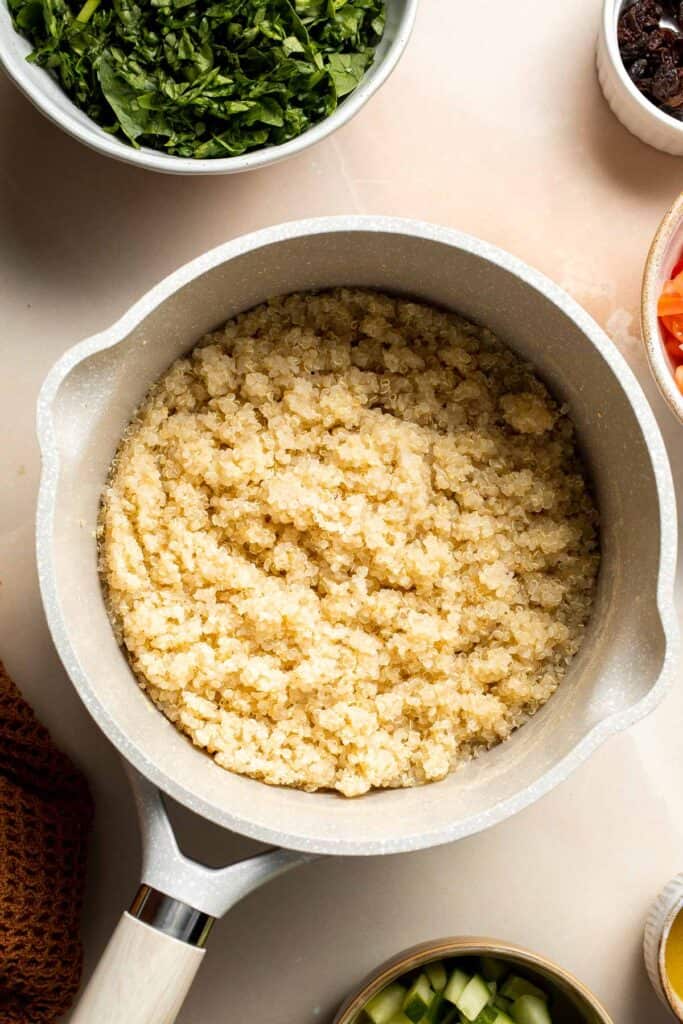
- Make the lemon vinaigrette. In a small mixing bowl, make your lemon vinaigrette. Combine the lemon juice, olive oil, salt and pepper.
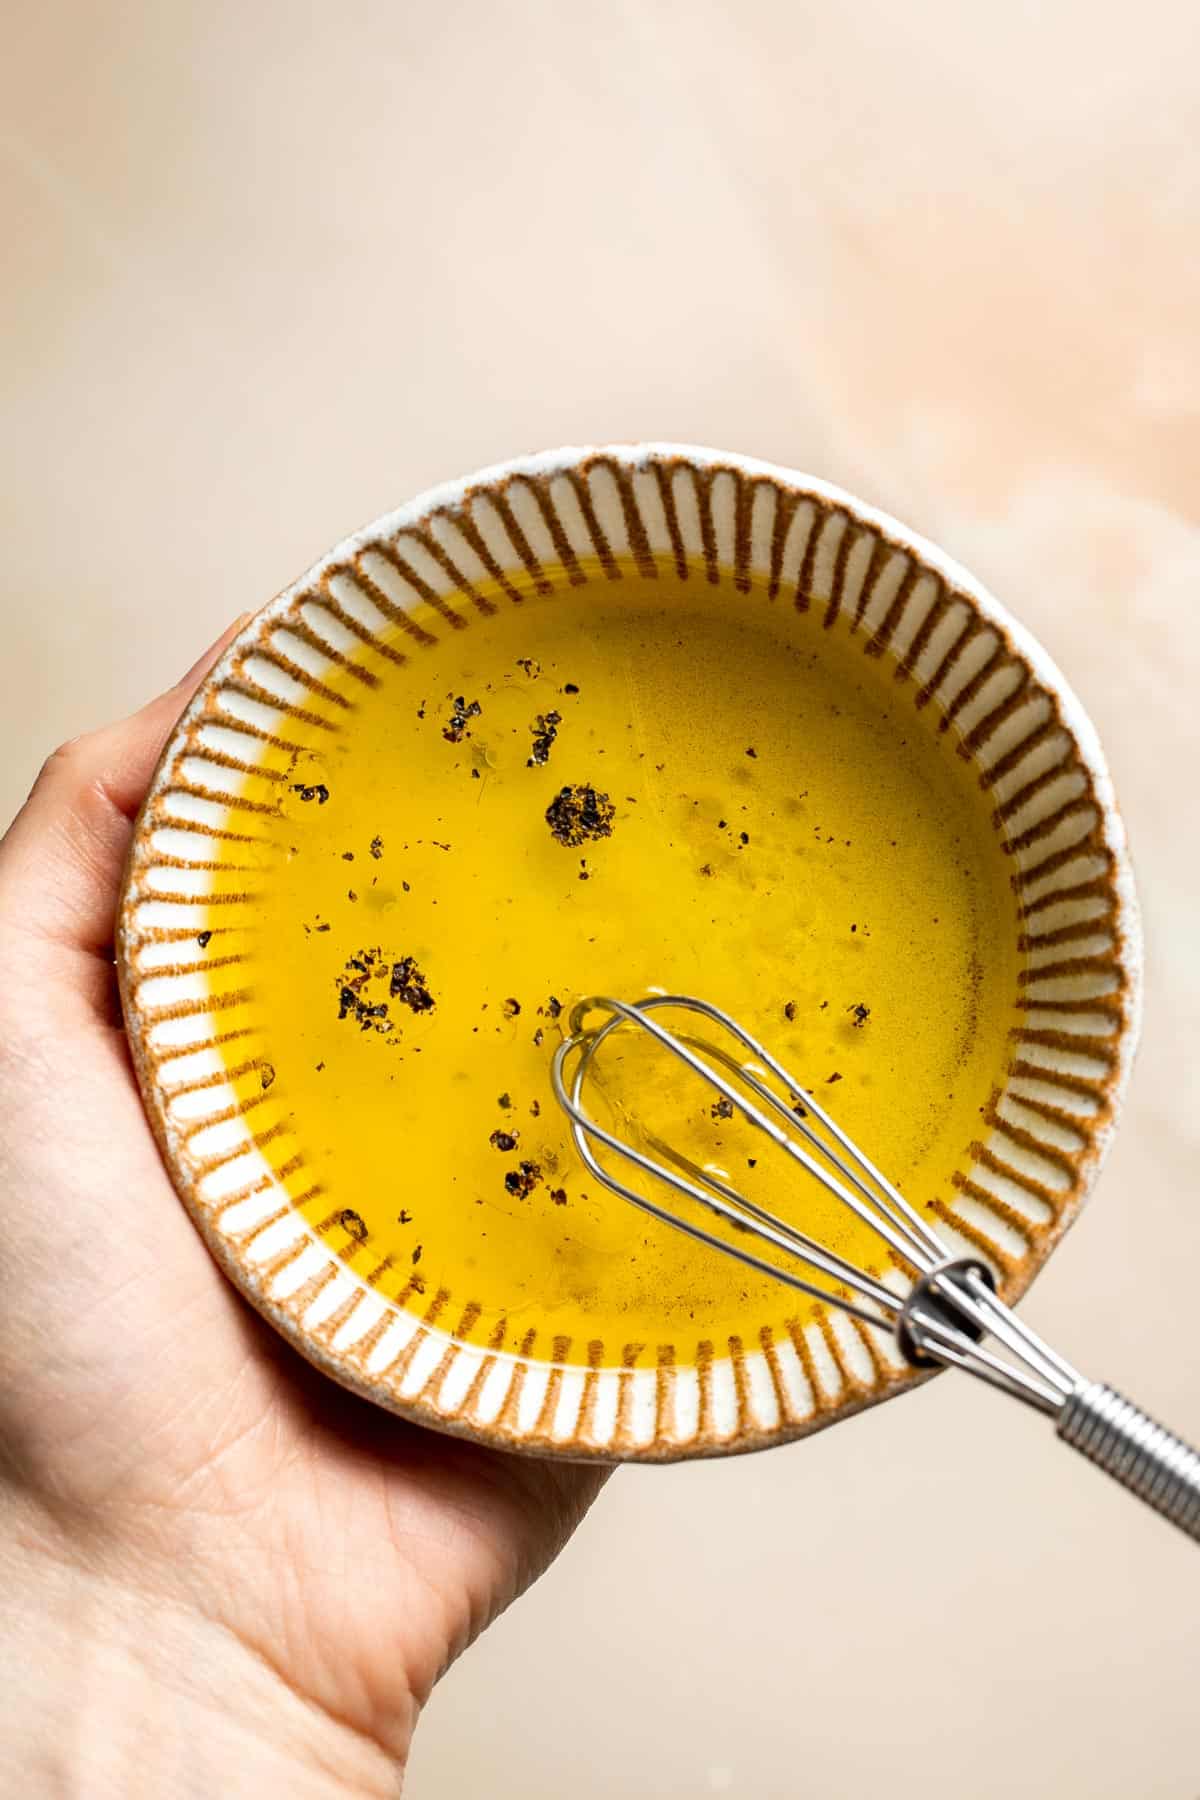
- Combine the salad ingredients. In a large serving bowl, combine the spinach, tomatoes, cucumbers, raisins and cooled quinoa. Pour the dressing on the salad and toss to coat.
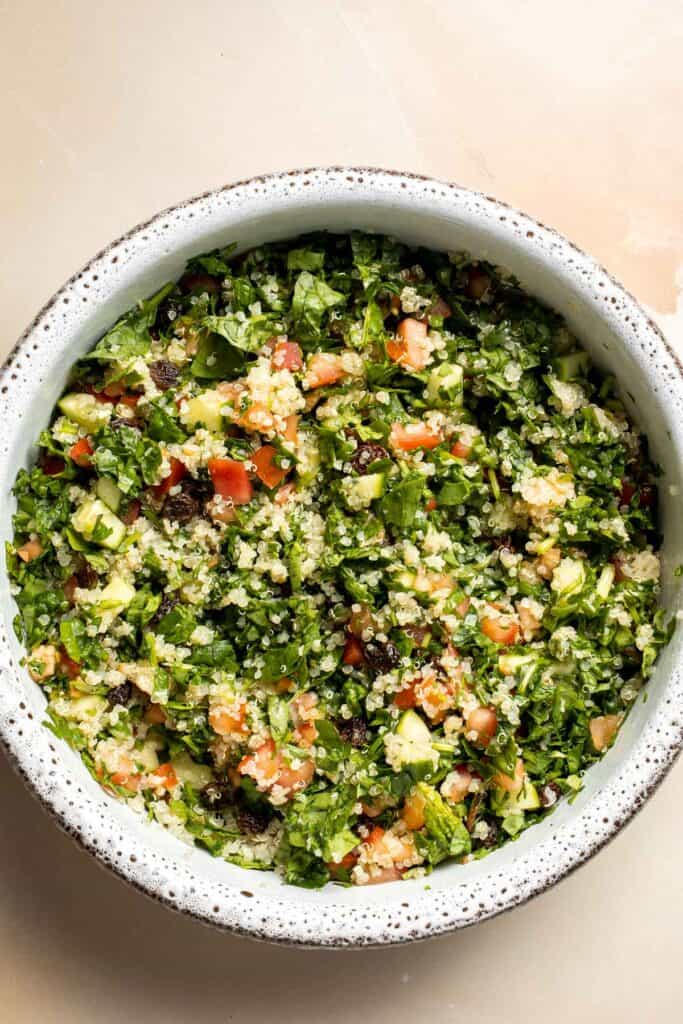
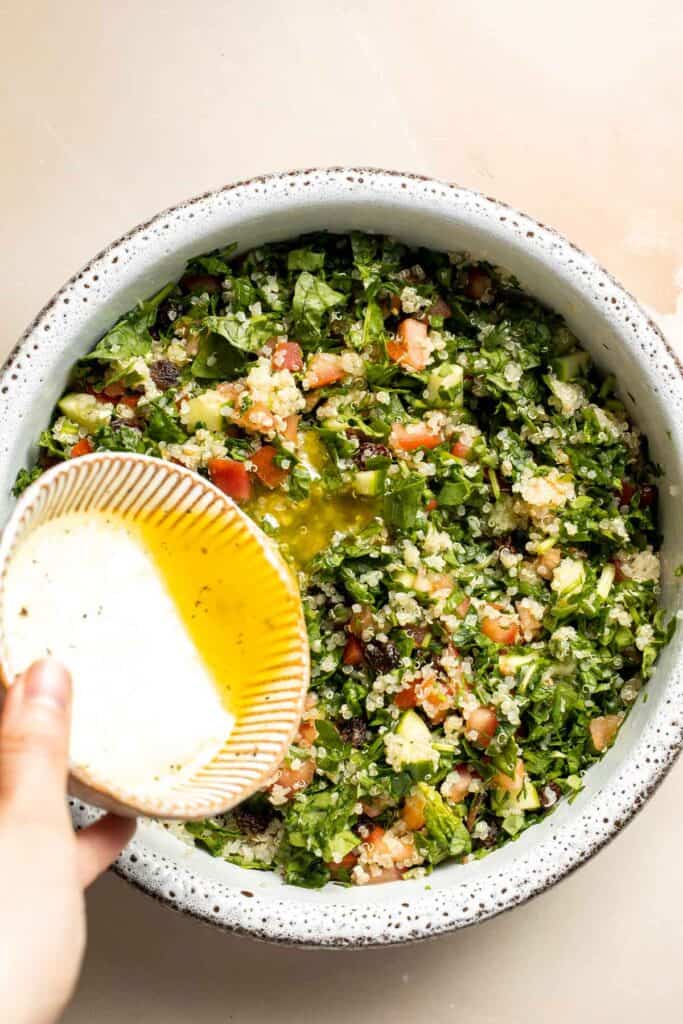

- Serve. Season to taste with more salt and pepper, if needed.
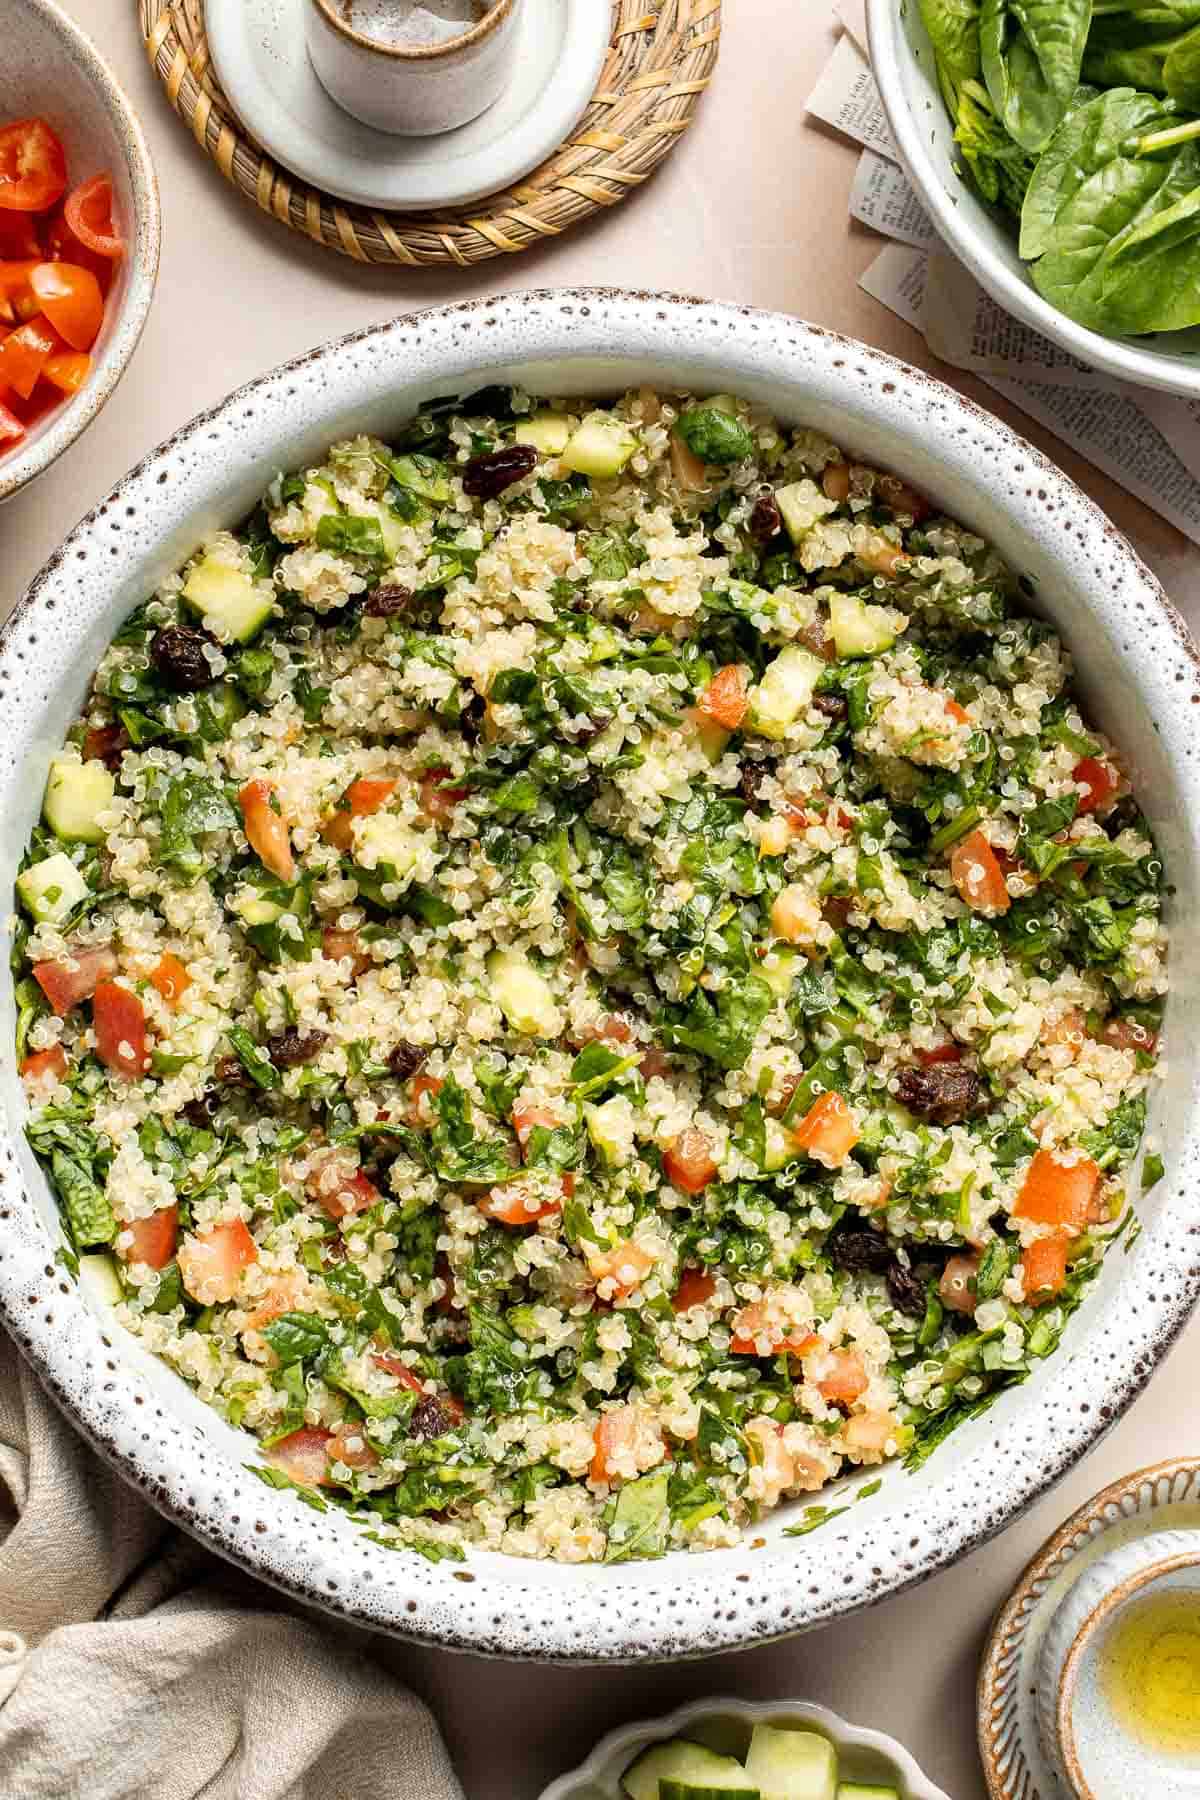
Recipe Variations
- Add more protein. Garbanzo beans or cannellini beans would pair well with the quinoa and add extra protein. Grilled chicken is a great choice for meat eaters.
- Add cheese or nuts. There are so many ways to customize this healthy salad recipe. Add some creamy goat cheese or salty feta cheese for a tangy flavor contrast, or sprinkle some pine nuts or pumpkin seeds for crunch.
- Add other veggies. Mince some fresh herbs like basil or parsley for extra freshness, add sun-dried tomatoes or roasted red peppers for sweetness, avocado for flavor and texture, and more. A little sliced red onion would add a nice spicy kick, as well!
- Change the greens. Of course, you'd need to change the name of the recipe, but if you get tired of fresh spinach or need to change things up, you can use other leafy greens like kale or chard. They can handle sitting in the dressing for a while, although more delicate leafy greens should be added right before serving.
- Try other dried fruits. Instead of raisins, try using dried cherries or cranberries. You can even throw in some fresh apples for an added crunch.
How to Serve
This Quinoa Spinach Salad is delicious served on its own as a light lunch, or paired with a protein including:
- Oven Baked Chicken Breast
- Greek Salmon
- Honey Garlic Shrimp Skewers
- Garlic Butter Steak Bites
- Chicken Milanese
For more recipe ideas, see our 50+ Healthy Lunch Ideas.
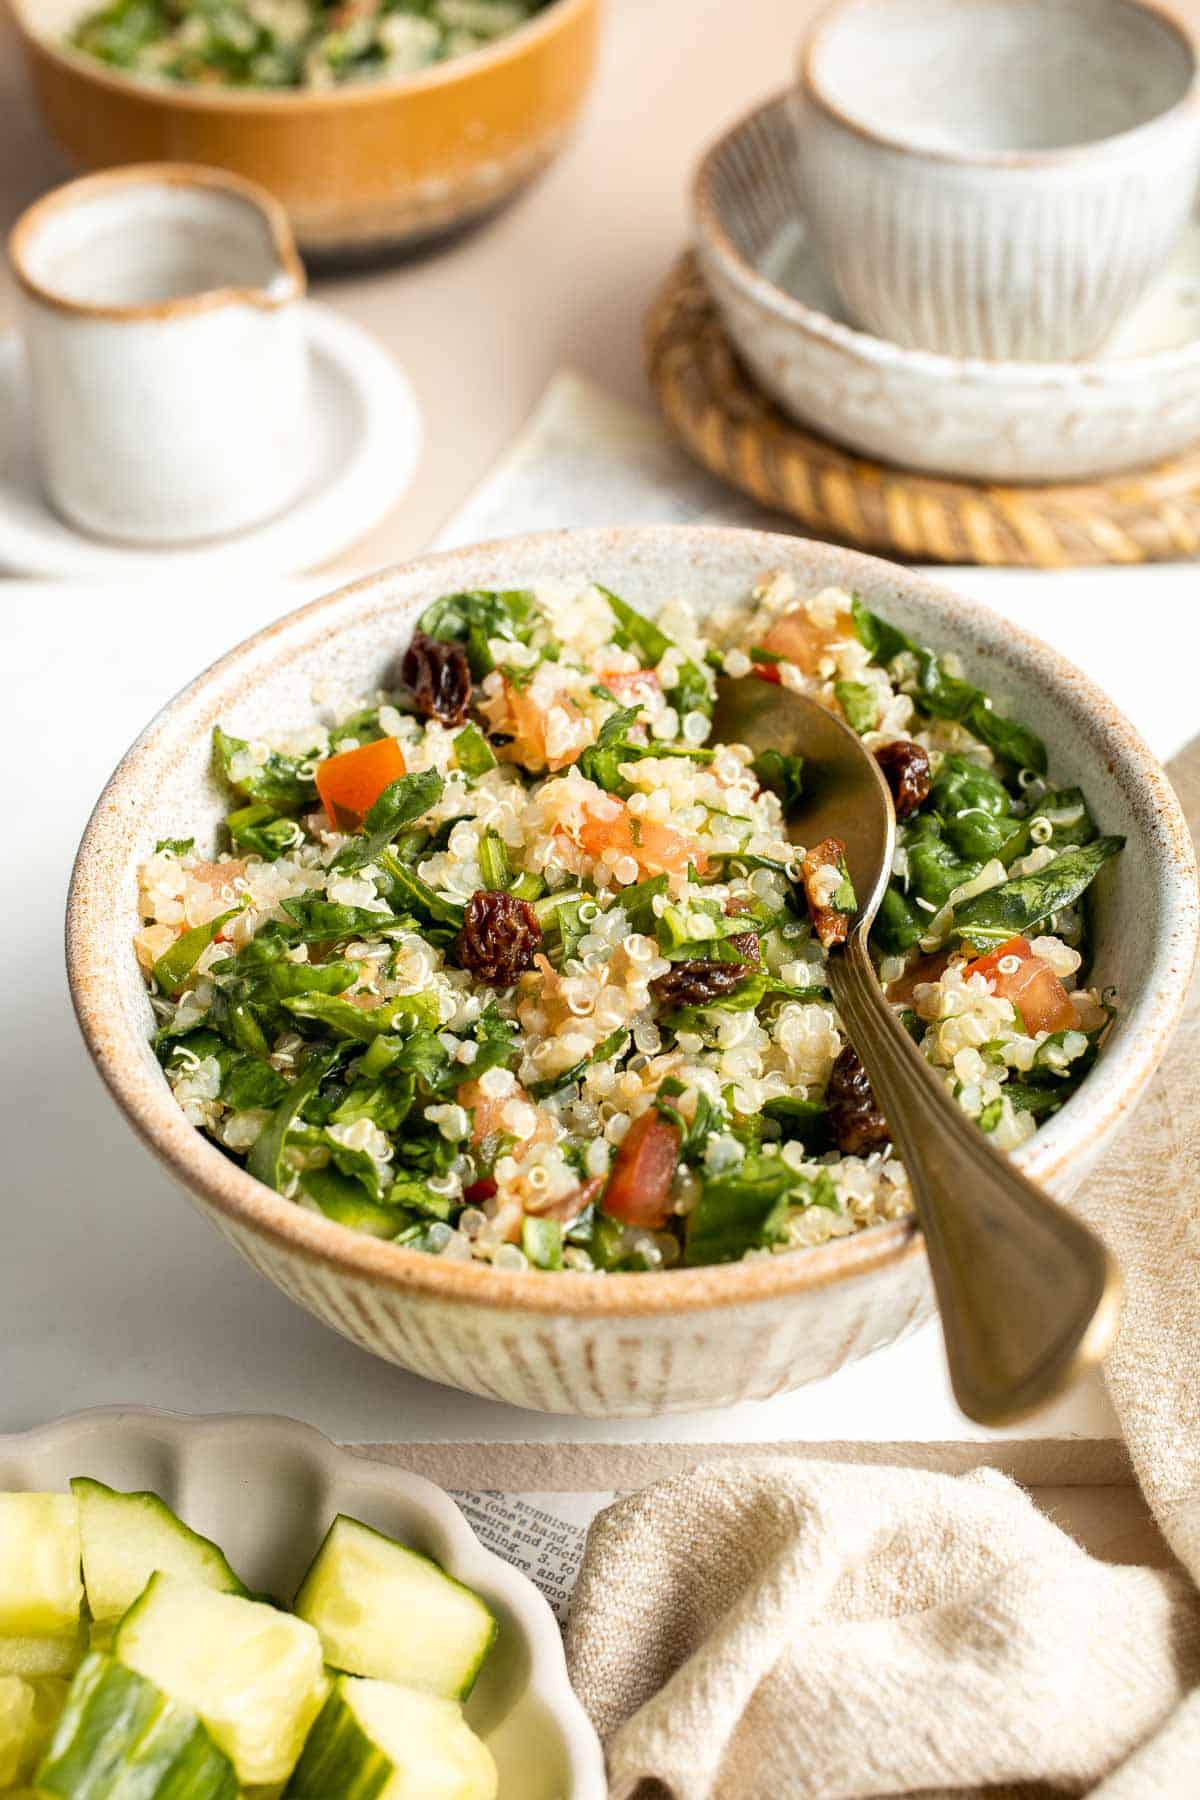
Recipe Tips and Tricks
- Strain off any excess moisture from the quinoa. You want the quinoa to absorb the dressing, not water down the flavor. Let it cool in a fine-mesh sieve or strainer to wick off any extra water.
- Cut the spinach into strips. The spinach pieces need to be small enough to eat easily without disappearing into the fluffy quinoa and veggies. It's easiest to cut full-size spinach leaves into strips but you can certainly use baby spinach to skip that step!
- Cook the quinoa in broth. With so few components, it's important to add flavor wherever you can. One easy way to do that is to cook the quinoa in chicken or veggie broth to infuse flavor into every bite.
How to Store
This quinoa salad is so easy to make and it lasts several days in the fridge. Store in an airtight container in the refrigerator for up to 3 days.
FAQ
It depends. As written, this recipe was formulated as a cold salad that would be filling enough to serve as a complete meal or as a hearty side salad. But it's also great with warm quinoa! For this option, store the quinoa separately from the veggies and spinach, and then add those right after you heat the quinoa in the microwave. This is a really satisfying option on cooler days.
Absolutely! However, I think you'll be pleasantly surprised by how much flavor you can get from a four-ingredient salad dressing. It's just lemon juice, olive oil, salt, and pepper, and you can even use bottled lemon juice to make things easier. Whisk the dressing ingredients in a bowl or shake them in a jar for less clean-up! If you use a store-bought dressing, look for a lemony option to keep the same flavor profile.
Whether you have leftover cooked quinoa in the fridge or containers of precooked quinoa from the grocery store, either will work in this spinach quinoa salad. Homemade quinoa shouldn't be any older than a day or two, and for food safety, it's best to eat all of the salad within 1-2 days.
More Salad Recipes
- 40 Best Salad Recipes
- Southwest Quinoa Salad
- Butternut Squash Quinoa Salad
- Tabbouleh Salad
- Simple Italian Salad
- Kale Chickpea Salad
Tried this recipe?
I'd love to hear what you think! Leave a comment and rating below to share your feedback. Your reviews help others discover this recipe and help me keep creating more free recipes for you. Snap a photo and tag me on social media @aheadofthyme too.
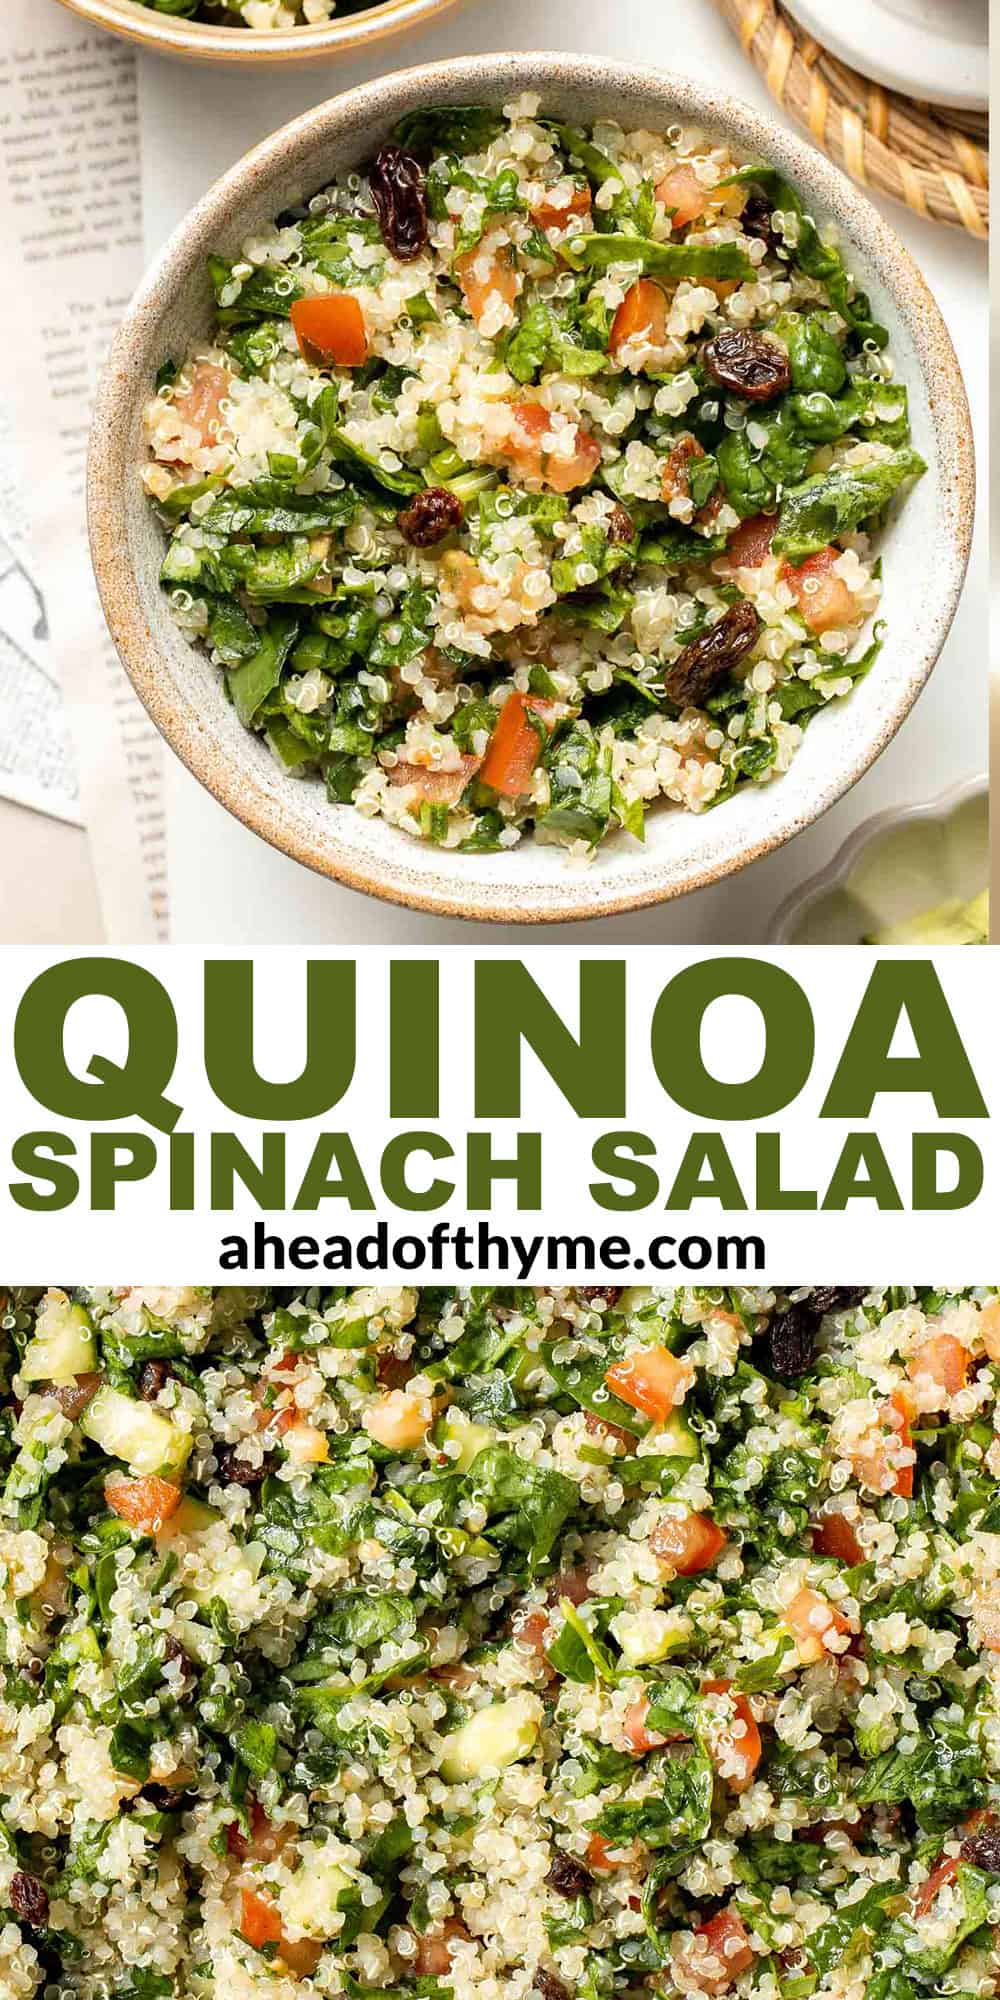
Iced Mocha
Homemade Iced Mocha latte is sweet, creamy, and chocolaty, just like your favorite coffee shop drink - but it's way cheaper and ready to be served any time! Simply make a batch of mocha concentrate, then pour and serve. It's the perfect way to cool down on those hot summer days!

I love making my own homemade coffee drinks. They're always so much easier to make than you'd expect, and there's nothing like having your favorite drink waiting for you in the fridge. This easy iced mocha recipe is a great way to use up any leftover coffee since you mix the coffee with cocoa powder and sugar before adding it to your glass. The mocha concentrate will last in the fridge for about a week, so you can sip on it all week long!
Why You'll Love This Iced Mocha
- Classic mocha flavor. This homemade mocha mixes regular coffee with cocoa powder and regular sugar, which you can adjust to taste. The bitterness of the chocolate and coffee gives this drink full-body flavor, and a little sugar mellows the whole thing out. It's a classic for a reason, and easy enough that you can make it for your morning coffee every day!
- Save money. An iced mocha at my local coffee shop is often $5-6. With this simple recipe, you can make your own at home for just a fraction of the cost.
- Control the quality of your ingredients. Making iced coffee at home is a great way to avoid allergens or increase the quality of your ingredients. You can use all organic products, dairy-free milk, or whatever you need to make it just right.

Ingredient Notes
To make this delicious Iced Mocha, you will need the following ingredients (full measurements in recipe card below):
- coffee - use regular brewed coffee. It's easiest to dissolve the sugar and cocoa powder when the coffee is still warm.
- cocoa powder - this is the regular powdered stuff you use for brownies. I recommend using unsweetened cocoa powder.
- granulated sugar - to add sweetness. Adjust to taste.
- ice cubes
- milk - choose your favorite milk. It can be regular whole milk or non-dairy milk.
- whipped cream - optional, for serving.
- chocolate sauce - optional, for serving.
You will also need measuring cups and spoons, a small mixing bowl, whisk, glass cup, and a spoon.

How to Make the Best Iced Mocha
- Make mocha concentrate. In a small mixing bowl, add the coffee, cocoa powder, and sugar. Whisk until well combined without any lumps.


- Assemble. Place a few ice cubes into a glass cup. Fill with the mocha concentrate, then top with milk.


- Sweeten. Stir gently to combine. Add more sugar, if desired.
- Serve. Top with whipped cream and a drizzle of chocolate sauce.

Recipe Variations
- Use espresso. If you have an espresso maker at home, make 1-2 shots of espresso to use instead of regular coffee. Feel free to dilute it with extra water or milk.
- Use cold brew coffee. This is such an easy option! Keep a jug of unsweetened cold brew in the fridge or leftover cold coffee.
- Make a big batch. On the weekend, make an extra pot of coffee and prepare the mocha mixture all at once. Keep it in the fridge, then pour it over ice and add some cold milk before serving.
- Go sugar-free. Instead of sugar, use liquid stevia drops or your favorite sugar substitute. You can also use natural sweeteners like honey or maple syrup, although those will change the flavor of the mocha slightly.
- Try an iced caramel mocha. Stir in a dollop of my homemade salted caramel sauce for a delicious twist on the traditional mocha.
How to Serve
This Iced Mocha is delicious served on its own, or paired with some of delicious treats including:
- Oreo Brownies
- Chocolate Chip Cookies
- Whipped Shortbread Cookies
- Chocolate and Vanilla Marble Cake
- S'mores Bars
- Strawberry Cupcakes
For more recipes, see our 40 Best Summer Desserts.

Recipe Tips and Tricks
- Warm the coffee. I know this is an iced coffee drink, but the sugar crystals will dissolve a lot better using hot coffee.
- Make coffee ice cubes. Fill ice cube trays with leftover coffee, and use the coffee ice cubes to keep your iced mocha from diluting! It's such an easy hack.
- Use good-quality cocoa powder. The chocolate flavor comes from the cocoa powder, and there is a wide range of quality out there. Opt for a high-quality brand, and feel free to substitute different flavors of chocolate (white, milk, or dark chocolate) to make it your own.
Storing and Freezing Instructions
How to Store
Once assembled, these homemade mochas should be served right away.
If you prefer to make a large batch to enjoy later, combine several servings of the coffee, cocoa powder, and sugar in a large container, whisk well, and store in the fridge for up to 7 days. To serve, pour the concentrate over ice and add the milk, whipped cream, and chocolate syrup like normal.
How to Freeze
The mocha concentrate can easily be frozen. Make sure the cocoa powder and sugar are fully incorporated into the coffee, then freeze. To serve, thaw in the fridge overnight and shake to incorporate.
FAQ
An iced mocha is a cold coffee drink made by combining espresso or coffee with sweetened chocolate and your milk of choice, then serving it over ice. It's similar to chocolate milk with a kick of caffeine! There are lots of variations, but this is the main formula. Mochas are often served with a little whipped cream or even a scoop of ice cream on top with a chocolate drizzle. You can make mocha with any color of chocolate, and you can use any type of coffee you prefer (espresso, instant coffee, cold brew concentrate, regular brewed coffee, etc).
They're very similar. The main difference is chocolate. Iced lattes are made by pouring espresso shots over ice and then topping them with milk. An iced mocha follows the same formula, but you need to add chocolate. Stir some cocoa powder and sugar into the coffee, add milk, then squirt some whipped cream and drizzle chocolate syrup before serving.
Whipped cream and chocolate syrup are classic, but you can also add chocolate shavings or a sprinkle of cocoa powder. For extra flavor, feel free to use a chocolate-flavored whipped cream, a drizzle of caramel, or a sprinkle of cinnamon for a little warmth.
More Cold Drink Recipes
Tried this recipe?
I'd love to hear what you think! Leave a comment and rating below to share your feedback. Your reviews help others discover this recipe and help me keep creating more free recipes for you. Snap a photo and tag me on social media @aheadofthyme too.

Peach Galette
This homemade Peach Galette is a simple, rustic tart, perfect for enjoying the flavors of summer! Fresh peaches are tossed in sugar, cinnamon, and ginger and then nestled in a pie crust before baking. The result? A buttery, flaky pie crust with tender, spiced peaches in every bite. It tastes like pure summer and is unforgettable with a scoop of Vanilla Ice Cream or whipped cream.
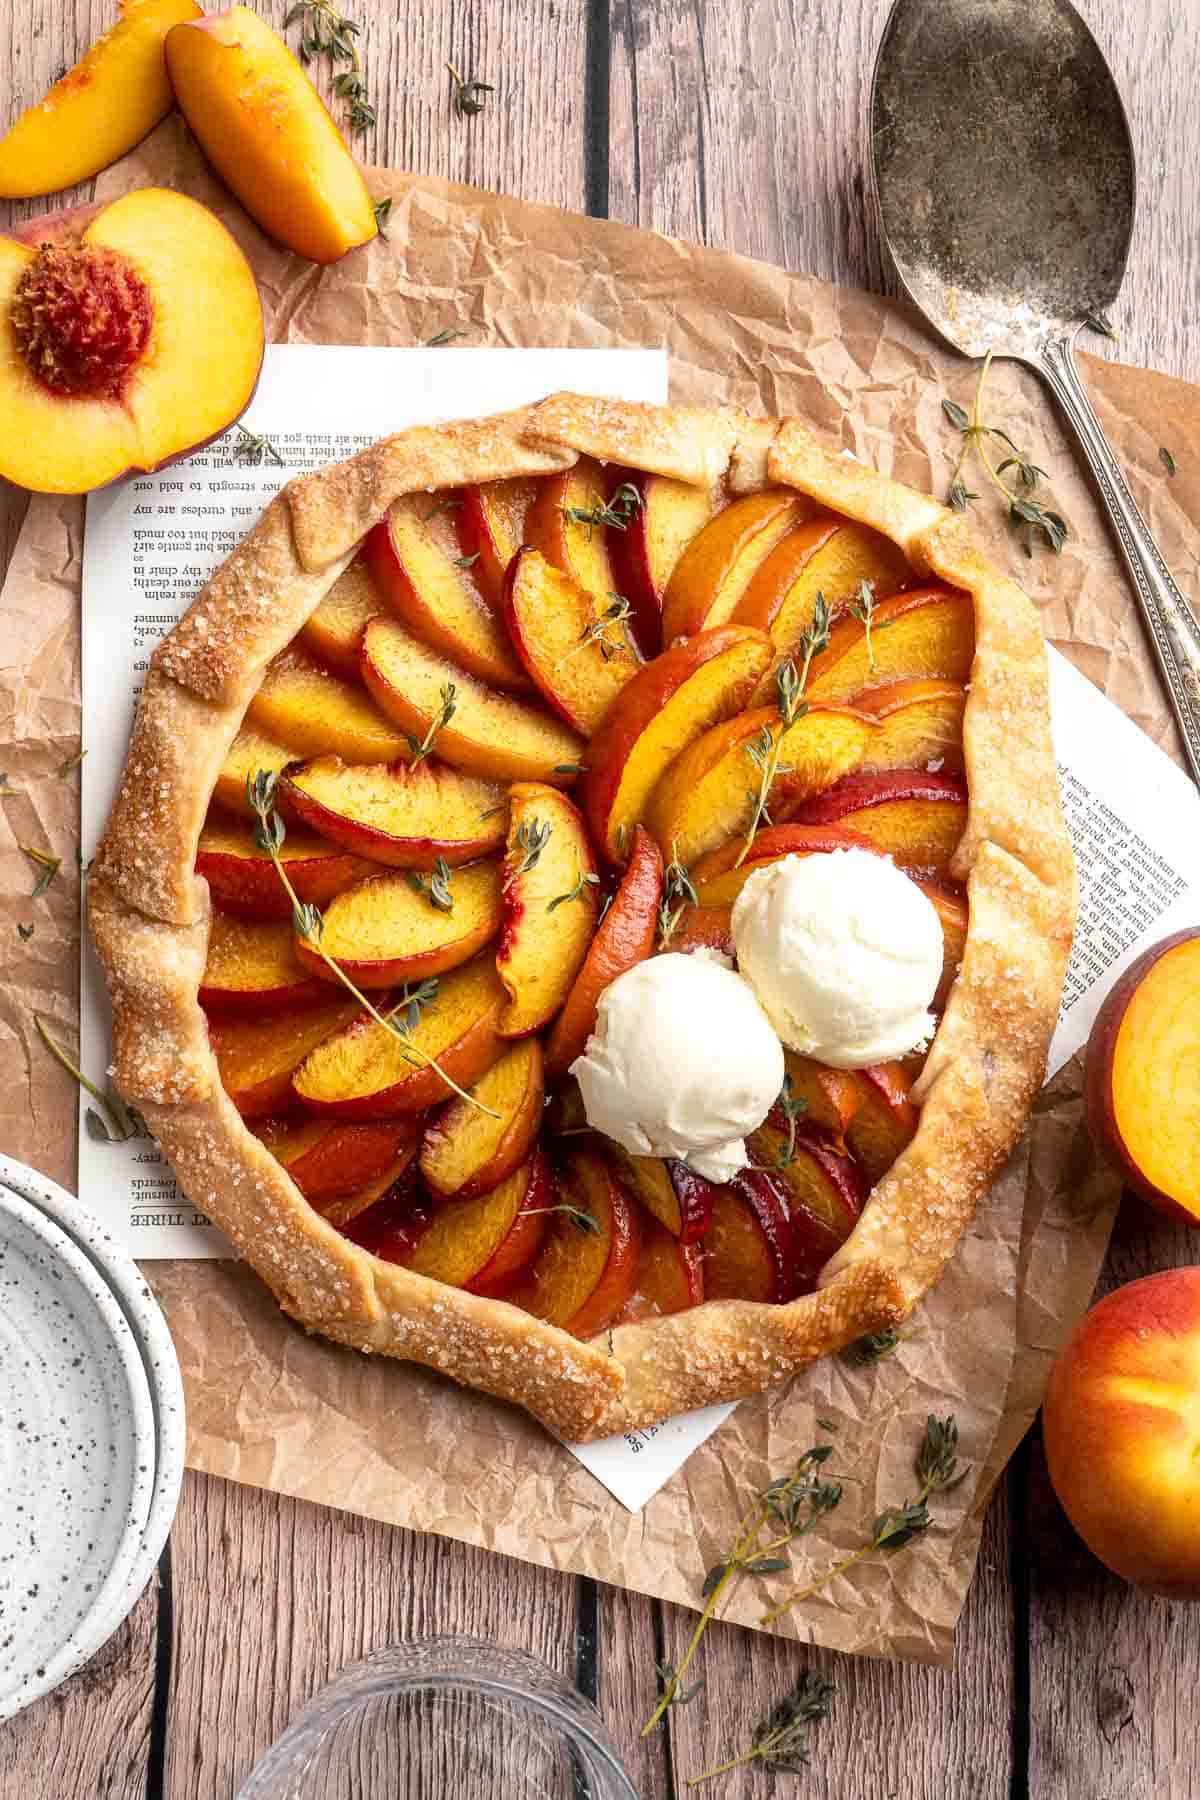
Galettes are one of my favorite desserts to make because they look fancy but are so easy and simple to make! They are rustic open-faced pies, and can be either sweet (like my Strawberry Galette) or savory (like my Tomato Galette). This rustic peach galette tastes like a cross between a peach turnover and a traditional pie and is my favorite way to end a warm summer night!
Why You'll Love This Peach Galette
- Classic summer flavors. The flaky pie crust and ripe peaches are a match made in heaven! Peaches add a tart, fresh flavor that balances out the buttery pie crust. Top it off with my easy No Churn Vanilla Ice Cream for a little creaminess and extra sweetness. Great for barbecues, dinner parties, or any special occasion!
- Easy to adapt. Feel free to use a homemade or storebought crust, or replace the peaches with nectarines. Change the spices or make little galettes for single-serving portions. You can even use a gluten-free crust if needed. You have lots of options!
- Super simple dessert. Galettes are known for being simple and rustic, which means you don't need to worry about perfect crimping or shaping. Especially if you use storebought pie crust, this peach galette recipe will come together with just a few minutes of effort. It will take longer to preheat the oven than to prepare the filling!
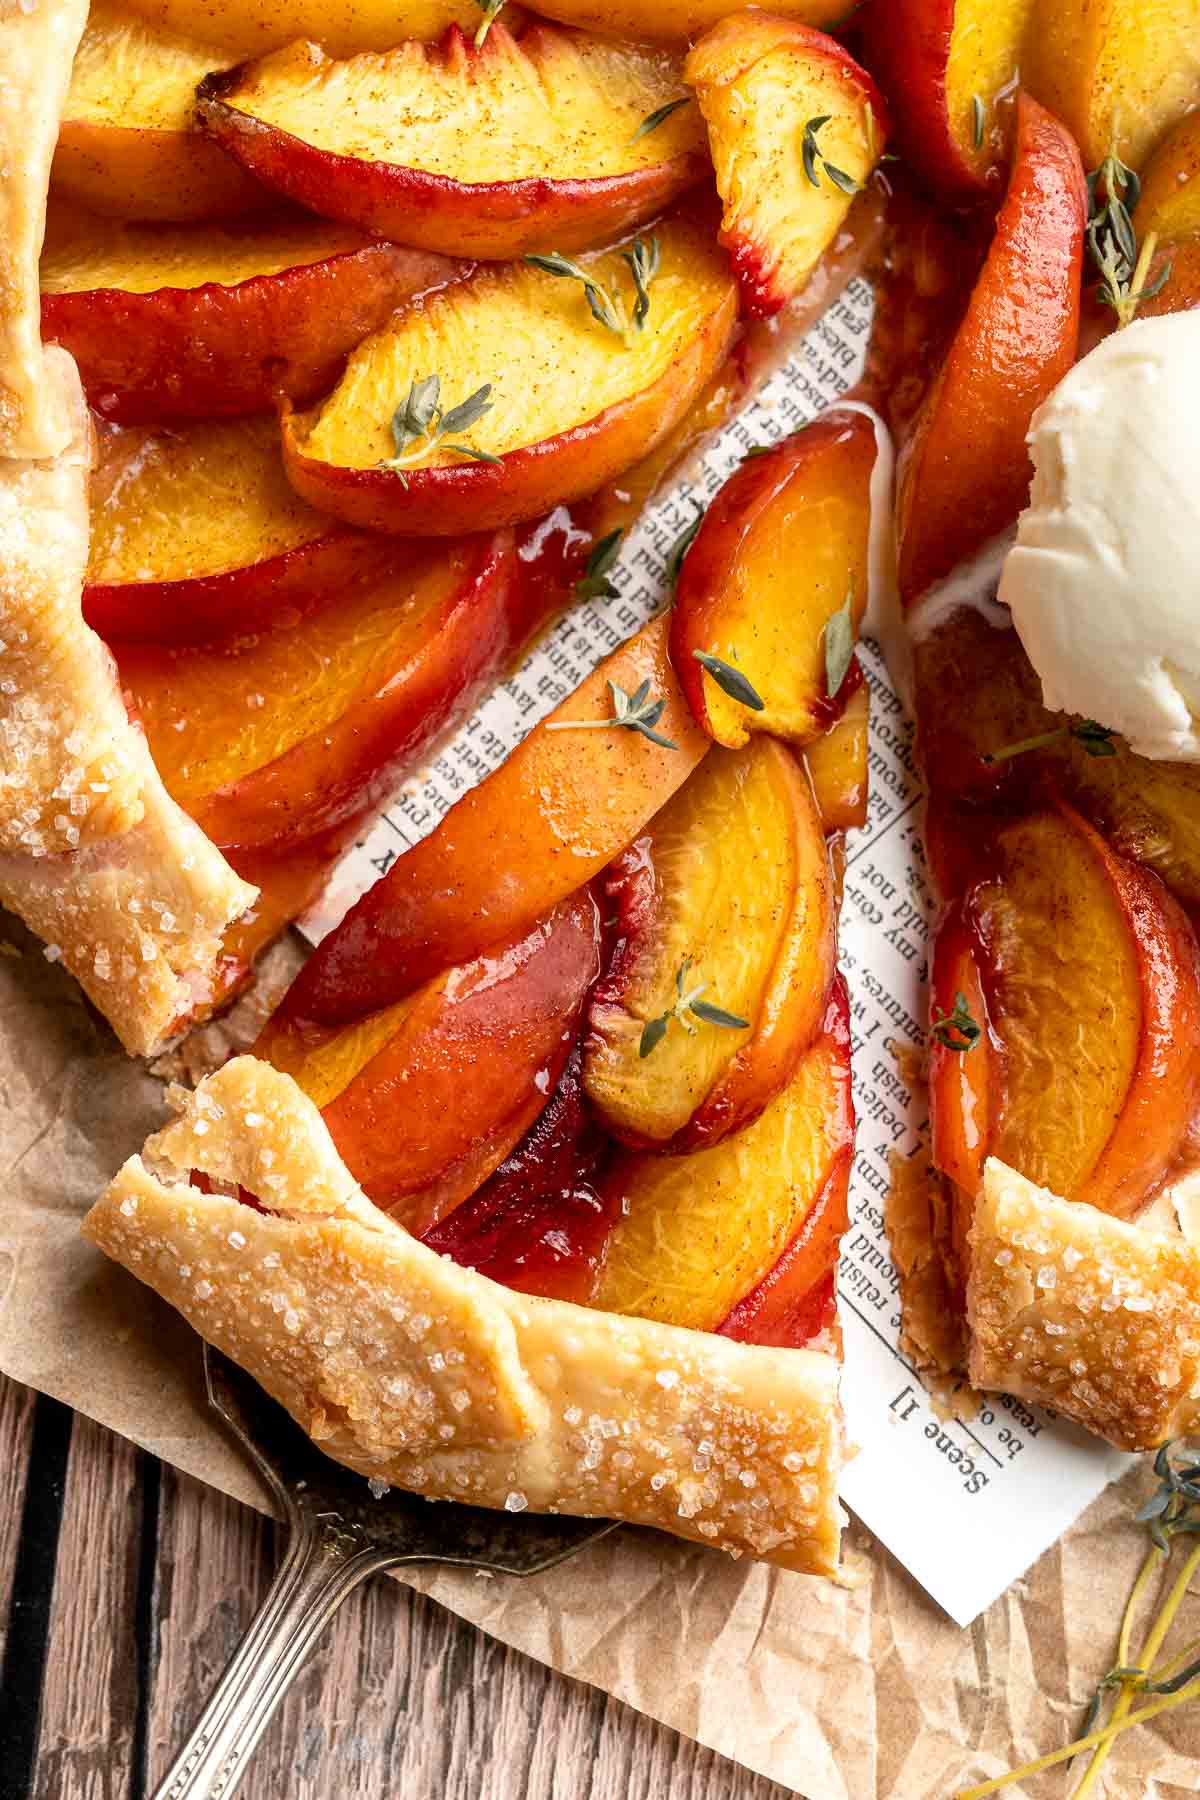
Ingredient Notes
To make this delicious Peach Galette, you will need the following ingredients (full measurements in recipe card below):
- pie crust - use homemade or store-bought pie crust. This is a great place to substitute a gluten-free pie crust or even puff pastry.
- peaches - it's best to use peaches that are still slightly firm, as over-ripe peaches turn to mush in the oven.
- sugar - white sugar for just enough sweetness and some coarse sugar for sprinkling on the crust before baking.
- cornstarch - this will thicken the peach juices and create a sauce.
- seasonings - I like to add warm spices, like cinnamon and ground ginger.
- vanilla extract
- egg - whisk the egg with water to make an egg wash that will make the flaky crust golden and lovely.
You will also need measuring cups and spoons, a rolling pin, baking sheet, parchment paper, large bowl, small bowl, whisk, and a pastry brush.
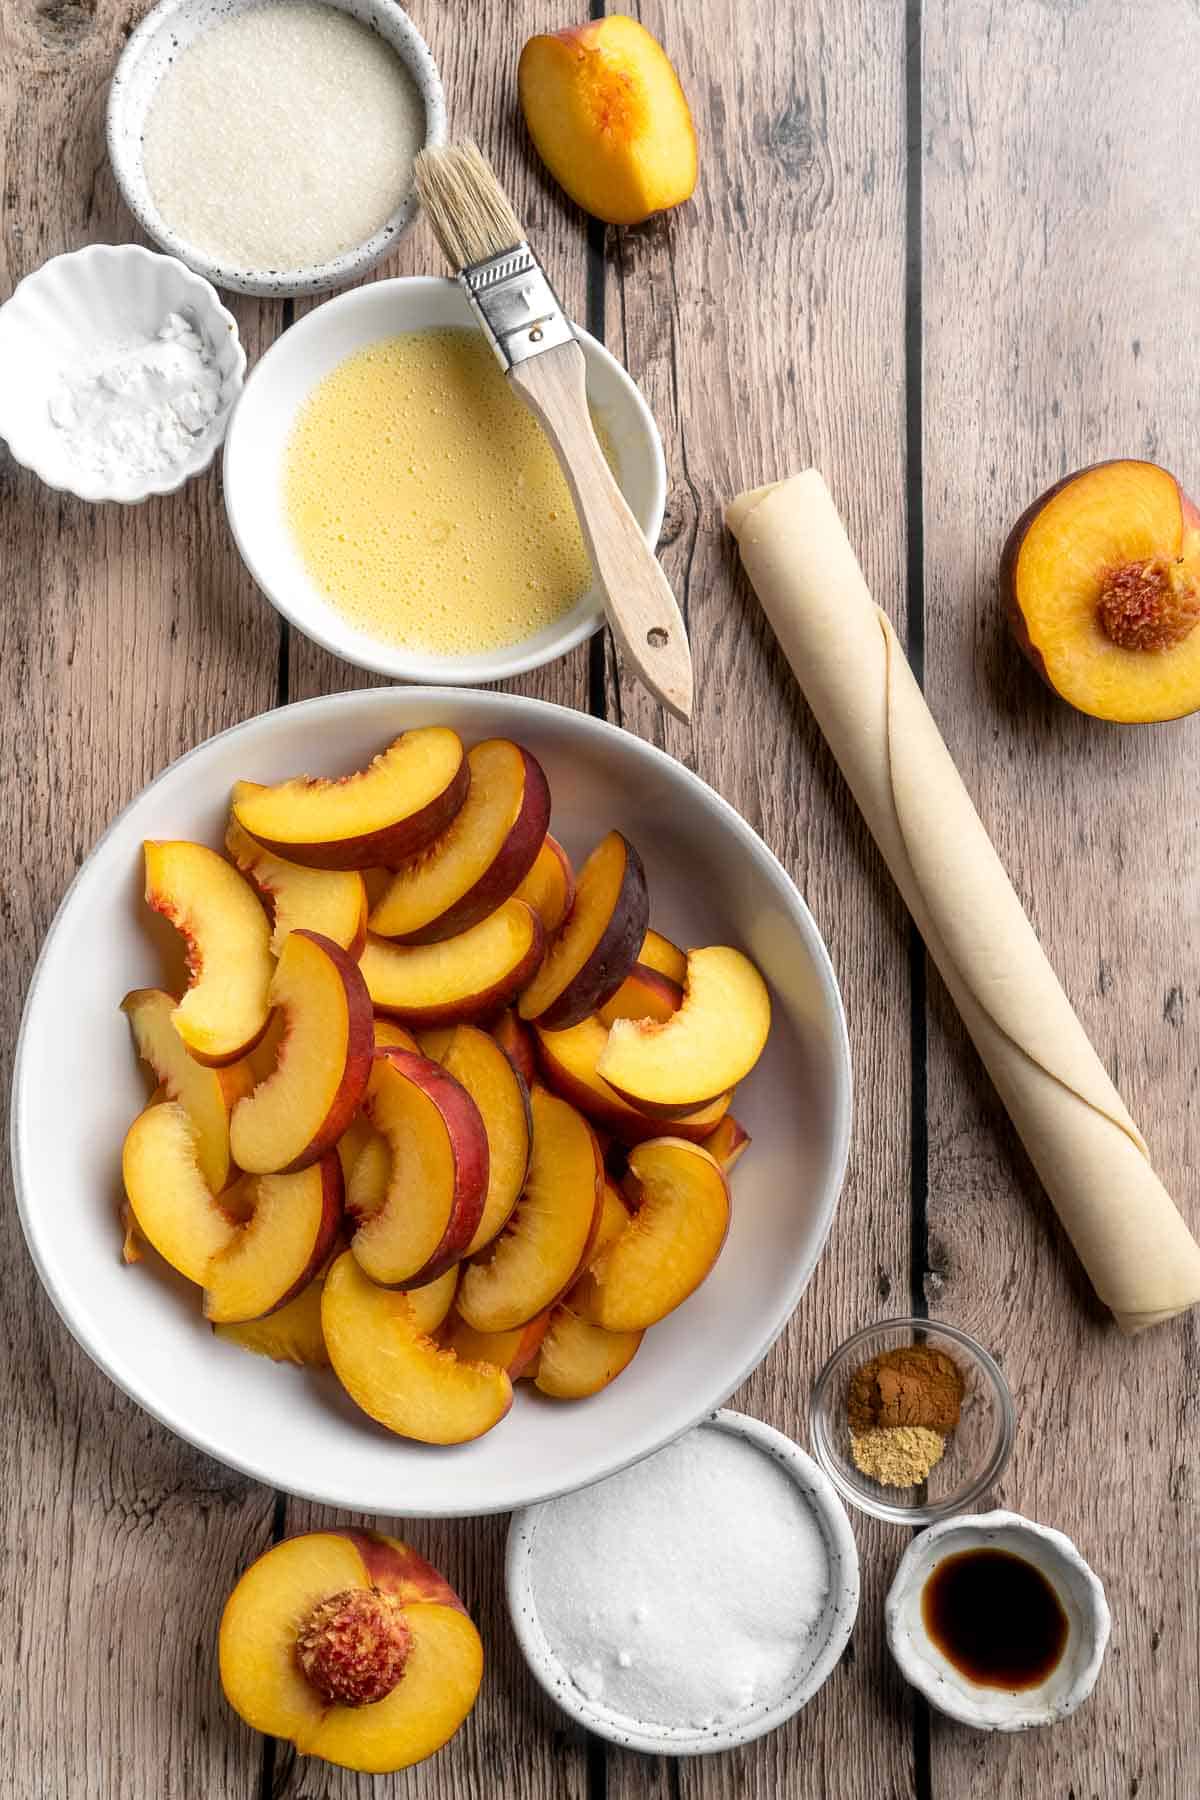
How to Make the Best Peach Galette
- Shape pie crust. Prepare a baking sheet with parchment paper. Roll out your pie dough into a 12-inch circle, then place onto the prepared baking sheet.
- Make filling. In a large mixing bowl, toss together the peach slices, sugar, cornstarch, cinnamon, ginger, and vanilla, until well combined.
- Assemble. Pour the peach mixture into the centre of the rolled out pie crust (or arrange in a circular-spiral pattern), ensuring there is a 2-inch border of bare dough left around the edge.


- Fold edges. Begin folding the edges of the dough over the fruit, overlapping as needed and pressing the seams of the dough together as you go.

- Add egg wash. In a small mixing bowl, whisk together the egg and water to make an egg wash. Use a pastry brush to brush the pie dough with the egg wash, then sprinkle with the coarse sugar.


- Bake. Place into a 400F preheated oven to bake for 30 to 35 minutes, or until the dough looks golden. Remove the galette from the oven, allow to cool for 10 minutes, then slice and serve!
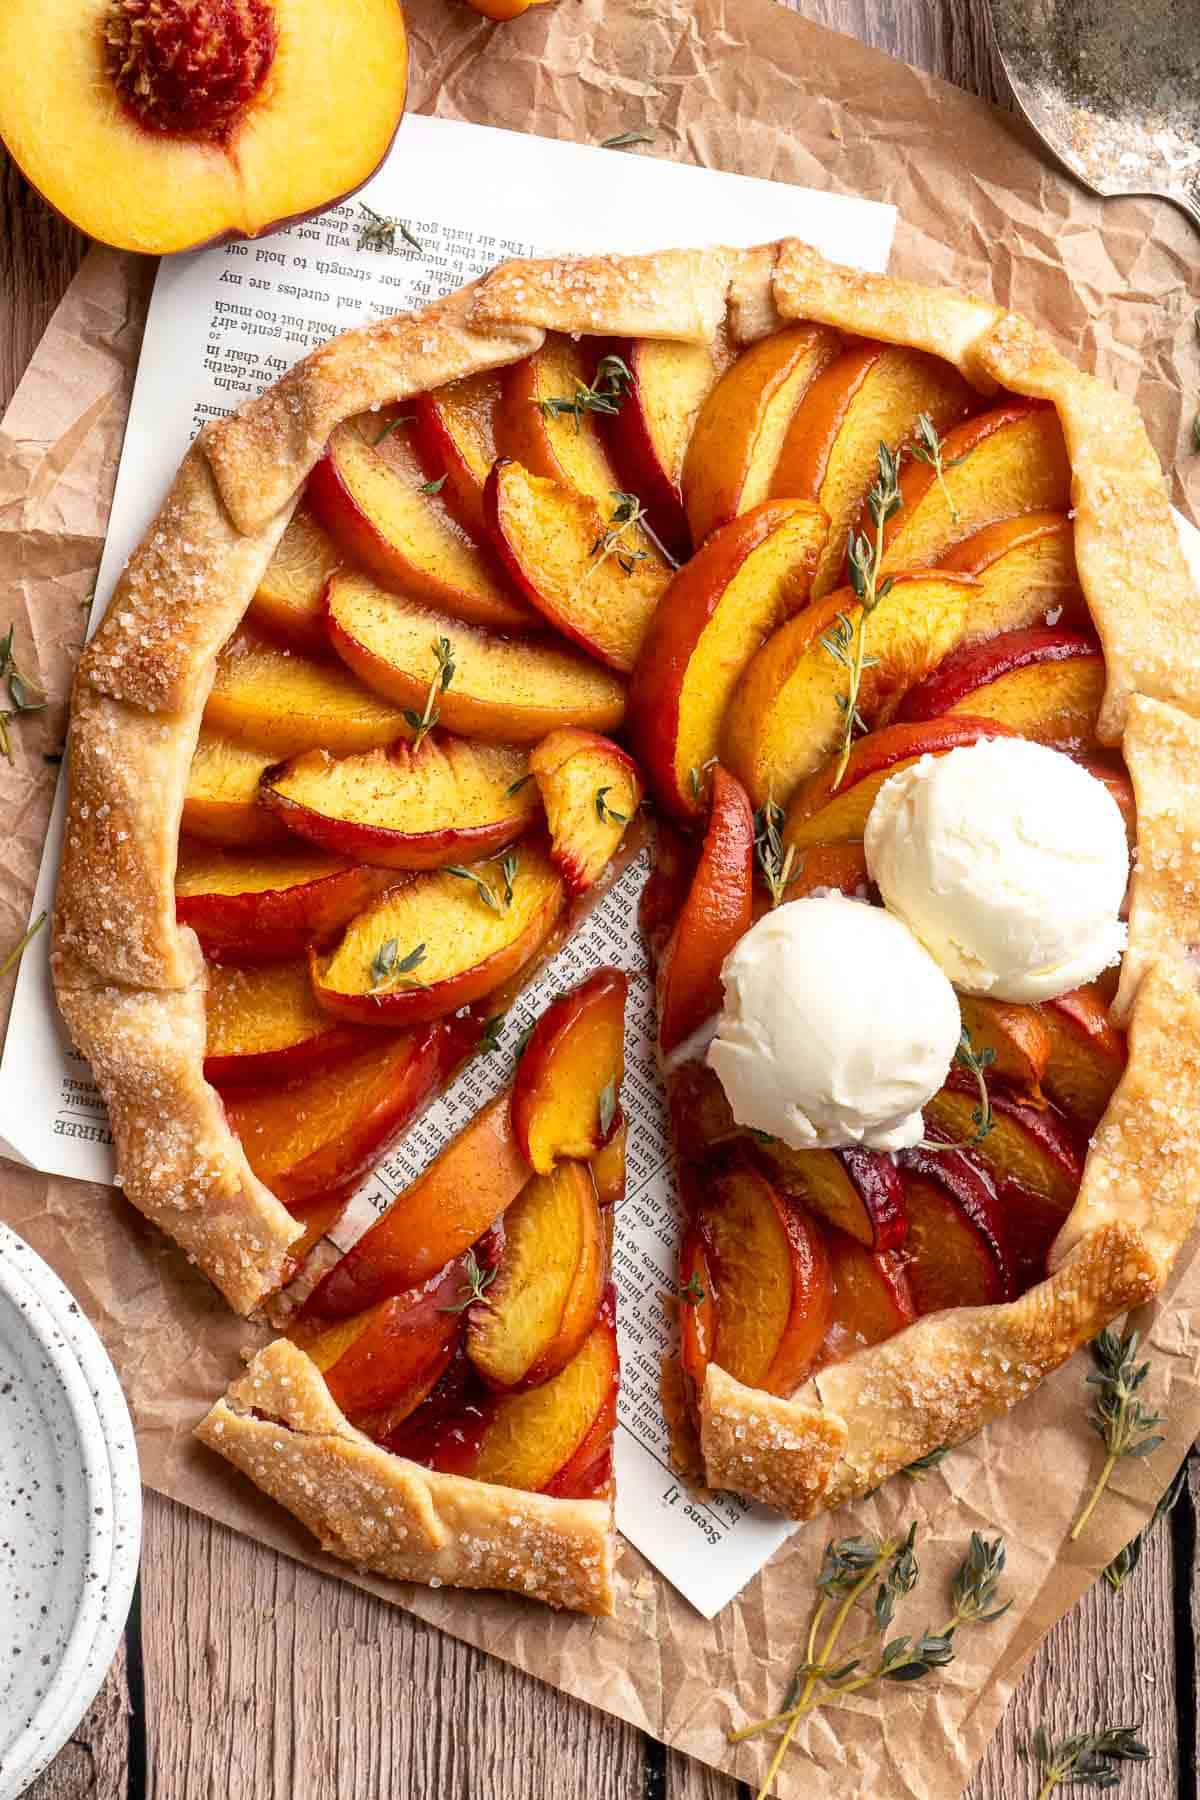
Recipe Variations
- Try different fruits. Instead of juicy peaches, try nectarines, apricots, or plums. You can also use two different fruits, like peaches and cherries, etc.
- Use puff pastry. This is a fun alternative if you want some extra height! The flaky pastry puffs up in the oven and has several layers of crispy crust to bite through.
- Change the size. Hosting a special dinner? Make mini galettes by cutting your pie crust into 6-inch diameter rounds. Fill with the peach filling, leaving a 1-inch barrier. Fold like normal, then bake for 20-30 minutes. You may need extra crust to use all the filling.
How to Serve
This Peach Galette is delicious served on its own or with No Churn Vanilla Ice Cream as a treat at brunch or after dinner. It is also great as part of a larger dessert spread along with some of our favorites:
- Ice Cream Sandwiches
- Blueberry Cupcakes
- Lemon Curd Cookies
- Strawberry Sorbet
- Zucchini Bread
- Icebox Cake
For more recipes, see our 40 Best Summer Desserts.

Recipe Tips and Tricks
- Make homemade pie crust. Homemade is always best. It's not complicated to make your own pastry dough, especially with a food processor. Follow the galette crust recipe in my Mushroom Galette, or make my easy Puff Pastry Pie Dough.
- Chill the dough. If you want a nice flaky crust, you must properly incorporate fat into the galette dough and bake the cold dough in a hot oven. Chilling the dough also relaxes the gluten proteins and keeps the butter super cold. Very important!
- Use the right pan. Fruit galettes should be baked on a flat pan, like a sheet pan or cookie tray. This allows the crust to puff up properly. If you use a baking dish or a deep pan, your crust will likely be softer and not bake as evenly.
Storing and Freezing Instructions
How to Store
Store any leftover galette in an airtight container in the fridge for 3-4 days.
How to Reheat
Like a good peach pie, this galette is best served warm. Pop it in the microwave for 30 seconds to 1 minute, or bake it at 350 for 10 minutes or so until nice and warm.
How to Freeze
Once fully baked, cool the galette to room temperature, then wrap with several layers of plastic wrap. Refrigerate first, then freeze for up to 2 months.
FAQ
It's not necessary. Since peach skin is so thin, I don't see a need for this, and I like the color difference it adds after baking. If you don't like the skin, try dunking the peaches into boiling water for about 30 seconds, then pop them in an ice bath. The skin will peel off easily.
Keep things simple and use a basic butter pie crust, or add some flake with a rough puff or full puff pastry. They're all lovely in their own way!
Yes, I highly recommend it. The egg wash gives the crust a nice golden brown color and helps the coarse sugar adhere, which adds a nice crunch and extra sweetness. It's a simple upgrade with a big impact.
More Peach Recipes
Tried this recipe?
I'd love to hear what you think! Leave a comment and rating below to share your feedback. Your reviews help others discover this recipe and help me keep creating more free recipes for you. Snap a photo and tag me on social media @aheadofthyme too.

Chicken Satay Skewers with Peanut Sauce
Better than takeout, these Chicken Satay Skewers with a peanut sauce are juicy, tender, and easy to make at home. The chicken is packed with bright bold flavors from the simple coconut marinade and the homemade peanut dipping sauce. It's savoury, sweet, tangy, and nutty. They tastes just like what you would order at a fancy restaurant (if not better!) and you won't believe how easy it is to make at home. All you need is a few minutes to prep, let the chicken marinate for an hour and then spend about 15 minutes grilling. So easy, and so delicious!

My family loves grilling skewers, but these delicious chicken skewers are always on repeat, especially during the summer! The fragrant, hearty flavors from the yellow curry and coconut in the chicken marinade are so satisfying, and we can't get enough of the satay peanut sauce recipe! We often make extra peanut dipping sauce to serve on other dishes later in the week, like these Vietnamese Salad Rolls or Tofu Lettuce Wraps. Even kids love the flavors in this simple main dish, so you can really feed the whole family without heating the kitchen. Win-win!
Why You'll Love these Chicken Satay Skewers
- Packed with flavor. Chicken satay skewers are loaded with flavor with an easy to make coconut marinade packed with seasoning. Drizzle some homemade peanut sauce on top and you have the perfect balance of flavors with all the umami notes from soy sauce and the sweetness of brown sugar.
- Quick and easy meal. Although the chicken needs to marinate for an hour, it's ready in just about 15 minutes on the grill - which is way faster than takeout! Marinate it the night before for a very low-prep meal any night of the week. Plus, the wooden skewers make them easy to serve and eat. Great for entertaining!
- Grill-charred to perfection. Although you can make these satay chicken skewers on your indoor grill pan or even baked in the oven or air fryer, they're meant to be made over a grill. The sear marks add texture and flavor to your chicken that is on another level.

Ingredient Notes
To make these delicious grilled Chicken Satay Skewers, you will need the following ingredients (full measurements in recipe card below):
- chicken breasts - cut boneless and skinless cut into 1-inch cubes. You will thread 4-5 pieces on each skewer to make 10-12 skewers.
- coconut milk
- soy sauce
- fish sauce
- yellow curry powder
- brown sugar
- garlic
- ginger
- vegetable oil
- lime wedges - optional, for serving
- roasted peanuts - optional, for serving
- fresh cilantro - optional, for serving
You will also need measuring cups and spoons, skewers (try these bamboo skewers), tongs for grilling, a grill (or indoor grill pan), and a digital meat thermometer.
Thai Peanut Dipping Sauce Ingredients
- hoisin sauce (or dark soy sauce)
- peanut butter
- red curry paste (optional)
- lime juice - freshly squeezed is best, but you can use packaged juice as well.
- honey - or granulated sugar
- boiling water - helps to dissolve the ingredients into a smooth sauce.
- roasted peanuts - chopped and sprinkled on top.
How to Make the Best Chicken Satay Skewers with Peanut Sauce
- Marinate the chicken. Place cubed chicken into a zip-loc bag. Add in all the marinade ingredients (coconut milk, soy sauce, fish sauce, yellow curry powder, brown sugar, minced garlic, ginger and vegetable oil). Stir well to combine. Press the air out of the bag and seal tightly. Press the marinade around the cubed chicken to coat. Place in the refrigerator and marinate for at least 1 hour or overnight.
- Thread the chicken. Thread the chicken onto skewers (about 4 to 5 pieces per skewer). Gently dab with paper towel to remove excess marinade off the chicken.
- Grill the skewers. Heat a grill pan over medium high heat for 4-5 minutes and lightly brush the grill with some vegetable oil. You should notice the oil shimmer and sizzle when it's hot and ready. Grill the chicken skewers for 8-10 minutes on each side or until the internal temperature reaches 165 F (as read on a meat thermometer) and grill marks are clearly visible. Do not overlap the skewers at any time but you can turn the skewers occasionally to achieve even cooking and grill marks on both sides.
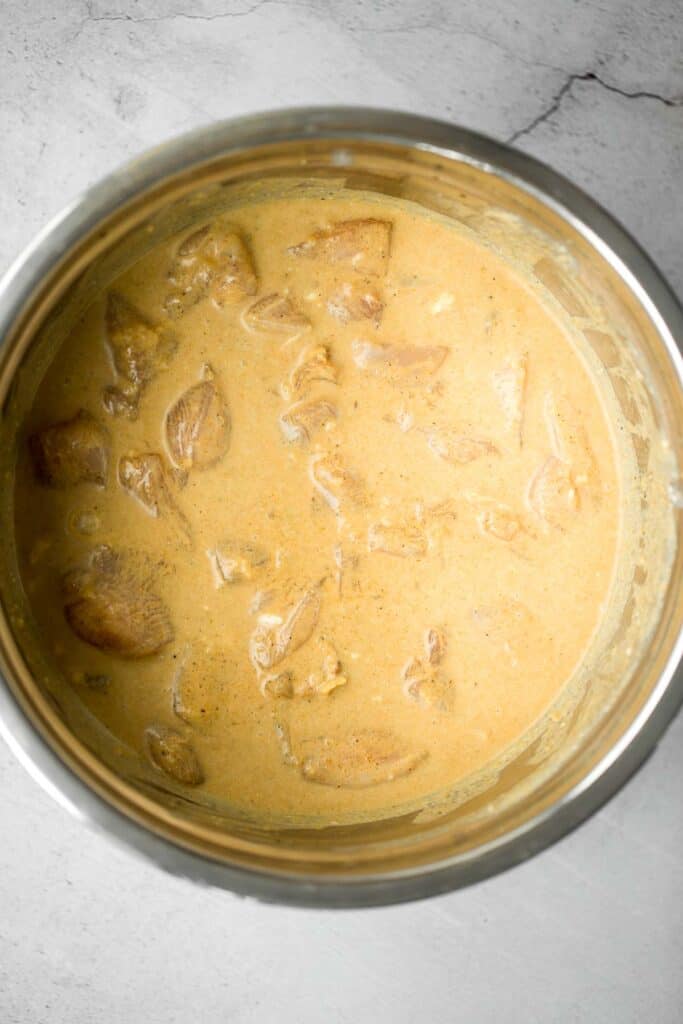
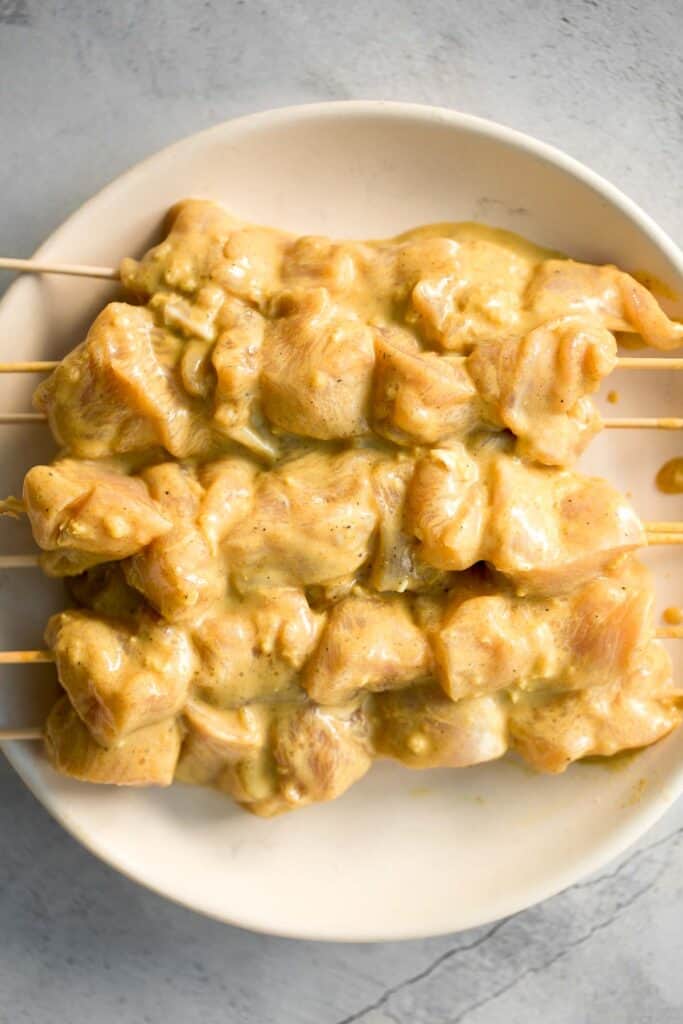
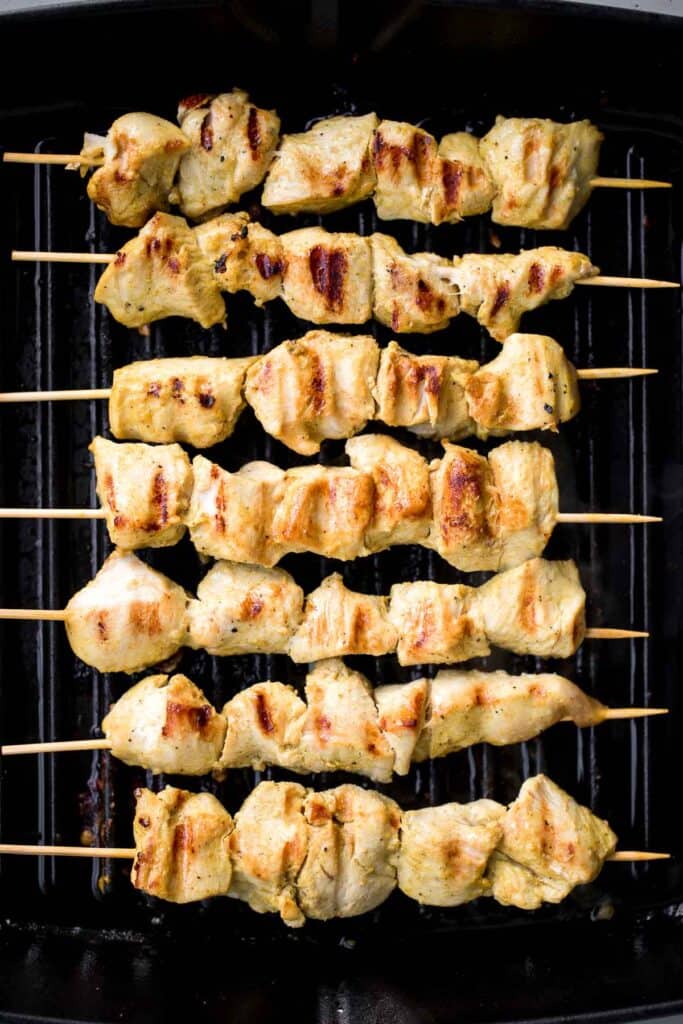
- Make the peanut sauce: Combine all the ingredients (hoisin sauce, peanut butter, red curry paste (optional), lime juice, honey and water). Stir well with a spoon to mix until the mixture is smooth and uniform. Sprinkle chopped roasted peanuts on top.
- Serve. Serve the skewers on a plate with peanut sauce and lime wedges. Sprinkle roasted peanuts and chopped cilantro on top.

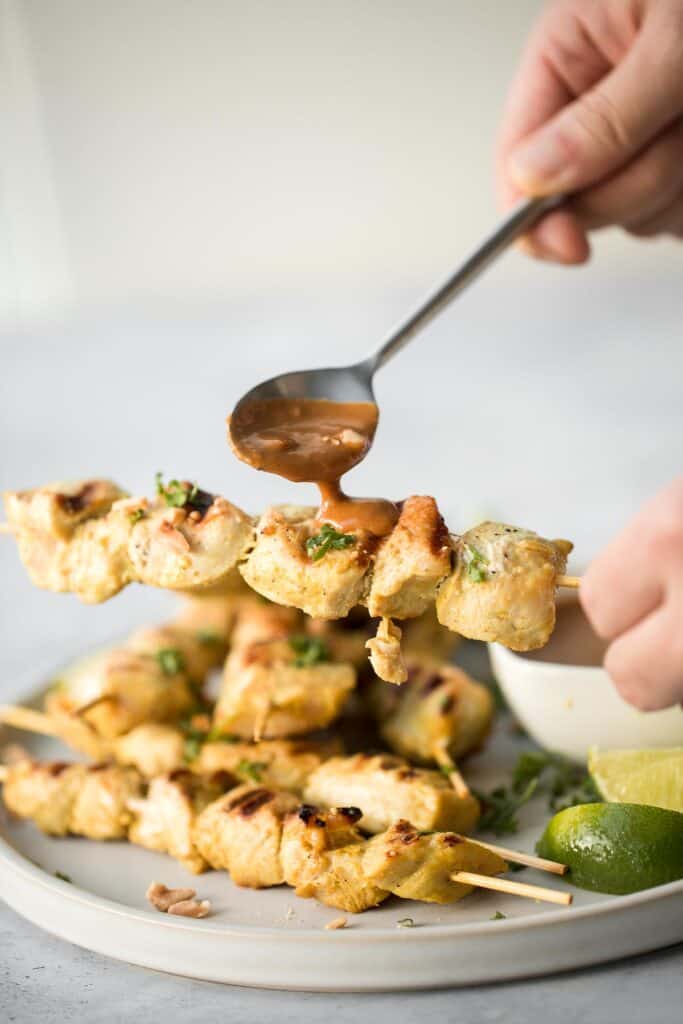

Recipe Variations
- Try different proteins. The marinade's rich, aromatic seasonings work just as well with shrimp, pork, and other mild-flavored proteins. For a vegetarian option, try extra firm tofu cubes.
- Make it spicy. You can add sriracha, red pepper flakes, or a little Thai red curry paste to the chicken marinade as well as the peanut sauce. Adjust the heat to taste. I usually add any spicy ingredients on the side to let everyone adjust the heat to their preference.
- Change the marinade. There are countless ways to adjust the marinade. We love this coconut curry marinade, but you could easily marinate your chicken in a spicy Red curry mixture, honey ginger, teriyaki sauce, and more.
How to Serve
These Satay Chicken Skewers are delicious served on their own with peanut sauce for dipping, or with a South East Asian inspired side dish. Some of our favorites to serve with this are:
For more recipes, see our 25 Side Dishes for Chicken.

Recipe Tips and Tricks
- Space the skewers evenly. Do not overlap the skewers at any time when grilling. You can turn them occasionally to achieve even cooking and grill marks on both sides.
- Use a digital thermometer. A digital meat thermometer is very useful when grilling skewers for checking doneness. Simply insert halfway inside the meat to get a quick reading so that you never end up with undercooked or overcooked meat.
- How to cook skewers in the oven. To cook satay skewers in the oven, place them on a baking tray and roast at 480 F for 12-13 minutes, or when the internal temperature reaches 165 F. You can add some charring by then placing under the broiler on high for 1 minute. Keep a close eye on them, because they can burn quickly.
- How to cook chicken satay in the air fryer. You can cook this chicken in the air fryer as well. Do not thread them and place about 10 cubed chicken pieces in the air fryer basket at a time. Cook at 350 F for 25 minutes, shaking the basket halfway through. You won't get the charred grill marks but they taste amazing and so tender.
Storing and Freezing Instructions
How to Store
Unthread the chicken satay and store it in an airtight container for up to 3 days in the refrigerator. You can also store the leftover peanut sauce for up to 1 week in the fridge in an airtight container.
How to Reheat
Preheat the oven to 350F and wrap the satay chicken skewers in aluminum foil. Reheat for 10-20 minutes until warmed through. For juicier kabobs, you can add a splash of water or chicken broth to the aluminum foil wraps.
FAQ
Yes, but skip the skewers! Arrange the pieces of chicken throughout the air fryer basket and cook for 25 minutes at 350F. Shake the basket at least once to get a nice texture on each piece.
Since the chicken pieces are cubed, they can simply be poked onto the tip of the skewers and then pulled down until just a few inches above the bottom of the skewer. Only add 4-5 pieces per skewer so they can cook evenly. If you're using bamboo skewers, I recommend soaking those in water for about 30 minutes first. Metal skewers can be used right away.
I prefer to use boneless, skinless chicken breasts for this easy chicken satay recipe, as the breast meat has a nice, tender texture and really absorbs the marinade. Boneless chicken thighs are also a great alternative.
More Chicken Skewer Recipes
- Lemongrass Chicken Skewers
- Greek Chicken Souvlaki Skewers
- Balsamic Chicken Kabobs
- Teriyaki Chicken Skewers with Pineapple
- Korean Chicken Skewers
- Persian Saffron Chicken Kebabs (Joojeh Kabob)
Tried this recipe?
I'd love to hear what you think! Leave a comment and rating below to share your feedback. Your reviews help others discover this recipe and help me keep creating more free recipes for you. Snap a photo and tag me on social media @aheadofthyme too.

What Recipes to Cook in August
Are you wondering what to cook in August? Browse our collection of 50 best August recipes to cook for breakfast, lunch, dinner, and dessert!

It's August which means we are enjoying the last weeks of summer before fall and back to school rolls around. Our new roundup of fresh seasonal recipes to make throughout this month still includes lots of grilling recipes, fresh salads and summer soups, and light meals that incorporate the abundant of late season veggies like zucchini and corn. Our round up of the 50 best recipes to cook in August includes summer breakfast and brunch recipes, easy lunch recipes, light and filling dinners, fresh appetizers and snacks, and fruity and frozen desserts.
What is in Season in August
There are so many fruits and vegetables in season during the summer. Some of the most popular summer produce that you can find fresh in your local grocery store or farmer's markets in the month of August include (click the links below for a list of recipes that we have using that ingredient):
Holidays in August
There aren't really any big holidays this month. August is all about enjoying the last few weeks of summer with more picnics, BBQs, and potlucks, and getting ready for back to school. Check out our favorite recipes to make for the kids:
Breakfast Recipes to Cook in August
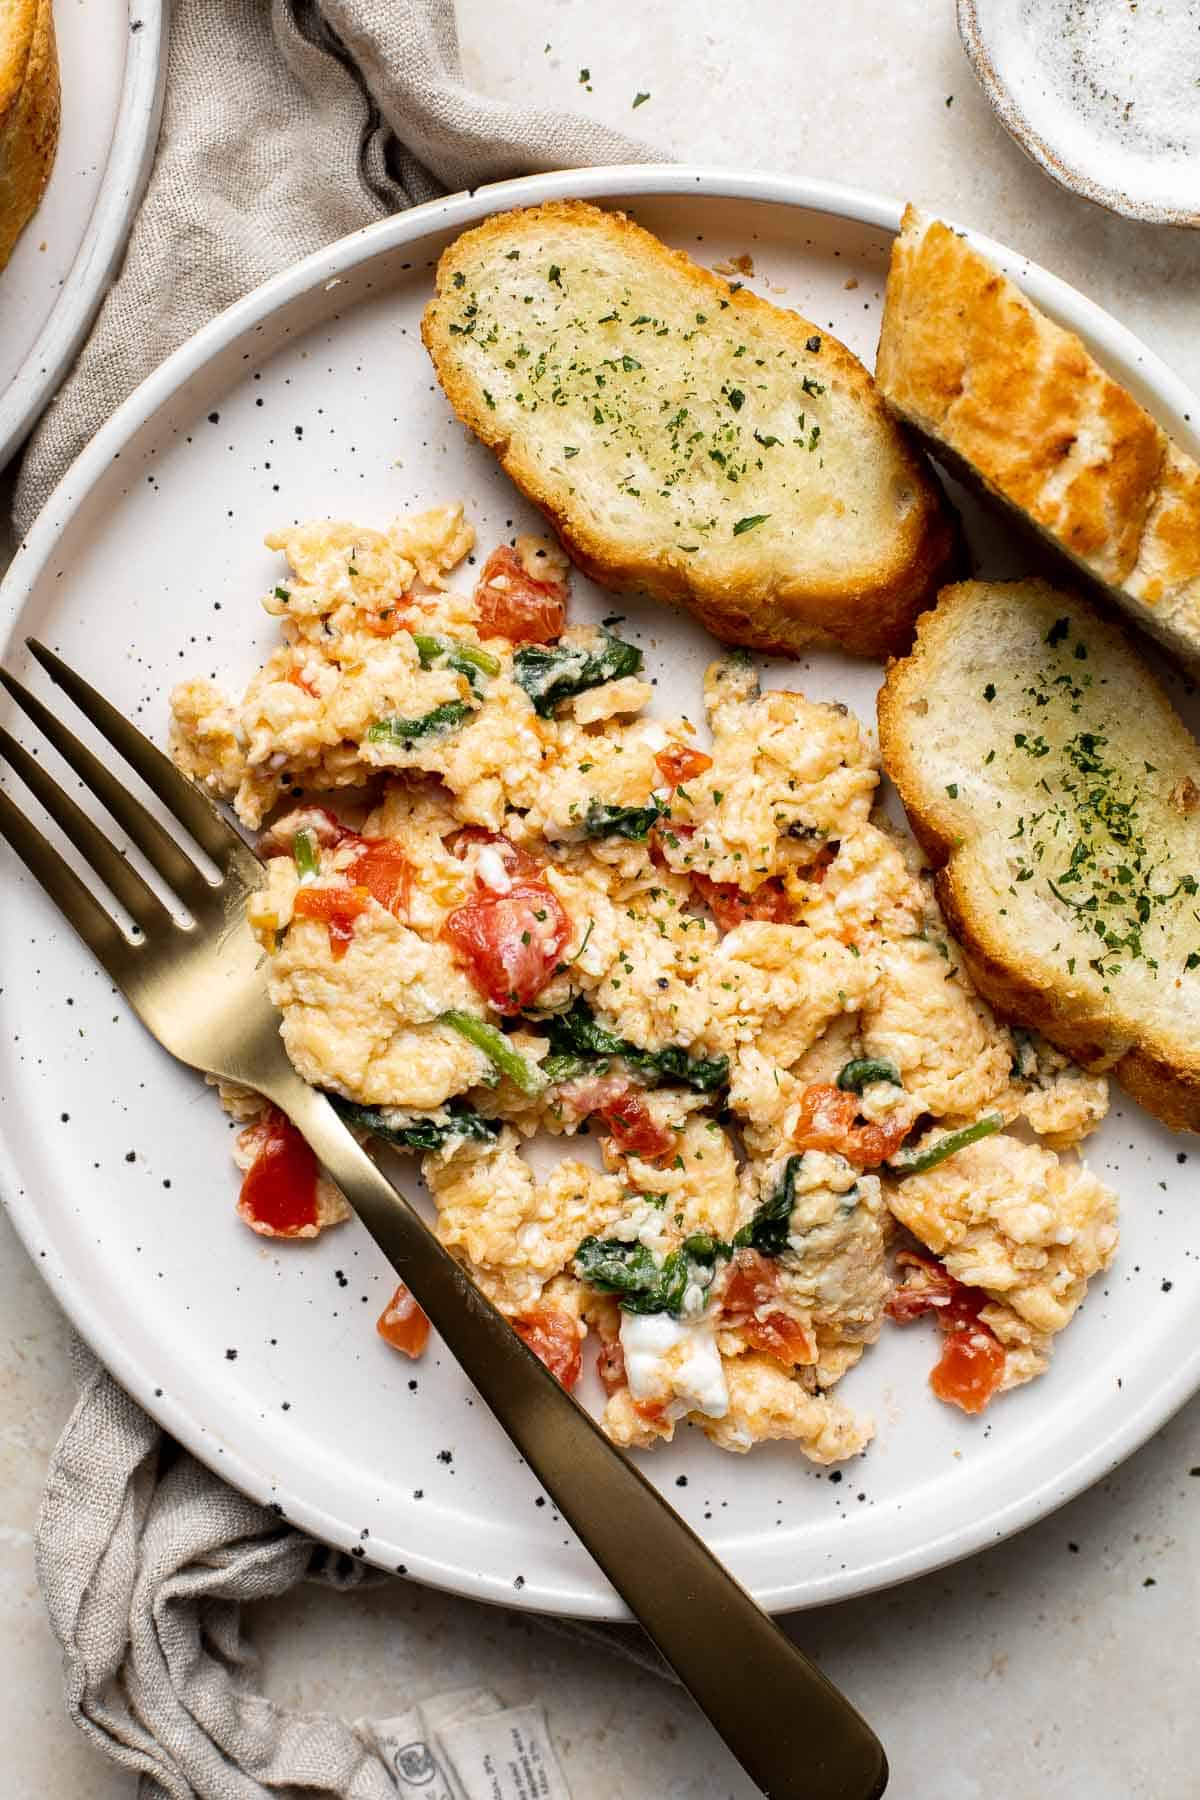 | 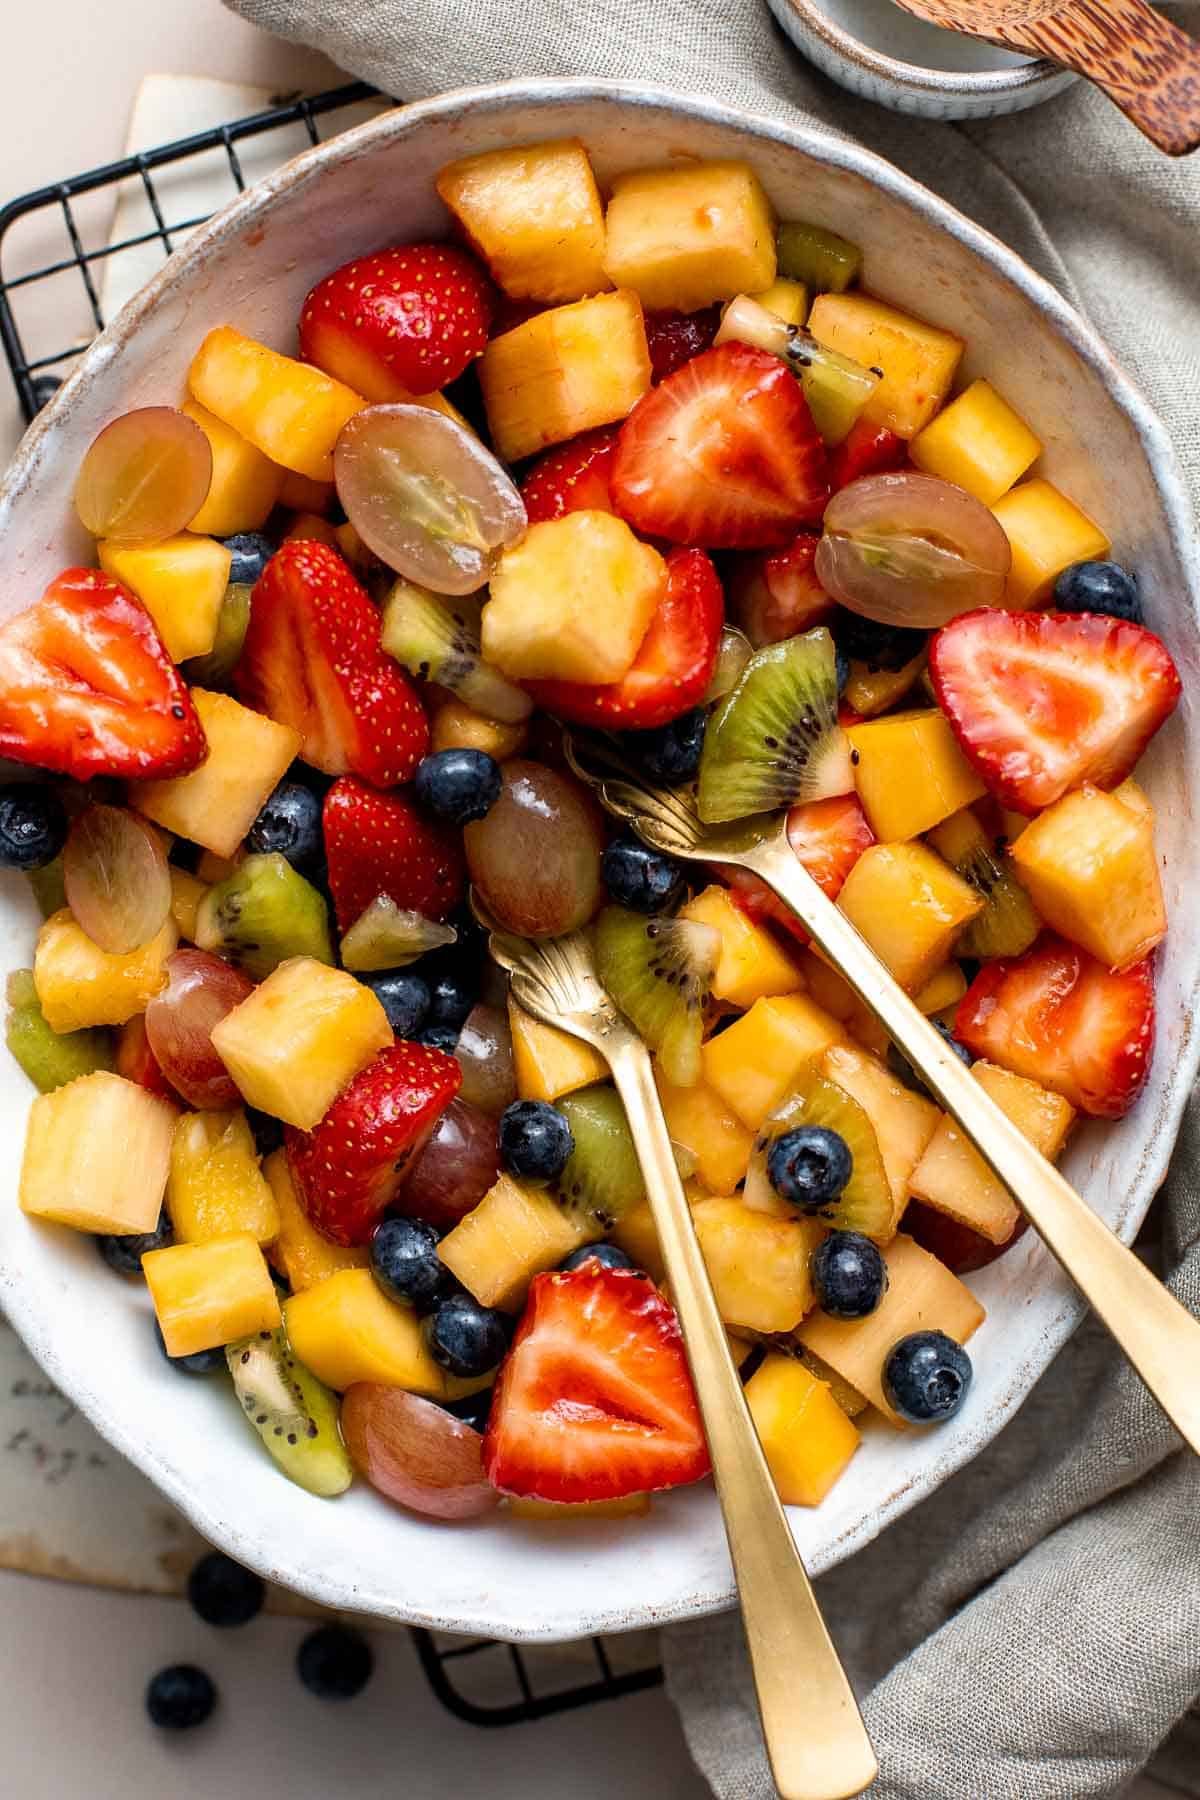 |
- Mediterranean Scrambled Eggs. Mediterranean Scrambled Eggs with spinach, tomato, and feta is loaded with flavor and a quick and easy breakfast to make in under 10 minutes (with prep!).
- Summer Fruit Salad. This Summer Fruit Salad is colorful, delicious, and naturally sweet (no processed sugar!). It's easy to make with fresh fruit tossed in a homemade dressing.
- Nutella Crepes. Nutella crepes with berries are sweet and indulgent. These French pancakes are an easy to make blender recipe that will have you craving breakfast all day.
- Mango Pineapple Smoothie Bowl. Mango pineapple tropical smoothie bowl? Yes, please! Who doesn't love pineapples and mangos blended together and topped with more fruit, granola, and coconut?
- Caprese Frittata. Caprese Frittata is light and fluffy, laced with fresh basil and topped with melted mozzarella cheese and blistered balsamic tomatoes. Ready in 10 minutes!
- Zucchini Muffins. Quick and easy zucchini muffins are loaded with fresh zucchini which makes them fluffy, moist, delicious, and full of nutrients. Freezer-friendly too!
- Mini Pancakes. Mini Pancakes (Silver Dollar Pancakes) are the fluffy, fun-sized version of classic pancakes. They're easy to make using a handful of everyday ingredients.
- Blueberry Cinnamon Rolls. Delicious blueberry cinnamon rolls are soft and fluffy, filled with cinnamon sugar, loaded with fresh blueberries, and topped with cream cheese icing.
Lunch Recipes to Make in August
 |  |
- Gourmet Hot Dogs. Juicy and delicious Gourmet Hot Dogs loaded with a variety of toppings will take your next backyard BBQ or potluck to a whole new level. Try them all!
- Gazpacho. Gazpacho is a refreshing, simple, and delicious chilled soup. This super easy no cook soup is made by blending the summer's freshest veggies.
- Simple Italian Salad. Simple Italian Salad is fresh, delicious, and flavorful. This Olive Garden copycat is loaded with fresh veggies and lightly tossed in homemade dressing.
- Chicken Pad Thai. No more takeout when you can make flavourful, restaurant-style, authentic chicken Pad Thai at home in just 10 minutes. It's sweet, savoury, sour and nutty.
- Mediterranean Bowl. This Mediterranean Bowl is healthy, nourishing, and delicious. It's made with quinoa, hummus, chickpeas, and fresh veggies to keep you full for hours.
- Stuffed Zucchini Boats. Stuffed Zucchini Boats are a fun, low carb dinner filled with a hearty meat sauce, topped with cheese, and baked until melty and bubbly.
- Mexican Street Corn (Elote). Mexican street corn (elote) is a delicious corn on the cob loaded with a cheesy sauce elevated with cilantro and lime. Creamy, cheesy, spicy, and flavorful.
- Shrimp Scampi with Zucchini Noodles. Shrimp scampi with zucchini noodles is filling, yet surprisingly light! Since we are using fresh zucchini noodles, you will feel no guilt in sopping up the sauce with an extra crusty piece of bread!
- Salmon Bites. Salmon Bites are flavorful and delicious bite-sized pieces of salmon cooked until tender with crispy, golden edges and coated with an homemade sticky glaze.
- Tomato Basil Soup. Homemade tomato basil soup is comforting, rich, and smooth. This cozy soup is easy, flavourful, and nourishing, making it so much better than canned.
Dinner Recipes to Cook in August
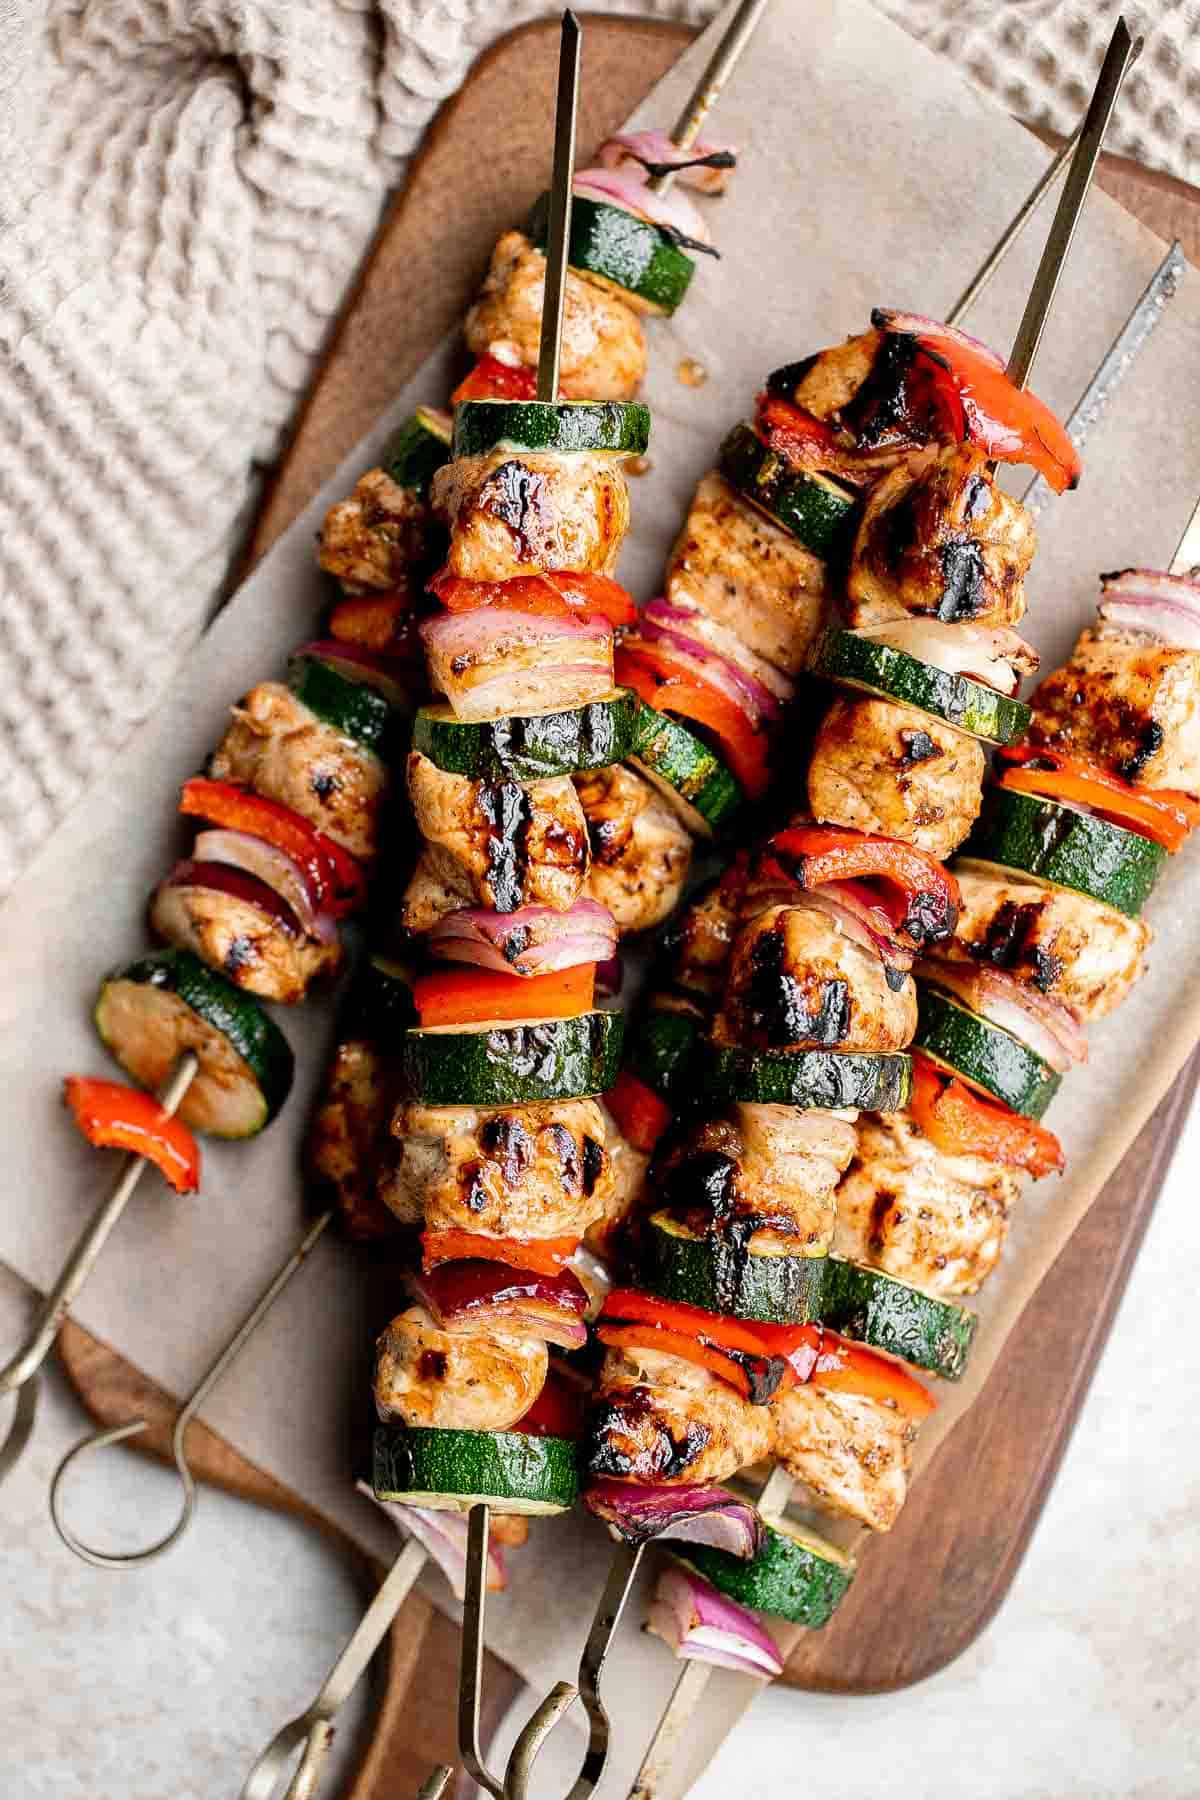 |  |
- Balsamic Chicken Kabobs. Grilled Balsamic Chicken Kabobs are a delicious flavorful summer grill staple marinated in a balsamic sauce, skewered with vegetables, and grilled or baked.
- Beer Battered Fish. Crispy Beer Battered Fish is flaky and tender on the inside with a crispy, crunchy coating on the outside - the best traditional fish and chips!
- Creamy Tomato Pasta. This Creamy Tomato Pasta is a simple and delicious meal made from scratch in 25 minutes with a cream and tomato based sauce that is rich and silky smooth.
- Spicy Cumin Lamb Skewers. Juicy and tender, Xinjiang Spicy Cumin Lamb Skewers with a bold cumin and cayenne marinade, are so flavourful and easy to make on the grill or air fryer.
- Baked Caprese Chicken. Baked caprese chicken is tender, juicy, and delicious, topped with burst tomatoes, mozzarella cheese, fresh basil, and a drizzle of balsamic glaze.
- Teriyaki Salmon. Quick easy teriyaki salmon is tender, flaky, and flavorful, with bold flavors from the delicious teriyaki marinade. Great for dinner or meal prep lunches.
- Honey Garlic Shrimp Skewers. Grilled honey garlic shrimp skewers marinated in a flavorful Asian marinade are sweet and savory, loaded with flavor, and ready in 25 minutes.
- Lemongrass Chicken. Pan-fried Lemongrass Chicken is a healthy, flavorful, and gluten-free Vietnamese dinner that is quick and easy to prep and cook in less than 25 minutes!
- Black Bean Burgers. Homemade vegetarian black bean burgers are thick, hearty, flavorful, and delicious. They are easy to make with the best texture (no mushy burgers here!).
- Grilled Shrimp Boil. Easy, garlicky and buttery grilled shrimp boil with prawns, corn, baby potatoes and sausage, seasoned and tossed with parsley takes just 20 minutes to cook.
Appetizers and Snacks to Make in August
 | 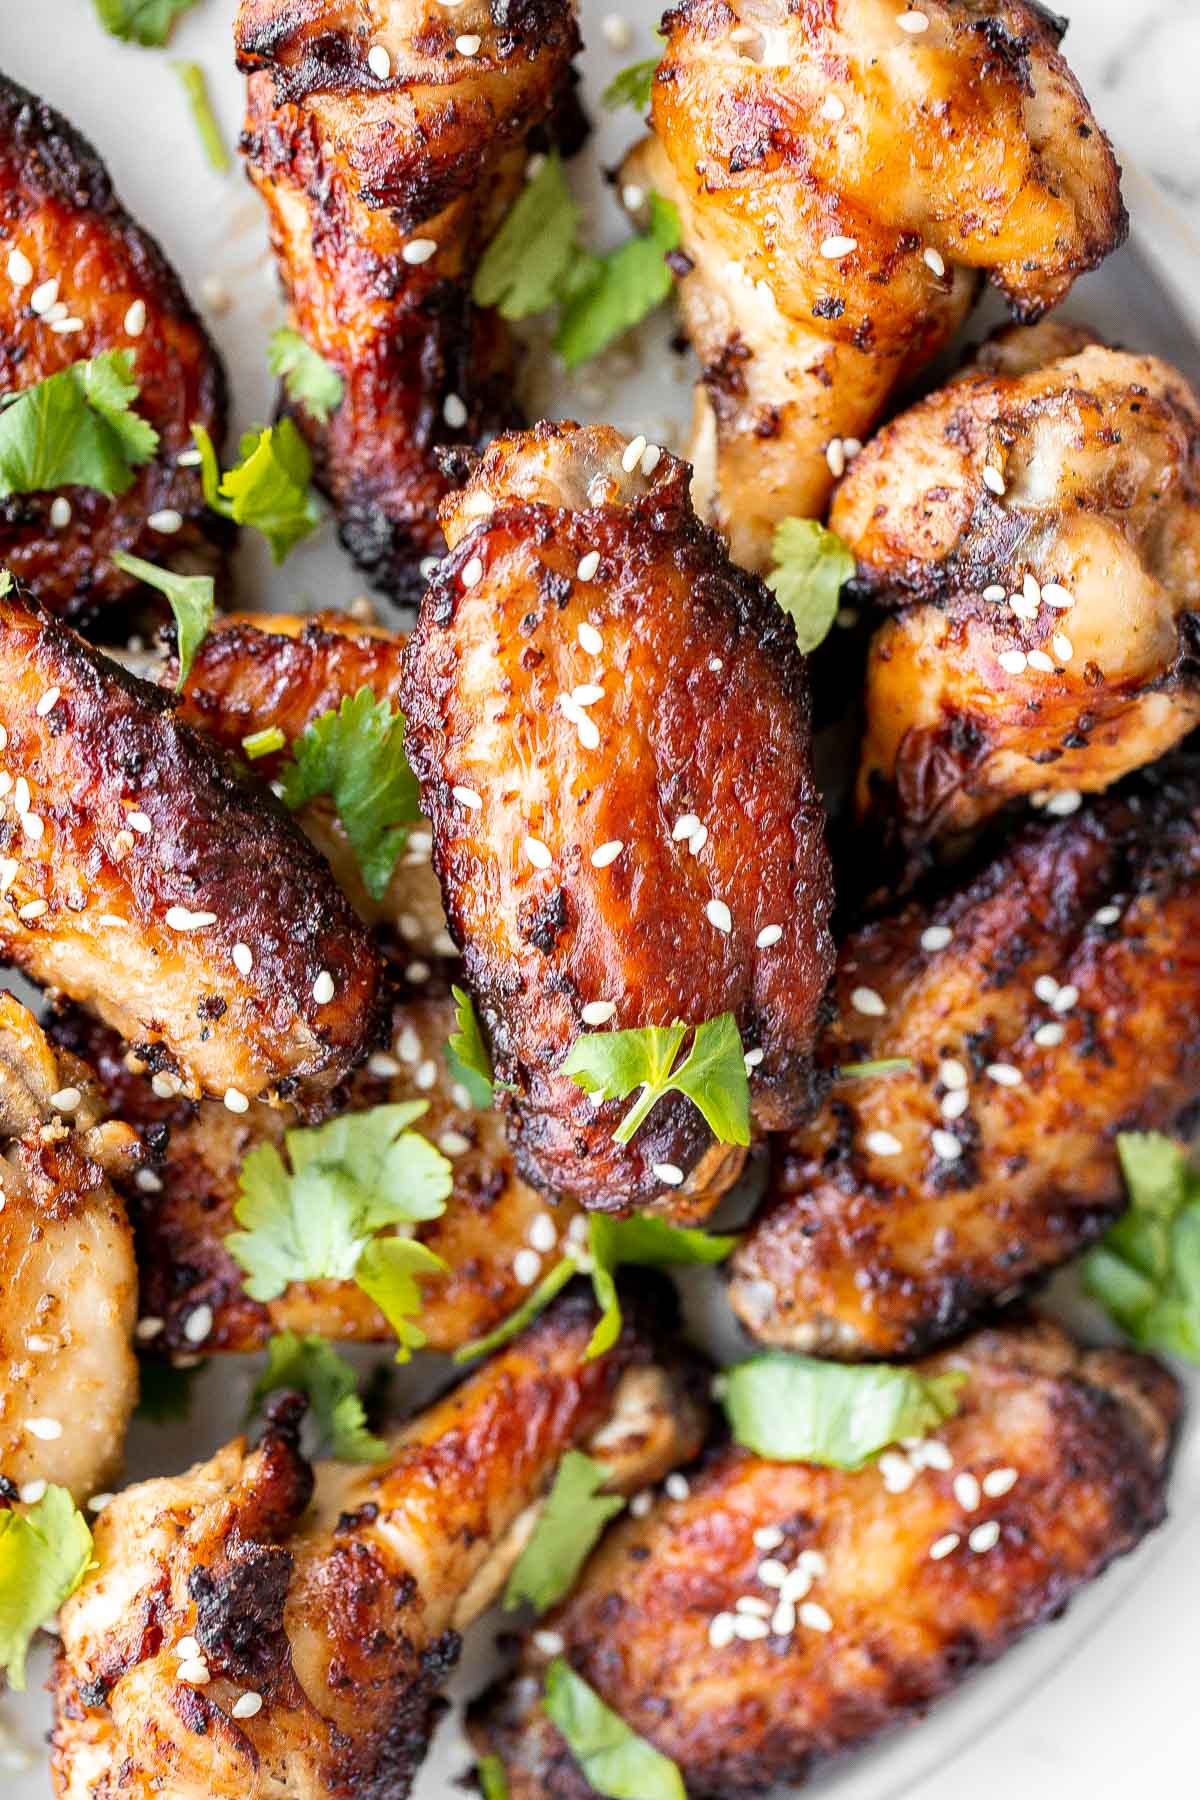 |
- Antipasto Platter. This Antipasto Platter is a show-stopping appetizer made with a variety of marinated veggies, olives, cheeses, breads, cured meats, and fresh vegetables.
- Miso Garlic Chicken Wings. Baked miso garlic chicken wings are crispy, delicious, and easy to make. They're marinated in a savoury Asian marinade, and cooked in the oven or air fryer.
- Shrimp Tacos. Quick and easy shrimp tacos with lime crema slaw are ready in less than 30 minutes and are packed with flavourful crispy shrimp and creamy cabbage slaw.
- Fried Zucchini. Fried Zucchini are flavorful, savory, and delicious. Soft and tender zucchini fries are coated in a golden crispy breadcrumb exterior. So good!
- Tomato Galette. Tomato Galette is the ultimate celebration of summer, made with a buttery, flaky crust, a thin layer of cheese, and a bed of colorful heirloom tomatoes.
- Pico de Gallo. Homemade Pico de Gallo is quick and easy to make at home in just 5 minutes with a handful of simple ingredients. It's fresh, delicious, and authentic.
- Chicken Nachos. Chicken nachos are an easy to make when you're craving something filling, crunchy, cheesy, and satisfying. Perfect game day appetizer or late-night snack.
- Roasted Red Pepper Hummus. Smooth creamy roasted red pepper hummus is a delicious, flavourful, vegan + gluten-free dip. This healthy appetizer is easy to make with a few ingredients.
- Teriyaki Meatballs. Teriyaki meatballs are our latest go to weeknight dinner - quick and easy to cook in the air fryer or oven, saucy and flavorful, and freezer-friendly.
- Zucchini Fritters. Zucchini fritters are crispy outside, tender inside, and loaded with zucchini. These healthy bites are one of my favorite ways to use up summer zucchini.
Desserts to Bake in August
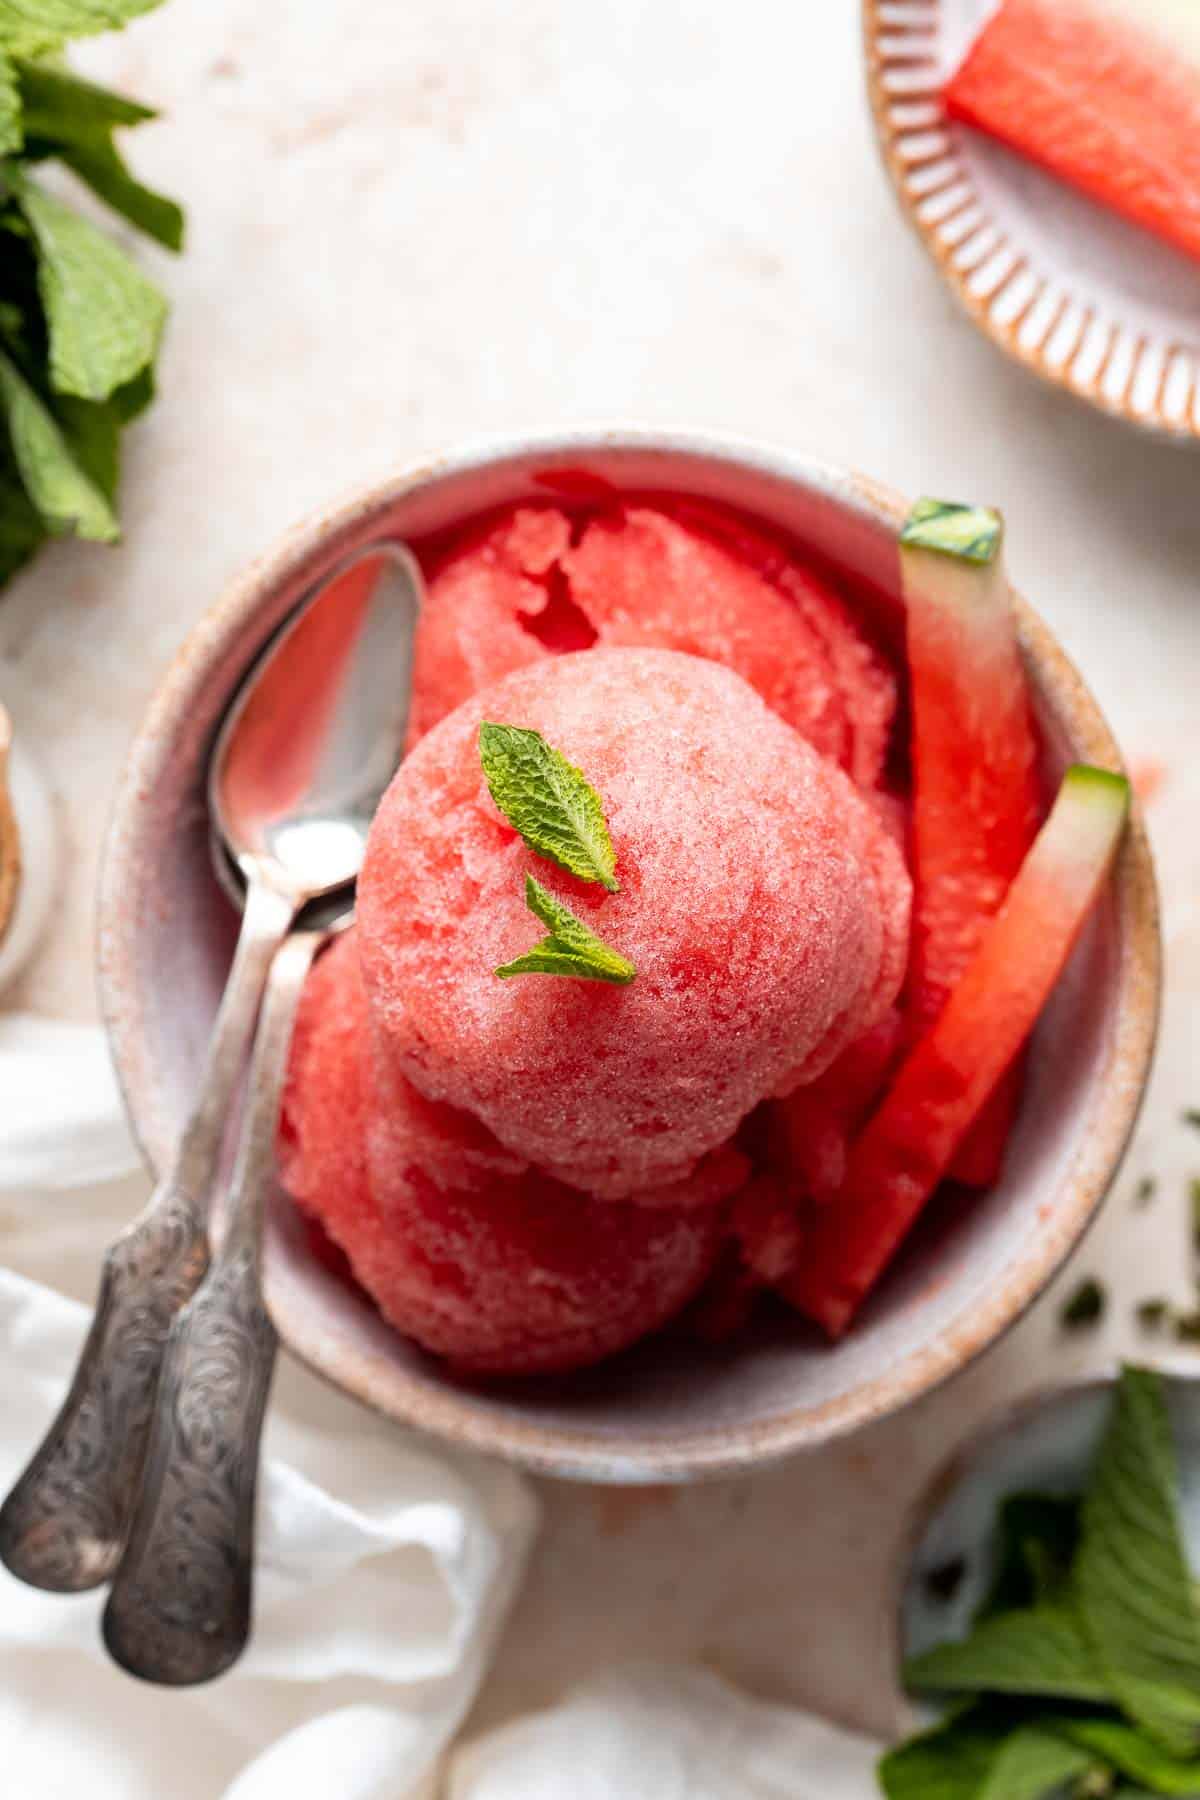 | 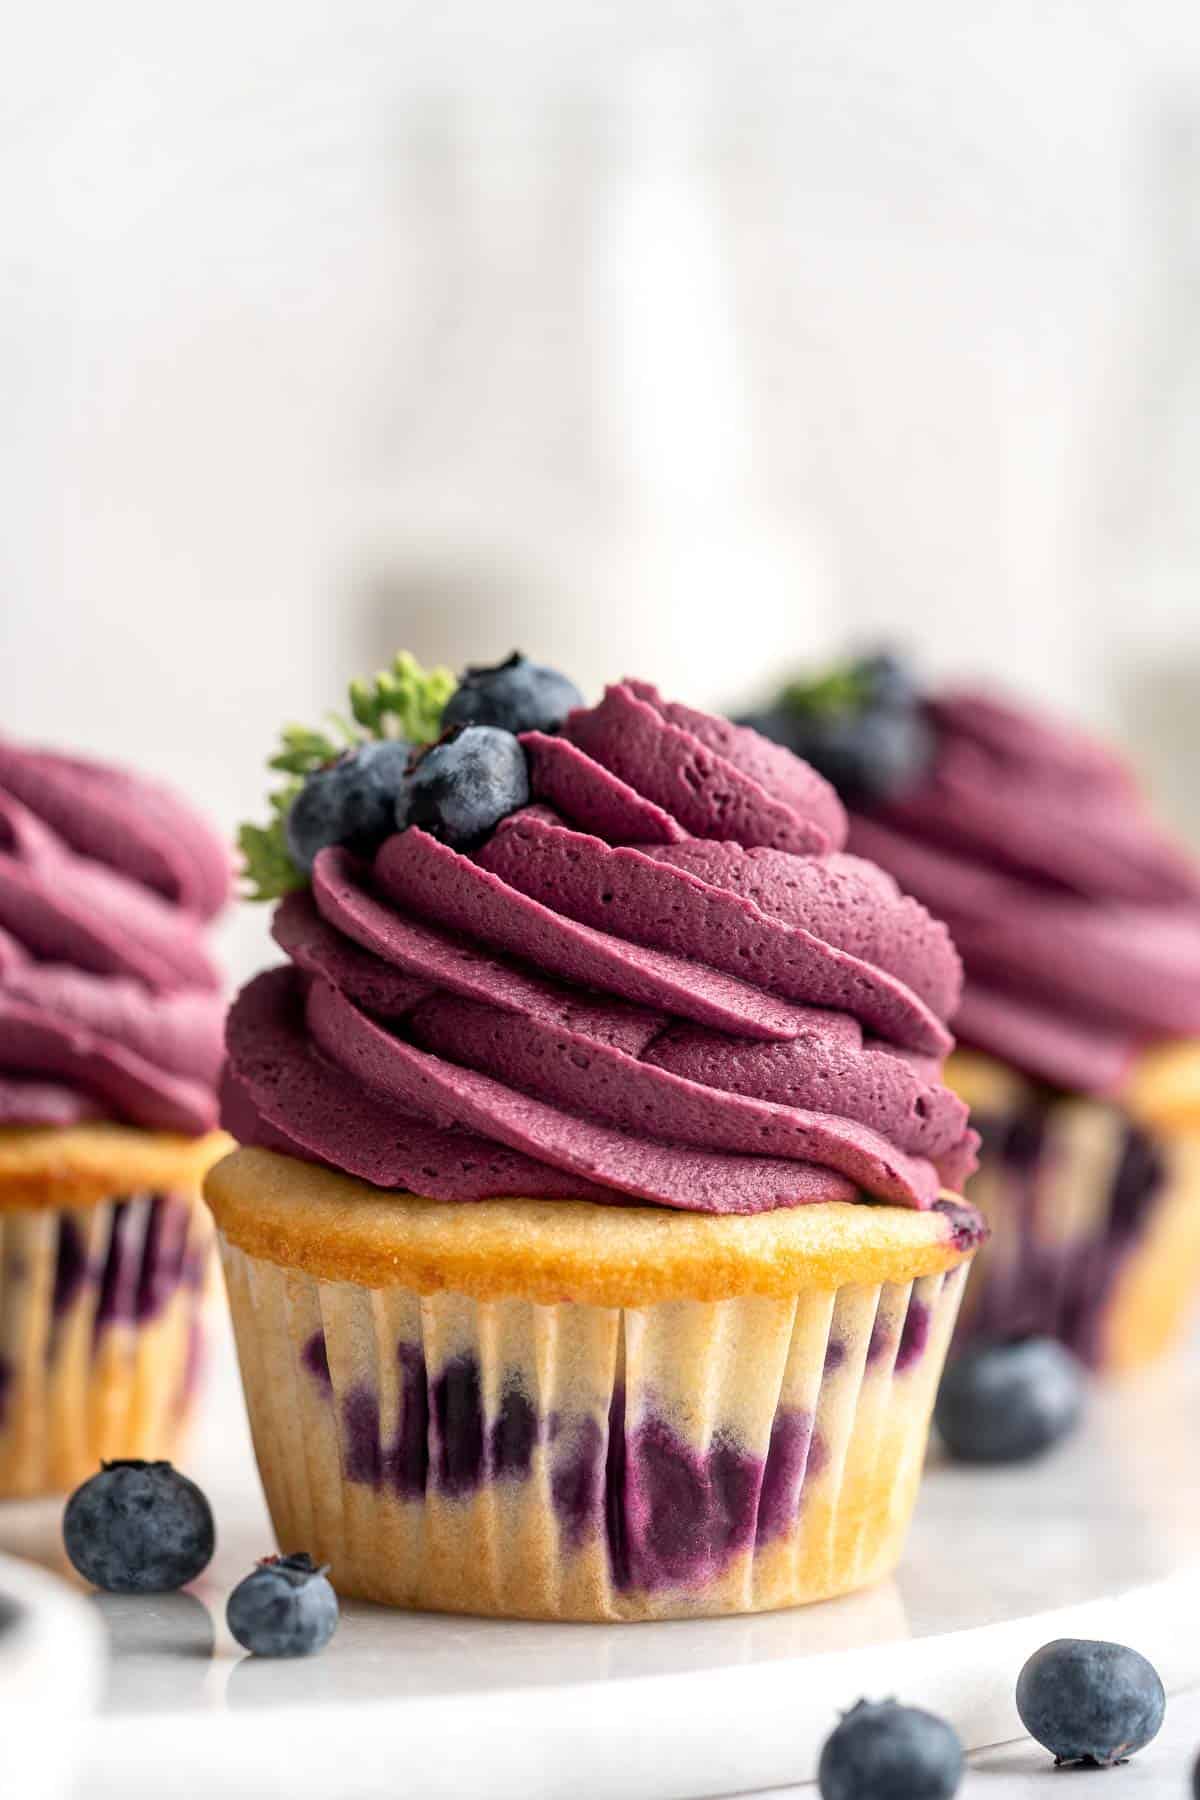 |
- Watermelon Sorbet. This 2-ingredient Watermelon Sorbet is easy to make, healthy, all-natural and vegan. Make this homemade frozen treat with no ice cream maker required!
- Blueberry Cupcakes. Blueberry Cupcakes are a homemade treat with moist and tender vanilla cupcake batter loaded with fresh blueberries and topped with blueberry buttercream.
- Peach Galette. This homemade Peach Galette is a simple, rustic tart, perfect for enjoying the flavors of summer! It's buttery and flaky with tender, spiced peaches.
- Chocolate Zucchini Cake. Chocolate zucchini cake is moist, fluffy, and delicious. Loaded with fresh zucchini for a burst of nutrition, and topped with a homemade cream cheese icing.
- Cherry Cheesecake. Cherry Cheesecake is lush, velvety, and creamy finished with a heap of sweet homemade cherry sauce on top. The perfect summer dessert with cherries!
- Ice Cream Sandwiches. Homemade Ice Cream Sandwiches are made with creamy vanilla ice cream perfectly nestled between two tender homemade chocolate cookies.
- Peach Cobbler. Easy peach cobbler is packed with sweet and juicy fresh peaches and topped with a buttery, golden topping. Make it with just 15-minutes of actual prep work.
- Cherry Crumb Bars. These bakery-style homemade Cherry Crumb Bars with 3 delicious layers are sweet, buttery, and tart. They're easy to make and ready in just over an hour.
- Blueberry Pie. Summery classic blueberry pie is made with the perfect flaky pie crust, a jammy blueberry filling with a hint of lemon, and sealed with a lattice top.
Did You Make Any of These Recipes to Cook in August?
Please leave a comment and rating below, and let me know what you thought of this round up of delicious recipes to cook this August. Be sure to snap a picture and tag me on Instagram @aheadofthyme or share it on the Pinterest pin so that I can follow along.
HUNGRY FOR MORE? Don't forget to sign up for my email newsletter so that you don't miss any recipes. You can also follow along on Instagram and Pinterest for more recipe updates.
Gazpacho
Gazpacho is a refreshing, simple, and delicious chilled soup. This super easy no cook soup is made by blending the summer's freshest veggies including perfectly ripe tomatoes, cucumbers, bell peppers, onions, and garlic, with a little olive oil and a few seasonings. It takes just 10 minutes to prep before chilling. There is nothing more refreshing on a hot summer day!

Authentic gazpacho soup is a traditional dish from Southern Spain made with heaps of fresh summer produce, bread, olive oil, vinegar, and some simple seasonings. Since it contains mostly tomatoes, you'll certainly notice the fresh tomato flavor, but the cooling cucumber and savory onion and garlic add layers of flavor that refresh all the way down. It's a celebration of summer's abundance, and this easy gazpacho recipe is a mainstay on our menu all summer long!
Why You'll Love This Gazpacho
- Great for entertaining. Homemade tomato gazpacho couldn't be easier to make, yet it looks and tastes five-star. Make it with the finest quality ingredients you can afford, blend it together the day before, then serve in shot glasses or small cups with a drizzle of olive oil and a few garnishes. You won't even break a sweat (or have to turn on the oven)!
- So quick to prepare. If you have a blender, fresh summer produce, and a handful of pantry staples, you can make gazpacho in just a few minutes. Plus since it's a no cook soup, clean-up is minimal. Just place the blender in the dishwasher and you're done! Perfect for those too-hot-to-cook nights when you just want to veg out. Just blend, chill, then serve!
- Gluten-free and vegan. Traditional gazpacho is almost always vegan, which is amazing for vegetarians and vegans or anyone looking to add more veggies to their summer meals. This version ditches the bread to make it suitable for a wider audience, so it's gluten-free, too. Don't worry; it still has tons of fresh flavor, but it's a little thinner and smoother than the traditional gazpacho recipe.
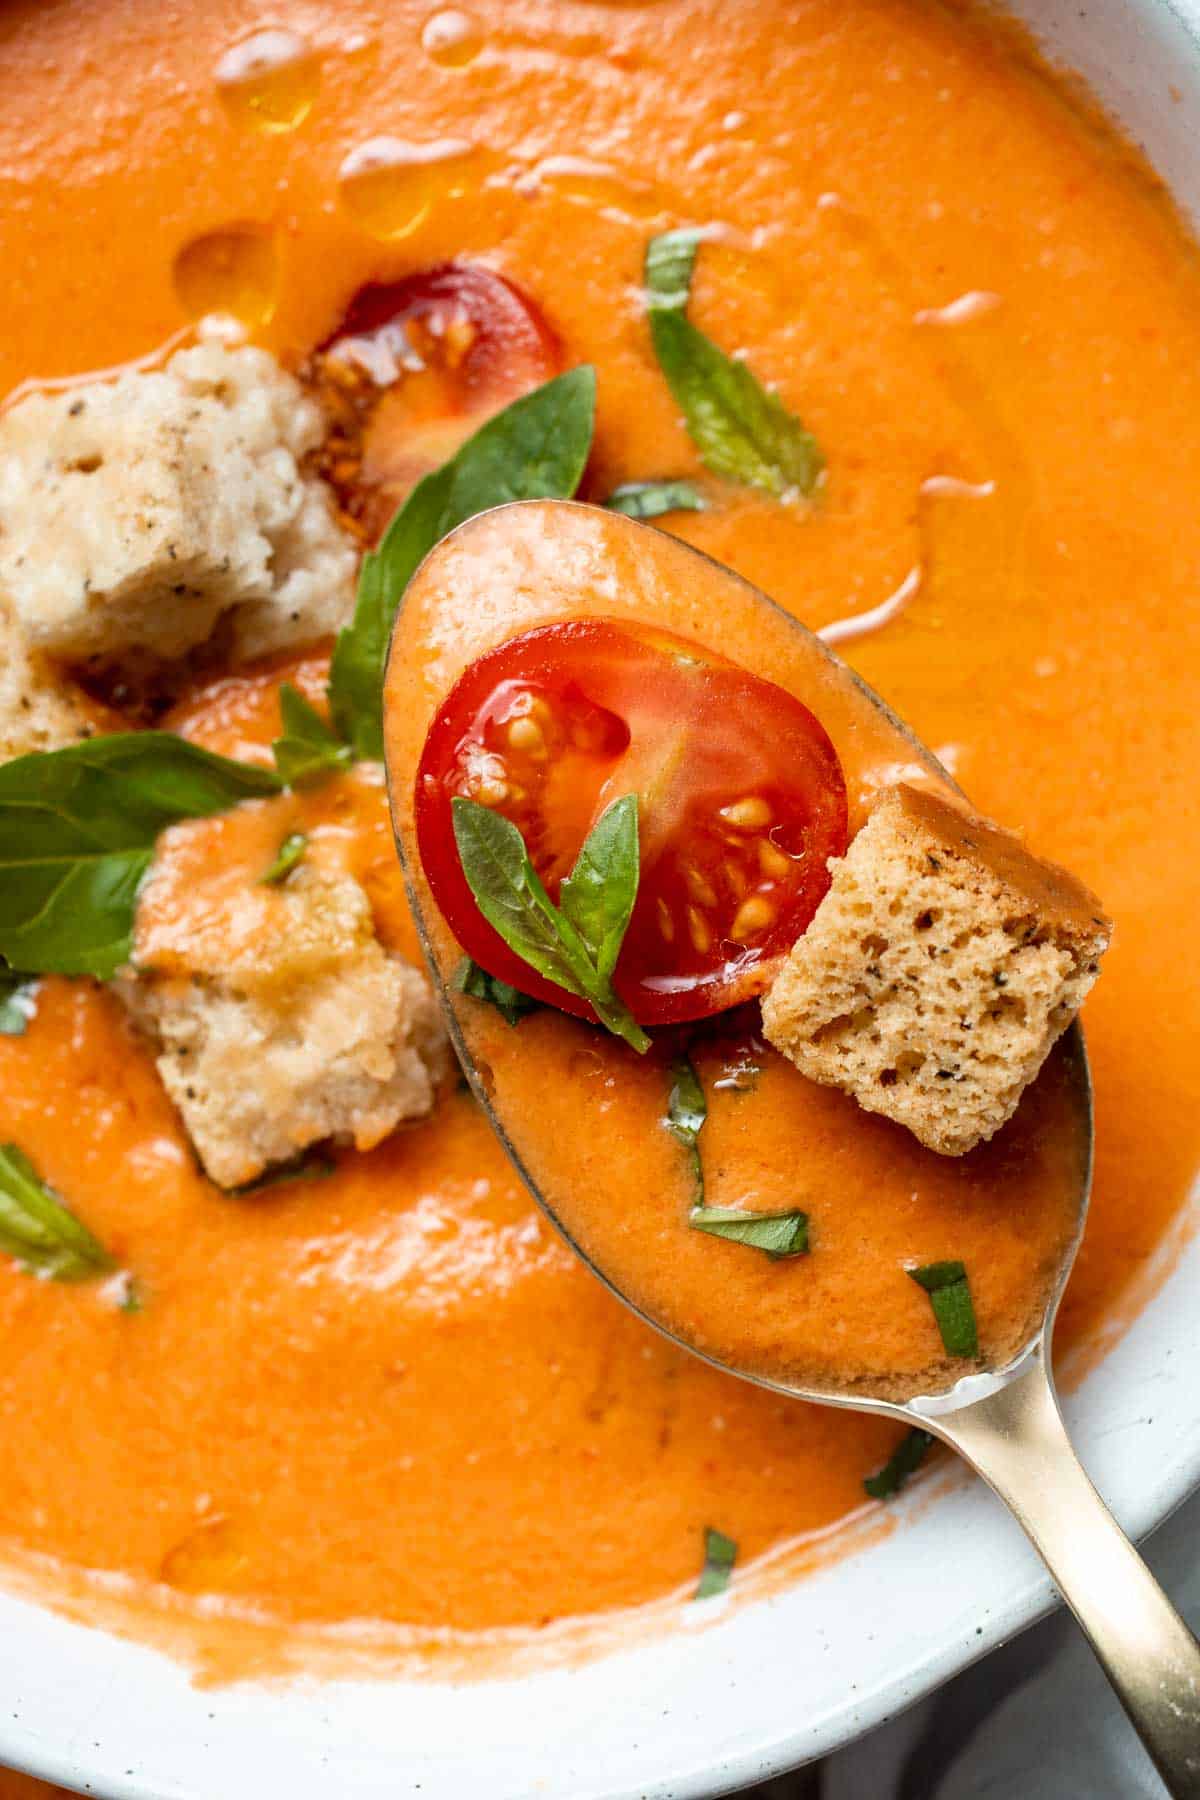
Ingredient Notes
To make this delicious Gazpacho, you will need the following ingredients (full measurements in recipe card below):
- fresh veggies - quality matters here, especially for the tomatoes. Choose really good tomatoes, like the freshest, ripest heirloom tomatoes at the market. Grab an English cucumber, red bell pepper, red onion, and garlic, too.
- extra-virgin olive oil - for the soup and for serving.
- sherry vinegar - real Spanish sherry vinegar from Jerez is a delicacy and can be hard to find. For a budget choice, choose red wine vinegar instead.
- salt & freshly ground black pepper
- cherry tomatoes - for garnish
- fresh basil - chopped or sliced to sprinkle on top.
- croutons - these are optional for garnish. I prefer to make my own, but you can also use freshly made croutons from a store instead.
You will also need a high speed blender or food processor, a glass container or a large bowl for chilling, and serving dishes.
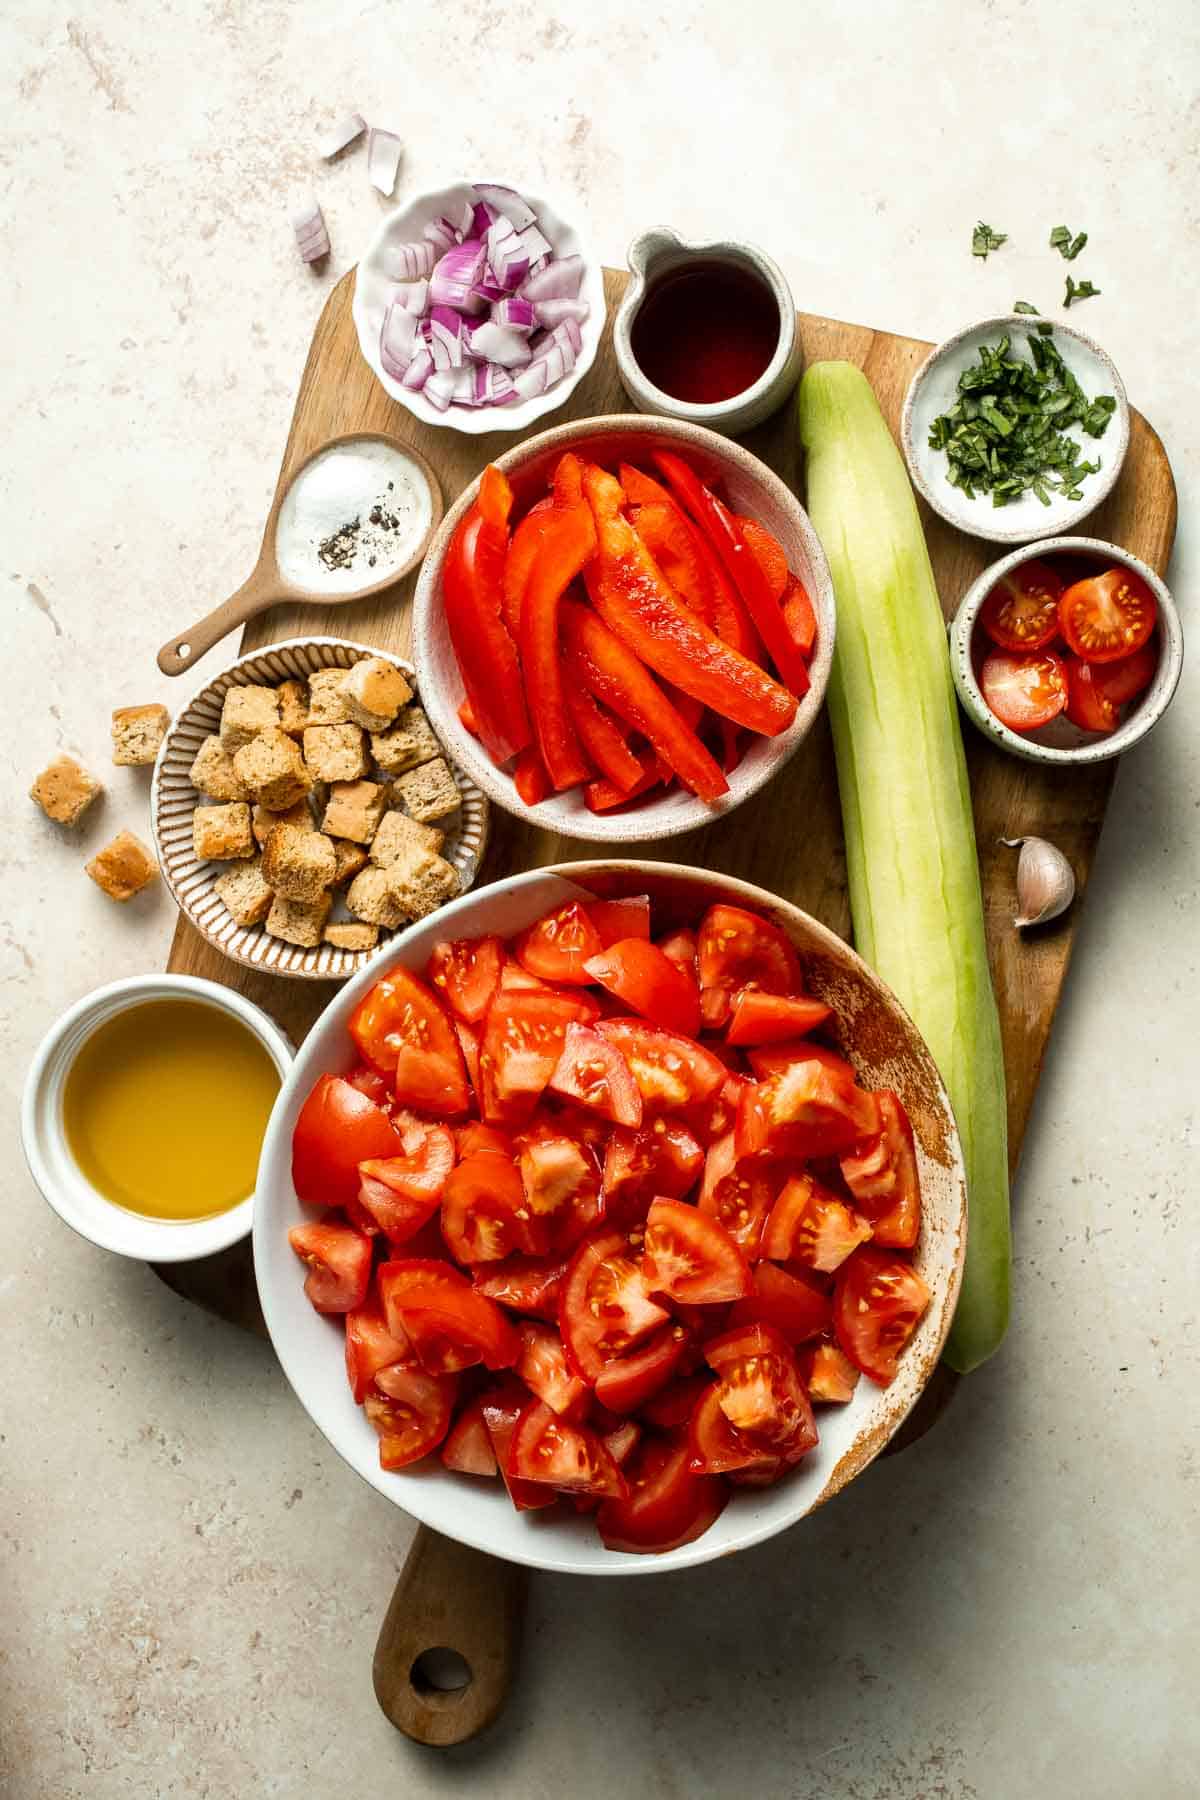
How to Make the Best Gazpacho
- Blend. In a blender, add tomatoes, cucumber, bell pepper, onion, garlic, oil, vinegar, salt and pepper. Blend on high until smooth, about 1-2 minutes.


- Chill. Transfer the mixture into a glass container and close the lid. Refrigerate for at least 2 hours so all the flavors infuse together.


- Serve. Divide into bowls and garnish with cherry tomatoes, basil, and croutons, if desired. Add a drizzle of olive oil and serve cold.


Recipe Variations
- Add bread. Many Spanish gazpacho recipes call for leftover slices of white bread, which give the soup a bit of texture and extra flavor. We typically make it without, but it's delicious that way, too!
- Add fruits. Watermelon gazpacho is a traditional summer option and pairs perfectly with the other fresh ingredients in this recipe. Add a little fresh mint for a cooling note.
- Give it some spice. Gazpacho usually isn't super spicy, but it can be! Add a jalapeno or serrano pepper to the gazpacho or ½ - 1 teaspoon of red pepper flakes. Just remember that you can't take it out, so start with less, taste, and add more if needed. The heat will build as it chills, too!
How to Serve
This Gazpacho is delicious served on its own, or paired with some of my favorite sides including:
- Spanish Tortilla (Tortilla de Patatas)
- Patatas Bravas
- Garlic Breadsticks
- Simple Italian Salad
- Yeast Rolls
For more recipes, see our 25 Side Dishes for Soup.
Recipe Tips and Tricks
- Use the best quality ingredients. This isn't a time to use pale, lackluster grocery store tomatoes. Grab the plumpest, freshest tomatoes from your garden or the farmer's market, and use fresh herbs, not dry ones. It will make a tremendous difference!
- Don't forget to chill out. Gazpacho needs to chill for at least a couple of hours for the best texture and flavor. Budget for 2-4 hours or make it the day before and serve the next day.
- Make your own croutons. When you have simple recipes like this, it's all about layering flavor. Homemade croutons will taste so much better than the prebagged croutons from the store and couldn't be easier. I usually use my No Knead bread, cut it into cubes, then toss the cubes with olive oil and a little sea salt. Bake at 350 F for 5-7 minutes or until toasted golden brown on all sides. Easy and delicious!
- Thin as needed. If you find your homemade gazpacho is a little thick, don't water it down. Instead, use storebought tomato juice to thin as needed.
Storing and Freezing Instructions
How to Store
Gazpacho is intended to be eaten cold and should be stored in the fridge. To keep it fresh, keep it in an airtight container in the fridge for 3-4 days.
How to Freeze
For longer storage, freeze the chilled gazpacho in freezer-safe containers for up to 6 months. Let it gradually thaw in the fridge overnight before serving like normal. If it separates, blend or shake thoroughly before serving.
FAQ
Gazpacho is a traditional Spanish soup made by blending raw vegetables, primarily fresh tomatoes with chopped cucumber, onion, bell pepper, and garlic, with crusty bread and a little olive oil and vinegar. There are also variations that use watermelon, strawberries, and other summer fruits. Unlike most soup recipes, classic gazpacho is served chilled from the fridge. It has similar flavors to your favorite tomato salsa, but in soup form! There are countless different recipes out there, each reflecting different cultural traditions and seasonal variations. Since it only requires a few minutes of actual prep time, it's a fantastic way to use up extra produce, and there's no better way to cool down during the hot summer months!
Yes, this homemade gazpacho soup can certainly be frozen for later! Normally, we do not recommend freezing recipes with fresh ingredients as the cell walls will burst and break apart after thawing. However, that works in our favor here. Just make sure the soup is completely chilled first, then store it in a freezer-safe container for no more than 6 months. Be careful to thaw it slowly in the fridge (ideally overnight), and blend or shake it really well to incorporate any liquid that may separate out.
Yes, most of the time. Even the most authentic gazpacho recipe generally only contains fresh vegetables, bread, olive oil, vinegar, and seasonings, and these are usually vegetarian or even vegan. It's a fantastic plant-based summer meal. Since there are so many different versions out there, always ask the chef to make sure there isn't Worcestershire sauce or any other meaty flavor-boosters.
More Tomato Soup Recipes
- 60 Best Soup Recipes
- Tomato Basil Soup
- Roasted Red Pepper and Tomato Soup
- Creamy Tomato Potato Soup
- Vegetarian Tortilla Soup
- Alphabet Soup
Tried this recipe?
I'd love to hear what you think! Leave a comment and rating below to share your feedback. Your reviews help others discover this recipe and help me keep creating more free recipes for you. Snap a photo and tag me on social media @aheadofthyme too.

Beer Battered Fish
Crispy Beer Battered Fish is flaky and tender on the inside with a crispy, crunchy coating on the outside. These traditional fish and chips made with white fish are coated in a simple batter with the secret ingredient of ice cold beer to create the perfect crust. Serve with homemade tartar sauce and French Fries or Baked Potato Wedges for a homemade version of this classic meal.
This beer battered fish recipe relies on simple pantry staples and you don't have to be a big beer drinker to enjoy it - you can use non-alcoholic beer instead too. Those fizzy bubbles and tangy flavor give your batter a light, fluffy texture and a little extra flavor. Save the excess batter to coat chicken, zucchini, onion slices, and more to make the most of that crunchy coating! Great for fish fry Friday night, game days, and just because!
Why You'll Love This Beer Battered Fish
- Ready in 20 minutes. Frying is such a quick and easy way to cook proteins and one of the best methods for cod! The high heat cooks the white fish just enough without overcooking it, so you get sweet, tender cod with a perfectly flaky texture under a crisp coating. It's such a treat and a super quick dinner on busy nights!
- Restaurant-quality flavor. Most of us rely on restaurants or chip shops for fried fish and are intimidated by the thought of breading and frying fish at home. That's part of why I love using a beer batter. It doesn't require the same dredging process as breaded fish, so you can just dunk the pieces of fish in the batter and then fry. Easy!
- Feeds a crowd. Just one batch makes 6 servings, and you can easily double (or triple) that for a fish fry. It makes such an easy dinner, and your guests will be impressed by your crispy fish every time. Serve it with coleslaw, applesauce, and potato pancakes for a classic fish fry, make fish tacos, or keep it simple with French fries and malt vinegar. You can't go wrong!

Ingredient Notes
To make this delicious Beer Battered Fish, you will need the following ingredients (full measurements in recipe card below):
- cod fish fillets - make sure these are completely thawed and cut into 3-inch long strips. You can substitute any type of flaky white fish filets, including haddock, halibut, pollock, perch, striped bass, etc.
- all purpose flour
- cornstarch - for an extra crispy beer batter.
- seasonings - for the best flavor, season the batter with paprika, garlic powder, salt, and freshly ground black pepper.
- beer - you'll need some ice cold beer straight from the fridge. Any type will do! I like to use an inexpensive lager or pale ale, but you can also use red ales, stocks, porters, and more.
- egg - this will give the fish batter a nice, thick consistency to glaze over the fish pieces.
- vegetable oil - for frying.
- tartar sauce - optional, for serving. Either make homemade tartar sauce or grab some from the store.
You will also need measuring cups and spoons, a large pot or Dutch oven, cooking or deep-fry thermometer, paper towels, a large bowl, a whisk, and a plate.

How to Make the Best Beer Battered Fish
- Heat oil. In a large, heavy bottomed cooking pot (or deep fryer), add enough oil to fill the pot at least 2-3 inches deep. Preheat the oil over medium-high heat until the temperature reaches 350F, about 3-4 minutes.
- Prep fish. Use a paper towel to gently pat the fish fillets completely dry. Season with salt and pepper evenly on both sides.
- Make coating. In a large mixing bowl, whisk together the flour, cornstarch, paprika, garlic powder, salt, and pepper until evenly combined. Stir in beer and egg and mix well until smooth. If it's too thick, add a little more beer or water.


- Coat. Use a cooking thermometer to make sure the oil temperature reaches 350 F. Once ready, dip the fish fillets, one piece at a time, into the batter and slowly add them into the hot oil.

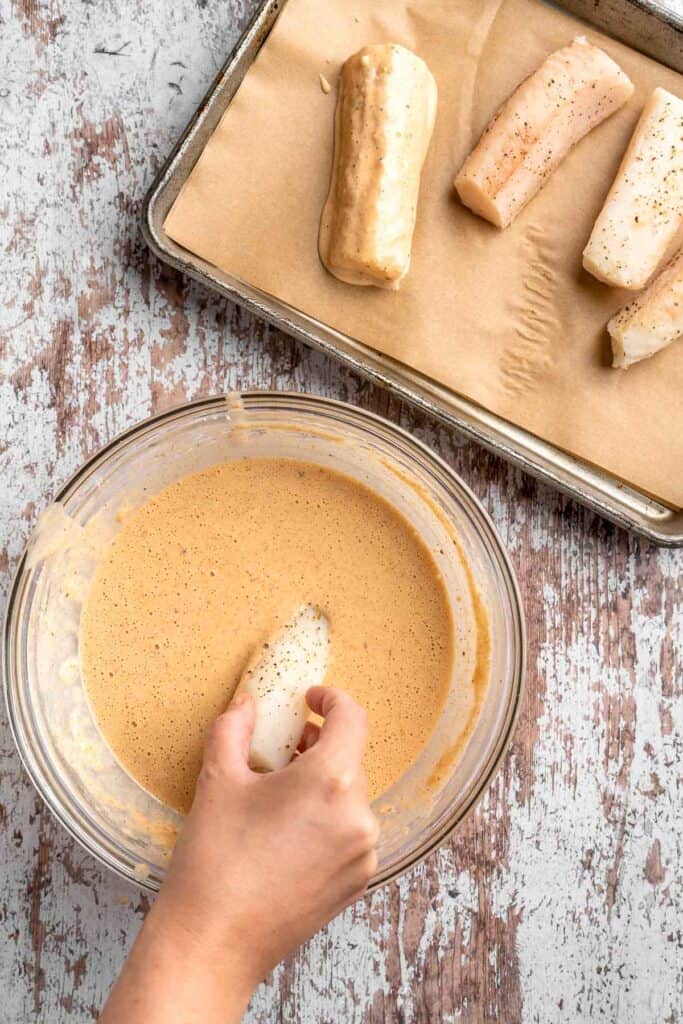

- Fry. Fry until the batter is crispy and golden brown, about 5 minutes. You can cook 2-3 pieces in one batch and make sure not to overcrowd the pot.
- Absorb. Place on a paper towel-lined plate to absorb some of the oil.
- Serve. Serve with a side of tartar sauce.


Recipe Variations
- Spice things up. For a kick of heat, add a little cayenne pepper to your batter.
- Try different beers. Light beers will add a mild, slightly yeasty flavor to your batter, while dark beer will add a richer, nuttier flavor. Feel free to experiment with different types to see how the flavor changes!
- Make it nonalcoholic. Although the alcohol will cook off in the fryer, some people prefer to avoid alcohol completely. In this situation, use nonalcoholic beer or try soda water.
How to Serve
This Beer Battered Fish is delicious served on its own, or paired with some classic sides including:
- Baked Potato Wedges
- Classic Coleslaw
- Spicy Mac and Cheese
- Crispy Air Fryer French Fries
- Sweet Potato Tater Tots
- Simple Italian Salad
For more recipes, see our 25+ Best BBQ Side Dishes.

Recipe Tips and Tricks
- Dry your fish. This is a super simple recipe, but make sure you follow all the steps carefully. For the best results, make sure you pat the fish dry with a paper towel before dipping it in the batter. Otherwise, the batter can fall off in the fryer.
- Fry your sides. Save the leftover batter and oil to make calamari, cauliflower tots, fried onion rings, zucchini fritters, and so on.
- Dip in starch first. This is optional, but if you want a super crispy coating, it can help to coat the fish in cornstarch or rice flour before dipping it into the cold batter. Just pat the fish sticks dry, coat in the starch, then dip in batter and fry.
- Watch the color. It's easy to fry any food for too long, which will give it a bitter, off flavor. The batter should be fully golden brown before removing the fish from the fryer.
- Save the batter. You can save any leftover batter and oil to make calamari, cauliflower tots, fried onion rings, zucchini fritters and so on.
Storing and Freezing Instructions
How to Store
Fried fish is best served hot to keep the crispy texture. If you have extra, store it in an airtight container lined with paper towels to absorb excess moisture.
How to Reheat
The best way to reheat fried fish is to bake it in the air fryer or oven at 360 F for 10-15 minutes or until heated all the way through. This will crisp up the coating to keep it from turning to mush.
How to Freeze
Feel free to freeze any extra pieces of fish on a sheet pan. Transfer to an airtight container for up to 2 months and reheat from frozen.
FAQ
"Beer battered" refers to how fried foods are coated before frying. It's an alternative to dredging and breading, which can be more labor-intensive and messy. Beer batter is made by mixing cold beer into a mixture of flour, cornstarch, and different seasonings until it has the consistency of pancake batter. For beer battered fish, you dip the filets into the thick batter, then fry for a crispy, crunchy shell similar to traditional fish and chips.
There are a few pro tips for keeping any fried foods crispy, including beer battered fish. You'll need to control several variables: temperature, ingredients, and cooling. The batter needs to be very cold, and the fryer must be preheated to 350F. Add a little cornstarch to the batter to absorb extra moisture and keep things nice and crispy! After you remove the fish from the fryer, place it either on a paper towel-lined plate or, if you're baking a bunch, place a wire rack over a baking sheet. This will let any extra oil drip off and keep the crust nice and crunchy. If you do all of these things right, you'll have perfectly crispy fish every time.
Although the batter itself is made with beer, the deep frying process will burn off any residual alcohol. If you need to avoid alcohol for any reason, feel free to use a non-alcoholic beer or try club soda, like tempura batter.
More Seafood Recipes
- Homemade Fish Sticks
- Salmon Bites
- Baked Coconut Shrimp
- Miso Black Cod (Sablefish)
- Seared Scallops
- Garlic Butter Salmon
Tried this recipe?
I'd love to hear what you think! Leave a comment and rating below to share your feedback. Your reviews help others discover this recipe and help me keep creating more free recipes for you. Snap a photo and tag me on social media @aheadofthyme too.

Blueberry Cupcakes
Blueberry Cupcakes are a delicious homemade treat to enjoy while summer berries are fresh in season. The moist and tender vanilla cupcake batter is loaded with fresh blueberries, baked, and topped with a creamy and fluffy blueberry buttercream that has a gorgeous purple hue thanks to homemade blueberry compote. Serve these summer cupcakes at birthday parties, backyard gatherings, and potlucks!

Blueberry season just might be the best time of the year! These cupcakes are a celebration of the season's abundance and a must-try for anyone who loves summer berries. Juicy blueberries also taste wonderful in my Lemon Blueberry Bread, Blueberry Cake, and Blueberry Cinnamon Rolls, but these blueberry cupcakes are one of my favorite blueberry recipes to date. It's got double the blueberries (in the batter and frosting), which really gives them a potent punch of berry flavor. I can't get enough of them!
Why You'll Love These Blueberry Cupcakes
- The perfect summer cupcake. Tender, fluffy, and full of fresh flavor, these blueberry cupcakes are the ideal way to savor the season's abundance. Since they're handheld, they're also easy to serve at any summertime gathering or with a nice glass of lemonade on a hot summer afternoon.
- Loaded with real blueberries. There's no hiding the berry flavor in this recipe! There are blueberries in every single bite. The fluffy cupcakes are spotted with purple explosions on the inside, and the buttercream is made with homemade blueberry compote for that jammy, berry flavor. The blueberry lovers in your life will go wild for them!
- Great for entertaining. The purple hue from the buttercream is so eye-catching! They make a show-stopping option for Mother's Day, bridal showers, birthday parties, and any other occasion.
Ingredient Notes
To make these delicious Blueberry Cupcakes, you will need the following ingredients (full measurements in recipe card below):
- fresh blueberries - it's important to use fresh, firm blueberries instead of frozen ones for the cupcake batter. For the compote in the frosting, you can use either fresh or frozen blueberries.
- flour - regular all purpose flour is best. I don't recommend using self raising flour.
- baking powder - this is the main leavening agent. Be sure to use fresh baking powder and sift it to remove any clumps.
- unsalted butter - since this recipe uses the creaming method, the butter must be at room temperature. You also need softened butter for the blueberry buttercream frosting.
- sugar - for the batter, regular granulated sugar adds the right amount of sweetness to let the berry flavor shine. For the frosting, use confectioners' sugar (powdered sugar) to thicken and sweeten the frosting.
- eggs - to bind the batter together and give it a nice rise.
- vanilla extract - for extra flavor in the batter and frosting.
- sour cream - the extra fat will add a moist texture and extra flavor.
- salt
- lemon juice - lemon and blueberry are a classic combination, and the lemony flavor really pops in the frosting!
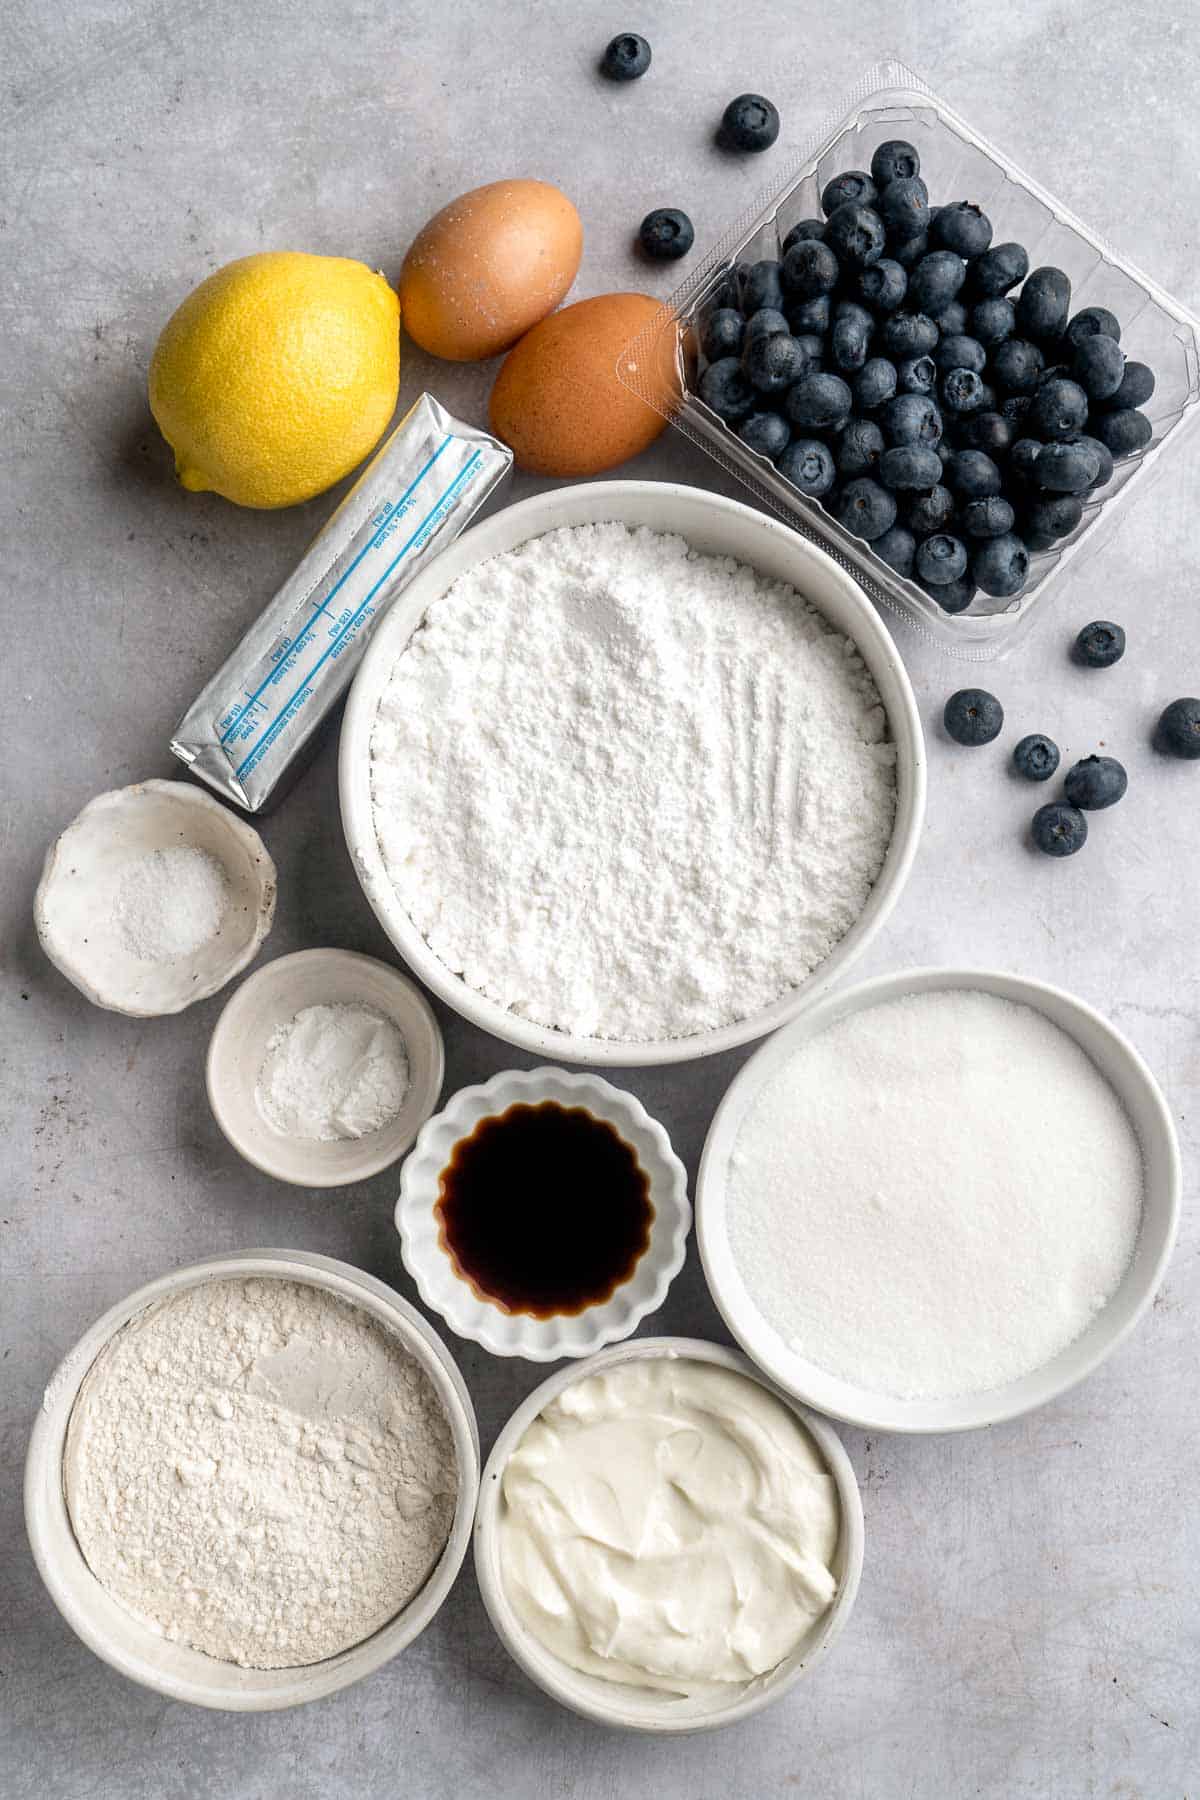
Baking Tools
You will also need the following baking tools and equipment:
- 12-cup muffin pan
- cupcake liners
- mixing bowls: two medium bowls and a large bowl
- hand mixer and/or a stand mixer with a whisk attachment,
- spatula
- wire rack
- small saucepan
- piping bag fitted with a closed-star tip
How to Make the Best Blueberry Cupcakes
First, make the blueberry cupcakes.
- Prep blueberries. In a medium mixing bowl, toss together the blueberries and 1 tablespoon of flour. Set aside.
- Combine dry ingredients. In a separate medium sized bowl, add the flour, baking powder, and salt. Whisk together to combine.
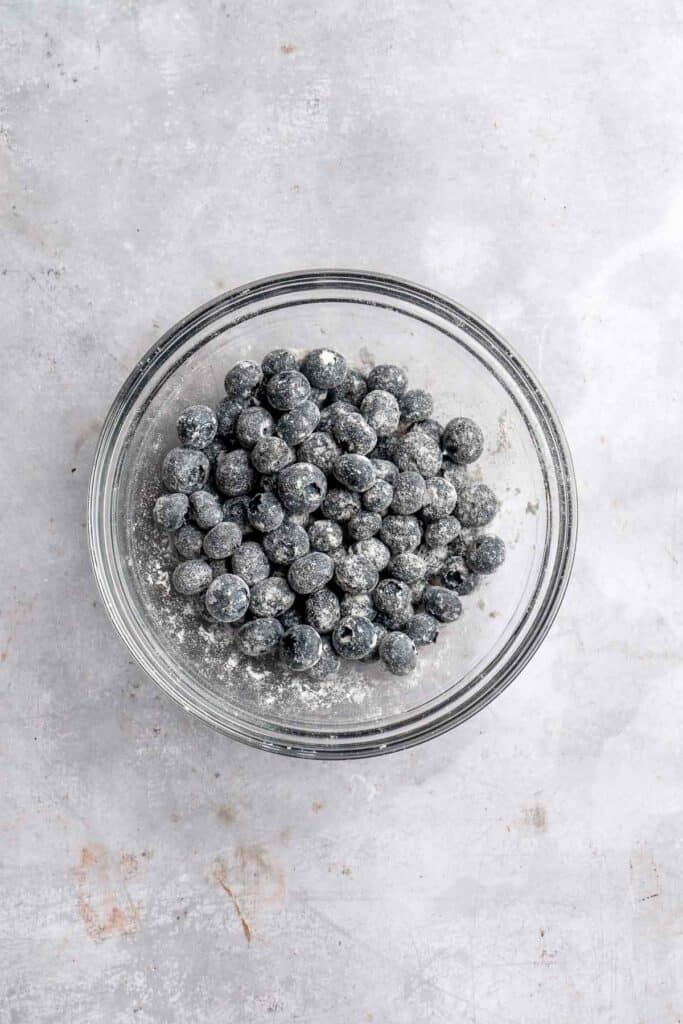
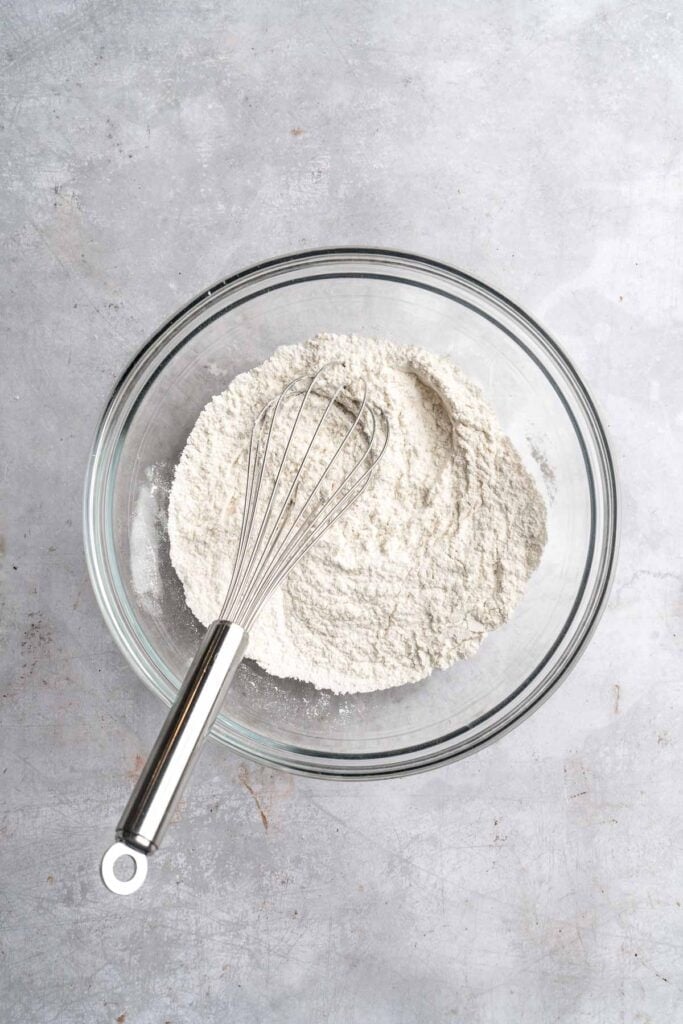
- Combine wet ingredients. In a large mixing bowl, add butter and sugar. Use an electric mixer and beat on medium-high until light and fluffy looking, about 3-4 minutes. Add in the eggs and vanilla, then beat again until well incorporated and smooth.
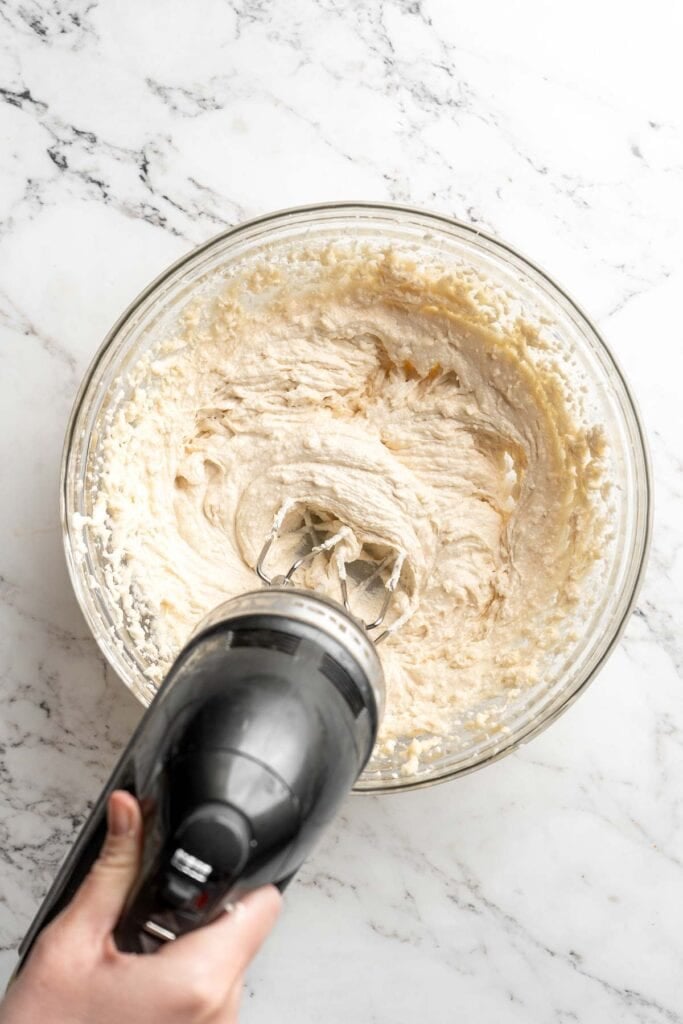
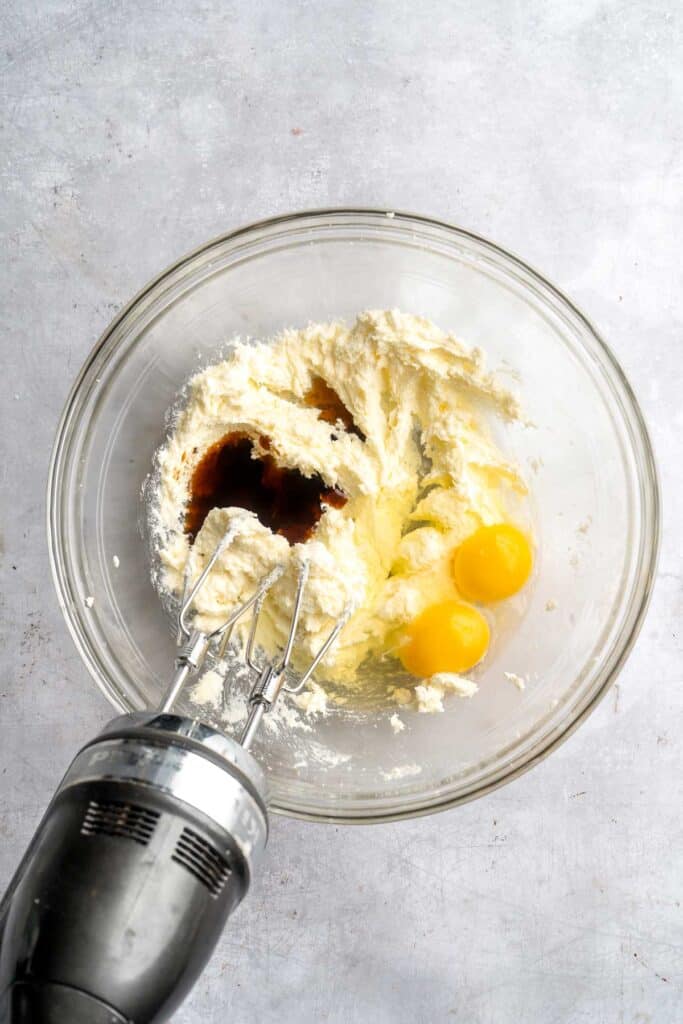
- Make batter. Add ⅓ of the flour mixture to the large bowl, then mix on low until combined. Add ½ of the sour cream and mix on low until combined. Continue alternating the flour mix and the sour cream, until both have been completely added (finishing with the flour mixture).

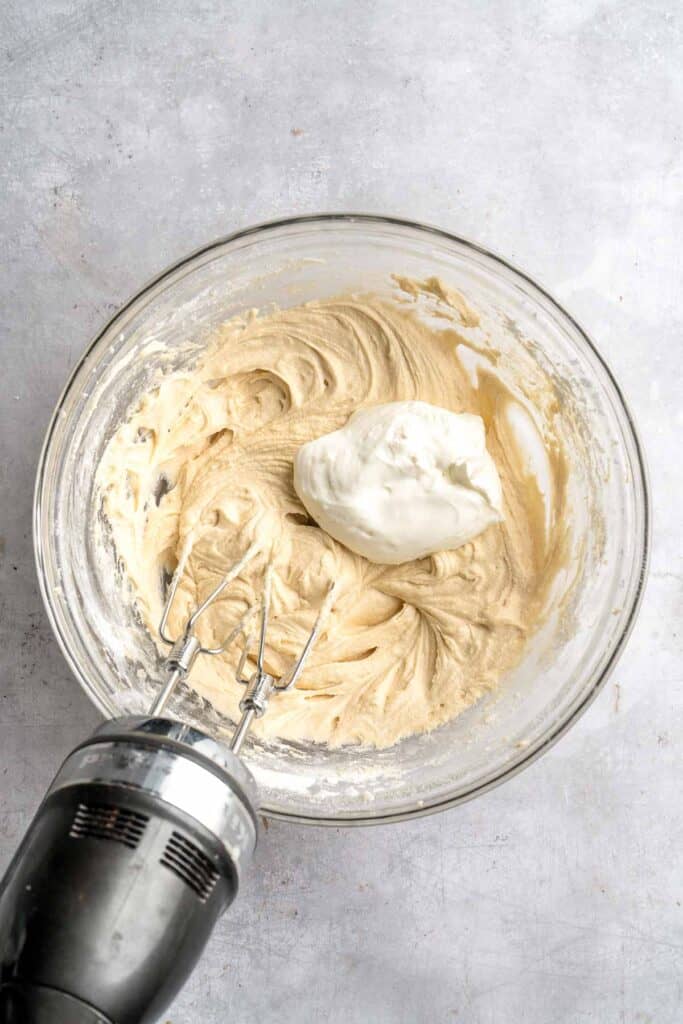
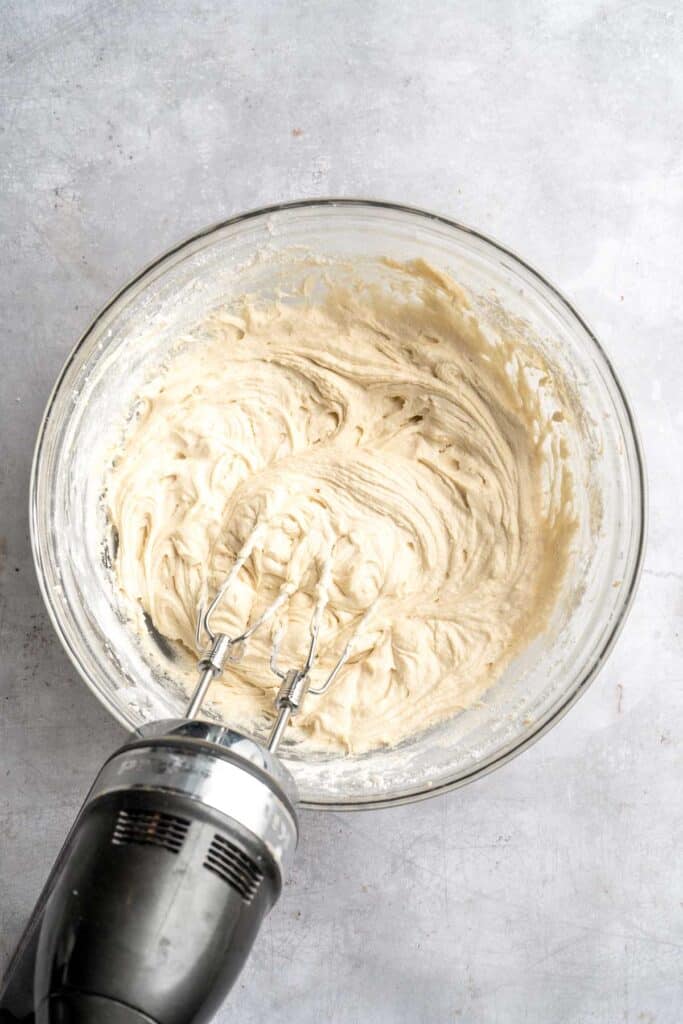
- Add blueberries. Fold in the flour-covered blueberries.
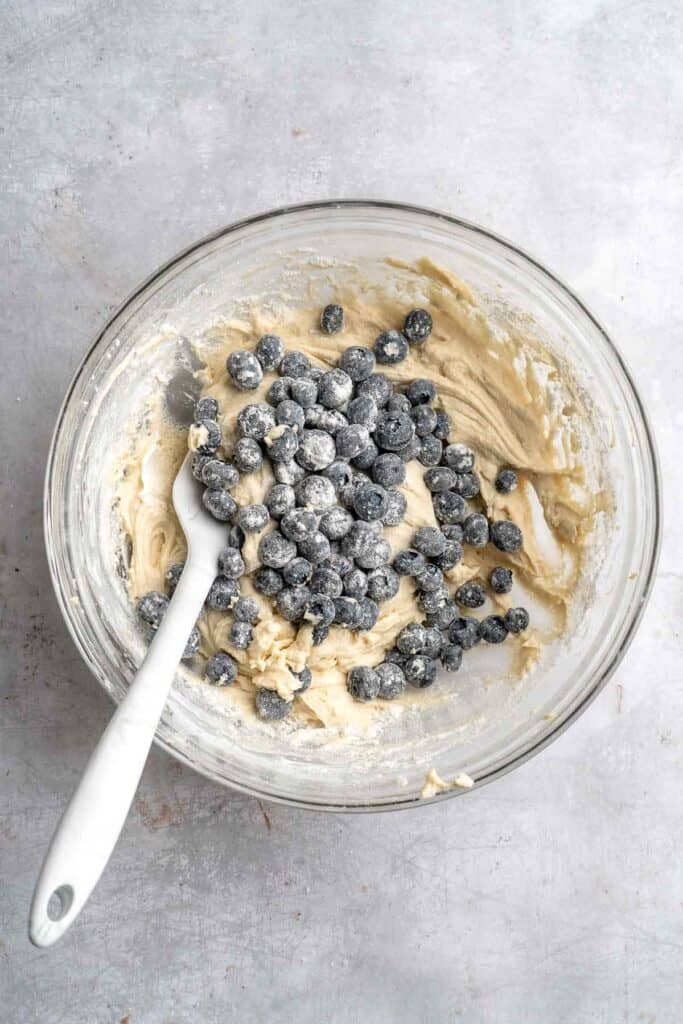

- Bake. Prepare a 12-tin muffin pan by lining with cupcake liners. Divide the batter into the cupcake tins. Place the tin into the oven and bake in a 350F preheated oven for 20 to 22 minutes, or until an inserted toothpick comes out clean. Allow to cool for 5 minutes, then transfer to cooling rack. Allow to cool completely before frosting.
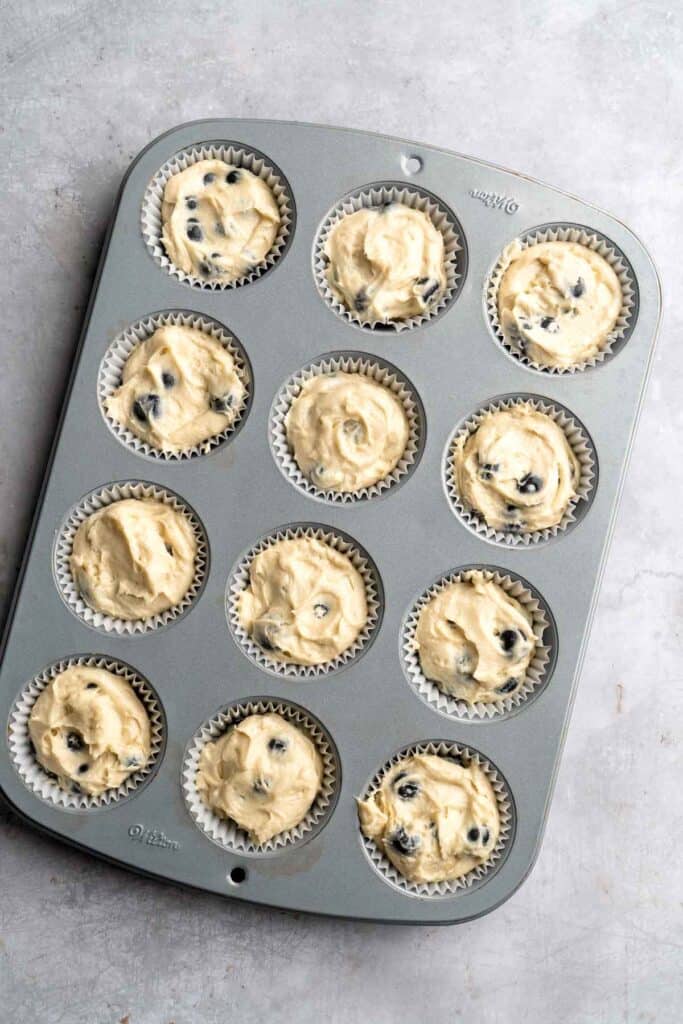
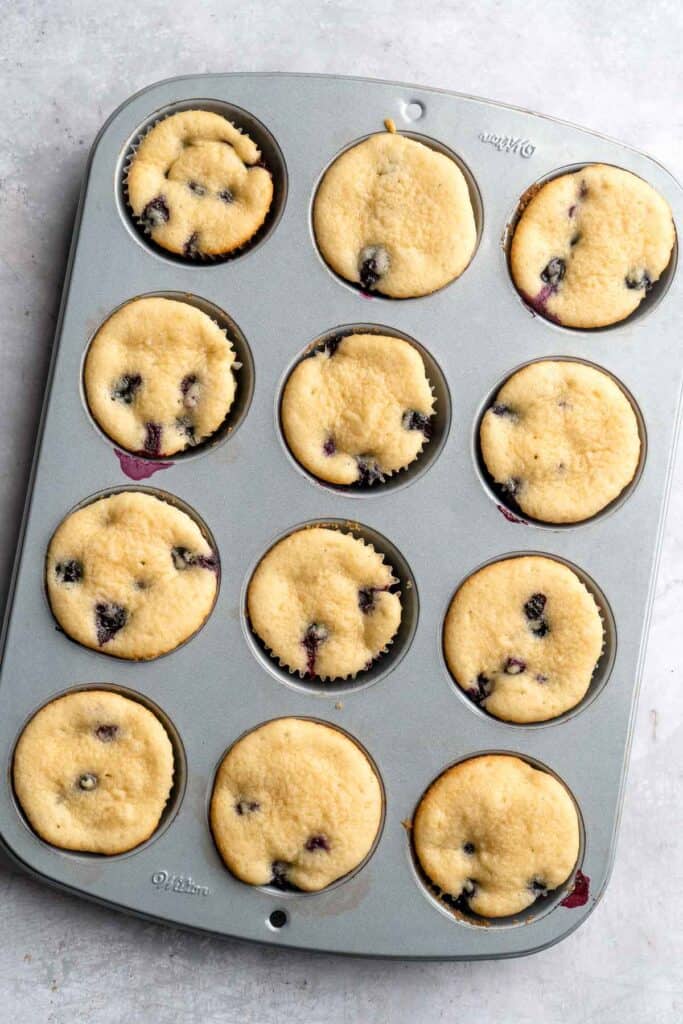
Next, make the blueberry buttercream frosting.
- Make compote. Place the blueberries and lemon juice into a saucepan or skillet and heat over medium heat. Bring to a simmer, while stirring frequently and mashing the blueberries as they soften. Continue to simmer until the compote has thickened slightly and tastes slightly less tart (it will still taste slightly tart though), about 10 minutes. Remove from the heat and allow the compote to cool to room temperature.

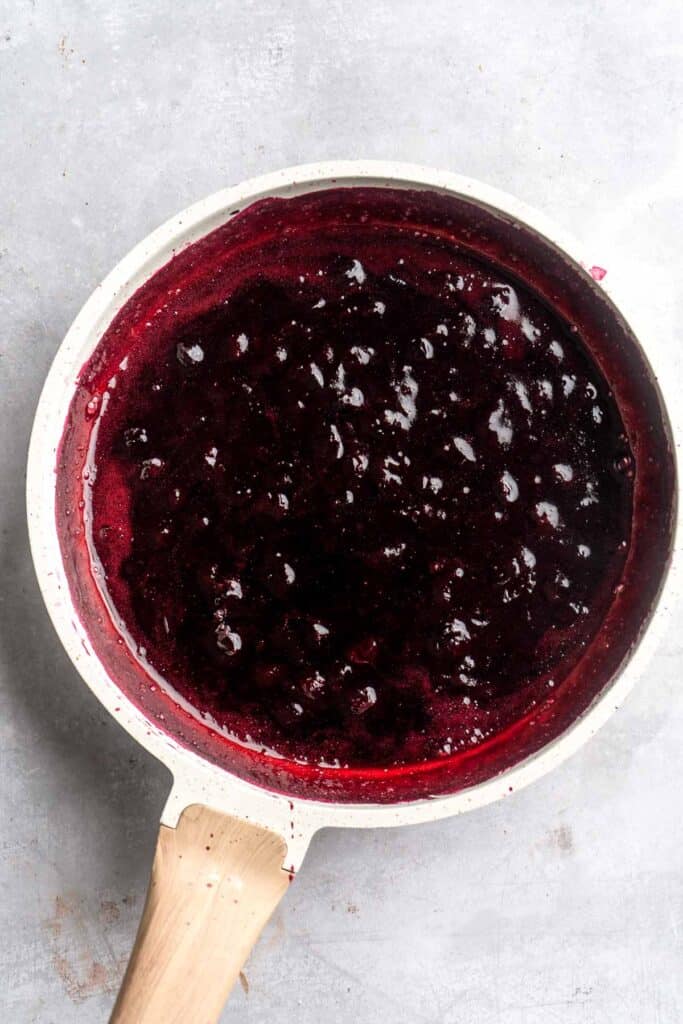
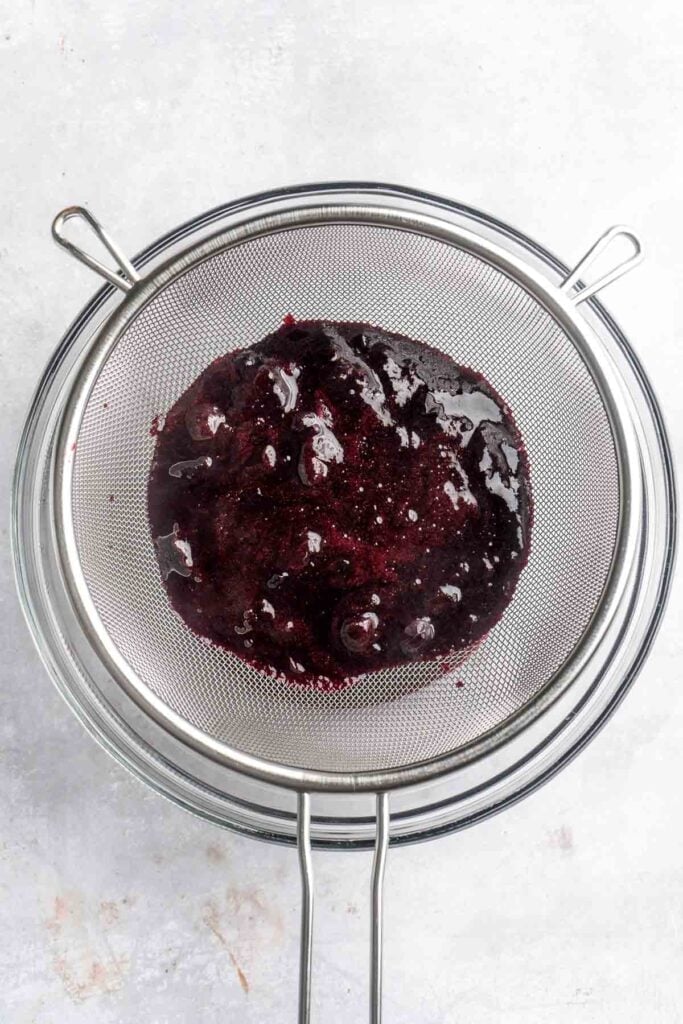
- Cream butter. Add the butter to a stand mixer fitted with the whip attachment. Beat on high until fluffy and pale, about 3-4 minutes.
- Add sugar. Turn to low, then begin adding the confectioners' sugar.
- Add remaining ingredients. Once all of the sugar has been added, add the blueberry compote, vanilla and salt, then beat on high until very smooth and fluffy, about 2 minutes. Use a spatula to scrape at the bowl occasionally to ensure even mixing.
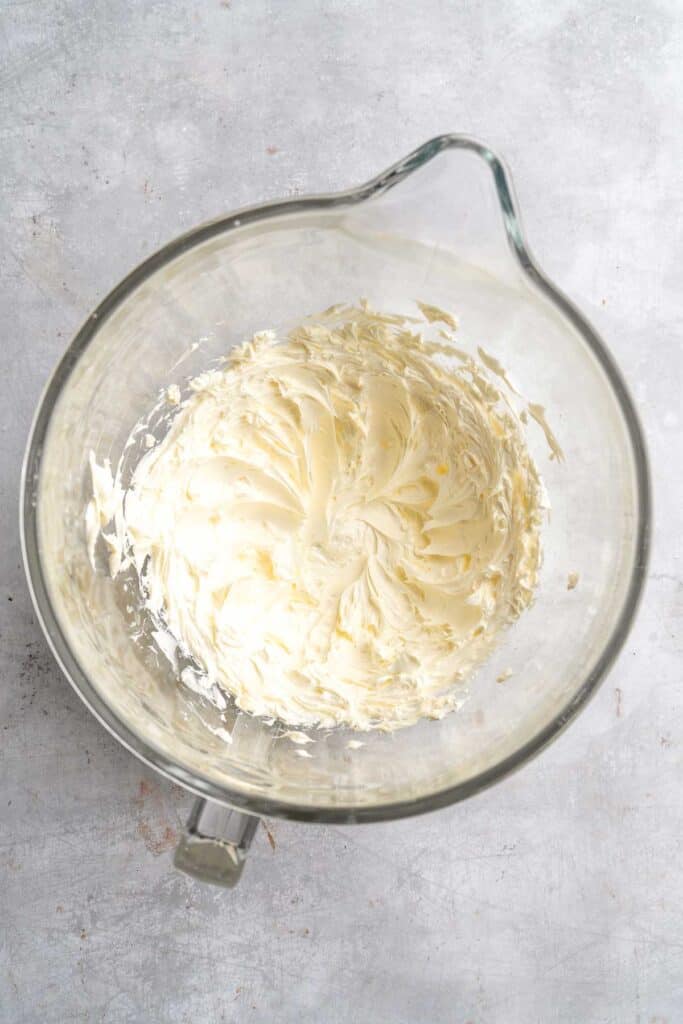
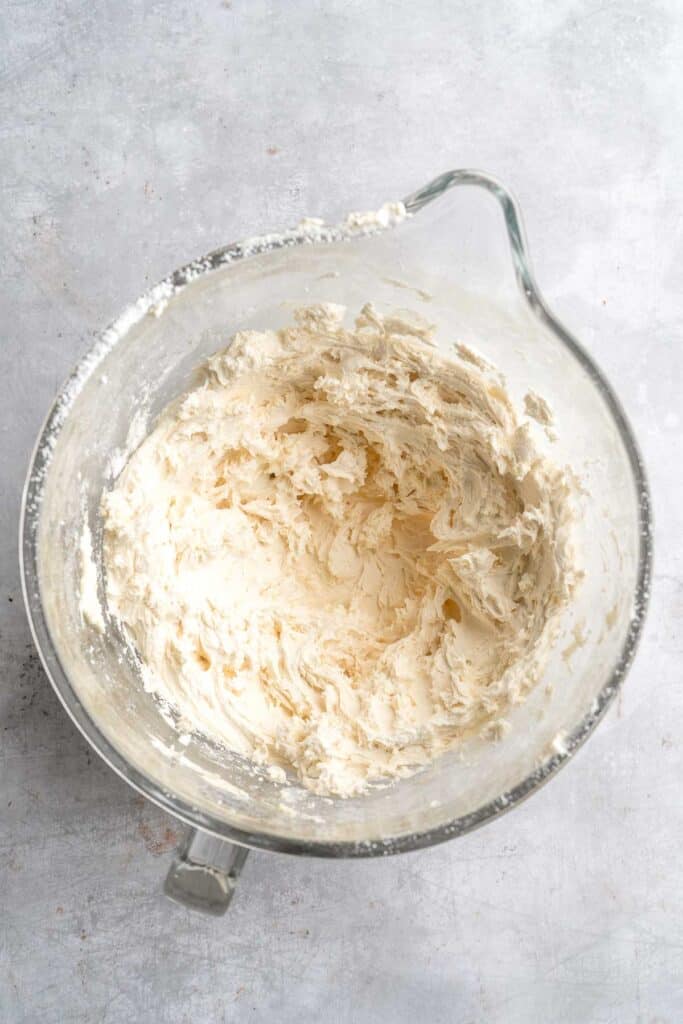

Finally, frost the cupcakes.
Add the frosting to a piping bag fitted with a large closed-star tip and pipe the frosting onto each cupcake. Finish with 3 blueberries on each cupcake.

Recipe Variations
- Fold in the compote. Instead of whipping the compote into the frosting, fold it in gently for a two-toned, white and purple appearance.
- Fill the cupcakes. For an extra pop of flavor, core the middle and add blueberry curd, lemon curd, or extra homemade blueberry compote.
- Make lemon blueberry cupcakes. Add the 1 -2 TBS lemon zest to the cupcake batter, and replace the vanilla with lemon extract. These lemon cupcakes will have a bright lemon flavor to pair with the lemon blueberry frosting!
- Make mini blueberry cupcakes. Scoop the batter into a mini muffin tin and bake for 10-12 muffins.
- Try blueberry cream cheese frosting. Make my cream cheese frosting but bold in the blueberry compote for extra berry flavor. I love the tangy flavor with the fresh berries!
How to Serve
These Blueberry Cupcakes are a delicious dessert served on its own, or as part of a larger spread with some of my favorite summer treats including:
For more recipes, see our 40 Best Summer Desserts.
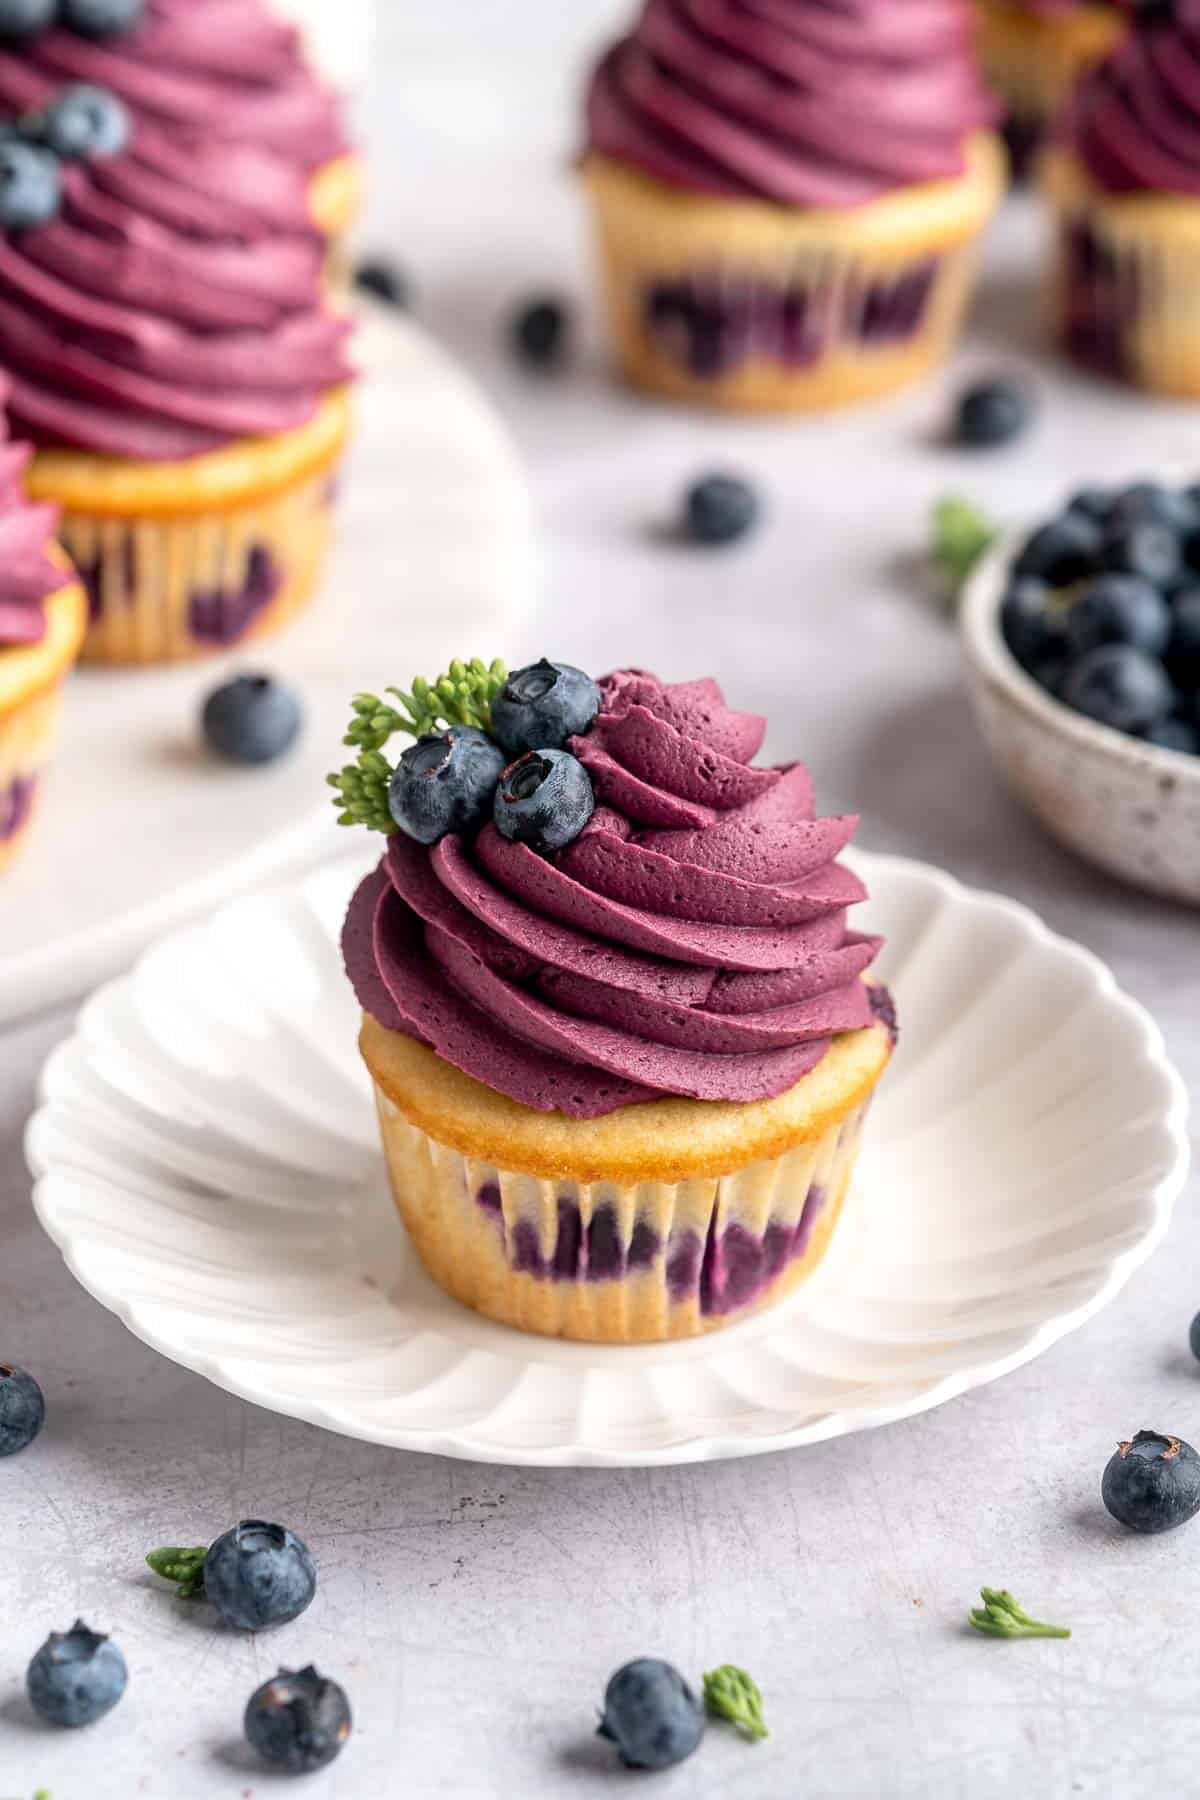
Recipe Tips and Tricks
- Use room temperature eggs and butter. This will help the batter come together with the right texture. The cupcakes won't be nearly as fluffy if you rush this step.
- Cool the cupcakes completely. If you try to frost the cupcakes while still warm, your buttercream will melt and cause them to become soggy. Only frost cooled cupcakes.
- Add the berries at the end. The delicate fresh berries are prone to popping, which will change the color of your cupcakes to a pale purple-blue. Adding them at the end also helps keep them from sinking.
Storing and Freezing Instructions
How to Store
Store any leftover cupcakes in an airtight container in the fridge for 3-4 days. This will keep them fresh, but will cause them to dry out over time. For the best flavor, let the cupcakes come to room temperature before serving.
How to Freeze
Excess cupcakes can also be frozen for several months. I recommend storing the cupcakes and frosting separately and then decorating after the frosting is thawed.
FAQ
The baker's secret is to toss your fresh berries with flour before you add them to the batter! This layer of flour will absorb the extra moisture and help them stay put. It also helps to use a recipe that results in a thicker batter, like this one. In thinner batters, the berries will naturally sink down.
Blueberry muffins tend to be moist and tender, similar to a pound cake, whereas cupcakes are intentionally light and airy. Cupcakes also tend to be sweeter and topped with frosting or a glaze. Muffins may contain a crumble topping but are often served without any extra garnish. Since muffins aren't quite as sweet, they're usually served at breakfast or brunch while cupcakes are treated more like a regular slice of cake and served as dessert.
I highly recommend using fresh berries! The moisture from frozen blueberries can cause your cupcake batter to turn gummy in the oven, which is unpleasant. However, frozen berries are a great addition to blueberry sauce or compote, which you can add as a cupcake filling or to make your frosting.
More Blueberry Recipes
- 15 Best Blueberry Recipes
- Blueberry Yogurt Muffins
- Blueberry Cheesecake
- Blueberry Cake
- Blueberry Crisp
- Blueberry Oat Squares
Tried this recipe?
I'd love to hear what you think! Leave a comment and rating below to share your feedback. Your reviews help others discover this recipe and help me keep creating more free recipes for you. Snap a photo and tag me on social media @aheadofthyme too.

Greek Rice
This simple Greek Rice is lemony, full of herbs, and warm, delicious flavors - and it couldn't be much easier to make! The rice is toasted for a nutty flavor and then simmered with sautéed onions and garlic, broth, and dill to infuse flavor in every grain. Add in fresh lemon juice and chopped parsley for even more flavor when serving. It's the perfect side dish to pair with Greek dishes or serve as your go-to herb rice dish for any meal!
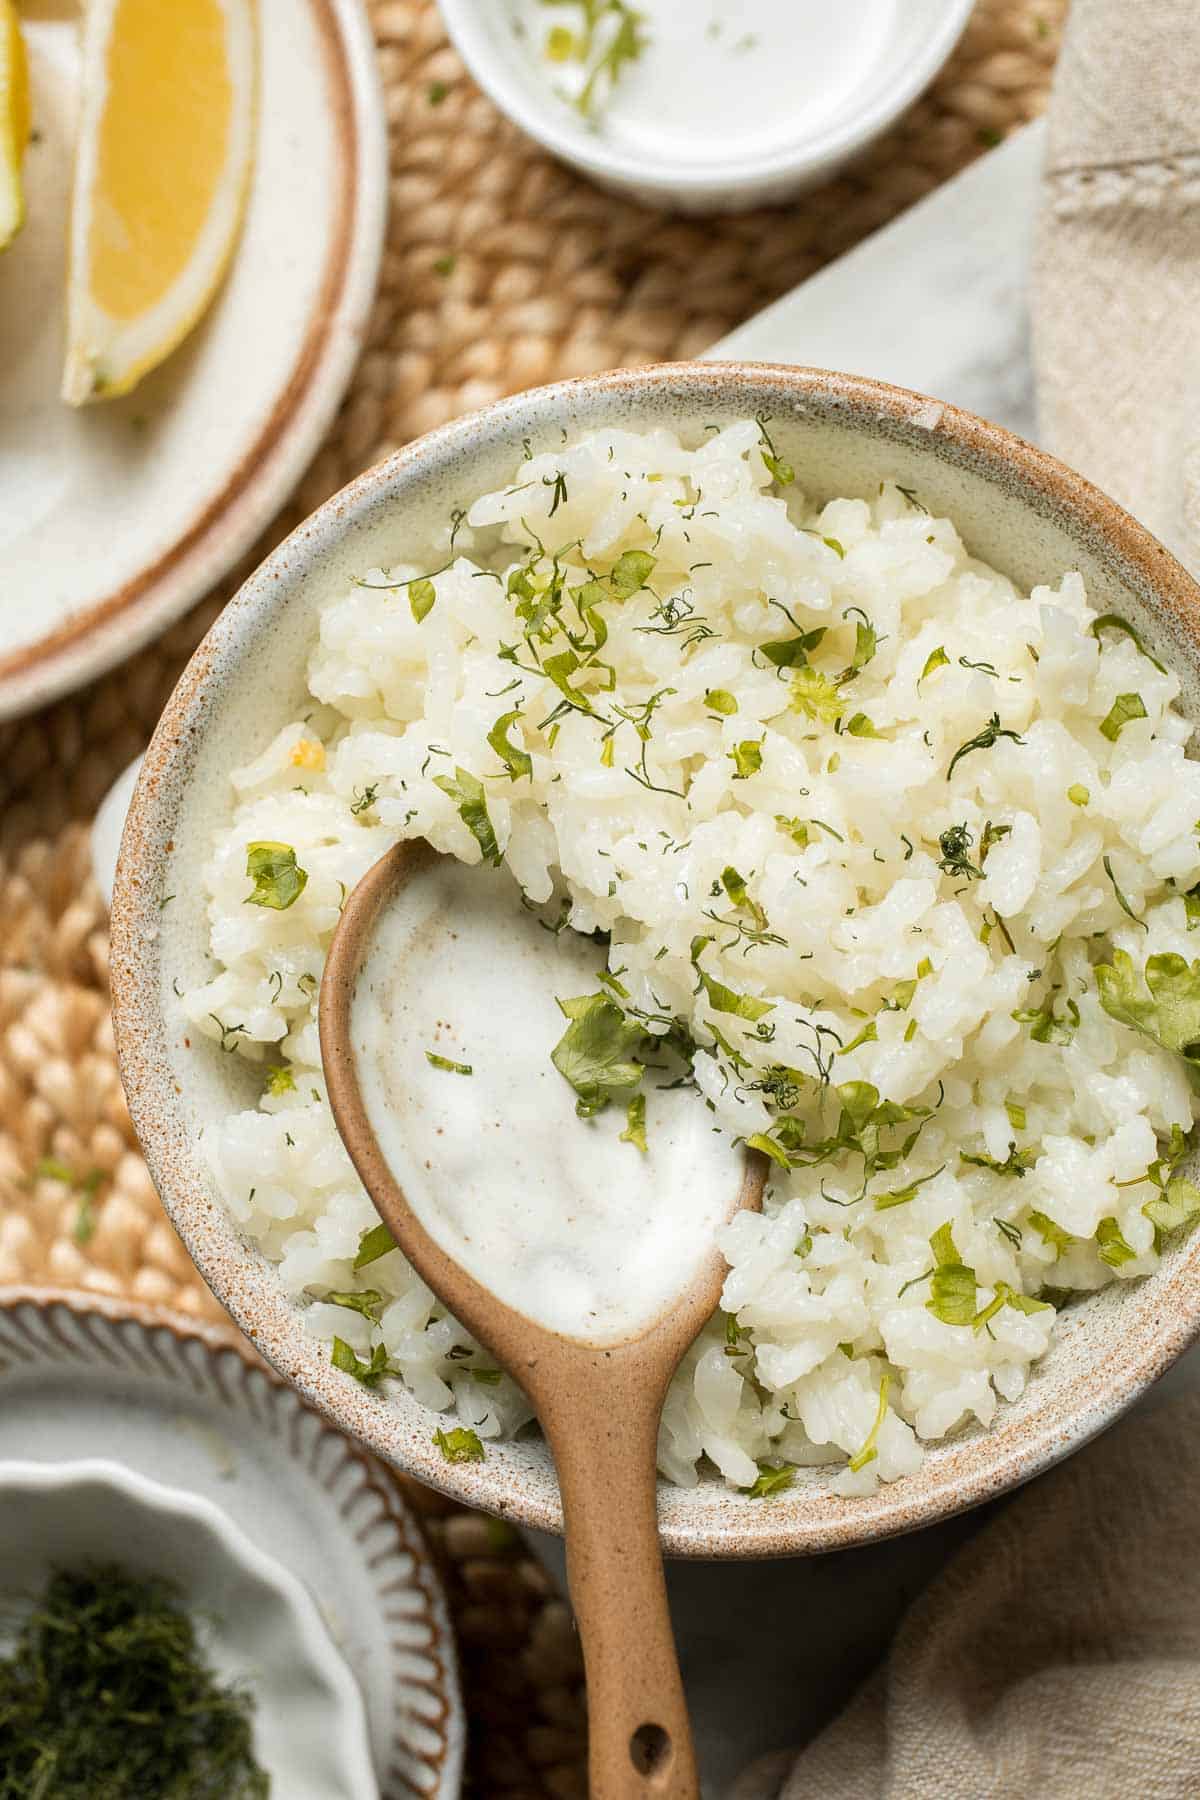
This easy lemon rice recipe tastes just like the fluffy rice you get at a good Greek restaurant, yet surprisingly quick and easy to make at home. With just a few simple ingredients, you can elevate traditional white rice with so much flavor. You'll want to serve this one-pot side dish on special occasions but it's quick enough to make on busy weeknights too. Plus, you'll have plenty of time to work on your main dish so that the whole meal can be ready at once. It's. a keeper!
Why You'll Love This Greek Rice Recipe
- Ready in just 30 minutes. The amount of flavor you can add to a pot of rice in just 30 minutes is always so surprising, especially with such simple ingredients! This Greek lemon rice pilaf is one of my go-to side dishes, and I'm sure you'll feel the same way, too!
- Loaded with flavor. This is an easy herb rice recipe, but every step adds flavor, from sauteeing the aromatics, toasting the rice, cooking the rice in chicken stock, and seasoning with lemon juice and herbs. It doesn't take a lot of effort (or ingredients) to add a ton of flavor.
- Great side dish for a range of cuisines. The lemony, herbaceous flavors in this Greek style rice pair perfectly with lots of Mediterranean favorites, like my Greek Chicken Breast or Greek Salmon. But it's also a great side for other regional cuisines, like my Middle Eastern Chicken Shawarma, Persian Lamb Chops, and more.
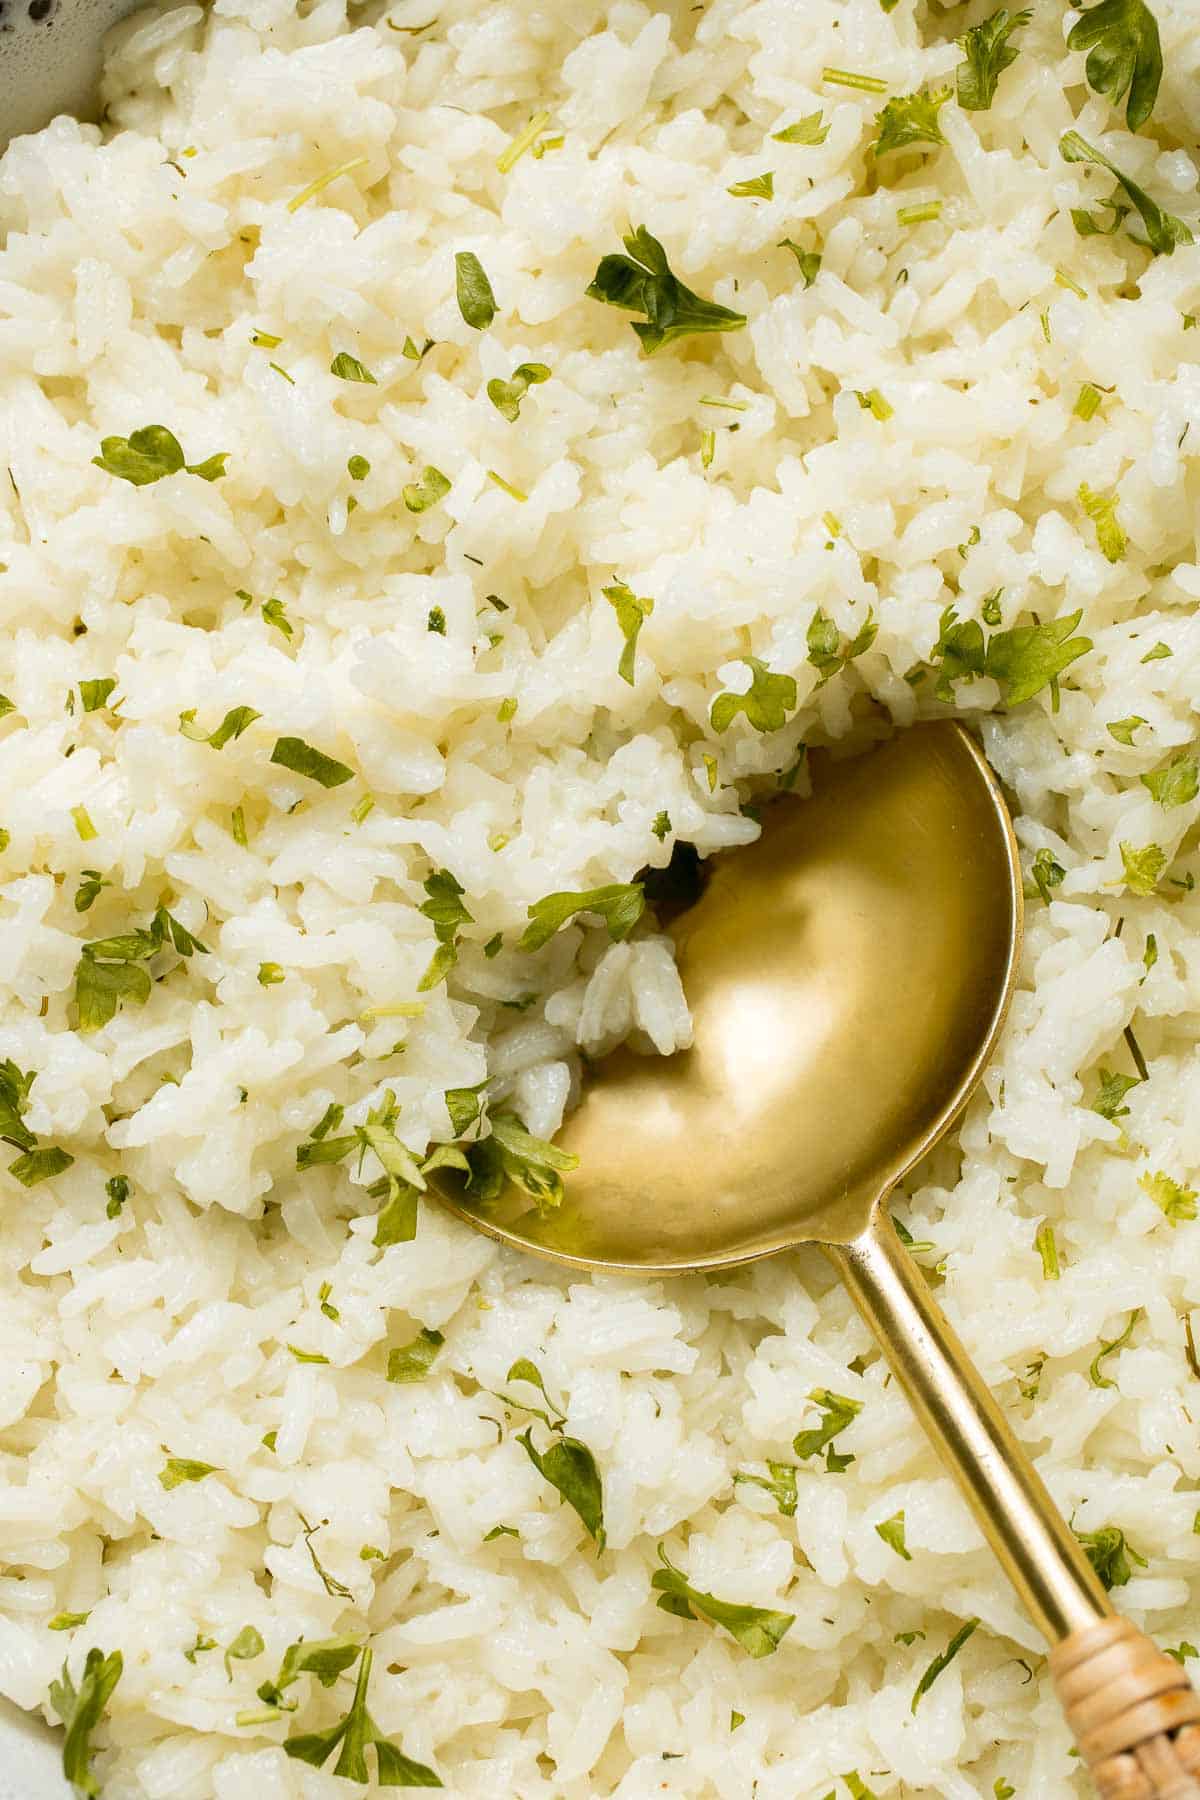
Ingredient Notes
To make this delicious Greek Rice, you will need the following ingredients (full measurements in recipe card below):
- extra virgin olive oil - to sautee the vegetables.
- aromatics - keep it simple with freshly minced garlic and white onion.
- long grain white rice - basmati or jasmine are ideal for this recipe with their plump, tender grains.
- chicken broth - broth makes it easy to infuse extra flavor into every bite. Use vegetable broth for a vegetarian or vegan option.
- seasonings - stick with salt and dried dill.
- lemon juice - this is a key flavor in this rice dish. Fresh is best! Feel free to add some lemon zest, too.
- parsley - finely chop to sprinkle as a garnish.
You will also need measuring cups and spoons, a medium pot with a lid, a cutting board, and a sharp knife.
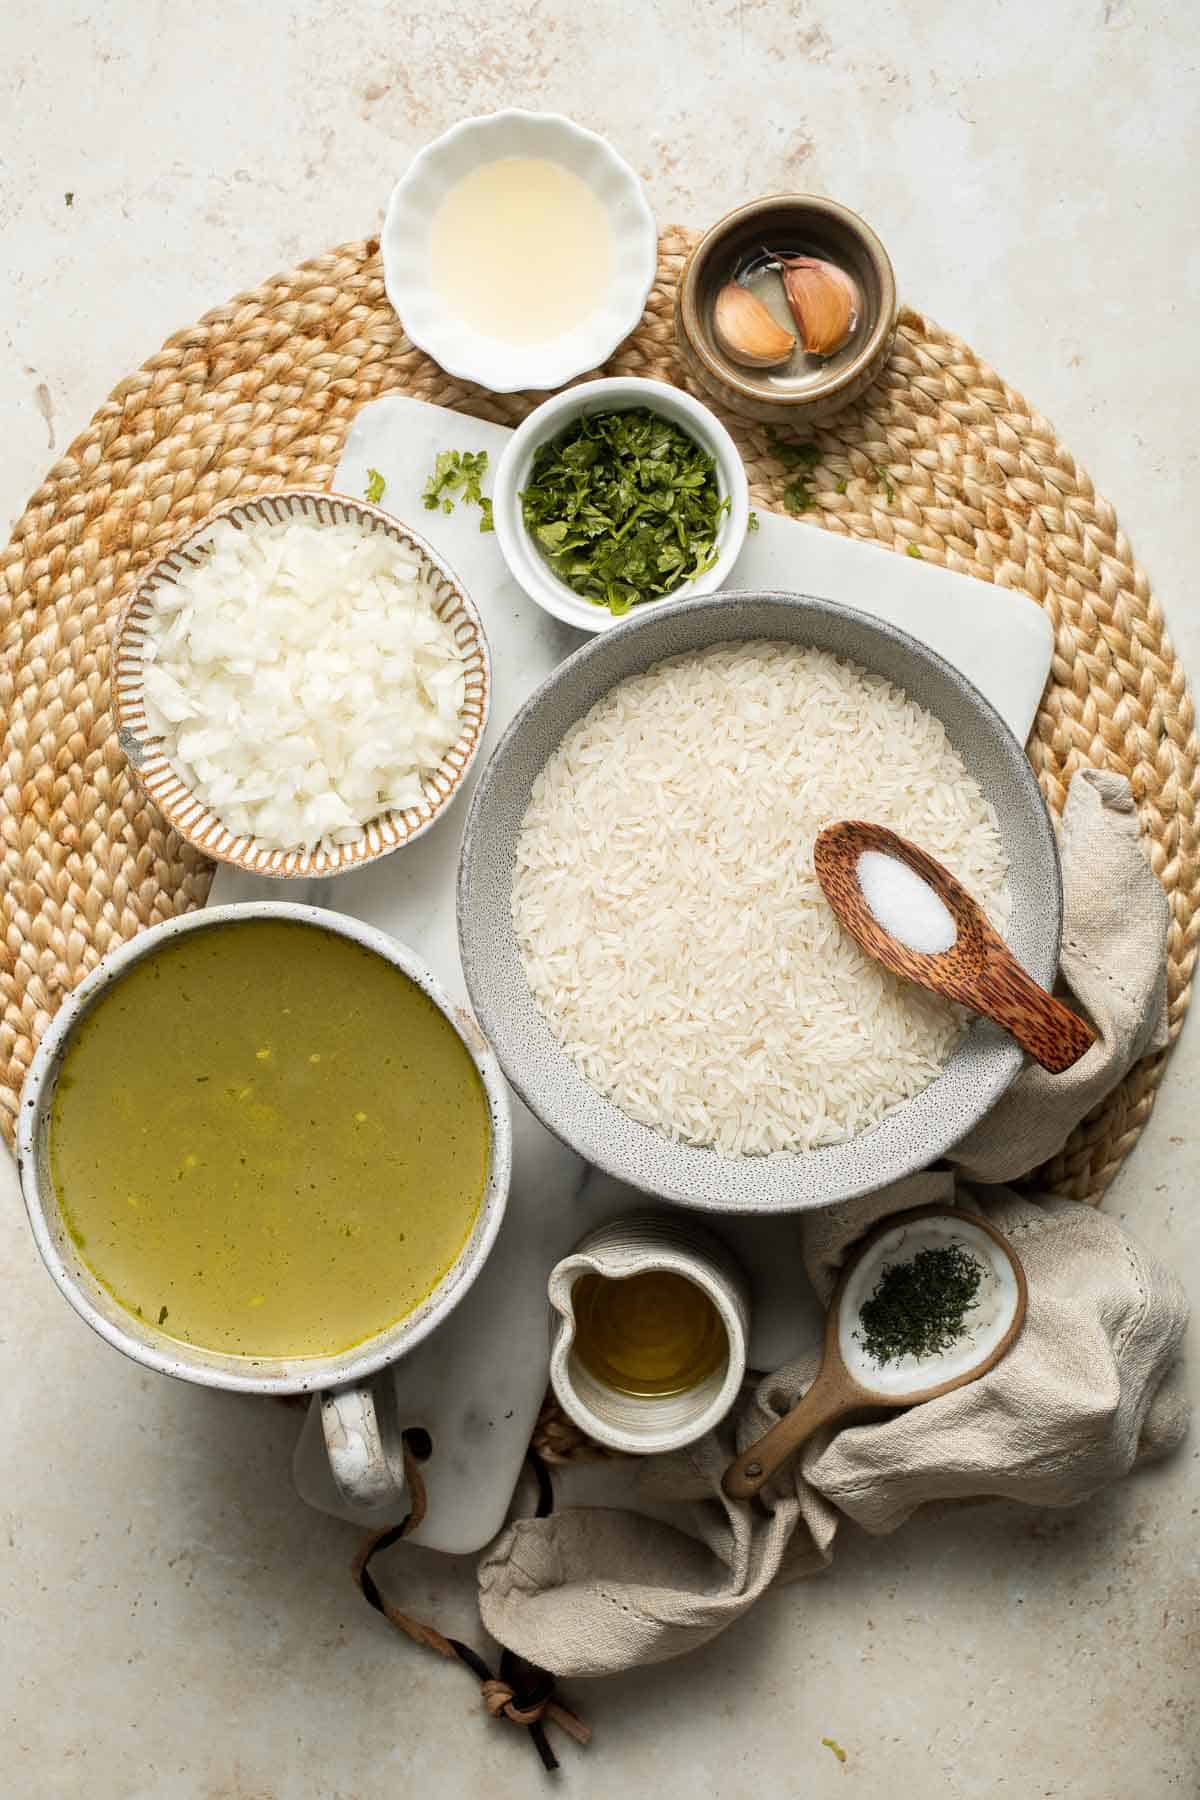
How to Make the Best Greek Rice
- Sauté aromatics. In a medium sized pot, heat oil over medium-high heat until sizzling hot, about 1 minute. Add garlic and onion and sauté until fragrant, about 1 minute.


- Toast rice. Add rice and toast until the rice turns almost translucent, about 2-3 minutes.


- Add remaining ingredients. Add broth, salt, and dill. Mix well and bring it to a boil.


- Simmer. Turn the heat to low and cover the lid. Simmer for 15 minutes or until all the liquid is absorbed.
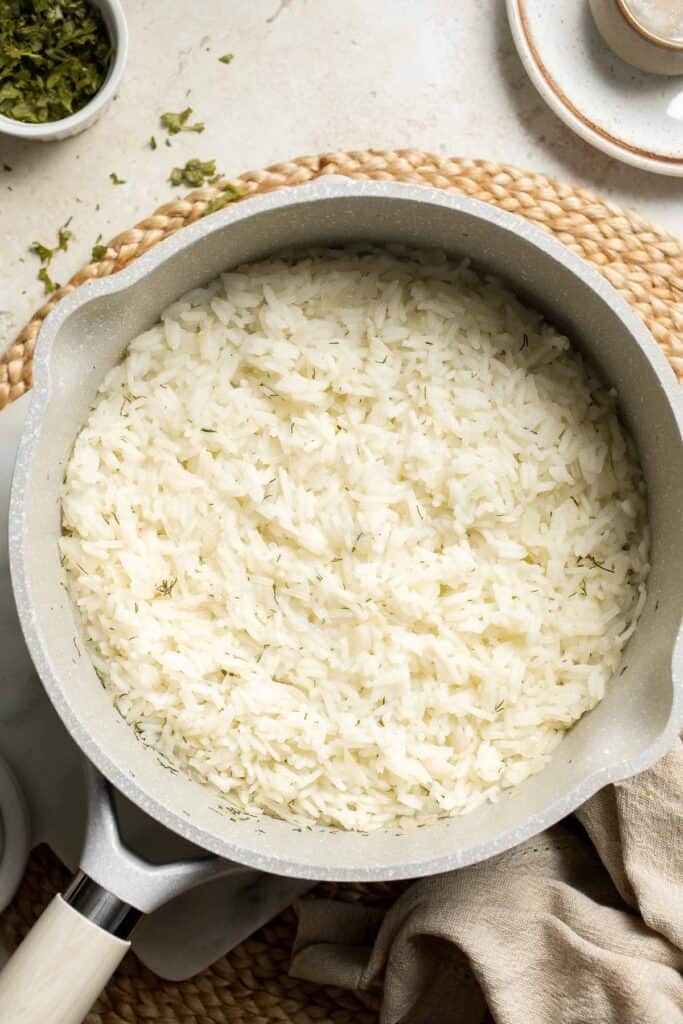
- Rest. Turn off the heat and let it rest for 10 minutes.
- Serve. Top with lemon juice and parsley. Serve warm.


Recipe Variations
- Use brown rice. Stick with long-grain rice to get those individual grains. Add a little extra chicken stock to help the grains soften up.
- Expand the garnishes. To make this Greek rice dish even more decadent and celebratory, serve it with fresh dill and mint, a drizzle of olive oil, crumbled feta cheese, freshly sliced cherry tomatoes, pine nuts, and more.
- Add greens. Sneak in some extra veggies by adding a hearty handful of chopped spinach. Add it after you sauté the garlic and onion, and let it soften before you toast the rice.
- Use a rice cooker. Sauté your aromatics and toast the rice in a pan like normal, then transfer everything to your rice cooker. Add the broth like normal and cook until the rice is perfectly tender and plump. Squeeze fresh lemon juice on top and garnish with parsley before serving.
How to Serve
This Greek Rice is delicious served on the side of a protein-heavy entree, a Greek Salad, and some Greek Potatoes. Some of my favorite Greek main courses to pair this with are:
- Chicken Souvlaki
- Greek Meatballs
- Greek Lamb Shanks
- Souvlaki Beef Shish Kebabs
- Greek Salmon
- Greek Lamb Souvlaki Skewers
For more recipe ideas, see our 30 Best Greek Recipes.
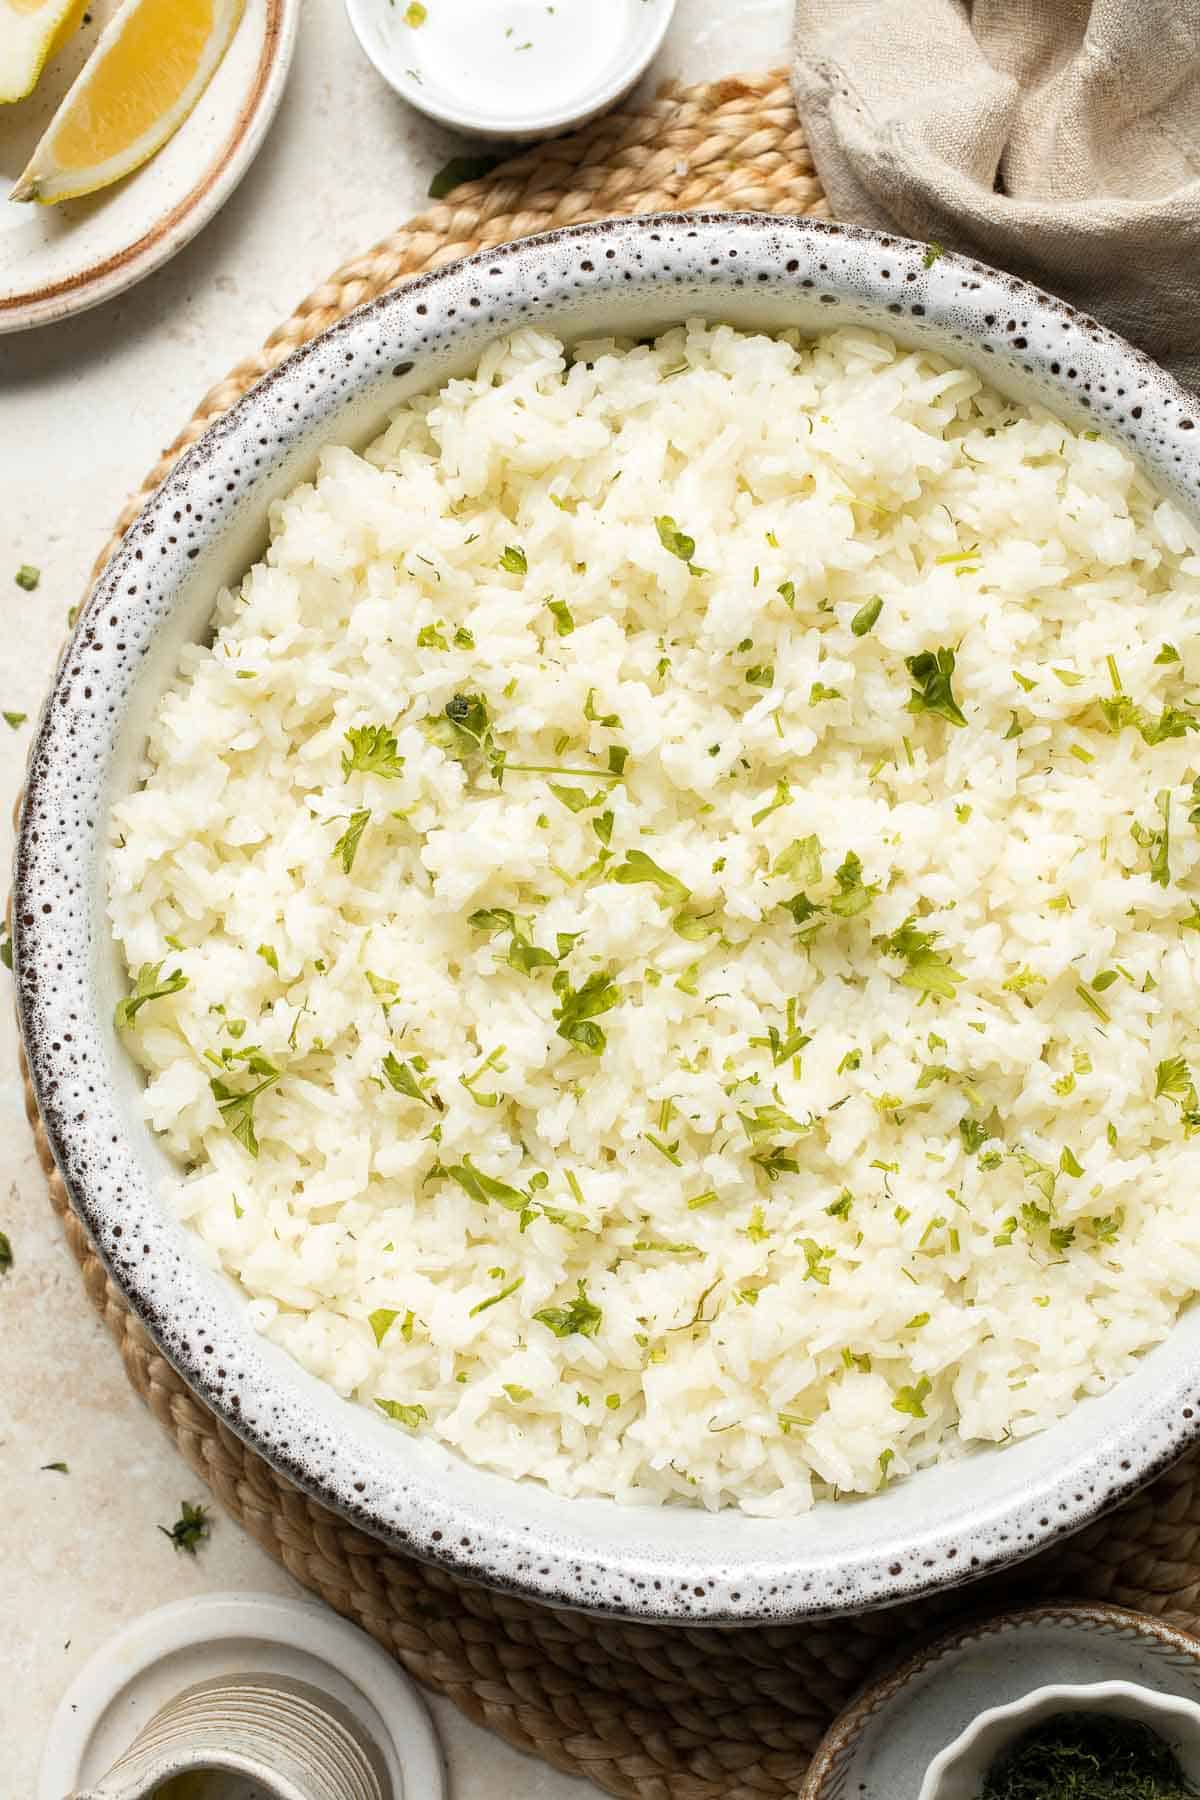
Recipe Tips and Tricks
- Use the right rice. Long-grain rice has the right texture and flavor to take this Greek lemon rice recipe over the top. If you substitute a short-grain variety, you won't get the same fluffy texture.
- Toast the rice grains. This simple step gives the rice a nutty flavor that adds extra depth to this dish.
- Let it rest. That 10-minute rest is the final part of the cooking process. This will allow the rice grains to plump up and absorb all that broth. If you rush this step, your rice will not be nearly as soft and tender.
Storing and Freezing Instructions
How to Store
Allow the rice to cool then transfer the leftovers to an airtight container. Store in the fridge for 3-4 days.
How to Reheat
The best way to reheat rice is to place it in a small pot and add a splash of water. Cover and heat over medium, allowing the rice to steam slightly. You can also microwave for a few minutes.
How to Freeze
Leftovers can easily be frozen for several months. Simply thaw in the fridge and reheat like normal.
FAQ
Greek rice is a popular side dish at Greek restaurants that typically consists of a lemony rice pilaf made with plump grains of rice cooked in garlic, onion, chicken stock, and fresh herbs, then garnished with fresh lemon juice for a pop of freshness. It's hearty and comforting yet light and refreshing at the same time.
Most Greek restaurants use long-grain rice, like basmati or jasmine rice, for their famous Greek rice. These types separate into individual grains after cooking and stay dry and fluffy, unlike short-grain varieties, which can easily become sticky and clump together.
It can be, but you'll want to ask about the cooking liquid. This easy Greek rice recipe uses chicken broth to give the rice extra flavor, but you can use vegetable broth instead. If you get Greek rice at a restaurant, you'll want to double-check!
More Rice Recipes
- 30 Best Rice Recipes
- Basmati Rice with Saffron
- Cilantro Lime Rice
- Steamed Rice
- Broccoli Rice
- Black Beans and Rice
Tried this recipe?
I'd love to hear what you think! Leave a comment and rating below to share your feedback. Your reviews help others discover this recipe and help me keep creating more free recipes for you. Snap a photo and tag me on social media @aheadofthyme too.

Simple Italian Salad
This Simple Italian Salad is fresh, delicious, and flavorful. It is loaded with fresh veggies and lightly tossed in homemade dressing, and ready in just 10 minutes. Serve this Olive Garden copycat with your favorite Italian recipes - and don't forget the Garlic Breadsticks!

I think we've all had that moment at Olive Garden when we want to eat the salad more than the pasta! The sharp red onion, briny olives, pepperoncini peppers, and tangy dressing complement the rich flavors in Italian food so well. This made from scratch version can be served as a light main dish on its own, but is also the perfect salad to pair with homemade pasta dishes. It's become our go-to side salad for almost any meal!
Why You'll Love This Simple Italian Salad
- Super simple ingredients. Most of the ingredients for this Italian chopped salad recipe can either be stocked in the pantry or kept in the fridge for whenever. This makes it easy to throw together quickly, even on those busy nights. It's a great way to sneak in some extra veggies, too!
- Ready in 10 minutes or less. All you need to do is chop the ingredients, toss them in the dressing and serve. It's really that simple to make this easy tossed salad.
- Perfect for pizza night. Serve some extra veggies with your Margherita Pizza (Neapolitan Skillet Style) or BBQ Chicken Pizza to make your Friday night favorite a little more nutritious. This simple Italian salad recipe balances the heavier flavors of tomato sauce and molten mozzarella cheese really well.

Ingredient Notes
To make this delicious Simple Italian Salad, you will need the following ingredients (full measurements in recipe card below):
- romaine lettuce - roughly chopped into bite-sized pieces. You can also use iceberg lettuce or another crunchy lettuce.
- cherry tomatoes - leave them whole or slice in half.
- black olives - these are classic, but you can use kalamata olives if you prefer.
- red onion - thinly sliced for a little bite.
- pepperoncini peppers - these are sold in jars, which are easy to keep in the pantry. You can leave this out if you don't have it.
- croutons - either buy a bag of croutons from the store or make homemade croutons with leftover Small Batch Sourdough Bread.
- Parmesan cheese - freshly grated onto the salad before tossing.
- sunflower seeds - I recommend toasting these. Toasted pumpkin seeds are great too.
- Italian dressing - Homemade Italian dressing is the best, but you can use store-bought as well.
- salt and pepper - season as needed.
You will also need measuring cups and spoons, a large bowl, tongs, and serving dishes.

How to Make the Best Simple Italian Salad
- Combine. In a large serving bowl, combine the all salad ingredients including lettuce, tomatoes, olives, red onion, pepperoncini, croutons, parmesan cheese and sunflower seeds.
- Toss. Drizzle with Italian dressing and toss well to coat. Taste and season with additional salt and pepper, if needed.
- Serve. Serve immediately.


Recipe Variations
- Add protein. Add a can of rinsed and drained garbanzo beans or cannellini beans for plant-based protein or add chopped salami for some meat.
- Add cheese. Throw in some chopped mozzarella cheese or provolone cheese. It tastes great, too!
- Add more veggies. There are lots of ways to modify this dish. Add some spring greens like baby spinach or kale, chopped green onions, artichoke hearts, English cucumbers, and more.
How to Serve
This Simple Italian Salad is delicious served on its own for a light lunch, or paired with some of my favorite Italian entrees including:
- Homemade Meat Lasagna
- Italian Meatballs
- Easy Chicken Parmesan (Parmigiana)
- Pesto Penne Pasta
- Stuffed Shells
- Chicken Marsala
For more recipe ideas, see our 50 Best Italian Recipes.

Recipe Tips and Tricks
- Dress right before serving. Once tossed in dressing, the fresh greens will begin to soften. If you want to prep this salad for lunches, always store the dressing on the side.
- Use your favorite dressing. I like to make my own Italian Dressing, but you can definitely change things up. These flavors are also great with a Balsamic Vinaigrette or even just a little extra-virgin olive oil and red wine vinegar. Keep it simple!
- Homemade is best. When possible, make your own croutons, dressing, etc. They'll have a cleaner, fresher flavor that really brings this classic Italian salad to life! Try our Rice Croutons for another option.
Storing Instructions
Once dressed, the salad should be consumed in one sitting. If you want to save leftovers for later, store it with the dressing on the side.
FAQ
Keep it simple and use a homemade Italian salad dressing. You don't need much; my recipe calls for extra virgin olive oil, white wine vinegar, lemon juice, garlic, parsley, Italian seasoning, and salt and pepper. It's that easy, yet it tastes way better than the bottled stuff from the store!
In restaurants, you'll usually see this salad made with an iceberg salad mix, tomatoes, red onion, pepperoncini peppers, olives, croutons, and Parmesan, all tossed in an Italian vinaigrette. This version is very similar, except I like to add sunflower seeds for crunch, and I use cherry or grape tomatoes for a brighter pop of tomato flavor. That's it!
I prefer to use mild, crunchy lettuces, like romaine hearts. They have a great texture that adds to the experience. Any crisp lettuce will do, though, like iceberg lettuce, butterhead lettuce, and more. Feel free to incorporate some baby spinach or tender leafy greens for extra flavor, too.
More Salad Recipes
- 40 Best Salad Recipes
- Caesar Salad
- Italian Pasta Salad
- Tomato and Mozzarella Caprese Salad
- Garden Salad
- Tomato Burrata Salad
Tried this recipe?
I'd love to hear what you think! Leave a comment and rating below to share your feedback. Your reviews help others discover this recipe and help me keep creating more free recipes for you. Snap a photo and tag me on social media @aheadofthyme too.

Ice Cream Sandwiches
Nothing says summer better than ice cream, and these homemade Ice Cream Sandwiches are the very best! Creamy vanilla ice cream is perfectly nestled between two tender homemade chocolate cookies for that classic flavor we all love. They're surprisingly easy to make and a fun nostalgic option for backyard barbecues, birthday parties, or just because!
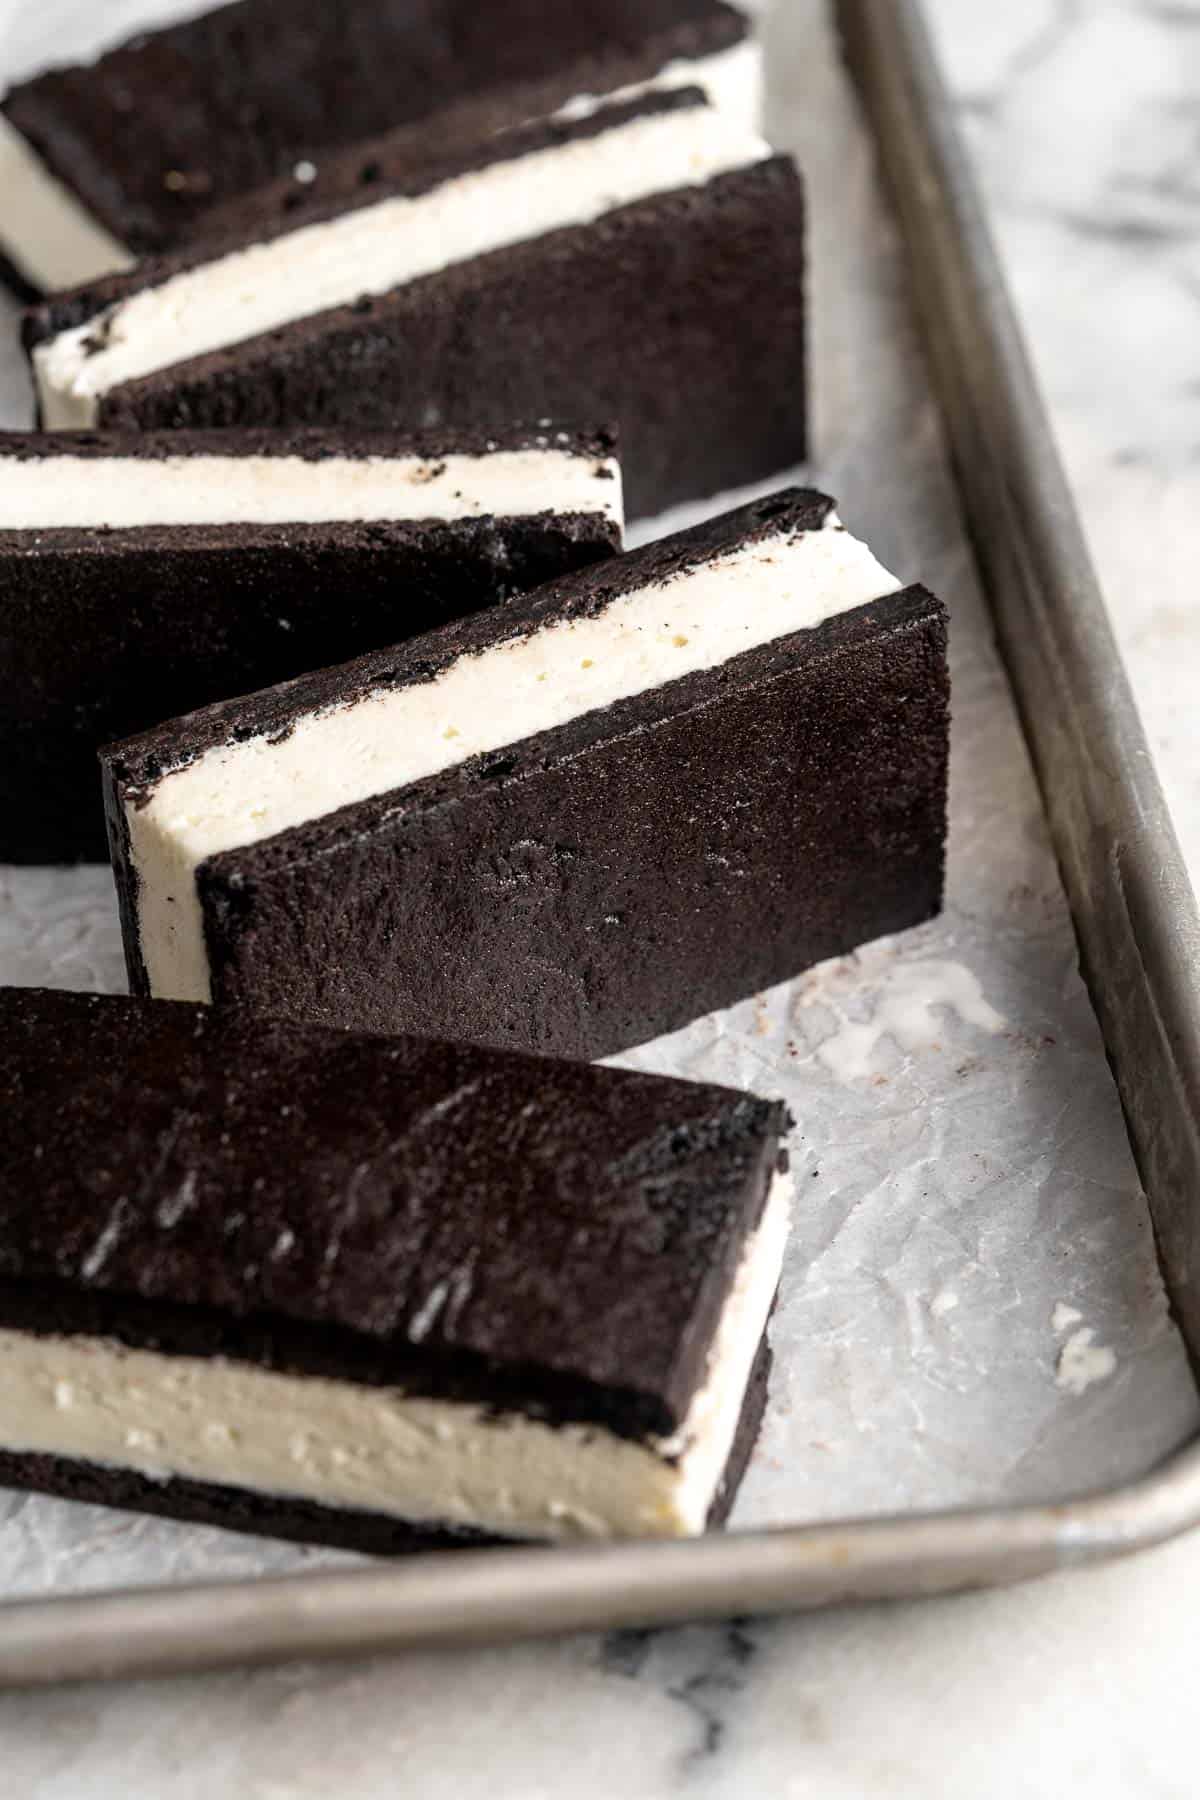
When the temperatures rise, nothing quite hits the spot like a freshly unwrapped ice cream sandwich with chocolate sandwich cookies and creamy vanilla filling. They're extra delicious when you've been outside in the sun all day! Most people would never even consider making them from scratch, but it's actually a lot easier that you might think. They're way better than store-bought ice cream sandwiches, so you may never go back!
Why You'll Love This Ice Cream Sandwich Recipe
- Iconic ice cream sandwich look. If you grew up eating grocery store ice cream sandwiches, these homemade chocolate cookies will give you a wave of nostalgia. They have that classic dark brown look and the same chocolaty flavor you know and love - but taste way better! Plus, they're made without any corn syrup, natural flavors, or stabilizers, so you can really control the quality of ingredients.
- Perfect summer treat. Ice cream sandwiches are made to be eaten out of the hand, ideally in the backyard with the sprinklers running and kids laughing and playing. They're so refreshing and taste just like childhood!
- Completely customizable. Instead of classic vanilla, you can use any ice cream flavor you like for the ice cream layer. Dream up unusual combinations or even mix and match 2-3 flavors together. It's so much fun!

Ingredient Notes
To make these delicious Ice Cream Sandwiches, you will need the following ingredients (full measurements in recipe card below):
- vanilla ice cream - use my No Churn Vanilla Ice Cream for a homemade option, your favorite vanilla ice cream from the store, or any ice cream flavor of your choosing.
- all purpose flour
- cocoa powders - use Dutch cocoa powder and double Dutch cocoa powder (also known as black cocoa powder) for that extra dark brown color. You can substitute with more Dutch cocoa if you don't have double Dutch powder.
- baking powder - to give the homemade cookies a little lift.
- salt
- unsalted butter - make sure to use softened butter.
- vegetable oil - this will give the cookies a soft, tender texture, perfect for flexing with the ice cream in the sandwich.
- sugars - you need both brown and white for the best flavor and texture.
- vanilla extract
- eggs - room temperature is best.
Equipment Needed
You will also need measuring cups and spoons, a 9x13 baking pan, an ice cream scoop (optional), parchment paper, a spatula, plastic wrap, a rimmed cookie sheet, medium and large bowls, a whisk, an electric mixer, a sharp knife, and a wire rack.
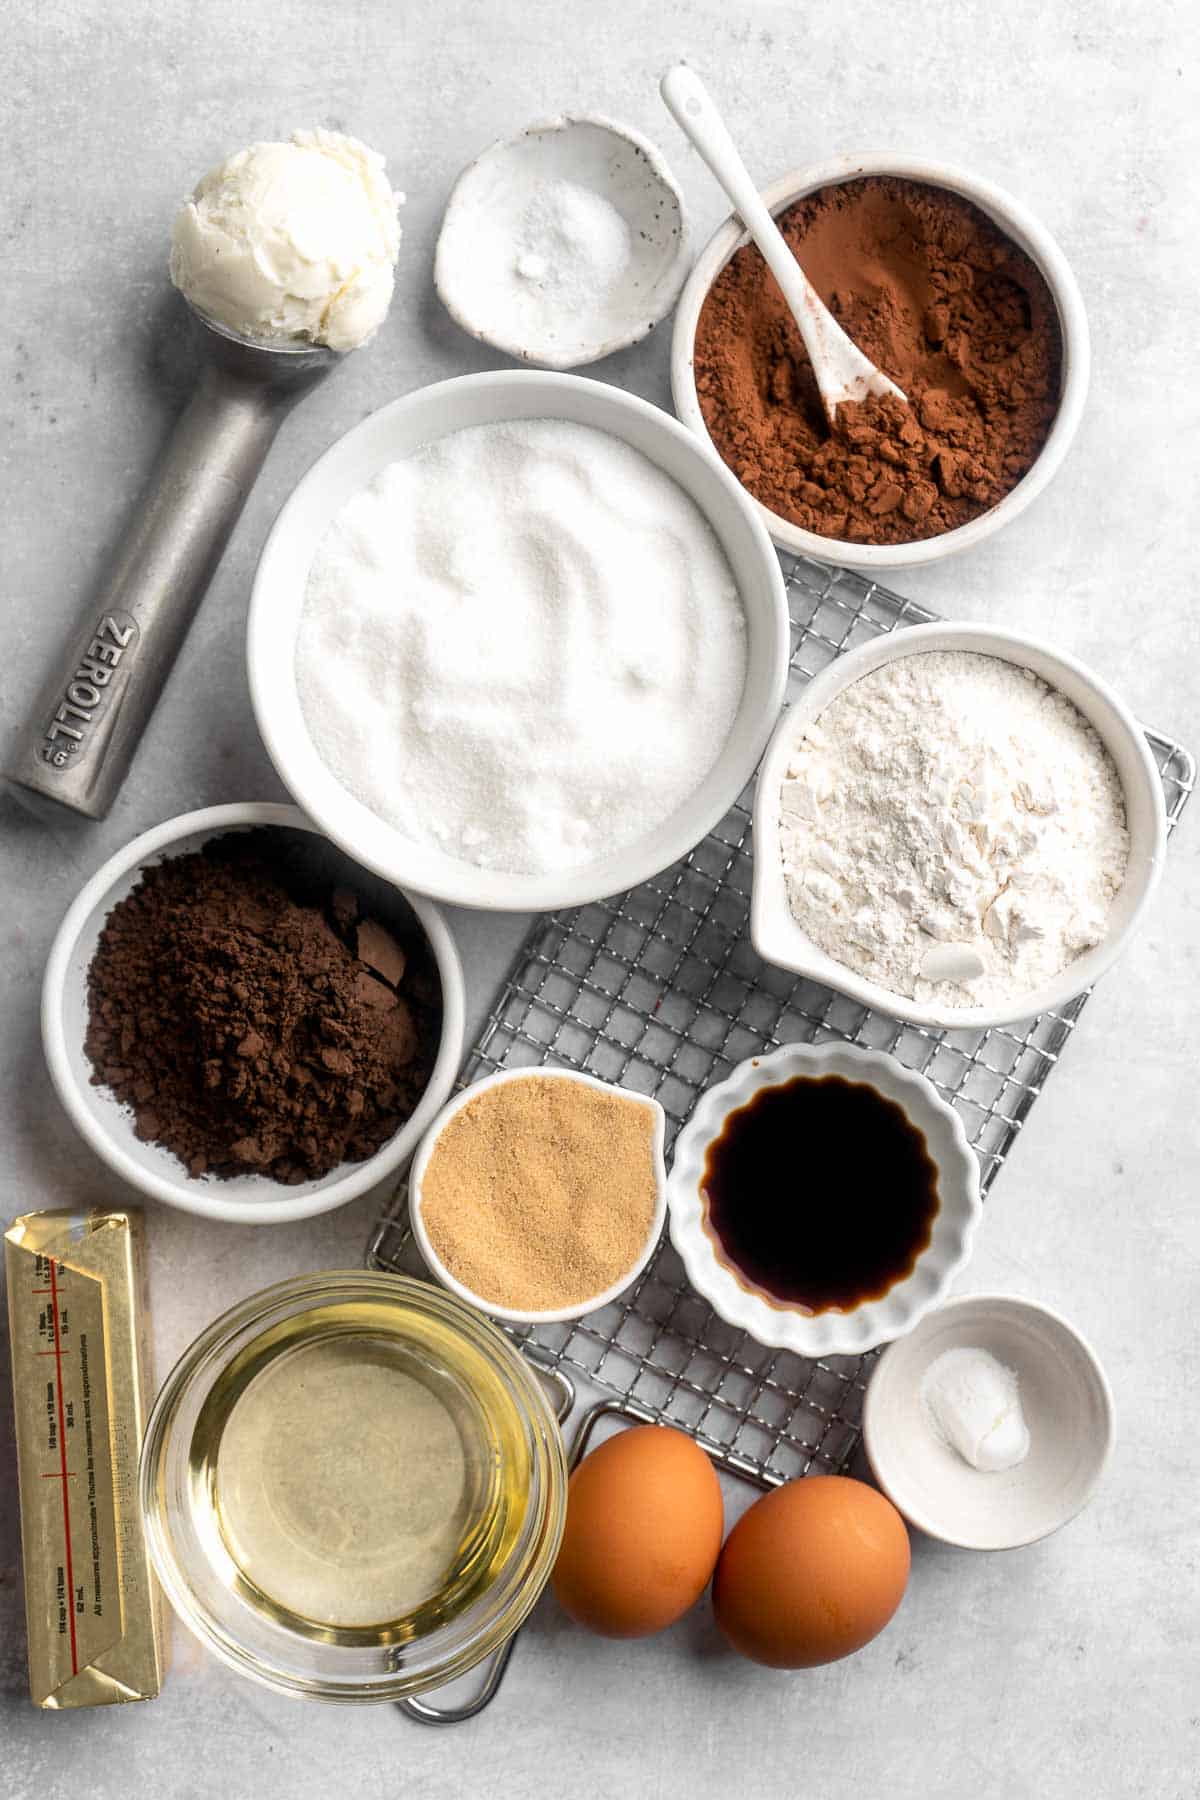
How to Make the Best Ice Cream Sandwiches
First, prep the ice cream.
Line a 9x13-inch baking pan with parchment paper. Transfer the ice cream into the baking pan and use a spatula to spread it out until smooth and flat (this may take several minutes). Transfer the ice cream into the freezer and freeze for at least 4 hours.

Then, make the cookie layers.
- Combine dry ingredients. In a medium mixing bowl, whisk together the flour, both sifted cocoa powders, baking powder, and salt, until well-combined. Set aside.

- Combine wet ingredients. In a large mixing bowl, using an electric hand mixer, beat together the butter, oil, white sugar and brown sugar until pale and fluffy, about 3 minutes. Add in the eggs and vanilla, then beat again until well-combined and smooth.


- Add dry ingredients to wet. Add in the dry ingredients to the wet batter, then beat again until well-combined.


- Bake. Prepare a nonstick 18x13-inch baking sheet with butter or baking spray and parchment paper. Transfer the batter into the prepared baking sheet. Smooth it out with a spatula. Place into a 350F preheated oven to bake for 11-12 minutes.
- Slice. Remove from the oven, then immediately use a sharp knife to slice down the centre of the cookie. Allow to cool in the pan until fully cooled.


- Invert. When fully cooled, place a parchment lined cooling rack (or the bottom of another baking sheet) on top of the cookie halves and carefully invert them.
Assemble the ice cream sandwiches.
- Assemble. Remove the ice cream brick from the freezer and the pan, then carefully place it onto one of the cookie halves, then place the other cookie half on top.
- Freeze. Lightly cover with plastic wrap, then transfer back into the freezer to harden for at least another 4 hours, or preferably overnight.


- Slice. When hardened, use a sharp knife to slice into 12 bars. Enjoy immediately, or wrap each bar individually with plastic wrap, and place back into the freezer.

Recipe Variations
- Make cookie ice cream sandwiches. Make equal-sized rounds of chewy chocolate chip cookies, then sandwich them together with a scoop of your favorite ice cream flavor. You can also use any of your favorite cookie recipes, so feel free to try any combo you'd like!
- Coat the sides. After assembling the sandwiches, press the sides into mini chocolate chips, chopped peanuts, crushed graham crackers, crushed Oreos, or sprinkles for extra crunch and flavor.
- Mix and match flavors. Instead of using just one type of ice cream, mix 2 to 3 different flavors for a custom flavor combination!
How to Serve
These Ice Cream Sandwiches are delicious served on their own, or served as part of a larger dessert spread with some of my favorite summer desserts including:
- S'mores Bars
- Key Lime Pie
- Strawberry Crumb Bars
- Summer Fruit Salad
- Blueberry Cheesecake
- Rice Krispies Treats
For more recipes, see our 40 Best Summer Desserts.
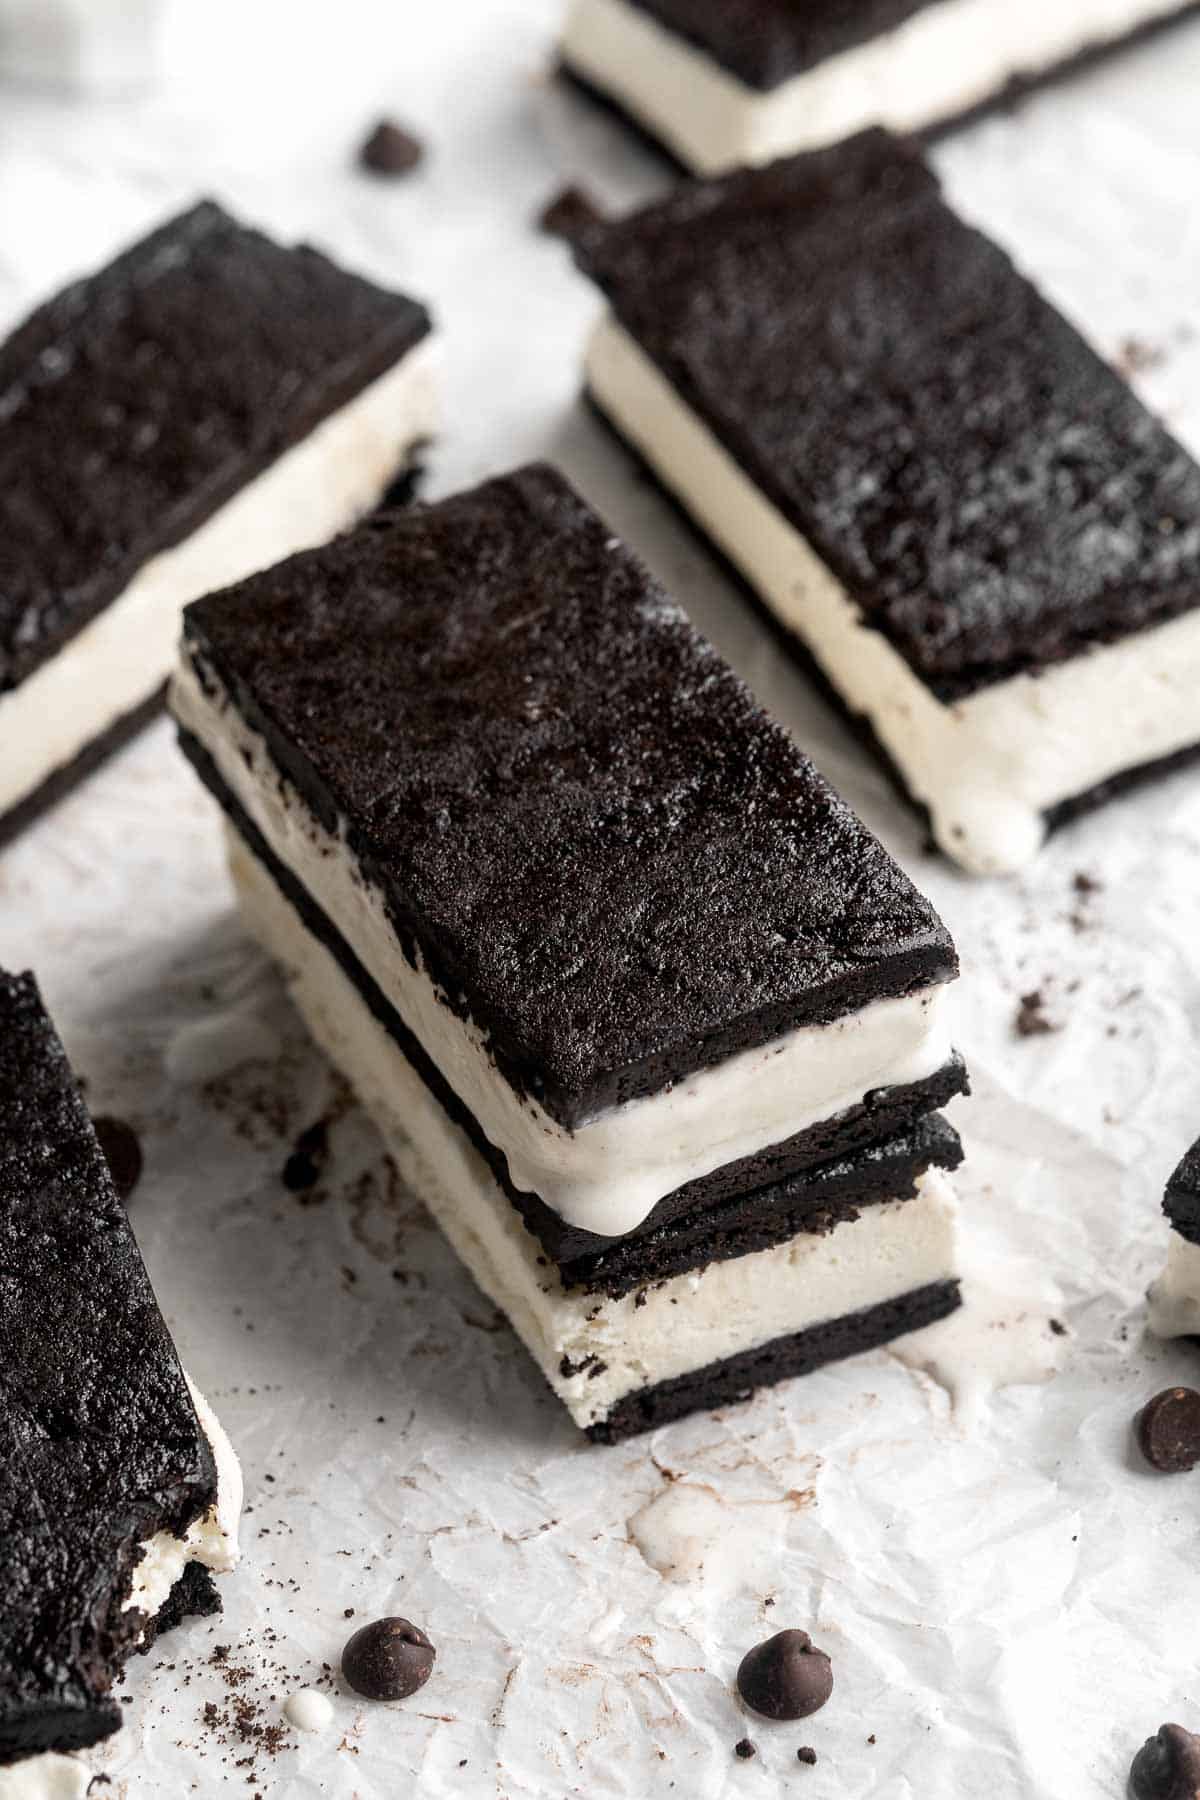
Recipe Tips and Tricks
- Cool the cookies first. Make sure those cookies cool to room temperature before you start assembling the sandwiches. Hot cookies and cold ice cream are a melty mess.
- Don't rush. It's tempting to speed through the process so you can eat your sandwiches right away, but give yourself plenty of time! The whole process is much easier (and tidier) if you let the ice cream freeze into a block and re-freeze the individual sandwiches before serving.
- Homemade is best. The most delicious ice cream is homemade. If you like that classic ice cream sandwich flavor, make vanilla ice cream with real vanilla beans or try another homemade flavor. Even if you've never made ice cream before, my No Churn Vanilla Ice Cream recipe is super easy!
Storing Instructions
If you don't plan to eat these ice cream sandwiches today, wrap them individually with plastic wrap or parchment paper, then store them in an airtight container in the fridge for 1-2 months.
FAQ
If you want your ice cream sandwiches to look like ones from the store, cut pieces of parchment paper into squares slightly larger than the sandwiches. Place the sandwich in the middle. Tuck the right side over the ice cream sandwich until it covers the top cookie. Press the top and bottom pieces against the sandwich, then lay the extra paper on top of the first fold. Then fold the left side of the paper on top of the cookie, covering the other folds. Tape the paper down for easy serving later.
The classic ice cream sandwich is made by sandwiching vanilla ice cream between two long chocolate wafers. These cookies are soft and tender, allowing them to flex with the ice cream as you bite them. You can make your own chocolate cookies at home following this recipe and turn them into delicious ice cream treats with a tub of your favorite vanilla ce cream!
Unfortunately, that's not clear. Ice cream sandwiches have been available for a long time, as early as 1899! The first ice cream sandwich patent appeared in 1921, but they were already popular decades before that.
More Ice Cream Recipes
- 40 Best Summer Desserts
- No Churn Vanilla Ice Cream
- Strawberry Frozen Yogurt
- Strawberries and Cream Popsicles
- Watermelon Sorbet
- Mango Frozen Yogurt
Tried this recipe?
I'd love to hear what you think! Leave a comment and rating below to share your feedback. Your reviews help others discover this recipe and help me keep creating more free recipes for you. Snap a photo and tag me on social media @aheadofthyme too.
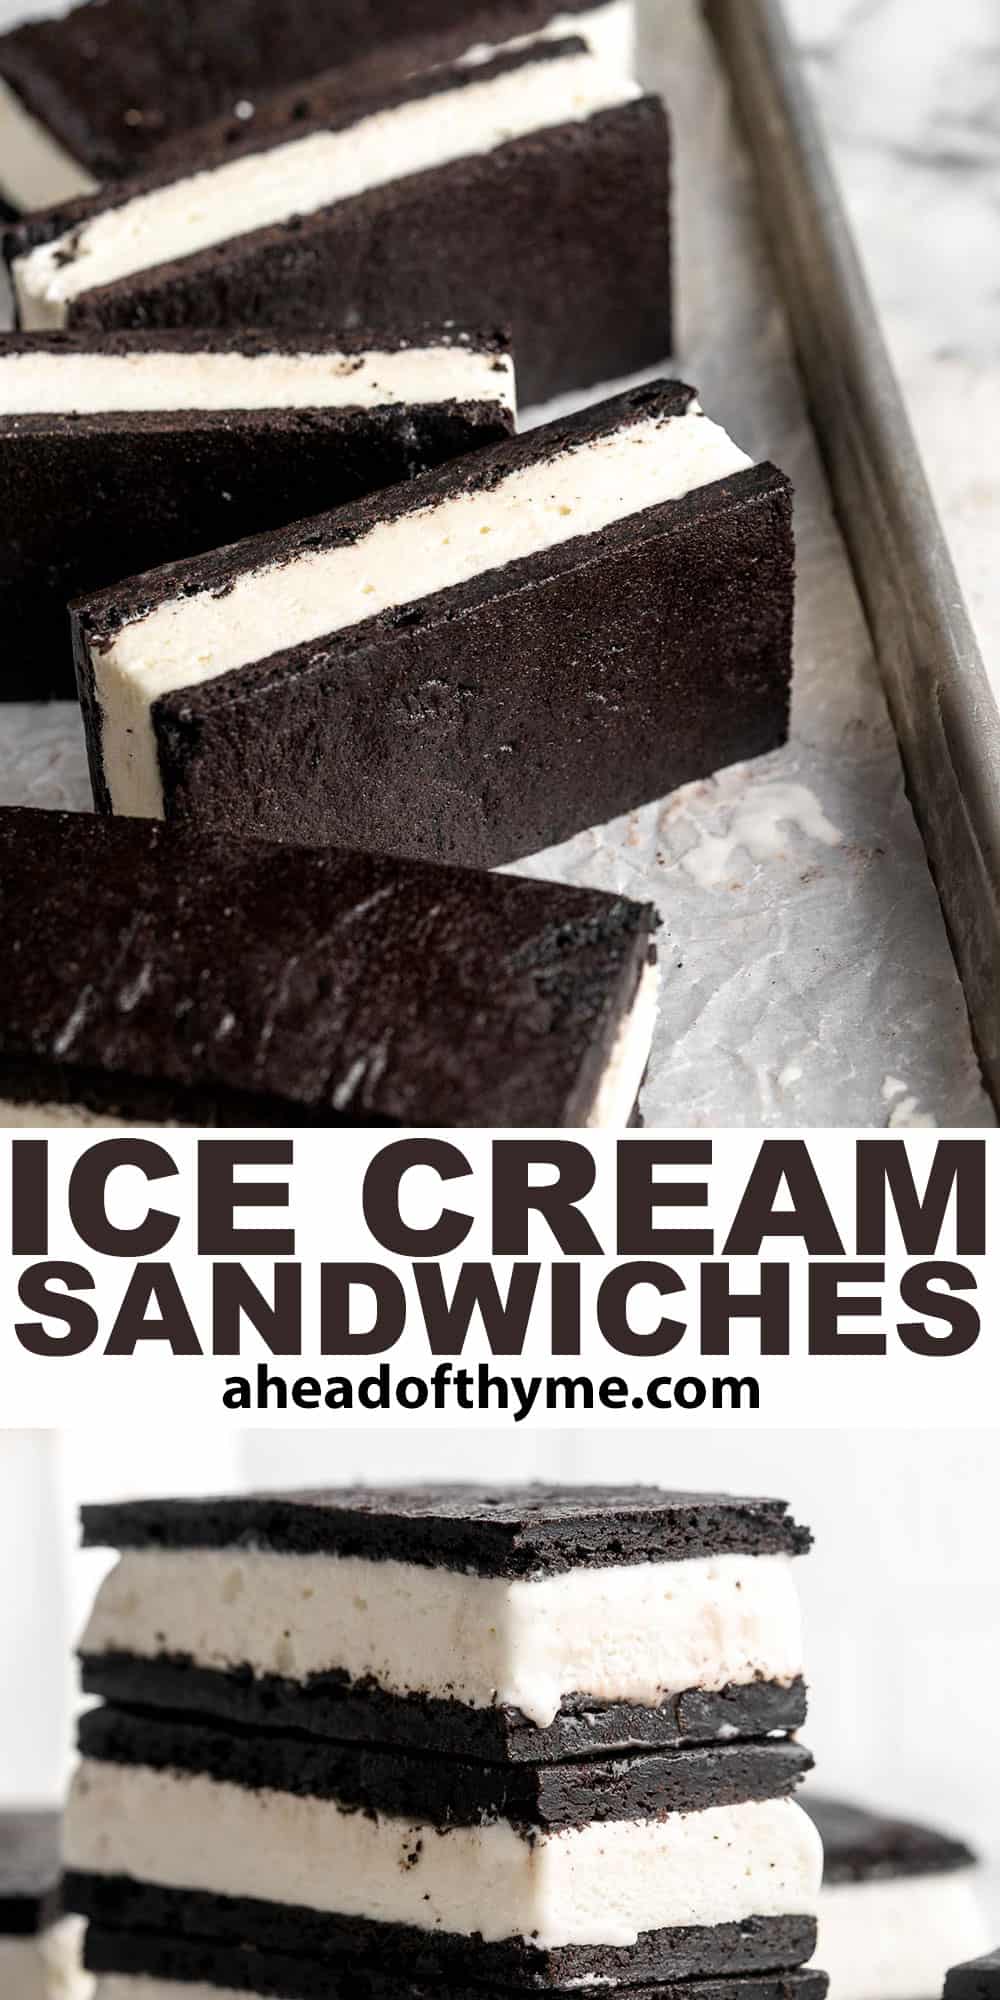
Spicy Cumin Lamb Skewers
Spicy Cumin Lamb Skewers are juicy, tender, and succulent. The bold cumin and cayenne marinade mixed with oil, garlic, and soy sauce, adds such an incredible depth of flavour to these lamb skewers, making them savoury, spicy, and so flavourful. My favourite part? Xinjiang lamb skewers are super quick and easy to make, taking just 10 minutes to cook on the grill.

Spicy cumin lamb skewers, also known as yang rou chuan, are a popular Chinese street food originating in northern China, in the Xinjiang region. They sold by street vendors all over China and are traditionally cooked over a charcoal grill or a Chinese barbecue grill. To see how it's done with a Chinese grill, see our Grilled Spicy Cumin Lamb Skewers recipe post.
Why You'll Love These Spicy Cumin Lamb Skewers
- Incredible flavor. Xinjiang lamb skewers are popular for a reason! By using lamb leg or shoulder meat, the skewers stay moist and tender because these parts of the meat has plenty of fat to soak up the marinade. As the skewers cook, the outside caramelizes in the savory seasonings of whole and ground cumin, fresh garlic, and cayenne. On the inside, the quick grilling process locks in the moisture and flavor from the Shaoxing wine and soy sauce. They're meaty, smoky, and spicy, with just a touch of sweetness. So good!
- Great for entertaining. Prep the meat the night before, then grill right before serving. It smells amazing and tastes even better; your guests will be begging for this easy recipe!
- Cook however you'd like. Although it's traditional to prepare these spiced lamb kebabs on a Chinese grill, I've shared tips for cooking them on a gas or charcoal grill, an indoor grill pan, in the oven, or in the air fryer. This means you can enjoy the long after BBQ season ends!

Ingredient Notes
To make these delicious Spicy Cumin Lamb Skewers, you will need the following ingredients (full measurements in recipe card below):
- lamb leg or shoulder - cut into 1 inch cubes.
- vegetable oil
- Chinese cooking wine - also known as Shaoxing wine.
- soy sauce
- garlic
- cumin powder
- cayenne pepper - these skewers are spicy. For a milder taste, add just 1 teaspoon of cayenne powder or even less, depending on your personal preference. If you want them extra spicy, add up to 1 tablespoon.
- cumin seeds - optional. I love cumin seeds on these skewers. They add extra flavour and a nice texture.
- salt
You will also need measuring spoons, skewers, tongs for grilling, and an indoor grill pan (if you are not using an outdoor grill), and a digital meat thermometer.
How to Make the Best Spicy Cumin Lamb Skewers (Three Ways)
- First, marinate the lamb. Add cubed lamb into a ziploc bag and add vegetable oil, cooking wine, soy sauce, minced garlic, cumin powder, cayenne pepper, cumin seeds (optional), and salt. Press the air out of the bag and seal tightly. Press the marinade around the lamb to coat. Place in the fridge to marinate at least 30 minutes or overnight, to infuse all the seasoning and spices into the meat.
- Next, thread the lamb onto skewers. Depending on the size of your skewers, you should be able to thread 6 skewers with 6-7 pieces of lamb on each.
- Finally, it's time to grill. Preheat grill (or grill pan) over medium high heat for 4-5 minutes and lightly brush the grill with remaining vegetable oil. Grill the skewers for 10-15 minutes (rotating every few minutes), or until the internal temperature of the lamb reaches 155 F, as read on a digital meat thermometer (or 160 F for well done). Near the end of grilling, sprinkle some more cumin seeds on top.


- Time to serve! Serve hot with an extra sprinkle of cayenne pepper, if desired.
How to Cook Lamb Skewers in the Oven
To cook spicy cumin lamb skewers in the oven instead, simply place the skewers on a baking tray and bake at 440 F for 15 minutes, rotating the skewers halfway.
How to Cook Lamb Skewers in the Air Fryer
To cook spicy cumin lamb skewers in the air fryer, cook them (unskewered) at 375 F for 15 minutes, shaking the basket halfway. Once done, leave the basket in the air fryer for another 2 minutes, as it will continue to cook with the residual heat.
Recipe Variations
- Make beef skewers instead. Not a fan of lamb? Not a problem. The fatty, meaty flavor of beef is a perfect alternative. Choose a marbled cut, like a leg or shoulder.
- Adjust the heat. Change the heat level to your own preference. You can skip the cayenne pepper, use red pepper flakes instead, or replace it with mild chili powder for the flavor without the heat.
- Tweak the spice mixture. Feel free to add more spices to make this recipe your own, like whole fennel seeds, caraway seeds, garlic powder, or your favorite Chinese spice blend. You can even add some ground Sichuan peppercorns for an interesting mouth-numbing sensation!
How to Serve
These Spicy Lamb Skewers are delicious served on their own, or paired with some complimentary Asian-style side dishes including:
- Vegetarian Fried Rice
- Asian Cold Noodle Salad
- Shanghai Style Vegetarian Steamed Buns
- Chicken Potstickers
- Steamed Rice
- Chinese Garlic Cucumber Salad
- Crispy Bottom Shanghai Pan-Fried Pork Buns
For more recipe ideas, see our 60 Chinese Takeout Recipes at Home.

Recipe Tips and Tricks
- Marinate the lamb. It is crucial to let the lamb marinate for at least 30 minutes to allow the flavours to infuse into the mean and to tenderize the meat, aka making it juicier. If you have the time, I recommend marinating it even longer or overnight for the best results.
- How to make the lamb even more tender. Turn off the heat and remove the the grill from heat a couple minutes earlier, when the internal temperature reaches 150 F (5 degrees lower than the desired level). Let it rest for a few minutes in the pan as the residual heat will continue to cook the skewers. Resting after cooking helps the juices redistribute into the meat. Once the internal temperature reaches 155 F, remove from the pan and serve.
- Use a digital thermometer. A digital meat thermometer is very useful when grilling meat skewers for checking doneness. Simply insert halfway inside the meat to get a quick measurement.
- Make extra. This is a smaller batch recipe that makes 6 skewers. Simply double or triple the recipe to feed a hungry crowd.
Storing and Freezing Instructions
How to Store
Unthread the lamb and store it in an airtight container for up to 3 days in the refrigerator.
How to Reheat
Reheat in the microwave until fully warmed through. You can also reheat in a preheated 325F oven for 10 minutes or air fryer for 5 minutes until warmed through.
How to Freeze
You can freeze both the raw marinated lamb or the cooked lamb. Place in an airtight cotnainer and freeze for up to 2-3 months. If freezing cooked lamb, be sure to unthread the lamb first. When ready to cook or eat, thaw overnight in the fridge before cooking according to recipe instructions or popping into the oven to reheat (if cooked).
FAQ
Yes! Cumin's nutty, earthy flavor pairs wonderfully with lamb meat and is a traditional flavor combination for these Chinese lamb skewers. When seasoning lamb with cumin, I like to add some sort of acidity and sweetness, like Chinese cooking wine, to mellow out the richness of the meat. This balances the savory flavors of the lamb and the cumin to add a necessary balance.
For the best flavor and tender texture, use fatty lamb, like lamb shoulder or leg. Look for a cut that is marbled with fat, which will melt and become tender on the grill. Avoid lean meat, which can overcook and become tough very quickly.
Yes, but this recipe is specifically formulated for grilling little meat cubes, not ground meat. Instead, try substituting ground lamb in this beef kofta recipe and adjusting the spices. Either reduce or eliminate the wine and soy sauce, as they will add too much liquid. You won't get quite the same flavor, but this is the best way to make skewers with ground lamb.
More Grilled Skewer Recipes
- Greek Souvlaki Lamb Skewers
- Chicken Satay Skewers with Peanut Sauce
- Easy Greek Chicken Souvlaki Skewers
- Souvlaki Beef Shish Kebabs
- Teriyaki Chicken Skewers with Pineapple
- Persian Saffron Chicken Kebabs (Joojeh Kabob)
Tried this recipe?
I'd love to hear what you think! Leave a comment and rating below to share your feedback. Your reviews help others discover this recipe and help me keep creating more free recipes for you. Snap a photo and tag me on social media @aheadofthyme too.

Gourmet Hot Dogs
Juicy and delicious Gourmet Hot Dogs will take your next backyard BBQ or potluck to a whole new level. Whether you prefer a classic dog, Mexican flavors, or an Asian-inspired option, we have a hot dog toppings combo for you. Can't choose which one to try? Make a hot dog bar and let your guests serve themselves!
It might sound like an oxymoron, but gourmet hot dogs are a real thing! It's all about pairing flavors and ingredients. With the right sausages, buns, and toppings, the humble hot dog can become something quite special. Fancy hot dogs are becoming more and more common (and expensive) these days, but you can save your cash and make your own in the comfort of your own home. This trio of hot dog recipes is perfect for Memorial Day, the 4th of July, Labor Day, and any summer gathering!
Why You'll Love These Gourmet Hot Dogs
- Looks so appetizing. These hot dogs are decorated to the nines with all the best toppings. We eat with our eyes after all, and these hot dogs taste as good as they look!
- Easy to serve a crowd. Hot dogs are a staple at sports arenas and barbecues for a reason. Since they are precooked, they just need to be warmed up, which makes them super quick to make. Grill a bunch, lay out your favorite hot dog toppings and serve!
- Three flavor combinations. Instead of just one perfect hot dog, how about 3 delicious options? Keep it simple with a classic hotdog, spice it up with a Mexican-style dog, or incorporate some Asian flavors. It's fun to try all 3!
- Elevated flavor. With higher-quality ingredients, you can really see why hot dogs are so beloved. You feel the snap of the sausage, the soft bite of the bun, and the mixture of flavors and textures from the toppings. It takes the plain old hot dog and really makes it something special!

Ingredient Notes
To make these delicious Gourmet Hot Dogs, you will need the following ingredients (full measurements in recipe card below):
- weiners - pay a little extra for premium hot dogs from either your local grocery store or butcher.
- hot dog buns - I like to make my own hot dog buns for a really fresh flavor and perfect chew. Feel free to mix and match different options, like brioche, sweet Hawaiian hot dog buns, artisan-style rolls, etc.
Hot Dog Toppings
| Classic hot dog | - onion - sauerkraut - play around with specialty flavors of sauerkraut or make your own. - sliced pickles - use any type you like: classic dill, bread and butter, spicy pickles, etc. - ketchup - mustard |
| Mexican style hot dog | - pico de gallo - make your own Pico de Gallo from scratch or substitute your favorite type of salsa. - cheddar cheese - to melt onto the hot dog for a cheesy bite. - jalapeños - for a less spicy kick, you could substitute this with sautéed bell peppers. - sour cream |
| Asian style hot dog | - fried onions - see how to make fried onions in our Potato Onion Pierogi recipe. - teriyaki sauce - it's worth it to take 10 minutes to make your own Teriyaki Sauce. - mayonnaise - look for Japanese mayo (Kewpie) for the best flavor. - seaweed flakes (furikake) - these add a crunchy, salty flavor that's perfect as a garnish. |
You will also need a grill, tongs, and any serving supplies you need.
How to Make the Best Gourmet Hot Dogs
- Cook the weiners. Grill the hot dogs over medium-high heat until the skin on all sides begins to brown, about 5-7 minutes.
- Toast buns. Toast the hot dog buns for a few minutes on the grill until warm and toasty.


- Assemble. Place the hot dog wieners in the buns and top with desirable toppings. Serve warm.


Recipe Variations
- Use different sausages. Instead of regular hot dogs, try brats, Italian sausage, veggie dogs, or even blends of specialty meats (elk or bison sausage, etc). There are even hot dogs made from brisket, wagyu beef, and other specialty options. You have lots of potential here!
- Change the buns. Make your own tender hot dog buns or mix and match the buns with the recipe. A sweet bun would pair well with the Japanese-style hot dog, while I like an artisan roll for the Mexican one. Pretzel buns are a nice option for the classic dog.
- Add different toppings. There are so many ways to top hot dogs - you're really spoiled for options! Get creative and try something new.
- Make a Seattle dog by brushing cream cheese on the bun and adding grilled onions.
- Try Hawaiian hot dogs by adding bacon, pineapple, red onion, and my spicy mayo or the teriyaki mayo from the Asian-style dogs.
- For a Swiss-style dog, top with Swiss cheese, caramelized onions, sauteed mushrooms, and a little Dijon mustard.
How to Serve
These Gourmet Hot Dogs are delicious served on their own, or paired with some complimentary side dishes. I like pairing each flavor with different sides, including:
- To pair with the Classic Hot Dog: Caesar Salad, Baked Potato Wedges, Grilled Vegetable Skewers, or Classic Potato Salad.
- To pair with the Mexican Hot Dog: Guacamole, Mexican Stuffed Peppers, Air Fryer Mexican Shrimp, or Crispy Refried Bean Tacos.
- To pair with the Asian Hot Dog: Vegan Soba Noodle Salad, Baked Sweet Potato Wedges, Chinese Garlic Cucumber Salad or Vegetarian Fried Rice.
For more recipes, see our 25+ Best BBQ Side Dishes.

Recipe Tips and Tricks
- Focus on quality. Fortunately, hot dogs are pretty affordable, but the price can go up when you focus on higher-quality ingredients. Splurge on the hot dogs themselves. You want really good hot dogs, not the $1-2 packs from the store. The fresh components are generally not very expensive and making these fancy hot dogs at home will still save lots of money compared to buying them from a gourmet hot dog stand!
- Make components from scratch. If you have a little time, try to make your own buns, mayo, teriyaki sauce, pico de gallo, etc. Those homemade elements taste much fresher than the prepackaged stuff from the store and can make a big difference.
- Grill the dogs. Technically, hot dogs can be prepared on the stove, in the oven, in the air fryer, and more, but grilling will give the best texture and bite.
Storing and Freezing Instructions
How to Store
Once assembled, these hot dogs are best served fresh. If you have leftovers, store the cooked hot dogs and any perishable toppings in separate airtight containers in the fridge for 3-4 days.
How to Reheat
After grilling, the hot dogs can dry out a bit. Return some of that moisture by wrapping them with a damp paper towel and microwaving for 45-50 seconds. You can also gently steam them in a skillet on the stove with a splash of water.
FAQ
That answer depends on where you live, as there are major differences across stores. However, I recommend looking for a mixture of beef and pork in a natural casing whenever possible. If you can find locally made hot dogs or weiners, definitely go for those. For a storebought brand, look for Nathan's, Sabrett, Boar's Head uncured beef frankfurters, or a beloved local option near you.
The best tasting hot dogs are grilled, which gives the skin a little bite and a smokiness that pairs well with the toppings. You can definitely prepare them in different ways, but grilling really kicks them up a notch,
There are truly endless options! At gourmet hot dog stands, you'll often find a variety of different, rotating flavors. I prefer to either keep things simple with the classic combo of mustard, ketchup, onion, sauerkraut, and pickle or incorporate a few different flavor profiles. My Mexican-style hot dog has homemade pico de gallo with cheddar cheese, jalapeno, and sour cream, while my Asian-style hot dog has mayo, teriyaki sauce, fried onions, and seaweed flakes. They're both totally different in their own ways, but still delicious! Play around with different flavor profiles, seasonal ingredients, and sauces to make your own custom creations.
More Sandwich Recipes
- Lobster Rolls
- Lemongrass Chicken Banh Mi Sandwich
- Cheeseburger Sliders
- Beef and Bean Burritos
- Chicken Shawarma
- Roasted Broccoli Grilled Cheese Sandwich
Tried this recipe?
I'd love to hear what you think! Leave a comment and rating below to share your feedback. Your reviews help others discover this recipe and help me keep creating more free recipes for you. Snap a photo and tag me on social media @aheadofthyme too.

Iced Chai Latte
Sweet, spicy, and ice cold, is there anything more refreshing than an Iced Chai Latte? It's easy to make this boldly flavored iced chai tea latte at home with just a teabag and a little patience - no boxes of concentrate required!

I adore anything chai flavored (hello Chai Cookies!), and I am more likely to have a cup of hot Chai Tea Latte in my hand instead of coffee. Those classic warming spices make you feel so cozy, and the ice-cold version is especially refreshing when it gets hot out. This easy iced tea recipe is quick enough to make every day, or you can save time and just double or triple it and keep a stash of homemade chai concentrate in the fridge.
Why You'll Love This Iced Chai Latte
- Creamy and refreshing. Iced chai has the perfect balance of sweetness, creaminess, and bold spices that make it a popular choice from midwinter to the hottest days of summer. There's nothing quite like it!
- Skip the trip to the coffee shop. Instead of spending a small fortune at coffee shops or on those quart boxes of chai concentrate, make your own iced chai tea latte at home! It only takes about 20 minutes, and you can easily double or quadruple this recipe to have extra on hand any time a chai craving starts calling.
- Control the quality of ingredients. If you have any dietary restrictions, it can be nearly impossible to find coffee drinks that fit your needs. For this recipe, you can use organic tea, your favorite type of milk (or no milk), or any type of sweetener that works for you.

Ingredient Notes
To make this delicious Iced Chai Latte, you will need the following ingredients (full measurements in recipe card below):
- water + ice cubes
- chai teabag - there is a huge range in quality when it comes to pre-bagged tea. If you want a strong, pure chai flavor, it's worth it to pay a couple of extra dollars for a better-quality brand.
- milk - use your milk of choice: dairy or non-dairy.
- sweetener- this is totally optional, and you can use any type of sweetener you'd like. I recommend sugar, maple syrup, or honey.
You will also need measuring cups and spoons, a small saucepan, storage container, and a glass.

How to Make the Best Iced Chai Latte
- Steep. Bring water to a boil in a small saucepan. Remove from heat and add tea bag. Steep for 5 minutes. Then, remove and discard the teabag. Transfer to the fridge to chill for about 5-10 minutes.


- Assemble. Place a few ice cubes into a glass cup. Fill with the chai tea concentrate, then top with milk.


- Sweeten. Stir gently to combine and taste. Add sweetener, if desired.


Recipe Variations
- Add more spices. This recipe relies on bagged chai, but you can certainly steep extra spices to add even more flavor. If you're making a larger batch, throw in a star anise or two, some cinnamon sticks, and a few cardamom pods to make those spices pop.
- Use a flavored sweetener. Instead of sugar or maple syrup, use vanilla simple syrup or cinnamon simple syrup for an extra layer of flavor.
- Try different types of chai. There are so many varieties of chai that it can be a bit overwhelming. Most of us are used to masala chai, which is known for lots of warm spices like cinnamon, clove, cardamom, and black pepper, but that's just the start! Have fun trying cardamom chai, turmeric ginger chai, rooibos chai, and more.
- Make an iced dirty chai latte. Add a shot of espresso or some cold brew coffee for a hit of caffeine to get you through the day.
- Go decaf. If you need to take it easy on the caffeine, look for a decaffeinated brand of chai without black tea.
- Use loose tea. Love loose chai tea? Replace the bag of tea with approximately 2-3 teaspoons of loose tea leaves. Just be sure to strain the mixture with a fine mesh strainer to remove any pieces of black tea or spices.
How to Serve
This Iced Chai Latte is a delicious and refreshing drink to enjoy on its own, or paired with some sweet treats or cookies including:
For more recipes, see our 50 Best Cookie Recipes.

Recipe Tips and Tricks
- Steep as long as you'd like. If you crave the intensity of chai concentrate, feel free to let the tea steep a little longer. Just be sure not to go for too long, as the black tea can add a bitter flavor. For an even stronger flavor, use two bags of tea instead of one.
- Make lots of extra. To keep ready-to-serve iced chai in the fridge, sweeten the chai mixture while it is still warm, let it cool in the fridge, then add the milk. Store it in a pitcher in the fridge, fill a glass with ice, and pour! If you use regular dairy, keep an eye on the expiration date.
- Steep in water only. Sometimes, people like to skip a step and steep the tea in the milk, but it will not work the same way. The water will extract much more flavor, giving you a stronger, bolder chai flavor faster. It's a simple recipe, but it's best to trust the process.
Storing and Freezing Instructions
How to Store
Any leftover chai concentrate should be stored in an airtight container in the fridge for 5-7 days. I like to make extra to keep in a large mason jar or a pitcher for easy pouring.
How to Freeze
If you have any iced chai leftover, pour it into ice cube molds and freeze it. The next time you make an iced chai, use the frozen cubes to keep your drinks from diluting. This makes the very best iced chai latte!
FAQ
The secret is to make your own chai concentrate. That's easier than it sounds! Just steep your favorite chai tea bag in hot water until it has plenty of flavor, then chill in the fridge. Once cold, pour the chai over ice, add a little milk, and stir in your favorite sweetener. That's it!
Yes, most chai tea brands are made with black tea, which contains caffeine. Black tea has about half as much caffeine as coffee, but you can certainly choose a decaf chai tea brand instead.
You can really use any type of chai tea you'd like! For that classic chai flavor, look for spiced chai or masala chai. Feel free to play around with different brands, as some will have much more flavor than others. For the best flavor, skip the bottom shelf option and choose something a little more expensive. Give it a smell, too. If it smells really aromatic and spicy, go for it!
More Cold Drink Recipes
- Homemade Iced Tea
- Matcha Milk Tea
- Iced Latte
- Cold Brew Coffee
- Homemade Lemonade
- Homemade Peach Iced Tea
Tried this recipe?
I'd love to hear what you think! Leave a comment and rating below to share your feedback. Your reviews help others discover this recipe and help me keep creating more free recipes for you. Snap a photo and tag me on social media @aheadofthyme too.

Cherry Tomato Salad
This quick and easy Cherry Tomato Salad is light, fresh, and delicious. It is is one of the most intensely flavored side dishes, yet it only requires a few minutes of effort. Sweet cherry tomatoes are tossed with red onion, fresh basil, and feta cheese in a simple homemade vinaigrette that brings out every note of this simple tomato salad Save the recipe to make on repeat all summer long!
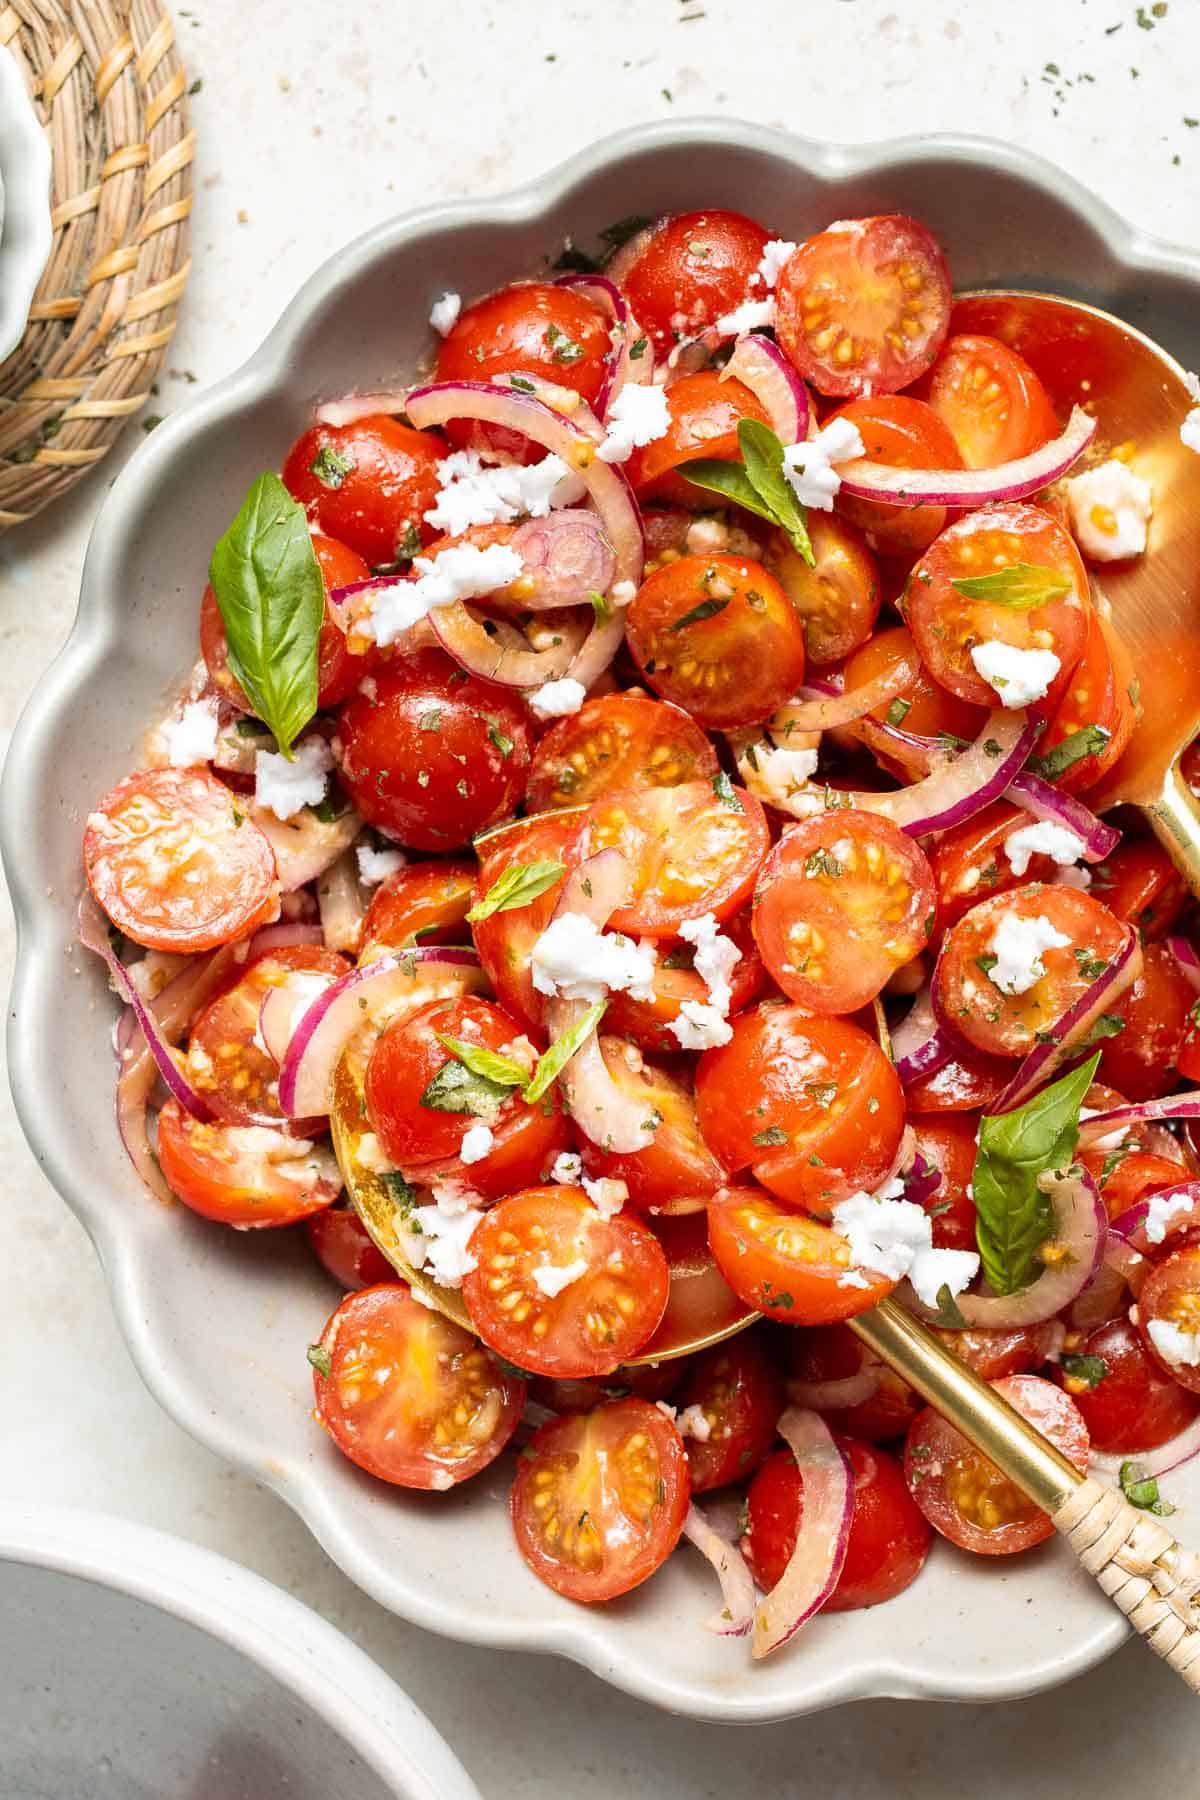
I'm always amazed by how much more flavor cherry tomatoes have than regular slicing tomatoes - plus they are even better when they are fresh in season. They're super sweet with a tangy acidity that stands out in salads, pastas, and more. Because of this, they only require a few simple garnishes to really bring them to life.
Why You'll Love This Cherry Tomato Salad
- Simple ingredients. This summery cherry tomato salad recipe only requires a handful of ingredients you can keep on hand to throw it together any time!
- Ready almost instantly. Few side dishes taste this good so quickly. Ripe cherry tomatoes are so flavorful that they require barely anything to make them pop. Just slice them in half, toss them with a few fresh ingredients, add the simple dressing, and serve. Done!
- Colorful summer side dish. The bright red color of the tomatoes is so eye-catching and pops on any table! Fortunately, it tastes even better than it looks. I always get lots of oohs and ahhs about this recipe. Make a double batch- it goes quickly!
- Great for entertaining. Since the salad contains mostly fresh ingredients, it can be placed on a serving table and enjoyed for hours without losing its color and texture. Plus, it's much lighter than many mayo-based salads while still being hearty enough to serve with your favorite Summer Grill Recipes including Balsamic Chicken Kabobs, Ribeye Steak, and more.
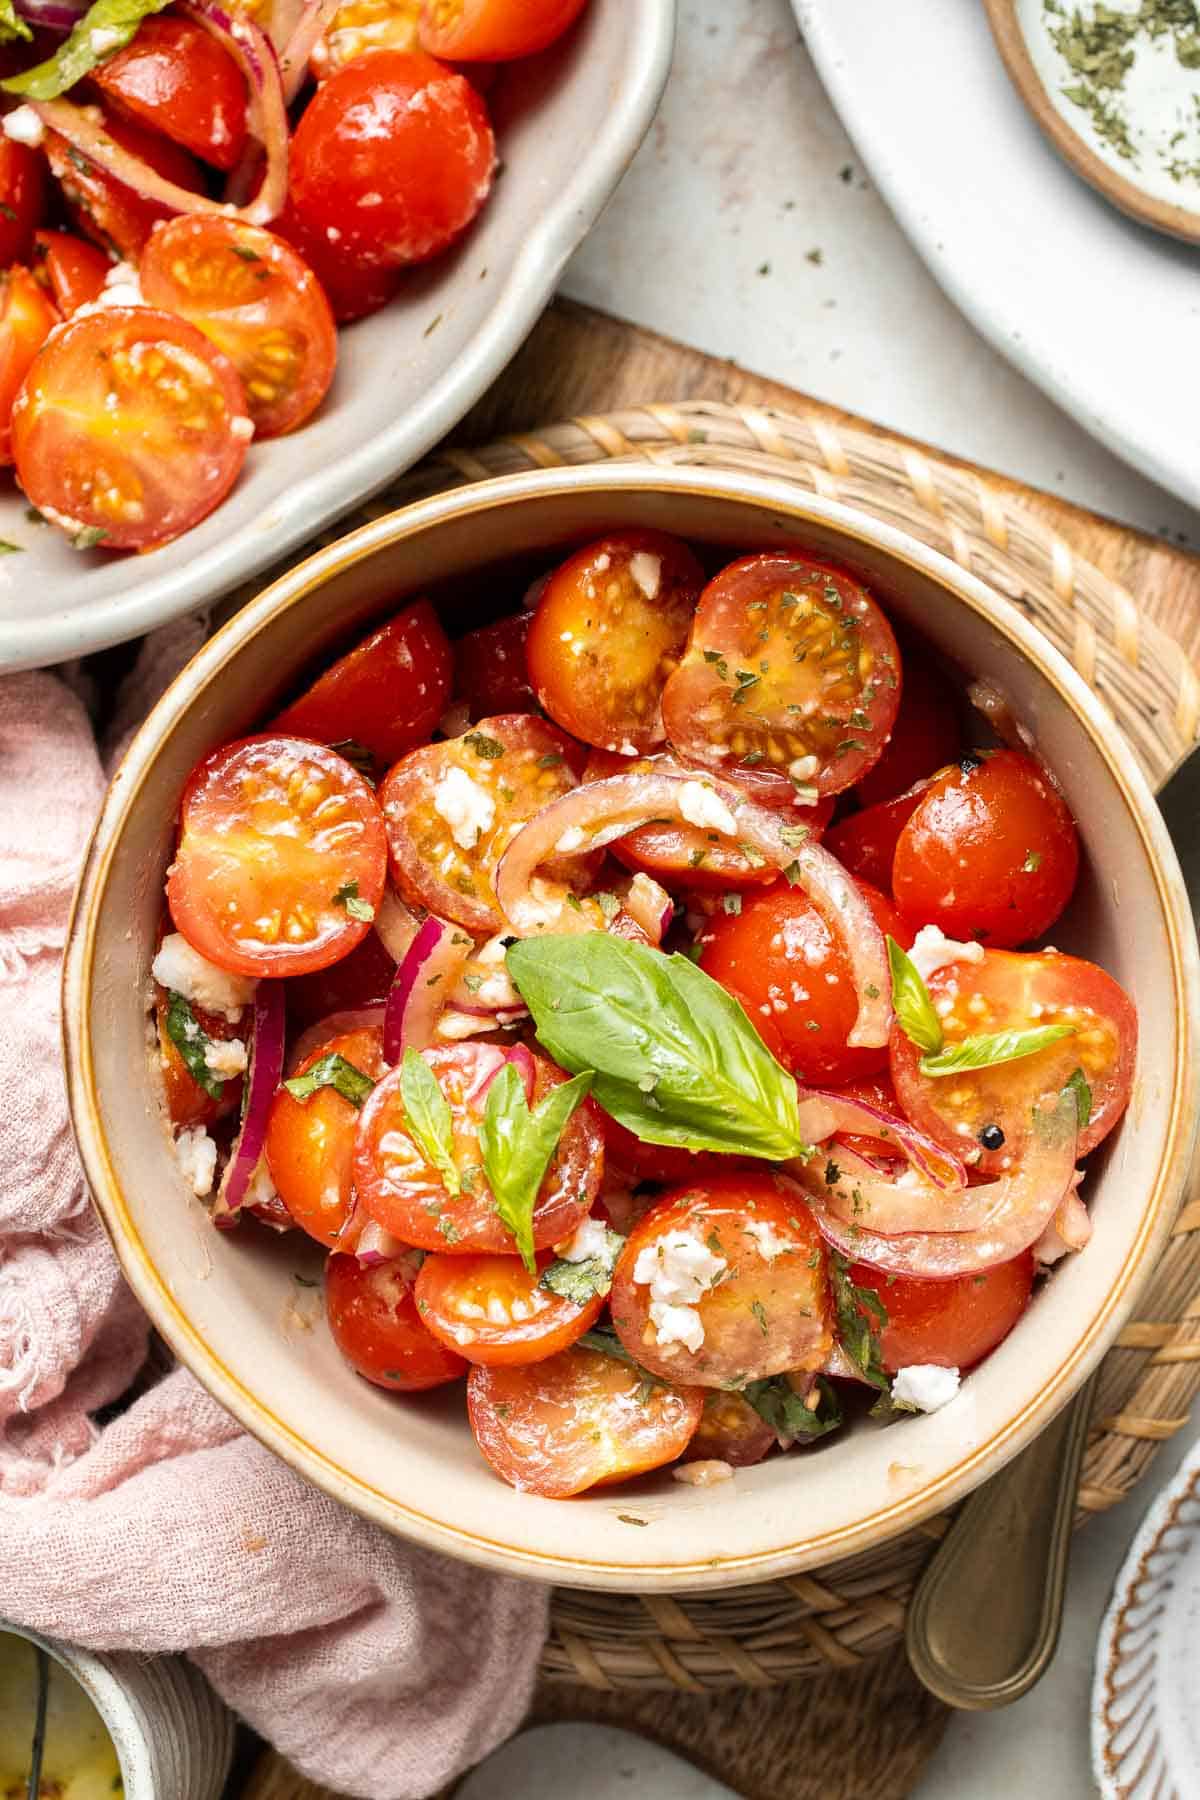
Ingredient Notes
To make this delicious Cherry Tomato Salad, you will need the following ingredients (full measurements in recipe card below):
- cherry tomatoes - for the best flavor, only use perfectly ripe tomatoes and slice each one in half so it can soak up the vinaigrette. Grape tomatoes work great, too.
- red onion - thinly sliced to add a savory bite.
- basil leaves - chop fresh basil into bite-sized pieces.
- feta cheese - crumble or cube some feta cheese for the salad.
- extra virgin olive oil - this forms the base of the dressing.
- white wine vinegar - I like to use a mild-tasting vinegar like white or red wine vinegar. Balsamic vinegar is a great way to bring out the tomatoes' sweetness, too.
- lemon juice - freshly squeezed gives the most potent flavor.
- freshly minced garlic - for a savory note.
- Italian seasoning
- ground black pepper
You will also need a measuring cups and spoons, large serving bowl, a small bowl, and serving utensils.

How to Make the Best Cherry Tomato Salad
- Combine. In a large serving dish, combine cherry tomatoes, onion, basil, and feta cheese.


- Make dressing. In a small mixing bowl, add olive oil, vinegar, lemon juice, garlic, Italian seasoning and pepper. Mix well to combine.
- Toss. Add the dressing into the tomato salad. Toss well and serve immediately.


Recipe Variations
- Bake it. I know this is a salad, but roasted cherry tomatoes, onions, feta, and a tangy vinaigrette all taste amazing roasted in the oven and served over fresh pasta in my Baked Feta Pasta! This recipe is a nice way to keep the same flavors but bulk up the meal on those cooler end-of-summer nights.
- Add more veggies and herbs. This marinated tomato salad is easy to tweak with different veggies, herbs, and more. For a deeper layer of flavor, I like to add thinly sliced bell peppers, sun-dried tomatoes, or roasted red peppers. An English cucumber and some green onions add a nice freshness, and fresh parsley is a good alternative to basil.
- Change the cheese. Tiny fresh mozzarella balls are a nice alternative to feta for a twist on my Cherry Tomato Caprese Salad.
- Use larger tomatoes. If you can find some really flavorful heirloom tomatoes, dice or slice them to use instead of cherry tomatoes. They usually won't have quite the same sweetness as cherry tomatoes, but they'll soak up that homemade dressing and taste wonderful!
- Serve as a pasta salad. To stretch the salad for a larger crowd, boil macaroni or penne until al dente, then rinse under cool running water. Add the veggies and feta and toss with a double (or triple) batch of the dressing as needed. Let it rest in the fridge for a few hours to let the flavors come together.
How to Serve
This Cherry Tomato Salad is delicious served on its own as a light lunch, or paired with some of my favorite summer dinners including:
- Pasta Primavera
- Greek Chicken Souvlaki Skewers
- Spanish Tortilla (Tortilla de Patatas)
- Salmon Burgers
- Tater Tot Casserole
- Vegetable Orzo
For more recipes, see our 60+ Summer Dinner Ideas.
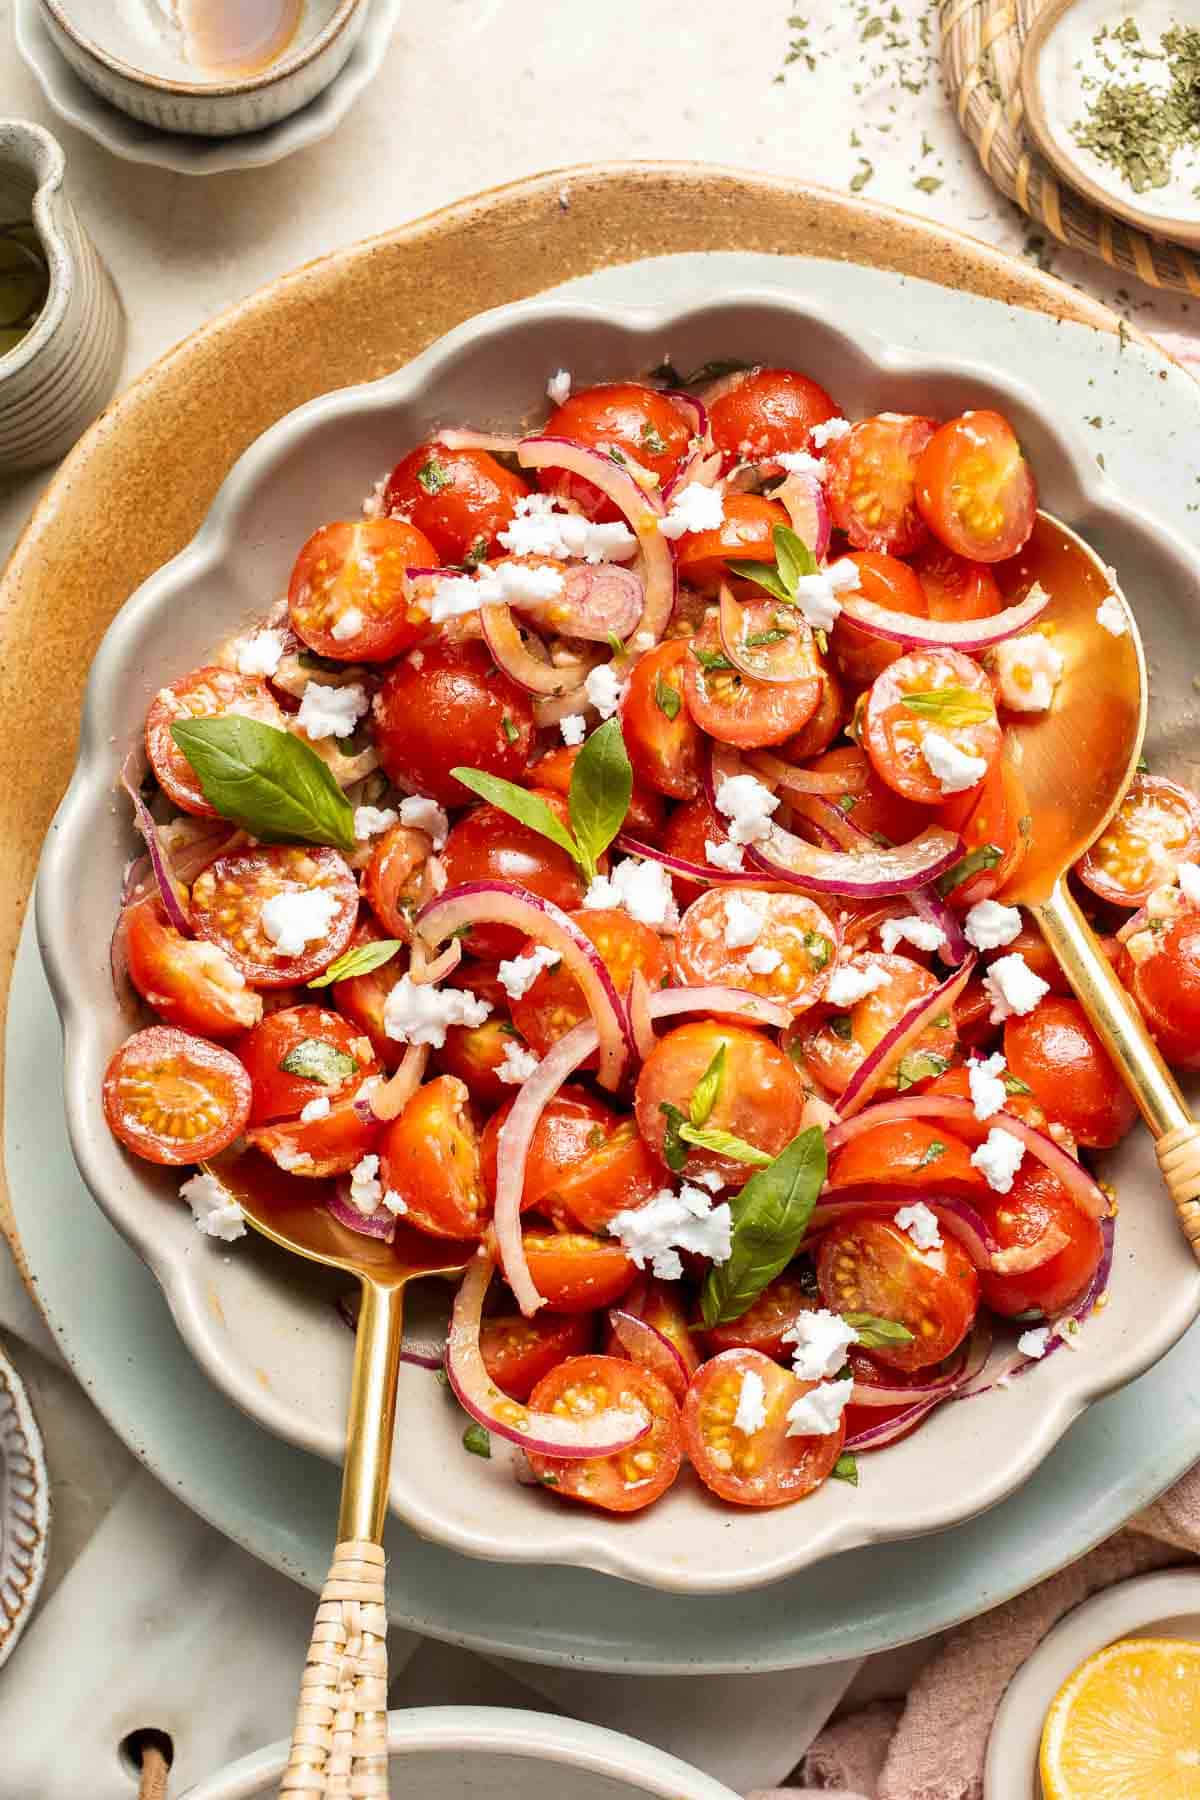
Recipe Tips and Tricks
- Quality matters. I recommend taking a trip to the farmer's market instead of buying your tomatoes from the grocery store. You want the freshest, most flavorful cherry tomatoes picked at peak freshness. Look for varieties like Sungold, Sweet Millions, and Lemon Drop, and don't be afraid to incorporate different colors of tomatoes for more visual appeal.
- Marinate for better flavor. You truly do not need to wait to eat this summer salad, but the onions and tomatoes will soak up even more flavor after 30 minutes to an hour. If you can make the salad and let it rest while you prepare the main dish, it'll be absolutely perfect by dinner time.
- Try the plate trick. Instead of individually slicing each tiny tomato, try this trick. Arrange as many tomatoes as you can in an even layer on a dinner plate. Then, cover that plate with another plate (flipping it upside down if needed). Using a sharp serrated knife in one hand and gently holding down the top plate in the other, saw through the space between the two plates to cut through the tomatoes. So easy!
Storing Instructions
This cherry tomato salad should be stored in an airtight container in the fridge for up to 3-4 days.
FAQ
Tomatoes, in general, are great for you, and cherry tomatoes are no exception. Cherry tomatoes are high in vitamin C, which is essential for many functions, as well as lycopene, which can help reduce the likelihood of strokes and even support bone health! Incorporate them into your diet in these cherry tomato recipes, like my baked caprese chicken or baked Mediterranean pasta.
I usually prefer to pair cheeses with fresh tomatoes in one of two ways. Option 1: Something sI usually prefer to pair cheeses with fresh tomatoes in one of two ways. First, choose something salty and briny, like feta or ricotta salata (a dry, crumbly version of ricotta more like feta than standard ricotta). They're both salty enough to bring out the flavor of fresh tomatoes.
Or, consider cool, creamy cheeses, like fresh mozzarella or burrata. Of course, tomatoes and mozzarella cheese is a classic pairing used in everything from margherita pizza to my caprese pasta salad. But if you enjoy fresh mozzarella with tomatoes, do yourself a favor and try my tomato burrata salad. It has all the flavors you love but is extra buttery and creamy, thanks to the burrata's high-fat content. It's exceptional!
Yes! Cherry tomatoes' sweetness and intense flavor make them particularly wonderful in tomato salads. I recommend cutting them in half to make them easier to eat and to allow the tomatoes to soak up the dressing. I like to balance them with a little red onion, fresh herbs, and briny feta, but they're also fantastic on their own tossed in a little homemade vinaigrette.
More Salad Recipes with Cherry Tomatoes
- 40 Best Salad Recipes
- Tomato Burrata Salad
- Tomato and Mozzarella Caprese Salad
- Tomato Cucumber Avocado Salad
- Tortellini Salad
- Mediterranean Couscous Salad
Tried this recipe?
I'd love to hear what you think! Leave a comment and rating below to share your feedback. Your reviews help others discover this recipe and help me keep creating more free recipes for you. Snap a photo and tag me on social media @aheadofthyme too.

Icebox Cake
This old-fashioned Icebox Cake is a timeless no bake dessert that sounds retro, but has all the modern flavors you love. Creamy homemade vanilla whipped cream is layered with crunchy, chocolaty Oreo cookies, then frozen and sliced into perfect little slices of cookies and cream perfection your guests will devour in moments. It only requires 4 simple ingredients and takes just 5 minutes to assemble (yes, really!) - making it the ideal frozen dessert to make this summer!
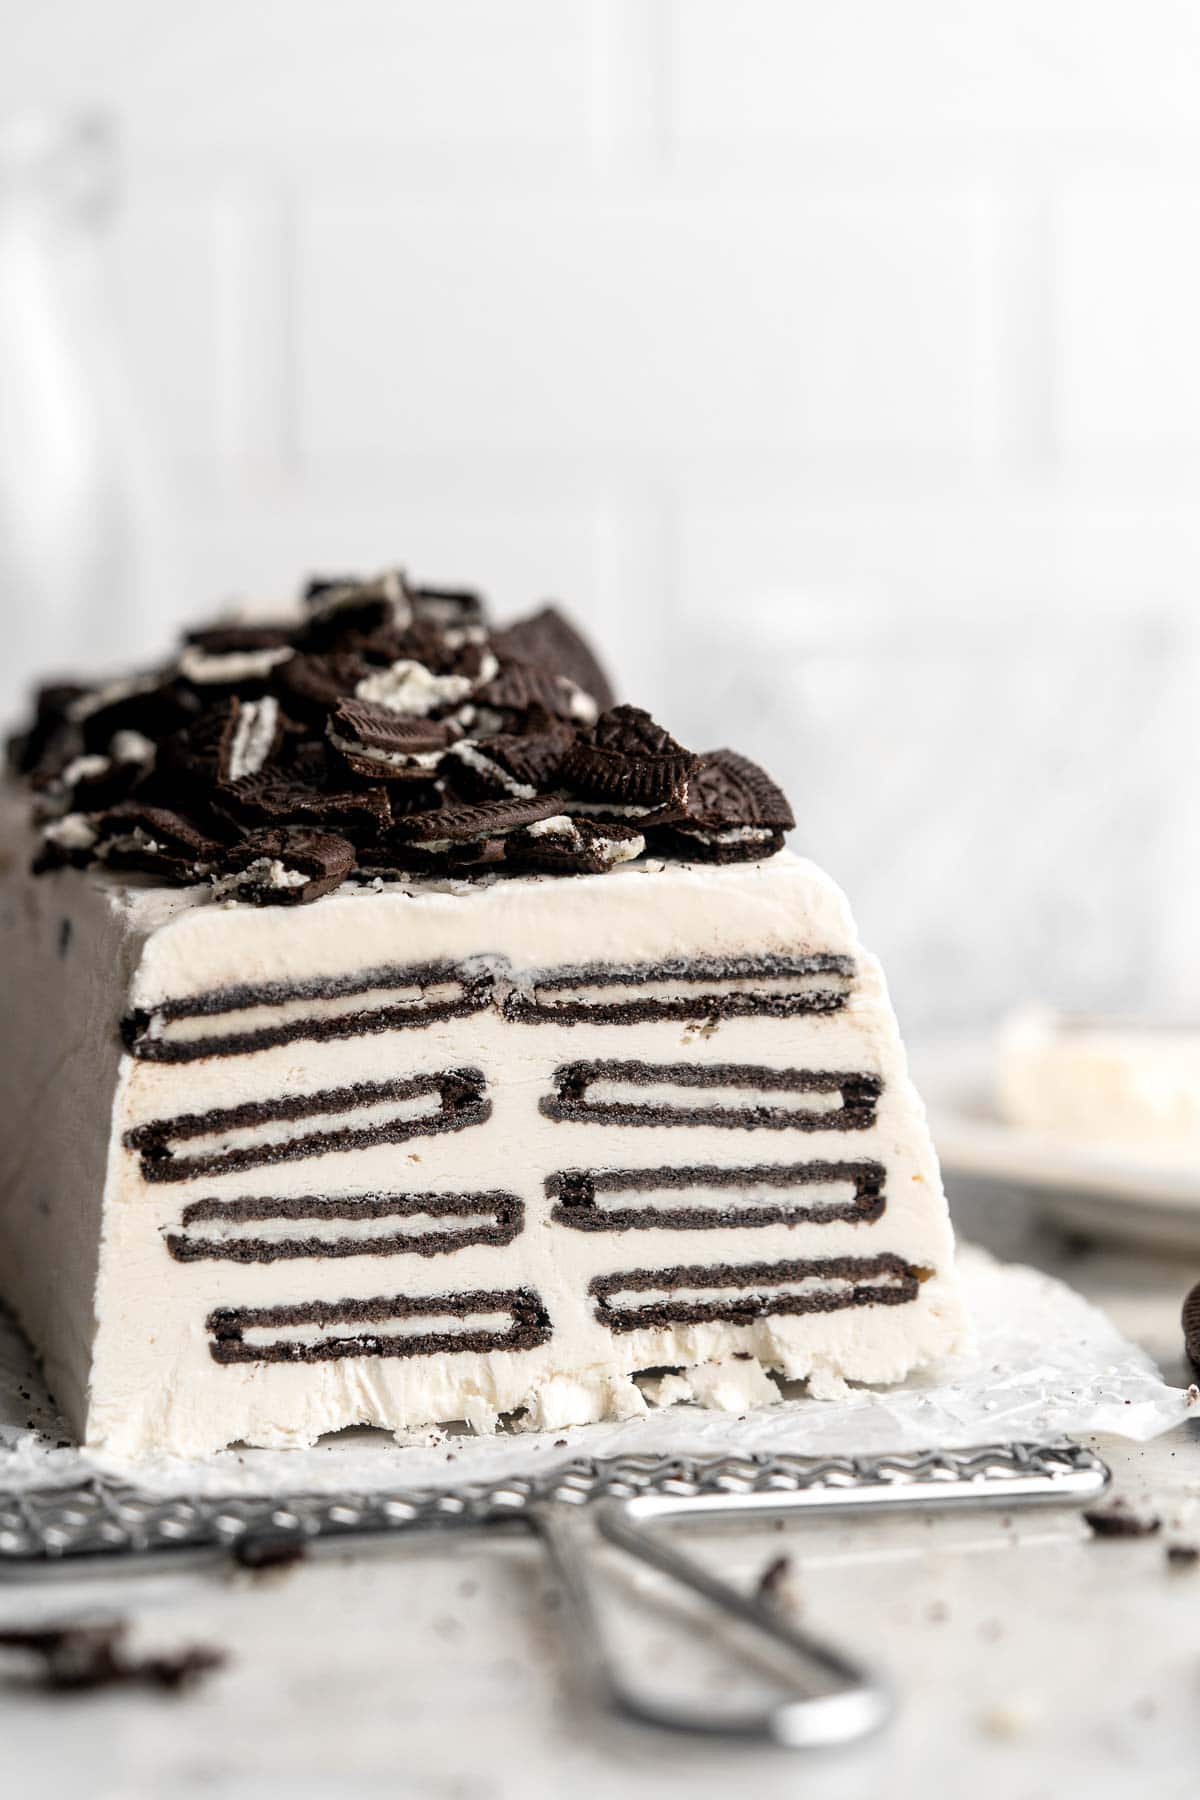
So where does the its name come from? None of us have iceboxes anymore, but these devices are the ancestors of modern electric refrigerators. Blocks of ice used to be stored in wooden lockers which was used it to chill and preserve food - including cold treats to cool down on hot days. This easy icebox cake is an homage to this time with a modern twist (hello Oreo's!).
Why You'll Love This Icebox Cake
- Minimal prep. I don't know any other dessert you can make with 5 minutes of effort, at least not one that tastes this good! All that time goes to making the whipped cream, then layering it with Oreo thins in a loaf pan. It does need to freeze solid for 8 hours, but you can start it the night before or the morning of your party, then pop it in the freezer until you're ready to serve. Done and dusted!
- Extremely easy to customize. With only two basic components to this recipe, you might be surprised by how many ways you can tweak the ingredients to make it your own. Change the cookies, add fresh berries, drizzle in some melted chocolate, use different extracts, etc. But you certainly don't have to do that if you don't want to. This traditional icebox cake gets rave reviews exactly as is!
- Cool and creamy. On a hot summer day when the temperatures are soaring, nothing will cool you down like a slice of ice-cold icebox cake straight from the freezer. The chocolatey flavors in the Oreo icebox cake taste like cookies and cream ice cream in cake form!
- Great make-ahead dessert for entertaining. Ice box cakes are ideal for entertaining as you can make them the day (or week) before, then pull them out when you need them. They're great for a birthday party, backyard BBQ, or any other special occasion in your life!

Ingredient Notes
To make this delicious Icebox Cake, you will need the following ingredients (full measurements in recipe card below):
- heavy cream - use high-fat heavy whipping cream to make homemade whipped cream. Don't try to use half-and-half or whole milk; you need the real deal.
- confectioners' sugar - this powdered sweetener will dissolve into the cream for just enough sweetness.
- vanilla extract - for a touch of vanilla flavor.
- Oreo thins - these skinny Oreos are very thin and crunchy, making them ideal for this classic icebox cake. Feel free to use your favorite brand of crispy, crunchy cookies, like chocolate wafers, digestive biscuits, graham crackers, Biscoff cookies, and more.
You will also need measuring cups and spoons, a loaf pan, plastic wrap, stand mixer with a whisk attachment (or large bowl and electric mixer), spatula, serving platter, and a sharp knife for serving.

How to Make the Best Icebox Cake
- Prep. Prepare a loaf pan by lining all sides of it with plastic wrap. Set aside.
- Make whipped cream. In the bowl of a stand mixer (or in a large mixing bowl), add heavy cream, confectioners' sugar, and vanilla. Beat on high until soft peaks have formed.

- Assemble cake. Dollop a small amount of whipped cream into the bottom of the prepared loaf pan and spread it out into an even layer. Place 8 oreo thins across the whipped cream layer. Add another layer of whipped cream, topped with 8 oreos. Repeat 2 more times (4 total layers). Finish with one more layer of whipped cream on top.


- Freeze. Place into the freezer to harden for 8 hours, or overnight.
- Serve. When ready to serve, turn the loaf pan upside out onto a serving platter to remove it from the loaf pan (it may need to be banged or hit a few times to release it). Remove the plastic wrap from around the cake, then garnish by pressing the crushed Oreos into the top. Slice and enjoy.

Recipe Variations
- Use a different extract. Instead of vanilla, try adding a little almond extract for a nutty flavor or about half as much mint extract for a mint chocolate icebox cake!
- Add some mix-ins. Make your own flavor combination and add lots of texture with fresh berries, chocolate shavings, graham cracker crumbs, Strawberry Jam, Strawberry Compote, or a drizzle of peanut butter.
- Use store-bought whipped topping. Homemade is best, but many people grew up eating icebox cakes made with Cool Whip. Since Cool Whip is non-dairy, this can be an advantage for people who need to avoid dairy products, and some people prefer that extra-sweet, creamy flavor.
- Whip in some cream cheese. Cream cheese makes everything better, doesn't it? Let about 4 ounces (half a box) of cream cheese warm up to room temperature, then whip until fluffy before you drizzle in the heavy cream, powdered sugar, and vanilla. The extra tanginess balances the sweetness of the Oreo cookies really well and makes this easy dessert taste like an Oreo cheesecake!
How to Serve
This Icebox Cake is delicious served on its own on a hot day, or paired with some of other summer desserts including:
- Fresh Fruit Tart
- Strawberry Shortcake
- Rhubarb Crisp
- Funnel Cake
- Strawberry Crumb Bars
- Summer Fruit Salad
For more recipe ideas, see our 40 Best Summer Desserts.

Recipe Tips and Tricks
- Watch for soft peaks. Regular whipped cream is made by whipping the cream until it has stiff peaks that stand up straight even after you remove the whisk. This delicious dessert requires soft peaks, which curl down instead. This is a smoother, creamier texture ideal for this no bake cake.
- Choose thin, crunchy cookies. If you aren't a fan of Oreo cookies, you can absolutely use something else but focus on cookies that are thin and crispy, like Biscoff cookies, graham crackers, etc. These cookies will absorb some of the moisture from the whipped cream and end up having a cake-like texture. It may be tempting to use classic chocolate chip cookies or other chewy cookies, but they are too thick and become very hard and chewy after freezing.
- Don't skimp on the plastic wrap. If you do not properly line your loaf pan, you'll have quite a tough time removing this no bake icebox cake from the pan. You could dip the loaf pan into warm water to soften it up, but this can cause the outside of the cake to look messy, and it's easy to accidentally thaw it too much. Lining the pan well the first time will save you quite a hassle.
Storing Instructions
For best results, this ice box cake should be wrapped in several layers of plastic wrap and stored in the freezer. This will make it easy to remove from the pan and slice. It should be served frozen and sliced like a loaf.
FAQ
Icebox cakes are creamy no bake desserts made by layering whipped cream with a layer of chocolate wafer cookies or graham crackers, then freezing the cookie-cream mixture in a loaf pan until solid. They were initially stored in iceboxes, the precursor to modern refrigerators that rose to popularity in the 1920s and 30s. These wooden lockers were filled with ice, which allowed people to have cold and frozen foods on hand for the first time. Recipes for icebox cakes were distributed on the backs of cookie boxes, and the rest is history. They quickly became a popular summertime tradition that persists even today over 100 years later!
Like homemade ice cream and other creamy treats, most icebox cake recipes should be consumed within about a month of being frozen. After that, it can become frostburned and start to taste like the freezer. To minimize this, wrap it very well in plastic wrap first.
Not exactly. They definitely fit under the same umbrella of frozen creamy desserts, but icebox cakes are made from layers of cookies and whipped cream that are frozen and then sliced like cake. There is no ice cream involved - just frozen whipped cream. Ice cream cakes are usually made from ice cream as well as baked cakes, chocolate ganache, and other fillings or frostings.
More Frozen Dessert Recipes
- Strawberries and Cream Popsicles
- No Churn Vanilla Ice Cream
- Mango Frozen Yogurt
- Watermelon Sorbet
- Strawberry Frozen Yogurt
- Strawberry Sorbet
Tried this recipe?
I'd love to hear what you think! Leave a comment and rating below to share your feedback. Your reviews help others discover this recipe and help me keep creating more free recipes for you. Snap a photo and tag me on social media @aheadofthyme too.

Grilled Vegetable Skewers
Grilled Vegetable Skewers are tender, delicious, and flavorful. Grilling is the best way to serve your summer vegetables, and these veggie skewers couldn't be any easier to make. Load up on fresh veggies, thread them onto skewers, brush with a very simple marinade, then grill. They're a great addition to your favorite burgers and kebabs or serve them over salads and fresh pasta for a simple vegetarian summer meal.
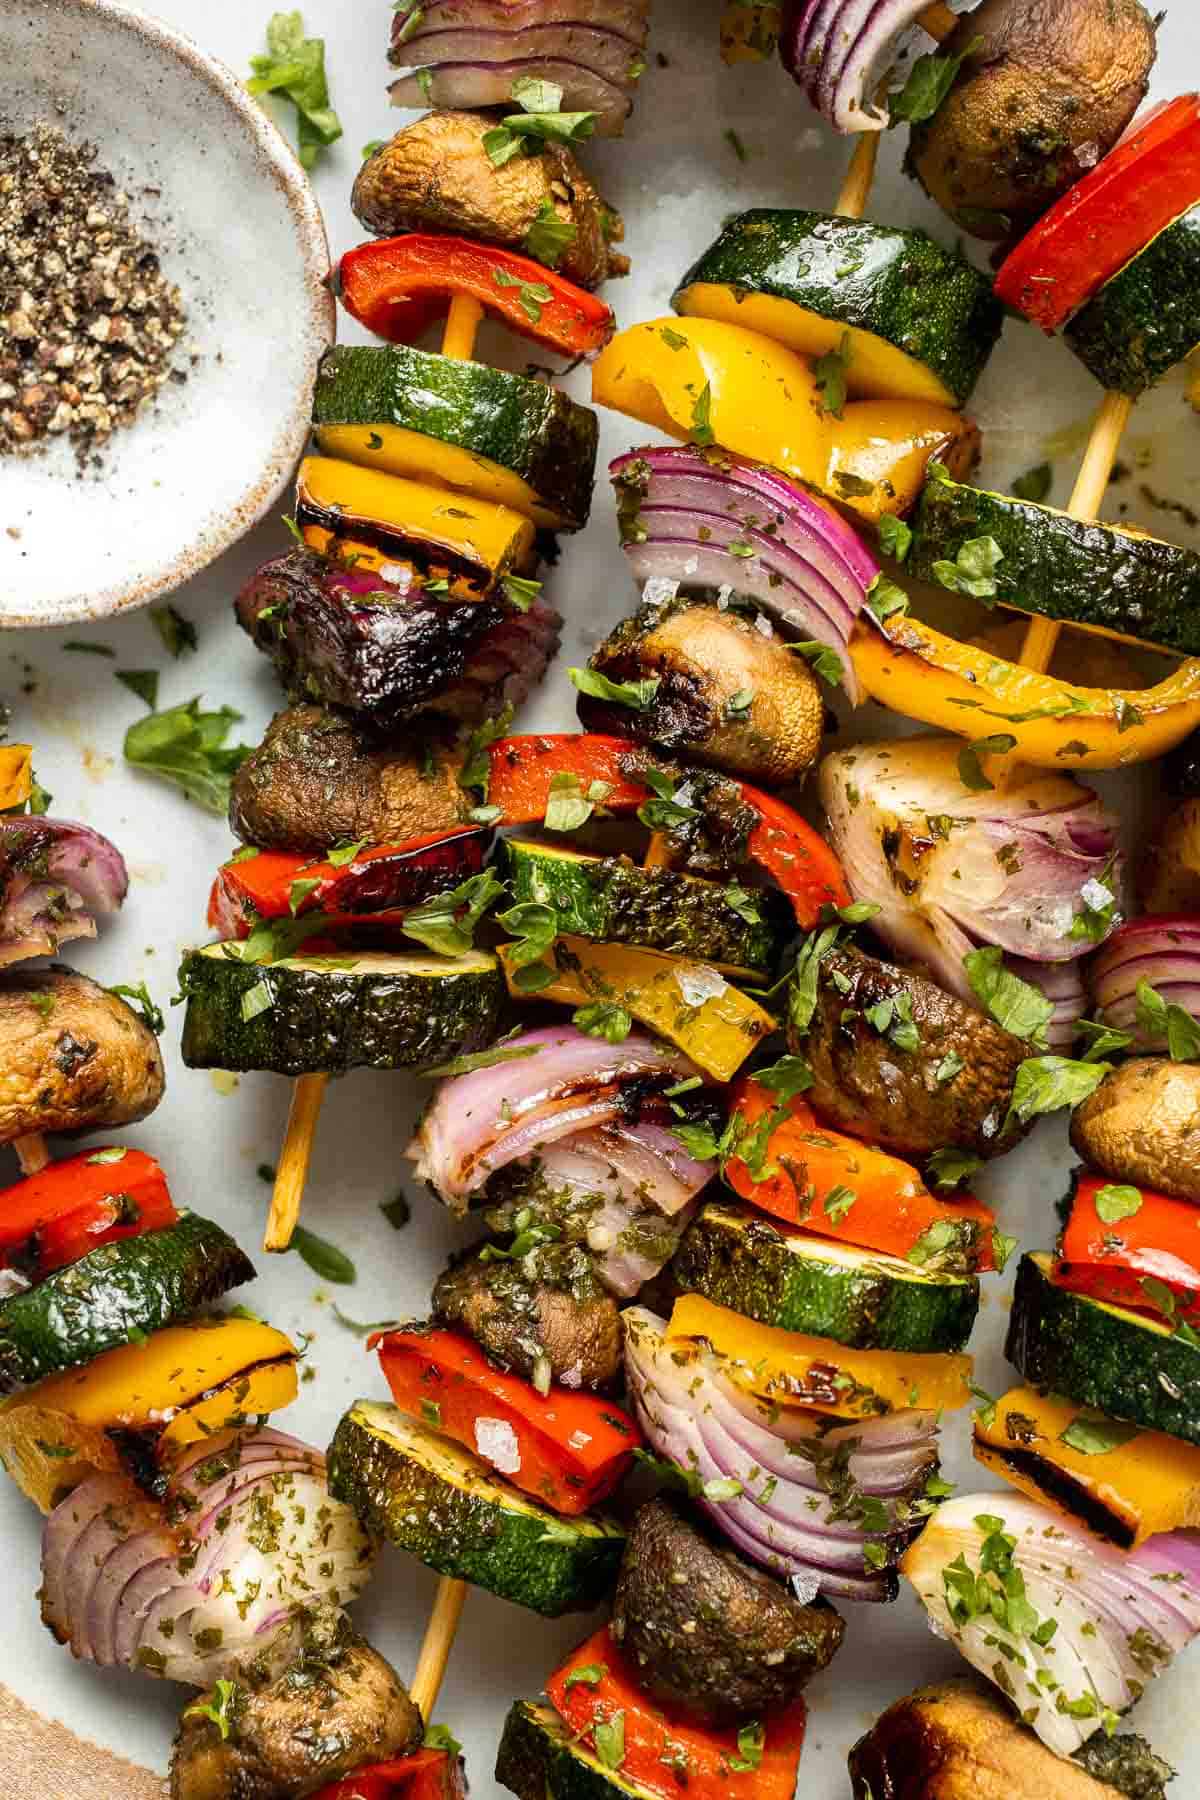
If you're already preheating the grill for your entree, prepare the rest of the meal at the same time! These veggie kabobs can be made with any assortment of seasonal produce, although I'm partial to summer squash, bell peppers, onion, and mushrooms. As they caramelize and cook down, the veggies will take on a bolder, slightly sweet flavor with a hint of smoke from the fire. So good! They're hands-down the easiest and tastiest summer side dish for your BBQs, potlucks, and more.
Why You'll Love These Grilled Vegetable Skewers
- Easy to prep ahead. After slicing the veggies and preparing the skewers, brush them in the vegetable marinade then pop them in the fridge. Grab them the next day to throw on the grill. Since they're on wooden skewers, they're easy to serve right off a tray. Great for entertaining!
- Summer favorite. Make the most of the season by loading up on fresh squash, peppers, and more. This is a great way to use all the different vegetables from your garden or your haul from the farmer's market. It's a summer classic!
- Versatile side dish. There are so many ways to make this easy side dish your own! Try different vegetables, use your favorite seasoning, and use whichever type of grill or grill pan you have. They turn out great every time!
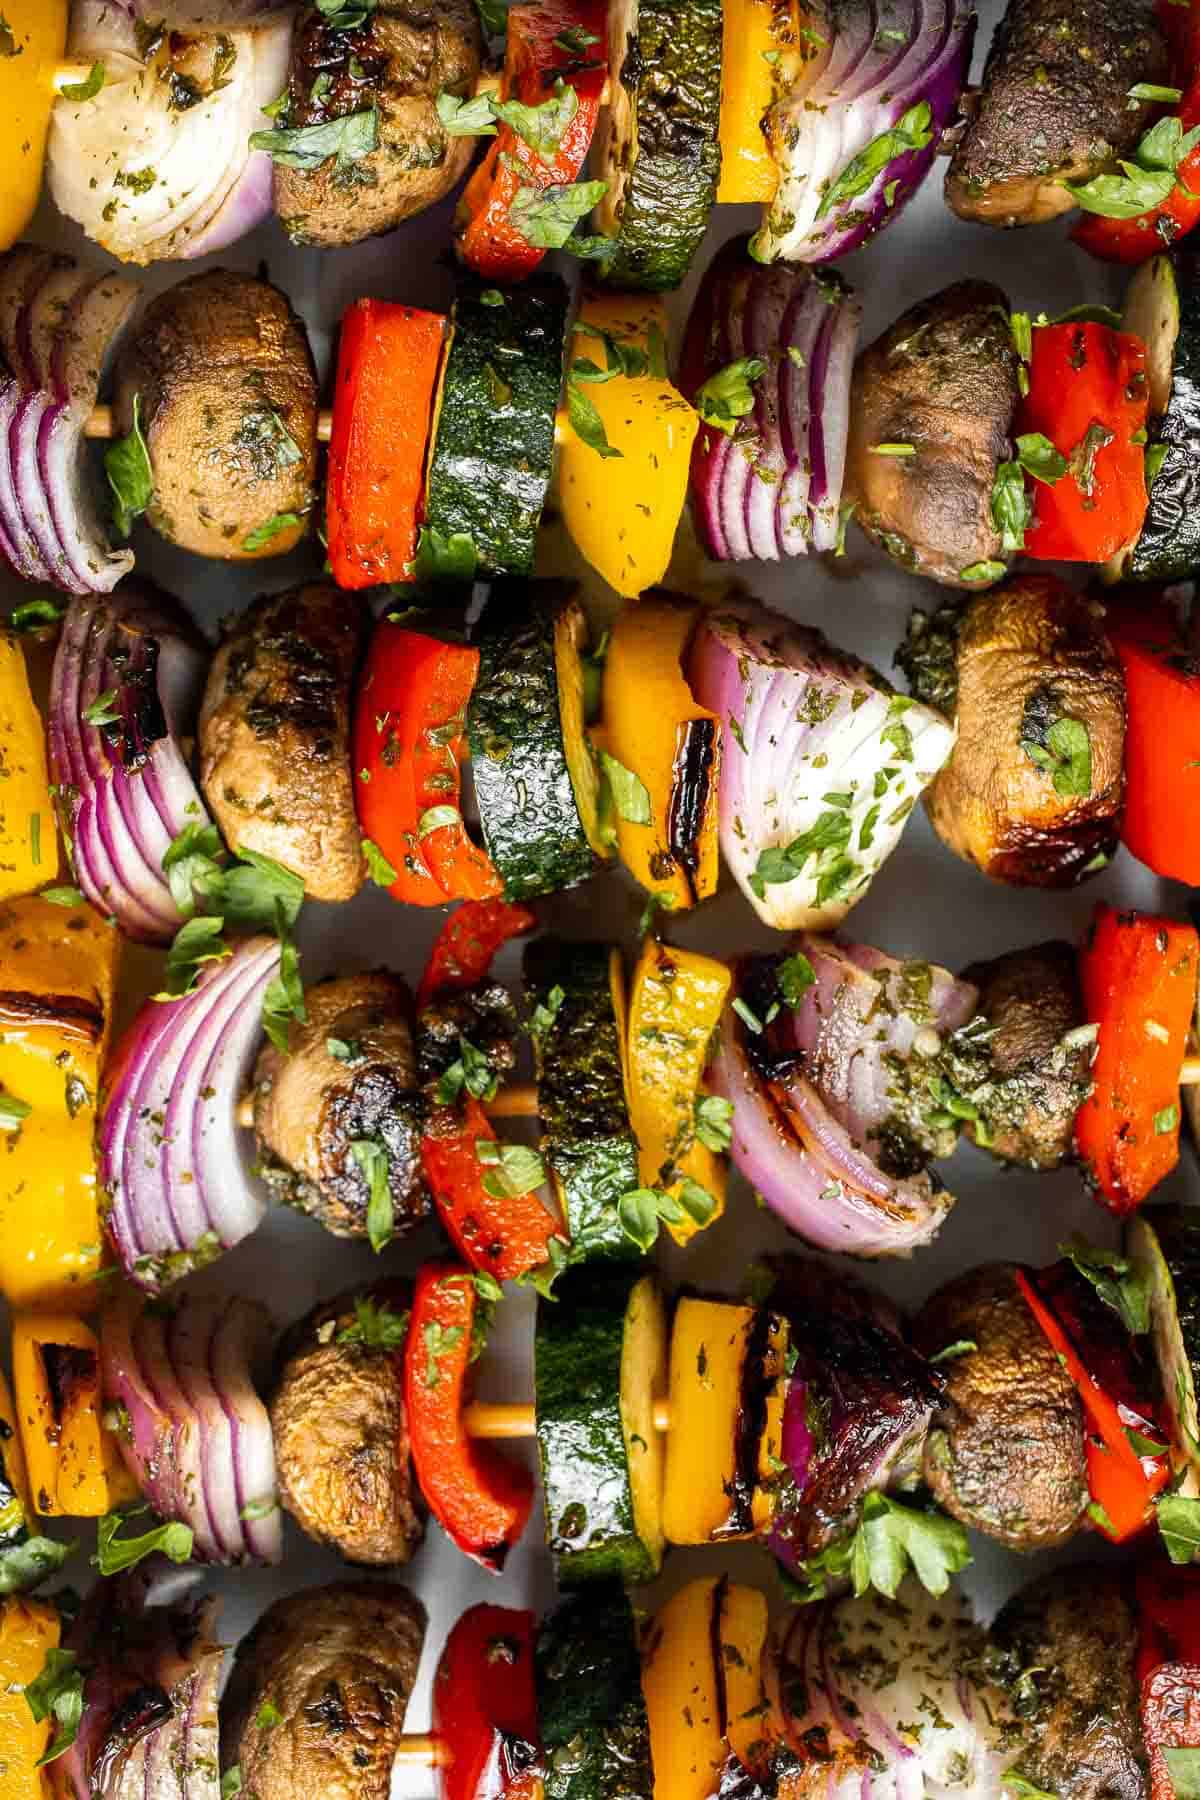
Ingredient Notes
To make these delicious Grilled Vegetable Skewers, you will need the following ingredients (full measurements in recipe card below):
- fresh vegetables - use a mixture of fresh zucchini, red and yellow bell peppers, red onions, and white button mushrooms.
- olive oil - to caramelize the outside of the veggies and keep the seasonings in place.
- seasonings - season the marinade with freshly minced garlic, Italian seasoning, kosher salt, and ground black pepper. It's super simple, but so flavorful!
- fresh parsley - for garnish and a fresh herby flavor.
You will also need measuring spoons, metal or bamboo skewers, a small bowl, a basting brush, and an outdoor grill or indoor grill pan.
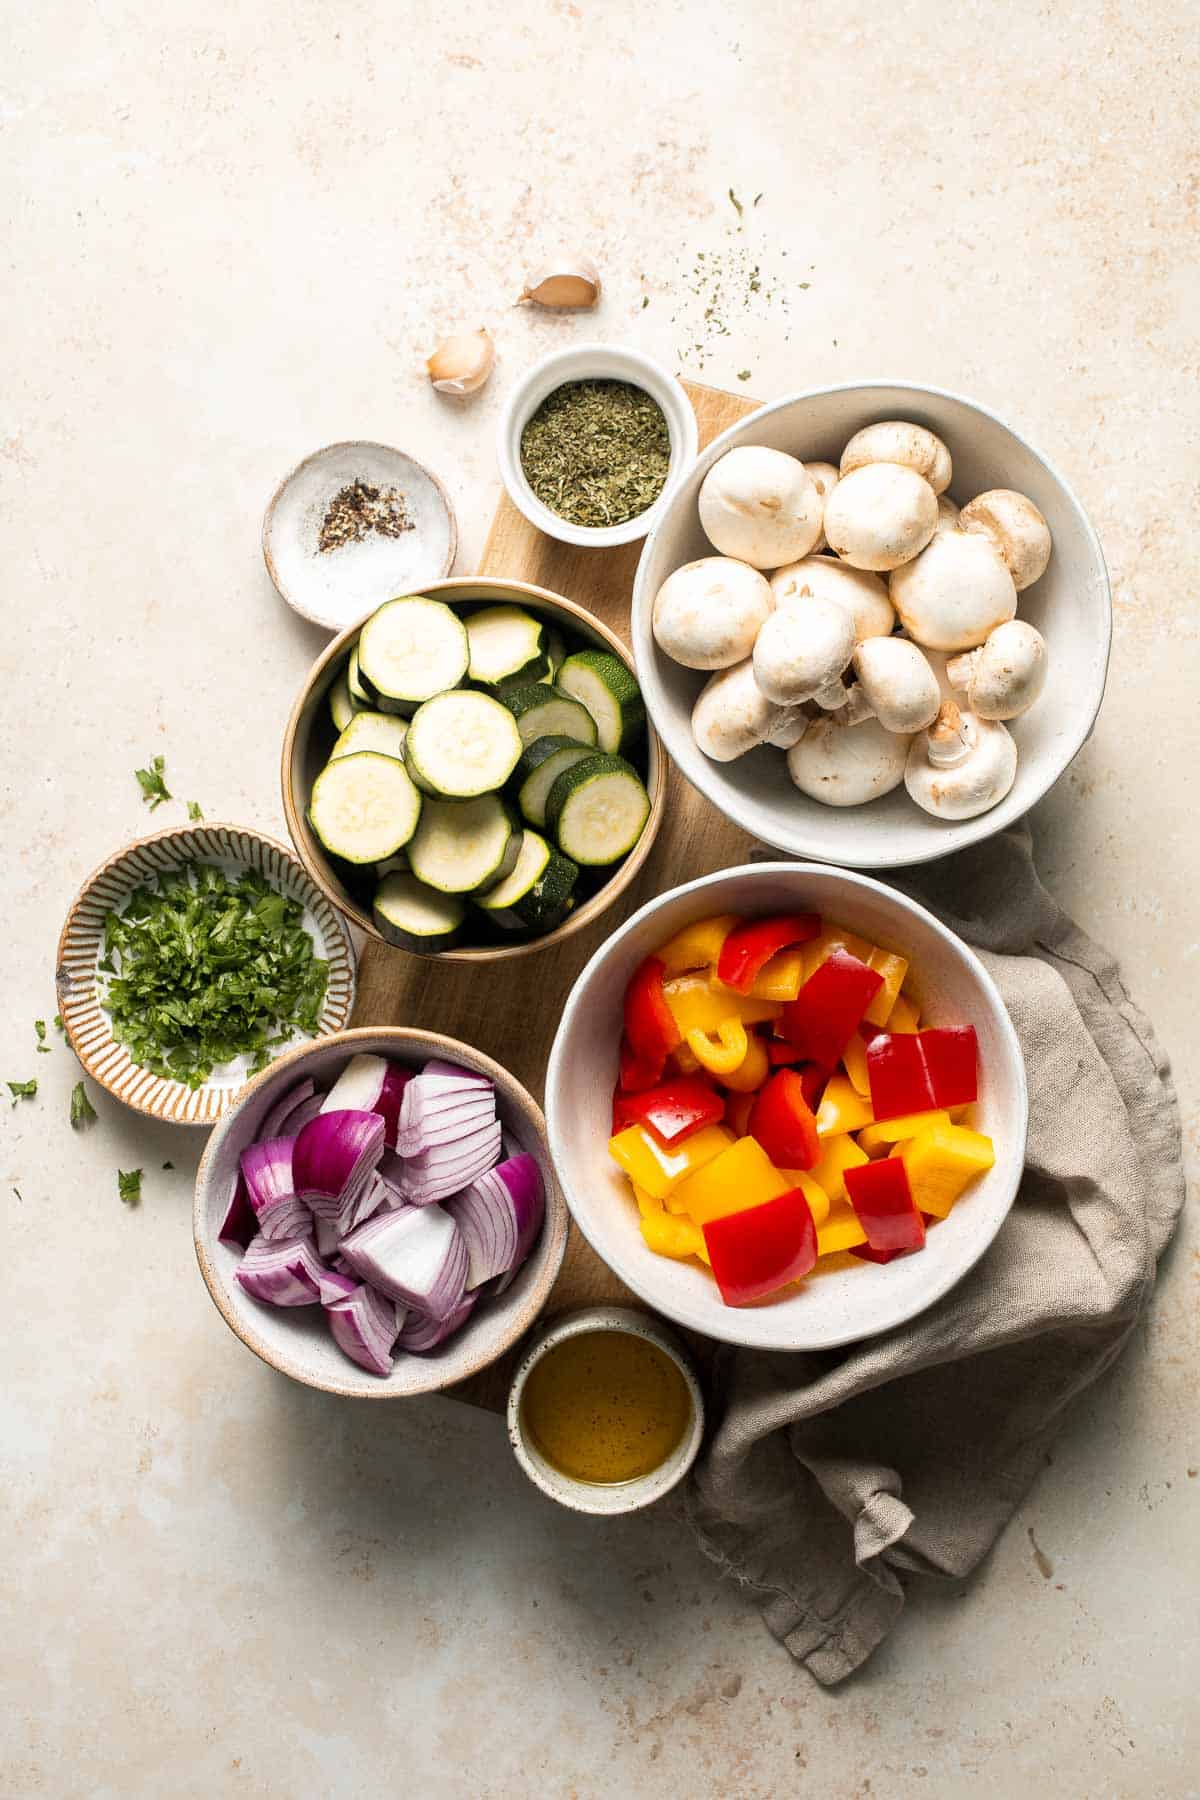
How to Make the Best Grilled Vegetable Skewers
- Thread skewers. Prepare the skewers by threading the vegetables onto each skewer, alternating them by color and texture.

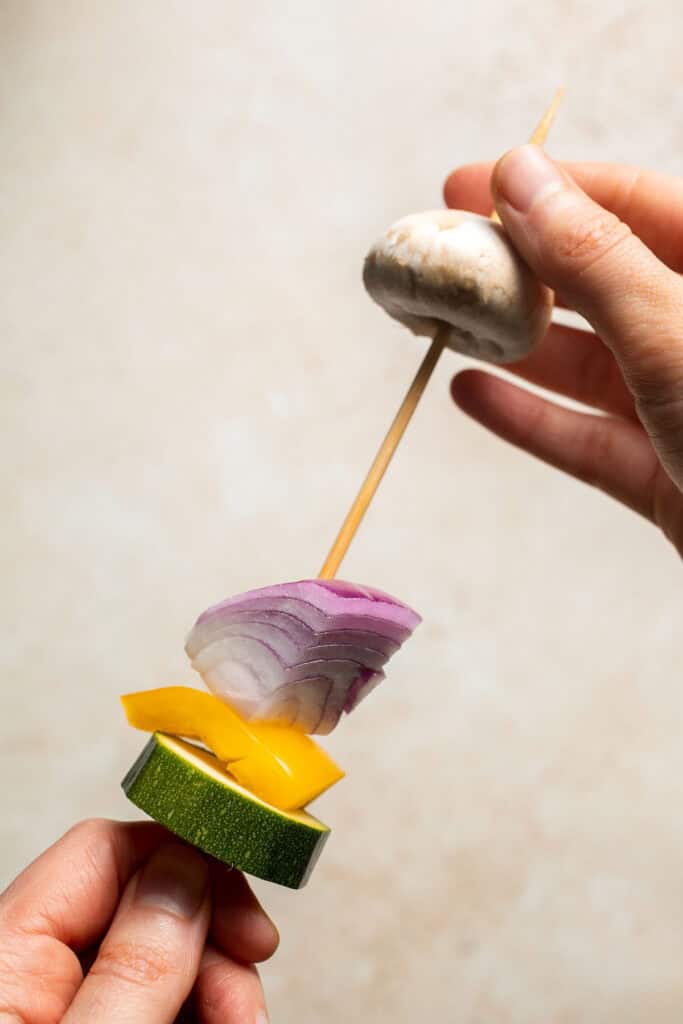
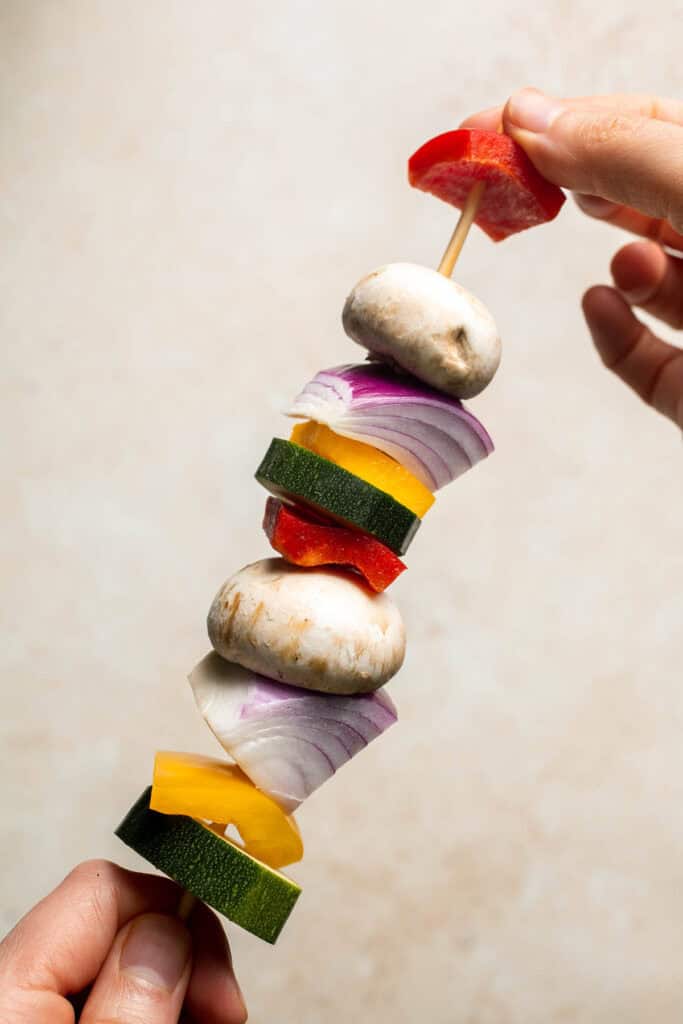
- Add seasoning. In a small mixing bowl, combine olive oil, garlic, Italian seasoning, salt, and pepper. Stir to combine. Brush half of the mixture evenly over the vegetable skewers.
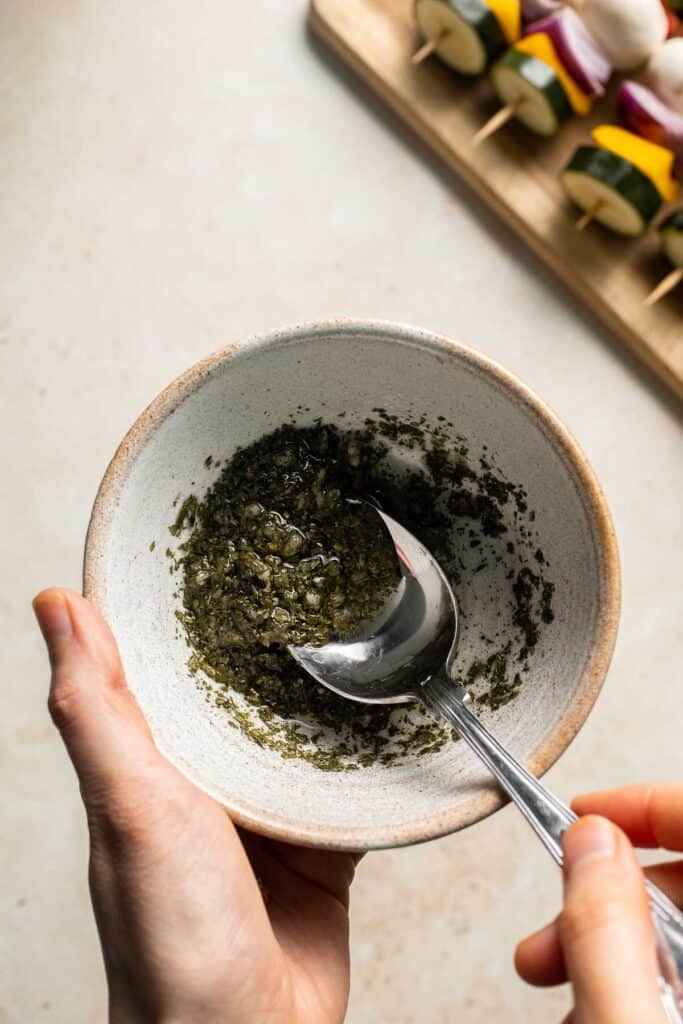
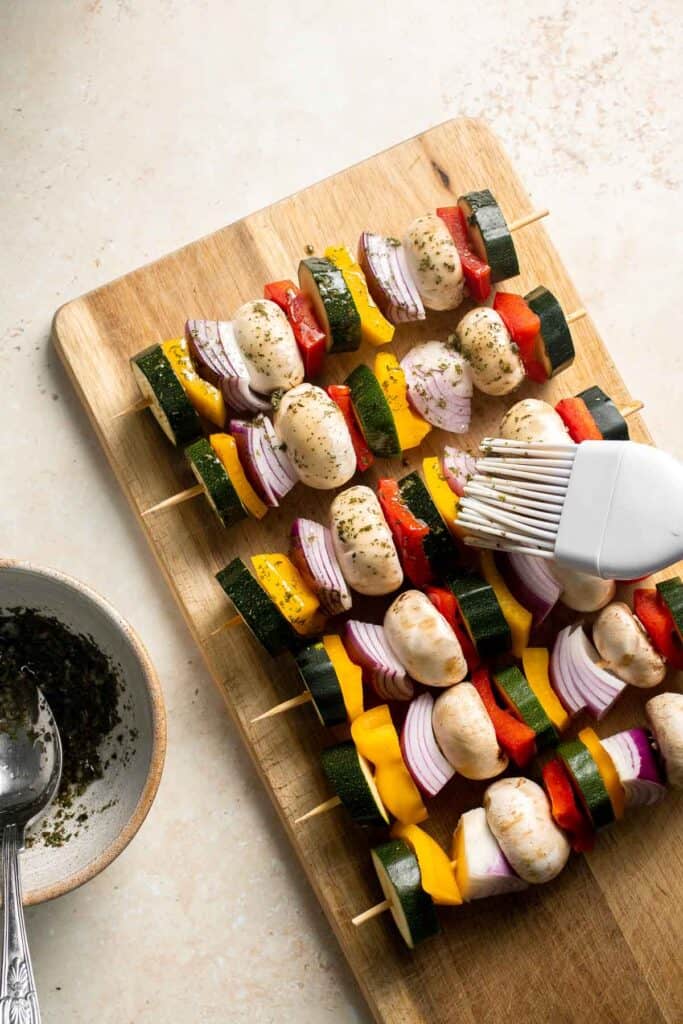
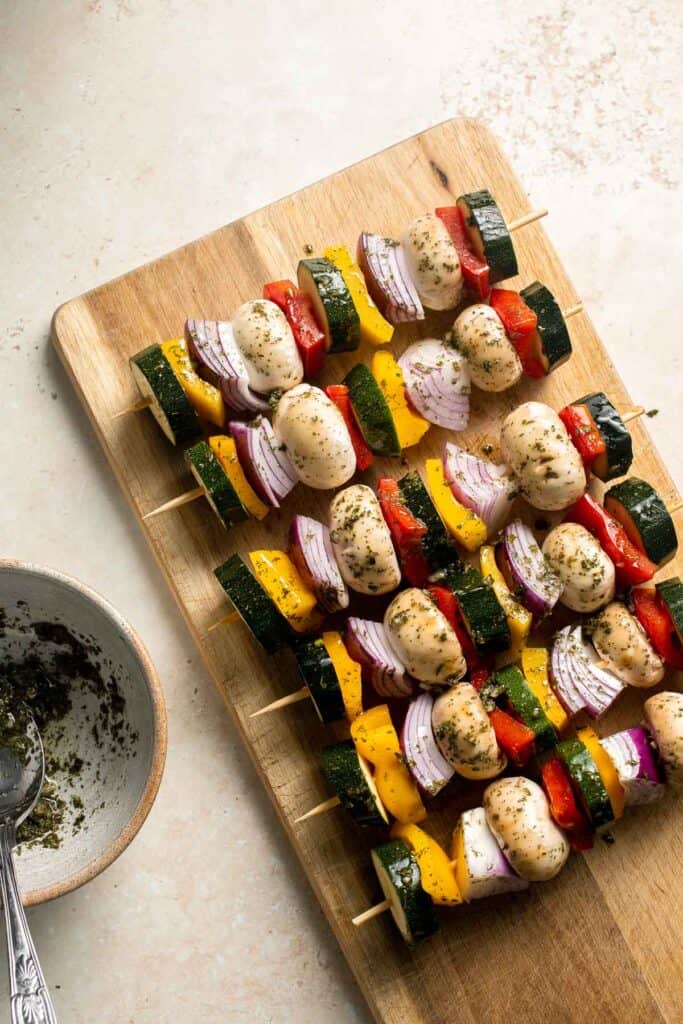
- Preheat. Preheat grill over medium-high heat to 450F (or preheat grill pan until sizzling hot), about 5 minutes.
- Grill. Place the skewers evenly spaced apart on the grill and grill until nicely charred and tender, about 5-7 minutes per side. Brush the skewers with the remaining olive oil mixture halfway through cooking.
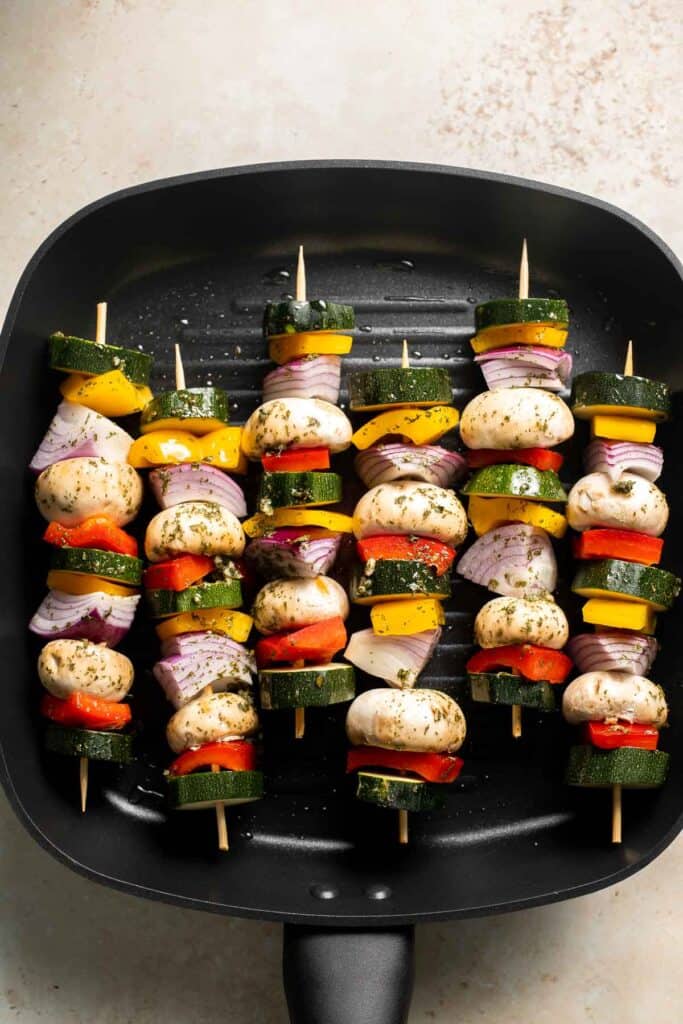
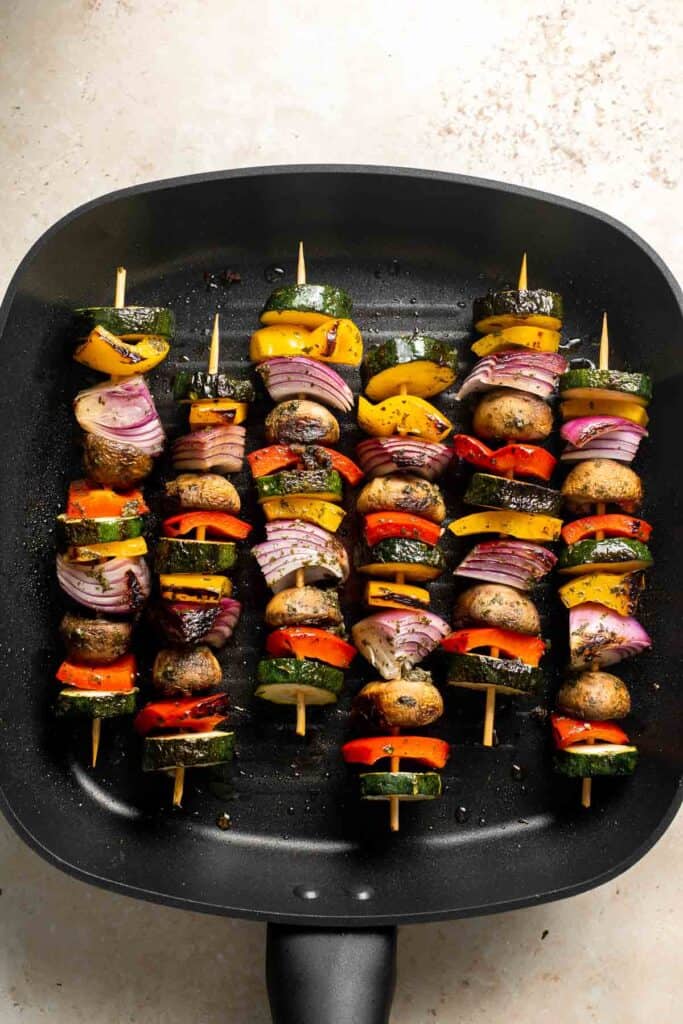
- Serve. Serve immediately with chopped parsley sprinkled on top, if desired.
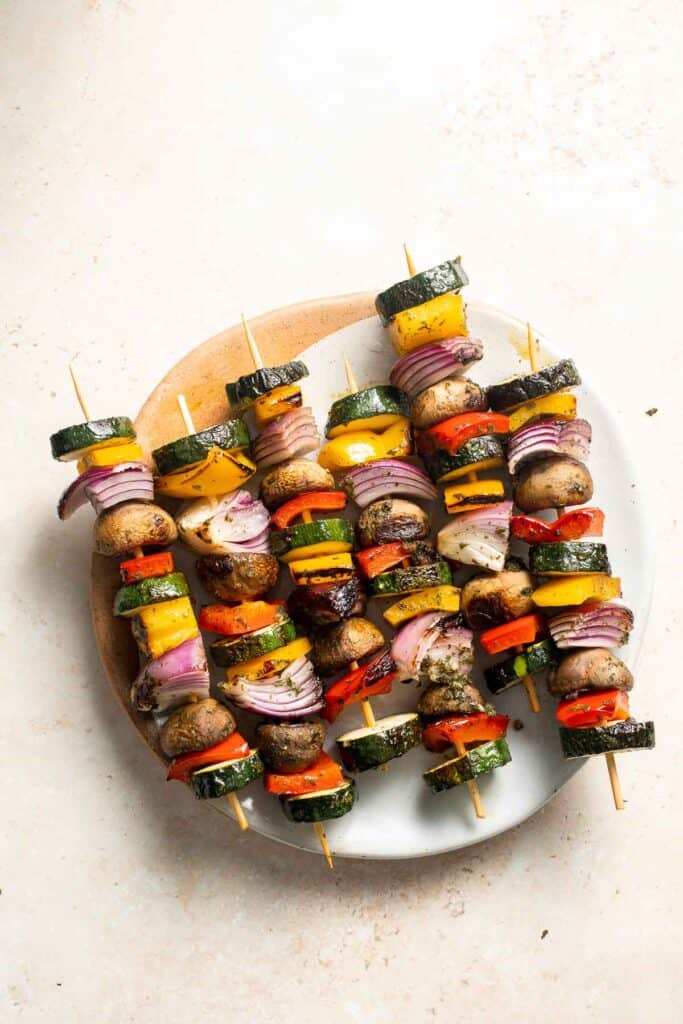

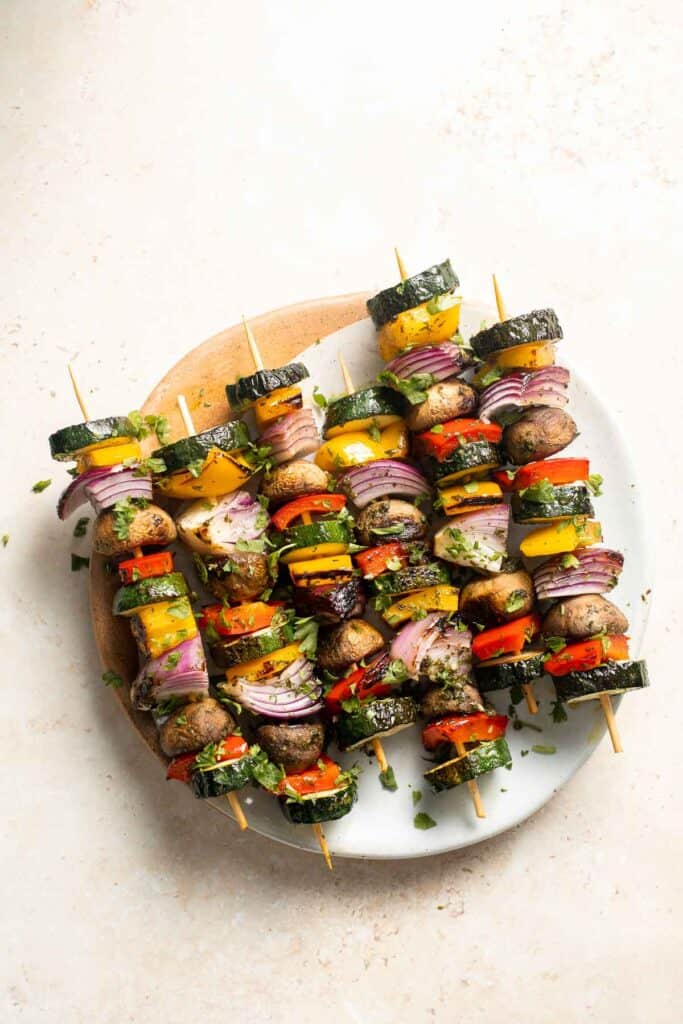
Recipe Variations
- Drizzle with balsamic vinegar. Balsamic has a sweet, earthy flavor that becomes really thick and gorgeous after roasting or grilling. Add a little balsamic vinegar to the marinade, or drizzle the freshly grilled skewers with balsamic glaze just before serving. A little homemade basil pesto would taste like heaven, too!
- Change the veggies. In general, it's best to use quick-cooking veggies that will cook at approximately the same time. If you decide to add veggies that take a little longer to cook (potatoes, sweet potatoes, Brussel sprouts), cut them into slightly smaller bites so they cook in the same amount of time.
- Adjust the spices. I'm all about the simple garlic and herb flavors here, but make these grilled veggie skewers your own! Change the spices, use your favorite spice blend, etc.
How to Serve
These Vegetable Skewers are delicious served on its own, but even better paired with other proteins and/or sides. Some of my favorite recipes to pair with these grilled veggies are:
- Greek Chicken Souvlaki Skewers
- Classic Juicy Hamburgers
- Stovetop Mac and Cheese with White Cheddar
- Honey Garlic Shrimp Skewers
- Creamy Chicken Pesto Pasta
- Cheeseburger Sliders
- Souvlaki Beef Shish Kebabs
For more recipes, see our Easy Summer Grilling Recipes.
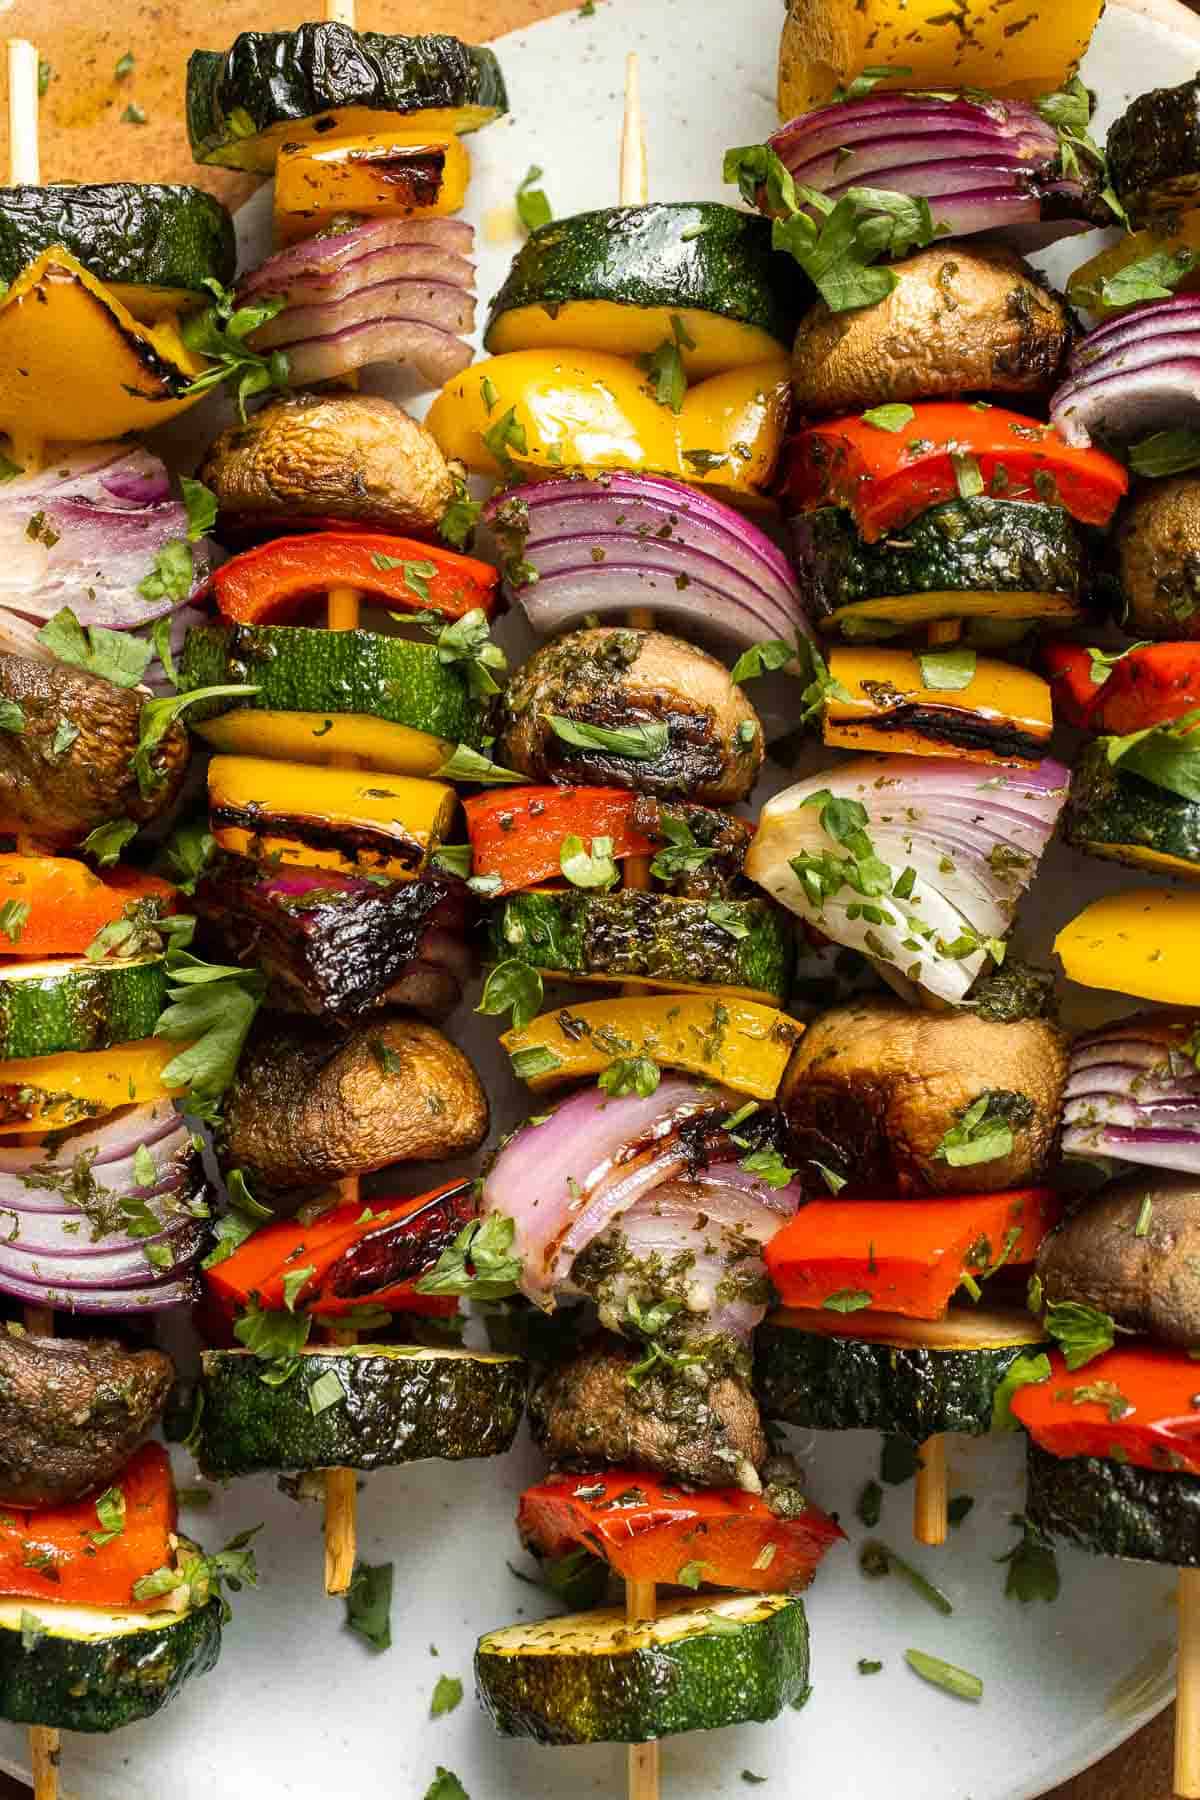
Recipe Tips and Tricks
- Use metal skewers. If you love to make kabobs and skewers all summer long, invest in a set of metal skewers. The metal will help them cook more quickly on the inside, and you can wash and reuse them for years to come.
- Soak the wooden skewers. To minimize sticking (and burning), soak any type of wood skewers for at least 30 minutes. For extra flavor, soak them in beer, wine, or another flavorful liquid.
- Make extras. Even if you're serving these skewers with grilled meats tonight, the leftover grilled veggies would be great to add to salads, sandwiches, pasta salad, and more. Do yourself a favorite and make a double batch!
Storing and Freezing Instructions
How to Store
Store any leftover grilled vegetables in an airtight container in the fridge for 3-4 days. I recommend unthreading them before storing.
How to Reheat
You can either pop them back on the grill for a few minutes, zap them in the microwave, or bake them in an air fryer or oven at 350 F until warmed through.
FAQ
There are so many options! I use zucchini, bell peppers, red onions, and mushrooms, but you can also add grape or cherry tomatoes, baby potatoes, sweet potatoes, small rounds of fresh corn on the cob, yellow squash, Brussels sprouts, and any of your favorite vegetables. I recommend using vegetables that cook quickly and cutting them into similar sizes so they cook evenly.
Not long. Preheat the grill to 450 F, then grill for 5-7 minutes per side until they're slightly charred and tender.
I recommend keeping it simple. You need a little fat to help with the caramelization process and your favorite seasonings to flavor the chopped vegetables. I like to make a simple marinade with olive oil, fresh garlic cloves, salt, pepper, and a little Italian seasoning. You can also add lemon juice or zest, a little vinegar, and your favorite fresh herbs.
More Vegetable Recipes
- 40 Best Vegetable Sides
- Mediterranean Roasted Vegetables
- Sautéed Spinach
- Roasted Asparagus and Mushrooms
- Baked Zucchini Fries
- Vegetable Orzo
Tried this recipe?
I'd love to hear what you think! Leave a comment and rating below to share your feedback. Your reviews help others discover this recipe and help me keep creating more free recipes for you. Snap a photo and tag me on social media @aheadofthyme too.

Classic Juicy Hamburgers
Better than the steakhouse, these Classic Juicy Hamburgers are perfectly seasoned, tender and juicy, and so flavorful and delicious - literally the best burgers ever! With just 10 minutes of prep, you can enjoy restaurant style burgers at home today. Plus, you can make homemade burgers over the grill, on the stove in a cast-iron skillet, or in the oven.
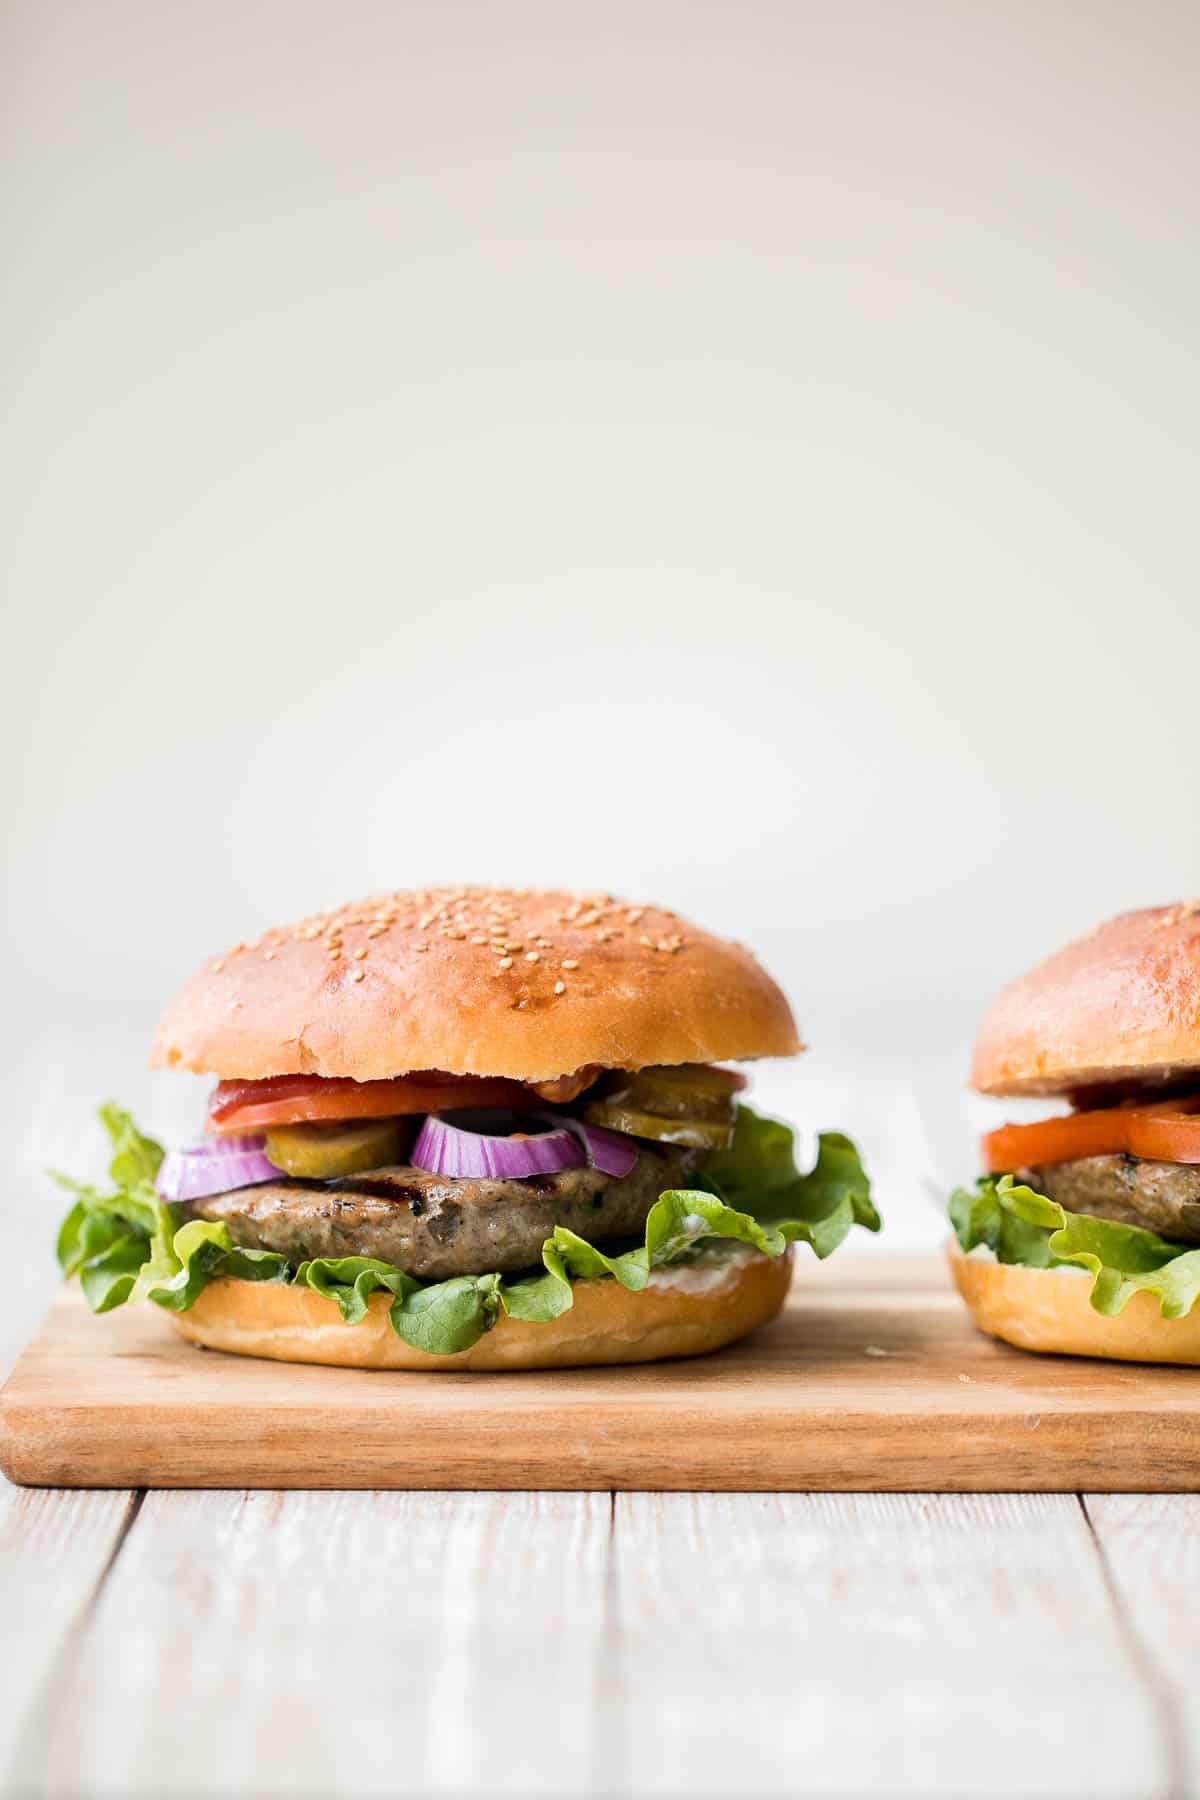
Why You'll Love These Classic Juicy Hamburgers
- Super flavorful burger patties. The key to this classic burger recipe is to load the beef patties up with flavor. We're not skimping here. The meat mixture has panko breadcrumbs, cheddar cheese, pickle juice, Worcestershire sauce, parsley, garlic powder, and salt and pepper. That seems like a lot but when the meat tastes this good, the rest of the toppings are just a garnish!
- Classic burger flavor. There are plenty of great burger recipes out there, like my Mediterranean Turkey Burgers or these flavor-packed Salmon Burgers, but there's nothing like a juicy burger straight from the grill! This simple burger recipe has an iconic flavor we all know and love. Just serve it in some Homemade Hamburger Buns and your favorite toppings!
- Great for entertaining. Hosting a BBQ or party? Double or triple this recipe for the best homemade hamburgers! It only takes 10 minutes to make the burger patties, and each pound of beef will give you 4 quarter-pound burgers. Make as many as you need!
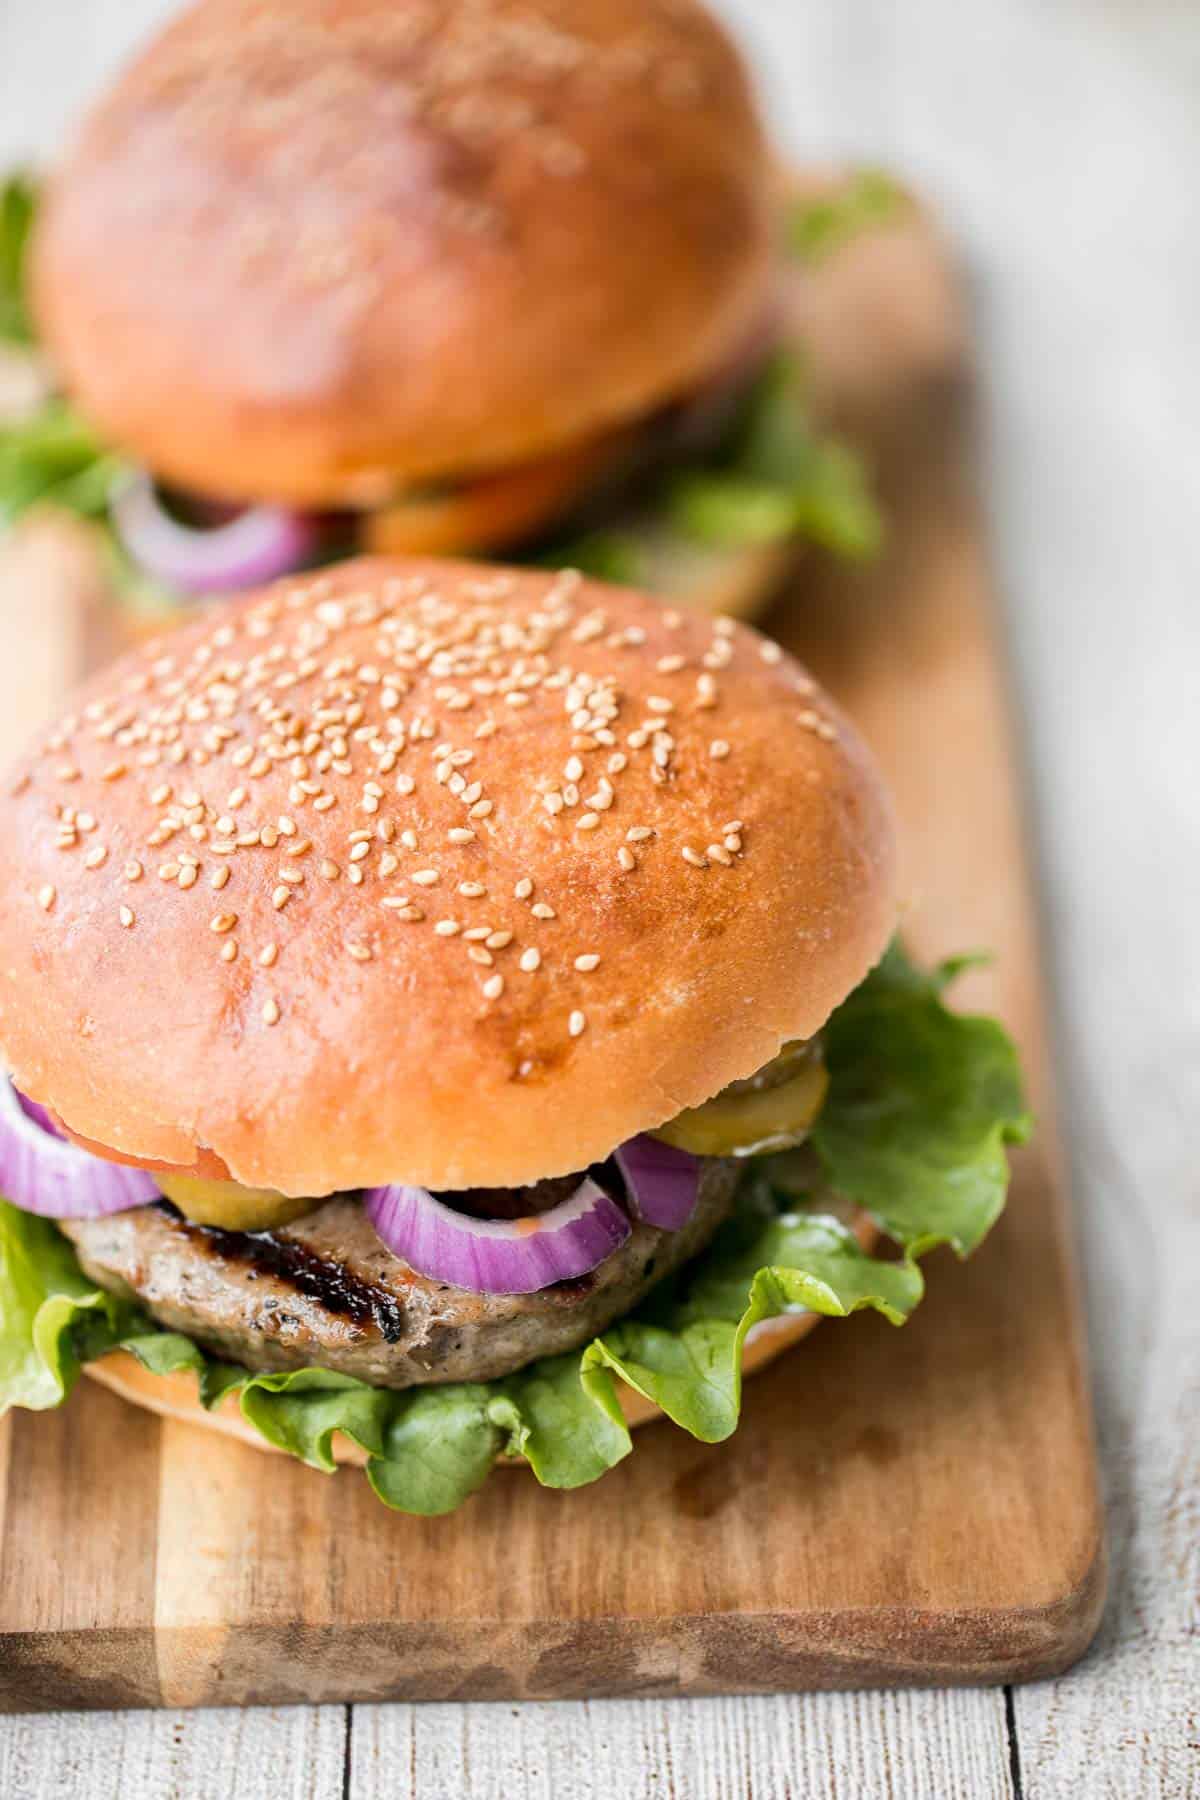
Ingredient Notes
To make these delicious and juicy Classic Hamburgers, you will need the following ingredients (full measurements in recipe card below):
- ground beef - I used lean ground beef but you can use any kind. You can also substitute with other types of ground meat.
- Panko breadcrumbs
- cheddar cheese - you can replace this with another kind of cheese including Parmesan, asiago cheese, Monteray Jack, etc.
- parsley - feel free to use other herbs such as dill or thyme.
- pickle juice - You can use cold water instead. I often use pickle juice in my burger patties because they make the burger juicier and adds so much flavour. Pickle juice contains water, vinegar, sugar, mustard seeds, dill and a variety of spices.
- garlic powder
- Worcestershire sauce - this is optional but adds great flavor.
- salt and pepper
- vegetable oil or cooking spray oil - for grilling.
- hamburger buns - make your own easy homemade hamburger buns in under 3 hours with only 15 minutes of actual prep work. They are soft, fluffy, and airy.
- toppings - We opted for classics like mayonnaise, lettuce, tomato, red onions, pickles, and ketchup. These are my favourite toppings, but they are all completely optional. Feel free to top these burgers with whatever toppings that you like.
You will also need measuring cups and spoons, an indoor grill pan (if you are not using an outdoor grill), a turner spatula to flip the hamburgers over, and a meat thermometer.
How to Make Classic Juicy Hamburgers
- Make the patties: In a large mixing bowl, add ground beef, breadcrumbs, cheddar cheese, parsley, pickle juice, garlic powder, Worcestershire sauce (optional), and salt and pepper. Stir well to combine. Shape the ground beef mixture into a firm ball. Cover the bowl with cling wrap and refrigerate for at least 1 hour or overnight.
- Shape the patties: Transfer the ground beef mixture onto a large piece of parchment paper. Flatten the ground beef with your hands into a square that is ½-inch thick (approximately an 8x8-inch square). Use a 4-inch wide circular mold (or the rim of a round bowl) to cut out 4 hamburger patties.
- Cook the hamburger patties: You can cook these patties on the grill, on the stove top, or in the oven.
- To grill: Brush oil over the grill pan and heat over medium-high heat for 3 minutes until the oil starts to sizzle and shimmer. Place patties spaced apart on the grill and cook for 5 minutes on each side until the internal temperature for the patties reaches 160 F.
- To cook on the stove: Heat oil in a cast-iron skillet over medium-high heat for 3 minutes until sizzling hot. Place patties on the skillet and cook for 3-5 minutes until nicely seared and starting to brown up the sides. Flip the patties over and cook for another 3-5 minutes, until the internal temperature for the patties reaches 160 F.
- To cook in the oven: To bake or air fry, cook for 15-17 minutes at 425 F or until they reach 160 F internally.


- Assemble the hamburgers: Toast the buns on the grill, if desired. On each hamburger bun, spread mayonnaise onto the bottom half. Top with a piece of lettuce and a grilled hamburger patty. Top the patty with sliced tomato, onions and pickles. Add ketchup on top and place the top half of the bun on top.


Recipe Variations
- Change the protein. I used lean beef, which is lower in fat. For an even juicier burger, use a cut with a higher fat content, like 80/20, or add some ground chuck. For a leaner burger, replace the ground beef with ground turkey.
- Try a different cooking method. Although I prefer grilling my burgers, you can also make them in a cast iron skillet on the stove, bake them in the oven, or prepare them in the air fryer. To bake or air fry, cook for 15-17 minutes at 425 F or until they reach 160 F internally.
- Change up the toppings. There are lots of different ways to top these burger patties, so the sky's the limit. Pair them with blue cheese and roasted mushrooms and onions for a hearty, earthy flavor, or add a country twist with fried onions, BBQ sauce, cheddar cheese, and bacon.
- Make it dairy-free. If you can't tolerate dairy, feel free to skip the cheddar cheese in the burger patty or try a non-dairy cheese.
How to Serve
These Juicy Hamburgers are delicious served on its own, or paired with some classic burger sides including:
- Baked Potato Wedges
- Arugula Salad
- Sweet Potato Tater Tots
- Spicy Mac and Cheese
- Baked Potato
- Crispy Air Fryer French Fries
- Italian Pasta Salad
For more recipes, see our 25+ Best BBQ Side Dishes.
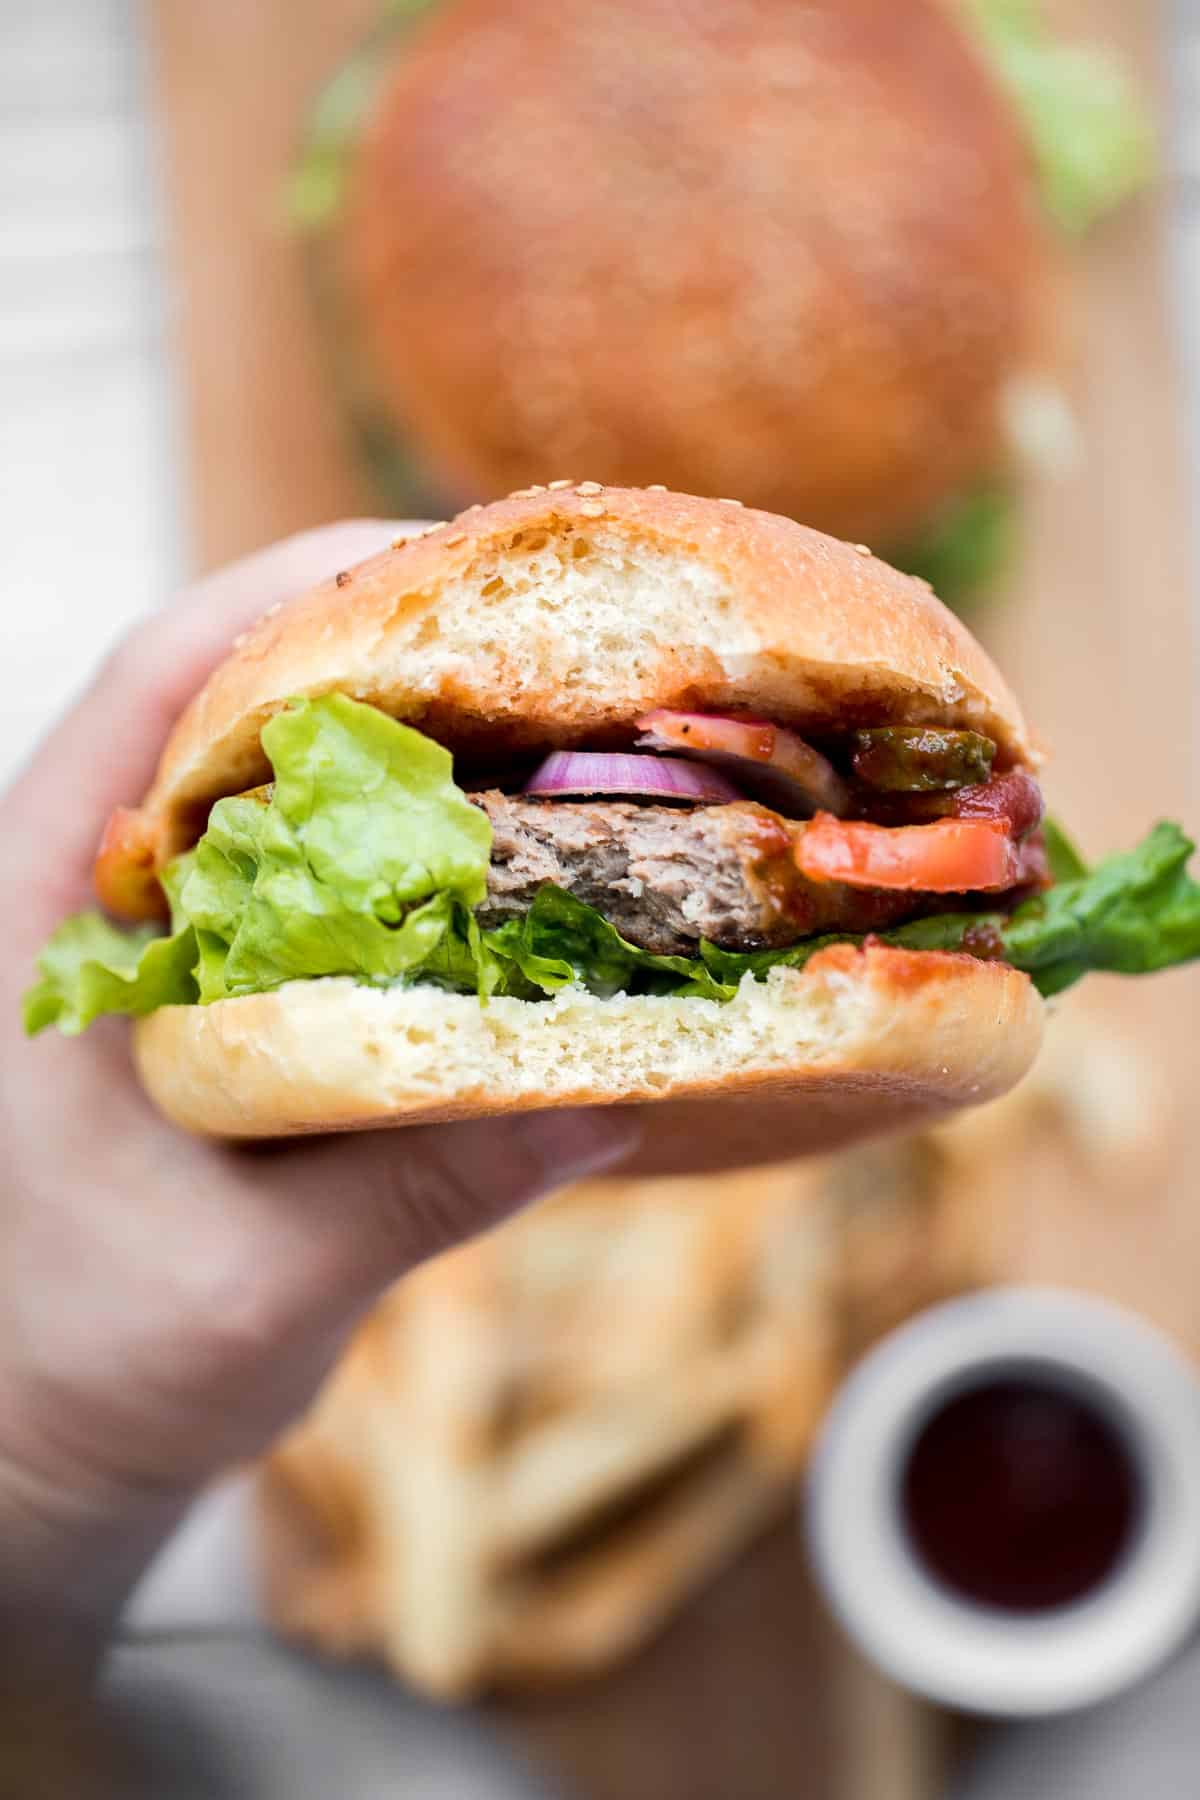
Recipe Tips and Tricks
- How to tell if the burger is cooked. A digital meat thermometer is very useful when grilling meat for checking doneness. Simply insert halfway inside the meat to get a quick measurement.
- Make your own artisan hamburger buns. You can make your own easy homemade hamburger buns in under 3 hours with only 15 minutes of actual prep work. These buns are soft, fluffy, and so airy. Totally worth the extra effort.
Storing and Freezing Instructions
How to Store
Store leftover cooked patties in an airtight container for up to 3 days. You can store the uncooked patties for up to 2 days from the date you purchased the ground beef.
How to Reheat
Reheat leftover hamburger patties on the grill, stove over medium heat, or in a 350F preheated oven or air fryer. Heat until the internal temperature hits 165ºF as read on a meat thermometer.
How to Freeze
You can freeze both cooked and uncooked hamburger patties for up to 3 months. Place them on a parchment lined baking tray and place in the freezer for an hour. Then, stack them up and layer small squares of parchment paper in between them. Store in an airtight ziploc bag and place back in the freezer.
To use them, defrost overnight in the refrigerator. For the cooked patties, simply reheat once thawed. For the uncooked patties, cook according to recipe instructions once thawed.
FAQ
There's nothing quite like a classic beef burger! Keep this diner staple simple with a well-seasoned hamburger patty, toasted bun, then a little mayo, iceberg lettuce, tomato, red onion, pickles, and ketchup. Many people like to add a slice of cheese (usually cheddar or American cheese), but this is optional. Feel free to add a little burger sauce to make them extra special!
Not long! The cooking time depends on your cooking method, but burgers are generally done in 10 minutes or less. On a gas or charcoal grill, it will take about 5 minutes per side. In a cast iron skillet, it will take 3-5 minutes per side. When done, an instant-read thermometer inserted into the center of the patty should read 160 degrees F.
There are lots of different opinions on this, but after making more than my fair share of homemade burgers, I have some thoughts to share. First, you should add some sort of bread crumbs to absorb the moisture from the meat as it cooks. I like to use panko breadcrumbs, which have a very light flavor that lets the meat shine. For flavor, I like to add shredded cheddar cheese, pickle juice (yes, really!), Worcestershire sauce, parsley, garlic powder, and simple salt and black pepper. The pickle brine will tenderize the meat and add a tanginess that balances the flavor of the beef. It's a simple combination that results in the most deliciously juicy grilled burgers every time!
More Burger Recipes
- 15 Best Burger Recipes
- Quarter Pound Burgers
- Thai Turkey Burgers
- Black Bean Burgers
- Salmon Burgers
- Spinach and Feta Turkey Burgers
Tried this recipe?
I'd love to hear what you think! Leave a comment and rating below to share your feedback. Your reviews help others discover this recipe and help me keep creating more free recipes for you. Snap a photo and tag me on social media @aheadofthyme too.

Mediterranean Bowl
This Mediterranean Bowl is healthy, nourishing, and delicious. It's made with fluffy quinoa, creamy hummus, crispy chickpeas, and fresh veggies which means that it's loaded with plant-based protein and fiber to keep you full for hours. This grain bowl is one of my favorite recipes for summer lunches and tastes like you splurged on takeout every time!

These veggie packed Mediterranean bowls are basically Buddha Bowls, but with a Mediterranean twist for summer. I'm always drawn to Mediterranean food when the weather gets warmer, like this Chickpea Greek Salad, Mediterranean Flatbread, and Stuffed Eggplant. Mediterranean food is light and vibrant, and these veggie-packed quinoa bowls are no exception. They have all the Mediterranean flavors you love - fresh vegetables, herbs, olives, and briny feta. Add some quinoa and chickpeas and you will feel full for hours. It's the perfect, no-microwave-needed option for those busy summer days.
Why You'll Love This Mediterranean Bowl
- Perfect for meal prep. After cooking the quinoa, roasting the chickpeas, and preparing the veggies, the last step is to assemble your bowls and serve. Make the quinoa and roasted chickpeas the day before to make your prep session even easier!
- Easy vegetarian meal. This isn't a light summer salad - this is a full meal in a bowl! Plus, the only animal-based product in this whole recipe is the feta, so it's a fantastic option for vegetarians. For a vegan option, skip the cheese or use a dairy-free alternative. Easy!
- Adapt to your favorite flavors. There are lots of little ways to make this Mediterranean bowl recipe your own, like using a flavored hummus, adding more herbs, sprinkling some pine nuts, and using different fresh veggies from the market. Make it your own!

Ingredient Notes
To make this delicious Mediterranean Bowl, you will need the following ingredients (full measurements in recipe card below):
- cooked quinoa - make a batch of quinoa and allow it to cool. You can also use leftover quinoa straight from the fridge.
- chickpeas - if you have time, take the chickpeas to another level by roasting them! My crispy Roasted Chickpeas add a wonderful crunch. You can also use drained and rinsed chickpeas from a can.
- vegetables - use the freshest summer veggies like cherry tomatoes, bell peppers, English cucumber, and red onion.
- kalamata olives - these add a briny, salty flavor that works wonderfully with the fresh veggies.
- hummus - use either homemade hummus, like my Classic Hummus or Roasted Red Pepper Hummus, or grab your favorite brand from the store.
- feta cheese - adds a creamy, salty note.
- parsley - added for a fresh, herby note.
- extra virgin olive oil - optional, for serving.
- white sesame seeds - optional, for serving.
You will also need measuring cups, 2 large serving bowls, and a spoon.

How to Make the Best Mediterranean Bowl
- Assemble. In 2 large serving bowls, add equal portions of quinoa, chickpeas, tomatoes, bell pepper, cucumber, onion, olives, hummus, and feta.


- Serve. Sprinkle parsley on top of the bowl. You can also drizzle a little bit of olive oil and a sprinkle of white sesame seeds on the hummus, if desired. Serve immediately.


Recipe Variations
- Add more protein. If you're a meat eater, feel free to add some Chicken Souvlaki or a few Greek Meatballs. My Homemade Falafel would be great for a plant-based option!
- Use rice instead. Brown rice is a great alternative to quinoa, although it won't add quite as much protein. But it's cheaper and rice bowls will fill you up just as well!
- Add extra crunch. The Roasted Chickpeas add lots of crunch, but you can also crumble some pita chips on top right before serving. If meal prepping, package them on the side to keep them from softening.
- Squeeze some lemon juice on top. For an extra pop of freshness, squeeze a lemon wedge on top right before serving.
- Add some greens. This Mediterranean grain bowl is loaded with veggies but doesn't contain greens. Feel free to add a handful of arugula, baby kale, spring greens, or your favorite leafy greens if you'd like.
- Change the veggies. For a little extra sweetness, add a few sun-dried tomatoes or roasted red peppers.
- Drizzle tzatziki sauce. For a cooling, creamy flavor, drizzle a little homemade Tzatziki dressing over the bowl.
How to Serve
These Mediterranean Bowls are delicious and very filling served on its own. You can also pair them with some appetizer or sides including:
- Homemade Pita Bread
- Mediterranean Roasted Vegetables
- Roasted Red Pepper and Tomato Soup
- Greek Salmon
- Ground Beef Stuffed Peppers
- Persian Lentil Soup
For more recipes, see our 60 Best Mediterranean Diet Recipes.

Recipe Tips and Tricks
- Make your own hummus. Homemade hummus truly is the best, and you'll be surprised at just how much more flavor you can get compared to store-bought hummus. Plus, then you'll have extra hummus on hand for a Vegan Hummus Wrap or Hummus Flatbreads, noshing on veggies, and anything else you'd like!
- Plan ahead for meal prep. All of the ingredients in this recipe store well for meal prep, but it's helpful to understand a few logistics. First, this bowl can either be served warm or cold. Cold is easiest as you can eat it straight from the fridge. Warm is a little more complicated, as you'd only really want to heat the quinoa and possibly the canned garbanzo beans (if you skip the roasted chickpeas). Store those on the side to pop in the microwave, then add the cold veggies, olives, cheese, etc. right on top and serve.
- Change out the veggies. If you get tired of eating raw veggies, replace them with Mediterranean roasted veggies! They're loaded with summery flavors and a little heartier, perfect for when you need something a little more substantial.
Storing and Freezing Instructions
How to Store
The leftovers can be stored in airtight containers in the fridge for 3-4 days. If you are making these Mediterranean bowls for meal prep, it can help to store the quinoa in separate containers to reheat it without softening the raw veggies or melting the cheese.
How to Reheat
These grain bowls can be eaten cold like a salad, or you can reheat the quinoa and chickpeas in the microwave for a few minutes, then top them with the raw ingredients and other toppings.
FAQ
There are many ways to customize your Mediterranean bowl, but I like to start with a few basics. First, choose your grain. I recommend using quinoa for its fiber, healthy fats, and plant-based protein. Next, choose your beans. I like to add roasted chickpeas for extra crunch, but you can also use canned chickpeas. Then, choose your veggies. I like to use the same Mediterranean flavors I use in Greek salads, like cucumbers, tomatoes, bell peppers, red onion, olives, and feta cheese. Top it off with any sauces and garnishes, like homemade hummus, a drizzle of olive oil, and a sprinkle of white sesame seeds to bring it all together.
This Mediterranean quinoa bowl recipe can be eaten either hot or cold. The flavors really come out when you warm up the quinoa, but all of the other ingredients are served cold like a salad. In fact, you can easily add a handful of leafy greens and serve it as a Mediterranean quinoa salad!
The quinoa makes this recipe more like a grain bowl, but you can either replace it with rice or a different grain or skip it entirely. If you skip it, you might find it more satisfying to add a bunch of greens and serve it as a salad instead.
More Quinoa Recipes
- How to Cook Quinoa
- Vegetarian Stuffed Peppers
- Quinoa Spinach Power Salad with Lemon Vinaigrette
- Southwest Quinoa Salad
- Creamy Chicken, Broccoli and Quinoa Casserole
Tried this recipe?
I'd love to hear what you think! Leave a comment and rating below to share your feedback. Your reviews help others discover this recipe and help me keep creating more free recipes for you. Snap a photo and tag me on social media @aheadofthyme too.

Roasted Chickpeas
Crispy Roasted Chickpeas are delicious, flavorful, and easy to make. This vegan snack is super versatile and also makes an amazing crunchy topping for salads, grain bowls, and more. They genuinely could not be easier to make: rinse the canned beans, toss with spices, and roast until golden brown and crispy. We keep a jar in the pantry at all times!
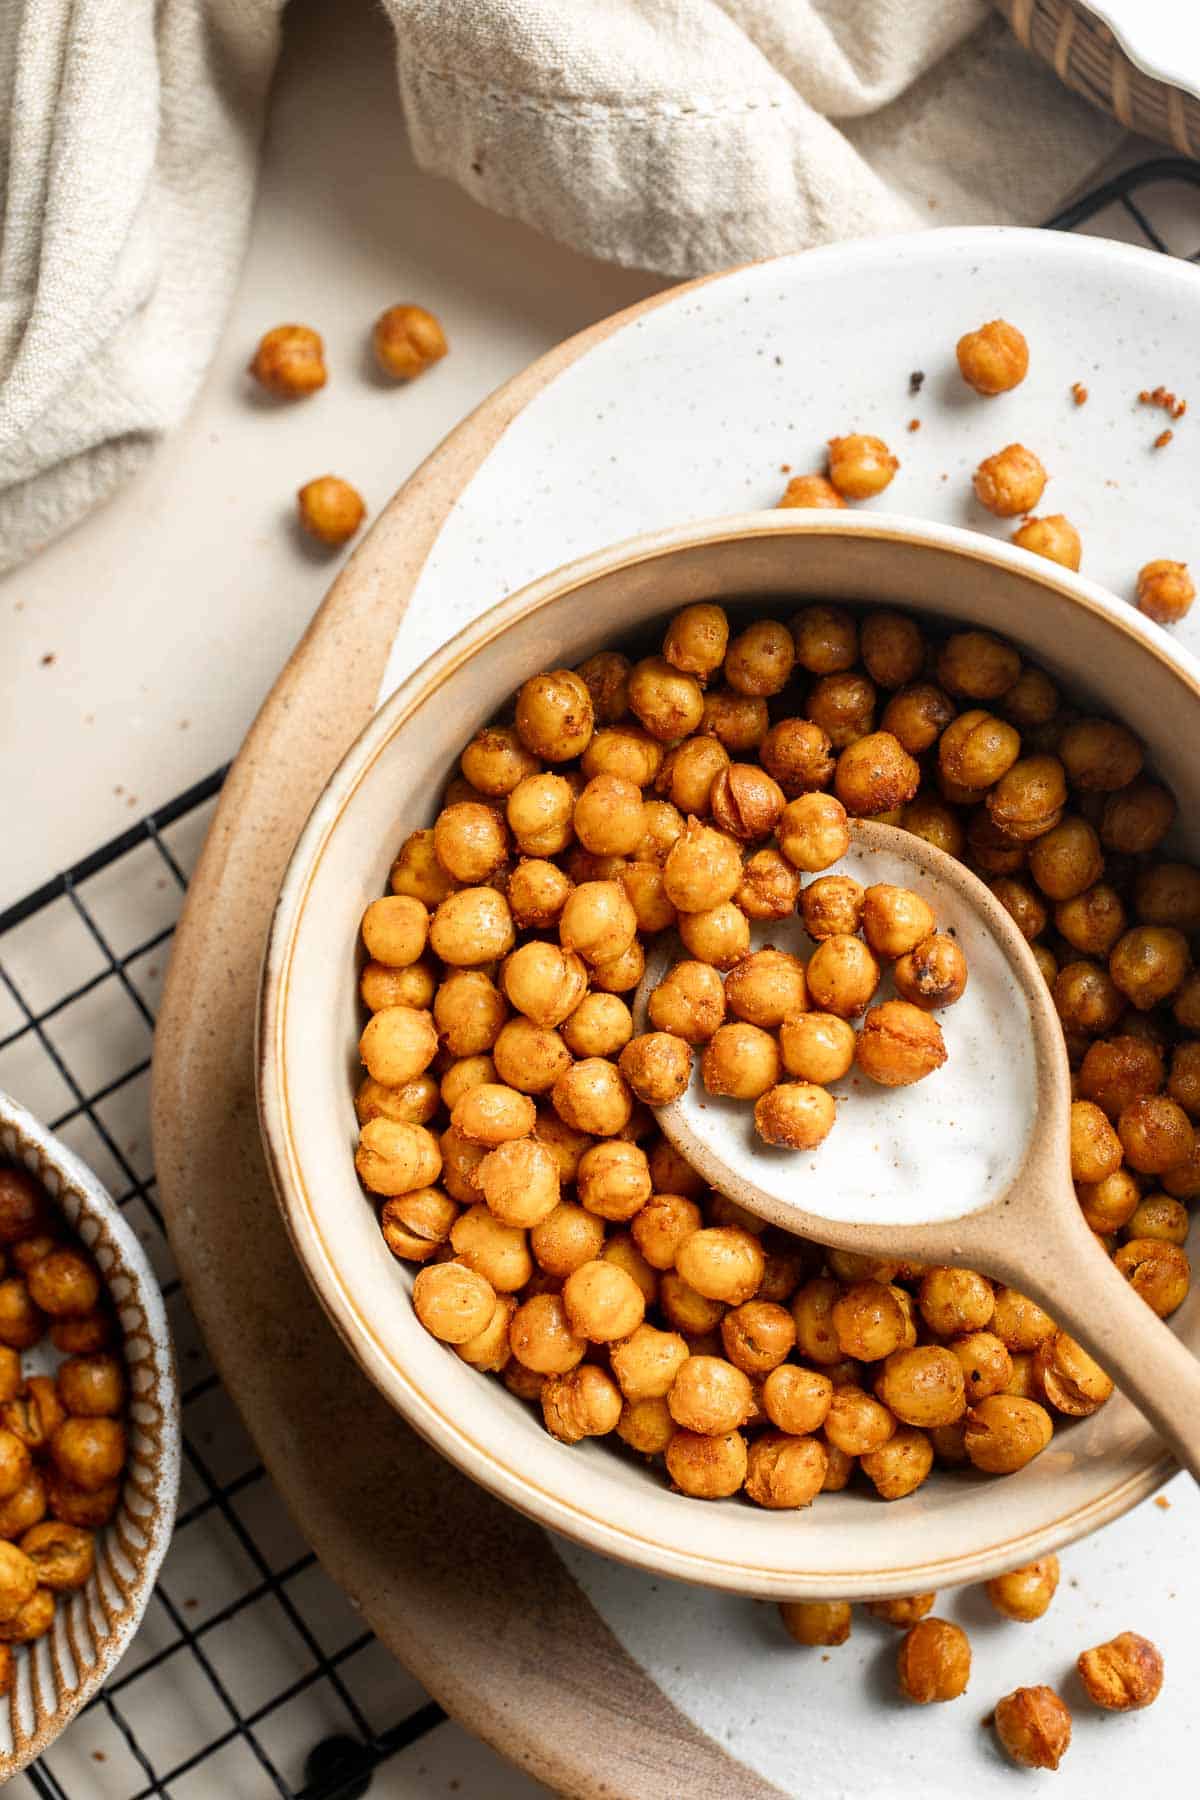
With so many allergens and dietary restrictions, it can be hard to find snacks that work for everyone. This roasted chickpeas recipe is simple but surprisingly compatible with a variety of dietary needs. Chickpeas are naturally vegetarian and vegan, and they're also high in protein and fiber. This recipe also contains no gluten, dairy, sugar, or preservatives (other than salt). They're even plastic-free! Healthy doesn't mean boring, though. The crispy, crunchy texture, smoky and savory spices, and slightly nutty flavor make these toasted chickpeas delicious enough to munch on by the handful!
Why You'll Love These Roasted Chickpeas
- Perfect healthy snack. Sometimes, I get a serious craving for potato chips with their salty flavor and crispy texture. These crispy chickpeas scratch that same itch, but with extra fiber and protein and without the frying! It feels like you're being decadent and indulgent, but you really aren't. They're perfect!
- Way cheaper than store-bought snacks. Have you noticed the cost of healthy snacks at the store lately? Even a box of crackers has shot up to $5-6! No, thanks. Canned chickpeas are still just $1-2, and most of us already have oil and spices on hand.
- Easy to customize. The flavors included in the recipe card are my favorite way to season these crunchy chickpeas, but they're just a recommendation. You can follow the same steps with your favorite seasoning blend or spice mixes to make them your own. They can be sweet, savory, spicy, or anything you'd like!
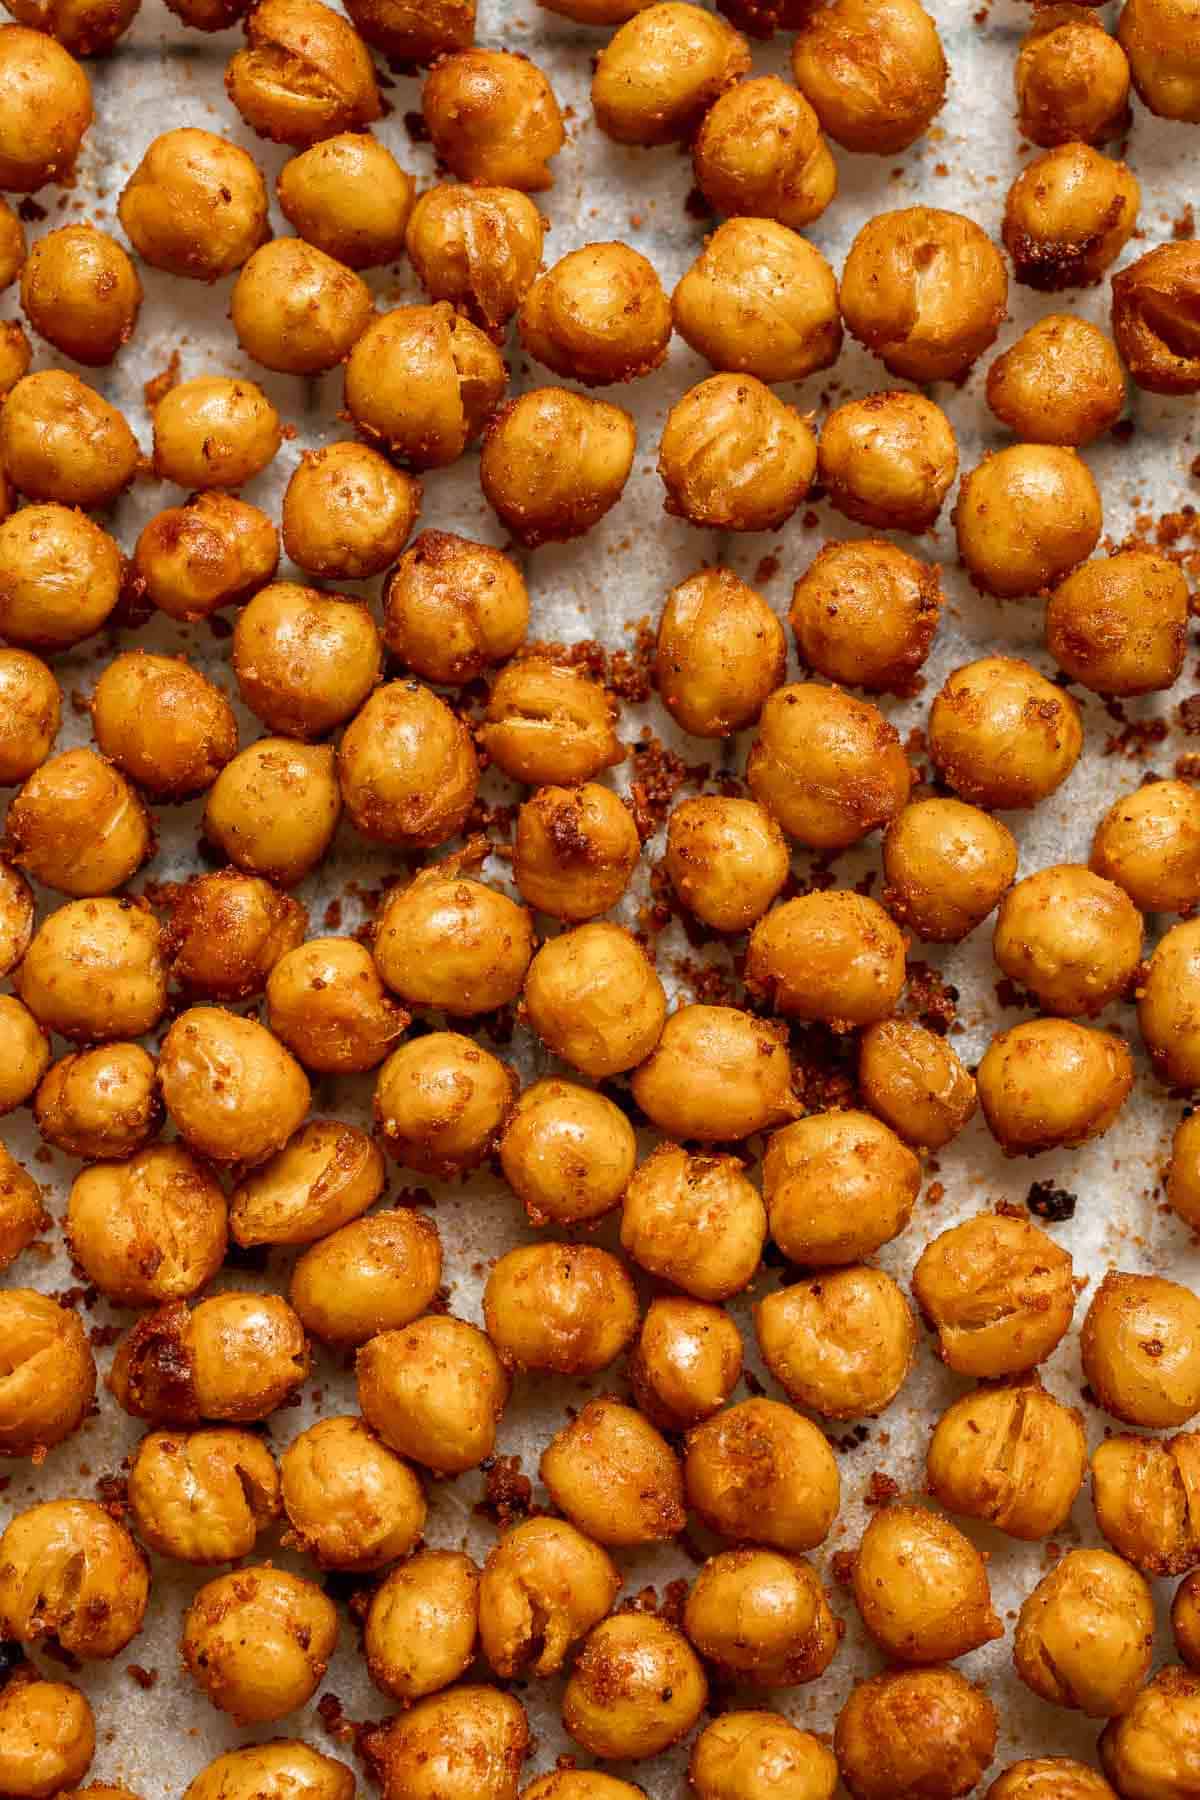
Ingredient Notes
To make these delicious Roasted Chickpeas, you will need the following ingredients (full measurements in recipe card below):
- chickpeas - drain off the liquid from one can of chickpeas and rinse them well. Let them dry on a clean kitchen towel for a bit to remove as much of the excess moisture as possible.
- oil - use a neutral cooking oil that can tolerate high temperatures. Avocado oil or extra virgin olive oil both work well.
- spices - for a smoky, savory flavor, use smoked paprika, garlic powder, ground cumin, sea salt, and black pepper to taste.
You will also need measuring spoons, a colander, a large baking tray, parchment paper, a paper towel, a large mixing bowl, and a storage jar.
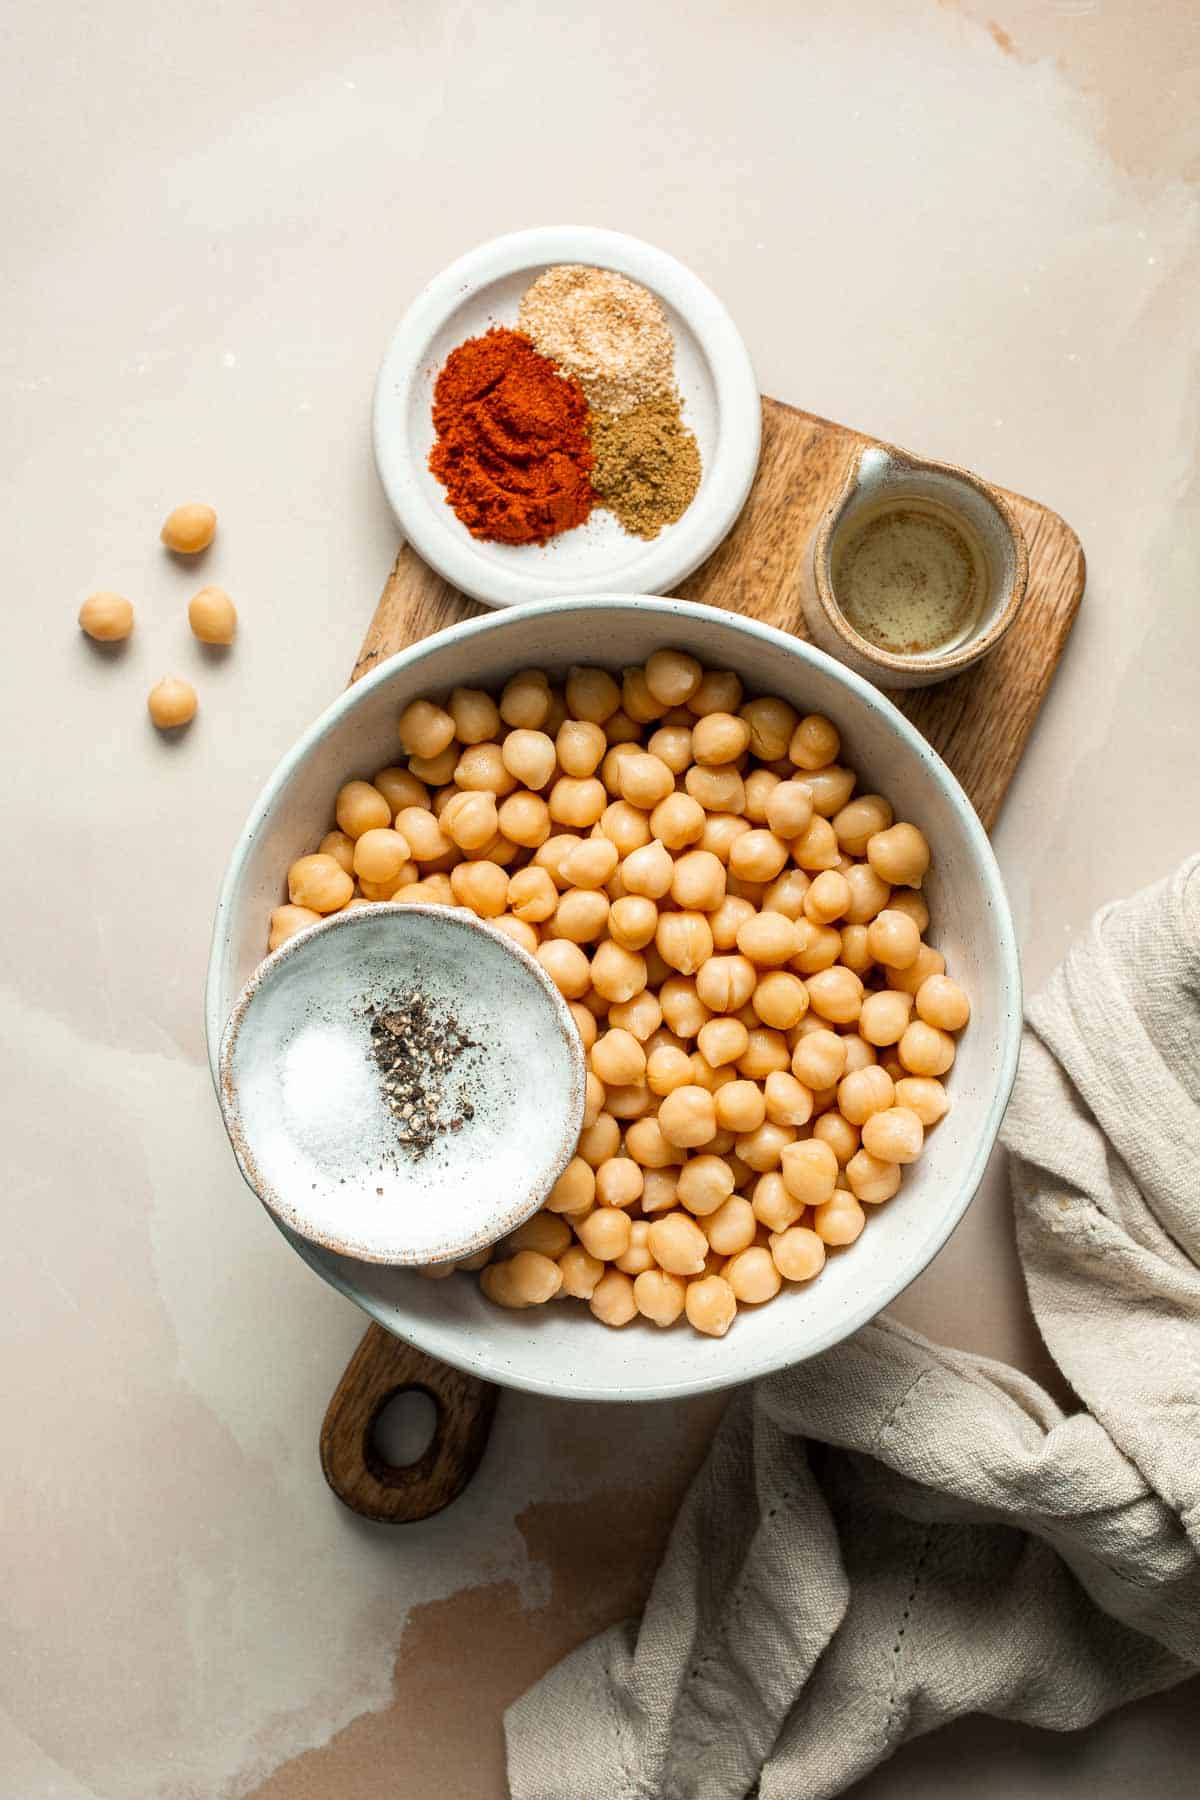
How to Make the Best Roasted Chickpeas
- Drain and rinse. Drain the canned chickpeas in a colander and rinse under running water. Use a paper towel to pat completely dry.
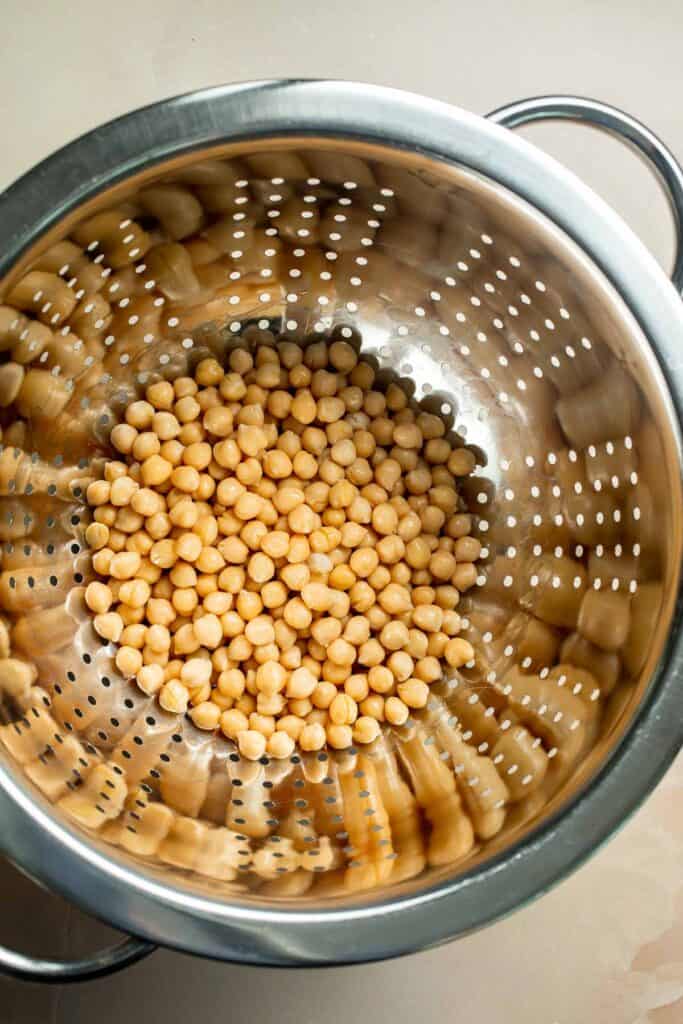
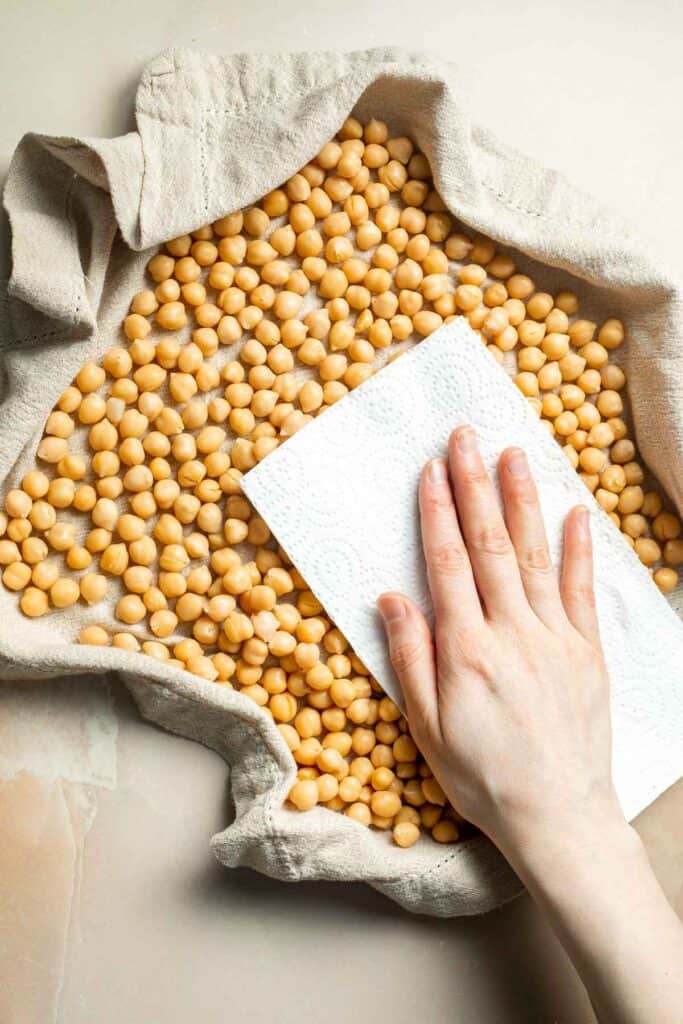

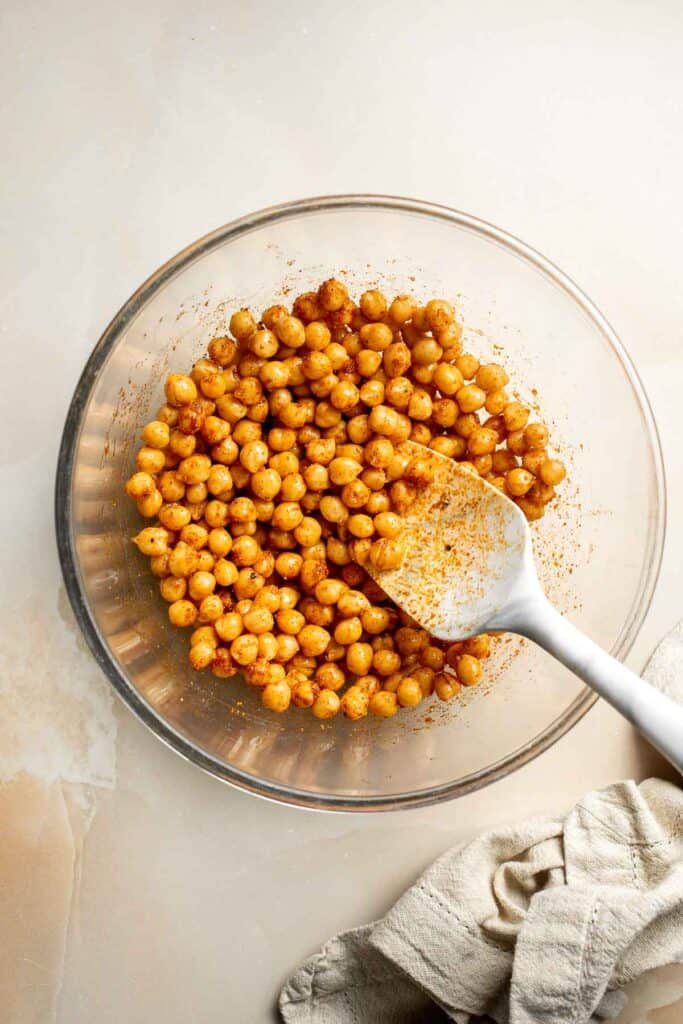
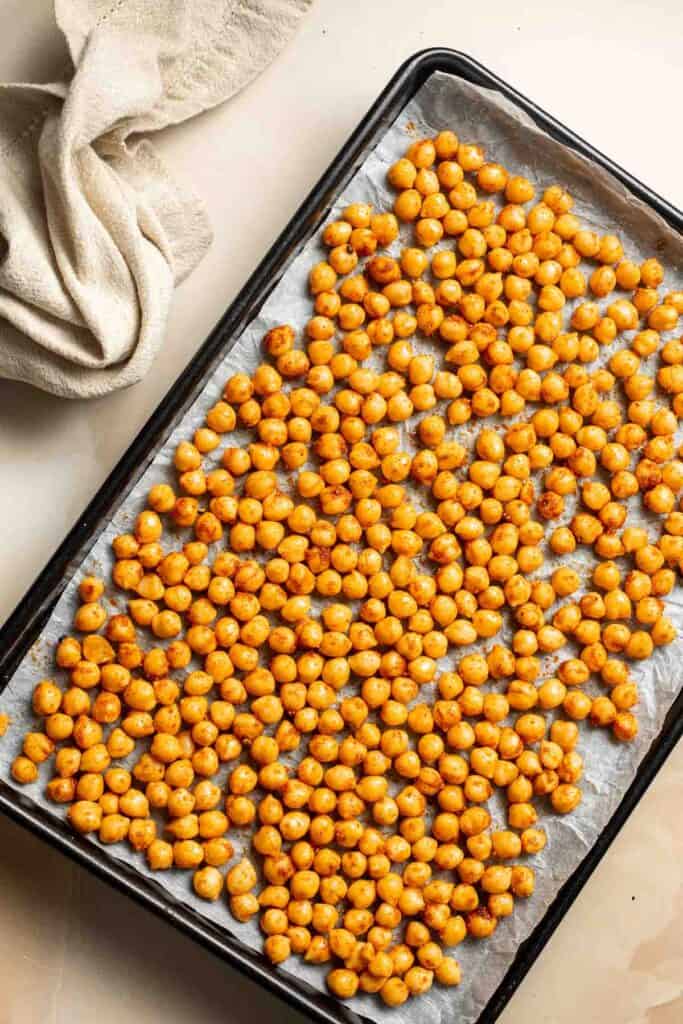
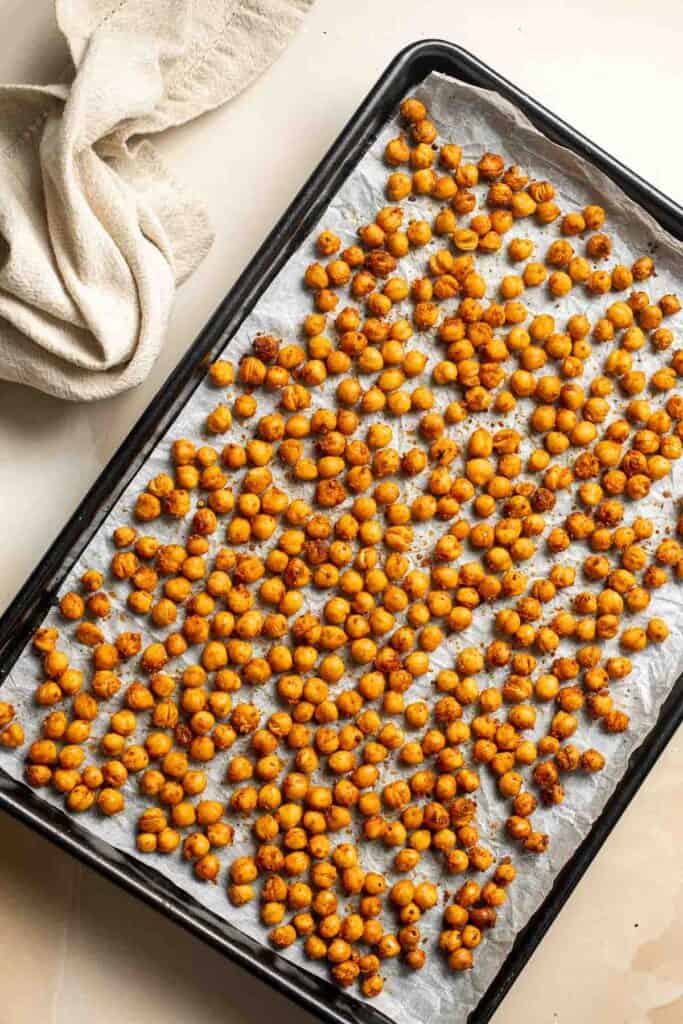
Recipe Variations
- Spicy roasted chickpeas. Add some chili powder, a dash of cayenne, or a squirt of sriracha.
- Use Indian spices. Toss the chickpeas in your favorite curry powder or garam masala.
- Classic salt and pepper. Prefer simple snacks? Skip the spices and use salt and black pepper.
- Add some sweetness. Toss the chickpeas with cinnamon and a drizzle of maple syrup for sweetness.
- Go Mediterranean. Add dried herbs like Oregano and dill, a squeeze of lemon juice or red wine vinegar, and grate some fresh Parmesan cheese for an extra layer of crunch.
How to Serve
These Roasted Chickpeas are delicious as a snack served on its own and eaten by the handfuls, or added as a topping to salads, grain bowls, and more. Some popular options are:
They are also great served as part of a larger snack platter with:
For more recipe ideas, see our 50 Best Healthy Snacks.
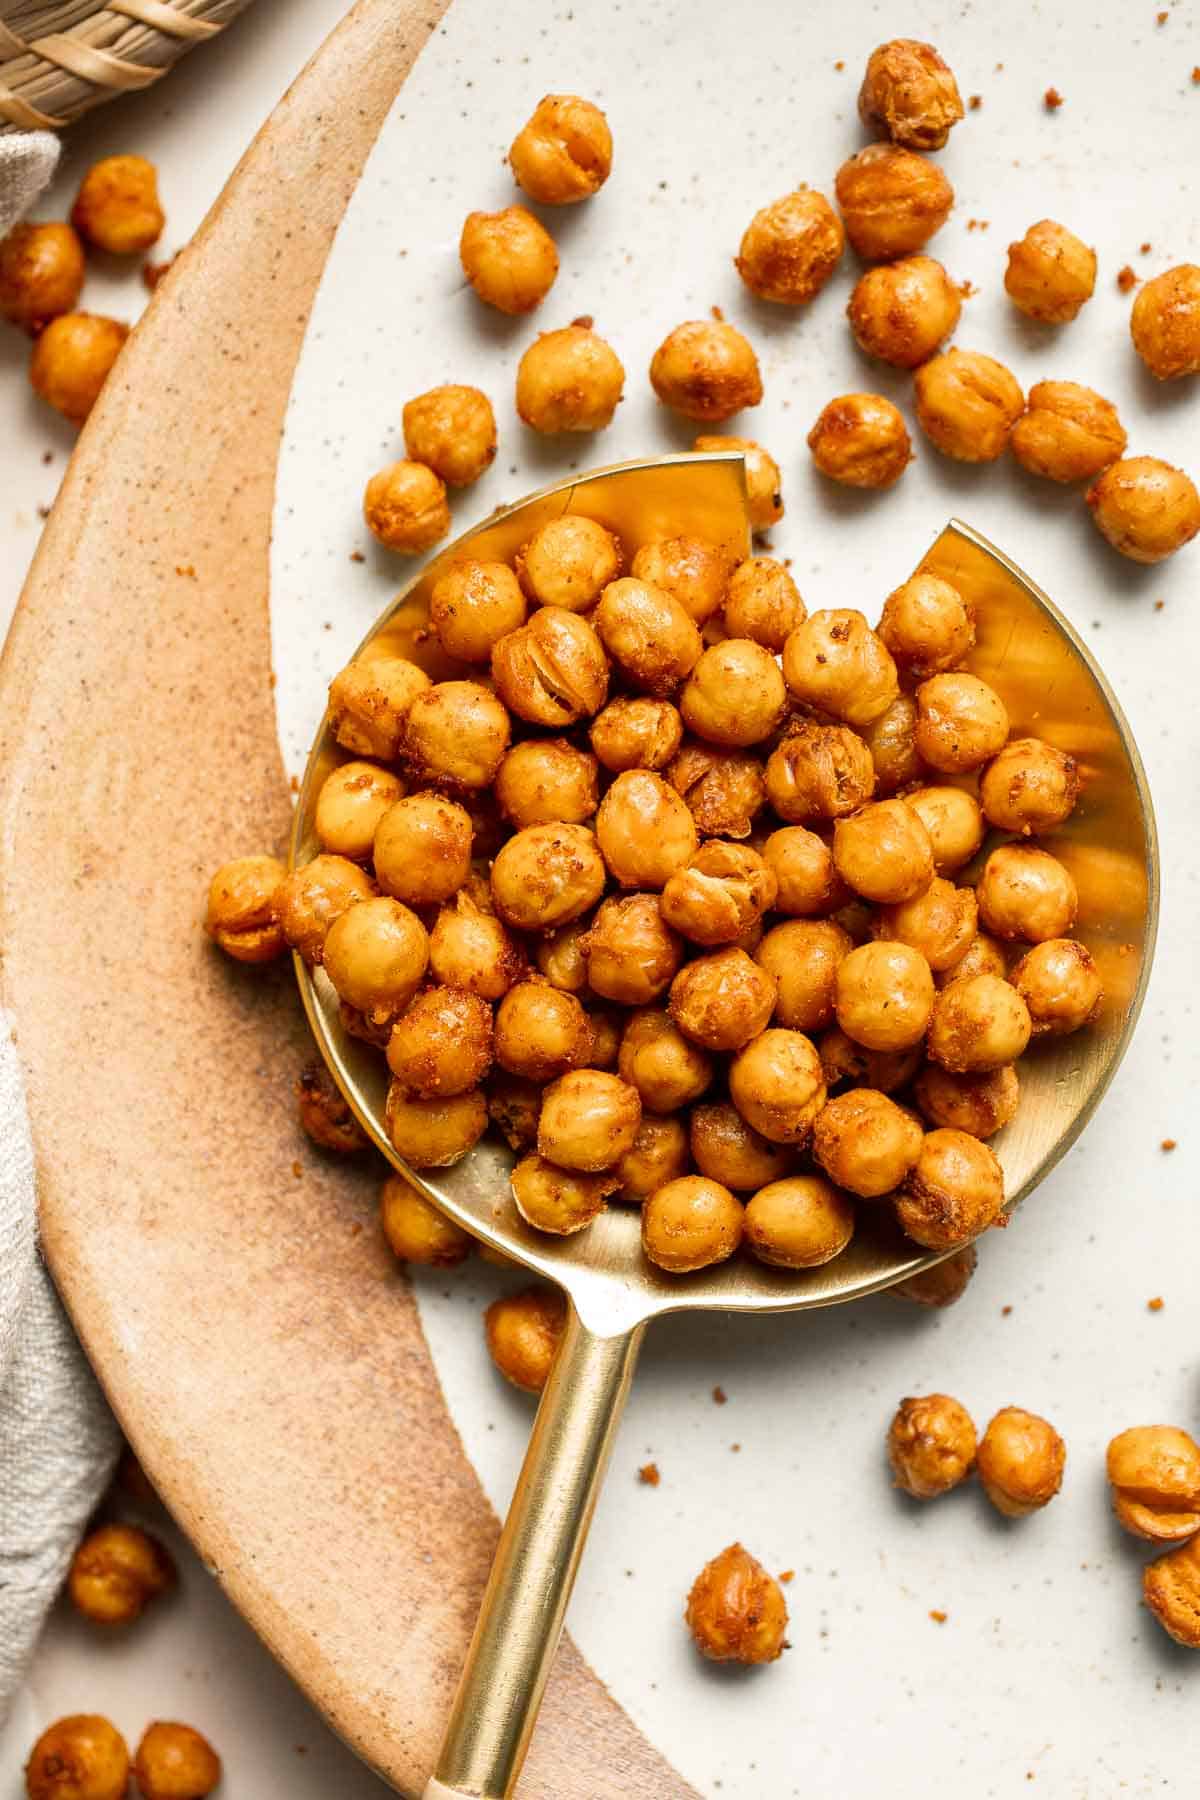
Recipe Tips and Tricks
- Dry chickpeas thoroughly. If you want your chickpeas to have lots of flavor, they need to be as dry as possible. Otherwise, the water will resist the oil and spices. This is the one part of the recipe that's a little fussy, but it's worth it to really pat those chickpeas dry!
- Don't crowd the pan. Like roasting vegetables, the chickpeas need space to toast and pop on the baking dish. If you want to double this batch, I recommend using no more than two cans of chickpeas per half-sheet tray, but ideally, one can per tray.
- Preheat the oven. The crispy crunch comes from shocking the room-temperature chickpeas with the heat of the oven. If you add the beans to a cold oven, you won't get the same crunchy texture.
- Substitute in salads. Use roasted chickpeas in any recipe that calls for regular chickpeas such as: Kale Chickpea Salad, Mediterranean Chickpea Salad, or Chopped Asparagus Salad.
Storing and Freezing Instructions
How to Store
Once roasted, your crispy garbanzo beans can be stored in an airtight container at room temperature for 5-7 days. After that, they'll start to lose their crunch a bit.
How to Reheat
You do not need to reheat your roasted chickpeas, but warming them up brings out their flavor and can make your salads and sandwiches even more enjoyable. The easiest method is to sautee them in a hot skillet for just a few minutes until they are warm to the touch.
FAQ
Some recipes call for this step, but after trying it both ways, I don't see the fuss. Those chickpea skins soak up the flavor and become so crispy that they shatter in your mouth. That's not a bad thing, if you ask me. The only con is that the skin can make the chickpeas a little less crunchy, so keep that in mind. When you dry the chickpeas with a clean kitchen towel, give them a little rub to gently coax a few extra skins off, and you'll get the best of both worlds - easy, crispy, crunchy, and delicious.
Yep! The air fryer is a great way to roast chickpeas and get maximum crispiness. Preheat the air fryer for at least 5 minutes first, and check on them several times during the cooking process to make sure they don't burn. I find it easiest to make air fryer chickpeas in a basket-style air fryer because you can toss the chickpeas to get that perfect crispy exterior. Start checking them around 10-15 minutes; they won't need quite as long as oven-roasted chickpeas.
No. The roasting process dries out the chickpeas, similar to making bread crumbs. If properly baked until dry and crispy, they can be stored in a mason jar in the pantry for 5-7 days.
More Chickpea Recipes
- Classic Hummus
- Falafel
- Vegetable Curry
- Chickpea Tacos
- Kale Chickpea Salad
- Curried Chickpea Stuffed Acorn Squash
Tried this recipe?
I'd love to hear what you think! Leave a comment and rating below to share your feedback. Your reviews help others discover this recipe and help me keep creating more free recipes for you. Snap a photo and tag me on social media @aheadofthyme too.

What Recipes to Cook in July
Are you wondering what to cook in July? Browse our collection of 50 best July recipes to cook for breakfast, lunch, dinner, and dessert!

It's July which means we are full swing into summer! Our new roundup of fresh seasonal recipes to make throughout this month includes lots of grilling recipes, fresh salads, and light meals to showcase all the colorful and bold flavors of summer. Our curated list of the 50 best recipes to cook in July uses seasonal summer produce in a variety of delicious breakfast and brunch recipes, simple lunch recipes such as salads and sandwiches, light but filling dinners, fresh appetizers and snacks, and fruity and frozen desserts. Let's dive in!
What is in Season in July
There are so many fruits and vegetables in season during the summer. Some of the most popular summer produce that you can find fresh in your local grocery store or farmer's markets in the month of July include (click the links below for a list of recipes that we have using that ingredient):
Holidays in July
The big holiday this month in Canada is Canada Day on July 1st. In the United States, the big holiday is the Fourth of July, which is all about summer recipes and red, white, and blue food. Check out our favorite recipes to make to celebrate the occasion: 40 Best 4th of July Recipes.
Breakfast Recipes to Cook in July
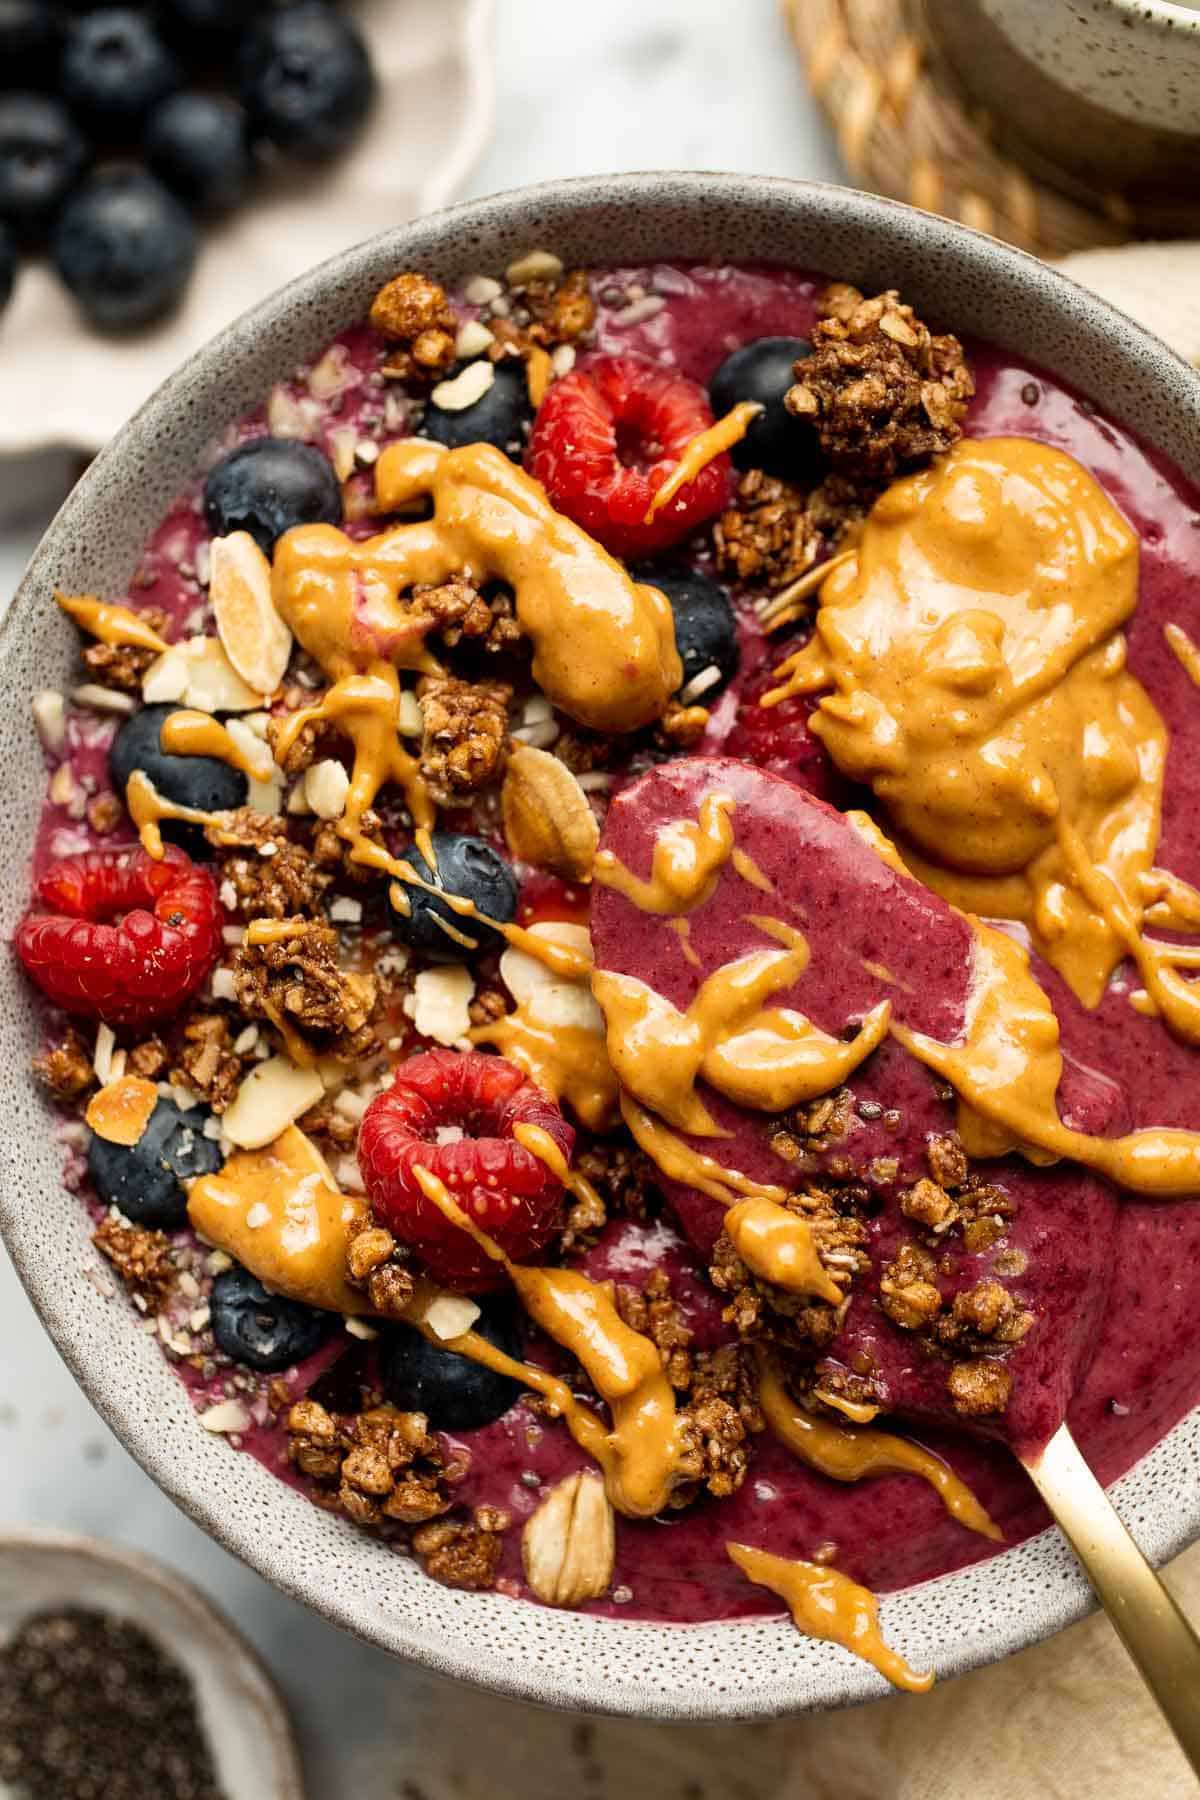 | 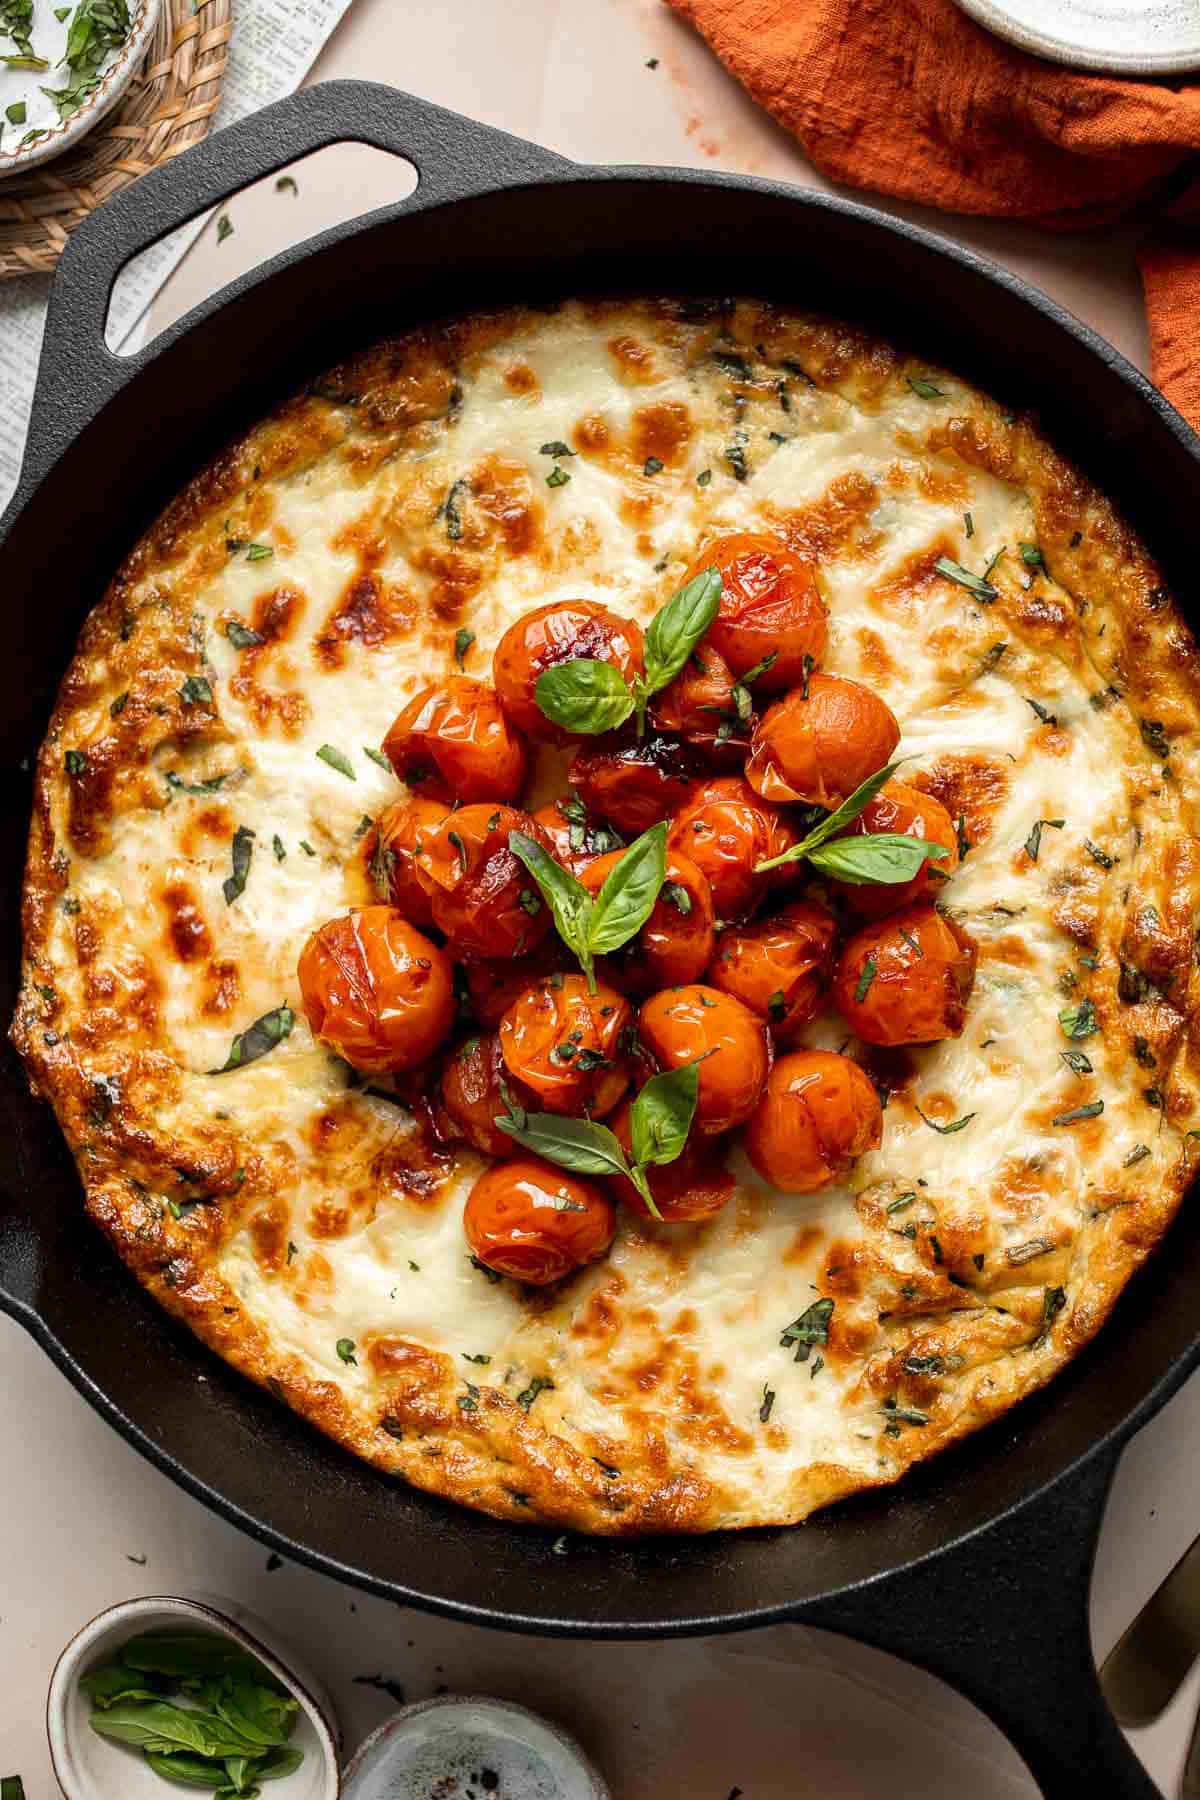 |
- Berry Smoothie Bowl. This Berry Smoothie Bowl is the best way to start the day. It's quick and easy to make, healthy, and packed with nutrients. Customize it with toppings!
- Caprese Frittata. Caprese Frittata is light and fluffy, laced with fresh basil and topped with melted mozzarella cheese and blistered balsamic tomatoes. Ready in 10 minutes!
- Chilaquiles Verdes. Chilaquiles Verdes feature crispy baked tortilla chips smothered in a homemade sauce loaded with salsa verde and features classic Mexican toppings.
- Blueberry Scones. Glazed lemon blueberry scones are total breakfast goals. Blueberries and lemon partner together in a light, tender and flakey scone, drizzled with a sweet lemon glaze that is nothing short of impressive.
- Shakshuka. Shakshuka is a quick and easy, one-pan Middle Eastern classic with a savory saucy tomato-vegetable base and perfectly poached eggs on top.
- Mango Yogurt Smoothie. Healthy mango yogurt smoothie is refreshing, delicious, and healthy. Loaded with tropical mangos and low-fat yogurt, it's the perfect breakfast on the go.
- Triple Berry French Toast. Triple berry french toast with warm slices of bread, creamy egg mixture, an overload of berries, and drizzled maple syrup on top.
- Tex Mex Egg Muffins. Tex Mex egg muffins are a delicious, filling, and healthy breakfast or snack. They are light and fluffy, perfect for meal prep, and freezer-friendly.
Lunch Recipes to Make in July
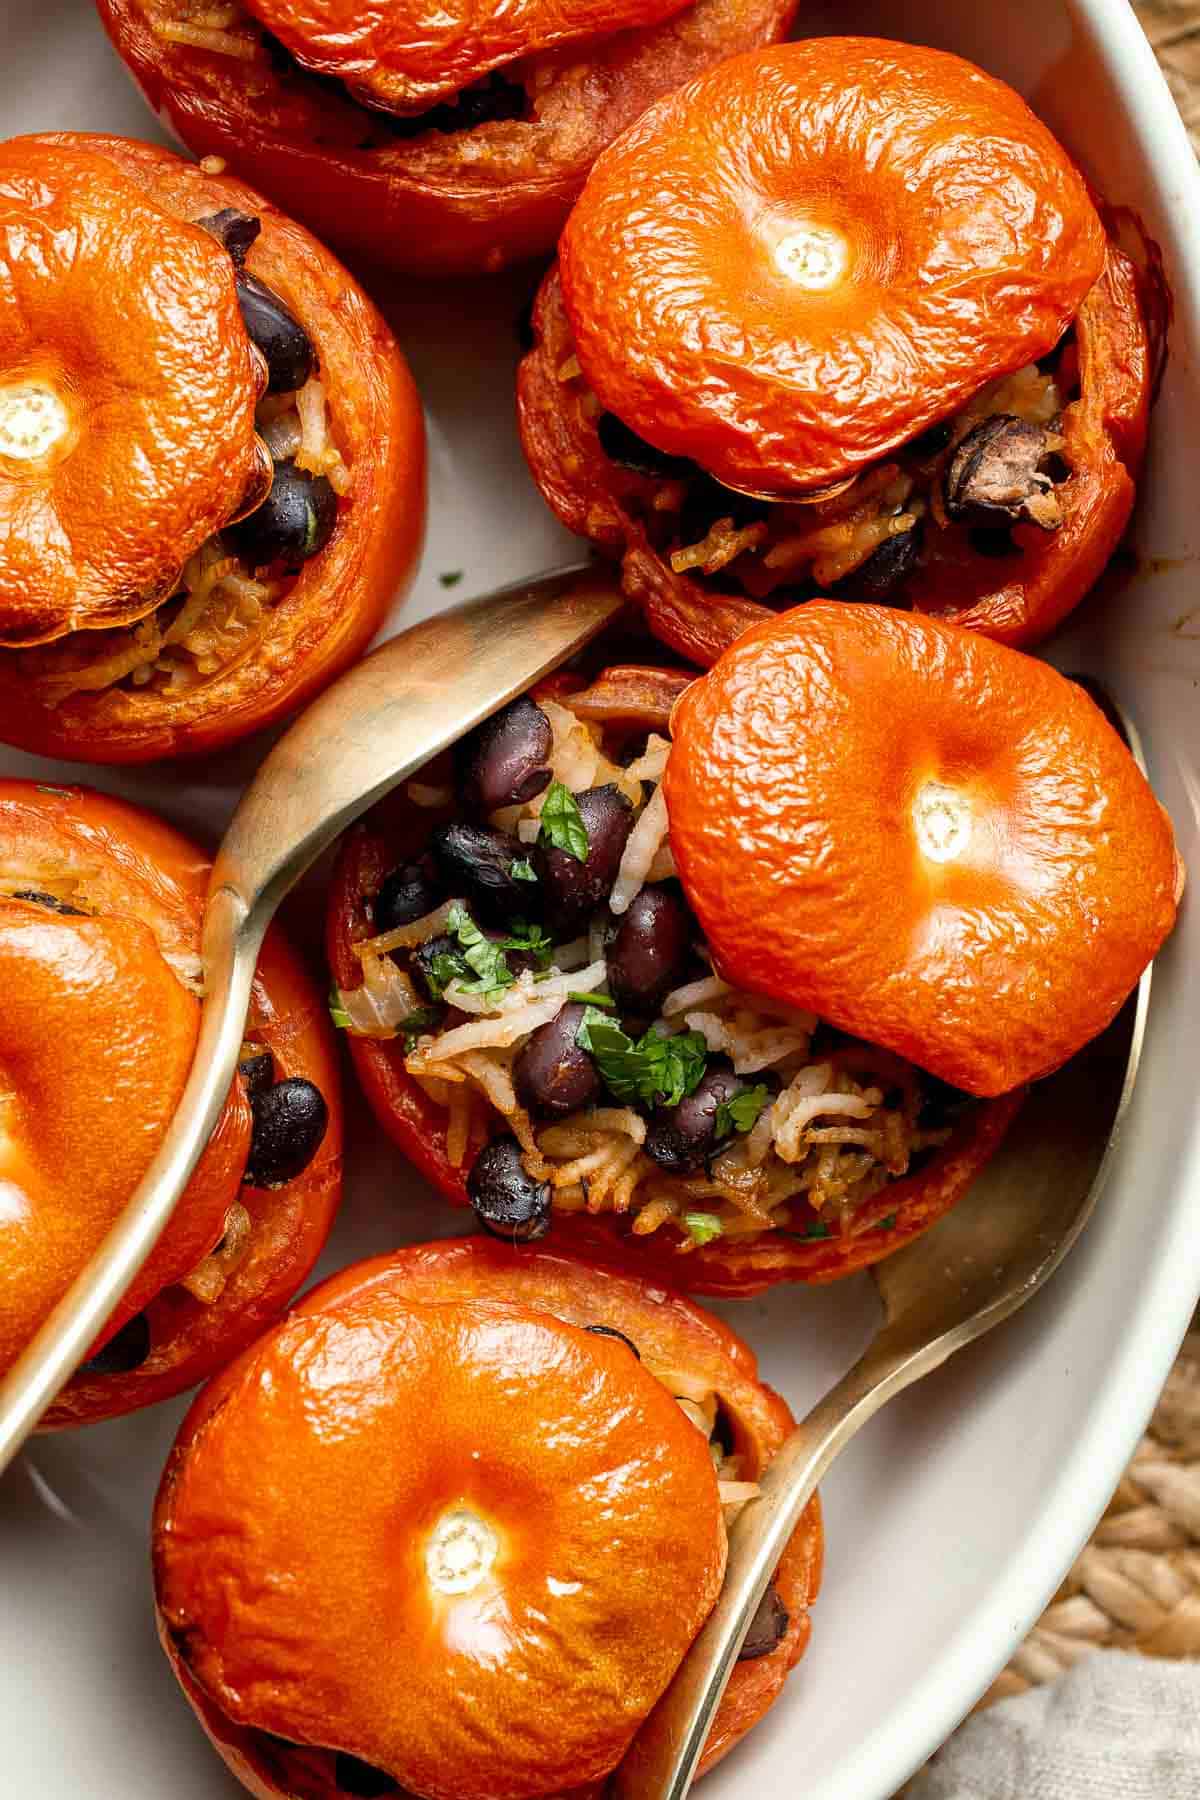 | 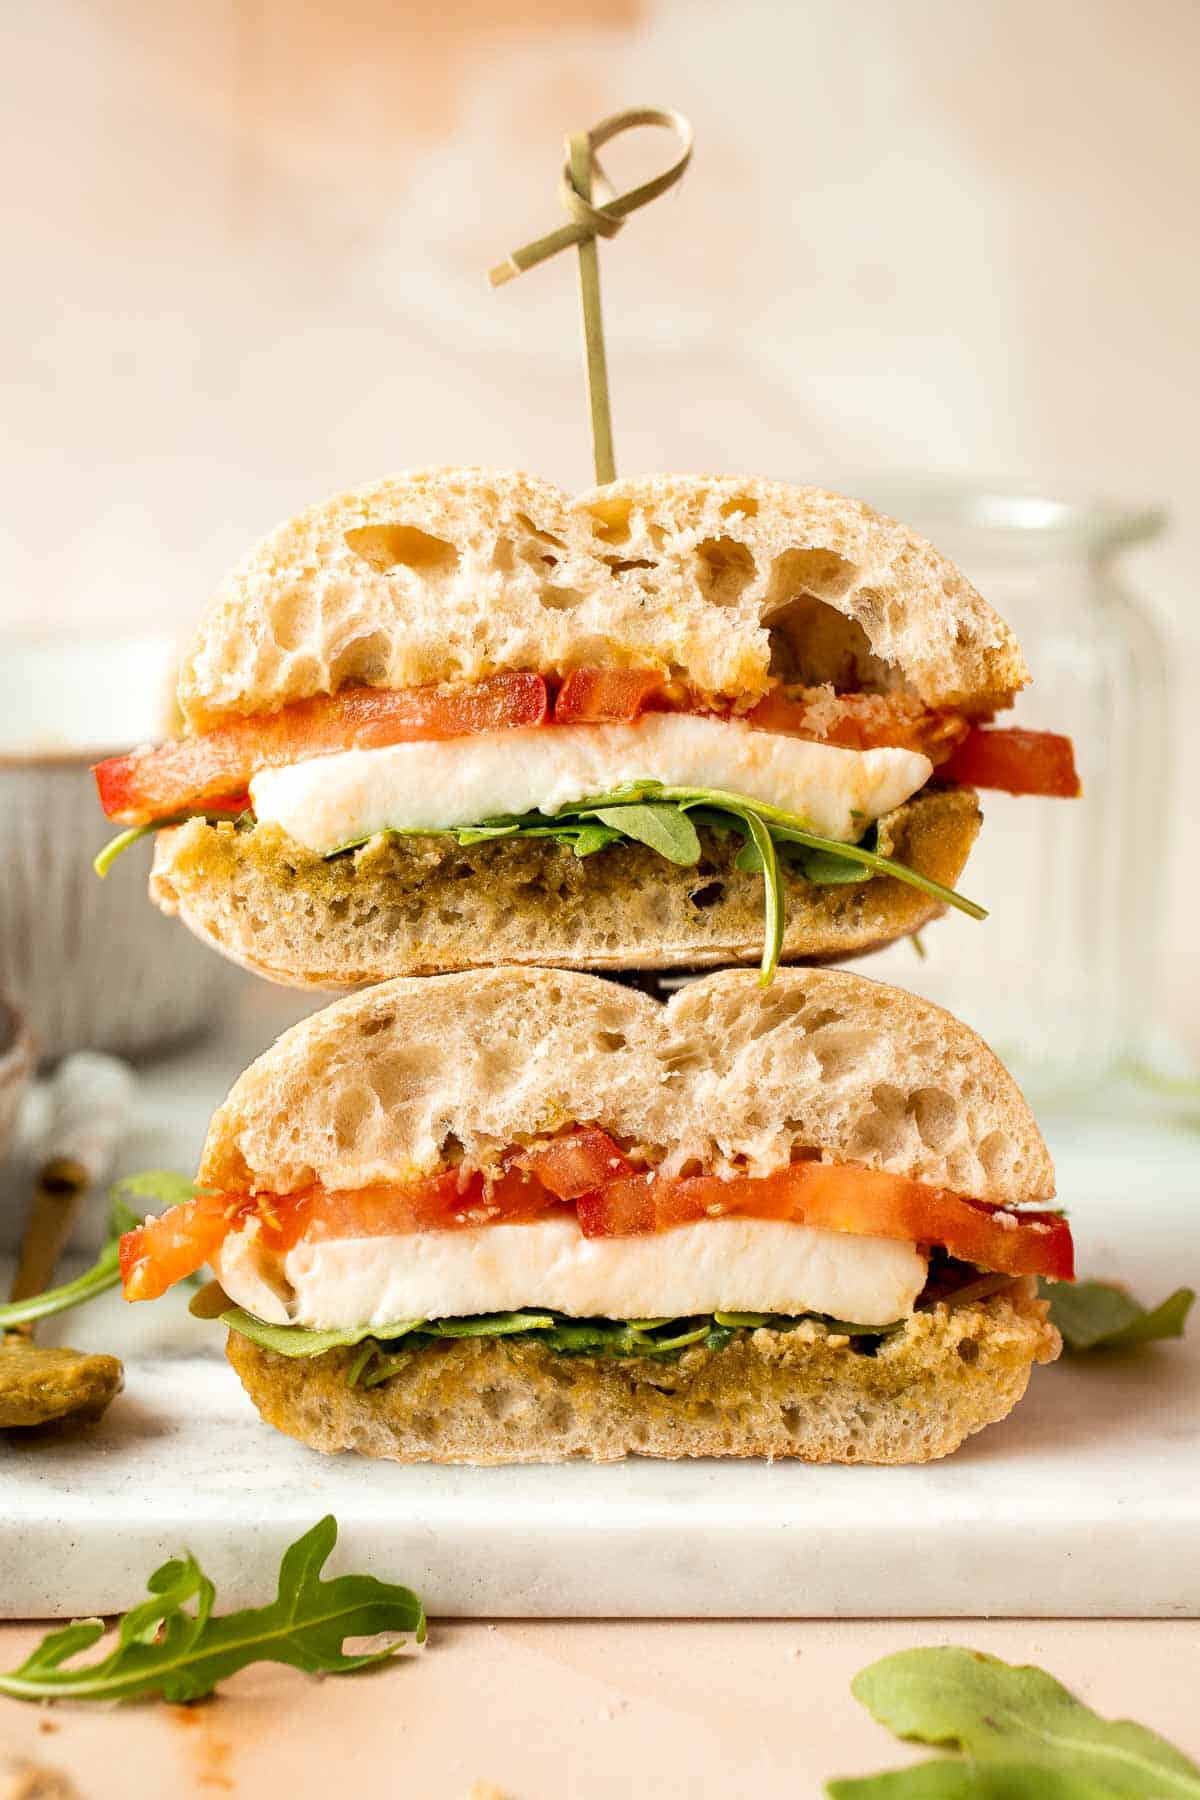 |
- Stuffed Tomatoes. Stuffed Tomatoes are a simple vegetarian meal made with fresh tomatoes stuffed with a comforting mixture of beans and rice, and baked to perfection.
- Caprese Sandwich. This vegetarian Caprese Sandwich is packed with layers of fresh tomatoes, mozzarella, greens, and a balsamic basil pesto sauce in between ciabatta buns.
- Italian Pasta Salad. Italian pasta salad is delicious, wholesome, and easy to make. Make it up to three days ahead for your summer picnics and cookouts. You can't get more classic than Italian Salad for lunch.
- Fish Tacos. Flavourful, easy fish tacos with lime crema is made with seasoned white fish, cabbage slaw, and lime sauce. It takes less than 25 minutes to prep and serve.
- Vietnamese Noodle Bowl with Chicken. Vietnamese noodle bowl with lemongrass chicken, fresh vegetables and herbs, tossed in a homemade Vietnamese sauce is healthy, delicious, light, and filling.
- Greek Chicken Gyros. This refreshing and light, easy Greek chicken gyros is packed with tender souvlaki chicken, Greek salad, and homemade tzatziki sauce, all wrapped in a pita.
- Cheeseburger Sliders. Easy Cheeseburger Sliders have the classic flavor of your favorite burgers in bite-size form without the fuss of forming or grilling a single burger patty!
- Asian Cold Noodle Salad. Flavorful, crispy, and crunchy, this Asian Cold Noodle Salad is made with noodles, vegetables, peanuts, and cilantro tossed in a homemade peanut dressing.
- Tomato Burrata Salad. Tomato Burrata Salad is made with ultra creamy burrata over a bed of marinated tomatoes and onions and a drizzle of fresh basil pesto on top. So fresh!
- Tofu Lettuce Wraps. Tofu Lettuce Wraps are filled with a vegan filling of tofu, veggies, and homemade peanut sauce for the best balance of textures and flavors.
- Ground Beef Stuffed Peppers. Ground beef stuffed peppers are delicious, healthy, and filling. Stuffed with beef rice and veggies, they're easy to make ahead and freezer-friendly.
Dinner Recipes to Cook in July
 |  |
- Greek Chicken Souvlaki Skewers. Easy Greek Chicken Souvlaki Skewers are marinated in garlic, herbs, and lemon for that classic Mediterranean flavour. Grill in under 15 minutes!
- Vegetable Orzo. This Vegetable Orzo is easy to make with seasonal vegetables that are roasted then topped with warm fluffy orzo, feta cheese, and fresh herbs.
- Classic Juicy Hamburgers. Better than the steakhouse, these classic juicy hamburgers are perfectly seasoned, so flavourful and delicious. Make them on the grill or on the stove.
- Shrimp Fajitas. Shrimp fajitas are healthy, flavorful, and delicious. This one skillet recipe is loaded with shrimp and vegetables and is ready in just 20 minutes.
- Baked Mediterranean Pasta. Baked Mediterranean pasta is simple, flavorful, and vibrant, loaded with fresh tomatoes, artichoke hearts, and olives, and topped with mozzarella cheese.
- Teriyaki Chicken Skewers with Pineapple. Juicy and tender Teriyaki Chicken Skewers with pineapple, bell peppers and red onions are sticky, sweet, savoury, and tangy. So flavourful and delicious.
- Garlic Butter Salmon. Tender, flaky, flavorful garlic butter salmon is well-seasoned, seared to perfection, and basted until juicy. Quick and easy to make in 20 minutes.
- Ratatouille. Ratatouille is a classic summer stew loaded with tender, flavorful vegetables smothered in a rich homemade tomato sauce. It is easy to make too!
- Mediterranean Chicken Patties. Delicious, moist and juicy Mediterranean chicken patties have everything you want in one bite: protein, veggies, herbs, and they're quick and easy to make. Serve it on it's own, with hamburger buns, or a side of Basmati rice.
- Italian Meatballs. Meatballs are probably my favorite of all ground beef recipes. These quick, easy homemade Italian meatballs are juicy, flavourful, and delicious, simmered in a rich and savoury tomato sauce. Make them in just 30 minutes.
Appetizers and Snacks to Make in July
 | 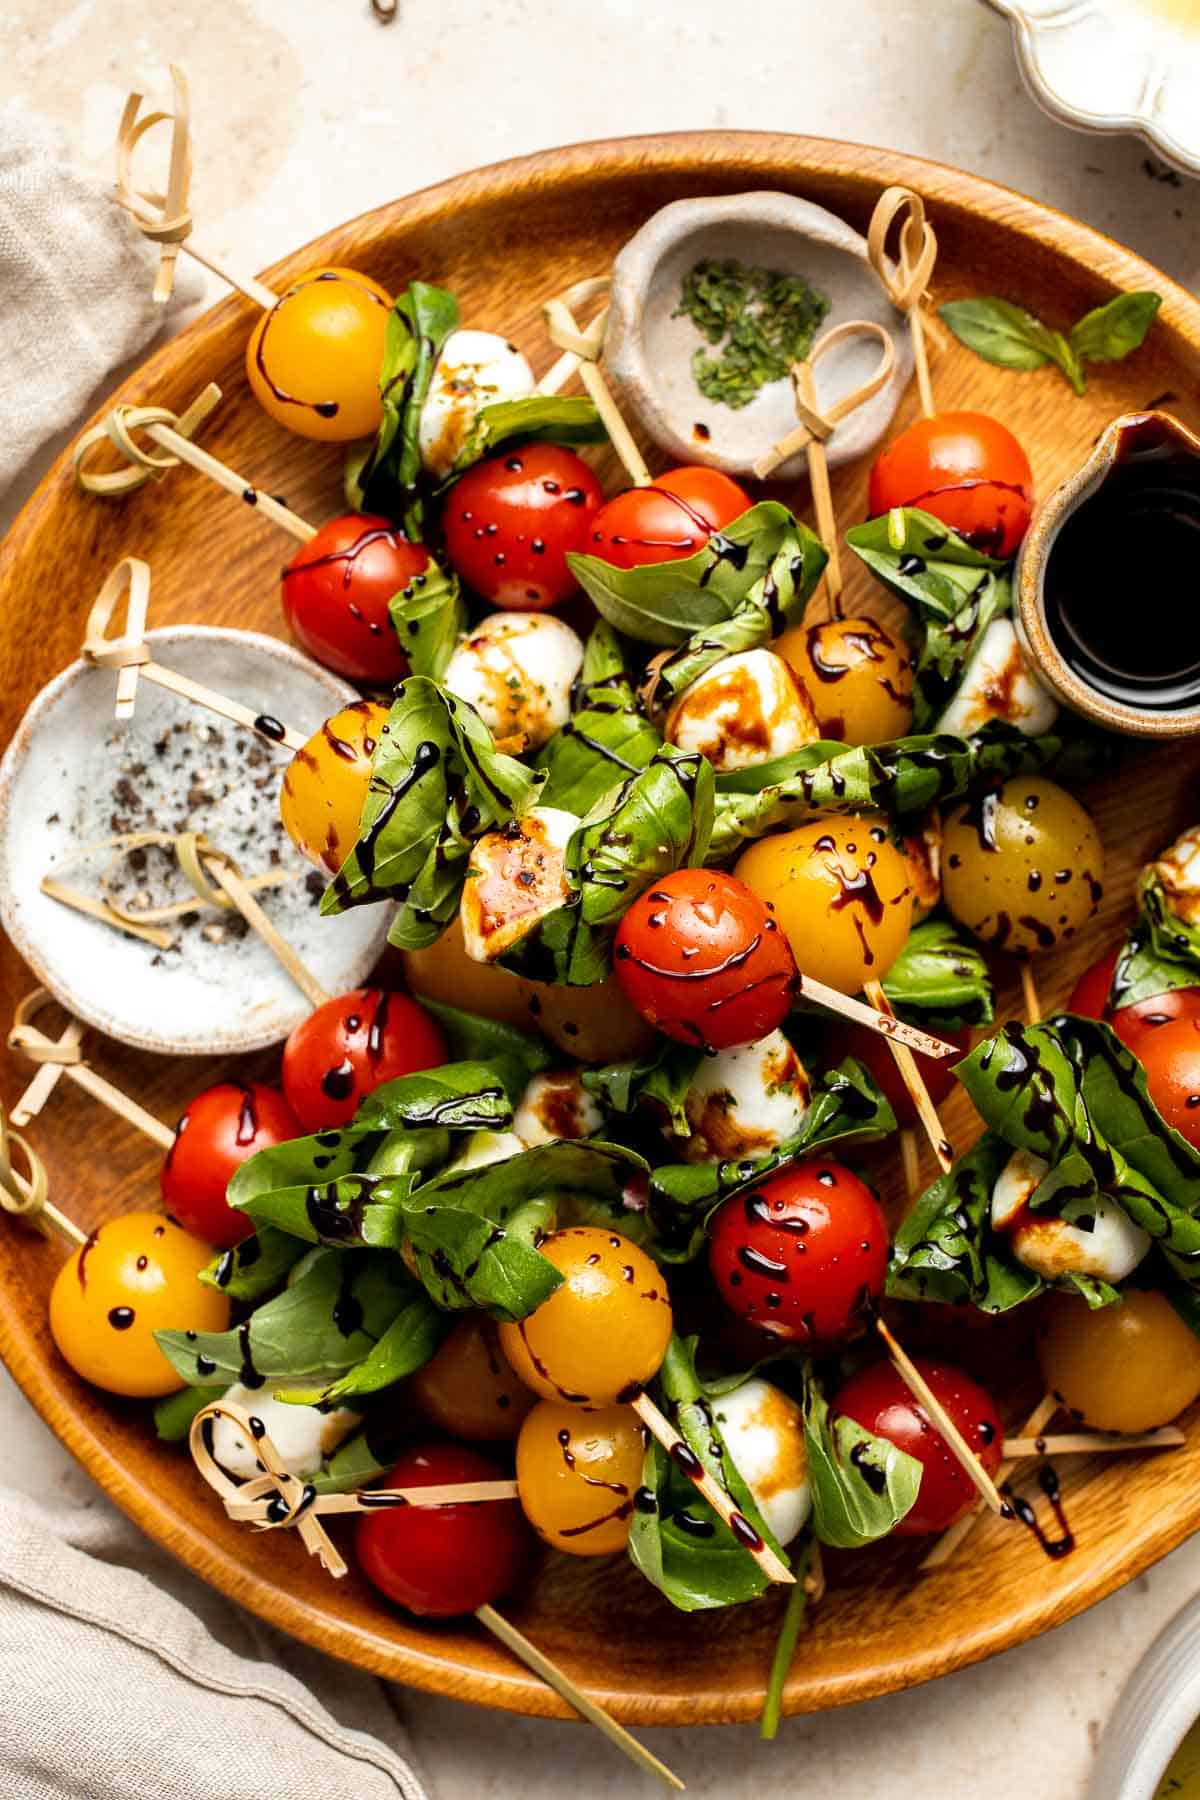 |
- Tomato Bruschetta. Tomato bruschetta with balsamic glaze is an easy Italian appetizer topped with tomatoes, onions, garlic, basil and olive oil. Delicious, fresh and simple.
- Caprese Skewers. Caprese Skewers are a quick and fresh appetizer made with bite-sized mozzarella, juicy tomatoes, and basil leaves with a drizzle of balsamic glaze.
- Vietnamese Salad Rolls. Fresh, light and healthy Vietnamese salad rolls are packed with vermicelli noodles, shrimp, fresh vegetables and herbs and dipped in homemade peanut sauce.
- Spanish Tortilla. This traditional Spanish Tortilla, also known as tortilla española or tortilla de patatas, is a popular egg and potato dish served across Spain.
- Vegetable Quesadillas. Vegetarian quesadillas are quick and easy, completely customizable, loaded with veggies and beans. Serve this kid-friendly Mexican meal for lunch or dinner.
- Homemade Fish Sticks. Quick easy baked homemade fish sticks are crispy on the outside, tender and flaky on the inside, and packed with flavor. Kid-friendly + freezer-friendly.
- Mango Salsa. Fresh mango salsa is sweet, tangy, and delicious. It's a quick and easy recipe that you can whip up with just 6 ingredients and in under 10 minutes.
- Greek Fries. Homemade Greek fries bring a Mediterranean twist on a classic side dish, crispy fries are topped with crumbled feta cheese, fresh parsley, and lime juice. | aheadofthyme.com
- Chicken Potstickers. Homemade Chicken Potstickers have a crispy shell on the outside with a burst of delicious chicken filling on the inside that's seasoned to perfection.
- Veggie Tray. This homemade veggie tray is a quick easy healthy snack or appetizer to make for your next party, with a variety of colorful vegetables and delicious dips.
Desserts to Bake in July
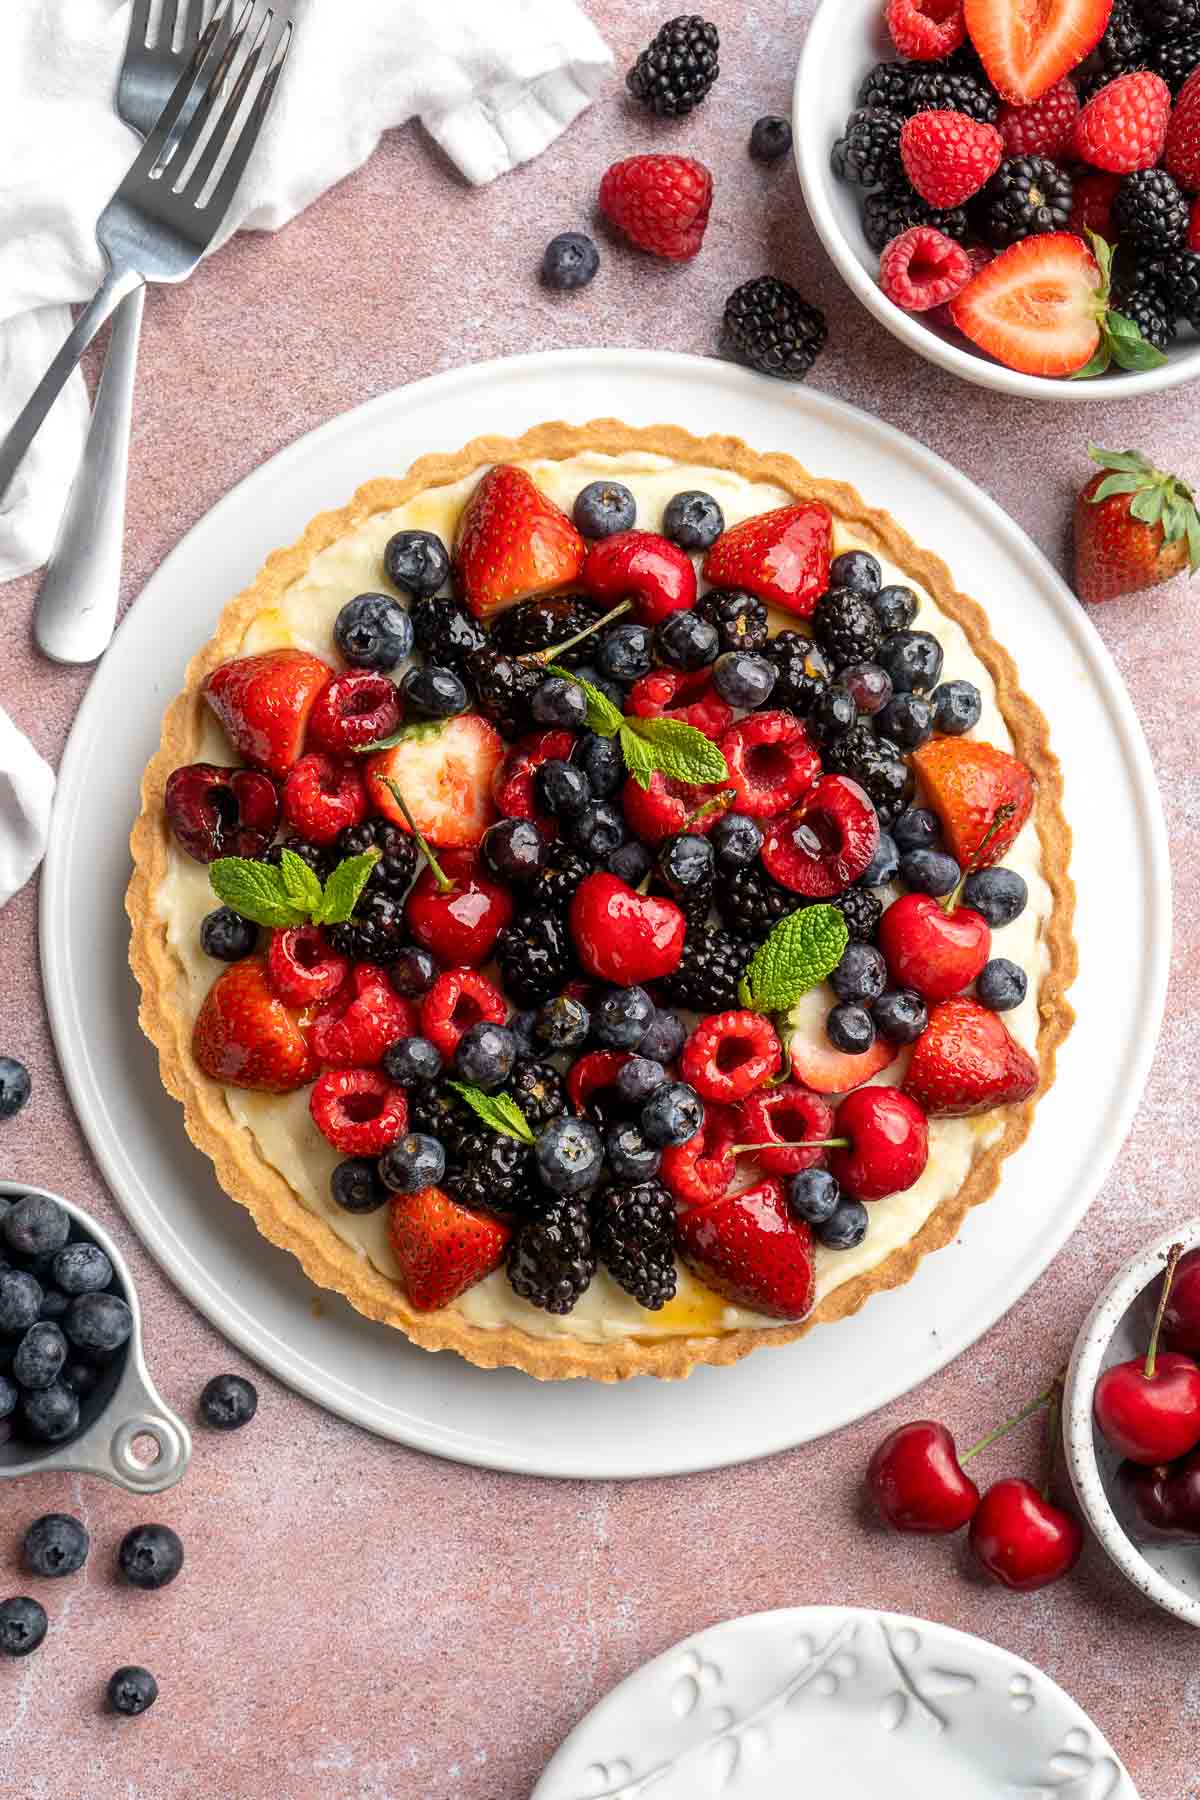 | 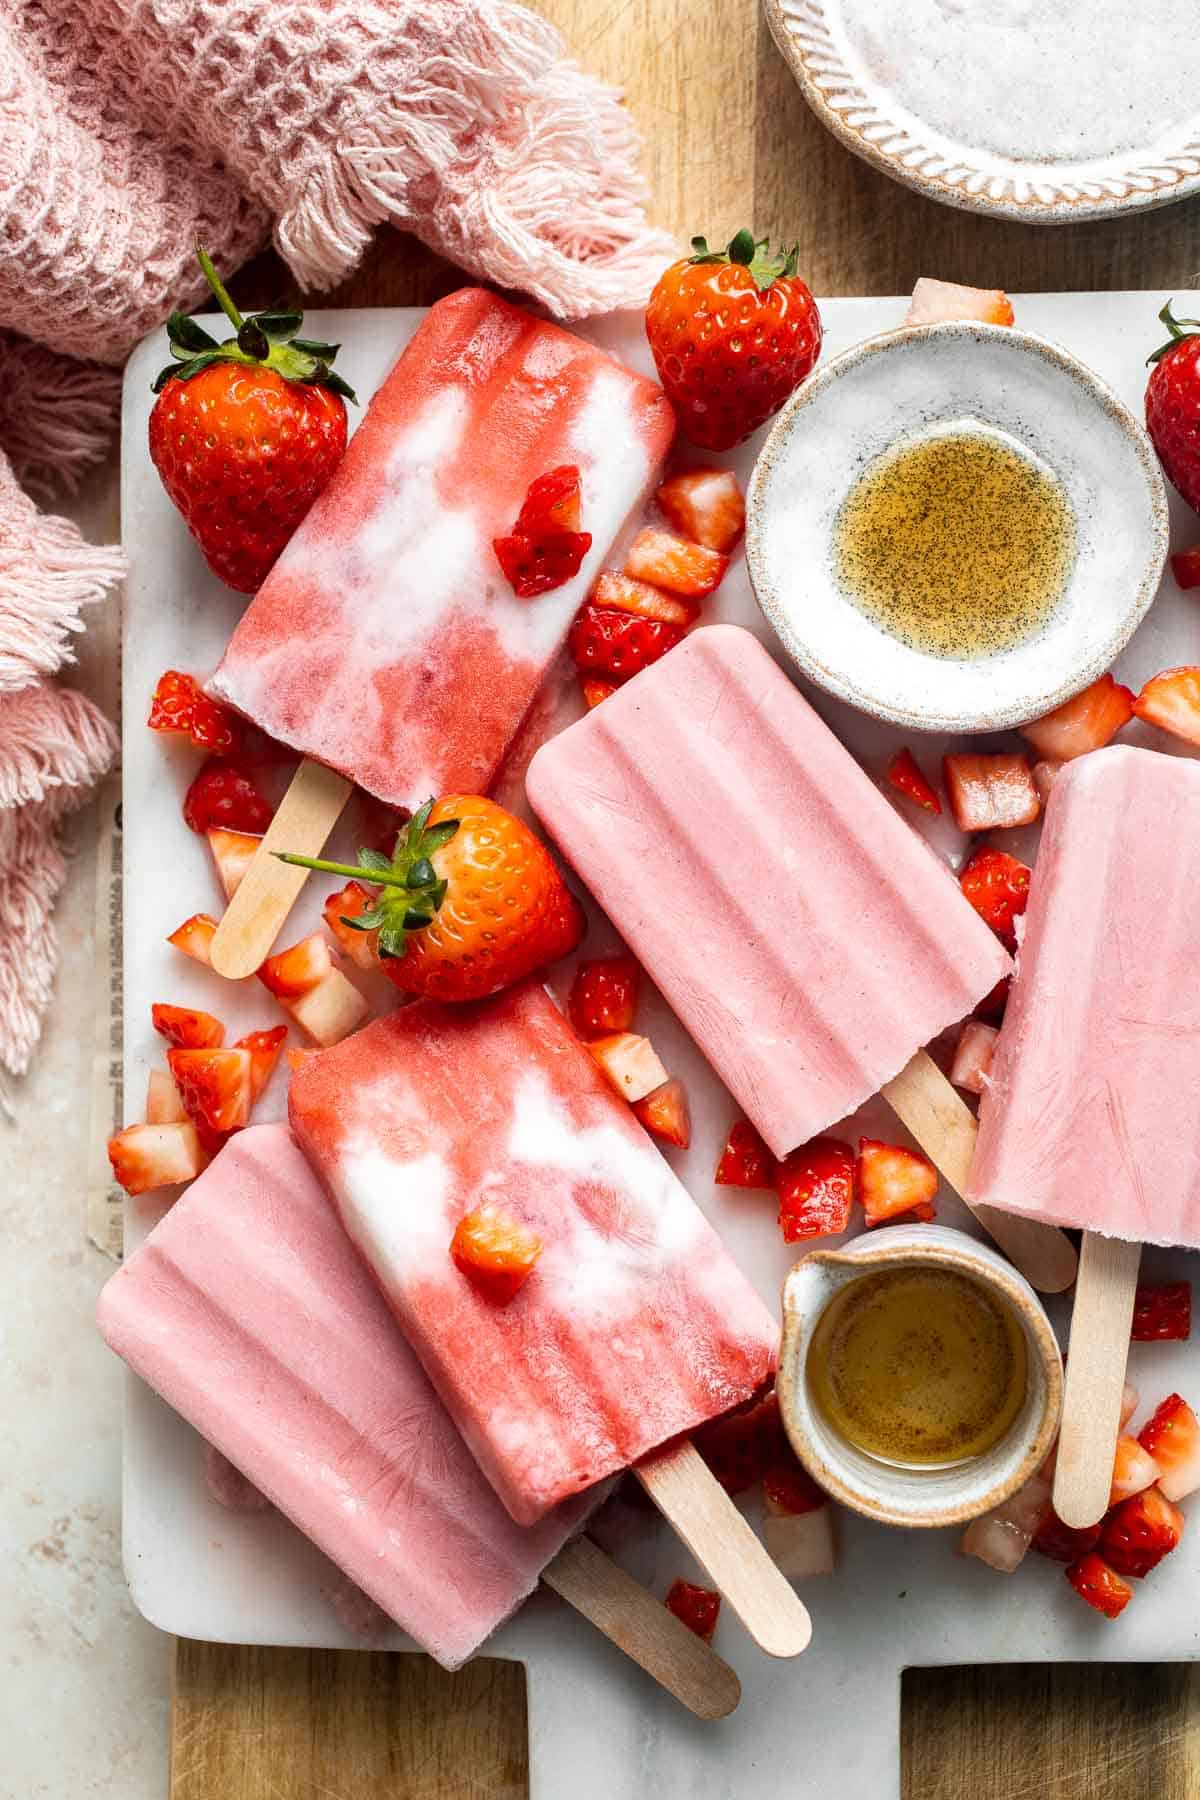 |
- Fresh Fruit Tart. This Fresh Fruit Tart is made with a homemade sugar cookie crust, filled with a sweet vanilla custard and topped with fresh seasonal fruit.
- Strawberries and Cream Popsicles. Homemade Strawberries and Cream Popsicles are healthy and easy to make using just four ingredients including fresh fruit.
- No Bake Blackberry Cheesecake. No bake blackberry cheesecake is light, smooth, creamy, and delicious, with a buttery graham cracker crust, cheesecake layer, and blackberry mousse on top.
- Lemon Meringue Pie. Lemon Meringue Pie made with delicate peaks of golden-brown meringue, creamy and tart lemon curd filling, and flaky pie crust is the best homemade pie ever!
- No Churn Vanilla Ice Cream. Sweet and creamy, this No Churn Vanilla Ice Cream recipe is the easiest way to make homemade ice cream - no ice cream maker required!
- S'mores Bars. S'mores Bars are a delicious twist on the classic campfire dessert with delicious layers of graham crackers, chocolate, and marshmallows.
- Lemon Blueberry Bread. Easy lemon blueberry bread with lemon glaze is soft, moist, and delicious. This quick bread with fresh blueberries and lemon is the perfect summer dessert.
- Mango Frozen Yogurt. Mango frozen yogurt is a healthy, creamy, fruity, and refreshing frozen treat that's easy to make in minutes with a few ingredients and no refined sugar.
- Peaches and Cream. Peaches and Cream is an old-fashioned, no bake dessert that is simple to make with layers of tender, stewed peaches and homemade whipped cream.
Did You Make Any of These Recipes to Cook in July?
Please leave a comment and rating below, and let me know what you thought of this round up of delicious recipes to cook this July. Be sure to snap a picture and tag me on Instagram @aheadofthyme or share it on the Pinterest pin so that I can follow along.
HUNGRY FOR MORE? Don't forget to sign up for my email newsletter so that you don't miss any recipes. You can also follow along on Instagram and Pinterest for more recipe updates.
Rhubarb Crisp
Old-fashioned Rhubarb Crisp is one of the coziest and most satisfying spring desserts. The sweet, tart rhubarb filling bubbles and pops in the oven under a crumbly, buttery crisp topping, and it will make your kitchen smell absolutely divine. Pair it with a scoop of Vanilla Ice Cream, and you'll understand why I look forward to rhubarb season all winter long!

I love fresh rhubarb with its mouth-puckering, lemony flavor and how it takes on the most beautiful pink color after baking! Although you can make a delicious crisp with any type of fruit, this homemade rhubarb crisp recipe is an extra special seasonal treat. The sweet topping and slightly sour filling are in perfect balance without ever becoming too sweet. Perfect for Easter, Mother's Day, or any spring gathering.
Why You'll Love This Rhubarb Crisp
- Such an easy recipe. Crisps and crumbles have been popular for centuries because they're both delicious and seriously easy to make! You don't need any fancy gadgets or equipment - just some cutting boards, bowls, and a baking dish. They're the ultimate low-tech dessert.
- Great balance of flavor. The buttery oat topping is a perfect match for the tangy rhubarb. I like to serve this crisp with a little ice cream, homemade custard, or whipped cream to take the whole dish over the top.
- Perfect spring dessert. Although rhubarb is often available throughout the summer, it tends to show up in early to late spring. As soon as the first stalks appear at the farmers market, I can't help but bring some home for this easy rhubarb crisp. It has a timeless, cozy flavor that is tasty enough to serve after a Sunday dinner. It's such a treat!

Ingredient Notes
To make this delicious Rhubarb Crisp, you will need the following ingredients (full measurements in recipe card below):
- rhubarb - wash the rhubarb stalks really well and cut them into small pieces.
- sugar - add a little white sugar to offset the tartness of the rhubarb. You also need brown sugar in the topping which adds extra flavor and a crunchy texture.
- flour - in the oven, the flour will gel with the rhubarb juice and thicken the filling.
- cinnamon - a little cinnamon makes every crisp taste better.
- oats - crisps are made with an oat topping. You'll get the best texture with old fashioned oats, not quick oats.
- butter - use softened butter or coconut oil to bring the crisp topping together.
You will also need measuring cups and spoon, mixing bowls, cutting board and knife, spatula, 9-inch square baking dish, cooking spray, and a wire rack.

How to Make the Best Rhubarb Crisp
- Make rhubarb filling. In a large mixing bowl, combine rhubarb, sugar, flour, and cinnamon. Gently toss to combine. Grease a 9-inch square baking pan with cooking oil spray. Set aside.
- Make oat topping. In another mixing bowl, combine rolled oats, flour, brown sugar, softened butter, and cinnamon. Stir together with a rubber spatula until combined.


- Assemble. Evenly distribute the rhubarb mixture into the greased pan. Evenly distribute the oat mixture on top of the rhubarb layer.


- Bake. Bake in a 375F preheated oven for 35 to 40 minutes until the top is lightly browned. Place on a wire cooling rack to cool down for 10 minutes.
- Serve. Serve in serving bowls topped with a scoop of vanilla ice cream.

Recipe Variations
- Add some strawberries. Strawberry rhubarb is a classic combination, and you could easily replace some of the rhubarb with fresh strawberry slices for a strawberry rhubarb crisp.
- Make it gluten-free. If you need to avoid gluten, replace the flour in the filling with a teaspoon or two of cornstarch and use a gluten-free flour replacement for the topping.
- Use frozen rhubarb. This can be hard to find in stores, but frozen rhubarb is a great option for rhubarb desserts. I recommend thawing the rhubarb first and then draining off any excess liquid. You may need to extend the baking time a few extra minutes.
How to Serve
This Rhubarb Crisp is delicious served on its own with a scoop of ice cream or a dollop of homemade whipped cream. It is also delicious as part of a larger dessert spread with some of my other favorites, including:
For more recipe ideas, see our 50 Best Spring Desserts or 40 Best Summer Desserts.

Recipe Tips and Tricks
- Try a food processor. One of the reasons why crisps are so popular is because you don't need to use any fancy gadgets. But if you have limited mobility or just need an alternative, you can very gently pulse the crisp topping together in a food processor. Be careful not to overmix, as you will break the oat pieces down too much. Another option is to pop the topping ingredients into the bowl of a stand mixer with a paddle attachment and mix on low until it forms coarse crumbles.
- Use fresh rhubarb. Check the cut end of the rhubarb to ensure freshness. If the end seems dried out, you may need to trim off an inch or two. It's best to use fresh, firm rhubarb.
- Don't eat the leaves. If you have a rhubarb plant at home, you probably already know that rhubarb leaves are toxic. To harvest rhubarb, you should pull the full stalk directly from the plant and then cut off the rhubarb leaves. Rinse the rhubarb stalks well before slicing to remove any dirt or bugs.
Storing and Freezing Instructions
How to Store
Once baked, let the rhubarb crisp sit at room temperature for a few hours and then cover with plastic wrap and store the leftovers in the fridge for 2-3 days.
How to Reheat
Crisps always taste best warm. If you're reheating a small portion, microwave your serving for 30 seconds or so until warmed through. If you want to warm a large serving for a crowd, place the entire baking dish back in the oven at 350 degrees for 5-10 minutes.
How to Freeze
Leftover rhubarb crisp can be frozen in a freezer-safe container for several months.
FAQ
That really depends on the size of your stalks. First, I usually trim a little bit from either end of the stalk as they can dry out in storage. Then, you'll want to trim the rhubarb into ½-inch pieces. For thick stalks, that may require slicing the stalk in half lengthwise and then cutting both halves into little bites.
Crisps use a thickener like flour or cornstarch to make the fruit filling nice and glossy. If you skipped that step, your crisp will be runny. It also continues to set up as it sits, so you may notice your crisp is extra runny right after baking. If you've used the proper amount of flour, just let the crisp rest a bit then check again later.
In general, peeling rhubarb is unnecessary, but it can be helpful during the height of summer when the stalks begin to dry out and become woody. The fresh, crisp stalks at the beginning of the season are lovely exactly as they are.
More Fruit Crisp Recipes
- Blueberry Crisp
- Strawberry Cobbler
- Strawberry Crumb Bars
- Individual Apple Crisp
- Easy Peach Cobbler
- Cherry Crumb Bars
Tried this recipe?
I'd love to hear what you think! Leave a comment and rating below to share your feedback. Your reviews help others discover this recipe and help me keep creating more free recipes for you. Snap a photo and tag me on social media @aheadofthyme too.

Greek Chicken Souvlaki Skewers
Bring out the grill because easy Greek Chicken Souvlaki Skewers are on the menu tonight! These classic skewers are marinated in a simple mixture of garlic, herbs, and lemon for that classic Mediterranean flavour we all know and love. Serve on its own with a side of Tzatziki Sauce or as part of a complete souvlaki meal with all the sides.
Souvlaki chicken skewers are the best addition to your summer cookout menu or weeknight dinners this season. It may even be the easiest recipe that you make all summer! But plan ahead as you do need to leave some time to allow the chicken to marinate, but then you will spend less than 15 minutes grilling!
Why You'll Love These Chicken Souvlaki Skewers
- Quick and easy summer meal. Although the chicken needs to marinate for a few hours, it's ready in just about 15 minutes on the grill - that's faster than takeout! Marinate it the night before for a very low-prep meal any night of the week. Great for entertaining, too!
- Don't heat up the kitchen. You know those days when it's just too hot to turn on the stove? Use the grill instead! These chicken souvlaki skewers are cooked on a hot grill and will be the star of the show in Greek salads, alongside your favorite summer salads, in warm pita bread with your favorite veggies and sauces, and more.
- Infused with flavor. The marinating process is key as it allows the olive oil, seasonings, lemon juice, and more to work their way deep inside the pieces of chicken. The marinade ingredients may be simple, but they are certainly effective. There's no dry, bland chicken here! This Greek chicken souvlaki recipe is a personal favorite, and I'd gladly enjoy these skewers several times per week!
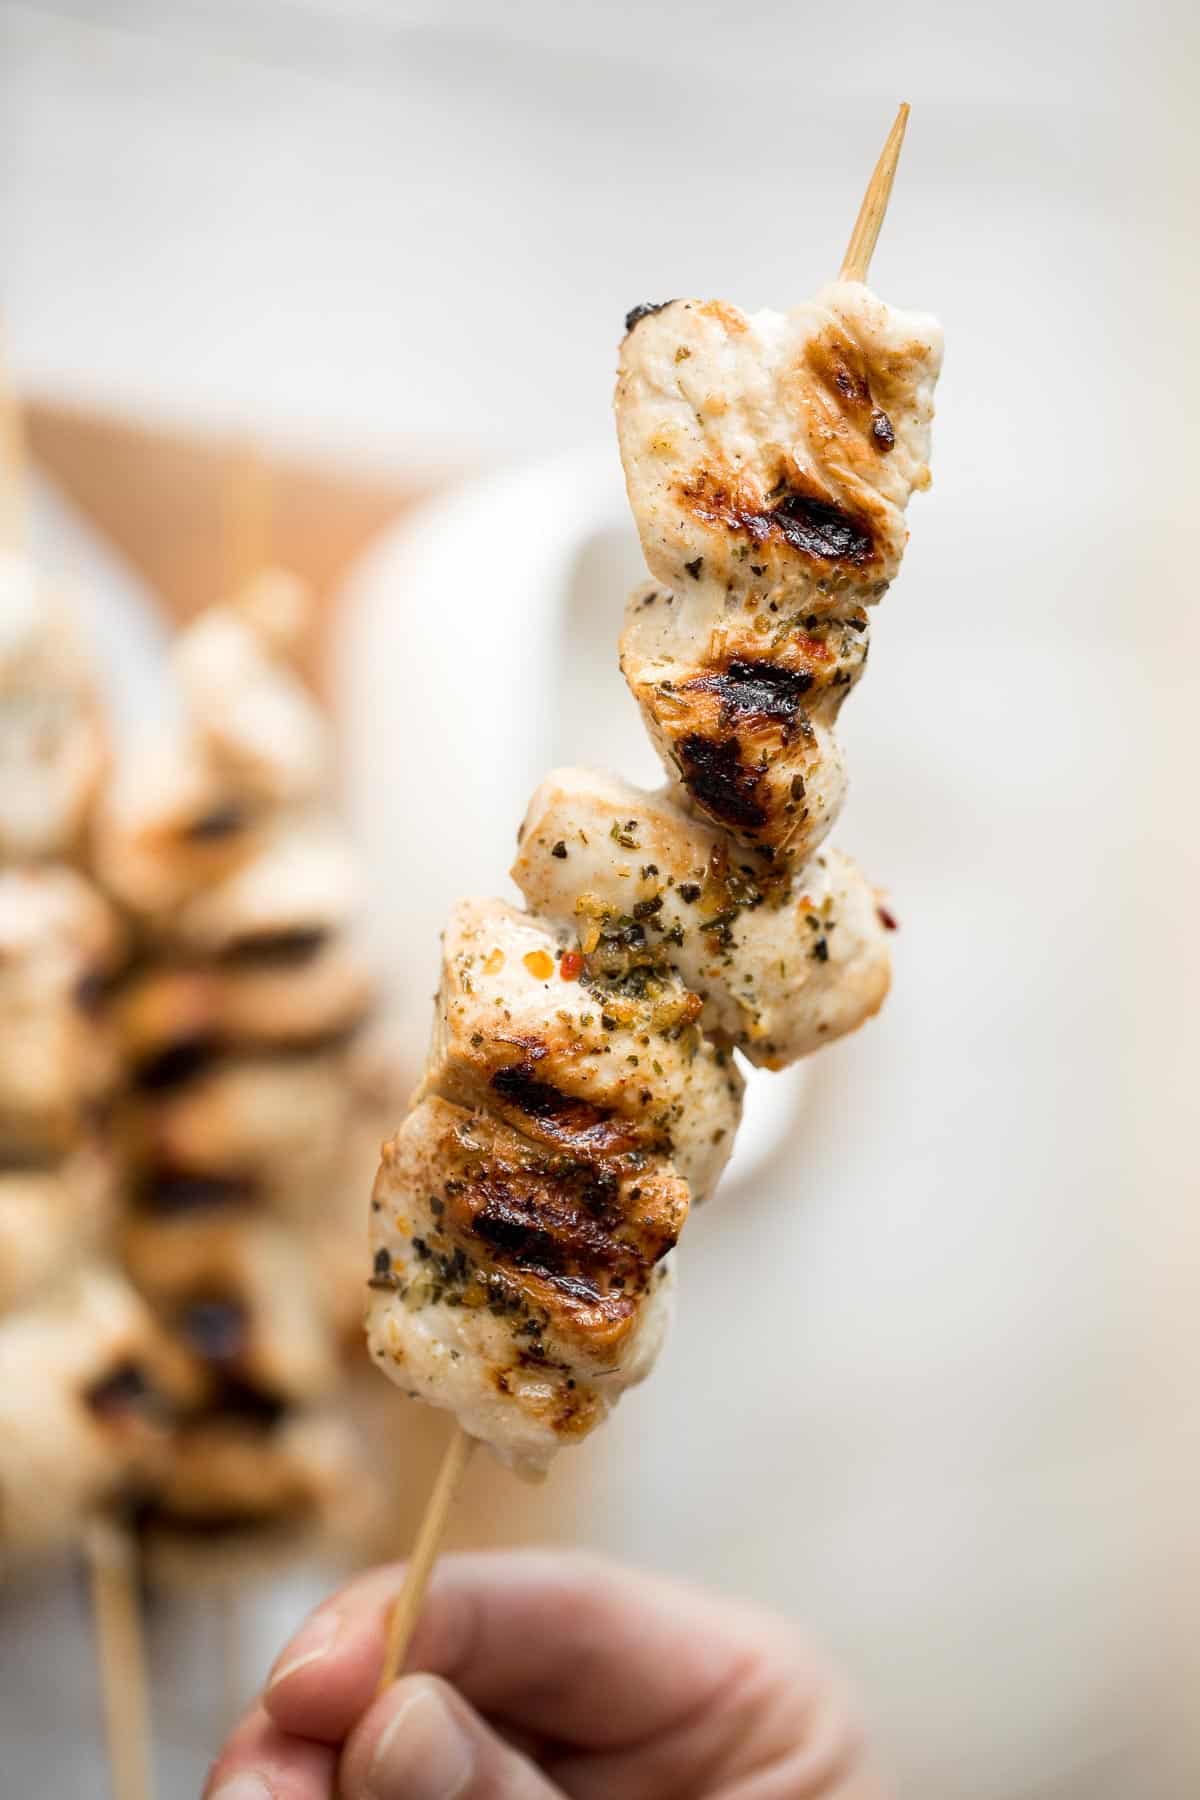
Ingredient Notes
To make this easy Chicken Souvlaki Skewers , you will need the following ingredients (full measurements in recipe card below):
- chicken breast - cut into 1 to 2-inch cubes for easy threading.
- souvlaki marinade - we make this easy marinade from scratch in just minutes using a combination of water, garlic, parsley, dill, honey (or sugar), salt, lemon, and bay leaves.
- salt and pepper - used to season the skewers. You can also add some Italiano seasoning, if desired.
- olive oil - for grilling.
You will also need measuring cups and spoons, skewers, tongs for grilling, and a grill (or an indoor grill pan.
How to Make the Best Greek Chicken Souvlaki Skewers
- Prepare the marinade. Add all of the ingredients for the chicken marinade into a small pot. Stir and bring to a boil. Turn off the heat and set aside to cool off for 1 hour. It should be cooled down completely.
- Marinate the chicken. Cut the chicken breasts into 1 to 2-inch thick cubes (I cut out 10 small cubes from each breast). Add the cubes into the marinade and let them soak in for 1 hour (up to overnight).
- Skewer the chicken. Drain the chicken pieces with a colander and remove excess marinade with paper towels. Thread the chicken onto skewers. Season with salt and pepper.
- Grill the skewers. Lightly brush olive oil over grill pan. Preheat the grill over medium high heat for about 5 minutes, until sizzling hot. Cook the chicken skewers for 7 minutes on each side or until its internal temperature reaches 165 F (75 C). Serve warm.
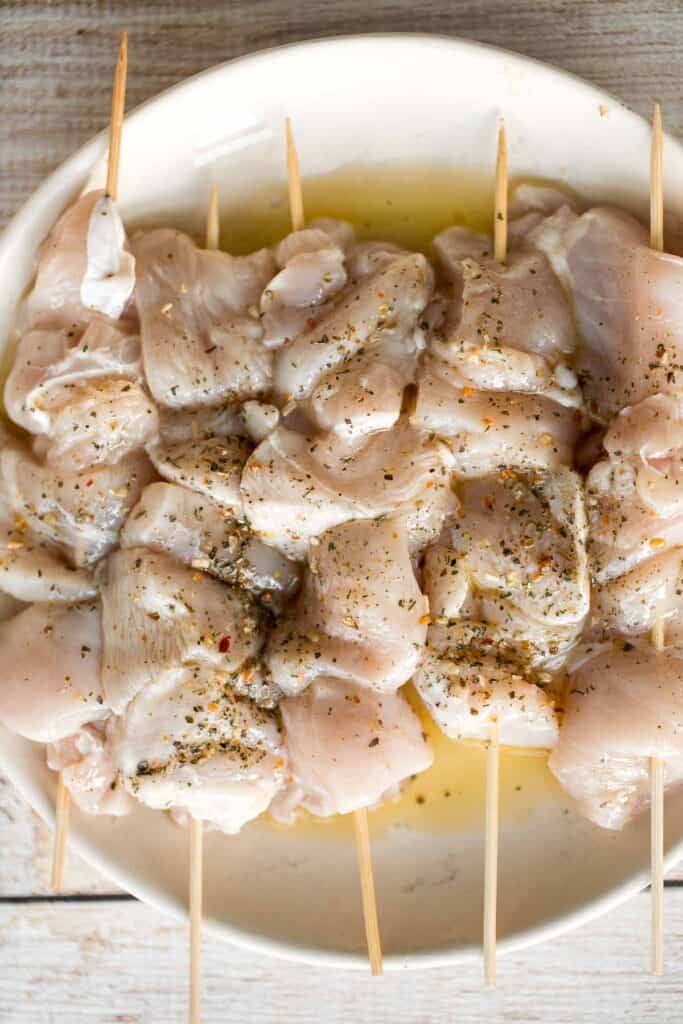
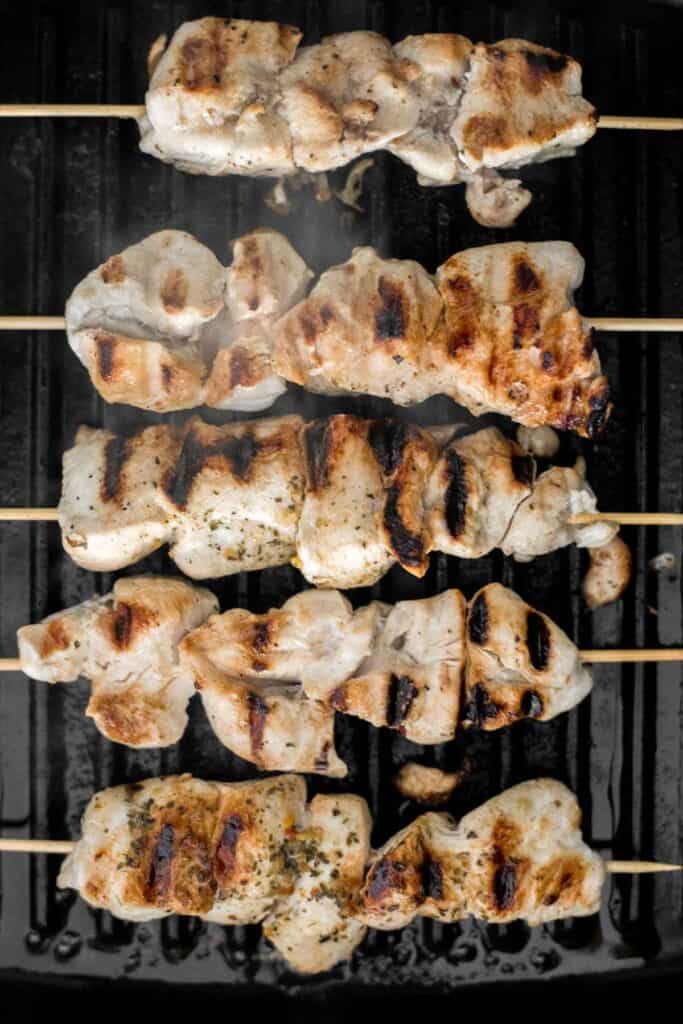
Step by Step Recipe Video
Recipe Variations
- Change the cut. I like to use boneless skinless chicken breasts, but the higher fat content in chicken thighs makes them extra tender and flavorful. Feel free to use turkey breast or other cuts of poultry if you'd like.
- Change the protein. I love Greek souvlaki and use a similar recipe to make Beef Souvlaki, Lamb Souvlaki, and more. The marinade ingredients change slightly depending on the protein, but they're very similar.
- Add some heat. Add a dollop of harissa paste to the marinade for a smoky, spicy flavor that pairs beautifully with the coolness of Tzatziki Sauce.
- Make a Greek gyro. Wrap these juicy skewers inside a pita and top with Greek Salad and a generous spoonful of homemade Tzatziki Sauce. For more tips, see our easy homemade Greek Chicken Gyros recipe.
How to Serve
Serve these chicken souvlaki skewers with a slather of tzatziki sauce on top. You can make your own homemade sauce in less than 5 minutes using Greek yogurt, cucumber, dill, garlic, lemon juice, olive oil, and salt and pepper. The sauce needs an hour to refrigerate to let the flavours infuse into the yogurt, so plan this while your chicken is marinating too.
I recommend serving this as a full souvlaki meal with all the classic sides including:
- Greek Lemon Roasted Baby Potatoes
- Pilaf Rice
- Greek Salad
- Mediterranean Roasted Vegetables
- Greek Fries
For more recipe ideas, see our 30 Best Greek Recipe
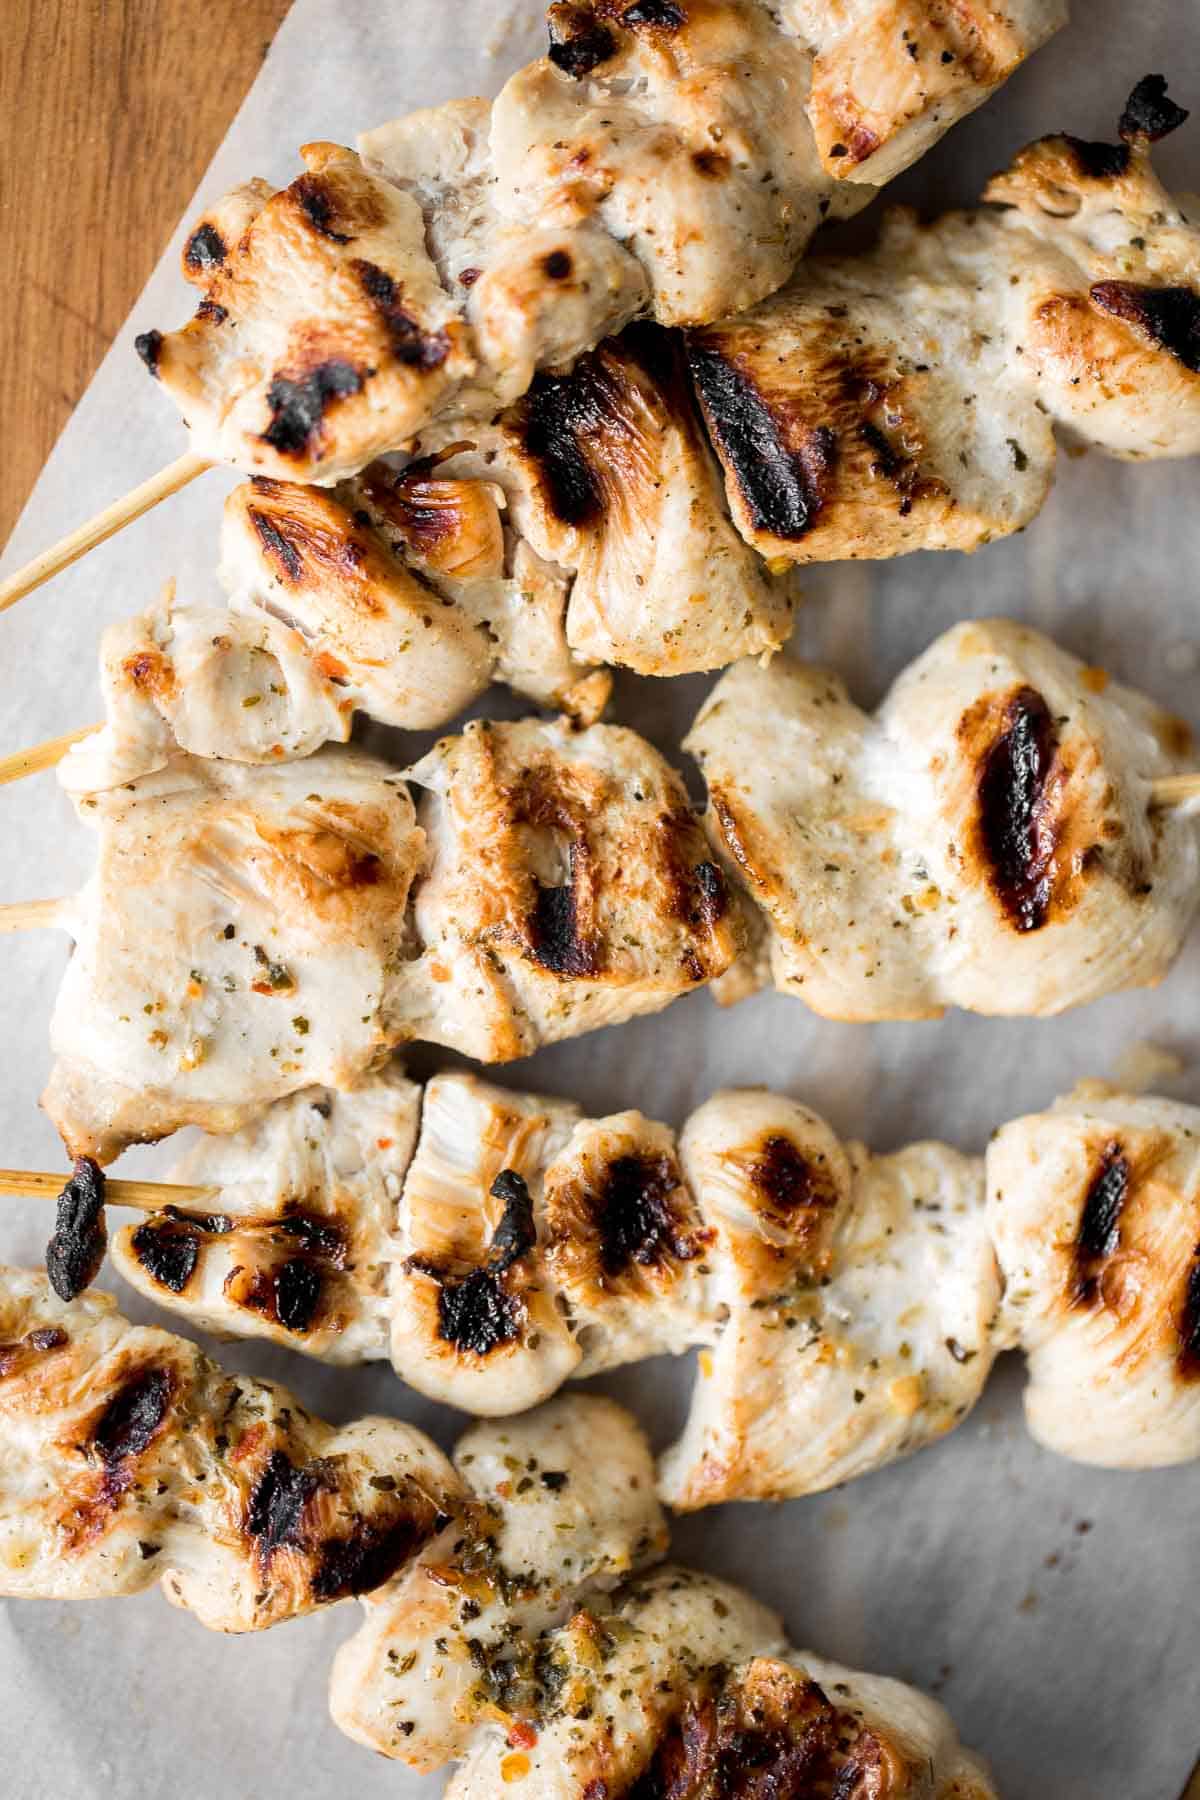
Recipe Tips and Tricks
- Marinate the chicken. It is crucial to let the chicken marinate at least for an hour to allow the flavours to infuse and for it to get juicier. If you are able to let it marinate even longer, it will taste that much better. I prefer letting it marinate overnight, if you have the time.
- Double up the recipe. This recipe that makes about 10 skewers. You can easily double or triple the recipe to feed a crowd.
- How to cook skewers in the oven instead. You can absolutely cook these skewers in the oven as well. This way you can cook them all year round. They just won't have those charred grill marks, but will still taste delicious. To bake, place skewers on a baking tray and roast at 480 F for 12-13 minutes, or when the internal temperature reaches 165 F. You can add some charring by then placing under the broiler on high for 1 minute. Keep a close eye on them, because they can burn quickly.
Storing Instructions
How to Store
Unthread the chicken souvlaki and store it in an airtight container for up to 3 days in the refrigerator.
How to Reheat
Reheat in the microwave until fully warmed through. You can also reheat in a preheated 325F oven for 10 minutes or air fryer for 5 minutes until warmed through.
How to Freeze
Unthread the chicken and place in an airtight container and freeze for 2-3 months. Thaw in the fridge before microwaving or popping into the oven to reheat.
FAQ
If you don't have a grill or it's too cold to grill outside, don't worry! This easy chicken souvlaki recipe is easy to bake in the oven, too. Roast the skewers for 12-13 minutes at 480 F and broil for 1 minute to add a little color. Delicious! If you're baking the chicken to serve over salads, you can skip the wooden skewers and arrange the bite-sized pieces right on the tray. If you're already preheating the oven, make a tray of Mediterranean roasted vegetables as well. The Greek flavors in the chicken taste great with the pesto-coated veggies.
The marinated chicken pieces have a slightly sweet, herby, garlicky, and lemony flavor with a little char from the grill. This flavor combination pairs well with a variety of sauces, salad dressings, and dips. I prefer to keep things simple and usually serve them with tzatziki sauce, homemade hummus, or with some fresh lemon wedges to squeeze on top right before serving. They also shine with Caesar dressing, tahini sauce, Greek salad dressing, and more.
Choosing the right size is key for any skewers and kabobs. If you cut the chicken cubes too small, they'll dry out quickly on the grill. If they're too large, they'll take forever to cook and won't be easy to eat on a skewer. Aim for 1 to 2-inch chunks and try to cut as consistently as possible. This will ensure that they all cook at the same time, and they'll be easy to bite right off the skewers.
More Chicken Skewer Recipes
- Teriyaki Chicken Skewers with Pineapple
- Chicken Satay Skewers with Peanut Sauce
- Persian Saffron Chicken Kebabs (Joojeh Kabob)
- Korean Chicken Skewers
- Balsamic Chicken Kabobs
- Tandoori Chicken Skewers
Tried this recipe?
I'd love to hear what you think! Leave a comment and rating below to share your feedback. Your reviews help others discover this recipe and help me keep creating more free recipes for you. Snap a photo and tag me on social media @aheadofthyme too.

Asian Cold Noodle Salad
Nothing screams summer more than a crispy, crunchy, Asian cold noodle salad, infused with cilantro and a peanut and lime dressing - so refreshing!
Inspired by my favorite Asian Cold Noodle Salad from the store, this homemade version has the same fresh flavors and crunchy textures that make it so light and refreshing. Tender chow mein noodles, fresh vegetables, chopped peanuts, and cilantro are tossed in a tangy peanut dressing that brings every bite to life. You'll want to keep a batch in the fridge for a delicious side dish or light dinner all summer long!

The gorgeous, vibrant colours make this salad such a beautiful addition to our dinner table. Plus, it tastes as good as it looks! But the absolute best part about this salad is that it tastes just as good the next day - if not better. All it needs is a quick re-toss because some of the dressing may have sunk to the bottom of the dish. So what that basically means is that you can take this colourful dish to work the next day. Not having to think about what I am going to prepare for lunch is a major win.
Why You'll Love This Asian Cold Noodle Salad
- Seriously refreshing. The cold noodles and crunchy veggies will fill you up without warming you up, but it's the creamy peanut sauce that really brings the dish together. It's savory, tangy, nutty, and slightly sweet all at the same time. Sometimes, it's the only thing I want to eat on a hot summer day!
- Perfect for entertaining. Like your favorite pasta salads, this Asian cold noodle salad is a great option for serving at picnics and potlucks! You don't have to worry about keeping it warm, and it will help cool you down from the summer heat.
- Great for meal prep. The cold noodles taste even better the next day after the creamy peanut sauce infuses into the noodles. Since the veggies will stay slightly crisp for a couple of days in the fridge, just can just give it a stir and serve!
Ingredient Notes
To make this easy Asian Cold Noodle Salad , you will need the following ingredients (full measurements in recipe card below):
- chow mein noodles - if you don't have chow mein noodles available at your local grocery store, don't worry. You can also use ramen noodles, spaghetti noodles, soba noodles, and more.
- veggies - slice up the cucumber and carrot into 2-inch thin strips.
- cilantro
- peanuts - you could also substitute with cashews or other nuts.
- peanut dressing - an easy dressing made homemade using peanut butter, soy sauce, rice vinegar, sesame oil, honey (or brown sugar if you want to keep the recipe vegan), lime juice, and garlic. You can also add in some red pepper powder for a spicy kick.
You will also need measuring cups and spoons, medium cooking pot, blender, and large serving bowl or mixing bowl.
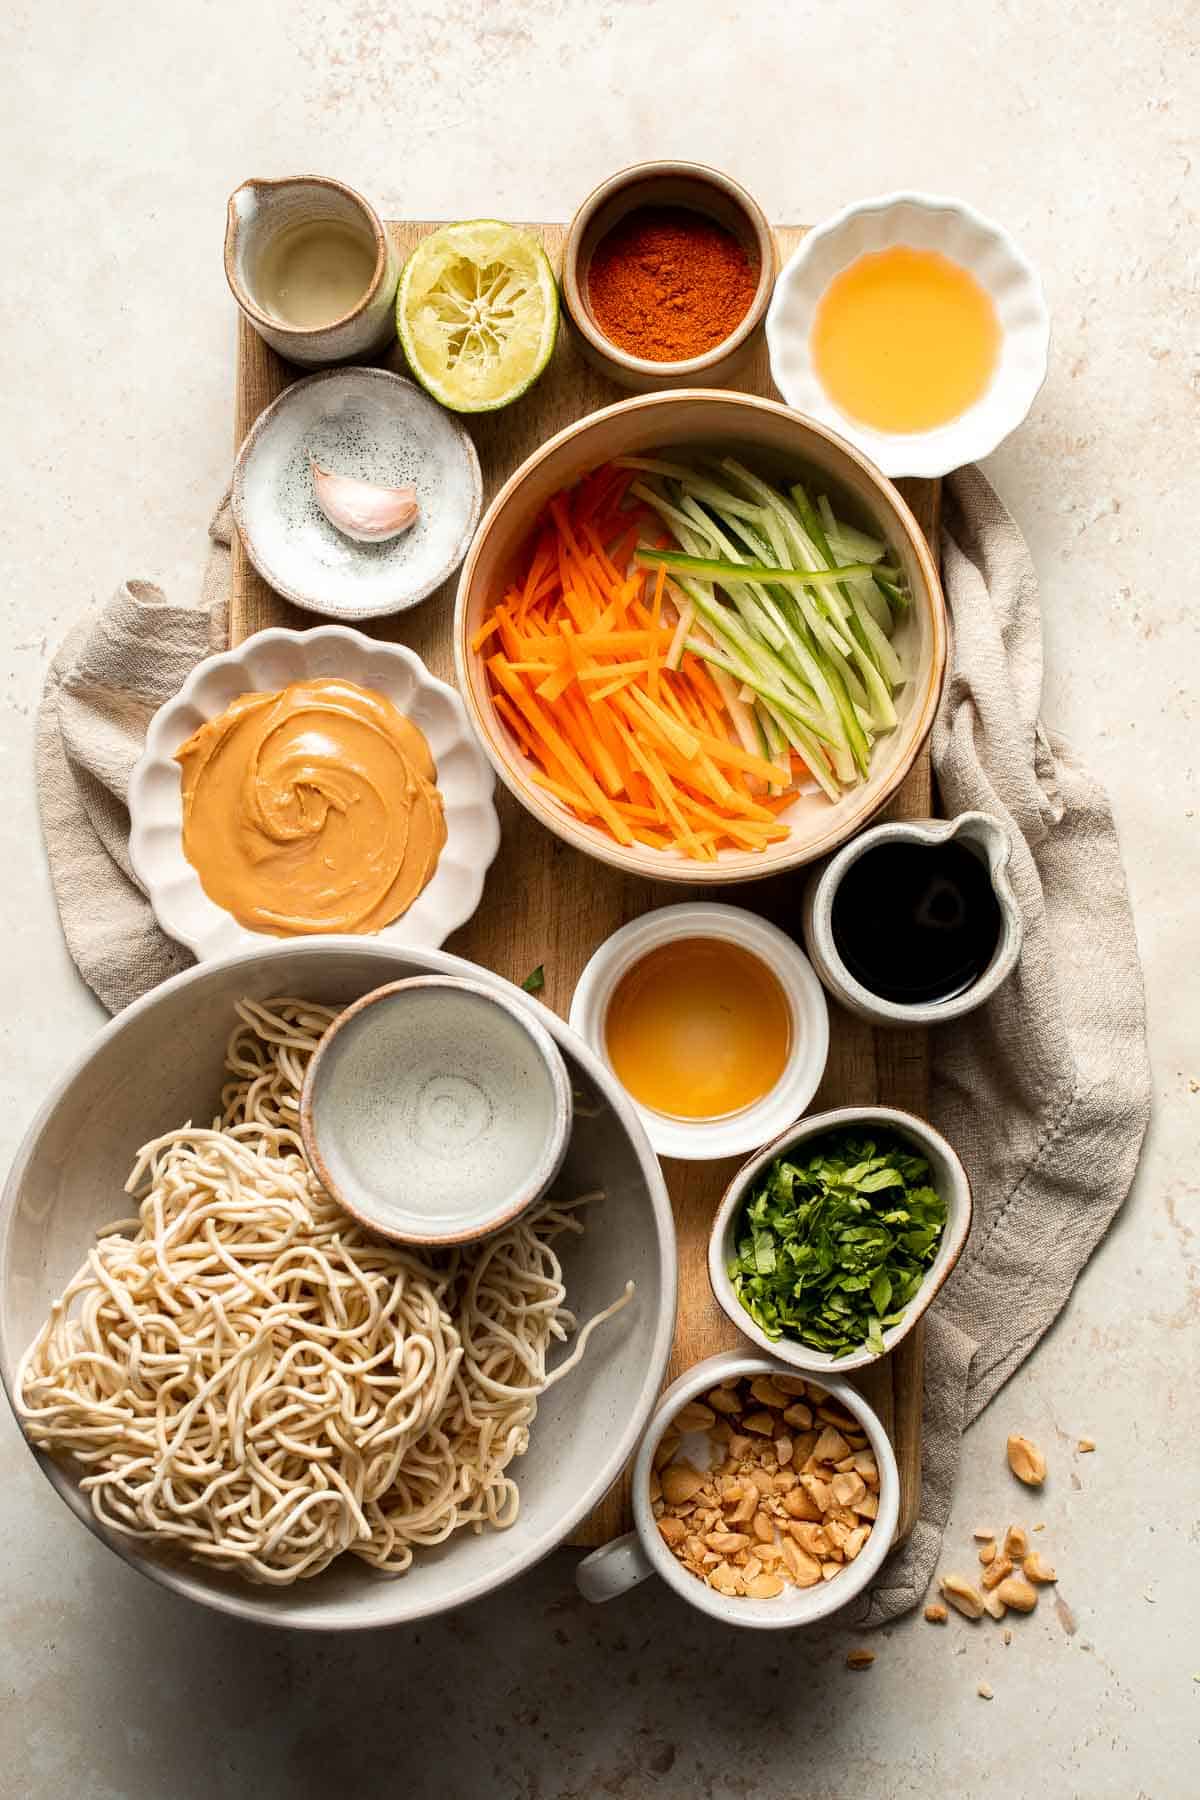
How to Make Asian Cold Noodle Salad
- Cook the noodles. Bring a medium pot of water to a boil and add the dry noodles. If the noodles you have used are not pre-cut into short pieces, use your hands to break them into smaller pieces, about 2-3 inches long (You could also cut them after cooking). Cook the noodles according to the package directions. Drain and rinse the noodles with cold water.


- Make dressing. Meanwhile, make the dressing by adding the peanut butter, soy sauce, rice vinegar, sesame oil, lime juice, honey, garlic, and red pepper powder (if using) in a blender. Blend until smooth.


- Combine. Transfer the drained noodles to a large serving bowl. Add the chopped cucumber, carrots, cilantro, and peanuts.


-

Step by Step Recipe Video
Recipe Variations
- Add more fresh veggies. Feel free to load up on even more crunchy veggies, like thinly sliced red cabbage, Napa cabbage, bell peppers, green onions, red onions, snap peas, and more. This is a great basic recipe you can adapt with the flavors of the season.
- Load up on protein. Make this delicious cold noodle salad into a main dish by adding a serving of Oven Baked Chicken Breast, Salmon Bites or Honey Garlic Shrimp on top.
- Go peanut-free. If you're allergic to peanuts, use cashews and cashew butter or almonds and almond butter.
How to Serve
This Asian Cold Noodle Salad is delicious served on its own as a light dinner or lunch, but is also great served as a side dish alongside some Asian main courses including:
- General Tso's Chicken
- Sweet and Sour Pork
- Beef and Broccoli Stir Fry
- Kung Pao Tofu
- Garlic Shrimp Stir Fry
- Orange Chicken
For more recipe ideas, see our 60 Chinese Takeout Recipes at Home.

Recipe Tips and Tricks
- Strain off any extra liquid. After rinsing the noodles, shake off as much of the excess water as you can. Otherwise, it will dilute the sauce and make your Asian noodle salad taste less flavorful.
- Slice the veggies into thin strips. The goal is to have thin pieces of veggies that can nestle in with the noodles for easy serving. Other shapes, like half-moon slices, will stick out and not be as easy to eat.
- Let the salad rest. You can serve this Asian noodle salad recipe right away, but the flavors will be even bolder if you let it rest for at least an hour.
- Save the peanut dressing. Make a big batch of the peanut dressing and use in other recipes throughout the week. It's great in other salads, stir-frys, or warm noodles. Just note that if you take a taste of the dressing on it owns (before it is mixed into the salad), it may taste a little strong. But do not be alarmed, once it is tossed into the salad, it balance out so well.
How to Store
Store this cold noodle salad in an airtight container in the refrigerator for up to 3-4 days.
FAQ
What sauce is best for Asian cold noodle salad?There are lots of different cold noodle recipes out there, but I prefer to make mine with a creamy peanut butter dressing. It has a tangy-sweet-spicy-umami flavor like your favorite Thai peanut sauce, and it's thick enough to coat every noodle. The best part is that it only requires a handful of pantry staples, so it's easy to make in a pinch!
What kind of noodles are best for cold peanut noodle salad?I prefer to use chow mein noodles, which have a square shape that adds a nice texture alongside the julienned carrots and cucumber strips. Really, though, you can use any type of noodle you'd like, even regular dried spaghetti noodles, buckwheat noodles, or even gluten-free brown rice noodles. Just be sure to choose noodles that are about the same thickness as spaghetti noodles and that are suitable for serving cold.
Do you have to rinse the noodles for cold noodle salad?Yes, all cold pasta salads require you to rinse the hot noodles under cold water, and for good reason. This process cools down the pasta quickly, so it won't overcook and become gummy in your dish. It also rinses off the starches from the outside of the noodles, so they're less likely to stick together. It's a key step in making any type of pasta salad, so don't skip it.
More Asian Salad Recipes
- 40 Best Salad Recipes
- Vegan Soba Noodle Salad
- Cold Noodles with Peanut Butter Sauce
- Asian Chopped Salad
- Thai Mango Salad
- Chinese Garlic Cucumber Salad
Tried this recipe?
I'd love to hear what you think! Leave a comment and rating below to share your feedback. Your reviews help others discover this recipe and help me keep creating more free recipes for you. Snap a photo and tag me on social media @aheadofthyme too.
Strawberries and Cream Popsicles
Nothing is more refreshing on a hot summer day than Strawberries and Cream Popsicles. They are healthy, vegan, and easy to make using just 4 ingredients! Blend fresh strawberries and layer them with a simple coconut milk mixture for a beautiful frozen treat. Or, if you are crunched for time, combine all the ingredients together to make creamy strawberry popsicles without layers.
Once you make homemade popsicles, you will never go back to the store-bought kind. Not only are these homemade strawberry popsicles pretty (almost too pretty to eat!), they don't have any refined sugar or other filler ingredients which is common in the store-bought variety. I mean, all these have are fresh fruit and can be sweetened if you want with natural sugar like maple syrup or honey.
Why You'll Love these Strawberries and Cream Popsicles
- Incredibly refreshing flavor. These homemade strawberries and cream popsicles are a fun twist on a timeless flavor combination. The strawberry mixture is the perfect balance of sweet and tart, and the cool, creamy coconut milk mellows it all out. They'll make you want to sit out on the porch and soak up the summer sun!
- Stunning presentation. The swirls of red and white always get a big reaction! They're pretty enough to serve at a potluck or summer party, but they're so flavorful you'll want to keep a stash of them in the freezer for yourself.
- Naturally sweetened and dairy-free. Unlike store-bought options, these homemade strawberry popsicles are made with pure, simple ingredients you can feel good about serving. There are just four total ingredients, including fresh ripe strawberries, honey or maple, canned coconut milk, and a little vanilla. No additives, dyes, gums, stabilizers, high fructose corn syrup, or other junk allowed!
Ingredient Notes
To make these delicious Strawberries and Cream Popsicles, you will need the following ingredients (full measurements in recipe card below):
- fresh strawberries - these will be blended into strawberry puree, so rinse, hull, and slice them.
- sweetener - choose any liquid sweetener you like. I recommend pure maple syrup or honey.
- coconut milk - use full-fat canned coconut milk for a smooth, creamy texture without the dairy. For a dairy version, feel free to use Greek yogurt.
- vanilla extract - this is entirely optional, but it adds an extra layer of flavor. Skip it for a non-alcoholic version.
You will also need measuring cups and spoons, a blender, a mixing bowl, a popsicle mold, and popsicle sticks.
How to Make the Best Strawberries and Cream Popsicles
First, make and fill the popsicle molds.
Method 1: Layered Strawberries and Cream Popsicles
- Prepare strawberry layer. Place 2 cups of the sliced strawberries into a blender. Add 4 tablespoons maple syrup and blend until combined. Set aside.
- Prepare coconut milk layer. Slice the remaining ½ cup of strawberries very thinly. Transfer into a large mixing bowl and add coconut milk, remaining 2 tablespoons maple syrup, and vanilla extract (if using). Stir to combine.
- Assemble. Scoop two tablespoons of strawberry puree mixture into each popsicle mold. Scoop two tablespoons of coconut milk mixture into each popsicle mold, leaving about ¼-inch space at the top. Repeat until popsicle molds are evenly filled to the top.
Method 2: Creamy Blended Popsicles
- Blend. Place all ingredients into a blender. Blend until smooth and creamy.
- Fill mold. Fill the popsicle molds with the strawberry mixture, leaving about ¼-inch space at the top.
Then, freeze and serve the popsicles.
- Freeze. Cover with the lid (if your popsicle mold has one), and add popsicle sticks halfway into each filled mold. Place molds in the freezer and freeze until set, at least 8 hours or overnight (recommended).
- Serve. Once popsicles are ready, run the mold under warm water for about 20 seconds to help loosen the popsicles and serve!
Recipe Variations
- Blend it all up. The two-tone color looks amazing, but if you're in a rush, feel free to blend the strawberry and coconut milk portions together into one creamy pink dream.
- Change the fruit. Play around with replacing some of the strawberries with your favorite fruits, like mango, raspberries, or blueberries. Make sure you keep the total quantities of fruit the same to get the right balance of flavor but have fun with it! You can also tuck a few larger pieces of strawberries into the popsicles for extra texture.
- Try different milks. Canned full-fat coconut milk has a really rich, creamy texture and a subtle coconut flavor that adds an extra layer of flavor to this recipe. If you aren't a fan of coconut milk, try using equal parts half-and-half and heavy cream. To keep them as dairy-free popsicles, look for other non-dairy milks with a richer consistency, like unsweetened oat milk coffee creamer.
- Drizzle with chocolate. For a more decadent dessert, drizzle melted white chocolate or dark chocolate over the bars after you remove them from the popsicle molds.
- Make them extra creamy. For a creamier texture, replace a small amount of the coconut milk with coconut cream. You won't need much - just a few tablespoons at most.
How to Serve
These Strawberries and Cream Popsicles are a delicious and refreshing treat to enjoy on a hot day. They are also a great treat to serve after a big BBQ or potluck, along with some of our other favorites
- Fresh Fruit Tart
- Classic Blueberry Pie
- S'mores Bars
- Strawberry Crumb Bars
- Key Lime Pie
- Lemon Bundt Cake
For more recipes, see our 40 Best Summer Desserts.
Recipe Tips and Tricks
- Freeze the sticks. If your popsicle mold requires wooden sticks, freeze for an hour first and then insert the sticks. This will keep them in place and prevent them from floating to the top. Then continue to freeze for another 7 hours or overnight.
- Freeze solid. You really can't rush the freezing process. If the popsicles aren't frozen solid, you'll have a mess trying to remove them from the molds. Be patient and let these creamy strawberry popsicles freeze all the way. (It helps to make them right before bed, so they're ready any time the next day!)
- Release with warm water. To remove the popsicles neatly from the mold, gently run them under warm water. Hot water will melt them too quickly. You want them to soften enough to pop them out of the mold. Less is more.
- Use seconds quality berries. Since you're blending the berries anyway, this is a great way to use up berries that are starting to get a little soft or have slight imperfections.
Storing Instructions
Homemade popsicles can easily become icy and freezer-burned if not properly stored. The secret is to freeze the popsicles until they are frozen solid, then wrap them in parchment paper or plastic wrap before storing them in a freezer bag or airtight container. It's best to have two layers of protection to keep them fresh for as long as possible. Try to eat them within 2-3 months, if you can make them last that long!
FAQ
Can you use frozen strawberries?Frozen strawberries are a great alternative to fresh in this easy recipe, as they can be used straight from the freezer. You'll need to blend them with your sweetener to break them into smaller pieces. If they are too firm to blend, let them rest on the counter at room temperature for 10-20 minutes to soften up slightly.
Do you have to sweeten homemade strawberry popsicles?That's entirely up to you. Personally, I find that adding a little maple syrup balances the tartness of the strawberries, and the coconut milk needs it to stand on its own. If you want to skip the sweetener entirely, it's best to blend the strawberries and coconut milk together and make creamy popsicles instead of separating out the two sections.
Which molds are best for making your own popsicles?There are lots of options out there, but I'm a huge fan of this popsicle mold. It has a classic popsicle shape, can make 10 popsicles at once, and it's easy to tuck in the freezer. Plus, it's surprisingly durable! We've used it dozens of times and have had no issues with the mold breaking or cracking. You will need to keep a stash of popsicle sticks on hand, but those are very inexpensive and easy to buy, even at the grocery store. The price is great, too!
More Frozen Dessert Recipes
- Strawberry Popsicles
- No Churn Vanilla Ice Cream
- Watermelon Sorbet
- Mango Frozen Yogurt
- Blackberry Milkshake
- Strawberry Sorbet
Tried this recipe?
I'd love to hear what you think! Leave a comment and rating below to share your feedback. Your reviews help others discover this recipe and help me keep creating more free recipes for you. Snap a photo and tag me on social media @aheadofthyme too.
Spanish Tortilla (Tortilla de Patatas)
This traditional Spanish Tortilla, also known as tortilla española or tortilla de patatas, is a popular egg and potato dish served at cafes, restaurants, and tapas bars across Spain. It's basically a thick potato omelet that is pan-fried until golden brown, then served in thick slices.

Spanish tortilla is a popular breakfast choice but can be served for lunch, dinner, or a snack any time of day when you're looking for something quick and filling. It's ready in just over half an hour and can be served warm, at room temperature, or eaten as cold leftovers. Tortilla de patatas is a big hit with families and anyone looking for a nourishing, comforting meal in a hurry.
Why You'll Love this Spanish Tortilla
- Authentic Spanish-style omelet. This tortilla de patatas recipe is authentic to the classic any-time dish that you might have in Spain if you traveled there. It's a simple dish that is enjoyed all over the country, and now you can bring it home with you!
- Only 5 ingredients. Making Spanish tortilla from scratch is incredibly straightforward and uses just five common household ingredients: eggs, potatoes, onions, olive oil, and salt. That's all! It's an ideal meal for when you're in between grocery shopping trips and need to make do with the staples.
- Quick and easy. Make this Spanish tortilla recipe in just 35 minutes! Layers of sautéed onions and potato slices are held together by soft beaten eggs, get pan-fried to a solid, custardy consistency, and sliced to feed a handful of people.
- Great for any time of day. Spanish tortilla is incredibly versatile and can be eaten for breakfast, brunch, lunch, dinner, or as an afternoon snack! It also makes a great appetizer for big events or to hold over hungry guests while you're whipping up dinner. A go recipe!
- Serve it Spanish style. Tortilla española is filling and satisfying on its own but especially well-suited to pair with briny olives, cured meats, and other tapas dishes. Serve it as an appetizer before a nice seafood or chicken paella, or try it as an open-faced omelet at your next brunch with a side of salsa!
Ingredient Notes
To make this delicious Spanish Tortilla, you will need the following ingredients (full measurements in recipe card below):
- extra virgin olive oil - you can also use avocado oil if you need a substitute.
- Yukon gold potatoes - if you don't have Yukon gold potatoes handy, try a fingerling variety or a red potato instead.
- yellow onion - if you don't have any yellow onions, use sweet onions, white onions, or shallots instead.
- eggs - whole eggs are recommended, but you can use 8 egg whites instead if preferred.
- salt
You will also need measuring cups and spoons, a sharp knife or mandoline slicer, a frying pan, colander, large mixing bowl, and a large plate.
How to Make the Best Spanish Tortilla (Tortilla de Patatas)
- Slice potatoes. Use a sharp knife or mandolin to slice the potatoes into ¼ inch thick slices.
- Cook potatoes and onions. Add olive oil in a large 10-inch non-stick frying pan and heat over medium-high heat for 1 minute. Add sliced potatoes, onion, and ½ teaspoon salt. Fry for 8-10 minutes until fork tender, stirring occasionally to evenly cook the potatoes.
- Drain oil. Remove from heat. Set a large bowl under a colander and place the potato mixture into the colander to drain the oil into the bowl underneath. Set aside for later.
- Add eggs. Transfer the potato mixture into a large mixing bowl and add the beaten eggs and remaining ½ teaspoon salt. Mix well and let sit for 5-10 minutes. The hot potato mixture will make the eggs set a bit.
- Heat pan. In the same frying pan, add 2 tablespoons of the reserved oil and heat over medium-low heat for 1 minute.
- Cook tortilla. Transfer the potato-egg mixture into the pan and let it spread evenly over the pan. Cook 4-6 minutes (or longer if necessary) until the edges start to firm up. You can run a rubber spatula along the outer edges of the tortilla to make sure it's not sticking. At this point, the mixture in the middle is still a bit runny. (For traditional runny tortillas, cook closer to 4 minutes, for a tortilla that is more set, cook closer to 6 minutes or longer).
- Flip over. Take a large plate (larger than the size of the pan) and place it upside down over the pan. Carefully flip the pan over to flip the tortilla onto the plate.
- Cook other half. In order to firm up the bottom half of the tortilla, repeat the same process. Add 1 tablespoon reserved oil to your pan and heat over medium-low heat for 1 minute. Carefully slide the tortilla back into the pan and cook for 4-6 minutes (or longer if necessary) until the bottom is completely set. Run the rubber spatula along the outer edges and gently press the sides in to form rounded edges. (For traditional runny tortillas, cook closer to 4 minutes or less, for a tortilla that is more set, cook closer to 6 minutes or more).
- Rest. Flip the tortilla over onto a plate and allow it to sit for 10 minutes. Serve warm.
Recipe Variations
- Add chorizo. Brown some chorizo in the pan before you cook the potatoes and onions to soak that spicy, savory flavor into every bite.
- Use more veggies. Fresh or roasted red bell peppers add a nice color and taste great in this Spanish tortilla recipe. Sprinkle some chopped parsley or chives on top as a garnish, too!
- Add cheese. Cheese, potatoes, and eggs always go well together, and that rule applies here, too. Add some shredded manchego or creamy goat cheese to the eggs and stir to combine.
How to Serve
This Spanish Tortilla is filling and satisfying on its own but even better served alongside other dishes, whether it's for breakfast, lunch, or an easy low-key dinner. Some of our favorite ways to serve tortilla de patatas are:
- As an appetizer. Serve it as an appetizer before a nice seafood or chicken paella. It is especially well-suited to pair with briny olives, cured meats, and other tapas dishes. Serve it as part of a larger appetizer spread along with a Charcuterie Board, Cheese Board, Olive Tapenade, or Antipasto Skewers.
- In a sandwich. Serve it cold in a sandwich with some hearty, crusty bread. Some of our favorite breads to use are Ciabatta Rolls, French Baguettes, or Small Batch Sourdough Bread.
- With a salad. Serve with a simple green salad such as Arugula Salad, Kale Caesar Salad, or Tabbouleh Salad.
Recipe Tips and Tricks
- Repurpose the leftovers. If you've got a lot left over and need creative ways to use it, try slicing it and using it as filling for a sandwich or breakfast burrito. You can also break it up over a salad or in stir fry!
- Deconstruct it. Try it as an open-faced omelet at your next brunch with a side of salsa!
- Use a lid for the flip. If using a plate to flip the tortilla seems tricky and unstable, try using a flat pan lid with a handle. The handle will give you better contact and control, making flipping the Spanish tortilla a breeze!
Storing and Freezing Instructions
How to Store
Transfer any leftover Spanish tortilla to an airtight container and refrigerate for up to 5 days.
How to Reheat
Reheat on the stovetop over medium heat until warmed through or in the microwave on high power for 1 minute, adding time as needed in 30-second increments. You can also reheat in the air fryer at 350F for a few minutes.
How to Freeze
Once the Spanish tortilla has cooled completely, wrap it tightly in plastic wrap or place it in a sealed freezer bag and freeze for up to 30 days. Allow it to thaw in the refrigerator before reheating or serving cold.
FAQ
What is a Spanish tortilla?The tortilla española is a traditional Spanish recipe and very common tapa made from simple ingredients: potatoes, onions, and eggs. Thin slices of potatoes and onions are lightly fried, then cooked in a mixture of eggs similar to a frittata or open-faced omelet. It's so simple and inexpensive to make yet filling enough to enjoy as a main dish or an appetizer alongside your favorite tapas recipes.
Is Spanish tortilla gluten free?The word "tortilla" confuses many people, but Spanish tortillas are not like Mexican tortillas at all. They contain no bread or wheat products and are made with just potatoes, onions, eggs, olive oil, and seasonings. They're naturally gluten-free.
Can I make a Spanish tortilla in the oven?If you're nervous about making the tortilla on the stove, you can certainly use the oven instead. Preheat the oven to 375 degrees F, butter or oil your baking dish, and bake for 35-40 minutes or until fully baked.
More Egg Recipes
- 20 Best Egg Recipes
- Egg and Potato Breakfast Casserole
- Caprese Frittata
- Spring Vegetable Frittata
- Egg Muffins
- Spinach and Feta Quiche with Cauliflower Crust
Tried this recipe?
I'd love to hear what you think! Leave a comment and rating below to share your feedback. Your reviews help others discover this recipe and help me keep creating more free recipes for you. Snap a photo and tag me on social media @aheadofthyme too.
Cheeseburger Sliders
Easy Cheeseburger Sliders have the classic flavor of your favorite burgers in bite-size form without the fuss of forming or grilling a single burger patty! A saucy ground beef mixture is nestled between two soft slider buns and topped with cheddar cheese and dill pickle. Perfect for a quick dinner and great for parties - the kids love them too!

I love serving trays of Turkey and Cheese Sliders at family parties, as you can easily make a dozen sandwiches with just a little bit of effort! These mini cheeseburgers are very similar in theory, except you cook ground beef in a burger sauce mixture then spread it over the rolls kind of like Sloppy Joes. One batch makes enough for 12 sandwiches and fit in a standard baking dish, which is perfect for a hungry family (and leftovers) or easy entertaining!
Why You'll Love These Cheeseburger Sliders
- Perfect party food. This easy cheeseburger sliders recipe is absolutely ideal for game day, birthday parties, potlucks, and other gatherings! Each batch makes enough for an entire 12-pack of dinner rolls and they're the perfect size to enjoy with potato salad, pasta salad, and all your favorite potluck fixings.
- Meaty and cheesy. The ground beef is brown then cooked with a mixture of ketchup and mayonnaise for that burger sauce flavor. They taste just like classic burgers in bite-sized form!
- Extremely quick to make. Since you don't need to make individual patties or anything, this recipe comes together really quickly. It just takes 30 minutes from start to finish. With so few ingredients required to make these sliders from scratch, you can easily throw them together for a last-minute dinner or party!
- Kid-friendly option. The small handheld size and traditional flavors also make these sliders a big hit with the kids! They love them just as much as regular burgers or Sloppy Joes. Mini burgers are ideal for kids' parties.
Ingredient Notes
To make these delicious Cheeseburger Sliders, you will need the following ingredients (full measurements in recipe card below):
- avocado oil - to brown the beef and onion. Olive oil works well too.
- ground beef - since the sauce is so creamy, I prefer to use lean ground beef with a lower fat content.
- yellow onion - thinly sliced and sauteed for that classic burger flavor.
- Worcestershire sauce - to give the beef a deeply savory note.
- ketchup - instead of squirting ketchup on each burger, it's mixed into the meat for a tomato-y flavor.
- mayonnaise - this adds a creamy, saucy texture and lots of flavor.
- salt and pepper
- dinner rolls - you can use any type of dinner rolls or even make your own yeast rolls, but make sure they are slider size.
- cheddar cheese - this is sprinkled on top of the meat mixture before baking so it gets nice and melty.
- dill pickles - these are optional, but I love adding thinly sliced pickles on top for a tangy note.
- melted butter - to brush the rolls before baking.
You will also need measuring spoons, a large skillet, baking sheet, parchment paper, sharp serrated knife, and a basting brush.
How to Make the Best Cheeseburger Sliders
- Cook meat. Heat oil in a large skillet over medium-high heat until the oil is sizzling hot, about 1 minute. Add ground beef and cook until browned on all sides, about 6-8 minutes. Break up beef into small pieces to help even browning.
- Saute onions. Add onion and sauté until tender, about 2-3 minutes.
- Add sauce. Add Worcestershire sauce, ketchup, mayonnaise, salt, and pepper. Mix well and cook for another 2 minutes, stirring occasionally. Remove from heat.
- Slice rolls. Line a large baking sheet with parchment paper. Place the dinner rolls on the lined baking sheet. Slice the rolls evenly in half lengthwise and leave the bottom half in the baking sheet.
- Assemble. Spread the beef mixture evenly over the bottom half of the rolls, top with shredded cheddar cheese, and a sliced pickle. Finish by adding with the top half of rolls on top.
- Bake. Brush the tops evenly with melted butter and bake in a 350F preheated oven until golden brown and the cheese is completely melted, about 12-15 minutes. Slice and serve warm
Recipe Variations
- Serve with your favorite burger toppings. These mini burgers are delicious all on their own, but they're also so tasty with the standard toppings like sliced lettuce, tomato, onion, and more.
- Use sliced cheese. If you don't have shredded cheese or want an even cheesier sandwich, lay slices of cheese on the bottom buns before adding the meat mixture. American cheese slices are a great option for that classic diner flavor, but we love cheddar.
- Make burger-sized sandwiches. Instead of making small individual sliders, this meaty filling can easily be added to full-sized burger buns as well. You won't get as many servings, but they're a fun alternative to regular burgers on a busy weeknight!
- Add a little sweetness. If you prefer sweet burger sauces, add a couple of teaspoons of brown sugar to the meat filling.
- Sprinkle with sesame seeds. After brushing the tops of the rolls with butter, sprinkle a few sesame seeds for a traditional burger look.
How to Serve
These homemade Cheeseburger Sliders are delicious served on its own, or paired with some of my favorite burger sides including:
- Caesar Salad
- Baked Potato Wedges
- Tomato Basil Soup
- Oven-Roasted Corn on the Cob
- Macaroni Salad
- Baked Sweet Potato
For more recipes, see our 25+ Best BBQ Side Dishes.
Recipe Tips and Tricks
- Slice before serving. You can just pick up a slider to remove it from the pan, but some meat may spill out along the sides. If you run a knife between the rolls before serving, the meat will move to one side or the other for less spillage.
- Season to taste. This recipe won't need much seasoning thanks to the tasty sauce, but it does help to add a little salt and pepper. Give it a taste before serving to make sure it's well seasoned.
- Line the pan. For easy serving and cleanup, line the baking dish with parchment paper first.
Storing and Freezing Instructions
How to Store
Store any leftover sliders in an airtight container in the fridge for 1-2 days. Technically, they can last a few days longer, but the buns can become soggy from the moisture of the meat filling.
How to Reheat
The quickest option is to microwave the slider for 1-2 minutes or until fully warmed through, but this can cause the rolls to become overly soft. I prefer to bake the leftovers in a 350 degree oven or air fryer for 5-10 minutes instead.
How to Freeze
It's easiest to freeze any leftover filling, then thaw and assemble a fresh batch of sliders. Otherwise, the buns will become soggy as the meat mixture thaws in the fridge.
FAQ
Can you make cheeseburger sliders with Hawaiian rolls?Yes, these burger sliders can be made with any type of dinner rolls, and King's Hawaiian rolls are an especially tasty option. The sweet and savory flavors work really well together.
Can you make sliders with ground beef?I love making mini burgers with dinner rolls and small patties, but there's an even easier option! If you cook ground beef with mayo and ketchup, you'll get the same meaty texture and burger flavor without having to form the ground beef into patties or grilling them. They're like Sloppy Joes, but in burger form. They're so quick to make!
How do you make cheeseburger sliders on a sheet pan?If you're hosting a big party and need enough food to feed a large crew, break out a half-sheet pan. Each one can hold two 12-packs of dinner rolls, so you can make a double batch of this cheeseburger slider recipe and arrange them side by side. It takes the same amount of effort, but you'll get 24 sliders per tray.
More Burger Recipes
- 15 Best Burger Recipes
- Classic Juicy Hamburgers
- Thai Turkey Burgers
- Salmon Burgers
- Mediterranean Chicken Patties
- Black Bean Burgers
Tried this recipe?
I'd love to hear what you think! Leave a comment and rating below to share your feedback. Your reviews help others discover this recipe and help me keep creating more free recipes for you. Snap a photo and tag me on social media @aheadofthyme too.
Vegetable Orzo
This Vegetable Orzo is easy to make with seasonal vegetables that are roasted then topped with warm, fluffy orzo, little chunks of feta cheese, and fresh herbs. It's an irresistible vegetarian meal. Substitute the summer veggies with whatever is in season and make this dish all year long!
This warm vegetable orzo is such a nice alternative to cold pasta salads, yet it's still full of sunny, summery flavors that make this meal light and refreshing, especially on a warm sunny day. Although simple, it is a real show-stopper that looks just as good as it tastes! Plus, it's quick enough for weeknight dinners and luxurious enough for all your summer entertaining. Serve it as a gourmet vegetarian main or a side dish.
Why You'll Love This Vegetable Orzo
- Packed with veggies. The veggies are the star of the show here and there are lots of them! The flavors of the fresh vegetables work so well with the warmth of the pasta and tangy feta cheese. It's an easy way to serve extra veggies without living off salads all summer long.
- Packed with flavor. The roasting process concentrates the fresh flavors of the vegetables and the tender pieces of orzo are the perfect size to soak up the olive oil and lemon juice squeezed on top. Plus, the tangy feta adds the right amount of zing to round out this dish.
- Naturally vegetarian. All of the ingredients in this recipe are naturally vegetarian, so it's suitable for a wide range of dinner guests. You can also easily make it vegan by omitting the feta or using a vegan cheese.
- Easy to adapt. This is a fun recipe to play around with throughout the year! The warm orzo works well with a variety of fresh vegetables, so you can adjust the options to different seasonal ingredients and fresh herbs. Plus, you can easily turn it into a main dish by adding protein, like grilled chicken, or a can of drained chickpeas for a plant-based option.
- Great for meal prep. Since the pasta reheats so nicely in the microwave, you can make a batch on the weekend and reheat it throughout the week!
Ingredient Notes
To make this delicious Vegetable Orzo, you will need the following ingredients (full measurements in recipe card below):
- veggies - roast a mixture of diced red onion, zucchini, red bell peppers, green beans, and grape or cherry tomatoes for lots of different textures and flavors.
- extra virgin olive oil - to caramelize the edges of the roasted veggies.
- orzo - cook this tiny rice-like pasta following the package instructions until al dente.
- feta cheese - cubed or crumbled; the salty creaminess really balances the richness of the veggies.
- dill - adds flavor, color, and freshness. You can substitute with other herbs including fresh parsley or thyme.
- lemon juice - a little acidity adds the perfect balance. You can even use balsamic vinegar instead.
- salt and pepper - season well to bring out the flavors of the veggies.
You will also need measuring cups and spoons, a roasting pan or baking sheet, a large pot, a strainer, and a large bowl or serving dish.
How to Make the Best Vegetable Orzo
- Combine veggies. In a large mixing bowl, add onion, zucchini, bell pepper, green beans, tomatoes, olive oil, and salt. Toss well.
- Roast veggies. Spread the veggies evenly in a single layer on a large baking sheet. Bake in a 375F preheated oven until tender, about 30 minutes.
- Cook orzo. While the vegetables are cooking, bring a pot of salted water to a boil. Add orzo, give it a stir, and cook over medium heat until al dente, about 8-10 minutes, or according to package instructions. Drain well and set aside.
- Assemble. To assemble, transfer the roasted vegetables to a serving dish and add orzo. Top with feta cheese, fresh dill, olive oil, lemon juice, salt and pepper. Stir well until evenly combined.
- Serve. Serve immediately with additional feta and dill sprinkled on top, if desired.
Recipe Variations
- Use your leftovers. If you made roasted veggies the night before, reheat them and make a batch of orzo for a quick meal or side.
- Adapt to the season. Once summer ends, replace the zucchini, green beans, and tomatoes with butternut squash, beets, sweet potato, brussels sprouts, etc.
- Play around with the toppings. For extra crunch, sprinkle the dish with toasted pine nuts or sliced almonds.
- Use the grill. If it's way too hot to crank up the oven, warm up the grill instead. Consider using a grill plan to keep any small pieces from falling through.
- Add cheese. Shave some Parmesan cheese over the roasted veggies for a savory, cheesy flavor.
How to Serve
This Vegetable Orzo is delicious served on its own as a vegetarian main dish or as a side dish to complement a high protein entree such as:
- Oven Baked Chicken Breast
- Juicy Hamburgers
- Salmon Bites
- Ribeye Steak
- Mediterranean Chicken Patties
- Baked Chicken Drumsticks
For more recipes, see our 60+ Summer Dinner Ideas.
Recipe Tips and Tricks
- Cook the pasta in broth. To give your orzo extra flavor, cook it in chicken or vegetable broth first.
- Don't overcook the pasta. Since orzo is so small, it's easy to overcook, which gives it a soft, slightly soggy texture. Watch an eye on the time and remove it from the heat once it is al dente.
- Toast the pasta. This might sound a little unusual, but toasting can add a nutty flavor to pasta, which pairs wonderfully with the roasted veggies and will help keep the noodles from becoming soggy. To toast the orzo, place it into a warm pot until it takes on a light golden brown color. Then, boil like normal.
Storing and Freezing Instructions
How to Store
Allow any leftovers to cool to room temperature, then store in an airtight container in the fridge for 3-4 days.
How to Reheat
I find it easiest to reheat a serving in the microwave for just a minute or two. You can also add a small splash of water to help steam the pasta.
How to Freeze
The leftovers can be frozen for several months, but the cooked pasta will be softer after thawing and reheating.
FAQ
What is orzo?Orzo is a small, rice-shaped pasta made from a mixture of durum and semolina wheat. It fits in the pastina category, which includes other very small pastas like tiny stars (stelline), ditalini, and more. Just like rice, the little pieces of pasta add texture and work wonderfully in lemon chicken orzo soup, orzo pasta salad, or this warm vegetable orzo salad.
Do you have to roast the vegetables for vegetable orzo?Some recipes call for sauteing the vegetables before cooking the pasta, but roasted veggies add so much more flavor. For this vegetable orzo recipe, I recommend roasting a mixture of summer vegetables first, then topping them with the al dente orzo, a little lemon juice, and any other toppings you would like. It tastes so much better this way!
What can you use in place of orzo?If you're out of orzo or just prefer something else, I recommend sticking with other types of small pasta if possible. Try ditalini, stellini, pastina, Israeli couscous, regular couscous, or even quinoa instead. They would all taste great with the roasted veggies and summery toppings.
More Vegetable Pasta Recipes
- 40 Best Pasta Recipes
- Pasta Primavera
- Avocado Pesto Pasta
- Vegetable Lasagna
- Baked Feta Pasta
- Tortellini Salad
Tried this recipe?
I'd love to hear what you think! Leave a comment and rating below to share your feedback. Your reviews help others discover this recipe and help me keep creating more free recipes for you. Snap a photo and tag me on social media @aheadofthyme too.
Fresh Fruit Tart
This Fresh Fruit Tart is made with a homemade sugar cookie crust, filled with a sweet vanilla custard then topped with an assortment of fresh seasonal fruit and a thin layer of apricot glaze for a little shine. It's the perfect balance of sweet and tart and is easily one of the most showstopping, eyecatching desserts you can make!
This fresh fruit tart would be right at home in the prettiest pastry shop in Paris, but it's easy to make at home! So the next time you need an extra special dessert for brunch or a bridal shower, this is the recipe to try! The crisp tart shell is made with a sugar cookie dough known as pâte sucrée, which shatters and crumbles for a nice crunch. My homemade pastry cream recipe is so easy to make, even if you've never made one before, and it's the perfect bed for fresh fruits. It's one of those savor-every-bite desserts and totally worth the effort (and the calories)!
Why You'll Love This Fresh Fruit Tart
- Eye-catching dessert for any occasion. The apricot glaze adds a glossy sheen that turns the fruits and berries into little jewels. Their organic shapes and vibrant colors are the perfect contrast to the neat and tidy crust. The whole look is completely balanced, making it an elegant dessert for baby showers, birthday parties, Mother's Day, and other special occasions.
- Loaded with fresh fruit. Unlike other desserts that rely on cooked fruit purees, jams, and jellies, this classic fruit tart recipe relies on the season's freshest produce. It's incredibly light and refreshing and my favorite way to celebrate summer's abundance!
- Completely from scratch. Every layer of this French fruit tart is made from scratch. Although that might sound intimidating, it's really straightforward. Make and blind bake the tart dough, prepare and chill the pastry cream in the fridge, then assemble and glaze the tart. The secret is to give yourself time so you won't need to rush through the process and follow the step-by-step instructions in the post below!
Ingredient Notes
To make this delicious Fresh Fruit Tart, you will need the following ingredients (full measurements in recipe card below):
- whole milk - for the creamiest texture, you need to use milk with a high-fat percentage. Whole milk is best.
- egg yolks - for the vanilla pastry filling and the sugar cookie crust. Egg yolks thicken the filling and give it a custard-like flavor. It also gives the crust a stronger shell.
- white sugar - for just enough sweetness.
- cornstarch - this will thicken the pastry cream to help it hold its shape in the tart shell.
- unsalted butter - whisk this in right at the end for a luxuriously creamy texture in the filling. For the crust, the butter must be fully softened and at room temperature as it needs to be creamed with the sugar.
- vanilla extract - to really highlight the vanilla flavor, use a high quality extract or vanilla bean paste.
- pinch of salt
- all purpose flour - for the crust.
- fresh fruits - use the freshest blueberries, blackberries, raspberries, cherries, and strawberries. Wash well and dry. Pit any cherries and remove the strawberry tops for easy serving.
- apricot jam - this will be mixed with water for the tart glaze, which keeps the fruits fresh and adds a gorgeous glossy sheen. Either apricot preserves or jam will work.
- water
Baking Tools
You will also need the following baking tools and equipment:
- measuring cups and spoons (or a kitchen scale)
- medium saucepan
- whisk
- sift
- strainer
- plastic wrap
- mixing bowls
- hand or stand mixer
- rolling pin
- tart pan with removable bottom
- paring knife
- pastry brush
How to Make the Best Fresh Fruit Tart
First, make the vanilla cream filling.
- Heat milk. In a medium saucepan, pour in the milk and heat over medium heat until simmering.
- Combine ingredients. Meanwhile, while milk is heating up, add the egg yolks and sugar to a large mixing bowl and whisk rapidly for about 1 minute, or until the mixture looks paler. Sift in the cornstarch, then whisk again until smooth.
- Add milk. Once the milk is simmering, slowly drizzle the hot milk into the egg mixture, while whisking simultaneously.
- Remove lumps. After all of the milk has been added, pour the custard back into the pot through a fine mesh sieve to remove any lumps.
- Heat custard. Place the custard back over medium heat, then heat until bubbling. Once bubbling, continue to cook for exactly 1 minute, then remove from the heat.
- Add remaining ingredients. Add in the butter and vanilla, then whisk to combine.
- Chill. Transfer to a heat-proof bowl, cover the surface with plastic wrap, then place into the fridge for at least 4 hours or overnight.
Next, make the sugar cookie crust.
- Combine wet ingredients. In a large mixing bowl, add the butter, sugar, and salt. Beat with an electric hand mixer until fluffy and pale, about 2-3 minutes. Add in the egg yolk and vanilla, then beat again until well-combined.
- Add in dry ingredients. Add in the flour and beat until combined, and a soft dough comes together (it may seem dry at first, but keep mixing and a dough will eventually form).
- Chill dough. Use your hands to gather the dough together and shape it into a disc. Wrap the dough tightly in plastic wrap and place into the fridge to rest for 30 minutes.
- Roll dough. After the 30 minute rest, remove the dough from the fridge and unwrap it. Place the dough onto a lightly floured work surface and use a rolling pin to roll it out into a 10.5-inch circle.
- Transfer to pan. Carefully transfer the dough into a 9-inch tart pan. Press the dough into the bottom of the pan and along the sides. Use a paring knife to cut off the excess dough.
- Bake. Place into a 350F preheated oven to bake for 28 minutes. Allow the crust to fully cool before adding the filling.
Finally, assemble the fruit tart.
- Add custard. When ready to assemble, place the crust onto a serving platter. Spoon the custard into the cooled crust. You can also transfer the crust into a piping bag with a large round tip and pipe the custard into the crust.
- Add fruit. Arrange the fruit on top of the custard.
- Add glaze. In a small mixing bowl, combine apricot jam and water. Stir until fully mixed. Use a pastry brush the fruit with the watered-down apricot jam. Keep cool until ready to serve.
Recipe Variations
- Change the fruit. Prefer just one type of berry? Want to use tropical fruits instead? You can use any combination of fruits you'd like! They will all pair wonderfully with the delicious vanilla pastry cream. You can't go wrong!
- Use real vanilla bean. I love seeing those little vanilla bean flecks in custards and creams. Feel free to scrape the vanilla flecks into the creamy custard with the vanilla extract and/or heat the sliced and scraped vanilla pod in the milk in the first step.
- Make mini fruit tarts. Use the same components in different proportions and make mini tarts! You will likely need extra crust, but the rest of the process is the same.
How to Serve
This Fresh Fruit Tart is delicious served any time of the year, but is especially good when fresh fruit and berries are in season. Serve it on its own or pair with other seasonal sweets including:
- Strawberry Crumb Bars
- Blueberry Buckle Cake
- Cherry Cheesecake
- No Churn Vanilla Ice Cream
- Lemon Drop Cookies (Anginetti)
- Strawberry Shortcake
For more recipes, see our 40 Best Summer Desserts.
Recipe Tips and Tricks
- Don't rush the process. The elements in this dish are easy to make, but they do require proper technique. Read the instructions completely before you start and be sure to follow along carefully.
- Use the freshest fruits. Since the fruits may be on top of the tart for a few days, it's best to use fruits that are fully ripe but not overly ripe. Otherwise, they may begin to soften and lose their bite.
- Cool the tart shell completely. The pastry crust should be at room temperature and the vanilla cream should be chilled in the fridge before assembling. This will minimize any issues with a soggy crust and give you the best presentation.
Storing and Freezing Instructions
How to Store
Store any leftover tart in an airtight container in the fridge for 2-3 days. It's best to use a container instead of plastic wrap, as the apricot glaze may stick to the plastic. After about 2 days, the crust will start to soften and lose its snap.
How to Freeze
The tart shell can be baked and frozen in advance, and so can the creamy vanilla custard, but not the fruits. They should only be served fresh. It's best to assemble the freeze the tart shell and custard separately, then assemble and glaze right before serving.
FAQ
Can you make fruit tart the day before?Yes, homemade fruit tarts can be made ahead of time and stored in the fridge. However, they are best served within the first two days as the crust will begin to absorb the moisture from the filling. Just be sure to store it in the fridge to keep it fresh. Another option is to make the crust and the filling the day before but add the fruit and glaze the day of for the best presentation.
Which fruits are best for fruit tarts?You can make fruit tarts with any type of fresh fruit, so there are countless options! I like to use a mixture of different colors and flavors for visual interest and interesting flavor combinations, but you can use all one type of fruit, coordinate different colors, etc. Fresh berries are a timeless choice, as well as cherries, kiwi slices, mandarin oranges, mangos, peaches, etc. Make sure the fruit is ready to eat, so remove any pits, peels, leaves, and such.
What's a good alternative to apricot jam for fruit glaze?If you don't like apricots or just don't have any apricot jam available, there are some other options to consider. The easiest alternative is to use another translucent jam or jelly, like apple jelly. This won't affect the color of the fruit, but it will still add the gloss and shine.
Another option is to cook down a cup of fresh orange juice or another fruit juice with a teaspoon or so of cornstarch until it turns into a slightly thickened gel. Let it cool, then brush it over the fruit like normal. This is a nice way to customize the flavor of your glaze, too.More Fruit Pie Recipes
- 25 Easy Pie Recipes
- Fresh Strawberry Pie
- Key Lime Pie
- Banana Cream Pie
- Classic Blueberry Pie with Lattice Top
- Lemon Meringue Pie
Tried this recipe?
I'd love to hear what you think! Leave a comment and rating below to share your feedback. Your reviews help others discover this recipe and help me keep creating more free recipes for you. Snap a photo and tag me on social media @aheadofthyme too.
Chicken Potstickers
Homemade Chicken Potstickers have a crispy shell on the outside with a burst of delicious chicken filling on the inside that's seasoned to perfection with ginger, garlic, and green onions. Their small size makes them perfect as an appetizer, but trust us, you'll want to make a meal out of them!

Since it's easy to find potstickers at the store, you might be tempted to grab those instead of making homemade potstickers. Although they do require a bit of effort, it's well worth it. The chicken is jam-packed with aromatic ingredients and flavors, and they don't have any of the additives or preservatives you find in the prepackaged ones. Just be warned - once you start making these easy chicken dumplings at home, the grocery store ones won't even taste good anymore!
Why You'll Love These Chicken Potstickers
- Tons of flavor. The ingredients for this chicken potsticker recipe read like a who's who of the most flavorful ingredients ever. There's green onion, fresh ginger, garlic, soy sauce, sesame oil, and Shaoxing cooking wine. The dipping sauce also calls for black vinegar, which adds incredible depth of flavor as well. They're the complete opposite of bland!
- Crispy and chewy texture. After pan-frying the potstickers, the wonton wrapper takes on a crunchy, crispy texture. We like to fry just one side to enjoy the chewy bite of the steamed wrapper as well. The two textures complement the flavors as well, making the entire dish just so much fun to eat!
- Easy to freeze. You can easily make a big batch of these delicious Chinese dumplings and freeze them for later. They cook wonderfully from frozen, and this is a great way to enjoy an easy weeknight meal on a night when you really need it!
Ingredient Notes
To make these delicious chicken potstickers, you will need the following ingredients (full measurements in recipe card below):
- ground chicken - make sure the chicken is fully thawed before starting the chicken potsticker filling.
- green onions - green onion has a refreshing herbiness that pairs really well with garlic and ginger. Chop extra green onions for a pop of color when serving too.
- egg - a little egg will help bind the filling together.
- garlic - either mince fresh garlic yourself or use minced garlic from the store.
- ginger - grating fresh ginger breaks it into tiny pieces to make sure there are little pieces in every bite.
- soy sauce - salty soy sauce will make sure the chicken is fully flavored. Oyster sauce is a good alternative.
- Shaoxing cooking wine - this is a deeply flavorful, amber-colored rice wine you can often find at Asian markets. You can also substitute with rice vinegar.
- sesame oil - sesame oil adds a rich, nutty flavor.
- corn starch - cornstarch will absorb moisture as the potstickers cook, making sure they have the perfect texture.
- salt and pepper - season well. White pepper can add another layer of flavor.
- round dumpling wrappers - although the dumpling skin is just made from a mixture of wheat flour and water (see our Dumpling Wrappers recipe), it's may be easier to purchase a 50-piece package of wonton skins from the grocery store. It's totally up to you!
- vegetable oil - you'll want a neutral-tasting oil that can handle frying, like vegetable oil or soybean oil.
- cold water - this is for steaming the potstickers after they fry for two different textures.
- white sesame seeds - sprinkle some over the dumplings for a nice garnish.
You will also need measuring cups and spoons, a large mixing bowl, spatula, plastic wrap, two small bowls, parchment paper, a baking tray, a tea towel, and a large non-stick frying pan.
How to Make the Best Chicken Potstickers
First, make the chicken filling.
- Combine ingredients. In a large mixing bowl, add ground chicken, green onions,, egg, garlic, ginger, soy sauce, Shaoxing wine, sesame oil, salt, and pepper. Stir with a spatula until evenly combined.
- Marinate. Cover the bowl with plastic cling wrap and marinate for at least 20 minutes (up to overnight) in the refrigerator to soak in all the flavours.
Next, wrap the dumplings.
- Moisten edges. Prepare a small bowl of water for dipping your fingers into. Take one dumpling wrapper at a time and place it in your palm. Dip your finger into water and smear it along the edge of the wrapper.
- Add filling. Transfer a tablespoon of filling into the centre.
- Fold wrapper. Fold the wrapper over into a half-moon shape, and enclose the filling inside. Press the edges together to seal, or pleat the edges together with your finger. Place the dumpling on a parchment-lined baking tray.
- Repeat. Repeat with all dumplings. Cover with a tea towel to prevent the wrappers from drying out.
Now, cook the potstickers.
- Pan fry bottoms. Heat vegetable oil over medium-high heat in a large non-stick frying pan until hot, about 3 minutes. Place a batch of 15 dumplings on the pan and place them approximately ½-inch apart to make sure that they don't stick together. Cook for 3 minutes until the bottom turns golden brown. (To get all sides crispy rather than just the bottom like we did, then cook on both sides until golden and crispy).
- Add water. Add water into the pan to cover half of the dumplings' height (½-inch deep). The water should start sizzling and boiling immediately.
- Cook. Cover with the lid and cook for 7-8 minutes until almost all the water has evaporated. Remove the lid and lower the temperature to medium heat. Cook for another 2 minutes until all water has been absorbed. The bottom of the dumplings should be crispy.
- Repeat. Repeat the same steps for another batch of 15 dumplings.
Potsticker Dipping Sauce
Serve chicken potstickers with black vinegar or soy sauce. Black vinegar has a deep, umami flavor, perfect for dipping sauces. We make a simple vinegar dipping sauce using black vinegar, soy sauce, sesame oil, and green onions:
- In a small mixing bowl, make the vinegar dipping sauce by combining black vinegar, soy sauce, sesame oil and green onions. You can also add some Sriracha for a spicy kick.
- Transfer the crispy dumplings onto a plate and sprinkle some sesame seeds and green onions on top. Serve with the homemade vinegar dipping sauce.
Recipe Variations
- Try a different ground meat. Chicken mince has a nice, almost neutral flavor. Ground turkey or ground pork would be a good alternative. You can also use ground chicken thigh meat for a richer flavor.
- Add more veggies. If you prefer dumplings with cabbage, you can easily shred and saute some napa cabbage or grated carrots to add to the delicious filling.
- Use gyoza wrappers. Can't find potsticker wrappers? Try gyoza wrappers instead. They're smaller and thinner, so you'll need to be careful with them, but they'll work in a pinch.
- Make it spicy. If you love everything spicy, add some sriracha to the dumpling filling or to your dipping sauce.
How to Serve
These Chicken Potstickers are delicious served on their own, or paired with some of other Chinese dim sum appetizers including:
- Crispy Bottom Shanghai Pan-Fried Pork Buns
- Spicy Chili Oil Wontons
- Vegetarian Spring Rolls
- Chive Pancakes with Sourdough Starter
- Miso Garlic Chicken Wings
Love dumplings and dim sum? Try these 25 Best Dim Sum Recipes to find your new favorite dumpling recipes and more!
Recipe Tips and Tricks
- Let it rest. The filling mixture will taste even better if you let it rest in the fridge for a few hours or even overnight. All those aromatic ingredients and spices mingle together. Your patience will be rewarded!
- Cover quickly. When you add the cold water to the hot pan, it will immediately start steaming. If there is any residual oil in the pan, it may splatter on you. Cover the pan right away to avoid burns.
- Fry on one side or both. You can see in these photos that we only fried one side of the dumplings. This can be a nice way to get a little crispiness while still enjoying the tender, chewy texture of the wonton wrapper. It's entirely up to you. Try it both ways and see what you prefer.
Storing and Freezing Instructions
How to Store
Store any leftover potstickers in an airtight container in the fridge for 3-4 days.
How to Reheat
Reheat the leftover cooked dumplings in the microwave or crisp them up in a pan with a little oil.
How to Freeze
I only recommend freezing raw potstickers (not cooked ones) to cook later. Arrange them in a single layer on a baking sheet lined with parchment paper for 1-2 hours. Then, transfer them to an airtight container and freeze them for several months.
How to Cook from Frozen
You can cook them directly from frozen - just let them steam a little bit longer than normal. After the first round of steaming, add an additional ¼ cup of water and cover again. Cook until the water is nearly gone (approximately 5 more minutes).
FAQ
What are chicken potstickers made of?There are many different variations of chicken potstickers, so there isn't one right answer. In general, they include ground chicken with aromatic ingredients like ginger and garlic. Some versions include Napa or green cabbage, water chestnut, and shredded carrot, but those aren't a requirement. We prefer to make these chicken pot stickers with green onion and several flavorful sauces, including Shaoxing wine, soy sauce, and sesame oil. This results in a protein-rich dumpling that's hearty enough to enjoy as a light meal or as a satisfying appetizer.
Are potstickers Chinese or Japanese?Pot stickers are a type of Chinese dumplings that originated in northern China. The Japanese version of pot stickers is called gyoza, which are smaller and can be cooked in several different ways. Potstickers are traditionally pan-fried and then steamed in the pan.
What sauce is good with dumplings?After making and eating many dumplings, we're hooked on this sweet-savory-tangy--salty-umami dipping sauce made from soy sauce, black vinegar (worth the hunt), green onions, and sesame oil. It whips up in just a few seconds of effort and brings so many different types of flavors in one little bite!
More Dumpling Recipes
- Beef Potstickers (Dumplings)
- Vegetable Dumplings
- Pork Dumplings
- Kimchi Dumplings
- Chicken and Cilantro Wontons
- Potato Onion Pierogi
Tried this recipe?
I'd love to hear what you think! Leave a comment and rating below to share your feedback. Your reviews help others discover this recipe and help me keep creating more free recipes for you. Snap a photo and tag me on social media @aheadofthyme too.
- « Previous Page
- 1
- …
- 6
- 7
- 8
- 9
- 10
- …
- 41
- Next Page »