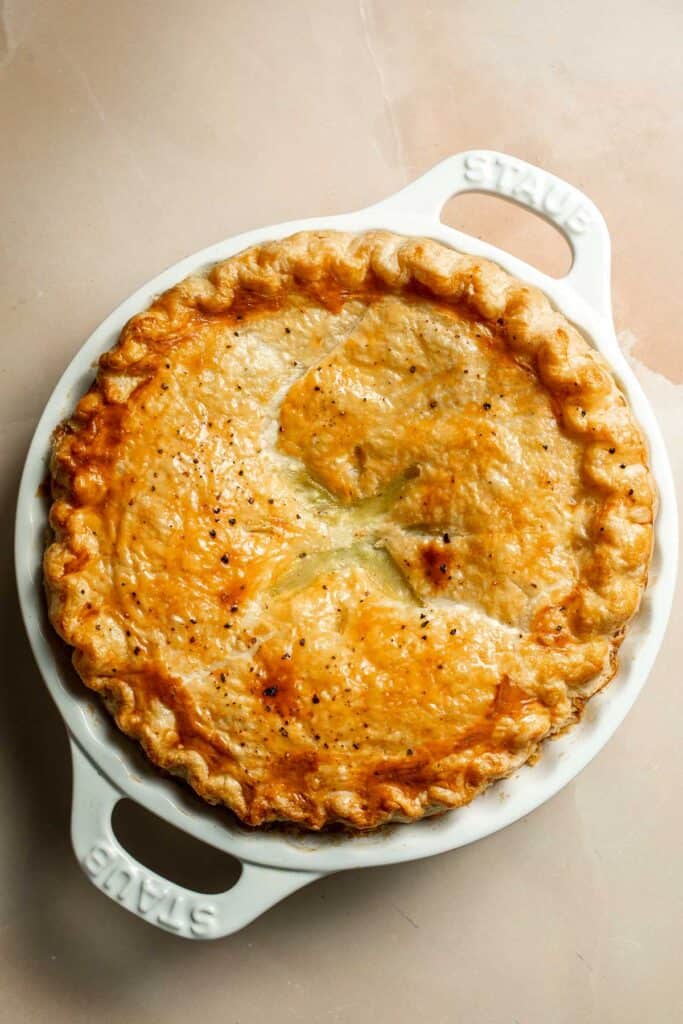
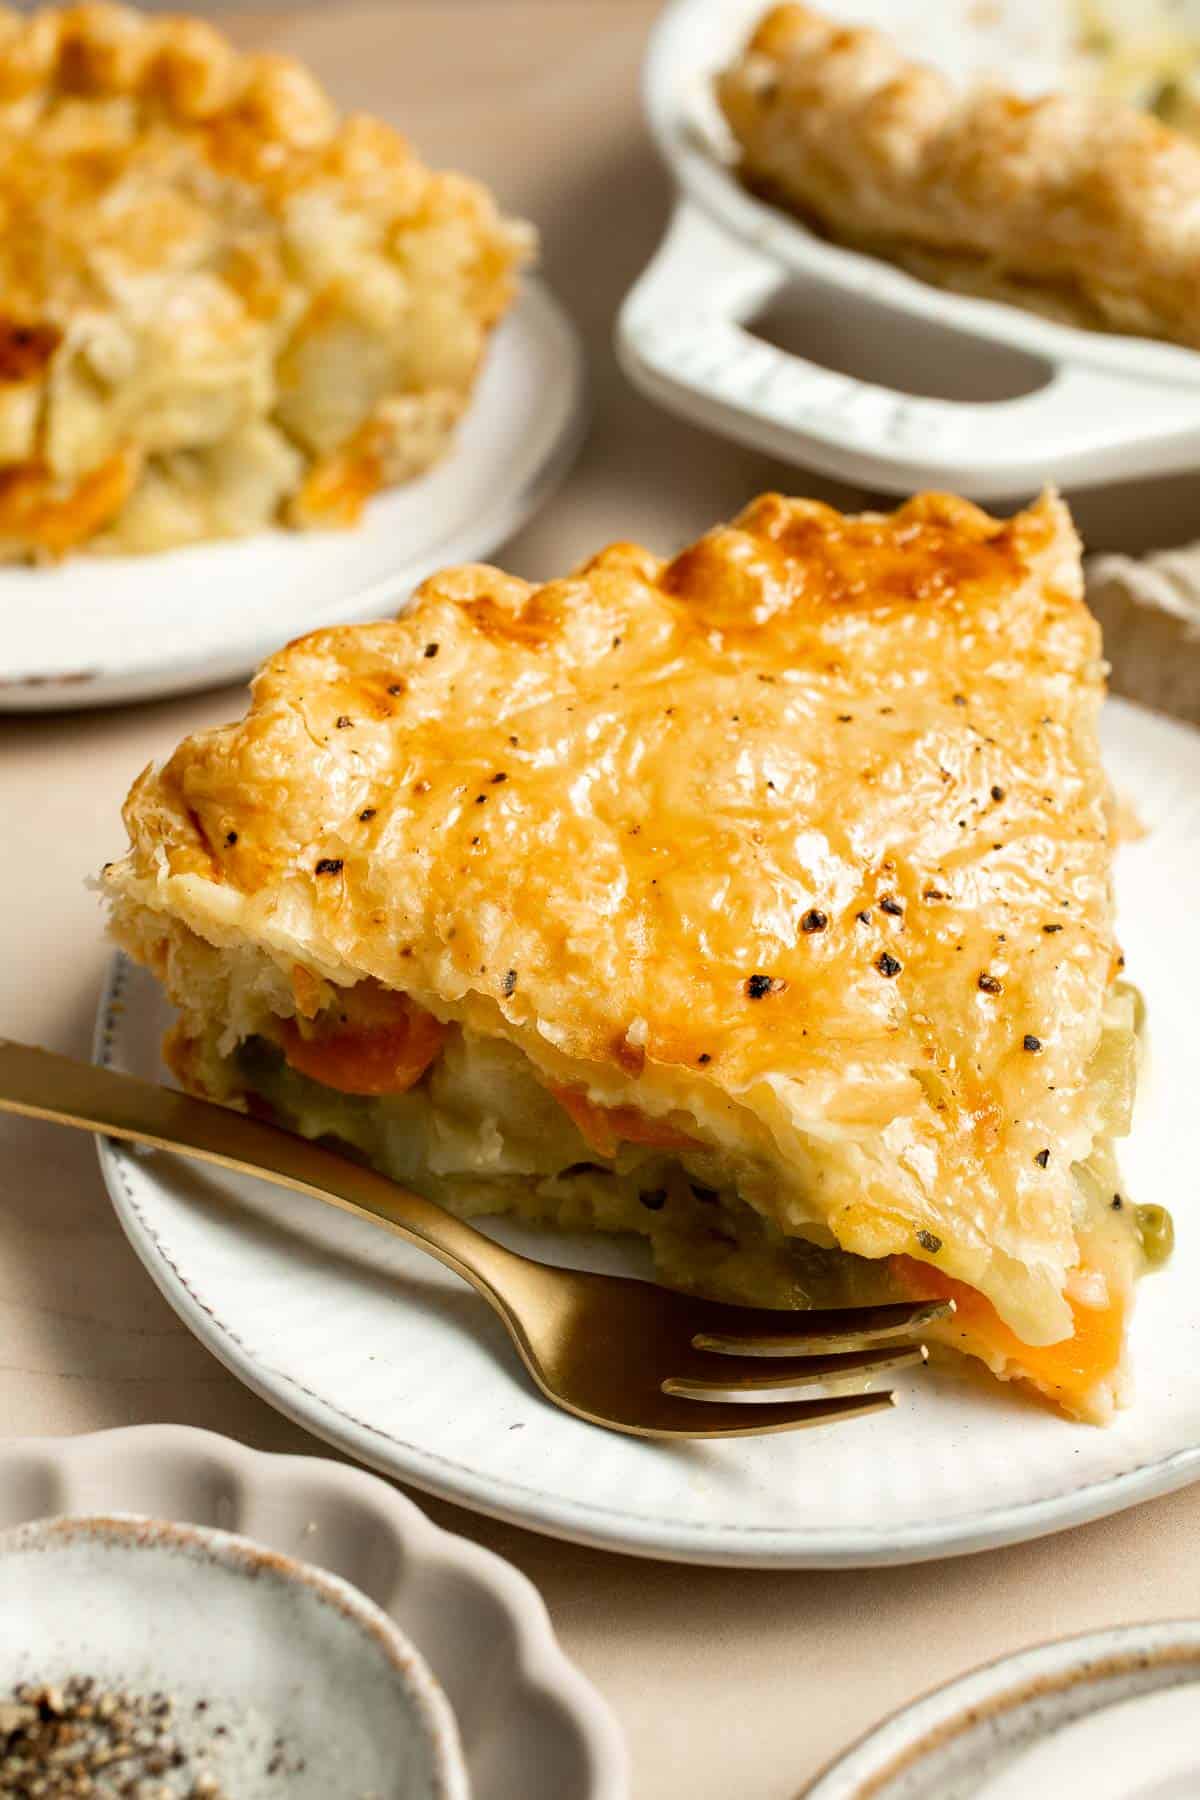
This Vegetarian Pot Pie is truly the ultimate comfort food. The creamy filling is loaded with tender veggies, all wrapped in a buttery, flaky puff pastry crust. It's easy to make using store-bought puff pastry, so don't let your pastry skills hold you back. It's a hearty, satisfying entree for a cold night in and makes a stand-out vegetarian centerpiece for any occasion!
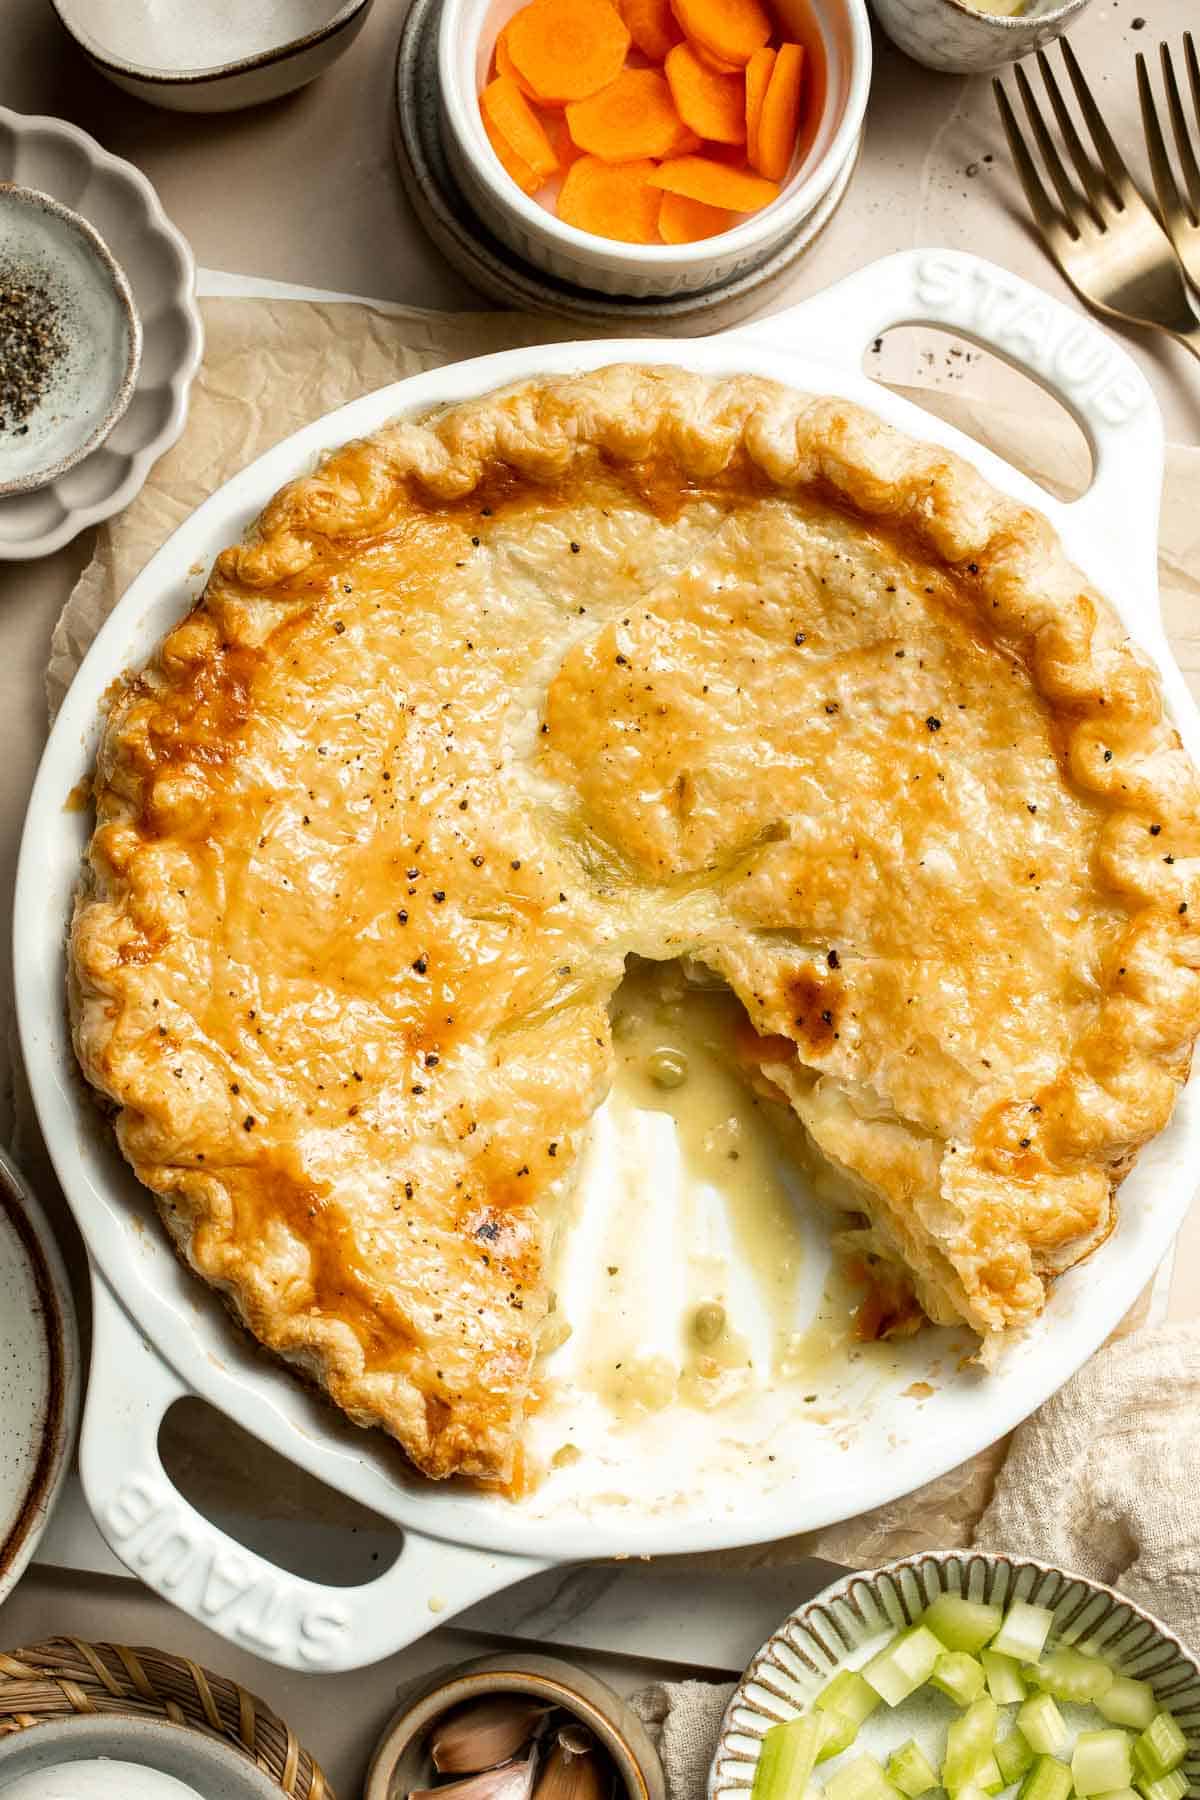
When the temperatures drop, there's nothing quite as comforting as pot pie. The flaky crust and creamy vegetable filling hit the spot, and the aroma fills the whole house! This vegetarian pot pie recipe is very similar to my chicken pot pie, except we ditch the chicken and add creamy coconut milk for extra richness. This makes it easier and faster to prepare, too. Enjoy it on its own or with a simple side salad for a little extra freshness. It doesn't need anything else!
Why You'll Love This Vegetarian Pot Pie
- Buttery, flaky crust. This recipe uses a double-crust made out of puff pastry, the flakiest, butteriest crust of all time. It's significantly better than regular pie crust and makes this dish extra special and indulgent.
- Classic comfort food. No one should have to live a life without pot pie, but it is hard to find vegetarian versions in stores. This homemade version has the same warm, cozy flavor you love without compromising on your dietary preferences.
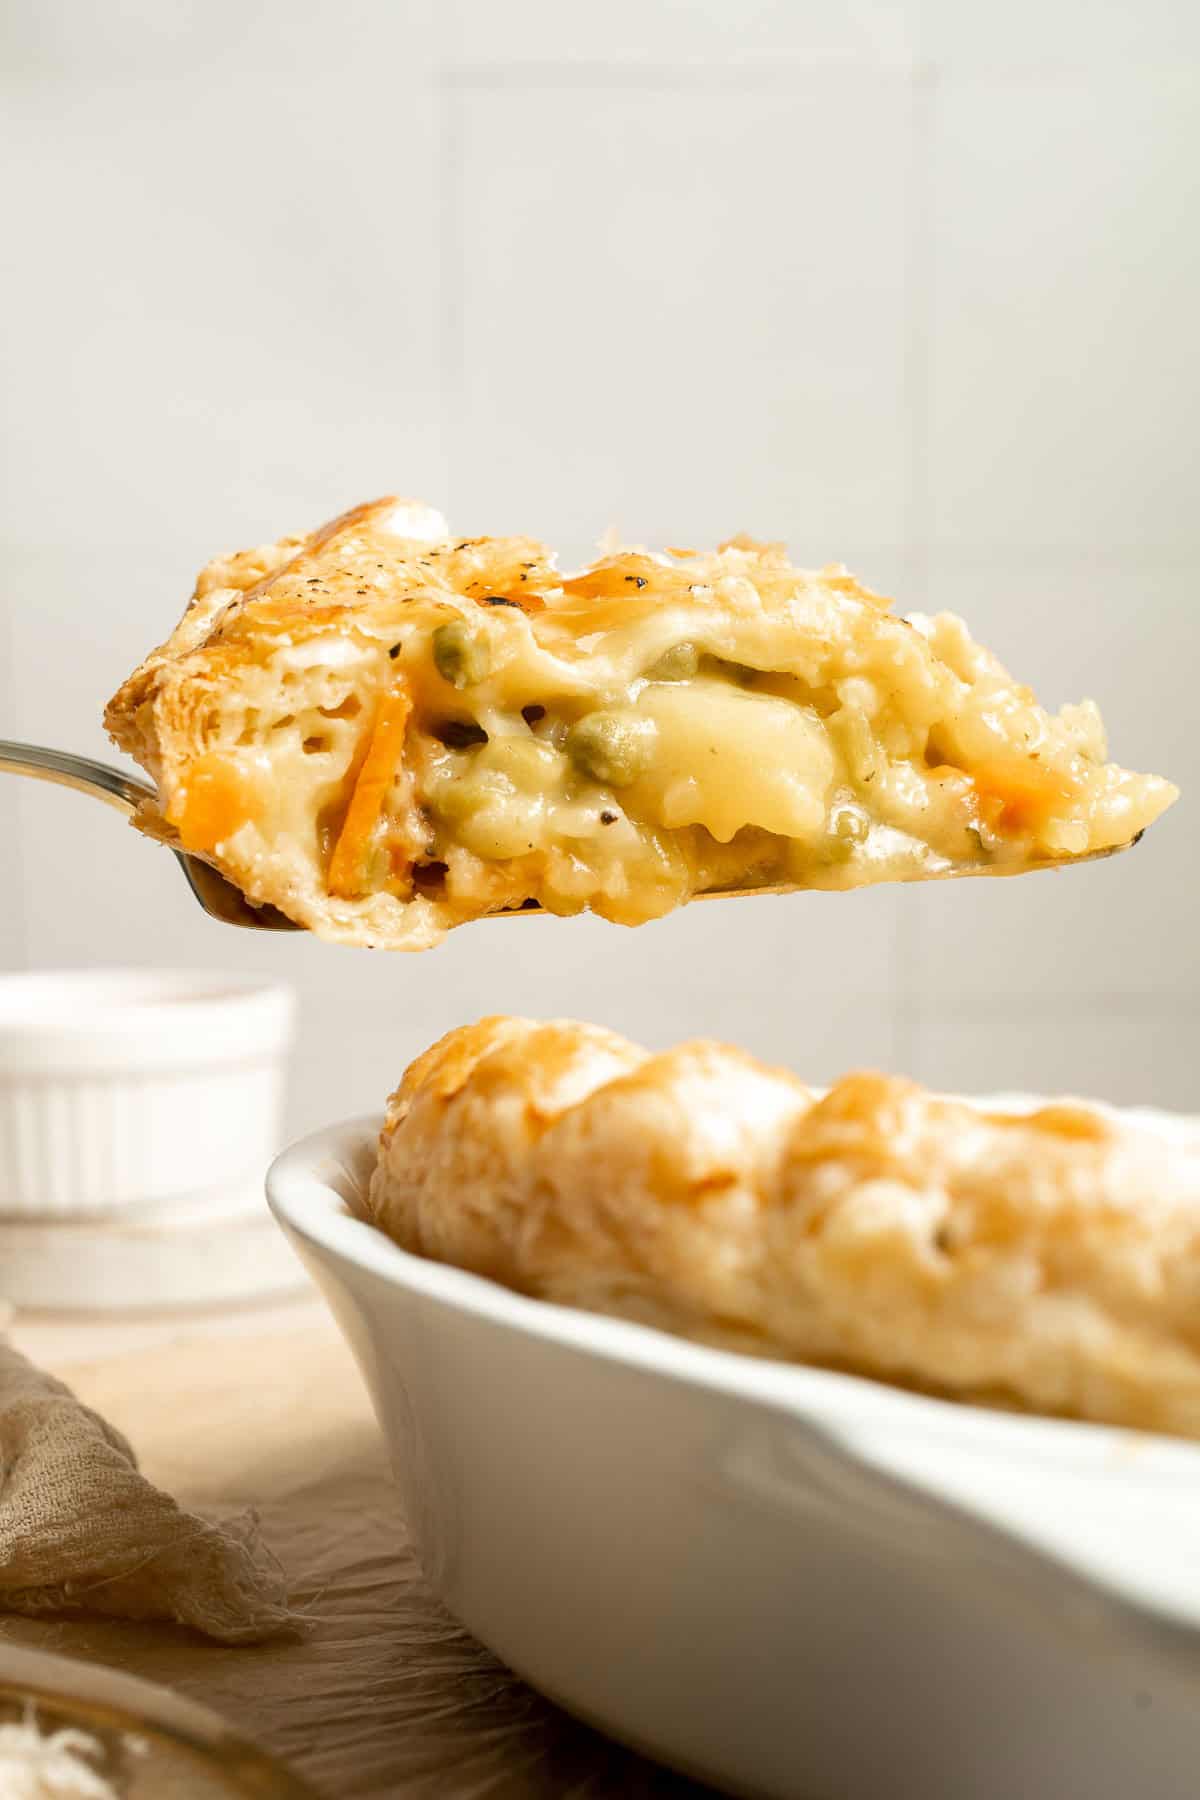
- Complete meal in one. With the flaky puff pastry dough, tender vegetables, and creamy sauce, you really need nothing else. It's surprisingly filling, too, and will keep you going for hours.
Ingredient Notes
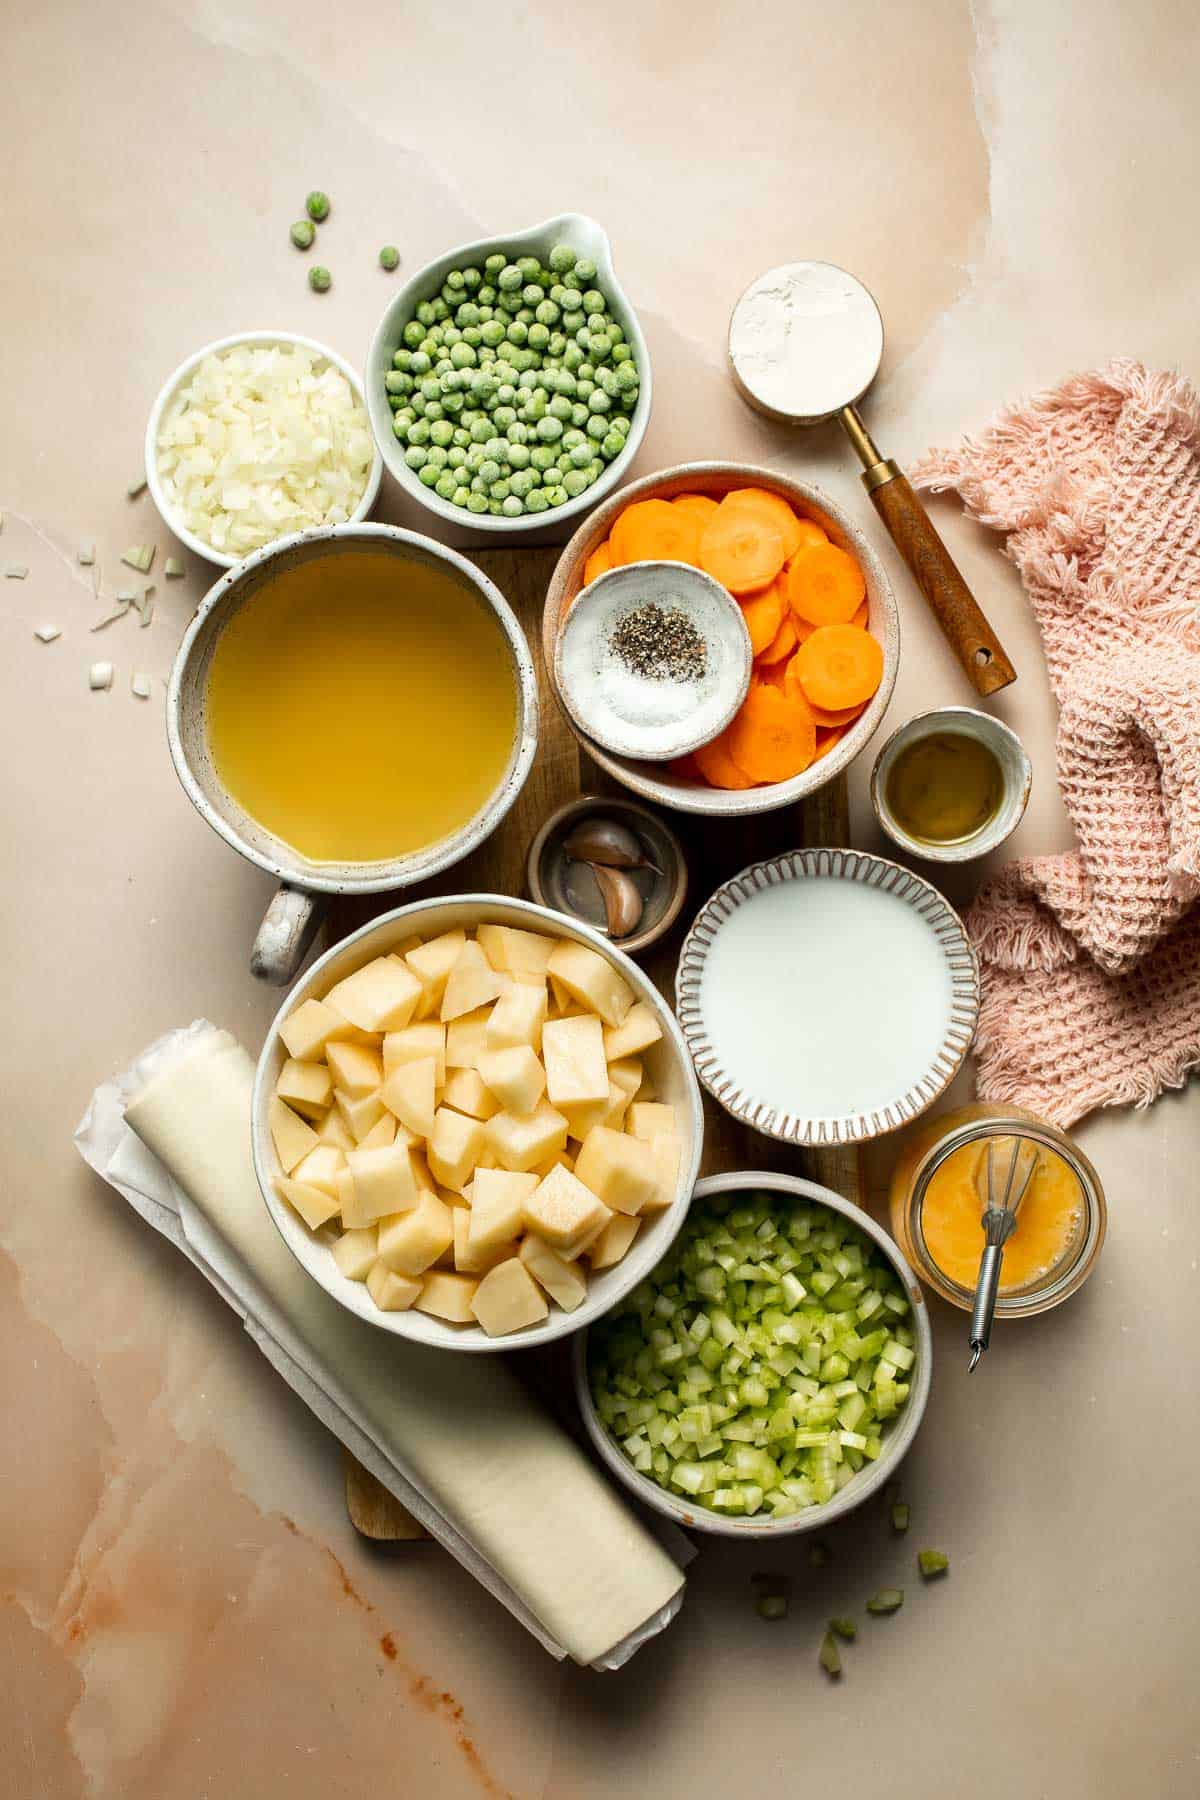
To make this delicious Vegetarian Pot Pie, you will need the following ingredients (full measurements in recipe card below):
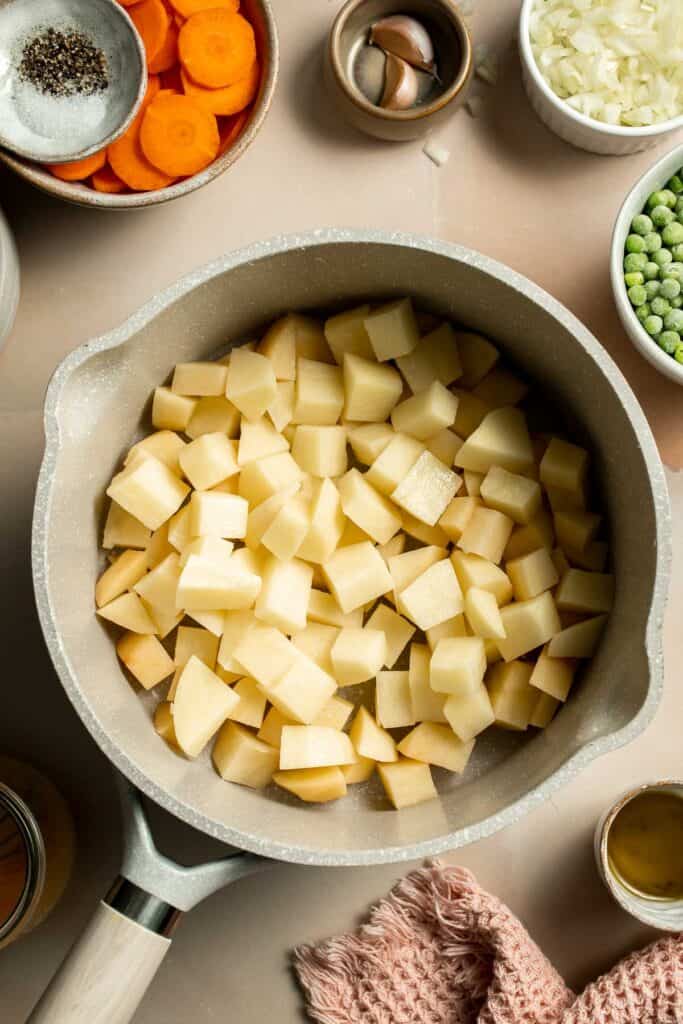
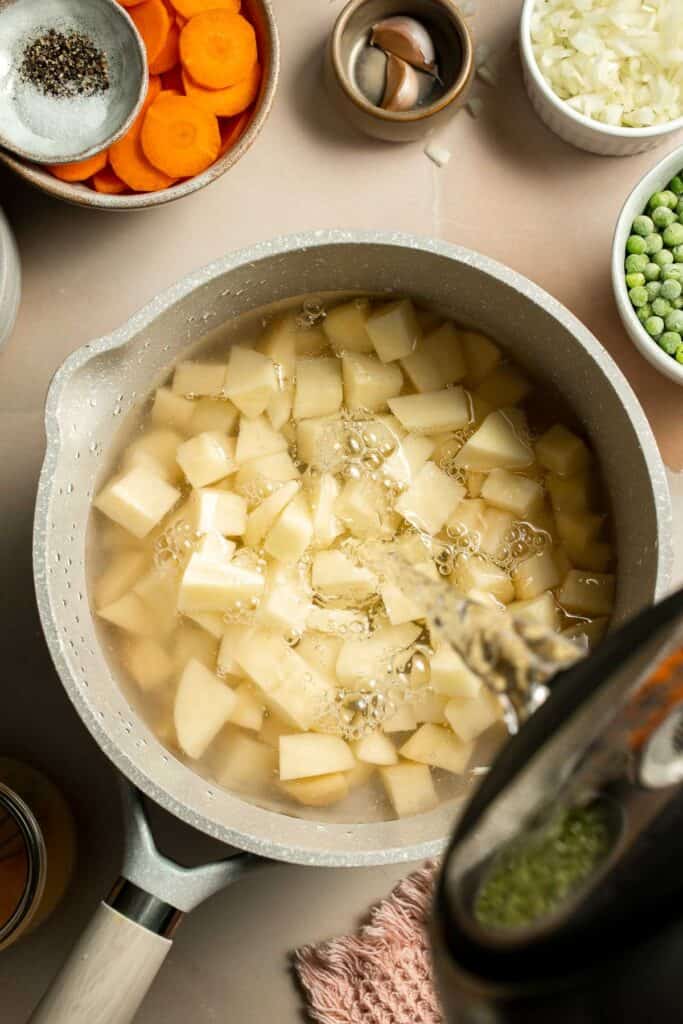
- vegetables - this recipe uses garlic, onion, celery, carrots, potatoes, and peas. The potatoes need to be boiled separately and can be cooked ahead of time.
- avocado oil
- all-purpose flour - to thicken the pot pie filling.
- vegetable broth
- coconut milk - or coconut cream, for a rich, creamy texture without dairy.
- salt + pepper
- egg - beaten well and brushed over the crust before baking.
- puff pastry double pie crust - if using store-bought puff pastry, thaw it completely. Homemade pie crust can be used instead, like this rough puff pastry, for an extra flaky crust.
You will also need measuring cups and spoons, a large pot, a large skillet, a stirring spoon, a 9-inch pie plate, a rolling pin, a sharp knife, a small bowl, and a pastry brush for egg wash.
How to Make the Best Vegetarian Pot Pie
First, prepare the creamy veggie filling.
- Boil potatoes. Place potatoes in a large pot and fill with salted water to cover the potatoes by about one inch. Bring to a boil over high heat. Then turn the heat down to low, cover, and simmer for 15 minutes, until potatoes are tender. Drain well and set aside to cool off.

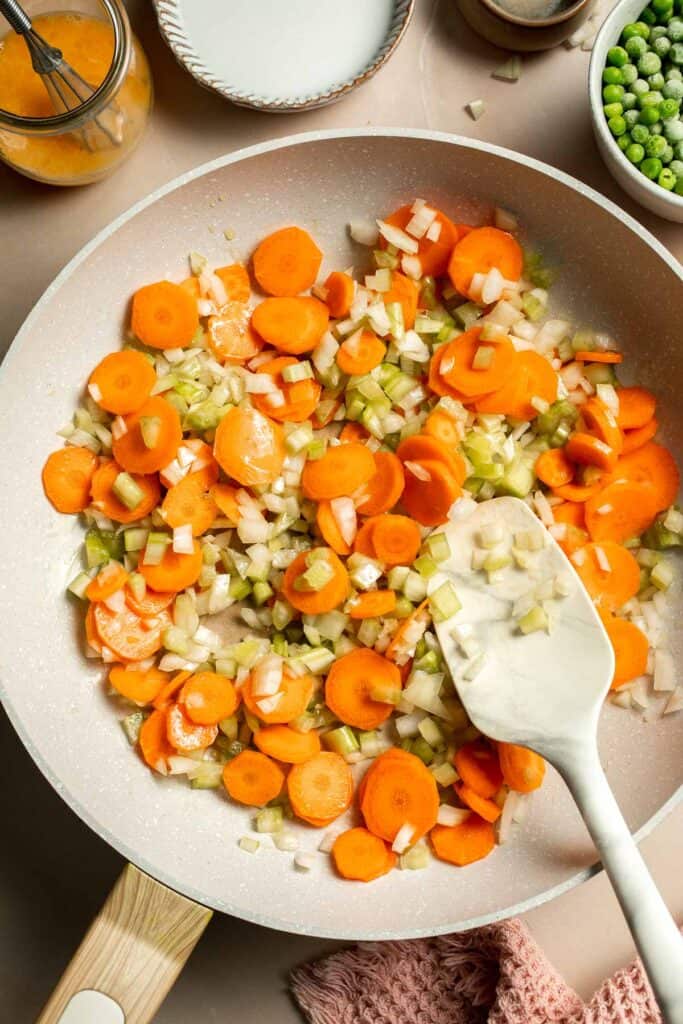
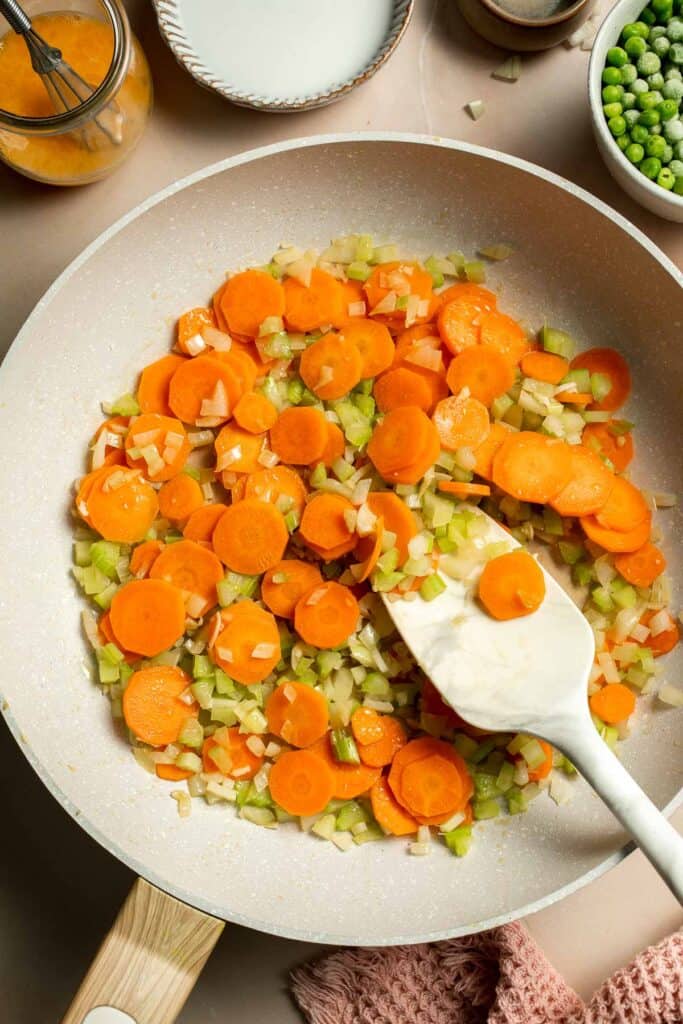
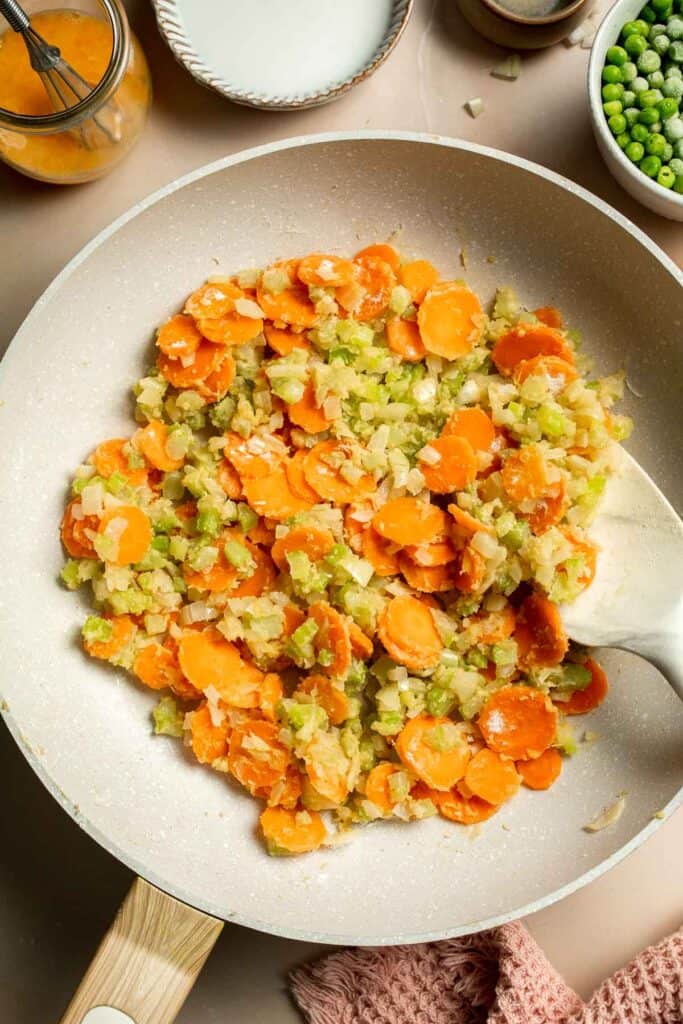
- Sauté veggies. In the meantime, heat oil in a large skillet over medium-high heat for 1 minute. Add onion, garlic, carrots, and celery. Sauté until tender, about 2 minutes.

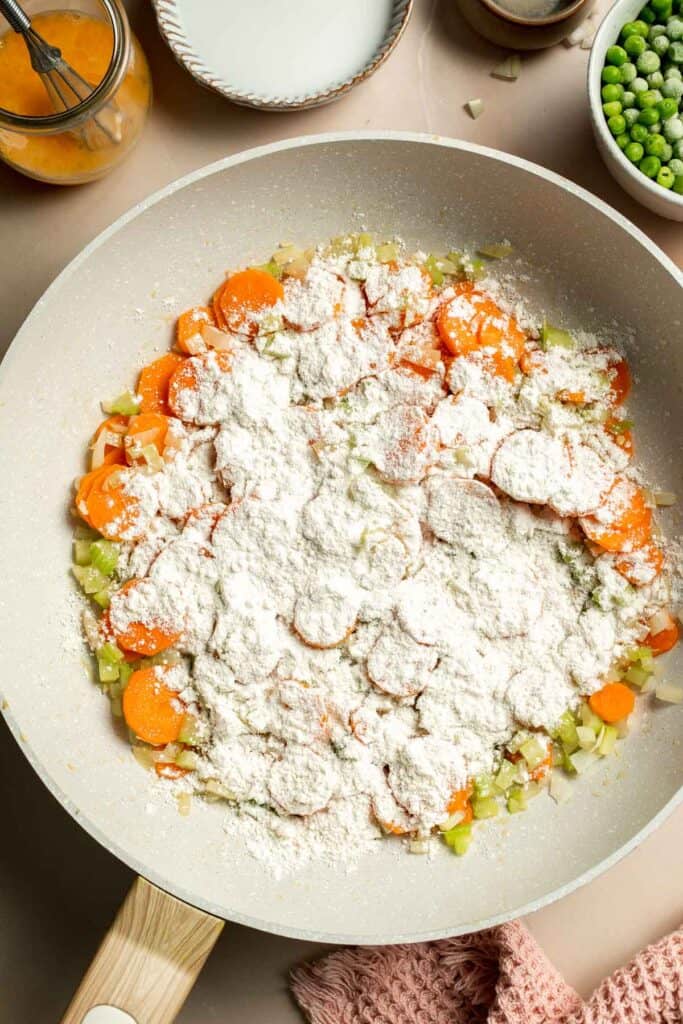
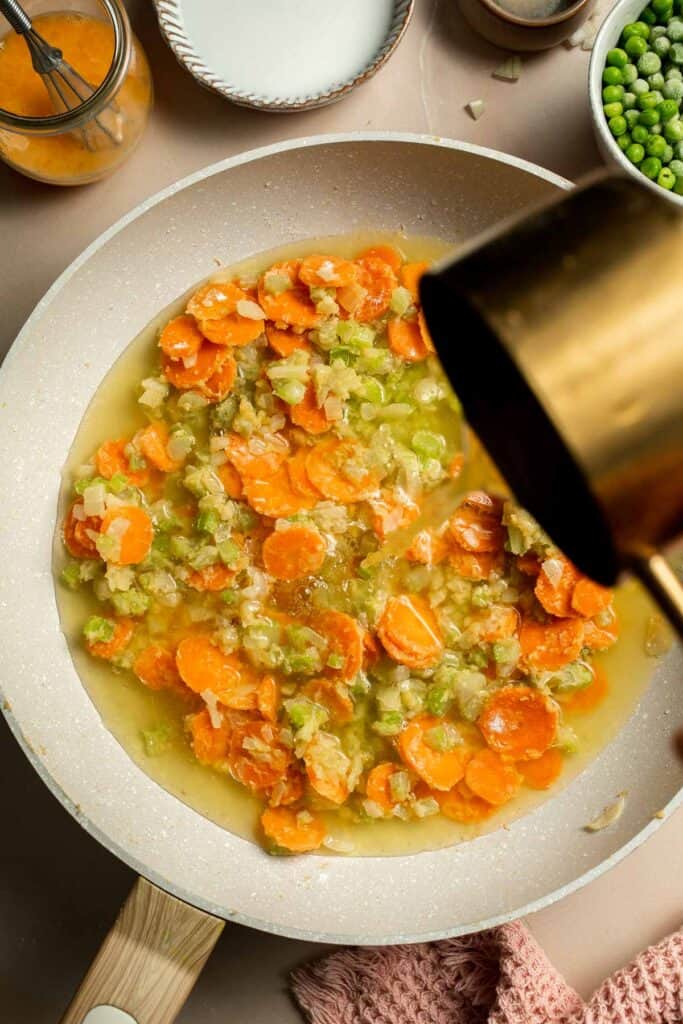
- Thicken. Add flour and stir well until thickened into a paste, about 1 minute.
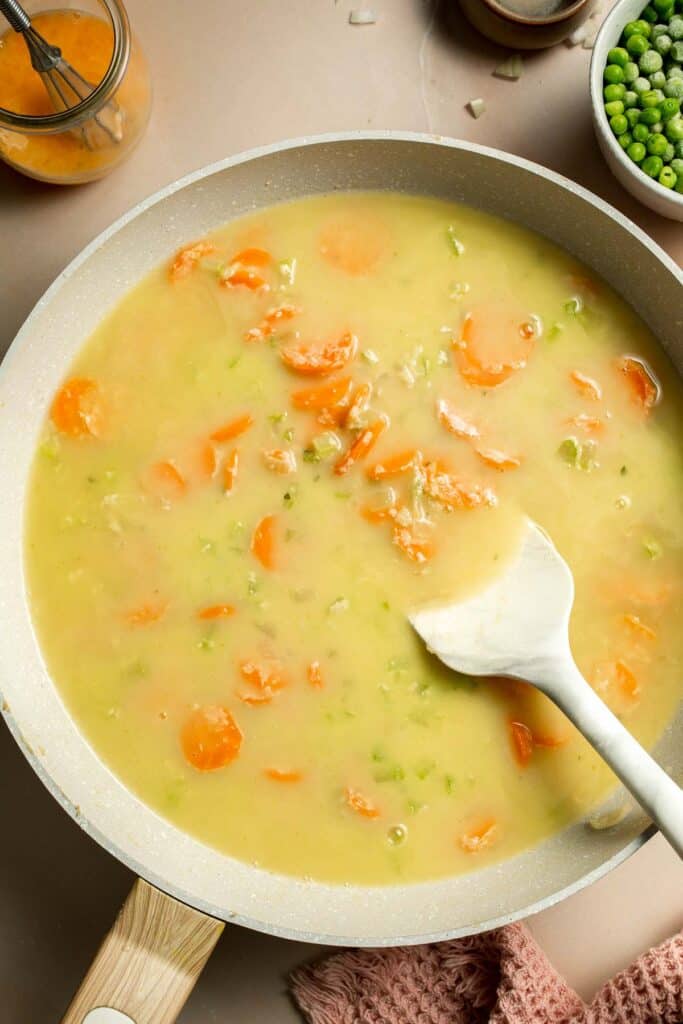
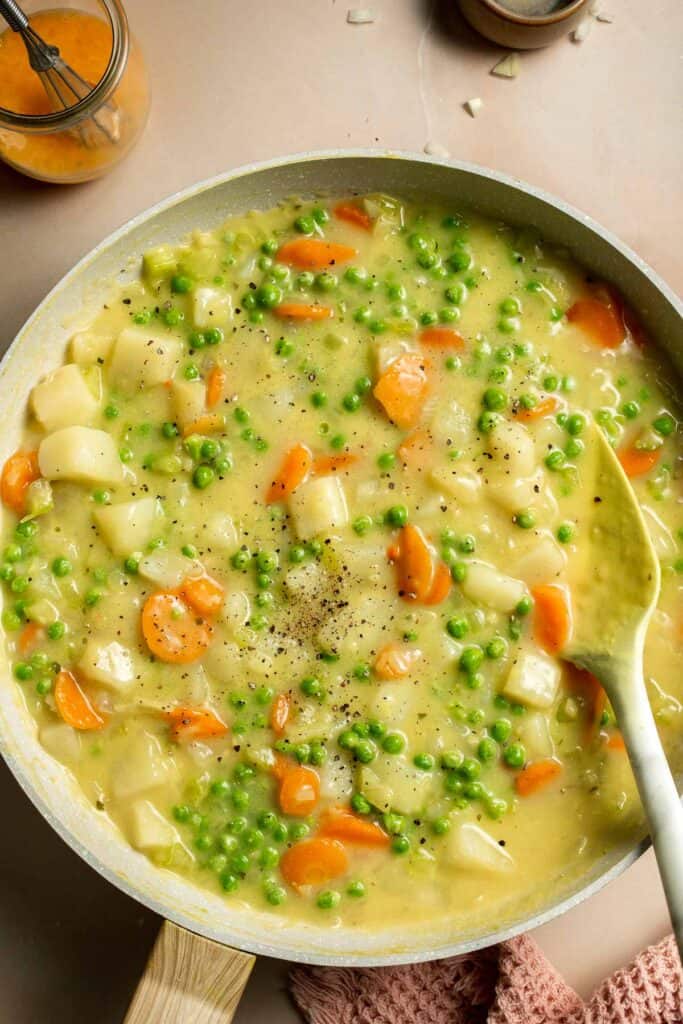
- Add broth and simmer. Slowly add vegetable broth and coconut milk. Stir constantly until smooth and bring the mixture to a simmer over medium heat. Simmer until thickened to a desired consistency (similar to gravy), about 2-3 minutes. Turn off heat.
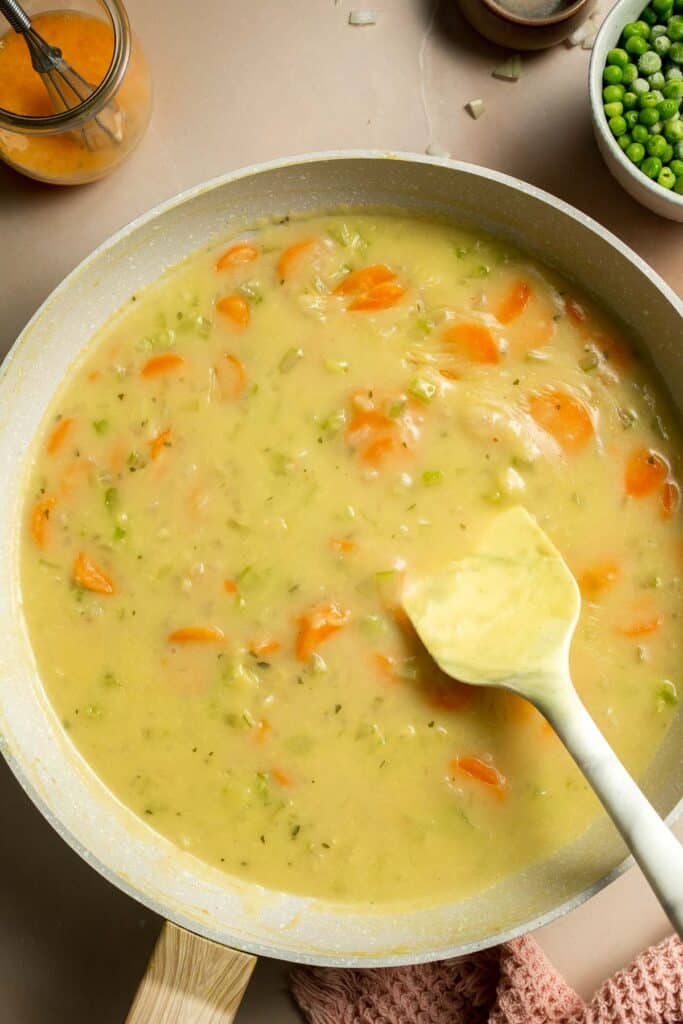
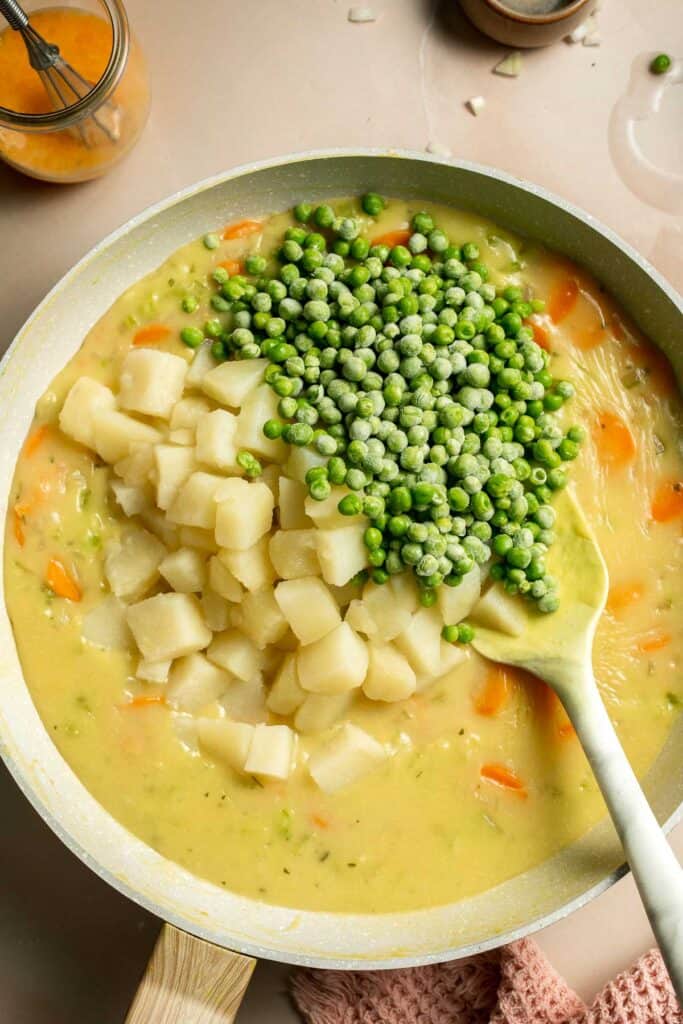
- Add potatoes. Stir in cooked potato and peas and season with salt and pepper. Set the filling aside, allowing it to cool off, about 10 minutes.
Then, assemble the pot pie and bake.
- Prep. Grease a 9-inch pie plate with cooking oil spray or butter.
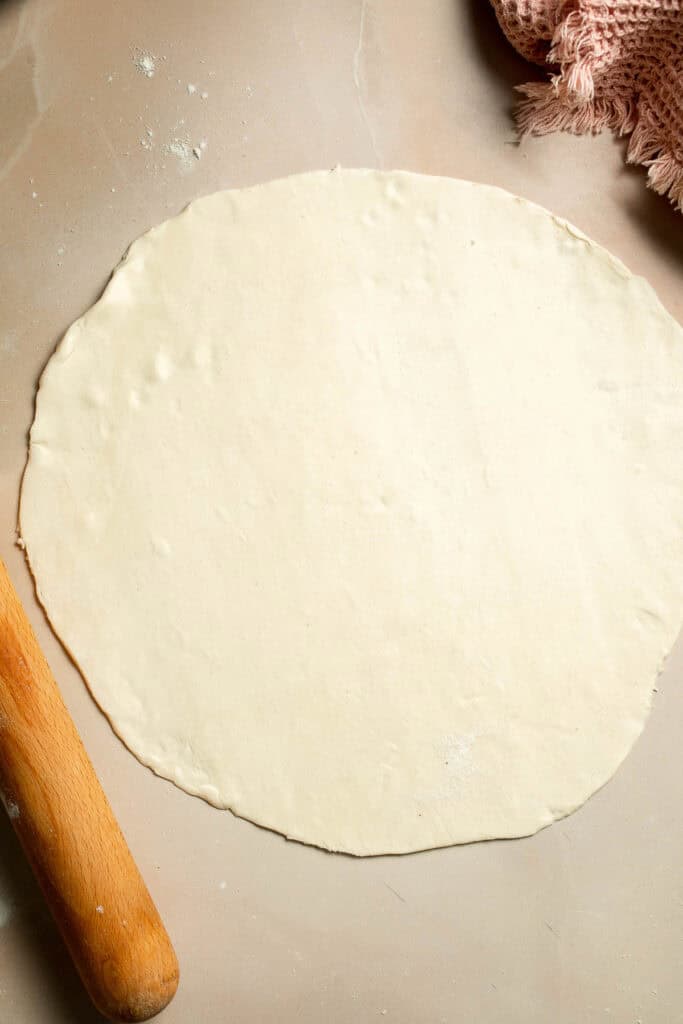
- Roll dough. Lightly flour your work surface and rolling pin. Roll the pie dough out into a 12-inch round. Carefully transfer it to the prepared pie dish and fit it in. Trim any excess dough if needed. Place in the fridge while you roll out the second piece of dough (top crust) to a 10 inch round.
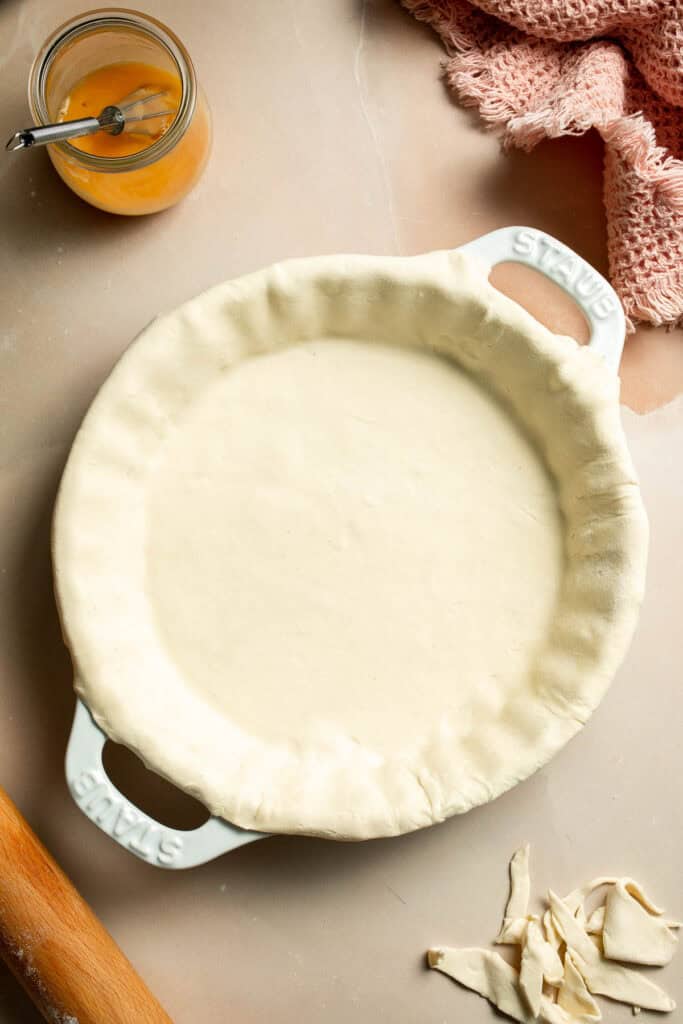
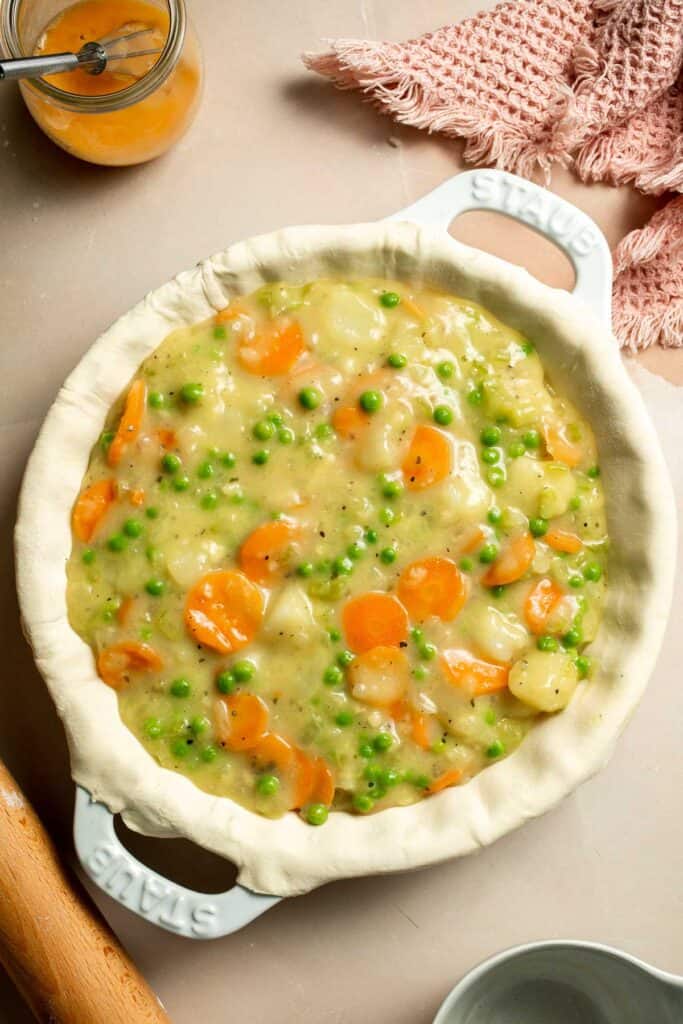
- Add filling. Remove the chilled pie crust from the fridge and fill with the veggie mixture.
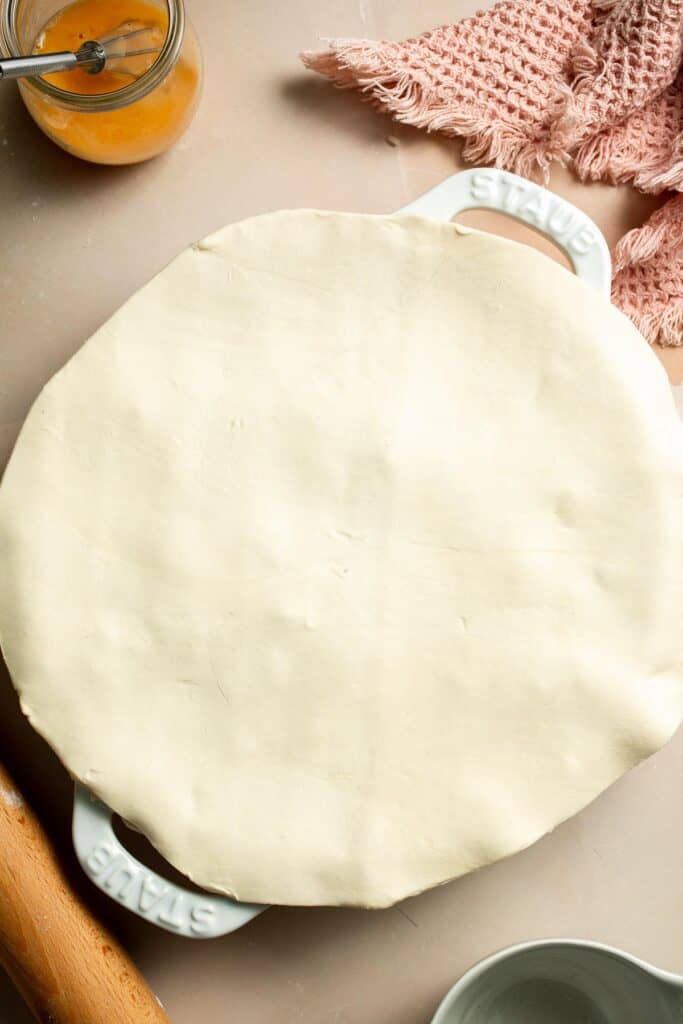
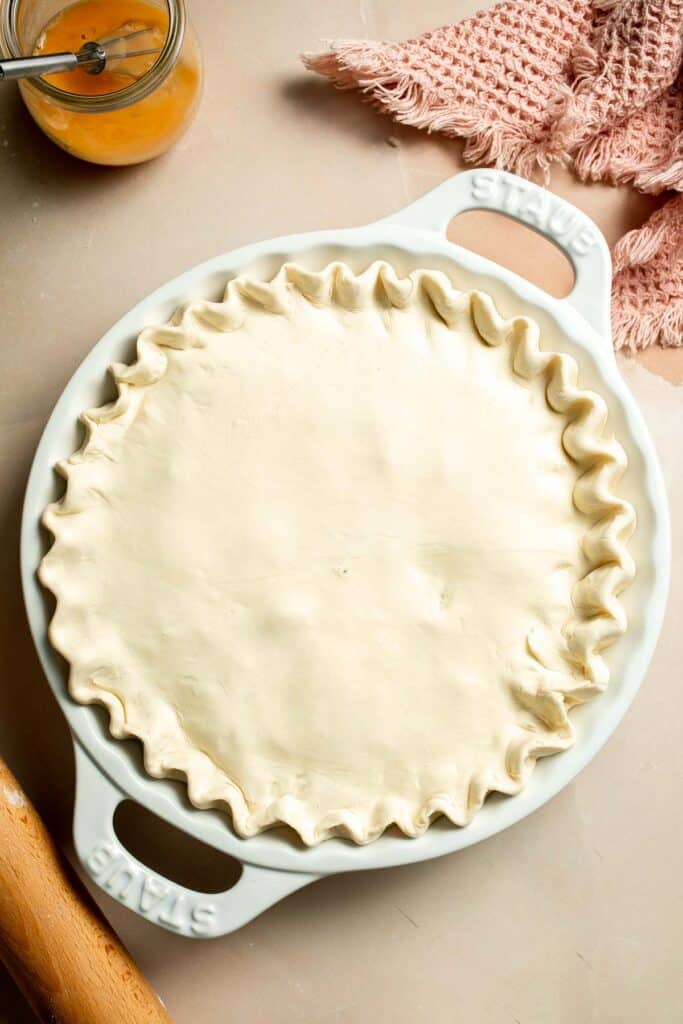
- Add top crust. Carefully place the top crust over the filling to form a lid (It should completely cover the edge of the bowl).
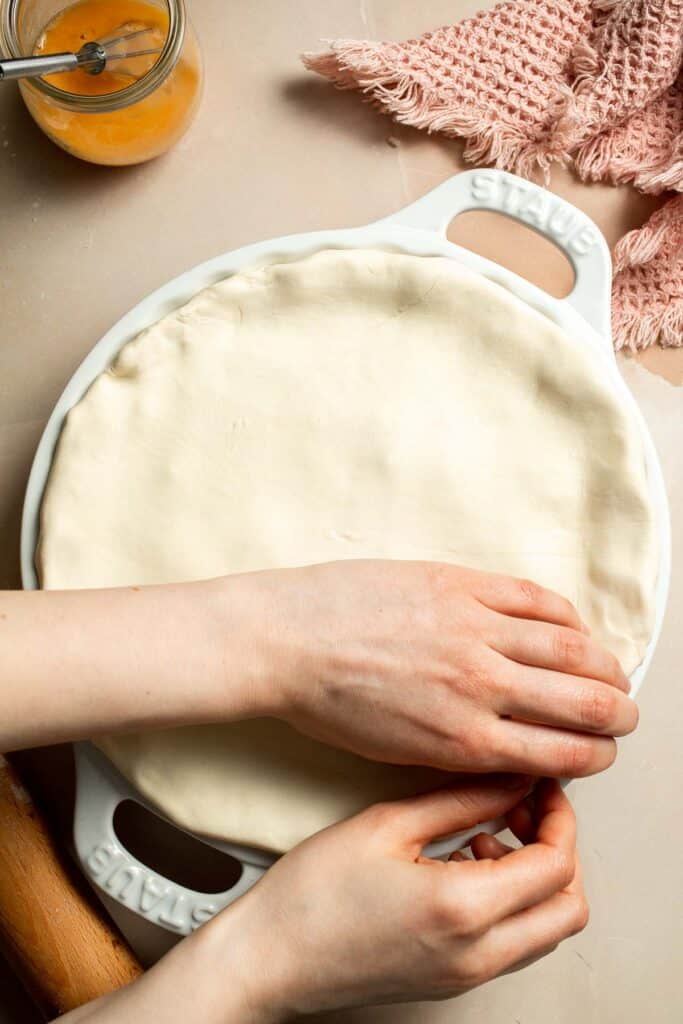
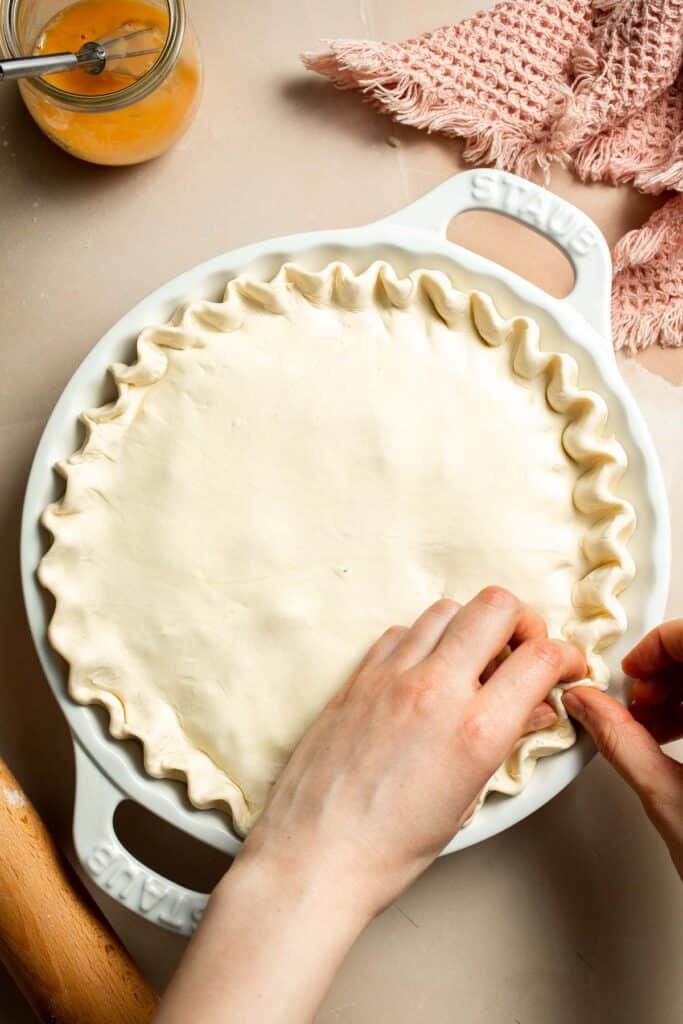
- Seal. Tuck in the excess overhanging dough and press down to seal the edge. Flute the edges of the pie crust (to make it look pretty).
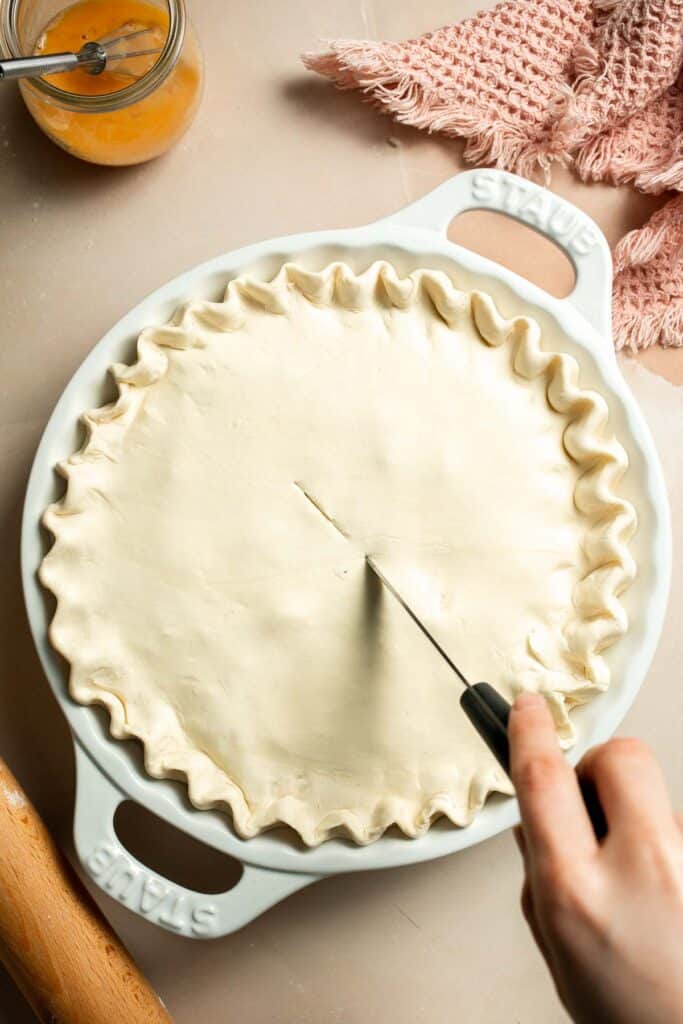
- Vent. Cut out a few small vents on the top crust with a knife.
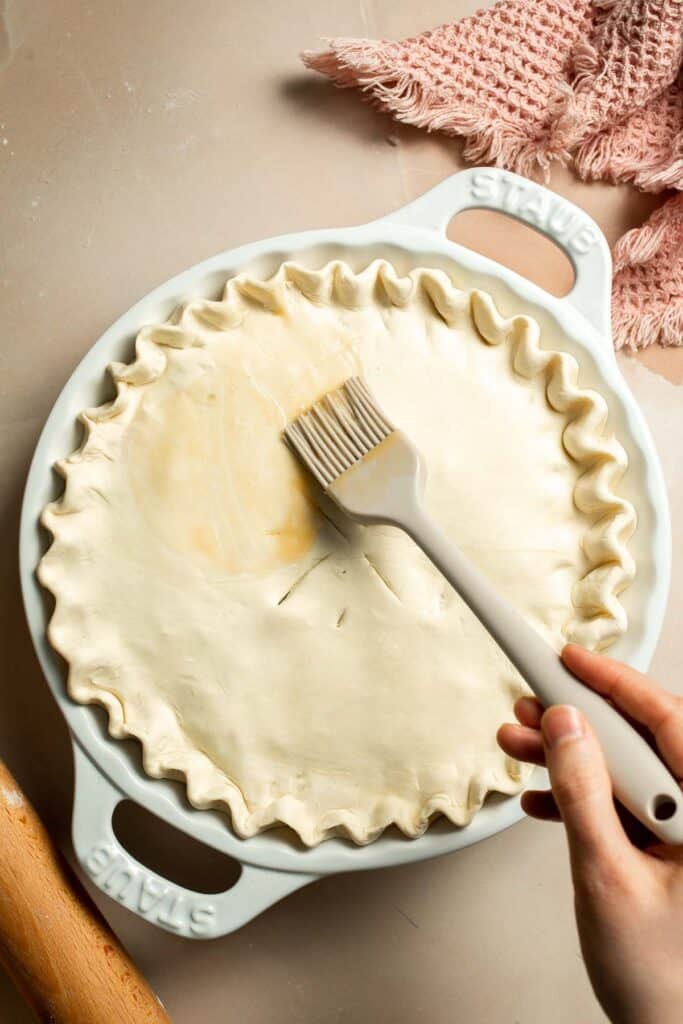
- Add egg wash. Apply egg wash over the top pie crust and season with a little bit of salt and pepper.
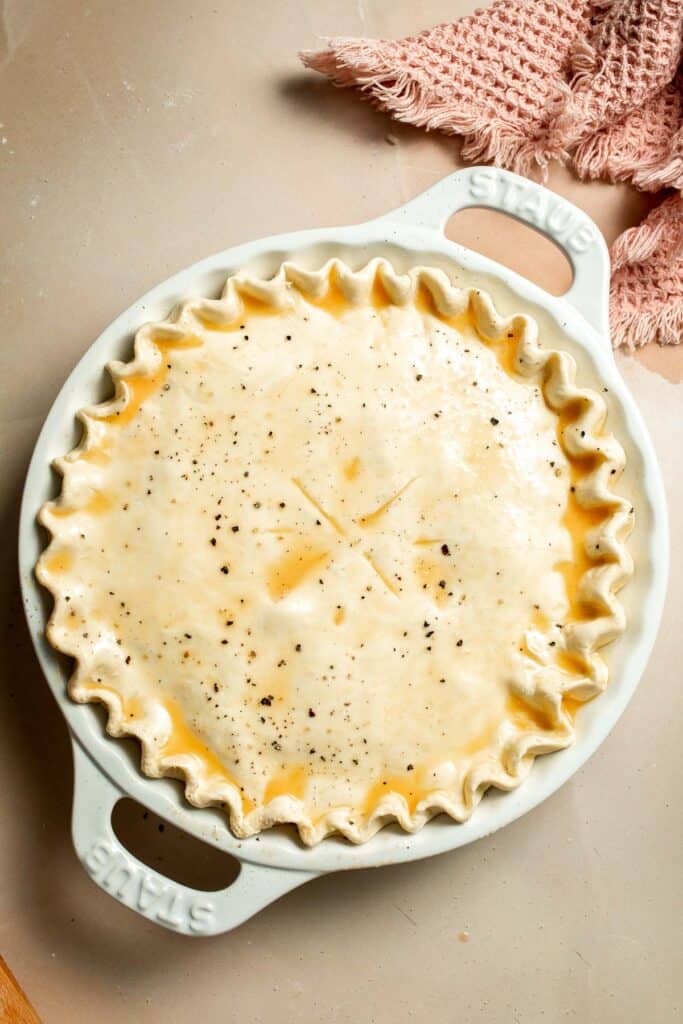
- Bake. Bake on the middle rack of a 400F preheated oven for 20 minutes, then lower the heat to 350F and bake for 10 more minutes until the top turns golden brown and dough is flaky. Let it rest for 15 minutes, then slice and serve.
Recipe Variations
- Add "meat." Add plant-based chicken or a can of white beans (strained and rinsed) for a meatier pot pie.
- Add other veggies. Consider the garlic, onion, celery, and carrots to be the starting point. You can also add green beans, sweet potatoes, cubed butternut squash, and more.
- Make mini pot pies. You'll need more frozen puff pastry for this, but you can line buttered ramekins with pastry, add the filling, and then add a circle of dough on top of the ramekins. Seal, vent, and bake like normal (approximately 25-35 minutes or until the crust is golden brown). You can also skip the bottom crust and add just the top crust if you want to lighten things up.
How to Serve
This Vegetarian Pot Pie is delicious served on its own, or paired with some of my favorite sides including:
- Balsamic Brussels Sprouts
- Spinach Salad
- Garlic Parmesan Roasted Carrots
- Curried Butternut Squash Soup
- Sweet Kale Salad
- Blistered Green Beans
For more recipes, see our 50 Best Fall Side Dishes.
Recipe Tips and Tricks
- Watch the temperature. If your filling is too warm, it will start to melt the butter in the pie crust. Let the filling cool off for a bit before assembling, and then bake right away after adding the top crust.
- Add slits. The filling will release steam in the oven, which can cause the top crust to rise up and potentially split or leave a big air pocket. Add a few small slits to vent the steam and have a smooth, flat crust.
- Watch the color of the pastry. I recommend starting with high heat and then dropping the heat to get a nice, crisp crust without burning the pastry. If it starts getting dark too early in the baking process, cover it with a sheet of aluminum foil.
- Bake on a baking sheet. With the flaky pastry and filling, the pie dish can be quite heavy and hard to maneuver. Place the pie pan on a sheet pan to make it easier to bring in and out of the oven.
Storing and Freezing Instructions
How to Store
Allow the pot pie to cool completely, then store it in an airtight container in the fridge for 3-4 days.
How to Reheat
Microwaving is the quickest option, but you'll get the flakiest puff pastry crust by popping the leftovers back in the oven or air fryer at 350 F until fully heated through.
How to Freeze
You can either freeze leftovers or the entire unbaked pot pie. The leftovers should be placed in a freezer-safe container or wrapped in several sheets of plastic wrap and then frozen for up to 3 months. For the unbaked pot pie, use a freezer-safe pie pan and freeze the whole thing on a sheet pan until frozen solid. Then, wrap it in plastic wrap and freeze for several months. Thaw completely in the fridge overnight before baking like normal.
FAQ
This easy vegetarian pot pie can be made vegan-friendly using vegan puff pastry. Ditch the egg wash and brush the top of the crust with non-dairy milk instead. You won't get quite the same sheen, but it works great in a pinch!
Yes! But first, make sure the creamy filling is slightly warm or cold (not hot) before transferring it to the pie crust, then add the top crust. If the hot filling sits in the crust, it can cause the butter to melt out and change the texture of your pot pie. Cover well with foil or plastic wrap, and refrigerate overnight. Bake like normal the following day and serve.
Although you can certainly make a delicious, creamy, crave-it-all-day pot pie with regular pie crust, a little store-bought puff pastry takes it to a whole different level. That flaky, puffy crust adds crunch and a buttery flavor that contrasts the creaminess of the filling. There's really no comparison. Puff pastry sheets are the best option for any type of pot pie!
More Vegetarian Entree Recipes
- 60 Easy Vegetarian Dinner Recipes
- Vegetarian Shepherd's Pie
- Vegetable Pasta Bake
- Pumpkin Curry with Chickpeas
- Eggplant Lasagna
- Vegetarian Burrito Bowl
Tried this recipe?
I'd love to hear what you think! Leave a comment and rating below to share your feedback. Your reviews help others discover this recipe and help me keep creating more free recipes for you. Snap a photo and tag me on social media @aheadofthyme too.

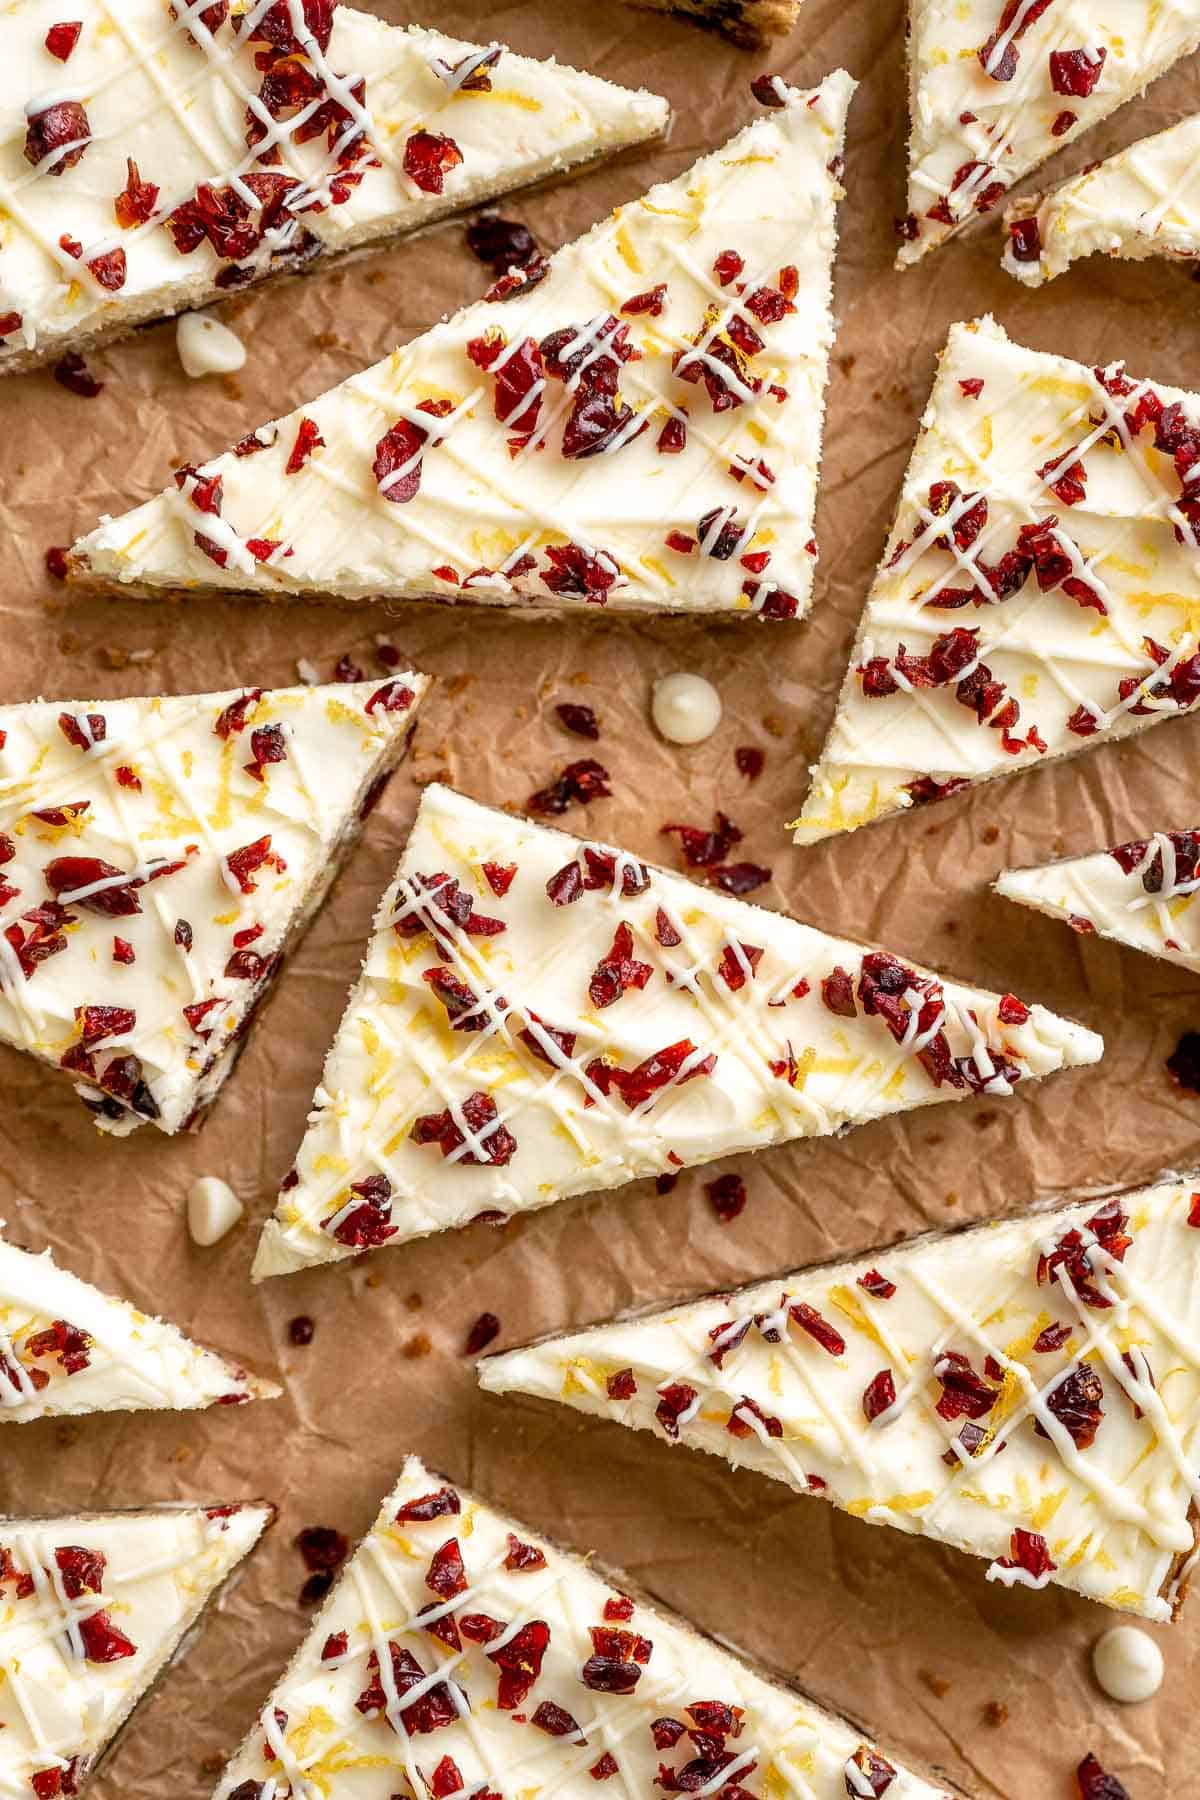
Cranberry Bliss Bars
Skip the trip to Starbucks and make homemade Cranberry Bliss Bars instead! These cranberry bars start with a chewy blondie base that is studded with dried cranberries and white chocolate, warmly spiced with a hint of orange, then topped with a swirl of tangy cream cheese frosting to balance the sweetness. Make it even more festive with extra cranberries on top and a white chocolate drizzle. Perfect for the holidays!
Although cranberry bliss bars started as a Starbucks recipe, they've quickly become part of mainstream culture. It's just not the holidays without them! Orange and cranberry are a match made in heaven, but it's the white chocolate that really takes this homemade version to the next level. They're so soft and chewy, look gorgeous on any dessert tray, and will disappear before your eyes. Serve them as a Thanksgiving dessert, in your cookie boxes, or at your holiday party!
Why You'll Love These Cranberry Bliss Bars
- Tender and chewy blondies. One of the best parts about cranberry bliss bars is the texture. They're not sugar cookies or brownies; they're blondies with a decadent, chewy bite. They're strong enough to eat with your fingers, but quickly turn soft and chewy in your mouth with crunchy chocolate chips and creamy frosting to keep it interesting. I can never eat just one bar!
- Classic flavor combination. These copycat Starbucks cranberry bliss bars were inspired by cranberry and orange, a classic combination, but with a sweet twist. The bars have a warm, caramel-like flavor from the brown sugar and warm spices, and the white chocolate chips balance the tart cranberries. The cream cheese frosting will remind you of your favorite fall desserts and keep everything from becoming too sweet!
- Favorite holiday treat. Even the naysayers who don't like cranberries can't help but love these cranberry bliss bars. The contrast of tart and sweet keeps them from being too sweet, and all the different textures make them so interesting and fun to eat. We serve them throughout the holiday season, but they go fast, so you might want to make a double batch...

Ingredient Notes
To make these delicious Cranberry Bliss Bars, you will need the following ingredients (full measurements in recipe card below):
- all purpose flour - regular all purpose works great. No need to fuss with cake flour.
- baking powder + soda - use both baking powder and soda to help the bars puff up and set nicely.
- spices - use warm spices, like ground ginger and cinnamon, and a little salt to bring out flavor.
- sugar - the mixture of brown and white sugar gives the bars a chewy texture, a nice bite on the outside, and extra flavor.
- orange zest - for a fresh orange flavor in the bars and in the cream cheese frosting.
- butter - for the bars, the butter will be melted, so no need to soften first. For the frosting, we will need to use softened butter.
- eggs - to bind the batter together and help it rise.
- vanilla extract - to flavor the bars and the frosting.
- orange extract - optional, but this is a great way to add even more orange flavor.
- white chocolate chips - for crunch and sweetness in the bars. We also need extra white chocolate to melt and drizzle on top too.
- dried cranberries - for flavor in the bars and to sprinkle on top after.
- cream cheese - softened at room temperature for easy whipping into frosting.
- confectioners' sugar - to sweeten and thicken the frosting.

Baking Tools
You will also need the following baking tools and equipment:
- measuring cups and spoons
- 9x13-inch baking pan
- parchment paper
- cooking spray
- mixing bowls
- whisk and large mixing spoon
- zester
- wire rack
- electric hand mixer
- sharp knife
How to Make the Best Cranberry Bliss Bars
Make the cranberry bliss bars:
- Combine dry ingredients. In a medium to large sized mixing bowl, whisk together the flour, salt, baking powder, baking soda, ginger, and cinnamon, until well-combined. Set aside.
- Combine wet ingredients. In a large mixing bowl, add the brown sugar, white sugar, and orange zest. Use your fingers to rub the orange zest together with the sugars. Next, add in the melted butter, eggs, vanilla, and orange extract (if using), until very smooth and well-combined.


- Add dry to wet. Add the dry mixture into the wet, then stir until fully-combined.
- Fold in mix-ins. Fold in the chocolate chips and dried cranberries.


- Bake. Prepare a 9x13-inch baking pan with cooking spray and line with parchment paper, leaving an overhang on 2 sides for easy removal. Pour the batter into the prepared baking pan, then place into a 350F preheated oven to bake for 25-30 minutes. When done, allow to cool fully before frosting. Then, use the parchment paper overhang to carefully remove it and place on a wire rack.


Make the cream cheese frosting:
- Combine. Add the cream cheese, butter, confectioners' sugar, vanilla, salt, and orange zest to a large mixing bowl. Using an electric hand mixer, beat the frosting together until smooth and well-combined.
- Spread frosting. Evenly spread the frosting over top of the cooled cookie bars.


- Melt white chocolate. In a small mixing bowl, add the white chocolate. Place into the microwave and heat in 30 second intervals, stirring in between, until full melted and smooth.
- Add toppings. Sprinkle the frosted bars with chopped dried cranberries, and drizzle with melted white chocolate. You can also sprinkle some extra orange zest, if desired.


- Chill. Place into the fridge for 30 minutes to 1 hour, until set.
- Slice. Slice the bars into 8 rectangles by making one vertical slice in the middle lengthwise, and 1 horizontal slice in the middle crosswise. Then add 2 more slices crosswise above and below the center slice. Slice each of those rectangles diagonally into triangles.


Recipe Variations
- Adjust the shape. Starbucks sells these bars sliced as triangular wedges, but you can also cut them into squares, bars, or whatever shape you prefer.
- Play with add-ins. For a deeper flavor, replace the white chocolate with dark or milk chocolate and use dark brown sugar instead of light. To add some crunch, sprinkle some toasted pecans or walnuts into the base or add chewiness with minced candied ginger or candied orange peel.
- Frost (or not). The sweet cream cheese frosting really balances the richness of the blondie base, but you can skip it if you want to serve the bars like brownies or substitute your favorite frosting.
How to Serve
These Cranberry Bliss Bars is delicious served on its own for a sweet breakfast treat, a dessert, or a snack with tea. If serving as part of a larger holiday dessert spread, pair them with some of my favorites including:
- White Hot Chocolate
- Gingerbread Cake
- Christmas Sugar Cookies with Royal Icing
- Pecan Pie Cheesecake
- Chocolate Spritz Cookies
- Cranberry Pie
For more recipes, see our 30 Best Christmas Dessert Recipes.

Recipe Tips and Tricks
- Salt everything. Since these copycat cranberry bliss bars are so sweet from all the sugar, cranberries, and white chocolate, you need something to balance all the sugar. That's where salt comes in. It will bring out the flavors in the bars and frosting, keeping them from tasting overly sweet or flat.
- Chill first. Make sure to frost the bars only after they've cooled, or the cream cheese icing may melt away.
- Use real white chocolate. Don't be confused by the different ingredients in the baking section. Look for real white chocolate (made with milk, cocoa butter, and sugar), not white melting chocolate (made from palm kernel oil, milk, and sugar). The real stuff is worth spending a little extra.
Storing and Freezing Instructions
How to Store
Since these bars are topped with cream cheese frosting, they need to be refrigerated for freshness. Store them in an airtight container for up to 5 days. Place a piece of parchment between any layers to avoid damaging the topping.
How to Freeze
Cranberry bliss bars freeze very well! You can either freeze the bars and frosting separately or freeze the frosted bars on a sheet pan until solid. Wrap each one well with plastic wrap and store it in a freezer-safe container for up to 3 months. Let the bars thaw in the fridge for a few hours, then let them warm up at room temperature for the best flavor and softest texture.
FAQ
I don't recommend it. Fresh cranberries are very tart, which is fine with all the sweetness in these bars, but they also pop and add moisture to the blondie batter when they bake. I prefer to use dried cranberries, which are sweeter and add a nice chewiness to the bars.
The Starbucks version uses cream cheese frosting, and I recommend it as well since the tangy cream cheese cuts through all the sweet elements in this cranberry blondie. If you're not a fan of cream cheese, make a lightly sweetened whipped cream or Swiss meringue buttercream instead.
Orange juice doesn't have the same intensity of flavor as orange extract, but it's a decent alternative in a pinch. Don't skip the orange zest, though. It's packed with flavor oils and will impart a refreshing orange flavor.
More Recipes with Dried Cranberries
- Cranberry Orange Muffins
- Almond Cranberry Granola Bars
- Cranberry Orange Shortbread Cookies
- Whole Wheat Cranberry Bread
- Gingerbread Granola
- Soft and Chewy White Chocolate Cranberry Cookies
Tried this recipe?
I'd love to hear what you think! Leave a comment and rating below to share your feedback. Your reviews help others discover this recipe and help me keep creating more free recipes for you. Snap a photo and tag me on social media @aheadofthyme too.

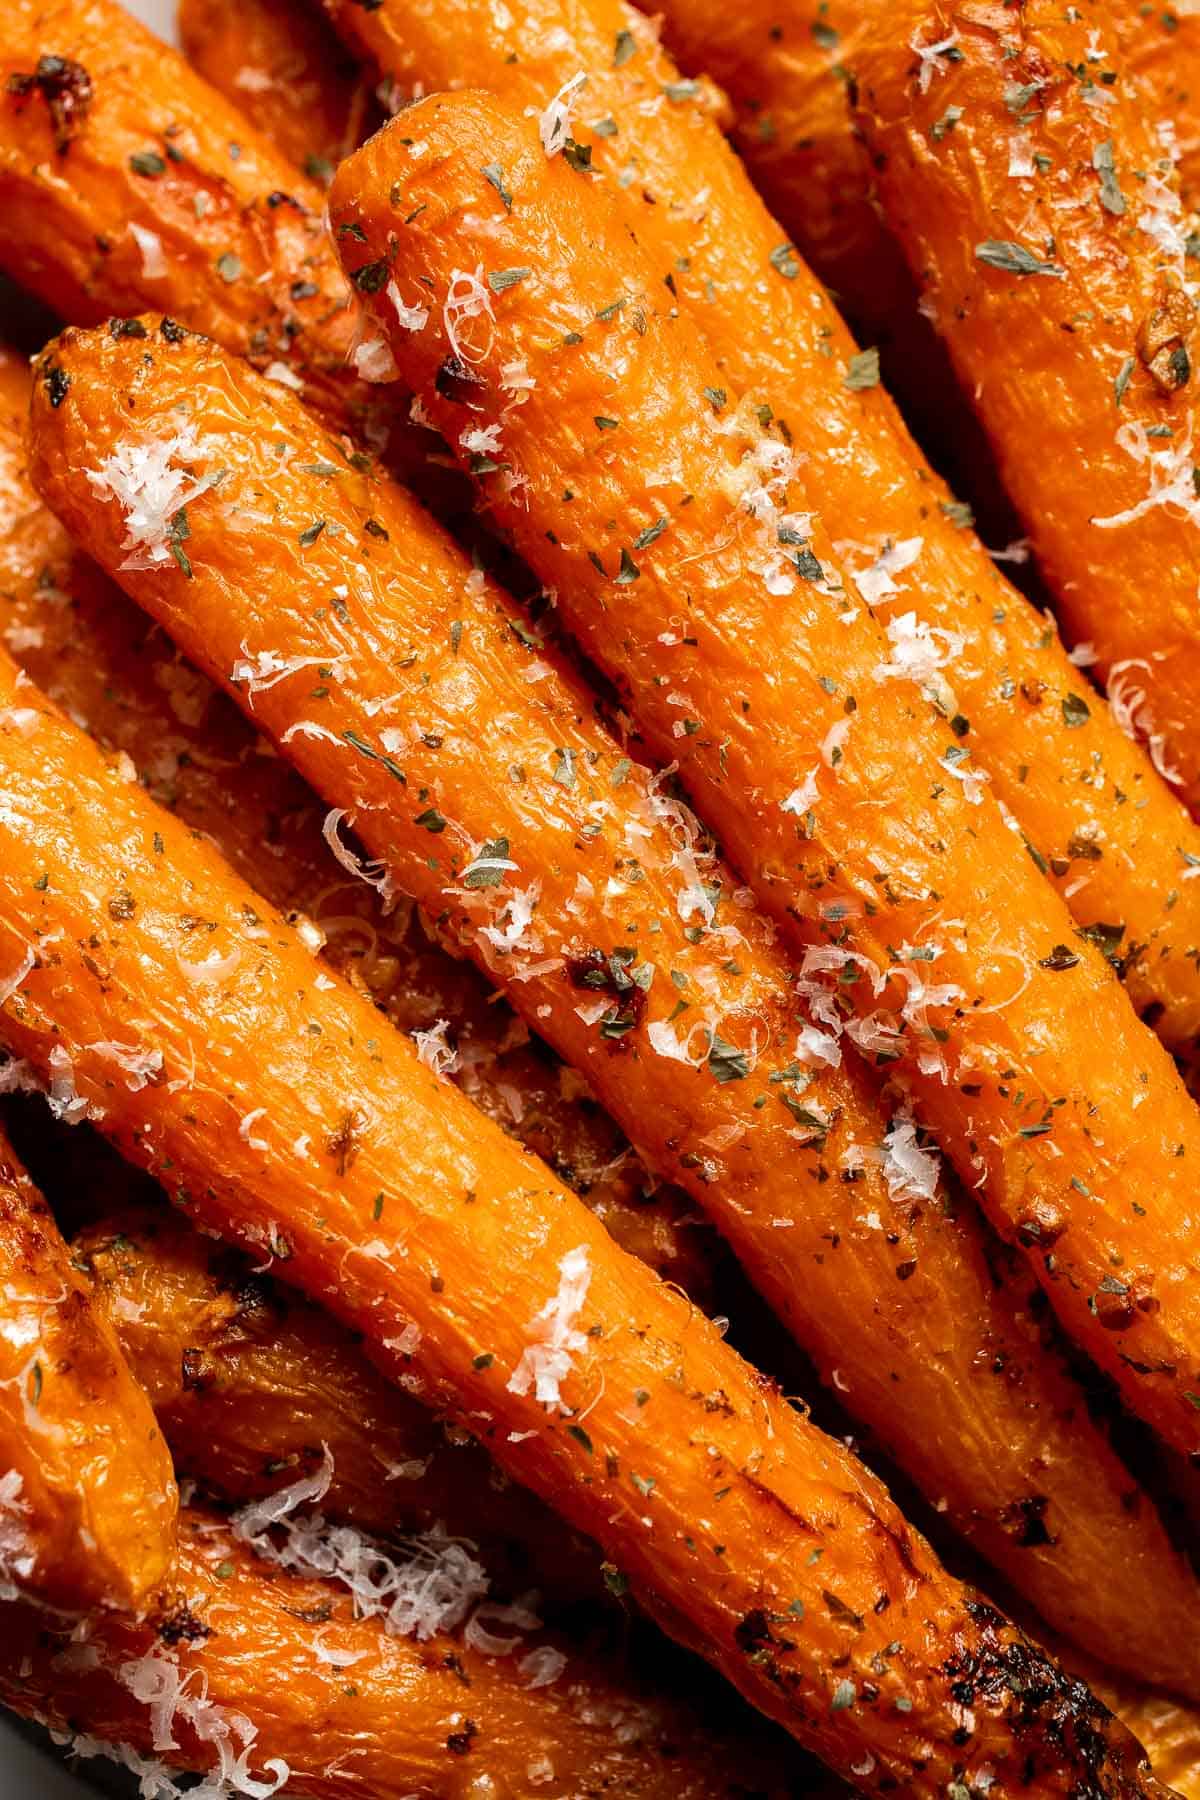
Garlic Parmesan Roasted Carrots
These Garlic Parmesan Roasted Carrots add a savory, cheesy flavor to any meal and are ready in just over 30 minutes! Fresh carrots are tossed in a blend of garlic, Parmesan, and dried herbs, roasted until tender and caramelized, then sprinkled with more cheese before serving. The garlicky coating infuses every bite with unbelievable flavor, making these roasted carrots a quick and delicious side dish for weeknight dinners or your holiday feast!

If you're searching for a way to enjoy more veggies, these Parmesan garlic carrots are a must-try. They really couldn't be much easier to make; you only need one sheet pan, a few basic ingredients, and about 5 minutes of active effort. It's the extra topping of freshly grated Parmesan that really takes them over the top, though! Even the pickiest eaters will eat a few extra servings of vegetables when they're covered in melted cheese. Offer these crispy Parmesan carrots alongside your favorite main dishes for a warm, comforting meal the entire family will love!
Why You'll Love These Garlic Parmesan Roasted Carrots
- So much flavor. The roasting process brings out the natural sweetness of the carrots, which is balanced by the sharpness of fresh garlic and salty Parmesan. Every bite is perfectly seasoned, tender, and bursting with amazing flavor. These carrots steal the show every time! I could easily eat a tray all by myself.
- Quick and easy prep. This roasted carrot recipe is incredibly easy to whip up, taking just 5-10 minutes to prep. Just toss everything together, bake, and cover with more cheese. While your carrots are roasting, you can focus on preparing the rest of your meal.
- Perfect side dish for fall. With their warm, comforting flavors, garlic parmesan roast carrots are a perfect addition to your dinner table during the cooler months of the year. Carrots are even sweeter after the first frost, too, making them a delicious side dish for your holiday meals.
Ingredient Notes
To make these delicious Garlic Parmesan Roasted Carrots, you will need the following ingredients (full measurements in recipe card below):
- carrots - washed with the tops trimmed off.
- avocado oil - or olive oil, to help the carrots caramelize. Melted butter would add a great flavor but may brown at high temps.
- garlic - finely chopped.
- seasonings - stick with timeless pantry staples, like Italian seasoning, salt, and pepper.
- Parmesan cheese - freshly grated Parmesan is a major part of this recipe. Be sure to use real Parmesan, not the stuff in the shaker bottle.
You will also need measuring cups and spoons, a large mixing bowl, sharp knife, baking pan, and spatula.

How to Make the Best Garlic Parmesan Roasted Carrots
- Combine. In a large mixing bowl, add carrots, avocado oil, garlic, Italian seasoning, salt, pepper and ⅓ cup of Parmesan cheese. Toss well until evenly coated.


- Bake. Arrange the carrots in a single layer on the pan and bake in a 400F preheated oven for 25- 30 minutes until tender. Flip once halfway through baking to cook evenly.


- Serve. Serve immediately and top with the remaining Parmesan cheese.

Recipe Variations
- Roast other root vegetables. Parsnips cook very similarly to carrots and would be a nice addition to this recipe. Replace some of the carrots with peeled and trimmed parsnips and roast like normal.
- Play with other seasonings. Feel free to replace the salt with your favorite seasoning salt, add more dried herbs, garlic powder, red pepper flakes, or even some ranch dressing powder. Sprinkle with herbs, like fresh parsley or dill.
- Crisp up the crust. For a crispy parmesan crust, sprinkle the roasted carrots generously with parmesan cheese and melt under the broiler until the cheese melts and turns golden brown. It's decadent but such a nice treat for holiday dinners!
- Save the carrot tops. If you're using fresh carrots with the tops still on, save the tops to make an herby pesto. The tops taste similar to parsley and make a great garnish.
How to Serve
These Garlic Parmesan Roasted Carrots are delicious served on the side of my favorite main dishes including:
- Easy Juicy Roasted Turkey Breast
- Ribeye Steak
- Roast Stuffed Chicken
- Creamy Garlic Salmon
- Stuffed Pumpkin
For more recipes, see our 40 Best Thanksgiving Main Dishes.

Recipe Tips and Tricks
- Don't crowd the pan. Arrange the carrots in a single layer on the baking sheet. Crowding can trap steam and prevent proper caramelization, resulting in soggy carrots.
- Consider the carrot size. Keep an eye on the cooking time, as it varies based on the size of your carrots. To check if they're done, pierce a carrot with a fork. If it slides in easily, they're ready to serve!
- Make extra. Keep in mind that roasting carrots causes them to shrink significantly as they release moisture. Consider making an extra tray to make sure you have plenty for leftovers.
Storing and Freezing Instructions
How to Store
Store any leftover roasted carrots in an airtight container in the fridge for up to 3-4 days.
How to Reheat
The easiest method to reheat the carrots is to microwave them for 2-3 minutes until warmed through. Alternatively, you can bake them in the oven at 350°F for 5-10 minutes, but be aware that they may soften due to the heat.
How to Freeze
While freezing is not ideal for the best flavor, if you choose to freeze them, allow the carrots to cool to room temperature. Store them in a freezer-safe bag or airtight container for up to 3 months.
FAQ
Yes! They roast beautifully and have a naturally sweet flavor. Just follow the same method as the whole carrots, reducing the cooking time slightly if needed. Baby carrots generally take about 20-25 minutes to become tender.
Roasted carrots typically take 25-30 minutes in a 400 F oven. Cooking time may vary depending on the size and thickness of the carrots, so it's important to check for doneness by piercing them with a fork; they should be fork-tender when ready.
While it's not recommended for optimal flavor, cooked carrots can be frozen in a freezer-safe bag for up to 3 months. They will be softer after thawing and reheating, but will still have great flavor.
More Carrot Recipes
- 40 Best Carrot Recipes
- Balsamic Roasted Carrots
- Candied Carrots
- Garlic and Herb Roasted Carrots
- Maple Roasted Carrots with Yogurt Sauce
- Honey Roasted Carrots
Tried this recipe?
I'd love to hear what you think! Leave a comment and rating below to share your feedback. Your reviews help others discover this recipe and help me keep creating more free recipes for you. Snap a photo and tag me on social media @aheadofthyme too.

Buttermilk Cornbread
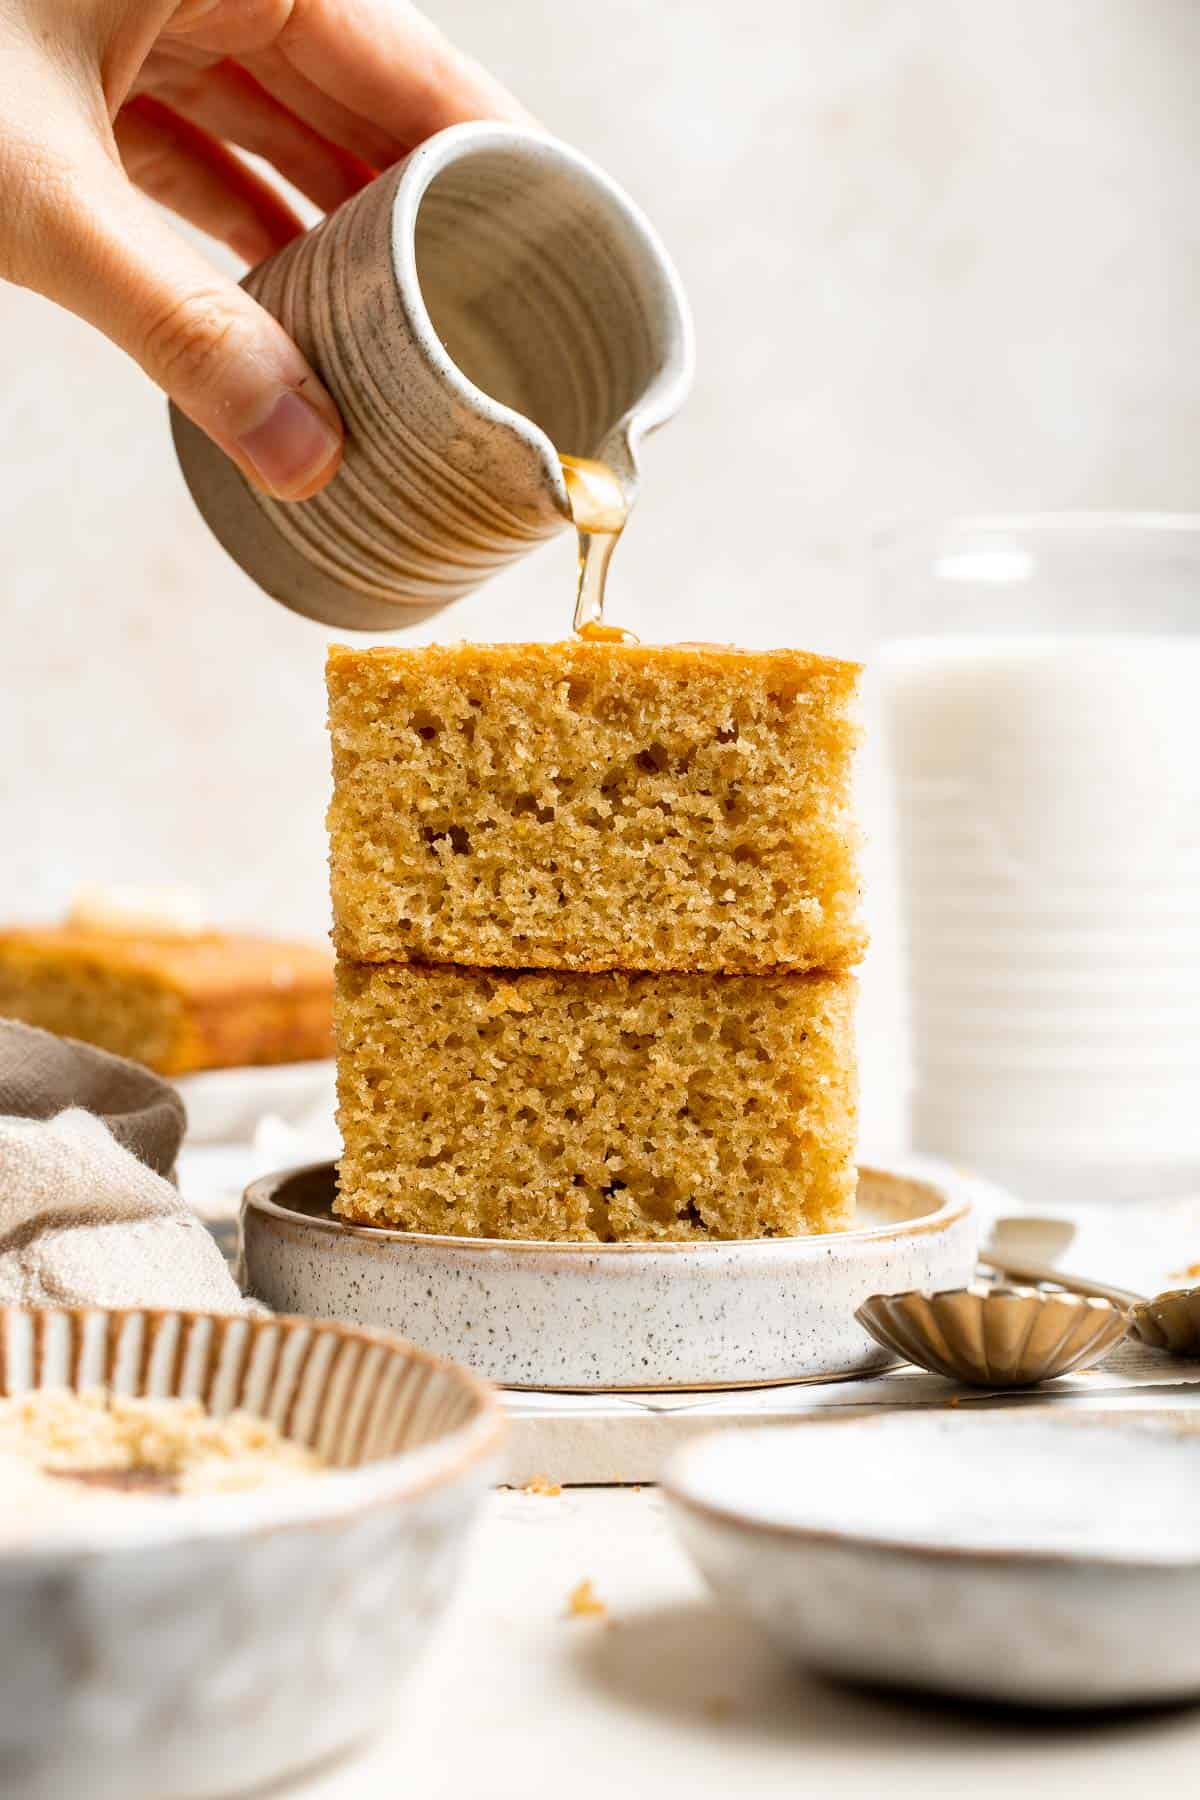
This old-fashioned style Buttermilk Cornbread tastes just like grandma used to make with a super moist, tender texture, crisp edges, and just enough sweetness to balance out the heat from your favorite chili. The batter takes just moments to whisk together, then bake and serve. There's a reason that cornbread is a classic, and this will be your new favorite recipe!

When it comes to comfort food, few things can beat a slice of warm buttermilk cornbread. It's heaven on its own with a drizzle of maple syrup or honey, served alongside your favorite One Pot Chili, Lentil Stew, or Slow Cooker BBQ Ribs, or turned into Cornbread Stuffing for a holiday favorite. Go ahead and make an extra pan next time your family comes over for dinner because they'll definitely be coming back for seconds!
Why You'll Love This Buttermilk Cornbread
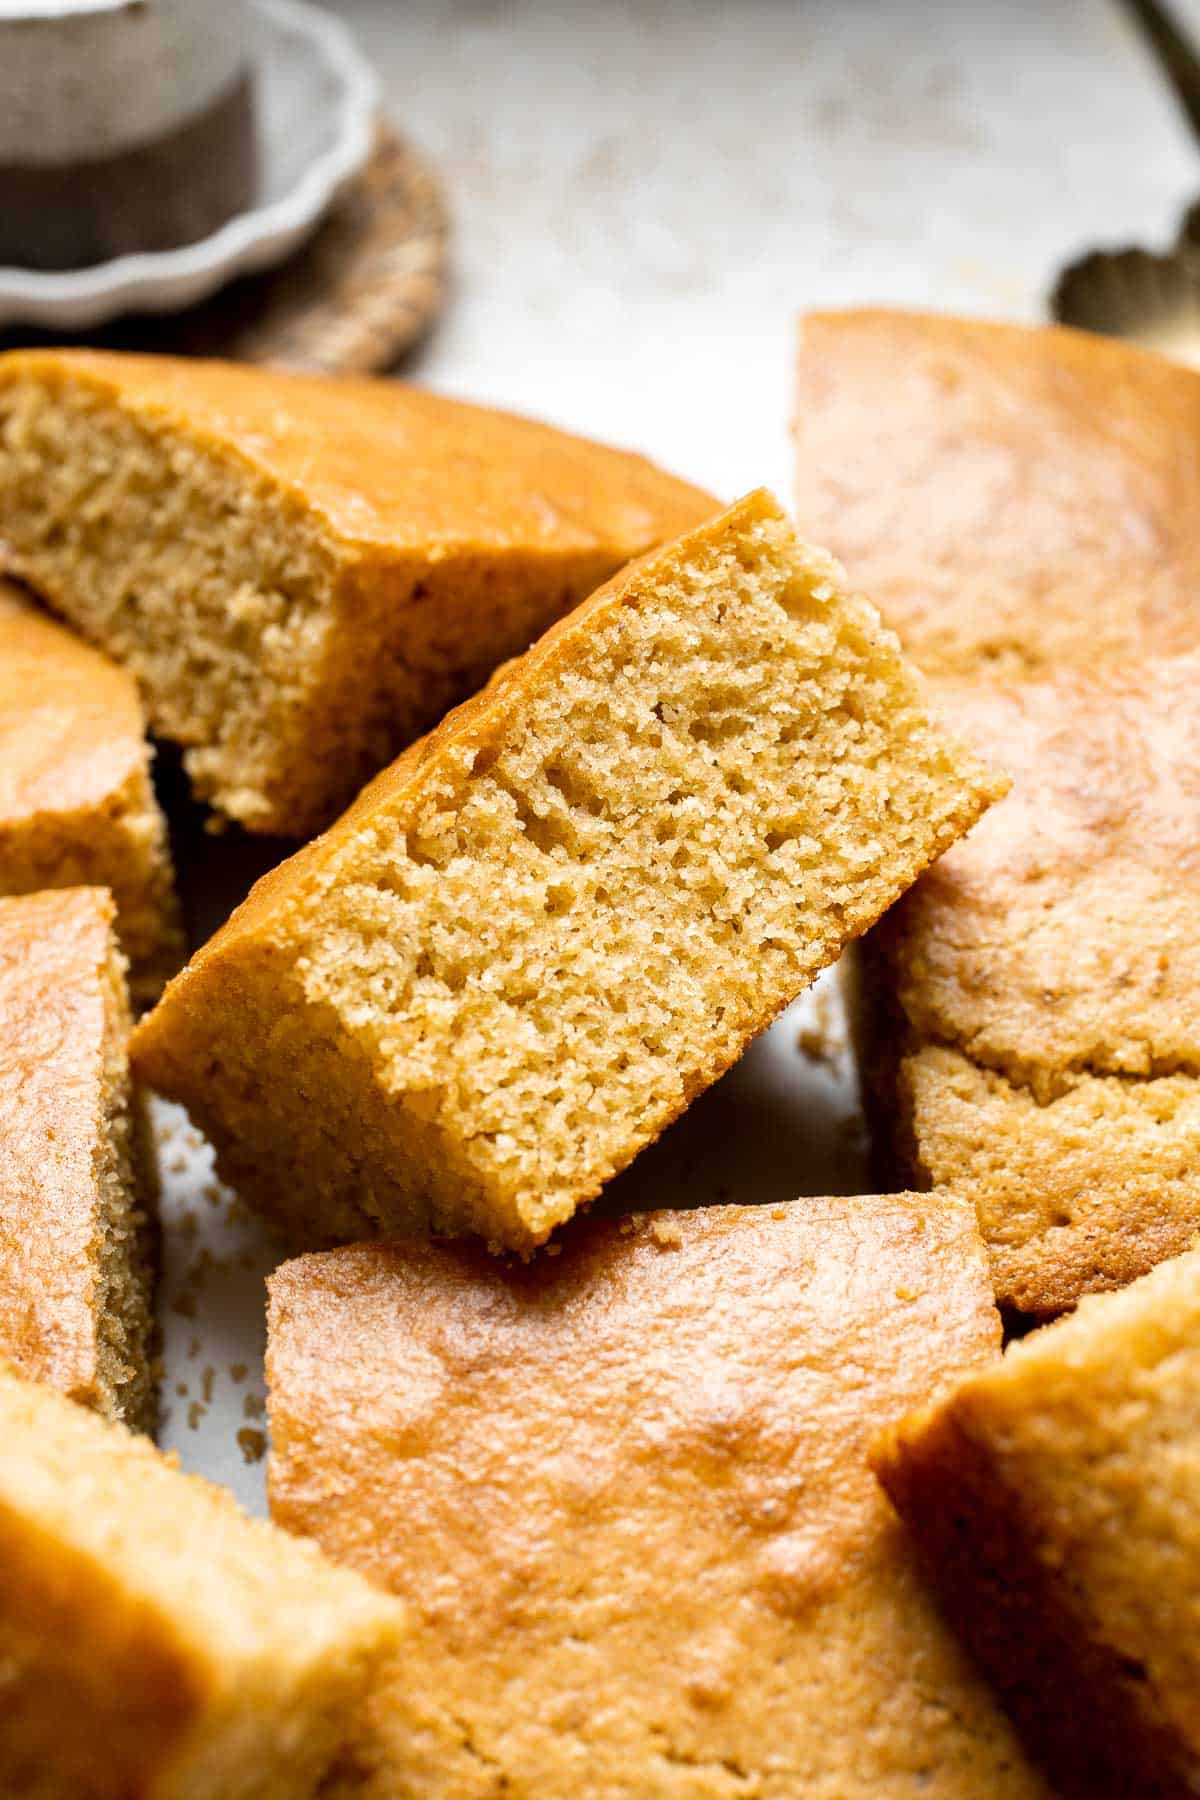
- Nostalgic flavor. Cornbread is a must for many of us, especially around the holidays or with certain dishes in the summer months (think BBQ ribs). This version has the perfect balance of sweetness, which brings out its flavor without taking over. This classic cornbread recipe tastes just like the cornbread you grew up eating!
- Super simple to make. This old-fashioned cornbread relies mostly on pantry staples, including cornmeal, flour, butter, and sugar. The only fresh ingredients are buttermilk, eggs, and butter, which many of us already have in the fridge. Just whisk everything together and bake! It's almost as easy as making cornbread from the Jiffy box, but tastes way better.
- Perfect side dish. This homemade cornbread recipe pairs well with just about anything - think hearty winter stews, meaty chilis, or slow-cooked BBQ. It goes with everything!
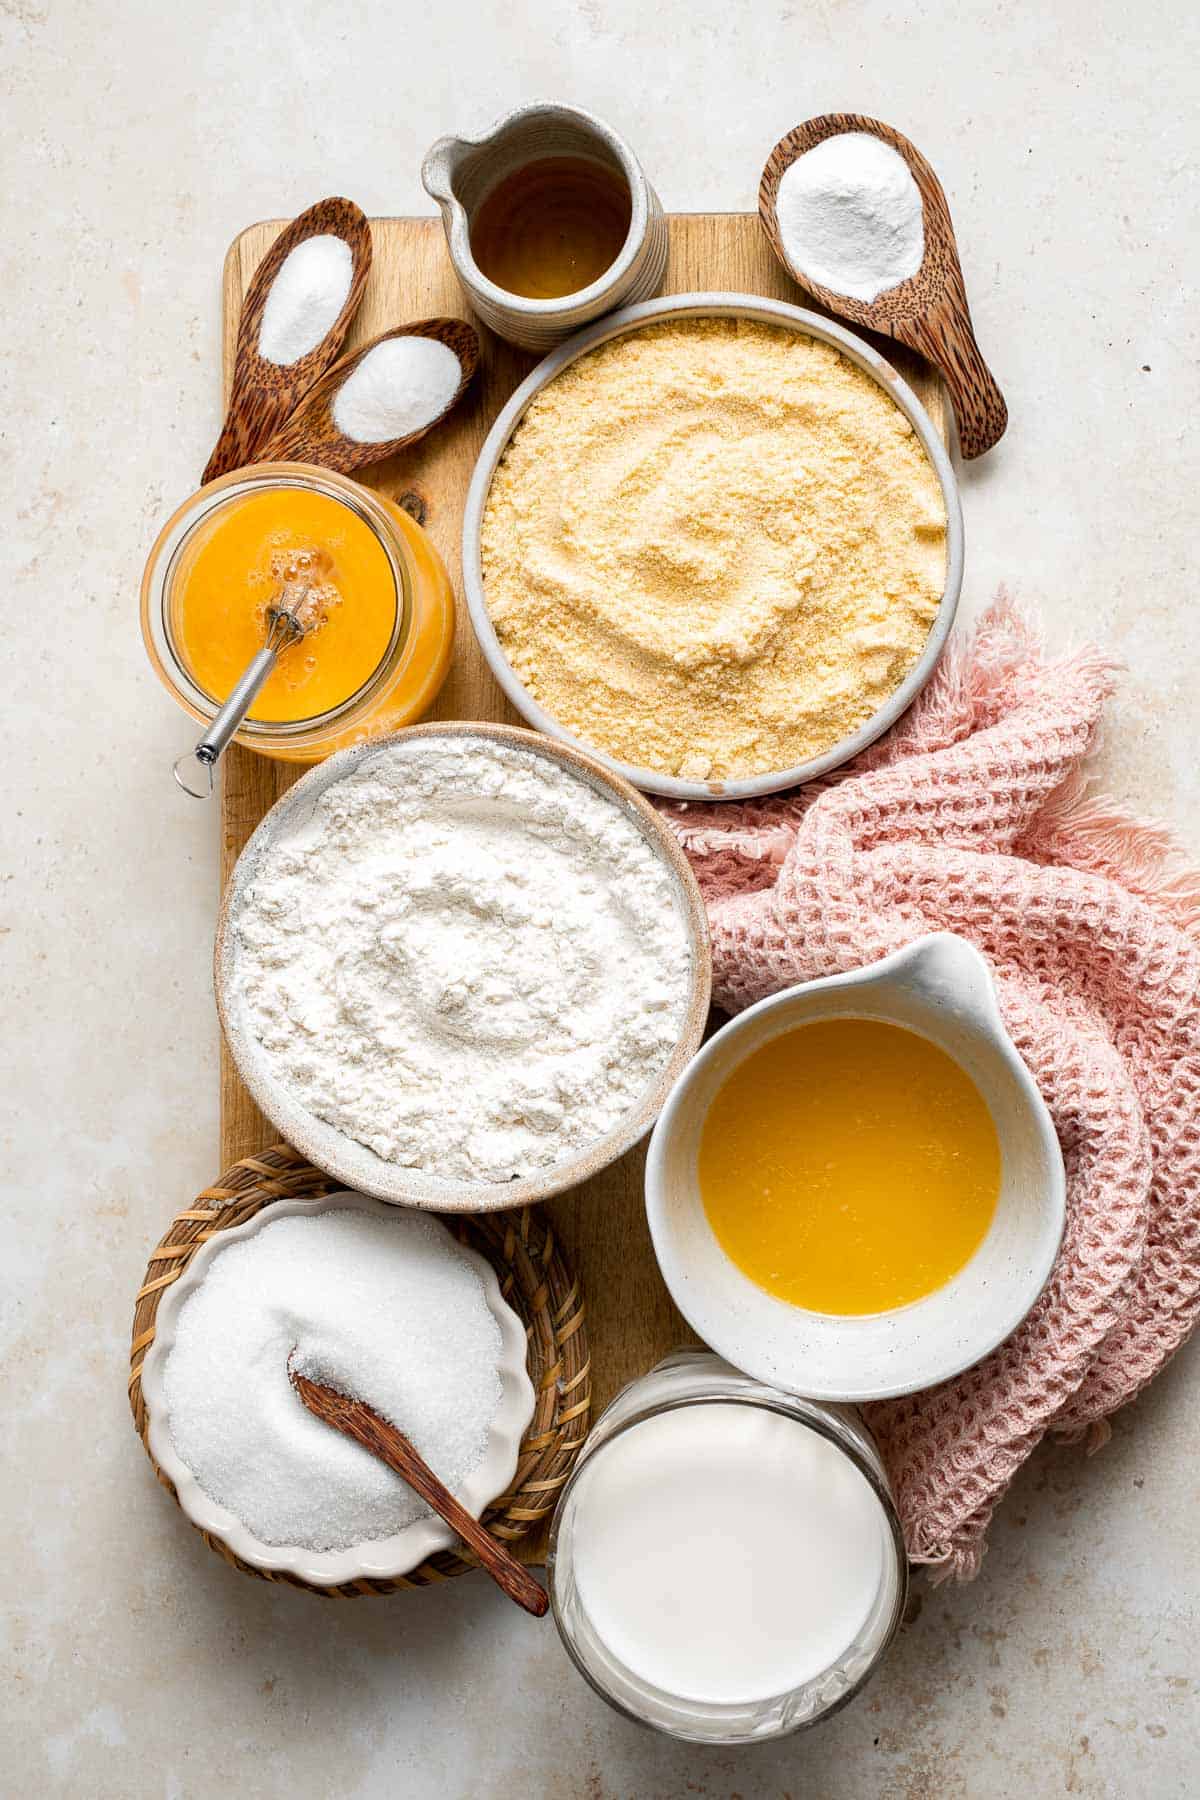
Ingredient Notes
To make this delicious Buttermilk Cornbread, you will need the following ingredients (full measurements in recipe card below):
- butter - adds a rich buttery flavor and keeps the cornbread moist.
- all purpose flour - the best cornbread always contains some flour, which gives it a softer, more cake-like texture.
- yellow cornmeal - this is key! Use medium or fine-grind cornmeal and save the coarse stuff for polenta.
- sugar - for just enough sweetness. Feel free to use less if you prefer.
- baking powder + soda
- salt
- buttermilk - at room temperature. This will react with the baking soda and make this cornbread nice and light.
- eggs - to bind everything together.
- maple syrup - optional, for serving. A little honey is nice, too!
You will also need measuring cups and spoons, a 9-inch square baking pan, mixing bowls, a whisk, a silicone spatula, and a toothpick.
How to Make the Best Buttermilk Cornbread
- Combine dry ingredients. In a large mixing bowl, whisk together flour, cornmeal, sugar, baking powder, baking soda, and salt. Set aside.
- Combine wet ingredients. In a medium mixing bowl, whisk together melted butter, buttermilk, and eggs until smooth.


- Add wet to dry. Pour the wet mixture into the dry mixture. Use a silicone spatula to stir until combined and no dry flour is visible in the bowl. Make sure to scrape down the sides of the bowl with the spatula. For the best texture, do not overmix. The mixture will be fairly wet.


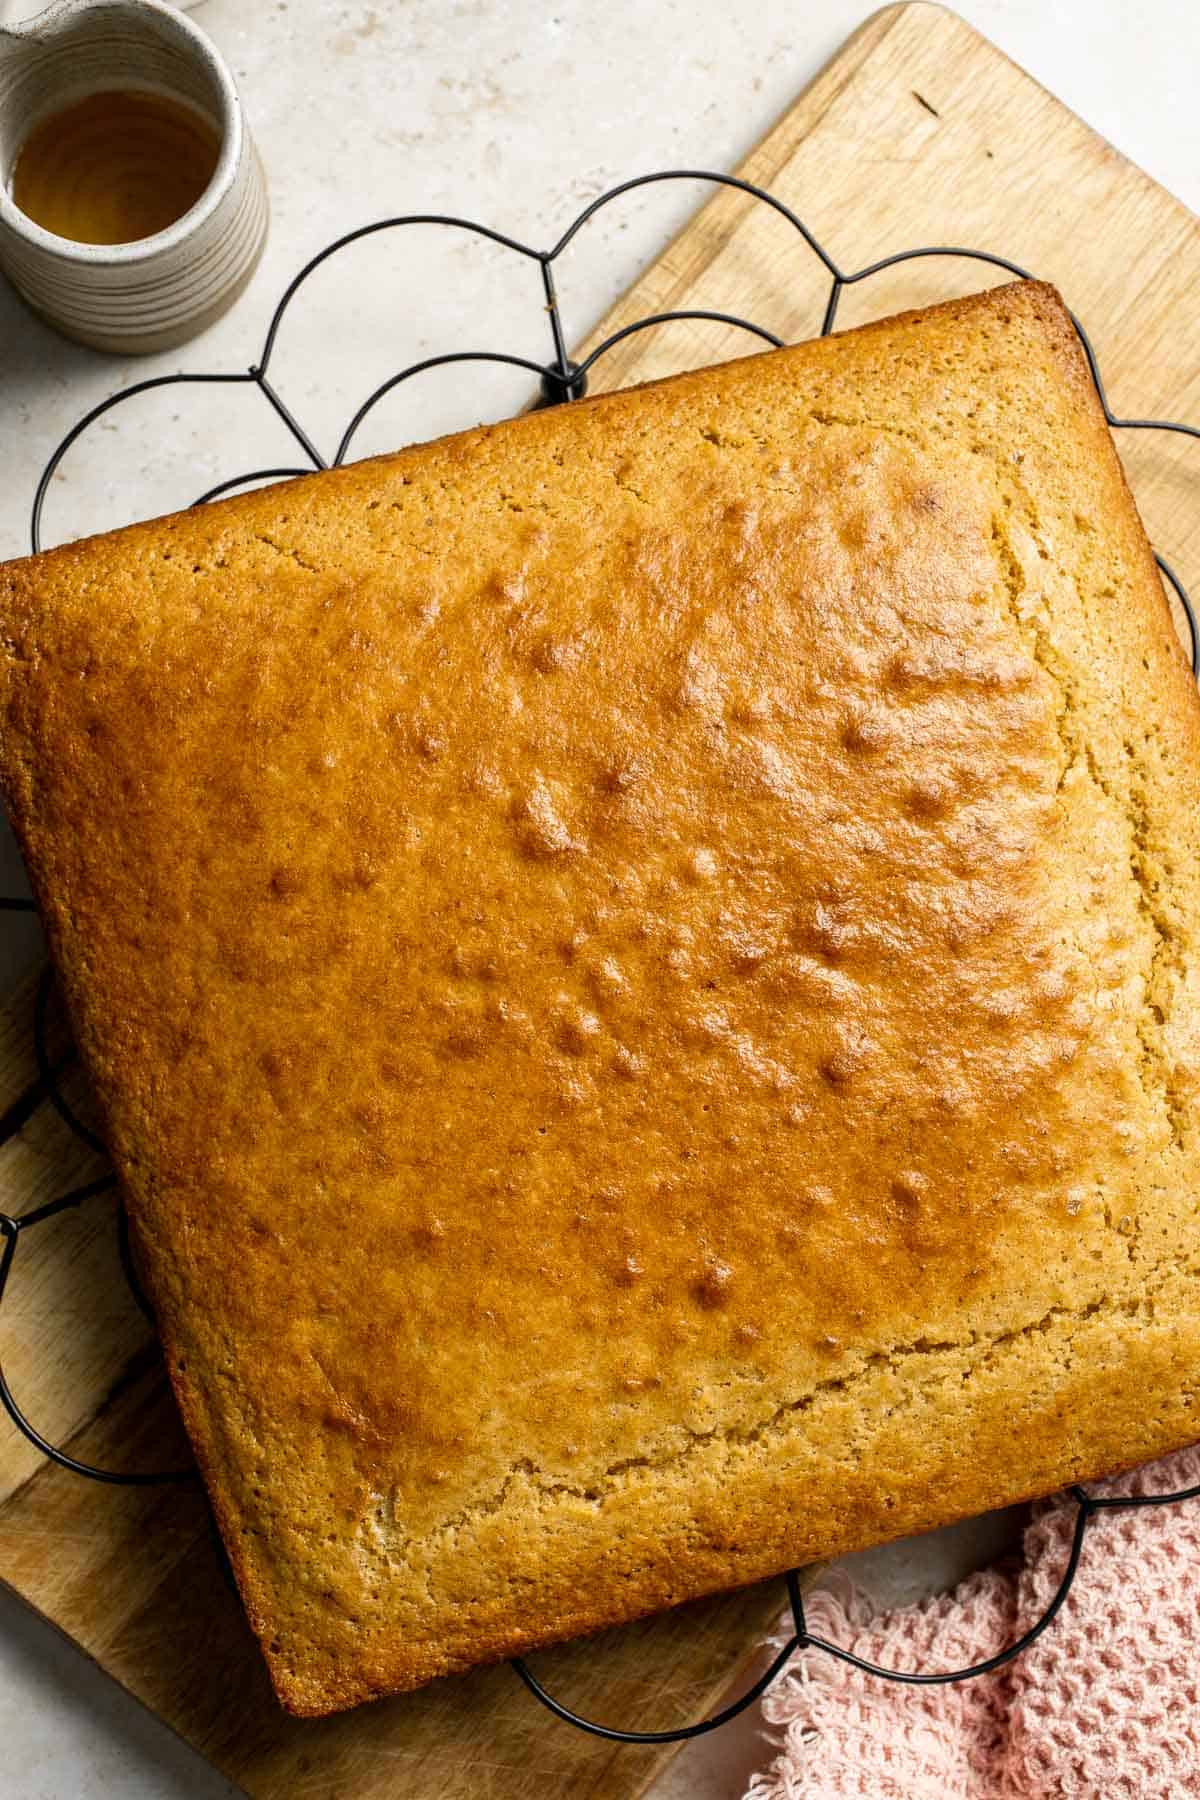
- Bake. Lightly grease a 9-inch square baking pan with some melted butter. Pour batter into the prepared baking pan. Tap the pan to release some trapped air bubbles, if any. Bake in a 400°F preheated oven for 25 minutes until golden brown and a toothpick inserted in the center comes out clean.


- Serve. Remove the pan from the oven and let it cool for 15 minutes before serving. Slice and drizzle with maple syrup (optional).
Recipe Variations
- Sweeten to taste. This recipe works great whether you like sweet or savory cornbread. If you prefer more Southern-style cornbread, feel free to use less sugar (and skip the maple syrup). You can serve your piece of cornbread with a pat of butter instead.
- Use a cast-iron skillet. Although I like to use a square pan, many people swear by using a cast iron pan. That works, too! Just be sure to butter it well.
- Play with mix-ins. Popular options for savory cornbread include shredded cheese, diced jalapeños, cooked bacon, green onions, or even whole corn kernels for extra texture. Serve it with hot honey for a little heat!
- Make cornbread muffins. Scoop the batter into a prepared muffin pan for bite-sized treats! Follow this cornbread muffin recipe to get perfect results every time.
How to Serve
This Buttermilk Cornbread is delicious served before or during dinner, paired with some of my favorite hearty mains including:
- Slow Cooker Beef Chili
- Italian Lentil Soup
- Slow Cooker BBQ Ribs
- White Chicken Chili
- Apple Cider Chicken with Butternut Squash
Recipe Tips and Tricks
- Use the right kind of cornmeal. Look for fine or medium-grind cornmeal, not the coarse stuff. This is key!
- Make your own buttermilk. Of course, homemade buttermilk cornbread requires buttermilk, but sometimes you run out! Instead, measure out the same amount of regular milk, but replace 1 teaspoon with white vinegar or lemon juice. Let it sit for 5-15 minutes, then use like normal.
- Preheat your pan. For extra crispy edges, preheat your baking dish in the oven before pouring the batter. This technique helps the cornbread form a delicious golden brown crust while keeping the inside moist and tender. Just make sure to grease the hot skillet carefully before adding the batter.
Storing and Freezing Instructions
How to Store
Once the cornbread has cooled completely, store it in an airtight container at room temperature for up to 3 days. If you want to keep it longer, store it in the fridge for 4-5 days, but refrigerated cornbread tends to dry out. Works great for soup!
How to Reheat
To reheat, simply pop the cornbread in the microwave for 15-20 seconds or warm it in the oven at 350 F for 5-10 minutes until it's heated through.
How to Freeze
For longer storage, freeze leftover cornbread in an airtight container or freezer bag for up to 3 months. Place it in the fridge overnight to thaw.
FAQ
Buttermilk is a staple in old-fashioned cornbread for several reasons. Buttermilk is naturally acidic, which helps soften the crumb and reacts with the baking soda to get a nice rise. It also adds fat, moisture, and a slightly tangy flavor, which keeps the cornbread moist, tender, and not too sweet.
It's really a matter of personal preference. Southern cornbread is usually savory with little to no sugar, giving it a hearty, traditional flavor. Northern cornbread is often sweetened, making it more cake-like. You can always use less sugar in your favorite cornbread recipe until you find the sweet spot.
If your cornbread turned out dry and crumbly, there are a few places to check. First, did you make any modifications? Using less butter or fat-free milk will change the fat content, making the cornbread less tender and more prone to drying out. The main reason for crumbly cornbread, however, is over-baking. Once the middle is baked, get the cornbread out of the oven! The longer it bakes, the dryer it will be.
More Cornbread Recipes
- 50 Best Bread Recipes
- Pumpkin Cornbread
- Rosemary Cornbread
- Cornbread Muffins
- Vegetarian Cornbread Stuffing
Tried this recipe?
I'd love to hear what you think! Leave a comment and rating below to share your feedback. Your reviews help others discover this recipe and help me keep creating more free recipes for you. Snap a photo and tag me on social media @aheadofthyme too.

25 Side Dishes for Curry
Looking for a delicious side dish to serve with the curry recipe that you are planning for dinner? Curry is one of our favorites because it's cozy, comforting, and just warms you up inside. Plus, it's often quick and easy to whip up - perfect for busy weeknights! So if you are wondering "what to serve with curry", you are in the right place. We are sharing over 25 of the most popular and best side dishes for curry including everything from traditional sides like rice and bread, to unconventional pairings like potatoes, to veggie sides and fresh salads, and more.

Best Side Dishes for Curry
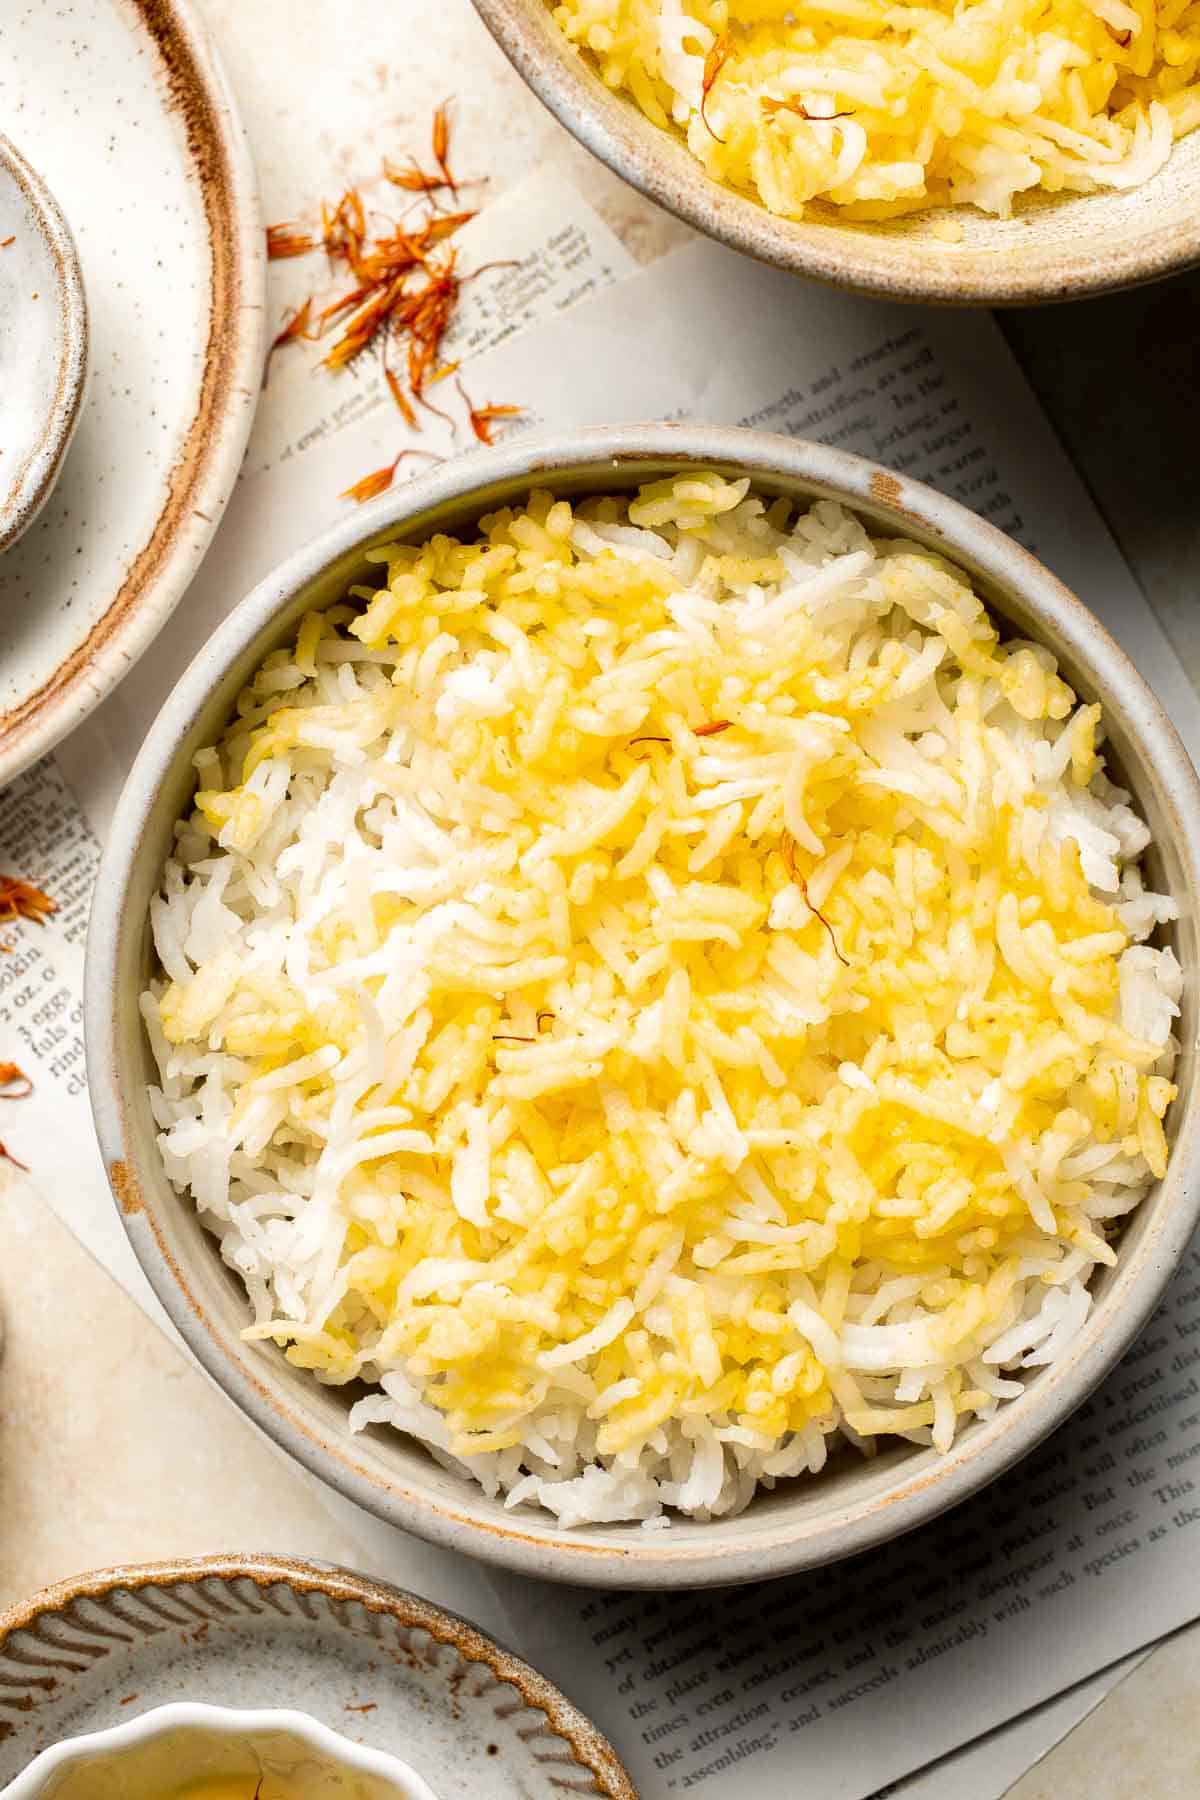
Basmati Rice with Saffron is an traditional side served in Middle Eastern and Persian cuisine. It's simple to make with this easy-to-follow recipe.
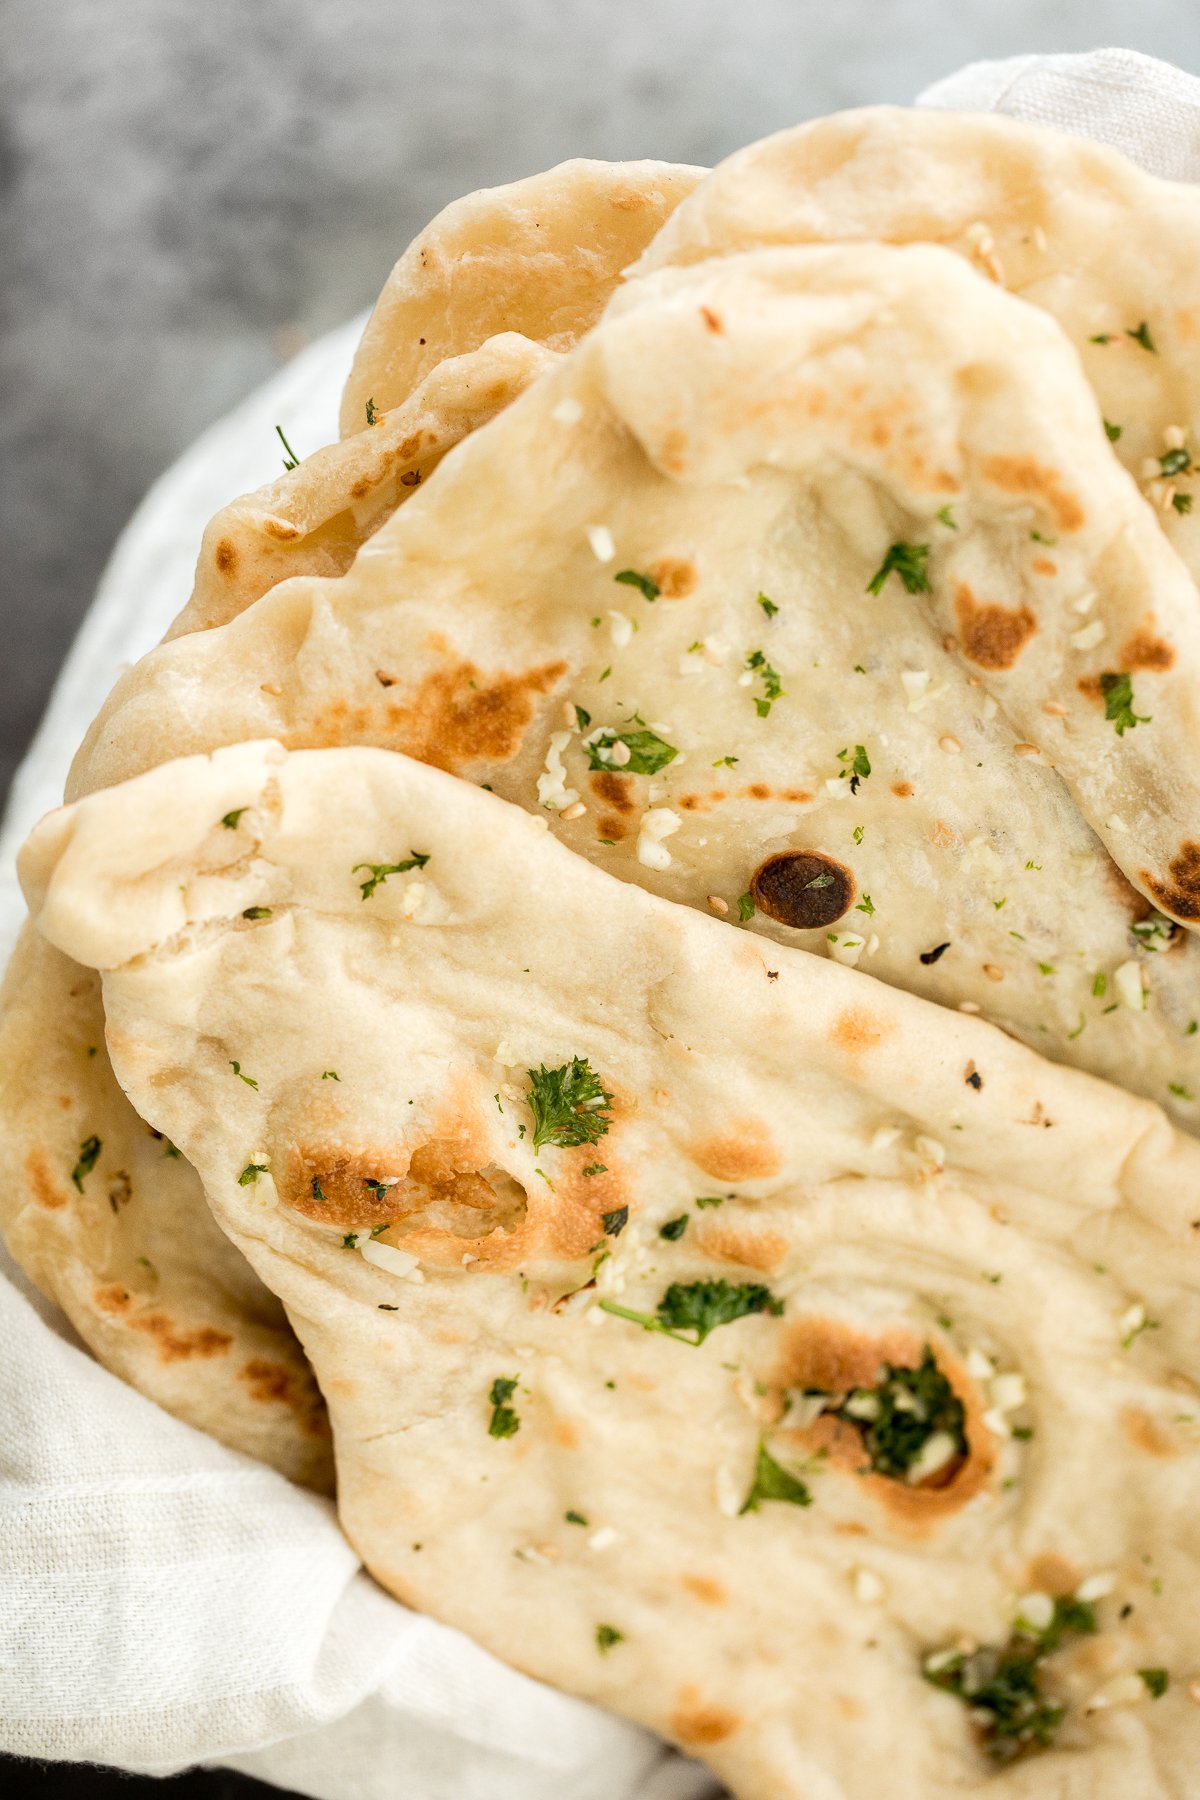
Freshly baked small batch garlic naan bread is buttery, garlicky, soft and pillowy, and full of perfect blistered air pockets. It's quick and easy to make.
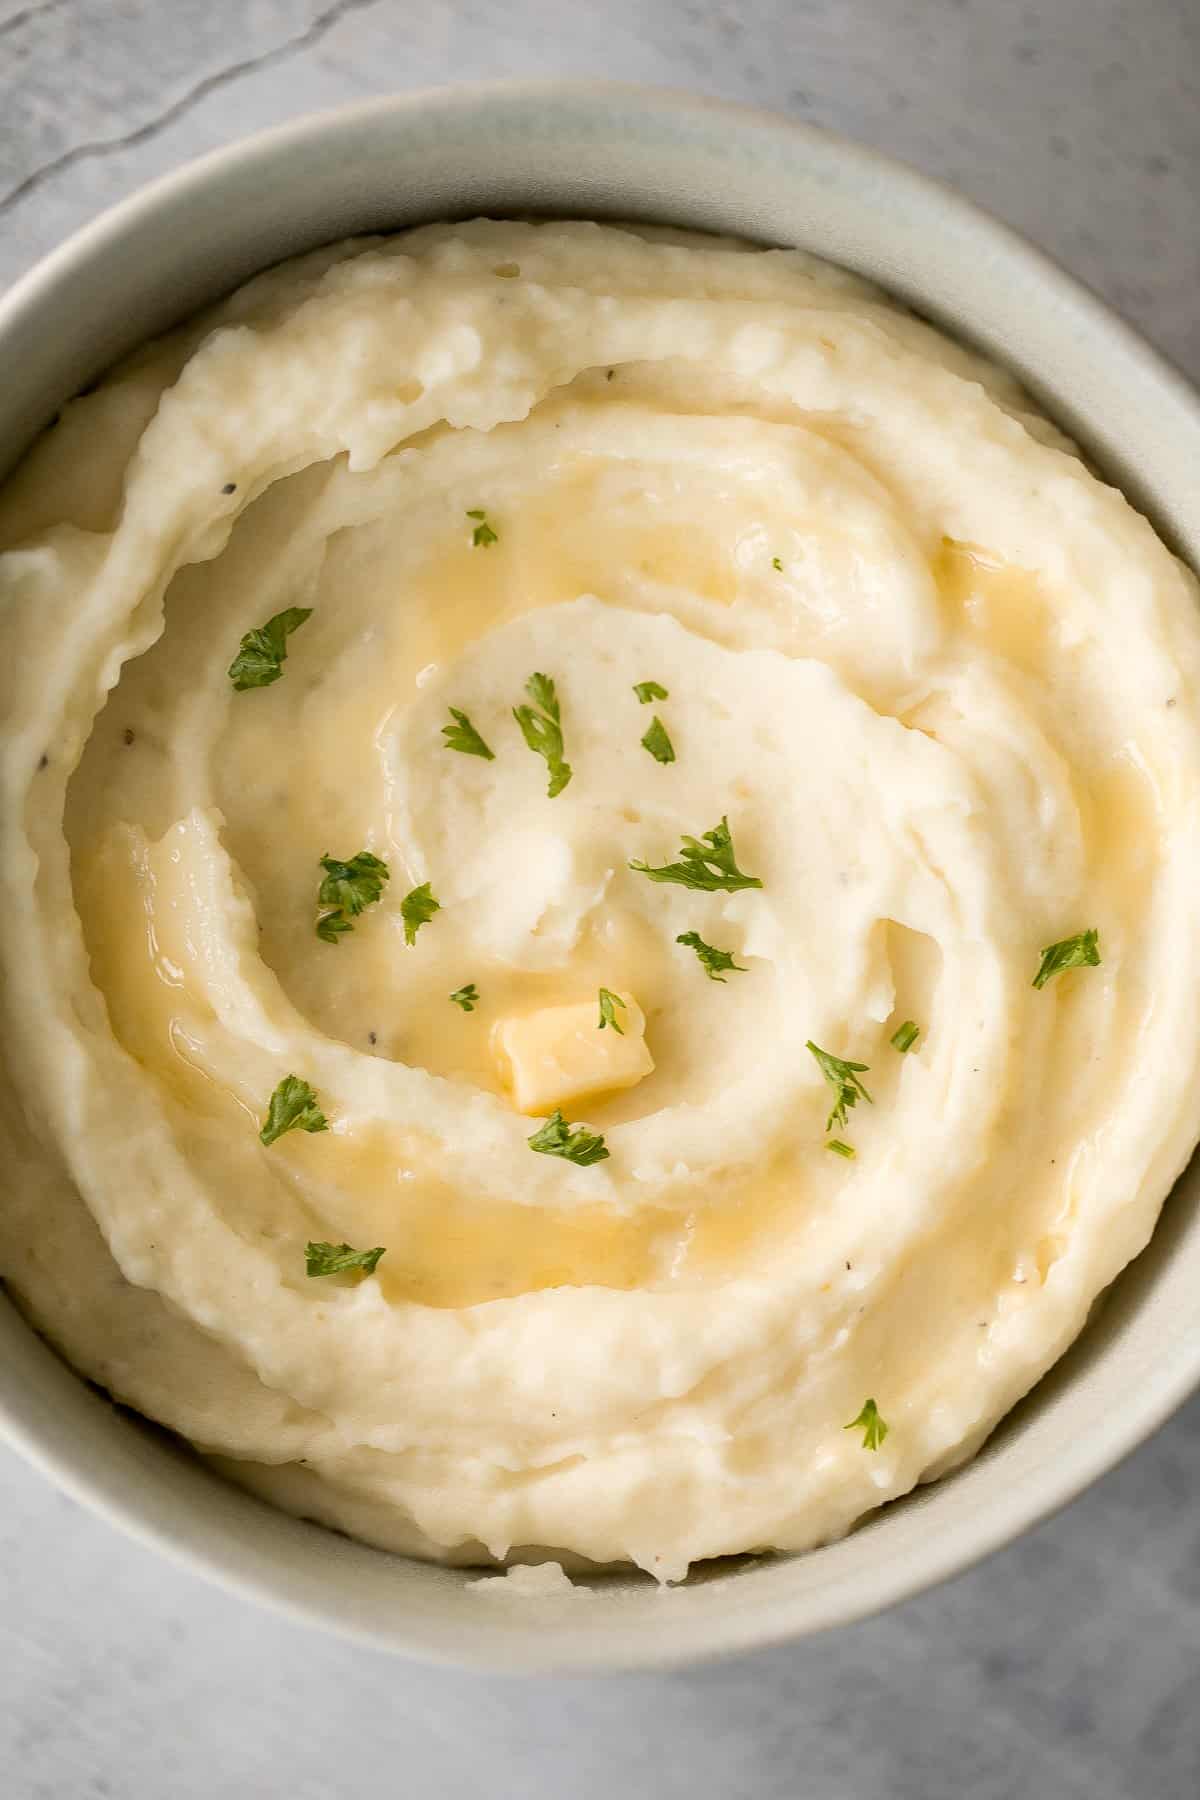
Creamy, buttery, and delicious, this is the best and creamiest mashed potatoes recipe you will ever find. It's velvety, smooth, and melts in your mouth.
Quick and easy roasted cauliflower is a delicious, flavourful side dish that you throw on a sheet pan and into the oven. Plus, it's vegan and gluten-free.

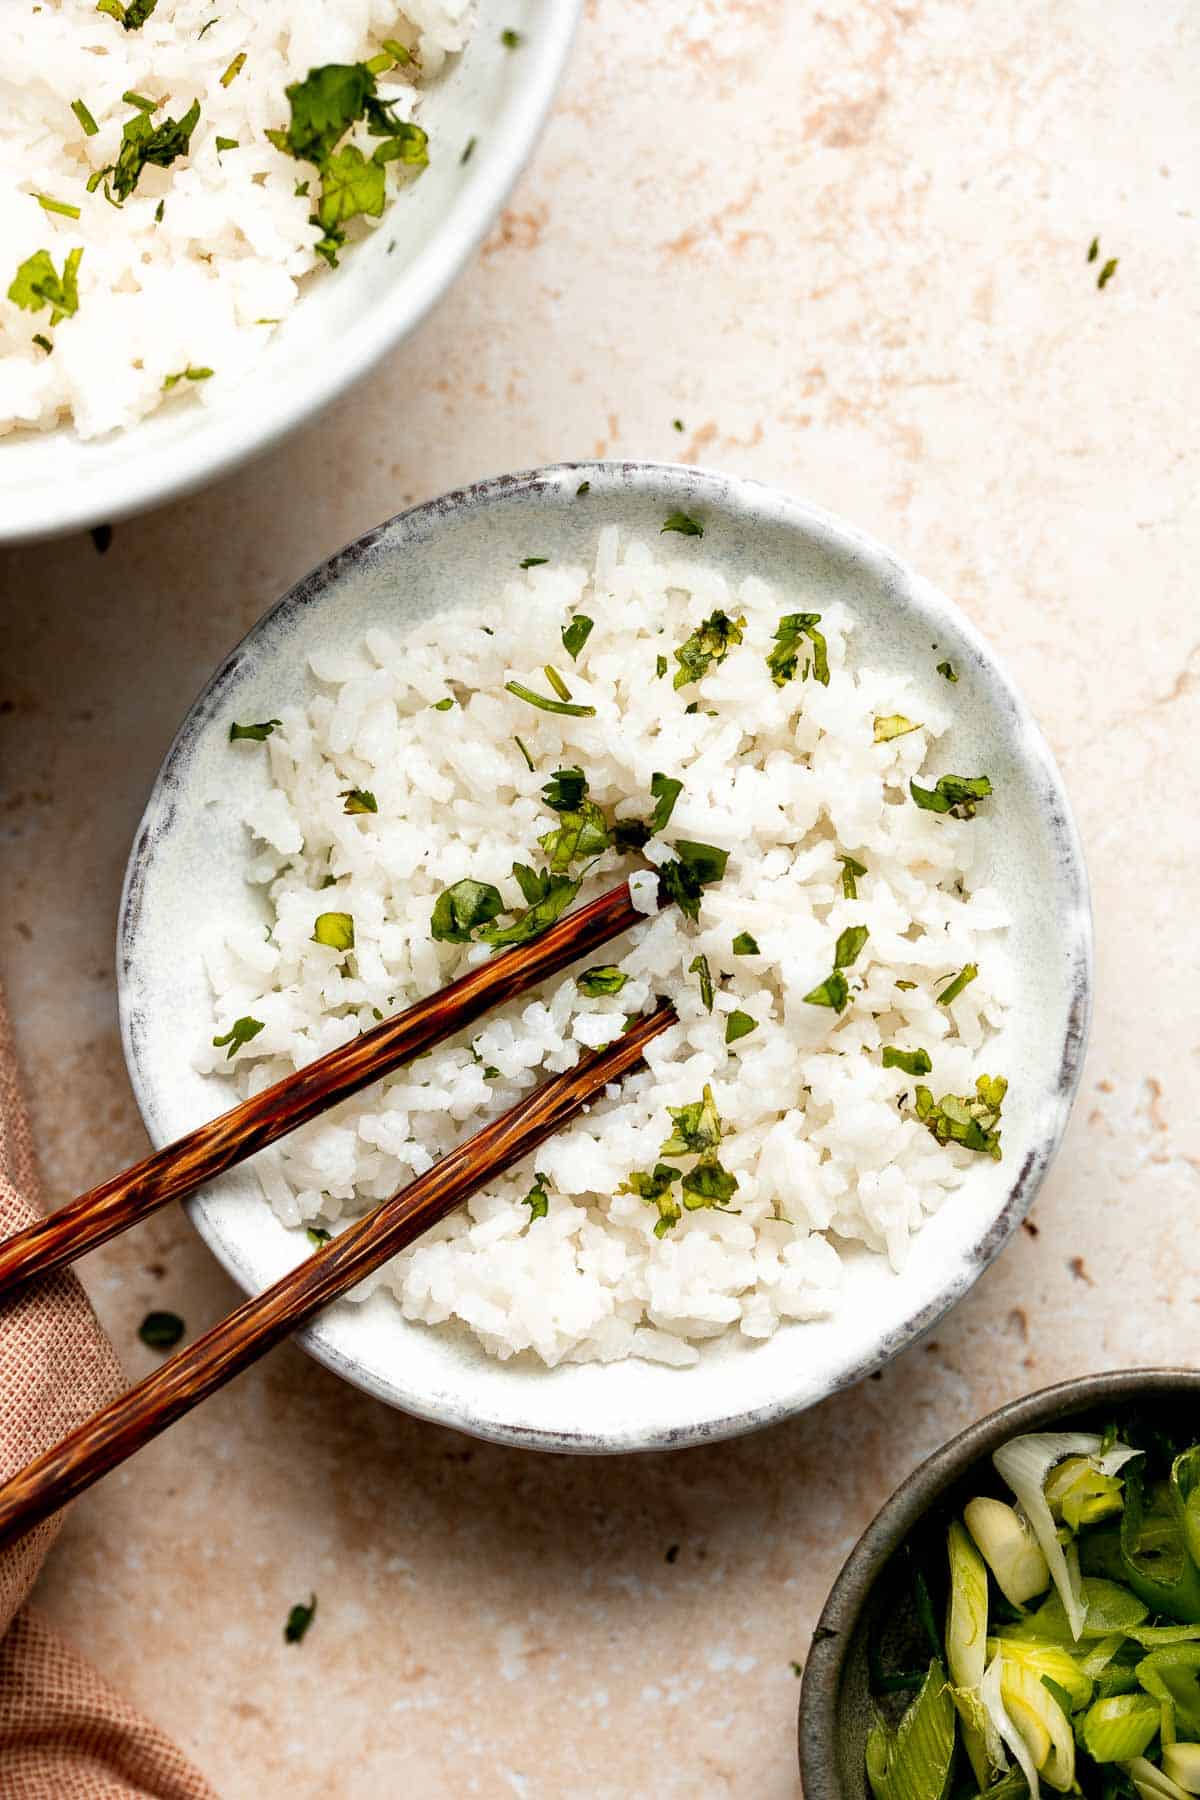
Easy coconut rice is light, fluffy, delicious, and flavorful. It's a quick and easy side dish that compliments all Thai, South Asian, and tropical dishes.
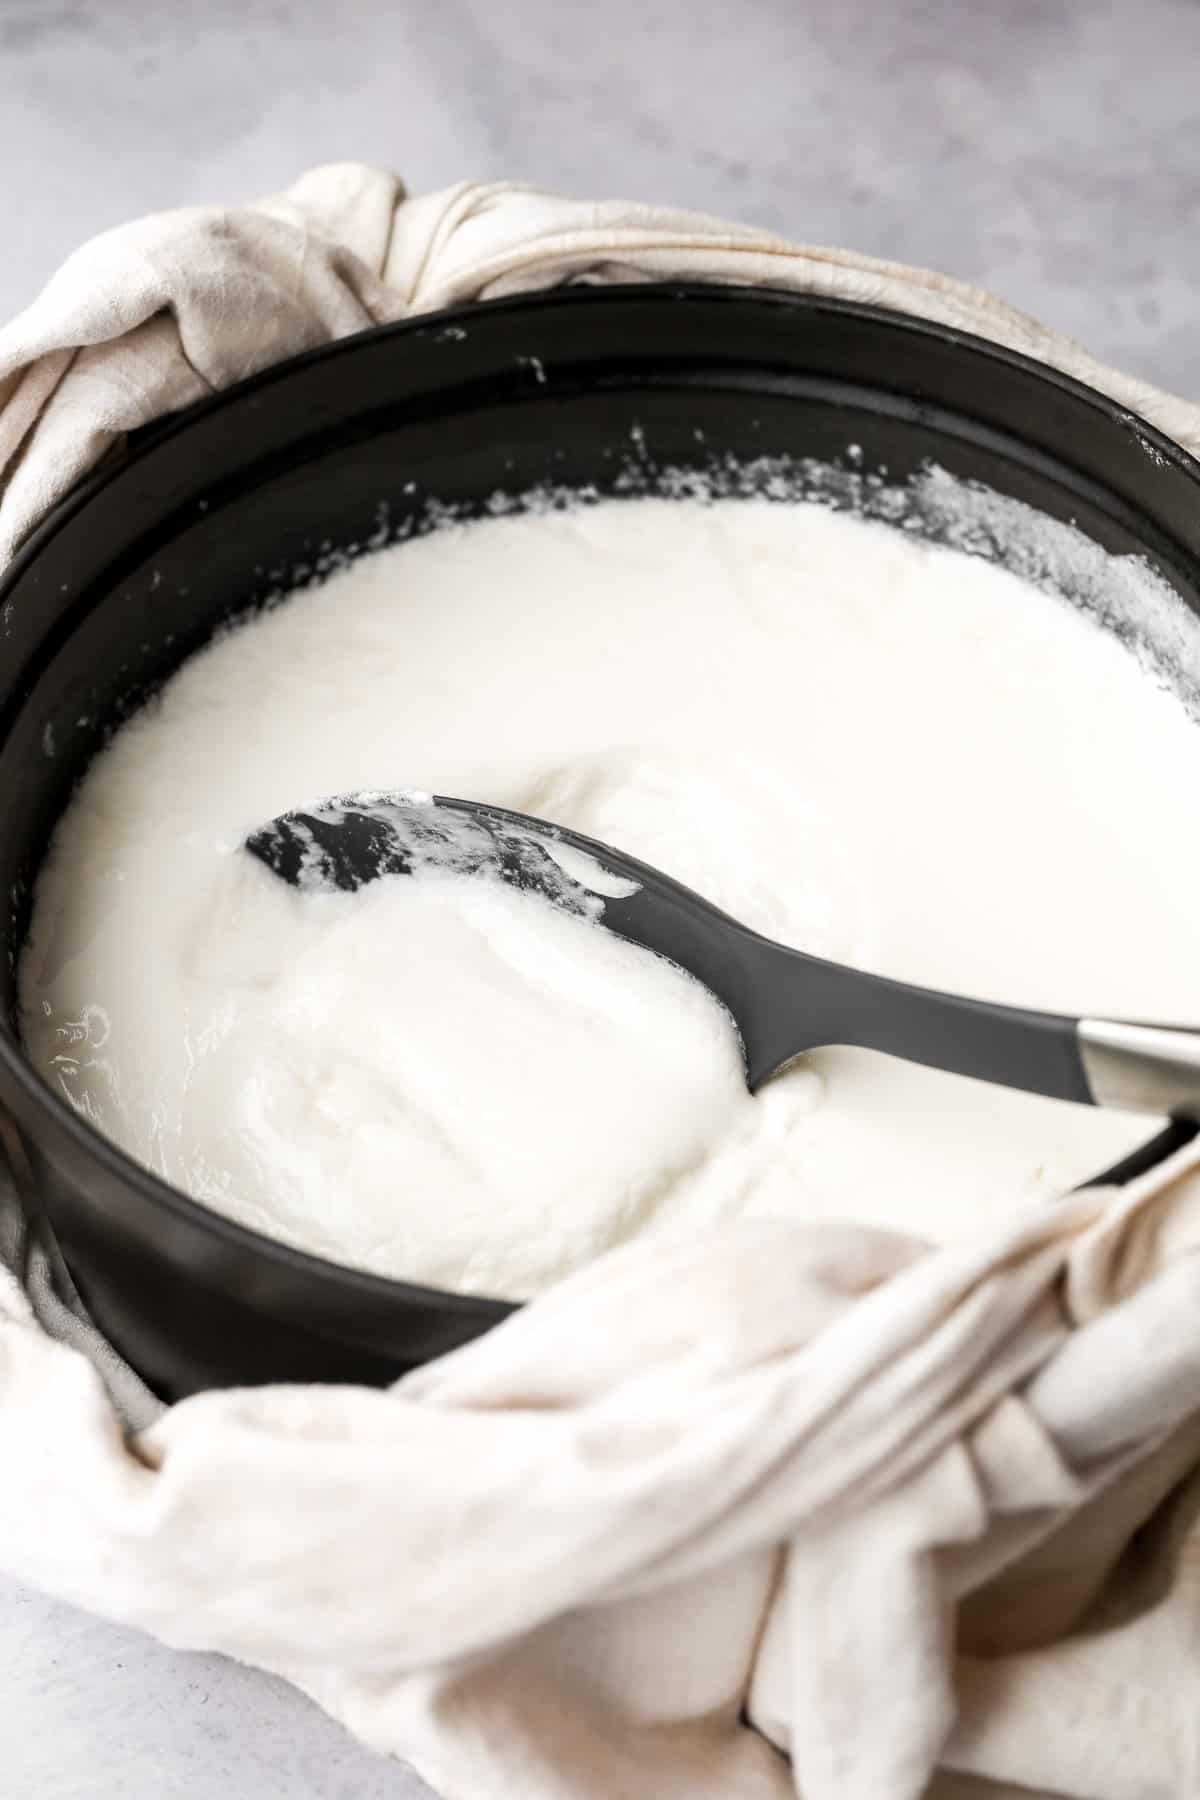
Thick and creamy homemade yogurt is so easy to make at home with just 2 ingredients, a heavy pot, and just a few minutes of actual hands on prep work.
Tandoori chicken drumsticks are crispy outside, juicy and tender inside, and packed with flavor. An easy dinner to make in the oven, stovetop, or grill.

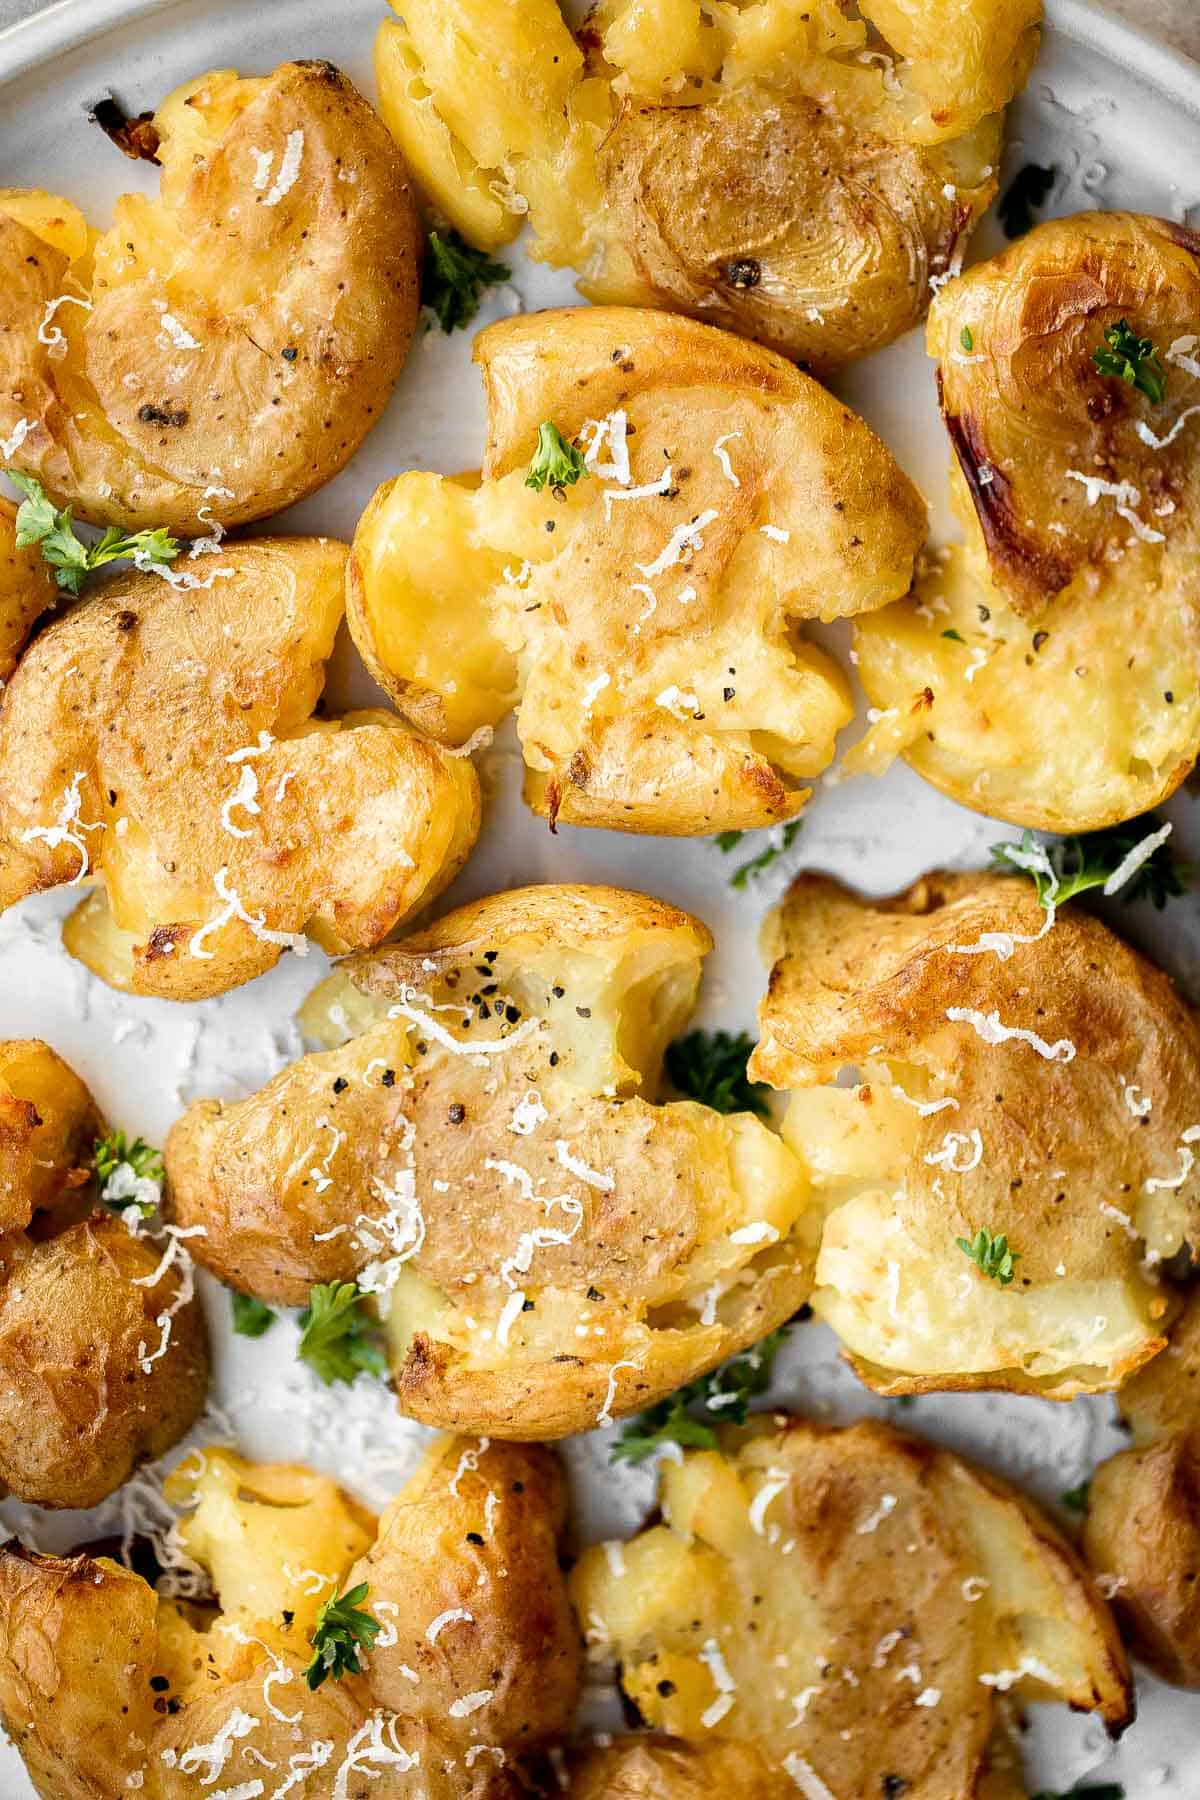
These crispy smashed potatoes are the perfect side dish. They're easy to make, crispy on the outside, tender and fluffy on the inside, and so flavorful.
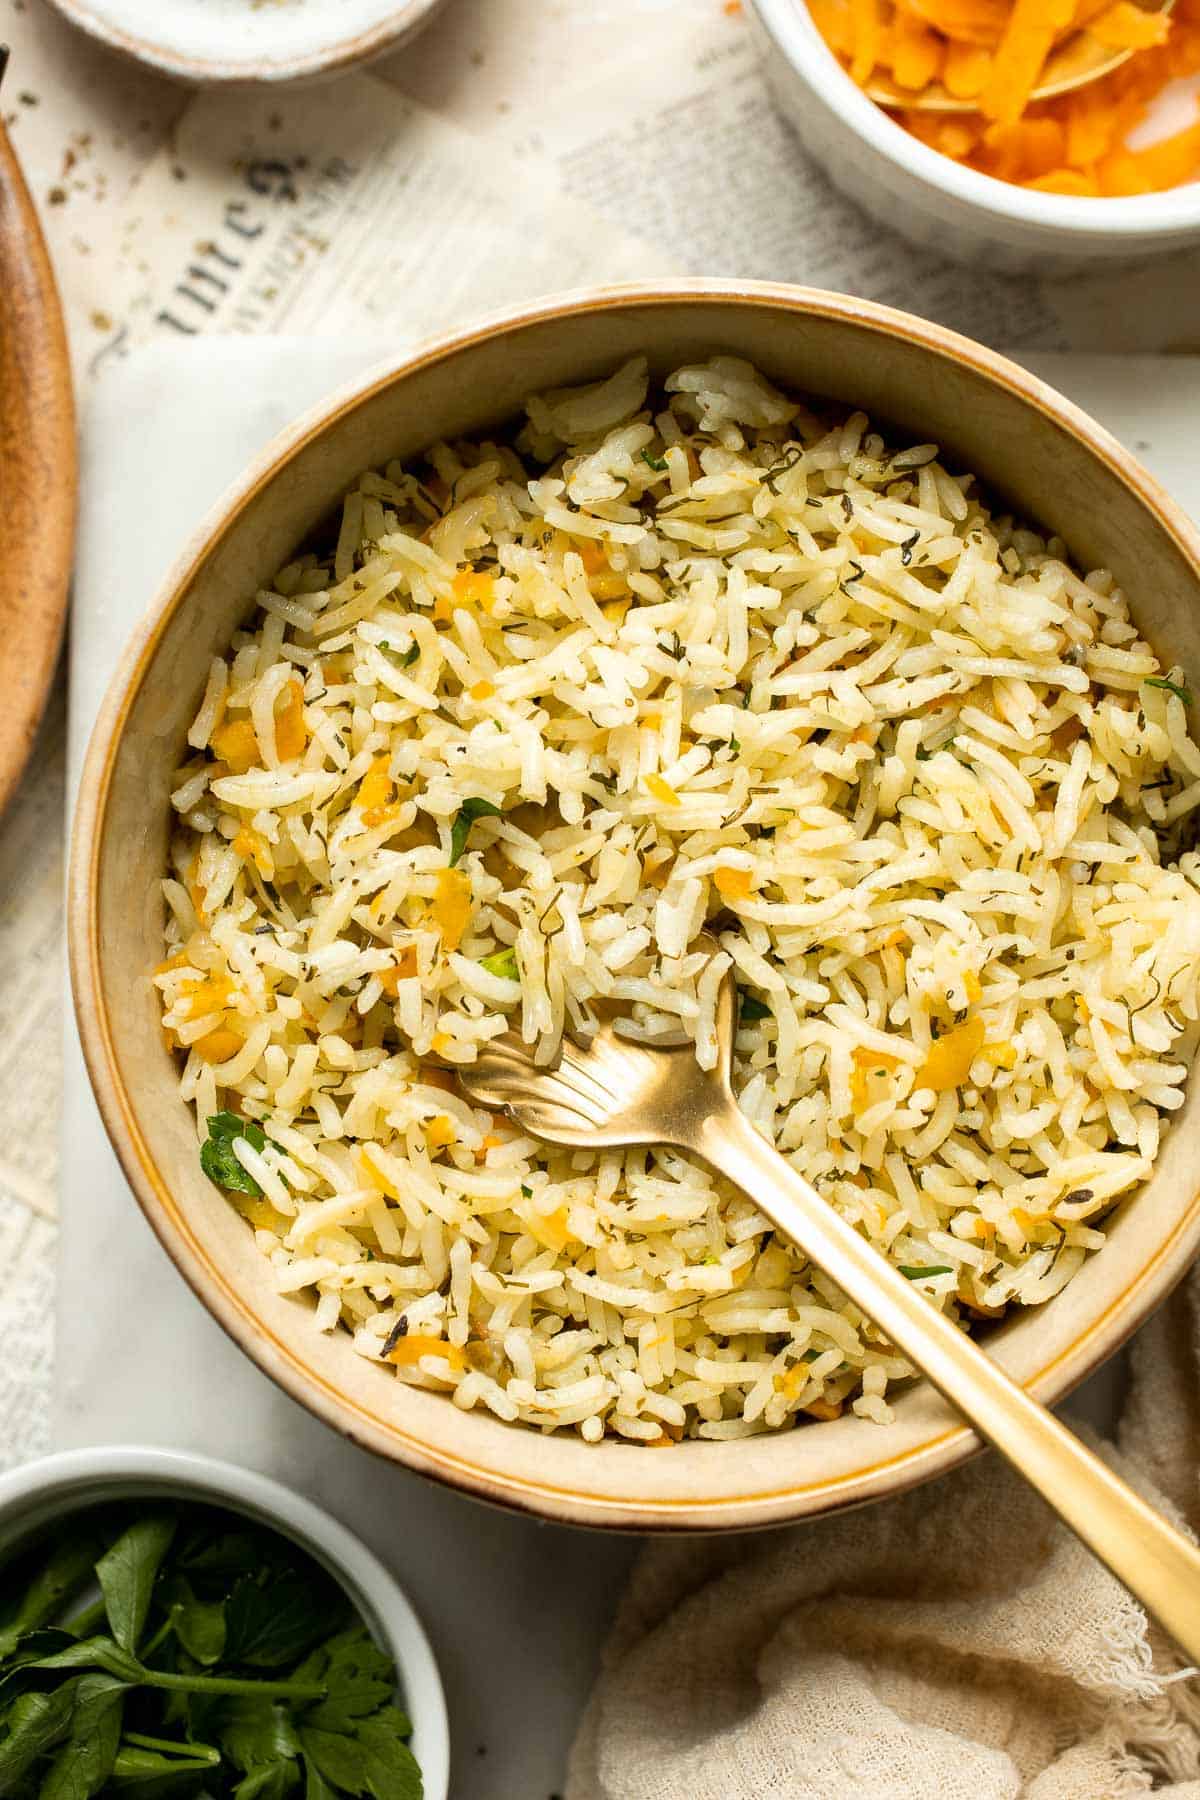
One pot Rice Pilaf with Carrots is quick, easy, and loaded with flavor. Cook this vegetable rice on the stove, rice cooker, or instant pot.
Cranberry Chutney
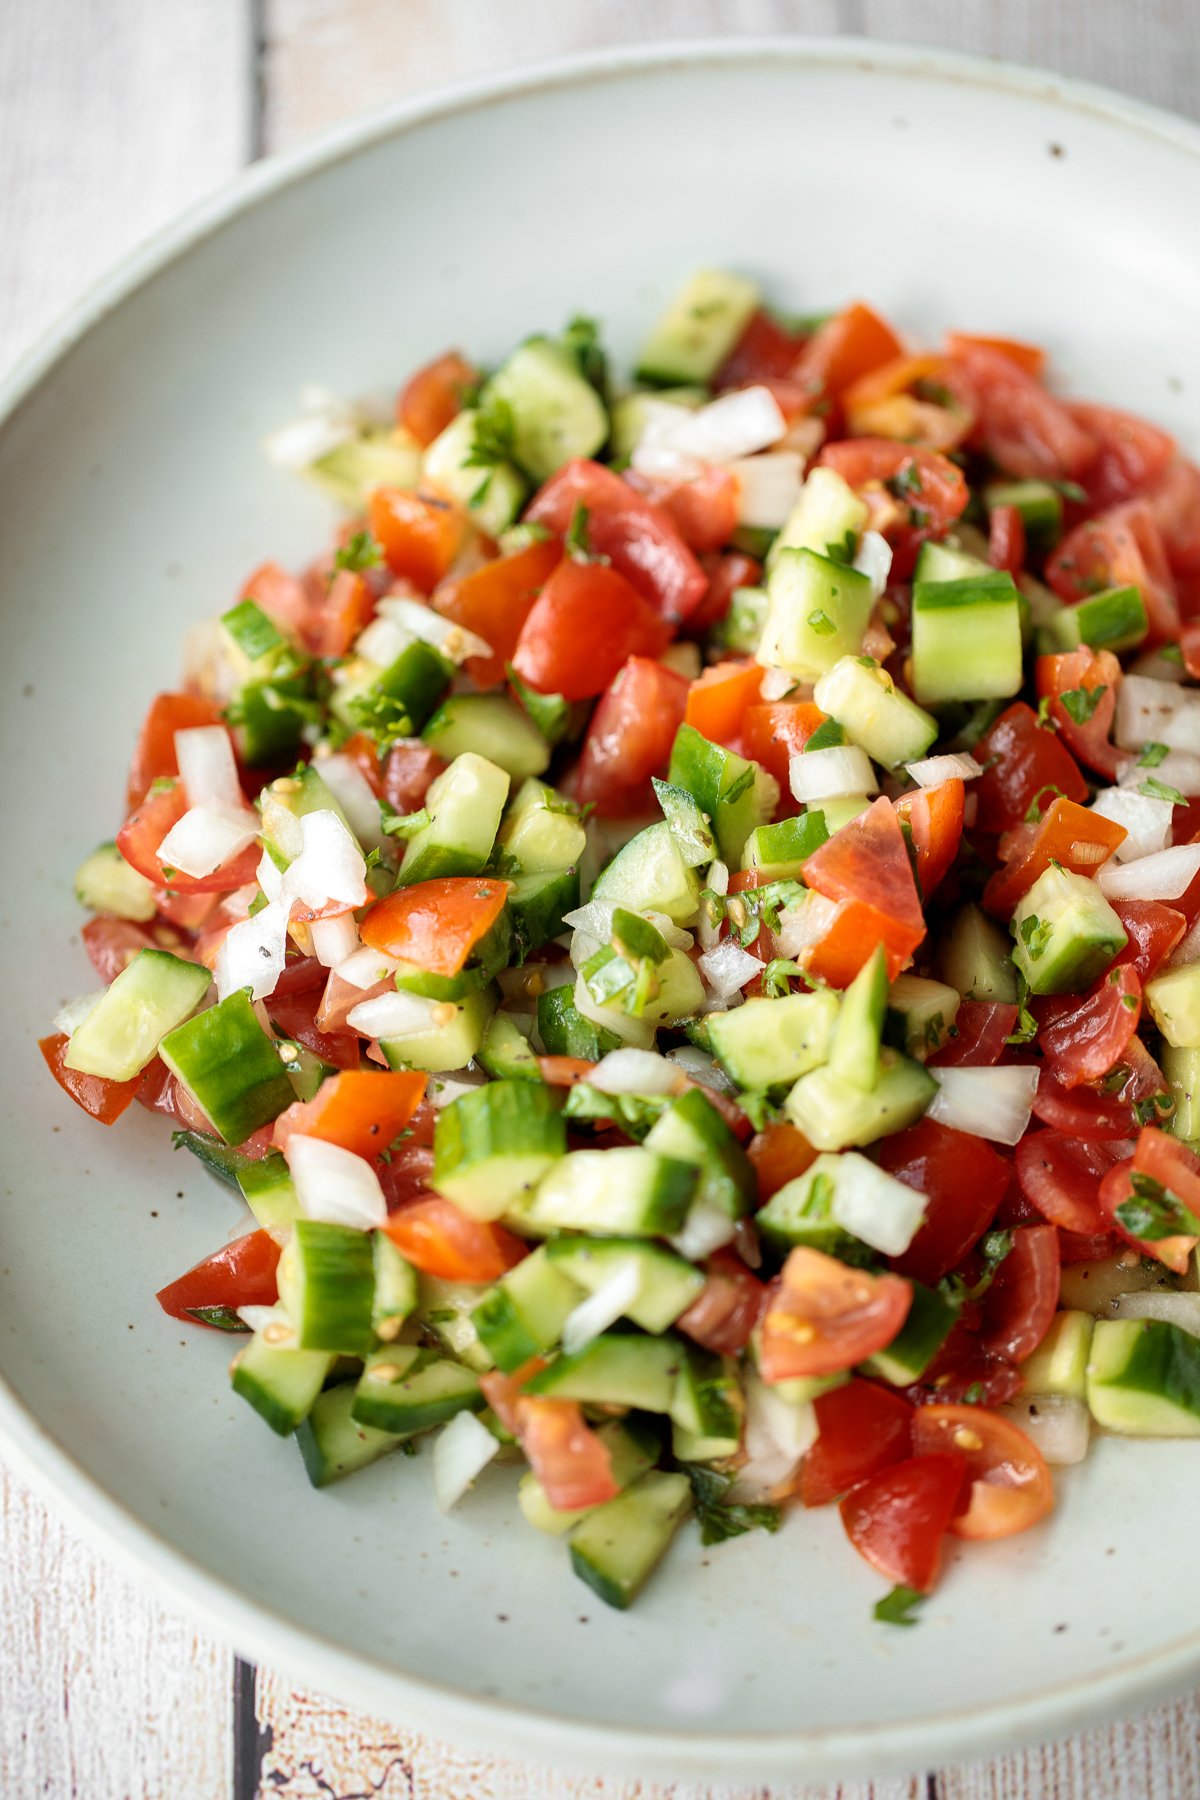
Healthy, light and refreshing Persian Shirazi salad with cucumber and tomato is a simple salad packed with herbs and tossed in an olive oil and lime dressing.
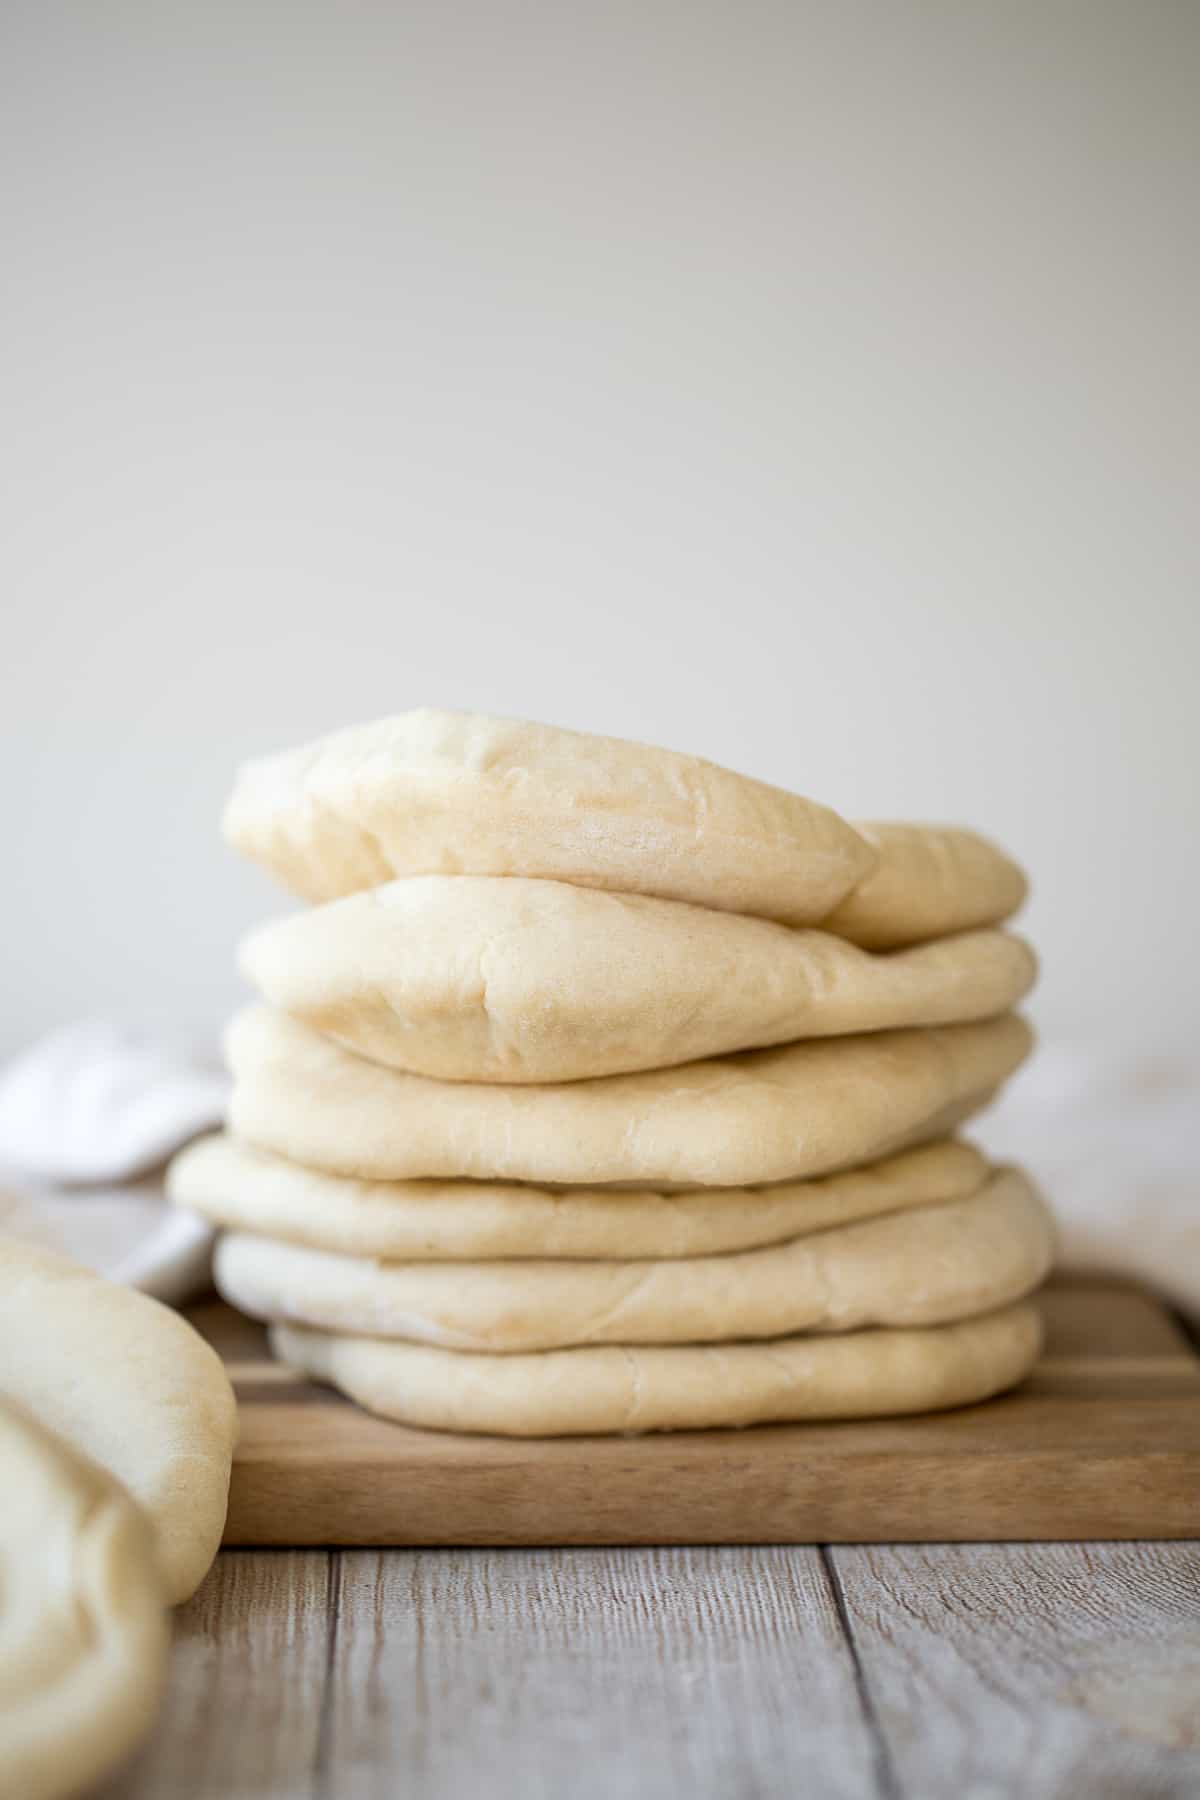
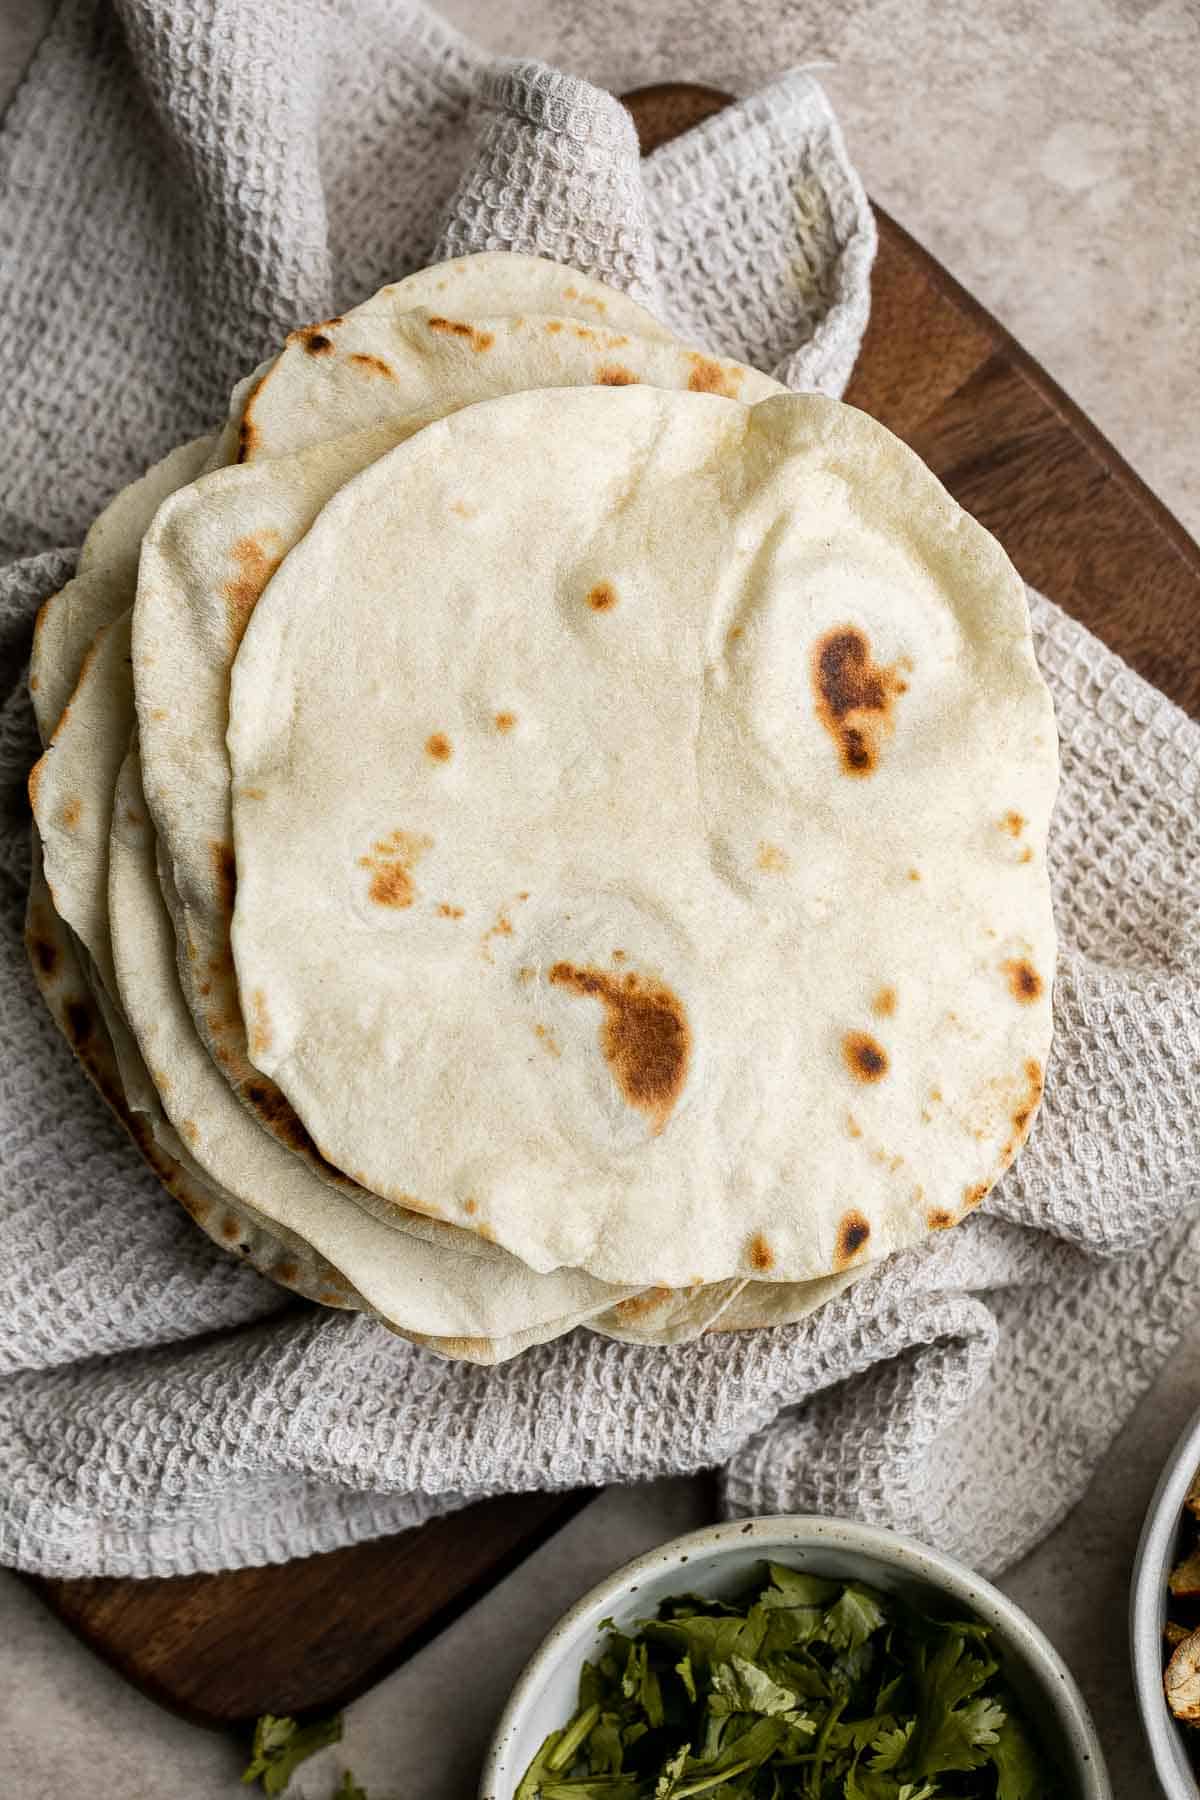
Nothing compares to freshly baked, quick and easy homemade pita bread. It's soft and puffy, with a perfect pocket. It takes just 15 minutes of actual prep.
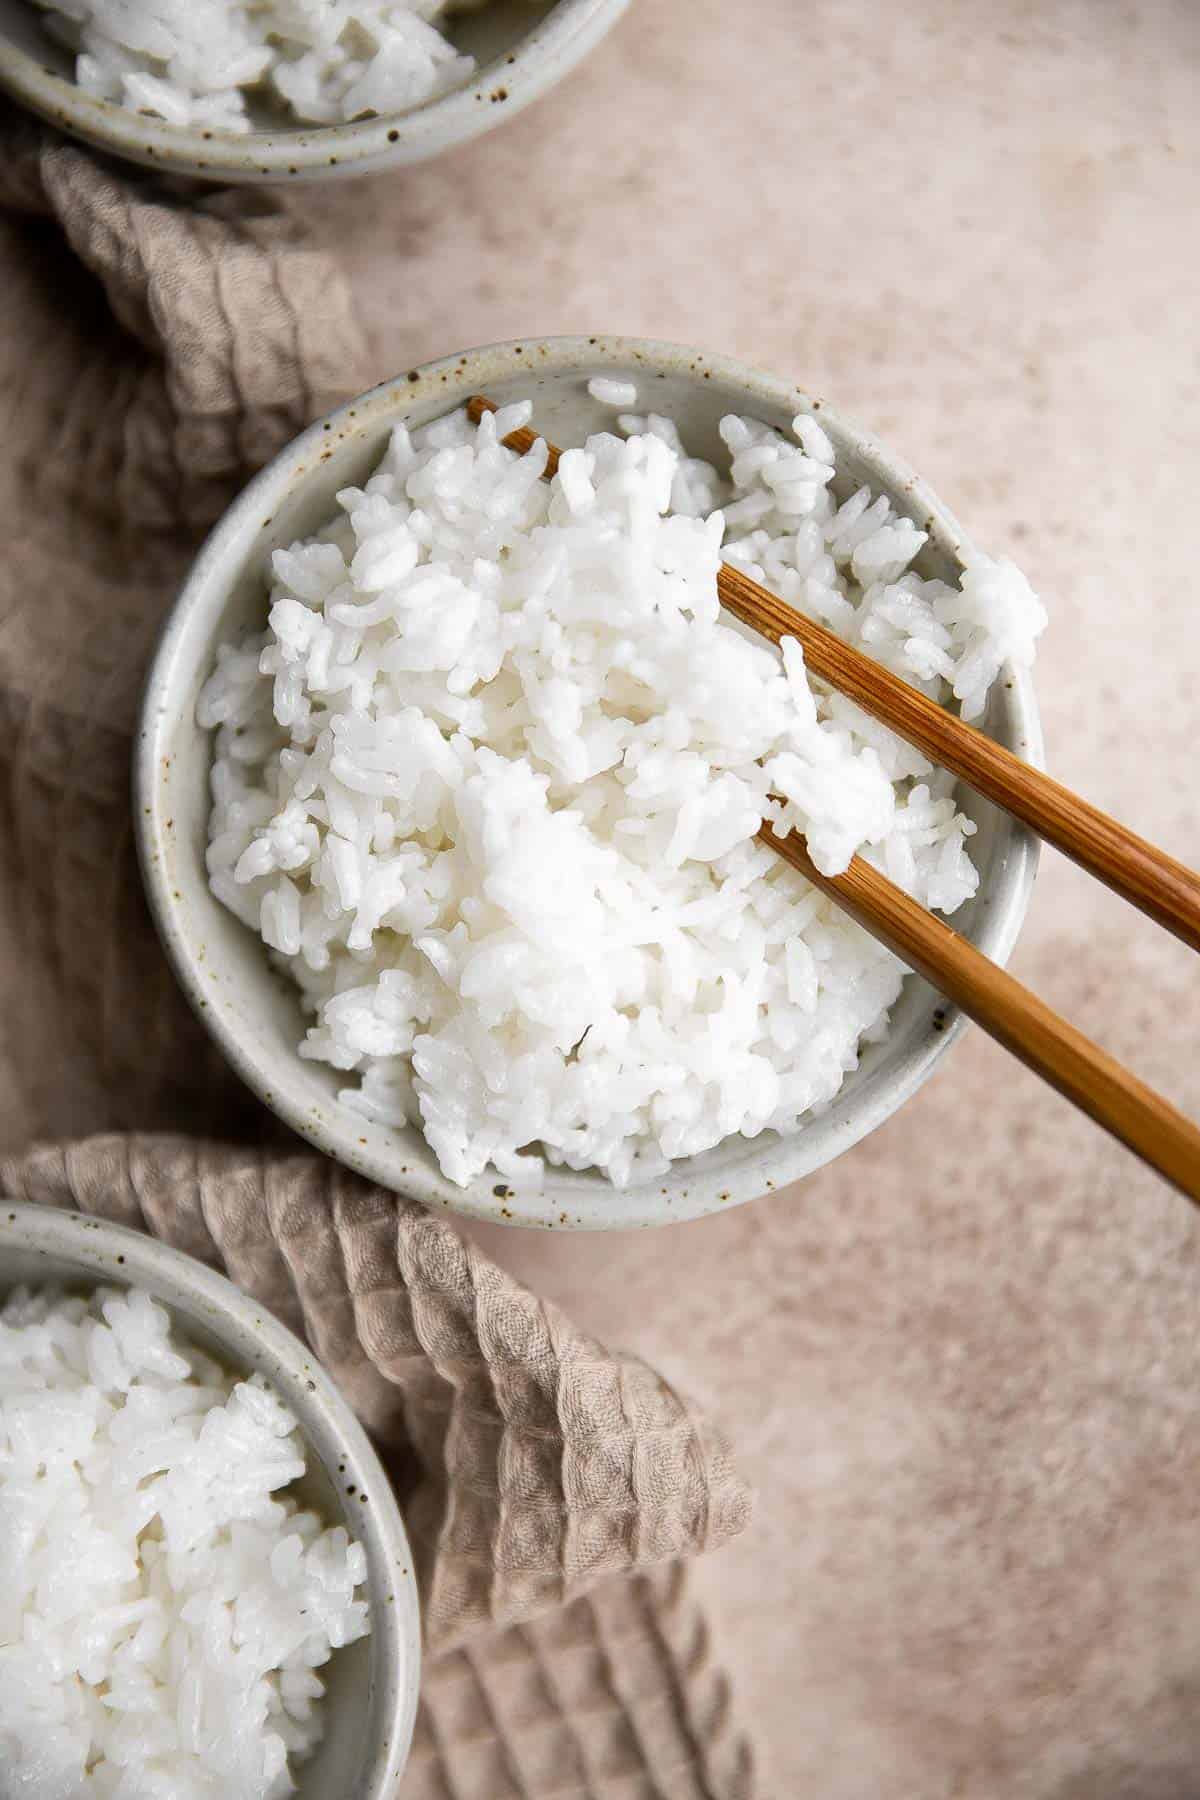
Learn how to make steamed rice that's perfectly cooked, fluffy and delicious in 30 minutes. Cook white rice on the stove, rice cooker, or instant pot.
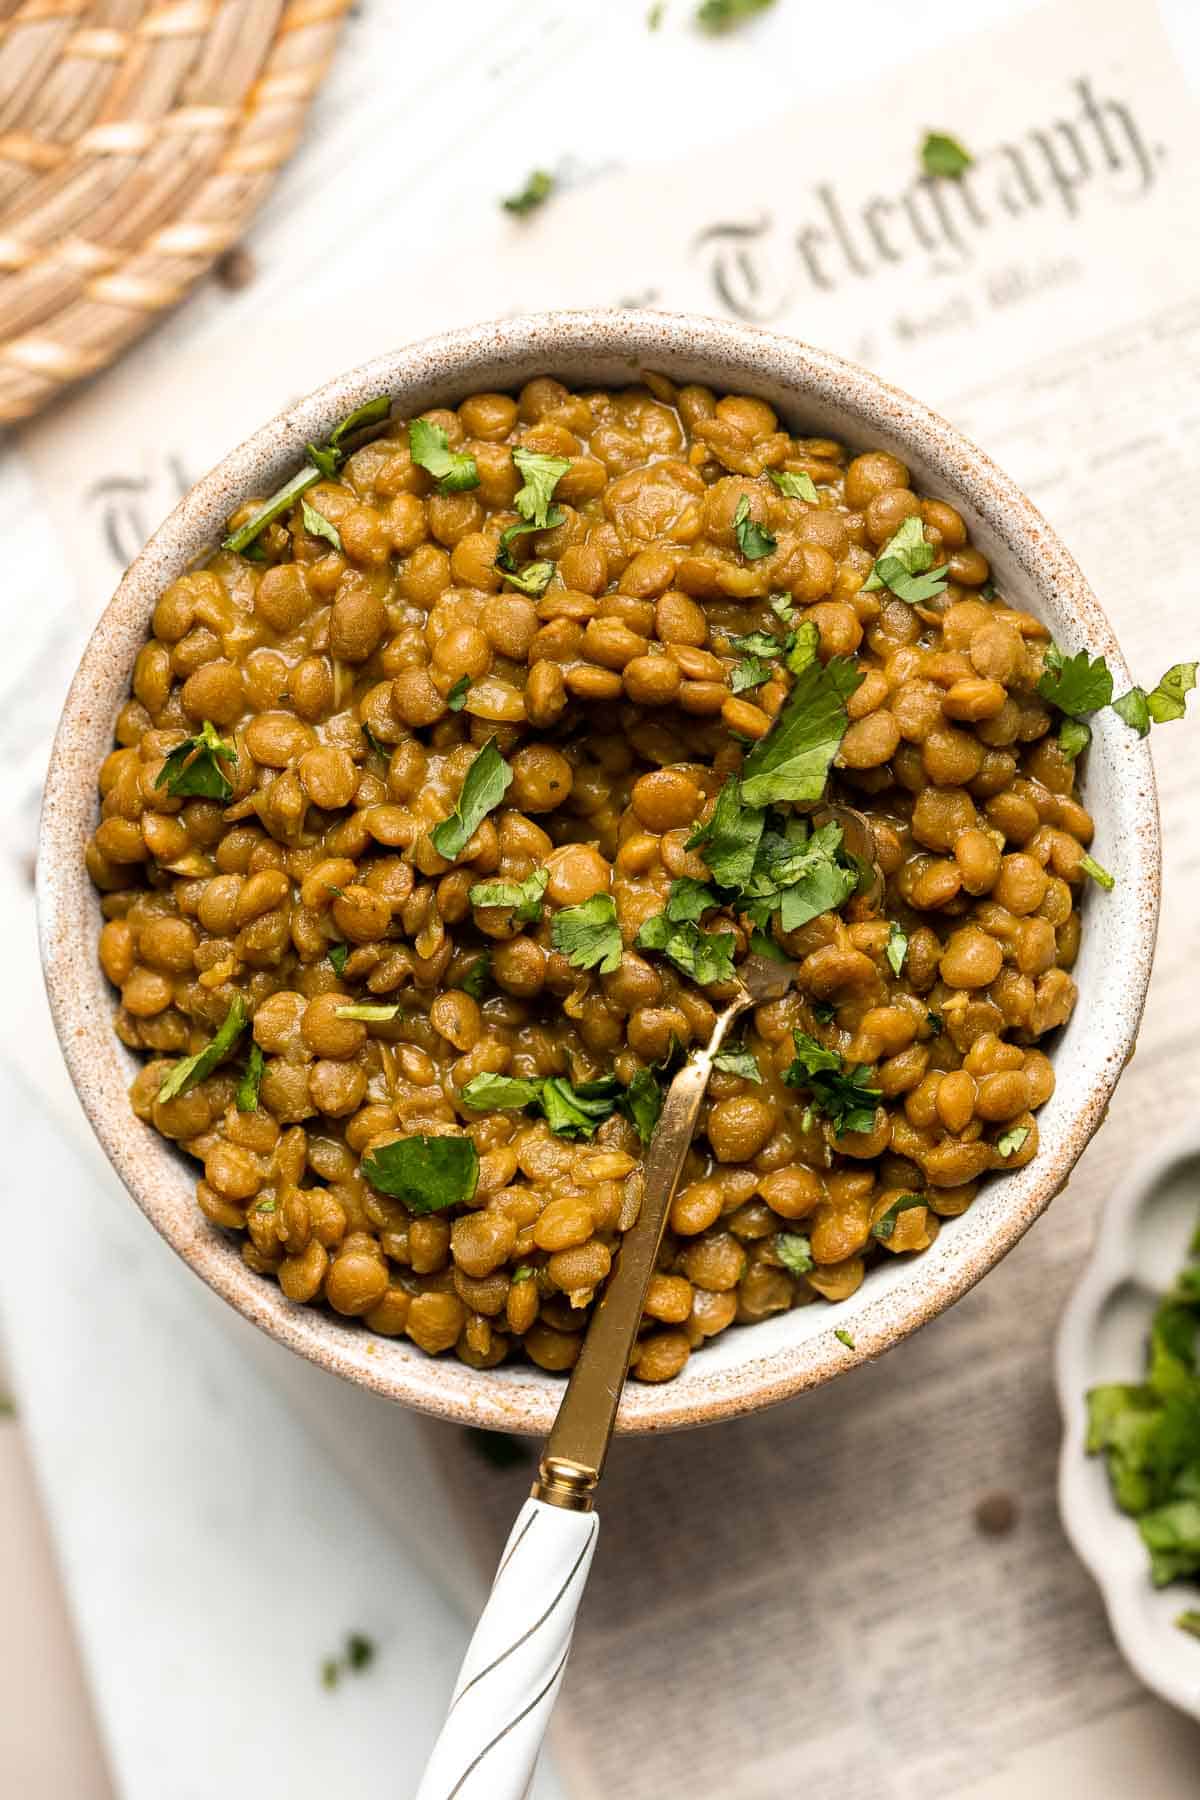
Easy 20-Minute One Pot Lentils are a healthy, nourishing, and delicious vegan meal that is easy to make in a few simple steps. Make a big batch and freeze!
Sweet Potato Fritters are easy to make, flavorful, and delicious. They're pan-fried to perfection with a crisp crust on the outside and a soft bite inside.

This fluffy, creamy Parsnip Puree looks like mashed potatoes but has a distinctly nutty flavor that sets it apart. It is quick and easy to make too!

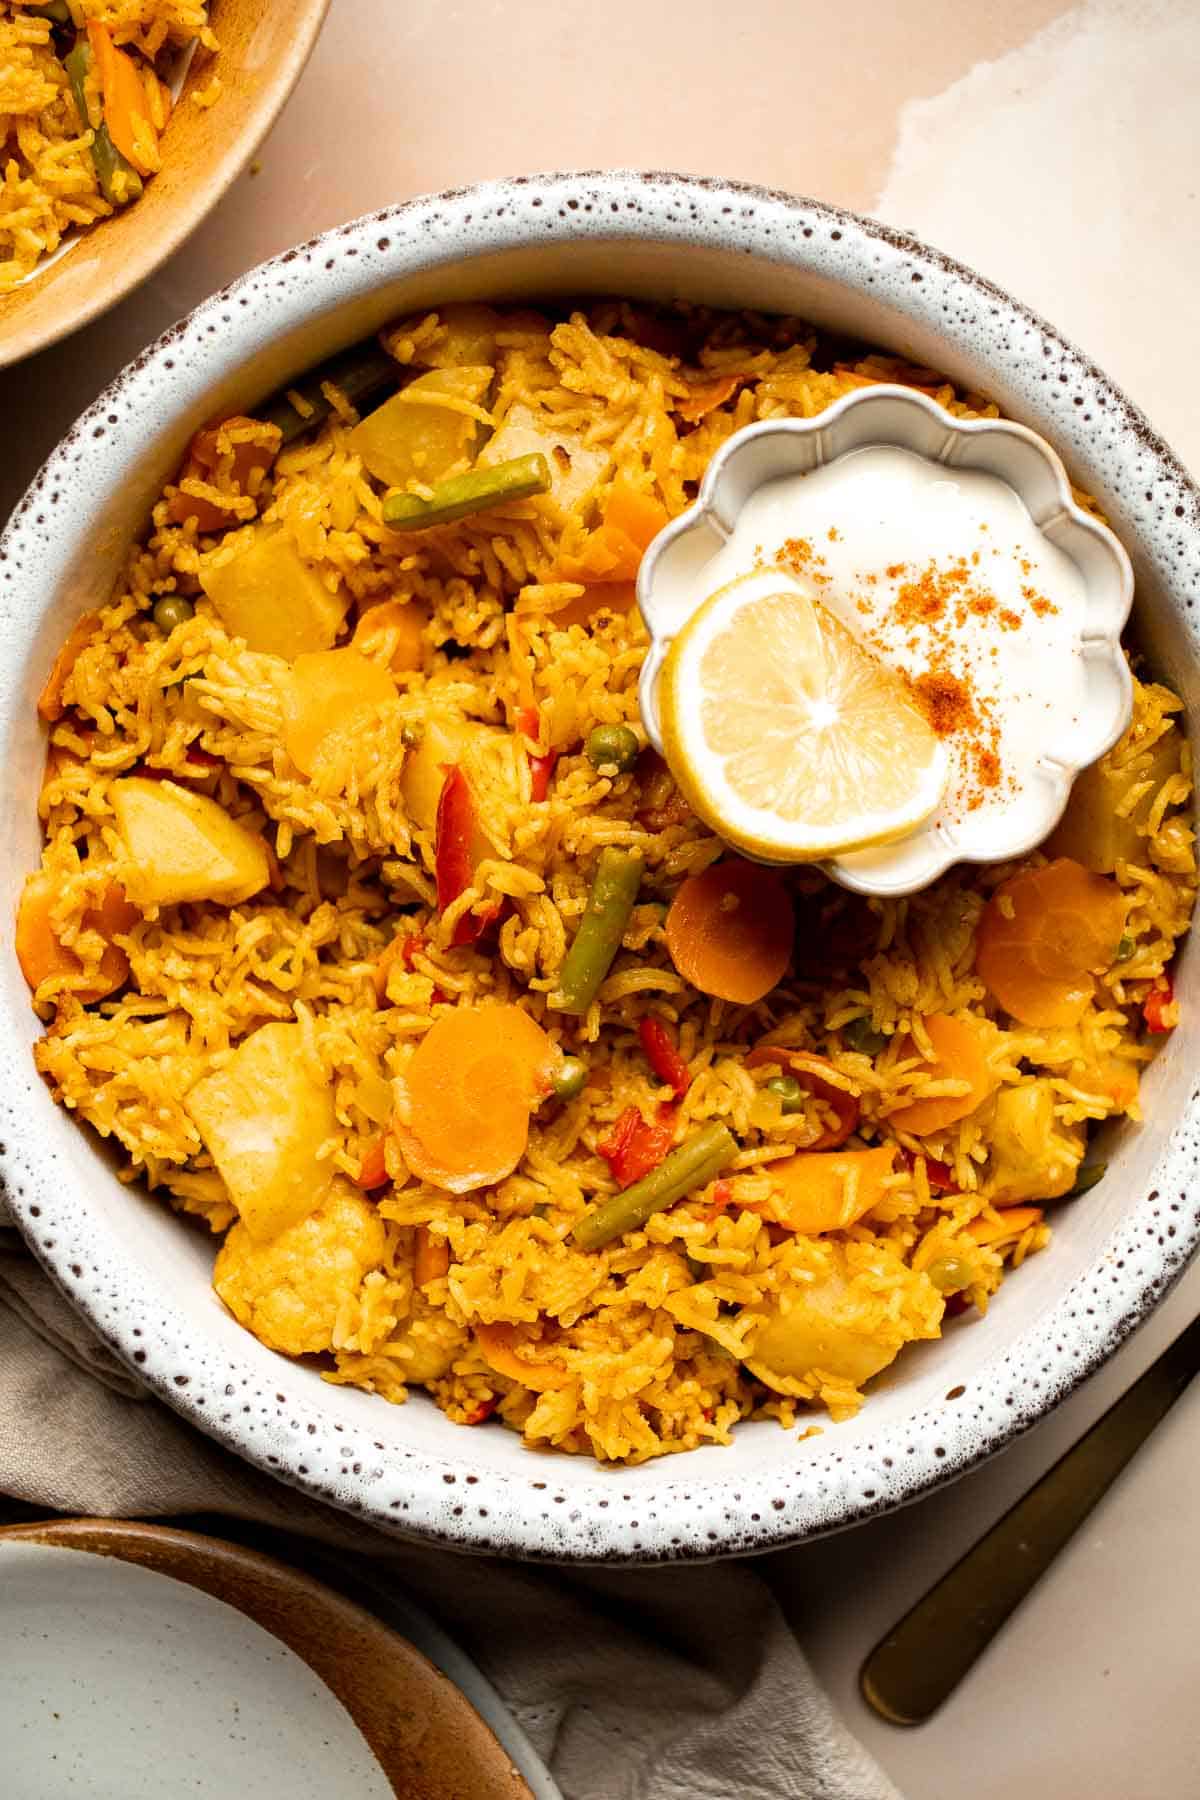
This Vegetable Biryani is a warming and comforting recipe, that is full of flavor and many different textures, making it the ultimate vegetarian side dish.
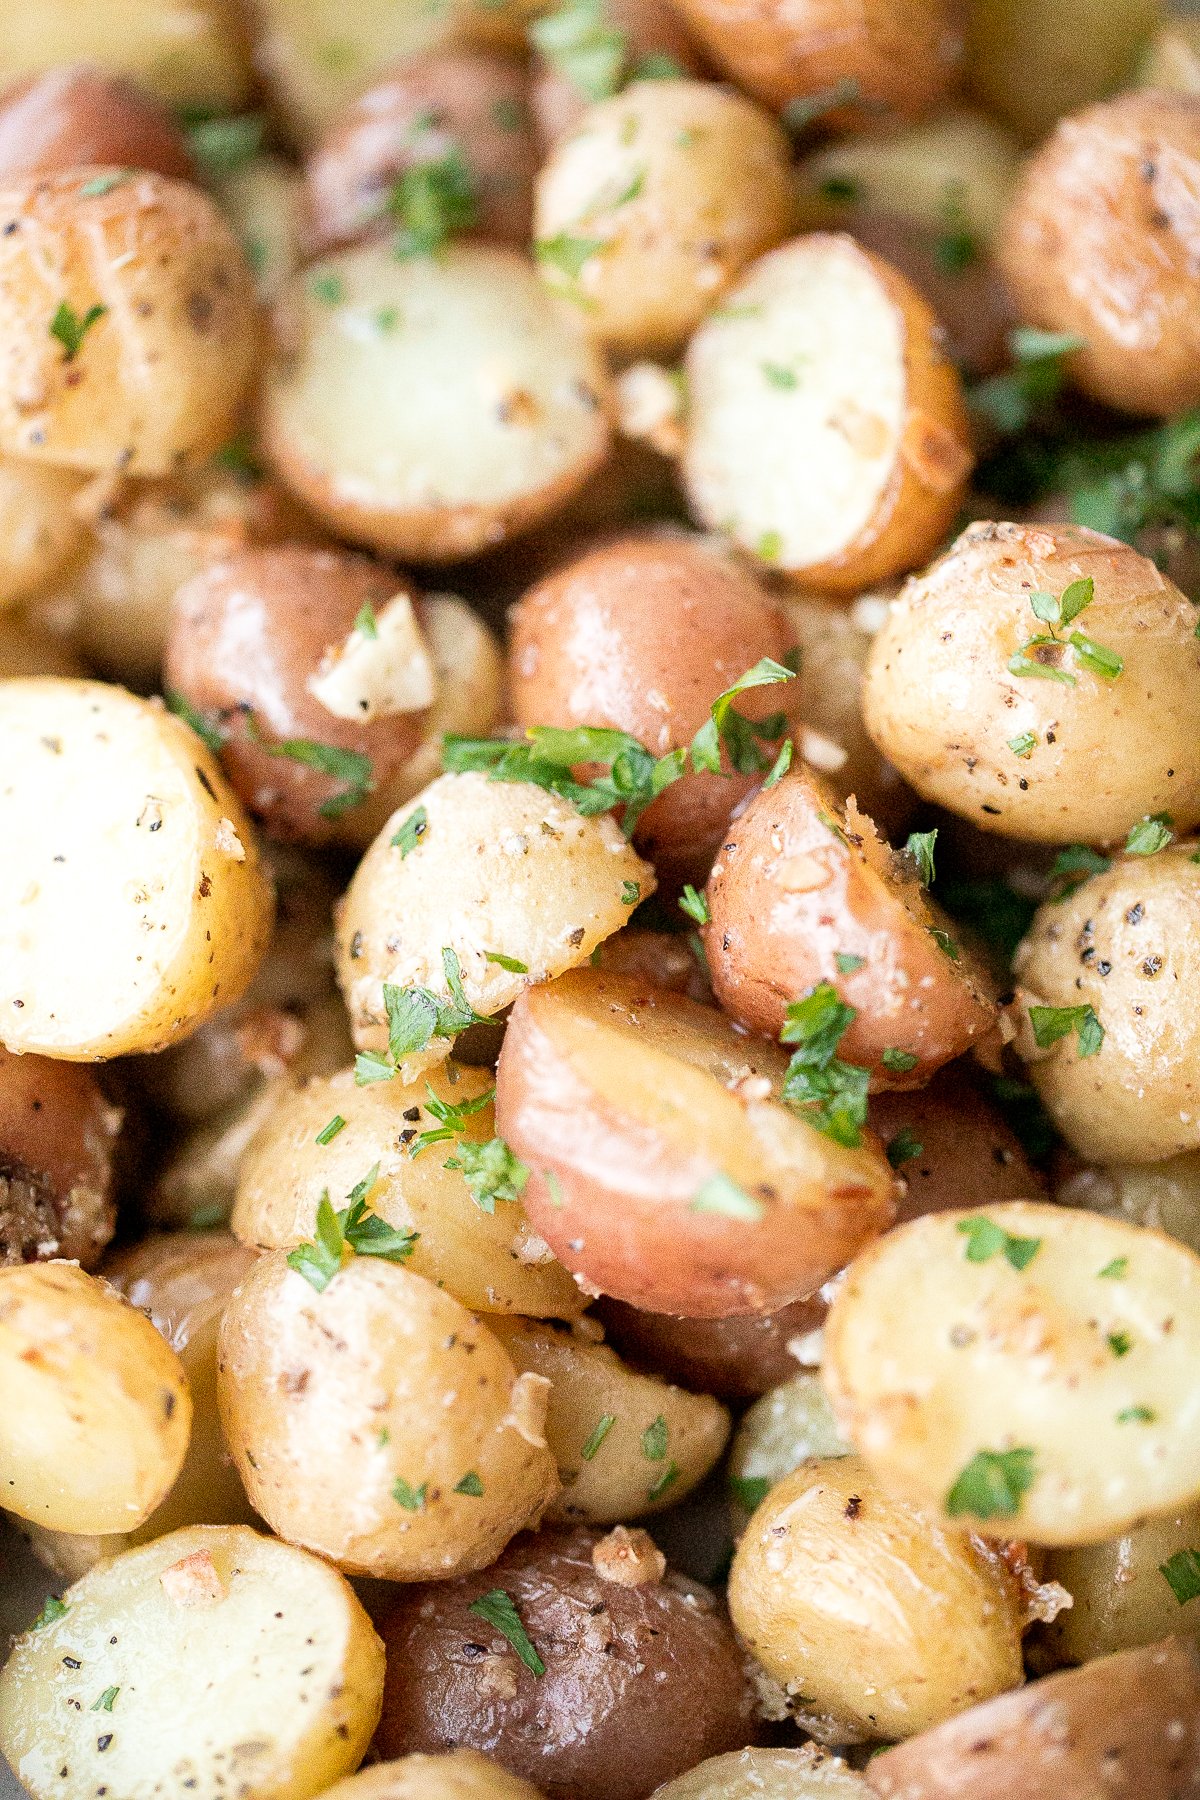
Roasted Garlic Parmesan Baby Potatoes
Quick and easy roasted garlic Parmesan baby potatoes are crispy on the edges and tender inside. They are delicious, flavourful and bakes in just 30 minutes.
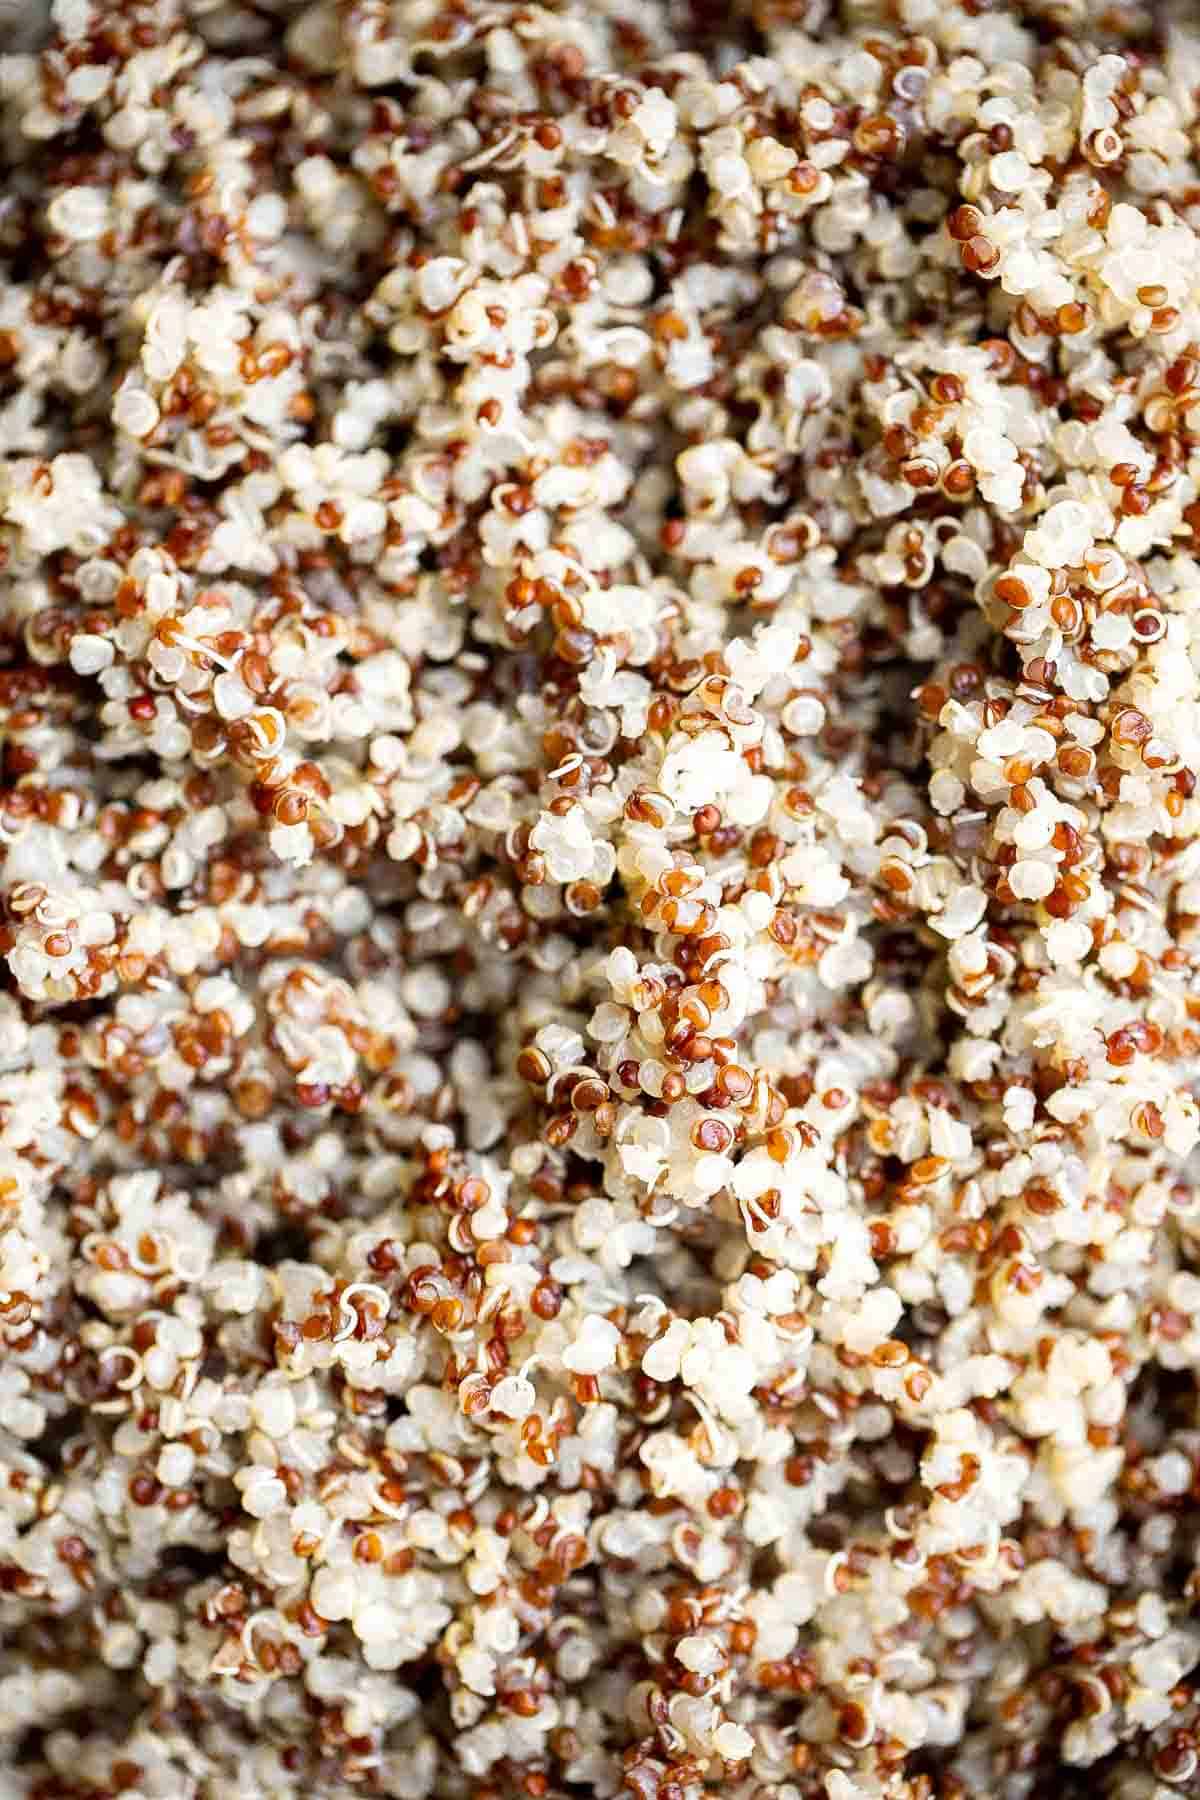
Making perfect fluffy quinoa at home is quick and a lot easier than you think! Learn how to cook quinoa perfectly every time using our simple recipe.
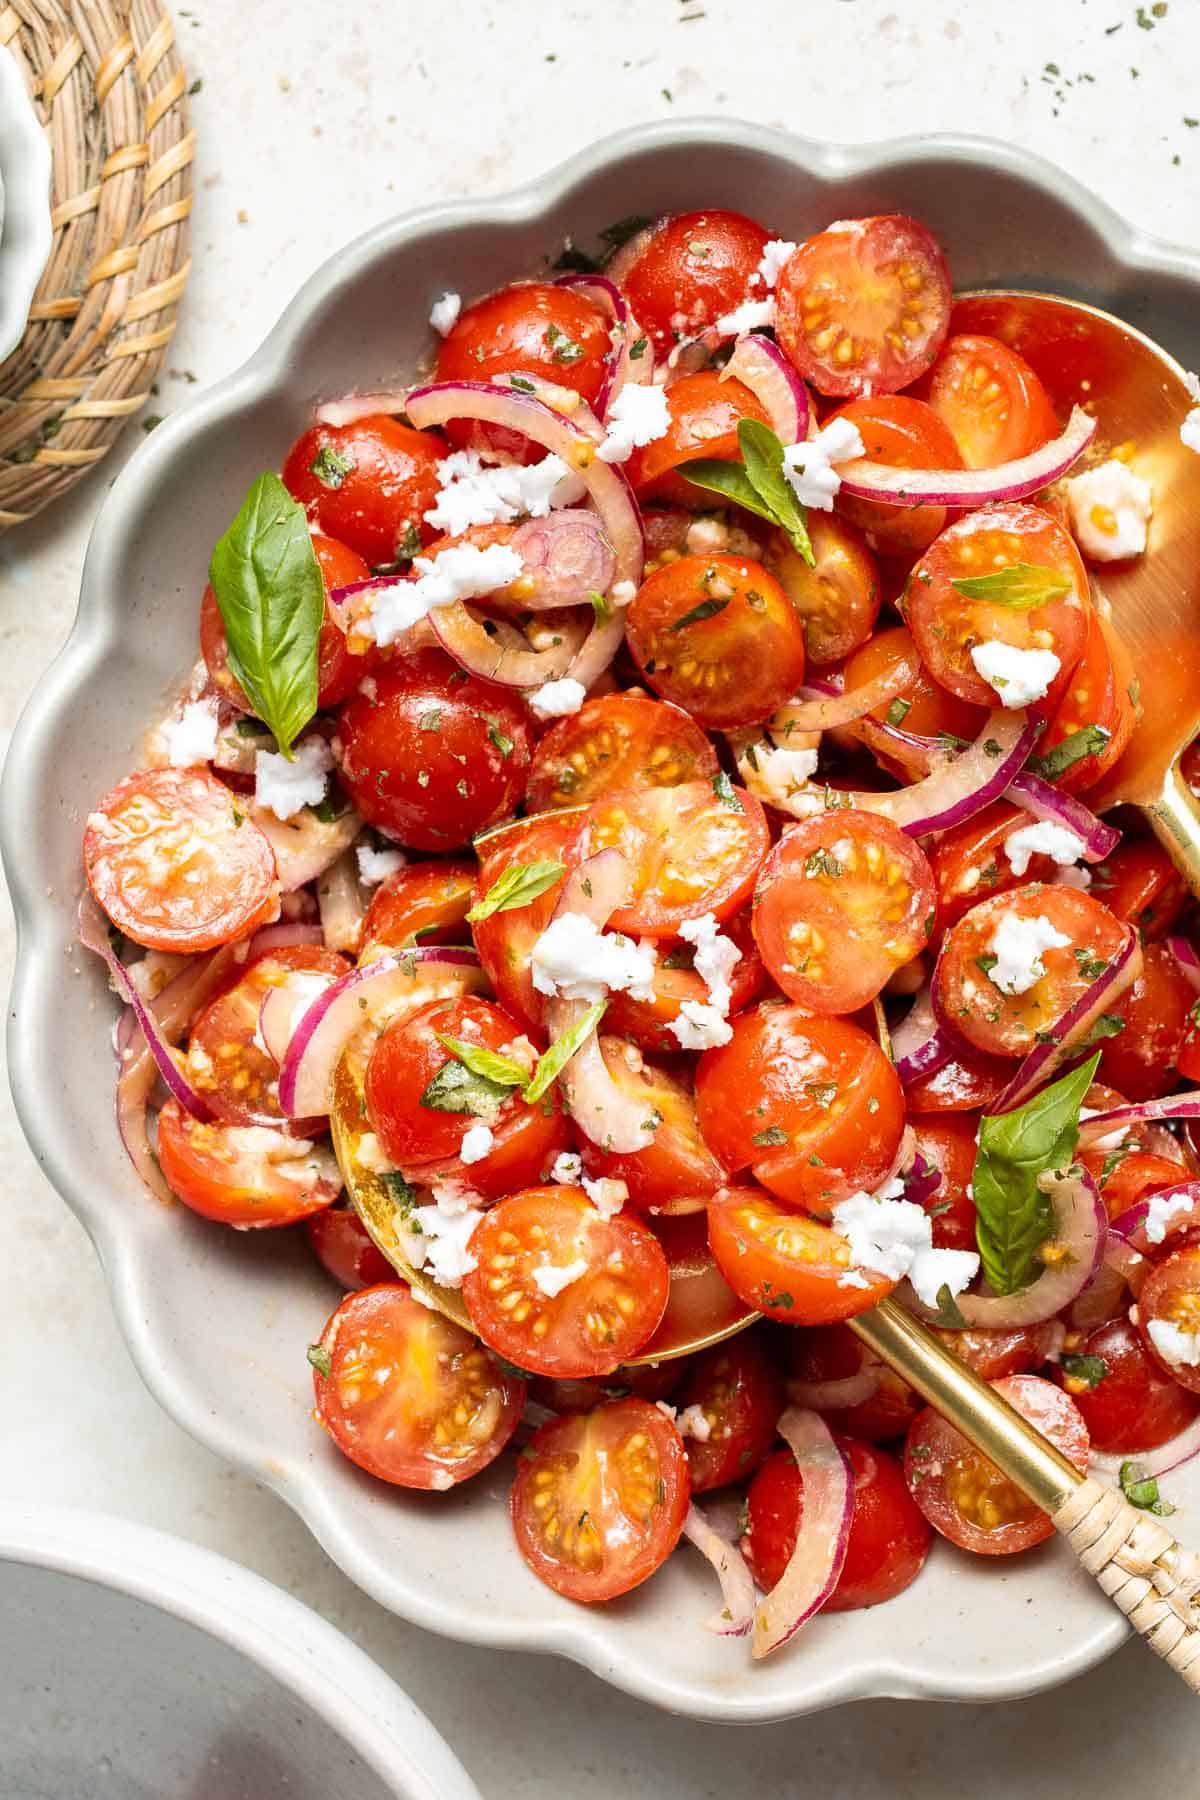
This quick and easy Cherry Tomato Salad is made with sweet cherry tomatoes, red onion, fresh basil, and feta cheese tossed in a simple vinaigrette.
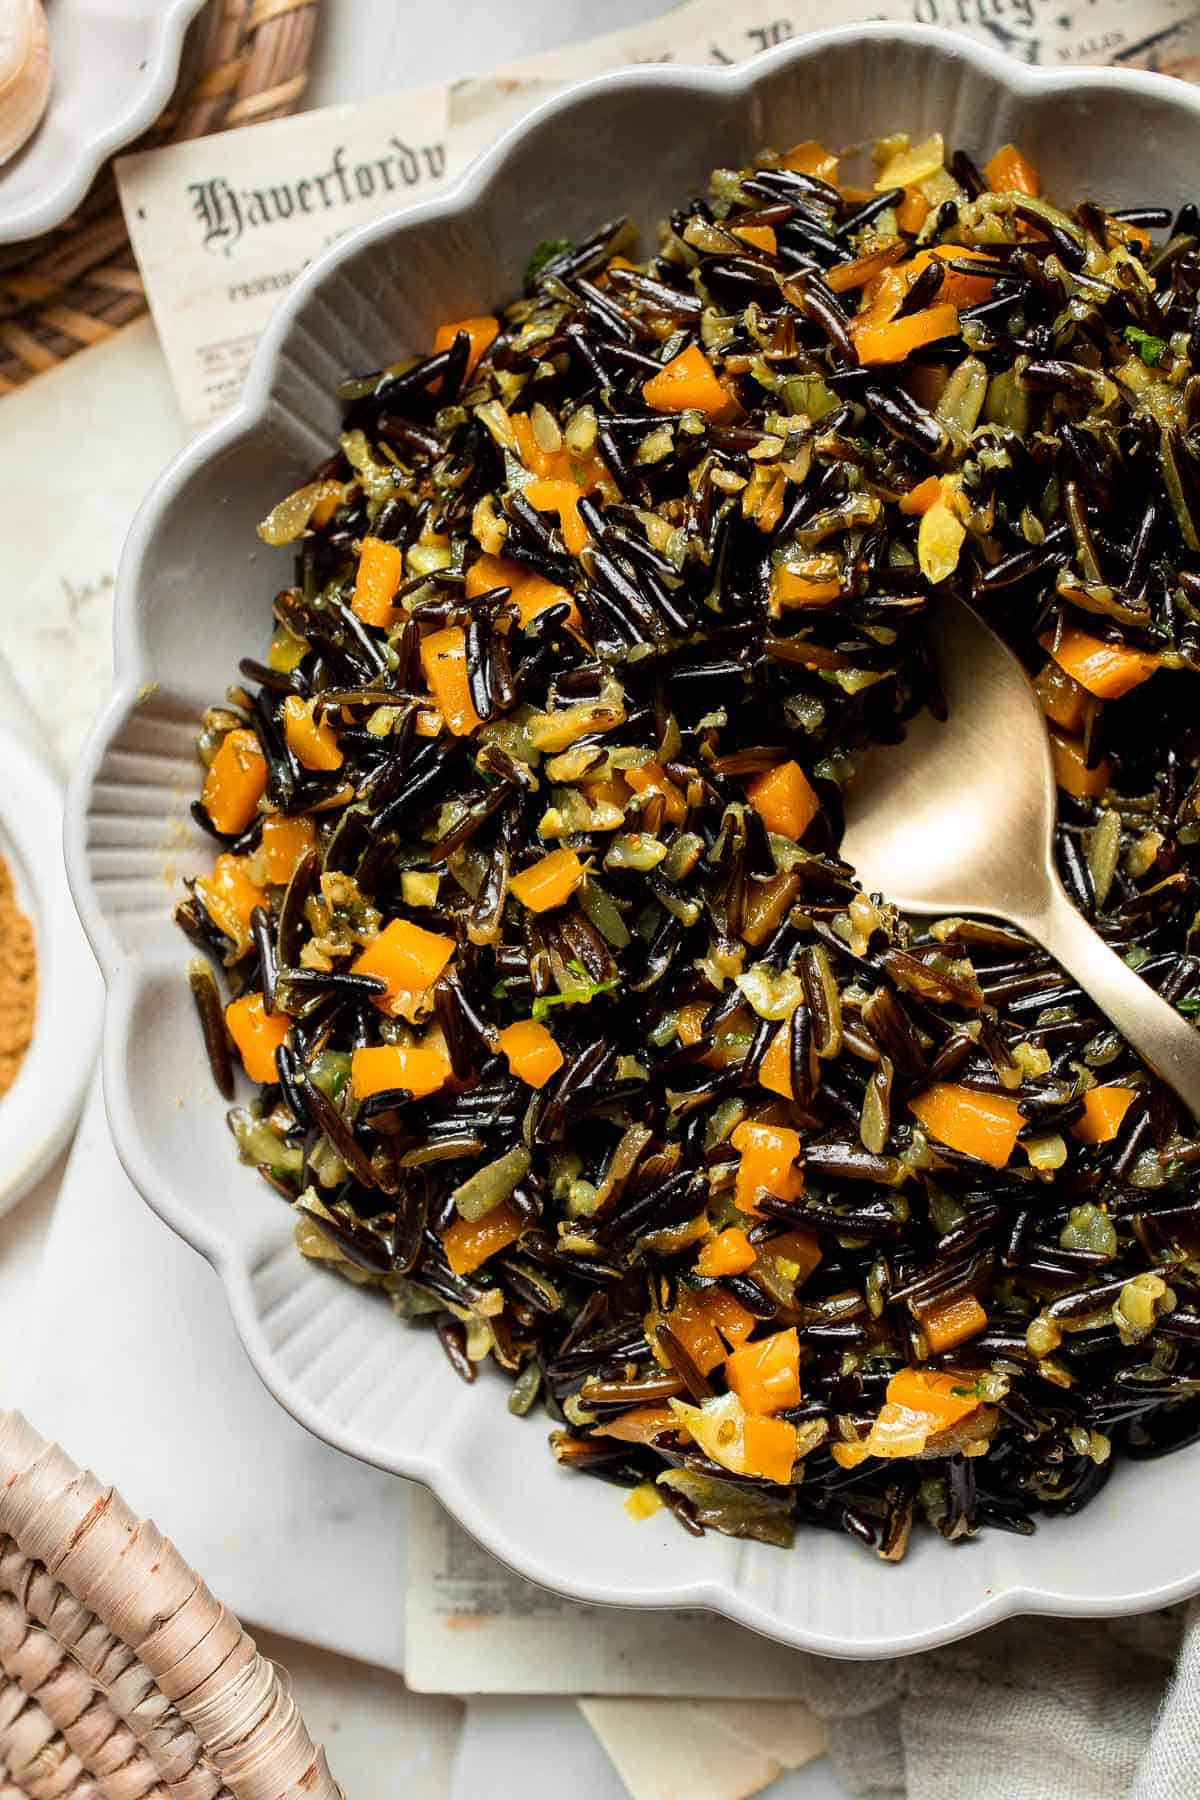
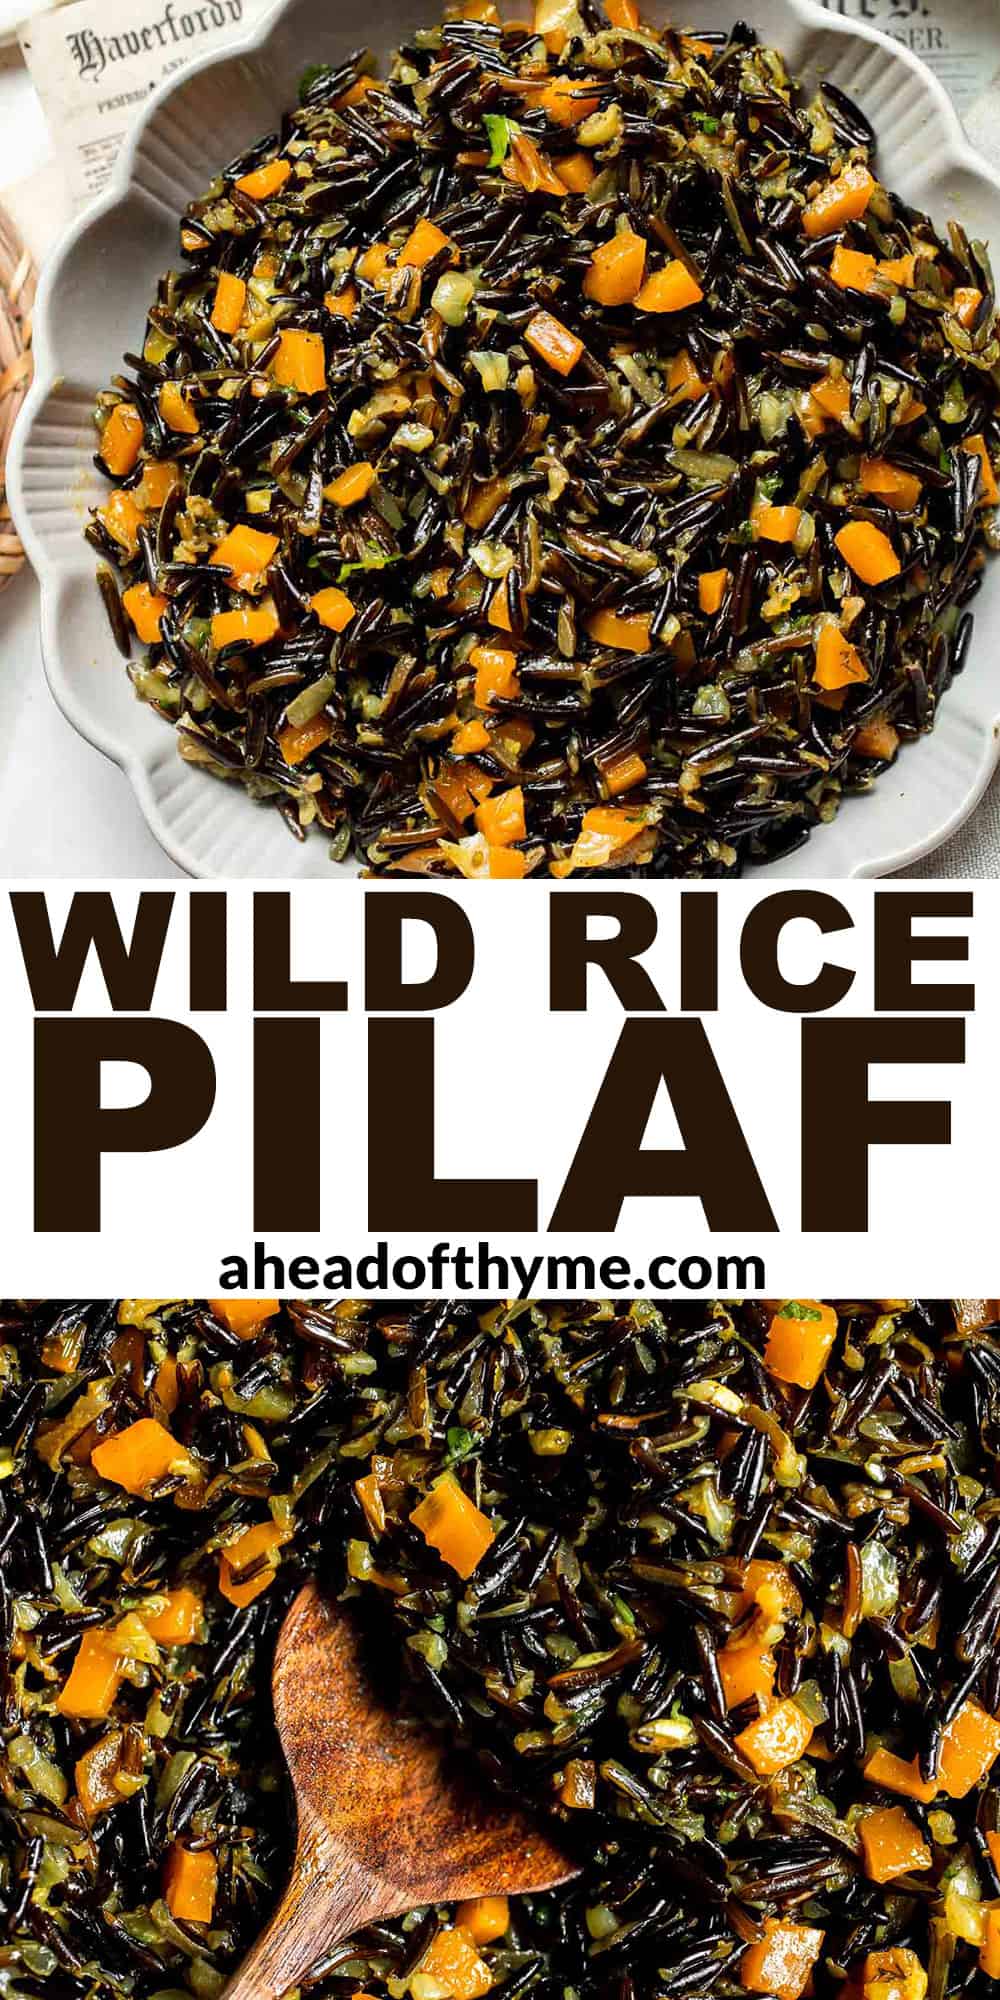
Wild Rice Pilaf is a wholesome, nutritious side dish that pairs the naturally nutty flavor of wild rice with vegetables, spices, and fresh herbs.
Homemade flour tortillas are delicious, soft, and so easy to make! They are easy to make with just 5 pantry staple ingredients and ready in under an hour.
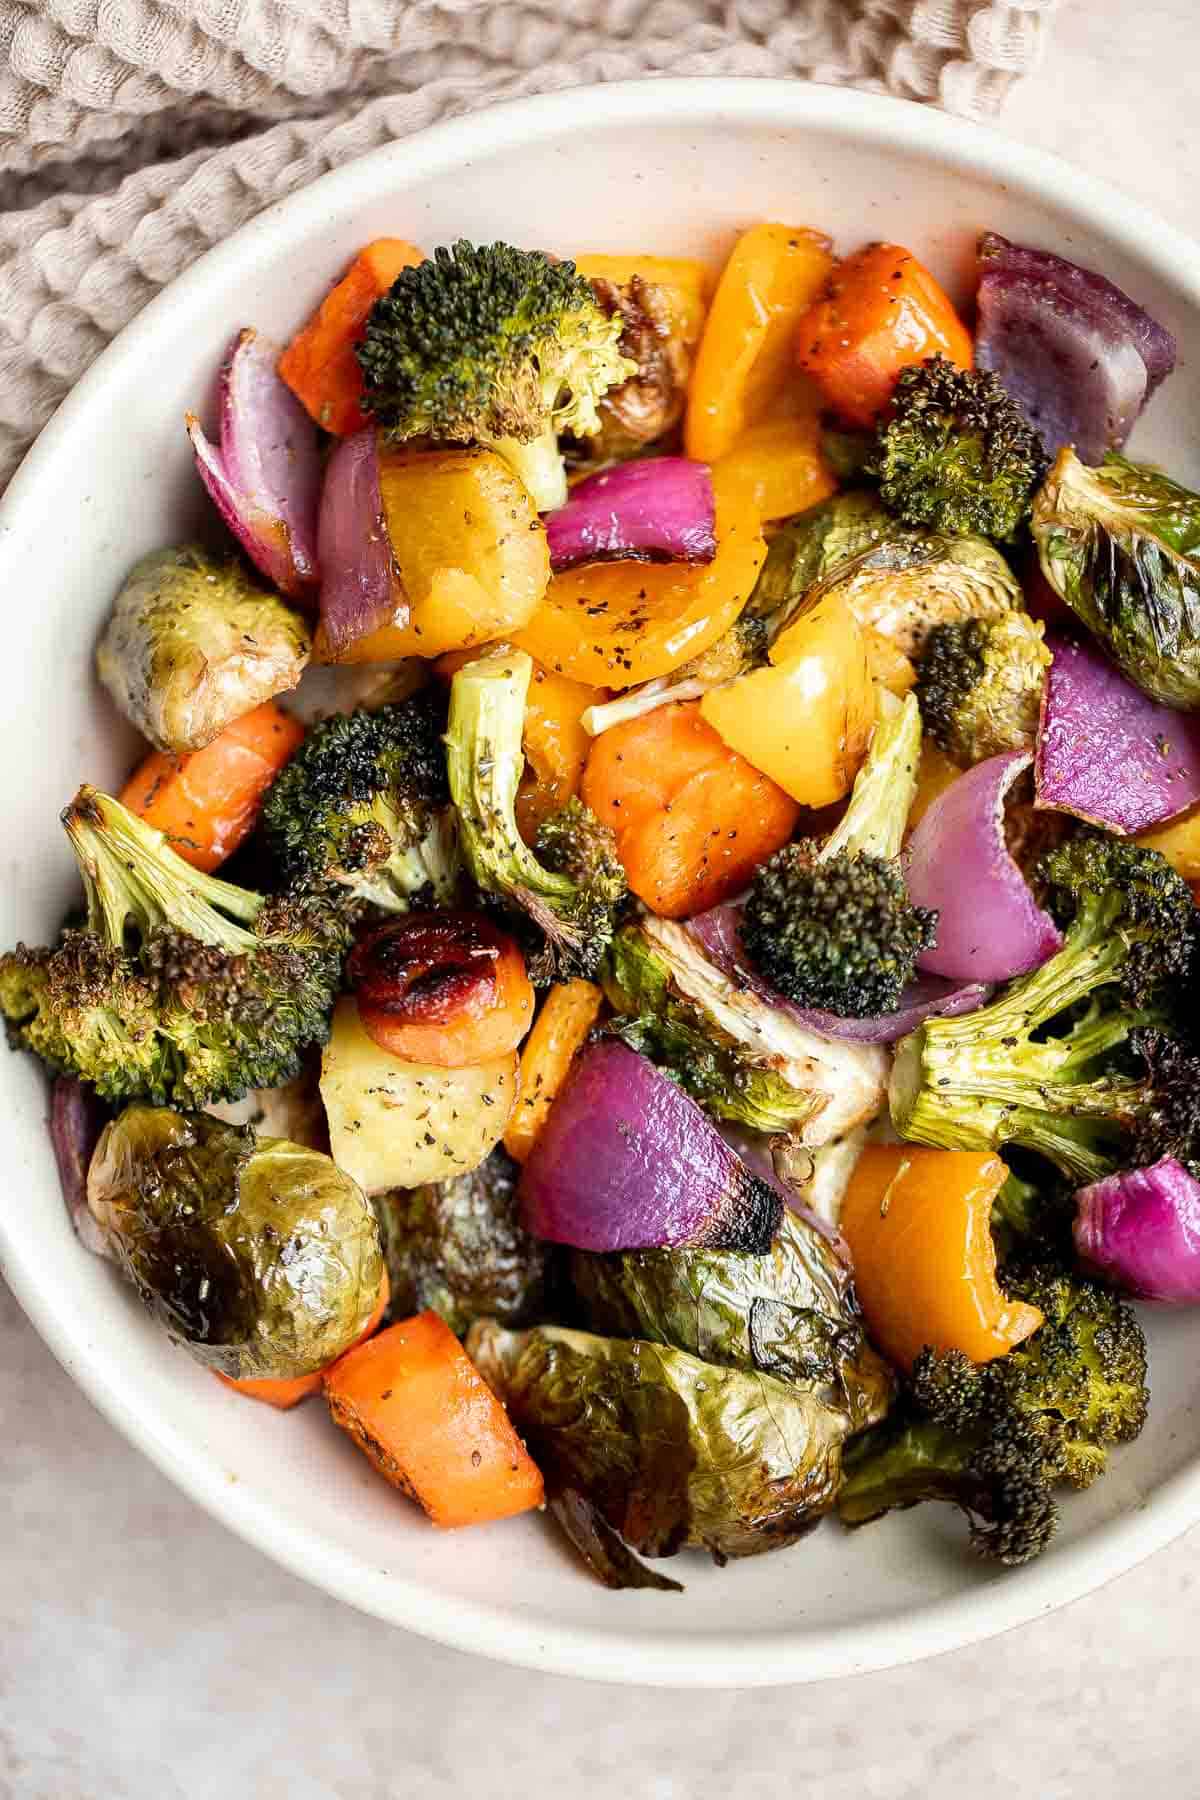
Oven Roasted Vegetables are a delicious flavorful side dish that goes well with almost any dinner main. Customize it with whatever veggies you have on hand.
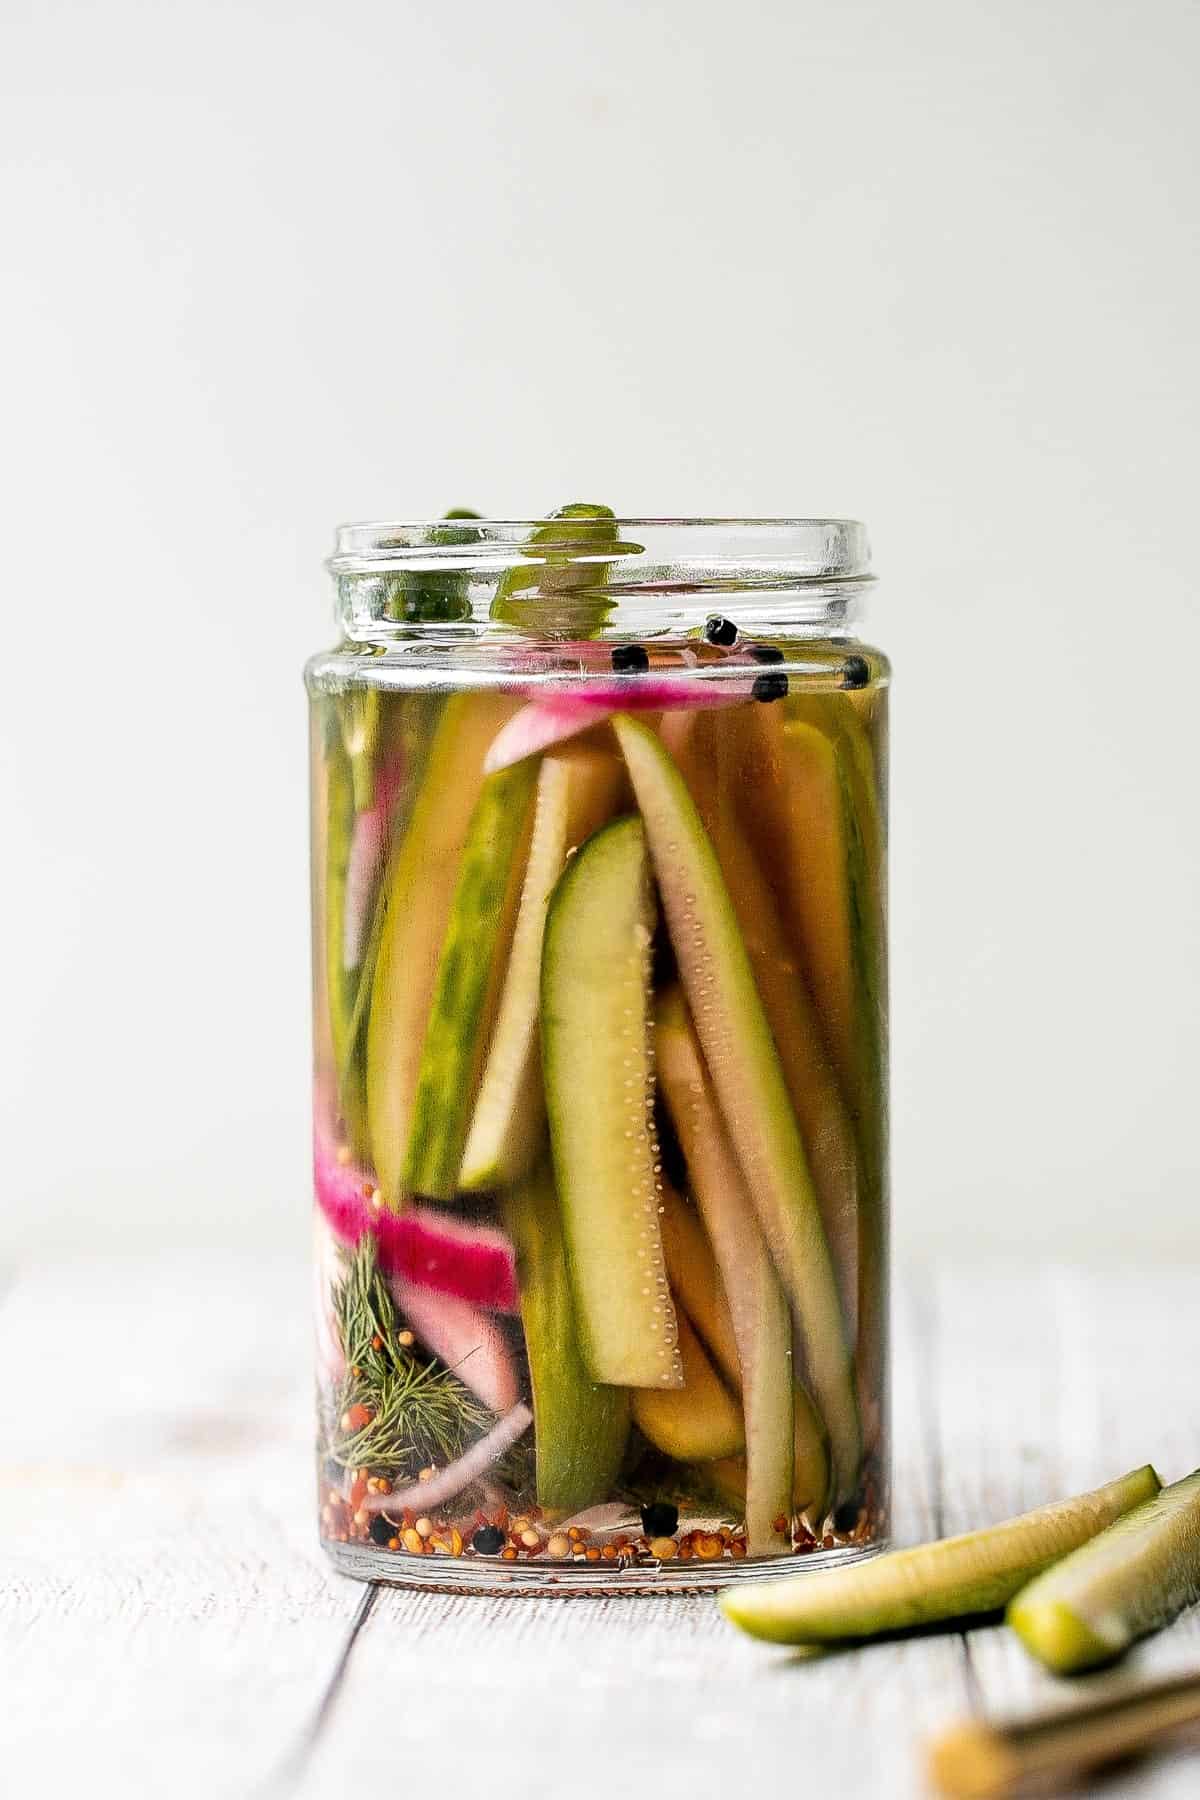
Homemade pickles are easy to make at home in just 5 minutes with no canning required. Plus, they are ready to eat in just 1 to 2 days!
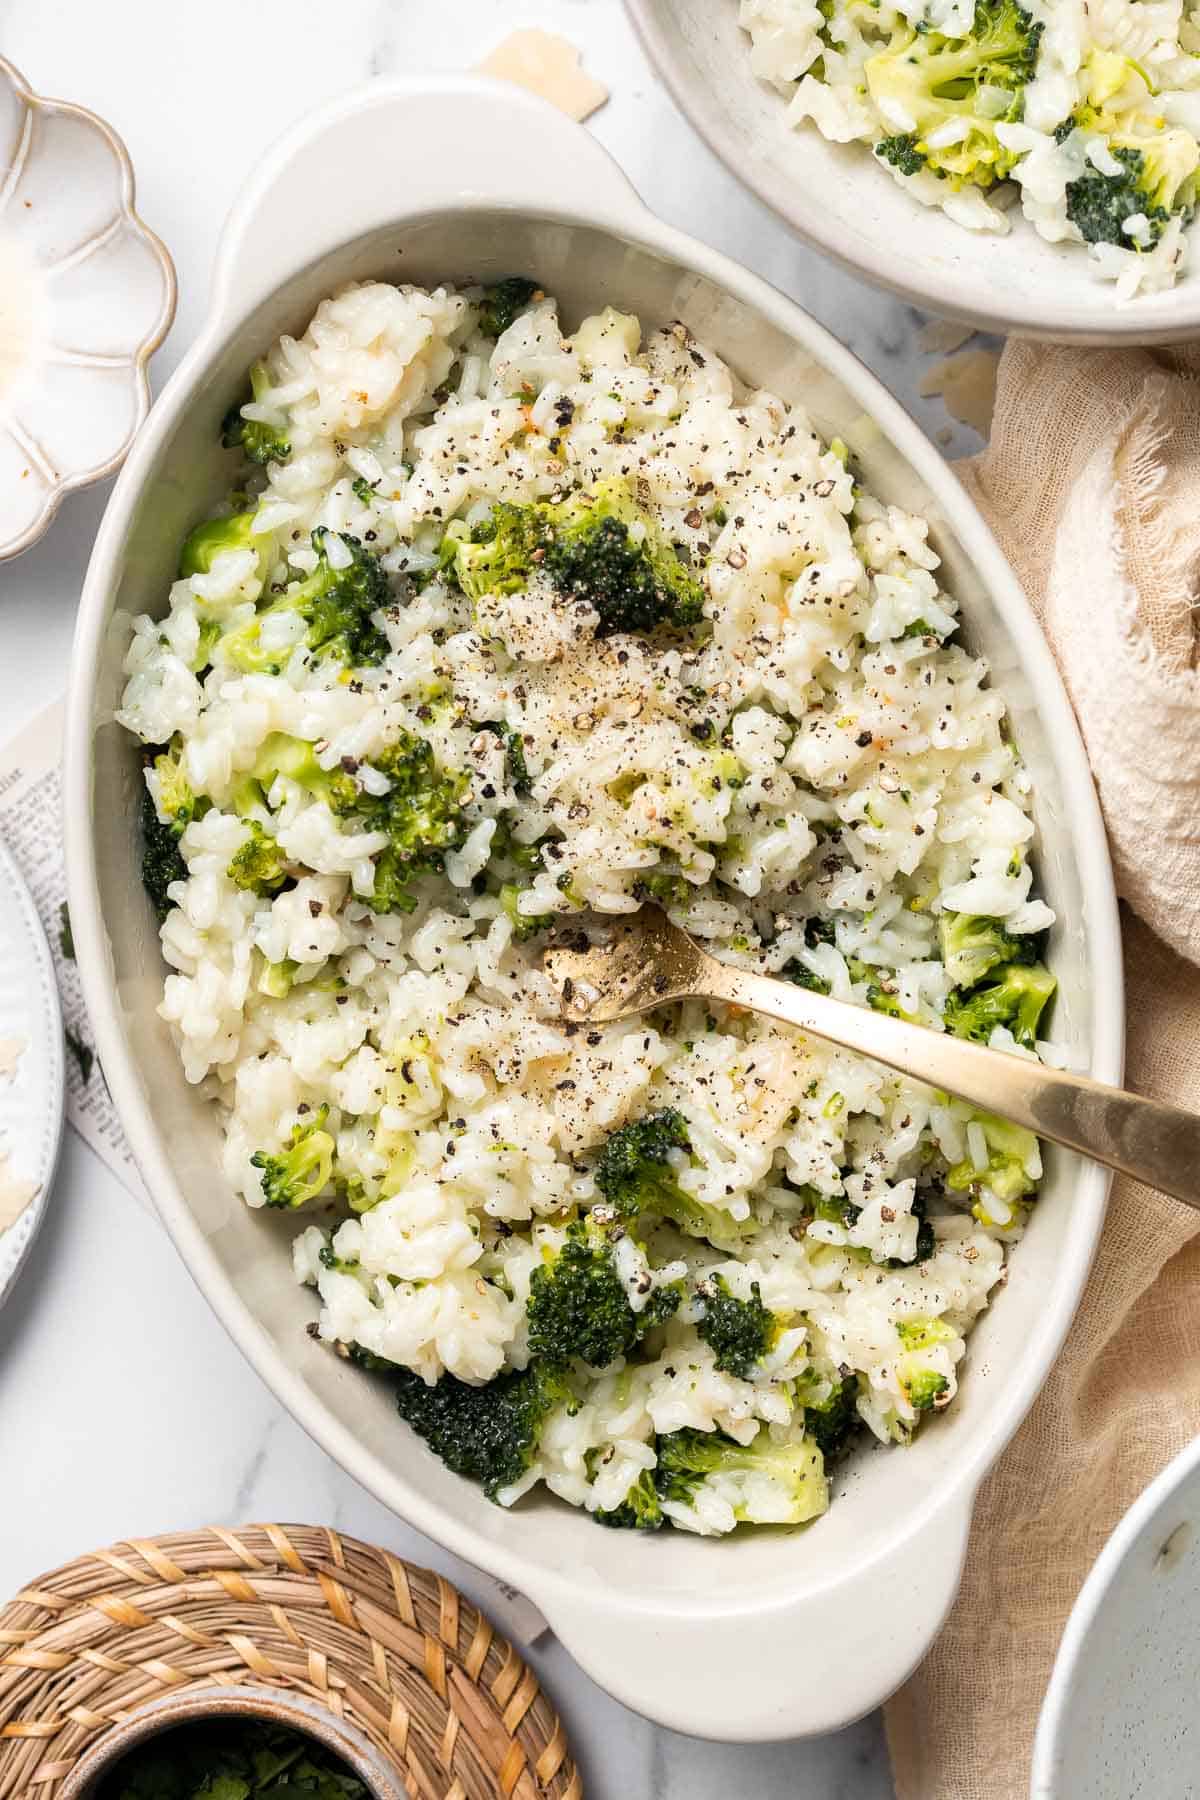
Broccoli Rice is the perfect side dish: creamy, cheesy, healthy, and filling. Plus, it's quick and easy and all made in one pot in just over 30 minutes.
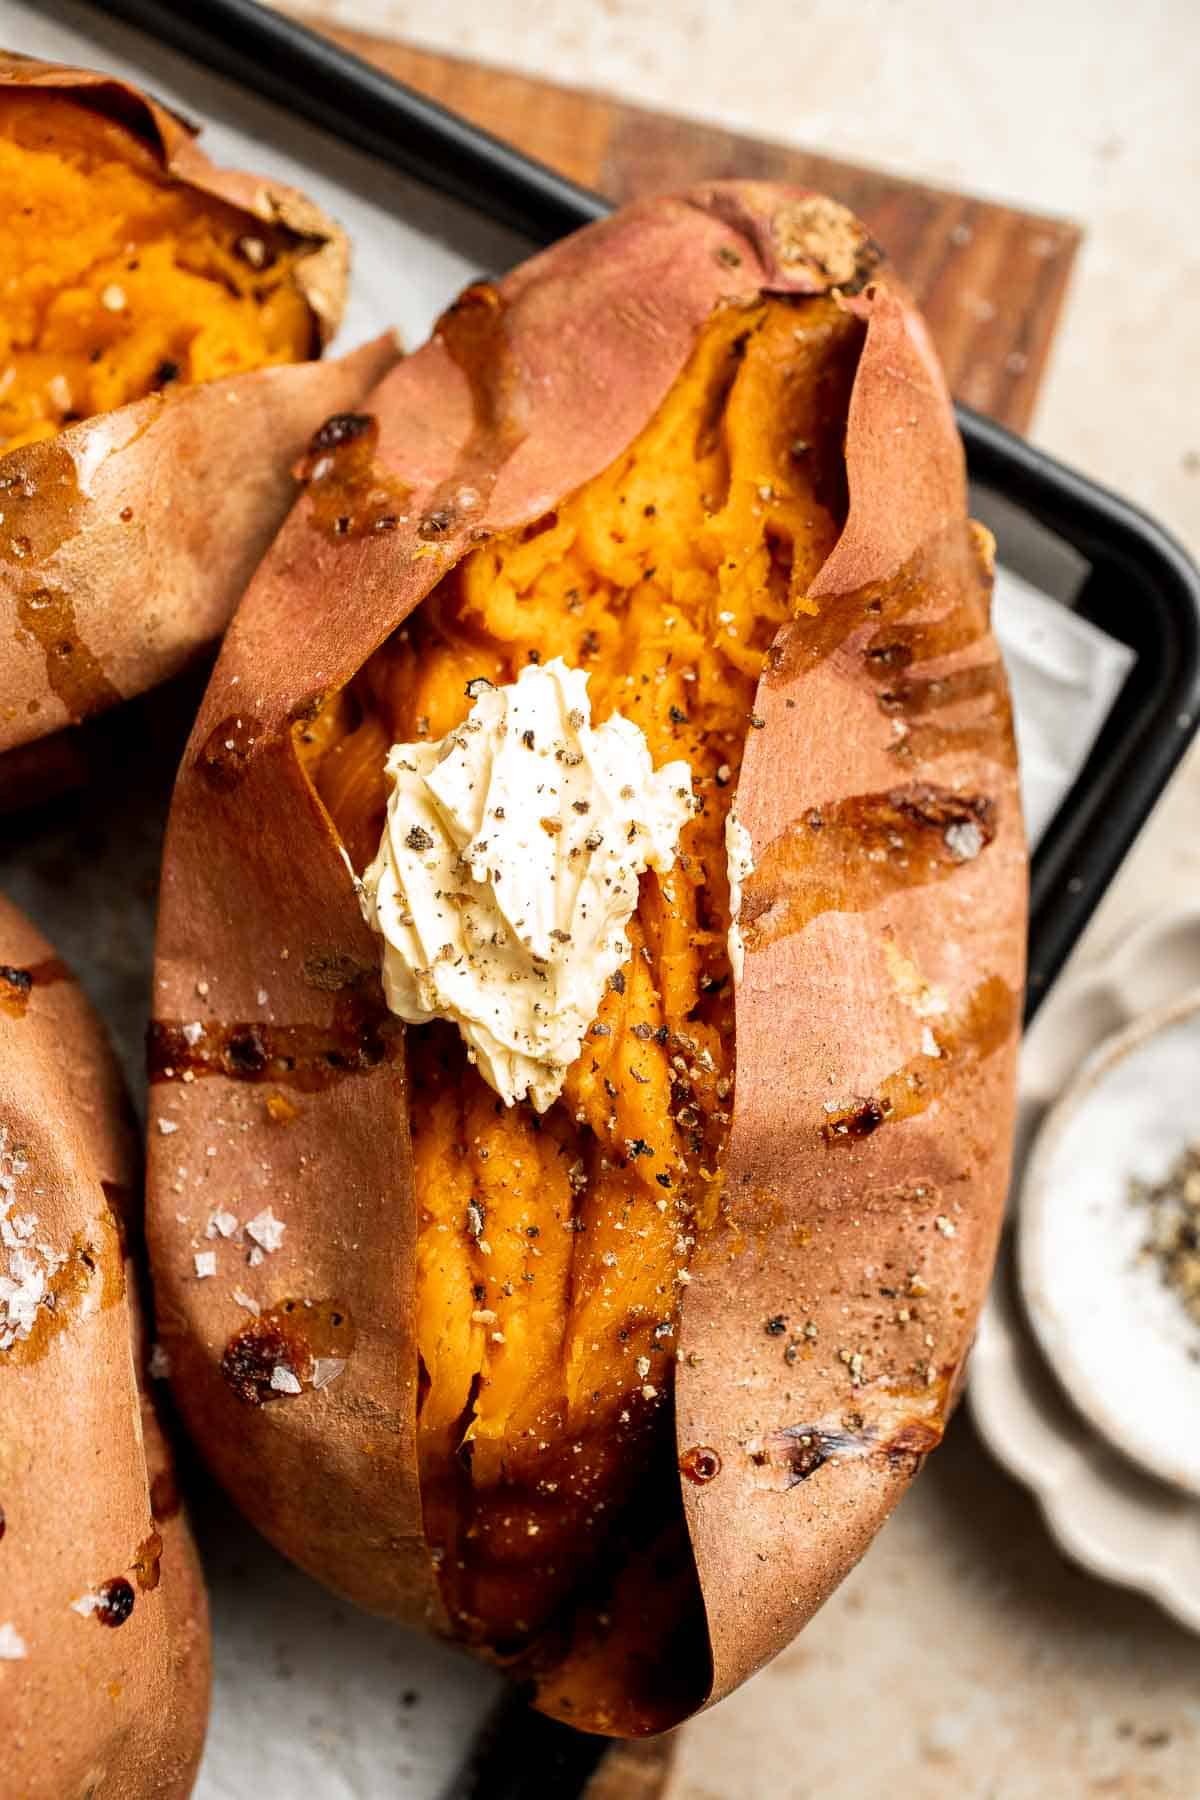
Baked Sweet Potato takes almost no effort to make (in the oven or grill) and always taste amazing. They're soft and tender, naturally sweet, and delicious!
Our Favorite Curry Recipes
Looking for some curry main dishes to pair these sides with? Here are some of our most popular curries and stews:
- One Pot Coconut Curry Beef Stew
- Indian Butter Chicken
- Vegetable Curry
- Thai Turkey Meatballs in Coconut Curry
- Pumpkin Curry with Chickpeas
- Thai Sweet Potato Yellow Curry
- Coconut Lamb Curry
How to Make Ahead and Store Side Dishes
Many of these curry side dish recipes can be prepared in advance and kept in the refrigerator for a few days, or frozen for up to three months. Alternatively, you can prep the ingredients and refrigerate them until you're ready to assemble and/or cook. Refer to each recipe for detailed instructions on making ahead and storing.
To reheat, place any leftovers in a skillet and heat over the stove over medium-low heat until warmed through. You may also be able to reheat some recipes in the air fryer or the oven at 300F for 10-15 minutes until warmed through. Again, check each recipe for detailed instructions.
More Side Dish Recipes
- 50 Best Fall Side Dishes
- 30 Side Dishes for Pasta
- 25 Side Dishes for Soup
- 30 Potato Side Dishes
- 40 Vegetable Side Dishes
- 25 Side Dishes for Chicken
Did You Make Any of These Side Dishes for Curry?
Please leave a comment and rating below, and let me know what you thought of this round up of side dish recipes to serve with curry. Be sure to snap a picture and tag me on Instagram @aheadofthyme or share it on the Pinterest pin so that I can follow along.
HUNGRY FOR MORE? Don't forget to sign up for my email newsletter so that you don't miss any recipes. You can also follow along on Instagram and Pinterest for more recipe updates.
Wild Rice Pilaf
This Wild Rice Pilaf is a wholesome, nutritious side dish that pairs the naturally earthy and nutty flavor of wild rice with aromatic vegetables, savory spices, and fresh herbs. With just 5 minutes of prep, it's a mostly hands off recipe that can simmer away while you prepare the rest of the meal. It's the perfect side dish for the colder months of the year and has a hearty, comforting flavor that brings any meal together!
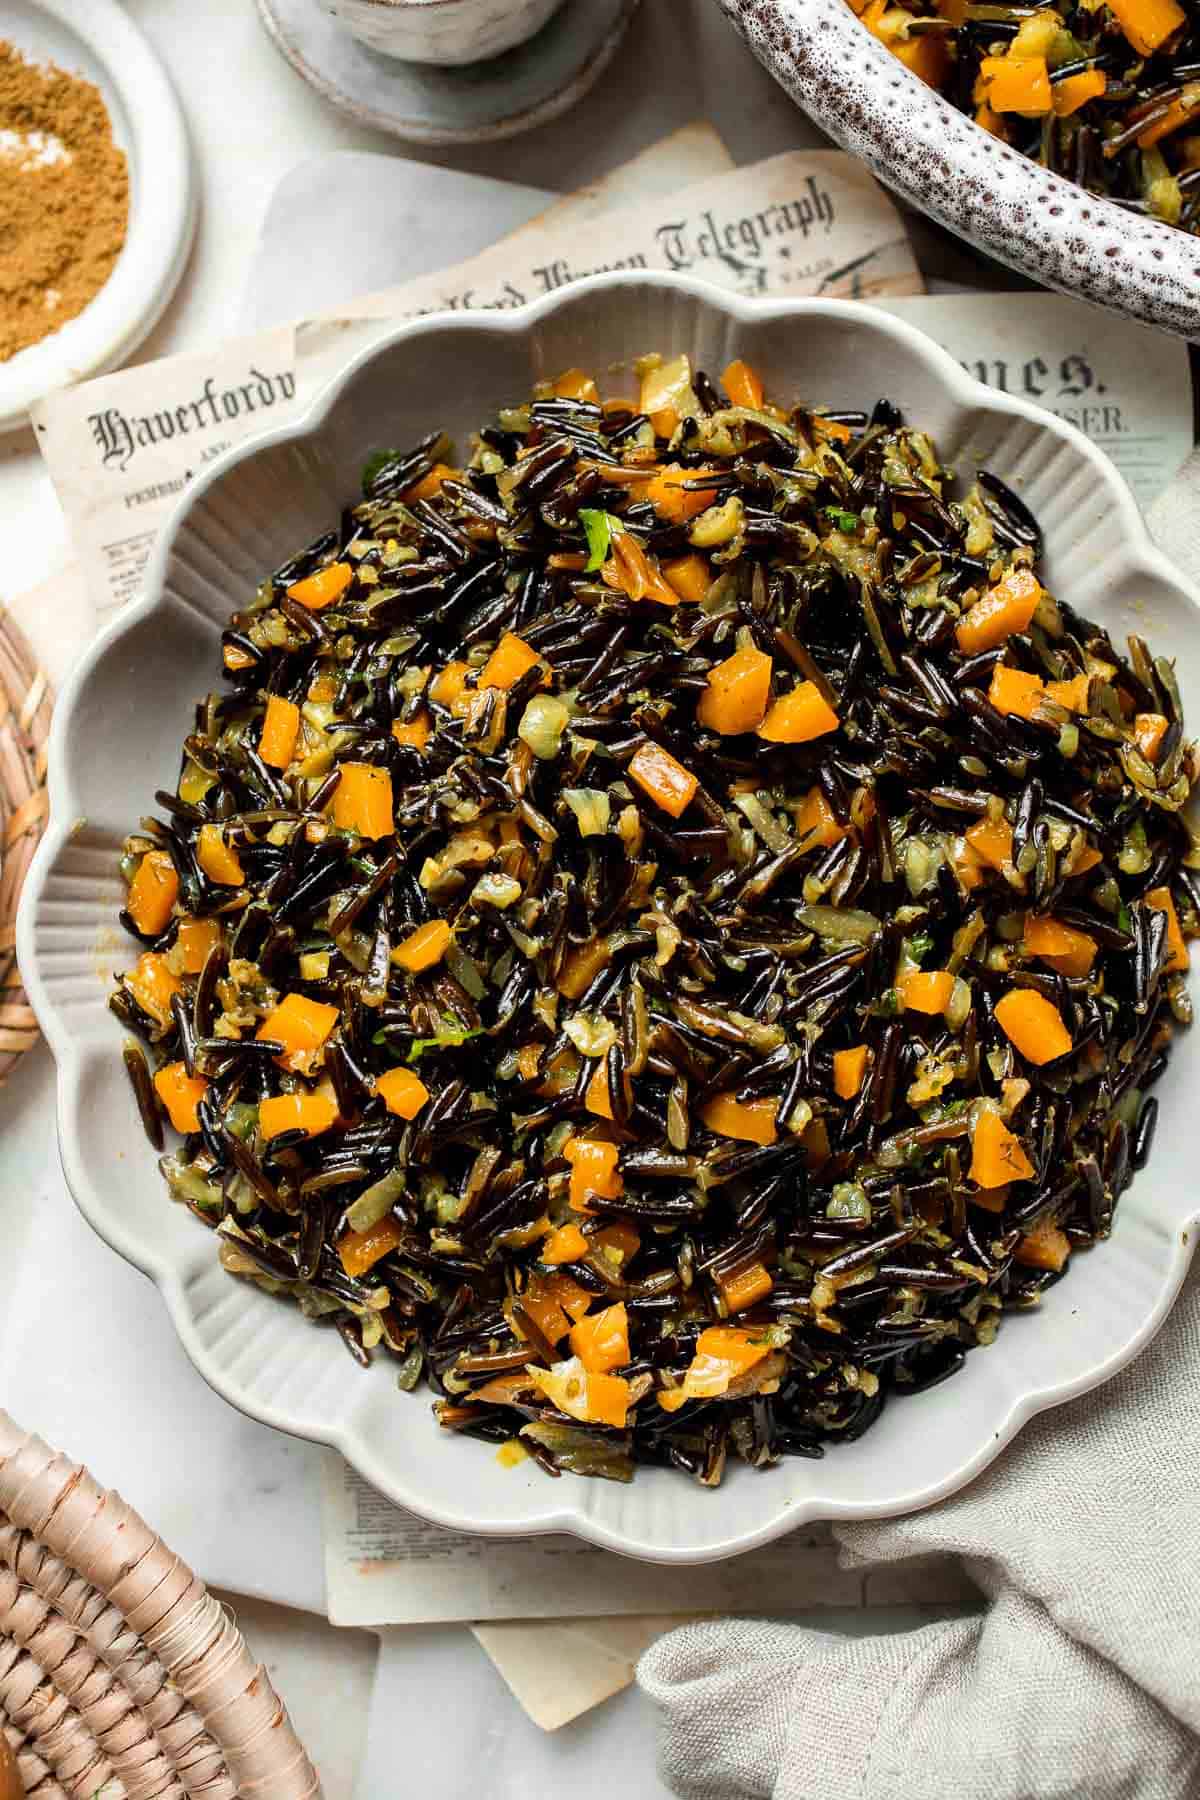
Wild rice is a unique, highly nutrient-dense grain harvested from shallow lakes and marshes across the United States. It's known for its dark color, uniquely nutty flavor, and chewy texture. Unlike other varieties of rice, wild rice is flavorful on its own. I like it as a side dish instead of regular brown or white rice with meaty entrees that can withstand a little competition. Serve with a showstopping main course, like Roast Turkey or Pork Tenderloin, or your favorite vegetarian main dish. It's one of my go-to side dishes when the temperatures drop.
Why You'll Love This Wild Rice Pilaf
- Rich, nutty flavor. Wild rice is known for having a grassy, nutty flavor that stands out from regular rice. Especially when infused with vegetable broth, spices, and herbs, this wild rice pilaf adds so much extra flavor and makes any meal more interesting.
- Naturally vegetarian. Every element of this recipe is plant-based, making it an easy side dish to accommodate a range of dietary preferences. It's also gluten-free, dairy-free, and vegan.
- Great for entertaining. Since the wild rice recipe is infused with fresh herbs and spices, it's flavorful enough to serve like a salad at a holiday potluck or as a featured side for a special main course. It's a great addition to any holiday meal!
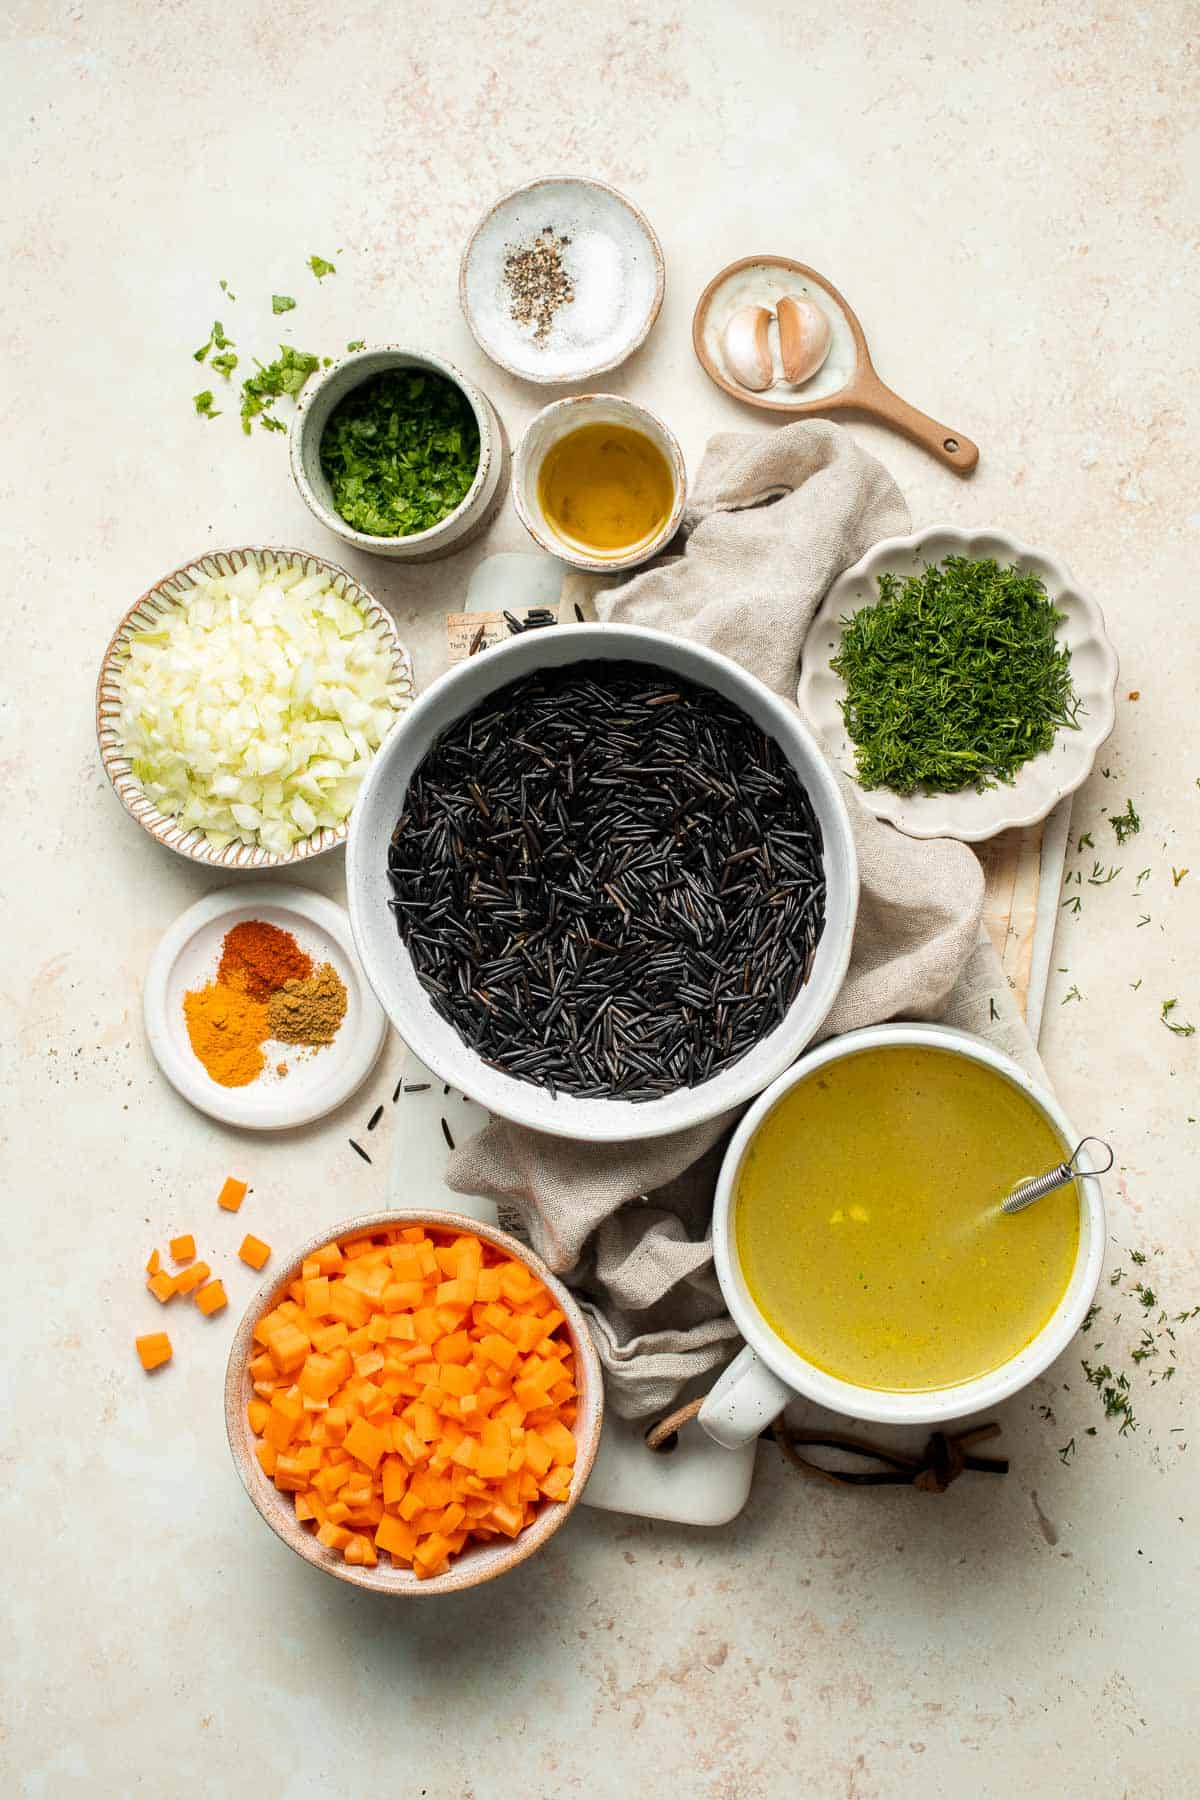
Ingredient Notes
To make this delicious Wild Rice Pilaf, you will need the following ingredients (full measurements in recipe card below):
- avocado oil - to sauté the aromatics. Olive oil is a good alternative.
- aromatics - finely chop fresh garlic, onion, and carrots.
- stock - vegetable stock to plump up the rice grains. If not vegetarian, substitute chicken stock.
- wild rice - rinsed well and drained. Be sure to choose straight wild rice, not a wild rice mix.
- seasonings - use paprika, ground turmeric powder, ground cumin, salt and black pepper for a savory, smoky flavor.
- fresh herbs - including dill and parsley.
You will also need measuring cups and spoons, a large pot with a lid, a spoon or spatula, and a fork for fluffing.
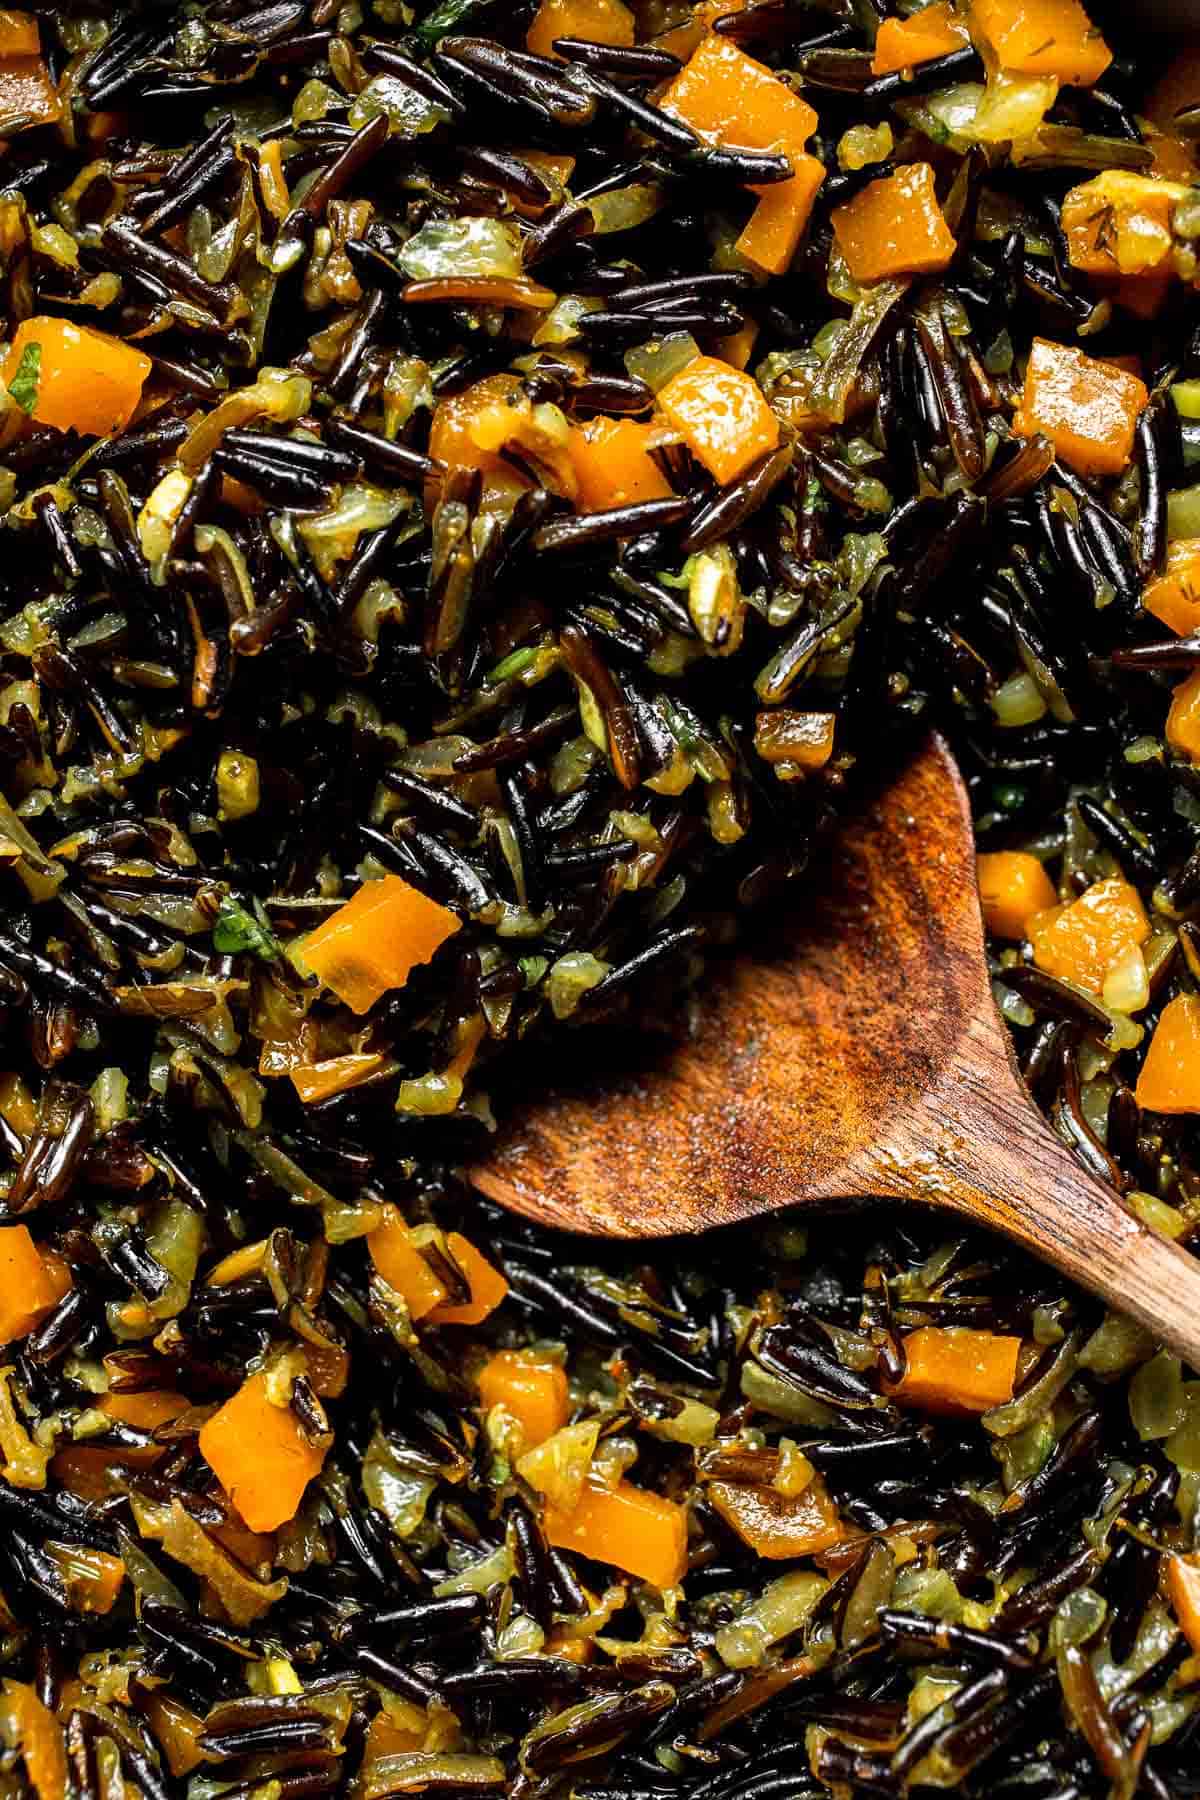
How to Make the Best Wild Rice Pilaf
- Sauté aromatics. Heat oil in a large cooking pot over medium-high heat for 1 minute. Add onion, garlic and carrot. Sauté until fragrant, about 2 minutes.


- Add rice and seasoning. Add rice, paprika, turmeric, cumin, and dill. Mix well until evenly combined and cook for 1 minute.


- Add stock and simmer. Add vegetable stock, salt, and pepper. Bring to a boil, reduce the heat to low and cover. Simmer for about 40 minutes, until the rice is cooked and water is all absorbed. Open the lid occasionally to let the steam escape and ensure the liquid does not overflow. The cooked wild rice should be tender and the kernels are burst open.


- Rest. Turn off the heat and let it sit for another 10 to 15 minutes. Fluff with a fork and serve.


Recipe Variations
- Play with add-ins. This recipe can be expanded in many different ways. Add dried cranberries, diced apples, pecans, or walnuts, or incorporate different herbs, like fresh thyme.
- Add protein. Stir in browned sausage crumbles to make this wild rice pilaf recipe even more filling. For a vegan option, stir in plump, tender lentils or garbanzo beans at the end of the cooking time.
- Add some citrus. Squeeze a little fresh orange or lemon juice over top for a bright flavor.
How to Serve
This Wild Rice Pilaf is delicious served as a side dish paired with some of my favorite entrees including:
- Slow Cooker Turkey Breast
- Dutch Oven Whole Roast Chicken
- Roast Beef
- Honey Glazed Roast Pork
- Stuffed Pumpkin
Recipe Tips and Tricks
- Don't overcook. Wild rice has a unique texture and can become mushy if overcooked. Monitor the cooking time and check for doneness by tasting a few grains. When done, the grains will pop open and should be tender, slightly al dente, and have a slight chew.
- Use real wild rice. You may find a wild rice blend in your local grocery store, which mixes different types of rice together. Real wild rice has a very dark brownish-black color and does not have grains with different colors.
- Layer flavors. This recipe infuses flavor deep into each grain of rice by sautéing the aromatics, blooming the spices, and using flavorful broth. Using water or skipping any of these steps will result in a less flavorful dish.
Storing and Freezing Instructions
How to Store
Allow the wild rice pilaf to cool to room temperature before transferring it to an airtight container. Refrigerate for 3-5 days.
How to Reheat
For best results, reheat the wild rice on the stovetop. Preheat a skillet over medium heat, then add the pilaf and a bit of broth or water to prevent it from drying out. Stir frequently until the rice and vegetables are heated through, then top with fresh herbs.
FAQ
Yes, wild rice is naturally gluten-free, making wild rice pilaf a safe option for those with gluten sensitivities or celiac disease. Look for plain wild rice, not a wild rice blend, which may contain other gluten-containing grains.
Rinsing wild rice removes excess starch and any debris, resulting in a fluffier texture and preventing it from becoming gummy during cooking. This simple step helps ensure a better finished dish.
Yes, you can overcook any type of rice. The best way to avoid soggy, mushy wild rice is to follow a tested recipe (like this one) and watch the water. It should all be absorbed during the cooking process. You can tell the rice is done when it bursts open and has a tender texture.
More Wild Rice Recipes
- 30 Best Rice Recipes
- Creamy Wild Rice Soup
- Beef Wild Rice Soup
- Stuffed Butternut Squash with Wild Rice
- Leftover Turkey Wild Rice Soup
Tried this recipe?
I'd love to hear what you think! Leave a comment and rating below to share your feedback. Your reviews help others discover this recipe and help me keep creating more free recipes for you. Snap a photo and tag me on social media @aheadofthyme too.
Sweet Potato Gratin
Made with thinly sliced sweet potatoes baked in a creamy béchamel sauce, this Sweet Potato Gratin is the most luxurious way to serve sweet potatoes. The tender pieces of sweet potatoes plump up in the creamy sauce while a crunchy crust of cheesy goodness develops on the outside. It tastes like fall in every bite and is a fun alternative to traditional au gratin potatoes for any occasion!
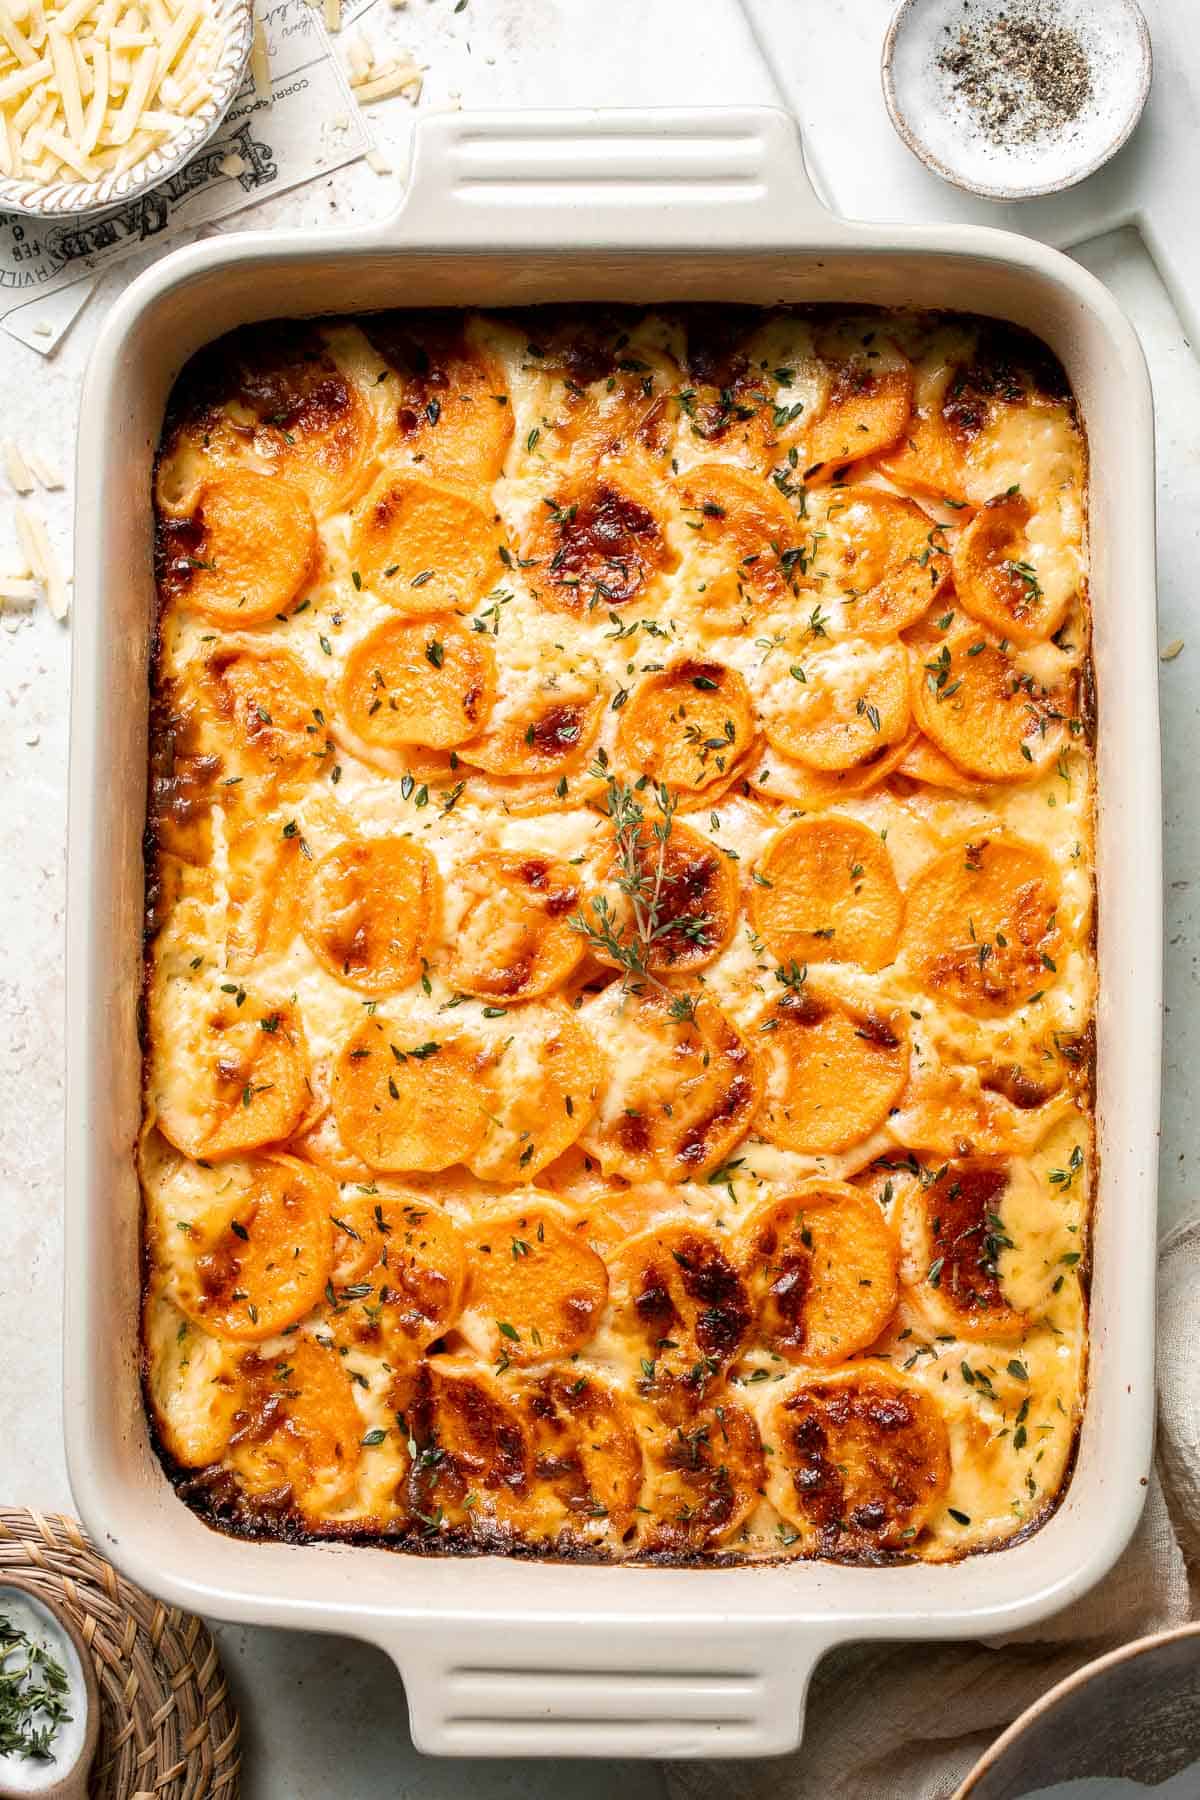
Potatoes au gratin is one of the most beloved potato dishes, commonly served at all the major holiday meals. This cheesy sweet potato gratin recipe follows this same tradition, but believe me when I tell you that sweet potatoes are a major upgrade. They're still tender and creamy, but that hint of sweetness makes the whole dish way more interesting. This easy sweet potato gratin will be right at home next to Holiday Glazed Baked Ham, Roast Turkey, and all your favorite Thanksgiving sides. It's the perfect side dish!
Why You'll Love This Sweet Potato Gratin
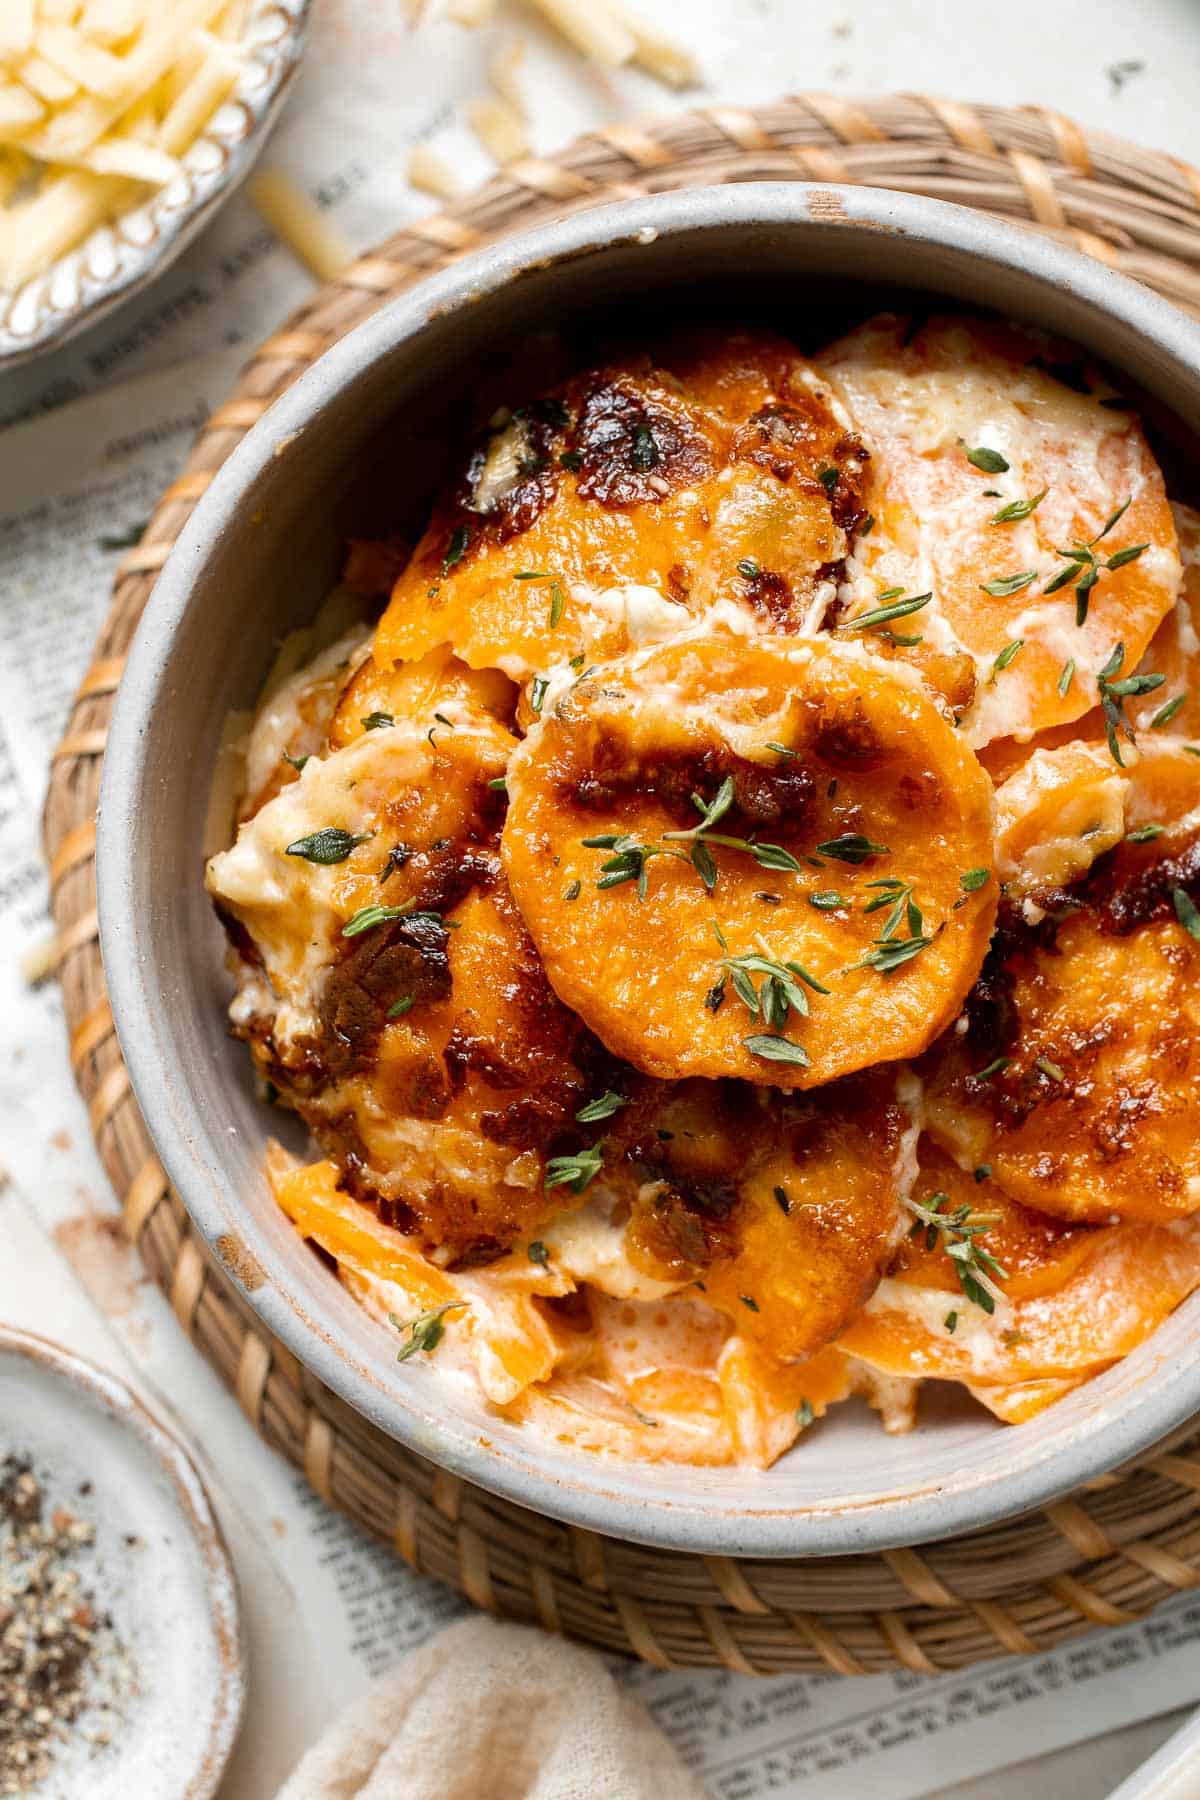
- The ultimate comfort food. The sweet potato slices essentially soak up the creamy sauce, which you can taste with every bite. I'm not sure there is a more perfect comfort food out there. This dish has it all - warm, cozy, rich, hearty, and filling. I could eat it with a spoon!
- Perfect for Thanksgiving dinner. Many of us serve Potatoes Au Gratin or Scalloped Potatoes around the holidays, and this sweet potato au gratin is the perfect alternative. It fills that spot so well while offering a fun twist on a traditional flavor profile.
- Savory recipe for sweet potatoes. Many of us associate sweet potatoes with brown sugar and marshmallows around the holidays, but I love that this savory sweet potato gratin melds sweet and savory together. It's still sweet from the potatoes, but you get so much flavor from that creamy, cheesy sauce!
Ingredient Notes
To make this delicious Sweet Potato Gratin, you will need the following ingredients (full measurements in recipe card below):
- sweet potatoes - peeled and thinly sliced. It's much easier to do this with a mandolin slicer as you need really consistent slices.
- butter
- garlic - this will help make this sweet potato gratin taste more savory.
- heavy cream - for a rich, creamy sauce. Half and half will work in a pinch, but I prefer the richness of heavy whipping cream over whole milk.
- cheese - use shredded Gruyère cheese or sharp cheddar cheese, and Parmesan, for the cheese sauce. You can also use a mix of different types of melty cheese.
- salt and pepper
- thyme - finely chopped to add to the sauce and as a garnish.
You will also need measuring cups and spoons, 9x13 baking dish, mandolin slicer, medium saucepan, and aluminum foil.

How to Make the Best Sweet Potato Gratin
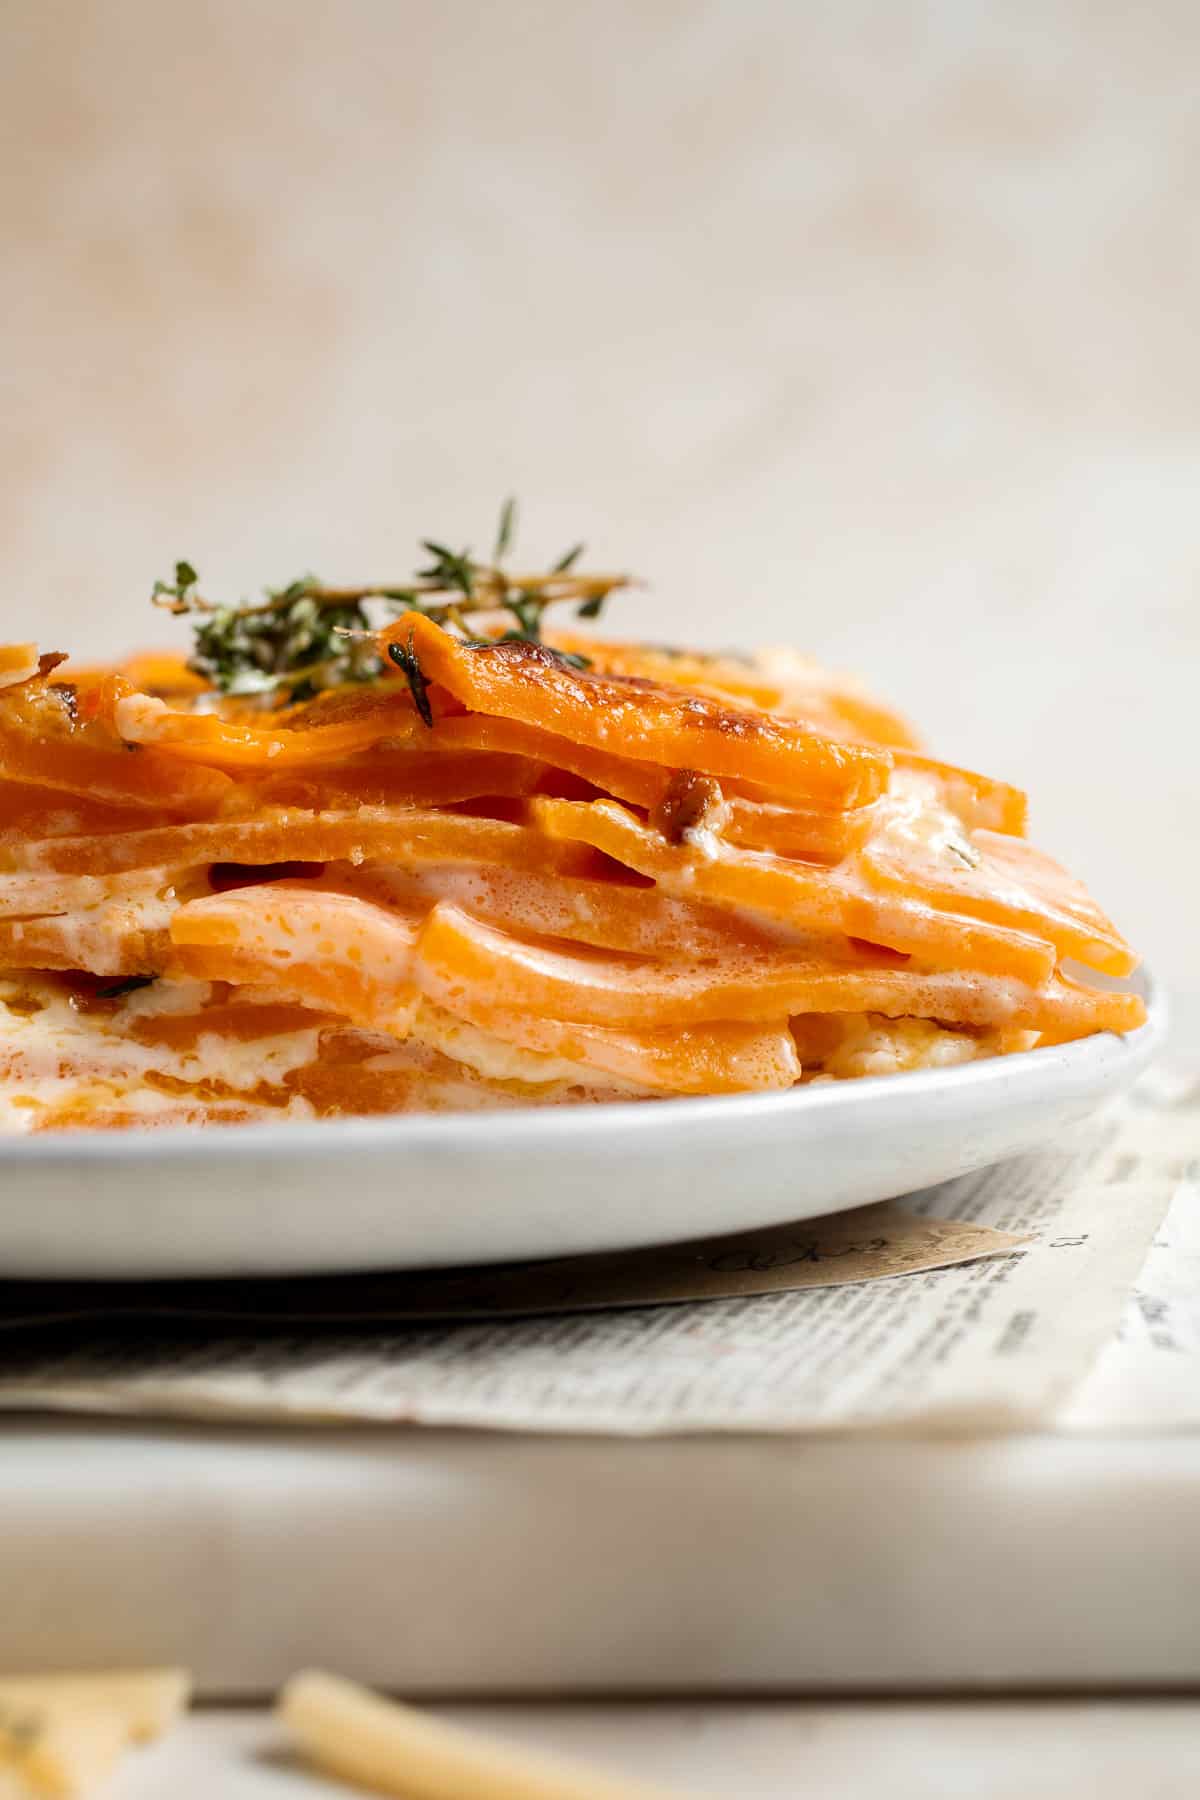
- Slice sweet potatoes. Use a mandolin to slice sweet potatoes into ⅛ inch thick rounds.

- Make sauce. In a medium saucepan, melt butter over medium heat and sauté garlic until fragrant, about 1-2 minutes. Add heavy cream, salt, pepper, cheese, and thyme. Stir constantly until the melted cheese mixture is smooth, about 3-5 minutes.


- Assemble. Lightly grease a 9x13-inch casserole dish with butter or cooking oil spray. Arrange sliced sweet potato rounds in an even layer in the baking dish. Pour cheese sauce on top of the sweet potatoes, and cover with aluminum foil.


- Bake. Place into a 375F preheated oven and bake for 45 minutes. Uncover and continue to bake for 20-30 more minutes or until golden brown and the sweet potatoes are tender.
- Broil (optional). Optionally broil on HI for an additional 1-2 minutes to achieve a lightly brown crust.
- Serve. Garnish with fresh chopped thyme and serve immediately.


Recipe Variations
- Add a crunchy breadcrumb topping. For a crispy layer, feel free to mix together bread crumbs with melted butter like this Baked Mac and Cheese. The extra crunch is a nice way to balance the cream sauce and tender pieces of sweet potato.
- Try other herbs. I love the flavor of thyme with gruyere cheese, but you really just need some sort of fresh herbs to bring the dish to life. This recipe also works well with fresh sage or rosemary.
- Mix and match potatoes. For a slightly less sweet side dish, alternative slices of sweet potato and regular potatoes, ideally Yukon Gold or Russet potatoes.
How to Serve
This Sweet Potato Gratin is a delicious side dish that goes well paired with some of my favorite sides including:
- Prime Rib Roast
- Baked Chicken Drumsticks
- Instant Pot Turkey Roast
- Roasted Pork Tenderloin
- Salmon Bites
- Air Fryer Lamb Chops
Recipe Tips and Tricks
- Grease the pan. If you want to simplify clean-up and serve picture-perfect portions, add the sweet potatoes to a well greased baking dish.
- Grate the cheese yourself. Many grated cheeses are coated with a fine powder to keep them from clumping together in the bag. This can affect how well they melt. For the gooiest, meltiest cheese sauce, grate the cheese yourself.
- Embrace the broil. Taking a few minutes to broil the top of this delicious sweet potato gratin is well worth the minimal effort. You'll get a bubbly, golden brown crust but crispy, cheesy edges It's the best part!
Storing and Freezing Instructions
How to Store
Allow the dish to cool to room temperature, then either transfer the leftovers to an airtight container or cover the full baking dish with plastic wrap or foil. Refrigerate for 3-4 days.
How to Reheat
Smaller portions can be microwaved for 1-2 minutes or you can cover the pan with foil and bake at 350 F until heated through.
How to Freeze
Leftovers can be frozen for up to 3 months, although the consistency will be softer and a little mushier after thawing and reheating.
FAQ
Yes! Prepare the whole dish, cover it with foil, then refrigerate it overnight and bake it the next day, right before your meal. This is a great way to save a little time on the day while still serving an exceptional Thanksgiving or Christmas dinner.
This sweet potato au gratin recipe is a savory dish made by baking thin slices of sweet potato in a creamy cheese mixture while sweet potato casserole is a sweet side dish usually served with butter, brown sugar, and marshmallows. They are both great holiday side dishes, but one tastes much more like dessert!
Yes, and I think you might fall in love with this flavor combination. Especially if you choose salty, nutty cheeses that pair well with the sweetness of sweet potatoes, you get a uniquely cozy, comforting side dish fit for any special occasion. Plus, sweet potatoes tend to cook a little faster than white potatoes, too!
More Sweet Potato Recipes
- Sweet Potato Casserole with Marshmallows
- Smashed Sweet Potatoes
- Sweet Potato Tater Tots
- Baked Sweet Potato
- Herb Roasted Sweet Potatoes
- Sweet Potato Croquettes
Tried this recipe?
I'd love to hear what you think! Leave a comment and rating below to share your feedback. Your reviews help others discover this recipe and help me keep creating more free recipes for you. Snap a photo and tag me on social media @aheadofthyme too.

Cranberry Pie
This Cranberry Pie features an orange-infused cranberry pie filling steeped with warm, aromatic spices, all nestled under a gorgeous lattice pie crust. The sweet-tart flavor is the perfect counterpoint to a rich, hearty holiday meal, and the deep red filling adds a pop of color to your dessert table. It's also one of the easiest pies to make and is ready in less than an hour!

Once the temperatures start to drop, we're in the thick of pie season! Cranberry pie may be new to you, but it's really a timeless option that works perfectly with any fall and winter meals. Cranberries begin to ripen in October and are a match made in dessert heaven with fresh oranges and warm spices. This stunning cranberry pie is right at home next to Pecan Pie and Pumpkin Pie on your holiday table and tastes great with a swirl of whipped cream or a scoop of Vanilla Ice Cream. It's the perfect holiday dessert!
Why You'll Love This Cranberry Pie
- Perfect for the holidays. Tart cranberries are available throughout the holiday season, and their tart flavor is the perfect palate cleanser after a hearty meal. Enjoy this traditional pie for Thanksgiving, Christmas, New Year's, and beyond!
- Aromatic flavor. With the fresh orange juice and zest and the combination of ginger, cinnamon, and cardamom, the cranberry filling is much more nuanced than the average cranberry sauce served at your Thanksgiving meal. It smells wonderful and has a crispy, flaky crust with a crunchy sugar topping. Serve it warm to bring out all those wonderful aromas!
- Easy to make. I know that making pie intimidates some bakers, but this one is a cinch! The cranberry filling cooks in about 5 minutes on the stove, and you can either make your own pie crust or grab some from a store. The hardest part is making the lattice top, but don't let that intimidate you. I'll walk you through it step-by-step below!

Ingredient Notes
To make this delicious Cranberry Pie, you will need the following ingredients (full measurements in recipe card below):
- pie crust - homemade or store-bought. This homemade pie crust recipe always turns out extra flaky and is a great option for this recipe.
- fresh cranberries - fresh berries are best, although frozen cranberries will plump up nicely when heated as well.
- white sugar - for just enough sweetness.
- orange juice + zest - for a pop of freshness and the perfect balance. Lemon zest works well, too.
- cornstarch - to thicken the pie filling.
- all purpose flour
- spices - the mixture of ginger, cinnamon, and cardamom will add layers of warmth and a unique flavor profile.
- salt
- vanilla extract - or use almond extract for a nutty flavor.
- egg + water - for egg wash.
- white or coarse sugar - for sprinkling on top.

Baking Tools and Equipment
You will also need the following kitchen tools:
- measuring cups and spoons (or kitchen scale)
- food processor
- mixing bowls
- mixing spoon
- large skillet
- rolling pin
- 9-inch pie plate
- sharp knife or pastry cutter
- pastry brush
- aluminum foil or pie shields (optional)
- baking sheet
How to Make the Best Cranberry Pie
First, make the cranberry pie filling.
- Chop cranberries. Add the cranberries to a food processor, then pulse until coarsely chopped.

- Combine ingredients. Transfer to a mixing bowl, then add in sugar, orange juice, orange zest, cornstarch, flour, ginger, cinnamon, cardamom, and salt, until well-combined. Allow to sit for 1 hour, to allow the cranberry juices to release.


- Cook. After an hour, give the mixture a stir to combine again, then transfer into a large skillet. Place the skillet over medium heat, then bring to a light bubble. Once bubbling, cook, while stirring frequently, for 5 minutes - once ready it should resemble a loose jam. Stir in the vanilla.


- Cool. Transfer to a bowl, cover, and allow to cool to room temperature or colder.
Then, fill the pie.
- Roll dough. If using homemade pie doughs, roll both out to be about 12 inches in diameter.
- Add bottom crust. Carefully transfer one into a 9-inch pie dish, press it into the bottom and sides of the pie pan, with some of the dough overhanging the edge of the pan.
- Cut lattice strips. Cut the other rolled out pie dough into ten to twelve 1.5-inch thick strips. You can also make thinner strips and braid them for a different pattern.
- Add filling. Pour the cooled cranberry pie filling into the pie crust.

How to Make a Lattice Pie
- Add first layer of 2 strips. Begin arranging the lattice top by placing two long strips in a cross shape in the middle of the pie, with the horizontal strip going over top of the vertical strip.
- Add second layer of 2 strips. Place two more strips on either side of the vertical strip, both going over the horizontal strip.


- Add another strip. Lift up the strip that is on the bottom of the cross, (the "under" strip). Place another strip under the strip you just lifted up but over the other two strips.


- Repeat. Repeat lifting up all the "under" strips when placing a new strip, alternating with each new strip, until you have a full woven lattice pattern.


- Prepare the edges. Cut off any excess pie dough from the lattice strips, then fold and curl up the overhang of the bottom pie dough with any excess lattice strips, to seal them together. Use your fingers to crimp/flute the edges of the pie crust.


Finally, let's bake the cranberry pie.
- Add egg wash. Brush with egg wash and sprinkle with sugar.
- Bake. Place the pie plate onto a baking sheet and place into a 425°F preheated oven to bake for 10 minutes, then turn the oven down to 375F and bake for an additional 35-45 minutes, or until the crust looks golden. If the edges are browning too quickly, add aluminum foil or pie shields to the edges to stop further browning.


- Rest. Remove from oven, allow to cool for 1 hour to firm up, then enjoy warm with ice cream.


Recipe Variations
- Add dried fruit or nuts. For an extra texture and pop of sweetness, add dried cranberries, cherries, or chopped dried apricots to the filling. You can also sprinkle toasted and chopped walnuts or pecans into the filling for a little crunch.
- Add a little alcohol. A splash of Grand Marnier, Cointreau, bourbon, or dark rum a little extra flair for the holidays. Add the alcohol at the end of the cooking time to preserve the flavor.
- Skip the lattice. If making a lattice pie top feels intimidating, feel free to skip that and cover the top of the pie with the second sheet of crust. Be sure to seal the edges and add a few vent holes before baking.
- Play with decorations. If you have any scraps of pie crust, use a cookie cutter to trim out seasonal shapes, like leaves or snowflakes. Place them on top of the crust before baking for an extra touch.
How to Serve
This Cranberry Pie is delicious served on its own with some whipped cream or Vanilla Ice Cream. If serving it as part of a large holiday dessert spread, include these favorites:
- Pecan Pie Cheesecake
- Pumpkin Cupcakes
- Spritz Cookies
- Gingerbread Cake
- Pumpkin Pie Bars
- Sourdough Cinnamon Roll Twist Bread
For more recipes, see our 50 Best Fall Desserts.

Recipe Tips and Tricks
- Watch your temperatures. The secret to a good fruit pie is to use a very cold pie crust and room temperature (or refrigerated) pie filling. If you try to add the filling to the homemade crust while still warm, the butter will melt before you start baking and cause a soggy bottom.
- Bake on the bottom rack. Although it's standard to bake pies in the center of the oven, I find baking on the bottom rack helps the bottom crust crisp up nicely without browning the top too much.
- Don't skip the egg wash. That last-second glaze helps the crust turn nice and golden brown in the oven. It adds a professional look and also helps the coarse sugar stick, too.
Storing and Freezing Instructions
How to Store
Allow the hot pie to cool to room temperature, then wrap in foil or plastic wrap and store in the fridge for 3-4 days.
How to Reheat
Warm up an individual slice by microwaving for 30 seconds to a minute, then serve with a scoop of vanilla ice cream. For larger servings, transfer the whole pie plate to the oven and bake at 350 F until the filling is hot in the center.
How to Freeze
Leftover pie can be frozen solid and then wrapped in several layers of plastic. Freeze for up to 2-3 months and let it thaw overnight in the fridge before serving.
FAQ
Although pie tastes best at room temperature, it should be stored in the refrigerator to stay fresh. Wrap it well with plastic wrap or foil to keep it airtight.
The main difference is cornstarch! Cranberry sauce is made with just the cranberries, sugar, and any aromatic spices or orange juice and is generally cooked until it thickens like a jam. Cranberry pie filling may contain similar ingredients, but it also contains cornstarch and flour to thicken the cranberry mixture into a thick, glossy pie filling that will hold its shape in the crust. It also tends to be a little sweeter to stand out as a dessert instead of a multipurpose condiment.
The top crust helps seal in moisture, add a crunchy texture, and make the pie easy to serve. If you're not a fan of double-crust pies, you can either skip the top crust entirely or replace the top crust with a buttery streusel topping, like my apple crumble.
More Cranberry Recipes
- Cranberry Scones with Orange Glaze
- Cranberry Sauce Oat Bars
- Baked Cranberry Sauce
- Cranberry Sauce Swirl Pound Cake
- Cranberry Brie Bites
- Cranberry Sauce Swirl Cheesecake
Tried this recipe?
I'd love to hear what you think! Leave a comment and rating below to share your feedback. Your reviews help others discover this recipe and help me keep creating more free recipes for you. Snap a photo and tag me on social media @aheadofthyme too.

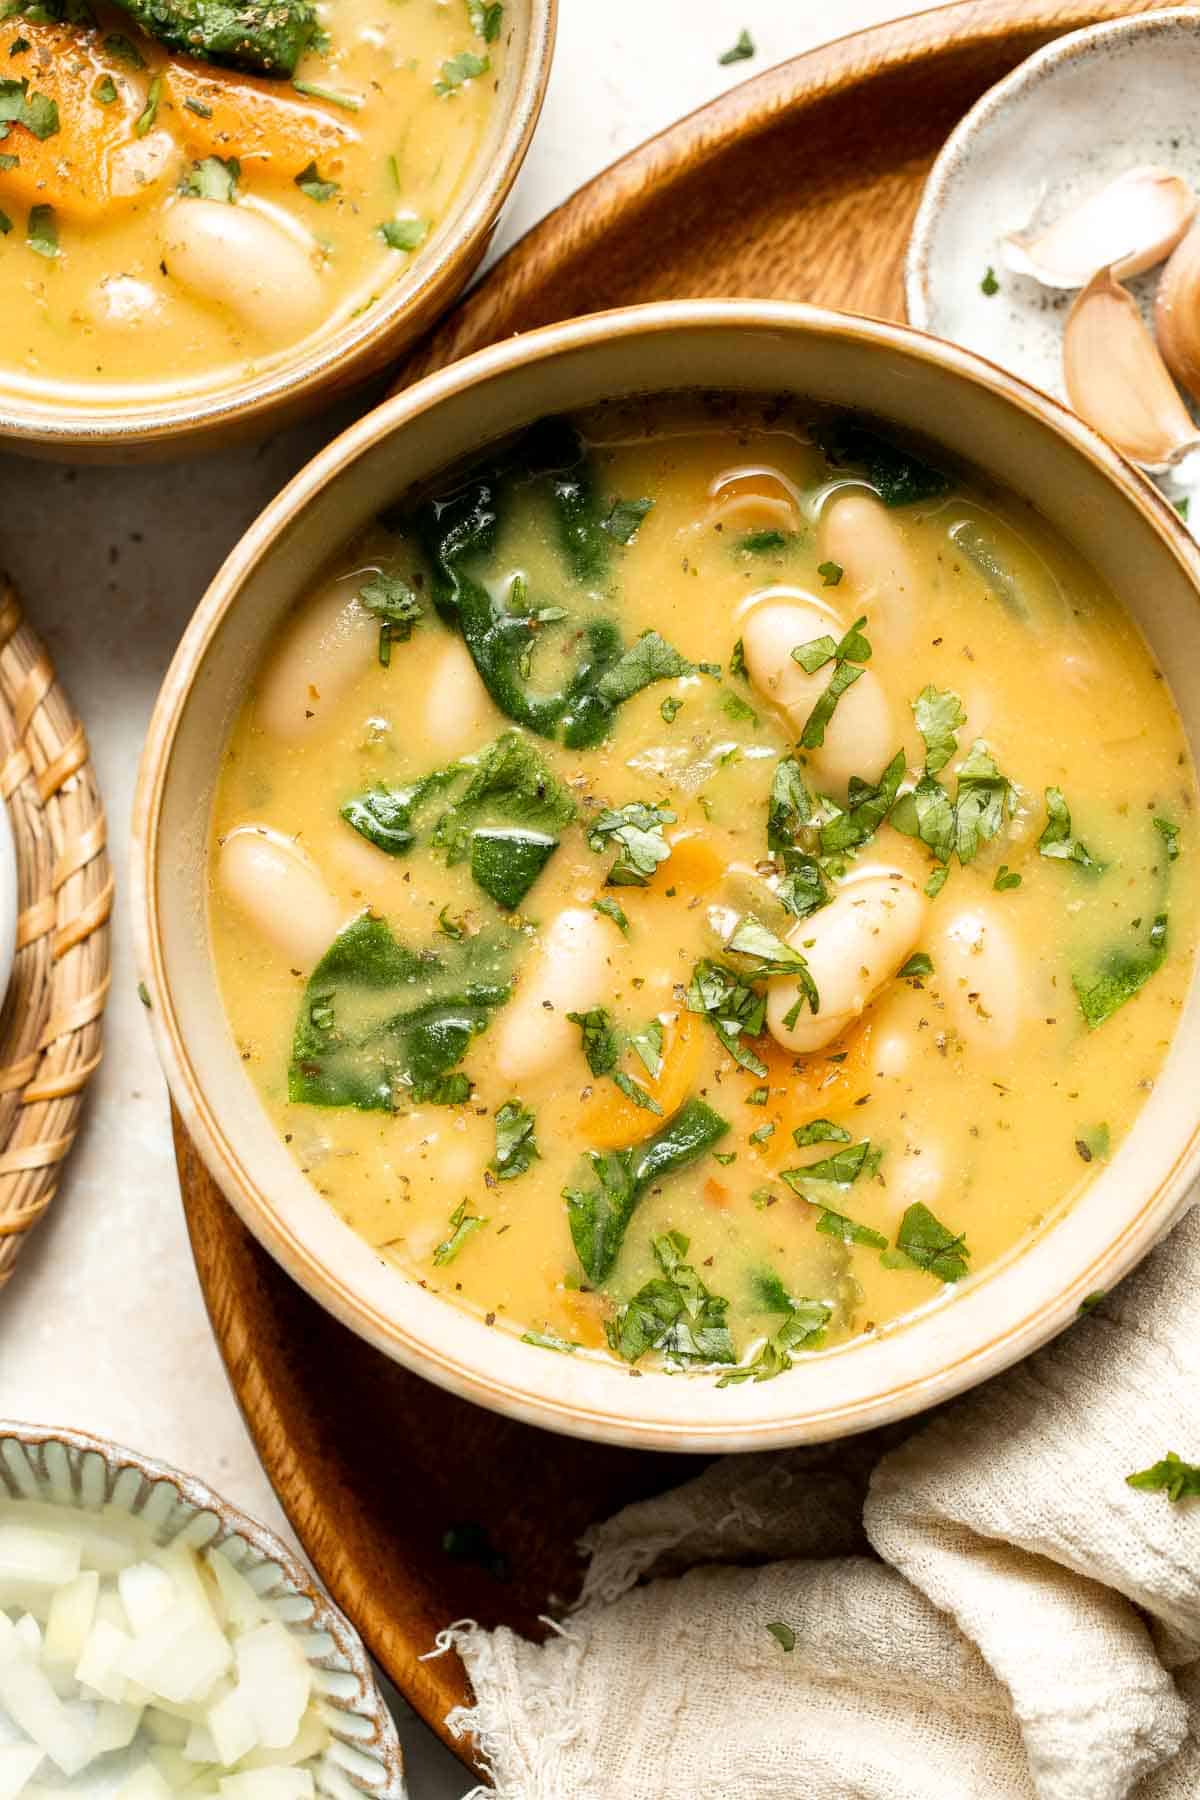
Tuscan White Bean Soup
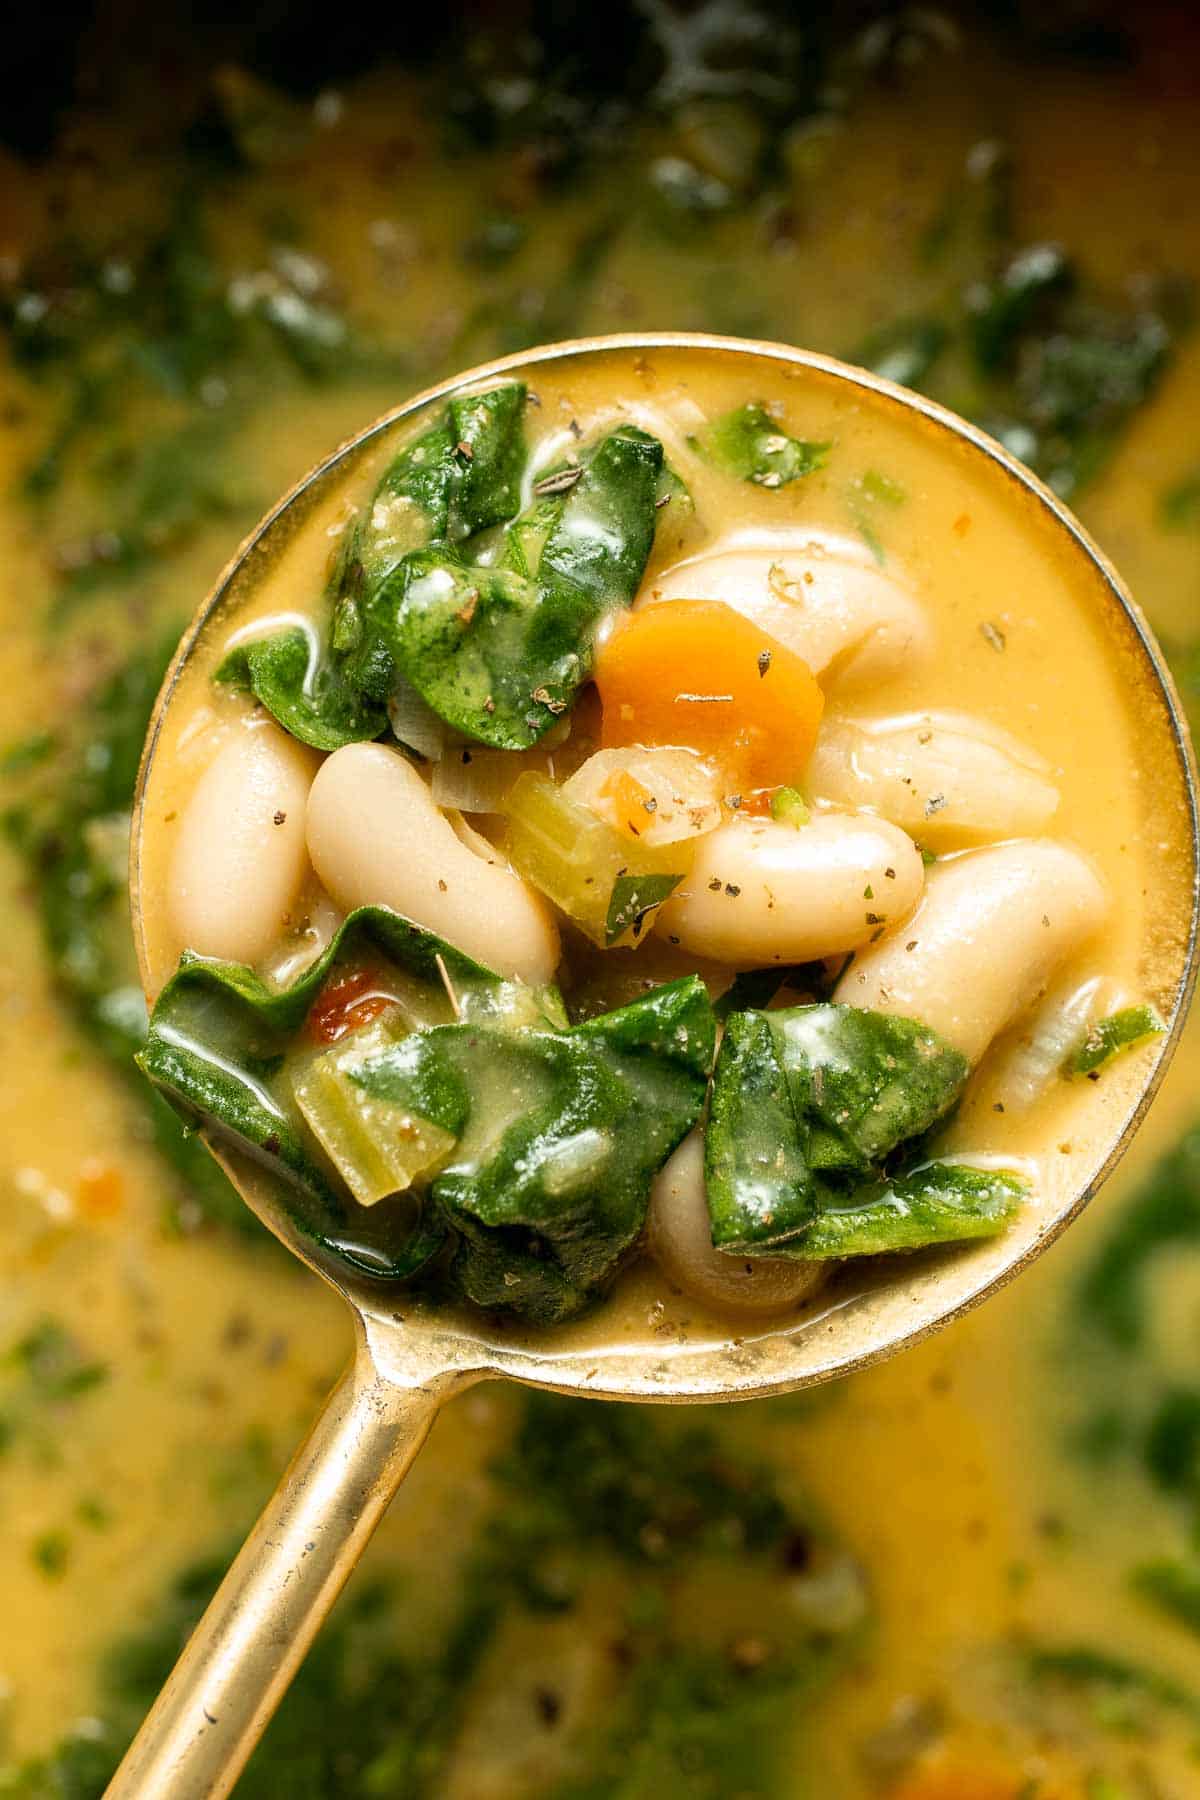
This Tuscan White Bean Soup is comforting, nourishing, and delicious, packed with creamy cannellini beans, fresh herbs, tender veggies, and rich heavy cream. Even better, it's ready in just 30 minutes and uses common pantry staples, making it an easy choice for a quick, cozy dinner any night of the week. You'll be making this recipe on repeat!
If you're looking for a soup to warm you from the inside out, this is it! This easy Tuscan white bean soup is a classic Italian soup packed with plenty of protein and fiber from the white beans and fresh vegetables to keep you full for hours. Serve it with some crusty bread to soak up the delicious broth. Whether you serve it as a starter or main dish, make plenty because your guests will definitely be coming back for more!
Why You'll Love This Tuscan White Bean Soup
- Ready in 30 minutes. This homemade soup comes together in just half an hour, making it the perfect quick meal for weeknight dinners when you're short on time but still want something cozy and nourishing. One pot makes enough for four servings, but you can certainly double that for leftovers all week!
- Comforting vegetarian soup. Combining butter, heavy cream, and mashed beans creates a rich, creamy texture that's super comforting without being too heavy. It's the perfect winter soup to warm your body and soul.
- Family-friendly flavors. There's something about the creamy broth and tender white beans that makes this soup a hit with even young eaters. It's a crowd-pleaser for the whole crew, which is a relief on those busy nights!
Ingredient Notes
To make this delicious Tuscan White Bean Soup, you will need the following ingredients (full measurements in recipe card below):
- butter - for sautéing the aromatics. You can also substitute with oil such as avocado oil.
- aromatics - sauté diced onion, garlic, carrots, and celery to give the broth a nice depth of flavor.
- seasonings - you'll get plenty of flavor from just Italian seasoning, red pepper flakes, salt, and pepper.
- white cannellini beans - canned beans are the easiest option as you just need to rinse before adding. You can also cook dry beans but you will need to prep them in advance as they need to be soaked overnight. See our Cannellini Beans recipe for instructions.
- vegetable broth - stick with vegetable broth for a vegetarian soup or substitute chicken broth.
- heavy cream - this is key for a rich, creamy broth. You can substitute with half and half cream but note the soup will be a little less creamy.
- baby spinach - or substitute with baby kale, to wilt in the soup before serving.
- parsley - optional, for garnish.
You will also need measuring cups and spoons, a large pot, a wooden spoon, a cutting board, a sharp knife, and a high-speed blender or immersion blender.

How to Make the Best Tuscan White Bean Soup
- Sauté veggies. Melt butter in a large pot over medium-high heat until bubbly, about 1-2 minutes. Add onion, garlic, carrots and celery. Sauté until tender, about 3-5 minutes.
- Season. Stir in Italian seasoning and red chili flakes.


- Add beans and soup base. Add white beans, vegetable broth, and heavy cream.


- Simmer. Bring it to a boil and simmer over medium heat for 10 minutes, stirring occasionally.


- Blend. Turn off the heat. Transfer 2 cups of the soup to a blender and blend until smooth, about 1 minute.


- Return to pot. Return the mashed soup to the pot and stir until incorporated.


- Add spinach. Stir in fresh spinach until wilted, about 1 minute. Season with salt and pepper to taste.


- Serve. Garnish with parsley and serve warm.

Recipe Variations
- Change the beans. Instead of white kidney beans, feel free to use navy beans or Great Northern beans. Both varieties offer a slightly different texture and flavor but work great with the other flavors in this soup.
- Add more protein. This Tuscan white bean stew tastes wonderful with browned Italian sausage, ground beef, or leftover rotisserie chicken.
- Simmer parmesan rind. The tough rind of Parmigiano Reggiano is loaded with flavor and imparts a sweet, savory note to the broth. Just spoon them out before serving.
How to Serve
This Tuscan White Bean Soup is delicious served on its own with croutons or a side of crusty bread, or paired with some of my favorite sides including:
- Simple Italian Salad
- Roasted Broccoli Grilled Cheese Sandwich
- Pigs in a Blanket
- Arugula Salad
- Pepperoni Pizza Rolls
For more recipes, see our 25 Side Dishes for Soup.

Recipe Tips and Tricks
- Meal prep for later. Since the flavors deepen as it sits, this soup tastes even better the next day. Make a single or double batch for leftovers all week long.
- Adjust the consistency. If the soup is too thick for your liking, add more veggie broth to thin it out. Alternatively, if it's too thin, let it simmer uncovered for a few extra minutes to reduce. You can also blend a larger portion of the soup for a thicker consistency.
- Use the right pot. Using a heavy-bottomed pot, like an 8-quart Dutch oven, helps cook more evenly, retain heat, and can slightly reduce cooking time.
Storing and Freezing Instructions
How to Store
Let the soup cool to room temperature before transferring it to an airtight container. Store it in the refrigerator for up to 5 days.
How to Reheat
Reheat leftovers on the stovetop over medium heat, stirring occasionally until warmed through. You may need to add a bit more broth to adjust the consistency, especially if the soup has thickened during storage. For a quicker option, you can reheat in the microwave in 30-second intervals, stirring in between.
How to Freeze
To freeze, allow the soup to cool completely, then transfer it to freezer-safe containers. Portion it out in individual serving-size containers so you can thaw only what you need. Freeze for up to 3 months and thaw in the fridge overnight when you're ready to reheat.
FAQ
Tuscan white bean soup is a classic Italian dish known for its comforting and rustic flavors. It typically features cannellini beans (white kidney beans), aromatics like onion, garlic, and celery, and a flavorful broth seasoned with Italian herbs. Finish it with leafy greens, like spinach or kale, and cream for a rich, warming flavor.
Yes, just be sure to soak them overnight and cook them until tender before adding them to the recipe. Keep in mind that using dried beans will add more cooking time compared to canned beans. For an extra earthy flavor, cook the beans in broth or add a bay leaf while they simmer.
No, you can certainly skip the cream for a lighter soup or replace it with a neutral-tasting non-dairy cream. If you skip the cream, consider serving it with a squeeze of lemon juice for a brighter flavor.
More Hearty Vegetarian Soup Recipes
- 60 Best Soup Recipes
- Italian Lentil Soup
- Pasta e Fagioli Soup
- Lemon Chickpea Orzo Soup
- Creamy Wild Rice Soup
- Minestrone Soup
Tried this recipe?
I'd love to hear what you think! Leave a comment and rating below to share your feedback. Your reviews help others discover this recipe and help me keep creating more free recipes for you. Snap a photo and tag me on social media @aheadofthyme too.

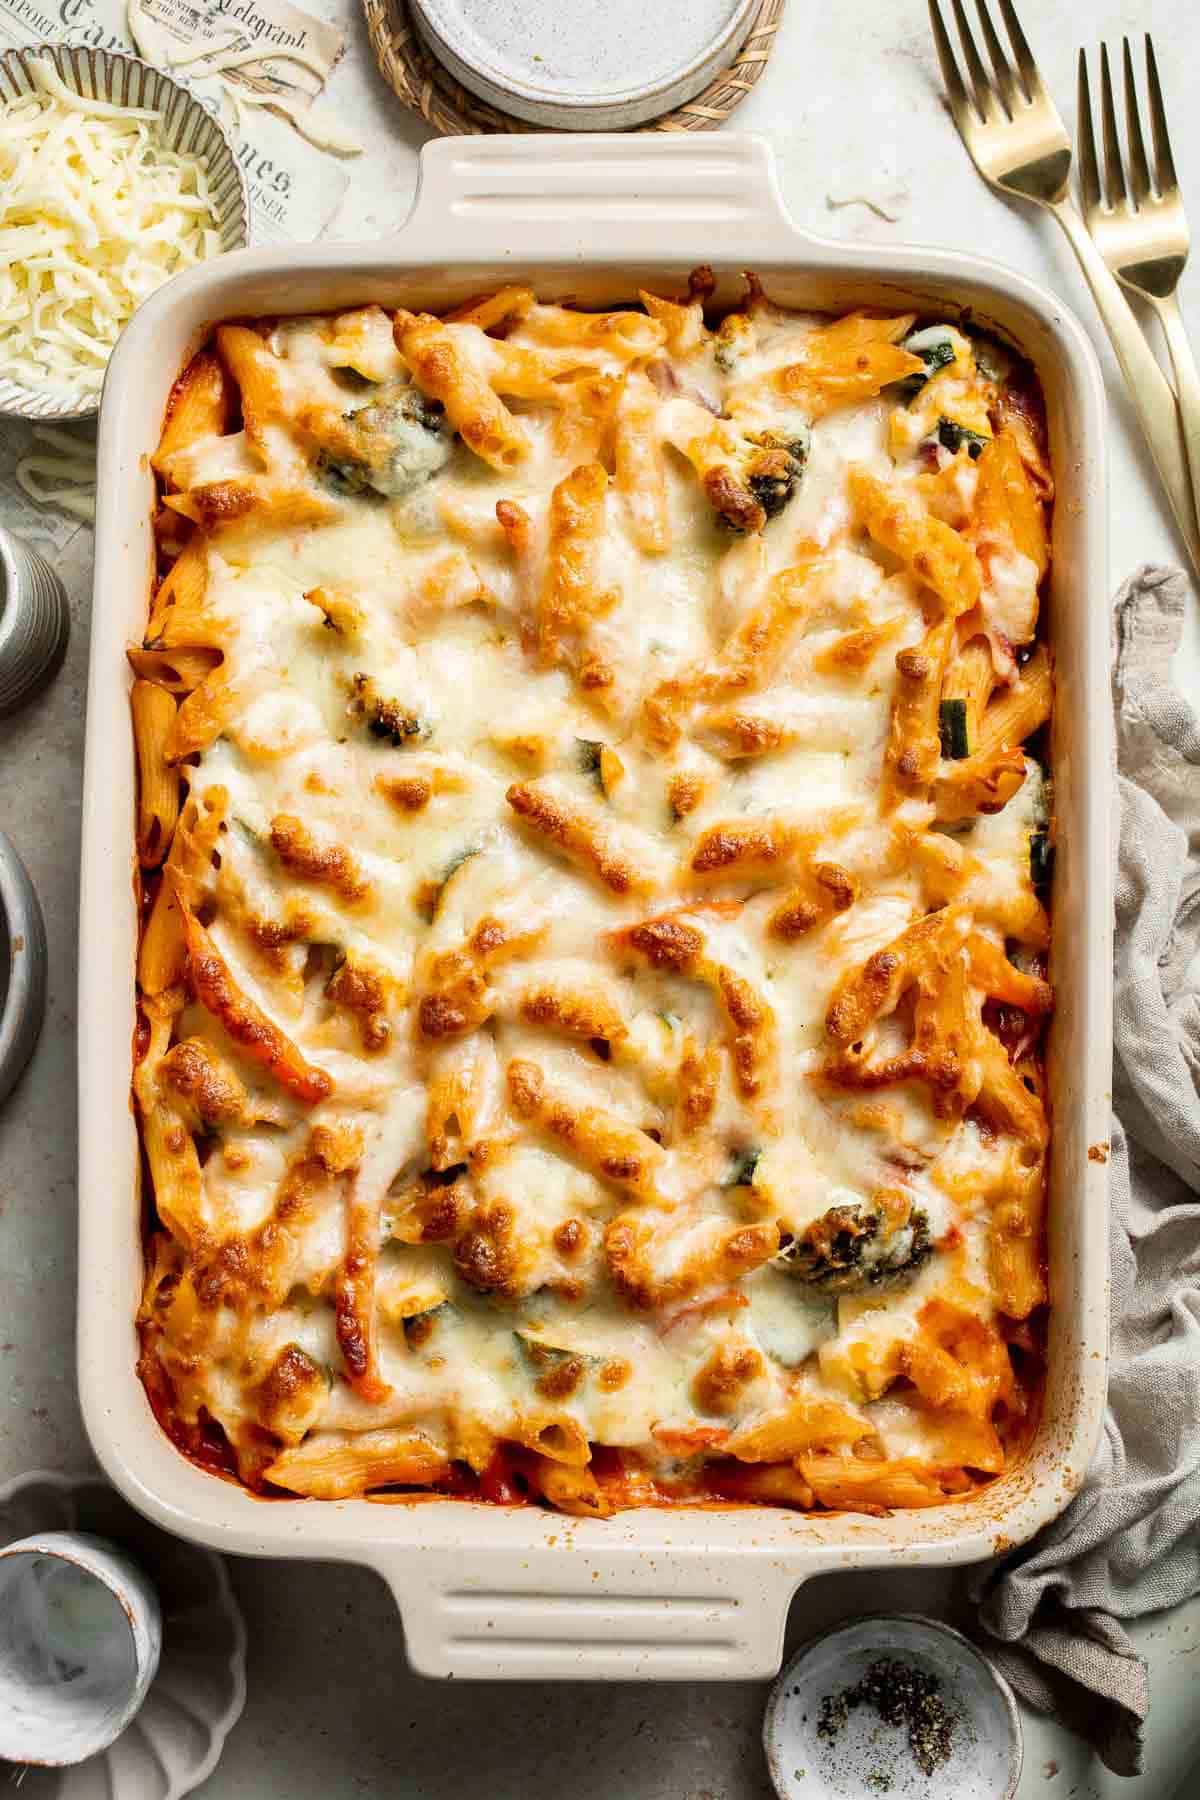
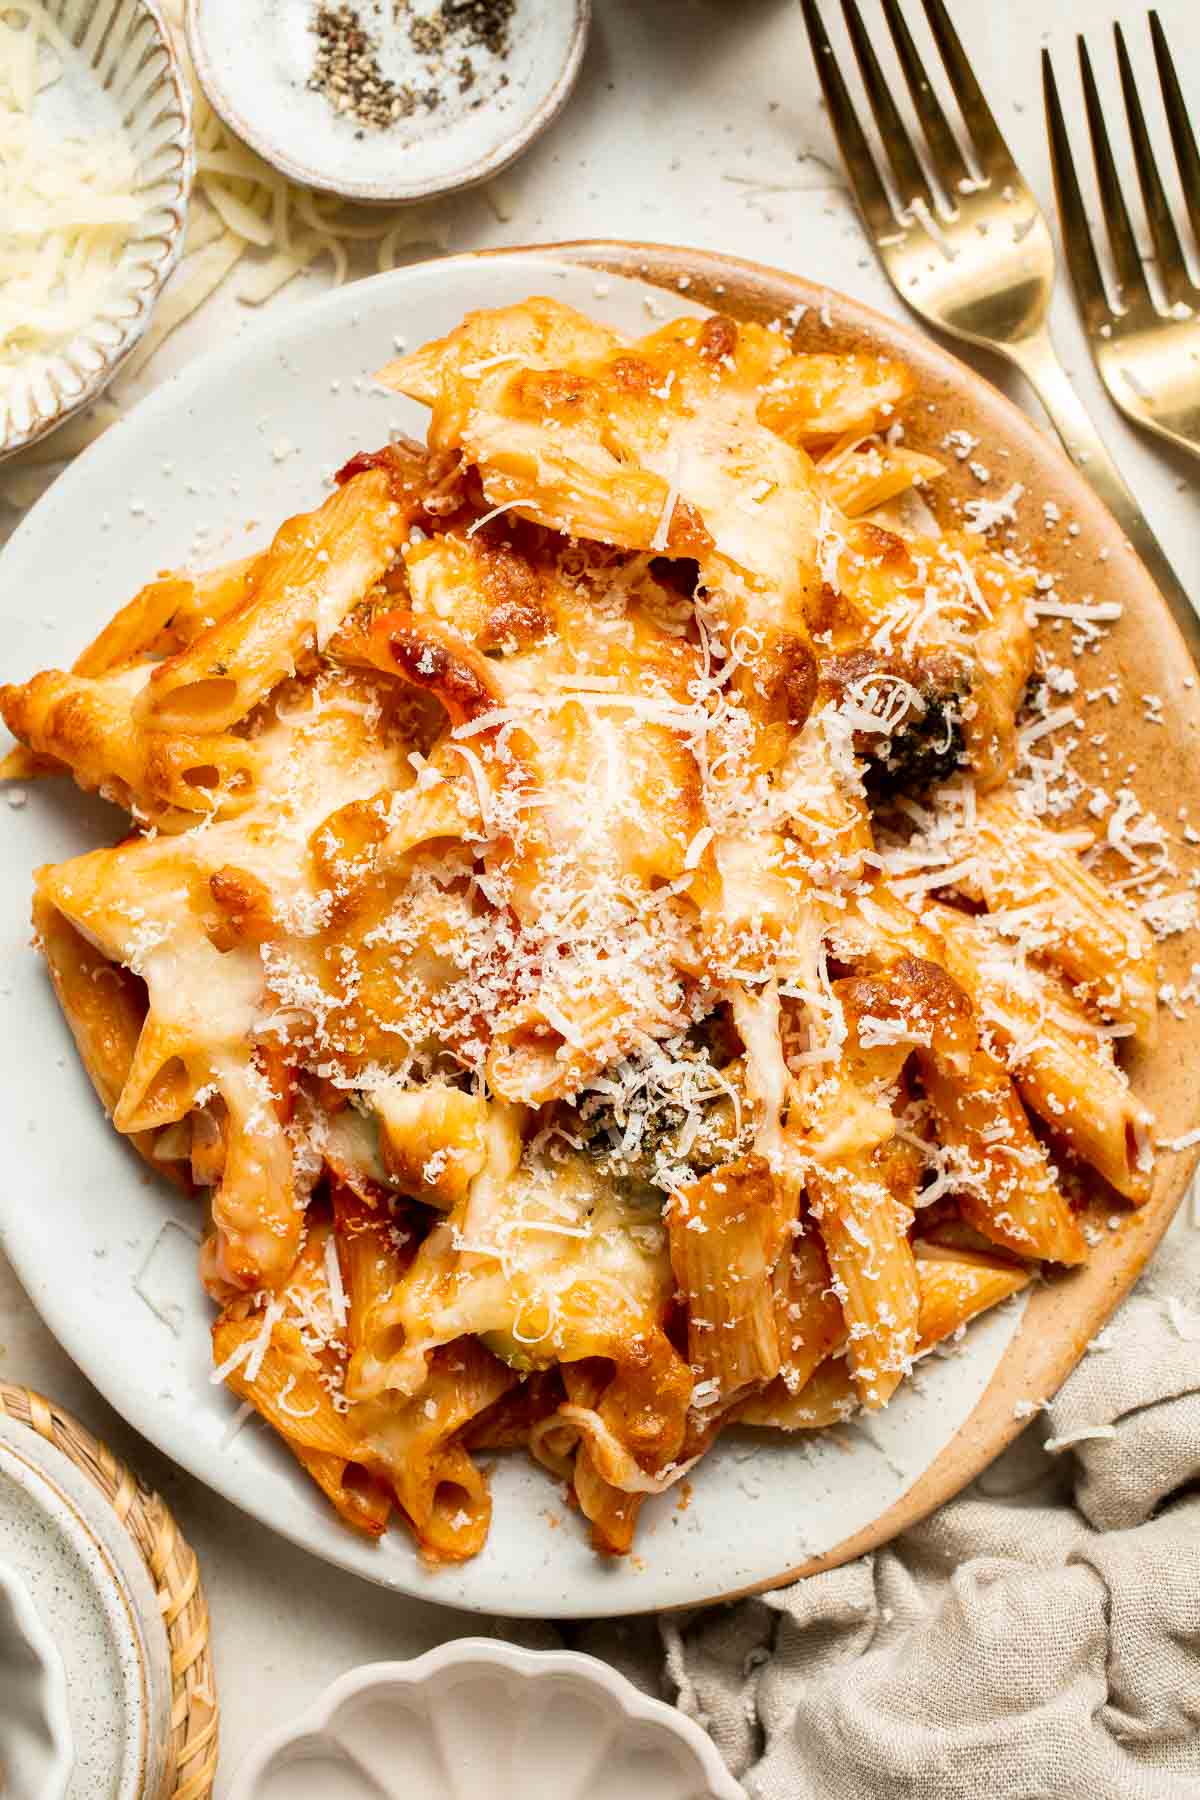
Vegetable Pasta Bake
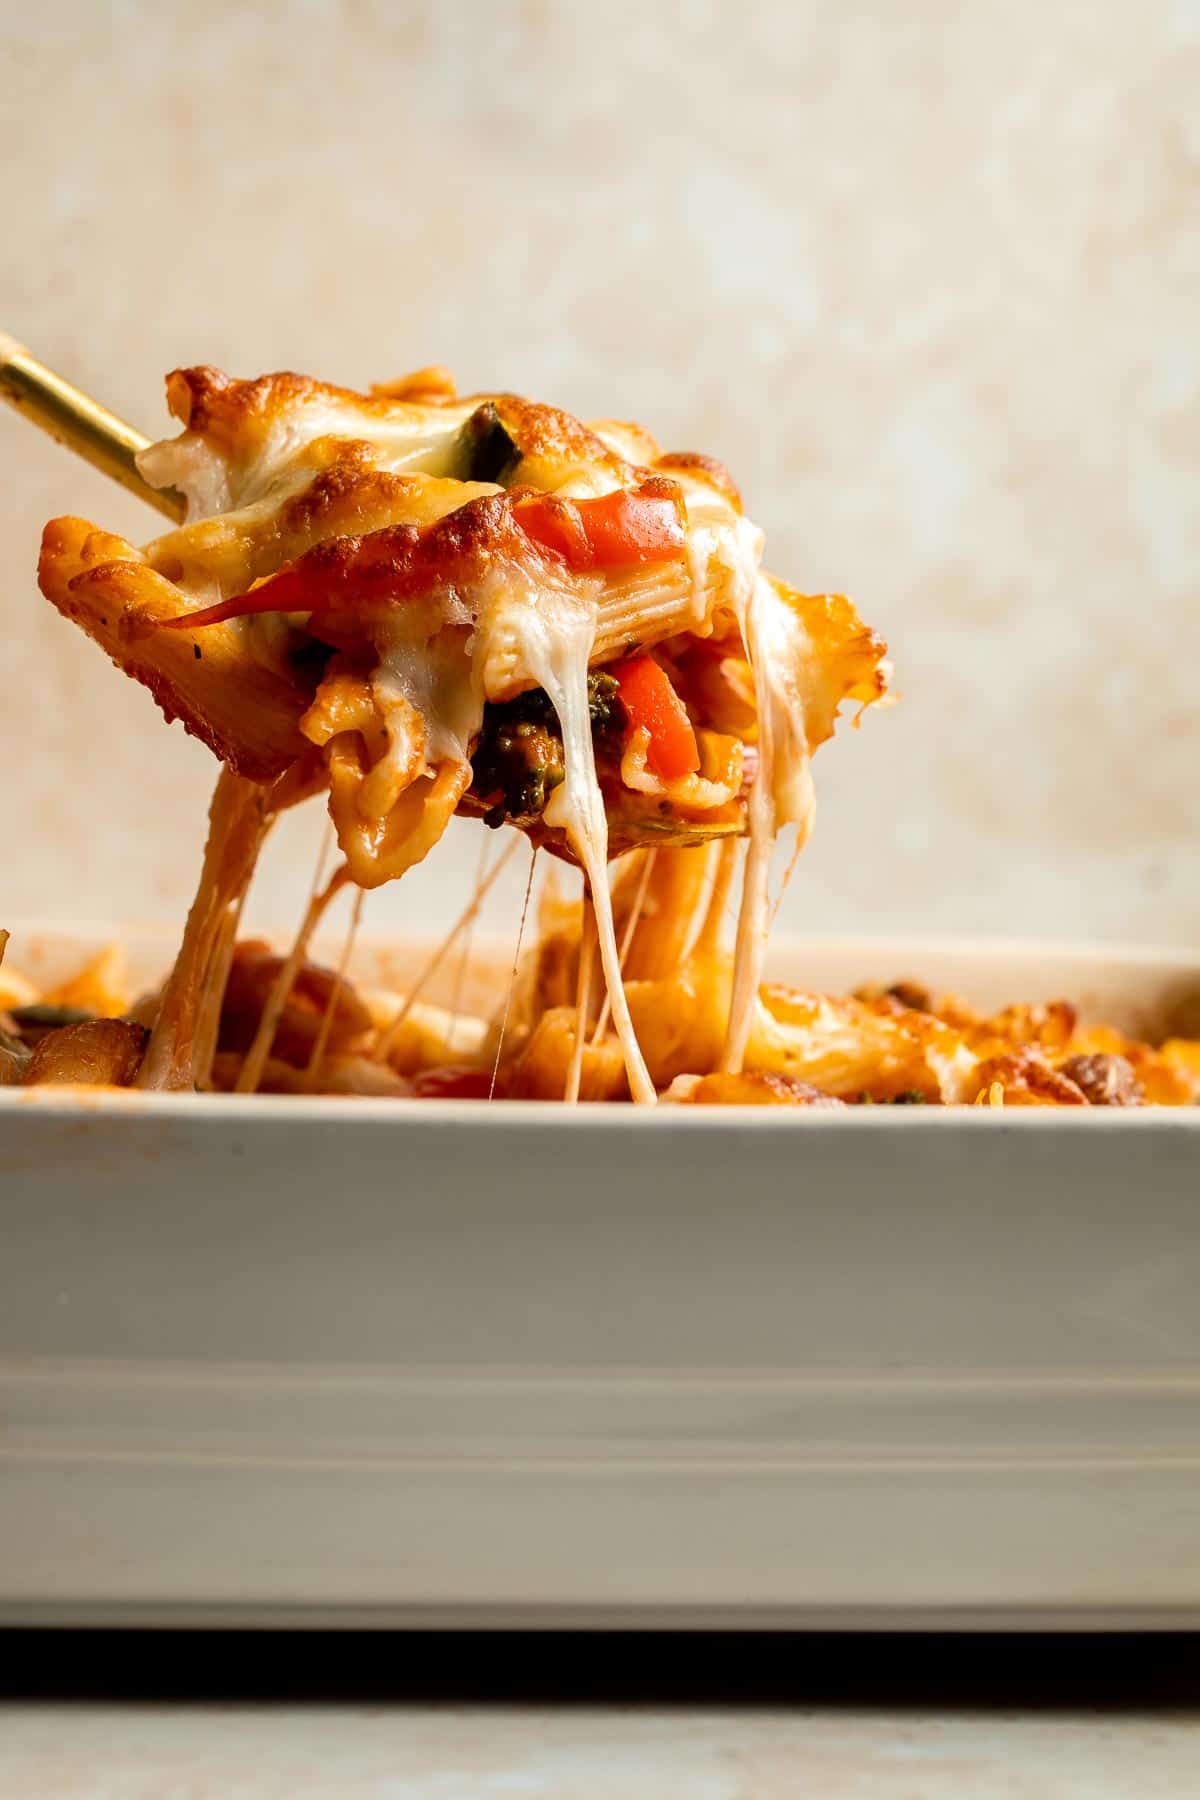
This hearty Vegetable Pasta Bake is easy to make, packed with veggies, and loaded with flavor! It features al dente pasta coated with a bold marinara sauce with vegetables, then baked with cheese on top until melty. It's the most comforting vegetarian dinner to fill up the whole family on those busy weeknights - even the meat lovers enjoy this one!
Pasta bakes require minimal extra effort beyond making a simple pot of pasta, but they're so much heartier and feed a small army! You almost always end up with lots of leftovers, which make convenient lunches for the rest of the week. I like to balance this saucy, cheesy pasta casserole with a Simple Italian Salad, or for the meat eaters, pair it with Italian Meatballs or Italian Chicken Skewers instead. You can't go wrong!
Why You'll Love This Vegetable Pasta Bake
- Easy make-ahead meal. Although this veggie pasta bake comes together quickly, you can also prep it the night before, let it cool, then pop it in the fridge. When you're ready, bake it like normal and serve!
- Great way to serve extra veggies. With five different types of veggies in one dish, this side dish is the easiest way to serve extra veggies with your meal. It has red onions, garlic, bell peppers, zucchini, and broccoli!
- Naturally vegetarian. This recipe contains no meat, making it suitable for a wide variety of dietary preferences. It can easily be vegan if you use dairy-free cheese, too! Great for the whole family.
Ingredient Notes
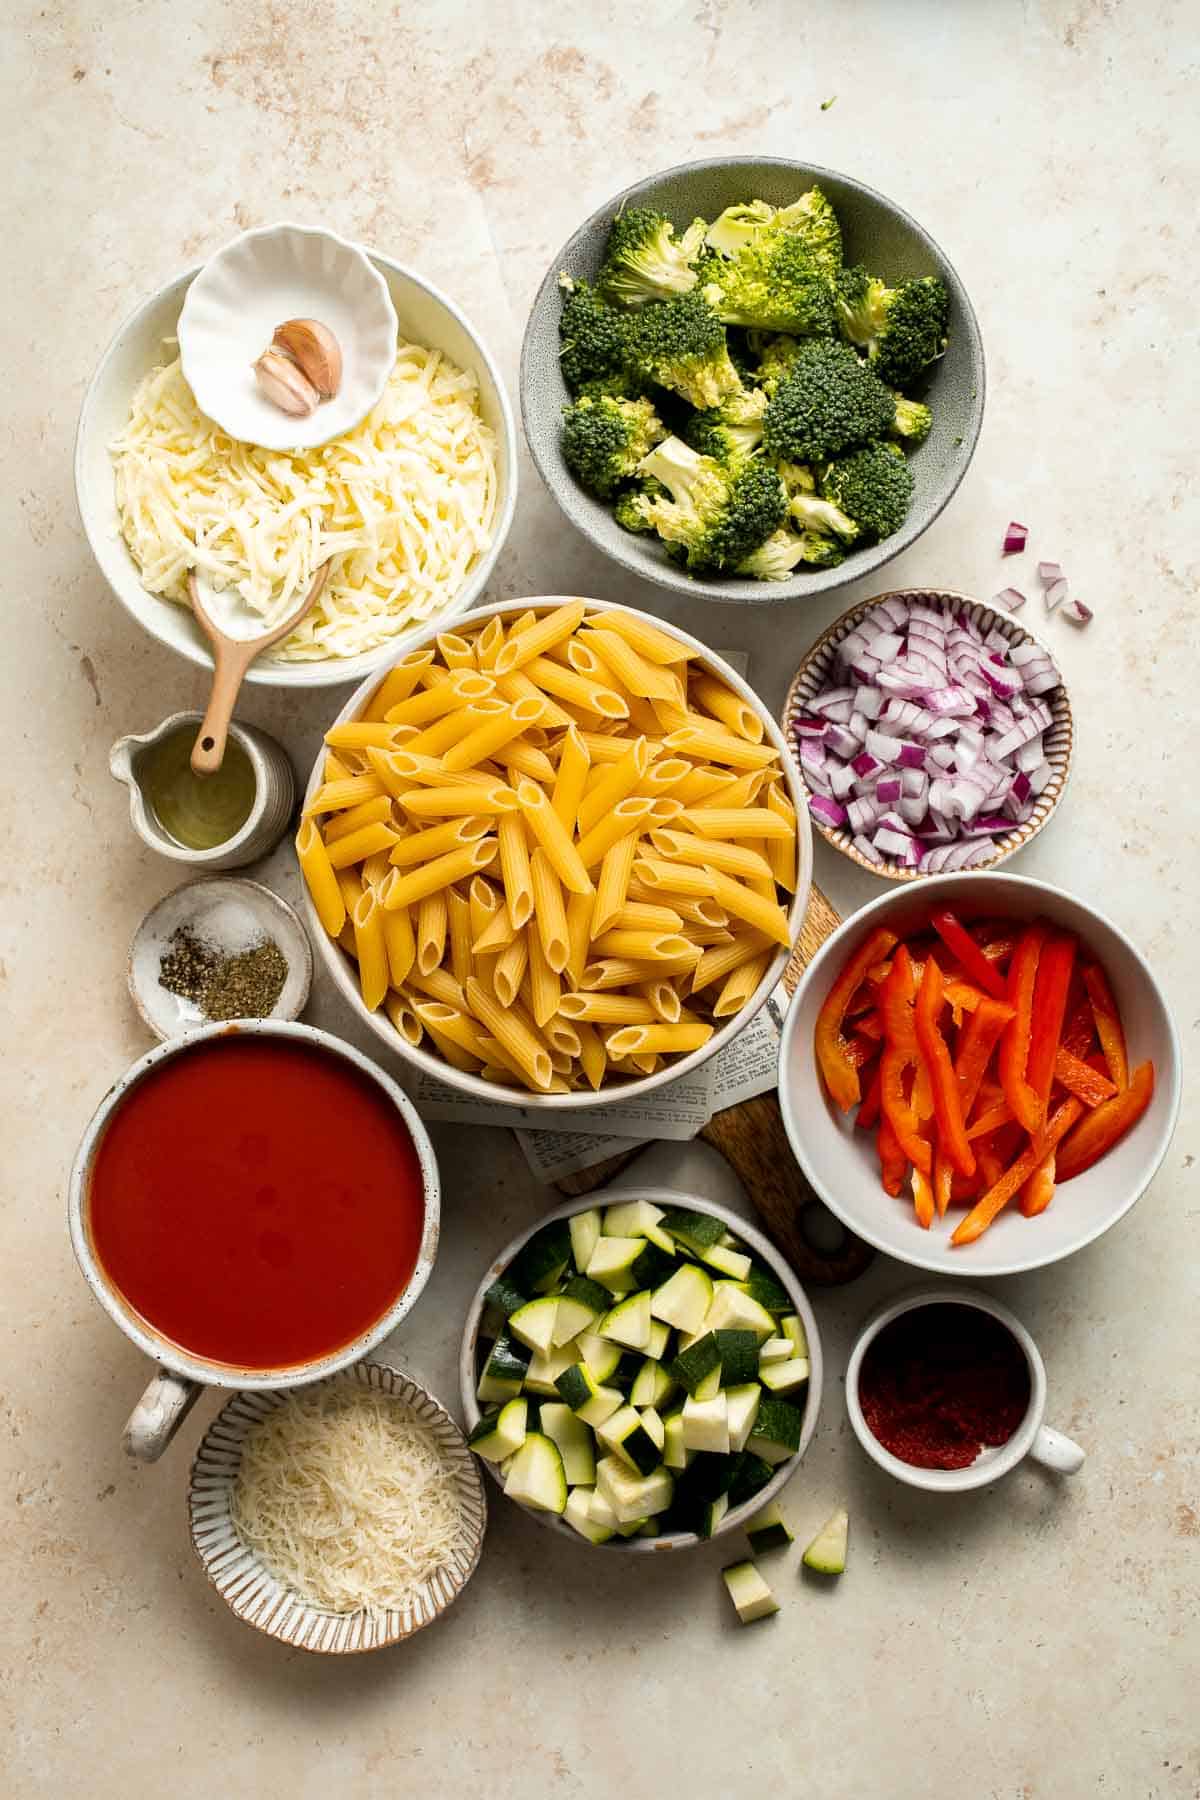
To make this delicious Vegetable Pasta Bake, you will need the following ingredients (full measurements in recipe card below):
- pasta - we used penne pasta but feel free to use your favorite type of pasta. If you're gluten-free, try brown rice or lentil pasta.
- avocado oil - or olive oil.
- vegetables - sauté red onion, garlic, bell pepper, zucchini, and broccoli florets, then simmer them in the pasta sauce.
- tomato paste - this amps up the flavor of the sauce and makes it taste more meaty and satisfying.
- marinara sauce or tomato sauce - this vegetarian baked pasta comes together really quickly with store-bought marinara sauce or use homemade marinara sauce.
- seasonings - you only need Italian seasoning, salt, and ground black pepper for plenty of flavor.
- cheeses - sprinkle a mixture of grated mozzarella cheese and Parmesan cheese over the whole thing before baking.
You will also need measuring cups and spoons, a large pot, colander, a large spoon for stirring and sautéing, a 9x13 casserole dish, and a grater.
How to Make the Best Vegetable Pasta Bake
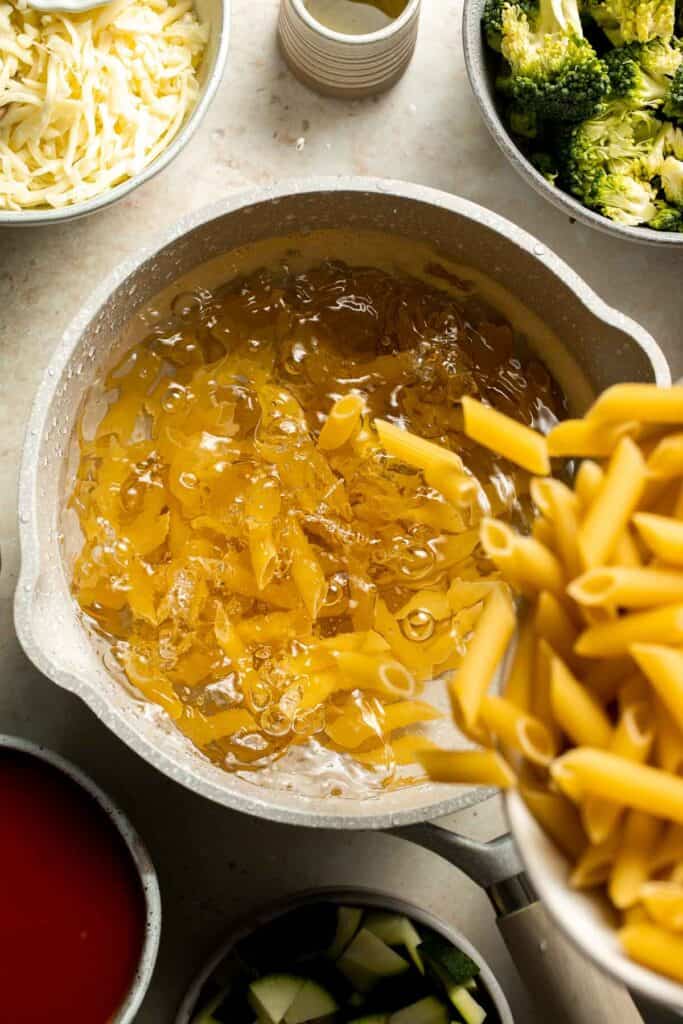
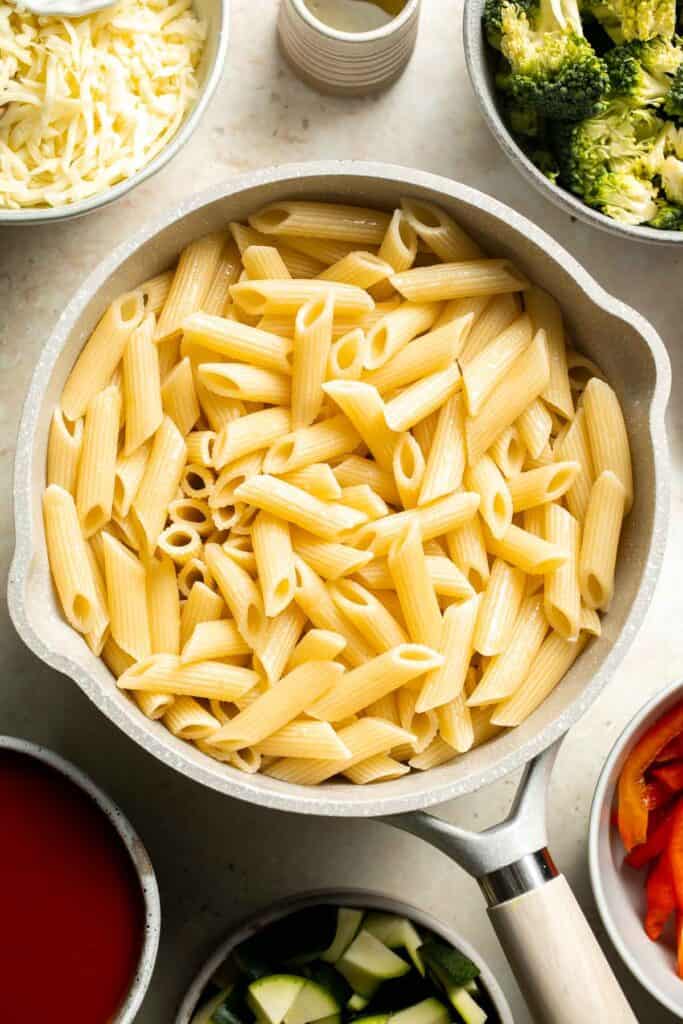
- Cook pasta. Bring a large pot of salted water to a boil over medium-high heat. Add pasta and cook until al dente according to package directions, about 8-10 minutes. Drain well and set aside.
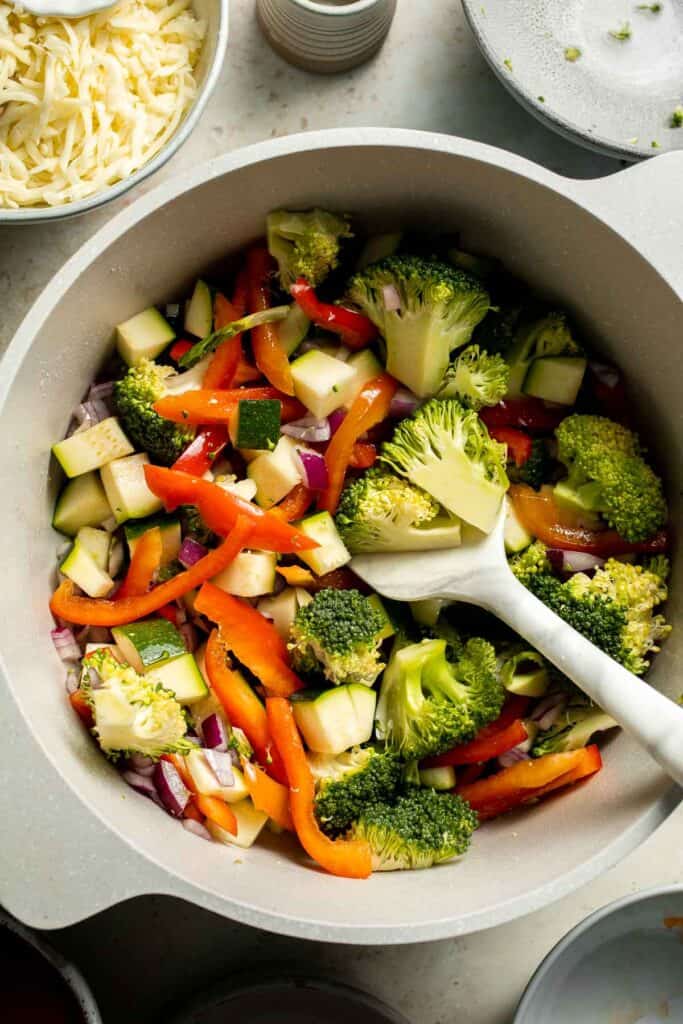
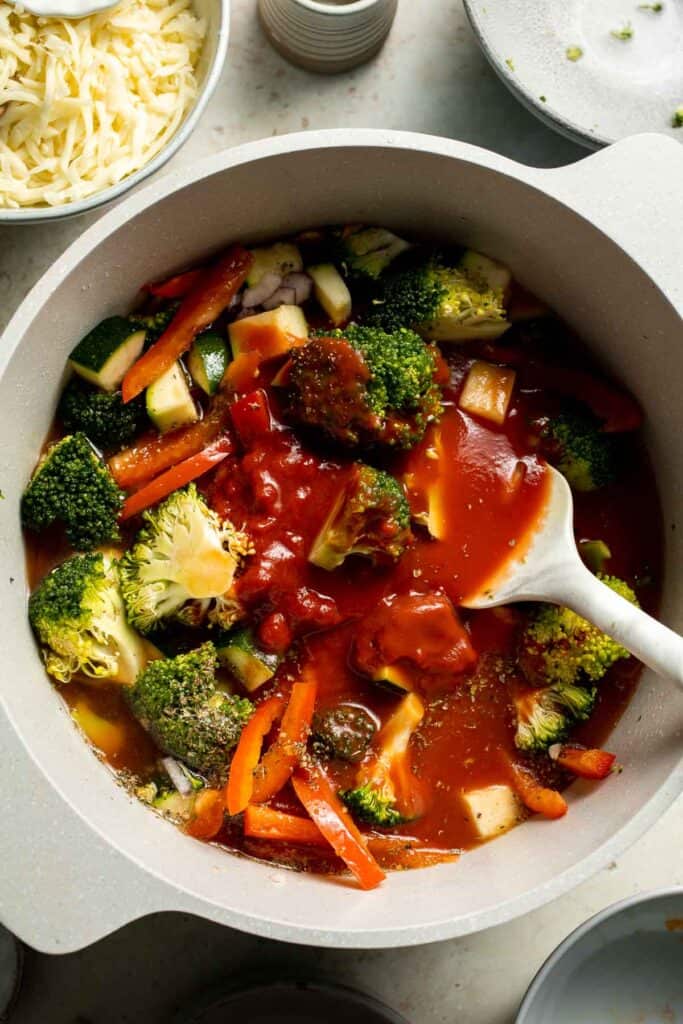
- Sauté veggies. Meanwhile, heat oil over medium-high heat in a large pot until hot, about 1 minute. Add onions, garlic, bell pepper, zucchini, and broccoli. Sauté until fragrant, about 1 minute. The vegetables do not need to be cooked through.


- Add sauce. Add tomato paste, marinara sauce, Italian seasoning, salt, and pepper. Reduce heat to medium and bring it to a simmer, stirring occasionally.

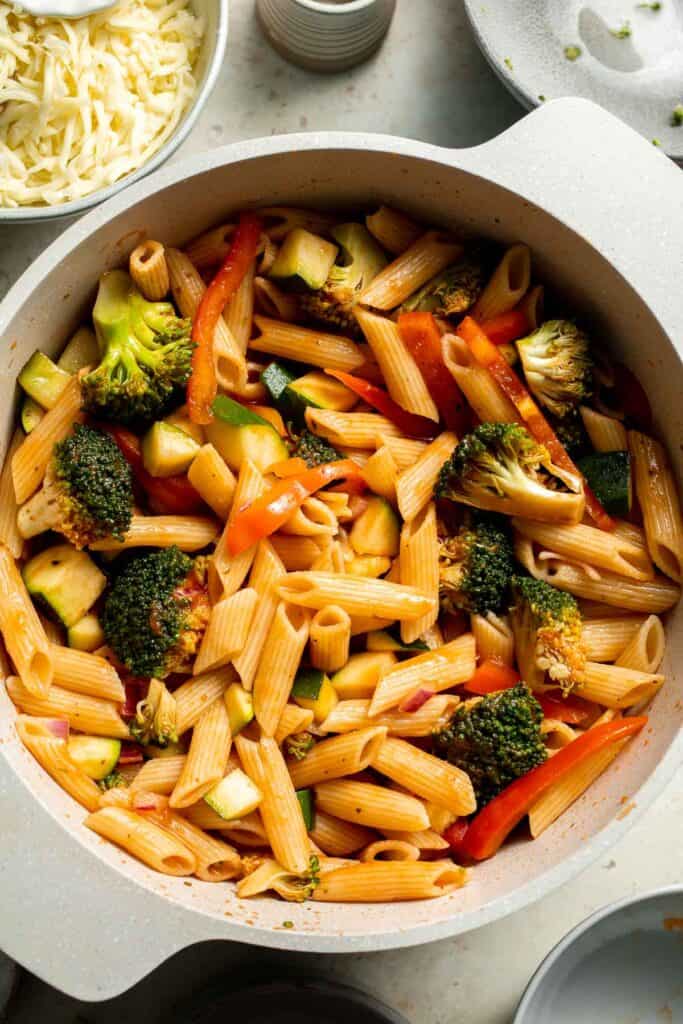
- Toss in pasta. Add the cooked pasta into the sauce and toss well to mix evenly.

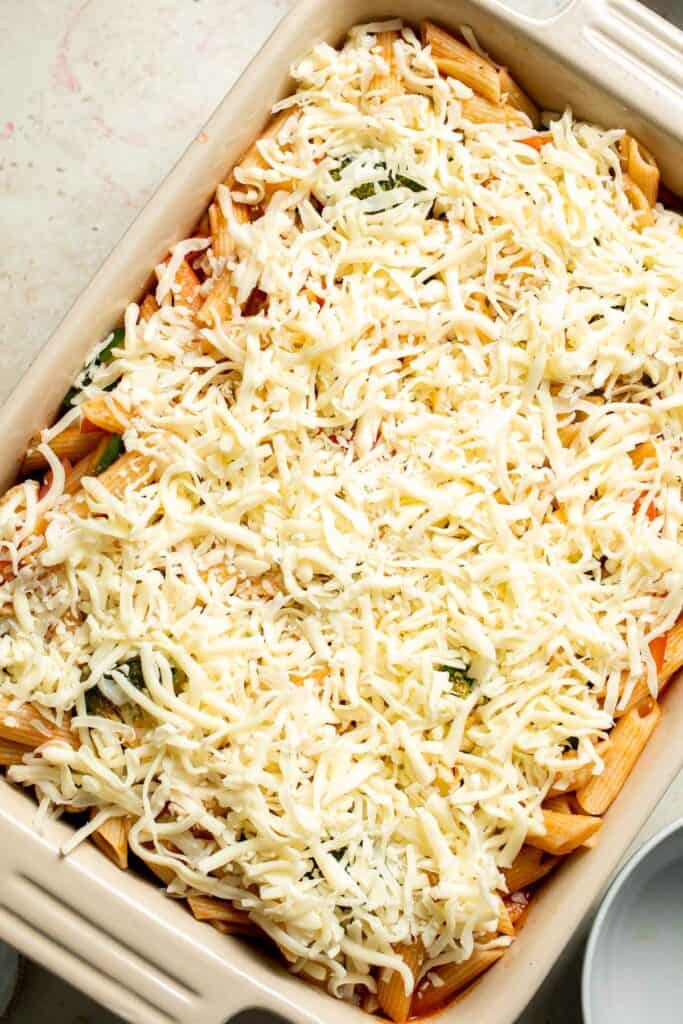
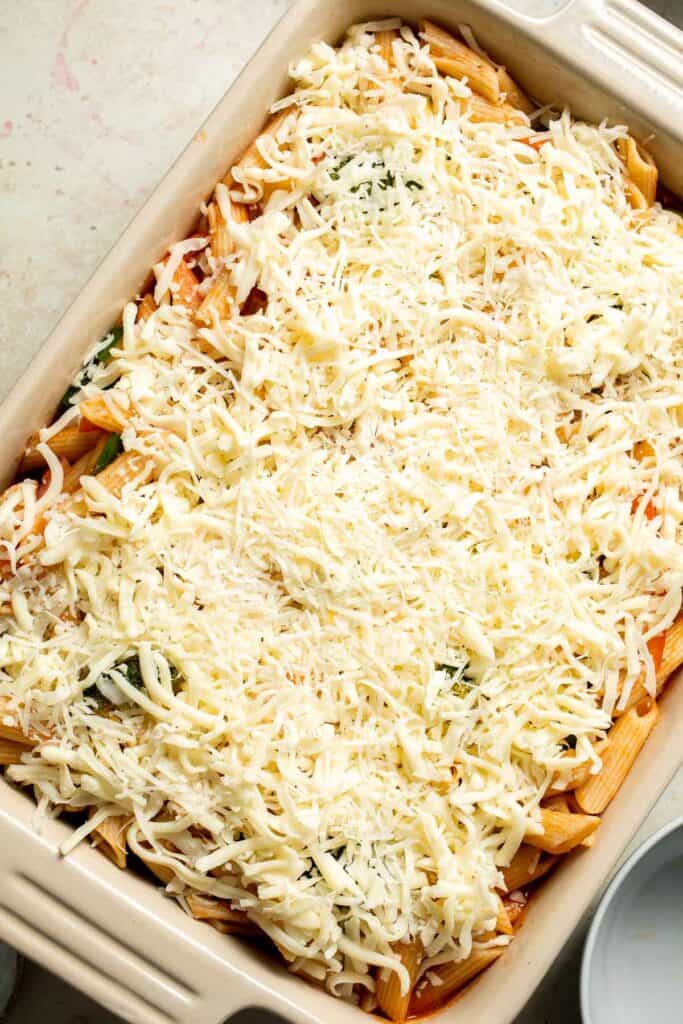
- Add cheese. Transfer the pasta mixture into a 9x13-inch casserole dish and top with mozzarella and parmesan cheese.

- Bake. Bake the pasta in a 375F preheated oven for 25 minutes until the melted cheese is golden brown. Let cool for 15 minutes, then serve.

Recipe Variations
- Spice it up. Add red pepper flakes to the sauce mixture for a nice, warm heat.
- Change up the veggies. You can use so many different vegetables here! Replace the broccoli with cauliflower or romanesco, use different colors of bell peppers, try yellow squash instead of zucchini, etc. You can also add greens, like baby spinach, which will cook down in the sauce. For extra tomato flavor, bake cherry tomatoes into the pasta. Jarred sun-dried tomatoes and artichokes are wonderful, too.
- Make a creamy sauce. For a richer, creamier sauce, reduce the heat to low and add about ½ cup of heavy cream and extra grated Parmesan, like this Creamy Tomato Pasta. Let it thicken for about 3-4 minutes, then toss it with the cooked pasta and bake like normal. Or, melt half a block of cream cheese into the tomato sauce for a rich, tangy flavor.
- Add extra protein. Look for a high protein pasta, add a layer of cottage cheese in the middle of the pasta bake (ideally seasoned with a little garlic powder and salt), or stir some Italian sausage or ground beef crumbles into the pasta sauce.
How to Serve
This Vegetable Pasta Bake is delicious and filling served on its own, or paired with some of my favorite pasta sides including:
- Cheesy Garlic Dinner Rolls
- Kale Chickpea Salad
- Curried Butternut Squash Soup
- Pull Apart Garlic Bread
- Arugula Salad
For more recipes, see our 30 Side Dishes for Pasta.
Recipe Tips and Tricks
- Cook pasta until al dente. Since the pasta will continue cooking in the oven, I always boil the noodles until just al dente. Otherwise, the pasta can become a little too soft after baking.
- Clear the fridge. This recipe is a great way to use up smaller amounts of fresh vegetables in the fridge. Add a few mushrooms, wilting spinach leaves, half of a leftover yellow squash, etc. It's very flexible.
- Skip the fat-free mozzarella. Have you ever noticed how some shredded mozzarella doesn't really melt? The trick is to use a nice, fresh mozzarella and grate it yourself. For the creamiest, gooey cheese pull, use whole milk mozzarella.
Storing and Freezing Instructions
How to Store
Portion out leftovers into individual airtight containers and refrigerate for 3-4 days. For larger servings, cover the pan with plastic wrap or aluminum foil.
How to Reheat
Microwave an individual serving for 3-5 minutes or until piping hot. For larger servings, pop the pasta dish back in the oven at 350 F until heated through.
How to Freeze
I recommend freezing the unbaked pasta instead of the leftovers, which tend to become soggy after thawing and reheating. To freeze, prepare the pasta bake recipe up until the baking step. Instead of baking, cover it with foil and refrigerate until fully chilled. Then freeze solid for up to 3 months. Be sure to use a freezer-safe baking dish. When you're ready to bake, let it thaw in the fridge overnight and bake in a preheated oven like normal. Great for meal prep!
FAQ
There are so many options! I generally like to use veggies that tolerate a little extra cooking, like onions, garlic, peppers, zucchini, and broccoli, but that's just the start. You can really work with any vegetables, although heartier starches, like butternut squash or root vegetables, generally taste best in a cream-based sauce instead of a tomato-based sauce like this vegetarian pasta bake.
Yes! Although there are no-boil lasagna sheets that soften from the sauce in the oven, most noodles will not cook properly unless boiled before baking. I always recommend boiling the pasta until just al dente to avoid over-cooking in the oven.
Yes! You can actually freeze the pasta before baking, which makes it wonderful for a busy night later in the year. Just assemble everything like normal, cover with foil, and chill in the fridge. Once cold, place it in the freezer. The night before you need it, pop it in the fridge to thaw then bake the next night like normal.
More Pasta Bake Recipes
- 40 Best Pasta Recipes
- Spinach and Ricotta Pasta Bake
- Baked Feta Pasta
- Pasta Bake with Sausage (Baked Ziti)
- Baked Mediterranean Pasta
- Shrimp Fettuccine Alfredo Pasta Bake
Tried this recipe?
I'd love to hear what you think! Leave a comment and rating below to share your feedback. Your reviews help others discover this recipe and help me keep creating more free recipes for you. Snap a photo and tag me on social media @aheadofthyme too.
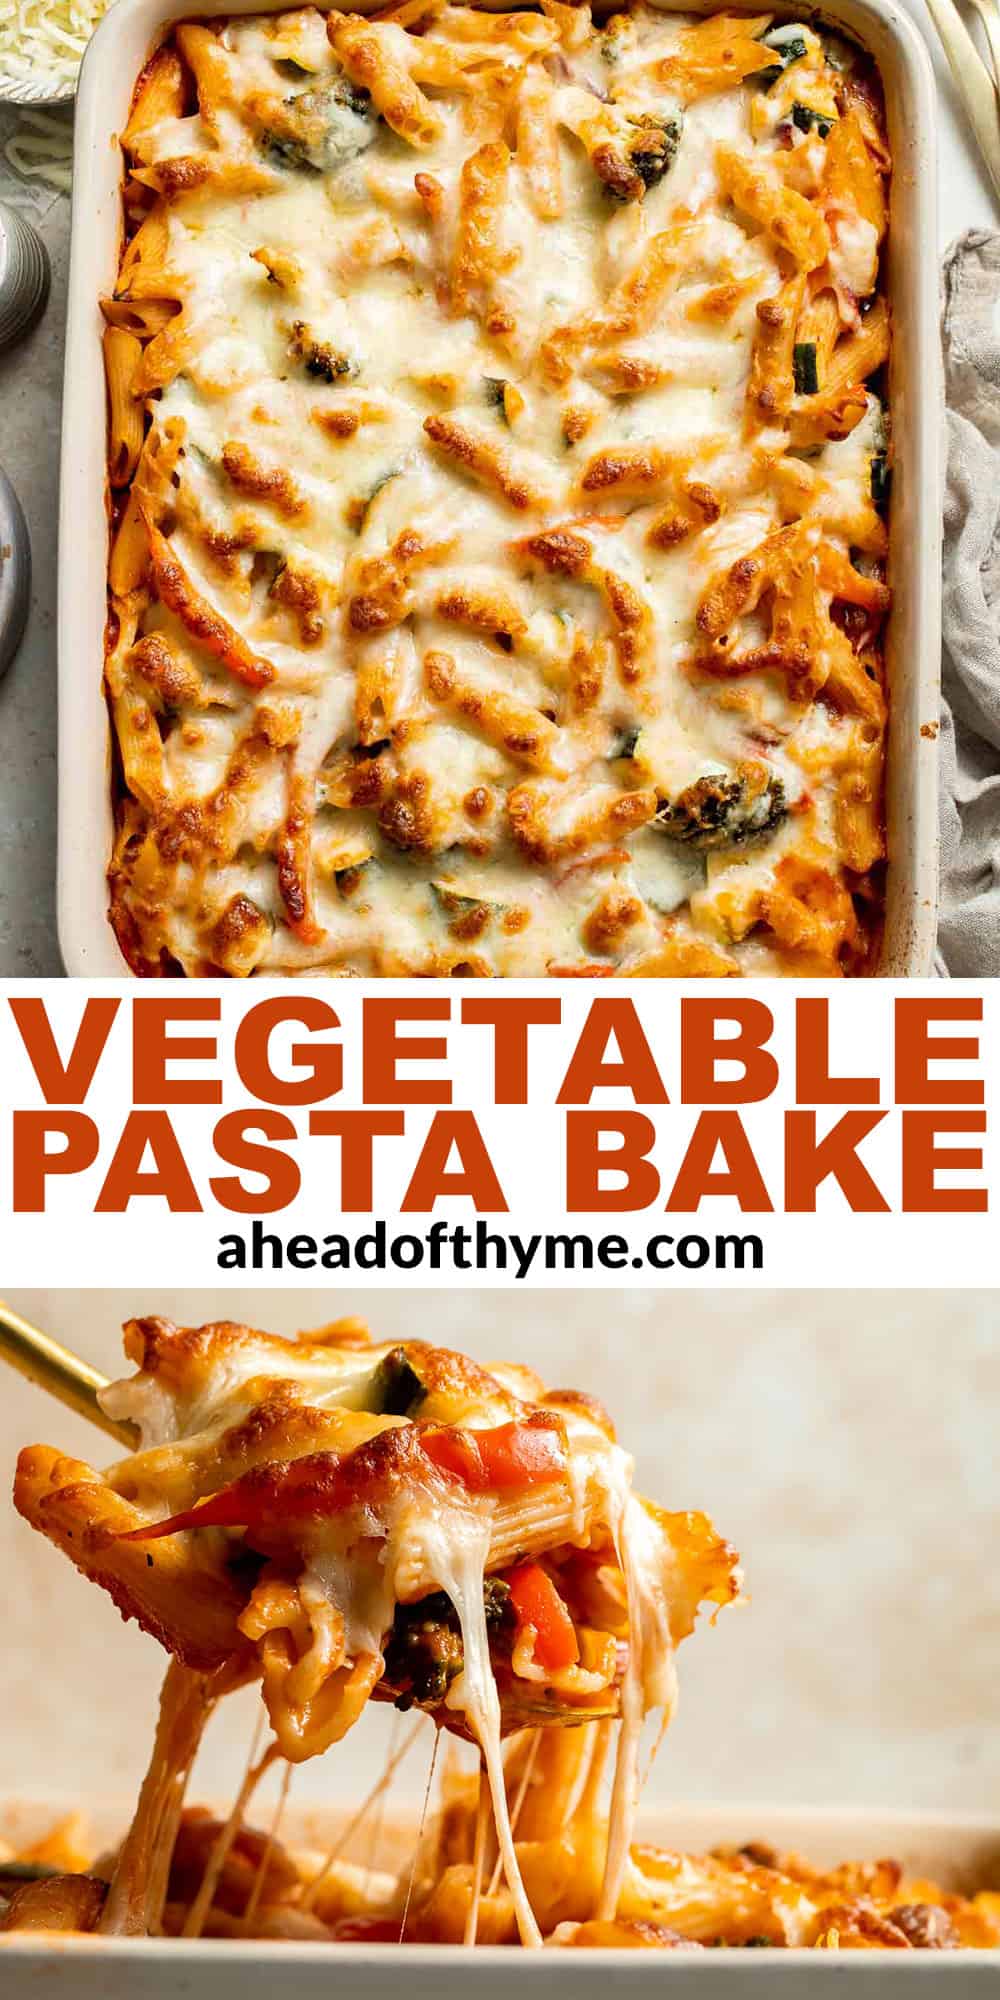
Pumpkin Curry with Chickpeas
Creamy Pumpkin Curry with Chickpeas is packed with warming spices and aromatic flavors that will warm you up from the inside out. Fresh pumpkin, broccoli, cashews, and chickpeas are steeped in a fragrant red coconut curry sauce infused with lots of fresh lime juice. It's sweet and savory, creamy and refreshing, and ready in just over 30 minutes. Vegan and gluten-free too!
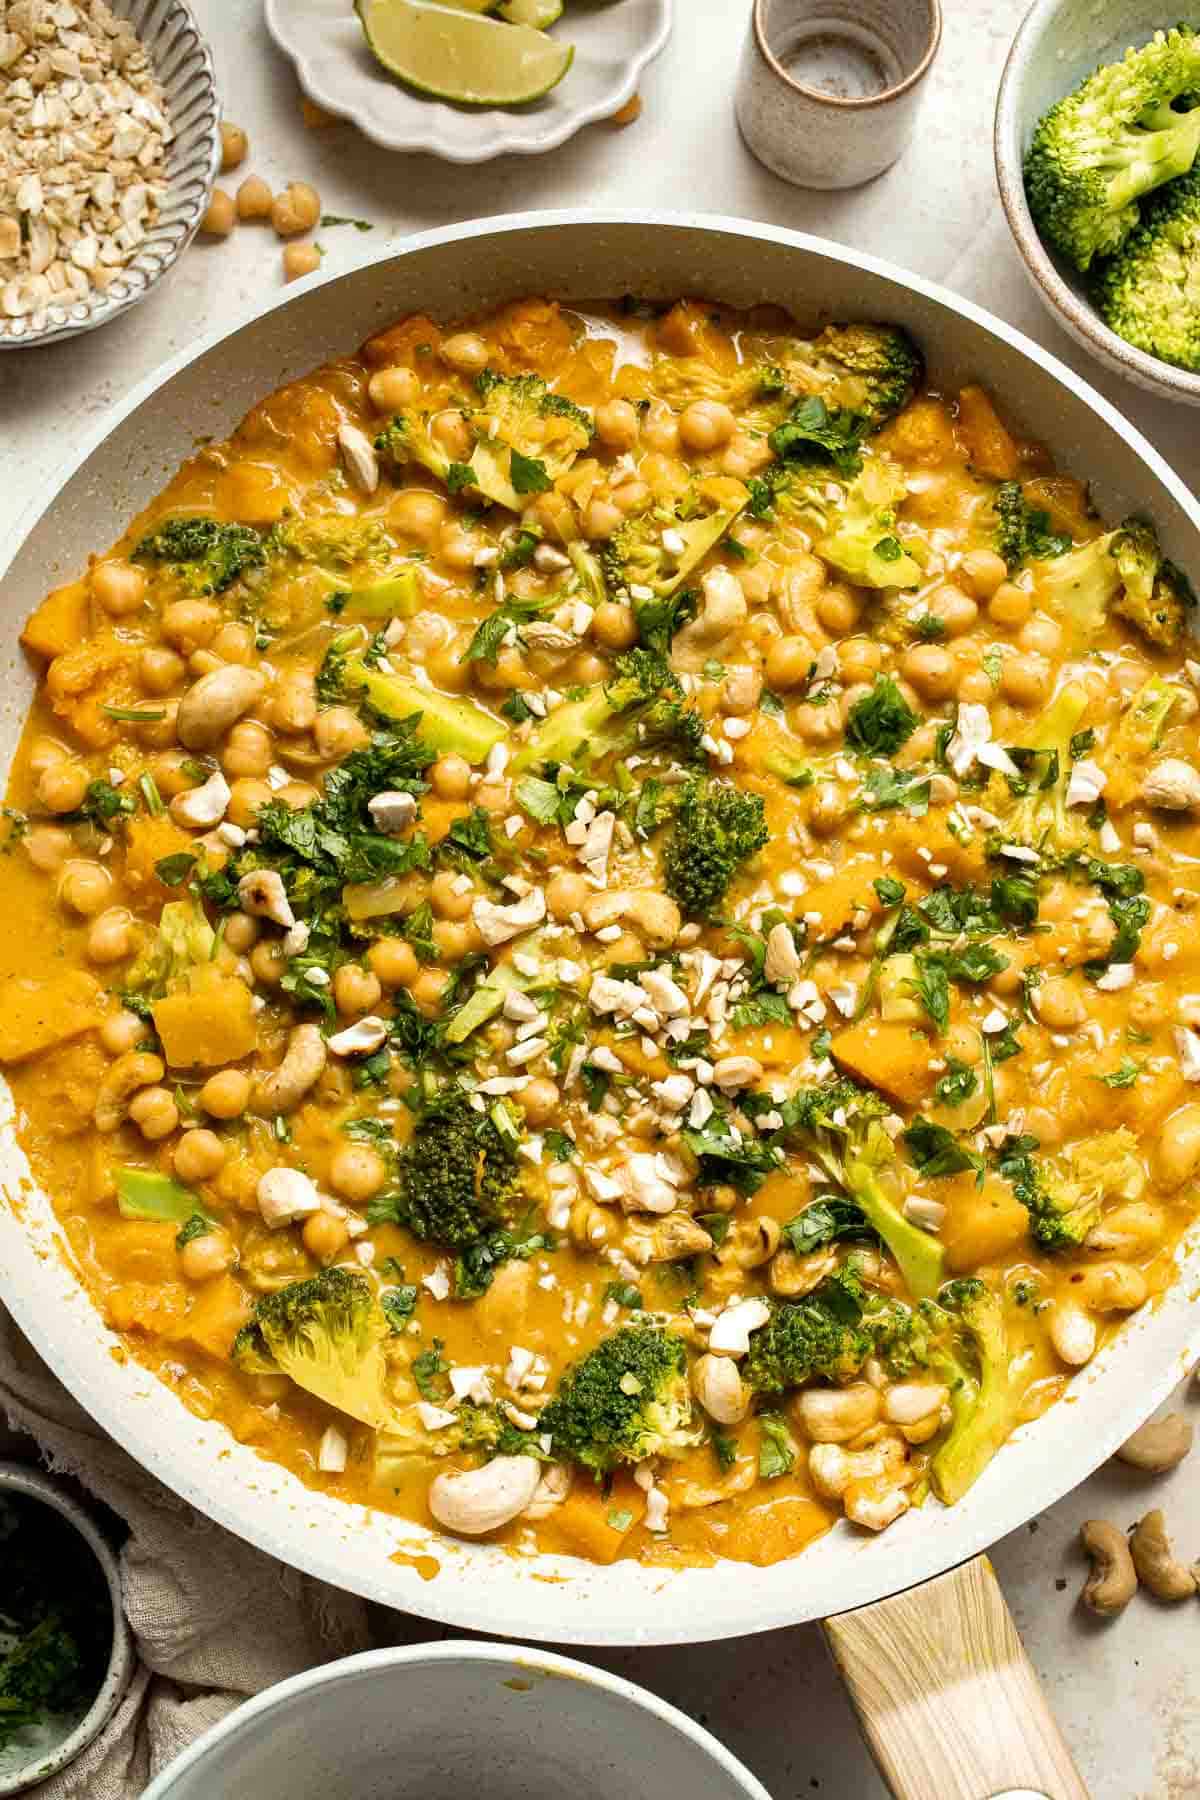
I like to get festive and make at least one pumpkin dish every fall. This bowl of this comfort food might just be my favorite pumpkin recipe. This simple pumpkin coconut curry recipe is a testament to the powerful warmth of red curry. The fiery red chilis and aromatic spices offer a gentle heat that will make your cheeks red - but don't worry, the creamy coconut milk and sweet pumpkin balance the spice level, preventing it from being too hot. Serve it over fluffy jasmine rice or fragrant Coconut Rice with cashews and cilantro and a heap of warm Garlic Naan Bread for an easy vegetarian dinner the whole family will love!
Why You'll Love This Pumpkin Curry with Chickpeas
- Ready in 35 minutes. Yes, you can start with fresh pumpkin and dry rice and turn it into a meal in just about 30 minutes of cooking! This recipe is fast and loaded with so much flavor. It's the perfect curry recipe to warm you up on a cold, fall day.
- Naturally vegan and gluten-free. We love making flexible vegetarian dishes that we can add meat to if we want, but this simple vegan curry really needs nothing else. The rich curry sauce and plump pieces of pumpkin and chickpeas are so filling and satisfying. No one will miss the meat (or dairy) one bit. Perfect for Meatless Mondays! It's gluten-free, too!
- Made with real pumpkin. Why does this matter? Because pumpkin is so good for you. It is basically fall's superfood. Some reasons why are that it: 1. boosts immunity, 2. burns fat, 3. protects your eyes, 4. fights cancer, 5. beneficial for heart health, and 6. reduces inflammation. This just names a few of its large range of health benefits.
- Complete meal in one. This pumpkin curry recipe comes together in one pot and contains all the protein and veggies you need to fill up. Plus, it'll be ready by the time your rice is done steaming. It's the easiest dinner during the cold winter months and makes enough for the whole family!

Ingredient Notes
To make this delicious Pumpkin Curry with Chickpeas, you will need the following ingredients (full measurements in recipe card below):
- oil - coconut oil to sauté the aromatics. You can substitute this with other vegetable oils too such as avocado oil.
- aromatics - chopped onion and fresh garlic play up the savory flavors in the curry. Ginger adds bright heat.
- fresh pumpkin - ditch the canned pumpkin purée. You want plump cubes of peeled and diced pumpkin to soak up the savory sauce. Any type of pumpkin or winter squash will work.
- red curry paste - use your favorite brand of store-bought red curry paste or make your own from scratch. Make sure to find one made without shrimp paste to keep this dish vegetarian.
- vegetable stock - or chicken stock, if not vegetarian. We usually use vegetable broth.
- coconut milk - full-fat coconut milk will bring down the heat level and add a rich creaminess.
- chickpeas - these are loaded with plant-based protein and fiber and take on the flavors of the curry sauce really easily. We used canned chickpeas but you can substitute with homemade cooked chickpeas too (see How to Cook Dried Beans for instructions).
- broccoli
- cashews - to add to the curry, plus more for serving.
- lime juice - to contrast the creamy sauce.
- cilantro - for garnish.
You will also need measuring cups and spoons, a large skillet, and a spatula or spoon.
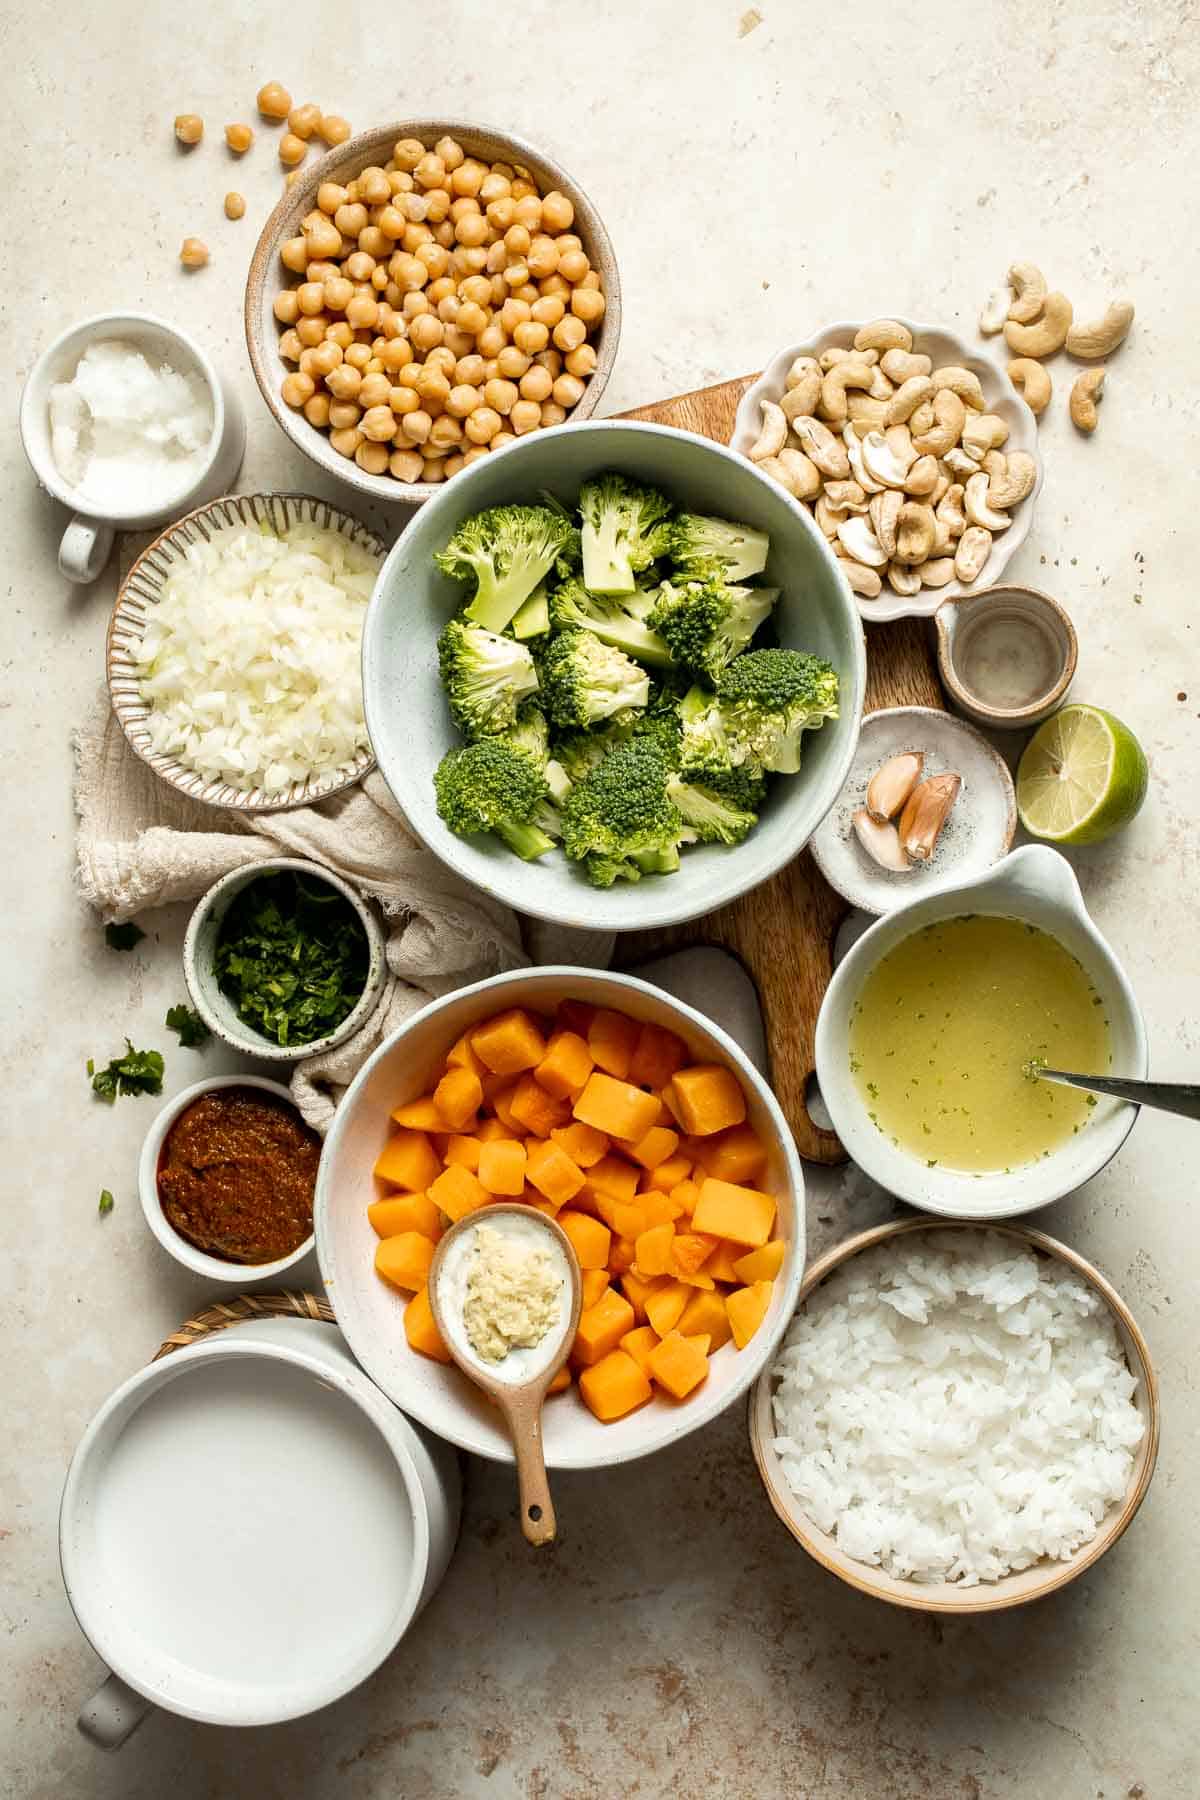
How to Make the Best Pumpkin Curry with Chickpeas
- Sauté aromatics. Heat oil in a large, deep skillet over medium heat. Sauté onion for 3 minutes, then add ginger and garlic. Sauté for another minute until fragrant and onions are soft and translucent.
- Add pumpkin. Add curry paste and pumpkin. Combine and cook for another minute until the pumpkin is coated.


- Add liquids and simmer. Stir in coconut milk and stock and bring to a boil. Turn the heat down to low and bring to a simmer. Then, cover and simmer until the pumpkin is cooked through, about 15 minutes.
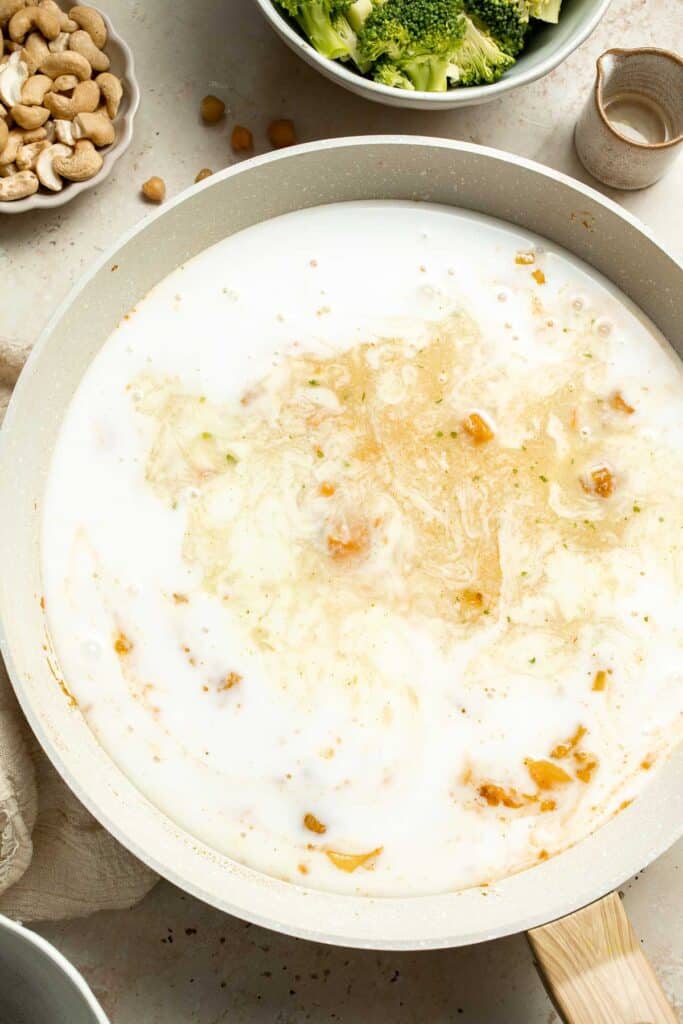

- Add broccoli. Add broccoli and simmer for 5 more minutes, uncovered.


- Add chickpeas. Stir in chickpeas, cashews, and lime juice.

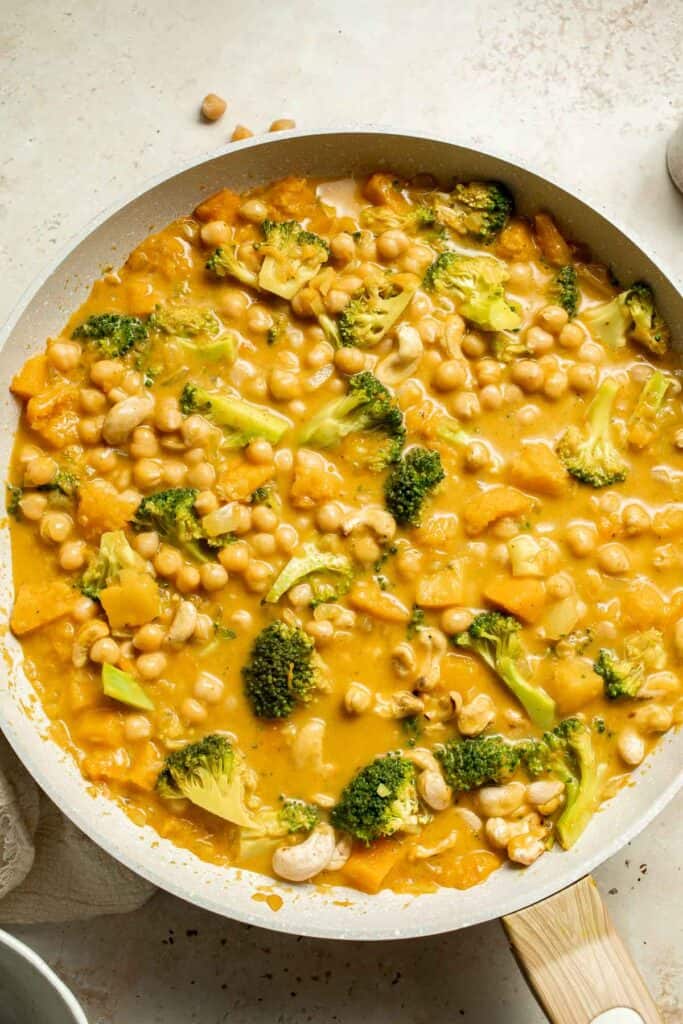
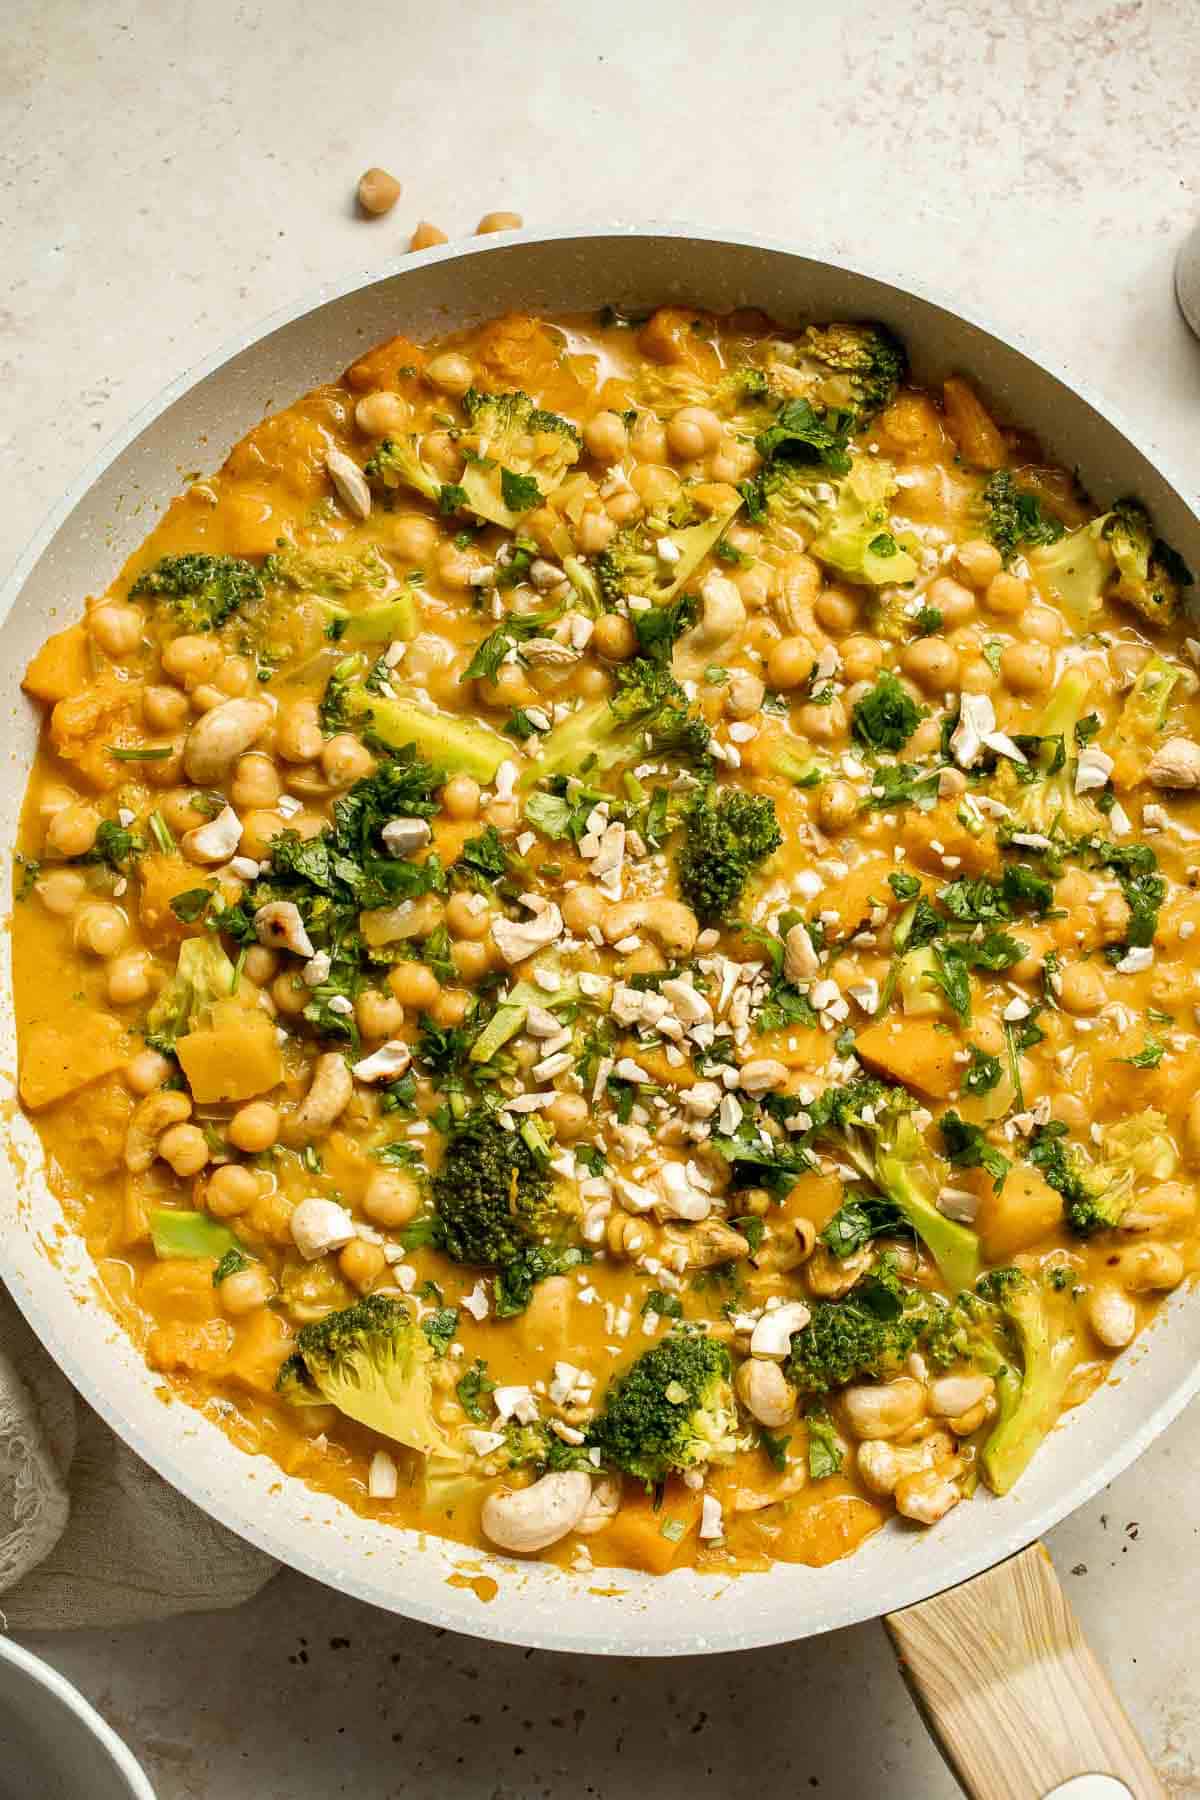
Recipe Variations
- Change the veggies. Try different vegetables for this recipe, like carrots, sweet potatoes, green beans, red bell peppers, etc. Add baby kale or spinach for extra greens. Peeled and cubed butternut squash would be a great alternative to pumpkin, too!
- Use different beans. Hearty chickpeas stand up the sauce really well, but I also enjoy this recipe with lentils. They can soften up and make the curry very thick, so be sure not to overcook them.
- Try other curries. Yellow curry also works wonderfully with warm, hearty vegetables and would be a great substitute for the spicy red curry.
How to Serve
This Pumpkin Curry with Chickpeas is delicious paired with some of my favorite curry sides including:
- Rice - Made a pot of Coconut Rice or Steamed Rice at the same time to be more efficient on busy weeknights. Rice Pilaf with Carrots is also great with this pumpkin coconut curry.
- Bread - Bread is perfect for sopping up all that curry sauce. Serve it with Garlic Naan Bread, or Pita Bread.
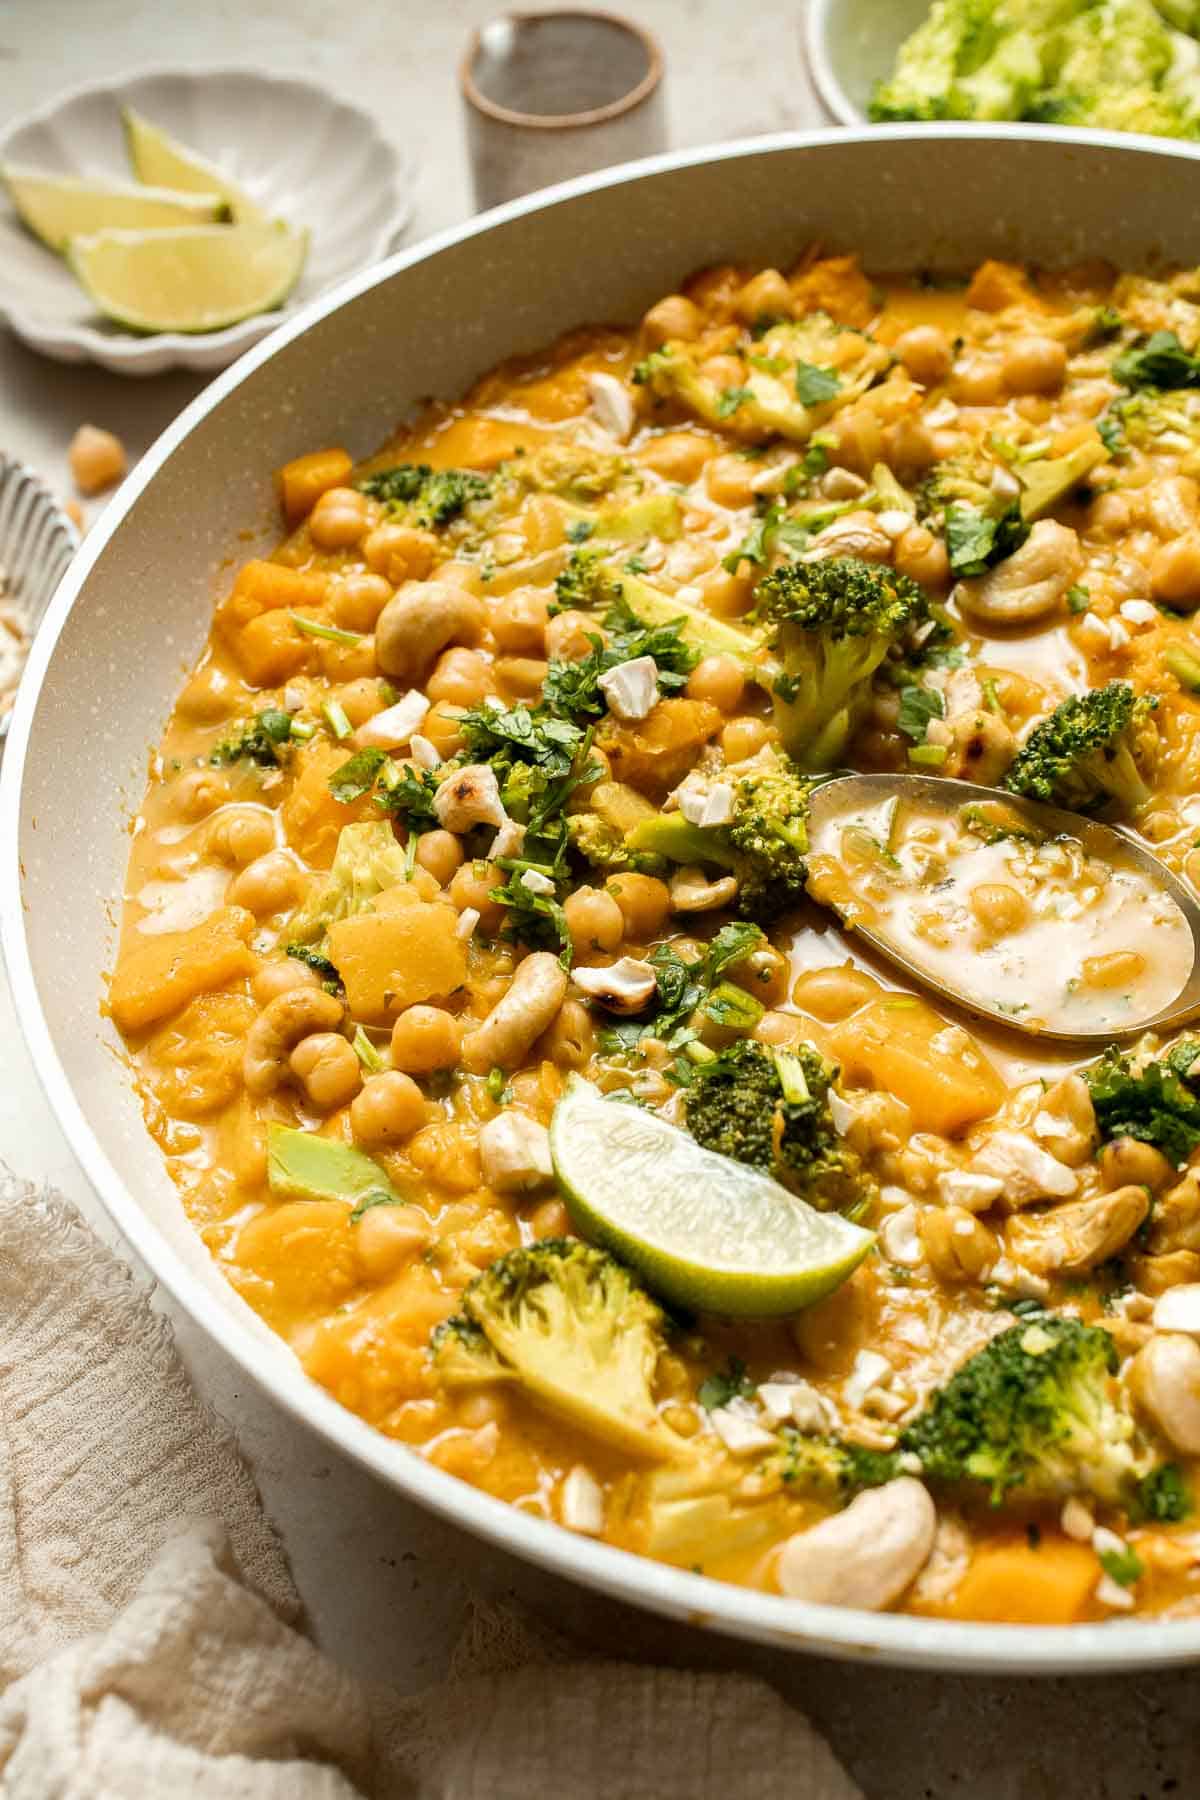
Recipe Tips and Tricks
- Prep the pumpkin ahead of time. Although it's pretty quick to peel and cube the pumpkin, it's so nice to have it ready to go in the fridge! If you do weekend meal prep, peel and cube the pumpkin and grab it whenever you're ready to make the curry.
- Don't overcook. If you overcook the pumpkin pieces, they'll start to soften and take on a soggy texture. I prefer them when they still have a little bit of bite.
- Start with a little heat. If you're intimidated by spice, feel free to start with half as much curry paste then add more if needed.
Storing and Freezing Instructions
How to Store
Store leftover curry in an airtight container in the fridge for 3-4 days.
How to Reheat
For individual servings, just pop your meal prep container into the microwave for 5-6 minutes and stir well halfway through. For larger servings, warm the curry on the stove until heated through.
How to Freeze
This curry freezes well, but the pumpkin will become softer after freezing, thawing, and reheating. Store the leftovers in individual containers, then freeze them solid for up to 3 months. Thaw in the fridge before reheating.
FAQ
I highly recommend using fresh pumpkin, as you'll get nice plump pieces of pumpkin that soak up the creamy curry sauce. You can use any type of pumpkin, although sugar pie, winter luxury, or Hokkaido pumpkin are ideal. You can also substitute other firm-skinned winter squashes, like butternut, kabocha, blue Hubbard, and more.
Red curry paste gets its distinctive color from lots of chilis, which can add a fiery heat. If you want all that flavor without all the heat, use full-fat coconut milk or a little coconut cream. The richness of the milk brings down the heat level and adds a glossy, creamy texture. Light coconut milk is not recommended as it does not have the same cooling effect. Even with coconut milk, red curry will still usually be quite warm, so use less, if needed, to manage the heat.
That really depends on the specific recipe. There are many different types of curry powder, but it takes time to bloom the dry spices and bring out their flavors. In curry paste, the warming spices and peppers are already hydrated and ready-to-use, giving your curry the best flavor. Plus, curry paste is an easy ingredient to find in most grocery stores or Asian markets.
More Savory Pumpkin Recipes
- Coconut Curry Pumpkin Soup
- Stuffed Pumpkin
- Pumpkin Cornbread
- Creamy Pumpkin Pasta
- Pumpkin Soup
- Pumpkin Pancakes
Tried this recipe?
I'd love to hear what you think! Leave a comment and rating below to share your feedback. Your reviews help others discover this recipe and help me keep creating more free recipes for you. Snap a photo and tag me on social media @aheadofthyme too.

Balsamic Brussels Sprouts
These Balsamic Brussels Sprouts are garlicky, salty, and sweet. They are sautéed and coated with balsamic vinegar and soy sauce that caramelizes into a glossy, tangy balsamic glaze that mellows out the earthy sprouts. Ready in just 15 minutes, they are the perfect side dish to serve with any entree for a last-minute weeknight meal or as part of a more elaborate spread on your holiday table.

When it comes to side dishes, these sautéed balsamic brussels sprouts are a total game-changer! Brussels sprouts have always been one of my favorite fall veggies, but adding that sweet balsamic glaze takes them to a whole new level. I often whip these up when I want to impress guests or when my family needs a tasty boost of greens. They're way faster than roasting - and trust me, once you try them, you'll find yourself craving these little beauties again and again. Pair them with Roasted Turkey or Honey Glazed Ham for a holiday meal or with my Apple Cider Chicken for a cozy fall feast!
Why You'll Love These Balsamic Brussels Sprouts
- Ready in 10 minutes. Compared to Roasted Brussels sprouts, which take half an hour, this one-skillet side dish is ready in a fraction of the time. Plus, you don't need to waste any time preheating the oven. They're the perfect side dish for a quick weeknight dinner!
- Sweet and savory flavor profile. That little bit of balsamic vinegar cooks down into a bold glaze that highlights the nutty flavor of the sprouts while eliminating any bitterness. These two ingredients should always be together. They bring out the best of each other!
- Great for entertaining. These balsamic roasted Brussels sprouts will be a hit at your next dinner party and are a delicious side dish for your holiday table. Even people who don't like sprouts are converted when they try them this way!
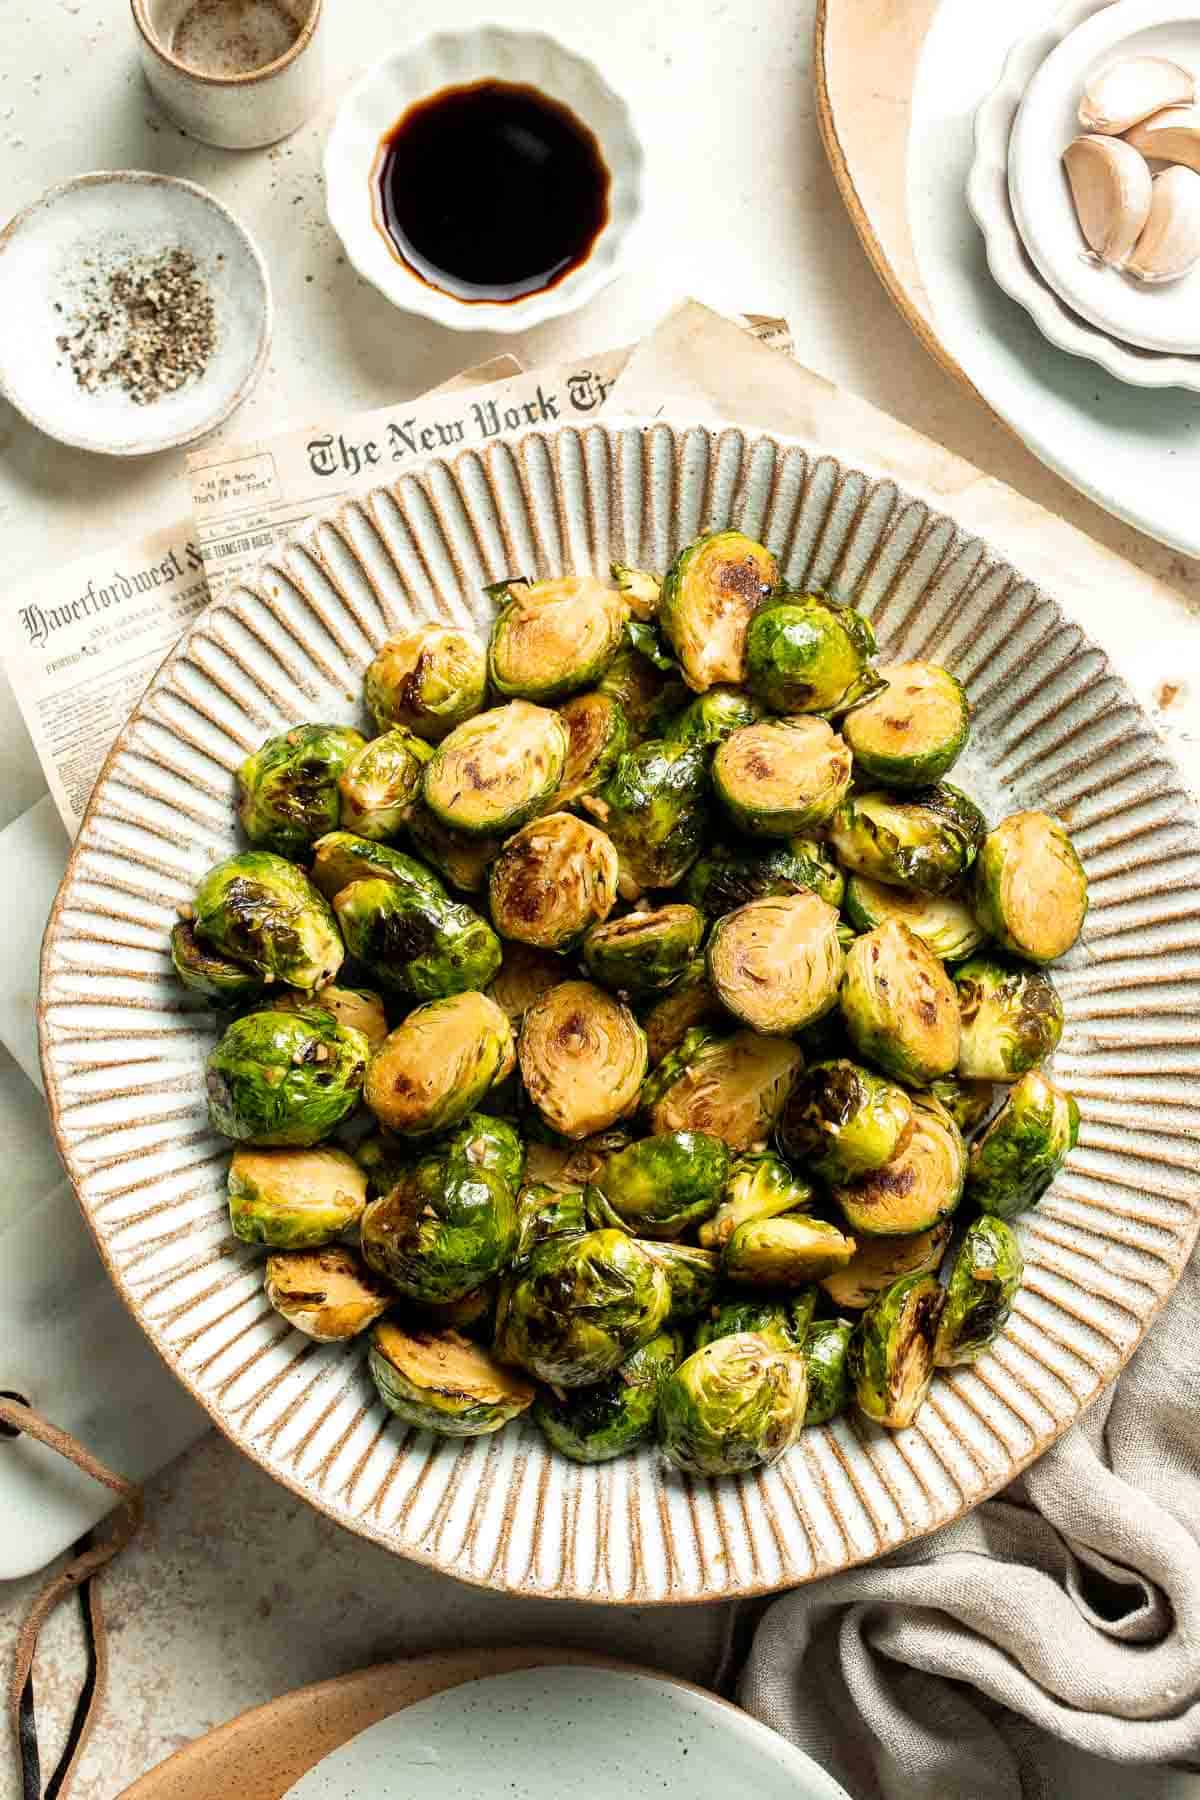
Ingredient Notes
To make these delicious Balsamic Brussels Sprouts, you will need the following ingredients (full measurements in recipe card below):
- avocado oil - this neutral oil allows the sprouts to crisp up beautifully without overpowering the flavor, but you can also substitute olive oil.
- Brussels sprouts - rinsed and halved. If any of the outside leaves are turning gray or yellow, peel those off before roasting.
- garlic
- salt and pepper - added to taste.
- balsamic vinegar - for that signature tangy-sweet flavor.
- soy sauce - regular soy sauce works best, but feel free to use gluten-free or reduced-sodium versions if preferred. Coconut aminos also work.
You will also need measuring spoons, a large skillet, a cutting board, and a sharp knife.
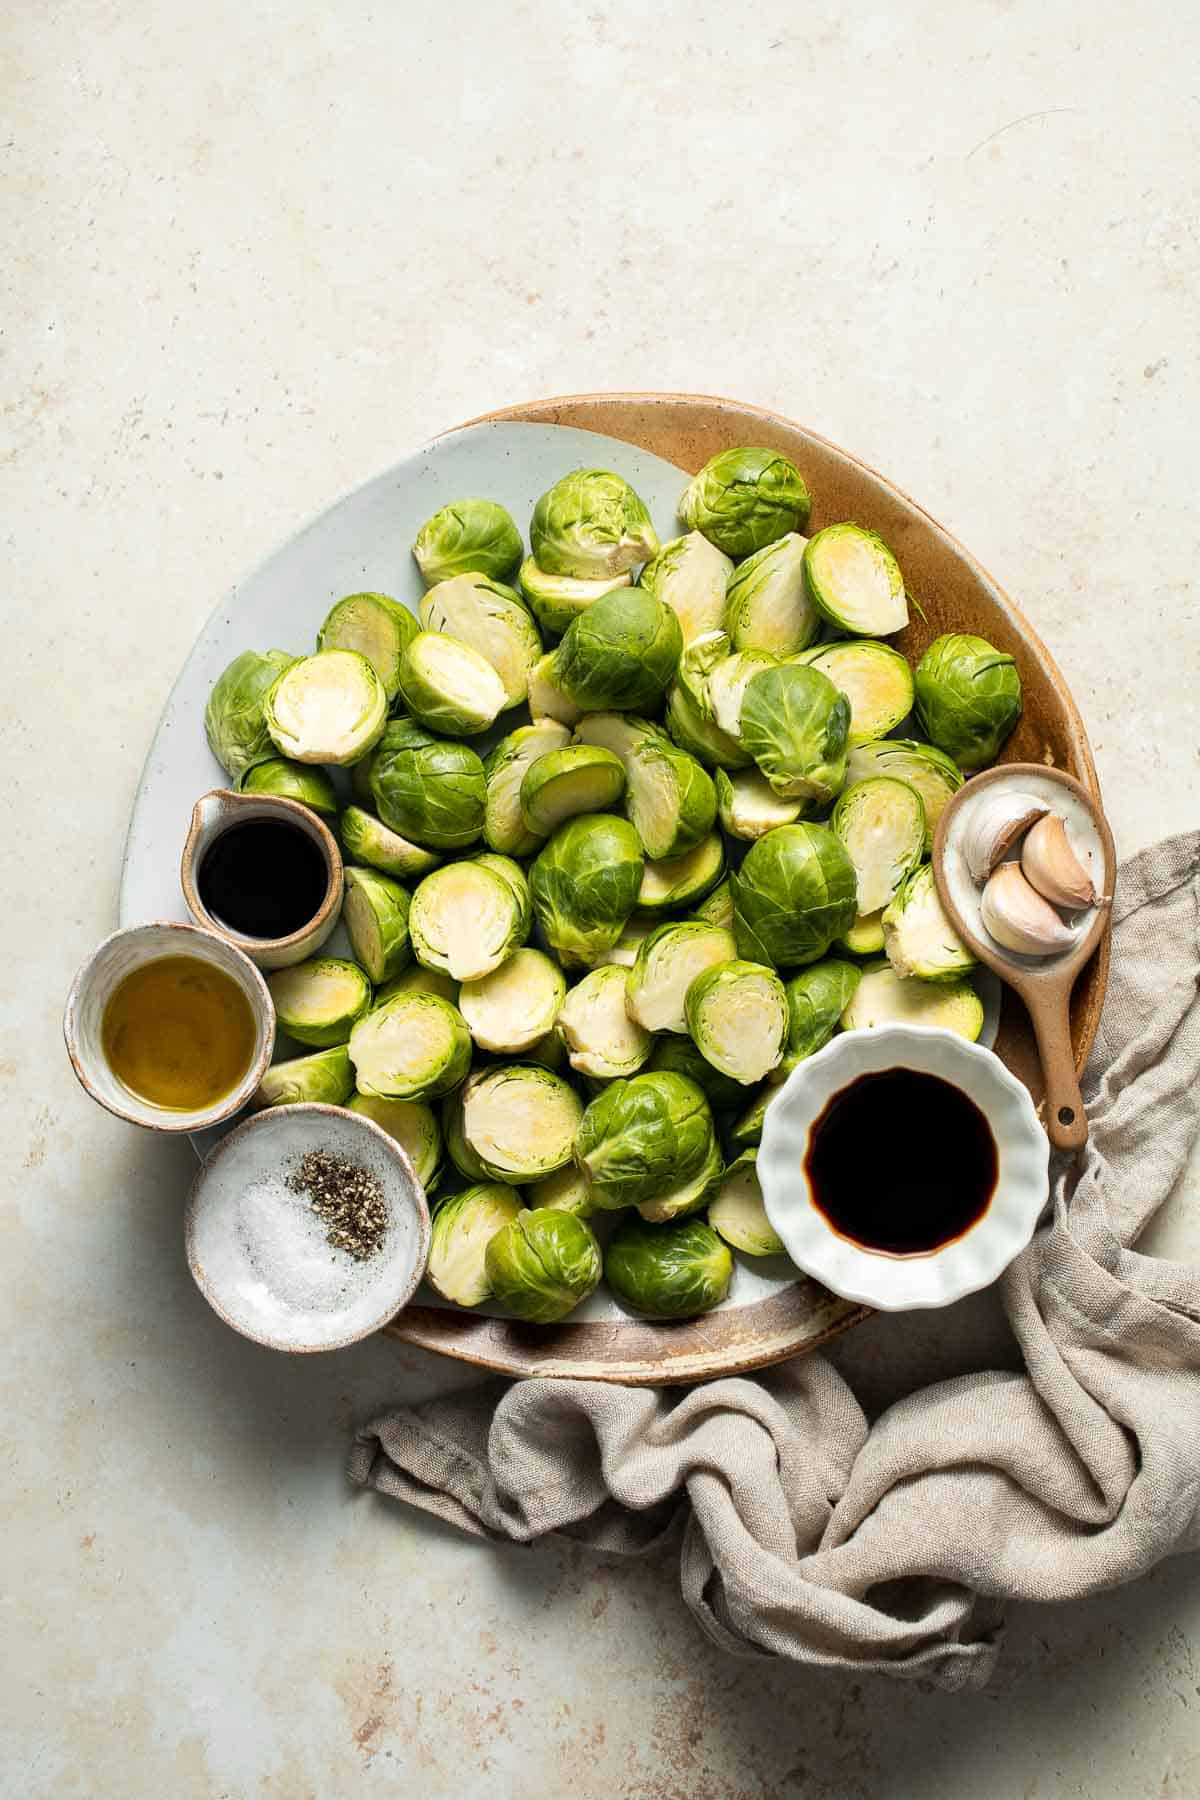
How to Make the Best Balsamic Brussels Sprouts
- Sauté brussels sprouts. Heat oil in a large skillet over medium-high heat for 1 minute. Add Brussels sprouts and cook until golden brown, stirring occasionally, about 5 minutes.

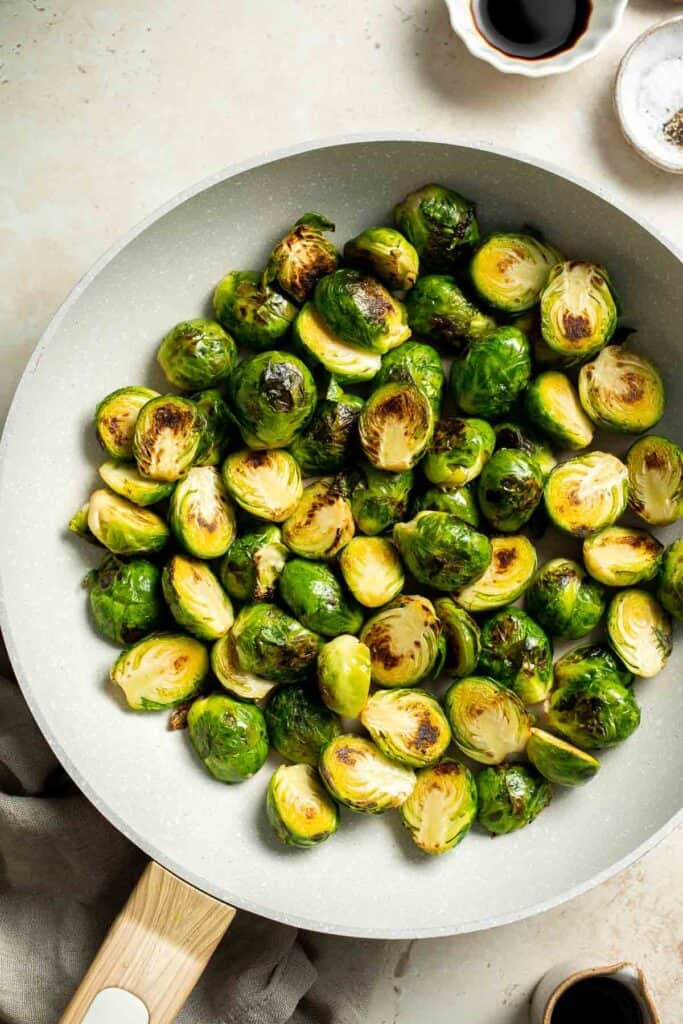
- Season. Add garlic and season with salt and pepper. Sauté until fragrant, about 1 minute.
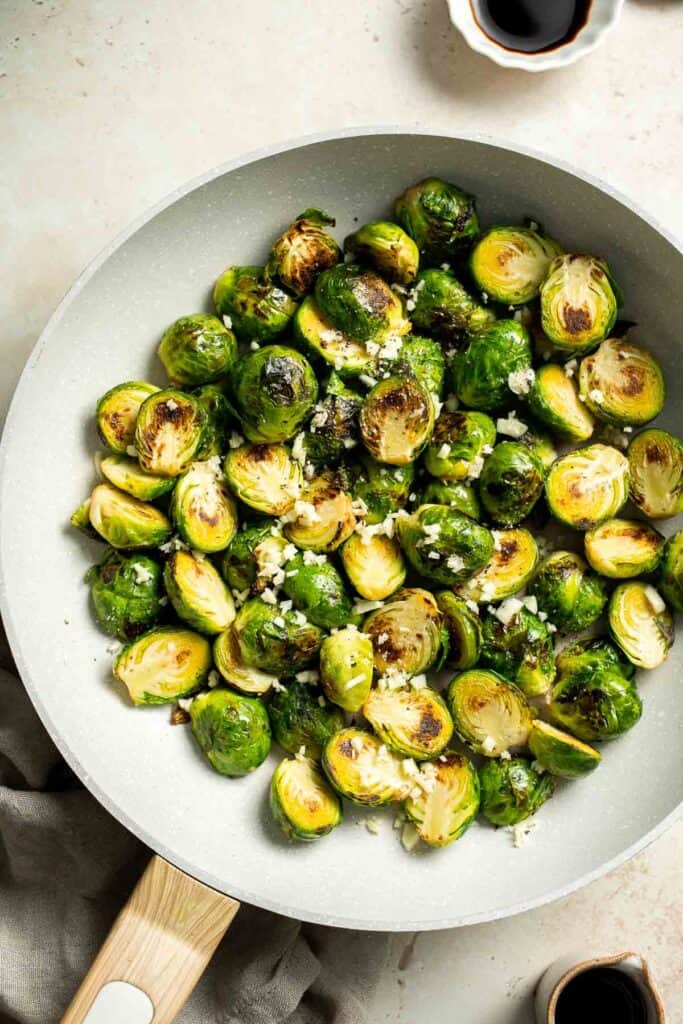
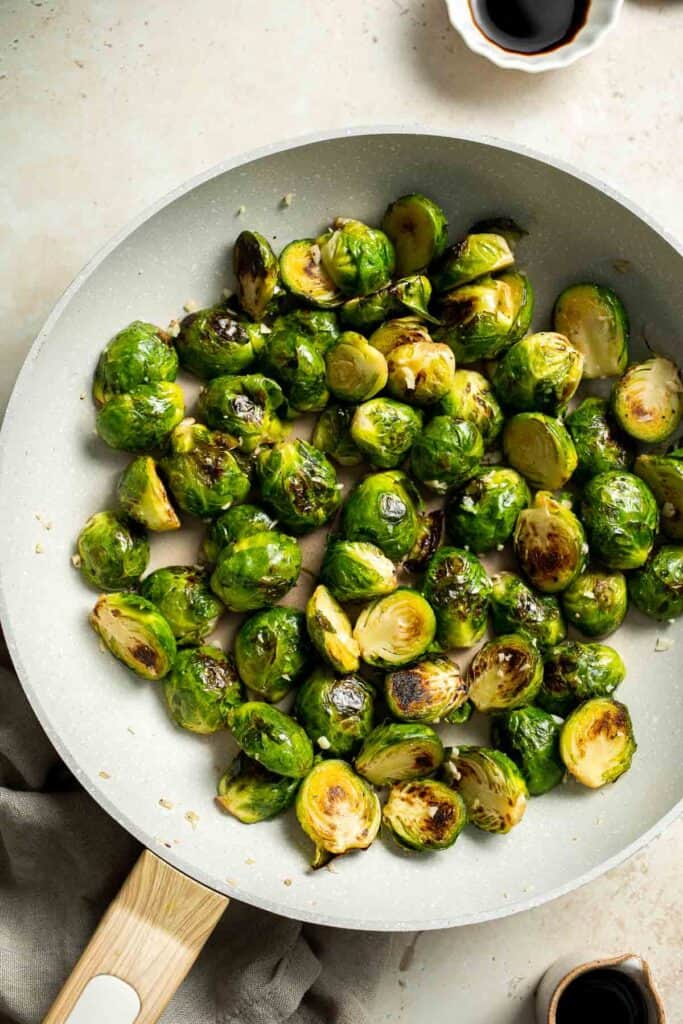
- Add glaze. Add balsamic vinegar and soy sauce. Stir constantly until evenly coated and continue cooking until almost all the sauce mixture is absorbed, about 2 minutes. Serve immediately.
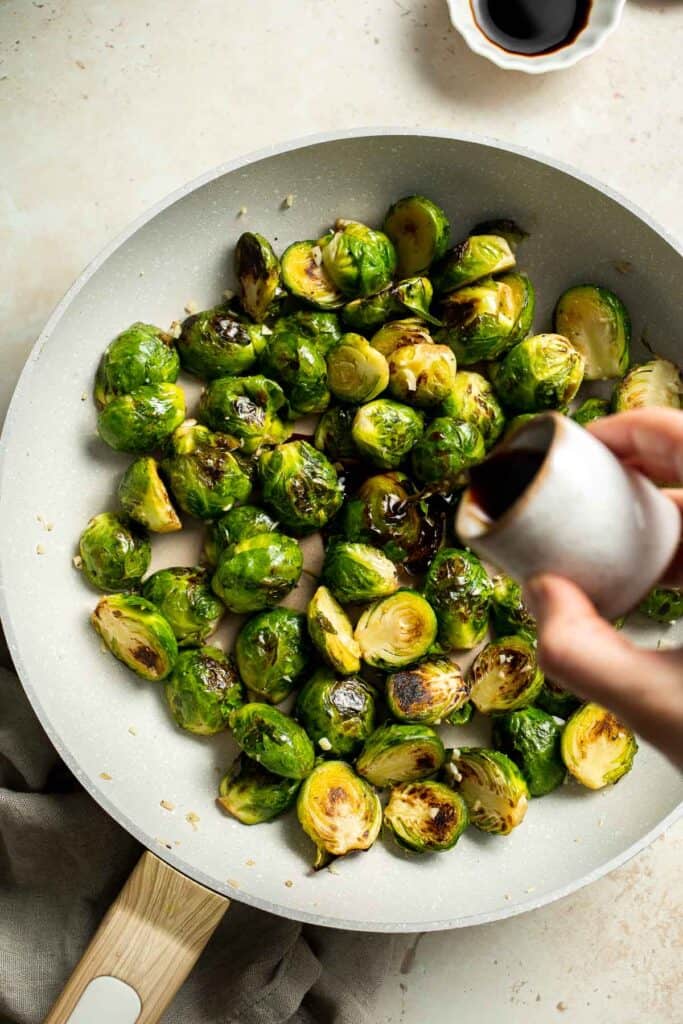
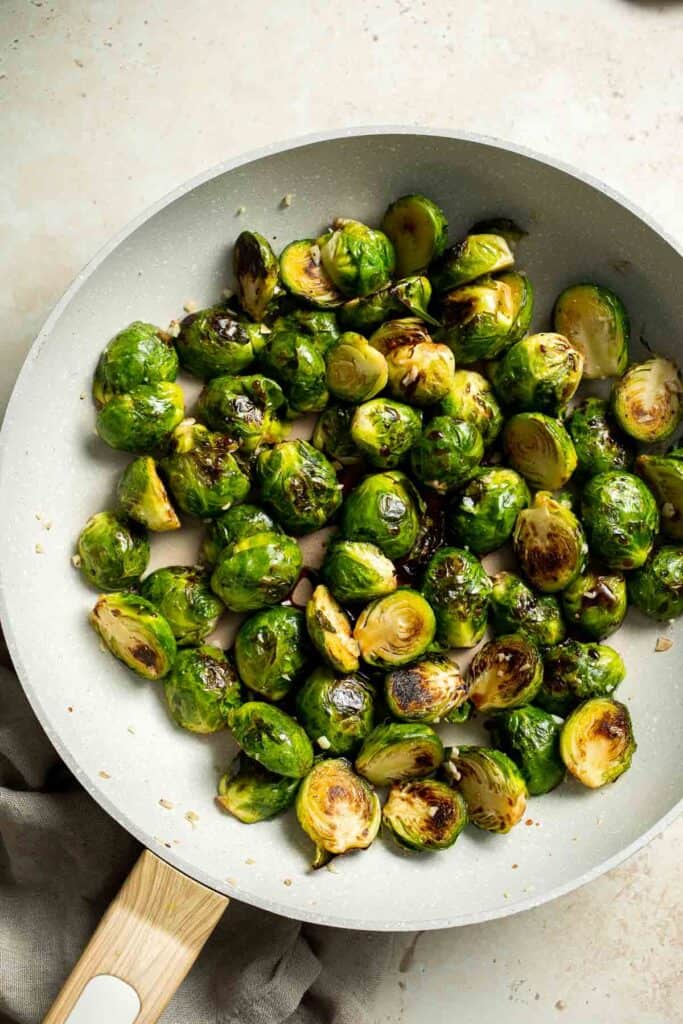

Recipe Variations
- Add a little sweetness. Balsamic cooks down to a sweet, tangy glaze, but if you prefer sweeter sprouts, add a drizzle of maple syrup or a tablespoon of honey.
- Play with garnishes. These balsamic Brussels sprouts don't really need anything else, but it can be fun to pair them with different toppings. Grate some fresh Parmesan cheese, add some red pepper flakes, or sprinkle some fresh herbs, like parsley or a little thyme. For an even stronger punch of balsamic flavor, add an extra drizzle of store-bought balsamic reduction, too.
- Give them some crunch. Toss in some toasted almonds, pecans, pine nuts, or pumpkin seeds for extra texture and a nutty flavor.
How to Serve
These Balsamic Brussels Sprouts are delicious pair with almost any entree. Some of our favorites to serve this with are:
- Dutch Oven Whole Roast Chicken
- Ribeye Steak
- Garlic Butter Salmon
- Stuffed Pork Loin
- Instant Pot Whole Turkey
- Stuffed Pumpkin
For more recipes, see our 40 Best Thanksgiving Main Dishes.
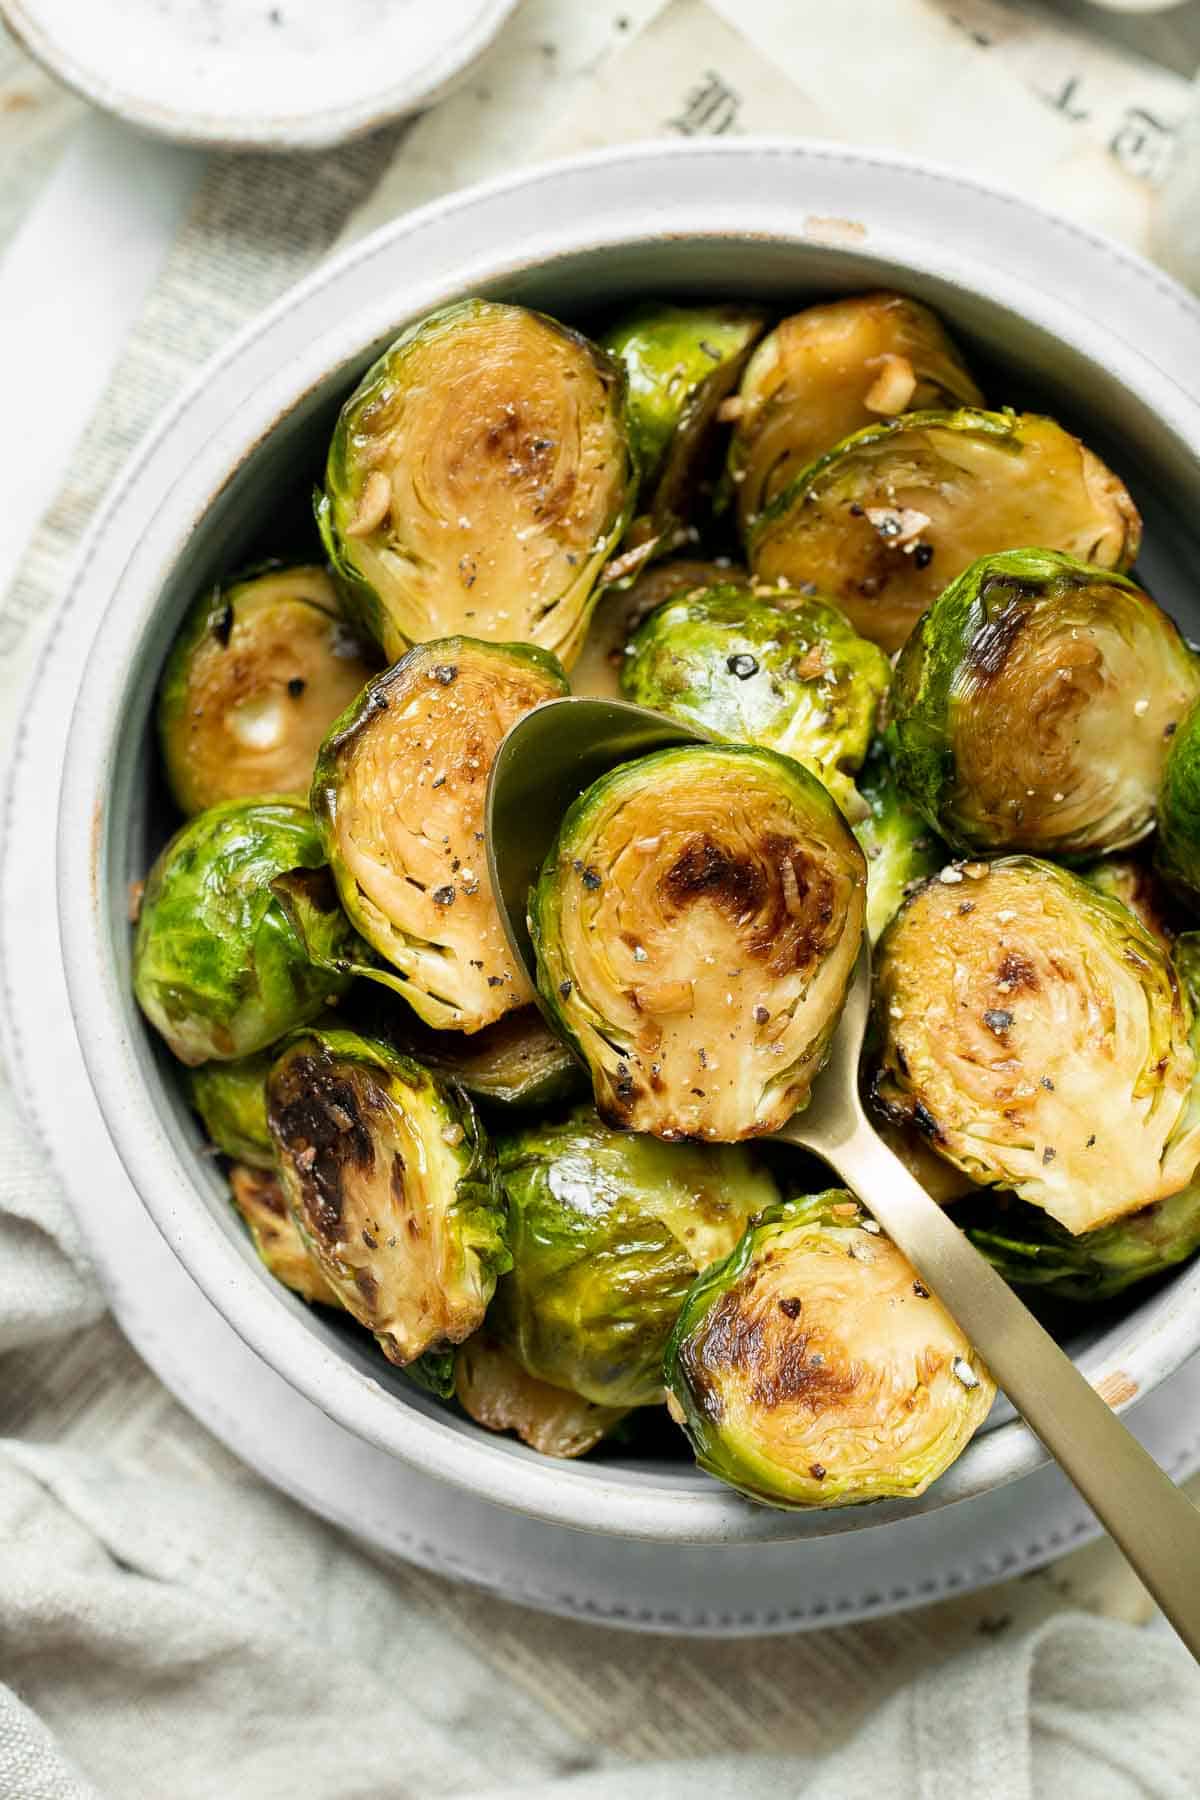
Recipe Tips and Tricks
- Rinse well. Those little layers of leaves can hold onto dirt quite well. Soak them well in cool water and shake them off. It also helps to remove any yellow leaves and trim off the tough ends. If there are loose leaves, they can either be left on or you can trim them off.
- Preheat the pan. If the pan is too hot, the halved Brussels sprouts will burn quite quickly, and, if too low, they won't crisp up and get that golden brown edge (the best part!). The secret? Heat the oil over medium high heat for 1 minute, and then add the sprouts. Works every time!
- Cut sprouts evenly. For even cooking, try to cut all the Brussels sprouts to a similar size and spread them out in an even layer on the pan. This helps them cook at the same rate so none are over or underdone.
Storing and Freezing Instructions
How to Store
Let the Brussels sprouts cool completely before transferring them to an airtight container then refrigerate for up to 4 days.
How to Reheat
For best results, reheat the sprouts in a skillet over medium heat to bring back some of the original crispness. Alternatively, you can reheat them in the oven at 400 F for about 5-10 minutes or in the microwave if you're short on time (though they won't be as crispy).
How to Freeze
To freeze, spread the cooled sprouts out on a rimmed baking sheet lined with parchment paper and place them in the freezer for about 2 hours. Then, transfer them to a freezer-safe bag or container and freeze for up to 3 months. When ready to use, thaw completely in the fridge before reheating.
FAQ
Yes, balsamic vinegar is a great addition to Brussels sprouts! Its tangy sweetness pairs perfectly with the earthy flavor of the sprouts, especially when roasted or sautéed. Plus, the vinegar cooks down into a wonderful glaze.
Both methods have their pros and cons. Roasting Brussels sprouts is more hands-off and allows the seared side to caramelize with flavor. But you can also achieve a similar flavor with a faster cooking time by cooking them on the stove. If you're in a time crunch, I highly recommend making balsamic Brussel sprouts on the stove. The flavor and texture are spot on!
It's not recommended. Fresh Brussels sprouts will give you the best flavor and texture. Frozen sprouts tend to release more moisture, which can result in a less crispy finish. If you want to roast frozen sprouts, you'll get a better texture by roasting them on a sheet pan at 400 F for about 20-25 minutes instead of sautéing them.
More Brussels Sprouts Recipes
- 15 Best Brussels Sprouts Recipes
- Sautéed Brussels Sprouts
- Cheesy Brussels Sprouts Bake
- Parmesan Crusted Brussels Sprouts
- Honey Balsamic Brussels Sprouts
- Brussels Sprouts with Cranberries
Tried this recipe?
I'd love to hear what you think! Leave a comment and rating below to share your feedback. Your reviews help others discover this recipe and help me keep creating more free recipes for you. Snap a photo and tag me on social media @aheadofthyme too.
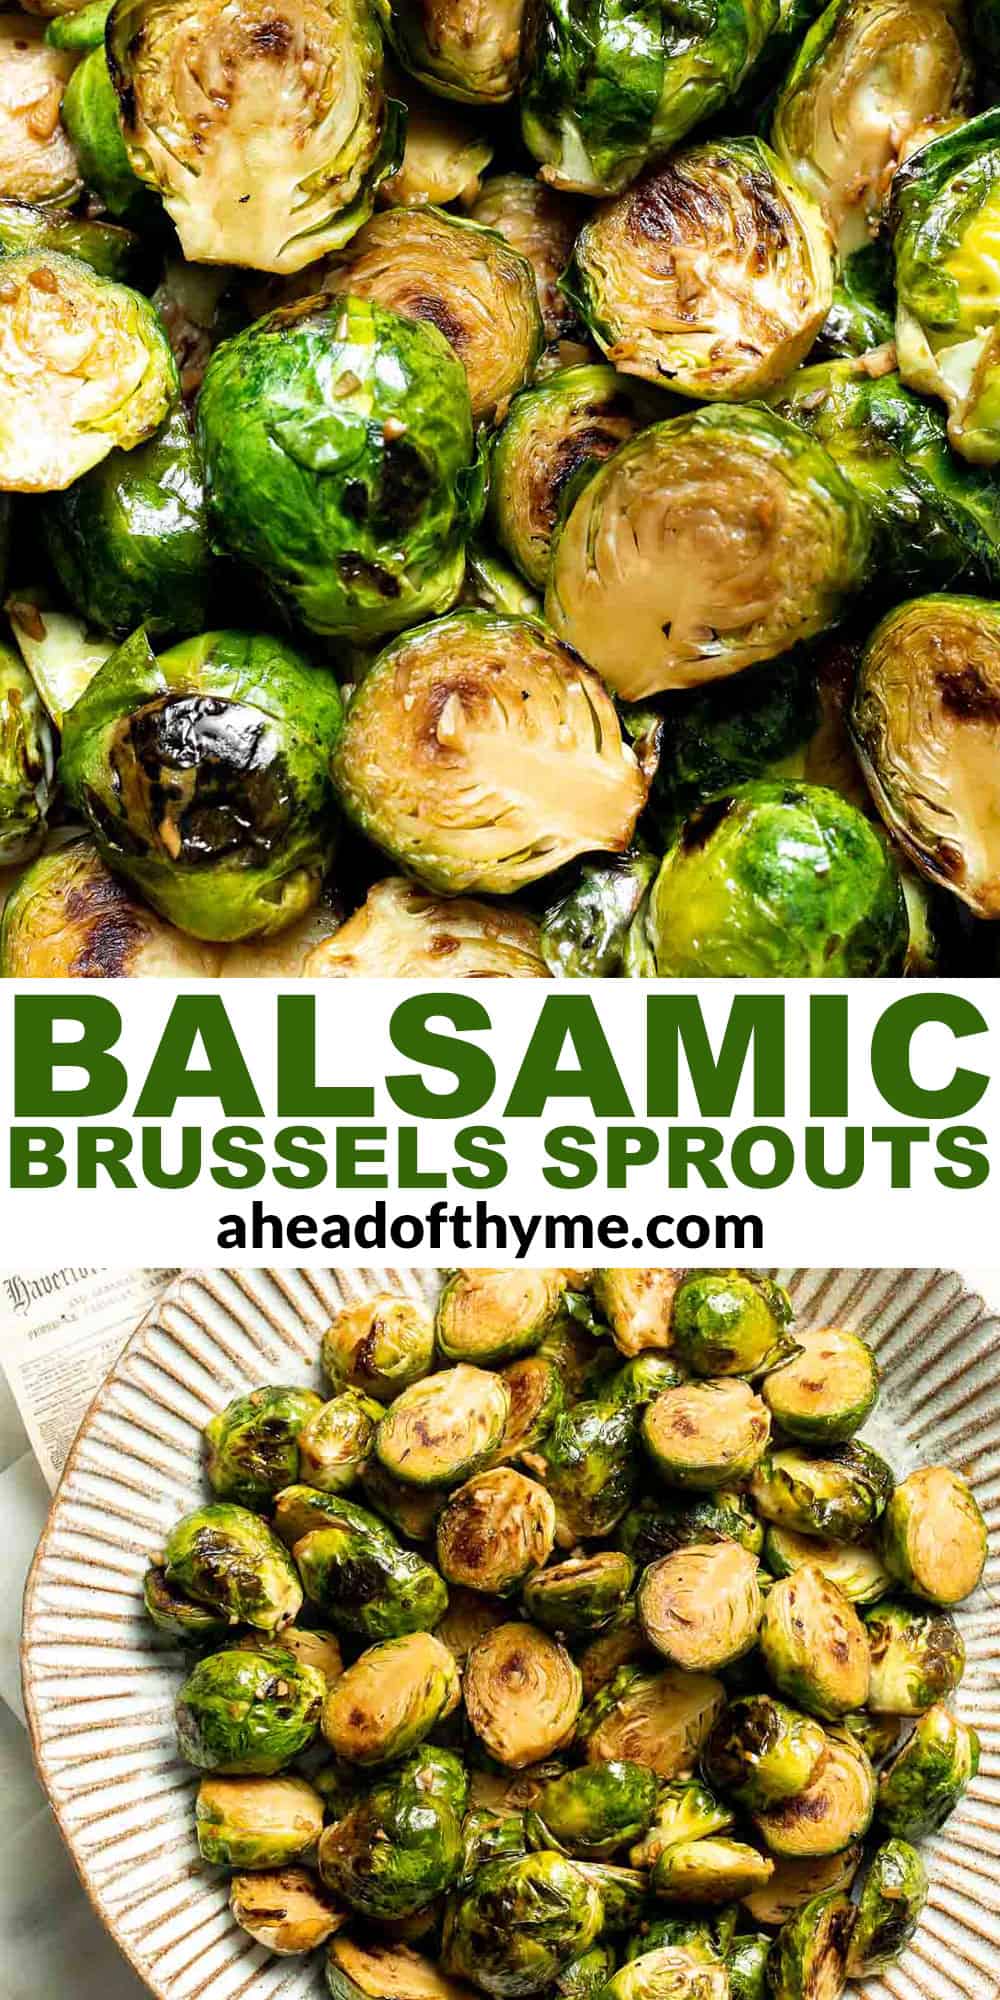
Pumpkin Cupcakes
Homemade Pumpkin Cupcakes are infused with layers of warm spices, sweet brown sugar and maple syrup, and real pumpkin for an ultra-moist, melt-in-your-mouth texture. They are topped with a brown butter maple buttercream that adds a rich, nutty flavor and makes them look and taste like they came from a bakery. They're perfect for Halloween, Thanksgiving, or any fall party!

Pumpkin is one of my favorite seasonal flavors, and I use it in everything! From sweet pumpkin pie bars to savory pumpkin pasta, it's such a versatile ingredient. These moist pumpkin cupcakes are one of my all-time favorite pumpkin desserts for several reasons. They make the whole house smell like autumn, are packed with cozy fall flavors, and I cannot get enough of the maple-infused brown butter buttercream. Don't let their gourmet flavor profile intimidate you, though. They're easy to make and come together in less than an hour!
Why You'll Love These Pumpkin Cupcakes
- Perfect fall flavor. These pumpkin spice cupcakes are moist and tender on their own, but the brown butter maple buttercream takes them over the top! Brown butter gives the frosting a deep flavor and keeps it from being too sweet, allowing the maple, pumpkin, and warm spices to really stand out. They're decadent in all the right ways.
- Super simple recipe. This recipe requires you to mix the wet ingredients and dry ingredients separately, then bring them together gradually. The result is a moist, flavorful cupcake with just enough sweetness and layer upon layer of flavor. I promise the buttercream is easy to make, too! Just follow the simple steps below.
- Ready quickly. One huge advantage of making these delicious pumpkin cupcakes instead of a cake is how quickly they come together! Although you'll need time to brown and cool the butter for the frosting, you can have a dozen delicious cupcakes ready in less than an hour. This makes them fast enough for a last-minute party or to make as a special seasonal treat!

Ingredient Notes
To make these delicious Pumpkin Cupcakes, you will need the following ingredients (full measurements in recipe card below):
- all purpose flour - this is the perfect base for cupcakes. Always scoop and level to avoid adding too much flour.
- baking powder
- spices - I like to use a mixture of ground cinnamon, ginger, allspice, and cloves for that classic pumpkin spice flavor profile. You also need a little salt to bring out the flavor in both the cupcakes and buttercream.
- eggs - let these come to room temperature first.
- light brown sugar
- maple syrup - for a cozy fall flavor in the cupcakes and to go along with the maple buttercream.
- vanilla extract - adds flavor to both the cupcakes and frosting.
- vegetable oil - this is the secret to really moist and tender cupcakes with lots of flavor.
- pumpkin purée - choose real pumpkin purée (not pumpkin pie filling). You can either use the canned stuff or roast and purée fresh pumpkins.
- unsalted butter - for the brown butter maple buttercream, this will need to be browned, then cooled before whipping. Make sure the butter is at room temperature first for the best results.
- confectioner's sugar - for sweetness and to make the frosting pipeable.
- maple extract - this is optional in the buttercream, but we recommend it for a strong maple flavor.
Baking Tools
You will also need the following baking tools and equipment:
- measuring cups and spoons (or a kitchen scale)
- 12-cup muffin pan
- cupcake liners
- large bowl
- whisk
- mixing spoon
- stand mixer
- wire rack
- small saucepan
- heatproof bowl
- piping bag
How to Make the Best Pumpkin Cupcakes
First, make the pumpkin cupcakes.
- Combine dry ingredients. In a large sized mixing bowl, add the flour, baking powder, salt, cinnamon, ginger, allspice, and cloves, then whisk together to combine.

- Combine wet ingredients. In a stand mixer fitted with the paddle attachment, add eggs, brown sugar, maple syrup, and vanilla. Beat on high for around 5 minutes, the mixture should look thick, fluffy, and be tripled in volume.
- Add pumpkin. Scrape down the sides of the bowl and then turn stand mixer to medium speed and slowly drizzle in the oil. After all the oil has been added and incorporated, add in the pumpkin puree and then beat until well-combined.


- Add dry to wet. On low speed, spoon in the dry mixture to the stand mixer, mixing until just combined and smooth.


- Bake. Prepare a 12-tin muffin pan with cupcake liners. Add the batter evenly to the cupcake pans, then place into a 350F preheated oven to bake for 18-20 minutes, or until a toothpick comes out clean. Allow to cool completely before frosting.


Then, make the brown butter maple buttercream.
- Brown the butter. In a small saucepan over medium heat, add butter and bring to a boil. Continue heating over medium heat, constantly stirring until the butter has turned a nutty brown color. It may be hard to see the color if your butter is foaming a lot, so periodically take it off the heat to check the color. Remove from heat, transfer to a heatproof bowl, and allow to cool to room temperature.
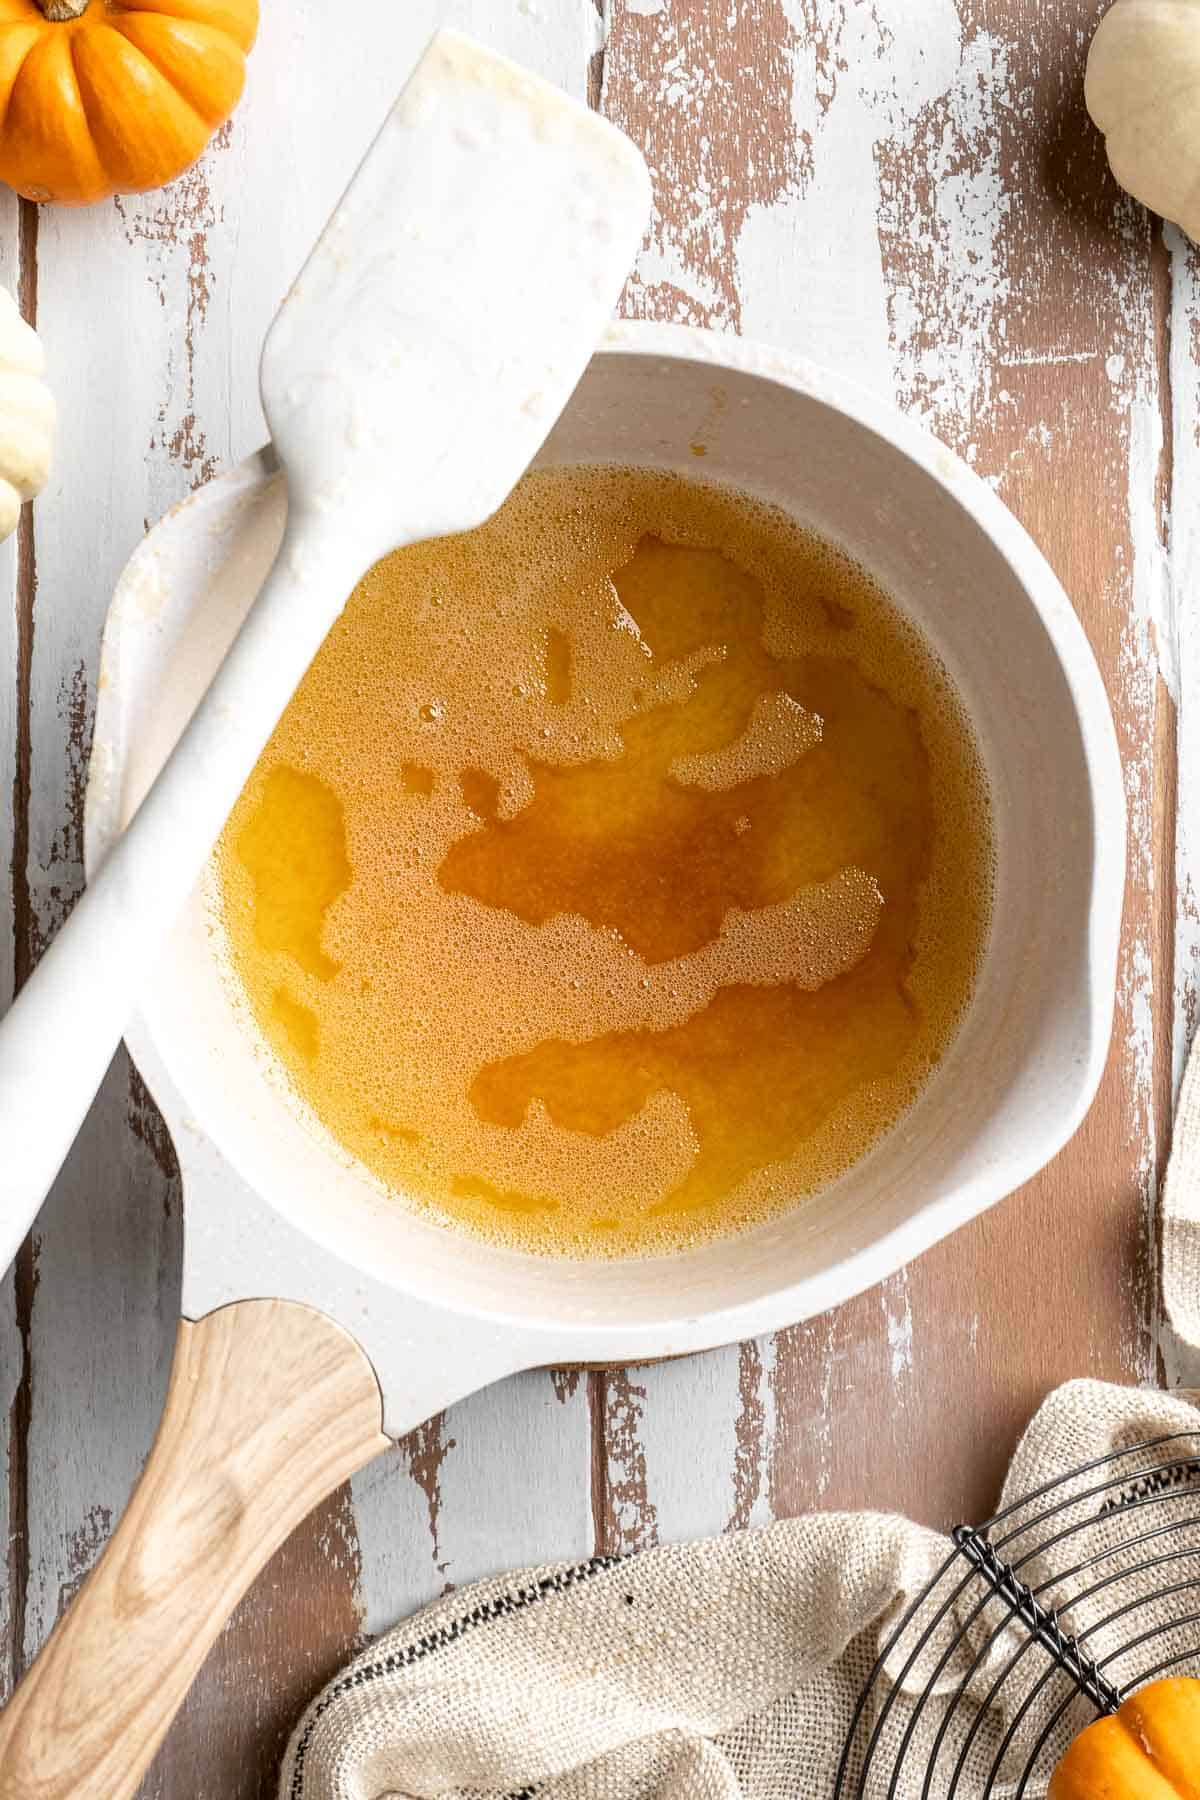
- Beat butter. Add room temperature browned butter to a stand mixer fitted with the whisk attachment. Beat on high until butter is doubled in volume, and looks light and fluffy.


- Add remaining ingredients. Turn the stand mixer to low and slowly add the confectioners' sugar and salt. Beat until completely incorporated, then add in the maple syrup and vanilla. Beat until well-combined and fully incorporated.


- Pipe icing. Transfer buttercream to a piping bag fitted with a star tip, then pipe onto cooled cupcakes.

Recipe Variations
- Change the frosting. Not a fan of buttercream? The moist pumpkin cupcakes would also be lovely with some homemade cream cheese frosting! Try this brown butter cream cheese frosting from my gingerbread cake for a warm, cozy flavor.
- Fill the cupcakes. For an over-the-top experience, core each cupcake and add a dollop of cookie butter or dark chocolate ganache before decorating with a swirl of buttercream like normal.
- Use homemade pumpkin puree. Canned pumpkin puree absolutely works, but you'll get the richest pumpkin flavor when you roast your own! Cut the pumpkins in half and remove the seeds, then place them cut-side down on a baking sheet. Bake at 400 F until the pumpkin flesh is tender, then remove the skin and blend into a puree.
- Make mini cupcakes. Prefer bite-sized treats? Scoop the batter into a mini muffin tin and bake for about 10-14 minutes.
How to Serve
These Pumpkin Cupcakes are delicious served on their own as a sweet treat after dinner or at parties. It is also great paired with other classic fall treats are part of a larger dessert spread, including:
For more recipes, see our 50 Best Fall Desserts.

Recipe Tips and Tricks
- Cool the brown butter. The butter needs a chance to solidify again after browning. If you try to make the frosting while it is still liquid, it will not thicken up.
- Whip until fluffy. This recipe includes one step that really makes them light and fluffy-whipping the wet ingredients. This isn't just whisking them until incorporated; you're trying to incorporate a lot of air into the mixture and need to whip until the mixture triples in size. It's the key to really fluffy pumpkin cupcakes!
- Use fresh spices. Pumpkin cupcakes are all about the warm spices. For the best flavor, use fresh spices instead of the old jars tucked in the back of your spice cupboard. I also prefer to measure out individual spices instead of using pumpkin pie spice, as the flavor tends to be bolder and richer.
Storing and Freezing Instructions
How to Store
Store leftover unfrosted cupcakes in an airtight container at room temperature for 2-3 days, or store frosted ones in the fridge for 5-6 days. They have the best flavor and texture at room temperature, so let them rest on the counter for a bit before serving.
How to Freeze
I recommend freezing the cupcakes unfrosted with the frosting on the side, but you can also freeze them after decorating. Store the leftovers in a freezer-safe container and freeze for 2-3 months. Thaw in the fridge, then serve at room temperature.
FAQ
There are so many options to pair with pumpkin, but cream cheese frosting is a popular choice. It cuts through the richness of the pumpkin cake batter really nicely. However, I'm a fan of traditional buttercream, and this brown butter maple buttercream takes these easy pumpkin cupcakes to a totally different level. The browning process adds so much depth of flavor and a nice nuttiness, which plays up the warm spices and pumpkin flavor. You can also use a dark chocolate buttercream, cinnamon frosting, or a decadent caramel pecan frosting.
Pumpkin is a winter squash, just like butternut and blue hubbard, and can be replaced with other types of roasted squash in your favorite pumpkin recipe. If you want to make your own squash puree, look for flavorful, tender varieties like butternut, kabocha, or buttercup squash.
The secret to moist cupcakes comes down to the ingredients and preparation method. Pumpkin puree is moist on its own, but I almost always pair it with vegetable or canola oil, which makes the cupcakes much softer than regular butter. Instead of simply whisking the wet ingredients together, I also recommend whipping the egg mixture until light and airy, which makes the muffins soft and fluffy instead of heavy and dense. They're the perfect pumpkin cupcakes!
More Pumpkin Dessert Recipes
- 20 Best Pumpkin Desserts
- Pumpkin Pie Bars
- Pumpkin Dump Cake
- Pumpkin Roll
- No Bake Pumpkin Cheesecake
- Pumpkin Bread
Tried this recipe?
I'd love to hear what you think! Leave a comment and rating below to share your feedback. Your reviews help others discover this recipe and help me keep creating more free recipes for you. Snap a photo and tag me on social media @aheadofthyme too.

Stuffed Pumpkin
This Stuffed Pumpkin is filled with a savory blend of rice, veggies, and cranberries then topped with cheese and baked until the pumpkin is perfectly tender and the cheese is melty. Plus, these stuffed veggies are naturally vegetarian and gluten-free. So make the most of pumpkin season this year and serve it as a main dish for dinner or as a festive side for your holiday meals.

There's something so special about this time of year when the weather changes and the fall crops start making their way to the table. It's the perfect excuse to get creative with seasonal favorites like pumpkins. These stuffed pumpkins are an extra-special seasonal touch that really stands out from the standard casseroles and roasts. Serve them as a meatless main course with Roasted Butternut Squash Soup or Winter Kale Salad, or offer them as a filling (and adorable) side dish at your Thanksgiving table or fall gathering!
Why You'll Love This Stuffed Pumpkin
- Vegetarian main dish. Stuffed pumpkin is a great vegetarian main course to serve at Thanksgiving (or any fall night!). Thanks to the rice, veggies, and tender roasted pumpkin, these stuffed pumpkins are hearty and filling enough that even the turkey lovers at your table won't miss the meat!
- Delicious fall flavors. From the sweet pumpkin and cranberries to the savory veggies and spices, every bite is a perfect blend of comforting seasonal flavors. It's like capturing the essence of autumn in a dish. This is pure comfort food!
- Festive presentation. Serving these perfect little pumpkins whole makes for such a fun and impressive display on your dinner table! It's the kind of dish that gets everyone excited before they've even taken a bite!

Ingredient Notes
To make this delicious Stuffed Pumpkin, you will need the following ingredients (full measurements in recipe card below):
- pumpkin - I recommend using smaller sugar pumpkins, which are more flavorful, have a meaty texture, and cook faster than larger pumpkins. These are traditionally use for pumpkin pie, but they work great for roasting.
- avocado oil - or olive oil.
- veggies - while the pumpkin is roasting, prep the onion, garlic, carrots, celery, and sliced crimini mushrooms.
- basmati rice - long grain rice stays nice and fluffy, helping to keep the filling from becoming too dense or mushy. You can also use a long grain brown rice, if you prefer.
- dried cranberries - for a burst of sweetness.
- seasonings - you only need a little salt, black pepper, and paprika.
- vegetable stock or water
- roasted pumpkin seeds - adds a nice crunch to contrast the soft filling.
- shredded cheese - use mozzarella or substitute with another good melting cheese, like Swiss or Gruyère cheese.
- parsley - this is optional (for garnish), but the fresh flavor makes the hearty filling pop.
You will also need measuring cups and spoons, a sheet pan, pumpkin carving knife, fork, cutting board, a very sturdy knife, a large pot, and a large spoon.

How to Make the Best Stuffed Pumpkin
First, roast the pumpkin.
- Prep pumpkin. Cut the top of the pumpkin off with a pumpkin carving knife and scoop out the seeds.
- Bake. Place the pumpkin (with the lid on) onto a baking sheet. Bake in a 350F preheated oven for 45 minutes, or until soft. Insert a fork to check doneness. If it's fork tender, it's ready.


Next, make the filling.
- Sauté aromatics. Heat oil in a large pot over medium-high heat until the hot oil sizzles, about 1-2 minutes. Add onions, garlic, carrots and celery. Sauté until fragrant, about 2 minutes.


- Add mushrooms. Add mushrooms and sauté for 2-3 minutes until softened a bit.
- Add rice and seasoning. Add rice, dried cranberries, paprika, salt and pepper. Stir well until evenly combined.


- Simmer with stock. Add vegetable stock and bring to a boil. Reduce heat to low and cover the lid. Simmer until almost all of the liquid is absorbed, about 15 minutes.
- Add seeds. Stir in pumpkin seeds and set aside.


Finally, let's assemble and bake.
- Add filling. Transfer the rice-veggie filling into the hollowed-out pumpkin. Top with shredded cheese.


- Bake. Return the stuffed pumpkin to the oven and bake until the melted cheese turns golden brown, about 10 minutes. You can also broil on HI until golden brown, about 2-3 minutes.

- Serve. Garnish the cheese-stuffed pumpkin with parsley and serve.


Recipe Variations
- Try different squashes. Instead of a sugar pie pumpkin, try other types of pumpkins or squashes, like delicata squash, acorn squash, butternut squash, etc. Smaller pumpkins tend to work best.
- Add protein. While this recipe works well as a vegetarian main course, feel free to add in some cooked ground turkey or sausage if you prefer.
- Make it vegan. For a completely plant-based version, skip the cheese or substitute with your favorite vegan cheese alternative.
- Load up on veggies. The rice stuffing mixture would also be great with baby spinach or kale or little pieces of diced sweet potatoes to play up the natural sweetness of the squash.
- Serve with a pumpkin lid. For an extra touch, roast the tops of the pumpkins (with the vines intact as a handle), then set them on top of each pumpkin before serving.
How to Serve
This Stuffed Pumpkin is delicious and filling served on its own, or pair it with some of my favorite fall sides including:
- Curried Butternut Squash Soup
- Butternut Squash Salad
- Roasted Brussels Sprouts
- Potato Leek Soup
- Cornbread Muffins
- Spinach Salad
For more recipes, see our 50 Best Fall Side Dishes.

Recipe Tips and Tricks
- Season well. Since the flesh of the pumpkin will be eaten straight out of the skin, it's really important to infuse that with flavor. Even if you just sprinkle it with a little salt before baking, it will bring out a lot of flavor.
- Prep the night before. If serving this stuffed baked pumpkin at a holiday meal or dinner party, it can be a big help to prep as much as possible the day before. Get the pumpkins ready to bake, then chill in the fridge overnight. The next day, bake like normal and serve.
- Simplify clean-up. Line the baking sheets with parchment paper for easy clean-up.
Storing and Freezing Instructions
How to Store
Once cooled to room temperature, store any leftover roasted stuffed pumpkin in an airtight container in the refrigerator for up to 3-4 days. If you have leftover filling, you can also store it separately in a sealed container.
How to Reheat
If frozen, place pumpkins in the fridge overnight to thaw when ready to reheat. Then, bake pumpkins on a baking tray in a 375 F preheated oven for 15-30 minutes until warmed through.
How to Freeze
Allow it to cool completely, then wrap each small pumpkin tightly in aluminum foil or plastic wrap before placing it in a freezer-safe container or bag. The stuffed pumpkins can be frozen for up to 1 month. Note: the texture of the pumpkin meat and filling may be a little mushier after freezing. The best way to enjoy this recipe is always fresh out of the oven!
FAQ
Yes, but the texture of the rice and the pumpkin may soften and turn a little mushy after thawing and reheating. For the best presentation and flavor, serve the stuffed pumpkin straight from the oven.
You can really stuff any type of pumpkin or winter squash. The goal is to choose a pumpkin or squash that isn't too large, which is why I like to use pie pumpkins. They tend to be just a few pounds each and have a wonderful, meaty texture that works very well in this recipe. Other great options include delicata squash, Red Kuri, acorn squash, etc.
Technically, yes, you can eat the pumpkin skin as it is edible. However, it tends to be firm and papery, making it hard to chew. Personally, I scoop out the filling and a little of the roasted pumpkin flesh and don't eat the skin.
More Savory Pumpkin Recipes
- Pumpkin Soup
- Creamy Pumpkin Pasta
- Pumpkin Chickpea Curry
- Pumpkin Cornbread
- Coconut Curry Pumpkin Soup
- Pumpkin Pancakes
Tried this recipe?
I'd love to hear what you think! Leave a comment and rating below to share your feedback. Your reviews help others discover this recipe and help me keep creating more free recipes for you. Snap a photo and tag me on social media @aheadofthyme too.
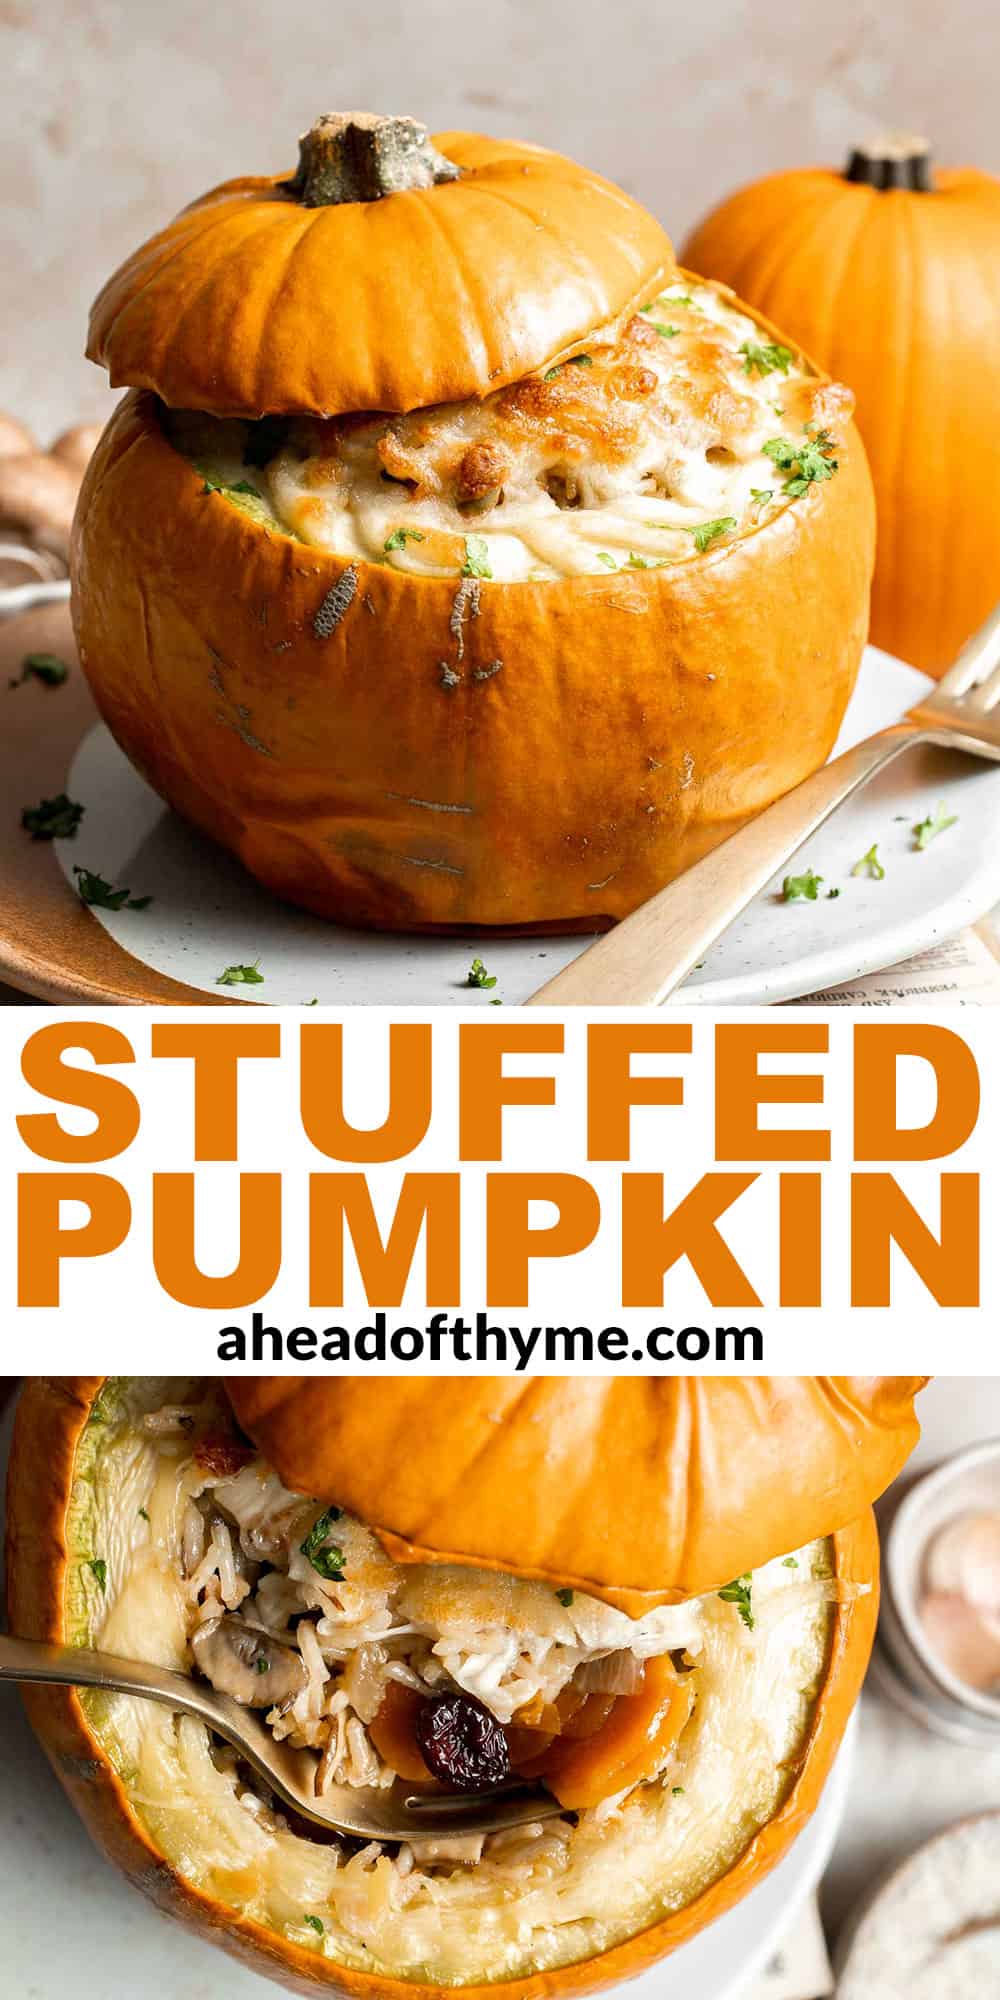
Italian Lentil Soup
Italian Lentil Soup transforms simple pantry staples (like protein-rich lentils and canned tomatoes) and fresh veggies into a hearty meal guaranteed to warm you up on a cold winter day. As the lentils cook in the broth, they plump up with all that tomato-y goodness, infusing flavor deep into every spoonful. This rustic dish is super simple, ready in just under an hour, and tasty enough to please the whole family!
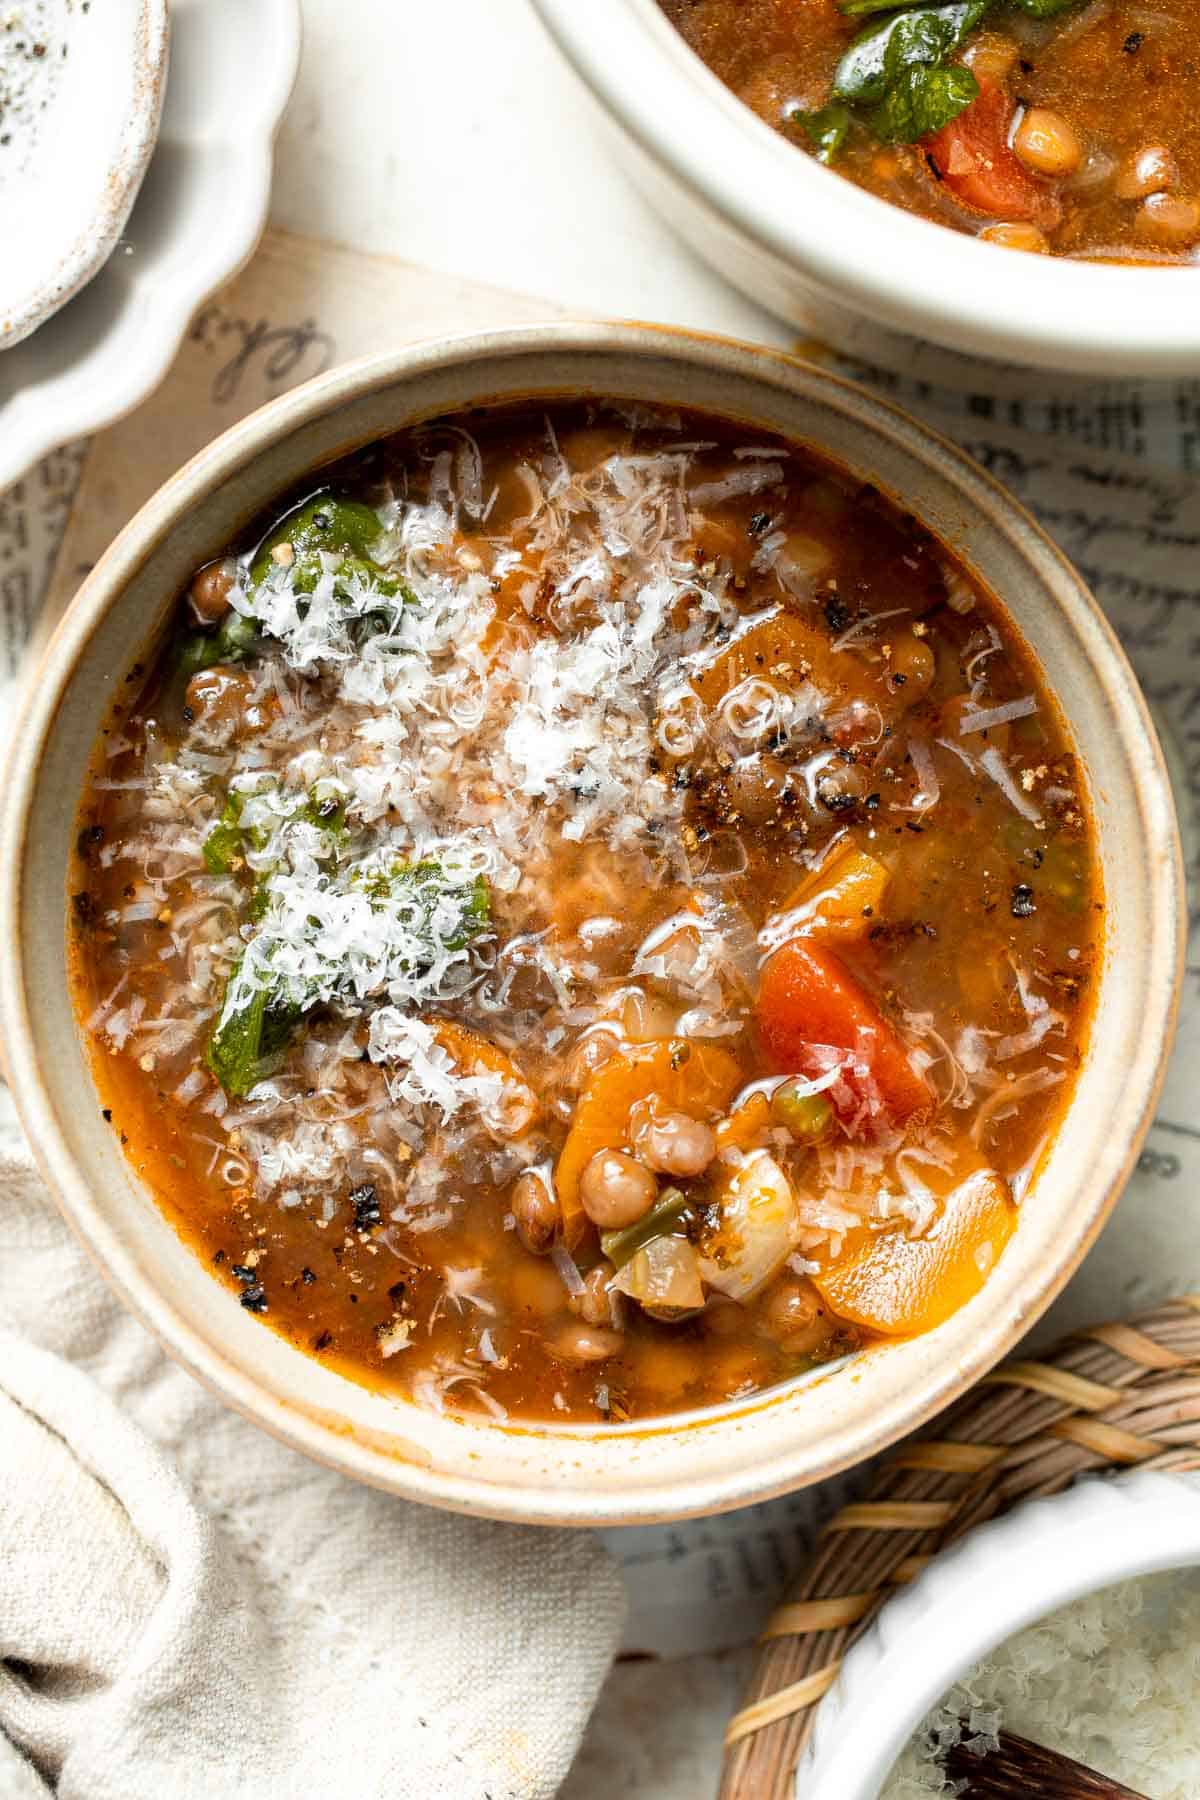
We always have several different types of lentils in our pantry for making soups, stews, meatballs, and more. They're so inexpensive, loaded with fiber and plant-based protein, and they really take on the flavor of whatever they're cooked in! Lentils are also surprisingly meaty, making even a simple vegetable soup filling and satisfying. Serve this hearty soup with a hunk of crusty bread, grated Parmesan, and a sprinkle of fresh parsley to warm up from the inside out!
Why You'll Love This Italian Lentil Soup
- Uses simple ingredients. It's so nice to grab a few items from the pantry and turn them into a complete meal. This recipe relies on a few fresh ingredients, like baby spinach, onion, garlic, carrots, and celery, but the rest comes straight from the pantry. So easy (and inexpensive)!
- Naturally vegan and gluten-free. This lentil soup is a plant-based option that is incredibly warm and satisfying thanks to the bold flavors and meaty lentils. Even the meat eaters love it! Leave out the parmesan cheese garnish to keep it vegan, otherwise it will be a great vegetarian soup option.
- Great for meal prep. One batch makes enough for 8 servings, which is enough for a hungry family or to prep for lunches all week long. Plus, the flavors build as the soup sits, so it tastes even better the next day!

Ingredient Notes
To make this delicious Italian Lentil Soup, you will need the following ingredients (full measurements in recipe card below):
- lentils - brown lentils these have the perfect neutral flavor for soaking up the flavors from the broth. Start by soaking them in boiling water with baking soda to plump up and cook more quickly. You can also substitute wither green lentils if you prefer.
- extra virgin olive oil
- vegetables - layer flavor into the broth by sautéing diced onion, minced garlic, carrots, and celery.
- seasonings - Italian seasoning is the star here, adding a comforting, herby flavor. Season well with salt and ground black pepper to bring out lots of flavor.
- tomato paste + canned tomatoes - for a concentrated pop of tomato flavor.
- vegetable broth - feel free to use water or chicken broth instead, if not vegetarian.
- baby spinach - to wilt into the soup. Feel free to use your favorite leafy greens, like Tuscan kale, baby kale, etc. Frozen spinach also works great and is easy to have on hand at all times.
- Parmesan cheese - added for garnish and flavor. This is optional for a vegan lentil soup.
You will also need measuring cups and spoons, a large mixing bowl, strainer, cutting board, sharp knife, and a large pot.
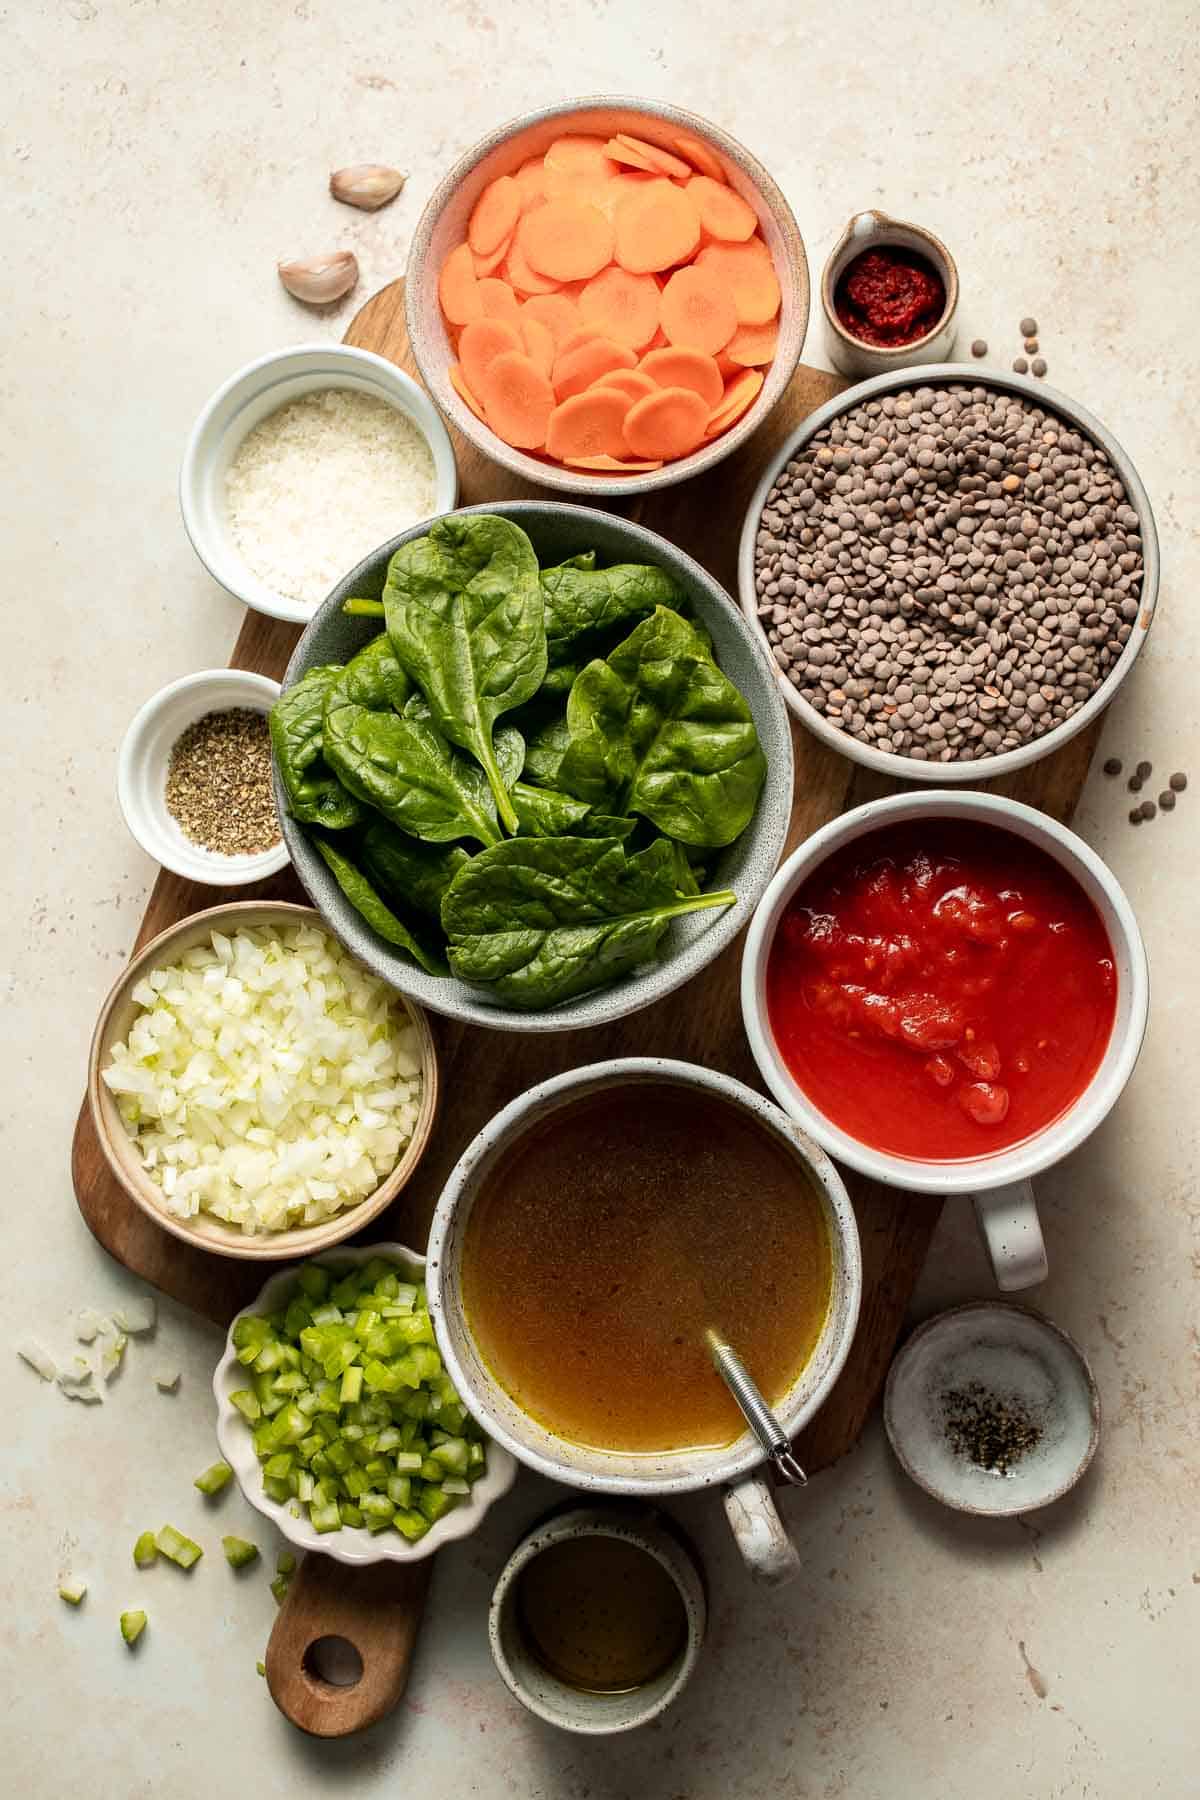
How to Make the Best Italian Lentil Soup
- Soak lentils. Add lentils to a large mixing bowl and sort out any debris, then rinse and drain. Pour in some boiling water on top, enough to cover the lentils, and let it sit for 10 minutes. Then, rinse and drain again.


- Sauté veggies. Meanwhile, in a large stockpot, heat oil over medium-high heat until hot, about 2 minutes. Add onions, garlic, carrots and celery. Sauté until softened, about 5 minutes.
- Add lentils. Add softened lentils, Italian seasoning, and tomato paste. Stir well until evenly combined.


- Add liquids and simmer. Add diced tomato and water (or vegetable broth), and bring it to a boil. Then reduce heat to low and simmer, uncovered, until the lentils are cooked through and tender, about 25 to 30 minutes, stirring occasionally. Add ½ cup of water at a time if necessary (if too much water is absorbed).


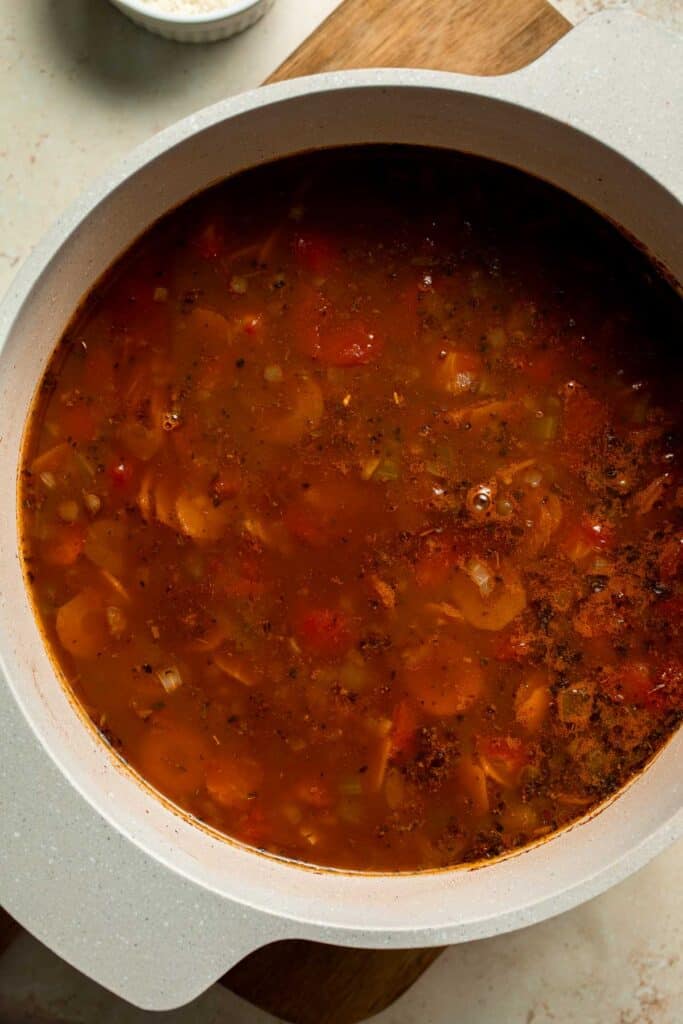
- Add spinach. Remove from heat and stir in baby spinach until wilted. Season with salt and pepper to taste.


- Serve. Garnish with grated Parmesan cheese, if desired, and serve warm.
Recipe Variations
- Add more veggies. This recipe has similar flavors to minestrone and would taste great with some cubed zucchini, sweet potatoes, diced potatoes, green beans, regular kale, swiss chard, or other hearty vegetables.
- Amp up the stock. Since the lentils absorb the broth, it's a good idea to use a good quality vegetable stock, whether storebought or homemade. Add a few bay leaves and some red pepper flakes for heat. You can also infuse the stock with extra flavor by simmering a rind of Parmigiano Reggiano. This releases a slightly sweet, cheesy flavor that takes the flavor over the top.
- Keep it vegan. Did you know traditional Parmigiano Reggiano is not vegetarian or vegan? If you're vegetarian, choose a Parmesan-style cheese made with microbial enzymes or rennet or a dairy-free alternative.
How to Serve
This Italian Soup Recipe is delicious served on its own, or paired with some of my favorite soup sides including:
For more recipes, see our 25 Side Dishes for Soup.
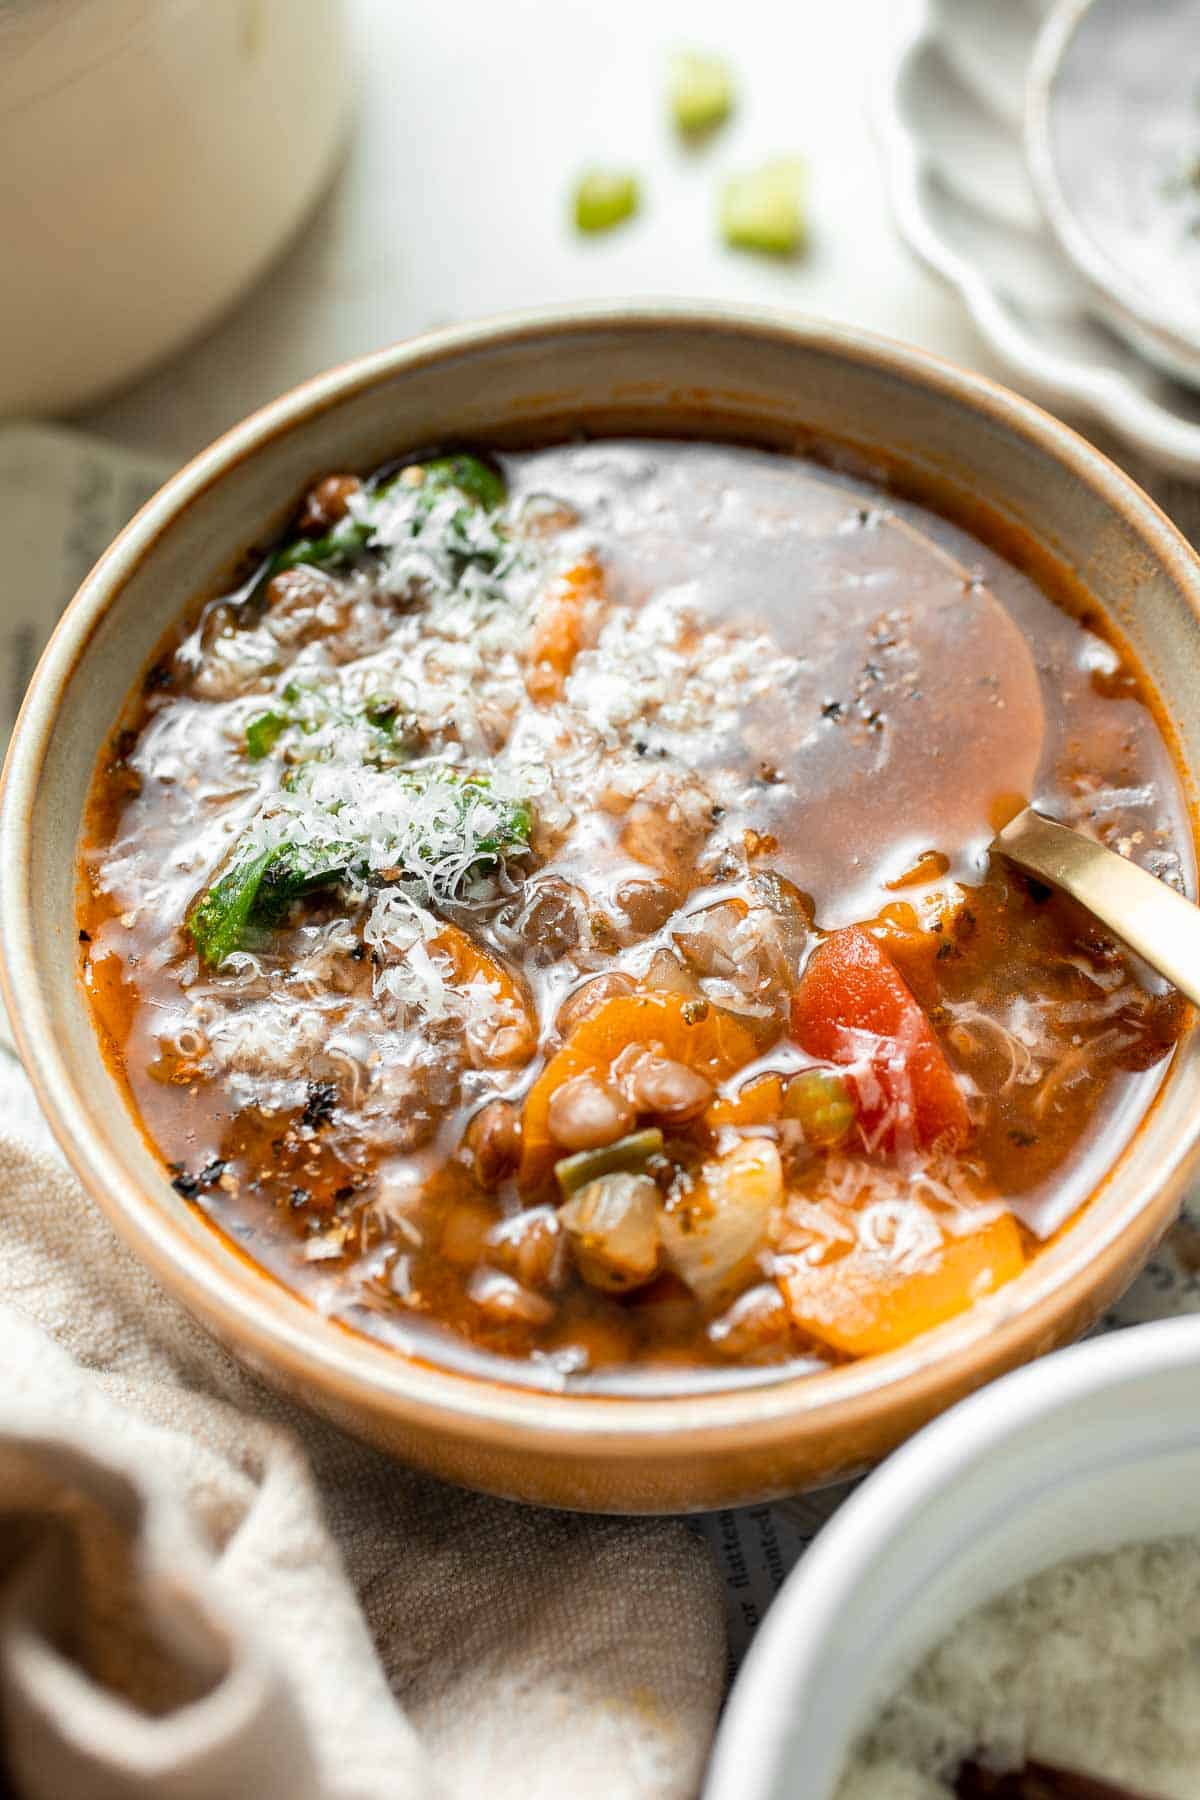
Recipe Tips and Tricks
- Don't rush. This vegetarian lentil soup only takes about an hour, but that includes building flavor. Take your time sauteing the vegetables and give the tomato broth plenty of time to cook down and mellow out. It's worth it!
- Use fresh lentils. If you've ever tried to cook old, dried lentils from the back of your pantry, you know they take forever to soften. This soup is best with lentils purchased within the last year.
- Soak first. Lentils cook so quickly that many people skip this step, but it's truly the best way. The soaking of lentils speeds up the cooking process, infusing moisture and flavor deep inside. I actually like to cover the lentils in boiling water with baking soda, which speeds up the soaking process and can actually help make the lentils more digestible, too.
Storing and Freezing Instructions
How to Store
Allow any leftover soup to cool to room temperature, then store in an airtight container in the fridge for 3-4 days.
How to Reheat
Either microwave an individual serving for 3-4 minutes, stirring as needed, or warm a larger serving in a pot on the stove. Stir frequently to avoid burning.
How to Freeze
Fill freezer-safe containers almost all the way, leaving at least 1 inch of space for expansion. Freeze solid for up to 3 months, then thaw in the fridge overnight before reheating. After thawing, the lentils may start to break down, but it still tastes great.
FAQ
I recommend using either brown or green lentils, which have a relatively neutral, slightly nutty flavor that works well in this soup. Red lentils taste great, but break down quickly and won't retain their texture as well.
That really depends on the recipe! Lentils are hearty on their own, so many variations of this soup do not call for pasta. However, you can certainly choose to add some dried pasta for another layer of texture, if you prefer.
Yes! Zuppa di lenticchie ("lentil soup" in Italian) is traditionally made on New Year's Day in certain regions of Italy, as all the little lentils represent abundance and good luck. It's a great way to ring in the New Year and it's good for you, too!
More Lentil Recipes
- Persian Lentil Soup
- Easy 20-Minute One Pot Lentils
- Coconut Curry Lentil Soup
- Lentil Stew
- Vegetarian Shepherd's Pie
- Warm Lentil Salad with Butternut Squash
Tried this recipe?
I'd love to hear what you think! Leave a comment and rating below to share your feedback. Your reviews help others discover this recipe and help me keep creating more free recipes for you. Snap a photo and tag me on social media @aheadofthyme too.
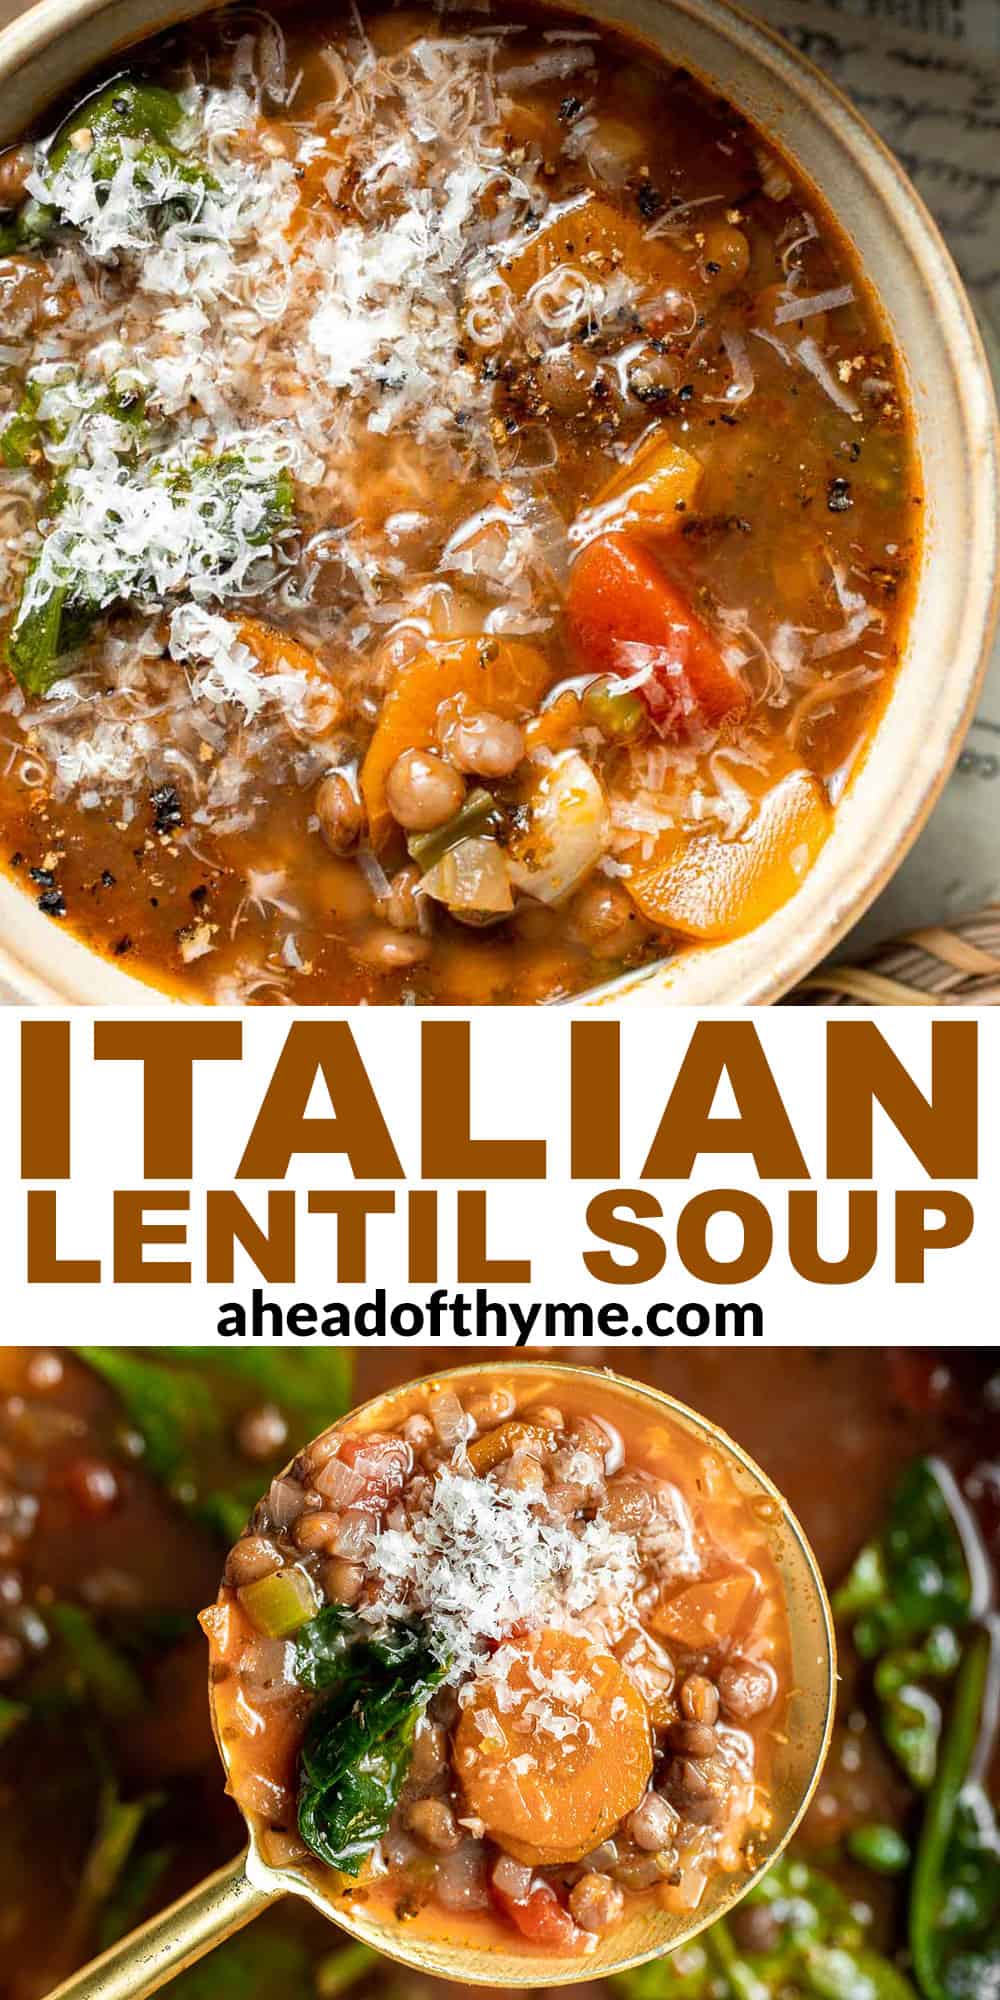
Creamy Butternut Squash Pasta
This Creamy Butternut Squash Pasta is cozy, creamy, cheesy fall comfort food. This easy pasta recipe is made with roasted butternut squash that is pureed to create a silky smooth sauce coating each noodle. Throw in some Parmesan cheese and seasonings balance out the natural sweetness of the squash and add an irresistibly savory, cheesy flavor. It's hands down the best vegetarian pasta dish for chilly fall evenings.
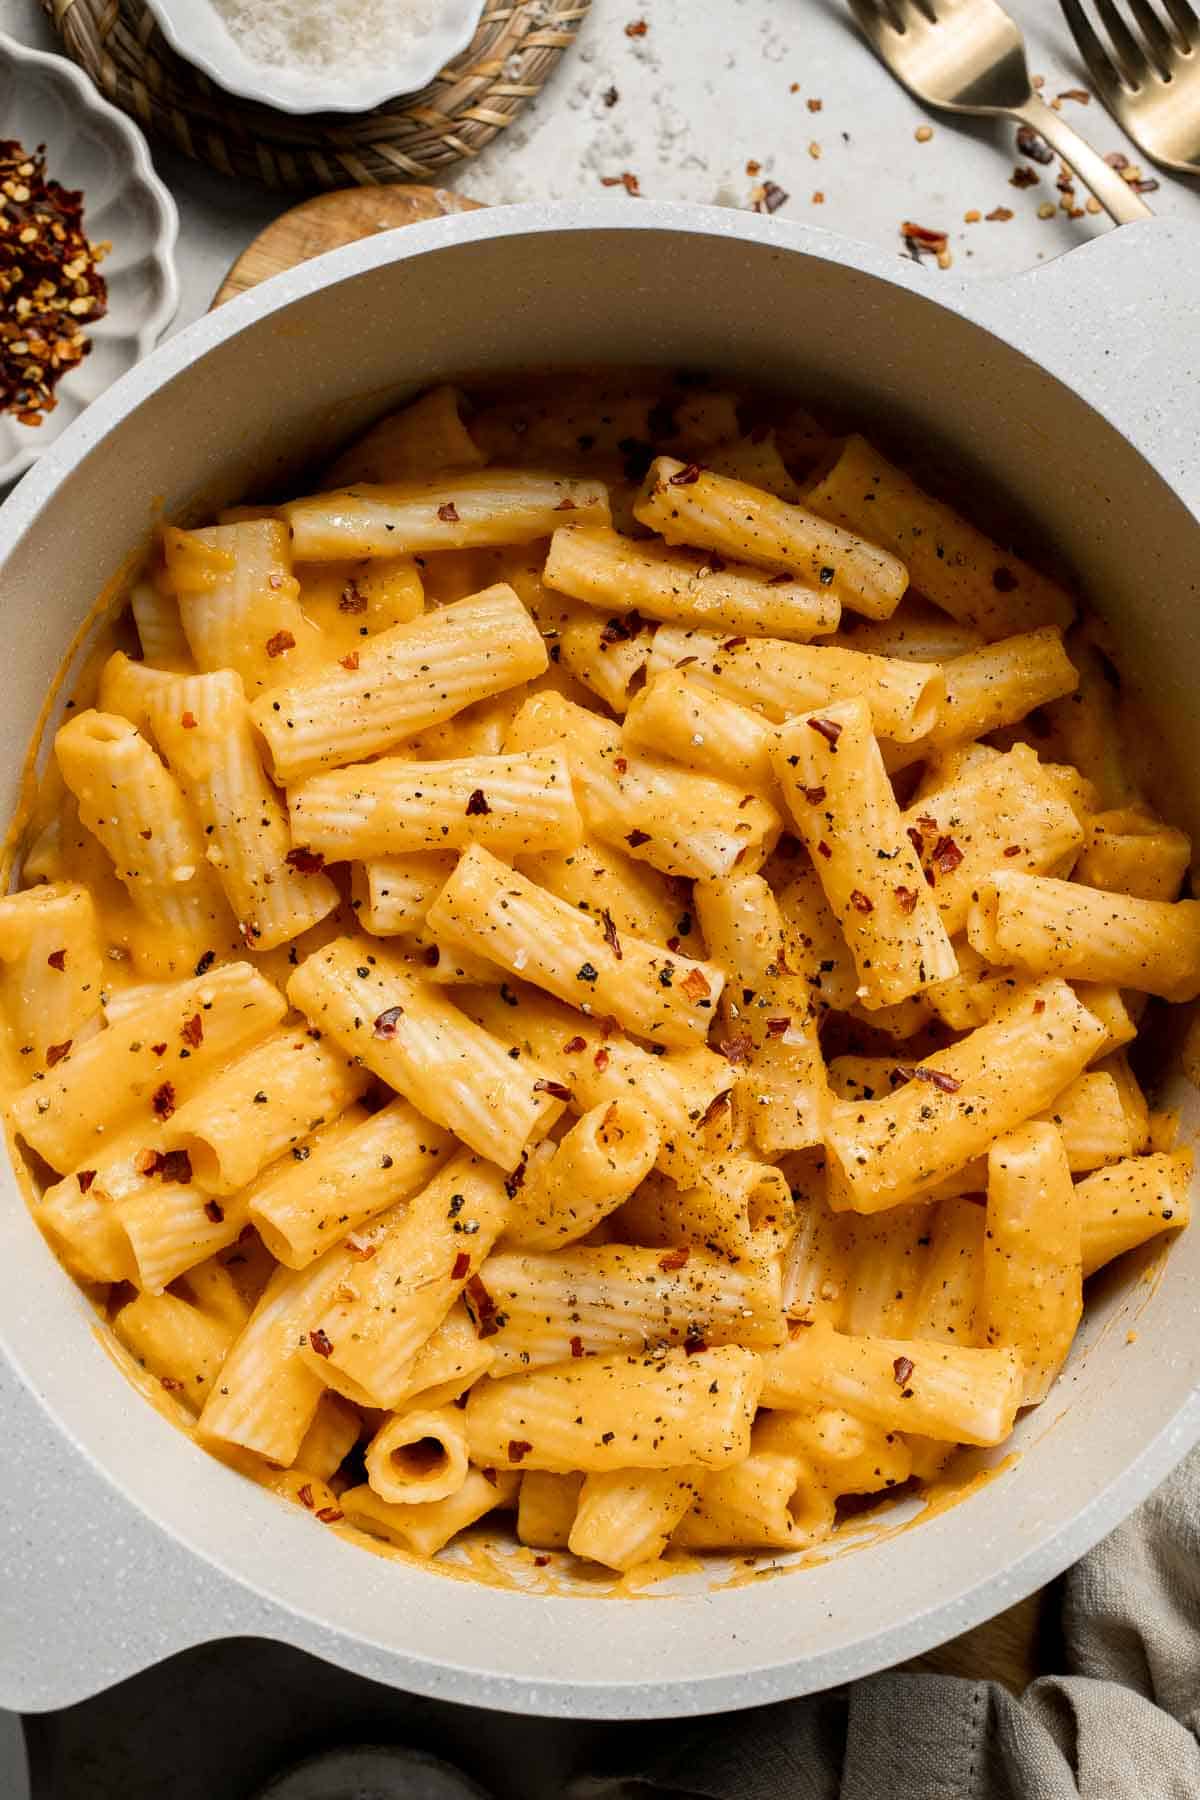
As fall rolls in, I start craving seasonal squash and comforting pasta dishes - and this butternut squash pasta recipe is the best of both worlds! It's so creamy and cozy, and every bite warms you from the inside out. Serve it with Cheesy Garlic Bread, a crisp Green Salad, or even a side of Roasted Brussels Sprouts for a simple, fall-inspired meal. Kids love it, too, and it's a great way to sneak in veggies to even the pickiest eaters!
Why You'll Love This Creamy Butternut Squash Pasta
- Packed with veggies. The best part about this pasta dish is that the sauce is made with roasted butternut squash as the base instead of milk or cream. This means it adds an extra dose of veggies in every serving in addition to a hearty, slightly sweet flavor from the squash. It's a simple swap, and your family won't even know they're eating lots of vegetables!
- Creamy without being heavy. The butternut squash puree makes this sauce smooth and velvety, offering a creamy texture without relying on heavy cream or excessive butter.
- Versatile and customizable. You can easily adjust the ingredients to suit your dietary needs, whether you prefer gluten-free pasta, plant-based alternatives, or you like incorporating extra veggies or meat.
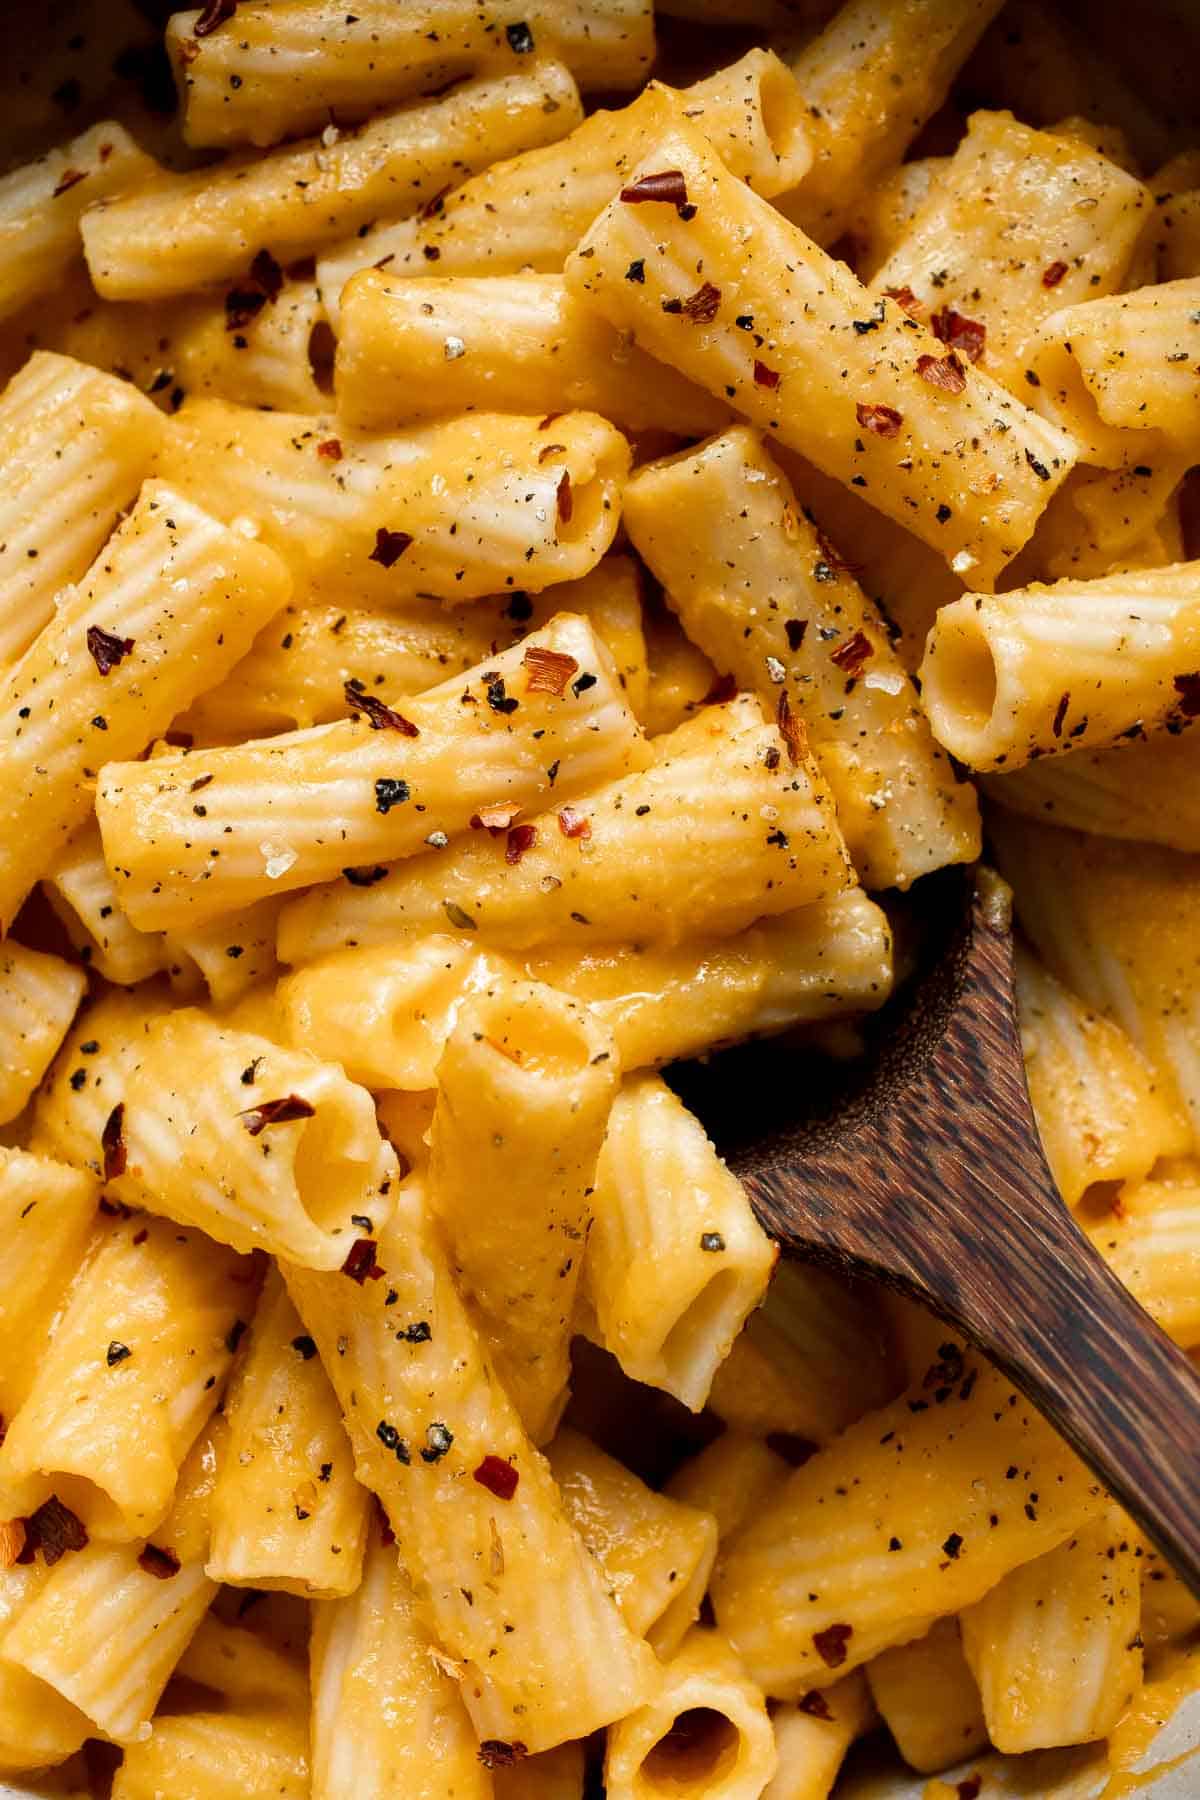
Ingredient Notes
To make this delicious Creamy Butternut Squash Pasta, you will need the following ingredients (full measurements in recipe card below):
- pasta - we used rigatoni pasta but feel free to substitute with your favorite pasta.
- butternut squash - cut into ½ inch pieces.
- aromatics - dice and saute onion and garlic to play up the savory flavors.
- melted butter - make sure it's fully melted so you can coat all the veggies.
- seasonings - use Italian seasoning, salt, and ground black pepper.
- half and half cream - you can substitute this for milk for a less creamy alternative.
- Parmesan cheese - freshly grated is best.
You will also need measuring cups and spoons, large bowl, large baking sheet, large pot, strainer, and food processor or immersion blender.
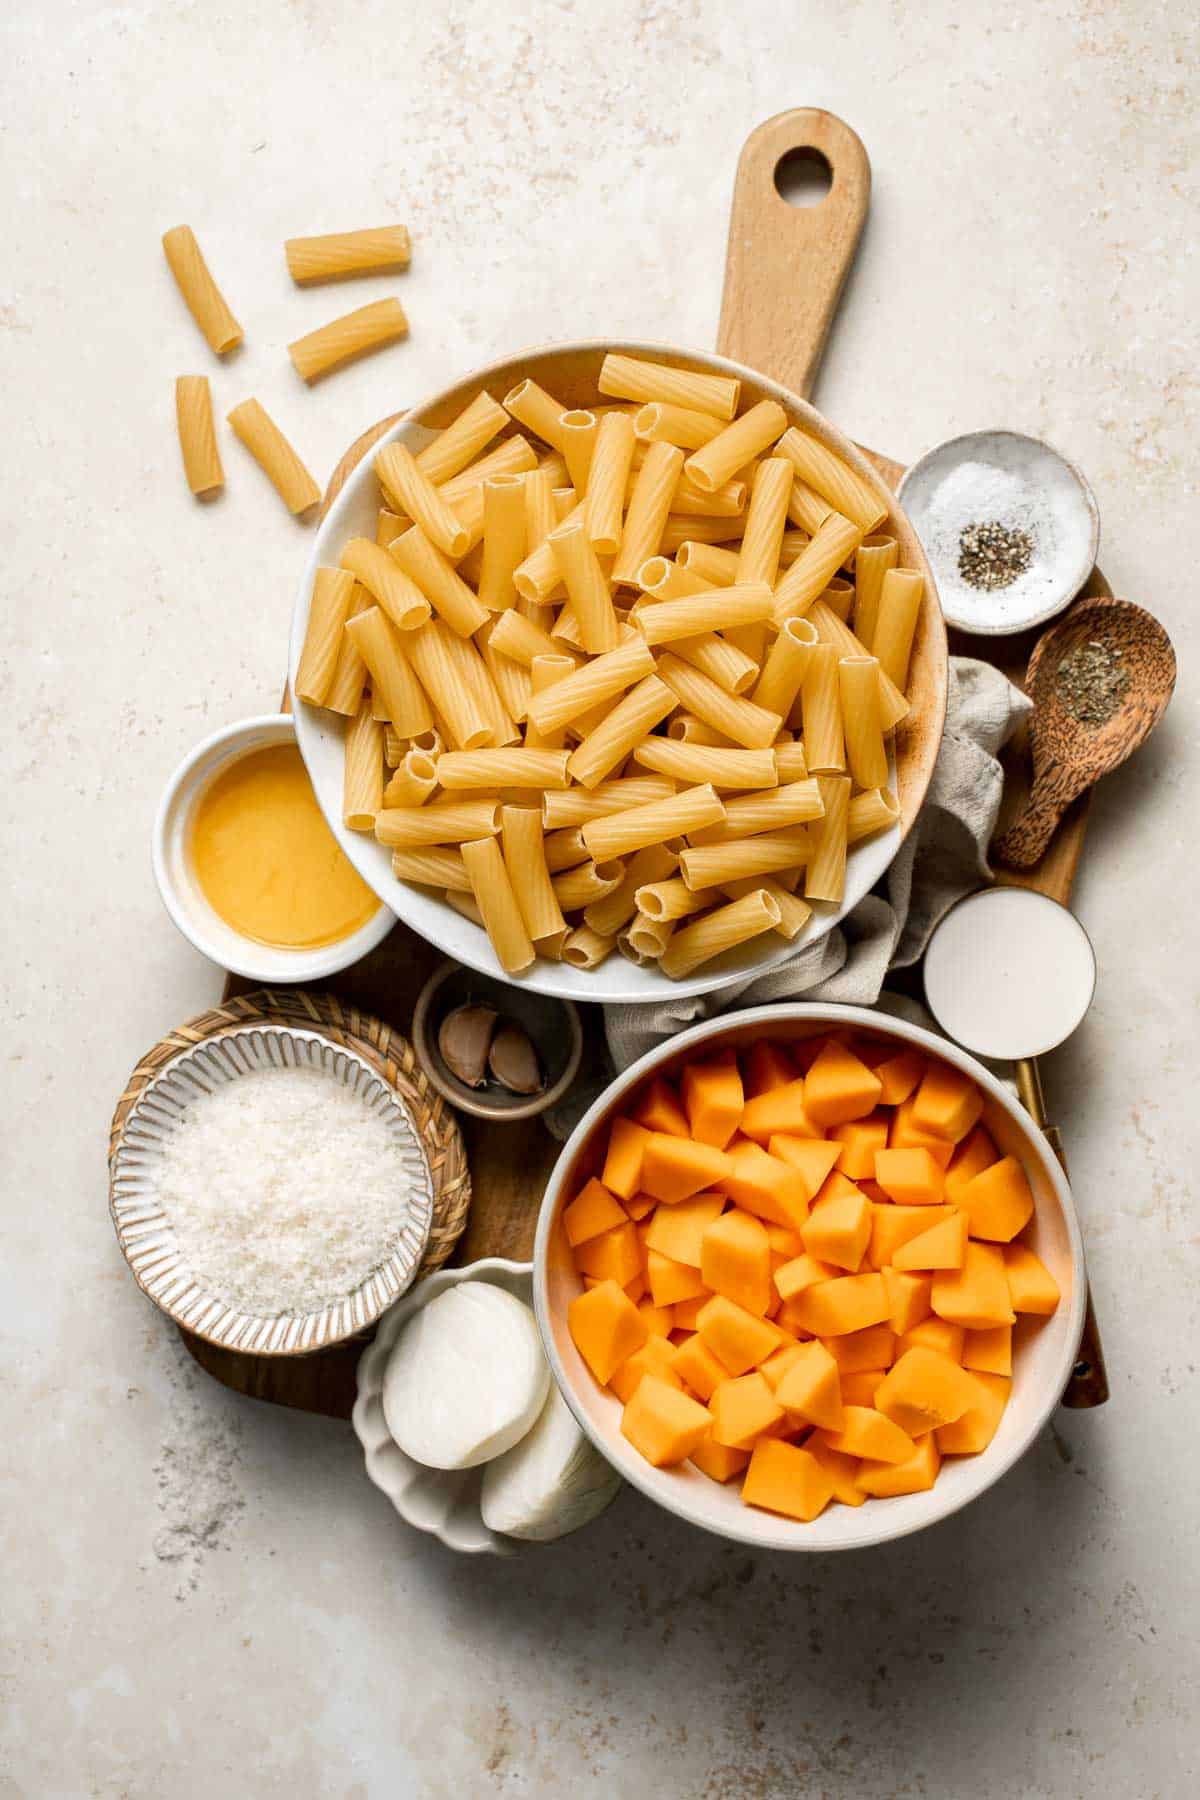
How to Make the Best Creamy Butternut Squash Pasta
- Season veggies. In a large mixing bowl, add cubed butternut squash, onion, garlic, melted butter, Italian seasoning, salt, and pepper. Toss well to coat and arrange them on a rimmed baking sheet.


- Roast veggies. Roast in a 400F preheated oven until tender, approximately 20-25 minutes. Remove and let cool slightly, about 3-5 minutes.


- Cook pasta. While the squash is baking, cook pasta in a large pot of boiling salted water until al dente, or in accordance with package instructions. Drain, reserving 1 cup of the pasta cooking water.


- Blend sauce. Add the roasted veggies to a food processor, along with cream and parmesan cheese. Puree until smooth. Slowly drizzle in ¼ cup of reserved pasta water and pulse until it reaches a desired consistency. Add more hot pasta water, if needed.


- Toss. Add the drained pasta back into the pot. Pour the sauce on top and toss to combine.


- Serve. Season with more salt and freshly cracked pepper on top (to taste) and serve immediately. You can also top with chili flakes.
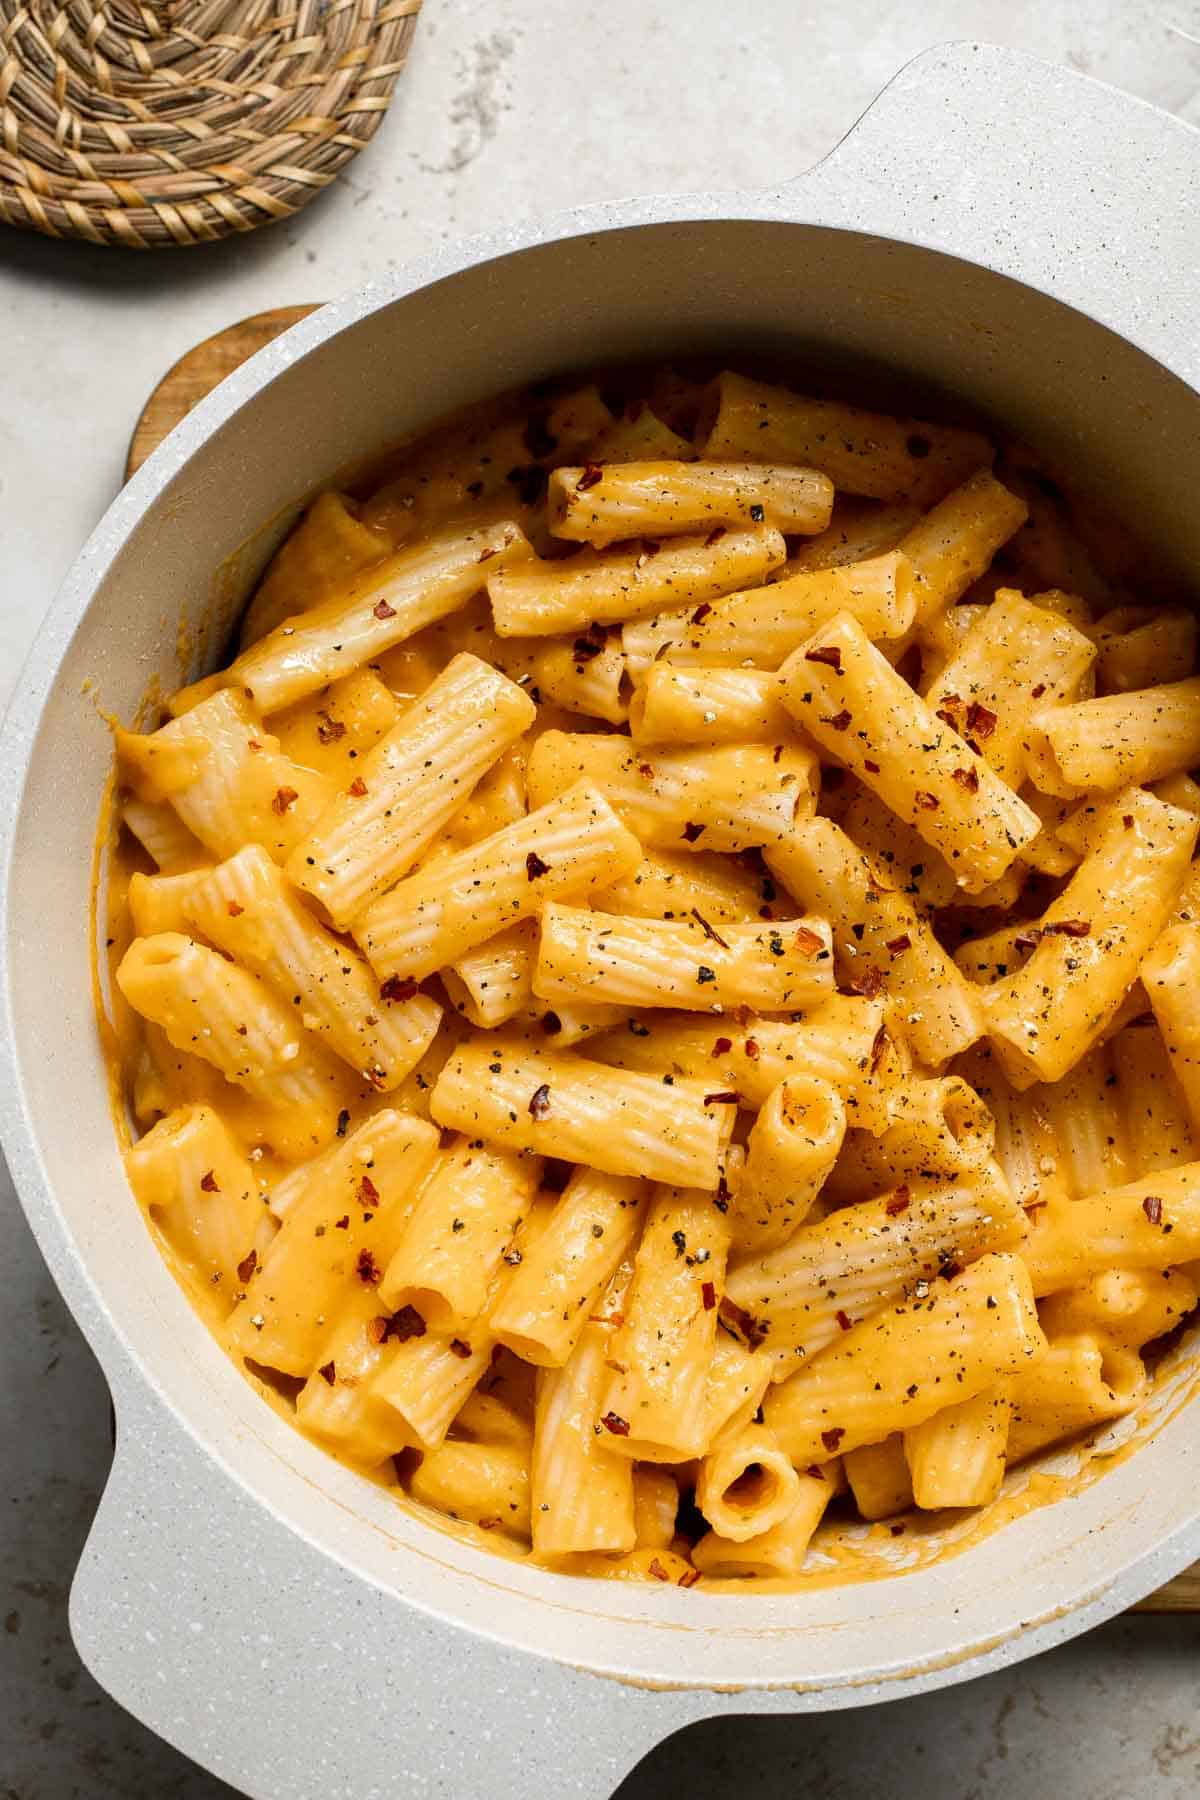
Recipe Variations
- Try other winter squashes. Instead of butternut, feel free to use your favorite winter squash, like Red Kuri, Kabocha, etc.
- Play with garnishes. The hearty flavor of roast butternut goes wonderfully with crispy fried sage leaves, a little freshly squeezed lemon juice or lemon zest, toasted pine nuts, etc. I like to add some red pepper flakes for a bit of heat!
- Make it gluten-free. Since the only gluten in this recipe comes from the pasta, you can easily swap out your favorite gluten-free pasta.
How to Serve
This Creamy Butternut Squash Pasta is delicious served on its own with a side of crusty bread for sopping up any extra sauce. You can also pair it with some of our favorite pasta sides sides including:
- Fall Harvest Salad
- Cheesy Garlic Bread
- Roasted Brussels Sprouts
- Arugula Salad with Apple and Pecan
- No Knead French Baguettes
- Oven Roasted Vegetables
For more recipes, see our 30 Side Dishes for Pasta.
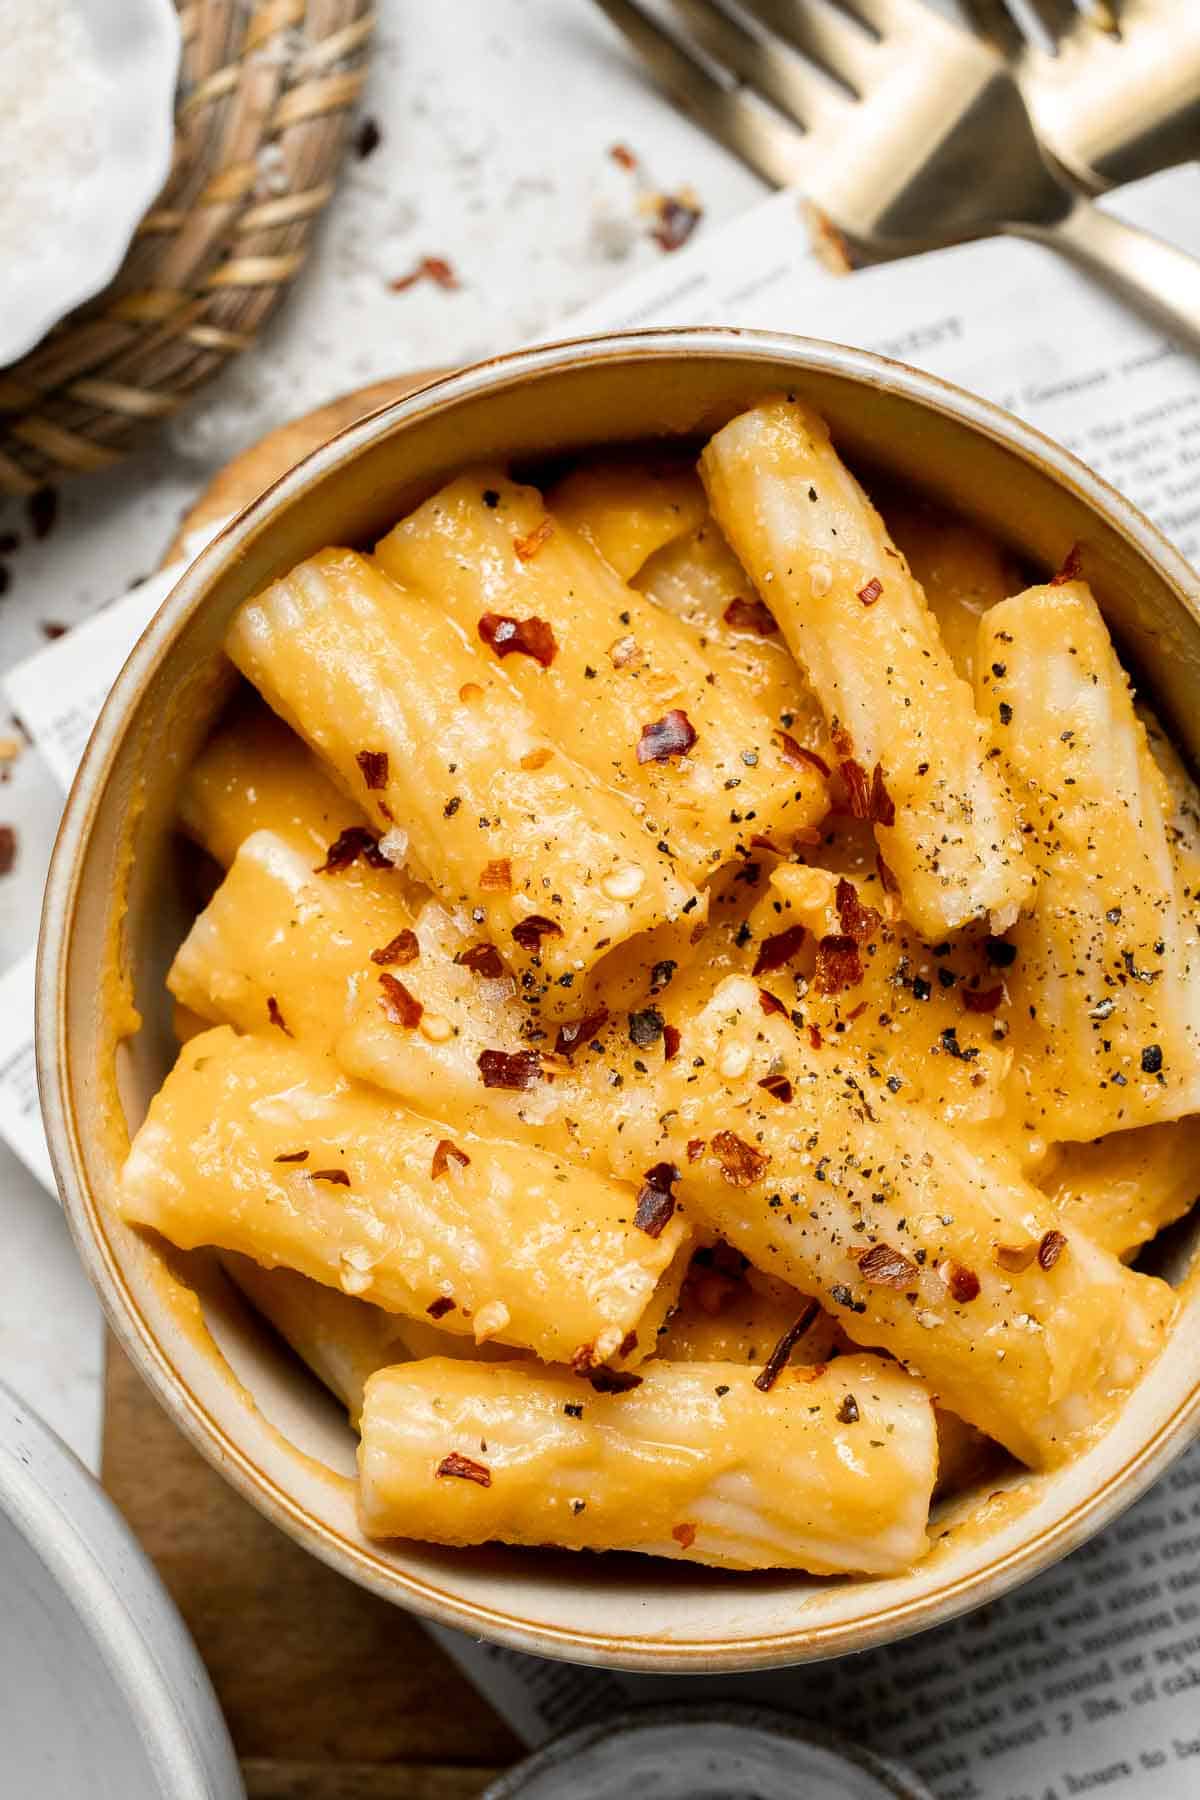
Recipe Tips and Tricks
- Roast veggies the night before. If you know you want to make this delicious pasta later in the week, roast the veggies a day or two before or make the creamy pasta sauce and let it cool in the fridge. Then, you'll only need to cook the pasta and finish the dish!
- Puree, don't mash. The creamy butternut squash sauce needs to be blended until completely smooth, ideally using an immersion blender or regular blender. It's hard to make a silky, velvety sauce with a potato masher.
- Roast all the way. Make sure the squash is fork tender before you remove it from the oven. Otherwise, it will be gritty, not a nice, creamy sauce.
Storing and Freezing Instructions
How to Store
Allow the cooked pasta to cool completely to room temperature. Then store in an airtight container in the fridge for up to 4-5 days.
How to Reheat
Cover and reheat in the microwave for 30-second intervals, stirring in between. You can also reheat the pasta in a saucepan on the stove. Cook on medium-low heat until heated throughout. Add a splash of water or milk if the mixture is too thick.
How to Freeze
Portion your pasta in airtight containers or freezer-safe bags and make sure to label with the date. Store in the freezer for up to 3 months. Thaw your butternut squash pasta in the fridge overnight.
FAQ
Yes, you can use frozen butternut! Make sure to preheat the oven and the baking sheet, and add the frozen squash mixture directly to the hot pan. This will also help crisp up the edges and get a nice, caramelized flavor. The roasting time might be slightly shorter than fresh butternut, so keep an eye on the squash as it cooks.
You can make it vegan, but the texture may not be as thick and creamy depending on the cheese and milk alternative. To make vegan butternut squash pasta sauce, simply substitute the melted butter for a little olive oil or butter-flavored shortening, and use a plant-based, unsweetened half-and-half and vegan cheese or nutritional yeast.
Yes! While the creamy butternut squash pasta sauce is packed with veggies, feel free to add more! It's great with fresh spinach, baby kale, or frozen peas added at the end of the cooking time. Garnish with roasted broccoli, crispy slices of roasted squash, or fried sage.
More Butternut Squash Recipes
- 30 Best Butternut Squash Recipes
- Butternut Squash Carbonara
- Butternut Squash Risotto
- Butternut Squash Mac and Cheese
- Curried Butternut Squash Soup
- Butternut Squash Lasagna
Tried this recipe?
I'd love to hear what you think! Leave a comment and rating below to share your feedback. Your reviews help others discover this recipe and help me keep creating more free recipes for you. Snap a photo and tag me on social media @aheadofthyme too.

Smashed Sweet Potatoes
Crispy Smashed Sweet Potatoes are the perfect side dish for your fall and winter meals, and are so simple to make. After cooking the sweet potatoes until tender, smash them on a sheet pan with melted butter and spices, then bake until a crispy crust forms on the edges. They're the perfect combination of sweet and savory, and are fast enough to make for any weeknight dinner!
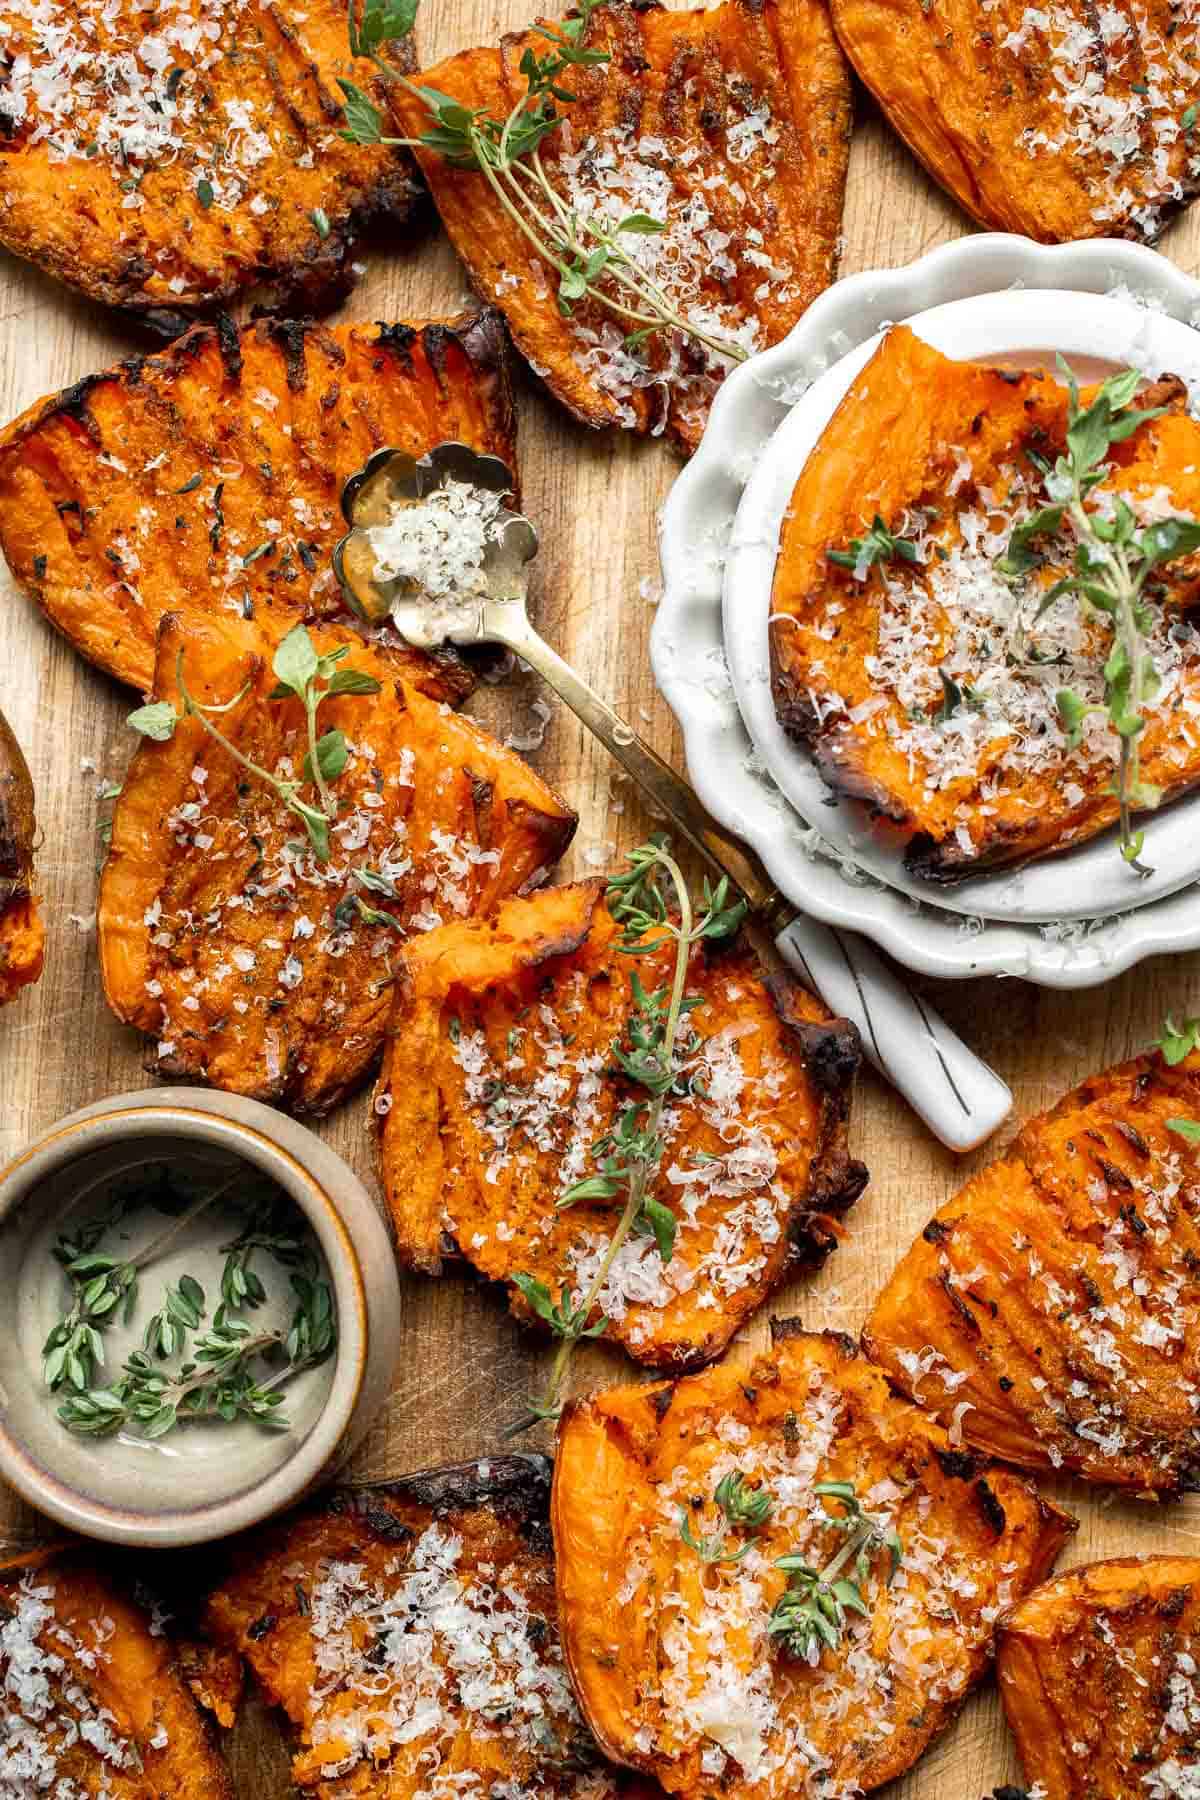
Most of us only eat sweet potatoes in a couple of ways: as sweet potato fries or baked into a dessert-like Sweet Potato Casserole for Thanksgiving. These smashed potatoes are a fun, savory twist that can also stand in for mashed or roasted potatoes with any meal. Pair them with Ribeye Steak, Honey Baked Ham, or Roasted Chicken for a delicious veggie side dish your family will beg for!
Why You'll Love These Smashed Sweet Potatoes
- Not too sweet. This simple sweet potato dish mellows out the natural sweetness of these roots by pairing them with melted butter, spices, and Parmesan cheese. They're a great alternative to the sugary dishes most of us grew up with and are healthy enough to make any night of the week!
- Amazing texture. The double-cooking method ensures that the sweet potatoes are tender and fluffy on the inside with a crispy, savory crust on the outside. I love that crunch!
- Easy to prep ahead of time. Once the sweet potatoes are cooked until tender, they can be tucked away in the fridge, then smashed the next day. This makes this sweet potato recipe ideal for a holiday or special occasion.
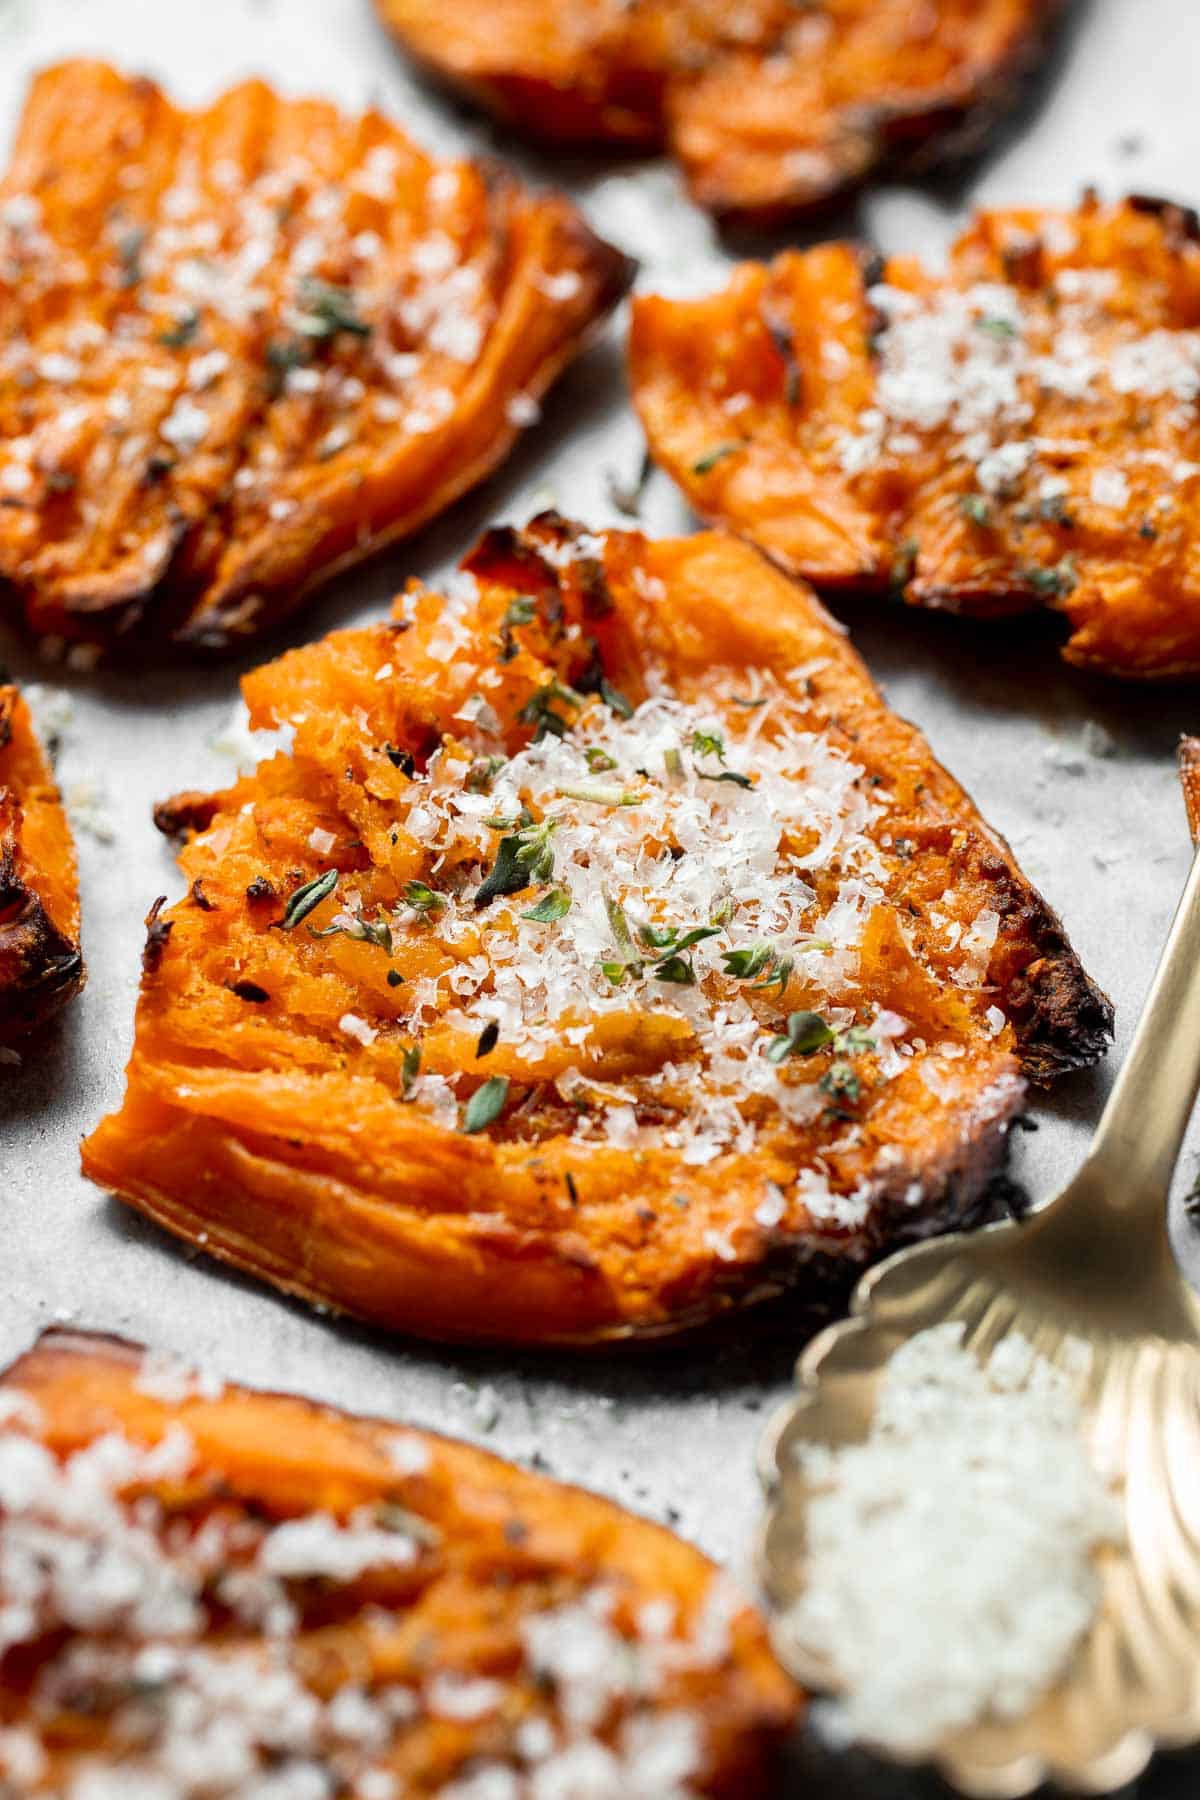
Ingredient Notes
To make these delicious Smashed Sweet Potatoes, you will need the following ingredients (full measurements in recipe card below):
- sweet potatoes - choose large sweet potatoes and cut them into quarters.
- butter - for extra flavor and to help develop a nice crust. Feel free to use a flavored herb butter, if you prefer.
- seasonings - season the melted butter with paprika, Italian seasoning, garlic powder, sea salt, and ground black pepper.
- Parmesan cheese - to sprinkle over the warm potatoes right after baking.
- thyme - feel free to garnish with other fresh herbs such as parsley, rosemary, or sage.
You will also need measuring spoons, a large pot or instant pot, a strainer, a small bowl, and a pastry brush.

How to Make the Best Smashed Sweet Potatoes
First, precook the sweet potatoes.
You can cook the sweet potatoes either on the stove or in the instant pot.
- To cook on the stove: Place quartered sweet potatoes in a large pot of salted water. The potatoes should be covered in water by about one inch. Bring to a boil over high heat, then turn the heat down to low, cover, and simmer until the sweet potatoes are tender, about 18-20 minutes.


- To cook in the instant pot: Add sweet potatoes in the instant pot and cover with water (about 3-4 cups). Add a little bit of salt and stir well to dissolve. Seal the lid and set the steam release knob to the sealed position. Cook the potatoes on Manual pressure for 8 minutes until tender. Once the time is up, quick release pressure or wait until all of the steam has released and the valve has dropped.
Then, smash and bake.
- Prep (if needed). If you precooked the sweet potatoes in the instant pot, drain them in a colander and place them potatoes evenly spaced apart on a large baking sheet. If you precooked in the oven then skip this step.
- Make seasoning blend. In a small mixing bowl, stir together melted butter, paprika, Italian seasoning, garlic powder, salt, and pepper until smooth.


- Smash. Use a fork to gently flatten the cooked sweet potato chunks into approximately ½-inch thick discs directly on the baking sheet. Brush the seasoning mixture evenly over each potato disc.


- Bake. Bake in a 400F preheated oven until golden brown and crispy, about 25-30 minutes. You can also broil on high for another 5 minutes to get the sweet potatoes extra crispy.

- Serve. Sprinkle with parmesan cheese and some chopped thyme, and serve.


Recipe Variations
- Precook the potatoes. If you want to make this side dish for a special occasion, simplify your prep. Cook them the day before, then chill them in the fridge until you're ready to smash.
- Change the flavor profile. This recipe uses garlic powder, paprika, and Italian seasoning, which pairs well with many main dishes. Feel free to change the seasonings to suit your preferences. Make them spicy with a little cumin and chili powder, toss them with yellow curry powder, or drizzle them with maple syrup, brown sugar, and cinnamon for a sweet side.
- Use normal potatoes. This method works with any variety of potatoes, including traditional Russets, red potatoes, baby potatoes, and more. Just adjust the cooking time to avoid overcooking the potatoes, then smash and season like normal.
- Serve with sauces or dips. These crispy sweet potato rounds can be served with different sauces and garnishes like baked potatoes! Try serving them with sour cream and green onions, honey mustard, basil pesto, chimichurri, and more.
How to Serve
These Smashed Sweet Potatoes are delicious served on its own as an appy with a dipping sauce on the side, or served as a side dish with some of my favorite entrees including:
- Roast Stuffed Chicken
- Garlic Butter Steak Bites
- Creamy Garlic Salmon
- Easy Slow Cooker Turkey Breast
- Cream Cheese Pasta
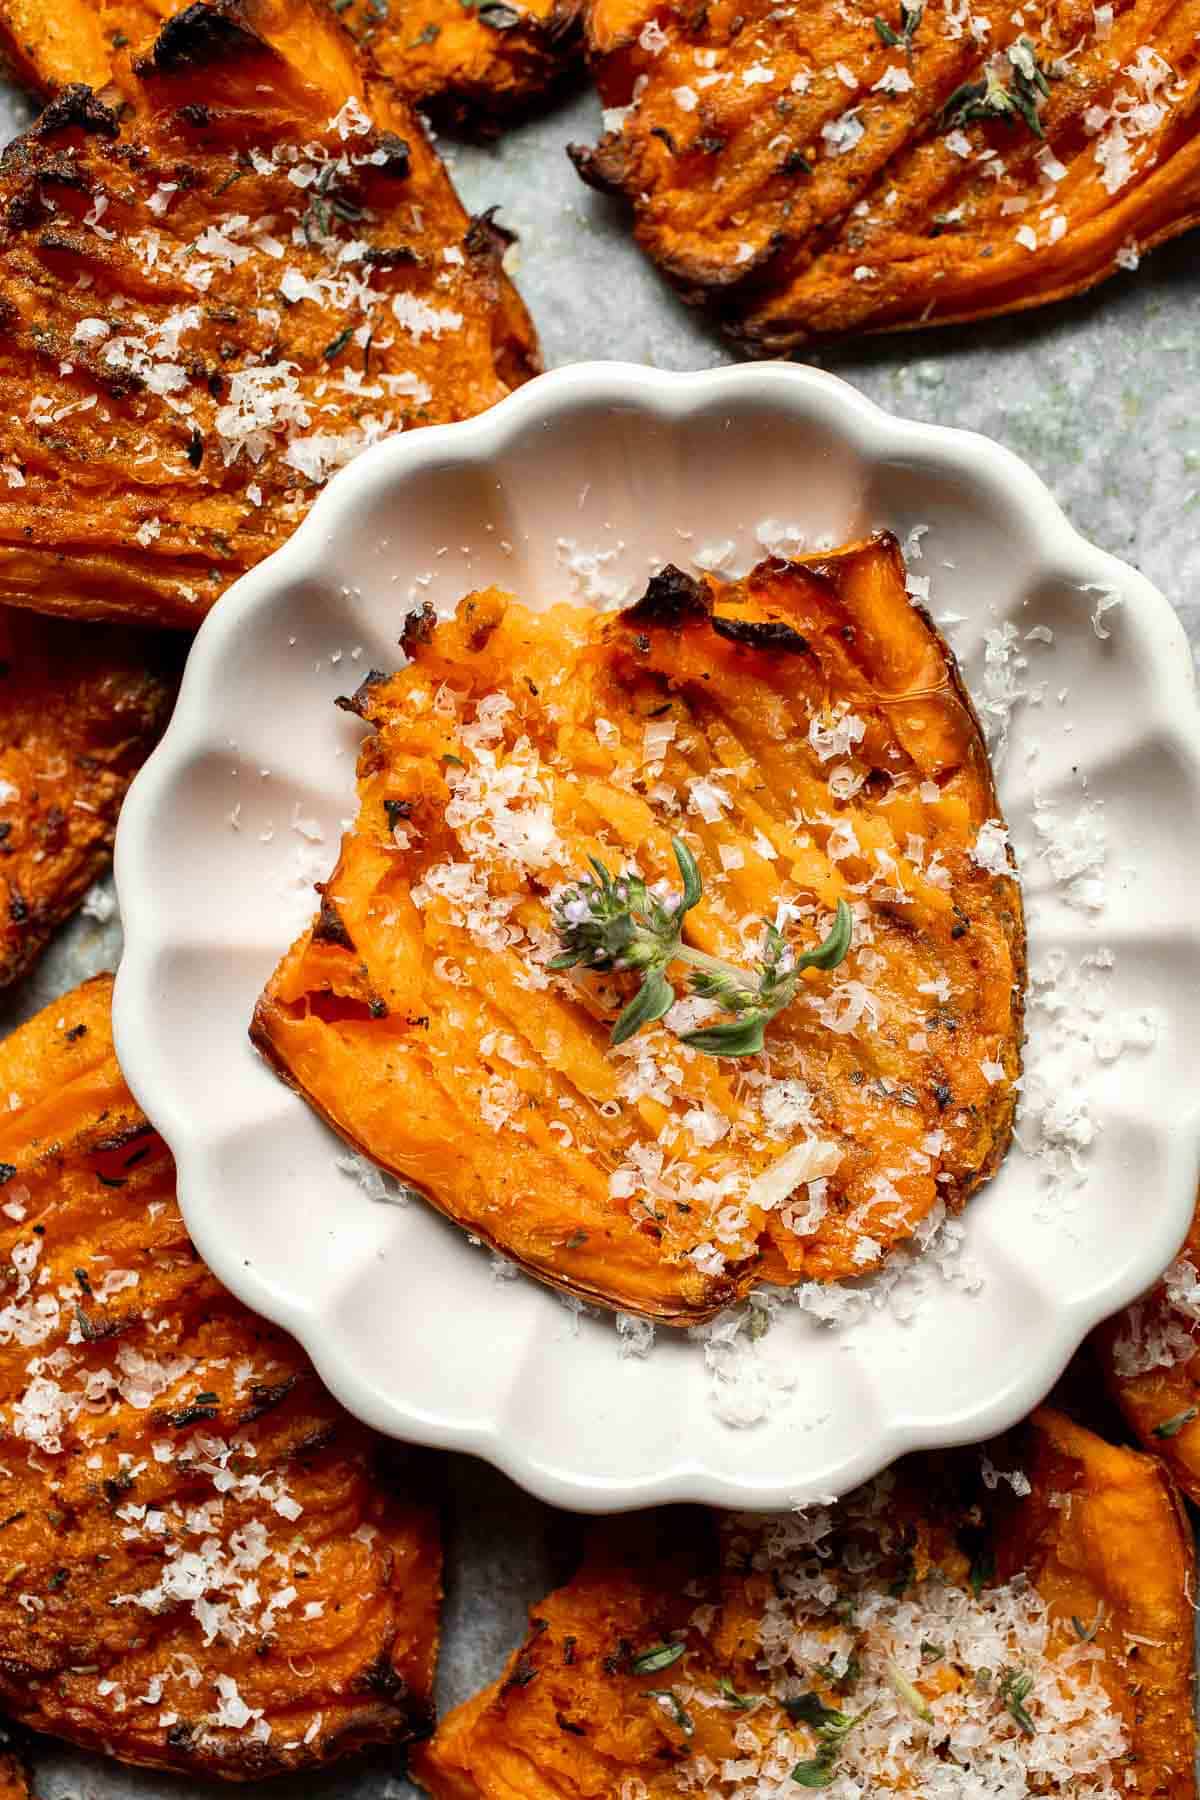
Recipe Tips and Tricks
- Don't over or undercook. If you don't cook the sweet potatoes long enough, they won't smash, and if you overcook them, they lose their texture. You want to cook them until they are fork tender: still sturdy enough to hold together but tender enough to smash.
- Peel or don't. The skin of the sweet potato will add extra texture and keep things nice and crispy, but they can also be peeled if you prefer.
- Try different tools. I like to use a fork to crush the sweet potato pieces, but you can also use a potato masher, the bottom of a glass jar, or any other tool that works for you.
- Skip the parchment paper. Although I usually line my sheet pans with parchment paper before roasting, try brushing the pan with olive oil or melted butter instead. You'll get a nice, golden crust where the potato meets the pan.
Storing and Freezing Instructions
How to Store
Place any leftover smashed sweet potatoes in an airtight container in the fridge for 3-4 days.
How to Reheat
To crisp up the outside, place the leftovers in the air fryer or oven at 400 F and bake for 5-7 minutes or until heated through.
How to Freeze
Freeze any leftovers on a sheet pan, then transfer them to a freezer-safe container and store for 2-3 months.
FAQ
Yes! You just need the sweet potatoes to be tender enough to smash, but you can do that the day before and store them in the fridge until you need them. Since the sweet potatoes will not be hot anymore, you may need to bake for an extra minute or two.
Yes, but you will lose some of the crispy texture after freezing, thawing, and reheating. One option is to reheat your smashed potatoes in the air fryer, which will crisp up the outside as much as possible.
They can go either way, but I prefer to make them savory! Pairing sweet potatoes with savory spices and Parmesan cheese mellows the sweetness and brings out their full flavor. They're the perfect balance of sweet and savory.
More Sweet Potato Recipes
- Baked Sweet Potato Wedges
- Sweet Potato Fritters
- Sweet Potato Tater Tots
- Baked Sweet Potato
- Herb Roasted Sweet Potatoes
- Savory Mashed Sweet Potatoes
Tried this recipe?
I'd love to hear what you think! Leave a comment and rating below to share your feedback. Your reviews help others discover this recipe and help me keep creating more free recipes for you. Snap a photo and tag me on social media @aheadofthyme too.

Pumpkin Pie Bars
With their buttery shortbread cookie crust and velvety pumpkin filling, these creamy Pumpkin Pie Bars make it easy to enjoy the flavor of traditional pumpkin pie in handheld form! They're incredibly simple to make (no pie crust skills required) and look gorgeous arranged on your serving tray. One batch makes 16 bars, so you'll have plenty to share with your friends and family!
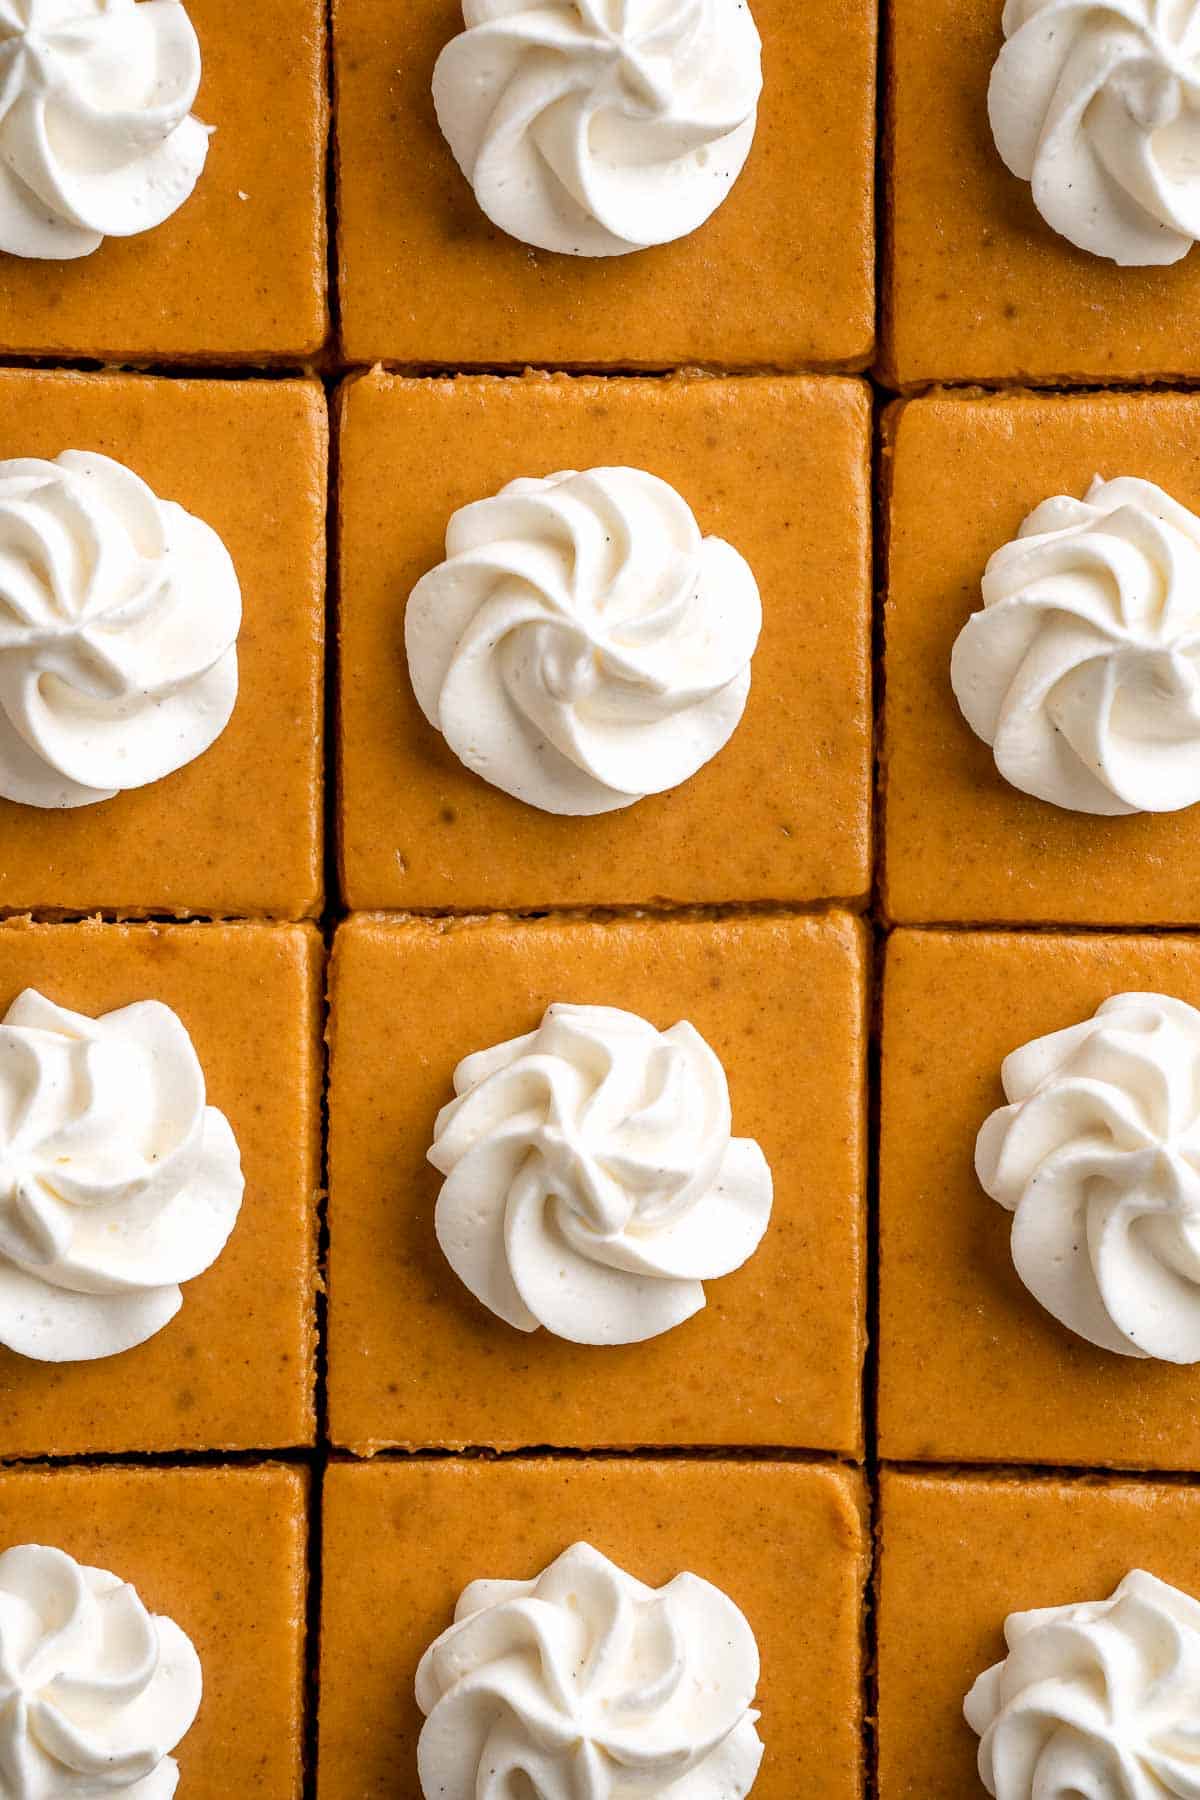
Pumpkin pie is one of the most iconic Thanksgiving desserts ever, right up there with Pecan Pie, but it can be a bit of a bear to make from scratch. Between rolling out the pie crust and getting the custardy pumpkin filling just right, you need a tried-and-true recipe with just the right balance of sugar and spice and, of course, the perfect crust. These easy pumpkin pie bars are sweet and creamy, and that buttery shortbread crust is way better than regular pie crust. They're so good you won't need to drown them in whipped cream - just a dollop will do!
Why You'll Love These Pumpkin Pie Bars
- Holiday classic revisited. It's not the holidays without at least one slice of pumpkin pie. Many of us rely on the plastic-packaged pies from the grocery store, but they pale in comparison to the rich, creamy texture and perfectly spiced flavor in these bars. You may find yourself relying on this recipe and ditching the pie completely!
- Serves a crowd. One batch of this pumpkin pie bars recipe makes 16 bars, which is way more than most pies! Plus, you can serve them with a napkin instead of requiring a fork and plate. So handy for entertaining!
- Perfect make ahead dessert. These pumpkin desserts must cool in the fridge for at least 8 hours, so they're ideal for making the day before your big event! Just grab the cooled bars from the fridge, top with freshly whipped cream, and serve. No stress!

Ingredient Notes
To make these delicious Pumpkin Pie Bars, you will need the following ingredients (full measurements in recipe card below):
- unsalted butter - the butter must be at room temperature to get the right texture for the shortbread cookie crust.
- confectioner's sugar - this will add just enough sweetness and a melt-in-your-mouth texture in the crust. We also need powdered sugar for the whipped cream.
- flour + baking powder - for the shortbread crust.
- vanilla extract - for a hint of vanilla in the crust, pumpkin filling, and whipped cream.
- pumpkin puree - this can either be canned pumpkin puree from the store, or you can roast your own pumpkins at home and blend the flesh into a puree.
- evaporated milk - for a rich, creamy pumpkin filling.
- sugar - the combination of white and brown sugar adds plenty of sweetness and flavor while still letting the pumpkin flavor stand out.
- cornstarch - sift it well to remove clumps. This will absorb excess moisture for a nice, smooth set for the filling.
- spices - you'll need cinnamon, pumpkin pie spice, ground ginger, and salt.
- eggs + yolks - to bind the filling together and a creamy custard-like texture.
- heavy cream - to make the whipped cream.
You will also need measuring cups and spoon, 9-inch square baking pan, parchment paper, large bowl, electric mixer, medium bowl, whisk, cutting board, and a piping bag (optional).

How to Make the Best Pumpkin Pie Bars
First, make the shortbread cookie crust.
- Cream. In a large mixing bowl, add butter, salt, and vanilla. Use an electric hand mixer to beat together until smooth and creamy. Add in the confectioners' sugar, then continue to beat for 3-4 minutes, or until pale and fluffy.


- Add dry ingredients. Add in the baking powder, then spoon in flour in increments while you continue to mix the dough with the hand mixer. Once all the flour has been fully mixed in, the dough should look soft and slightly crumbly.


- Spread dough. Prepare a 9-inch square baking pan with 2 sheets of parchment to line every side of the pan. Leave an overhang on the sides to easily lift out the baked bars. Gather the dough together then transfer into the prepared baking pan. Use your hands to spread the dough evenly across the pan.
- Bake. Place into a 350F preheated oven to bake for 18 minutes. Remove from the oven and allow to cool to just barely warm.


Then, prepare the pumpkin pie filling.
- Combine ingredients. Add all of the pumpkin pie filling ingredients into a large mixing bowl, then whisk well until smooth.


- Add filling. Pour the filling over top of the slightly warm shortbread crust.


- Bake. Turn the oven down to 325F. Place into the oven to bake for 50-55 minutes. When done, the edges should be fully set, but the centre should still be slightly jiggly.

- Chill. Remove from oven and allow to cool to room temperature on the counter. Then place into the fridge for at least 8 hours, or preferably overnight.
Finally, make the whipped cream topping.
- Slice. Use the parchment paper overhand to carefully remove the cold bars from the baking pan and place onto a cutting board. Use a sharp knife to slice into 16 squares.

- Whip. In a medium mixing bowl, add all the whipped cream ingredients including heavy cream, confectioners' sugar, and vanilla. Beat with an electric hand mixer until stiff peaks form.
- Assemble. Place the whipped cream into a piping fitted with a large star tip. Pipe a swirl onto each pie bar. You can also add a dollop of whipped cream to each bar using a spoon instead.


Recipe Variations
- Make sweet potato bars. Instead of pumpkin puree, use canned sweet potato puree for a traditional Southern flavor. It works well with all the same spices and is an easy swap! Just make sure it's 100% pureed squash, not the sweetened sweet potatoes used for sweet potato casserole.
- Cut them into shapes. You'll have a little waste this way, but these easy pumpkin pie bars are seriously adorable trimmed into little pumpkins with a Halloween cookie cutter!
- Add extra decorations. For an extra special presentation, make an extra batch of the cookie crust or grab a roll of frozen pie crust from the store. Cut the dough into tiny pumpkins, turkeys, or leaves using a cookie cutter and add them on top of each bar. I also like to sprinkle a few graham cracker crumbs on top of the whipped cream (or a little ground cinnamon) for an extra touch.
How to Serve
These Pumpkin Pie Bars is a delicious dessert served on its own at Thanksgiving or any night of the week in the fall. If serving as part of a larger dessert spread on your holiday table, pair it with some other Thanksgiving classics such as:
For more recipes, see our 25 Best Thanksgiving Dessert Recipes.

Recipe Tips and Tricks
- Cool slowly. Just like cheesecakes, pumpkin pies are prone to splitting. They need to cool slowly and have a nice, cold rest in the fridge to get the best texture. Make the bars at least the day before you need them!
- Dairy temperature matters. This recipe isn't very challenging, but you want to make sure you follow the temperature suggestions for the dairy products. For example, the butter for the crust must be at room temperature, but the cream for the whipped cream needs to be as cold as possible. It makes a big difference!
- Watch the whipped cream. It's very easy to over-whip your cream, which turns it into butter. Once the cream starts to thicken, slow down and check the consistency. You want stiff peaks, which means the cream should stand straight up after you remove the beater. If it curls over, whip a little bit longer.
Storing and Freezing Instructions
How to Store
To avoid damaging the whipped cream topping, I recommend placing the bars in a large airtight container and storing them in the fridge for 3-4 days. The whipped cream will begin to soften after a day or two, but you can either make stabilized whipped cream or store the bars without whipped cream and frost them right before serving.
How to Freeze
Place your pumpkin bars on a large sheet pan and freeze solid. For the freshest flavor, I recommend wrapping the individual bars in plastic wrap then freezing them in an airtight container for several months. Let the bars thaw slowly in the fridge overnight, then add a dollop of homemade whipped cream.
FAQ
There are so many variations out there, but you'll almost always see ground cinnamon and pumpkin pie spice. I like to add ground ginger for a little warmth, which works really well with the other spices and the pumpkin purée.
I love making these mini pumpkin pies for a low-key Thanksgiving dessert, and they're honestly easier to make than regular pie! But I don't recommend just adapting your favorite pie recipe. Traditional pie crust is too thin to hold onto the thick pumpkin layer. You need something heartier, like a shortbread crust. This is thick enough to eat with your hands without worrying about pie falling down your shirt but still tender and crumbly enough to melt in your mouth. It's the best option, for sure!
Technically, yes, but you will need quite a lot of graham cracker crust, and the bars will need to be served with a spatula and eaten with a fork. Make a double batch of the graham cracker crust from my Pecan Pie Cheesecake (although you may have some extra). Press it into the bottom of the pan, then par-bake it following the instructions from the cheesecake. Once the crust is baked, bake the pumpkin filling and chill like normal.
More Pumpkin Dessert Recipes
- 20 Best Pumpkin Desserts
- Pumpkin Dump Cake
- Pumpkin Spice Latte
- Mini Pumpkin Pies (Small Batch)
- Pumpkin Bundt Cake
- Pumpkin Mousse
Tried this recipe?
I'd love to hear what you think! Leave a comment and rating below to share your feedback. Your reviews help others discover this recipe and help me keep creating more free recipes for you. Snap a photo and tag me on social media @aheadofthyme too.

Blistered Green Beans
Blistered Green Beans are smoky, garlicky, and peppery. This flavorful side dish is one of the quickest ways to prepare fresh green beans. As the veggie blister over high heat, they take on a subtle char flavor that balances their natural sweetness. Then, toss them in garlic, soy sauce, and red pepper flakes for a savory, slightly spicy, and super easy side dish that goes with anything!
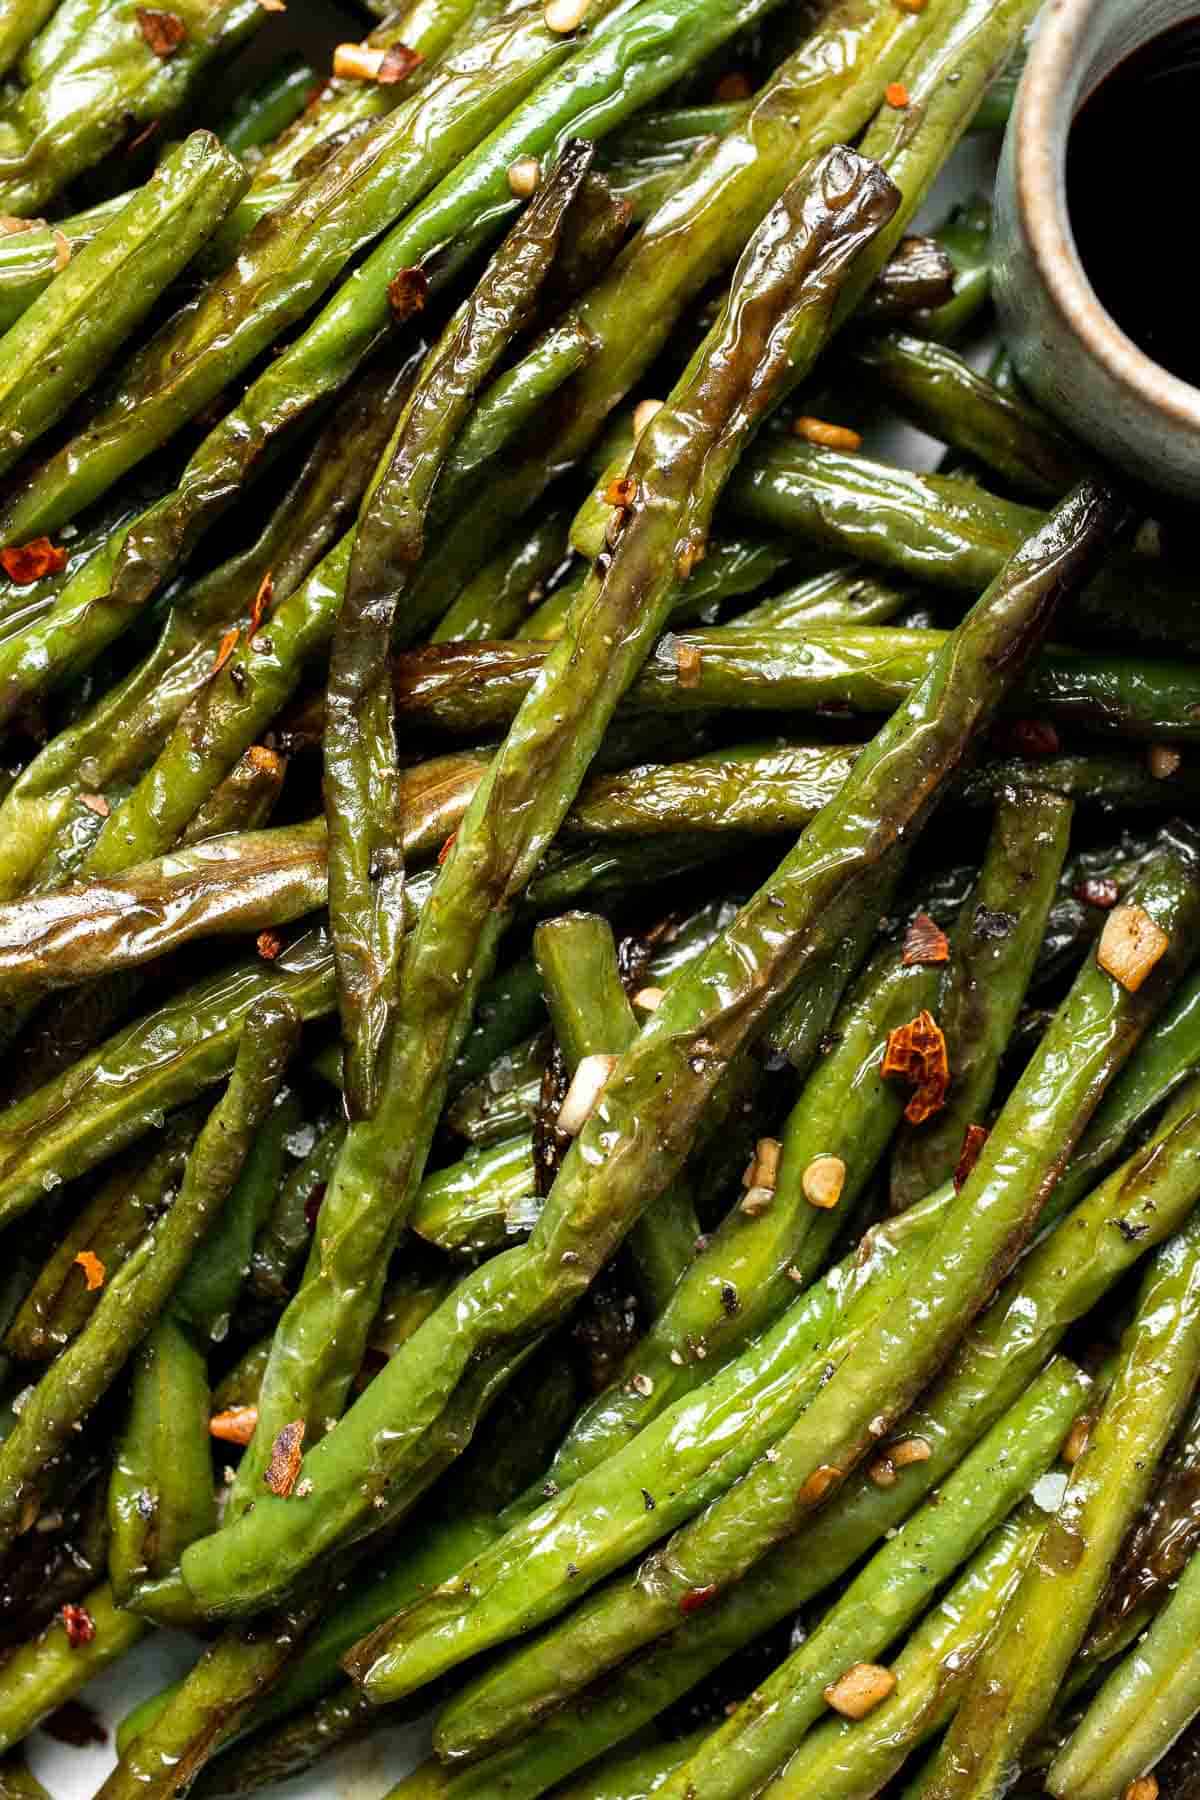
Green beans are such a versatile veggie. During the summer, we almost always have green beans on hand. During the fall, they make for the perfect Thanksgiving side dish. They're so light and fresh with a nice, crisp bite. Although we often like to saute them or add them to stir-fries, blistering is my all-time favorite method. There's truly nothing faster, and the bold flavors in the seasoning wakes up any main dish.
Why You'll Love These Blistered Green Beans
- Quick and easy. Blistering is similar to grilling, as you cook the beans very quickly over high heat. They only take about 3-4 minutes in the hot pan, making them an ideal last minute side dish for a busy night!
- Crisp, fresh texture. Green beans have a crisp texture and characteristic crunch that disappears if you cook them too long. Since this recipe cooks the beans so quickly, you preserve that texture and bright flavor without dealing with mushy, soggy beans.
- Dress up or down. This is a super simple recipe you can make any night of the week, yet it's fancy enough to serve at your next dinner party. The spicy, savory flavor is the perfect counterpoint to rich, roasted meats and elevates any meal.
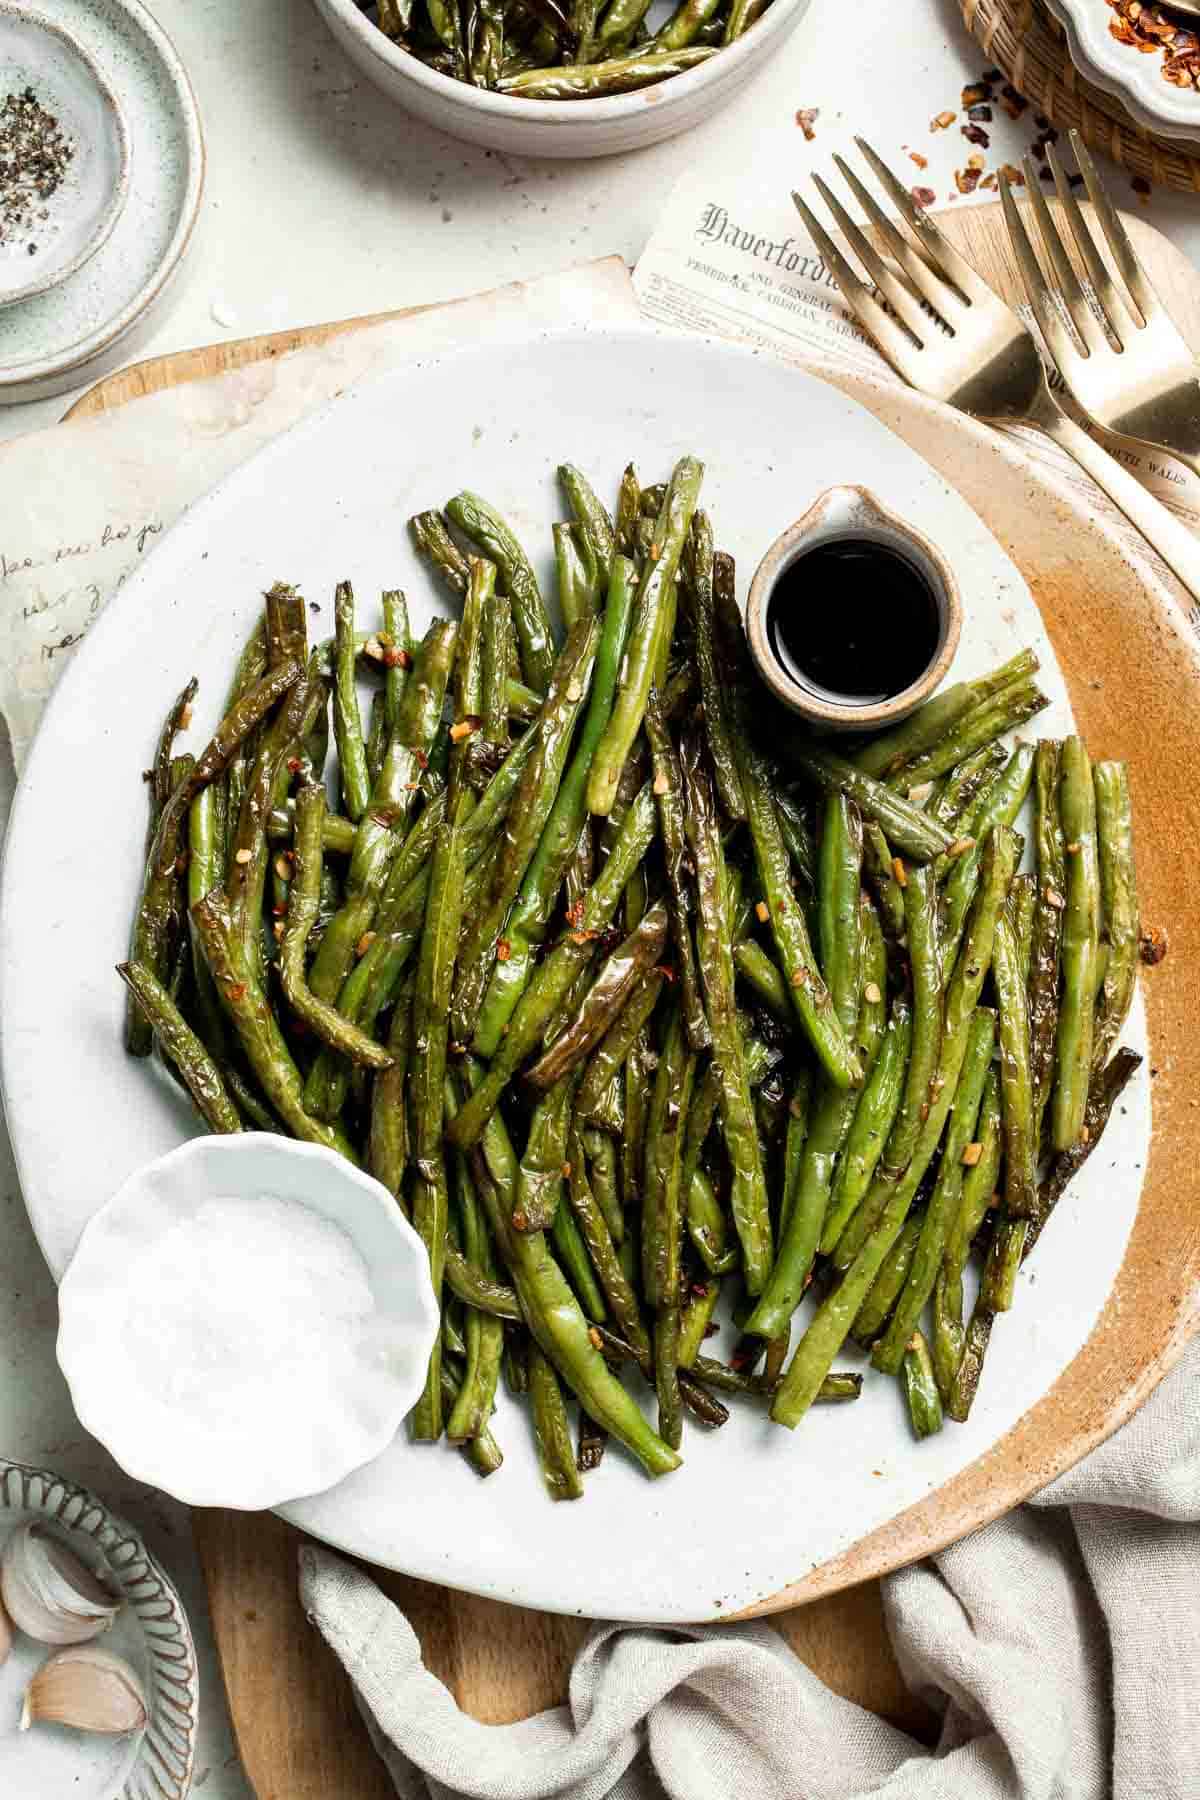
Ingredient Notes
To make these delicious Blistered Green Beans, you will need the following ingredients (full measurements in recipe card below):
- green beans - these should be washed well, then trim off the ends. If you're using string beans, be sure to remove the string before cooking. You may also see these called French green beans or runner beans, depending on where you live.
- butter - for a rich, buttery flavor. If you have issues with the butter browning, try using a little olive oil instead.
- fresh garlic cloves - finely minced.
- soy sauce - for a salty umami flavor. Any soy sauce will do, including wheat-free tamari or liquid aminos.
- seasonings - add red chili flakes, kosher salt, and freshly ground black pepper for a little heat and flavor.
You will also need measuring spoons, a large skillet (stainless steel or cast iron) and tongs.
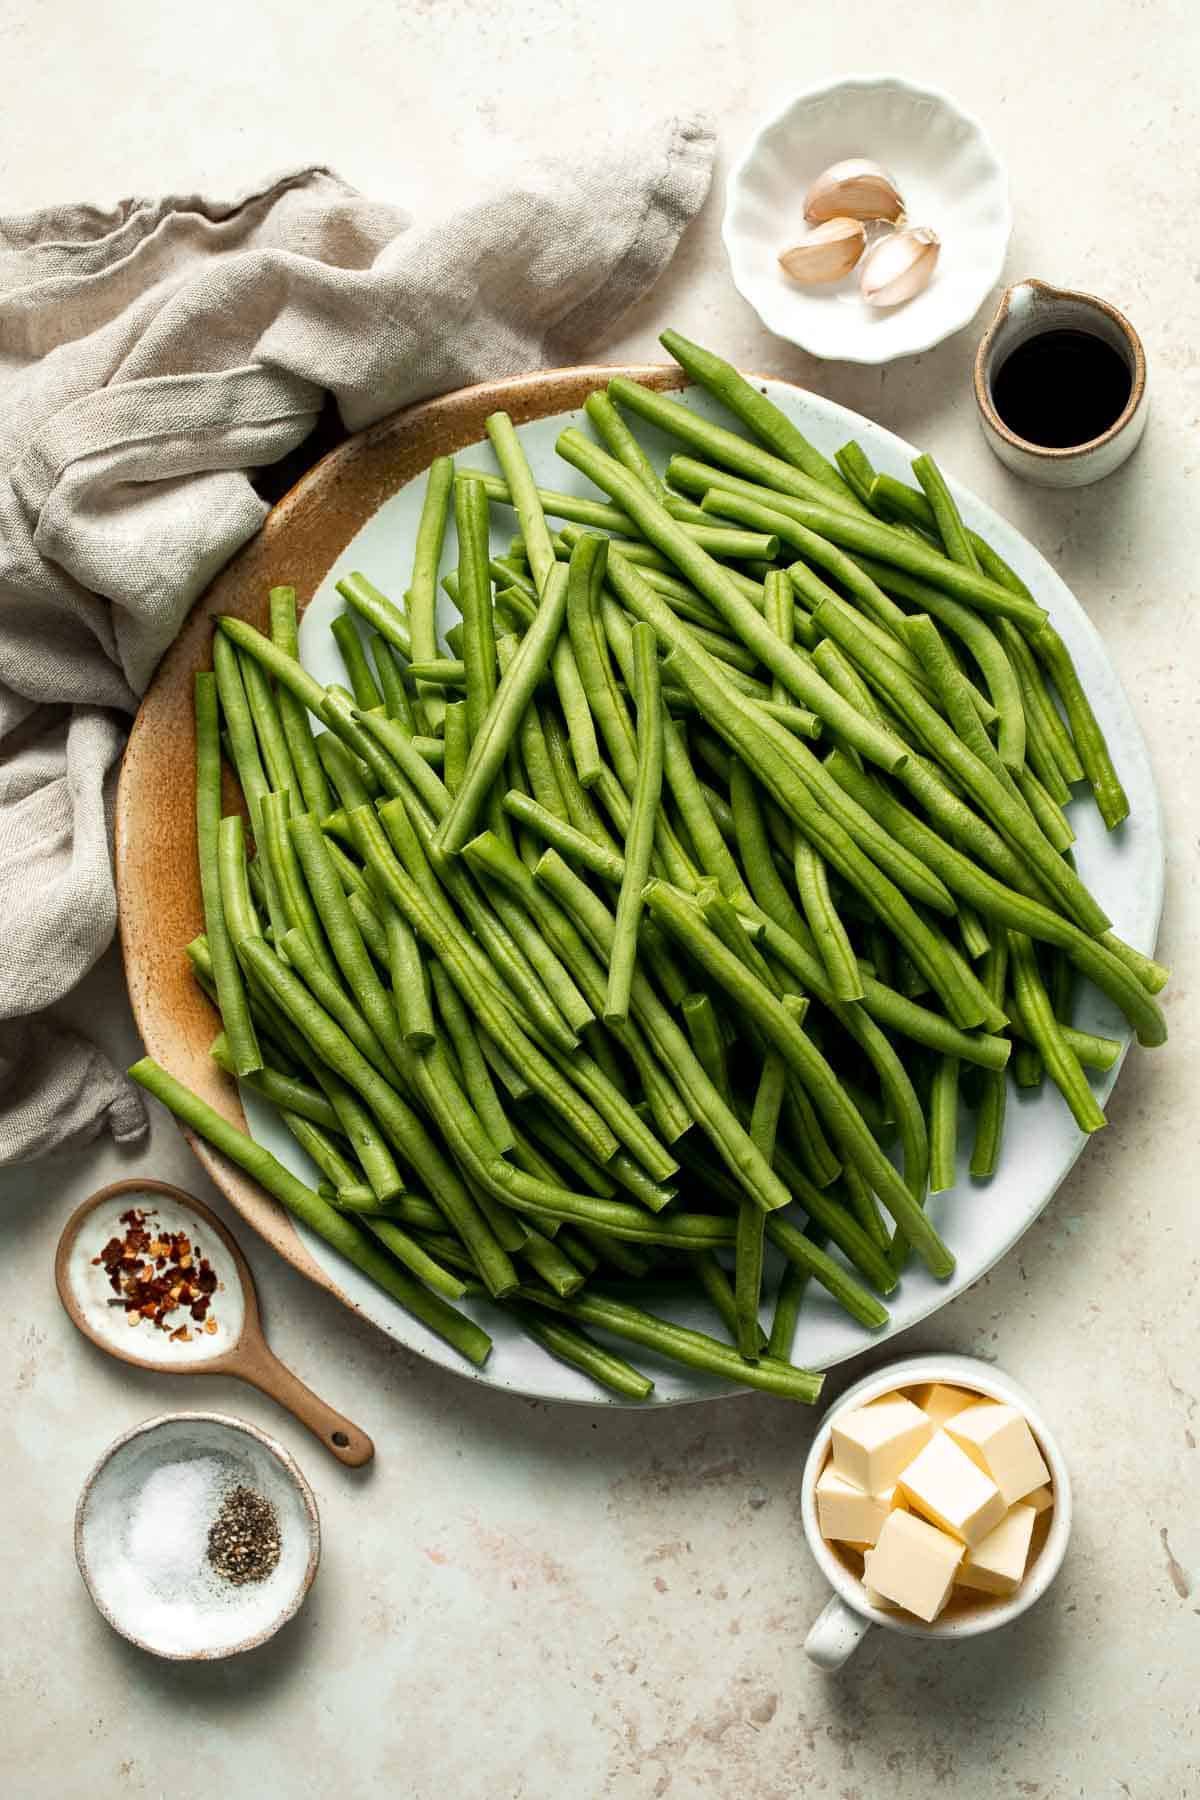
How to Make the Best Blistered Green Beans
- Melt butter. In a large stainless pan or cast iron skillet, melt butter over medium-high heat until bubbly, about 1 minute.
- Blister the green beans. Add green beans and toss well to coat in the melted butter. Allow the green beans to cook (no need to stir) and blister on both sides, about 2 minutes on each side. The green beans should look slightly charred. (Optionally, you can blister the green beans by broiling in the oven on HI until slightly charred, about 1 minute).


- Season. Add garlic, soy sauce, and chili flakes. Mix well to season the green beans. Add salt and pepper to taste and serve immediately.

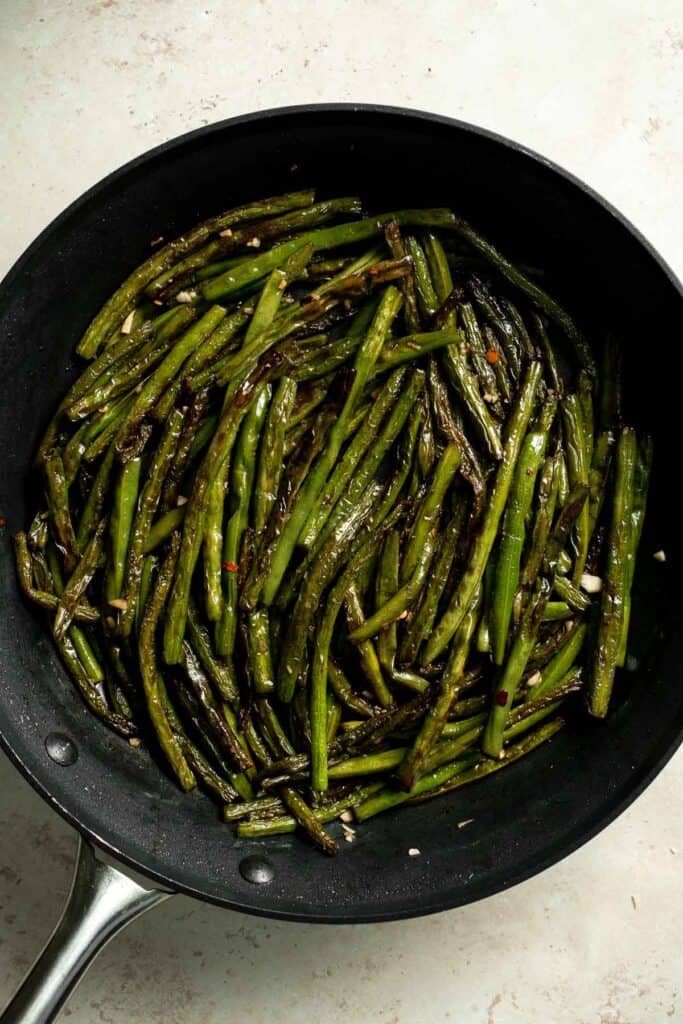
Recipe Variations
- Try other beans. Any green beans can be prepared in this way, from yellow wax beans to tender haricot verts and beyond. Just watch the cooking time, as thinner beans will cook even faster.
- Season however you'd like. For this blistered green beans recipe, you toss the blistered beans with soy sauce, garlic, and chili flakes, but that's just one option. They're great with just salt and pepper, although I also love them with a squeeze of fresh lemon juice. Feel free to try your favorite seasoning salt instead.
- Play with garnishes. These tender, crispy green beans need nothing extra, but sometimes I like to serve them with extra crunch. Sprinkle sliced almonds, chopped pistachios, or crispy fried shallots.
How to Serve
These Blistered Green Beans are a delicious side dish paired with a main course meal on a weeknight dinner or holiday meal. Some of my favorite entrees to serve with this are:
- Garlic Butter Salmon
- Roast Chicken
- Instant Pot Turkey Breast
- Stuffed Butternut Squash with Wild Rice
- Prime Rib Roast
For more recipe ideas, see our 40 Best Thanksgiving Main Dishes.
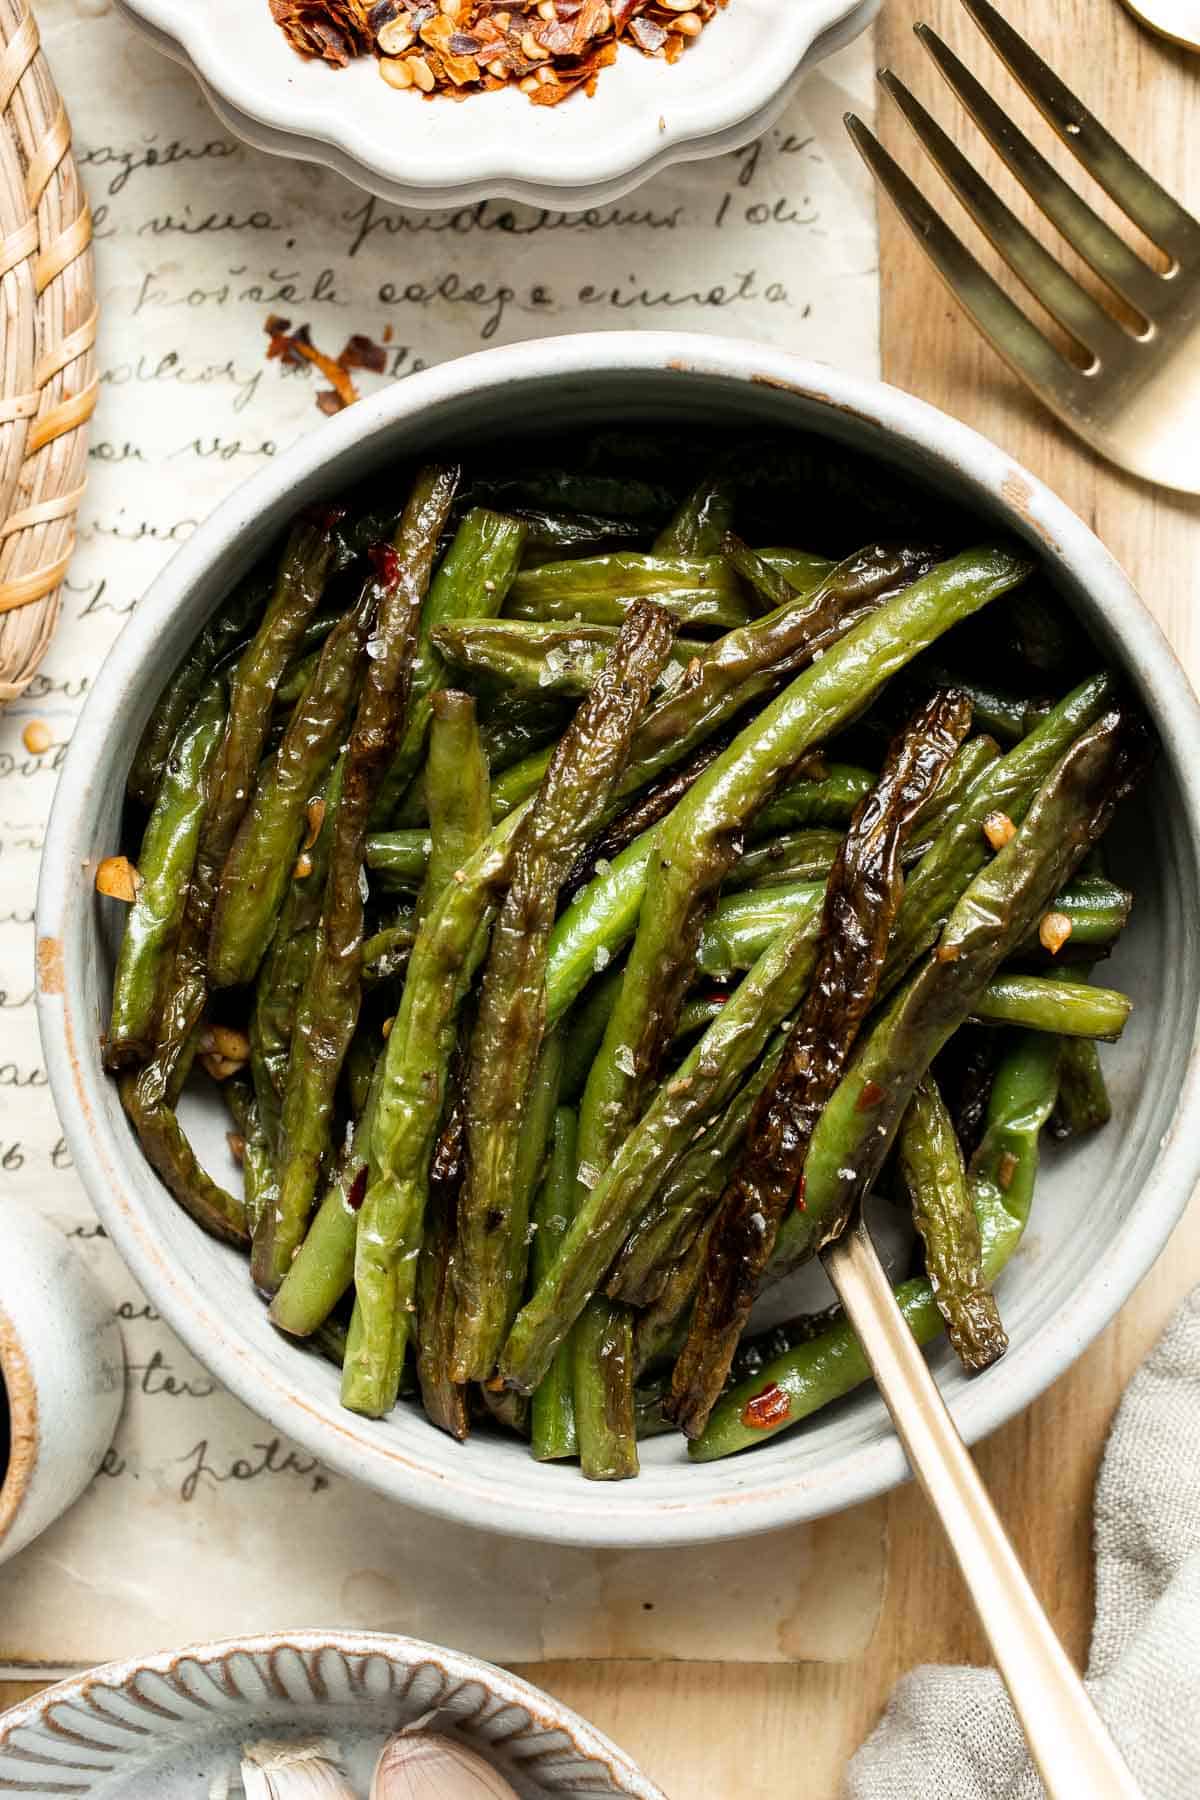
Recipe Tips and Tricks
- Watch the butter. Butter browns quickly at high temperatures. Just let it melt and bubble over medium high heat for one minute, then add the beans. This minimizes issues with the butter burning and gives the green beans a subtle richness that keeps them tender.
- Don't crowd the pan. For the best browning, the beans need room to touch the bottom of the pan. If you add too many beans at once, they'll start to steam from the heat instead of blister.
- Add the garlic last. It's tempting to gloss over the recipe quickly and add the garlic first, but it will burn from the heat of the butter. Add the garlic at the end. It will cook just enough from the residual heat of the green beans and add a bold pop of garlicky goodness.
Storing and Freezing Instructions
How to Store
Blistered green beans taste best fresh from the skillet. If you have too much leftover, let them cool to room temperature then store them in an airtight container in the fridge for 3-4 days.
How to Reheat
Microwave the green beans for 1-2 minutes or warm them in a hot skillet over medium low heat. Once reheated, the green beans will be slightly softer than they were when freshly cooked.
FAQ
Blistering refers to the way the outside of the green beans bubbles and browns from the high heat of the hot skillet. It's a specific cooking technique that tends to be quick and fast, which locks in flavor and adds a subtle char that brings out the sweetness of the fresh green beans.
You can prepare any fresh-eating green bean using this method. You can use regular green beans (like Blue Lake or Jade green beans from the farmers market), yellow wax beans, colorful Dragon's Tongue or purple beans, Chinese long beans, or thin, skinny haricots verts. The cook time will vary slightly depending on the size of the beans, so keep a close eye and be careful not to overcook.
Technically, yes, but you get the best blister effect from a hot cast iron or stainless steel pan.
More Green Bean Recipes
- 15 Best Green Bean Recipes
- Green Beans Almondine
- Green Beans with Bacon
- Pesto Green Beans
- Roasted Garlic Green Beans (Air Fryer or Oven)
- Green Beans with Pecans
Tried this recipe?
I'd love to hear what you think! Leave a comment and rating below to share your feedback. Your reviews help others discover this recipe and help me keep creating more free recipes for you. Snap a photo and tag me on social media @aheadofthyme too.

Hot and Sour Soup
Homemade Hot and Sour Soup is tangy, spicy, and so much better than takeout! This classic Chinese soup has an aromatic broth that is loaded with mushrooms, tomatoes, and carrots, then thickened with cornstarch for a glossy, silky texture. Stir in whisked egg for delicate egg ribbons that soak up all that flavor. Ready in just 25 minutes, it's faster than ordering takeout!
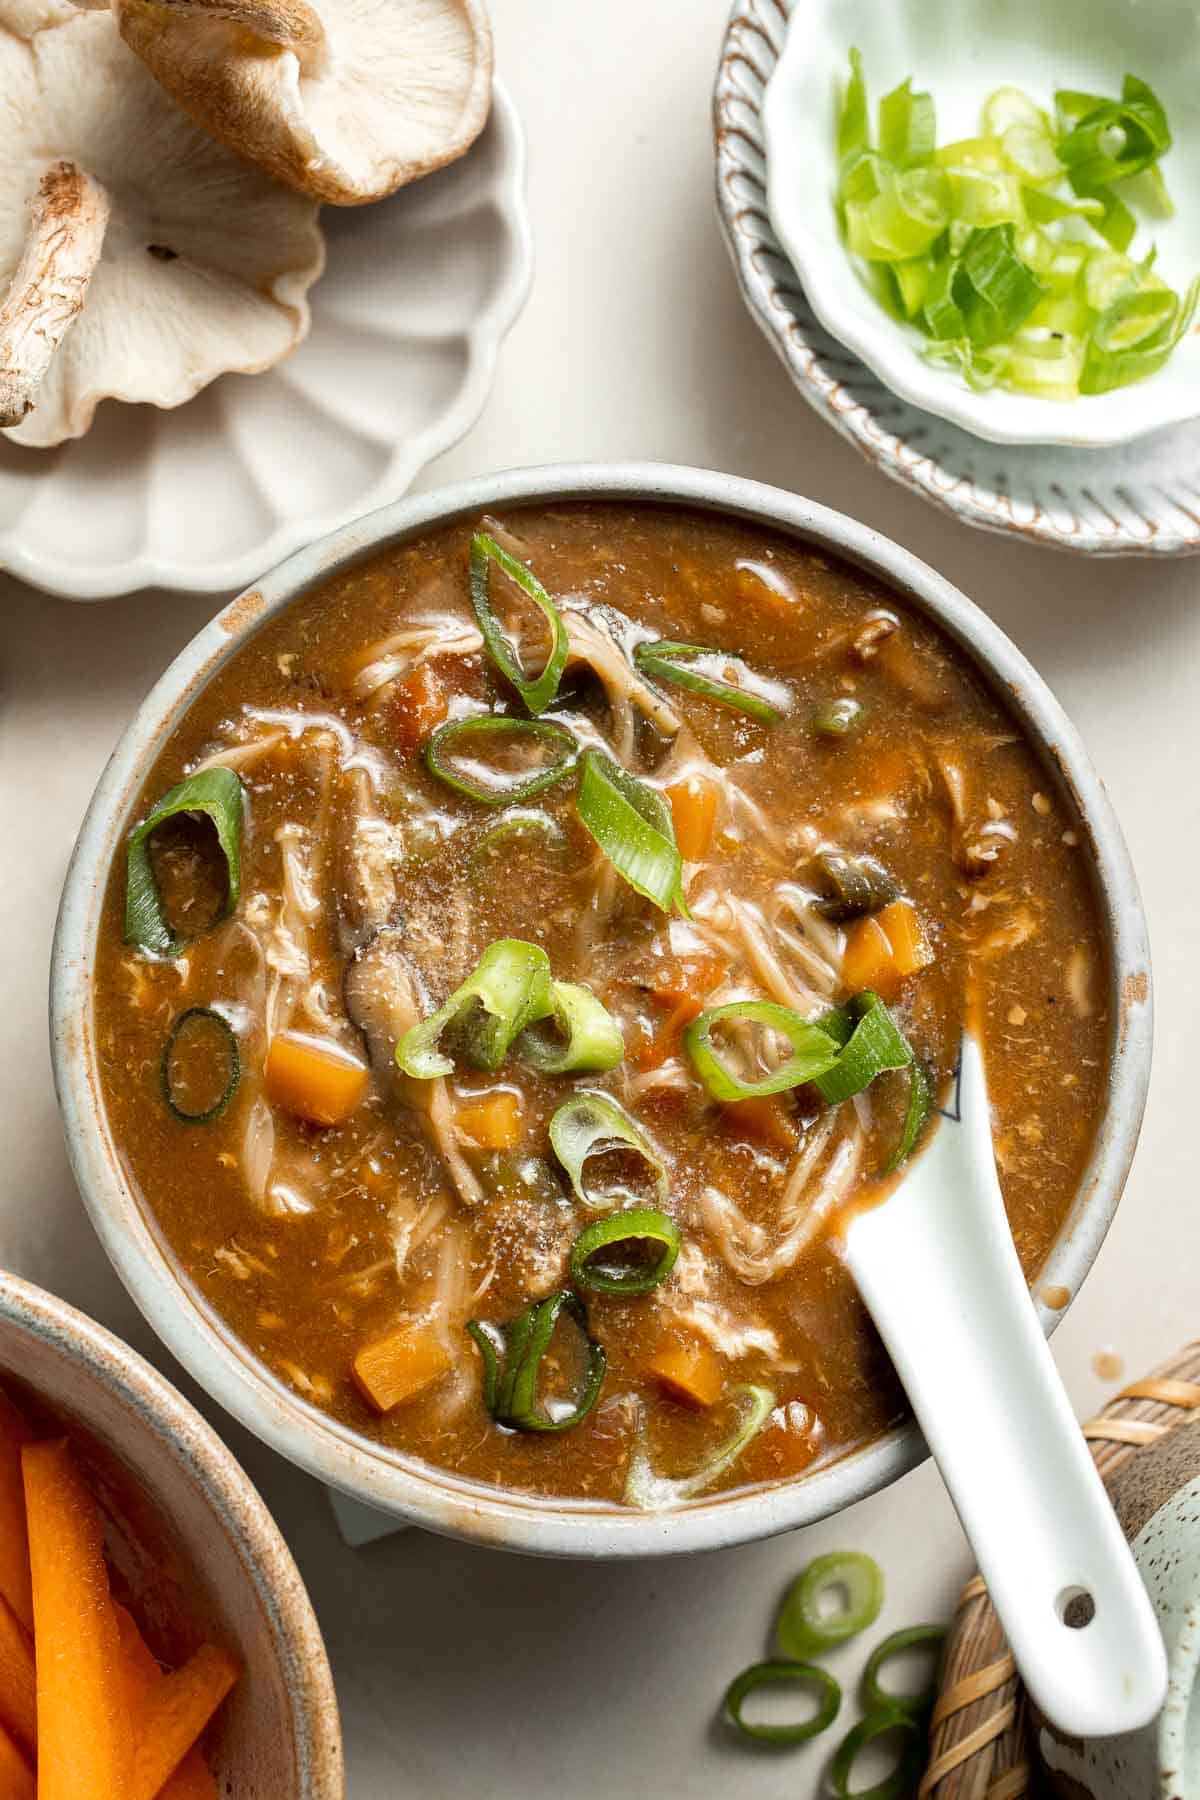
Hot and sour soup is a traditional Chinese dish known for being spicy with a tangy flavor from the vinegar. Although most Western versions are somewhat mild, this from-scratch hot and sour soup recipe can be made as spicy (or as mild) as you like! Serve it as an appetizer before your favorite Chinese recipes, like Sesame Chicken or Broccoli Beef, or pour an extra large serving for a main dish. It's the perfect addition to any meal!
Why You'll Love This Hot and Sour Soup
- Quick to make. This flavorful Chinese soup only requires about 25 minutes, which includes the time to flavor the broth and prep and cook the veggies. It's super quick and one of my favorite soups for those cool fall and winter days!
- Full of flavor. "Hot and sour" refers to the spicy white pepper and tangy vinegar, which give this soup a bold flavor that warms you all the way down. This is one of the most aromatic, intensely flavored soups, and we can't get enough of it!
- Restaurant quality. Unlike other versions that use regular soy sauce and more Americanized flavors, this recipe tries to keep this soup as authentic as possible while still considering product availability. This simple recipe truly tastes like the soup you get from your local Chinese restaurant, if not better!

Ingredient Notes
To make this delicious Hot and Sour Soup, you will need the following ingredients (full measurements in recipe card below):
- stock - use a high-quality chicken broth or stock. For a vegetarian meal, choose vegetable stock.
- soy sauce - we use both light and dark soy sauces as both sauces have slightly different flavor profiles, which enhances the broth and adds a nice depth of flavor. If you only have one, feel free to substitute it for the other.
- sesame oil - for a nutty, aromatic note.
- white vinegar - this gives the soup a sour flavor. Chinese black rice vinegar is a good substitute.
- white pepper powder - this has a slightly fruity flavor and a nice heat. If you cannot find this, try black pepper instead.
- hot sauce - or sriracha, to taste.
- tomatoes - we use roma tomatoes, but feel free to use any variety that you have.
- carrots
- shiitake mushrooms - or oyster mushrooms. If you can't find fresh shiitakes, try rehydrating dried shiitake mushrooms.
- enoki mushrooms - these are thin Japanese mushrooms commonly found at Asian stores or major grocery stores. Button mushrooms will work in a pinch.
- green onion - finely chopped, for garnish.
- cornstarch - this will thicken the hot soup and give it a glossy, silky texture.
- eggs - these will be whisked and stirred into the hot soup, similar to making egg drop soup.
- salt and pepper
You will also need measuring cups and spoons, a large pot, a small bowl, and a fork.

How to Make the Best Hot and Sour Soup
- Make the soup base. In a large pot, add stock, soy sauce, sesame oil, vinegar, pepper, and hot sauce. Heat over medium-high heat and bring to a boil.

- Add veggies. Add tomatoes, carrots, and mushrooms and cook until tender, about 8-10 minutes, stirring occasionally.


- Make cornstarch slurry. In a small mixing bowl, stir together cornstarch and ¼ cup water until it turns into a slurry. Slowly stir the cornstarch slurry into the pot of soup and keep stirring until well combined and no lumps remain in the soup.


- Add eggs. When the soup is thickening and simmering, stir in beaten eggs with a fork and keep stirring until the soup reaches a desired consistency, about 2 minutes.
- Serve. Sprinkle with green onion and season with salt and pepper to taste. Serve immediately.


Recipe Variations
- Make it hot. Feel free to be heavy-handed with the hot sauce or sriracha if you prefer a spicier soup. You can also simmer a hot chili pepper to infuse the broth with heat.
- Add protein. To keep this soup veggie-friendly, add pieces of soft tofu to the broth for a little extra protein. For meat eaters, add leftover pulled pork, roasted chicken, or your favorite Chinese meatballs.
- Add more veggies. Traditional recipes from Northern China often include lily buds, wood ear mushrooms, and other regional ingredients. To sneak in some extra veggies, you can also add bamboo shoots, green beans, broccoli, or cauliflower.
How to Serve
This Hot and Soup Soup is delicious served on its own, or paired with some of my favorite Chinese sides including:
- Steamed Scallion Buns
- Egg and Chive Vegetarian Dumplings
- Chinese Garlic Cucumber Salad
- Spicy Chili Oil Wontons
- Shanghai Style Vegetarian Steamed Buns
- Savoury Chive Pancakes with Sourdough Starter
For more recipes, see our 25 Best Dim Sum Recipes.

Recipe Tips and Tricks
- Source the right ingredients. Depending on where you live, it may be challenging to fins some of these ingredients. However, it's worth the hunt! Check your local Asian market. Even major groceries, like Whole Foods, often sell a wide range of Asian condiments and produce.
- Make a cornstarch slurry. It's tempting to add the cornstarch directly to the chicken broth, but don't! It will clump up and become impossible to stir in. Mix it with a little warm water for the best texture and flavor.
- Stir in a circular motion. After adding the whisked egg, stir the soup in a circular direction to help the egg feather out into thin tendrils instead of clumping up.
Storing and Freezing Instructions
How to Store
Once cooked, let the soup cool to room temperature, and then store the leftovers in an airtight container in the fridge for 3-4 days.
How to Reheat
Either warm the leftover soup in a pan on the stove or microwave it for several minutes. Stir well.
How to Freeze
Hot and sour soup freezes well, although it is so quick and easy to make that you may not need to go through the effort. To freeze, chill the soup first and then freeze in freezer-safe containers, leaving 1-2 inches of space at the top for the soup to expand. Thaw in the fridge, then reheat following the instructions above.
FAQ
It depends on the recipe you follow. This recipe is very easy to make vegetarian using vegetable stock, but the versions in many restaurants will be made with chicken stock instead. That's part of why we like to make our own -- we can make it vegetarian-friendly to serve our whole family.
Most hot and sour soup recipes, like this one, rely on cornstarch for that glossy, smooth texture. Cornstarch is naturally gluten-free, which makes it suitable for people who need to avoid gluten for any reason.
It can, but most of the time, hot and sour soup is made without meat. This doesn't necessarily mean it is vegetarian, though. Many versions use chicken stock instead, and you may find some with roasted meat or meatballs. If you want a vegetarian hot and sour soup, it's best to make your own.
More Hearty Vegetarian Soup Recipes
- 60 Best Soup Recipes
- Easy Wonton Soup
- Hungarian Mushroom Soup
- Vegetarian Mushroom Barley Soup
- Pasta e Fagioli Soup
- French Onion Soup
Tried this recipe?
I'd love to hear what you think! Leave a comment and rating below to share your feedback. Your reviews help others discover this recipe and help me keep creating more free recipes for you. Snap a photo and tag me on social media @aheadofthyme too.

Oatmeal Breakfast Bars
Oatmeal Breakfast Bars are chewy, filling, and delicious. Packed with simple, healthy ingredients like oats, peanut butter, and bananas, these bars are nutritious enough to start your day. They are great when you need a quick, healthy breakfast on-the-go or a snack that the whole family will love - kids too!. Think warm, comforting bowls of oatmeal, but in bar form.
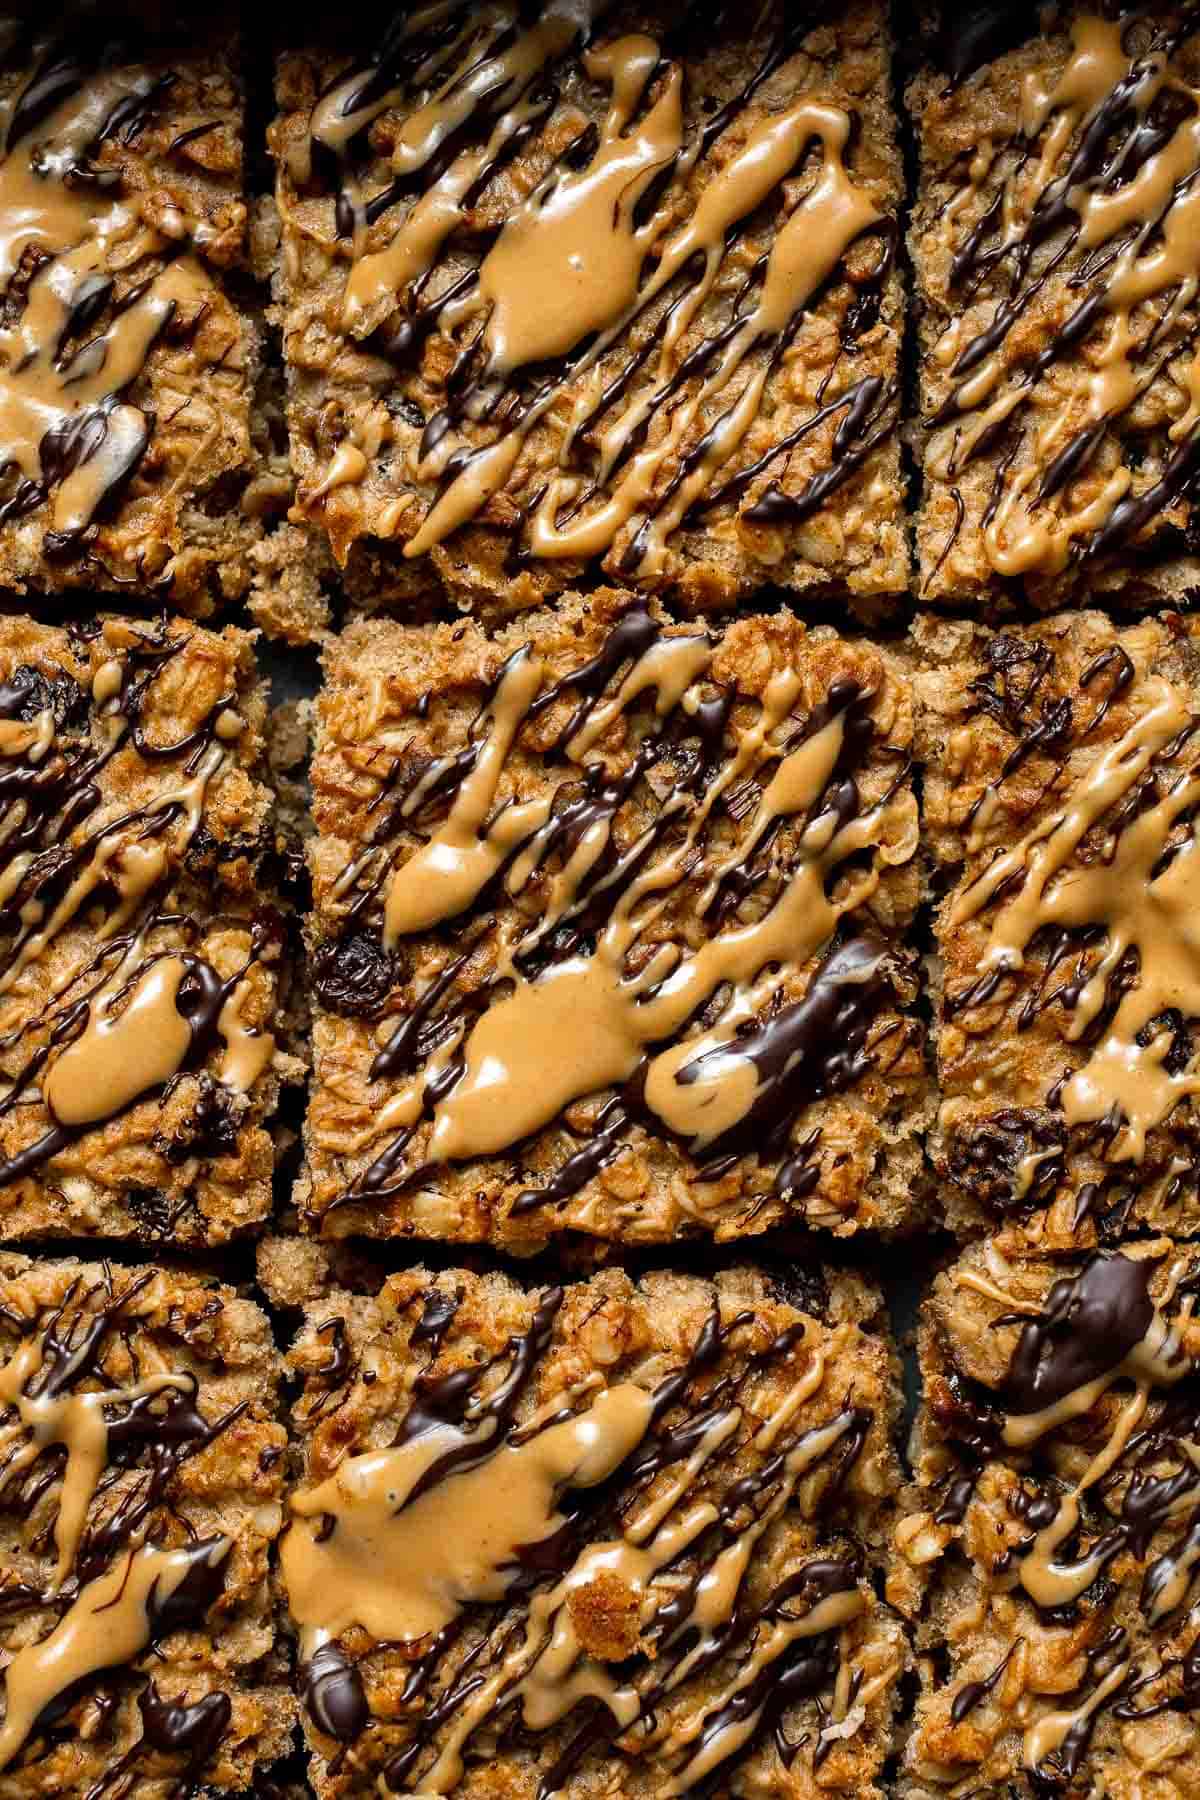
Oats are one of the cheapest, healthiest, and most versatile ingredients in our pantries. They can be used for everything from traditional oat porridge to chewy oatmeal raisin cookies and so much more! These homemade bars have the texture of a soft granola bar, so you can eat them right out of your hand instead of needing a plate and fork. Plus, you can change out the spices, nut butter, dried fruit, and more for a totally different flavor profile. We like to serve them with an apple and Greek yogurt or a slice of egg casserole for a super simple breakfast on those busy days!
Why You'll Love These Oatmeal Breakfast Bars
- Feeds the whole family. With 9 servings in each batch, these bars are ideal for feeding a crowd or keeping yourself stocked all week. Plus, they're popular with both kids and adults!
- Made with wholesome ingredients. Packed with whole grains like oats, natural sweeteners like bananas, and healthy fats from peanut butter and coconut oil, these bars have plenty of fats, fiber, and protein to start your day. They're also much healthier and cheaper than prepackaged bars from the store!
- Great for meal prepping. Take a little time on the weekend to set yourself up for success. These healthy oatmeal bars only take 40 minutes to prepare and are a lifesaver when you need breakfast ready quickly. Make a double batch and freeze the extras for up to 3 months!
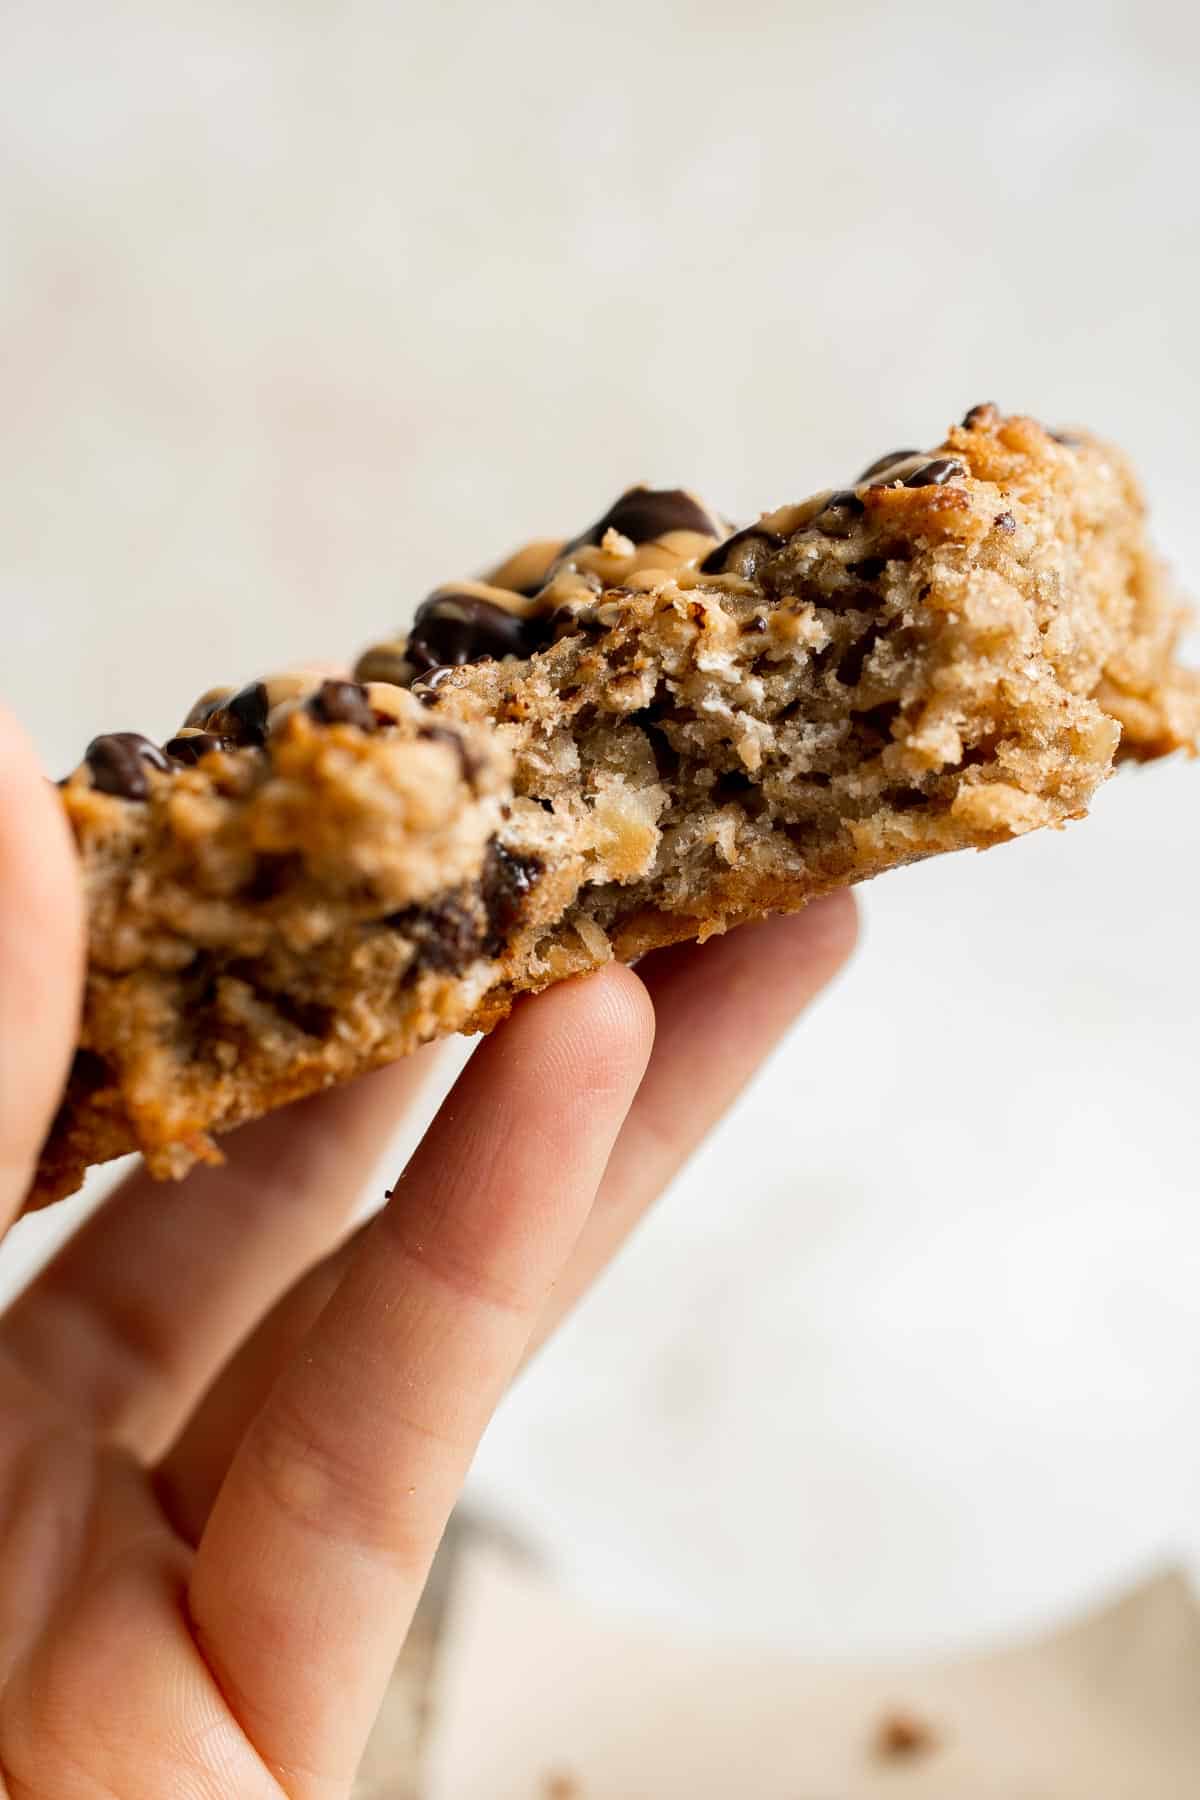
Ingredient Notes
To make these delicious Oatmeal Breakfast Bars, you will need the following ingredients (full measurements in recipe card below):
- rolled oats - also known as old-fashioned oats. Avoid quick oats, which soften too quickly.
- all-purpose flour - this adds structure to the oat mixture.
- cinnamon
- baking powder - for a lighter texture.
- sugar - we use granulated sugar, but feel free to use brown sugar instead.
- salt
- raisins - for extra texture and natural sweetness.
- creamy peanut butter - for healthy fats. Feel free to use almond butter, sunflower seed butter, or your favorite nut butter. Save a little extra for drizzling on top as a garnish.
- coconut oil - for moisture and a tender texture. Melted butter works great, too.
- mashed ripe bananas - the browner, the better.
- egg
- vanilla extract
- melted chocolate - optional, for serving.
You will also need measuring cups and spoons, a medium and large bowl, a whisk, a 9 inch square baking dish, a rubber spatula, and a wire cooling rack.
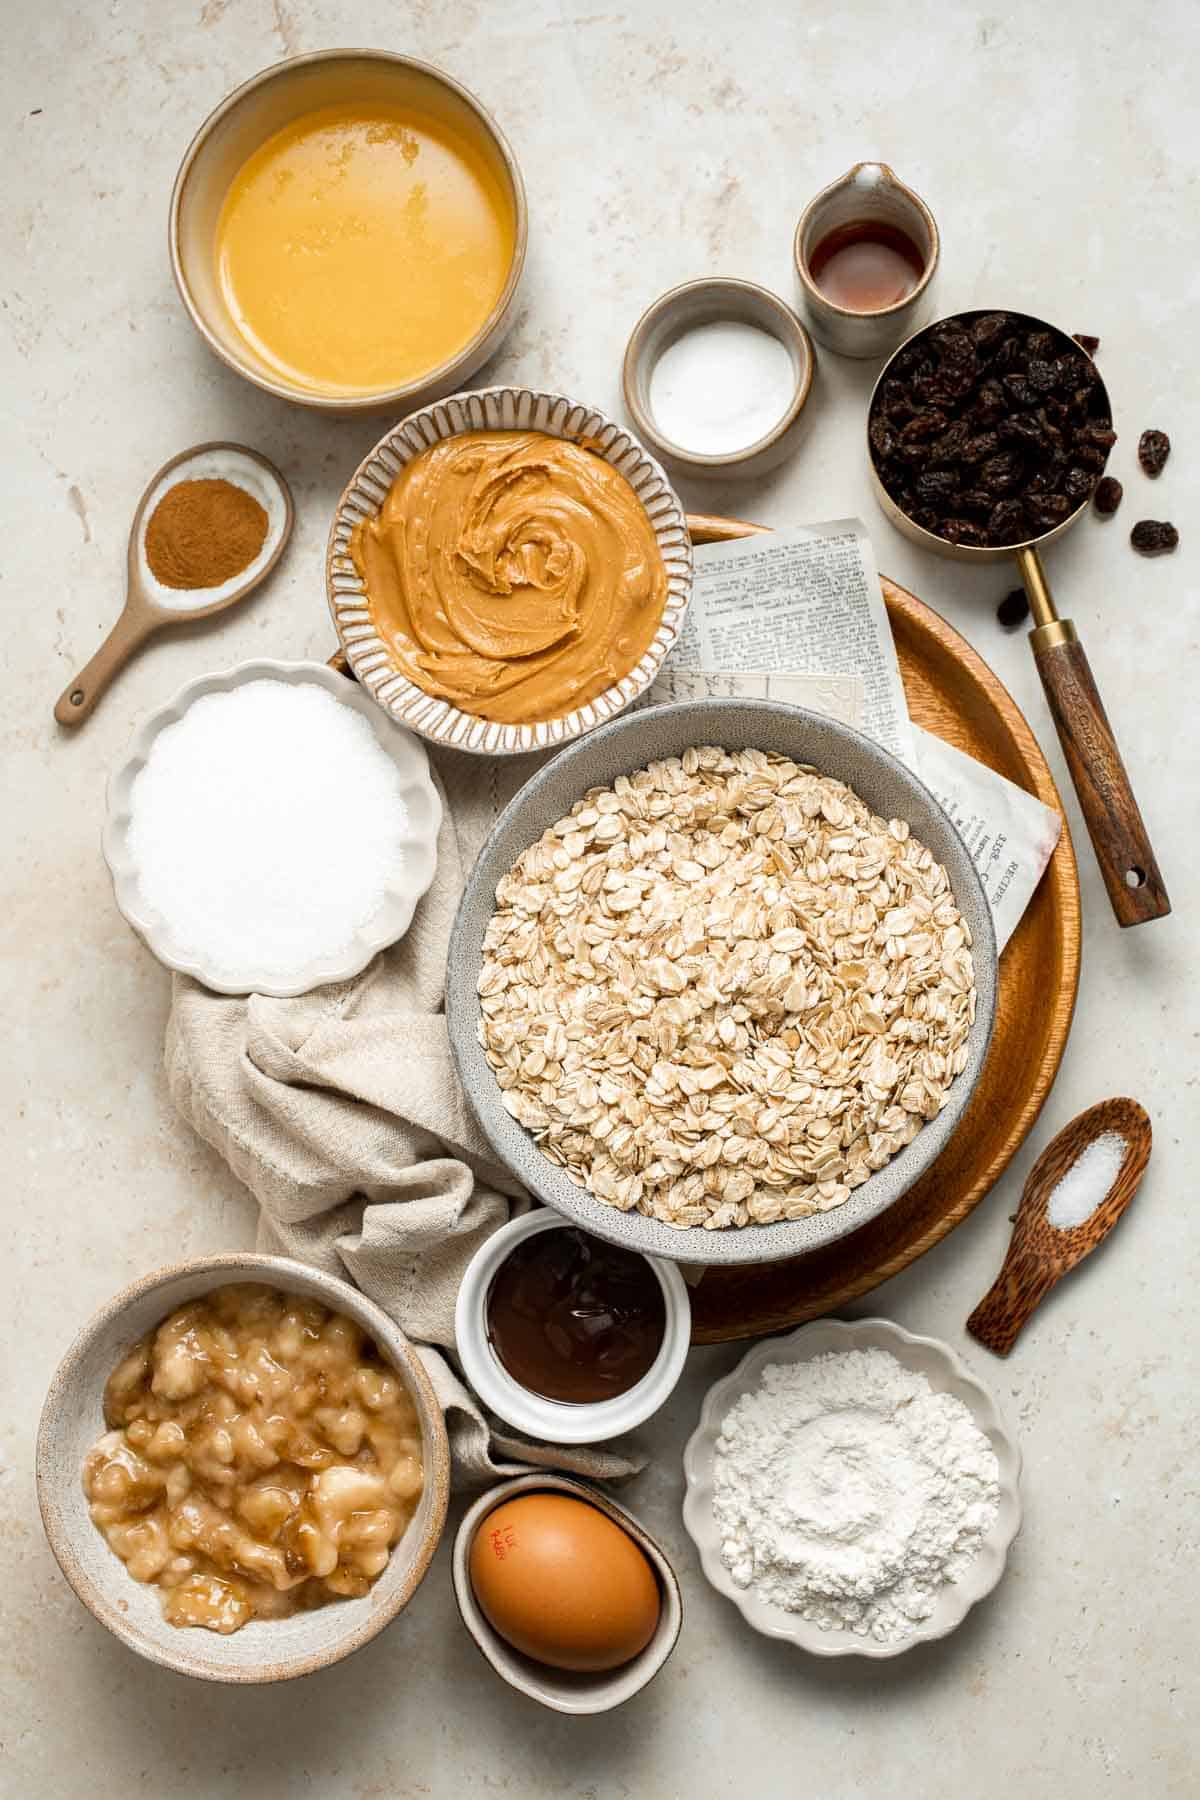
How to Make the Best Oatmeal Breakfast Bars
- Combine dry ingredients. In a large mixing bowl, whisk together all the dry ingredients including rolled oats, flour, cinnamon, baking powder, sugar, and salt until evenly combined. Stir in the raisins.


- Combine wet ingredients. In another mixing bowl, mix together all the wet ingredients including peanut butter, coconut oil, mashed bananas, egg, and vanilla extract until smooth.
- Add dry to wet. Add the dry mixture into the wet mixture and fold together until just combined.


- Spread. Transfer the mixture into a 9-inch square baking pan and press gently to create an even layer.
- Bake. Bake in a 350F preheated oven for 25 to 30 minutes until lightly browned.


- Slice. Place on a wire rack to cool down completely. Then, cut into 9 even squares.


- Serve. Serve with a drizzle of melted chocolate and a drizzle of peanut butter.


Recipe Variations
- Swap out the all-purpose flour. Feel free to use whole wheat flour for extra fiber or use a 1:1 gluten-free flour replacement.
- Play with the fruit. Create blueberry oatmeal breakfast bars by adding fresh blueberries, or replace the raisins with other types of dried fruit like cranberries, apricots, or chopped dates.
- Add seeds for crunch. If you like a little bit of crunch in your oat bars, sprinkle in pumpkin seeds, sunflower seeds, or your favorite chopped nuts.
How to Serve
These Oatmeal Breakfast Bars are delicious served on-the-go on their own or paired with milk, coffee or tea. Some of my favorite drinks to pair with this are:
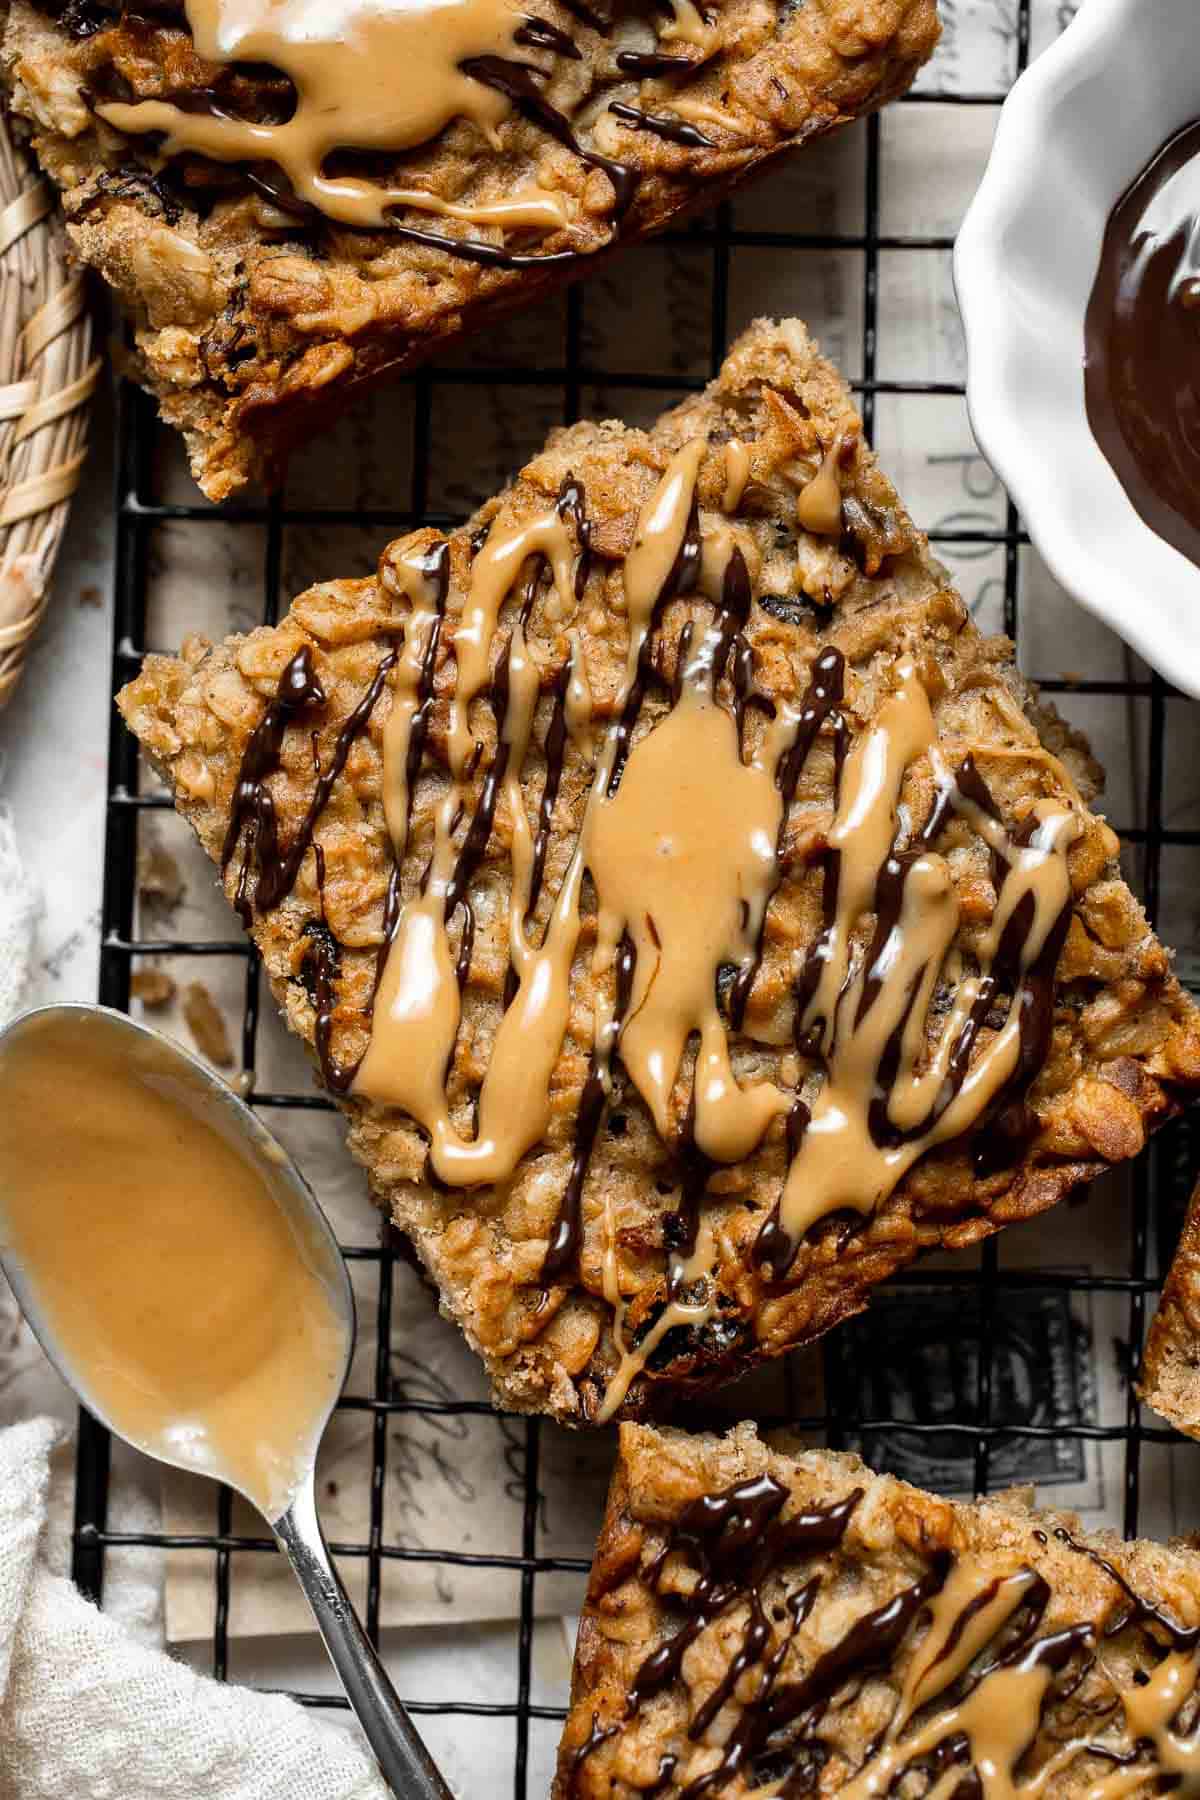
Recipe Tips and Tricks
- Use parchment paper for easy removal. Line your baking dish with parchment paper to prevent sticking and make it easier to lift the bars out once they're baked. This also helps keep the edges from overbaking.
- Avoid overmixing the ingredients. When combining the wet and dry ingredients, fold them together until they are just combined. Overmixing can cause the oats to break down, resulting in a denser, less chewy texture.
- Cool completely before cutting. It's tempting to slice into your bars immediately, but letting the bars sit and cool will make them easier to cut and hold together better.
Storing and Freezing Instructions
How to Store
To keep your leftover bars fresh, store them in an airtight container at room temperature for up to 3 days. For best results, wrap each bar individually in plastic wrap or parchment paper. For longer storage, place the bars in the fridge where they'll keep for up to a week.
How to Reheat
For a warm breakfast, microwave one bar for 10-15 seconds until just heated through.
How to Freeze
Tightly wrap each bar individually, then place them in a freezer-safe container or airtight container and store in the freezer for up to 3 months. When you're ready to enjoy, just take one out and let it thaw at room temperature or overnight in the fridge.
FAQ
Yes, of course. Use a 1:1 ratio of gluten-free flour in place of the all purpose flour, and make sure to use certified gluten-free oats. They're much cheaper than buying gluten-free breakfast bars at the store!
If you want to reduce the sugar, I recommend starting by using less sugar than the recipe calls and letting the natural sweetness of the mashed bananas stand out. For a sweeter flavor, use a natural granulated sweetener, like coconut sugar or maple sugar, instead of regular white sugar.
Rolled oats are ideal for these bars because they maintain a chewier texture. Quick oats or instant oats are steamed during processing, which causes them to soften much faster. This can make them soggy or overly dense after baking. Old fashioned oats are the best choice.
More Recipes with Oats
- Homemade Granola
- Cinnamon Apple Baked Oatmeal
- Banana Chocolate Chip Oatmeal Muffins
- Almond Butter Granola Bars
- Blueberry Oat Squares
- Oat Porridge
Tried this recipe?
I'd love to hear what you think! Leave a comment and rating below to share your feedback. Your reviews help others discover this recipe and help me keep creating more free recipes for you. Snap a photo and tag me on social media @aheadofthyme too.
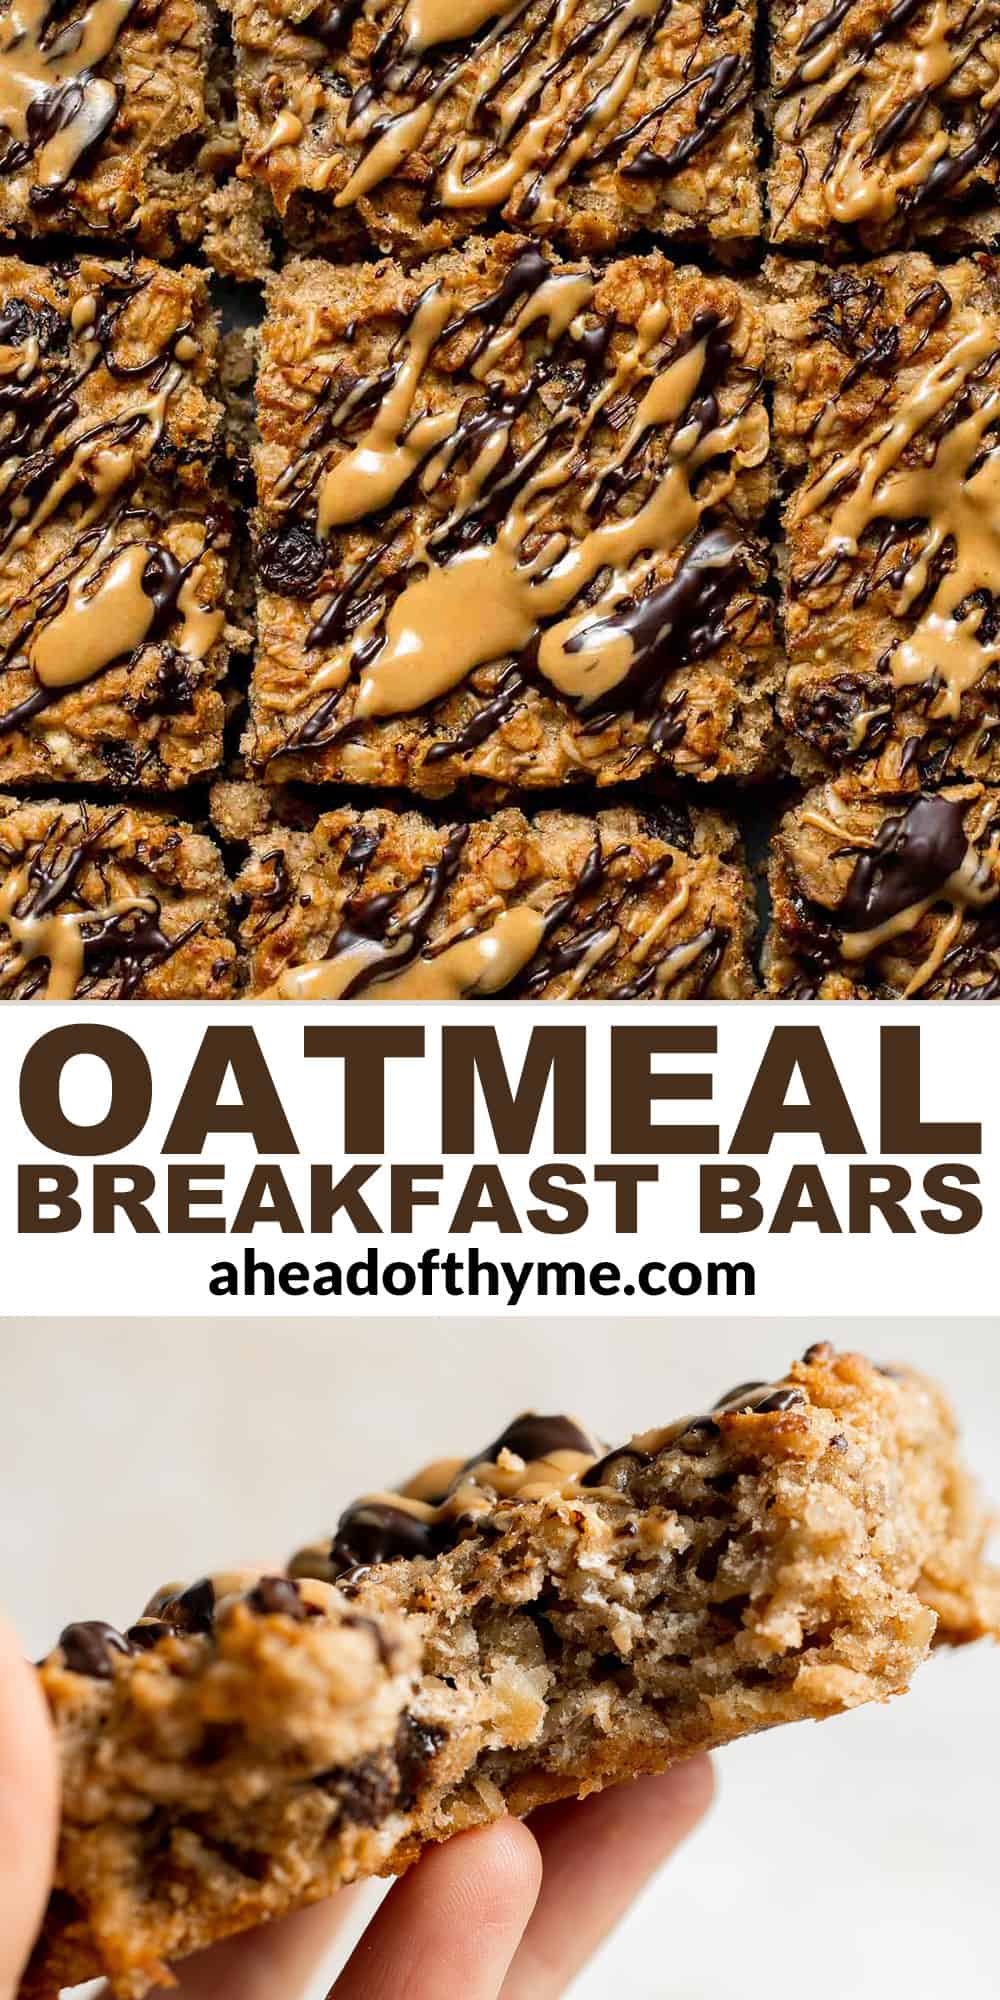
Parsnip Puree
This fluffy, creamy Parsnip Puree looks like mashed potatoes but has a distinctly nutty flavor that sets it apart. It is quick and easy to make too! Just simmer the parsnips and garlic until tender, then blend with other ingredients until silky smooth. They're perfect for soaking up gravies or sauces, and are a delicious alternative to traditional mash for the holidays and beyond.
Did you know parsnips are related to both carrots and parsley? The combination of those two flavors sums up what parsnips taste like really well. They're slightly sweet with a nutty, aromatic flavor that holds up to hearty roasted meats, like Roast Turkey, Pork Tenderloin, or Prime Rib. But if you're worried it's too different for your holiday table, give it a try. This parsnip puree recipe turns out lusciously creamy every time, and even mashed potato purists give it rave reviews!
Why You'll Love This Parsnip Puree
- Ready in 20 minutes. This recipe sounds fancy but is super simple to make. I'm always amazed at how quickly this parsnip mash comes together! Unlike potatoes, which seem to take forever to soften up, this entire recipe only takes about 25 minutes. It's so handy for last-minute meals!
- Creamy and delicious. Some veggies just work so well when mashed (hello Mashed Potatoes!) and parsnips are one of those veggies. When cooked until tender and mashed with a bit of milk and butter, it turns so silky and velvety.
- Great for holidays. Parsnips are in season during the fall and winter. Their sweet, nutty flavor works well with other seasonal favorites and roasted meats, making them a natural fit for Thanksgiving dinner or your Christmas feast!

Ingredient Notes
To make this delicious Parsnip Puree, you will need the following ingredients (full measurements in recipe card below):
- parsnips - I recommend using large parsnips, which are easy to peel.
- garlic
- butter
- sour cream - for a little tanginess to offset the nutty flavor of the parsnips.
- whole milk - for creaminess.
- salt and pepper - added to taste.
- fresh thyme - this is optional, for garnish. Feel free to substitute with your favorite herb such as parsley, rosemary, or dill.
You will also need measuring cups and spoons, a large pot, strainer, fork, and an immersion blender or high-speed blender.

How to Make the Best Parsnip Puree
- Cook parsnips. Place parsnip chunks and whole garlic cloves in a large pot and cover with salted water (covering the parsnips by about an inch). Heat over high heat and bring to a boil. Reduce heat to low, cover, and simmer for 10-12 minutes, until the parsnips are tender when you insert a fork.


- Blend. Remove from heat, drain and place back in the pot. Use a hand-held immersion blender to puree the mixture until smooth, You can also use a food processor or blender to mash the parsnips and garlic.


- Add remaining ingredients. Add in the butter and sour cream and stir together until melted and well combined. Pour in the milk and stir to combine. Then, add the salt and pepper, to taste.


- Serve. Garnish with chopped thyme and serve as a side dish.

Recipe Variations
- Use broth. Infuse extra flavor into the parsnips by boiling them in veggie or chicken broth.
- Add potatoes. Combine both parsnips and white potatoes for an extra fluffy, creamy mash with a milder flavor.
- Play with different fats. Replace some of the butter with rendered bacon fat or add a drizzle of truffle oil for a deeply aromatic note.
How to Serve
This easy Parsnip Puree recipe is a delicious side dish that works well with roasted meats as it does with our vegetarian main dishes. Some of my favorite dishes to pair this with are:
- Easy Juicy Roasted Turkey Breast
- Garlic Butter Steak Bites
- Creamy Garlic Shrimp
- Stuffed Eggplant
- Roasted Spatchcock Chicken
- Glazed Honey Balsamic Pork Chops
- Lentil Meatballs

Recipe Tips and Tricks
- Use fat for flavor. Just like making mashed potatoes, these pureed parsnips need some fat to bring out the full depth of their flavor. I use a mixture of butter, whole milk, and sour cream. Cream cheese is a nice alternative to sour cream, and a little heavy cream can make this nutty side dish even more decadent.
- Use the right tools. Using a potato masher works, but you'll get a really smooth consistency using a hand blender.
- Start on low heat. Any time you cook root vegetables for mashing, start them in cold water for the creamiest texture.
Storing and Freezing Instructions
How to Store
Store leftover parsnip puree in an airtight container in the fridge for 3-4 days.
How to Reheat
Microwave individual portions for 2-3 minutes or warm the parsnip puree in a small pan on the stove with a splash of water or chicken stock.
How to Freeze
Store the leftovers in a freezer-safe storage container, then freeze for up to 3 months.
FAQ
Parsnips are long, white root vegetables that resemble white carrots. Although they are relatives of carrots, they're also related to parsley, which explains some of their rich, earthy flavor. They are usually harvested after the first frost, which makes them even sweeter. Then, they are roasted, turned into soup, or even mashed into a creamy parsnip puree to enjoy with roast chicken and other hearty meats.
Yes, but you will need non-dairy milk with a neutral flavor. Otherwise, your mashed parsnips will taste like coconut, which isn't exactly the flavor we're going for. If you need to avoid dairy, try full-fat coconut milk or dairy-free whipping cream, non-dairy sour cream, and butter-flavored shortening.
You'll need to boil the parsnips, similar to boiling potatoes. Peel and slice the parsnips, then cover with cold salted water and boil for 10-12 minutes or until fork tender. Strain, add the other ingredients, and blend until smooth. I find using a high speed blender or immersion works the best.
More Mashed Vegetable Recipes
- Best and Creamiest Mashed Potatoes
- Mashed Cauliflower
- Mashed Butternut Squash
- Brown Butter Mashed Potatoes
- Creamy Garlic Mashed Cauliflower
- Savoury Mashed Sweet Potatoes
Tried this recipe?
I'd love to hear what you think! Leave a comment and rating below to share your feedback. Your reviews help others discover this recipe and help me keep creating more free recipes for you. Snap a photo and tag me on social media @aheadofthyme too.

Spinach and Ricotta Pasta Bake
Spinach and Ricotta Pasta Bake is the ultimate cozy comfort meal, packed with creamy ricotta and tender spinach, tossed in marinara, and baked with extra cheese until bubbly. It tastes like Vegetarian Spinach Lasagna, but way easier to make! The whole family loves this simple, vegetarian dinner.
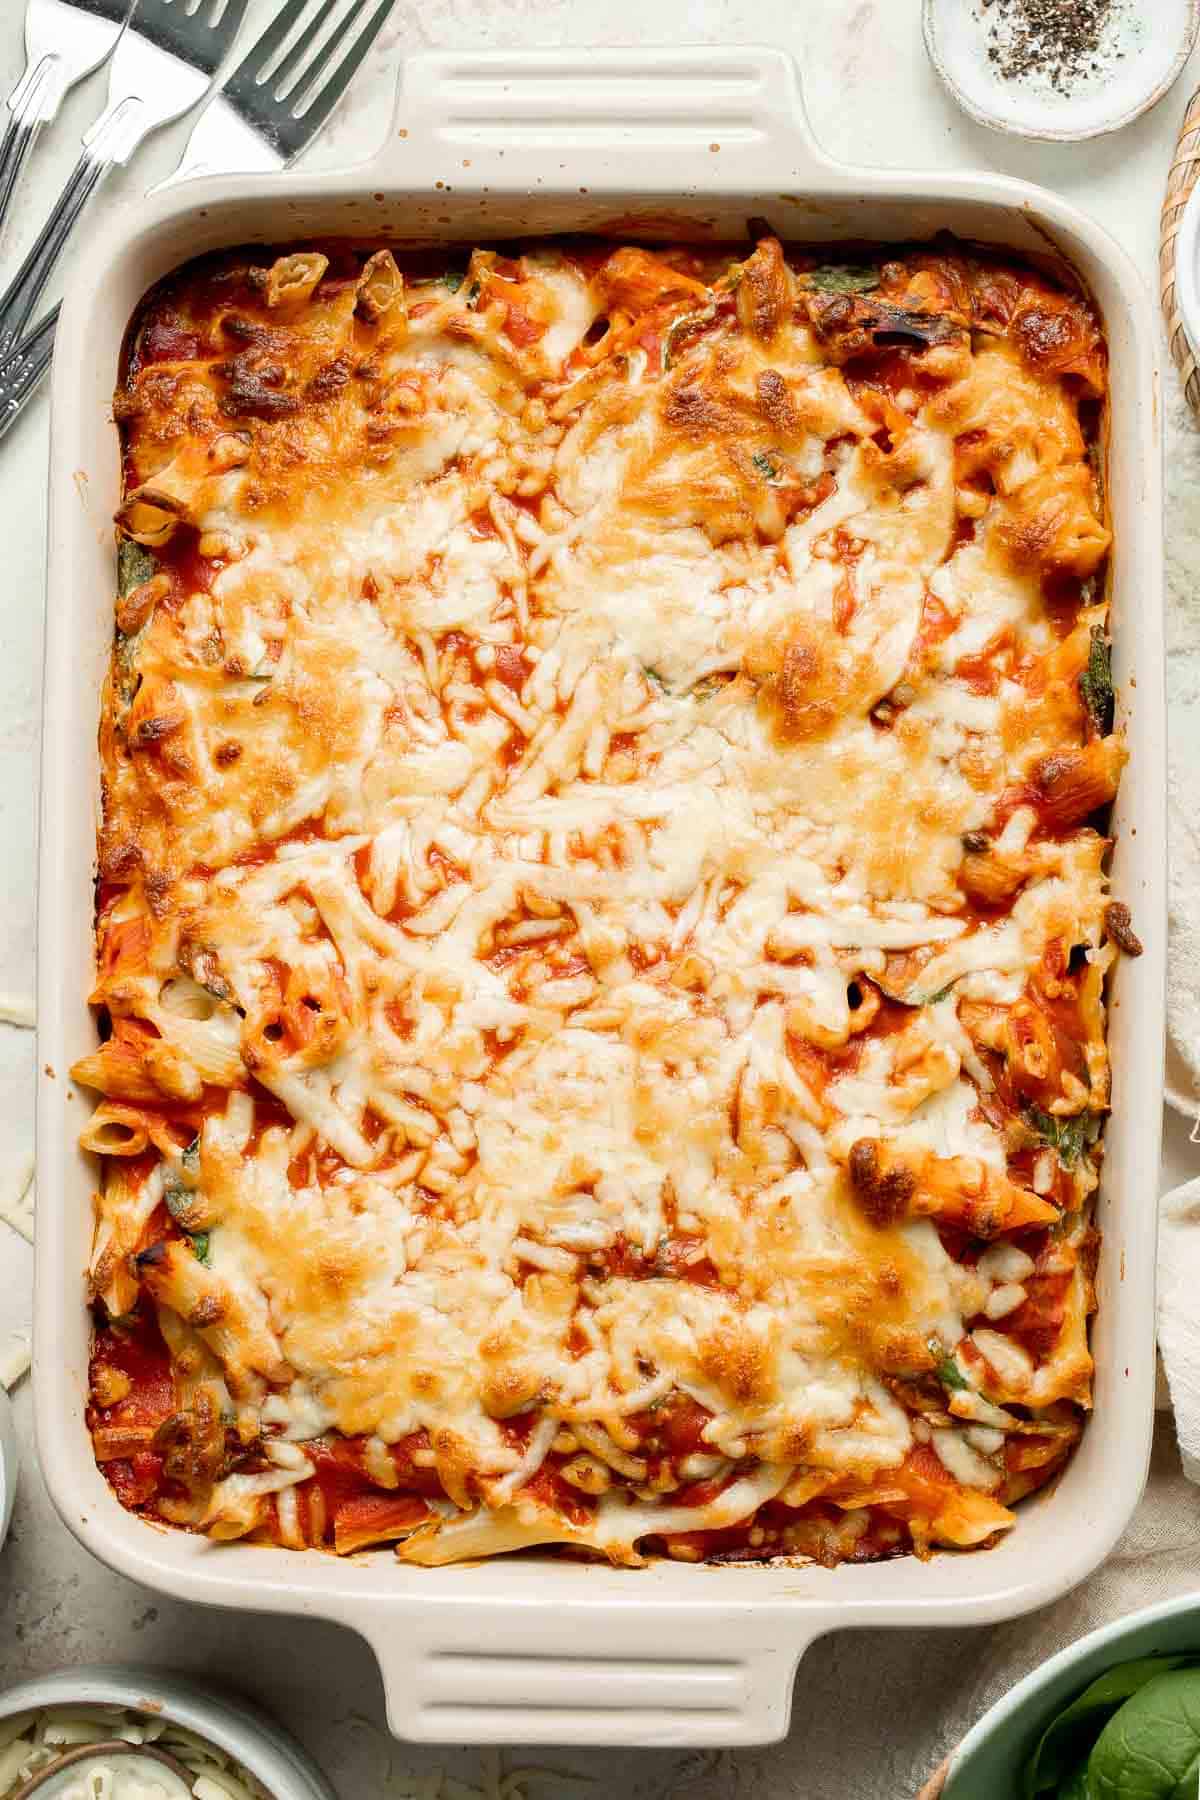
Pasta is my go-to for quick, family-friendly meals, and this spinach pasta bake has quickly become one of our regular options. Everyone loves the cheesy sauce, and I love that we're sneaking in some spinach for some extra greens! Serve it on its own as a vegetarian main or pair it with your favorite Italian recipes, like meatballs or eggplant parmesan, to make it a complete meal. Dinner is served!
Why You'll Love This Spinach and Ricotta Pasta Bake
- Quick and easy. This "lazy lasagna" is just that! While the pasta cooks, preheat the oven and work on the ricotta mixture. Then, mix everything together, top with tomato sauce and extra cheese, and bake. That's it. So easy!
- So flavorful. Similar to Stuffed Shells, this delicious pasta bake is loaded with creamy cheese and spinach. A touch of marinara cuts through all that creamy goodness and adds a rich tomato flavor to bring everything together.
- Great for entertaining. If you have company coming over and you want something you can pop in the oven while you catch up, this is the recipe to try! You'll have plenty of time to mingle while the pasta bakes. You can even prep it the night before for easy entertaining!
- Easy to customize. Need a gluten-free option? Want to add more fiber? Prefer a different noodle? There are so many ways to make this ricotta pasta bake recipe your own.
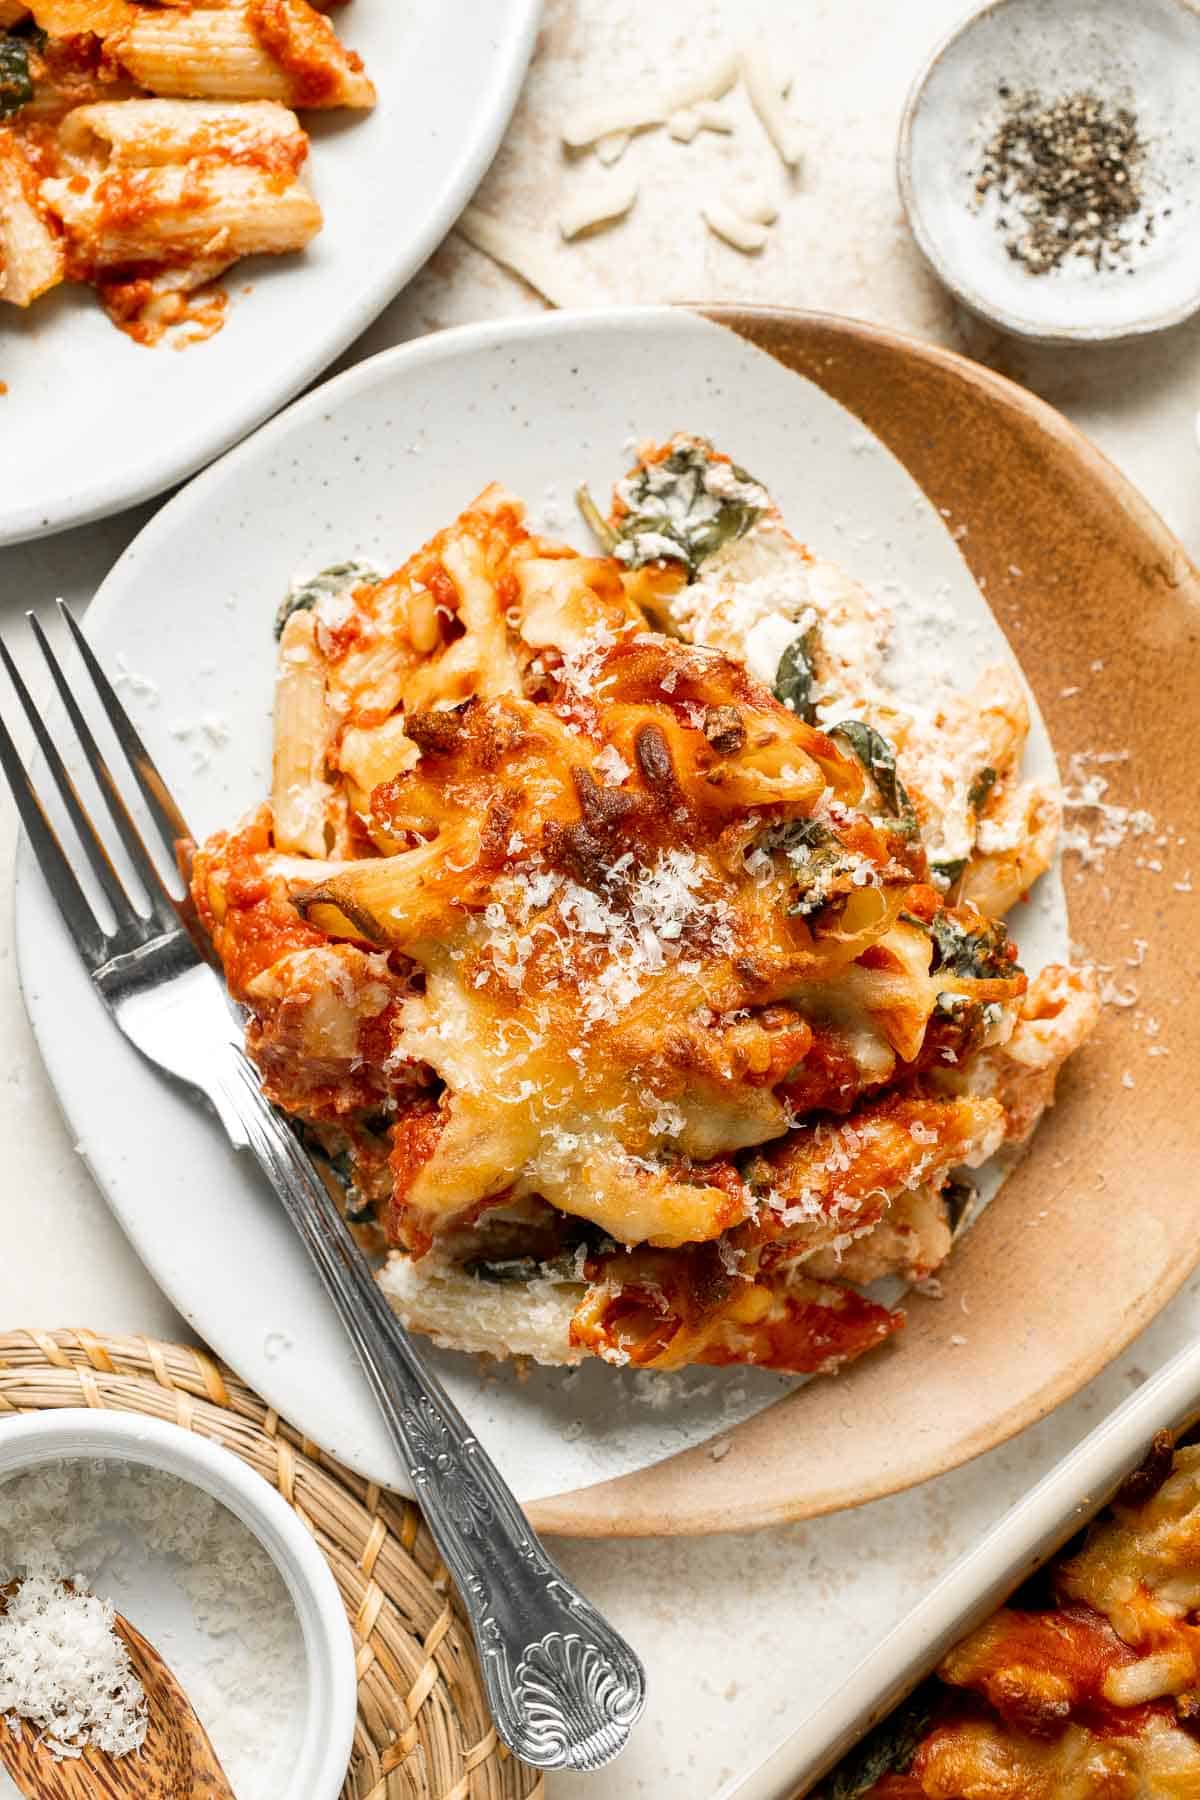
Ingredient Notes
To make this delicious Spinach and Ricotta Pasta Bake, you will need the following ingredients (full measurements in recipe card below):
- pasta - we like using a pasta that catches as much sauce as possible. Our favorite is penne, but other good ones that work in this recipe are rotini, rigatoni, and farfalle.
- cheeses - the filling is made with three kinds of cheese: ricotta, mozzarella, and Parmesan, and you'll sprinkle extra mozzarella on top before baking. If real Parmesan is out of your budget, try Grana Padano or Pecorino Romano.
- garlic
- egg - to hold the cheese mixture together.
- baby spinach - the fresh spinach will wilt from the heat of the warm pasta, so there is no need to blanch or cook it first.
- salt and pepper
- marinara sauce - a little pasta sauce adds color and a pop of acidity. We love using our Homemade Marinara Sauce in this pasta.
You will also need measuring cups and spoons, a large pot, strainer, a large bowl, and a 9x13 baking dish.
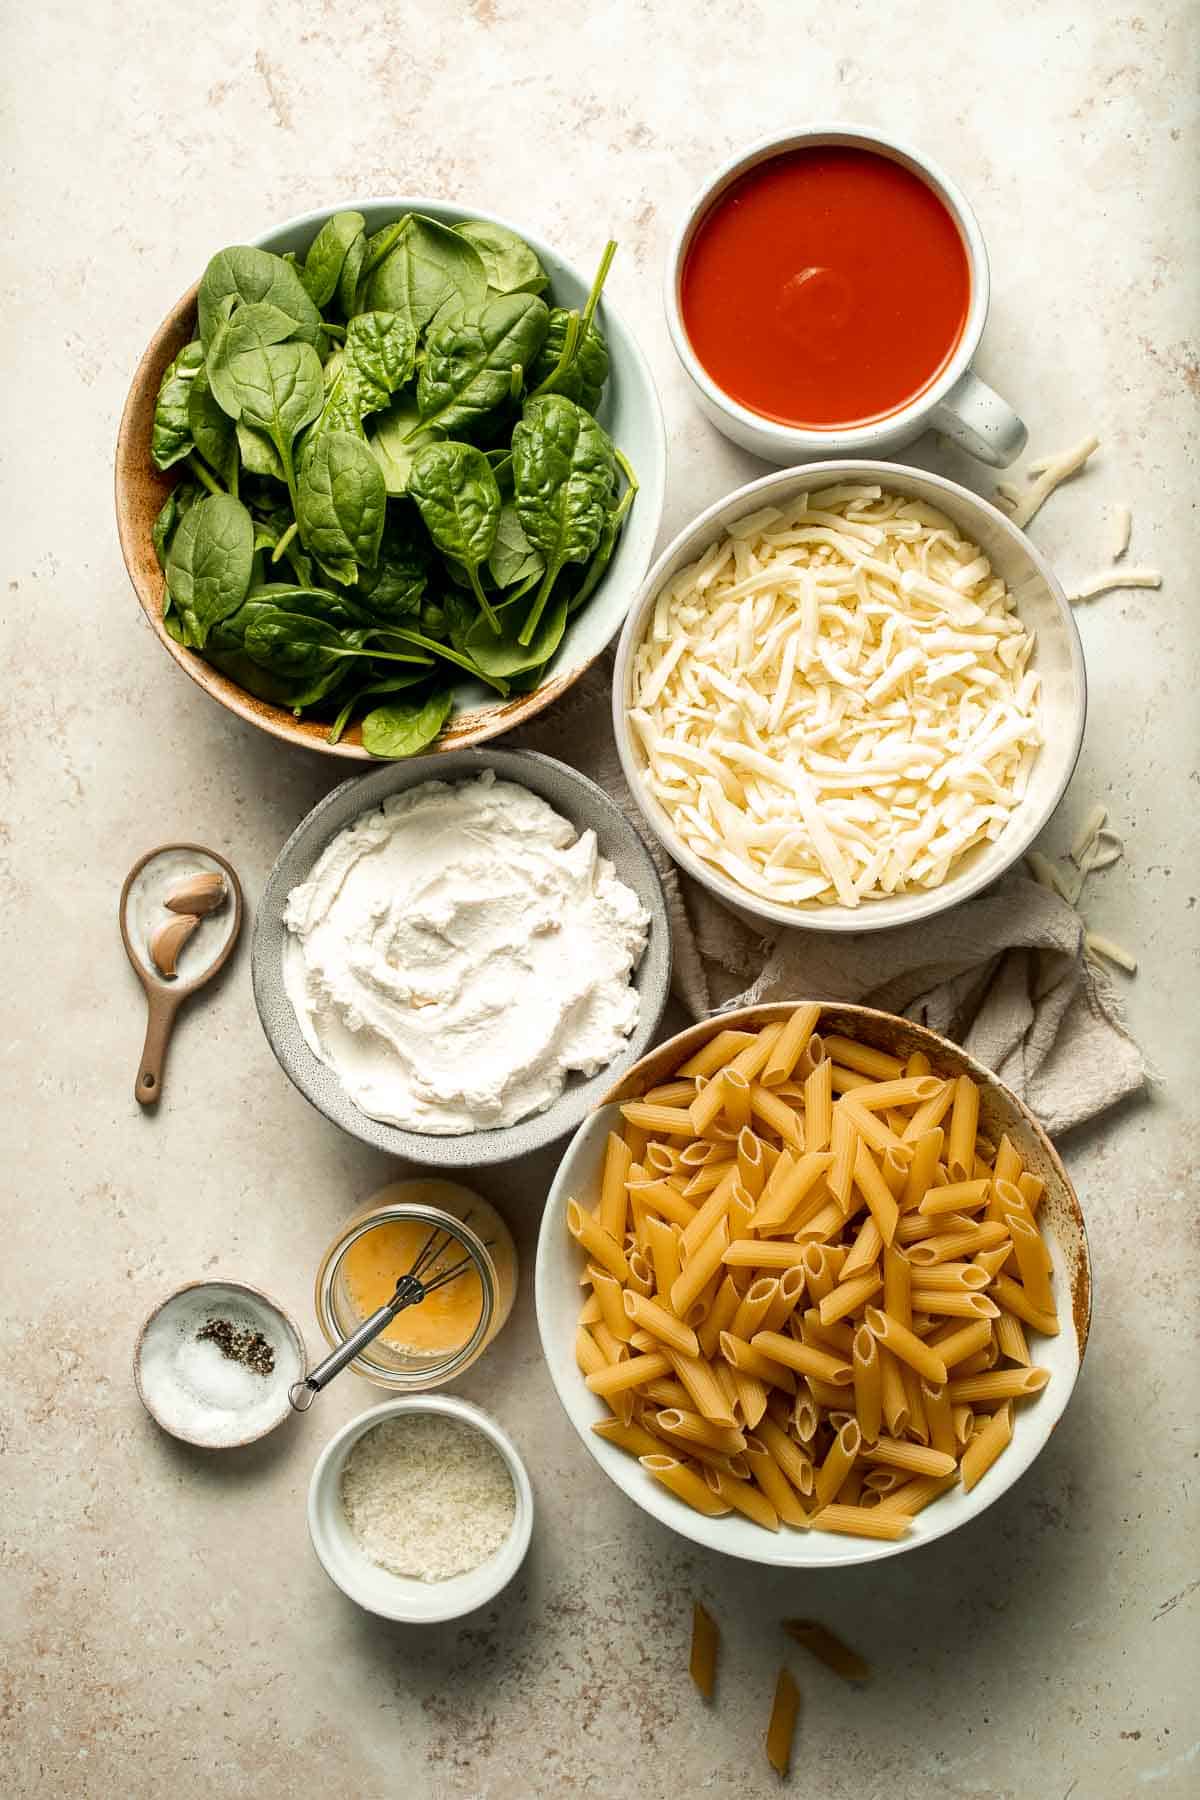
How to Make the Best Spinach and Ricotta Pasta Bake
- Cook pasta. Bring a large pot of salted water to a boil over medium-high heat. Add pasta and cook until al dente (fully cooked but still firm), about 8-10 minutes, or according to package directions. Drain well and leave the pasta in the pot to stay warm.

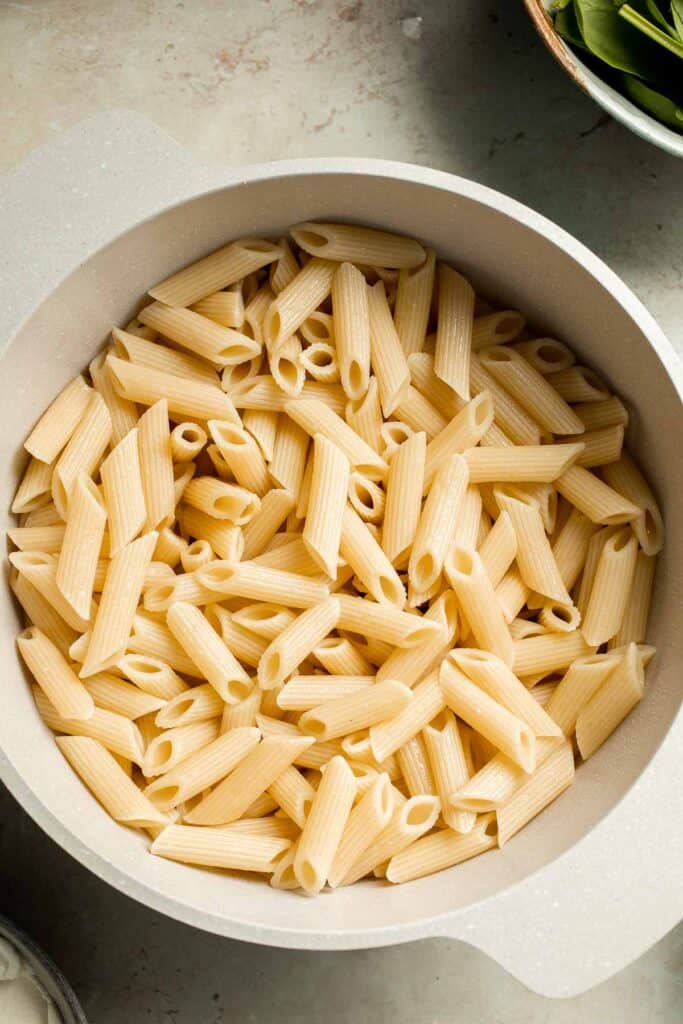
- Make cheesy sauce. In a large mixing bowl, combine ricotta cheese, 1 cup mozzarella, Parmesan cheese, garlic and beaten egg. Mix well.
- Toss in pasta. Add the warm pasta, spinach, salt, and pepper and toss well, until the spinach is wilted.
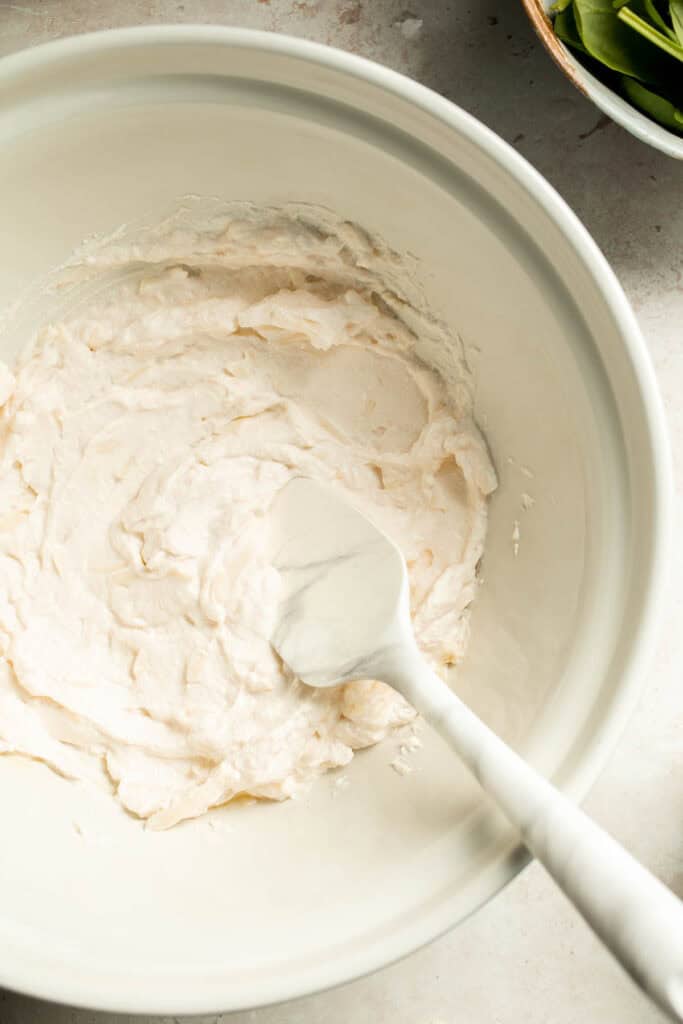
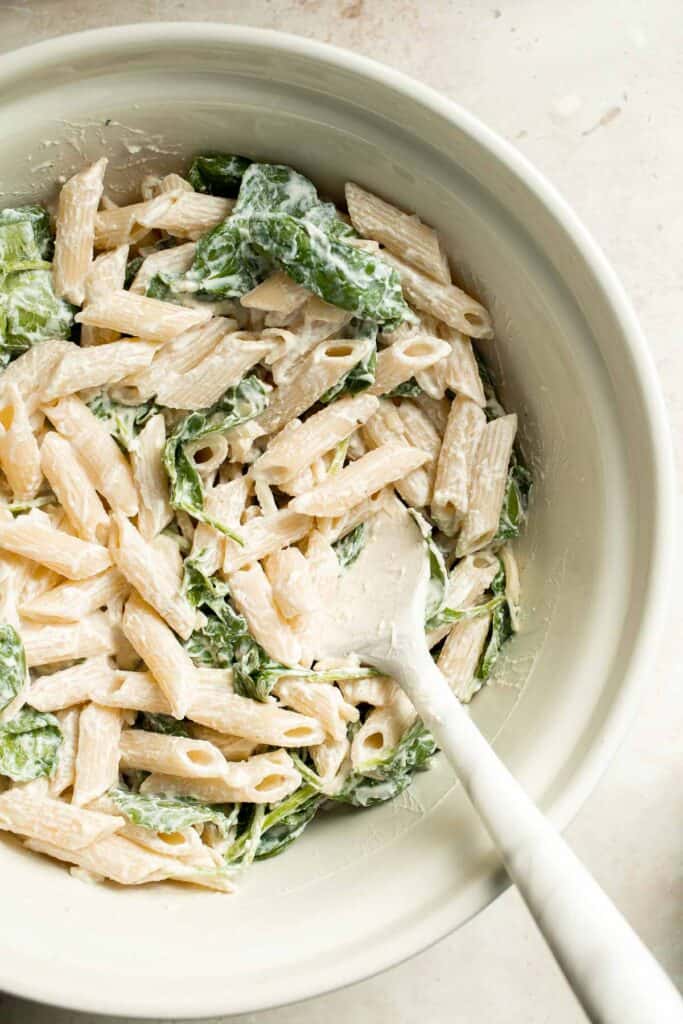
- Assemble. Transfer the pasta ricotta mixture into a 9x13 casserole pan. Top with marinara sauce and the remaining 2 cups mozzarella cheese.
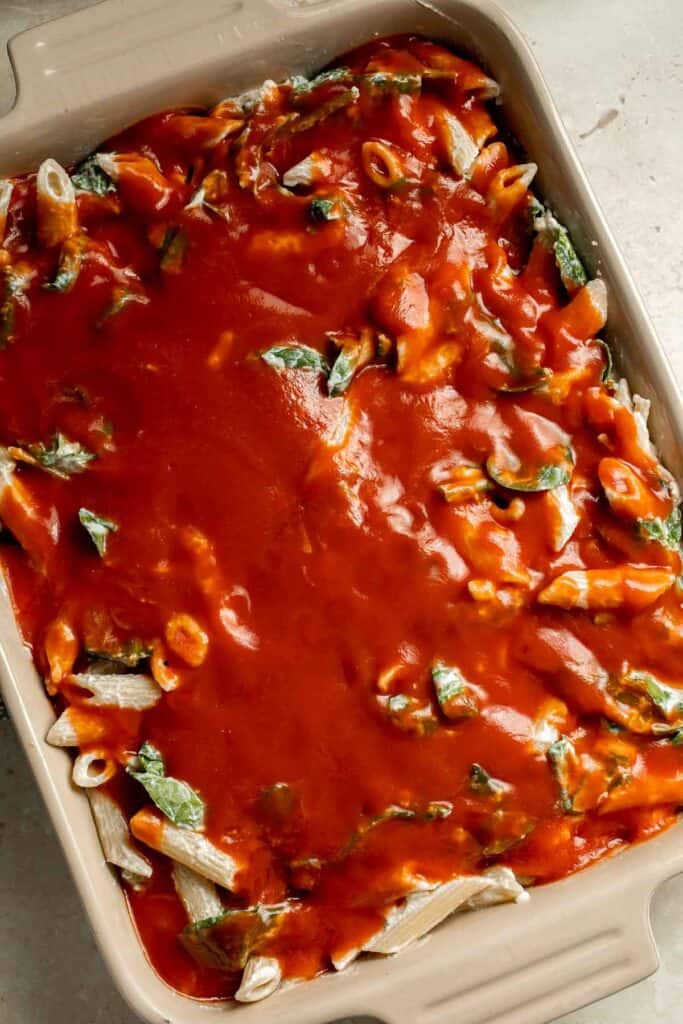
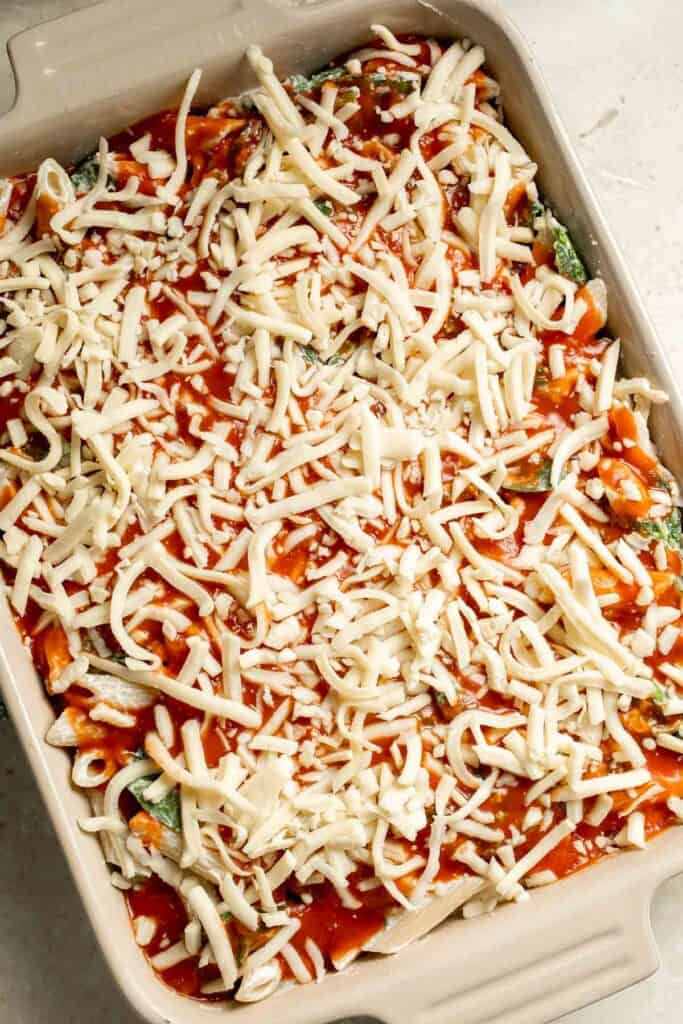
- Bake. Bake the pasta in a 375F preheated oven for 25 minutes until the melted cheese is golden brown. Let cool for 15 minutes, then serve.

Recipe Variations
- Change the pasta. Feel free to use your favorite pasta shape, like pasta shells, rotini, etc. Whole wheat pasta is more filling, but you can also use your favorite gluten-free pasta.
- Play with add-ins. For extra flavor, sprinkle sun-dried tomatoes, artichokes, olives, or pine nuts into the pasta mixture before baking.
- Add extra protein. Add browned Italian sausage crumbles or leftover rotisserie chicken to the pasta mixture before baking. Or, replace the marinara sauce with your favorite meat sauce.
How to Serve
This Spinach and Ricotta Pasta Bake is delicious and filling served on its own. You can also pair it with some pasta sides including:
- Pull Apart Garlic Bread
- Simple Italian Salad
- Easy Baked Meatballs
- Garlic Breadsticks
- Tomato Basil Soup
For more recipes, see our 30 Side Dishes for Pasta.
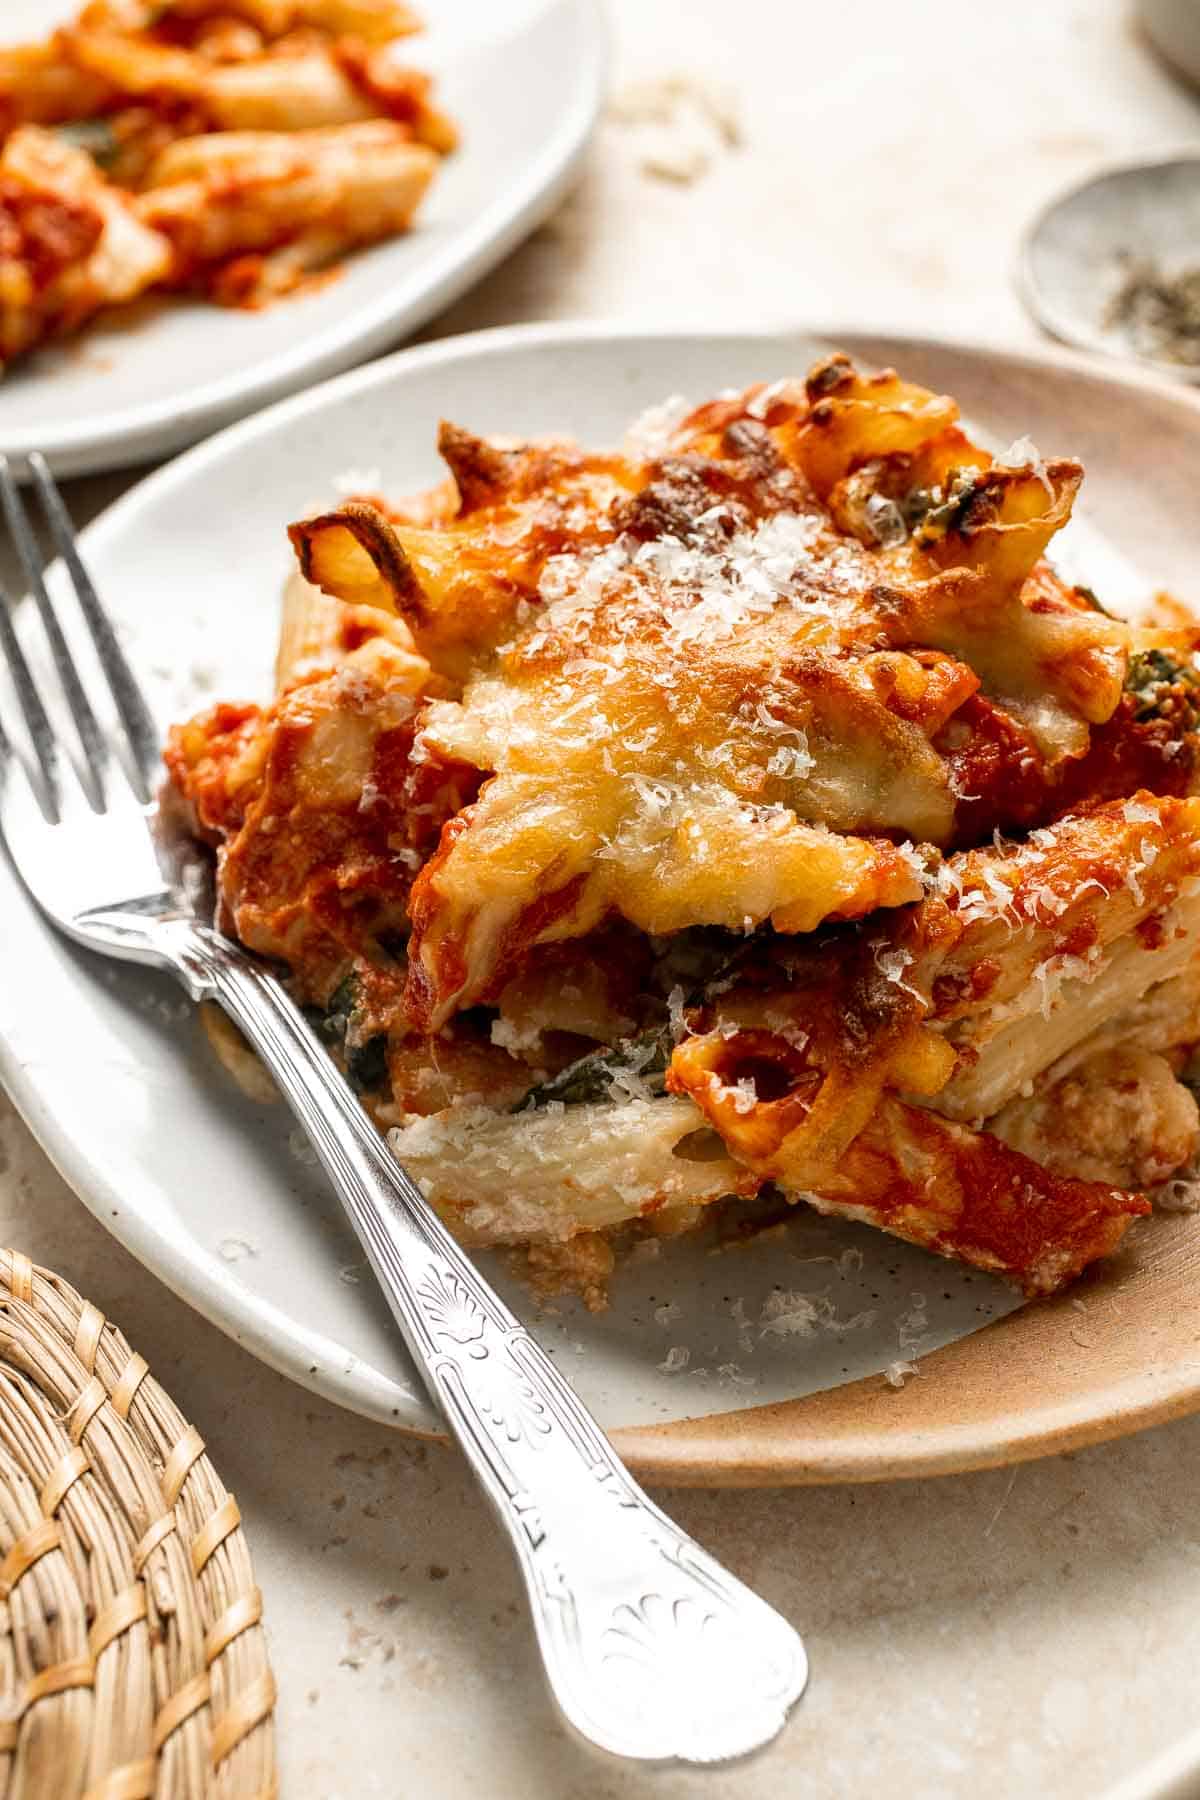
Recipe Tips and Tricks
- Salt the water. This will add flavor directly to the pasta, which brings the whole dish to life.
- Cook until al dente. Especially since the pasta will continue to cook in the oven, it's very important to bring it out of the boiling water as soon as it turns al dente. Be careful not to overcook.
- Prep the night before. If you want to serve this great pasta bake for a dinner party, make everything the night before, cover with foil, and keep it in the fridge. The next day, preheat the oven and bake like normal.
Storing and Freezing Instructions
How to Store
Let any leftover pasta cool to room temperature, then store in an airtight container in the fridge for 3-4 days.
How to Reheat
Microwave individual portions for 2-3 minutes or until heated through. To reheat large portions, bake them in the oven at 350 until piping hot in the middle.
How to Freeze
Leftover pasta bake can be frozen in individual airtight containers for several months.
FAQ
If you need to avoid ricotta for whatever reason, look for small curd cottage cheese. It cooks down just as well and has a mild, creamy flavor. It's an easy swap and can sometimes be easier to find (and cheaper) than regular ricotta.
Pasta bakes require noodles that can handle some stirring and baking. I prefer to use penne pasta, which has a tubular shape that holds onto sauce and doesn't fall apart as easily as more delicate pasta varieties.
No, but I recommend it! The spinach ricotta sauce has a mild, creamy flavor, and the acidity of the marinara cuts through all that richness. This balances the flavors in the dish and adds a little color contrast, too.
More Vegetarian Pasta Recipes
- 40 Best Pasta Recipes
- Veggie Pasta
- Creamy Tomato Pasta
- Baked Feta Pasta
- Spinach Artichoke Pasta
- Cream Cheese Pasta
Tried this recipe?
I'd love to hear what you think! Leave a comment and rating below to share your feedback. Your reviews help others discover this recipe and help me keep creating more free recipes for you. Snap a photo and tag me on social media @aheadofthyme too.
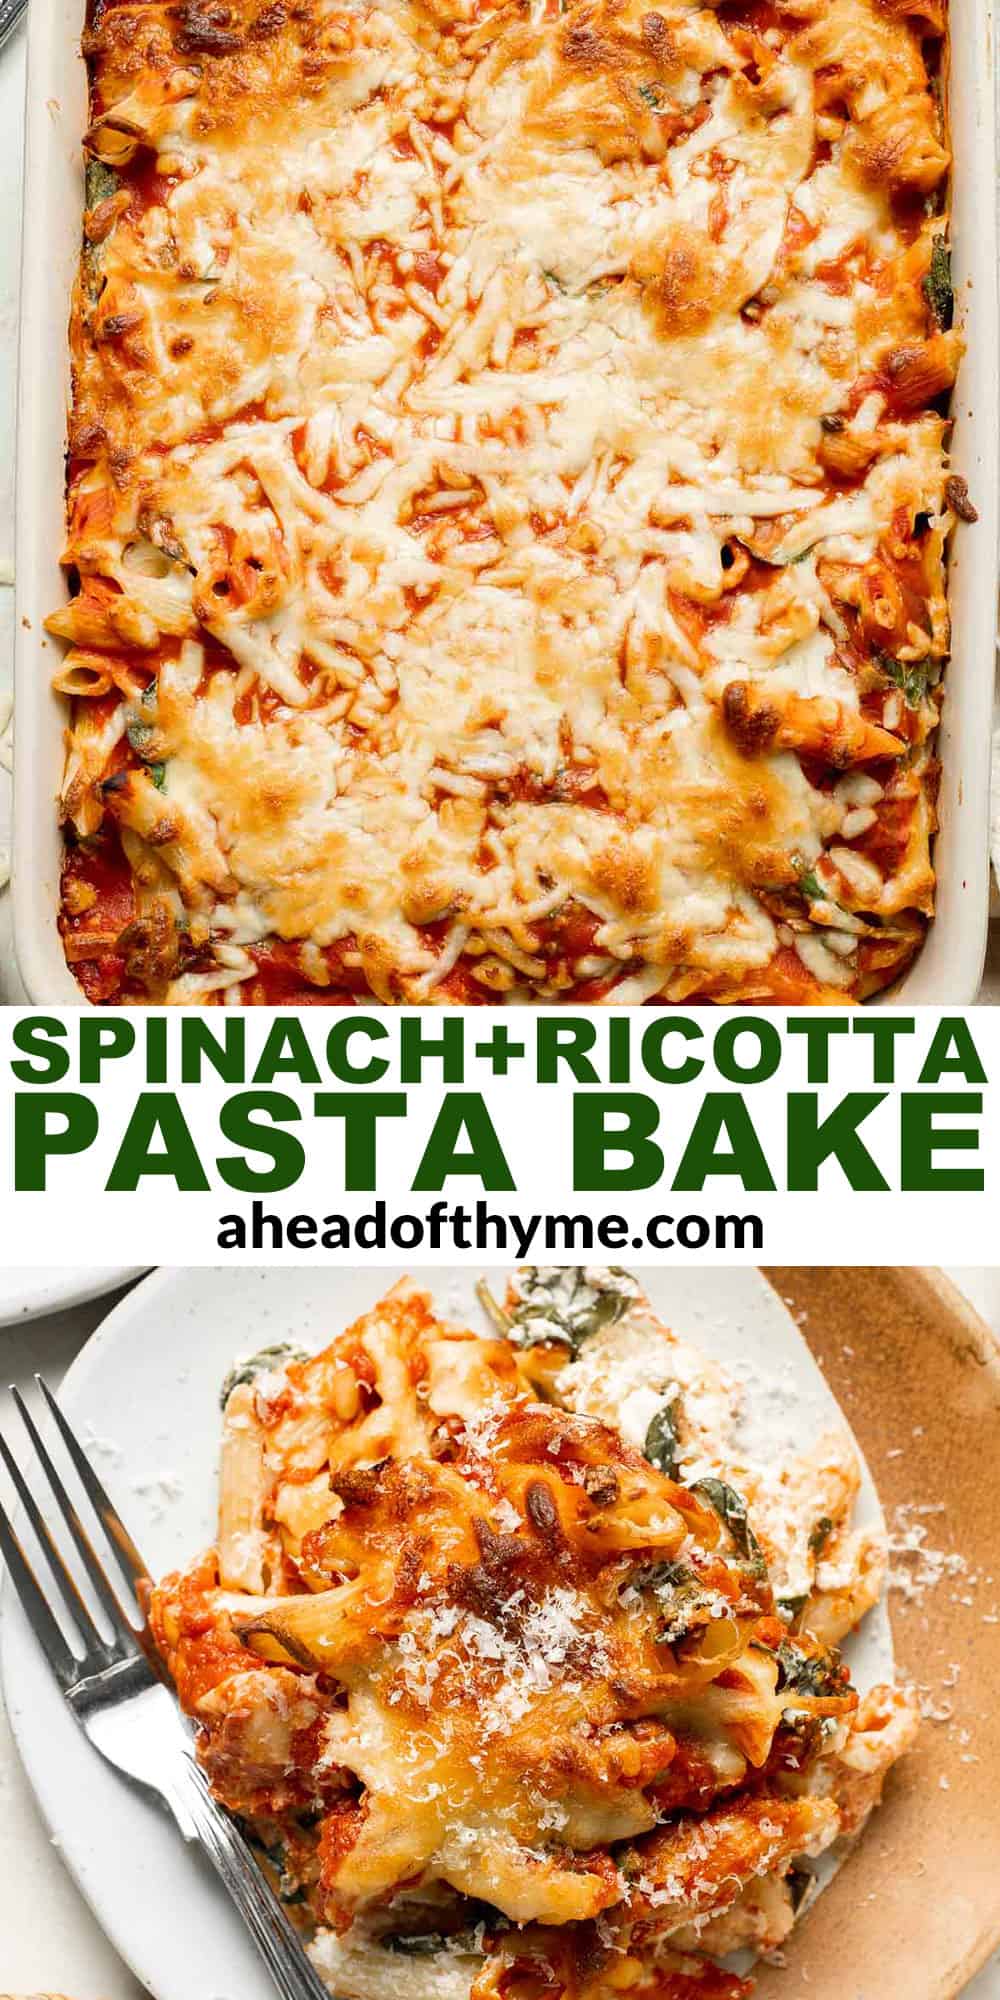
Pecan Pie Cookies
Pecan Pie Cookies have a buttery, chewy cookie base with a dollop of homemade pecan pie filling in the center of each one. They taste just like the classic Thanksgiving dessert in cookie form, and are the perfect treat to take your holiday dessert table to the next level. You won't believe how easy they are to make either!

I'll admit it, I may like Pecan Pie more than the average person. There's something about that gooey, caramel-like pecan filling with the flaky, buttery crust that gets me every time! It should be enjoyed far more often than once a year, like in these Pecan Pie Bars, Pecan Pie Brownies, or my Pecan Pie Cheesecake. These chewy pecan pie cookies are such a fun twist for cookie exchanges, adding to a Holiday Cookie Box, or a Thanksgiving dessert on the go. One tip? Save the recipe - you'll want to make these cookies again next year!
Why You'll Love These Pecan Pie Cookies
- Pecan pie flavor in cookie form. If you love traditional pecan pie, these cookies are a bite-sized, handheld version with all the flavors and textures you love. But, they're easier to serve and you don't have to fuss with rolling out pie crust at all!
- Classic holiday flavor. With warm spices, butter, brown sugar, maple syrup, and lots of pecans, these pecan cookies taste like fall in every bite. They're perfect for Thanksgiving, but are right at home during any of the fall or winter holidays!
- Melt-in-your-mouth texture. This recipe is all about getting the textures and flavors just right. The buttery cookies have so much flavor from the spices and brown sugar, but it's the puffy, slightly chewy, cloud-like texture that takes them over the top. As the cookie melts away in your mouth, you get a burst of that pecan filling. It's heaven!
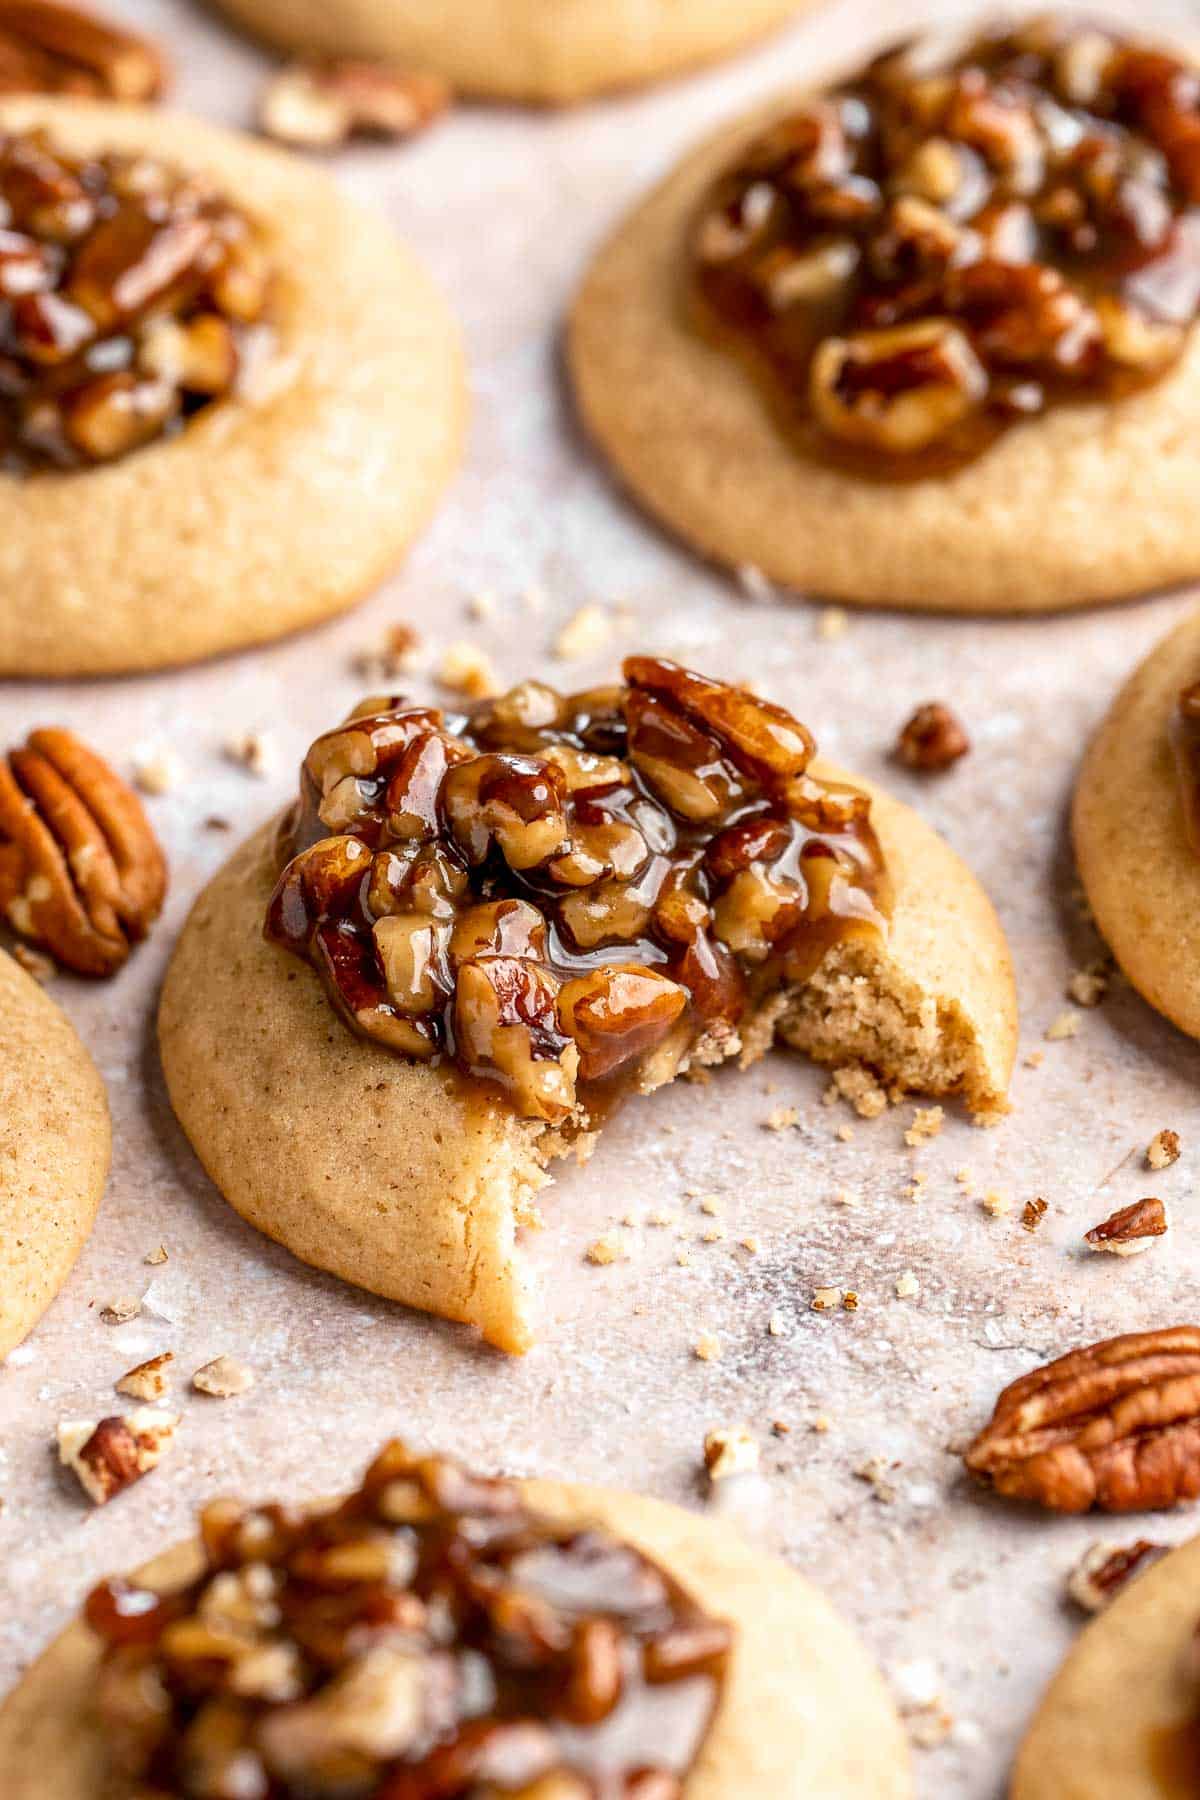
Ingredient Notes
To make these delicious Pecan Pie Cookies, you will need the following ingredients (full measurements in recipe card below):
- all purpose flour
- cornstarch - sifted to remove lumps. This will help make the cookies extra soft and tender.
- baking powder + soda - this recipe calls for two leavening agents to help the cookies puff up nicely.
- spices - you need classic fall spices like cinnamon and nutmeg (and salt). Freshly grated nutmeg has the best flavor.
- butter - you need melted butter for the cookies to give them a chewy texture and buttery flavor. You also need softened butter for the pecan filling.
- sugar - you will need light brown sugar and white sugar.
- eggs - you need an egg and a yolk.
- vanilla extract
- pecans - chopped pecans will need to be toasted then added to the filling. Be careful not to burn them.
- dark corn syrup or maple syrup - either of these syrups will add lots of flavor and help stabilize the filling, preventing it from crystallizing.
- heavy cream - to give the filling a rich, creamy flavor.
You will also need measuring cups and spoons, baking sheets, parchment paper, several mixing bowls, a whisk, a spatula, a small cookie scoop, a wire rack, one tablespoon measuring spoon (for making the wells to hold the filling), and a medium saucepan.
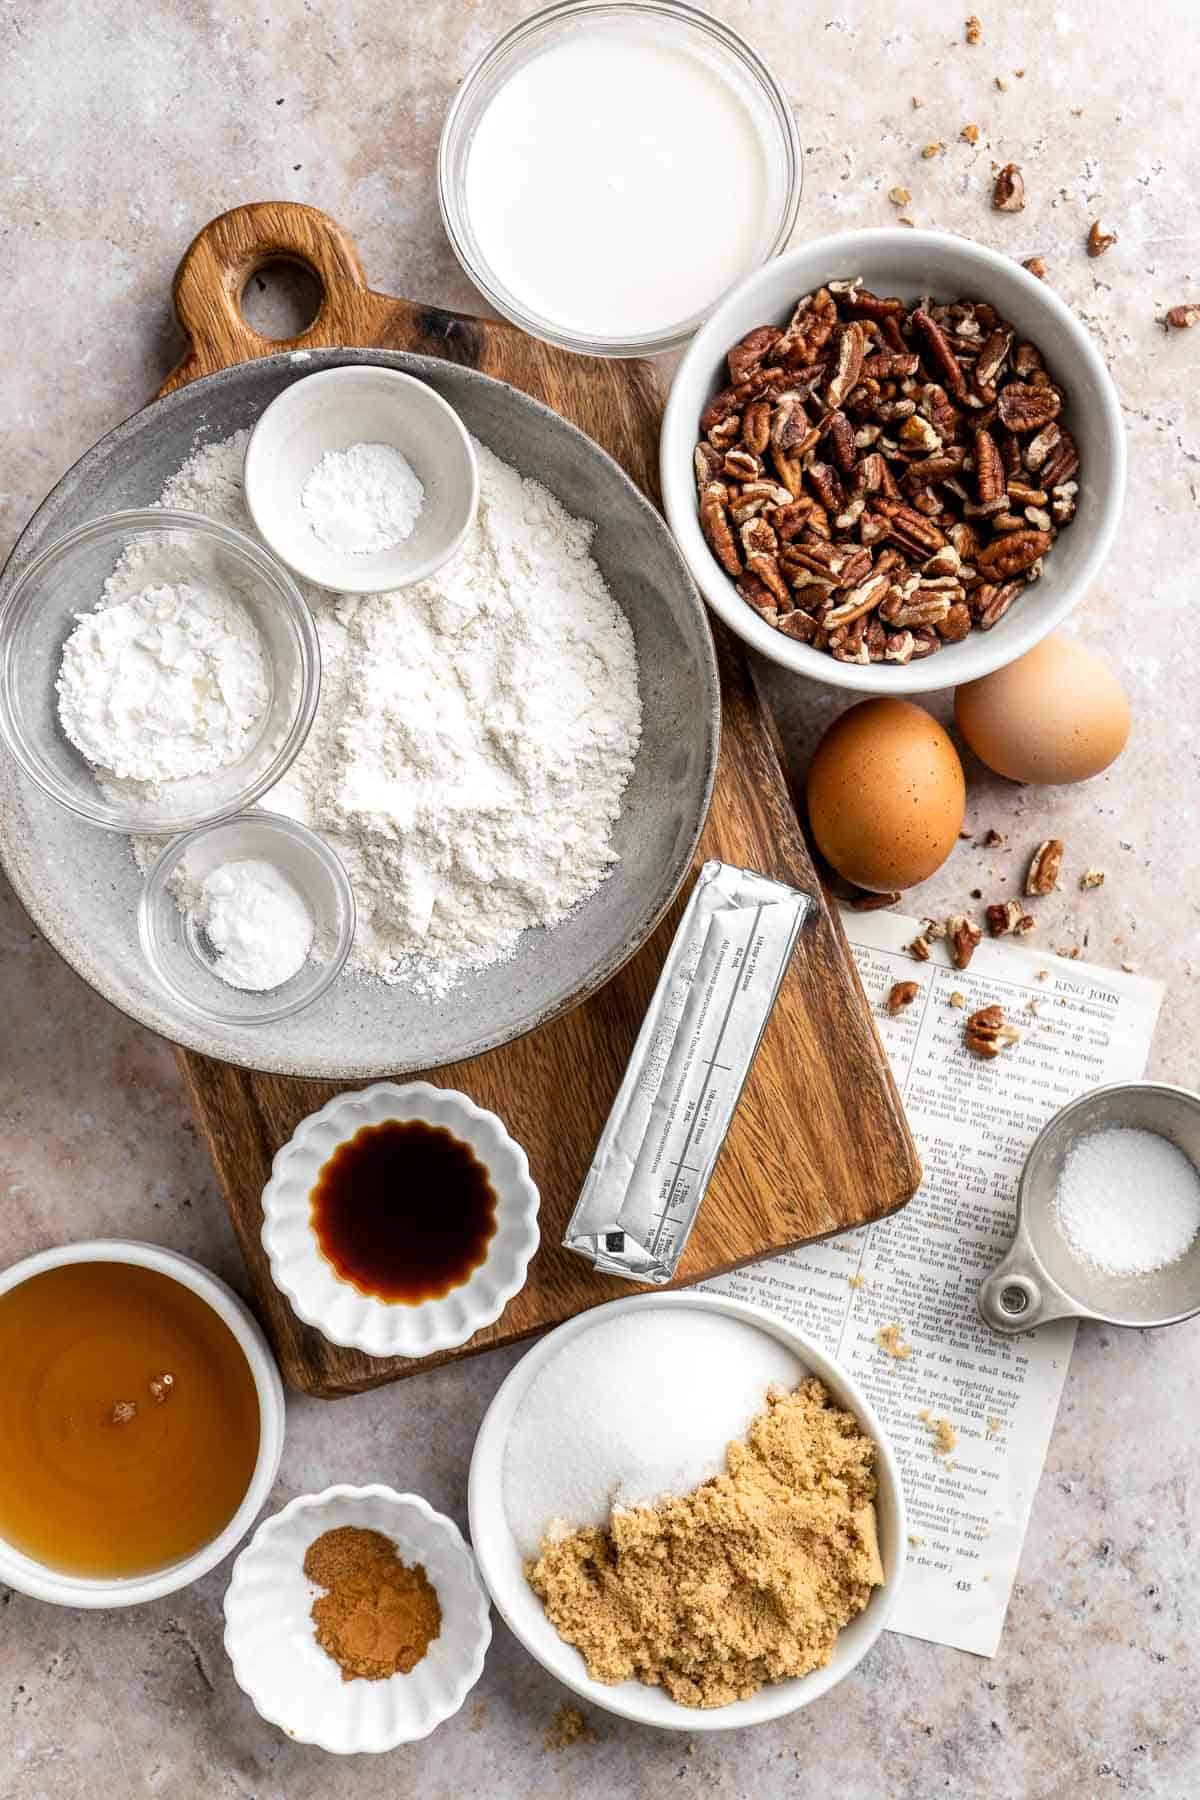
How to Make the Best Pecan Pie Cookies
First, make the cookies.
- Combine dry ingredients. In a medium mixing bowl, whisk together the flour, sifted cornstarch, baking powder, baking soda, salt, cinnamon, and nutmeg, until well-combined. Set aside.
- Combine wet ingredients. In a large mixing bowl, beat together the melted butter, brown sugar, white sugar, egg, egg yolk, and vanilla, until smooth, well-combined, and slightly aerated (about 1 minute of beating with a whisk).


- Add dry to wet. Add in the dry ingredients to the wet, then use a spatula to fold the batter together until well-combined and smooth.


- Scoop and chill. Prepare 2 large baking sheets with parchment paper (or bake in 2 batches). Using a small cookie scoop, scoop out the cookie dough onto the baking sheets (I did 9 per sheet), then place into the freezer for 25 minutes.
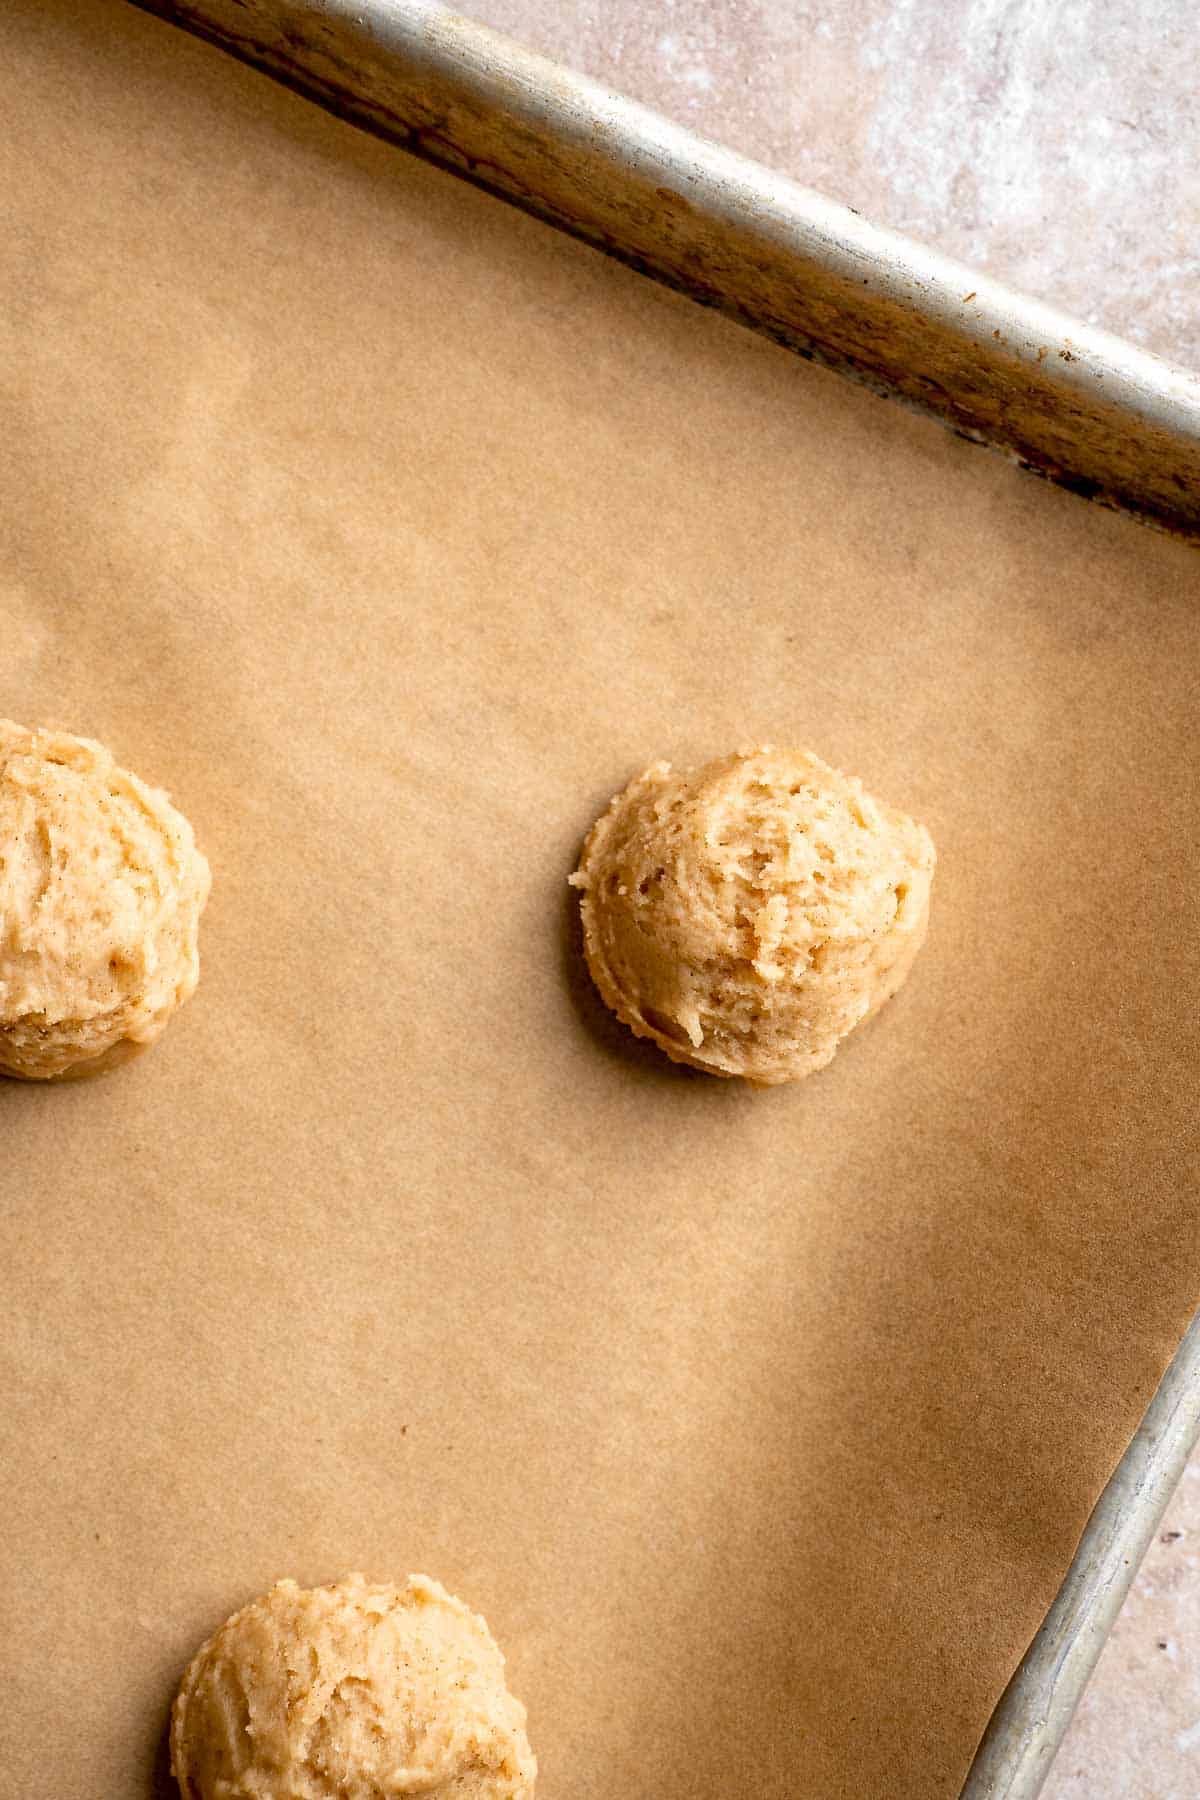
- Bake. Place the chilled cookies into a 350F preheated oven to bake for 13-14 minutes (I recommend baking in batches).
- Add indent. When done, remove the cookies from the oven, then immediately press the back of a 1-tablespoon measuring spoon into the centre of each cookie to create a deep indent in each cookie. Transfer the cookies onto a wire rack to cool fully before filling with pecan pie filling.


Next, make the pecan pie filling.
- Toast pecans. Add chopped pecans to one of the previously used baking sheets (the same parchment is fine) and place into oven for 3 minutes. Remove from oven, stir, then return to oven for another 3 minutes. Set aside.
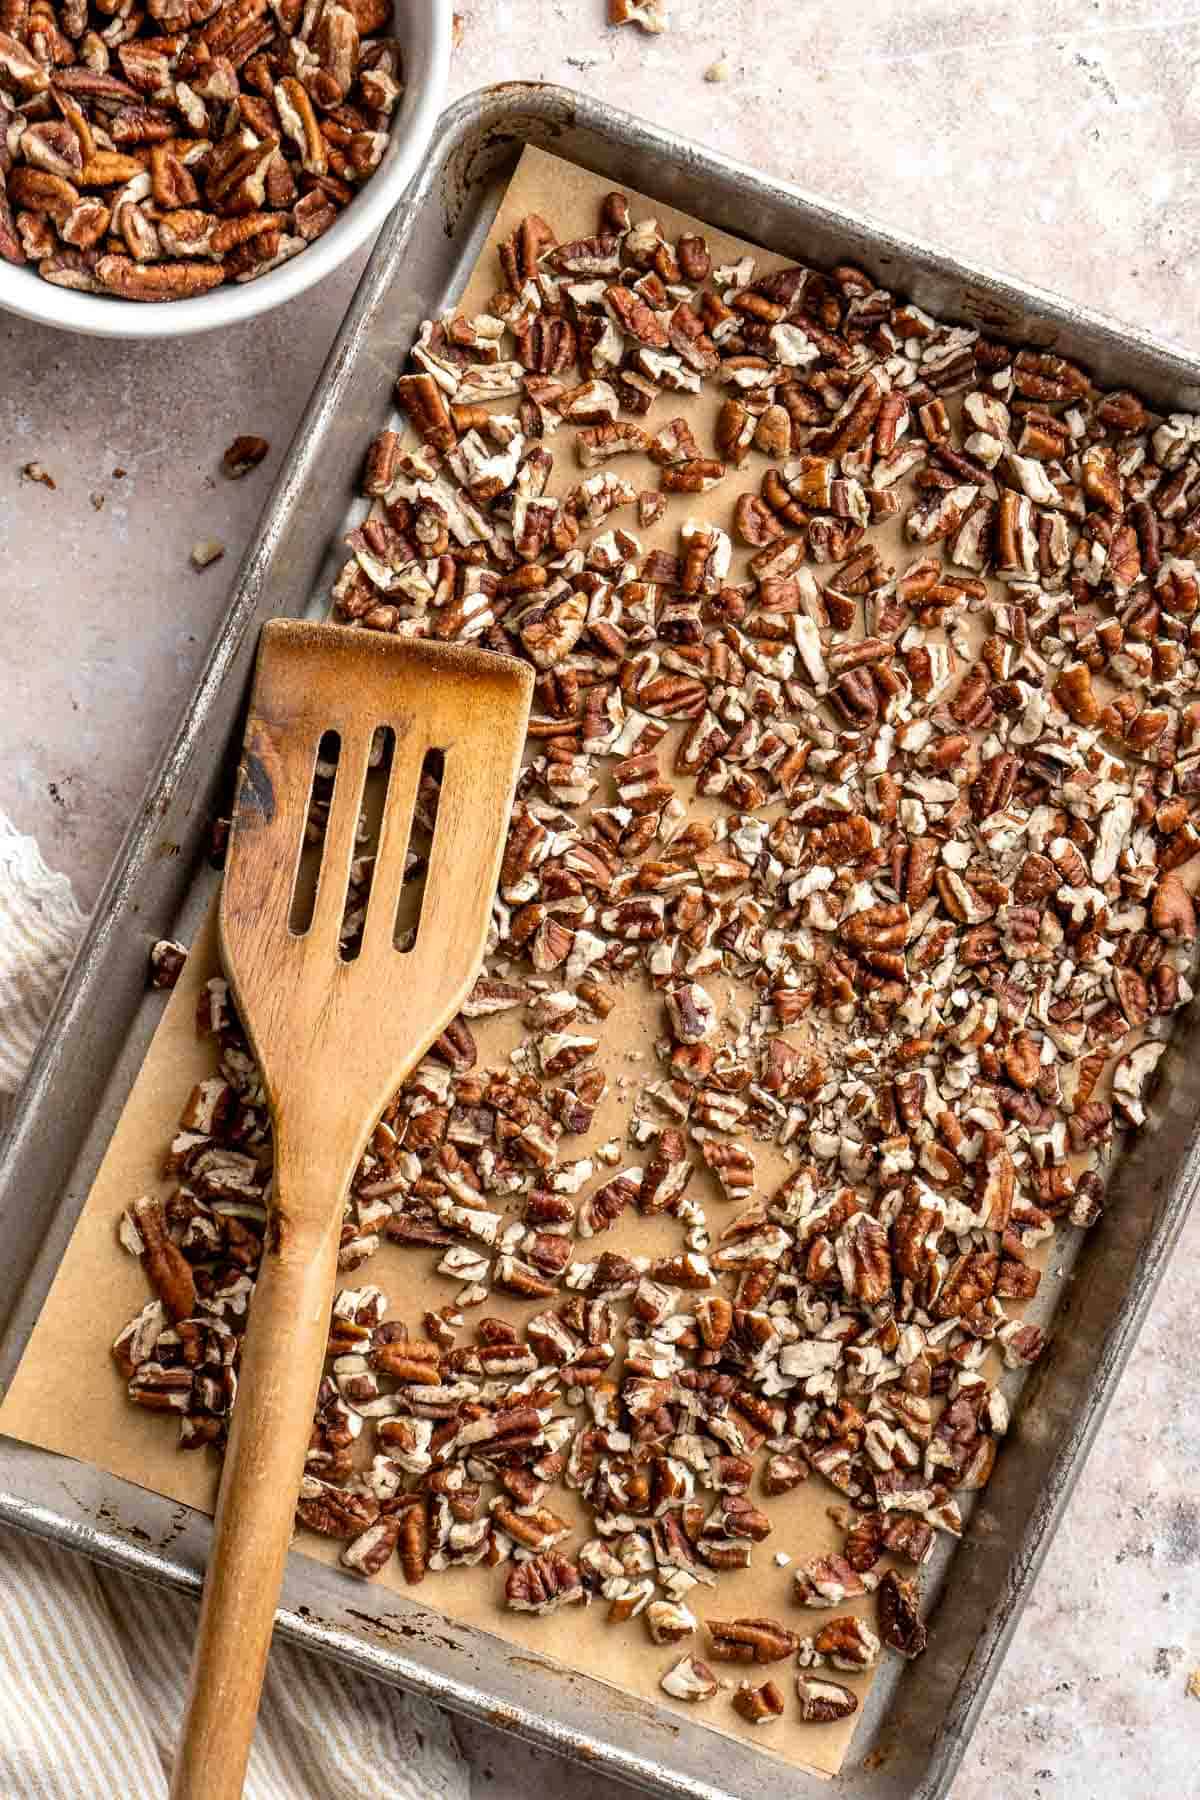
- Cook sauce. In a medium saucepan over medium heat, add butter, brown sugar, and corn syrup (or maple syrup). Bring to a light boil, while stirring, and allow to boil for 1 minute.


- Add pecans. After 1 minute, add in the toasted pecans, stir, and continue to cook for another additional minute.
- Add remaining ingredients. Finally, stir in the heavy cream, vanilla, cinnamon, nutmeg, and salt, then continue to cook for another 1-2 minutes, while stirring.
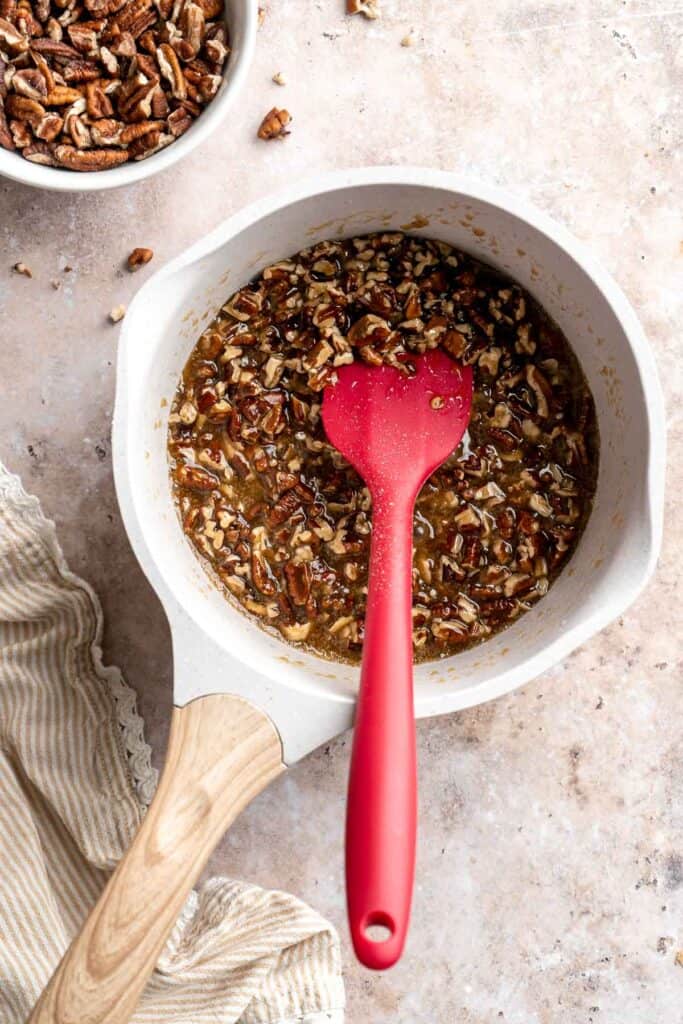

- Rest. Remove from the heat, and allow the caramel to cool until it is still warm but thicker in texture.
Lastly, assemble the pecan pie cookies.
When ready, scoop 1-2 tablespoons of the pecan pie filling into each cookie indent, and lightly press it in to each indent with the spoon. Allow the filling to cool and thicken more, about 20-30 minutes, before serving.


Recipe Variations
- Add chocolate. Fold mini chocolate chips into the cookie dough, place a small piece of dark chocolate into each well while the cookies are warm, and/or drizzle the finished cookies with melted chocolate. Great for the holiday season!
- Use bourbon. Instead of vanilla extract, add some bourbon to the pecan pie filling for an extra dose of Southern flavor.
- Try other nuts. Of course, this pecan pie cookie recipe is a celebration of pecans, but this recipe would also be fantastic with walnuts or almonds.
How to Serve
These Pecan Pie Cookies are delicious served on their own as a snack or dessert, paired with a warm drink including:
They are also great served as part of a larger dessert spread with some other fall favorites. See our 50 Best Fall Desserts for more ideas.
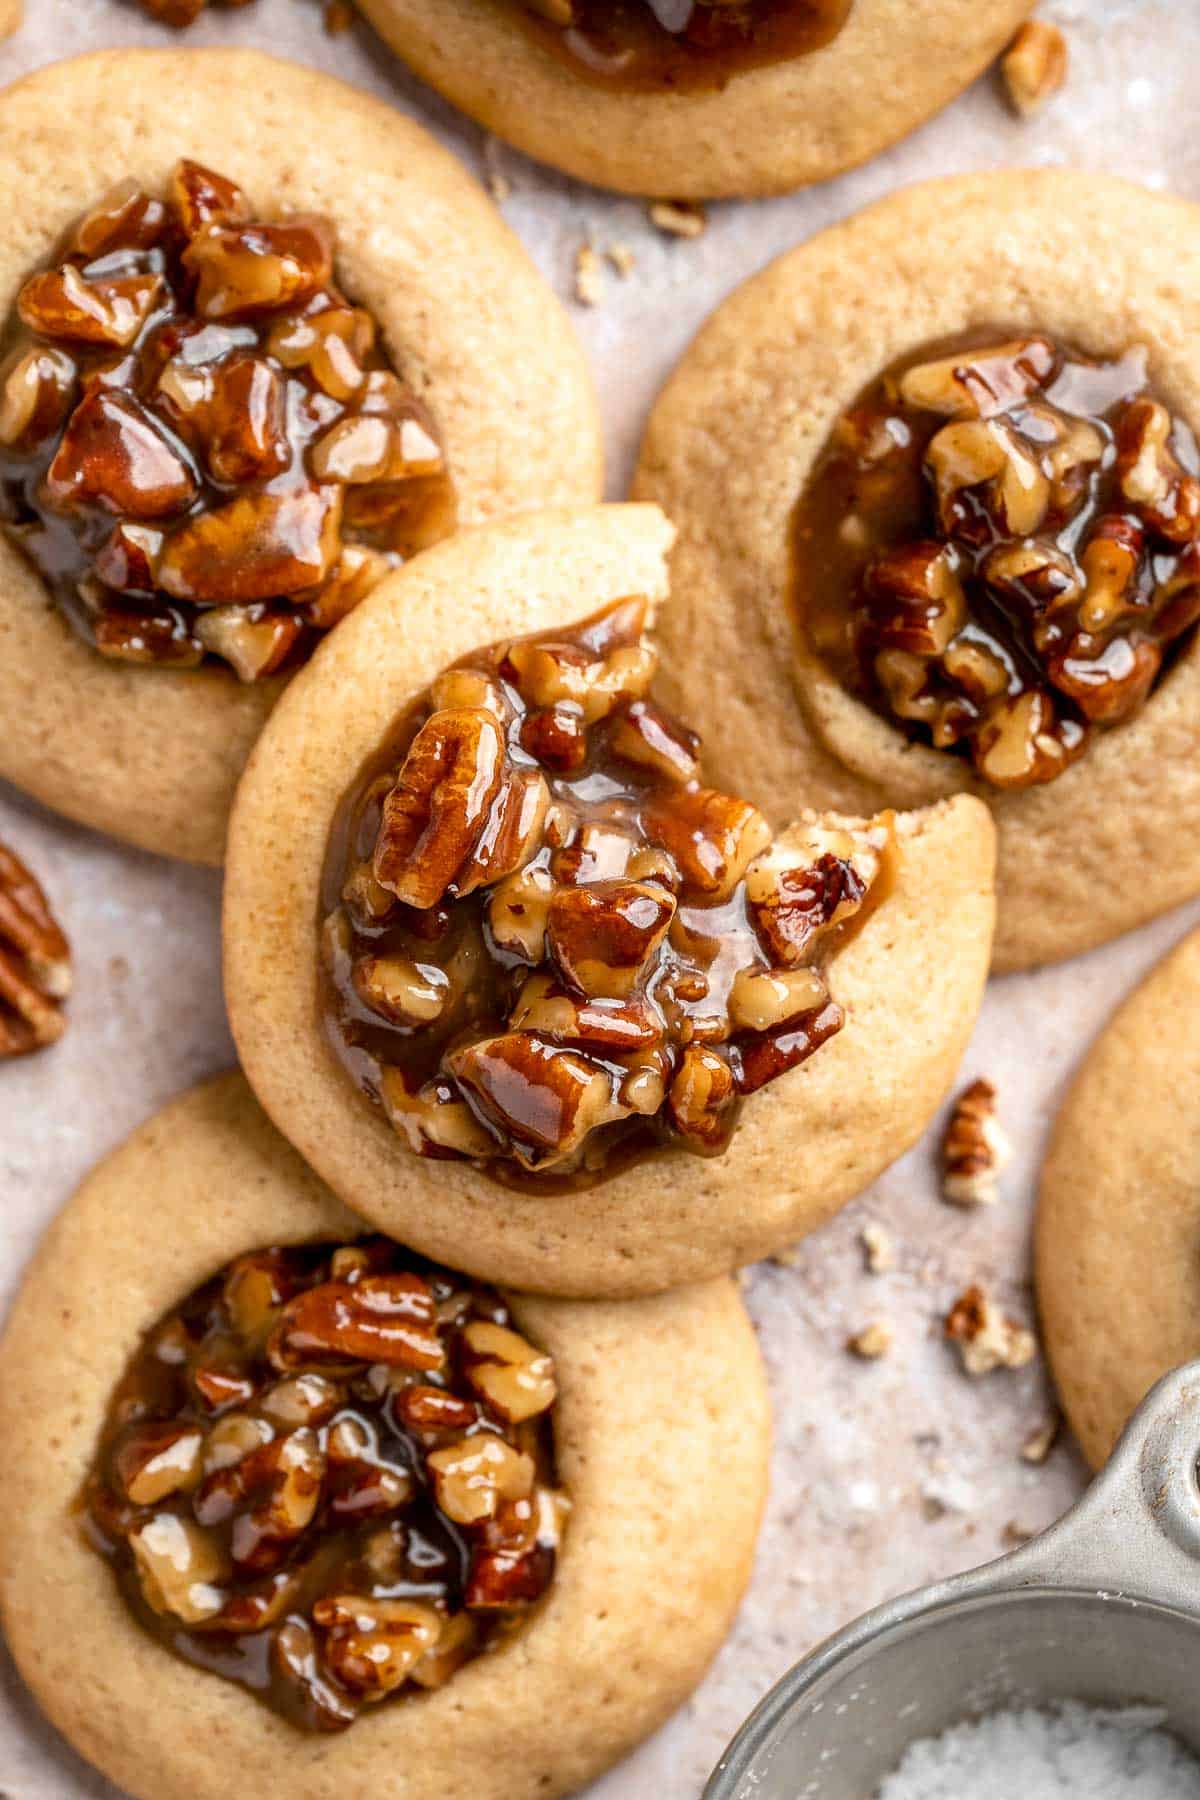
Recipe Tips and Tricks
- Chill the dough. Especially since this recipe uses melted butter, the chilling process helps cool down the butter and hold the dough in place. You can certainly make the cookie dough the night before, and let it chill overnight!
- Don't skip the salt. Since pecan pie filling is so sweet, many pecan pie recipes can taste like a sugar bomb. This is where salt comes in. Salt brings out flavor and creates balance, which helps keep the filling from being too sweet.
- Press after baking. If you try to form the wells for the pie filling before baking, they will lose shape in the oven. Roll the dough into balls, bake, then press while the cookies are still warm. If you wait too long, the cookies will firm up, so press the center of each cookie right away.
Storing and Freezing Instructions
How to Store
Store the cooled cookies in an airtight container at room temperature for 3-4 days. For easy storing and to prevent a mess, I like to store the cookies in muffin cups.
How to Freeze
The baked cookies can be frozen on a large baking sheet, then frozen for several months. You can also prepare the cookie dough, freeze the cookie dough balls, and prepare the pecan filling fresh whenever you'd like.
FAQ
No! Although it's common in many recipes, you can absolutely replace it with maple syrup. Either syrup will help prevent the sugar from crystallizing as the pie filling sits, ensuring it has the perfect texture every time. I prefer to use maple syrup, which adds an extra depth of flavor.
For this pecan cookie recipe, I prefer to use a soft, puffy, chewy cookie dough instead of a traditional shortbread. Although shortbread tastes more like pie crust, it doesn't have the same give and can break apart when you eat it, causing the nutty filling to ooze out. This cookie dough recipe incorporates cornstarch and melted butter to get a tender, chewy texture, and the soft dough can easily be shaped after baking to hold the filling in place.
Pecans have an iconic flavor and a wonderful texture that works well in many recipes, like these pecan sandies, Mexican wedding cookies, butter pecan cookies, and more. But if you're all out or just want to change things up, feel free to replace the pecans with other tree nuts. Walnuts, almonds, and hazelnuts all have distinct flavors that would work well with the rich, sweet flavors in this easy cookie recipe.
More Pecan Dessert Recipes
- 30 Best Pecan Recipes
- Pecan Pie
- Chocolate Pecan Pie
- Pecan Pie Cheesecake
- Pecan Pie Brownies
- Chopped Pecan Pie
Tried this recipe?
I'd love to hear what you think! Leave a comment and rating below to share your feedback. Your reviews help others discover this recipe and help me keep creating more free recipes for you. Snap a photo and tag me on social media @aheadofthyme too.

Curried Butternut Squash Soup
Curried Butternut Squash Soup is rich, creamy, and brimming with cozy fall flavors, like cinnamon and curry. This comforting fall soup is filling enough to be served as a vegetarian or vegan main dish yet elegant enough to round out your holiday menu. Best of all, it'll be on the table in just over 30 minutes!

Once you've tried this coconut curry butternut squash soup, you'll find yourself sneaking winter squash into your grocery cart every week this autumn. It might be a simple recipe, but believe me, it does not taste simple. Serve it with a soft ciabatta roll or a cranberry brie grilled cheese on the side to make it into a complete meal.
Why You'll Love This Curried Butternut Squash Soup
- Classic comfort food. Butternut squash is already comforting, but the maple syrup, curry powder, cinnamon, and coconut milk make this coconut curry butternut squash soup cozy in all the right ways. It's the best way to warm up on cold winter nights and makes great leftovers!
- Naturally vegetarian. One of my favorite things about this curried butternut squash soup recipe is that it is naturally vegetarian, vegan, and dairy-free, yet no one can tell, and it always gets rave reviews! It's a great choice when you need to satisfy several dietary needs at once.
- Crowd-pleasing flavors. This is one of my all-time favorite soups for a reason. The combination of savory and sweet flavors makes it irresistible, and you can make it look five-star by adding a few simple garnishes.

Ingredient Notes
To make this delicious Curried Butternut Squash Soup, you will need the following ingredients (full measurements in recipe card below):
- coconut oil - to sauté the aromatics. Olive oil or avocado oil is a good swap.
- aromatics - sauté chopped onions and minced garlic for a savory note to balance the sweetness of the squash.
- butternut squash - peeled and cubed into small pieces. You can also buy cubed butternut at the store to skip this step and save the bulk of the prep time.
- seasonings - you'll need a mixture of yellow curry powder, cinnamon, salt, and ground black pepper.
- vegetable broth - feel free to use chicken broth instead if you are not vegetarian.
- coconut milk - to give the soup a creamy texture. Save some extra full-fat coconut milk for a garnish.
- maple syrup - for extra sweetness and flavor. You can also substitute for honey if you are not keeping the recipe vegan.
- pumpkin seeds and thyme - these are optional to add as a soup garnishes on top.
You will also need measuring cups and spoons, a large pot, a wooden spoon, and an immersion blender or high-speed blender.

How to Make the Best Curried Butternut Squash Soup
- Sauté aromatics. Heat coconut oil in a large pot over medium-high heat. Add onions and garlic. Sauté until soft and translucent, about 2-3 minutes.
- Add butternut squash. Add butternut squash, curry powder, cinnamon, salt, and pepper. Sauté for 6-8 minutes until softened a bit, stirring frequently for even cooking.


- Add base. Add vegetable broth, coconut milk and maple syrup, and stir to combine. Bring to a boil, then cover and simmer on medium-low heat for 15 minutes.
- Blend. Remove from heat and puree the soup in the pot using an immersion blender, or transfer the soup to a heavy duty blender and puree in batches. If the soup is too watery, place the pot of pureed soup back on the stove and simmer uncovered over medium-low heat until desired consistency is reached, stirring occasionally. If the soup is too thick, add in some water to thin it out.


- Serve. Top with a drizzle of coconut milk, and sprinkle some pumpkin seeds and chopped thyme on top. Serve warm.
Recipe Variations
- Play around with garnishes. For more flavor, garnish with lemon or lime juice, fresh cilantro, pomegranate seeds, sliced green onions, a dollop of sour cream, croutons, toasted coconut flakes, etc. There are so many options!
- Add some heat. Simmer slices of fresh ginger in the soup for a bright, cleansing flavor, and add red pepper flakes or cayenne pepper to taste. Stir in a dollop of Thai red curry paste for a spicier flavor to balance out the sweetness of the butternut squash.
- Use different squash. Instead of butternut, use other winter squashes, like pumpkin, Red Kuri, Blue Hubbard, etc. It makes a great pumpkin soup, too!
How to Serve
This Curried Butternut Squash Soup is delicious served on its own with a side of crusty bread, or paired with some of my favorite sides including:
- Fall Harvest Salad with Butternut Squash and Apple
- Vegetarian Lasagna with Spinach
- Garlic Breadsticks
- Roasted Broccoli Grilled Cheese Sandwich
- Winter Kale Salad
- Butternut Squash Quesadillas with Chicken and Kale
For more recipe ideas, see our 25 Side Dishes for Soup.

Recipe Tips and Tricks
- Roast ahead of time. If you know you want to make this butternut squash curry soup this week, roast a bunch of butternut squash on a baking sheet the night before and refrigerate until you need it. The soup will be ready way faster!
- Season multiple times. For a really flavorful soup, add a pinch of salt any time you add an ingredient. This will ensure that every layer is properly seasoned.
- Make a big batch. If you have a large soup pot, consider making a double (or triple) batch for easy leftovers all week. The leftovers freeze wonderfully, too!
Storing and Freezing Instructions
How to Store
Allow leftover soup to cool to room temperature and store in an airtight container for 3-4 days.
How to Reheat
Warm the soup in a small pan over medium heat or microwave for several minutes. Top with fresh garnishes and enjoy!
How to Freeze
Fill freezer safe containers almost all the way with soup, leaving at least 1 inch for expansion. Refrigerate until chilled, then freeze solid for 3-6 months. Thaw frozen soup in the fridge then reheat like normal.
FAQ
The natural sweetness of butternut squash pairs wonderfully with yellow curry powder, which has a sweeter flavor often used with potatoes, carrots, and other starchy root vegetables. It gives this soup a warm, cozy flavor!
There are so many options! This soup can be served without any garnishes, or add a little coconut milk, fresh herbs, and pumpkin seeds for texture and flavor. It's ideal with some crusty bread to sop up every last drop! If you want to serve it for a light meal, pair it with a grilled cheese, turkey and cheese sandwich, or a nice winter salad. For a heartier meal, offer it as a side dish with roasted turkey, prime rib, or honey baked ham.
Try to eat all of your leftover soup within 3-4 days, or freeze the leftovers for several months.
More Butternut Squash Soup Recipes
- Roasted Butternut Squash Soup
- Butternut Squash Apple Soup
- Roasted Butternut Squash and Cauliflower Soup
- Instant Pot Butternut Squash Soup
- 30-Minute Butternut Squash Soup
- Acorn Squash Soup
Tried this recipe?
I'd love to hear what you think! Leave a comment and rating below to share your feedback. Your reviews help others discover this recipe and help me keep creating more free recipes for you. Snap a photo and tag me on social media @aheadofthyme too.

What Recipes to Cook in October
Are you wondering what to cook in October? Browse our collection of 50 best October recipes to cook for breakfast, lunch, dinner, and dessert!

It's already October, which means we are in the thick of fall. Cozy sweaters, warm drinks, and movie nights by the fireplace in is what the vibe is all about. Our latest compilation of in season recipes to make this month is giving seasonal veggies (hello butternut squash and pumpkin!) meets comfort food. Our roundup of the 50 best recipes to cook in October includes fall spiced breakfast recipes, nourishing soups and salads for lunch, comfort food dinners, delicious appetizers and snacks, and the best fall desserts.
What is in Season in October
The month of October is when we see fall produce in full swing. Some of our favorite fruits and veggies that you will see pop up in the grocery stores or farmer's markets this month are listed below. Click on the links below to see the recipes we have using that ingredient!
Holidays in October
The big holiday in October in Canada is Canadian Thanksgiving. We have shared hundreds of holiday recipes over the years so you don't need to look any further for ideas!
- Thanksgiving Dinner Prep Guide + Checklists
- 40 Best Thanksgiving Main Dishes
- 50 Best Thanksgiving Side Dishes
- 25 Best Thanksgiving Dessert Recipes
Another big holiday in October is Halloween! This end of the month holiday is all about treats and dessert. Check out our 25 Best Halloween Desserts.
October Breakfast Recipes
 |  |
- Sheet Pan Pancakes. Simplify your mornings with fluffy, golden Sheet Pan Pancakes! This is the easiest way to make pancakes without all the waiting, flipping, and mess.
- Mini Glazed Pumpkin Scones. Quick and easy Starbucks inspired mini glazed pumpkin scones are the perfect little fall treat packed with pumpkin flavour and topped with two sweet glazes.
- Pumpkin Pie Granola. Quick and easy pumpkin pie granola packed with oats, pumpkin, pumpkin spice, and nuts, is vegan, gluten-free, and refined sugar-free. The best fall snack.
- Avocado Toast with Poached Egg. Avocado Toast with Egg is the perfect recipe to make for breakfast when you are short on time but looking for something delicious, healthy, and nutritious.
- Breakfast Potatoes. Breakfast Potatoes are crispy on the outside while soft and tender inside. These skillet potatoes are delicious, flavorful, and ready in 30 minutes.
- Pumpkin Cinnamon Rolls. Soft and fluffy, pumpkin cinnamon rolls are packed with pumpkin, layered with pumpkin spice, and topped with cream cheese icing.
- Pumpkin Pancakes. Homemade Pumpkin Pancakes are the perfect fall breakfast - light, fluffy, delicious, and warmly spiced. Ready in just 15 minutes with simple pantry staples.
- Egg and Potato Breakfast Casserole. Egg and Potato Breakfast Casserole is an easy vegetarian breakfast bake loaded with veggies. It is completely customizable and can be made ahead of time.
- Pesto Babka. Pesto babka is a showstopping loaf of bread that is savory, delicious, and flavorful with beautiful twists and turns. Plus, it is surprisingly easy to make!
- Pumpkin Muffins. Pumpkin Muffins are fluffy, moist, delicious, flavorful, and loaded with real pumpkin. Serve this quick and easy recipe for breakfast, snack, or dessert.
October Lunch Recipes
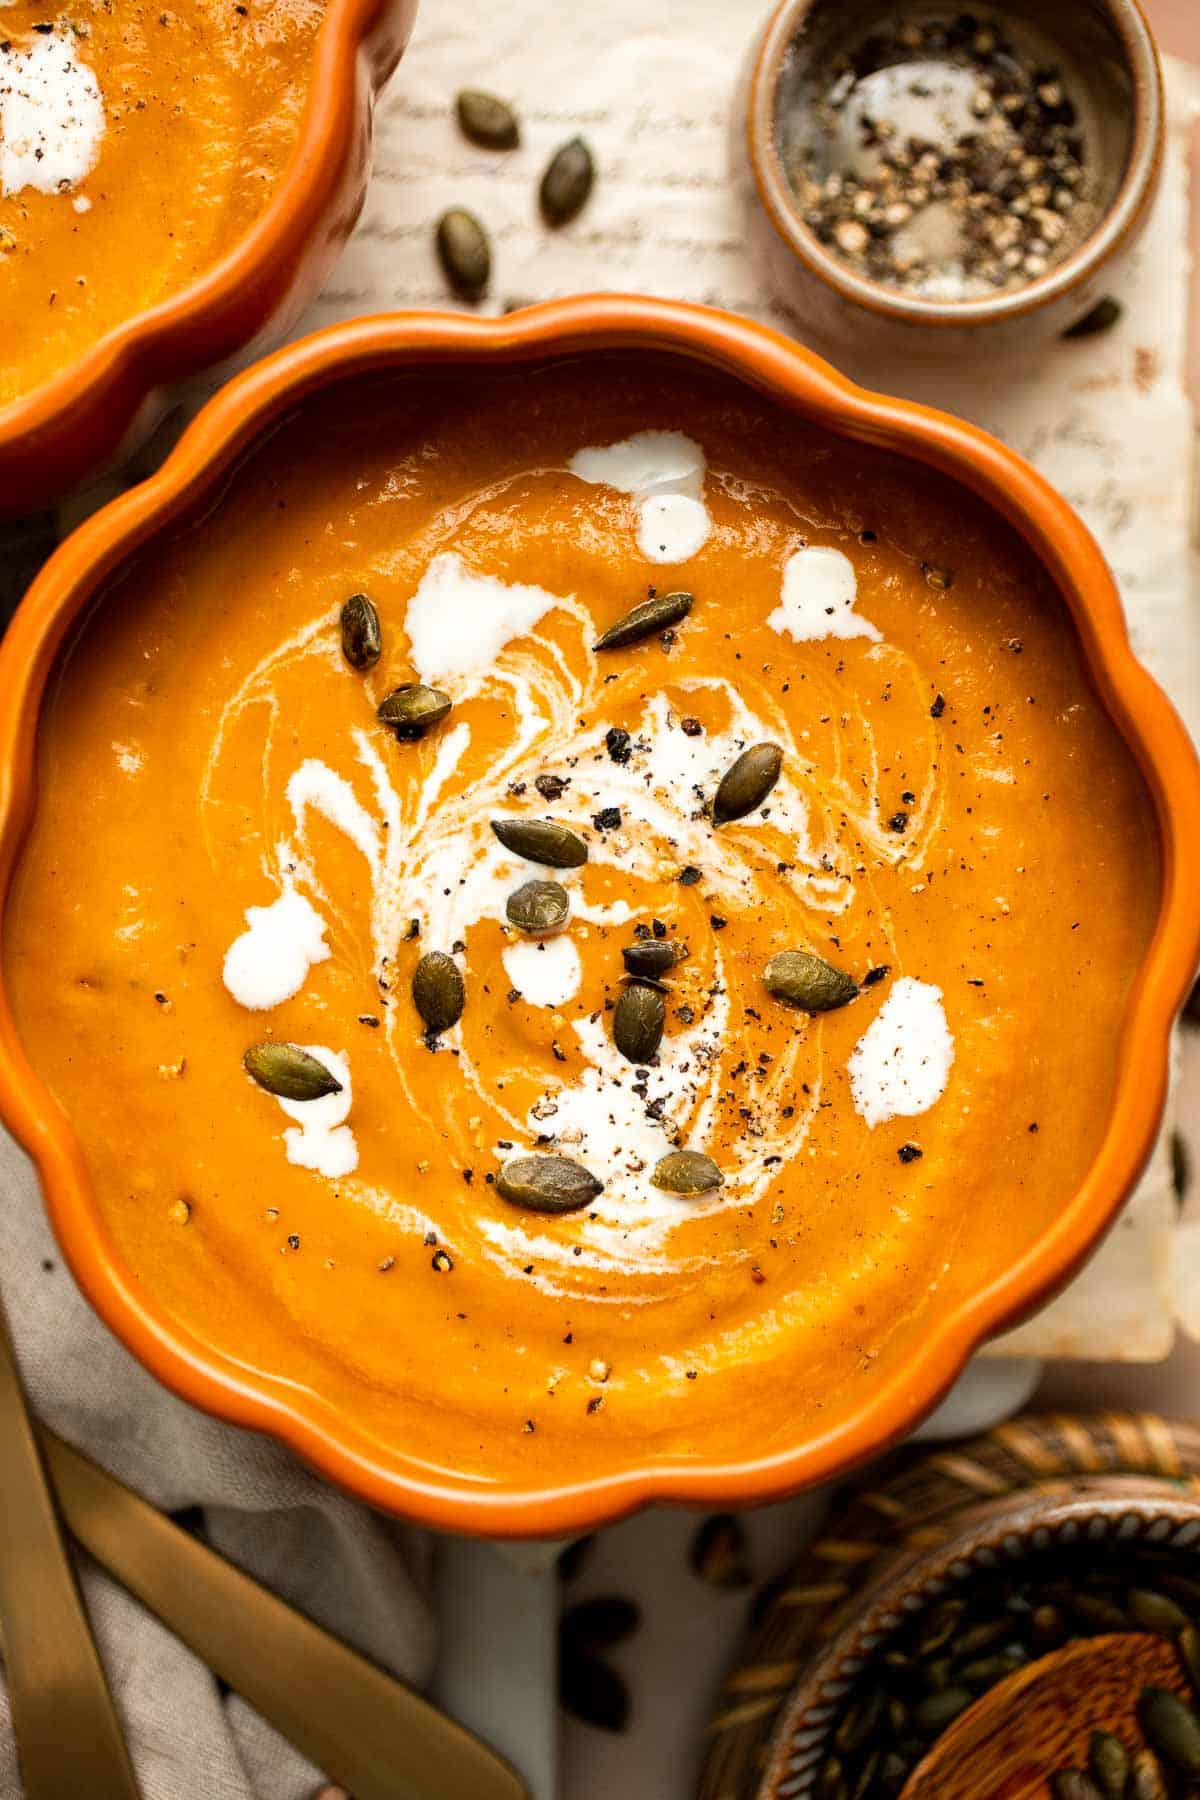 | 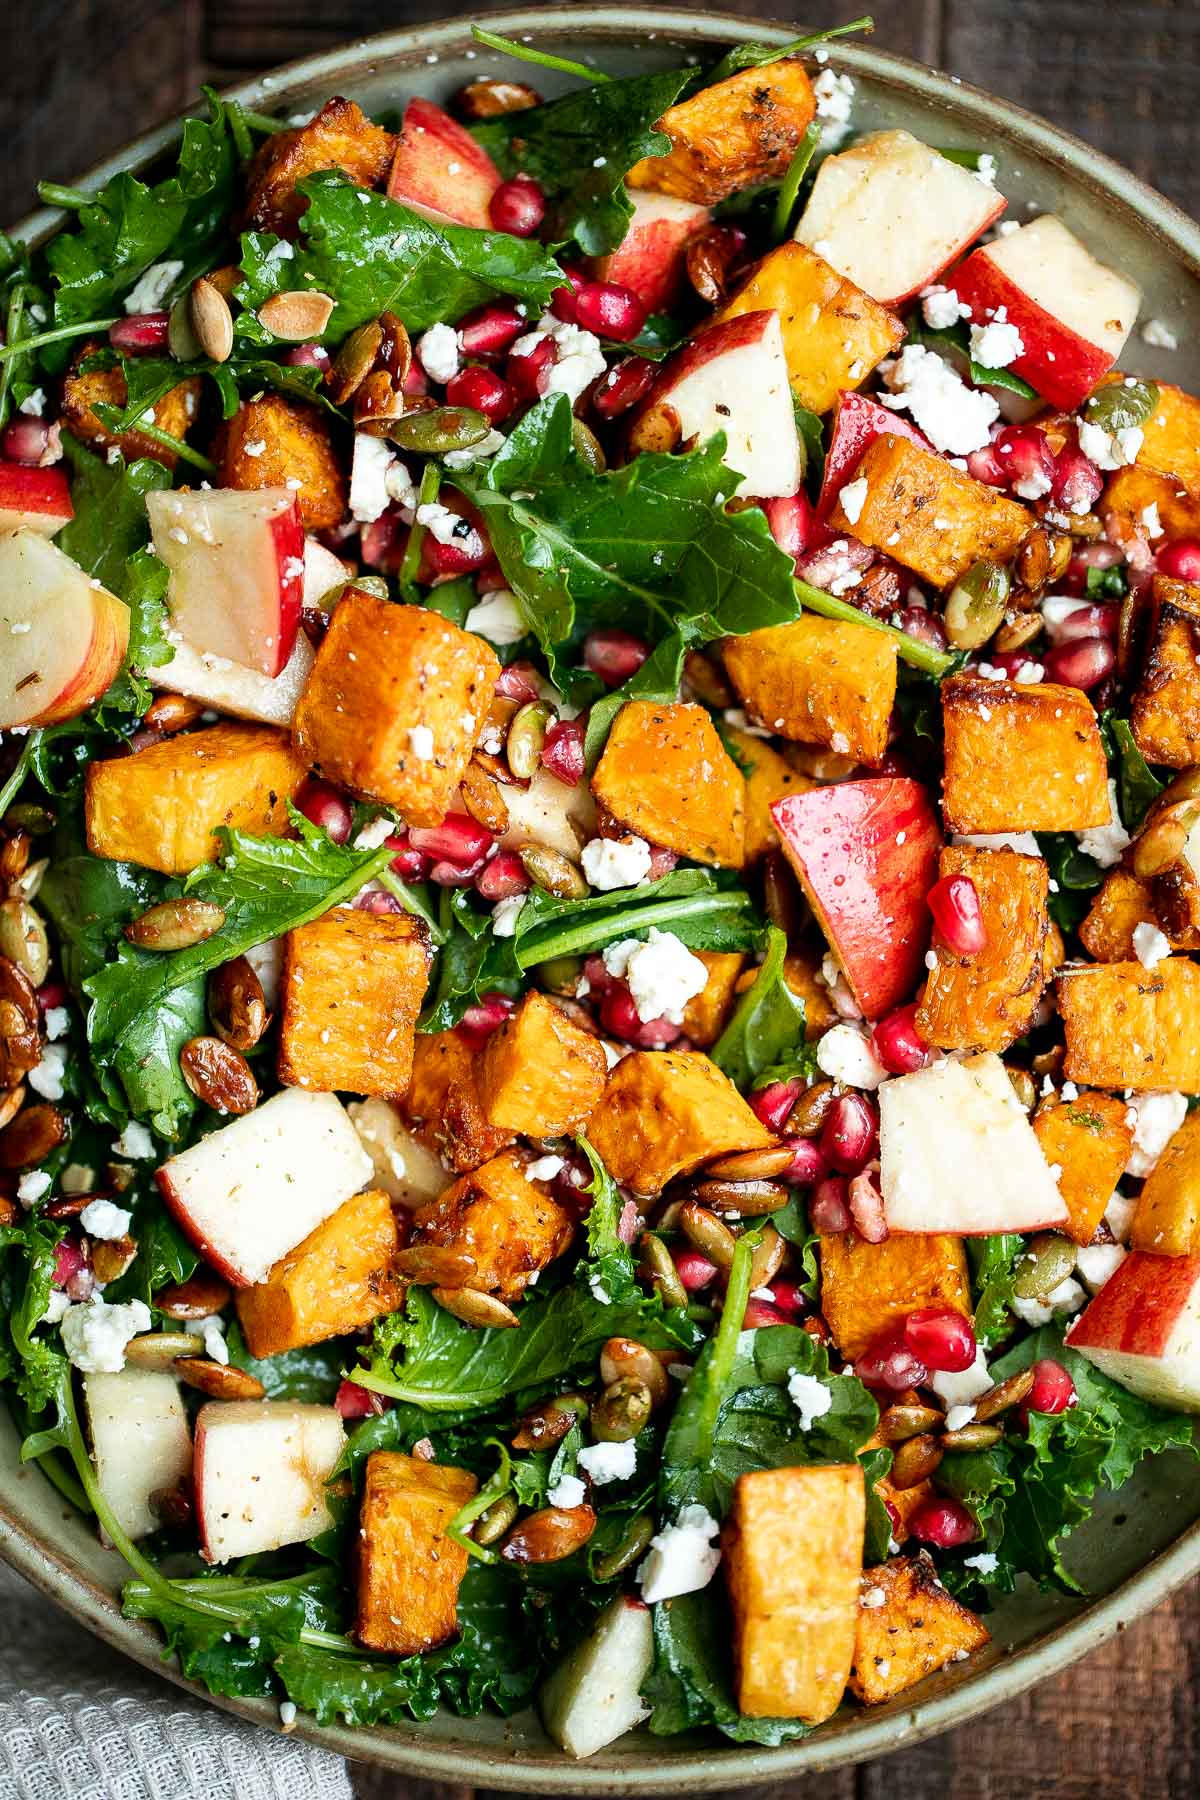 |
- Pumpkin Soup. This Pumpkin Soup is perfectly smooth and creamy with aromatic vegetables and warm spices. Make it this fall from start to finish in about 30 minutes!
- Fall Harvest Salad with Butternut Squash. Fall harvest salad with roasted butternut squash and apple is the only salad recipe you need this fall or winter. It's healthy, wholesome, and nourishing.
- Butternut Squash Quesadillas. Quick and easy butternut squash quesadillas with chicken and kale is the best fall weeknight meal. It's flavourful, so cheesy, and has the perfect crunch.
- Chicken Potato Soup. Chicken Potato Soup is cozy, hearty, and delicious - loaded with chicken, potatoes, veggies, and greens simmered in a creamy broth. Ready in 40 minutes.
- Butter Chicken Pizza. Quick, easy, delicious and saucy leftover butter chicken pizza with an ultra crispy pizza crust is made entirely in a cast-iron skillet in just 10 minutes.
- Cream Cheese Pasta. This Cream Cheese Pasta is simple, creamy, and so delicious. Ready in just 15 minutes from start to finish!
- Butternut Squash Quinoa Salad. This Butternut Squash Quinoa Salad is easy to make, ready in under an hour, delicious, and loaded with health benefits. It's the perfect fall salad.
- Beef Potstickers. Homemade Chinese beef potstickers (dumplings) are crispy on the outside and tender and juicy inside packed with a delicious beef filling.
- Butternut Squash Carbonara. If you like traditional carbonara, you are going to love creamy butternut squash carbonara pasta with Parmesan, bacon and sage. The best fall comfort food.
October Dinner Recipes
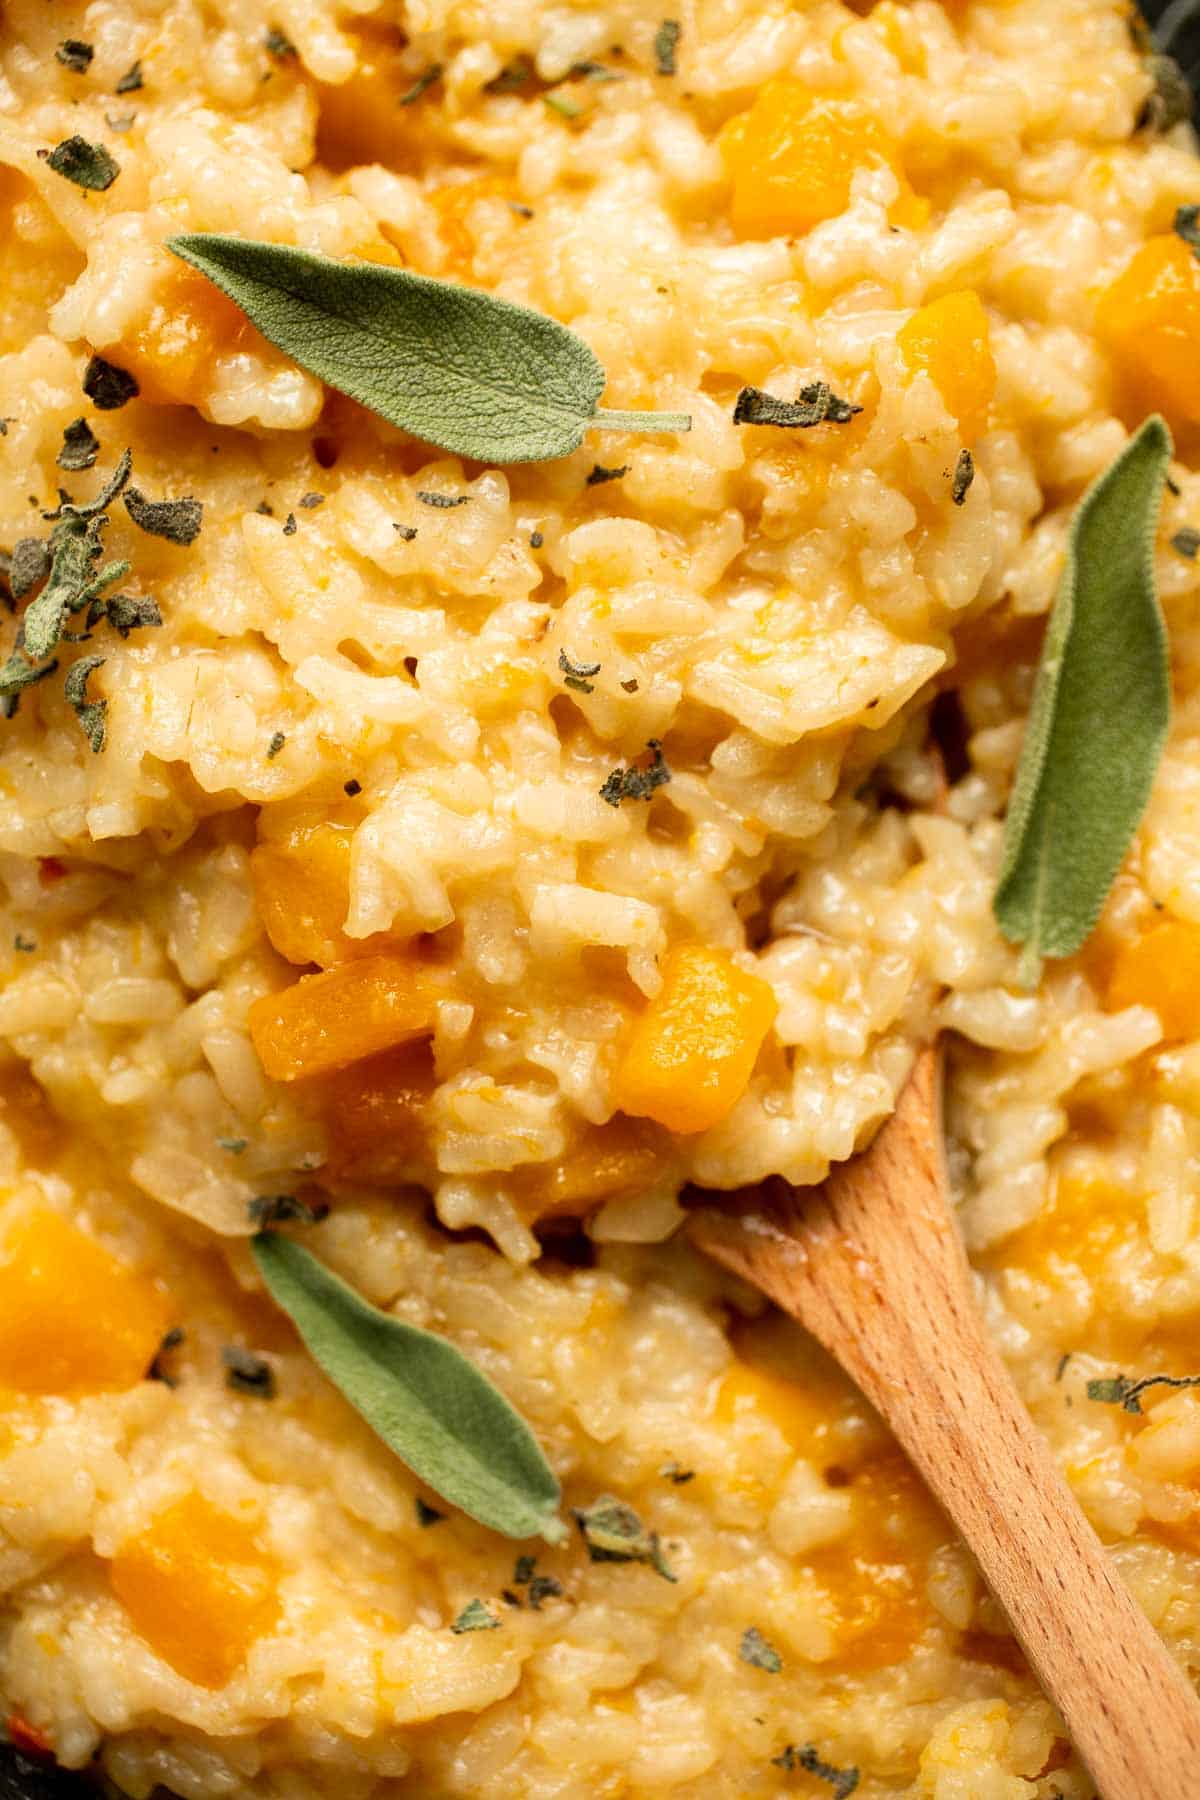 |  |
- Butternut Squash Risotto. Butternut Squash Risotto is warm, satisfying, and naturally vegetarian - ideal for a quiet fall dinner or a show-stopping entree at your next autumn party.
- Baked Chicken Drumsticks. Baked Chicken Drumsticks are ideal for busy weeknights. Marinate inexpensive chicken legs with everyday spices and bake until crispy, tender, and flavorful.
- Swedish Meatballs. Delicious, comforting homemade Swedish meatballs are seared and smothered in a creamy gravy sauce and taste so much better than IKEA meatballs.
- Glazed Honey Balsamic Pork Chops. Quick and easy, glazed honey balsamic pork chops are tender and juicy, seared in thyme and coated with a honey balsamic sauce. Make it in under 30 minutes.
- Stuffed Butternut Squash. Healthy hearty and wholesome stuffed butternut squash with wild rice and mushrooms is an easy cozy vegetarian fall dinner or side. The best comfort food.
- Pumpkin Chickpea Coconut Curry. Warm yourself up this fall with a big bowl of comforting pumpkin chickpea coconut curry with cashews. This curry is also vegan and gluten-free!
- Creamy Garlic Shrimp. Creamy garlic shrimp is a delicious, quick and easy 15-minute meal (including prep!) that you need to include in your weeknight dinner meal plan.
- Chicken Marsala. Chicken marsala in creamy mushroom sauce is a quick and easy 30-minute chicken dinner that is pure comfort food goals. A total crowd favourite.
- Coconut Curry Beef Stew. Warm and cozy, easy one pot coconut curry beef stew is hearty yet creamy, packed with tender beef chunks, potatoes and carrots, and creamy coconut milk.
- Lasagna Roll Ups. Lasagna roll ups are a twist on traditional lasagna. Lasagna noodles are filled with cheese and meat sauce and rolled up. Make ahead and freezer-friendly!
- Chicken Divan. Chicken Divan is a deliciously creamy casserole made with tender chicken and cheesy broccoli, baked with breadcrumbs. It's warm and cozy comfort food.
October Appetizers and Snacks
 |  |
- Cheese Board. This easy Cheese Board is a popular and classic appetizer arranged with an assortment of cheese, bread and crackers, fresh fruit, and nuts.
- Bacon Wrapped Brussels Sprouts. Bacon wrapped brussels sprouts are the sweet, savory, and salty appetizer that you need at your next holiday gathering this fall. Simple and easy to make.
- Pumpkin Hummus. Make creamy pumpkin hummus in under 5 minutes with a few pantry staples including canned pumpkin. It's the best healthy and delicious fall snack or appy.
- Twice Baked Potatoes. Twice Baked Potatoes are the perfect side dish or appetizer with tender baked potato boats, gooey, cheesy filling, and classic baked potato toppings.
- Pretzel Bites. These tender, chewy homemade Pretzel Bites taste professionally made but are a beginner-friendly recipe you can easily make in the comfort of your own home.
- Crab Dip. Warm baked Crab Dip is a creamy, cheesy and flavorful appetizer made with tender crab meat, melted cheese, and a creamy base to hold it all together.
- Butternut Squash Galette. This butternut squash galette (free-form tart) is the perfect meal any time of day! Serve it with a fried egg for breakfast or alongside a big salad for lunch or dinner.
- Pigs in a Blanket. Pigs in a blanket from scratch are a delicious and easy appetizer or snack to make for your next party or gathering - juicy, cheesy, flaky, and buttery.
- Sweet Potato Fritters. Sweet Potato Fritters are easy to make, flavorful, and delicious. They're pan-fried to perfection with a crisp crust on the outside and a soft bite inside.
- Garlic Knots. Garlic knots are fluffy on the inside, crispy on the outside, and topped with delicious savory garlic herbed butter that will have you begging for more.
October Desserts
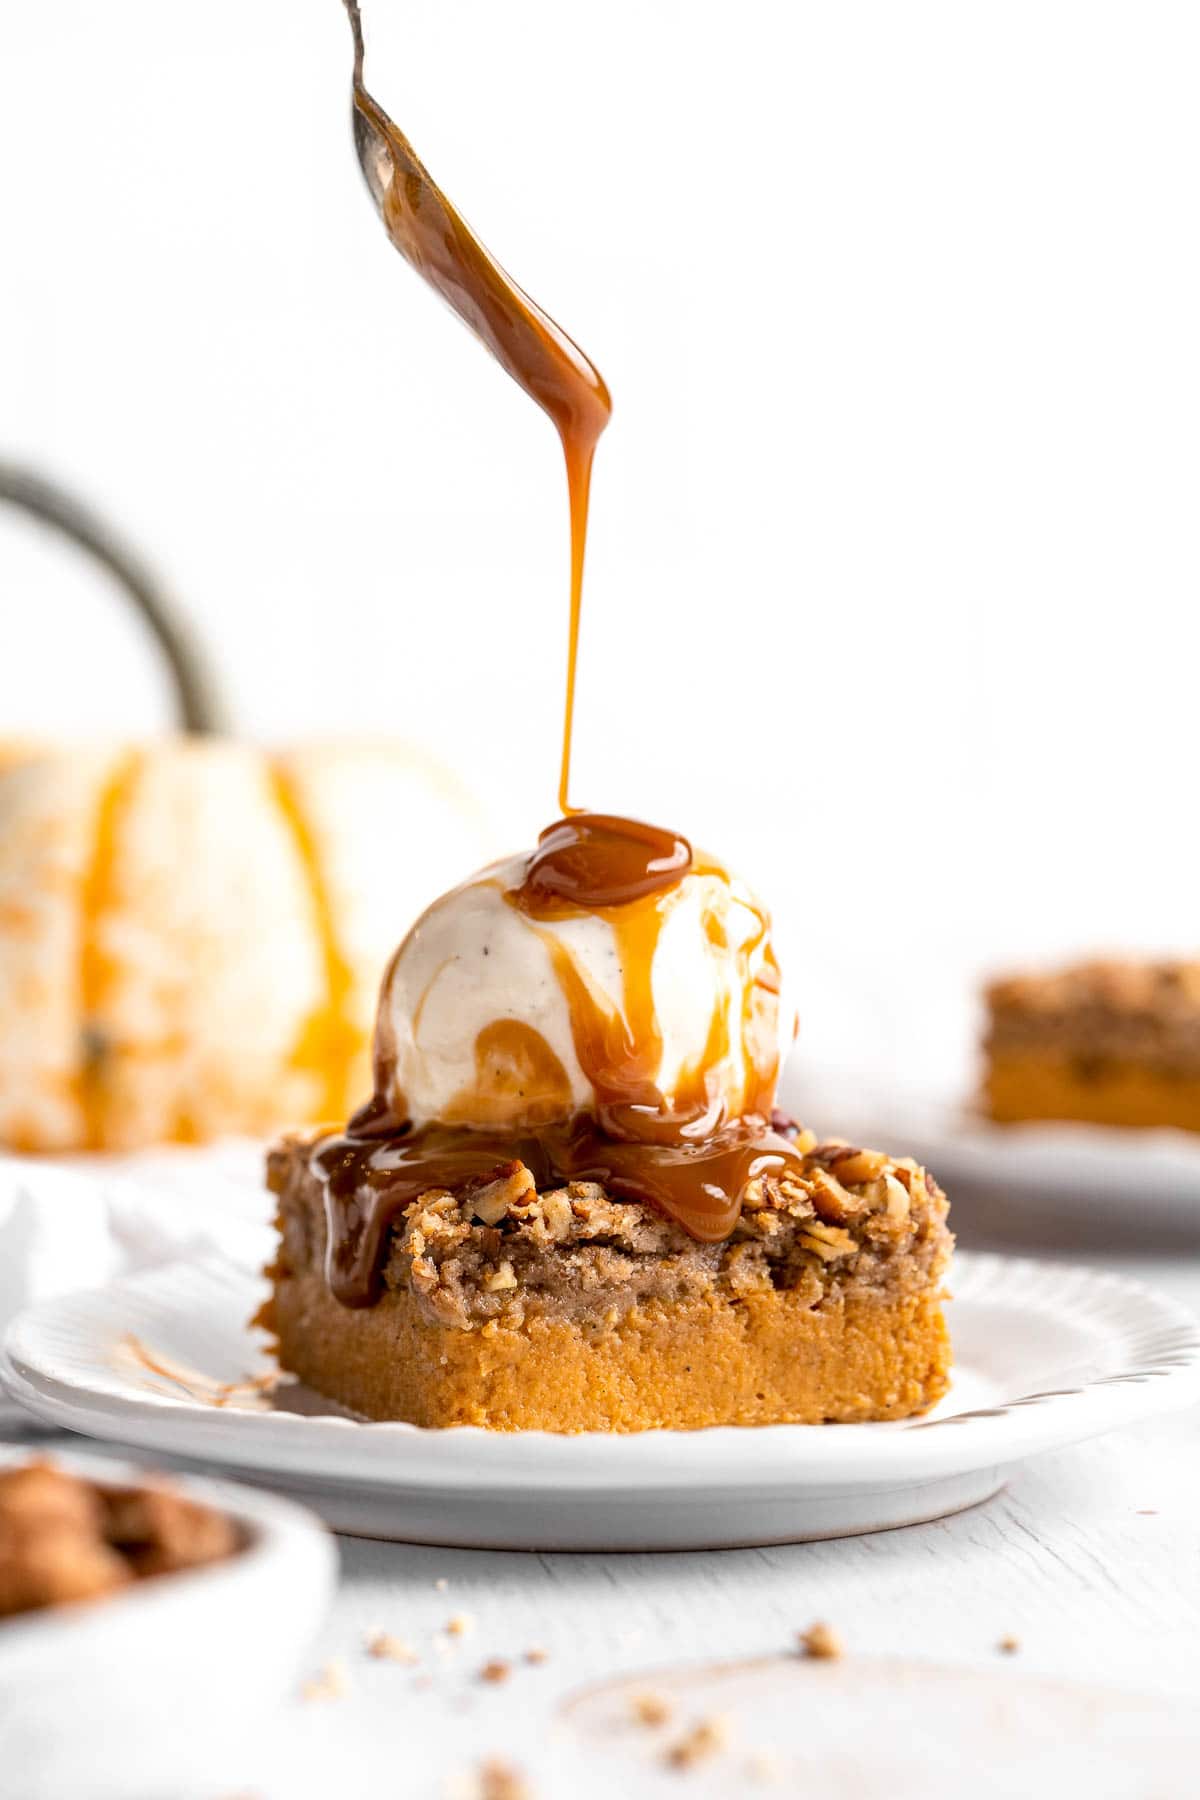 | 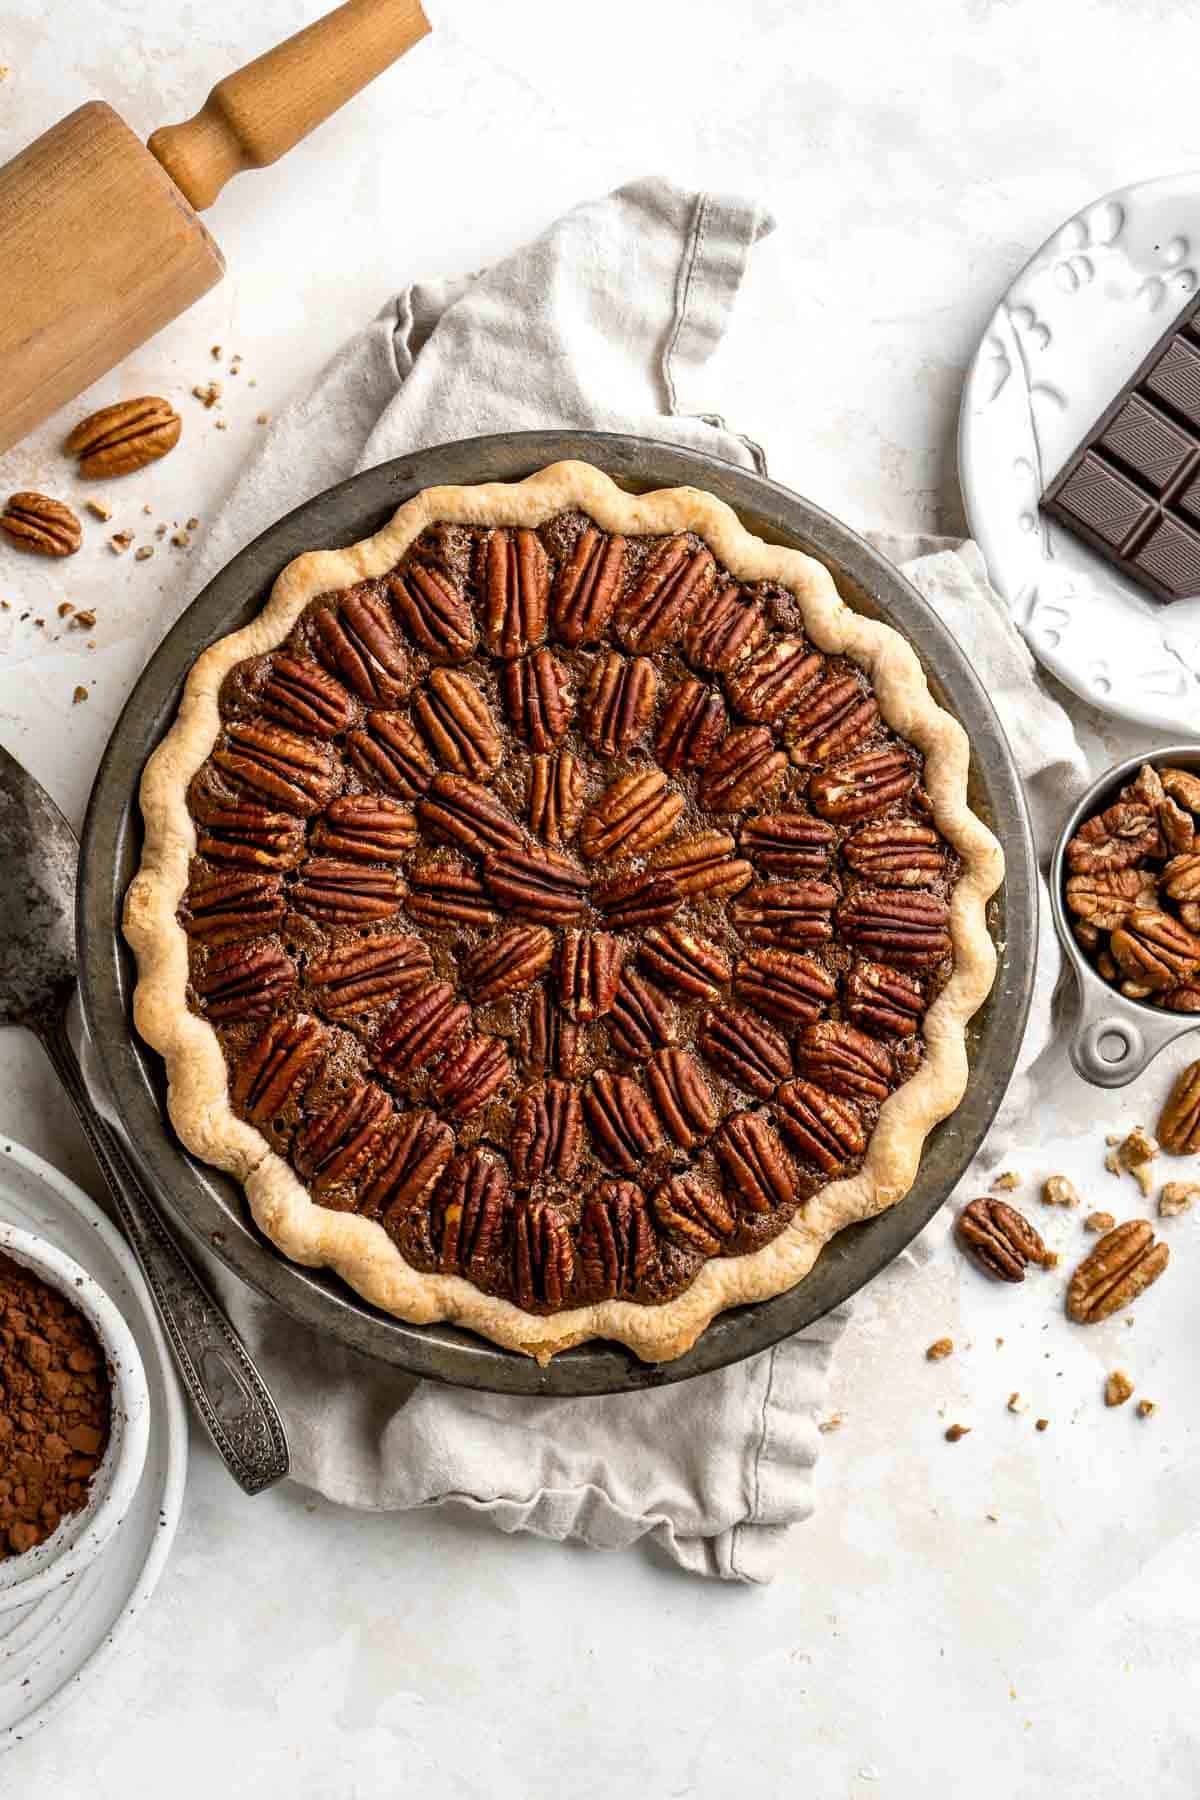 |
- Pumpkin Dump Cake. This easy Pumpkin Dump Cake recipe is loaded with fall flavors from the homemade pumpkin pie filling topped with spice cake mix and pecans.
- Chocolate Pecan Pie. This decadent Chocolate Pecan Pie is a twist on the classic holiday pie with a rich, dark chocolate flavor that pairs wonderfully with toasted pecans.
- Mini Pumpkin Pies. Small batch mini pumpkin pies with a flaky crust, delicious pumpkin pie filling, and cinnamon whipped cream, are perfect for a small Thanksgiving crowd.
- Chocolate Chip Pumpkin Bread. Soft and moist, small batch chocolate chip pumpkin bread is the easiest fall treat, packed with fall flavours of warm pumpkin spice, pumpkin, and chocolate.
- Caramel Apples. Nothing says fall better than Homemade Caramel Apples that are sweet, delicious, and fun to make. Chewy caramel made from scratch covers crisp juicy apples, topped with optional toppings.
- Pumpkin Roll. Celebrate the flavors of fall with a show-stopping Pumpkin Roll featuring a tender pumpkin spice cake swirled around a rich cream cheese filling.
- Pumpkin Bundt Cake. Pumpkin bundt cake with cream cheese icing is a perfect fall dessert to serve this year - super moist inside, with a perfect golden brown crumby crust.
- Butternut Squash Bread. Move over pumpkin, there is a new loaf in town! Butternut Squash Bread is moist, fluffy, flavorful, and brings the pumpkin spice season to your home.
- Pumpkin Mousse. This rich, creamy pumpkin mousse is a fall dessert favorite. It's beginner-friendly, no bake, and easy to whip up in 15 minutes before ready to chill.
- Halloween Bark. Halloween Bark is a delicious, sweet, and fun to make chocolate treat. This quick and easy no bake recipe is easy to make with a handful of ingredients.
More Fall Recipes
- 60+ Fall Dinner Ideas
- 50 Best Fall Side Dishes
- 50 Best Fall Desserts
- 40 Best Fall Appetizers
- 15 Best Fall Salad Recipes
- 40+ Cozy Fall Soup Recipes
Did You Make Any of These October Recipes?
Please leave a comment and rating below, and let me know what you thought of this round up of delicious recipes to cook this October. Be sure to snap a picture and tag me on Instagram @aheadofthyme or share it on the Pinterest pin so that I can follow along.
HUNGRY FOR MORE? Don't forget to sign up for my email newsletter so that you don't miss any recipes. You can also follow along on Instagram and Pinterest for more recipe updates.
Crab Dip
This warm baked Crab Dip is a creamy, cheesy, and flavorful appetizer that's perfect for any occasion. Melted cheese, chunks of sweet, tender crab meat, and a creamy base to hold it all together make this seafood dip unbelievably delicious. Whether you're hosting a party, bringing an appetizer to a potluck, or just enjoying some snacks with friends, this tasty dip will be the main attraction.

Seafood lover or not, this creamy crab dip is one of the best appetizers out there. Plus, it's just as easy to make as it is fun to eat. It takes 15 minutes of preparing ingredients (mostly just mixing everything together), then the dip goes in the oven to melt into a scoopable, spreadable dip that you'll want to smear on everything! Serve it hot or cold with bread, crackers, chips, or fresh veggies for the perfect snack.
Why You'll Love this Crab Dip Recipe
- Quick and easy. Dips are one of the best ways to whip up a delicious appetizer or snack for a last-minute gathering. All you have to do is mix the ingredients together and bake for 20 minutes until the cheese is melted and bubbly.
- Made with real crab. No imitations necessary - this crab dip is loaded with real lump crab meat for an unforgettable dish.
- Creamy and savory. As soon as you take the first bite, you'll be in love with how creamy and savory this dip is. The mayonnaise and cream cheese create a creamy base that gets even better with tangy sour cream and sharp cheddar cheese. Add all that with the lump crab meat, and you're in for a treat.
- Perfect for all occasions. Your next hors d'oeuvre doesn't have to be complicated. Baked crab dip is a perfect dish for hosting, whether you're filling your home with extended family and friends, or just treating your partner and children to a delicious appetizer. Serve it for any occasion - a game day party, a girls' night in, a picnic or potluck, or even bigger events like birthday parties, holiday dinners, and baby showers.

Ingredient Notes
To make this delicious Crab Dip, you will need the following ingredients (full measurements in recipe card below):
- crab meat - use lump crab meat which are larger, more meaty pieces for the best results. You can easily get either fresh (refrigerated), frozen, or canned from the supermarket. I prefer using fresh. You can substitute with chopped imitation crab meat if it's easier for you to find.
- cream cheese - a rich and creamy base for the dip. Use softened for easier mixing. Feel free to substitute with ricotta if you prefer.
- mayonnaise - added to thin out the cream cheese and to help combine everything together while enhancing the overall creaminess.
- sour cream - for some tangy flavor that adds an extra layer of richness to the dip. You can use plain greek yogurt in place of the sour cream in this recipe.
- cheddar cheese - use either medium or sharp cheddar cheese. You can use pre-shredded cheddar or grate it fresh yourself.
- garlic powder
- paprika - a pinch will give your dip some color and a nice smoky flavor.
- Worcestershire sauce - enhances that deep umami flavor. You can use soy sauce in place of the worcestershire sauce if you don't have any on hand.
- lemon juice - brightens up the dip and adds a nice citrusy flavor.
- green onion - for both the base and garnish.
- salt and pepper
You will also need measuring cups, a large mixing bowl, stand mixer (optional), casserole dish, and oven.

How to Make the Best Crab Dip
- Beat the dairy ingredients. In a large mixing bowl, add cream cheese and stir well or beat with a stand mixer until smooth. Add mayonnaise, sour cream, and ½ cup cheddar cheese. Mix well until evenly combined.


- Season. Stir in garlic powder, paprika, Worcestershire sauce, lemon juice, salt, pepper and green onion.


- Mix in crab meat. Add crab meat and toss until evenly combined.


- Assemble. Transfer the mixture into a 1-quart casserole dish and top with the remaining ½ cup cheddar cheese.


- Bake. Bake in a 375F preheated oven for 20 minutes until melted cheese is bubbly.
- Serve. Garnish with green onions and serve with French baguette slices or crackers.


Recipe Variations
- Serve it chilled. Prepare the dip ahead of time and keep it in the refrigerator until you're ready to serve it. A great option if you're serving a crowd or don't want to deal with heating up the dip right before serving.
- Add Old Bay seasoning. For a classic Maryland flavor, add a pinch or two of Old Bay to your dip. The crab will already have some saltiness to it so you won't need too much. It adds a really nice flavor that will bring out the flavors of the crab even more.
- Mix in more seafood. Add some chopped shrimp or scallops for a heartier dip that's perfect for special occasions.
- Make it spicy. Spice up the dip with a few dashes of hot sauce or red pepper flakes. You can also add chili peppers like jalapeños, poblanos, or serranos for a milder heat.
- Skip the canned crab. There's nothing wrong with canned crab, but if it's an extra-special occasion, try using fresh crab from your local market or seafood counter instead! The texture will be different and the crab will taste fresher, making an even better dip.
How to Serve
Enjoy this delicious Crab Dip with chips, crackers, or crusty bread as an appetizer. Some of my favorite things to dip in crab dip are:
- Garlic Breadsticks
- Veggie Tray
- Homemade Baked Potato Chips
- Baked Zucchini Fries
- Pretzel Bites
- Sweet Potato Tater Tots

Recipe Tips and Tricks
- Balance the creaminess. Adjust the proportions of the mayonnaise, cream cheese, and sour cream to your desired level of creaminess. You want a nice balance of all three ingredients to create the perfect texture and flavor.
- Keep it warm. The crab dip has to remain hot while it's served to follow food safety protocols. Leave it out for no more than two hours before storing or discarding it -otherwise you can keep it hot in a crock pot, under a food lamp, in a chafing dish or in the oven on a low setting.
- Make it ahead of time. This crab dip can be made up to 2 days in advance and stored in the refrigerator until ready to serve.
- Repurpose the leftovers! Crab dip is for more than dunking crackers. Make a crab dip sandwich, use it to make rangoons or potstickers, or spread it on a wrap and load it up with fresh, crisp vegetables.
Storing and Freezing Instructions
How to Store
Cover tightly or transfer leftovers to an airtight container and refrigerate for up to 4 days.
How to Reheat
Reheat the dip in the microwave for 1 to 2 minutes or until it's warm. You can also pop it in the oven at 375F for 10 minutes or until bubbly. Add a little bit of liquid if it's too thick from storage and top it with more cheese and garnish.
How to Freeze
Keep the baked or unbaked dip in a freezer-safe bag or container and freeze it for up to 3 months. Thaw it overnight when it's ready for consumption before baking or reheating.
More Cheesy Dip Recipes
- 20 Best Dip Recipes
- French Onion Dip
- Baked Spinach Dip
- Queso Mexican Cheese Dip
- Pizza Dip
- Whipped Ricotta Dip
Tried this recipe?
I'd love to hear what you think! Leave a comment and rating below to share your feedback. Your reviews help others discover this recipe and help me keep creating more free recipes for you. Snap a photo and tag me on social media @aheadofthyme too.

Sheet Pan Pancakes
Simplify your mornings with these fluffy, golden Sheet Pan Pancakes! This is hands down the easiest way to make a bunch of pancakes for the family without all the waiting, flipping, and mess. With just one pan, an oven, and a few simple ingredients, you'll have delicious pancakes ready to serve. Plus, you can customize the pan with different toppings to suit everyone's preferences.
Next time you need an easy breakfast for a special morning, give this sheet pan pancake recipe a try! This recipe is basically hands-off, so you can make a big batch of pancakes for the entire family without missing out on the time together. We especially love them for the holidays when we want to spend more time making memories and less time in the kitchen! Serve them with Strawberry Compote, homemade Blueberry Sauce, maple syrup, or a swirl of whipped cream for an extra special breakfast they'll remember forever!
Why You'll Love These Sheet Pan Pancakes
- Ready in 30 minutes. No more waiting around the stove flipping pancakes one by one. With these oven-baked pancakes, you can make a whole batch at once in half the time.
- Feed the whole family. One batch of these sheet pan pancakes makes 16 small pancakes which is enough for 6-8 servings, so you'll have plenty for the whole crew. It's an ideal option for busy mornings or special occasions.
- Endlessly customizable. Everyone can add their own toppings to different sections of the pan, making it easy to please everyone at the table with just one batch - even the picky eaters who prefer plain pancakes!
- No flipping necessary. Simply pour batter into the pan, bake, and slice. You'll get all the fluffy goodness of regular pancakes without the hassle of flipping each one individually. It's a game changer!

Ingredient Notes
To make these delicious Sheet Pan Pancakes, you will need the following ingredients (full measurements in recipe card below):
- all purpose flour - be sure to scoop and level for accurate measuring.
- baking powder - helps create light, fluffy pancakes. Sift out any clumps for the best results.
- baking soda - using both baking powder and soda ensures your pancakes will bake thoroughly.
- granulated sugar - adds a touch of sweetness to balance the flavor.
- salt
- milk - at room temperature for a smooth, even batter.
- unsalted butter - melted butter adds a soft, tender texture and delicious flavor.
- vanilla extract
- eggs - beaten
- cooking spray
- toppings - add your favorite fruit such as strawberries, blueberries, and bananas. Chocolate chips and shredded coconut are also great topping options.
You will also need a measuring cups and spoons, mixing bowls, a fine mesh sieve, a whisk, and a half-sheet baking pan.
How to Make the Best Sheet Pan Pancakes
- Combine dry ingredients. In a large mixing bowl, sift together flour, baking powder, baking soda, sugar and salt.
- Combine wet ingredients. In a medium mixing bowl, whisk together milk, butter, vanilla extract, and eggs.
- Add wet to dry. Add the wet ingredients to the dry ingredients and fold together until just combined (the batter will be lumpy). Do not over mix.


- Pour. Grease a large 13x18 sheet pan (half sheet pan) with nonstick baking spray or brush with melted butter. Pour the batter into the sheet pan and spread evenly.
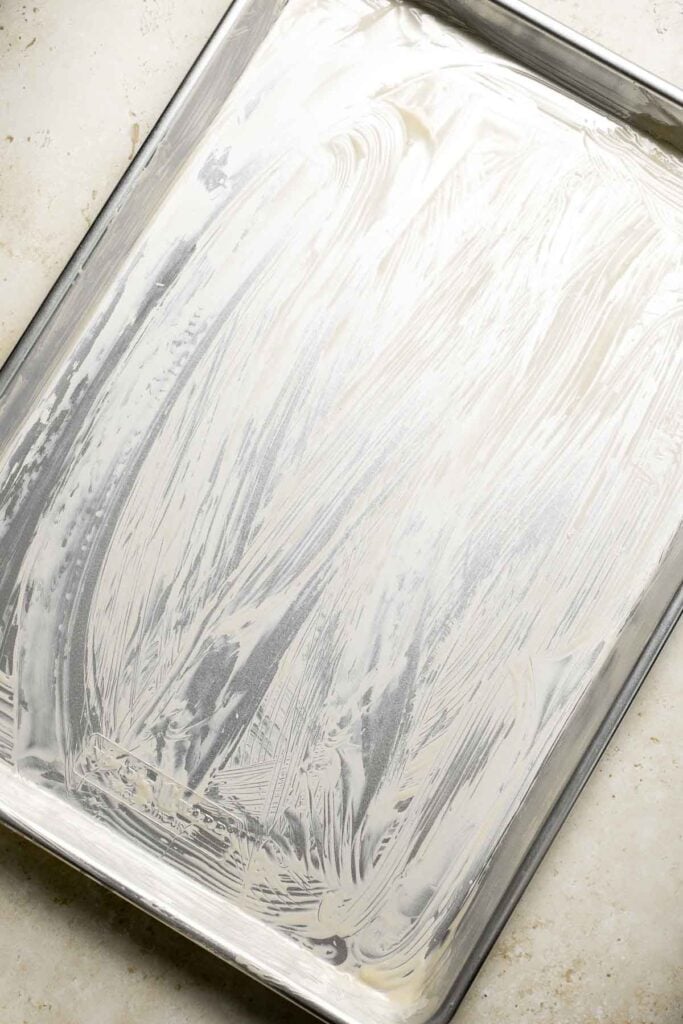

- Add toppings. Add your favorite toppings including sliced strawberries, blueberries, banana, and chocolate chips.
- Bake. Bake the pancake in a 400F preheated oven until golden brown and a toothpick inserted into the center of the cake comes out clean, about 18-20 minutes.


- Serve. Cut into 16 rectangular portions and serve with a drizzle of maple syrup.
Recipe Variations
- Add your favorite toppings. Instead of the classic strawberry, blueberry, chocolate chip, and banana combo, try adding other fresh fruits like raspberries, blackberries, or cherries. You can also sprinkle nuts (like chopped pecans or walnuts) or coconut flakes for added crunch. We like to make banana nut pancakes with sliced bananas and chopped pecans on top!
- Add flavor to the batter. For a fun twist, stir in a tablespoon of cinnamon or cocoa powder to the pancake batter before baking. You can also swap the vanilla extract for almond or maple extract for a unique flavor profile.
- Gluten-free version. Replace the all purpose flour with a gluten-free flour blend. Be sure to check if the blend includes xanthan gum or similar to help with texture. You may need to adjust the liquid slightly for the right consistency.
- Protein-packed pancakes. For an extra protein boost, replace a small amount of the flour with your favorite protein powder.
How to Serve
These Sheet Pan Pancakes are delicious served on their own with maple syrup, Strawberry Compote, Blueberry Sauce, or a swirl of whipped cream. It is also perfect paired with a larger breakfast or brunch spread along with some classics including:
For more recipes, see our 50 Best Breakfast Ideas.
Recipe Tips and Tricks
- Spread evenly. For a perfectly golden pancake, spread the batter evenly in the sheet pan. An uneven layer can result in uneven cooking, with some areas overcooked and others undercooked.
- Grease the pan well. Ensure the entire surface of the pan is thoroughly greased to prevent sticking. If your pans are older, you can line the pan with a piece of parchment paper instead of oil.
- Avoid frozen fruit. For the best texture, use fresh fruit instead of frozen. Frozen fruit can release excess moisture during baking, making the pancake soggy.
- Let cool before cutting. Allow the sheet pan pancake to cool for a few minutes to help it set. Once ready, you can use a sharp knife or pizza cutter for neatly sliced pancakes.
Storing and Freezing Instructions
How to Store
Once fully cooled, store leftover sheet pan pancakes in an airtight container in the fridge for 2-3 days.
How to Reheat
Place the pancakes in a toaster oven for a few minutes until warmed through, or microwave them with a damp paper towel over the top to retain moisture. For larger batches, you can also place the pancakes on a prepared baking sheet and reheat them in the oven for about 5-10 minutes.
How to Freeze
Store the leftover pancakes in a freezer-safe container or freezer bag for up to 3 months. Make sure to place them in single layers to avoid sticking. This will make it easy to grab individual pancakes when you're ready to reheat. Thaw in the fridge before reheating.
FAQ
The baking time for an entire batch of pancakes is 18-20 minutes in a 400F preheated oven. The timing can vary depending on the fillings you choose and the thickness of the batter.
Yes! Simply place the leftover pancakes in a freezer-safe container or freezer bag and store for up to 3 months. When you're ready to eat, just thaw them in the fridge and reheat as needed. They're so handy for meal prep!
Try dark chocolate chips, fresh berries, bananas, or chopped nuts on top of the pancakes before baking for a flavorful twist. Afterward, you can drizzle with maple syrup, add whipped cream, butter, or even Nutella or homemade almond butter for more flavor variations. Anything you like on regular pancakes will work on these delicious sheet pan pancakes!
More Pancake Recipes
- Best Old Fashioned Pancakes
- Blueberry Pancakes
- Mini Pancakes (Silver Dollar Pancakes)
- Applesauce Pancakes
- Gingerbread Pancakes
- Carrot Cake Pancakes
Tried this recipe?
I'd love to hear what you think! Leave a comment and rating below to share your feedback. Your reviews help others discover this recipe and help me keep creating more free recipes for you. Snap a photo and tag me on social media @aheadofthyme too.

Sweet Potato Fritters
Homemade Sweet Potato Fritters are easy to make, flavorful, and delicious. They're pan-fried to perfection with a crisp crust on the outside and a soft bite on the inside. Plus, the flavor is unmatched - with a mixture of Parmesan cheese and chives for a savory, salty flavor that balances the sweetness of the sweet potatoes. Serve as an appy or pair with roasted meats, baked mac and cheese, or slow cooker ribs for a cozy, comforting meal any time of the year.
Is it worth the effort to make sweet potato fritters instead of an easier preparation, like baking or roasting? Absolutely! These crispy fritters have the crunchy texture of your favorite French fries or hash browns but with the sweetness of sweet potatoes and layers of flavor. Yet, they're still really simple to make, even on a busy weeknight. Serve them with your favorite dipping sauce, like garlic aioli, honey mustard, or even homemade BBQ sauce.
Why You'll Love These Sweet Potato Fritters
- Crispy on the outside. Unlike other recipes that use the air fryer or bake the fritters in the oven, this one pan-fries the fritters in hot oil to get that crispy bite on the outside. That texture really can't be imitated, and they're certainly worth the effort!
- Sweet and savory. It's easy to make your sweet potato recipes a little too sweet, but this easy recipe balances the natural sweetness with salty Parmesan cheese, chives, and a few pantry seasonings. The flavors work together to make the perfect side dish for any meal.
- Family-favorite. You'll get zero complaints when you serve a pile of these fritters to your friends and family. It's best to make a double batch...they'll want seconds!

Ingredient Notes
To make these delicious Sweet Potato Fritters, you will need the following ingredients (full measurements in recipe card below):
- sweet potato - peeled and grated. You'll need to let the excess liquid drain out, so it helps to start this before you get any of your other supplies ready.
- Parmesan cheese - for a salty, umami flavor.
- all purpose flour - to absorb extra moisture and make a crisp crust.
- egg - to bind the fritters together.
- chives or green onions - finely chopped into small pieces.
- seasonings - season with garlic powder, paprika, salt, and ground black pepper.
- vegetable oil - for pan frying. Feel free to use any neutral oil that can tolerate high heat (avocado oil, refined coconut oil, etc).
You will also need measuring cups and spoons, a box grater or food processor, colander, a large mixing bowl, a large skillet, a spoon or spatula, paper towels, and a plate.
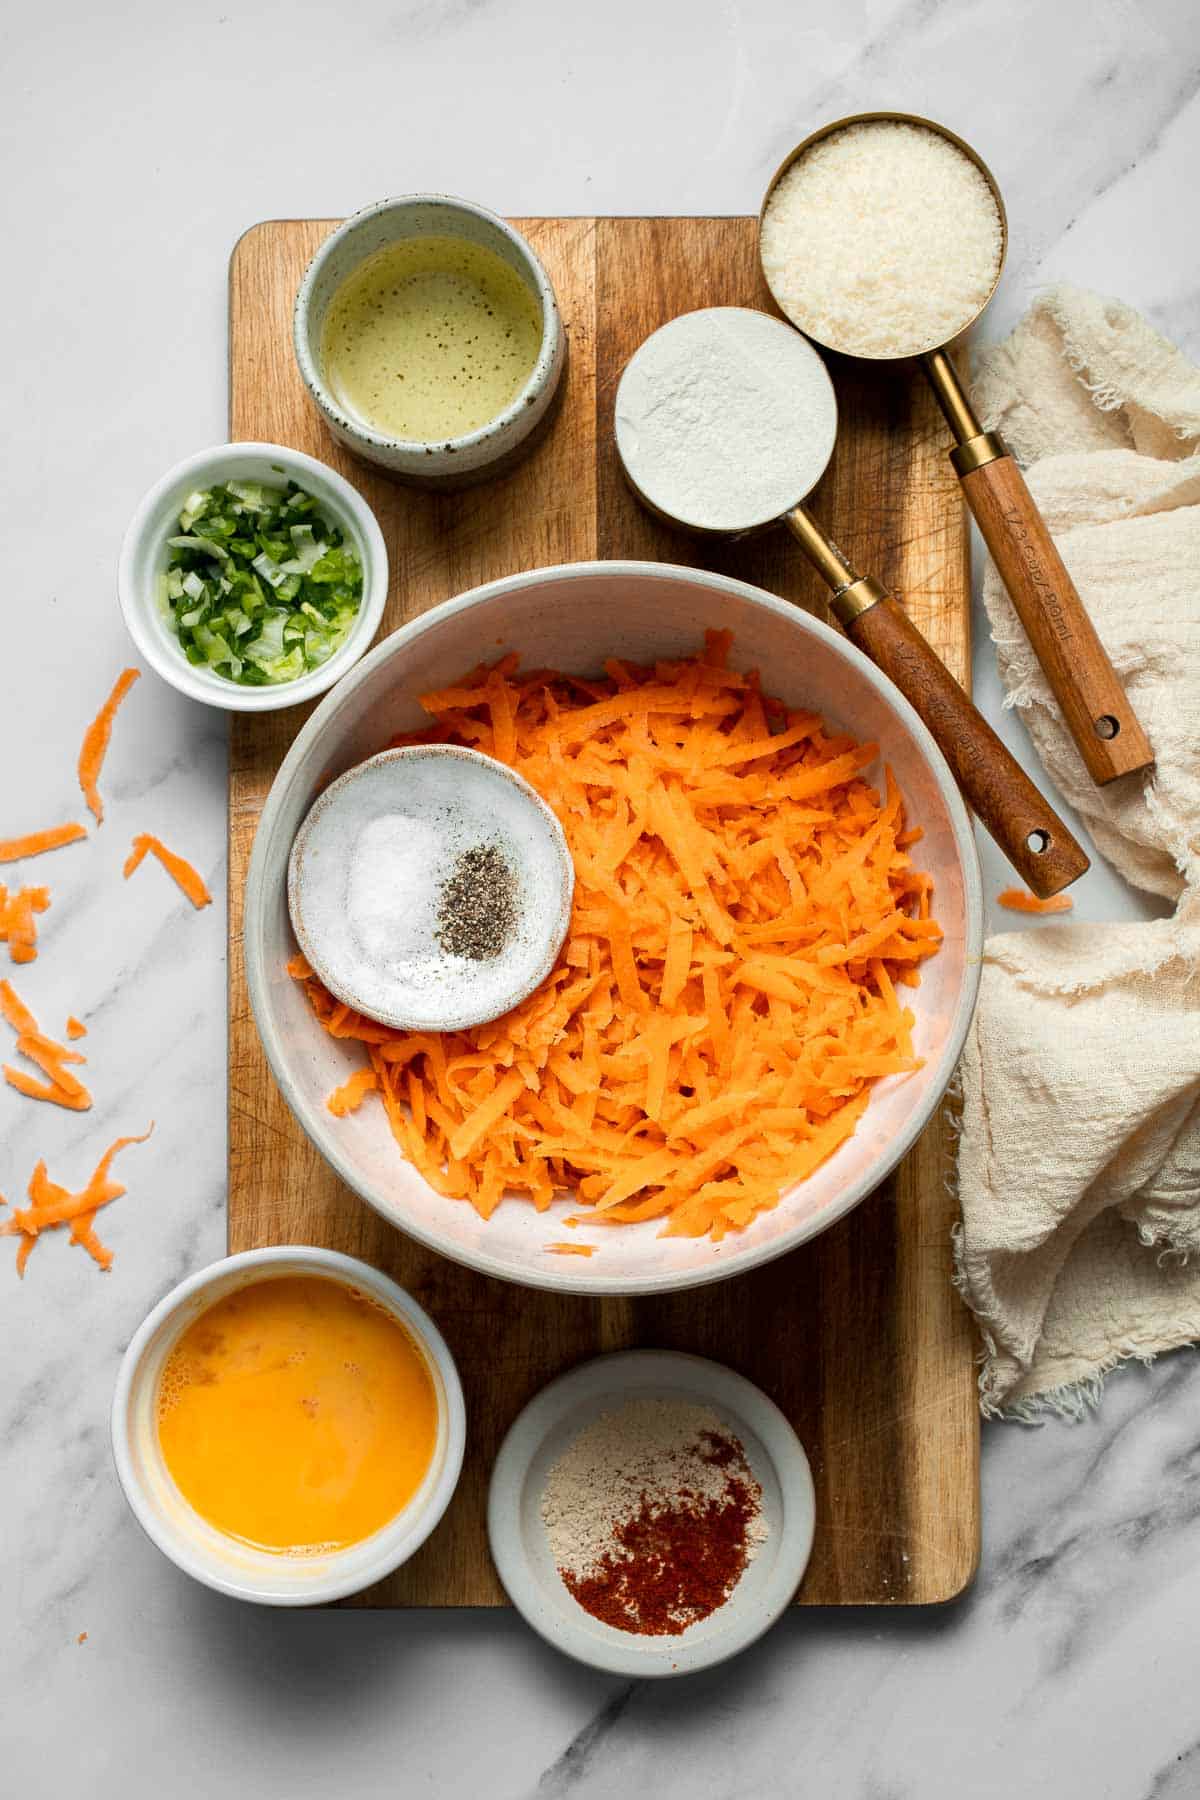
How to Make the Best Sweet Potato Fritters
- Prep the sweet potato. Use a box grater or food processor to grate the sweet potato. Place the grated sweet potato in a colander over a large bowl or in the kitchen sink. Sprinkle the grated sweet potato evenly with a little bit of salt. Toss well to combine and let it sit for 10 minutes (Salt will draw out excess moisture inside the sweet potato).
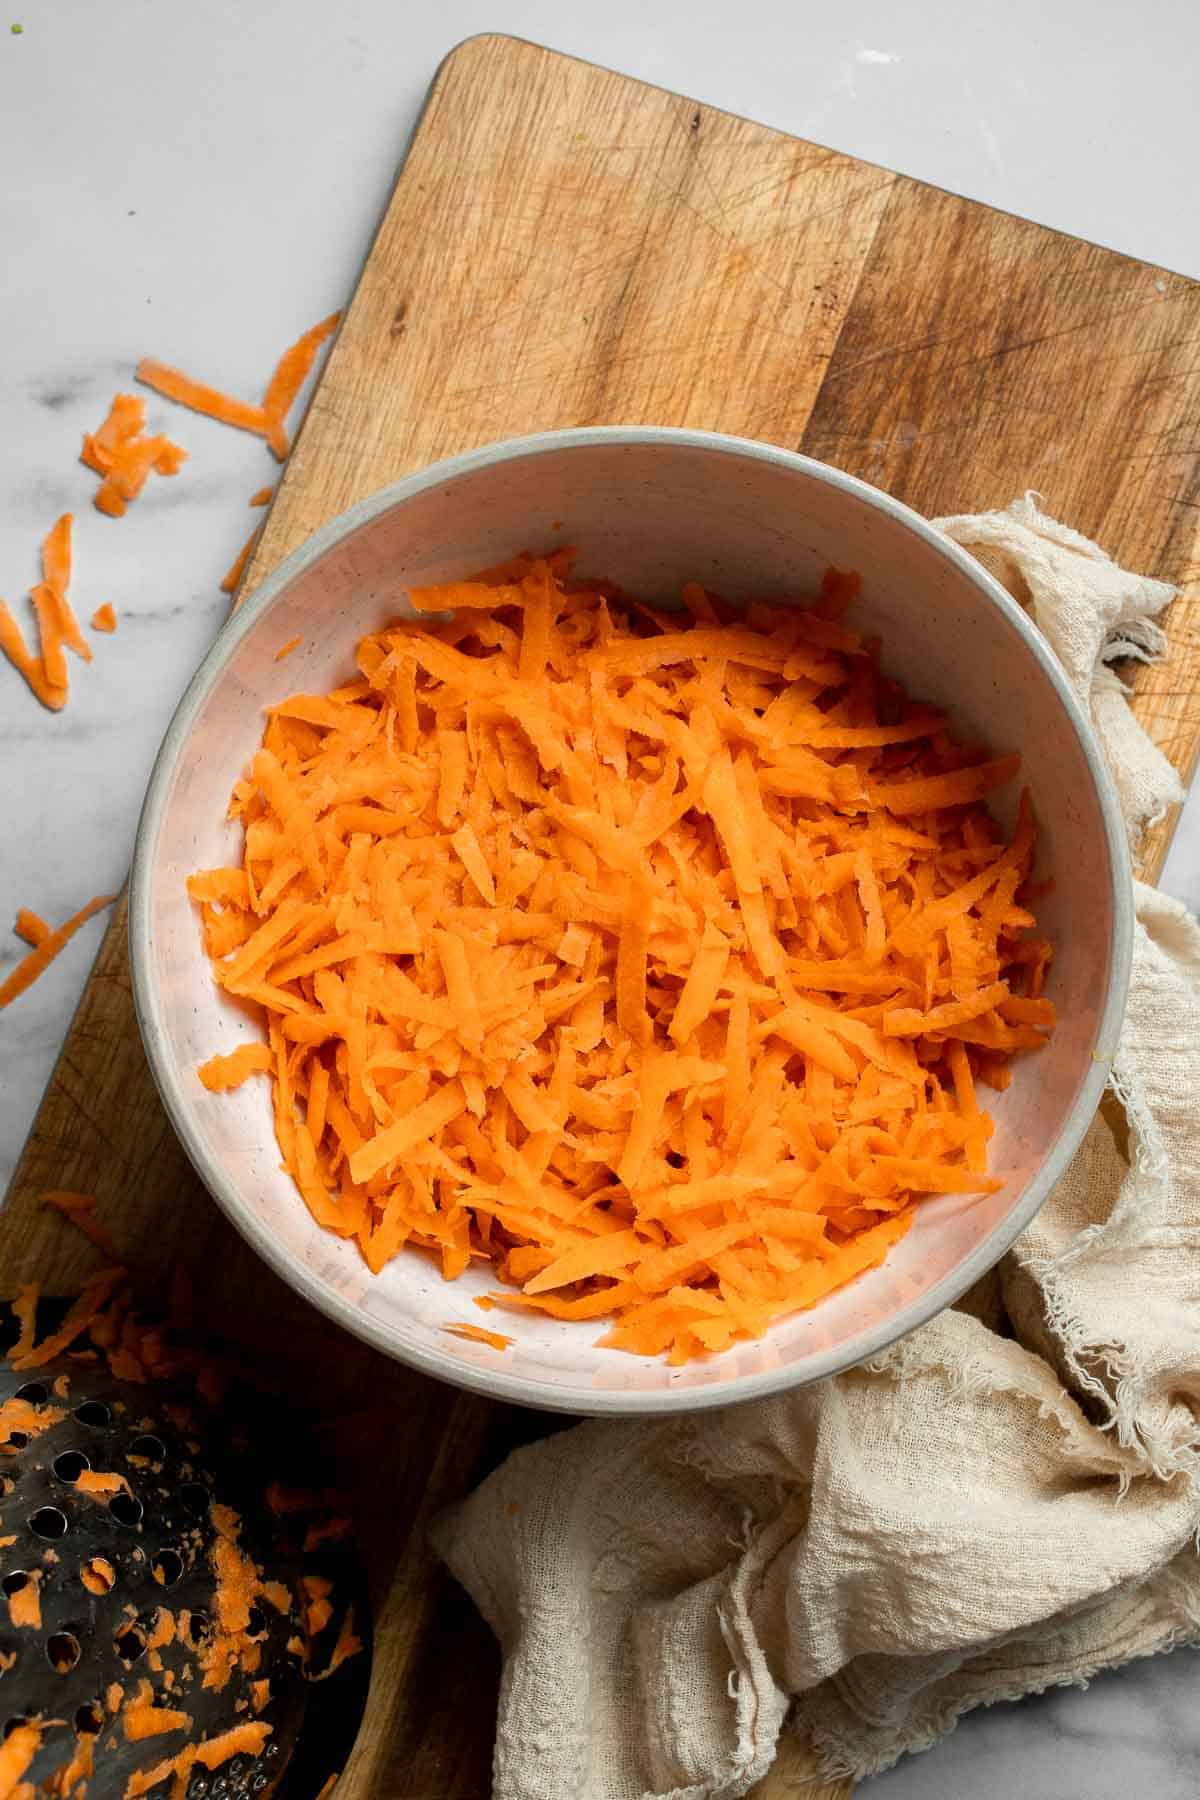
- Squeeze liquid. Use your hands to squeeze out as much liquid as possible from the sweet potato. Set aside in a large mixing bowl.


- Season. Add Parmesan cheese, flour, egg, chives, garlic powder, paprika, salt, and pepper. Mix well until evenly combined.


- Cook. Heat oil in a large skillet over medium heat until sizzling hot, about 2 minutes. Place 2-3 tablespoonfuls of the sweet potato mixture in the skillet and gently flatten with the back of a spoon or spatula. You can probably fit 4-5 fritters in one skillet, depending on the size of your skillet. Cook until golden brown on the bottom, about 2 minutes, and flip over. Cook the other side until golden brown, another 2 minutes. Repeat in batches until the sweet potato mixture is used up.


- Rest. Let the sweet potato fritters cool on a paper towel-lined plate.
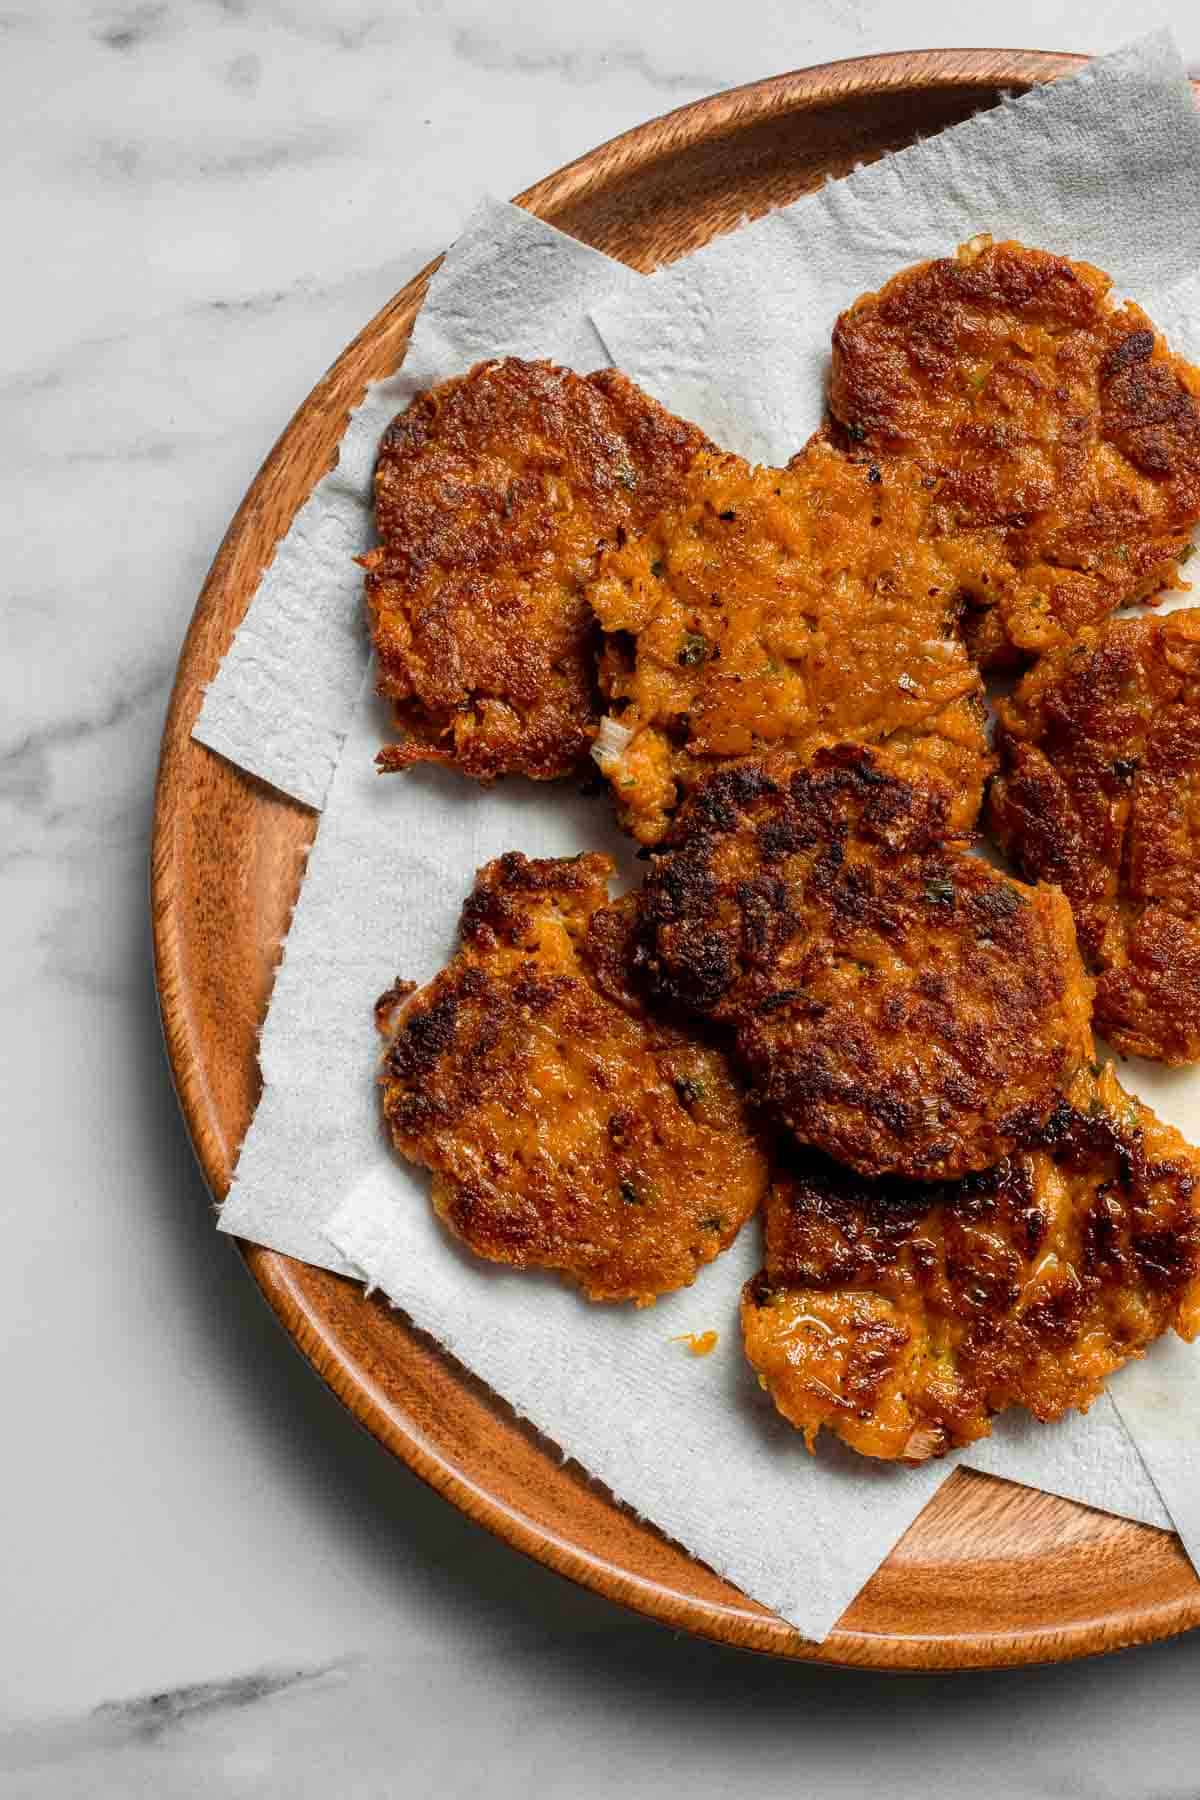
- Serve. Serve warm with a side of mayonnaise or garlic aioli for dipping.
Recipe Variations
- Adjust the seasonings. Garlic and paprika are pretty crowd-pleasing, but you can add a little heat with chili powder or cayenne pepper, add more aromatics with onion powder, or even add a little extra sweetness with a teaspoon or two of brown sugar.
- Mix sweet potatoes and white potatoes. For a fun two-toned mixture, combine shredded sweet potatoes and white potatoes. This will also minimize the sweetness of the fritters if you prefer a more savory option.
- Make them gluten-free. Use a gluten-free flour replacement to make these easy fritters celiac-friendly.
How to Serve
These Sweet Potato Fritters are delicious served on its own with spicy mayo or garlic aoili for dipping. It's also great paired with a protein heavy entree such as:
- Classic Juicy Hamburgers
- Baked Chicken Drumsticks
- Ribeye Steak
- Creamy Salmon Pasta
- Cheeseburger Sliders

Recipe Tips and Tricks
- Remove as much liquid as possible. Excess liquid will make the fritters pop in the hot oil and can make them soggy. Squeeze out as much as you can.
- Look for the signs. You can fry without a candy thermometer, but you'll want to look for the right signs. The oil should make a bubbling sound and if you add a drop of batter to the oil, it should start to bubble right away. Otherwise, it may be easier to use a thermometer and fry when the oil is between 350-375 F.
- Turn on the kitchen fan. Pan-frying usually releases quite a bit of heat and smoke. To prevent the smoke alarm from going off, open a kitchen window or turn on the range fan.
Storing and Freezing Instructions
How to Store
Store leftover fritters in an airtight container lined with paper towels to absorb extra oil.
How to Reheat
To get that crisp bite back, it's best to pop the fritters in the air fryer or oven at 400 F for 5-10 minutes. This will crisp up the outside while warming the inside.
How to Freeze
Arrange the cooled fritters in a single layer on a baking tray, then freeze solid. Transfer to a freezer-safe container for 2-3 months.
FAQ
There are two main culprits. First, you may not have removed enough liquid from the sweet potatoes. Be sure to wring them out as much as possible. Additionally, your frying oil may be too cold. The oil should be between 350-375 F, and it will make a bubbling sound as it reaches temperature.
After you go through the effort of frying, keep your fritters nice and crisp by allowing them to rest on a wire rack or a plate lined with paper towels. This will help wick away excess oil to keep the fritters crisp longer.
Yes! After frying, let the fritters cool on a wire rack, then freeze them on a baking sheet lined with parchment paper. Transfer to a freezer-safe bag and freeze for up to 3 months. After thawing, I recommend reheating the fritters in the air fryer or a hot oven to crisp them back up.
More Sweet Potato Recipes
- Sweet Potato Croquettes
- Sweet Potato Tater Tots
- Baked Sweet Potato
- Herb Roasted Sweet Potatoes
- Sweet Potato Rolls
- Baked Sweet Potato Wedges
Tried this recipe?
I'd love to hear what you think! Leave a comment and rating below to share your feedback. Your reviews help others discover this recipe and help me keep creating more free recipes for you. Snap a photo and tag me on social media @aheadofthyme too.

Apple Crumble
Made with tender apples and topped with a buttery brown sugar crumble, this old-fashioned Apple Crumble is the perfect fall dessert! Serve it warm from the oven with a big scoop of ice cream, and watch it disappear before your eyes. Your guests will be begging you for the recipe!
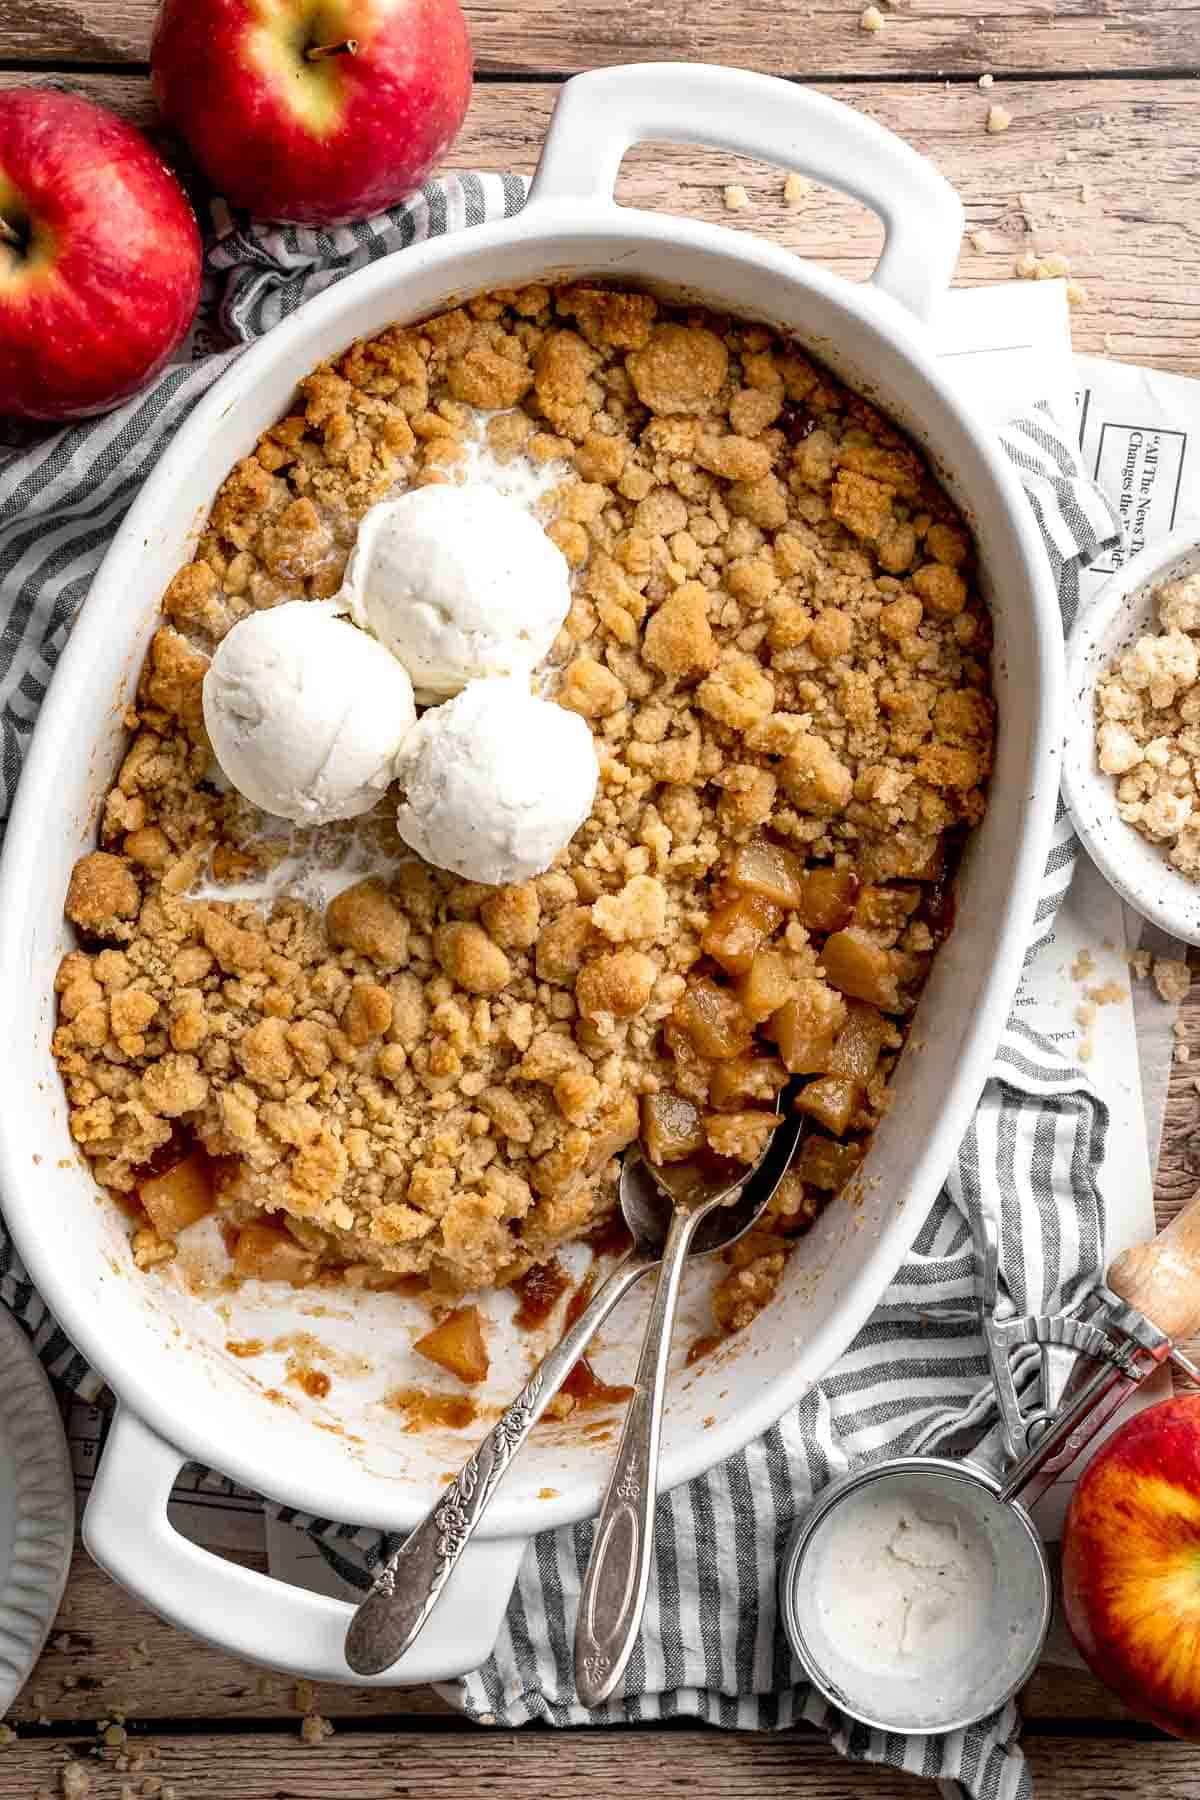
Fruit crumbles have been popular for centuries, and for good reason! They're so easy to prepare, require no fancy gadgets, and fill your house with the most delicious cinnamon apple aroma. They're simple enough to throw together whenever yet flavorful enough to serve even at special occasions! Take it over the top with a scoop of vanilla ice cream, a little homemade caramel sauce, and a hot cup of coffee or apple cider, and you'll understand why this apple dessert is such a classic!
Why You'll Love This Apple Crumble
- Ready in 35 minutes. You don't have to be an experienced baker to pull off the humble crumble. From preheating the oven to taking the first bite, this easy apple crumble recipe will be ready in no time. It's my go-to anytime I need a last-minute dessert.
- Warm, cozy dessert. The tender apples, crumbly topping, and warm spices make this cinnamon apple crumble ideal for cool nights or drizzly, rainy days. Serve homemade apple crumble with vanilla bean ice cream, whipped cream, or warm custard for a taste of heaven.
- Just the right size. One batch this baked apple dessert makes enough for a 9x9 square pan, which is enough for 6-9 servings. This is just enough for a family of 4 (with leftovers) or a small dinner party!
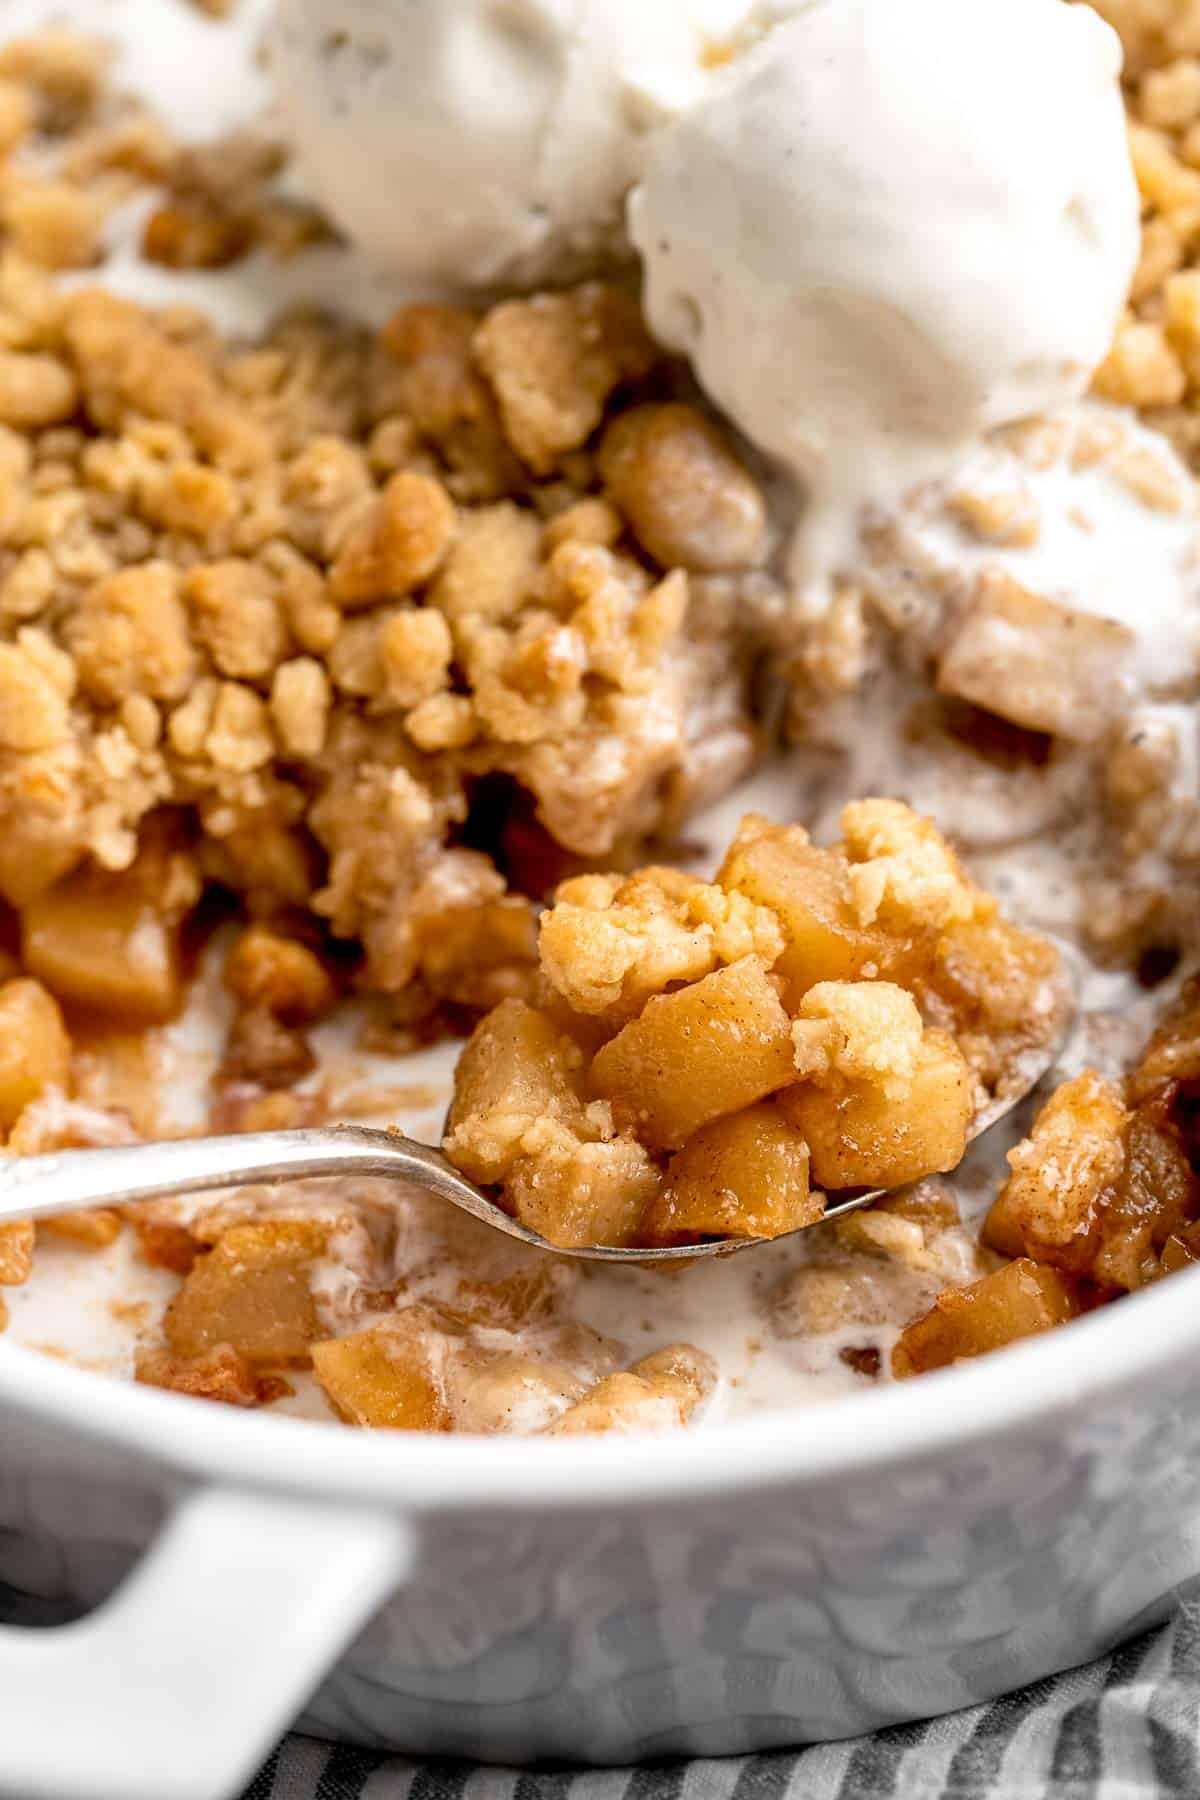
Ingredient Notes
To make this delicious Apple Crumble, you will need the following ingredients (full measurements in recipe card below):
- all purpose flour - to hold the topping together and give it extra crunch.
- sugar - the combination of brown and white sugar adds sweetness but also ensures you get a chewy, crunchy bite.
- spices - season the topping with cinnamon, ground ginger, and a little kosher salt. The apple filling also has these spices with the addition of allspice, too.
- cold butter - it's essential to use very cold, unsalted butter. The colder, the better.
- semi-tart apples - you can use any kind of apples, but I like ones that are crisp with a sweet-tart flavor, like Pink Lady apples.
- lemon juice - to bring out the tart flavor.
- vanilla extract
- cornstarch - to thicken the apples into a saucy filling.
You will also need measuring cups and spoons, a 9 inch square baking dish, medium bowl, large bowl, a cutting board, and a sharp knife.
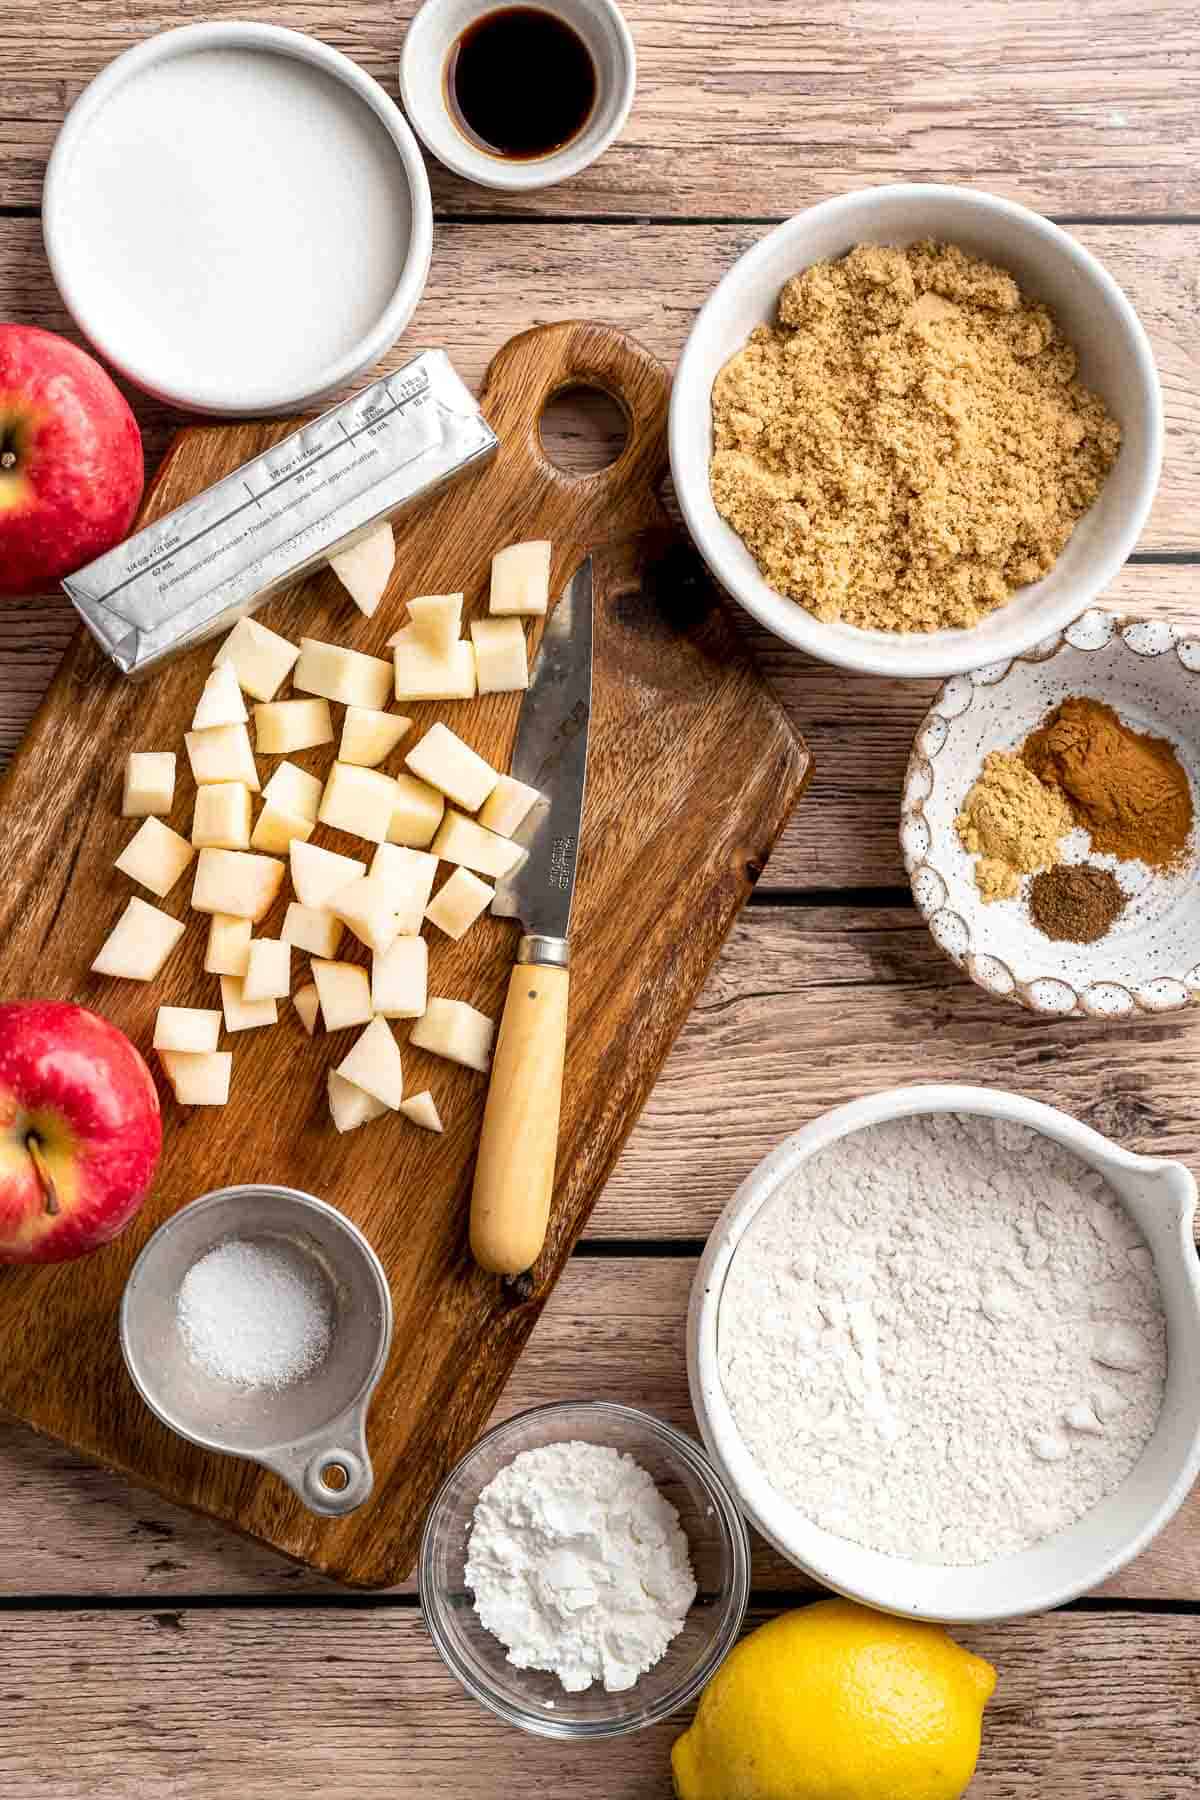
How to Make the Best Apple Crumble
First, prepare the crumble topping.
- Combine dry ingredients. In a medium mixing bowl, whisk together the flour, brown sugar, white sugar, cinnamon, ground ginger, and salt, until well-combined.
- Add butter. Add in the cold butter cubes, then use your fingers and hands to work the butter into the dry ingredients by pressing and crumbling it all together. When ready, the crumble topping should resemble wet sand. Squeeze some handfuls of crumble together to create larger pieces.
- Chill. Place into the freezer for at least 15 minutes, while you prep the filling.
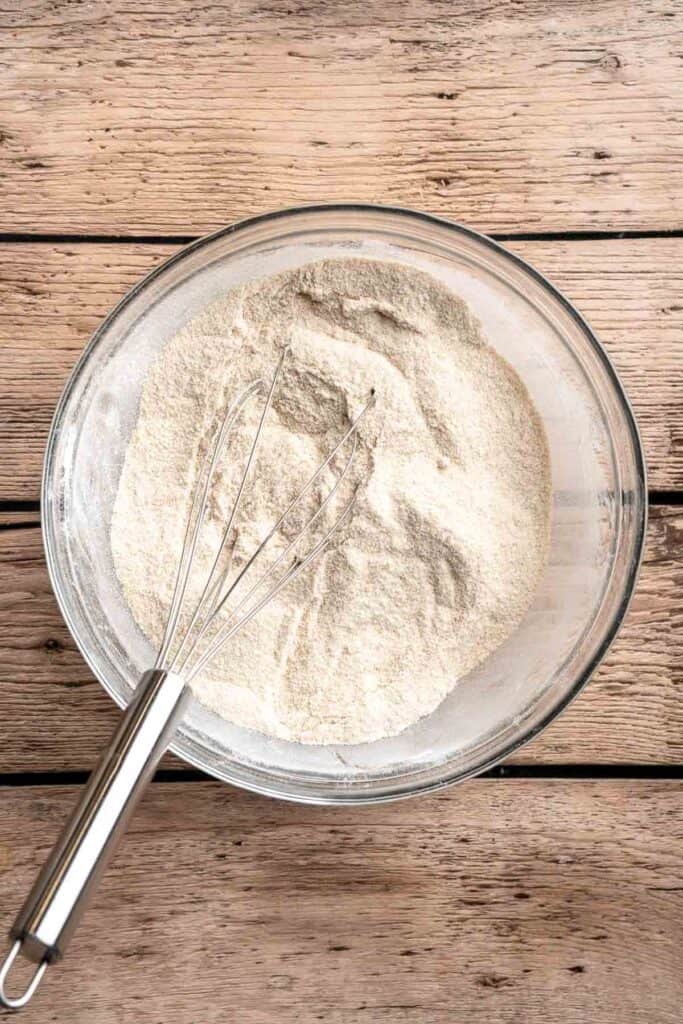


Next, make the easy apple filling.
In a large mixing bowl, toss together the diced apples, lemon juice, vanilla, brown sugar, cornstarch, salt, cinnamon, ground ginger, and allspice until well-combined.
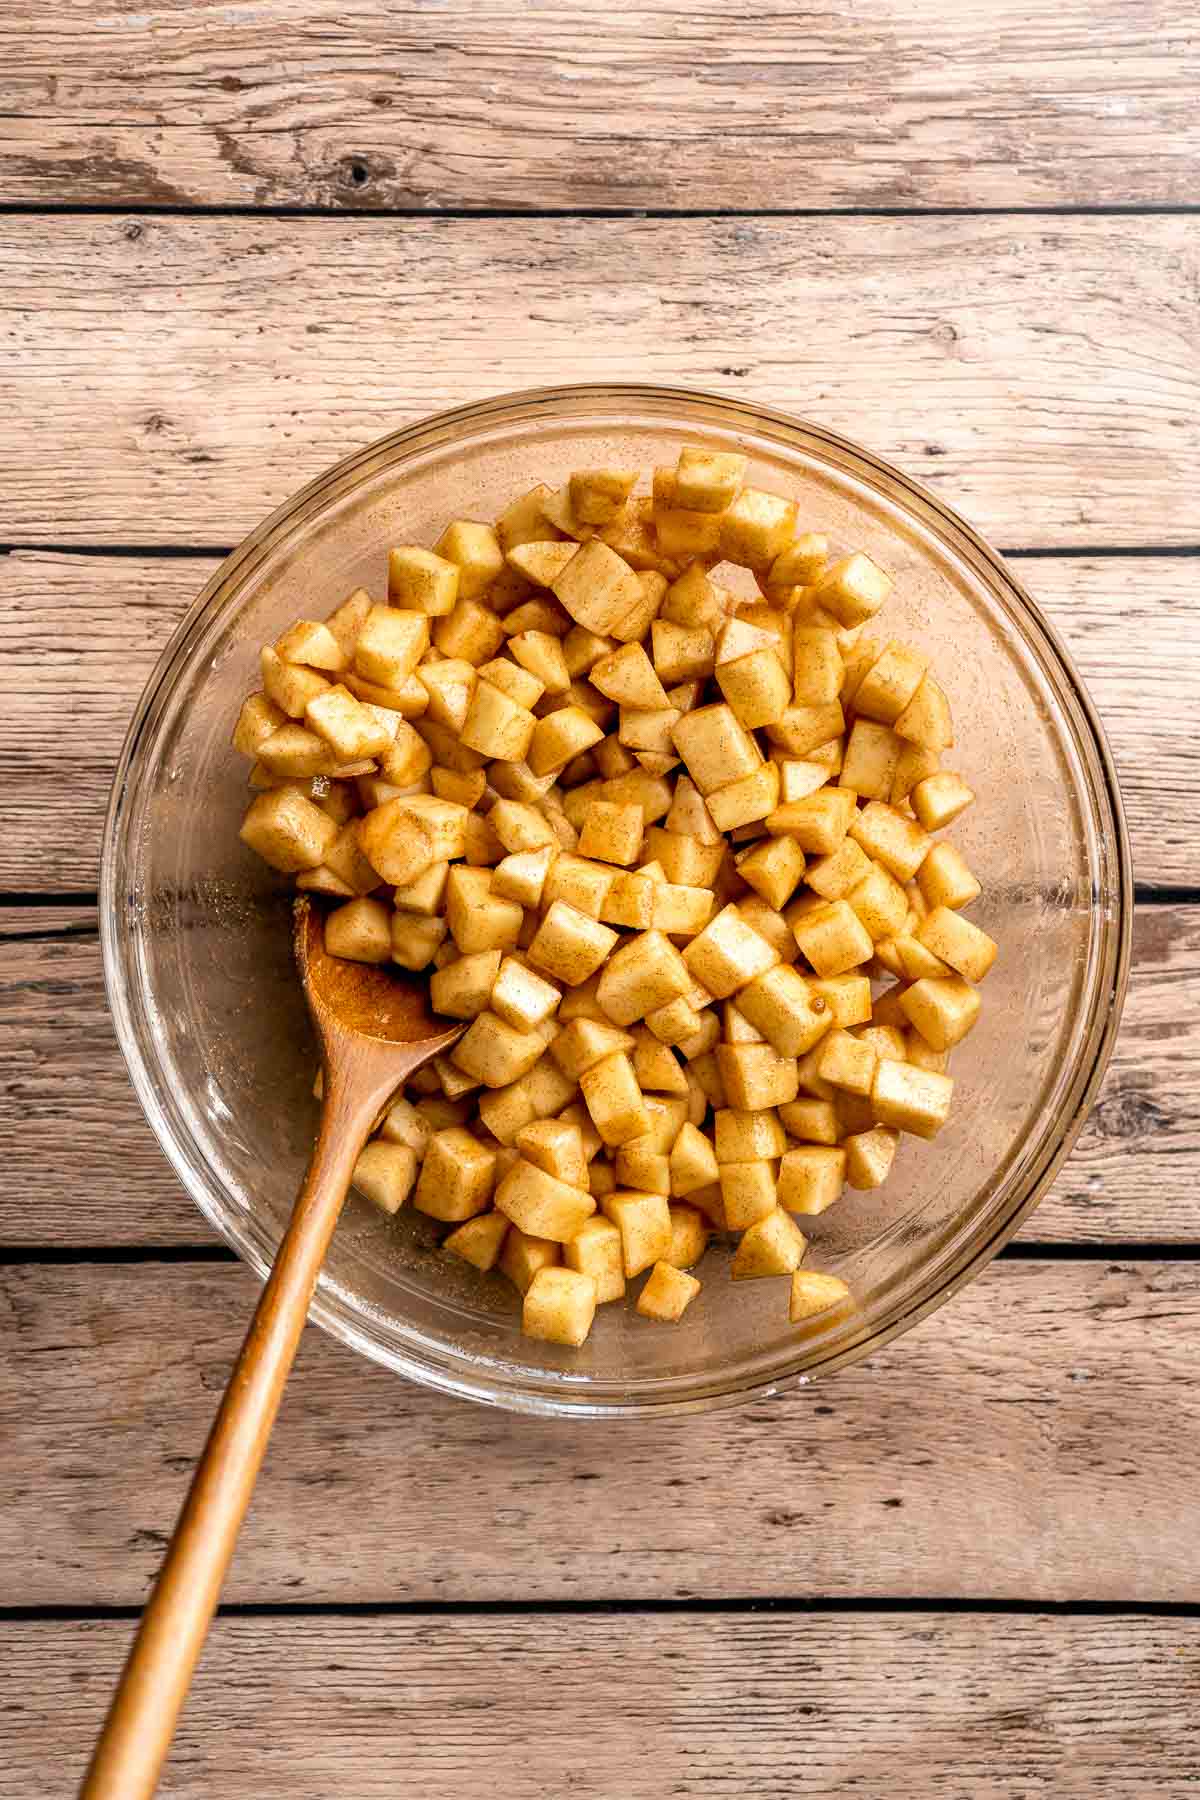
Now, let's assemble the apple crumble and bake.
- Assemble. Grease a 9-inch square baking pan with butter or cooking oil spray. Pour the apple mixture into the prepared baking pan. Sprinkle the cold crumble topping evenly over the apples.
- Bake. Place into a 375F preheated oven to bake for 35 minutes, or until the crumb topping looks golden brown.


- Rest. Allow to cool for 15-20 minutes and then serve warm with ice cream or on its own.


Recipe Variations
- Mix different types of apples. For the best flavor, use apples with some tartness to them. I'm partial to Honeycrisp or Pink Lady apples, but you can also use half Granny Smith apples and half a sweet variety.
- Use apple pie spice. This spice blend is great for baked apple recipes and is a good choice for your homemade apple crumble.
- Add nuts. For a nutty flavor and extra bite, add a handful of chopped walnuts or pecans to the crumble topping.
How to Serve
This Apple Crumble is delicious served on its own for a sweet treat after dinner. It goes especially well paired with Vanilla Ice Cream and a warm drink including:
- Slow Cooker Apple Cider
- Chai Tea Latte
- Golden Milk Turmeric Latte
- Ginger Turmeric Tea
- Pumpkin Spice Latte
- Matcha Latte
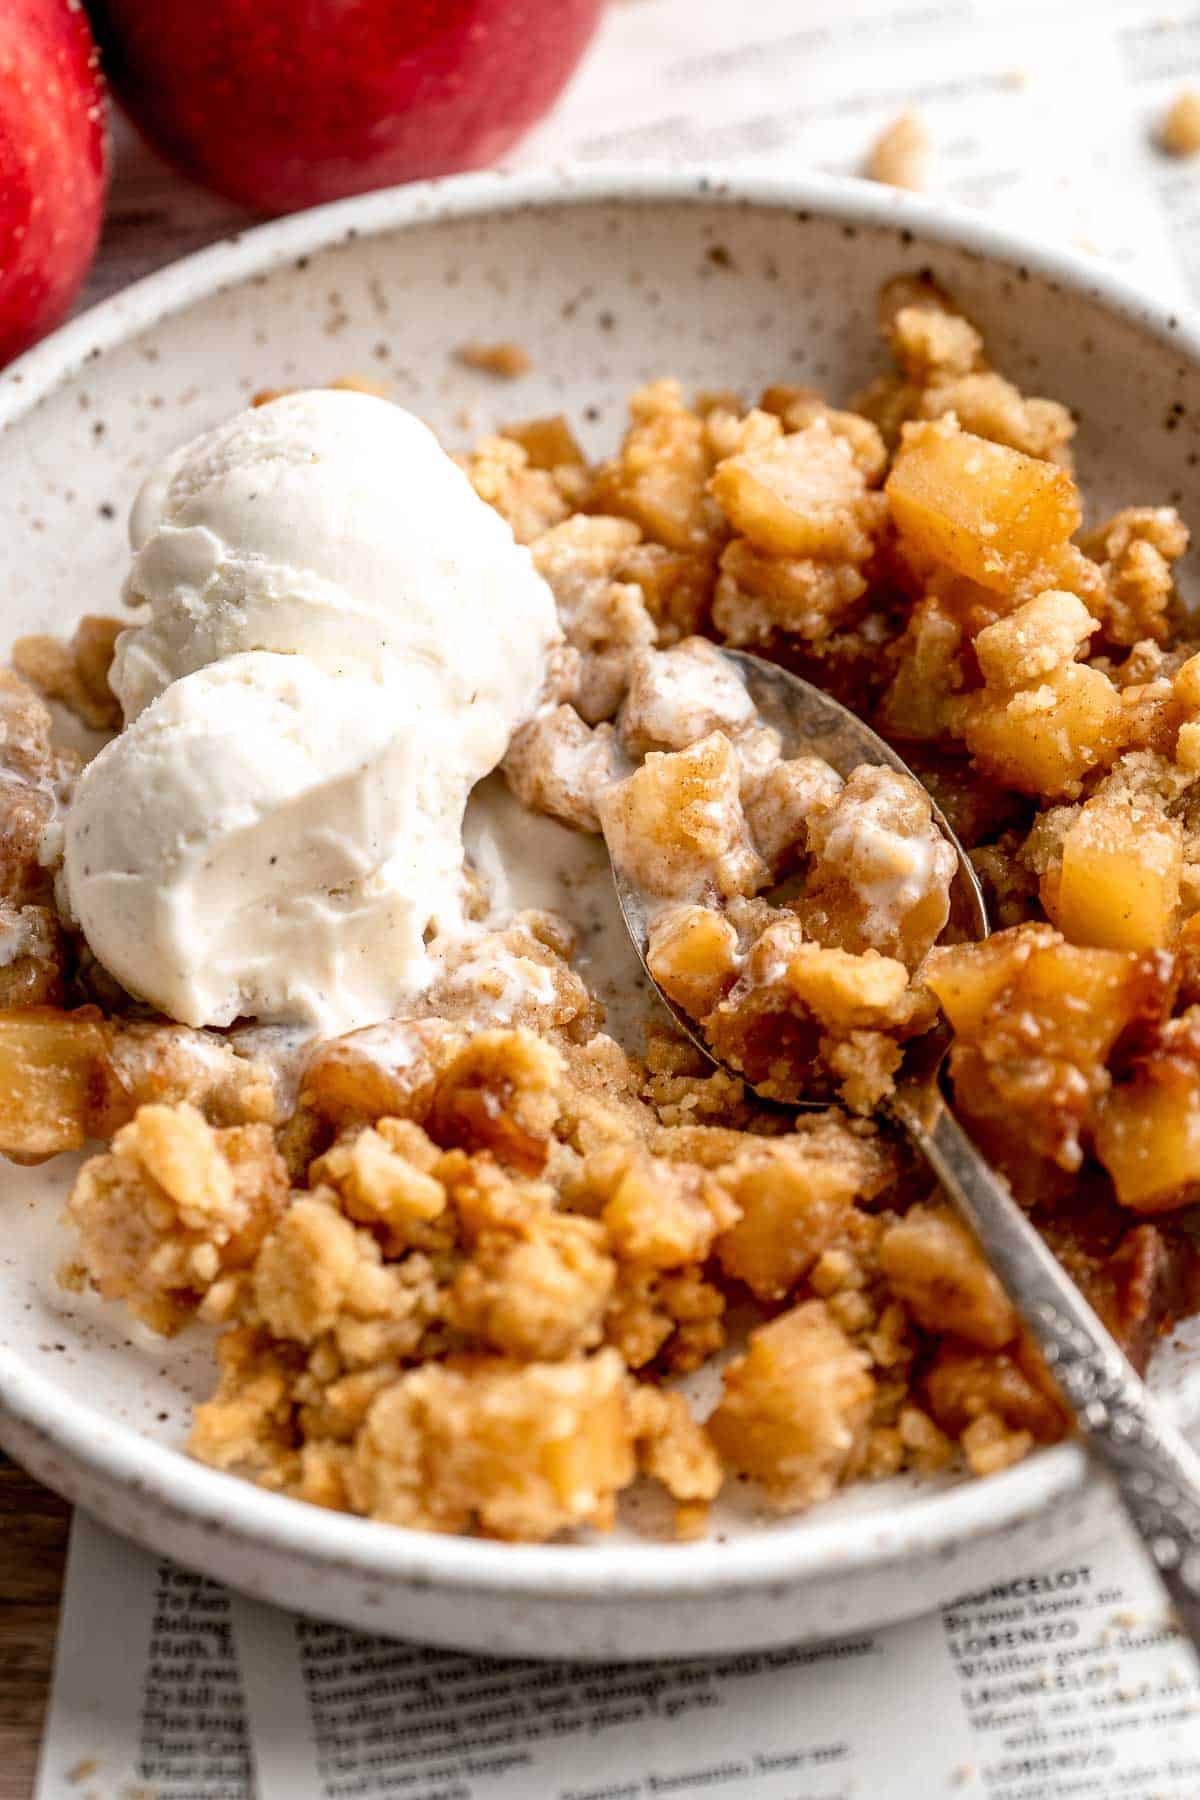
Recipe Tips and Tricks
- Use a pastry cutter. This tool is made to cut butter into flour and is really handy for making crumble toppings. If you don't have one though, don't worry about it! You can also use a fork or your fingers.
- Add some clumps. The best crumble topping has a mixture of large and smaller pieces, which add different textures. I like to mix the butter until the topping looks like wet sand, then squeeze it to vary the sies of the clumps.
- Chill out. It really cannot be understated. You want really cold butter for the crumbliest, crunchiest topping. Warm or room temperature butter will melt too fast and totally change the flavor and texture.
Storing and Freezing Instructions
How to Store
Let the crumble cool to room temperature, then transfer to an airtight container or cover the pan with plastic wrap or foil. Refrigerate for 3-4 days.
How to Reheat
The quickest method is to pop the crumble in the microwave for 1-2 minutes, but you can also warm the leftovers in a 350F oven until heated through.
How to Freeze
Place the cooled leftovers in a freezer-safe container and freeze for 3-6 months.
FAQ
Traditionally, apple crumble is made with a streusel topping made from flour, sugar, and butter, while apple crisp has a crumbly oat topping. They're very similar and the terms are often used interchangeably, but oats are the key difference.
The most iconic part of any fruit crumble is that cookie-like crumble mixture! It's made by mixing flour with cold butter and sugar, which is then baked over the fruit filling. As it bakes, the crumble takes on a crunchy, chewy texture that really brings the whole dessert together. Pro Tip: Use a mixture of white and brown sugar for the best texture and flavor.
There are lots of options! If you live in the UK, you might crave apple crumble with warm custard, which makes it even cozier. If you're in the US or Canada, you are probably used to this delicious dessert served with whipped cream or vanilla ice cream. All of these options are great in their own right, and it really depends on if you prefer a warm topping or a cold one. You can't go wrong!
More Apple Dessert Recipes
- 20 Best Apple Desserts
- Apple Tart
- Braided Lattice Apple Pie
- Apple Crisp
- Caramel Apples
- Apple Turnovers
Tried this recipe?
I'd love to hear what you think! Leave a comment and rating below to share your feedback. Your reviews help others discover this recipe and help me keep creating more free recipes for you. Snap a photo and tag me on social media @aheadofthyme too.

Easy Wonton Soup
Easy 10-minute Wonton Soup is filling, delicious, and so flavorful. With a light, savory broth and tender dumplings, this homemade wonton soup is the perfect lunch or dinner for cozy nights in. The best part? It's easy enough that you can make it in no time at all. With just a handful of simple ingredients, this soup is ready in only 10 minutes! It'll become your new go-to recipe when you want a warm, comforting meal in a hurry.
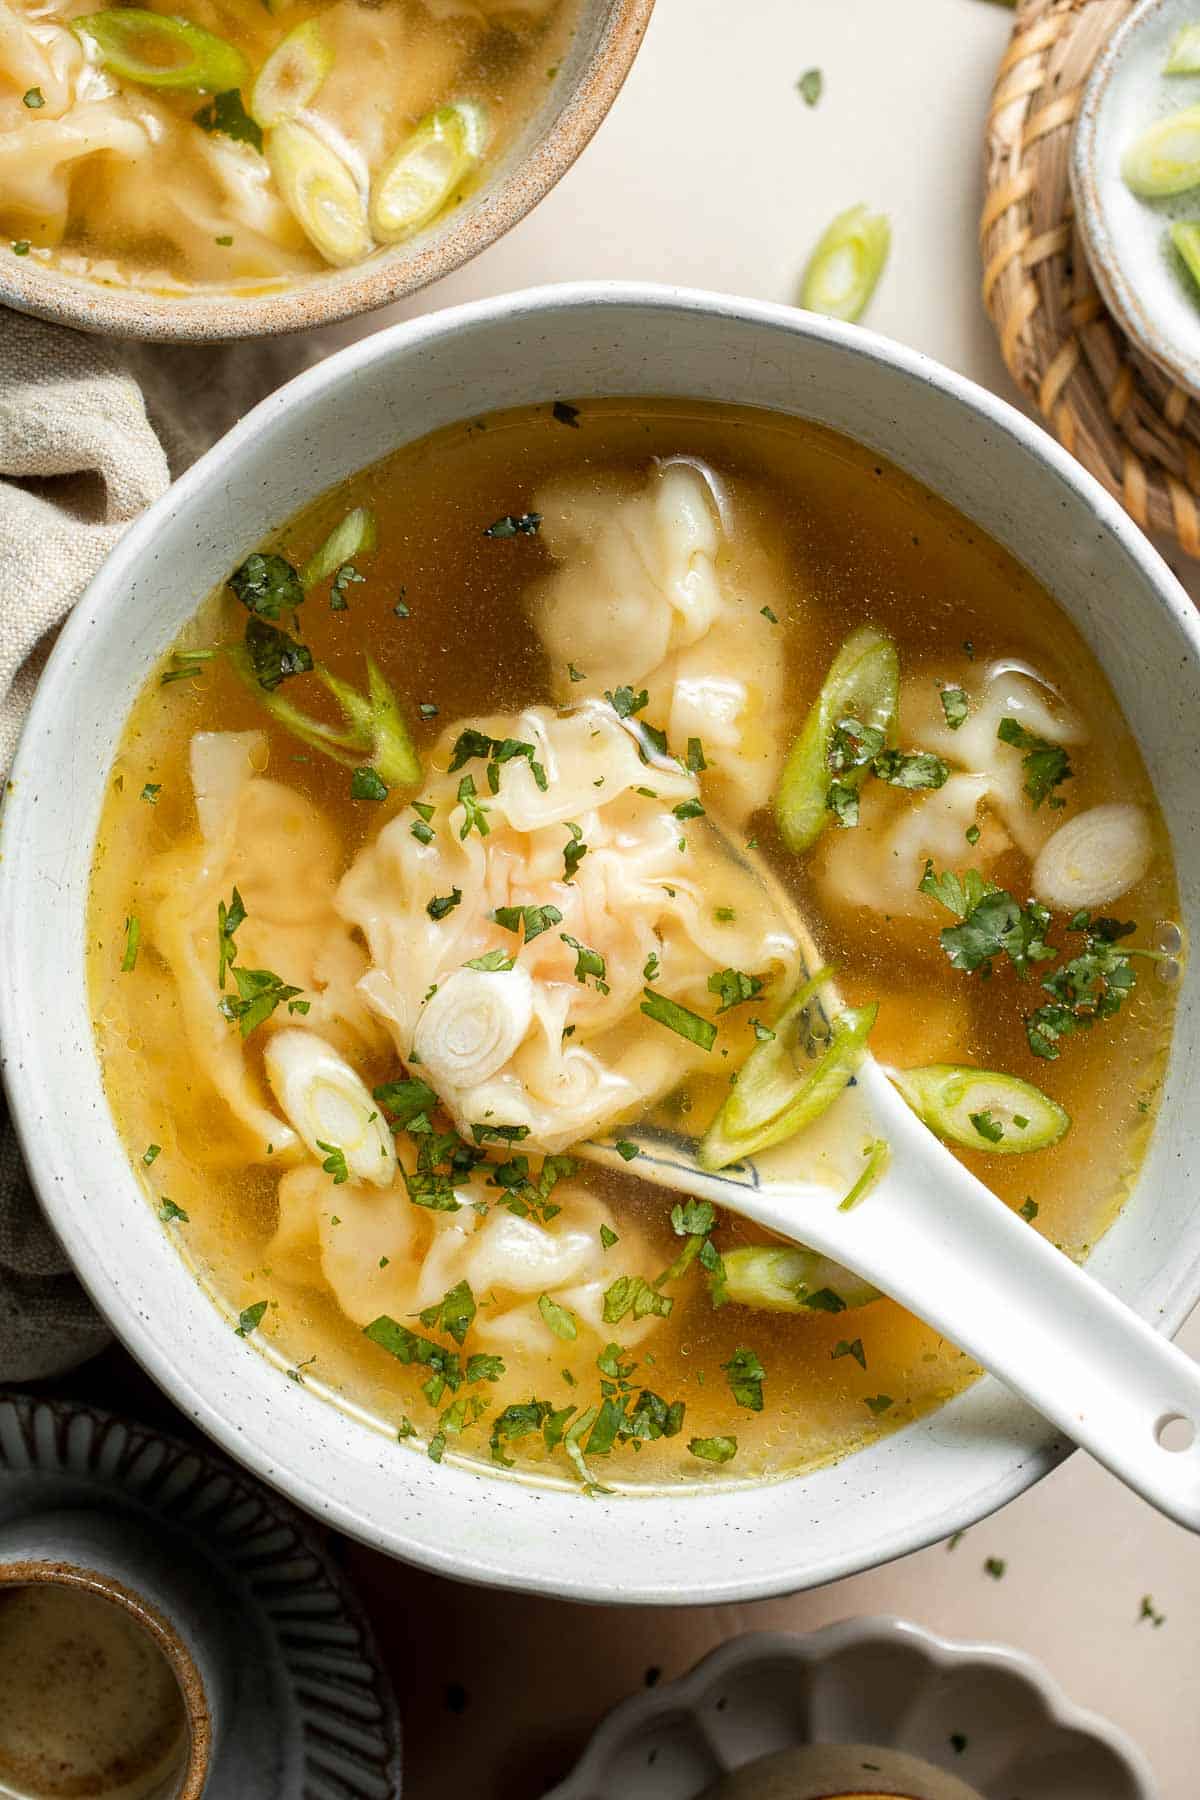
There's something so satisfying about a big bowl of wonton soup. I love the warm, fragrant broth and biting through the tender wonton wrappers into the bright, gingery ground pork or chicken filling inside. This version starts with fresh or frozen wontons, so you can either use your favorite homemade wontons or grab some from the store. Either option will work wonderfully with this simple delicious broth!
Why You'll Love This Wonton Soup Recipe
- Incredibly quick and easy to make. This traditional Chinese dish is one of the easiest weeknight meals. Since you're starting with premade dumplings, this soup will come together very quickly. Just warm up some chicken stock and water in a pot, boil the wontons, then top with the seasonings. Serve and enjoy! It's the ultimate easy meal for busy nights (and way better than takeout). Seriously, put down the phone and put down that take-out menu!
- Rich flavor. This simple wonton soup recipe is all about flavor. The chicken broth is the base, and the dark soy sauce and sesame oil add a nutty, umami flavor. The fresh herbs and onions bring a brightness that ties the flavors from the fragrant dumplings and broth together. It's such a wonderful, simple dish that tastes amazing!
- Easy to customize. There are so many easy ways to adapt this dumpling soup. Start by replacing the chicken stock with veggie stock for a vegetarian dish. Use any wontons you'd like, whether that's ground chicken, pork, veggies, etc. Adjust the broth to your flavor preference by adding oyster sauce, fresh ginger, or homemade chili oil. You can also load it with more veggies, like fresh mushrooms, baby bok choy, napa cabbage, and more. Make it your own!
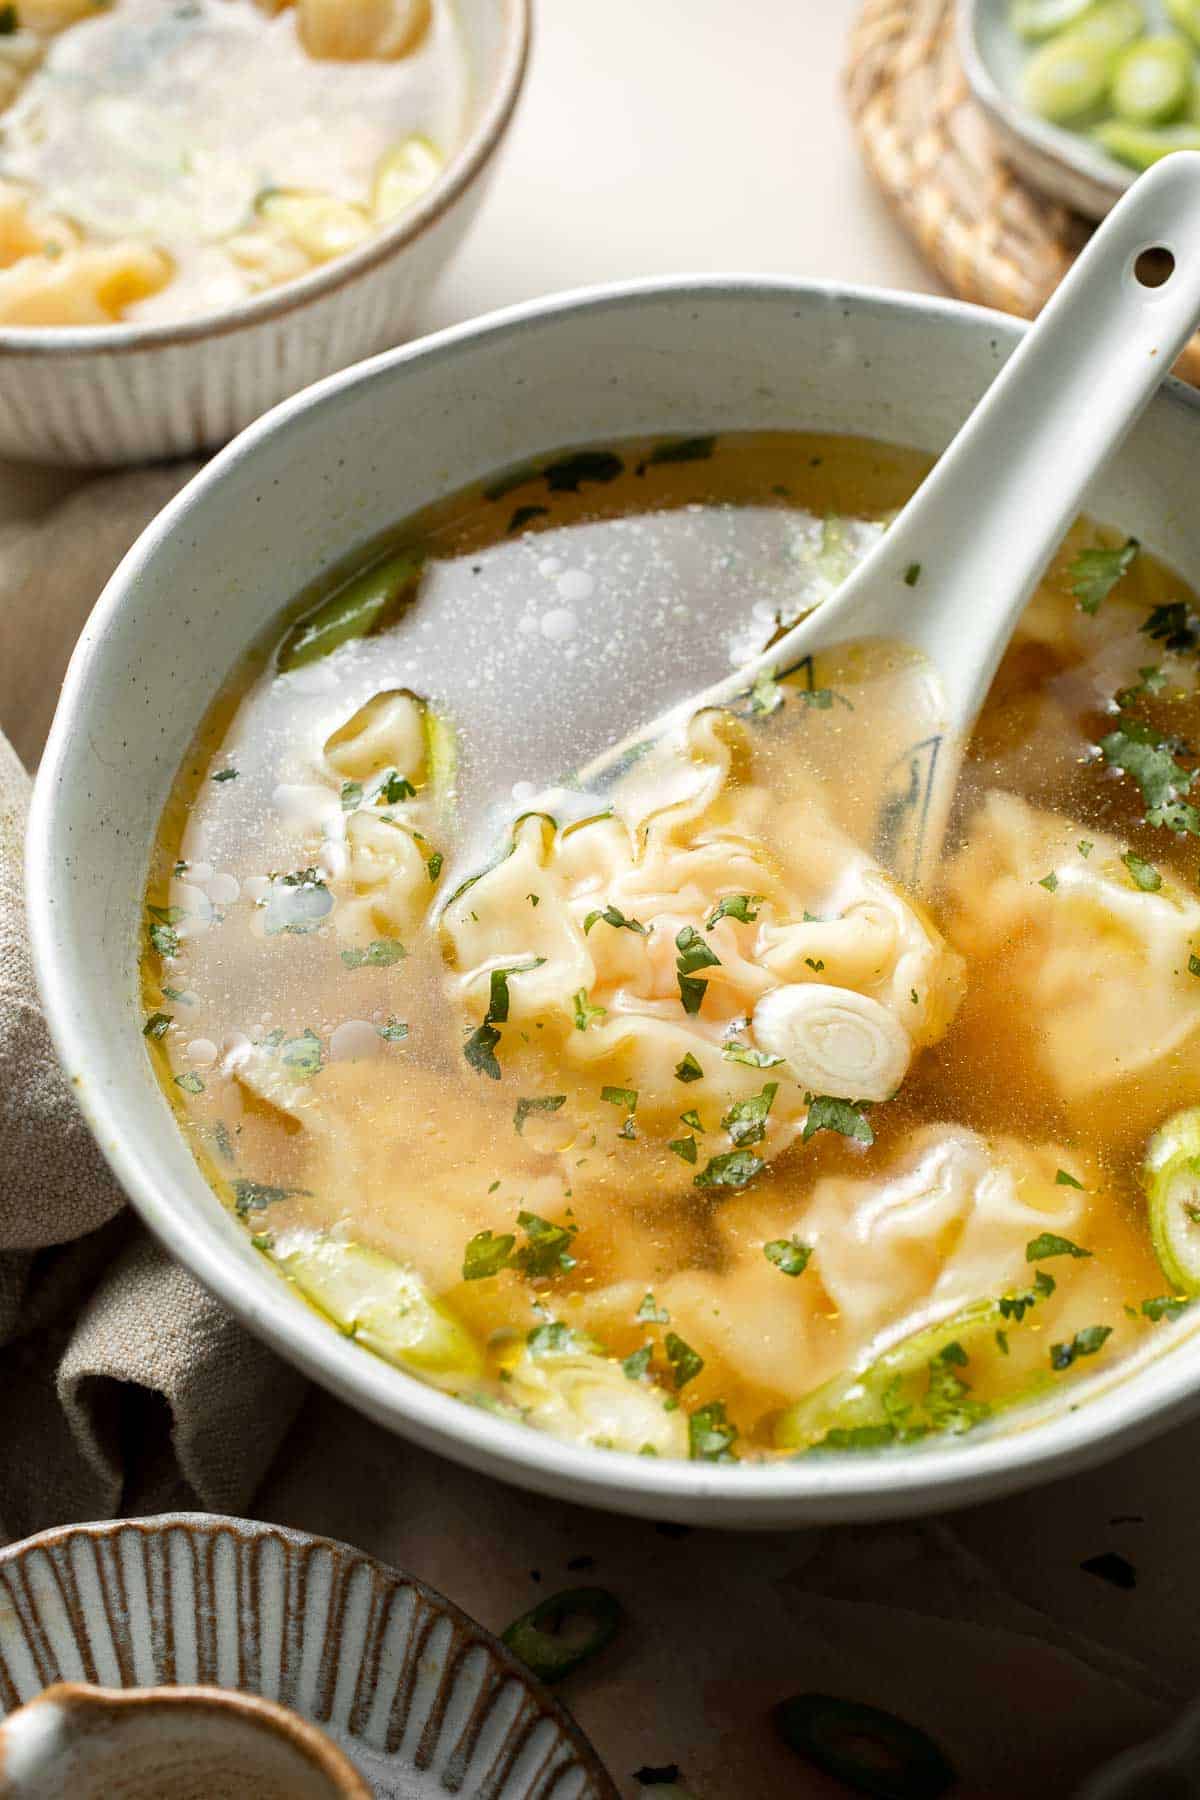
Ingredient Notes
To make this delicious wonton soup, you will need the following ingredients (full measurements in recipe card below):
- wontons - use your favorite store-bought or homemade wontons, like these Chicken and Cilantro Wontons. You can also subsitute with dumplings such as these delicious Pork Dumplings. Either frozen or fresh will work!
- chicken stock and water - start with either storebought or homemade broth for this chicken wonton soup recipe.
- salt - season the broth well to highlight the flavors in the juicy wontons.
- dark soy sauce - this special soy sauce has a bolder, sweet flavor that is perfect for the light broth. You can substitute it with regular soy sauce as well.
- sesame oil - add a little nuttiness with pure sesame oil.
- cilantro - rinse and chop the cilantro to use as a garnish and add a herby flavor.
- green onions - sliced a few green onions to add flavor and bite to the soup.
You will also need measuring cups and spoons, a small saucepan and a bowl.
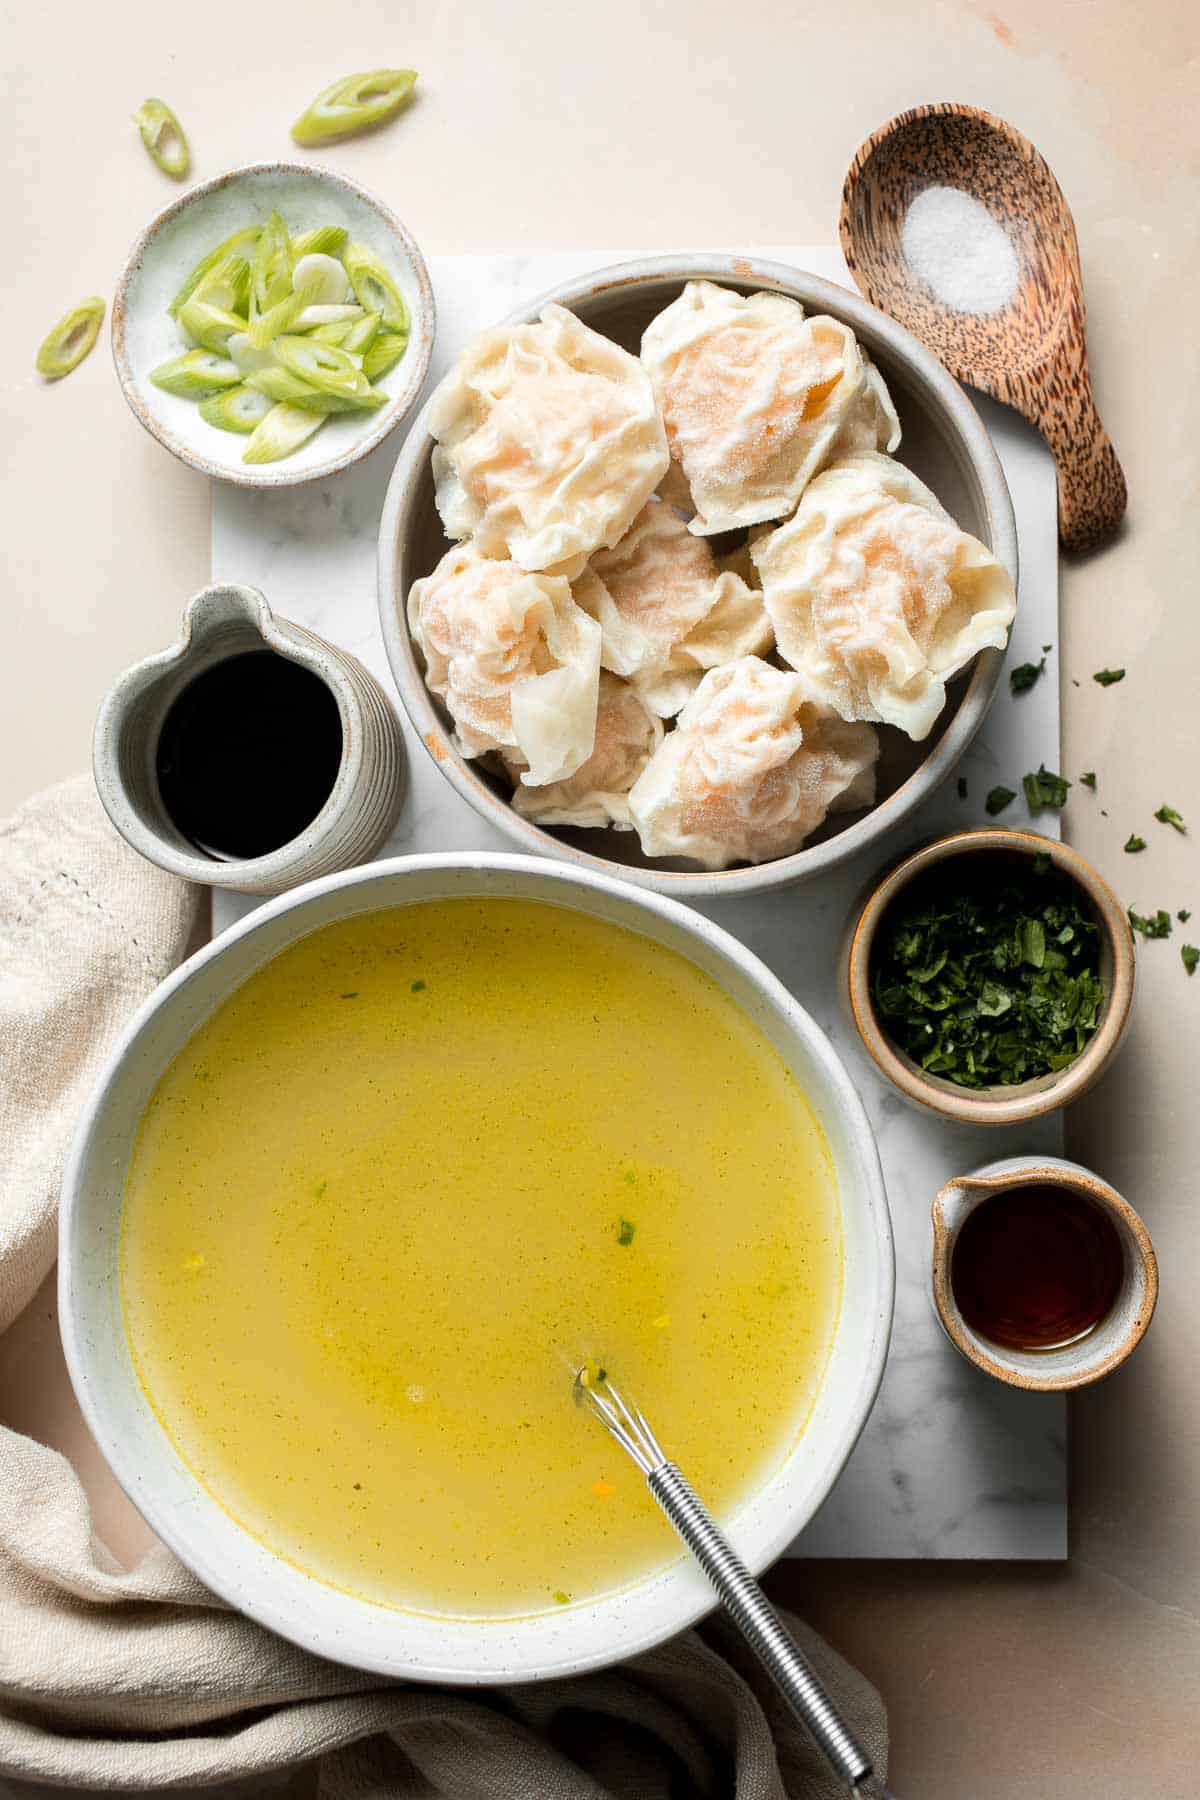
How to Make the Best Wonton Soup
There are really just two main steps to follow for this super easy soup. Cook the wontons, then serve.
- Boil the wontons. In a small saucepan, add chicken stock, water, and salt, and bring to a boil over medium-high heat. Add wontons and cook until they float to the top, about 5 minutes.
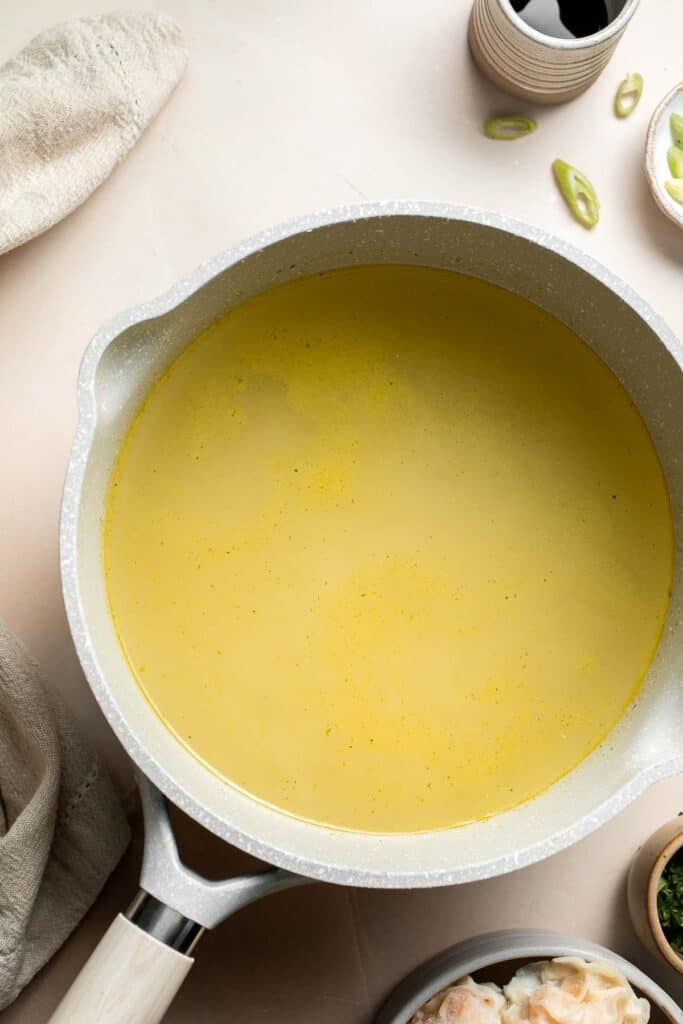
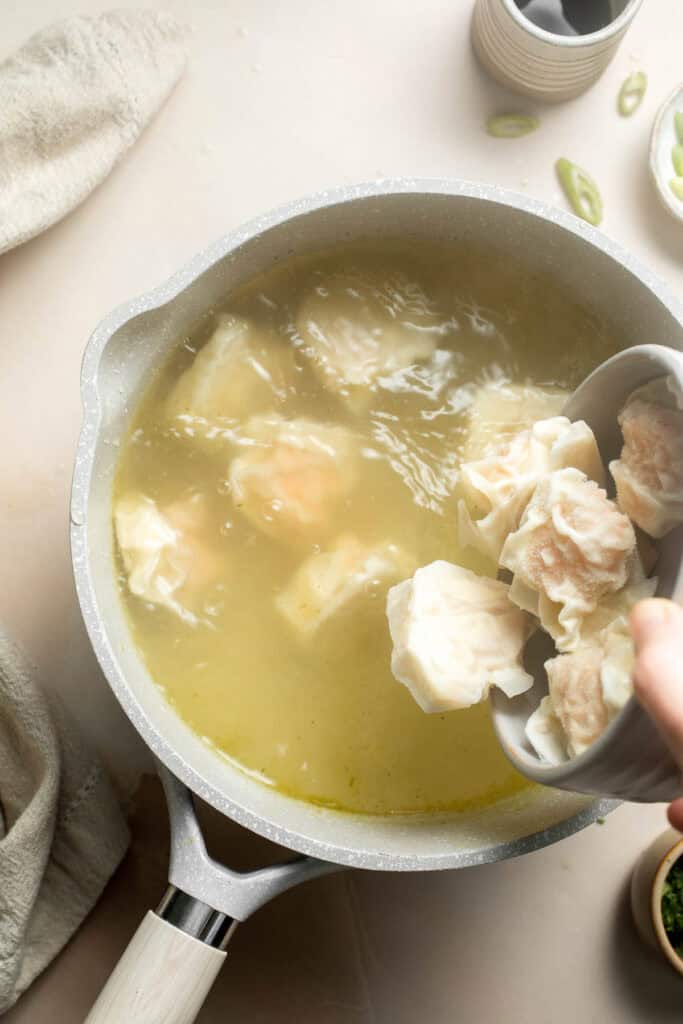
- Add water. Then, add more water. Let the wontons float to the top again, about 5 more minutes.

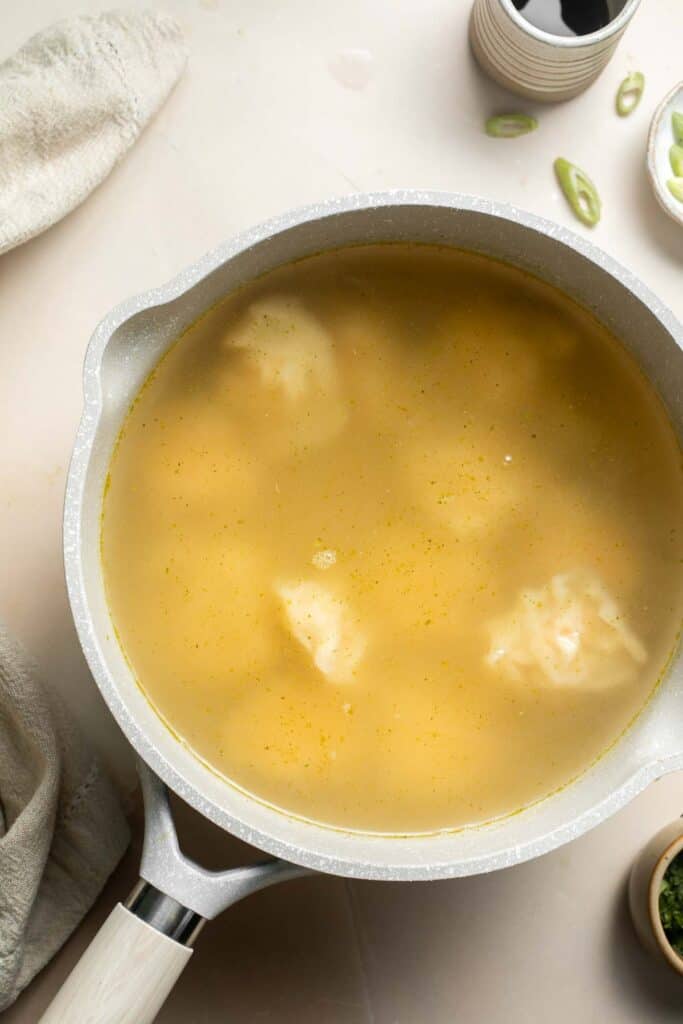
- Season. Once the wontons float to the top again, add soy sauce and sesame oil and goive the soup a gentle stir.
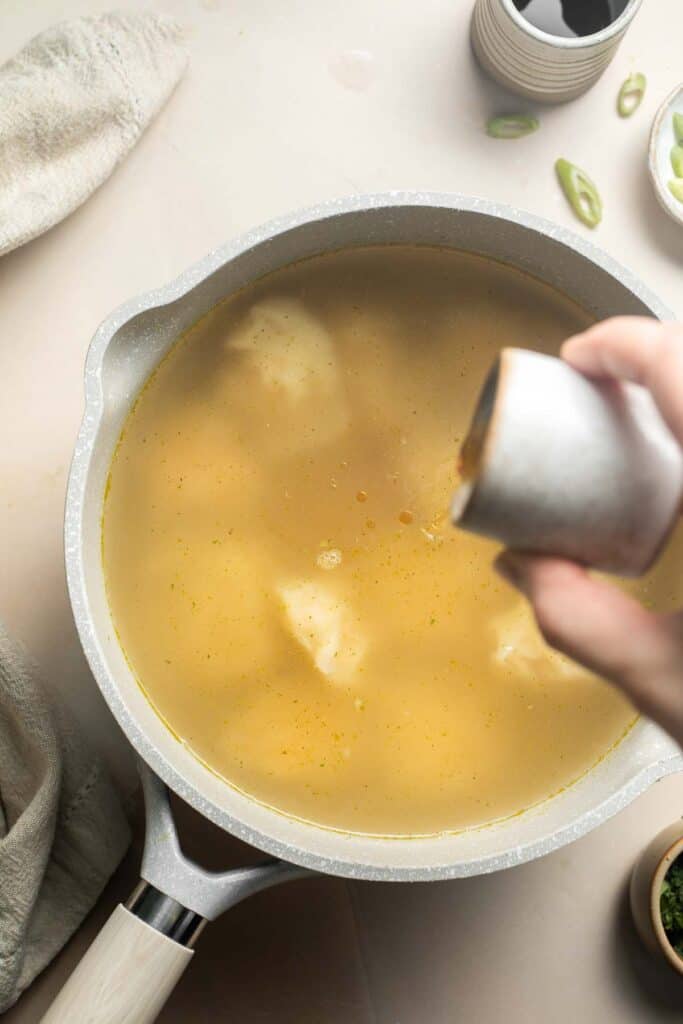
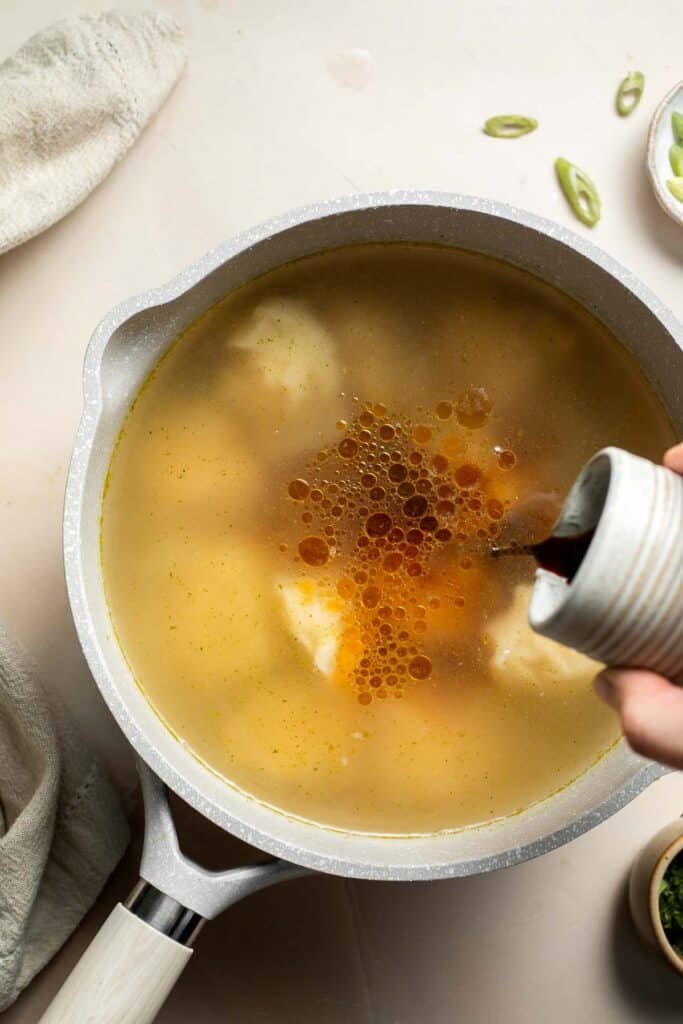
- Serve the soup. Use a slotted spoon to scoop the wontons out and place into a large soup bowl. Top up with the soup base. Garnish with cilantro and green onions and serve hot.
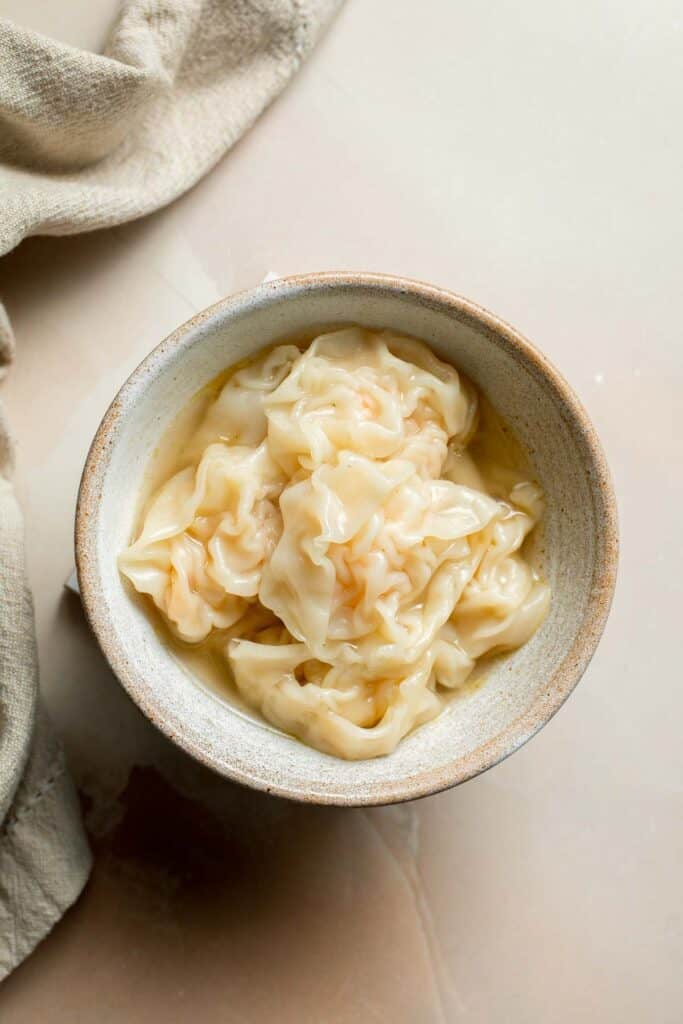
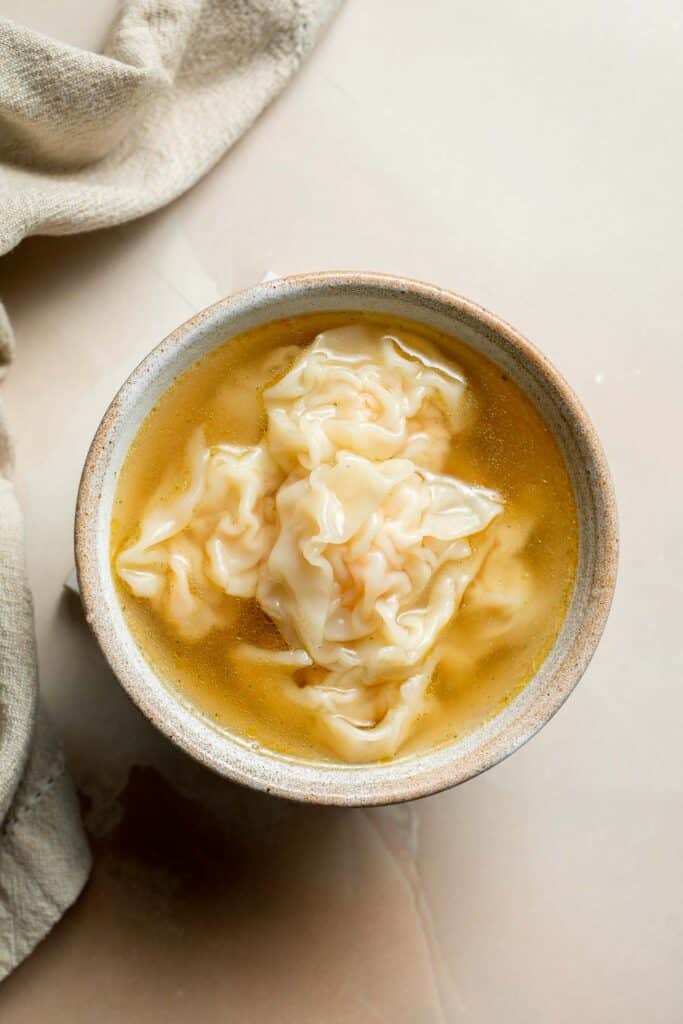
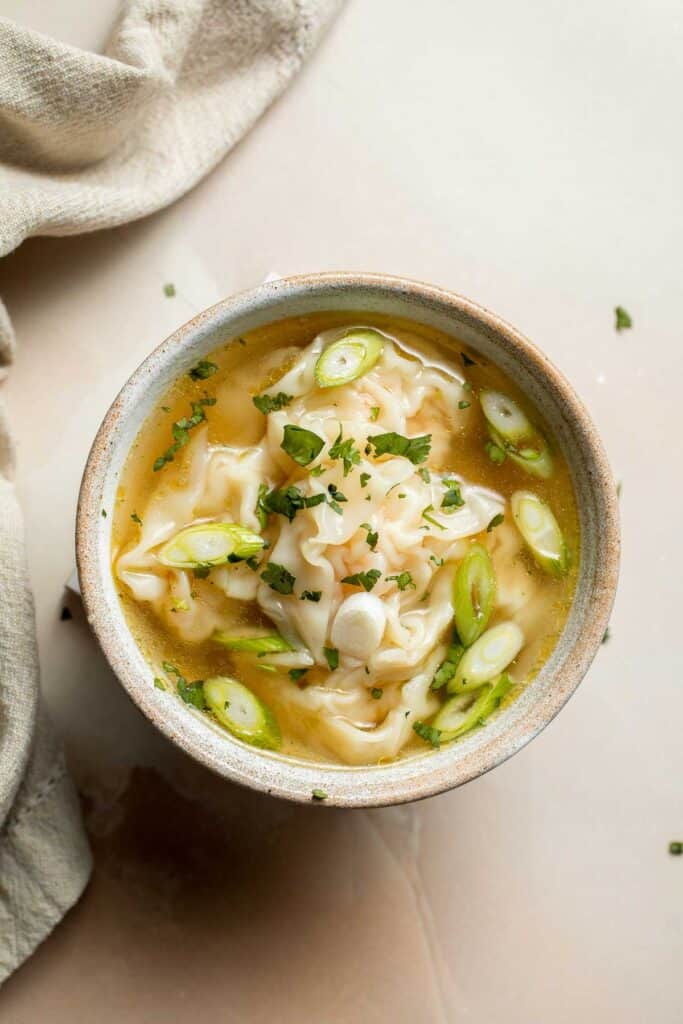
Wonton Soup Recipe Video
Recipe Variations
- Adjust the broth. This easy wonton soup recipe calls for a simple but very flavorful broth. You can easily adjust the flavor of the broth by adding different spices or sauces, like a little white pepper, rice vinegar, fish sauce, oyster sauce, chili oil, and more. Start with the base recipe and tweak it a little at a time.
- Infuse extra flavor. If you have extra time, you can also steep some fresh ginger, lemongrass, or dried shiitake mushrooms in the broth. Strain them out before serving.
- Add more veggies. Complement the fresh herbs by adding extra vegetables, like Napa cabbage, baby bok choy, bean sprouts, and more.
- Use different dumplings. This delicious Chinese soup uses traditional wontons. If you're unable to find wontons in your grocery store, you can try using potstickers or gyoza instead for a nontraditional twist. They might not have quite the same texture, but they'll still taste great!
- Make it vegetarian. For a vegetarian wonton soup, simply use vegetarian-stuffed wontons and vegetable stock, instead of chicken stock.
How to Serve
This easy Wonton Soup is delicious served on its own, or paired with some of my favorite Chinese side dishes including:
- Shanghai Pan-Fried Pork Buns
- Vegetarian Spring Rolls
- Crispy Bottom Pan-Fried Vegetable Buns
- Chive Pancakes with Sourdough Starter
- Miso Garlic Chicken Wings
Love dumplings and noodles? You'll love these 25 Best Dim Sum Recipes too!
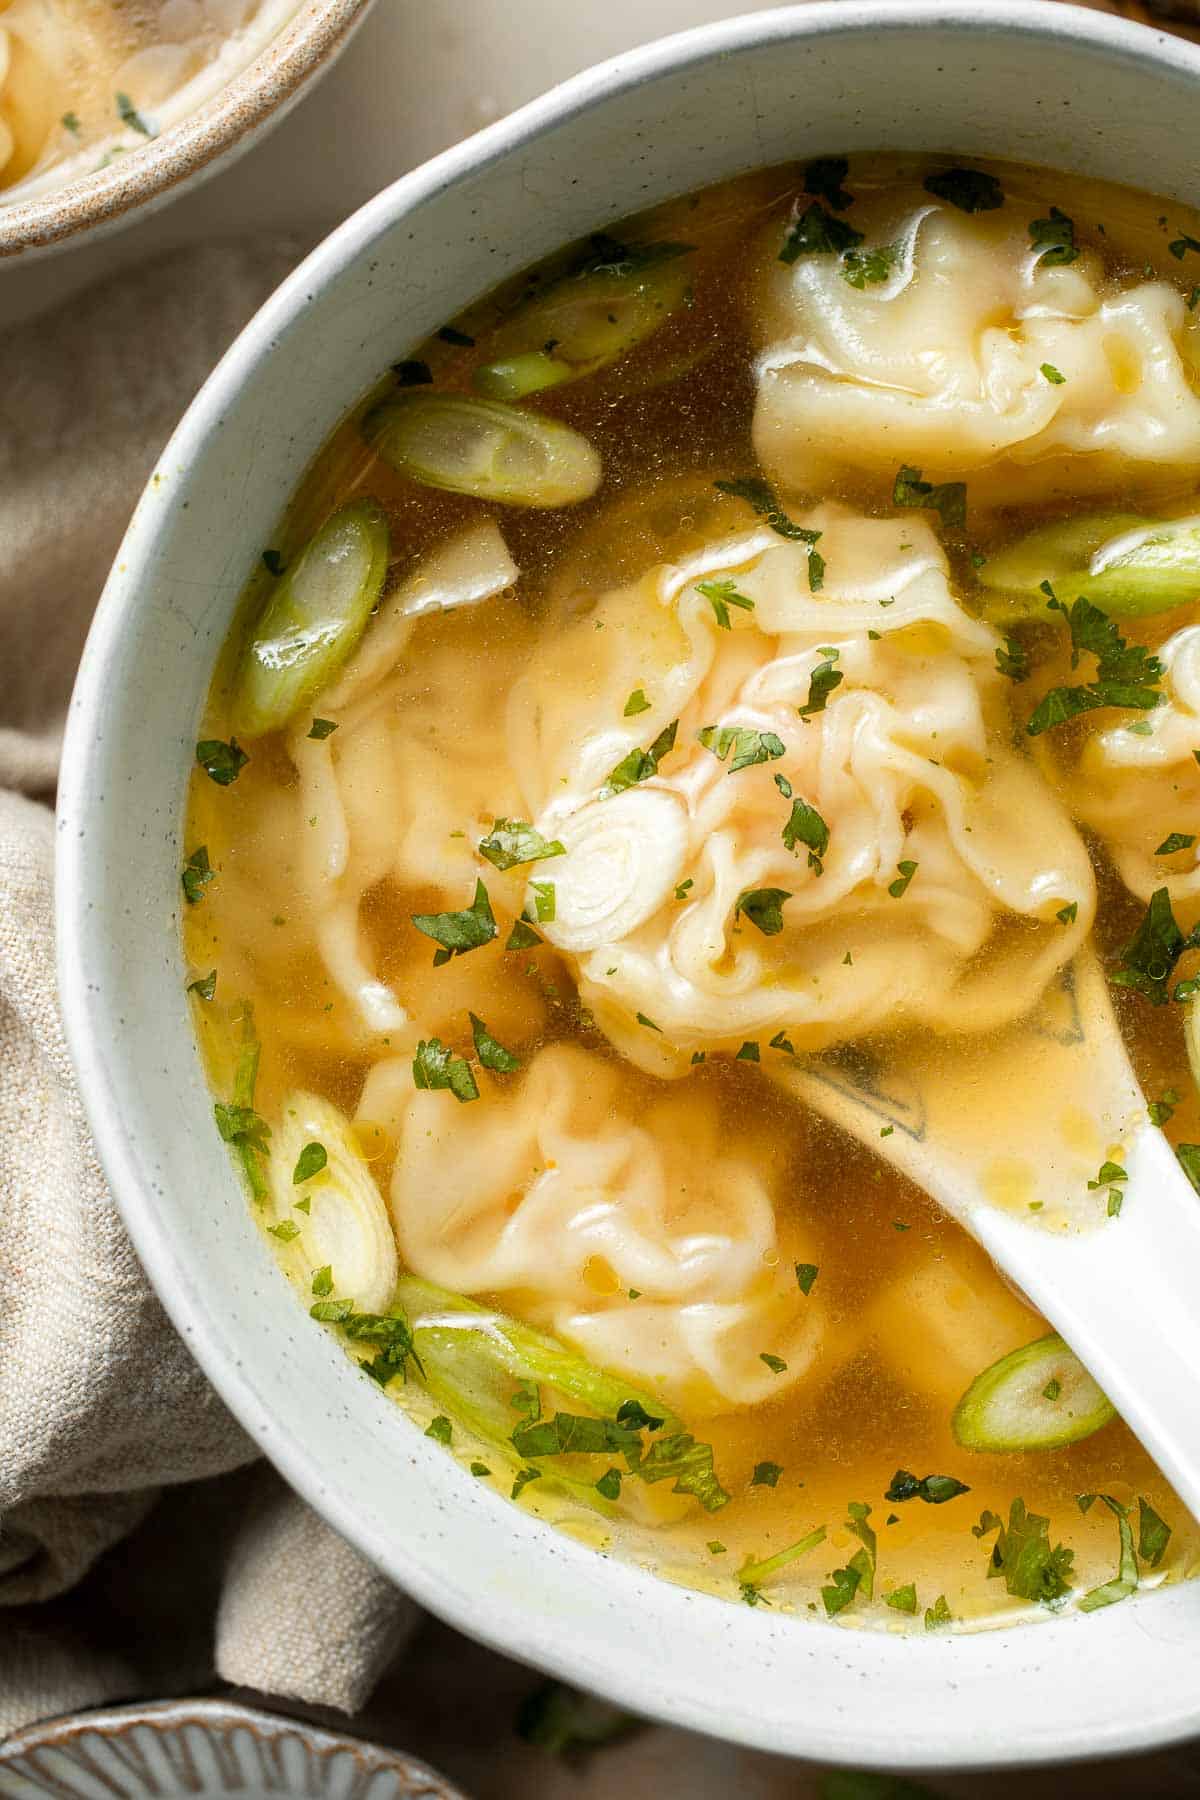
Wonton Soup Recipe Tips and Tricks
- Change the broth or dumplings. Chicken broth is a great, relatively neutral base that works well with chicken or pork dumplings. However, if you want to use shrimp wontons, consider using a fish broth instead. Try beef broth for Beef Dumplings.
- Don't overcook the dumplings. To keep the dumplings from becoming too soft, add cold water to the pot right after the dumplings rise to the surface. This will slow down the cooking process just enough and make it easy to eat the soup right away.
- Use the right dumplings. Although you can technically use potstickers or other types of premade dumplings, this recipe is specifically made for wontons. They're meant to be boiled, whereas potstickers are meant to be steamed. Thinner-skinned dumplings can still be used in this version of wonton soup, but they won't have the same bite and texture.
Storing and Freezing Instructions
How to Store
Store leftover soup in an airtight container in the fridge for 3-4 days. Be sure to refrigerate the leftovers within 2 hours of cooking. Store the leftover cilantro and green onions separately.
How to Reheat
Wonton soup is best served fresh to maintain the texture of the wonton wrappers. If you have leftovers, place them in a small pot on the stove and warm the mixture until piping hot. Garnish with fresh herbs and onions.
How to Freeze
If you'd like to freeze the leftovers, you can freeze the chilled soup base store in freezer-safe containers and freeze for 3-6 months. Thaw in the fridge before reheating. The dumplings cannot be frozen after cooked. You can freeze them before cooking. See our Egg and Chive Vegetarian Dumplings for tips on storing.
FAQ
Although Chinese wonton soup recipes vary across the country, most of them start with a simple broth. This version of wonton soup is made in the Hong Kong style, with a mild chicken broth, tender chicken or pork dumplings, and the rich flavors of dark soy sauce and sesame oil. The soup broth has a savory, nutty, and umami flavor that's the perfect balance for the flavorful dumplings. Garnish with fresh cilantro and green onions for an extra pop of color and flavor.
A good bowl of wonton soup can definitely be enjoyed as a meal on its own, but it's much more fun to eat with your favorite dim sum or Chinese takeout recipes. Pair it with steamed buns, egg rolls, steamed veggies, Char Siu Chicken, Instant Pot Braised Pork, Pork Noodles, Miso Black Cod (Sablefish), and so much more.
This amazing wonton soup can easily be stored for later. The best way is to chill the leftovers in the fridge, then reheat them in a pot on the stove the next day. You can also microwave a bowl of the soup for 2-3 minutes at a time or until fully heated. The dumplings may begin to soften after being heated twice, so it's best to warm the soup up quickly. Don't forget to add your garnish right before serving!
More Asian Soup Recipes
- Shanghai Style Wonton Soup
- Chinese Hot Pot at Home
- Quick and Easy Vegetarian Ramen
- Vietnamese Pho
- Coconut Curry Ramen
- Thai Red Curry Noodle Soup
Tried this recipe?
I'd love to hear what you think! Leave a comment and rating below to share your feedback. Your reviews help others discover this recipe and help me keep creating more free recipes for you. Snap a photo and tag me on social media @aheadofthyme too.
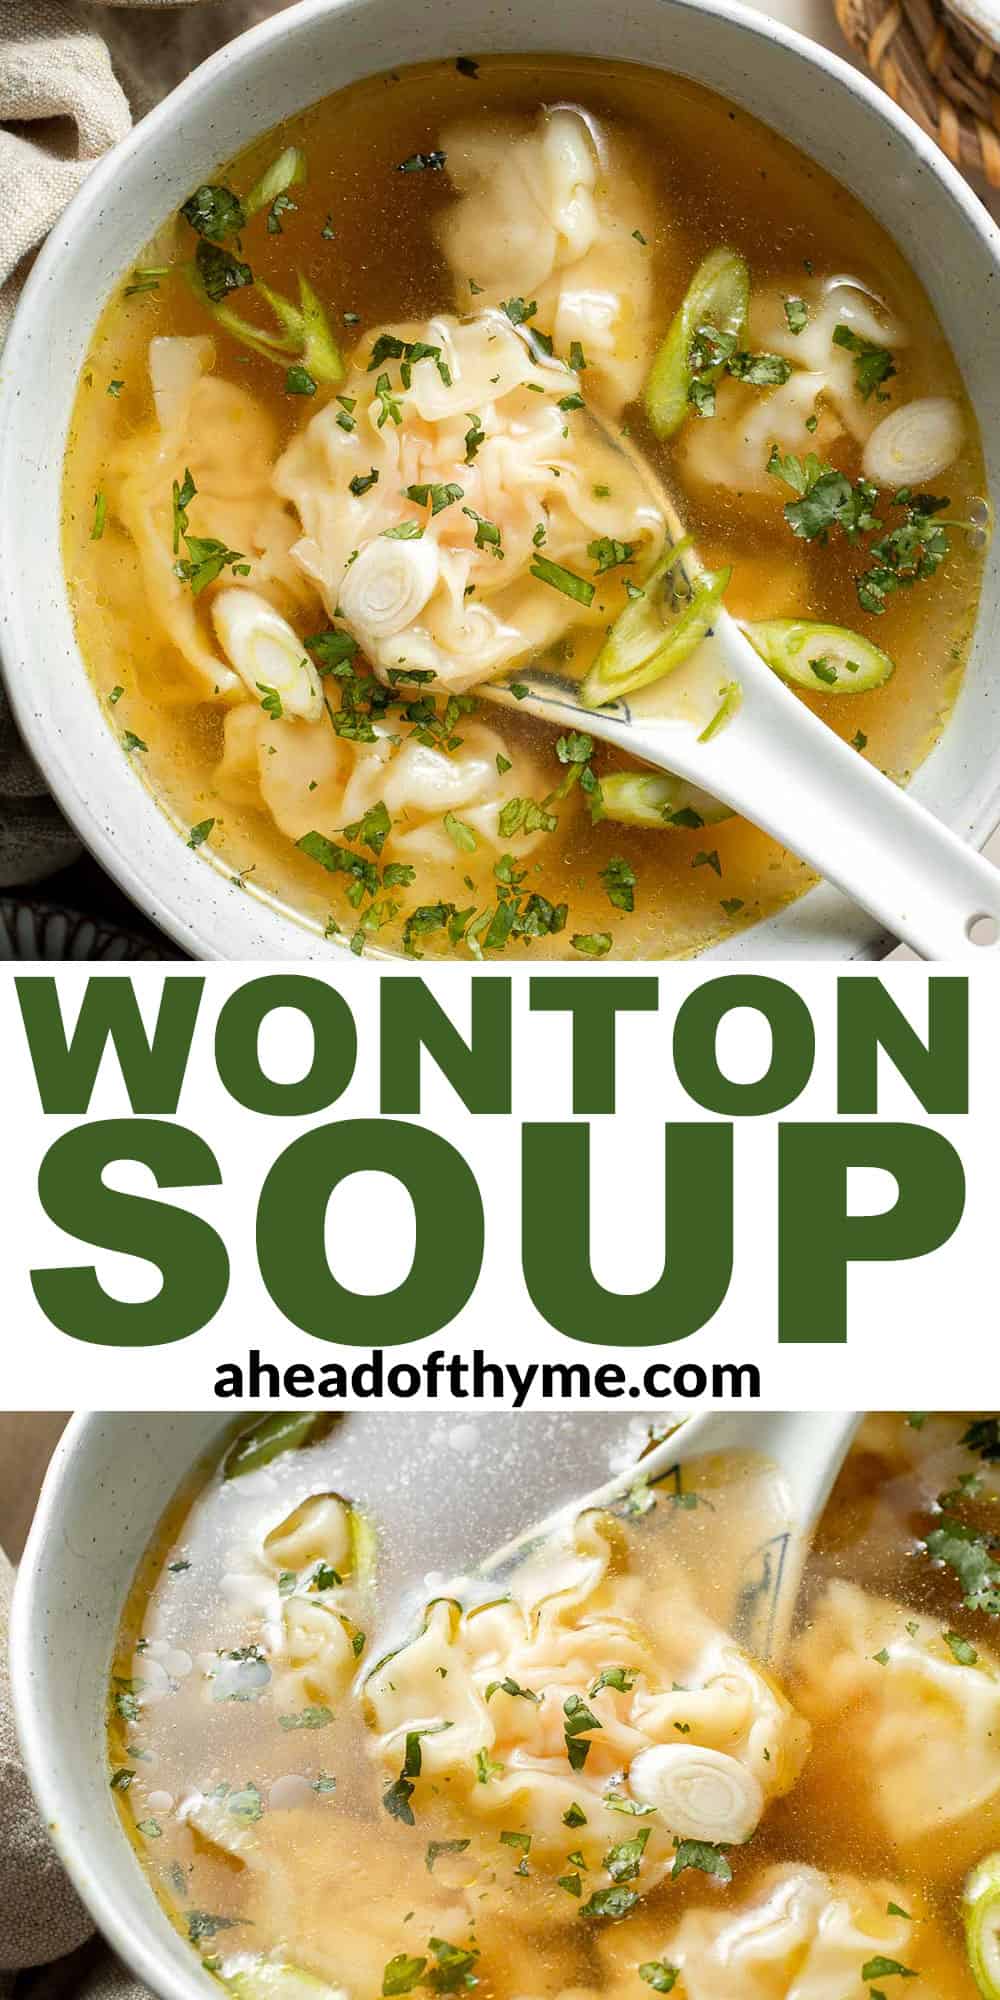
Cream Cheese Pasta
This Cream Cheese Pasta is simple, creamy, and so delicious. Adding cream cheese is the secret to the creamiest, easiest pasta ever! As the cream cheese melts and infuses into the starchy pasta water, it turns into a glossy sauce that coats each noodle with a rich, tangy flavor. This easy cream cheese pasta is ready in just 15 minutes from start to finish and is about to be your new best friend on those busy weeknights!
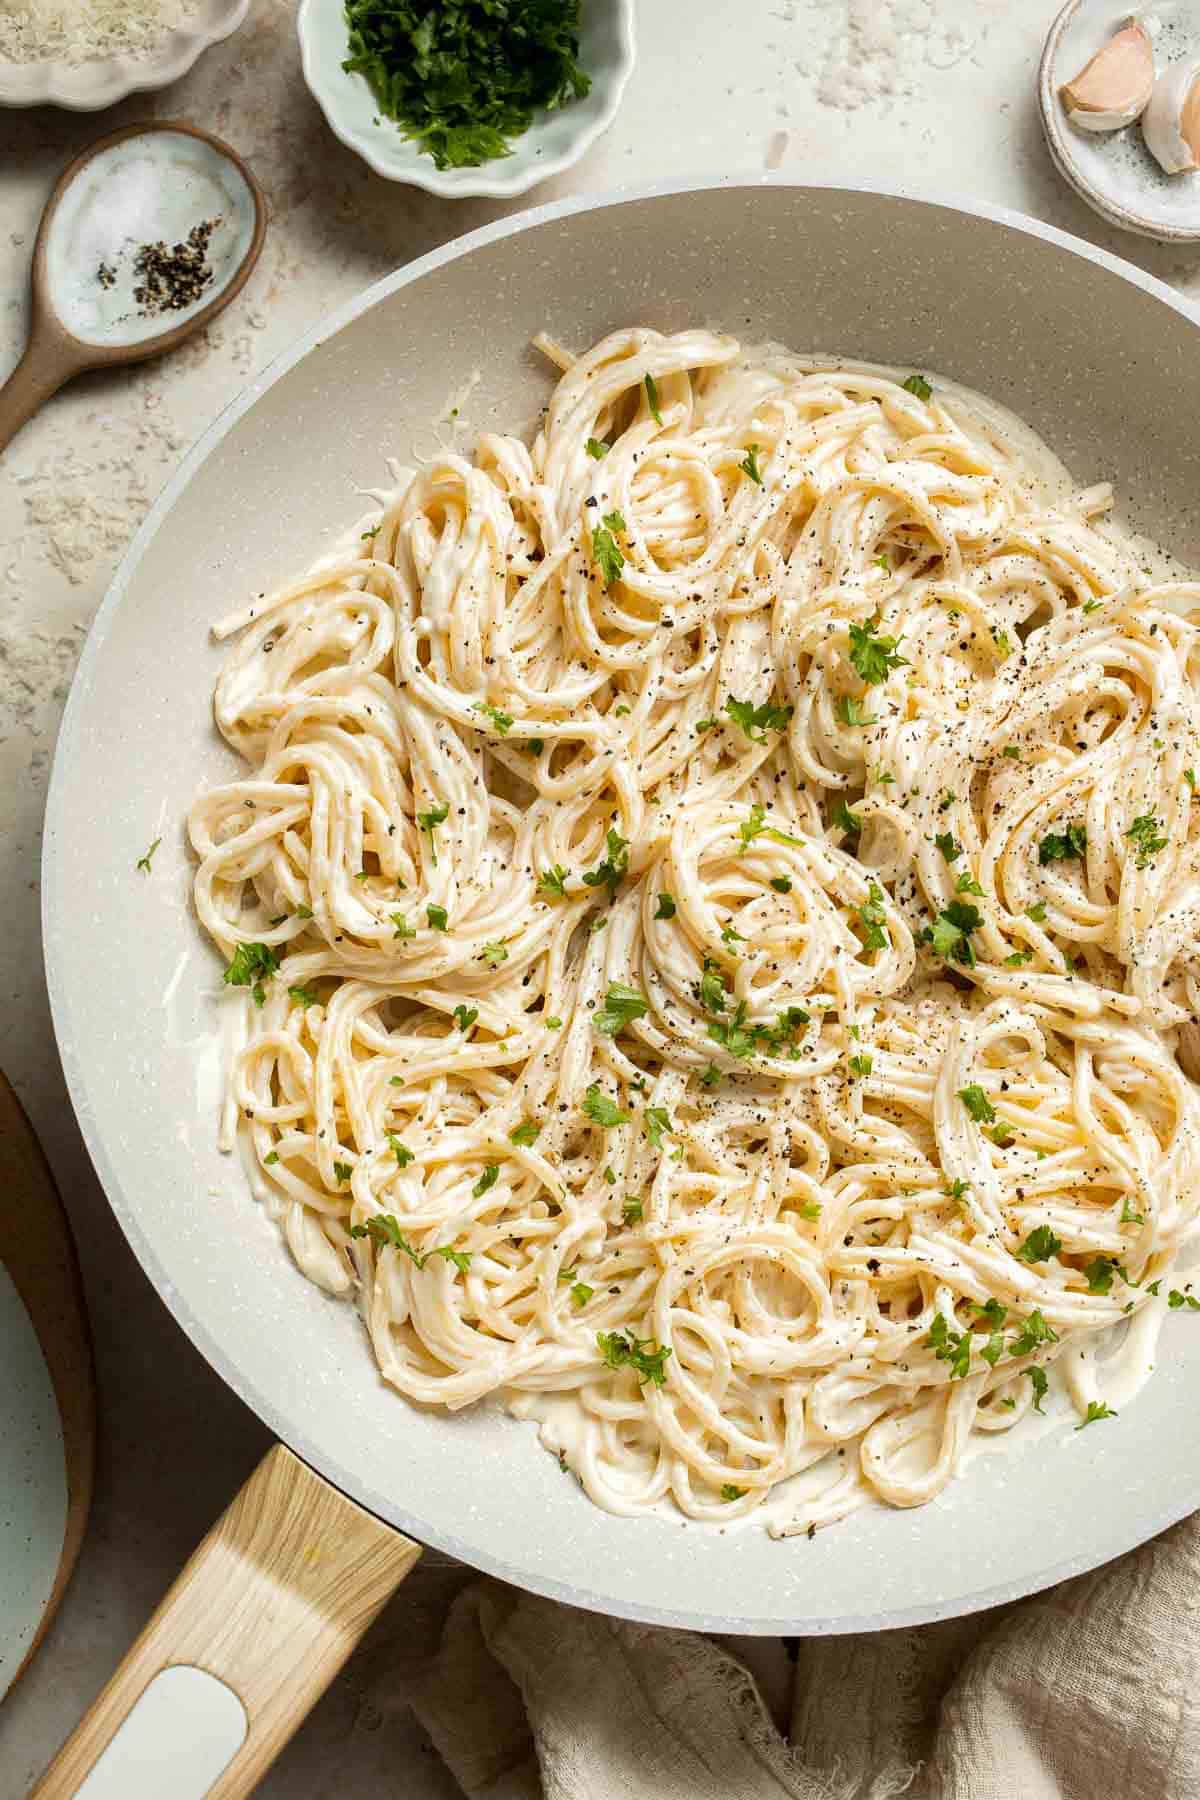
If you've never tried adding cream cheese into your pasta sauce before, you're about to thank me. This recipe is oh-so-simple, but the flavor is out of this world. You won't believe that just a handful of pantry staples and a couple items from your cheese drawer could make dinner that tastes this good. Creamy, savory, and just a little bit spicy. Serve it on its own or with leftover chicken breast, a simple green salad, and a little garlic bread. Start with my basic recipe, but take it in whatever direction you'd like!
Why You'll Love This Cream Cheese Pasta
- Ready in 15 minutes. You know those nights when you're too tired to function, let alone come up with a plan for dinner? This is THE recipe for those nights. You really don't need to think and it only uses a handful of ingredients. Cook the pasta, sautee some garlic with chili flakes, then mix everything together with a little pasta cooking water. In just a few moments, the cream cheese sauce will be ready. Dinner is served!
- Rich, creamy sauce. Cream cheese melts like nothing else and the slightly tangy flavor cuts through the richness, keeping it from tasting too heavy. A little garlic and chili flakes add a nice savory flavor, and I love how the Parmesan melts into the sauce for a salty, umami note. So good!
- Easy to adapt. This cream cheese pasta recipe can easily be tweaked by adding different veggies, seasonings, and add-ins. I like to serve it as a simple main dish on busy nights, but it's also a great side dish to use instead of fettuccine alfredo with your favorite proteins. The sky's the limit here!
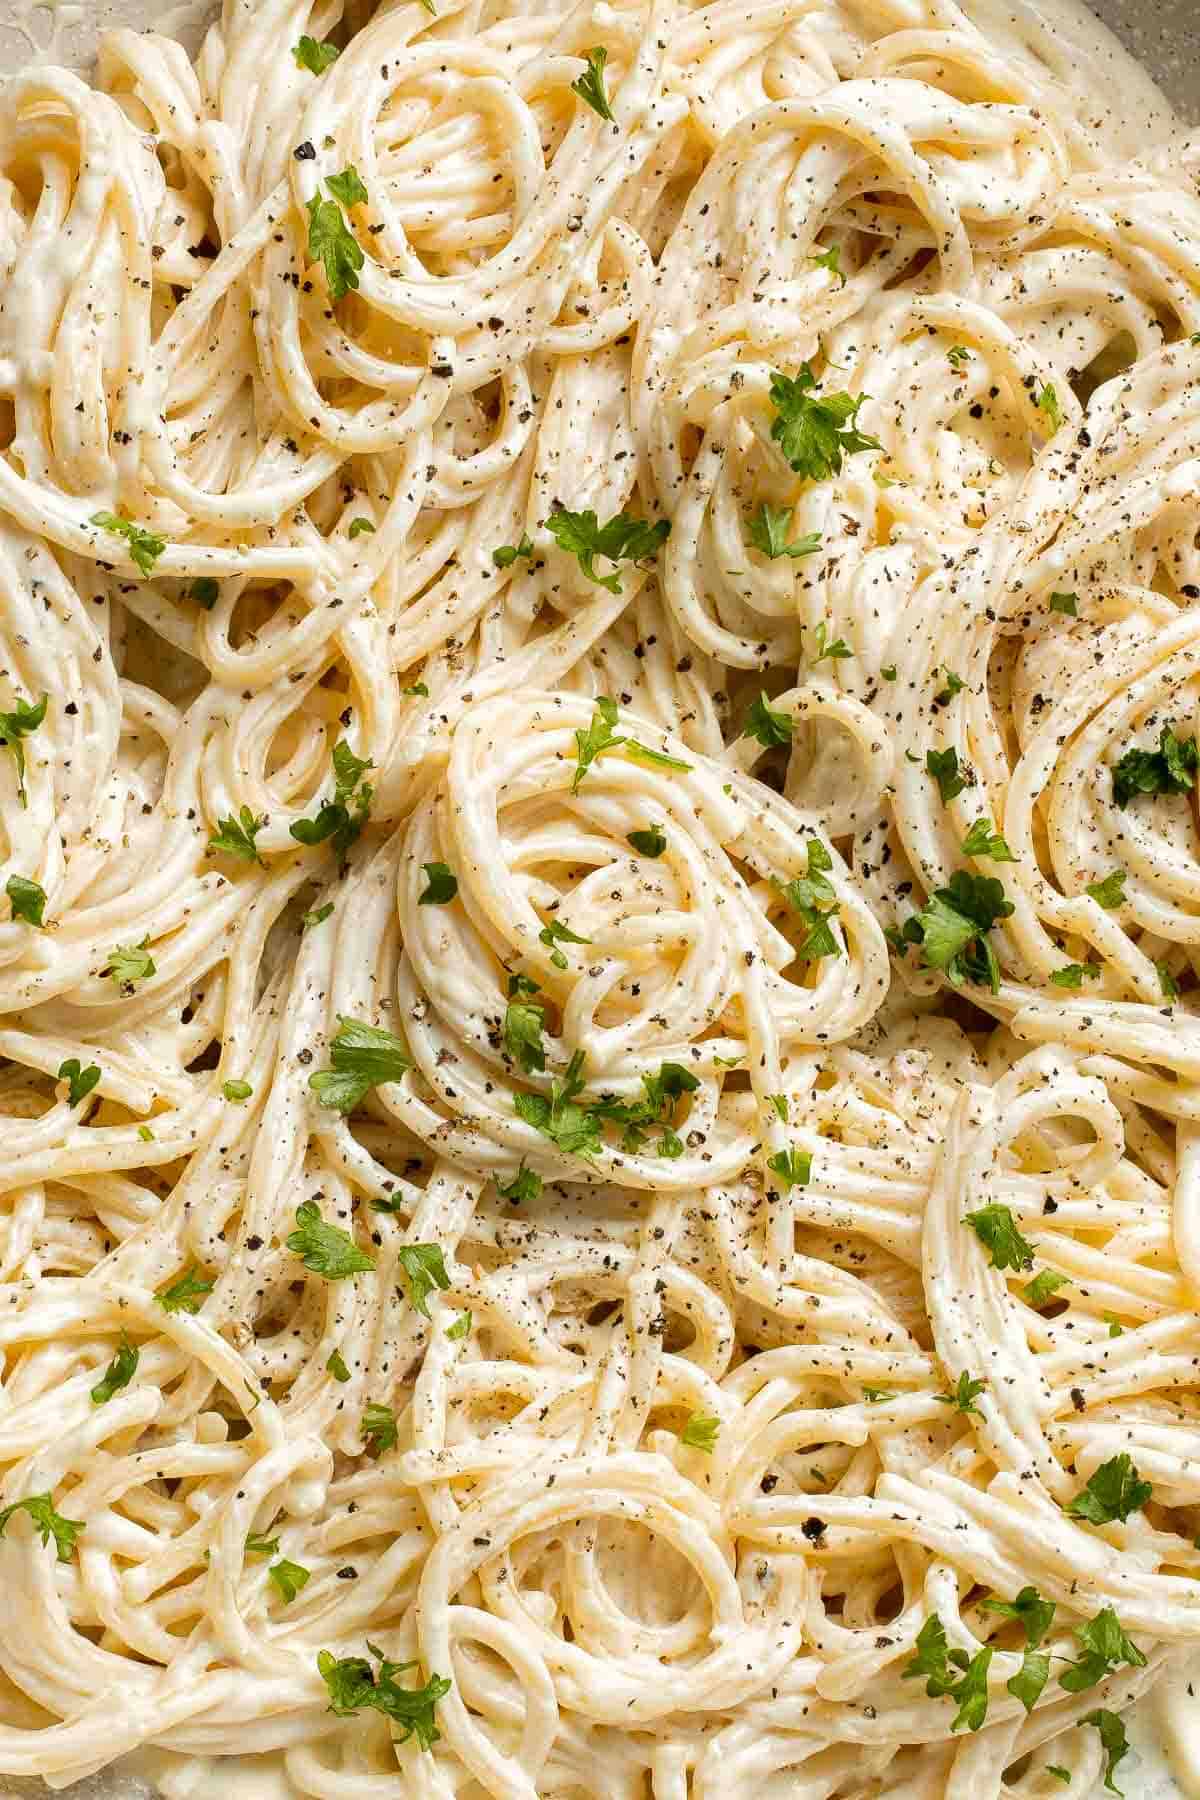
Ingredient Notes
To make this delicious Cream Cheese Pasta, you will need the following ingredients (full measurements in recipe card below):
- spaghetti - boil this while you prepare the sauce, and reserve some of the leftover pasta water to thicken the delicious sauce and make it silky smooth.
- extra virgin olive oil
- garlic - minced and sauteed with the red pepper flakes for a little bit of heat.
- chili flakes
- cream cheese - I always recommend full-fat cream cheese for the best flavor.
- Parmesan cheese - freshly grated.
- salt and pepper - to taste
- parsley - optional, for garnish.
You will also need measuring cups and spoons, a large pot, strainer, small bowl, large skillet, cheese grater, and a serving spoon.
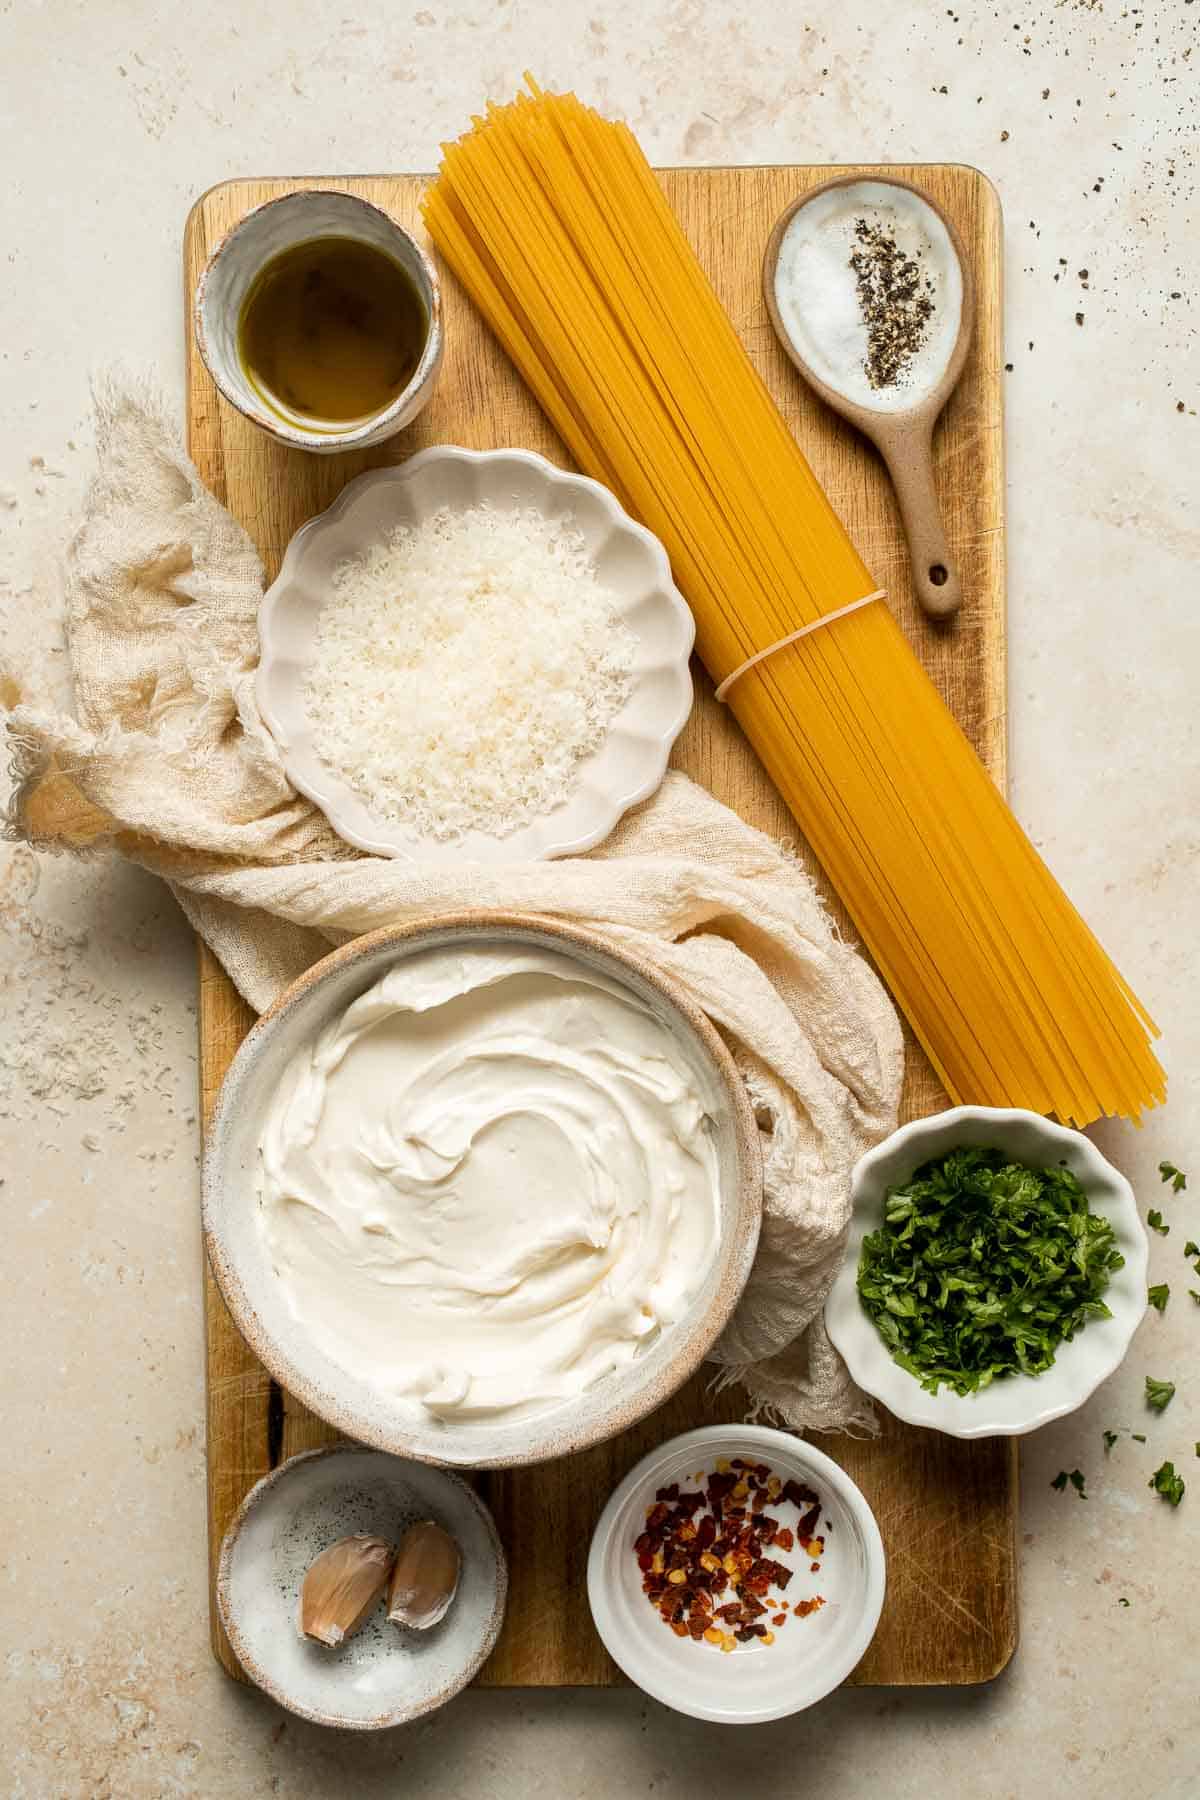
How to Make the Best Cream Cheese Pasta
- Cook pasta. Bring a large pot of salted water to boil over medium-high heat. Add spaghetti noodles and cook until al dente according to package directions, about 8-10 minutes. Reserve ¼ cup of the hot pasta water in a small bowl. Drain the noodles and set aside.


- Sauté aromatics. Meanwhile, heat oil in a large skillet over medium-high heat for 1 minute. Add minced garlic and chili flakes (optional) and sauté until fragrant, about 1 minute.
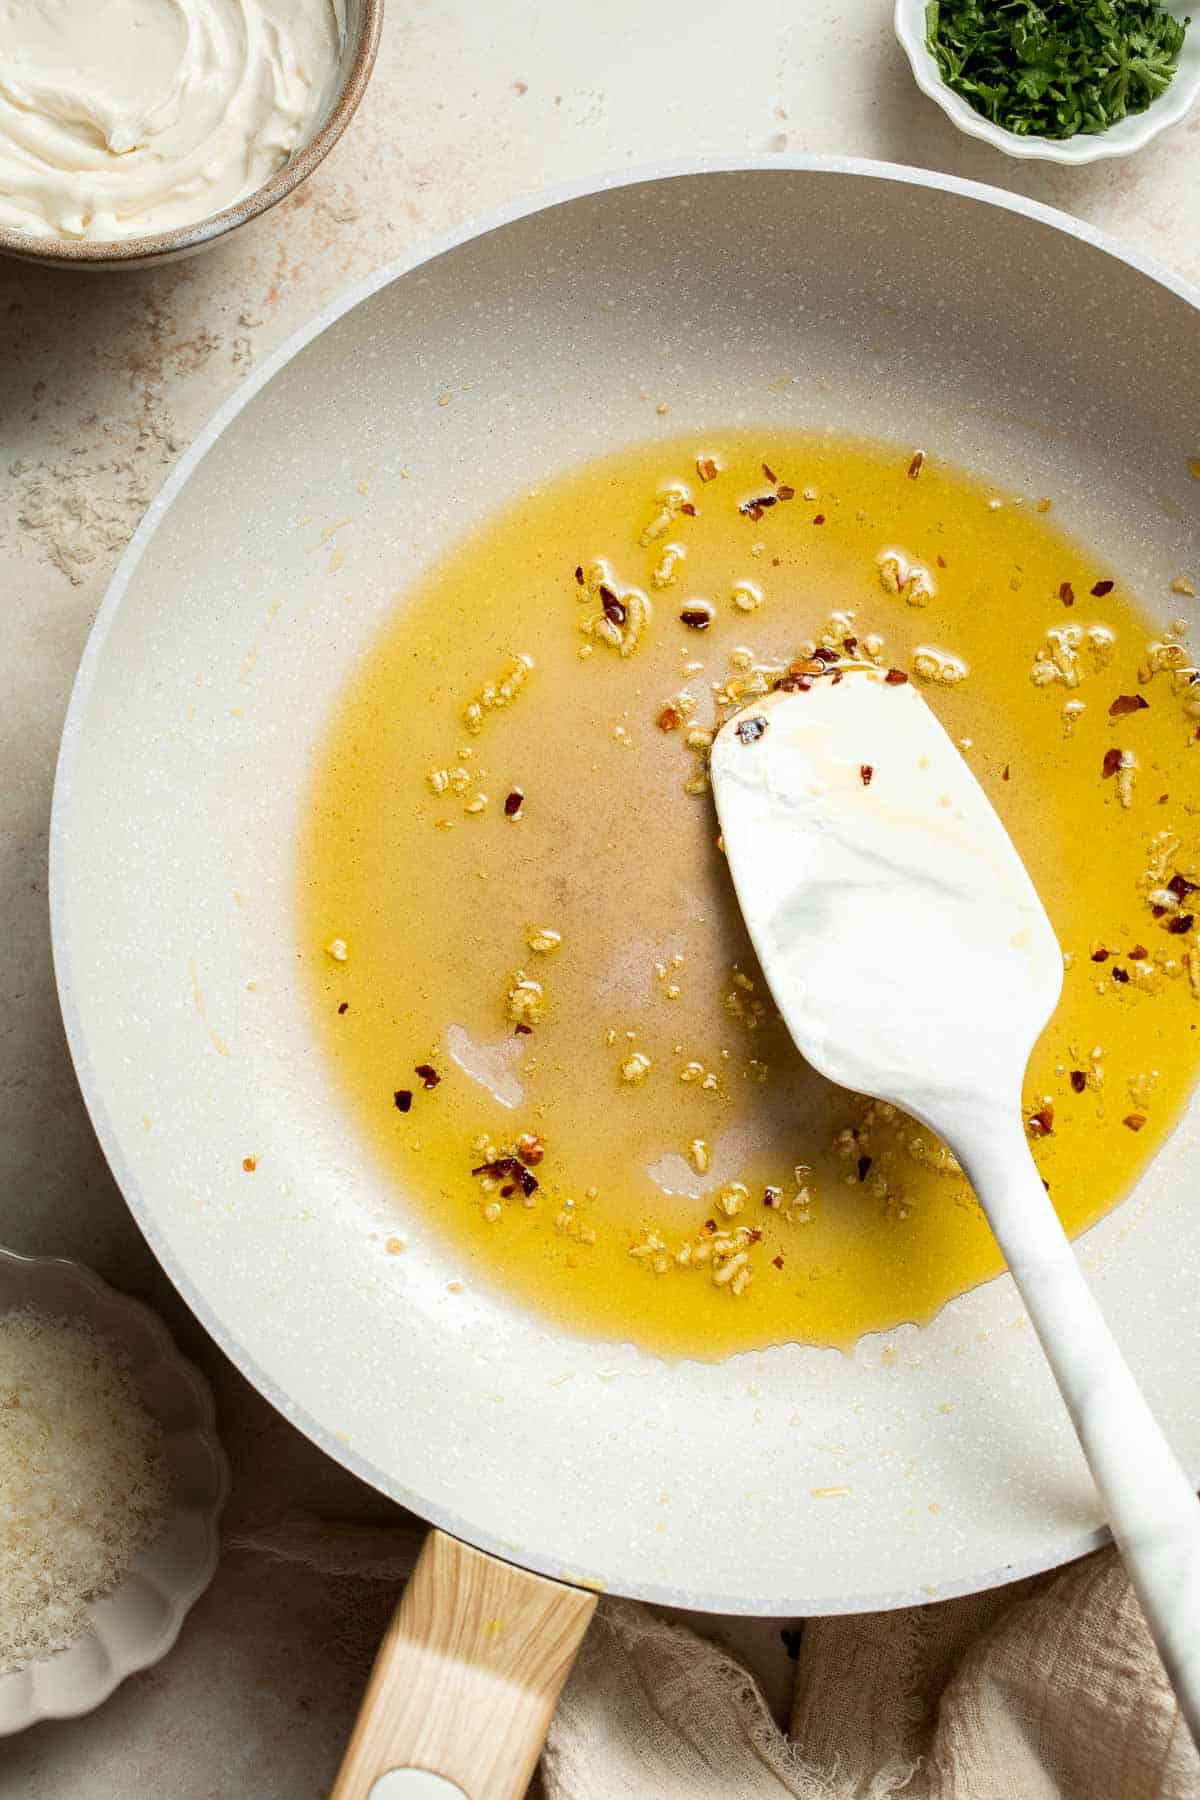
- Add cheese. Add ¼ cup reserved pasta water, cream cheese and Parmesan cheese. Gently stir until smooth and bring it to a simmer, about 1-2 minutes.
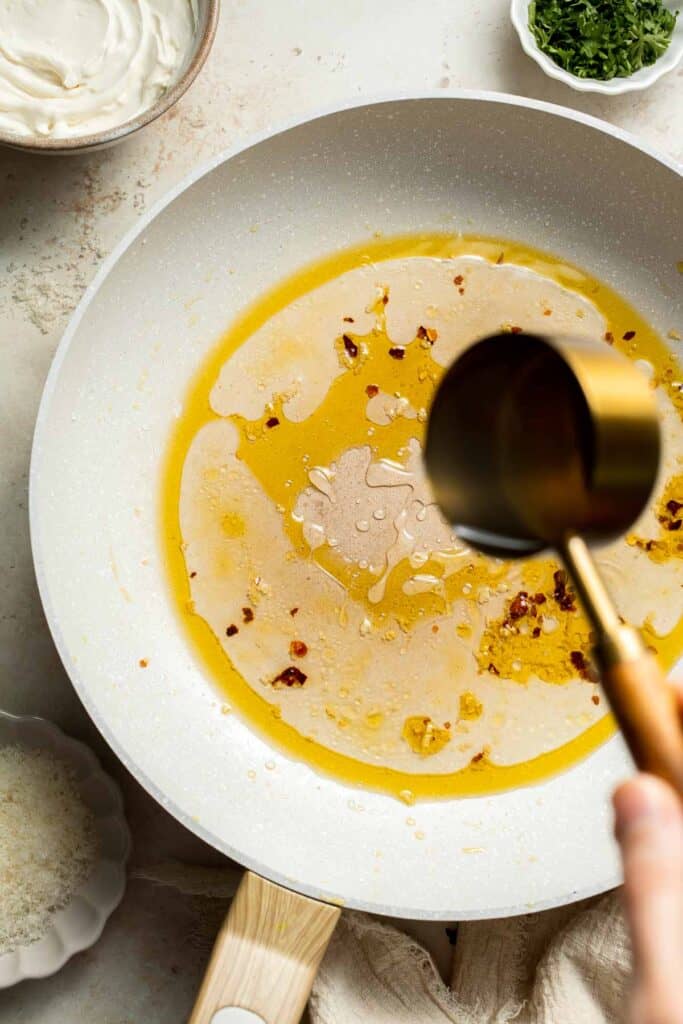


- Toss. Add cooked spaghetti and toss well. Season with salt and pepper to taste.

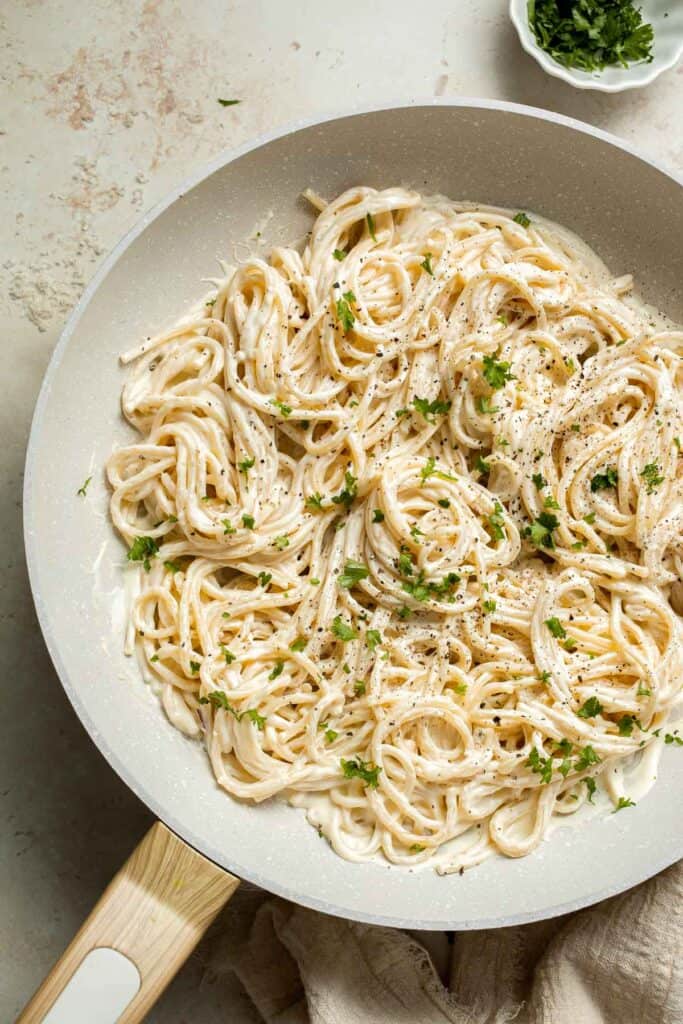
- Serve. Sprinkle with parsley and extra parmesan cheese if desired. Serve warm.
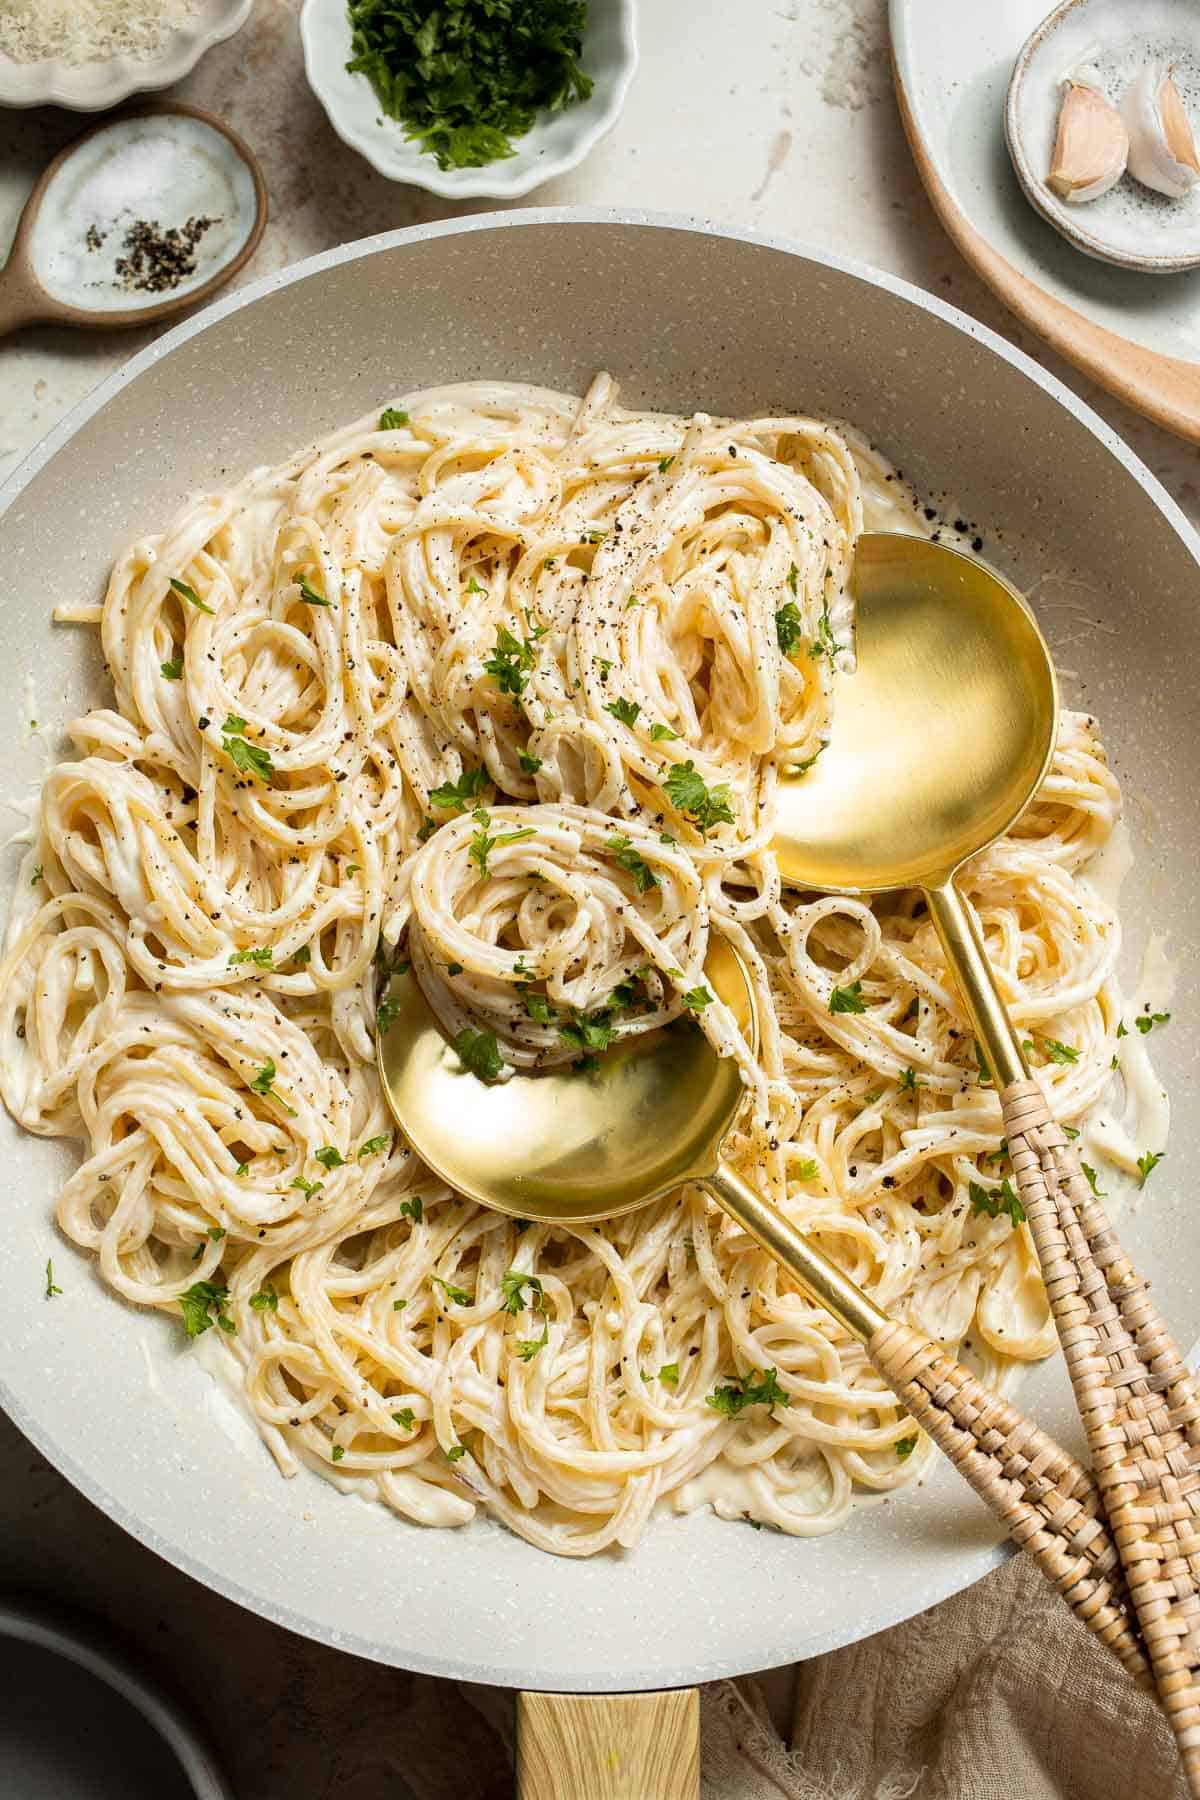
Recipe Variations
- Add protein. There are lots of protein options to make this creamy cheese pasta a complete meal. It's wonderful with grilled chicken breast, cooked sausage crumbles, pancetta or cooked bacon, marinated grilled shrimp, sliced steak, etc.
- Load up on veggies. When you add the cream cheese, add some frozen or fresh spinach for a dose of greens. It's also great with artichoke hearts, olives, sun-dried tomatoes or roasted cherry tomatoes, roasted zucchini, and more for a Mediterranean-inspired flavor.
- Add some tomato sauce. I love pairing cream cheese with tomato sauce! The creamy flavor makes ordinary jarred marinara sauce taste expensive and so hearty.
How to Serve
This Cream Cheese Pasta is delicious served on its own, or paired with some of my favorite pasta sides including:
For more recipes, see our 30 Side Dishes for Pasta.
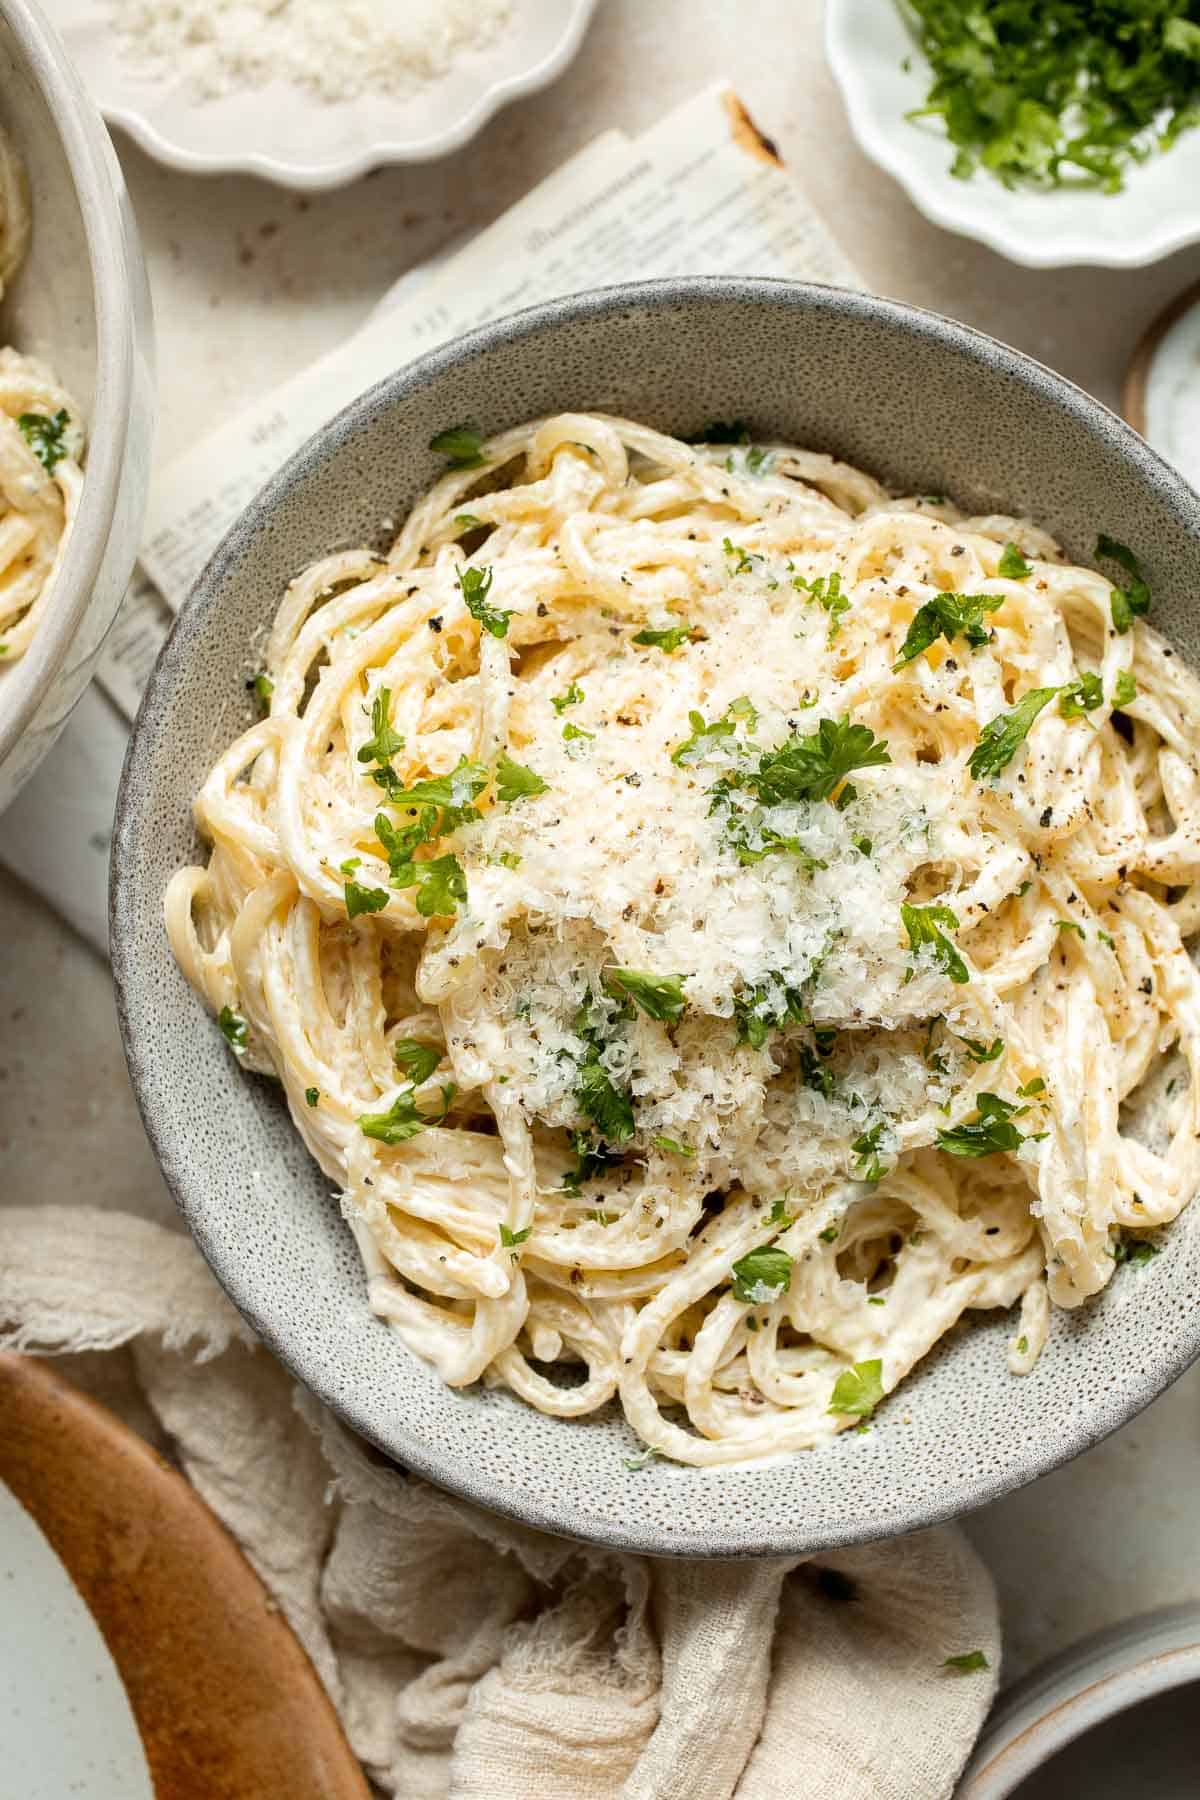
Recipe Tips and Tricks
- Salt the water generously. For the best flavor, salt the water until it has a mild saltiness. Italians say the water should be as salty as the sea! It really makes a difference.
- Grate the parmesan yourself. It's easier to buy pre-shredded or grated parmesan, but some shredded cheeses contain additional binders that affect how well the cheese melts. It's worth the elbow grease to grate your own.
- Look for vegetarian parmesan. If you're vegetarian, it's helpful to know that traditional Parmigiano Reggiano is made with animal rennet. Look for regular "parmesan" cheese made with microbial rennet instead.
Storing Instructions
How to Store
Store any leftovers in an airtight container in the fridge for 3-4 days.
How to Reheat
Either microwave the leftover pasta for a few minutes or warm it in a skillet over medium heat. I recommend adding a splash of water to loosen up the sauce and make it glossy again.
FAQ
Yes! Cream cheese is high in fat, very creamy, and melts incredibly well, which makes it perfect for adding to pasta sauce. If you add it with a little parmesan cheese and some of the starchy water from cooking pasta, it will turn into a silky smooth sauce that clings to each noodle. Plus, the tangy flavor is so satisfying and works well with a wide range of add-ins. It's even great added directly to your favorite tomato sauce!
Freezing cooked pasta isn't always a great choice. The pasta becomes thick and soggy after thawing and reheating, and the cream cheese can separate. You can likely get away with it, but I recommend making a fresh batch for the best results.
I always recommend full-fat cream cheese because it is so rich and creamy, but you can use reduced-fat Neufchatel cheese as well. Fat-free cream cheese has a slightly rubbery texture and doesn't melt as well, so I would skip that option.
More Cheesy Pasta Recipes
- 40 Best Pasta Recipes
- Creamy Tomato Pasta
- Spicy Mac and Cheese
- Veggie Pasta
- Skillet Lasagna
- Baked Feta Pasta
Tried this recipe?
I'd love to hear what you think! Leave a comment and rating below to share your feedback. Your reviews help others discover this recipe and help me keep creating more free recipes for you. Snap a photo and tag me on social media @aheadofthyme too.
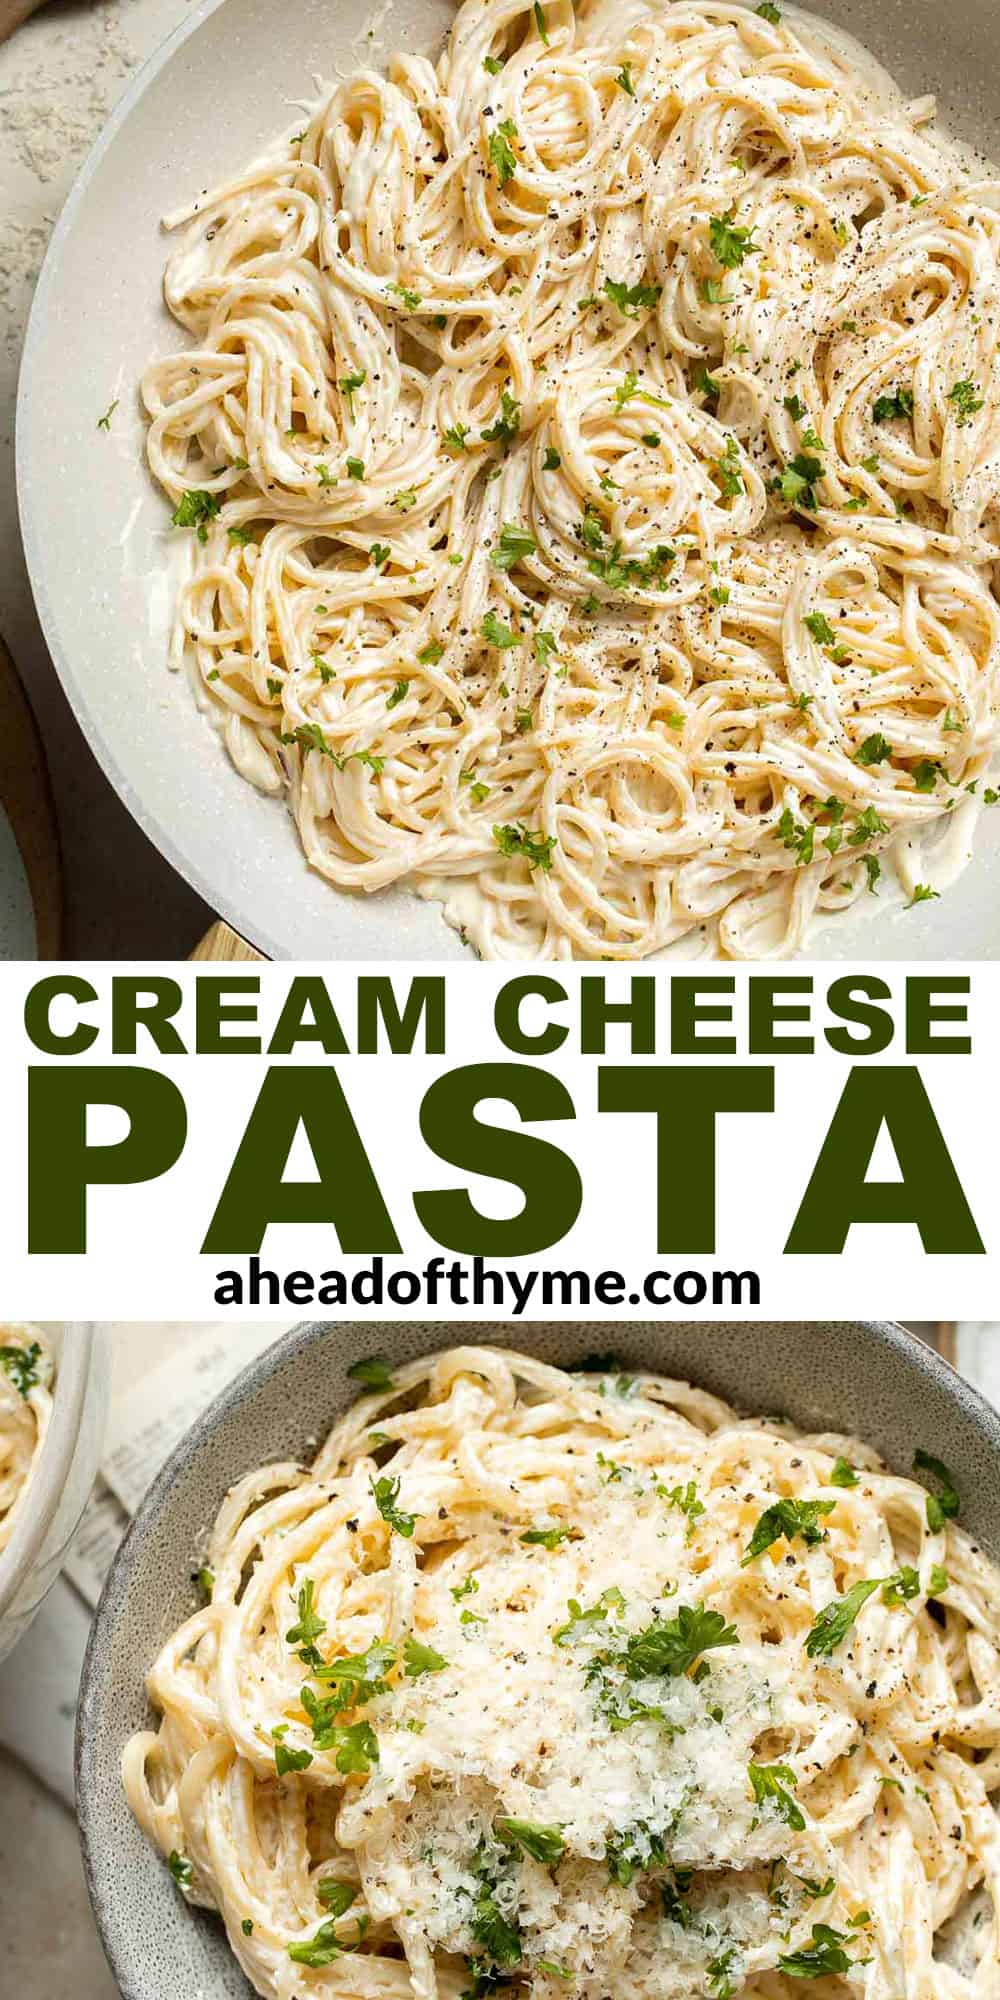
Ham and Cheese Pinwheels
Freshly baked from the oven, these Ham and Cheese Pinwheels are warm and tender with ooey, gooey melty cheese, sweet ham, Dijon mustard, and mayo. They're easy enough to make for dinner on busy weeknights but also make an excellent appetizer for parties or a perfect item for your kid's school lunch!

Normally, when you think of savory pinwheels, you think of cold rolled up sandwiches made with flour tortillas. Although those are good in their own right, tortilla pinwheels are nothing like this baked version! This ham and cheese pizza rolls are a savory cross between Cinnamon Rolls and Turkey and Cheese Sliders. Despite the major glow-up, these baked pinwheels require just about the same amount of time and effort, and your guests will beg you for the recipe. My secret ingredient? Use premade pizza dough to skip ahead to shaping!
Why You'll Love These Ham and Cheese Pinwheels
- Warm and cozy. These ham and cheese pinwheels are the perfect party appetizers for the cooler months of the year. Serve them on game day, for Christmas morning brunch (it's a great way to use leftover Christmas ham!), or as a filling appy on New Year's Day. They straddle the line between appetizer and main course and can go either way. So satisfying!
- Feed a crowd. Since one tray makes enough for 12 servings, there are plenty of pinwheels for the whole crew! The recipe is easy to double, too. We even like to send the leftovers in school lunches as an alternative to ham and cheese sandwiches!
- Minimal prep. I know that the thought of hand-rolling pastries sounds time-consuming, but it doesn't have to be! This easy recipe can be made with store-bought pouches of pizza dough, so you can skip kneading and rising. Roll out the dough, add the toppings, then roll it up, cut, and bake. So simple!

Ingredient Notes
To make this delicious Ham and Cheese Pinwheels, you will need the following ingredients (full measurements in recipe card below):
- pizza dough - either make a batch of your favorite homemade pizza dough or grab a pouch of the premade stuff from the store.
- sauce - we add in some mayonnaise and dijon mustard. Mayo adds a creamy, tangy flavor that balances the Dijon well.
- deli ham - thinly sliced. Feel free to use whichever variety of ham you prefer (honey baked, black forest, etc). You can also thinly slice any leftover ham from the holidays!
- cheese - we use sharp white cheddar cheese but you can use any melty cheese such as mozzarella, swiss cheese, etc. It's easiest to use shredded cheddar cheese, which can be sprinkled over the ham for easy rolling.
- egg - lightly beaten for egg wash to give the pinwheels a lovely golden color.
- parsley - optional for serving.
You will also need measuring cups and spoons, a rolling pin, a small bowl, a sharp knife or bench scraper, a baking sheet, parchment paper, and a pastry brush.
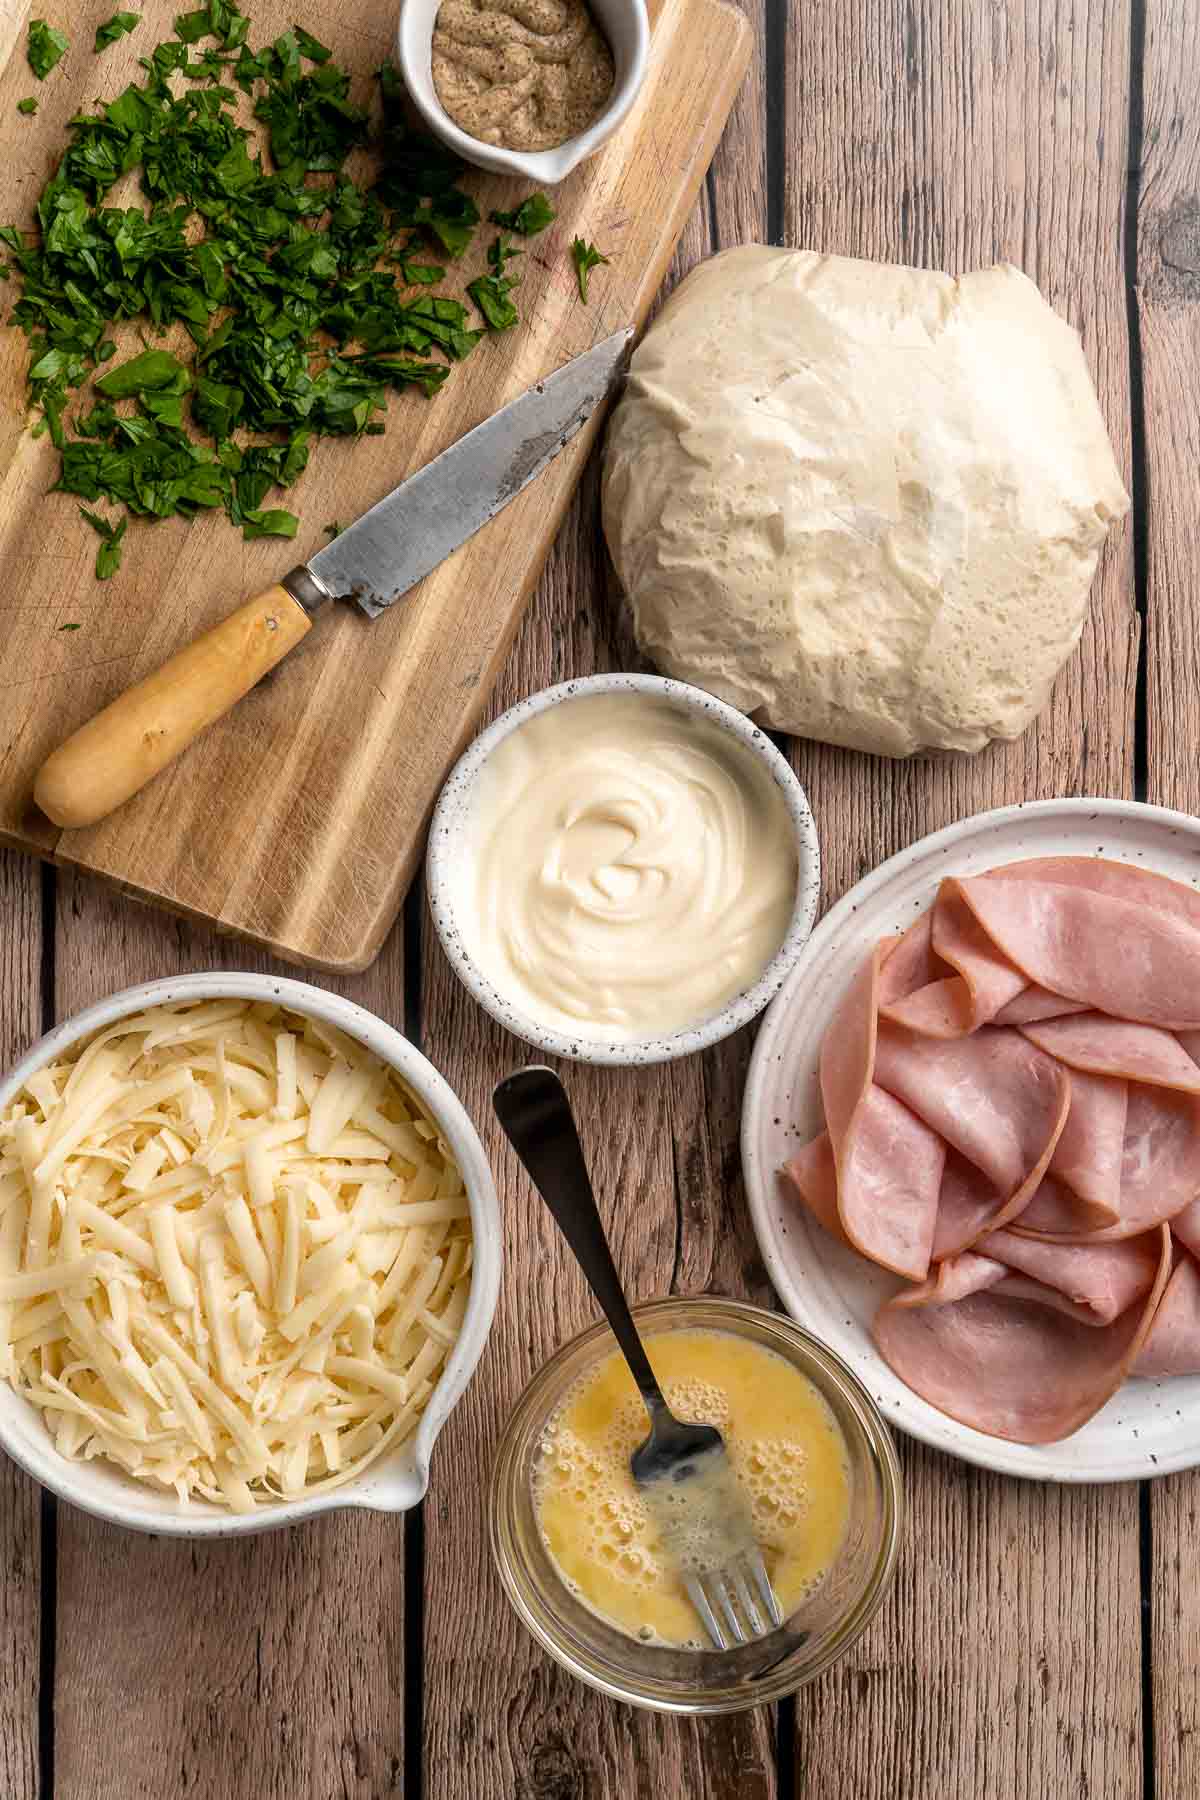
How to Make the Best Ham and Cheese Pinwheels
- Shape dough. Transfer prepared pizza dough onto a lightly oiled surface and gently flatten into a 10x14-inch rectangle using a rolling pin.
- Make the sauce. In a small mixing bowl, mix mayonnaise and mustard until smooth.
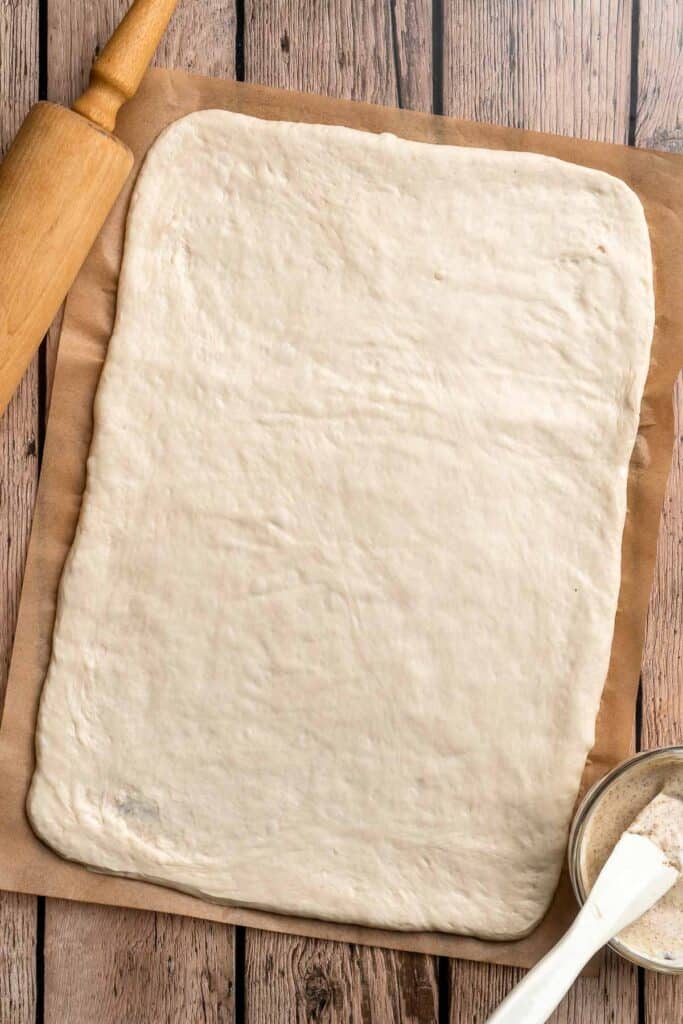
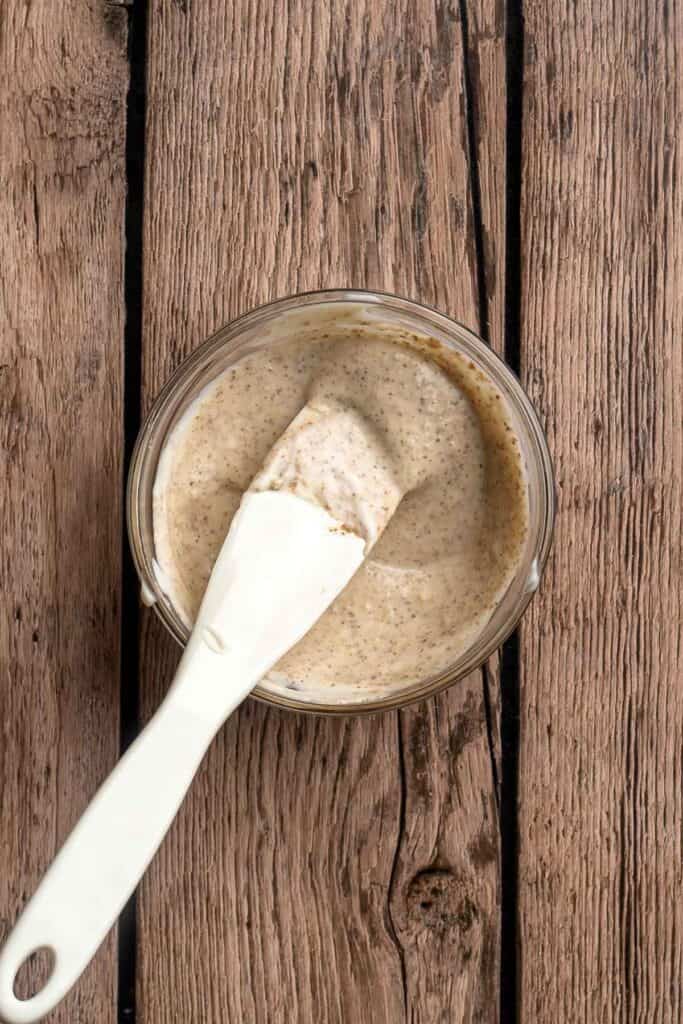
- Assemble. spread evenly over the dough, leaving a ½-inch border on all sides. Then, add deli ham slices over the sauce and sprinkle shredded cheese evenly over the ham.


- Roll. Roll up the dough tightly lengthwise into a log and pinch the end edges to seal.
- Slice. Cut the rolled dough into 12 even pieces using a knife or bench scraper, about 1-inch wide each.

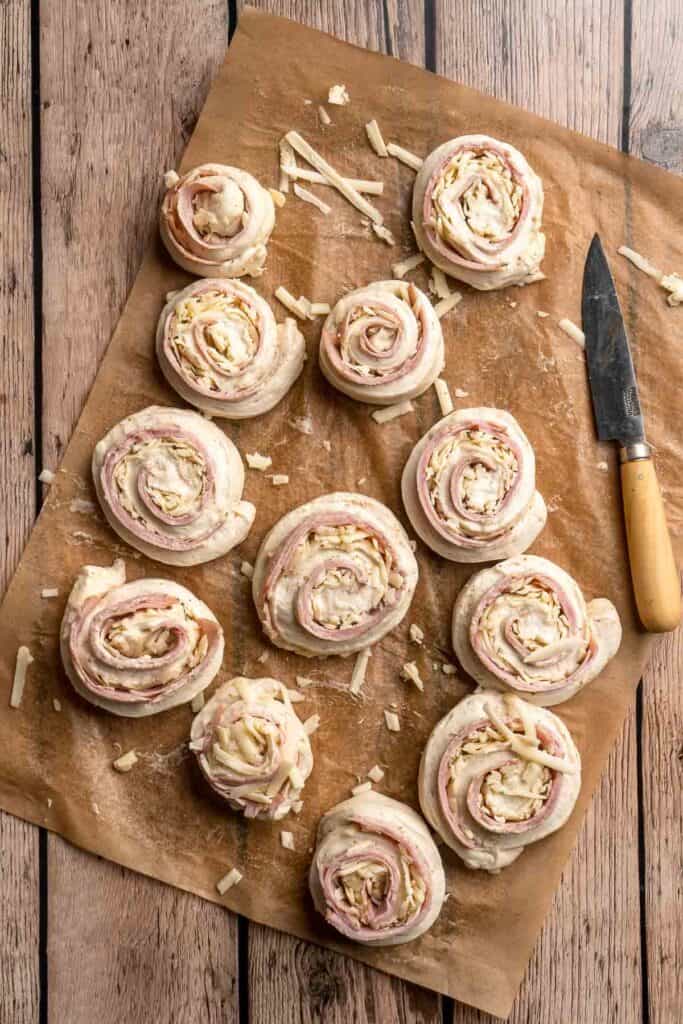
- Bake. Arrange the rolls flat on a large half sheet baking tray lined with parchment paper. Brush a little bit of egg wash over each roll. Bake in a 400F preheated oven for 20 minutes until golden brown.


- Serve. Let the rolls cool for 5-10 minutes. Then, sprinkle chopped parsley on top and serve immediately.
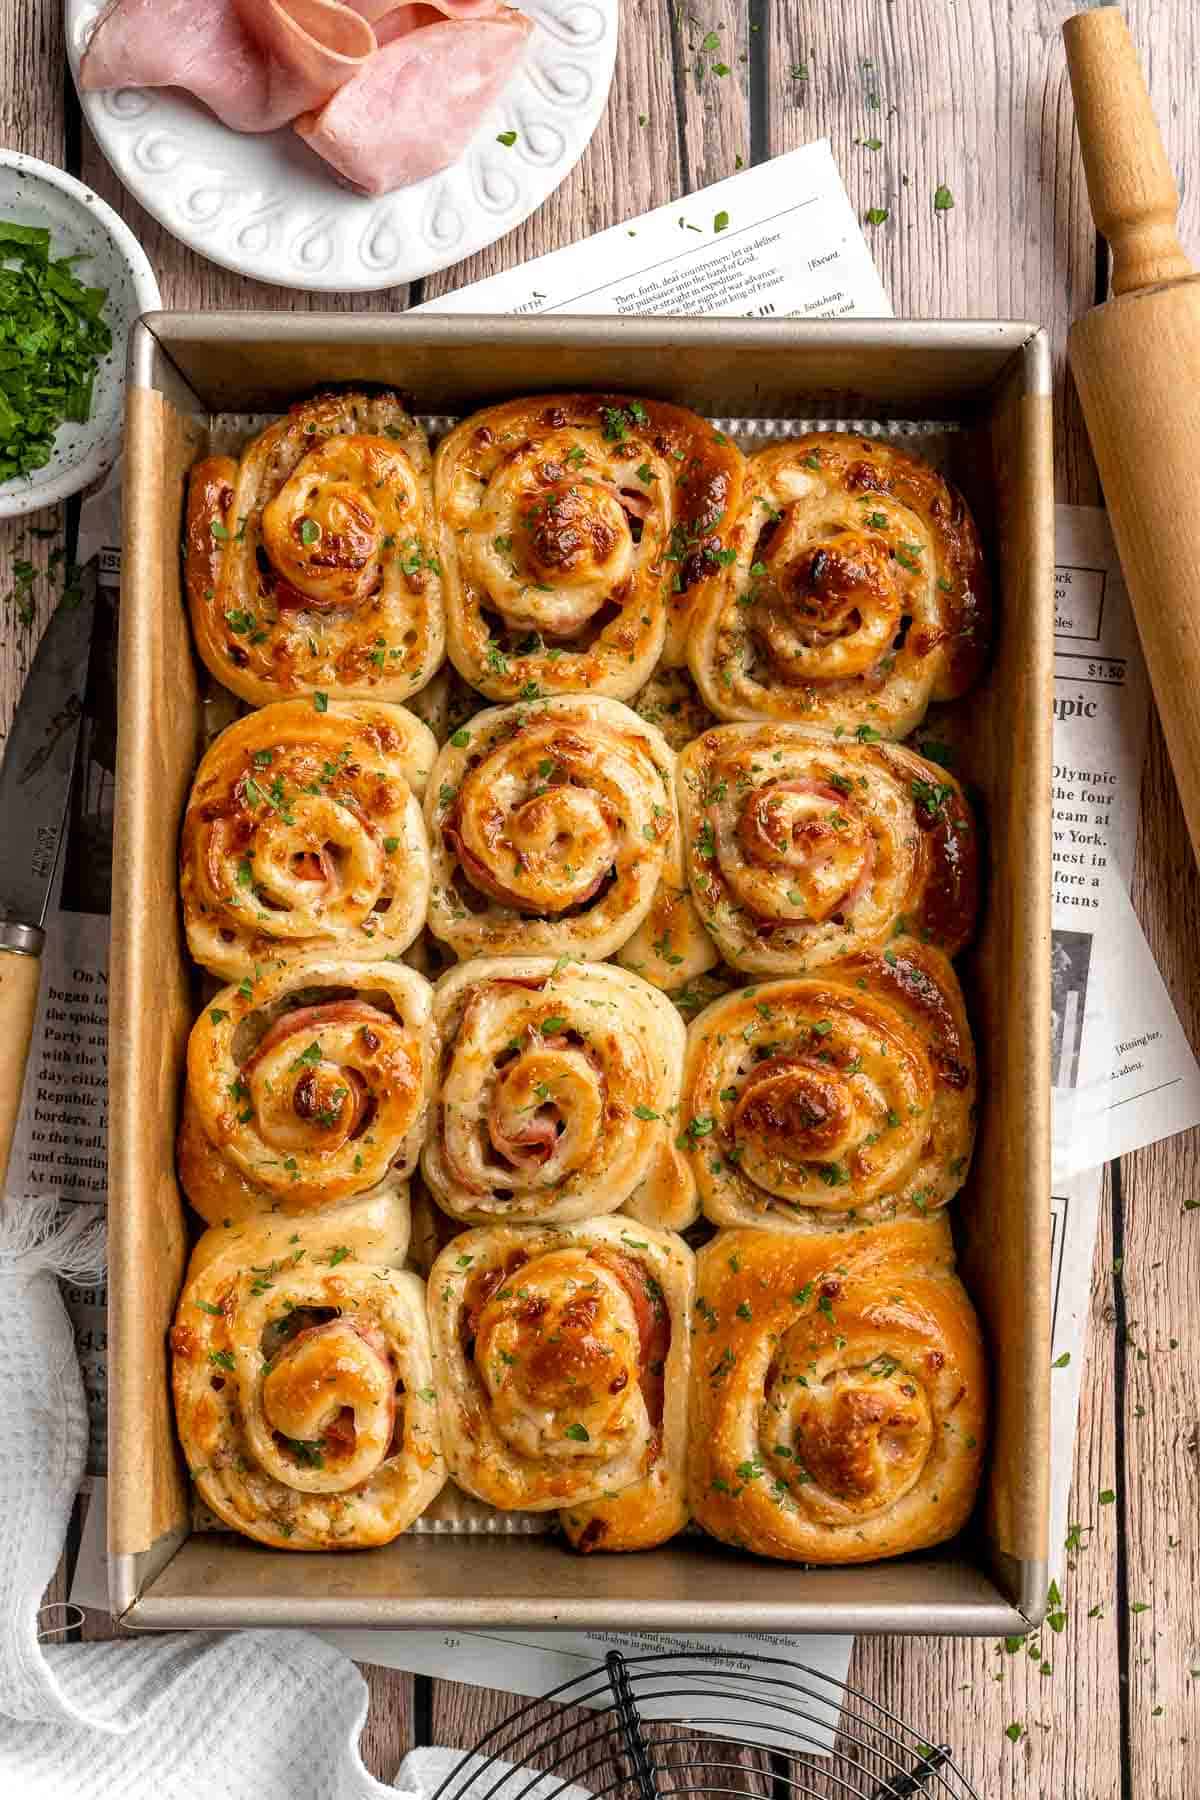
Recipe Variations
- Use different cheeses. Ham and cheddar go well together, but Swiss cheese is a good swap. Look for a shredded Swiss cheese mixture with gruyère for a nice melt. Mozzarella cheese is a great choice, too.
- Use different meat. I also enjoy these with roast beef, turkey, or any type of cured deli meat.
- Use puff pastry. This version will have a totally different texture than pizza dough, but flaky puff pastry is a great swap. Be sure to give the rolls plenty of space to expand, and make sure the oven is nice and hot before you add them in. Crescent roll dough works well, too!
- Play with toppings. Want to get fancy? Try sprinkling different toppings over these easy ham and cheese roll ups, either before or after baking. Before baking, try poppy seeds or white sesame seeds. After baking, drizzle a little hot honey or sprinkle chopped green onions. You can also brush them with melted butter for a soft texture and delicious buttery flavor!
How to Serve
These Ham and Cheese Pinwheels are delicious served on their own, or paired with a warm and cozy soup such as:
For more recipes, see our 60 Best Soup Recipes.

Recipe Tips and Tricks
- Let them rise. After shaping the rolls, let them rise in a warm place for 15-20 minutes before baking for an even softer texture.
- Use a very sharp knife. It can be tricky to cut through the dough without smashing it to pieces. Use a sharp serrated knife or a granton edge knife to saw neatly through the slices of ham.
- Prep the day before. If you want to serve this ham and cheese pinwheels recipe at your next party, prep them the day before, then wrap the whole tray with plastic wrap, and pop them in the fridge. Before your guests arrive, preheat the oven, remove the plastic, and bake like normal.
Storing and Freezing Instructions
How to Store
Store any leftover pinwheels in an airtight container in the fridge for 3-4 days.
How to Reheat
Either microwave each roll individually for 1-2 minutes or pop them in the oven at 350 F for 5-7 minutes.
How to Freeze
Leftover roll ups can be wrapped in plastic wrap and stored in the freezer for several months. Thaw in the fridge then bake like normal.
FAQ
This recipe takes just 20 minutes in a 400 F oven. You will also need about 5-10 minutes to let the rolls cool before serving.
Although there are many types of dough out there, I prefer to use pizza dough. It's soft, tender, and chewy, with a mild flavor that lets the ham and cheese stand out. You can substitute rolls of crescent dough or even use puff pastry for a flaky, buttery texture, but a bag of storebought pizza dough works surprisingly well.
There are lots of sauces that go well with sliced ham, but I like to keep things simple with a mixture of mayo and dijon. Combined together, you get a slightly sharp, creamy, tangy sauce that pairs perfectly with ham and the sharp cheddar cheese. Feel free to use honey dijon or flavored mustard to give the recipe a fun twist with a similar flavor profile.
More Sandwich Appetizer Recipes
- Pepperoni Pizza Rolls
- Grilled Cheese Roll Ups
- Cheeseburger Sliders
- Tuna Melt Grilled Cheese Sandwich
- Gourmet Hot Dogs
Tried this recipe?
I'd love to hear what you think! Leave a comment and rating below to share your feedback. Your reviews help others discover this recipe and help me keep creating more free recipes for you. Snap a photo and tag me on social media @aheadofthyme too.

Apple Tart
This Apple Tart is one of the most perfect cozy fall desserts: tart apples are nestled in a flaky crust, then topped with cinnamon-ginger-sugar and melted butter, infusing a sweet and spicy flavor into each bite. Glaze the warm tart with fruit preserves and serve. It's like an apple pie - but way better!
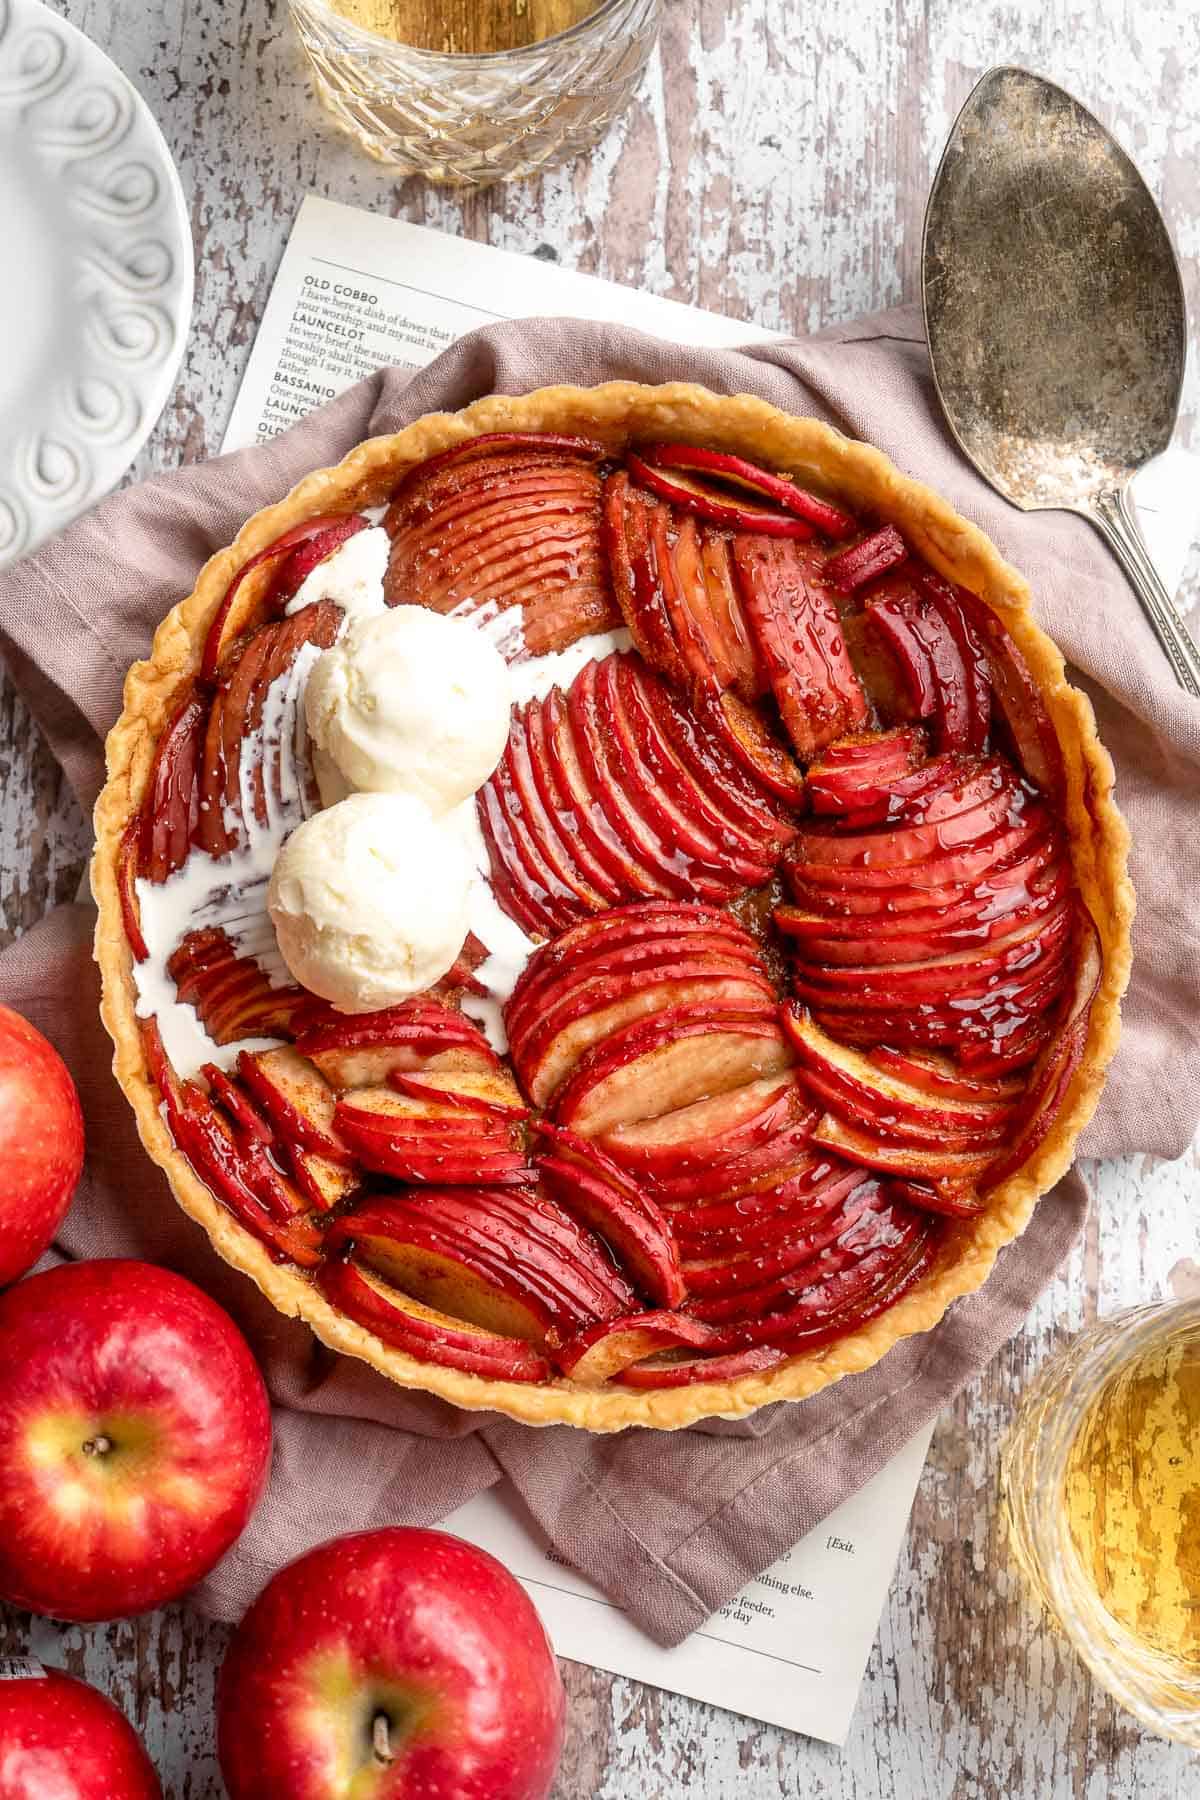
This apple tart may look like art that came from a fancy pastry shop, but it's actually easier to make than you'd think - even amateur home cooks can do it with our easy to follow step-by-step recipe, I promise! Serve it warm with a dollop of homemade whipped cream or a generous scoop of vanilla ice cream for Thanksgiving, Christmas, or your next fall party!
Why You'll Love This Apple Tart
- A fun twist on apple pie. This easy French apple tart has all the components and flavors of classic apple pie, but in a different format. It's open-faced and shorter than pie, and I like to cut the apples really thin to give them a nice bite. The main difference is the appearance - the glazed fruit and beautiful design make it a show-stopper!
- Warm, cozy flavor. Made with melted butter, warm vanilla extract, cinnamon, ginger, and fresh apples, this easy apple tart recipe is the ultimate way to enjoy the warm, comforting flavors of fall. It's one of the best apple desserts ever!
- Easy to make. Just because this fruit tart looks fancy, don't be fooled! It's actually a lot easier to make than it looks. First, you can use storebought pie crust to save on time. Second, if you have a mandolin or a sharp knife, you can easily slice the apples very thinly and then fan them out in the pan.
- Beautiful presentation. Although apple pie is beautiful in its own way, I love being able to see the apple slices. It's almost too pretty to eat but tasty enough that you'll want seconds (and thirds)!
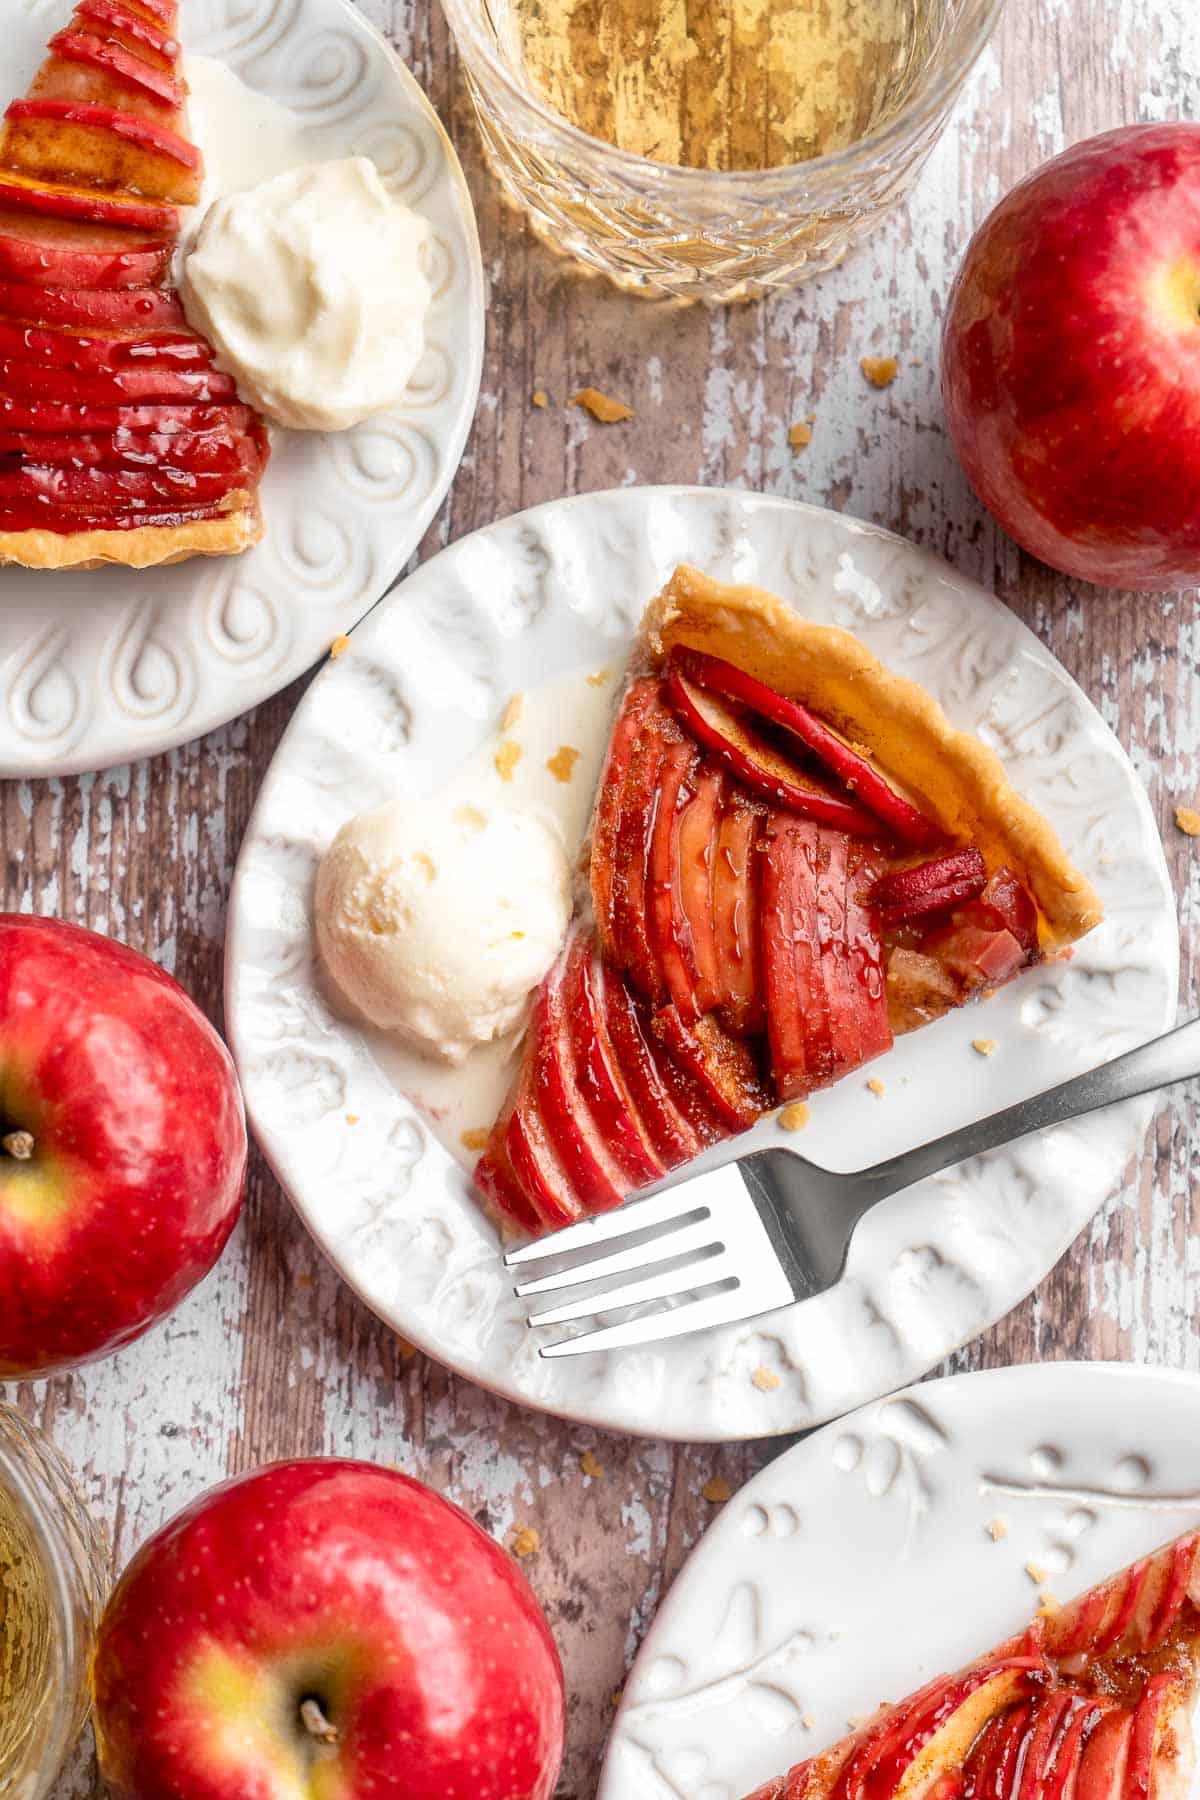
Ingredient Notes
To make this delicious Apple Tart, you will need the following ingredients (full measurements in recipe card below):
- pie crust - use storebought or homemade pie crust.
- apples - I recommend semi-tart apples like pink lady or granny smith apples, but you can use any kind of apples you prefer.
- white sugar
- cozy spices - season this treat with warm fall spices including cinnamon and ground ginger.
- salted butter - to pour over the apple slices in the tart shell.
- lemon juice - this keeps the apples from browning and adds a nice, bright flavor.
- vanilla extract
- all purpose flour - this will absorb any apple juices at the bottom of the tart shell to keep the crust from getting soft.
- fruit preserves - to glaze the tart, brush with apricot, plum, or cherry preserves after baking.
You will also need measuring cups and spoons, a rolling pin, 9 inch tart pan, a sharp knife, a mandolin slicer (optional), pie weights, parchment paper, small bowls, a whisk, a small sieve, a half-sheet pan, and a pastry brush.
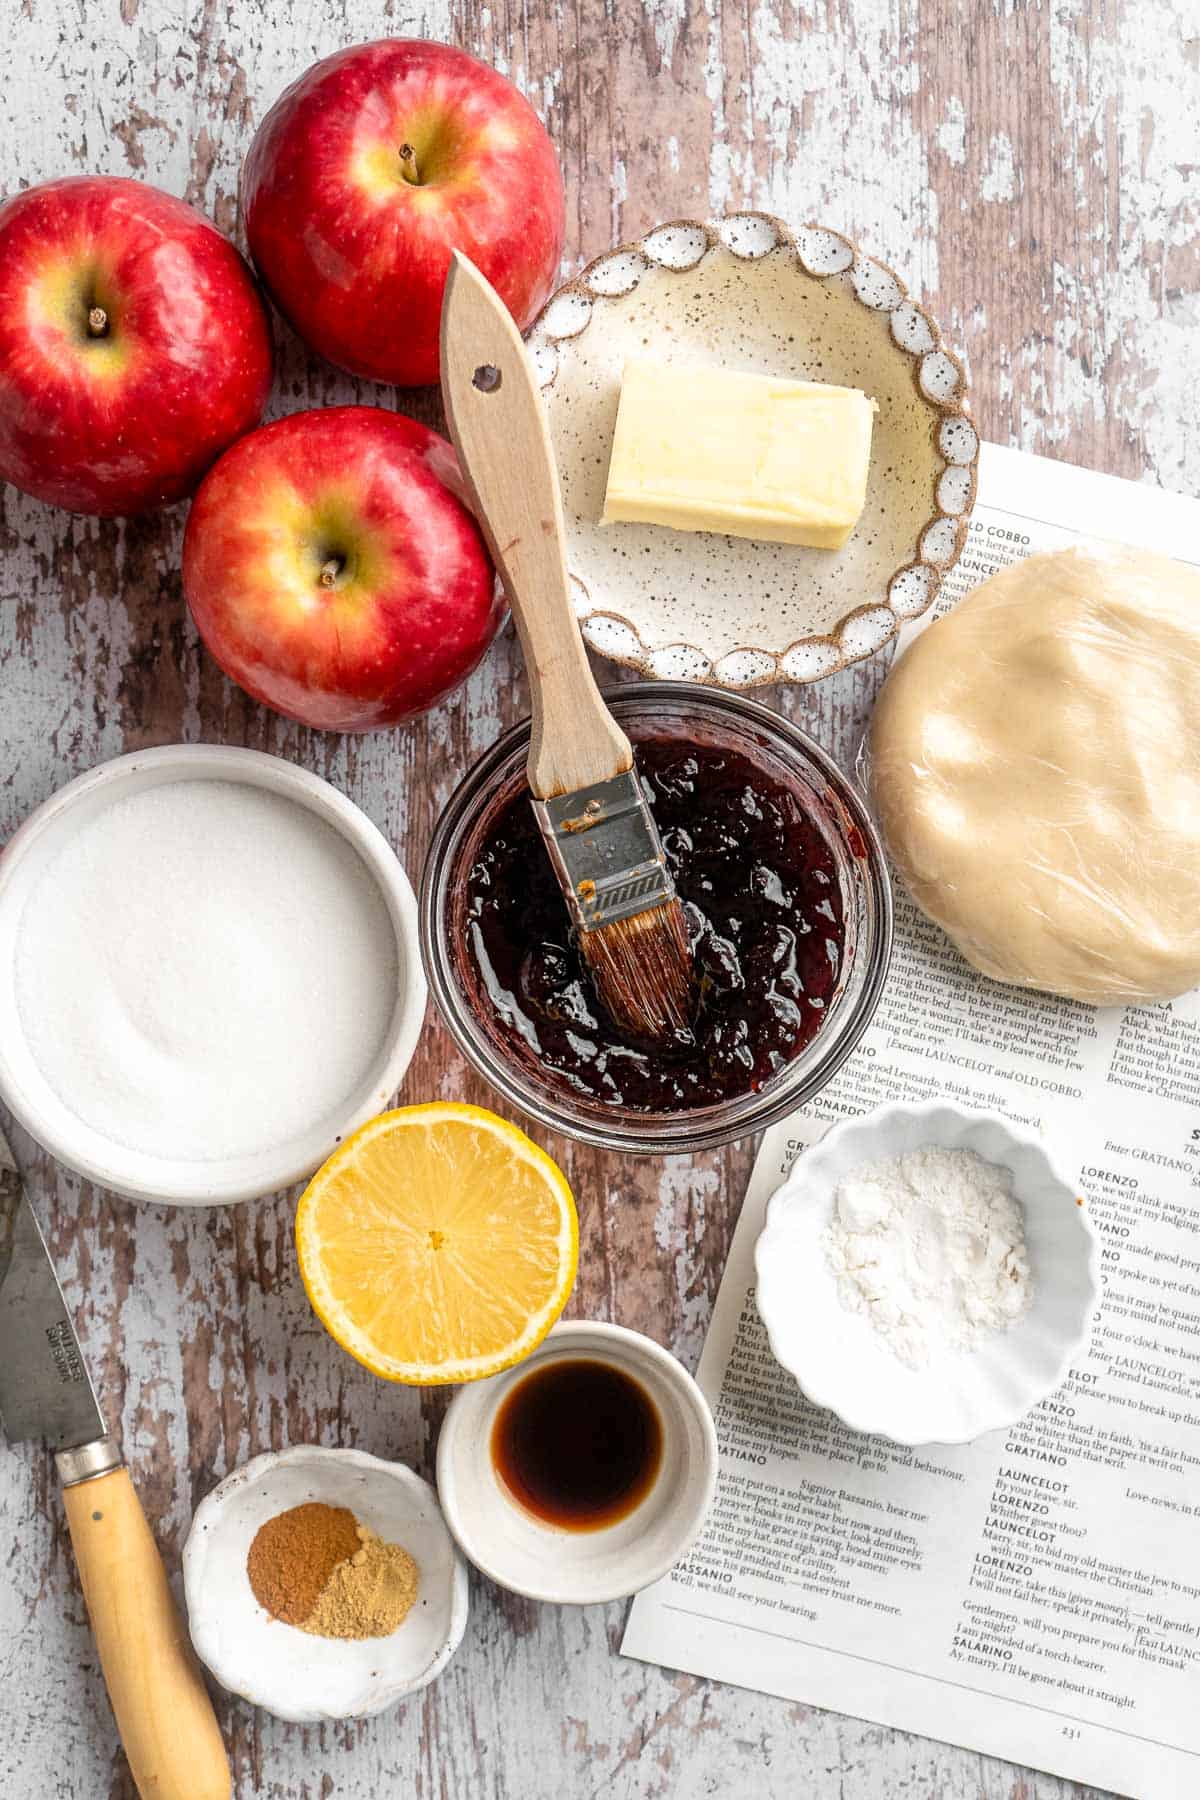
How to Make the Best Apple Tart
- Shape the crust. Prepare your pie crust by rolling it out into a 12-inch circle, then transfer into a 9-inch tart pan. Press dough into the bottom, and along the sides, then use a knife to remove the excess dough overhang.
- Pre-bake the crust. Place a piece of parchment on top of the crust, then fill with pie weights or dried beans. Place onto a baking sheet, and then into a 400F preheated oven to bake for 15 minutes. After 15 minutes, remove the crust from the oven, and remove the pie weights and parchment. Allow to cool while you prepare the apples and filling.
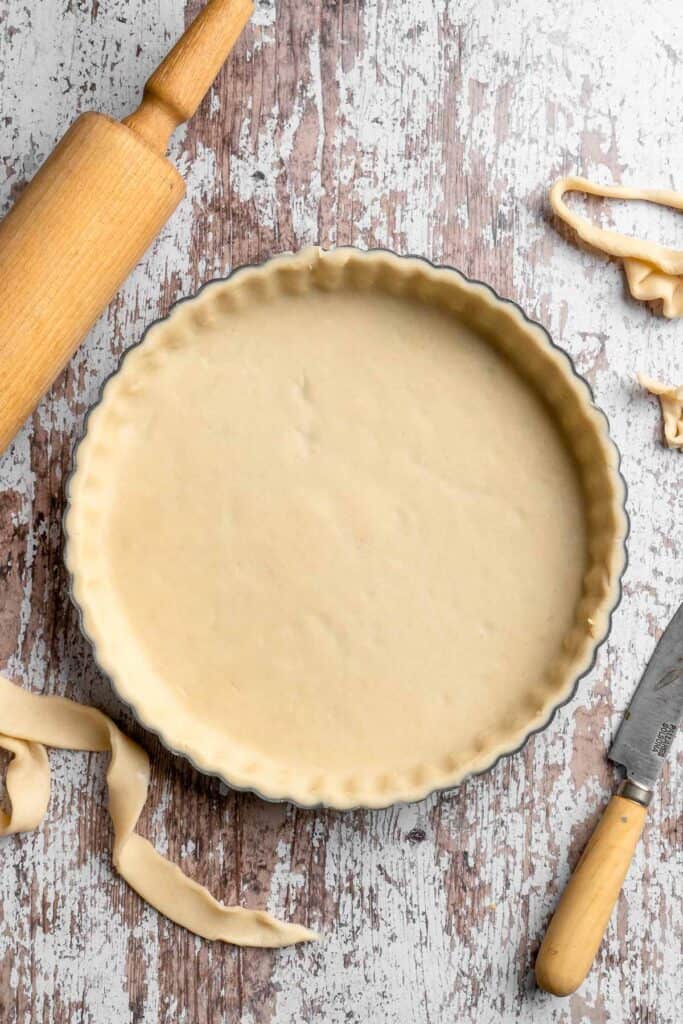
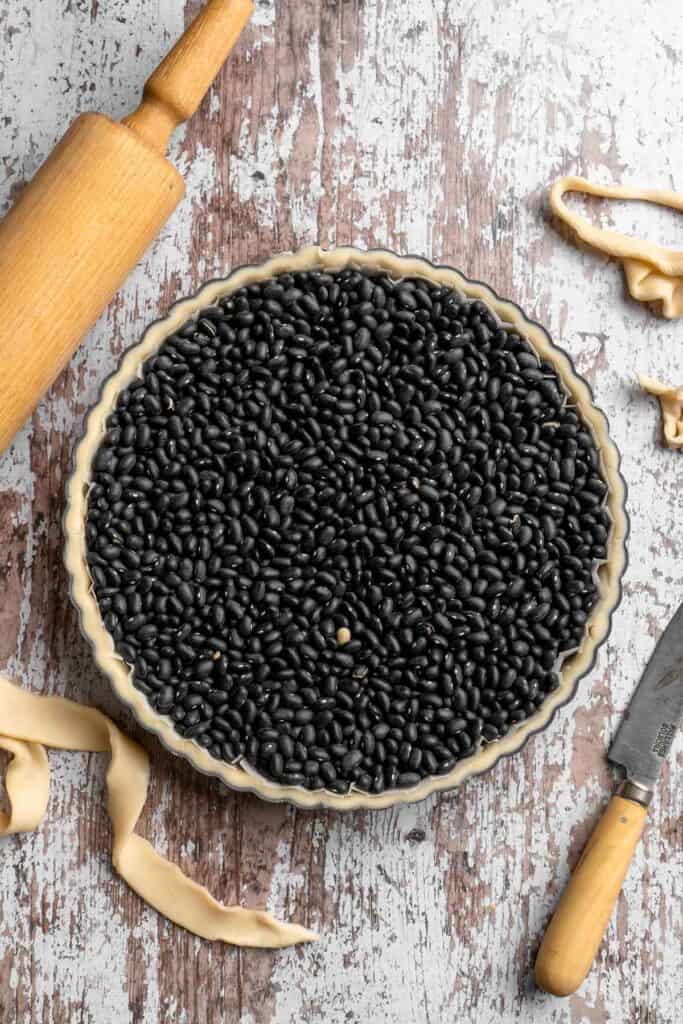
- Prep apples. Prepare your apples by slicing them thinly and keeping them in groups. Set aside.
- Make cinnamon sugar. In a small mixing bowl, whisk together the sugar, cinnamon, and ginger. Set aside.
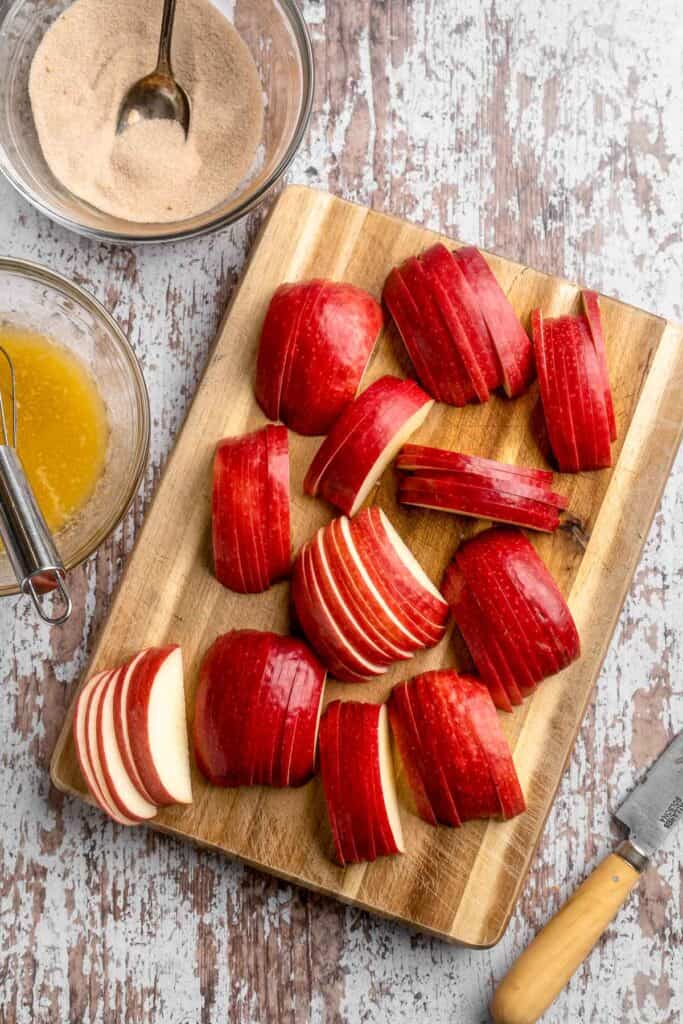
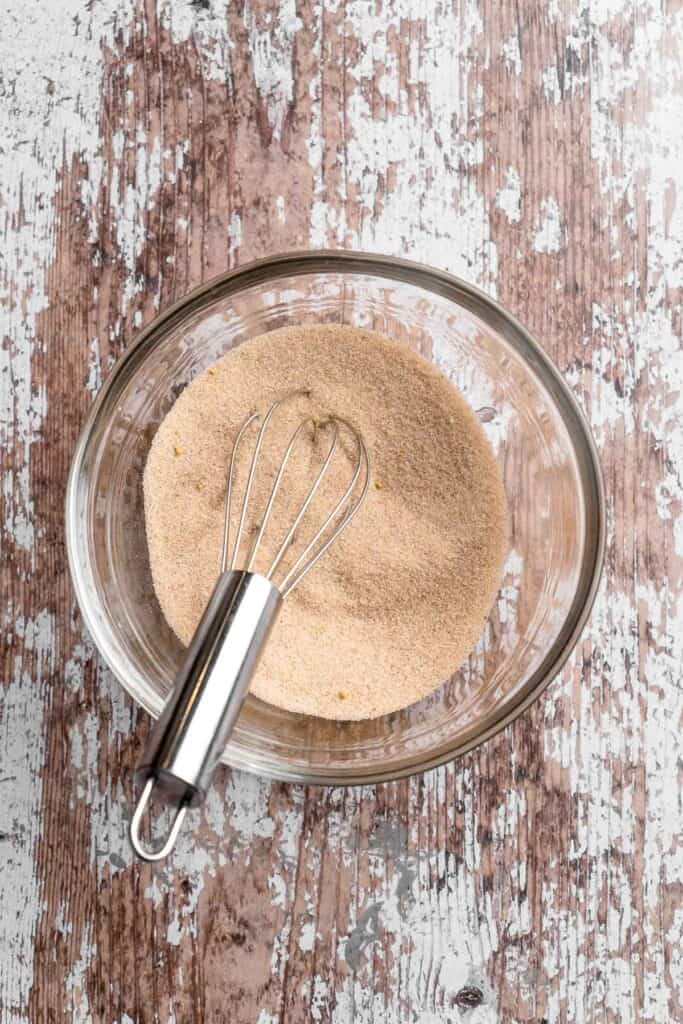
- Assemble. Using a small sieve, dust the bottom of the slightly cooled pie crust evenly with the flour, then sprinkle half of the cinnamon-ginger-sugar over top of the flour.
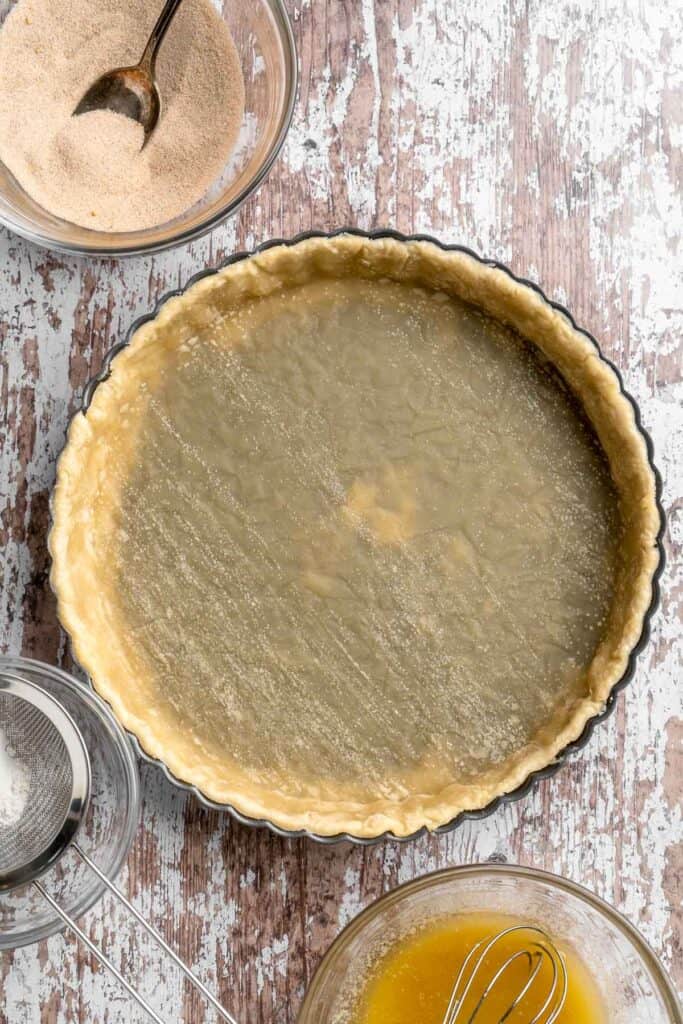

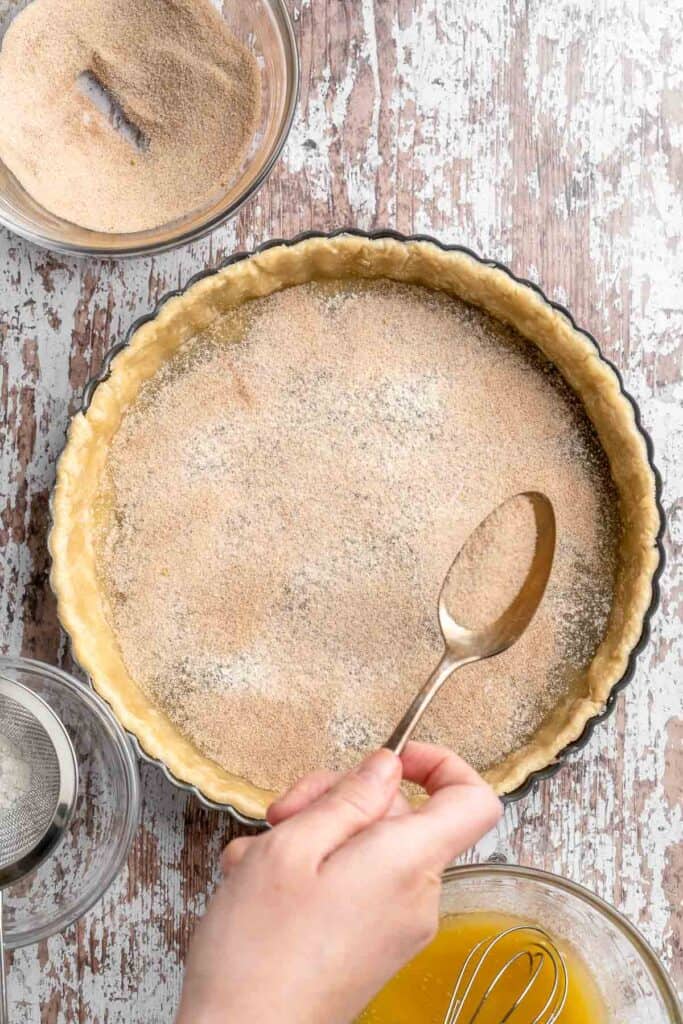
- Add apples. Add apples on top by placing the groupings of apples in varying directions, pushing each group gently to create a slightly fanned out appearance.

- Add topping. In another small mixing bowl, whisk together melted butter, lemon juice, and vanilla. Pour the melted butter mixture evenly over the apples, then sprinkle the remaining cinnamon-ginger-sugar over top, as well.
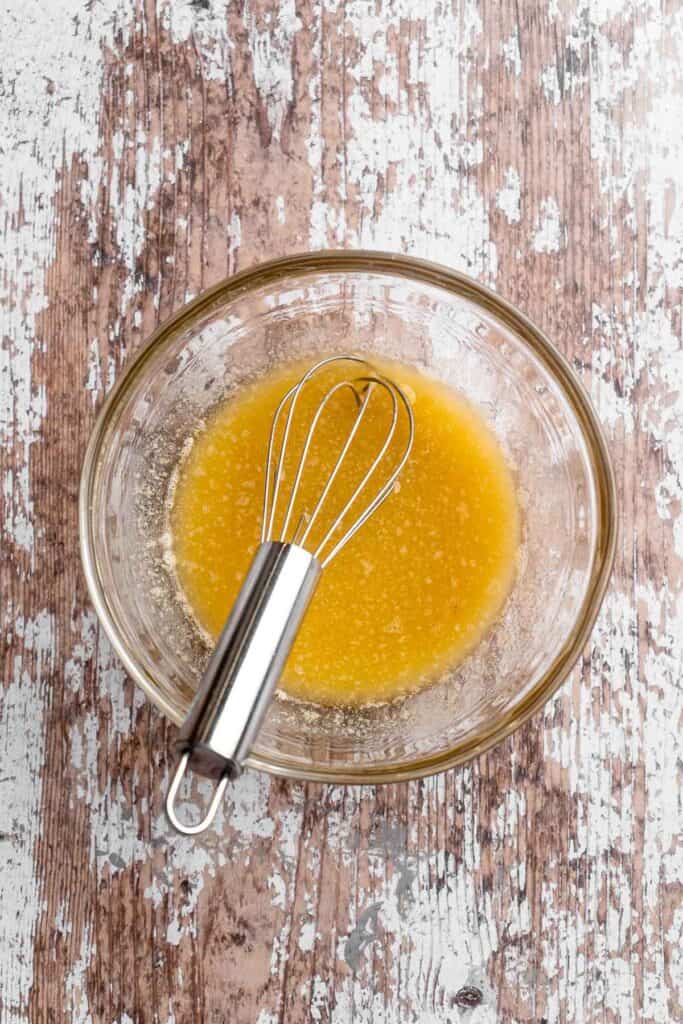


- Bake. Place the tart back on top of the baking sheet, then place into the oven to bake for 40-45 minutes.
- Add preserves. Remove the cooked tart from the oven, then brush with warmed preserves. Allow the tart to cool for at least 30 minutes to set up before enjoying!
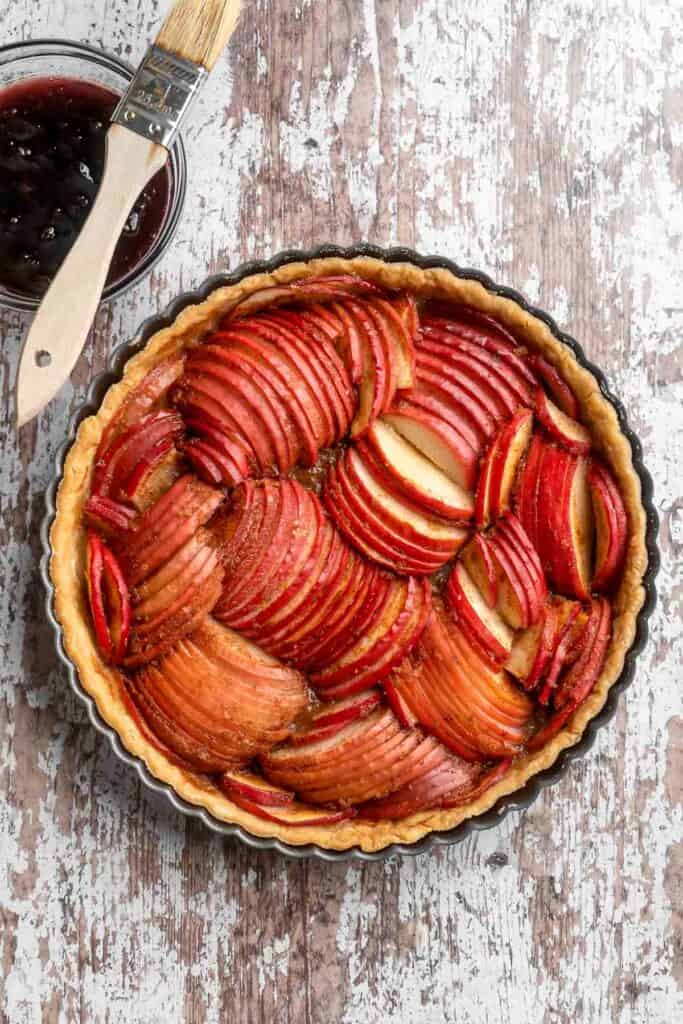
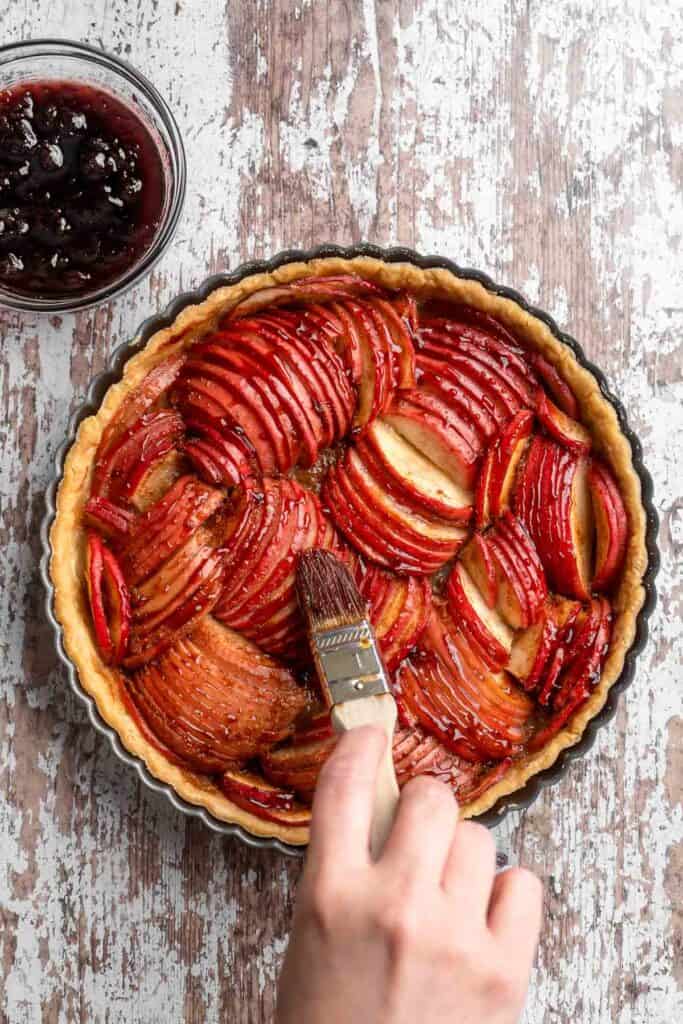
Recipe Variations
- Try different varieties of apples. Each one has a different flavor. I also like to mix red and green apples for a two-toned effect. Instead of this design, arrange the apple slices in any pattern you like.
- Add a splash of bourbon. This can be used instead of the vanilla extract and will add a rich, cozy flavor.
- Grate some zest. For an extra aromatic note, grate some orange or lemon zest into the melted butter mixture.
How to Serve
This Apple Tart is delicious served on its own with a scoop (or two!) of vanilla ice cream. You can also serve it as part of a larger fall dessert spread along with some of our other favorites including:
For more recipes, see our 50 Best Fall Desserts.
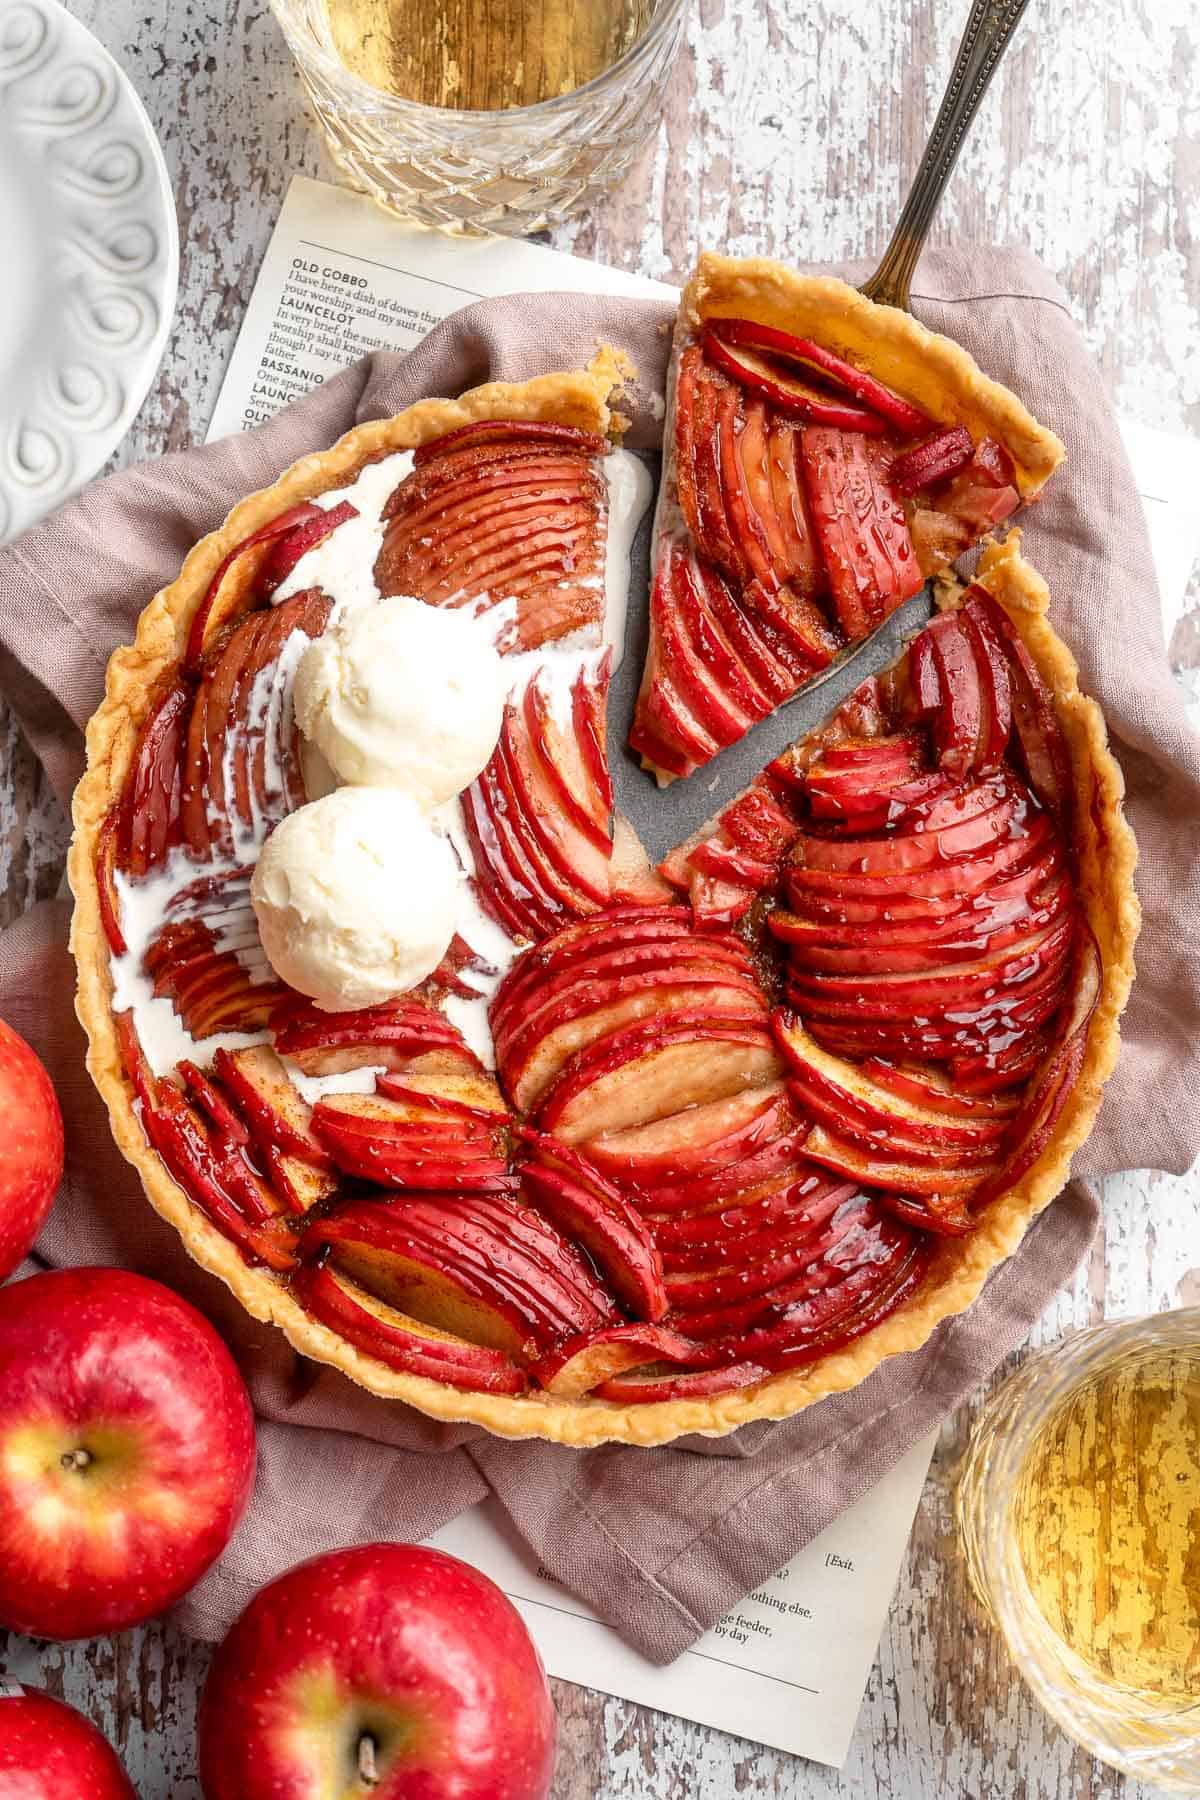
Recipe Tips and Tricks
- Don't skip the cool down. If you try to serve this tart too soon, it will fall apart and ooze on the plate. It needs at least 30 minutes to hold together. A little extra time makes a big difference.
- Sprinkle flour on the bottom crust. This is an easy tip that can make a big difference! The extra flour will soak up any moisture from the apples to keep the tart shell nice and crisp.
- Blind bake your crust. This recipe doesn't bake long enough to cook the pie crust completely unless you prebake it. If you skip this step, your crust will likely be soggy.
- Use the right pan. Planning to serve the tart out of the pan? Make sure you use a tart pan with a removable bottom.
Storing and Freezing Instructions
How to Store
Allow the leftover tart to cool to room temperature, then cover with plastic wrap and store for up to 2 days. For longer storage, keep the tart in the fridge and reheat before serving.
How to Reheat
Microwave a slice for 30 seconds to a minute to warm up the apples. To reheat larger portions, bake them on a sheet pan at 400 F for 5-7 minutes.
How to Freeze
Leftover slices can be wrapped in plastic wrap and frozen for 2-3 months.
FAQ
Keep things simple, and use your favorite homemade pastry dough. I like to make flaky puff pastry pie dough that has lots of little layers to crunch through. You can also grab a roll of frozen pie dough at the store to skip that whole process.
There are many apples to choose from. The best apples for baking are slightly sweet and tart, like Pink Lady, Honey Crisp, Zestar, and Braeburn. You can also mix tart apples, like Granny Smith, with sweeter varieties, like Gala or Golden Delicious apples.
Most fruit tarts are made by glazing the top of the tart with fruit preserves, which adds a shiny, glossy look and extra sweetness. Apricot preserves are traditional for glazing fruit, but I also enjoy plum or cherry.
More Apple Dessert Recipes
- 20 Best Apple Desserts
- Braided Lattice Apple Pie
- Apple Turnovers
- Baked Apples
- Apple Cake
- Apple Crisp
Tried this recipe?
I'd love to hear what you think! Leave a comment and rating below to share your feedback. Your reviews help others discover this recipe and help me keep creating more free recipes for you. Snap a photo and tag me on social media @aheadofthyme too.

Pasta e Fagioli Soup
Pasta e Fagioli Soup translates literally to pasta and beans, but it's way more flavorful than it sounds! This classic Italian soup features aromatic veggies, creamy white beans, and tender ditalini pasta, all simmered until plump and tender in a savory tomato broth. It's quick and simple to make with everyday pantry staples yet hearty enough to stick to your ribs!

For many non-Italians in the United States, our first introduction to this hearty Italian soup is at Olive Garden, where it's been a fan favorite for years. But just like anything, homemade is best! This flavorful bean soup is similar to minestrone soup, except it is a little thinner and has fewer veggies. It's light enough to be served as a side dish, but I love it for an easy vegetarian meal on those cold days. Pair it with some crusty bread and some freshly grated Parmesan cheese for a simple, timeless meal.
Why You'll Love This Pasta e Fagioli Soup
- Made with inexpensive ingredients. Shop your pantry for this one! You'll need some common storage vegetables, everyday seasonings, and canned tomatoes and beans. It's very budget-friendly yet the veggies and pasta will fill you up for hours.
- Quick and easy. Soups are all about layering flavor, which often means they take a long time, but not this one. Just soften the veggies, then simmer the tomatoes and add the pasta. From start to finish, it's done in just 40 minutes!
- Vegetarian version. Pasta fagioli can be made in many different ways following regional variations, including some that add ground beef, beef broth, sausage, and more. Although these versions are delicious, this pasta fagioli recipe is made without any animal products so the entire family can enjoy it. Great for vegetarians and vegans!

Ingredient Notes
To make this delicious Pasta e Fagioli Soup, you will need the following ingredients (full measurements in recipe card below):
- extra virgin olive oil
- fresh vegetables - you'll need classic soup veggies to give the sauce lots of flavor: onion, garlic, carrots, and fresh celery.
- seasonings - you don't need much. The dried herbs in Italian seasoning add so much flavor, and salt and ground black pepper will take care of the rest.
- diced tomatoes - canned diced tomatoes will add little pieces of tomato for extra texture.
- tomato paste - this will add a concentrated tomato flavor and an umami flavor that brings the whole dish together.
- vegetable broth - for a vegetarian-friendly soup.
- white kidney beans (cannellini beans) - these soft, creamy beans are perfect for this classic Italian dish. Great Northern beans are a good alternative if you can't find cannellini.
- ditalini pasta - these tiny little noodles plump up in the soup and add a pop of texture. Feel free to use other pastina (tiny pasta), like orzo, alphabet pasta, or tiny stars.
- fresh parsley - chopped for garnish.
You will also need measuring cups and spoons, a large pot, and a wooden spoon.

How to Make the Best Pasta e Fagioli Soup
- Sauté aromatics. Heat oil in a large stockpot or Dutch oven over medium-high heat. Add onion, carrots, celery, and garlic. Sauté until fragrant, about 3-4 minutes.


- Add seasoning. Stir in Italian seasoning, salt and pepper.


- Add soup base. Add diced tomato, tomato paste, vegetable broth and white beans.


- Boil. Bring the soup to a gentle boil over medium heat and stir occasionally, about 10-15 minutes.
- Add pasta. Add pasta and continue cooking for another 10 minutes until pasta is cooked to al dente. Stir occasionally to ensure pasta doesn't stick to the bottom of the pot.


- Add parsley. Stir in fresh parsley and serve warm.

Recipe Variations
- Add meat. For extra protein, brown some lean ground beef, ground turkey, or hot Italian sausage in the pot before sauteeing the veggies.
- Simmer a Parmesan cheese rind. The rind of Parmesan cheese may be too hard to eat on its own, but it's packed with concentrated umami flavor and a subtle sweetness. Simmering it in the broth will impart incredible depth of flavor!
- Spice it up. To warm up on those cool nights, add a teaspoon (or two!) of red pepper flakes. The heat will build as it sits, so start with less.
- Use a slow cooker or pressure cooker. If your slow cooker has a saute function, you can make the whole dish there! Otherwise, you can add all the ingredients (except the beans and pasta) to a slow cooker and let it cook on high for about 3-4 hours. Add the pasta and beans for about 30 minutes at the end and cook until the noodles are tender. You can also make this soup in an instant pot.
How to Serve
This Pasta e Fagioli Soup is delicious served on its own, or paired with some of my favorite soup sides including:
- Simple Italian Salad
- Garlic Breadsticks
- Cranberry Brie Grilled Cheese
- Air Fryer Pizza Rolls
- Tomato Burrata Salad
For more recipes, see our 25 Side Dishes for Soup.

Recipe Tips and Tricks
- Don't rush the veggies. This is a very quick recipe to make, but each step builds flavor. Let the veggies release their aroma before adding the broth.
- Boost flavor when possible. For a smoky note, use fire-roasted tomatoes instead of diced tomatoes. You can also add 1-2 bay leaves to the broth, use homemade broth, simmer a parmesan rind, etc.
- Don't overcook the noodles. The pasta will continue cooking in the hot soup even after you turn off the heat. Let the noodles cook until al dente, then remove from the heat right away.
Storing and Freezing Instructions
How to Store
Store any leftovers in an airtight container in the fridge for 3-4 days.
How to Reheat
Pour the leftovers into a small saucepan, and heat until hot and bubbling.
How to Freeze
Start by chilling the soup in freezer-safe containers in the fridge. Fill them about 2 inches less than full to allow the soup to expand. Once fully chilled, transfer them to the freezer and store for up to 3 months. Thaw in the fridge before reheating like normal.
FAQ
Absolutely! Just remember that once cooked pasta is frozen, thawed, and reheated, it can become soggy. If you know you want to freeze the soup, skip the pasta and add it when reheating, or just be aware that the noodles will soften a bit.
This classic Italian soup is made with the essentials: onion, garlic, celery, and carrot, sauteed until tender, then cooked with Italian seasoning, diced tomatoes and tomato paste, dried pasta, and cannellini beans. The mixture is simmered together until the pasta is al dente, then serve with fresh parsley. It's very simple and ideal for cool fall and winter nights.
It depends on the recipe you follow. Most of the time, pasta fagioli soup is made without meat and is a great vegetarian/vegan soup. However, some recipes do use ground beef, sausage, bacon, or pancetta for flavor, so you'll definitely want to check the recipe!
More Soup Recipes with Pasta
- 60 Best Soup Recipes
- Minestrone Soup
- Alphabet Soup
- Lemon Chicken Orzo Soup
- Creamy Tortellini Soup with Sausage
- Lasagna Soup
Tried this recipe?
I'd love to hear what you think! Leave a comment and rating below to share your feedback. Your reviews help others discover this recipe and help me keep creating more free recipes for you. Snap a photo and tag me on social media @aheadofthyme too.

Rice Pilaf with Carrots
This quick and easy one pot Rice Pilaf with Carrots is what your weeknight dinners have been missing. Simple long grain rice is elevated with so much flavour thanks to sautéed carrots, onion, garlic, and herbs, all cooked in flavourful stock. This fresh and fluffy vegetable rice takes just 10 minutes to prep and you can even cook it faster in your rice cooker or instant pot.
What is a Rice Pilaf?
A pilaf is a rice dish that is cooked in a stock with added vegetables, spices, herbs, and sometimes meat. It is found in many cuisines around the world but originated in ancient Persia, as referenced in one of the stories of Alexander the Great. This dish has been a favourite of mine growing up!
Why You'll Love this Rice Pilaf Recipe
- Classic comfort food. A scoop of warm rice pilaf right from the pan has all those cozy, aromatic notes that make you feel like you're back at grandma's house. It's true comfort food!
- Simple side dish. The homemade vegetable rice pilaf is so easy to make! After sauteing the veggies, add the rice, veggie stock, and potatoes, then cover to simmer. Once it's done, fluff and serve. Easy!
- Easy to adapt. There are countless variations of rice pilaf out there, and this carrot rice pilaf is a very versatile side dish. It's great with your favorite flavors from the Middle East, but it's also wonderful with roasted chicken, beef, and more! Plus, you can adapt the seasonings and veggies to make it your own.
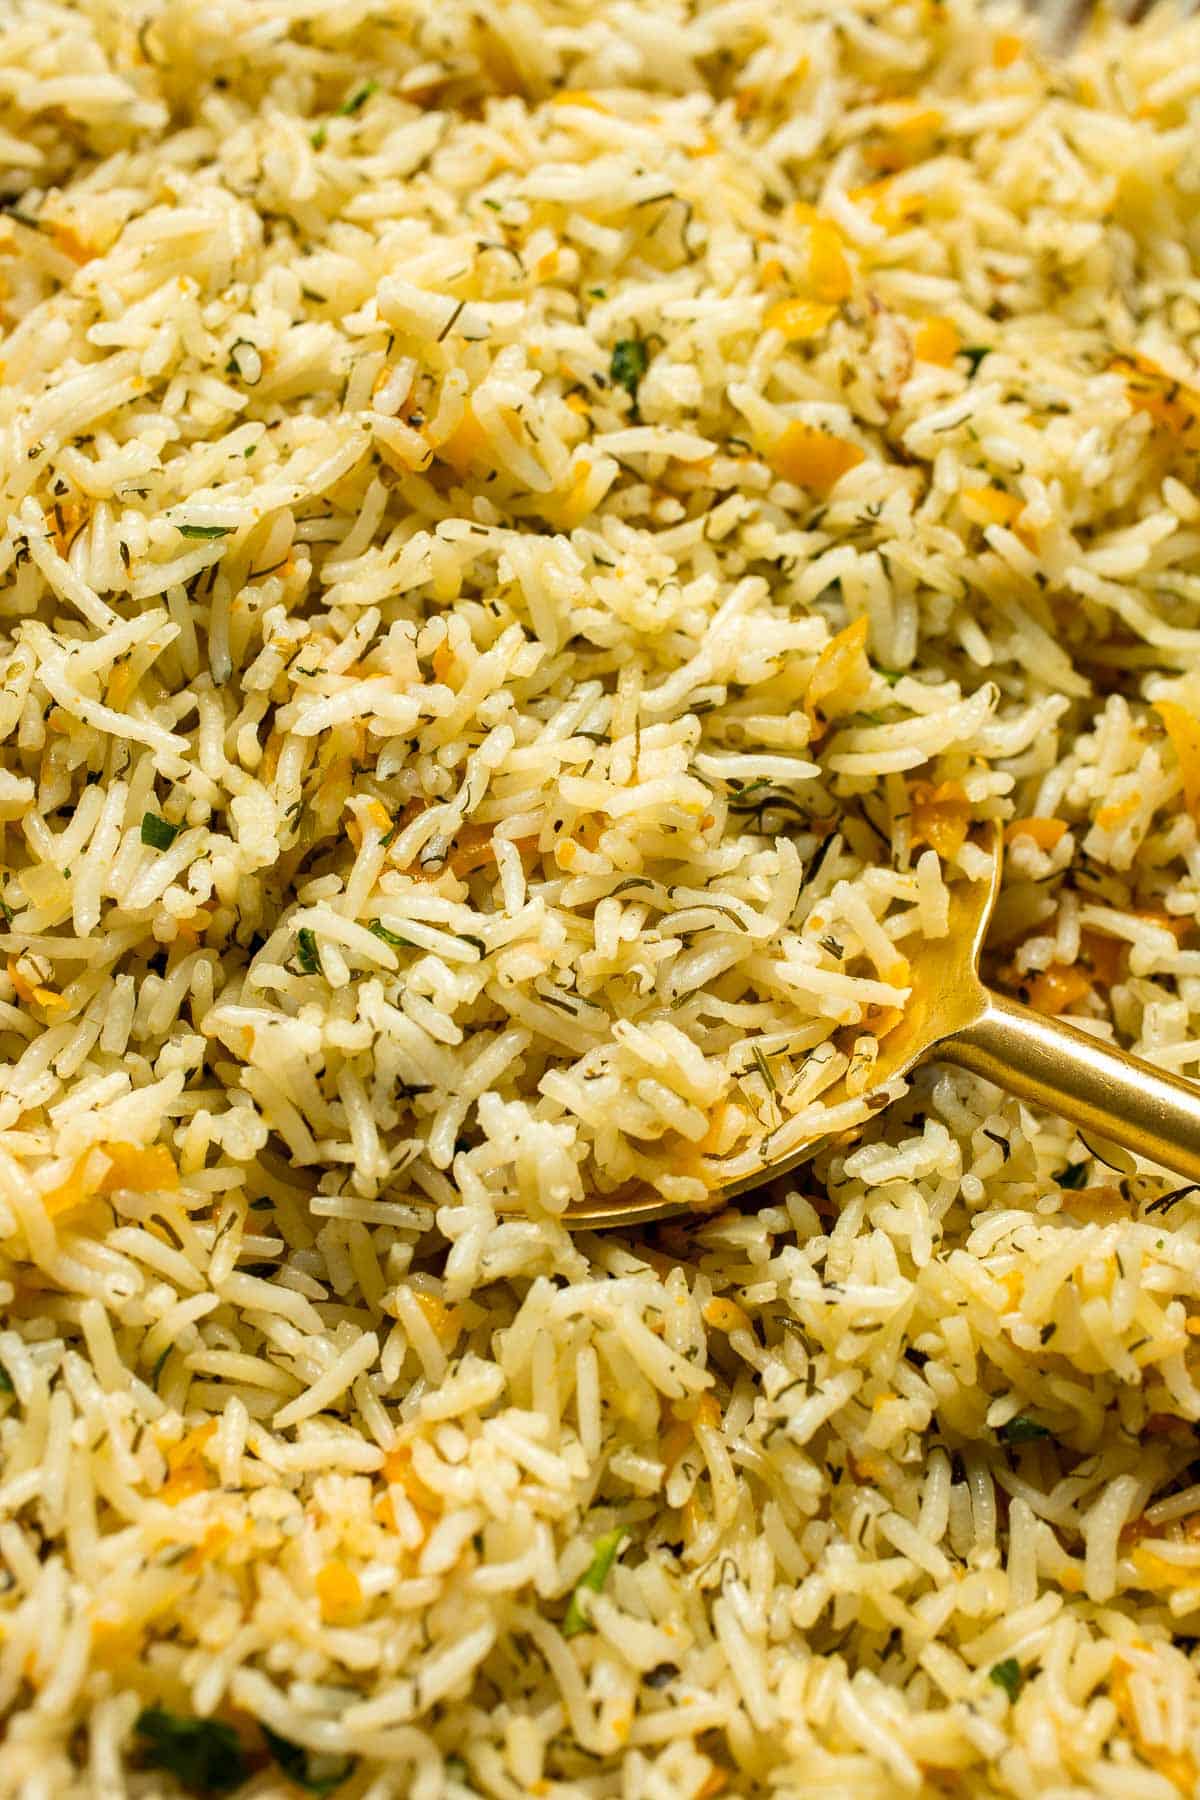
Ingredient Notes
To make this one pot Rice Pilaf with Carrots, you will need the following ingredients (full measurements in recipe card below):
- rice - you can use any kind of rice that you want, but we recommend using a long grain Basmati rice for the most authentic results.
- olive oil
- veggies - you will need just onion, carrot, and garlic.
- herbs - this rice has fresh dill which adds tons of flavor. You can also add a sprinkle of fresh parsley on top for garnish and extra flavor.
- vegetable stock - you can also use chicken stock.
- Italian seasoning - this is optional, but it adds extra flavour.
- salt
- potatoes - adding potatoes on top absorbs all the delicious flavour of the rice and stock. This is completely optional but highly recommended.
You will also need measuring cups and spoons, a 4 quart Dutch oven or large cooking pot.
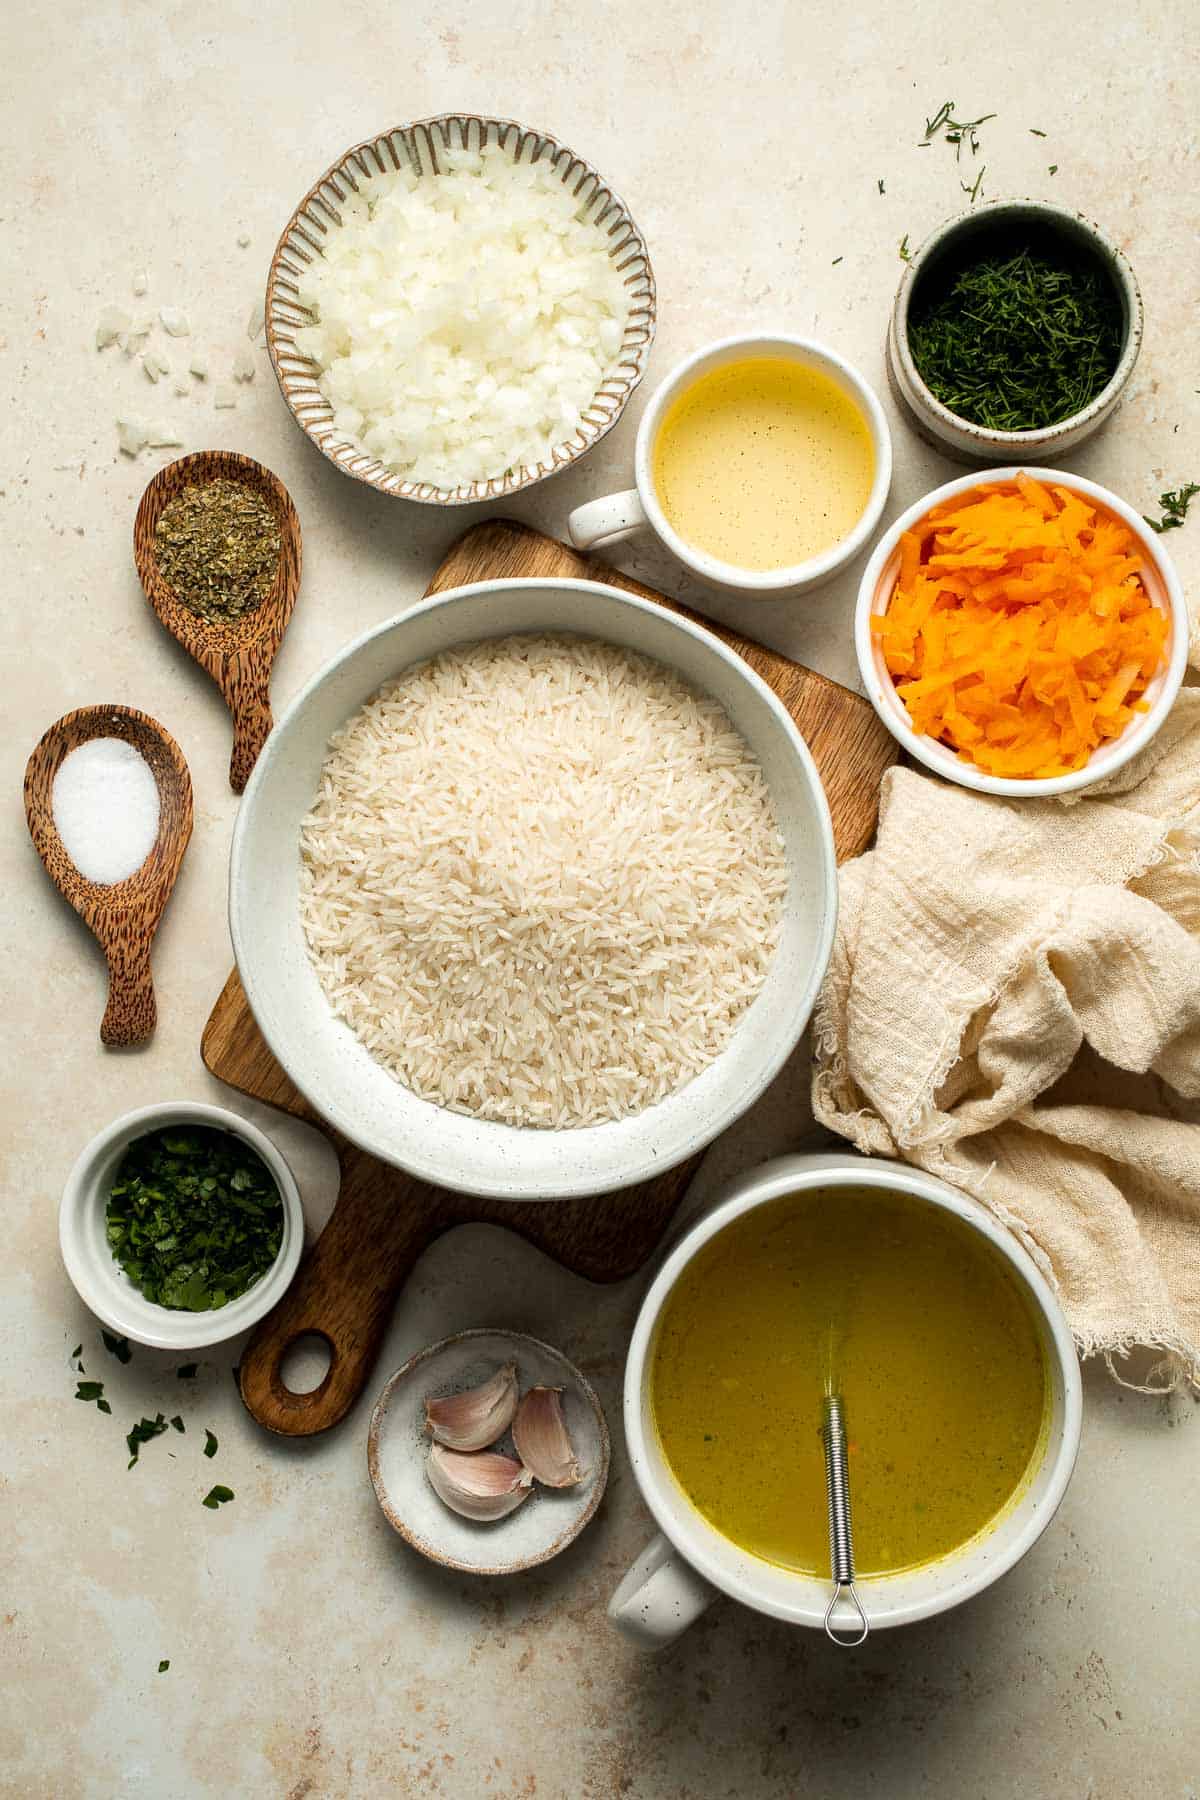
How to Make the Best Rice Pilaf with Carrots (Three Ways)
You can make this easy rice pilaf in a pot on the stove, in a rice cooker, or in the instant pot!
- Prepare rice. Place the rice in a large bowl and rinse 3 to 4 times with cold running water to wash off extra starch from the rice. You can also pre-soak rice in water for 30 minutes.
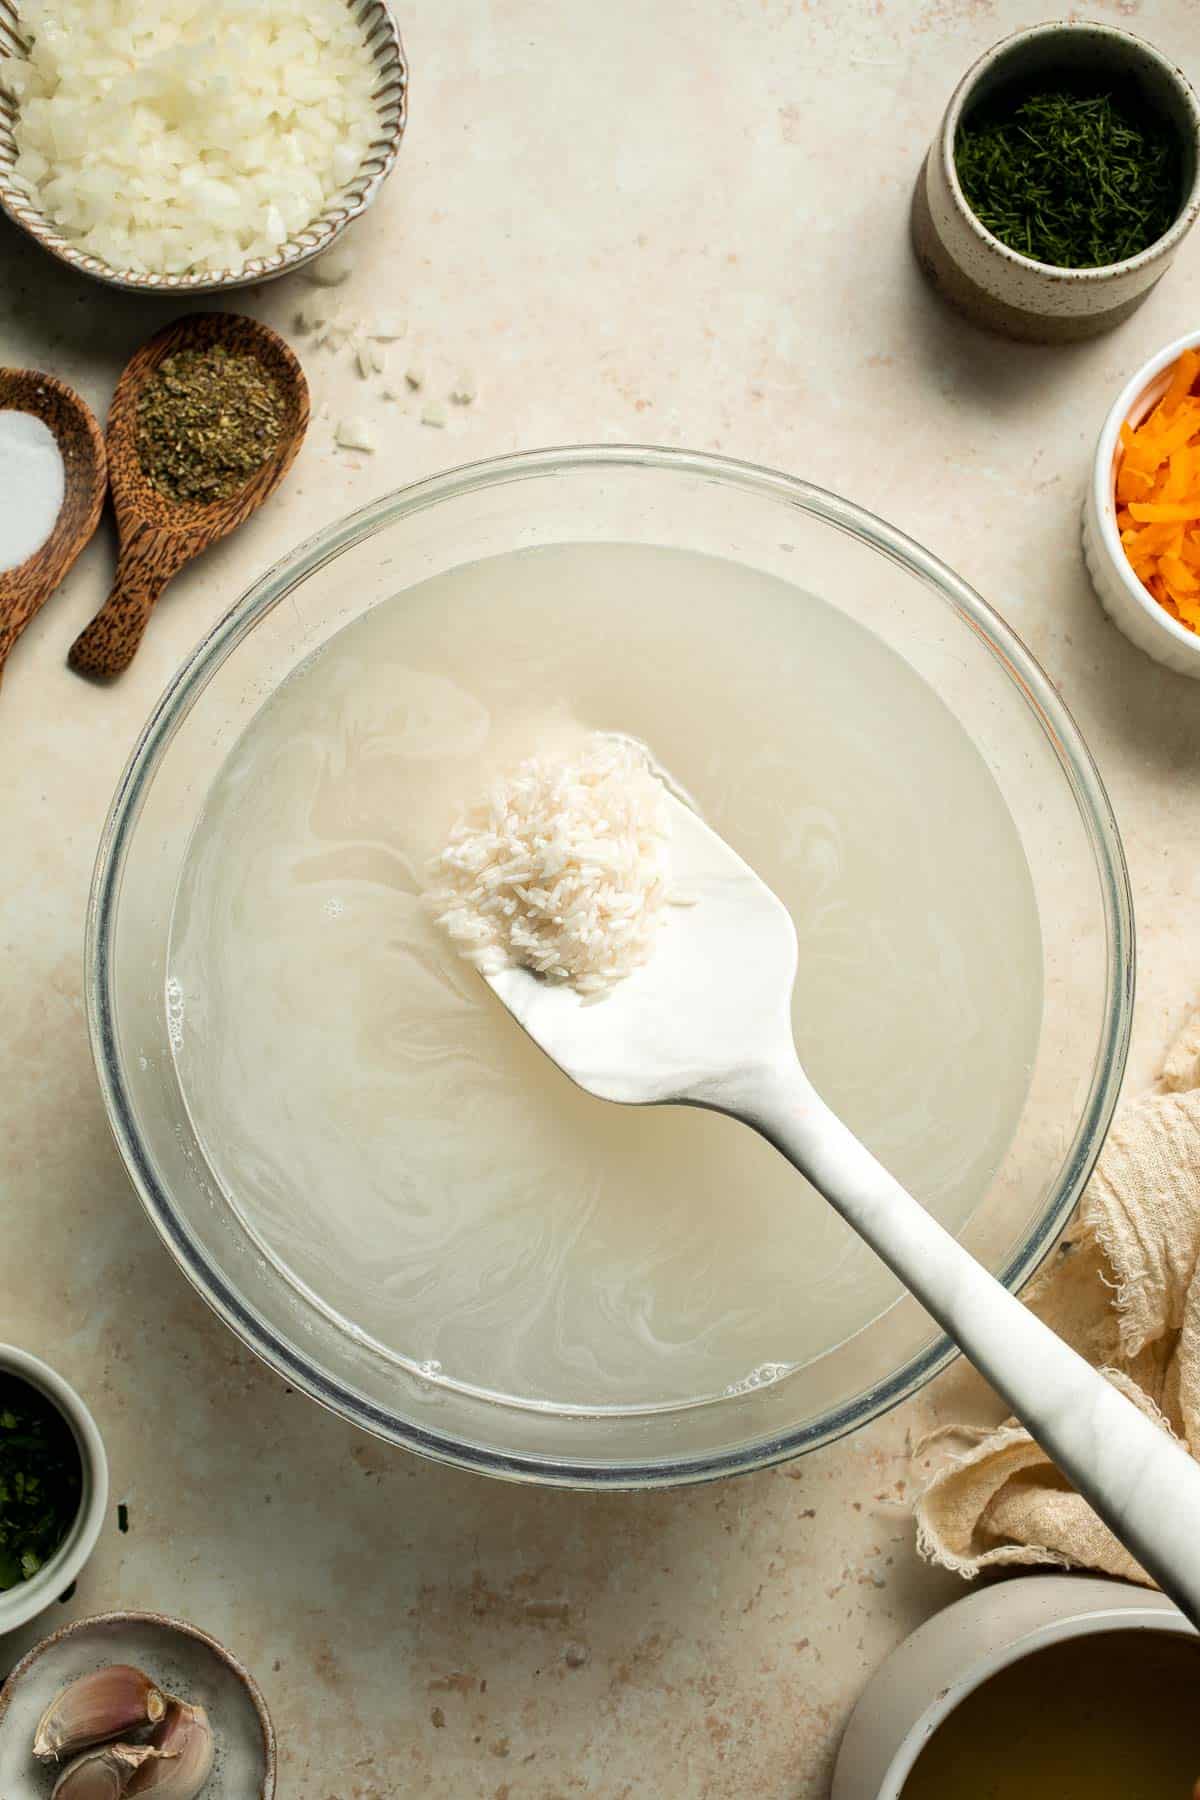
- Saute aromatics. Heat olive oil in a Dutch oven or cooking pot over medium high heat for 1 minute. Add onion, carrot, garlic and dill. Sauté for 3 minutes until you start to smell the aroma from the herbs.
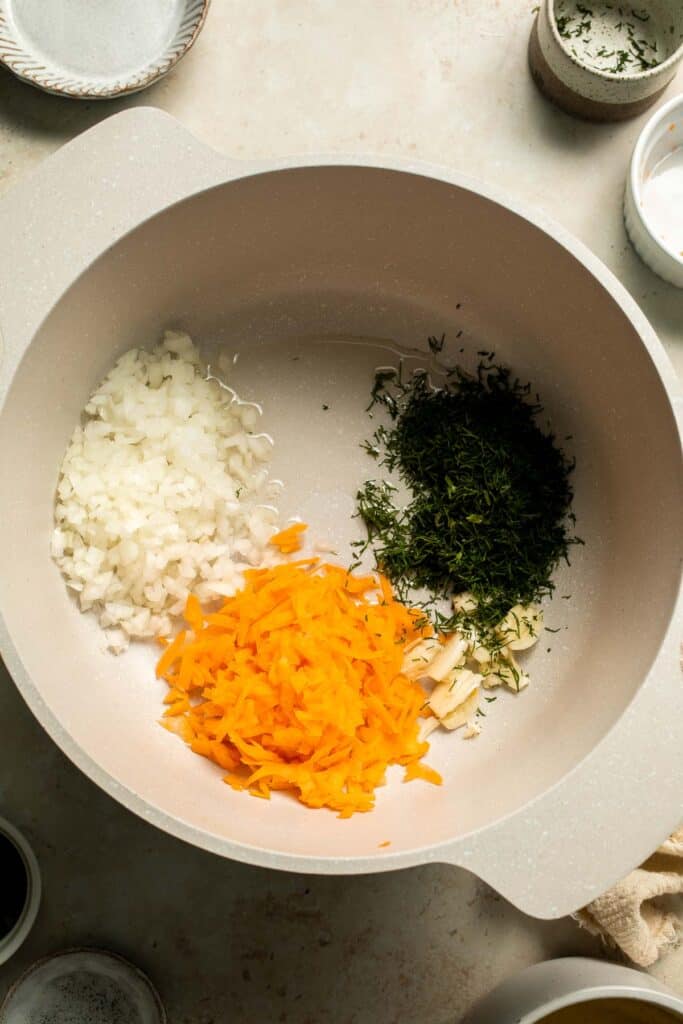
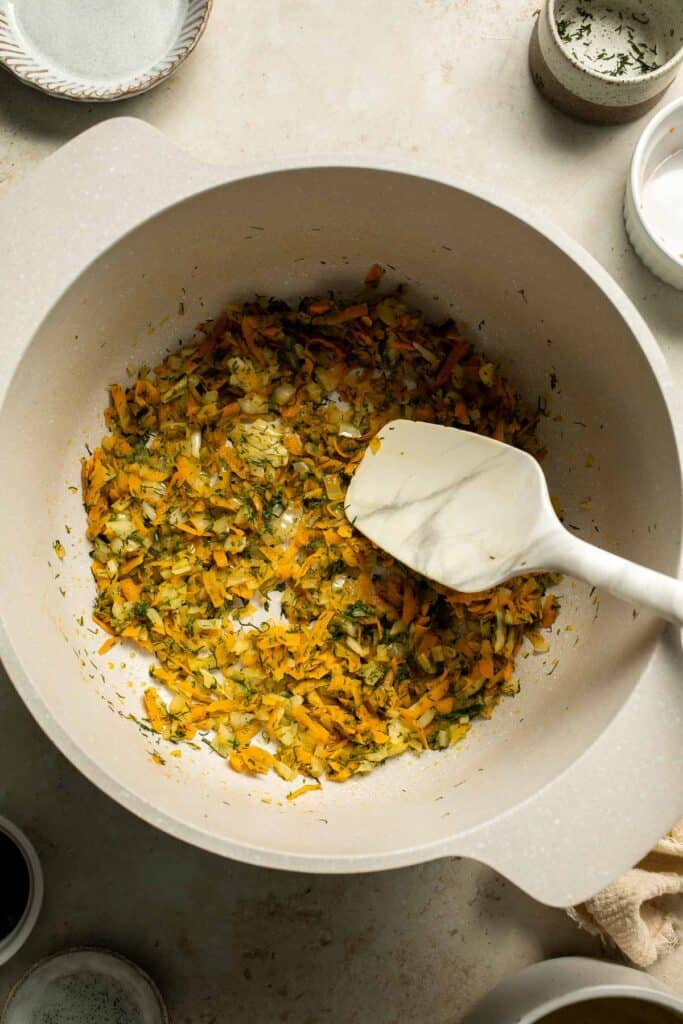
- Add rice and seasoning. Drain the rice in a strainer and add it in the Dutch oven or pot. Stir well to combine rice with vegetables and herbs. Add vegetable stock, Italian seasoning and salt. Mix well and bring to a boil.
- Add potatoes (if using). Add halved potatoes on top and coat with the stock to allow them to soak in the wonderful flavour.
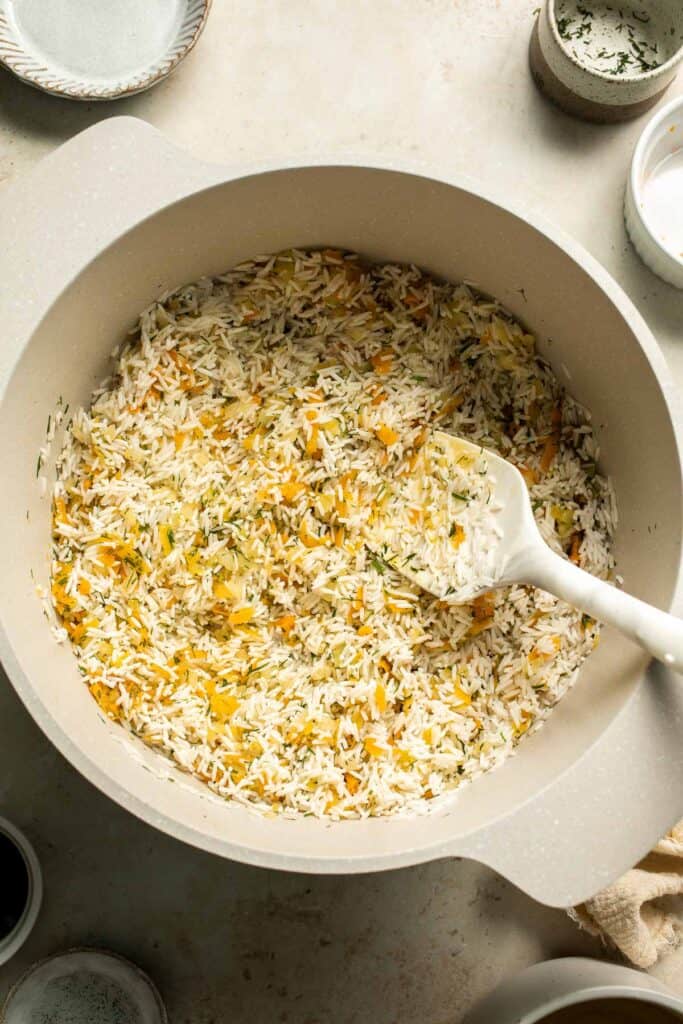
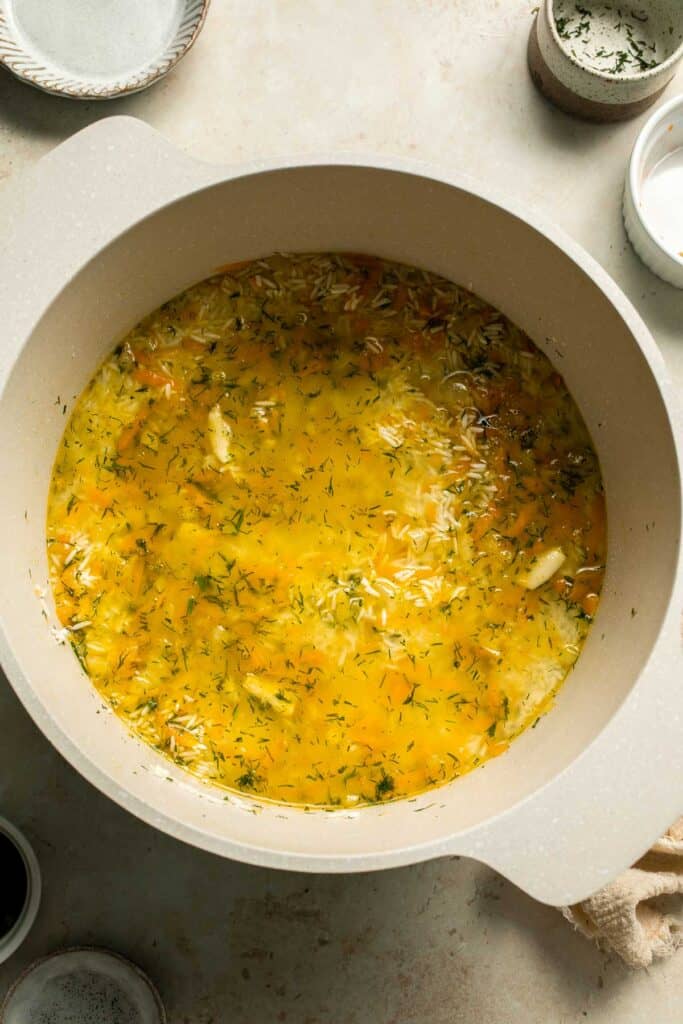
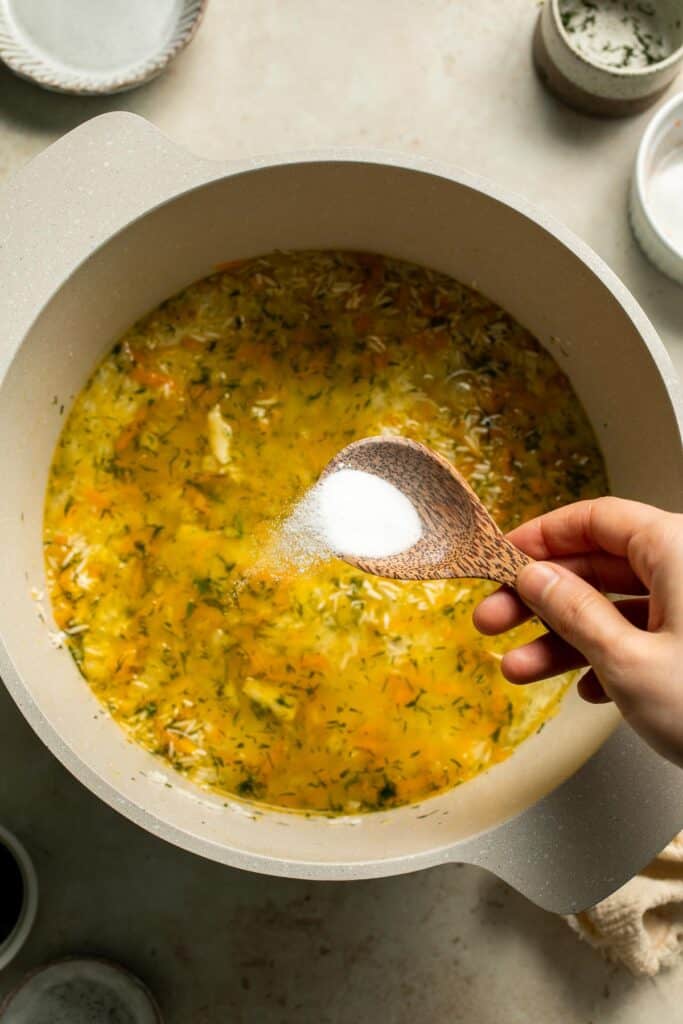
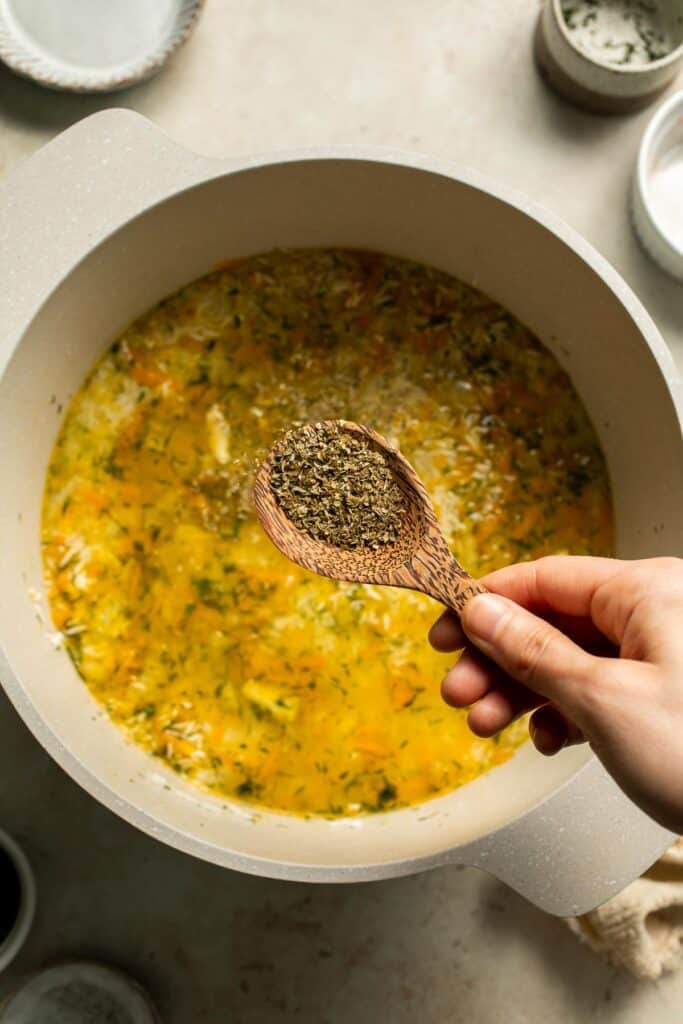
- Simmer. Turn heat down to low and cover. Wrap the inside of the pot lid with a clean dish towel to help absorb the steam inside the pot, otherwise your rice will be mushy. Simmer for 30 minutes, until rice cooked and water is all absorbed. Turn off the heat and let it sit for another 10 to 15 minutes.
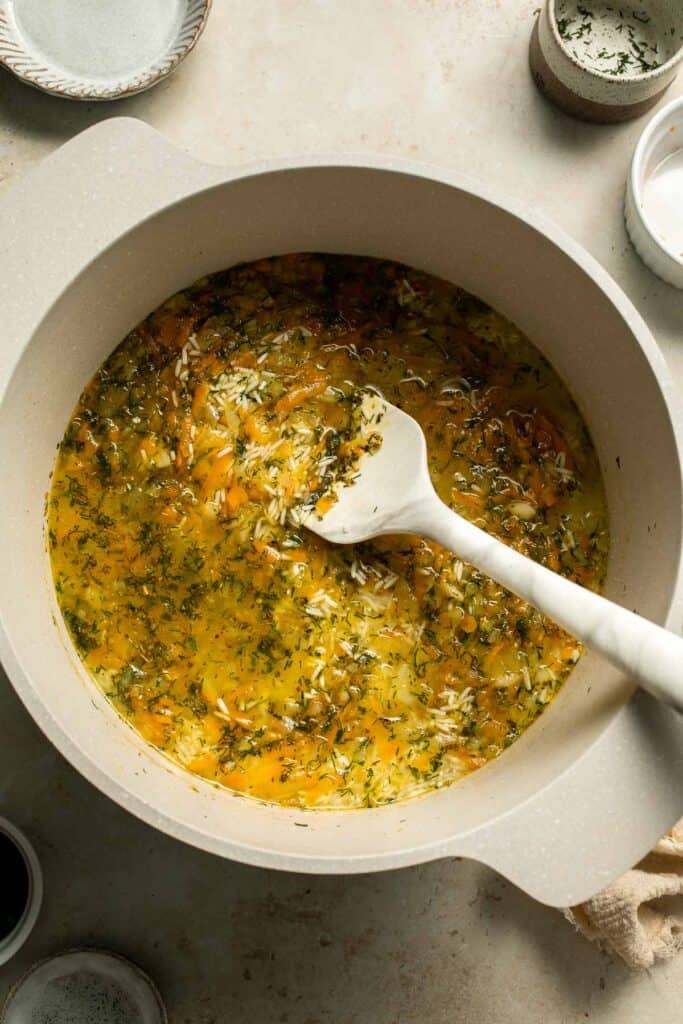
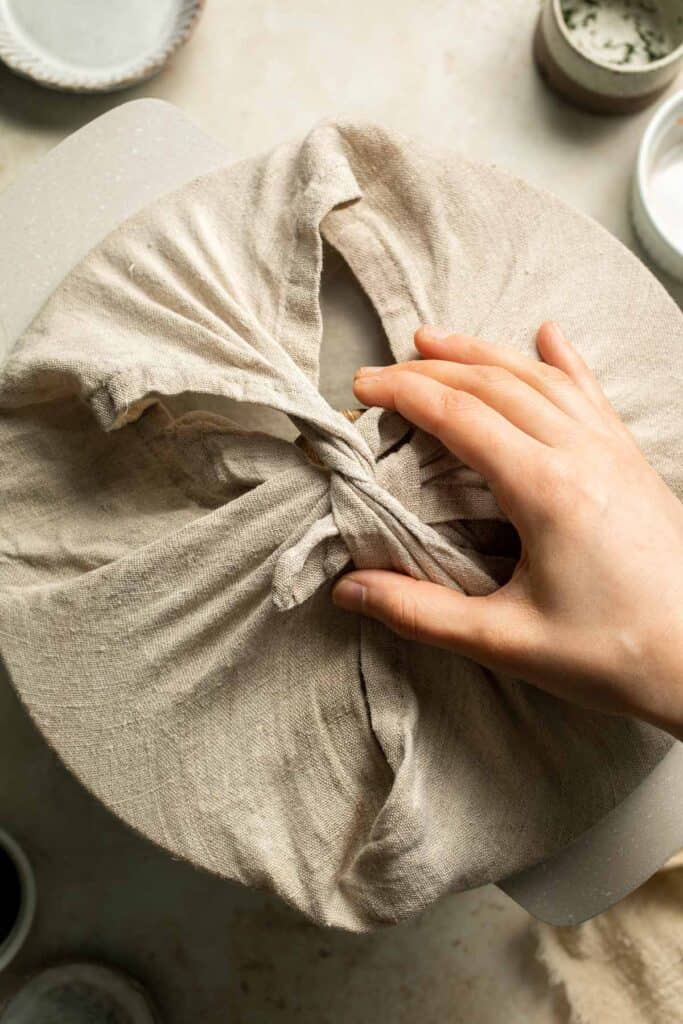
- Add parsley. Gently fluff the rice and add chopped parsley on top.
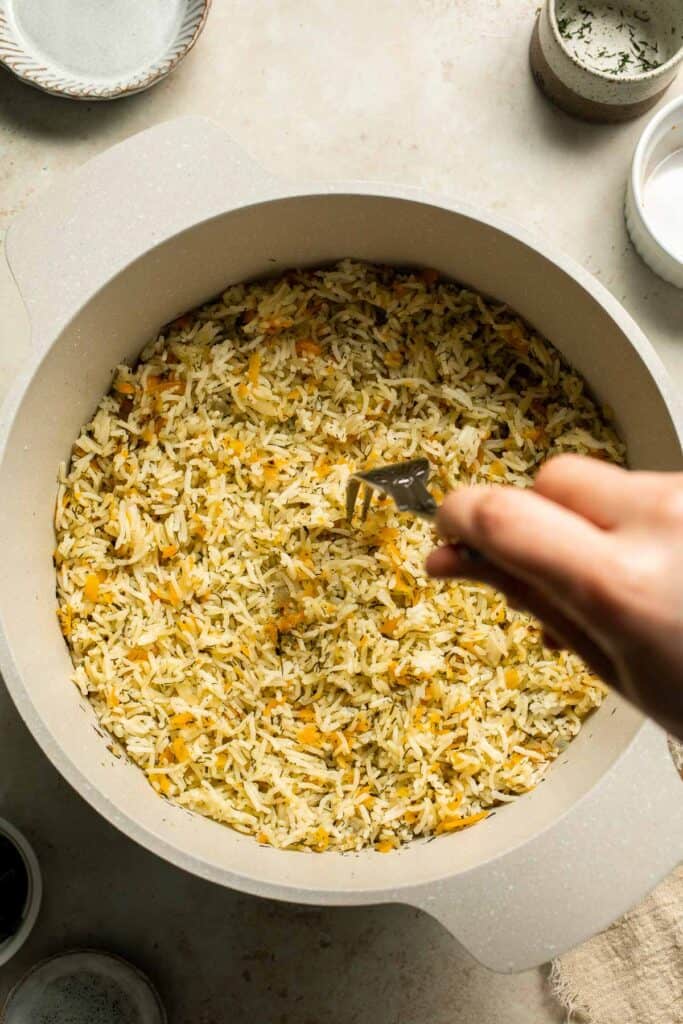
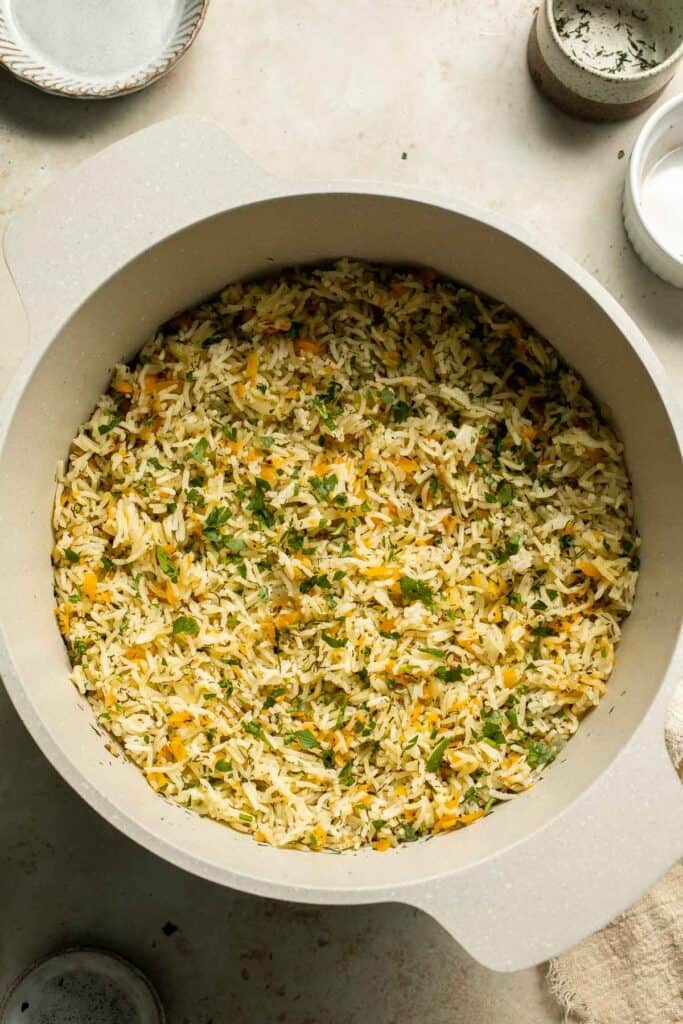
How to Cook Rice Pilaf in the Rice Cooker
You can cook this pilaf in a rice cooker. Simply prepare and cook the ingredients in a skillet and then transfer to the rice cooker. Add the rice and stock and mix together to combine. Add potatoes (if using). Then turn on the rice cooker and cook the way you normally cook rice in the rice cooker.
How to Cook Rice Pilaf in the Instant Pot
You can cook this pilaf in an instant pot. Use the sauté feature on the instant pot to cook the vegetables and herbs. Then, stir in rice and remaining ingredients. Lock the lid and seal. Cook on your "rice" setting. Let it release naturally for 10 minutes after, and then release any remaining pressure.
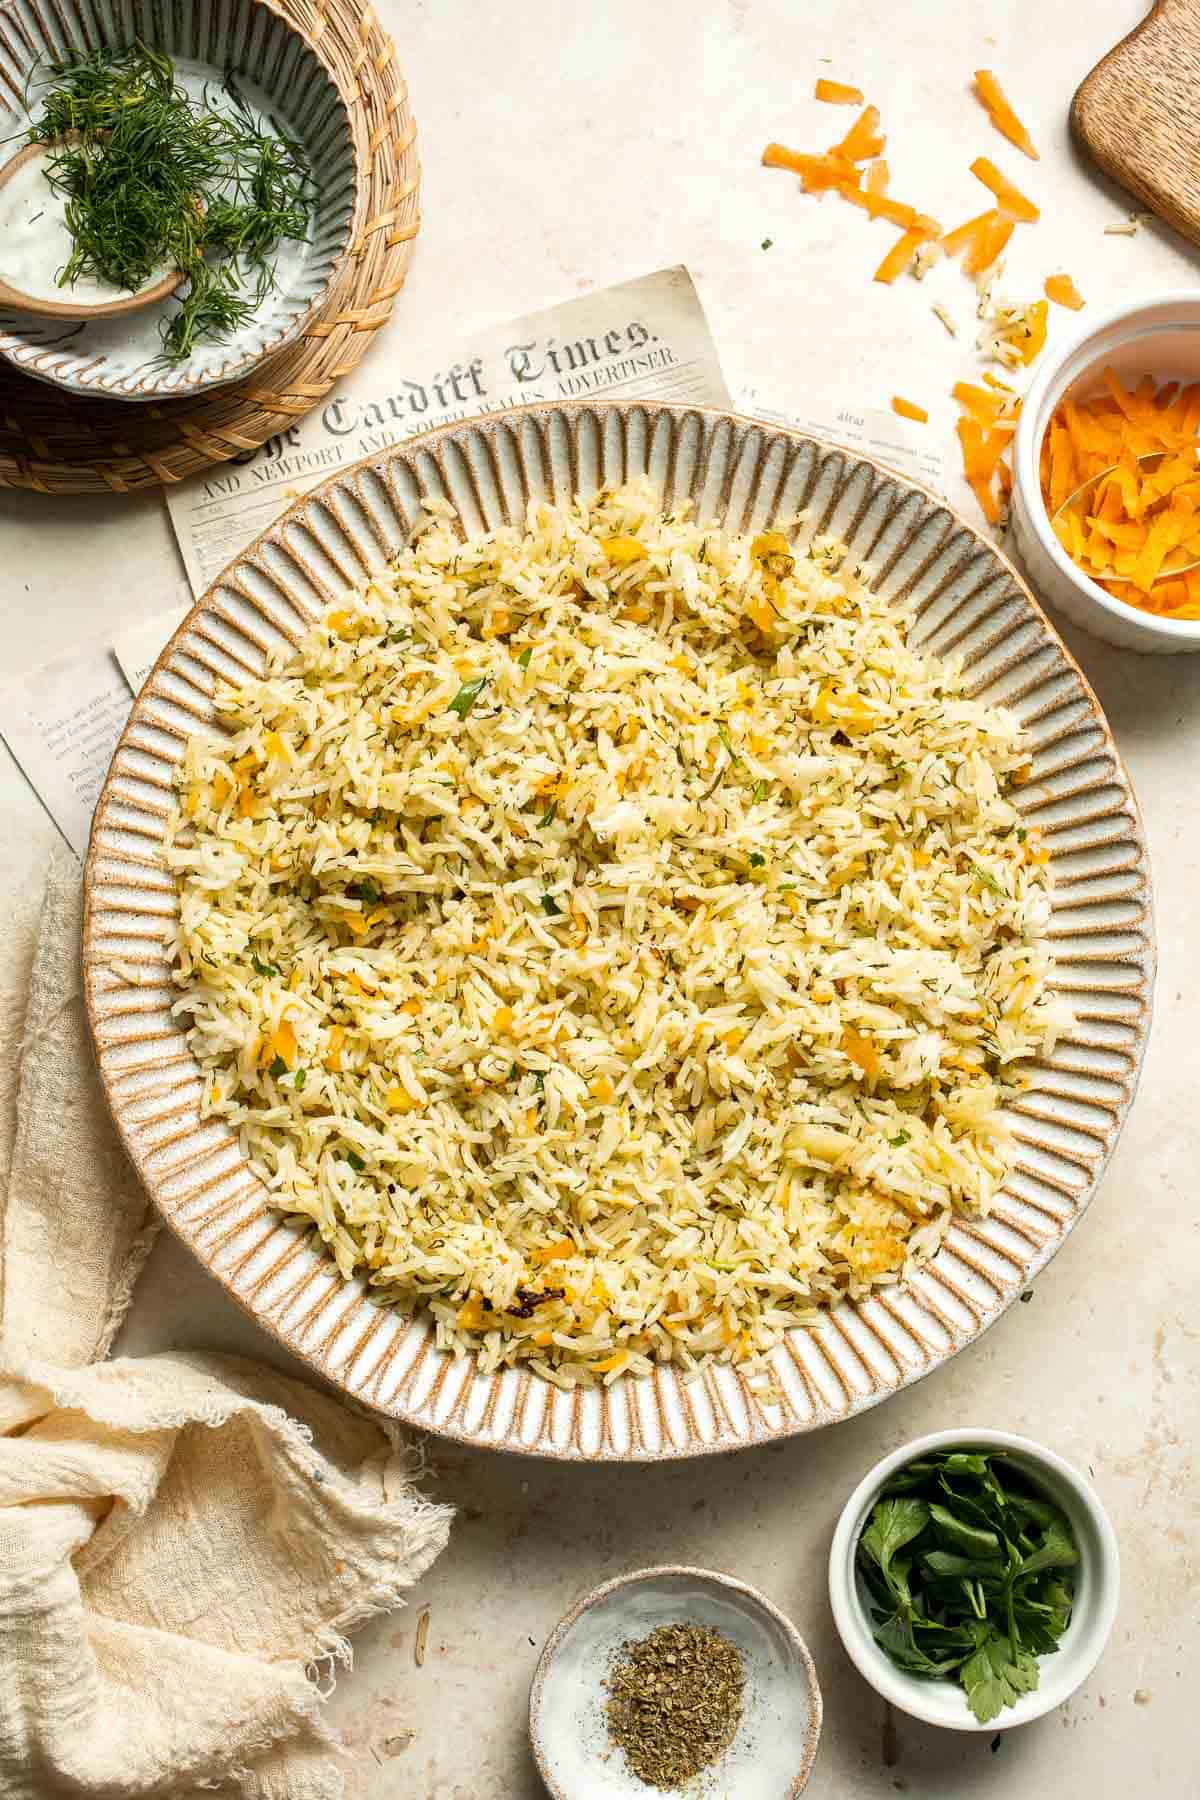
Recipe Variations
- Change the rice. I only recommend using a long-grain rice variety for this recipe, but you can use white or brown rice. Jasmine rice often ends up soggy during the long simmer, so it's not a great option.
- Add protein. To increase the protein content, you can add nuts (especially pine nuts or sliced almonds), chickpeas, or cooked meat. Beef is popular in Russia and Eastern Europe, but I also enjoy it with some leftover rotisserie chicken and chicken broth for extra flavor.
- Add more veggies. The onion, carrot, and garlic are just the start! You can also add green beans, green peas, corn, chopped broccoli, etc.
How to Serve
This Rice Pilaf with Carrots is delicious paired with a side of grilled meat or a vegetarian entree. Some of my favorites to pair with this are:
- Greek Lamb Souvlaki Skewers
- Skillet Chicken Thighs and Potatoes
- Prime Rib Roast
- Stuffed Eggplant
- Persian Saffron Chicken Kebabs (Joojeh Kabob)
- Greek Salmon

Recipe Tips and Tricks
- Pre-soak the rice. Pre-soaking the rice for at least 30 minutes before cooking helps the rice cook faster and also creates a better texture.
- Use a dish towel. Wrap the inside of the pot lid with a clean towel and bring before covering it to simmer. This helps to absorb the steam inside the pot. Otherwise, you will end up overcooking the rice with a mushy texture.
How to Store
Let the rice pilaf cool completely before transferring it to an airtight container and storing in the refrigerator. It will last for 3-5 days in the fridge.
How to Reheat
The best way to reheat pilaf rice is on a skillet on the stovetop. Preheat the skillet to medium-high heat and add the fried rice. Stir frequently until the rice and veggies are warmed through, a few minutes.
How to Freeze
Allow the rice to cool to room temperature first, then transfer it into an airtight container or portion it out into freezer bags and squeeze out as much air as possible. Freeze for up to 3 months. Thaw overnight in the fridge before reheating according to instructions above.
FAQ
Rice pilaf hails from the Middle East, where it is common to use long-grain basmati rice. You don't have to use basmati, but you do need a long-grain brown or white rice that can stand up to the long simmer on the stove. Jasmine rice tends to become soggy and shorter-grain varieties turn gummy.
The word "pilaf" comes from the original 16th century Persian word pilav, which means a dish of meat and rice. It's often called pilau in the UK, but the two terms are interchangeable.
That's the best part! This easy rice pilaf recipe can be served with almost any main course, including baked or grilled fish, roasted beef, lamb, or chicken, or even vegetarian mains like stuffed tomatoes. The fluffy rice grains are perfect for soaking up braising liquid or sauce from stewed meats or lentils, but are also great with skewers and kebabs. The options are endless!
More Rice Recipes
- 30 Best Rice Recipes
- Greek Rice
- Vegetarian Fried Rice
- Broccoli Rice
- Black Beans and Rice
- Basmati Rice with Saffron
Tried this recipe?
I'd love to hear what you think! Leave a comment and rating below to share your feedback. Your reviews help others discover this recipe and help me keep creating more free recipes for you. Snap a photo and tag me on social media @aheadofthyme too.

Cinnamon Roll Muffins
These pillowy and buttery Cinnamon Roll Muffins are a smaller version of traditional cinnamon rolls that are baked in regular muffin cups for easy serving. The soft, yeasted dough puffs up around the swirl of cinnamon sugar filling in the middle, and is served warm with a drizzle of sweet cream cheese glaze. They're everything you love about cinnamon rolls in muffin form!
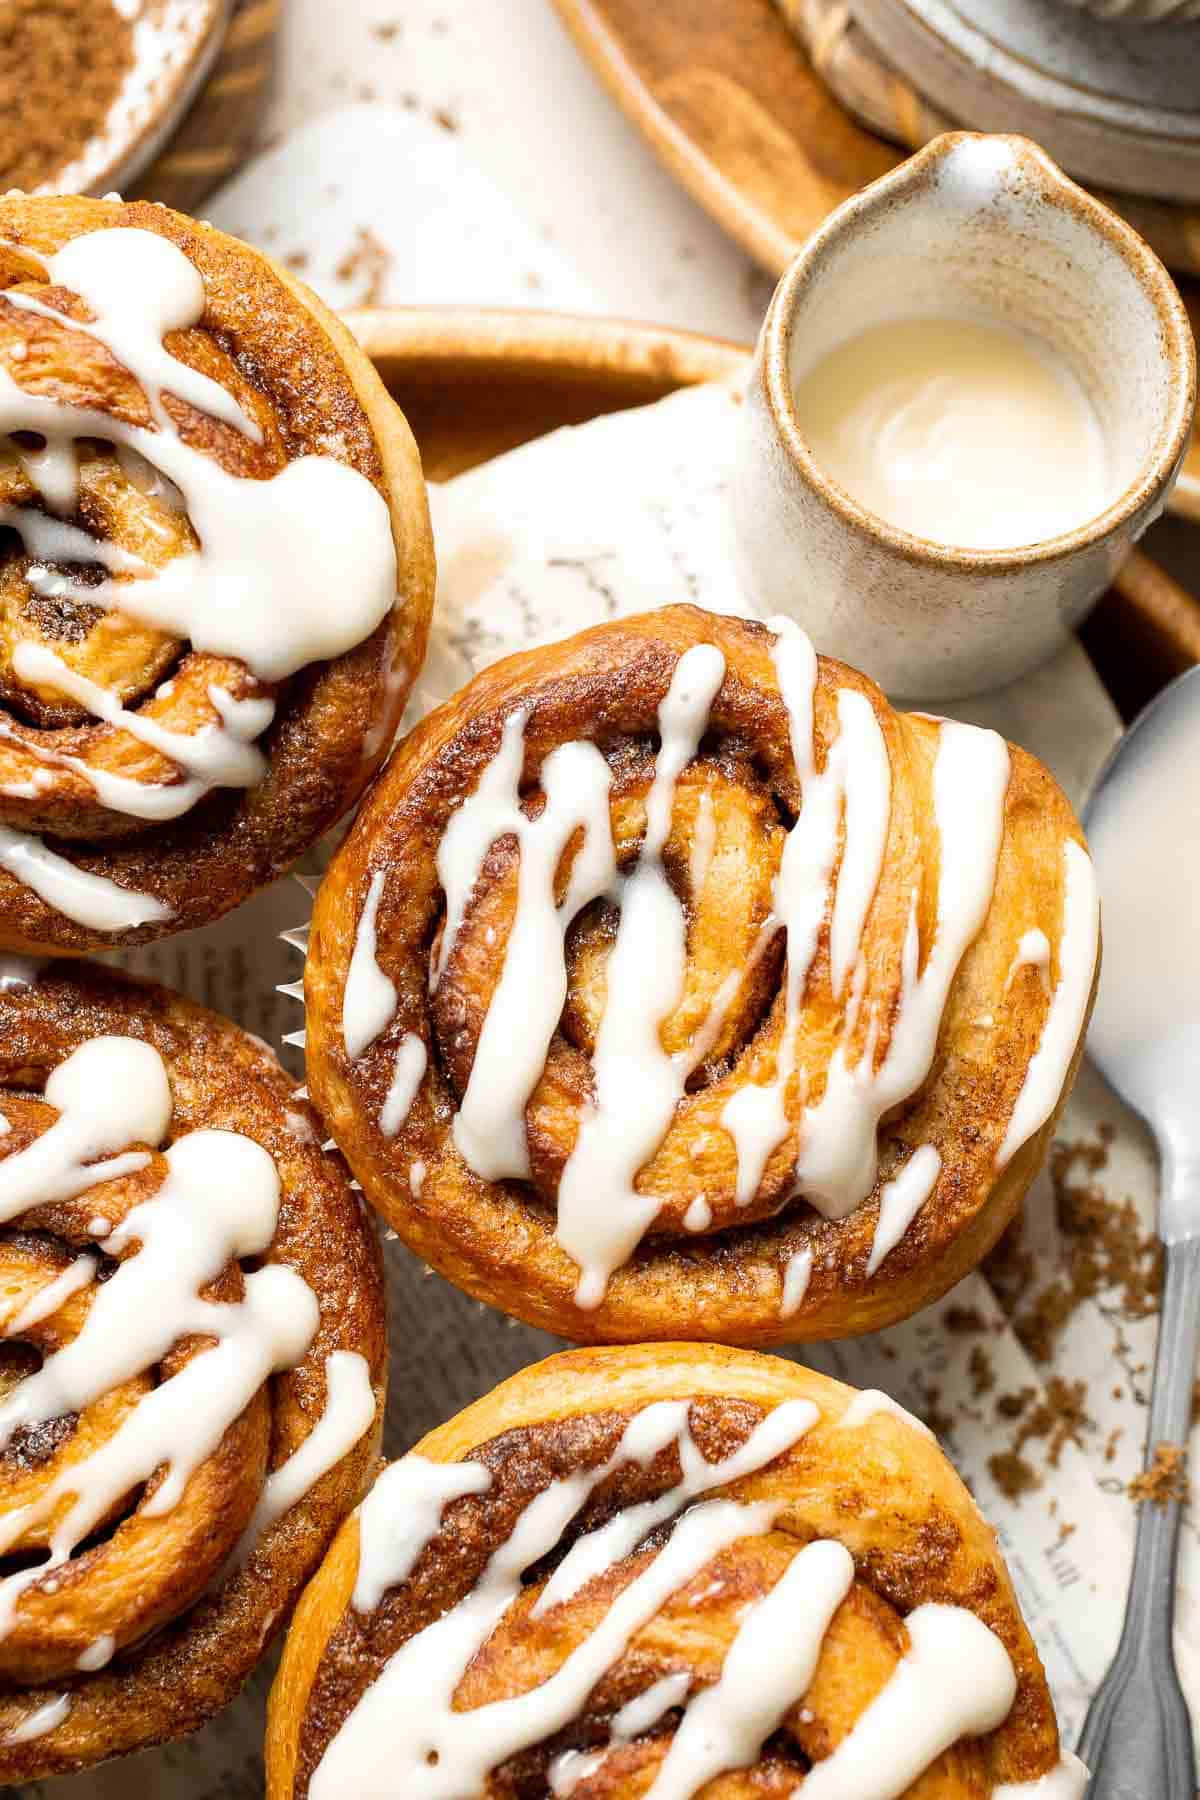
There's nothing like a freshly baked cinnamon roll, but trying to serve them can be a bit of a bear. Plus, most cinnamon rolls are so large! This cinnamon roll muffin recipe is the perfect solution. You still get the warm, cozy flavors you know and love, but they can easily be plucked from the muffin pan and served on trays for holidays, brunch, or just because. Pair them with a hot cup of coffee for the ultimate breakfast bite!
Why You'll Love These Cinnamon Roll Muffins
- Tender, fluffy dough. Unlike other recipes that use muffin batter to imitate the flavor of cinnamon rolls, this recipe is the real deal. The yeasted dough is made using the tangzhong method, which makes it incredibly tender and flexible. The main difference is the size of the rolls and the pan. The rest is the same!
- Classic cinnamon roll flavor. The inside of these fluffy cinnamon rolls is a mixture of butter, brown sugar, and warm cinnamon spice, which adds that iconic swirl and bold cinnamon flavor. You can't help but peel apart the layers to savor every bite!
- Easy to serve. Since each of these homemade cinnamon rolls is baked in a lined muffin tin, they can be placed on serving platters or tiered trays or set into a lunch box without making a huge mess. This also makes them easier to eat as you can hold them with the muffin liner instead of getting your fingers covered in glaze. They're ideal for entertaining!

Ingredient Notes
To make these delicious Cinnamon Roll Muffins, you will need the following ingredients (full measurements in recipe card below):
- milk - this recipe starts by cooking milk and flour together until they form a paste, which makes the dough extra pliable and flexible. You will also need milk for the dough (make sure it is warmed, not hot) and in the glaze (to thin it out).
- flour - this dough uses regular all purpose. Always scoop and level to avoid adding too much flour.
- salt
- instant yeast - this yeast starts working instantly, which speeds up the process.
- egg - for a soft texture and extra flavor.
- butter - melted butter will make the dough supple and tender. We also need softened butter for the cream cheese glaze.
- brown sugar - for the dough and also in the filling. brown sugar is traditional in cinnamon roll filling, as it adds lots of extra flavor. Feel free to use either light brown sugar for a milder flavor or dark brown sugar for a molasses-like flavor.
- ground cinnamon - a classic staple in cinnamon sugar.
- cream cheese - it must be softened first. Set it out on the counter when you start the dough and it should be soft by the time these cinnamon roll muffins are done baking.
- confectioners' sugar - for just enough sweetness in the glaze.
- vanilla extract
You will also measuring cups and spoons, need a small saucepan, whisk, stand mixer with a dough hook, mixing bowl, plastic wrap, cupcake liners, small bowl, muffin tin, rolling pin, sharp serrated knife (or string or floss), wire rack, small bowl, and a hand mixer.

How to Make the Best Cinnamon Roll Muffins
First, prepare the tangzhong.
Add the milk and flour to a small saucepan, and whisk until smooth. Heat over medium and continue whisking while it heats. Once the tangzhong (homemade roux) has thickened (it should be thick enough that whisking leaves streaks), remove it from the heat to cool until just warm.


Now, let's prepare the dough.
- Combine ingredients. In the bowl of a stand mixer, add the flour, sugar, salt, yeast, milk, egg, butter, and tangzhong to a stand mixer.
- Knead. Knead with the hook attachment for 5-10 minutes. The dough should be smooth but will also be very soft and slightly sticky. You can also knead by hand by transferring the dough mixture onto a clean and dry surface and kneading for 5-10 minutes until it turns into a soft and smooth dough ball.
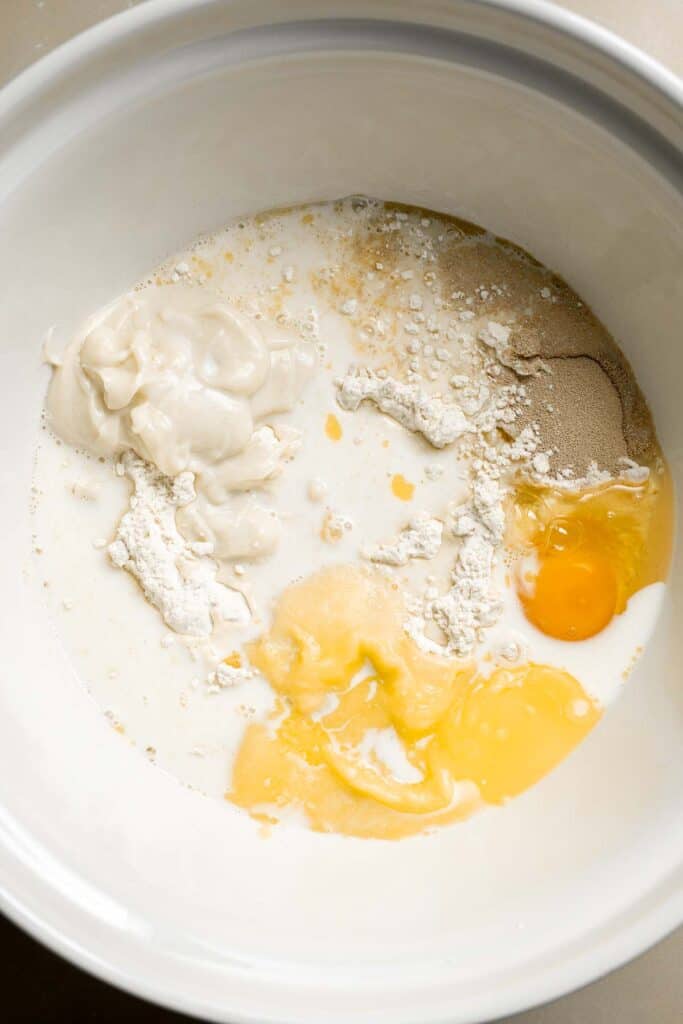


- First rise. Place the dough in an oiled mixing bowl, cover with plastic cling wrap, and place into a warm place to rise for 1 hour or until doubled in size (or overnight in the refrigerator).


Next, make the cinnamon filling.
In a small mixing bowl, whisk together brown sugar, cinnamon until evenly combined. Leave aside.


Assemble the cinnamon roll muffins.
- Punch dough. After the dough is doubled, use your hand to punch it down.

- Roll dough. Turn the dough out onto a lightly floured surface and use a rolling pin to roll it into a rectangle approximately 12x16-inches in size, with the long side facing you.
- Add filling. Gently spread softened butter across the dough, leaving a ½-inch strip bare along the top. Then sprinkle the cinnamon sugar mixture evenly over the butter.


- Roll and cut. Roll the dough up into a tight log. Use string, floss, or a sharp serrated knife to slice it into 12 even rolls.


- Second rise. Line a 12-cup muffin tin with cupcake liners and place cinnamon rolls into the liners. Cover with plastic wrap, and place back into a warm place. Allow it to rise for about 20-30 more minutes, or until doubled in size.


Bake the cinnamon roll muffins.
Remove the plastic cling wrap and bake in a 350F preheated oven for 20-25 minutes until golden brown and fully baked through the center. Let the muffins sit in the pan for 5 minutes, then remove and place on a wire cooling rack to cool.

Finally, make the cream cheese glaze.
Add butter, cream cheese, milk, confectioners' sugar and vanilla extract to a small mixing bowl and mix with an electric hand mixer until light and creamy. You can also mix together using a whisk and spatula. Once the muffins have cooled a bit, drizzle the glaze evenly over the top of the muffins.
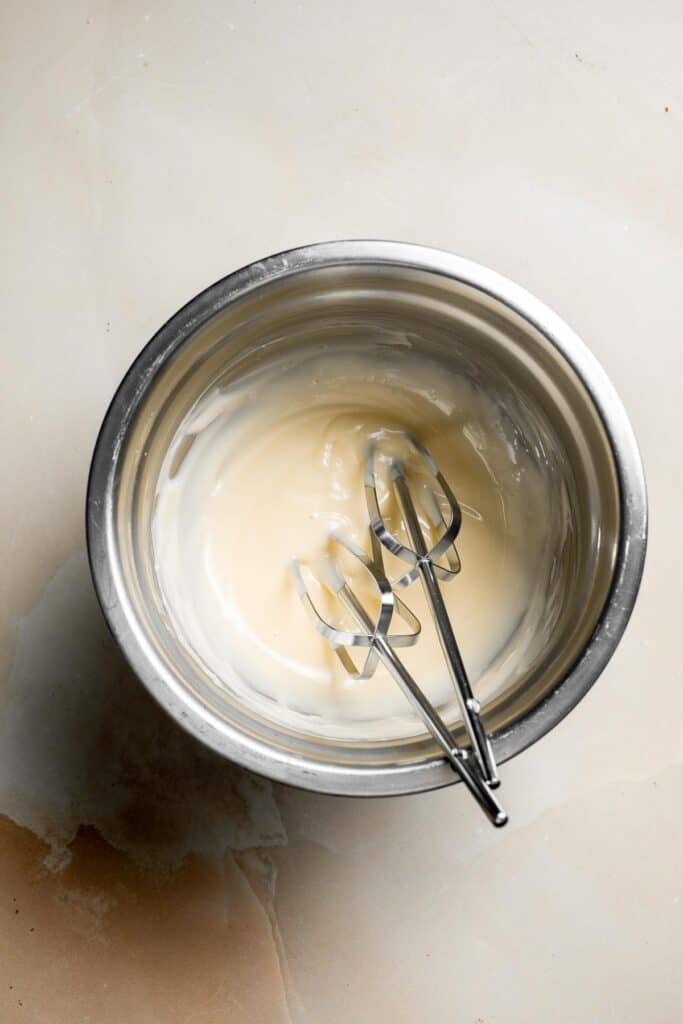


Recipe Variations
- Apple pie cinnamon roll muffins. Replace the cinnamon in the filling with apple pie spice, and spread minced apple pieces across the dough before rolling and cutting.
- Use a different glaze. Cream cheese glaze is traditional on cinnamon rolls, but you can skip the glaze, make frosting instead, use a regular milk glaze (milk and powdered sugar), or try something else. Have fun with it!
- Make dairy-free cinnamon rolls. Use non-dairy milk in the dough and glaze, and choose dairy-free cream cheese.
How to Serve
These Cinnamon Roll Muffins are delicious served on its own as a sweet breakfast or dessert. We like it at brunch along with some of our other favorites:
For more recipes, see our 40+ Best Brunch Ideas.

Recipe Tips and Tricks
- Use a thermometer. When baked, the cinnamon buns should reach an internal temperature of 190-200. Use an instant read thermometer to check for doneness instead of relying on color.
- Let them cool. Warm cinnamon muffins are the best, but if you frost too soon, the glaze will melt away. For best results, let the muffins cool for 15-30 minutes before glazing.
- Use a sheet pan. The goal of this recipe is to make cinnamon roll muffins, but you don't have to use a muffin pan if you don't want to! Just like regular cinnamon rolls, you can bake them in a baking dish or even on a sheet pan. You'll just end up with smaller cinnamon rolls, and they won't pop up the way they do when you bake them in a muffin pan.
Storing and Freezing Instructions
How to Store
Once cooled, store leftover cinnamon rolls in an airtight container in the fridge for 2-3 days.
How to Reheat
Cinnamon rolls always taste best warmed up. You can pop your leftover muffin in the microwave for 10-20 seconds, but be careful not to overheat, as the cream cheese glaze can start to melt.
How to Freeze
If you want to freeze the leftovers, I recommend storing the glaze separately. Then you can reheat the muffin like normal, and add a dollop of the cream cheese glaze on top right before serving.
FAQ
Yes, but you'll need to roll the dough thin enough to fit in the rolls in the pan. This recipe will walk you through making cinnamon rolls in muffin form, so it makes the whole process very easy. Just follow the step-by-step directions in the recipe card!
You can use either bread flour or all purpose flour for cinnamon rolls. If you use all purpose, I recommend using the tangzhong method, which makes the dough extra soft and tender. To do this, heat some of the flour with milk to create a paste then mix it into the dough like normal. It's an easy upgrade that can totally change the texture of your cinnamon rolls!
It's always best to follow the instructions on the recipe card. Especially with yeasted doughs, sometimes doubling doesn't turn out how you want. For best results, I recommend making multiple batches.
More Cinnamon Roll Recipes
- Skillet Cinnamon Rolls
- Gingerbread Cinnamon Rolls
- Blueberry Cinnamon Rolls
- Pumpkin Cinnamon Rolls
- Sourdough Cinnamon Roll Twist Bread
- Lemon Sweet Rolls
Tried this recipe?
I'd love to hear what you think! Leave a comment and rating below to share your feedback. Your reviews help others discover this recipe and help me keep creating more free recipes for you. Snap a photo and tag me on social media @aheadofthyme too.

Egg and Chive Vegetarian Dumplings
Egg and Chive Vegetarian Dumplings are delicious Chinese appetizers made with fragrant chives, fluffy scrambled eggs, and seasonings.

These homemade Egg and Chive Vegetarian Dumplings are based on a popular Chinese flavor combination that transforms two simple ingredients into the most deliciously savory filling. Savory chives give fluffy scrambled eggs a fresh, garlicky twist, and soy sauce and sesame oil add lots of umami flavor and just enough salt. They're quick, too - it takes just an hour to make a mountain of 50 delicious egg dumplings!
If you know me, you know that I love dumplings. Did you know it's customary in Chinese culture for families to get together and make dumplings on special occasions? They signify abundance and wealth, like a little mountain of coins stacked high. We often try to make vegetarian dumplings when possible to accommodate my vegetarian parents, and these chive dumplings are the perfect way to honor both families at once!
Why You'll Love These Egg and Chive Vegetarian Dumplings
- Makes 50 dumplings. It's amazing to think that just three eggs scrambled and seasoned can turn into over four dozen dumplings, but they do! This delicious chive and egg dumpling recipe makes plenty for you to share with your friends and family (or to freeze for later). You can always double the recipe, too!
- Ready faster than ever. Store-bought dumpling wrappers are a big time-saver. Since they're ready to use and this recipe uses simple, quick-cooking ingredients like eggs and chives, you can start filling and shaping in just a few minutes. You just combine some chopped Chinese chives (garlic chives) with fluffy scrambled eggs, and add a dash of flavour. So easy!
- Naturally vegetarian filling. Made with chopped chives, scrambled eggs, sesame oil, and soy sauce, this vegetarian dumpling recipe is suitable for non-meat eaters, Meatless Monday, and more. I promise - they're so savory no one will feel like they're missing out on anything!
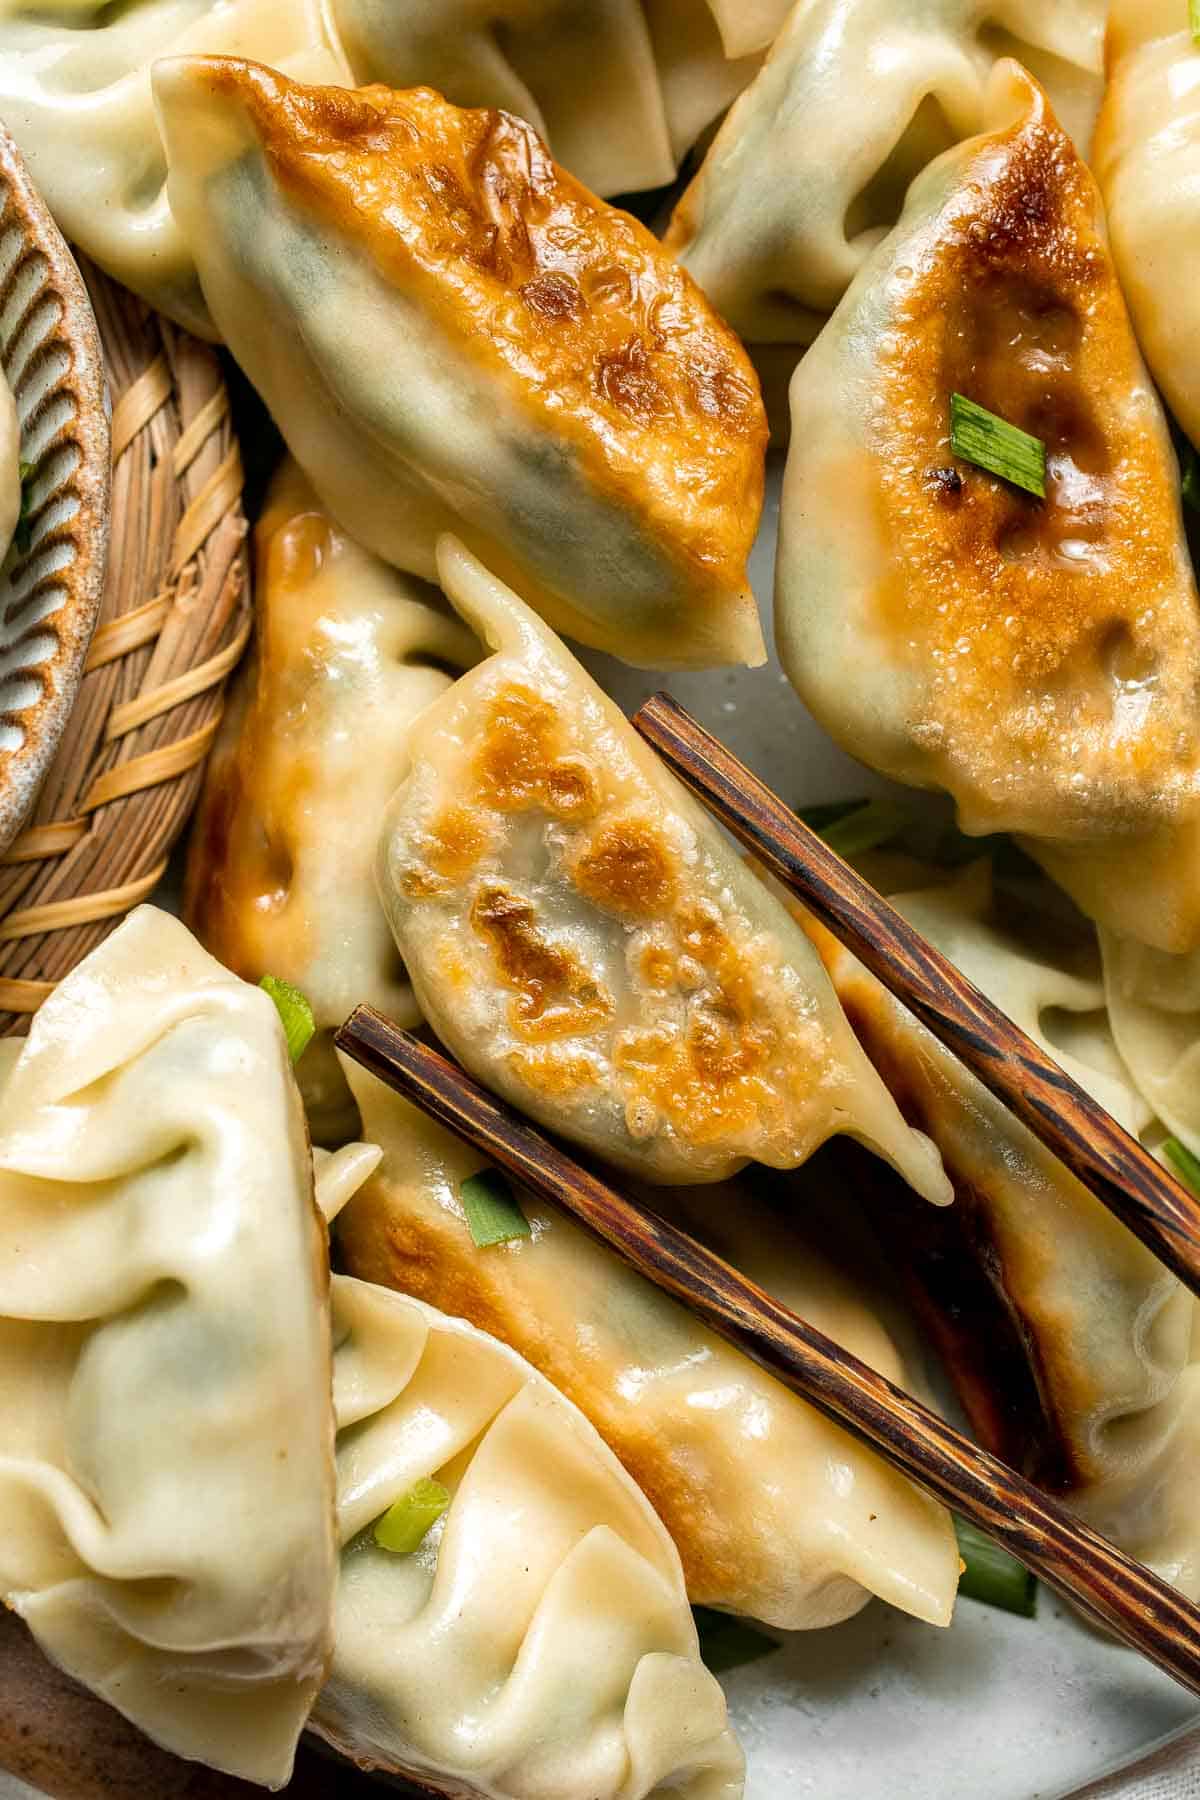
Ingredient Notes
To make these delicious Egg and Chive Vegetarian Dumplings, you will need the following ingredients (full measurements in recipe card below):
- eggs - the eggs are the main ingredient, so it helps to use the best ones. Large, farm-fresh eggs will add extra flavor if you have them.
- vegetable oil - to scramble the eggs without sticking.
- Chinese chives - these are a main ingredient, so it's worth hunting them down. Chinese or garlic chives are not the same as regular chives, and you're most likely to find them at Chinese grocery stores.
- sesame oil - for a nutty, savory flavor.
- soy sauce - this adds a hit of umami flavor without requiring any meat.
- salt & black pepper
- dumpling wrappers - you'll need a 1 lb pack of dumpling wrappers (50 count), or you can make homemade dumpling wrappers if you have a little extra time.
- black rice vinegar or soy sauce - for dipping
You will also need a measuring cups and spoons, mixing bowls, skillet, whisk, skillet or pot for cooking, a slotted spoon (for boiling), and a small bowl for the dipping sauce.
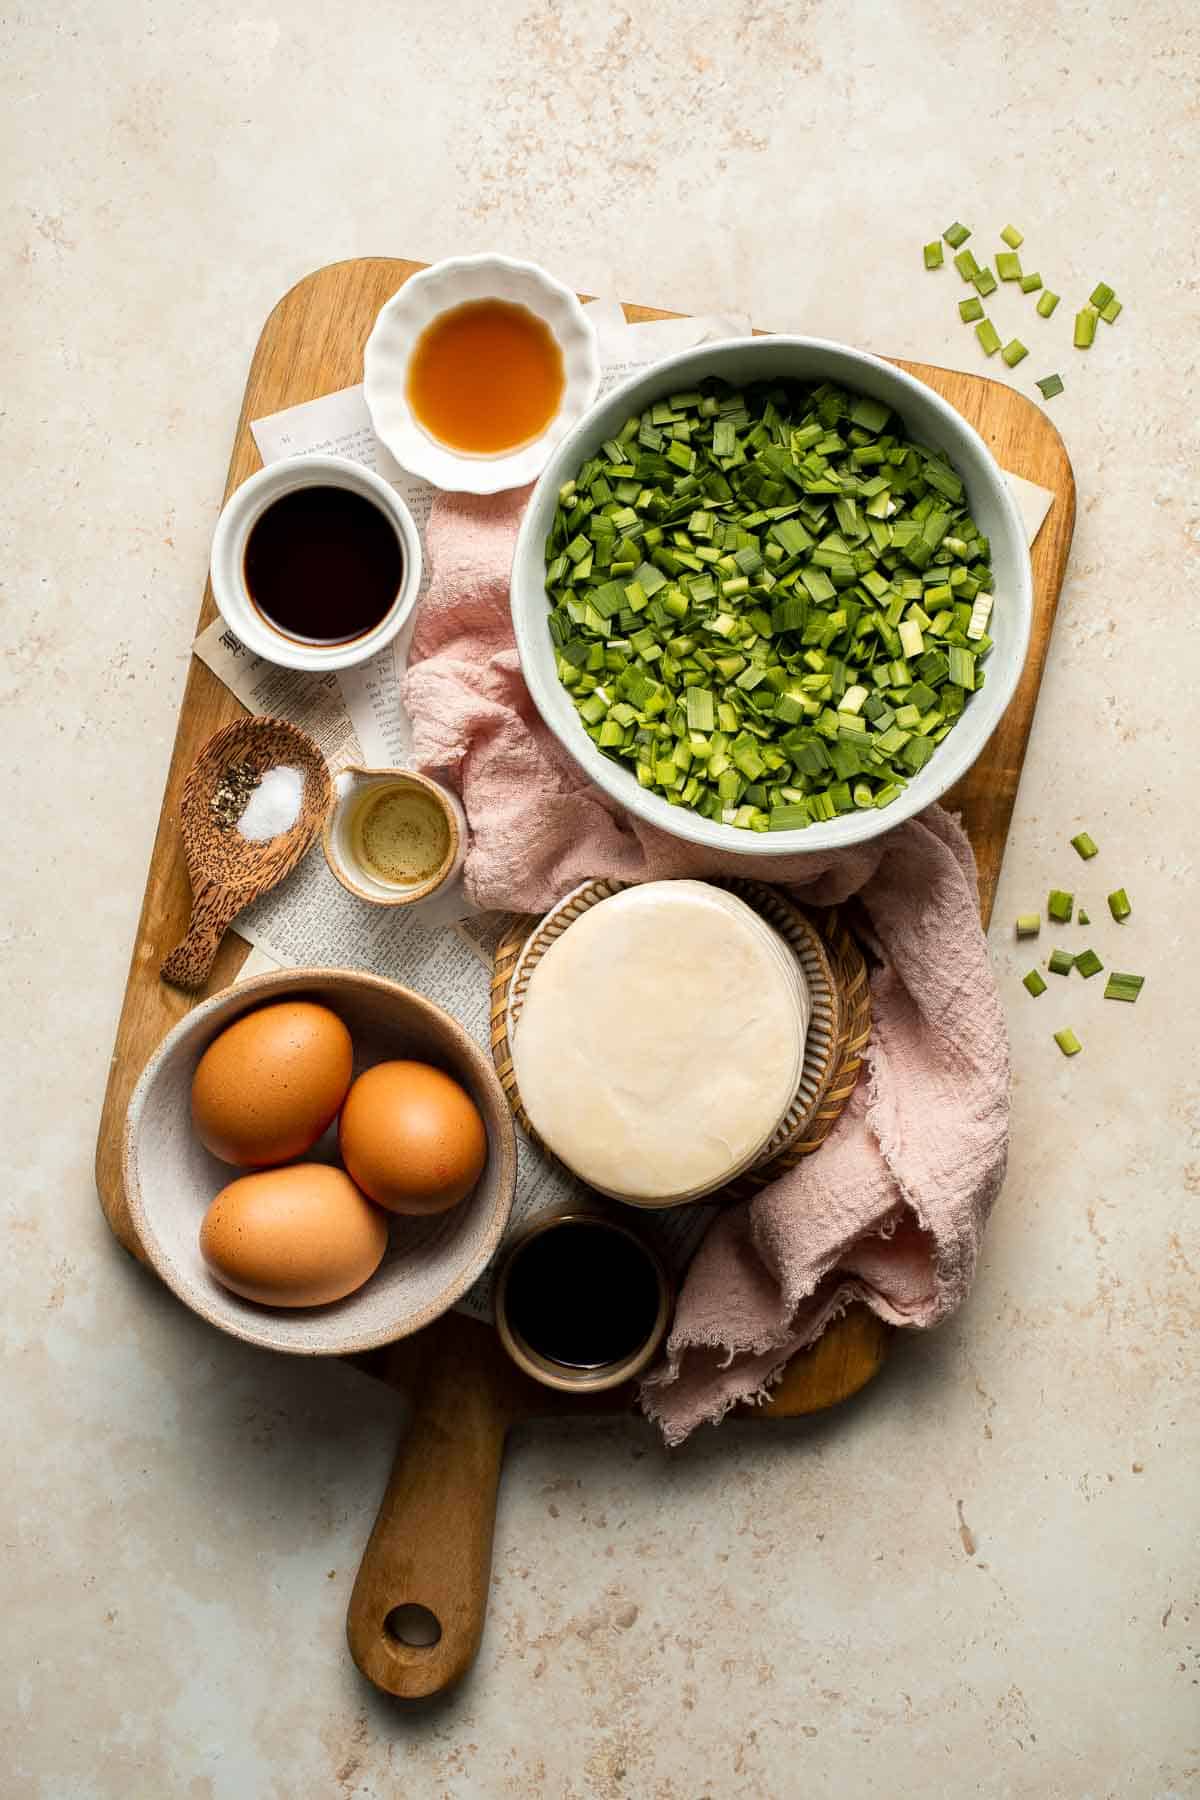
How to Make the Best Egg and Chive Vegetarian Dumplings
- Cook eggs. In a small mixing bowl, use a whisk to beat the eggs well, about 1 minute. Heat oil in a skillet over medium-high heat. Cook the eggs, scrambled, until light and fluffy. Do not overcook. Remove from heat and roughly separate eggs into small pieces (the size cottage cheese).


- Make filling. In large mixing bowl, combine the eggs, chives, sesame oil, soy sauce, salt, and pepper. Stir together until well combined.


How to Fold Dumplings
By now, you'd think I have got this dumping-folding skill down to a T. But no, I still need to refer back to my notes to remember just how to do it. So let's break it down into 3 steps:
- Fill. Scoop approximately 1 tablespoon of the mixture into the centre of a dumpling wrapper.
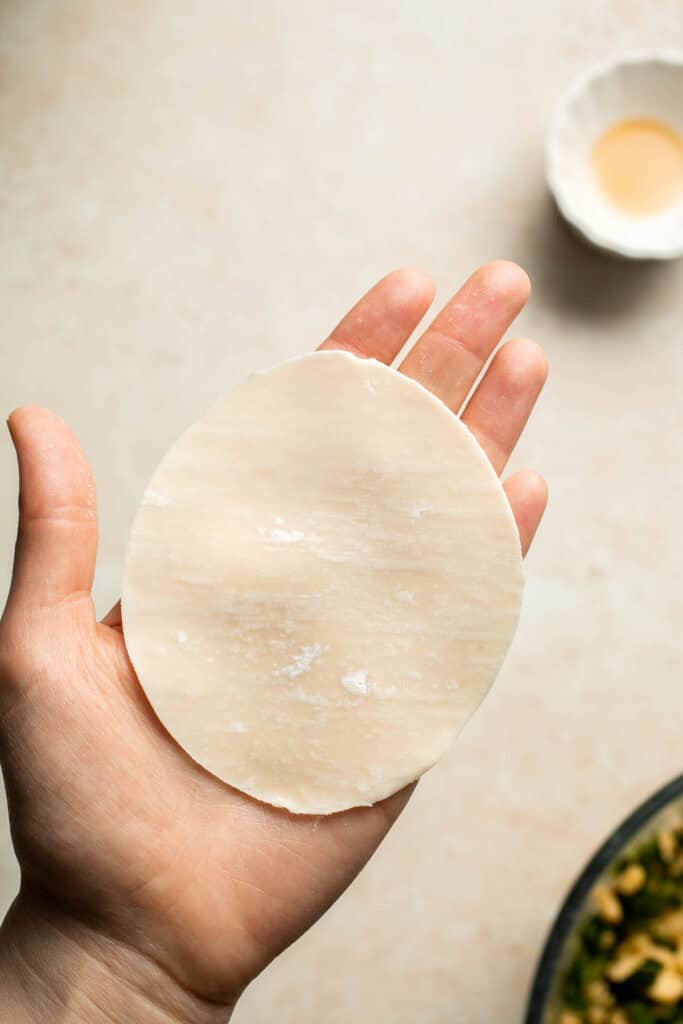

- Fold. Dip your finger in water and smear along the edges of the dumpling wrapper. Fold the dumpling wrapper over to create a half-moon shape, enclosing the filling inside.


- Seal. Seal the filling inside by pleating the edges together with your finger or pinch the edges together with a fork.


- Repeat. Repeat until all the mixture and dumpling wrappers are used up.

How to Cook Dumplings
You can cook these vegetarian dumplings by pan-frying, steaming, or boiling. We pan-fried these dumplings, because that is my favourite way to eat them. I just can't resist a crispy, golden wrapper with juicy filling. And don't get me started on that crunch with every bite.
Here are the three ways to cook dumplings:
- Pan-fry: In a large skillet, heat vegetable oil over medium heat. Add some dumplings and cook 2-3 minutes until bottom is crisp and golden. Add water (enough to cover the dumplings halfway up), cover, and steam the dumplings for about 5 minutes until the liquid is absorbed.

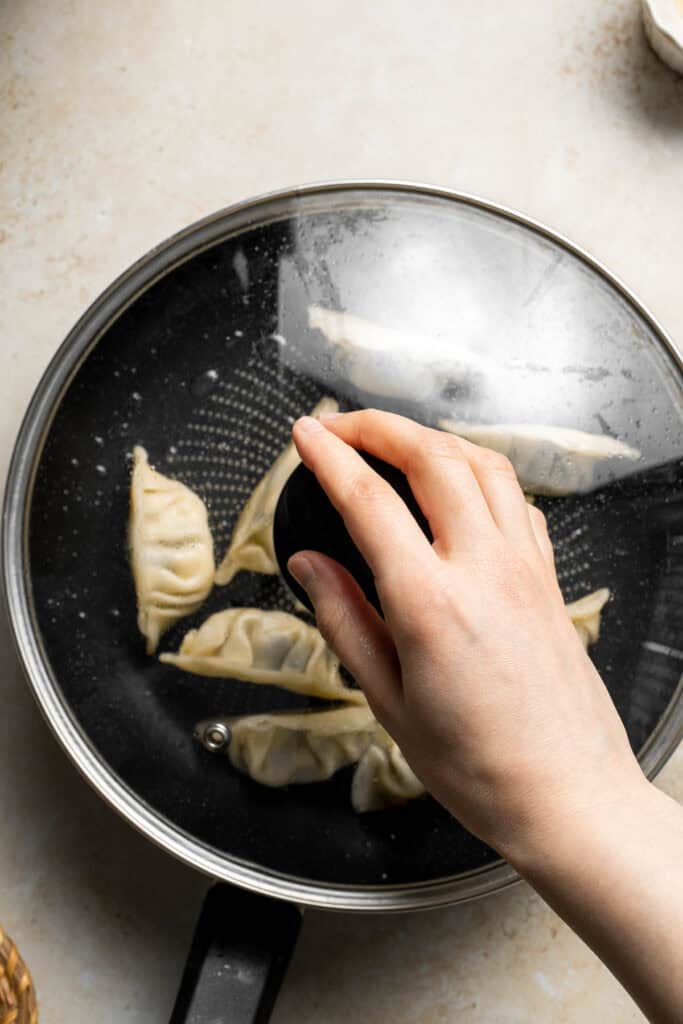

- Steam: In a pot, bring water to boil . Place some dumplings in steamer on top and steam for 10-15 minutes until tender.
- Boil: Fill a large pot with ⅔ water and bring to a boil. Add some dumplings and cook until they float and continue to cook for 2-3 minutes.
Repeat with remaining dumplings or store uncooked dumplings in the fridge for up to 2 days or in the freezer for up to 3 months.
Recipe Variations
- Adjust the filling. Feel free to add finely chopped green onions, replace the black pepper with white pepper, or add a bit of heat with some sriracha sauce or red pepper flakes. You can also add mini shrimp for extra protein and another layer of flavor!
- Choose your cooking method. In the recipe card, I've mapped out three different ways to prepare these dumplings: pan-frying, steaming, or boiling. They are all great options, but each one will result in a different final texture and flavor. I love pan-frying to get that crisp, golden bottom. Steaming results in a more delicate skin, and boiling is the quickest and easiest option when you're in a time crunch.
- Make a soup. Replace the chicken and cilantro wontons in my wonton soup for a light meal or appetizer to start your feast! To keep it vegetarian, replace the chicken stock with veggie stock.
How to Serve
These Egg and Chive Vegetarian Dumplings are delicious served on their own with a side of black vinegar or soy sauce for dipping. You can also serve it as part of a larger meal with other Vegetarian Chinese dishes including:
- Tofu and Mushroom Stir Fry
- Vegetarian Chow Mein
- Kung Pao Tofu
- Lo Mein Noodles
- Vegetarian Fried Rice
- Tofu Lettuce Wraps
For more recipe ideas, see our 30 Vegetarian Chinese Recipes.

Recipe Tips and Tricks
- Use high-quality ingredients. When you have such a short ingredient list, it helps to use the best ingredients you can find. Use farm-fresh eggs, fresh chives, and your favorite soy sauce. If you have multiple choices, splurge on the good dumpling wrappers! It makes a difference.
- Let the mixture cool. The filling doesn't need to be cold before you start making the dumplings, but it helps to let them cool down for a few minutes. This will prevent the hot filling from weakening and stretching the dumpling wrappers, which can cause rips when you start cooking.
- Seal well. Once you drop the dumplings in boiling water or start to steam them, your seals will be tested. The last thing you want is for that dumpling filling to spill out! Make sure you smear water along the edge of the wrapper and pleat the edges together with your fingers. It takes a little bit of practice the first time, but you'll get the hang of it quickly!
Storing and Freezing Instructions
How to Store
Store any leftover cooked dumplings in an airtight container in the fridge for 2-3 days. Leftover uncooked dumplings should be frozen (see instructions below).
How to Reheat
The easiest way to reheat dumplings depends on your original cooking method. I like to gently warm pan-fried dumplings in a hot skillet with a bit of oil. You aren't trying to crisp them up again, just to warm up them all the way through. For steamed or boiled dumplings, place them in a warm skillet with a teaspoon of water and cover with a lid. Let them gently steam for 3-5 minutes until they're nice and hot.
How to Freeze
It's always a good idea to make an extra batch because these dumplings are stored in the freezer. To store, simply place uncooked dumplings spaced apart on a sheet pan lined with parchment paper and freeze for an hour until hard. Then, transfer them into ziploc bags or tupperware and cook as desired, according to recipe instructions. You will need to add about 5 minutes extra to the cook time when cooking from frozen. Easy, peasy!
FAQ
Chinese chives are a special herb that looks similar to our favorite garden chives but is a little different. Chinese or garlic chives have a flatter, wider shape and a notoriously garlicky flavor that pairs wonderfully with eggs, shrimp, and other proteins. These chives are a staple in Chinese cuisine and are commonly available at Asian grocery stores. If you cannot find them, you can substitute regular onion chives, but consider adding a clove or two of freshly minced garlic for that savory punch.
Yes! These are a great substitute for gluten-free eaters. Just be sure to read the directions on the packaging, as you may need to adjust the cooking time slightly.
Yes! Eggs and garlic chives are a fantastic match, and they're often paired together in different Chinese recipes, like Chinese chive pockets, egg stir-fries, chive pancakes, and more. The fresh, herby flavor of the chives pairs wonderfully with the butteriness of the eggs, making these two ingredients a natural match.
More Dumpling Recipes
- Vegetable Dumplings
- Beef Potstickers (Dumplings)
- Pork Dumplings
- Chicken Potstickers
- Kimchi Dumplings
- Potato Onion Pierogi
Tried this recipe?
I'd love to hear what you think! Leave a comment and rating below to share your feedback. Your reviews help others discover this recipe and help me keep creating more free recipes for you. Snap a photo and tag me on social media @aheadofthyme too.

Caramel Apple Dip
This Caramel Apple Dip is a sweet and delicious fall dessert dip made in just minutes using 4 simple ingredients. The whipped cream cheese and caramel base layer is topped with even more caramel sauce and crunchy toffee bits. It has all the flavors of your favorite caramel apples but in dip form! Every bite has a crisp crunch and a mouthwatering pop of caramel flavor. So good!

If you need a new dessert for your fall gatherings, this caramel cream cheese apple dip is always a huge hit. The cream cheese layer helps cut the sweetness and balance the richness of the caramel, which makes it so smooth and easy to eat. Plus, you can serve it with way more than just apple slices. Try it with graham crackers, cookies, pretzels, and more. This may hands-down be the best caramel apple dip you'll ever try!
Why You'll Love This Caramel Apple Dip
- Ready in 5 minutes. Once the cream cheese is softened, the rest of the process is super quick. Just whip the cream cheese with brown sugar and caramel sauce, then start the layering process. It's fast enough to make at the last minute, but it tastes like you've been working on it for hours!
- Softened cream cheese is whipped with brown sugar and caramel sauce, then topped with even more caramel sauce and crunchy toffee bits.
- Great for entertaining. This easy caramel apple dip recipe is ideal for serving at fall gatherings, the holidays, and more! Create a caramel apple snack tray with crisp apple slices, Nilla wafers, graham crackers, and more, and let your guests make their own flavor combinations. It's always a crowd pleaser!
- Ooey gooey caramel layer. This caramel apple cream cheese dip has two layers: a sweet cream cheese base layer and gooey caramel sauce on top. As you scoop with an apple slice, you get that traditional rich caramel flavor with tangy cream cheese and the crunch of the toffee bits. So good!

Ingredient Notes
To make this delicious Caramel Apple Dip, you will need the following ingredients (full measurements in recipe card below):
- cream cheese - to make the cream cheese layer soft and fluffy, it must be completely softened before mixing. Full fat cream cheese has the best flavor.
- brown sugar - for extra flavor and sweetness.
- caramel sauce - add some of the caramel sauce to the cream cheese mixture and spread the rest on top. You can use store-bought caramel sauce or homemade. Try our Salted Caramel Sauce!
- toffee bits - sprinkle toffee bits on top for extra crunch and flavor.
- dippers - serve with sliced apples, graham crackers, pretzels, or more. When picking apples, choose your favorite apples. Tart Granny Smith apples are ideal for the sweetness of caramel, but I also like to use Honeycrisp, Cosmic Crisp, Pink Lady, or Gala.
You will also need measuring cups, a medium bowl, an electric mixer, and a serving dish.

How to Make the Best Caramel Apple Dip
- Beat ingredients. In a medium mixing bowl, add cream cheese and sugar, and use a hand mixer to beat until smooth and creamy.


- Add caramel sauce. Add half the caramel sauce and beat to combine.


- Assemble. Spread the caramel cheese dip into a 1 quart serving dish. Add the remaining caramel sauce on top and carefully spread into an even layer on top.Top with toffee bites.


- Serve. Serve with your favorite dippers including apple slices, pretzels, graham crackers, and vanilla wafers.
Recipe Variations
- Make your own caramel sauce. Storebought caramel sauce speeds up this recipe and makes it truly failproof. For a richer flavor, make your own homemade caramel sauce with butter, sugar, and heavy cream. Follow the steps in my Salted Caramel Sauce, but skip the salt (or leave it for a fun flavor variation)!
- Add more toppings. Just like real caramel apples, there are plenty of toppings to make your dip even more fun. Sprinkle mini chocolate chips, chopped nuts, or sprinkles on top. A little dark chocolate sauce would be great, too!
- Add some spices. Add a teaspoon of cinnamon or apple pie spice to the cream cheese layer for a warm, cozy flavor.
How to Serve
This Caramel Apple Dip is delicious served with your favorite dippers such as apple slices, pretzels, graham crackers, vanilla wafers, or shortbread cookies. You can also serve it as part of a larger fall dessert spread alongside some of our favorites:
For more recipes, see our 50 Best Fall Desserts.

Recipe Tips and Tricks
- Use store-bought sliced apples. To speed things up, grab a pack of sliced apples from the produce section at your grocery store. These slices have already been treated with lemon juice to prevent browning, so you can skip that step. They're great for school parties, too!
- Give it a minute. You don't have to let this recipe rest, but if you can spare an extra 15-30 minutes, it will let the cream cheese absorb the flavor of the brown sugar and caramel even more.
- Make a toppings bar. Instead of covering the dip with lots of toppings, serve the extras in small dishes on the side. Then, your guests can make different variations based on their favorite flavor combinations.
Storing Instructions
Any leftover dip should be covered with plastic wrap or transferred to an airtight container and stored in the fridge for 3-4 days. Let it sit out at room temperature to soften before serving.
FAQ
The best recipes do! You can technically serve caramel with toffee bits on top, but that's pretty basic. Adding cream cheese is an easy upgrade that cuts through the sweetness of the caramel, making it more balanced and easier to eat. It really elevates the flavor!
There are so many options! Of course, fresh apple slices are ideal, but you can also use crispy apple chips, graham crackers, salty pretzels, vanilla wafers, animal crackers, and more. Just make sure that whatever you use is strong enough to scoop through the fluffy caramel apple dip.
Yes, but your dip will have the best flavor and smoothest texture when served at room temperature. Set it on the counter for about 30 minutes before your guests arrive, and it'll be ready to go.
More Caramel Recipes
- Caramel Apples
- Caramel Cheesecake Brownies
- Salted Caramel Sauce
- Caramel Brownies
- Caramel Pecan Pie Cheesecake Bars
- Healthier Caramel Apple Fall Cheesecake
Tried this recipe?
I'd love to hear what you think! Leave a comment and rating below to share your feedback. Your reviews help others discover this recipe and help me keep creating more free recipes for you. Snap a photo and tag me on social media @aheadofthyme too.

Lemon Chickpea Orzo Soup
This Lemon Chickpea Orzo Soup is a cozy and hearty vegan soup loaded with veggies, chickpeas, and orzo pasta with the bright flavor of fresh lemon juice. This quick and easy soup is made with simple ingredients in under 30 minutes. The perfect weeknight lunch or dinner this fall!
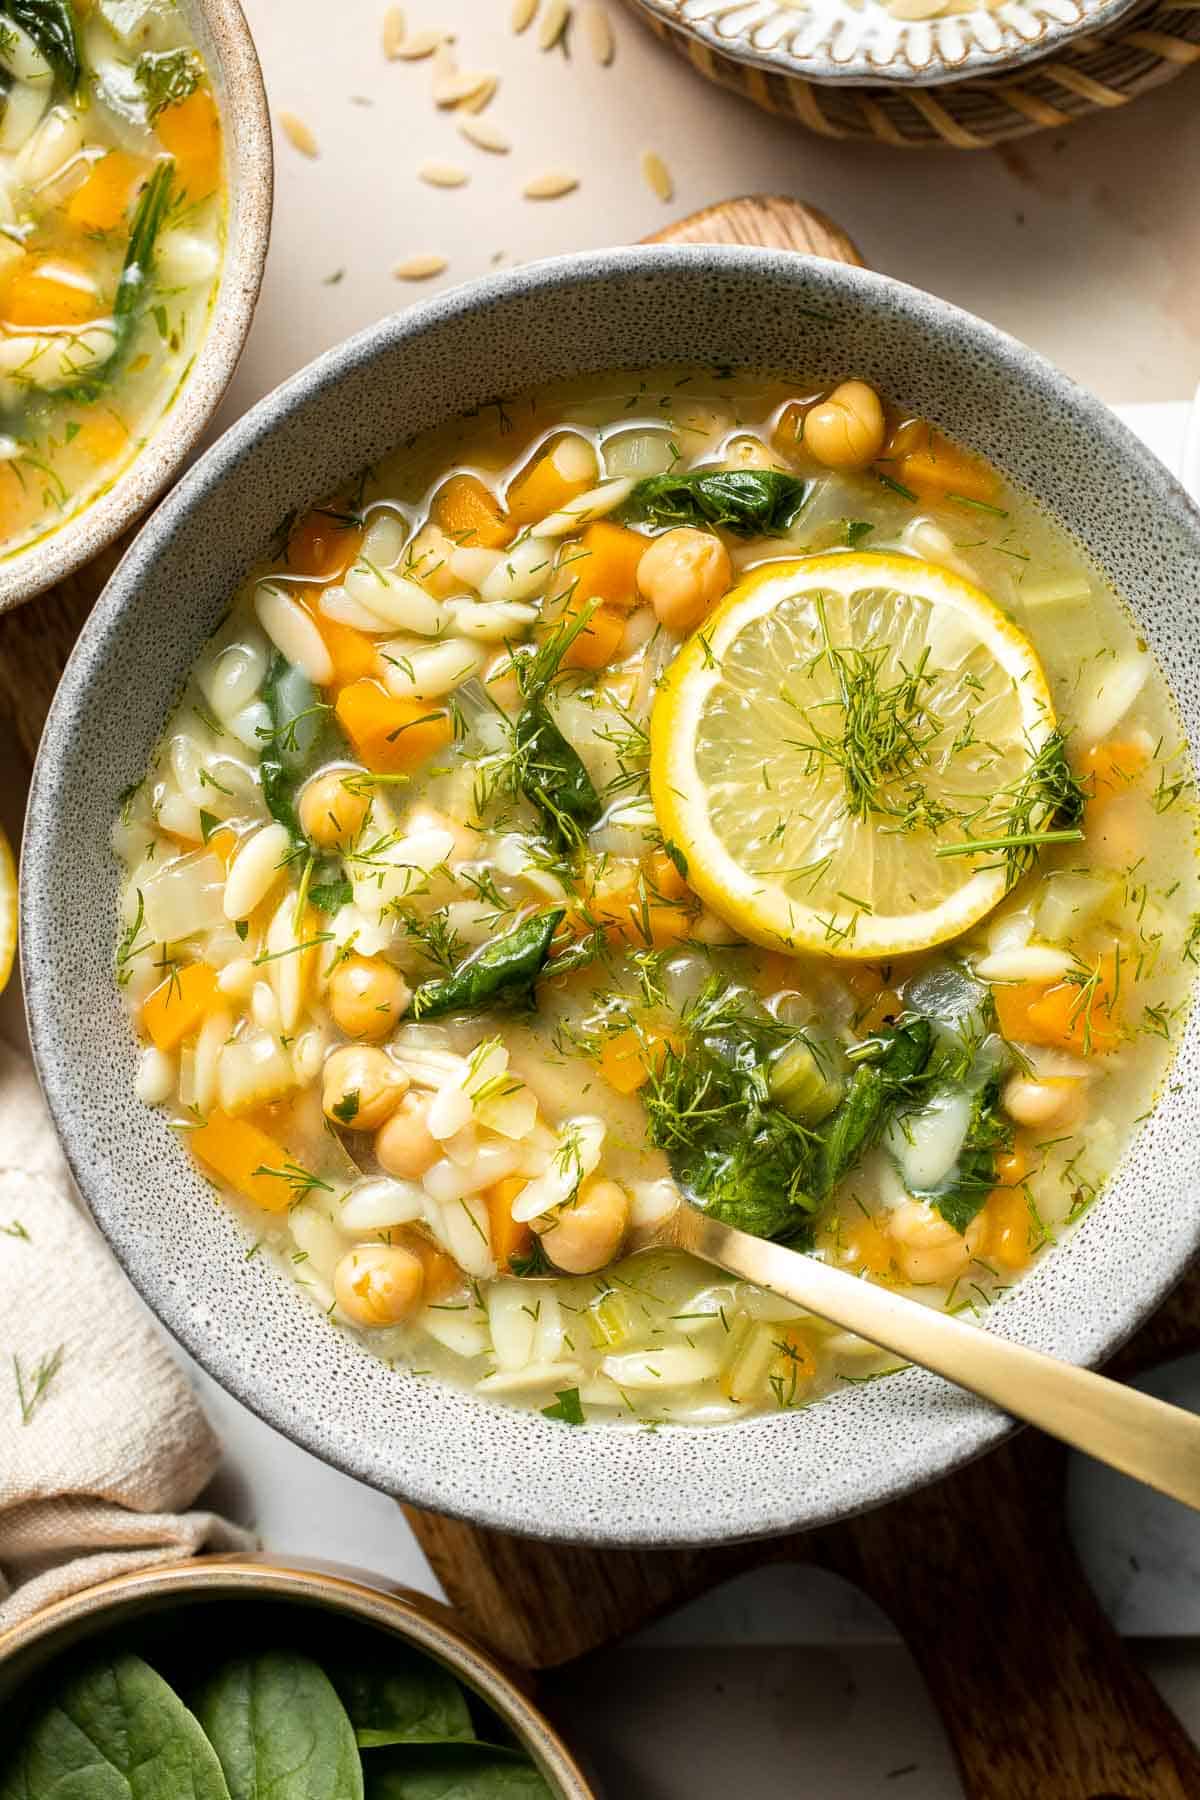
When the temperatures drop, and you need something warm and satisfying for dinner, give this recipe a try! It comes together so quickly, yet is filling enough to eat on its own as a simple vegetarian meal. Pair it with soft Ciabatta Rolls or a side of homemade Caesar Salad for a nice lunch, or offer it as a starter with your favorite Greek recipes. It's great for meal prepping, too. Make a big batch and enjoy a delicious bowl of soup for lunch all week long!
Why You'll Love This Lemon Chickpea Orzo Soup
- Made with simple pantry staples. There's something so wonderful about pulling a few ingredients from the pantry and turning them into a warm, satisfying meal! This lemon orzo soup recipe does require a few fresh components, but most of the ingredients can be gathered from the pantry or the crisper drawer. Plus, since it's made without any meat, it's budget-friendly, too!
- So easy to make. This simple soup starts by sauteeing veggies to release the flavor, then cooking them in broth with the chickpea beans and orzo pasta. Let the orzo plump up in the savory broth, then finish with baby spinach, lemon juice, and fresh herbs. The whole dish is ready in less than 30 minutes, perfect for an easy weeknight dinner even the meat eaters will love!!
- Naturally vegetarian. I love Greek Lemon Chicken Soup, but if you're vegetarian or need a vegan-friendly soup for your next meal, this is a stellar alternative! It has all the flavor of the original but is made with chickpeas instead of chicken. It's the perfect plant-based soup to cozy up during the colder months!

Ingredient Notes
To make this delicious Lemon Chickpea Orzo Soup, you will need the following ingredients (full measurements in recipe card below):
- oil - avocado oil to sauté the veggies. Butter or extra-virgin olive oil will work, too.
- veggies - use the classic mirepoix mix of veggies, including onion, celery, and carrots. A little fresh garlic will give the broth a savory flavor.
- vegetable stock - to make this a vegan lemon chickpea orzo soup, use your favorite veggie stock.
- chickpeas - rinsed and drained canned chickpeas.
- orzo pasta - this will plump up in the broth and become tender.
- lemon juice - add this towards the end of the cooking time to keep the lemon flavor bright and strong.
- baby spinach - this will wilt almost instantly in the hot broth. Frozen spinach can also work in a pinch.
- fresh herbs - fresh dill and parsley are much more aromatic than dried herbs and are the perfect garnish.
- seasoning - Italian seasoning, salt, and pepper.
You will also need measuring cups and spoons, a medium or large pot, cutting board and knife, and a ladle.

How to Make the Best Lemon Chickpea Orzo Soup
- Sauté aromatics. Heat oil in a medium pot over medium heat. Add onions and garlic and sauté until onions are soft and translucent, about 2-3 minutes. Add in celery and carrots and continue to sauté for another 3 minutes, stirring often.

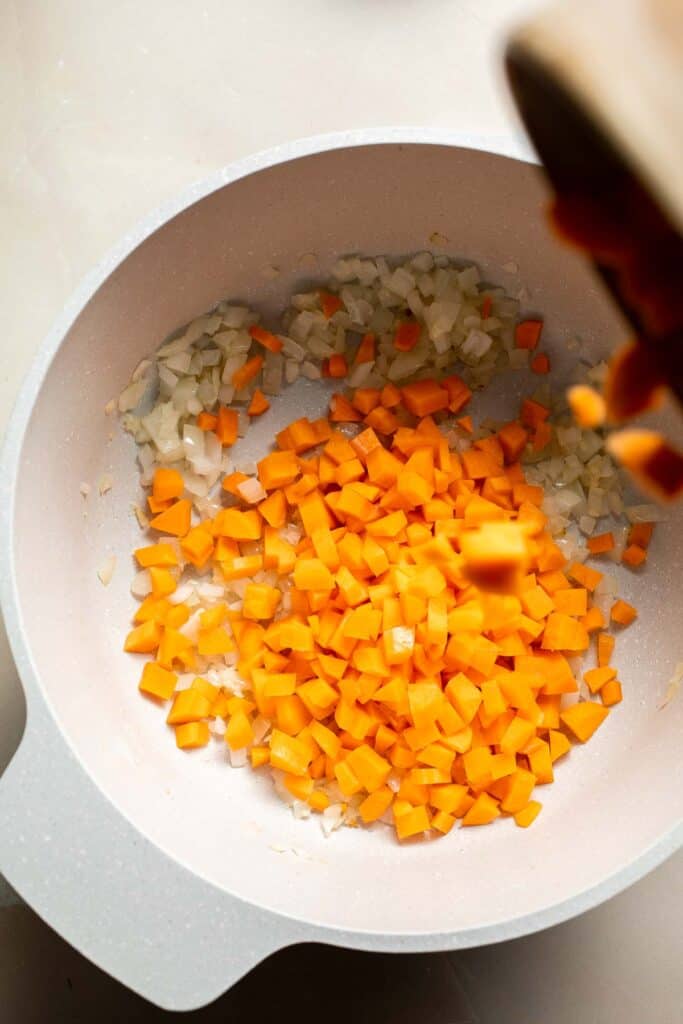


- Add stock. Add stock and bring it to a boil on high heat.


- Add chickpeas and orzo. Once the stock is boiling, add chickpeas, orzo and Italian seasoning.


- Cook. Cook uncovered on medium-high heat until the orzo is cooked through, about 10 more minutes, stirring occasionally to make sure the pasta doesn't stick to the bottom of the pot.
- Season. Once orzo is cooked, stir in lemon juice, baby spinach, parsley, and dill. Season with salt and pepper, to taste. Serve warm.


Recipe Variations
- Change the beans. Instead of chickpeas, use white beans, like cannellini or Great Northern beans.
- Add protein. This doesn't have to be a vegan or vegetarian soup! Feel free to add leftover rotisserie chicken and use chicken broth.
- Try a different pasta. Orzo is the perfect size and shape for soup, and it cooks very quickly! Really, though, you can add any type of pasta. Large varieties just take a little extra time to cook! Additionally, you can use whole wheat orzo for extra fiber or substitute gluten-free orzo to make this soup celiac-friendly.
- Tweak the veggies. There are many ways to adjust this soup to suit your preferences. For example, fresh spinach can be replaced with frozen spinach or a variety of other leafy greens, like Swiss chard, kale, etc. Feel free to sneak in some diced zucchini, too.
How to Serve
This Lemon Chickpea Orzo Soup is delicious served on its own, or paired with some of my favorite soup sides including:
For more recipes, see our 25 Side Dishes for Soup.

Recipe Tips and Tricks
- Make your own vegetable broth. Homemade is best! Using boxed broth works for quick dinners, but if you want even more flavor, simmer onion, celery, carrots, bay leaves, and any veggie scraps in a pot of lightly salted water until the broth has a rich flavor.
- Garnish with lemon zest. To play up the lemony flavor, add a little lemon zest on top of each bowl before serving.
- Simmer parmesan rind. For extra depth of flavor, simmer a parmesan rind in the lemony broth for a while. It will add a sweet, nutty, savory flavor to elevate this simple chickpea soup.
Storing and Freezing Instructions
How to Store
Allow the leftover soup to cool to room temperature, then store leftovers in an airtight container in the fridge for 3-4 days.
How to Reheat
Warm the soup in a pan on the stove or microwave it for several minutes. Add an extra squeeze of lemon juice after reheating.
How to Freeze
Soups with pasta can be frozen, but the noodles will plump up and become quite soggy after thawing. If you know you want to freeze the soup, consider leaving the orzo out and adding it when you reheat it.
FAQ
Yes! Orzo is a fantastic pasta to add to soup as it cooks quickly and has a similar texture to rice. It's essential in my lemon chicken orzo soup, this vegetarian version, creamy turkey orzo soup, and more.
Usually! Most pasta recipes use flour and water, although some include egg. You'll want to check the package ingredients, but most orzo recipes are safe for vegetarians and vegans.
You might be tempted to add lots of lemon juice early on to infuse its flavor into the broth, but it's actually best to add it towards the end. The longer it cooks, the more the flavor breaks down. You'll get a much stronger lemon flavor if you add it in the last few minutes of the cooking time or as a garnish.
More Hearty Vegetarian Soup Recipes
- 40 Best Vegetarian Soup Recipes
- Minestrone Soup
- White Bean Soup with Kale
- Persian Lentil Soup
- Alphabet Soup
- Hungarian Mushroom Soup
Tried this recipe?
I'd love to hear what you think! Leave a comment and rating below to share your feedback. Your reviews help others discover this recipe and help me keep creating more free recipes for you. Snap a photo and tag me on social media @aheadofthyme too.

Almond Butter Granola Bars
Looking for the perfect snack for your kids' lunchboxes or for your own? Almond Butter Granola Bars packed are the perfect handheld snack any time of day. They are healthy, gluten-free, and have no refined sugar. So unlike the sugary boxed stuff, you know exactly what ingredients are in these bars. It's guilt-free snacking at it's finest.

With all the chaos of the back-to-school season, it can feel overwhelming to get everything on the school supply list, juggle the changing schedule, and ensure you have plenty of nutritious snacks on hand! Fortunately, these healthy granola bars are extremely easy to make, so you can make them once and tuck them into lunch bags (or purses) for a healthy snack on the go. One batch makes 12 no bake granola bars and lasts for months in the freezer, so you can easily make a double or triple batch to stock up for a while!
Why You'll Love These Almond Butter Granola Bars
- Unprocessed. Unlike store-bought granola bars, these homemade ones only contain a short list of ingredients you know and love, like almond butter, oats, honey, etc. No corn syrup, additives, fillers, or junk.
- Customizable. Prefer a different nut butter? Go for it. Want to add mini chocolate chips or pumpkin seeds? They would be great! There are lots of ways to make these no bake granola bars your own.
- Nutritious snack. With plenty of fiber from the oats and almonds, healthy fats from the almond butter, and just enough sweetness from the honey, these energy bars will tide you over without adding too much sugar. Serve with fresh fruit and/or a protein shake for an easy breakfast or a filling post-workout snack!
- So easy to make. The best part of these almond granola bars might be that they are so easy to make! Just toast the oats and almonds, combine the ingredients, chill, and slice. So much easier that you might have thought it would be to make granola bars from scratch!

Ingredient Notes
To make these no bake Almond Butter Granola Bars, you will need the following ingredients (full measurements in recipe card below):
- almond butter - or peanut butter for peanut butter granola bars instead.
- rolled oats - you want to use old-fashioned rolled oats, not quick oats.
- almonds - feel free to use sliced almonds or substitute with other types of nuts such as pecans or walnuts.
- honey - or keep it vegan by using maple syrup.
- coconut oil - or substitute with melted butter.
- chocolate - fold in some semi-sweet chocolate chocolate chunks or chocolate chips. Melt extra chocolate to drizzle on top, if desired.
You will also need measuring cups and spoons, large sheet pan, mixing bowl, spatula, and an 8x8-inch square baking pan.

How to Make the Best Almond Butter Granola Bars
- Toast oats and nuts. In a large sheet pan, add rolled oats and almonds. Toss to combine and spread out evenly. Bake in.a 350F preheated oven for 10-15 minutes until toasted. Keep a close eye on them towards the end to make sure that they don't burn.


- Add remaining ingredients. Transfer the toasted oats and almonds to a large mixing bowl. Add almond butter, honey, and melted butter. Use a spatula to mix until combined. If the mixture is warm from the toasted oats or melted butter, then let it sit at room temperature until completely cool.

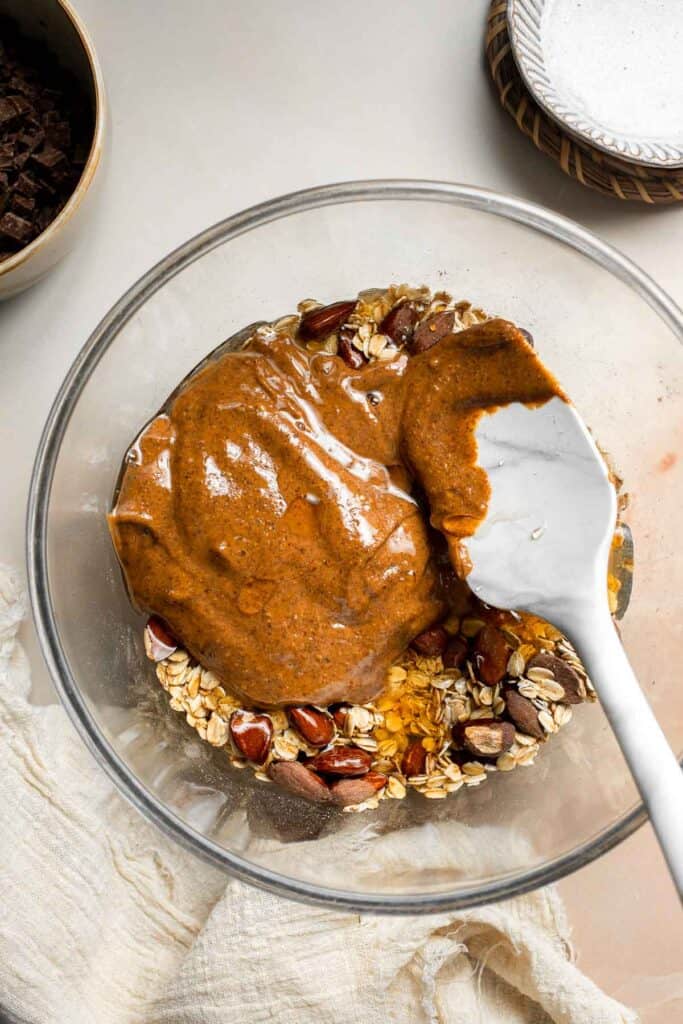

- Fold in chocolate. Once cooled to room temperature, fold in the chopped chocolate.


- Chill. Line an 8x8-inch square dish with parchment paper and allow for an overhang on two sides (for easy removal). Add the granola mixture and spread it across the bottom. Use a spatula or the back of a flat bottomed measuring cup or glass to pack it in very tightly and evenly. Transfer the pan to the fridge and chill until set, about 30 minutes.


- Slice. Once hardened, carefully remove the large granola square using the parchment paper overhang. Use a sharp knife to slice horizontally in the middle. Then, make 5 vertical slices to create 12 rectangular bars.


- Add chocolate drizzle (optional). On any of the granola bars, add a drizzle of melted chocolate. Place back into the fridge until the chocolate is completely hard.


Recipe Variations
- Change the nut butter. You can make these with many different nut butters, including sunflower seed butter, pumpkin seed butter, etc.
- Make them gluten-free. For a celiac-friendly snack, use certified gluten-free oats.
- Use a different sweetener. Instead of honey, try maple syrup, agave syrup, or even brown rice syrup.
- Add more chocolate. Add in 1-3 tablespoons of cocoa powder to give these granola bars an extra chocolatey twist.
- Adjust the flavors. Play around with the flavors by adding in some apple chunks, or raisins - or try using cinnamon, apple pie spice, or pumpkin pie spice for a different flavor profile. You can also stir in some chia seeds, ground flax seeds, cacao nibs, unsweetened coconut flakes, and more for extra flavor and a range of nutritional benefits.
- Drizzle them with chocolate. This makes these bars more of a dessert than a snack, but you can melt dark chocolate chips and drizzle them over the bars for a sweet pop of flavor.
How to Serve
These homemade Almond Butter Granola Bars are delicious served on their own as a snack or breakfast on the go, or packed for lunch alongside some other snacks including:
For more recipes, see our 50 Best Healthy Snacks.

Recipe Tips and Tricks
- Chill before cutting. After baking, the granola bars will still be soft and pliable. Let them cool completely before slicing and wrapping.
- Prep the pan. Line the pan with parchment paper to make it easier to remove the bars in one piece.
- Store properly. Homemade granola bars will last for 2 weeks in an airtight container at room temperature, but they'll last for several months in the freezer! I like to wrap them in wax paper before storing for easy serving.
Storing and Freezing Instructions
How to Store
You can store homemade granola bars in an airtight container in the fridge for up to 2 weeks.
How to Freeze
These homemade granola bars are freezer friendly. To freeze, slice and place them on a parchment lined baking tray and freeze for an hour. Then transfer the bars into a freezer bag. They can be stored in the freezer for up to 3 months.
FAQ
Yes! You don't have to splurge on almond butter at the store-make your own! Toast the almonds on a sheet pan at 350 for 5-10 minutes to warm them up, then blend in the food processor until smooth and creamy (about 5-10 minutes). Stir this homemade creamy almond butter into the oat mixture, and bake like normal. You can mix and match different nuts, too.
Honey not only adds sweetness but also helps hold these chewy almond butter granola bars together. If you don't have any, replace it with another syrupy sweetener, like maple syrup or brown rice syrup.
That depends on the quality of your ingredients. Oats and honey aren't typically very expensive, but if you use local, raw honey or organic sprouted oats, they can be! Almond butter tends to be a bit pricey, but you can often get it for a more affordable price at Costco or other bulk stores. Fortunately, this recipe can be made with any nut butter, so you can adapt the quality of ingredients to your budget.
More Granola Recipes
Chewy Peanut Butter Granola Bars
Tried this recipe?
I'd love to hear what you think! Leave a comment and rating below to share your feedback. Your reviews help others discover this recipe and help me keep creating more free recipes for you. Snap a photo and tag me on social media @aheadofthyme too.

Veggie Pasta
This comforting Veggie Pasta dish combines your favorite seasonal veggies with pasta in a simple tomato sauce, infusing a bright flavor into each bite. It's fast enough to make any night of the week, yet so flavorful you'll want to serve it at your next dinner party. Grate some Parmesan on top, and dinner is served!
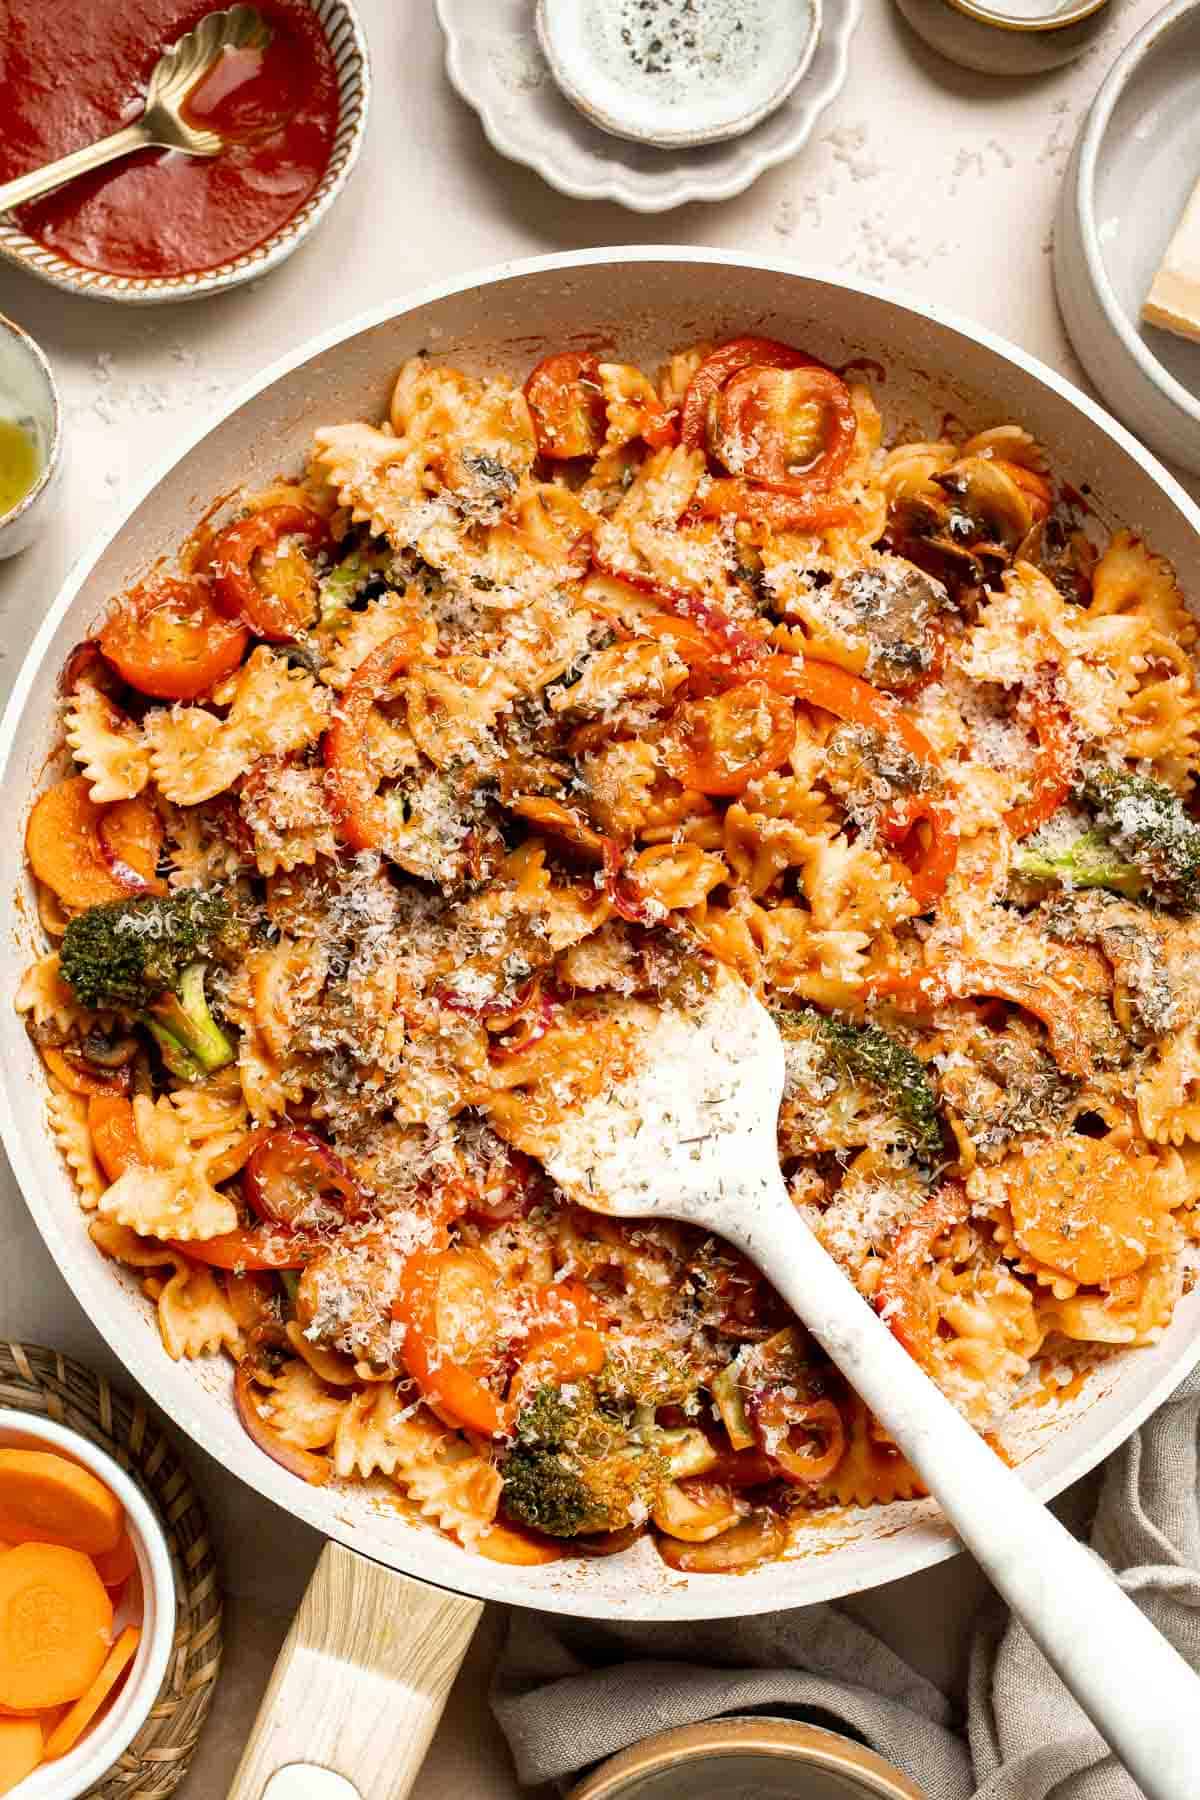
When you need a quick and easy dinner, sometimes you end up skimping out on veggies. Not with this recipe! This simple bowtie pasta dish is the best of all worlds: it's super quick to make, uses ingredients you probably have on hand, and has tons of vegetables. Turn it into a hearty main meal by adding cannellini beans, grilled chicken, or Italian sausage. Don't forget a hunk of crusty bread to sop up the sauce!
Why You'll Love This Veggie Pasta
- Ready in 30 minutes. Start the timer! You'll be ready to satisfy your pasta cravings in no more than 30 minutes, including the time it takes to cook all those fresh veggies, make the sauce, and simmer everything together. It's seriously fast!
- Vegetarian-friendly. Although you can serve this pasta with meat if you prefer, it's a fantastic vegetarian pasta dish. Serve it on Meatless Monday or as a veggie-friendly option at your next pasta night.
- Loaded with veggies. When I say veggie pasta, I mean it! There are 7 types of vegetables in this recipe, each of which adds a different texture and flavor. I love how the sweetness of the carrot plays with the brightness of the tomato sauce, and the mushrooms take on a meaty texture that makes the whole dish more satisfying. It's a celebration of the summer's finest and the easiest way to add more veggies to your plate!
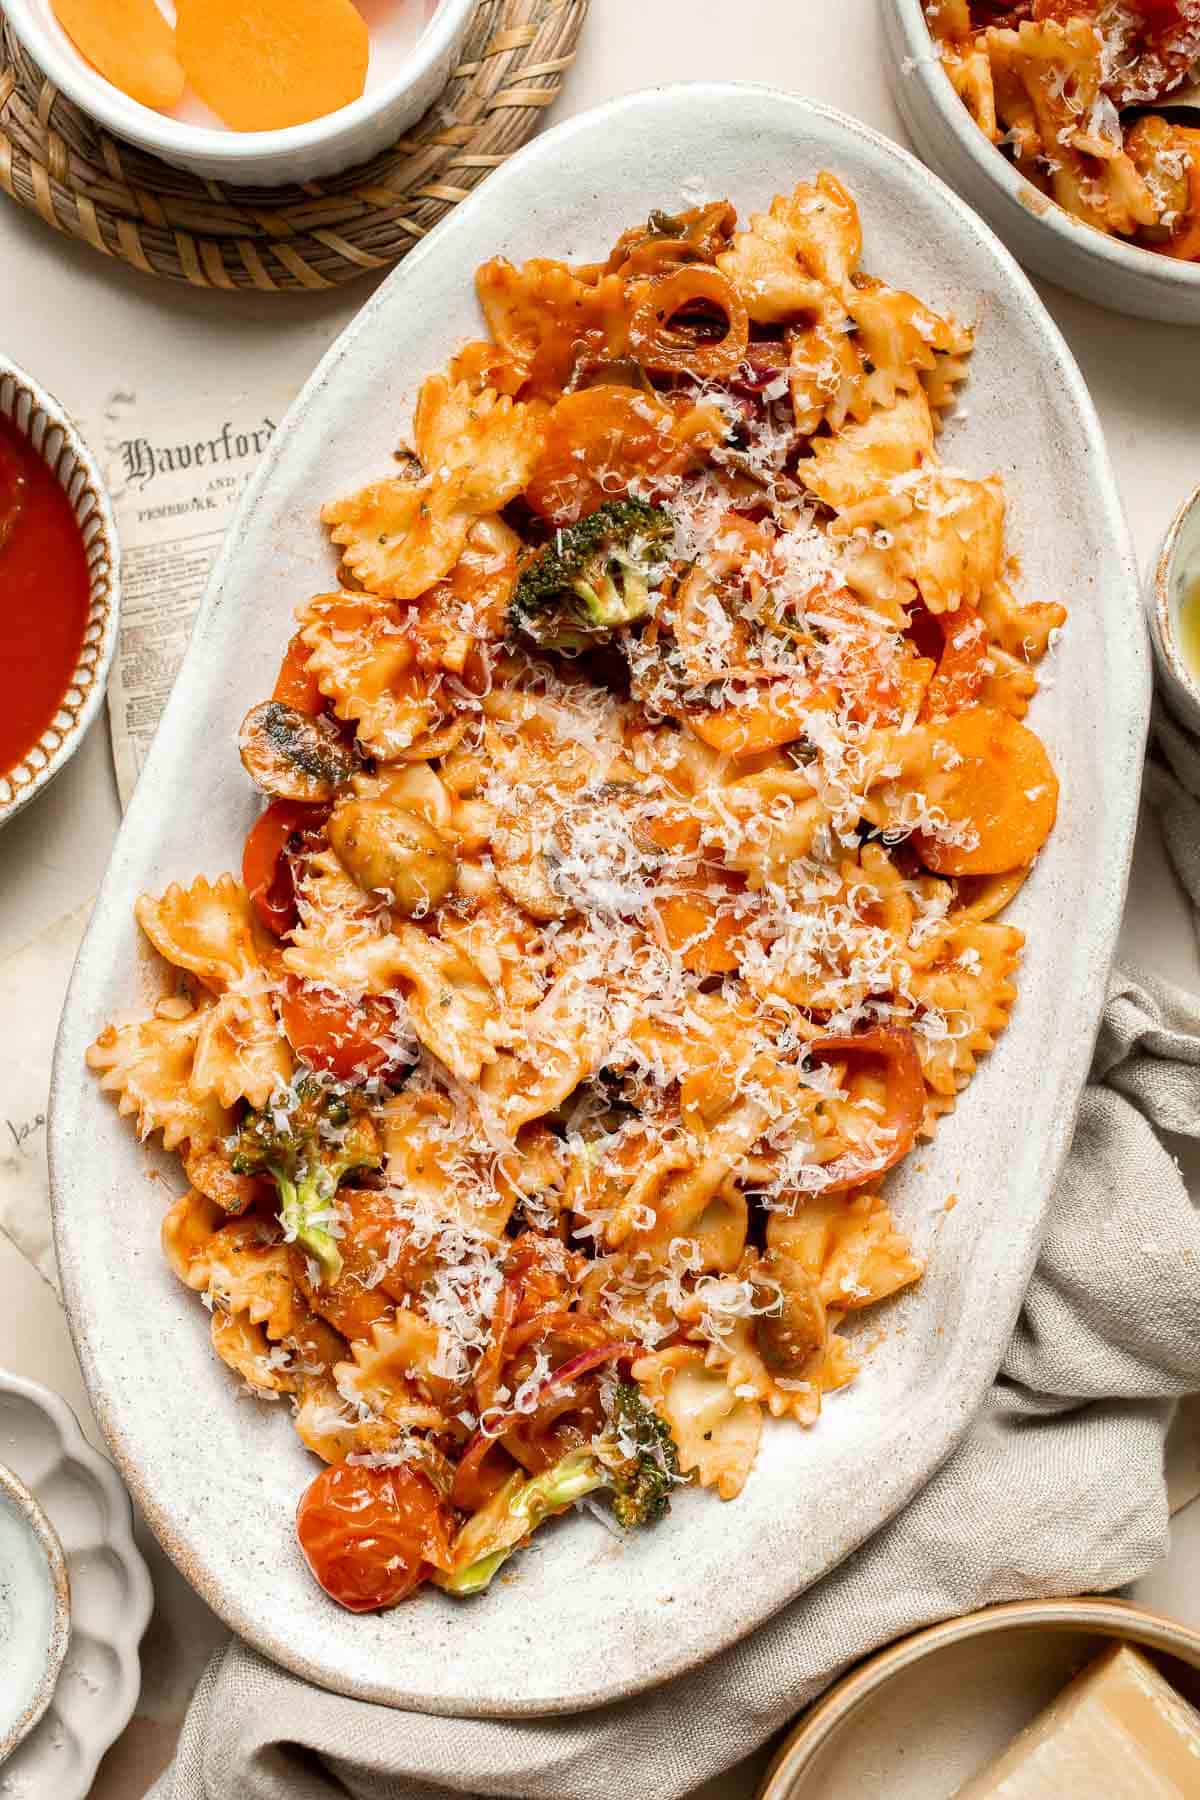
Ingredient Notes
To make this delicious Veggie Pasta, you will need the following ingredients (full measurements in recipe card below):
- pasta - we use bowtie pasta (farfalle pasta) but feel free to choose any type of pasta shape and type that you prefer, including whole-grain pasta or gluten-free pasta.
- extra virgin olive oil
- veggies - we use a variety of vegetables including white button mushrooms, garlic, red onion, carrot, red bell pepper, broccoli, and cherry tomatoes.
- tomato sauce - this is regular canned tomato sauce, although you can use marinara sauce instead for a more robust flavor.
- seasonings - use a mixture of Italian seasoning blend, salt, and black pepper.
- Parmesan cheese - use for garnish. To make this recipe vegan, then use non-dairy Parmesan or leave out the cheese.
You will also need measuring cups and spoons, a large pot, strainer, large skillet with a lid, and a serving spoon.
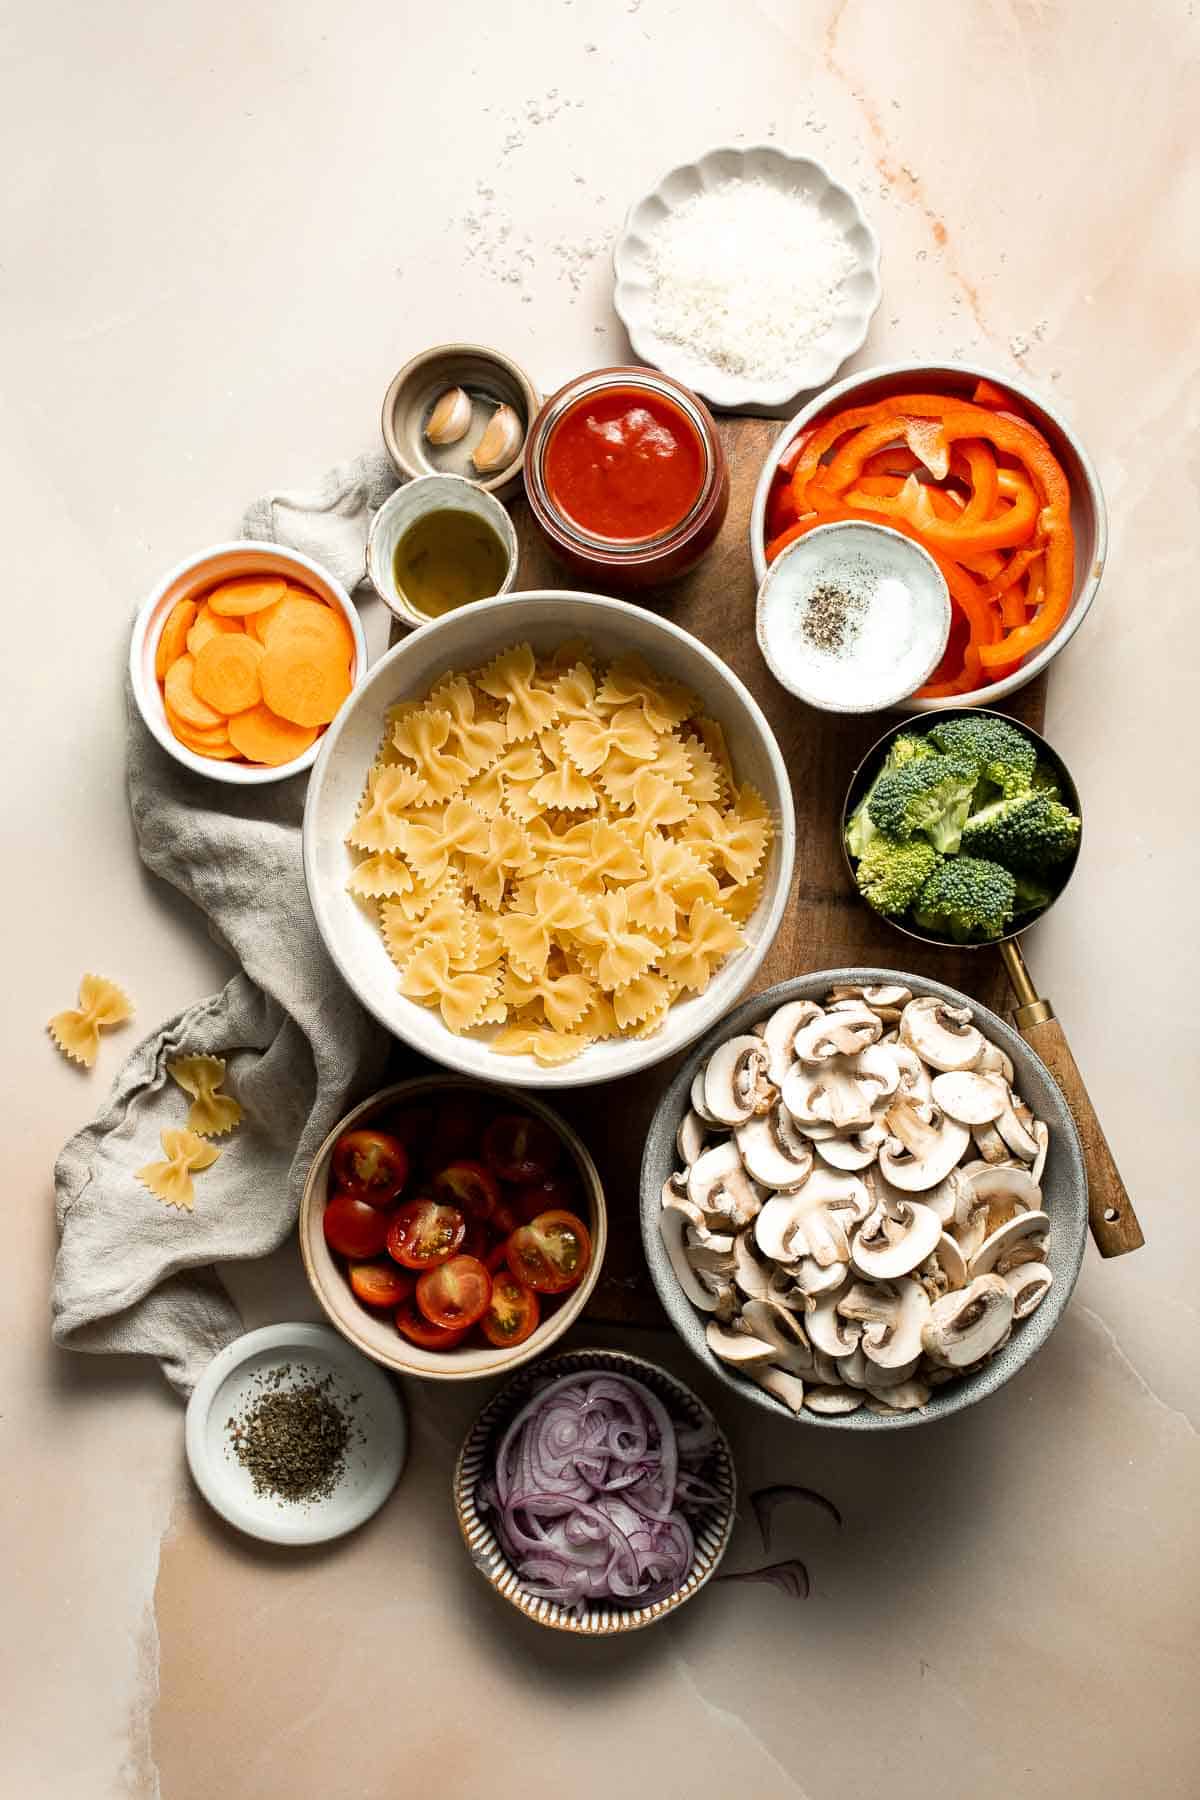
How to Make the Best Veggie Pasta
- Cook pasta. Bring a large pot of salted water to a boil over medium-high heat. Add penne pasta and cook until al dente (fully cooked but still firm), about 8-10 minutes or according to package directions. Drain well and set aside.
- Sauté mushrooms. While the pasta cooks, heat oil in a large skillet over medium-high heat until the hot oil sizzles, about 1-2 minutes. Add mushrooms and season with salt and pepper. Sauté for 5 minutes until golden browned on all sides.


- Cook veggies. Add onion, garlic, carrots, bell pepper, broccoli and tomatoes. Stir well until evenly combined.


- Add sauce and simmer. Add tomato sauce and Italian seasoning. Reduce heat to low and cover the lid. Simmer until all the veggies are tender, about 2-3 minutes.


- Add pasta. Stir in cooked penne pasta and toss well.


- Serve. Sprinkle with parmesan cheese and serve warm.

Recipe Variations
- Add protein. Serve this veggie pasta with grilled chicken breast, Italian sausage crumbles, or white beans to make it more filling.
- Make creamy vegetable pasta. Craving something decadent? Add 4-6 oz of cream cheese towards the end of the cooking time and let it melt into the sauce. It will add a tangy flavor and lusciously creamy texture.
- Add a dollop of pesto. Fresh herbs always pair well with pasta. For an extra pop of flavor, add a spoonful of fresh basil pesto to each bowl before serving.
- Spice it up. Add a teaspoon (or more) of crushed red pepper flakes to give the sauce a spicy kick.
How to Serve
This Veggie Pasta is delicious served on its own, or paired with some of my favorite pasta sides including:
- Garlic Breadsticks
- Kale Caesar Salad
- Whipped Ricotta Crostini
- Spinach Salad
- Pull Apart Garlic Bread
- Sautéed Brussels Sprouts
For more recipes, see our 30 Side Dishes for Pasta.
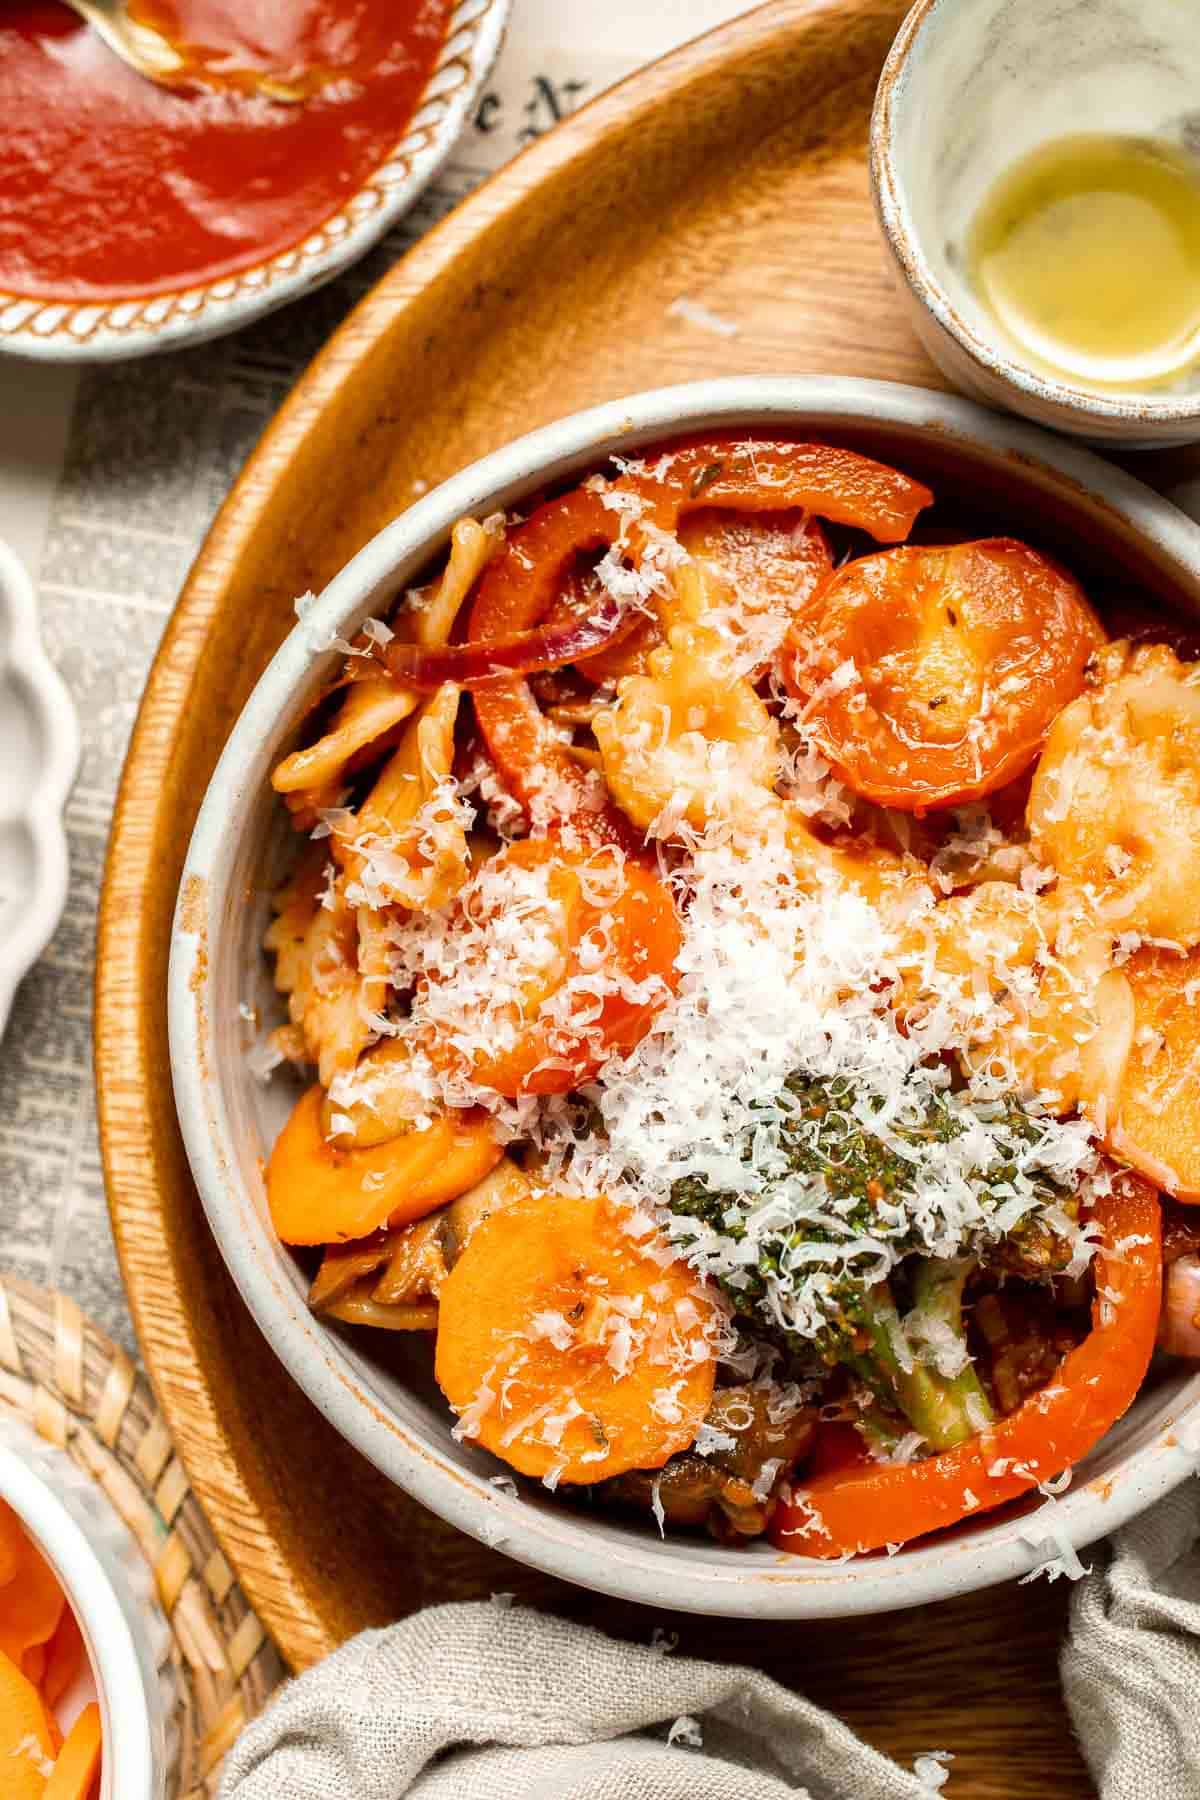
Recipe Tips and Tricks
- Use your favorite veggies. There are many ways to adapt this recipe. It's great with zucchini, yellow squash, green beans, Swiss chard, kale, spinach, etc. Use whichever seasonal vegetables you prefer.
- Cook the mushrooms first. It's tempting to skip ahead and add all the veggies at once, but it's worth the extra effort to dry out the mushrooms first! They'll make the sauce less watery, take on a meaty texture, and absorb the sauce so much better.
- Play with garnishes. Parmesan is a classic garnish for pasta dishes, but you can also try adding a drizzle of olive oil, goat cheese crumbles, fresh parsley, sliced olives, or even a squeeze of fresh lemon juice.
Storing and Freezing Instructions
How to Store
Store leftover pasta in an airtight container in the fridge for 3-4 days.
How to Reheat
Microwave the leftovers for a few minutes, give them a good stir, and add a little extra cheese on top. You can also warm the leftovers in a skillet with an extra splash of water to loosen the sauce.
FAQ
Pasta can be a great way to serve more veggies, whether that's by making a dish loaded with veggies (like this one), using pasta made out of veggies, or sneaking in some frozen spinach or grated zucchini into your favorite jarred marinara sauce. I like to use a combination of these methods when possible. For this dish, you sauté many different vegetables together before simmering them in a tomato sauce with the cooked pasta. It's an easy way to serve lots of veggies in one sitting, but you can certainly use veggie-based pasta or a sauce made with hidden veggies to add even more veggies to your plate.
Yes, but you'll want to skip the sauté step, or the veggies will overcook. Just warm the roasted vegetables with the tomato sauce until heated through, then add the cooked pasta. Using precooked veggies makes this meal come together even faster, which is so convenient on those busy weeknights!
All vegetables can be paired with pasta in some way or another, but you will want to adjust the sauce and type of pasta depending on the season. For example, this summery veggie pasta uses bell peppers, garlic, onion, mushrooms, carrots, and broccoli, which soak up the flavor of the tomato sauce for a satisfying summer dinner.
In the spring, I like to make this lemony pasta primavera recipe with fresh asparagus, carrots, and more. During the colder months, you'll usually pair hearty vegetables with creamy sauces, like this butternut squash carbonara or this creamy mushroom pasta. There are lots of great pasta recipes to choose from!
More Vegetarian Pasta Recipes
- 40 Best Pasta Recipes
- Farfalle Pasta with Mushroom Rosé Sauce
- Pasta Primavera
- Broccoli Pesto Pasta
- Baked Feta Pasta
- Creamy Tomato Pasta
Tried this recipe?
I'd love to hear what you think! Leave a comment and rating below to share your feedback. Your reviews help others discover this recipe and help me keep creating more free recipes for you. Snap a photo and tag me on social media @aheadofthyme too.

- « Previous Page
- 1
- …
- 5
- 6
- 7
- 8
- 9
- …
- 41
- Next Page »