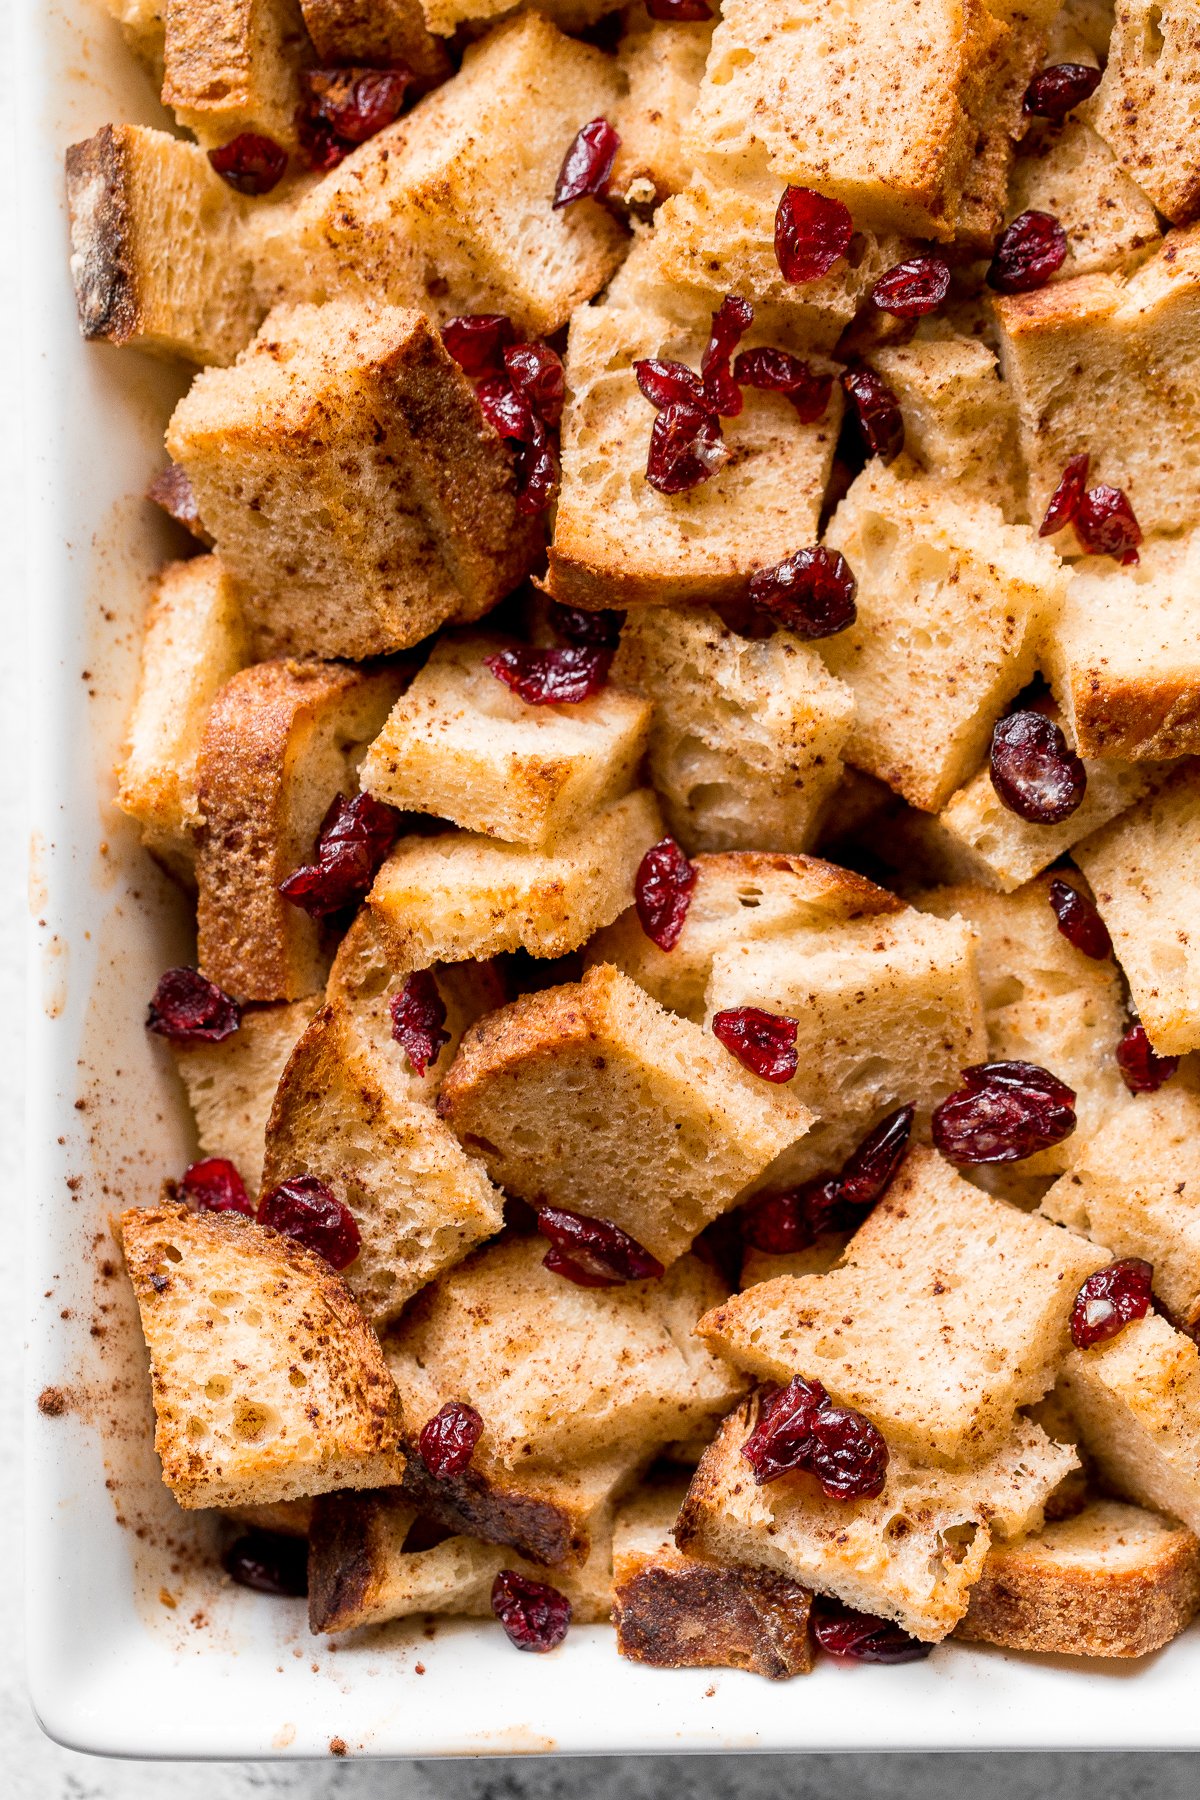
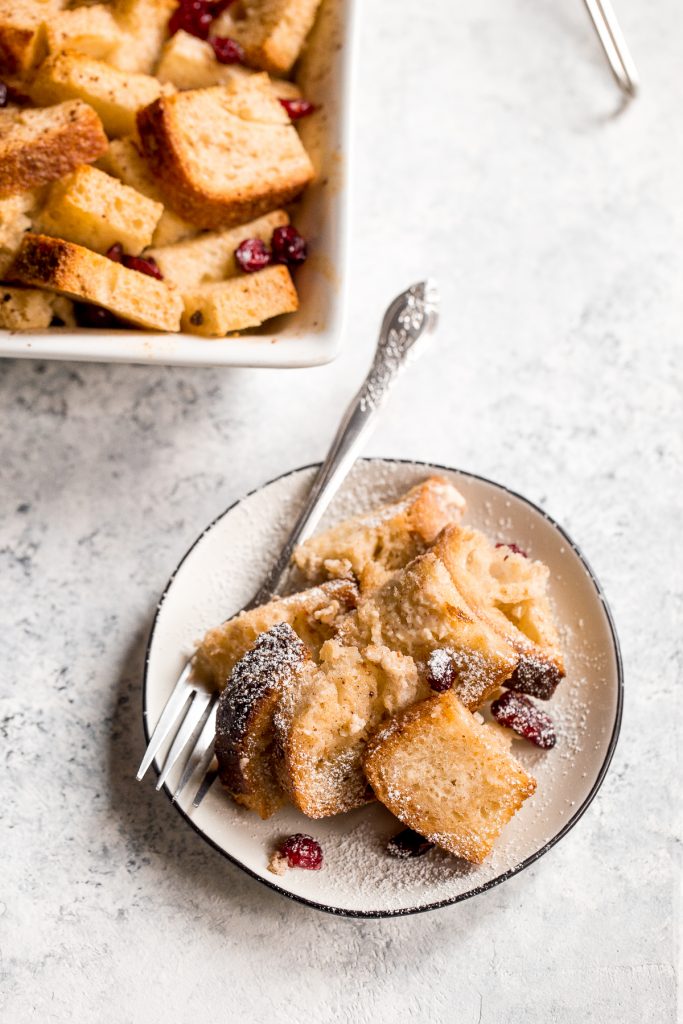
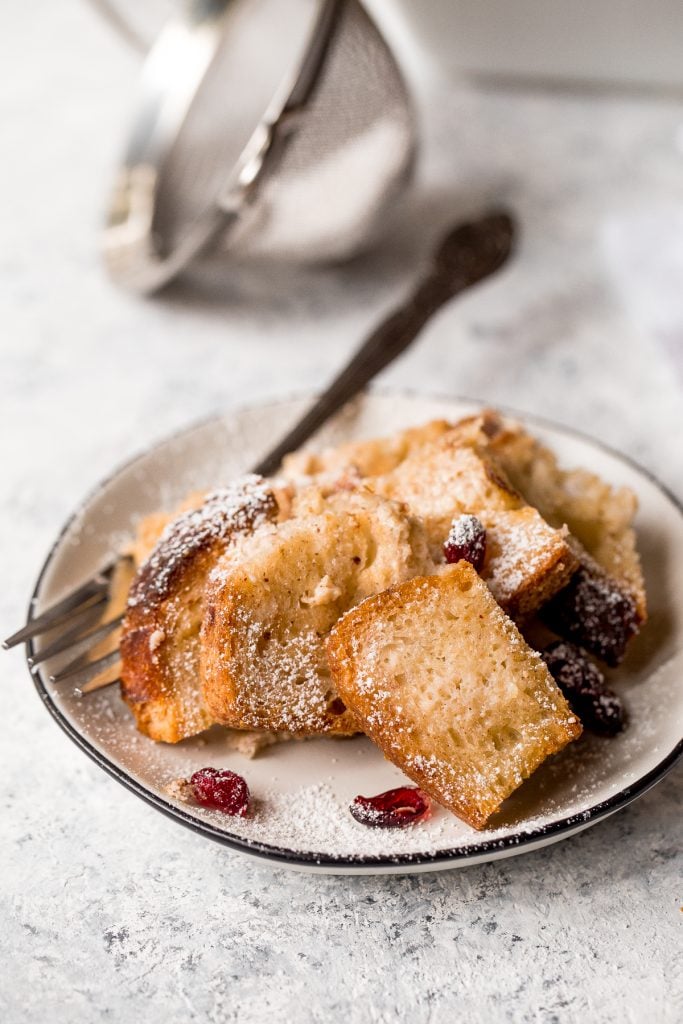
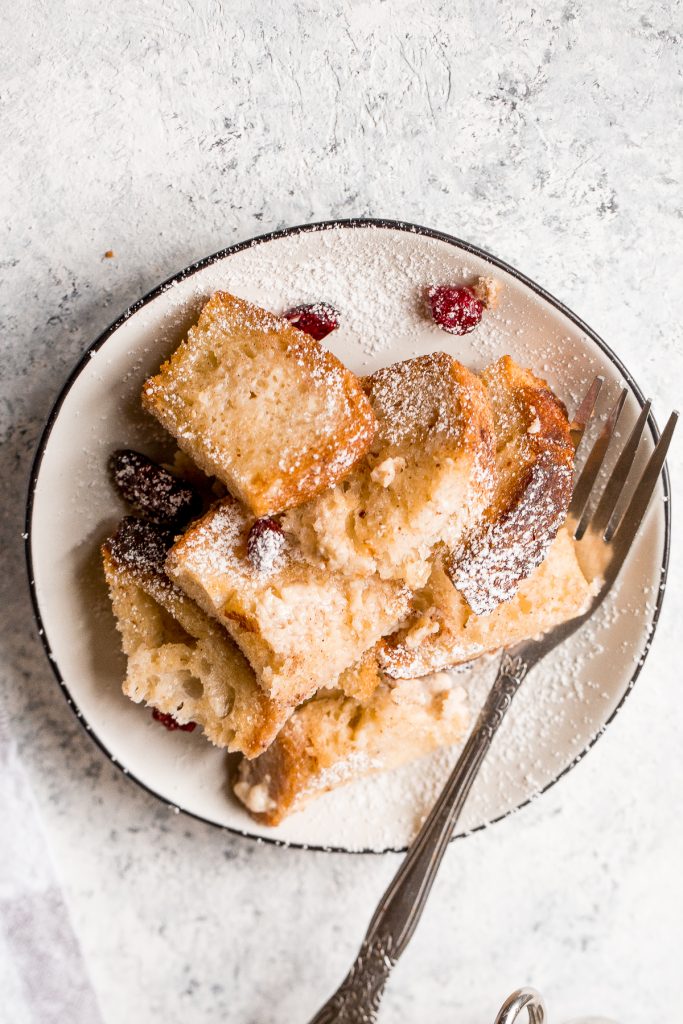
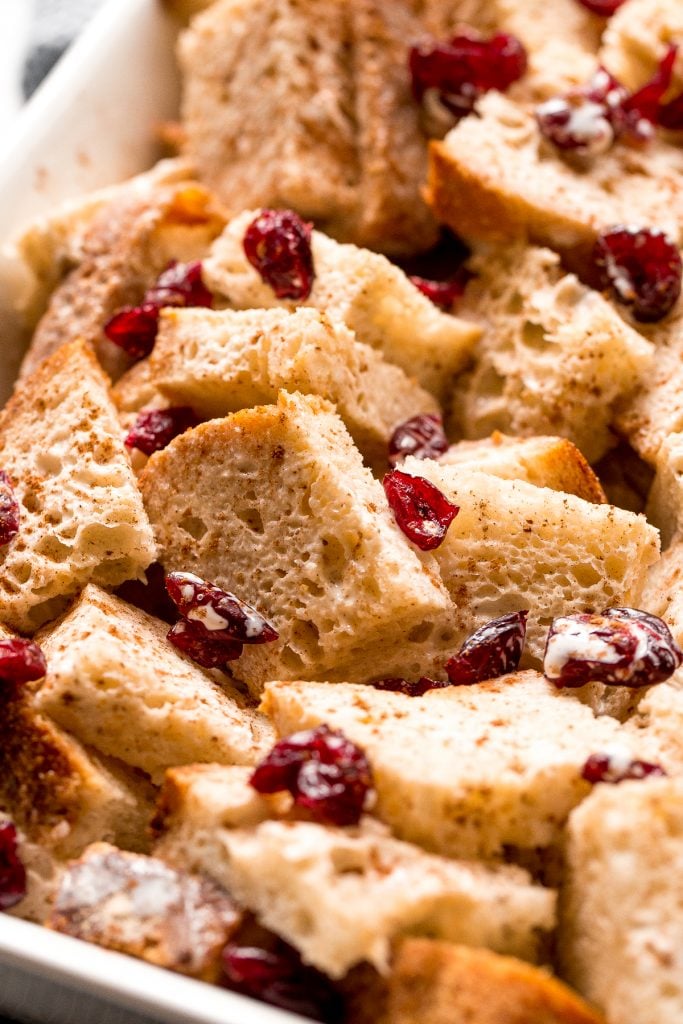
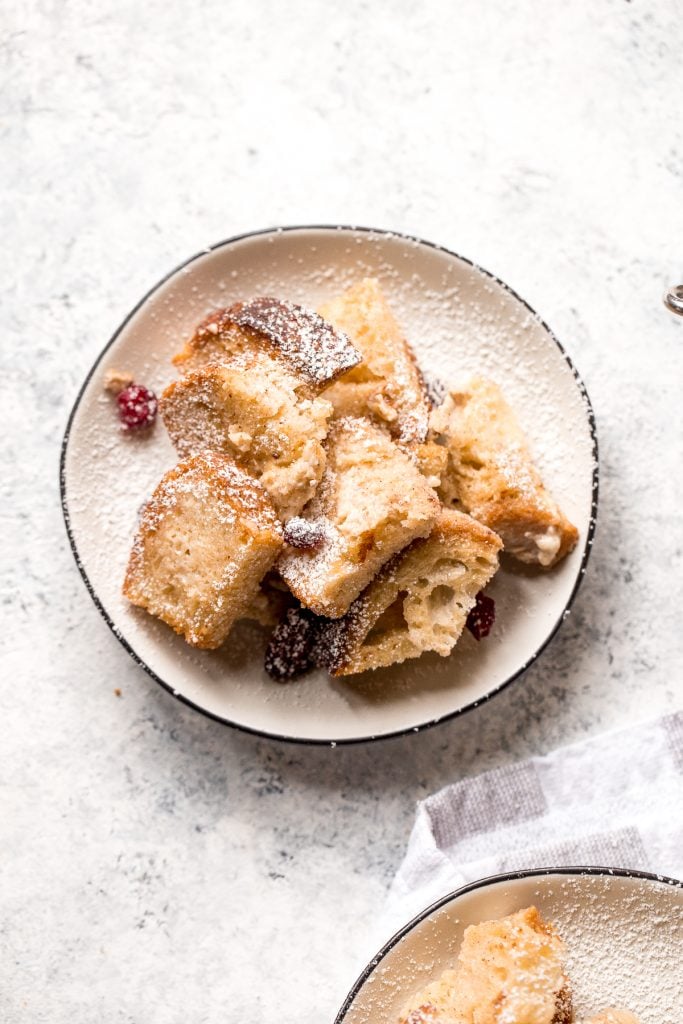
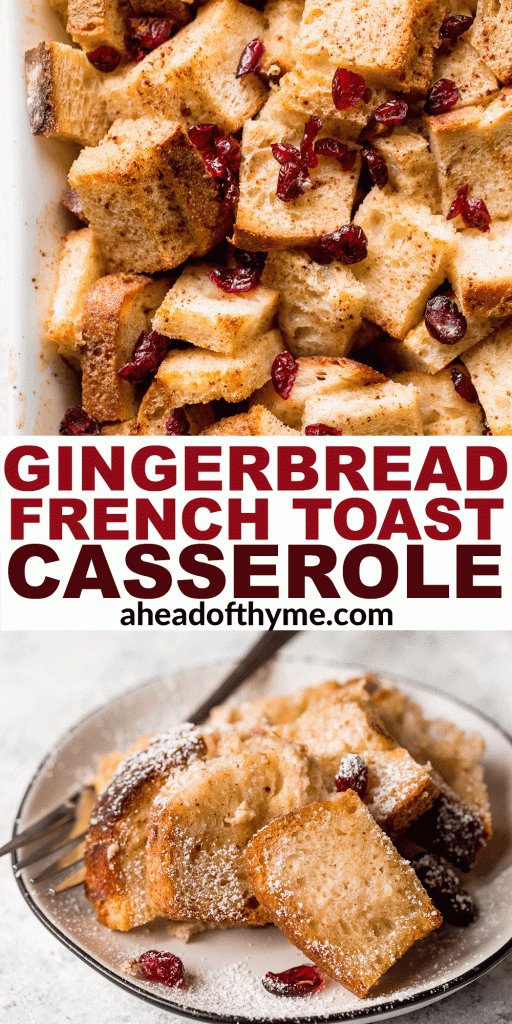
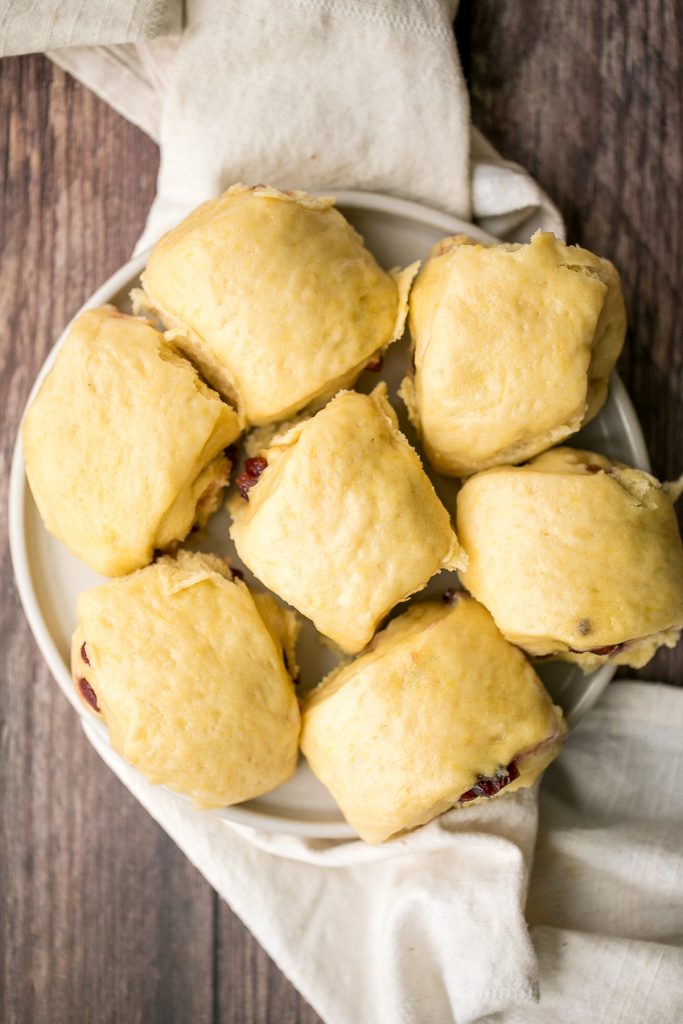
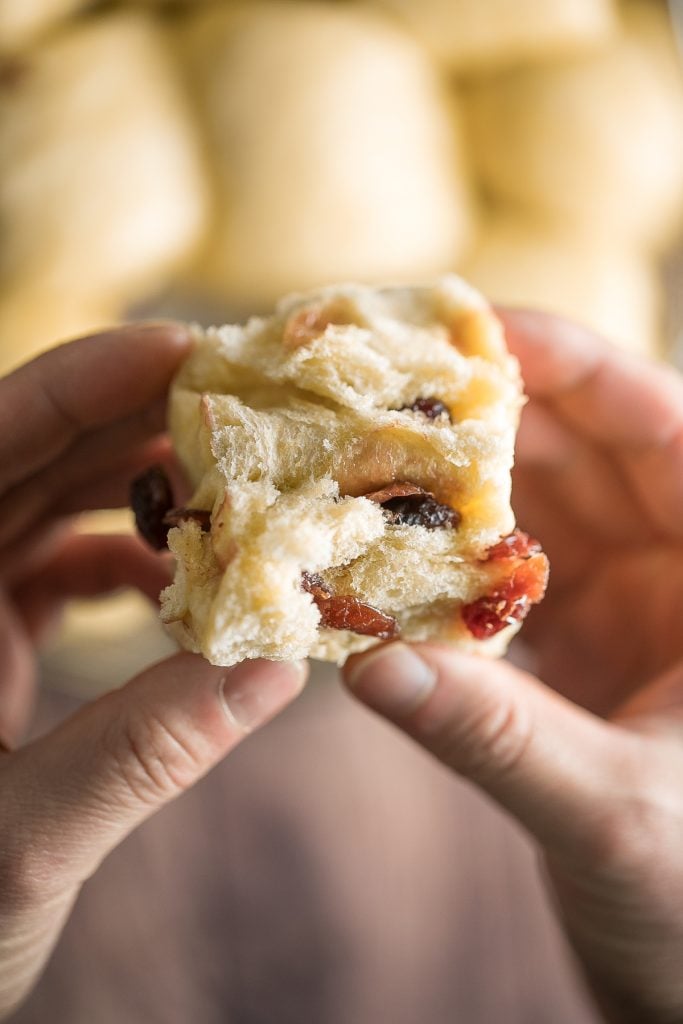
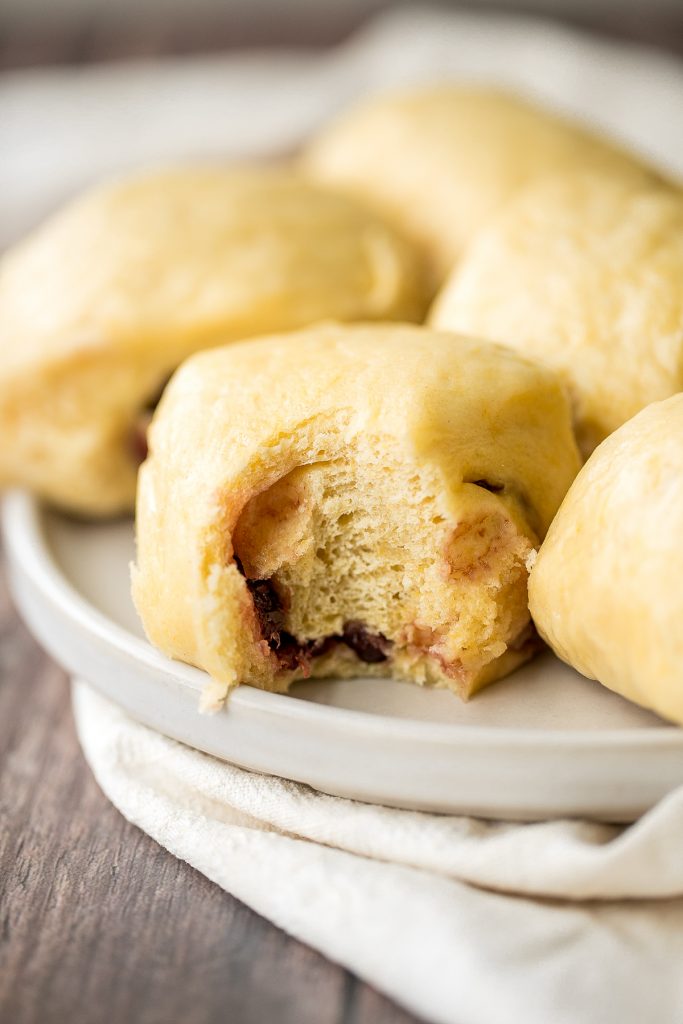
Festive baked gingerbread french toast casserole with cubed crusty bread, custard with warm gingerbread spices, and orange soaked cranberries, is baked until golden brown and crispy. It's soft and tender on the inside, and crispy and firm on the outside. This baked french toast is the perfect make-ahead holiday breakfast or brunch on Christmas morning or any cold winter morning to warm you right up and make your holiday season extra special and memorable.

Is it too early to talk about breakfast on Christmas morning? I feel that once December rolls around, it's time to bring out the decor, pick up last minute gifts, and start meal prepping, especially with all things gingerbread. Like this gingerbread bundt cake with maple cinnamon glaze, gingerbread muffins with vanilla bean glaze, or gingerbread linzer cookies with white chocolate.
Ingredients
To make this baked gingerbread french toast, you will need:
- eggs
- heavy cream
- gingerbread spices - ground cinnamon, ground ginger, all-spice blend, ground cloves, and ground nutmeg.
- salt
- bread - try a crusty homemade French baguette or other dense loaf that you would love to bring the classic gingerbread flavour you love to breakfast. Some other bread that work well are challah or brioche.
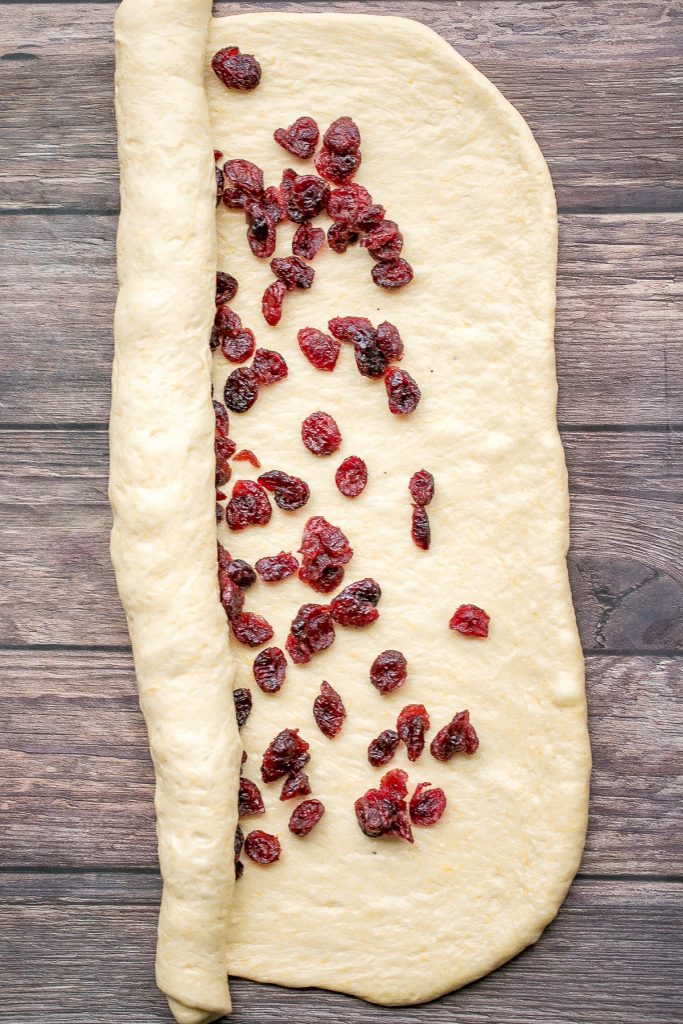
- dried cranberries soaked in orange juice - dried cranberries that have been rehydrated with orange juice for a little something extra. The flavours work amazingly and add a nice contrast in texture.
- orange juice
- for serving - maple syrup and confectioners' sugar.
You will also need a 9x13 baking pan.
How to Make the Best Baked Gingerbread French Toast Casserole
You will have one very happy family with a festive breakfast like this. The best part is that it really doesn't take that much effort to put this gingerbread french toast casserole together. It's easy to make in the morning or prepare it the night before.
- Make the custard. In a large bowl, whisk together eggs, heavy cream, cinnamon, ginger, all spice, cloves, nutmeg, and salt until smooth.
- Soak the bread. Place cubed bread in a large mixing bowl, then pour custard mixture on top. Stir to combine, and let sit for 30 minutes (up to overnight), tossing once halfway through.
- Soak the cranberries. Meanwhile, soak cranberries in a small bowl with orange juice for 10 minutes, then drain.
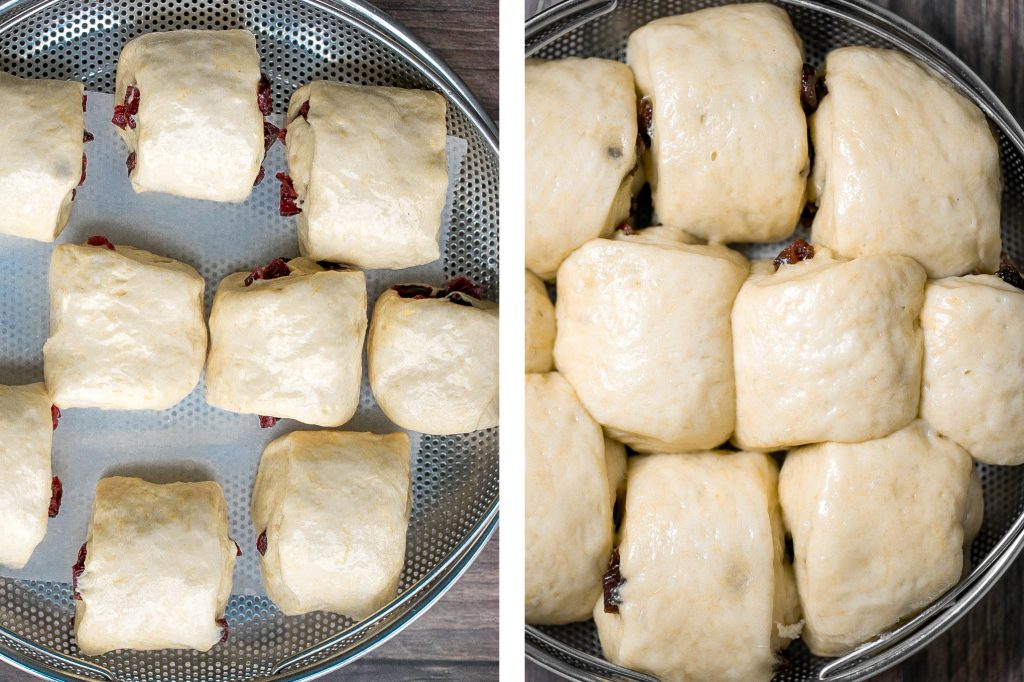
- Assemble. Spray a 9x13-inch baking pan with non-stick baking spray. Pour in bread and custard mixture and sprinkle on cranberries on top, dispersing evenly.
- Bake. Bake in a 350 F oven for 25 minutes or until golden brown and crispy. Serve warm with a dusting of powdered sugar and/or a drizzle of maple syrup on top.
How to Store Baked Gingerbread French Toast Casserole and Make Ahead
- Make ahead instructions: To make bake gingerbread french toast a day ahead, transfer the large mixing bowl with soaked bread into the refrigerator, cover and store overnight
- How to store: Cover or store in an airtight container in the refrigerator for up to 2 days.
- How to reheat: Reheat in the microwave for about one minute or in a 350F preheated oven for 10-15 minutes until warmed through.
More Breakfast Recipes
- Triple Berry French Toast
- Egg and Potato Breakfast Casserole
- Pumpkin Cinnamon Rolls
- Gingerbread Muffins with Vanilla Bean Glaze
- Cranberry Yogurt Muffins
- Cranberry Scones with Orange Glaze
- Whole Wheat Cranberry Bread
Tried this recipe?
I'd love to hear what you think! Leave a comment and rating below to share your feedback. Your reviews help others discover this recipe and help me keep creating more free recipes for you. Snap a photo and tag me on social media @aheadofthyme too.
Cranberry Orange Shortbread Cookies
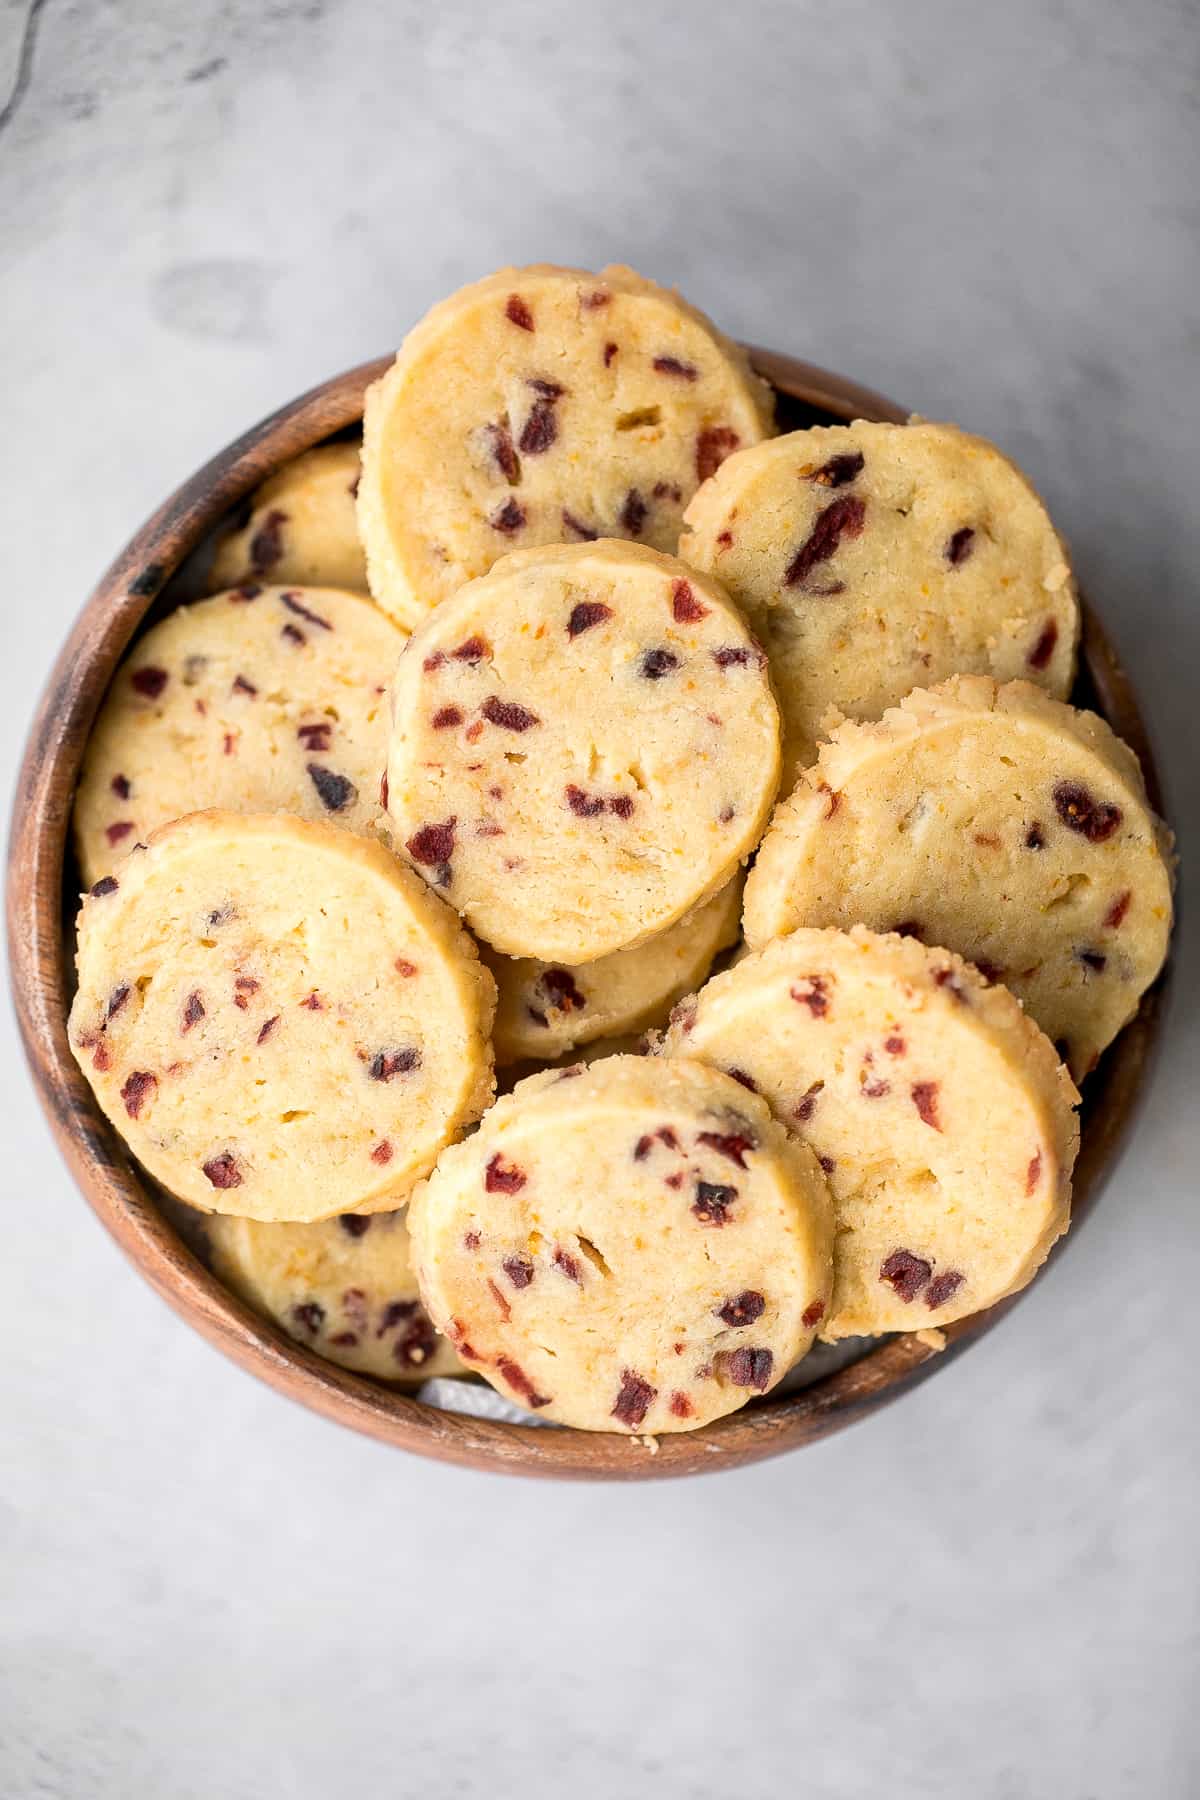
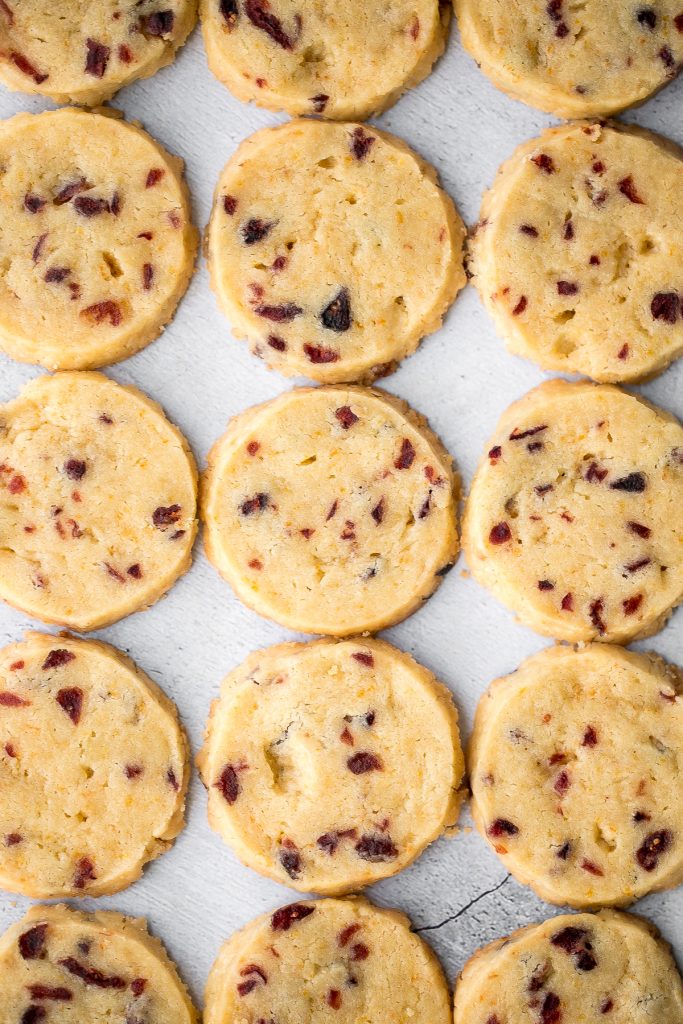
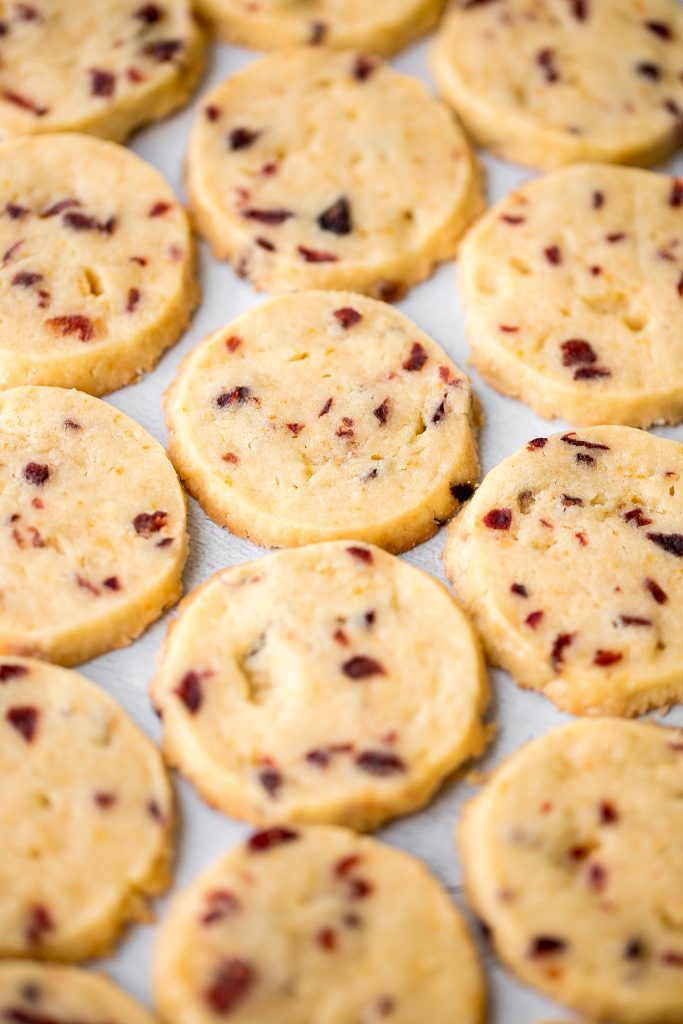
Cranberry orange shortbread cookies are classic sweet and buttery shortbread cookies with a major upgrade, packed with dried cranberries and fresh orange zest for a burst of flavour in every bite. These melt-in-your-mouth cookies are rolled, sliced and baked. They are the perfect cookie to add to your Christmas holiday baking list.

Every year, our kitchen literally turns into a holiday cookie factory. My favourite tradition is making cute holiday cookie boxes to gift to family and friends. I always bake the classics and like to throw in some new ones into the mix, and there always has to be shortbread in some form. Some of my other favourites to include are linzer cookies, Christmas sugar cookies, soft and chewy ginger cookies, chocolate crinkle cookies, peanut butter thumbprint cookies and gingerbread linzer cookies.
Ingredients
- butter
- Confectioner's sugar - this creates a melt-in-your-mouth cookie. You could also use granulated sugar for the same taste, but the texture will not be the same.
- all-purpose flour
- pure vanilla extract
- orange zest
- dried cranberries
- salt
You will also need measuring cups and spoons (or a kitchen scale for the most accurate measurements), mixing bowl, large half sheet baking pan, and wire cooling rack.

How to Make the Best Cranberry Orange Shortbread Cookies
- Make the shortbread dough: Cream the butter and sugar together using a stand mixer or hand mixer on medium speed until light and fluffy, about 2 minutes. Add vanilla, orange zest, and salt and beat until incorporated. Add flour and cranberries and beat until mixture forms into a dough.
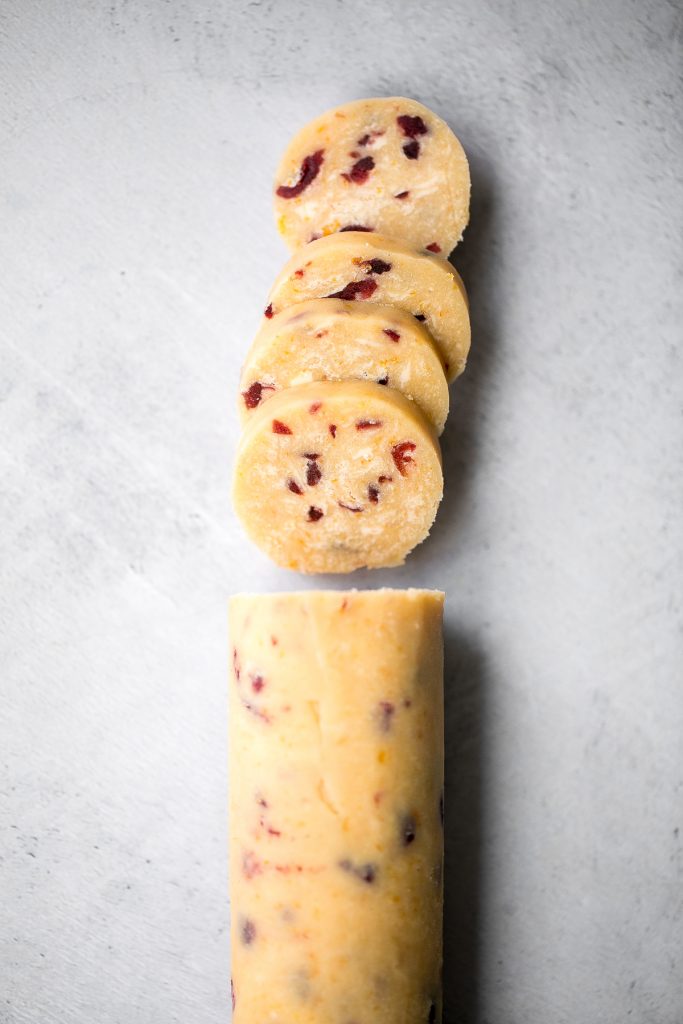
- Shape the dough into a log: Use your hands to shape the dough into a ball. The dough will be slightly dry, but it will soften up as you work with it. Then, roll the dough into a log, 2-inches in diameter. You can roll it out thicker but then you will get less cookies out of it. You can also do this in two batches to make it easier to work with two smaller logs.
- Chill the dough: Wrap the log tightly with plastic cling wrap and refrigerate for 2 hours, up to overnight.
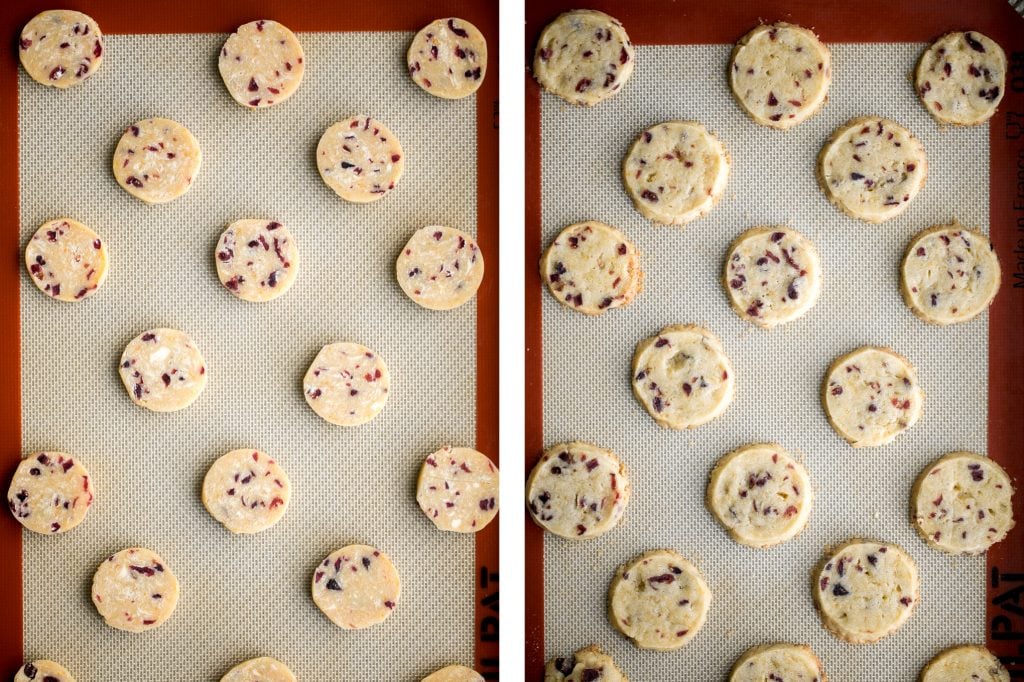
- Slice and bake: Cut the dough into ¼-inch to ½-inch slices, and place 1-inch apart on a half sheet baking pan lined with a silicone baking mat or parchment paper.
- Bake: Bake in a 350 F preheated oven for 10-12 minutes until just starting to brown on the edges.
- Cool: Allow cookies to cool in the pan for 5 minutes before transferring to a wire cooling rack to cool completely.
How to Store Shortbread
- At room temperature: Store in an airtight container at room temperature for up to 3 days.
- In the refrigerator: Store in an airtight container in the refrigerator for up to one week.
- In the freezer: To freeze, arrange them in a single layer in an airtight container. Then add a layer of parchment paper and place another layer of shortbread cookies on top.
- How to freeze before baking: Wrap the dough tightly in plastic wrap and then in a freezer bag and freeze for up to 2-3 months. When ready to bake, allow them to thaw in the refrigerator overnight before slicing and completing recipe as written.

More Cookie Recipes
- Cranberry Pistachio Biscotti
- Linzer Cookies
- Soft and Chewy Ginger Cookies
- Chocolate Crinkle Cookies
- Chocolate-Dipped Shortbread Heart Cookies
- Carrot Cake Shortbread Cookies
- Soft and Chewy White Chocolate Cranberry Cookies
- Christmas Sugar Cookies with Royal Icing
- Chocolate Chunk Peanut Butter Cookies
Tried this recipe?
I'd love to hear what you think! Leave a comment and rating below to share your feedback. Your reviews help others discover this recipe and help me keep creating more free recipes for you. Snap a photo and tag me on social media @aheadofthyme too.

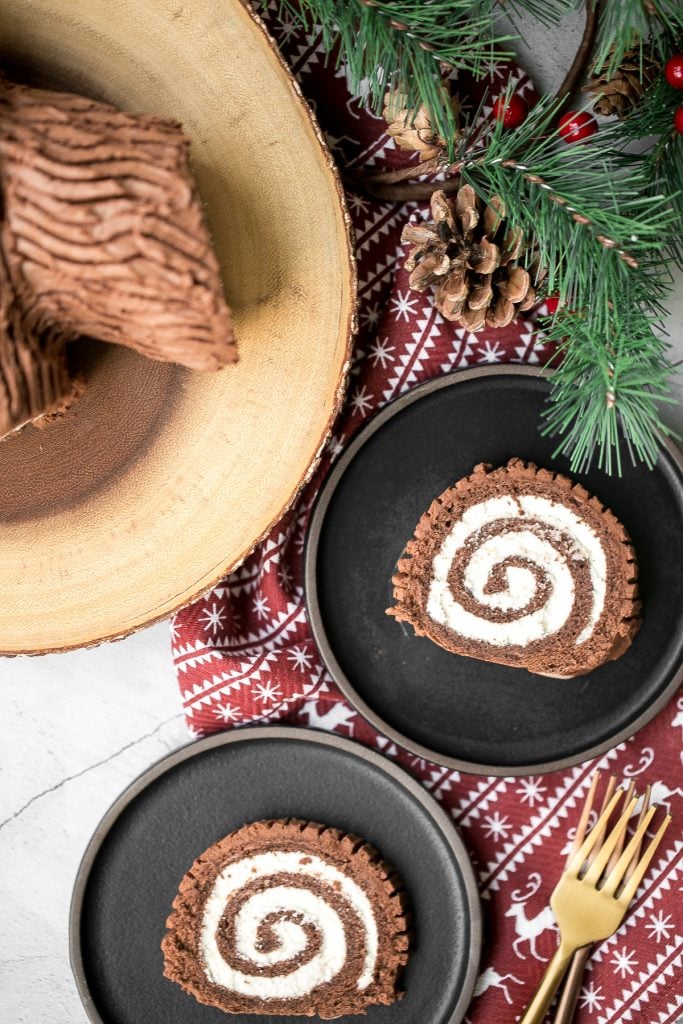
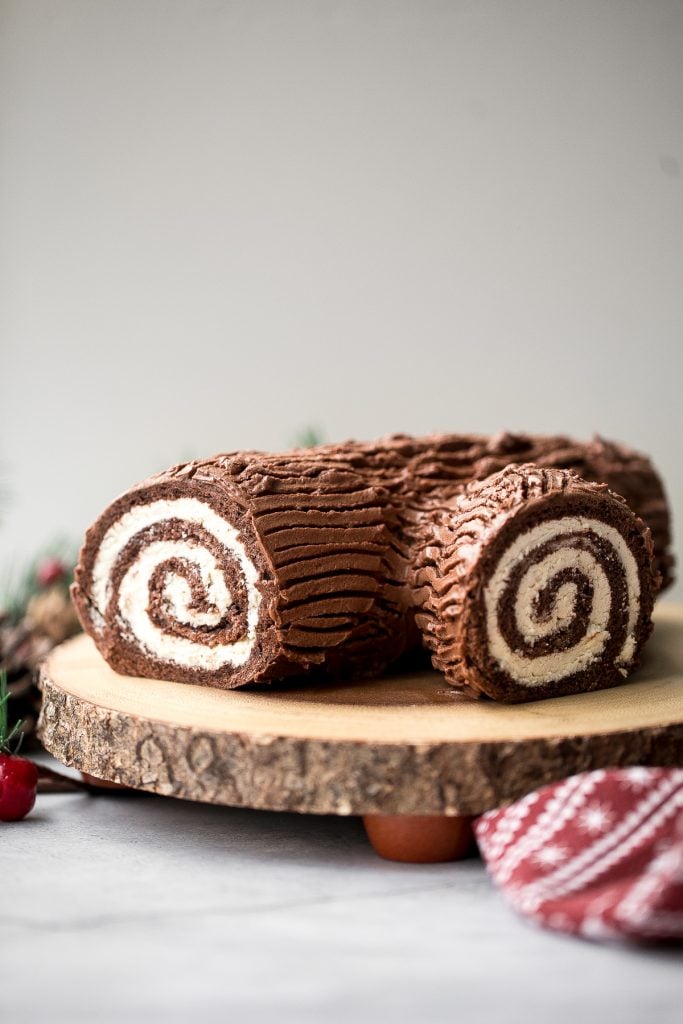
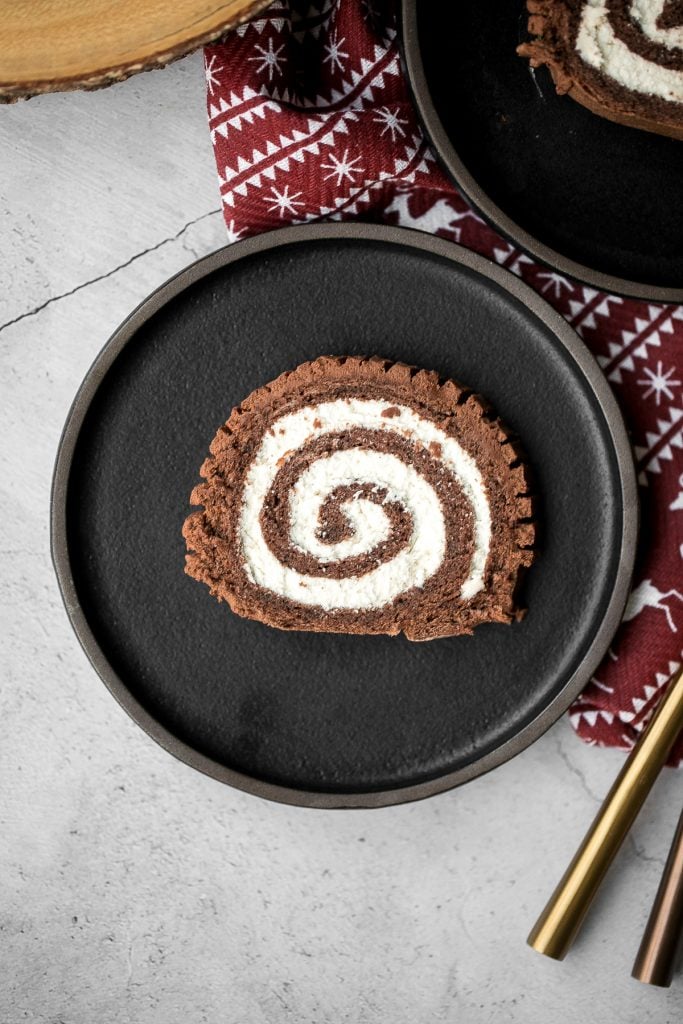
Holiday Yule Log Cake (Bûche de Noël)
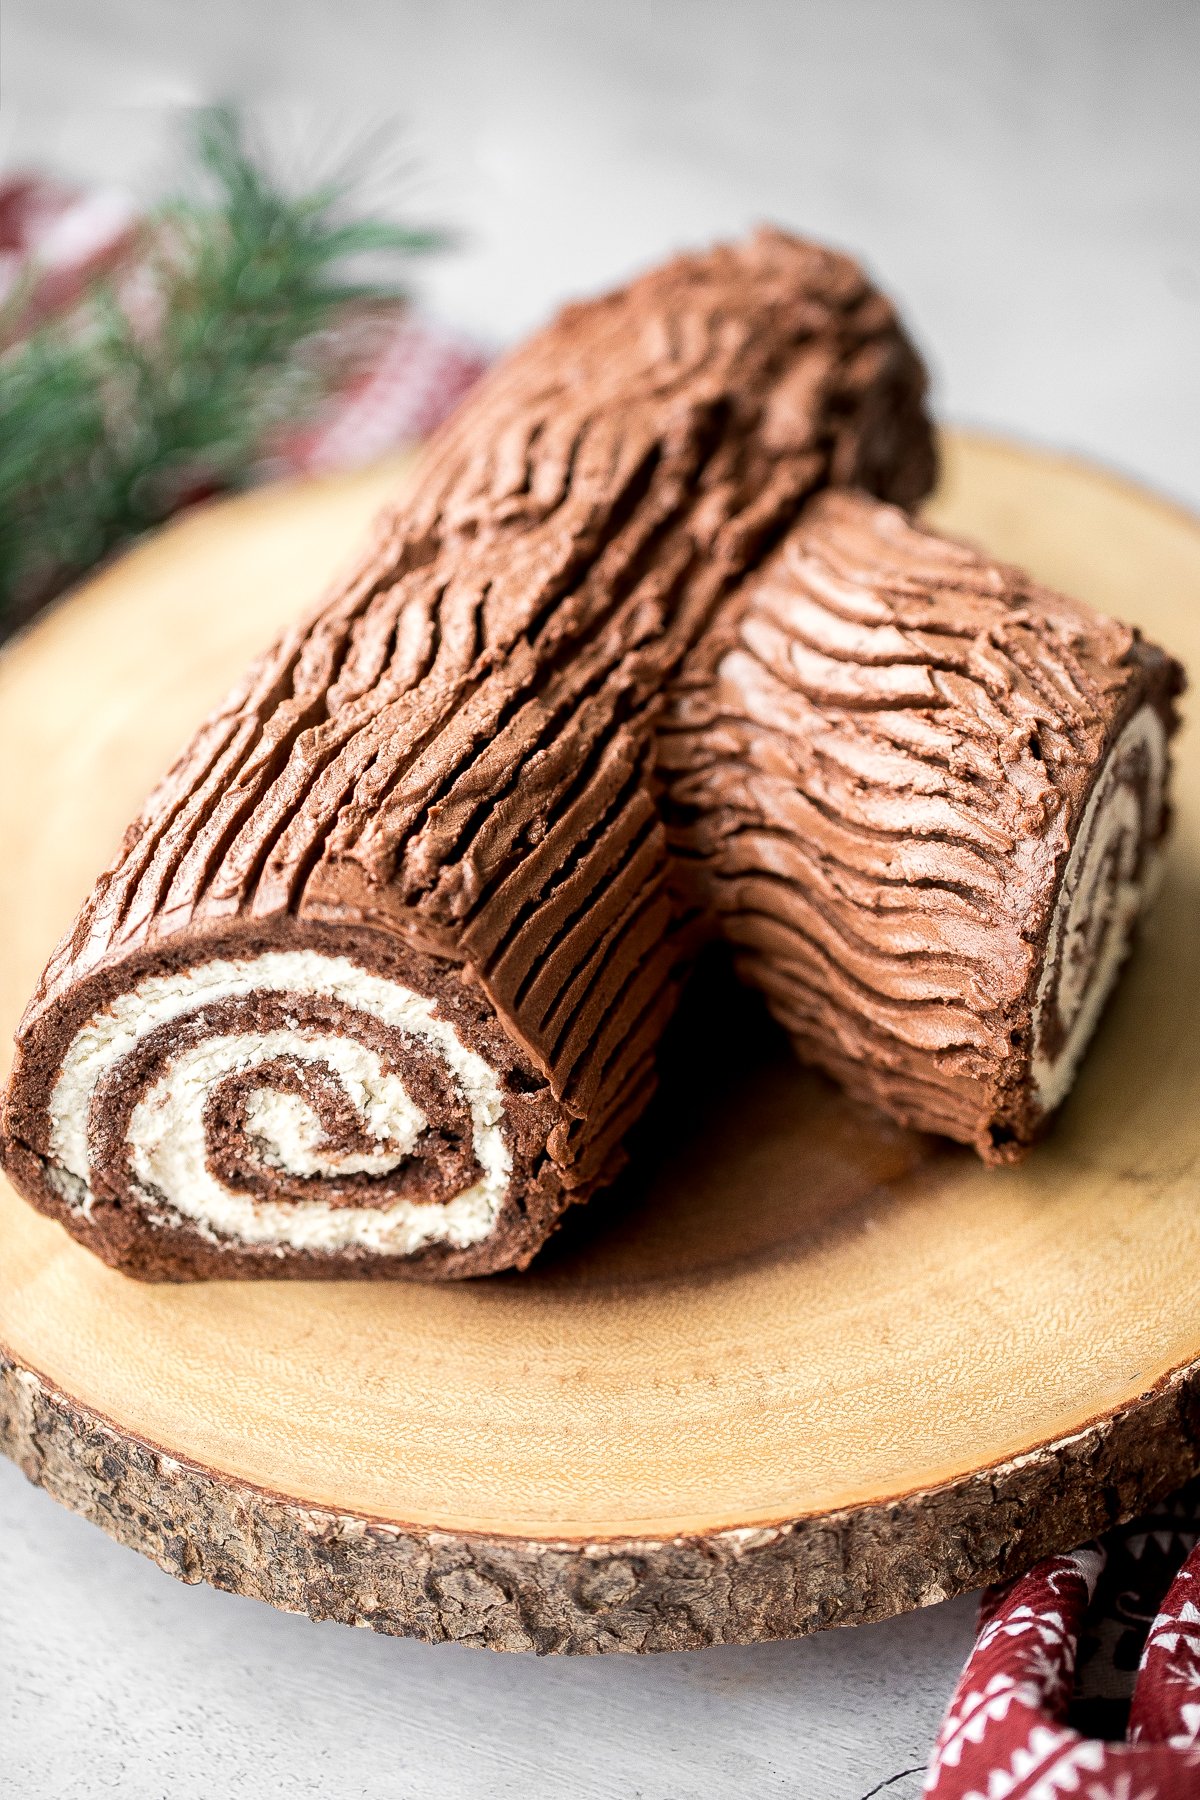
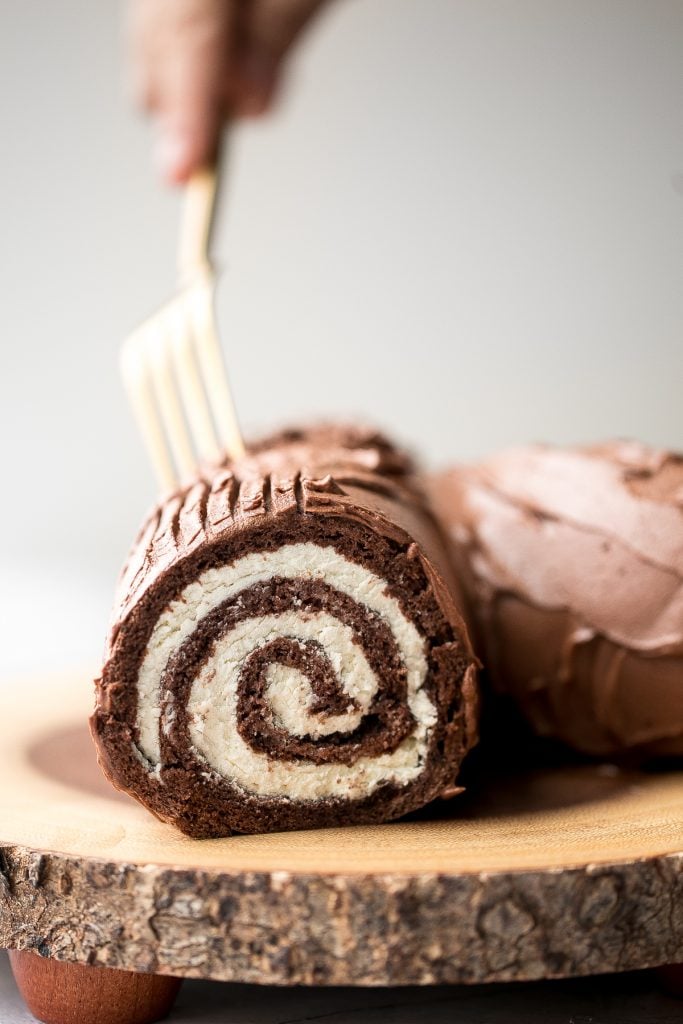
This classic holiday yule log cake (Bûche de Noël) is made with a tender and light chocolate sponge cake rolled and filled with an easy whipped cream filling, and coated in a rich whipped chocolate ganache. This beautiful traditional Christmas cake is styled to look like a log. It's a delicious festive treat that makes the perfect centrepiece on your holiday dessert table and is almost too pretty to eat.

What is a Yule Log Cake?
A holiday yule log cake, also known as a "Bûche de Noël" in French, is an old Christmas tradition that dates back to the 19th century in France. In the medieval times, families would gather and burn a yule log on Christmas Eve to to bring good luck. This yule log cake now represents that custom.
Ingredients
To make this fancy Christmas holiday yule log cake, you will need the following ingredients:
- all-purpose flour
- cornstarch - this key ingredient makes the cake soft and tender.
- cocoa powder
- salt
- eggs - divided into yolks and egg whites. The eggs whites will be beat separately and folded in, which creates a light spongy type of cake.
- granulated sugar
- vanilla extract
- whipped cream filling - made with heavy cream, confectioners' sugar, and vanilla extract.
- whipped chocolate ganache topping - semi-sweet chocolate and heavy cream.
You will also need measuring cups and spoons (or a kitchen scale for the most accurate measurements), hand mixer or stand mixer, mixing bowls, half sheet baking pan, parchment paper, dish towel, and a small saucepan.
How to Make the Best Holiday Yule Log Cake (Bûche de Noël)
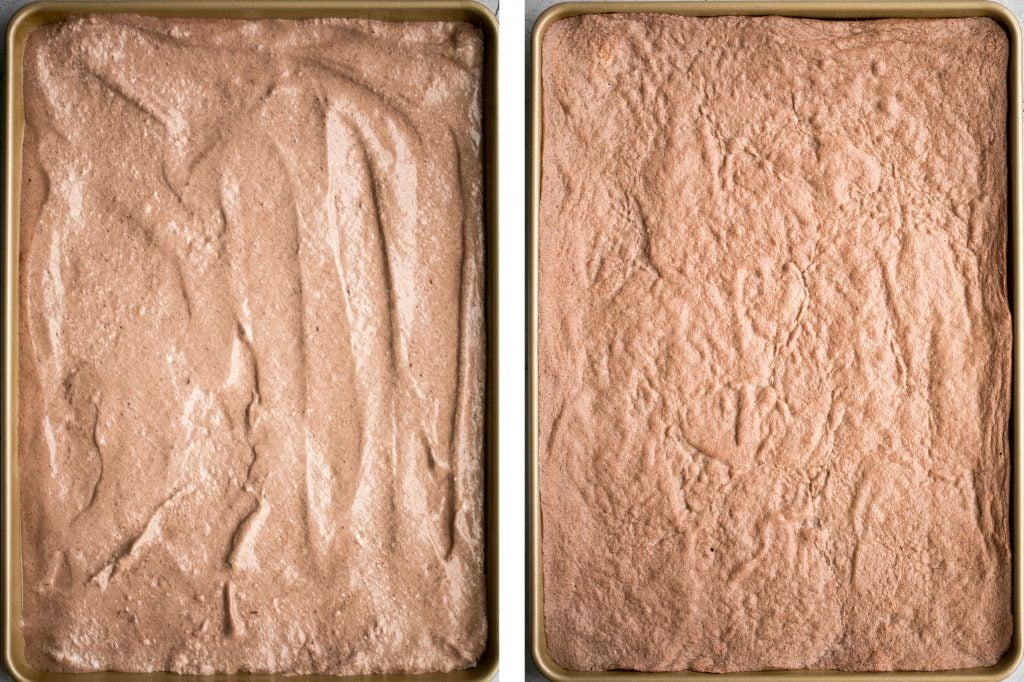
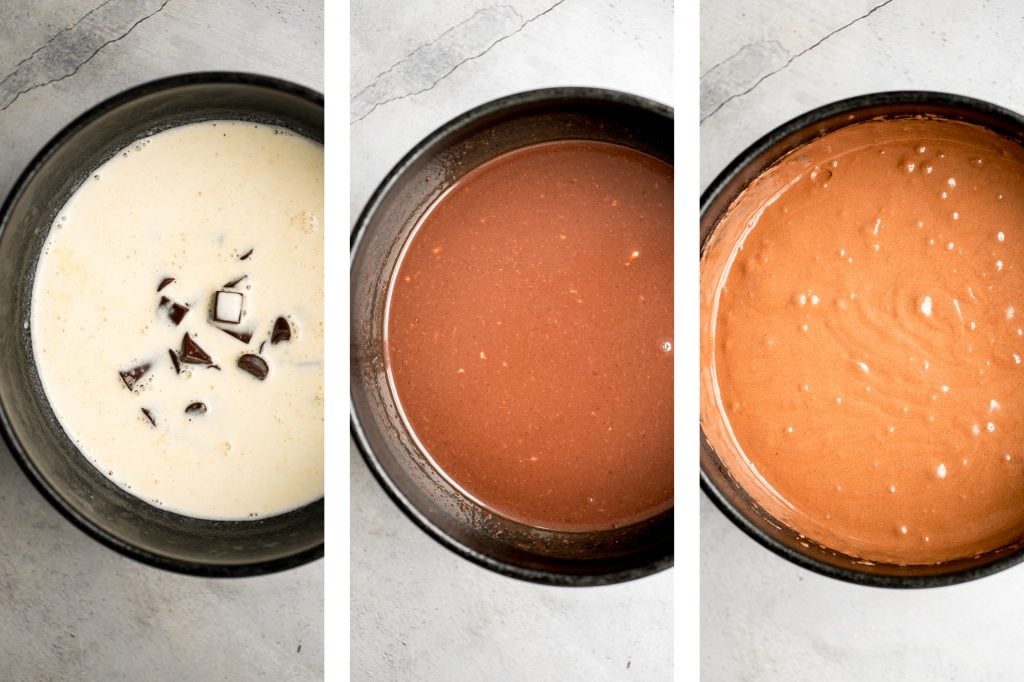
Step 1: Make the Cake
- Prep: Preheat oven to 400°F. Spray a half sheet baking pan (17x12-inches) with nonstick spray and line it with parchment paper. Spray the parchment paper with nonstick spray.
- Combine dry ingredients: In a medium mixing bowl, whisk together flour, cornstarch, cocoa powder, and salt. Set aside.
- Combine wet ingredients: Use a stand mixer or hand mixer to combine egg yolks, all but 2 tablespoons of sugar (set aside to be used with the egg whites), and vanilla in a large bowl. Beat together mixer on high speed until thick, fluffy and very pale yellow, about 4-5 minutes.
- Add dry ingredients to wet ingredients: Sift in half the dry ingredients into the bowl, and fold it in with a silicone spatula until just incorporated. Repeat with the remaining half of dry ingredients.
- Beat egg whites: In a medium bowl, beat egg whites on medium speed until soft peaks form, about 1-2 minutes. Gradually add in the remaining 2 tablespoons of sugar and beat on high speed until stiff peaks form, about 3-4 minutes.
- Fold in egg whites: Fold the egg whites into the batter using a silicone spatula, until just incorporated. Avoid overmixing and deflating the egg whites.
- Bake: Carefully pour the batter into the prepared half sheet baking pan and gently spread it out using a small icing spatula. Bake for 8-10 minutes. The cake is done when it springs back when lightly poked with your finger and a toothpick comes out clean.
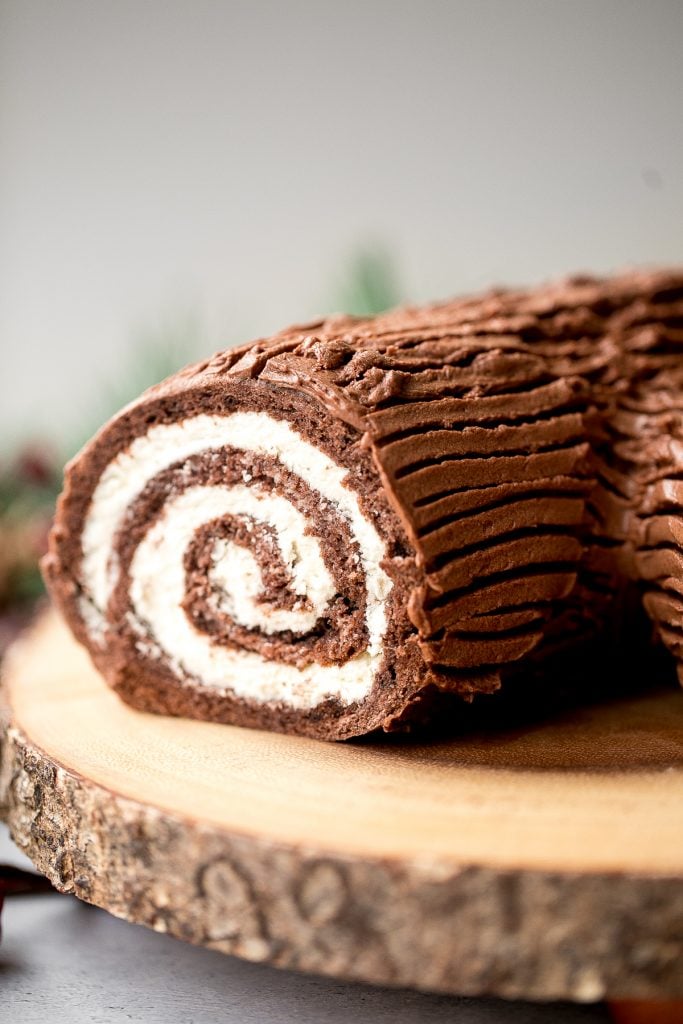
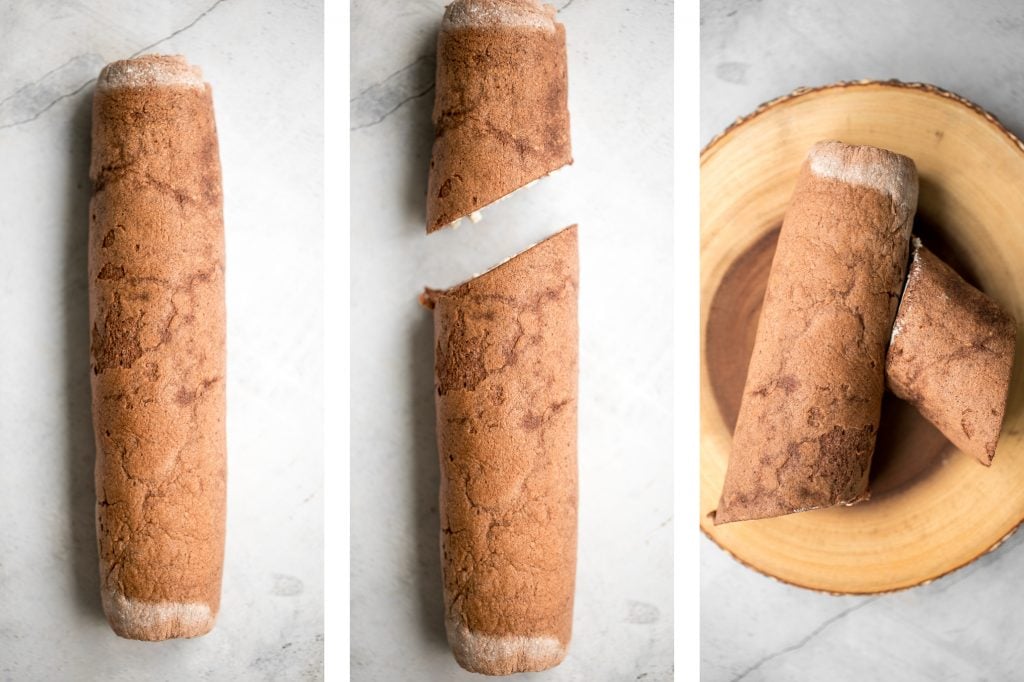
Step 2: Roll the Cake
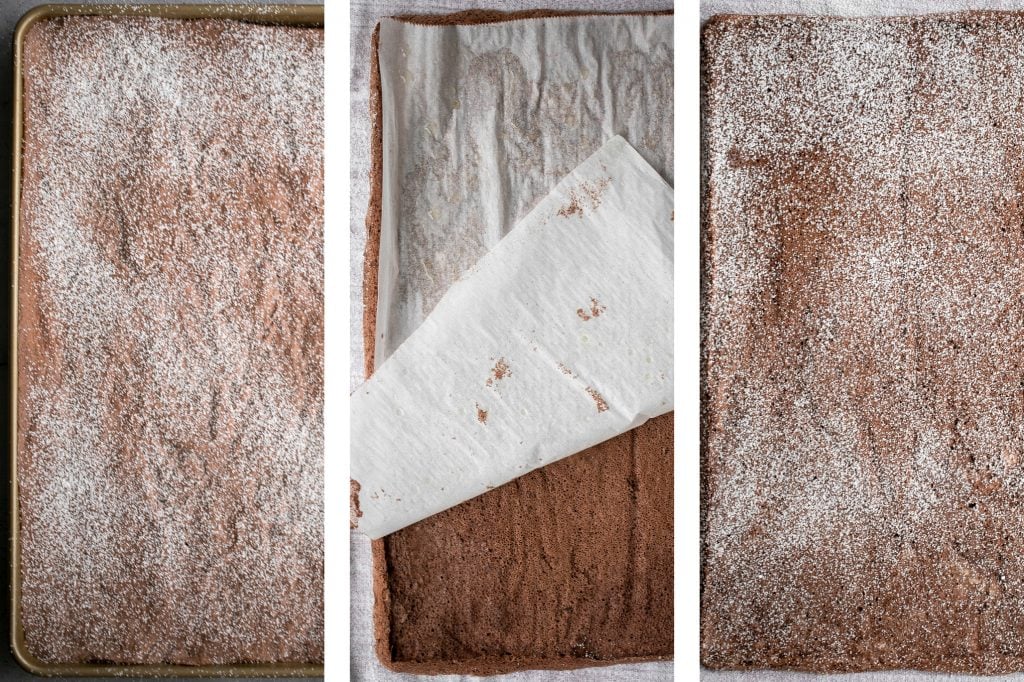
Once the cake is done, it will look a little puffed up and bubbly on the top. It will shrink down within a minute. Let it sit for a minute or two, then immediately run a small icing spatula or knife around the edges of the pan to loosen the cake.
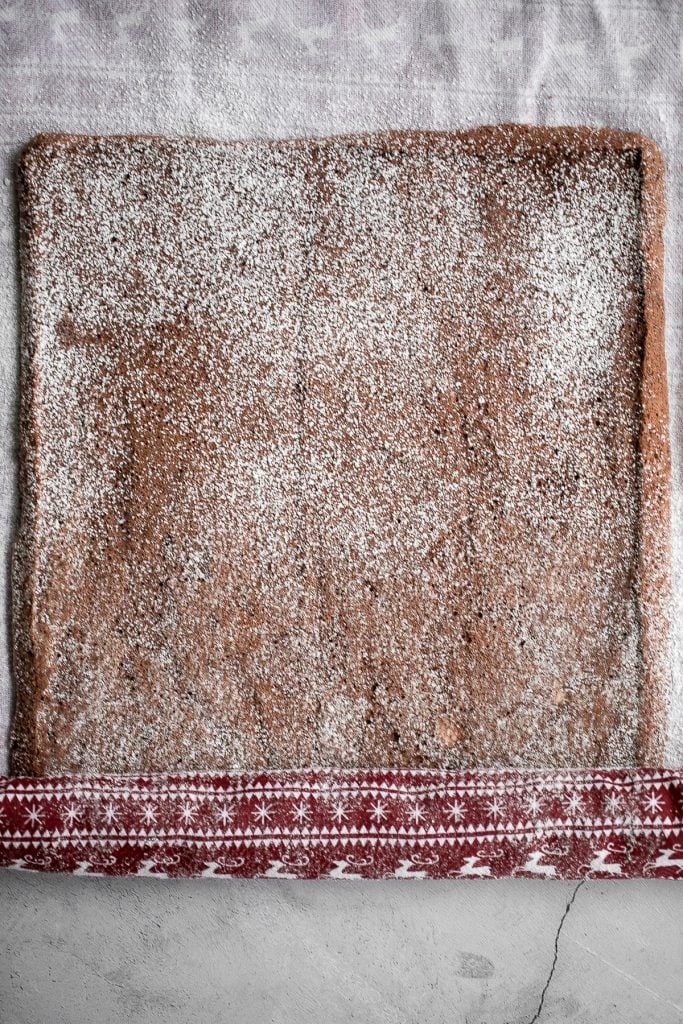
Sift some confectioners' sugar on top to cover the cake. Flip the cake over onto a clean kitchen towel placed on the counter. Remove the parchment paper which was originally lining the baking pan. Sift the newly exposed side of the cake with confectioners' sugar. This will help prevent the cake from sticking to the towel when rolled.
Slowly and gently roll the cake from the narrow end with the towel until the entire cake is rolled and completely covered in the towel. The cake will be warm when first rolled. Allow the rolled up cake to cool completely in the towel, about one hour, up to overnight.
Step 3: Filling the Cake with Whipped Cream
Use a stand mixer or hand mixer to whip the heavy cream with confectionary sugar and vanilla on medium speed until medium peaks form, about 2-3 minutes. Store in the refrigerator until ready to use.
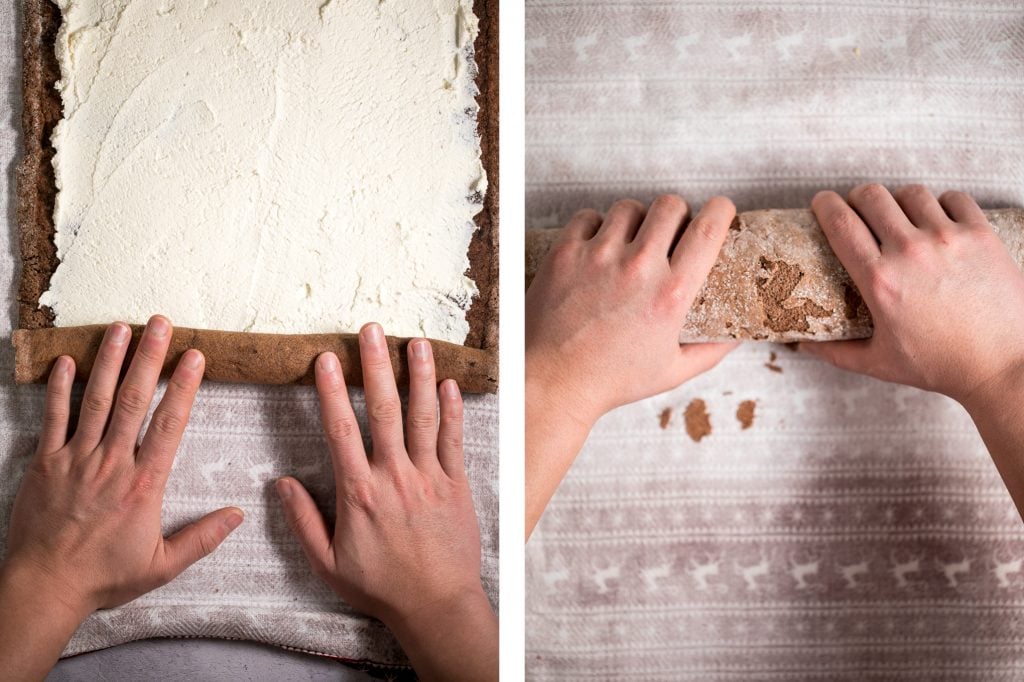
When the cake has cooled down completely, gently and very slowly unroll the cake. Using a small icing spatula, carefully spread the whipped cream evenly on top of the cake, leaving a 1-inch border uncovered around the cake.
Carefully and slowly roll the cake back up without the dish towel. Cover tightly with plastic cling wrap and refrigerate for at least 1 hour, up to overnight, to firm up before adding the whipped ganache topping.
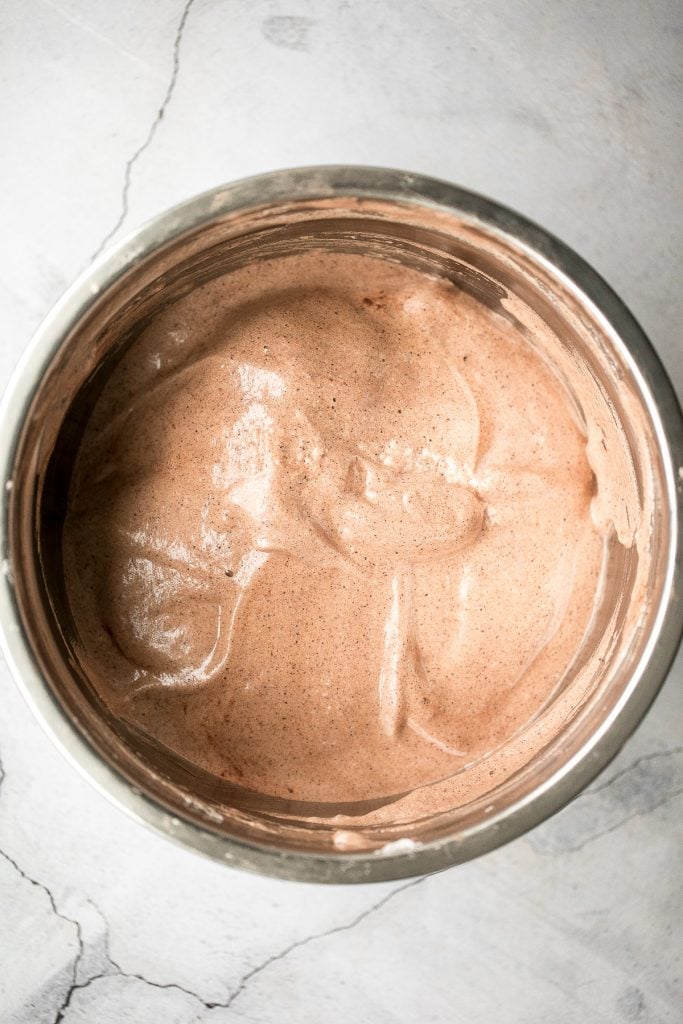
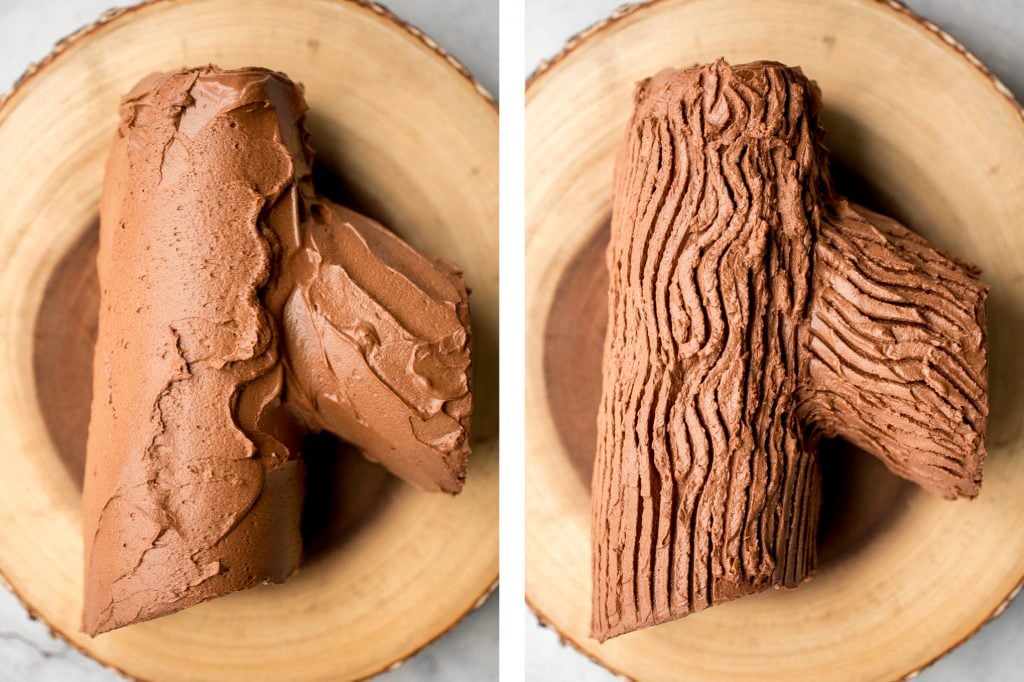
Step 4: Make the Whipped Chocolate Ganache
Place chopped chocolate into a medium bowl. Heat the heavy cream in a small saucepan until it begins to simmer. Immediately remove from heat before it begins to boil. Pour hot cream over top of the chopped chocolate, and let it sit for 5 minutes to allow it to soften the chocolate. Then use a spoon to slowly stir until completely combined. Allow the ganache to cool down and thicken uncovered in the refrigerator for 20 minutes.
Once the ganache has cooled down and is firm (but still soft), use a hand mixer to whip it on medium-high speed until fluffy, about 3-4 minutes.
Step 5: Create a Yule Log Branch and Coat Cake with Whipped Ganache
Remove the cake from the refrigerator and carefully remove the plastic cling wrap. Leave the yule log cake in tact and cut ½-inch from each side to make the edges even. You can also cut 4-inches off of one end of the yule log cake on angle and place it on the side of the roll to look like a tree branch.
Cover the cake with the whipped ganache and spread evenly using a small icing spatula. Draw lines using a fork to give it a wooden texture look like tree bark.
How to Store a Holiday Yule Log Cake
- To store in the refrigerator: Loosely cover the yule log cake with plastic cling wrap and store in the refrigerator for up to 3 days.
- To store in the freezer: Place the yule log cake on a parchment-lined baking sheet until completely frozen, about 2 hours. Then, tightly wrap it in plastic cling film and a layer of aluminum foil. Freeze for up to 3 months. To serve, allow it to thaw overnight in the refrigerator or for a few hours at room temperature.
Tips
- Do not overbake the cake. The cake is quite thin so keep a close eye on it. Take it out as soon as it is done. If you overbake it, it will be dry and crack as it rolls.
- Immediately roll the cake. Let the cake to sit for a minute or two, then immediately flip it over and gently and slowly roll. Otherwise, it will dry be too hard to roll without cracking.
- Dust the cake before rolling. Generously dust the cake on both sides before you start rolling it with the dish towel. Otherwise, the cake will stick to the towel and can tear when unrolling it.
More Holiday Cake Recipes
- Gingerbread Bundt Cake with Maple Cinnamon Glaze
- Festive Yogurt Fruitcake
- Cranberry Sauce Swirl Pound Cake
- Caramel Pecan Pie Cheesecake Bars
- Double Chocolate Loaf Cake
- Gingerbread Muffins with Vanilla Bean Glaze
Tried this recipe?
I'd love to hear what you think! Leave a comment and rating below to share your feedback. Your reviews help others discover this recipe and help me keep creating more free recipes for you. Snap a photo and tag me on social media @aheadofthyme too.
This post was originally published in 2017. It has been completely updated with new photographs, tweaks to the recipe, and tips.
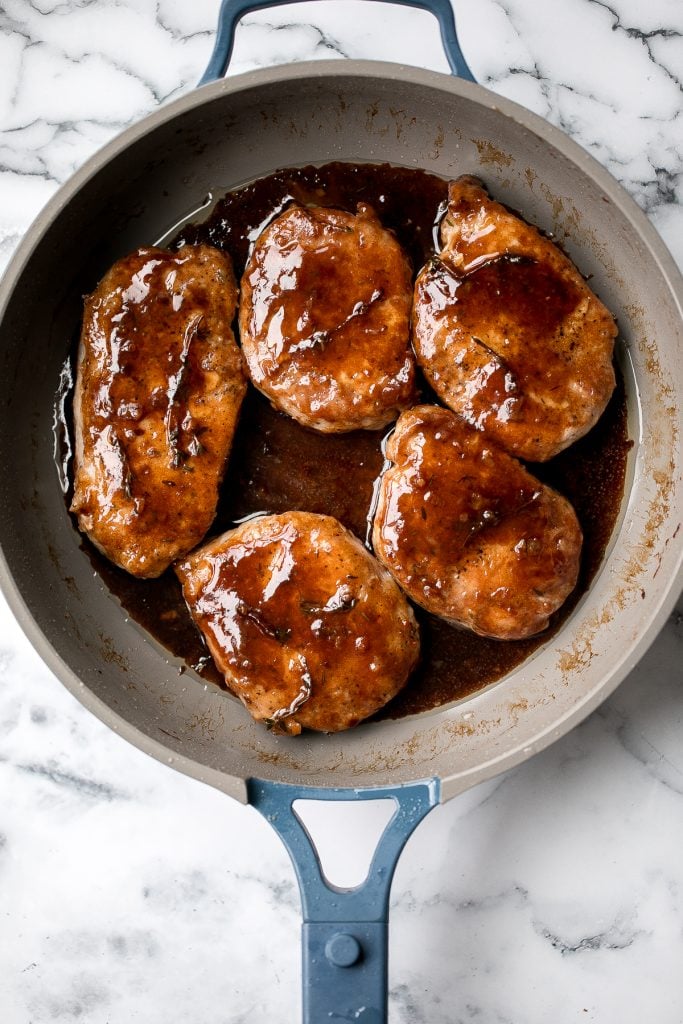
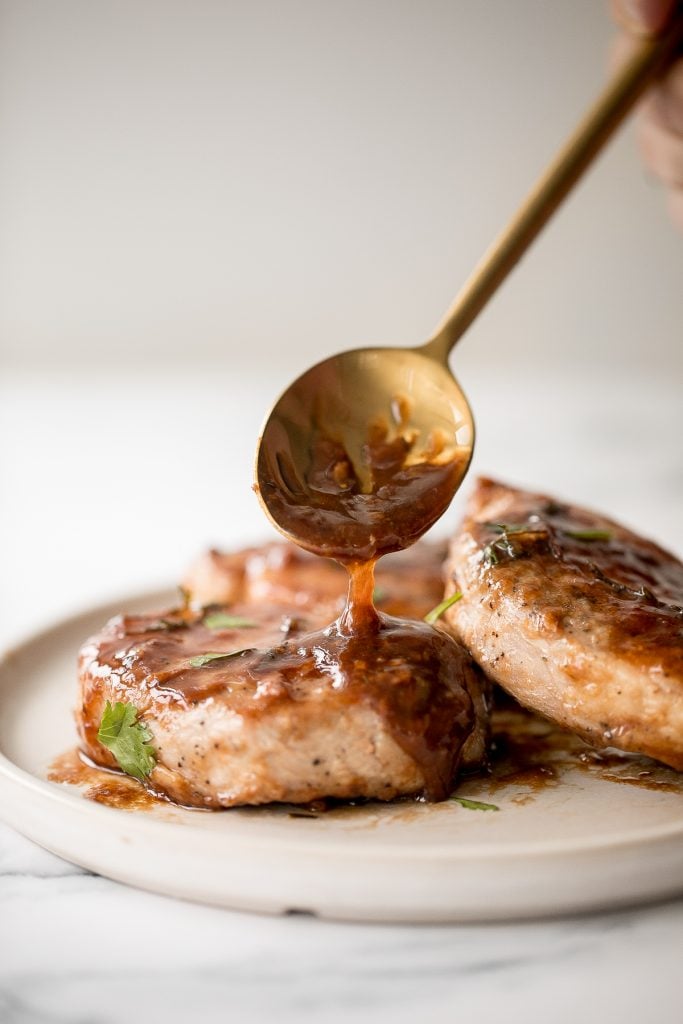
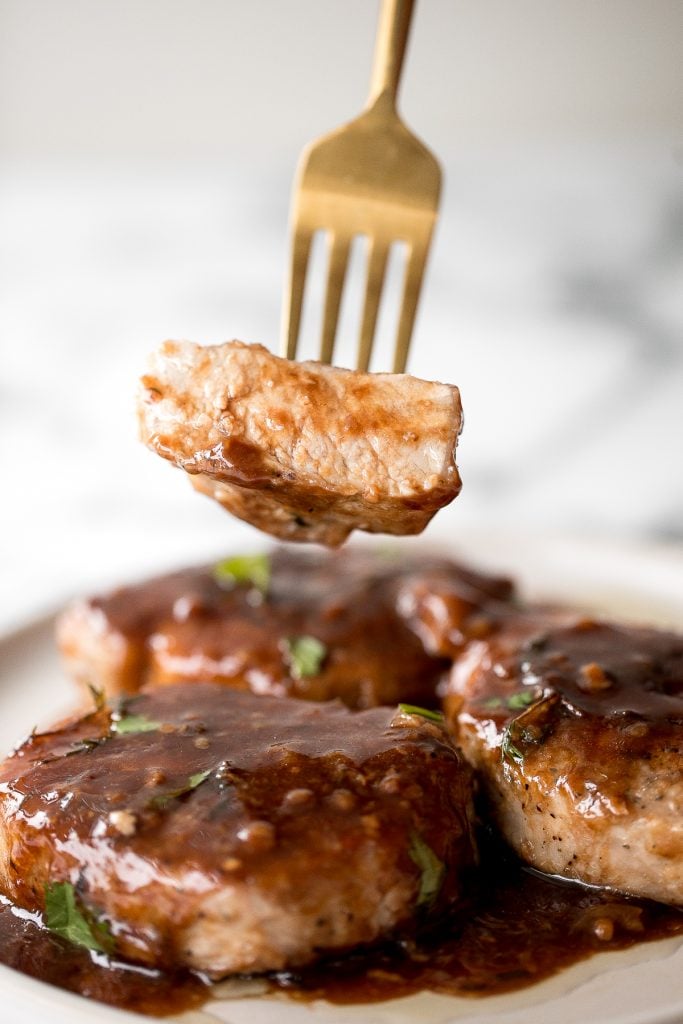
Glazed Honey Balsamic Pork Chops

Quick and easy, glazed honey balsamic pork chops are super tender, juicy, and succulent seared in fresh thyme and coated with a delicious honey balsamic sauce. This flavourful comforting dinner can be made in under 30 minutes, including prep. It's the best family favourite weeknight meal.
If you like our honey glazed roast pork, then these pork chops are a delicious and faster alternative to satisfy your cravings. There are so many vegetable sides that you can serve this with. Some of my favourites are roasted garlic parmesan baby potatoes, creamy mashed potatoes or garlic mashed cauliflower and sautéed garlic mushrooms.
Ingredients
- vegetable oil
- pork chops - 5-6 pork chops, about 1.5 lbs. total.
- salt and pepper
- all purpose flour - for dredging the pork chops to create a tasty golden crust on the outside and helps keep the pork chops moist.
- thyme - adding a few sprigs of thyme when searing the pork provides a subtle fragrance and flavour, which balances very well with the savoury pork chops.
- honey balsamic glaze - made with balsamic vinegar, honey, soy sauce, flour (to thicken the sauce) and sautéed garlic.
- cilantro - to garnish on top (optional).
You will also need a shallow saucepan or cast-iron skillet and a meat thermometer.
How to Make the Best Glazed Honey Balsamic Pork Chops
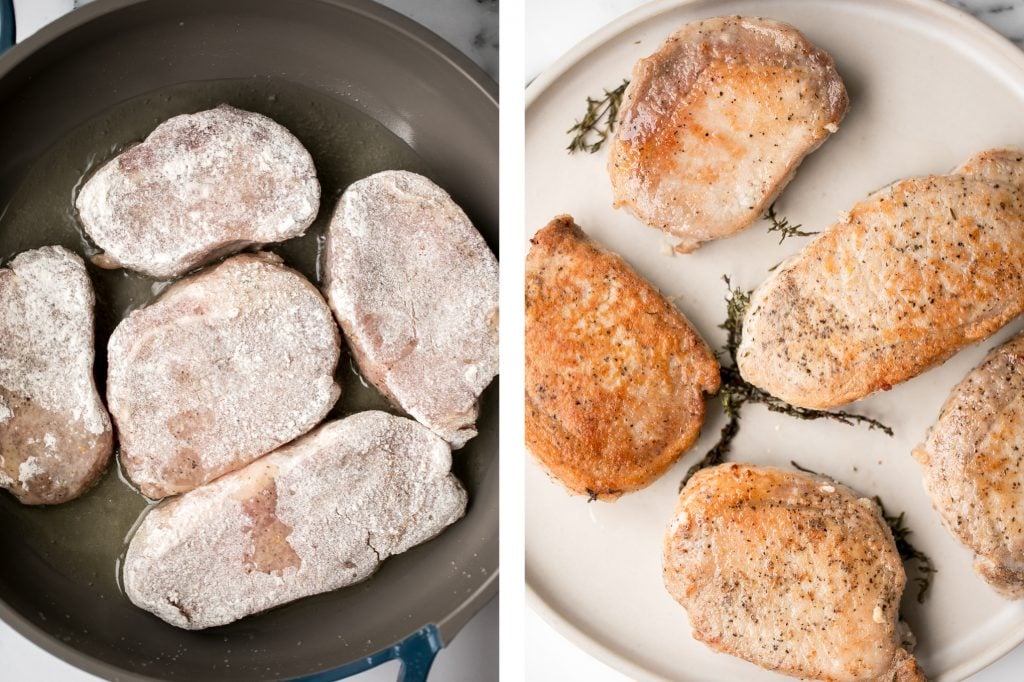
- Season and dredge the pork chops: Generously season both sides of each pork chop with salt and pepper. Place flour into a shallow bowl and dip the pork chops in to fully and evenly coat on both sides. Set aside on a place.
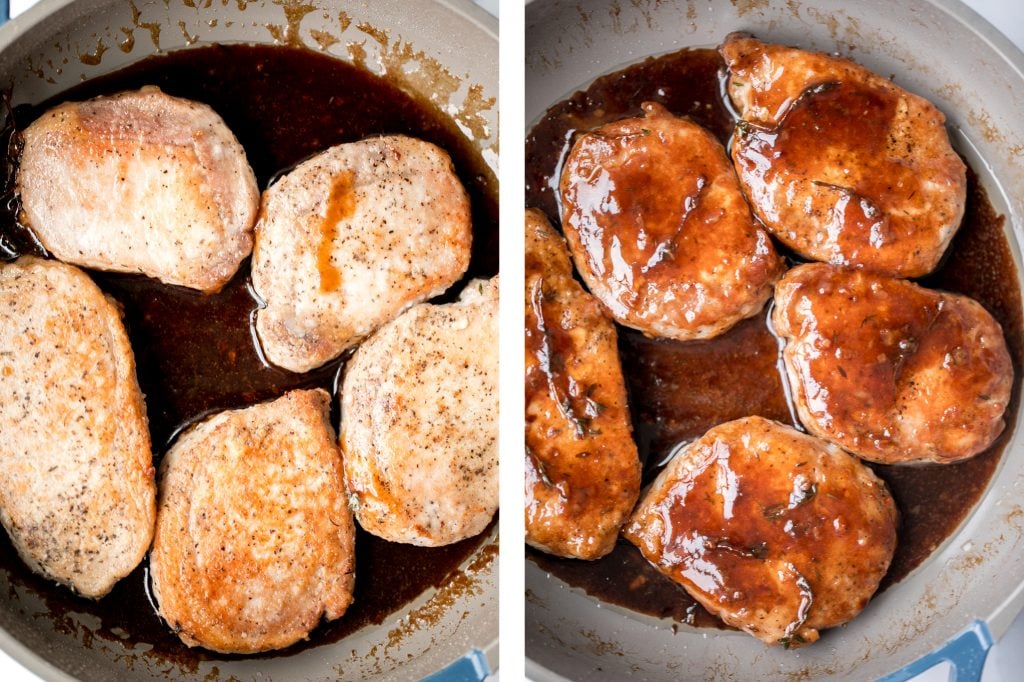
- Sear the pork chops: Heat oil in a large shallow saucepan over medium high for 2 minutes until the hot oil sizzles and shimmers. Add the pork chops and sprigs of thyme. Sear the pork chops for about 5 minutes per side until golden brown and fully cooked through, when the internal temperature on a meat thermometer reaches 145 F. Remove the pork chops and thyme from the pan, and set aside on a plate.
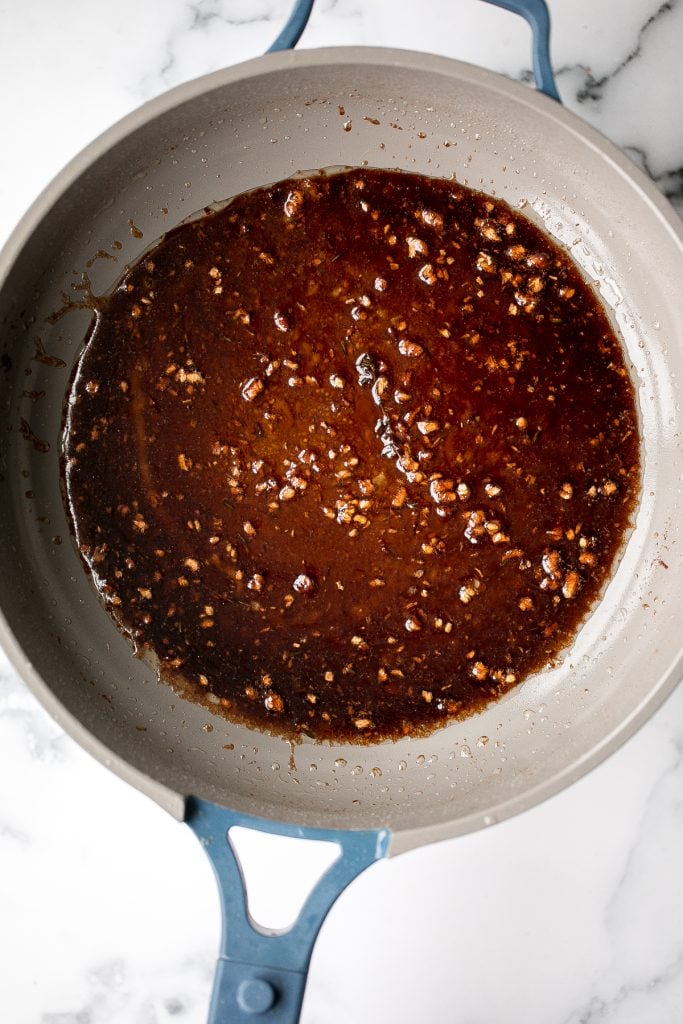
- Make the honey balsamic glaze: In a small bowl, whisk together balsamic vinegar, honey, soy sauce and flour (you can use leftover flour from the shallow bowl that was used to coat the pork chops initially). In the same saucepan used for the pork chops, turn the heat down to low and sauté garlic until fragrant, about 1 minute. Stir in the sauce and bring to a simmer until smooth and thickened to a desired consistency, about 2-3 minutes. Stir continuously to prevent the sauce from going lumpy.
- Toss pork chops in the glaze: Return the pork chops to the pan and toss well to coat. Cook the pork chops with the sauce for another minute, then remove from heat and garnish with cilantro.
Tips
- Use a digital thermometer. A digital meat thermometer is very useful when cooking pork or any kind of meat. It ensures that you never end up with undercooked or overcooked meat. Simply insert the thermometer halfway inside the meat to get a quick measurement. Once it reads 145F, remove the pork chops from the pan.
- How to store. Store pork chops along with any leftover glaze in an airtight container for up to 3 days in the refrigerator. To reheat, place in a saucepan and heat on the stove over medium-heat until heated through.
More Quick and Easy Dinner Recipes
- Creamy Lemon Chicken Piccata
- Cheesy Tortellini and Sausage Bake
- Stovetop Mac and Cheese with White Cheddar
- Baked Maple Salmon
- Sheet Pan Curry Chicken and Vegetables
- Creamy Tortellini Soup with Sausage
Tried this recipe?
I'd love to hear what you think! Leave a comment and rating below to share your feedback. Your reviews help others discover this recipe and help me keep creating more free recipes for you. Snap a photo and tag me on social media @aheadofthyme too.

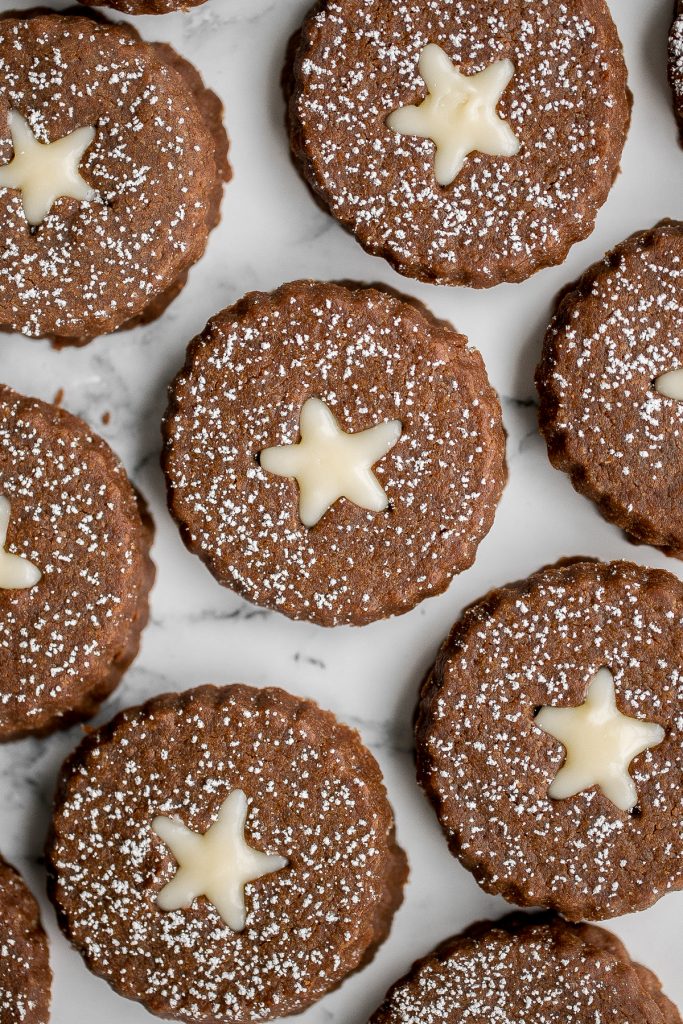
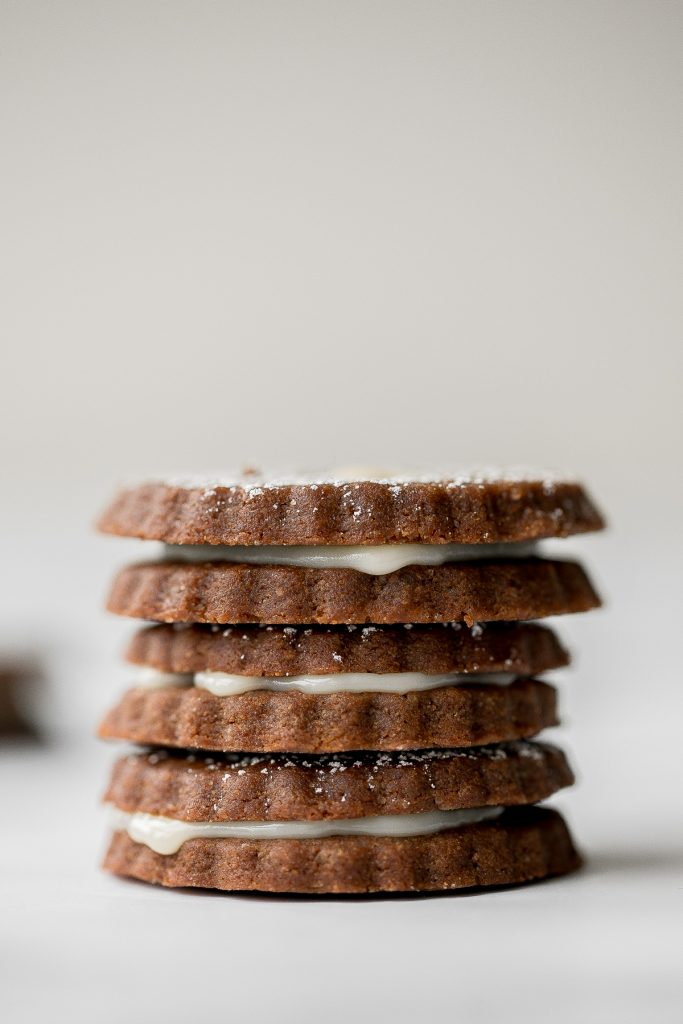
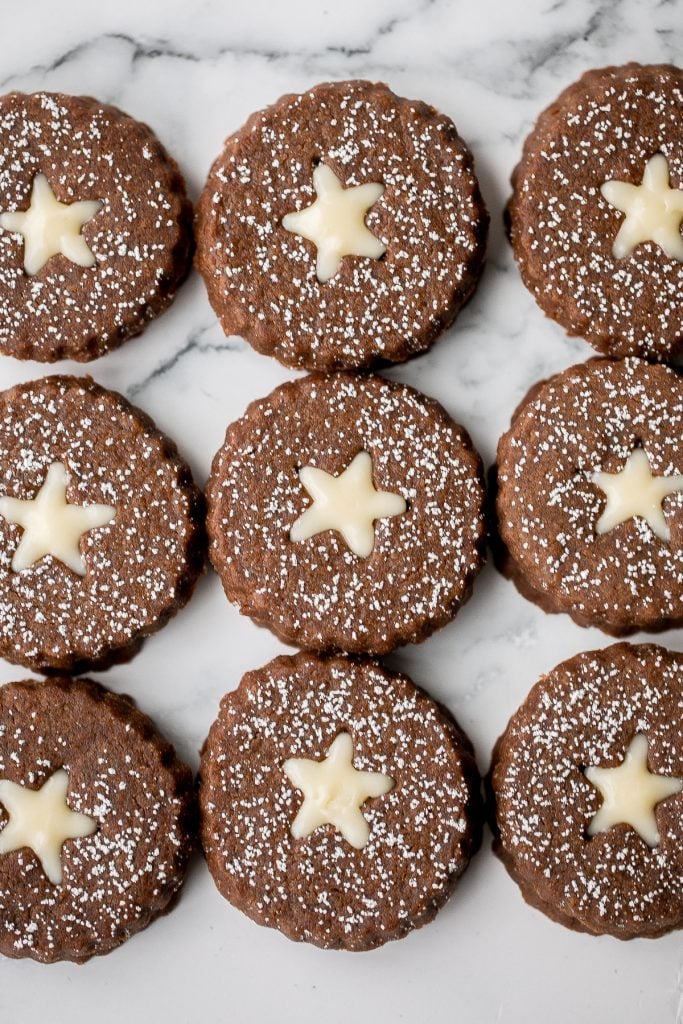
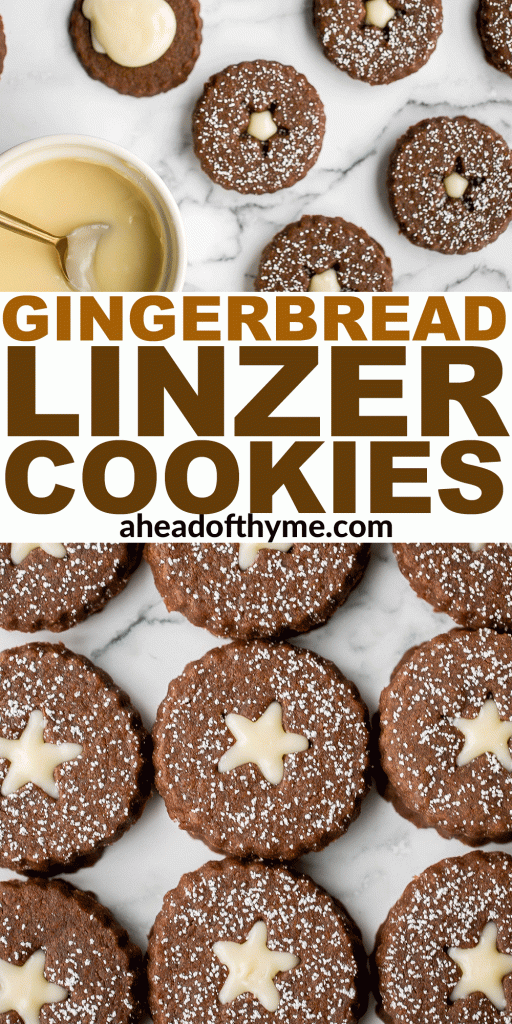
Gingerbread Linzer Cookies with White Chocolate

Gingerbread linzer cookies with white chocolate have two layers of soft and buttery gingerbread shortbread held together with a layer of white chocolate ganache, and lightly dusted with confectioners' sugar on top. They are warmly spiced with ginger and cinnamon and have a rich dose of molasses to keep them soft and chewy for days. This gingerbread twist on regular shortbread linzer cookies makes them the perfect holiday cookie.
Gingerbread linzer cookies with white chocolate ganache would be perfect in a holiday cookie box for family and friends, along with some of my other favourite Christmas cookies like jam-filled thumbprint cookies, Christmas sugar cookies, soft and chewy ginger cookies, chocolate crinkle cookies and cranberry pistachio biscotti.
Ingredients
- butter
- brown sugar
- pure vanilla extract
- molasses
- all-purpose flour
- ground ginger
- ground cinnamon
- salt
- confectioners' sugar - for dusting on top.
- white chocolate ganache - made with white chocolate and heavy cream.
You will also need measuring cups and spoons (or use a kitchen scale like I do for the most accurate measurements), mixing bowl, hand mixer (or stand mixer), rolling pin, linzer cookie cutters, half sheet baking pan, silicone baking mat, and wire cooling rack.
How to Make the Best Gingerbread Linzer Cookies with White Chocolate Ganache
- Make the dough: In a large mixing bowl, cream the butter and sugar together using a hand mixer or stand mixer until soft and fluffy, about 2 minutes on medium speed. Add vanilla and molasses and continue to beat until fully incorporated. In a medium mixing bowl, whisk together flour, ginger, cinnamon and salt, then gradually add it to the wet ingredients, and mix until your mixture forms flour, and mix until your mixture forms into a dough mass.
- Shape the dough and chill: Use your hands to form the dough into a ball (the dough will be slightly sticky). Place into the centre of a large piece of plastic cling wrap. Use your hands to flatten it into a disc and wrap it up tightly in the cling wrap. Chill in the refrigerator for 30 minutes up to overnight.
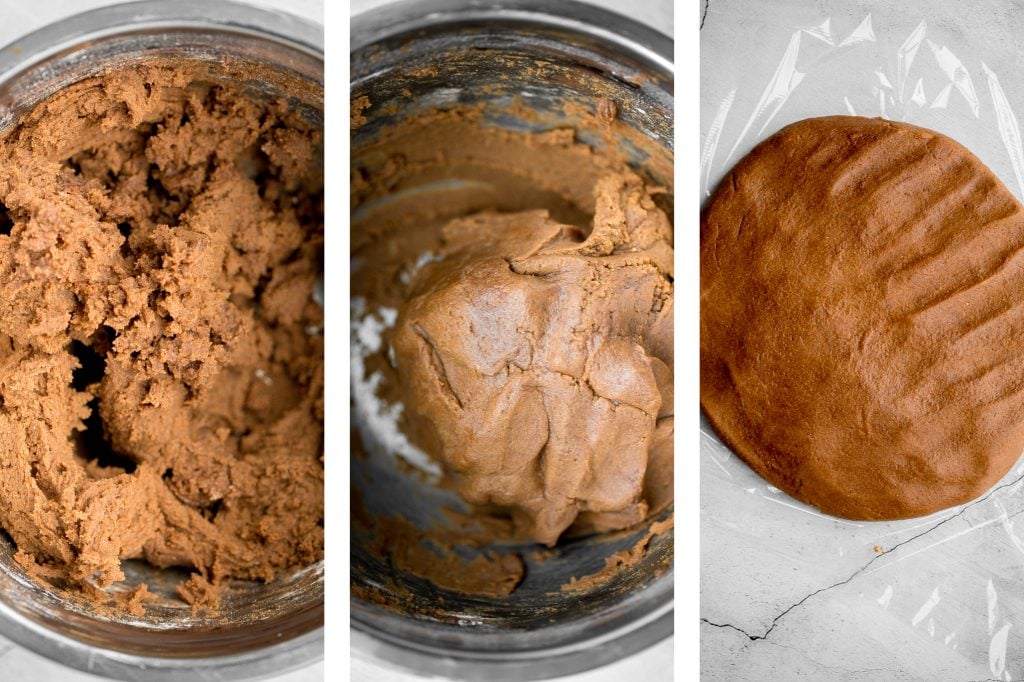
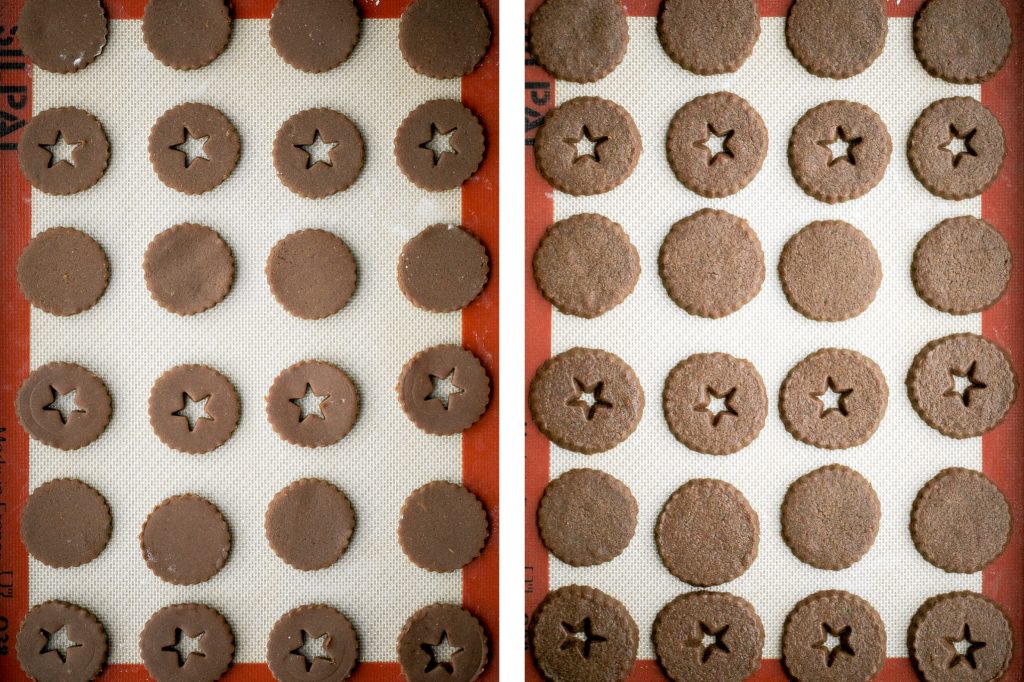
- Cut out the cookies: Once the dough is chilled, lightly dust a clean surface with flour, and place the dough on top. Use a rolling pin to roll out the dough until it is ¼-inch thick. Use 2-inch linzer cookie cutters to cut out the cookies. On half of the cookies, use a smaller cookie cutter to cut shapes in the center of the cookie. Remove the smaller cookie shapes and roll them together with the scraps to cut out more cookies.

- Second chill: Place the cookies an inch apart on half sheet baking pan lined with a silicone baking mat or parchment paper, and chill in the refrigerator for another 10 minutes, while the oven is preheating to 350 F.
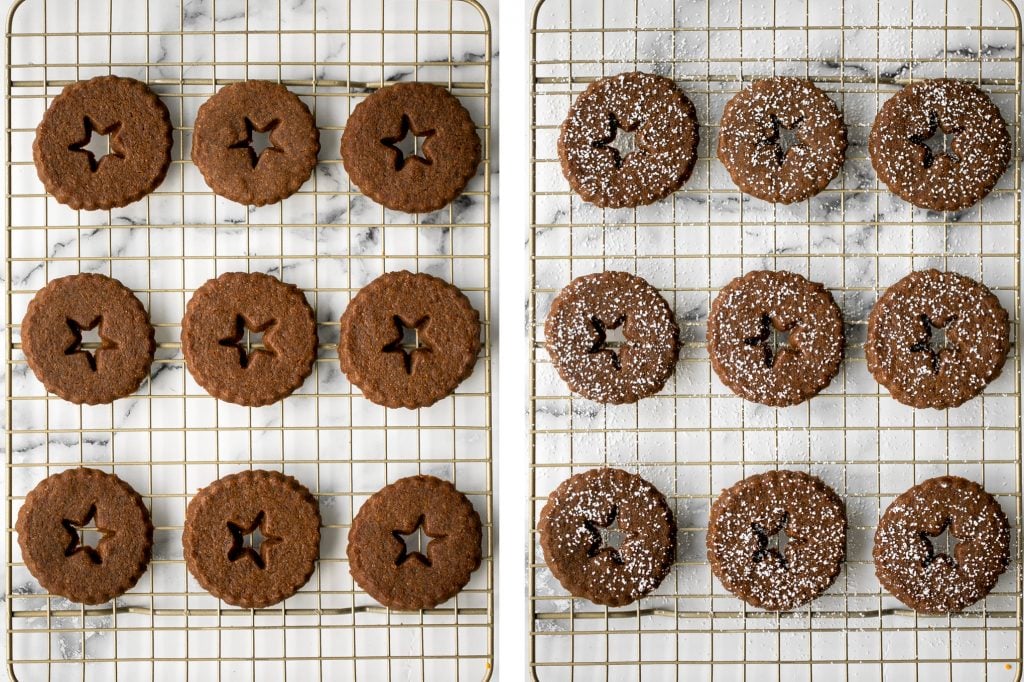
- Bake: Bake the cookies for 10 minutes, or until edges just start to brown. The cookies will be slightly soft when touched. Allow the cookies to cool on the baking sheet for 5-10 minutes, then transfer onto a wire cooling rack to cool completely to room temperature.
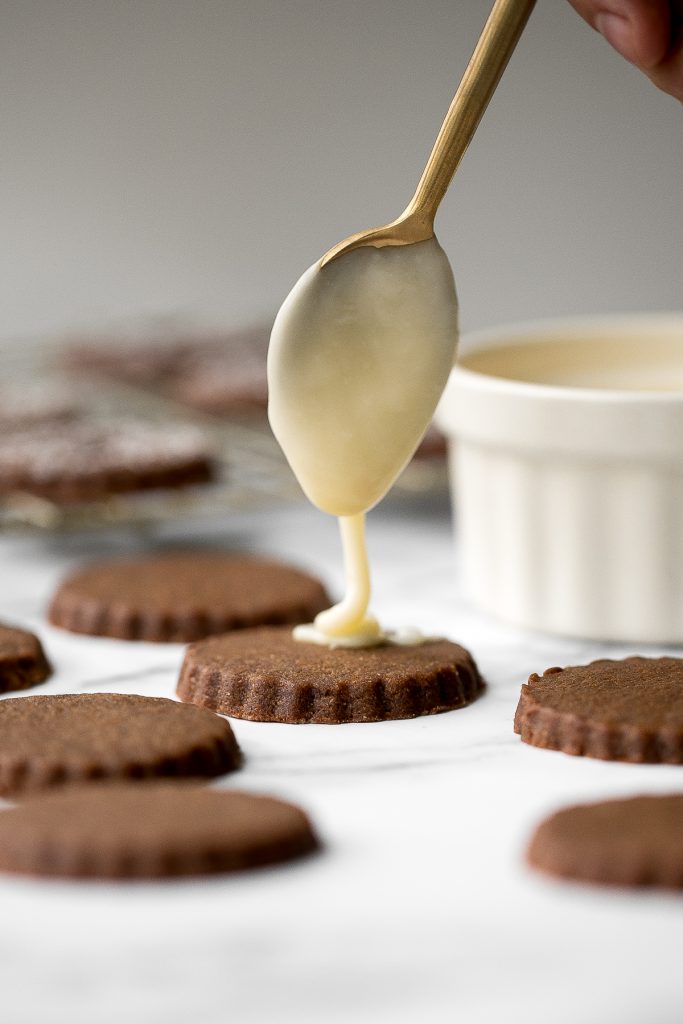
- Make white chocolate ganache: In a small saucepan, heat the heavy cream over medium heat until it begins to simmer (do not let it boil). Remove from heat and pour over a bowl of chocolate chips. Let it sit for 5 minutes. Then, stir slowly until combined and chocolate has melted. Refrigerate for 10-15 minute until cooled and thickened.
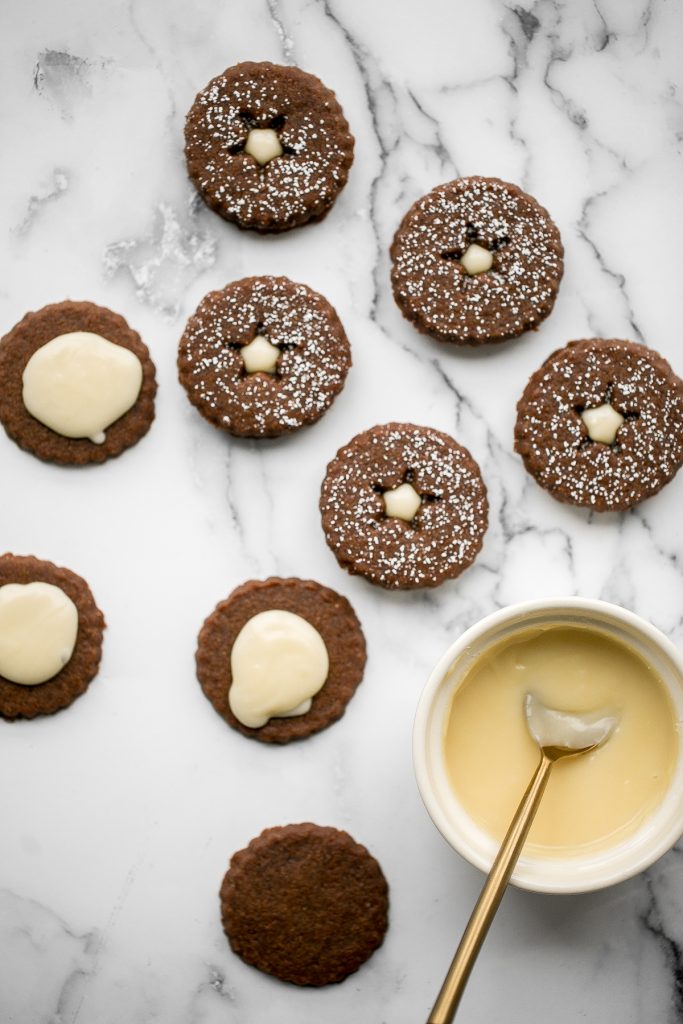
How to Assemble Linzer Cookies
- Dust confectioners' sugar on the cookies that have the center cut out.
- Place 1 teaspoon full of chocolate ganache on the bottom halves of each cookie (the cookies that do not have the center cut out).
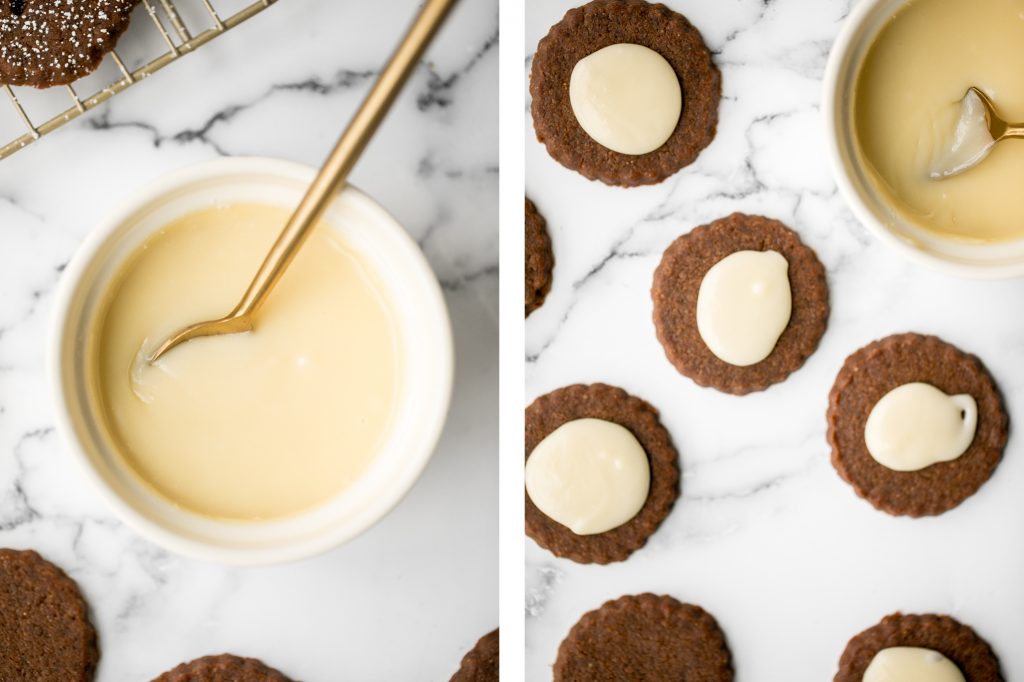
- Carefully place the tops of the cookies on the chocolatey bottoms. Be careful not to smudge the sugar on top. You can fill the open centers with more ganache using a piping bag with a fine round tip.
Storing and Freezing Instructions
- How to store: Store in a single layer in an airtight container at room temperature for up to 3 days, or in the refrigerator for up to one week.
- How to freeze: To freeze unassembled gingerbread linzer cookies, arrange them in a single layer in an airtight container. Then add a layer of parchment paper and place another layer of cookies on top. You can also freeze assembled cookies, but note that the confectioners' sugar will melt when the cookie thaws, so it might not be as pretty. I would recommend freezing the cookies unassembled, and then adding confectioners' sugar and ganache later once thawed.
More Cookie Recipes
- Linzer Cookies
- Chocolate Crinkle Cookies
- Jam-filled Thumbprint Cookies with Almond Glaze
- Soft and Chewy Ginger Cookies
- Christmas Sugar Cookies
- Cranberry Pistachio Biscotti
- Soft and Chewy White Chocolate Cranberry Cookies
Tried this recipe?
I'd love to hear what you think! Leave a comment and rating below to share your feedback. Your reviews help others discover this recipe and help me keep creating more free recipes for you. Snap a photo and tag me on social media @aheadofthyme too.
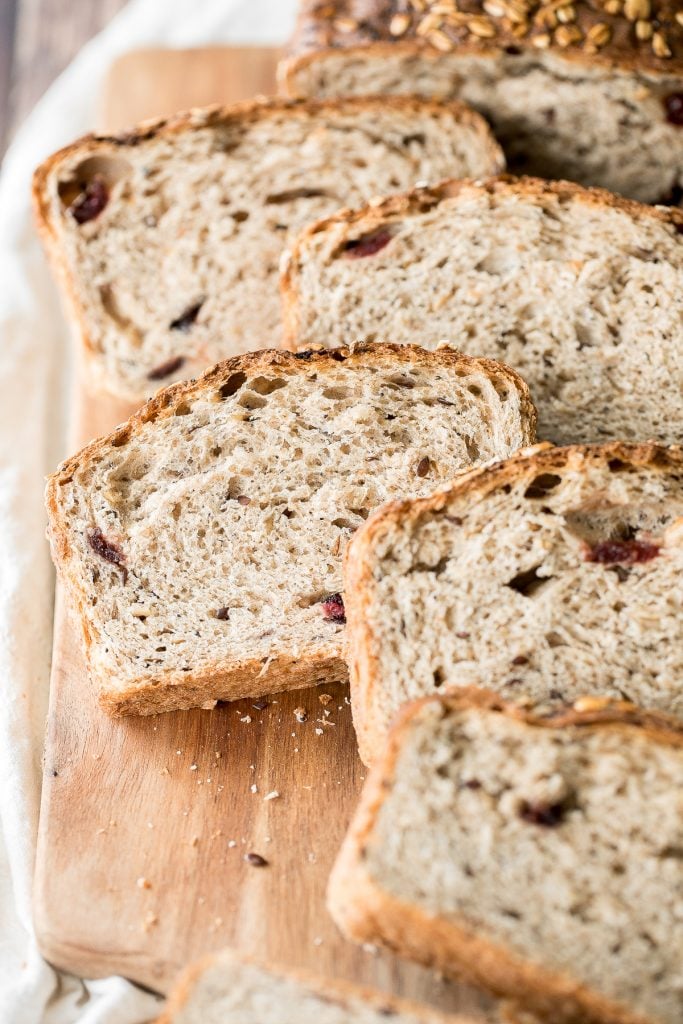
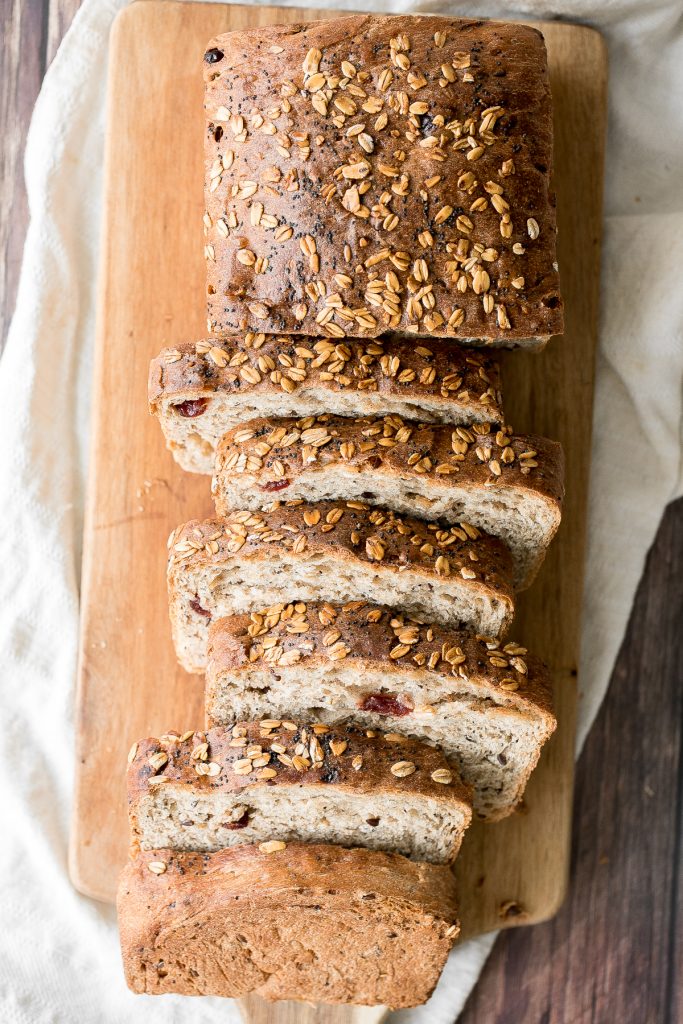
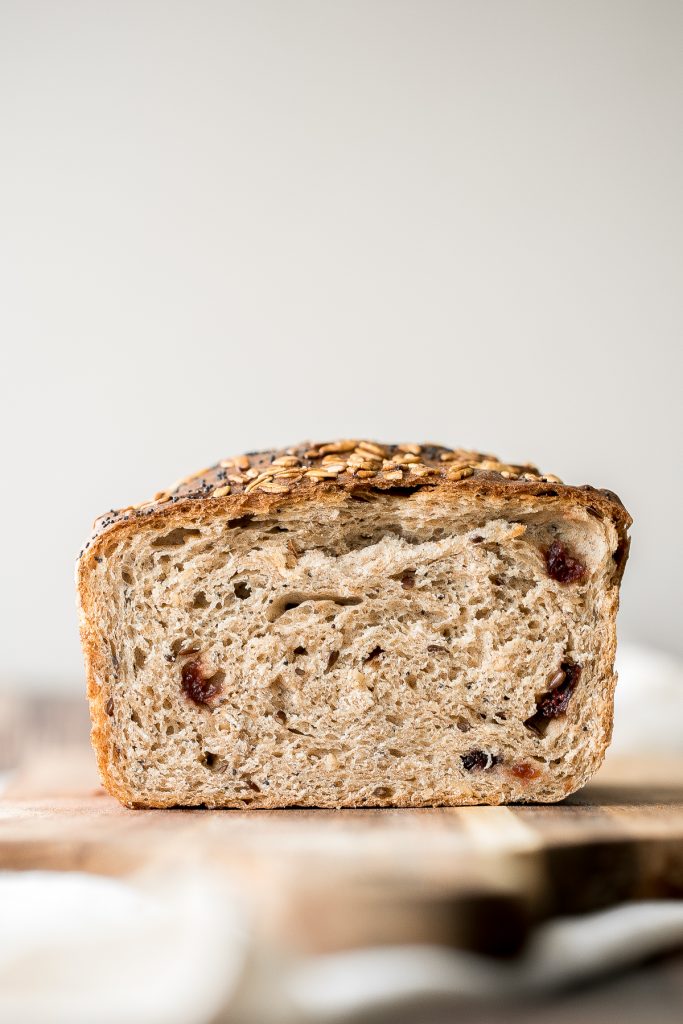
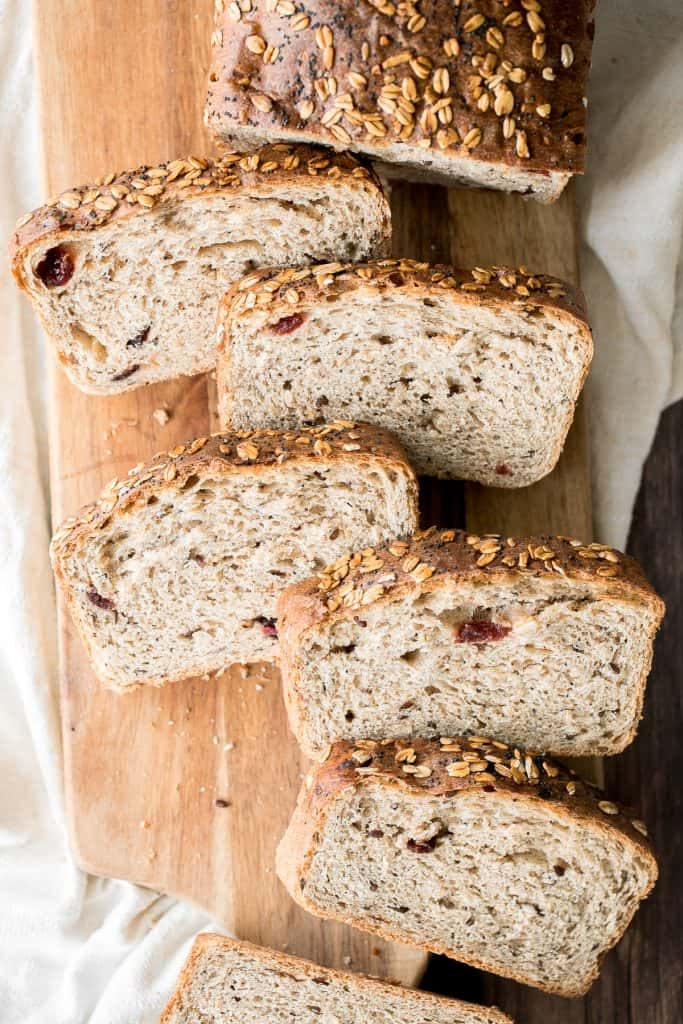
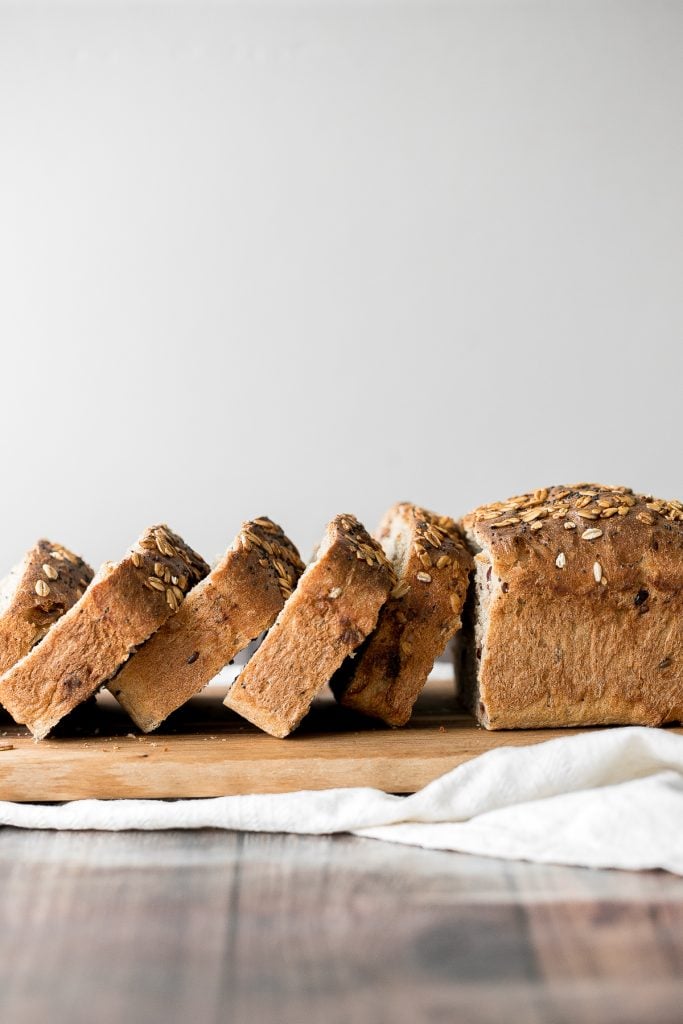
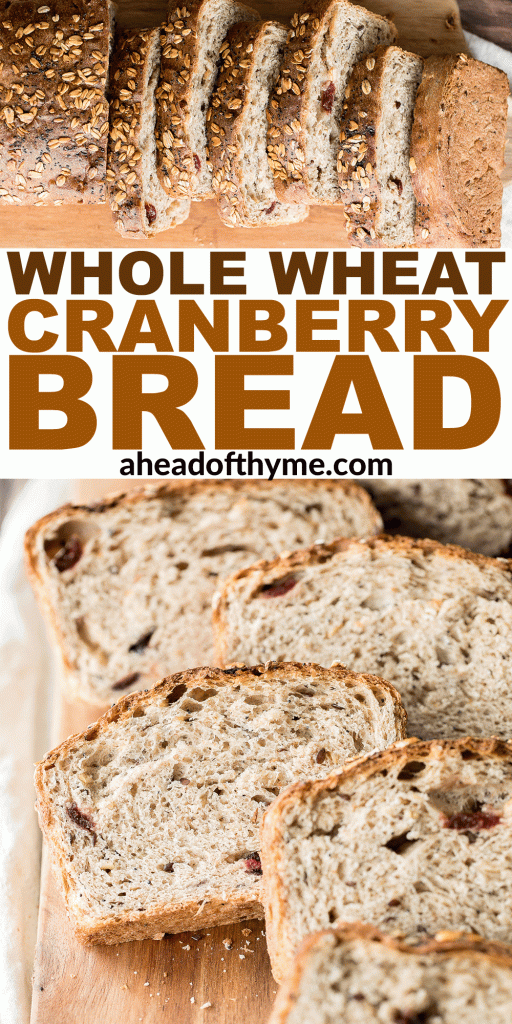
Whole Wheat Cranberry Bread
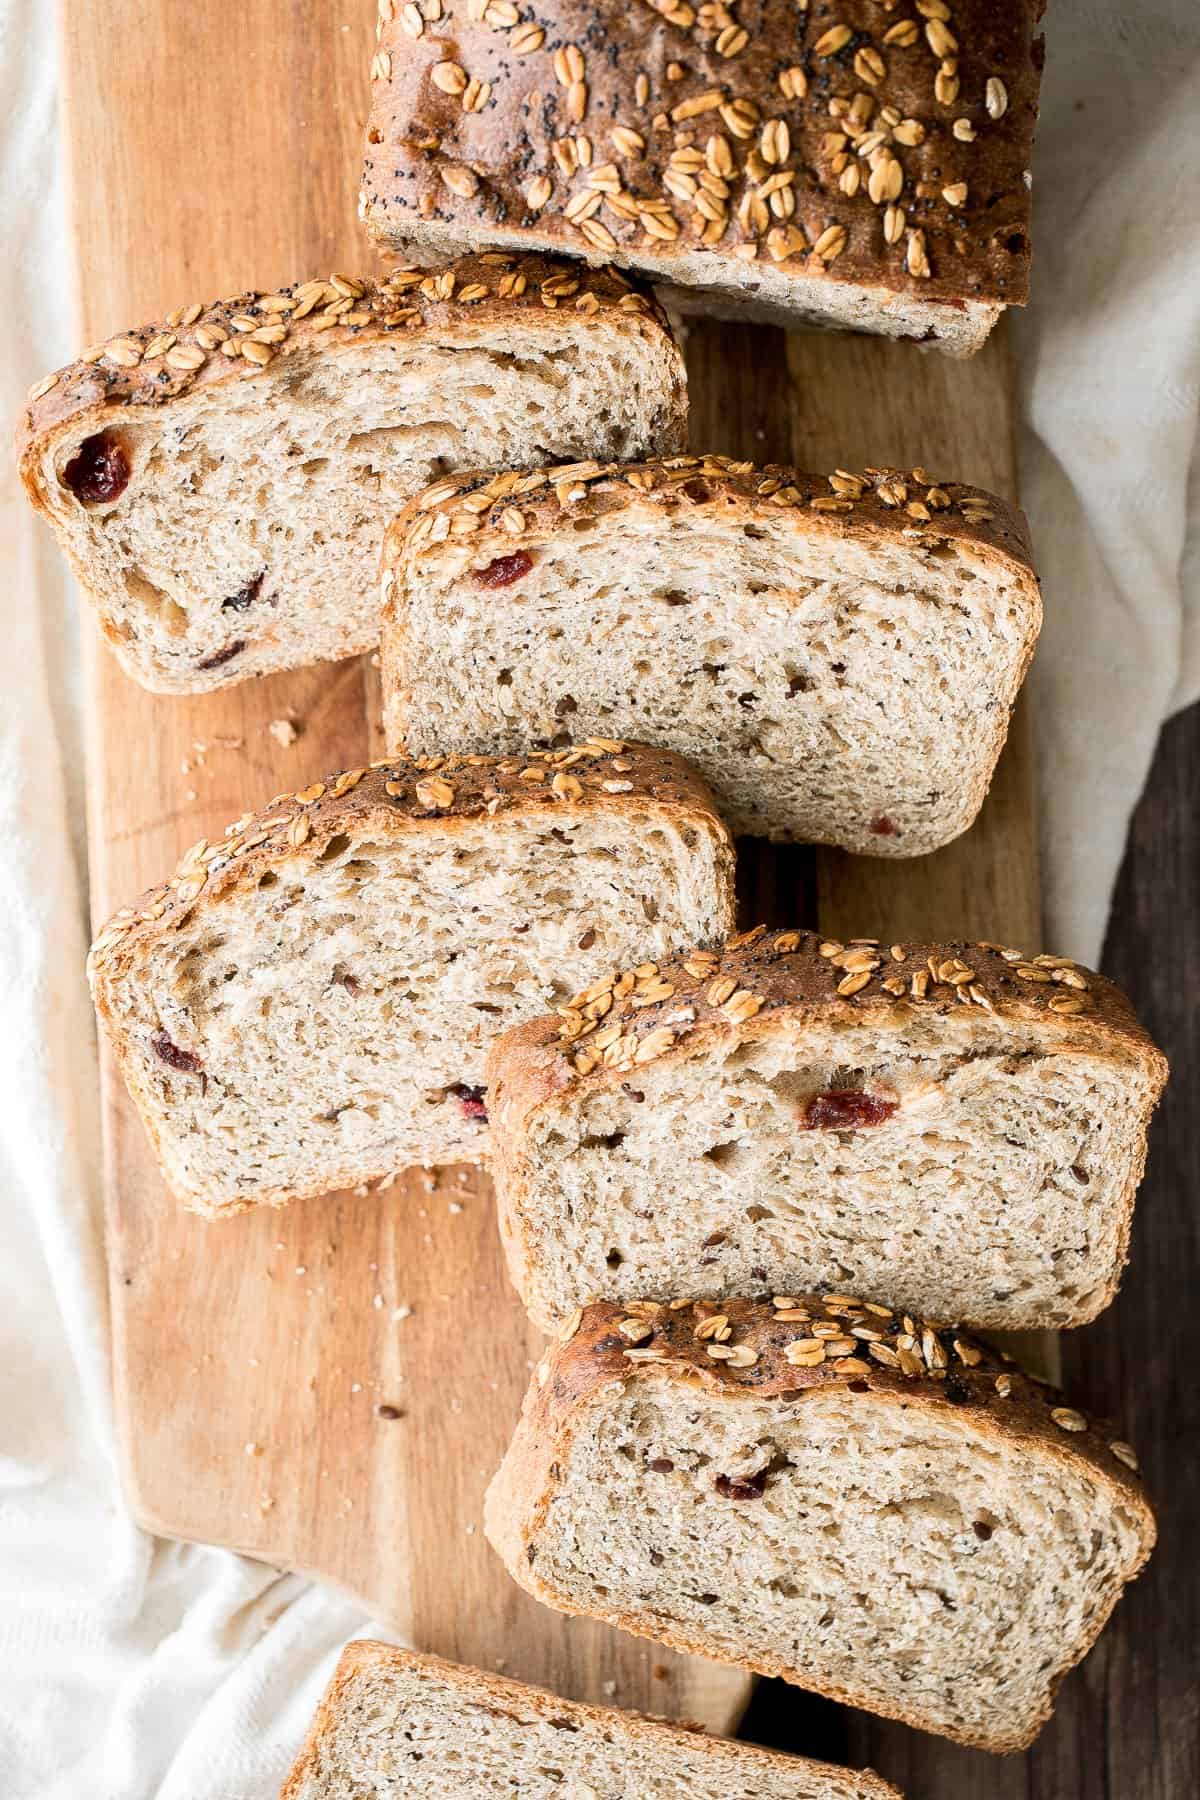
Elevate your sandwiches with this delicious whole wheat cranberry bread. This bread is chewy, fluffy and airy, packed with dried cranberries and seeds, and has a perfect crunchy crust topped with oats and more seeds. And you just need to spend about 15 minutes of actual work to prep the dough. SO easy.
If you are new here, then you won't know that we bake bread almost every single week. Last week it was easy challah bread, the week before that it was fruit and nut sourdough bread, and the list goes on (browse all our bread recipes). There are a few reasons why we love to make bread like this cranberry whole wheat bread. First, there is just something about the process of making bread that is so therapeutic. Second, you can enjoy a different loaf of bread every time as the options for flavours and textures are endless. And third, don't get me started on the scent of a freshly baked loaf of bread. We all know nothing beats that.
Ingredients
- active dry yeast
- milk + butter
- sugar
- flour - a 60/40 combination of all purpose white flour and whole wheat flour. You can also use 400 grams of a 60/40 flour blend instead of combining the two types of flour yourself.
- rolled oats
- dried cranberries
- seeds - flaxseeds, white sesame seeds, and poppy seeds.
- salt
- egg - for egg wash on top and to help the oats and poppy seeds stick to the crust.
You will also need a kitchen scale (or measuring cups and spoons), mixing bowl, half sheet baking pan and silicone baking mat (or parchment paper).
How to Make the Best Whole Wheat Cranberry Bread
Prepare the Dough:
In a small cup, whisk to combine yeast, milk, butter and sugar. Let it sit for 5 minutes to activate the yeast.
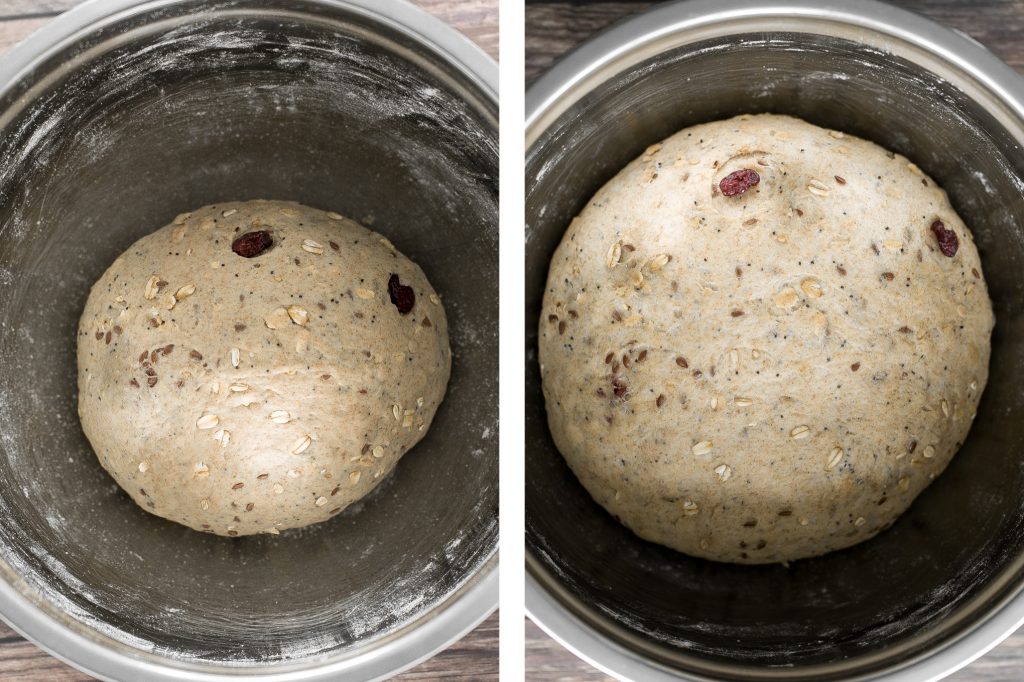
In a large mixing bowl, whisk to combine all purpose flour, whole wheat flour, ⅓ cup oats, cranberries, flaxseeds, sesame seeds and salt. Pour in the yeast mixture, and stir with a silicone spatula to combine until it forms a shaggy dough, scraping down the sides of the bowl (there should be no dry flour particles visible).
Transfer the dough onto a clean surface and knead for 5 minutes until it turns into a smooth dough ball. Because of the medium hydration (60% flour to liquid ratio) and high fat content (butter and milk), the dough is much softer and is easy to knead into a smooth ball.
Drizzle and spread a little bit of oil over the dough with your hands to help prevent it from drying out. Cover the bowl with plastic cling wrap and let it sit at room temperature for up to 2 hours or until doubled in size.
Shape the Dough:
Transfer the dough onto a lightly oiled surface. Flatten the dough into 9x5-inch rectangle and roll it into a log. Pinch the edges together to seal.
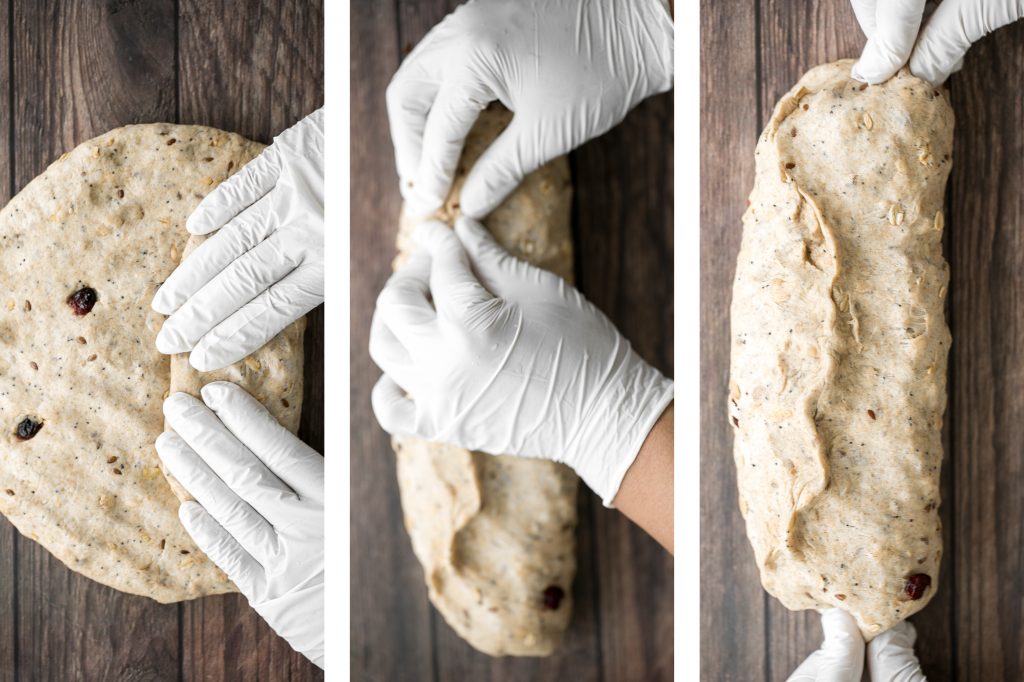
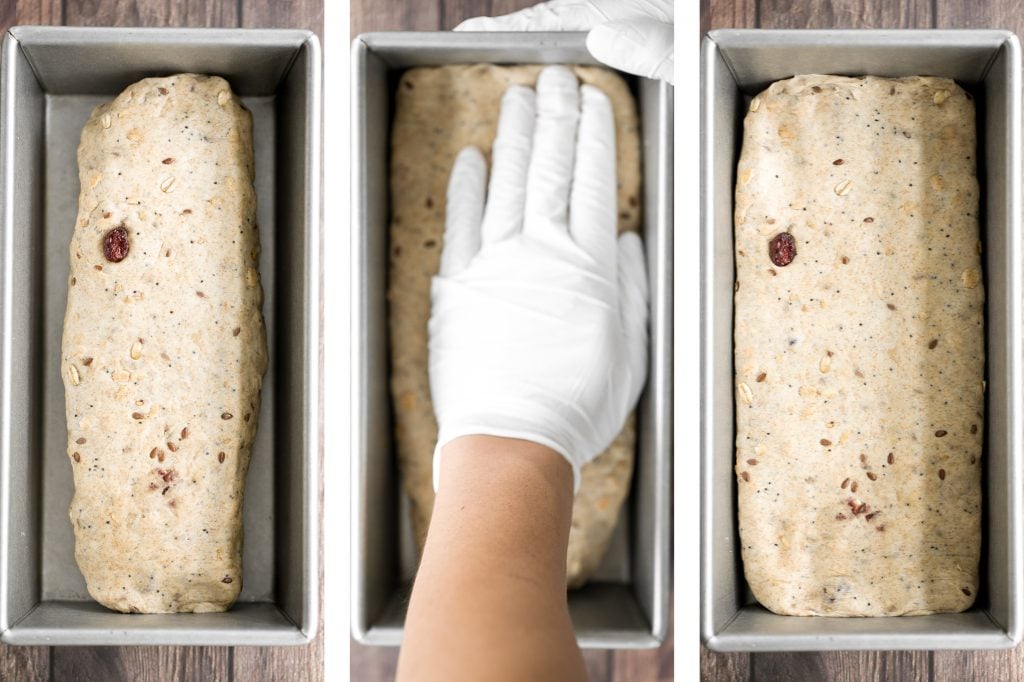
Then, transfer the rolled dough into a 9x5 loaf pan (or 1.5 lb. loaf pan) and press it down with your palm to spread cover the entire pan. This also helps distribute air bubbles evenly in dough when it rises. Set it aside to rise until the loaf almost rises to the rim of the pan, about 1-1.5 hours.
Add Toppings and Bake:
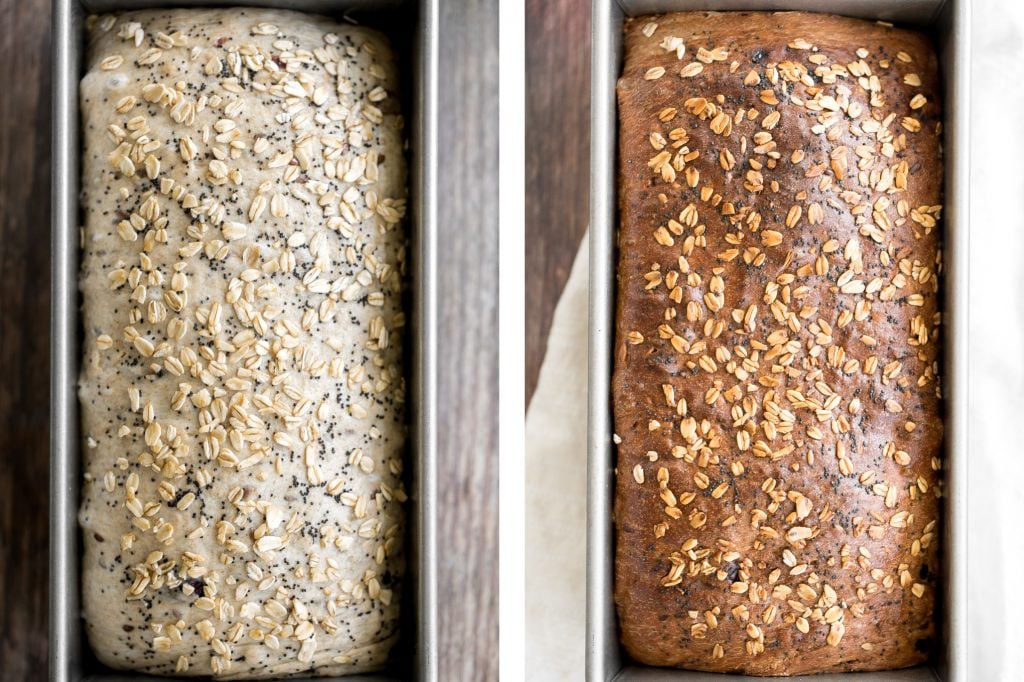
Gently brush egg wash over the top crust (be gentle with brushing since the loaf is filled with air bubbles). Sprinkle the top with the remaining oats and poppy seeds, and bake in a 400 F preheated oven for 40 minutes until the top crust turns golden brown.
Allow the whole wheat cranberry bread to cool in the pan for 5 minutes, then remove out of the pan and cool completely on a wire cooling rack before slicing, about 1 hour.
How to Store and Freeze Whole Wheat Cranberry Bread
- How to store: This bread will last for up to 2 days at room temperature. Cover it or store in a bread box so that it does not dry out. You can also store in the refrigerator in an airtight container for up to 1 week.
- How to freeze: Wrap the bread tightly in plastic cling wrap and place into an airtight container or freezer bag, and store in the freezer for up to 3 months. If freezing, I would recommend slicing the bread first so that it is easy to reheat a slice or two at a time.
- How to reheat: Toast frozen slices in the toaster on the freezer setting, or let the bread thaw to to room temperature first and then reheat in the toaster, oven or air fryer.
More Bread Recipes
- Small Batch No-Knead Bread
- No Knead French Baguettes
- Easy Small Batch Ciabatta Rolls
- Homemade Sunflower Seed Bread
- Easy Homemade Everything Bagels
- Easy Challah Bread
Tried this recipe?
I'd love to hear what you think! Leave a comment and rating below to share your feedback. Your reviews help others discover this recipe and help me keep creating more free recipes for you. Snap a photo and tag me on social media @aheadofthyme too.
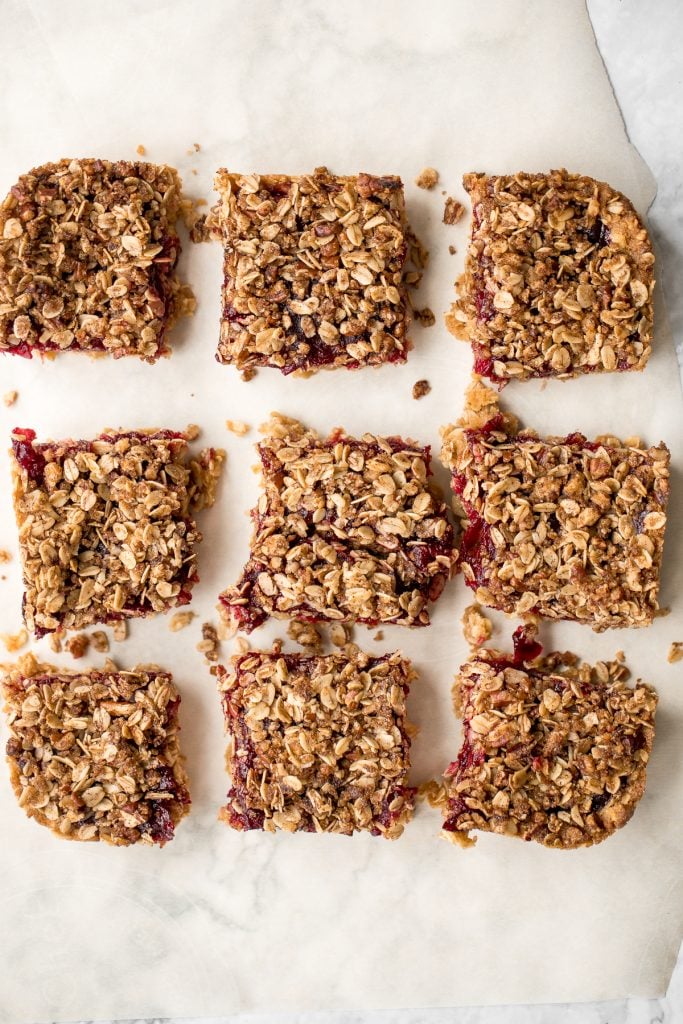
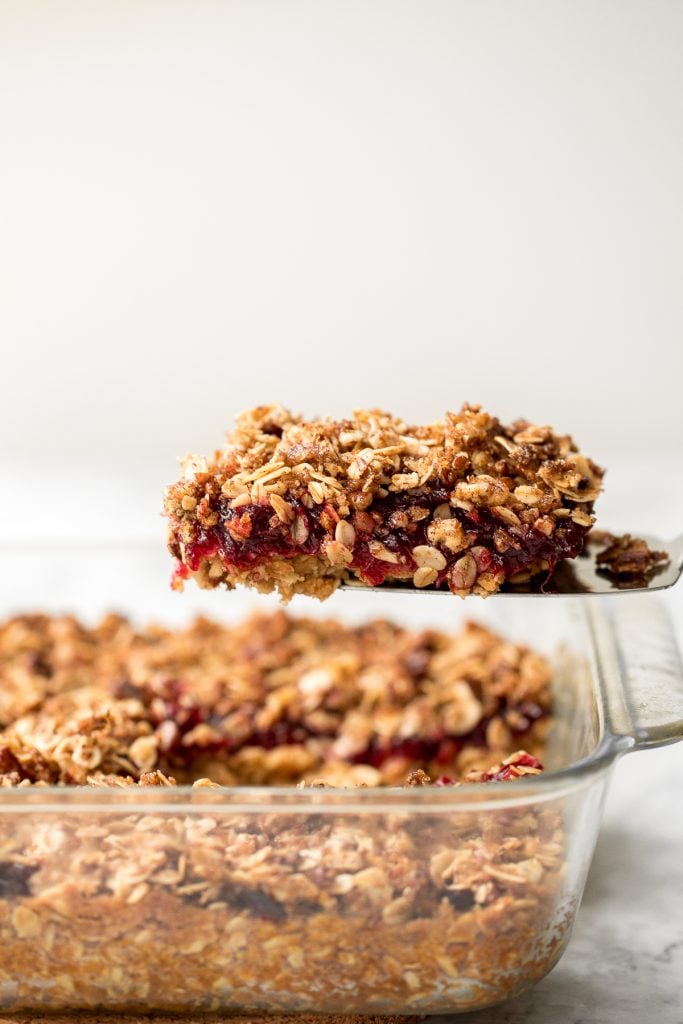
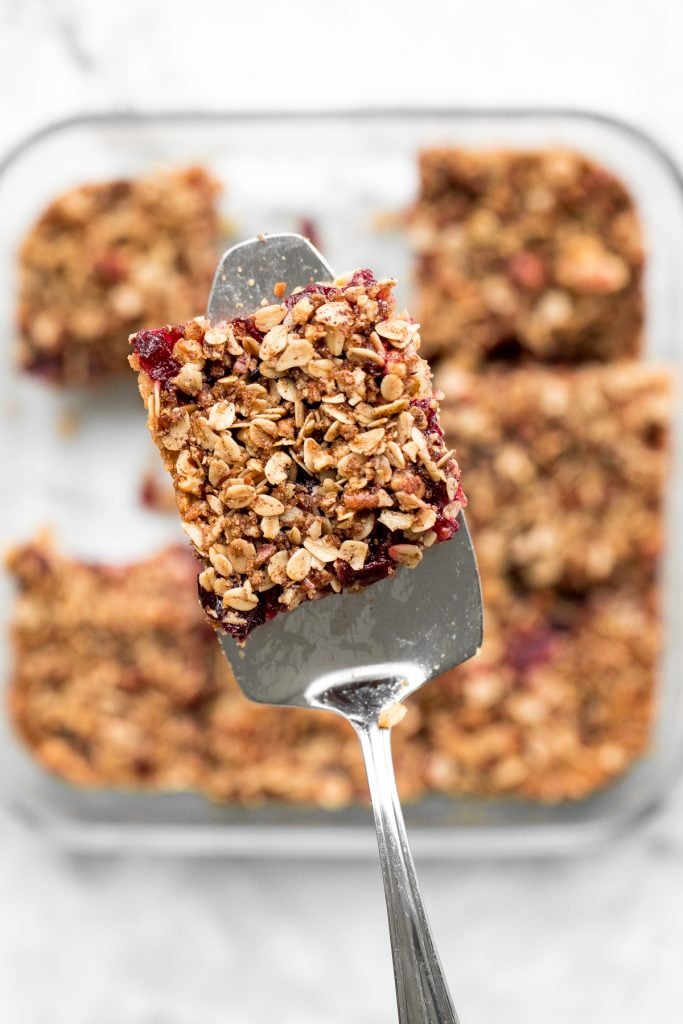
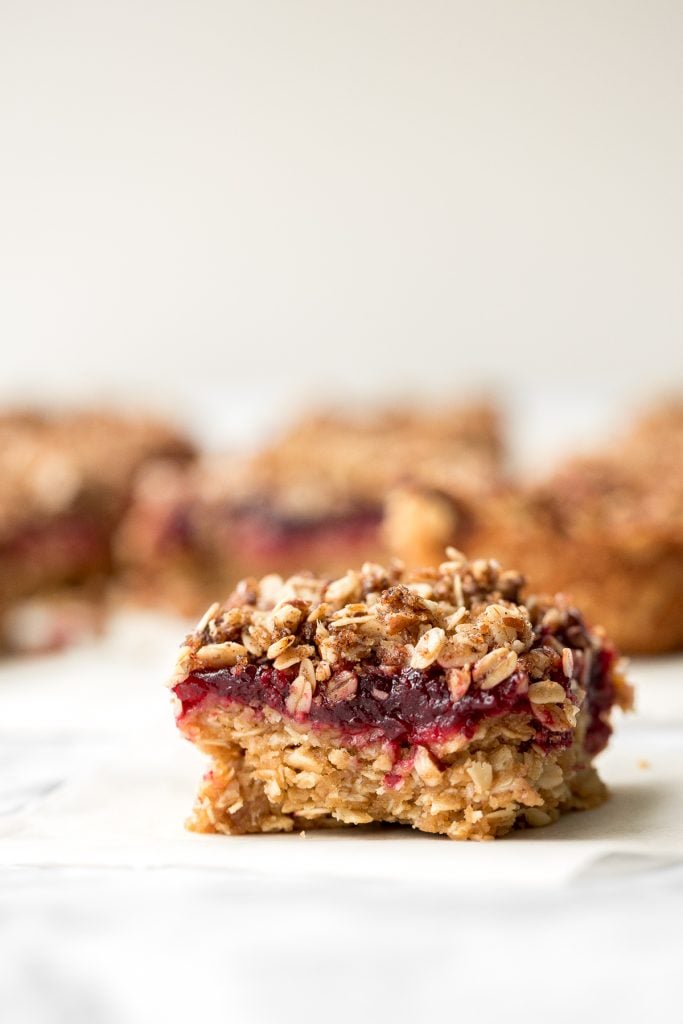
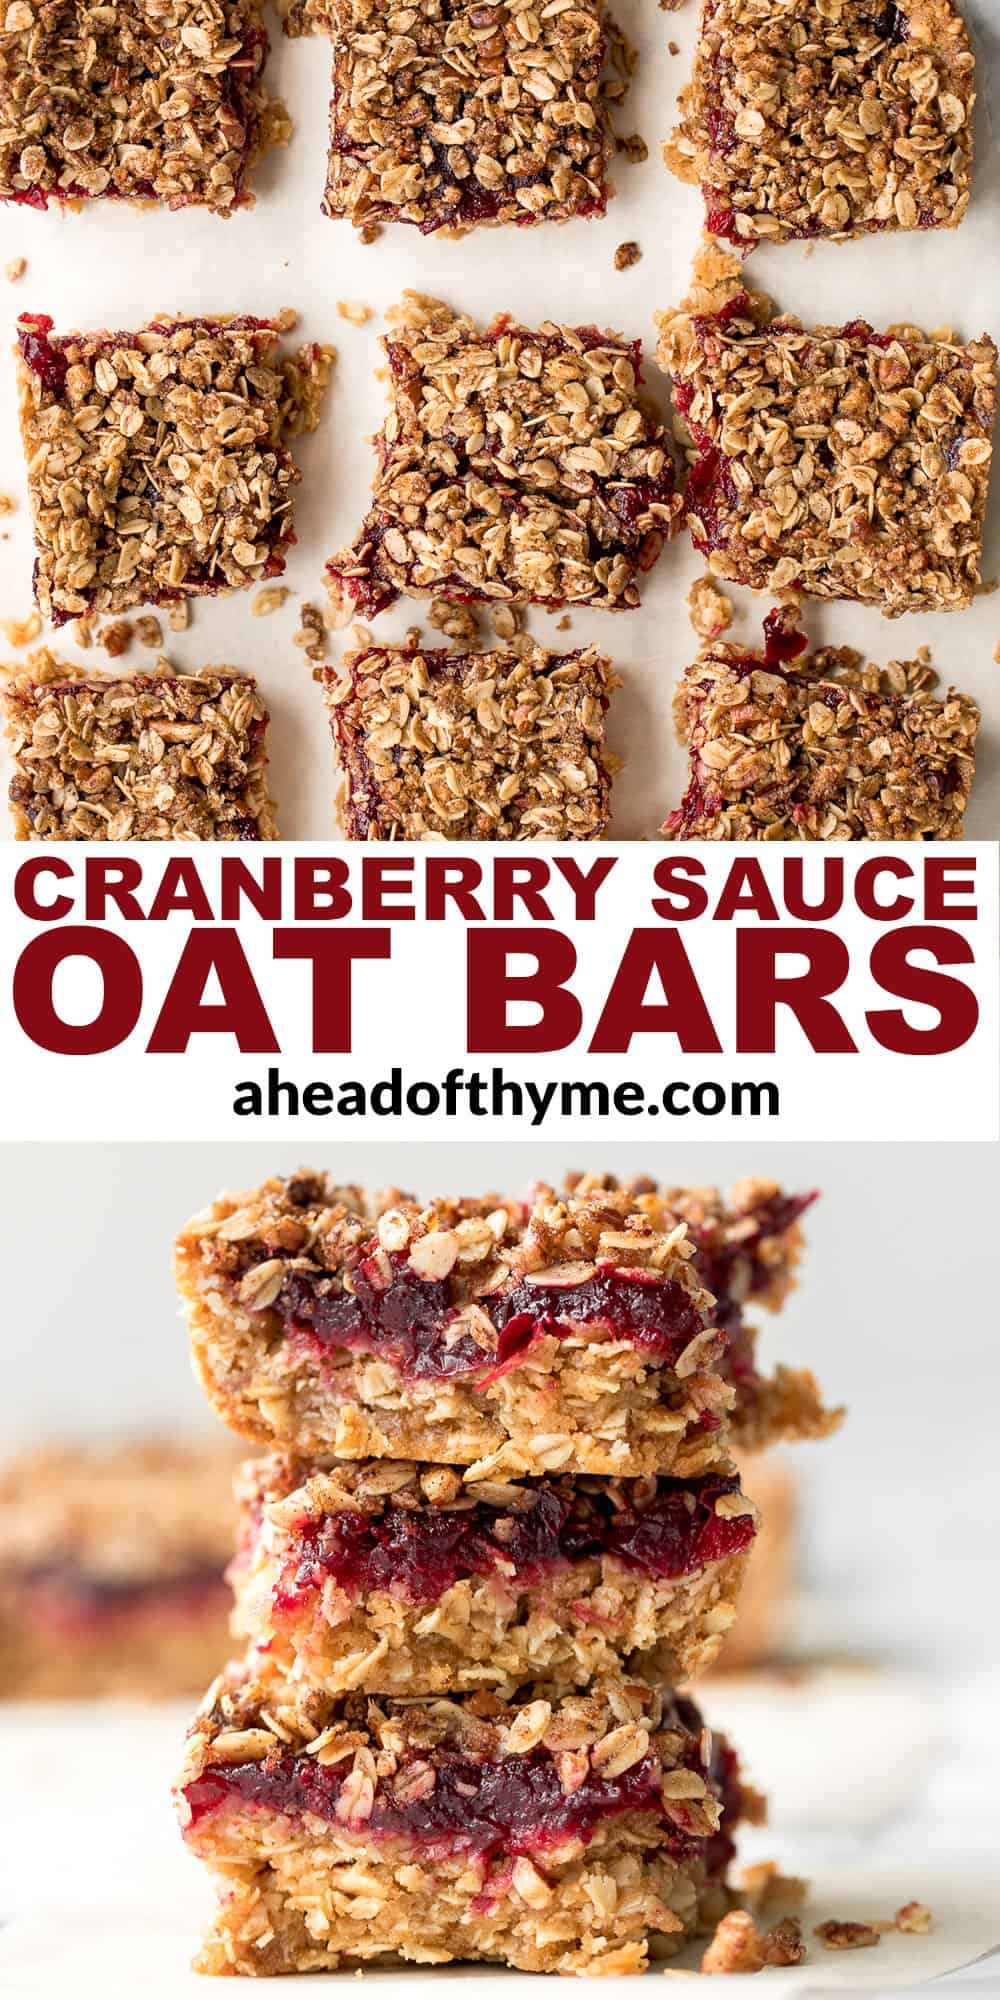
Cranberry Sauce Oat Bars
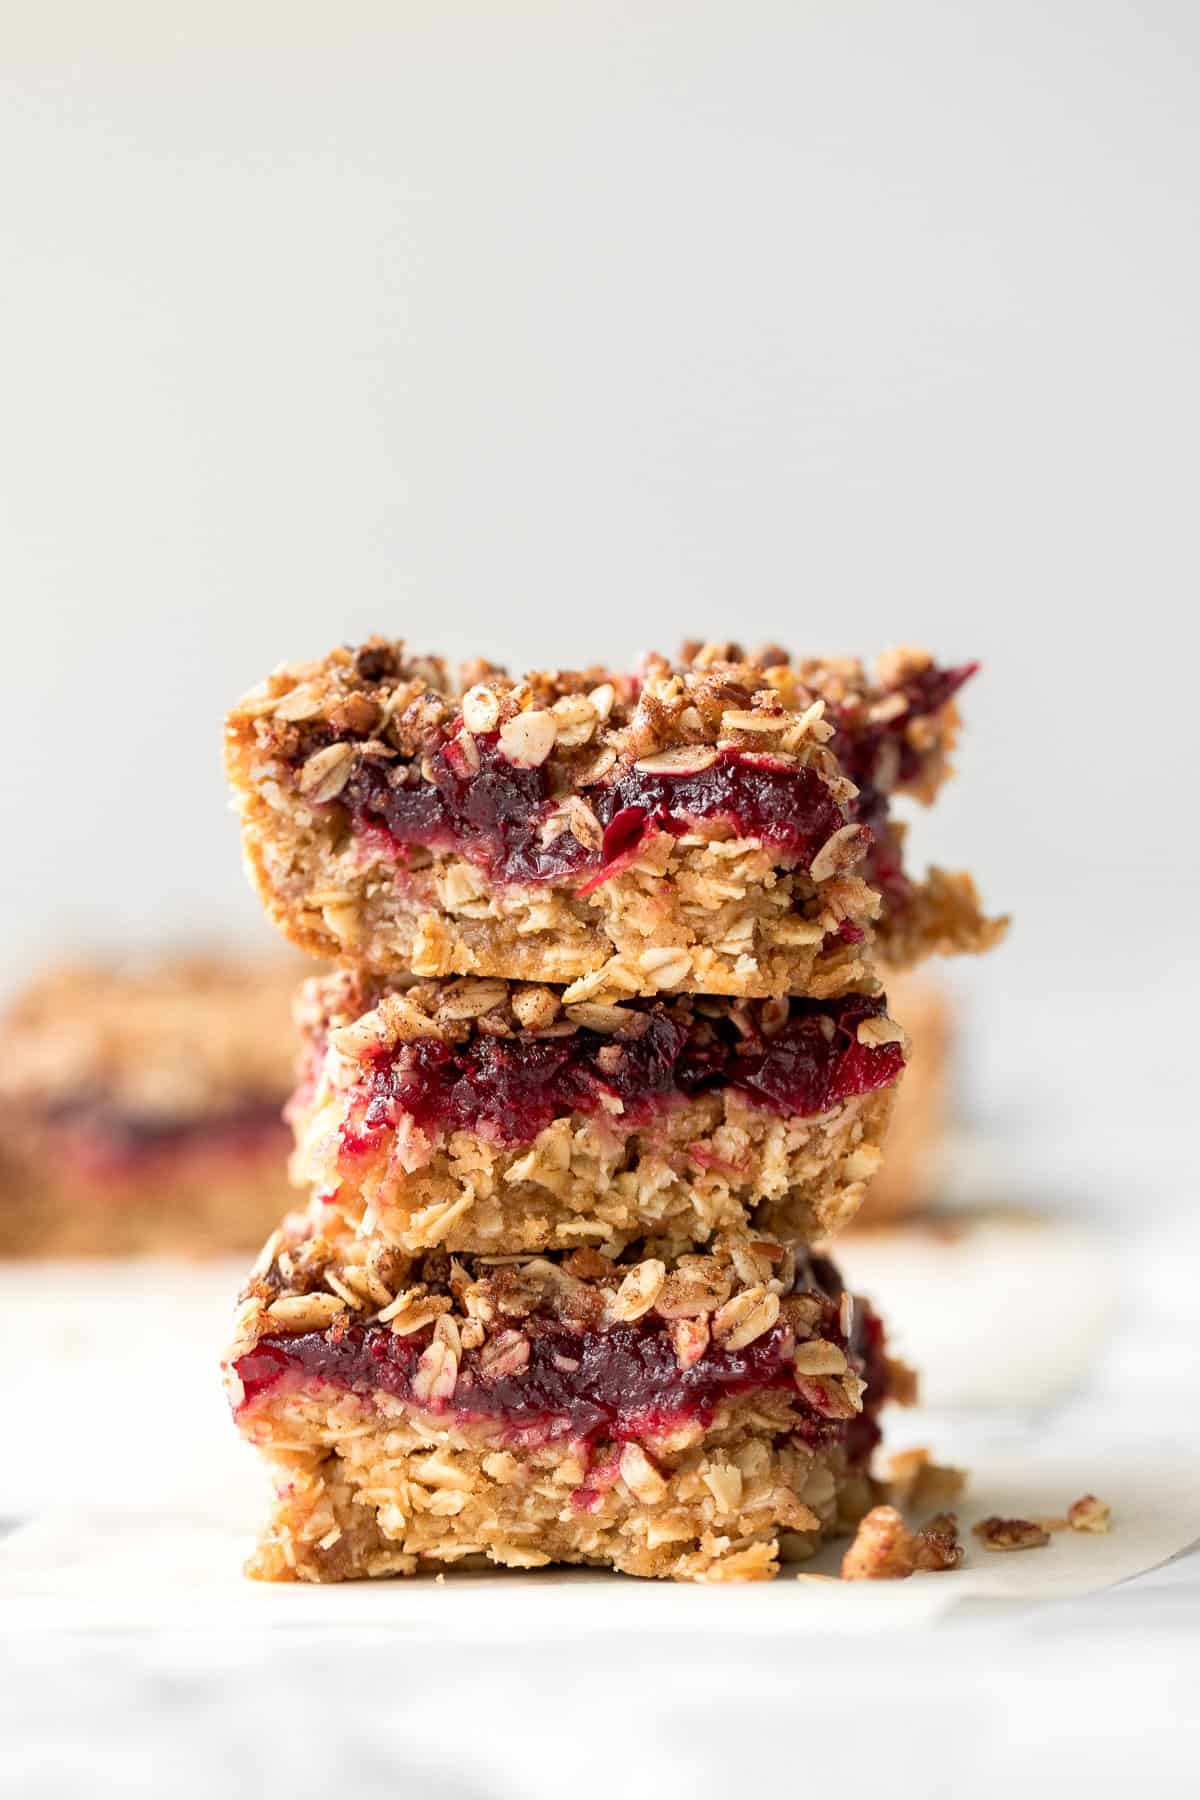
Easy and delicious cranberry sauce oat bars with a soft, chewy and buttery crust, a tart yet sweet cranberry sauce filling, and a crumbly pecan and oat topping is the best mouthwatering way to use up any leftover cranberry sauce from a holiday dinner. Enjoy these cranberry squares for breakfast, dessert, or any time of the day as a snack.

One of the best parts of Thanksgiving is all the leftovers, and my favourite item to work with is leftover cranberry sauce. I love turning them into delicious baked treats like cranberry sauce swirl pound cake and cranberry sauce muffins with oat streusel topping. And these tasty cranberry sauce oat bars fit right in. They are basically date squares made with cranberry sauce. Pretty genius right? Except they taste so different, and so delicious.
Ingredients
So there are 3 layers to these bars, and here is what you will need for each layer:
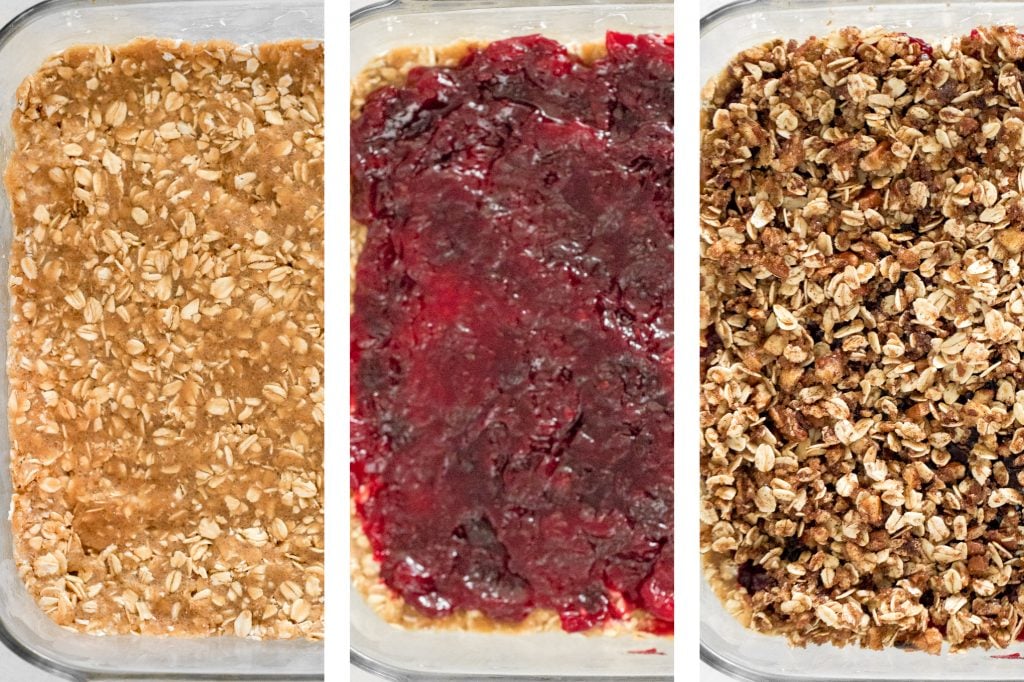
- buttery crust - butter, brown sugar, rolled oats (not quick oats), all-purpose flour, vanilla extract, baking powder, and a pinch of salt.
- cranberry sauce - homemade cranberry sauce or canned cranberry sauce both work great. If your cranberry sauce is already very sweet, you may want to cut down on some of the sugar in this recipe.
- pecan oat topping - melted butter, brown sugar, rolled oats, crushed pecans, and ground cinnamon.
You will also need measuring cups and spoons, mixing bowls, hand mixer (or stand mixer), 9-inch square baking pan, and wire cooling rack.
How to Make The Best Leftover Cranberry Sauce Oat Bars
- Make the crust: In a large mixing bowl, use a hand mixer or stand mixer to cream together butter with brown sugar until light and fluffy. Add rolled oats, flour, vanilla, baking powder, and salt. Continue to mix until fully combined. The mixture will resemble crumbs.
- Start assembling the layers: Transfer the mixture into a 9-inch square baking pan, and firmly press it in to create an even layer on the bottom. Layer and spread cranberry sauce on top.
- Make the pecan oat topping: In a shallow saucepan, melt butter over medium heat. Once melted, remove from heat and stir in brown sugar, oats, pecans, and cinnamon. Stir until fully combined. Sprinkle and evenly distribute the topping on top of the layer of cranberry sauce.
- Bake: Bake for 30 to 35 minutes in a preheated 350 F oven until lightly browned. Place baking pan on a wire cooling rack to cool down and cut into 9 even squares.
- Serve: Make yourself a nice cup of tea, coffee, or hot chocolate and grab a cranberry sauce oat bar.
Storing Instructions
- How to store: Cranberry sauce oat bars will last for up to 2 days tightly wrapped or stored in an airtight container at room temperature, or up to one week in the refrigerator.
- How to freeze: Cranberry sauce oat bars freeze really well and can be stored tightly wrapped in plastic cling wrap or in an airtight container for up to 3 months in the freezer. If you have a lot of leftover cranberry sauce, I would make a few batches and freeze for a rainy day.
More Cranberry Recipes
- Cranberry Sauce Swirl Pound Cake
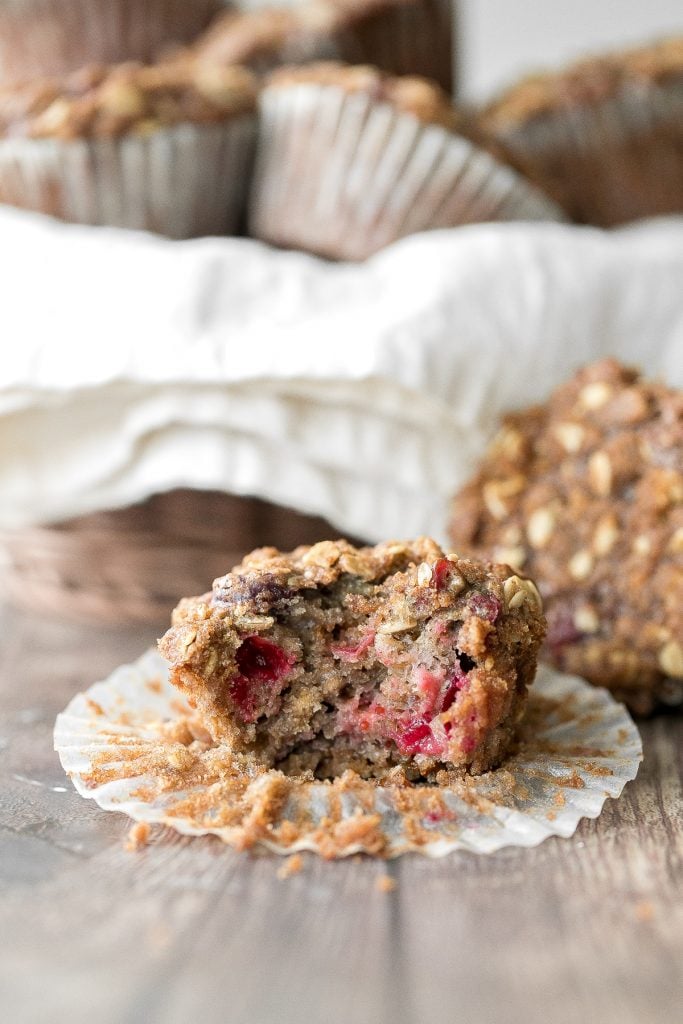
- Leftover Cranberry Sauce Muffins with Oat Streusel Topping
- Cranberry Scones with Orange Glaze
- Easy Make-Ahead Cranberry Sauce
- Cranberry Yogurt Muffins
- Cranberry Pistachio Biscotti
Tried this recipe?
I'd love to hear what you think! Leave a comment and rating below to share your feedback. Your reviews help others discover this recipe and help me keep creating more free recipes for you. Snap a photo and tag me on social media @aheadofthyme too.
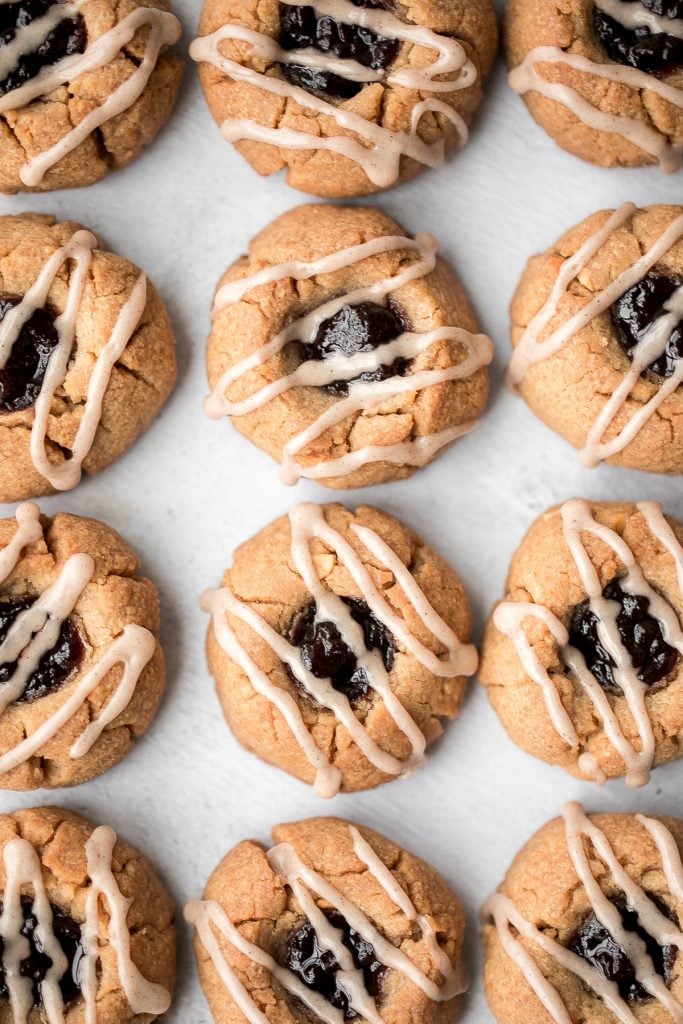
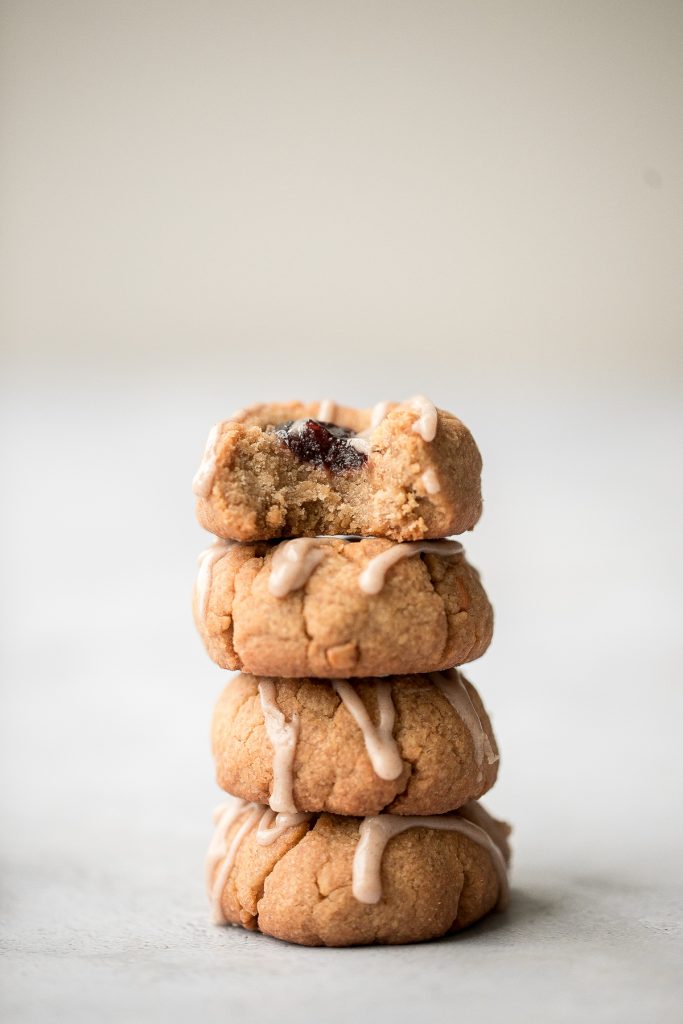
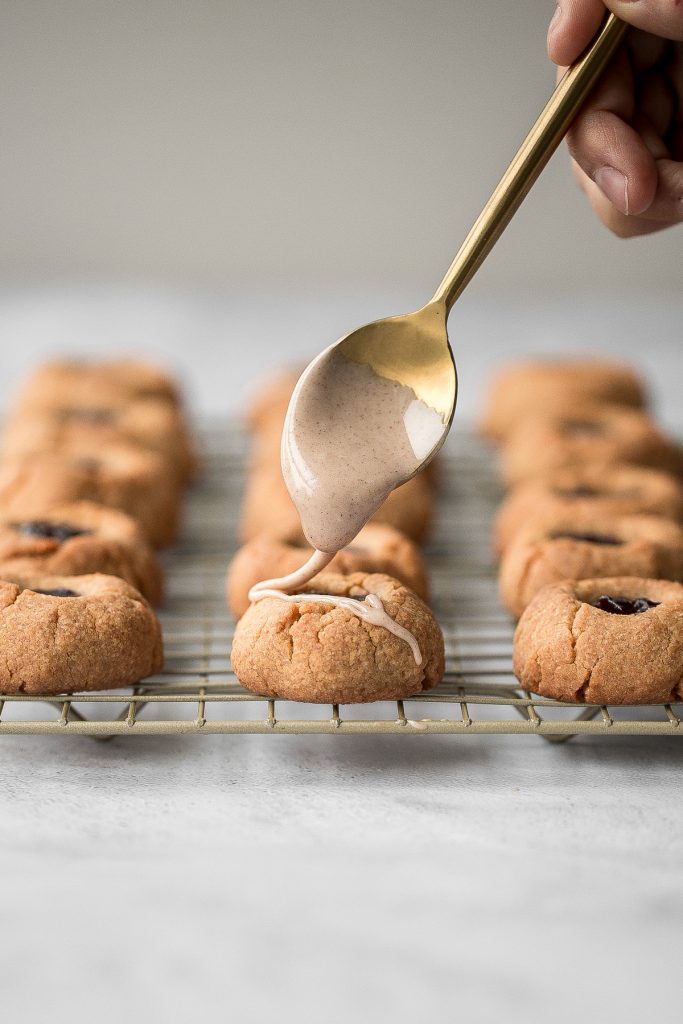
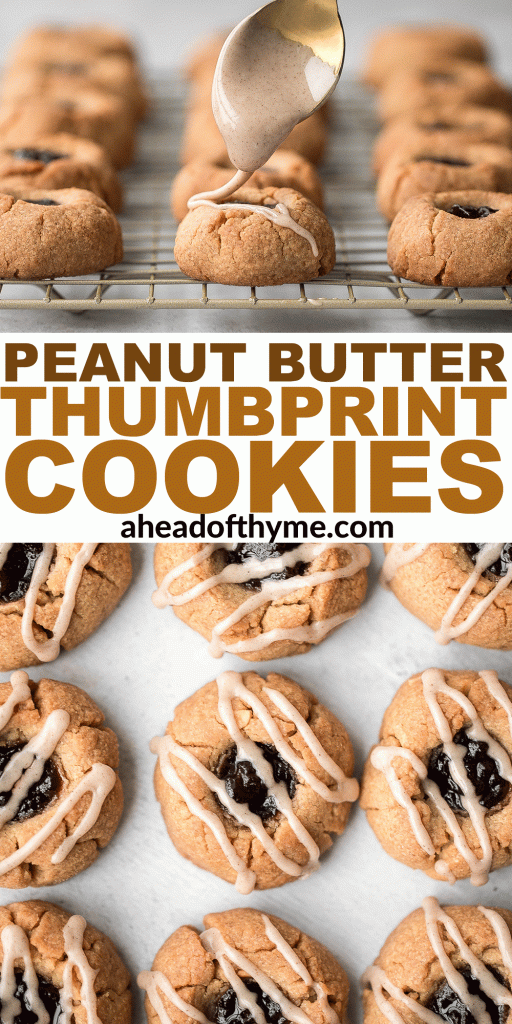
Peanut Butter Thumbprint Cookies
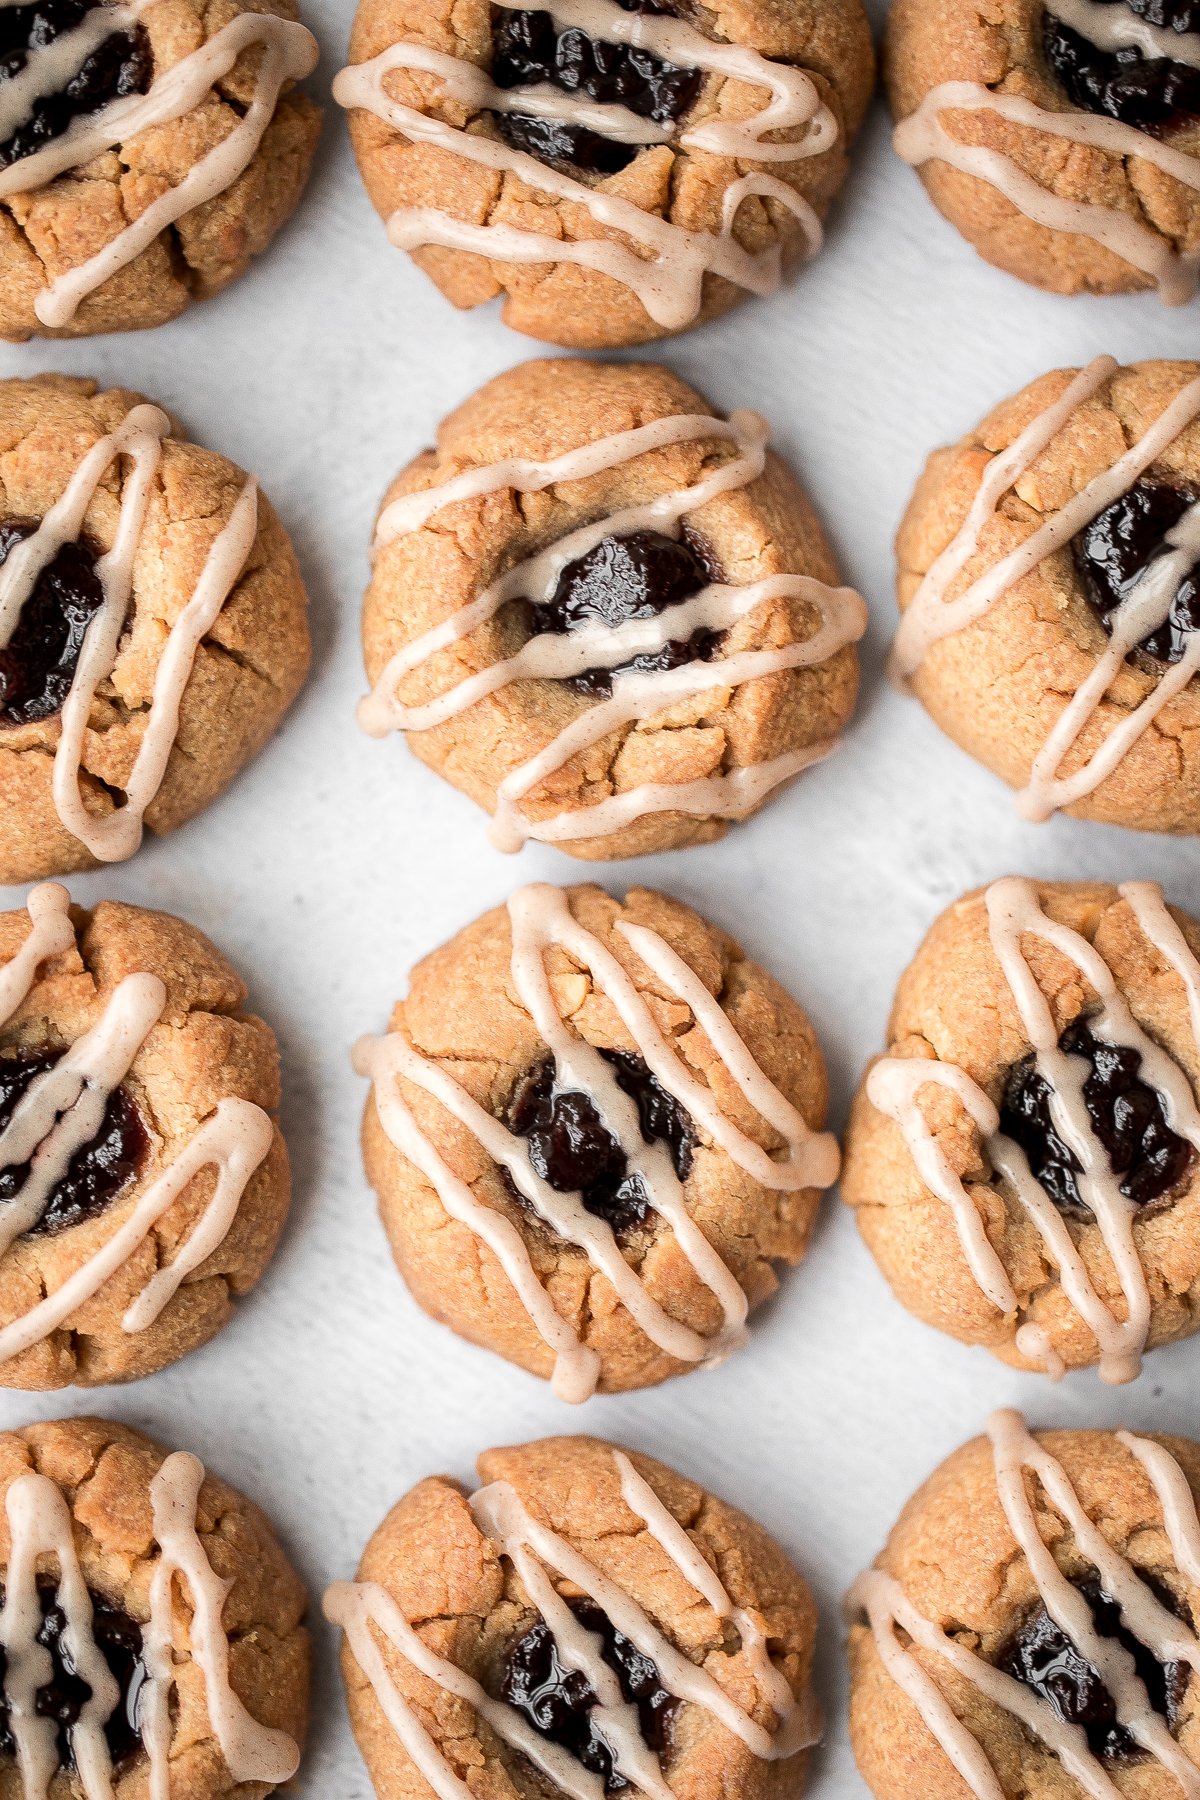
Melt-in-your-mouth peanut butter thumbprint cookies filled with sweet raspberry jam and topped with a drizzle of maple cinnamon glaze are the perfect cookies to indulge during the holidays or any time of the year. A twist on classic shortbread jam-filled thumbprint cookies with almond glaze, these cookies are basically soft and chewy peanut butter cookies with a major upgrade. The best part? They are quite easy to make.
These peanut butter thumbprint cookies are also the perfect cookie to include in a holiday cookie box because they are super easy to freeze, so you can make a batch in advance and assemble your cookie box once you have baked all your cookies, such as linzer cookies, Christmas sugar cookies, soft and chewy ginger cookies, chocolate crinkle cookies, and cranberry pistachio biscotti. Package them all up in these cute Christmas cookie boxes for friends and family.
Ingredients
- all-purpose flour - spooned and levelled. I use a kitchen scale for the most accurate measurements. =
- baking soda
- salt
- creamy peanut butter - I like the texture of creamy peanut butter, but crunchy peanut butter will also work.
- butter
- granulated sugar
- brown sugar
- large egg
- vanilla extract
- raspberry jam - you can use any jam or jelly that you have. I used raspberry jam, but I often use homemade strawberry jam with no pectin.
- maple cinnamon glaze - made with confectioners' sugar, maple syrup, ground cinnamon and milk. This glaze is drizzled on top and is completely optional.
You will also need measuring cups and spoons (or a kitchen scale), mixing bowls, hand mixer (or stand mixer), half sheet baking pan, silicone baking mat (or parchment paper), and wire cooling rack.
How to Make the Best Peanut Butter Thumbprint Cookies with Maple Cinnamon Glaze
- Combine dry ingredients: In a medium mixing bowl, whisk together flour, baking soda and salt. Set aside.
- Combine wet ingredients: In a large bowl, cream together peanut butter, butter granulated sugar, and brown sugar using a hand mixer (or a stand mixer) on medium speed until smooth and creamy, about 2 minutes. Add in egg and vanilla extract and continue to mix until fully combined.
- Add dry ingredients to wet ingredients: Gradually add the dry ingredients to the wet ingredients and mix on low speed until combined.
- Chill the dough: Cover and chill the dough in the refrigerator for 30 minutes.
- Shape the cookies: Roll dough into 1 inch balls, and place on a parchment lined cookie sheet. Make an indentation with your thumb (or the back of a wooden spoon) into the centre of each ball. The edges may crack slightly. Fill the indentation with jam. But be careful that you do not overfill them. Place cookies 2 inches apart on a half sheet baking pan lined with a silicone baking mat or parchment paper. Place baking sheet into refrigerator while the oven preheats.
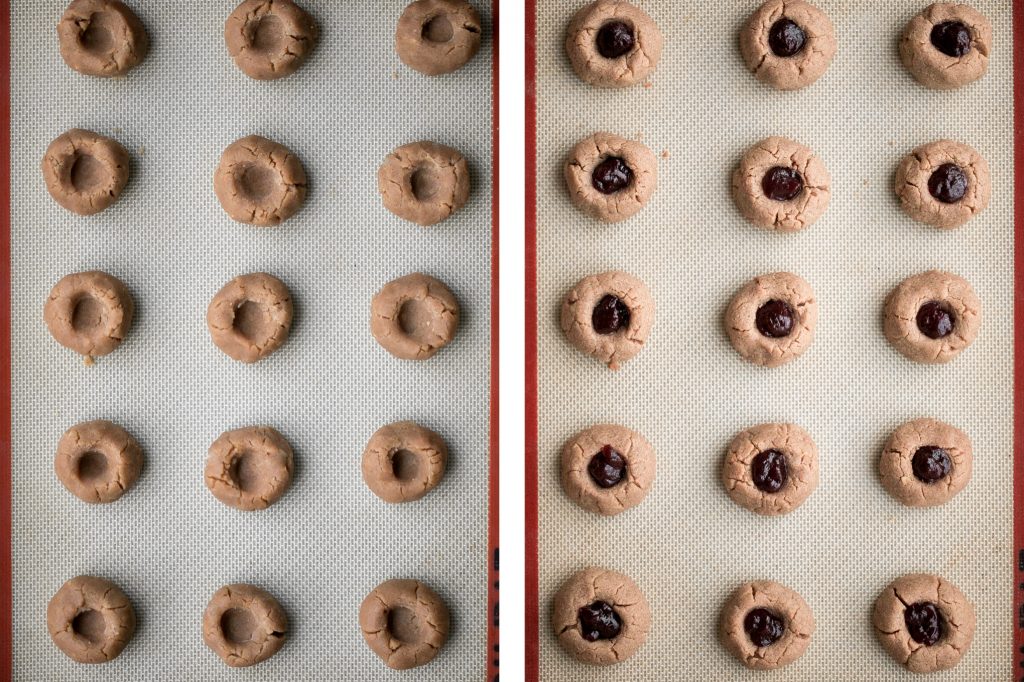
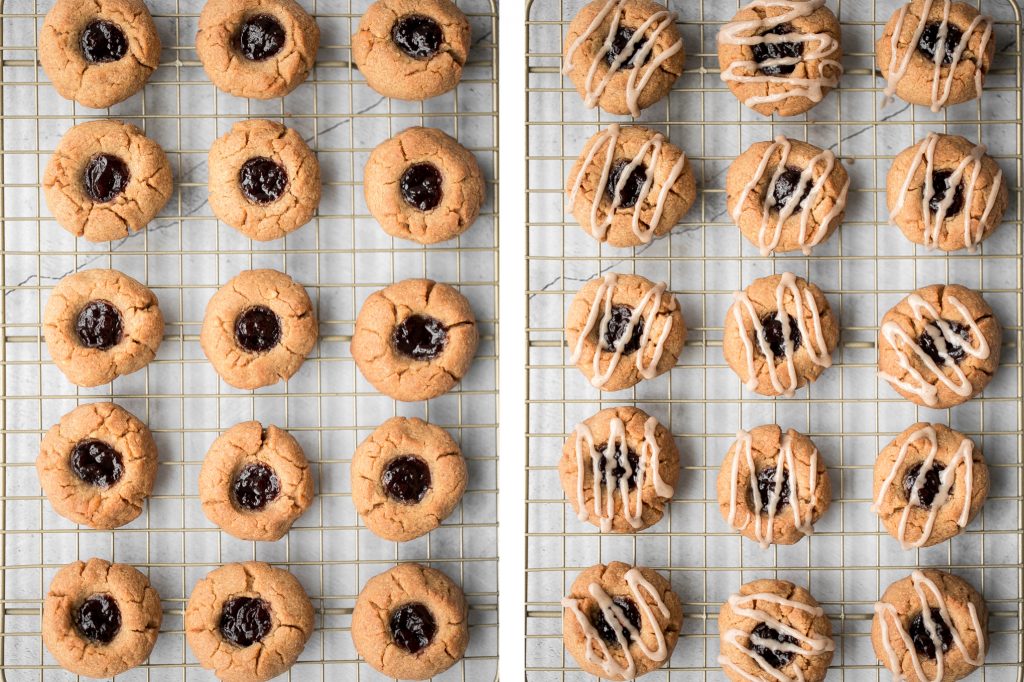
- Bake: Bake the cookies in a 350 F preheated oven for 13-15 minutes or until edges are lightly browned and centres have set. Allow cookies to cool on the baking sheet for 5 minutes, then transfer to a wire cooling rack to cool completely.
- Make the maple cinnamon glaze: In a small bowl, whisk together the confectioners' sugar, maple syrup, ground cinnamon and milk. Stir to combine into a smooth glaze. If you want to thin out the consistency, add a little more milk until you reach desired consistency. If the glaze is too thin, add more sugar. Using a spoon or a piping bag and drizzle glaze over the cooled cookies. Let set for 1 hour.
How to Store Thumbprint Cookies
- Storing instructions: Store thumbprint cookies in an airtight container at room temperature for up to 3 days, or in the refrigerator for up to one week.
- Freezing instructions: To freeze baked cookies, arrange them in a single layer in an airtight container, and stack them up in between layers of parchment paper. Freeze for up to 3 months.
- How to freeze unbaked cookies: Freeze the rolled cookie balls on a parchment-lined baking tray, and freeze for an hour. Once frozen, transfer to a freezer bag or airtight container and freeze for up to 3 months. When ready to bake, allow the cookie balls to thaw in the refrigerator overnight, or at room temperature for a few hours. Then, shape into thumbprint cookies, fill with jam, and bake according to recipe instructions.

More Cookie Recipes
- The Best Soft and Chewy Peanut Butter Cookies
- Jam-filled Thumbprint Cookies with Almond Glaze
- Chocolate Chunk Peanut Butter Cookies
- Peanut Butter Blossoms
- Soft and Chewy Ginger Cookies
- Chocolate Crinkle Cookies
- Christmas Sugar Cookies
- Soft and Chewy White Chocolate Cranberry Cookies
- Chocolate-Dipped Shortbread Heart Cookies
Tried this recipe?
I'd love to hear what you think! Leave a comment and rating below to share your feedback. Your reviews help others discover this recipe and help me keep creating more free recipes for you. Snap a photo and tag me on social media @aheadofthyme too.
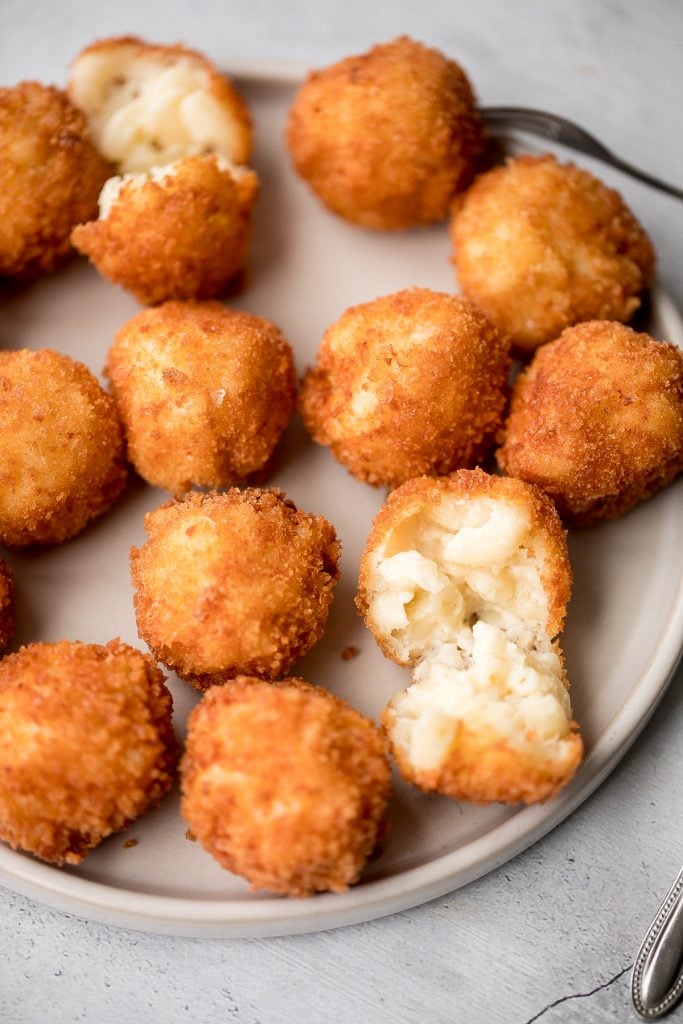
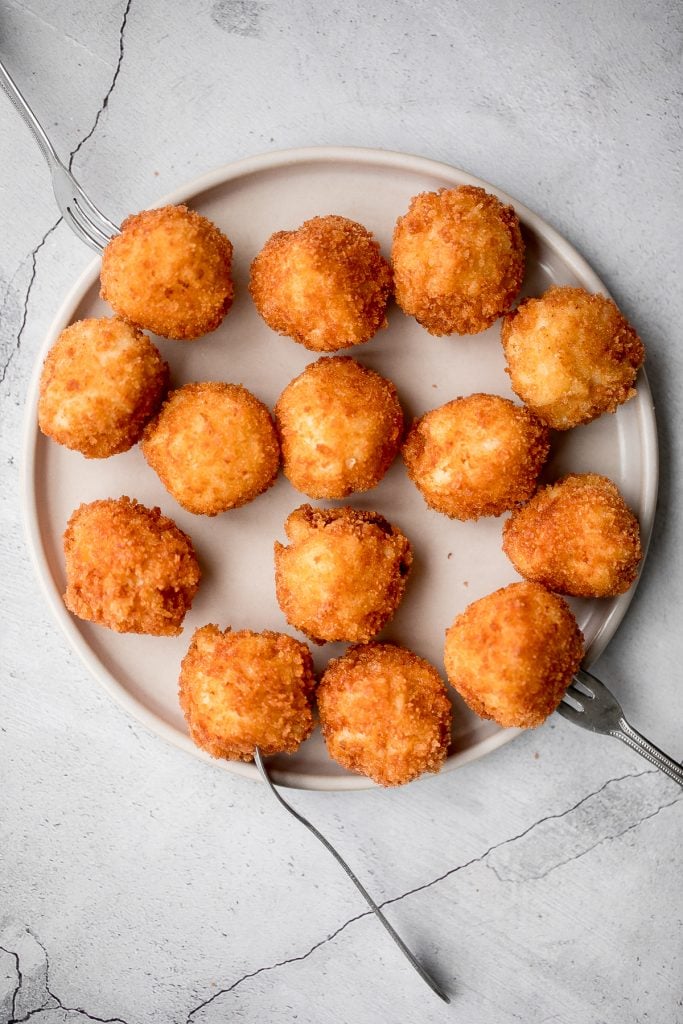
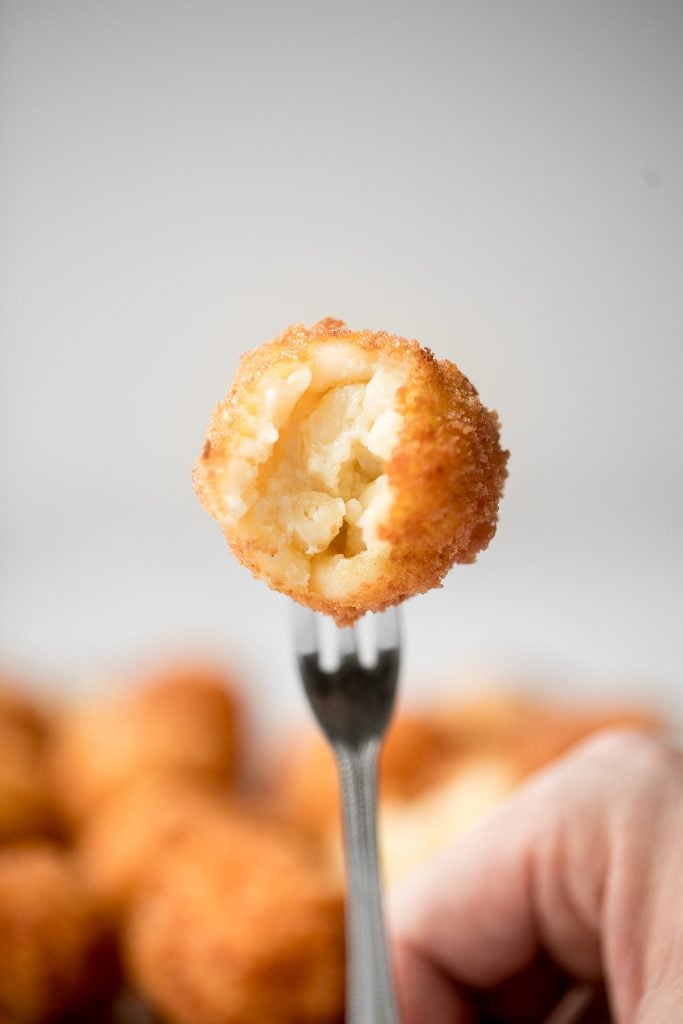
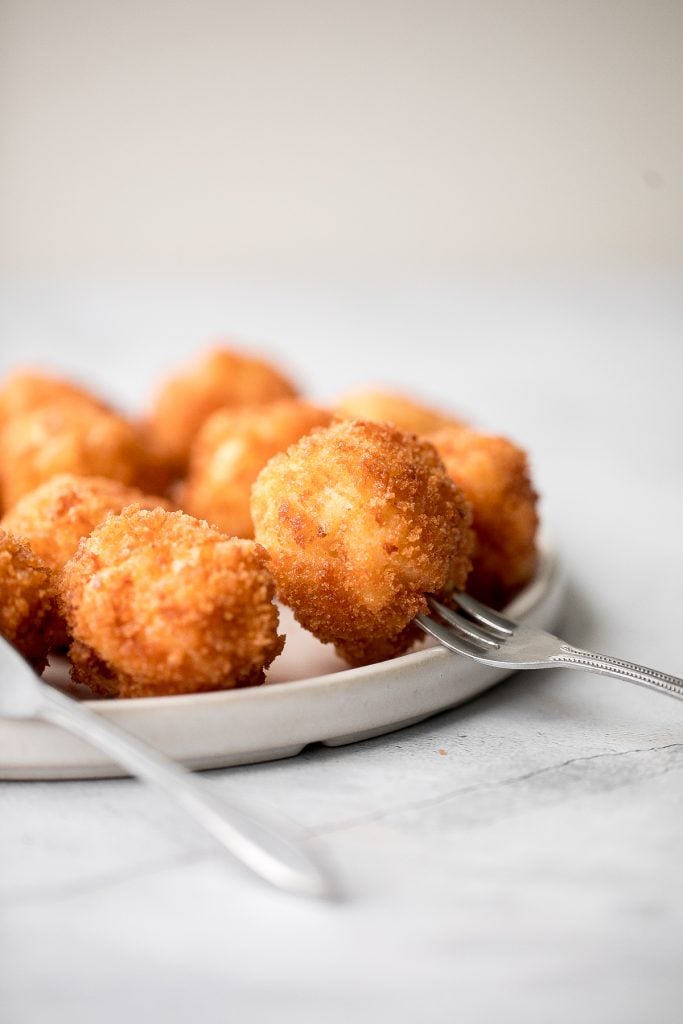
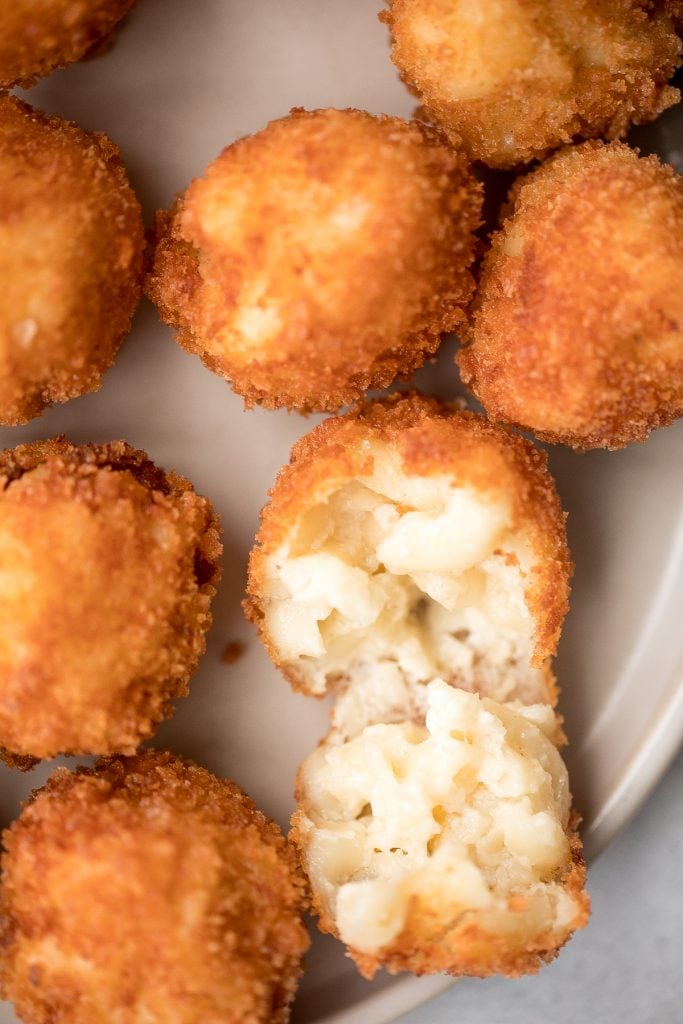
Fried Mac and Cheese Balls
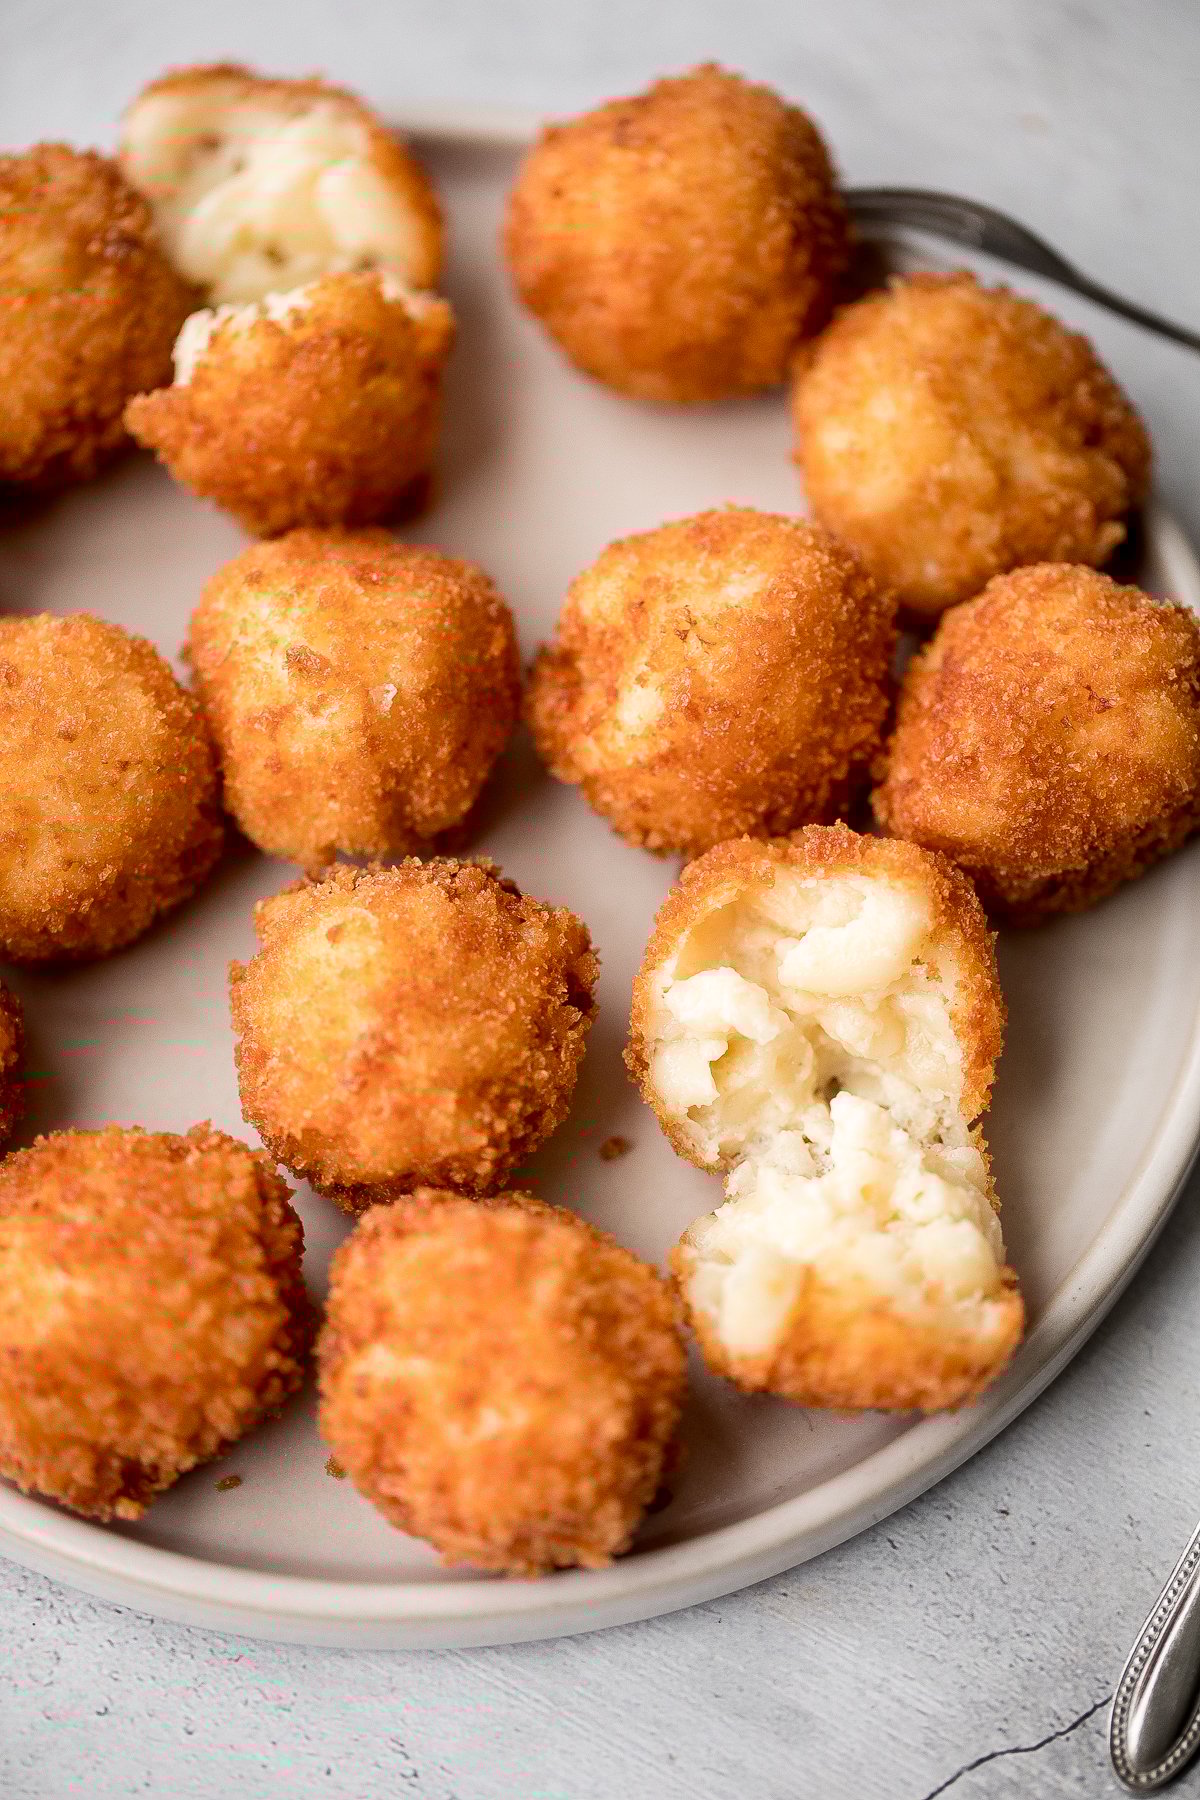
Fried mac and cheese balls are super crispy on the outside, creamy and cheesy on the inside, and have the best crunch. These easy to make appetizer version of creamy mac and cheese are the best bite-sized comfort food ever. They are perfect for a cozy lunch or dinner, or a game day snack, and the best way to use leftover mac and cheese.
Making fried mac and cheese balls is also a great way to use leftover mac and cheese from your Thanksgiving dinner. Some other ways I use up Thanksgiving leftovers every year are with leftover turkey wild rice soup, baked mashed potato spring rolls, and cranberry sauce oat bars.
Ingredients in Mac and Cheese Balls
These fried bite-sized appys only require the following ingredients (full quantities in recipe card below):
- macaroni and cheese - cold mac and cheese that has been refrigerated for at least 4 hours. This is a great way to use up and leftover stovetop mac and cheese with white cheddar or baked mac and cheese.
- egg - to bind the breadcrumbs onto the balls.
- panko breadcrumbs - to coat the mac and cheese balls. I prefer the texture of panko breadcrumbs, but you can use regular breadcrumbs as well.
- vegetable oil - for deep frying.
You will also need a medium cooking pot or a deep fryer.
How to Make the Best Fried Mac and Cheese Balls
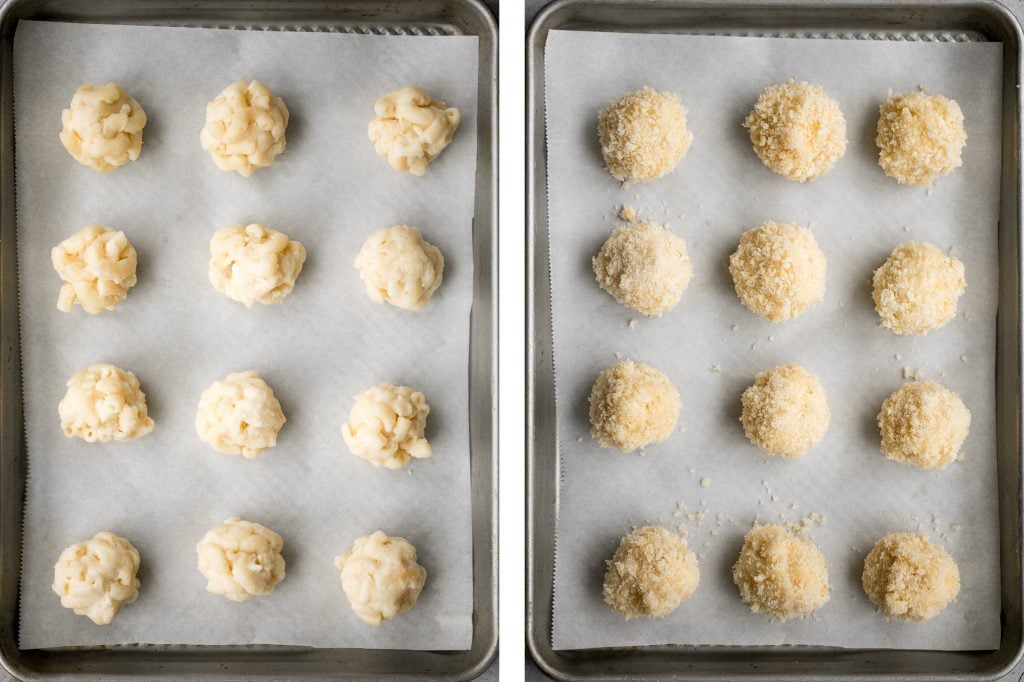
- Shape the mac and cheese balls. Scoop out a spoonful of mac and cheese using a cookie scoop and shape into a 1.5-inch ball. Repeat with with all mac and cheese. You should get about 18 mac and cheese balls.
- Coat the balls. Place beaten egg into one bowl, and panko breadcrumbs into another bowl. Coat each ball into the eggs and then dredge in panko to fully coat.
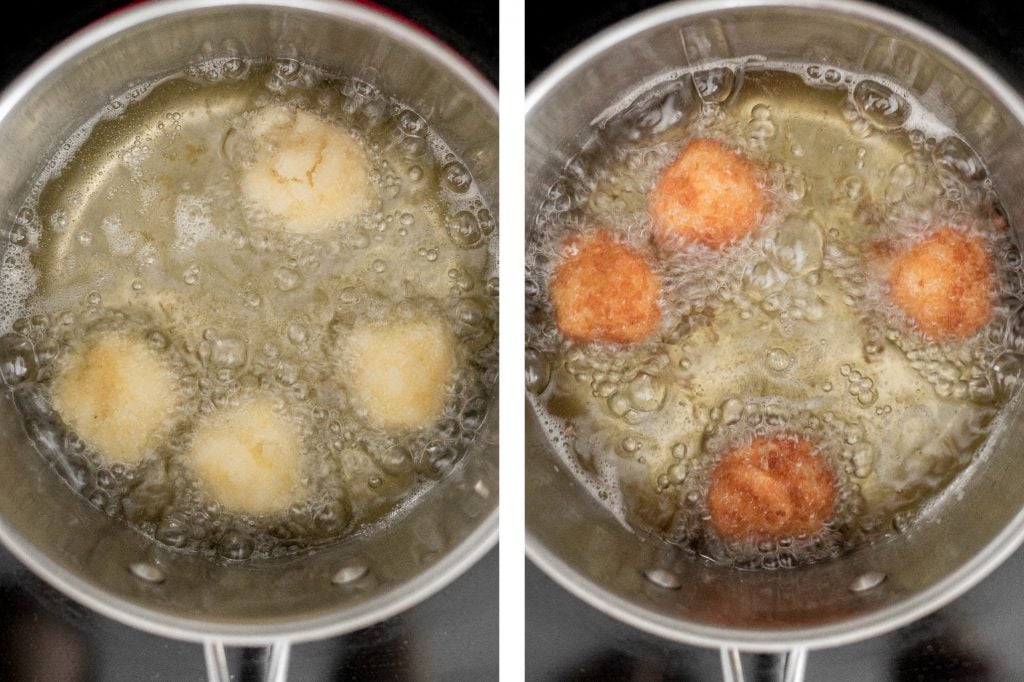
- Deep fry. Heat oil in a medium saucepan over medium high heat until shimmering and sizzling hot, about 4 minutes. Carefully add the mac and cheese balls, about 4-5 at a time (you will have to fry in batches). Fry until golden and crispy on all sides, about 4 minutes. Transfer to a plate lined with a paper towel to soak up any excess oil. Serve hot.
Tips and Alternate Cooking Methods
- How to freeze: Arrange uncooked, assembled mac and cheese balls in single layer on a parchment lined baking sheet. Freeze for 1 hour, then transfer to an airtight container or freezer bag and freeze for up to 3 months. You can deep fry directly from frozen.
- How to air fry mac and cheese balls: Assemble the balls as directed in the recipe, then spray lightly with cooking spray oil. Place the balls in an even layer in an air fryer basket (you will have to do this in batches as to not overcrowd the basket). Air fry at 350 F for 15 minutes until crispy.
- How to bake in the oven: Assemble the balls as directed in the recipe, and place on a half sheet baking pan lined with parchment paper or a silicone mat. Bake in a 350 F preheated oven for 20-30 minutes, until crispy on the outside. Rotate them every 5-10 minutes to ensure even cooking.
More Bite-sized Appetizers
- Baked Mozzarella Sticks
- Easy Homemade Chicken Nuggets
- The Best Breaded Air Fryer Fried Chicken Wings
- Baked Mashed Potato Spring Rolls
- Baked Sweet Potato Wedges with Honey Mustard
- Vegetarian Stuffed Mushrooms
- Baked Turkey Meatballs
Tried this recipe?
I'd love to hear what you think! Leave a comment and rating below to share your feedback. Your reviews help others discover this recipe and help me keep creating more free recipes for you. Snap a photo and tag me on social media @aheadofthyme too.

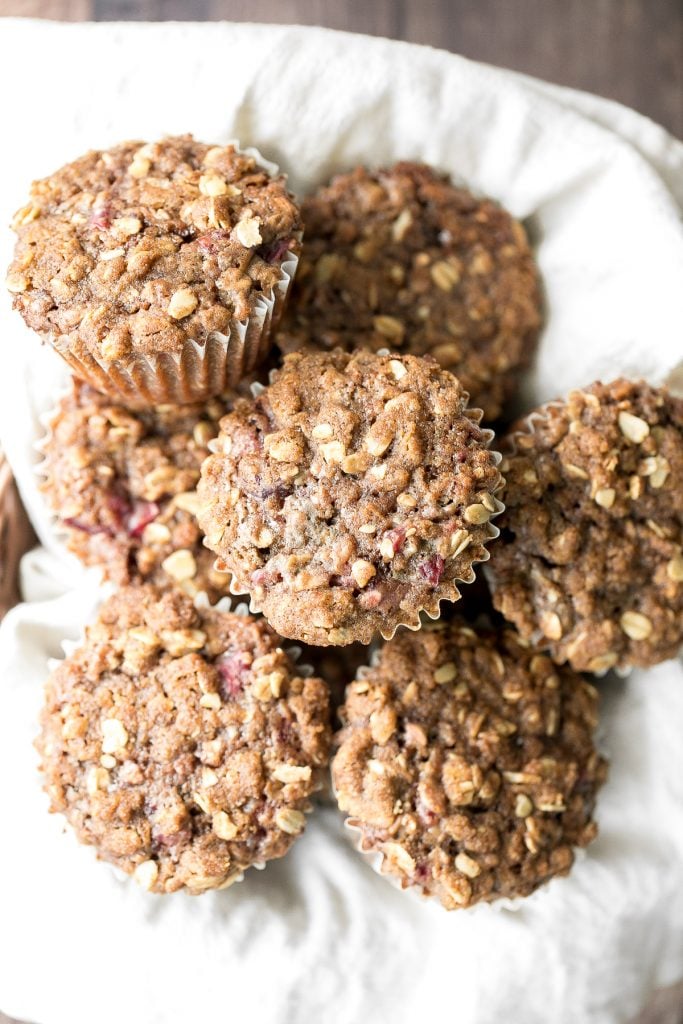
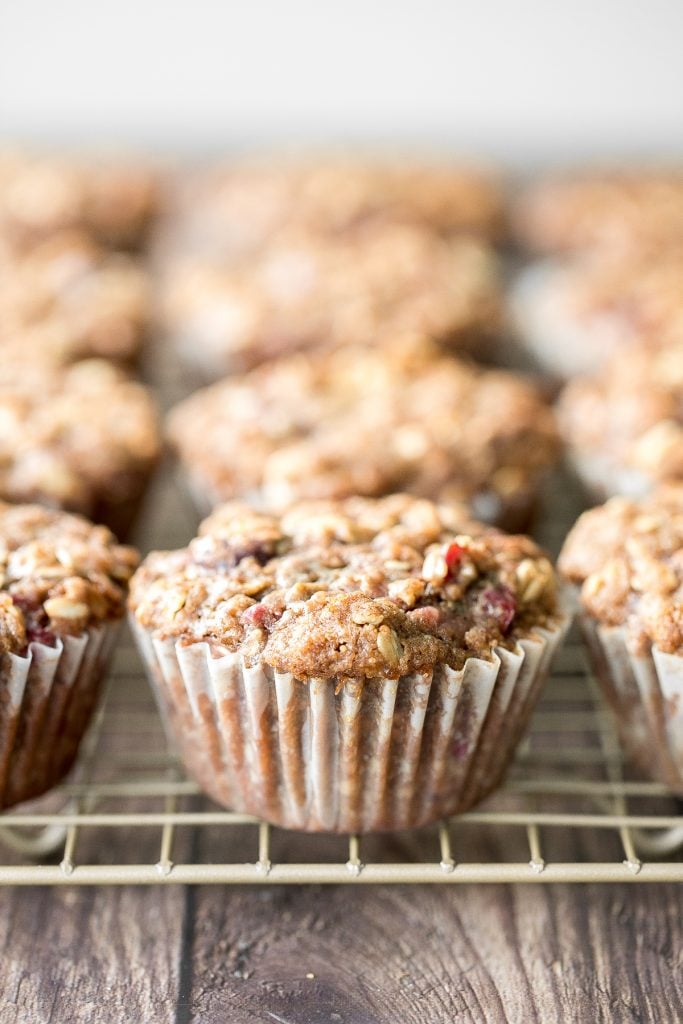
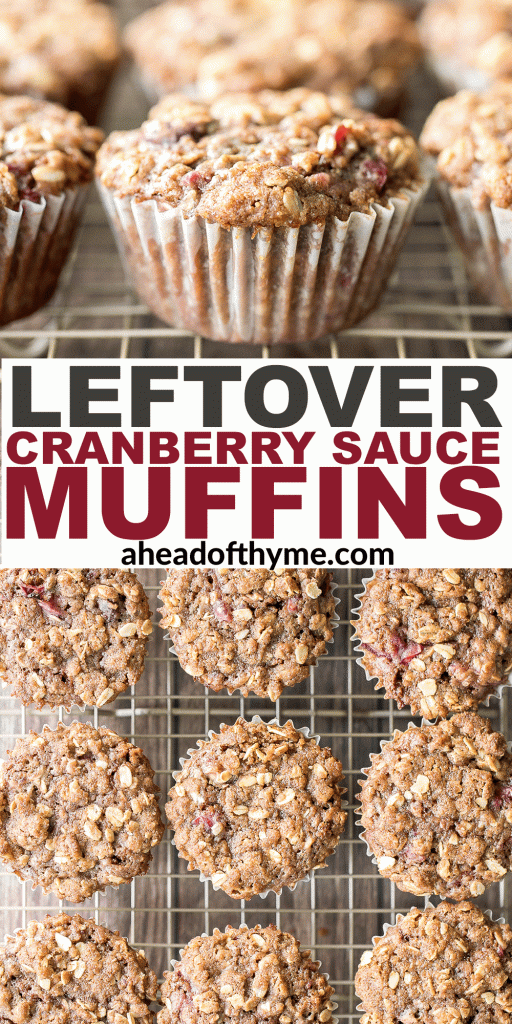
Leftover Cranberry Sauce Muffins with Oat Streusel Topping
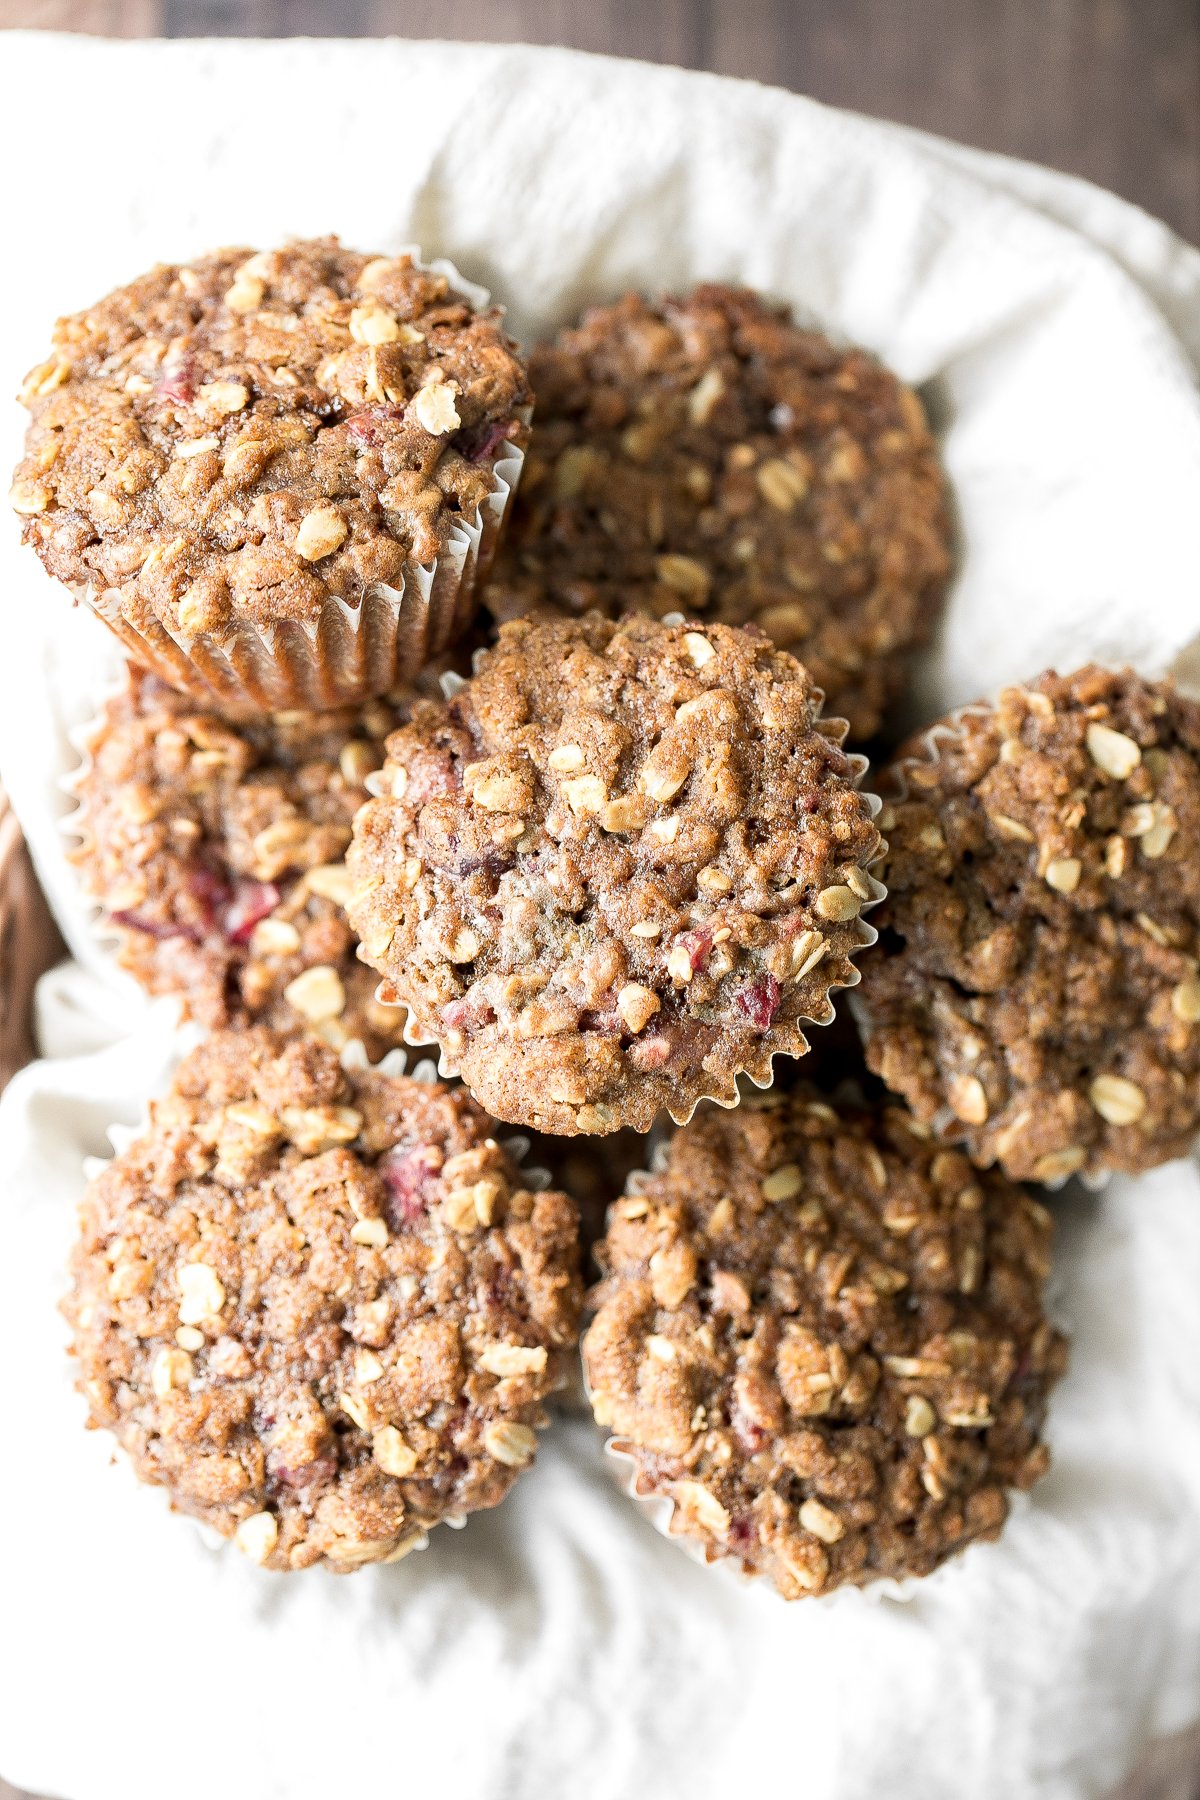
Don't know what to do with all those leftovers after your Thanksgiving feast? Well, you don't need to throw away that delicious cranberry sauce because there is a genius solution. Turn that sauce into delicious, leftover cranberry sauce muffins with an oat streusel topping and enjoy it for breakfast or dessert the next day.
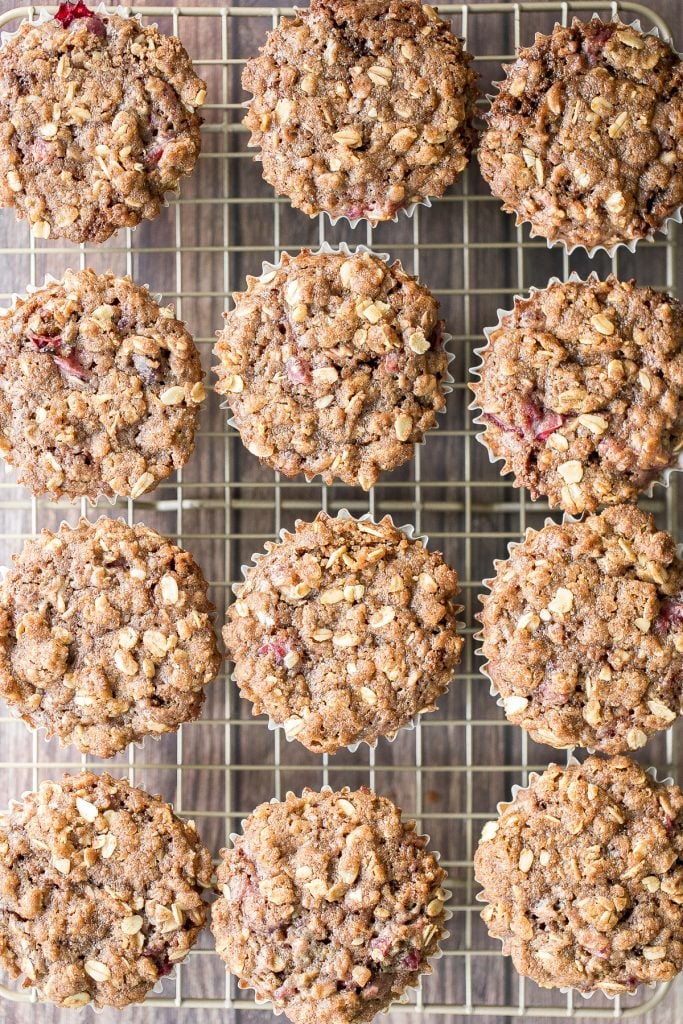
These delicious leftover cranberry sauce muffins are so quick and easy to make, making it the perfect recipe to whip up after a big holiday dinner. You can make these muffins from prep to table in just 30 minutes. So easy!
What is in Cranberry Sauce Muffins?
For the muffins, you will need the following pantry and refrigerator staples (full quantities in recipe card below):
- all-purpose flour
- old-fashioned rolled oats
- baking powder + baking soda
- salt
- ground cinnamon
- unsalted butter
- brown sugar
- milk
- egg
- vanilla extract
- leftover homemade cranberry sauce
You will also need a 12-tin muffin pan, cupcake liners, mixing bowls, measuring cups and spoons, a hand mixer or a stand mixer, and a cookie scoop (or a spoon) for scooping out the batter, and a wire cooling rack.
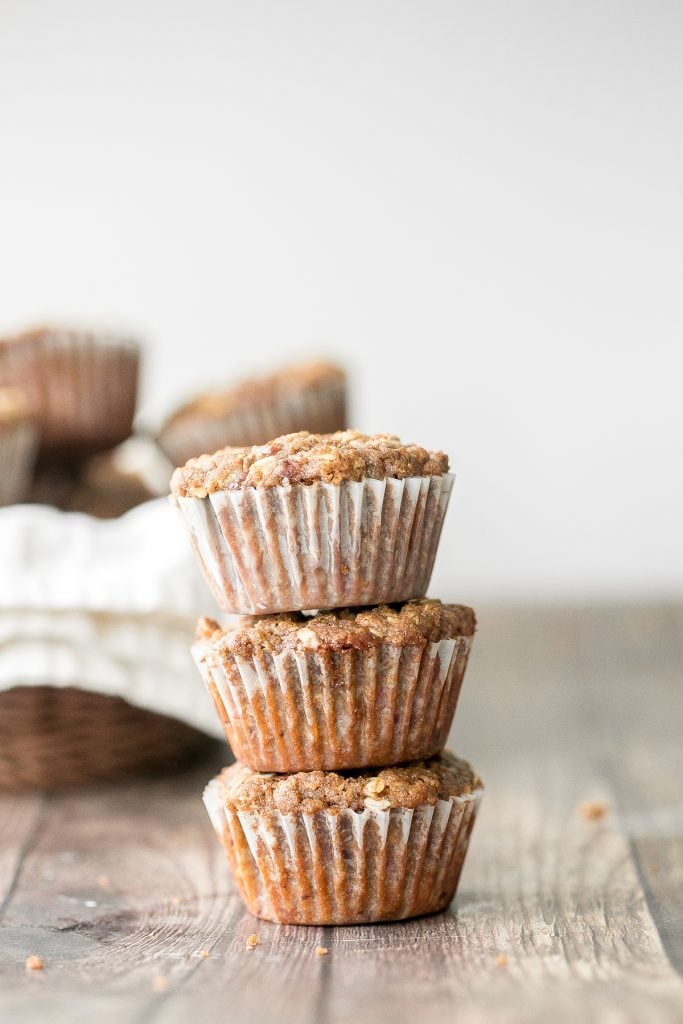
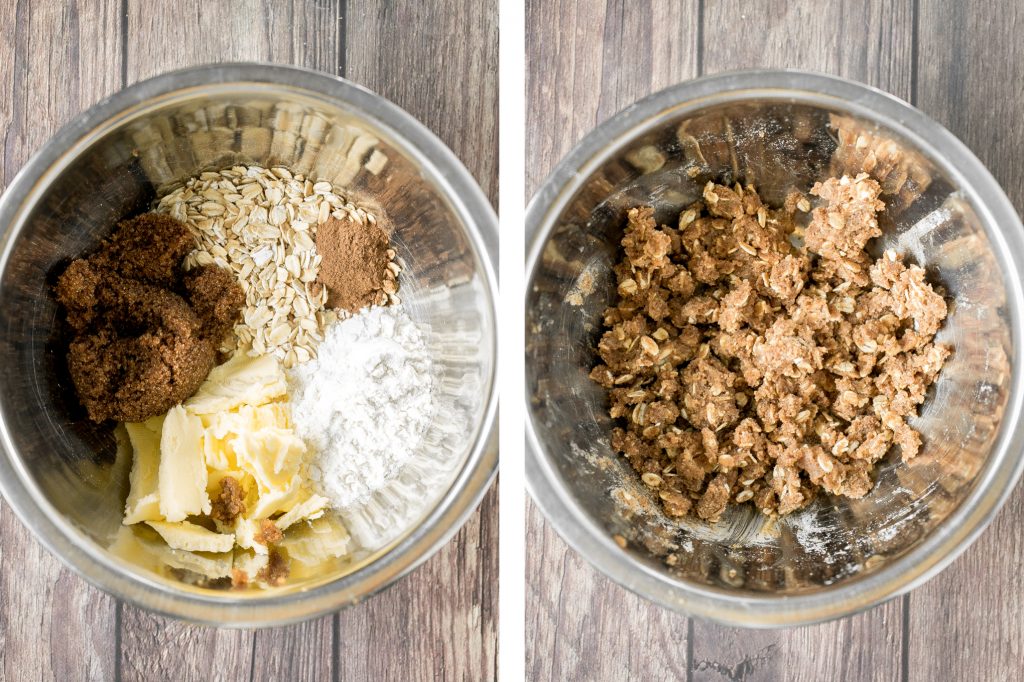
What is an Oat Streusel Topping?
An oat streusel topping is a mixture of flour, butter, sugar and oats which turns your muffins from regular muffins into decadent, bakery-quality muffins. You know, the kind of muffins which you only want to eat the crumbly top, throw out the rest and order another one, just to eat another top. It's basically the best thing that has ever happened to a muffin.
Save this streusel recipe and use it to top off all your favourite coffee cake, muffin and pie recipes. All you need a few tablespoons of each of the following:
- brown sugar
- old-fashioned rolled oats
- all-purpose flour
- unsalted butter
- cinnamon
How to Make the Best Leftover Cranberry Sauce Muffins
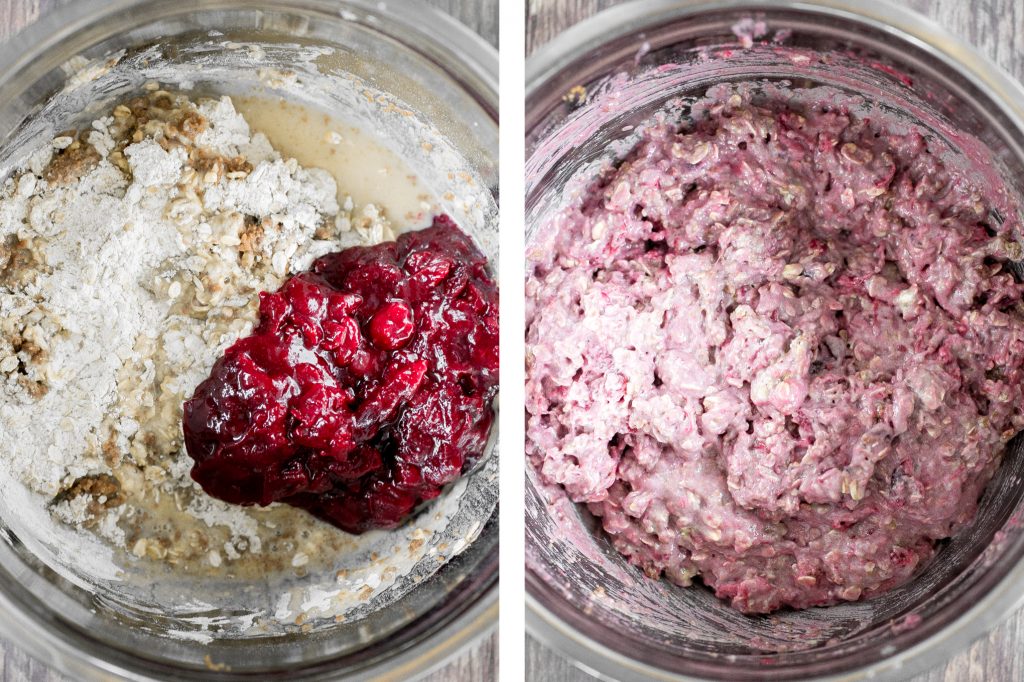
- Combine the dry ingredients: In a large mixing bowl, whisk together flour, oats, baking powder, baking soda, salt and cinnamon. Set aside.
- Combine the wet ingredients: In a medium mixing bowl, cream together butter and sugar. Add in milk, egg and vanilla and stir to combine. Note that the mixture will be lumpy.
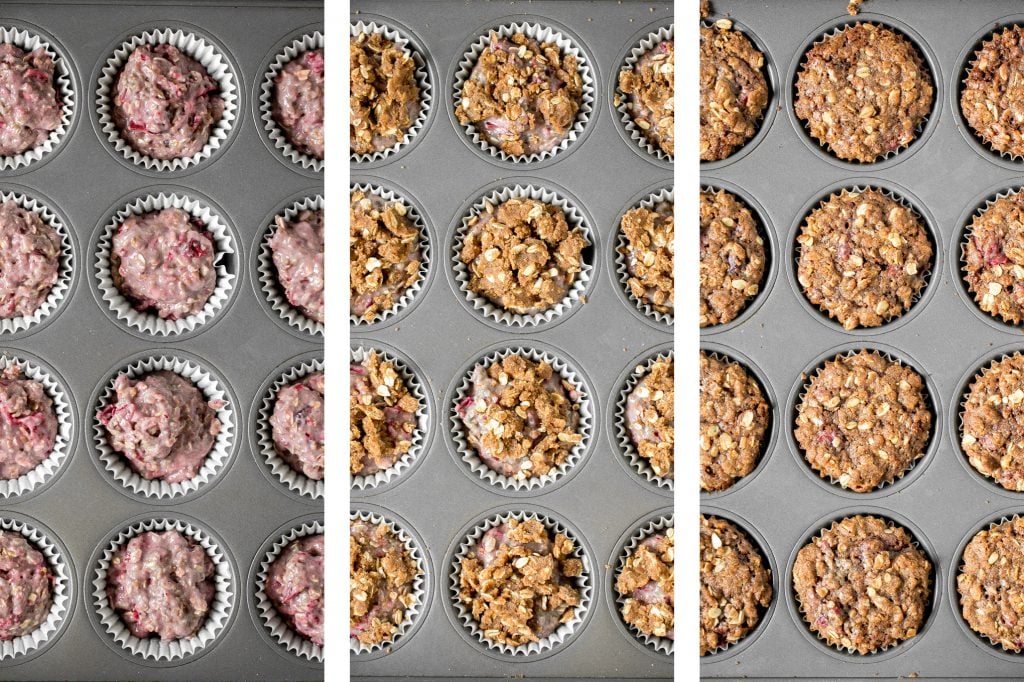
- Add the wet to the dry ingredients: Add the wet ingredients to the dry ingredients and give it a couple stirs with a spatula. Do not fully combine. Then add in the cranberry sauce and stir until just combined. Do not overmix. Line a standard 12-cup muffin pan with cupcake liners and lightly coat with nonstick baking spray. Divide batter evenly among the lined pan. Fill each liner about ¾ full.
- Make the oat streusel topping: In a small bowl, mix together the oat streusel topping ingredients until combined and crumbly. Sprinkle a spoonful on top of each muffin.
- Bake: Bake in a 400°F preheated oven for 18-20 minutes until toothpick comes out clean. Allow muffins to cool in the muffin tray for 5 minutes before transferring muffins onto a wire cooling rack to cool completely.

Tips for Making Cranberry Sauce Muffins
- Make your own cranberry sauce: You can make your own easy homemade cranberry sauce for this muffins. They take about 5 minutes to make, and unlike storebought, you know exactly what is in them (ie. no preservatives).
- Cupcake liners vs. cooking spray: I made these muffins using muffin/cupcake liners, but I always find that so much good stuff gets stuck to the liner. A solution is to spray the muffin tray generously with cooking oil and forgo the liners.
- How to store: You can store these muffins covered at room temperature for up to 2 days, or in an airtight container in the refrigerator for up to 1 week.
- How to freeze cranberry muffins: You can freeze these muffins (baked and cooled) for up to 3 months. To freeze, place them into a freezer bag or airtight container and store in the freezer. To eat, first let them thaw and then enjoy. You can also warm them up, once thawed, in the microwave or in the oven.
More Thanksgiving Leftover Recipes
- 25 Best Thanksgiving Leftover Recipes
- Cranberry Sauce Oat Bars
- Cranberry Sauce Swirl Pound Cake
- Leftover Turkey Wild Rice Soup
- Leftover Thanksgiving Turkey Sandwich
- Turkey Fried Rice
- Mashed Potato Cakes
Tried this recipe?
I'd love to hear what you think! Leave a comment and rating below to share your feedback. Your reviews help others discover this recipe and help me keep creating more free recipes for you. Snap a photo and tag me on social media @aheadofthyme too.
This recipe was originally posted in 2016. It has been completely updated with new photographs and written content.
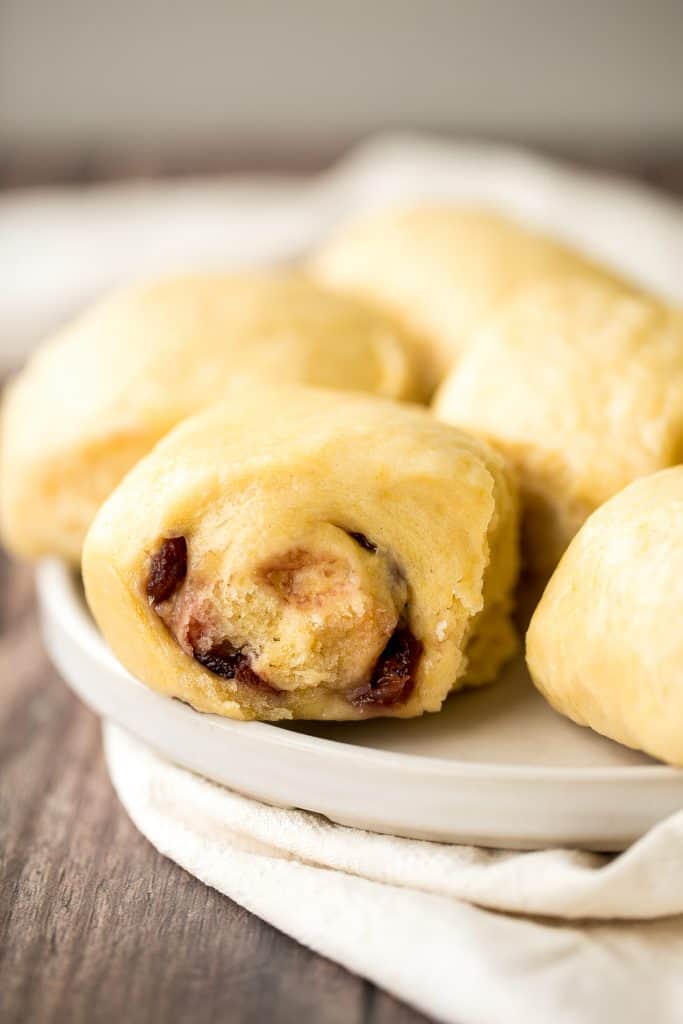
Cranberry Pumpkin Steamed Buns
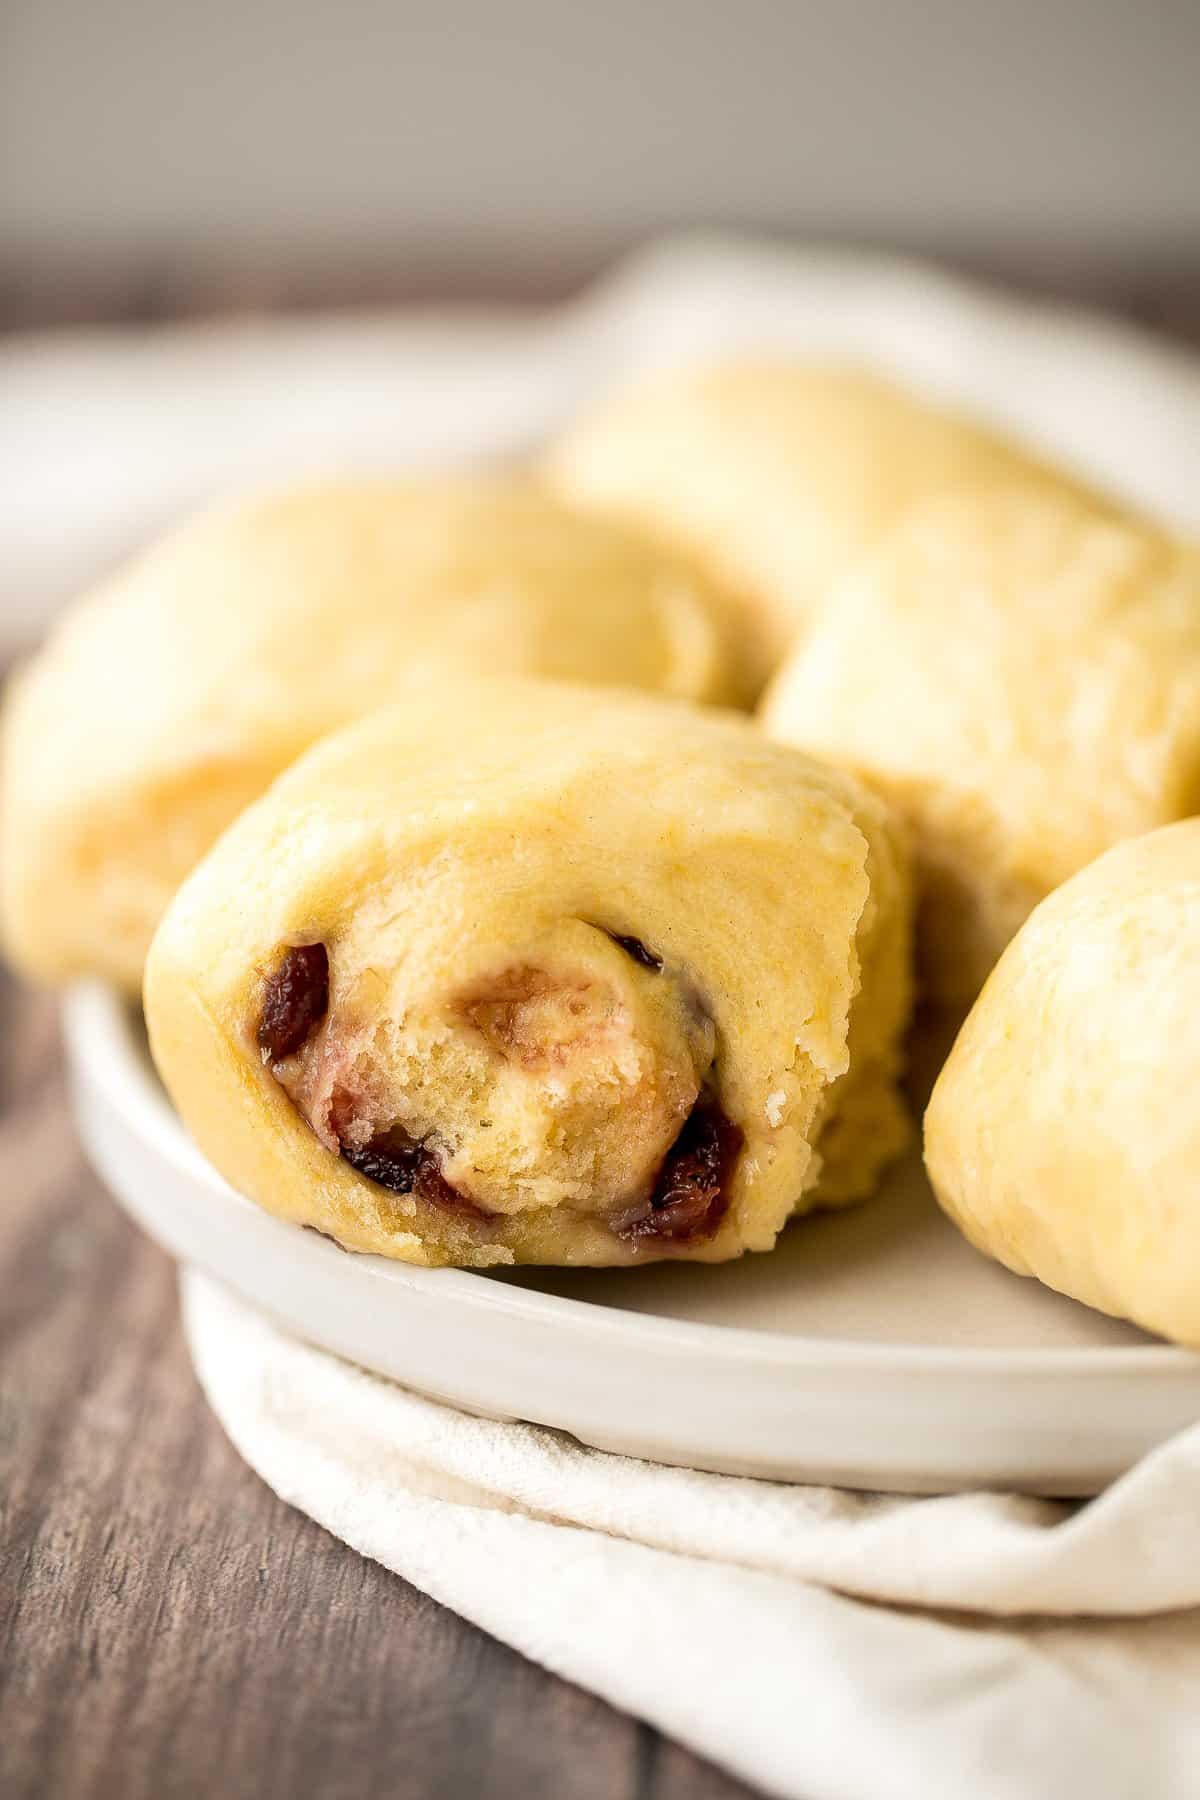
Cranberry pumpkin steamed buns are light, spongy, and fluffy and packed with dried cranberries and warm pumpkin puree for the best yet subtle pumpkin flavour. These colourful Chinese buns are the perfect festive snack or breakfast to serve this fall and winter season with a hot cup of green tea.
What are Steamed Buns?
Steamed buns (known as "baozi") as a very popular snack or breakfast dim sum dish all over China. You can find these buns in almost any big city market. They can be made savoury with meat or vegetables (like our Shanghai style vegetarian steamed buns with mushrooms and bok choy) or sweet like these cranberry pumpkin steamed buns. People often enjoy 1 or 2 of these vegan buns in one sitting.
Ingredients
- active dry yeast + water
- granulated sugar - helps feed the yeast to make it rise faster. You can substitute this with honey, if desired.
- vegetable oil
- pumpkin puree - homemade or canned pumpkin work well in this recipe. See the tips section below for instructions on how to make homemade pumpkin puree.
- all-purpose flour
- ground cinnamon
- salt
- dried cranberries - dried cranberries give these buns a really nice festive flavour. You can also substitute with raisins.
You will also need a large pot and steamer basket.
How to Make Cranberry Pumpkin Steamed Buns
- Prepare the dough. In a medium mixing bowl, dissolve yeast and sugar in water. Whisk in in oil and pumpkin puree until smooth and uniform. Set aside for a few minutes. In a large mixing bowl, whisk together flour, cinnamon and salt. Pour in yeast mixture and mix well until fully combined, scraping down the sides of the bowl (there should be no dry flour particles visible).
- Knead the dough and let it rise (first rise). Knead the dough on a clean surface for 5 minutes until it turns into a smooth dough ball. Transfer the dough back into the bowl and coat with a little bit oil to prevent from drying out. Cover the bowl with plastic cling wrap and let it rise at room temperature until doubled in size, about 1 hour.
- Shape the buns. Transfer the dough onto a lightly oiled clean surface and deflate the dough ball by punching the air out. Using a rolling pin to flatten and shape the dough into a rectangle, approximately 9x16-inches. Sprinkle dried cranberries evenly over the dough. Carefully roll the dough into a log and divide it into 8 equal pieces with a knife or bench scraper.
- Prepare the steamer and let the dough rise (second rise). Lightly oil a steamer basket and line with parchment paper (to prevent the buns from sticking during steaming). Place buns on top in an even layer. Fill a large pot with a little water, about 1 or 2 inches of water. Do not let the water go above the steamer basket at any time. Place steamer basket on top and cover with the pot lid. Let the buns rise for 15 to 20 minutes. You don't need to wait for the buns to double in size, as they will rise during steaming.
- Steam the buns. Transfer the pot to the stove and bring the water to a boil over high heat. Then, turn the heat down to medium-high and steam the buns for 15 minutes over the boiling water. Turn off the heat and leave the buns in the steamer for another 5 minutes before removing from steamer. This will help prevent the buns from shrinking due to temperature drop.

These cranberry pumpkin steamed buns are typically served on their own as a snack or breakfast item. They also go really well alongside other Chinese dim sum dishes such as crispy fried vegetarian spring rolls, crispy bottom Shanghai pan-fried pork buns, and savoury chive pancakes. Or browse all our dim sum recipes.
Tips for Making Pumpkin Steamed Buns
- How to make homemade pumpkin puree: You can use either canned pumpkin puree or homemade puree in these steamed buns. To make homemade pumpkin puree from scratch, cut the pumpkin into a few large pieces, remove the seeds and steam for 15 to 20 minutes until tender. Scoop out the pumpkin and transfer into a blender (without the skin). Puree until smooth. Cool the pumpkin puree to room temperature before using.
- How to store: Store in an airtight container at room temperature for up to 24 hours, or in the refrigerator for up to 4 days. To reheat, steam them for 10 minutes over boiling water. Steaming gives a better tasting bun and an ideal texture since the buns reabsorb any lost moisture.
- How to freeze: Place the steamed buns on a baking tray lined with parchment paper. Freeze for one hour, then transfer into an airtight container or freezer bag and store for up to 3 months in the freezer. To reheat, place directly on the steamer from frozen. Bring the water to a boil and steam for 10 minutes until warmed through.

More Savoury Bread Recipes
- Green Onion Dinner Rolls
- Shanghai Style Vegetarian Steamed Buns
- Easy Pumpkin Dinner Rolls
- Pumpkin Focaccia Bread with Fresh Herbs
- Artisan Green Olive Sourdough Bread
Tried this recipe?
I'd love to hear what you think! Leave a comment and rating below to share your feedback. Your reviews help others discover this recipe and help me keep creating more free recipes for you. Snap a photo and tag me on social media @aheadofthyme too.

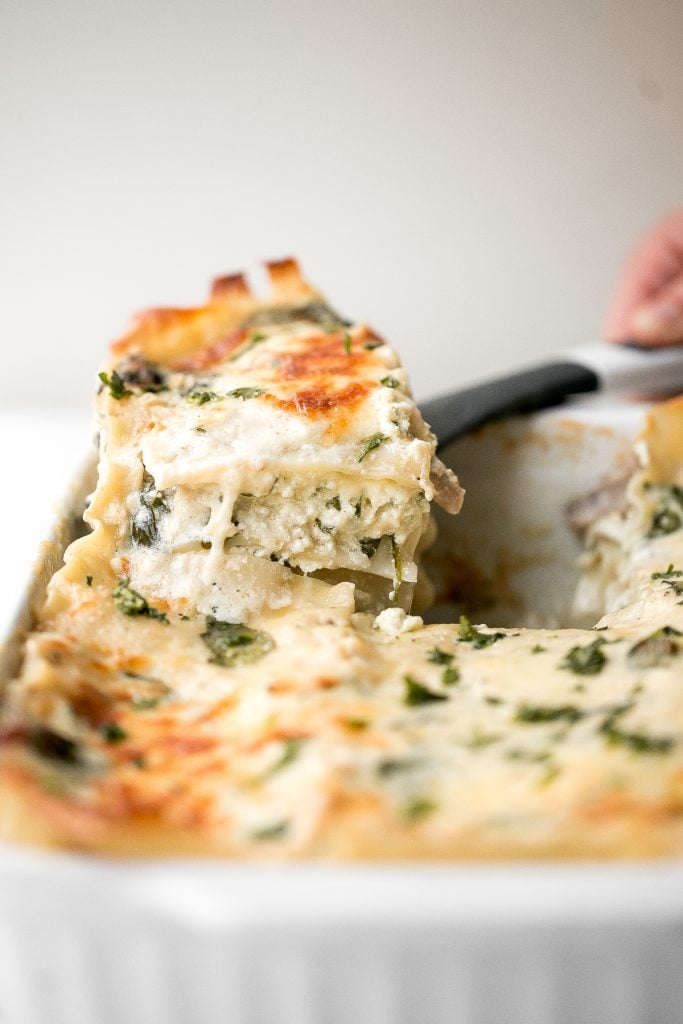
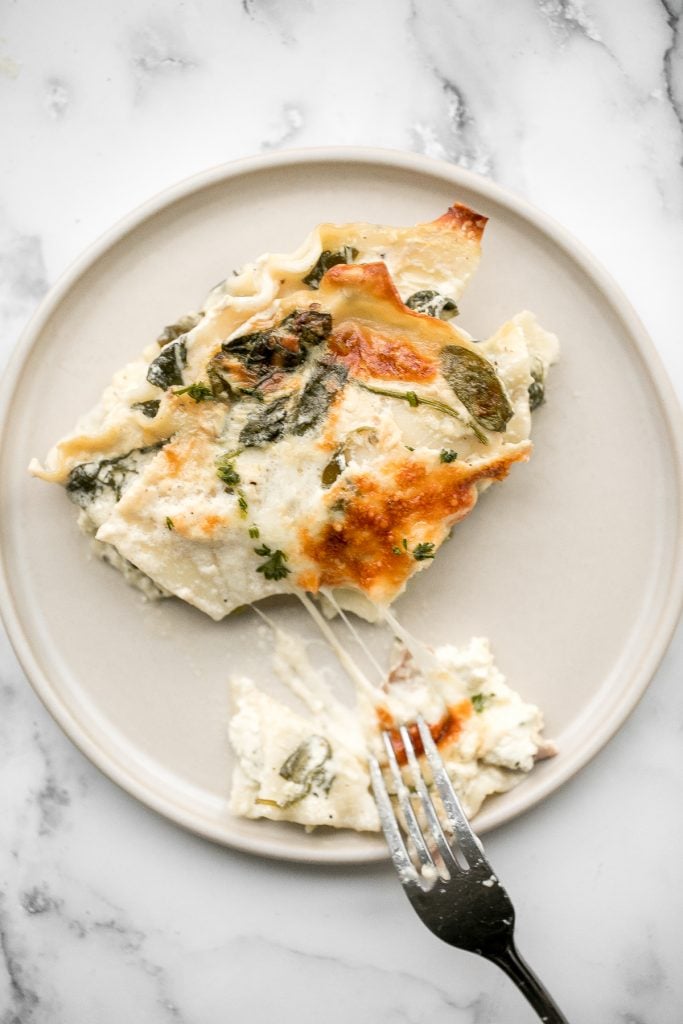
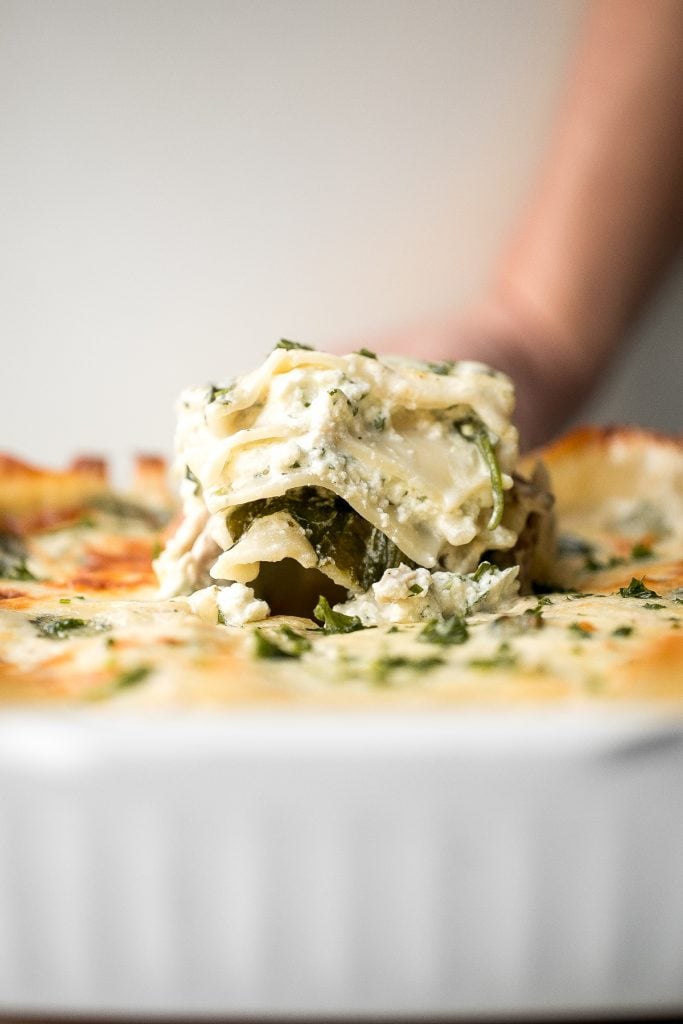
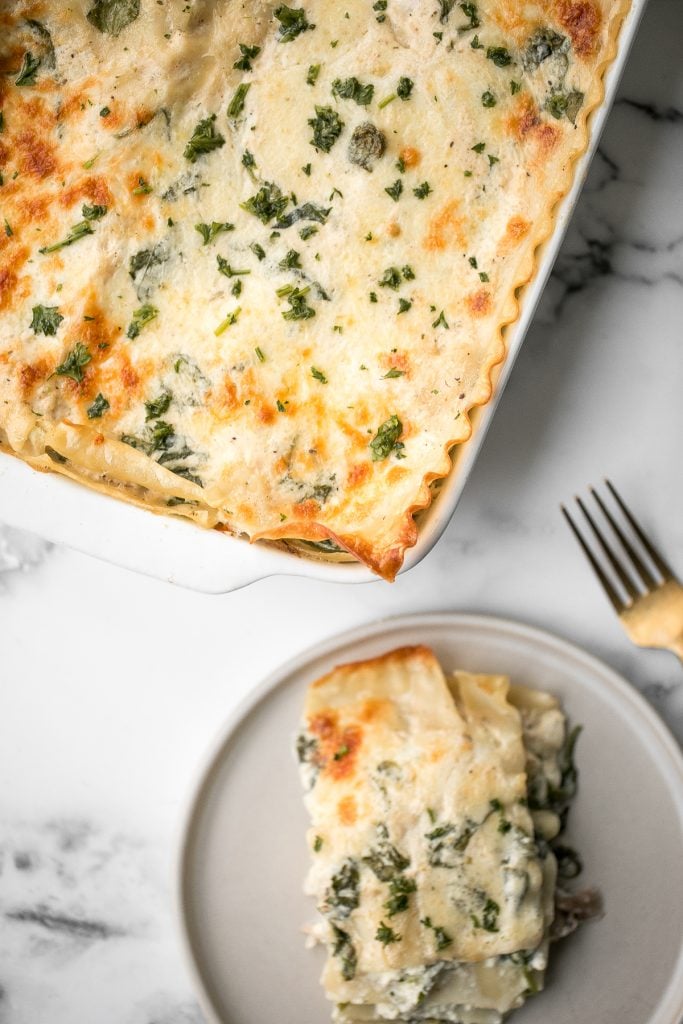
Creamy White Chicken and Spinach Lasagna
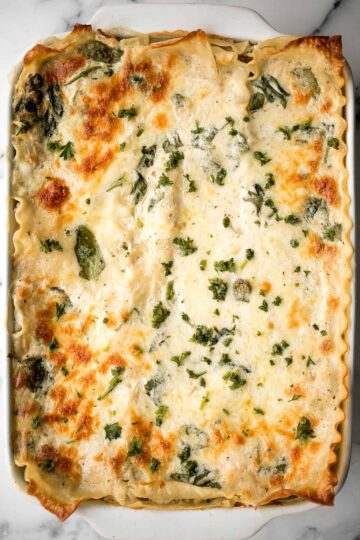
Creamy white chicken and spinach lasagna layered with tender shredded chicken, a creamy spinach alfredo white sauce, a ricotta cheese mixture, and gooey shredded mozzarella on top is the most comforting, creamiest, and cheesiest white lasagna ever. It's super easy to prepare this delicious and flavourful chicken lasagna ahead of time, it freezes beautifully both before and after cooking, and reheats really well.

This creamy white chicken lasagna is a great alternative to a classic meat lasagna or a vegetarian lasagna, and so delicious in its own right. Every bite of this lasagna just hits the spot, it is so good. If you like this lasagna, then you will love our other Italian-inspired favourites like easy chicken parmesan, cheesy tortellini and sausage bake, and shrimp fettuccini alfredo pasta bake.
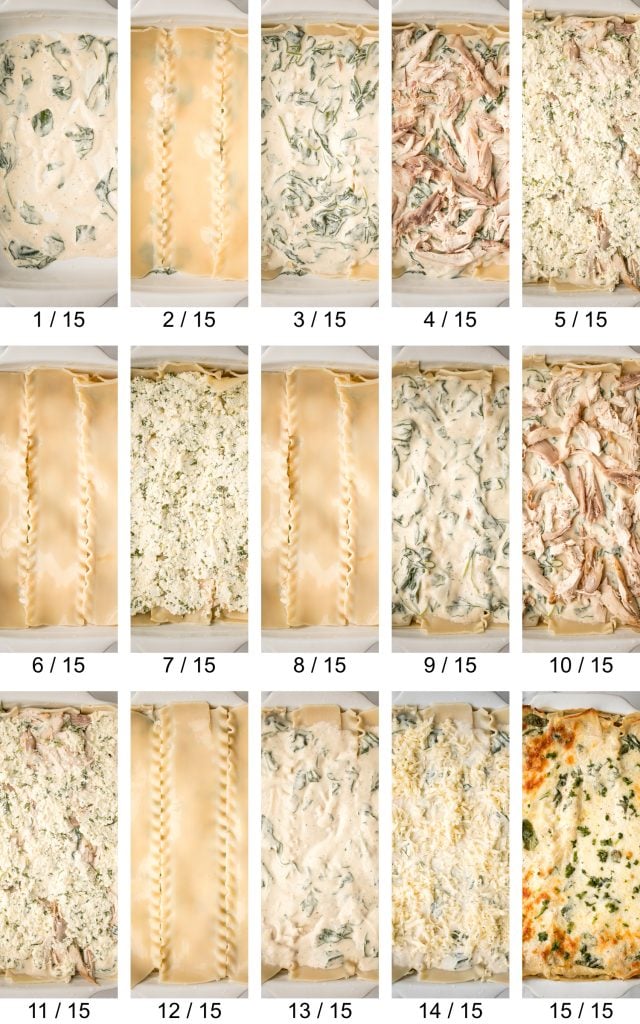
What are in the Layers in Creamy Chicken Lasagna?
- lasagna layer - lasagna noodles boiled in olive oil and salt.
- creamy spinach white sauce layer - olive oil, onion, garlic, chicken broth (or 1 tablespoon chicken bouillon powder + 1 cup water), all-purpose flour (or cornstarch), heavy cream and fresh baby spinach.
- chicken layer - 1 pound or 3 cups of shredded chicken. You can use a storebought rotisserie chicken or make your own. My favourite recipes to use are dutch oven whole roast chicken, roasted spatchcock chicken or Greek lemon garlic whole roast chicken. A slow cooker whole chicken would also work beautifully.
- cheese layer - ricotta cheese. mozzarella cheese, Parmesan cheese, egg, and parsley.
- shredded cheese layer on top - mozzarella cheese and Parmesan cheese.
You will also need a shallow saucepan, medium mixing bowl, and a 9x13 casserole pan.
How to customize: You can customize this lasagna by adding some other vegetables like sliced mushrooms or roasted bell peppers.
How to Make the Best Creamy White Chicken and Spinach Lasagna
- Cook the lasagna noodles: Bring a large pot of water to a boil over medium high heat. Add lasagna noodles, olive oil and salt and cook until al dente (fully cooked but still firm), or according to package directions, about 10 minutes. Rinse the noodles under cold water to stop the cooking process and set aside in the pot.
- Prepare the creamy spinach white sauce: Heat oil in a large saucepan for 2 minutes over medium-high heat until the oil is sizzling hot. Add onion and garlic and sauté until fragrant, about 2 minutes. Stir in chicken broth and flour and whisk until smooth and uniform. The sauce might initially be a little clumpy. Whisk in heavy cream and bring the sauce to a simmer over medium heat. Let it simmer, stirring occasionally until thickened, about 5-8 minutes. The sauce should be similar in consistency to a gravy and be thick enough to coat the back of a spoon. Remove from heat and stir in spinach. Set aside.
- Prepare the cheese mixture: In a medium bowl, combine ricotta cheese, 1 cup mozzarella, Parmesan, beaten egg, and parsley. Stir well to combine together. Set aside.

How to Assemble and Layer Lasagna
Assembling a lasagna is quite easy. All it involves is layering lasagna noodles, creamy spinach white sauce, chicken, and cheese mixture, with a sprinkle of shredded mozzarella cheese on top. Here is how to order this lasagna:
- Sauce: Evenly spread ½ cup of the spinach sauce in a 9x13 baking pan.
- Noodles: Place 3 lasagna noodles evenly over the sauce.
- Sauce: Spread ⅓ of the spinach sauce evenly over the noodles.
- Chicken: Sprinkle half the shredded chicken evenly over the sauce.
- Cheese: Spread ¼ of the ricotta cheese mixture on top.
- Noodles: Add another layer of 3 lasagna noodles.
- Cheese: Spread half of ricotta cheese mixture on top.
- Noodles: Add another layer of 3 lasagna noodles.
- Sauce: Spread ⅓ of the spinach sauce evenly over the noodles.
- Chicken: Sprinkle remaining half shredded chicken evenly over the sauce.
- Cheese: Spread remaining ¼ of the ricotta cheese mixture on top.
- Noodles: Add remaining layer of 3 lasagna noodles.
- Sauce: Add remaining ⅓ spinach sauce on top.
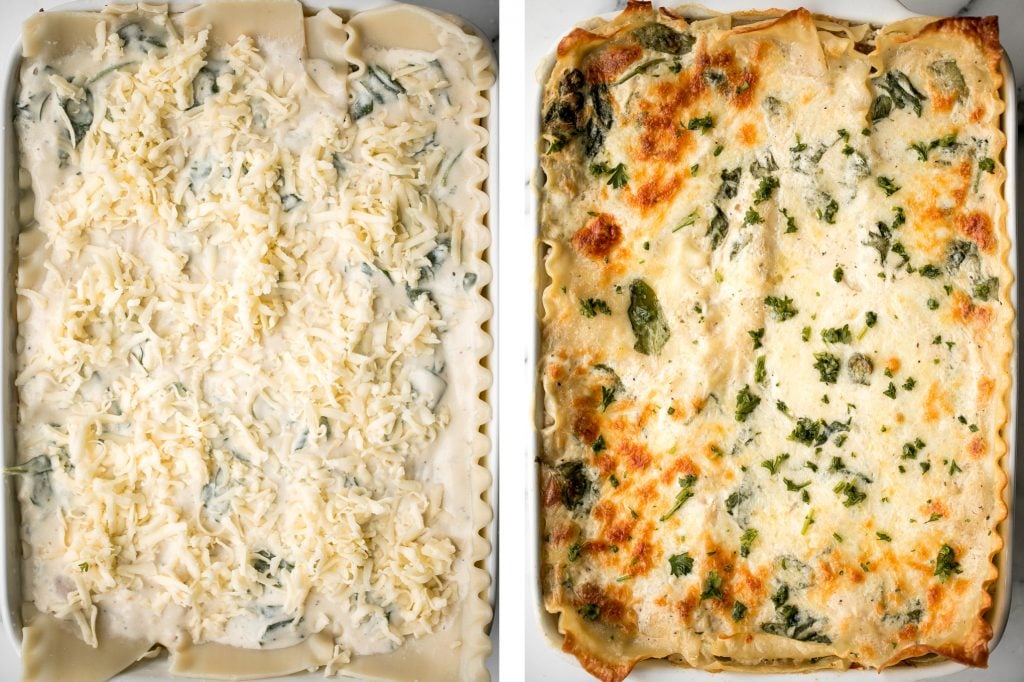
- Shredded cheese: Top with remaining cup of mozzarella.
How to Bake Lasagna
Lightly grease a large piece of aluminum foil and cover the pan with the greased side inside. This helps to prevent the melted mozzarella cheese from sticking to the foil while baking. Next, let's bake the lasagna.
- Bake the lasagna covered for 45 minutes in a preheated 375 F oven.
- Remove the foil and bake uncovered for another 20 minutes or until the melted cheese turns golden brown and bubbly.
- Optionally, turn on broiler on high and broil for 3-4 minutes to get a crispy and brown cheesy crust. But keep a close eye on the broiler as things can burn quickly.
Let the lasagna cool for at least 15 minutes before slicing and serving. This ensures that the sauce sets and isn't runny when you cut into the lasagna. I like to serve this lasagna with some cheesy garlic dinner rolls or rosemary garlic focaccia bread and a big salad on the side.
Make Ahead and Storing Instructions
- How to store lasagna before baking: Store assembled uncooked lasagna in the refrigerator for up to 2 days, covered in aluminum foil.
- How to store lasagna after baking: Store in the pan, sealed with aluminum foil, or transfer to an airtight container in the refrigerator for up to 3 days. To reheat, cover with aluminum foil and place in the oven at 350 F for 10 minutes, or until heated through. You can also reheat in the air fryer uncovered at 350 F for 5-10 minutes, or in the microwave for a few minutes.
- How to freeze lasagna before or after baking: Store lasagna (either uncooked or cooked) in the freezer for up to 3 months, covered in foil. I would recommend using a disposable 9x13 aluminum pan for assembling the lasagna in if you are planning to freeze it.
- How to reheat frozen lasagna:
- To reheat frozen uncooked lasagna, allow it to thaw in the refrigerator overnight. Then bake according to recipe instructions.
- To reheat frozen cooked lasagna, allow it to thaw in the refrigerator or kitchen counter. Then cover with aluminum foil and place in the oven at 350 F for 10 minutes, or until heated through. You can also reheat in the air fryer uncovered at 350 F for 5-10 minutes, or in the microwave for a few minutes.
More Pasta Recipes
- 40 Best Pasta Recipes
- Easy Meat Lasagna
- Cheesy Tortellini and Sausage Bake
- Shrimp Fettuccine Alfredo Pasta Bake
- Spaghetti Alfredo with Spinach and Mushrooms
- Butternut Squash Carbonara Pasta
- Creamy Spinach and Tomato Vegetarian Lasagna
- Farfalle Pasta with Light Creamy Mushroom Rose Sauce
Tried this recipe?
I'd love to hear what you think! Leave a comment and rating below to share your feedback. Your reviews help others discover this recipe and help me keep creating more free recipes for you. Snap a photo and tag me on social media @aheadofthyme too.

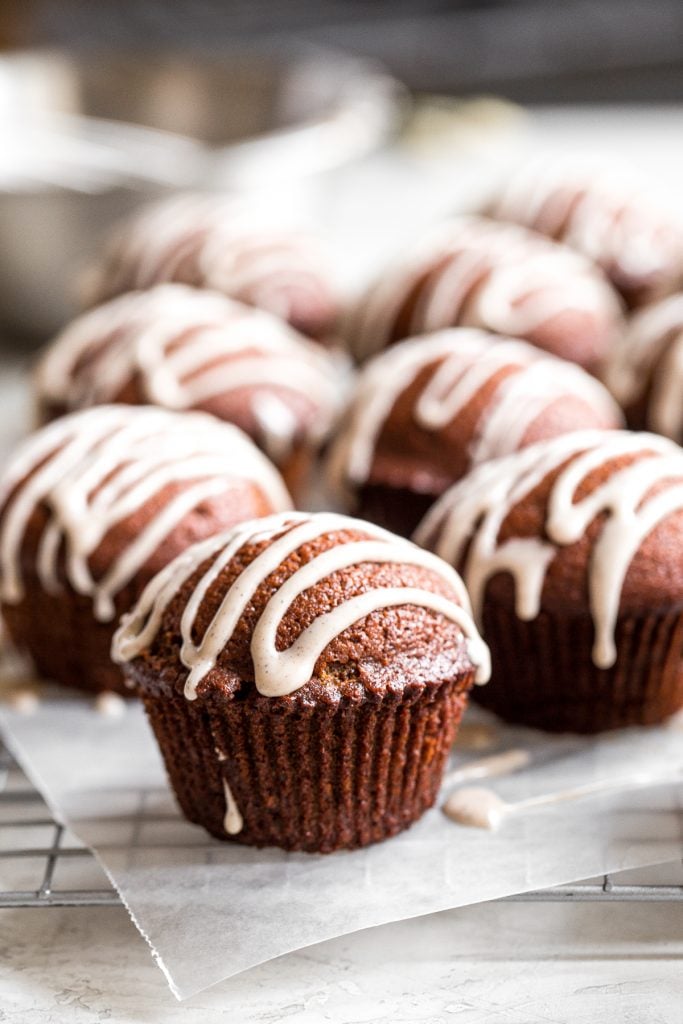
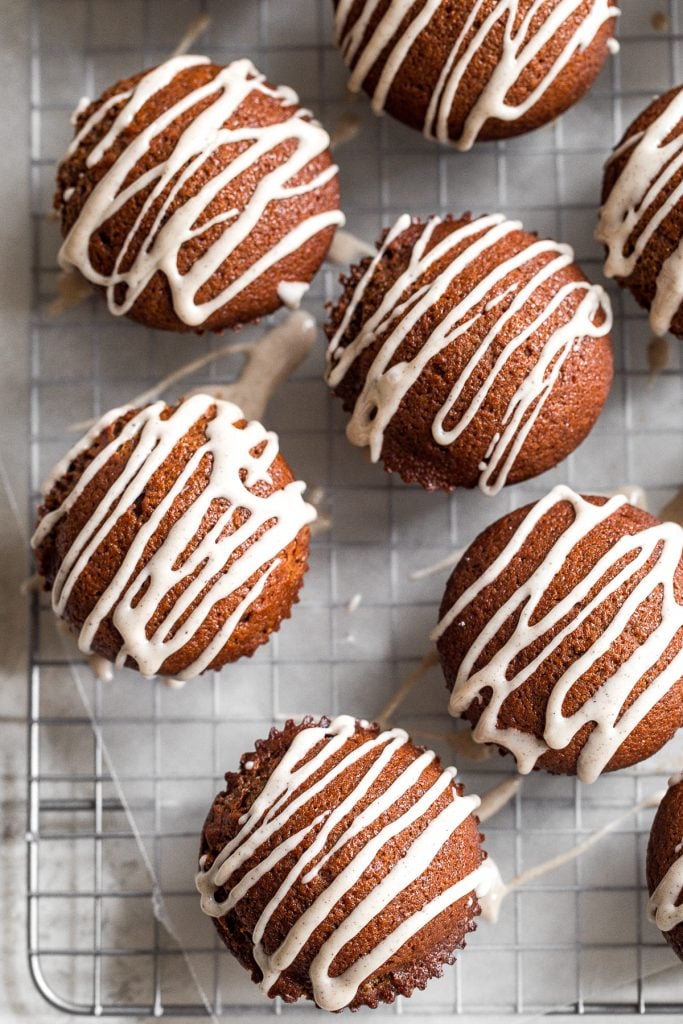
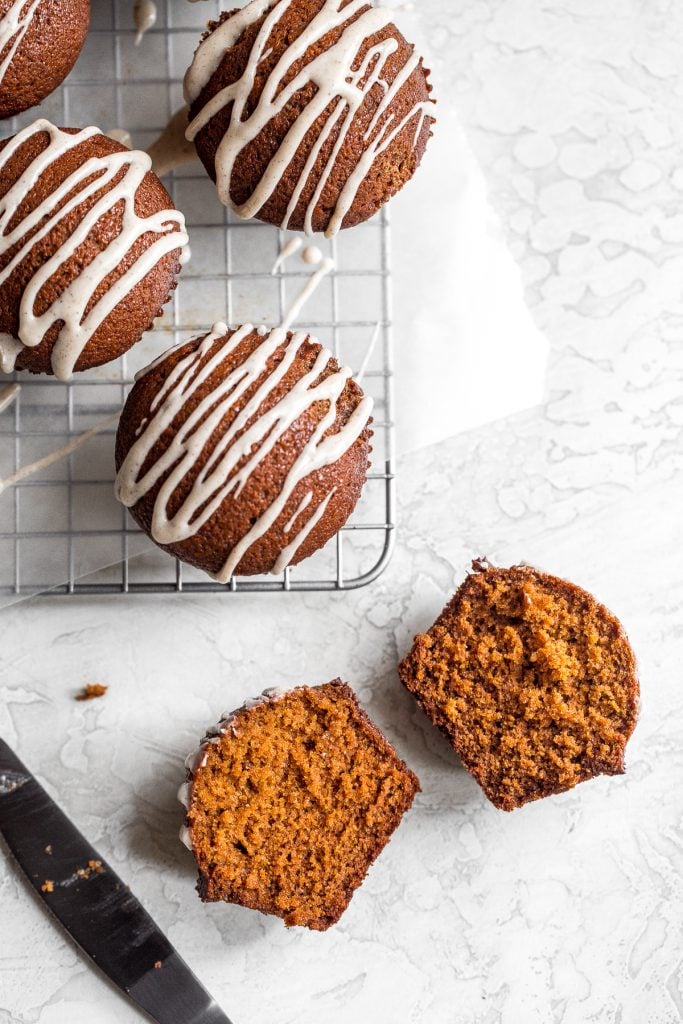
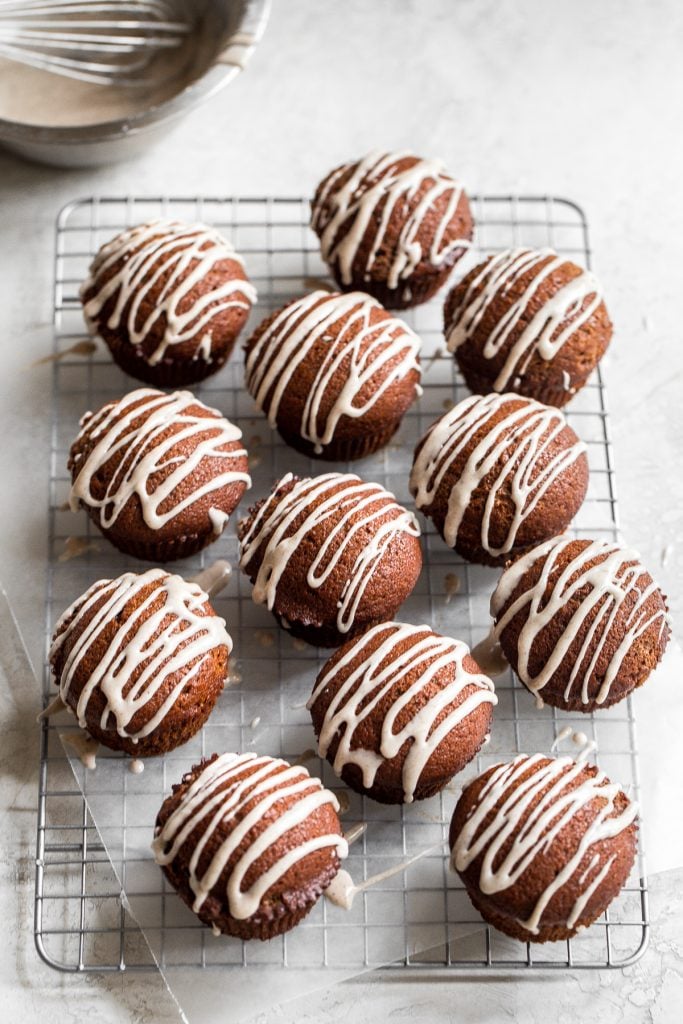
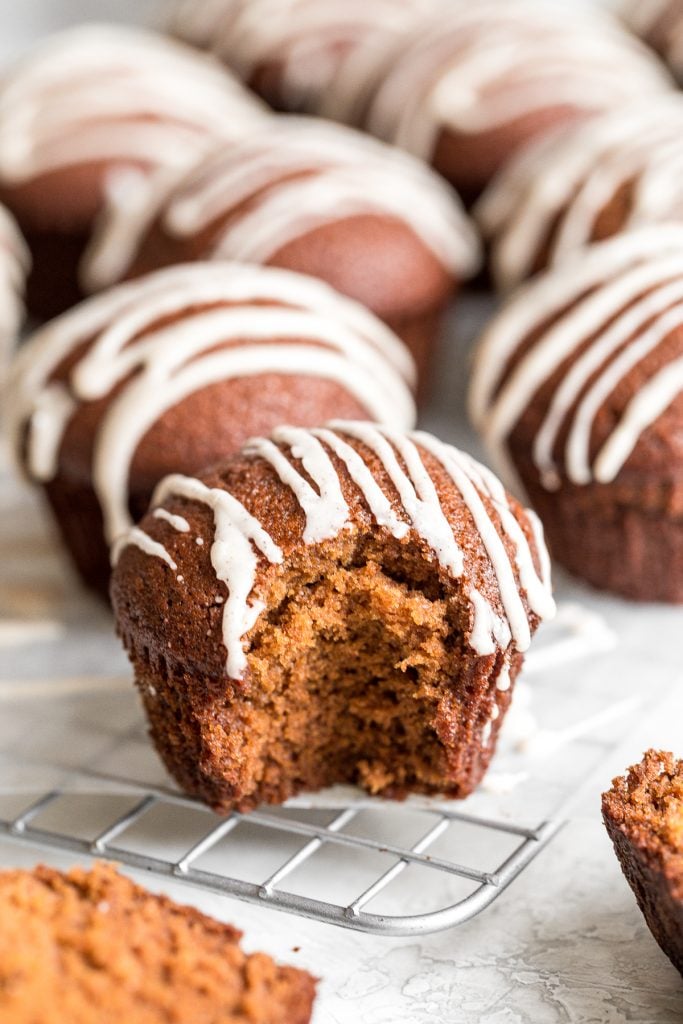
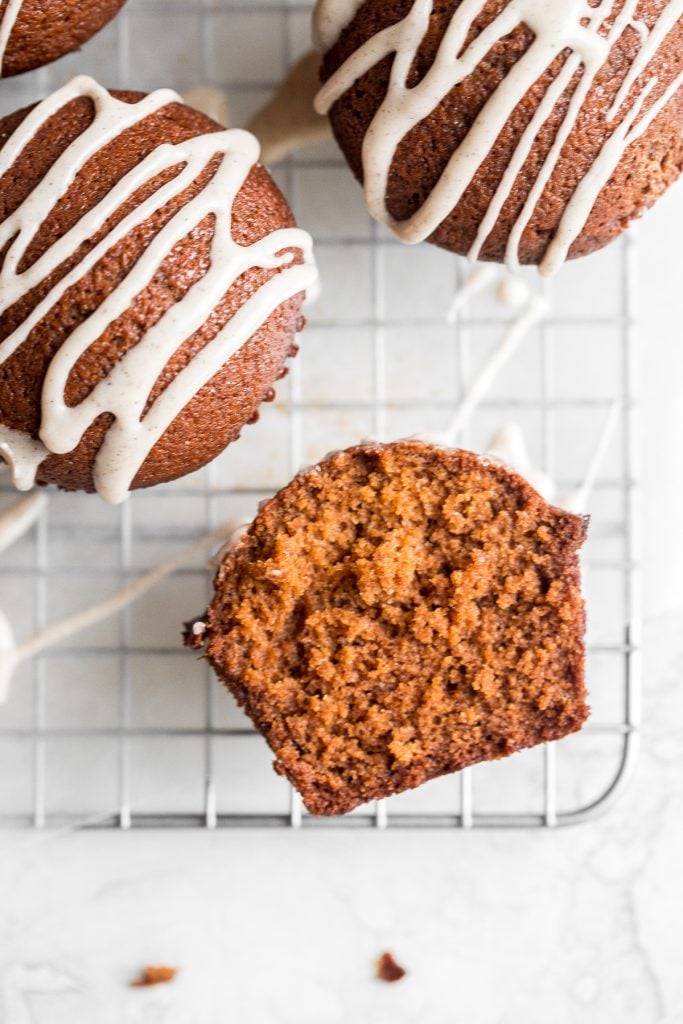
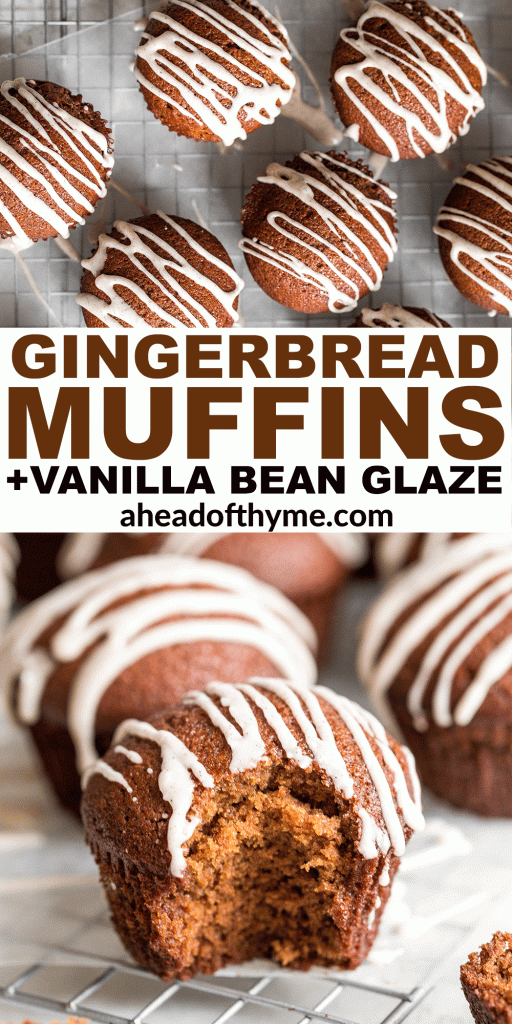
Gingerbread Muffins with Vanilla Bean Glaze

Gingerbread muffins with vanilla bean glaze are light, airy and fluffy with warm and fragrant festive spices of ginger and cinnamon, have a traditional dark brown colour from a rich dose of molasses, and are perfectly paired with a drizzle of the best vanilla bean glaze on top. This fun twist on classic gingerbread has all the holiday feels of hard gingerbread but turns it into a delightful breakfast or dessert that you will come back to again and again. The best part? You can be biting into one in about 30 minutes.
Much like our gingerbread bundt cake with maple cinnamon glaze, your house will smell incredibly amazing while you are baking these muffins. Trust me on this one. Those warm holiday spices will just waft throughout your kitchen. And just like the bundt cake, these muffins are super easy to make with just 10 minutes of prep. In fact, I might even recommend switching out Santa's cookies and milk for one or two of these muffins. They are that good.
Ingredients in Gingerbread Muffins
You will need a handful of pantry staples to make these muffins:
- all-purpose flour
- baking soda
- ground ginger
- ground cinnamon
- salt
- unsalted butter, at room temperature
- granulated sugar
- eggs, at room temperature
- dark molasses - you can substitute with honey if you don't have molasses. The muffins will not be as deep brown in colour but will still taste delicious.
- cold water
- vanilla bean glaze - made with confectioners' sugar, vanilla bean powder and whole milk.
You will also need measuring cups and spoons, mixing bowls, stand mixer (or hand mixer), 12-tin muffin pan, cupcake liners, and wire cooling rack.
How to Make the Best Gingerbread Muffins with Vanilla Bean Glaze
- Prep. Preheat oven to 350 F. Line a standard 12-tin muffin pan with cupcake liners and coat with nonstick baking spray.
- Combine dry ingredients. In a medium bowl, whisk together flour, baking soda, ginger, cinnamon, and salt. Set aside.
- Combine wet ingredients. Place butter and sugar in the bowl of a stand mixer fitted with paddle attachment (or in a large bowl and use a hand mixer). Beat on medium speed until light and fluffy, about 3 minutes. Add eggs one at a time, beating after each addition. Then, add molasses and beat until well mixed, scraping down the sides as needed.
- Add dry ingredients to wet ingredients. Carefully add half of the dry ingredients to the wet ingredients, then beat on low speed until incorporated. Add remaining dry ingredients, scraping down the sides, and beat until thoroughly mixed. With the mixer on low, add the cold water. Continue to beat for 2 minutes, or until mixture is very smooth.
- Bake. Divide batter evenly between muffin cups, about ¾ full. Bake for 25 minutes, or until a toothpick inserted into the middle of the muffin comes out clean. Let muffins cool for 10 minutes in the pan, then transfer to a wire cooling rack to cool completely.
- Make the vanilla bean glaze. While muffins are cooling, make vanilla bean glaze. Combine confectioners' sugar, vanilla bean powder, and milk in a small bowl and whisk until smooth. Add a little more milk, 1 teaspoon at a time, until you reach your desired consistency. Drizzle the glaze on top of the cooled muffins.
Gingerbread Muffins Storing Instructions
- How to store gingerbread muffins: Store freshly baked gingerbread muffins, covered, at room temperature for up to 2 days, or in an airtight container in the refrigerator for up to 1 week.
- How to freeze gingerbread muffins: To freeze, place baked and cooled muffins into a freezer bag or airtight container and store in the freezer for up to 3 months. To eat, first let them thaw in the refrigerator or at room temperature. Once thawed, you can also warm them up in the microwave, oven, or air fryer at 300F for 5-10 minutes until warmed through.
More Muffin Recipes
- Banana Chocolate Chip Muffins
- Leftover Cranberry Sauce Muffins with Oat Streusel Topping
- Spiced Carrot Muffins
- Cranberry Yogurt Muffins
- Spiced Apple Oatmeal Muffins with Crumb Topping
- Blueberry Yogurt Muffins
Tried this recipe?
I'd love to hear what you think! Leave a comment and rating below to share your feedback. Your reviews help others discover this recipe and help me keep creating more free recipes for you. Snap a photo and tag me on social media @aheadofthyme too.
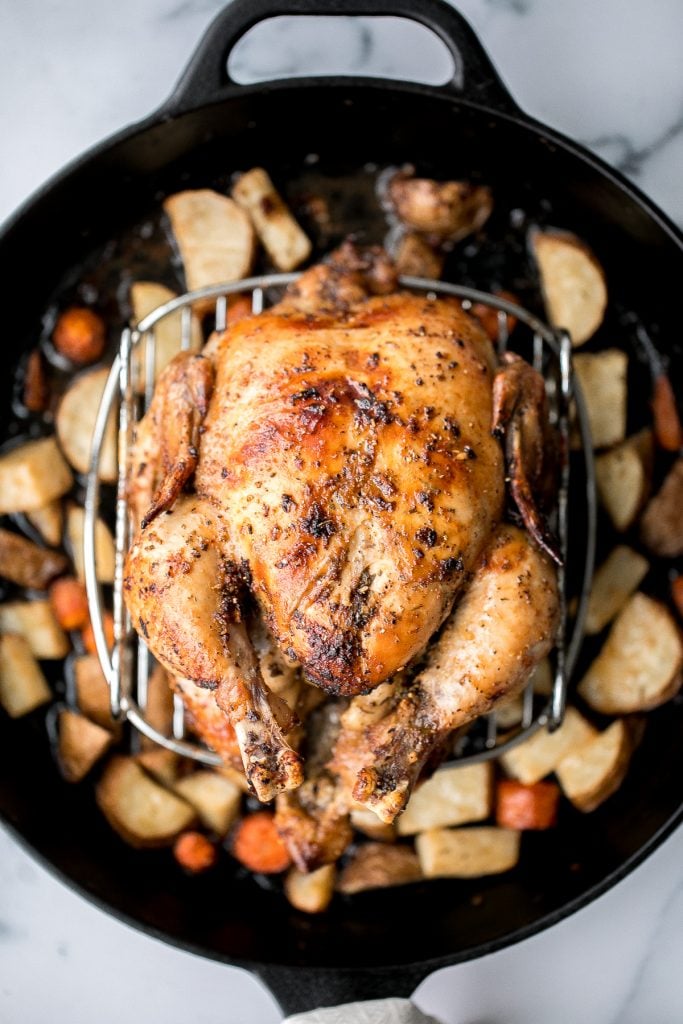
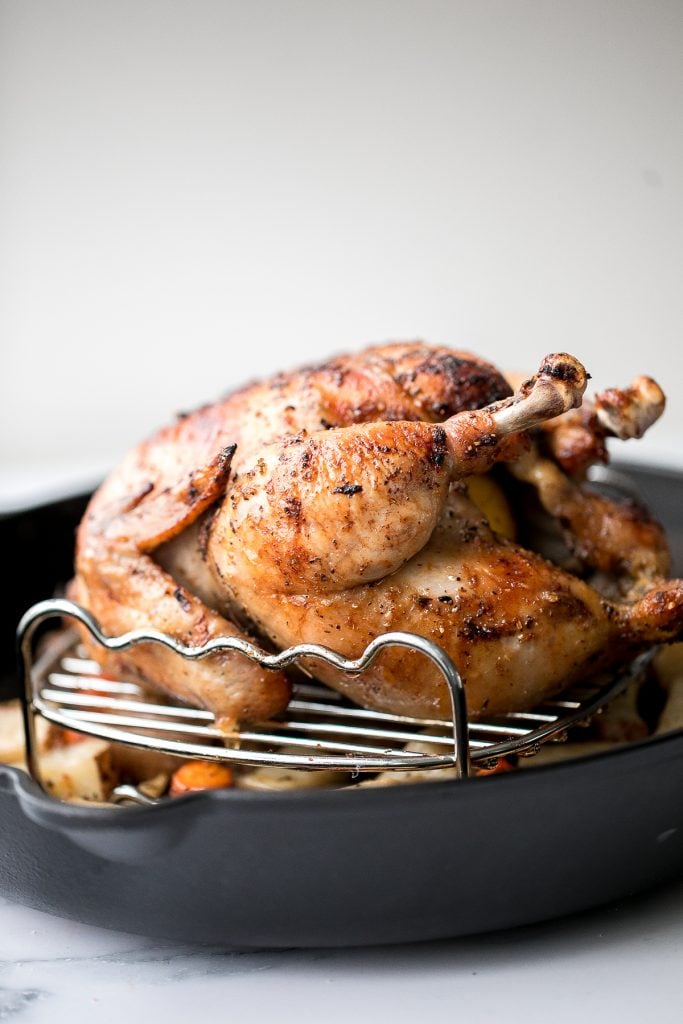
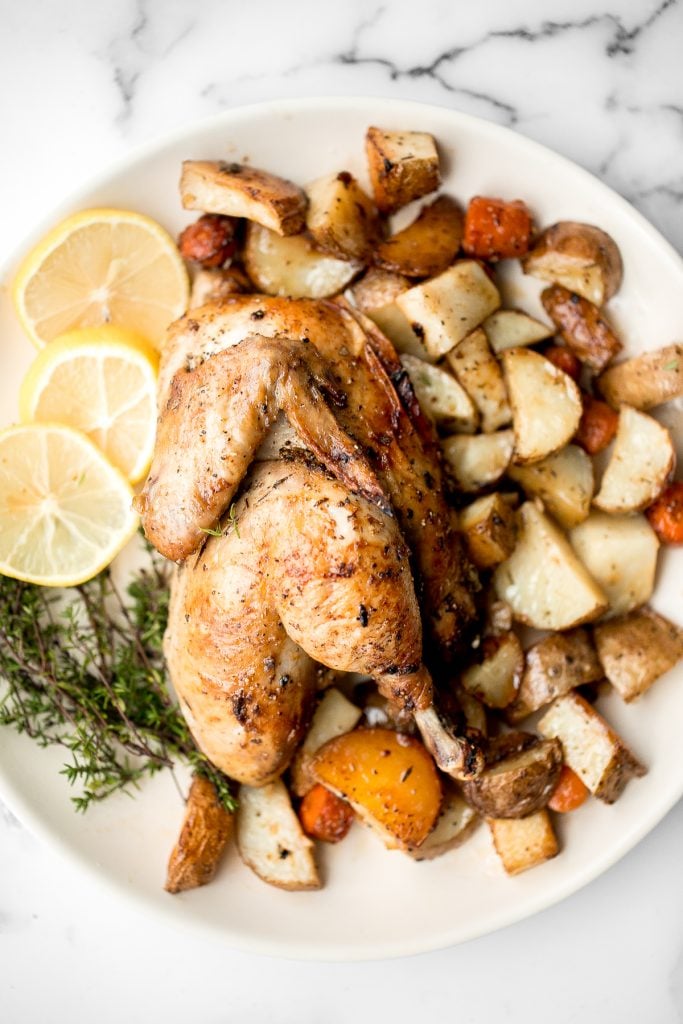
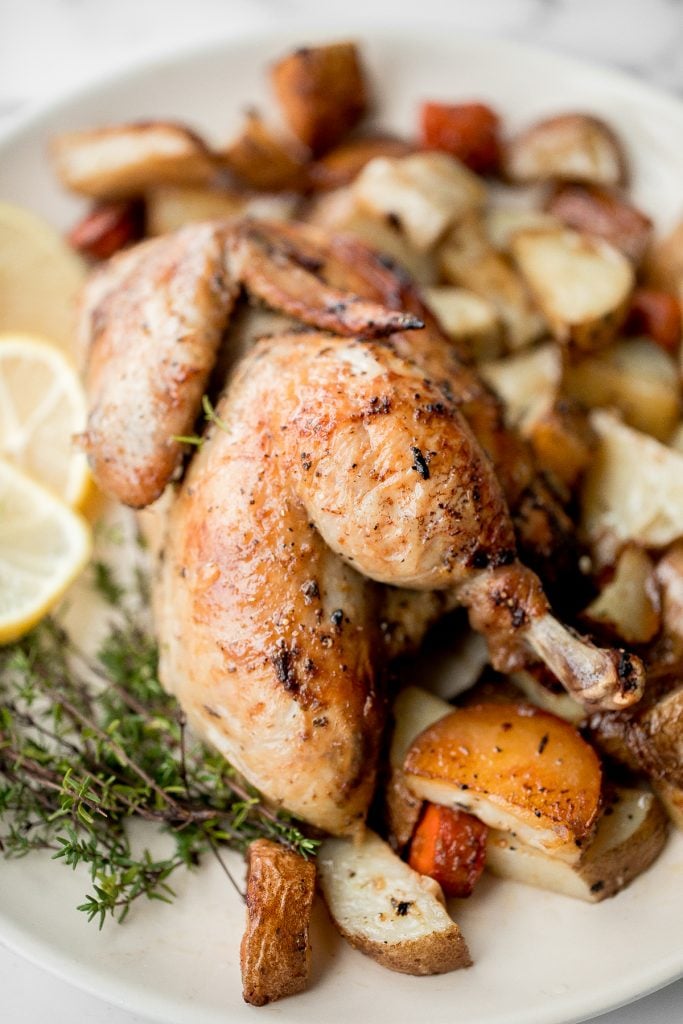
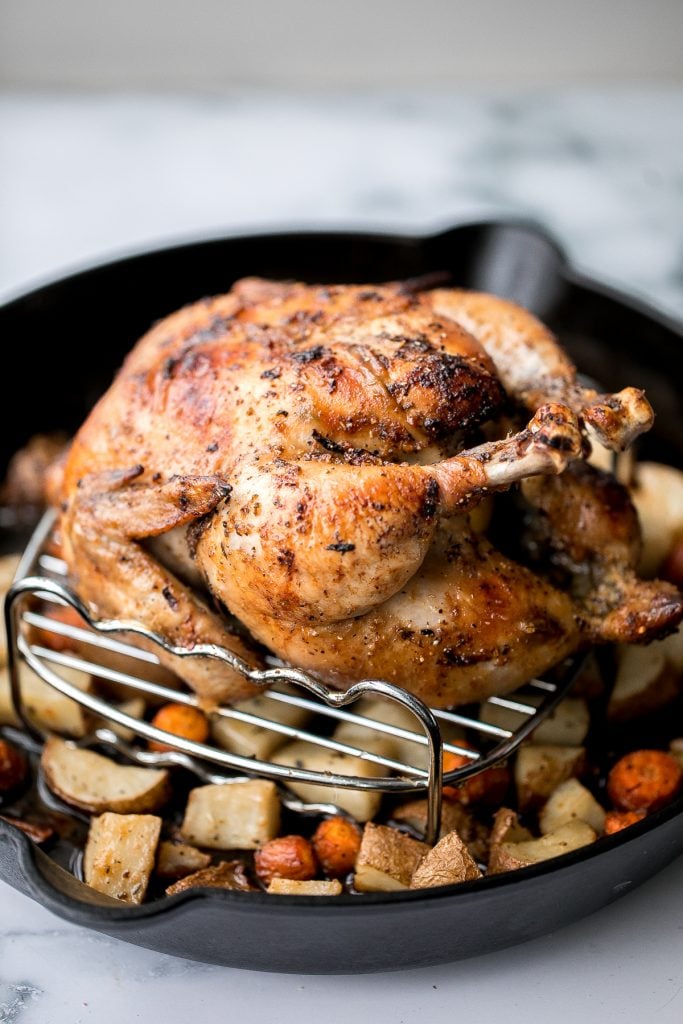
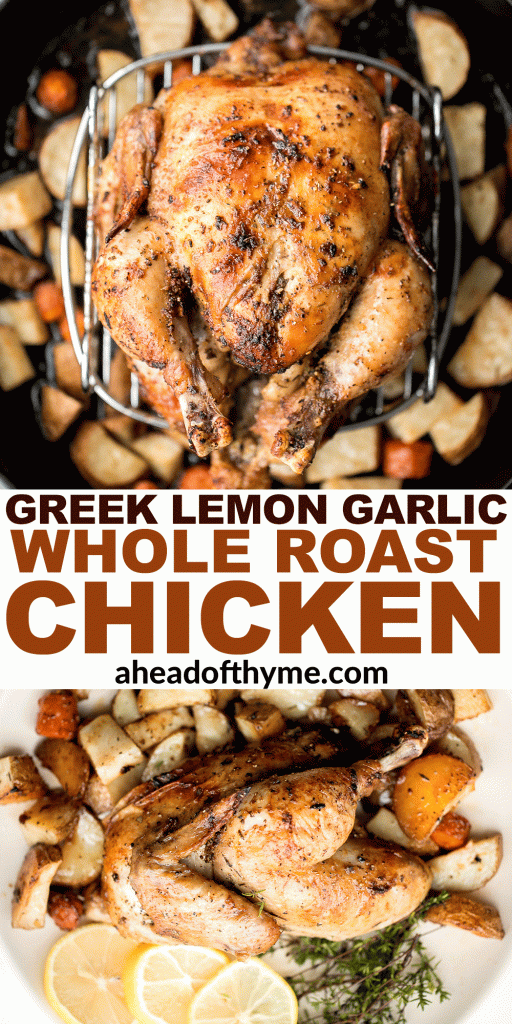
Greek Lemon Garlic Whole Roast Chicken

Easy Greek lemon garlic whole roast chicken is tender, juicy and succulent with the crispiest golden skin. It is so flavourful and seasoned with a delicious and bright lemon garlic sauce. This fancy one pan meal with potatoes and carrots can be prepped in just 15 minutes. It is the perfect showstopper for a holiday meal, or for any night of the week when you don't want to spend a lot of time in the kitchen.
We love making a whole chicken every now and then like our dutch oven whole roast chicken, roasted spatchcock chicken, or slow cooker whole chicken. Making a whole roast chicken is so easy to prepare but it is such a delicious meal that looks like it took a much longer time to prepare. Dinner has never been easier, especially when it's a one pan meal like this, so you don't have to worry about making any other sides.
Ingredients
- whole chicken - one whole chicken, about 3 lbs.
- salt and pepper
- fresh thyme
- lemon - you will need the juice and zest for the lemon garlic seasoning, and you will stuff the rest of the lemon into the cavity of the chicken for extra flavour.
- olive oil
- garlic
- paprika
- potatoes
- carrots
You also need a cast-iron skillet or roasting pan and meat thermometer.
How to Make the Best Greek Lemon Garlic Whole Roast Chicken
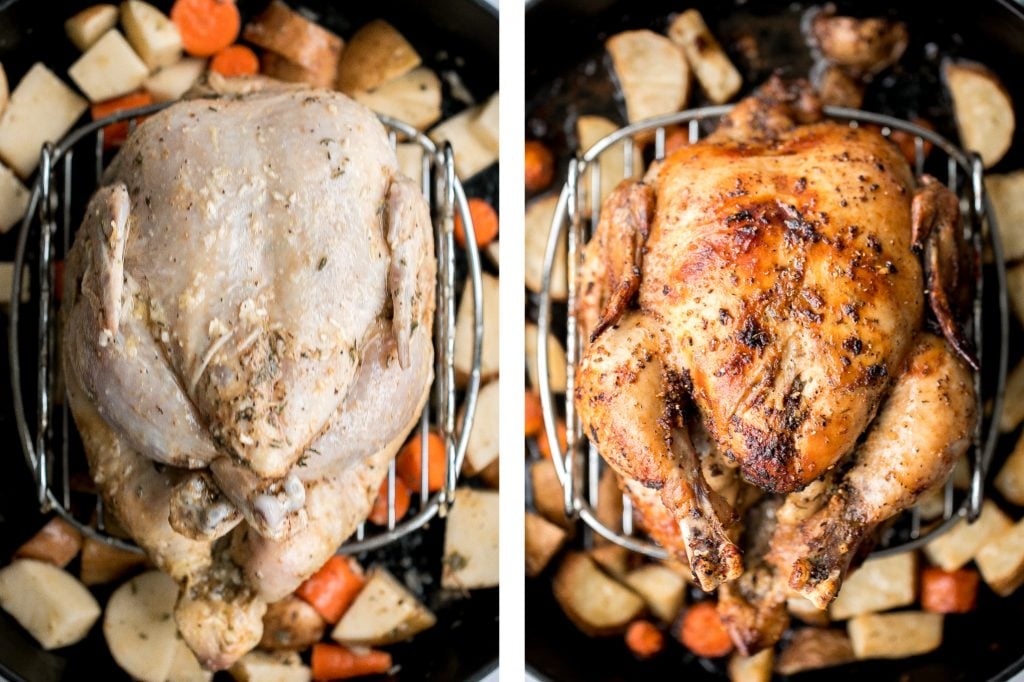
- Prepare the chicken: Pat dry the whole chicken completely with a paper towel before adding seasoning. This helps create an extra crispy skin when roasting. In a small bowl, whisk together salt, pepper and thyme and generously rub all over the chicken, inside and out. Set aside for at least 30 minutes or refrigerate overnight.
- Make the lemon garlic seasoning: Grate the lemon and transfer lemon zest into a small bowl. Then, squeeze out 2 tablespoons of lemon juice into the same bowl, and add olive oil, garlic and paprika, and whisk to combine. Stuff the leftover lemon into the cavity of the chicken. Generously brush half of the lemon mixture over the whole chicken.
- Prepare the vegetables: In a large mixing bowl, toss to combine the remaining half of the lemon mixture with potatoes and carrots.
- Assemble the roasting pan: Spread the vegetables evenly on the bottom of a large cast-iron skillet or a roasting pan. Place a roasting rack over the vegetables and place the whole chicken on top, breast side up. The roasting rack allows the heat to circulate evenly underneath the meat, as well as around the sides. If you don't have a roasting rack, you can place the chicken directly on top of the vegetables.
- Roast: Roast the chicken in a 375 F preheated oven for 1 to 1.5 hours depending on the size of the chicken, until the internal temperature reaches 165F. You can check the internal temperature by sticking a meat thermometer into the thickest part of the breast.
- Broil (optional): To make chicken skins extra crispy and browned, turn on the broil setting to high and broil for an additional 5 minutes. Keep a close eye on the broiler because things can heat up and burn quickly.
- Rest: Remove the pan from the oven and let it sit at room temperature for at least 15 minutes before serving (the chicken is still cooking gradually from the residual heat).
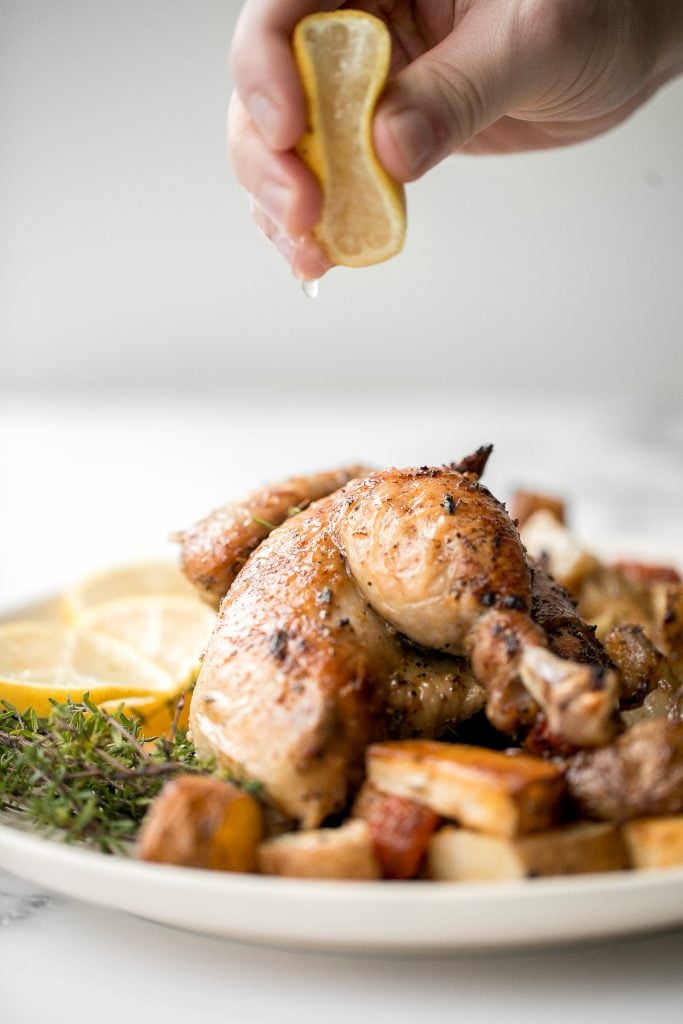
How to Serve Greek Whole Roast Chicken
Serve this Greek lemon garlic whole roast chicken with the roasted vegetables on the side, a squeeze of fresh lemon juice, and a drizzle of extra juices from the pan.
I also like to pair this with a rice pilaf with carrots or creamy mashed potatoes, and a fresh Greek salad or Mediterranean orzo pasta salad on the side.
How to Use Leftover Roast Chicken
There are so many ways to use up any leftovers, and you can use it in any recipe that calls for a rotisserie chicken. Try it in:
- pasta (baked pasta with chicken)
- salad (chicken can be added to almost any salad recipe)
- pizza (30-minute BBQ chicken pizza)
- baked potato (BBQ chicken stuffed baked potatoes)
- soup (lemon chicken orzo soup) or stew (Indian butter chicken)
Tips
- How to get extra crispy skin: There are two steps that can really help make the skin extra crispy. First, pat dry the chicken before adding any seasoning. Second, broil the chicken for 5 minutes after it is done roasting. But keep a close eye on the broiler because things can happen fast and you don't want to burn the skin.
- How to cook in a dutch oven: Once you have assembled the ingredients into a dutch oven instead, cover the lid and roast the chicken at 400F for 30 minutes. Then, remove the lid and continue to cook for another 20-25 minutes until the internal temperature reaches 165F as read on a meat thermometer in the thickest part of the chicken breast.
- How to store: Transfer any leftovers into an airtight container and refrigerate for up to 4 days. To reheat, place in the microwave, air fryer at 300F for 5-10 minutes, or in the oven at 300F for 10 minutes.
More Chicken Recipes
- Roasted Spatchcock Chicken
- One Pan Garlic Roasted Chicken and Baby Potatoes
- Dutch Oven Whole Roast Chicken
- Roasted Balsamic Chicken with Cranberries
- Skillet Chicken Thighs and Potatoes
- Sheet Pan Balsamic Chicken and Vegetables
- Sheet Pan Curry Chicken
Tried this recipe?
I'd love to hear what you think! Leave a comment and rating below to share your feedback. Your reviews help others discover this recipe and help me keep creating more free recipes for you. Snap a photo and tag me on social media @aheadofthyme too.
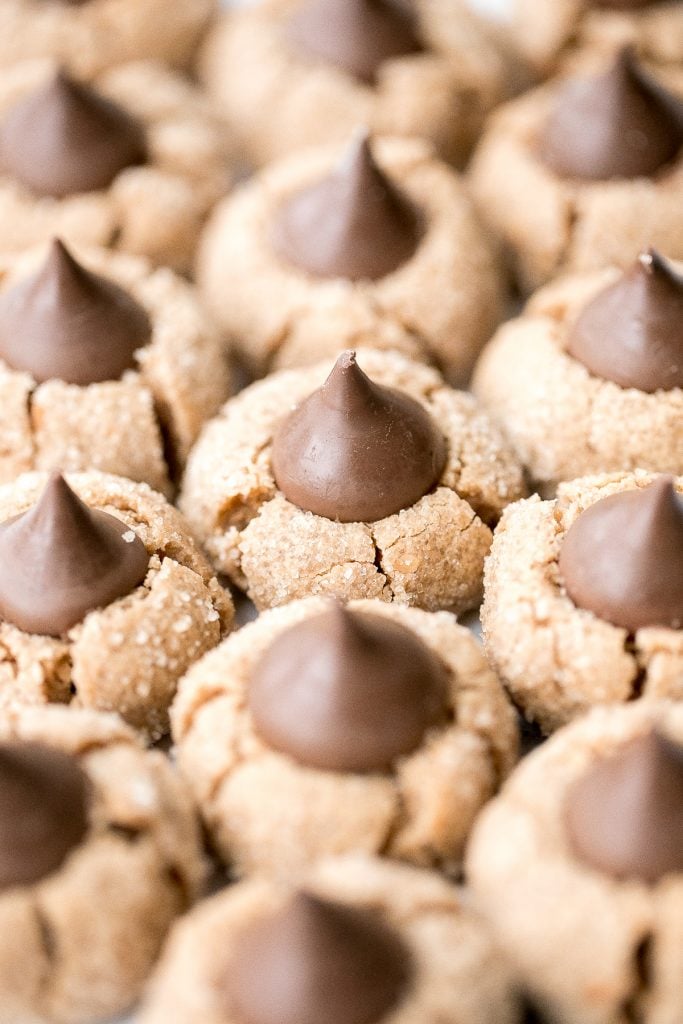
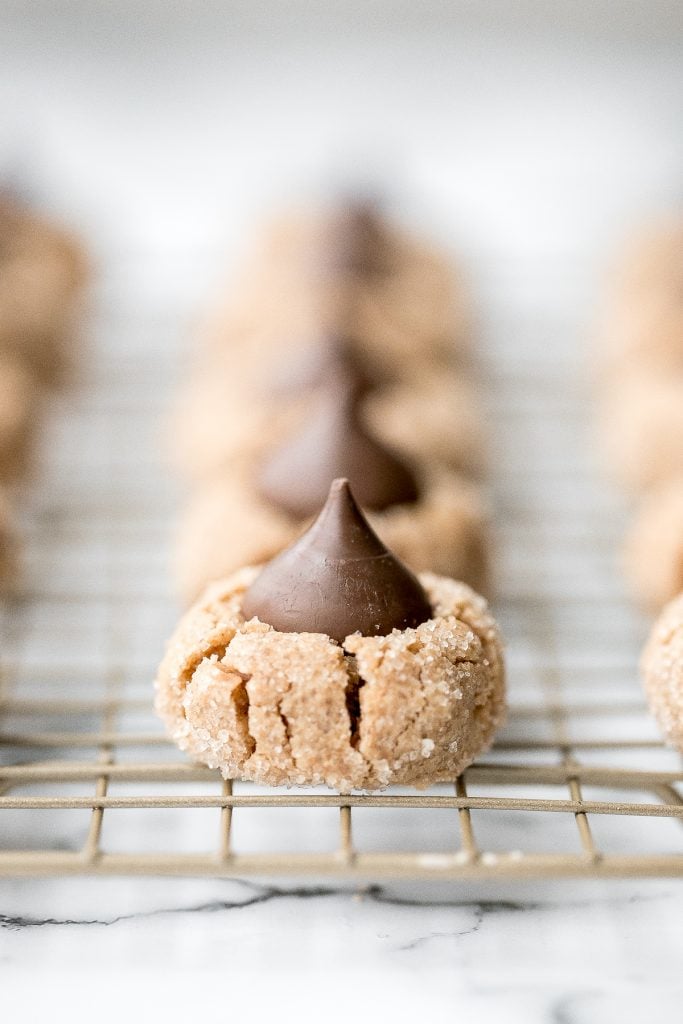
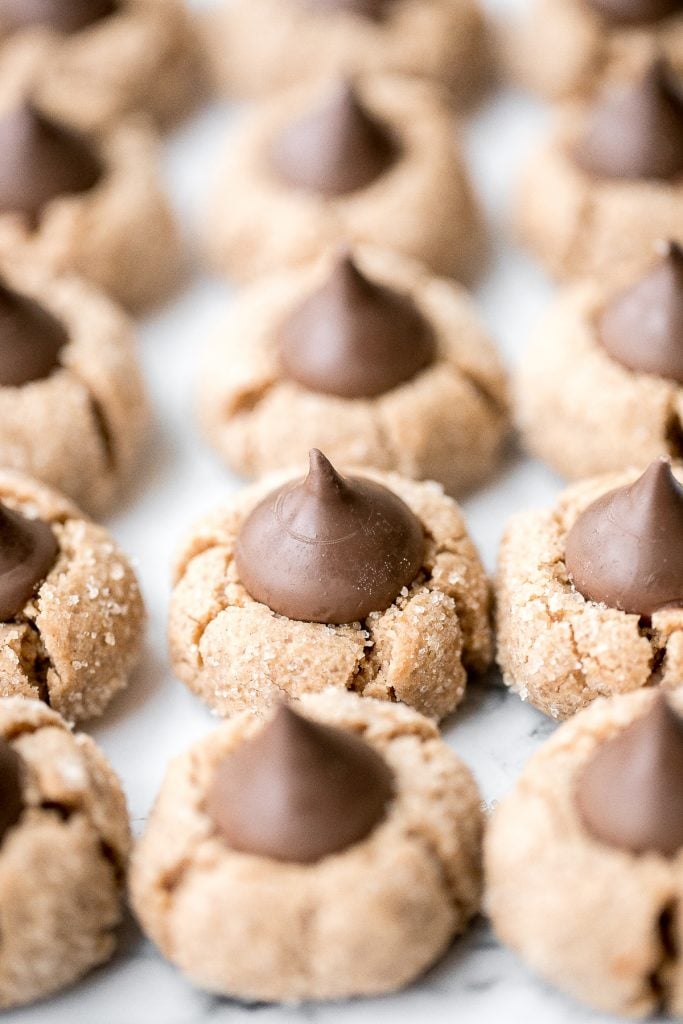
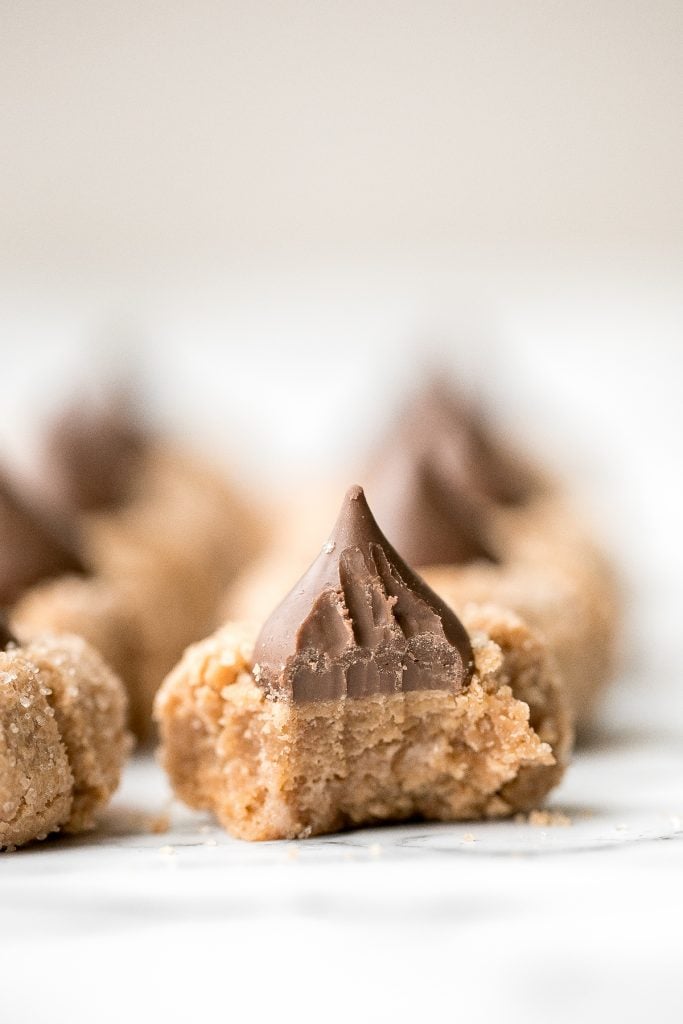
Peanut Butter Blossoms

Soft and chewy peanut butter blossoms are coated in sparkly sugar, and topped with a chocolate kiss. These classic Christmas cookies are super easy to make during the holidays or any time of year. They are buttery, delicious, and irresistible because there really is no better combination that peanut butter and chocolate.
I adapted these buttery peanut butter blossoms from my super popular soft and chewy peanut butter cookies that is loved by everyone who tries them. The only changes I really made were to chill the dough, coat in sugar, and a chocolate kiss. So if you have tried those cookies, then you will love these.

Peanut butter blossoms are an obligatory item to include in a festive holiday cookie box or tray, along with some of my other favourites like chocolate crinkle cookies, jam-filled thumbprint cookies, Christmas sugar cookies and soft and chewy ginger cookies.
Ingredients
- all-purpose flour - to measure the flour, you need to spoon it into your measuring cup and then level it off. You don't want to pack it in as this will yield a drier cookie than intended.
- baking soda
- salt
- peanut butter - I have used both creamy peanut butter and crunchy peanut butter with this recipe. Both taste amazing but I prefer the texture of creamy peanut butter a little more.
- butter
- sugar - you will need both granulated sugar and brown sugar.
- egg - for binding and holding the cookie together.
- vanilla extract - I used pure vanilla extract.
- chocolate kisses - the chocolate kisses are the "blossoms" in these cookies. I used Hershey's chocolate kisses for these cookies. You could also try other chocolate like mini peanut butter cups which would be pretty amazing.
- granulated sugar - more sugar for the coating.
You will also need measuring cups and spoons, mixing bowls, hand mixer (or stand mixer), half sheet baking pan lined with silicone baking mat or parchment paper, and wire cooling rack.
How to Make the Best Peanut Butter Blossoms
- Combine dry ingredients. In a medium bowl, whisk together flour, baking soda and salt. Set aside.
- Combine wet ingredients. In a large bowl, cream together peanut butter, butter granulated sugar, and brown sugar using a hand mixer (or a stand mixer) on medium speed until smooth and creamy, about 2 minutes. Add in egg and vanilla extract and continue to mix until fully combined.
- Add dry ingredients to wet ingredients. Gradually add the dry ingredients to the wet ingredients and mix on low speed until combined.
- Chill the dough. Cover and chill the dough in the refrigerator for 30 minutes.
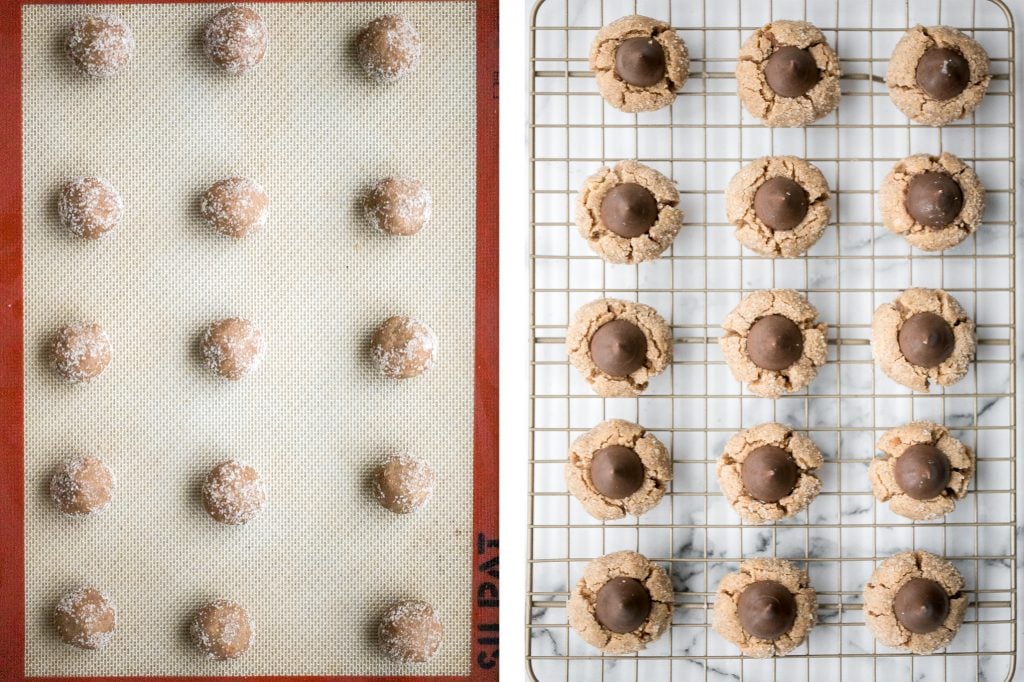
- Roll the cookies and coat in sugar. Use a cookie scoop to roll out 1-2 tablespoons of cookie dough and roll into a 1-inch ball. Roll the cookie ball into a bowl of sugar and fully coat it. Place on a half sheet baking pan lined with a silicone baking mat or parchment paper. Space them about 2 inches apart. You will have to bake in multiple batches, or freeze some uncoated cookie balls to bake later.
- Bake. Bake in a 350F oven for 10 minutes and remove from oven.
- Add chocolate kiss. Once you remove the cookies from the oven, immediately gently press a chocolate kiss into the center of each cookie. Transfer cookies to a wire cooling rack to completely cool.
PRO TIP: When you add the chocolate kisses, they will melt and get soft but will hold its shape. They will slowly harden as the cookies cool completely. You can speed up this process by transferring the cookies to the refrigerator to cool quickly.
How to Store and Freeze
- How to store: Peanut butter blossoms will stay soft in an airtight container for up to 1 week at room temperature.
- How to freeze:
- To freeze baked cookies: Freeze baked and cooled peanut butter blossoms in an airtight container or freezer bag for up to 3 months. Leave them out in the refrigerator or at room temperature to thaw.
- To freeze cookie dough: Place the rolled cookie balls (not coated in sugar) spaced apart on a baking tray, and freeze for an hour. Once frozen, transfer to a freezer bag or airtight container and freeze for up to 3 months.
- To bake from frozen: Allow the cookie balls to thaw in the refrigerator overnight, or at room temperature for a few hours. Then, roll in sugar and bake according to recipe instructions.
More Cookie Recipes
- Chocolate Chunk Peanut Butter Cookies
- Soft and Chewy White Chocolate Cranberry Cookies
- Christmas Sugar Cookies
- Chocolate Crinkle Cookies
- Soft and Chewy Ginger Cookies
- Jam-filled Thumbprint Cookies with Almond Glaze
- Cranberry Pistachio Biscotti
- Chocolate Chip Banana Bread Cookies
Tried this recipe?
I'd love to hear what you think! Leave a comment and rating below to share your feedback. Your reviews help others discover this recipe and help me keep creating more free recipes for you. Snap a photo and tag me on social media @aheadofthyme too.

40 Best Vegetarian Soup Recipes

Soup season is the best season. When cooler weather rolls around, my Dutch oven finds a permanent spot on my stovetop and is always full of soup. I could literally eat soup all day every day. So, today I am sharing my most popular 40 best vegan and vegetarian soup recipes, ranging from smooth and creamy, to wholesome and hearty, to noodles and ramen, with lots of gluten-free options as well.

Best Vegetarian Soup Recipes
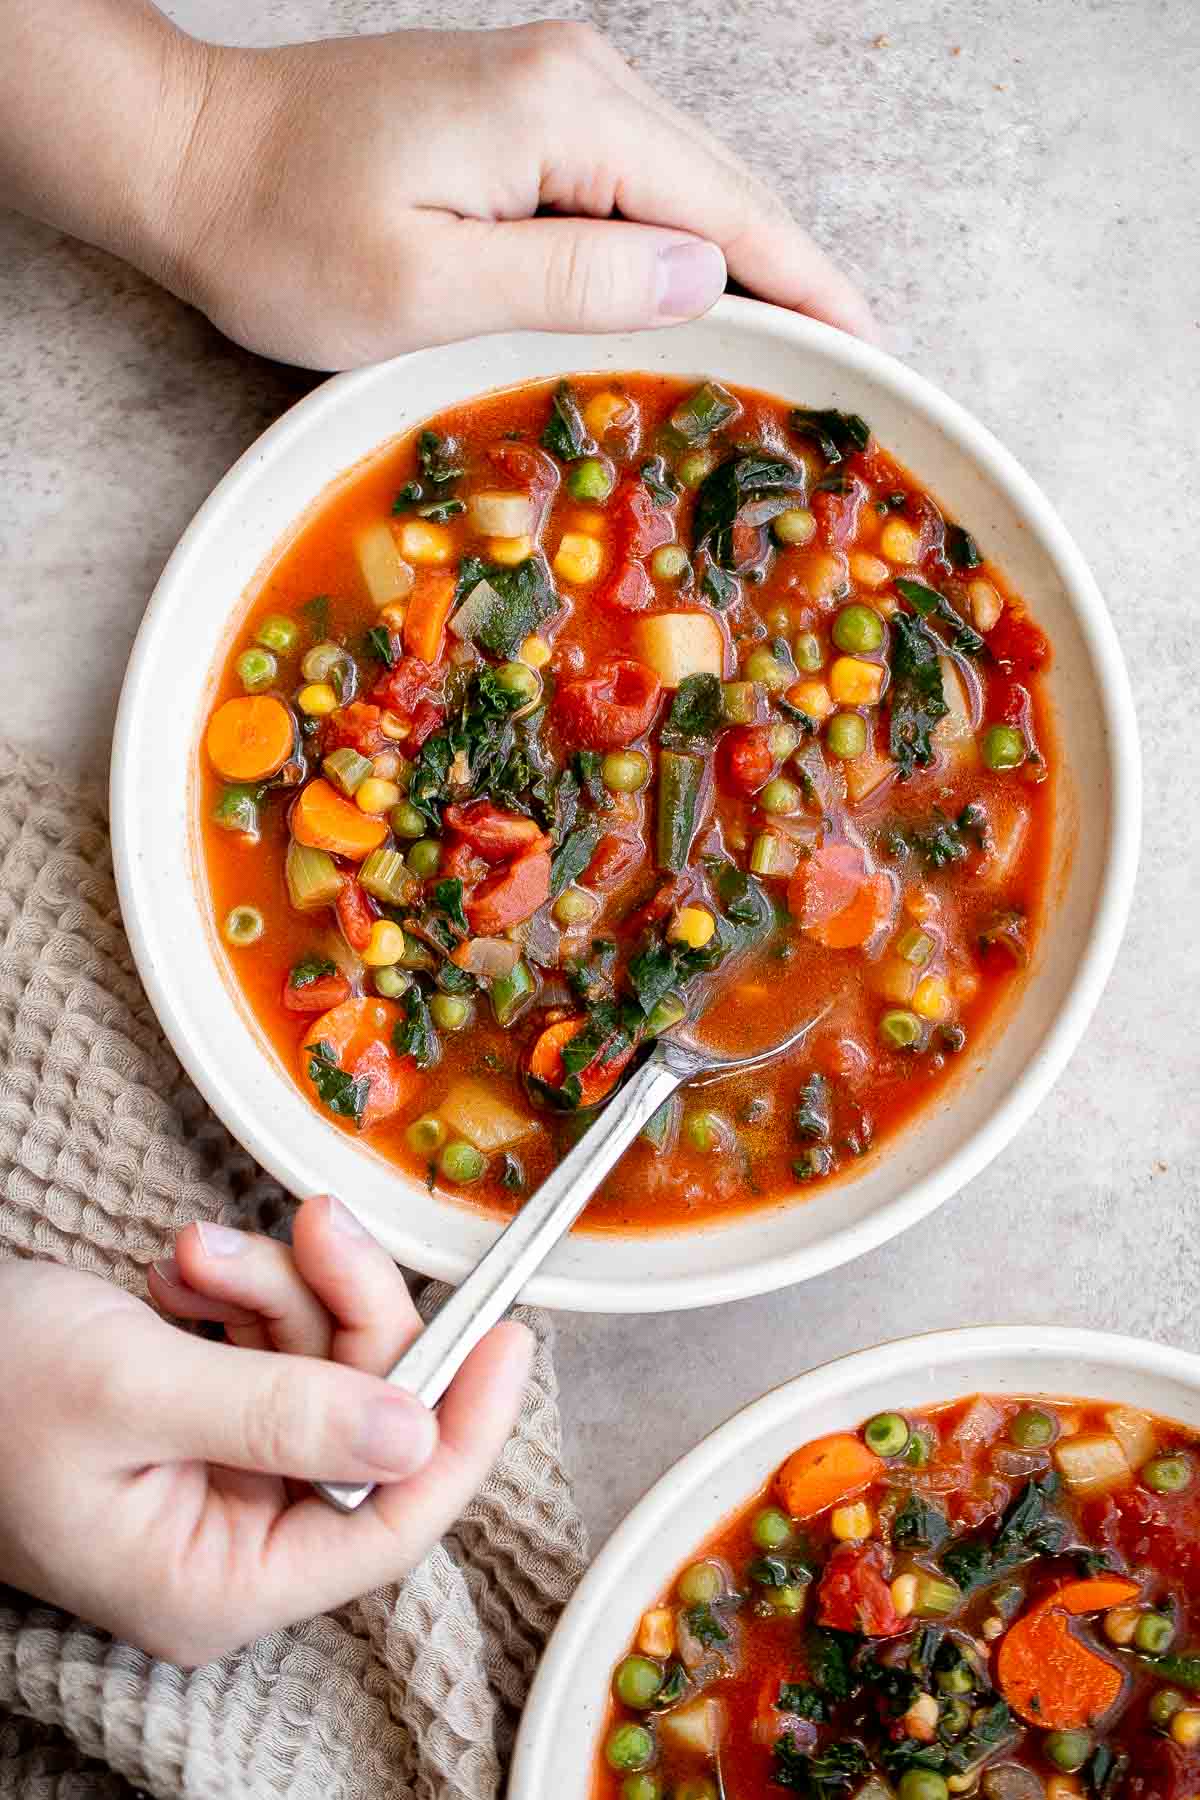
Vegetable Soup is a hearty, vegan soup that is delicious, flavorful, and easy to make. It's loaded with all kinds of veggies in a savory broth.
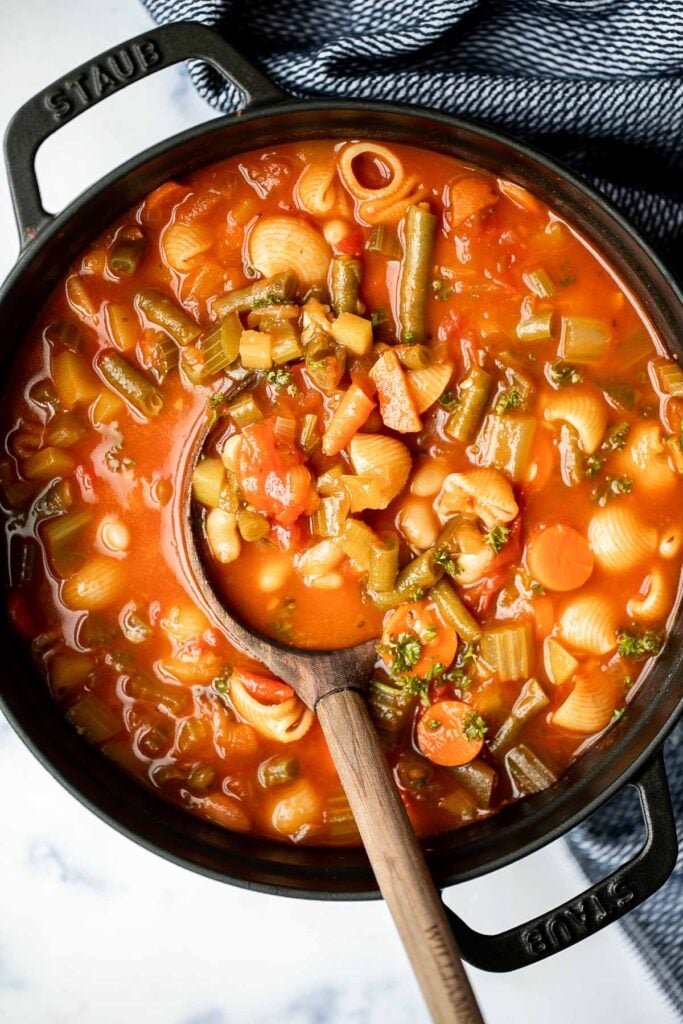
Minestrone soup is a hearty, healthy, nourishing, and delicious classic Italian soup, packed with vegetables and pasta simmered in a rich tomato broth.
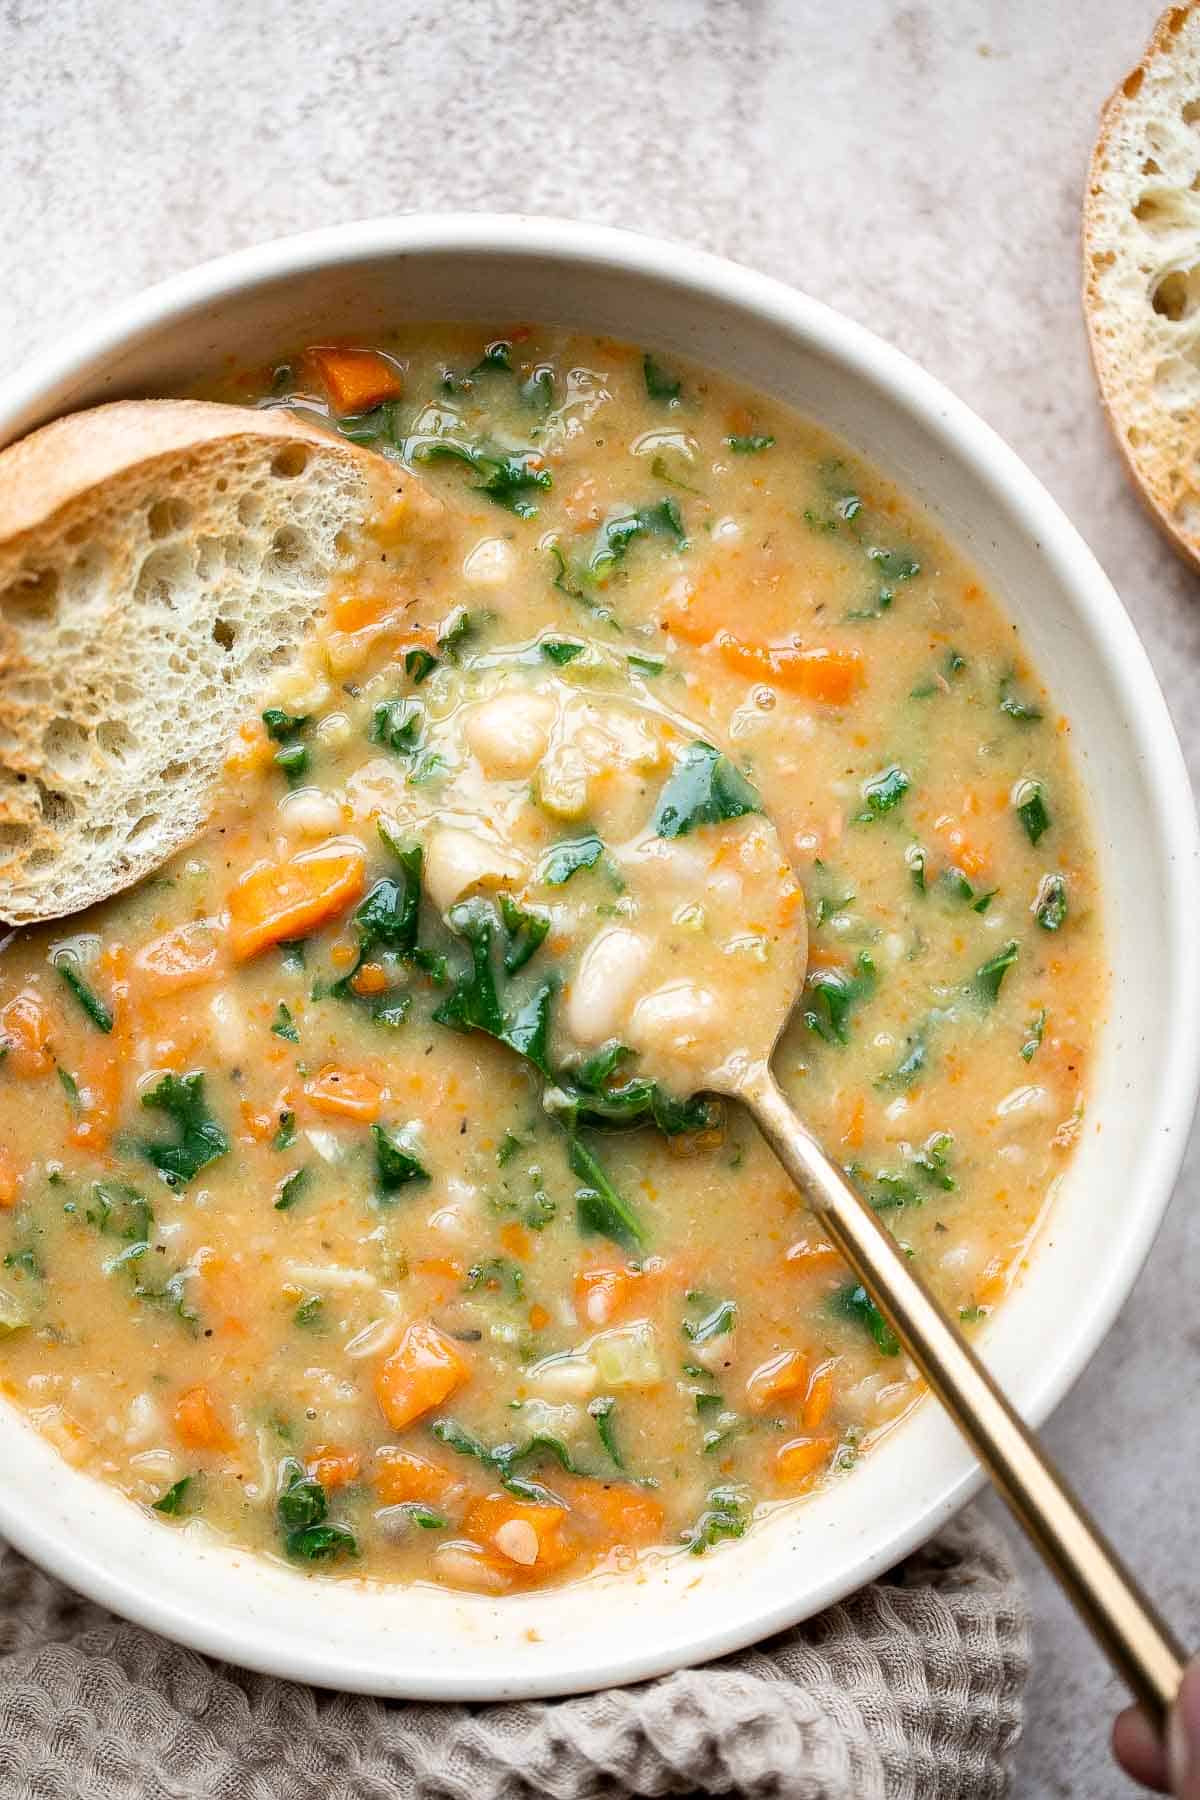
White Bean Soup with Kale is a hearty and nourishing one-pot meal that is flavorful and easy. Make this healthy soup in 30 minutes using simple ingredients.
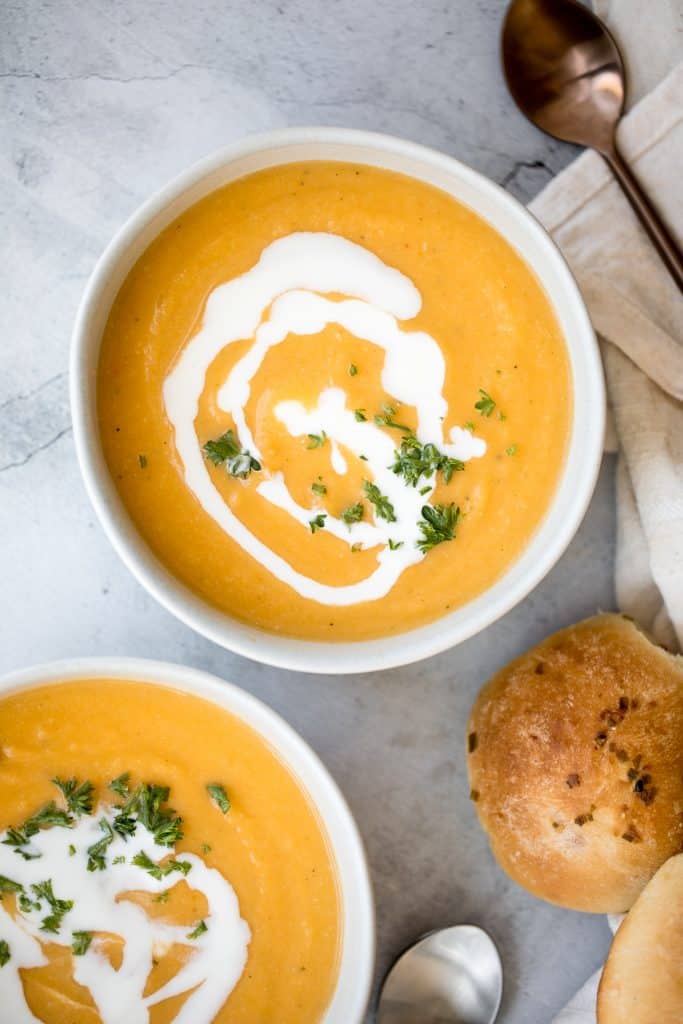
Roasted Butternut and Cauliflower Soup
Creamy roasted butternut squash and cauliflower soup has all the fall soup feels and is vegan and gluten-free. Plus, it's super easy to make in a sheet pan and then puree. Serve it with some quick and easy green onion dinner rolls or skillet dinner rolls.
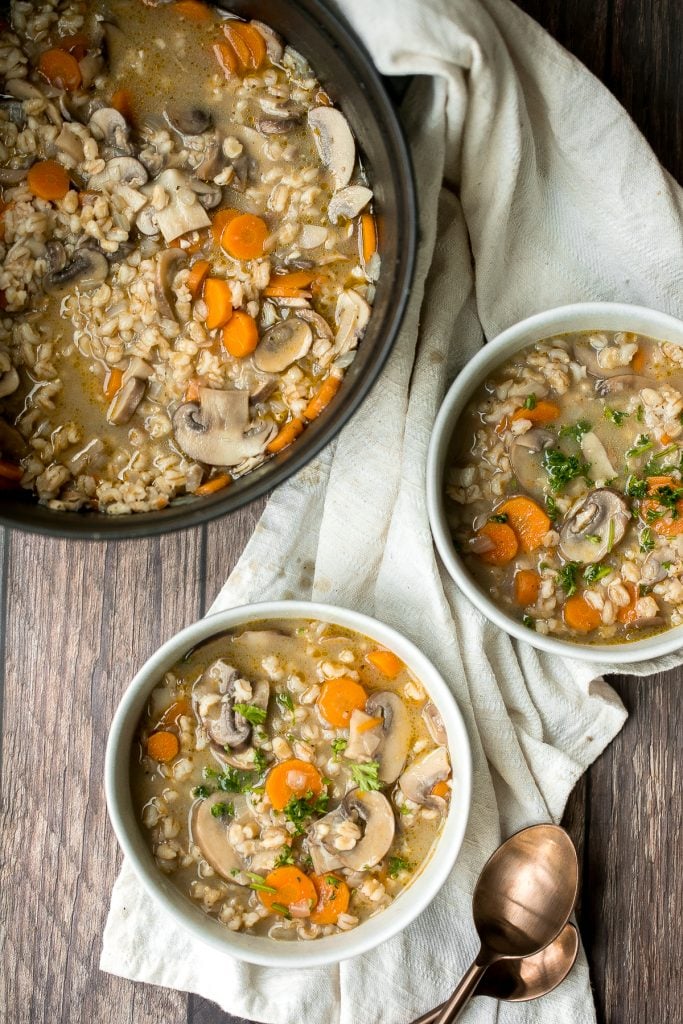
Vegetarian Mushroom Barley Soup
Wholesome hearty vegetarian mushroom barley soup is healthy, filling, and so delicious. This one pot meal is easy to make with just 10 minutes of prep.
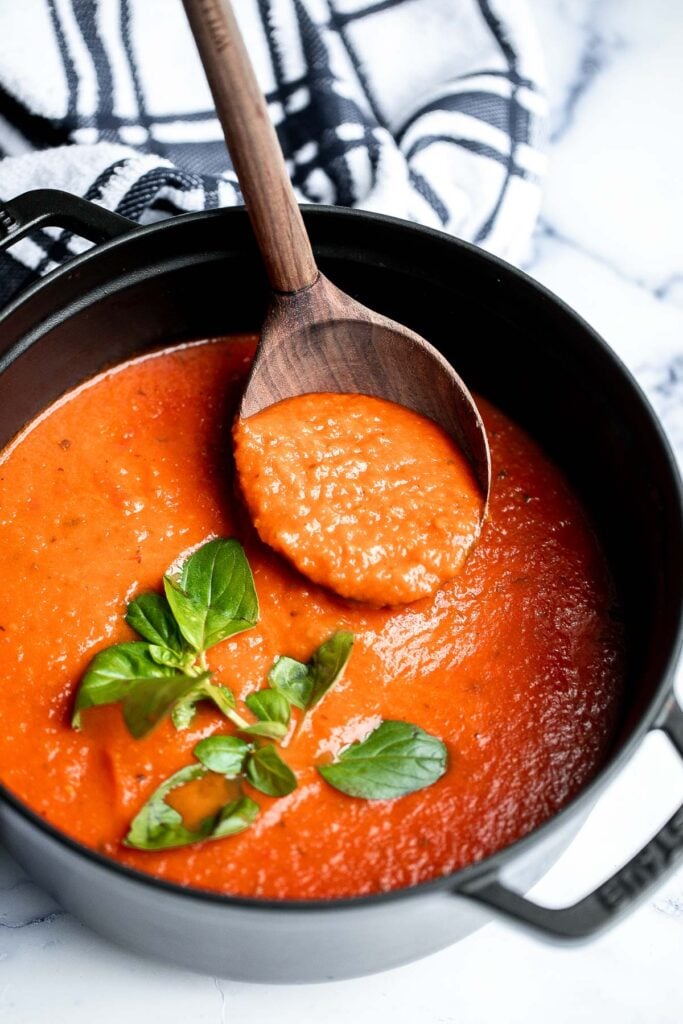
Homemade tomato basil soup is comforting, rich, and smooth. This cozy soup is easy, flavourful, and nourishing, making it so much better than canned.
Lemon Asparagus Soup with Parmesan
Lemon asparagus soup with parmesan is the perfect spring soup -- smooth, light, fresh, and flavourful. It's customizable and can be served hot or cold.

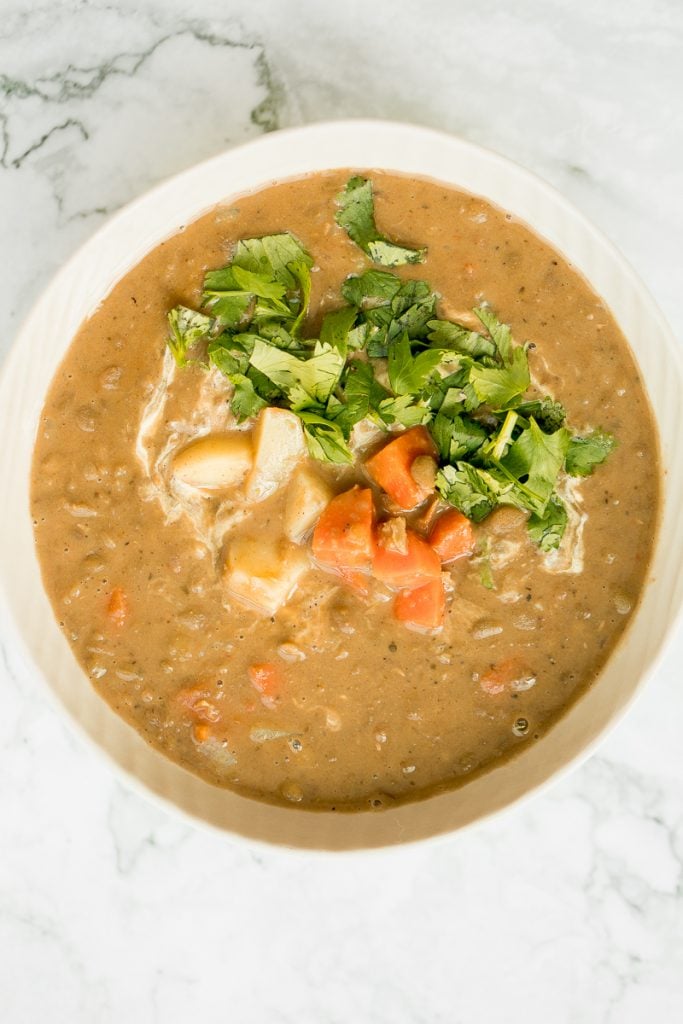
Indian-inspired, vegan, creamy coconut curry lentil soup is an easy and simple 30-minute pantry meal that is packed with spices for maximum flavour. Serve it as a soup or as a curry over some coconut rice.
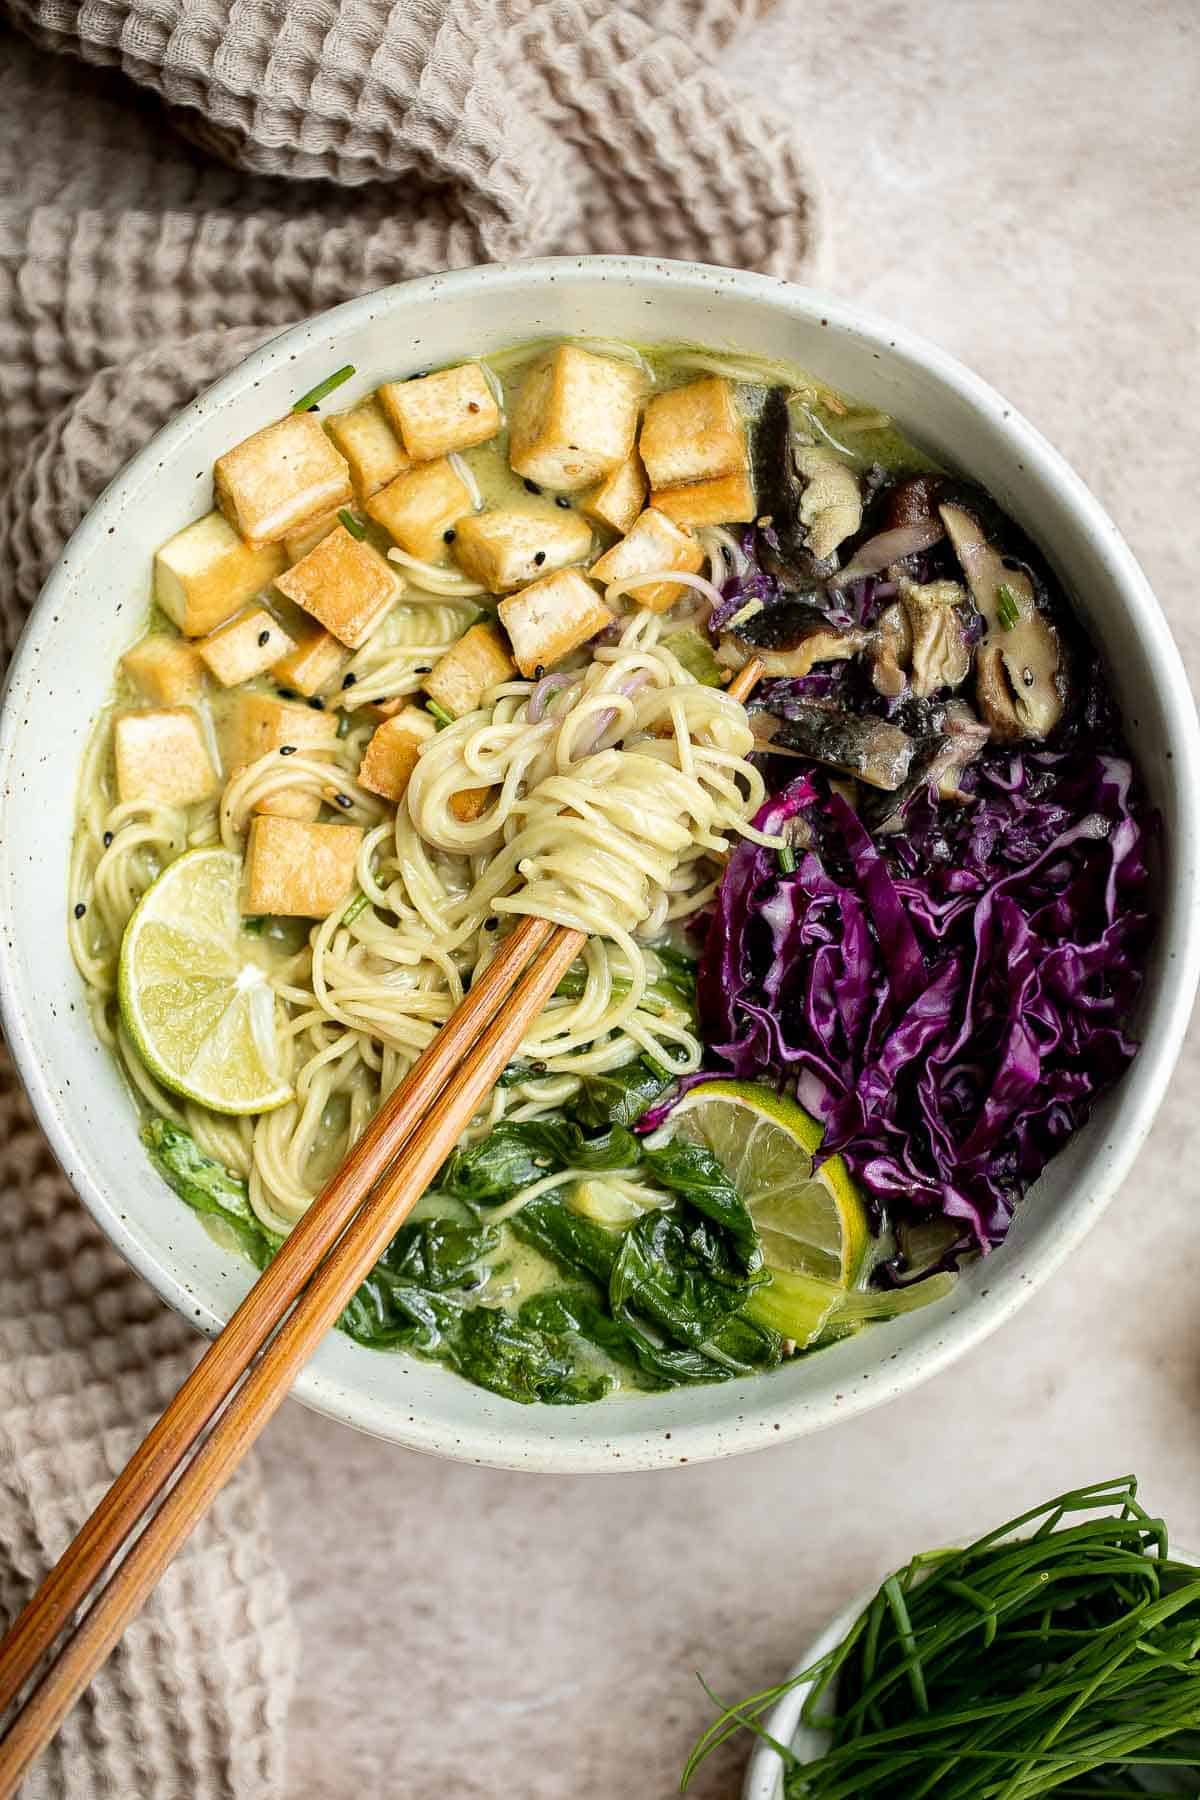
Creamy vegan ramen is delicious, flavorful, and healthy comfort food, packed with nutrients that will give you an immunity boost. Ready in just 30 minutes!

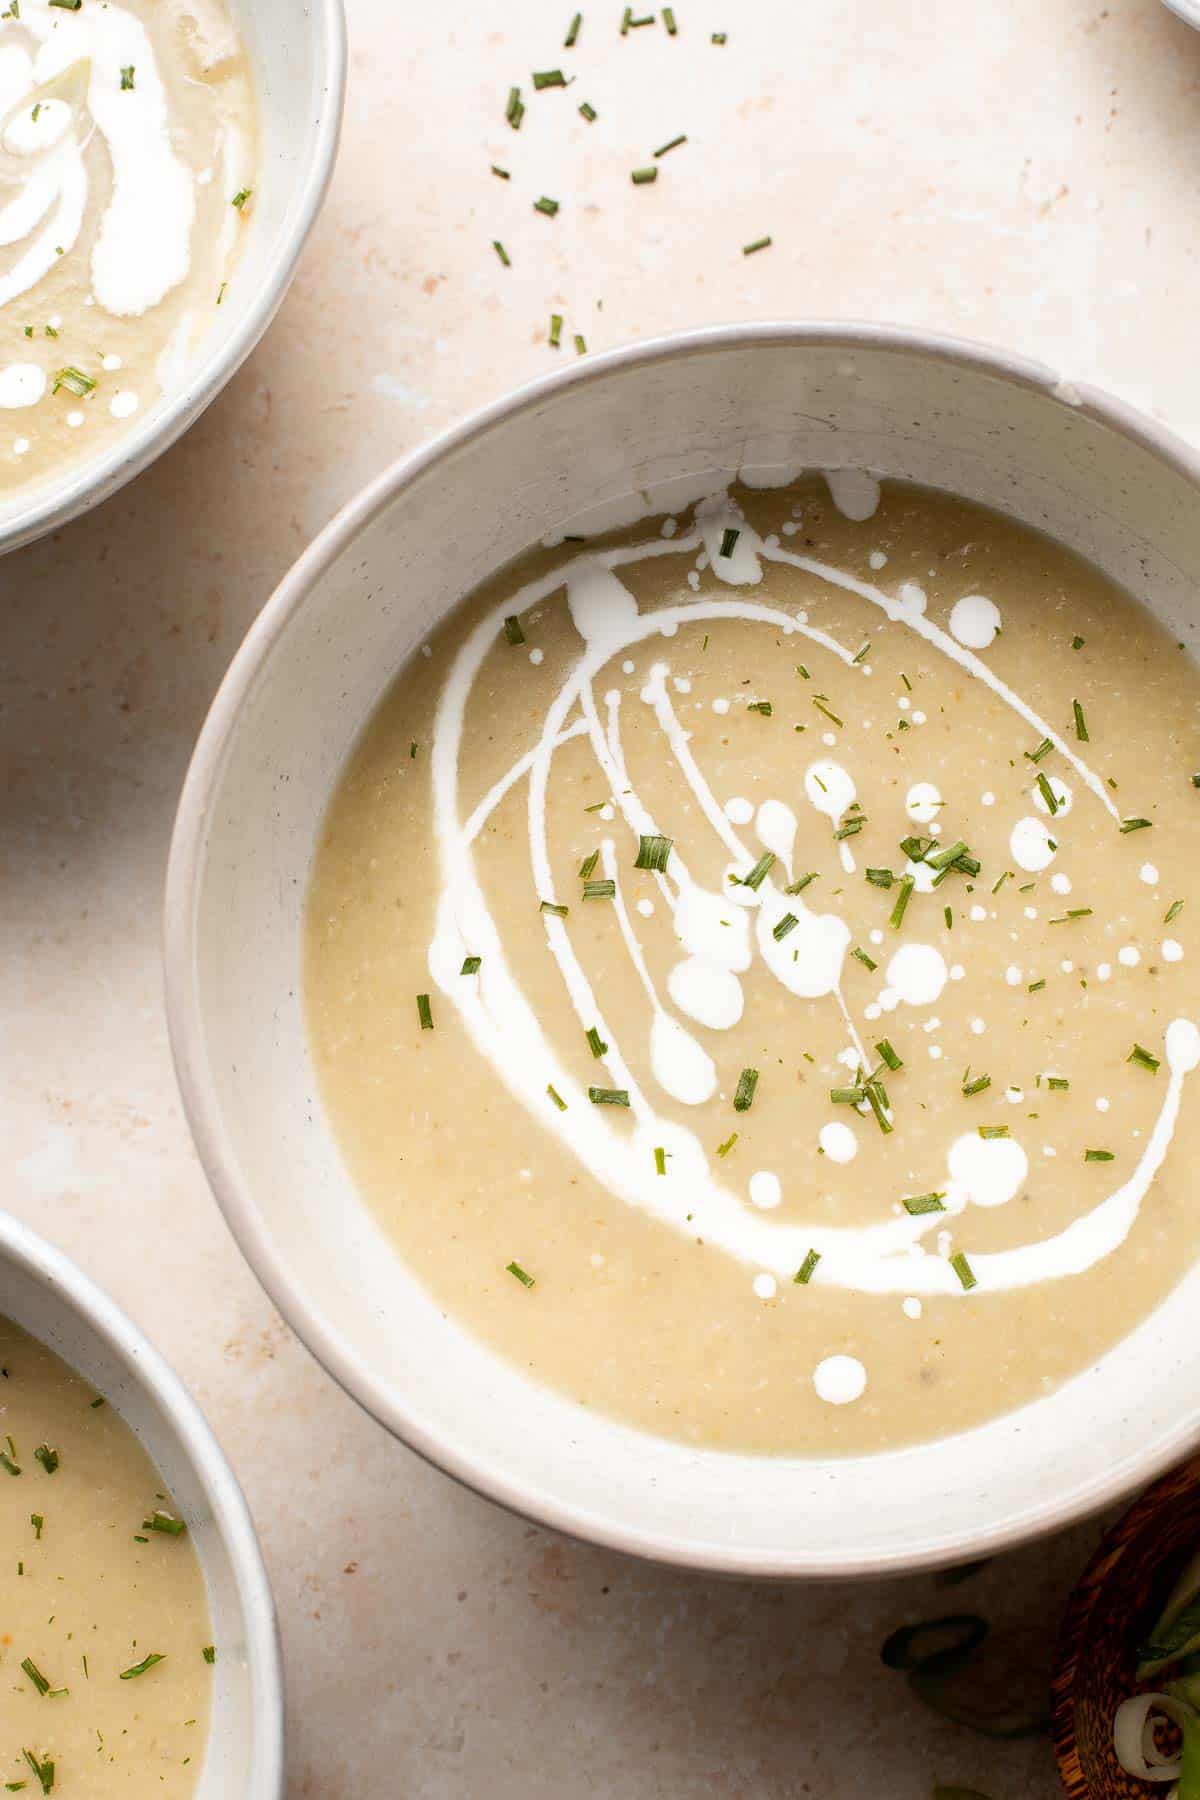
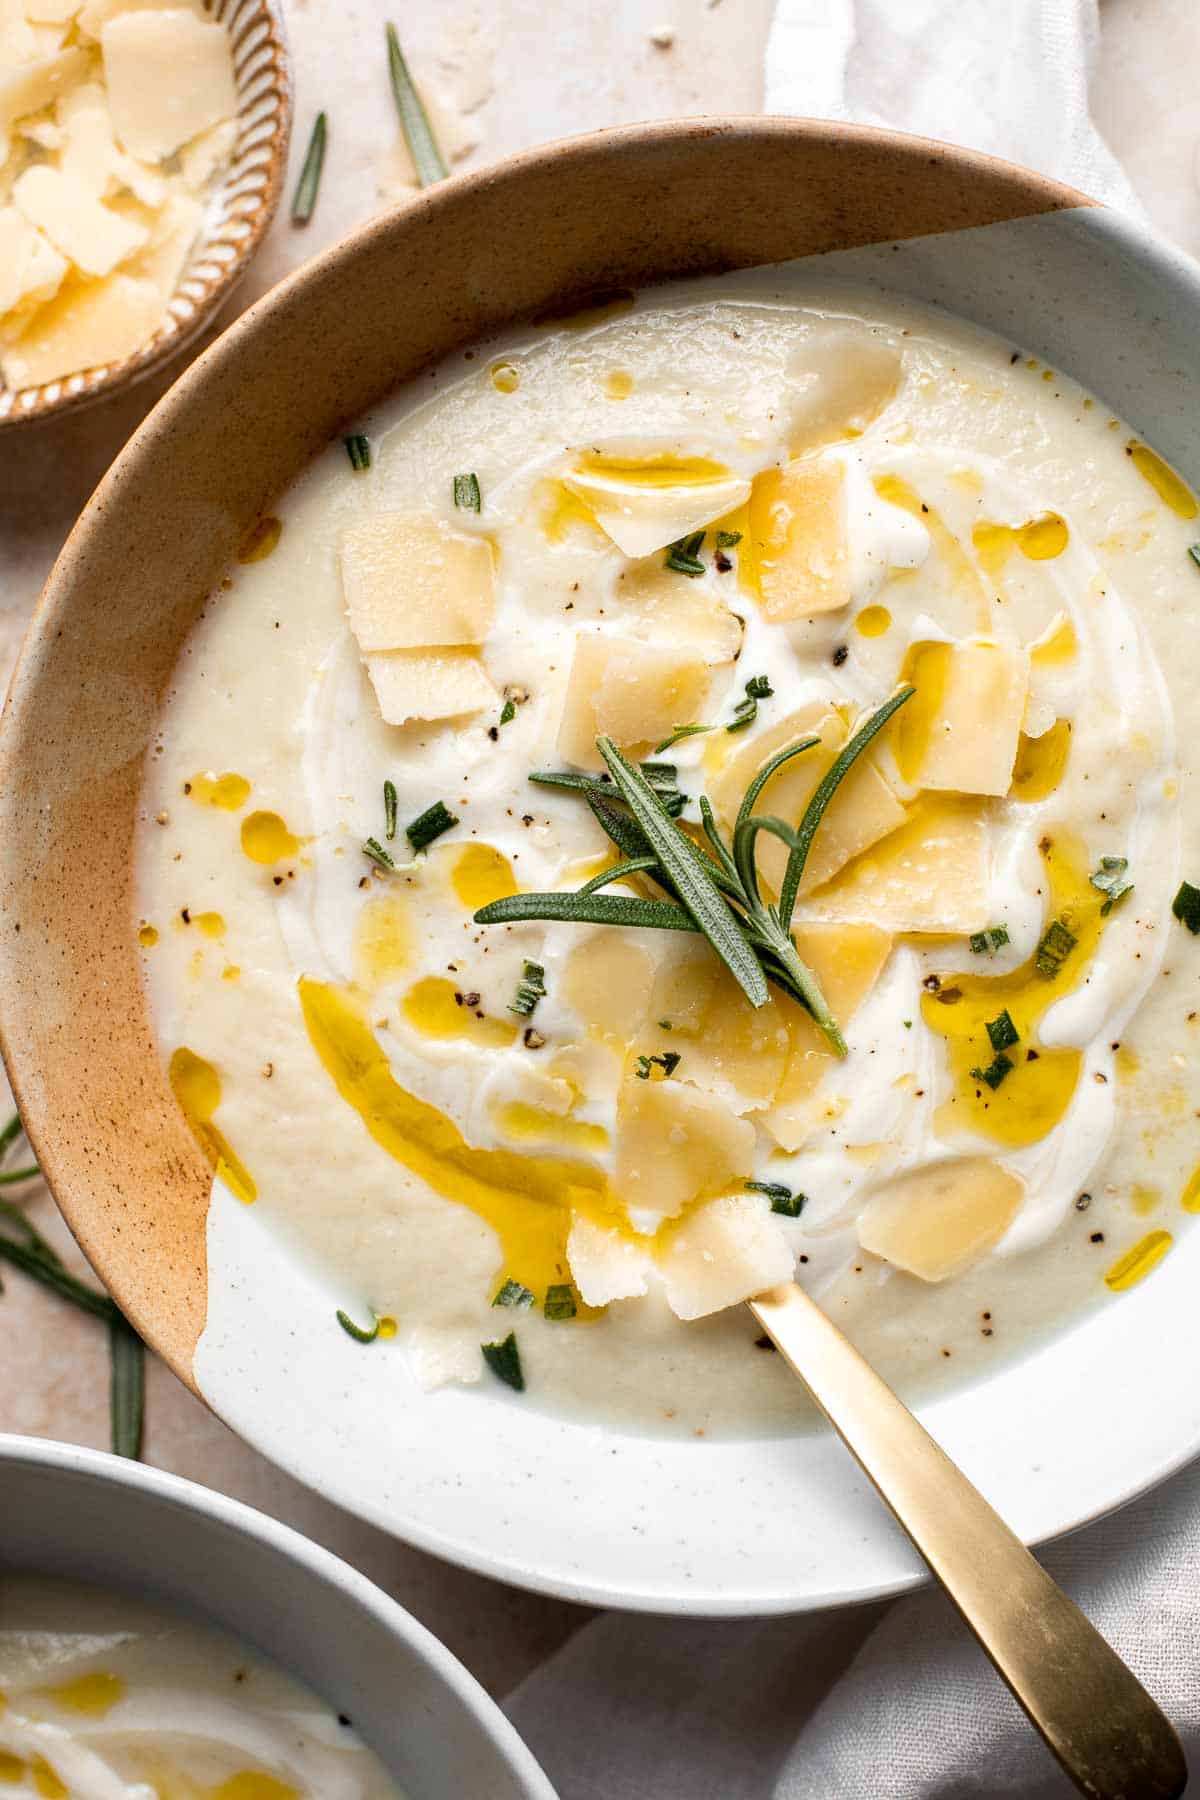
Creamy artichoke soup is rich, healthy, delicious, easy to make, and freezer-friendly. This vegetarian soup is loaded with artichokes, leeks, and potatoes.
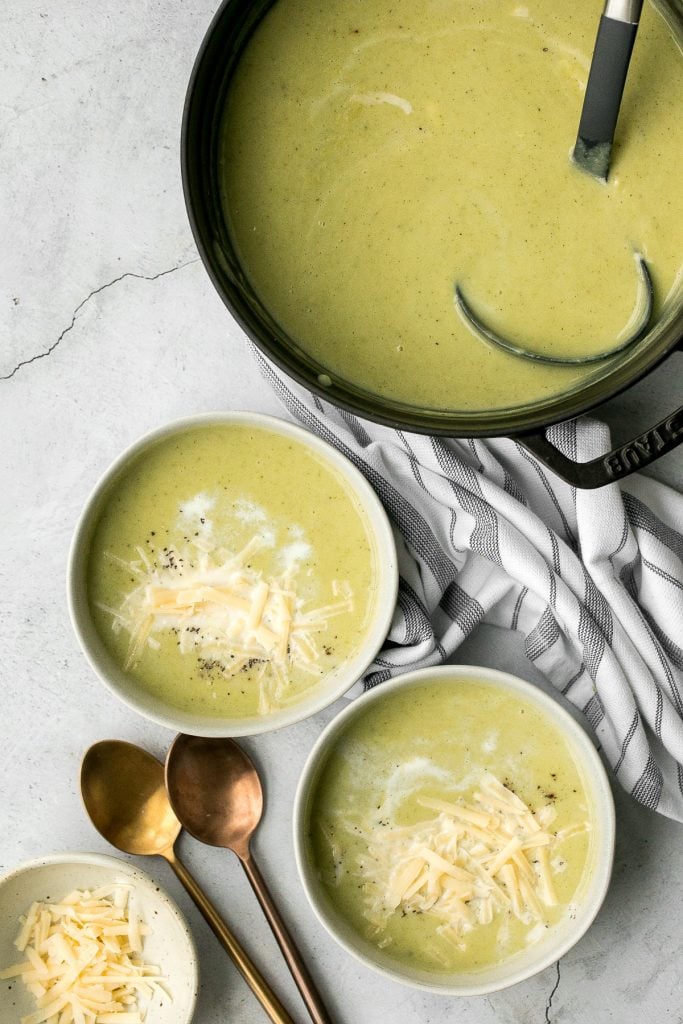
Delicious and flavourful, light cream of broccoli soup is a silky smooth, creamy, and thick soup made healthier with no cream. Make it in under 25 minutes.
One pot sweet potato soup is super silky, creamy and vegan, and packed with fall flavours. Make this quick and easy fall and winter soup in 30 minutes. Serve with some rosemary cornbread or pumpkin dinner rolls on the side.
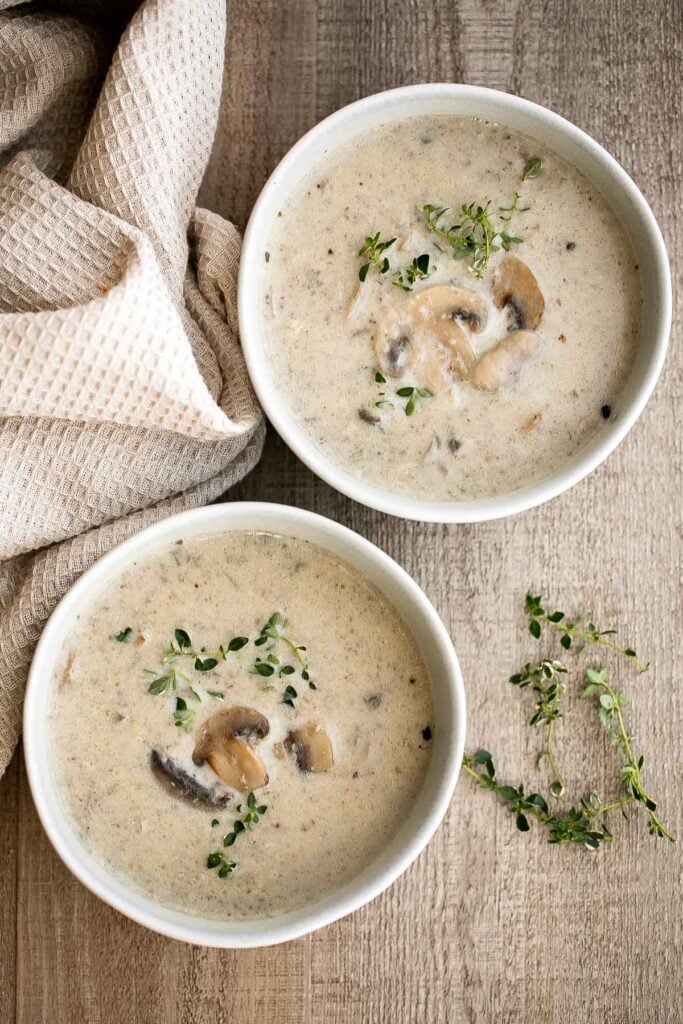
Cream of mushroom soup is thick, creamy, and comforting. This delicious one pot soup is easy to make in 45 minutes, freezer-friendly, and reheats well.
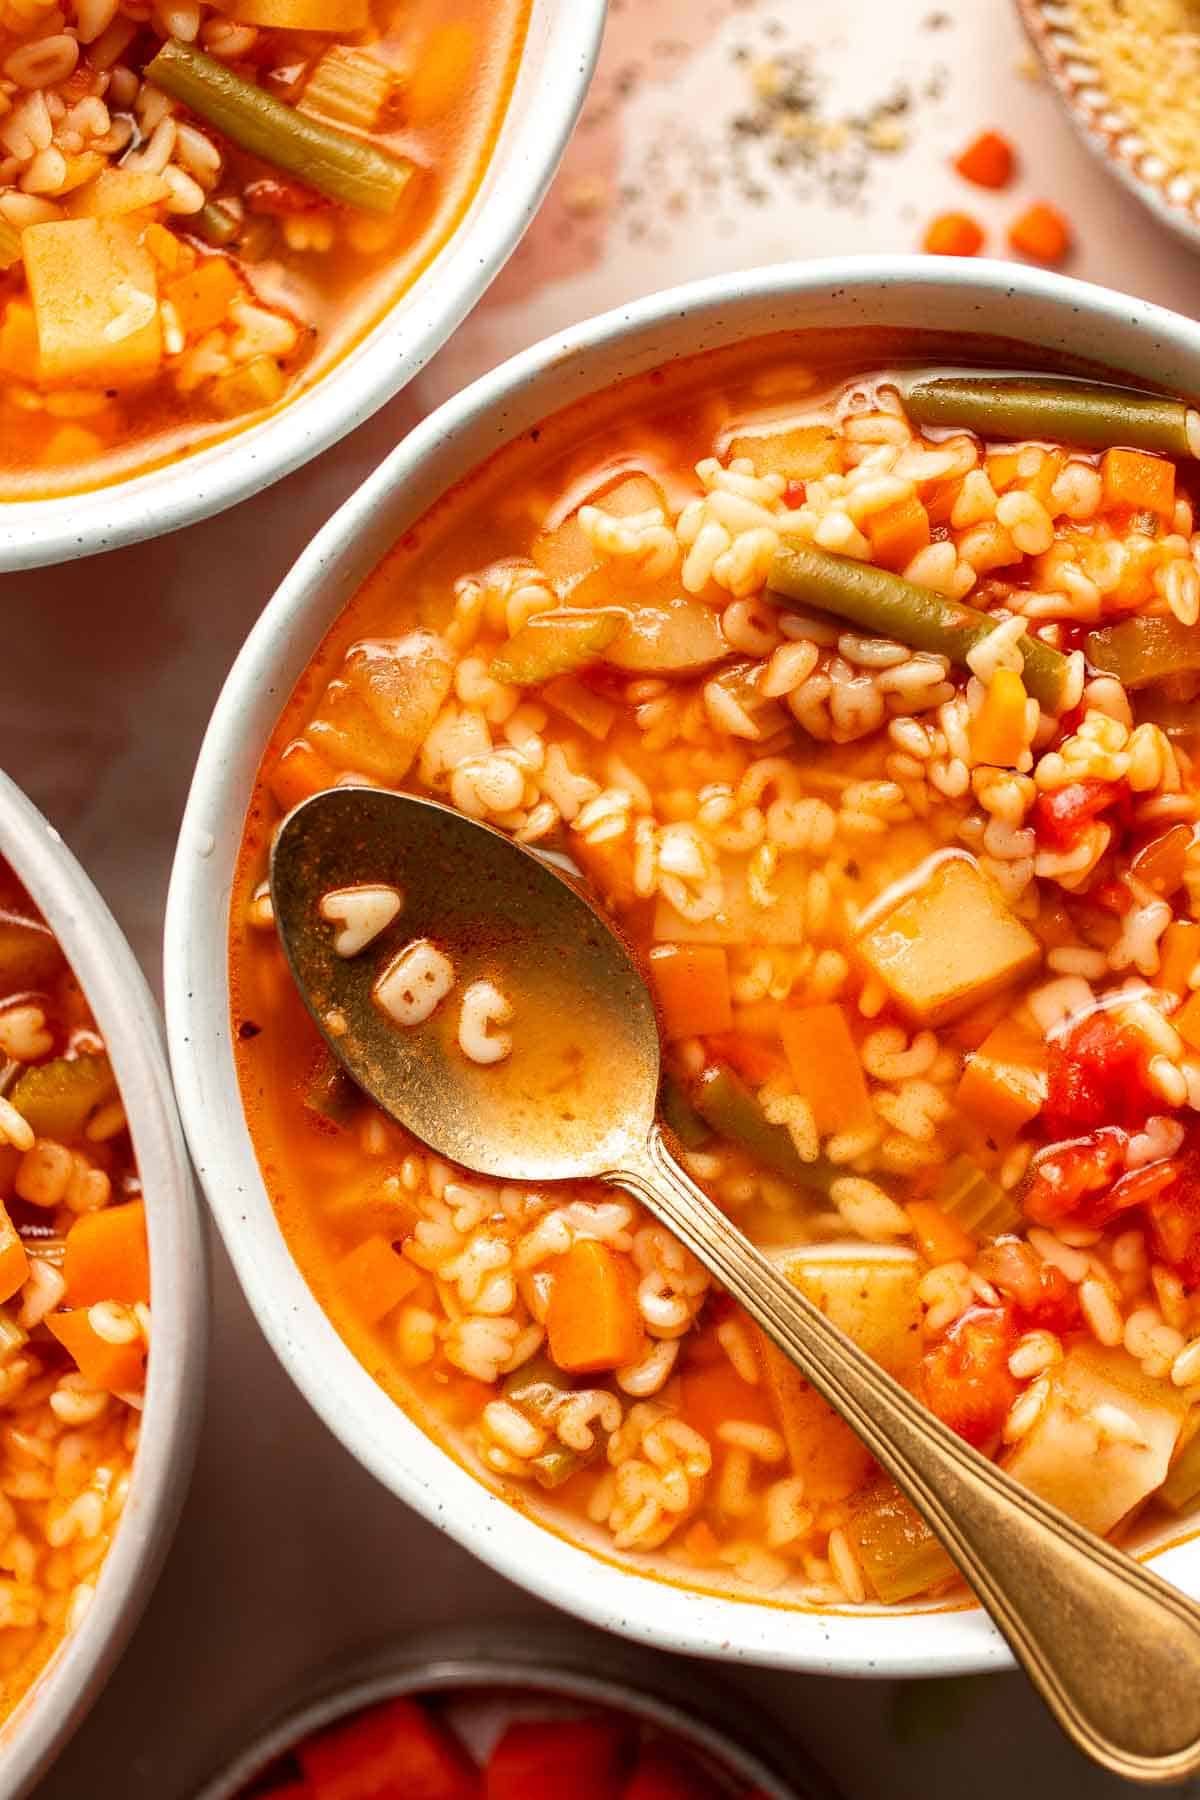
Homemade Alphabet Soup will quickly become a family favorite with its hearty vegetables and fun alphabet noodles. It's quick and easy to make in 30 minutes.
Roasted Acorn Squash Soup is smooth and velvety, packed with veggies, and loaded with fall flavor. Serve for a cozy lunch, dinner, or on Thanksgiving.
This Coconut Curry Ramen is creamy, rich, comforting, and delicious, with a perfect blend of mouthwatering textures and flavors and ready in 25 minutes.
Creamy Garlic Cauliflower Soup
Creamy Garlic Cauliflower Soup is creamy and healthy. This vegetarian soup is ready in 45 minutes with a handful of wholesome ingredients and a few steps. Serve it with an easy tomato bruschetta on the side.
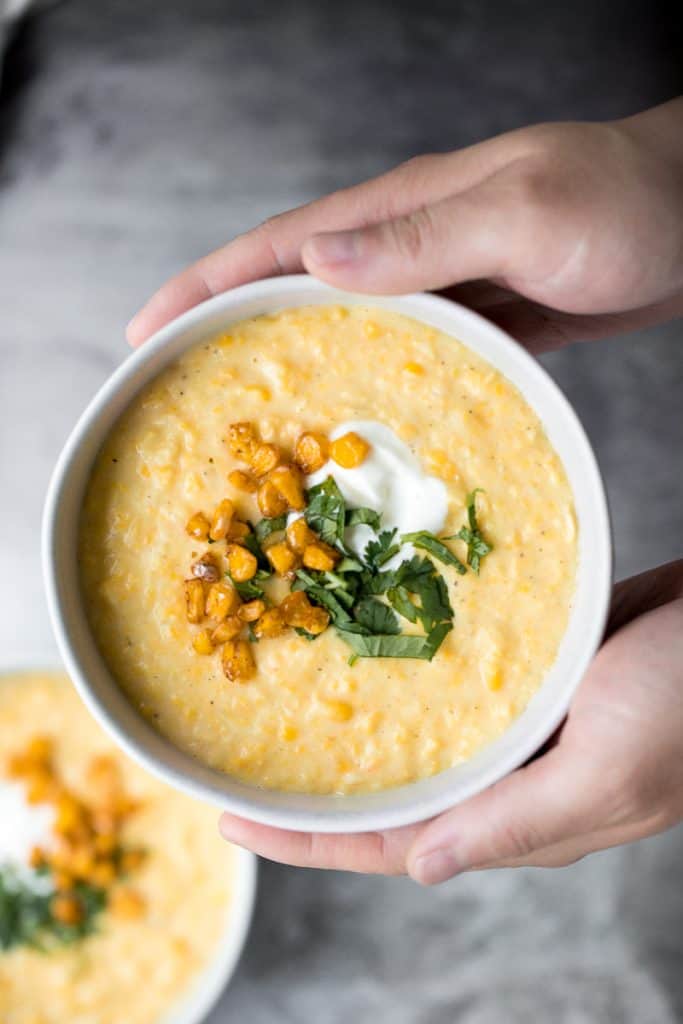
This vegetarian, hearty and filling, creamy Mexican corn soup is dense, bright, and full of flavour! It has all the warm and cozy vibes written all over it. Serve it with some butternut squash quesadillas.
Broccoli cheese soup is creamy, cozy, and delicious simmered in a buttery cheesy broth for the perfect blend of textures and flavors - comfort food goals.

Roasted Red Pepper and Tomato Soup
Roasted red pepper and tomato soup is silky smooth, incredibly flavorful and delicious, and easy to make. This vegan soup is healthy and nutritious too.

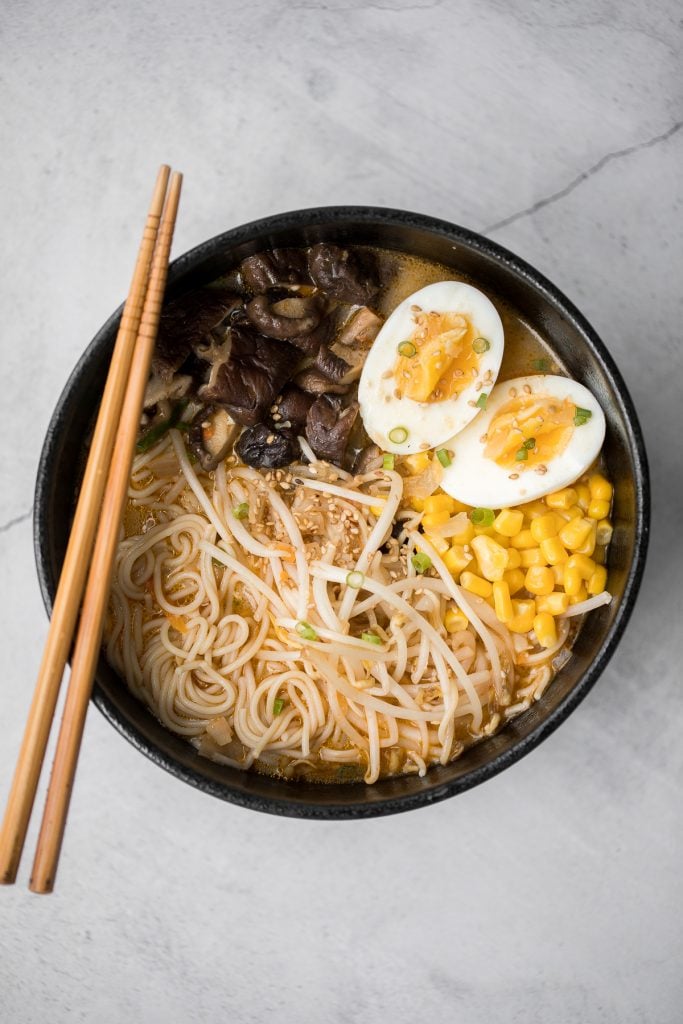
Vegetarian peanut miso ramen with a creamy vegan soup base, is topped with noodles, vegetables, and a perfect soft-boiled egg. Make it in just 20 minutes.
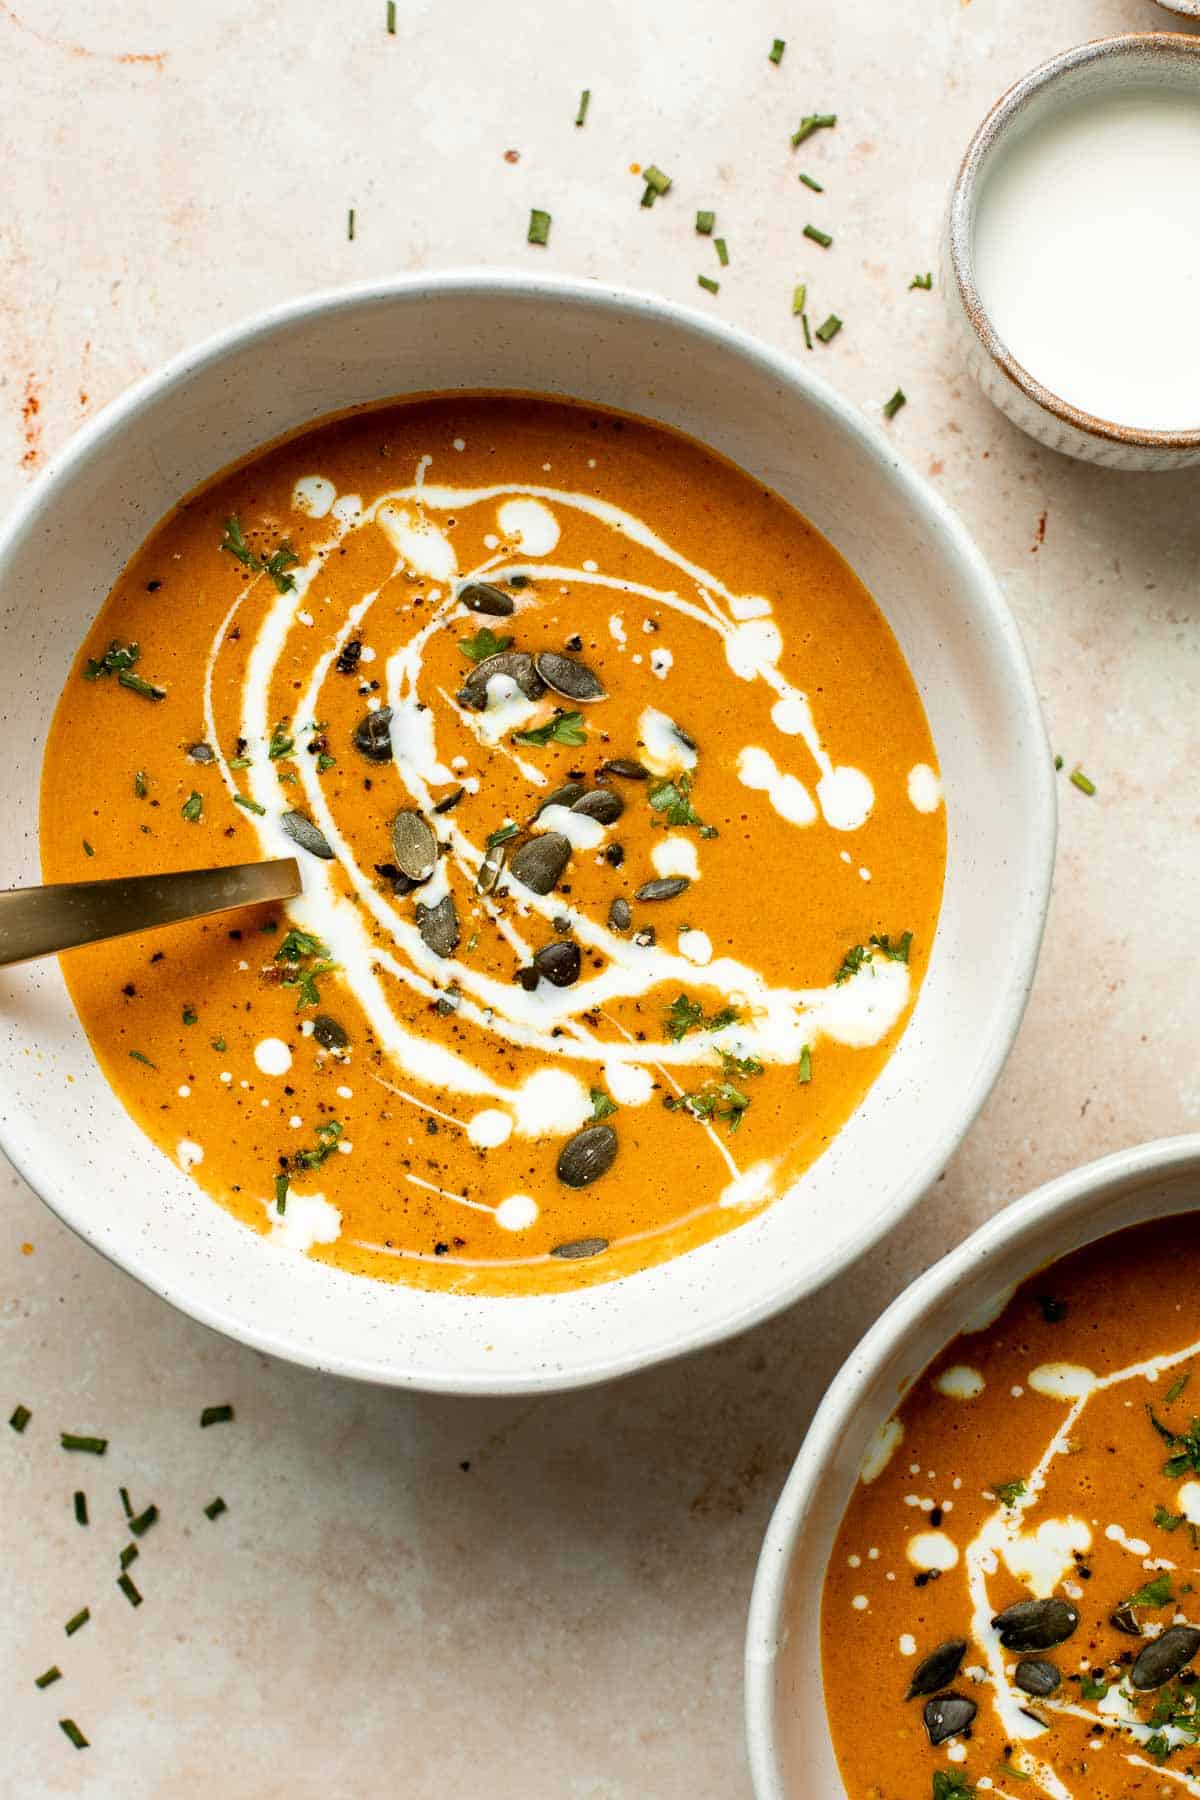
Roasted Carrot and Ginger Soup
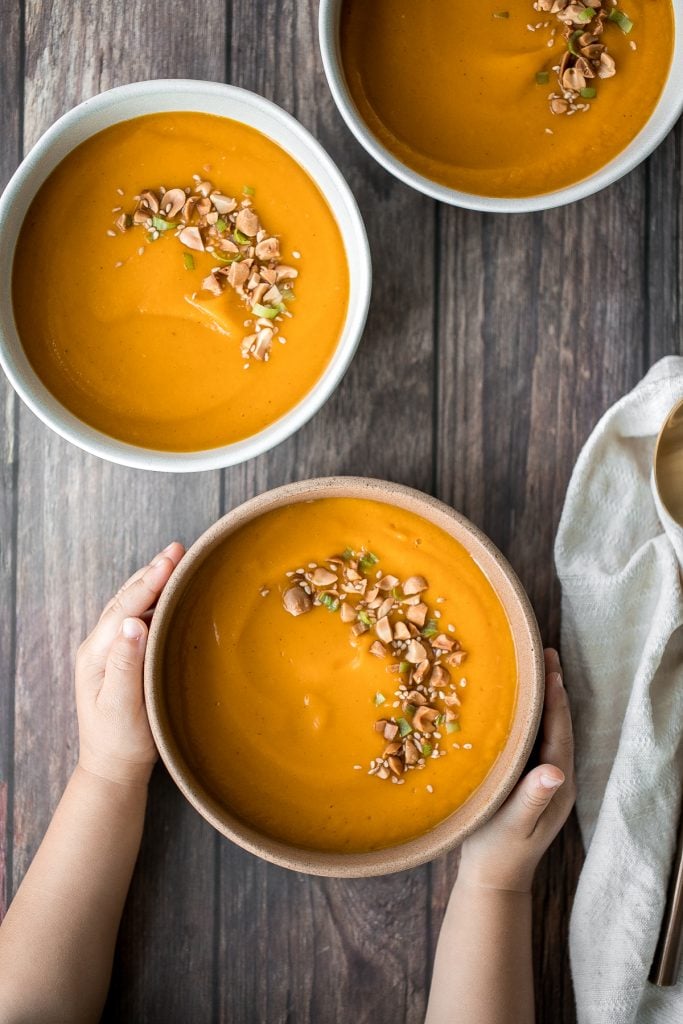
Roasted carrot and ginger soup is rich, velvety, creamy, flavorful, and delicious. This healthy vegetarian soup is quick and easy to make in 30 minutes. Serve it with some toasted bread.
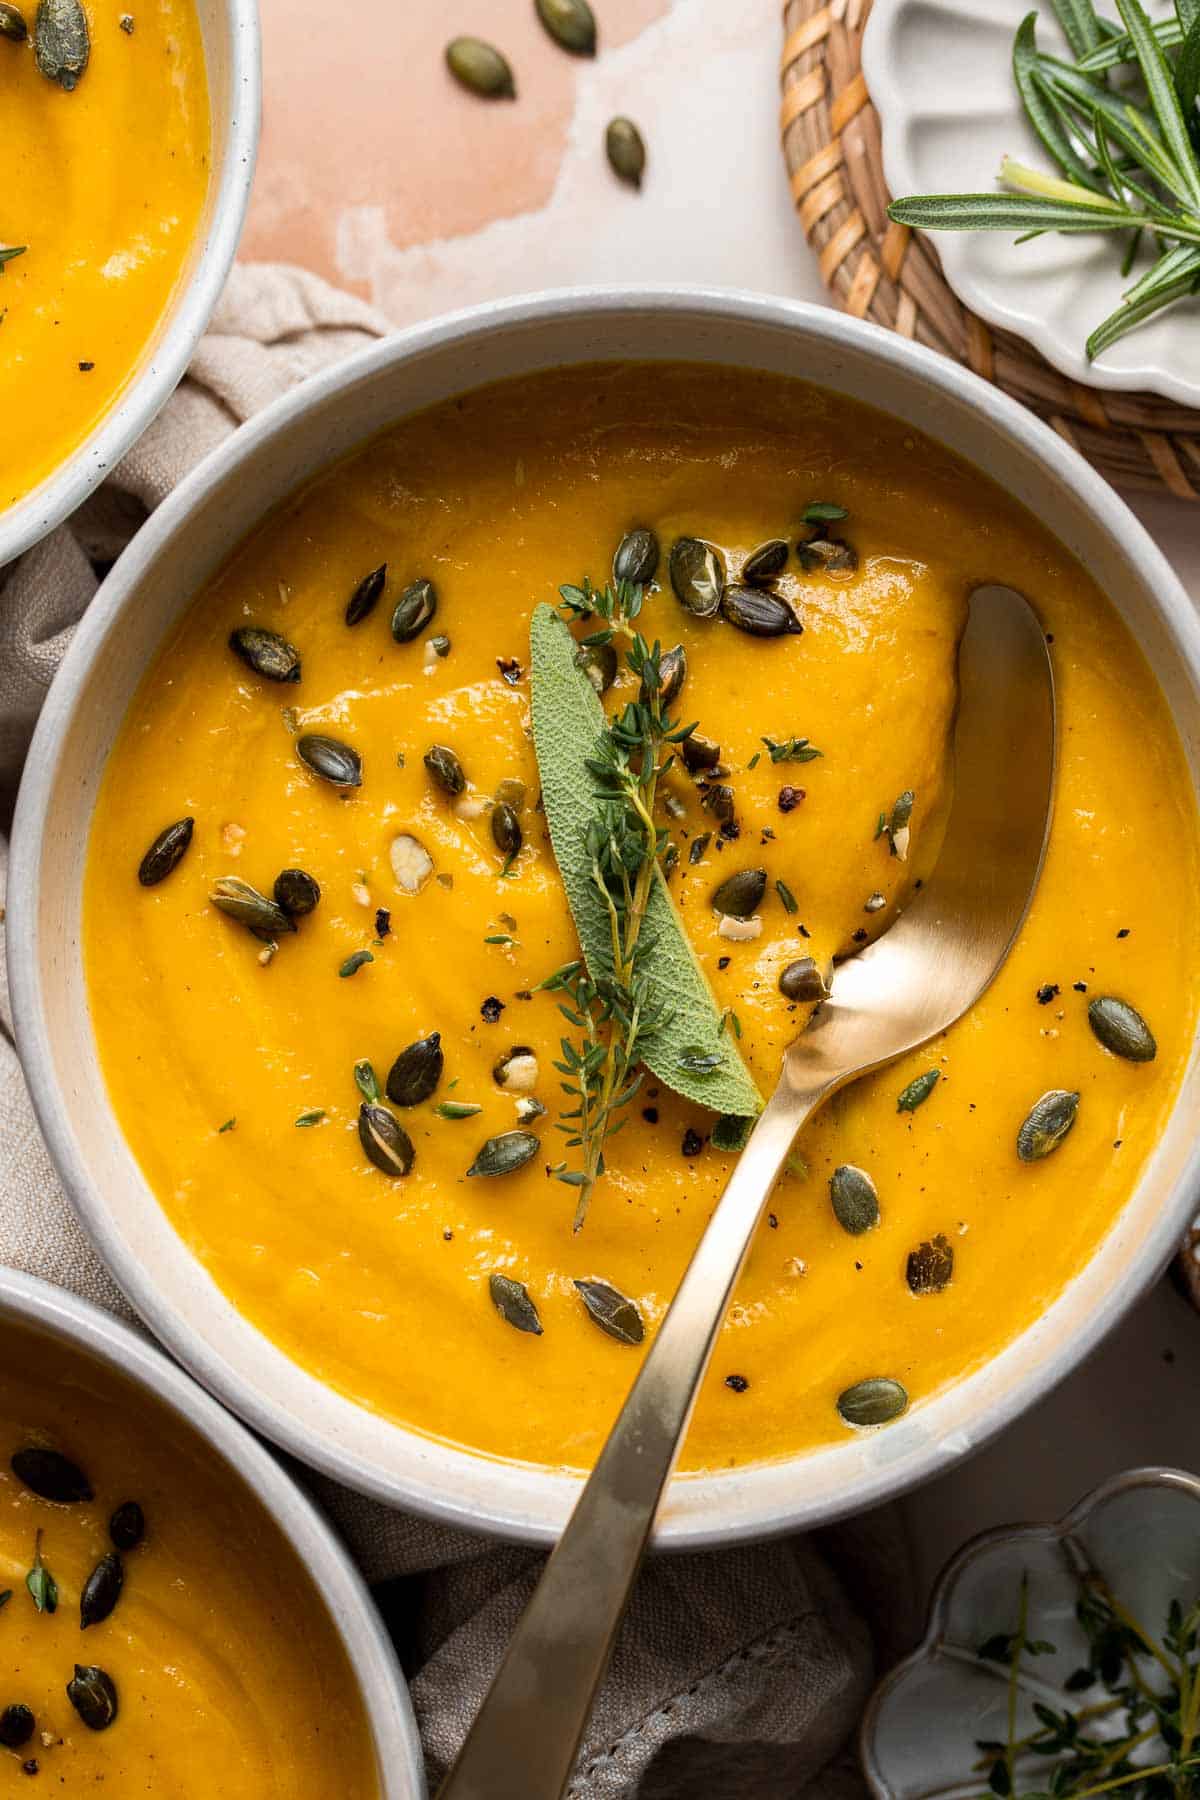
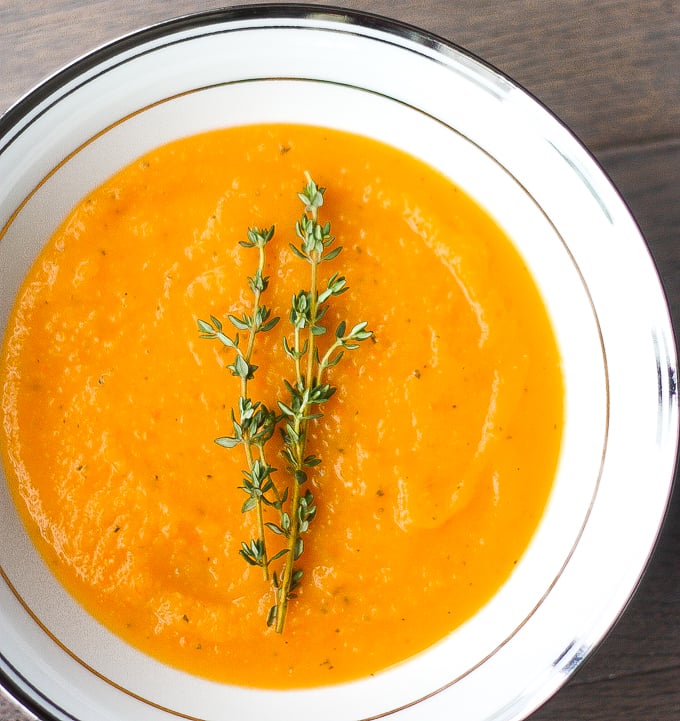
It's no surprise that this delicious and easy roasted butternut squash soup is the most pinned soup recipe on Pinterest. This soup captures the taste of the holidays in one spoon. Rosemary, sage and thyme, need I say more? Serve with with a side of homemade ciabatta bread or crusty no knead bread for dipping.
Creamless Cream of Asparagus Soup
Creamless cream of asparagus soup is healthy, delicious, smooth, creamy, quick and easy to make. A perfect spring soup for a last minute lunch or dinner.
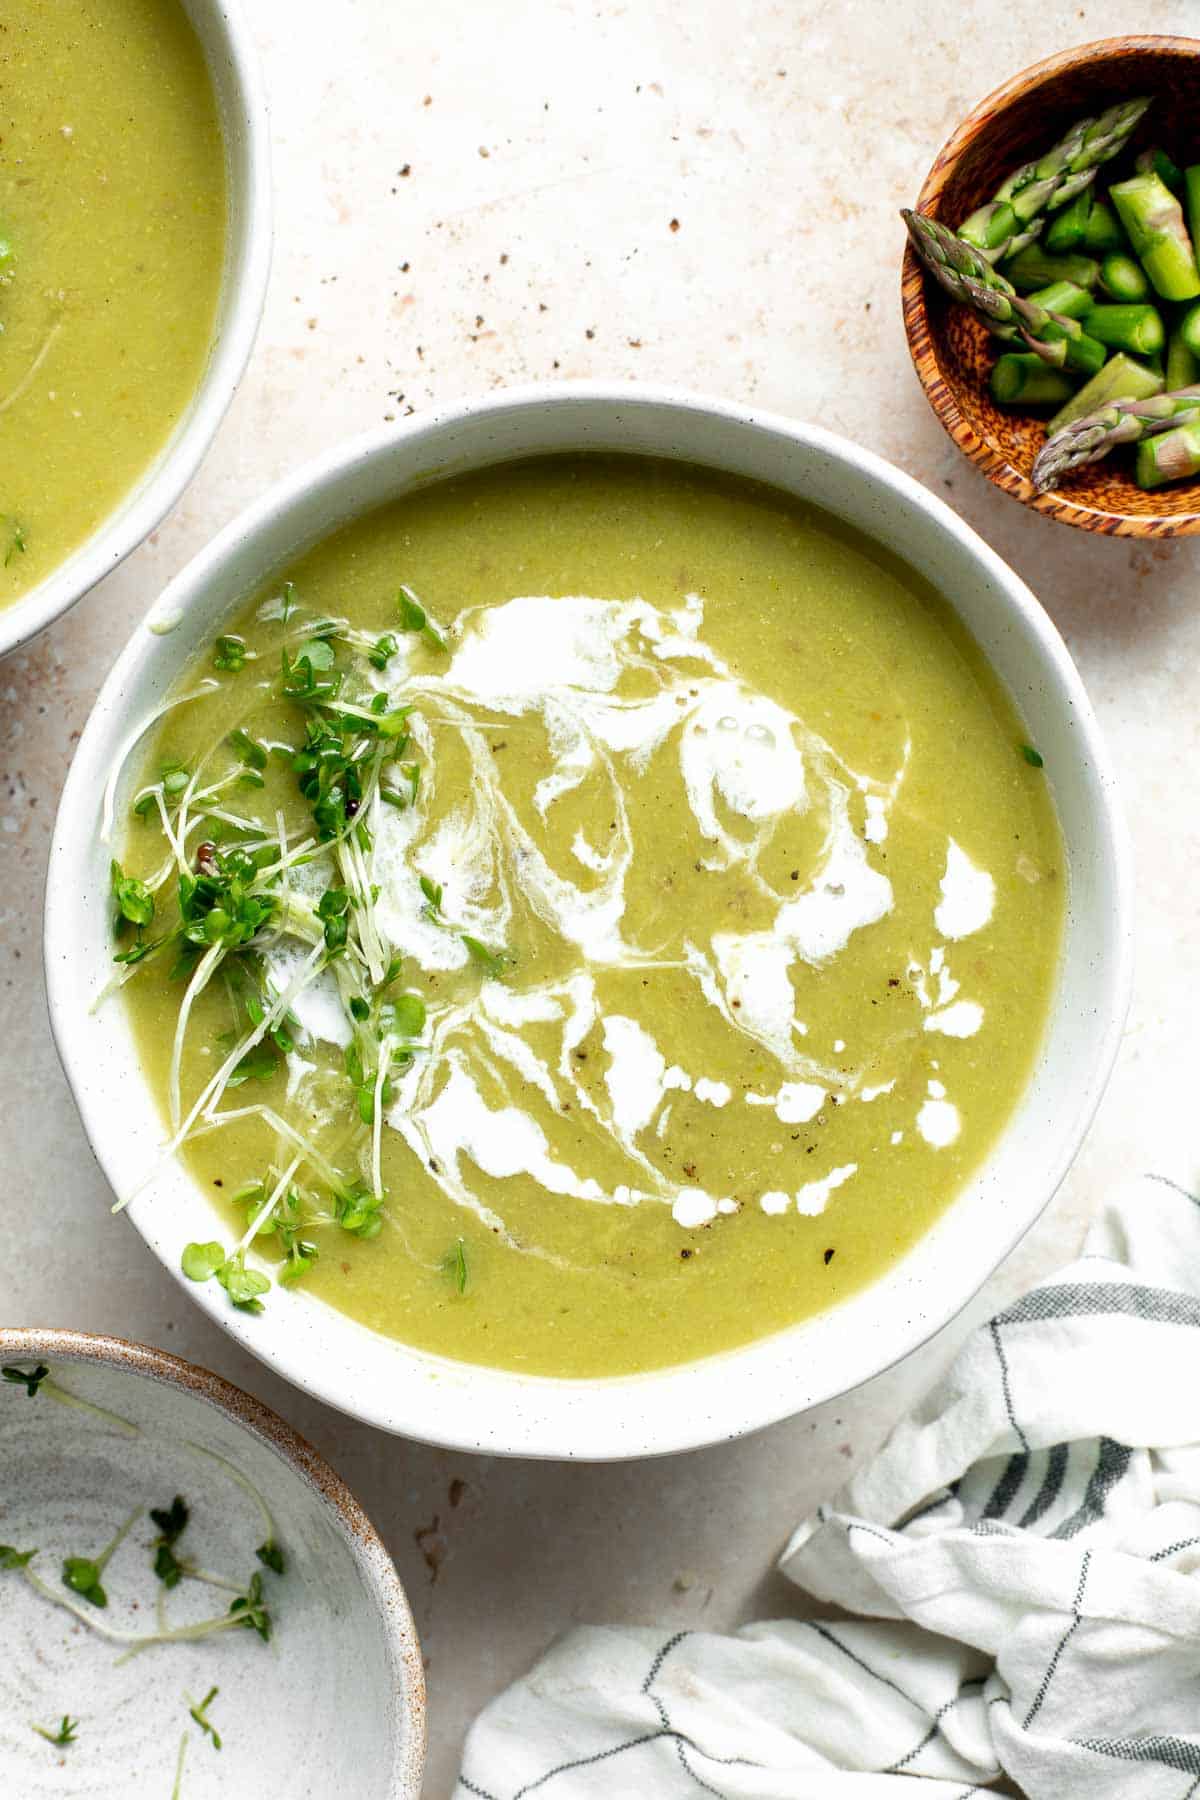
Make this silky smooth and creamy tomato potato soup in under 25 minutes. This gluten-free vegan soup is healthy and filling and the easiest weeknight meal.
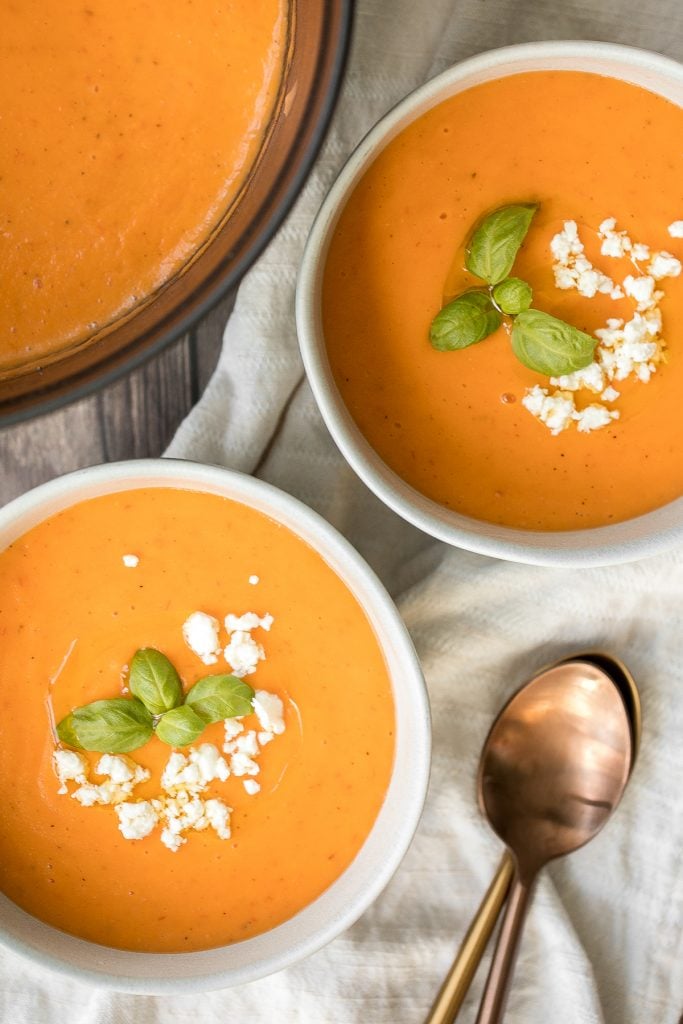
Potato Corn Chowder is rich, creamy, hearty, and delicious. Made with simple ingredients in 35 minutes, this vegetarian soup is perfect for a quick meal.
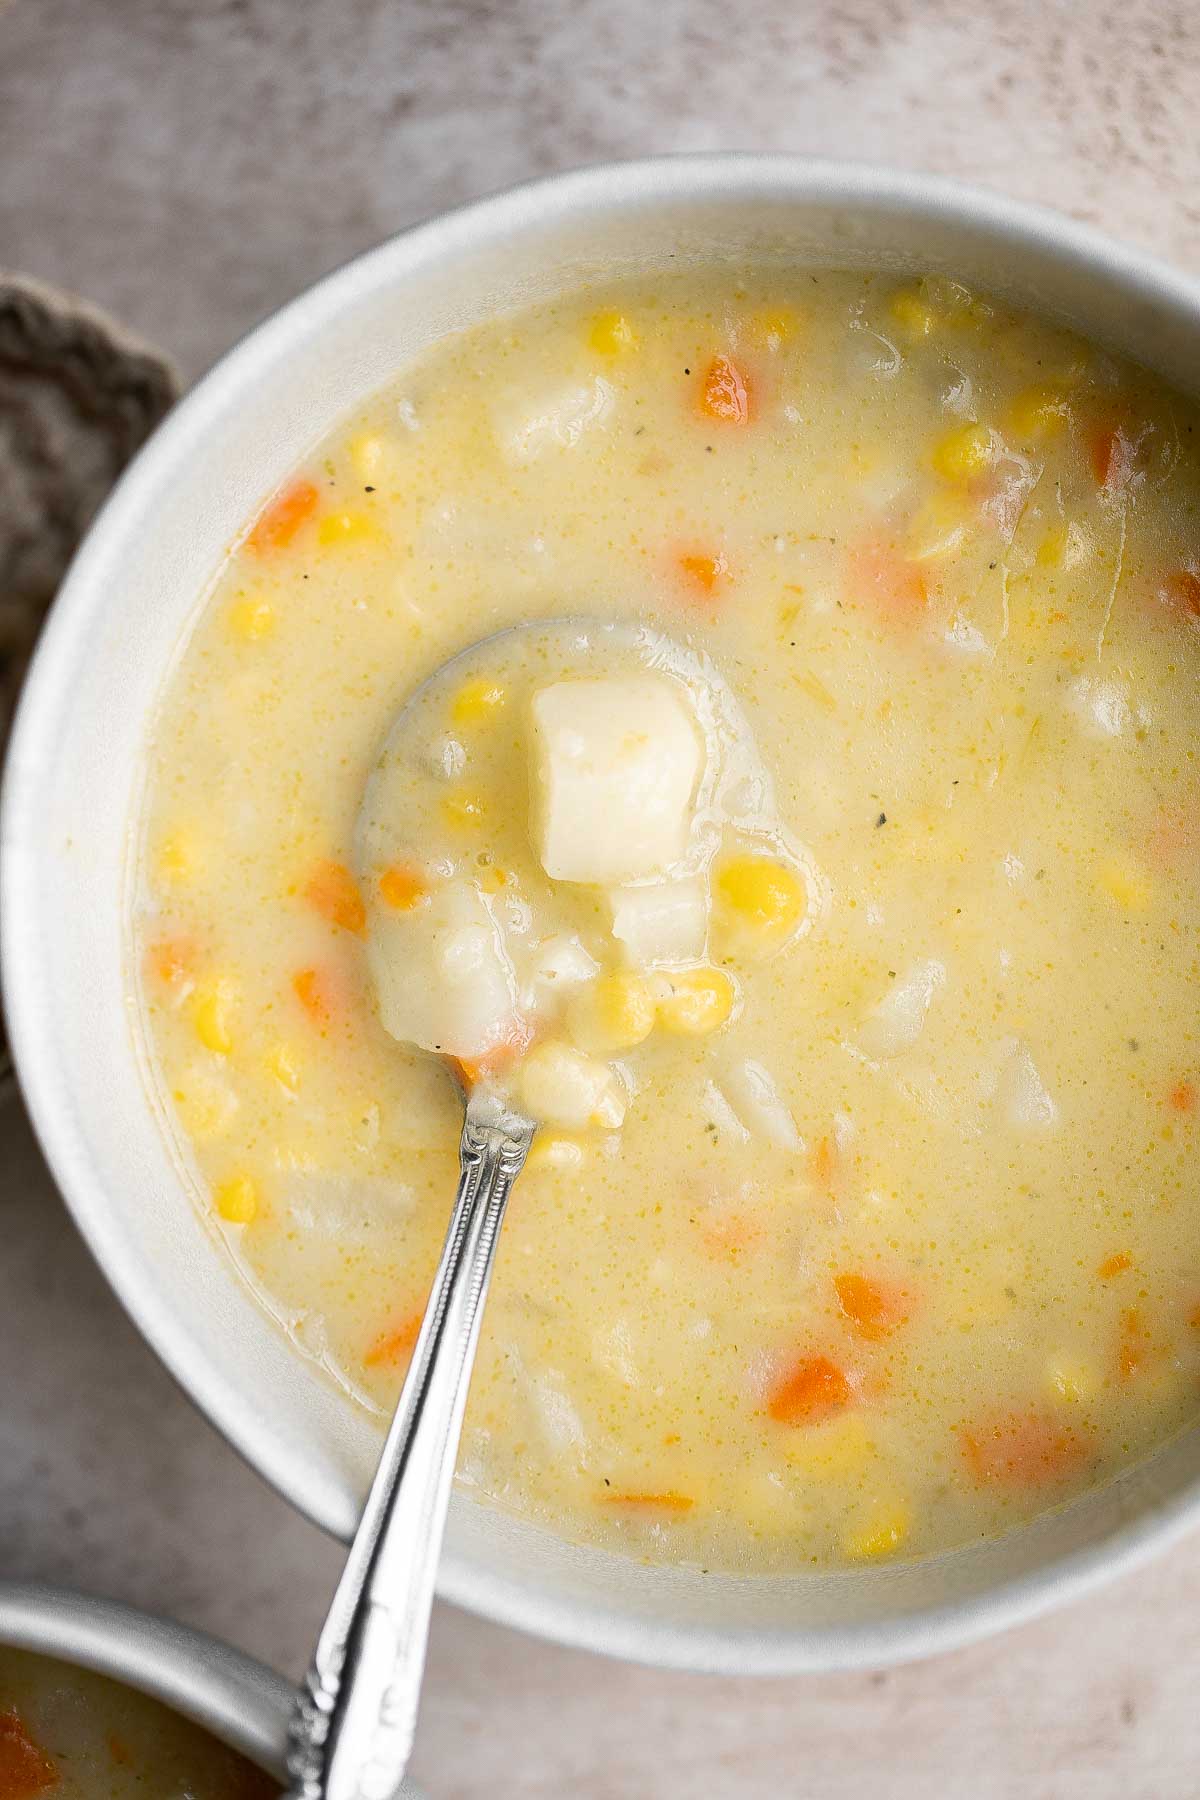
Pinto Bean Soup (Sopa Tarasca)
Spice up your weeknight dinners with Mexican Pinto Bean Soup (Sopa Tarasca) made with creamy pinto beans, spicy chipotle, and a tomato broth in 30 minutes.

30-Minute Butternut Squash Soup
Quick and easy 30-minute butternut squash soup is simple yet packed with flavour, is naturally vegan and gluten-free, and can be made ahead of time. Serve it alongside some easy rosemary garlic focaccia bread or cornbread muffins for dipping.
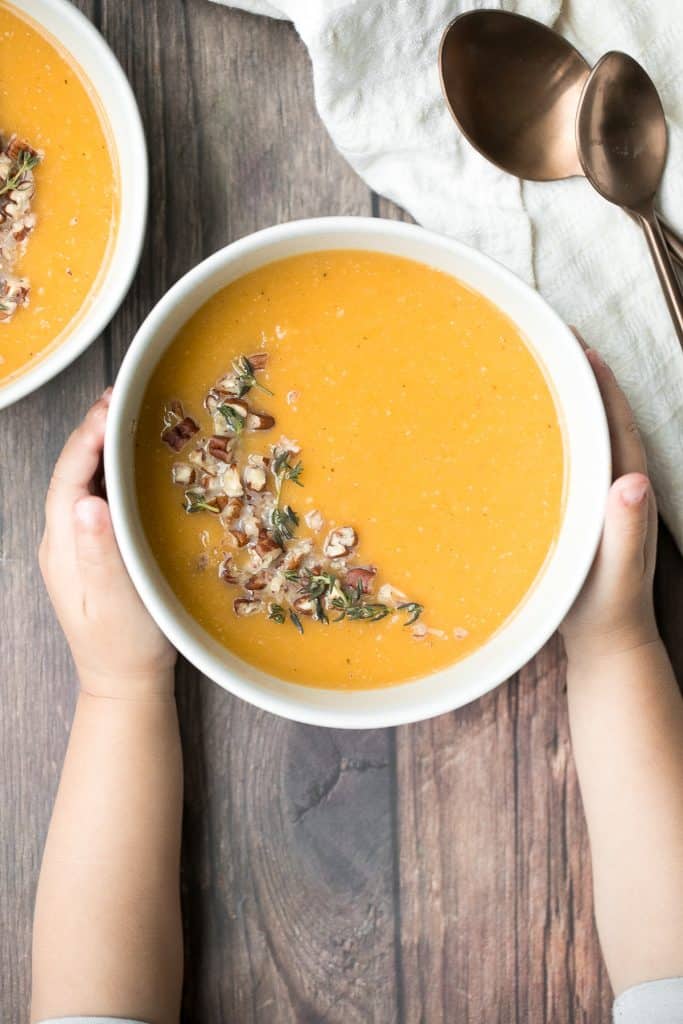
Quick and Easy Vegetarian Ramen
Put down that cup of instant noodles and make fresh, quick and easy vegetarian ramen in 15 minutes with fresh vegetables, noodles and authentic flavours. You might never go back to packaged ramen again.
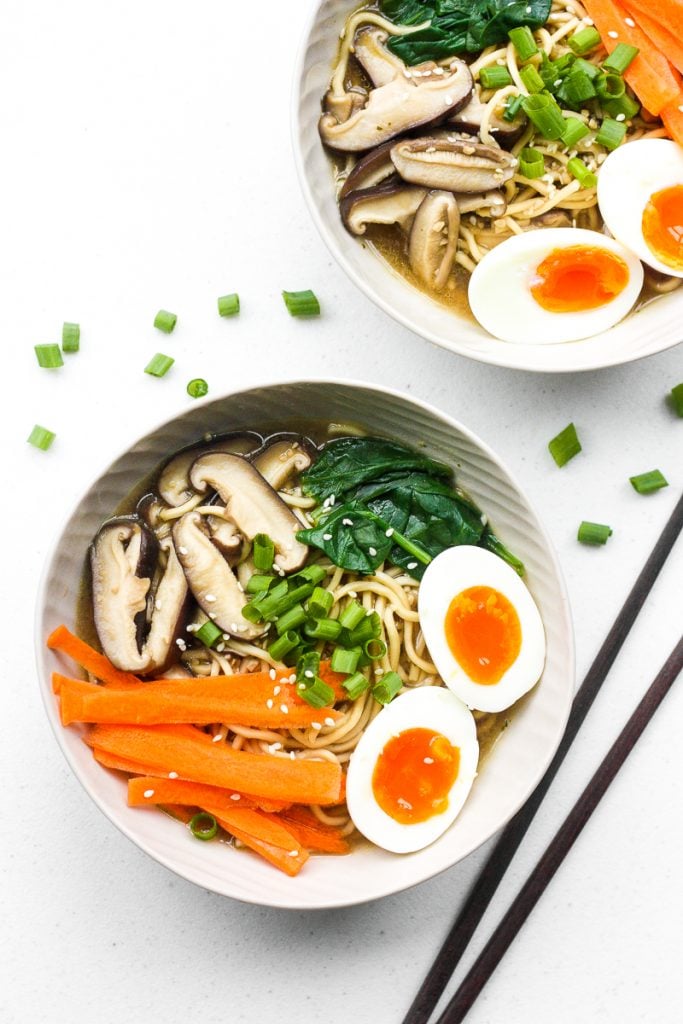
Cheesy Potato Soup is creamy, delicious, and comforting. This recipe takes everyday ingredients and transforms them in 30 minutes to a rich, luscious soup.
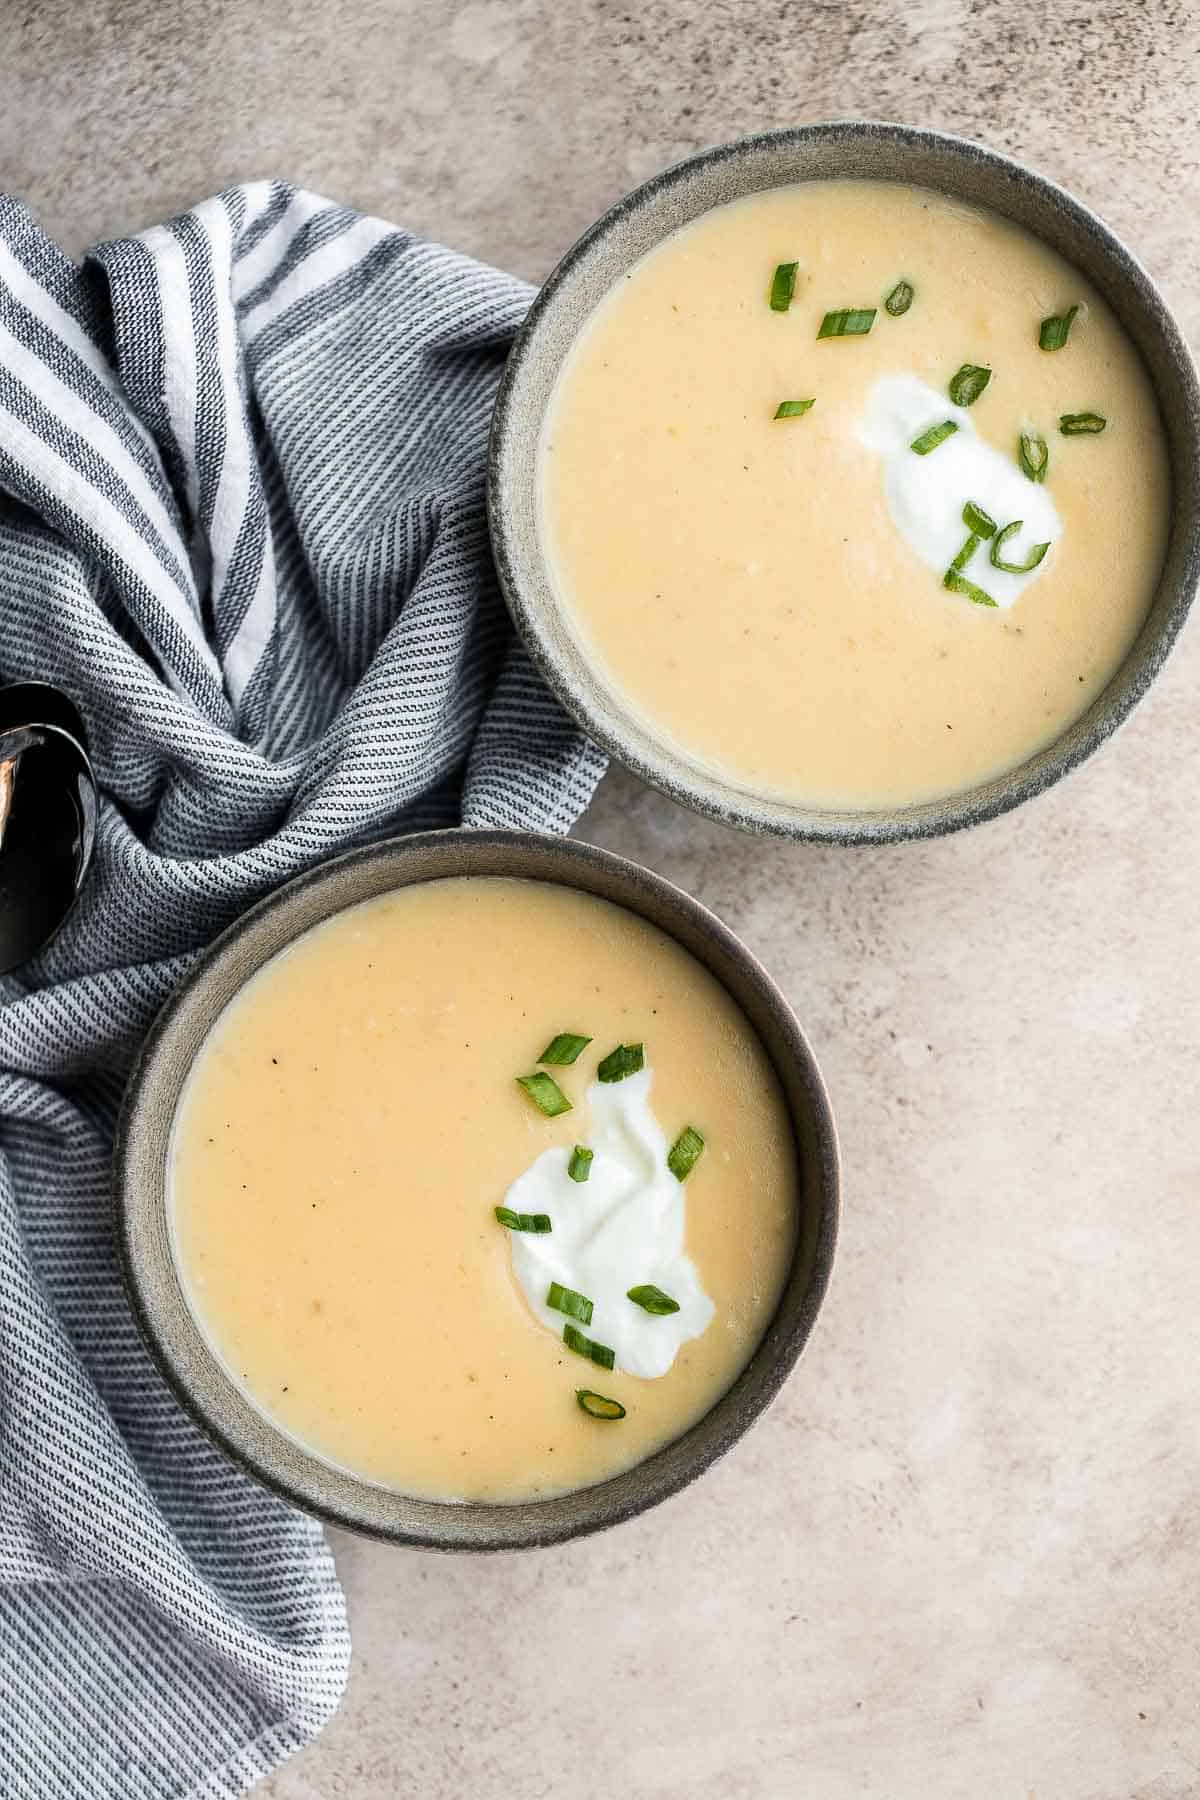
Carrot Pumpkin Soup is wholesome, nutritious, and delicious. It's quick and easy comfort food that's perfect to feed the family on lazy weeknights.
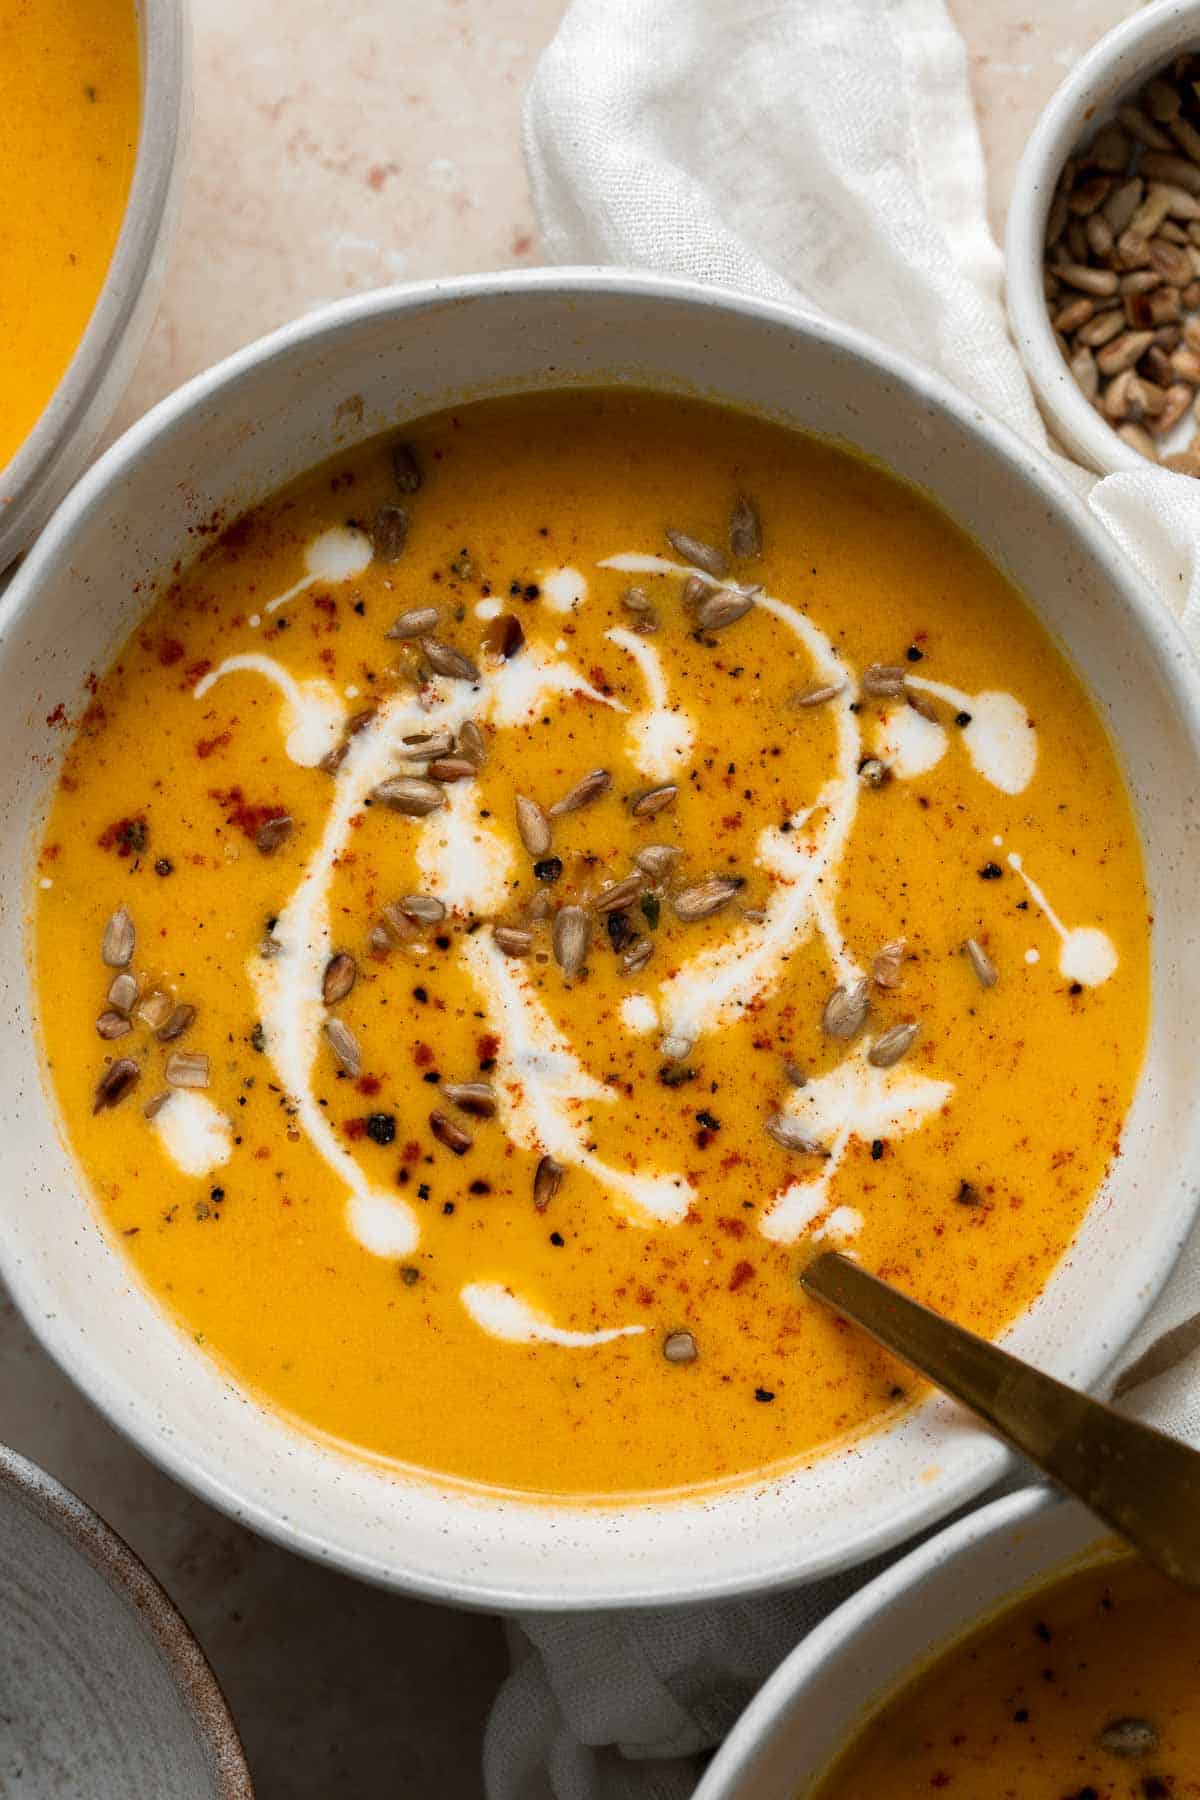
Instant Pot Butternut Squash Soup
Instant pot butternut squash soup is the perfect fall dish to cook in your pressure cooker - warm, cozy, comforting, and creamy. Make in 15 minutes.
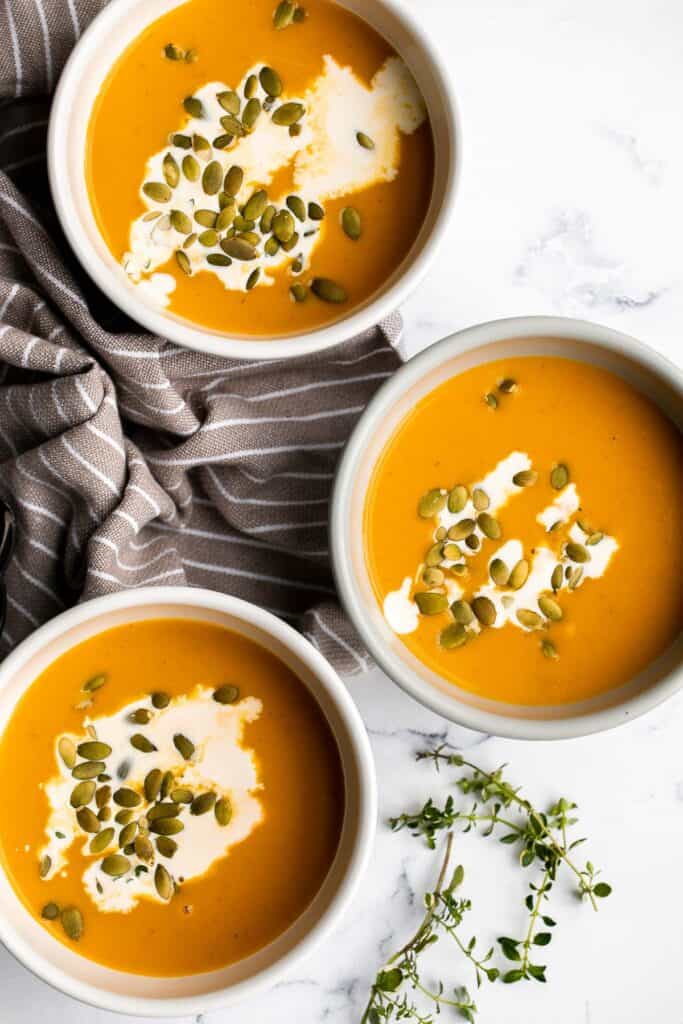
Mashed potato soup is one of the best ways to use up leftover mashed potatoes. It's creamy, cheesy, delicious, and ready in under 30 minutes.
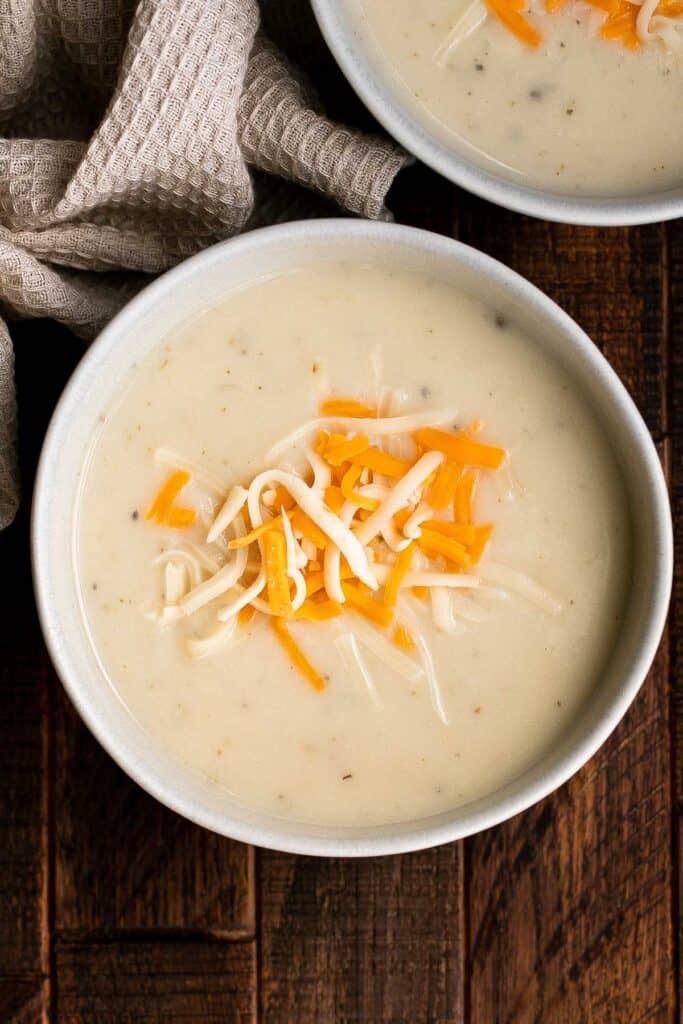
Spinach and Pea Soup is creamy, velvety, healthy and delicious. It's a curried soup with a vegan coconut milk base loaded with fresh spinach and green peas.
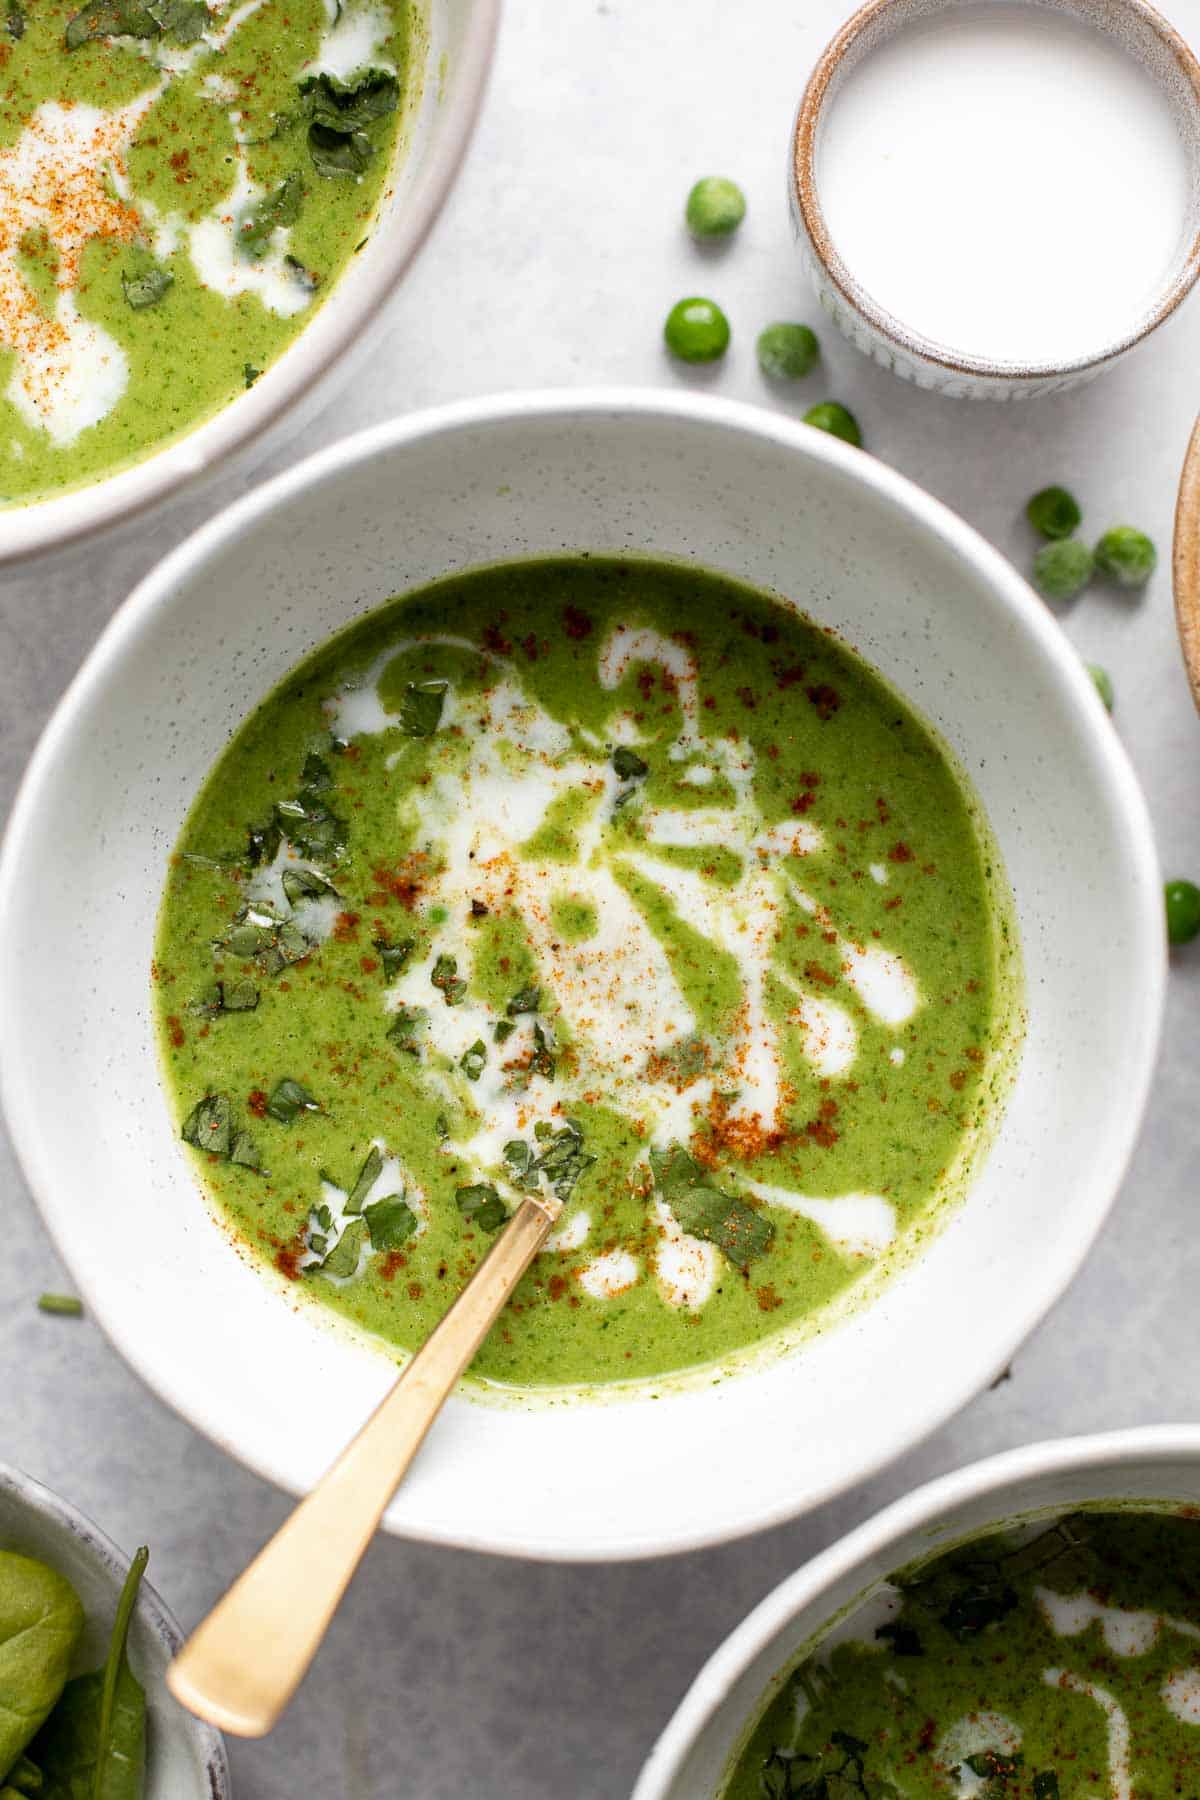
Coconut Curry Pumpkin Soup is rich, creamy, flavorful, and delicious. This vegan soup is ready just over 35 minutes with minimal prep and in one pot.
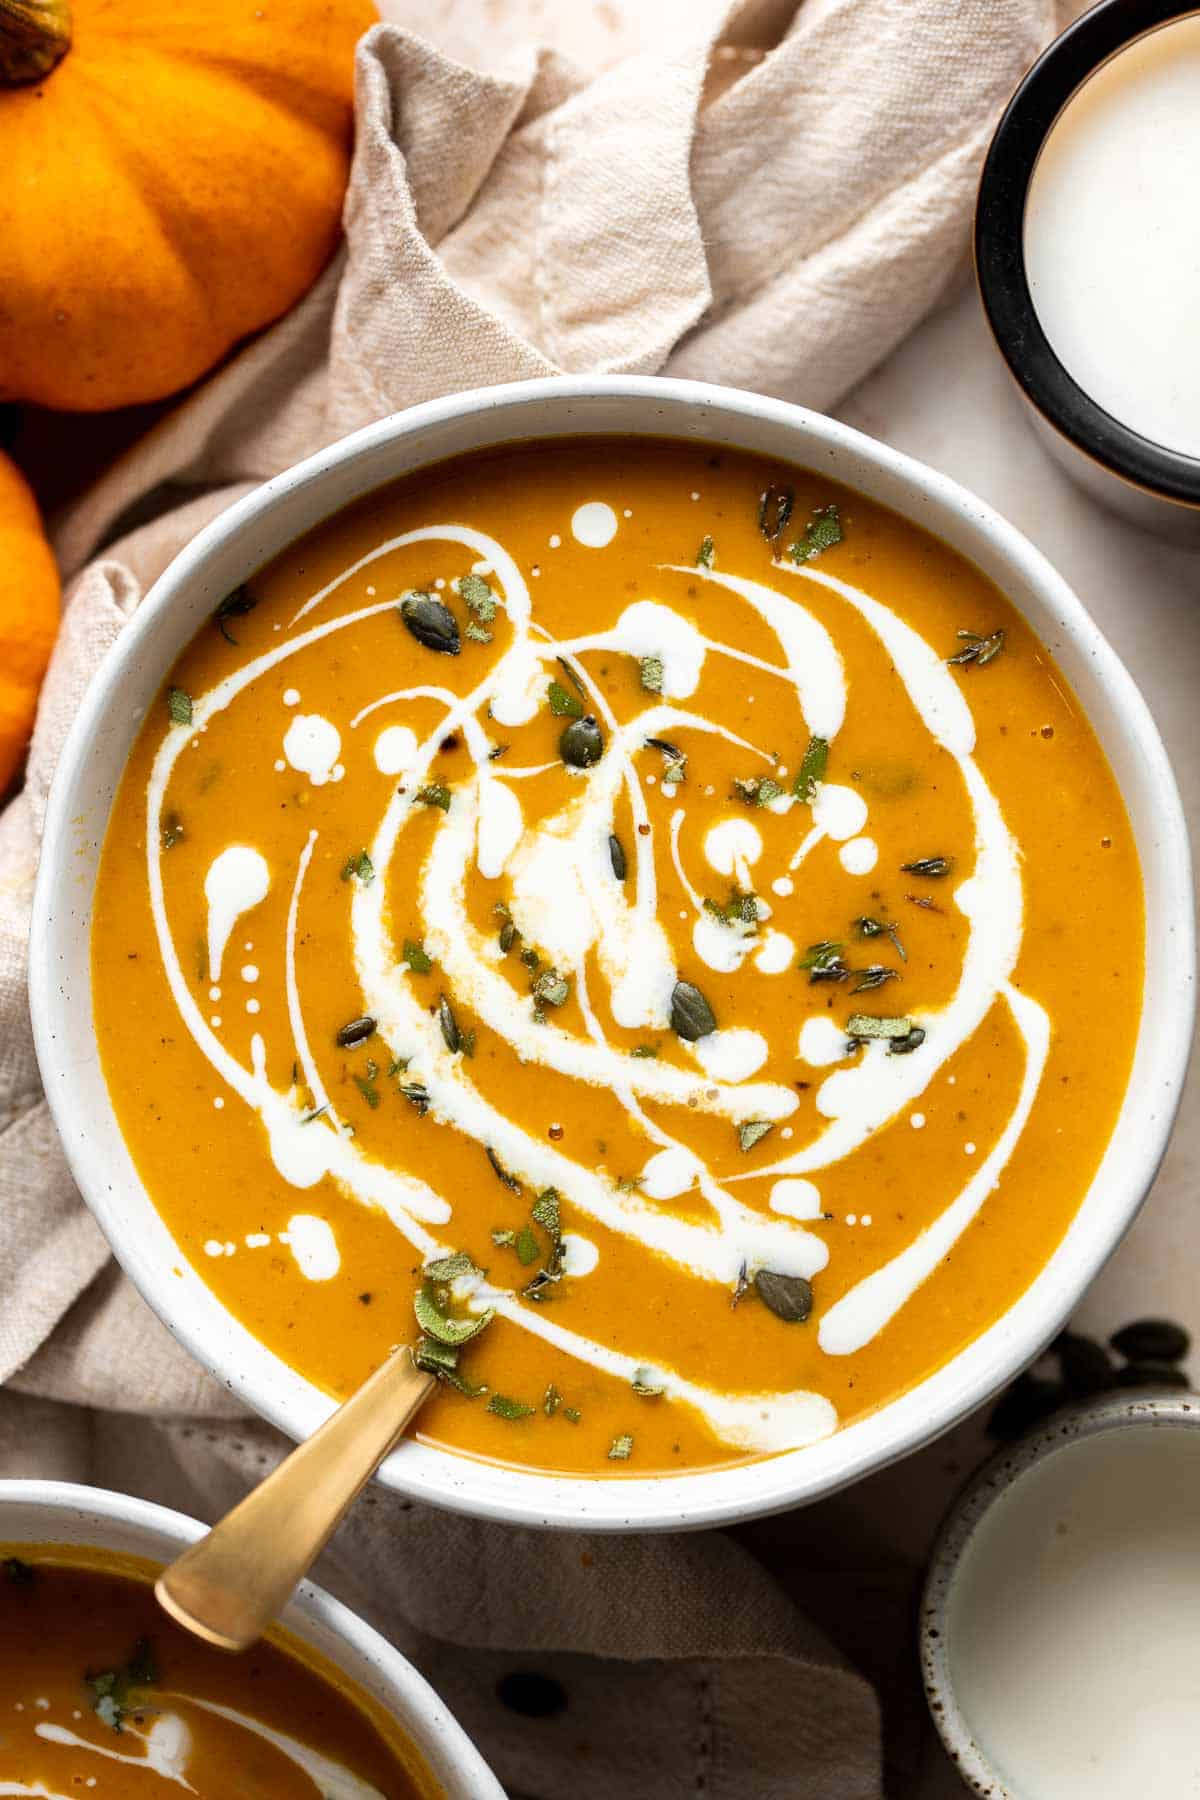
Slow Cooker Loaded Baked Potato Soup
Nothing says comfort food like a bowl of slow cooker loaded baked potato soup topped with cheddar cheese, crumbled bacon and green onions. Literally throw your ingredients into the slow cooker and come back to a fully cooked soup a few hours later.

Butternut Squash and Apple Soup with Toasted Croutons
Change up your butternut squash soup game with butternut squash and apple soup with toasted croutons. It's got sweetness from apple and carrots, a kick from onions and curry powder, and it's just all around comfort food… without the guilt!

Creamy Pumpkin and Corn Chowder
If you haven't had this combo of flavours together, then you are in for a real treat. Creamy pumpkin and corn chowder is ready in under 30 minutes. It's the perfect fall vegetarian and gluten-free weeknight dinner. Serve it with a winter kale salad on the side.
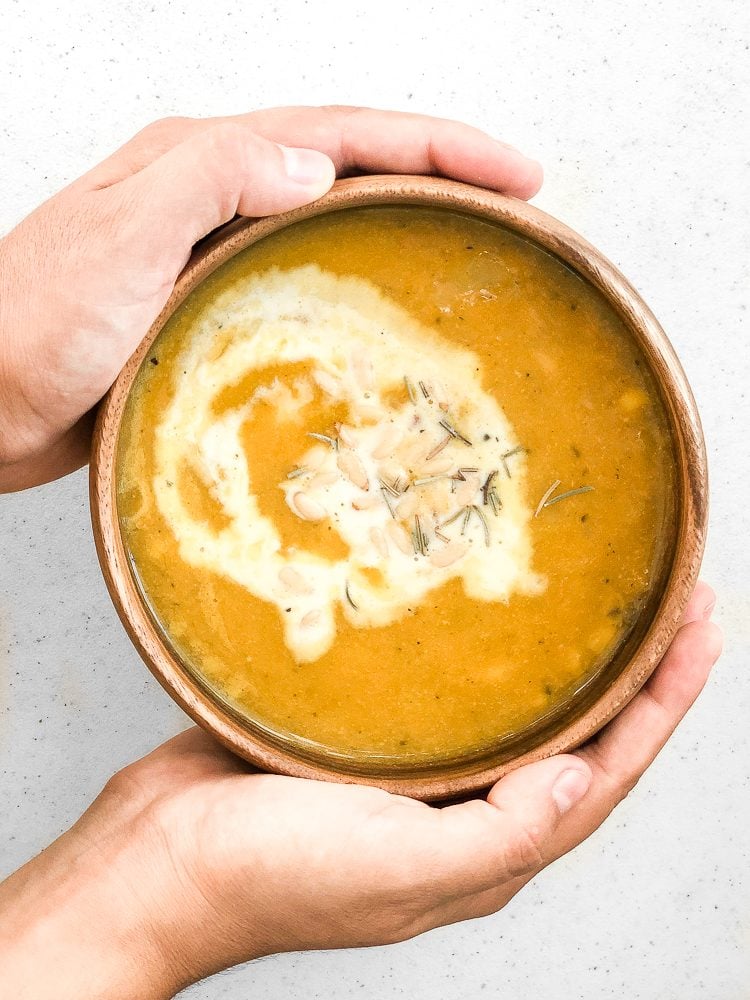
Storing and Freezing Instructions
All of these vegetarian soup recipes (except for the ramen) can easily be made ahead and stored in an airtight container in the refrigerator for up to 5 days or in the freezer for up to 3 months.
You can also choose to just prep the ingredients in advance, whether that means chopping up vegetables or mixing ingredients together. You can store all your prepared ingredients in airtight containers in the refrigerator. By prepping in advance, it will make the cooking process go a lot more smoothly and quickly.
Did You Make Any of These Vegetarian Soup Recipes?
Please leave a comment and rating below, and let me know what you thought of this round up of vegetarian soup recipes. Be sure to snap a picture and tag me on Instagram @aheadofthyme or share it on the Pinterest pin so that I can follow along.
HUNGRY FOR MORE? Don't forget to sign up for my email newsletter so that you don't miss any recipes. You can also follow along on Instagram and Pinterest for more recipe updates.
Linzer Cookies
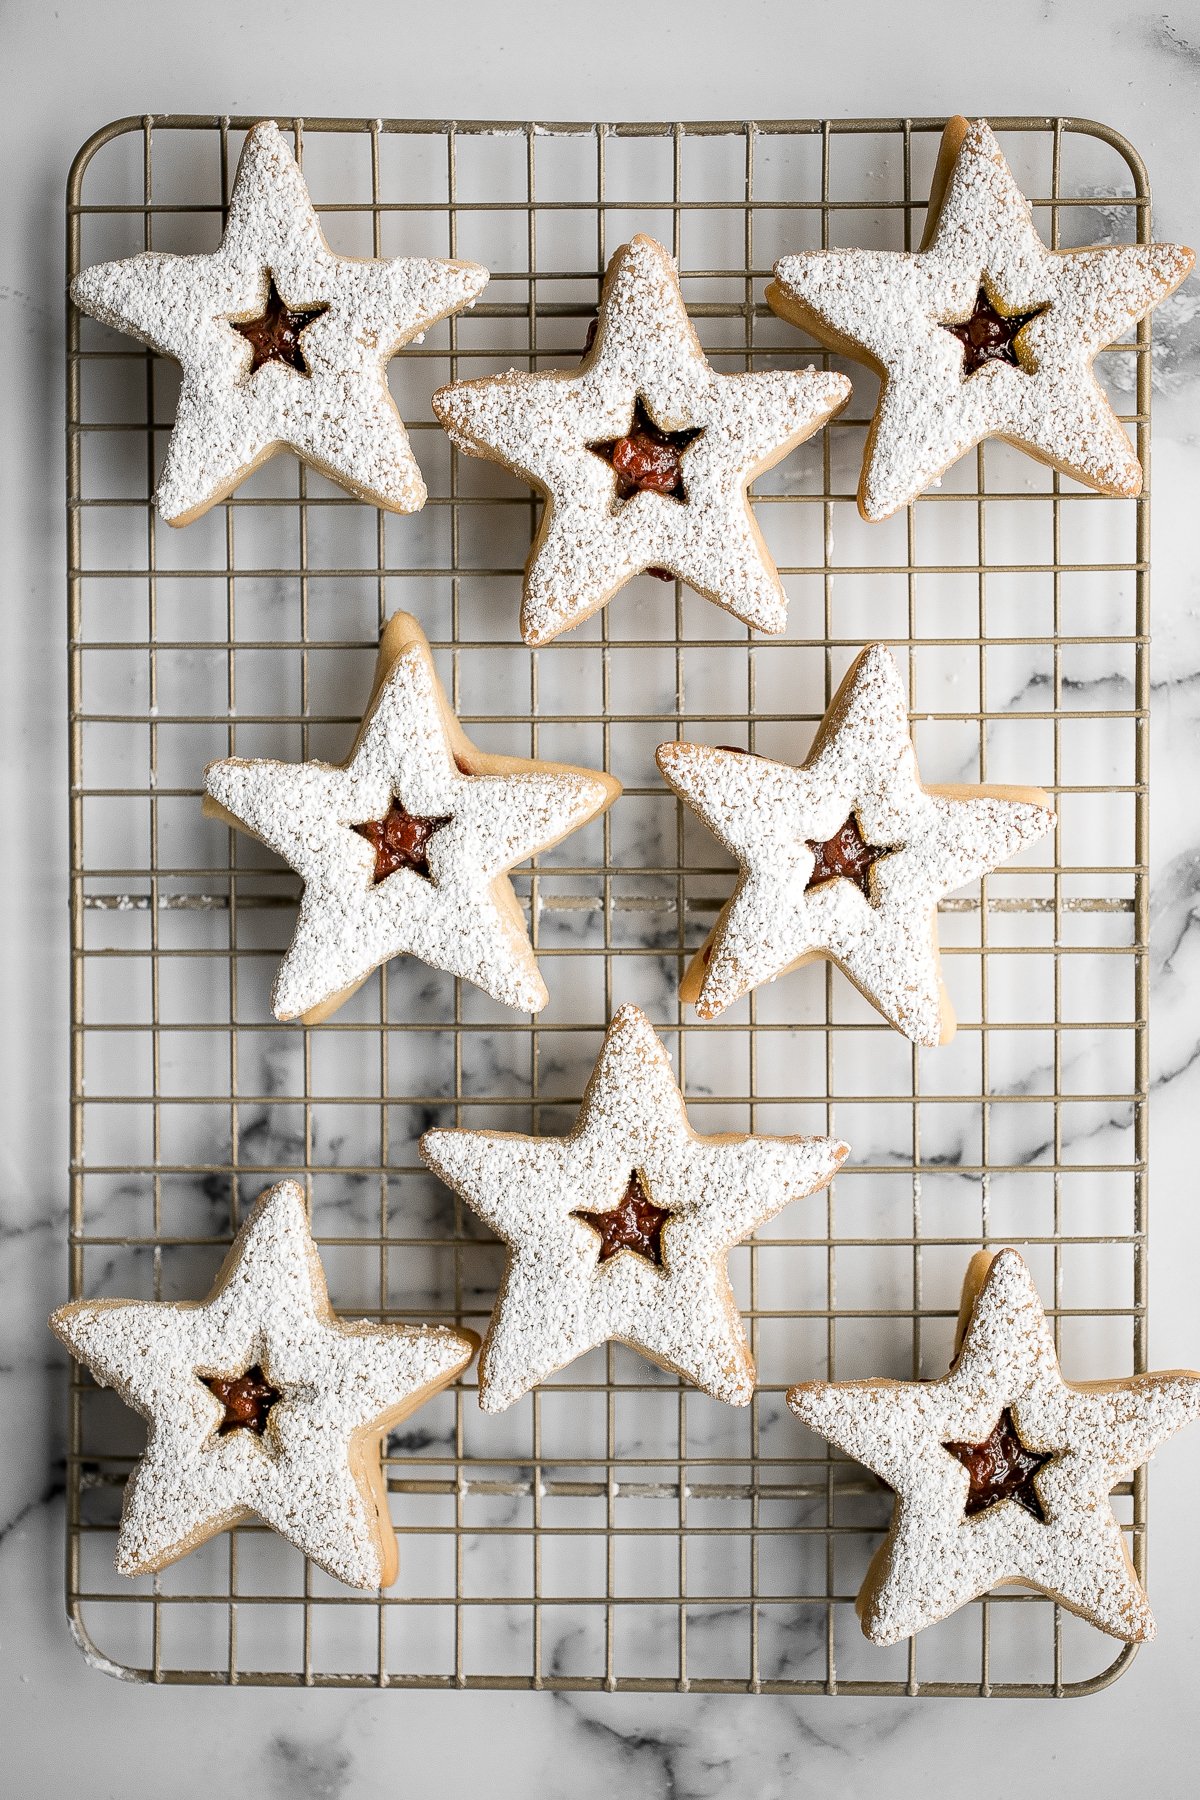
Sweet and buttery linzer cookies are a classic Christmas cookie that tastes even better than they look. These melt-in-your-mouth cookies have two layers of buttery and flaky shortbread, a layer of sweet fruit jam in between, and a generous dusting of confectioners' sugar on top. They are the perfect festive holiday treat.

This is the year to make all the cookies and do the holidays big. I am planning to make holiday cookie boxes for family and friends and packaging them up in these cute Christmas cookie boxes. These linzer cookies are the perfect Christmas cookie to include, with classic flavours of shortbread and jam (similar to my jam-filled thumbprint cookies). Some other must-haves to bake are Christmas sugar cookies, soft and chewy ginger cookies, chocolate crinkle cookies and cranberry pistachio biscotti.
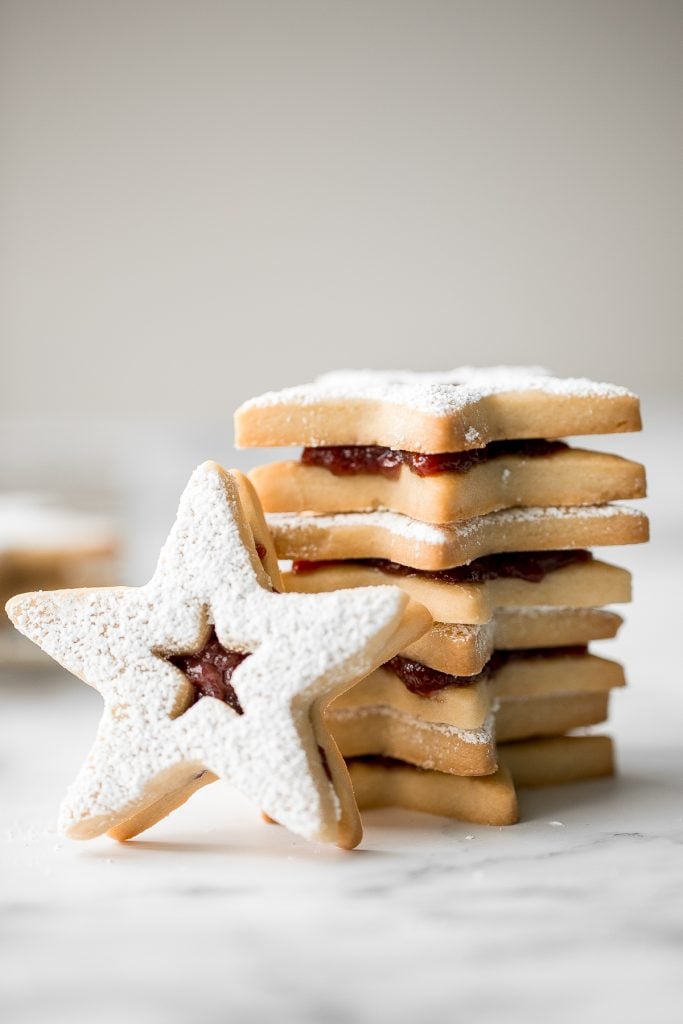
Ingredients
You only need a handful of ingredients to make these cookies, most of which you probably already have in your refrigerator and pantry.
- butter
- Confectioner's sugar - Confectioners' sugar (or powdered sugar) creates a melt-in-your-mouth cookie. You could also use granulated sugar to get a delicious cookie, but the texture will not be the same.
- all-purpose flour
- pure vanilla extract
- salt
- jam - Any fruit jam works with this recipe. I used seedless raspberry jam, and often use strawberry jam as well.
Equipment used:
- measuring cups and spoons
- mixing bowl
- hand mixer (or stand mixer)
- rolling pin
- linzer cookie cutters - I used a large star cookie cutter, and then used the small star cutout from this linzer cookie cutter set.
- half sheet baking pan lined with silicone baking mat or parchment paper
- wire cooling rack
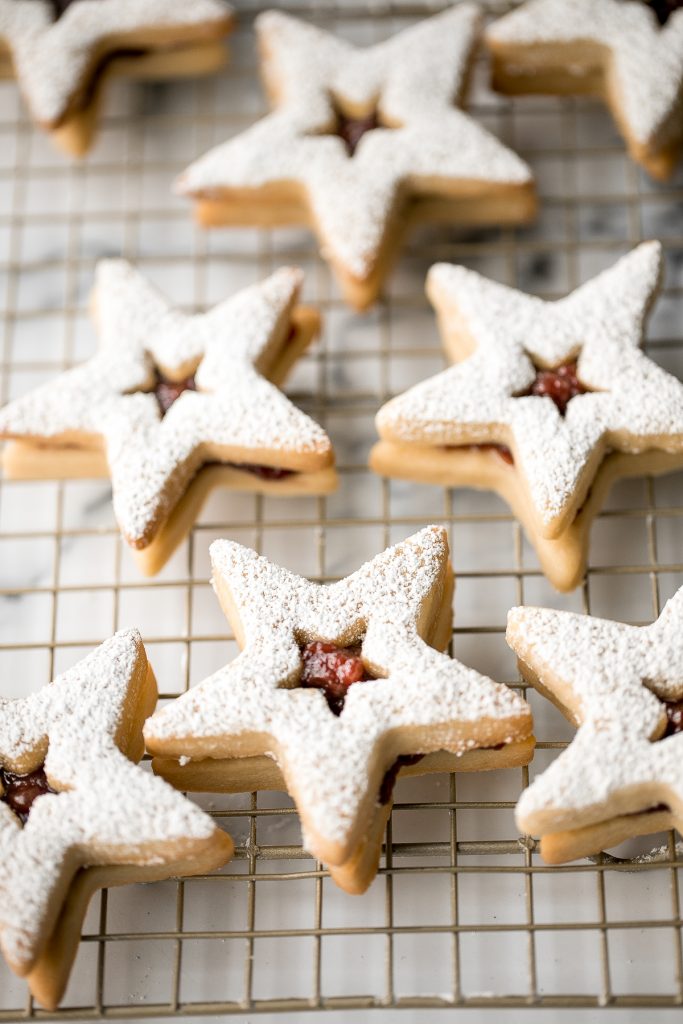
How to Make the Best Linzer Cookies
- Make the dough: In a large mixing bowl, cream the butter and sugar together using a hand mixer or stand mixer until soft and fluffy, about 2 minutes on medium speed. Add vanilla and salt and continue to beat until fully incorporated. Gradually add flour, and mix until your mixture forms into a dough mass.
- Shape the dough and chill: Use your hands to form the dough into a ball, and then shape into a flat disc. Cover tightly in plastic cling wrap, and chill in the refrigerator for 30 minutes.
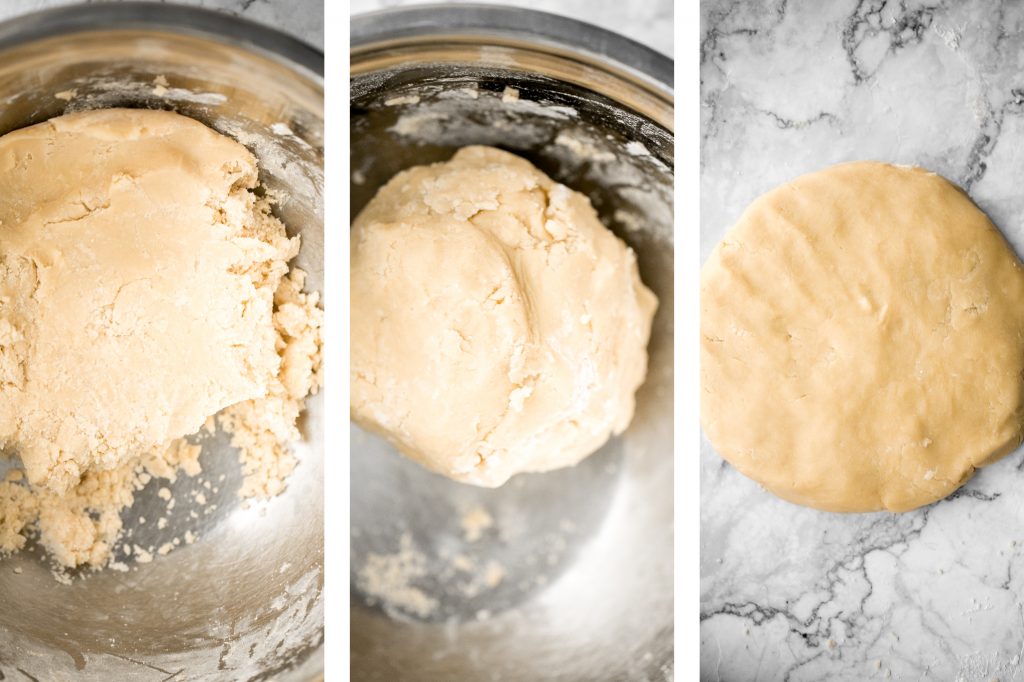
- Cut out the cookies: Once the dough is chilled, lightly dust a clean surface with flour, and place the dough on top. Use a rolling pin to roll out the dough until it is ¼-inch thick. Use linzer cookie cutters to cut out the cookies. On half of the cookies, use a smaller cookie cutter to cut shapes in the center of the cookie. Remove the smaller cookie shapes and bake them as separate little shortbread cookies, or roll them together with the scraps to cut out more cookies.
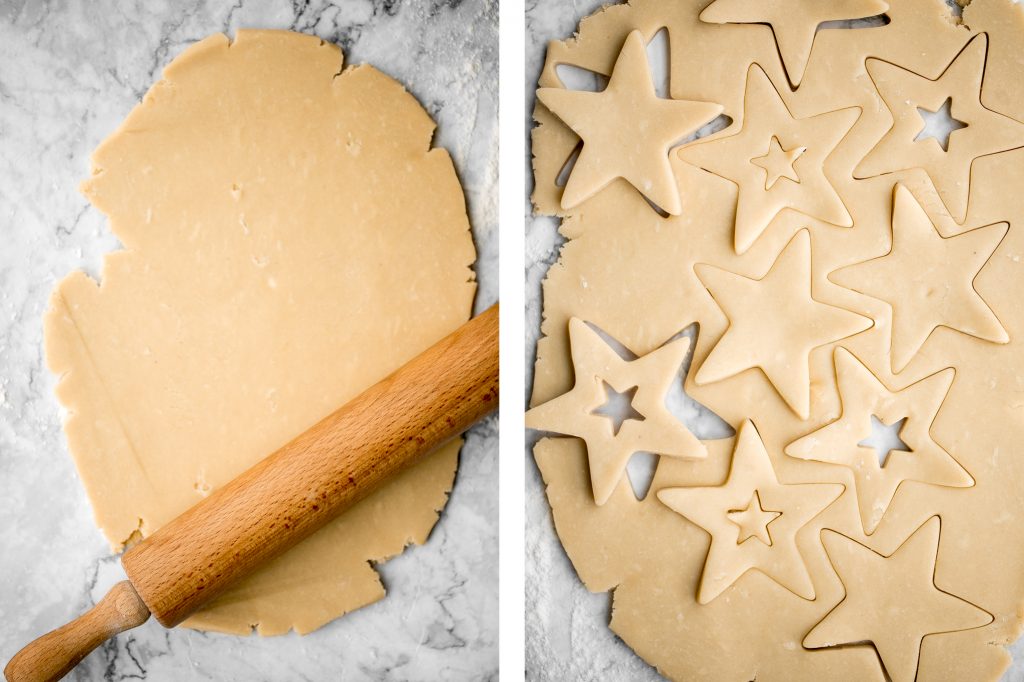
- Second chill: Place the cookies half-inch apart on half sheet baking pan lined with a silicone baking mat or parchment paper, and chill in the refrigerator for another 10 minutes, while the oven is preheating to 350 F.
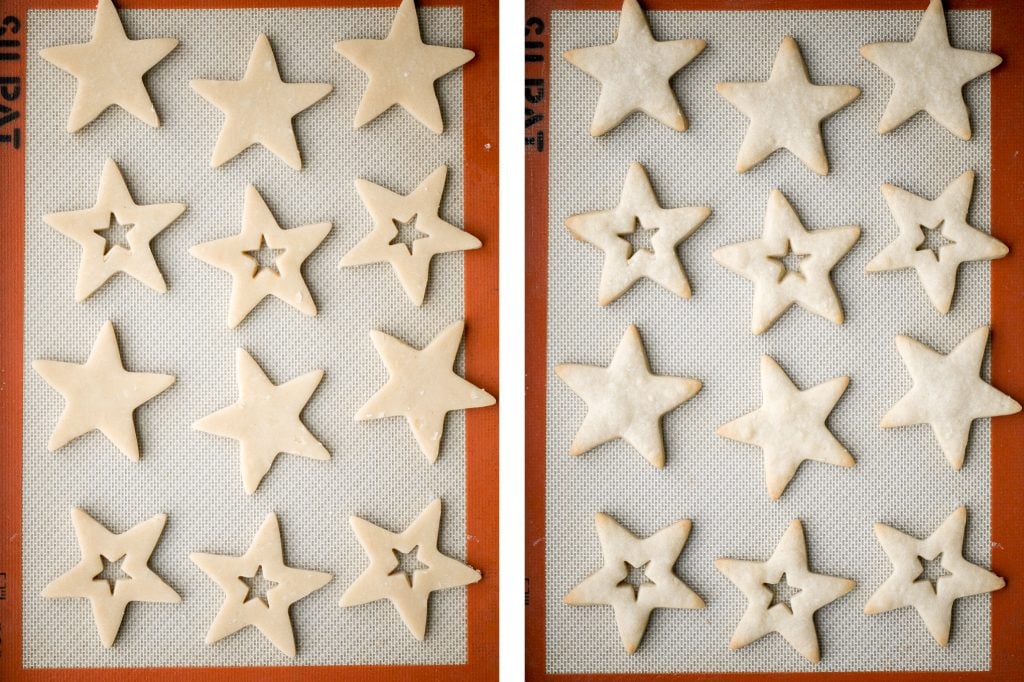
- Bake: Bake the cookies for 10 minutes, or until edges just start to brown. Allow the cookies to cool on the baking sheet for 5 minutes, then transfer onto a wire cooling rack to cool completely to room temperature.

How to Assemble Linzer Cookies
- Dust confectioners' sugar on the cookies that have the center cut out.

- Spread some raspberry jam on the bottom halves of each cookie (the cookies that do not have the center cut out), leaving a small ⅛-inch border around each of the cookies. You can use a knife or use a piping bag with a round piping tip to pipe the jam onto the cookies.
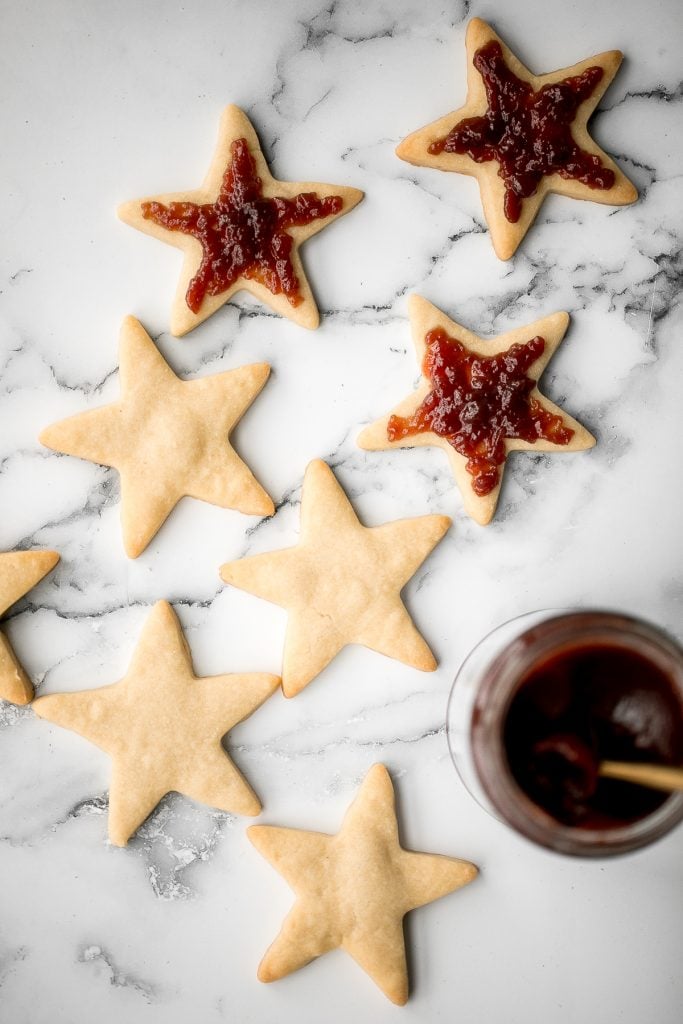
- Carefully place the tops of the cookies on the jammy bottoms. Be careful not to smudge the sugar on top. You can fill the open centers with more jam, if desired.
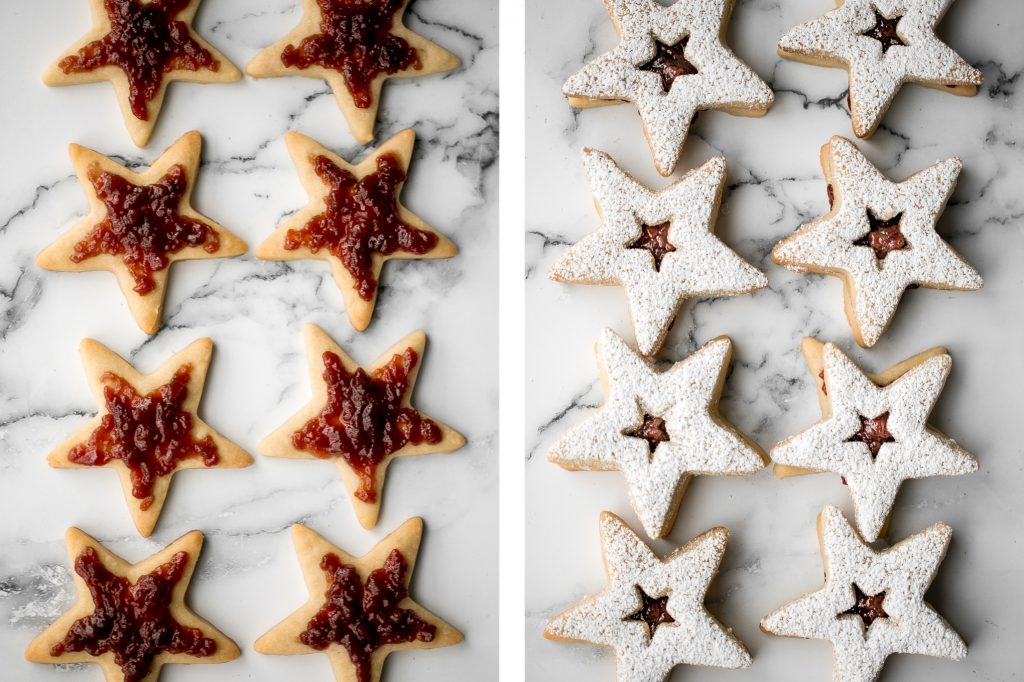
Storing Tips
- How to store: Store in a single layer in an airtight container at room temperature for up to 3 days, or in the refrigerator for up to one week.
- How to freeze: To freeze unassembled shortbread cookies, arrange them in a single layer in an airtight container. Then add a layer of parchment paper and place another layer of shortbread cookies on top. You can also freeze assembled cookies, but note that the confectioners' sugar will melt when the cookie thaws, so it will not be as pretty. I would recommend freezing the cookies unassembled, and then adding confectioners' sugar once thawed.

More Cookie Recipes
- Chocolate Crinkle Cookies
- Soft and Chewy Ginger Cookies
- Christmas Sugar Cookies
- Jam-filled Thumbprint Cookies with Almond Glaze
- Cranberry Pistachio Biscotti
- Soft and Chewy White Chocolate Cranberry Cookies
- Chocolate-Dipped Shortbread Heart Cookies
Tried this recipe?
I'd love to hear what you think! Leave a comment and rating below to share your feedback. Your reviews help others discover this recipe and help me keep creating more free recipes for you. Snap a photo and tag me on social media @aheadofthyme too.

Cheesy Tortellini and Sausage Bake

Quick and easy, cheesy tortellini and sausage bake is a delicious 30-minute dinner packed with so much flavour. It's loaded with tortellini pasta, Italian sausage, tomato sauce, fresh parsley and two types of gooey cheese baked to perfection for major comfort food goals. This quick and easy weeknight dinner is a big family favourite.
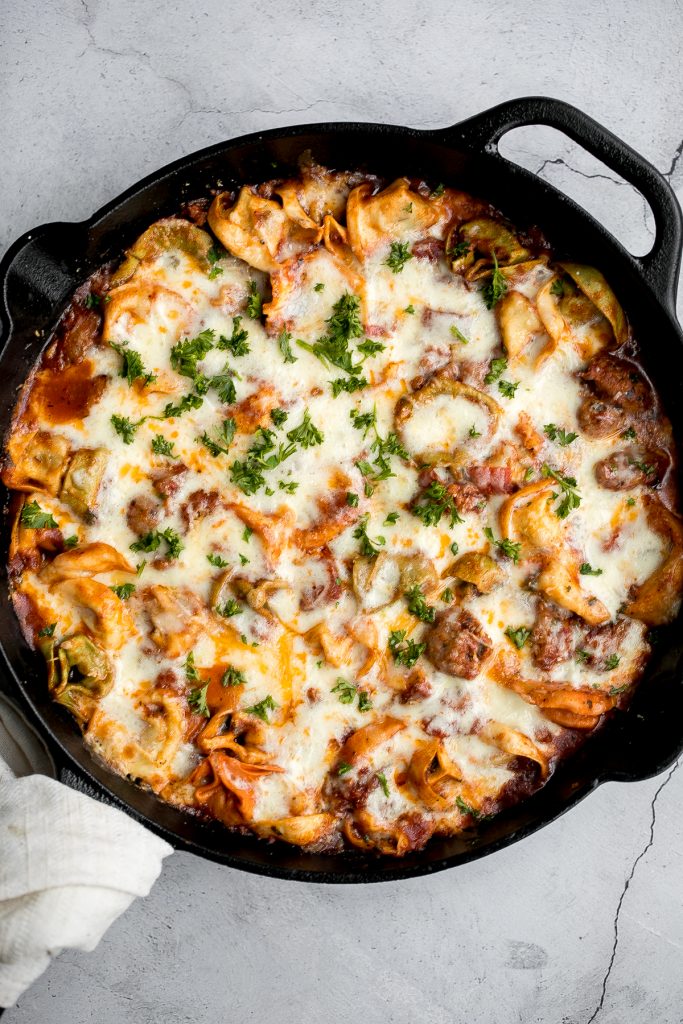
Who doesn't love a quick and easy one pot meal on a busy weeknight? Some of my other favourites to throw together quickly are shrimp fettuccine alfredo pasta bake, creamy tortellini soup with sausage, and creamy brussels sprouts bake, and baked maple salmon.
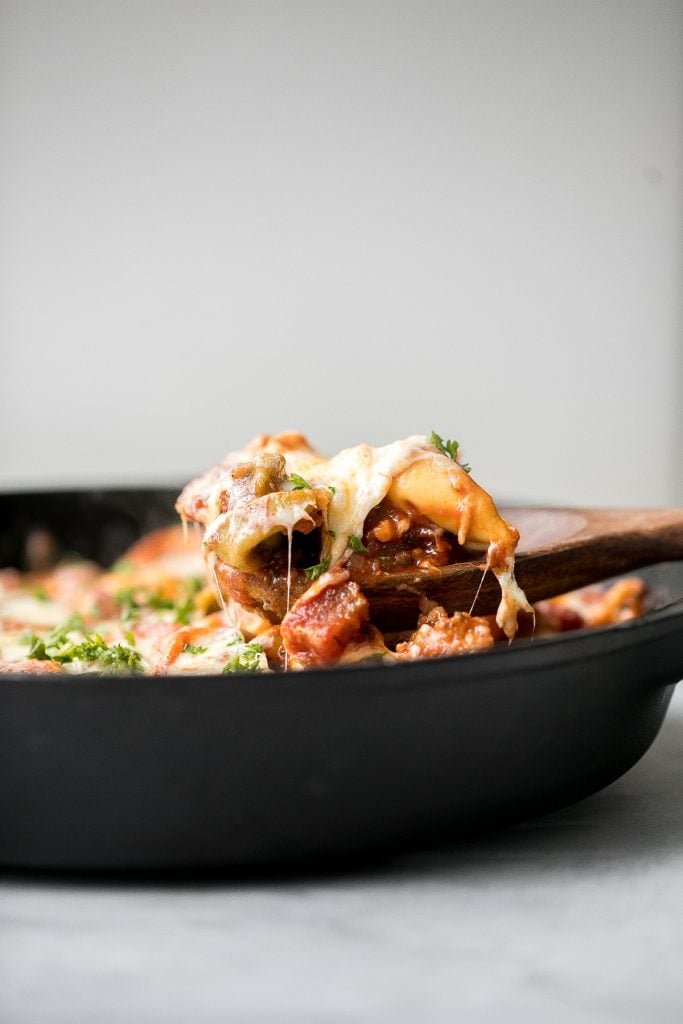
Ingredients in Baked Tortellini
- tortellini - I used cheese tortellini, but you can use any flavour that you like. You can also use fresh or frozen tortellini, but note that the cook time of the tortellini will be longer if it is from frozen.
- Italian sausage
- tomato sauce - either homemade or store-bought.
- olive oil
- onions
- fresh parsley
- salt and pepper
- cheese - both mozzarella cheese and Parmesan cheese.
You will also need a medium cooking pot, colander and cast-iron skillet (or oven-safe skillet).
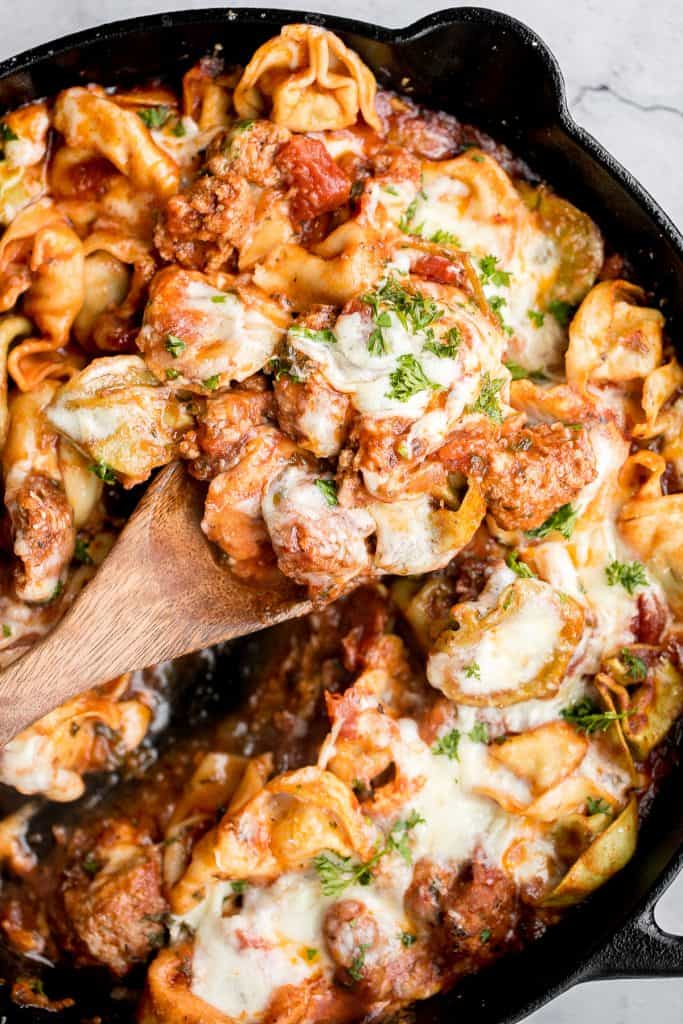
How to Make the Best Cheesy Tortellini and Sausage Bake
- Cook the tortellini: Bring a large pot of water to a boil over medium high heat. Add tortellini and cook according to package directions, about 8-10 minutes. Drain with a colander, and set aside.
- Cook the sausage: Meanwhile, heat oil in a large cast-iron skillet (or oven safe skillet) for 2 minutes over medium-high heat until the hot oil sizzles and shimmers. Add sausage and cook for 5-7 minutes until browned. Break the sausages into small pieces using a spatula.
- Add the sauce: Add onions and sauté until tender, about 3-4 minutes. Stir well to combine. Add in tomato sauce, parsley, salt and pepper. Stir well to mix and bring to a simmer. Turn the heat down to low, and simmer uncovered for 5 minutes.
- Combine and add cheese: Add in the cooked tortellini and stir well to fully coat it in sauce. Sprinkle shredded mozzarella and grated Parmesan evenly on top of the tortellini.
- Bake: Transfer the skillet into a 350F preheated oven and bake for 10-12 minutes, until the cheese melts and turns golden brown. Remove from oven, and let cool for 5 minutes before serving.
- Serve: Garnish with extra parsley and Parmesan on top.
How to Store
Store this tortellini and sausage bake in an airtight container in the refrigerator for up to 3 days. To reheat, simply heat in the microwave or in a skillet. You may need to add a little water to thin out the sauce a bit.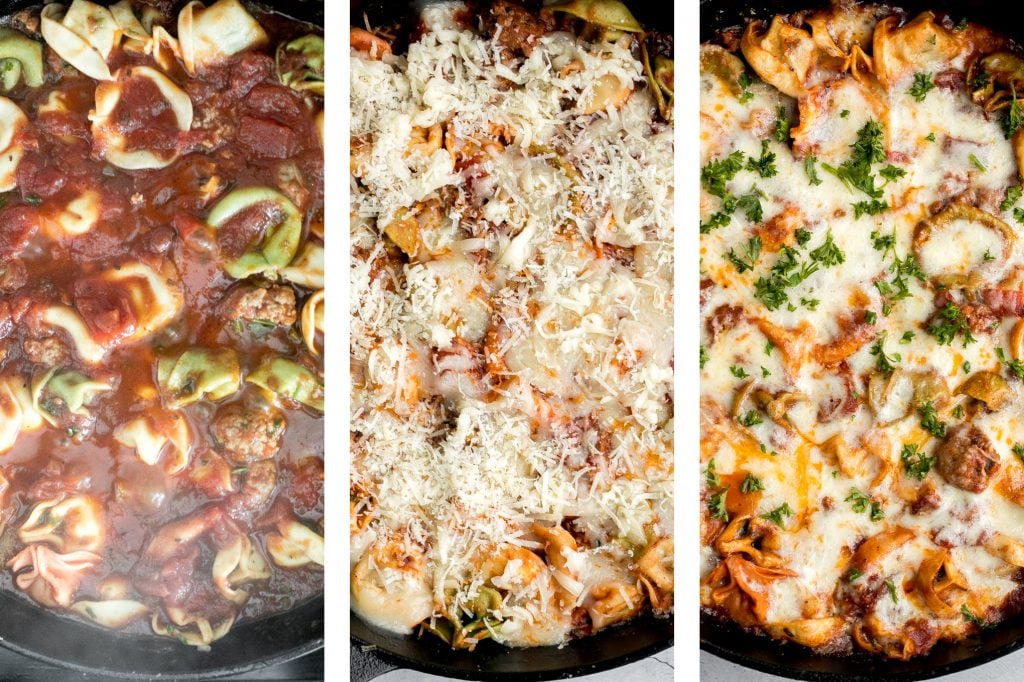
How to Serve Cheesy Tortellini and Sausage
I like to serve this delicious cheesy tortellini and sausage bake with some crusty homemade bread and a side salad. My favourite breads to pair this with are garlic rosemary focaccia bread or pull apart garlic bread, which are both perfect for dipping and soaking up all of that delicious tomato sauce.
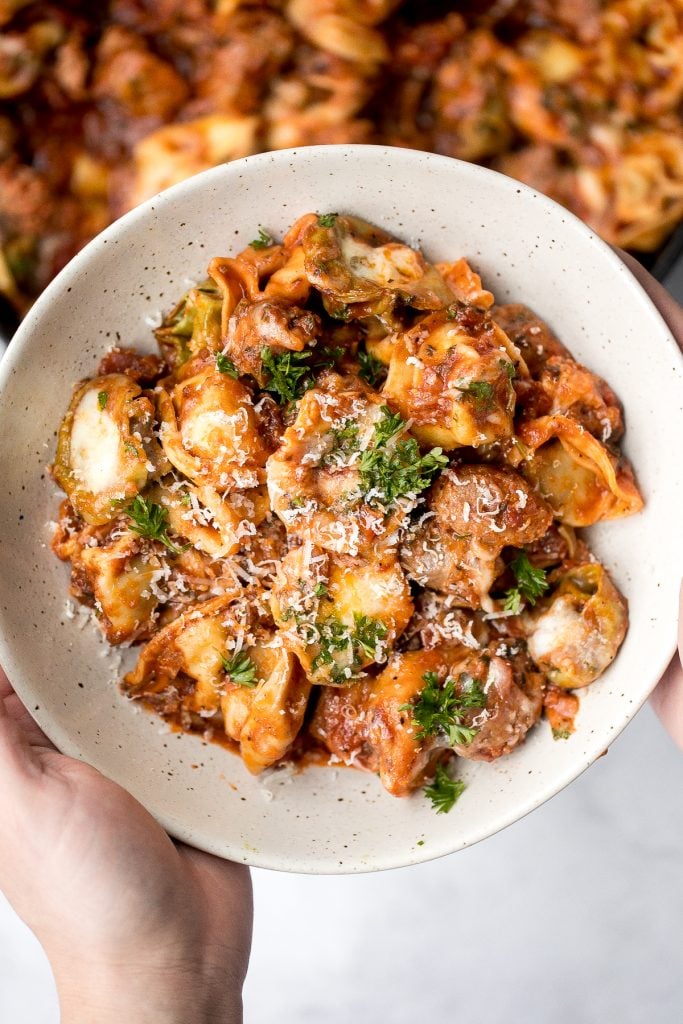
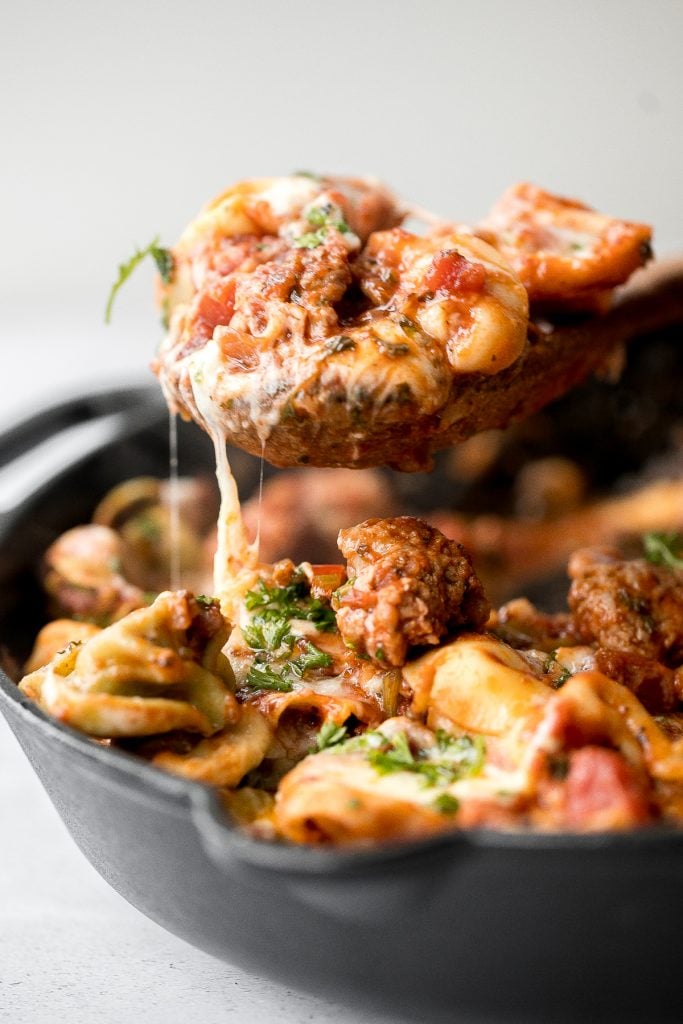
More Pasta Recipes
- 40 Best Pasta Recipes
- Creamy Tortellini Soup with Sausage
- Shrimp Fettuccini Alfredo Pasta Bake
- Butternut Squash Carbonara Pasta
- Creamy Avocado Basil Peso Spaghetti
- Easy Meat Lasagna
Tried this recipe?
I'd love to hear what you think! Leave a comment and rating below to share your feedback. Your reviews help others discover this recipe and help me keep creating more free recipes for you. Snap a photo and tag me on social media @aheadofthyme too.

Easy Make-Ahead Cranberry Sauce
Finally, a recipe that you can make days before Thanksgiving. Easy make-ahead cranberry sauce. You literally have no excuse to serve cranberry sauce out of a can when it only takes 15 minutes and 3 ingredients to make it homemade and so delicious. This is the easiest and most stress-free Thanksgiving recipe ever.
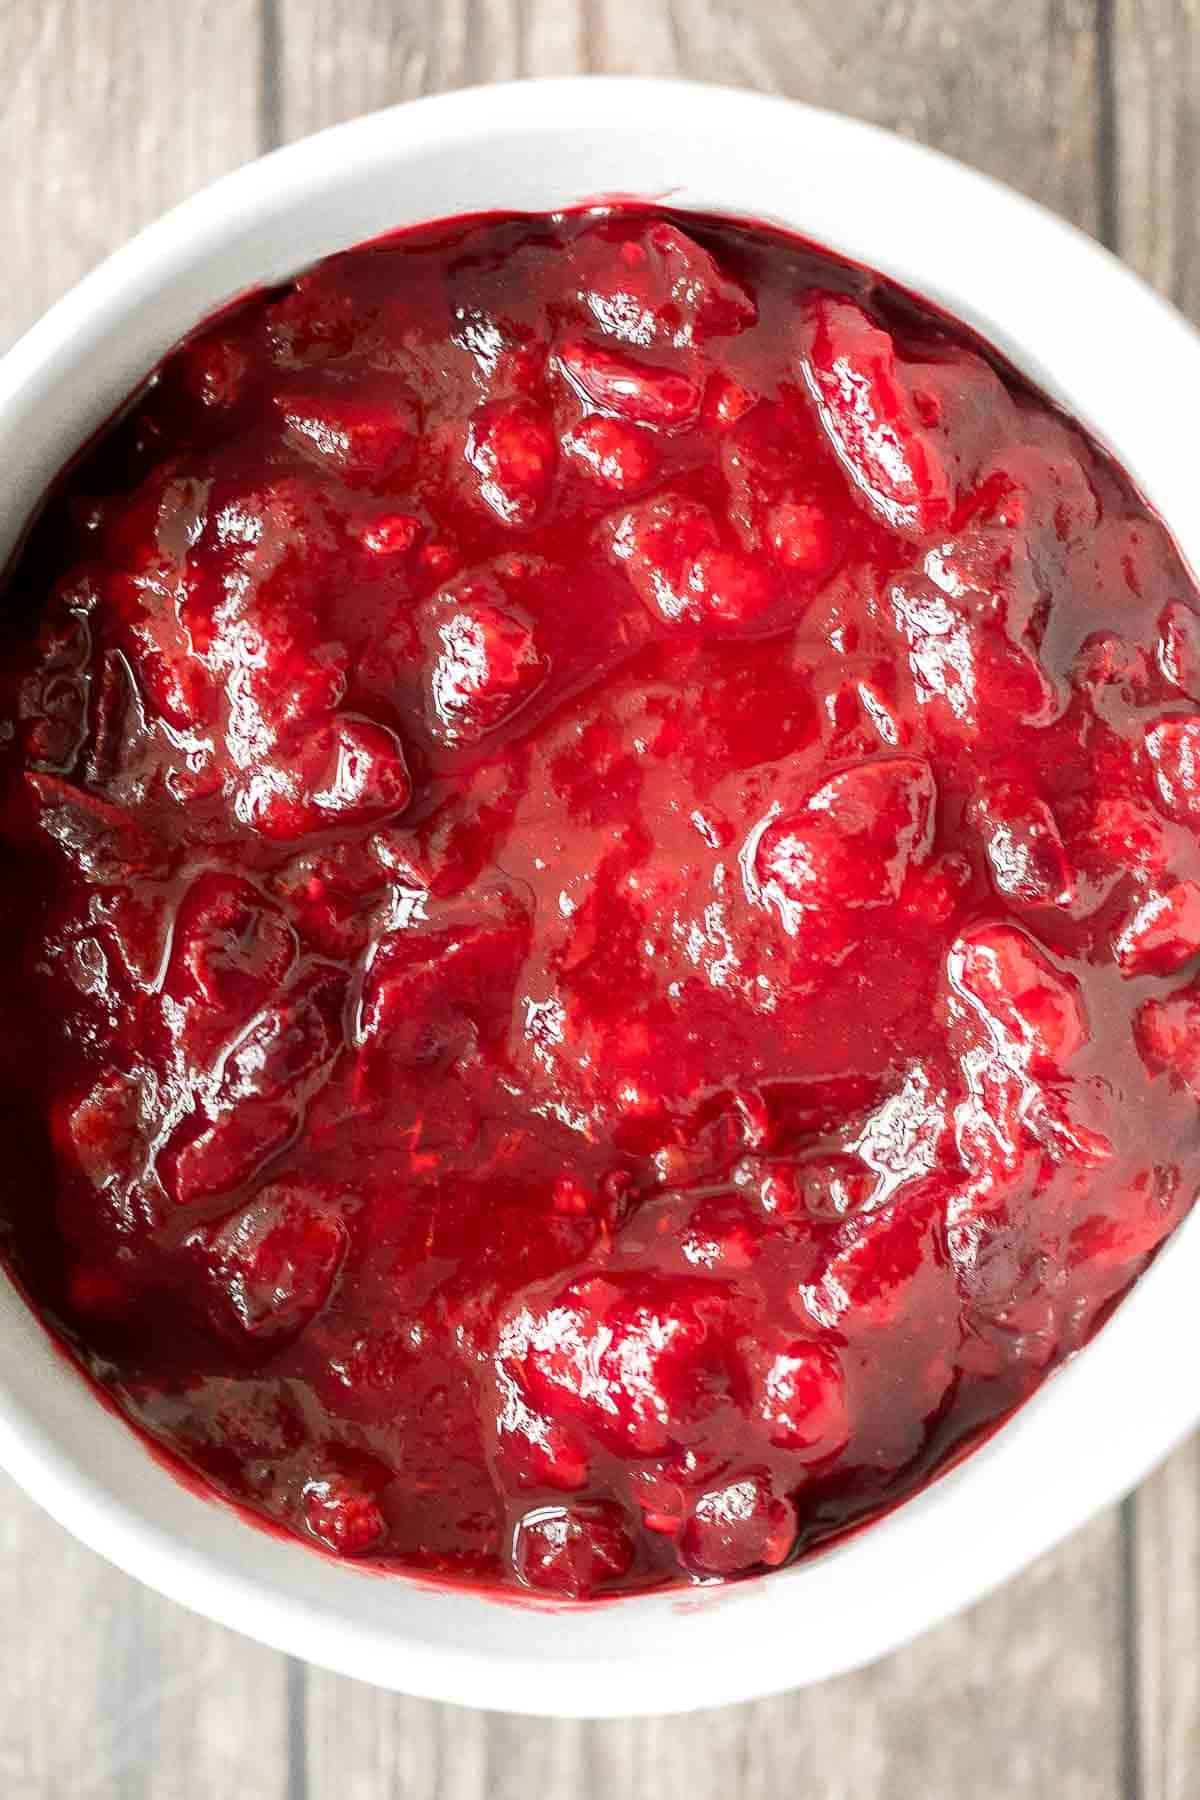
Ingredient Notes
To make this classic Thanksgiving sauce, you will need to gather these simple ingredients (full quantities in recipe card below):
- orange juice - this adds a really nice flavour that balances out the tangy cranberries.
- granulated sugar - you could also use brown sugar
- cranberries - I used fresh cranberries, but you can easily use frozen.
- pinch of cinnamon - this is an optional ingredient, but it adds a nice warming fall flavour.
You will also need a small saucepan.
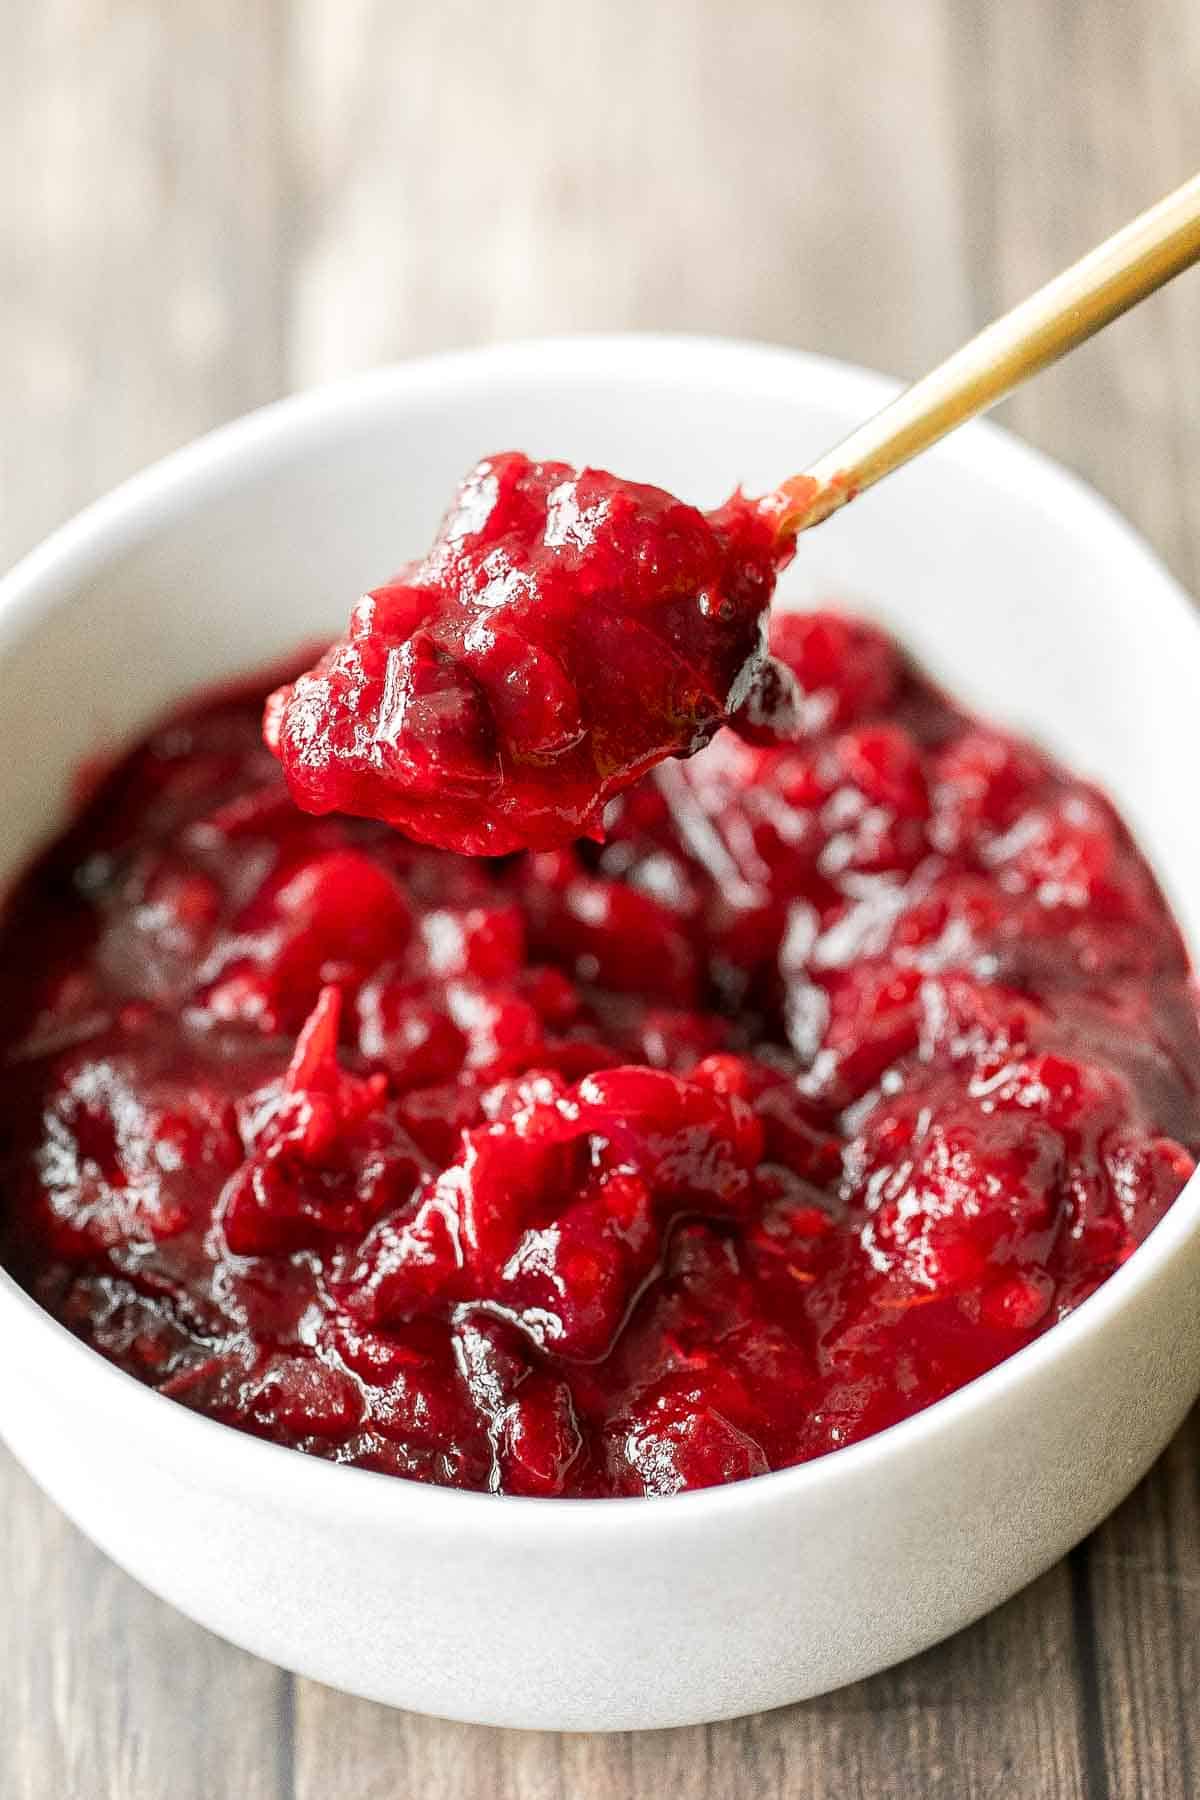
How to Make the Best Make-Ahead Cranberry Sauce
So there are basically 3 simple steps. That's right, 3 steps.
- Dissolve the sugar. The first step is to heat the orange juice and the sugar until the sugar dissolves and the mixture begins to boil.
- Add cranberries. The second step is so add the cranberries and allow the mixture returns to a boil and simmer on low. When the mixture is simmering, you will notice a popping sound. This is because cranberries "pop" or burst when heated. Just be careful to avoid any any splashing when the cranberries burst. Once the cranberries have burst, you can add a pinch of cinnamon (optional).
- Chill the cranberry sauce. Remove from heat and mash with the back of a spoon until desired consistency is reached. Let mixture cool at room temperature. Then, transfer to an airtight container and refrigerate overnight.
How to Serve Easy Make-Ahead Cranberry Sauce
Cranberry sauce is a staple for Thanksgiving dinner, along with a Whole Roast Turkey (or Turkey Breast) and Gravy, and all the classic Thanksgiving side dishes. Some of my favourite sides to serve are:
- Creamy Mashed Potatoes
- Sweet Potato Casserole
- Green Bean Casserole
- Cornbread Stuffing
- Sautéed Brussels Sprouts
- Oven Roasted Vegetables
Some of our other favourite sides to serve in the fall and during the holidays are:
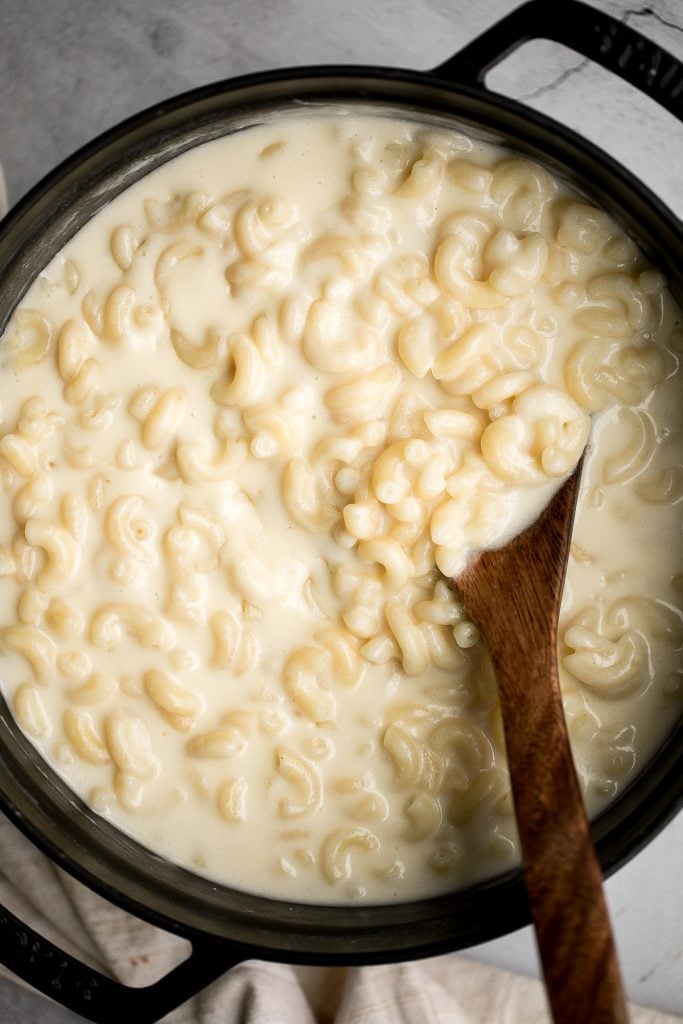
Stovetop Mac and Cheese with White Cheddar
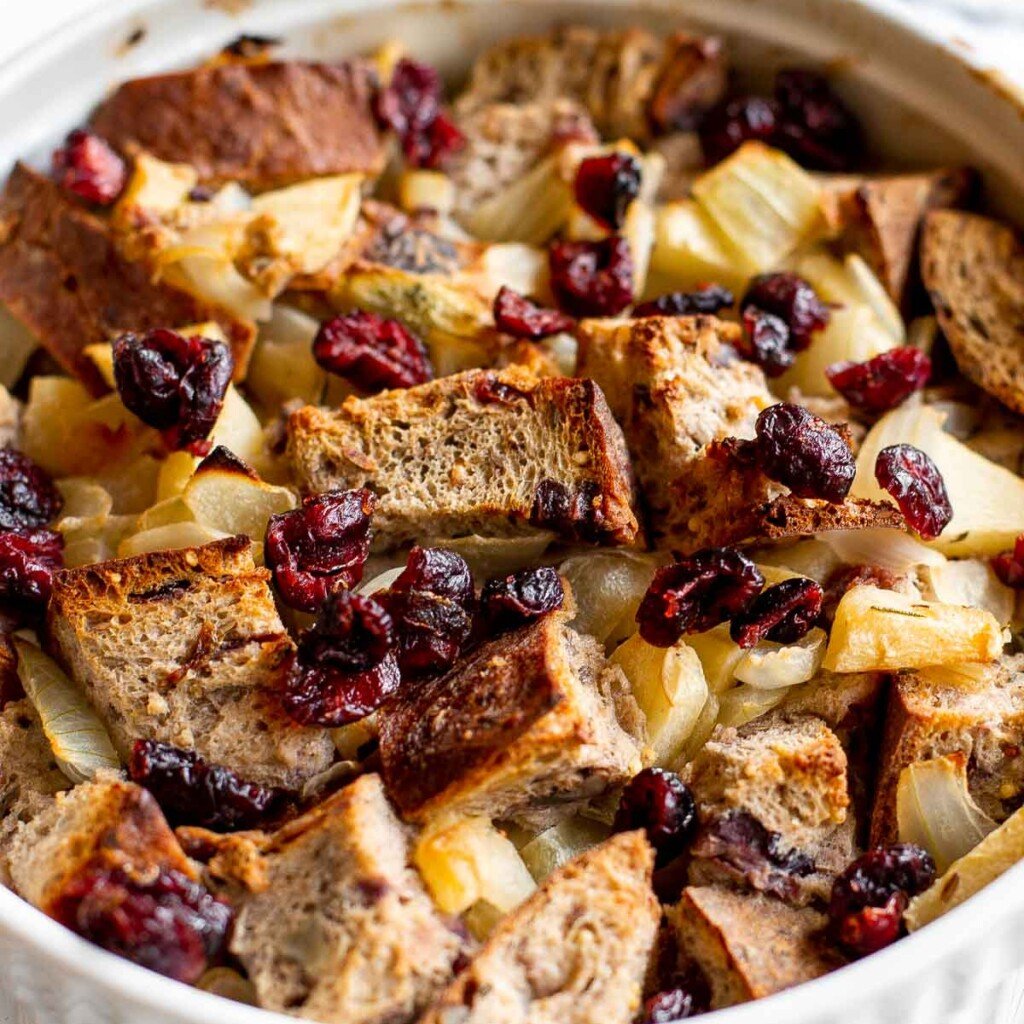
Cranberry Apple Walnut Stuffing

Butternut Squash Salad (with Kale, Walnuts, and Cranberries)

Classic Homemade Turkey Gravy (from Drippings or Broth)
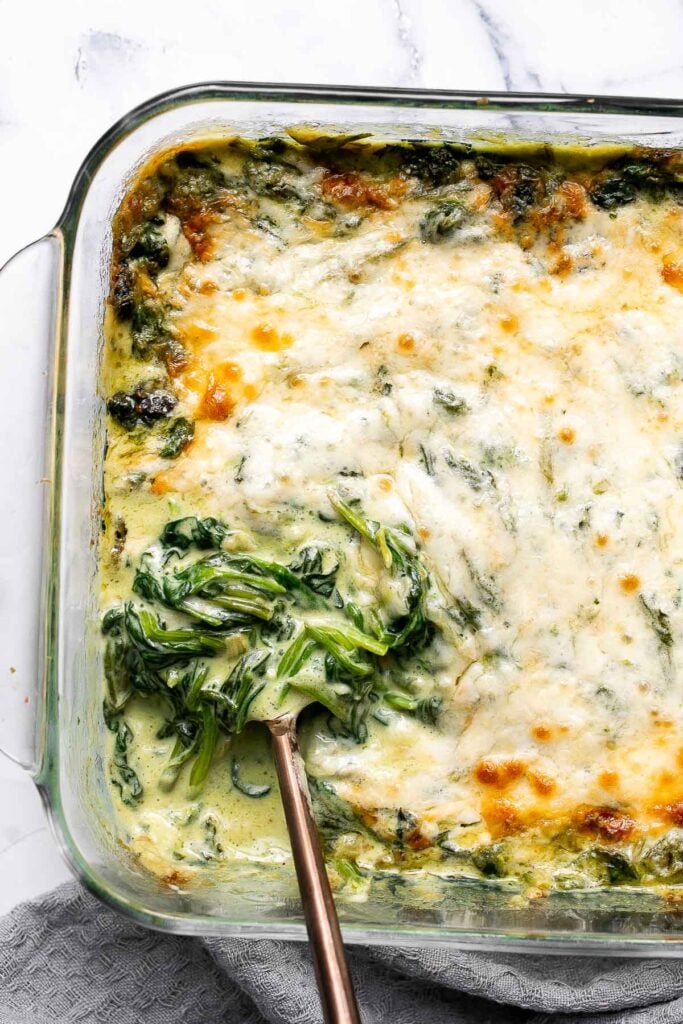
Creamed Spinach Gratin

Slow Cooker Cranberry Sauce (Cranberry Sauce in the Crockpot)
More Thanksgiving side dishes →
How to Use Leftover Cranberry Sauce
When I host Thanksgiving dinner, I usually make double the amount of cranberry sauce, because I find it's always better to have extra than to run out. Plus, when you make extra, it means that there are always leftovers, which makes for the best leftover cranberry sauce recipes. Here are some ways I use up leftover cranberry sauce:
- Make delicious baked goods such as cranberry sauce oat bars, leftover cranberry sauce muffins with oat streusel topping, and cranberry sauce swirl pound cake.
- Serve it for breakfast over top of pancakes with a side of whipped cream, as a jam spread over toast, or on top of cinnamon and walnut porridge.
- Spread it in a sandwich with leftover turkey and make leftover thanksgiving turkey sandwich.
- Add it to yogurt and granola and make a parfait.
More leftover cranberry sauce recipes →
Storing and Freezing Instructions
- How to store: Store cranberry sauce in an airtight container in the refrigerator for up to 10 days.
- How to freeze: Once cooled to room temperature, store cranberry sauce in an airtight container or freezer bag and store in the freezer for up to 3 months.
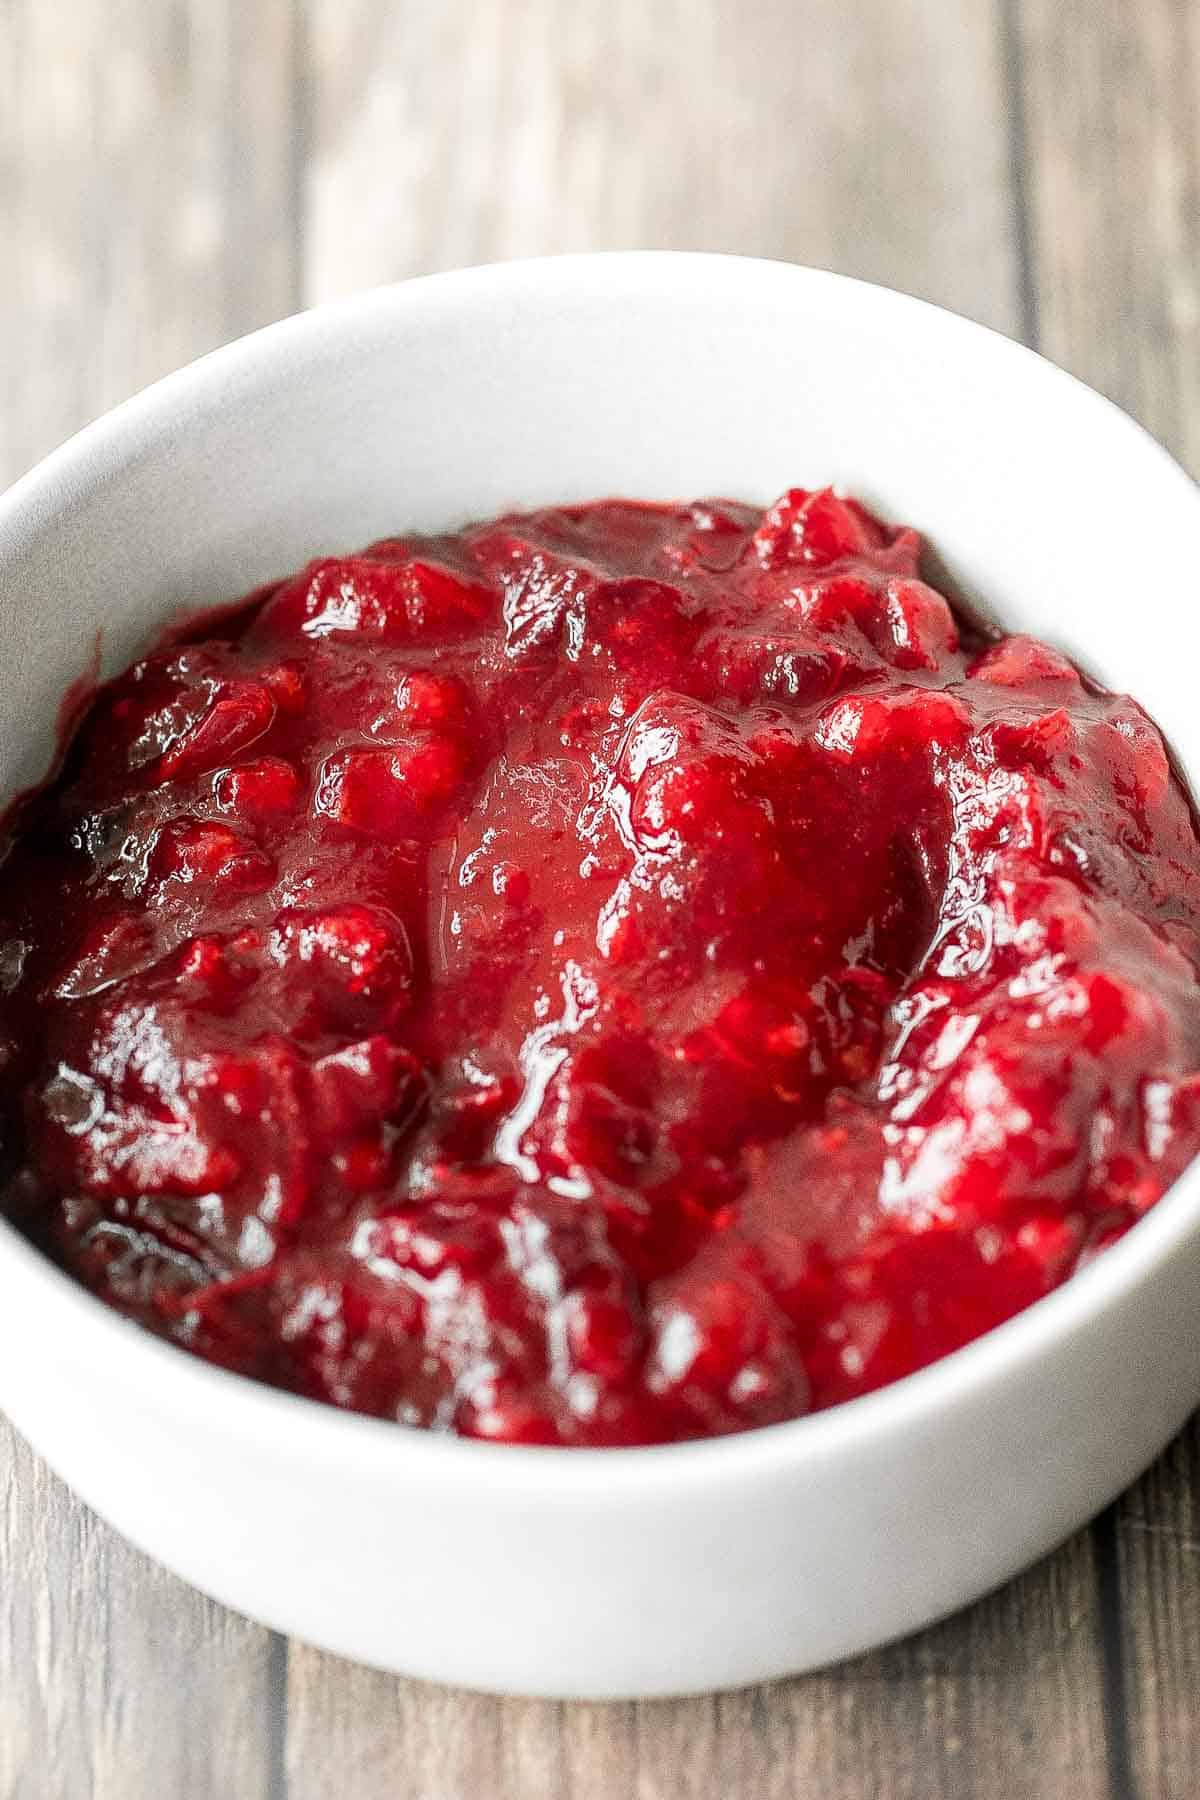
More Thanksgiving Recipes
- 15 Leftover Cranberry Sauce Recipes
- Easy Thanksgiving Dinner Menu
- Small Thanksgiving Menu for Four
- 50 Best Thanksgiving Side Dishes
- 15 Thanksgiving Bread Recipes
- 25 Best Thanksgiving Desserts
Tried this recipe?
I'd love to hear what you think! Leave a comment and rating below to share your feedback. Your reviews help others discover this recipe and help me keep creating more free recipes for you. Snap a photo and tag me on social media @aheadofthyme too.
This recipe was first published in 2016. It has been completely updated with new photographs and tips.

Roasted Balsamic Chicken with Cranberries

Roasted balsamic chicken with cranberries is a quick and easy weeknight dinner perfect for cozy fall and winter nights. This sheet pan meal is made with flavourful, succulent and tender boneless chicken thighs marinated in a delicious sweet and tangy balsamic marinade and is roasted with red onions and cranberries for the most amazing flavour. The best part? This 30-minute dinner is so easy to prep and even quicker to eat if you marinate the chicken in advance. You will not believe how much flavour is packed into one dish with so little prep.
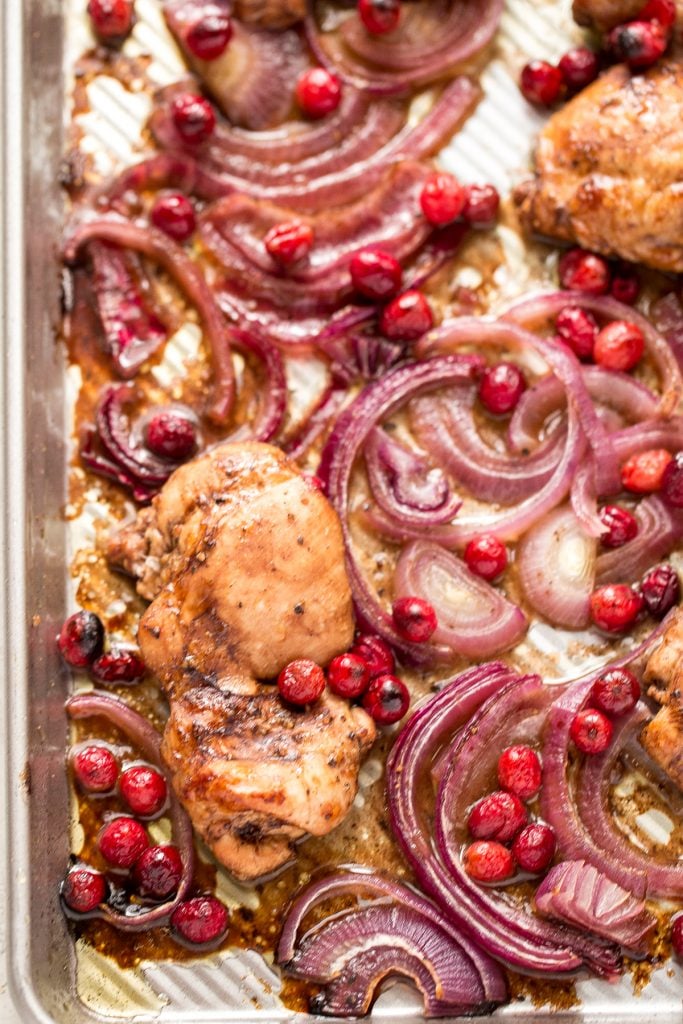
Ingredients
You will need a few ingredients to make this meal, and chances are that you will have most of them stocked up already.
- chicken thighs - I used boneless chicken thighs. You can also use bone-in thighs but the cook time will be slightly longer at about 30 minutes. Check for doneness using a meat thermometer. It will be done once it reads 165 F.
- chicken marinade - made with balsamic vinegar, olive oil, red wine vinegar, honey, salt and pepper. This marinade adds the perfect sweet and tangy flavour to perfectly roasted chicken thighs.
- red onion
- cranberries - I used fresh cranberries, but you can also use frozen. So while you might not have cranberries in your kitchen all year round, there's a good chance that during the holiday season you've got some leftover bags in the freezer that need to be used up. Here's your chance to turn them into something unexpected and unforgettable.
- tarragon - if you don't have tarragon, you can switch it up with your favourite herbs - oregano, thyme, rosemary, whatever you've got.
You will also need a mixing bowl, quarter sheet baking pan and meat thermometer.
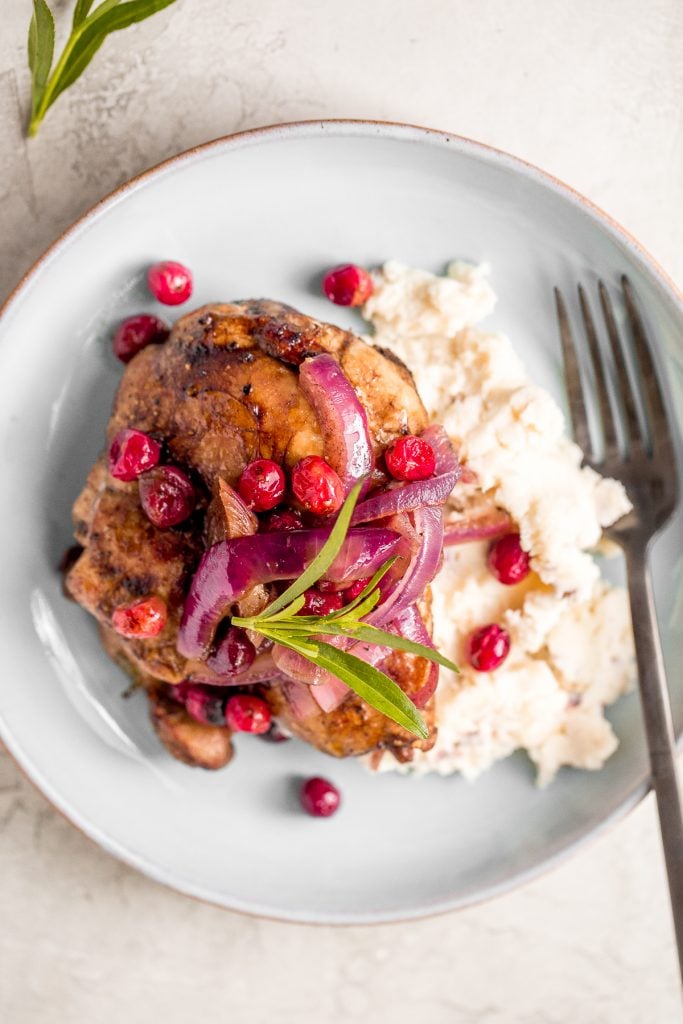
How to Make the Best Roasted Balsamic Chicken with Cranberries
- Marinate the chicken thighs: In a medium mixing bowl, combine balsamic vinegar, 2 tablespoons olive oil, red wine vinegar, honey, salt, and pepper, and stir to combine. Add chicken thighs to the marinade, then toss to combine. Cover the bowl and refrigerate for 30 minutes to marinate, up to overnight.
- Assemble the sheet pan: Coat a rimmed baking sheet with remaining 2 tablespoons olive oil. Then, add red onions in an even layer, and scatter chicken thighs between them, pouring the extra marinade on top of the onions. Add the cranberries and place a few sprigs of fresh tarragon on top.
- Roast: Roast in a 425F preheated oven for 20 to 25 minutes, or until juice from chicken run clear (when thickest part of the thigh reads at least 165 F on a meat thermometer).
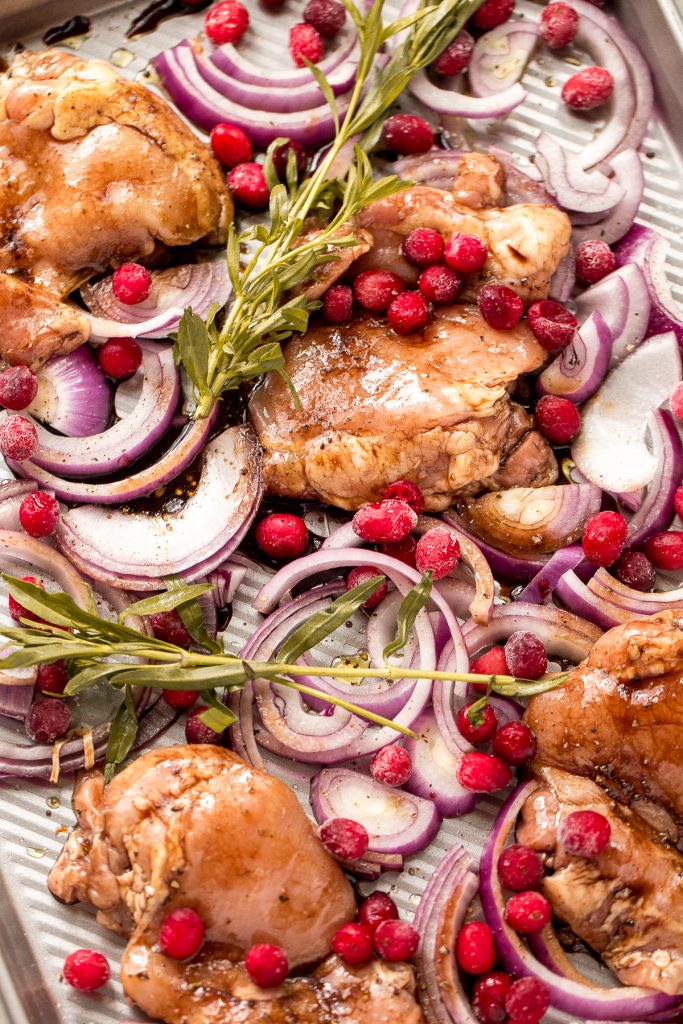
How to store: Transfer any leftovers into an airtight container with the juices from the pan, and refrigerate for up to 4 days. To reheat, place in the microwave, air fryer at 300F for 5 minutes, or in the oven at 300F for 10 minutes.
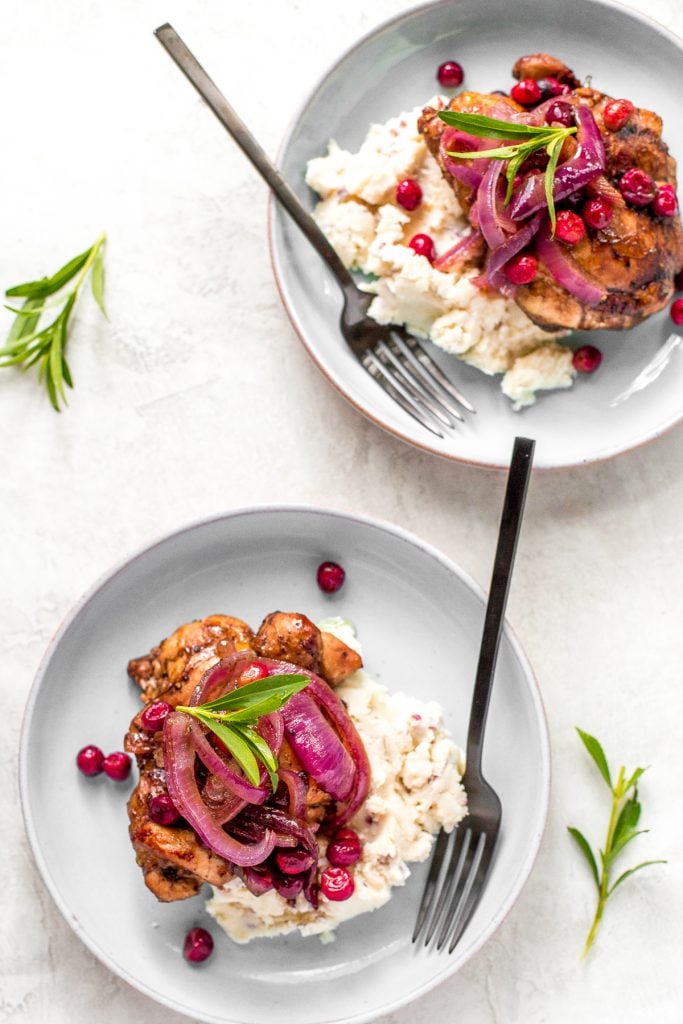
How to Serve Balsamic Chicken with Cranberries
I like to serve this roasted balsamic chicken with cranberries with a side of creamy mashed potatoes or creamy garlic mashed cauliflower to soak up the delicious pan drippings, and a big salad to add some green and complete the meal.
Some other side dishes that would be great with this are sautéed garlic green beans, easy roasted cauliflower, and air fryer baby potatoes.
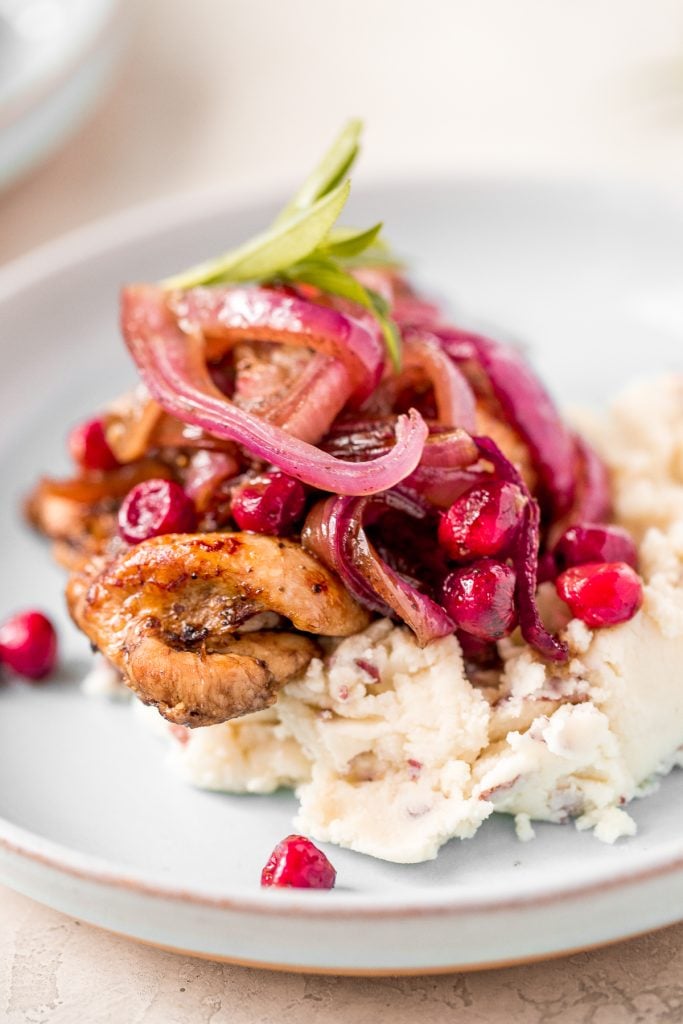
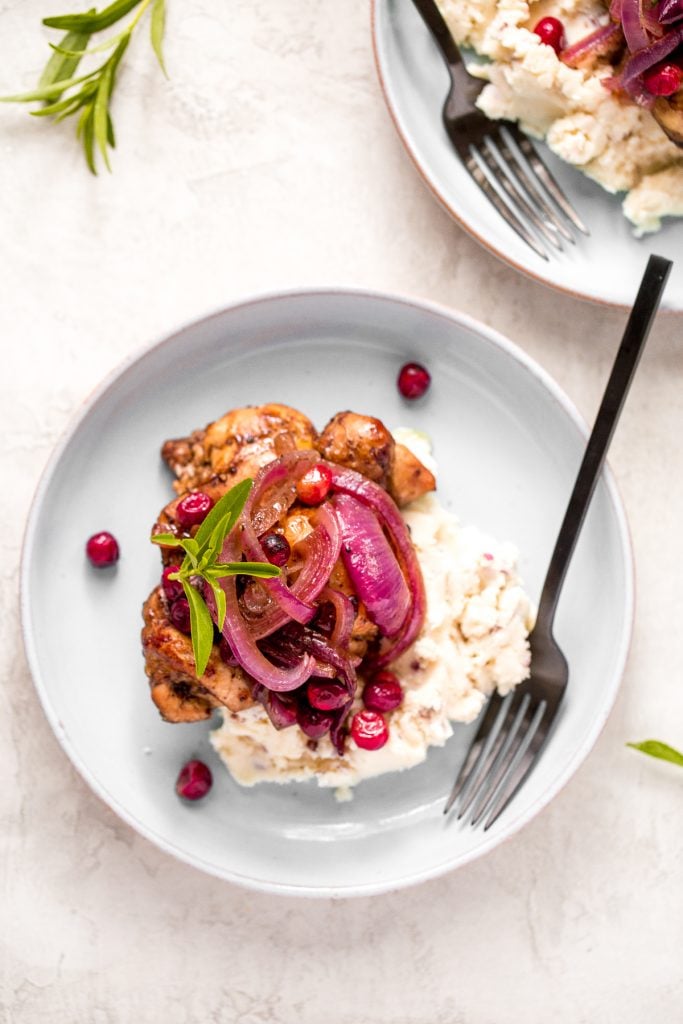
More Sheet Pan Chicken Recipes
- One Pan Garlic Roasted Chicken and Baby Potatoes
- Sheet Pan Balsamic Chicken and Vegetables
- Tandoori Chicken Sheet Pan Dinner
- Sheet Pan Curry Chicken and Vegetables
- Soy Glazed Chicken Thighs
- Sheet Pan Chicken Fajitas
Tried this recipe?
I'd love to hear what you think! Leave a comment and rating below to share your feedback. Your reviews help others discover this recipe and help me keep creating more free recipes for you. Snap a photo and tag me on social media @aheadofthyme too.

Easy Challah Bread
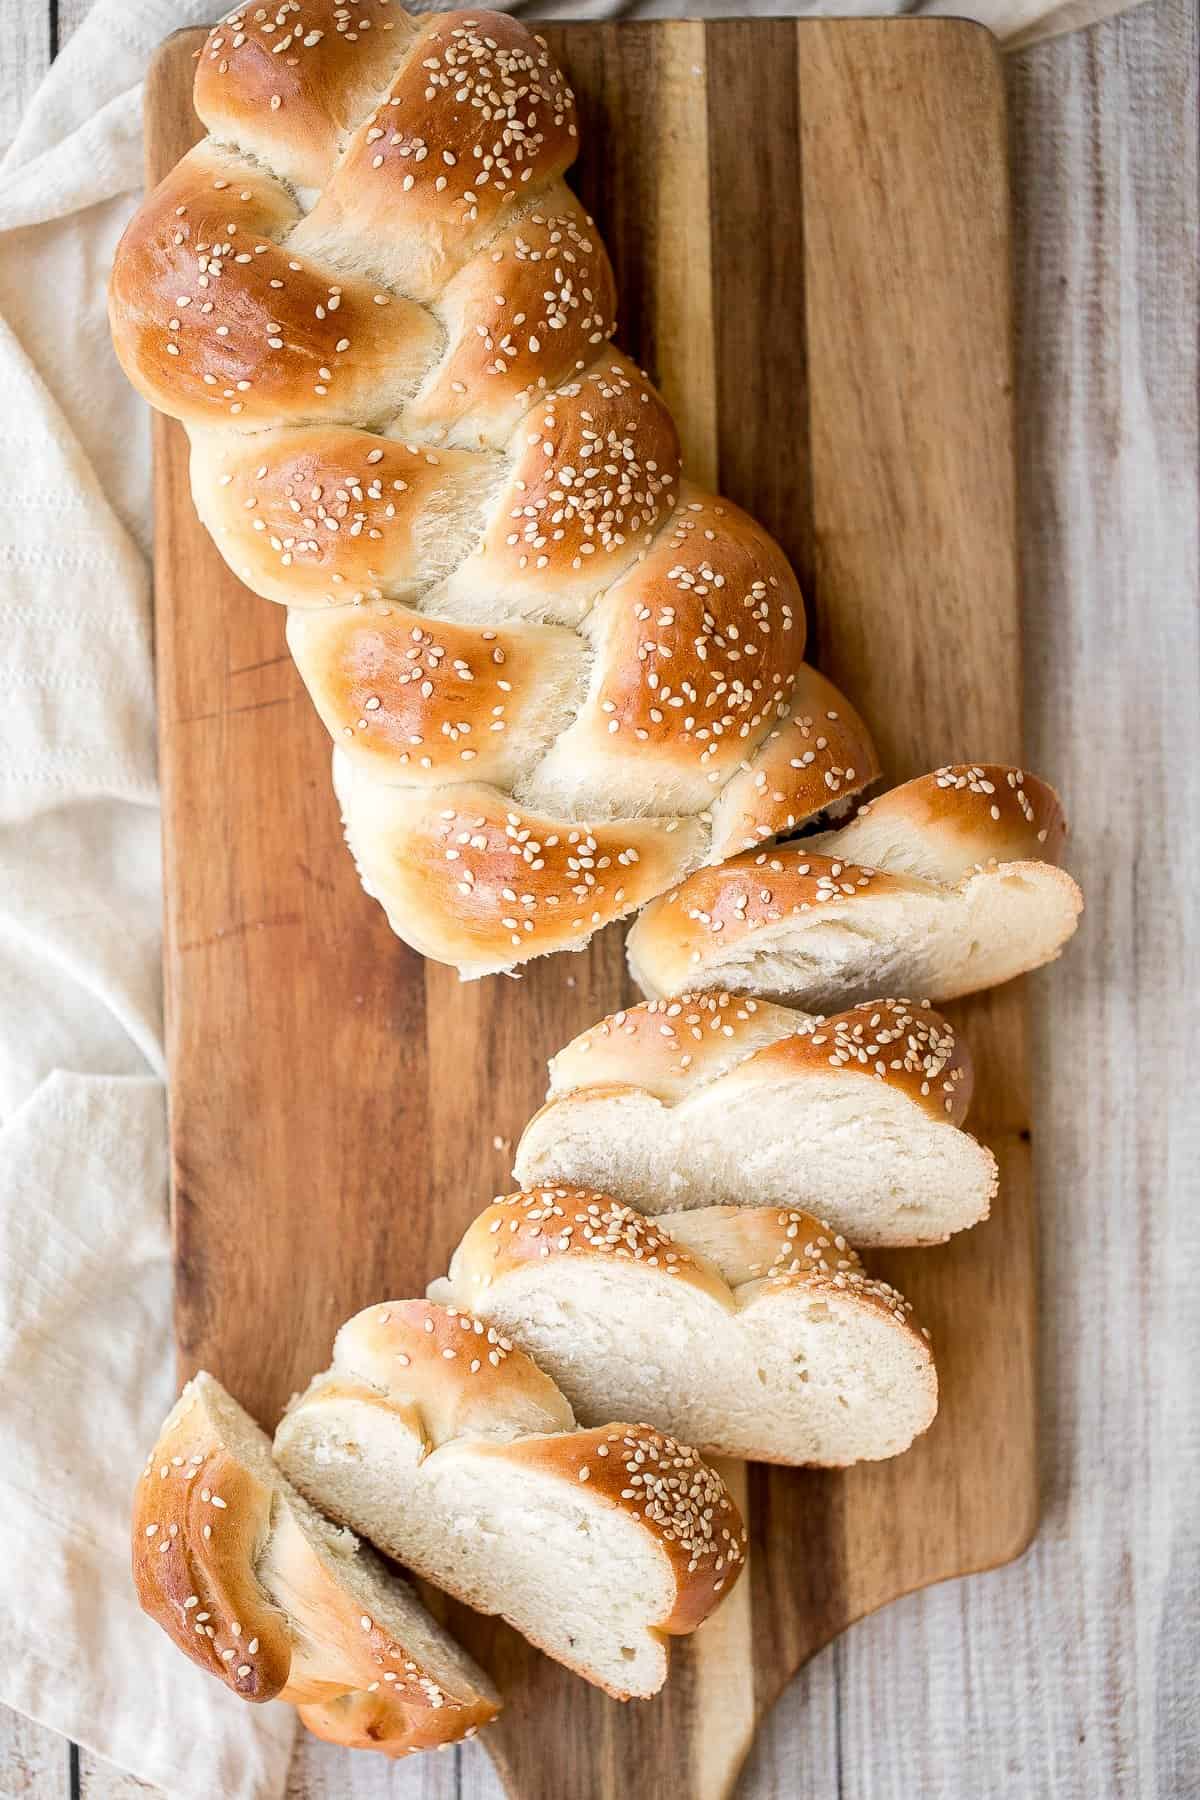
There is nothing like the scent of freshly baked bread filling up your kitchen. These beautiful braided loaves of traditional easy challah bread are light, soft and fluffy, with a beautiful golden brown crust coated in sesame seeds. It's rich in flavour and is slightly sweet. This easy three-strand braided challah takes just 20 minutes of actual prep work to come together. It's the perfect side of bread to serve with every day meals.
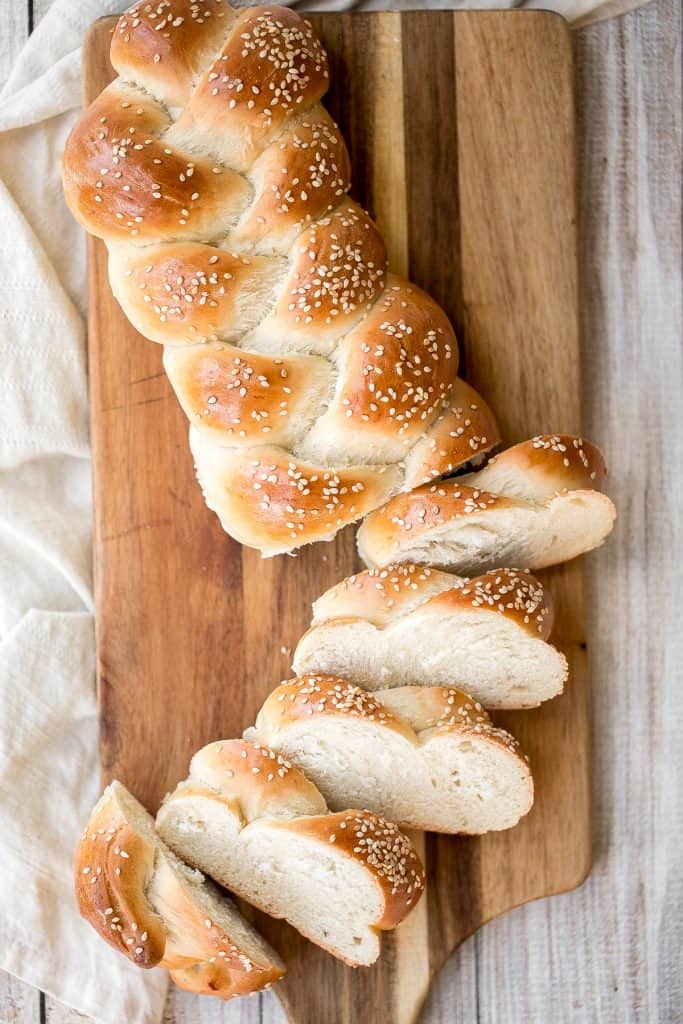
What is Challah?
Challah (also known as "egg bread") is a traditional Jewish bread that is baked when celebrating the Sabbath or other holidays. It is a braided loaf of bread that is made rich with eggs, sweetened with honey, and has the softest, fluffiest texture, perfect for french toast. There are many variations of challah in different parts of the world and you can customize it with a wide array of ingredients such as almonds, raisins, cinnamon, and so on (like in cinnamon raisin challah bread).
Challah is often compared to brioche bread as they are similar in texture, but they have their differences. Unlike brioche bread which is made primarily of butter and milk, traditional challah is made with canola oil and eggs for enrichment.
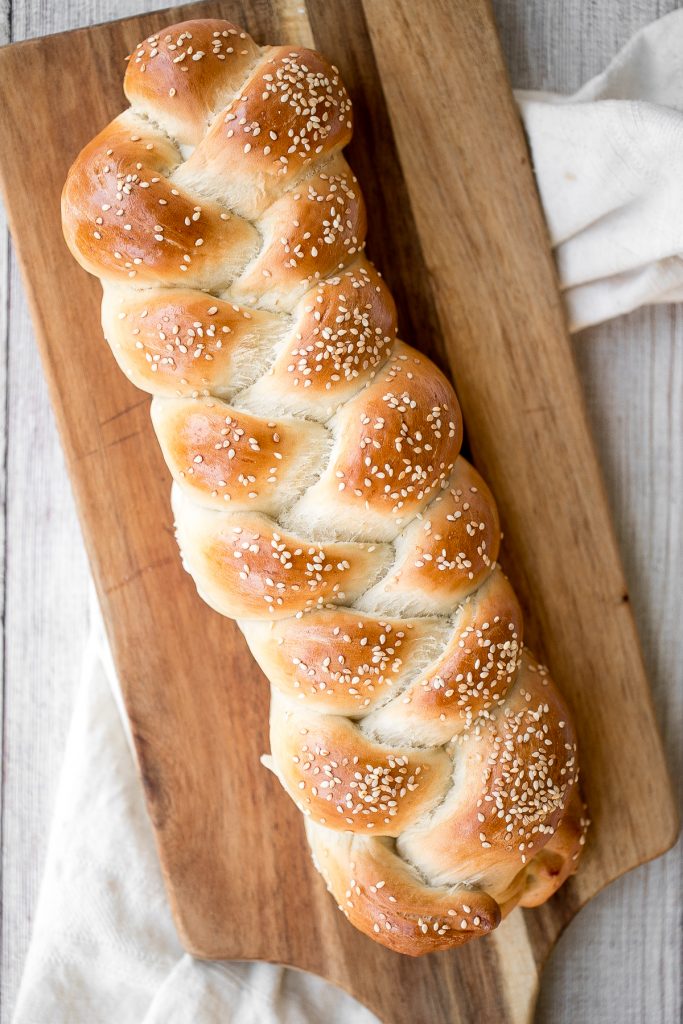
Ingredients
- active dry yeast
- water
- liquid honey
- vegetable oil
- eggs - you need one egg for the dough, and one egg to be used for the egg wash on top.
- all purpose flour
- salt
- white sesame seeds - to sprinkle on top.
You will also need a kitchen scale (or measuring cups and spoons), mixing bowls, half sheet baking pan and silicone baking mat (or parchment paper).
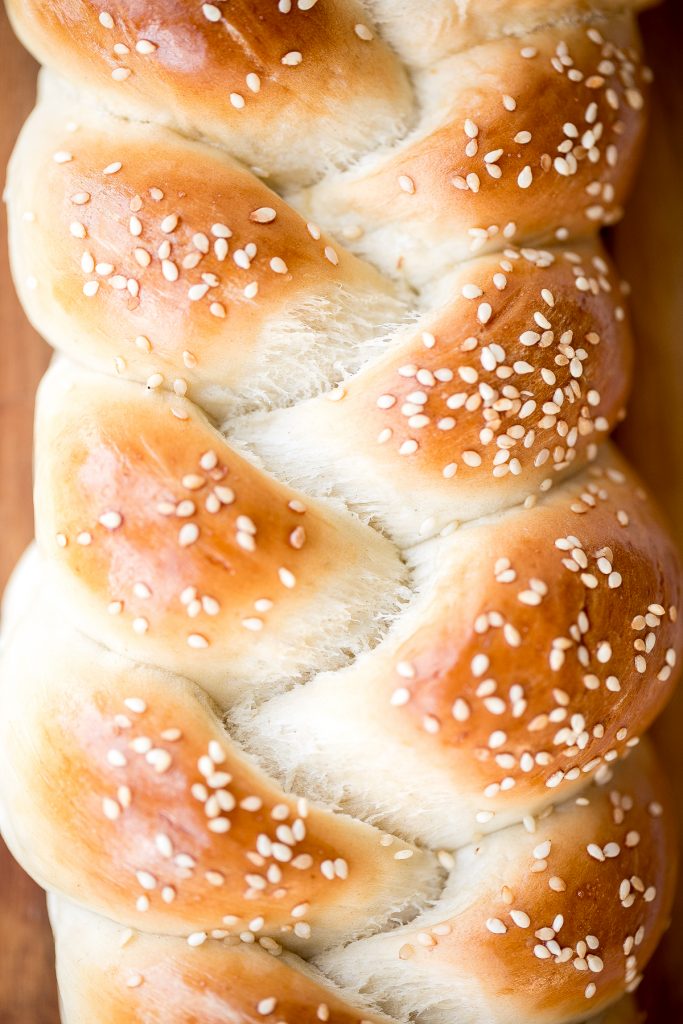
How to Make the Best Easy Challah Bread
First, prepare the dough. In a medium mixing bowl, dissolve yeast in water and whisk in honey, oil and one beaten egg. The mixture should start to bubble and develop a yeasty aroma. In a large mixing bowl, add flour and salt. Pour in the yeast mixture and mix well until fully combined, scraping down the sides of the bowl (there should be no dry flour particles visible).
Next, knead the dough on a clean surface for 5 minutes until it turns into a smooth dough ball. Transfer the dough back into the bowl and coat with a little bit of oil to prevent it from drying out. Cover the bowl with plastic cling wrap and let it rise at room temperature until doubled in size, about 1 hour.
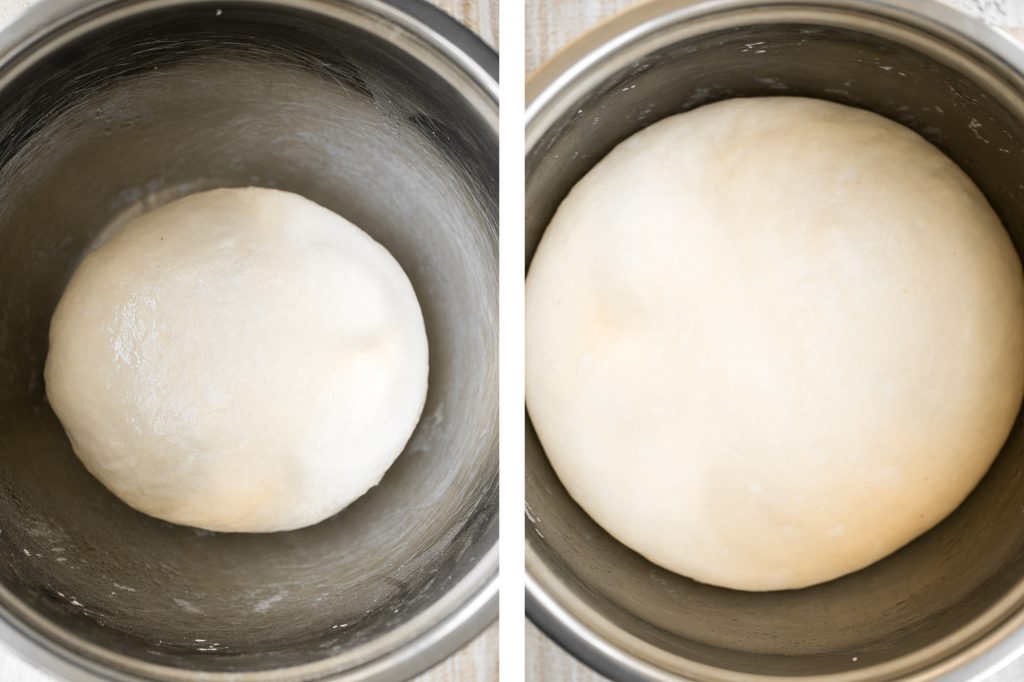
How to Braid Challah Bread with Step-by-Step Pictures
Now we are ready to braid the challah. We are making two 3-strand braided challah. You could also make one 6-strand challah.
- Punch down on the dough to deflate it completely and roll it into a log. Divide the log into 6 equal pieces and roll each piece into a long rope, about 1-inch thick.
- Place three ropes side by side on a lightly floured surface and pinch them together at the top to seal.
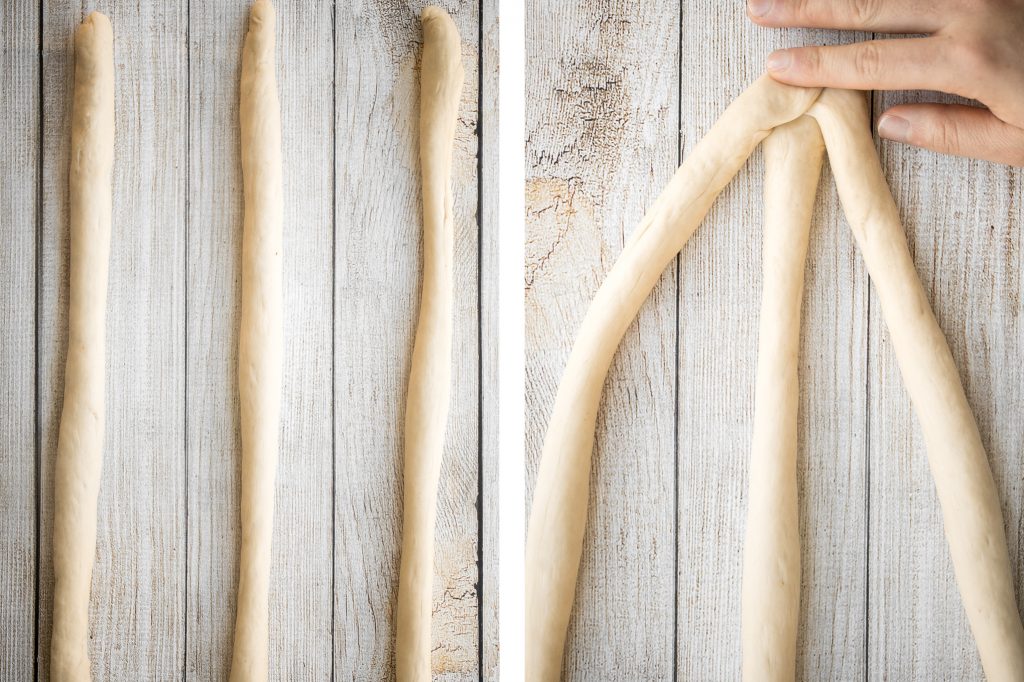
- Braid the three strands together by alternating the right strand over the middle strand and the left strand over the middle strand. Continue the pattern, alternating between the right and left strands until it reaches the ends. Pinch the ends together to seal.
- Repeat the same steps with the second challah.
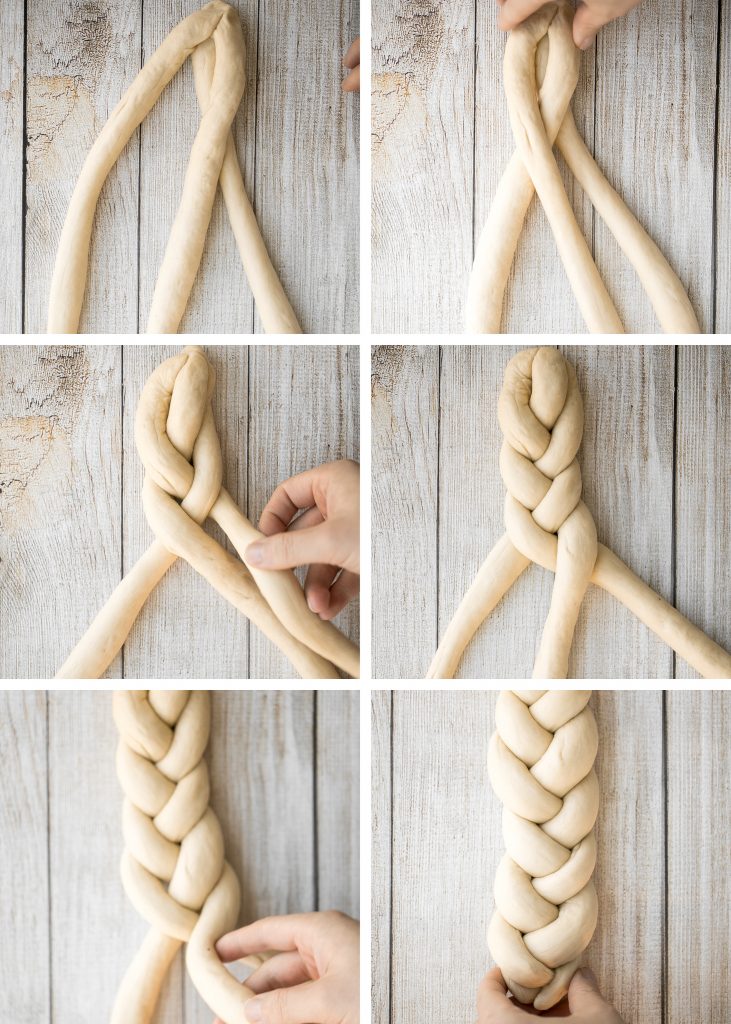
Then, place both challah on a parchment lined baking sheet, spaced apart. Cover with cling wrap and let rise until almost doubled in size, about 45 minutes depending on the room temperature.
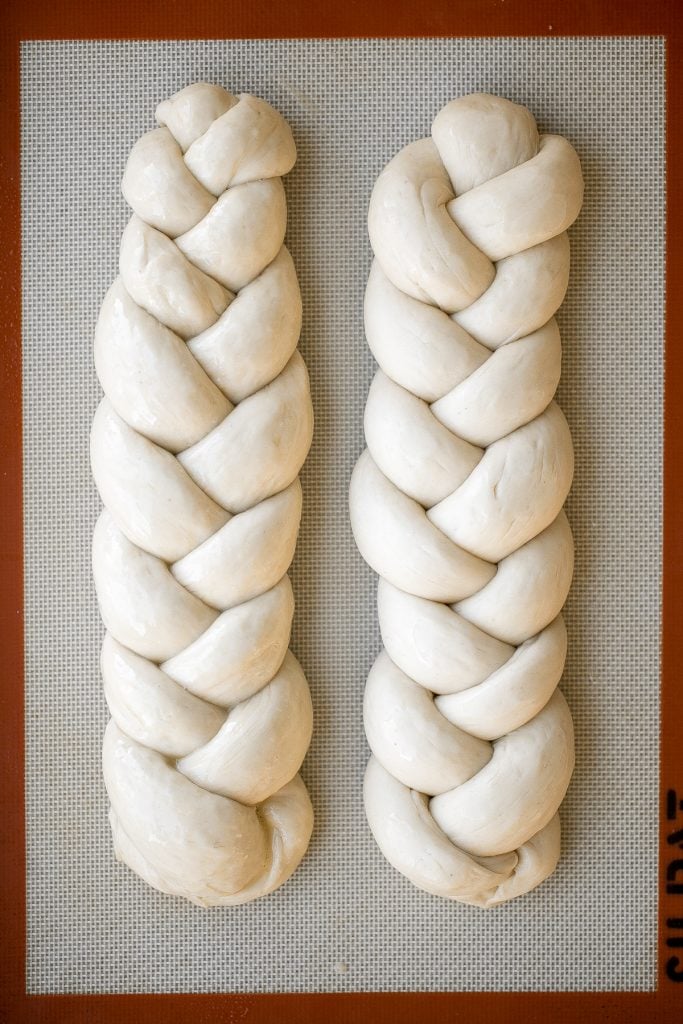
Now we are ready to bake. First, brush a generous amount of egg wash (beaten egg) evenly over the top and sprinkle with sesame seeds. The egg wash adds shine and creates a beautiful golden crust during baking. Then transfer into a 350 F preheated oven and bake for 25 minutes until the top turns golden brown.
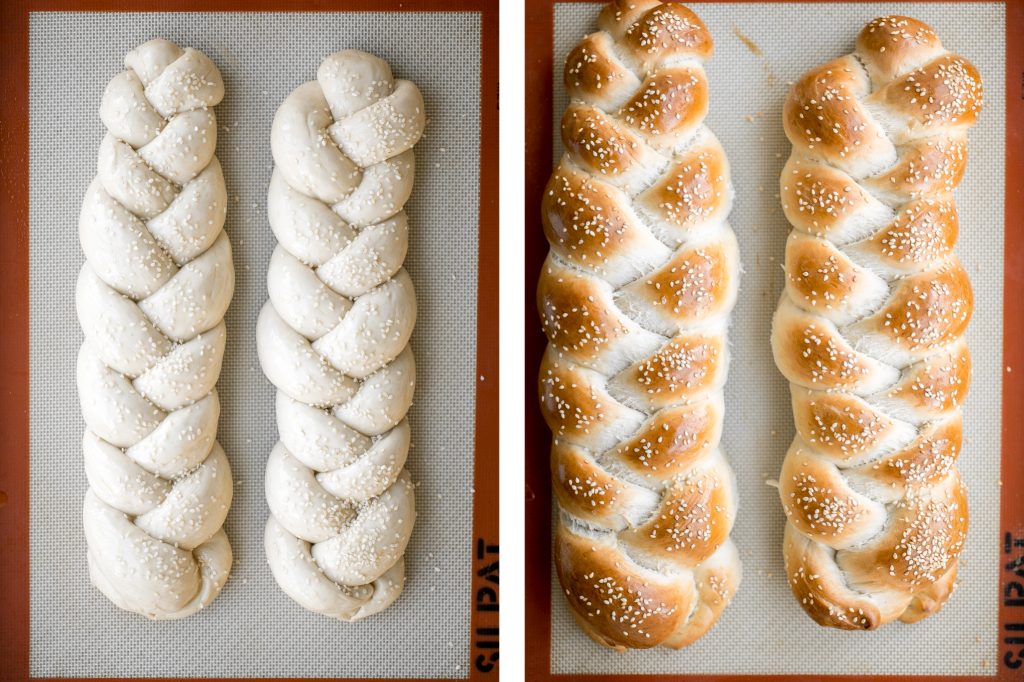
Let the challah bread cool down to room temperature before slicing, about 30 minutes.
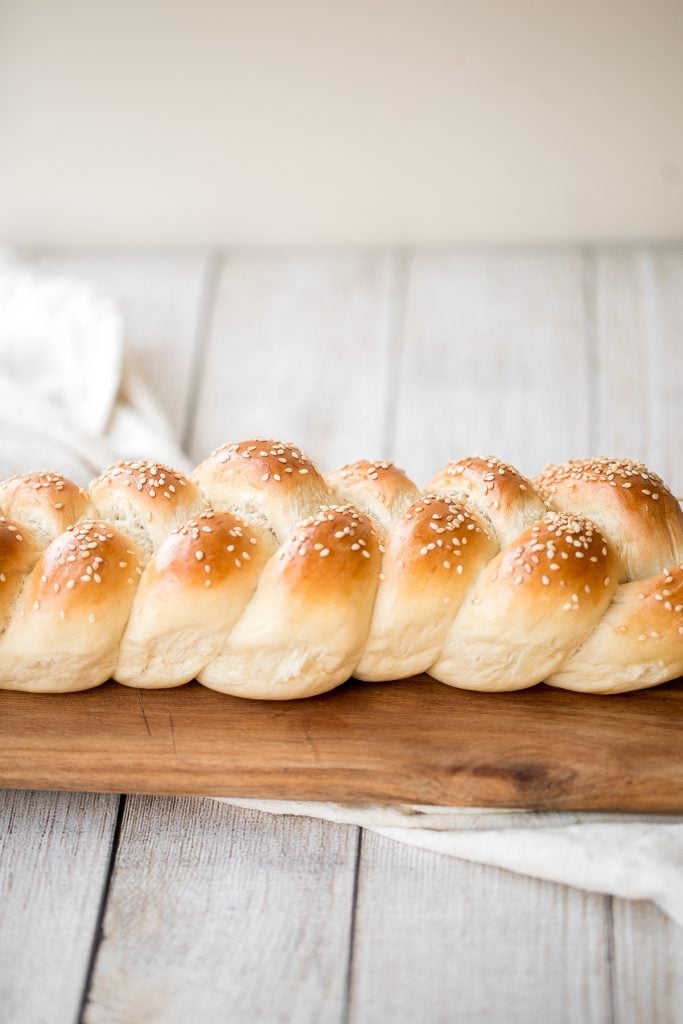
Challah Bread Storing Tips
- How to store: Store challah in a bread box or an airtight container at room temperature for up to 3 days or in the refrigerator for up to one week.
- How to freeze: You can also freeze challah in an airtight container or freezer bag for up to 3 months. To thaw, place in the refrigerator or kitchen counter.
- How to reheat: To reheat refrigerator or frozen challah that has been thawed, place in the air fryer or oven at 300 F for 5-10 minutes. You can also cut into slices and toast in the toaster or toaster oven.
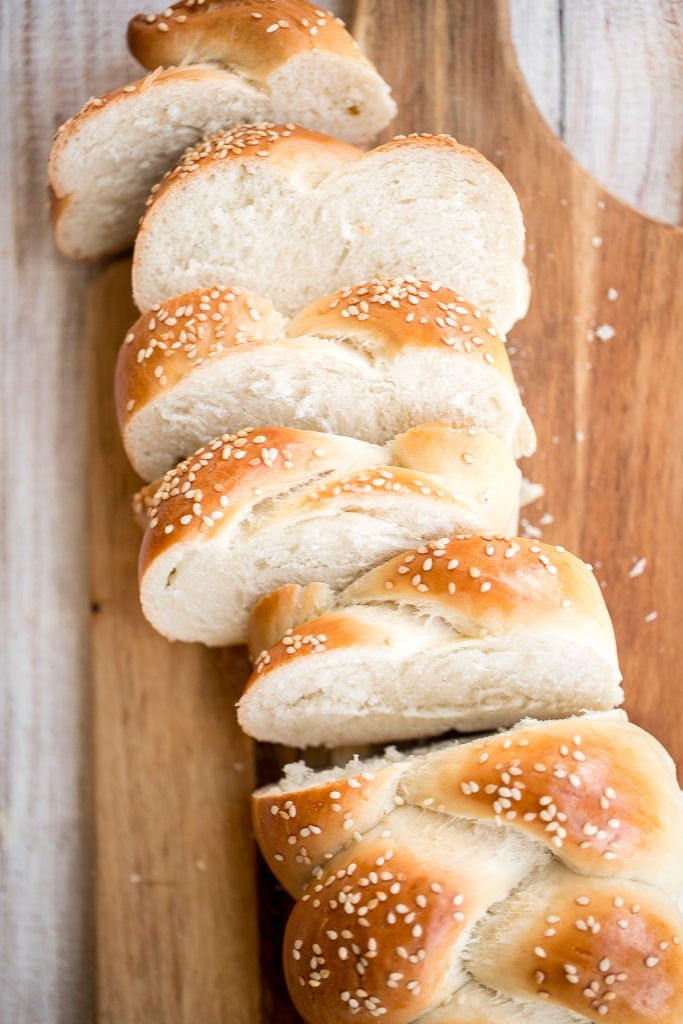
More Bread Recipes
- Brioche Bread
- Small Batch No-Knead Bread
- No Knead French Baguettes
- Easy Small Batch Ciabatta Rolls
- Homemade Sunflower Seed Bread
- Easy Homemade Everything Bagels
- Cheesy Garlic Dinner Rolls
Tried this recipe?
I'd love to hear what you think! Leave a comment and rating below to share your feedback. Your reviews help others discover this recipe and help me keep creating more free recipes for you. Snap a photo and tag me on social media @aheadofthyme too.
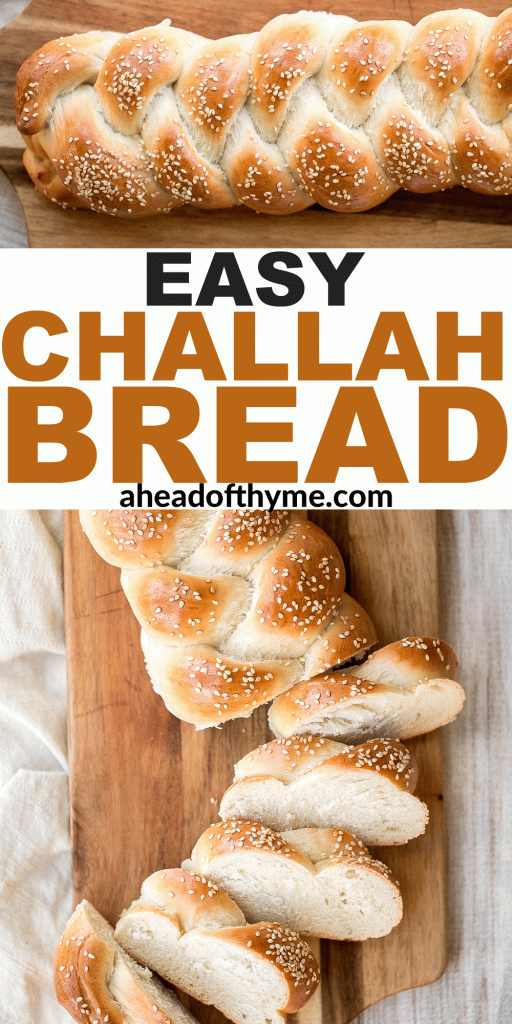
Chocolate Crinkle Cookies
Soft, tender and chewy, chocolate crinkle cookies are a classic Christmas cookie that tastes like a rich fudgy brownie packed with chocolate with a a crackly, crinkle crust, and coated in powdered sugar. This super simple cookie recipe is so easy to whip up, making it the perfect cookie to bake, even for the most novice of bakers.

What are Crinkle Cookies?
These cookies get their name from the deep crimson cracks that break the surface of the powdered sugar coating, which form naturally as the cookies bake.
Perfect for a Holiday Cookie Box
Are you counting down the days to cookie season like I am? I am already planning out all the cookies I am going to make and box up for family and friends this year. These chocolate crinkle cookies are definitely a must-have in your holiday cookie box, along with some of my favourite Christmas cookies such as Christmas sugar cookies, raspberry jam-filled thumbprint cookies, soft and chewy white chocolate cranberry cookies and chocolate-dipped shortbread cookies.
Ingredients in Chocolate Crinkle Cookies
To make these Chocolate Crinkle Cookies, you'll need the following ingredients (full measurements in recipe card below):
- all-purpose flour
- cocoa powder - use unsweetened cocoa powder.
- baking powder
- salt
- vegetable oil - other substitutes include olive oil or coconut oil.
- granulated sugar
- brown sugar
- pure vanilla extract
- eggs
- confectioners' sugar - for the beautiful snow-like coating.
You will also need measuring cups and spoons, mixing bowls, hand mixer (or stand mixer), cookie scoop, half sheet baking pan, and silicone mat.
How to Make the Best Fudgy Chocolate Crinkle Cookies
- Combine dry ingredients: In a small bowl, whisk together flour, cocoa powder, baking powder, and salt. Set aside
- Combine wet ingredients: In a medium bowl, use a hand mixer to beat together oil and sugars on medium-low speed until combined. Add vanilla and eggs, one at a time, and beat until combined.
- Add dry ingredients to wet ingredients: Gradually add the dry ingredients into the wet ingredients, and beat on low speed until just combined, scraping down the sides. Note that the dough is will be very sticky.
- Chill: Cover the bowl tightly with plastic wrap and chill in the refrigerator for at least 2 hours, up to overnight. If chilling the dough overnight, place the cookie dough on the counter for 10-20 minutes before rolling into balls. This will allow it to warm up slightly, otherwise the cookies will be thicker and will not spread as much.
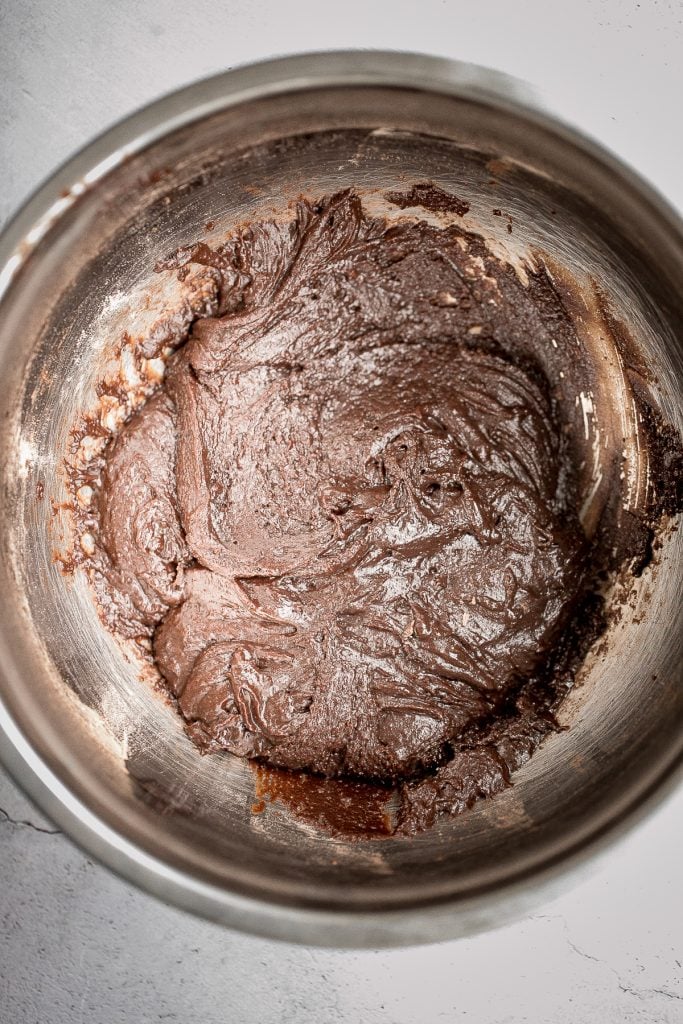
- Shape and coat the cookies: Remove cookie dough from the refrigerator. Use a cookie scoop to scoop out 1 tablespoon of cookie dough and roll into a ball. Roll the cookie ball into a shallow plate of confectioners' sugar and coat it completely. Place the cookie balls 2 inches apart on a parchment paper or silicone mat lined half sheet baking pan. Repeat until you have used up all the cookie dough. You may have to bake these in 2 batches.
- Bake: Bake in a 350 F preheated oven for 10-12 minutes, until just set. They will be soft to the touch and will appear slightly underbaked, but they will firm up as they cool. Give the baking sheet a few gentle taps on the kitchen counter. Allow the cookies to cool in the baking sheet for 5 minutes, then transfer to a wire cooling rack to cool completely.
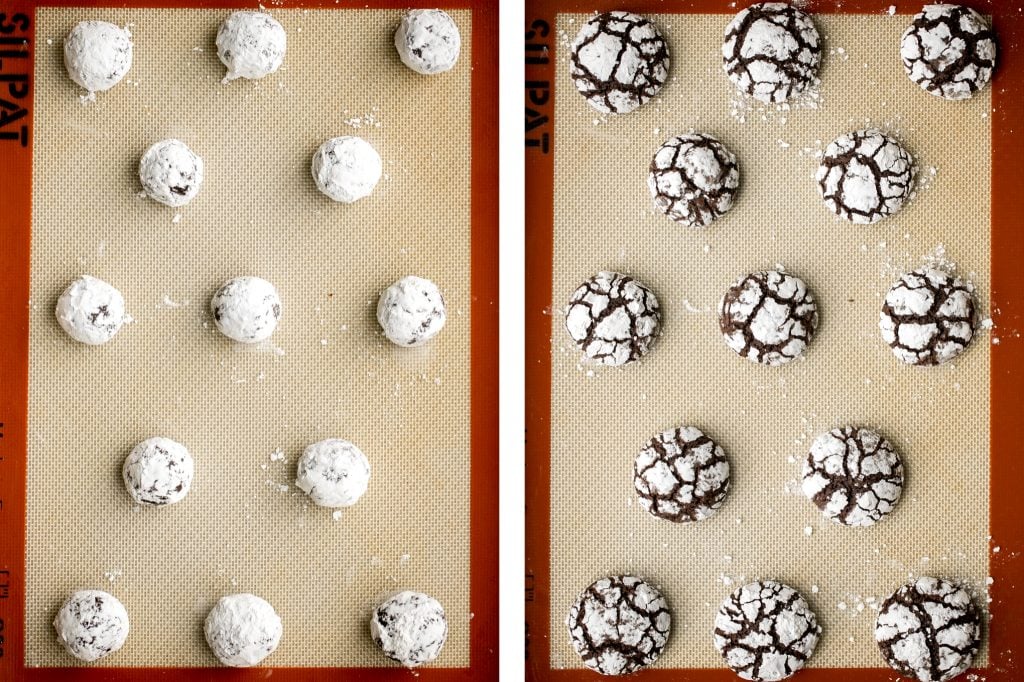
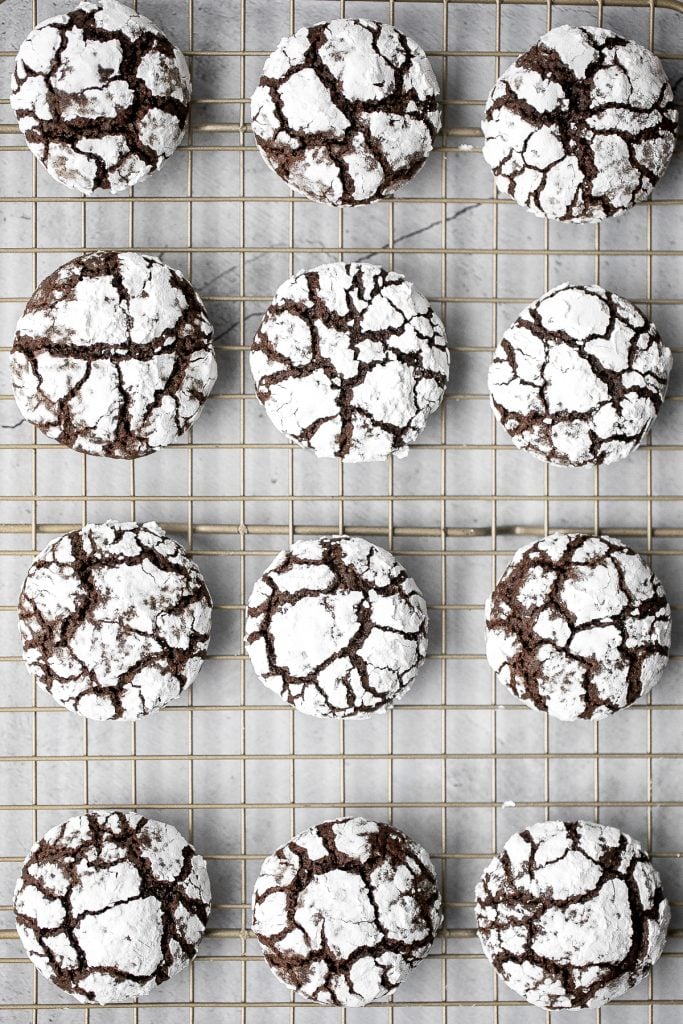
Tips
- You have to chill the dough. Do not skip this step. Chilling the dough firms up the dough and makes it so much easy to handle. You will not be able to roll them into balls without chilling them first for at least 2 hours, up to overnight. If chilling the dough overnight, place the cookie dough on the counter for 10-20 minutes before rolling into balls. This will allow it to warm up slightly, otherwise the cookies will be thicker and will not spread as much.
- Make a double batch. You can easily double the recipe to make a larger batch of cookies. Refrigerate the dough or uncoated cookie balls at any point that you are waiting for the oven to be ready.
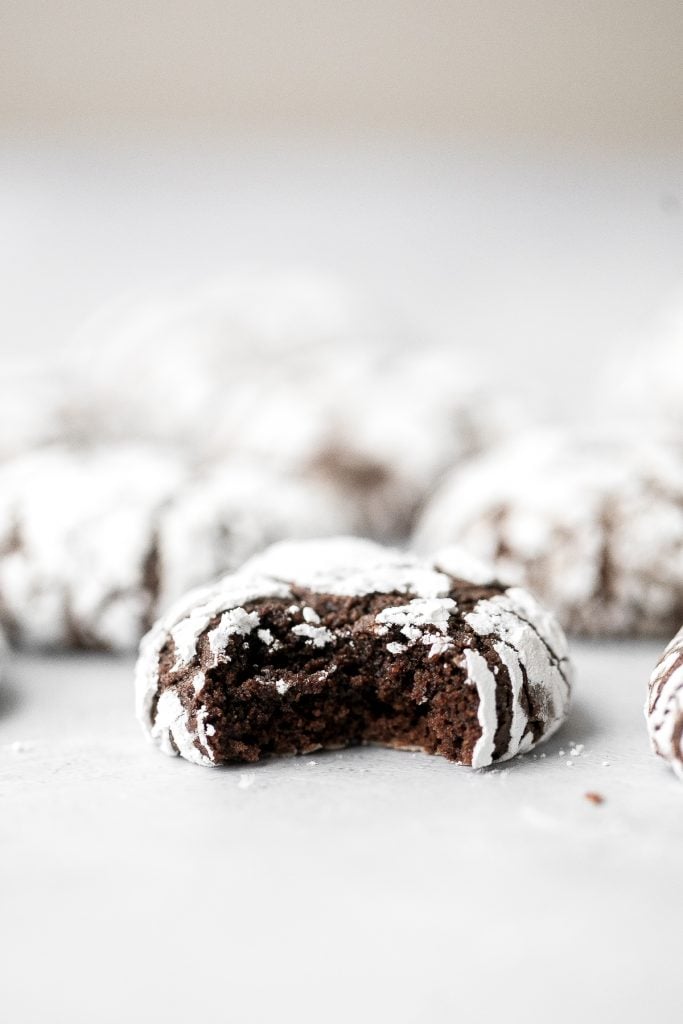
How to Store Crinkle Cookies
- Storing instructions: Store in an airtight container at room temperature for up to 1 week.
- How to freeze: You can freeze the rolled dough balls (before they are coated in confectioners' sugar) in a freezer bag for up to 3 months. To bake, allow it to thaw in the refrigerator, then roll in sugar and bake as per recipe instructions.
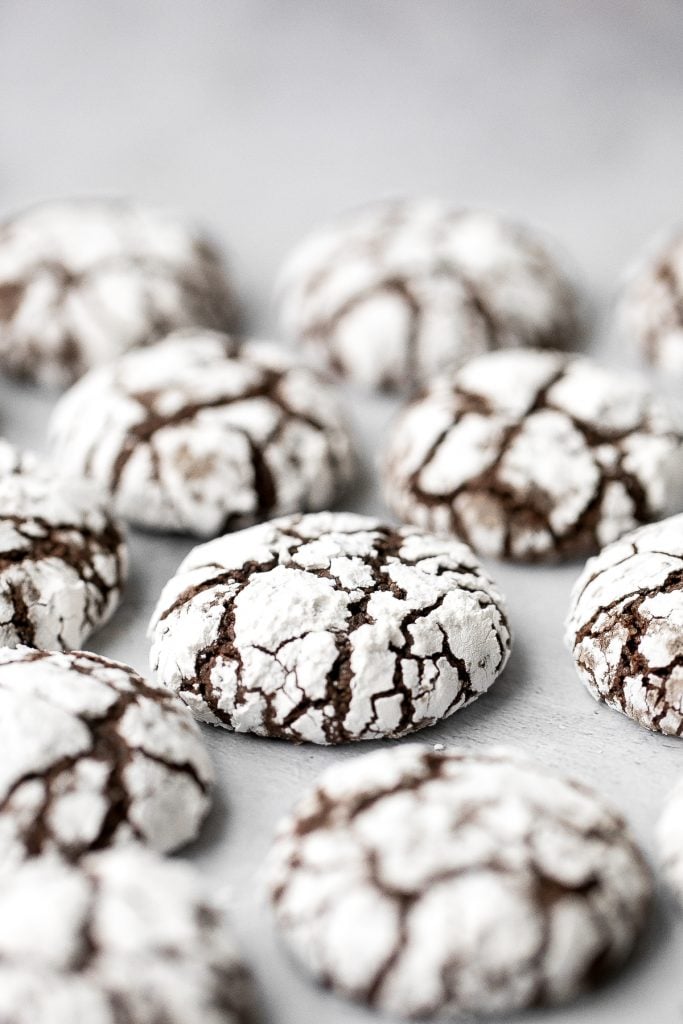
More Cookie Recipes
- The Best Soft and Chewy Peanut Butter Cookies
- Jam-filled Thumbprint Cookies with Almond Glaze
- Soft and Chewy White Chocolate Cranberry Cookies
- Christmas Sugar Cookies with Royal Icing
- Chocolate Chip Banana Bread Cookies
- Chocolate-Dipped Shortbread Heart Cookies
- The Best Chewy Chocolate Chip Oatmeal Cookies
- Chocolate Chunk Peanut Butter Cookies
Tried this recipe?
I'd love to hear what you think! Leave a comment and rating below to share your feedback. Your reviews help others discover this recipe and help me keep creating more free recipes for you. Snap a photo and tag me on social media @aheadofthyme too.

30 Best Thanksgiving Appetizers

Before we dig into our Thanksgiving feast, we need something savoury to snack on. From dips and spreads, to canapés and savoury tarts, to a holiday charcuterie board, I have got you covered. Today, I am sharing my 30 most popular and favourite recipes for Thanksgiving appetizers.

Best Thanksgiving Appetizers
Bacon Wrapped Brussels Sprouts
Bacon wrapped brussels sprouts are the sweet, savory, and salty appetizer that you need at your next holiday gathering this fall. Simple and easy to make.

This Cranberry Whipped Feta Dip is a festive, creamy appetizer that comes together in minutes with just a handful of simple ingredients.
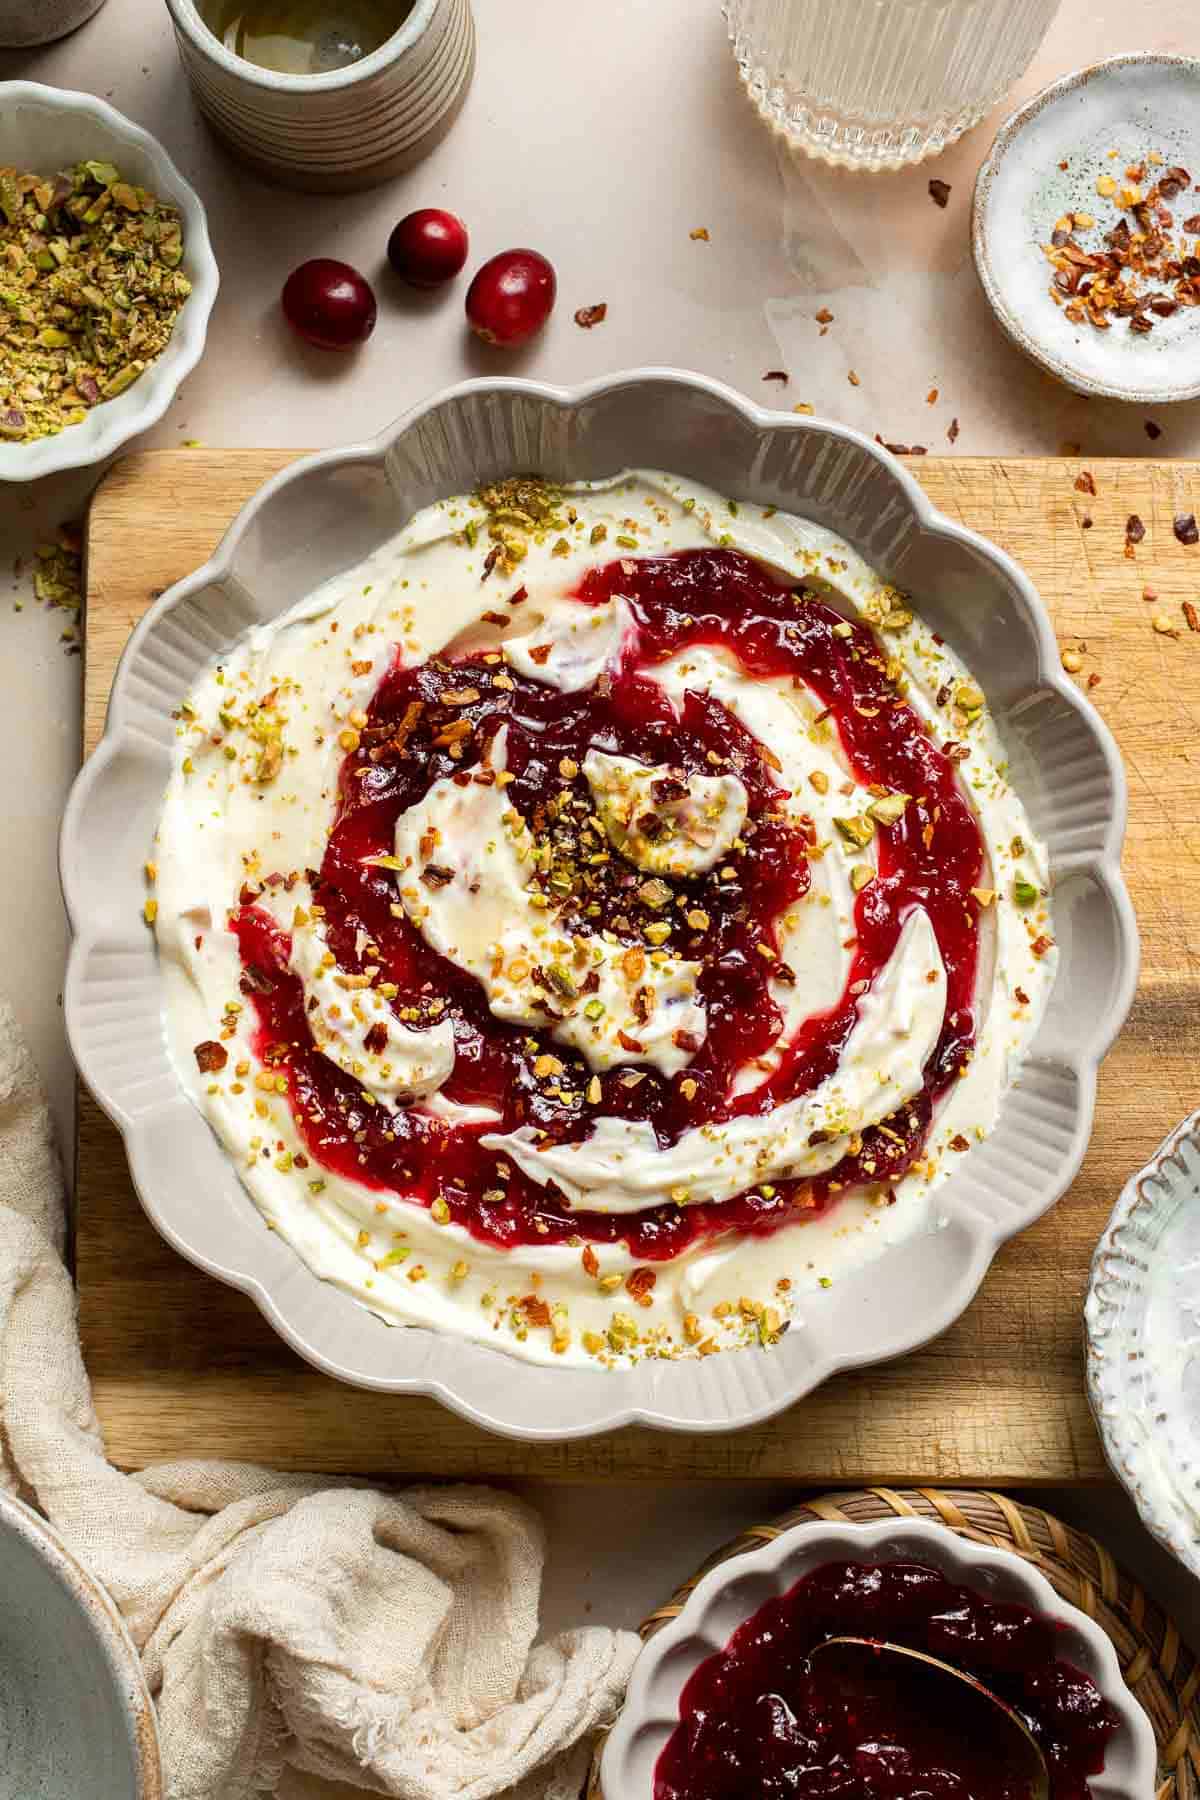
Easy Tomato Bruschetta with Balsamic Glaze
Tomato bruschetta with balsamic glaze is an easy Italian appetizer topped with tomatoes, onions, garlic, basil and olive oil. Delicious, fresh and simple.
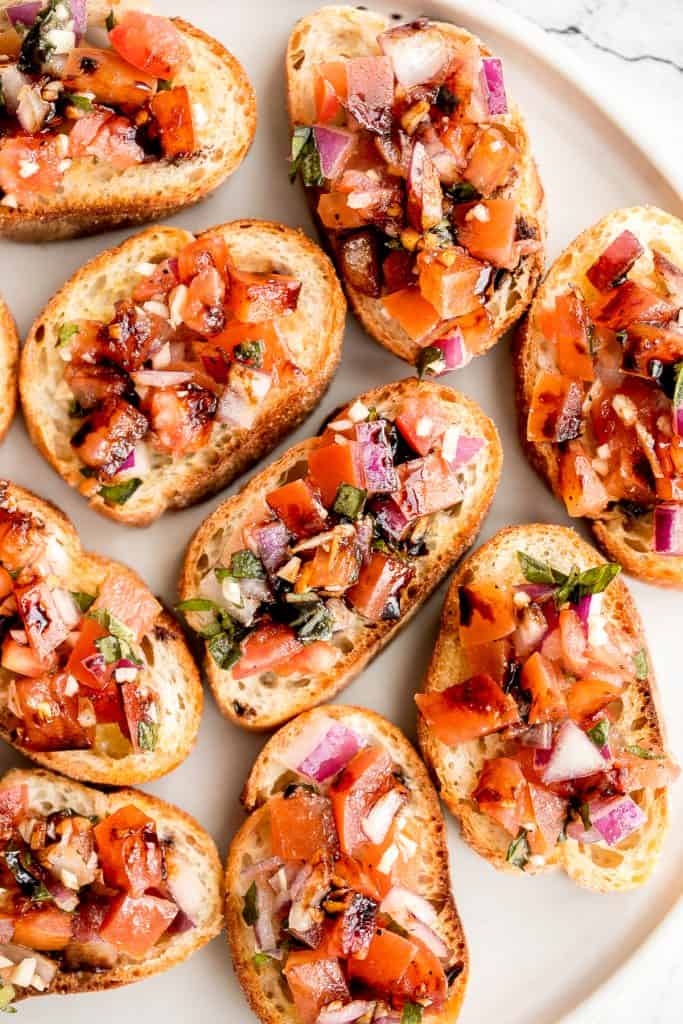
This easy charcuterie board is the perfect appetizer to impress with minimal effort- made with cheese, cured meats, crackers, dips, olives, fruit, and nuts.
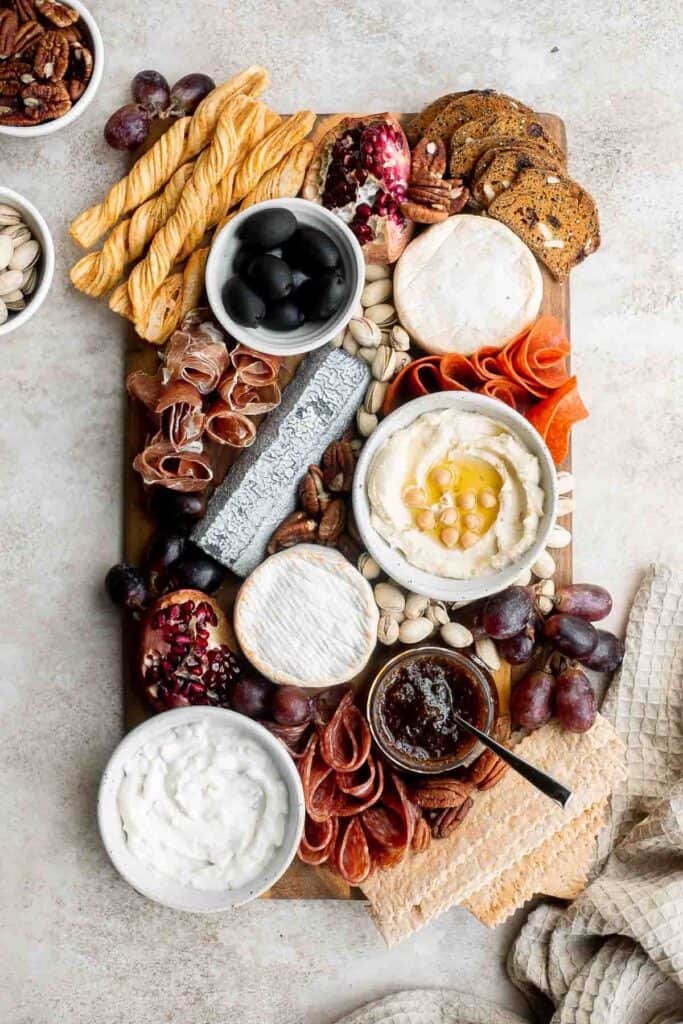
Fried mac and cheese balls are crispy on the outside, creamy and cheesy on the inside, and have the perfect crunch. Best way to use leftover mac and cheese.
Bacon cheddar cheese ball is an easy to make appetizer and delicious showstopper at holiday parties or game day. It's creamy, cheesy, and nutty.
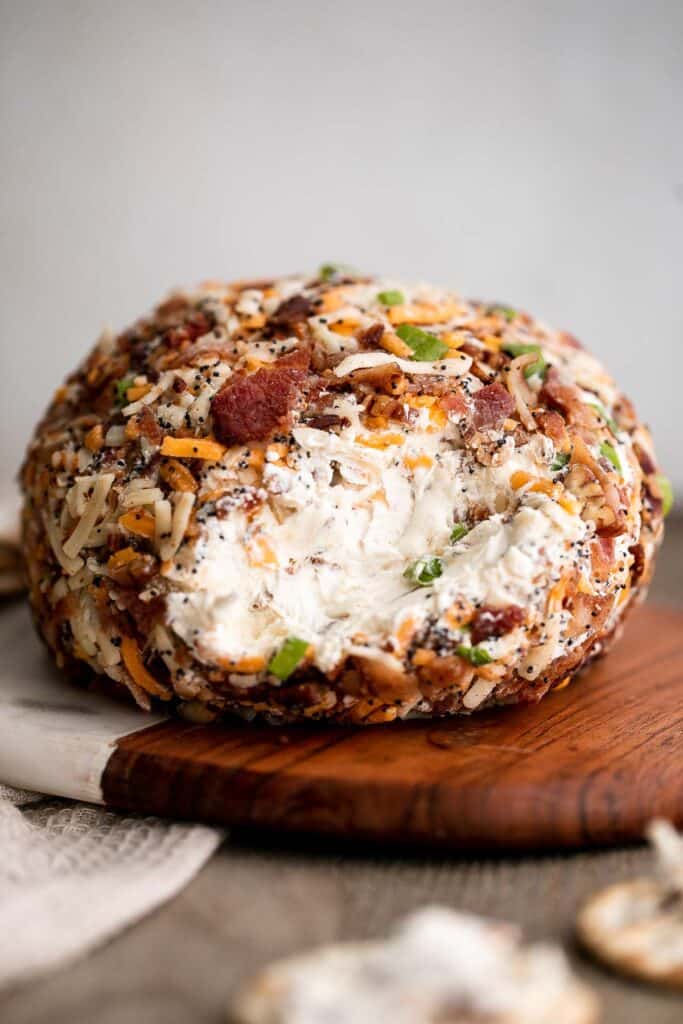
Cranberry Meatballs are sticky, sweet and tangy. These delicious bites are the perfect holiday appetizer, or a great way to use up leftover cranberry sauce.
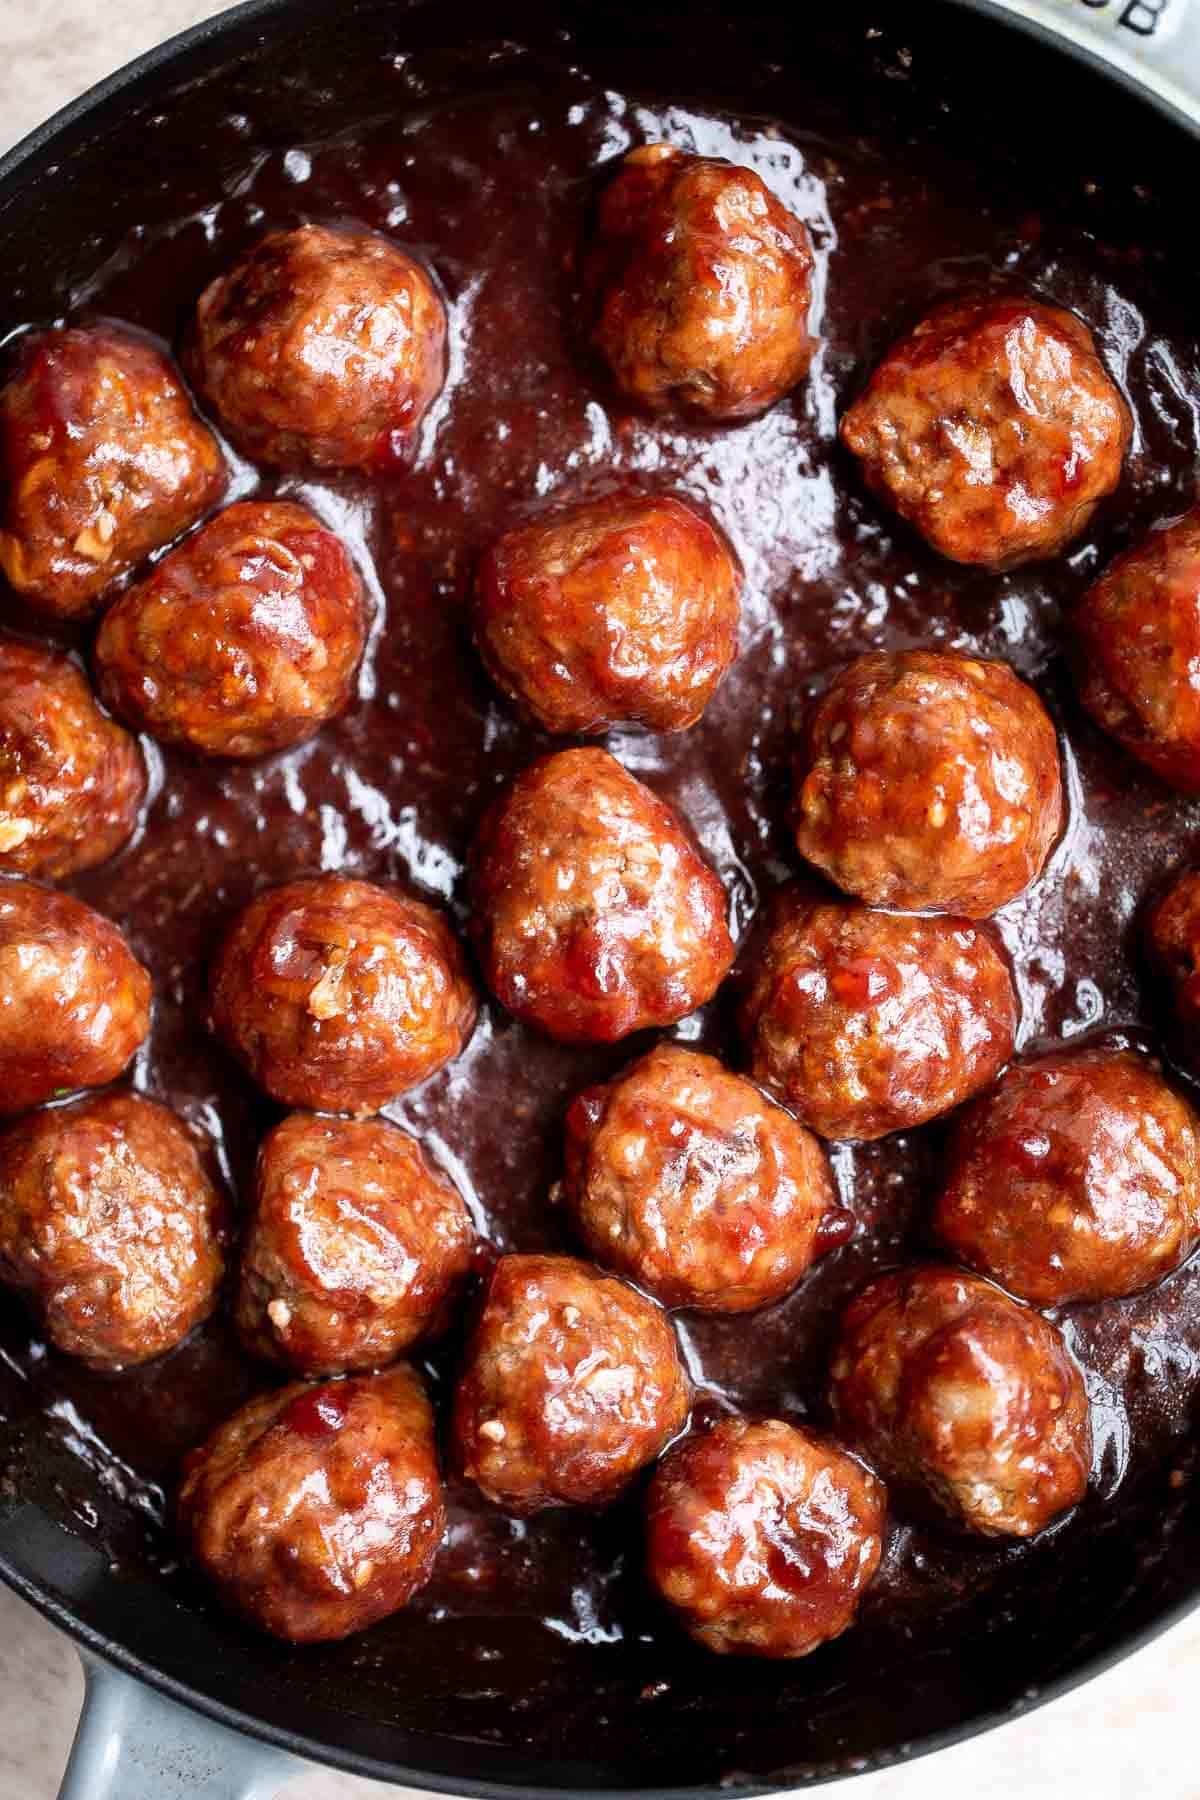
Make creamy pumpkin hummus in under 5 minutes with a few pantry staples including canned pumpkin. It's the best healthy and delicious fall appetizer.
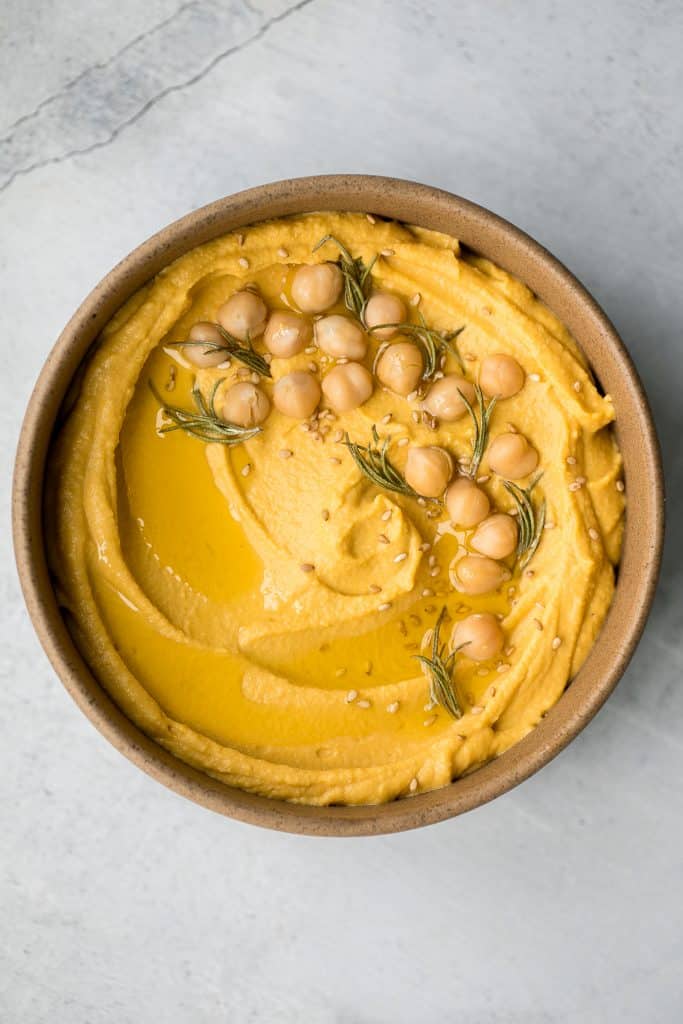
This easy Cheese Board is a popular and classic appetizer arranged with an assortment of cheese, bread and crackers, fresh fruit, and nuts.
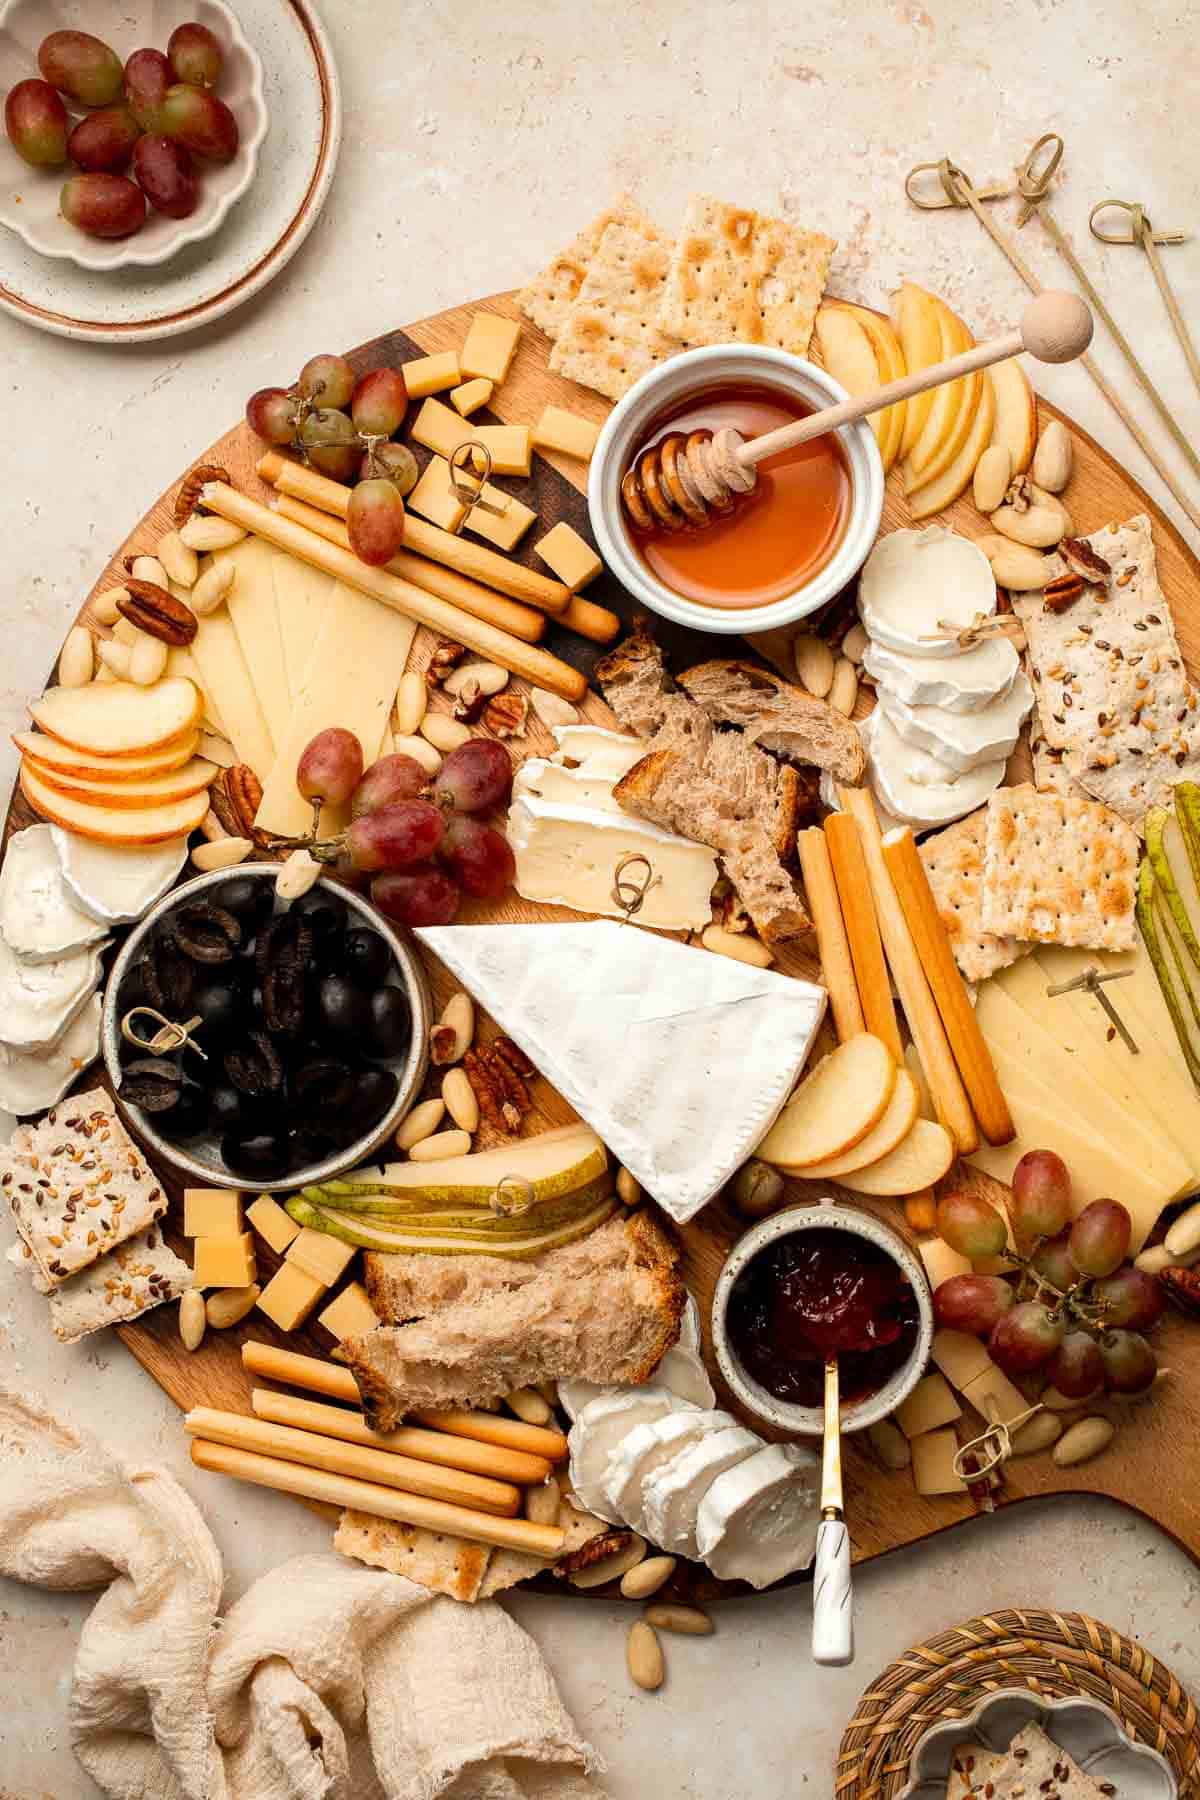
Crispy Smashed Sweet Potatoes are the perfect side dish for your fall and winter meals - sweet, savory, and so simple to make!
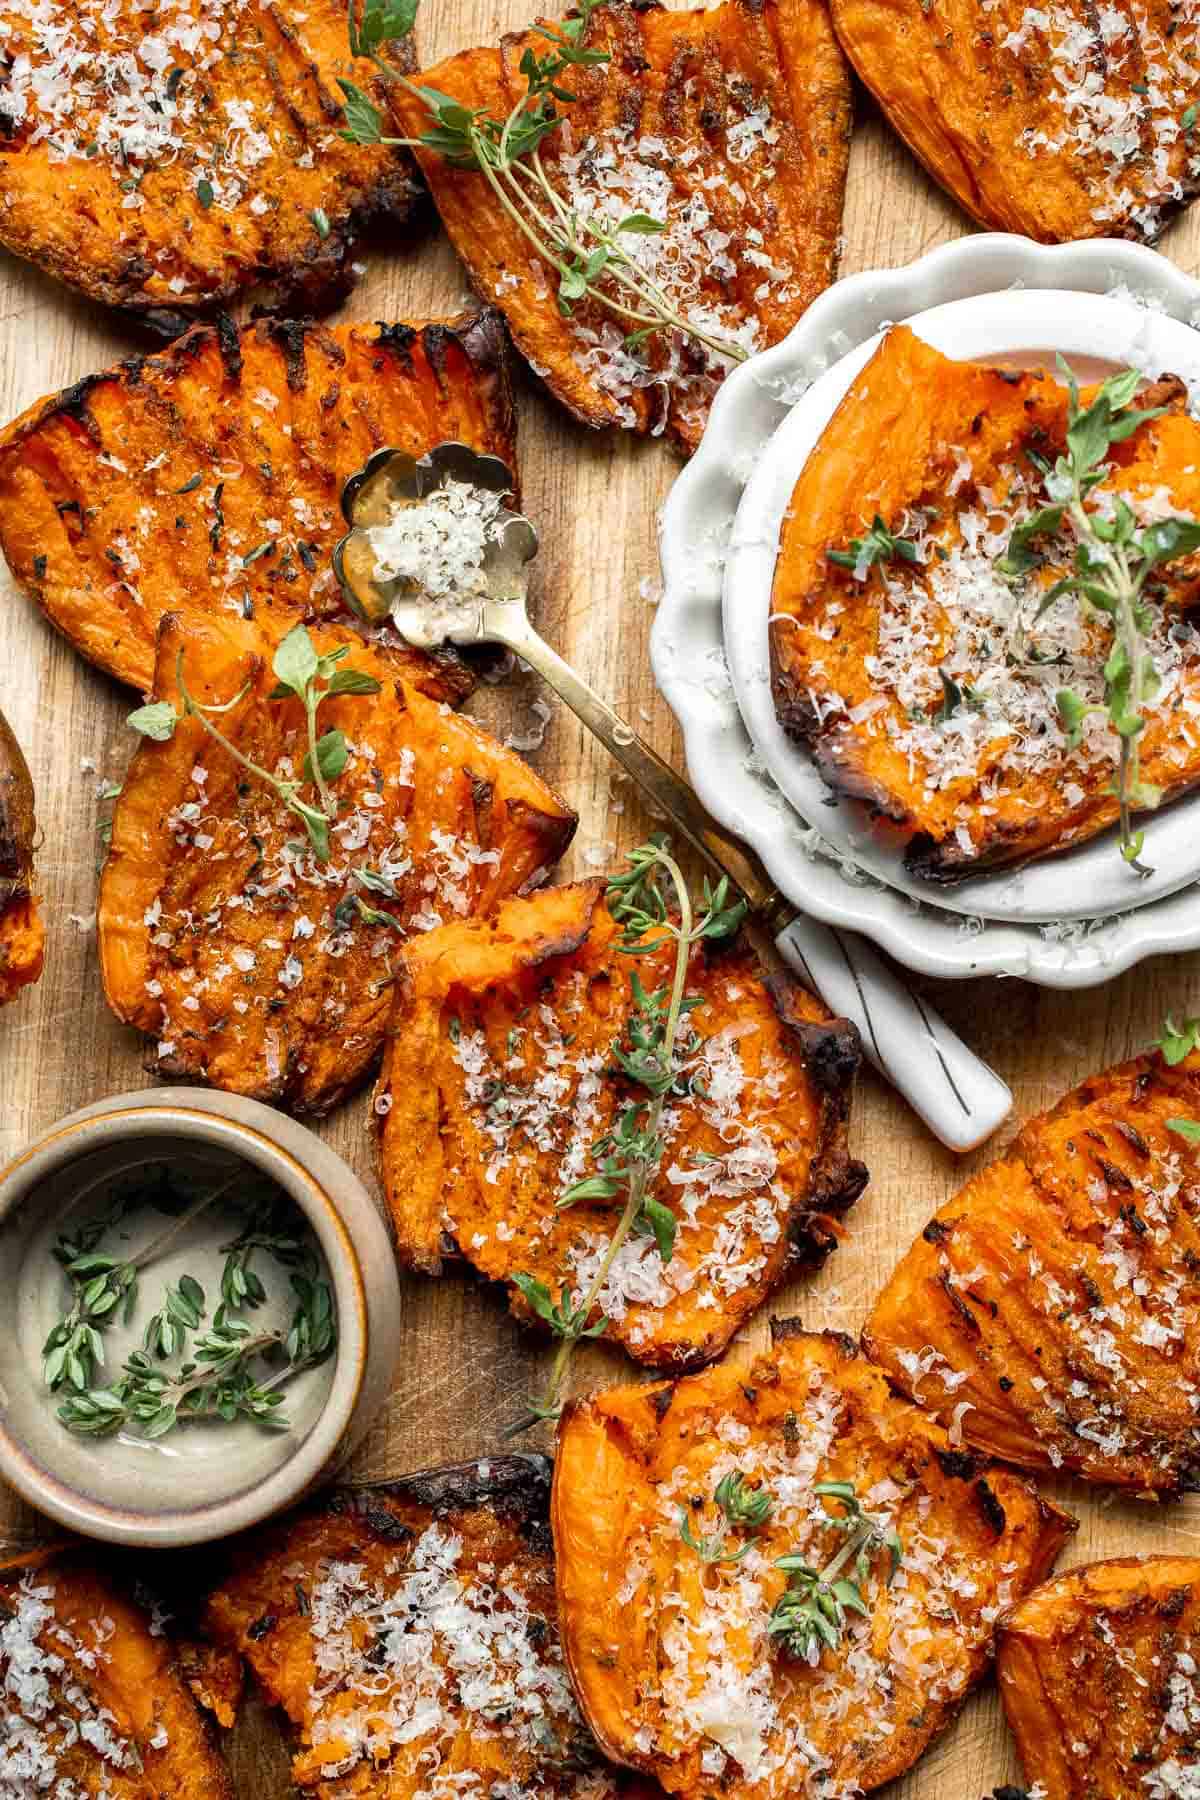
Cranberry baked brie is a sweet and savory appetizer you need to try this holiday season. It's quick and easy, melty and gooey, and so delicious.

Made with homemade pie crust and an earthy, cheesy mushroom filling, this savory Mushroom Galette is an absolute delight. Serve for appetizer or side dish.
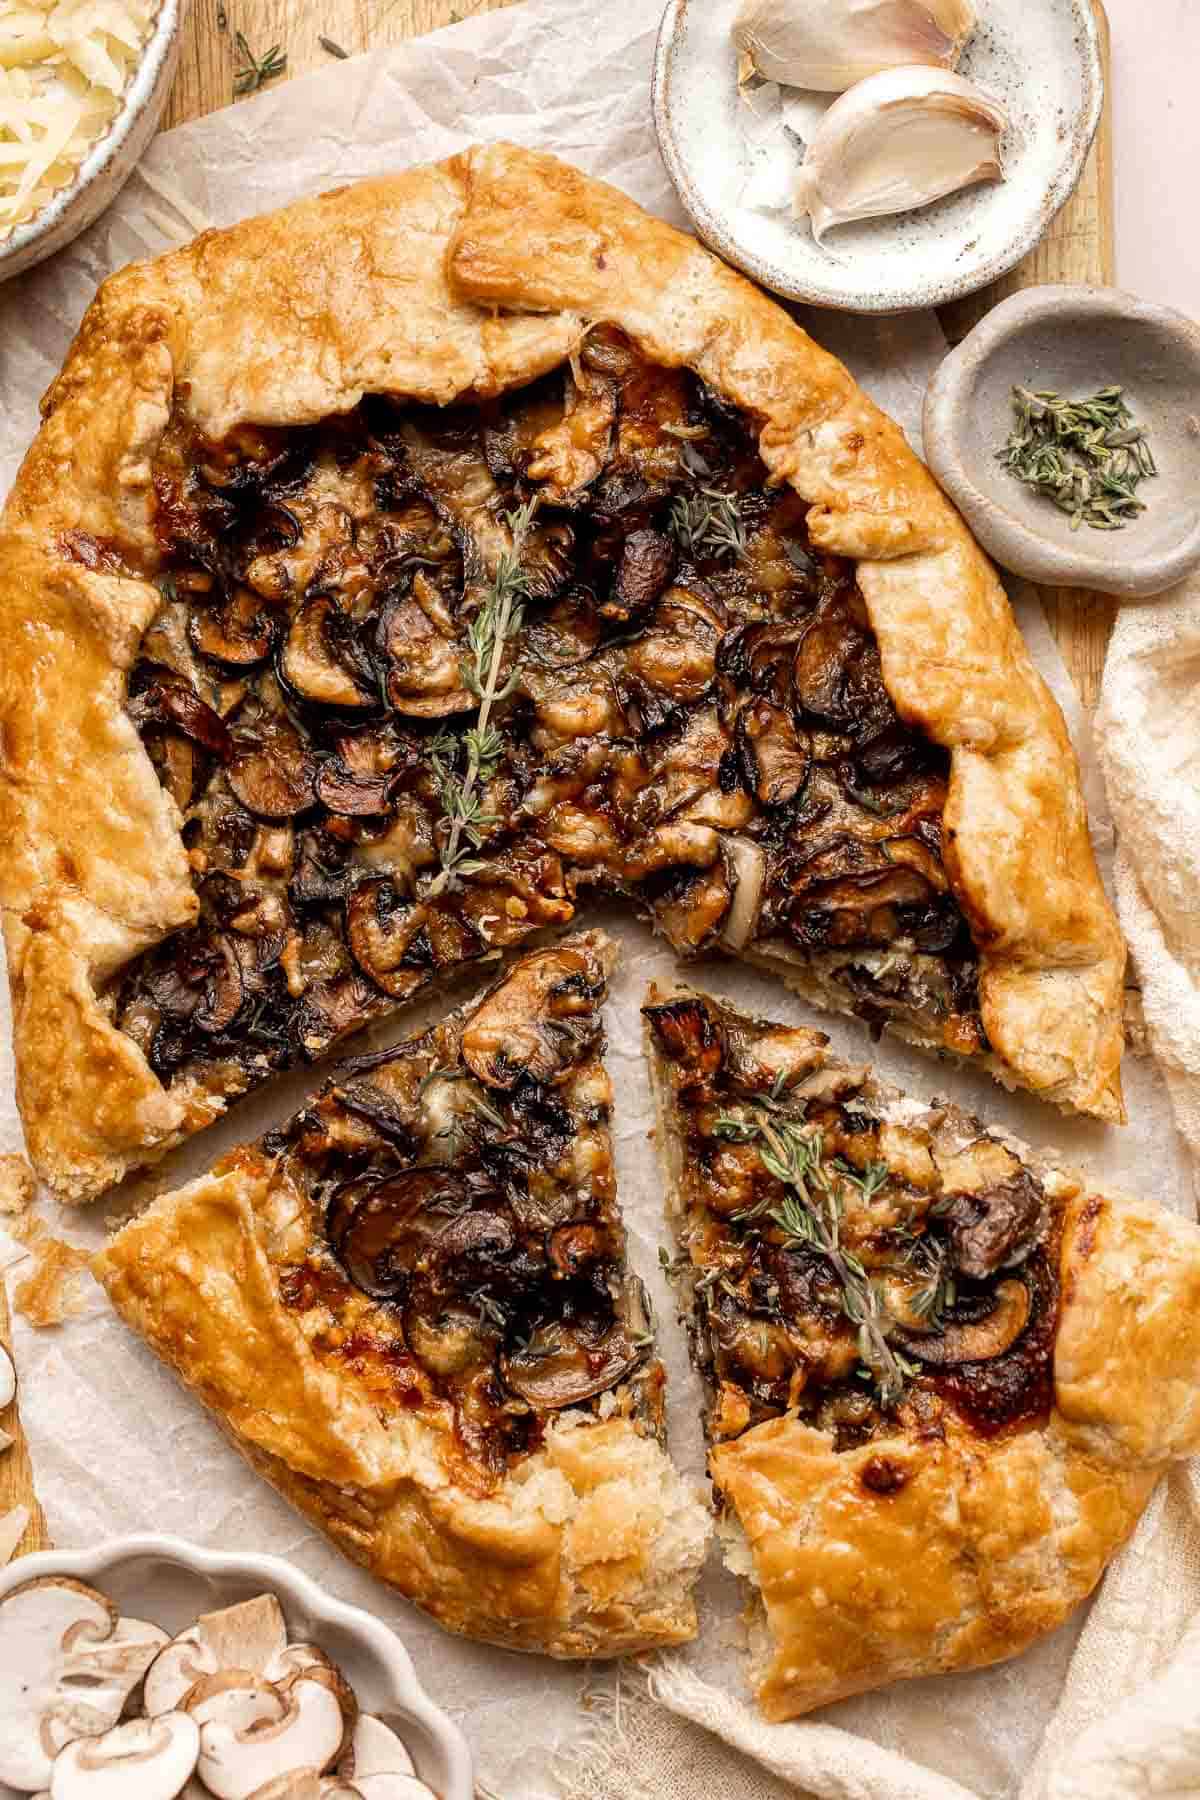
Warm, rich, creamy baked spinach dip is a delicious and easy appetizer that is baked until warm and melty. Easy to make ahead and a total crowd pleaser. It's one of my favourite Super Bowl recipes of all time.
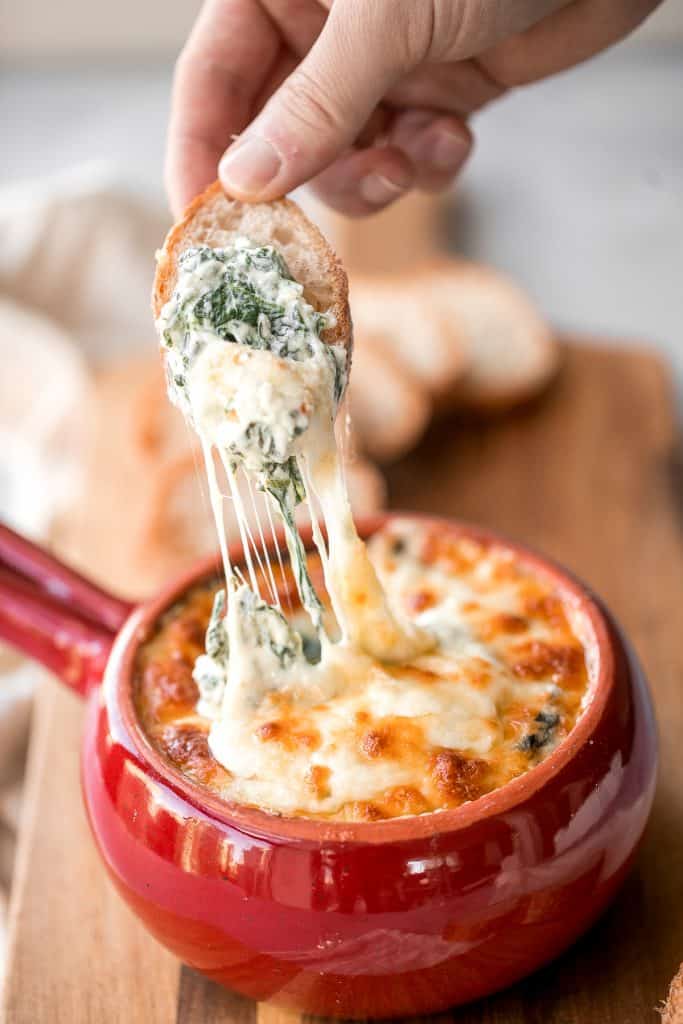
Antipasto skewers with tortellini are a quick, easy, and delicious appetizer with the best parts of a traditional antipasto platter but easier to eat.

Sweet Potato Croquettes are delicious, flavorful, savory balls of mashed sweet potatoes, cheese, and seasoning - crisp outside and soft and tender inside.

Marinated mozzarella balls is a delicious and simple yet stunning appetizer, made with fresh bocconcini soaked in olive oil, garlic, and fresh herbs.
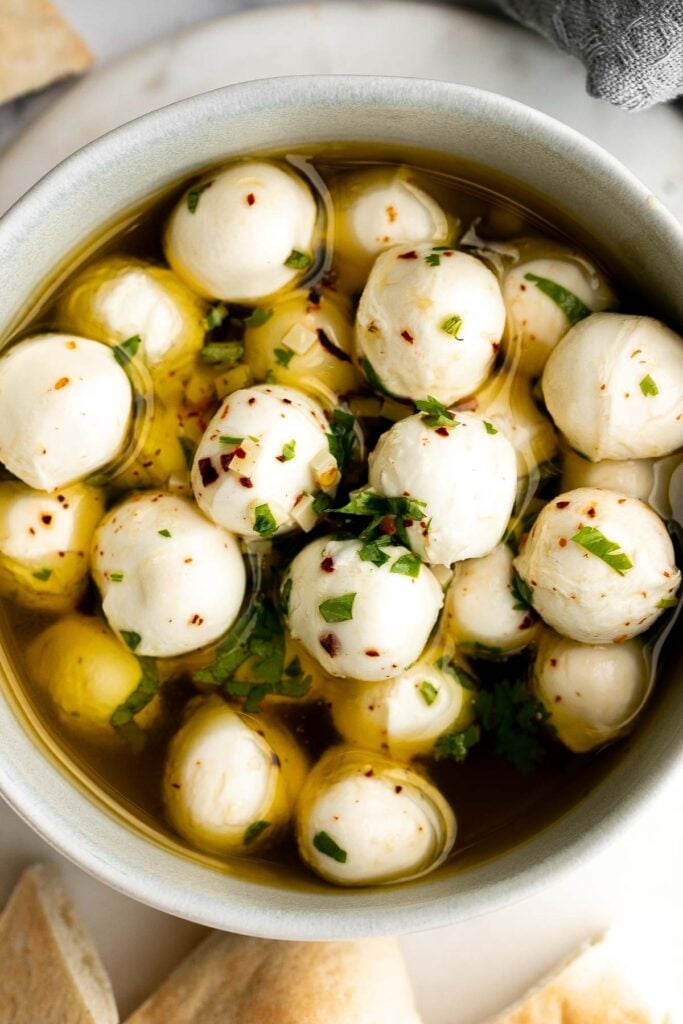
Whipped ricotta crostini is a fancy easy appetizer to make in just minutes or prepare in advance and assemble before serving. A total crowd pleaser.

Candied pecans are a delicious, crunchy, and sweet snack during the holidays or great topped on salads and more. Made with five pantry staple in 10 minutes.
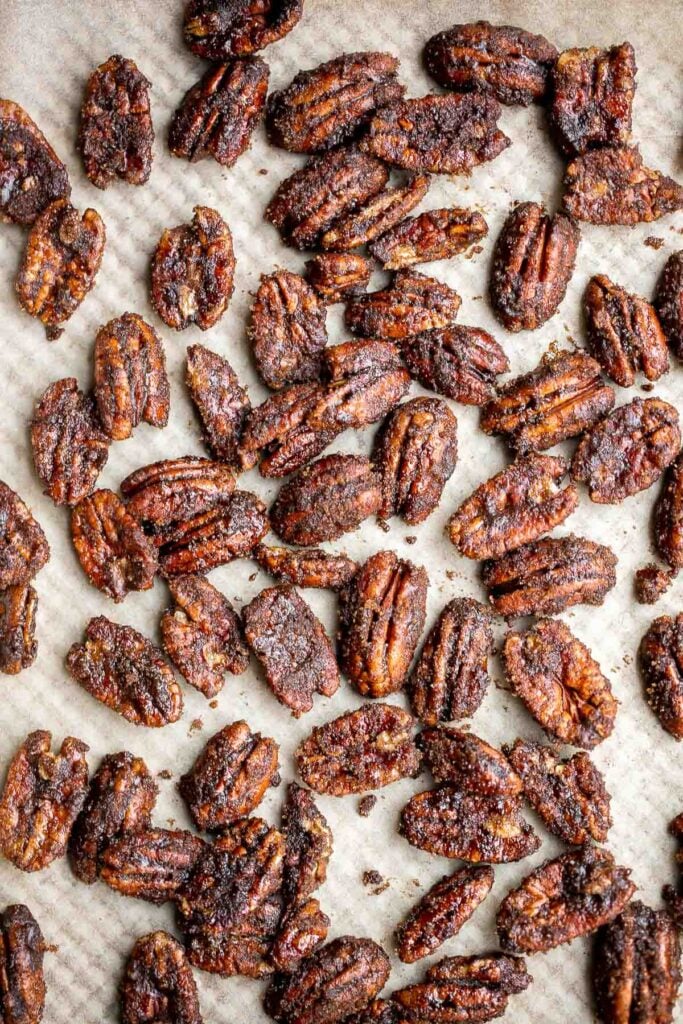
This homemade veggie tray is a quick easy healthy snack or appetizer to make for your next party, with a variety of colorful vegetables and delicious dips.
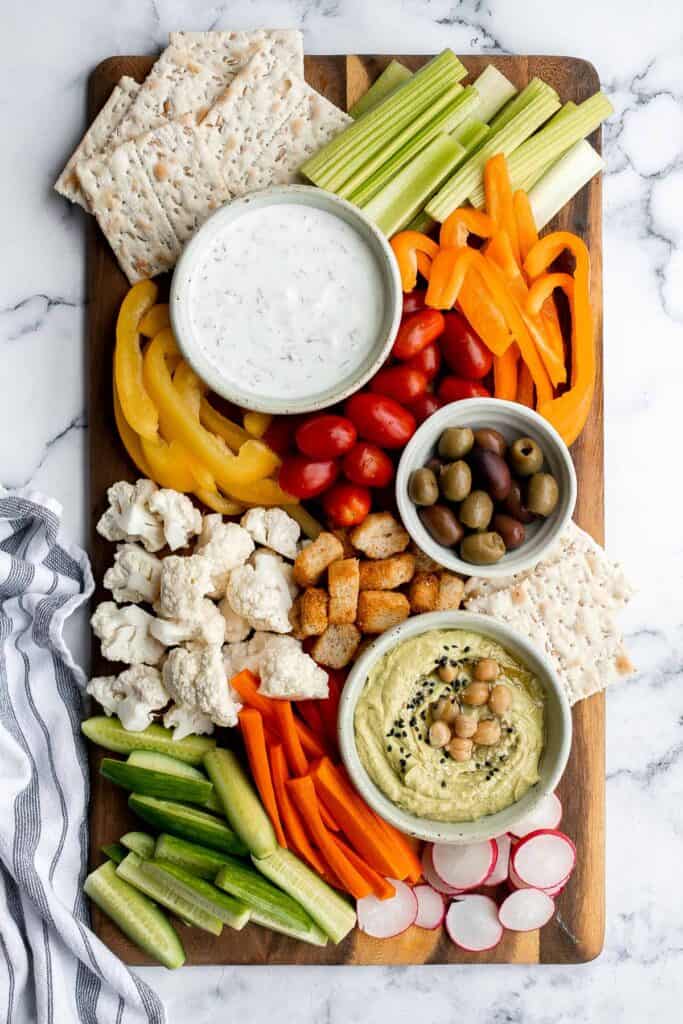
Vegetarian stuffed mushrooms are a delicious, flavorful, healthy, and nutritious appetizer. Plus, quick and easy to make in under 30 minutes including prep!
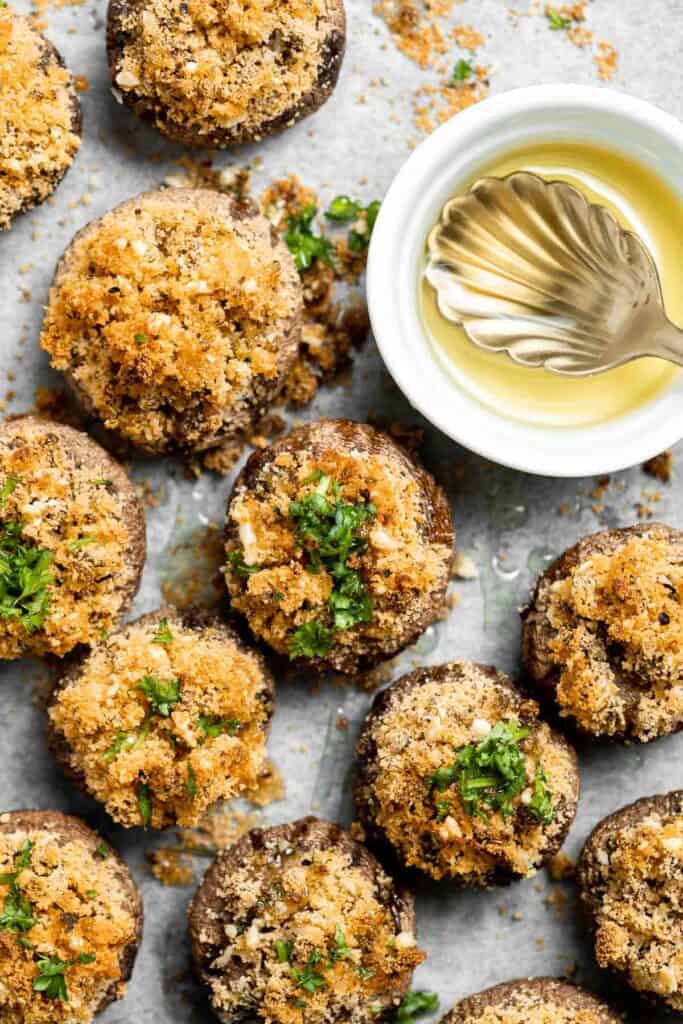
Whipped feta is light, airy, and fluffy. It's an easy yet impressive recipe that takes only 5 minutes to make in a blender with 3 simple ingredients.
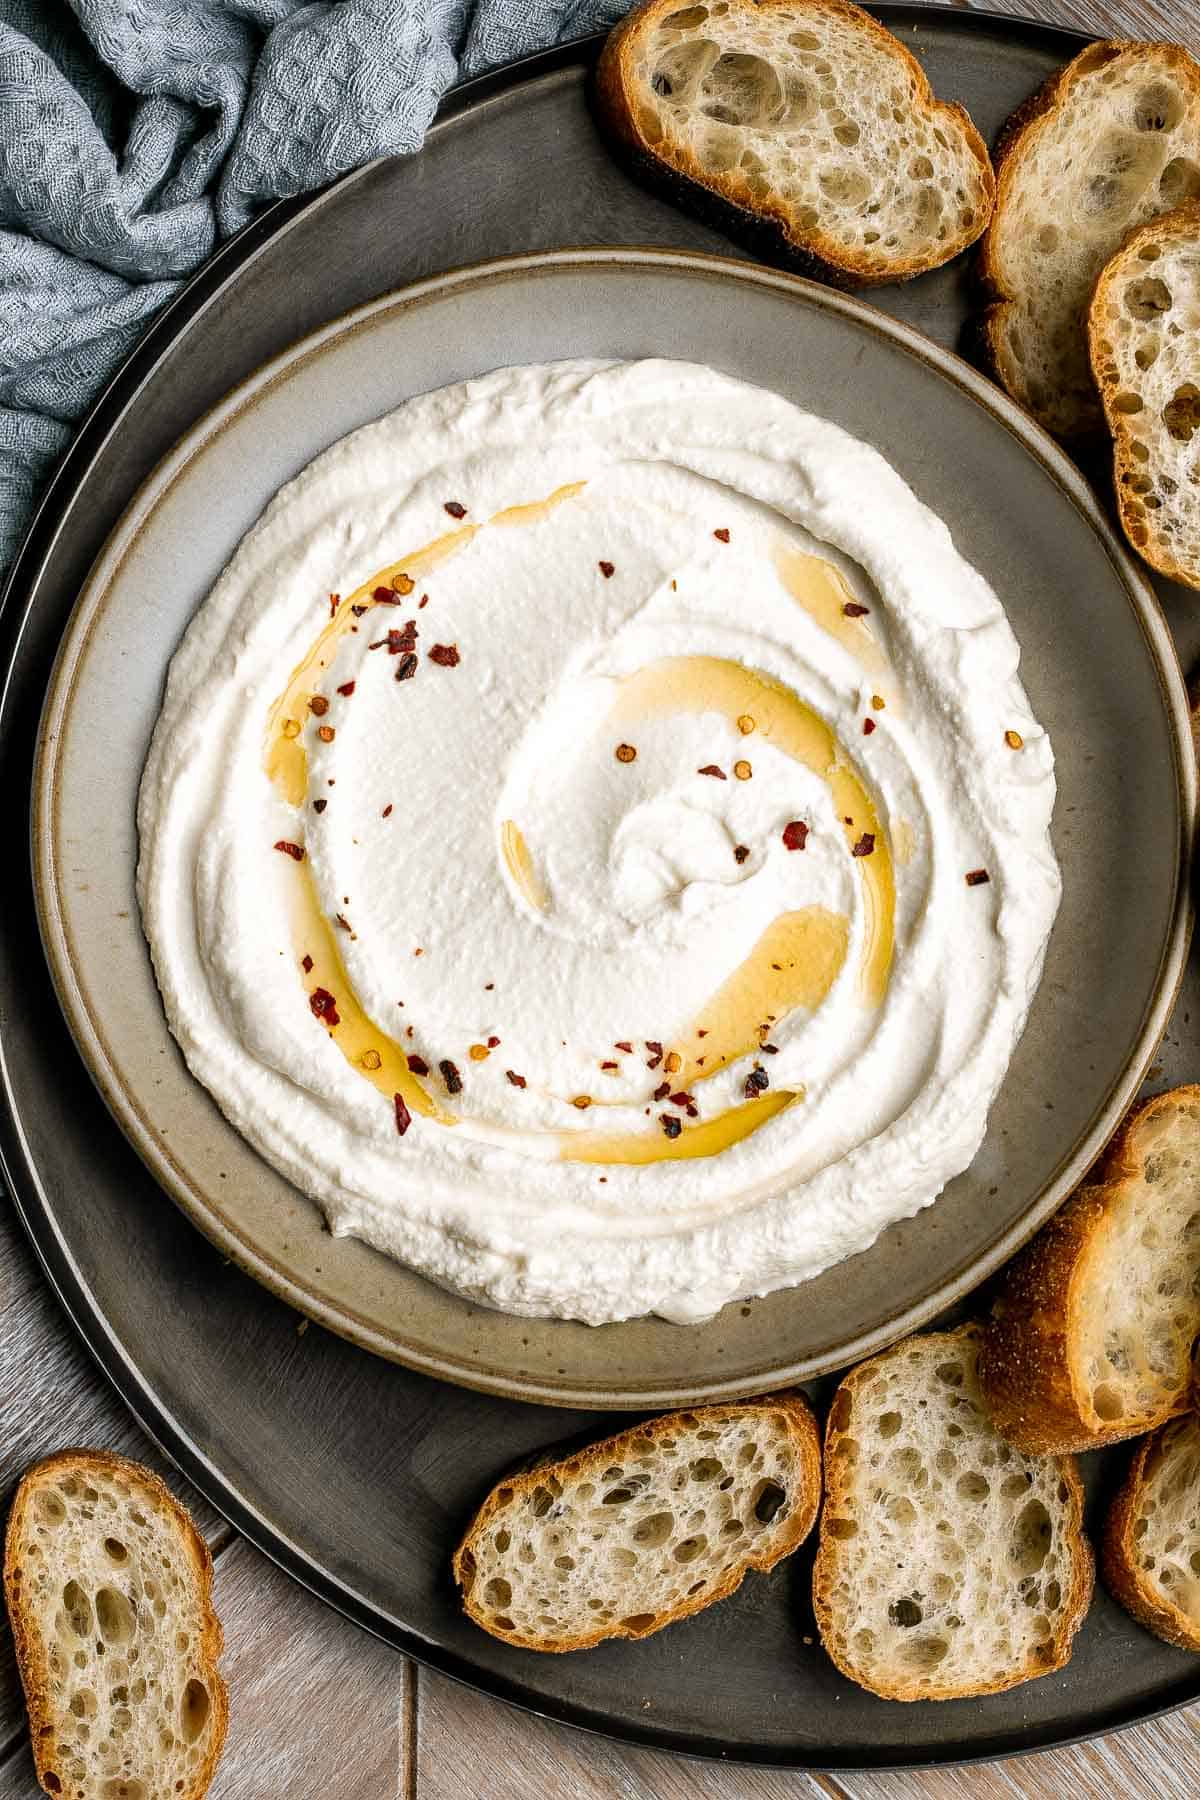
This butternut squash galette (free-form tart) is the perfect little snack any time of day. Slice it up and serve as an appy before a big dinner.
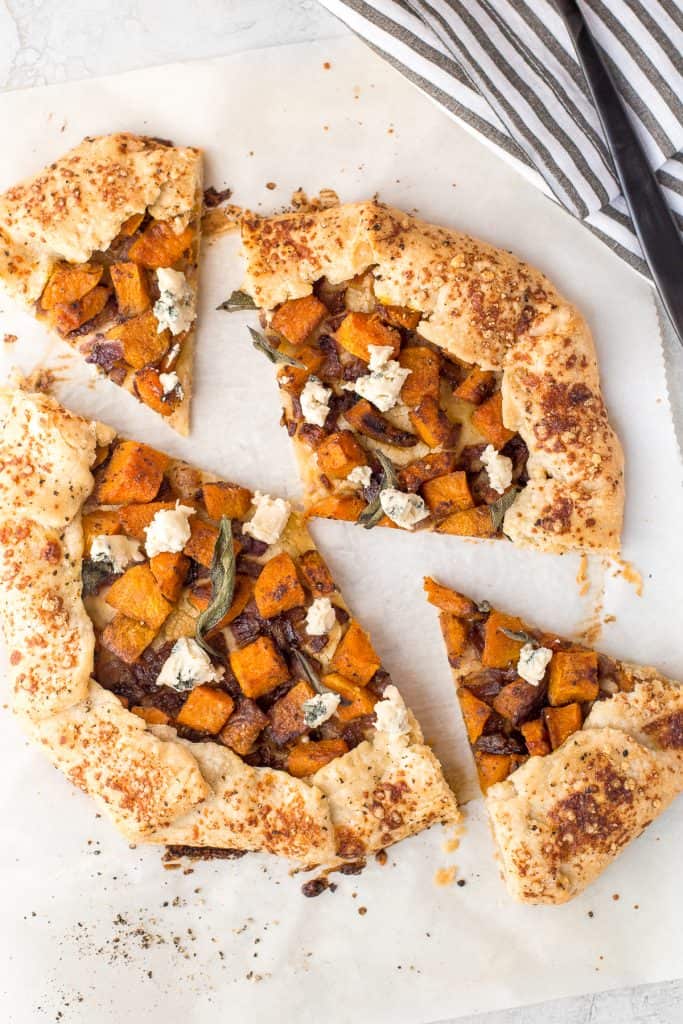
Fried Goat Cheese Balls are flavorful, delicious, and easy to make. With creamy, melty cheese oozing out of a crunchy, golden crust in every bite.

Baked green bean fries are flavorful, crispy, and nutritious. These veggies are quick and easy to make as a healthy appetizer, snack, or side dish.
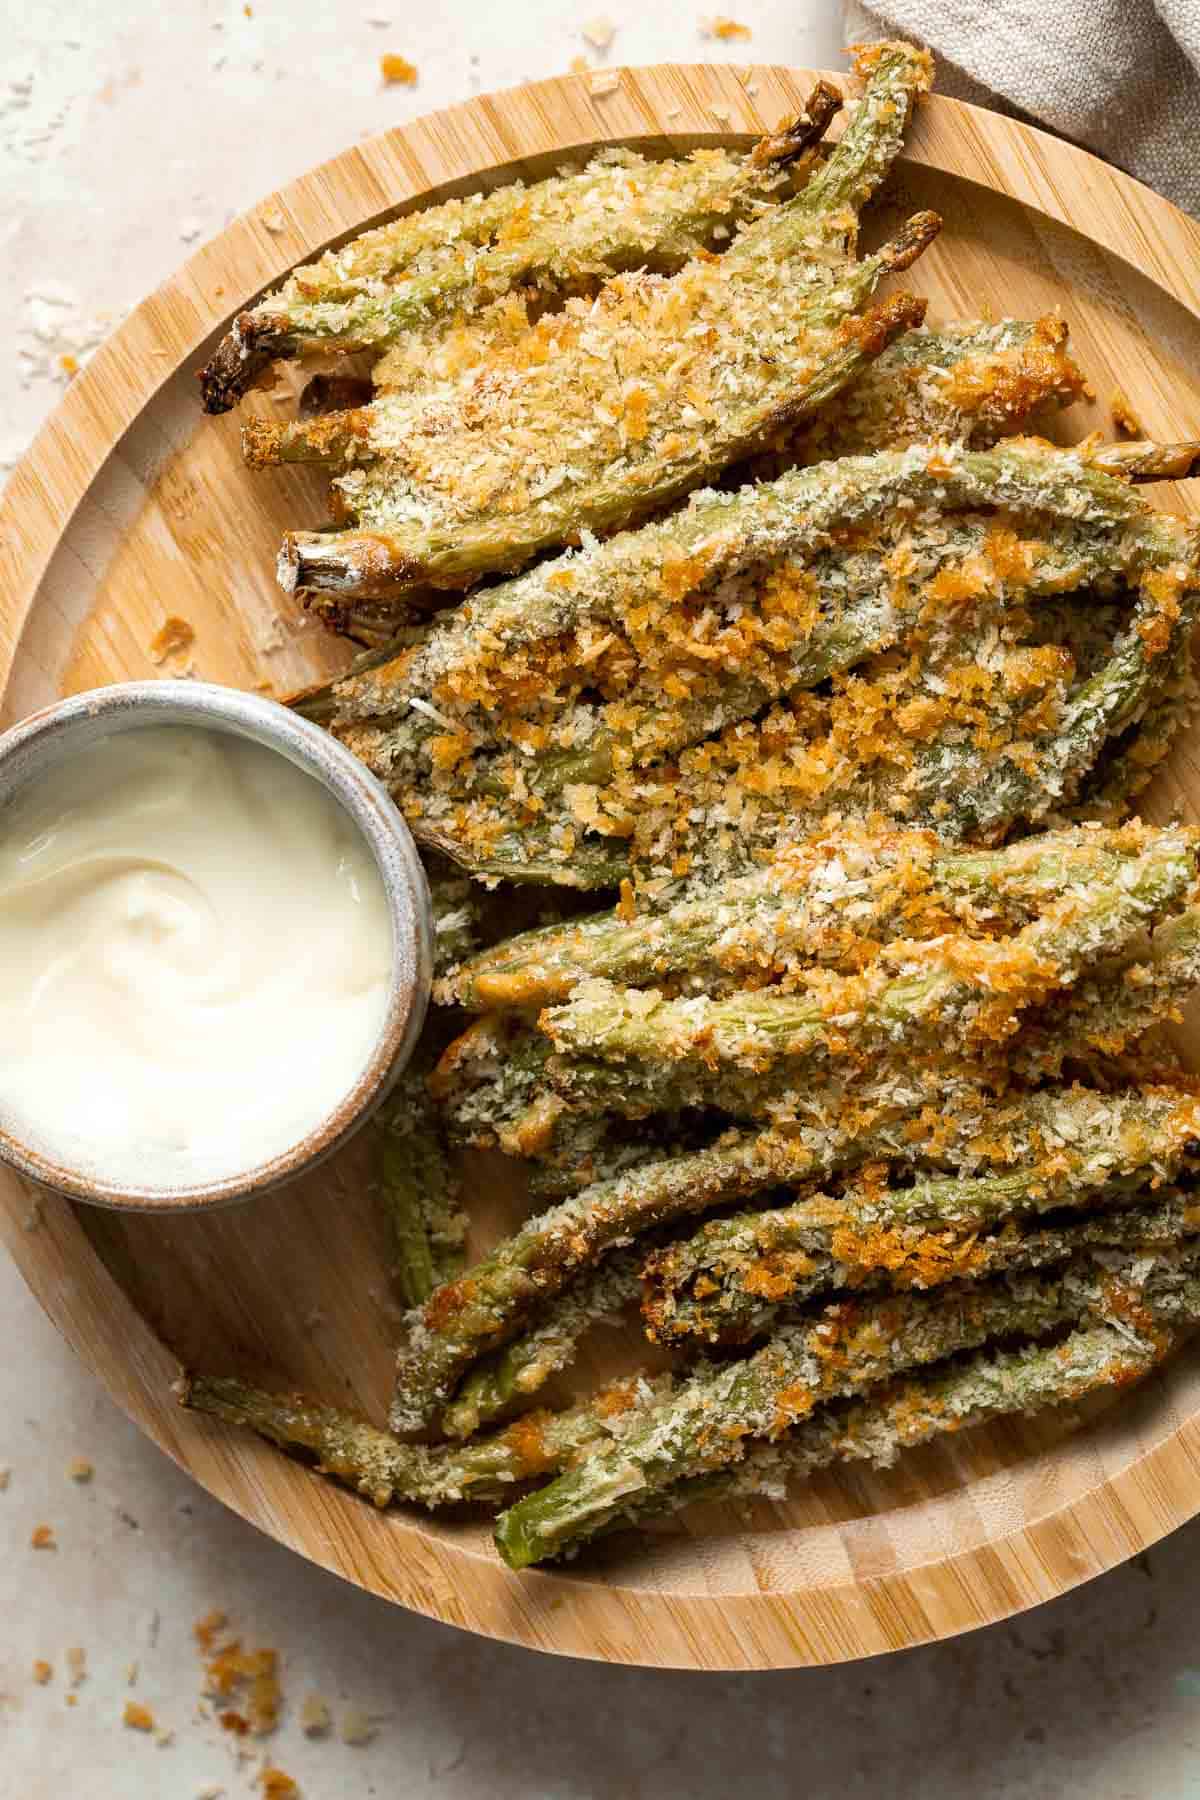
Mashed potato balls are a delicious appetizer that is crisp on the outside and soft, tender, and cheesy inside. Best way to use leftover mashed potatoes!

This Antipasto Platter is a show-stopping appetizer made with a variety of marinated veggies, olives, cheeses, breads, cured meats, and fresh vegetables.
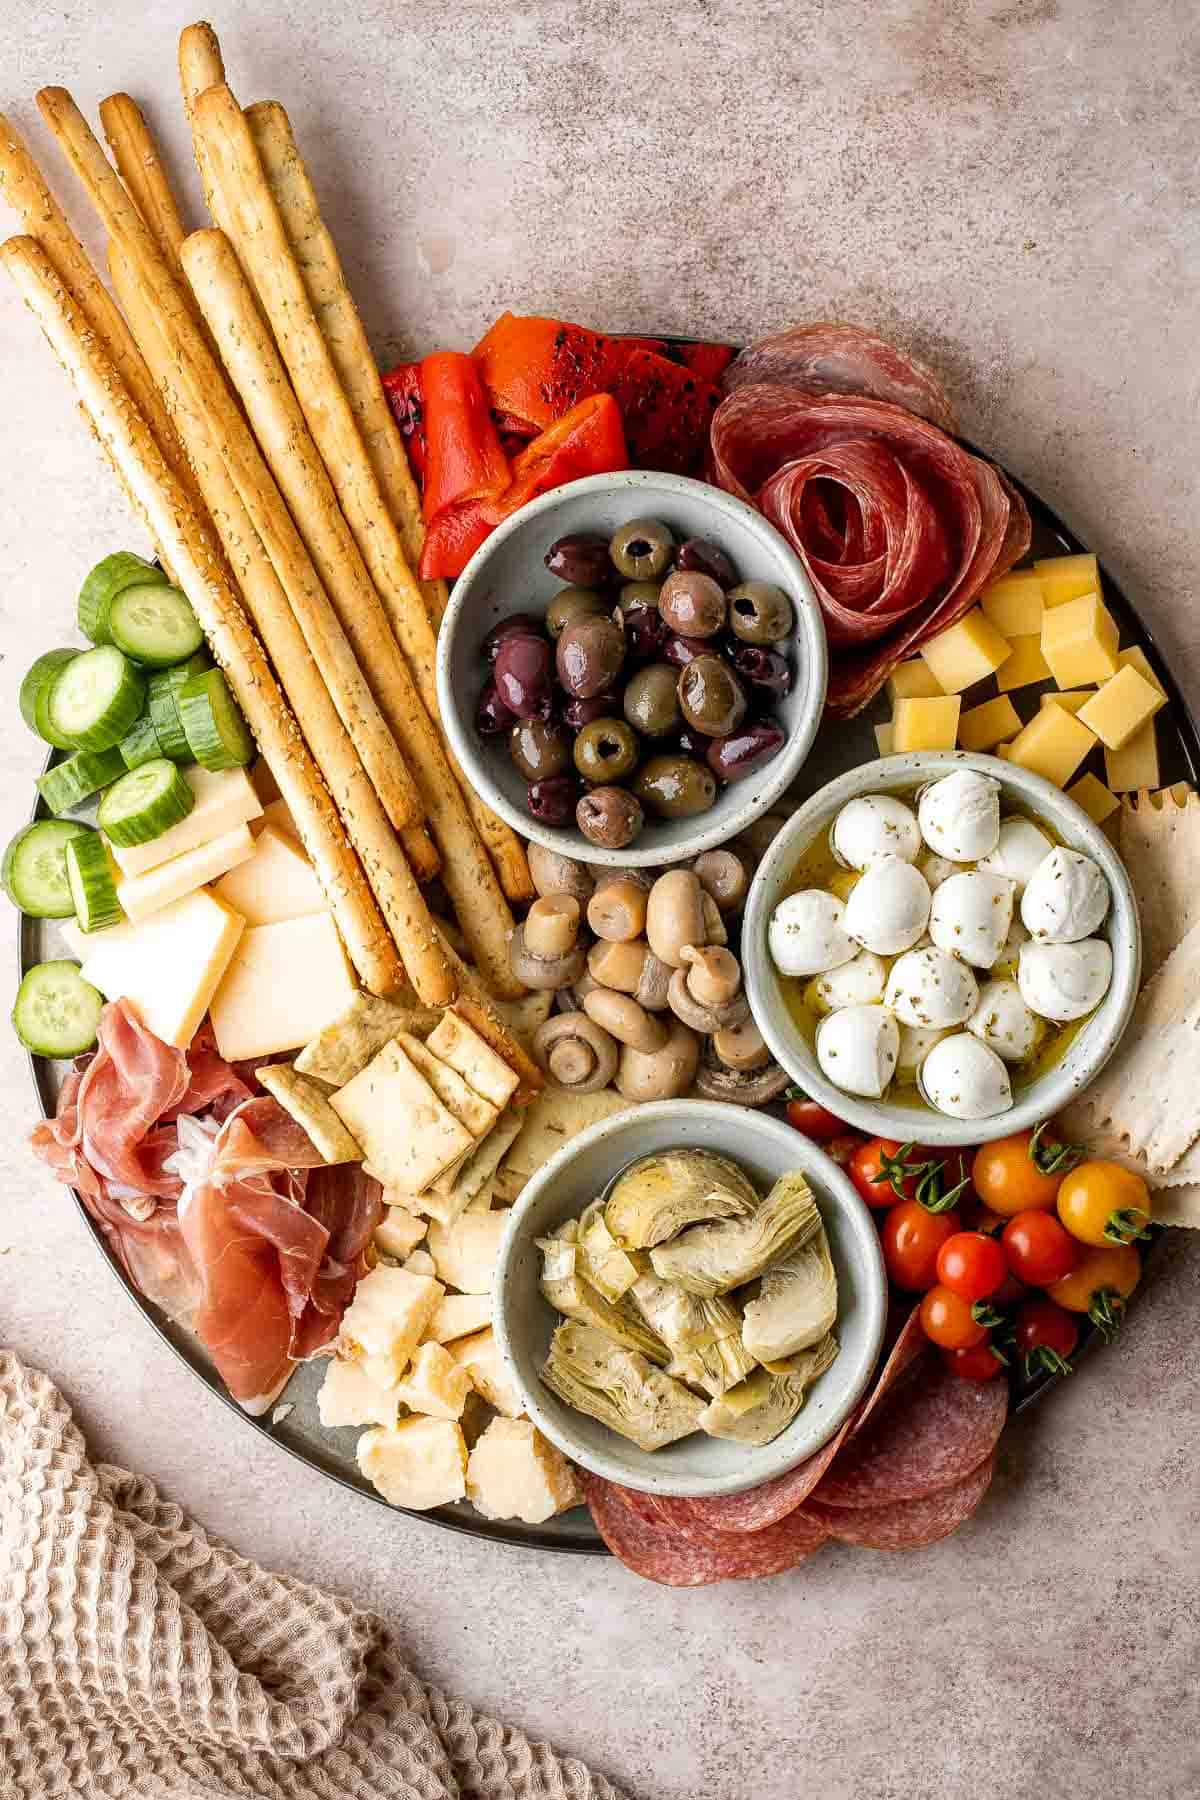
Soft garlic breadsticks are fluffy, airy, buttery, and delicious. They're an easy recipe that is perfect for beginners at baking bread.
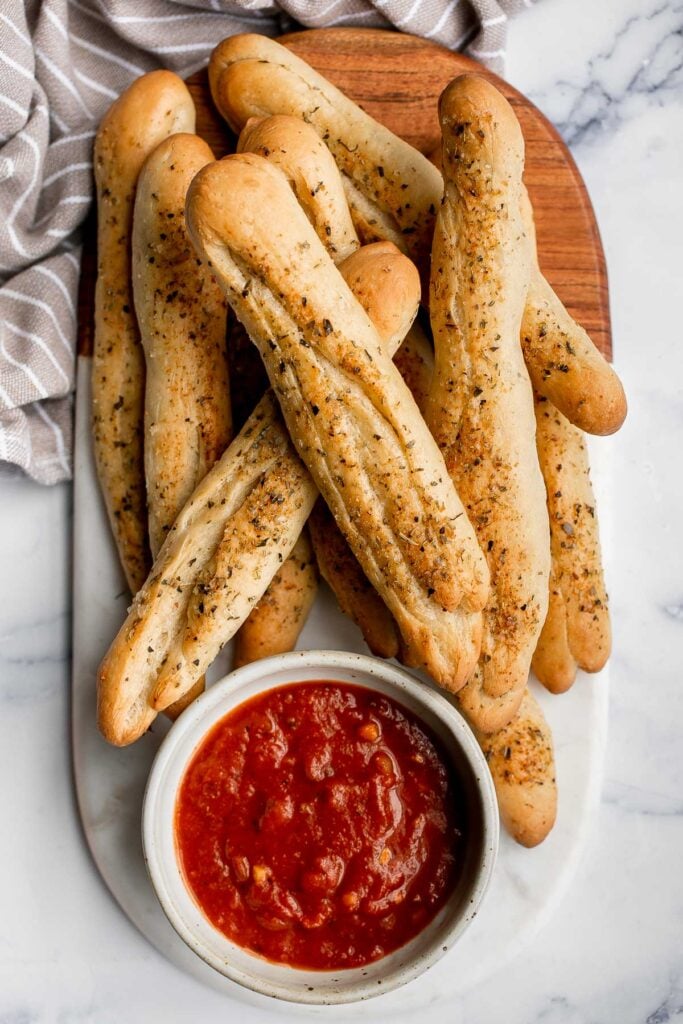
Cranberry Brie Bites are quick and easy to make with flaky puff pastry, gooey melty brie, and sweet cranberry sauce. The perfect holiday appetizer.
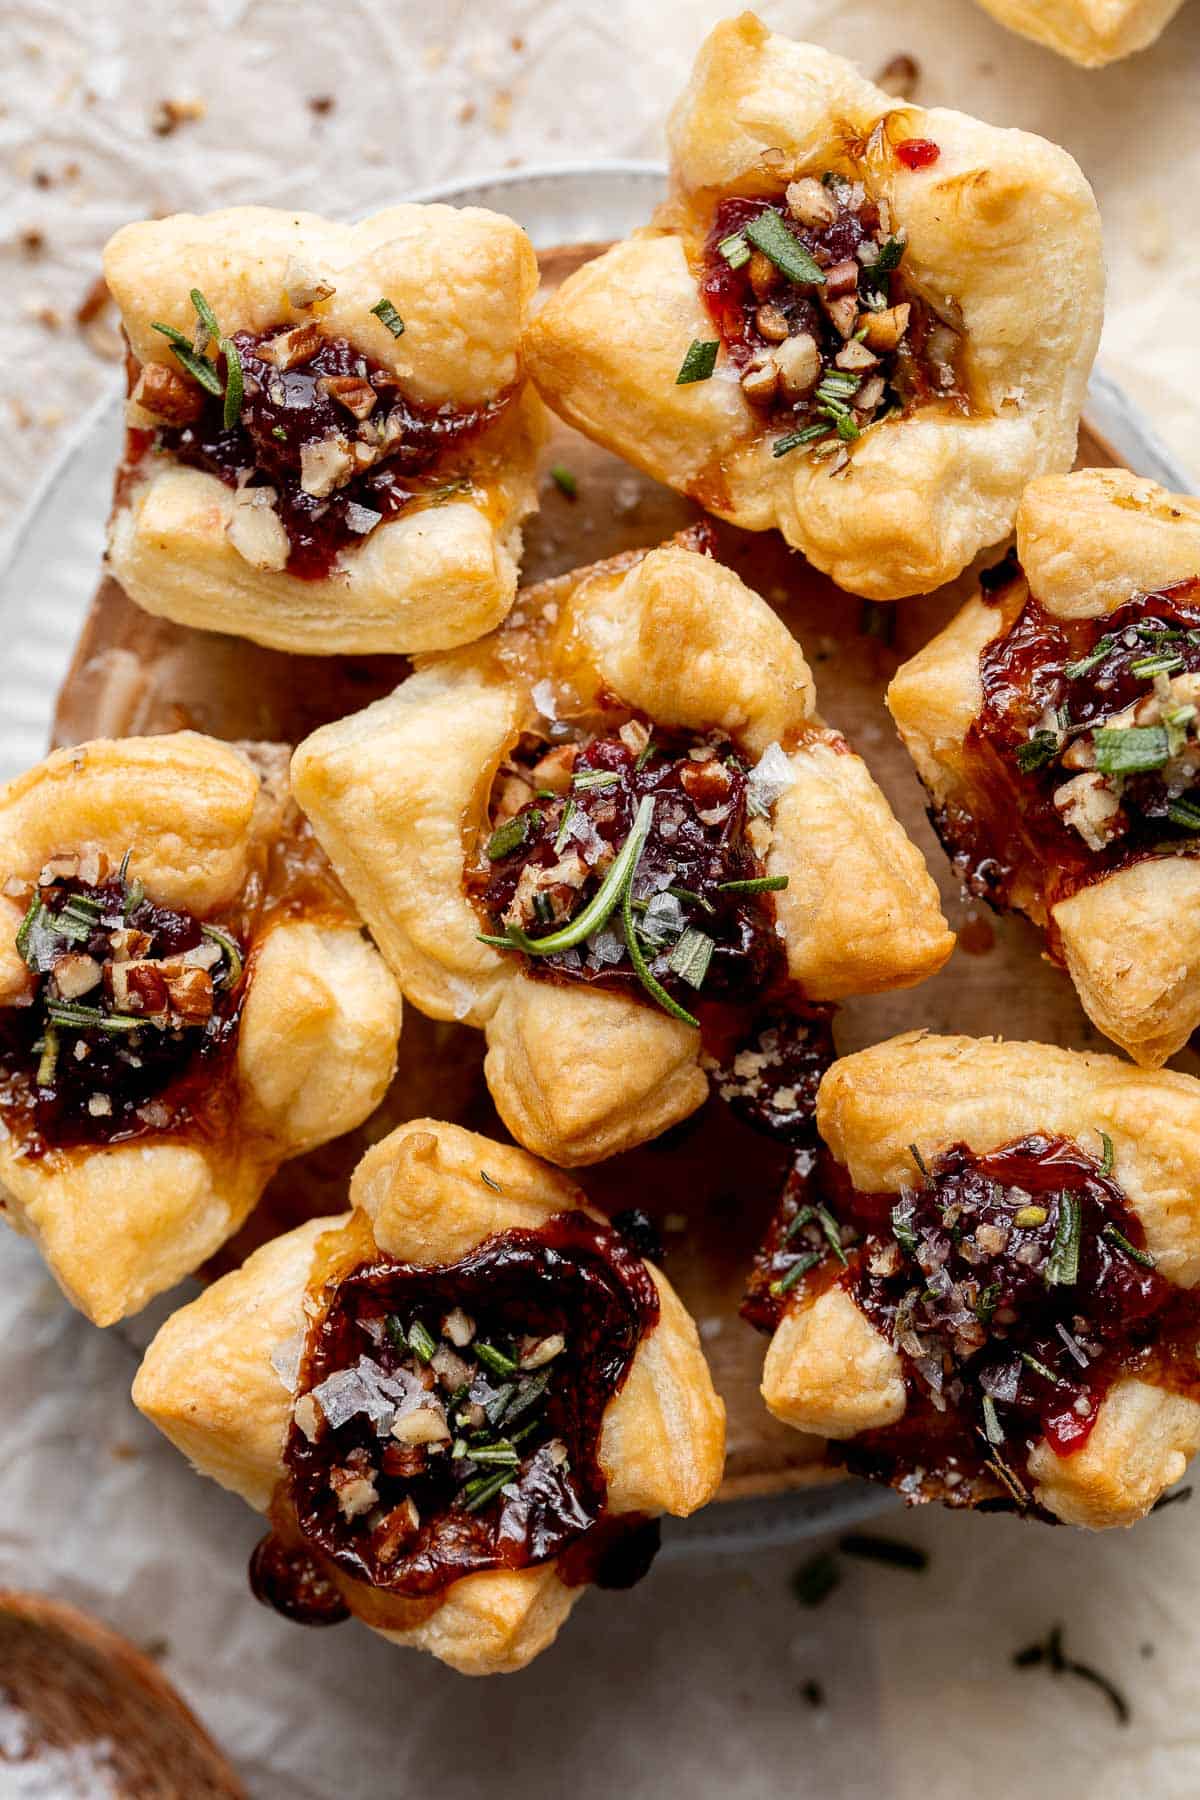
Potato Galette with Arugula and Creme Fraîche
Potato galette with arugula and crème fraîche is a rich, light, and delicious savoury tart to serve for breakfast, lunch, or dinner. A total crowd-pleaser.
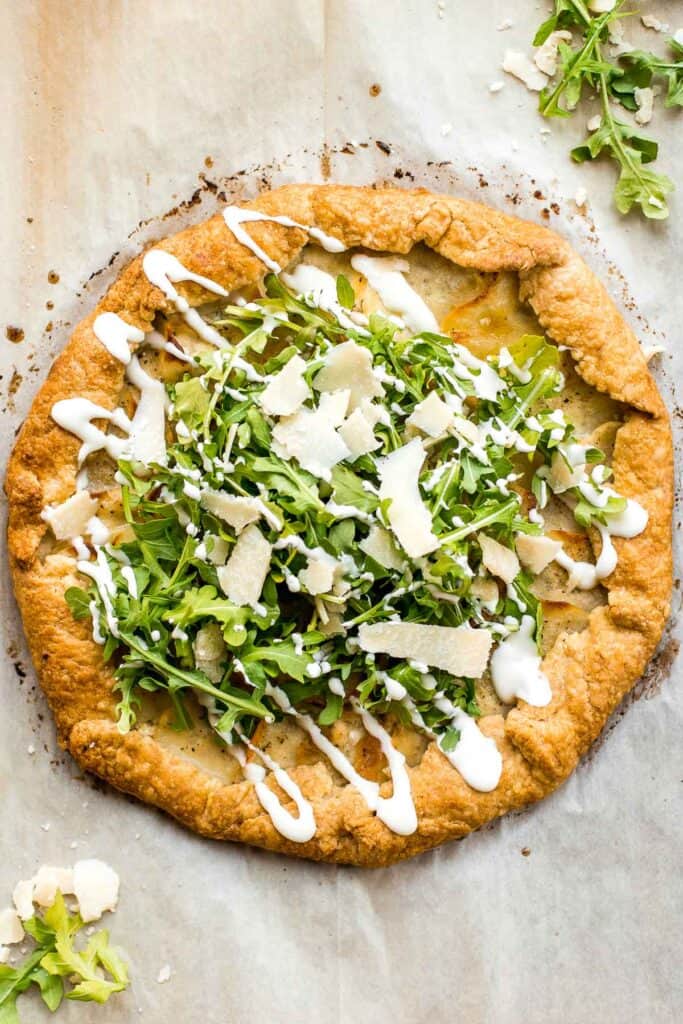
Smooth and creamy pesto hummus is a healthy, delicious and flavourful dip that is easy to make in just 5 minutes. It's vegan and gluten-free.
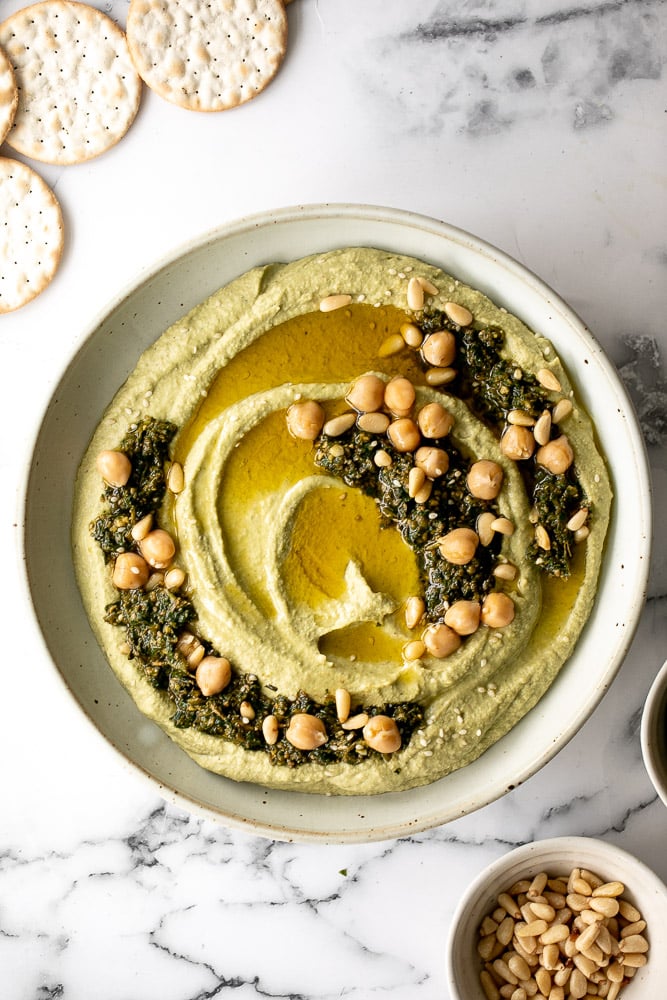
Whipped feta crostini with a herby olive topping is quick and easy snack or appetizer that is ready in less than 20 minutes - or 10 minutes if you're fast.
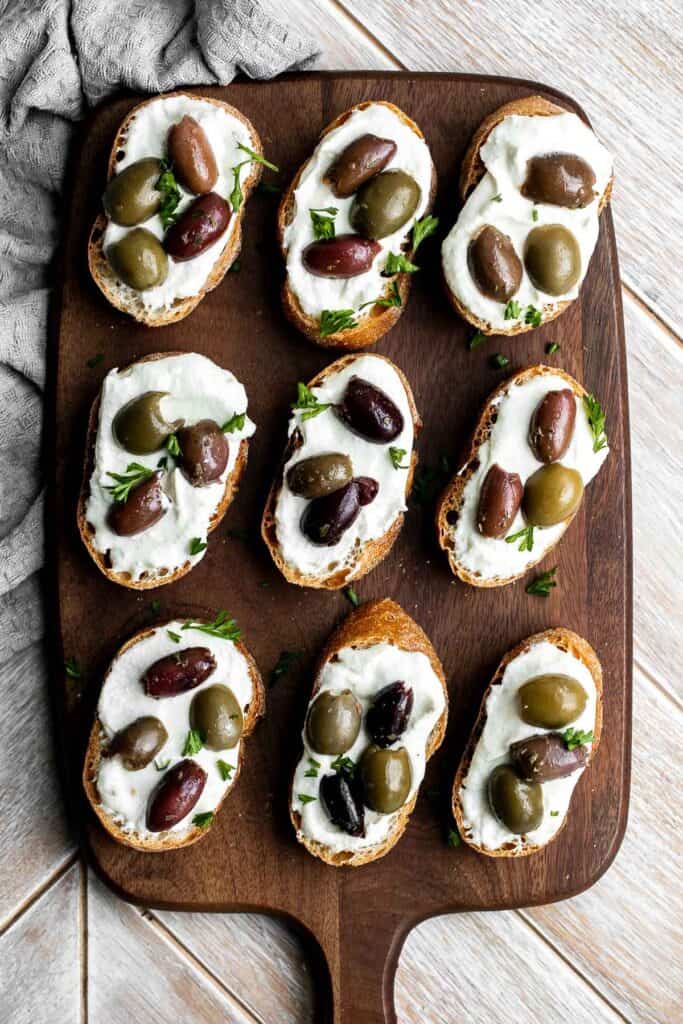
Classic deviled eggs are a simple, easy, and healthy appetizer to make when you need something quick for brunch, picnics, barbecues, potlucks, or Easter.
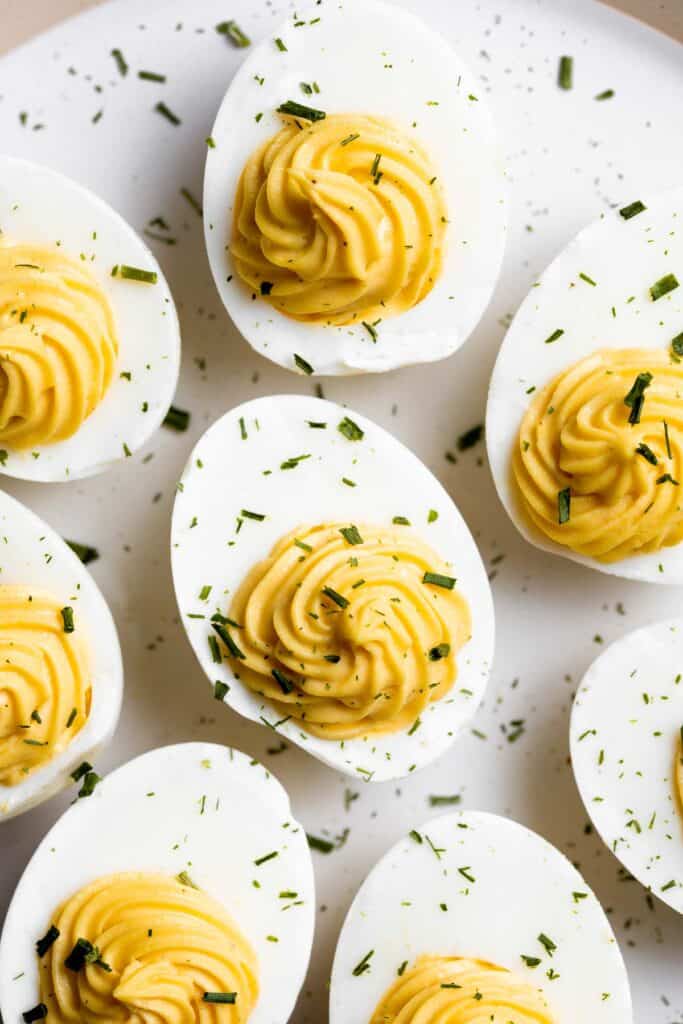
Olive tapenade is a delicious, flavorful, easy dip that comes together in minutes, made with the perfect combination of sharp, tangy, salty, and savory.
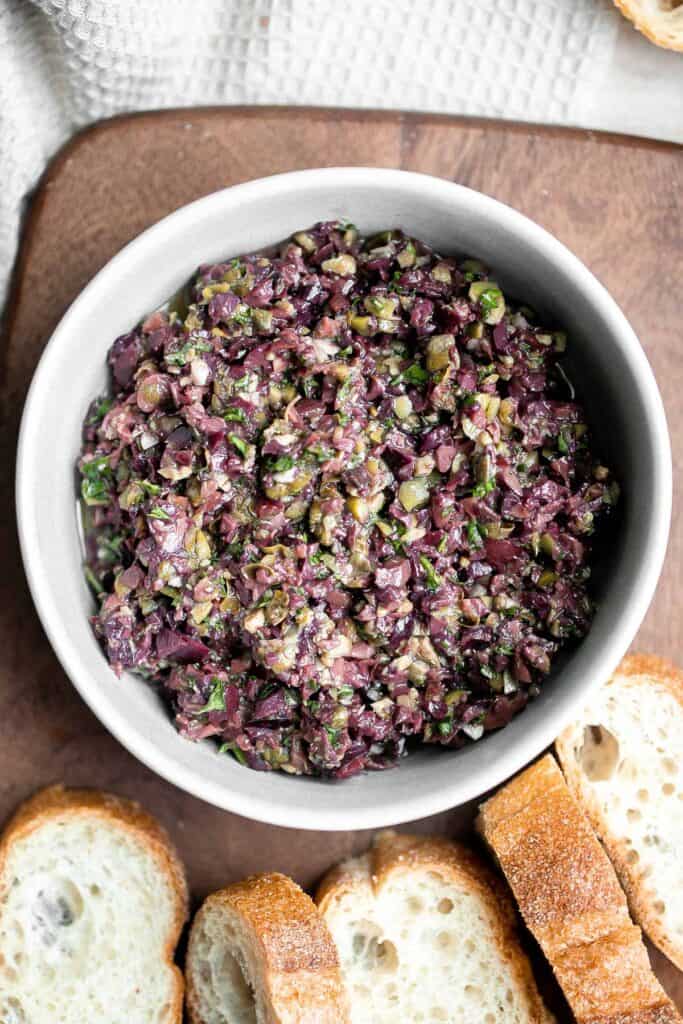
Pigs in a blanket from scratch are a delicious and easy appetizer or snack to make for your next party or gathering - juicy, cheesy, flaky, and buttery.

Curried White Bean Crostini with Toasted Pepitas
Curried white bean crostini with toasted pepitas is the perfect, sophisticated holiday appetizer that is ready to serve in under 15 minutes.
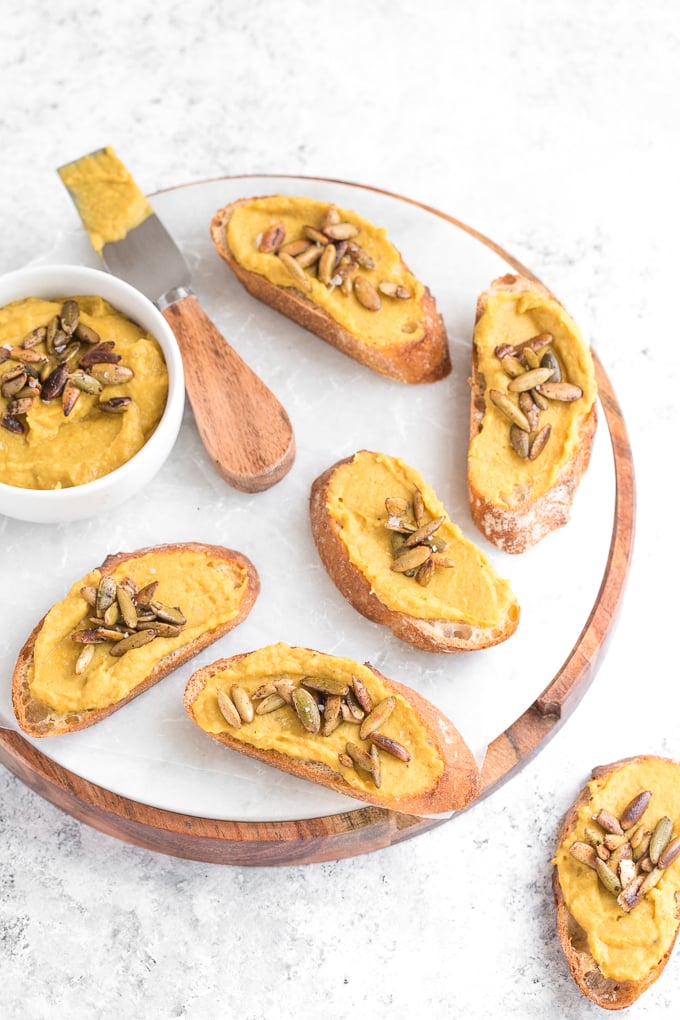
Crunchy, cheesy, and paired with an awesome dipping sauce, these baked mozzarella sticks are just as amazing as what you would find in a restaurant.

Whip up smooth and creamy classic hummus dip at home in just 5 minutes, by combining chickpeas, tahini, olive oil, lemon juice and garlic in the blender.
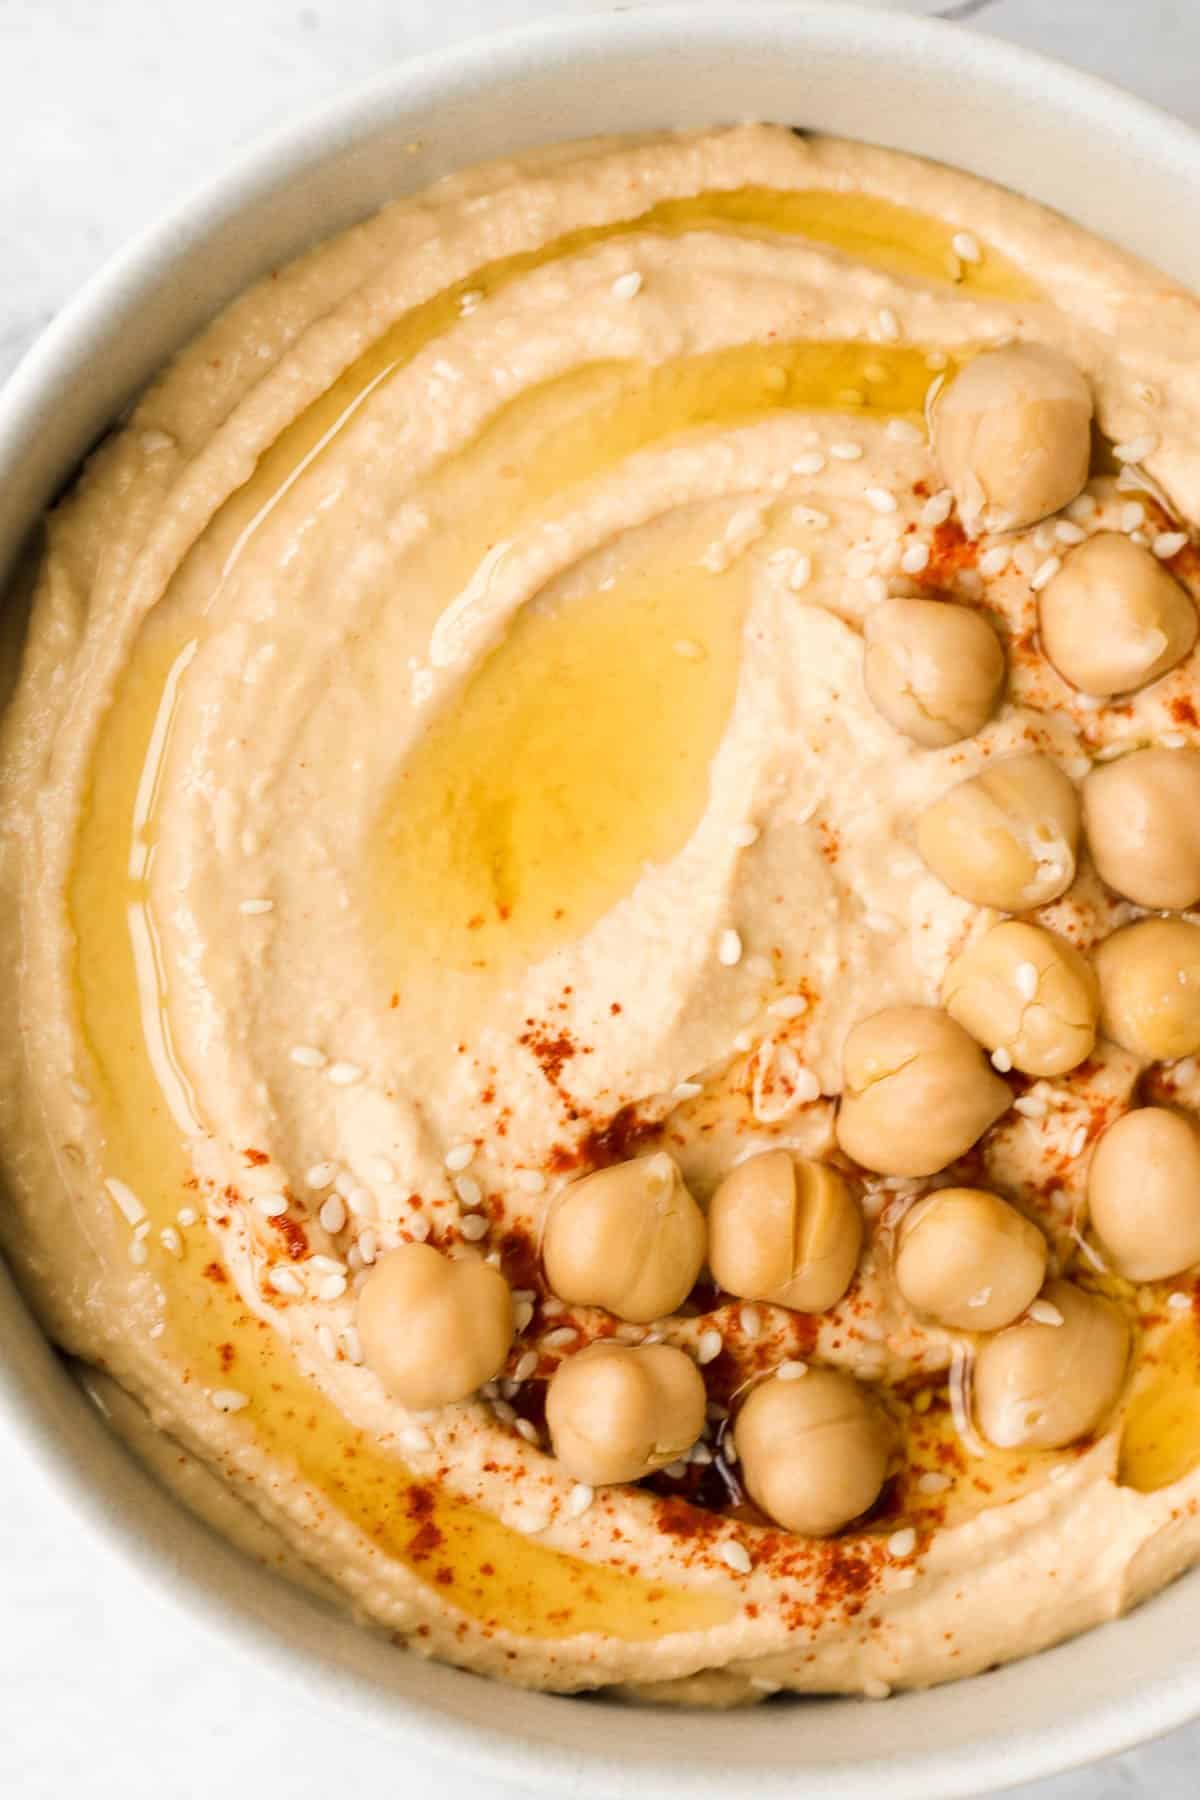
One-ingredient homemade baked apple chips are healthy, light, crispy and so crave-worthy. They contain no added sugar and are so easy to make at home.
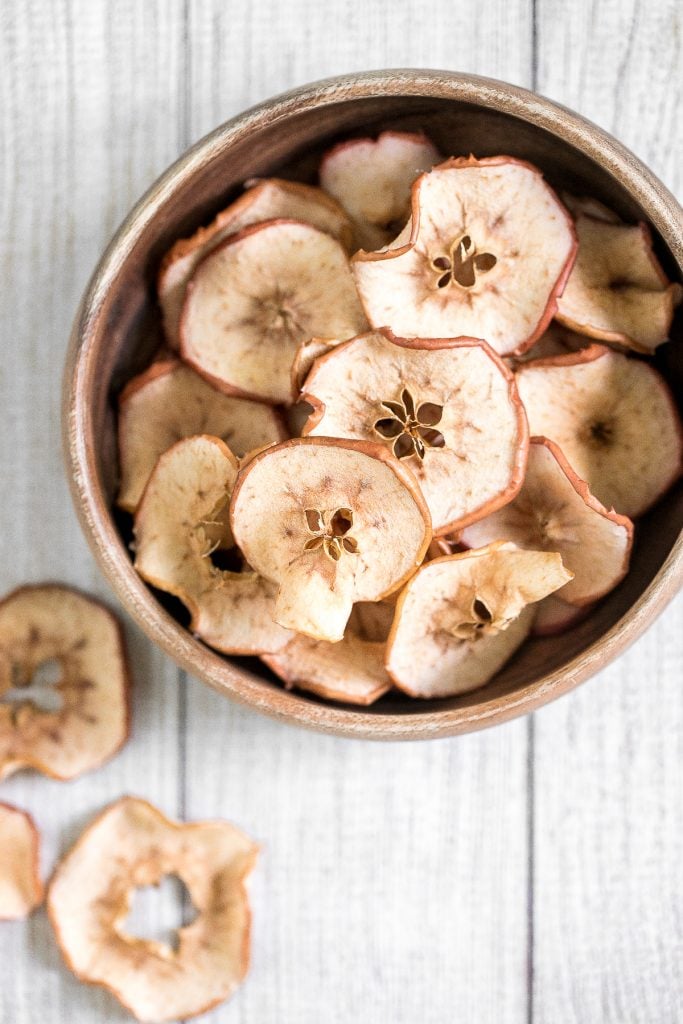
Looking for the perfect appetizer or light lunch? Try a tomato and mozzarella tart topped with basil and a drizzle of pomegranate molasses.
Caramelized onion dip is creamy, flavorful, and melt-in-your-mouth delicious. This easy appetizer is perfect for entertaining, on game day, or for a snack.
More Thanksgiving Recipes
Once you have selected the thanksgiving appetizers that you want to serve on your Thanksgiving dinner menu, let's tackle the other items on the menu:
- 40 Best Thanksgiving Main Dishes
- 50 Best Thanksgiving Side Dishes
- 15 Best Thanksgiving Bread Recipes
- 25 Best Thanksgiving Dessert Recipes
Thanksgiving Dinner Tips
- Plan your menu ahead of time. You can prepare some of these Thanksgiving appetizers in advance. Some can stored in an airtight container for a few days at room temperature or in the refrigerator, and some can even be frozen, according to recipe directions.
- Prep your ingredients as much as possible. Once you have decided on the dishes to serve, prepare as much as you can in advance, whether that is chopping ingredients or prepping the dish and storing in the refrigerator until ready for the oven. Any little bit that you can prepare in advance will make things much less stressful on the day.
- Set the table the night before. Take out the fancy dinnerware, flatware, glasses, placemats, and napkins and set the table the night before. It's one less thing to worry about on Thanksgiving.
Did You Make Any of These Thanksgiving Appetizers?
Please leave a comment and rating below, and let me know what you thought of this round up of recipes for thanksgiving appetizers. Be sure to snap a picture and tag me on Instagram @aheadofthyme or share it on the Pinterest pin so that I can follow along.
HUNGRY FOR MORE? Don't forget to sign up for my email newsletter so that you don't miss any recipes. You can also follow along on Instagram and Pinterest for more recipe updates.
Cranberry Pistachio Biscotti
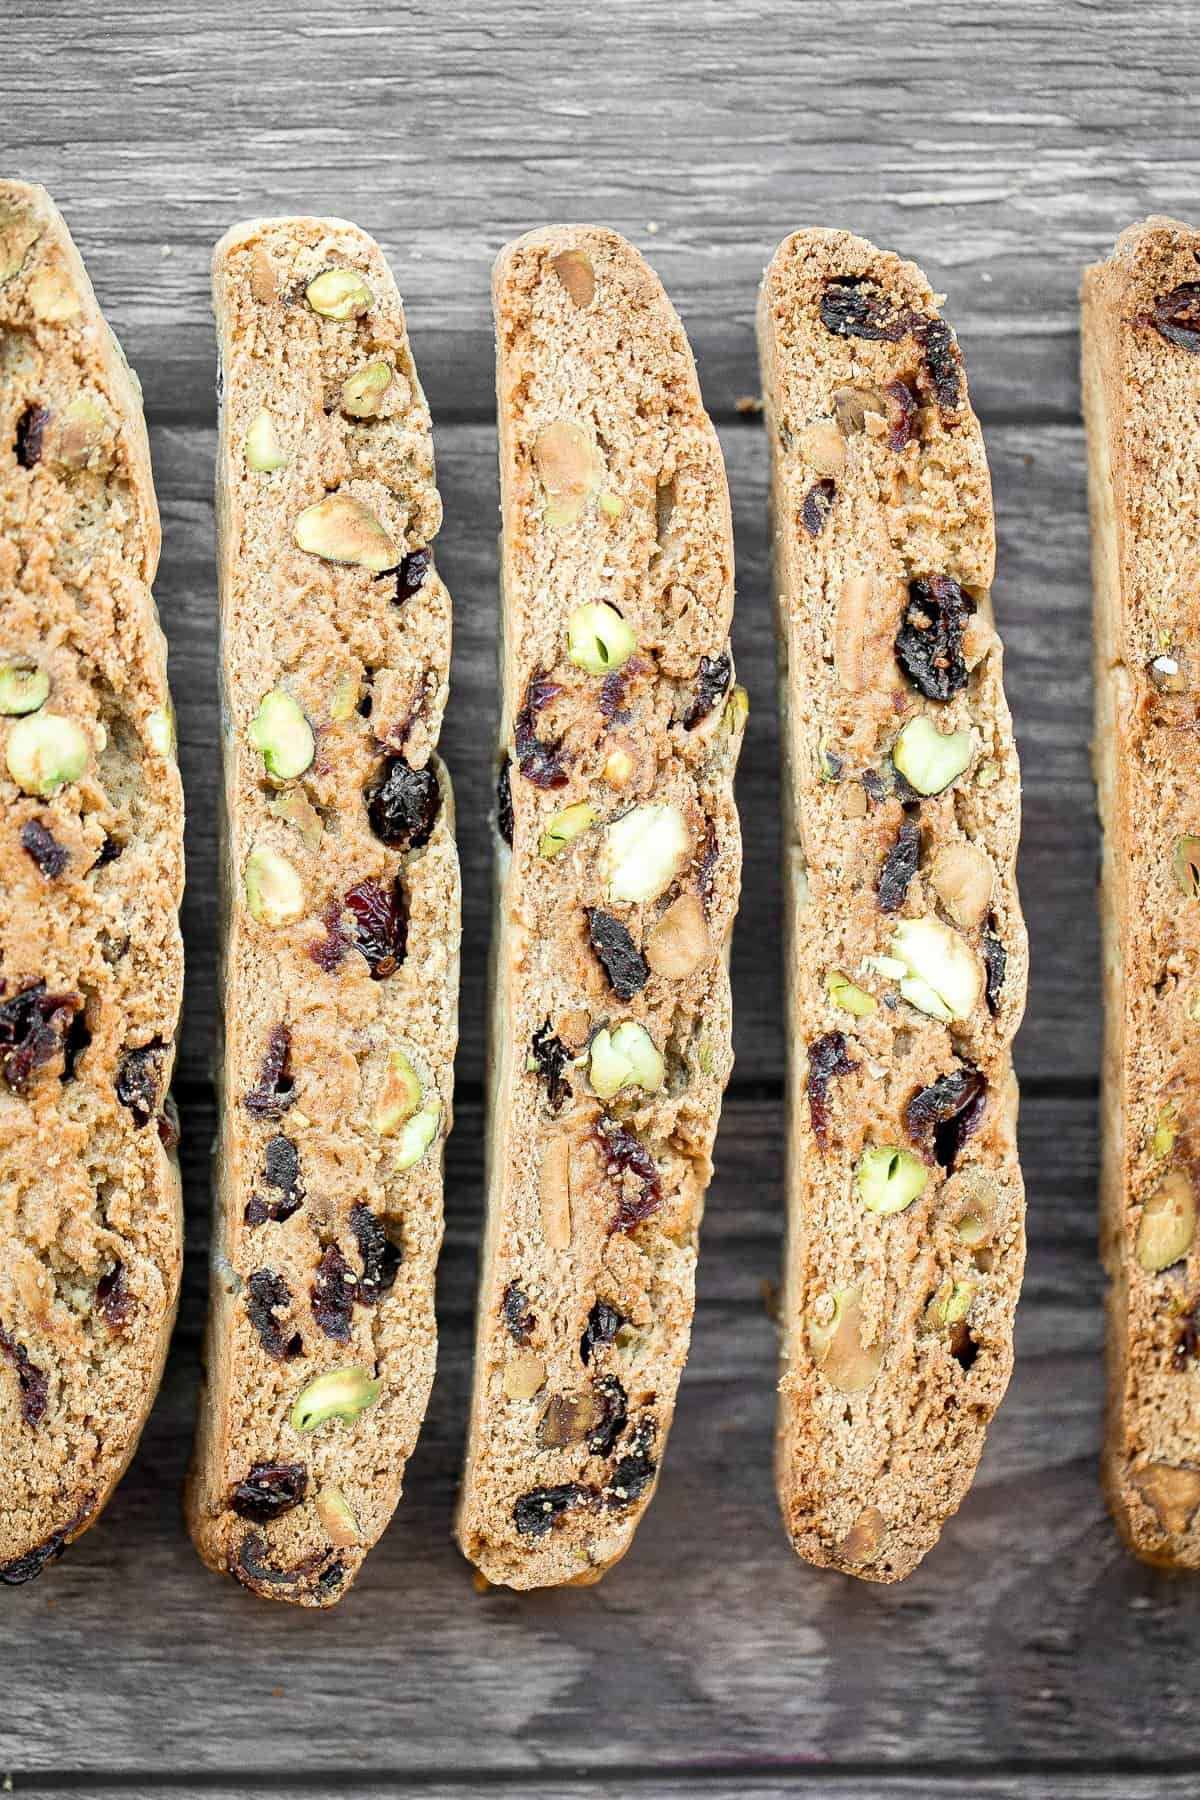
Festive cranberry pistachio biscotti are perfectly crunchy, a little crumbly, and so delicious. This Italian cookie is packed with cranberries and pistachios to give it that warm holiday flavour and all the feels with that classic red and green. They are the perfect cookie for dunking into a hot cup of coffee, tea or peppermint hot chocolate AND perfect to include in a Christmas holiday cookie box. You'll be surprised with how easy they are to actually make.
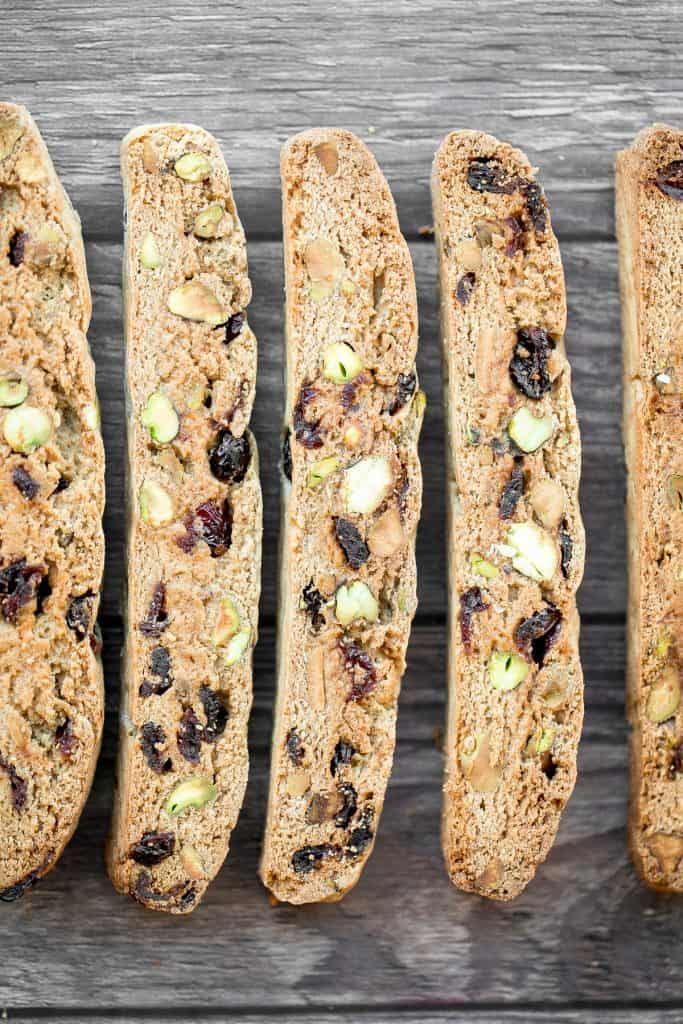
Who else is excited for cookie season? I love making a holiday cookie box to send out to family and friends, and especially so this year. I am planning to include this cranberry pistachio biscotti, alongside some of my other favourite Christmas cookies such as soft and chewy ginger cookies, soft and chewy white chocolate cranberry cookies, Christmas sugar cookies, and raspberry jam-filled thumbprint cookies.
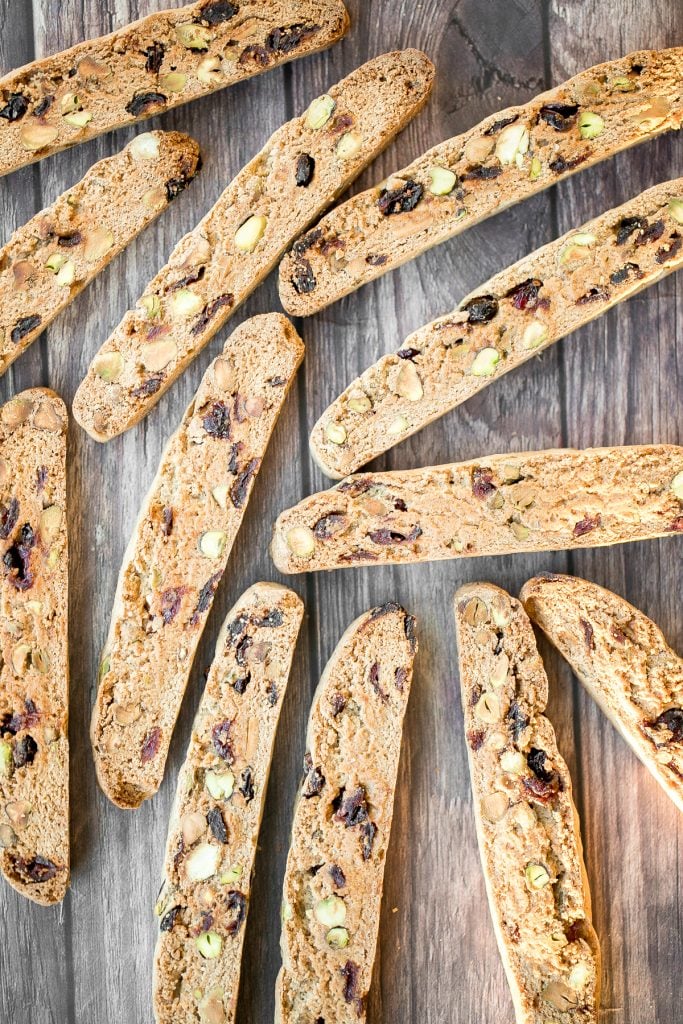
What is Biscotti?
Biscotti is a traditional Italian cookie that literally translates to "twice-baked". The cookie dough is formed into a log, baked and slightly cooled, then sliced and baked again on both sides to get the perfect crisp cookie. You can make them in all different flavours (try almond flavoured in easy almond biscotti) and you can dunk them into chocolate with extra nuts on top (because why not?)
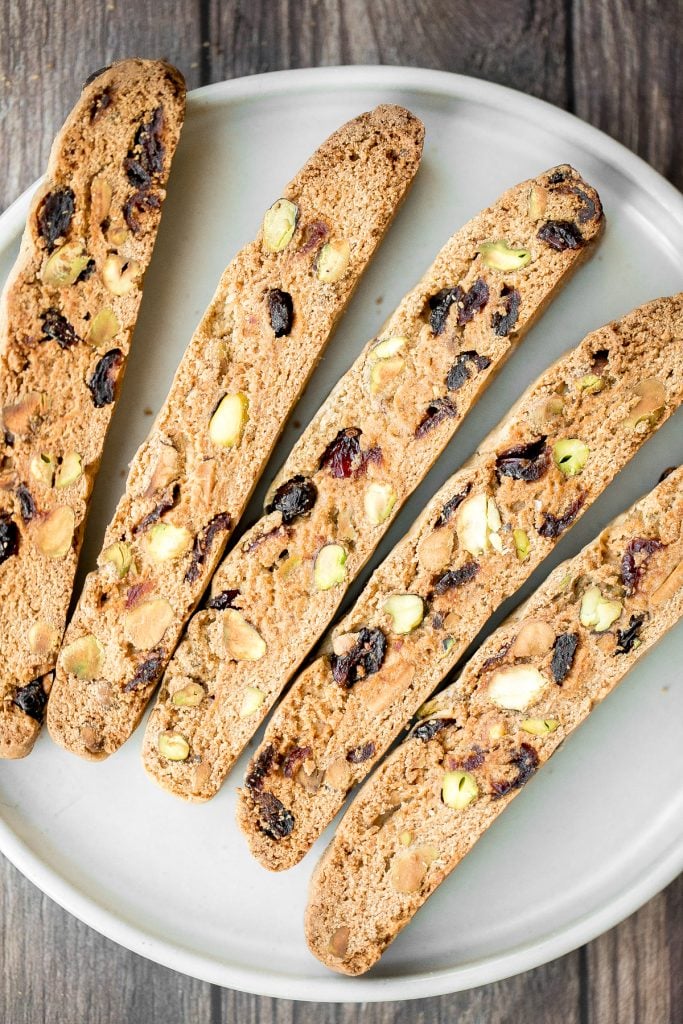
Ingredients
To make this easy cranberry pistachio biscotti, you will need:
- eggs - leave them out on the counter to get them to warm up to room temperature.
- brown sugar
- olive oil
- vanilla extract
- lemon zest - gives the biscotti a subtle hint of citrus flavour that pairs so well with the cranberries and pistachio.
- all-purpose flour
- baking powder
- dried cranberries
- pistachios - you want to use unsalted unshelled pistachios.
You will also need measuring cups and spoons, mixing bowls, hand mixer (or stand mixer), quarter sheet baking pan, and a wire cooling rack.
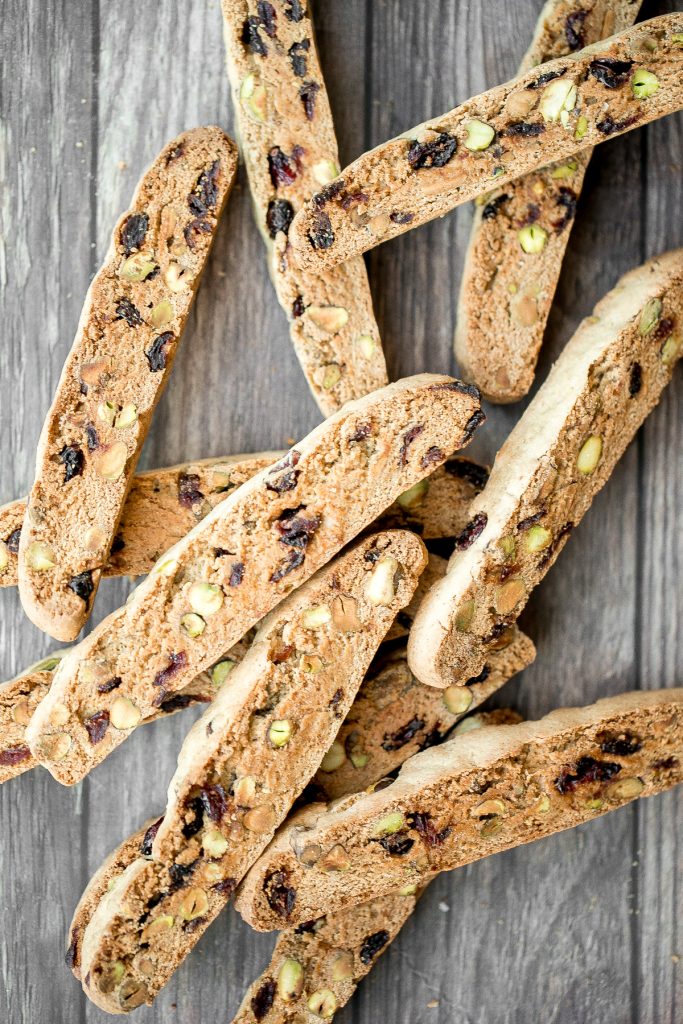
How to Make the Best Cranberry Pistachio Biscotti
- Combine the wet ingredients. In a medium mixing bowl, add eggs and brown sugar. Beat together using a hand mixer (or stand mixer) on medium speed until light and fluffy, about 1-2 minutes. Add in olive oil, vanilla, and lemon zest and beat together for another minute.
- Add wet ingredients to dry ingredients. In a large bowl, sift together flour and baking powder. Gradually stir in the wet ingredients, until just combined. Fold in the dried cranberries and pistachios and bring the dough together with your hands. The dough should be able to hold together but will still be slightly sticky.
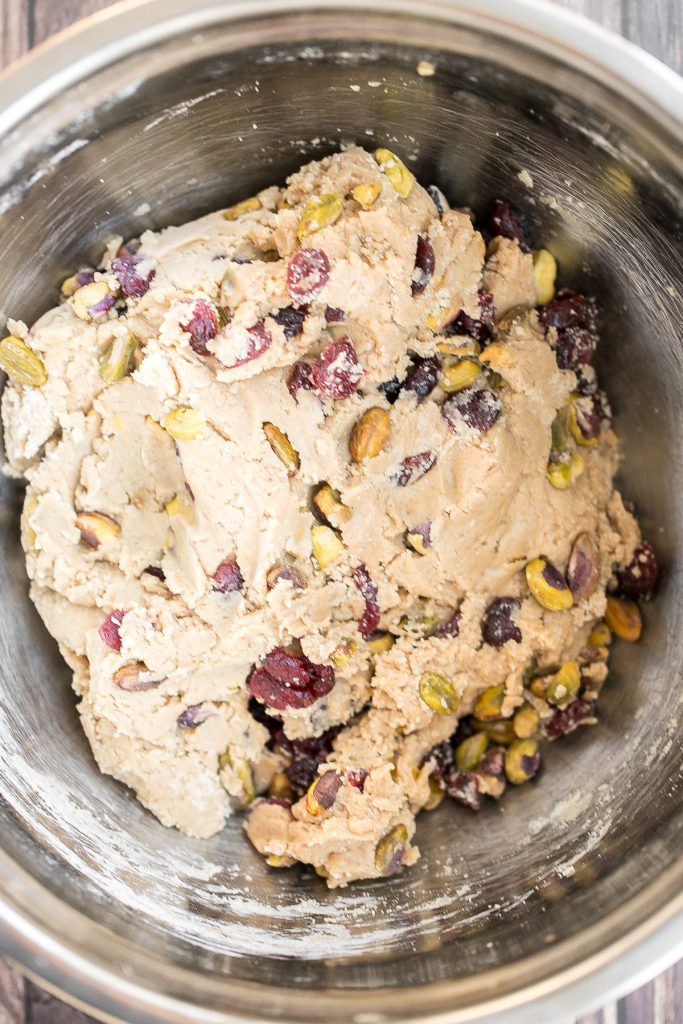
- Shape the dough. Transfer the dough onto a lightly floured surface and shape it into a rectangular log. Lightly flour a rolling pin and roll the dough into a rectangle measuring 10x6 inches, and ½-inch thick.
- Bake. Transfer to a quarter sheet baking pan lined with parchment paper or a silicone baking mat. Bake in a 350F preheated oven for 25 minutes, until golden brown.
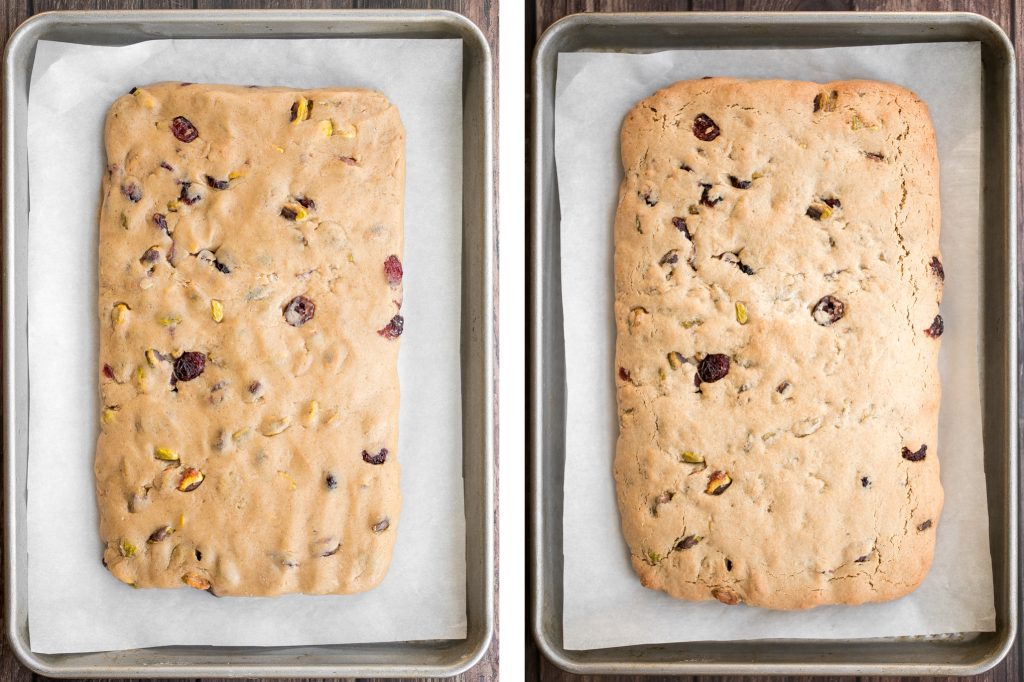
- Slice: Remove from oven and allow it to cool down in the pan until cool enough to handle, about 10 minutes. Transfer log to a cutting board and use a knife to cut into ¾-inch slices, crosswise. You should get about 14-16 slices, depending on how thick you rolled out the log.
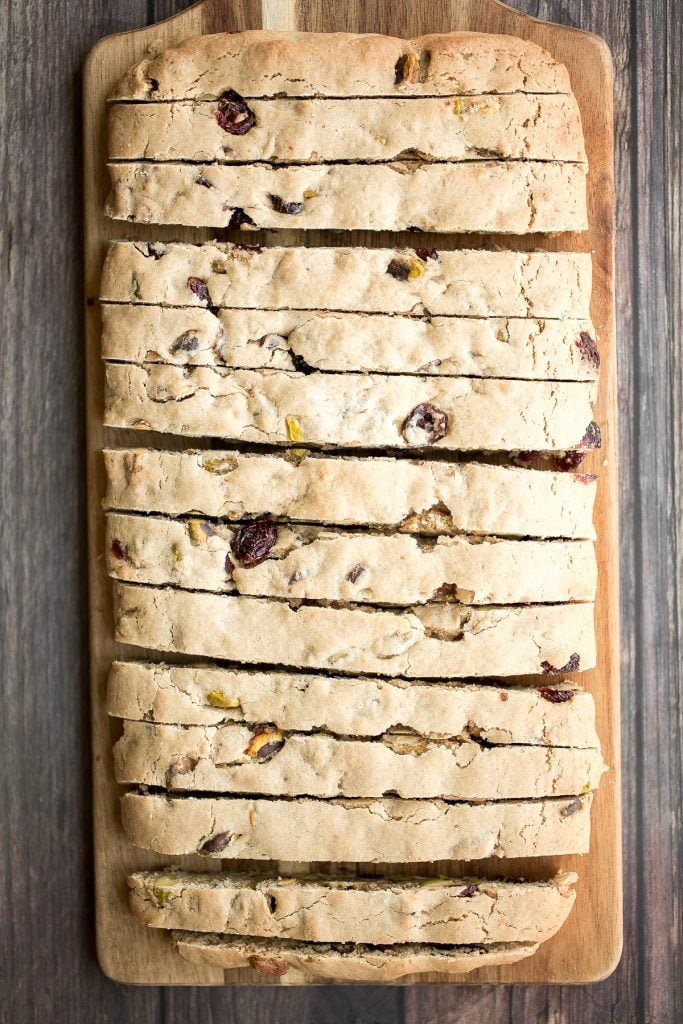
- Second bake: Reduce the oven temperature to 300F. Place the cranberry pistachio biscotti back on the lined baking tray (standing up on its cut side) and bake for 10 minutes. Then remove from oven and flip the biscotti over to the other side. Bake for another 8-10 minutes until crisp and golden.
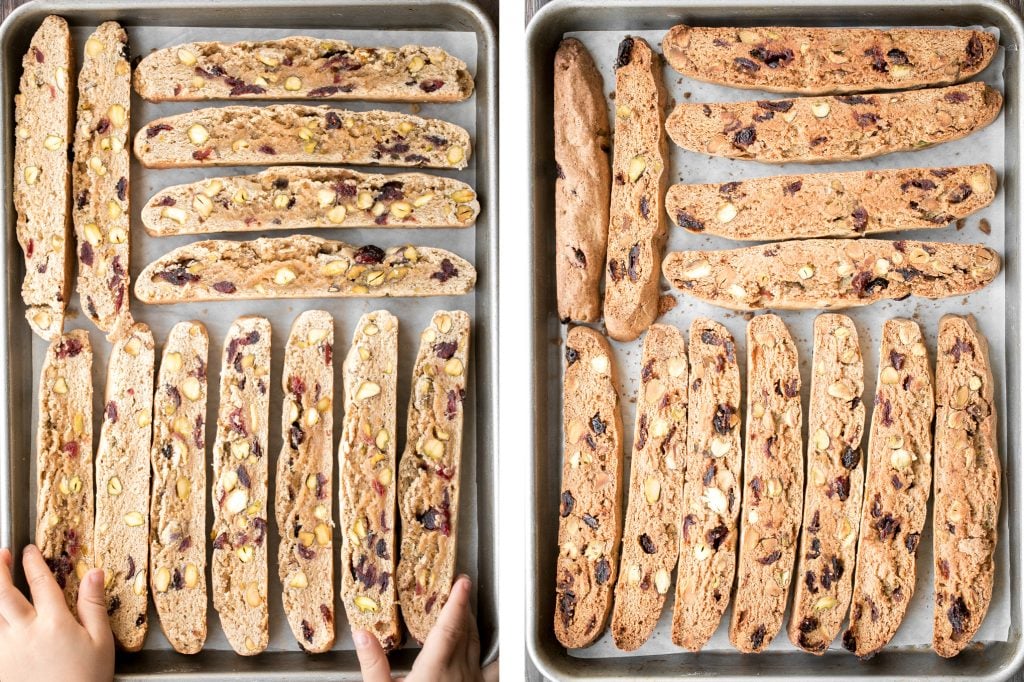
- Cool and serve: Allow biscotti to cool in the baking sheet for 5 minutes, then transfer to a wire cooling rack to cool down completely before serving. You can also melt some chocolate and dip half the biscotti into it, or drizzle it on top.
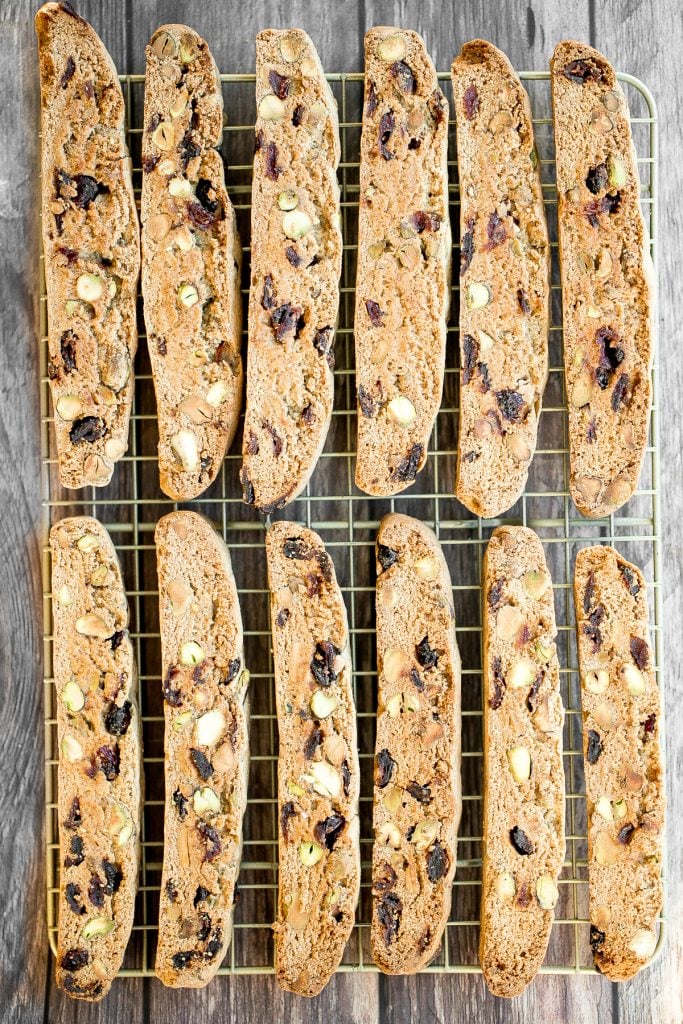
Cranberry Pistachio Biscotti Tips
- The texture: The ideal texture of biscotti is hard, dry and crunchy. It is the perfect texture for dunking into tea, coffee and hot chocolate.
- How to store: Store biscotti in an airtight container for up to 2 weeks at room temperature.
- How to freeze: Freeze biscotti in an airtight container or freezer bag for up to 3 months. When ready to eat, let it thaw at room temperature first.
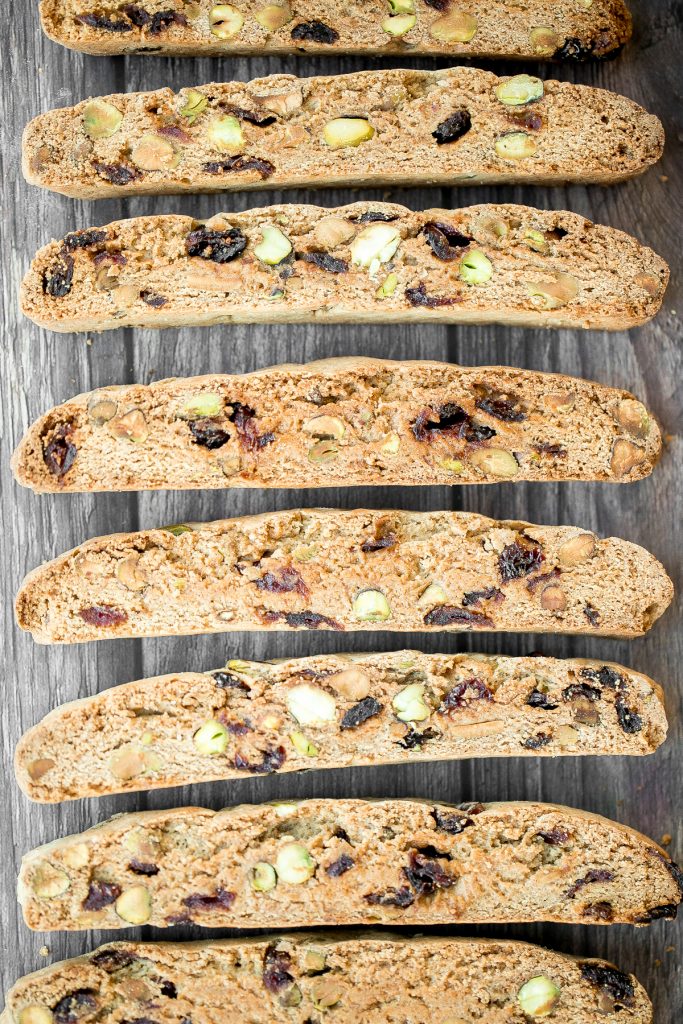
More Cookie Recipes
- Easy Small Batch Almond Biscotti
- Soft and Chewy White Chocolate Cranberry Cookies
- Persian Chickpea Cookies with Pistachio
- Chocolate-Dipped Shortbread Cookies
- Chocolate Chip Banana Bread Cookies
Tried this recipe?
I'd love to hear what you think! Leave a comment and rating below to share your feedback. Your reviews help others discover this recipe and help me keep creating more free recipes for you. Snap a photo and tag me on social media @aheadofthyme too.
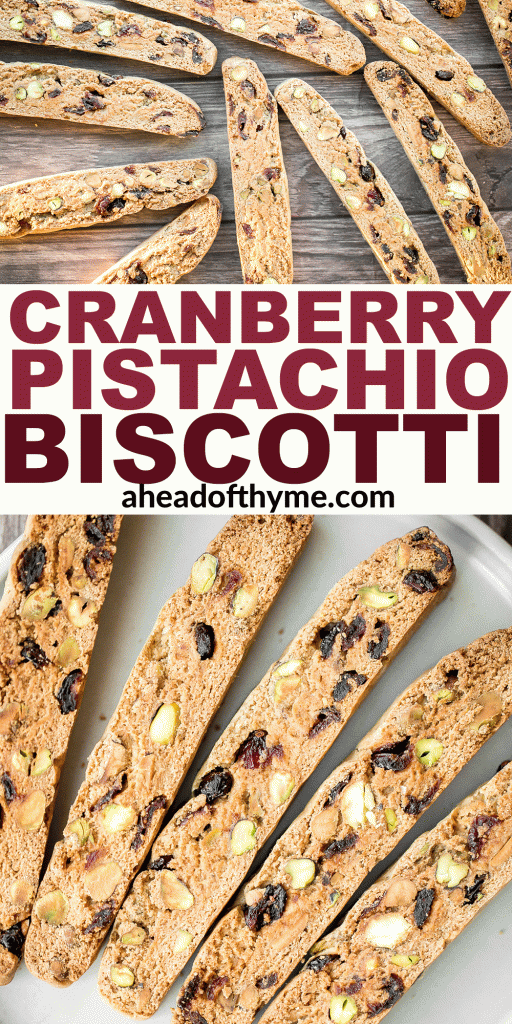
Healthy Mashed Potatoes

Healthy mashed potatoes are velvety and smooth, creamy and delicious packed with flavour, but with only a fraction of the calories. What's the secret? Substitute the cream for non-fat Greek yogurt and low-fat milk, and most of the butter with olive oil and chicken stock. These healthy mashed potatoes are the easiest side dish to prepare and can be made ahead of time. Add this quintessential holiday side dish to your Thanksgiving table this year and you won't regret it.
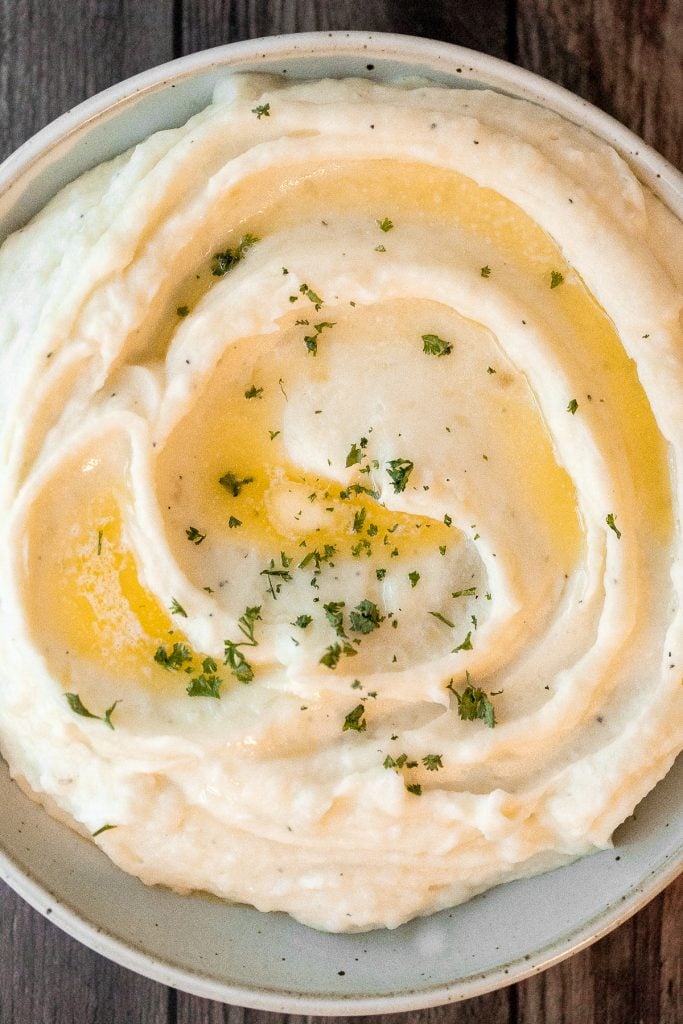
Potatoes are one of those foods that I can eat all day, every day. I like them prepared in any way, shape or form. But mashed potatoes might be my favourite way to enjoy this vegetable. I like them super creamy like in the best and creamiest mashed potatoes, and I like them garlicky like in garlic mashed potatoes with sour cream. I also like them healthy without sacrificing the taste. This recipe cuts out the total calories in this dish by almost 500. Pretty amazing.
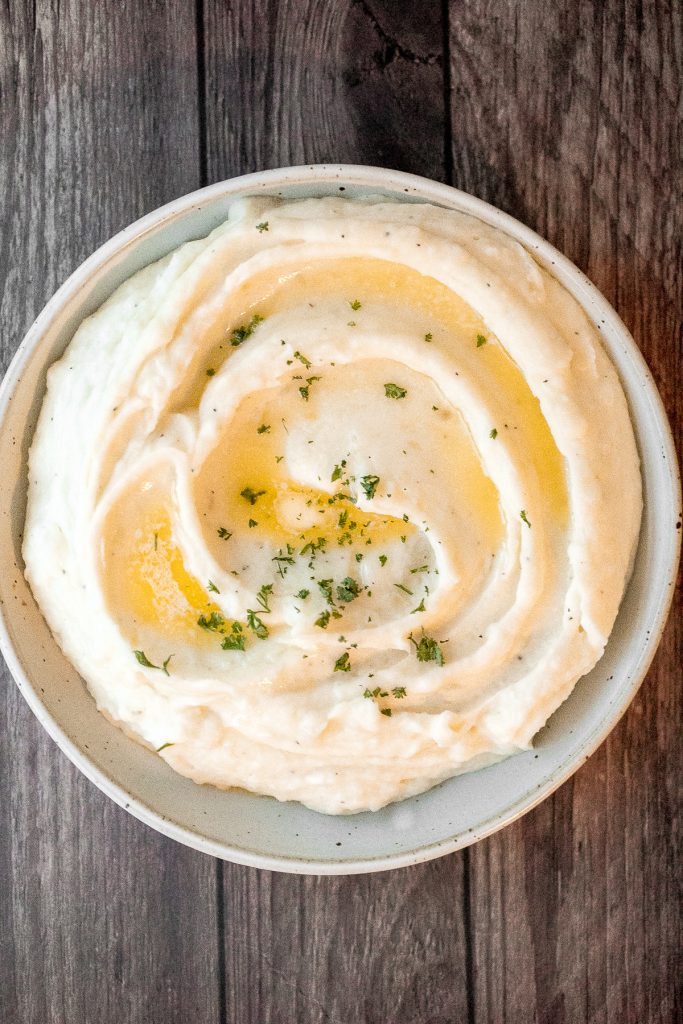
Ingredients
- potatoes - I use russet potatoes but Yukon gold potatoes are also perfect for mashed potatoes. They are softer and creamier.
- non-fat Greek yogurt - this adds a creamy velvety texture and also to replaces sour cream or heavy cream used in traditional mashed potatoes.
- non-fat milk - to create that smooth velvety texture without any cream.
- chicken broth - this adds flavour.
- butter - just one tablespoon in the whole dish to still give it that classic buttery texture and flavour.
- extra virgin olive oil - for texture and to keep the amount of butter that we use low.
- salt and pepper
You will also need a large pot and a potato masher.
How to Make the Best Healthy Mashed Potatoes
- Boil the potatoes: Place potatoes in a large pot and fill with salted water to cover the potatoes by about one inch. Bring to a boil over high heat, then turn down to low, cover and simmer for 15-20 minutes, until potatoes are tender.
- Mash the potatoes: Drain and place the potatoes back in the pot or into a mixing bowl. Mash the potatoes using a potato masher.
- Add remaining ingredients: Add chicken broth, milk, butter and olive oil. Whisk until light and fluffy. Add a generous amount of salt and pepper, to taste. Whisk until combined.
- Serve. Transfer to a serving dish, garnish with parsley, extra butter and serve warm.
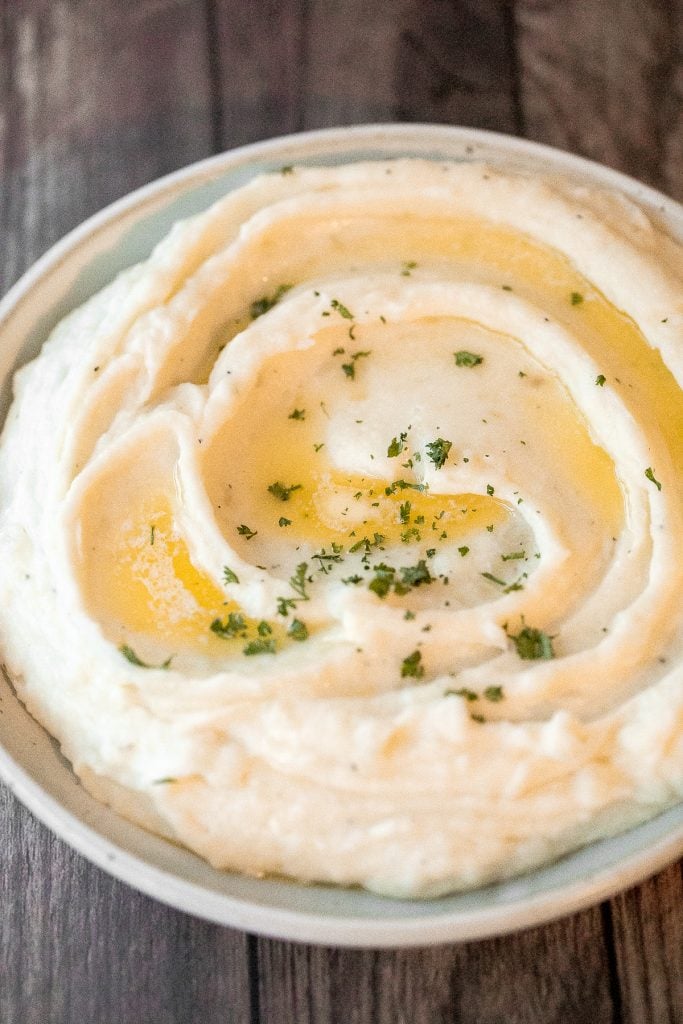
Tips
- Use a potato masher. Mash the potatoes using a simple potato masher. For extra creamy potatoes, use an electric hand mixer to mix the ingredients together after you have mashed the potatoes with the masher.
- How to store: Mashed potatoes can be stored in an airtight container in the refrigerator for up to 3 days.
- How to make ahead: Prepare these mashed potatoes up to 3 days ahead of time. To reheat, transfer to the microwave or oven.
More Potato Recipes
- The Best and Creamiest Mashed Potatoes
- Creamy Potatoes Au Gratin
- Garlic Mashed Potatoes with Sour Cream
- Hasselback Potatoes with Garlic Herb Butter
- Crispy Air Fryer French Fries
- Savoury Mashed Sweet Potatoes
- Slow Cooker Loaded Baked Potato Soup
Tried this recipe?
I'd love to hear what you think! Leave a comment and rating below to share your feedback. Your reviews help others discover this recipe and help me keep creating more free recipes for you. Snap a photo and tag me on social media @aheadofthyme too.
Creamy Tortellini Soup with Sausage
Hearty and creamy tortellini soup with sausage is total comfort food in a bowl. This flavourful tomato-based soup is packed with tortellini, Italian sausage, spinach and kale, for a wholesome one pot meal. The best part? You can make it in under 30 minutes, from prep to table, AND you can freeze leftovers for a rainy day. It's the perfect cozy lunch or dinner all fall and winter season long.
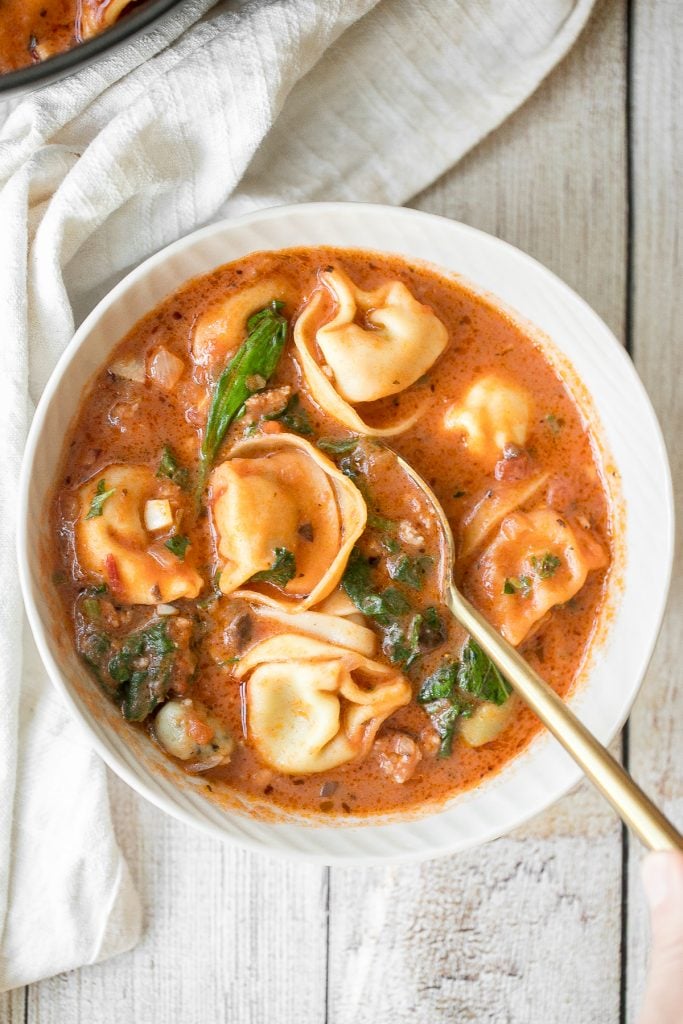
I am so excited when soup season rolls around because I am all about the warm winter sweaters and cozying up by the fireplace with a warm bowl of soup. Some of the hearty soups that we have been enjoying lately, in addition to creamy tortellini sausage soup has been vegetarian mushroom barley soup, healthy miso ramen with chicken, beef cabbage barley soup, and creamy vegetarian peanut miso ramen.
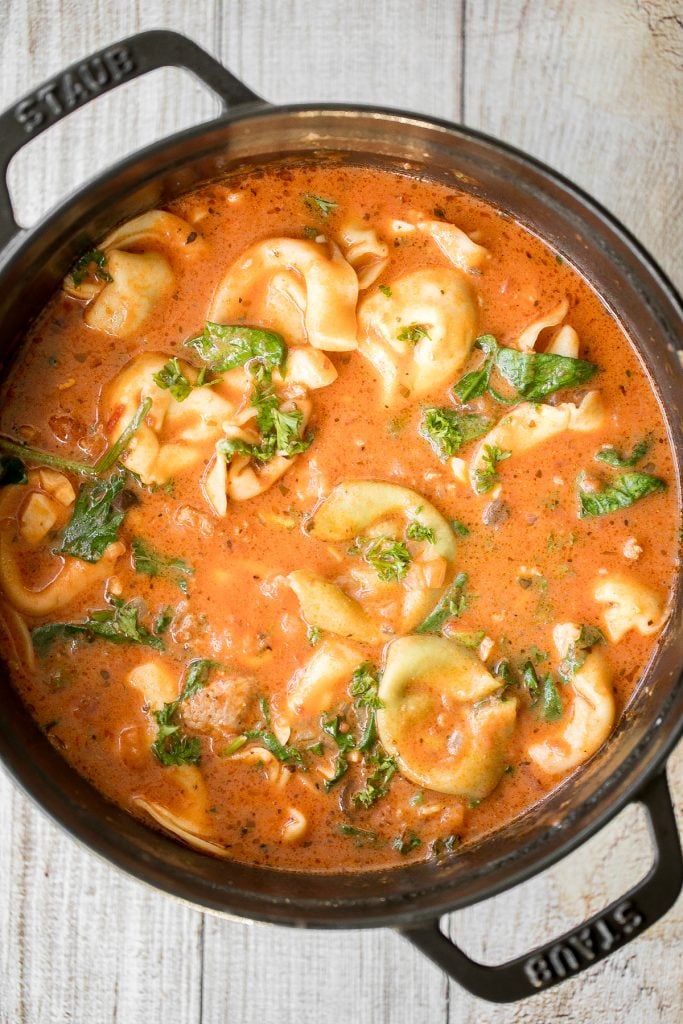
Ingredients and Substitutions in Tortellini Soup
To make this delicious creamy tortellini soup with sausage, you will need the following ingredients (full quantities in recipe card below):
- Italian sausage
- tortellini - I used cheese tortellini, but you can use any flavour that you like. You can also use fresh or frozen tortellini, but note that the cook time of the tortellini will be longer if it is from frozen.
- tomato sauce - either homemade or store-bought.
- heavy cream - you can also use half and half cream.
- onion
- garlic
- baby spinach
- kale
- all-purpose flour - a little flour helps thicken up the soup.
- salt and pepper
- fresh parsley - for garnish.
You will also need a medium cooking pot (I used my 4 qt. Dutch oven).
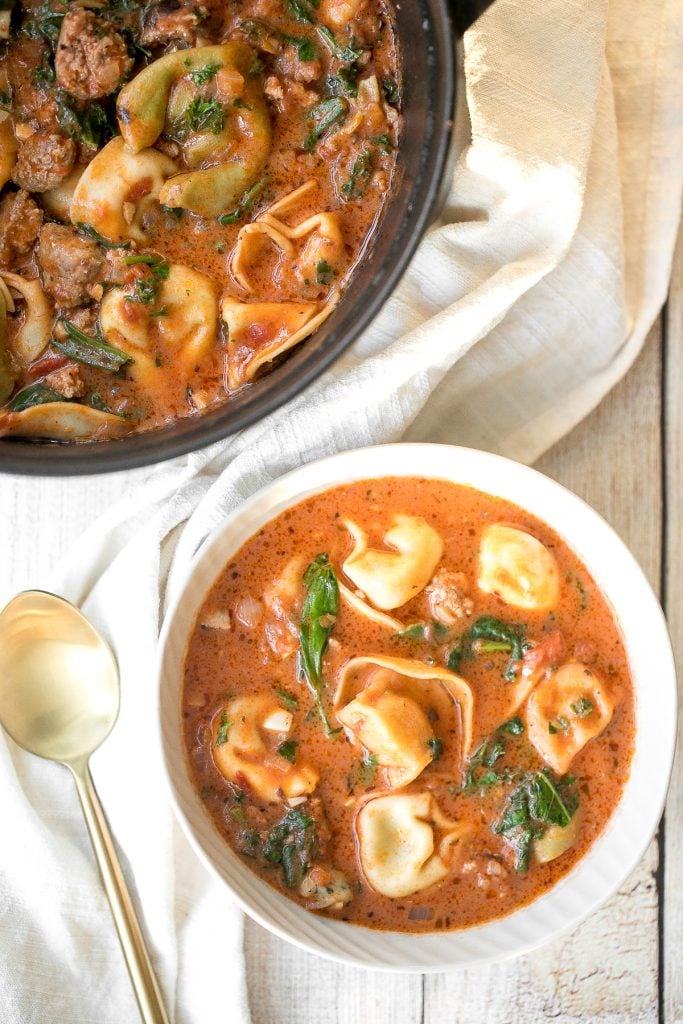
How to Make the Best Creamy Tortellini Soup with Sausage
- Cook the sausage: Heat oil in a Dutch oven or large pot for 2 minutes over medium high heat until the hot oil sizzles and shimmers. Add sausage and stir to cook for 5-7 minutes until browned. Break the sausages into small pieces using a spatula.
- Add onions and garlic: Add onions and garlic and sauté until tender. Stir well to combine and season with salt and pepper.
- Stir in flour and tomato sauce: Stir in flour until well combined, about 1 minute. Then, pour in tomato sauce. Turn the heat down to medium and stir well to combine. Bring the sauce to a simmer. Turn to low heat and let it simmer for 5 minutes.
- Add tortellini: Add tortellini and cook until tender, about 8-10 mins according to package directions. Stir occasionally to cook evenly.
- Add cream: Add heavy cream and stir well to mix. Make sure the heat is on low and stir well to achieve a smooth creamy consistency. You should notice the soup turn into a creamy orange colour after adding heavy cream. Add in spinach and kale. Cook for 1 minute until soft.
- Serve: Garnish with a sprinkle of fresh parsley on top and serve warm.

How to Serve Creamy Tortellini Soup
My favourite way to serve a hearty Italian soup like creamy tortellini soup with sausage is with a side of crusty garlicky bread like garlic rosemary focaccia bread, easy no knead tomato focaccia bread, pull apart garlic bread, or cheesy garlic dinner rolls. But really any crusty homemade bread works here to soak up all that creamy tomatoey soup.
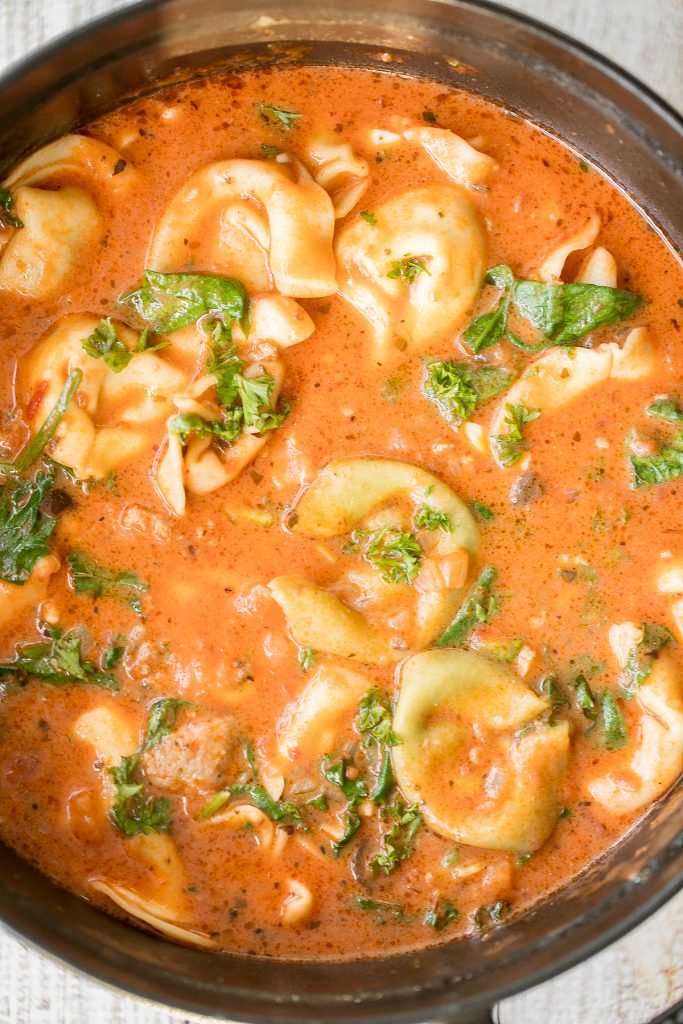
Storing Tips
- How to store: Store the soup in the pot (covered) or transfer to an airtight container, and store in the refrigerator for up to 3 days.
- How to freeze: Transfer soup to an airtight container and freeze in the freezer for up to 3 months. To serve, thaw it overnight in the refrigerator or for a few hours at room temperature on the kitchen counter. Then, reheat on the stove over medium-low heat and serve with fresh parsley on top.
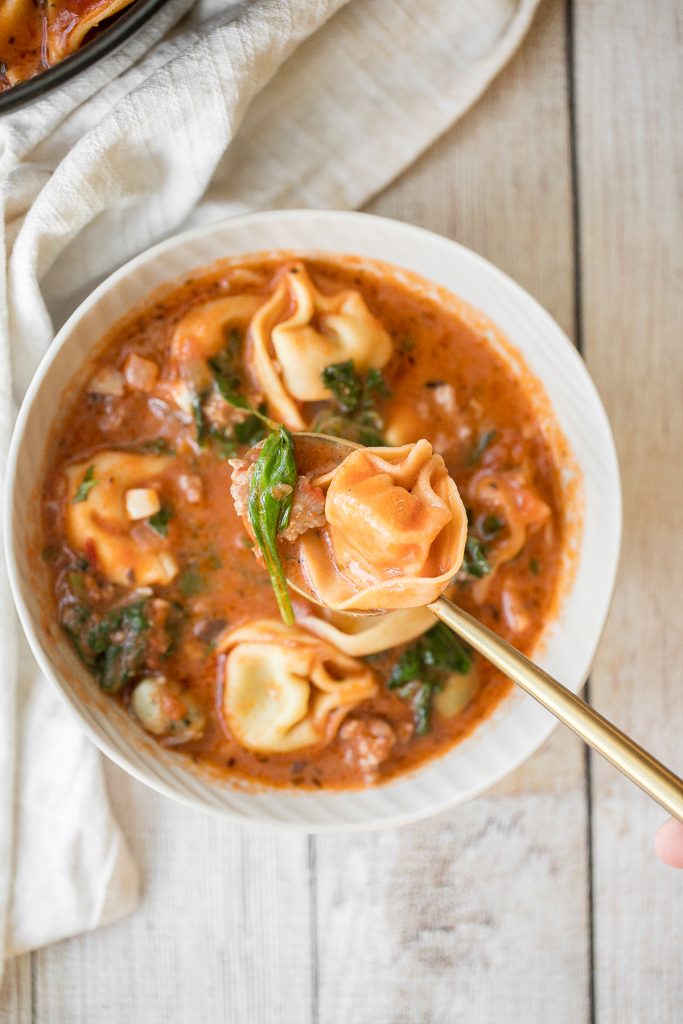
More Soup Recipes
- Vegetarian Mushroom Barley Soup
- Creamy Vegetarian Peanut Miso Ramen
- Lemon Chicken Orzo Soup
- Roasted Butternut Squash Soup
- Creamy Mexican Corn Soup
- Beef Cabbage Barley Soup
- 30-Minute Butternut Squash Soup
- Sweet Potato Soup
This easy creamy tortellini soup with sausage soup forms a part of my 25 warm and cozy fall soup recipes. Follow the link to check out all of my 25 fall favourite soups.
Tried this recipe?
I'd love to hear what you think! Leave a comment and rating below to share your feedback. Your reviews help others discover this recipe and help me keep creating more free recipes for you. Snap a photo and tag me on social media @aheadofthyme too.

Soft and Chewy Ginger Cookies
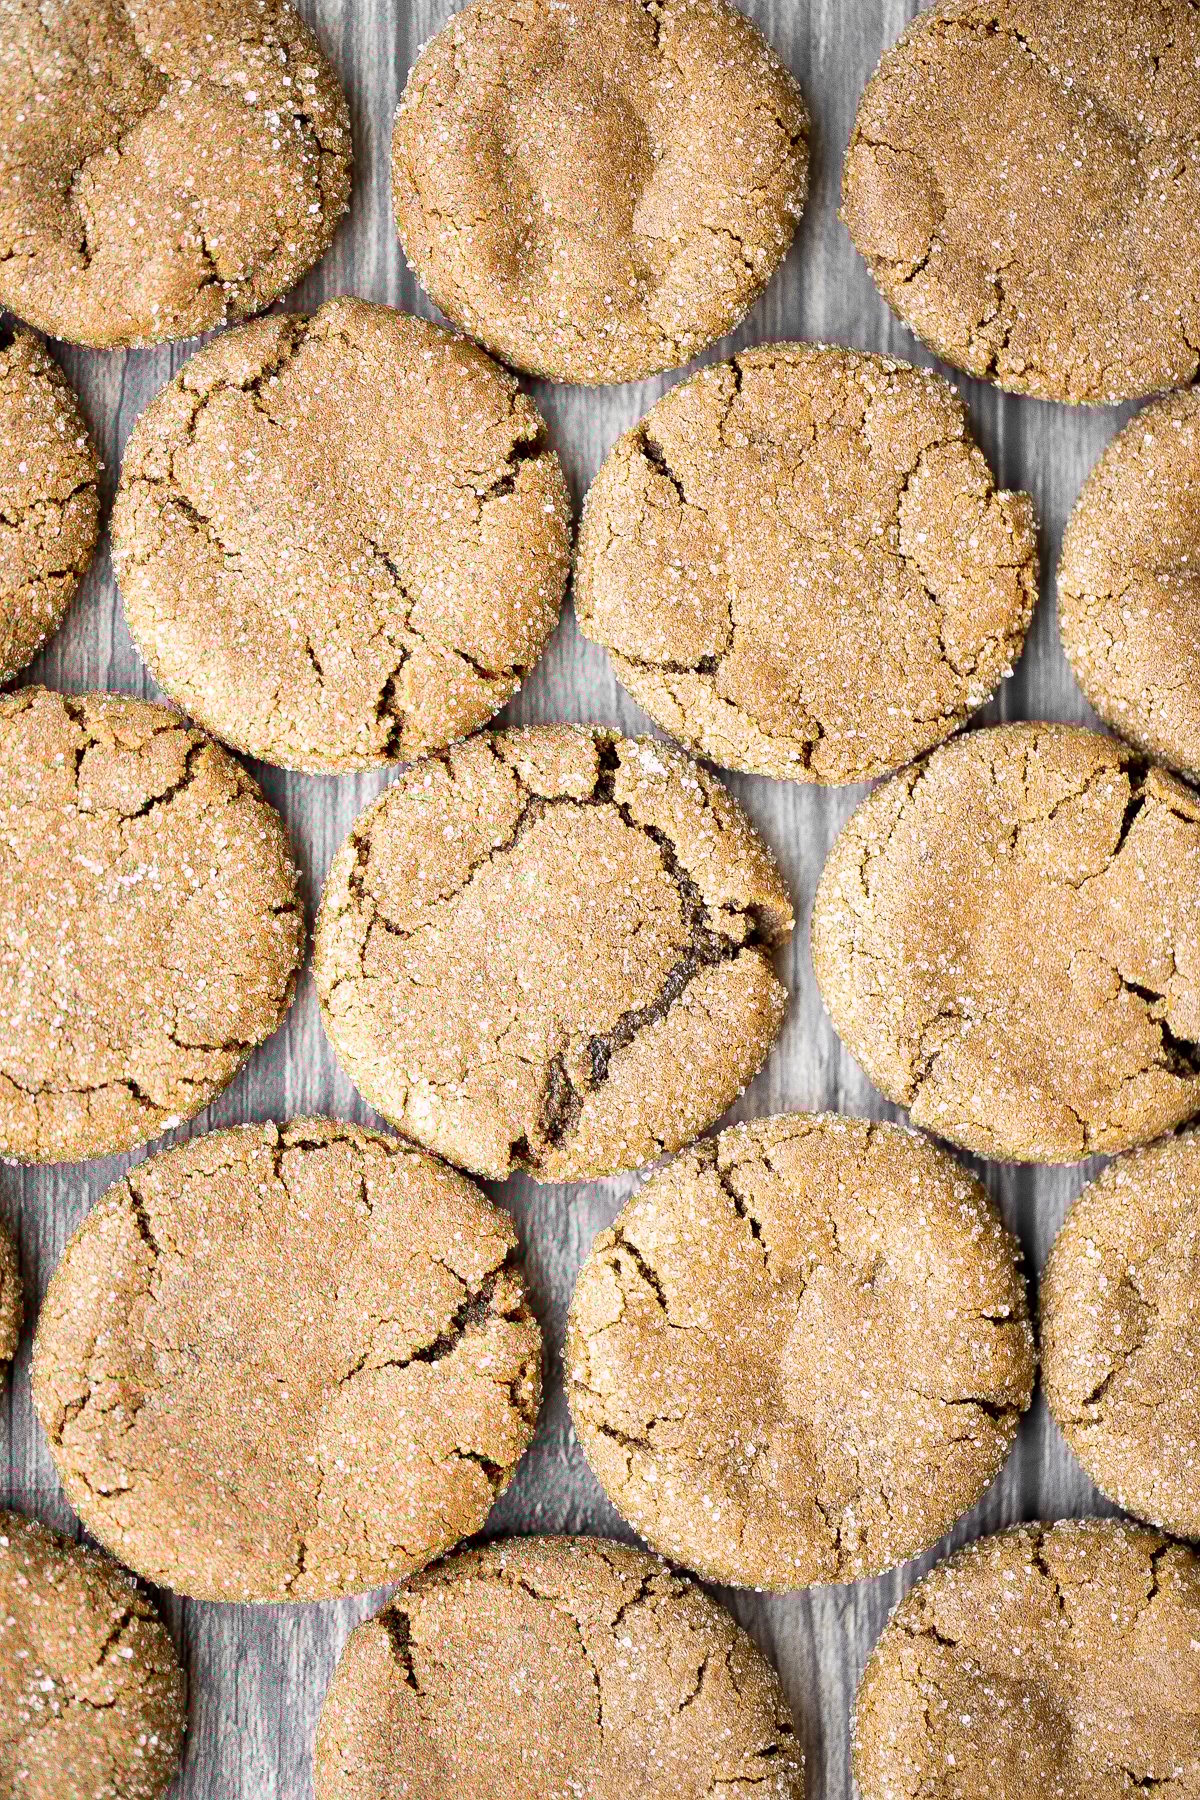
Soft and chewy ginger cookies are packed with ginger, molasses, and cinnamon spice, for the most warm and cozy cookie ever. These holiday cookies are so soft and chewy and stays soft for days, making it the best make ahead cookie recipe to bake. Plus, they are so easy to whip up, that even the kids will love to help.
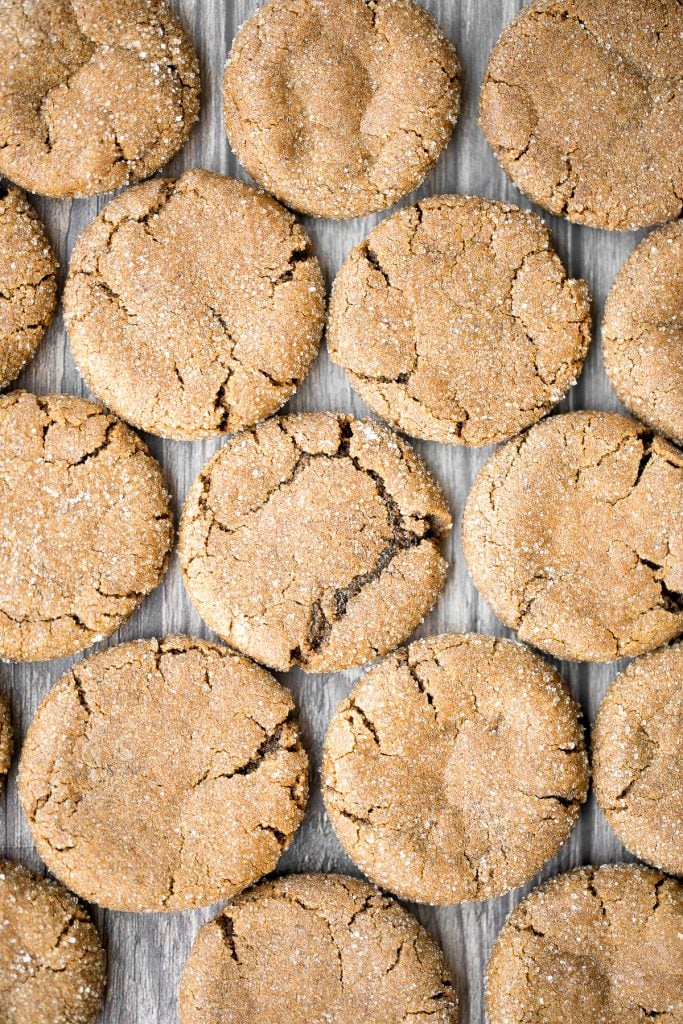
We are starting Christmas cookie season early this year, because why not? I don't know about you, but I have been in need of some major cookie therapy lately with all that has been going on. Plus, it's never too early to start thinking about the cookies that you want to include in your holiday cookie box this year. These soft and chewy ginger cookies definitely make the cut. Some of my other favourite Christmas cookies that I am planning to include are Christmas sugar cookies, jam-filled thumbprint cookies, soft and chewy white chocolate cranberry cookies and chocolate-dipped shortbread cookies.
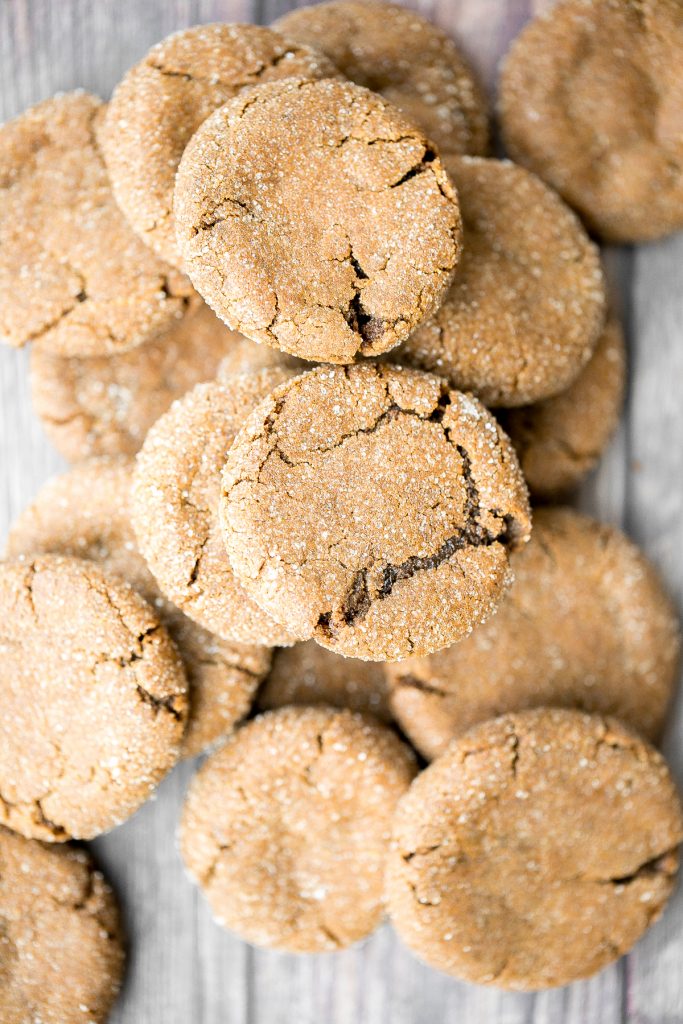
Ingredients in Soft Ginger Molasses Cookies
- all-purpose flour
- baking soda
- ground ginger
- ground cinnamon
- ground cloves
- molasses
- butter
- sugar - both granulated sugar and brown sugar.
- egg
- vanilla extract
- salt
- sugar coating - I used coarse sugar because I like the texture on the outside of these cookies. You could also just use granulated sugar.
You will also need measuring cups and spoons, mixing bowls, hand mixer (or stand mixer), cookie scoop, half sheet baking pan, and silicone mat.
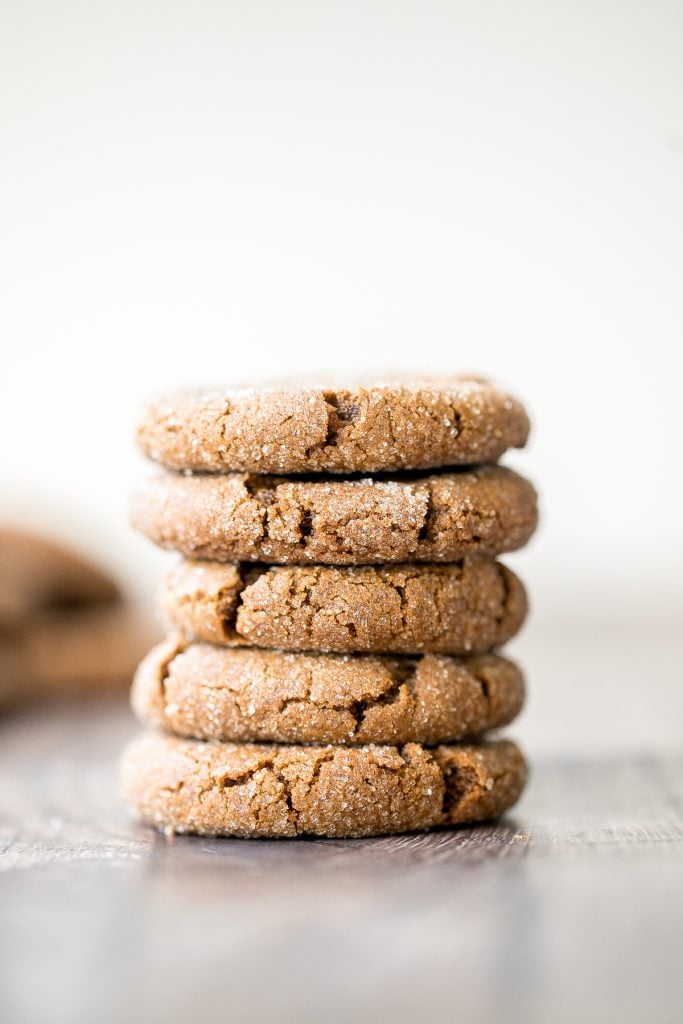
How to Make the Best Soft and Chewy Ginger Cookies
- Combine dry ingredients: In a medium bowl, whisk together flour, baking soda, ginger, cinnamon, cloves, and salt. Set aside.
- Combine wet ingredients: In a large bowl, cream together the butter and sugars using a hand mixer or stand mixer on medium speed until light and fluffy, about 2 minutes. Add the egg and beat until incorporated. Then add molasses and vanilla and beat on low until combined.
- Add dry ingredients to wet ingredients: Gradually add in the dry ingredients and beat until just combined.
- Chill: Cover the bowl with plastic cling wrap and refrigerate for 2 hours, up to overnight.
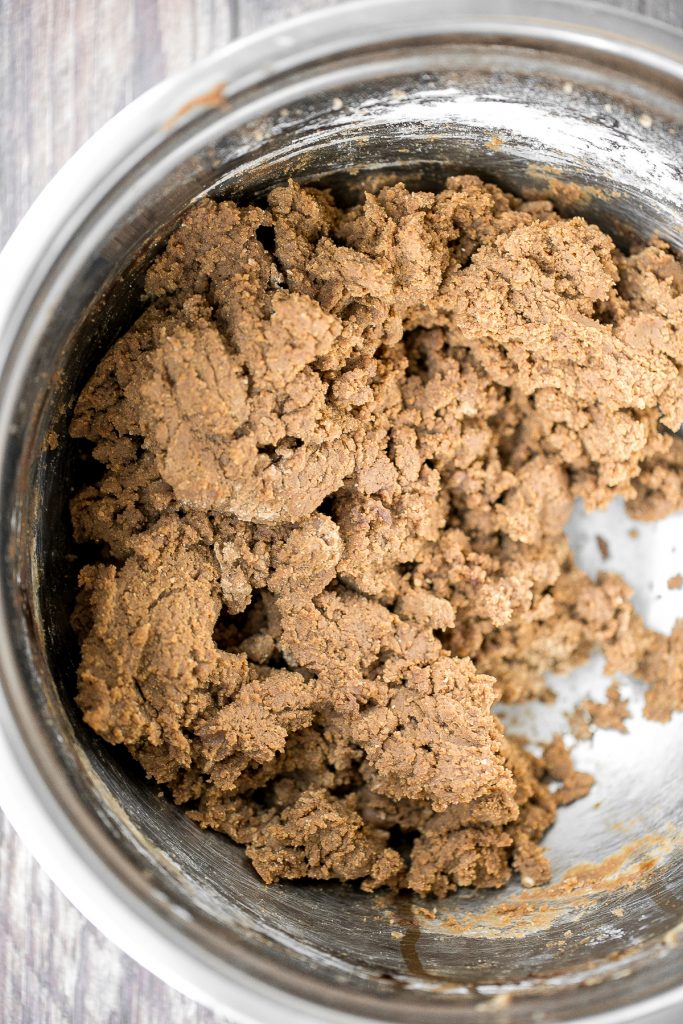
- Shape and coat with sugar: Transfer coarse sugar into a small bowl. Then, use a cookie scoop to scoop out 1-2 tablespoons of cookie dough at a time, and roll into 1-inch ball. Roll the cookie ball into the bowl of sugar to fully coat it. Place on a parchment paper or silicone mat lined half sheet baking pan, spaced 2-3 inches apart. You will need to bake in multiple batches, or freeze some uncoated cookie balls to bake later.
- Bake: Bake for 8-10 minutes in a 350 F preheated oven, until the edges are set. Remove from oven and allow the cookies to cool for 5 minutes on the baking sheet. Then, transfer to a wire cooling rack to cool down completely.
PRO TIP: If the cookies have a dome to them and are not very crinkled (this can happen if your cookie dough has been chilled for too long), gently press down on them using the back of a spatula so flatten them out a bit and create the crinkle effect. Do this just before transferring to a wire cooling rack to cool down completely.
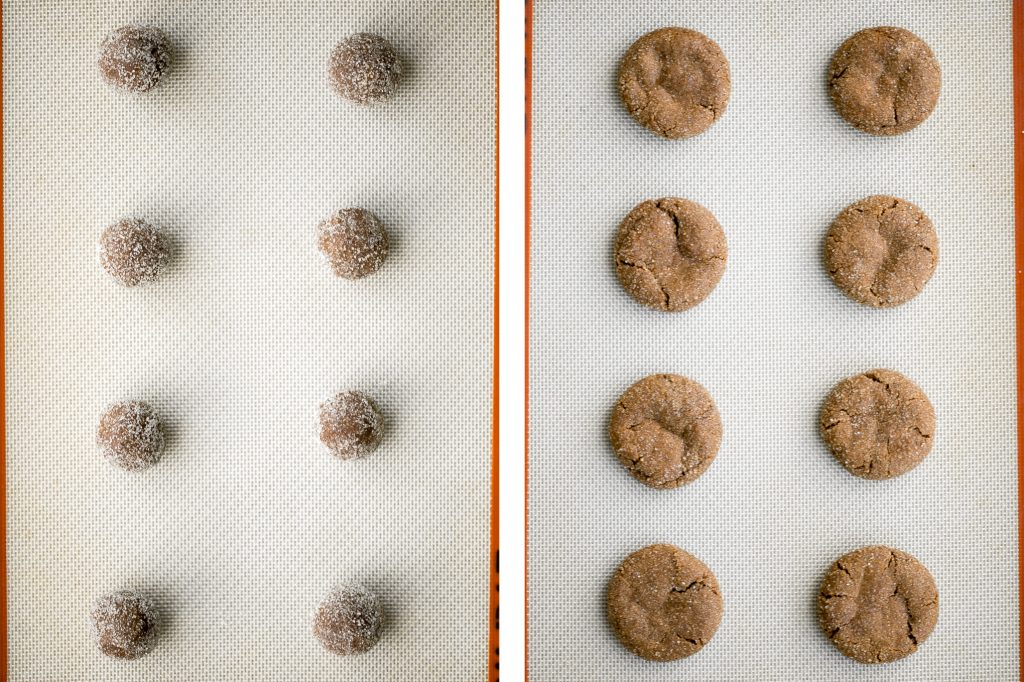
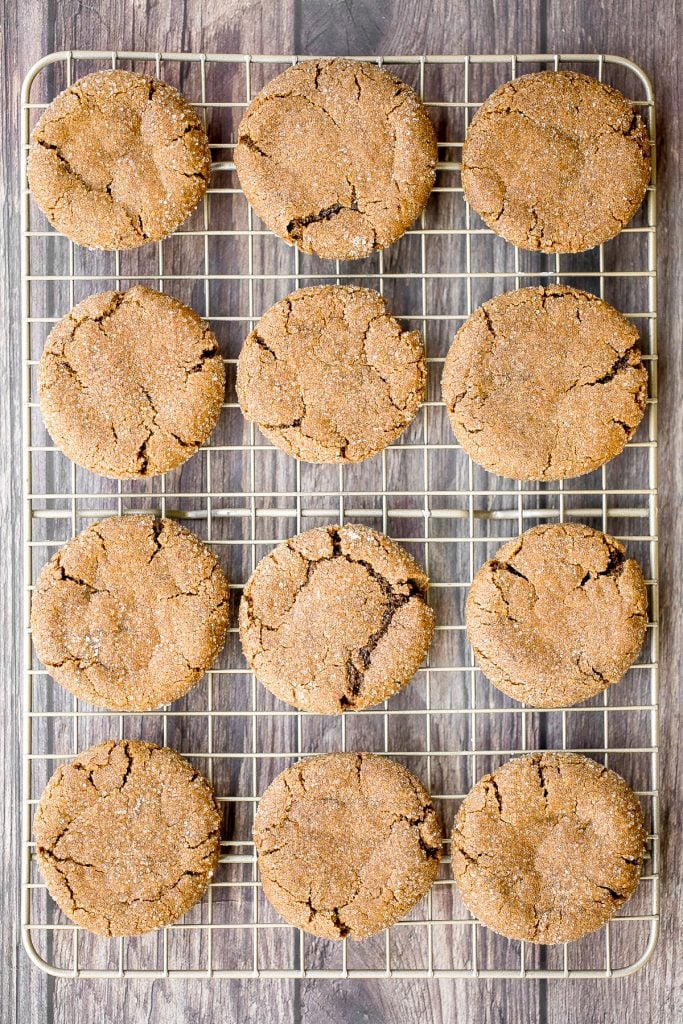
Storing Tips
- How to store: Store in an airtight container at room temperature for up to 1 week.
- How to freeze: Store in an airtight container in the freezer for up to 3 months. You an also freeze the rolled cookie balls that have not been coated in sugar for up to 3 months. When ready to bake, simply allow it to defrost in the refrigerator, then roll in sugar and bake.
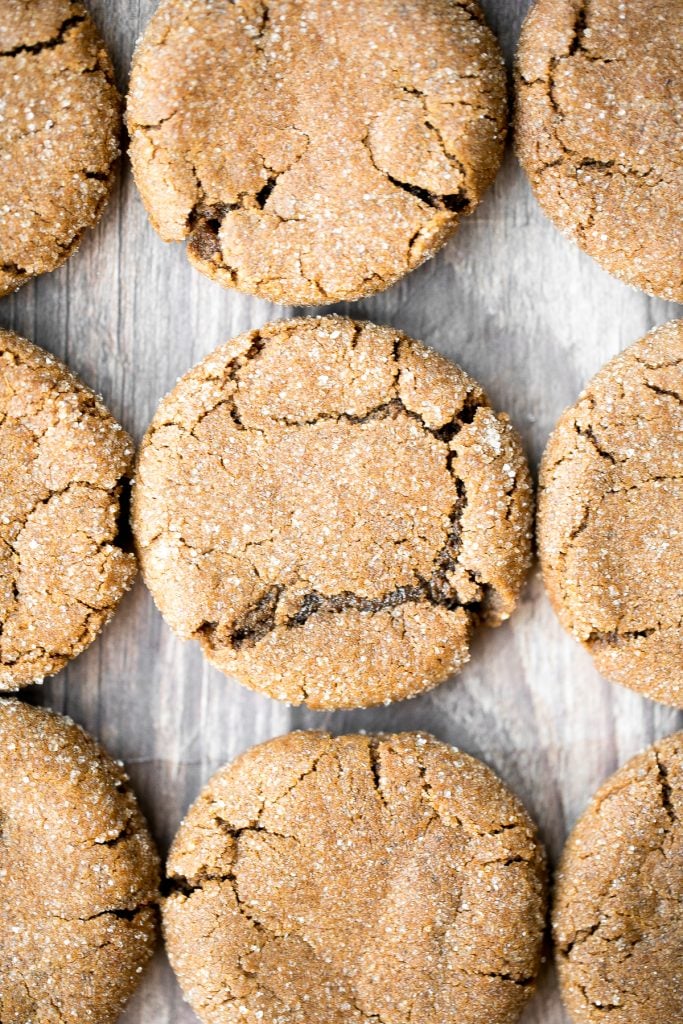

More Cookie Recipes
- Soft and Chewy White Chocolate Cranberry Cookies
- Jam-filled Thumbprint Cookies with Almond Glaze
- Christmas Sugar Cookies with Royal Icing
- The Best Soft and Chewy Peanut Butter Cookies
- Chocolate Chip Banana Bread Cookies
- Chocolate-Dipped Shortbread Heart Cookies
- The Best Chewy Chocolate Chip Oatmeal Cookies
Tried this recipe?
I'd love to hear what you think! Leave a comment and rating below to share your feedback. Your reviews help others discover this recipe and help me keep creating more free recipes for you. Snap a photo and tag me on social media @aheadofthyme too.

Honey Glazed Roast Pork with Vegetables
This easy, one pan honey glazed roast pork with vegetables is moist, tender, juicy, and succulent and coated with an irresistible honey glaze. This showstopper one pan meal with baby potatoes, apples and green beans is seasoned with incredible warm flavours that is perfect for a holiday dinner but easy enough to make any night of the week with just 15 minutes of actual prep. It is seriously the best roast pork ever.

This honey glazed roast pork is a complete dinner packed with vegetables, that you can serve on its own. Save the pan drippings to drizzle on top or turn it into a delicious gravy to serve it with. Some other sides that would go so well with this is garlic mashed cauliflower, sautéed garlic mushrooms, and creamy mashed potatoes.
Ingredients
- pork - I used boneless pork shoulder. Pork belly would also work great for this recipe, or any cut that roasts really well.
- pork marinade - hoisin sauce (or soy sauce), liquid honey, dark soy sauce, garlic, green onions, and ground black pepper.
- vegetables - I used baby potatoes, apples, green beans, and onions, tossed in olive oil, Italian seasoning and salt. The beauty of this recipe is that you can easily customize the vegetables for something else that you may have on hand. Sweet potatoes, butternut squash, and carrots would go really well in this too. Just cut the vegetables into 1-inch pieces to ensure even cooking.
- honey glaze - hoisin sauce, honey, and dark brown sugar. This combination of ingredients creates a honey glaze that is unreal. Packed with umami from the hoisin sauce, and sweetness from the honey and brown sugar (which also adds colour). It's so so good.
- gravy - you can drizzle the pork with pan drippings or make this optional gravy using the pan drippings and a little flour.
You will also need a large ziploc bag, cast-iron skillet (or quarter sheet baking pan), and a meat thermometer.
How to Make the Best Honey Glazed Roast Pork
- Marinate the pork: Pat dry the pork completely with a paper towel. Score the pork with a knife to make shallow cuts, about ¼-inch deep. Then, transfer the pork into a large ziploc bag, along with hoisin sauce, honey, dark soy sauce, garlic, green onions, and black pepper. Press the air out of the bag and seal tightly. Massage the marinade around the pork to coat it and place it in the refrigerator to marinate for at least 1 hour, up to overnight.
- Prepare the vegetables: In a large mixing bowl, add potatoes, apple slices, green beans and onion. Drizzle with olive oil and season with Italian seasoning and salt. Toss to combine with until well coated. Transfer the vegetable mixture onto a cast-iron skillet (or a quarter sheet baking pan) and spread them evenly.
- Roast the pork and vegetables: Place the marinated pork on top of the vegetables and drizzle the remaining marinade over the vegetables. Roast uncovered in a preheated 350F oven for 1.5 to 2 hours, until the internal temperature of the pork reaches 160 F on a meat thermometer. The baking time will vary depending on the size of the pork shoulder. Once the pork is done, let it rest at room temperature for 10 to 15 minutes before slicing.

- Make the honey glaze and broil:In a small bowl, whisk to combine hoisin sauce, honey, and dark brown sugar into a smooth paste. Generously brush the sauce over the pork and broil it on high for 3-4 minutes, or until you achieve a caramel brown colour and the edges of the pork turn nicely charred. The intense high heat creates a beautiful caramelizing glaze from the browning of sugar during broiling.
- Slice and serve: Slice the pork into ¼-inch pieces and serve with roasted vegetables and a drizzle of gravy (or just pan drippings if not making gravy) on top.
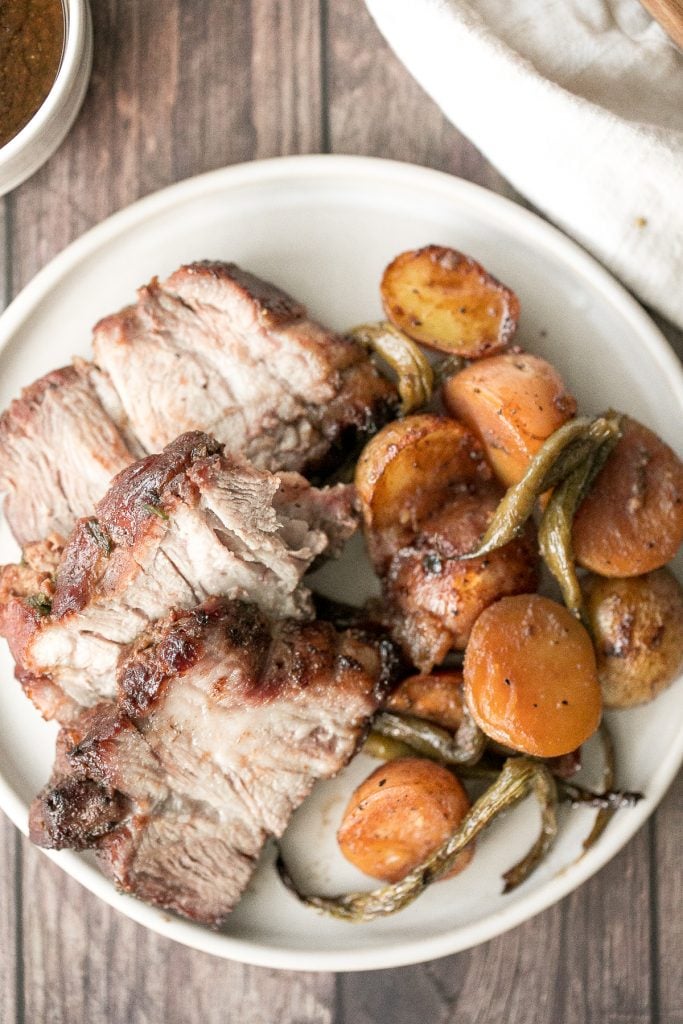
How to Make Easy 2-Ingredient Gravy
To make an easy 2-ingredient gravy to pour on top of the honey glazed roast pork, slowly pour the pan drippings through a fine mesh sieve and into a cooking pot. Add flour and whisk to combine. Make sure the flour is fully dissolved.
Transfer the pot to the stove and heat over medium heat for 3-4 minutes, continuously stirring until gravy is thickened. If you prefer a thicker gravy, whisk in ½ tablespoon of flour at a time to thicken it out. If it gets too thick, add ½ tablespoon of water at a time to thin it out.
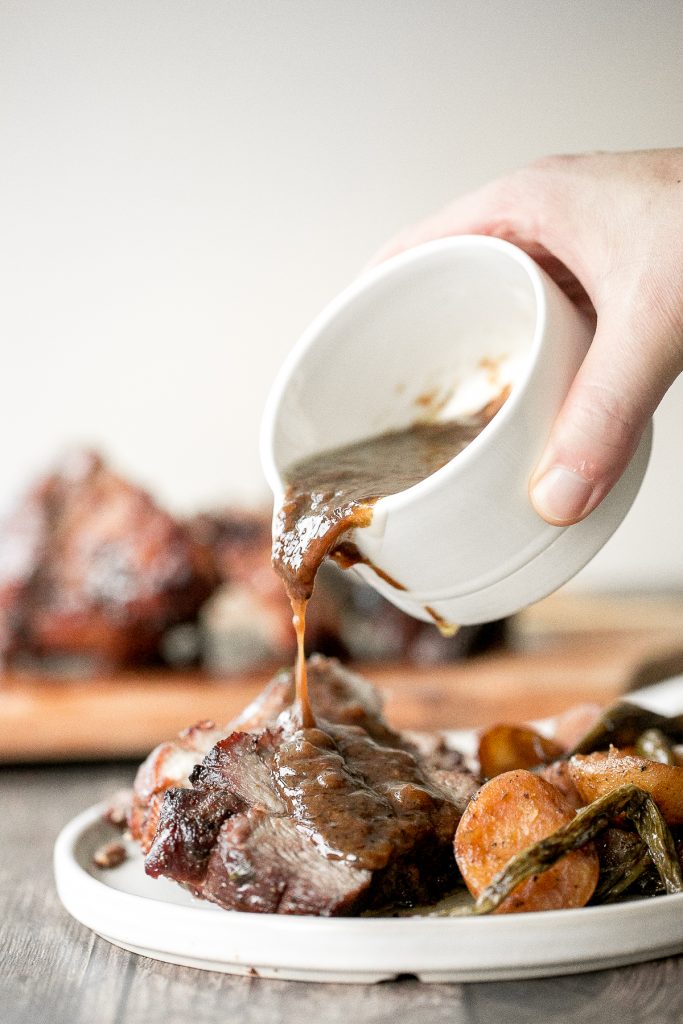
Tips for Making Roast Pork
- Use a digital thermometer. A digital meat thermometer is very useful when cooking pork or any kind of meat. It ensures that you never end up with undercooked or overcooked meat. Simply insert the thermometer halfway inside the meat to get a quick measurement. Once it reads 160F, the pork is done and you can take it out of the oven.
- Slow cooker instructions. You can make this honey glazed pork in the slow cooker as well. Marinate the pork as is, then sear it over medium high heat on all sides until browned, about 3-4 minutes per side. Then layer the vegetables on the bottom of the slow cooker and place the marinated pork on top. Cook on low for 4-6 hours. Then continue the recipe as is, making the glaze and broiling the pork for a few minutes until crisp.
- How to store. Store roast pork in an airtight container for up to 3 days in the refrigerator. To reheat, place in the oven or air fryer at 300F for 10-15 minutes until heated through.
- How to use leftovers. You can use leftover roast pork in Shanghai-style fried noodles, add them in crispy fried spring rolls or 10-minute fried rice, or throw it in a sandwich.
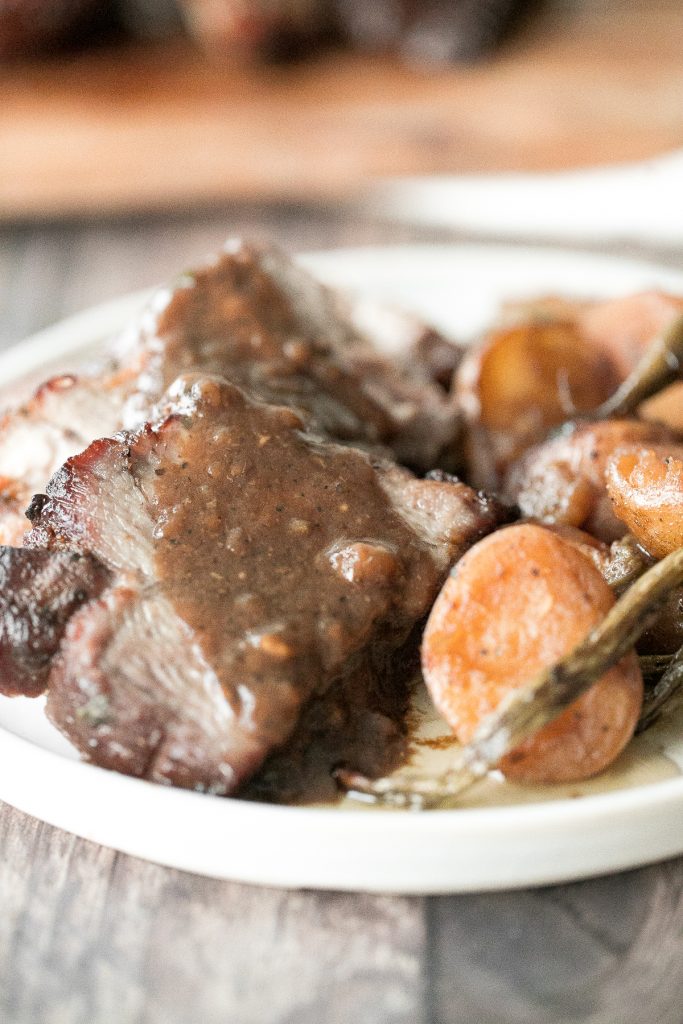
More Roast Meat Recipes
- Dutch Oven Whole Roast Chicken
- Easy Roast Lamb with Vegetables
- One Pan Garlic Roasted Chicken and Baby Potatoes
- Easy Juicy Roasted Turkey Breast
- Roasted Spatchcock Chicken (Butterflied Chicken)
- The Best and Juiciest Whole Roast Turkey
Tried this recipe?
I'd love to hear what you think! Leave a comment and rating below to share your feedback. Your reviews help others discover this recipe and help me keep creating more free recipes for you. Snap a photo and tag me on social media @aheadofthyme too.
Gingerbread Bundt Cake with Maple Cinnamon Glaze
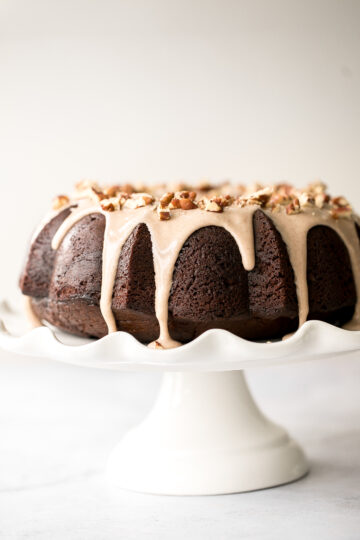
This showstopping festive gingerbread bundt cake with maple cinnamon glaze and pecans is moist, soft, and fluffy, and packed with warm holiday spices in every single bite. It is topped with a smooth maple cinnamon glaze with pecans on top that complements the gingerbread flavours so perfectly. The best part? This bundt cake may look like it took some serious holiday magic to make, but it is actually so easy to make in just a few simple steps and a handful of pantry staples. It's the perfect cake to make this holiday season.
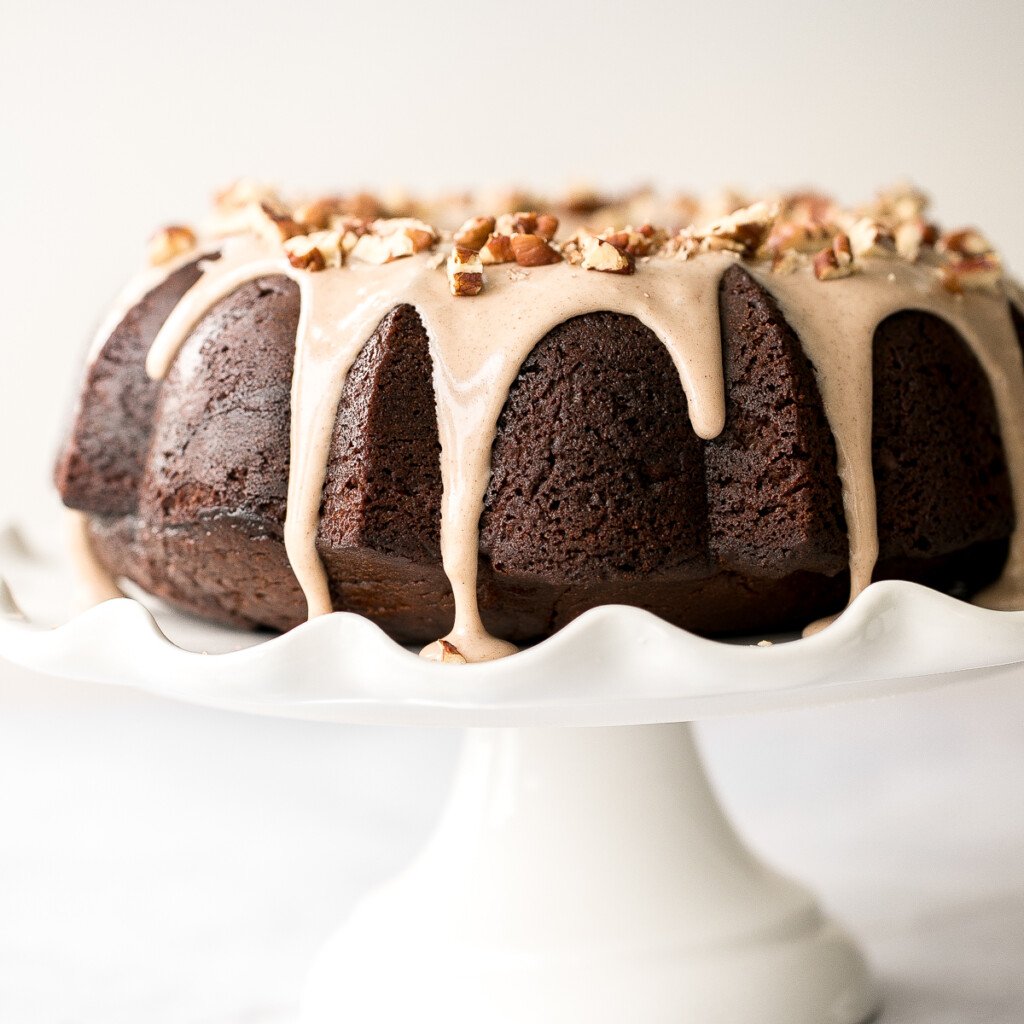
I love this time of year because it's all about the baked goods, which means that my house gets to smell like a European Christmas market all month long. This gingerbread bundt cake seriously has the best aroma ever.
Some other holiday favourites to bake are gingerbread muffins with vanilla bean glaze, soft and chewy ginger cookies, jam-filled thumbprint cookies, and festive yogurt fruitcake.
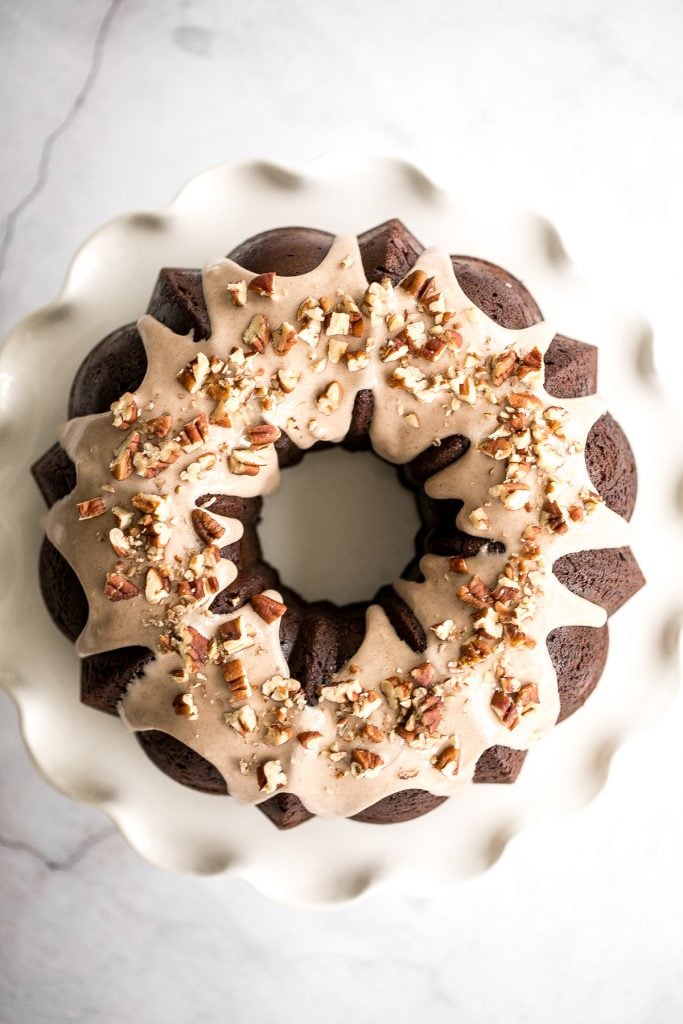
Ingredients
Here is what you need to gather in order to make this gingerbread bundt cake with maple cinnamon glaze:
- all-purpose flour
- baking powder + baking soda
- ground cinnamon, ginger, and all-spice - you could also use a combination of ground cinnamon, ground ginger, cloves and nutmeg, or simply use a gingerbread spice blend.
- salt
- butter
- dark brown sugar - I like dark brown sugar in this recipe, but you could also substitute it with light brown sugar.
- eggs
- vanilla extract
- molasses
- plain yogurt - this is the secret ingredient that make this cake super moist.
- milk
- maple cinnamon glaze - made with confectioners' sugar (icing sugar or powdered sugar), maple syrup, cinnamon and milk.
- pecans - for the topping. You can substitute this with chopped walnuts or crushed pistachios on top.
You will also need measuring cups and spoons, mixing bowls, hand mixer (or stand mixer), 10-cup bundt pan, and wire cooling rack.

How to Make the Best Gingerbread Bundt Cake
- Prep: Preheat oven to 350 F. Coat a 10-cup bundt pan with nonstick cooking spray and set aside.
- Combine dry ingredients: Combine flour, baking powder, baking soda, cinnamon, all spice and salt in medium bowl, and whisk to combine. Set aside.
- Combine wet ingredients: Cream butter and sugar in a large mixing bowl using a hand mixer to beat on medium speed until light and fluffy, about 3 minutes. Add eggs, one at a time, beating after each addition, then add molasses. Scrape down the sides as needed and beat until well mixed.
- Mix dry and wet ingredients together: Gradually add half of the dry ingredients to the bowl, and beat slowly until just combined. Add in yogurt and milk, and beat until combined. Then, gradually add remaining dry ingredients, scrape down the sides with a spatula, and beat until mixed.
- Bake: Bake for 55-65 minutes, until a toothpick inserted into the center of the cake comes out clean. Let it cool in the pan on a wire cooling rack for 10 minutes. Then flip upside down and let the cake cool down completely on the wire cooling rack.
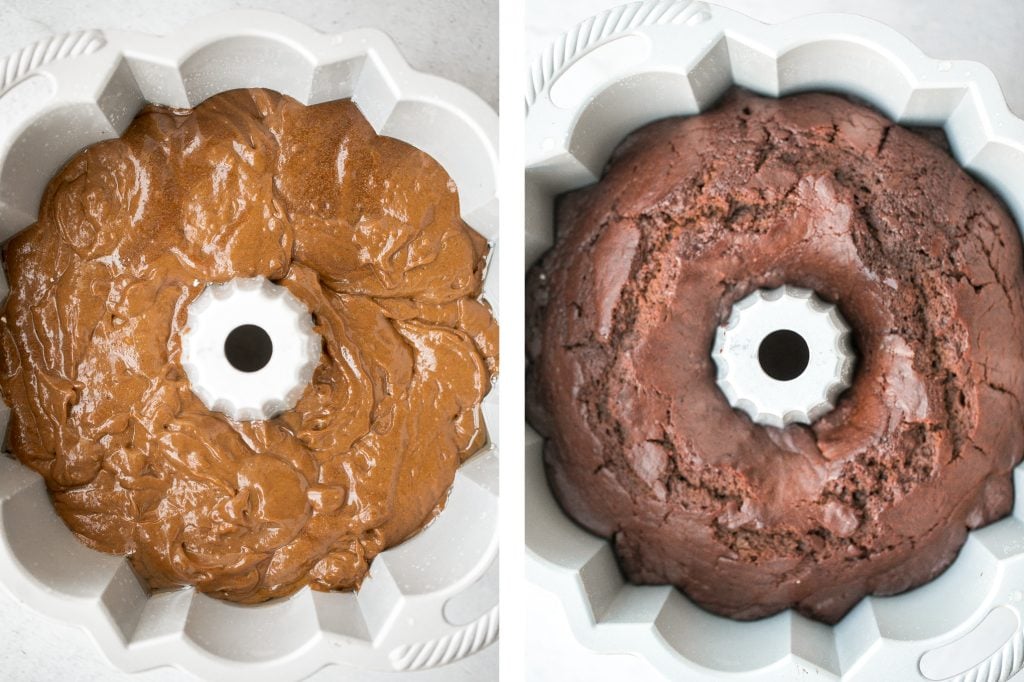
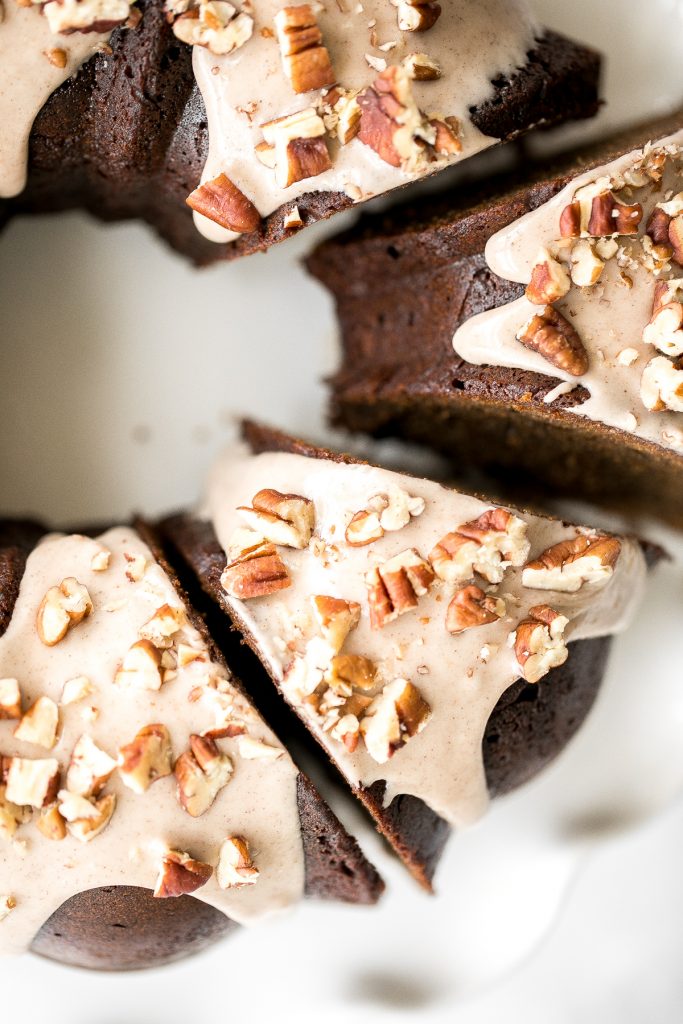
How to Make the Best Maple Cinnamon Glaze with Pecans
In a small bowl, whisk together confectioners' sugar, maple syrup, cinnamon and milk until smooth and creamy. If the icing is too thin, add in a little more sugar. If it is too thick, add in a little more milk.
Slowly drizzle the glaze over the cooled bundt cake and sprinkle chopped pecans on top.
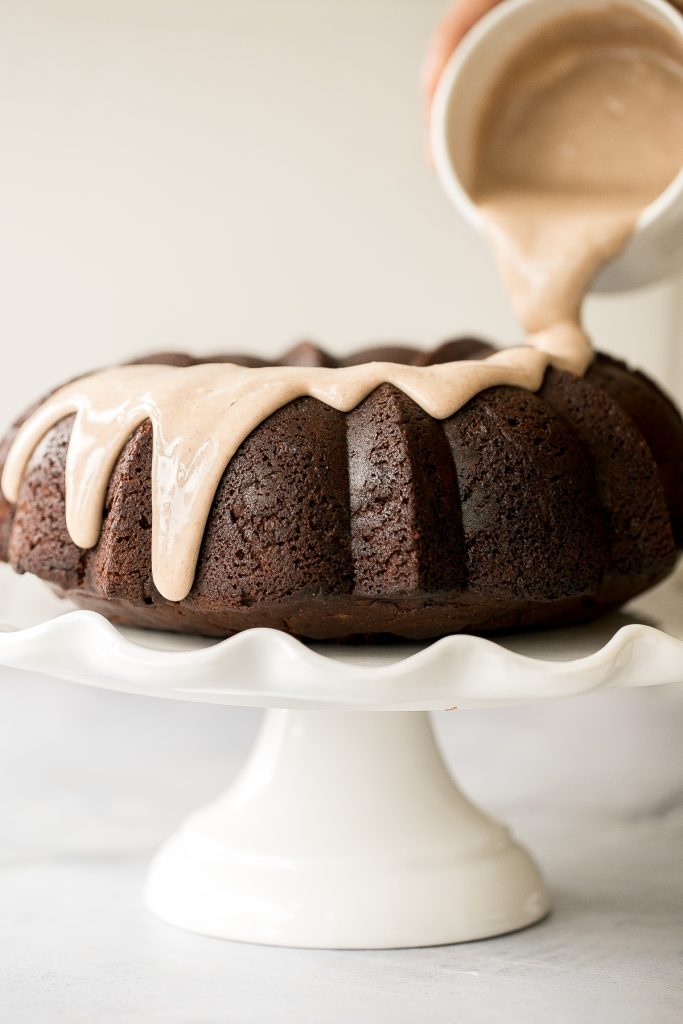
Storing Tips
- How to store: Store this freshly baked gingerbread bundt cake in an airtight container at room temperature for up to 2 days, or in the refrigerator for up to 1 week.
- How to freeze: To freeze, place the baked and cooled gingerbread bundt into a freezer bag or airtight container and store in the freezer for up to 3 months. To eat, allow it to thaw in the refrigerator or at room temperature. Once thawed, you can also warm it up in the microwave, oven, or air fryer at 300F for 5-10 minutes until warmed through, if desired.
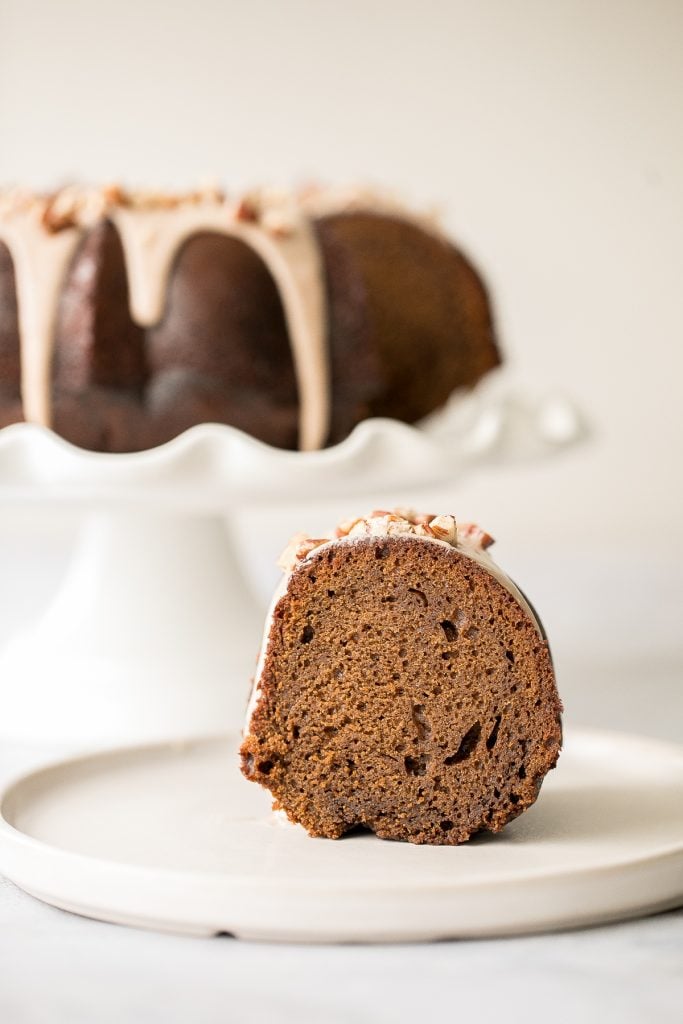
More Cake Recipes
- Gingerbread Muffins with Vanilla Bean Glaze
- Glazed Brown Sugar Bundt Cake
- Festive Yogurt Fruitcake
- Cranberry Sauce Swirl Pound Cake
- Lemon Loaf with Lemon Glaze
- Caramel Pecan Pie Cheesecake Bars
Tried this recipe?
I'd love to hear what you think! Leave a comment and rating below to share your feedback. Your reviews help others discover this recipe and help me keep creating more free recipes for you. Snap a photo and tag me on social media @aheadofthyme too.
This post was originally published in November 2017. It has been completed updated with new photographs and tweaks to the recipe to make it perfect.
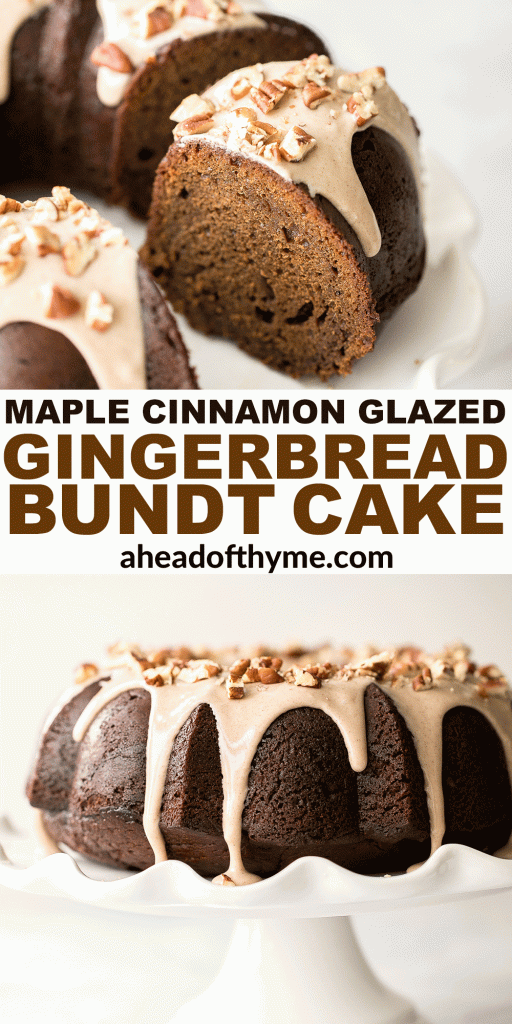
Cheesy Garlic Dinner Rolls
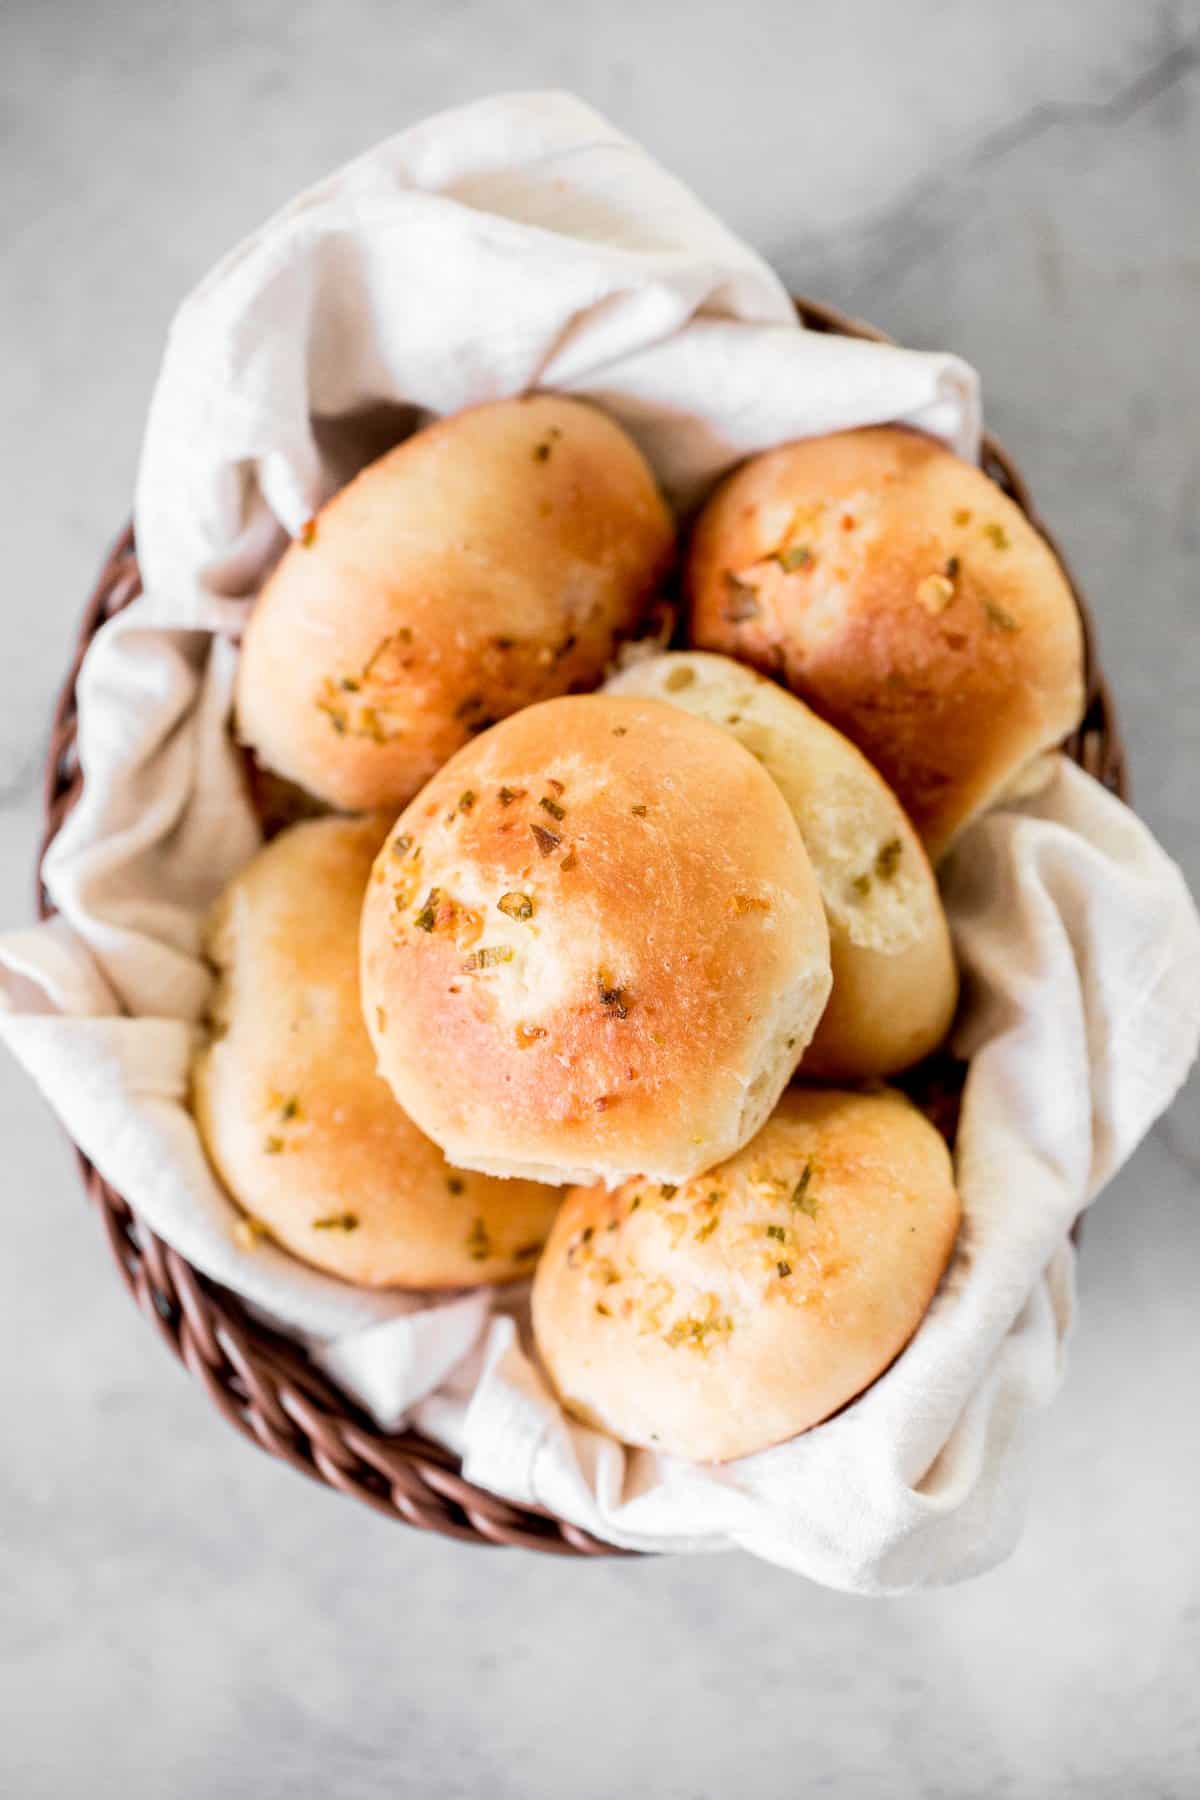
Quick and easy, 90-minute cheesy garlic dinner rolls are soft and fluffy, buttery and garlicky, and full of cheese inside. They are like traditional dinner rolls except so much better. They are the perfect compliment to your dinner table or holiday dinner menu. Enjoy it warm, fresh out of the oven, there is really nothing like it.
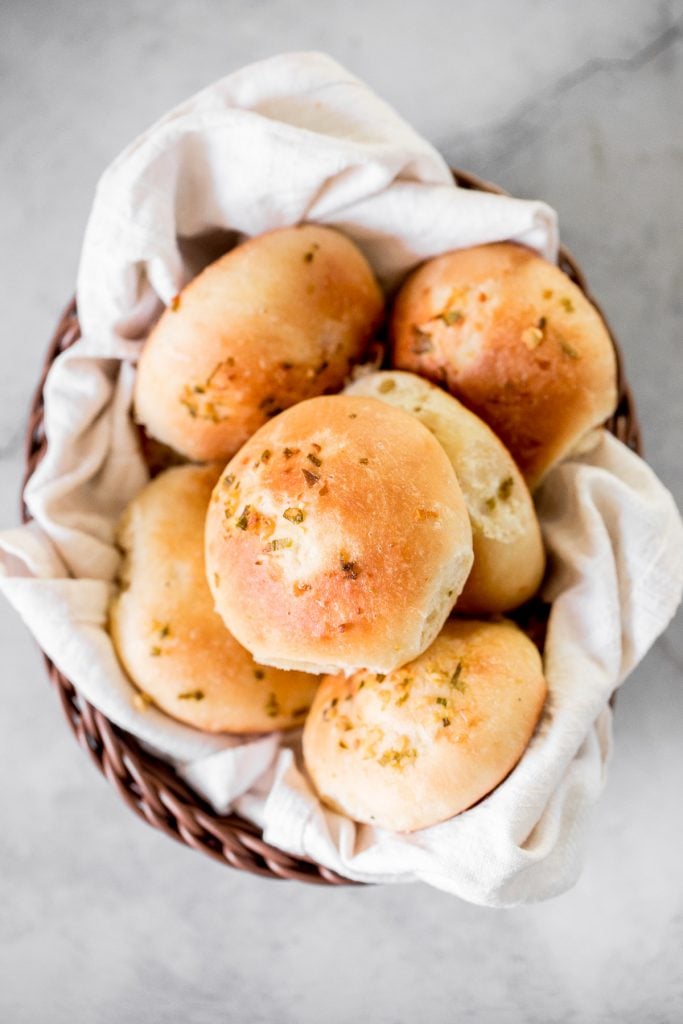
These cheesy garlic dinner rolls are so easy to make, taking just 15 minutes of actual prep work, since the yeast and the oven do most of the work. Just like most of our quick and easy breads such as green onion dinner rolls, pumpkin dinner rolls, skillet dinner rolls, and quick and easy pita bread. So simple, yet so delicious.
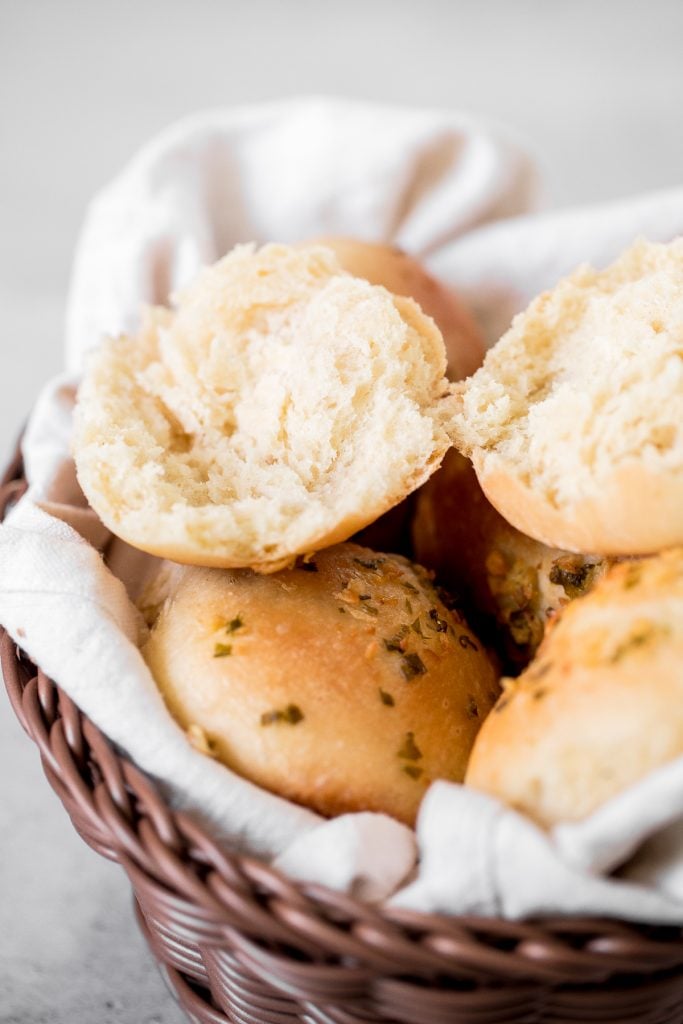
Ingredients
- all purpose flour
- active dry yeast
- milk + butter - adds fat content for fluffier and softer rolls.
- sugar - helps the dough rise faster by "feeding" the yeast.
- salt
- egg - leavening agent to promote rising.
- cheese filling - cream cheese and mozzarella cheese.
- garlic topping - garlic, butter, mozzarella cheese, Parmesan cheese, and green onions.
- egg - for egg wash.
- white sesame seeds - optional, to garnish on top.
You will also need mixing bowls, a cast-iron skillet or quarter sheet baking pan. I also highly recommend a kitchen scale to get the most accurate measurements when measuring out your ingredients.
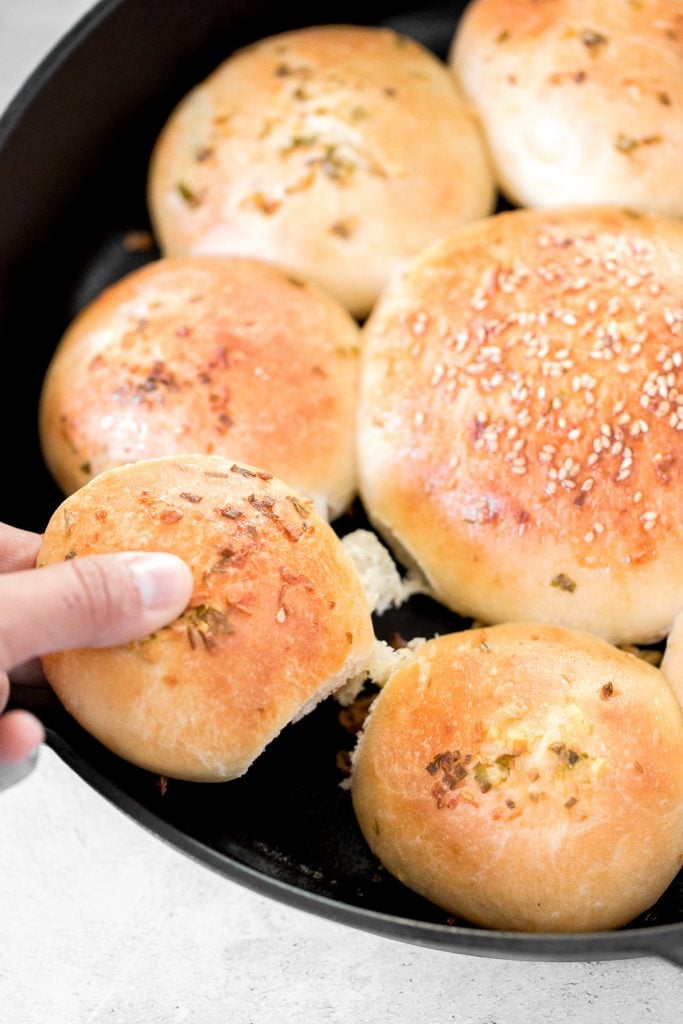
How to Make the Best Cheesy Garlic Dinner Rolls
- Prepare the dough. In a large mixing bowl, combine yeast, milk, butter, sugar, salt and egg, and whisk until well combined and yeast is dissolved. The butter might still be a little lumpy in the mixture at this point. Add flour and stir well to combine until there are no dry flour visible in the bowl. Make sure to scrape down the sides of the bowl with a spatula, as needed.
- Knead the dough. Transfer the dough onto a clean and lightly greased surface. The oil will help keep the dough from sticking to your hands initially. You can also lightly oil your hands. Knead the dough for 5-10 minutes, until the dough is smooth and not sticky at all.
Tips for Kneading Dough
- How to knead dough: Knead the dough by pushing it down and outward using the palms of your hands. Fold the dough in half toward you and press down. Repeat this motion by pushing the dough down and outward, and then folding over towards you. This helps build up gluten strength in dough that is responsible for making the bread fluffy.
- How to test if dough is well-kneaded: A well-kneaded dough is smooth and can hold its shape. You can test the dough by giving it a firm poke with your finger. The indentation should bounce right back. If it doesn't bounce back and stays like a dimple, keep kneading for a few more minutes.
- Shape and stuff the rolls. In a small mixing bowl, combine cream cheese and mozzarella. Roll the dough into a log and use a knife or bench scraper to divide it into 10-12 equal pieces (or 8-10 equal pieces with a larger piece in the middle). Flatten the dough and add 1.5 tablespoons of the cheese mixture into the centre. Press all edges into the centre to seal so that the cheese doesn't escape out during baking. Turn it over and cup the dough in your palm, making circular motions. It should take less than 30 seconds to roll each piece into a smooth ball.
- Proof the dinner rolls: Transfer the cheese-filled dough balls to a large cast-iron skillet or parchment-lined quarter sheet baking pan. Leave ½-inch of space in between each dough ball. Cover the pan with plastic cling wrap to prevent the dough from drying out. Let the rolls rest and rise for 1 hour. The rolls should almost double in size.
- Add garlic topping: In a small mixing bowl, stir to combine garlic, melted butter, shredded mozzarella, grated parmesan, and chopped green onions. Apply egg wash over each roll and add a spoonful of the garlic cheese mixture on top. Sprinkle some sesame seeds on top (optional, for garnish).
- Bake the dinner rolls: Bake in a 375 F preheated oven for 20 minutes, or until the tops of the rolls are golden brown. Let the rolls cool on a wire cooling rack for 15 minutes before serving.
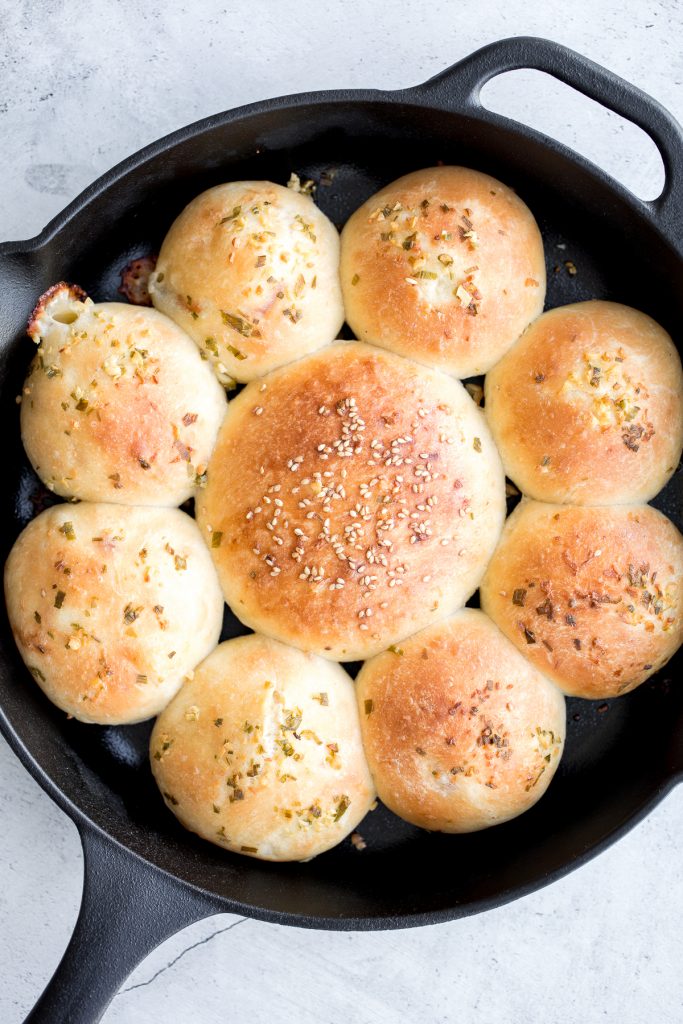
How to Serve Cheesy Garlic Dinner Rolls
Serve these cheesy garlic dinner rolls on their own as a delicious snack, or serve it alongside a complete meal for dinner (such as skillet chicken with lemon garlic sauce or shrimp fettuccine alfredo pasta bake), or alongside a soup (such as roasted butternut squash soup, creamy cauliflower and garlic soup, and sweet potato soup) or salad (try Mediterranean orzo pasta salad).
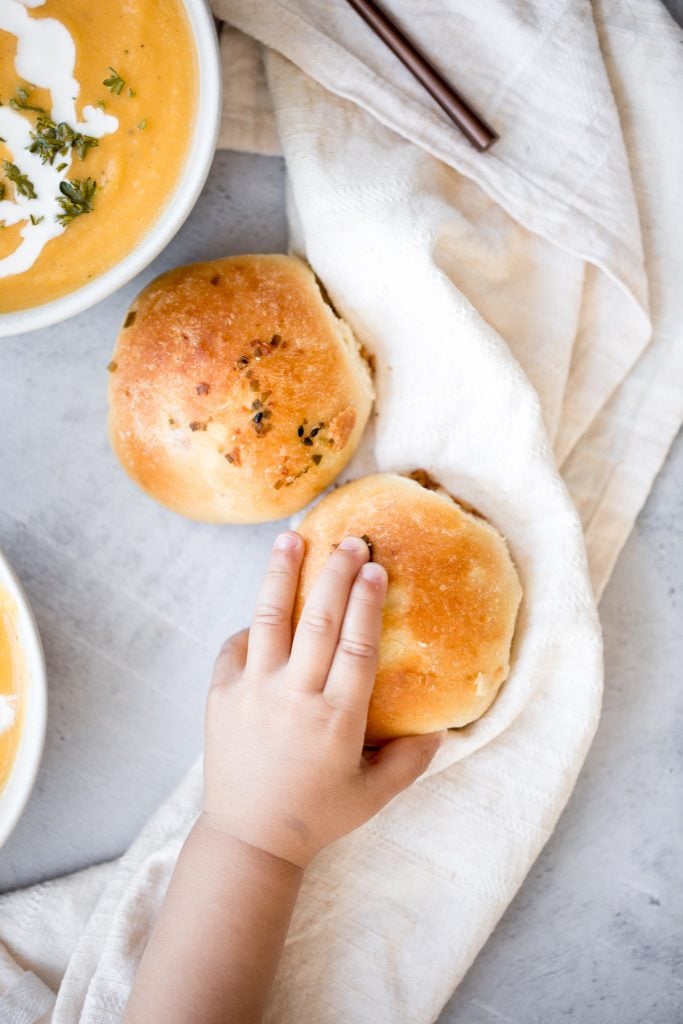
Tips on Storing Bread
- How to store: Store cooled dinner rolls covered at room temperature for up to 2 days. You can also store them in an airtight container in the refrigerator for up to 1 week.
- How to freeze: Store cooled dinner rolls in a freezer bag for up to 3 months.
- How to reheat: Reheat in the air fryer at 300F for 5-7 minutes, or in a 300F preheated oven for 10-12 minutes. If frozen, allow the dinner rolls to thaw first to room temperature, then reheat.
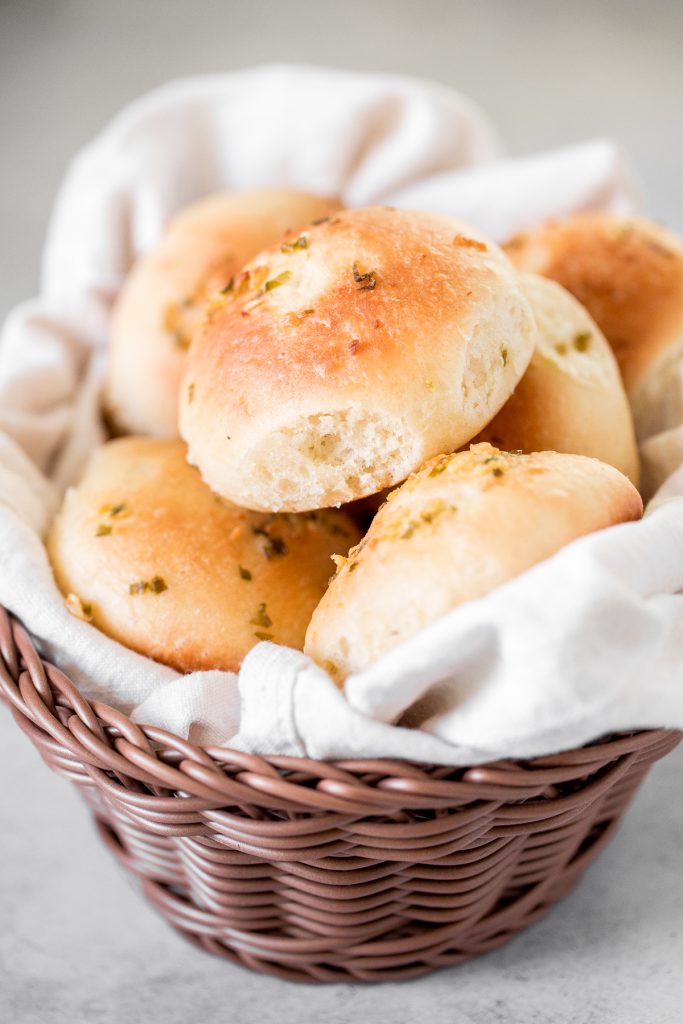
More Easy Bread Recipes
- Small Batch Garlic Naan Bread
- Quick and Easy Pita Bread
- Easy Homemade Everything Bagels
- Quick Green Onion Dinner Rolls
- Easy Small Batch Ciabatta Bread
- Homemade No Knead French Baguettes
- Pull Apart Garlic Bread
Tried this recipe?
I'd love to hear what you think! Leave a comment and rating below to share your feedback. Your reviews help others discover this recipe and help me keep creating more free recipes for you. Snap a photo and tag me on social media @aheadofthyme too.
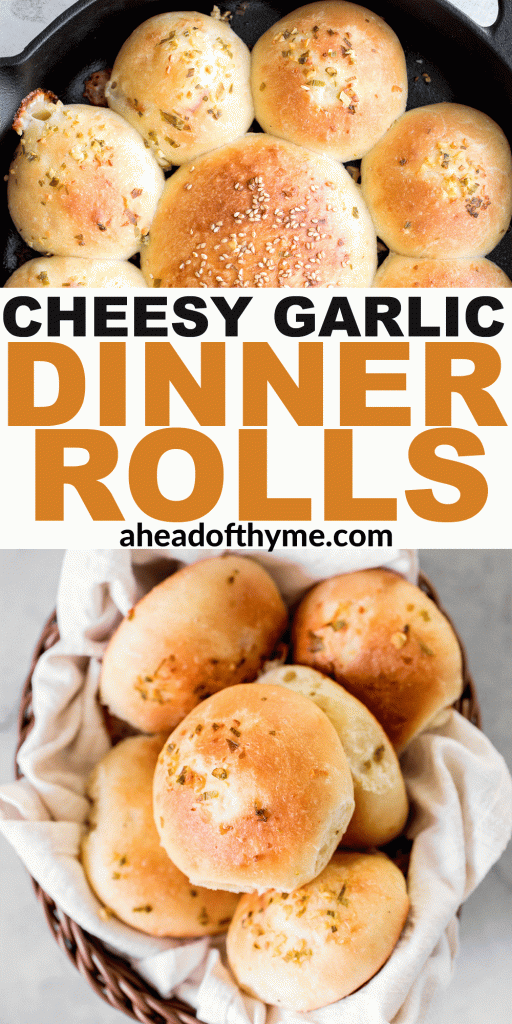
Cranberry Yogurt Muffins
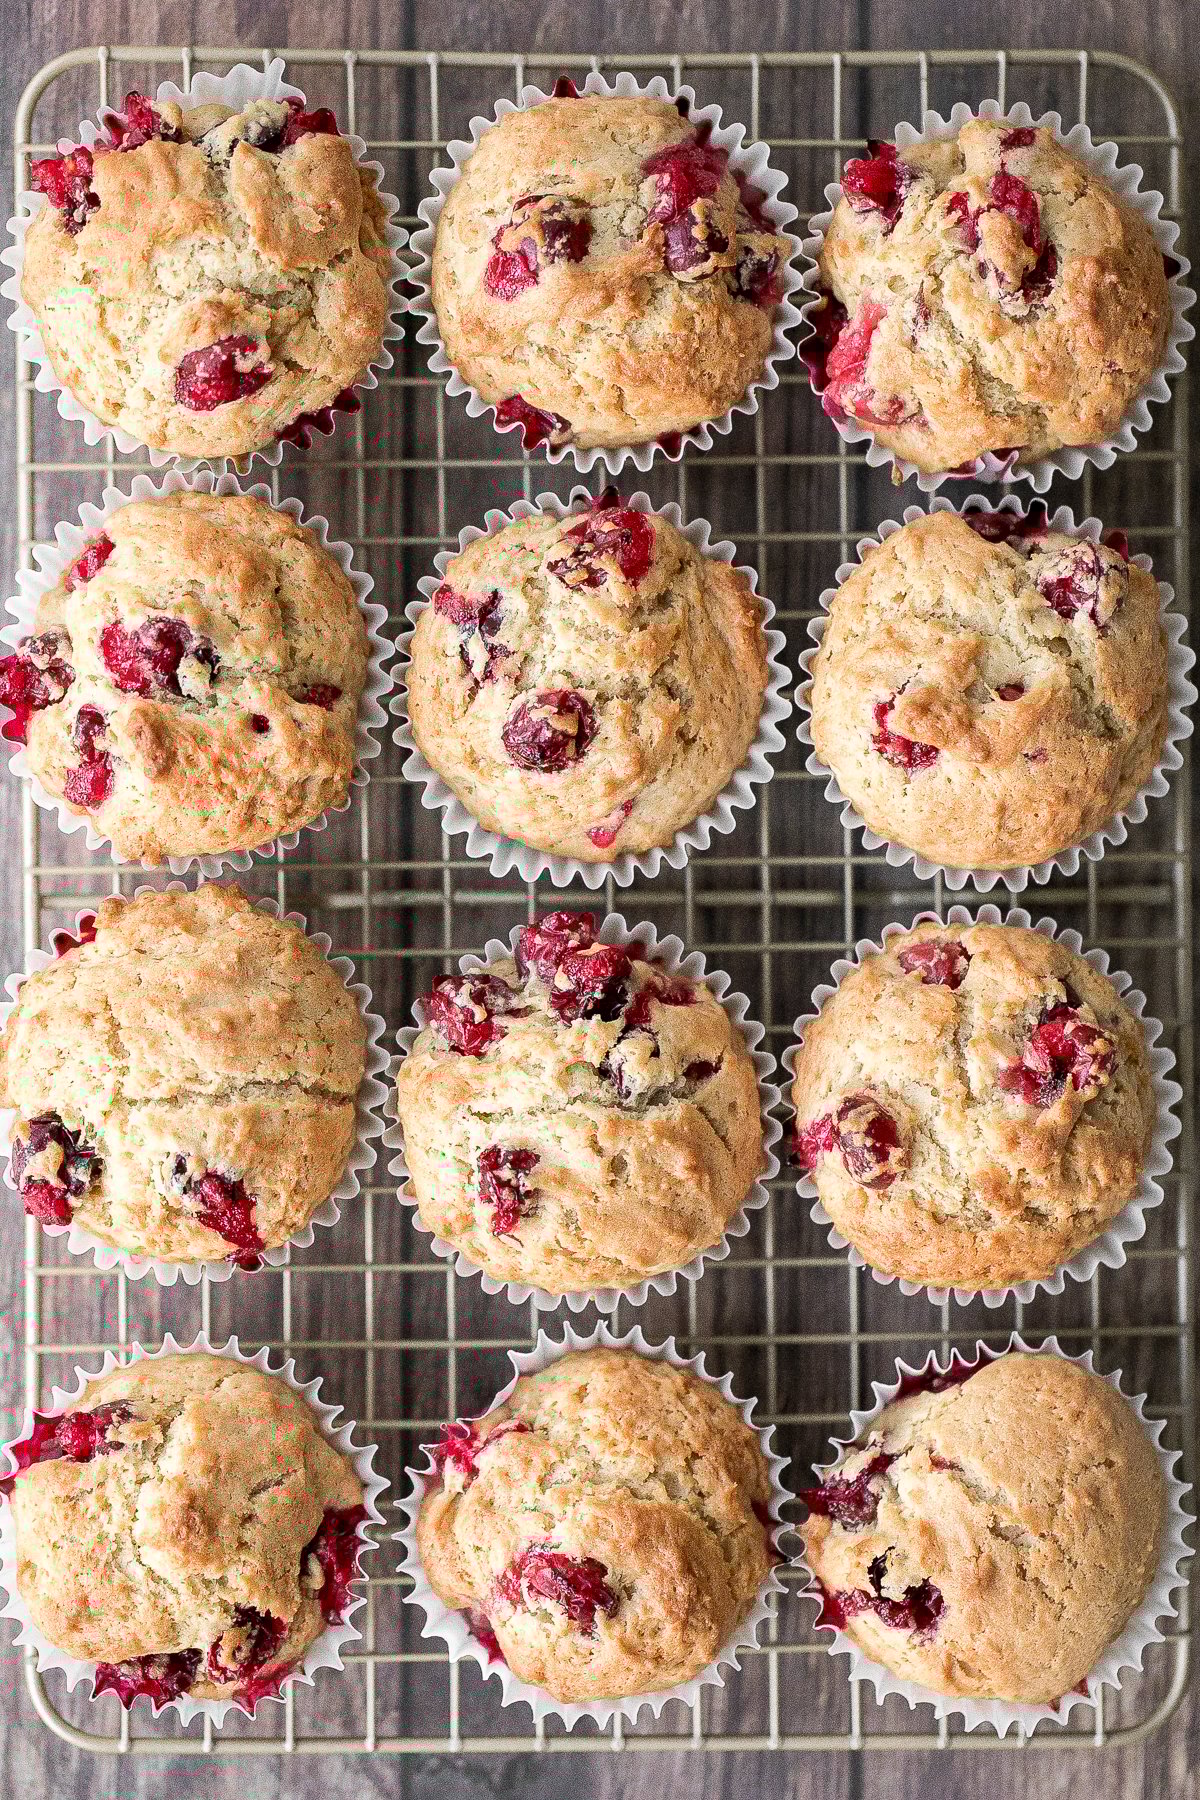
Buttery, soft and moist, cranberry yogurt muffins are packed with cranberries in every single bite. They are perfectly golden on the outside, yet fluffy, cakey and super moist inside. These muffins are the perfect tarty and sweet breakfast, snack or dessert to make this fall and winter season. Plus, they are quick and easy to make with just a few simple ingredients, and ready in under 30 minutes.

I love baking cranberries, especially when they are in season. But you can even make this recipe with frozen cranberries, so you don't have to wait all year to make it. Cranberries are also pretty amazing in cranberry scones with orange glaze, or turned into cranberry sauce and then added to baking recipes such as cranberry sauce muffins, cranberry sauce oat bars, and cranberry sauce swirl pound cake.
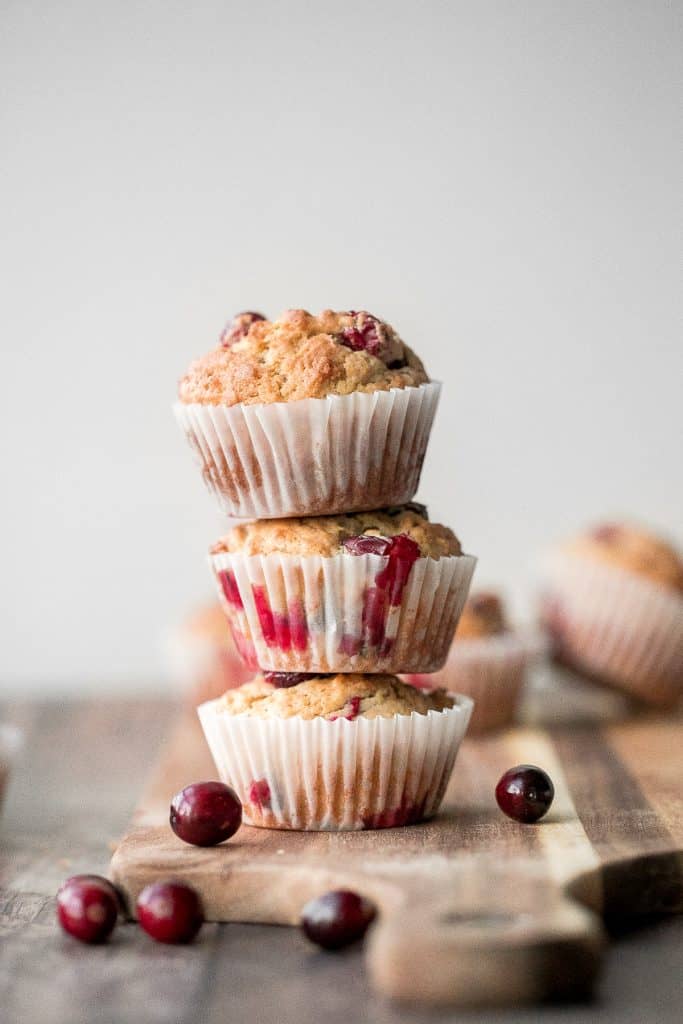
Ingredients in Moist Cranberry Yogurt Muffins
- all-purpose flour
- baking powder + baking soda - helps the muffins rise.
- salt - adds flavour.
- butter - I prefer using unsalted butter, but salted butter will work fine.
- brown sugar
- egg
- yogurt - this is the secret ingredient that makes these cranberry muffins super soft and moist, just like in blueberry yogurt muffins or festive yogurt fruitcake. I used whole fat plain yogurt. Greek yogurt or sour cream also work as good substitutes.
- vanilla extract
- cranberries - I used fresh cranberries as they are currently in season. You can also use frozen cranberries directly from the freezer, do not thaw them.
- sugar - adds sweetness to balance the tartness of fresh cranberries. You can leave this out, but then expect a more sour muffin.
You will also need a 12-tin muffin pan, cupcake liners, mixing bowls, measuring cups and spoons, a hand mixer or a stand mixer, a cookie scoop (or a spoon) for scooping out the batter, and a wire cooling rack.

How to Make the Best Cranberry Yogurt Muffins
These cranberry yogurt muffins are so quick and easy to make, with just 10 minutes of prep.
- Do some prep:
- Preheat oven to 400 F. Line a 12-tin muffin pan with cupcake liners, or spray with cooking spray.
- In a small bowl, combine cranberries with granulated sugar, and toss to combine until coated. Set aside.
- In a medium bowl, sift together flour, baking powder, baking soda and salt. Set aside.
- Combine the wet ingredients: Use a hand mixer (or stand mixer) to cream together the butter and brown sugar in a large bowl, until light and fluffy, about 2 minutes. Beat in egg, then add yogurt and vanilla and beat until combined. The batter will be lumpy.
- Add dry ingredients to wet ingredients: Add dry ingredients to wet ingredients and beat until just combined, and no dry flour particles are visible. Fold in the cranberry-sugar mixture.
- Scoop batter into muffin pan: Use a medium to large cookie scoop and divide batter evenly into the liners, filling them all the way to the top.
- Bake: Bake for 18-20 minutes, until the tops are golden brown and a toothpick inserted comes out clean. Allow muffins to cool in the pan for 5 minutes, then transfer them to a wire cooling rack to continue cooling.
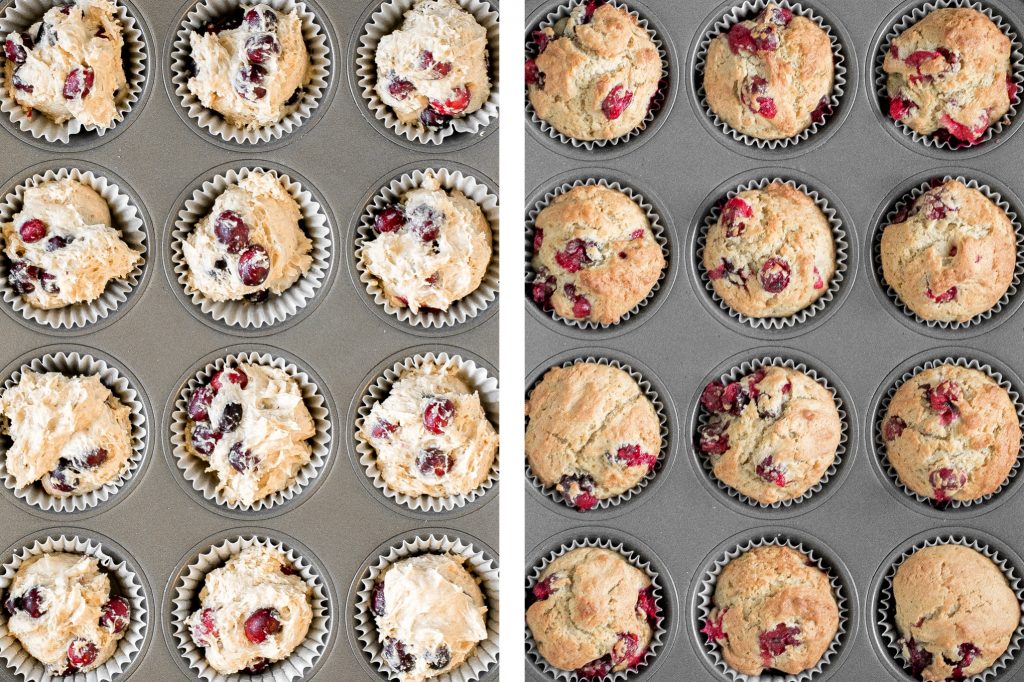
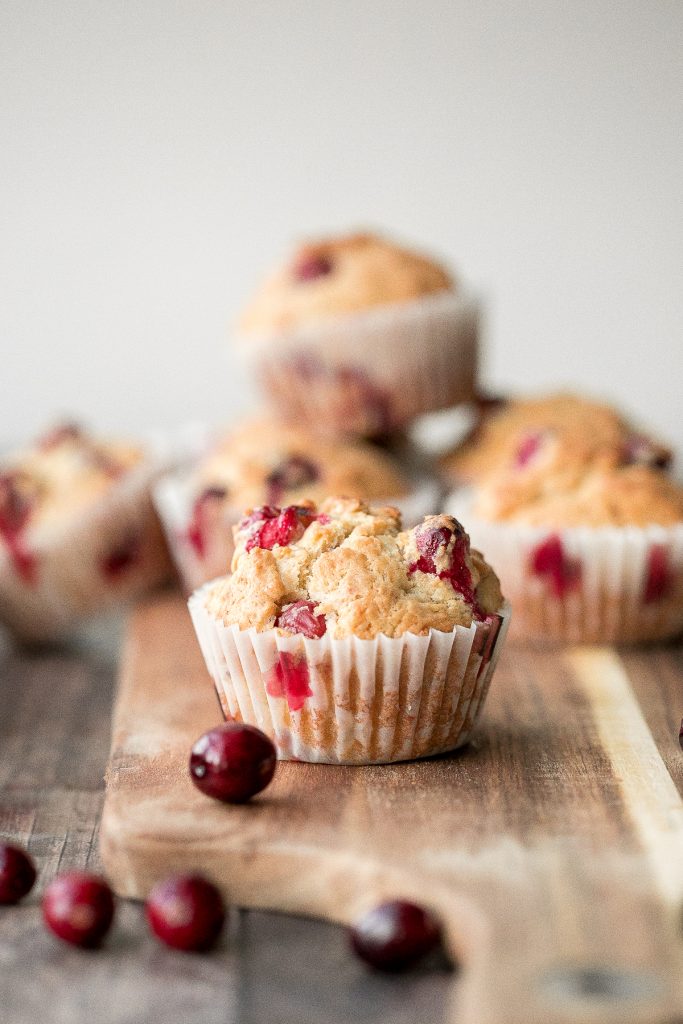
Tips for Making Cranberry Muffins
- How to store cranberry muffins: Store freshly baked cranberry muffins, covered, at room temperature for up to 2 days, or in an airtight container in the refrigerator for up to 1 week.
- How to freeze cranberry muffins: To freeze, place baked and cooled muffins into a freezer bag or airtight container and store in the freezer for up to 3 months. To eat, first let them thaw in the refrigerator or at room temperature. Once thawed, you can also warm them up in the microwave, oven, or air fryer at 300F for 5-10 minutes until warmed through.
- How to make jumbo muffins: To make 6 jumbo muffins instead, bake for 22-25 minutes until tops are golden brown and a toothpick inserted comes out clean.
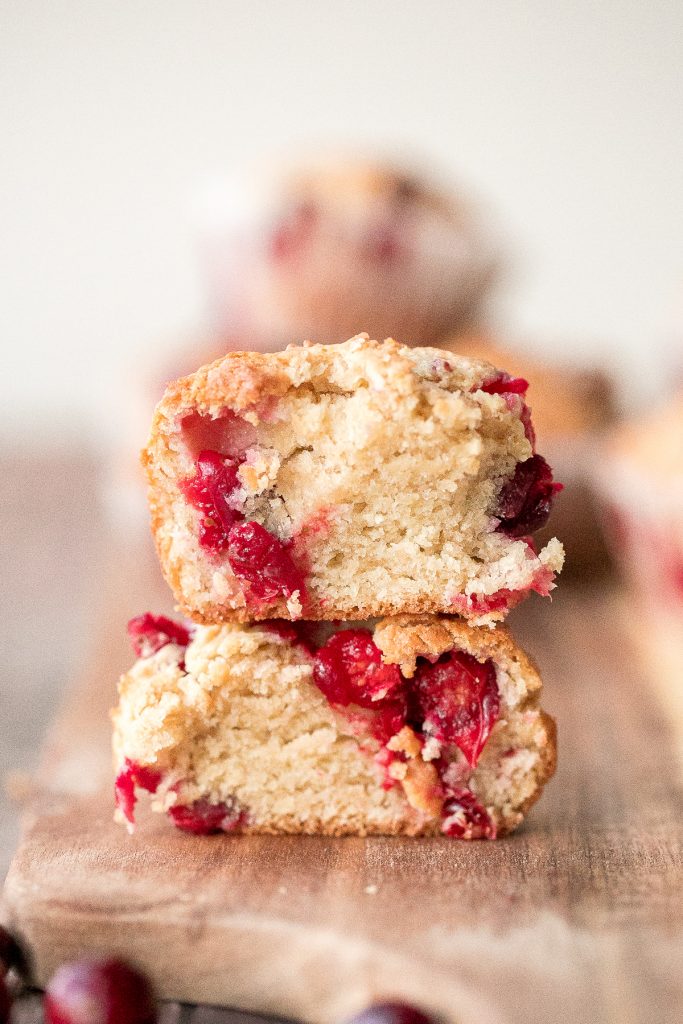
More Cranberry Recipes
- Easy Make-Ahead Cranberry Sauce
- Cranberry Scones with Orange Glaze
- Leftover Cranberry Sauce Muffins
- Roasted Balsamic Chicken with Cranberries
- Cranberry Sauce Oat Bars
- Cranberry Sauce Swirl Pound Cake
Tried this recipe?
I'd love to hear what you think! Leave a comment and rating below to share your feedback. Your reviews help others discover this recipe and help me keep creating more free recipes for you. Snap a photo and tag me on social media @aheadofthyme too.
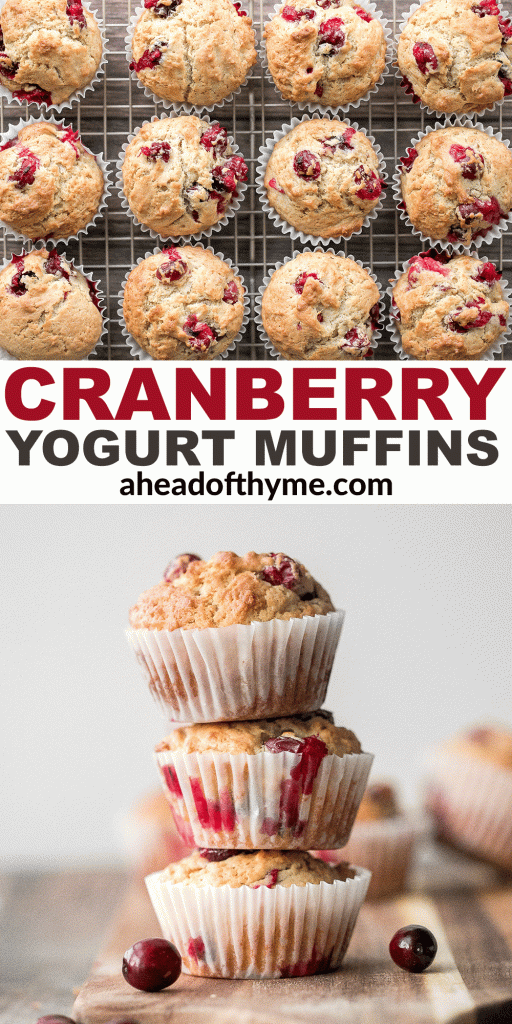
Small Thanksgiving Menu For Four
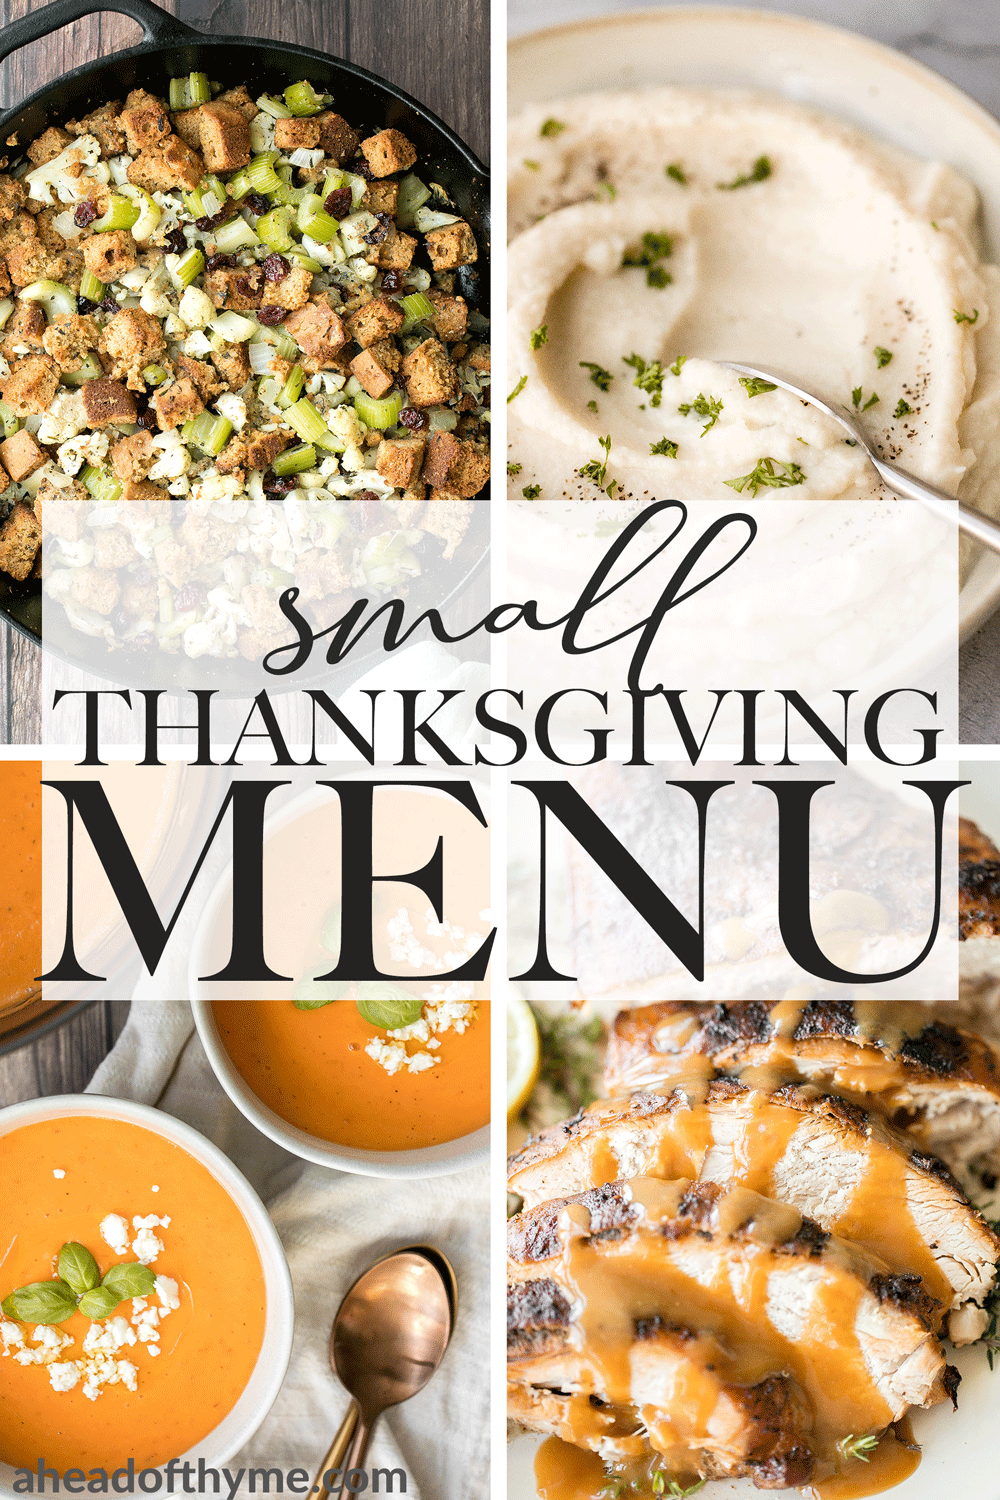
It looks like Thanksgiving, and the holidays in general, is looking very different for many of us this year. Some of us are planning small and intimate dinner parties with immediate family, some are planning virtual friendsgiving celebrations, and some might still be cooking up a huge Thanksgiving feast, boxing it up and dropping it off to family and friends. But just because the guestlist is small, doesn't mean that the thanksgiving dinner menu can't be epic. Today, I am sharing the best small Thanksgiving menu for four people with all the nostalgic classics (and of course some new comforting favourites) because we need all the holiday feels that we can get in 2020.
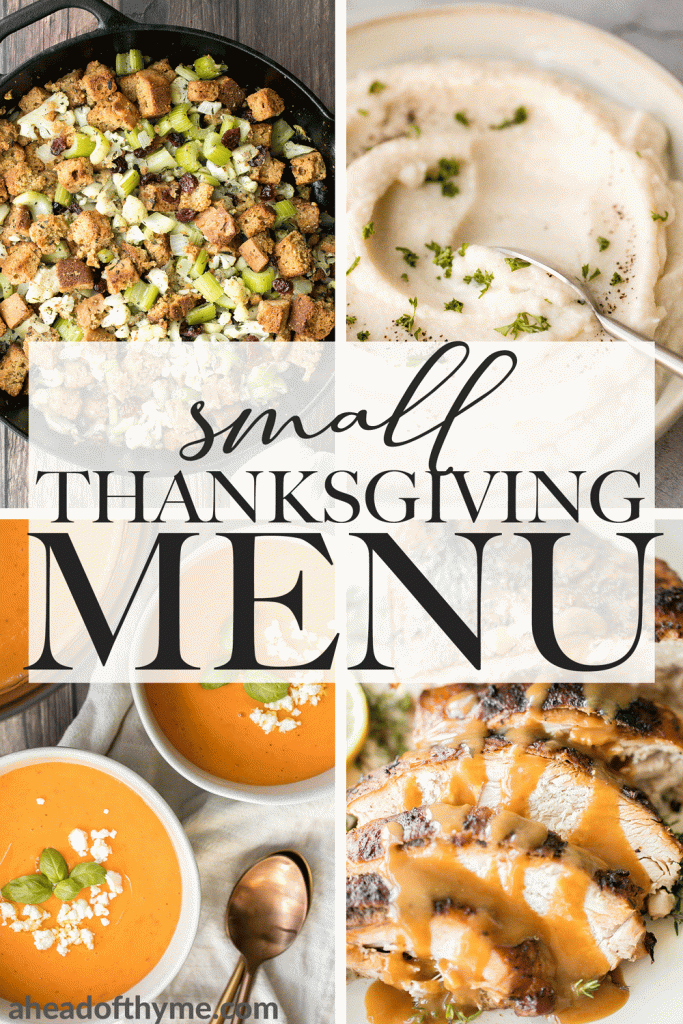
The menu is divided into the following sections: starters and snacks, mains, sides, soup and salad, dessert and thanksgiving leftovers.
Thanksgiving Starters and Snacks
Before we dig into our small Thanksgiving feast, and while the main course is spending its last moments in the oven, we need something to snack on. Bite-sized crostini like tomato bruschetta with balsamic glaze or curried white bean crostini is always a crowd favourite. You also can't go wrong with a classic holiday charcuterie board with creamy pumpkin hummus and sourdough crackers.
Pick one or two of the following starters to feature on your Thanksgiving menu:
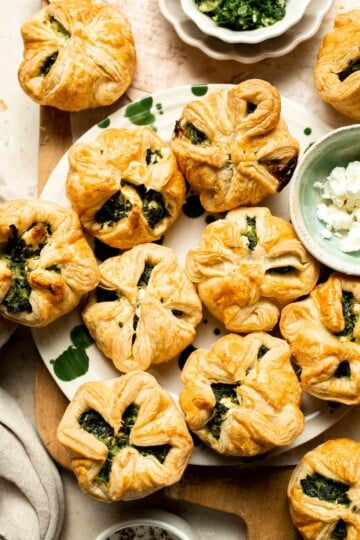

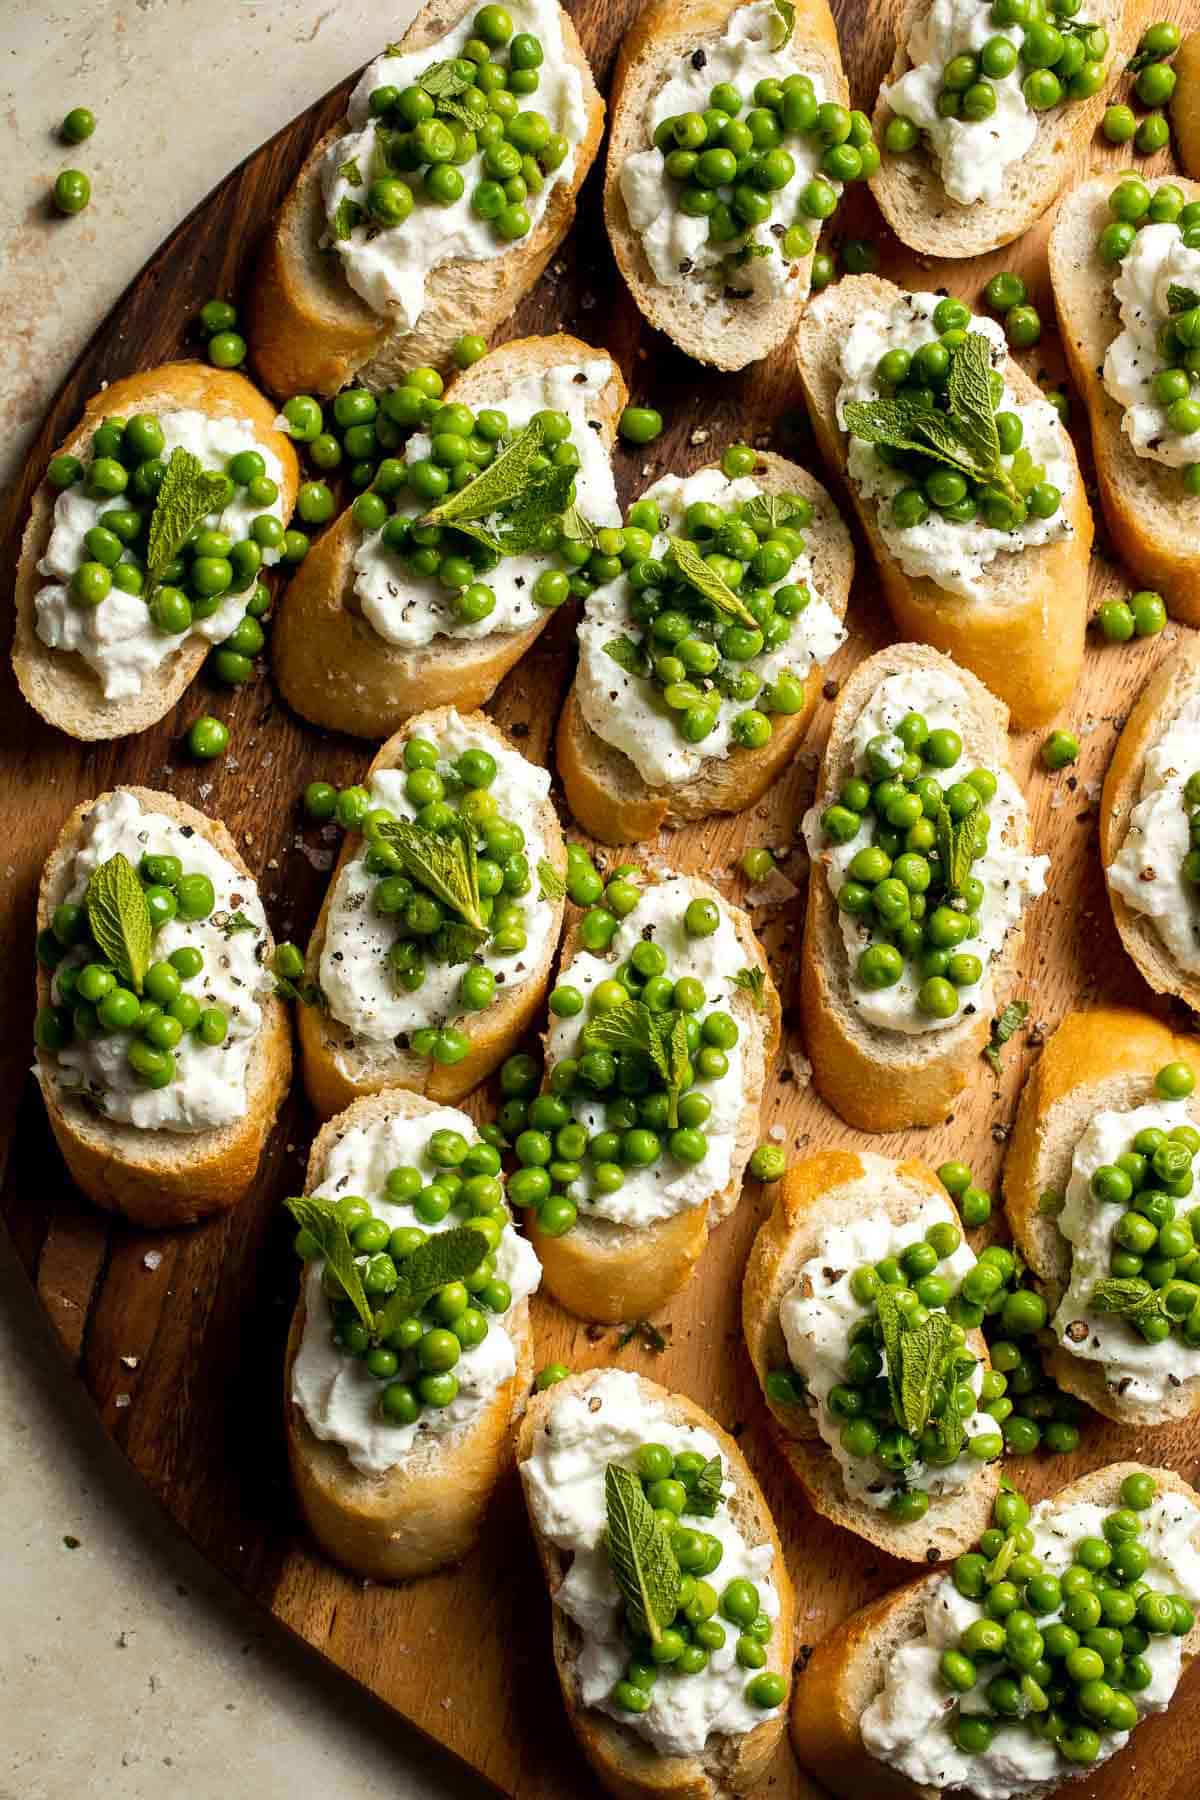
Thanksgiving Mains
If you are planning to cook turkey for just a few people, you might want to reconsider cooking an entire whole juicy roast turkey (although this would be a good idea just for all the delicious leftovers you would get!). Instead, try making roasted turkey breast or turkey legs, slow cooker turkey breast, or braised turkey breast. Another great option for a fancy Thanksgiving main is a whole roast chicken or whole roasted spatchcock chicken.
Pick one of the following mains to feature on your Thanksgiving menu:
- Vegetarian Meatloaf (Lentil Walnut Meatloaf)
- Easy Roast Turkey Recipe (Best Juicy Thanksgiving Turkey)
- Pesto Roast Chicken (Whole Roast with Basil Pesto)
- Crispy Roasted Spatchcock Chicken (Butterflied Chicken)
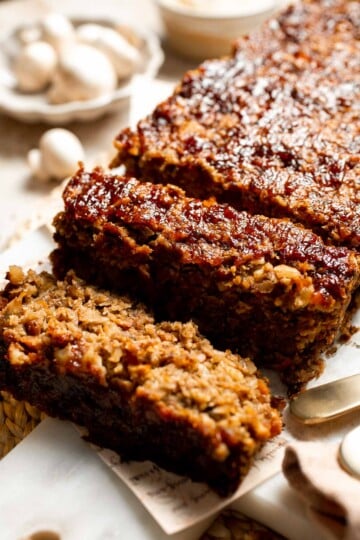
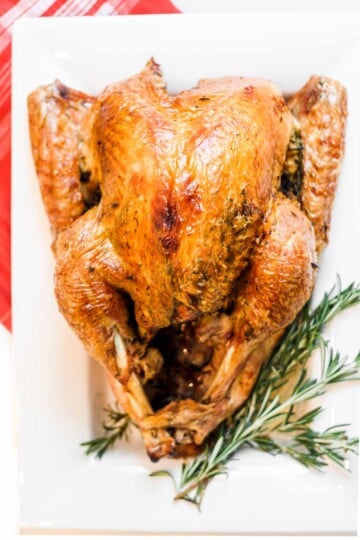
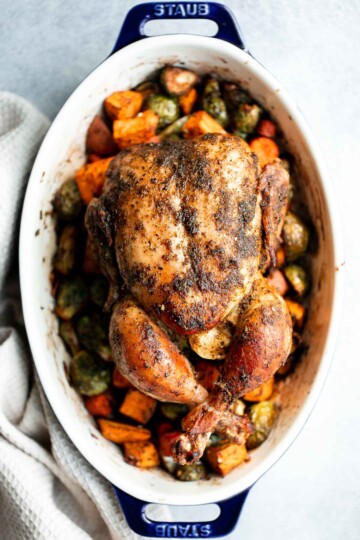
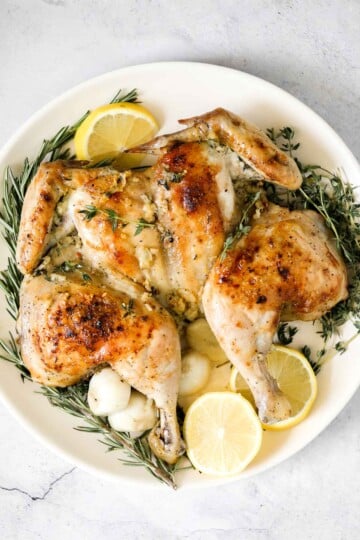
Thanksgiving Sides
Are you leaning more towards the nostalgic classics this year? Like creamy mashed potatoes, cranberry walnut apple stuffing, sweet potato casserole, roasted brussels sprouts and garlic green beans. Or do you want something festive but completely different? Like creamy brussels sprouts bake, sautéed garlic mushrooms, and stuffed butternut squash. Whatever you are in the mood for, I have a side dish for you.
Pick two to three of the following sides to feature on your Thanksgiving menu:
- Stovetop Mac and Cheese with White Cheddar
- Cranberry Apple Walnut Stuffing
- Butternut Squash Salad (with Kale, Walnuts, and Cranberries)
- Classic Homemade Turkey Gravy (from Drippings or Broth)
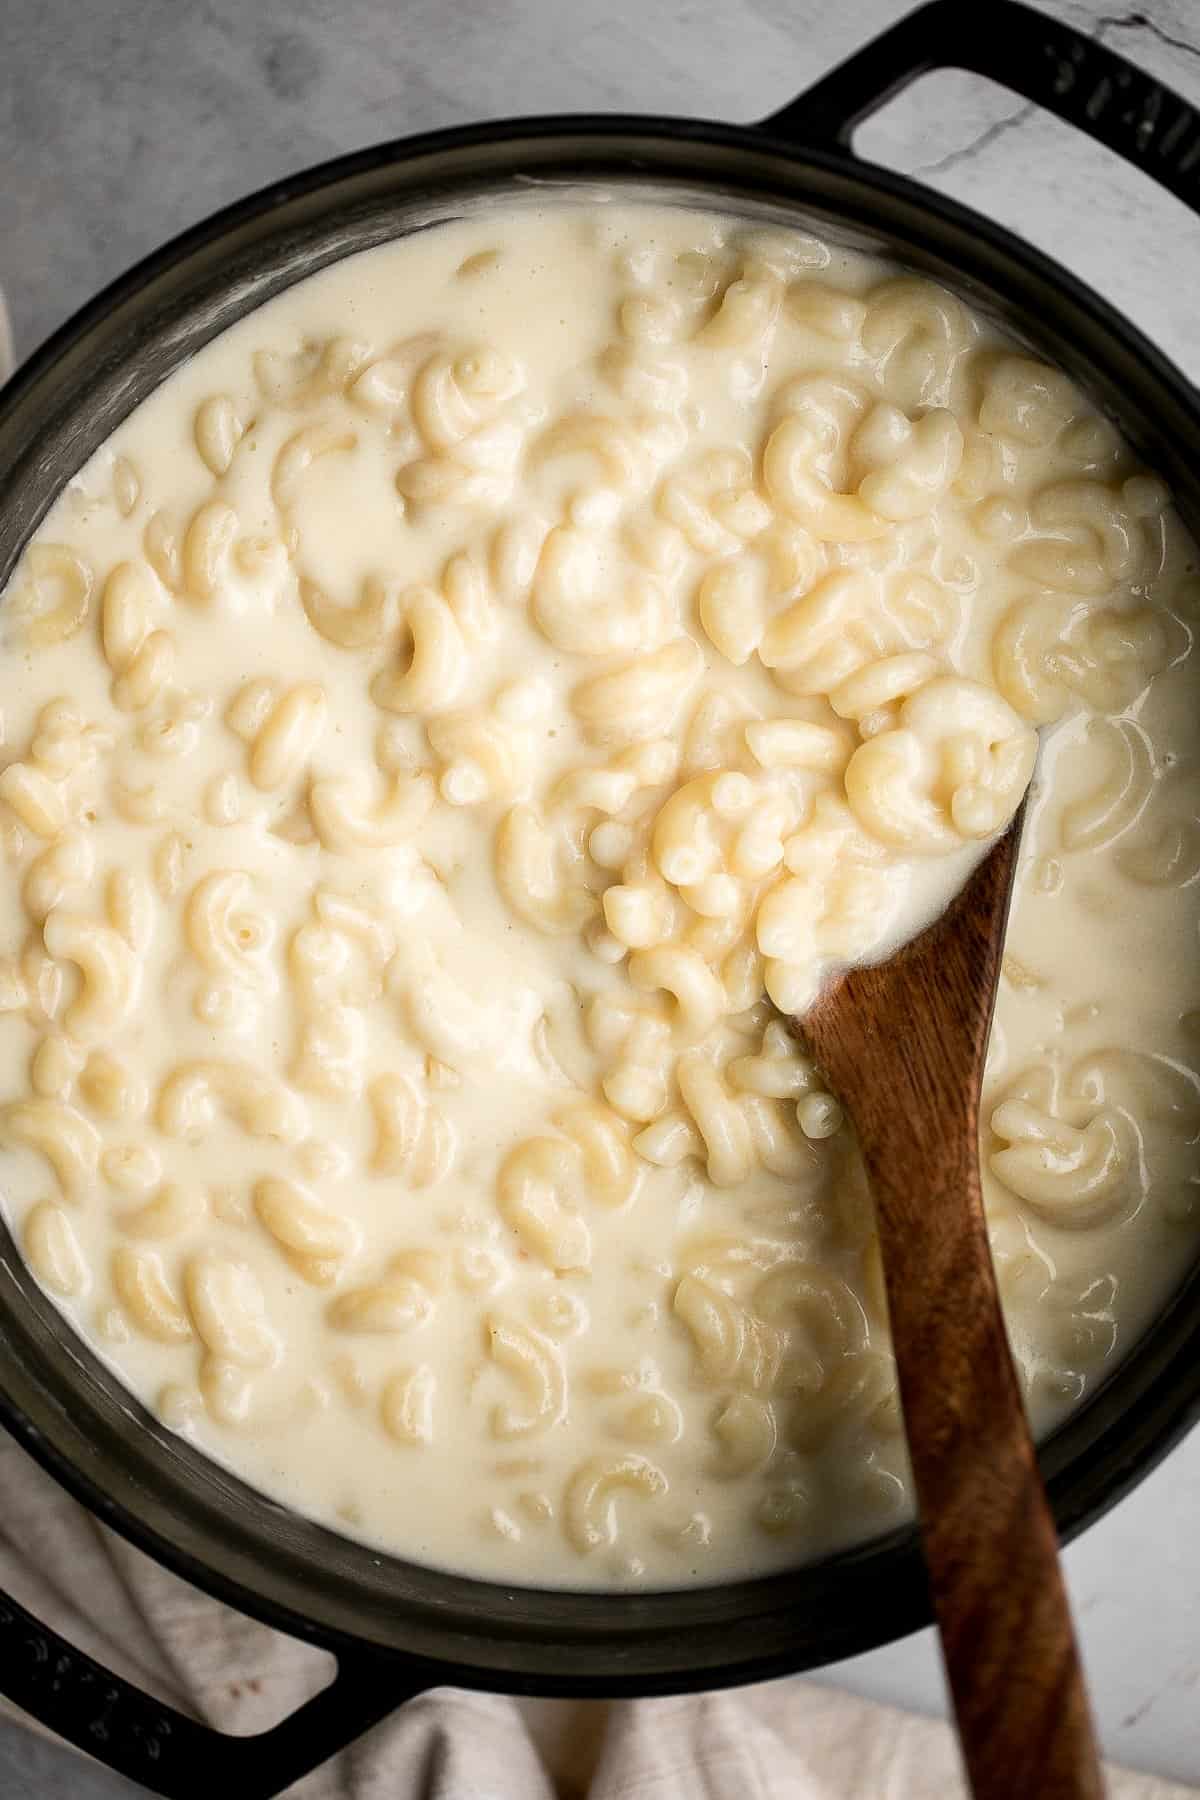
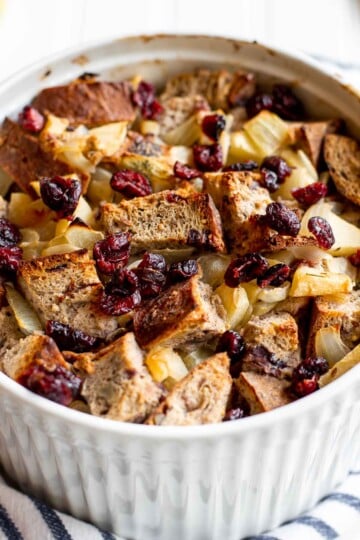
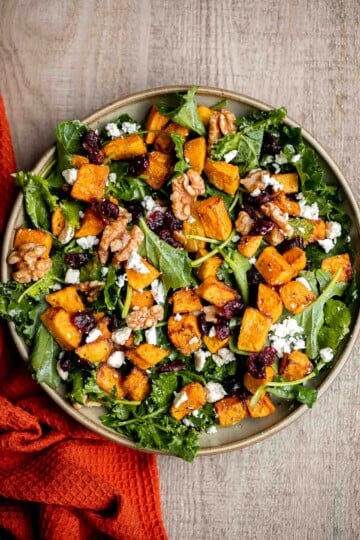

Thanksgiving Soup and Salad
I always start off my Thanksgiving dinners with a bowl of roasted butternut squash soup. It just sets the mood for the rest of the night. Plus, soup is really easy to make a few days ahead, and leftovers are good for up to 5 days to a week. I also usually throw in a light, seasonal salad on the dinner menu like apple walnut salad with balsamic vinaigrette just to balance out all the heavy comforting dishes.
Pick one soup and/or one salad to feature on your Thanksgiving menu:
- Butternut Squash Salad (with Kale, Walnuts, and Cranberries)
- Butternut Squash Lentil Soup
- Pomegranate Pear Salad with Walnuts
- Coconut Curry Pumpkin Soup
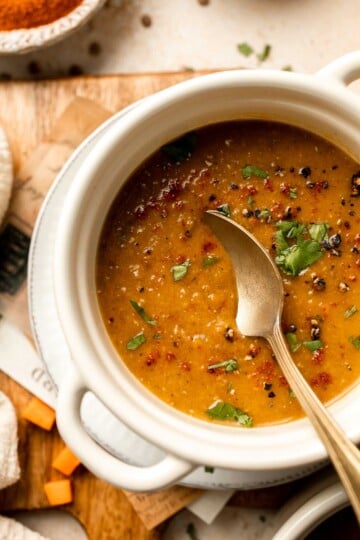
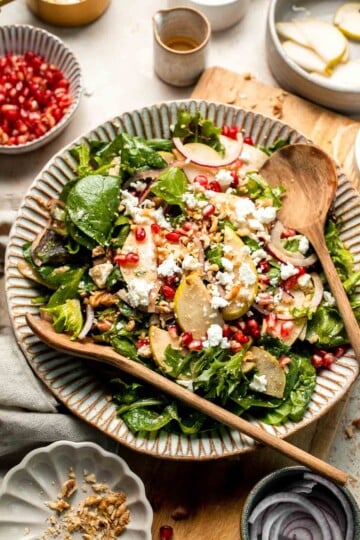

Thanksgiving Bread
We always have a bread basket with an assortment of bread on our Thanksgiving table every year. My favourites to make during the holidays are rosemary cornbread, pumpkin focaccia, and pumpkin dinner rolls. You also can't go wrong with simple homemade biscuits. The great thing about baking bread is that you can always make it ahead of time which is pretty great when it comes to Thanksgiving dinner planning. Always make what you can in advance.
Pick one of the following bread to feature on your Thanksgiving menu:
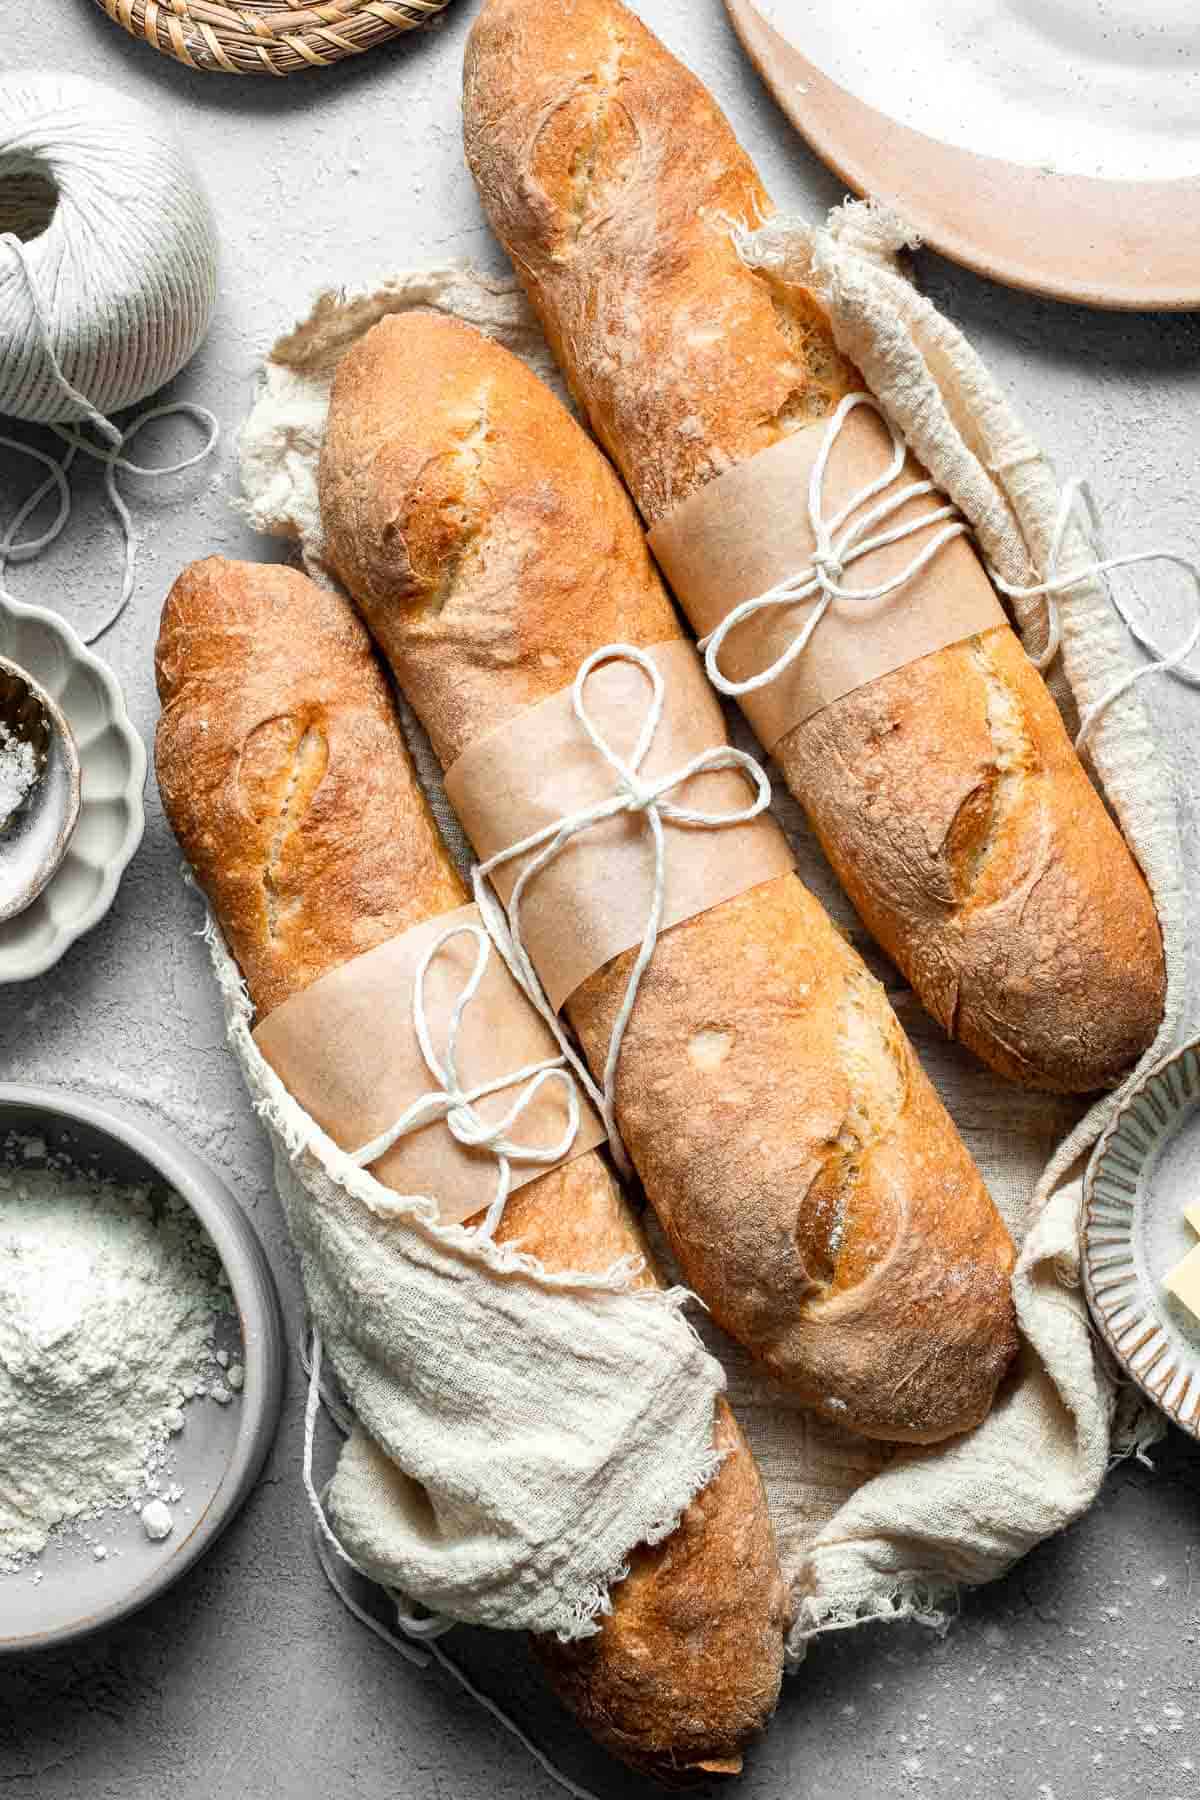

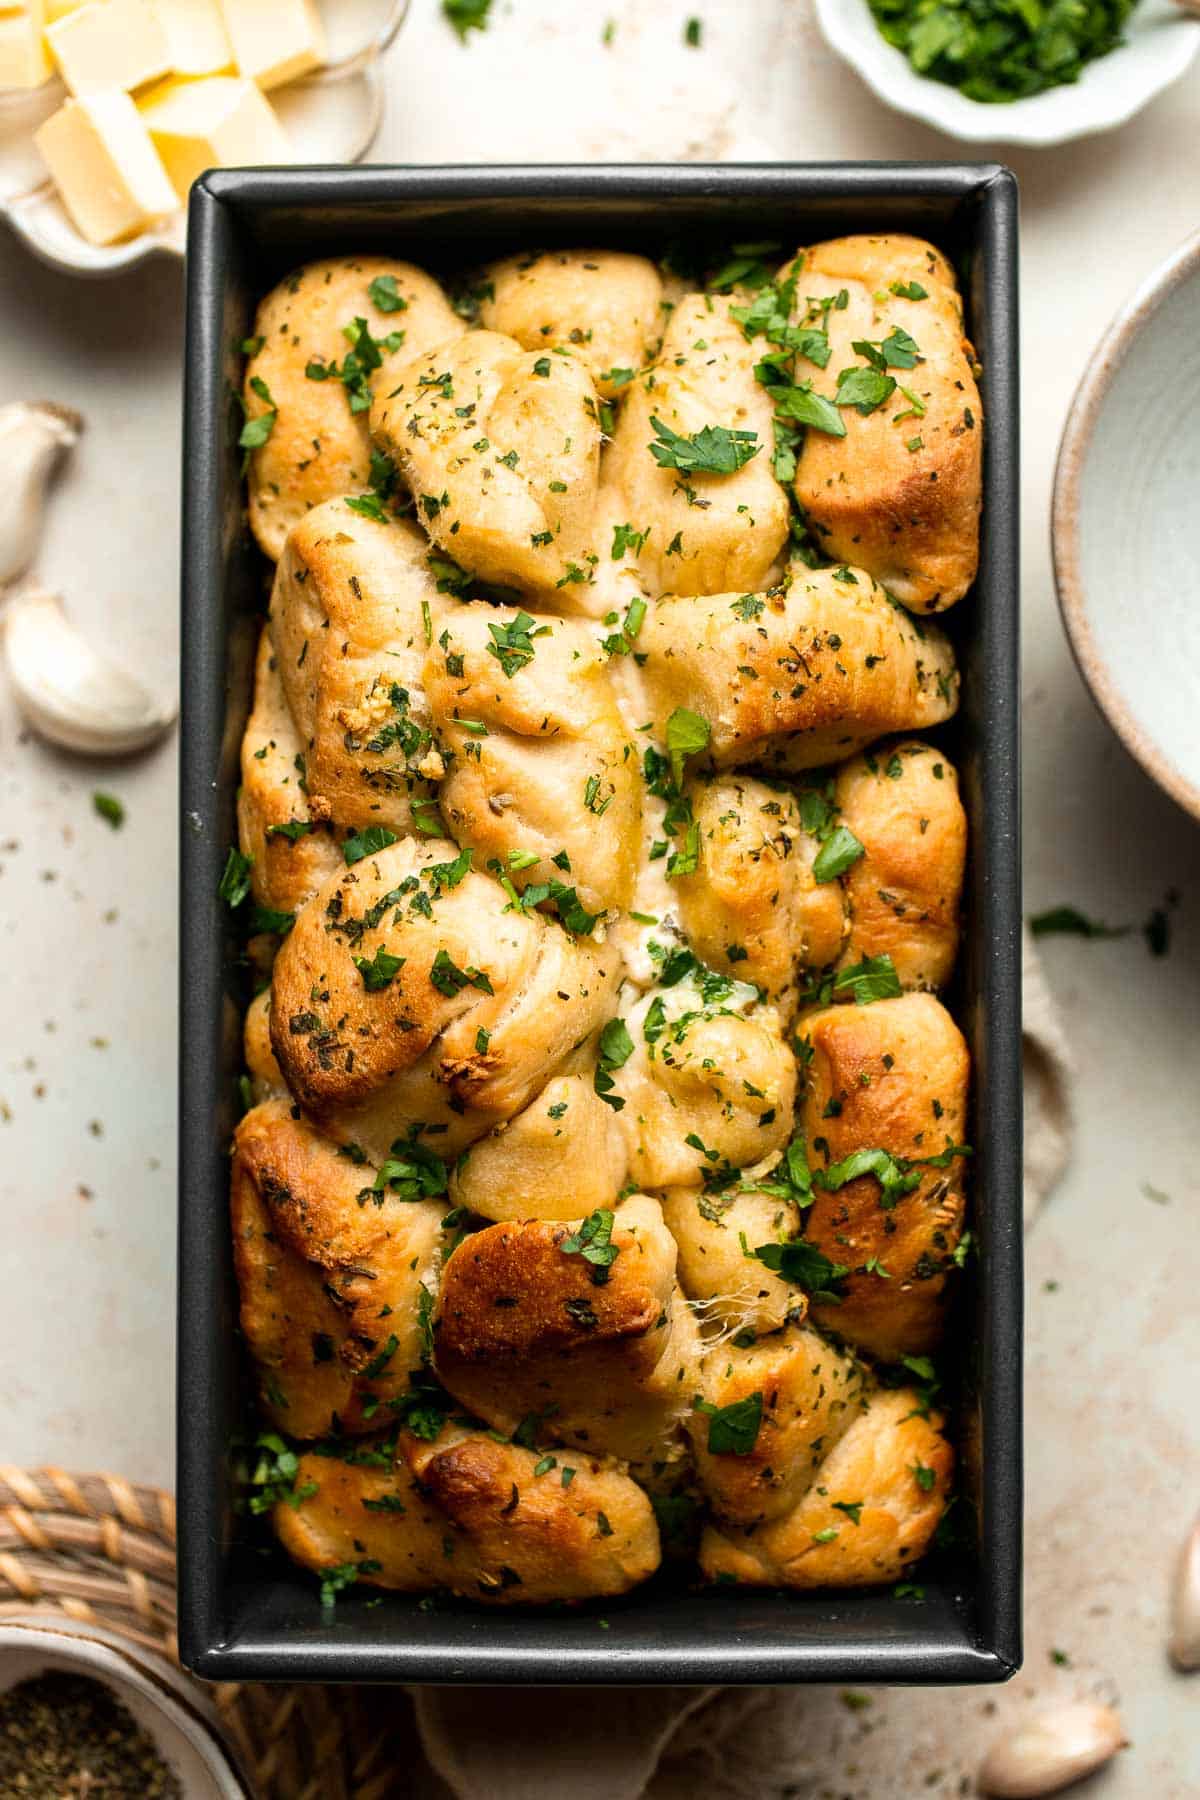
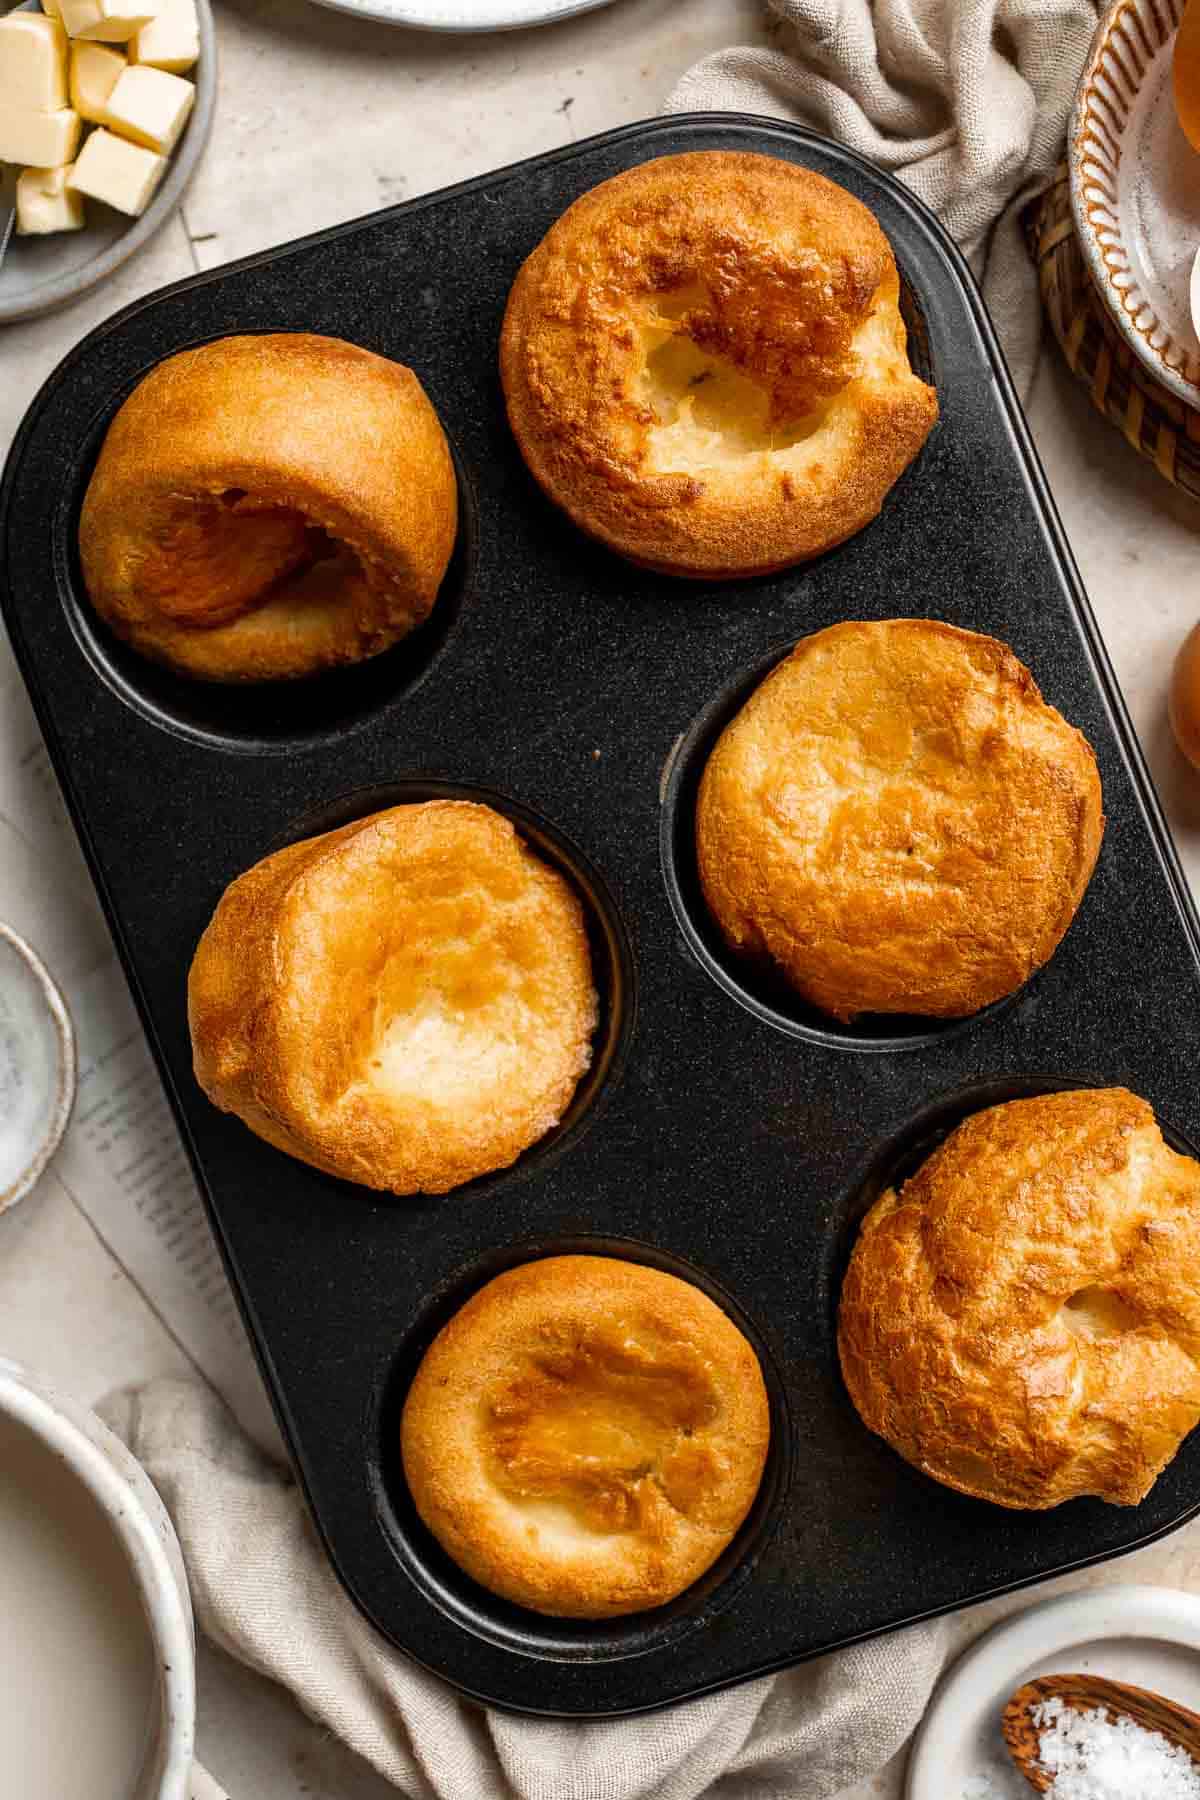
Thanksgiving Dessert
No matter how filling Thanksgiving dinner may be, there always room for dessert. Whether you are craving the classics -- pumpkin pie or pecan pie -- or something different like caramel pecan pie cheesecake bars, pumpkin chocolate chip cookies, or pumpkin pie bundt cake with cream cheeze glaze, we can all agree that one serving is never enough.
Pick one of the following desserts to feature on your Thanksgiving menu:
- Cranberry Hand Pies (with Leftover Cranberry Sauce)
- Sweet Potato Cake with Cream Cheese Frosting
- Turtle Cheesecake with Caramel, Chocolate, and Pecans
- Classic Homemade Pumpkin Pie from Scratch

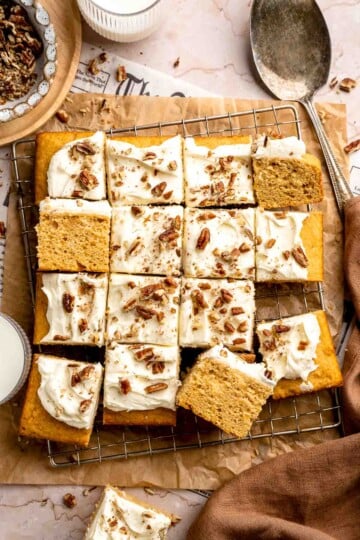
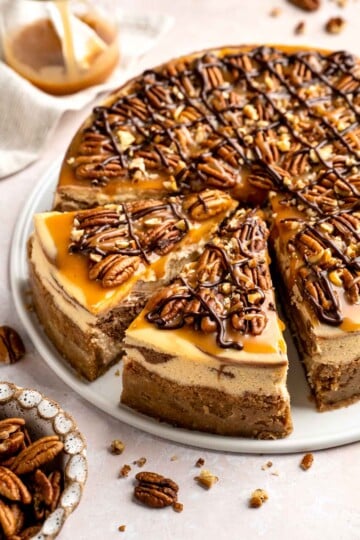
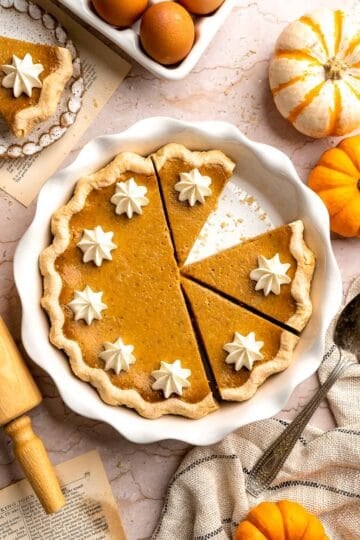
Thanksgiving Leftovers
Thanksgiving leftovers might actually be the best part of the Thanksgiving dinner experience, right? Which is a reason to just make a whole roast turkey even for a small intimate group. We always make leftover Thanksgiving turkey sandwiches for lunch the next day, and a big pot of leftover turkey wild rice soup to last a few more days. And the cranberry sauce? Always make extra and bake up a storm. It's usually cranberry sauce oat bars or cranberry sauce muffins over here.
- Roasted Brussels Sprouts Pasta
- Cranberry Brie Grilled Cheese
- Leftover Stuffing Meatballs
- Leftover Mashed Potato Gnocchi
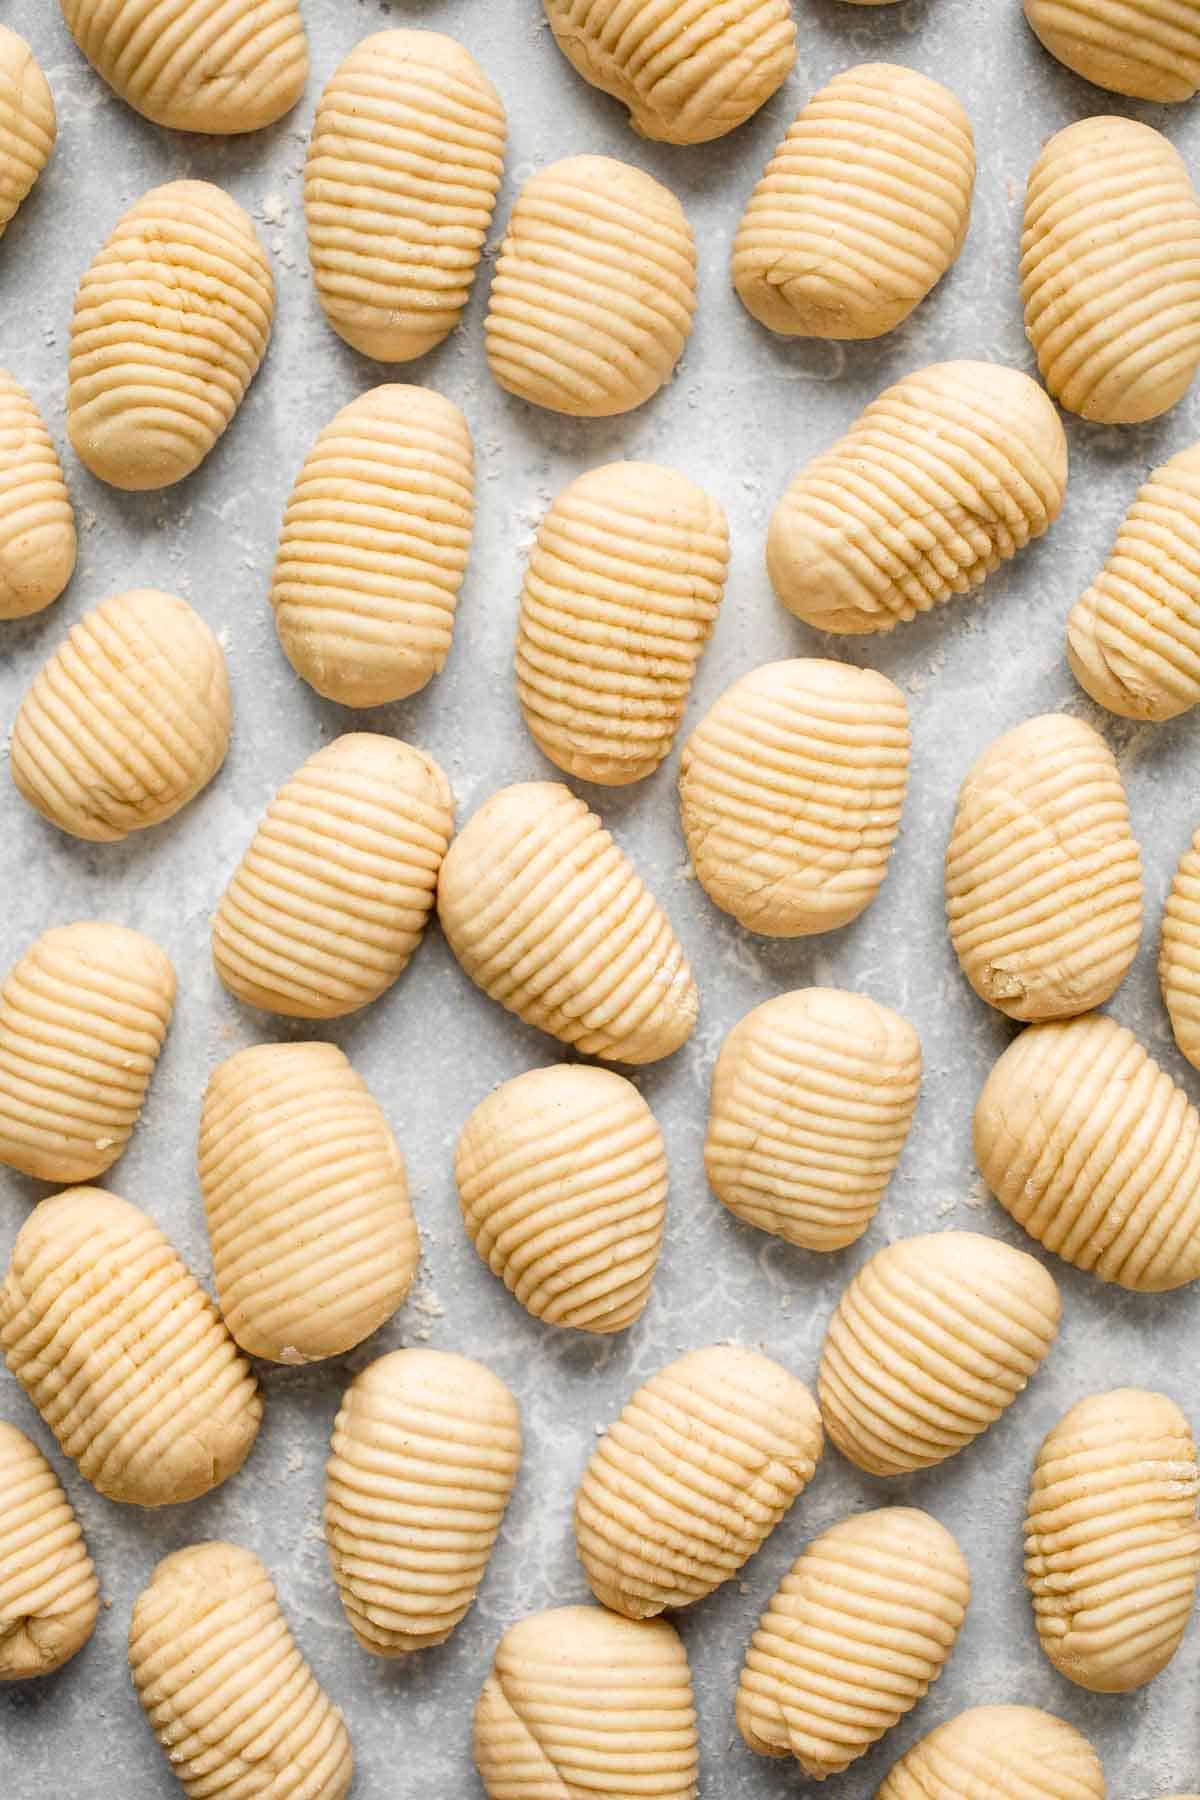
Tips for Planning the Best Thanksgiving Dinner Menu for Four
- Plan your menu ahead of time. You can prepare some of these Thanksgiving dishes in advance. Some can be frozen and reheated from frozen, others can be made and stored in an airtight container for a few days at room temperature or in the refrigerator, according to recipe directions.
- The turkey should be made fresh on the day of serving.
- Some sides should be made fresh on the day of serving, but many can be prepared in advance, stored in the refrigerator and reheated. Some easy make ahead sides are easy make ahead cranberry sauce, creamy mashed potatoes, sweet potato casserole, and creamy garlic mashed cauliflower.
- All soup can be prepared in advance and stored in the refrigerator for up to 5 days.
- Salads can be prepared in advance (chopping vegetables and mixing the dressing ingredients together), and assembled before serving.
- Most dessert can be made in advance and stored in an airtight container either at room temperature or in the refrigerator . Some can even be made weeks in advance, frozen, and reheated in the oven.
- You can mix homemade and storebought. There is nothing wrong with getting some help by incorporating storebought items into your menu. If baking a Thanksgiving dessert is stressing you out, then just pick up a pie from the store instead. Does the sound of peeling and cubing a whole butternut squash for a butternut squash soup sound like too much work? No problem, pick up some pre-cubed butternut squash from the local grocery store.
- Prep your ingredients as much as possible. Once you have decided on the dishes to serve, prepare as much as you can in advance. Whether that is chopping vegetables, beating eggs, or preparing salad dressings. You can store all your prepared ingredients in airtight containers in the refrigerator.
- Set the table the night before. Take out the fancy dinnerware, flatware, glasses, placemats, and napkins and set the table the night before. It's one less thing to worry about on Thanksgiving.
now available!
Free Printable Thanksgiving Menu Pack!
Plan your holiday dinner with ease! Get all 5 curated menus sent straight to your inbox.
Did You Make Any of These Thanksgiving Dinner Recipes?
Please leave a comment and rating below, and let me know what you thought of this round up of recipes. Be sure to snap a picture and tag me on Instagram @aheadofthyme or share it on the Pinterest pin so that I can follow along.
HUNGRY FOR MORE? Don't forget to sign up for my email newsletter so that you don't miss any recipes. You can also follow along on Instagram and Pinterest for more recipe updates.
Air Fryer Baby Potatoes

Crispy, and tender, easy air fryer baby potatoes are a healthier take on a classic side dish without compromising on the taste or texture. They are golden and crispy on the outside, yet soft and fluffy inside. This easy side dish comes together with a few simple ingredients, minimal prep and just 20 minutes in the air fryer. Making a potato side dish has never been easier!
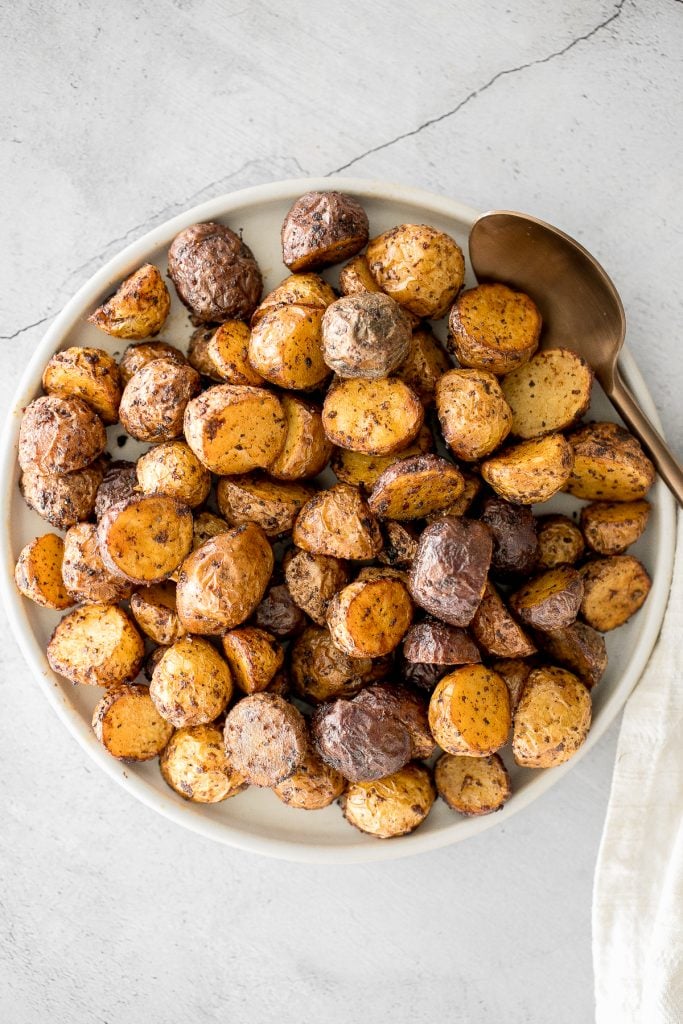
These air fryer baby potatoes are healthier than ones that you would traditionally roast in the oven because they have less fat and calories (less oil needed). AND they are quicker to make, taking half the time to cook than it would in the oven.
So it makes sense that we are kind of obsessed with our air fryer. It has completely changed the way we cook in our home, and we love to try everything in it. From breaded air fryer fried chicken wings and honey garlic chicken wings, to roasted vegetables and "stir fries", to lamb chops and fresh black cod. There is really nothing that you cannot make in it.
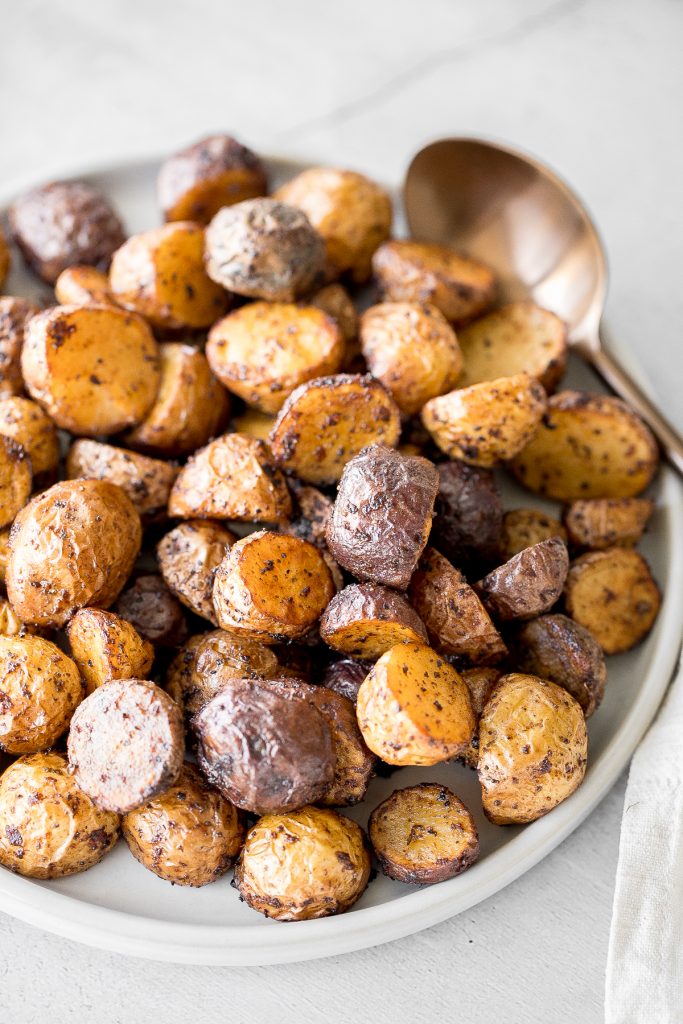
Ingredients
- baby potatoes - 1 lb. of baby potatoes, washed and halved. You could also substitute with any kind potatoes that you have on hand, just cut them into 1-inch pieces.
- olive oil - a little olive oil required to cook these.
- seasoning - paprika, garlic powder, Italian seasoning (or Old Bay seasoning), balsamic vinegar, soy sauce, salt and pepper.
You will also need an air fryer, measuring cups and spoons, and a mixing bowl.
How to Make the Best Easy Air Fryer Baby Potatoes
- Prep the potatoes. Wash the baby potatoes and slice them in half. Meanwhile, preheat the air fryer on 375°F for 5 minutes.
- Combine ingredients. Place all ingredients into in a large mixing bowl. Toss to combine.
- Cook in the air fryer. Transfer potatoes into the air fryer basket and arrange them in a single layer or slightly overlapping. Air fry at 375°F for 20-22 minutes shaking the basket halfway through, until the potato skins are golden brown and tender. Insert a fork to check doneness. If you can easily insert a fork, then it's fork tender and ready.
- Cool and serve. Let it cool for 5 minutes and serve. Serve as it, or garnish with some chopped parsley on top.
Frequently Asked Questions
- What air fryer do you recommend? I use the Philips Digital Turbostar Air Fryer and highly recommend it. We love it and have only good things to say about it.
- Can I double this recipe? Yes, absolutely. If you double or triple the recipe, you may have to make it in a few batches. To get crispy baby potatoes, you will need to arrange them in the air fryer basket in a single layer. If you start stacking them up and overcrowding the basket, they will not cook evenly and you may not get that crispy texture.
- Can I still make this in the oven? Yes, you can make this easily in the oven. Spread the fries in an even layer on a large baking sheet. Bake for 35-40 minutes at 425 F, until fork tender
- How do I store them? To store, transfer into an airtight container and store in the refrigerator for up to 4 days.
- How do I reheat them? To reheat, transfer into a 300F preheated air fryer basket and heat for 5-10 minutes, or in the oven until warmed through.
More Air Fryer Recipes
- The Best Breaded Air Fryer Fried Chicken Wings
- Crispy Air Fryer French Fries
- 6-Minute Air Fryer Asparagus
- Easy Air Fryer Lamb Chops with Dijon Garlic Marinade
- Honey Garlic Chicken Wings
- 10-Minute Air Fryer Jumbo Shrimp
- Air Fryer Spring Vegetables "Stir Fry" with Tofu
- Air Fryer Black Cod with Black Bean Sauce
Tried this recipe?
I'd love to hear what you think! Leave a comment and rating below to share your feedback. Your reviews help others discover this recipe and help me keep creating more free recipes for you. Snap a photo and tag me on social media @aheadofthyme too.
Pumpkin Energy Bites
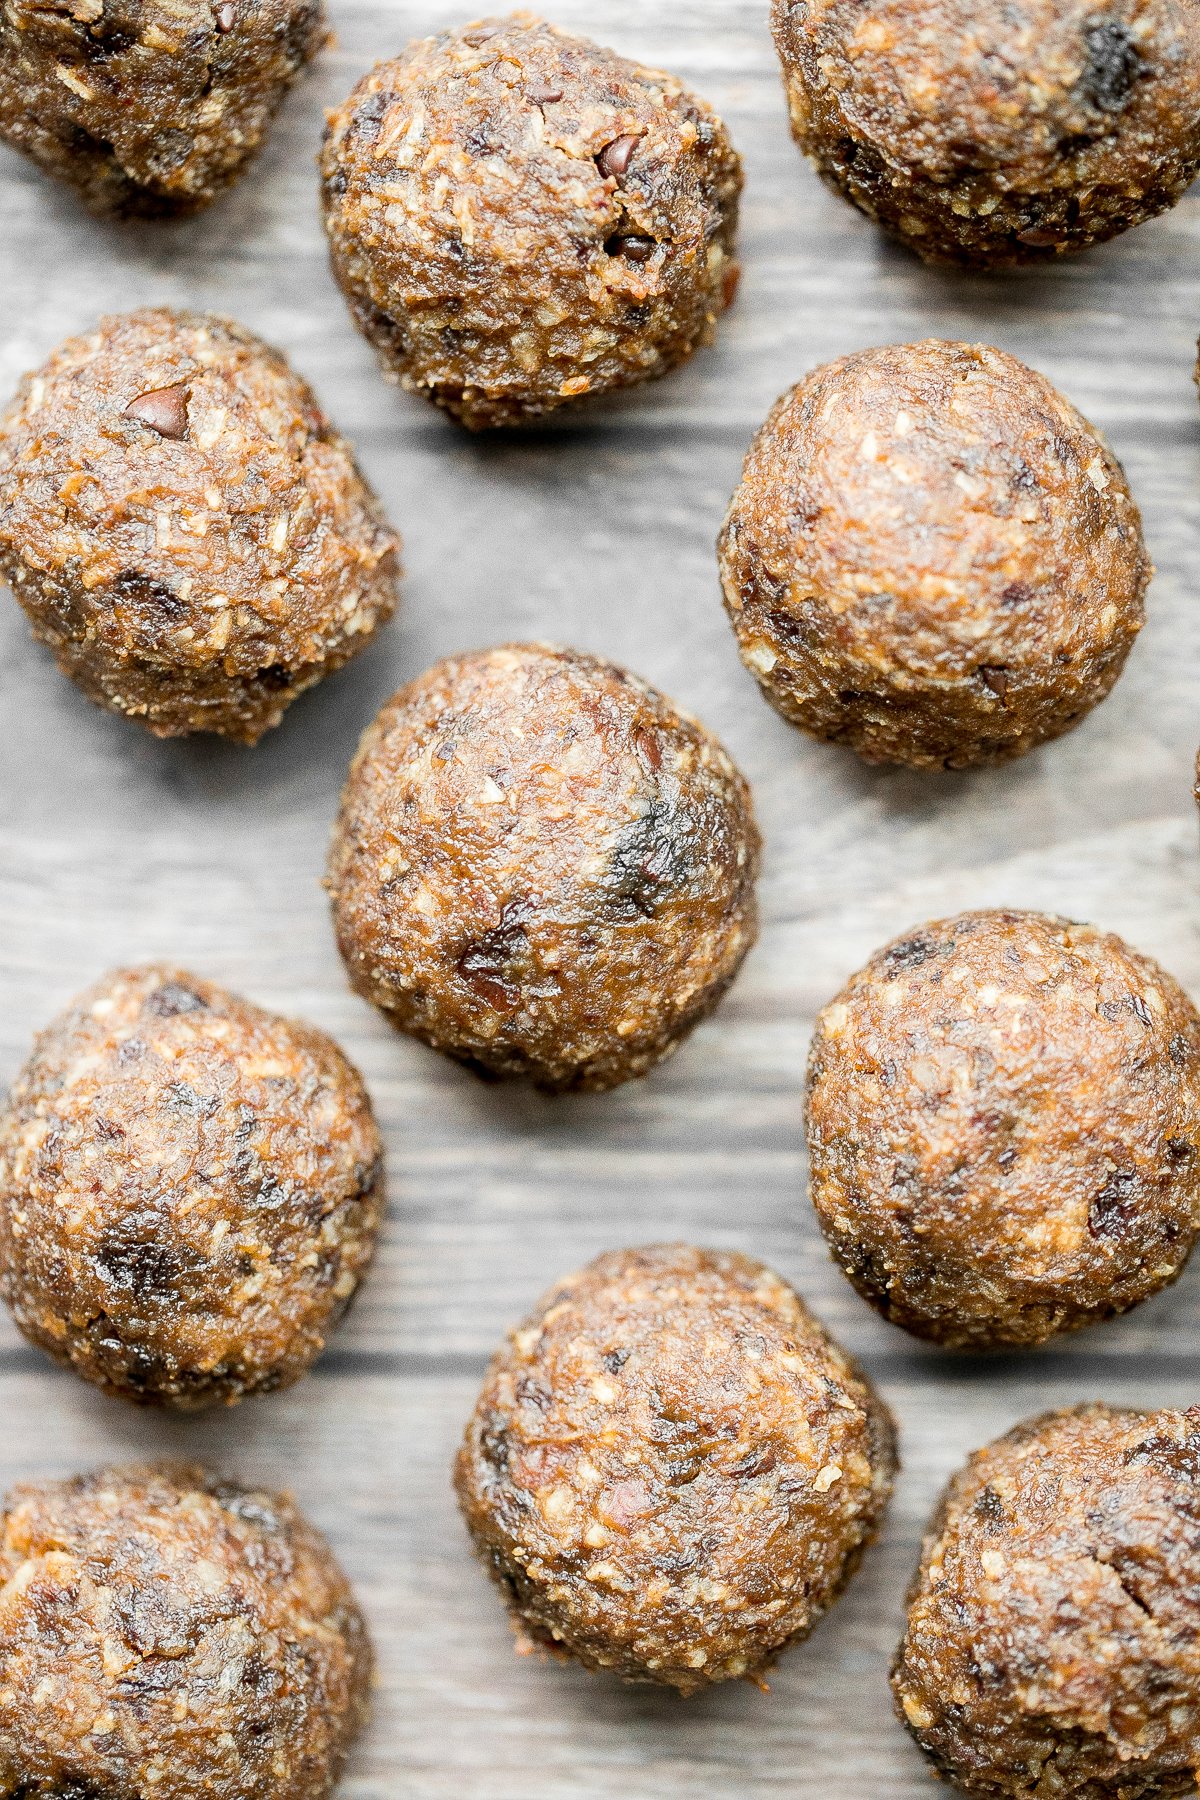
Wholesome and healthy pumpkin energy bites are packed with real pumpkin, peanut butter, raisins, pecans and coconut for a delicious and healthy alternative to satisfy your late-night pumpkin pie dessert cravings. And unlike pumpkin pie, these energy balls are gluten-free and vegan. Plus, they are so easy to whip up with just 15 minutes of prep and can be no bake. Perfect for breakfast, as a snack, or even dessert because hello chocolate chips!

This recipe needs ½ cup of pumpkin puree. You can double or triple the batch to use up all the puree that you may have, and store any extra pumpkin energy bites in the refrigerator to snack on all week, or in the freezer to last you a few months. Some other healthier options for using up any extra pumpkin puree that you have on hand are in pumpkin pie granola, creamy pumpkin hummus, and pumpkin dinner rolls.
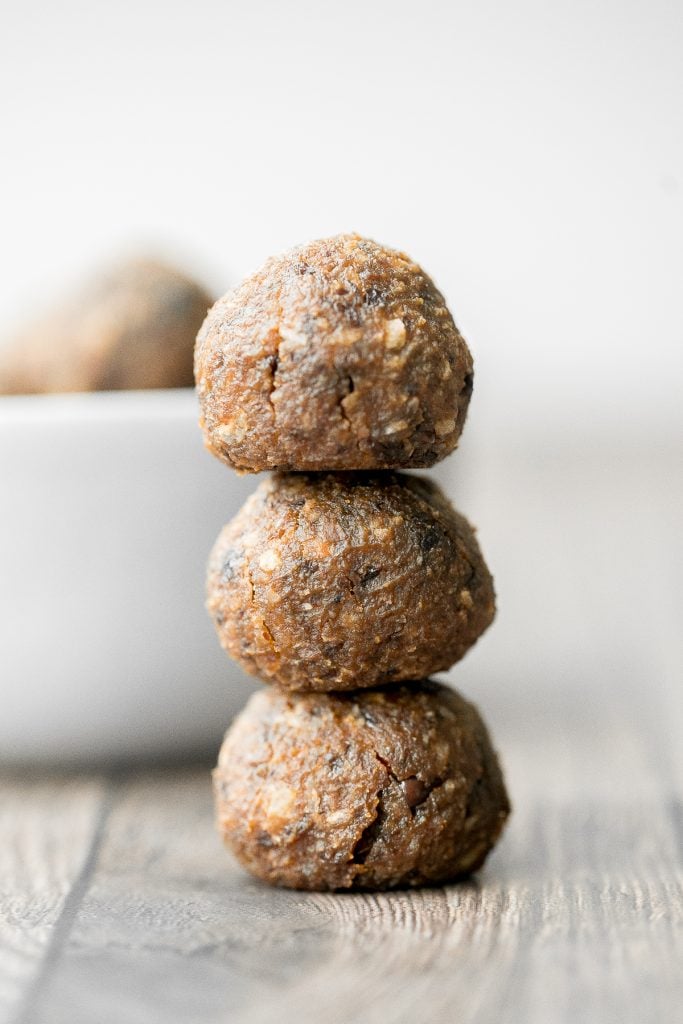
What is in Pumpkin Energy Bites?
To make these little pumpkin energy bites, you will need the following ingredients:
- pumpkin puree - you can use canned pumpkin or homemade pumpkin puree.
- raisins - adds sweetness to these bites and helps bind them together. You can also substitute with cranberries or dates.
- pecans - adds some structure and flavour. You can substitute with any other nuts that you have on hand, but it will slightly change the flavour. You can try walnuts or pumpkin seeds.
- shredded coconut - unsweetened.
- smooth peanut butter - you can also substitute this with other nut butters such as almond butter.
- pumpkin pie spice + ground cinnamon - because extra cinnamon is always a good idea.
- mini chocolate chips
You will also need a food processor, parchment paper or a silicone mat, and a baking tray.
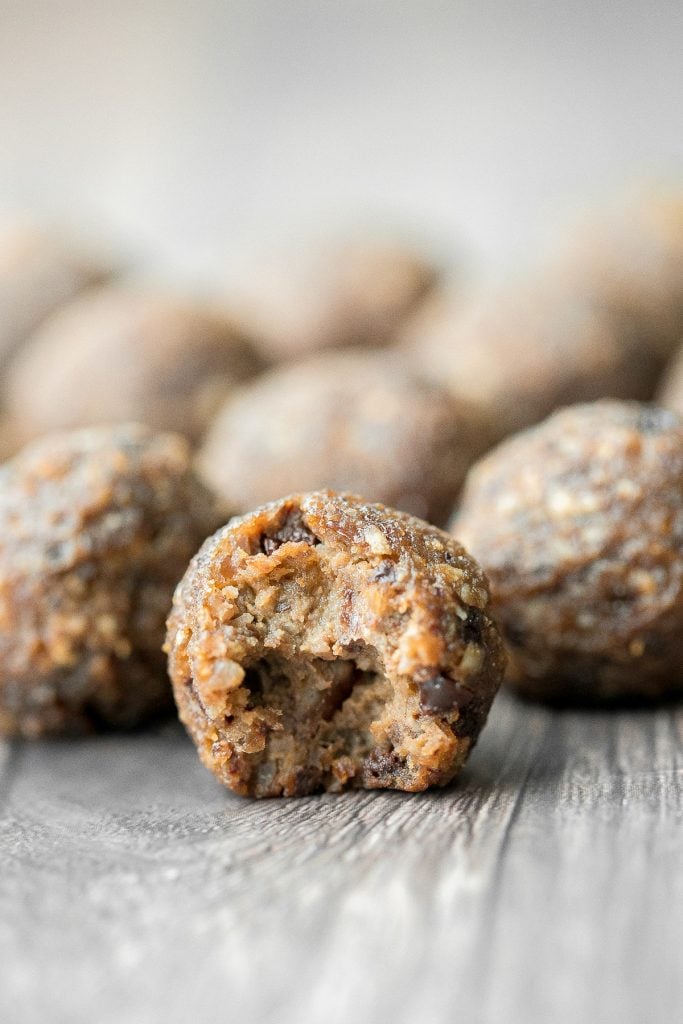
How to Make the Best Pumpkin Energy Bites
- Blend and combine ingredients: In a food processor, add raisins and pecans, and mix on low speed for 1 minute until finely blended into a paste. Add pumpkin puree, shredded coconut, peanut butter, cinnamon and pumpkin pie spice. Pulse mix on and off for 1 minute, until the mixture is well combined.
- Refrigerate: Transfer the mixture into a mixing bowl and fold in the chocolate chips. Cover and refrigerate for 1 hour.
- Roll into balls: Take a spoonful of the pumpkin mixture and roll into 1-inch balls. Place the rolled balls on a parchment-lined baking tray and refrigerate for 30 minutes or overnight to harden.
- Bake (optional): You can enjoy the pumpkin bites as is, or if they are too sticky and soft for your liking, then bake them in a 350F preheated oven for 20 minutes to help firm them up a little more. Cool to room temperature and enjoy.
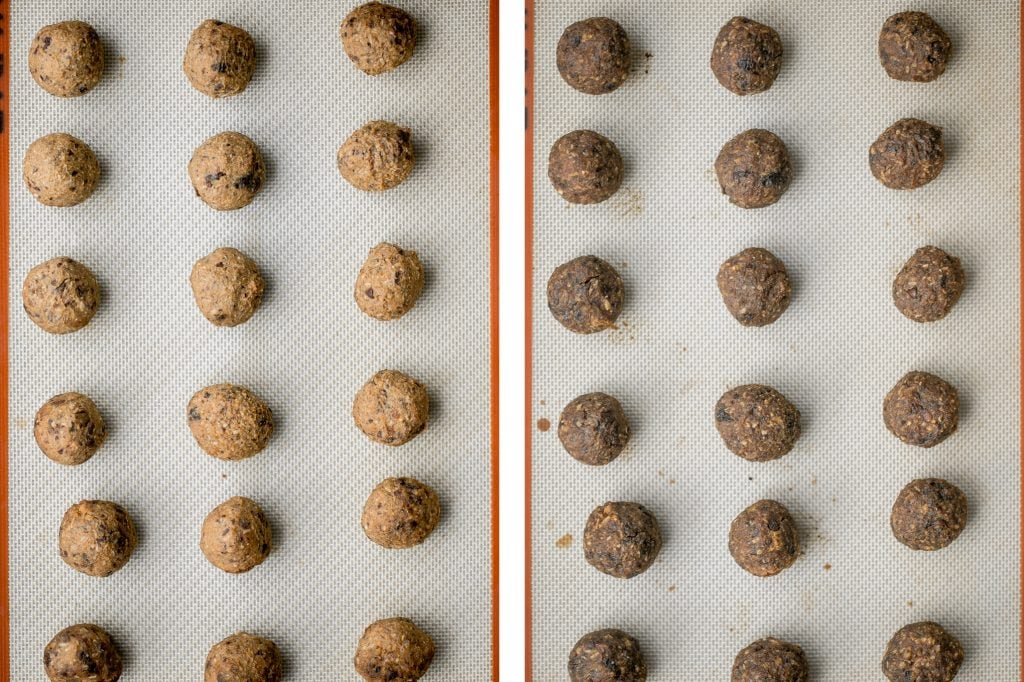

How to Store
- How to store: Store in an airtight container at room temperature for up to 2 days, or in the refrigerator for up to one week.
- How to freeze: Transfer to an airtight container or freezer bag and store for up to 3 months. To eat, let it thaw at room temperature or in the refrigerator first and then enjoy.
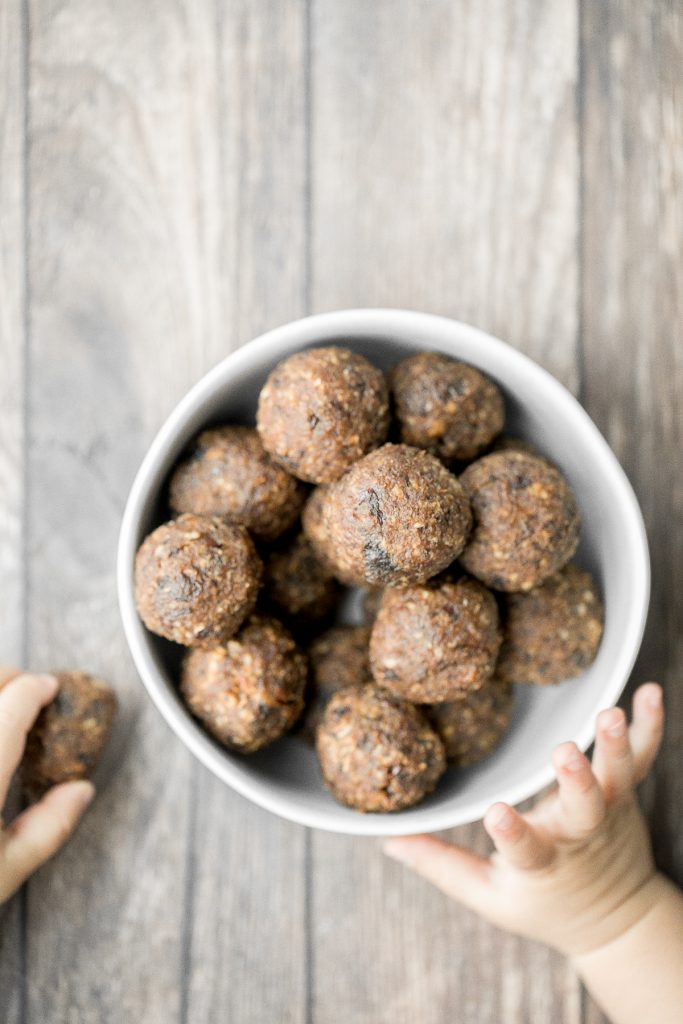
More Healthy Snack Recipes
- No Bake Protein Packed Energy Bites
- Chewy Peanut Butter Granola Bars
- Pumpkin Pie Granola
- Almond Butter Granola Bars
- Easy Cinnamon Apple Granola
- Cranberry Sauce Oat Bars
Tried this recipe?
I'd love to hear what you think! Leave a comment and rating below to share your feedback. Your reviews help others discover this recipe and help me keep creating more free recipes for you. Snap a photo and tag me on social media @aheadofthyme too.
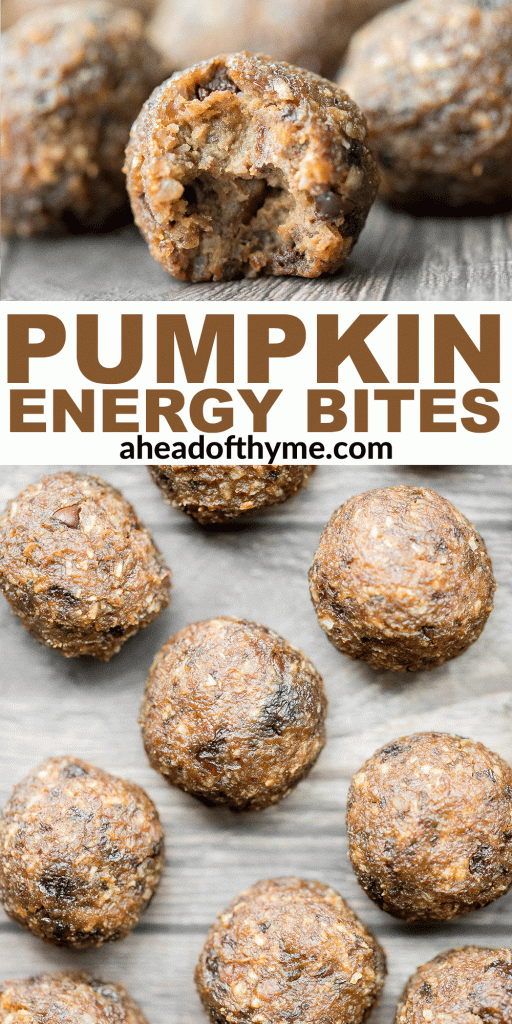
Creamy Garlic Mashed Cauliflower
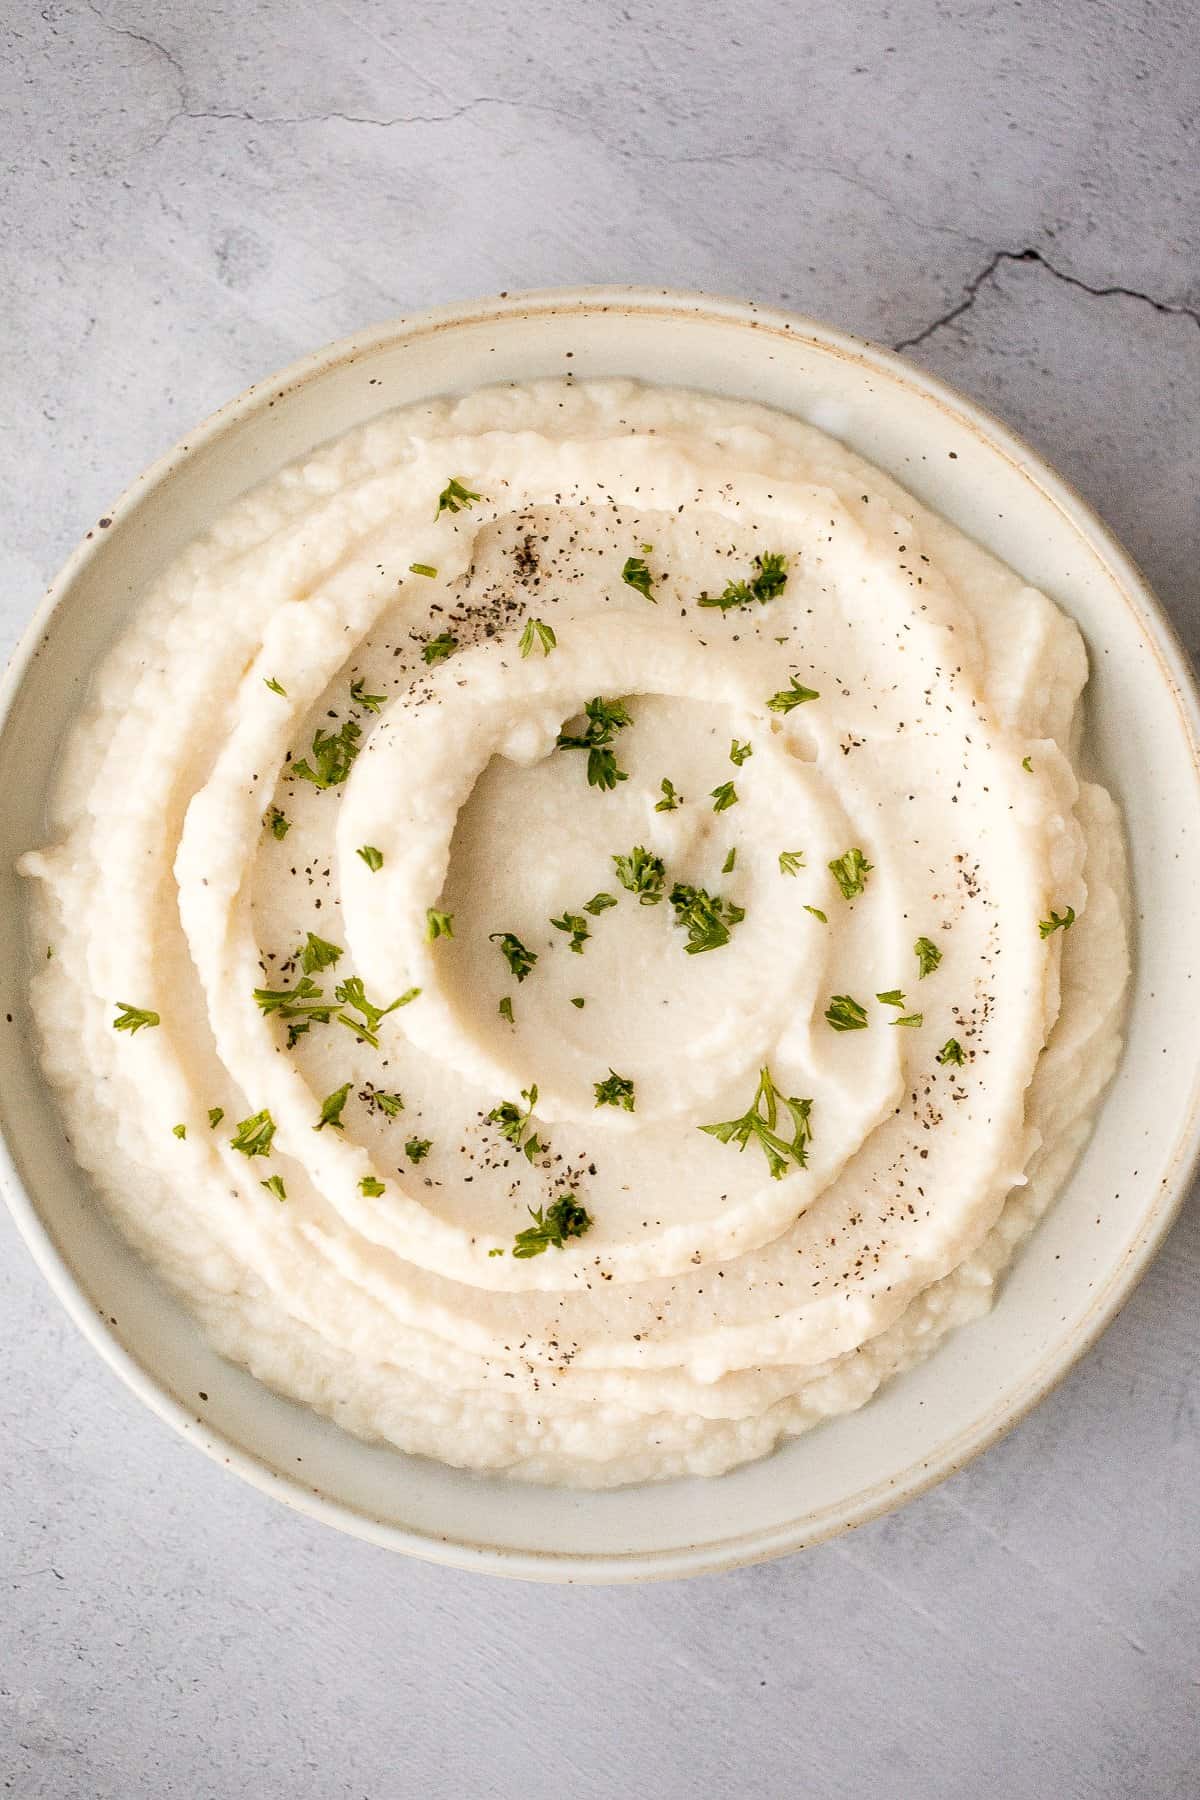
Imagine having a big serving of mashed potatoes but with a quarter of the calories. Now you can with creamy garlic mashed cauliflower. That's right, cauliflower. This easy side dish is buttery, garlicky, and so flavourful. It's pure comfort food but so much healthier. The best part? It comes together in just 20 minutes with only a handful of simple ingredients. So perfect on any night of the week.
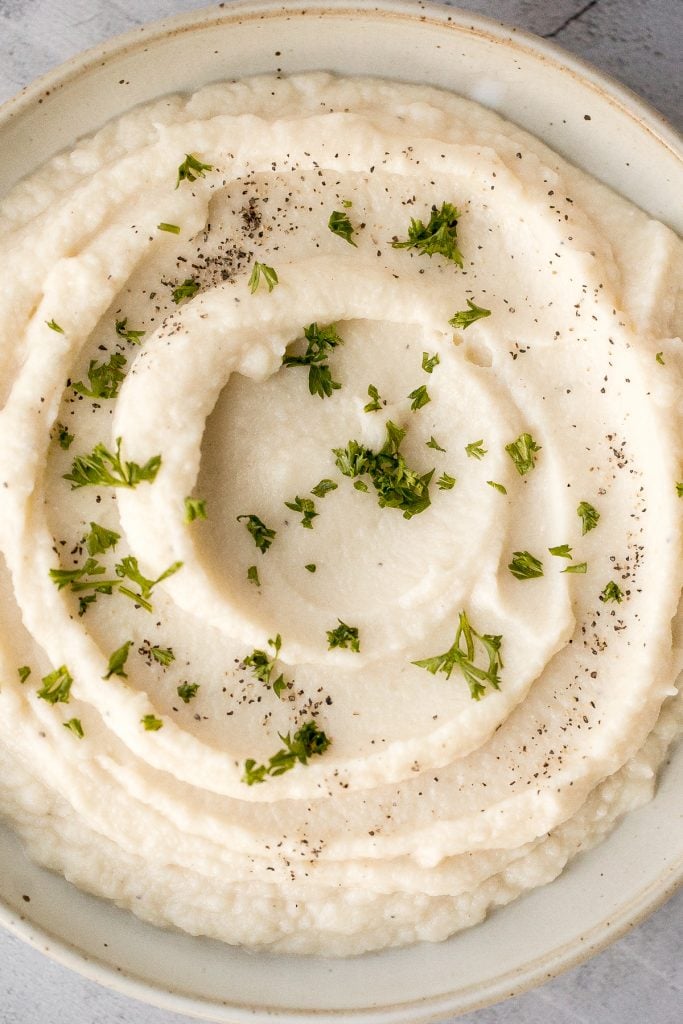
Mashed Cauliflower vs. Mashed Potatoes
Ok, so you may be thinking, hold on. You cannot serve mashed cauliflower and call it mashed potatoes. Well let me tell you. I had heard and read about cauliflower "mashed potatoes" for a while before I decided to attempt to make it myself. And believe me, I was the biggest skeptic of all. How is it possible that a vegetable such as a cauliflower could live up to the delicious potato in its amazing creamy mashed form? Well, it does. It just does. And here is how:
- Aesthetics: Let's start off with the aesthetics. It looks identical to mashed potatoes.
- Texture: Silky, velvety, creamy. Yup, just like mashed potatoes.
- Taste: Obviously, this is the main question. Well, you will be pleasantly surprised that when taking a bite, you'll barely be able to tell the difference. Of course, it is slightly different but the difference is minuscule enough to pass for the real thing.
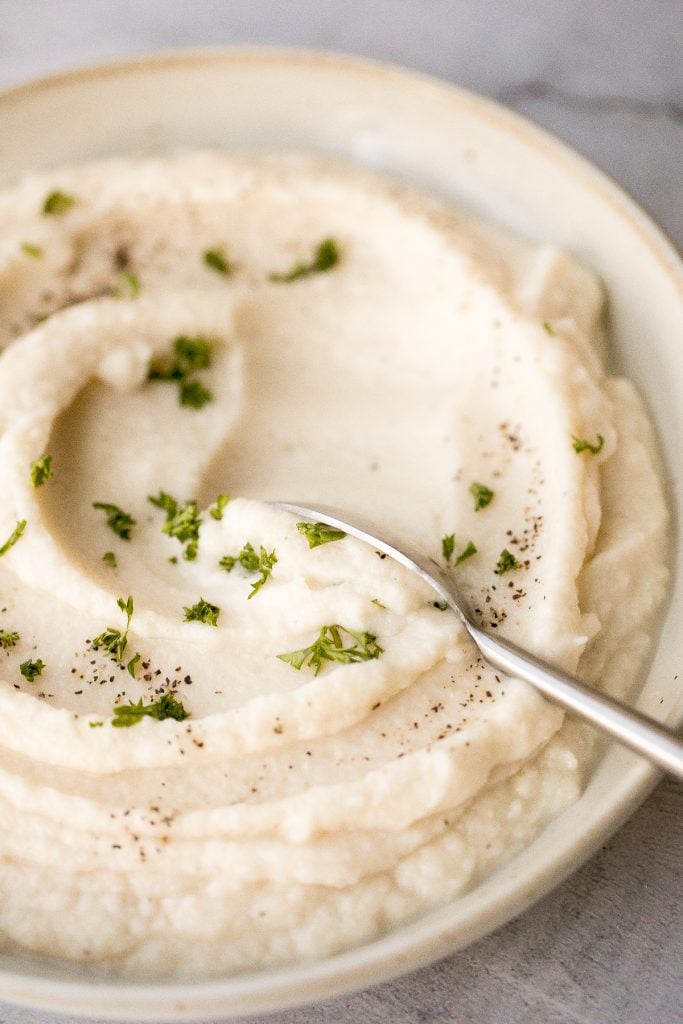
So what is the point of using cauliflower instead of potatoes? Well cauliflower is way healthier for you. Potatoes are starchy and full of carbs and contain 4 times the amount of calories than what you will find in the same serving of cauliflower. Also, unlike potatoes, cauliflower cooks really fast. Which explains how you can have this side dish ready to serve (including prep) in just 20 minutes.

Ingredients in Garlic Cauliflower Mash
Here is the few ingredients that you will need to gather in order to make this dish:
- cauliflower - 1 medium head of cauliflower cut into florets.
- butter - adds flavour and helps give this cauliflower mash super silky and velvety.
- garlic
- milk - adds a creamy and velvety texture.
- Parmesan cheese
- salt and pepper
- fresh herbs - optional, for garnish. Some great options are chopped parsley, chives or rosemary.
You will also need a large cooking pot, colander, skillet and food processor.
How to Make the Best Creamy Garlic Mashed Cauliflower
Watch this short 1-minute video to see how quick and easy it is to prepare this creamy garlic mashed cauliflower, and follow along the detailed steps below.
To summarize, here are the steps you need to take in order to make this delicious side dish:
- Cook the cauliflower: Bring a large cooking pot of salted water to boil. Add the cauliflower florets and turn the heat down to medium. Cover and cook for for 15 minutes until cauliflower is soft and tender. When the cauliflower is ready, remove from heat and drain in a colander.
- Sauté the garlic: While the cauliflower is cooking, melt butter in a frying pan over medium heat. Sauté the garlic for about 2 minutes until fragrant and soft. Remove from heat and set aside.
- NOTE: You could skip this sautéing step and add the butter and raw garlic directly into your food processor in the next step. However, I highly recommend sautéing. When you sauté the garlic, it brings out an amazing flavour that you just don't get when it is raw. It also infuses the garlic flavour into the butter which takes it to a whole different level.
- Puree: In a food processor, add the cooked cauliflower, sautéed garlic with the butter it was cooked in, milk, Parmesan cheese, salt and pepper. Puree on high until smooth, about 1 minute.
- Serve: Serve hot and sprinkle some fresh herbs (such as parsley, chives or rosemary) on top.
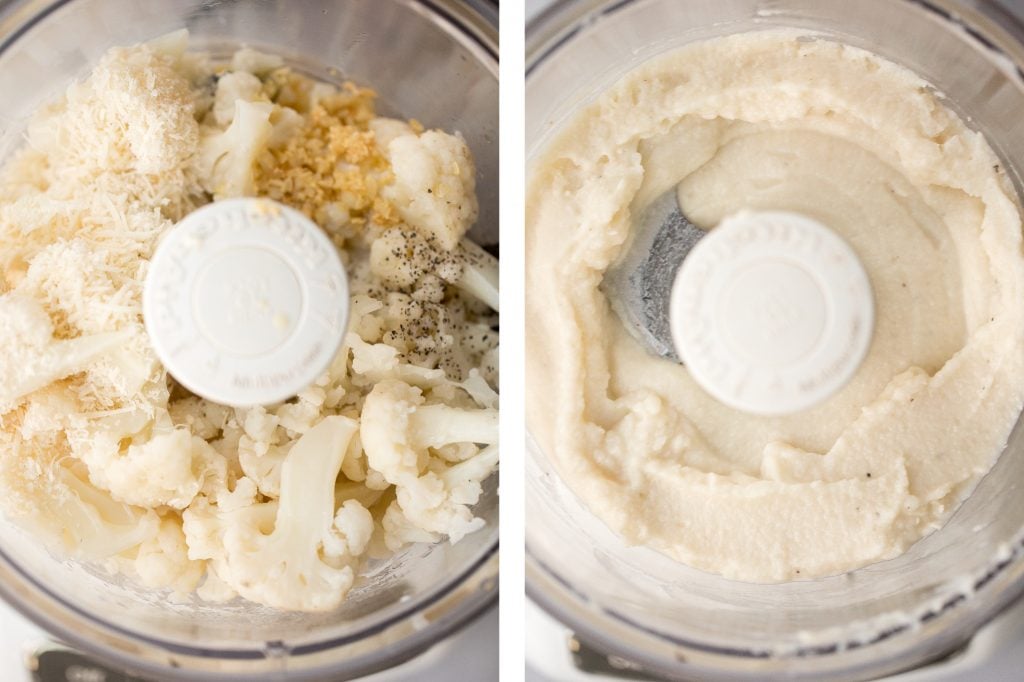
Storing Tips
- How to store and make ahead: This quick and easy recipe can be prepared up to 3 days ahead. Store in an airtight container in the refrigerator.
- How to reheat: To reheat, transfer to a skillet or cooking pot and heat on low heat until warmed through, about 1-2 minutes. You can also reheat in the microwave.
How to Serve Mashed Cauliflower
Creamy garlic mashed cauliflower are the perfect side dish to pretty much any meal that you can think of. It goes really well with roast chicken, steak, roast lamb, baked salmon or turkey.
It is also the perfect side to serve during the holidays for Thanksgiving dinner. Serve it with a juicy whole roast turkey or an easy juicy roasted turkey breast. Browse through some of my other favourite sides to pair it with during the holidays:
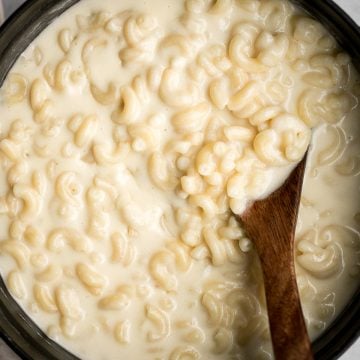
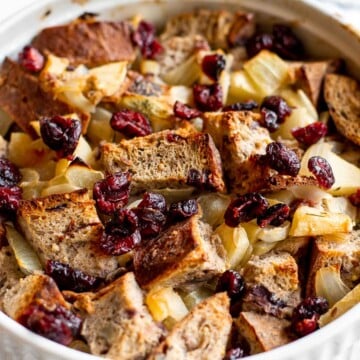
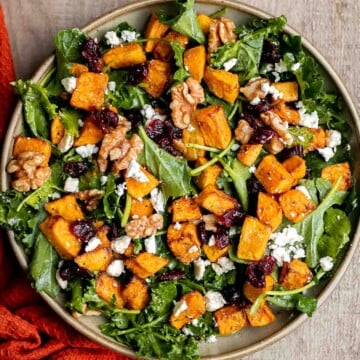
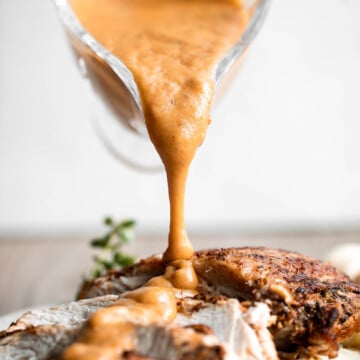


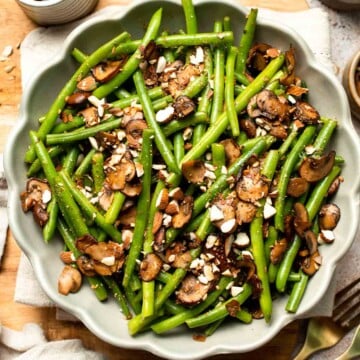
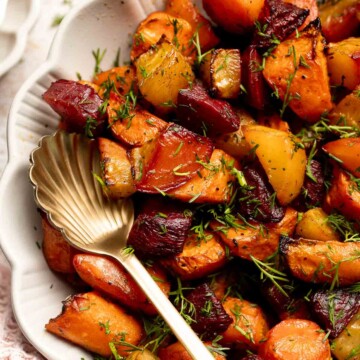
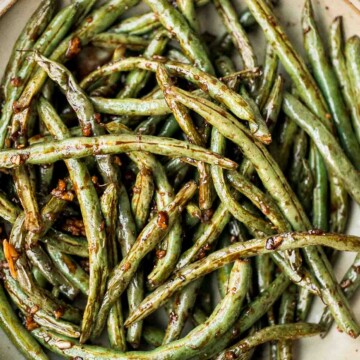
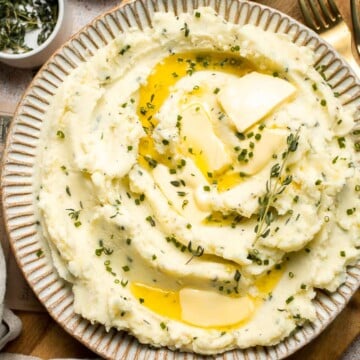
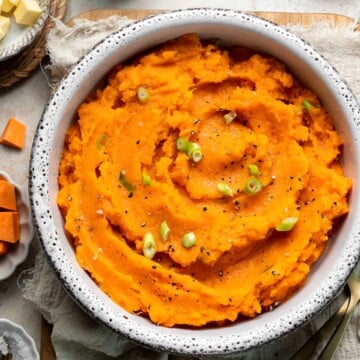
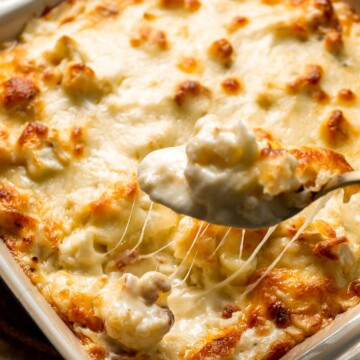

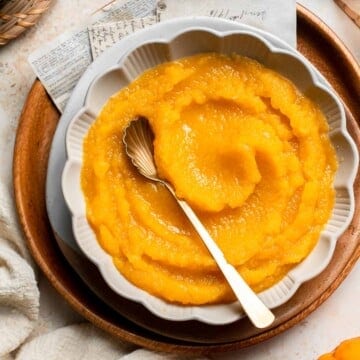
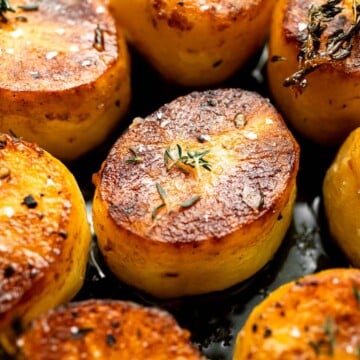
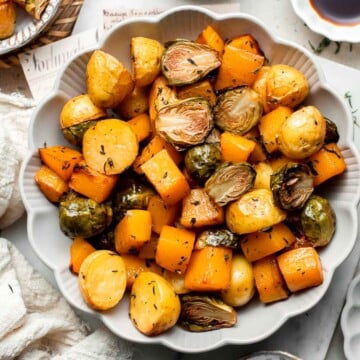
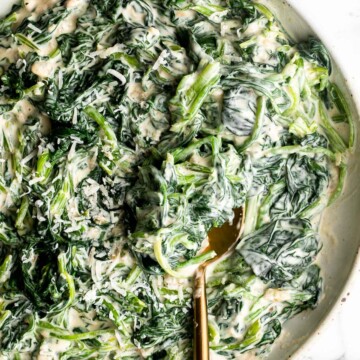
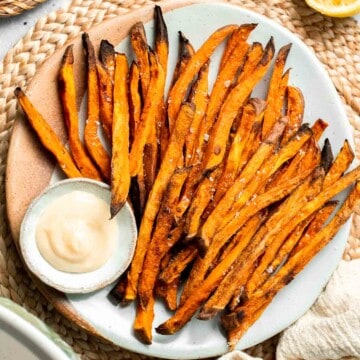
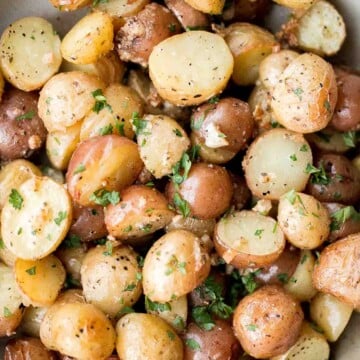

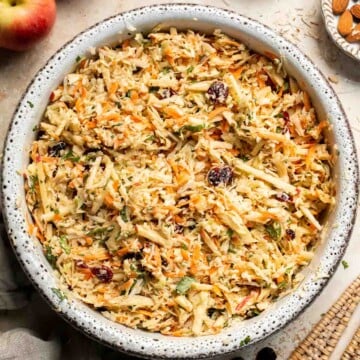


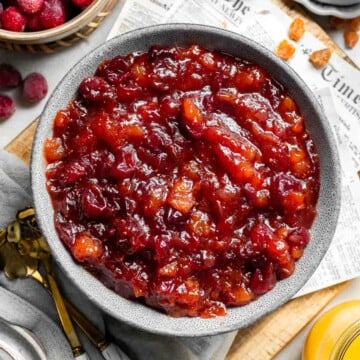

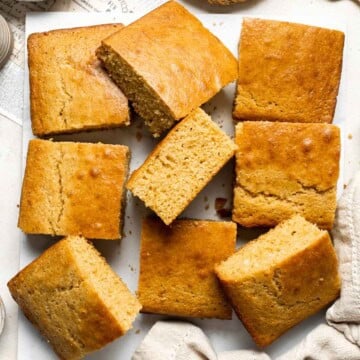
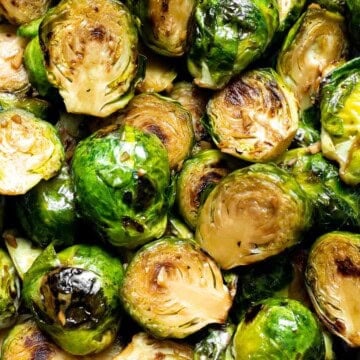


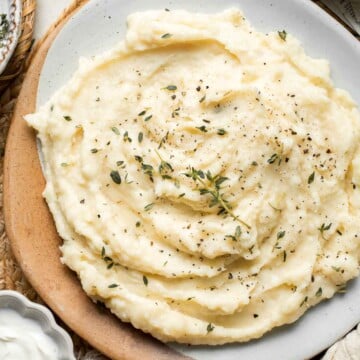


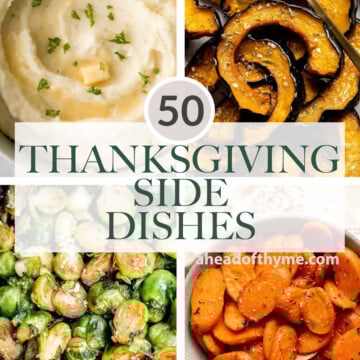
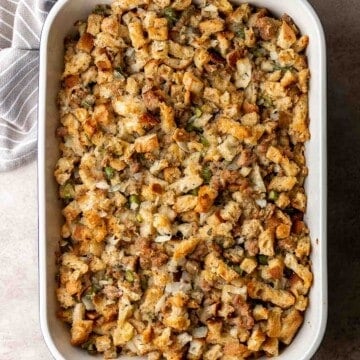

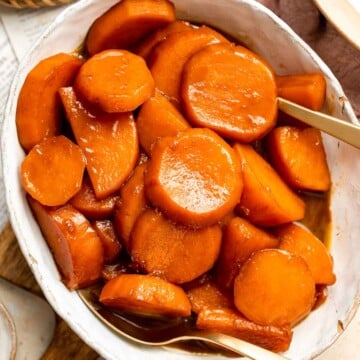
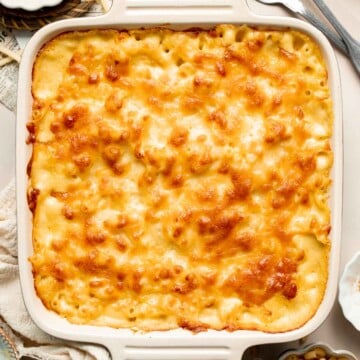
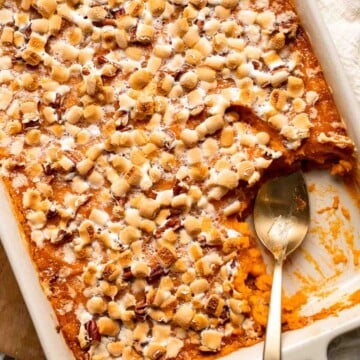
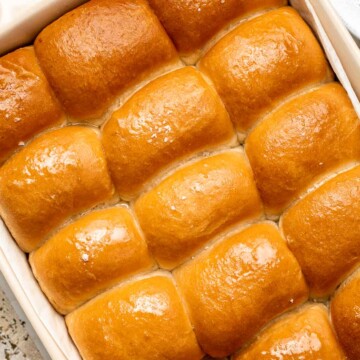


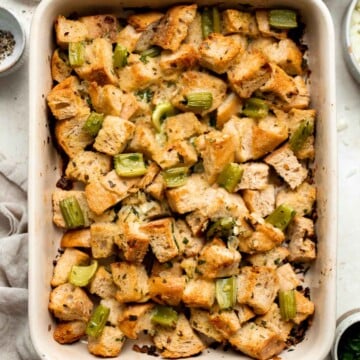
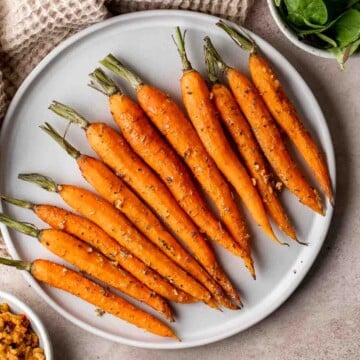
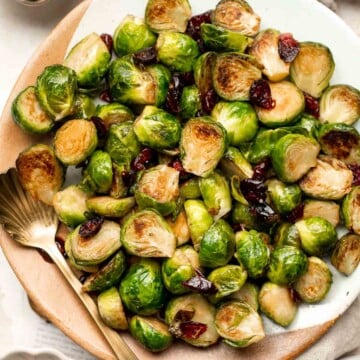
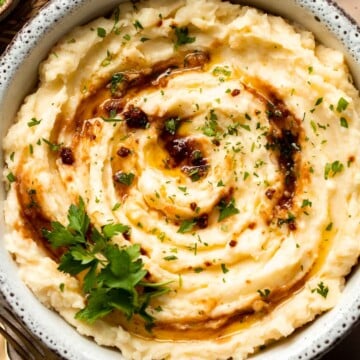
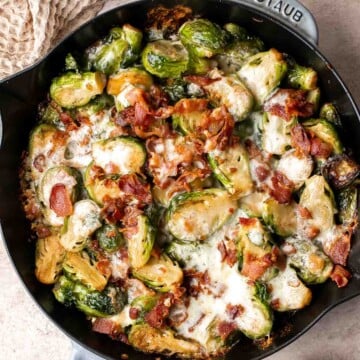

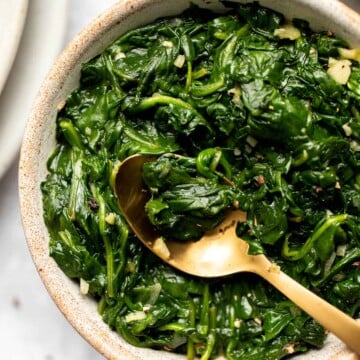


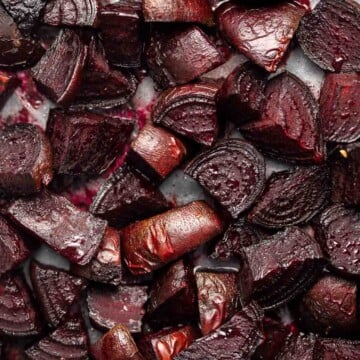
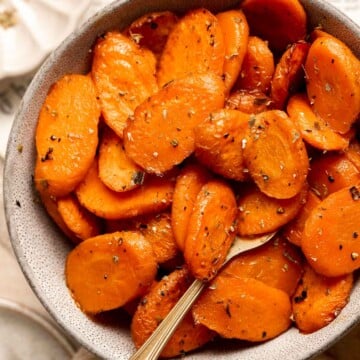
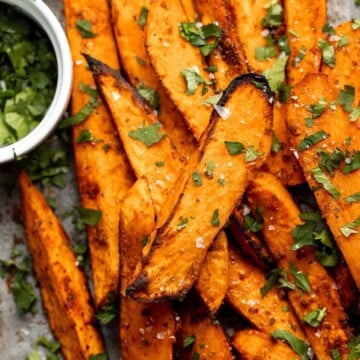
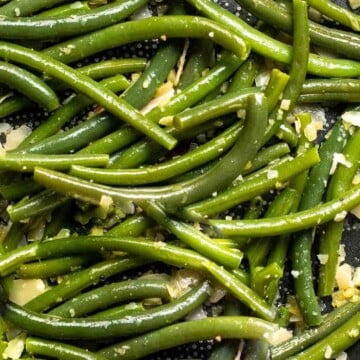

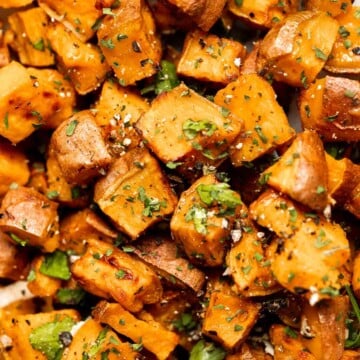
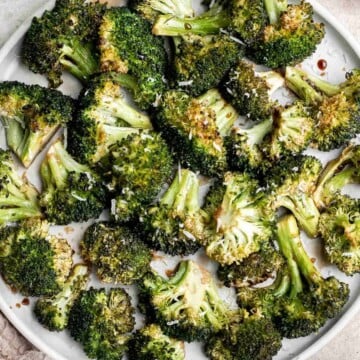
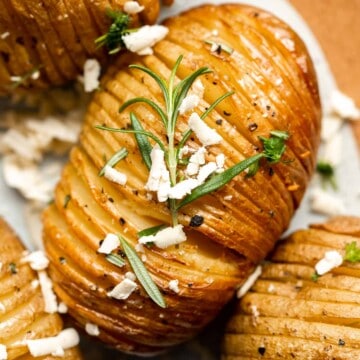
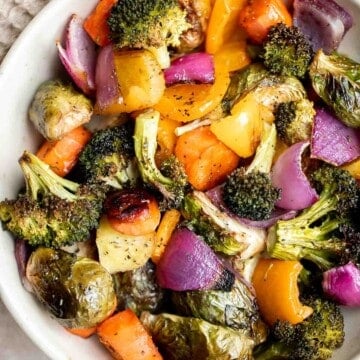
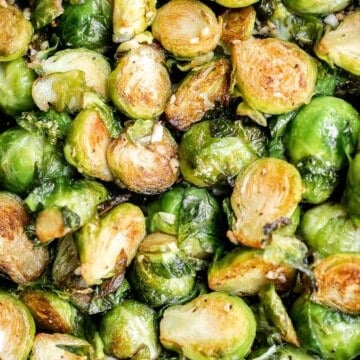
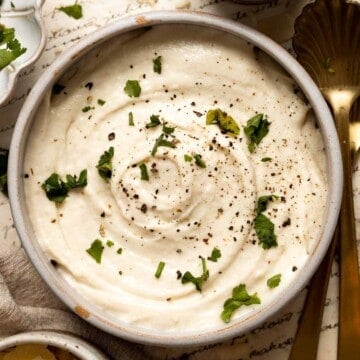

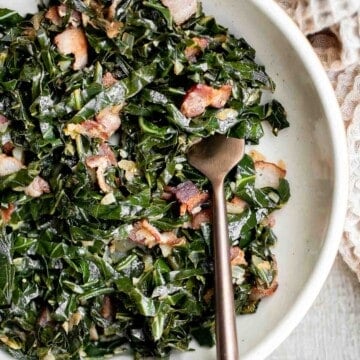
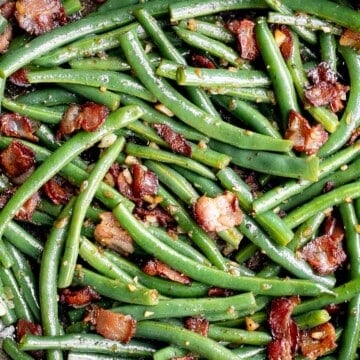
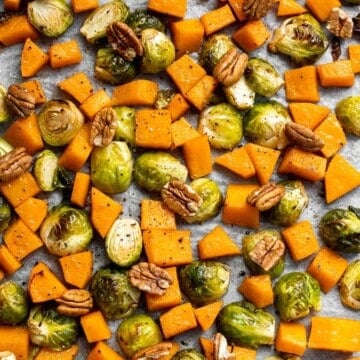
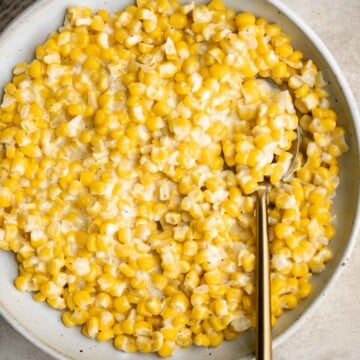
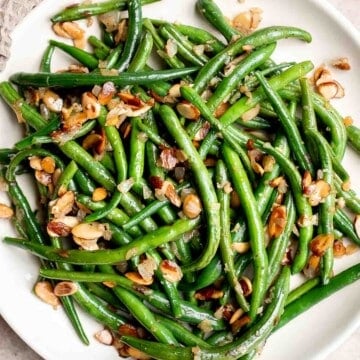
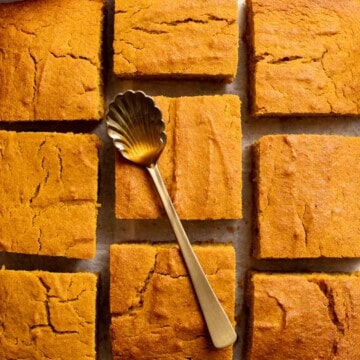
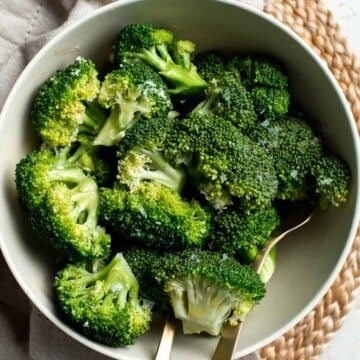
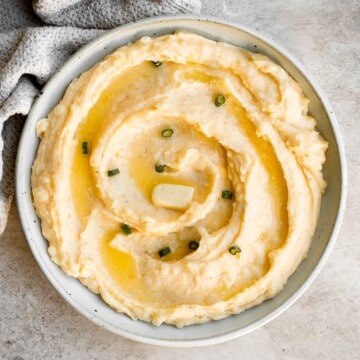
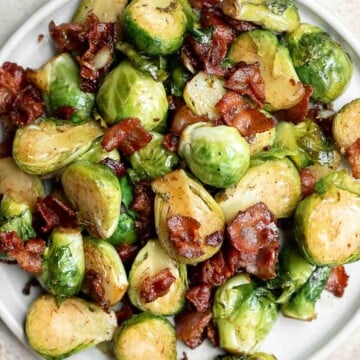


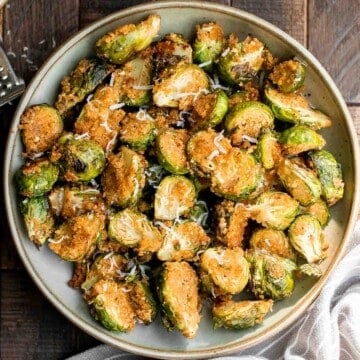
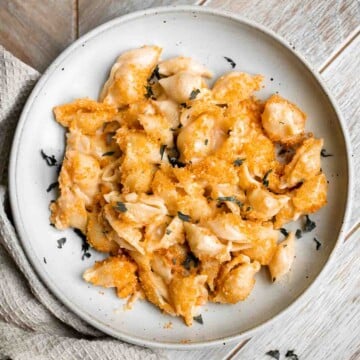
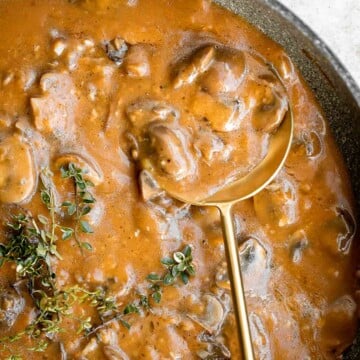
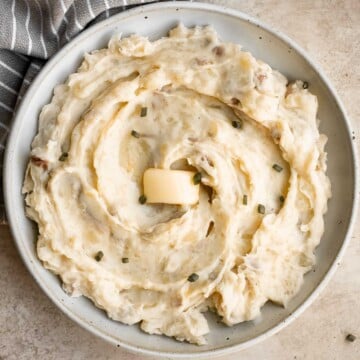
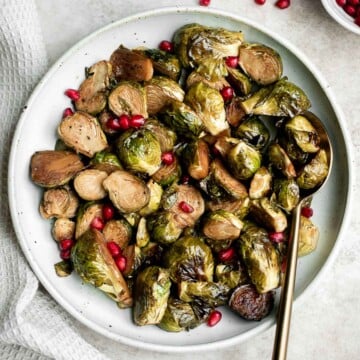
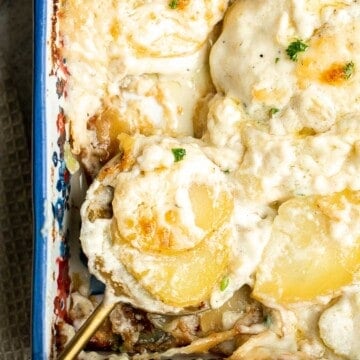
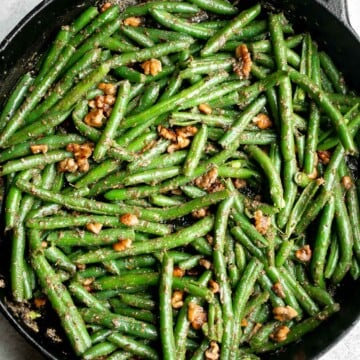

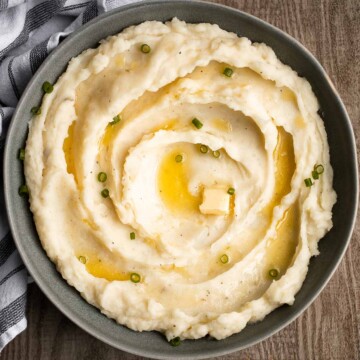
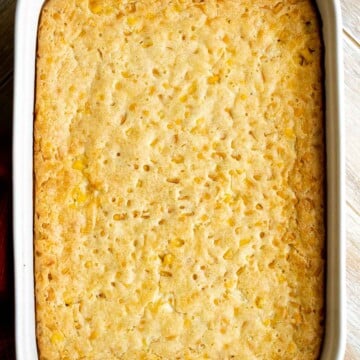


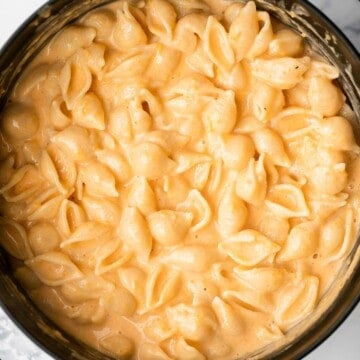
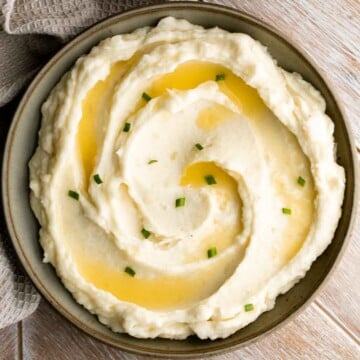
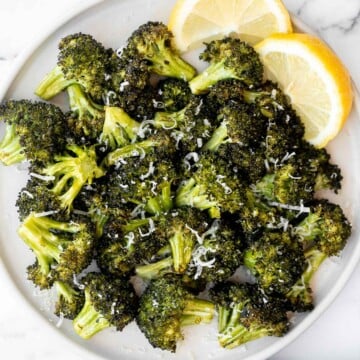
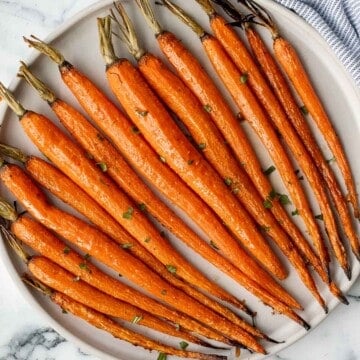
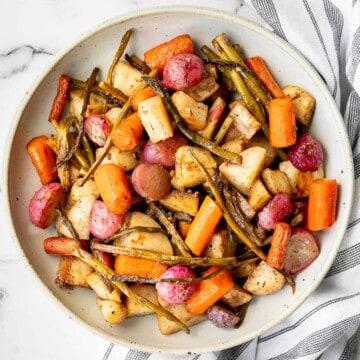
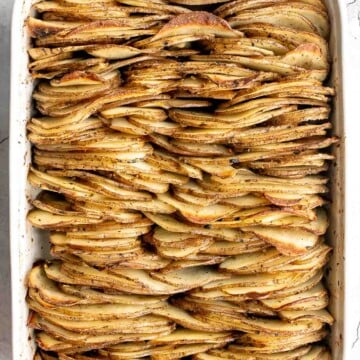


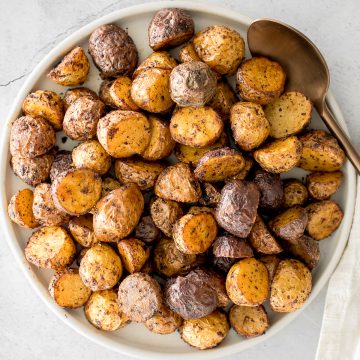
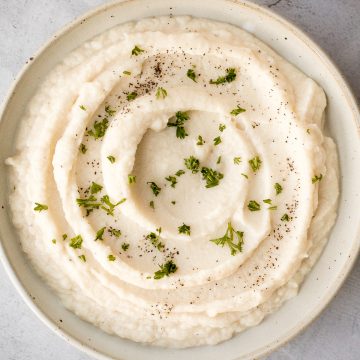

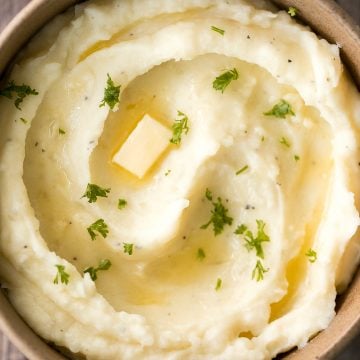
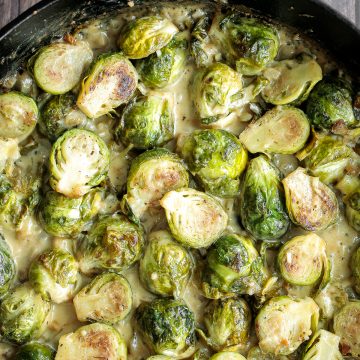
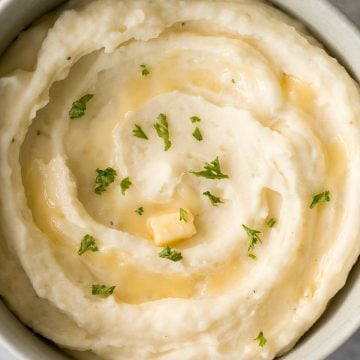
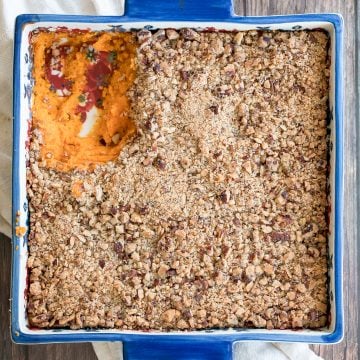
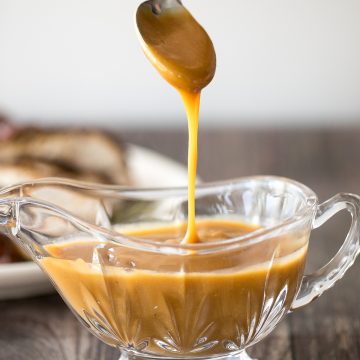

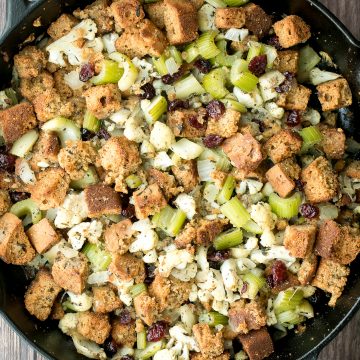


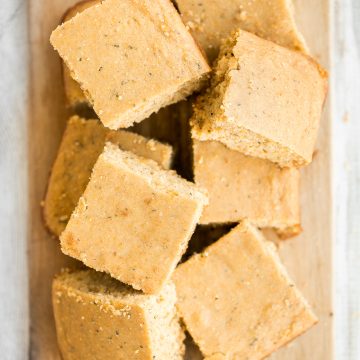


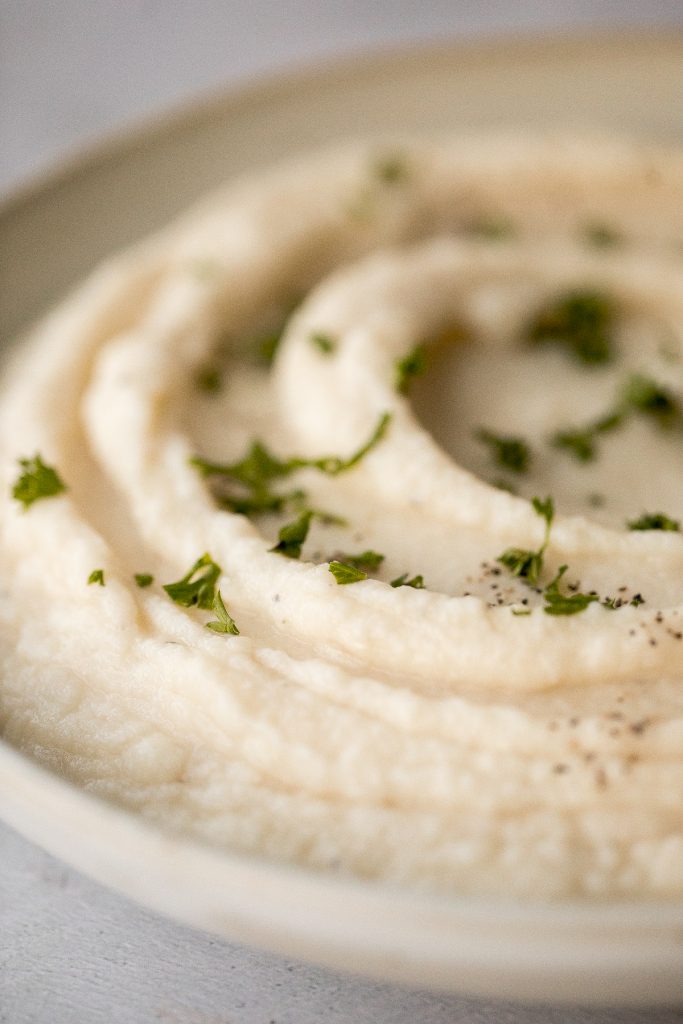
More Cauliflower Recipes
- Easy Roasted Cauliflower
- Roasted Butternut Squash and Cauliflower Soup
- Spinach and Feta Quiche with Cauliflower Crust
- Creamy Cauliflower and Garlic Soup
- Quinoa Cauliflower and Chickpea Vegetarian Meatballs
This post was originally posted in 2016. It has been completely updated with new photos, recipe video and helpful tips.
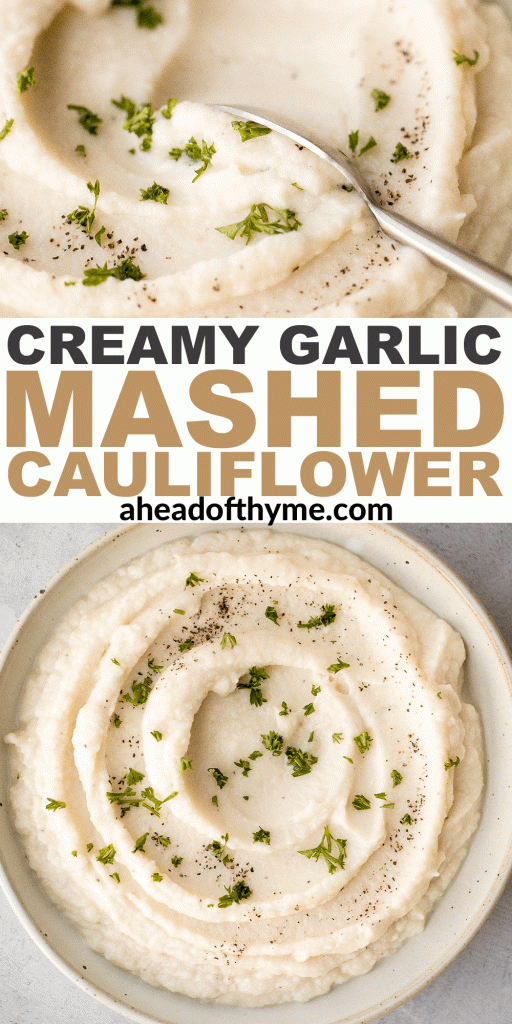
Beef Cabbage Barley Soup

Hearty beef cabbage barley soup is wholesome, filling and so flavourful. This one pot meal is packed with ground beef, fresh cabbage, and tender pearl barley and is pure comfort food. Make it with just 10 minutes of prep and leave it on the stove to simmer until ready. The best part? It's freezer-friendly, so you can make it ahead of time and freeze it for another day. It's the perfect meal to serve for lunch or dinner.
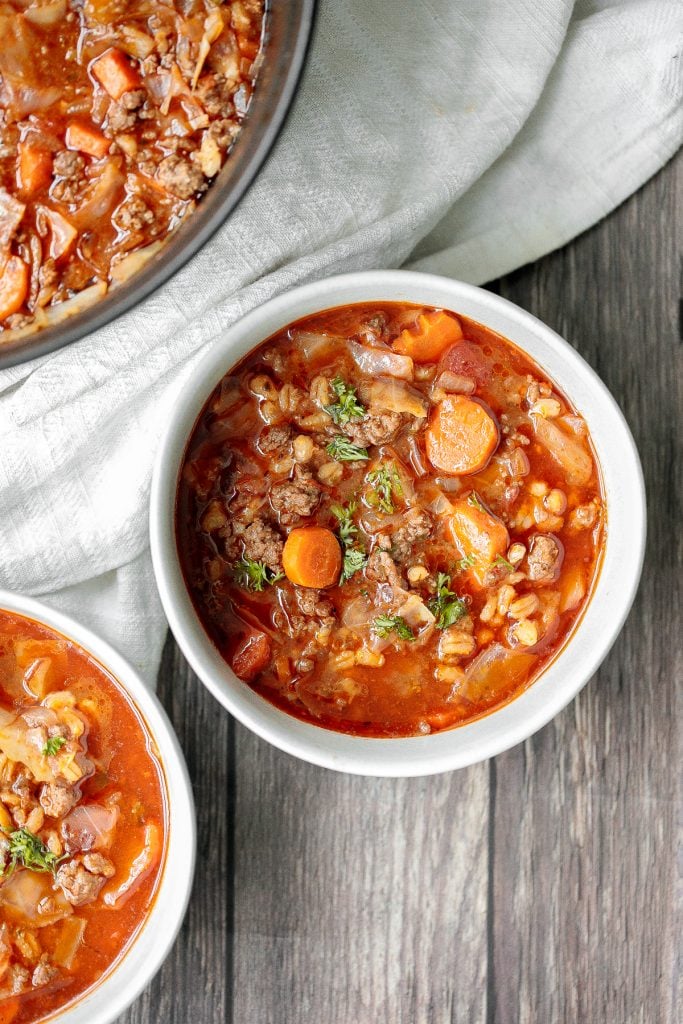
And the leftovers? They taste even better the next day. So go ahead and make a double or triple batch of this beef cabbage barley soup so that you have leftovers to eat all week or to freeze. And don't forget some crusty bread for dipping and soaking up all that soup. Some great bread to pair with this is pull apart garlic bread, rosemary garlic focaccia bread, or easy skillet dinner rolls. Some homemade no yeast biscuits also really hit the spot.
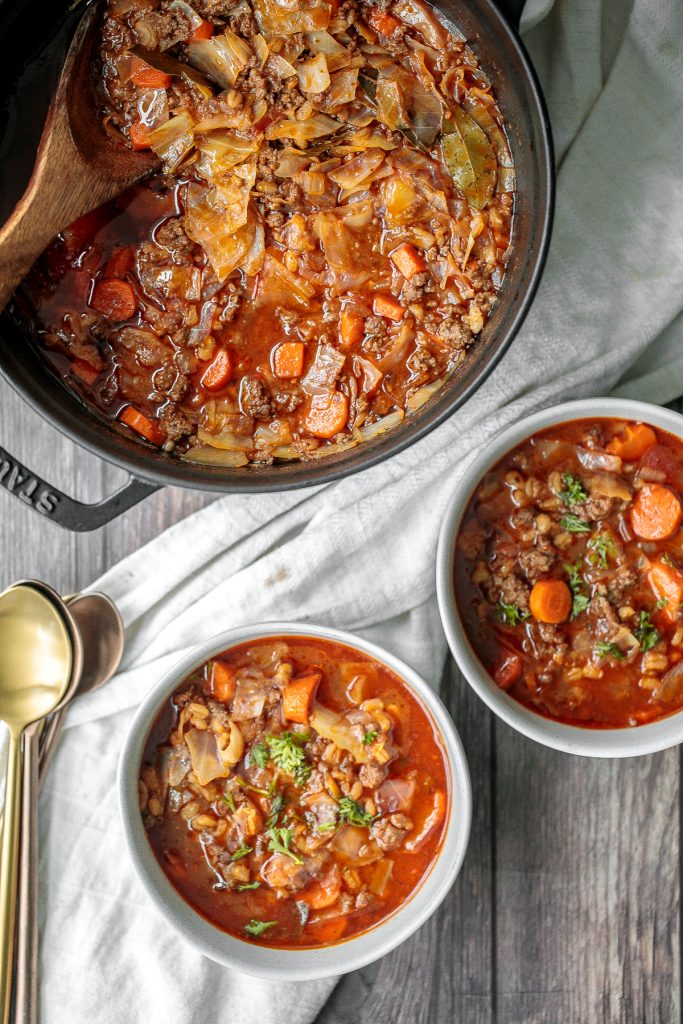
Ingredients
- ground beef - 1 lb. of ground beef.
- cabbage
- barley - the barley in this soup adds a nice texture. I used dry pearl barley, but you can also used hulled barley.
- olive oil
- onions
- garlic
- carrots
- bay leaves
- tomato sauce
- soy sauce
- miso paste - this adds a little flavour so that you don't need to season with any extra salt. If you don't have any miso paste, then add in salt and pepper, to taste.
- water
- fresh parsley - optional, to garnish on top.
You will also need a medium cooking pot (I used my 4 qt. dutch oven).
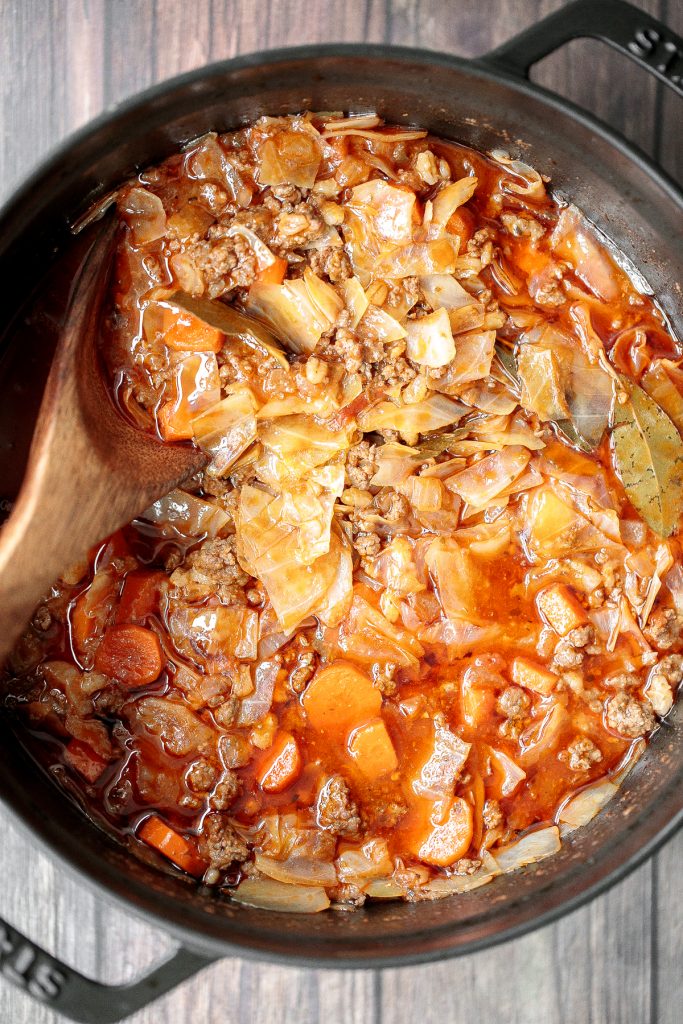
How to Make the Best Beef Cabbage Barley Soup
It is very simple to make this one pot beef cabbage barley soup. First, heat the olive oil in a medium-large cooking pot (I used my 4 qt. dutch oven) over medium high heat for 2 minutes until the hot oil is sizzling and shimmering. Add ground beef and stir well to cook for 5-7 minutes until browned.
Then, add onion and garlic. Stir well to combine and cook for 3-4 minutes until onions are soft and tender. Add cabbage, carrots, barley, and bay leaves. Stir well to combine and cook for another 2 minutes.
Add tomato sauce, soy sauce, miso paste and water. Stir well and bring the soup to a boil. Turn the heat down to low and cover. Simmer for 1 hour until the barley is soft and tripled in size. The barley be soft but still chewy.
Serve warm and garnish with fresh parsley.
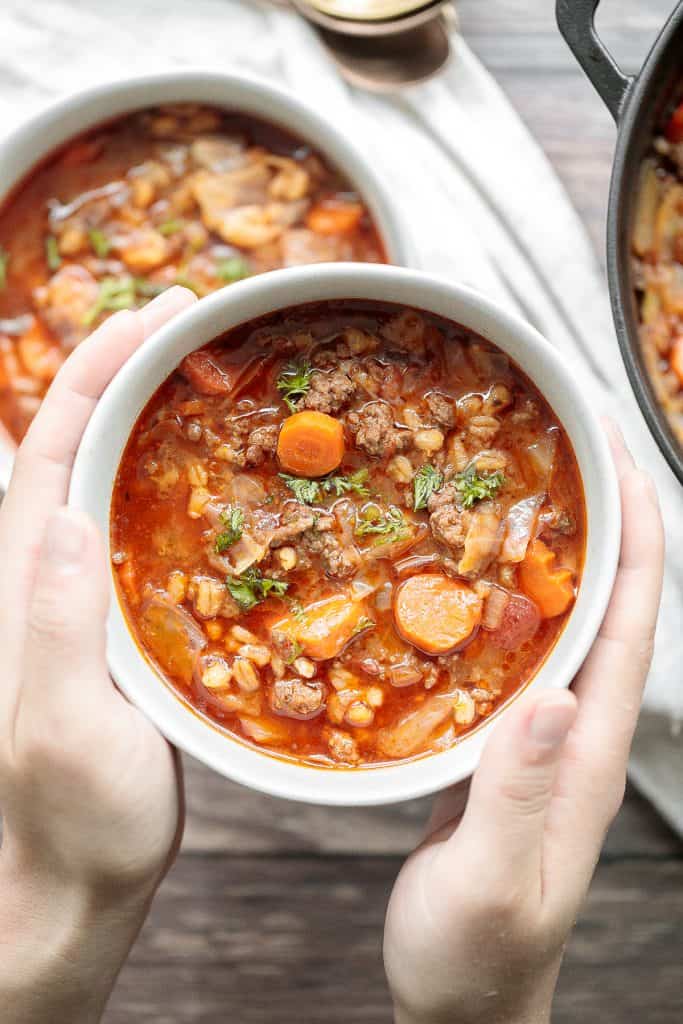
How to Store
- Storing Instructions: Store beef cabbage barley soup in the pot (covered) or transfer to an airtight container, and store in the refrigerator for up to 3-4 days.
- Freezing Instructions: Transfer soup to an airtight container and freeze in the freezer for up to 3 months. To serve, thaw it overnight in the refrigerator or for a few hours at room temperature on the kitchen counter. Then, reheat on the stove and serve with garnish on top.
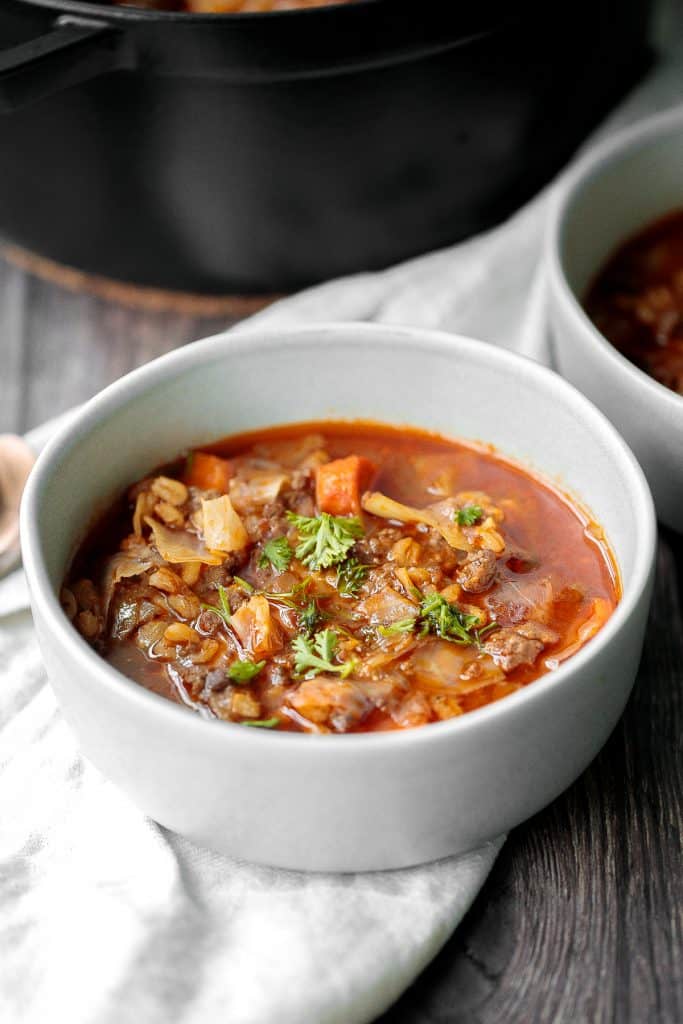
More Soup Recipes
- Vegetarian Mushroom Barley Soup
- Lemon Chicken Orzo Soup
- Roasted Butternut Squash Soup
- Creamy Mexican Corn Soup
- 30-Minute Butternut Squash Soup
- Sweet Potato Soup
- Roasted Butternut Squash and Cauliflower Soup
This easy beef cabbage soup forms a part of my 25 warm and cozy fall soup recipes. Follow the link to check out all of my 25 fall favourite soups.
Tried this recipe?
I'd love to hear what you think! Leave a comment and rating below to share your feedback. Your reviews help others discover this recipe and help me keep creating more free recipes for you. Snap a photo and tag me on social media @aheadofthyme too.

Easy Roast Lamb with Vegetables
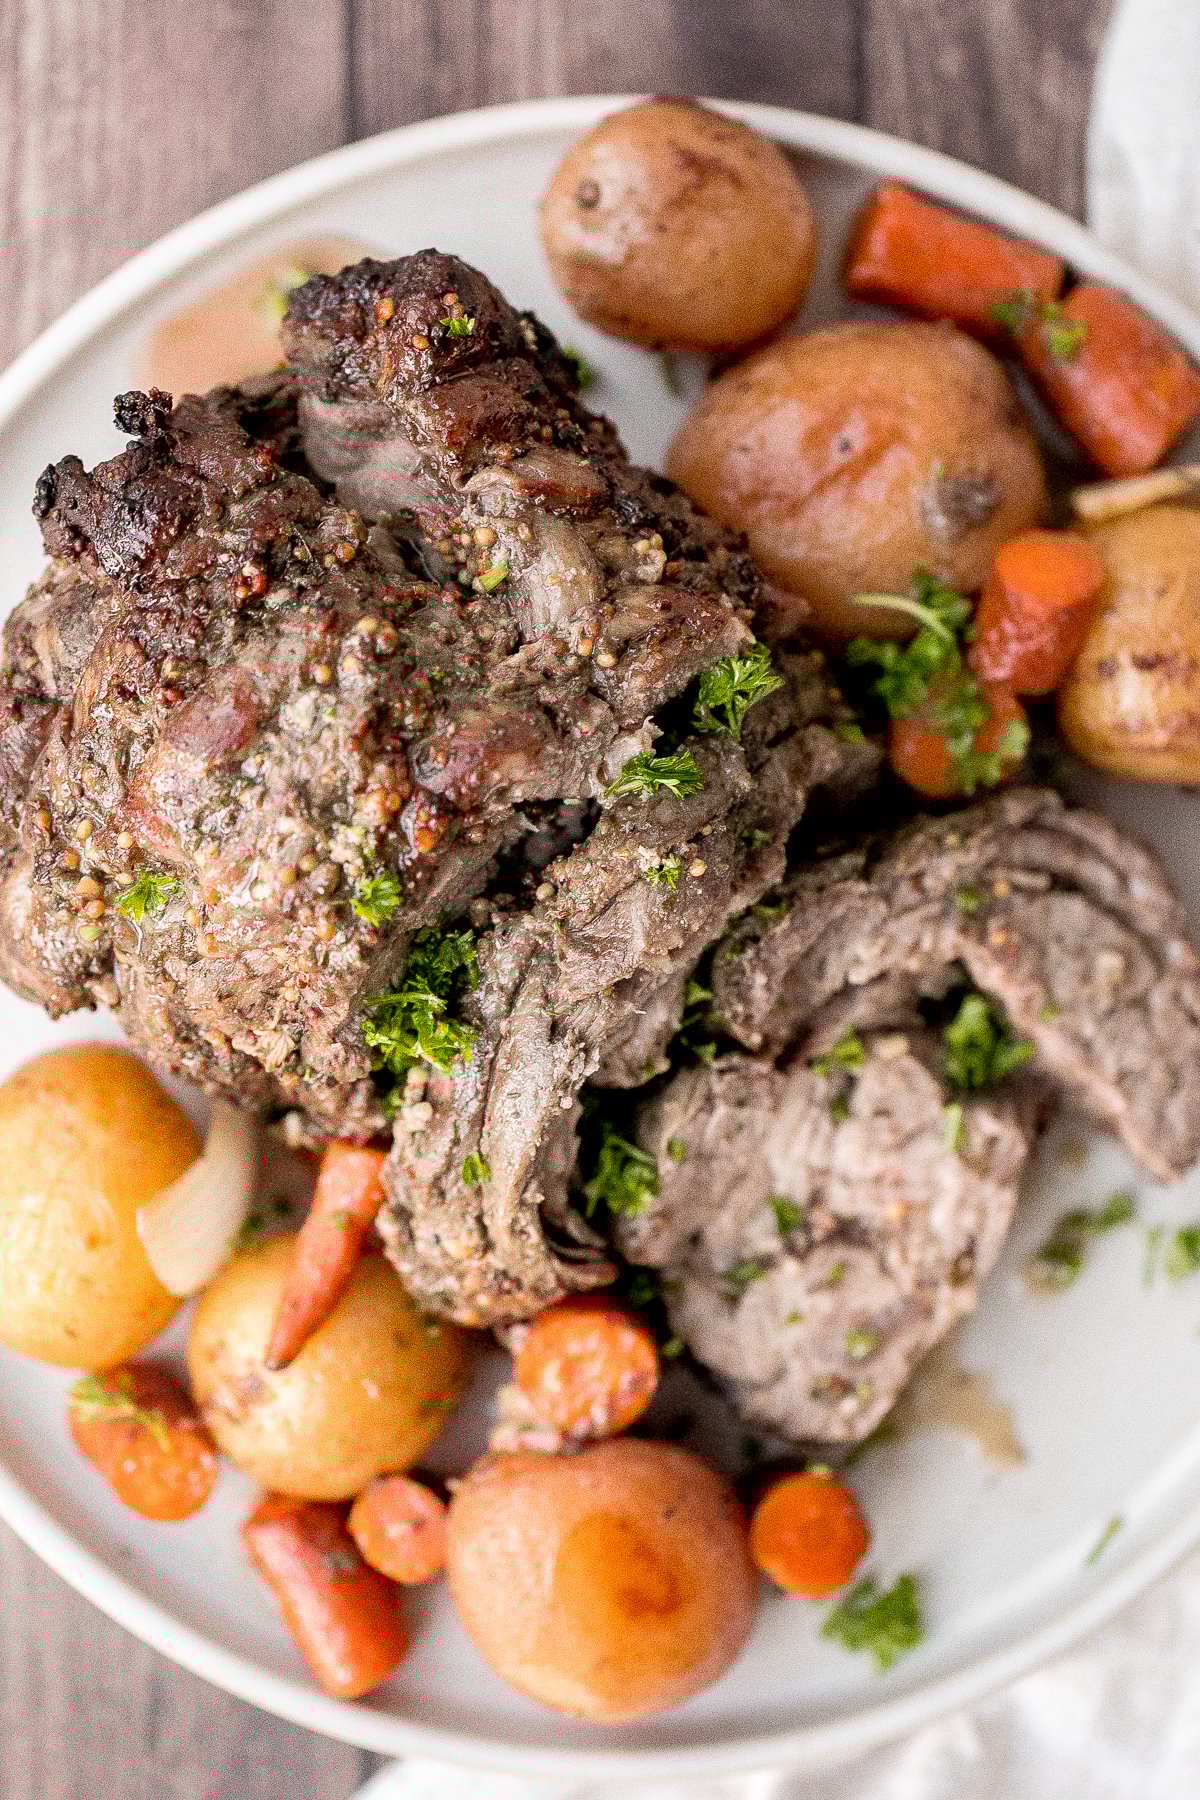
This easy roast lamb with vegetables is tender, juicy, and succulent and packed incredible flavours, seasoned with fresh herbs. This fancy dinner is so easy to prep in just 15 minutes, making it the ideal showstopper entree to serve at your holiday dinner or to serve any night of the week because we all deserve a fancy meal. Throw in some potatoes and carrots and you have yourself a complete one pan meal that will impress.
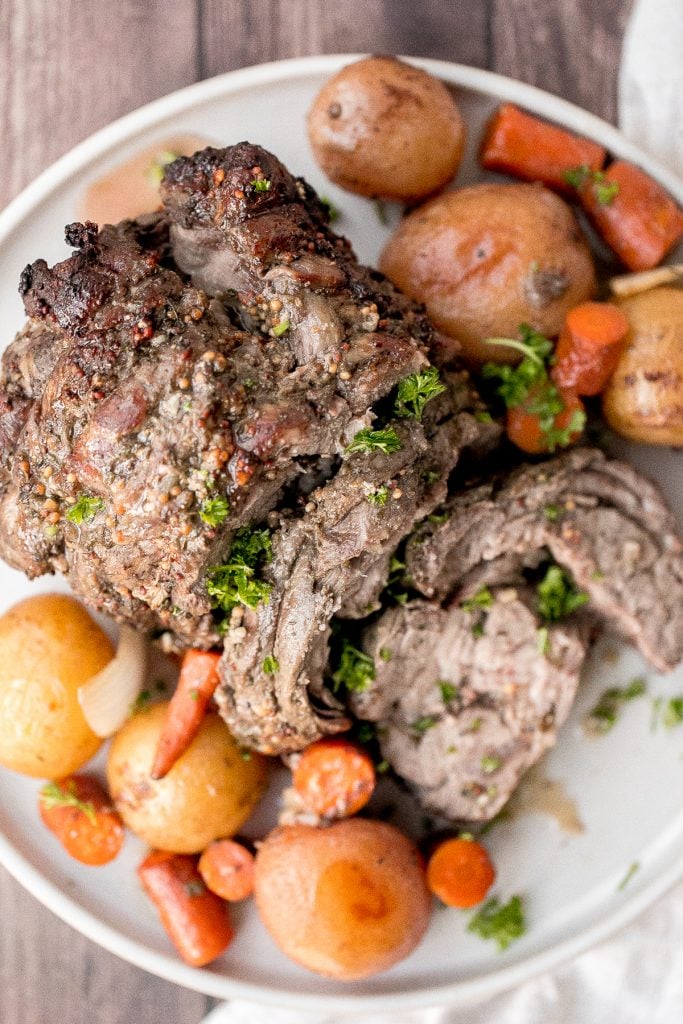
This one pan lamb dinner is a complete dinner packed with vegetables, so you can serve it as it on its own. But when serving this for a crowd, I like to complement it with extra sides. My favourites to serve with this are creamy mashed potatoes or garlic mashed cauliflower, hasselback potatoes, and sautéed garlic mushrooms.
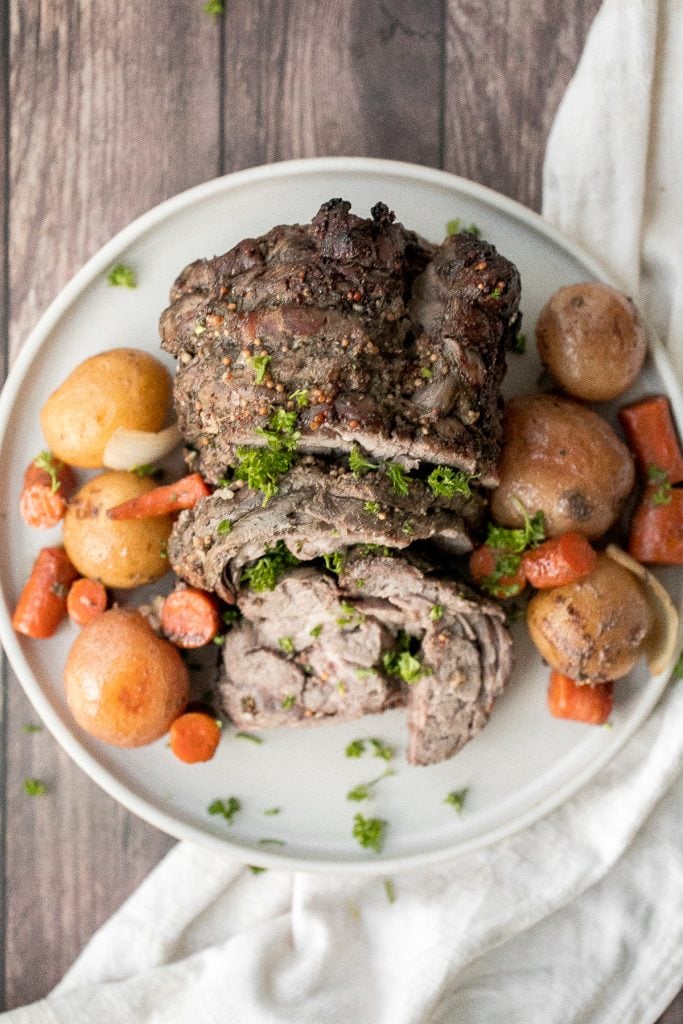
Ingredients
To make this easy roast lamb with vegetables, you will need to gather the following ingredients:
- lamb - 4 to 5 lb. boneless leg of lamb or lamb shoulder
- lamb marinade rub - olive oil, dijon mustard, fresh sage, fresh thyme, Italian seasoning, garlic, soy sauce, balsamic vinegar, coarse salt and black pepper.
- baby potatoes
- carrots
- onion
- olive oil
- Italian seasoning
- salt
- fresh parsley - optional, for garnish on top.
You will also need mixing bowls, 4 qt. Dutch oven (or you can make it in a roasting pan), kitchen string, and a digital meat thermometer.
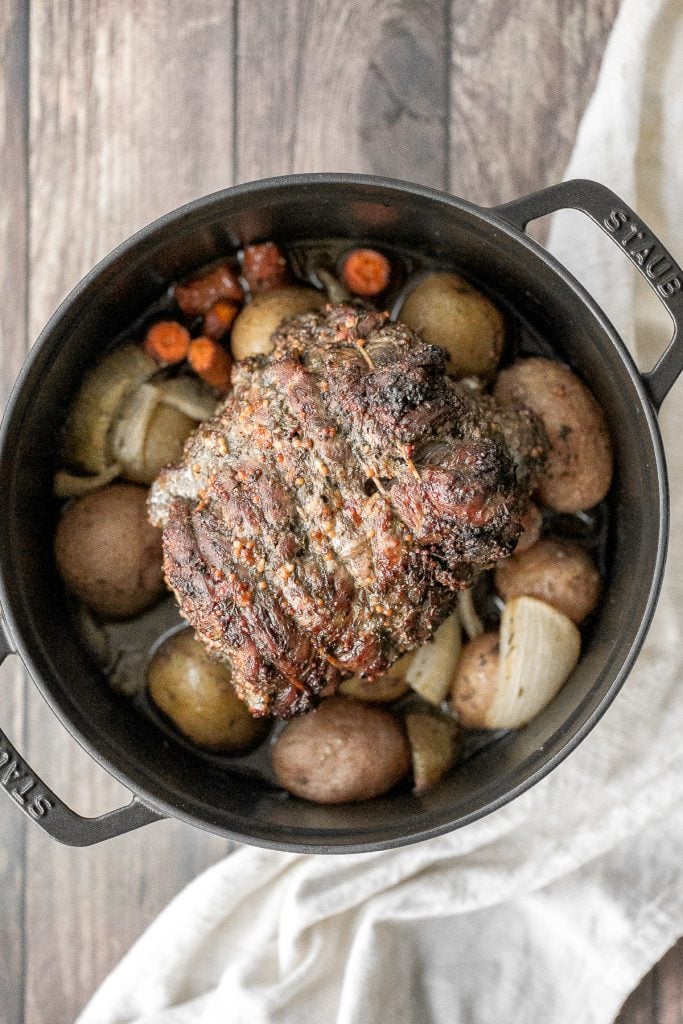
How to Make the Best Roast Lamb with Vegetables
- Prepare the vegetables: In a large mixing bowl, add potatoes, carrots and onions. Drizzle with olive oil and season with Italian seasoning and salt. Toss to combine until well coated. Transfer the vegetable mixture into a roasting pan or Dutch oven and spread them evenly on the bottom.
- Prepare the lamb: Pat dry the whole lamb leg (or shoulder) completely with a paper towel before adding seasoning. Score the leg of lamb with a knife to make shallow cuts, about ¼-inch deep.
- Make the lamb marinade rub: In a small mixing bowl, mix together olive oil, mustard, sage, thyme, Italian seasoning, garlic, soy sauce, balsamic vinegar, salt and pepper, until it forms a smooth paste. Rub and spread the mixture over the entire leg of lamb including the inside of the leg and the shallow cuts. Wear disposable gloves to make it easy to spread the mixture with your hands.
- Roast: Tie the leg of lamb together using kitchen string, if needed (to achieve even cooking). Place the leg of lamb on top of the vegetables. Roast uncovered in the oven at 350 F for 1.5 to 2 hours, until the internal temperature reaches 145F. The roasting time depends on the size of the lamb. Check for doneness by inserting a digital meat thermometer into the center of the meat to get a quick measurement.
- Rest and serve: Once the meat is done, remove from the oven and let it rest at room temperature for 10 to 15 minutes before slicing. Remove the strings tied around the lamb, garnish with fresh parsley and serve with the baked vegetables on the side.
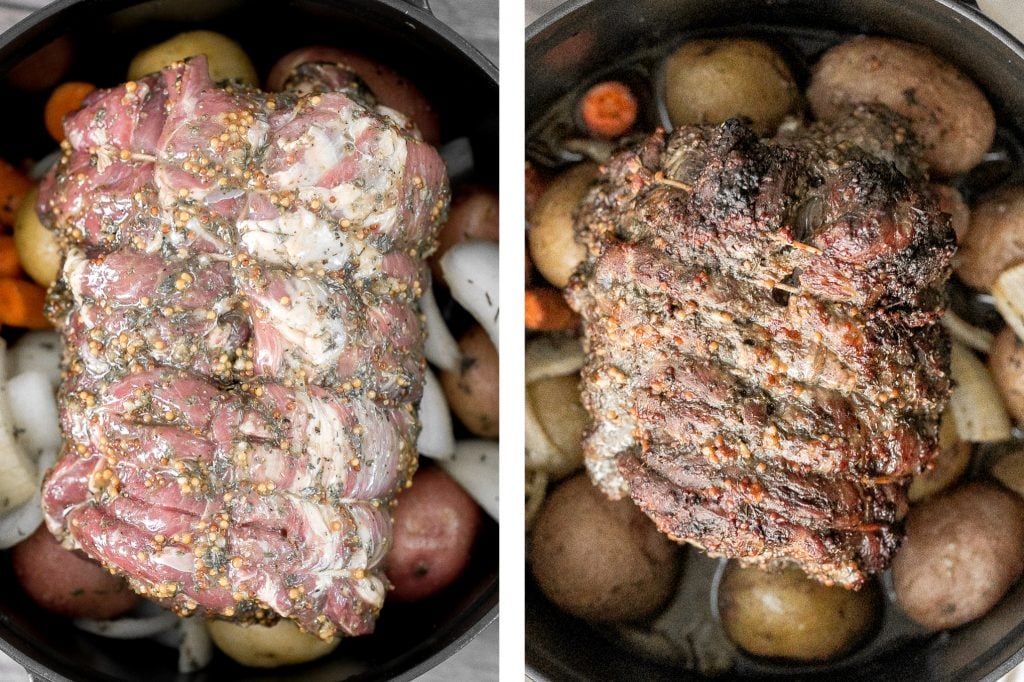
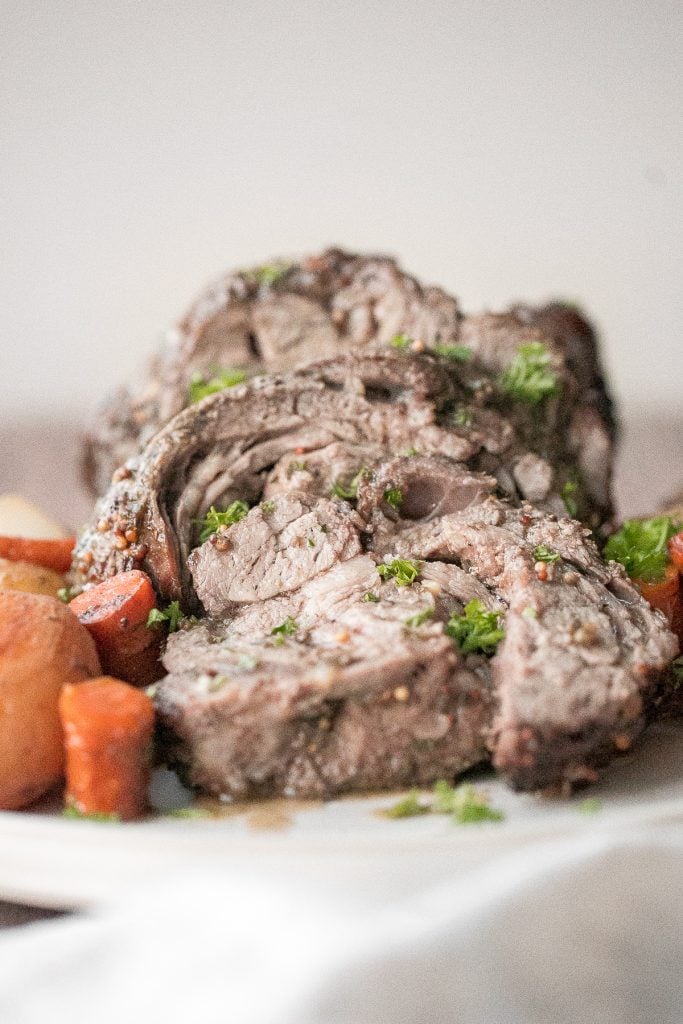
Tips for Making Roast Lamb
- Use a digital thermometer. A digital meat thermometer is very useful when cooking lamb or any kind of meat. Simply insert the thermometer halfway inside the meat to get a quick measurement. Once it reads 145F, the lamb is done and you can take it out of the oven.
- How to store. Store roast lamb in an airtight container for up to 3 days in the refrigerator. To reheat, place in the oven or air fryer at 300F for 10-15 minutes until heated through.
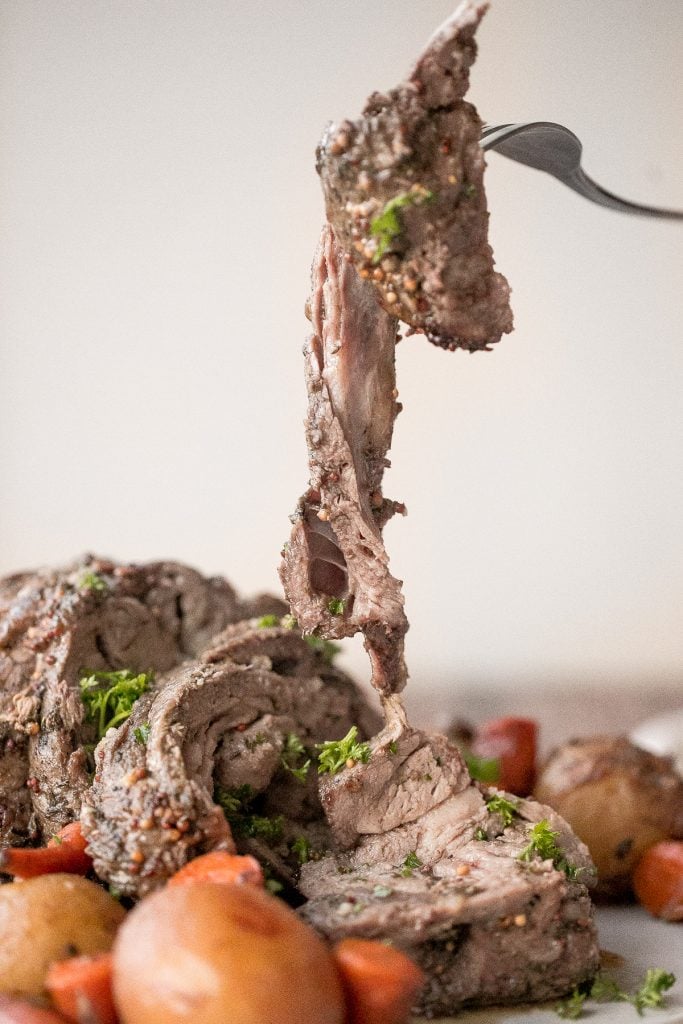
More Lamb Recipes
- Air Fryer Lamb Chops with Dijon Garlic Marinade
- Greek Lamb Souvlaki Skewers
- Spicy Cumin Lamb Noodles
- Slow Cooker Moroccan Lamb Stew
- Garlic Rosemary Rack of Lamb
Tried this recipe?
I'd love to hear what you think! Leave a comment and rating below to share your feedback. Your reviews help others discover this recipe and help me keep creating more free recipes for you. Snap a photo and tag me on social media @aheadofthyme too.
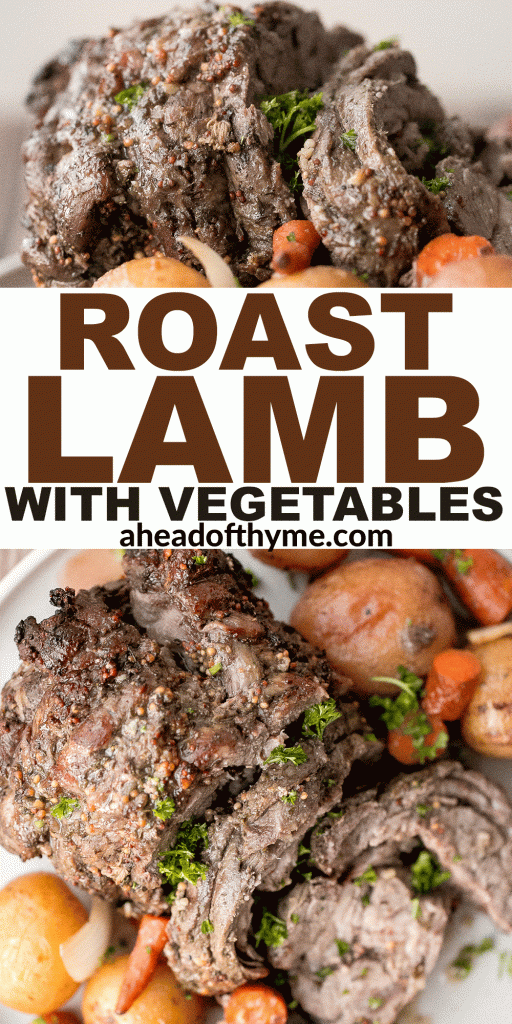
Banana Chocolate Chip Muffins
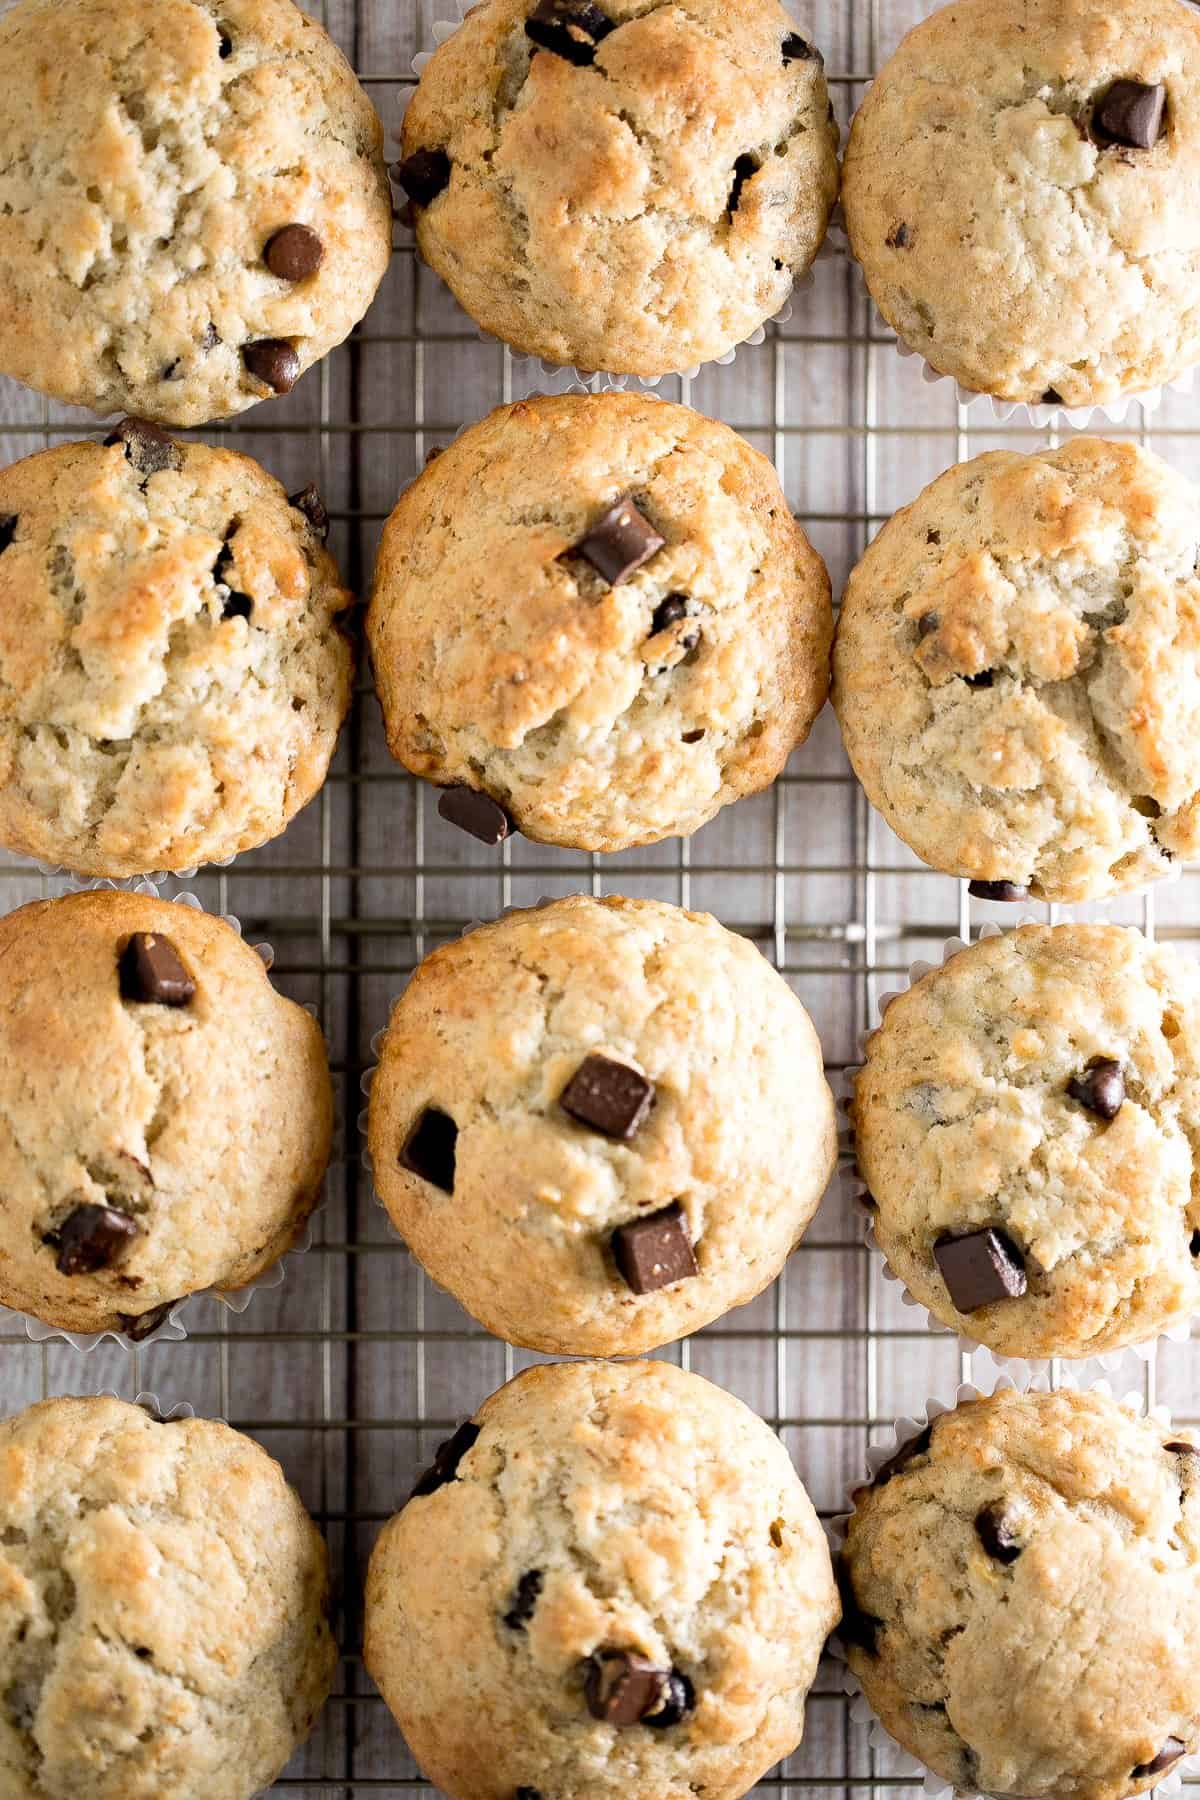
Fluffy, soft and moist, these are the best banana chocolate chip muffins ever. This is a super easy one bowl recipe that you can prep in less than 10 minutes with a few simple pantry staples. Plus, this is a one bowl recipe that requires no fancy equipment is required, just a spatula or spoon, which means less mess to clean up. Make a batch and watch them disappear before your very eyes, or make a big batch and freeze them for later. They are that good.

What I love about these muffins is that they have just the right amount of sweetness from the bananas and chocolate chips. I mean, is there really any better combination than banana and chocolate? I think not. They are amazing when thrown together in a muffin like this or in cookies like my chocolate chip banana bread cookies.
But you have options here and you can choose to cut down the amount of chocolate chips in half or switch it up for some pecans or walnuts and you still have a pretty amazing muffin that you can enjoy for breakfast, as a snack or dessert.
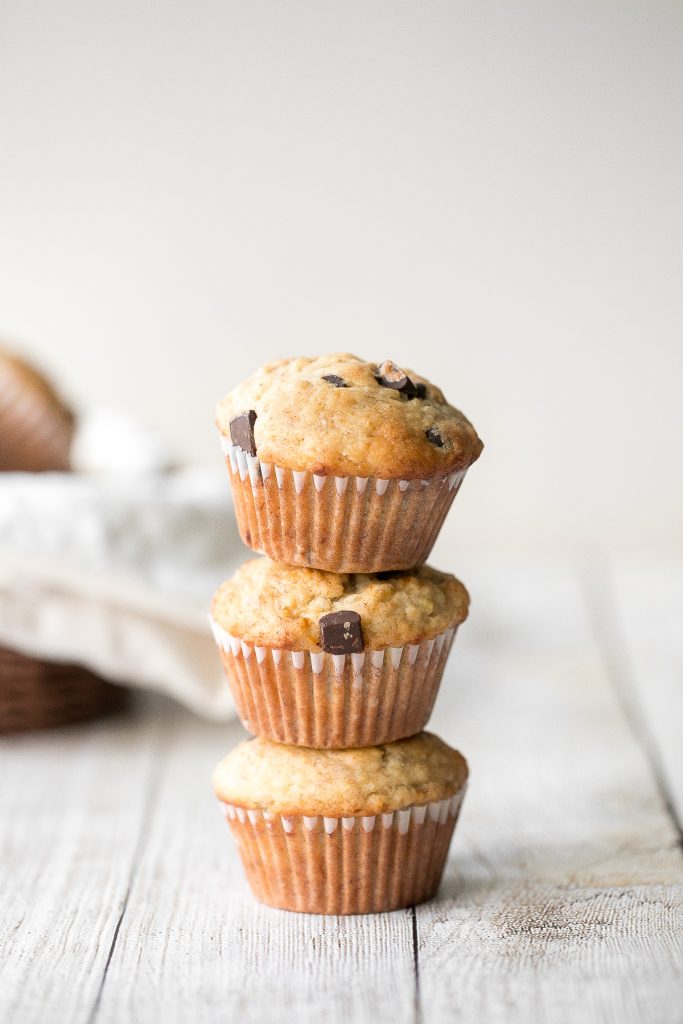
Ingredients in Banana Muffins
To make these easy one bowl banana muffins, you will need:
- ripe bananas - I used 3 medium bananas, or 1 cup mashed.
- vegetable oil
- large egg
- milk - I use whole milk, but any kind of milk works.
- vanilla extract
- sugar
- all-purpose flour
- baking powder
- salt
- chocolate chips or chunks
You will also need a 12-tin muffin pan, cupcake liners, mixing bowls, measuring cups and spoons, cookie scoop, and wire cooling rack.
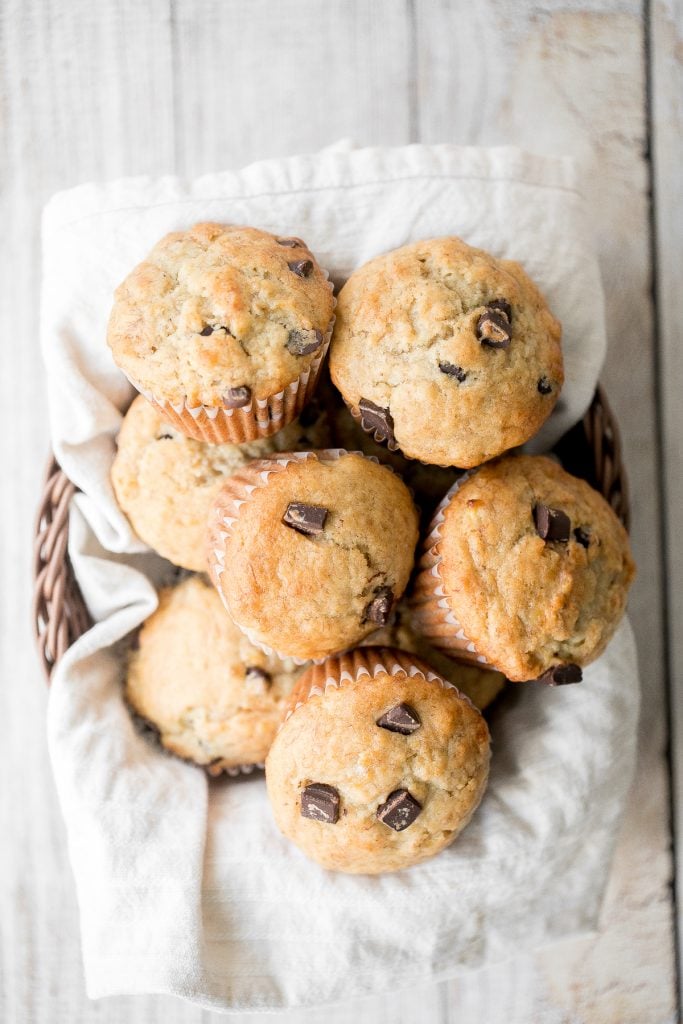
How to Make the Best Chocolate Chip Banana Bread Muffins
It is so easy to make these muffins in one large mixing bowl. First, mash the bananas in the bowl using a fork. Then, add the vegetable oil, egg, milk, vanilla and sugar and whisk together. Add in the flour, baking powder and salt. Stir with a spatula until just combined (do not overmix). Fold in the chocolate chips.
Divide the mixture into a lined 12-tin muffin pan using a medium cookie scoop. Fill each slot about ¾ full (up to full). Bake in a 350F preheated oven for 20-25 minutes, until the edges are golden and a toothpick inserted into the center comes out clean.
Allow muffins to cool in the pan for 5 minutes, then transfer them onto a wire cooling rack to cool down.
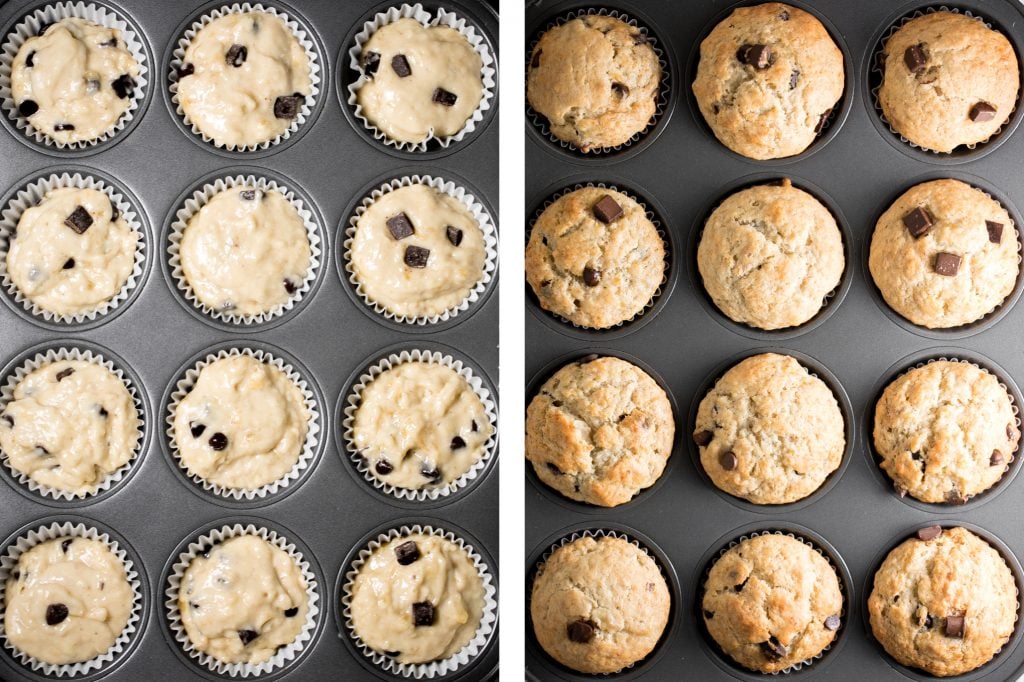
Tips and Tricks
- How to fill muffin liners: The key to the perfect rise is to fill the muffin liners at least ¾ of the way full. You will get about 14-16 muffins. I sometimes fill them all the way full to get exactly 12 muffins out of the batter, and will adjust the bake time by a few minutes.
- How to store: Freshly baked chocolate chip muffins can be stored at room temperature, covered with a dish towel, for up to 2 days. You can also store in an airtight container in the refrigerator for up to one week.
- How to freeze: Once baked and cooled, freeze these banana muffins for up to 3 months in a freezer bag or airtight container. To eat, first let them thaw first at room temperature or in the refrigerator. You can eat as is, or warmed them up in the microwave, oven or air fryer.
- How to make jumbo muffins: To make 6 jumbo muffins, bake for 24-27 minutes until tops are golden brown and a toothpick inserted comes out clean.

More Banana Recipes
- Chocolate Chip Banana Bread Cookies
- Nutty Banana Bread
- Banana Toast with Granola and Honey
- Majoon Banana and Date Smoothie
- 5-Minute Super Berry Smoothie Bowl
Tried this recipe?
I'd love to hear what you think! Leave a comment and rating below to share your feedback. Your reviews help others discover this recipe and help me keep creating more free recipes for you. Snap a photo and tag me on social media @aheadofthyme too.
This recipe was originally posted in 2015. It has been completely updated with new photographs and helpful tips.
Small Batch Sourdough Ciabatta Bread
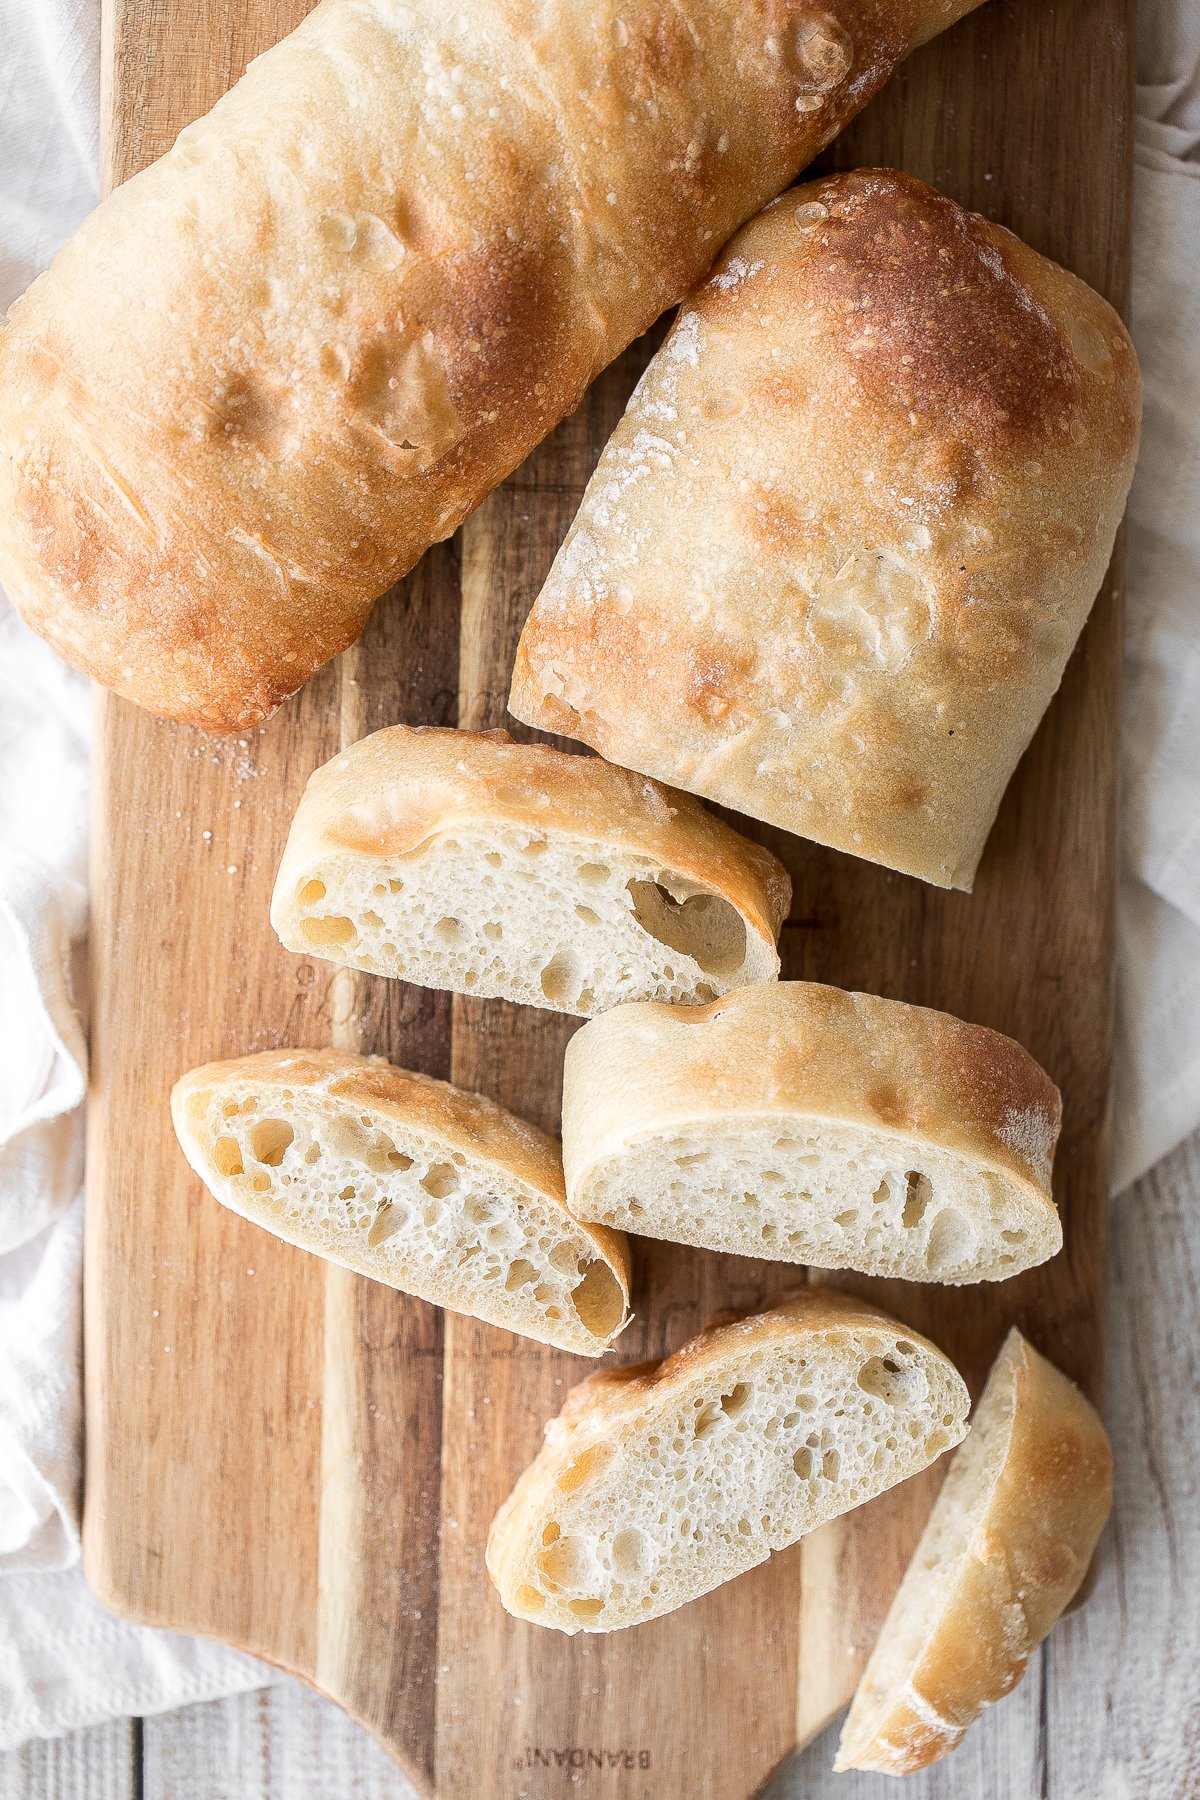
Soft and airy, artisan small batch sourdough ciabatta bread is light and fluffy inside with the perfect air holes and has a crunchy, crackly crust. It has that delicious signature sourdough taste that feels like it came straight out of a fancy bakery. This is the perfect bread to bake on the weekend with only 10 minutes of actual prep work required and no kneading. So easy.

We like to bake bread on the weekends, and love baking with our sourdough starter. It's normally a standard artisan-style loaf of bread like our small batch sourdough bread, green olive artisan sourdough bread, or fruit and nut sourdough bread, but this week we were craving our easy ciabatta rolls and decided to make it with sourdough. And wow, are we glad we did.

Ingredients in Sourdough Ciabatta
- sourdough starter - make your own sourdough starter using flour and water. It takes about 7 days to create a mature starter.
- all-purpose flour
- water
- salt
You will also need a digital scale, mixing bowl, bench scraper, large sheet pan, deep baking pan, and spray bottle.

How to Make the Best Small Batch Sourdough Ciabatta Bread
The steps in making this artisan sourdough ciabatta bread are essentially the same as making easy small batch ciabatta rolls, except we are using sourdough here instead of commercial yeast (so the proofing time will be longer), and we are making loaves instead of rolls. In summary, here is what you need to do:
Prepare the Dough (first rise)
In a large mixing bowl, whisk to combine sourdough starter, water, and salt until the starter dissolves. Add flour and mix well to combine, scraping down the sides of the bowl. Cover the bowl and let the dough rest for one hour.
Then, apply some water on your hands and stretch and fold the dough in the bowl by folding the edges over to the centre, one edge at a time. Wet hands make it easier to work with the dough and it should take you less than a minute to fold over all 4 sides. Cover with plastic cling wrap and let the dough rest for 30 minutes.
Stretch and fold the dough again, cover, and let dough rest until it almost doubles in size. It takes about 4 to 6 hours for the dough to double in size, depending on the room temperature (but it can take up to 8 hours if the room temperature is very cold).
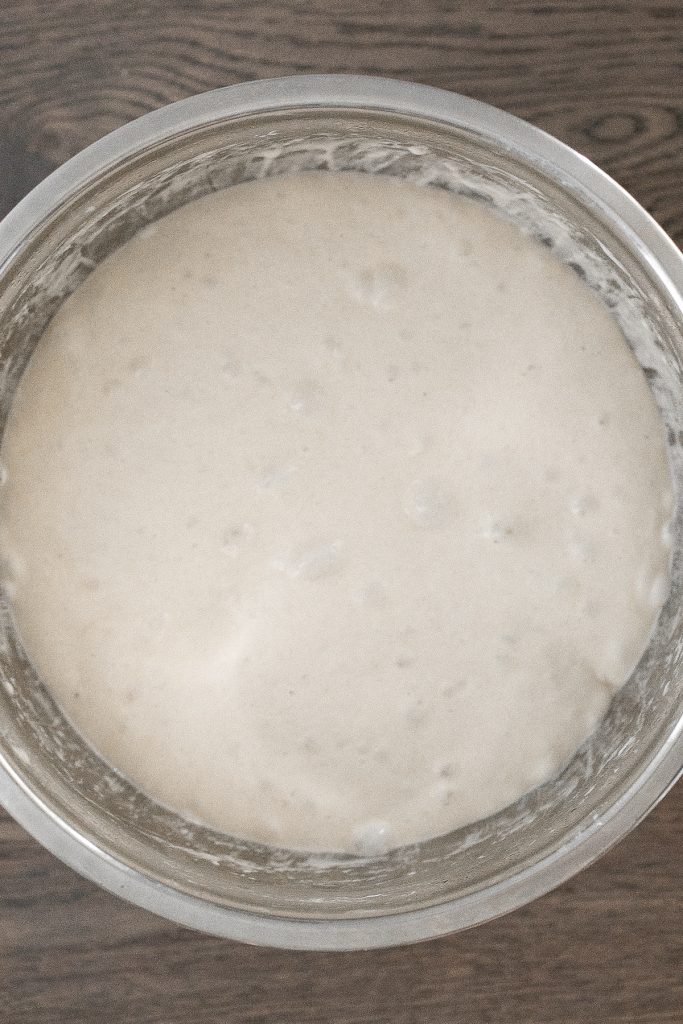
Shape the Dough (second rise)
Transfer the dough to a floured surface. Note that the dough will still be very sticky and that is okay. Sprinkle dough with a little flour and shape it into an approximate 8x12-inch rectangle by gently pulling the dough from underneath. The dough should be soft and pliable. Be careful not to press down on the dough because the air holes trapped inside might get squeezed out.
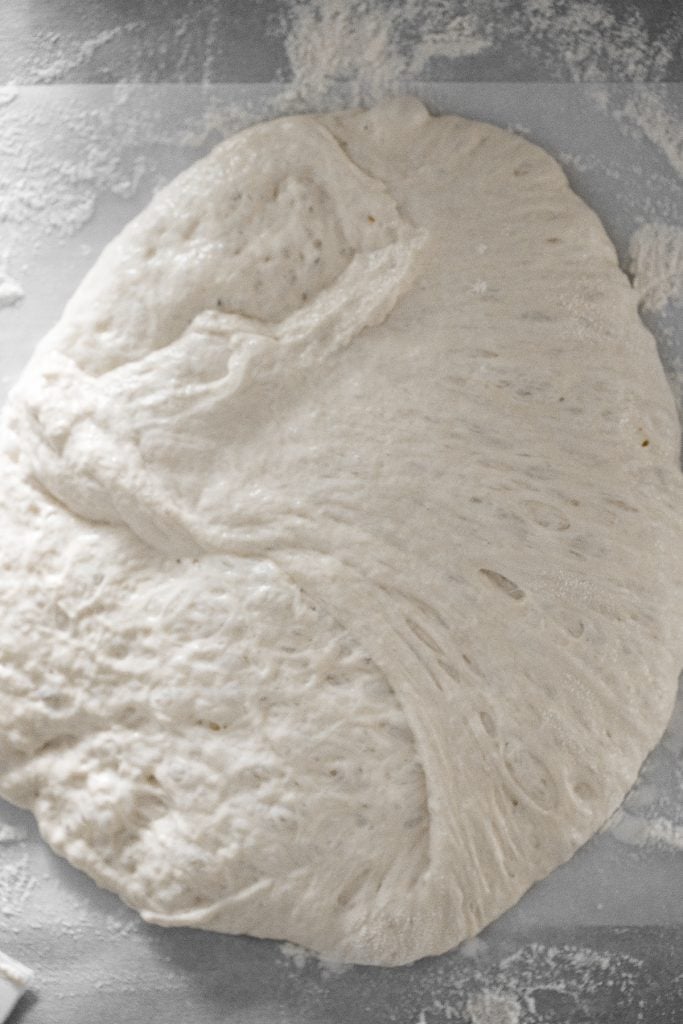
Gently roll the dough into a log and press the edges to seal. Sprinkle some flour if the dough gets too sticky at any point. Cut the rolled dough in half using a bench scraper and place them a few inches apart on a well-floured surface. Sprinkle flour over the dough to prevent it from sticking, and cover with plastic cling wrap.
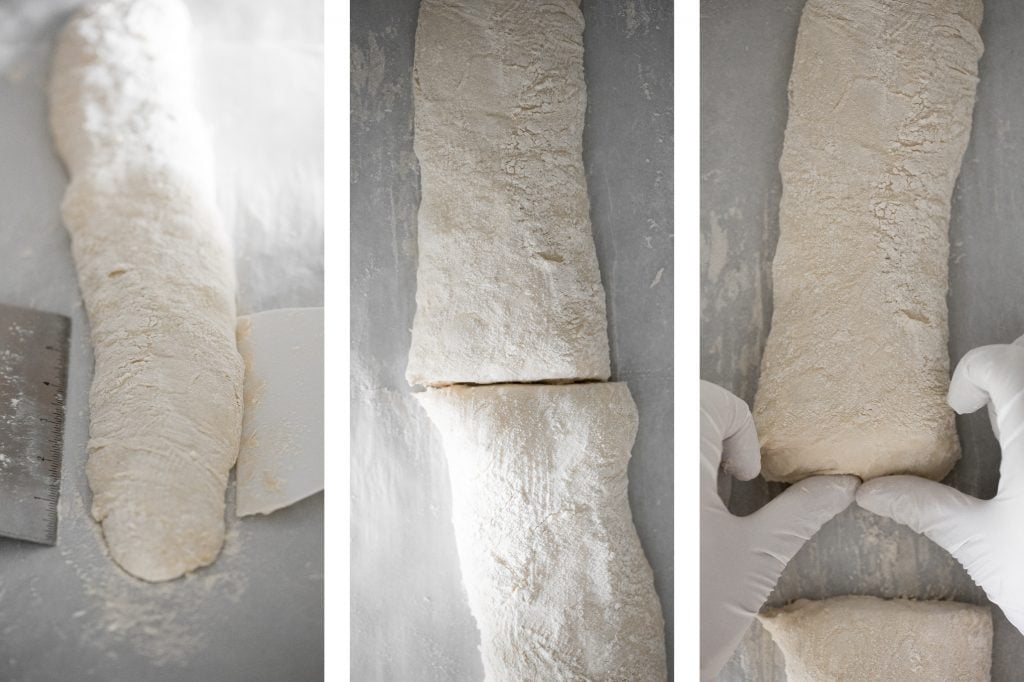
Let the dough rest for about 1 hour until puffy (second rise). The dough should be filled with air bubbles inside.

Bake the Sourdough Ciabatta Bread
Carefully slide each dough onto a large parchment-lined sheet pan using a bench scraper. Sprinkle flour to help with handling it and slowly stretch the ends a bit to shape the dough into approximately 12-inch loaves. Set aside.

Fill a deep baking pan with water and place it at the bottom of your oven. Preheat the oven to 420 F, and allow it to fill with steam from the water. When the oven is ready, slide the baking tray in and spray some water with a spray bottle over the dough immediately. Bake for 20 minutes until the crust turns golden brown.
Let the bread cool for 20 minutes. To check if the bread is done, you can tap the bottom of the bread with your finger. The bread will sound hollow when done.
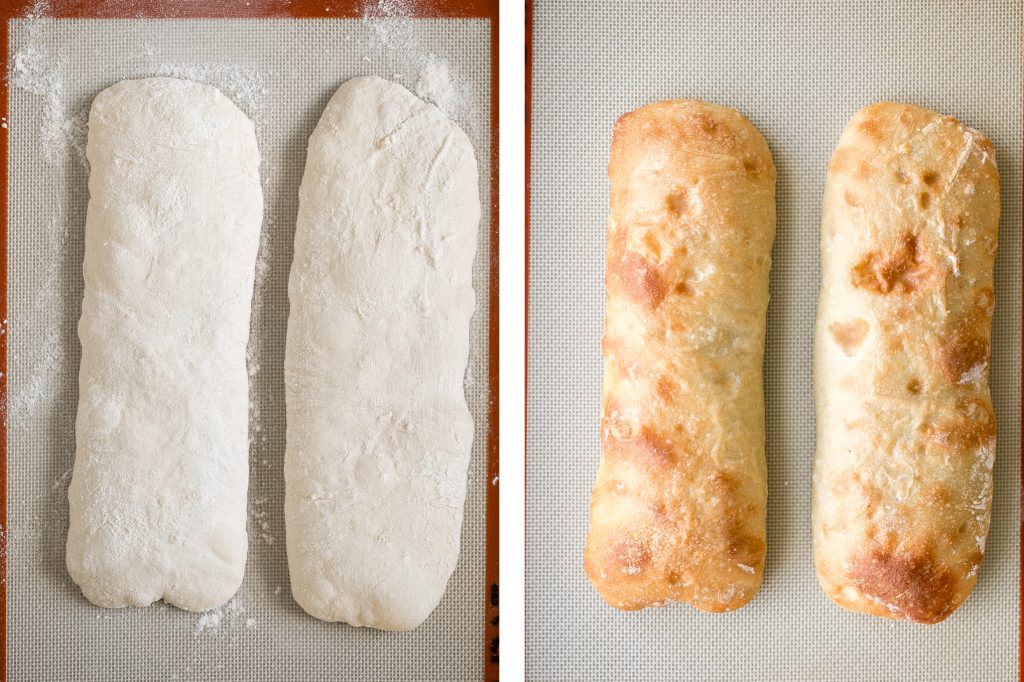
How to Store Sourdough Ciabatta Bread
To store, store small batch sourdough ciabatta bread covered in a bread basket at room temperature for up to 2 days. You can also store it in an airtight container in the refrigerator for up to 1 week. Slice and toast in the toaster, oven or air fryer.
To freeze, wrap the ciabatta tightly in plastic cling wrap and place into an airtight container or freezer bag, and store in the freezer for up to 3 months. If freezing, I would recommend slicing the bread in half or in slices so that it is easy to reheat a slice or two at a time.
To reheat, toast in the toaster on the freezer setting, or let the bread thaw to to room temperature first and then reheat in the toaster, oven or air fryer.

Tips
- How to make sourdough starter: You will need 7 days create a fully mature starter using flour and water. Please refer to my sourdough complete starter guide for help. The guide also includes the top frequently asked questions.
- How to serve: Ciabatta loaves are perfect for making sandwiches. They are great for making an easy deli sandwich, egg salad sandwich, turkey sandwich or lemongrass chicken sandwich.
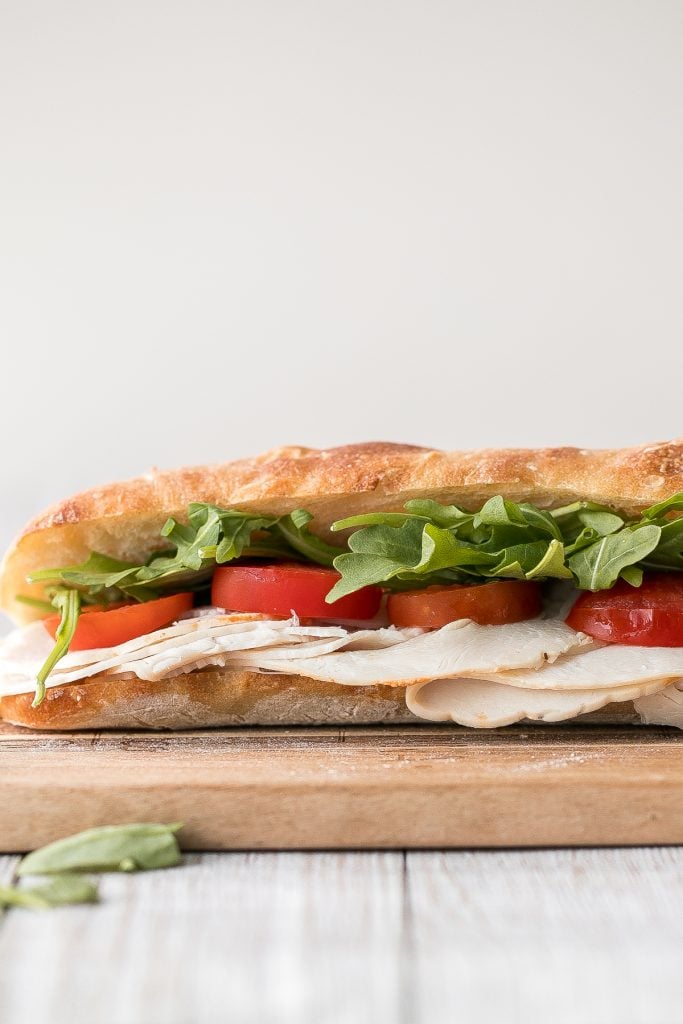
More Sourdough Recipes
- Small Batch Sourdough Bread
- Sourdough Cinnamon Roll Twist Bread
- Fruit and Nut Sourdough Bread
- Savoury Chive Pancakes with Sourdough Starter
- Small Batch Sourdough Pizza Dough
- Artisan Green Olive Sourdough Bread
- Seeded Whole Wheat Sourdough Bread
- Sourdough Discard Crackers with Sesame Seeds
Tried this recipe?
I'd love to hear what you think! Leave a comment and rating below to share your feedback. Your reviews help others discover this recipe and help me keep creating more free recipes for you. Snap a photo and tag me on social media @aheadofthyme too.

Cranberry Sauce Swirl Pound Cake

Cranberry sauce swirl pound cake is my newest favourite way to use up any leftover cranberry sauce from Thanksgiving, or a pretty good reason to whip up a fresh batch of cranberry sauce for. This vanilla pound cake is super moist and tender, with layered swirls of cranberry sauce for a sweet and tangy burst of flavour. You won't believe how easy it is to prep this showstopper treat in 10 minutes.
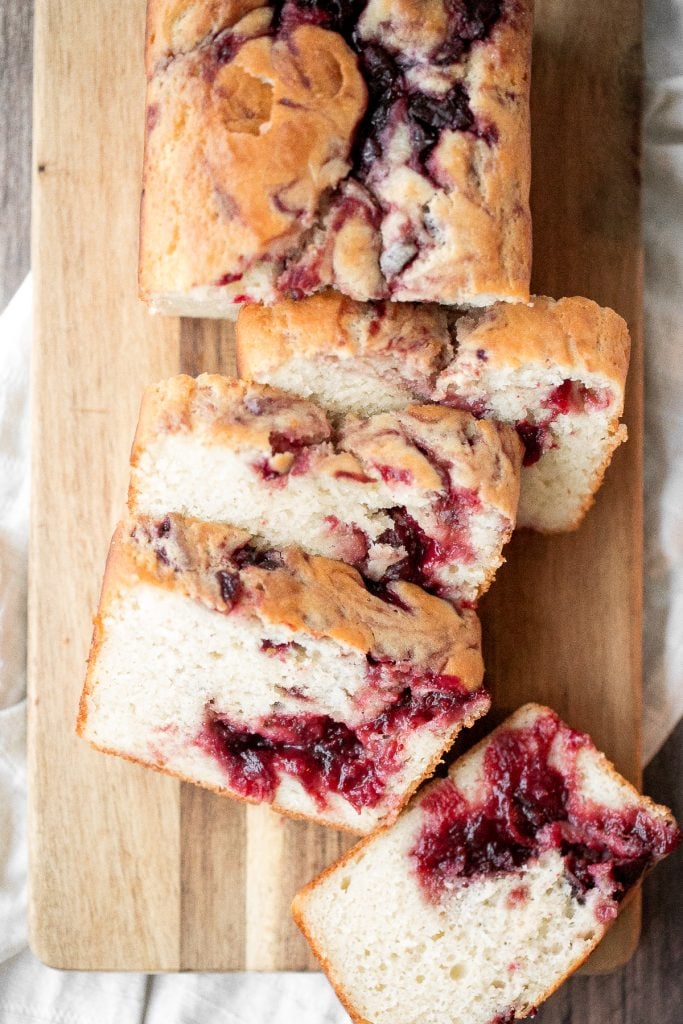
This cranberry sauce swirl pound cake is perfect for dessert after your holiday meal, alongside brunch, or even as a mid-day snack. I love using leftover cranberry sauce in baking because it just makes everything that much more festive, like my cranberry sauce oat bars or leftover cranberry sauce muffins. Both also highly recommended.
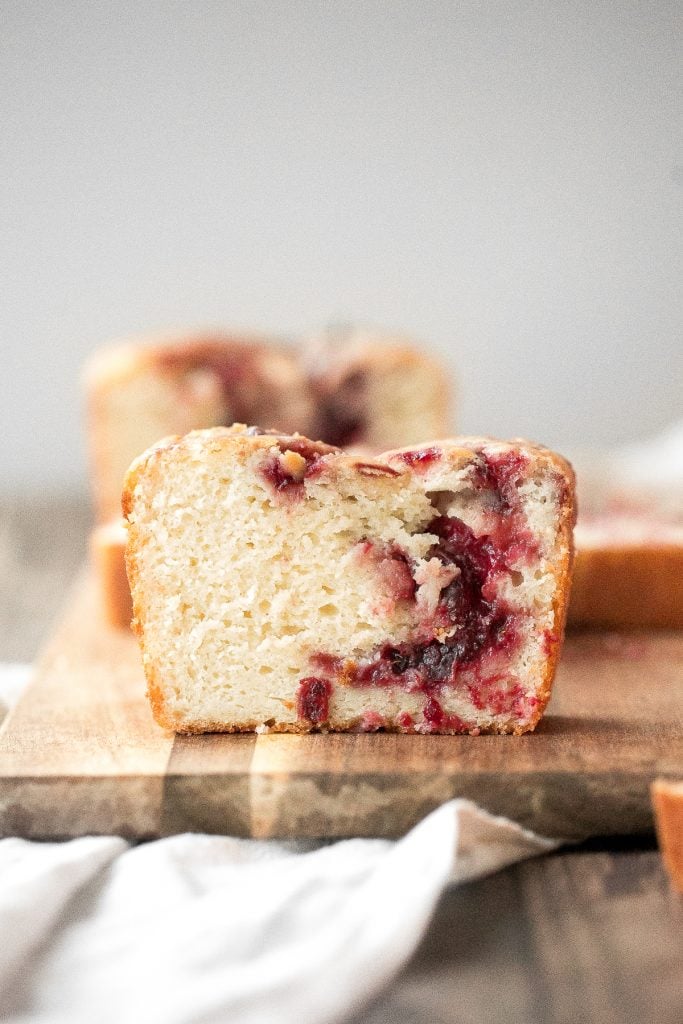
Ingredients
- all-purpose flour
- baking powder - adds lift.
- full-fat Greek yogurt - this is the secret ingredient for keeping the cake extra moist.
- cranberry sauce - for the beautiful cranberry sauce layer.
- sugar - adds some sweetness.
- eggs - adds flavour, lift and structure.
- vegetable oil - also keeps the cake moist.
- vanilla extract
- salt
You will also need measuring cups and spoons, mixing bowls, a hand mixer, parchment paper, and a 1 lb. loaf pan (8x4 inches).
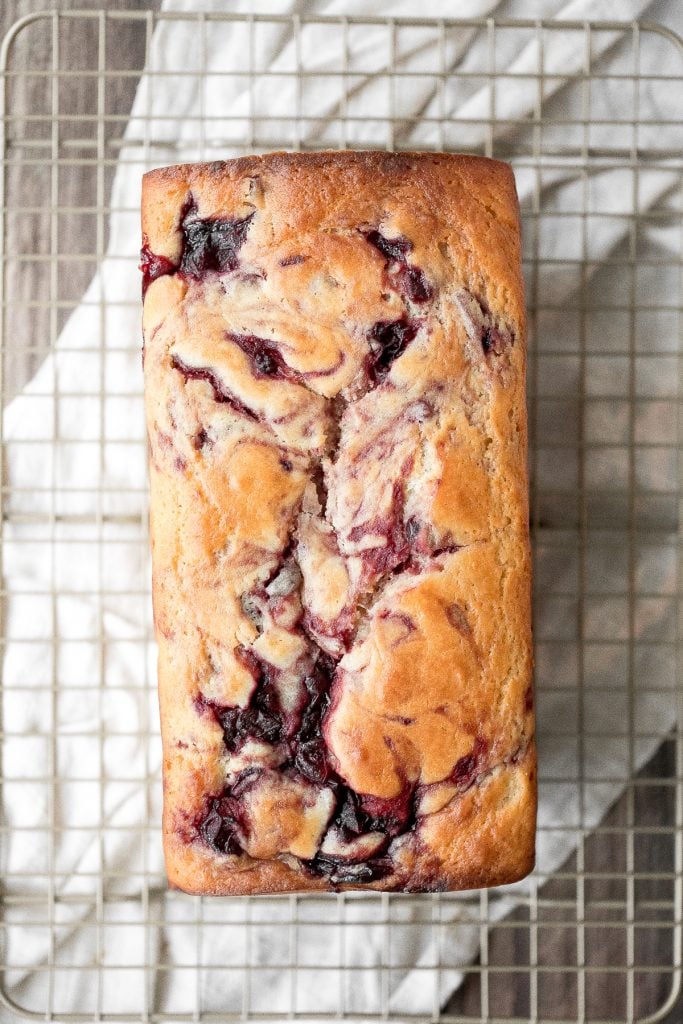
How to Make the Best Cranberry Sauce Swirl Pound Cake
- Prep: Preheat oven to 350 F. Line a 1 lb. loaf pan (8x4 inches). You want the parchment paper larger on the 2 longer sides of the pan so that you can easily pull it out when baked. Lining the pan this way will help easily remove the cake out of the pan after baking.
- Combine dry ingredients: In a medium mixing bowl, whisk together the flour, baking powder, and salt. Set aside.
- Combine wet ingredients: In a large mixing bowl, combine eggs, yogurt, and sugar, and beat with a hand mixer until smooth. Add in oil and vanilla extract and continue to beat until smooth.
- Add dry ingredients into wet ingredients: Gradually add in the dry ingredients and beat until just combined (about 30-60 seconds). Do not overmix.
- Assemble: Pour half the batter into lined loaf pan. Then scoop 2-3 dollops of cranberry sauce (half the sauce), and pour the remaining batter on top. Add the remaining cranberry sauce on top in a few dollops. Use a toothpick to give it a few swirls.
- Bake: Bake for 60-70 minutes, until the edges are browned and a toothpick inserted in the center comes out clean.
- Cool: Place pan on a wire cooling rack and allow the loaf to cool in the pan for an hour. Then, remove loaf from the pan and allow it to cool on a wire rack for another hour or two, until completely cooled.
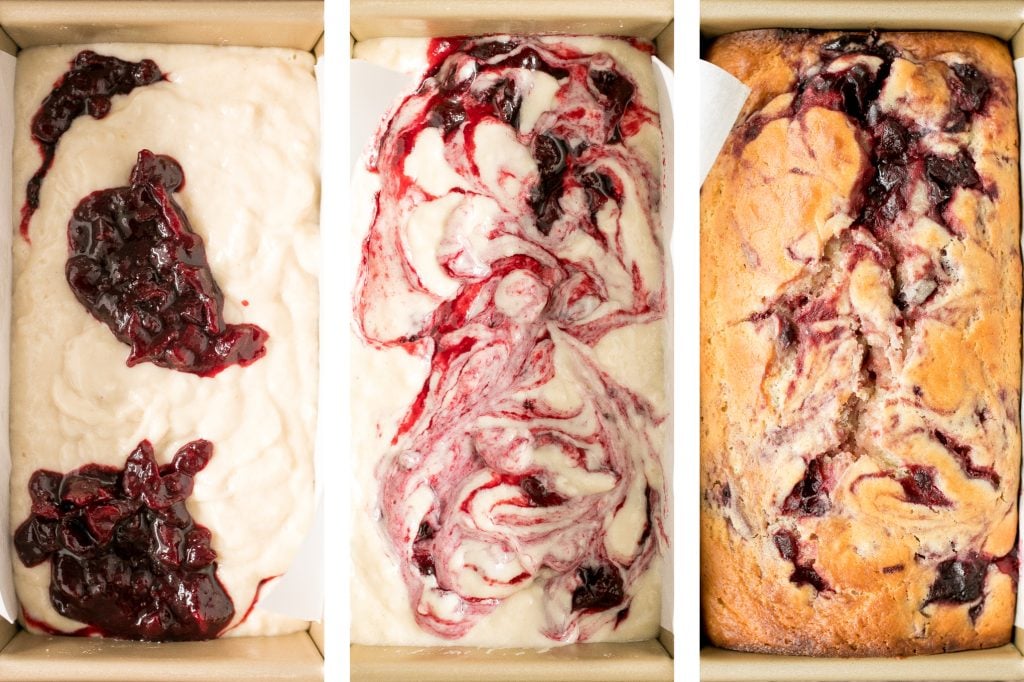
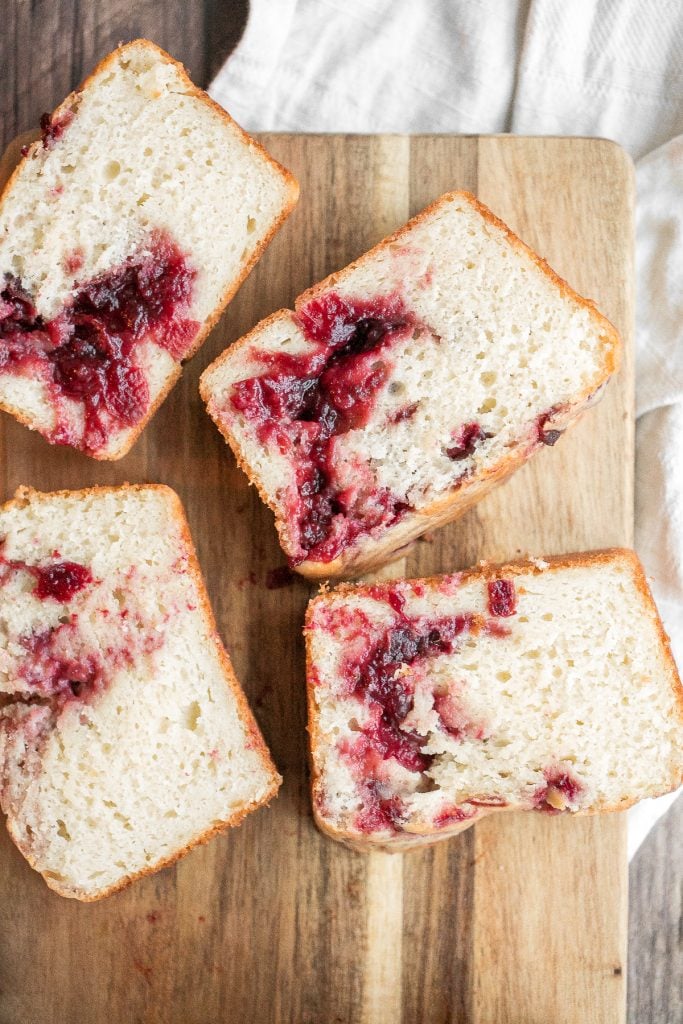
How to Store Cranberry Cake
- At room temperature or in the refrigerator: Cranberry sauce swirl pound cake stays moist and fresh for days at room temperature for up to 2 days, tightly wrapped in plastic wrap or stored in a large ziploc bag. Or tightly wrap in plastic wrap and store in the refrigerator for up to one week.
- In the freezer: You can freeze this cranberry cake for up to 3 months, wrapped tightly in plastic wrap or aluminum foil.
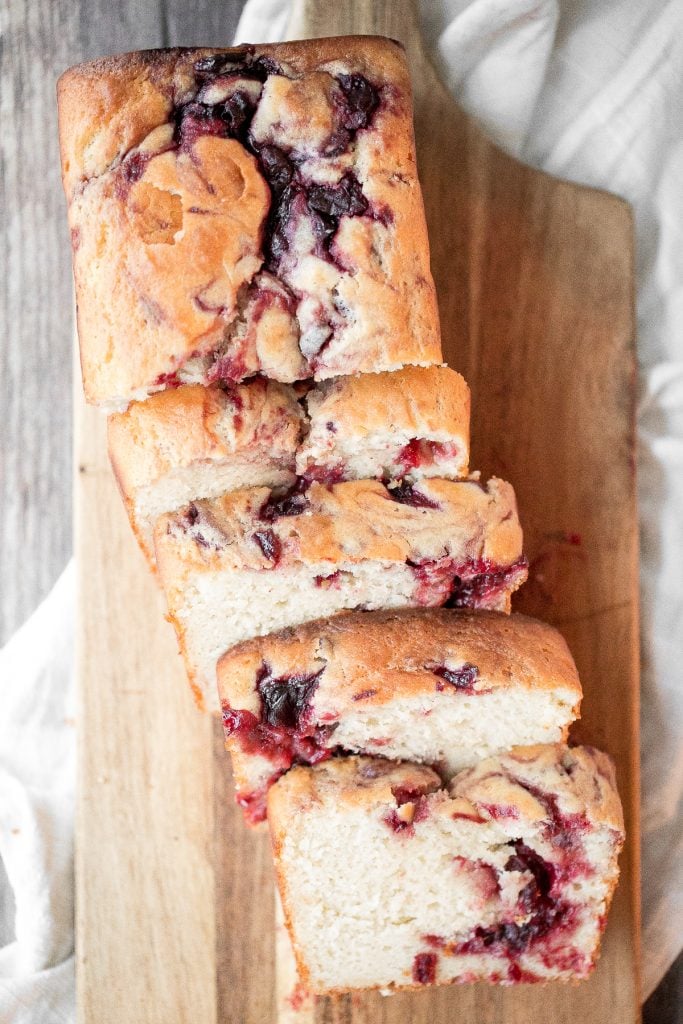
More Cranberry Recipes
- Easy Make Ahead Cranberry Sauce
- Cranberry Sauce Oat Bars
- Leftover Cranberry Sauce Muffins
- Cranberry Scones with Orange Glaze
- Soft and Chewy White Chocolate Cranberry Walnut Cookies
Tried this recipe?
I'd love to hear what you think! Leave a comment and rating below to share your feedback. Your reviews help others discover this recipe and help me keep creating more free recipes for you. Snap a photo and tag me on social media @aheadofthyme too.
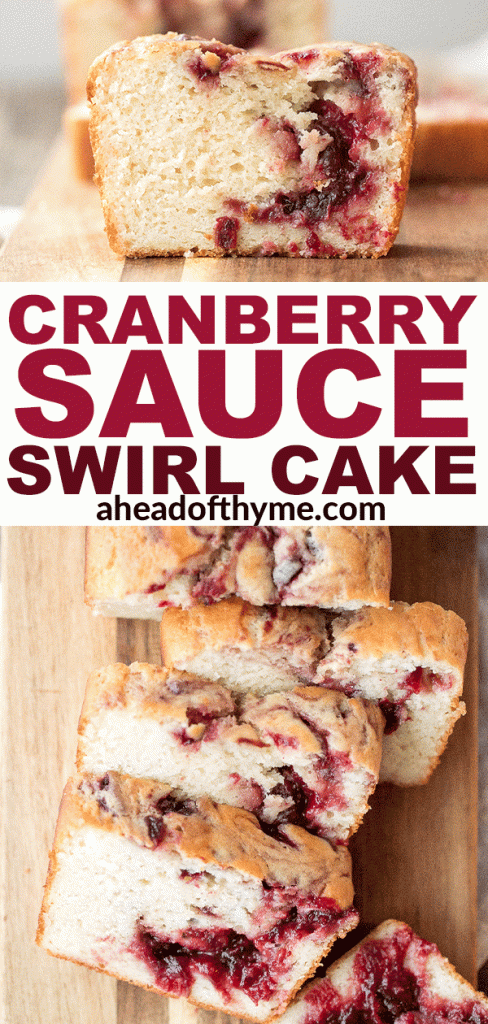
Winter Kale Salad with Apple Cider Vinaigrette and Spiced Pecans
With all the heavy dishes that accompany this cooler weather and seasonal holiday meals, I like to get behind a light salad every now and again. Winter kale salad with crisp apples, tangy goat cheese and spiced pecans tossed in apple cider vinaigrette is the perfect fall salad that can be on your table from start to finish in 10 minutes. Take that, lazy weeknight dinner.
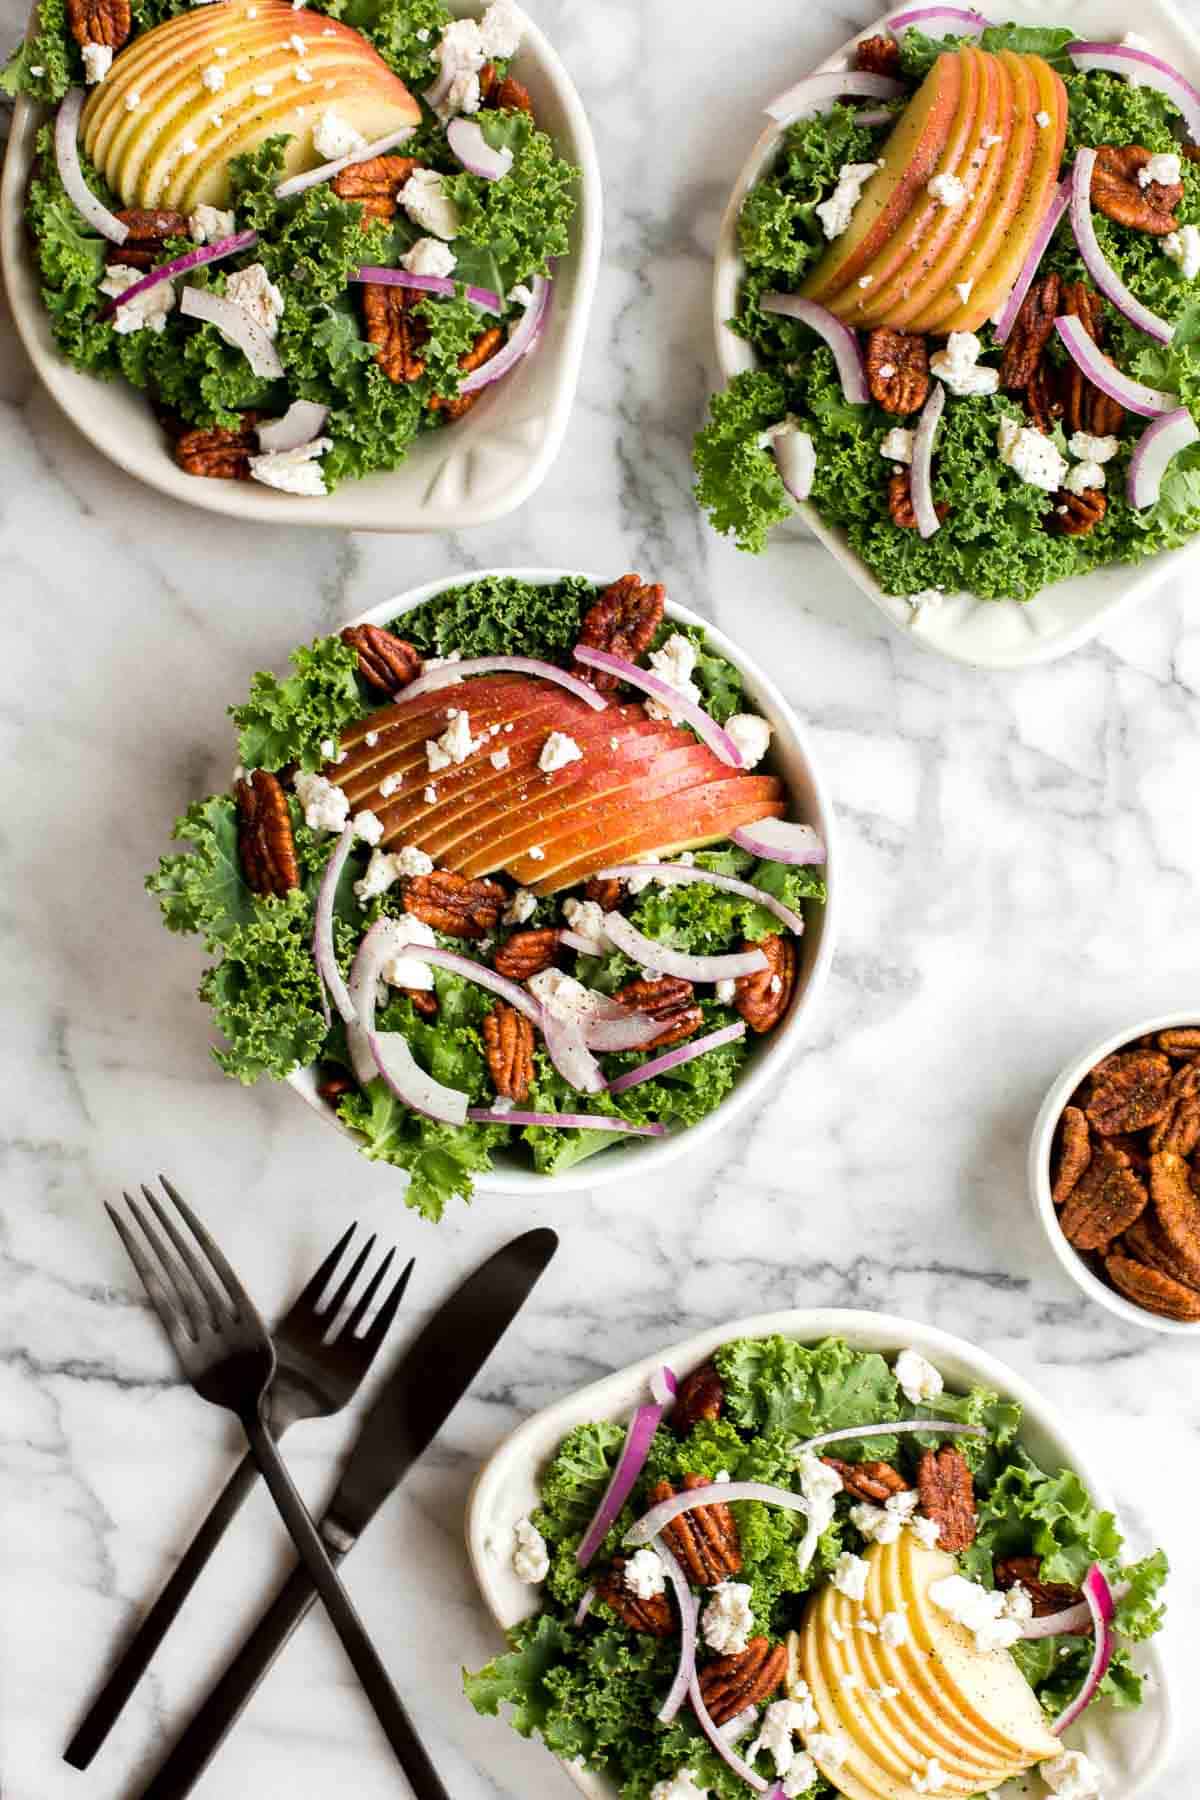
What I love about making salads is that you can really customize it for the seasons based on the fresh seasonal ingredients that you can throw in there. For instance, throw in some apples or butternut squash, and you instantly have a fall or winter salad. Some of my other favourites to make in the cooler months are my fall harvest salad with roasted butternut squash, apple walnut salad with balsamic vinaigrette, and goat cheese and tangelo winter salad with creamy dressing.

Ingredients in this Kale Salad
The best part about this recipe is that is versatile and completely customizable. Really, what you need is 1 bunch of your favourite leafy green + 1 crisp fruit + your favourite cheese + crunchy nuts. Here are the ingredients that I used:
- kale - you can use whichever type of kale you like best. I usually go for Lacinto kale (also known as Tuscan kale), but this week, I could only get my hands on curly kale. You can also easily switch out the kale completely for your favourite leafy green. I would recommend swiss chard, collard greens, and mustard greens, which I fing work better in this recipe than spinach or arugula.
- honey crisp apples - any kind of apple works in this salad. You can also substitute the apple with pear.
- goat cheese - I grabbed tangy and sweet goat cheese to balance the flavour of the spicy pecans. For an alternative, try blue cheese.
- spiced pecans - you can also use just regular toasted pecans instead of spiced pecans.
- apple cider vinaigrette - made with olive oil, apple cider vinegar, dijon mustard, salt and pepper. This vinaigrette is what all your salads need from fall until spring. Plus, you can double the amount of dressing and save half in the fridge to use throughout the week.
You can also add some protein to this winter kale salad. Try some shredded leftover roast chicken (or store-bought rotisserie chicken), baked maple salmon, or grilled shrimp.
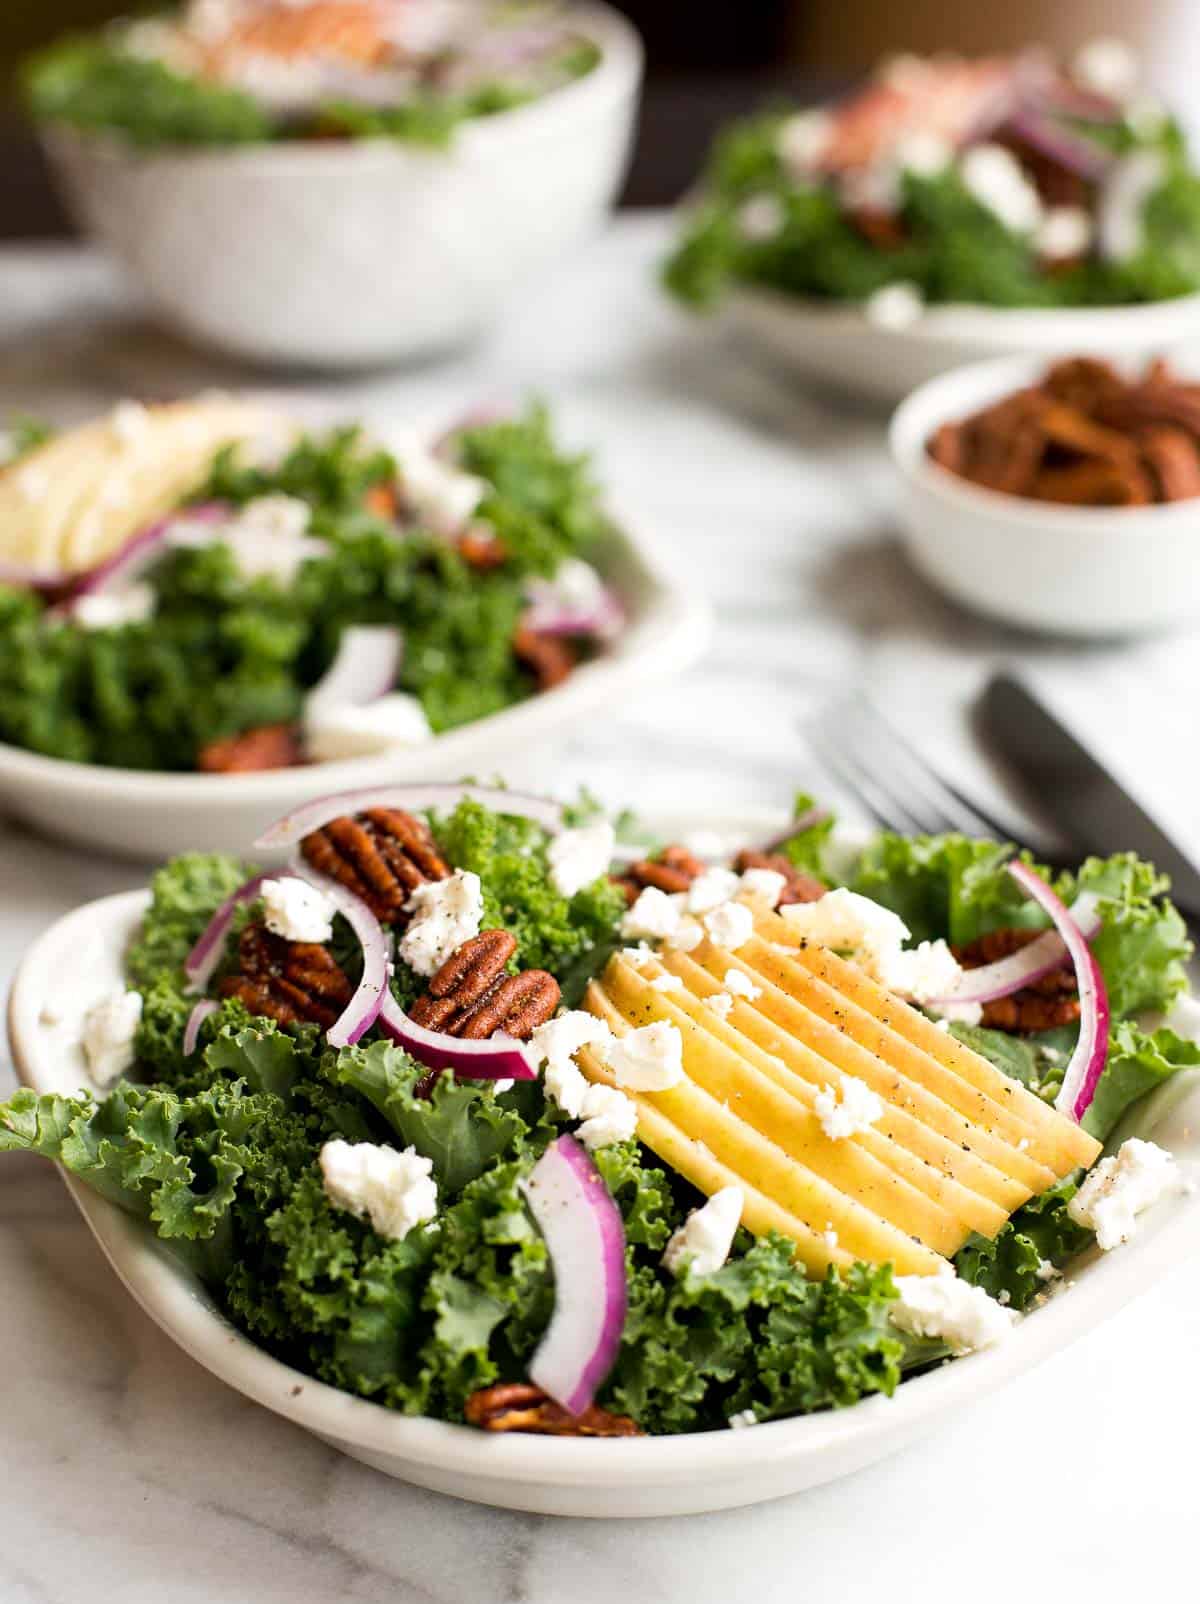
How to Make the Best Winter Kale Salad with Apple Cider Vinaigrette
First, make the apple cider vinaigrette in a small mixing bowl by whisking together olive oil, apple cider, vinegar, mustard, salt and pepper.
Place kale in a large mixing bowl and pour dressing over top. Toss to combine and let sit for 10 minutes. Then, add sliced apples, crumbled goat cheese, and spiced pecans on top. Season with additional salt and pepper to taste.
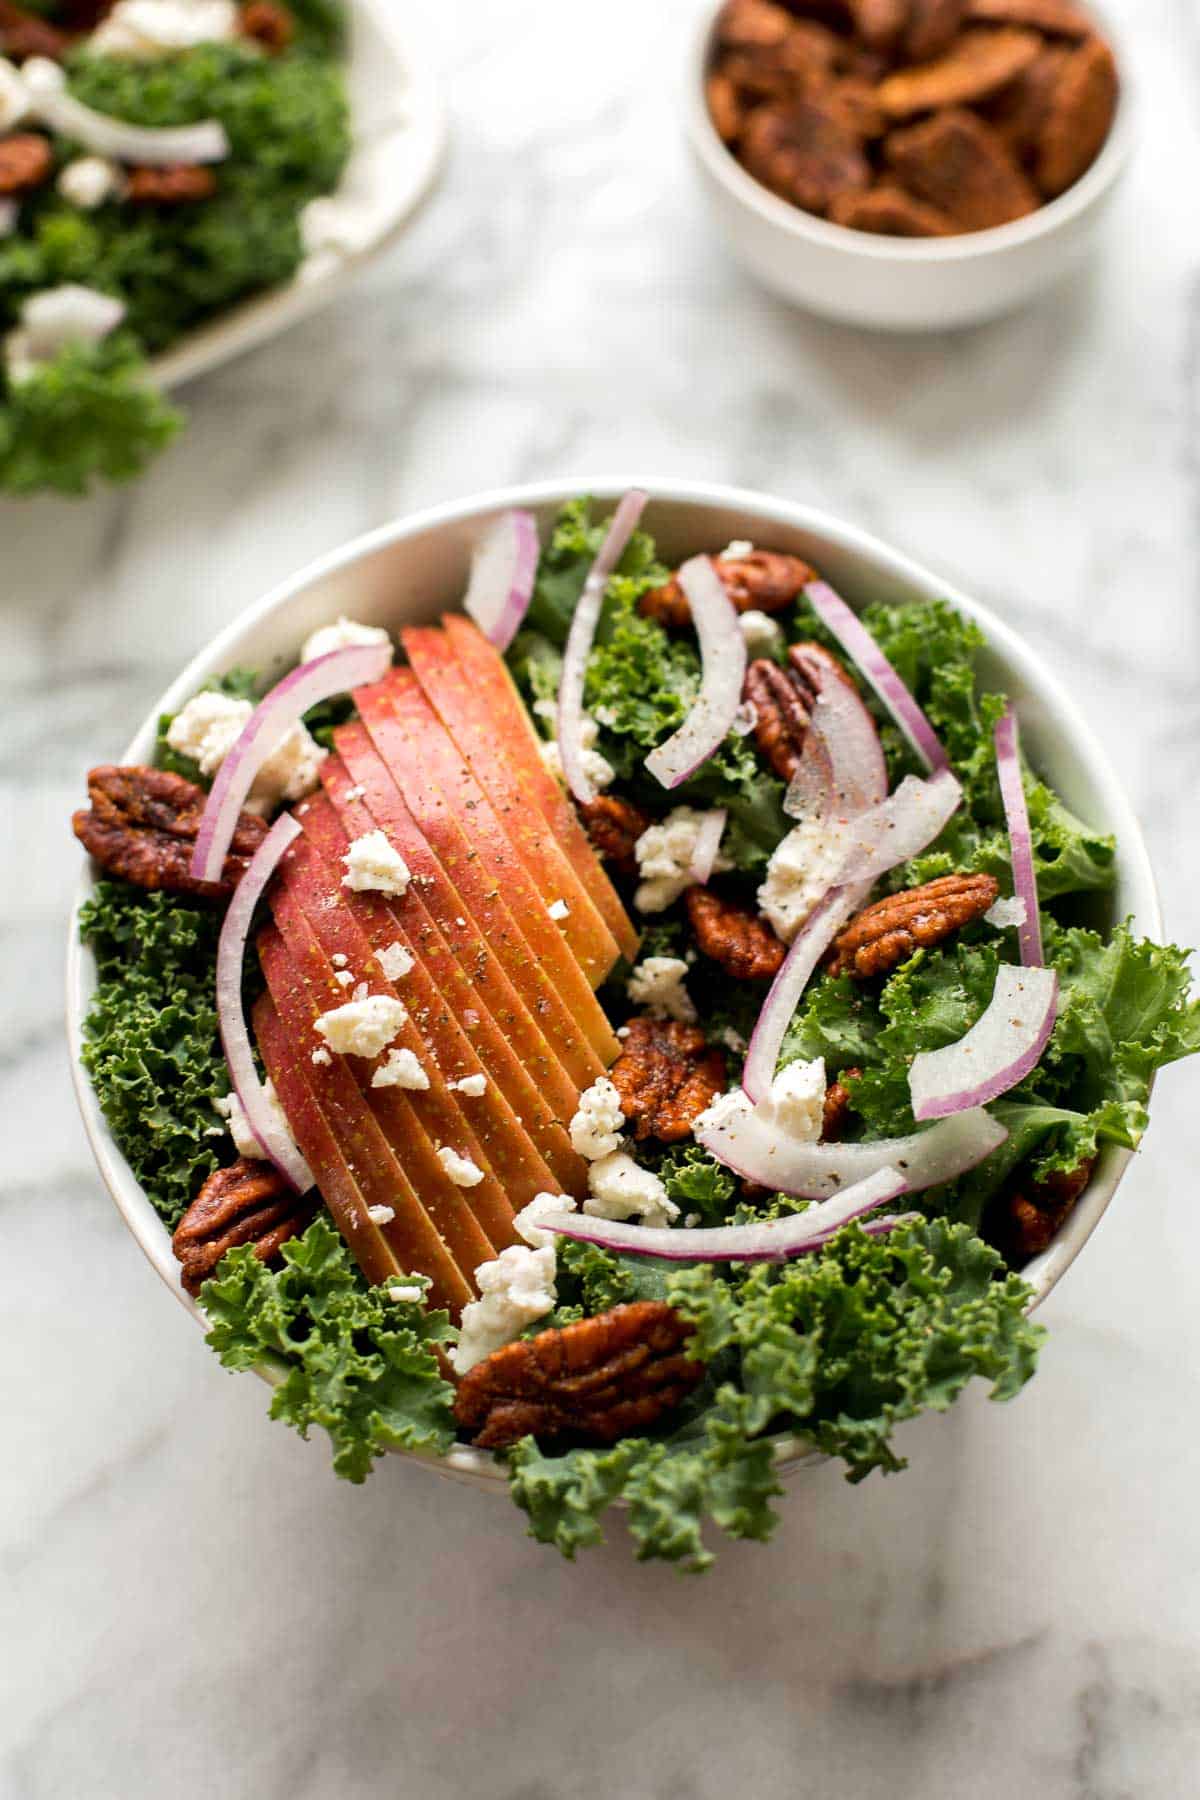
How to Make Easy Spiced Pecans
Have you tried spiced pecans before? They add a really delicious zing to salads, charcuterie boards, and are even perfect for snacking on solo. If you can't get your hands on spiced pecans at your local grocery store, you can easily make your own:
- Lightly toast pecans in a non-stick skillet.
- In a small bowl, combine ½ teaspoon ground black pepper, ½ teaspoon cinnamon, ½ teaspoon brown sugar, ½ teaspoon cayenne, and 1 teaspoon of salt.
- In a medium bowl, add pecans and 2 tablespoons of butter. Toss to coat. Add spice mixture and toss again until fully coated.
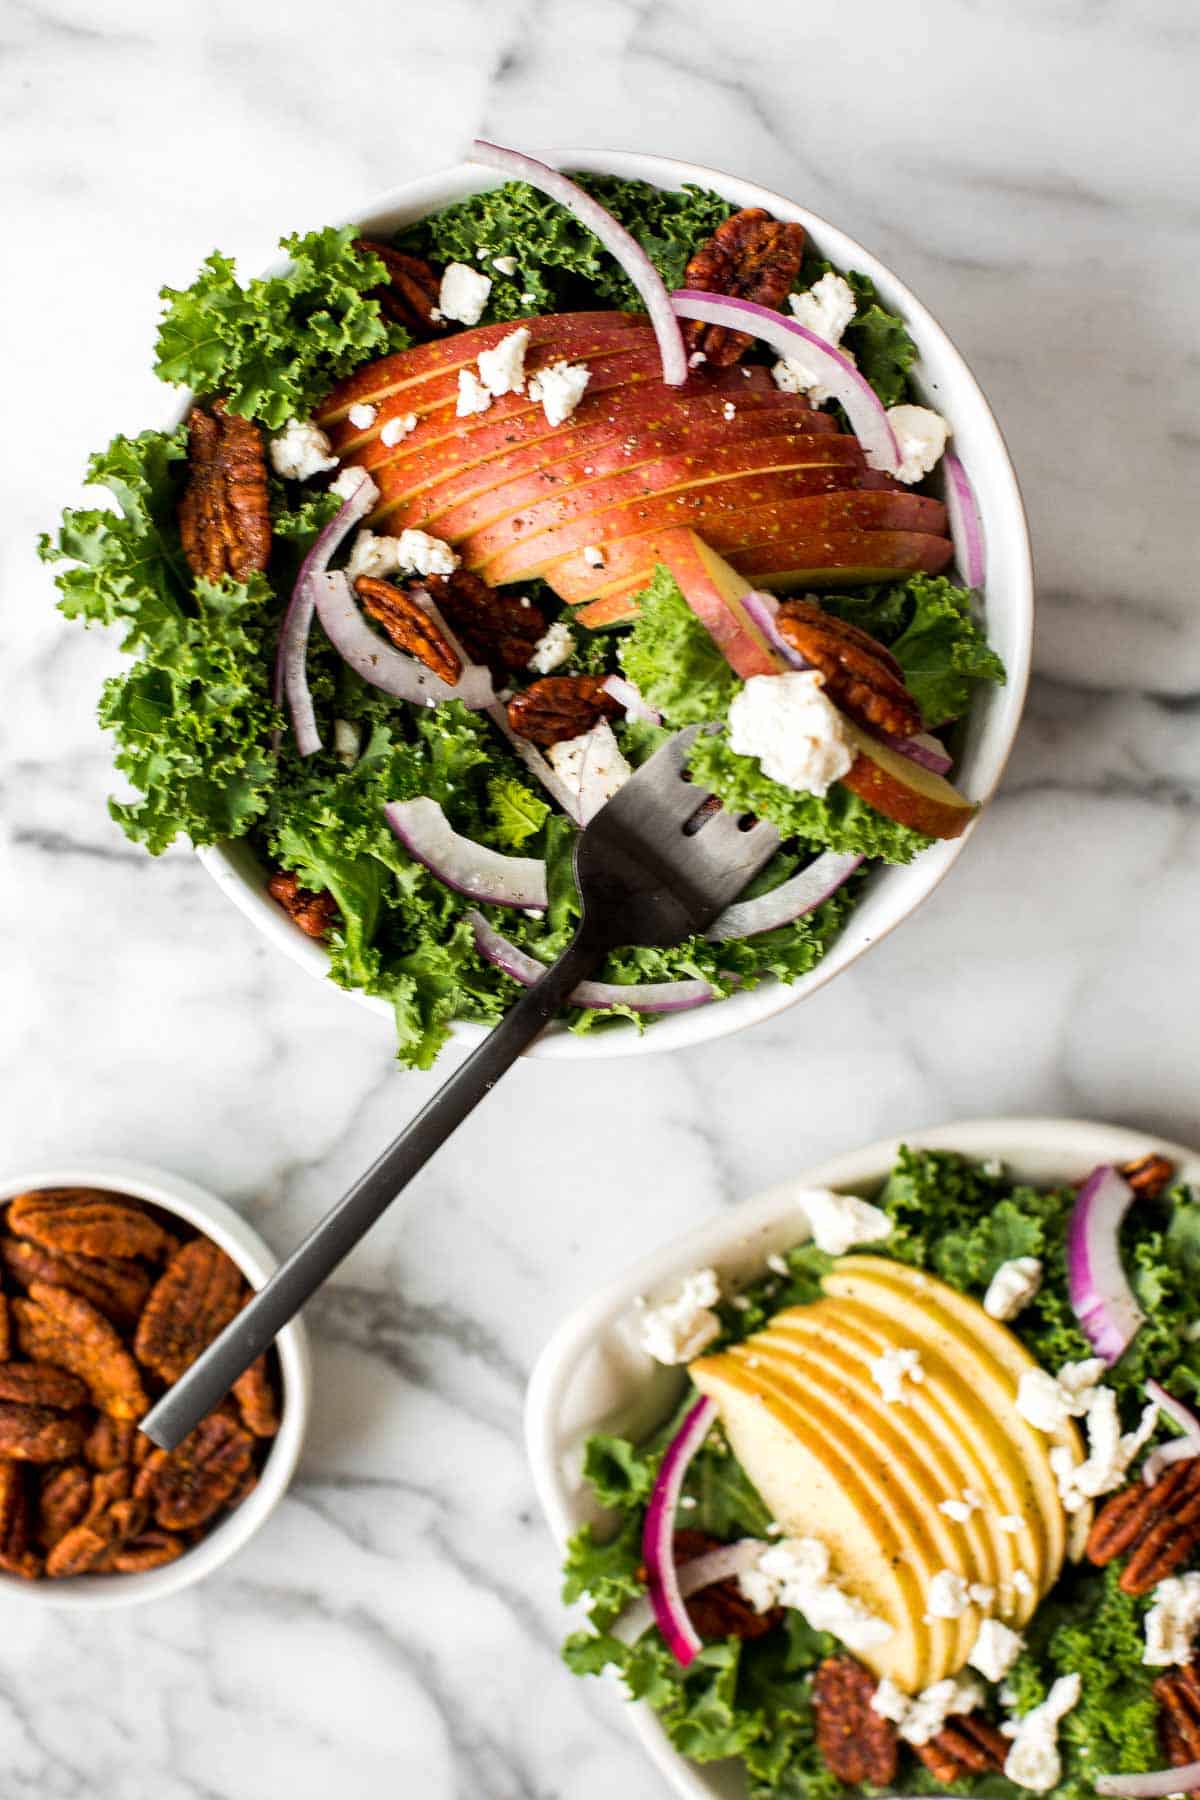
More Salad Recipes
- Fall Harvest Salad with Roasted Butternut Squash
- Mediterranean Orzo Pasta Salad
- Goat Cheese and Tangelo Winter Salad with Creamy Dressing
- Apple Walnut Salad with Balsamic Vinaigrette
- Radicchio and Mandarin Orange Salad with Walnuts and Currants
- Mediterranean Chickpea Wedge Salad with Hummus Dressing
- The Best Greek Salad
Tried this recipe?
I'd love to hear what you think! Leave a comment and rating below to share your feedback. Your reviews help others discover this recipe and help me keep creating more free recipes for you. Snap a photo and tag me on social media @aheadofthyme too.
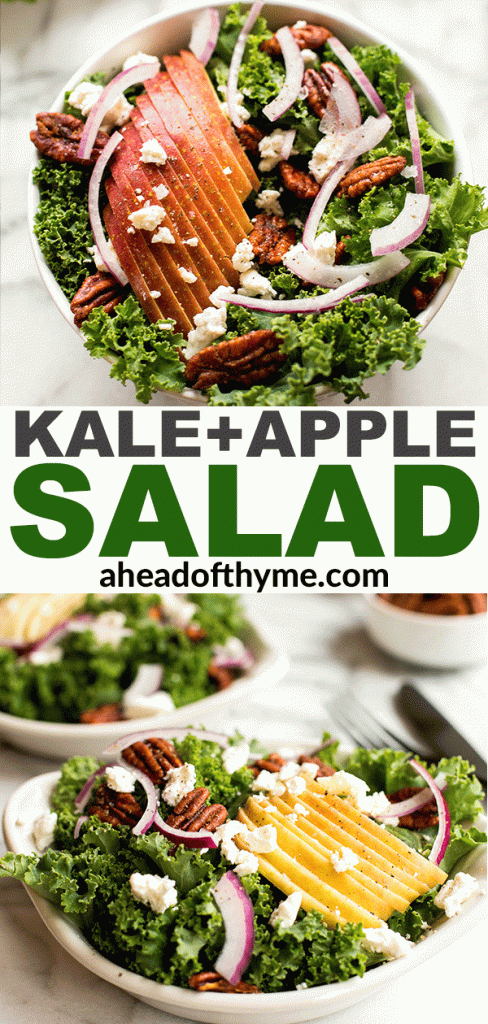
Roasted Pumpkin Wedges with Parmesan Cheese
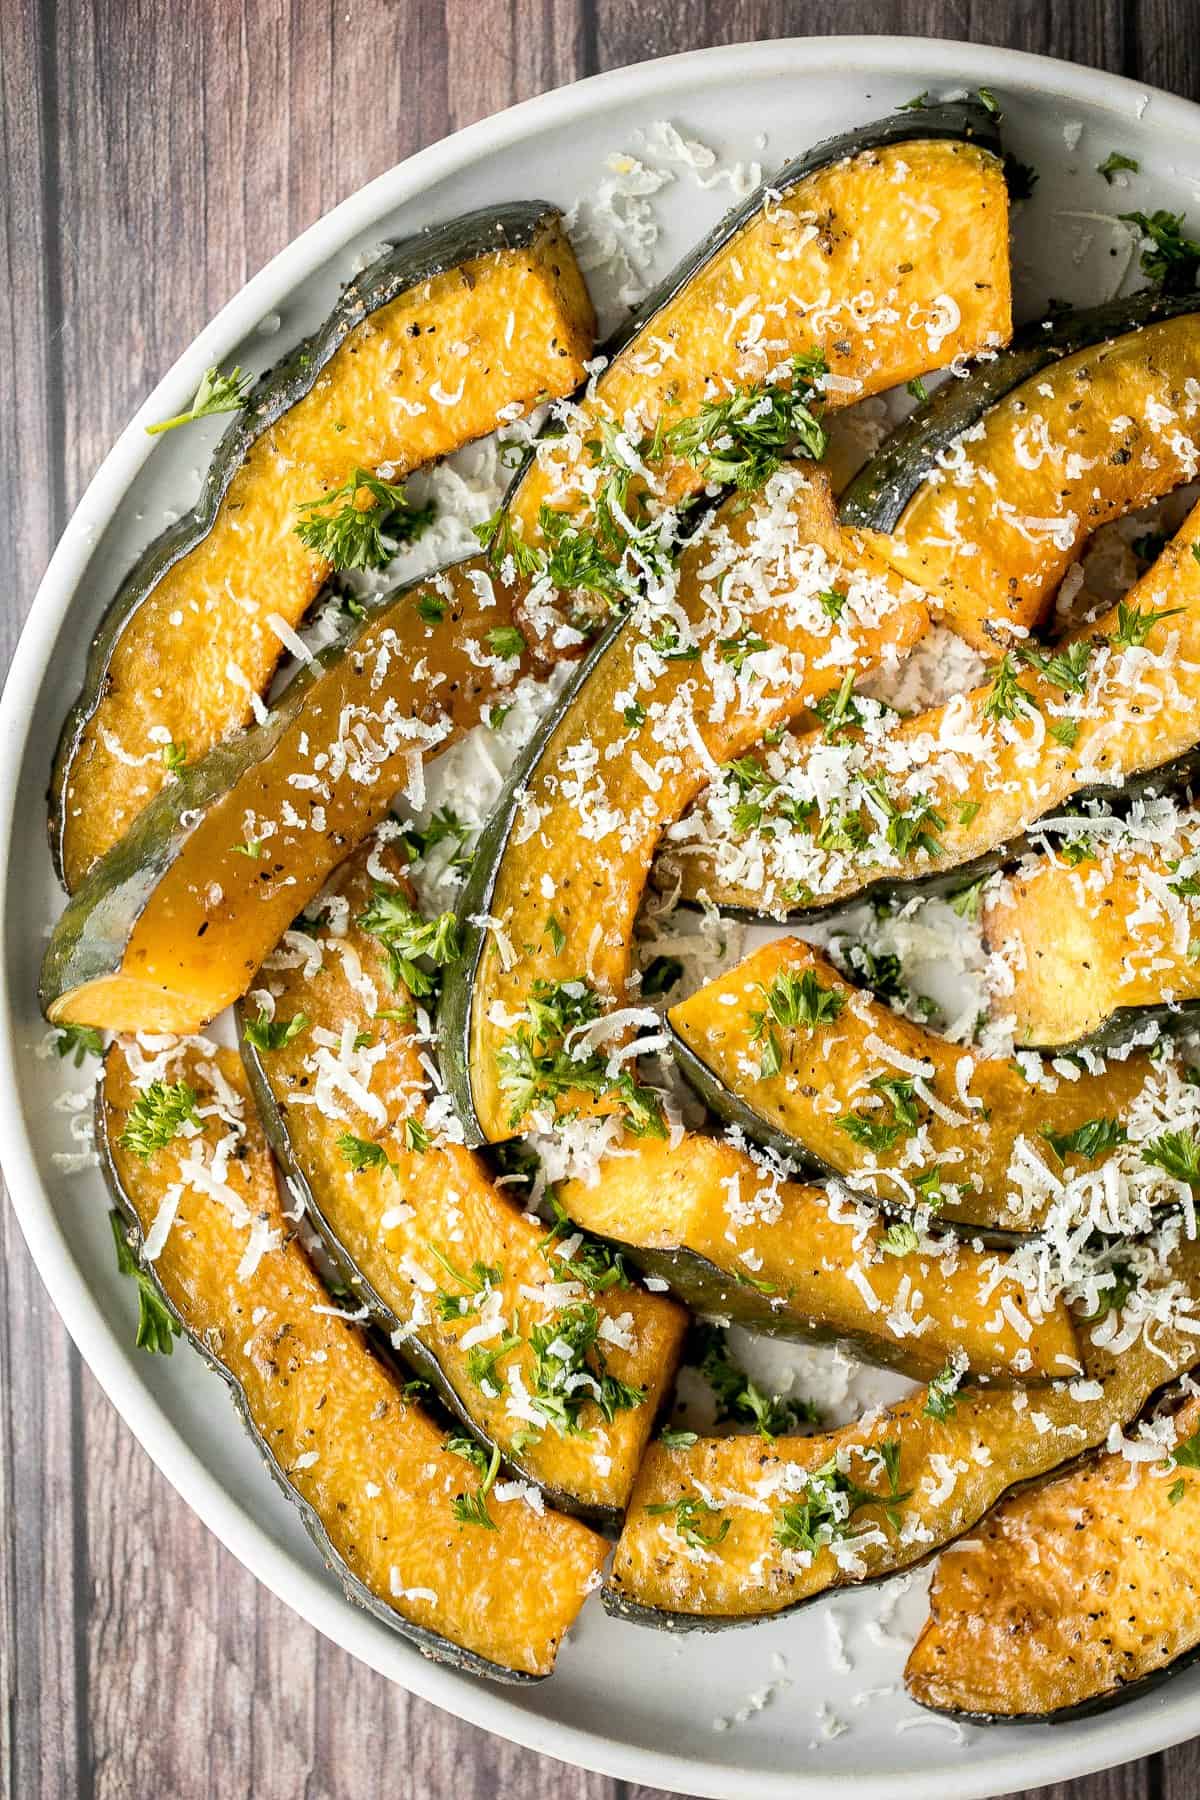
Soft and tender, easy roasted pumpkin wedges with Parmesan cheese is one of the easiest, delicious side dishes to make this fall. This gluten-free recipe is packed with flavour with a few simple ingredients, topped perfectly with Parmesan and parsley. Plus, prep it in just minutes by tossing all the ingredients in one bowl and roasting for an incredible depth of flavour. It's a no-stress side that is perfect to serve any night of the week, especially on your Thanksgiving holiday table.

It's never too early to start prepping for Thanksgiving dinner, and especially so when it comes to side dishes. There are just so many to choose from. Every year we stick to the classics, creamy mashed potatoes, sweet potato casserole with pecans, sautéed garlic green beans, and cranberry walnut apple stuffing, and add a few new and exciting dishes. This easy roasted pumpkin with parmesan is just that --- new and exciting.
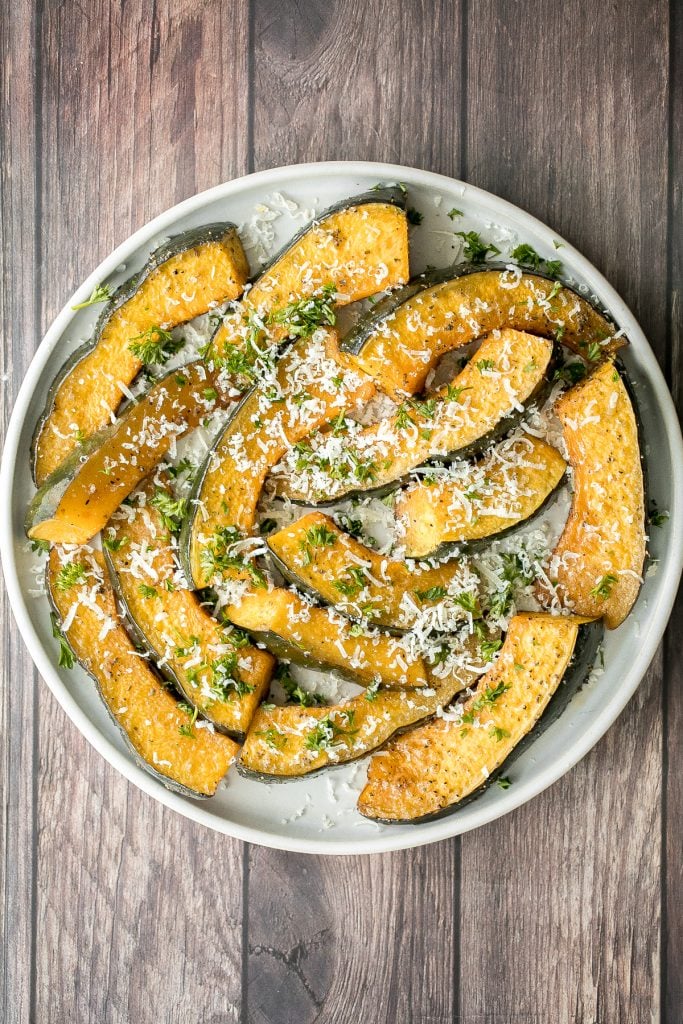
Ingredients
To make this delicious pumpkin, you will need the following pantry staples:
- pumpkin - I used a small kabocha pumpkin (also known as a kent pumpkin or Japanese pumpkin). You can also use other types of pumpkin or winter squash.
- olive oil
- Italian seasoning
- soy sauce
- balsamic vinegar
- salt and pepper
- Parmesan cheese - freshly grated Parmesan cheese on top.
- parsley - finely chopped fresh parsley for garnish.
You will also need a mixing bowl and a half sheet baking pan.
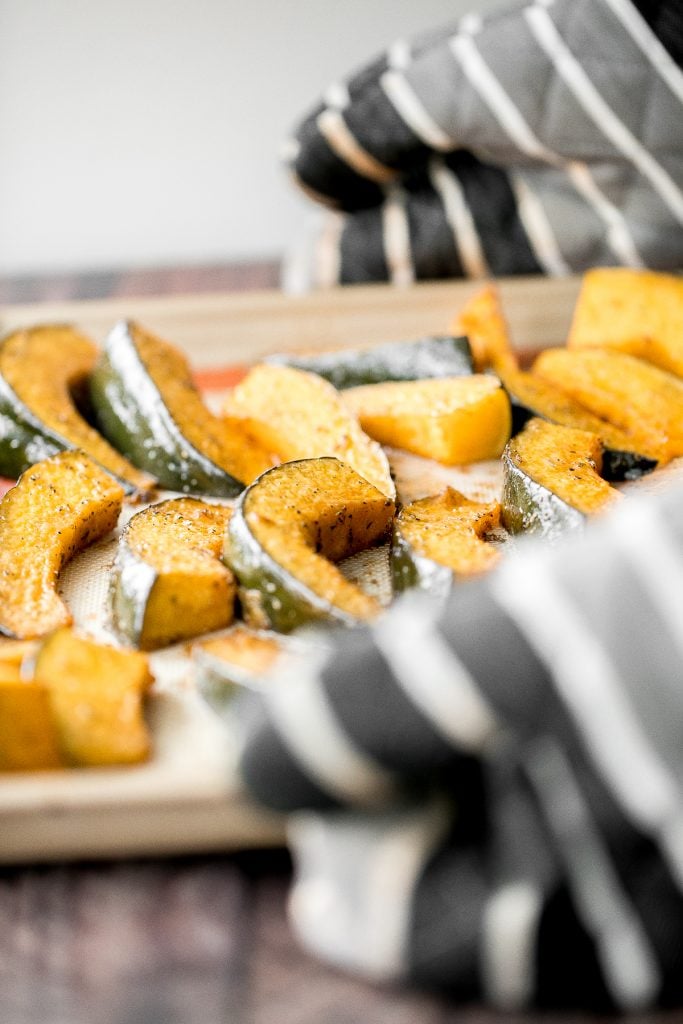
How to Make the Best Roasted Pumpkin Wedges with Parmesan Cheese
Roasted pumpkin wedges are so easy to make and so delicious. First, cut lengthwise into the pumpkin, scoop out the seeds, and slice into ¾-inch wedges.
Then, throw the pumpkin along with all the seasonings (olive oil, Italian seasoning, soy sauce, balsamic vinegar, salt and pepper) into a large mixing bowl or directly into a sheet pan, and toss to combine until well coated. Spread the pumpkin into an even layer on the pan and pop the pan into a 325 F preheated oven and roast for 20-25 minutes, or until the pumpkin is fork tender. If a fork slides in easily when inserted, then it is fort tender and ready.
Transfer pumpkin onto a serving dish, sprinkle with parmesan cheese and parsley on top and serve immediately.
PRO TIP: If the pumpkin is too difficult to cut into, you can microwave it for 1 minute or bake in the preheated oven for 10 minutes to soften it a bit before cutting into it, scooping out the seeds, and slicing.
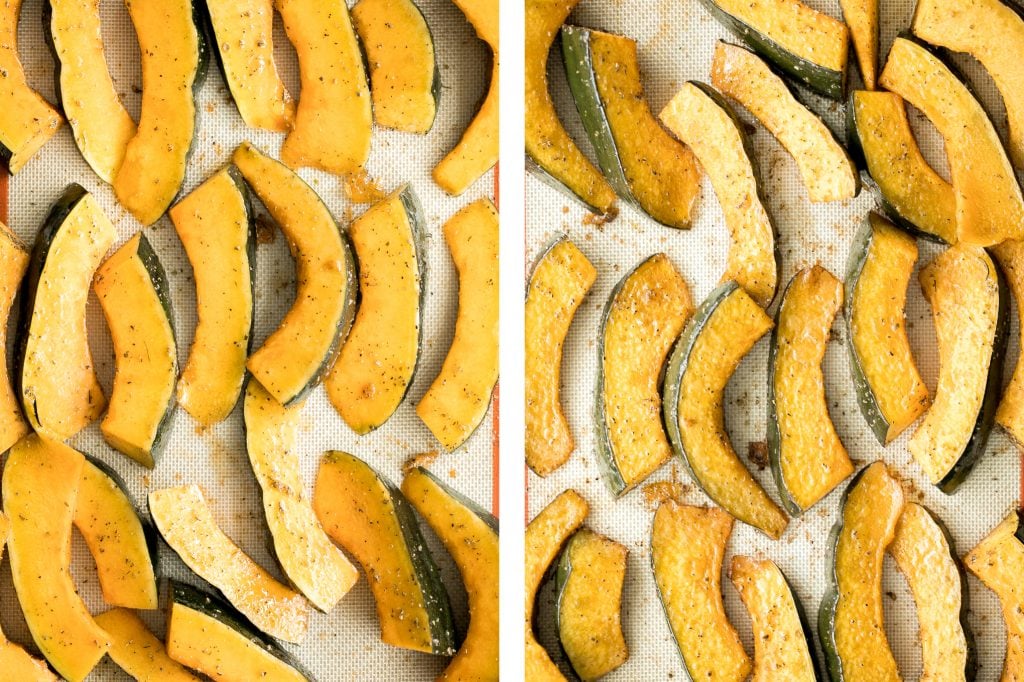
How to Serve Roasted Pumpkin
Serve easy roasted pumpkin as a side dish all season long with your fall meals. Some great ideas to pair this with are whole roast chicken, apple cider chicken breasts, air fryer lamb chops, or roasted spatchcock chicken.
It is also the perfect side dish to serve at your Thanksgiving holiday dinner, because it's so easy to make. Serve it with a juicy whole roast turkey or an easy juicy roasted turkey breast if you are having a smaller celebration this year. Try some other vegetable side dishes or potato side dishes below to pair it with:
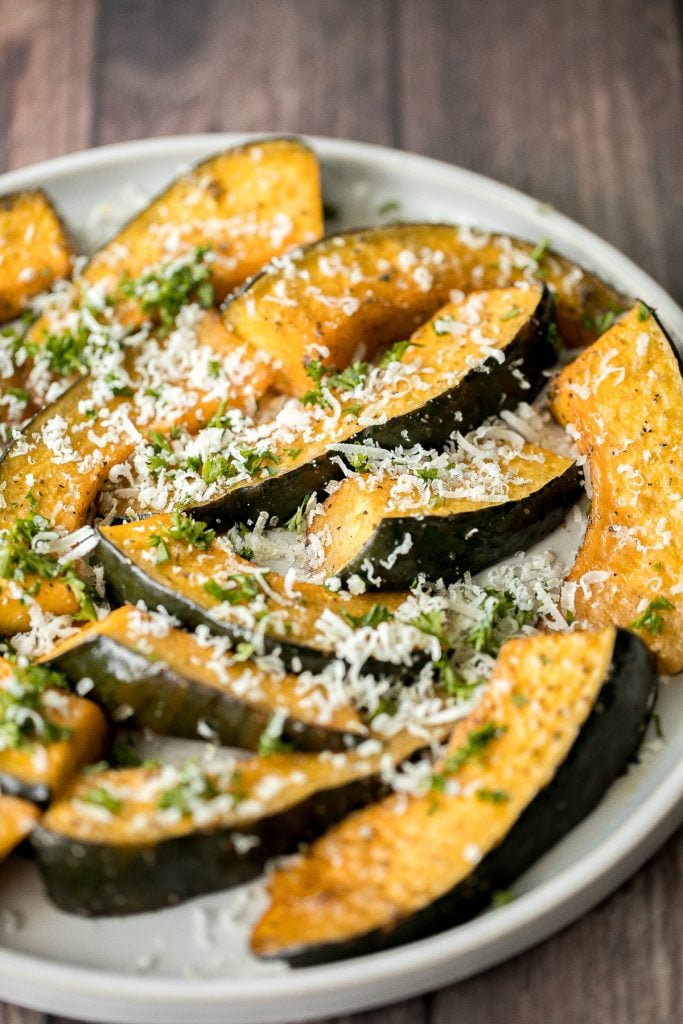
More Pumpkin Recipes
- Pumpkin Focaccia with Fresh Herbs
- Coconut Curry Pumpkin Soup
- Pumpkin Chickpea Coconut Curry
- Creamy Pumpkin Hummus
- Carrot Pumpkin Soup
- Easy Pumpkin Dinner Rolls
Tried this recipe?
I'd love to hear what you think! Leave a comment and rating below to share your feedback. Your reviews help others discover this recipe and help me keep creating more free recipes for you. Snap a photo and tag me on social media @aheadofthyme too.

- « Previous Page
- 1
- …
- 32
- 33
- 34
- 35
- 36
- …
- 40
- Next Page »