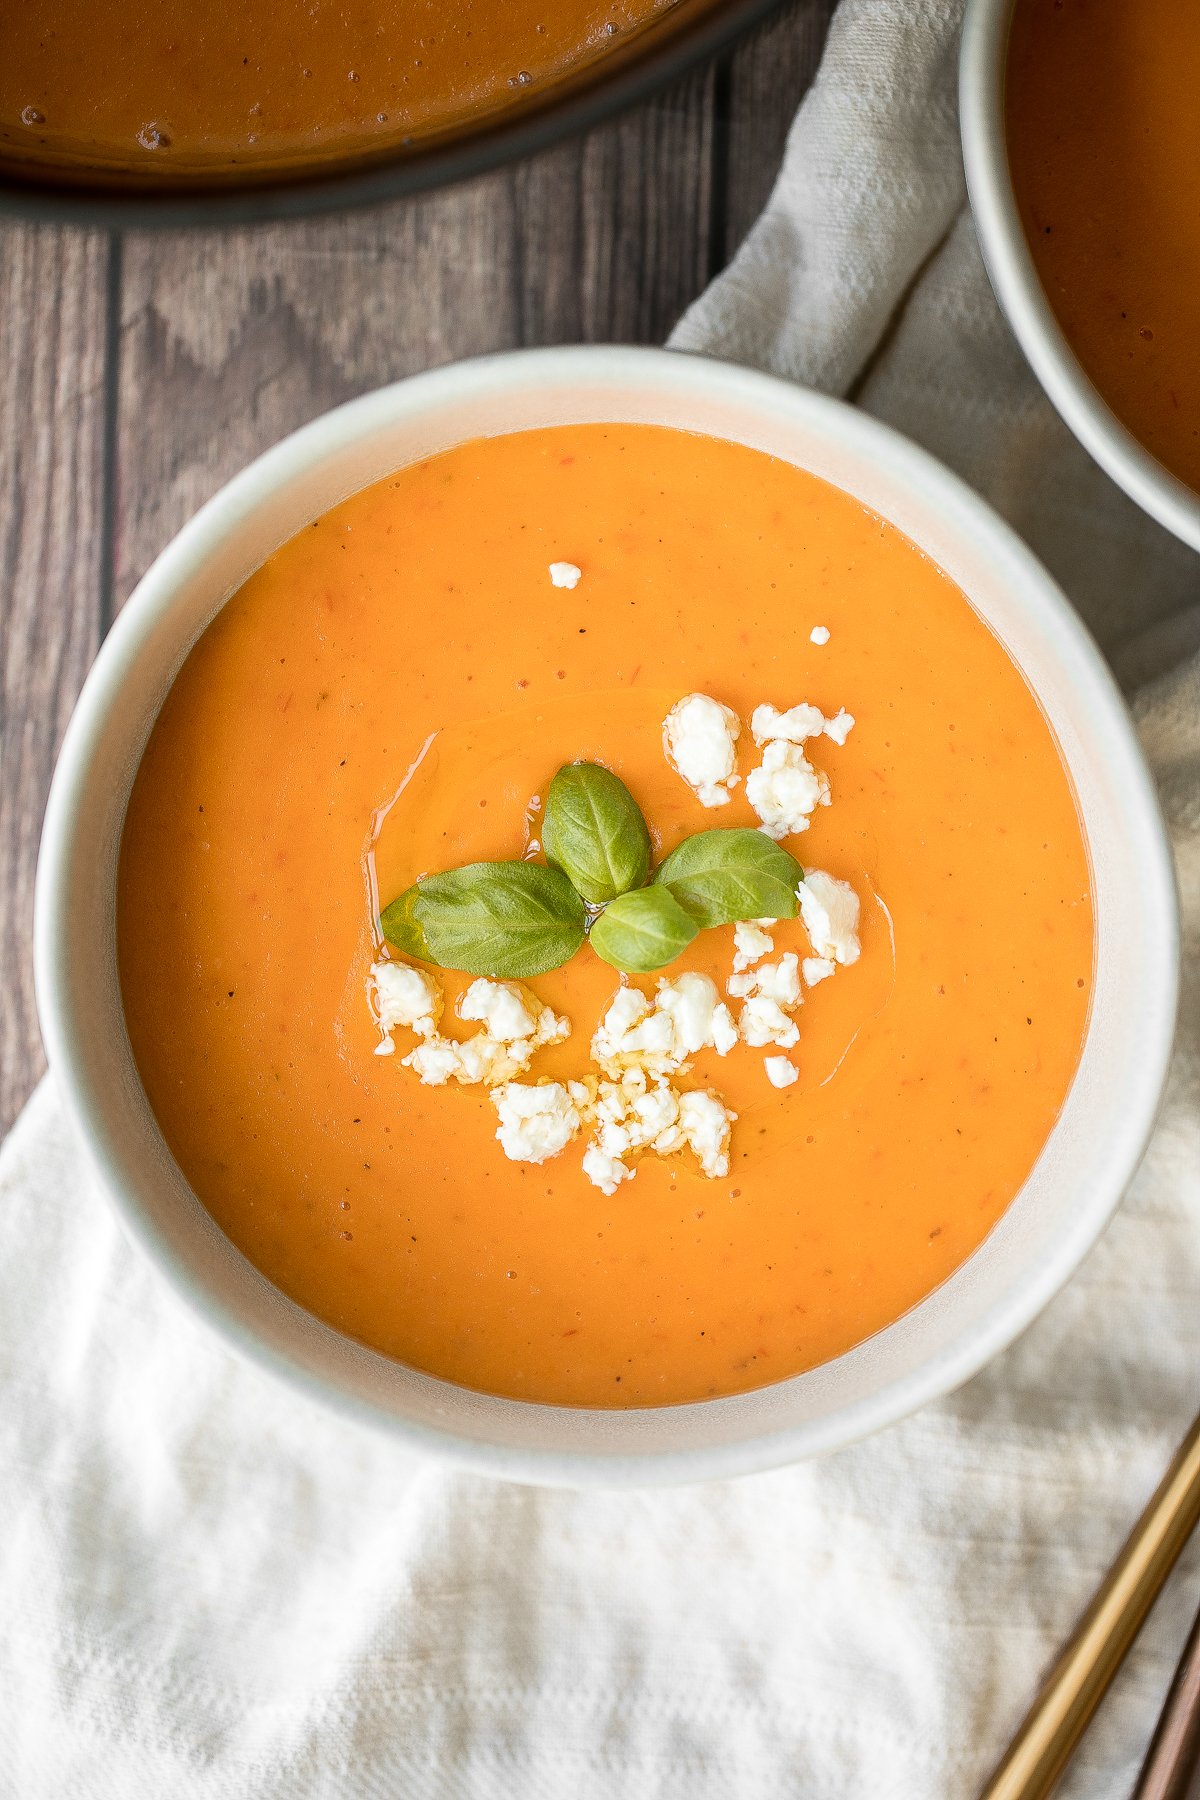
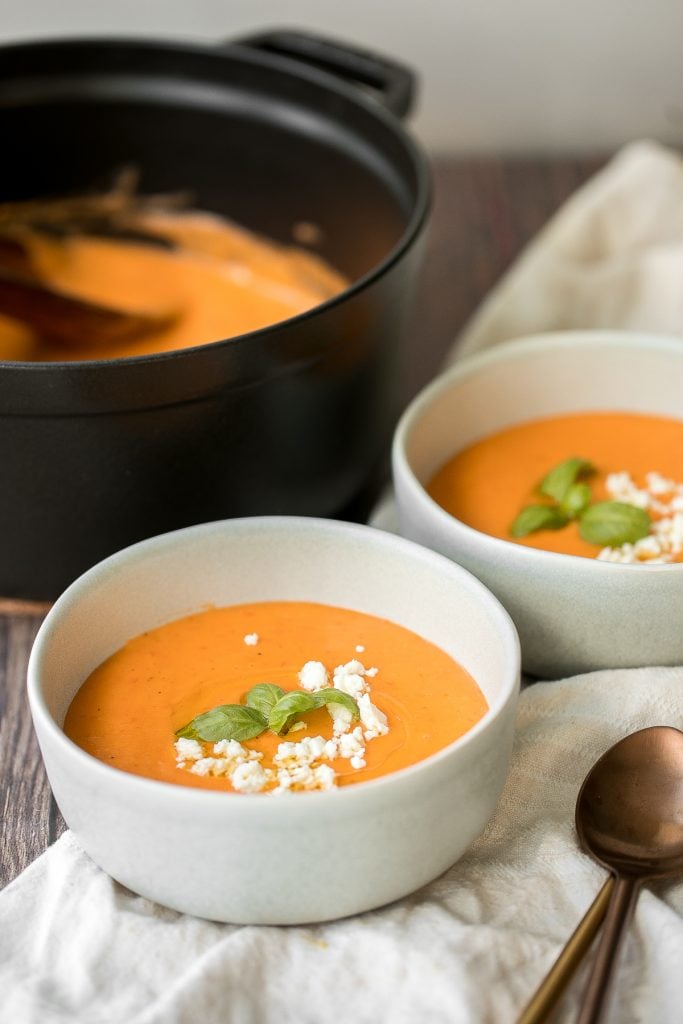
Creamy tomato potato soup is the coziest comforting fall soup that you can make in under 25 minutes including prep. This silky smooth gluten-free and vegan soup is packed with tomatoes, potatoes and some onions and no cream. It's healthy and filling and the easiest weeknight meal. Serve with fresh basil on top and a sprinkle of feta, or even make it ahead and freeze for a rainy day.
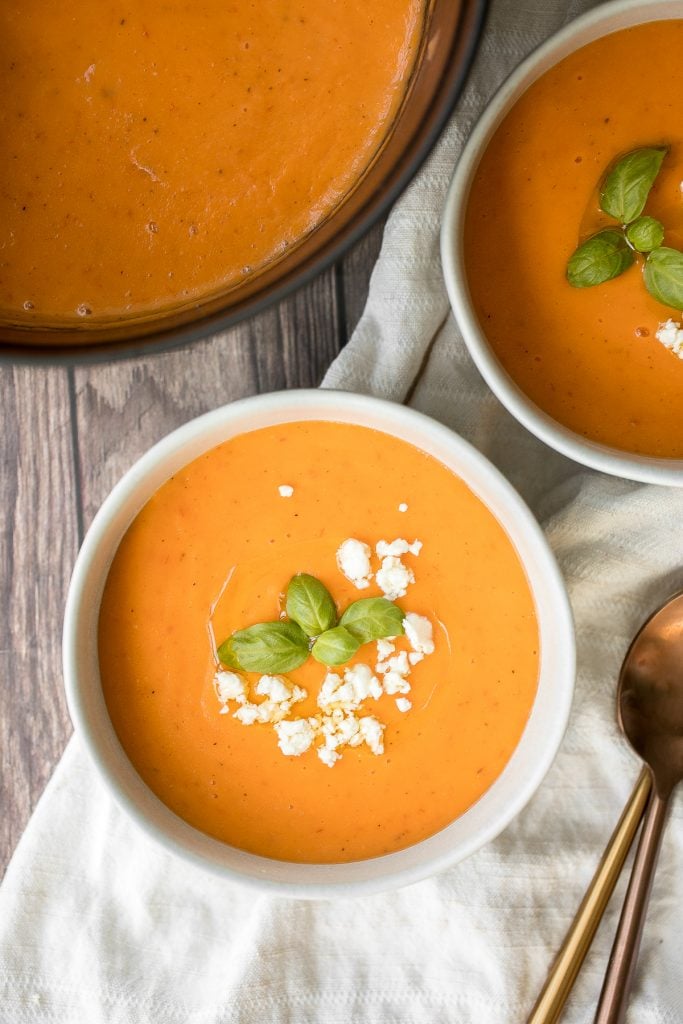
This creamy tomato potato soup is a warm and cozy meal on its own with a side salad and some crusty bread for dipping. Some great bread to pair with this is pull apart garlic bread, rosemary garlic focaccia bread, or small batch sourdough bread.
Ingredients
- tomatoes - I used fresh tomatoes, but both canned or fresh tomatoes work.
- potatoes
- olive oil
- onion
- garlic
- Italian seasoning
- salt and pepper
- toppings - feta cheese (omit this to keep it vegan or use a plant-based feta), and fresh basil leaves.
You will also need a medium cooking pot (I used my 4 qt. dutch oven) and an immersion blender or regular blender.
How to Make the Best Creamy Tomato Potato Soup
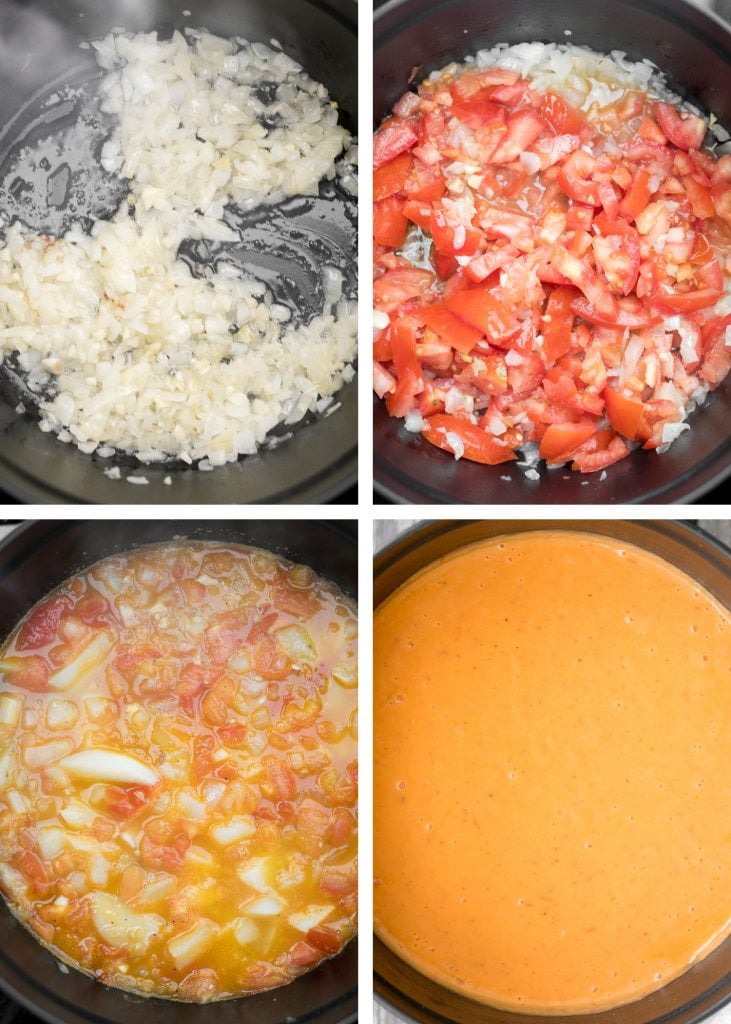
First, cook the potatoes. Add chopped potatoes into a medium cooking pot filled with salted water. Make sure all the potatoes are completely under water for even cooking. Bring it to a boil and cook for about 10 minutes until the potatoes are fork tender. If you can easily insert a fork inside, then it is fork tender and ready.
Meanwhile, cook the tomatoes. Heat oil in another medium cooking pot (or 4 qt. dutch oven) over medium-high heat for 2 minutes until the oil is sizzling hot. Add onion and sauté for 3-4 minutes until soft and tender. Add garlic and sauté for another 2 minutes. Then, add diced tomatoes and stir to cook for 5-7 minutes until tomatoes are soft and saucy. Stir in all the seasoning including Italian seasoning, salt, and pepper.
Transfer the cooked potatoes together with 3-4 cups of boiling potato water (depends on how thick you prefer the soup to be) into the tomato mixture. Stir well to combine and bring the soup to a simmer.
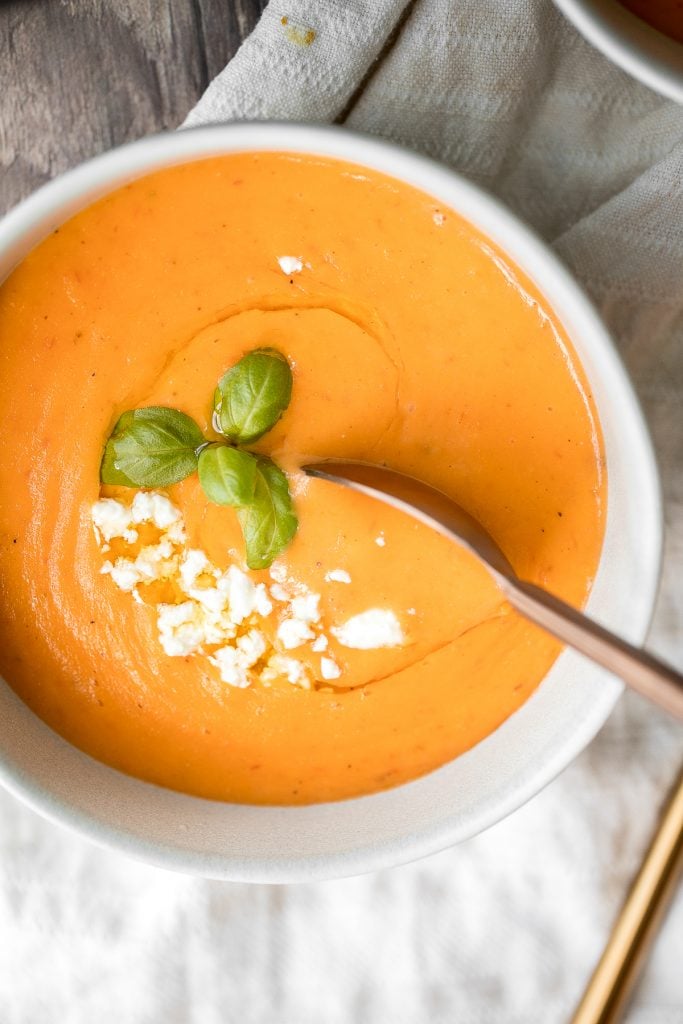
Blend the soup into a puree using an immersion blender or transfer the soup into a regular blender to puree. If using a regular blender, you will have to puree in batches.
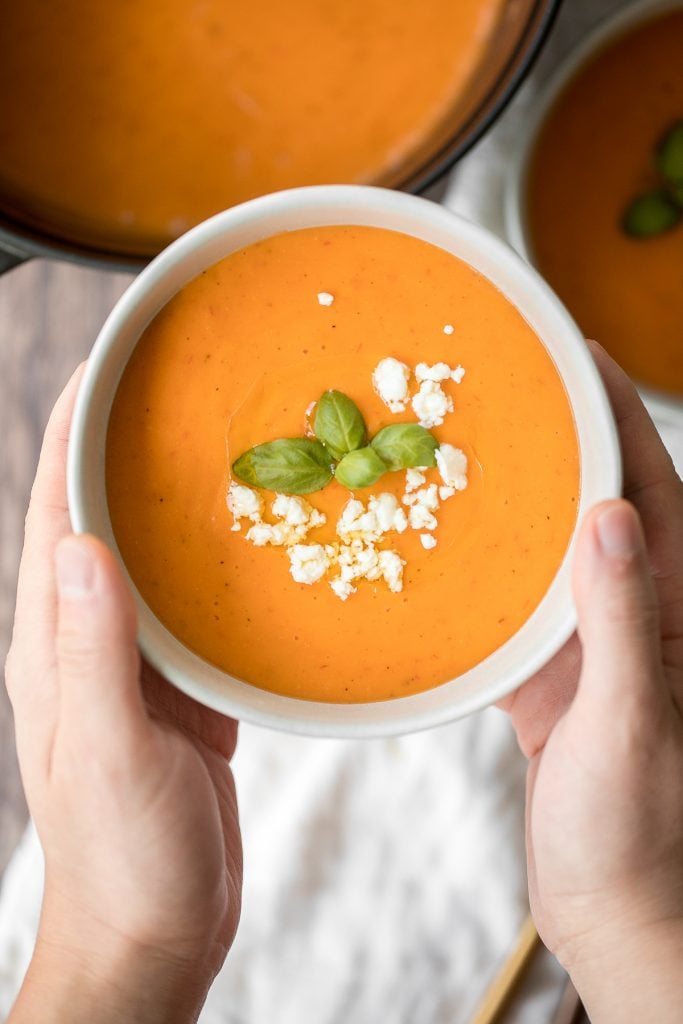
Serve immediately in a bowl and garnish with fresh basil, extra olive oil and feta cheese on top.

Tips for Storing Tomato Soup
- How to store: Store this soup still in the pot (covered) in the refrigerator for up to 5 days, or transfer the soup to an airtight container and store in the fridge.
- How to freeze: Transfer soup to an airtight container and place in the freezer for up to 3 months. To serve, allow it to thaw in the refrigerator or on the kitchen counter. Then, reheat on the stove and serve with garnish on top.
More Soup Recipes
- 30-Minute Butternut Squash Soup
- Sweet Potato Soup
- Roasted Butternut Squash and Cauliflower Soup
- Lemon Chicken Orzo Soup
- Roasted Butternut Squash Soup
- Creamy Mexican Corn Soup
- Vegetarian Mushroom Barley Soup
This easy creamy tomato potato soup forms a part of my 25 warm and cozy fall soup recipes. Follow the link to check out all of my 25 fall favourite soups.
Tried this recipe?
I'd love to hear what you think! Leave a comment and rating below to share your feedback. Your reviews help others discover this recipe and help me keep creating more free recipes for you. Snap a photo and tag me on social media @aheadofthyme too.

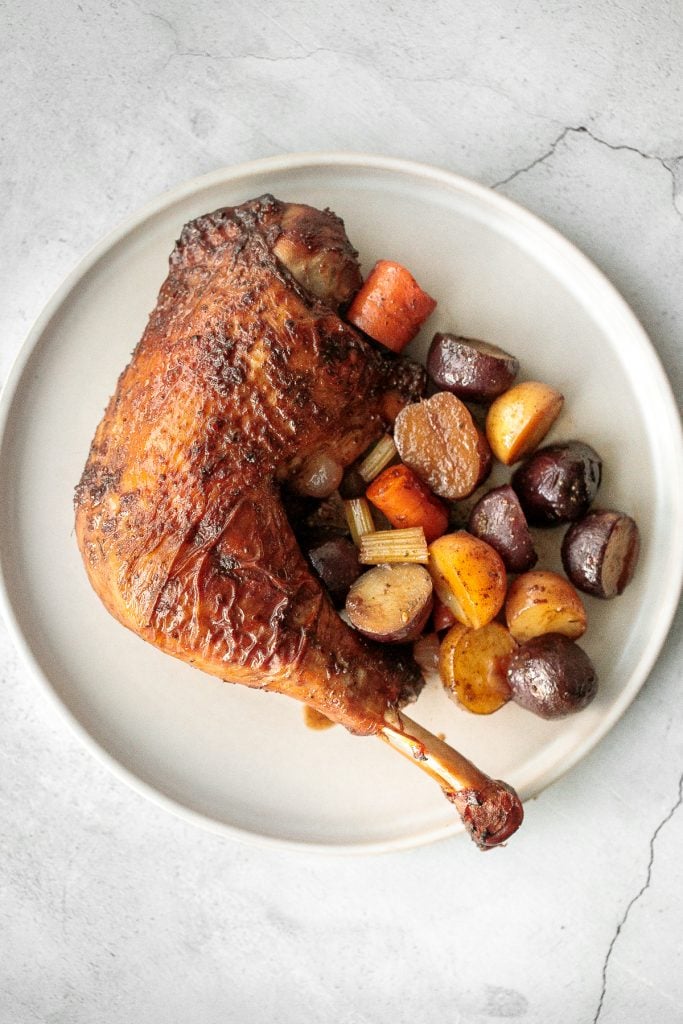
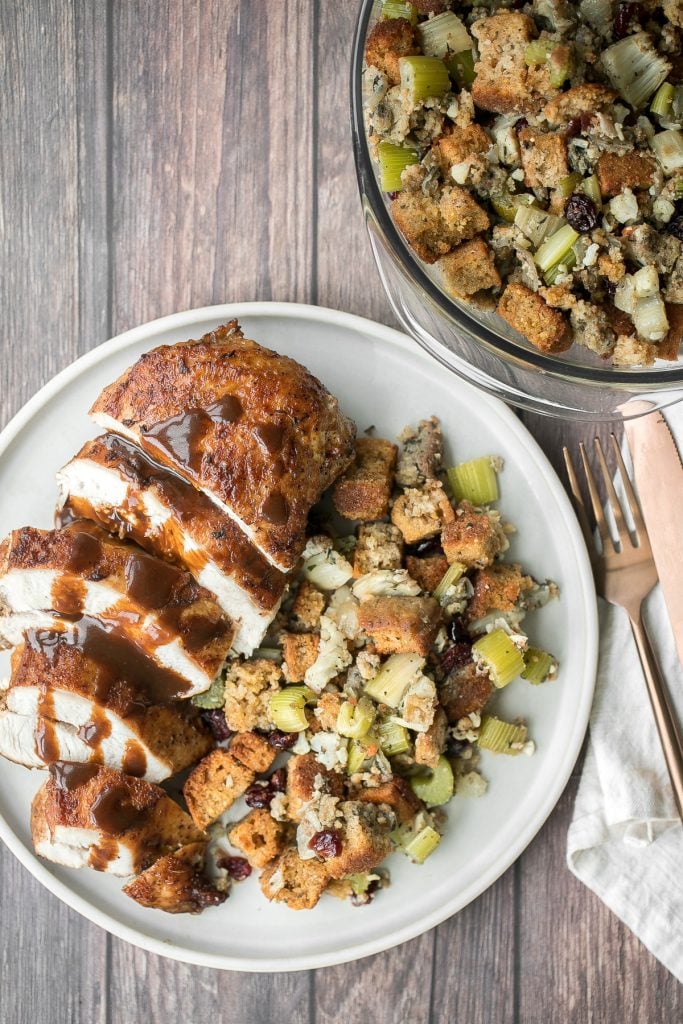
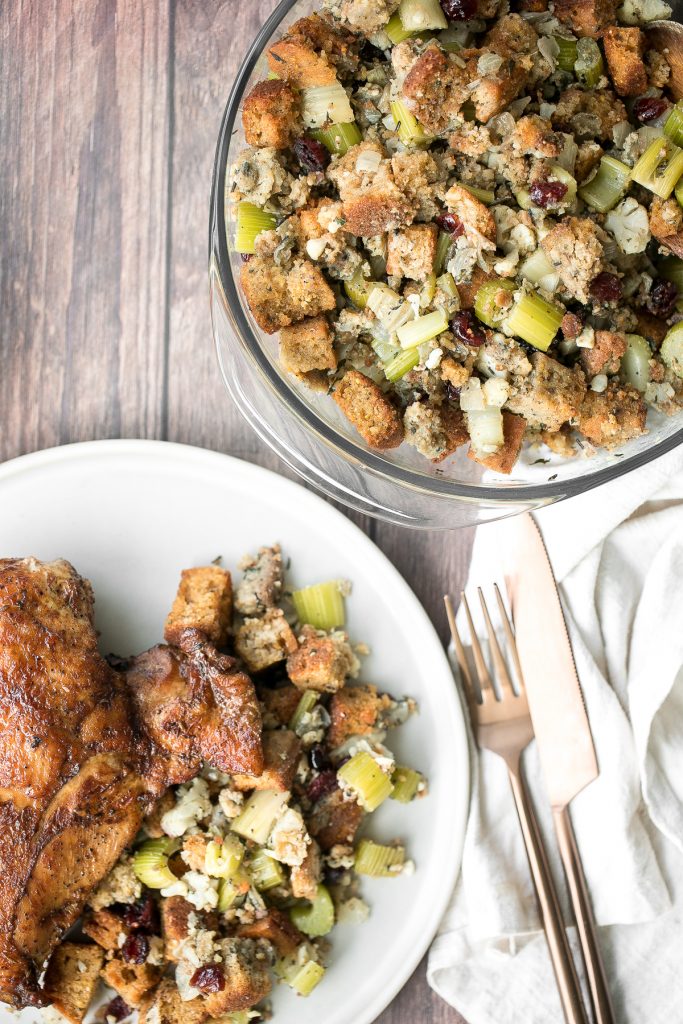
Roasted Turkey Legs with Vegetables
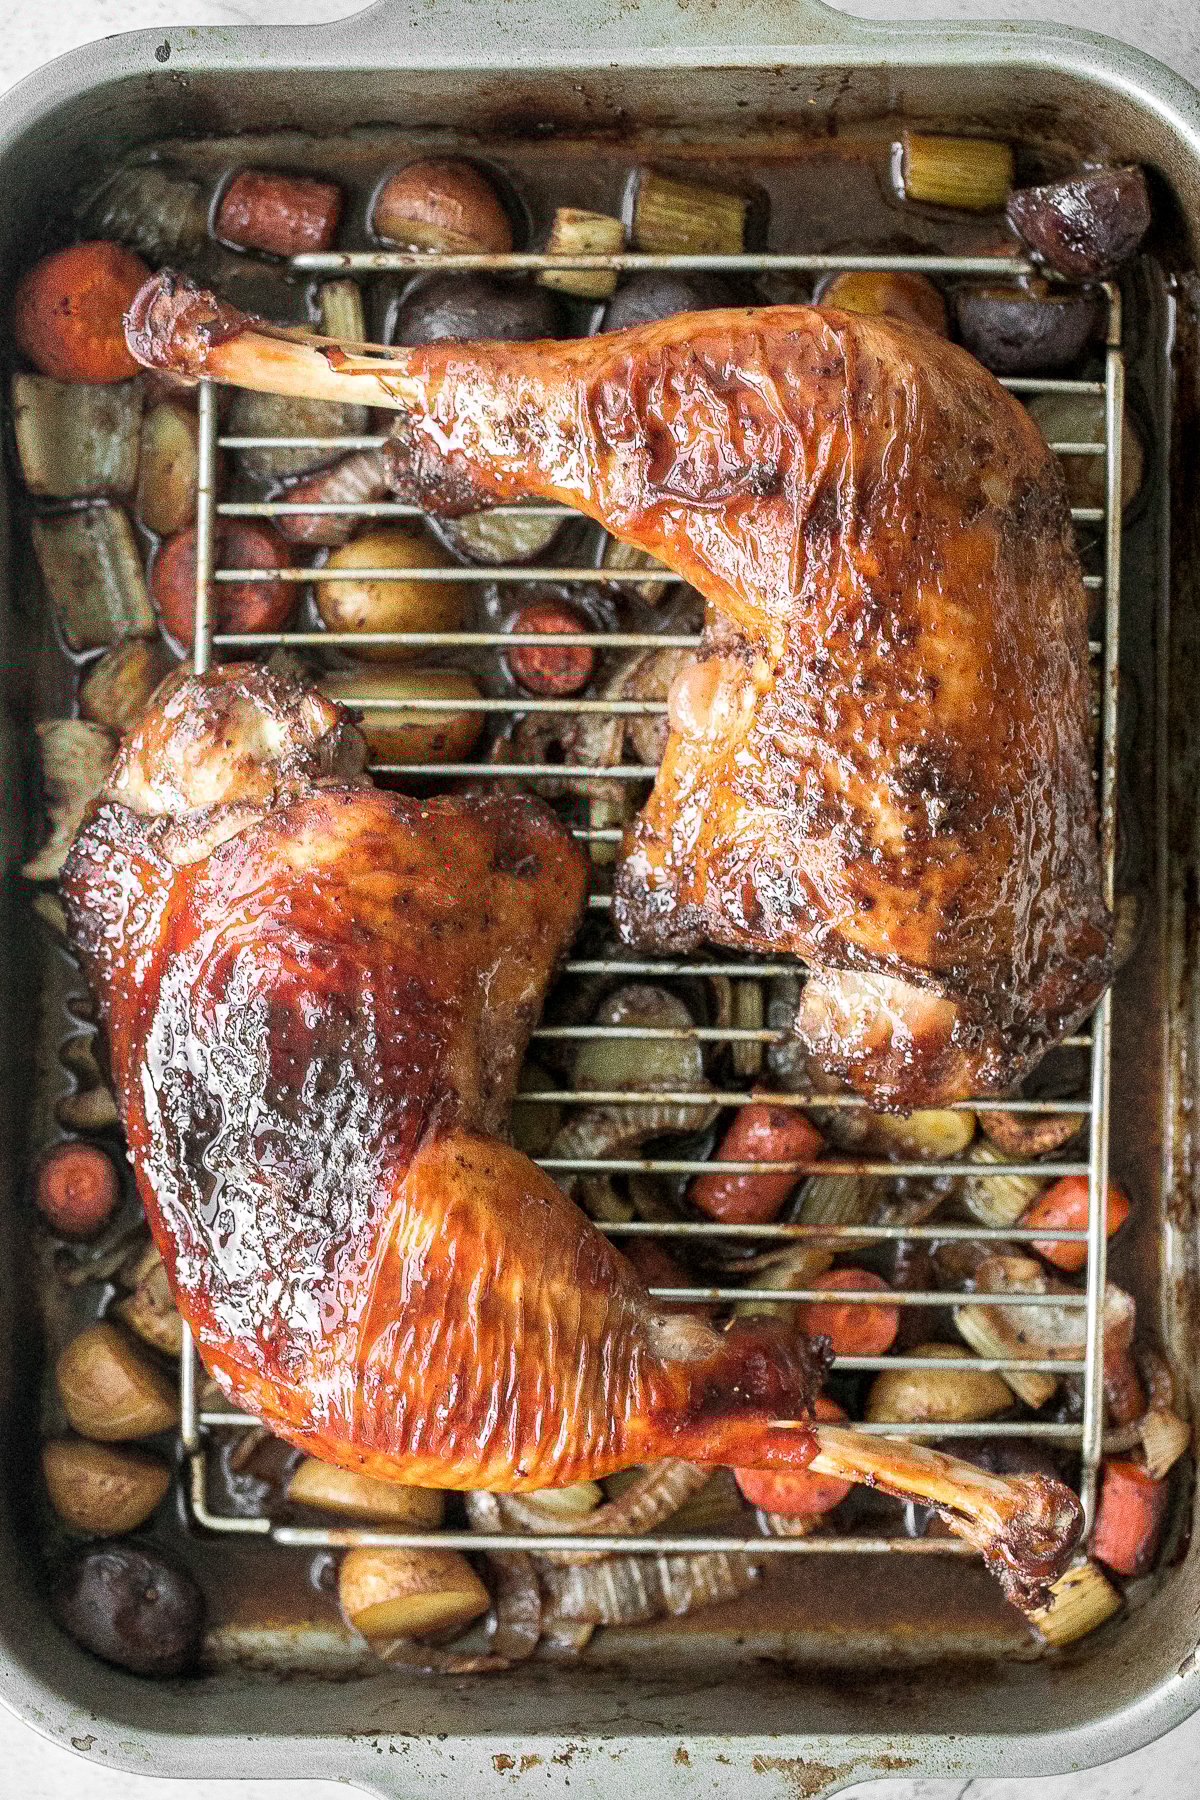
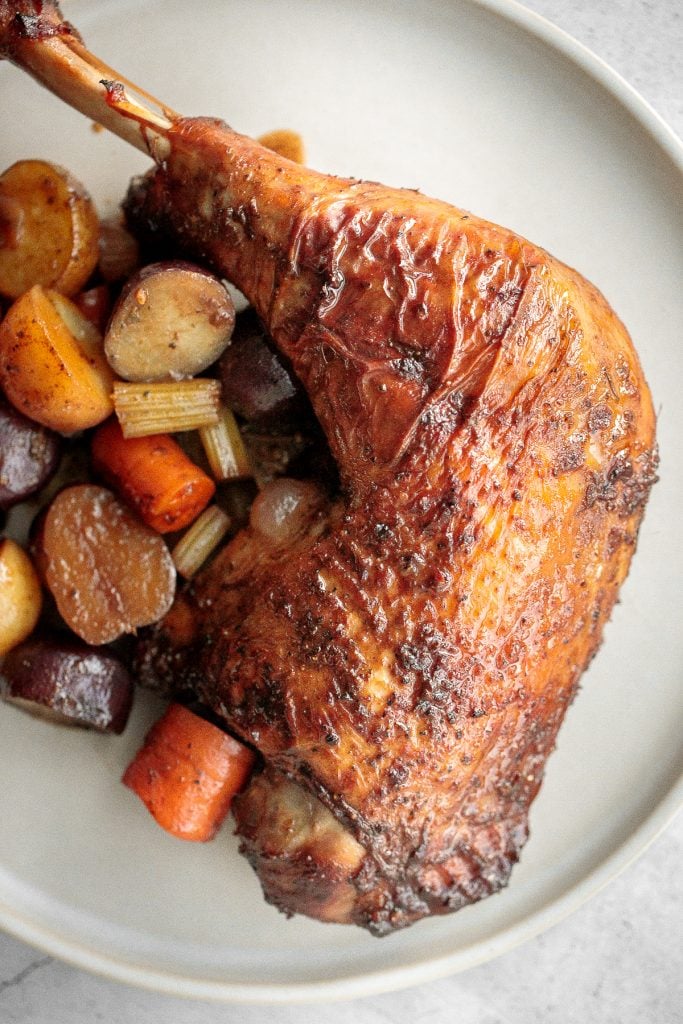
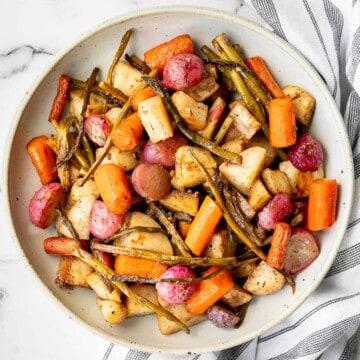
When you are craving a roast turkey but don't want to make a whole roast turkey, easy roasted turkey legs with vegetables is the perfect way to a cook a complete wholesome turkey dinner with potatoes and carrots. These turkey legs have the crispiest and perfectly browned skin and the meat is tender, succulent and so flavourful, seasoned with a simple and delicious marinade. Plus, if you marinade the turkey in advance, you can have dinner will be ready in about 1 hour.

Roasted turkey legs are the perfect family meal to serve in the fall. This meal is also the perfect main course to serve on Thanksgiving, especially this year if you are hosting a small, intimate Thanksgiving dinner for immediate family. Plus, use the pan drippings to make the easiest 2-ingredient turkey gravy.
Some other sides to serve with this on Thanksgiving are creamy mashed potatoes, garlic green beans, sweet potato casserole, and cornbread stuffing.
Ingredients
Here is what you will need for this easy sheet pan meal:
- turkey legs - I used two bone-in, skin-on, turkey legs with thighs (approximately 2 lbs. each). You can also just use turkey legs or turkey thighs.
- turkey marinade - vegetable oil, brown sugar, balsamic vinegar, Worcestershire sauce (optional), paprika, salt and pepper.
- onion
- carrots
- celery
- baby potatoes
You will also need a large roasting pan with rack, digital meat thermometer, and fine-mesh sieve (if making gravy).
How to Make the Best Roasted Turkey Legs with Vegetables
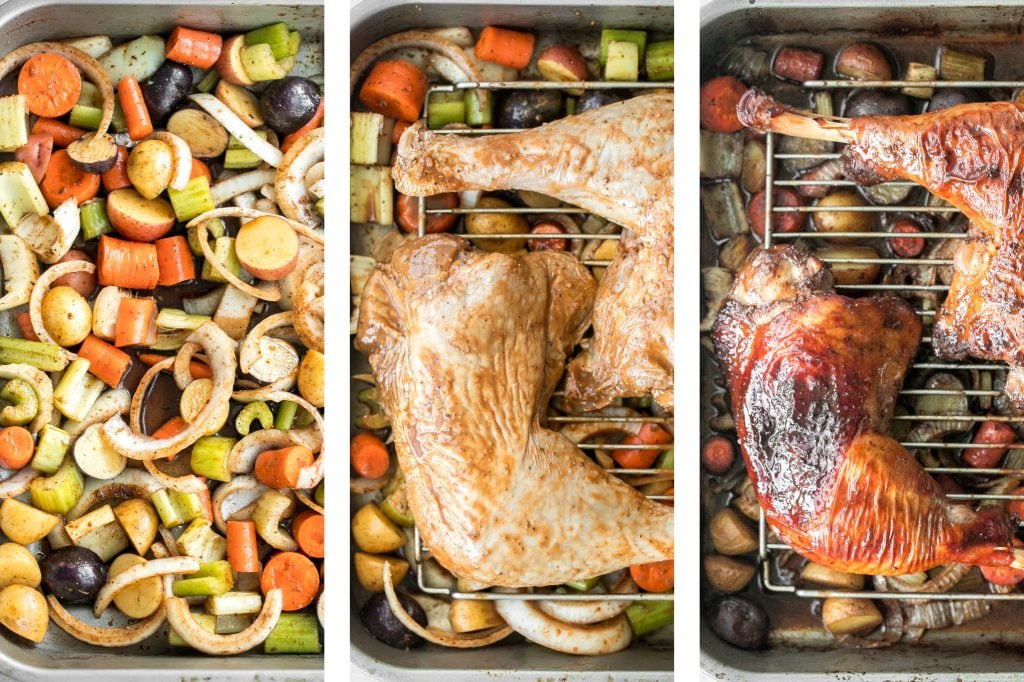
- Marinate the turkey: In a large bowl or ziploc bag, combine turkey legs with vegetable oil, brown sugar, balsamic vinegar, Worcestershire sauce, paprika, salt and pepper. Toss to coat turkey in the marinade. If marinating in a ziploc bag, press the air out of the bag, seal tightly, and press the seasoning around the turkey legs to coat. Transfer turkey to the refrigerator and marinate for at least one hour. The longer, the better.
- Assemble the roasting pan: Arrange onions, carrots, celery, and potatoes on a large roasting pan and place the roasting rack over the vegetables in the pan. Place the marinated turkey legs onto the rack. Drizzle any remaining marinade over the vegetables.
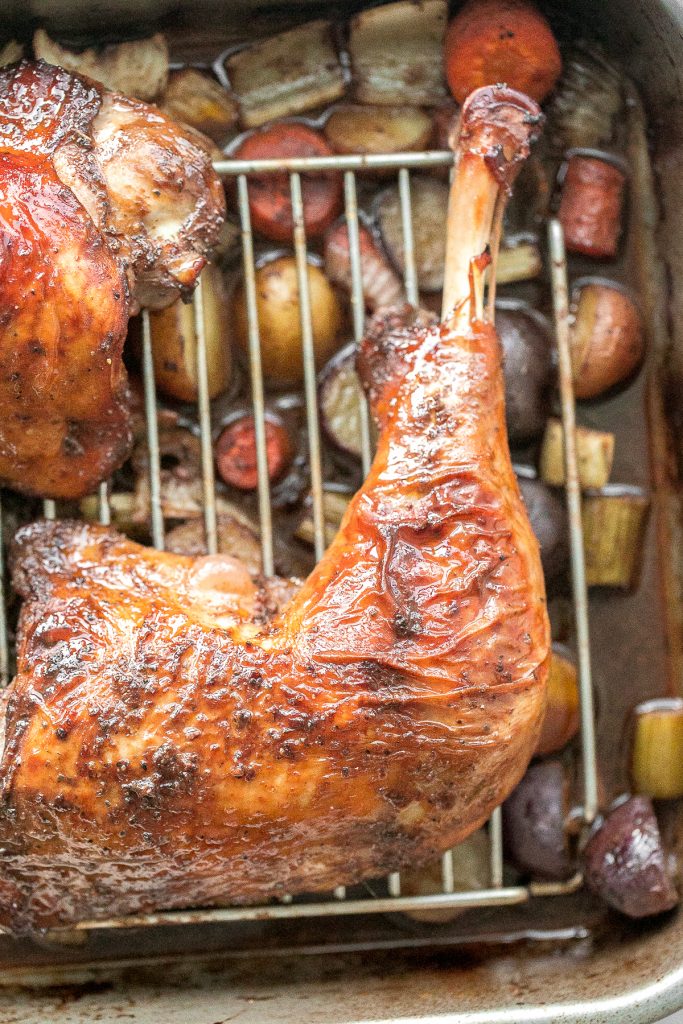
- Bake the turkey legs: Preheat oven to 375 F. Transfer the pan into the oven and bake for 1 to 1.5 hours (depending on the size of the turkey legs) until golden brown and the internal temperature for the turkey legs reaches 165 F on a digital meat thermometer.
- Broil the turkey legs (optional): Turn the broiler on high and broil the turkey legs for 3-4 minutes to achieve an extra crispy skin. Make sure to monitor the colour of the turkey skin during broiling since it can burning very quickly.
- Serve: Serve with the vegetables and drizzle with the juices from the pan. You can also use the pan drippings to make an easy 2-ingredient turkey gravy and drizzle on top.
Tips for Making Roast Turkey
- How to customize: You can customize this easy one pan dinner by switching up the vegetables and adding in whatever you have on hand. Some other great choices are sweet potatoes and butternut squash.
- How to tell if turkey is ready: The turkey is ready once the internal temperature reaches 165F. Insert a digital meat thermometer halfway inside the thickest part of the leg to get a quick reading. This will ensure that you never end up with undercooked or overcooked turkey.
- How to make gravy: Use the turkey pan juices to make easy 2-ingredient turkey gravy. You can also make a large batch of gravy using turkey stock in this classic turkey gravy recipe.
- How to store: Store in an airtight container for up to 4 days in the refrigerator. Use any leftovers to make leftover turkey sandwich, turkey fried rice or turkey wild rice soup.
How to Serve Roasted Turkey Legs
The beauty of this one pan dish is that it is a complete meal on its own with a nice serving of vegetables. You can also serve it with a side salad and some of these other delicious sides:


More Turkey Recipes
- Easy Juicy Roasted Turkey Breast
- Soy Glazed Braised Turkey Breast with Five-Spice
- Slow Cooker Turkey Breast
- The Best and Juiciest Whole Turkey
- Classic Homemade Turkey Gravy
- Easy 2-Ingredient Turkey Gravy
Tried this recipe?
I'd love to hear what you think! Leave a comment and rating below to share your feedback. Your reviews help others discover this recipe and help me keep creating more free recipes for you. Snap a photo and tag me on social media @aheadofthyme too.
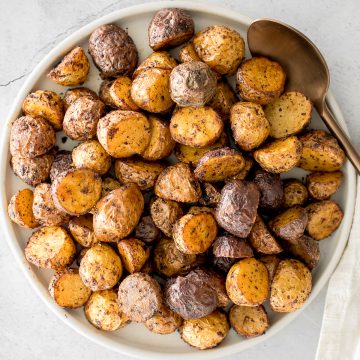
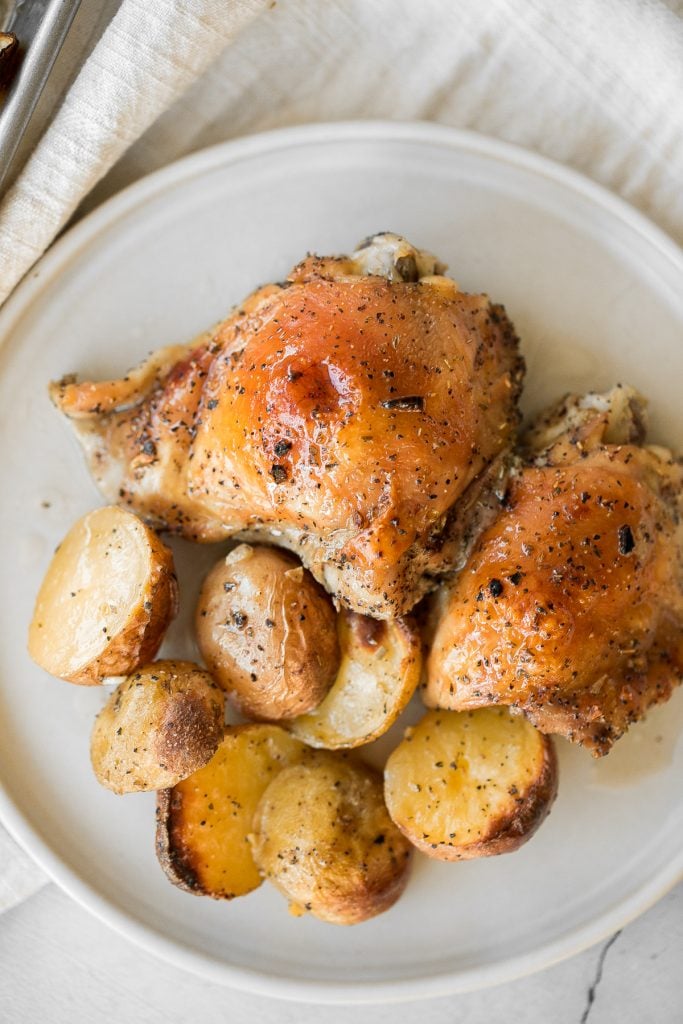
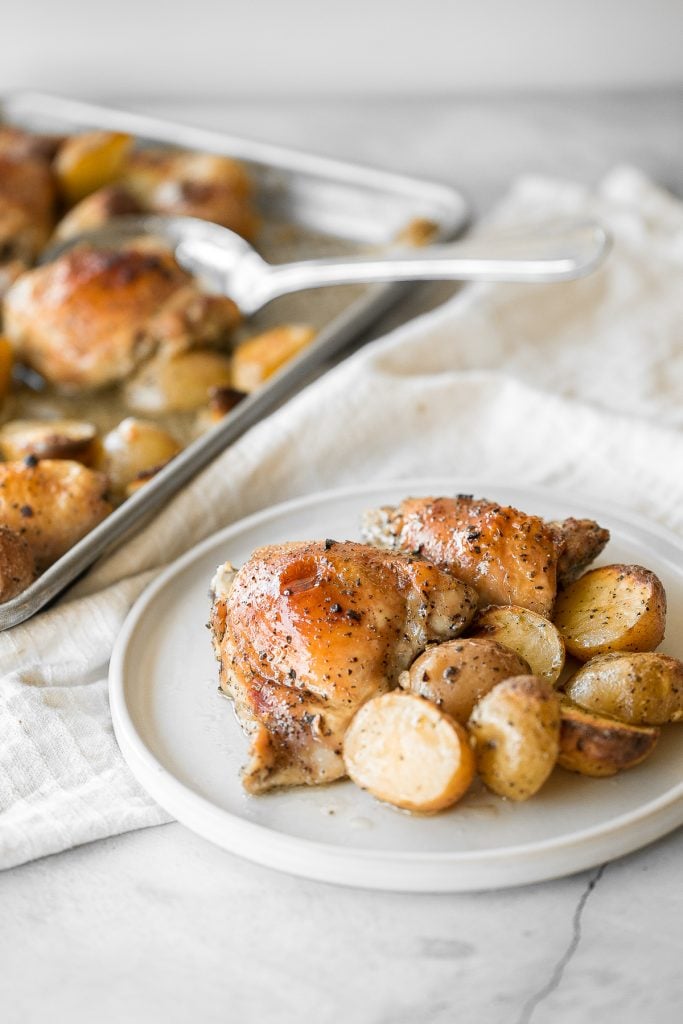
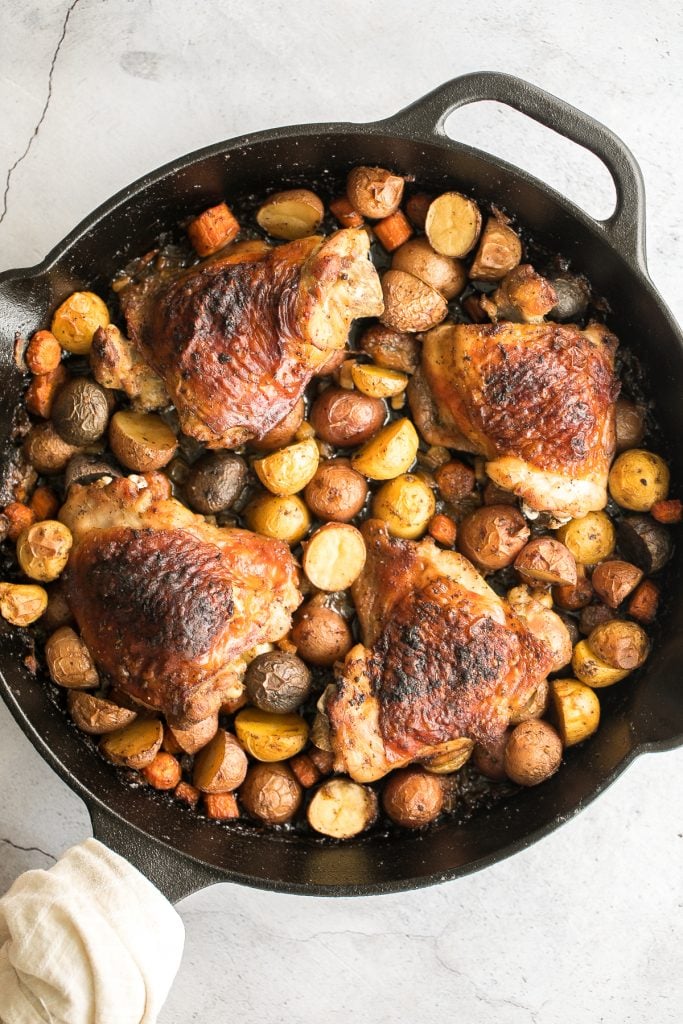
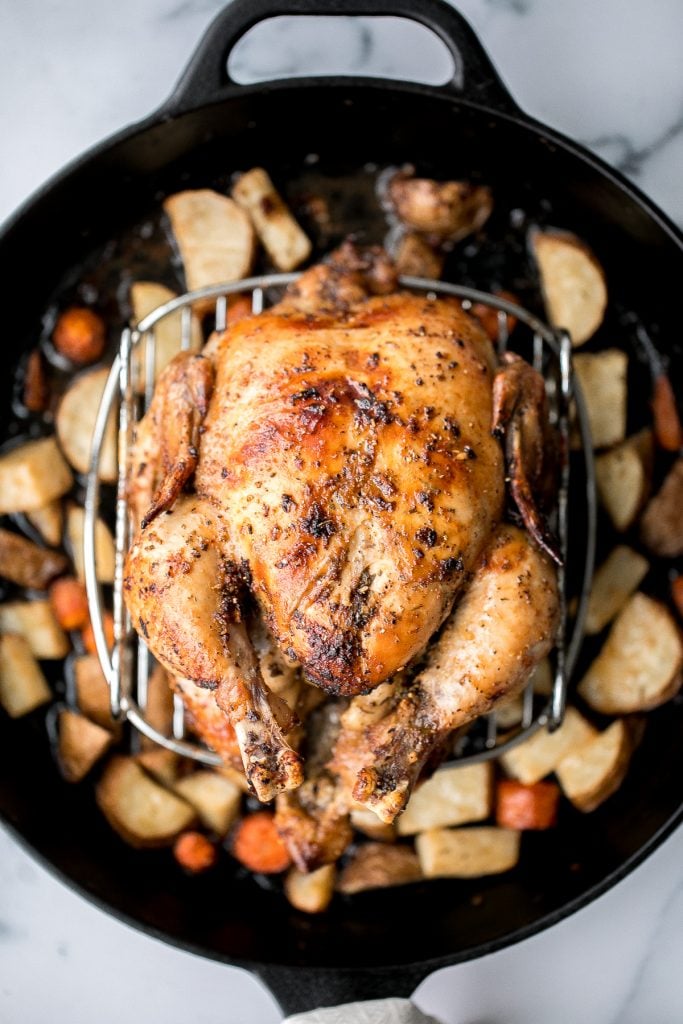
One Pan Garlic Roasted Chicken and Baby Potatoes
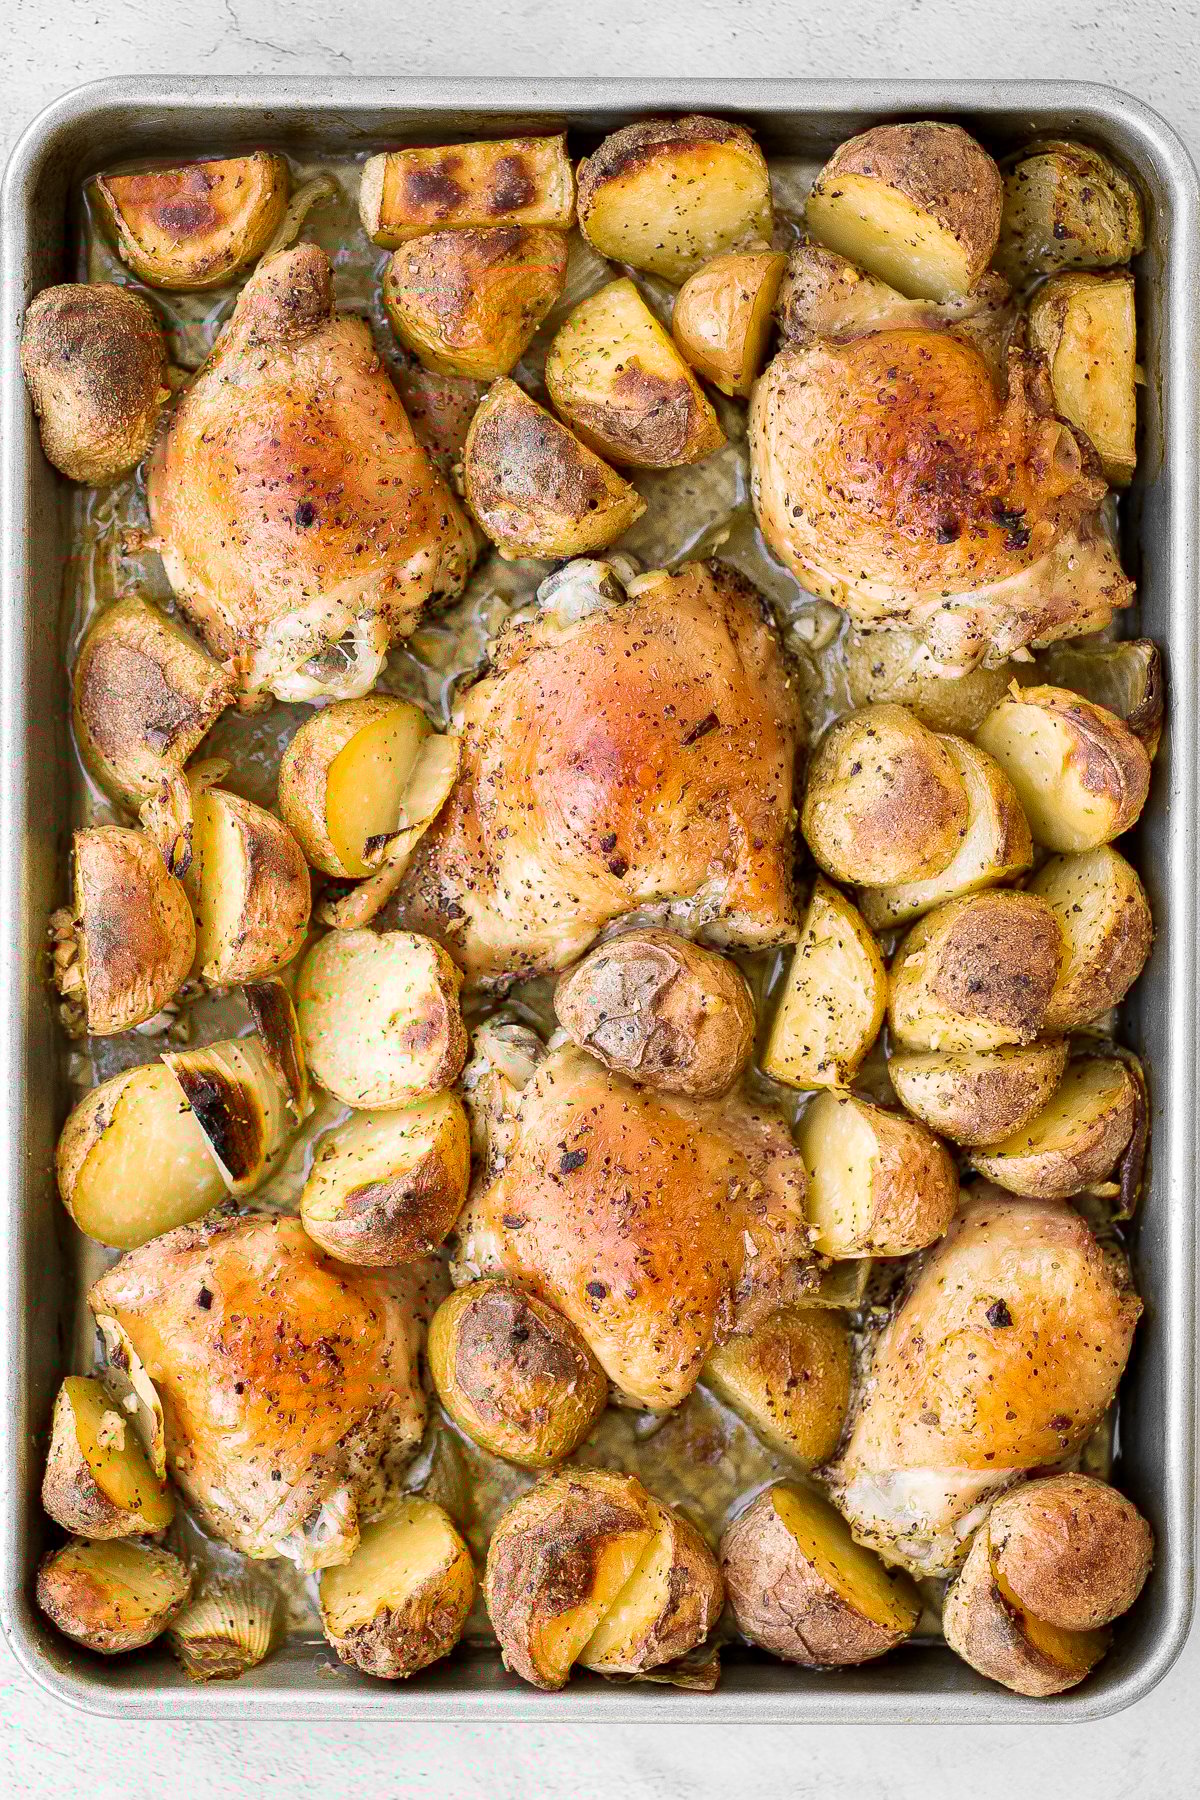
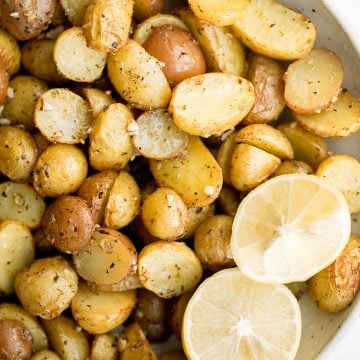
Who doesn't love classic chicken and potatoes? Make your life easy with one pan garlic roasted chicken and baby potatoes. This wholesome chicken dinner is made with flavourful, succulent and tender chicken thighs and baby potatoes seasoned with herbs. Plus, it takes only 10 minutes to prep in a single sheet pan (no extra dishes!). Just toss everything together, pop it in the oven and let the oven do its magic. So so easy and so delicious.
This is one of my go-to dishes because it's delicious and super easy, but it's especially a go-to when I have guests over. Kind of for the same exact reason. And if you have a lot of company, you can just double or triple the recipe and basically feed an army. I like to serve this alongside a big salad to add some green to my dinner. Try quinoa spinach power salad or Mediterranean chickpea wedge salad with hummus dressing. It also pairs really nicely with a one pot rice pilaf with carrots and creamy garlic mashed cauliflower.
Ingredients
To make this easy sheet pan chicken dinner, you will need the following:
- chicken thighs - you can also use chicken legs, but they may cook a little faster so you will need to adjust your cook time. I also recommend using bone-in, skin-on chicken because that gorgeous, golden crispy skin is one of the best parts. You can still cook these thighs without the skin, but the texture will be different.
- baby potatoes - you can also use regular potatoes chopped into small bite-sized pieces.
- onion
- garlic
- olive oil
- salt and pepper
- dried rosemary - You could also use any dried herbs. I often use Italian seasoning with this instead when I am out of rosemary.
You will also need measuring spoons and a 1/4 pan baking sheet.
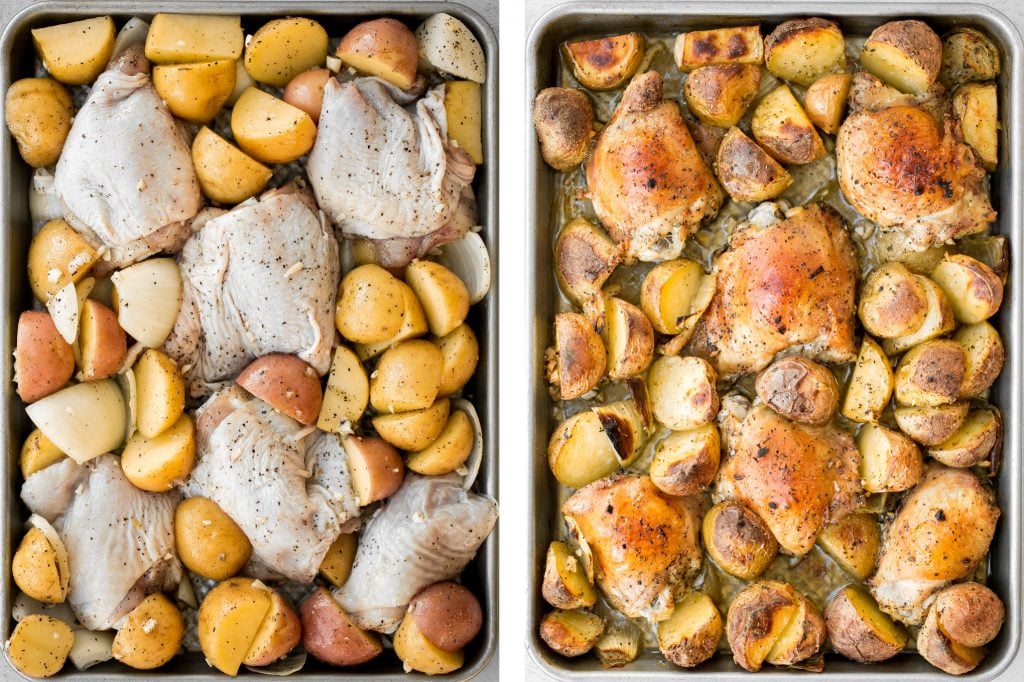
How to Make the Best One Pan Garlic Roasted Chicken and Baby Potatoes
It is so easy to make this sheet pan chicken meal in just a few simple steps:
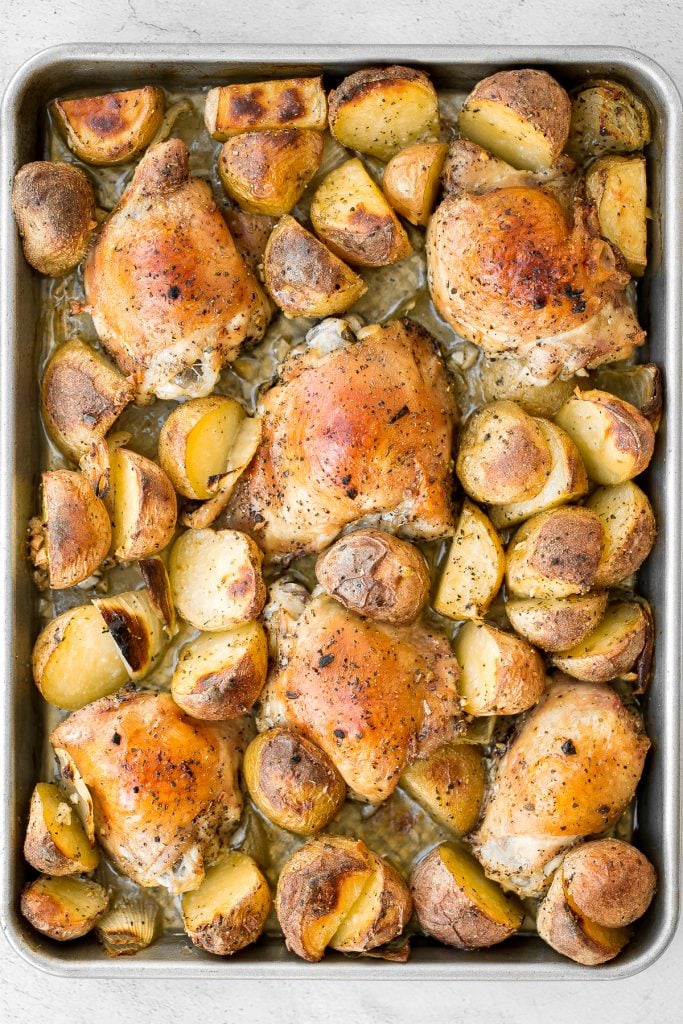
- Combine the ingredients. In a large roasting pan or casserole dish, add chicken, potatoes, carrots, onion, garlic and olive oil. Season with salt and pepper and toss to coat. Arrange chicken in between the potatoes. Season chicken with more salt and pepper on both sides. Sprinkle rosemary over the chicken and vegetables.
- Roast: Place the pan in a 350 F preheated oven and cook for 1 hour and 25 minutes until the skin is crispy and golden brown and potatoes are soft when pierced with a fork.
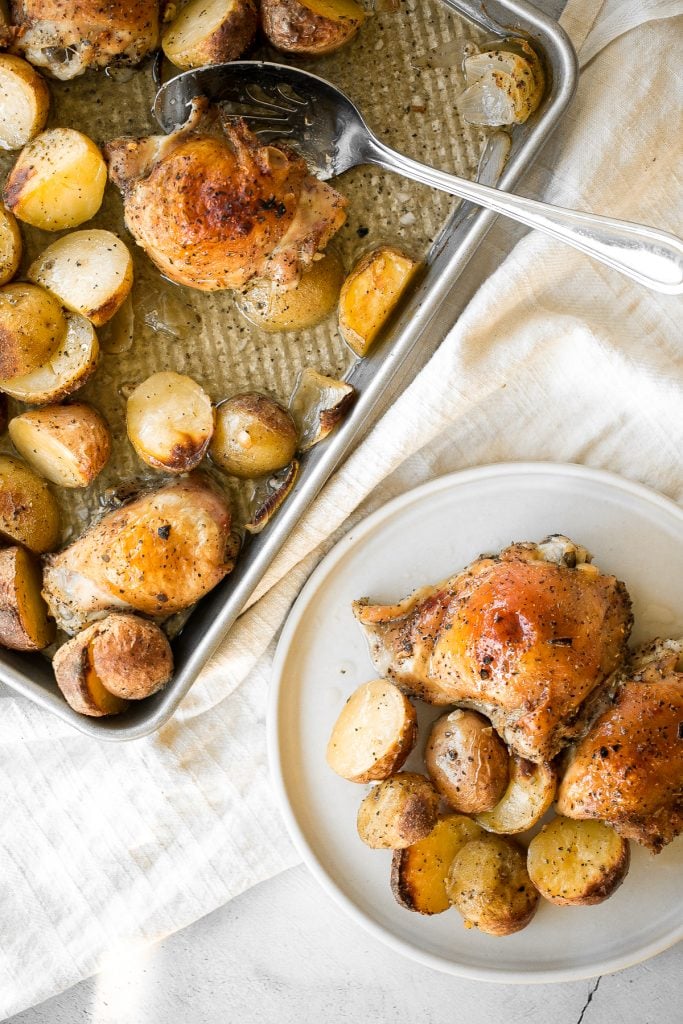
- Broil (optional): For crispier and more browned skin, turn the broiler on high and broil for 3-4 minutes until crispy. Be sure to keep a close eye on the broiler as things can burn very quickly. Remove from oven and serve.
Tips for Making One Pan Roasted Chicken
- How to customize: What is great about garlic roasted chicken and baby potatoes is that you can completely customize it with whatever vegetables that you have on hand. I often add in 2 medium carrots, but I completely forgot to pick them up this time, so I just left it out. Some other vegetables to add in are sweet potatoes, butternut squash, broccoli or mushrooms.
- How to store: Transfer any leftovers into an airtight container with the juices from the pan, and refrigerate for up to 4 days. To reheat, place in the microwave, air fryer at 300F for 5 minutes, or in the oven at 300F for 10 minutes.
More Sheet Pan Chicken Recipes
- Sheet Pan Curry Chicken and Vegetables
- Sheet Pan Balsamic Chicken and Vegetables
- Sheet Pan Soy Glazed Chicken Thighs
- Tandoori Chicken Sheet Pan Dinner
- Sheet Pan Chicken Fajitas
- Roasted Balsamic Chicken with Cranberries
Tried this recipe?
I'd love to hear what you think! Leave a comment and rating below to share your feedback. Your reviews help others discover this recipe and help me keep creating more free recipes for you. Snap a photo and tag me on social media @aheadofthyme too.
This post was originally posted in May 2017. It was completely updated in October 2020 with new photographs and written content.
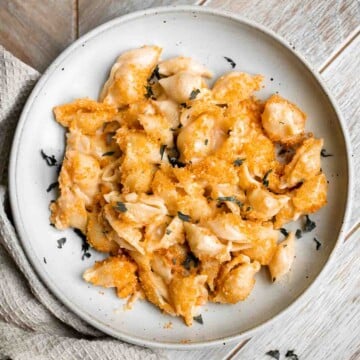
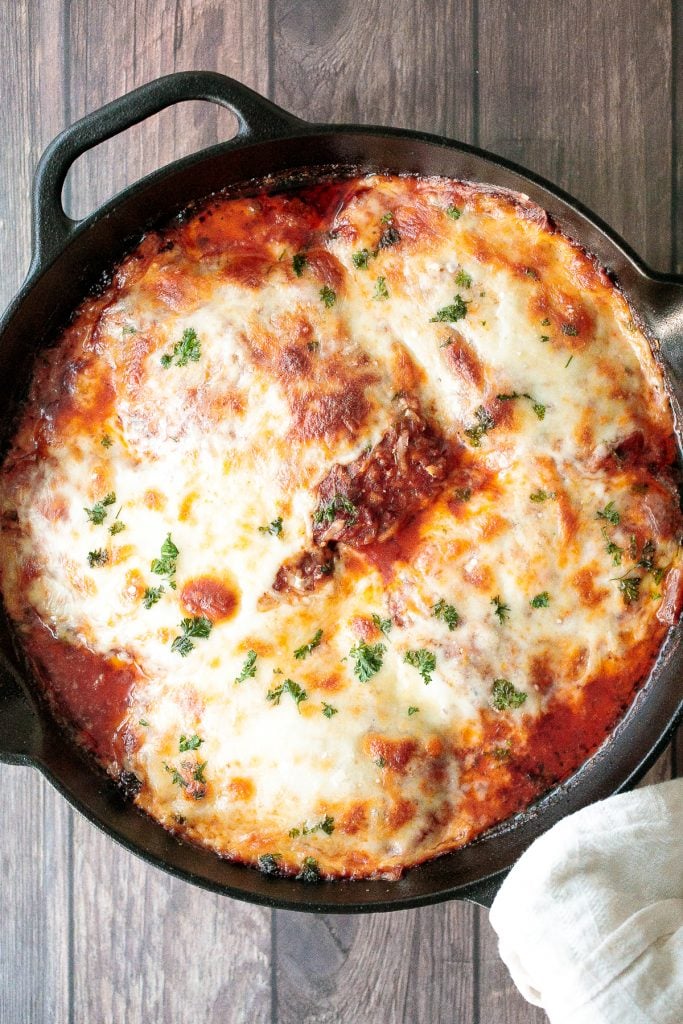
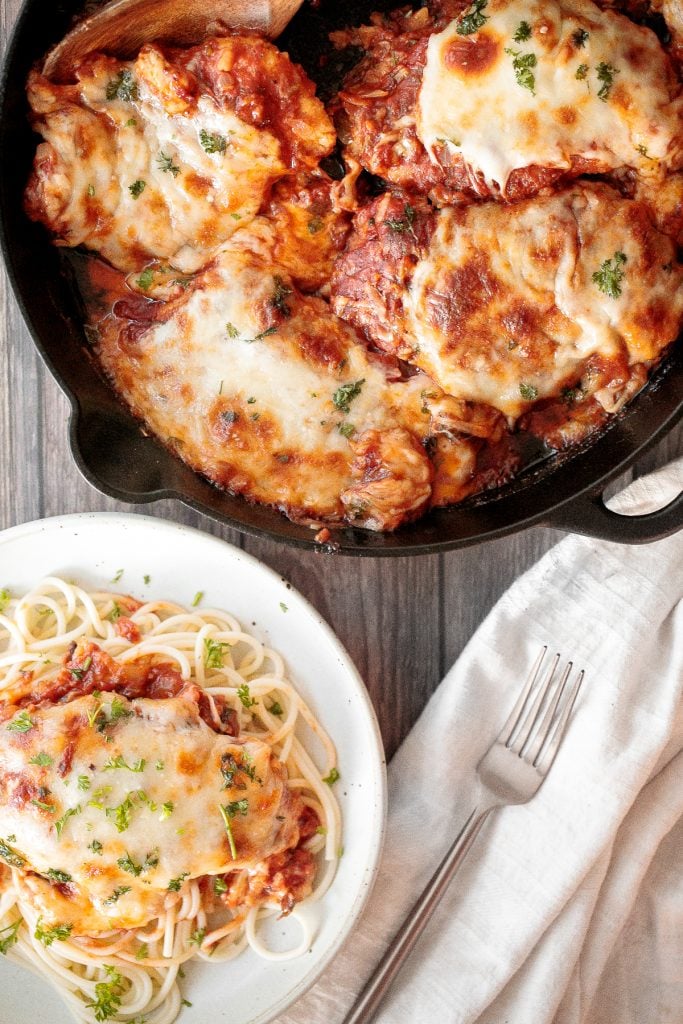
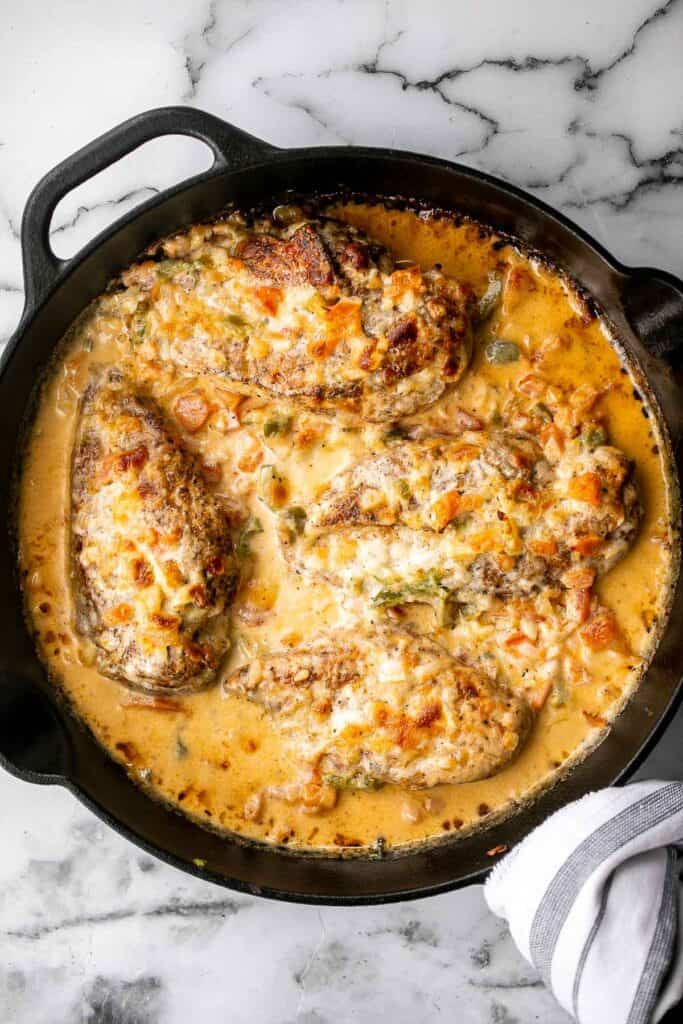
Easy Chicken Parmesan (Parmigiana)

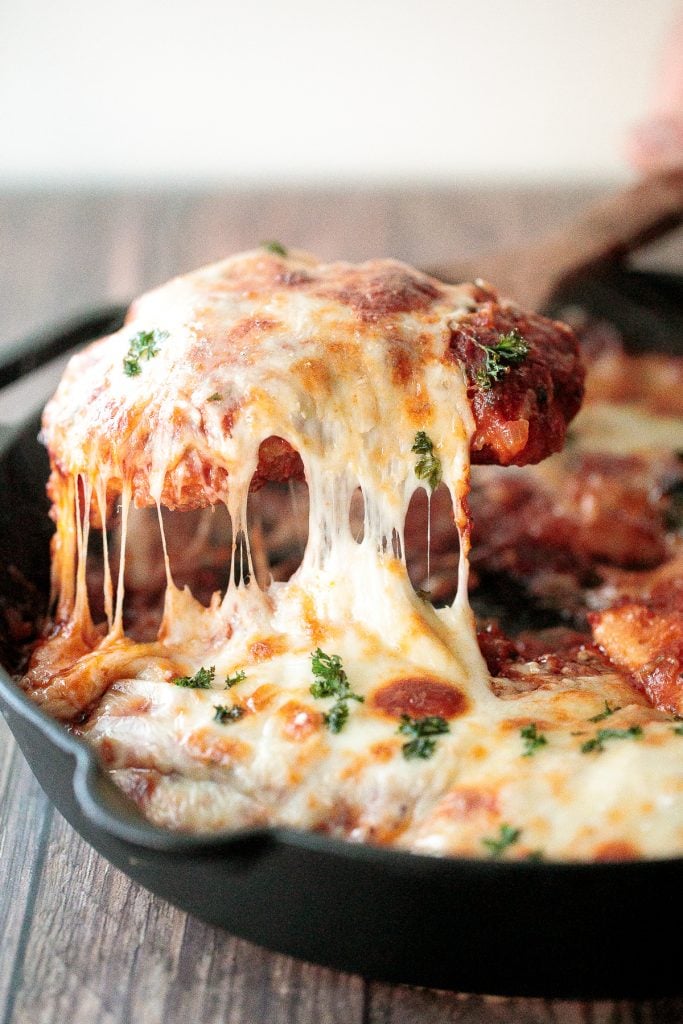
Easy chicken parmesan (parmigiana) is the ultimate chicken dinner comfort food. Soft and tender chicken with a crispy, breaded coating covered in a rich tomato sauce, and topped with golden melted mozzarella and parmesan cheese. This crowd favourite is much easier to make than you might think. Serve it on its own or over a bed of spaghetti pasta.

I love a good chicken dinner, especially one that looks super fancy and despite having a few different steps, is easy to make. Creamy chicken roulade with spinach and mushrooms or roasted spatchcock chicken are some of my other go-tos. For more chicken dinner inspo, check out my most popular quick and easy chicken recipes.
What is in Chicken Parmesan?
- chicken breasts - You can use 4 or 5 halved chicken breasts (whatever fits on your skillet). I used 5 halves and then used the remaining chicken to make Shanghai style fried noodles the next day.
- breaded coating - salt, Panko breadcrumbs, Parmesan cheese, and garlic powder.
- eggs - to help the breaded coating stick onto the chicken.
- vegetable oil - for pan-frying the chicken.
- tomato sauce - onion, garlic, tomato sauce, tomato paste, Italian seasoning, fresh parsley, and salt.
- mozzarella cheese - for that cheesy topping.
- Parmesan cheese - for the topping.
- fresh parsley - to garnish on top.
You will also need a cast-iron skillet (or an oven safe skillet). You could also fry the chicken in a regular skillet and then transfer into a casserole dish to bake with the sauce and cheese.
How to Make the Best Chicken Parmesan
First, prepare the chicken. Place each halved chicken breast between 2 sheets of plastic wrap or in a freezer bag. Carefully flatten the chicken breasts with a rolling pin to achieve uniform thickness, about ½-inch thick. Don't pound the breasts too hard. Pat dry each breast completely with a paper towel and season with 1 teaspoon salt. Set aside for at least 10 minutes.
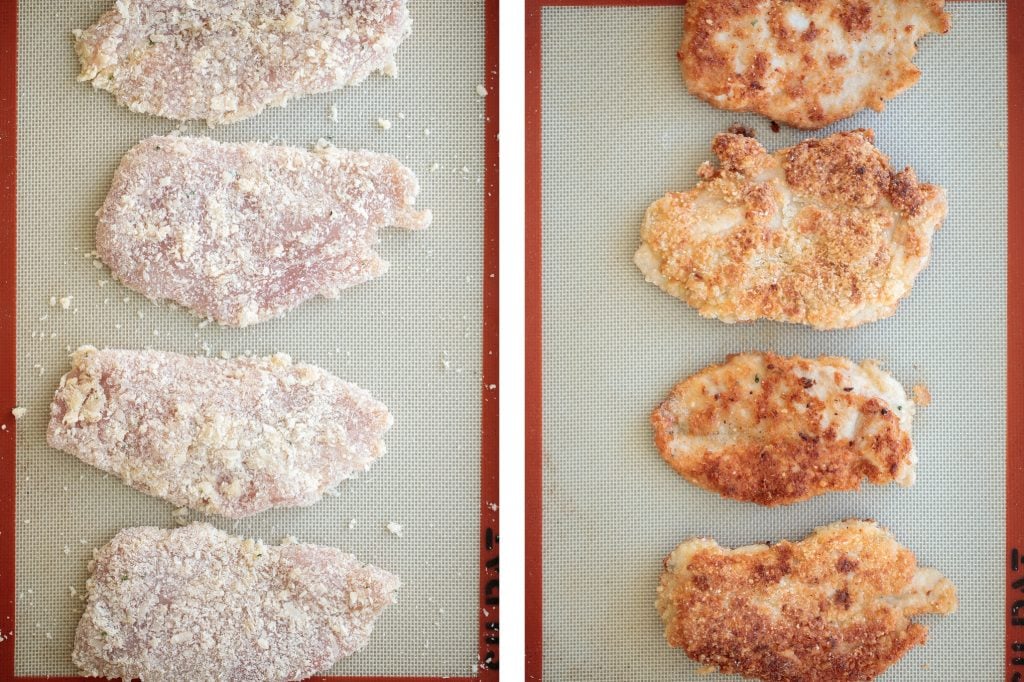
How to Coat Chicken Parmesan
- In a shallow plate, whisk together Panko breadcrumbs, Parmesan cheese, garlic powder and the remaining 1 teaspoon salt. Set aside.
- Add beaten eggs into another shallow plate.
- Dip both sides of each halved chicken breast into the eggs to evenly coat them, and then dip it into the breadcrumb mixture. The breadcrumbs will stick to the egg wash.
Then, heat oil in a non stick cast-iron skillet over medium-high heat for 2 minutes until the hot oil is sizzling and shimmering. Pan fry the chicken breasts for about 4-5 minutes on each side until golden and crispy. Set aside on a plate. The chicken should be almost fully cooked and the internal temperature should reach above 155 F, as measured on a meat thermometer.
Then, prepare the tomato sauce. Remove all but 2 tablespoons of the hot oil in the skillet. Add onions and sauté for 2 minutes until soft and tender. Then, add garlic and sauté for another 2 minutes until fragrant. Add tomato sauce, tomato paste, Italian seasoning, parsley, and salt. Stir well to combine and bring the sauce to a simmer. Turn to low heat and let it simmer for 5 minutes. Remove from heat and transfer sauce into a bowl.
Now, let's assemble the chicken parmesan and bake. In the same skillet (or in another cast-iron skillet or casserole dish), evenly spread ½ cup of the sauce on the bottom. Place the chicken breasts spaced evenly apart over the sauce. Cover each breast with ¼ cup sauce, and top each breast with a slice of mozzarella cheese and 1 tablespoon Parmesan cheese. Sprinkle finely chopped parsley on top.

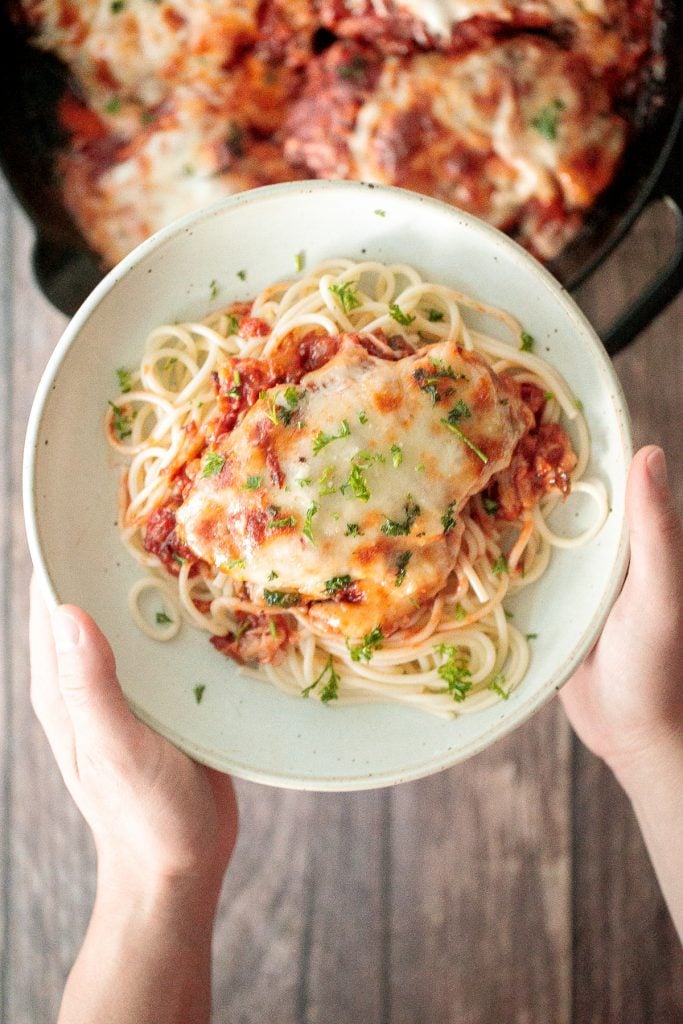
Bake in a 425F preheated oven for 15-20 minutes until the cheese melts and turns golden brown. Serve with spaghetti and garnish with more parsley on top.
How to Serve Chicken Parmesan
Serve this easy chicken parmesan over a plate of spaghetti, or with some crusty bread for major dipping and soaking up of all that sauce. My favourites are easy ciabatta rolls, rosemary garlic focaccia, and skillet dinner rolls. I also like to serve it with a side salad or roasted vegetables.
More Chicken Recipes
- Creamy Chicken Roulade with Spinach and Mushrooms
- Apple Dijon Braised Chicken Thighs
- Skillet Chicken Thighs and Potatoes
- Apple Cider Chicken with Butternut Squash
- Creamy Skillet Chicken with Lemon Garlic Sauce
- One Pot Spanish Chicken and Rice
- Dutch Oven Whole Roast Chicken
Tried this recipe?
I'd love to hear what you think! Leave a comment and rating below to share your feedback. Your reviews help others discover this recipe and help me keep creating more free recipes for you. Snap a photo and tag me on social media @aheadofthyme too.

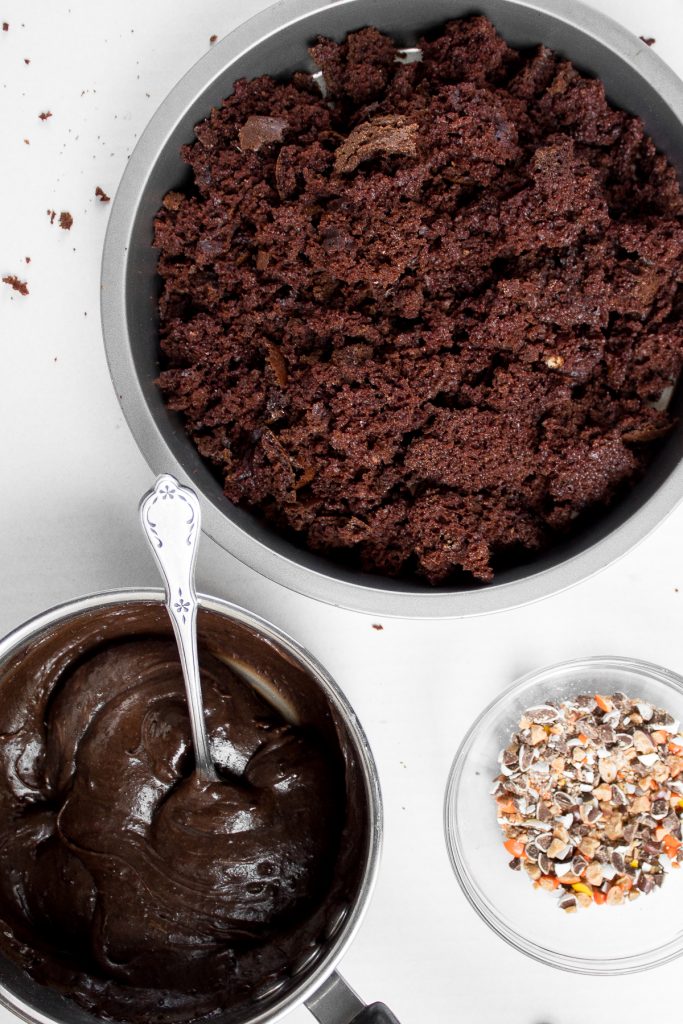
Spooky Halloween Chocolate Cake Pops

Looking for something cute and festive to bake for Halloween but do not have the time or energy to go all out on your decorating skills? Well, then these bite-sized spooky chocolate cake pops are for you. These balls of chocolate cake crumbs with chocolate frosting and Halloween sprinkles scream Halloween without major effort, and can be made using leftover cake to make things even easier. They are the perfect Halloween treat.

These chocolate cake pops are easy to make especially if you are using leftover cake. Plus, you don't even need to use a fancy cake pop tray to make these. Just like our homemade vanilla cake pops or safari animal print cake pops, you simple combine cake with frosting, roll the mixture into balls, then freeze until ready to coat in chocolate and sprinkles. It's so easy, but it does need some time to prepare, so plan accordingly.

Ingredients in Chocolate Cake Pops
To make these chocolate cake pops, you will first need to bake a small chocolate cake, or you can use leftover cake to make it even easier. If making the cake from scratch, here is everything you will need:
- all-purpose flour
- cocoa powder
- salt
- baking powder + baking soda
- egg
- granulated sugar
- vegetable oil
- milk
- hot coffee
- chocolate frosting - made with sugar, heavy cream, butter, chocolate, and vanilla extract.
- candies or nuts - this is optional, to add into the cake pops. I used white M&M's and Reese's candies.
- chocolate - for the chocolate coating.
- sprinkles - I used Halloween-themed sprinkles. You can change up the theme of these cake pops by using any kind of sprinkles you would like. For instance, red and green for Christmas, pink and red for Valentine's, and pale colours for Easter. The options are truly endless.
You will also need measuring cups and spoons, mixing bowls, round 6-inch cake pan, lollipop sticks, and a cake pop stand (or styrofoam block).

How to Make the Best Chocolate Cake Pops
First, you need chocolate cake. You can use leftover cake, or bake your own in a few easy steps.
- Preheat the oven to 375 F. Grease and flour a round 6-inch cake pan.
- In a medium bowl, sift together flour, cocoa powder, salt, baking powder and baking soda. Set aside.
- In a large bowl, use a hand mixer to beat egg and slowly add sugar. Continue to beat until mixture turns light yellow. Add oil and milk and mix until combined.
- Add the flour mixture and mix until incorporated. Then, add coffee and mix until incorporated. The batter will be a little more runny than most cake batters.
- Pour the batter into the prepared cake pan. Bake for 25-30 minutes until a toothpick inserted into the centre of the cake comes out clean. Let cake cool down completely in the pan.
Next, make the chocolate frosting. In a small saucepan, add cream and sugar and heat on medium-high. Dissolve the sugar into the cream, then add butter and remove from the heat. Mix until combined. Stir in chopped chocolate and vanilla. Set aside to cool down completely.
How to Shape and Assemble Cake Pops
Once the cake and frosting have cooled down, we are ready to shape and assemble the cake balls. Scoop out the cake and crumble into a large bowl (leaving the dry edges). You can also transfer it into a blender and give it a few pulses to crumble.
Add in the frosting and mix until incorporated and smooth. The cake mixture should have a play-doh like consistency. Add chopped candies and/or nuts, if desired.
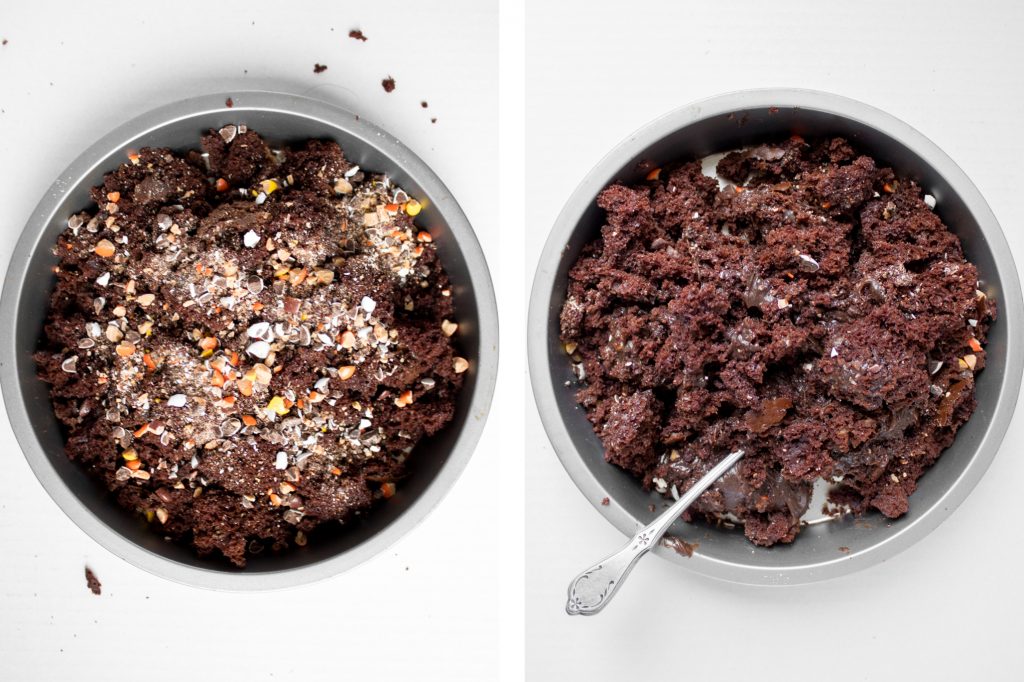
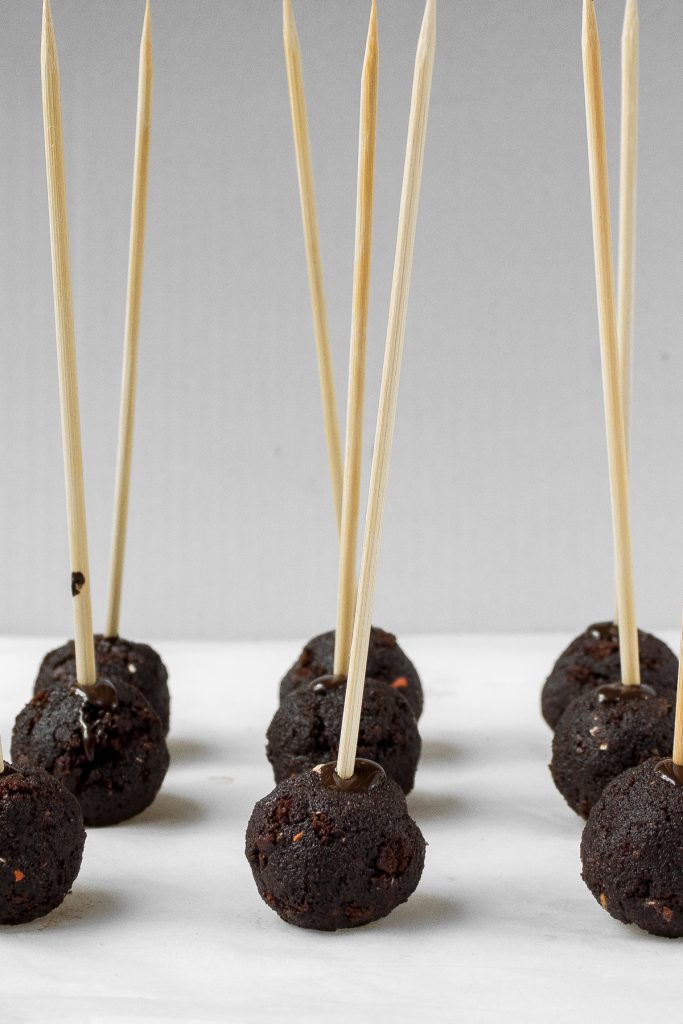
Then, shape the cake mixture into 1 to 1.5 inch size balls.
Melt some of the dark chocolate and dip ½-inch of each lollipop stick into the chocolate and stick into a ball. Repeat with all remaining cake pops. Place the cake pops on a parchment-lined baking sheet and into the freezer for one hour.
How to Coat and Decorate Cake Pops
Melt the rest of the dark chocolate in a tall, narrow cup or liquid measuring cup. Dip each cake pop in chocolate, coating it completely. Then add some sprinkles to cover it. Make sure to work fast as the chocolate solidifies very quickly.
Place the coated cake pops upright into a cake pop stand (or styrofoam block). Repeat with remaining cake pops. Place the cake pops into the refrigerator and allow the coating to set completely, approximately one hour.

How to Store Cake Pops
Store these cake pops on a cake pop stand or styrofoam block at room temperature for up to 2 days, or in the refrigerator for up to one week.
Cake pops also freeze beautifully. Transfer them into a large freezer bag (once they have fully set) and freeze for up to 2 months. When ready to eat, allow them to thaw in the refrigerator overnight.

More Bite-Sized Dessert Recipes
- Vanilla Cake Pops from Scratch
- Mini Pumpkin Pies (Small Batch)
- Individual Apple Crisp
- Safari Animal Print Cake Pops
- Caramel Cheesecake Brownies
- Baked Jelly Donuts with Strawberry Jam
- Dark Chocolate Raspberry Truffles
Tried this recipe?
I'd love to hear what you think! Leave a comment and rating below to share your feedback. Your reviews help others discover this recipe and help me keep creating more free recipes for you. Snap a photo and tag me on social media @aheadofthyme too.

25 Best Thanksgiving Dessert Recipes
Even after an epic Thanksgiving dinner, there is always room for dessert. From classic pies, to cakes, to cookies and more, I have got you covered. Today I am sharing my 25 most popular and favourite Thanksgiving dessert recipes that go beyond pumpkin pie (but of course, pumpkin pie included too).

Pies and Crisps
Classic Thanksgiving Pumpkin Pie
Thanksgiving just isn't the same without a slice of classic Thanksgiving pumpkin pie. There is nothing better than a bite into that flaky crust and smooth pumpkin filling, full of those classic pumpkin spice flavours.
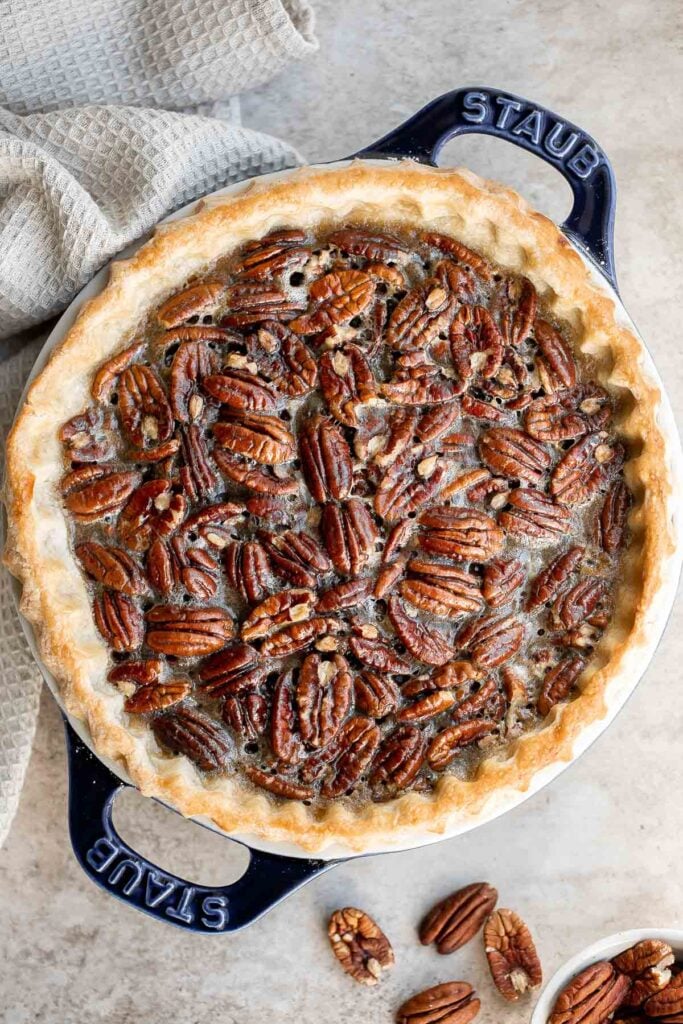
Old-fashioned pecan pie is a classic fall dessert with a homemade pie crust and sweet custard filling loaded with crunchy pecans - perfect for Thanksgiving. For such a fancy pie, it is actually embarrassingly easy to make.
Pumpkin mascarpone pie is a warm and cozy holiday dessert that is incredibly easy to make with just minutes of prep work before popping into the oven.
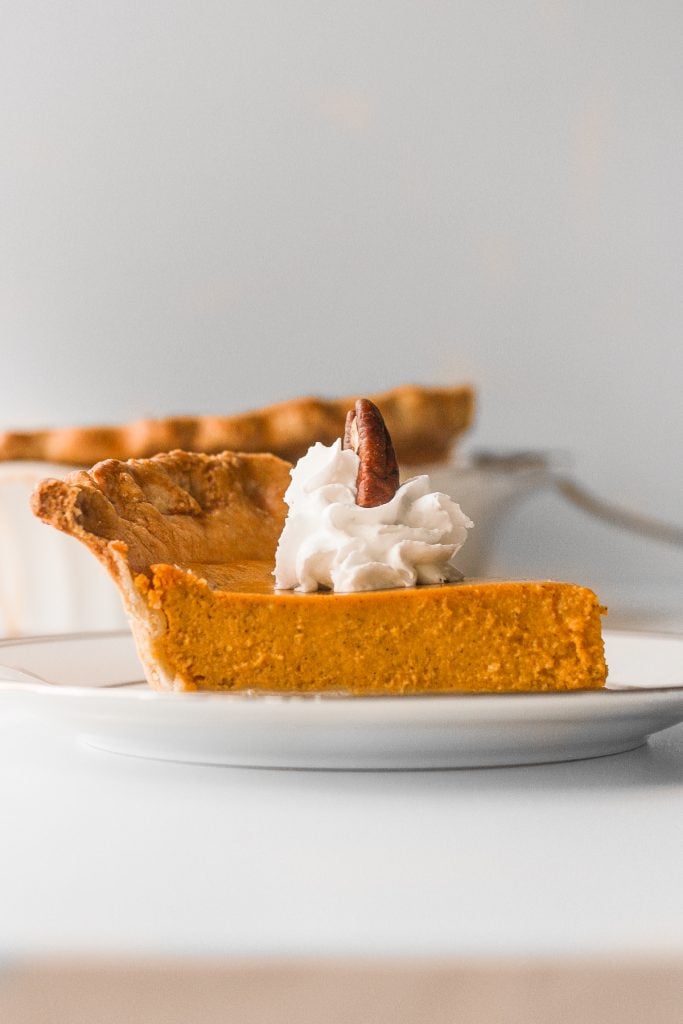
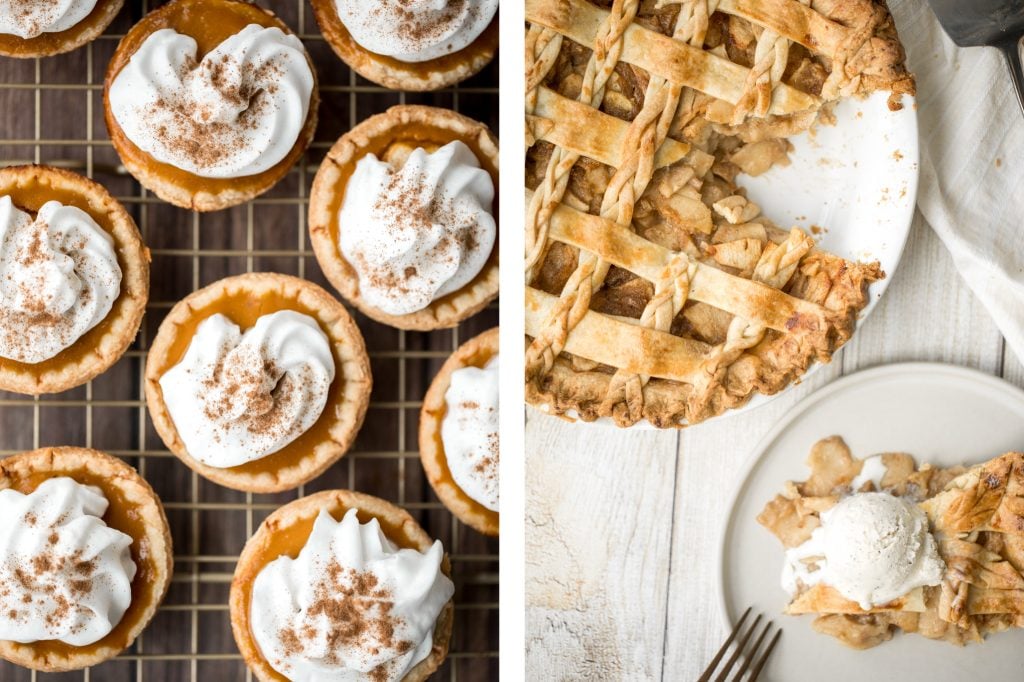
Small batch mini pumpkin pies with a flaky crust, delicious pumpkin pie filling, and cinnamon whipped cream, are perfect for a small Thanksgiving crowd.

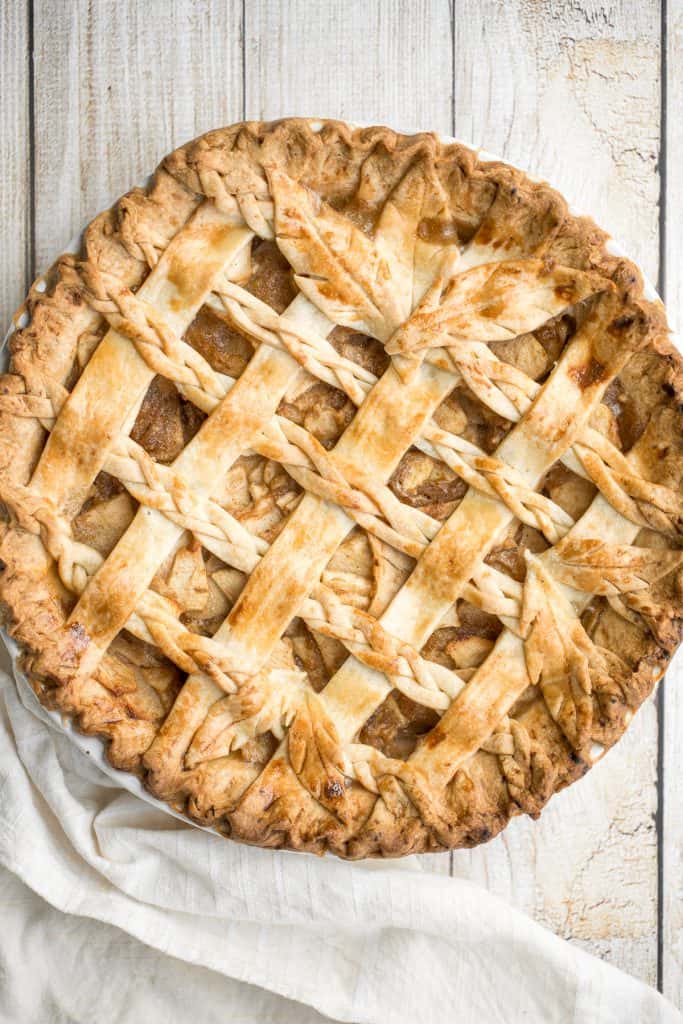
This braided lattice apple pie is packed with cinnamon apples tossed in a caramel sauce and sealed in a buttery, flaky pie crust with a braided lattice top. Serve it with a scoop of vanilla ice cream.
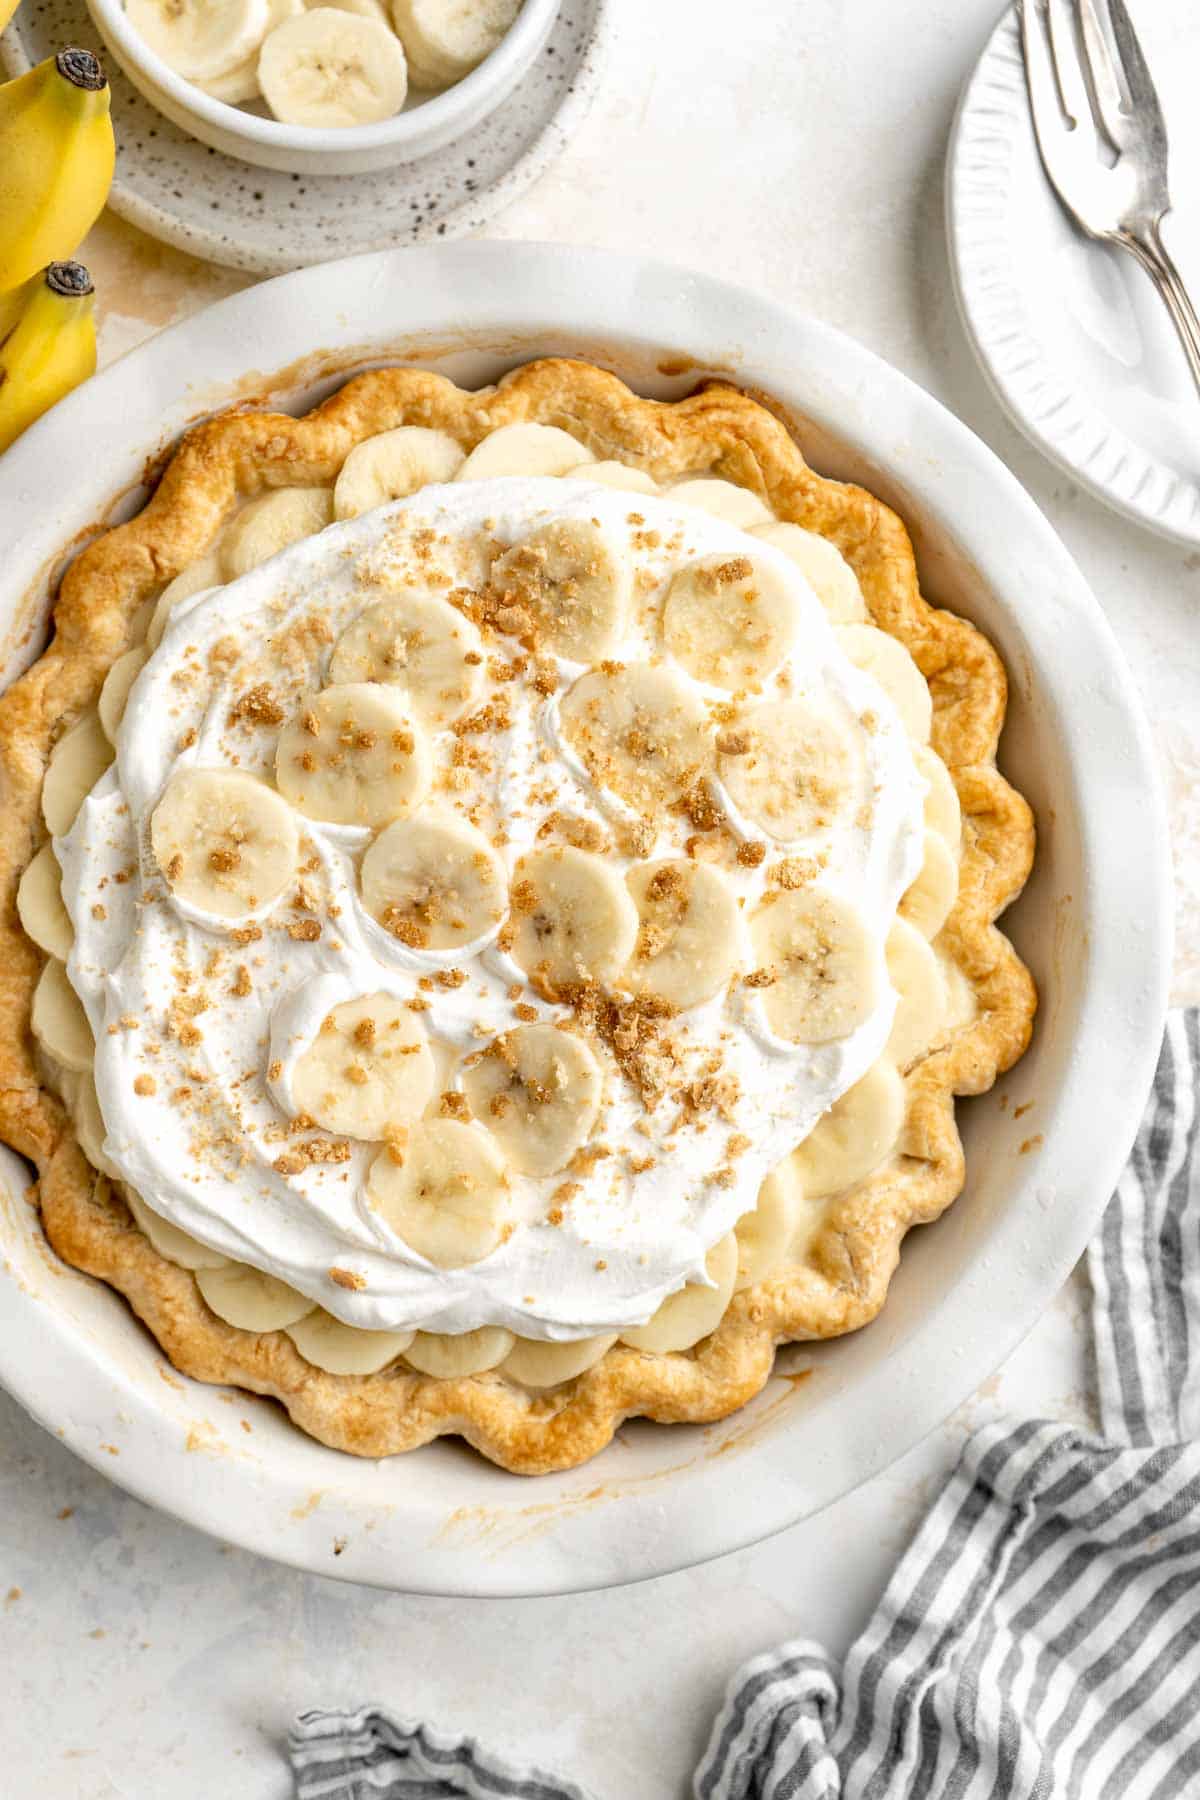
Homemade Banana Cream Pie is endlessly creamy with a buttery, flaky pie crust, a dreamy homemade vanilla custard, fresh banana slices, and whipped cream.
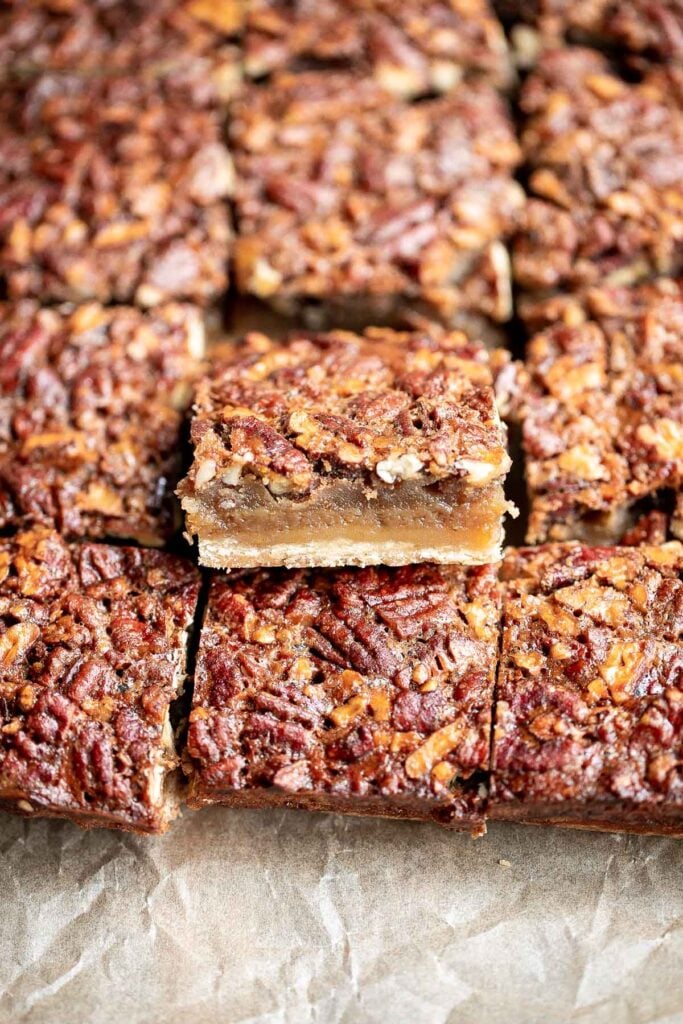
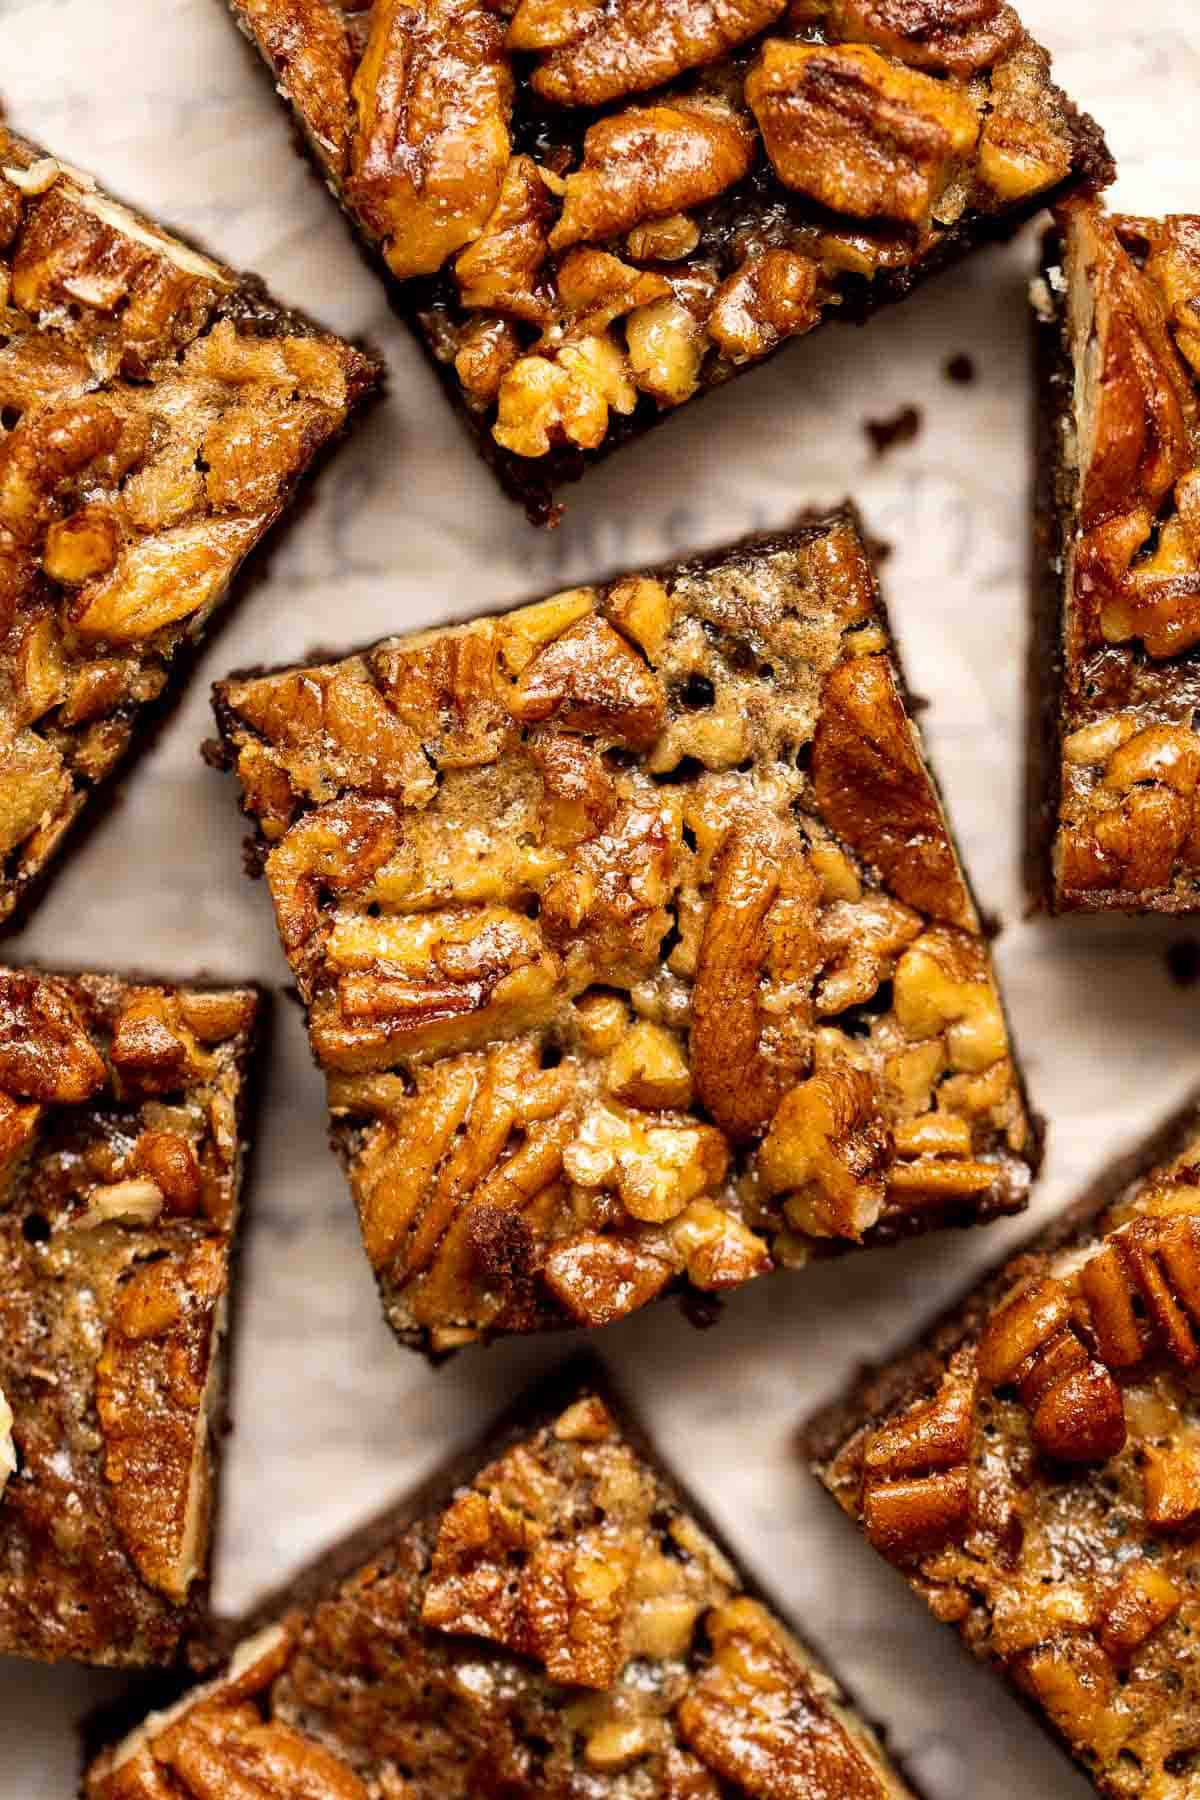
Pecan pie bars are the best and easiest way to enjoy the flavors of pecan pie but with half the effort and in a handheld bite-sized form.
Baked Apples are soft, warm, and tender, with a crunchy sweet cinnamon oat filling. This cozy and comforting fall dessert is quick easy to make too.
With a buttery, flaky crust and spiced sweet apple filling, these homemade Apple Turnovers are hands down one of the best ways to enjoy this seasonal fruit.

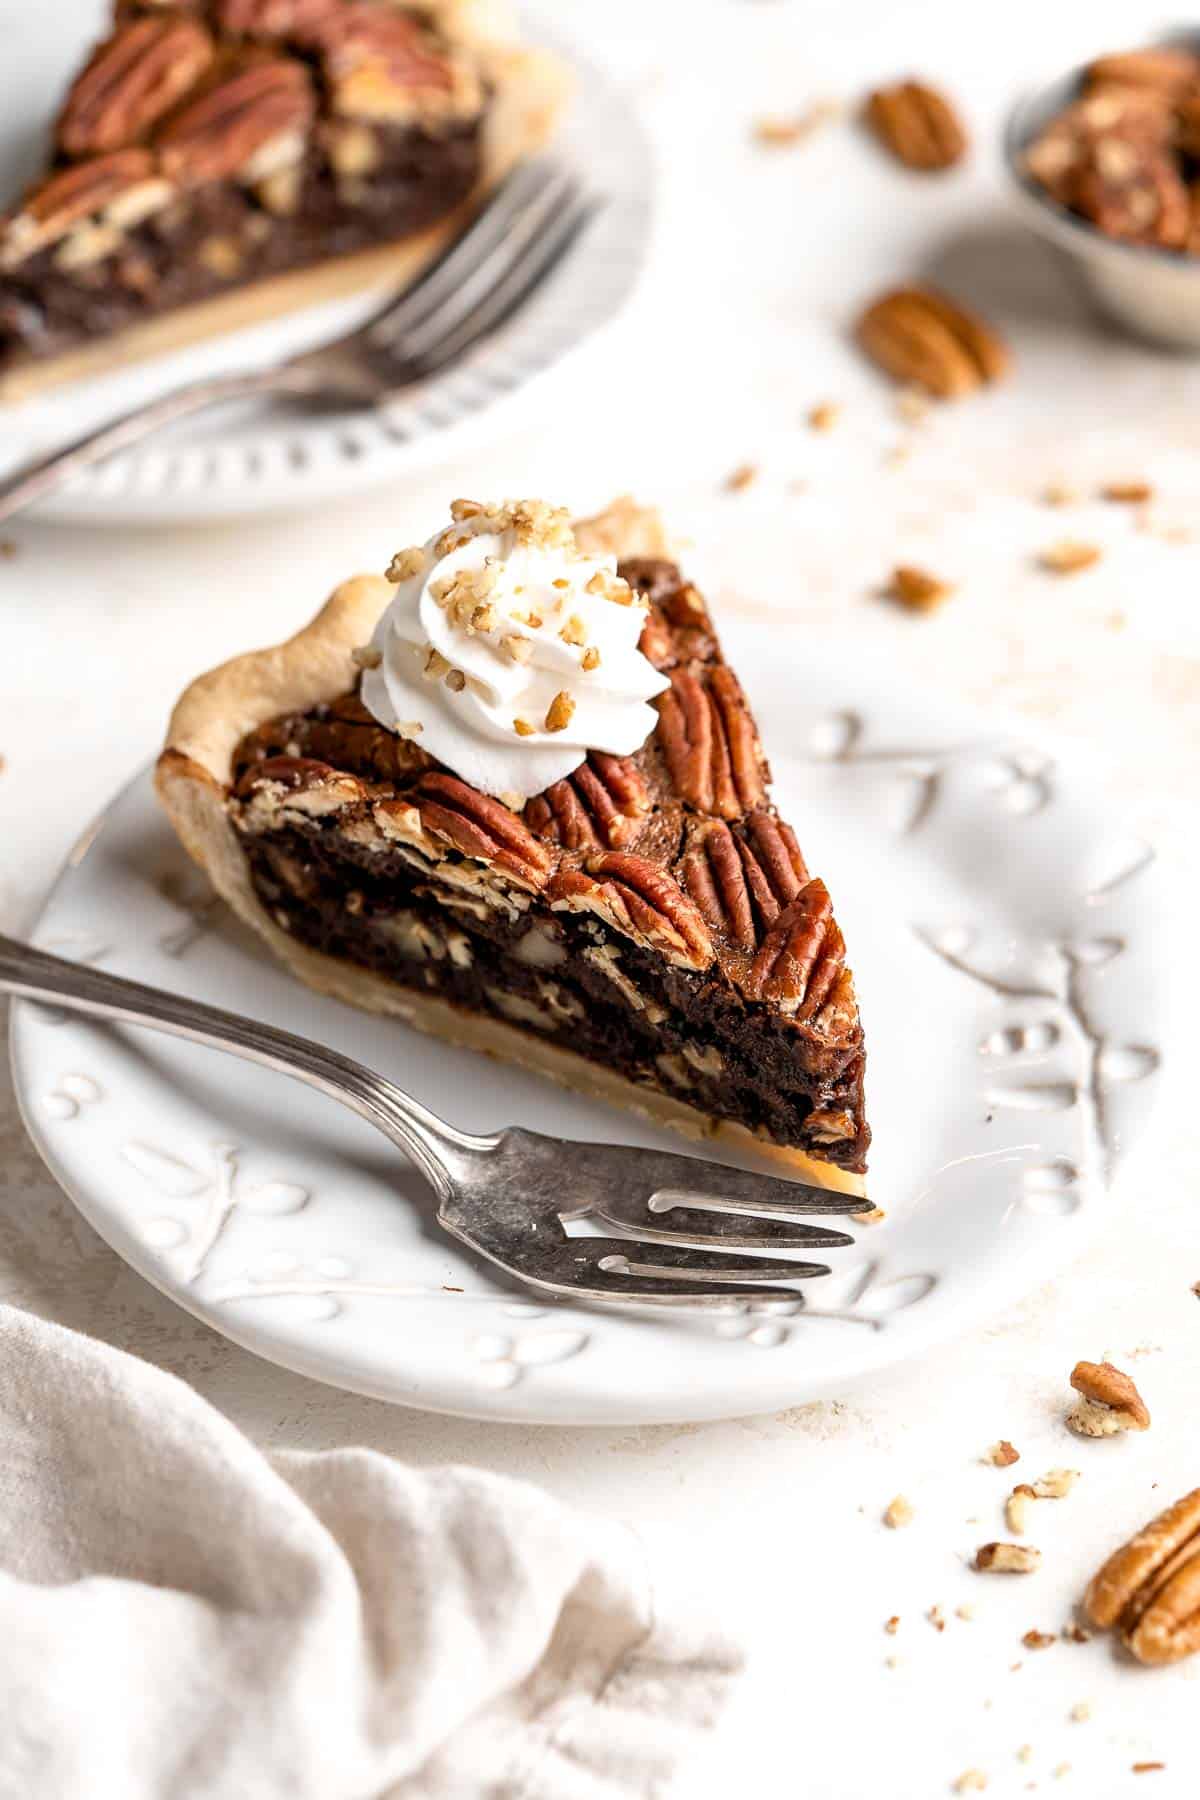
This decadent Chocolate Pecan Pie is a twist on the classic holiday pie with a rich, dark chocolate flavor that pairs wonderfully with toasted pecans.
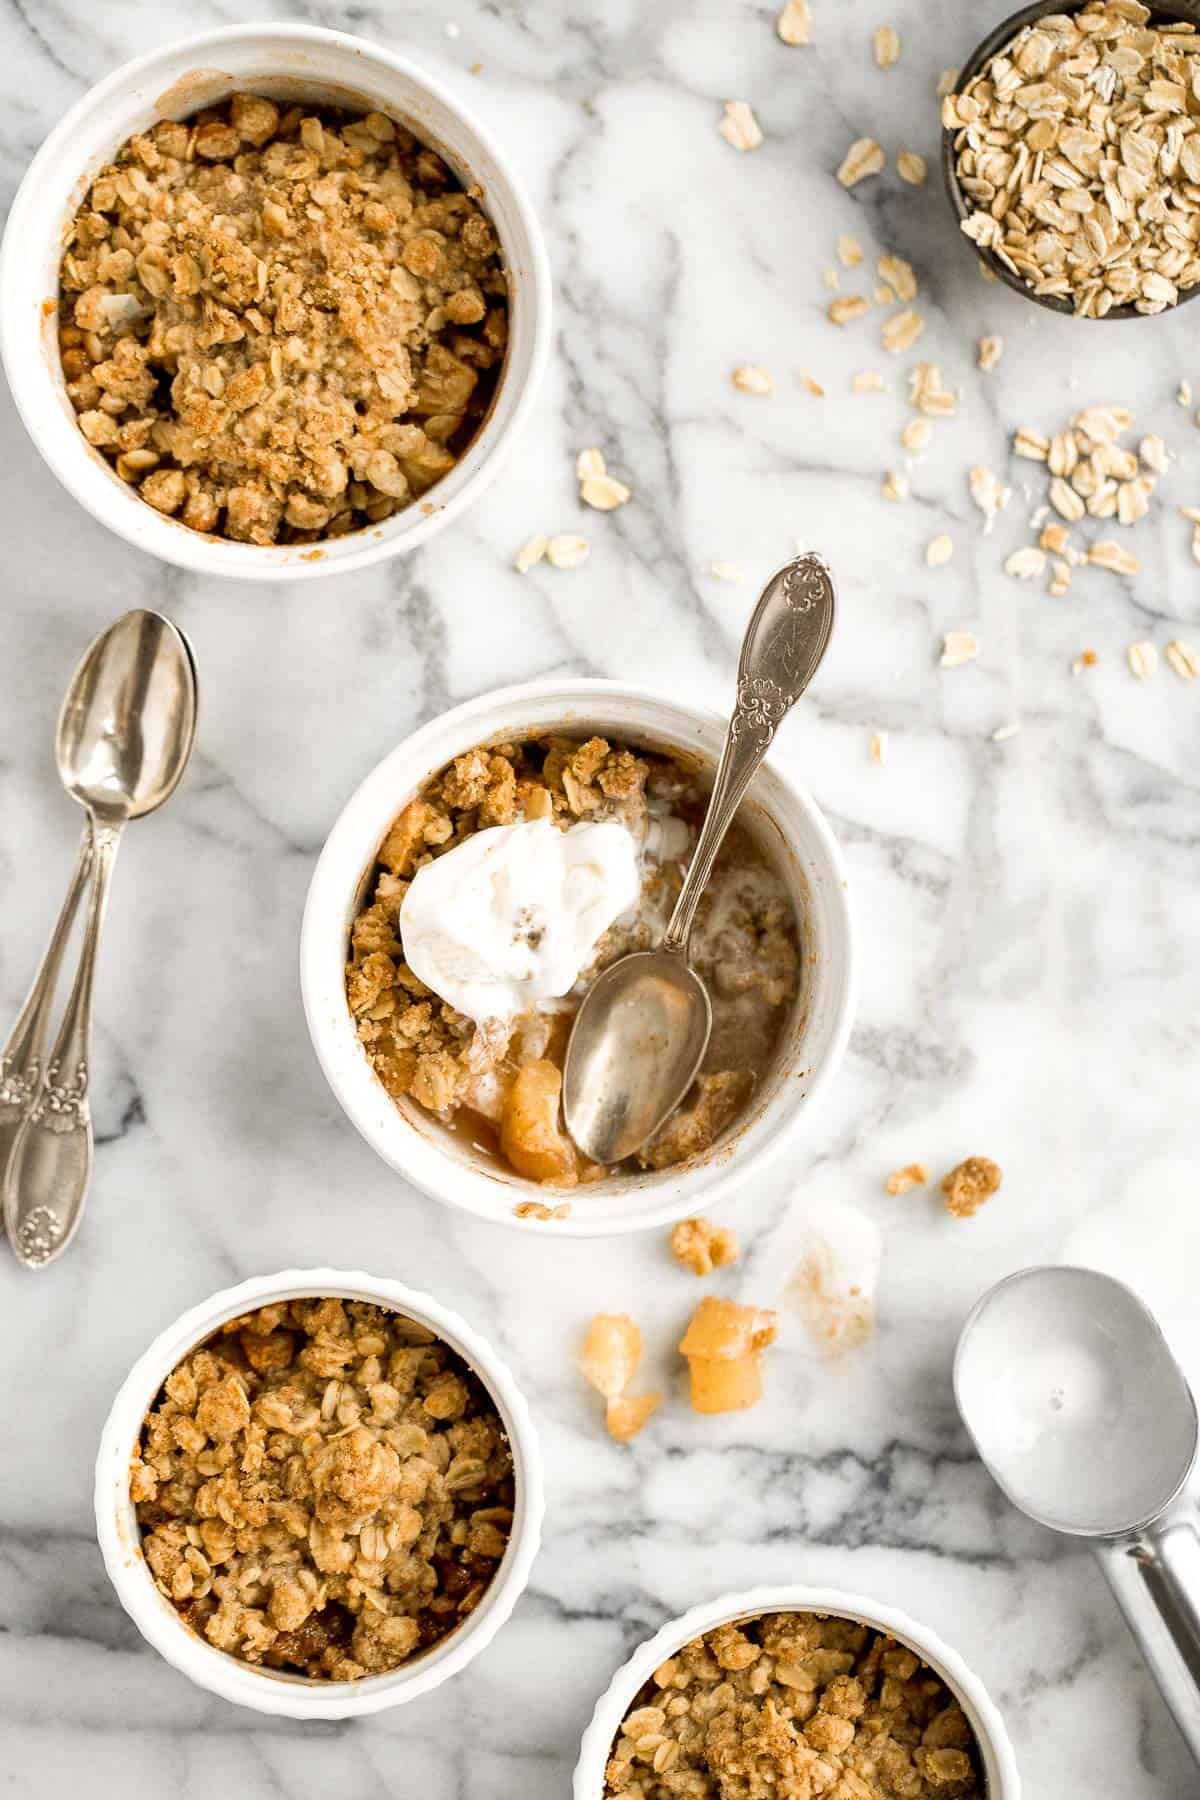
Individual apple crisp is a sweet tart fall dessert served in single-sized portions with all the crunchy corners of crumble. And so quick and easy to prep.
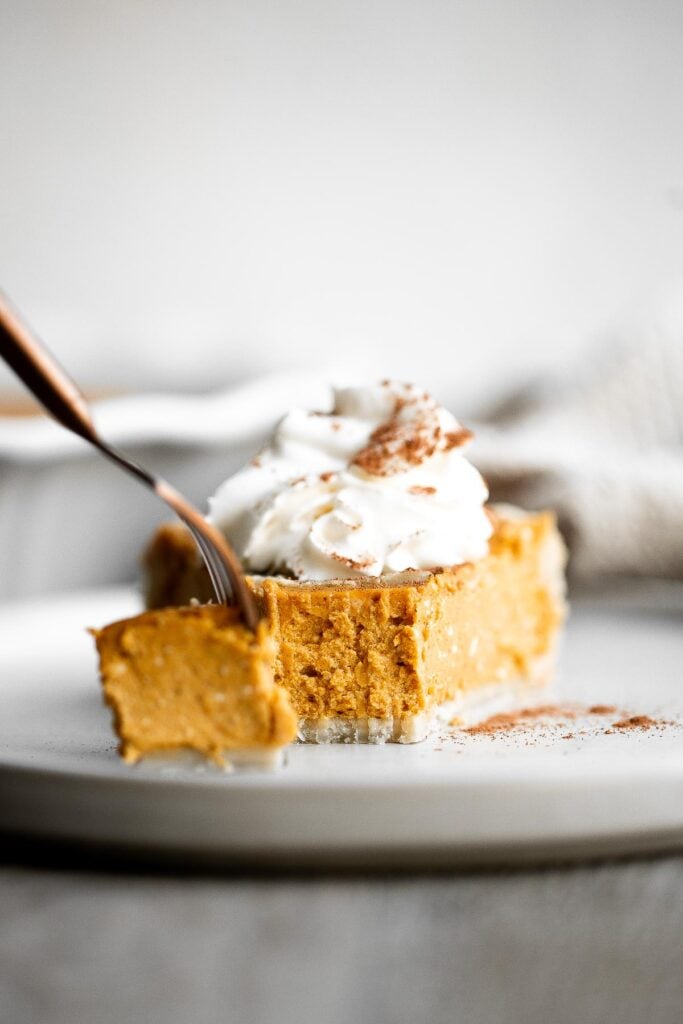
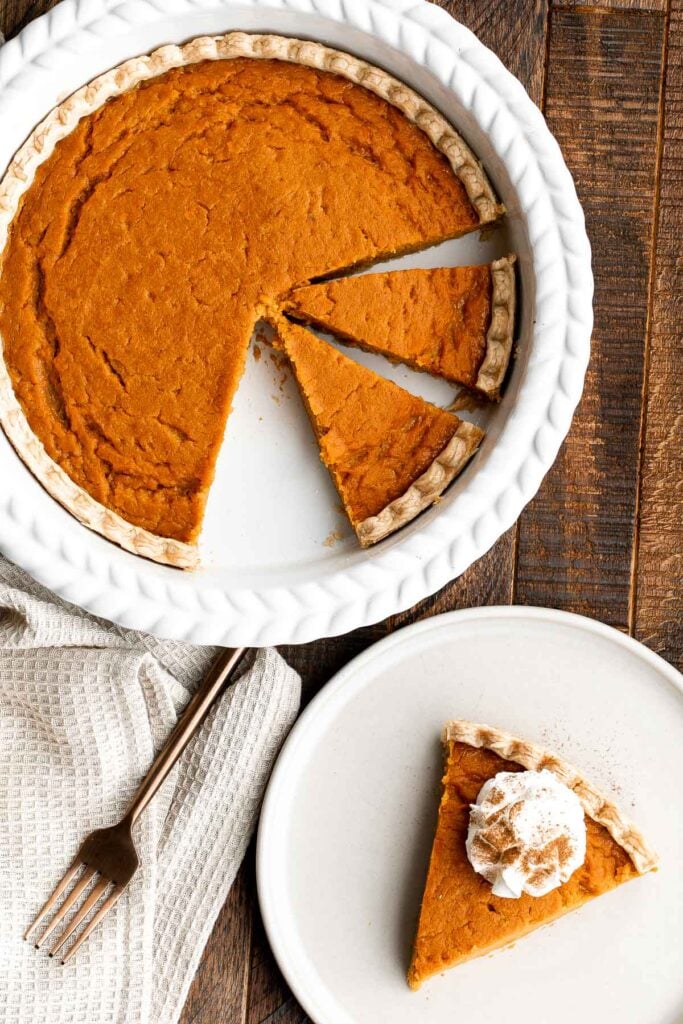
Sweet potato pie is warm and cozy, spiced with classic fall flavors, and delicious. Easy to make with cooked sweet potatoes or canned sweet potato puree.
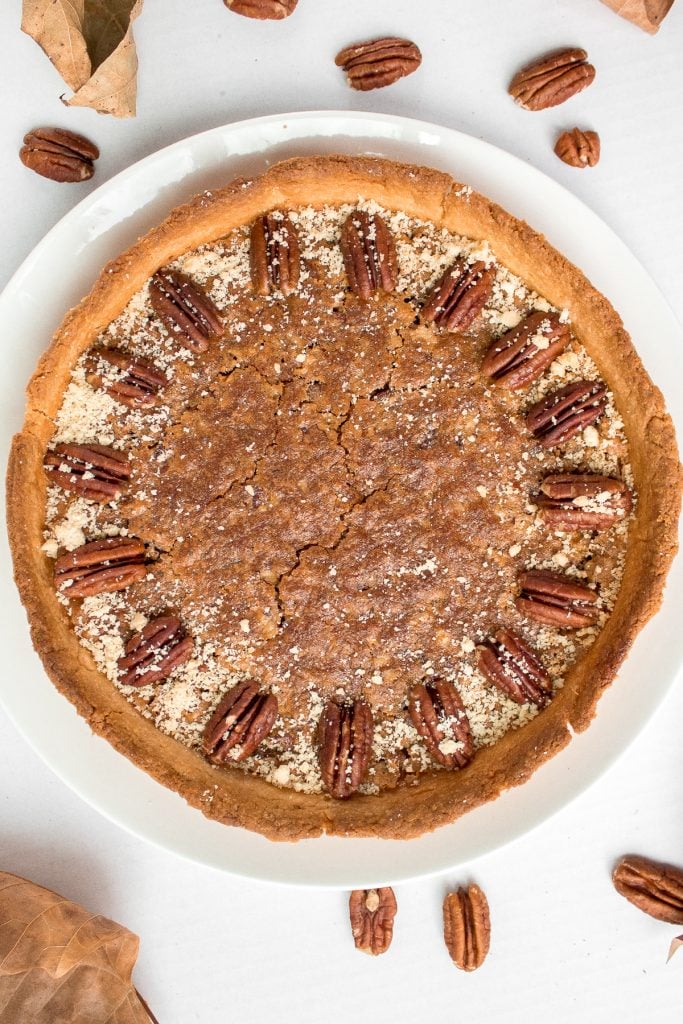
Give traditional pecan pie a twist this holiday season by using finely chopped pecans to create a smooth topping on this chopped pecan pie with a smooth custard filling. This pie is also ridiculously easy to make.
Why make pie or brownies when you can have them both at once? These Pecan Pie Brownies are the perfect fall treat for any occasion - rich, sweet, indulgent.
Easy homemade apple hand pies/turnovers are the perfect fall treat -- stuffed with tender apples and cinnamon and wrapped in crispy, flakey, buttery crust.

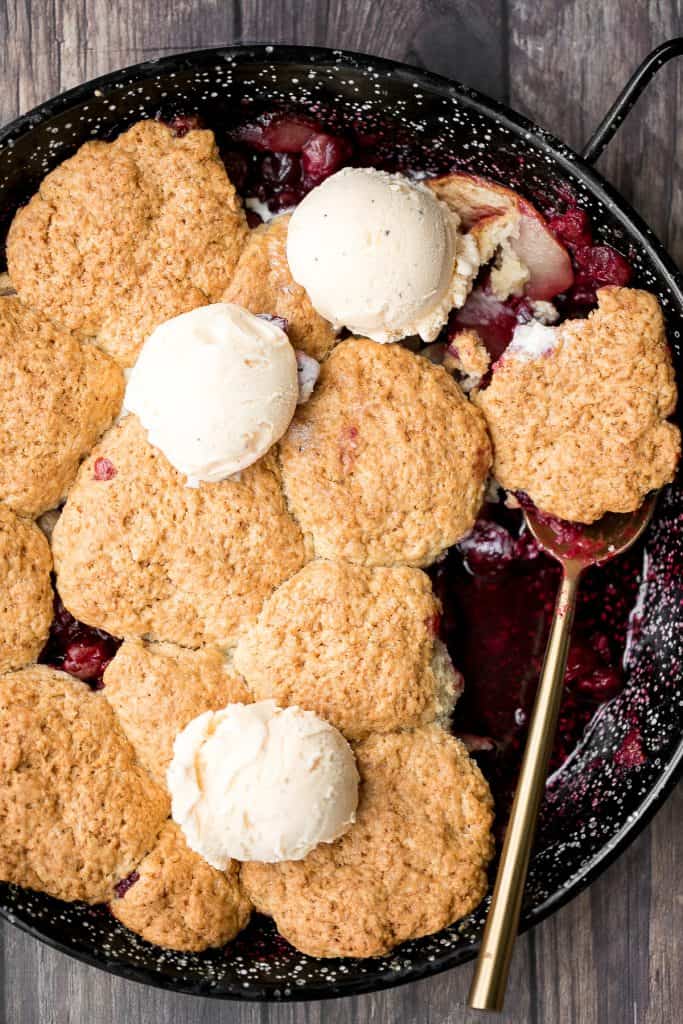
Cranberry-Apple Cobbler with Biscuits
Sweet and tart cranberry-apple cobbler with biscuits is packed with fresh fruit and a buttery biscuit topping. This holiday favourite is easy to make.
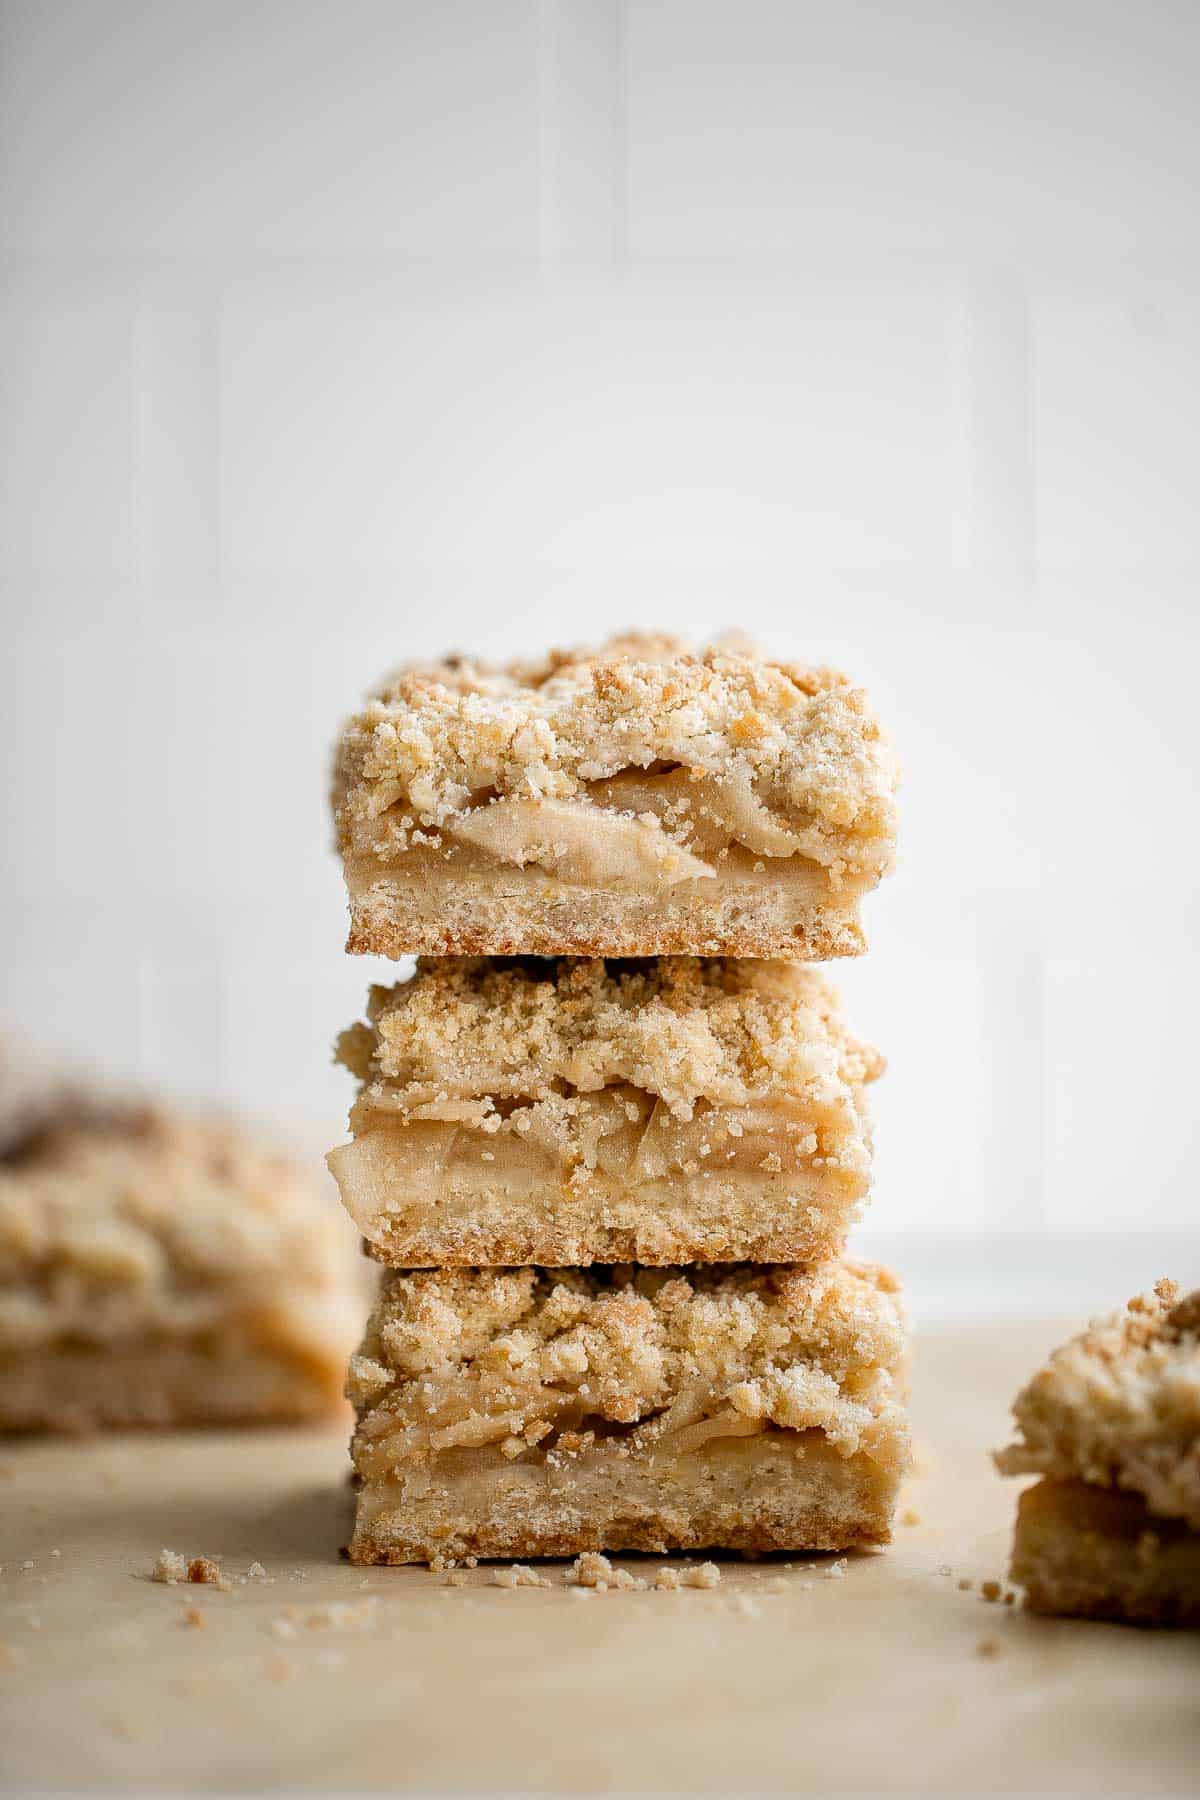
Homemade Apple Pie Bars are sweet, tart, and crumbly. With 3 delicious layers including a flaky pastry crust, cinnamon apple filling, and crumbly topping.
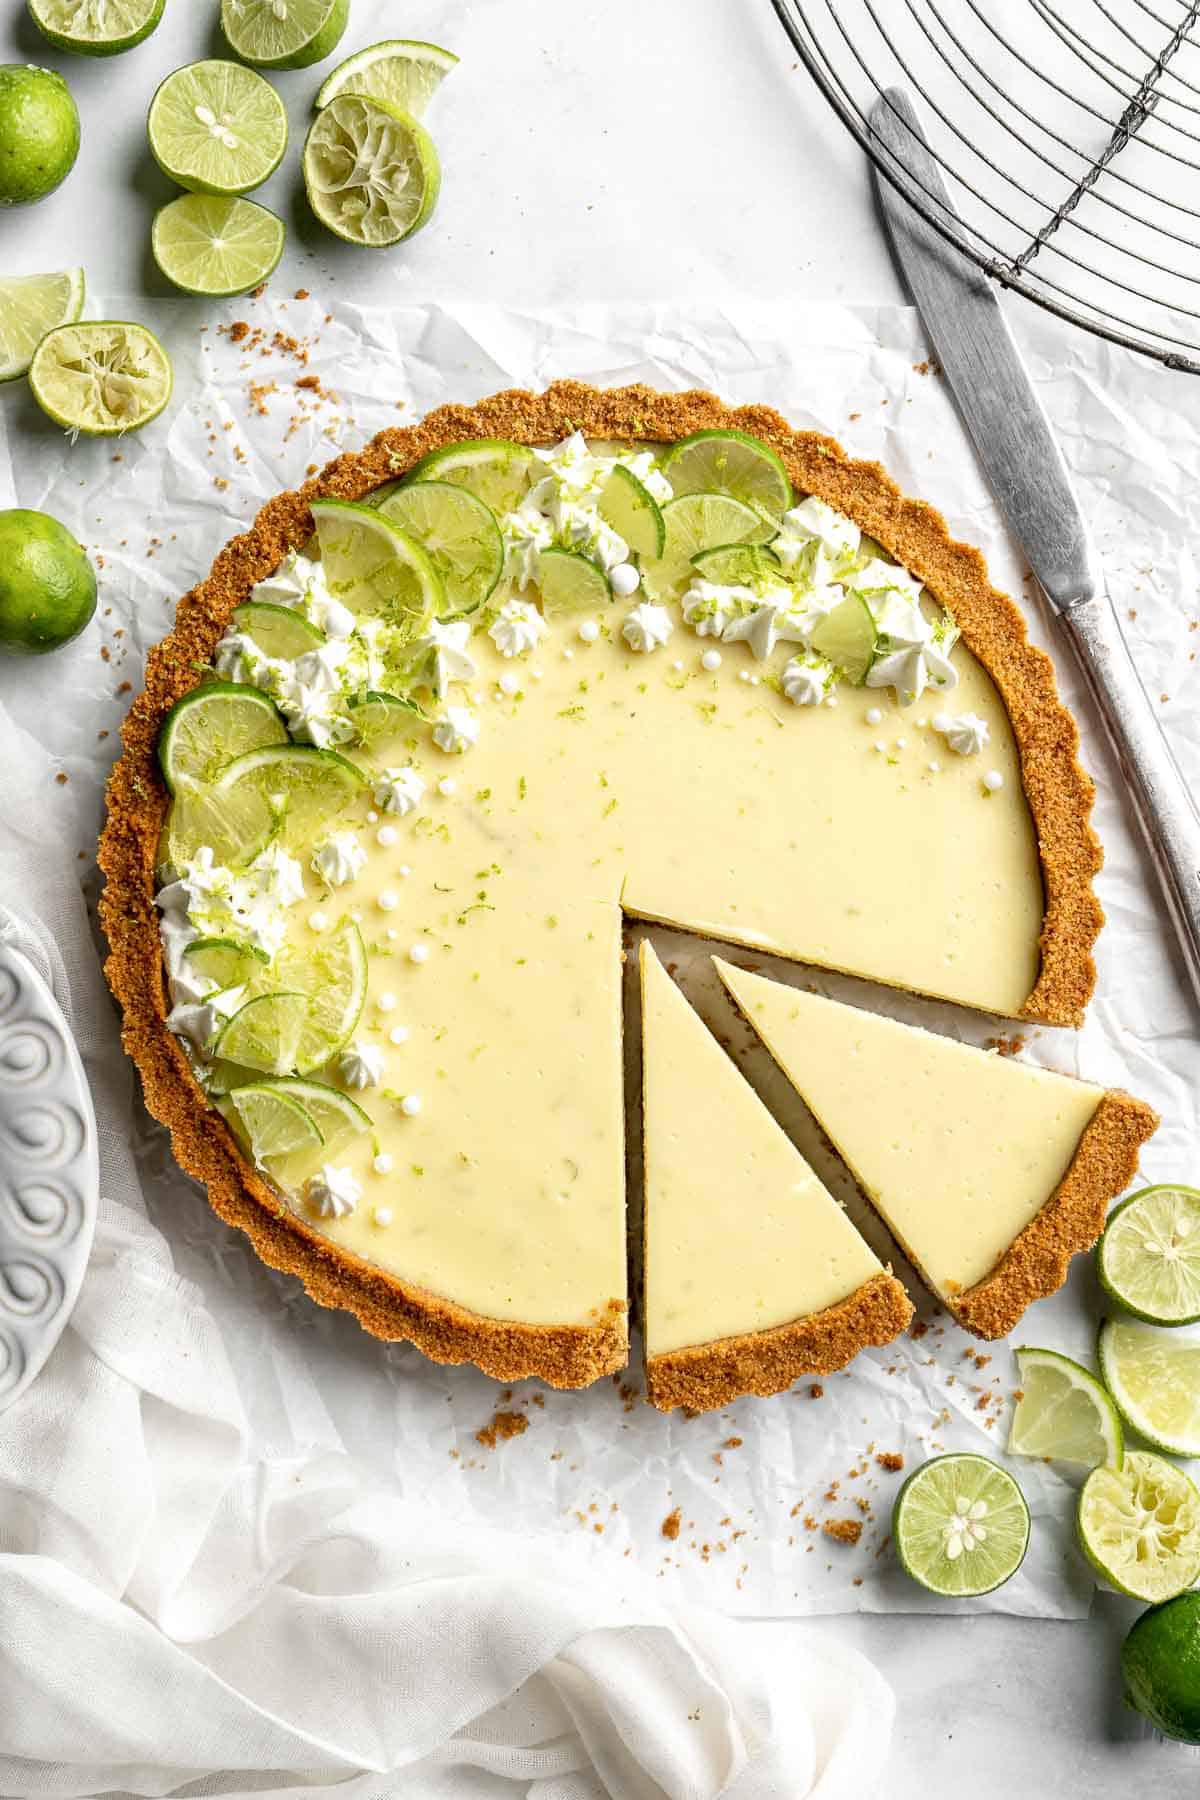
Perfectly creamy and tart with a buttery graham cracker crust, this easy Key Lime Pie is a classic for a reason. You won't need another pie recipe again!
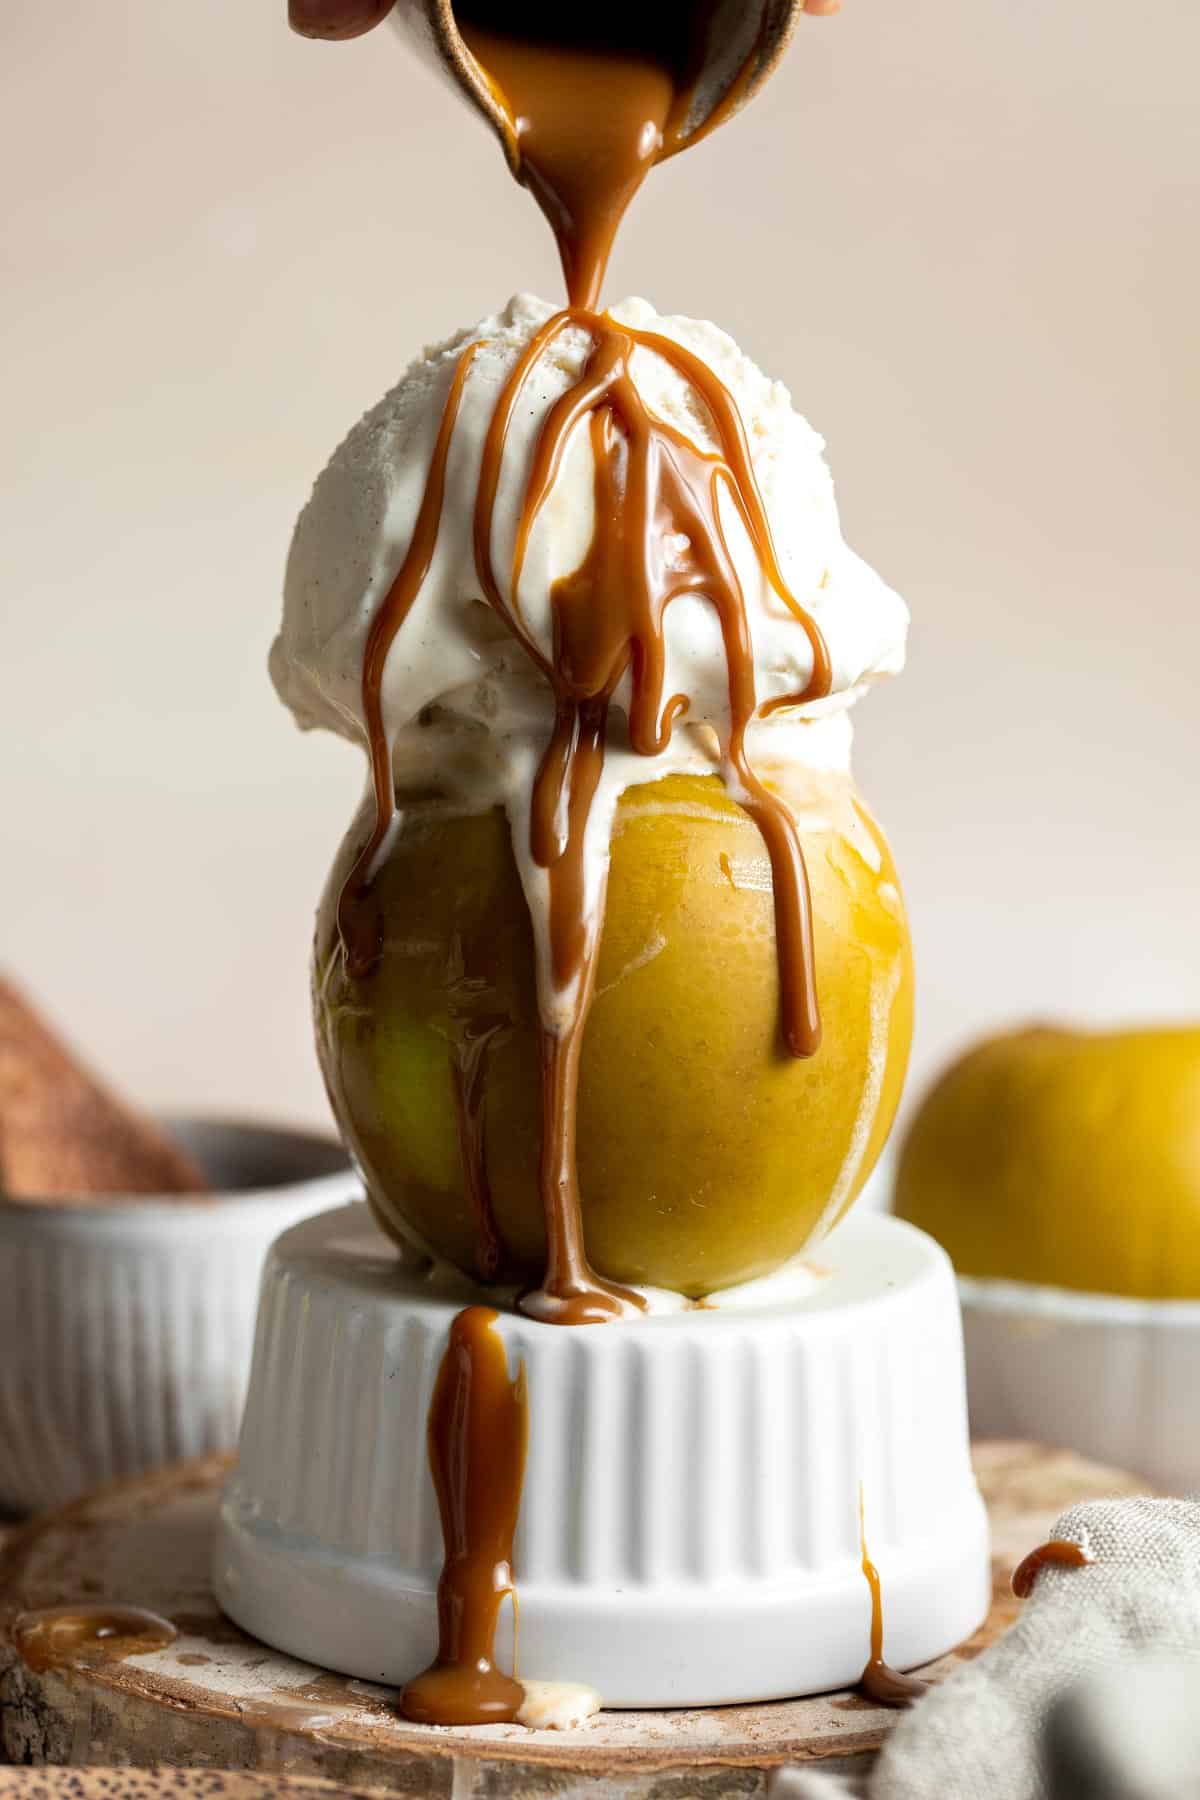
Nothing says fall better than Homemade Caramel Apples that are sweet, delicious, and fun to make. Chewy caramel made from scratch covers crisp juicy apples, topped with optional toppings.

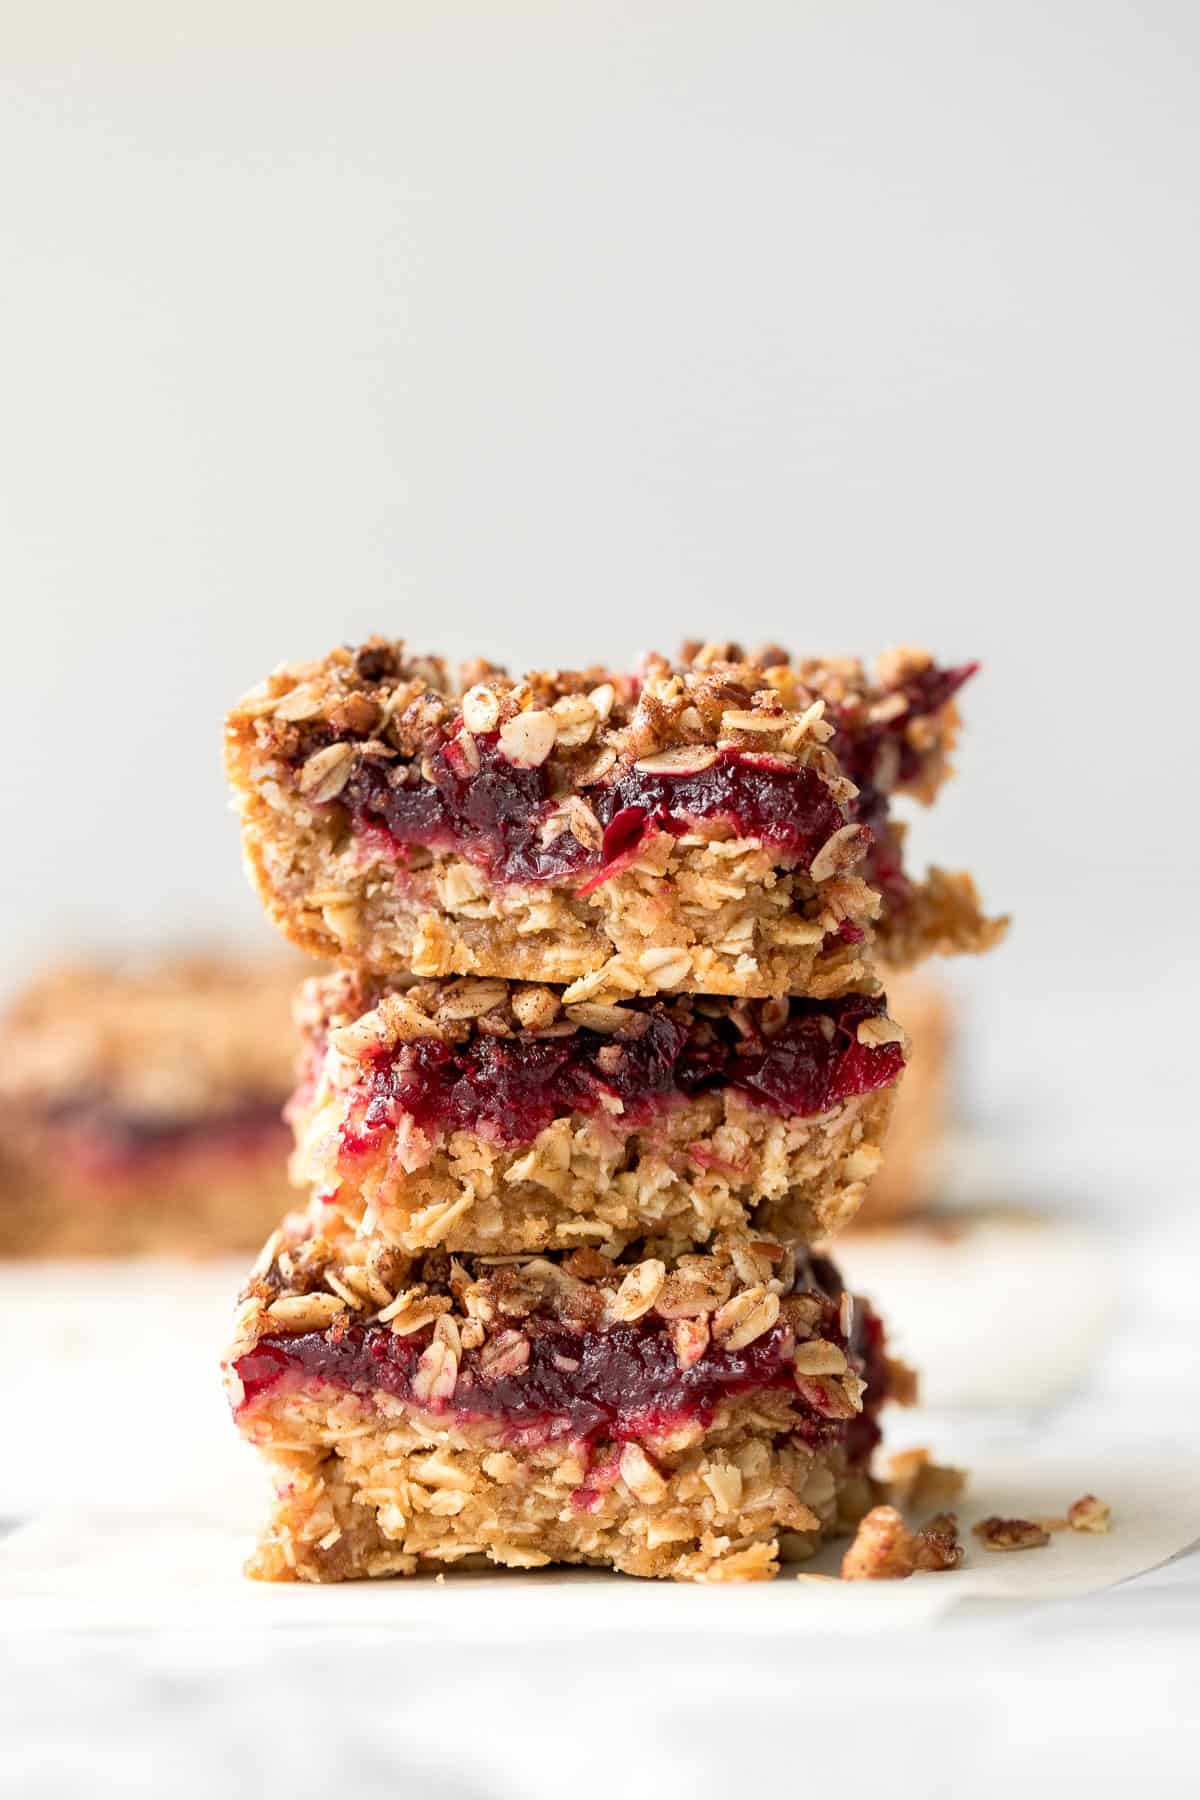
Got some leftover cranberry sauce from your holiday dinner? Revive them into delicious leftover cranberry sauce oat bars, perfect for breakfast or dessert.
Cake
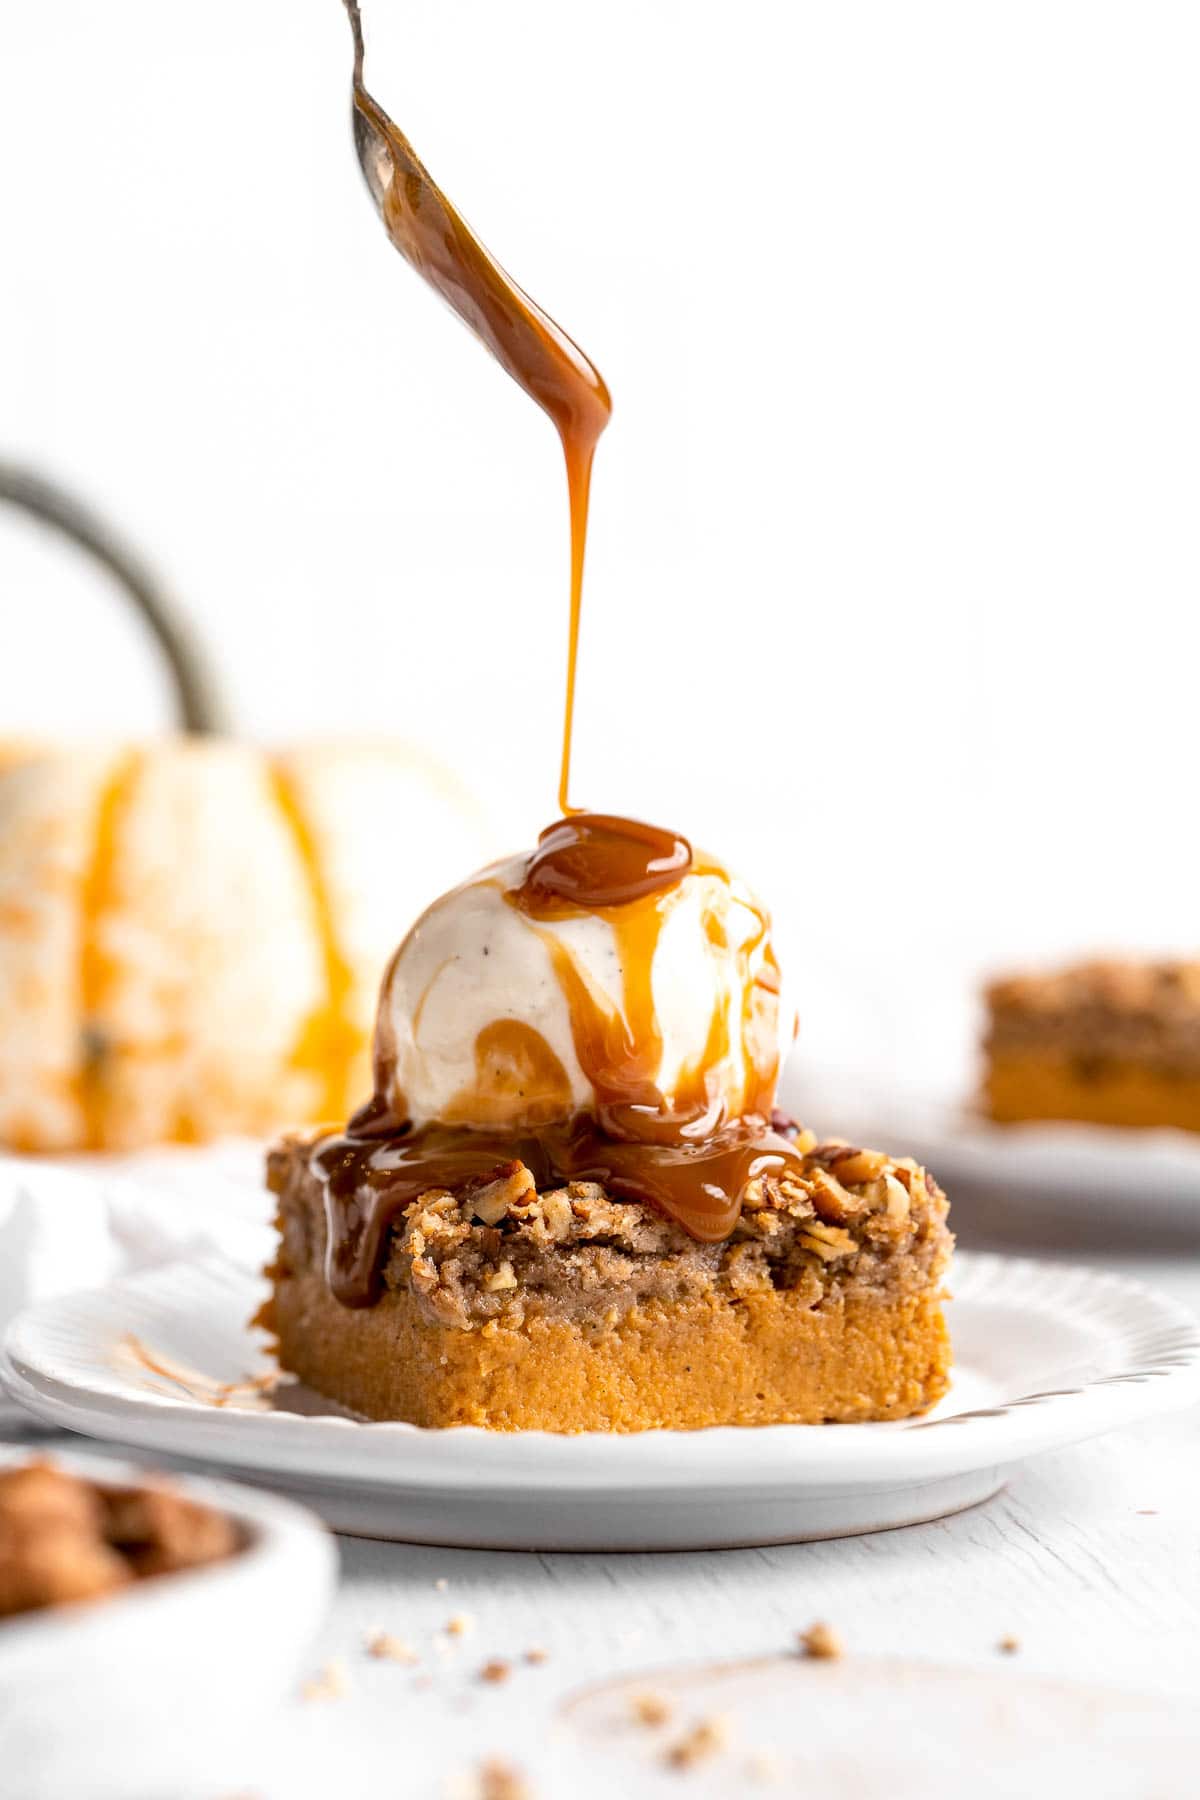
This easy Pumpkin Dump Cake recipe is loaded with fall flavors from the homemade pumpkin pie filling topped with spice cake mix and pecans.
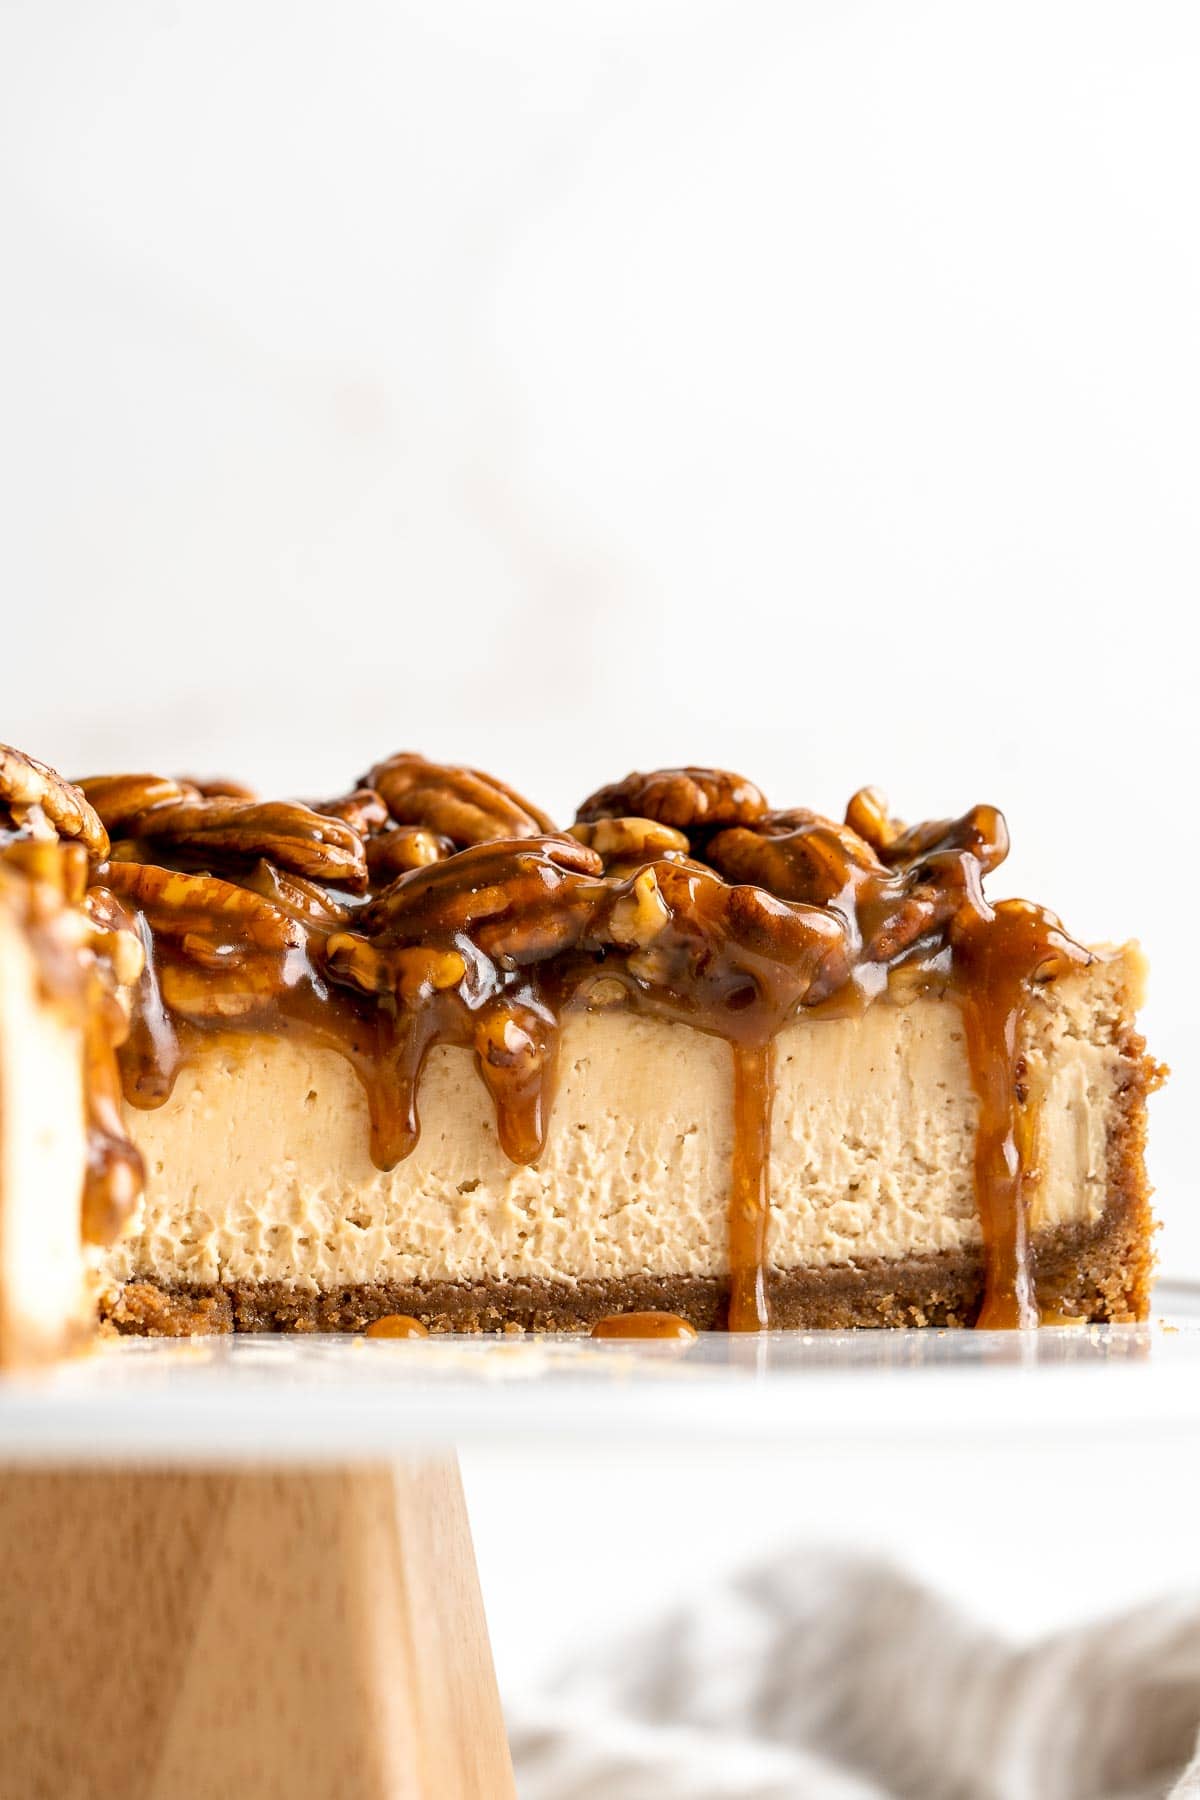
Pecan Pie Cheesecake takes a classic flavor to a new level with a pecan graham cracker crust, brown sugar cheesecake filling, and caramel pecan pie topping.
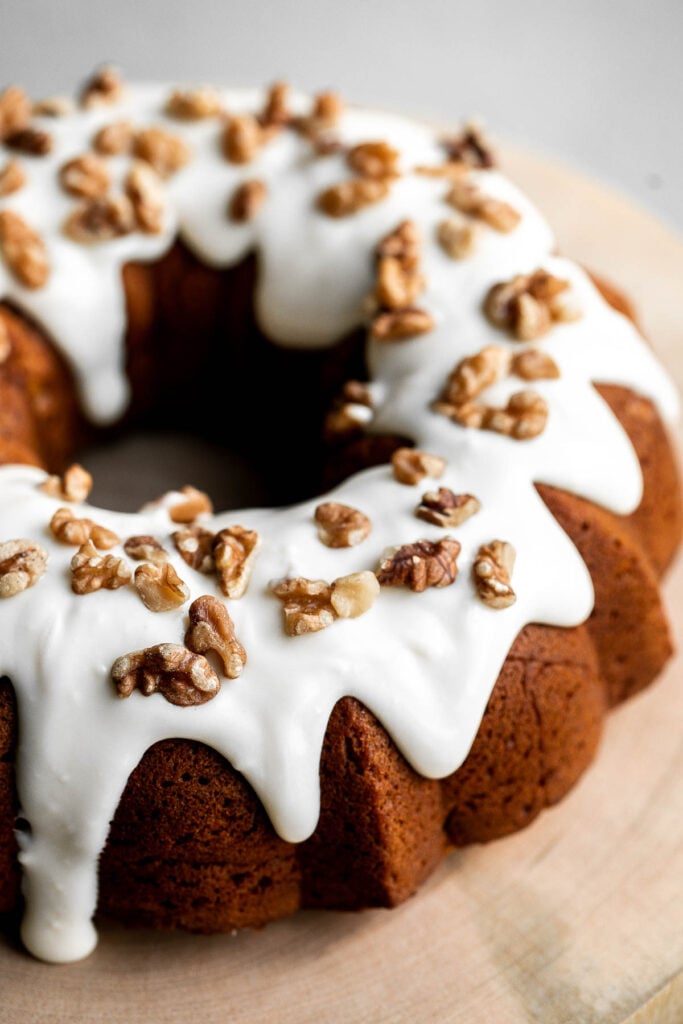
Pumpkin bundt cake with cream cheese icing is a perfect fall dessert to serve this year - super moist inside, with a perfect golden brown crumby crust.
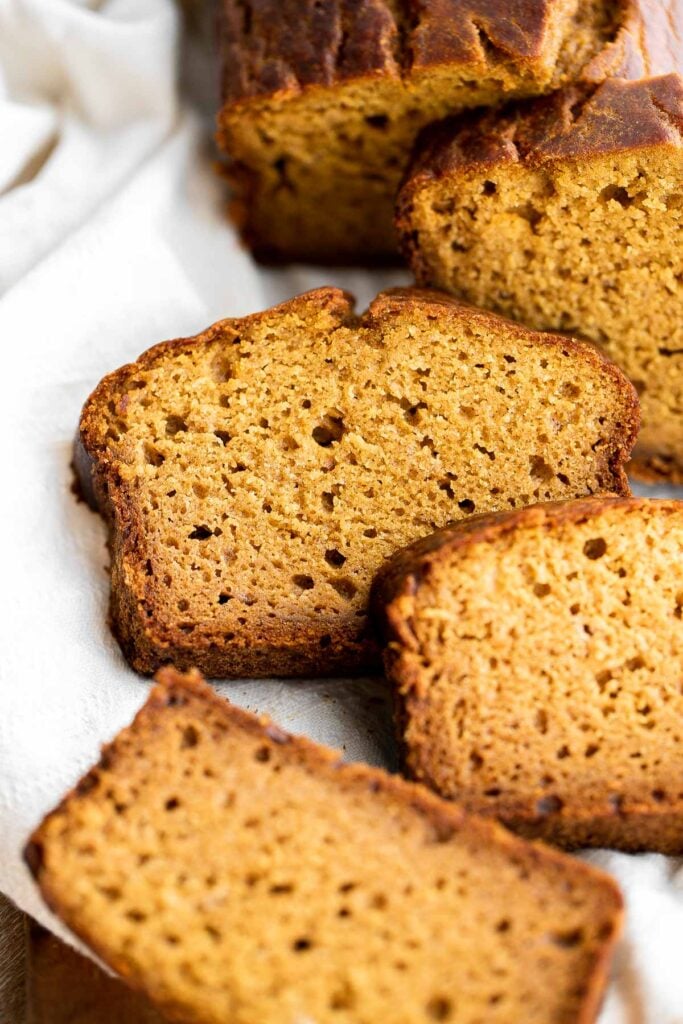
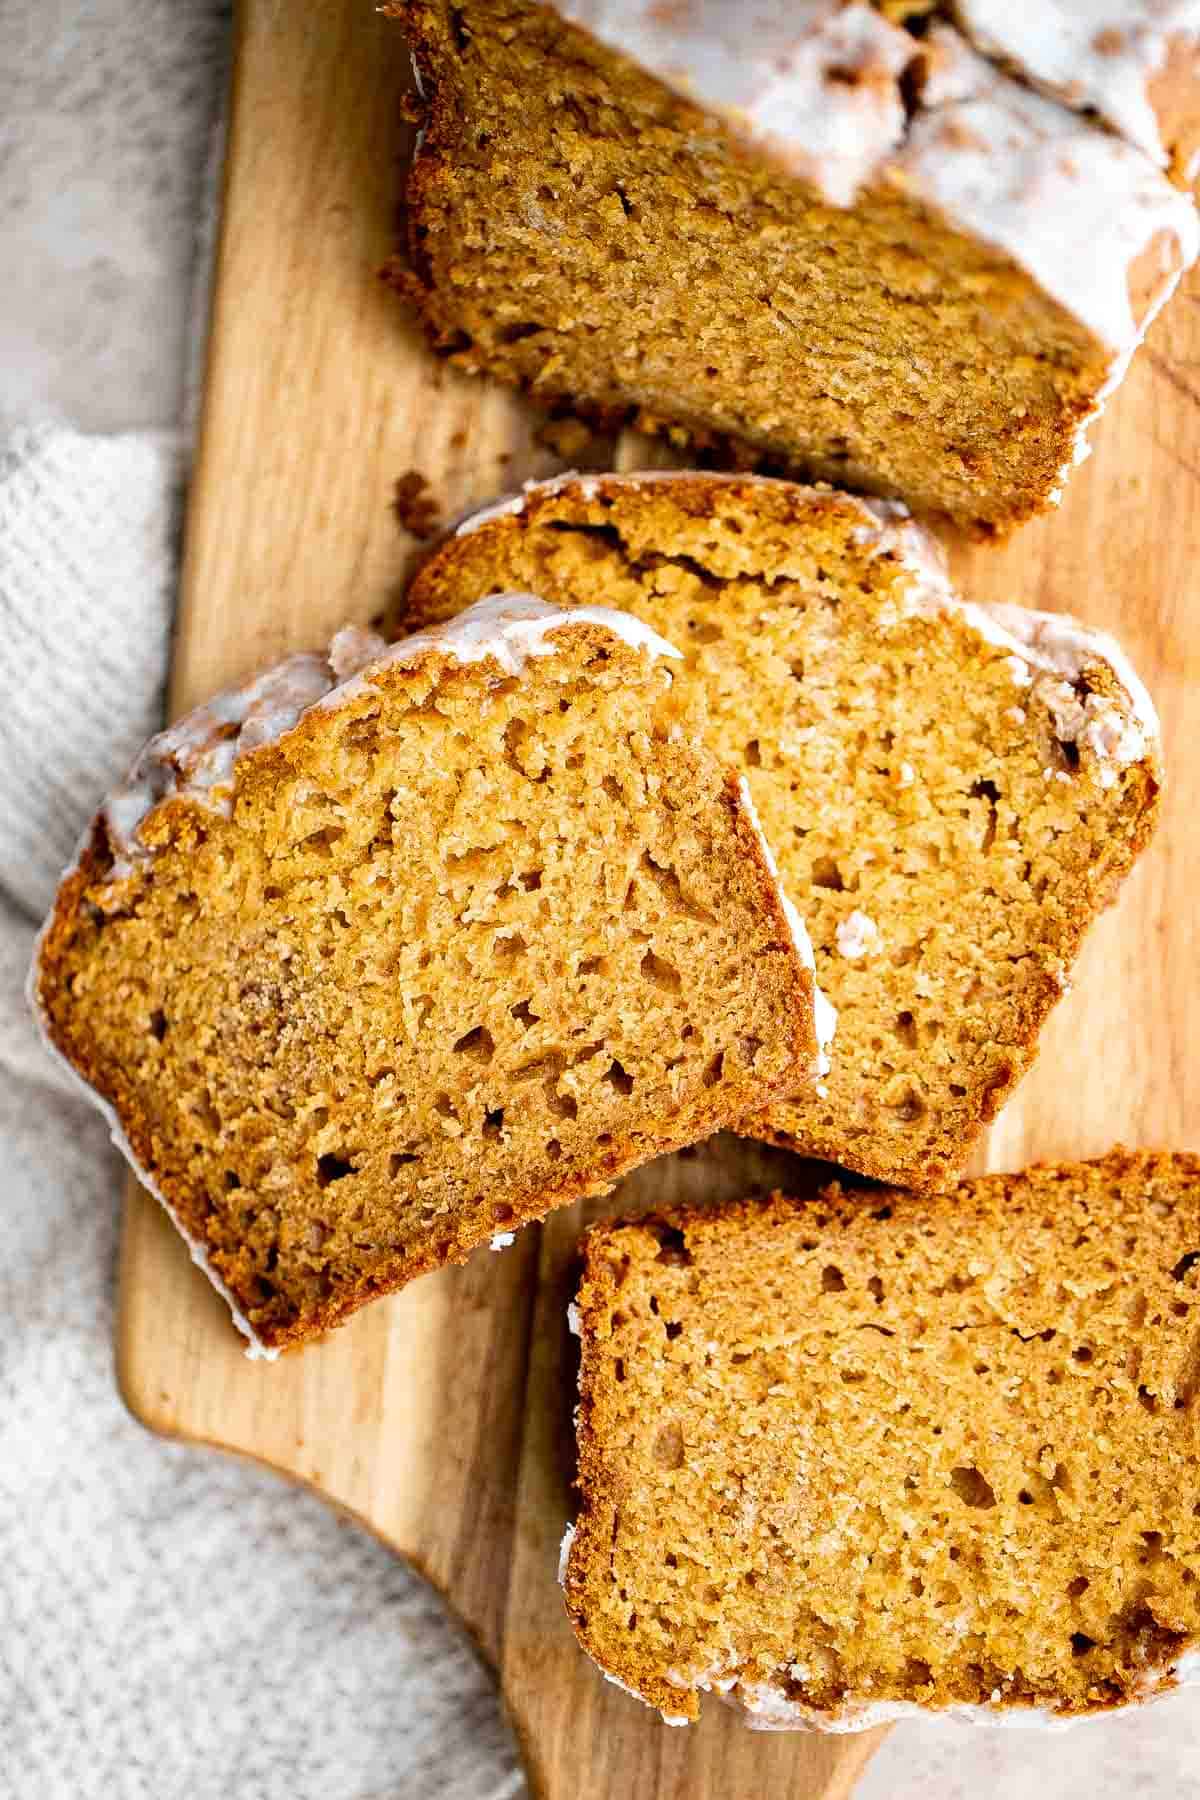
Pumpkin bread is fluffy, moist, and delicious. This classic fall loaf cake is loaded with real pumpkin and seasonal spices like cinnamon and ginger.
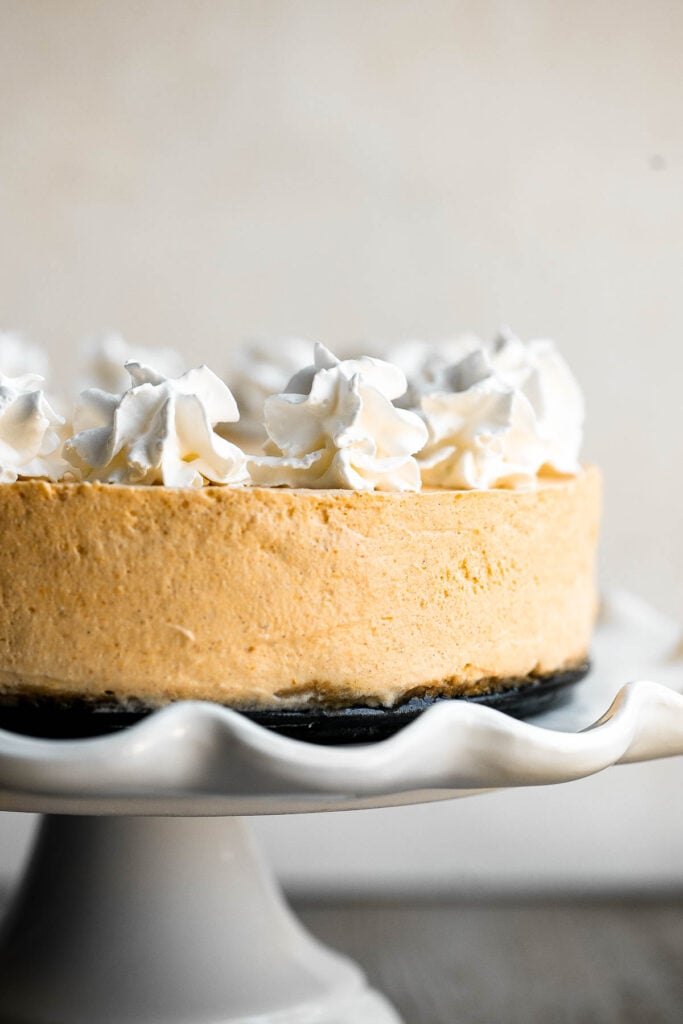
No bake pumpkin cheesecake is the easiest cheesecake to make this fall. It's light, smooth, creamy, and loaded with fall flavors like pumpkin and cinnamon.
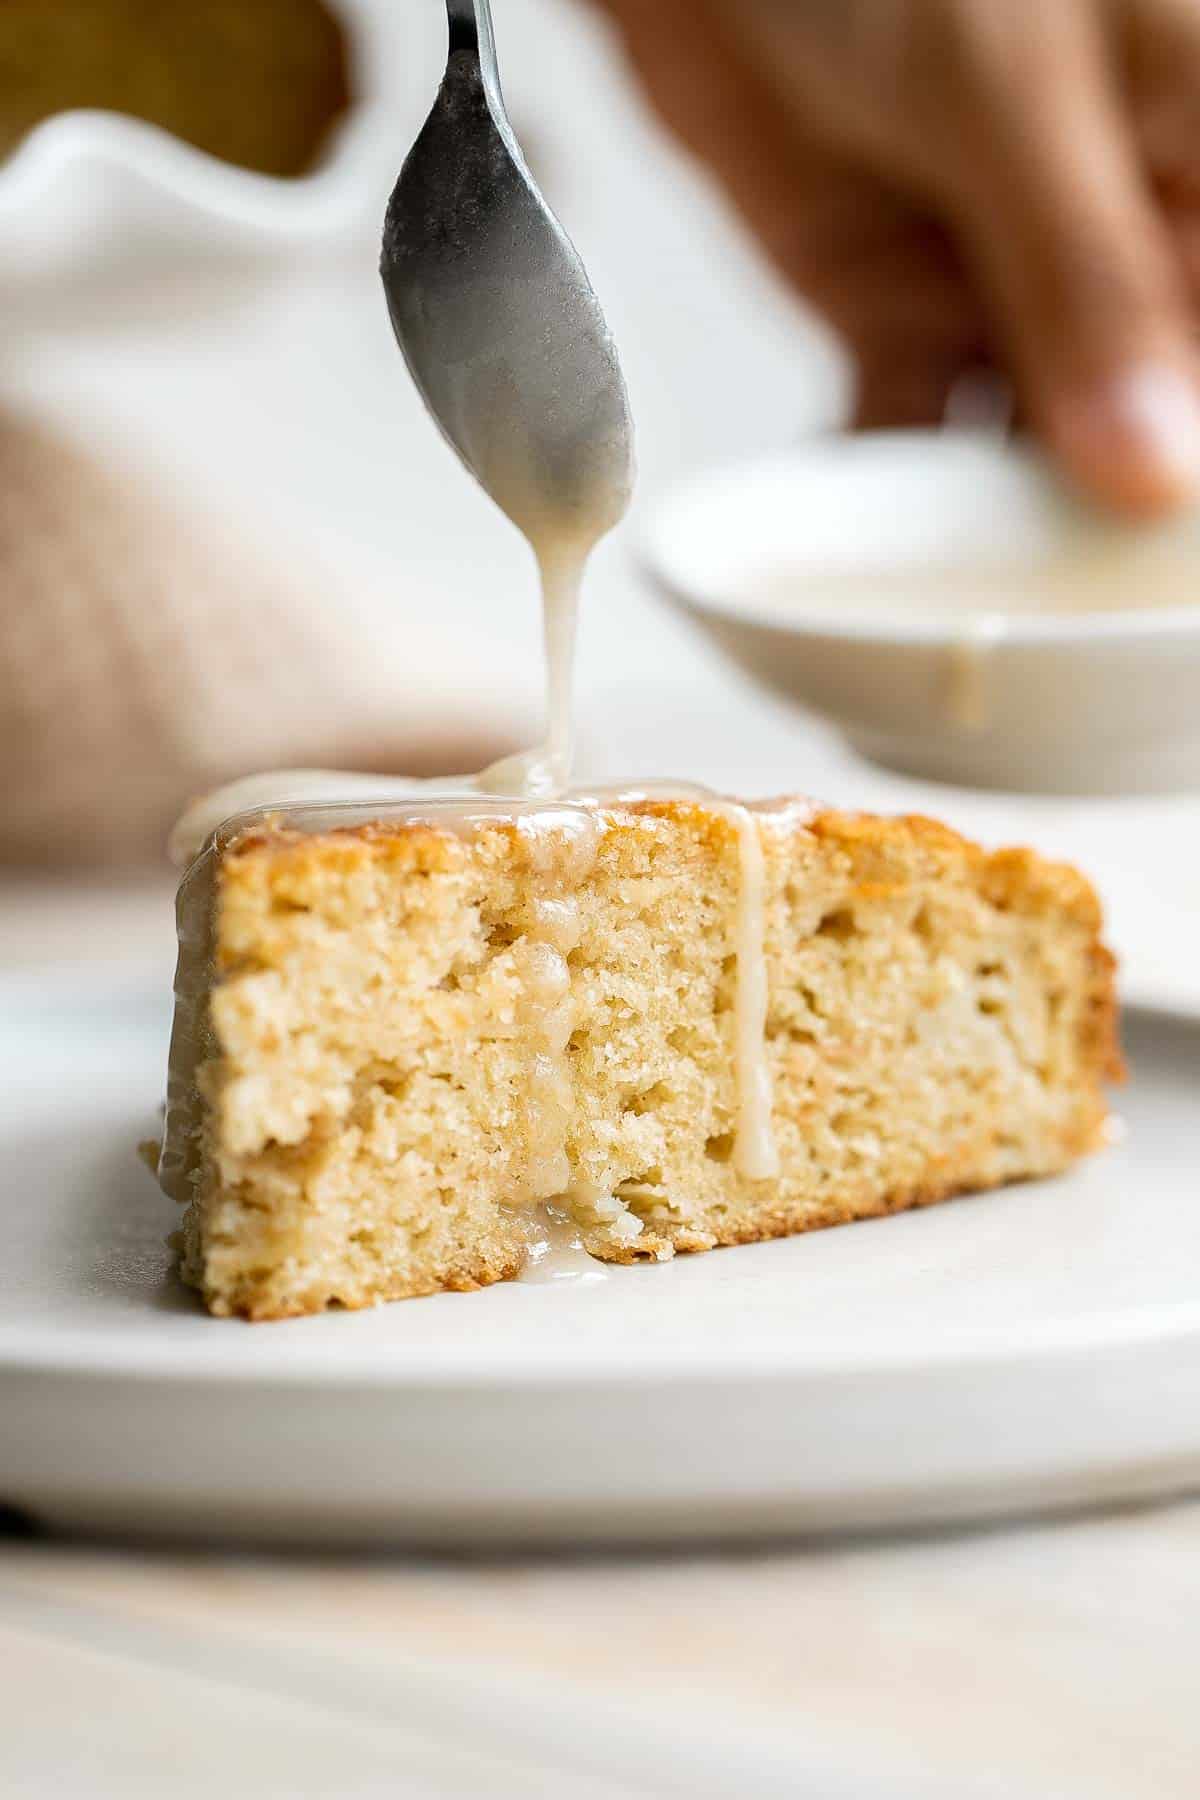
Easy Apple Cake has a dense and moist crumb and is loaded with fresh apples, cinnamon sugar, and nuts. It's quick, easy, and ready to eat in under an hour.
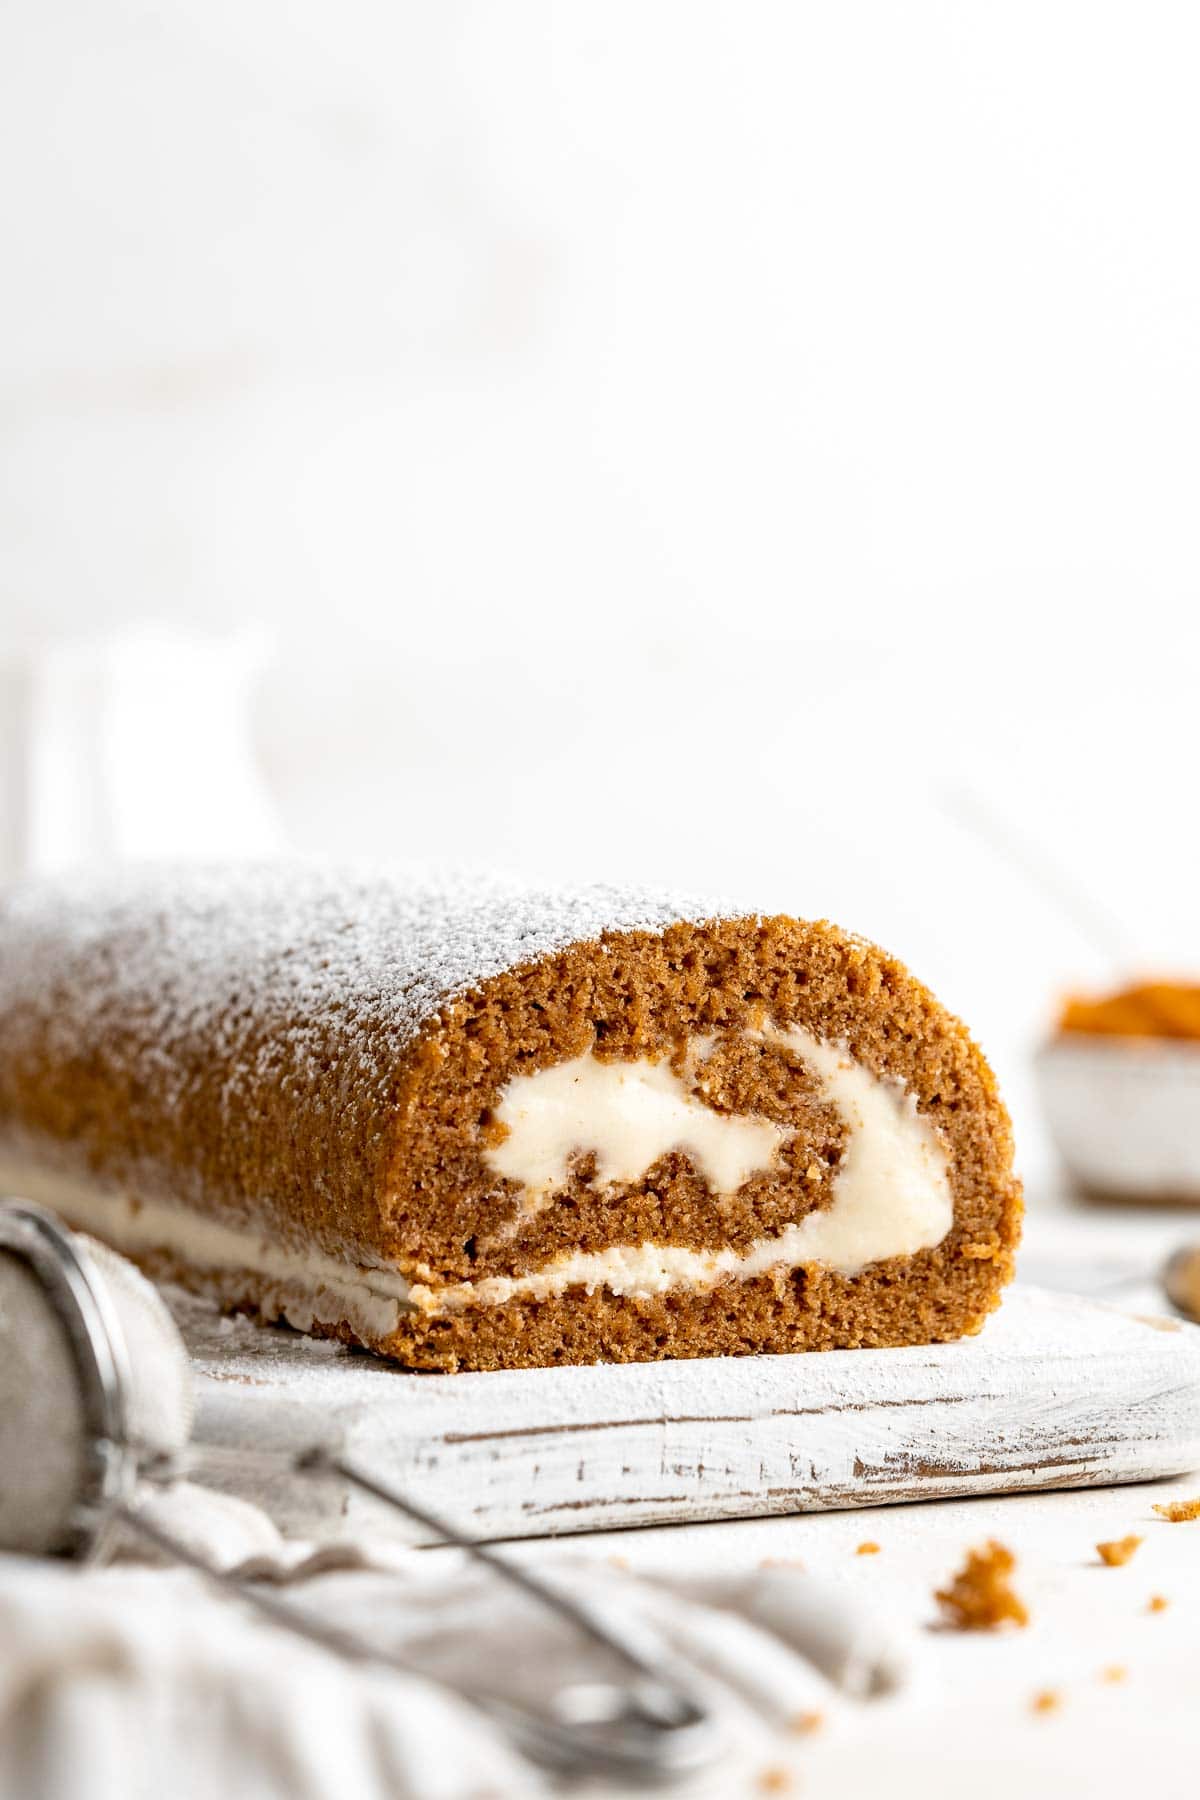
Celebrate the flavors of fall with a show-stopping Pumpkin Roll featuring a tender pumpkin spice cake swirled around a rich cream cheese filling.
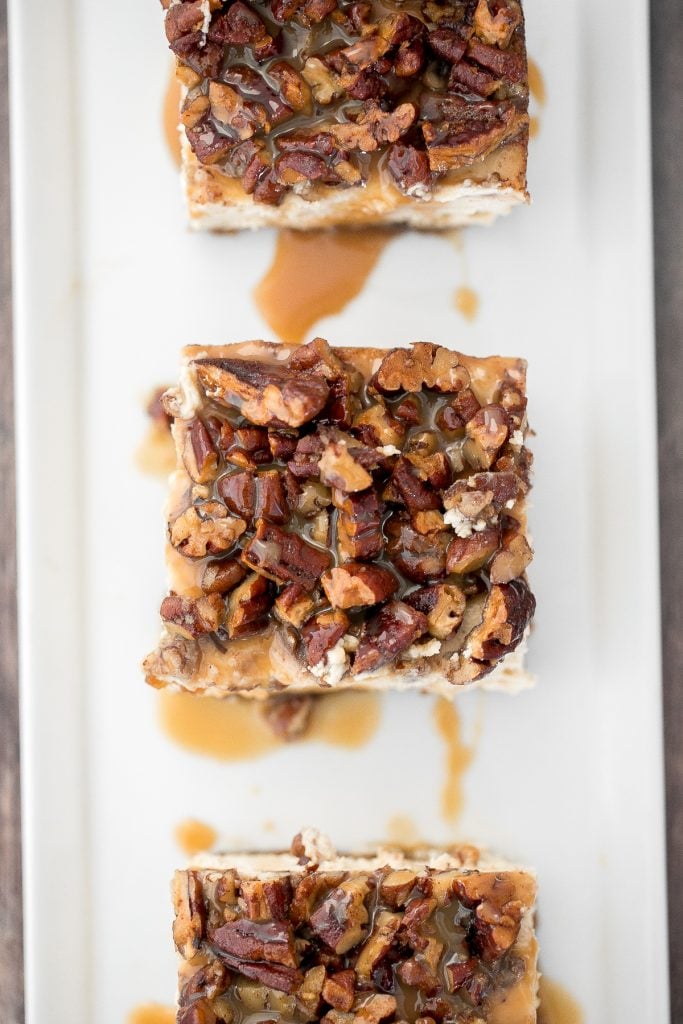
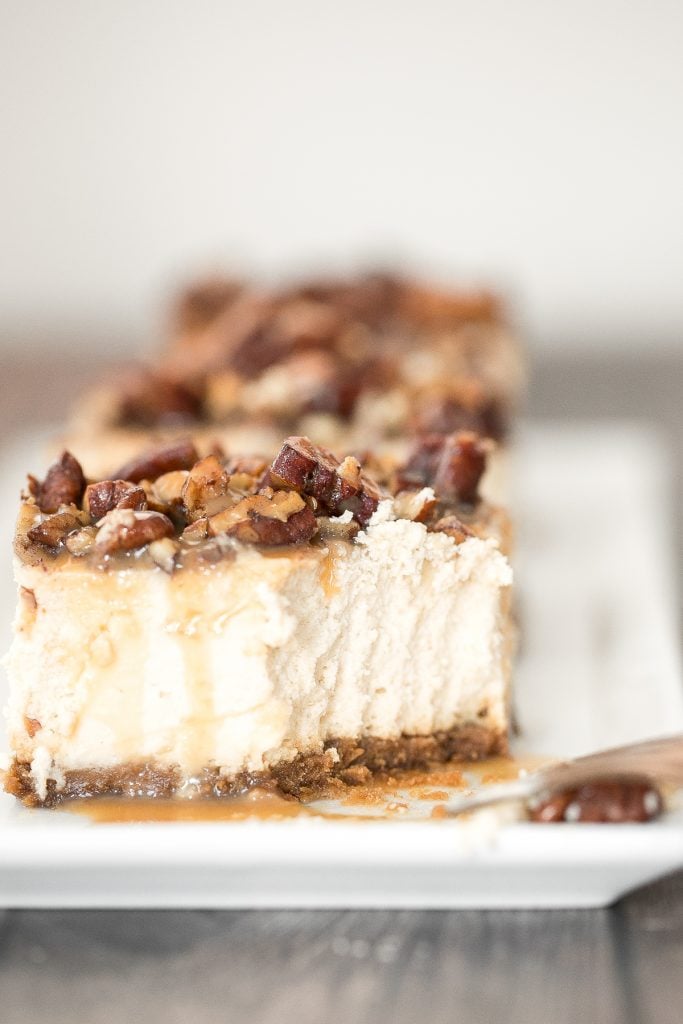
Caramel Pecan Pie Cheesecake Bars
Decadent caramel pecan pie cheesecake bars with a graham cracker crust, cheesecake filling, and caramel pecan topping is perfect for Thanksgiving this fall.

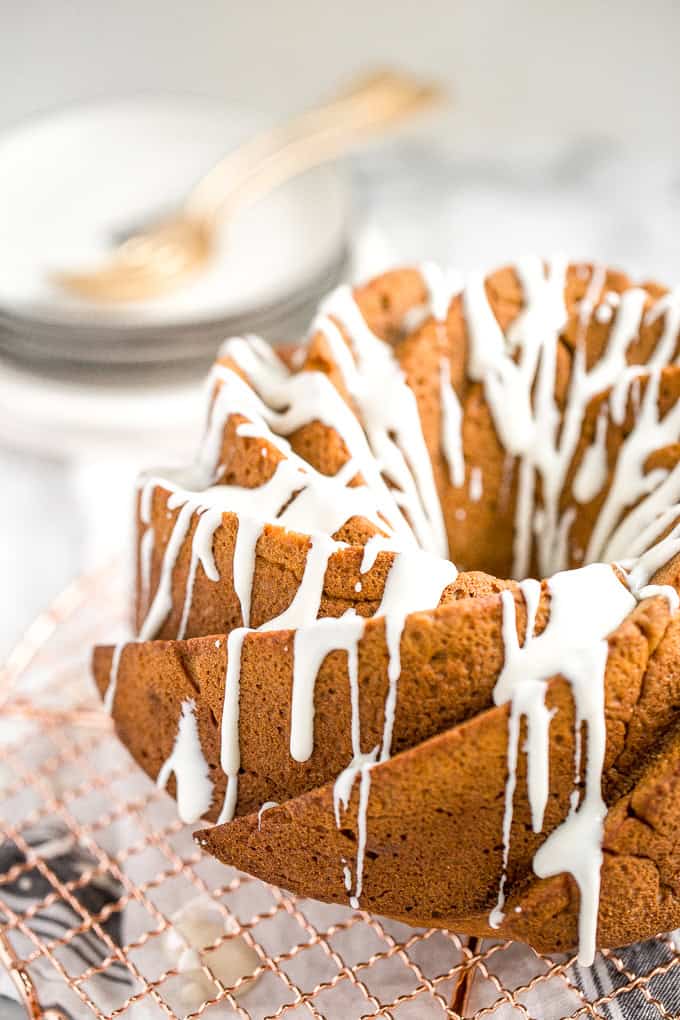
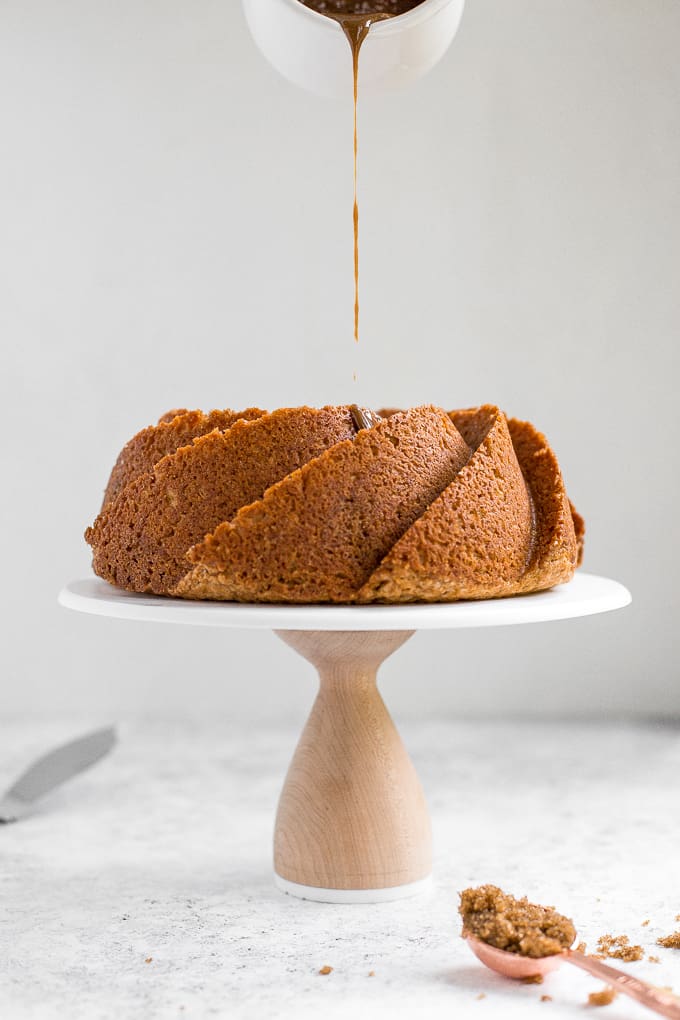
Gingerbread Bundt Cake with Maple Cinnamon Glaze
This showstopping festive gingerbread bundt cake with maple cinnamon glaze and pecans is moist, soft, and fluffy, and packed with warm holiday spices.
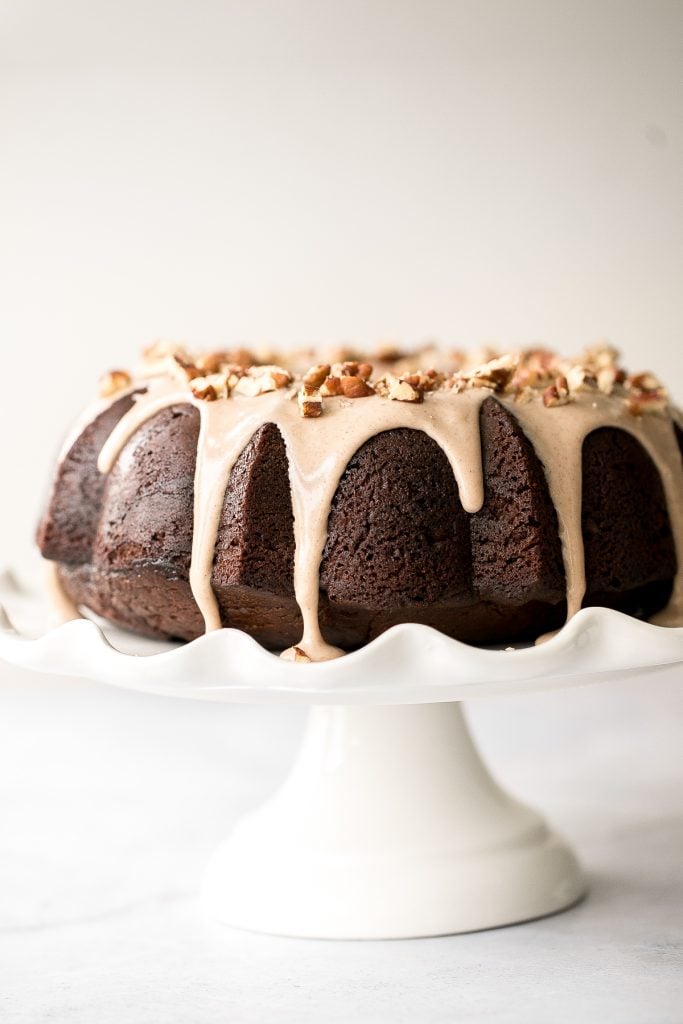
Pumpkin Pie Bundt Cake with Cream Cheese Glaze
This think and dense, yet surprisingly light, pumpkin pie bundt cake with cream cheese glaze is the perfect after dinner treat. It is warm from the mixture of pumpkin and pumpkin pie spice blend, with a hearty drizzle of cream cheese glaze. The perfect pair.
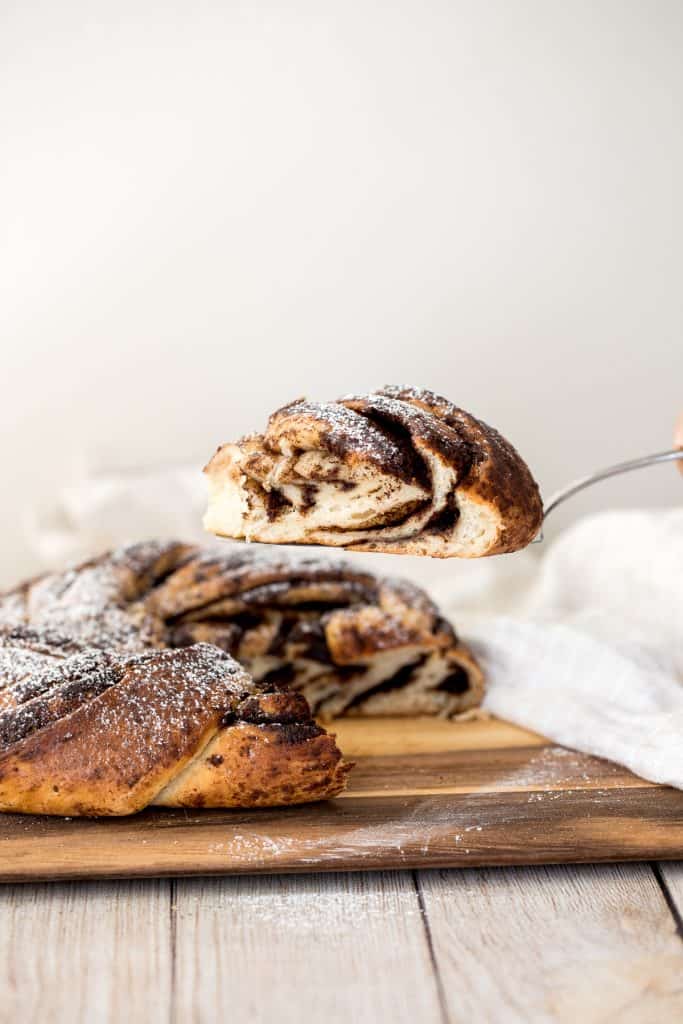
Sourdough Cinnamon Roll Twist Bread
Soft and fluffy sourdough cinnamon roll twist bread is buttery and layered with cinnamon sugar. Prep it the night before and freshly bake it right before serving for breakfast or dessert.
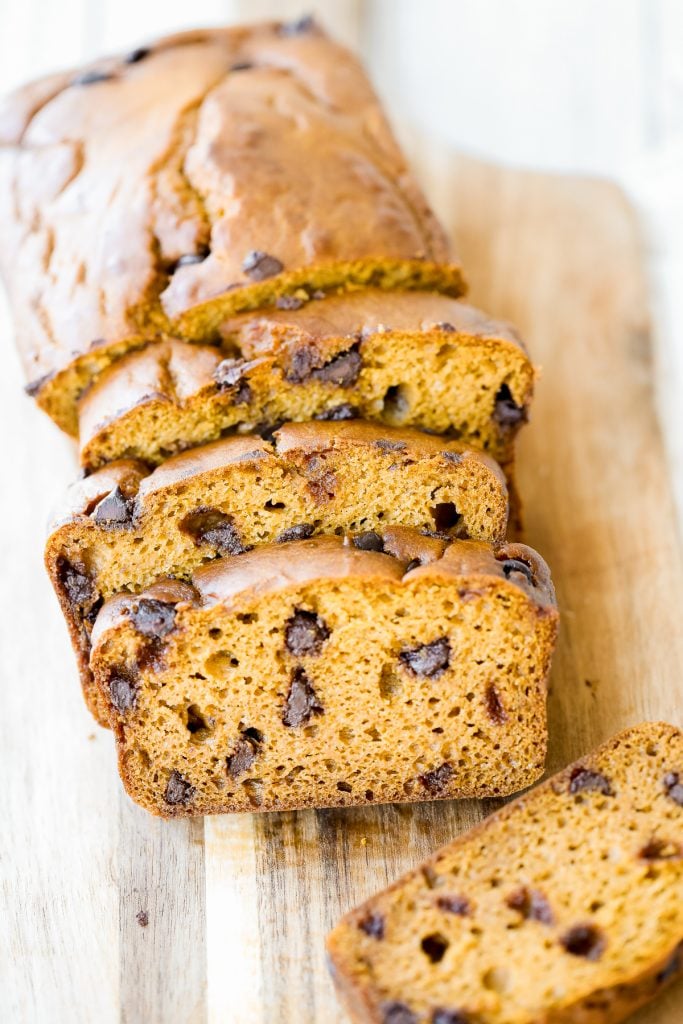
Soft and moist, small batch chocolate chip pumpkin bread is the easiest fall treat, packed with fall flavours of warm pumpkin spice, pumpkin, and chocolate.
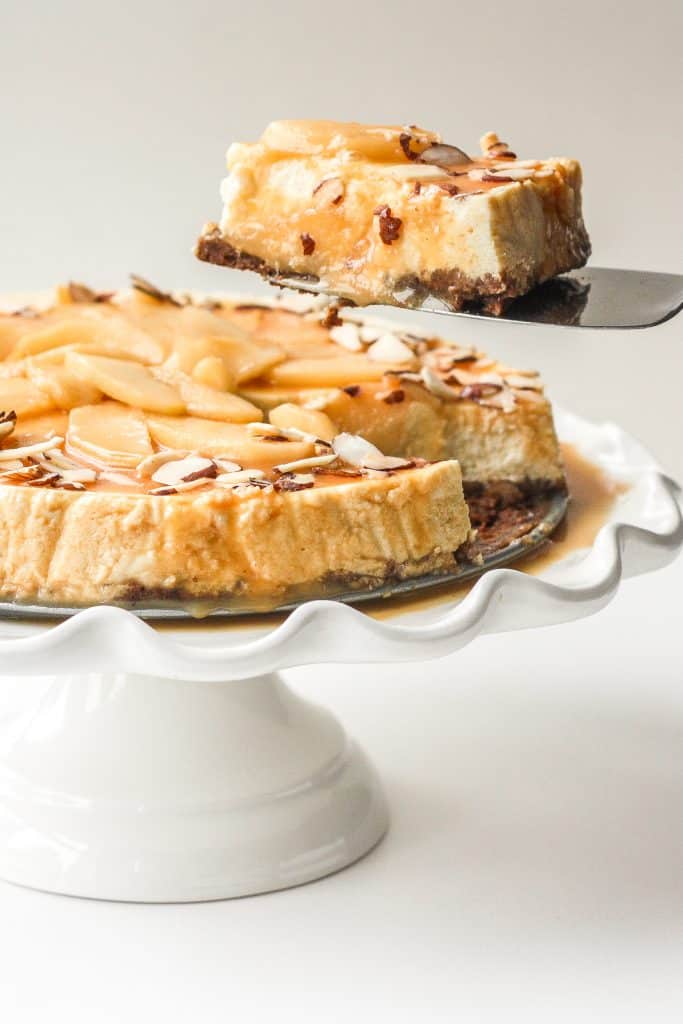
Healthier Caramel Apple Fall Cheesecake
Decadent and light, homemade healthier caramel apple fall cheesecake is made with a graham cracker crust, topped with caramel apples and caramel sauce. It's fall heaven.
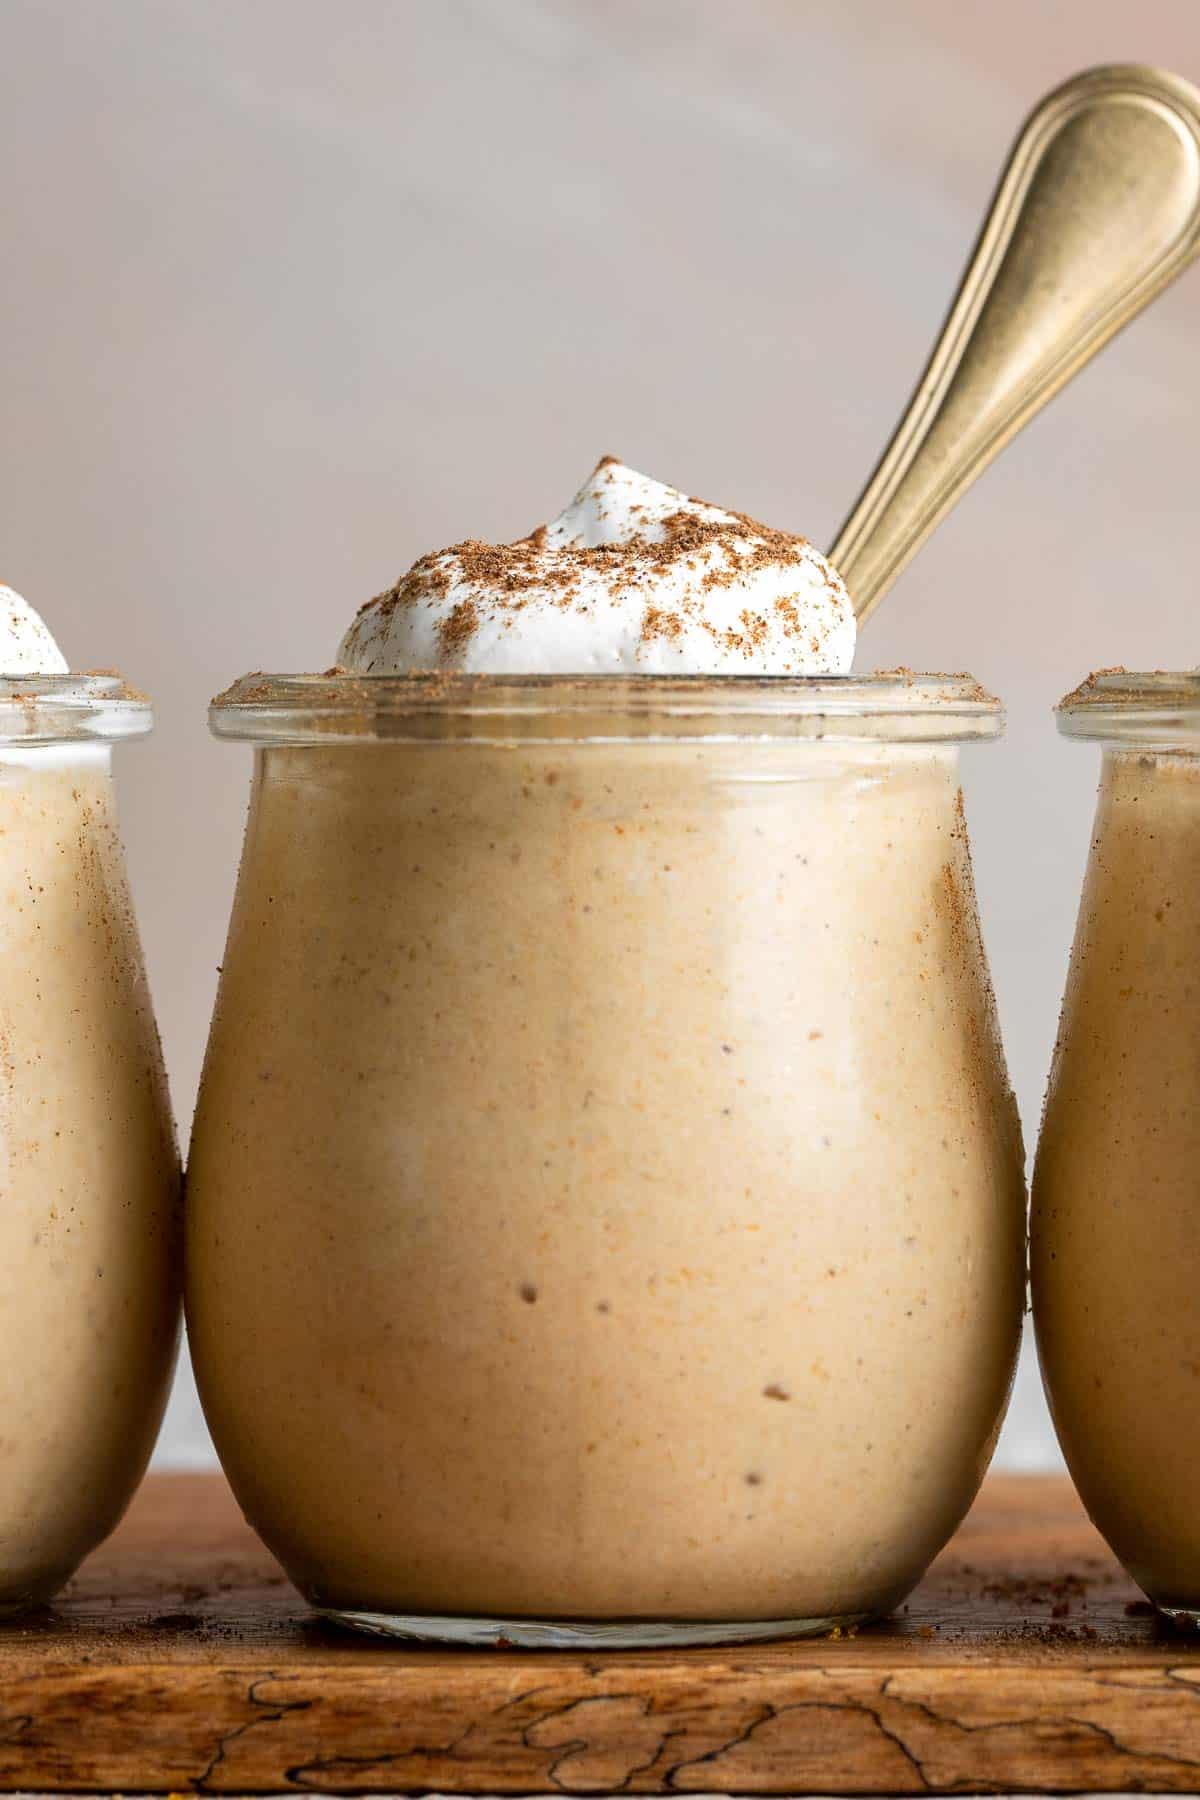
This rich, creamy pumpkin mousse is a fall dessert favorite. It's beginner-friendly, no bake, and easy to whip up in 15 minutes before ready to chill.
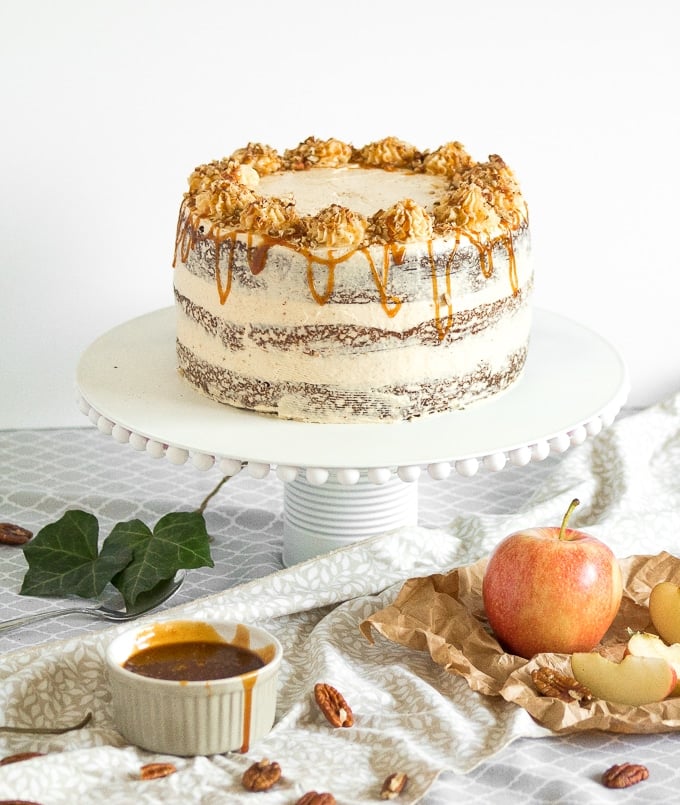
Apple Cardamom Cake with Caramel Pecan Butter Frosting
Apple cardamom cake with caramel pecan butter frosting is the perfect fall cake and is made by combining all your favourite fall flavours together.
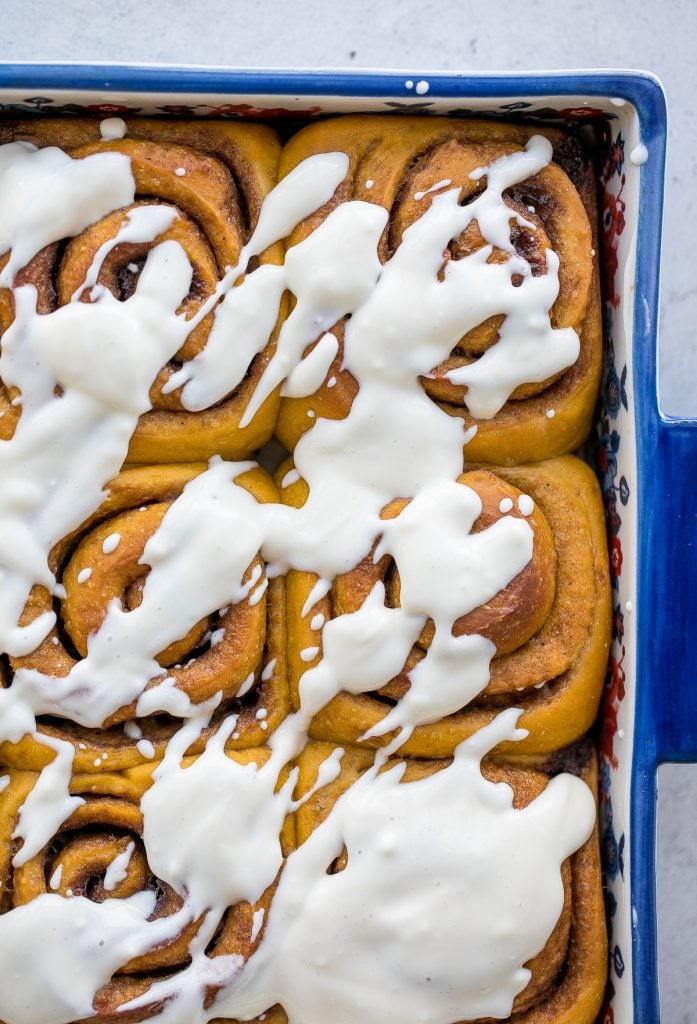
Soft and fluffy, pumpkin cinnamon rolls are packed with pumpkin, layered with pumpkin spice, and topped with cream cheese icing. Best fall treat ever.
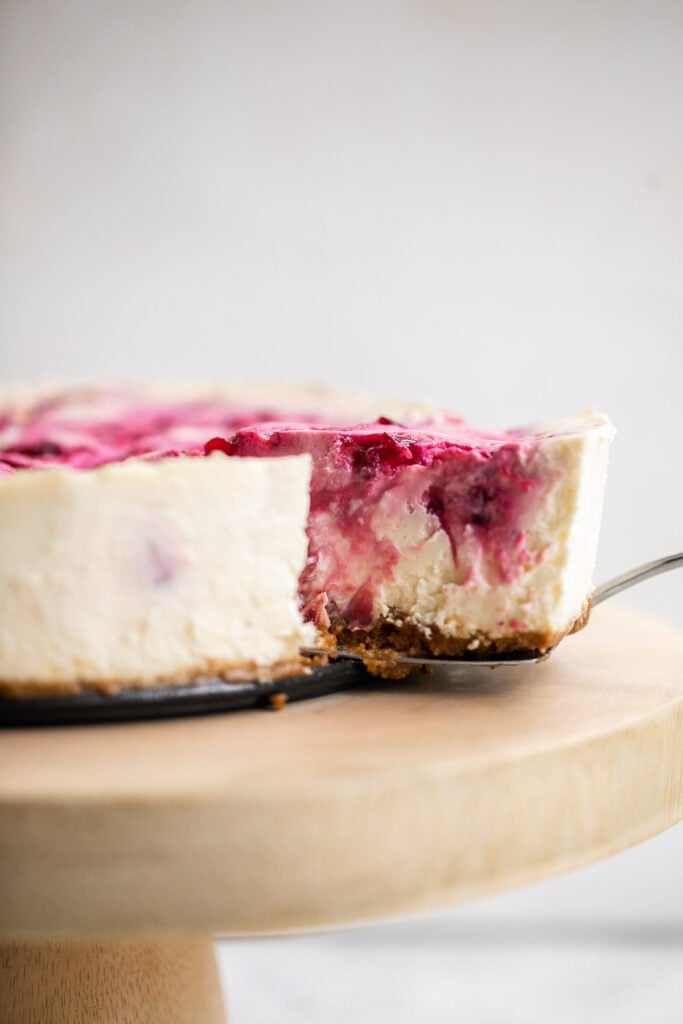
Cranberry Sauce Swirl Cheesecake
Cranberry sauce swirl cheesecake is creamy, smooth, and indulgent. With a gorgeous red swirl on top, it's the perfect holiday dessert for your next party.
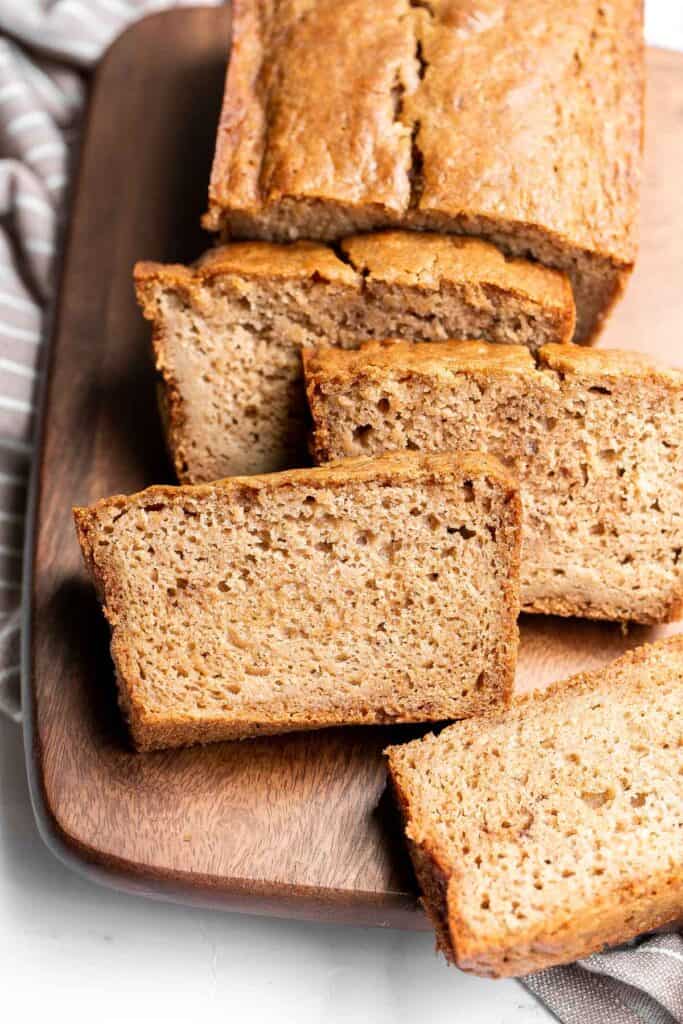
Homemade applesauce bread is fluffy, moist, and delicious. Loaded with fall flavors that transforms your favorite snack into a loaf cake.
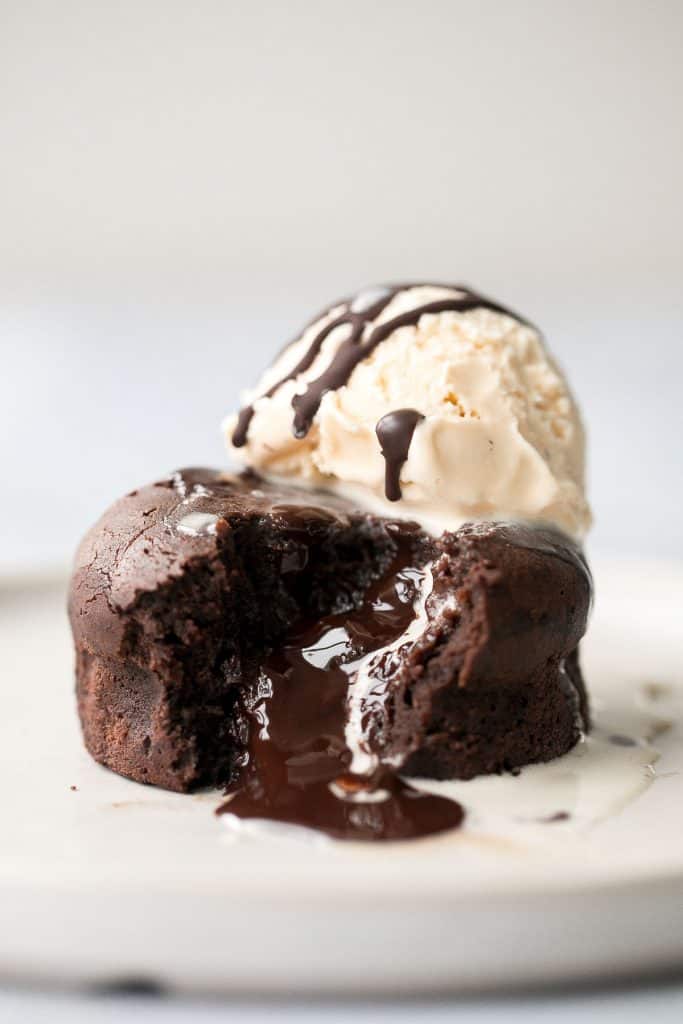
Molten chocolate lava cakes are rich and fudgy with a classic gooey chocolate center that flows out like lava. So simple and easy to make.
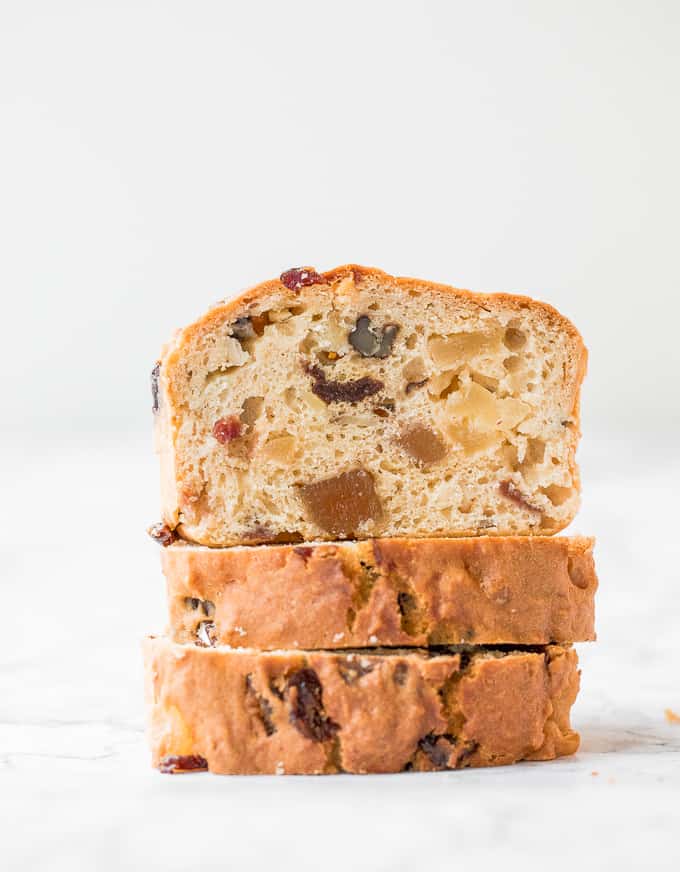
Perfect for the holidays, this super moist and tender, festive yogurt fruitcake is loaded with dried fruits and nuts for a burst of flavour in every bite.
No one will be able to resist this perfectly sweet and moist, glazed brown sugar bundt cake. Made with Greek yogurt for major decadence and richness.
Move over pumpkin, there is a new loaf in town! Butternut Squash Bread is moist, fluffy, flavorful, and brings the pumpkin spice season to your home.
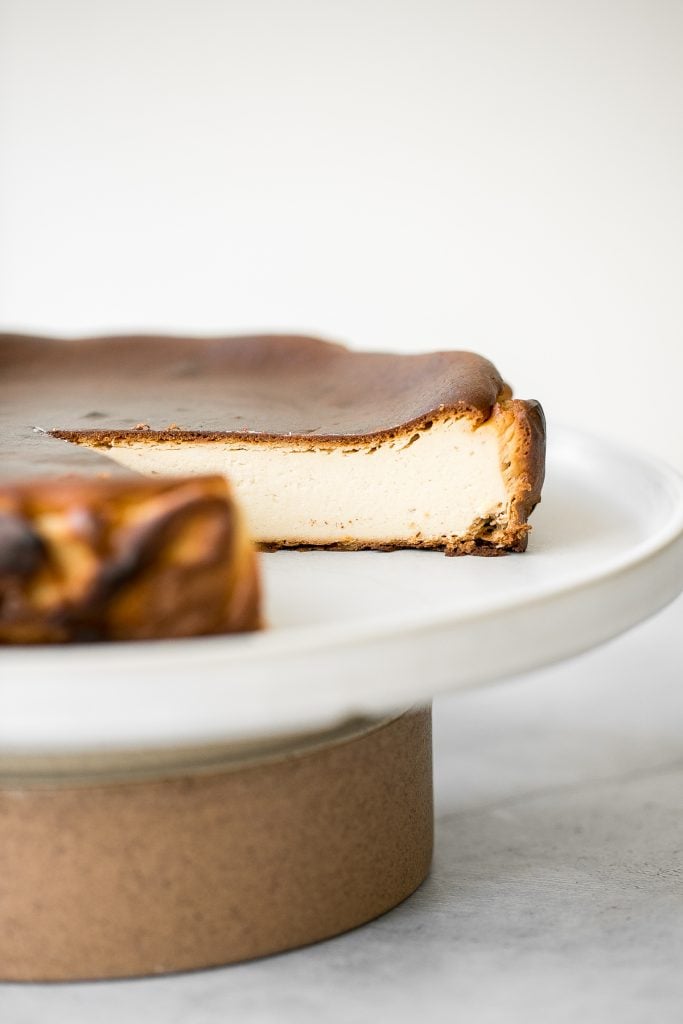
Easy No Crust Burnt Basque Cheesecake
Easy no crust burnt Basque cheesecake is the easiest one bowl recipe. It is perfectly caramelized on the top and edges and creamy yet firm on the inside.
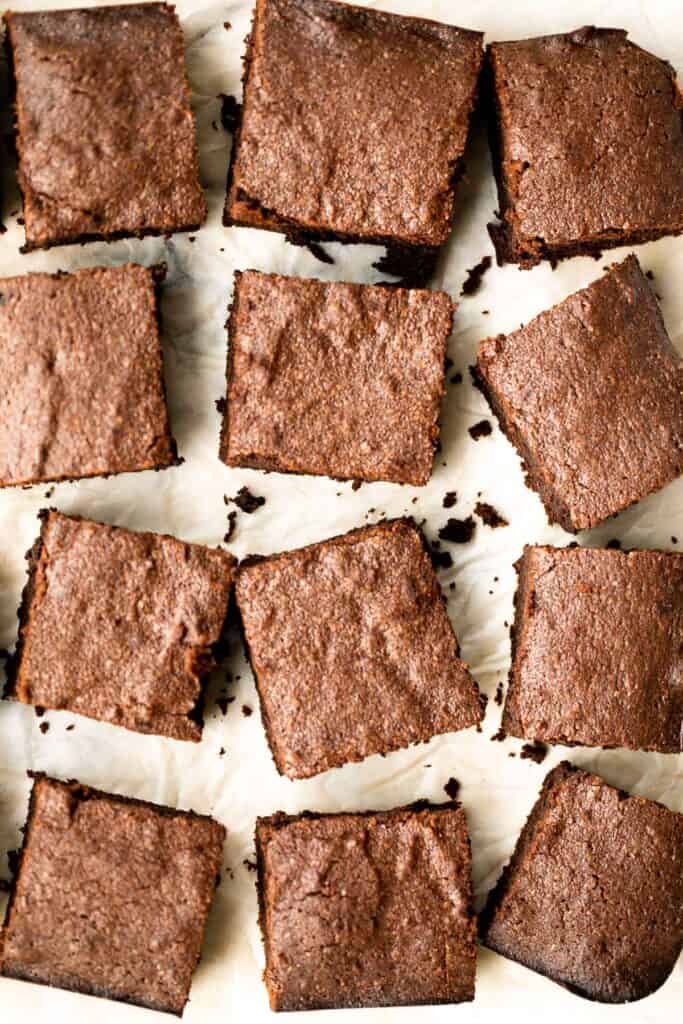
Fudgy brownies are rich, sweet, moist, and decadent. Plus, they're easy to make in one bowl (meaning less cleanup!) and ready in about 30 minutes.
Cookies
Butter Pecan Cookies are soft and chewy, have perfect golden crisp edges and loaded with crunchy toasted pecans. Quick and easy to make in under 20 minutes.

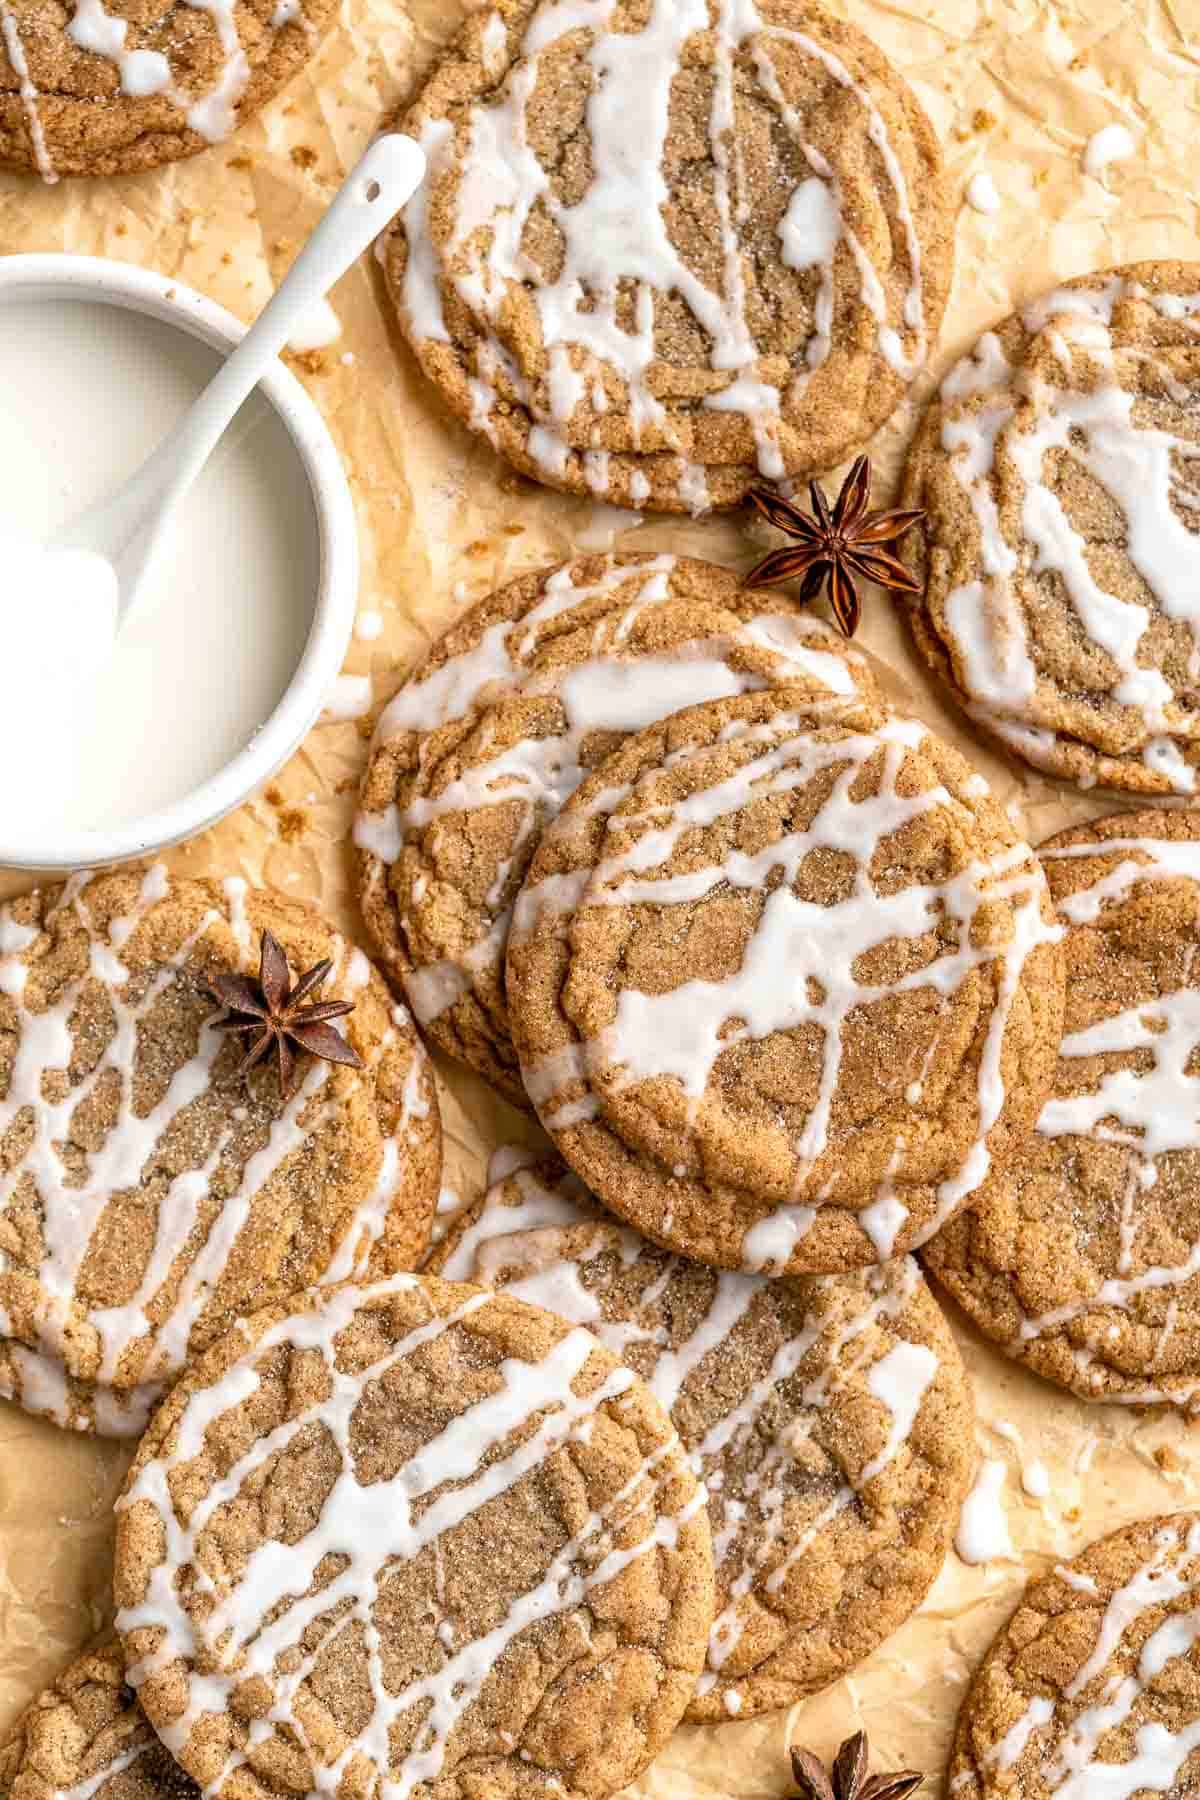
Soft and chewy Chai Cookies are loaded with warm chai spices and topped with drizzle of a sweet chai glaze. Quick and easy to make with no chill time!
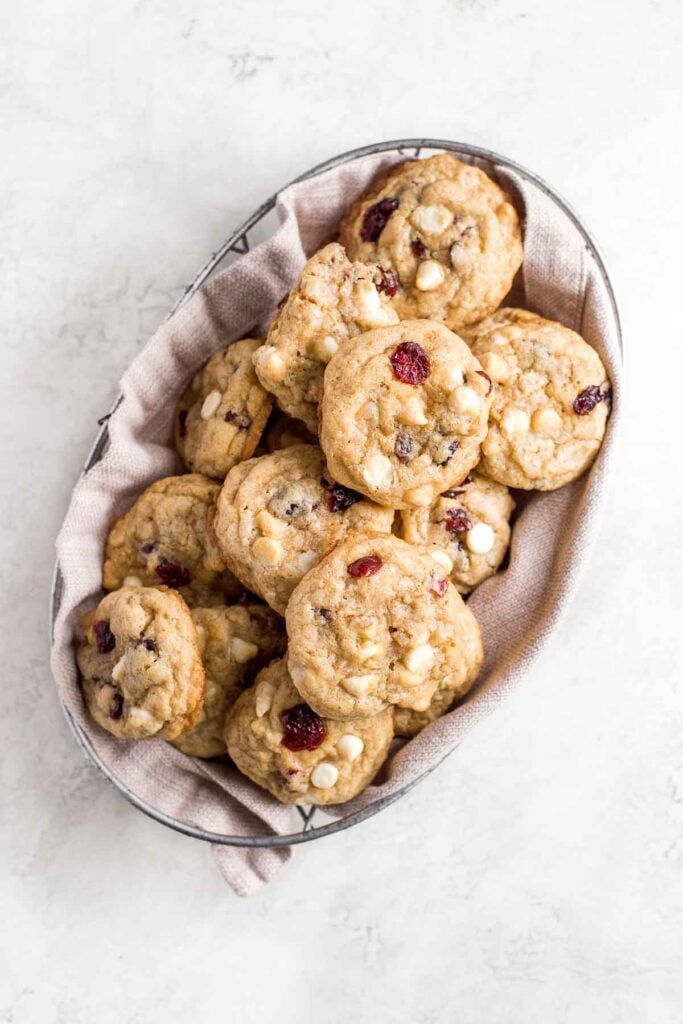
Soft and Chewy White Chocolate Cranberry Walnut Cookies
Warm, fresh-from-the-oven, soft and chewy white chocolate cranberry walnut cookies make the perfect holiday treat. They are beyond simple to prepare, and even easier to watch disappear.
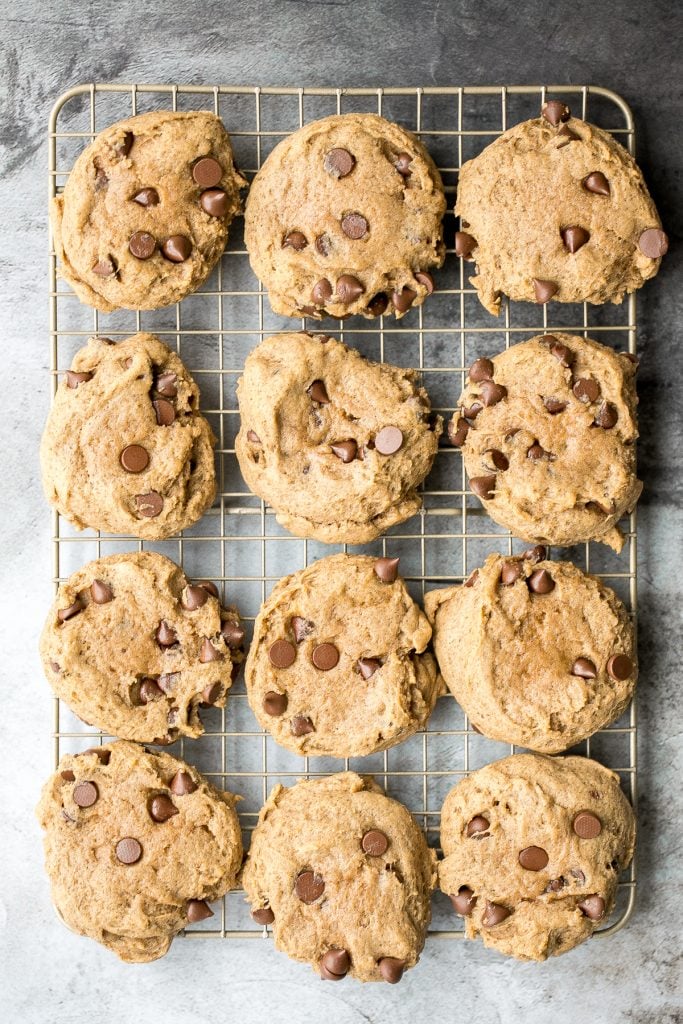
Pumpkin Chocolate Chip Cookies
Thick, fluffy, chewy pumpkin chocolate chip cookies is when pumpkin bread meets chocolate chip cookies. These no chill cookies are ready in under 20 minutes.
Brownie Cookies are the perfect combination of rich, chocolatey brownies and chewy, gooey cookies. Quick and easy to make with no chilling required.

Jam-Filled Thumbprint Cookies with Almond Glaze
Soft, buttery, melt-in-your mouth jam-filled thumbprint cookies with almond glaze are the cutest, festive treat to make. Plus, it comes together with just a handful of ingredients and less than 20 minutes of prep time.

Easy Small Batch Almond Biscotti
Small batch almond biscotti are crunchy, crumbly and packed with almonds, perfect for dunking into tea, coffee, or peppermint hot chocolate, and they are super easy to make.

The Best Chewy Chocolate Chip Oatmeal Cookies
Grab a tall glass of milk and start dipping the best homemade, soft-centered, chewy chocolate chip oatmeal cookies you will ever try.

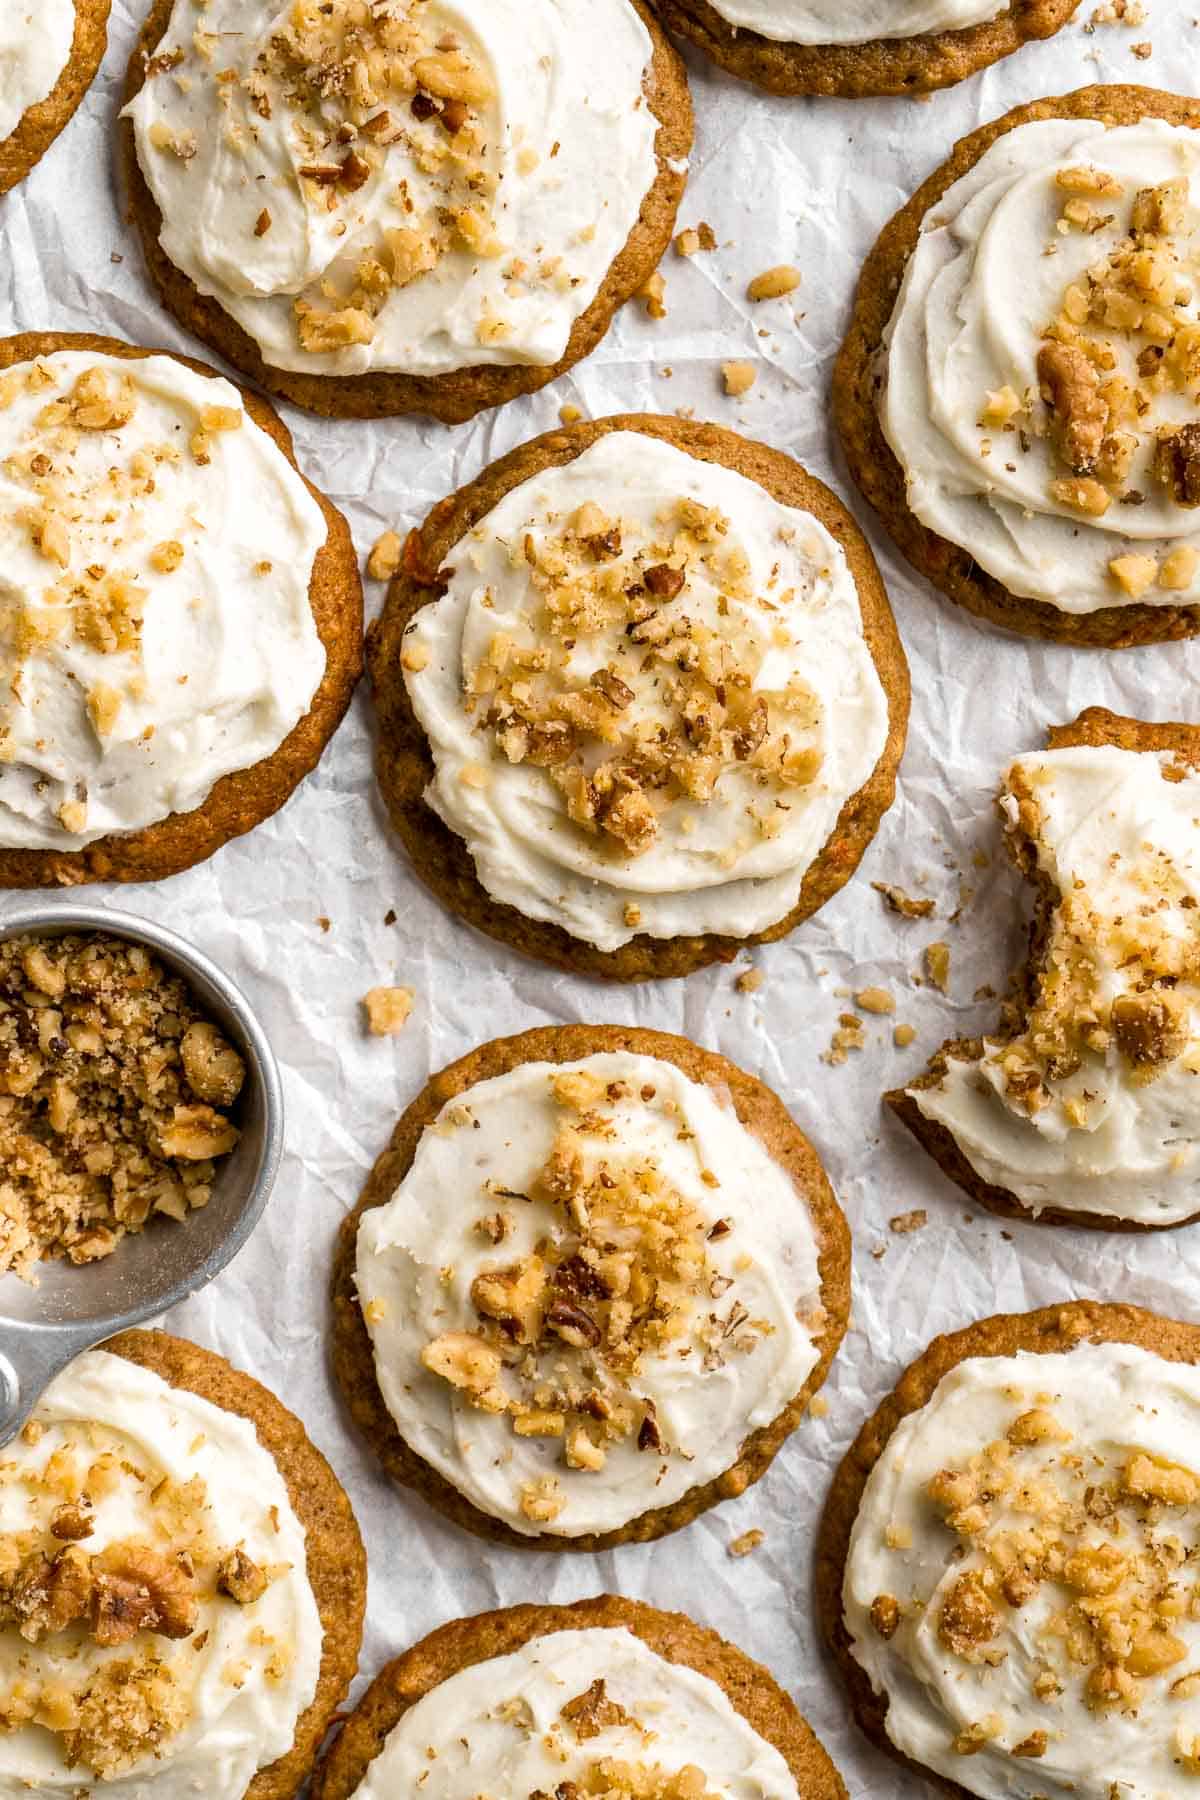
Carrot Cake Cookies are soft, chewy, cake-like cookies with a delicious homemade cream cheese glaze. They taste just like carrot cake but in cookie form.
How to Make Ahead and Store Thanksgiving Dessert
You can make or prepare all of these Thanksgiving dessert recipes ahead of time. You can store most of them at room temperature for a few days, in the refrigerator for up to one week, and in the freezer for up to 3 months. Check each recipe for exact storage details.
If you would like to reheat any of these desserts and serve them warm, just place the in a 300F preheated oven for 5-10 minutes. If heating from frozen, let it thaw first and then reheat. Making dessert a few days before Thanksgiving will make things so much easier on the day of your holiday meal.
More Dessert Recipes
- Chocolate Chunk Peanut Butter Cookies
- Caramel Cheesecake Brownies
- Double Chocolate Loaf Cake
- Baked Jelly Donuts
- Chocolate Chip Banana Bread Cookies
- Lemon Loaf with Lemon Glaze
- Carrot Cake Muffins
- Dark Chocolate Raspberry Truffles
- Vanilla Cake Pops from Scratch
- The Best Soft and Chewy Peanut Butter Cookies
- Cinnamon Apple Oatmeal Muffins
- Nutty Banana Bread
Did You Make Any of These Thanksgiving Dessert Recipes?
Please leave a comment and rating below, and let me know what you thought of this round up of recipes. Be sure to snap a picture and tag me on Instagram @aheadofthyme or share it on the Pinterest pin so that I can follow along.
HUNGRY FOR MORE? Don't forget to sign up for my email newsletter so that you don't miss any recipes. You can also follow along on Instagram and Pinterest for more recipe updates.
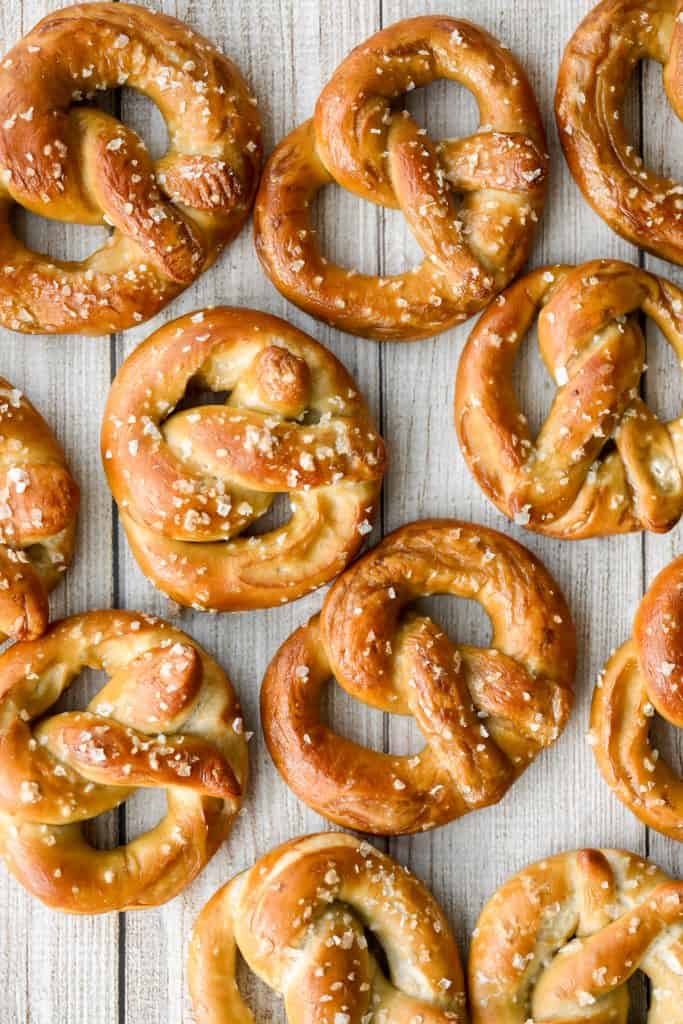
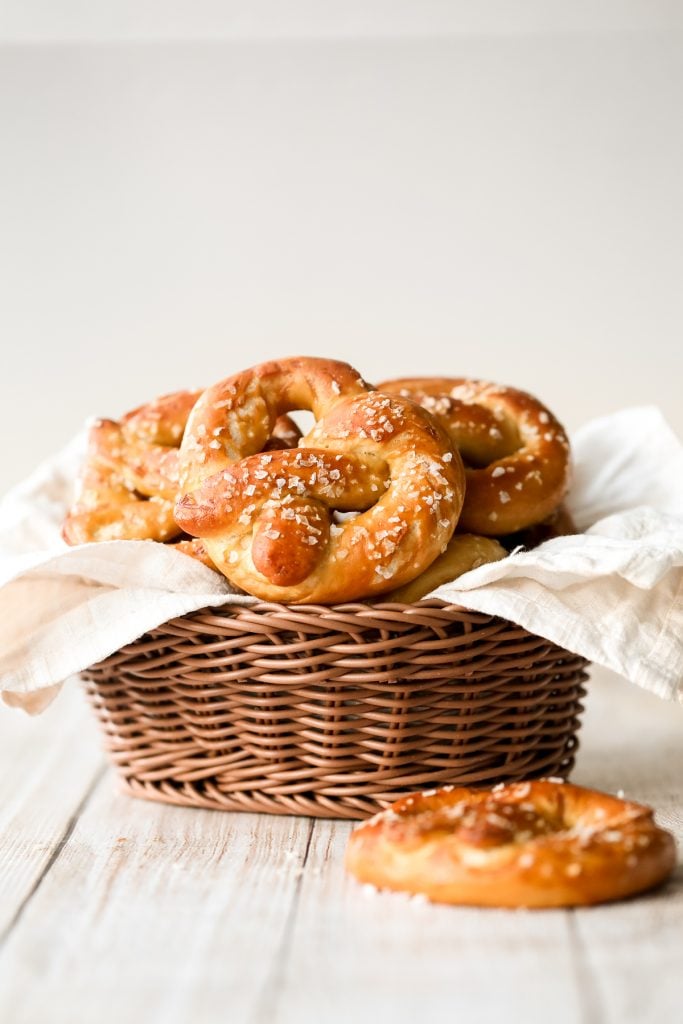
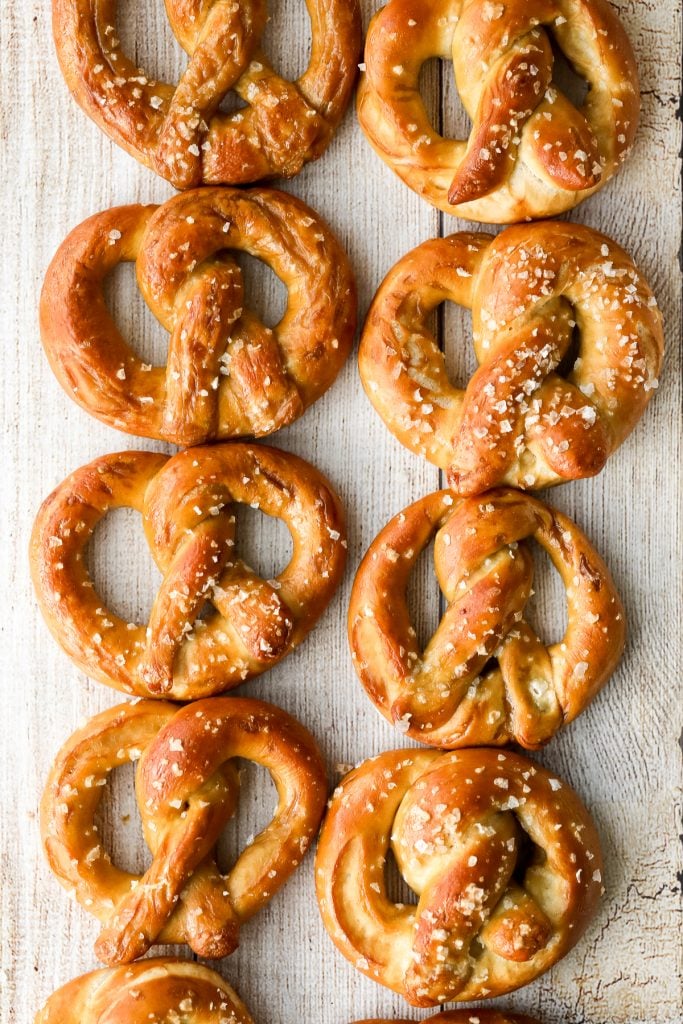
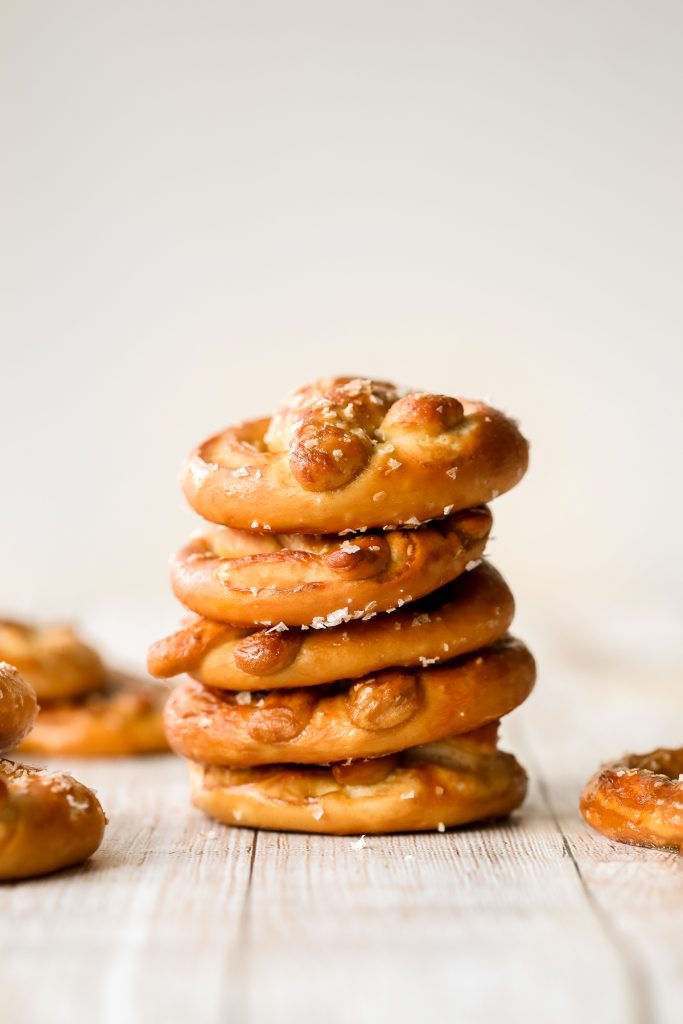
Easy Salted Soft Pretzels

Quick and easy salted soft pretzels are buttery, salty, and so delicious. They are golden brown and chewy on the outside, yet warm and soft inside. They are so easy to prepare with just 20 minute of actual prep work, and taste so much better than any pretzel you can find at the mall or ball park.
Weekends are for baking bread and we love a good easy bread over here. Especially one with minimal prep and a short rise time, like quick and easy pita bread or small batch garlic naan bread. But I have to admit that salted soft pretzels might just be my favourite. They are the perfect tasty snack with delicate flaked salt.
Ingredients
- active dry yeast + water
- salt
- brown sugar
- all-purpose white flour
- butter
- water bath - made with water, baking soda, and brown sugar. This water bath is what gives the pretzels its flavour and signature golden brown colour. This process is very similar to making homemade bagels.
- egg - for egg wash.
- salt flakes - to sprinkle on top.
You will also need a kitchen scale to accurately measure out ingredients (measuring cups and spoons can also work), mixing bowl, a large pot for the water bath, and ½ pan baking sheet.
How to Make the Best Salted Soft Pretzels (with Step-by-Step Pictures)
First, prepare the dough. Combine yeast, water, salt, and sugar in a large mixing bowl and stir to dissolve. Let the yeast mixture rest 5 minutes until it turns foamy.
Add in flour and melted butter. Stir well with a silicone spatula to combine until it forms a shaggy dough and no dry flour is visible in the bowl. Make sure to scrape down the sides of the bowl with the spatula.
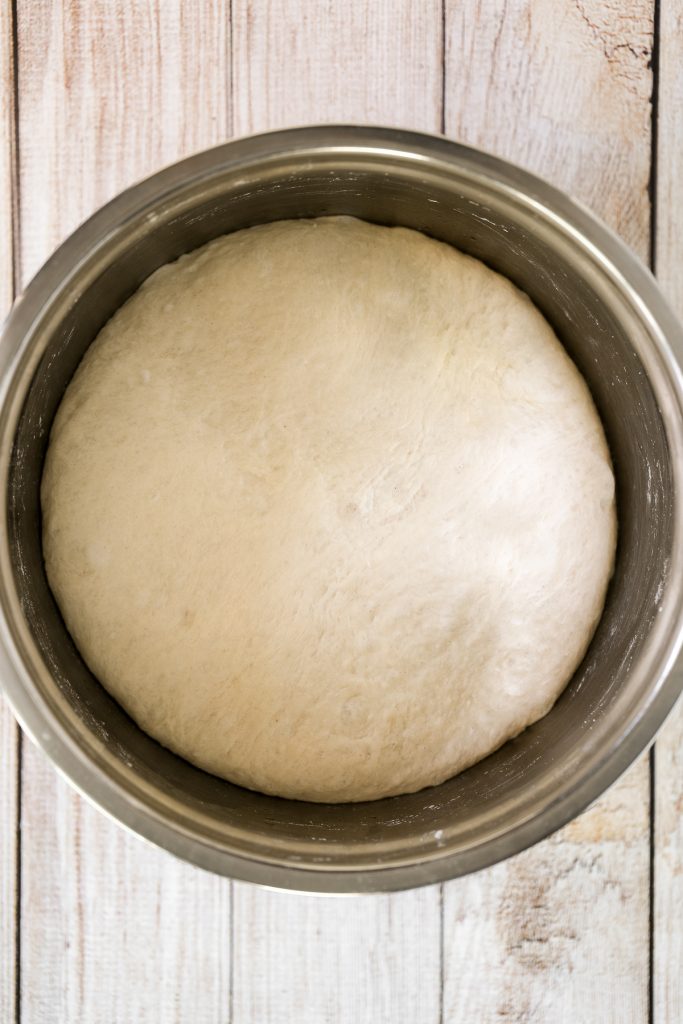
Knead the dough on a clean surface for 5 to 7 minutes until the surface of dough is smooth. Transfer the dough back into the bowl and cover with cling wrap. Let it rest up to 1 hour at room temperature until the dough doubles in size. PRO TIP: Lightly brush some oil over the dough ball to prevent it from losing moisture.
Soft pretzels are considered medium hydrated doughs, which means they require some kneading to get all the flour incorporated and gluten developed. Because of the added butter in the recipe, the dough becomes softer and is not sticky at all during kneading.
How to Shape Pretzels
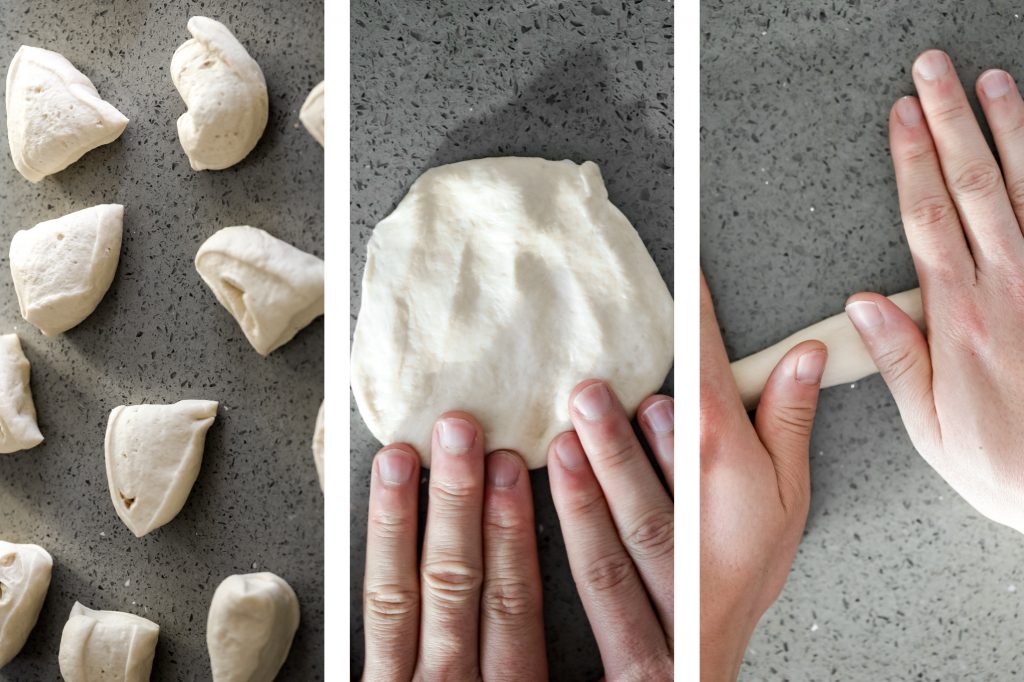
- Divide the dough into approximately 12 equal pieces, using a bench scraper. Shape each piece into a ball, and then roll each dough ball into a long rope approximately 20-inches long.
- Bring the two ends of each rope together to form a circle, with the ends on the bottom. Then, twist the ends a couple of times and pull them up and press them down into a pretzel shape.
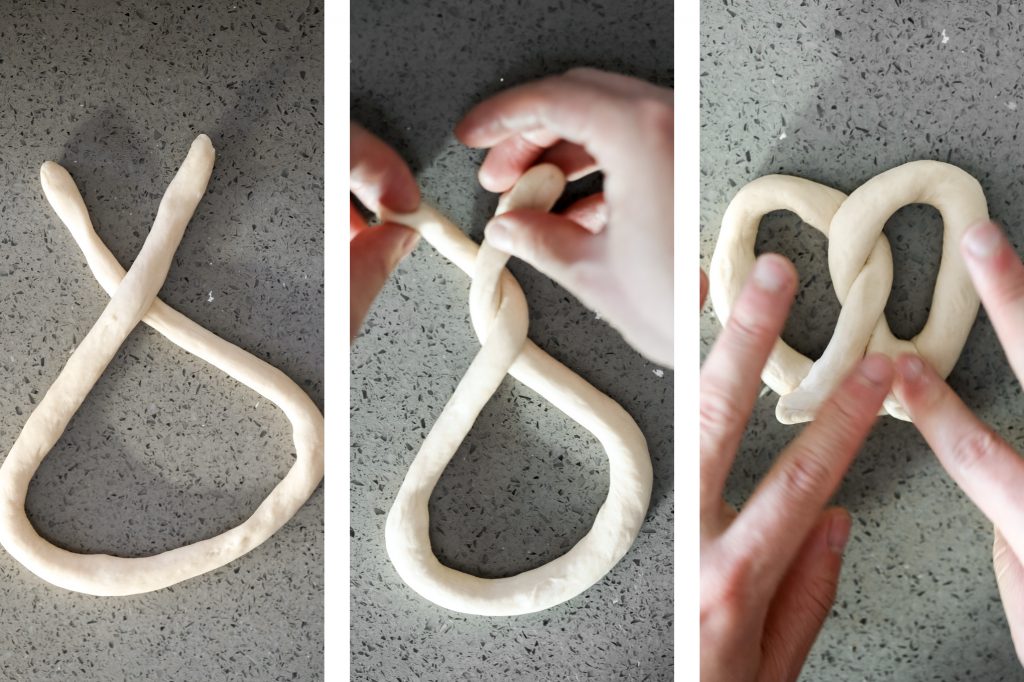
- Cover the shaped pretzels with cling wrap, as you prepare the water bath.
How to Cook Soft Pretzels
First, dip the pretzels into a hot water bath. Add water, baking soda and brown sugar in a large pot and bring it a boil. Drop pretzels in, 3 or 4 at a time. Make sure they have enough room to float around. Boil the pretzels for 30 seconds to 1 minute on each side. The longer you boil the pretzels, the chewier and browner the pretzels get after baking.
The main purpose of incorporating the water bath when making pretzels is to promote browning and develop chewy texture and golden crust.

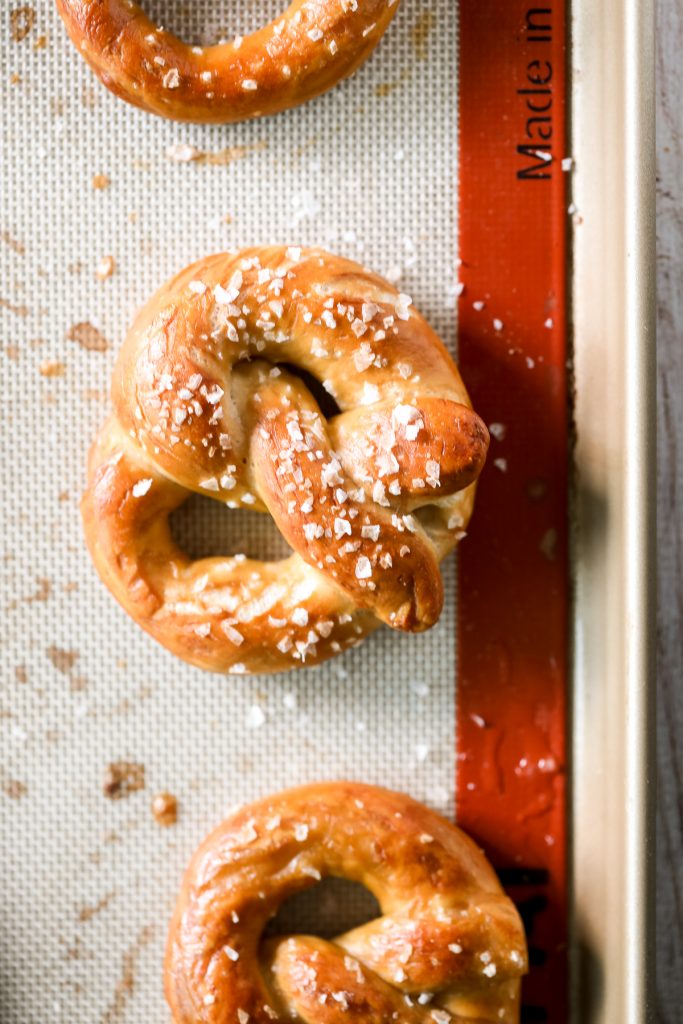
Transfer the pretzels onto a parchment-lined baking sheet and let them dry for 5 minutes. You may have to use two baking sheets or do this in two batches. I fit 6 pretzels per baking sheet.
Brush the egg wash over the pretzels and generously sprinkle salt flakes on top. Egg wash makes the pretzels brown during baking and also helps the salt flakes stick to the pretzels.
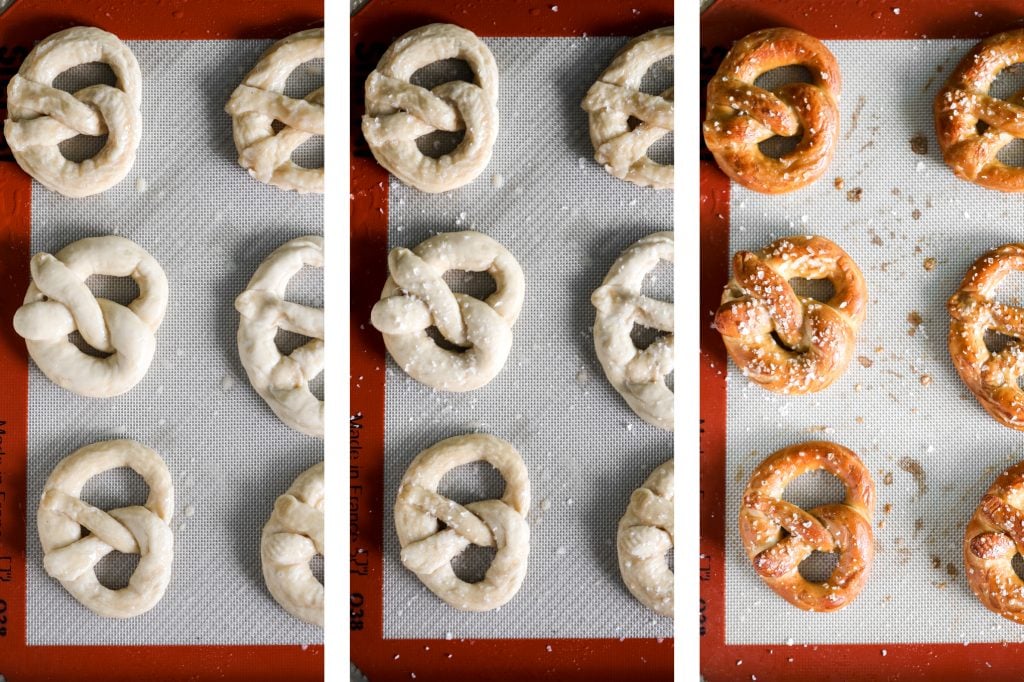
Now, bake the pretzels. Transfer the pan into a 400F preheated oven and bake for 15 minutes until golden brown. Transfer the pretzels to a wire cooling rack and cool completely.
Tips for Storing Pretzels
- How to store fresh pretzels: Homemade pretzels are best served fresh. To store pretzels in the short-term, keep them in an airtight container or ziploc bag for up to 3 days at room temperature.
- How to freeze pretzels: You can freeze pretzels in an airtight container or ziploc bag for up to 3 months in the freezer.
- How to reheat pretzels: To reheat from frozen, you can simple place the pretzels inside the toaster or toaster oven and toast on the freezer setting. You can also quickly reheat in the air fryer at 300F for 10 minutes. Otherwise, allow the pretzels to thaw in the refrigerator or at room temperature. Reheat thawed pretzels in the toaster, air fryer or oven at 300F for 5-10 minutes.
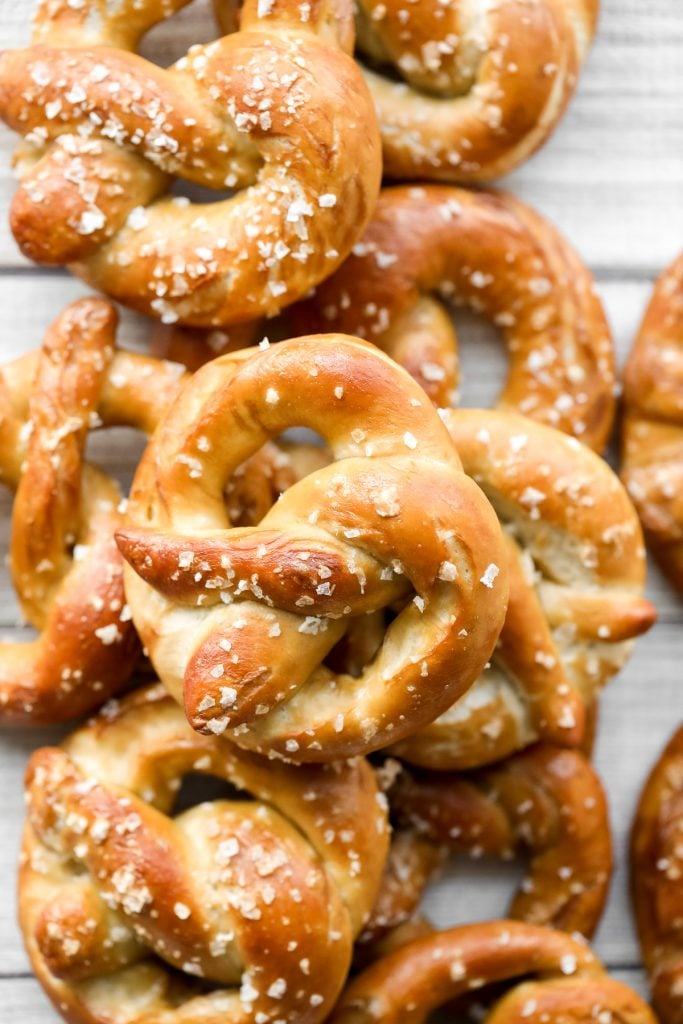
How to Serve Salted Soft Pretzels
These easy salted soft pretzels are delicious on their own as a snack. Everyone loves them, even the kids and it makes a great back-to-school or work snack. They are also really tasty dipped in some gooey cheese sauce, warm baked spinach dip, or smooth and creamy hummus.
More Quick and Easy Bread Recipes
- Quick and Easy Pita Bread
- Easy Homemade Everything Bagels
- Easy Small Batch Naan Bread
- Quick Green Onion Dinner Rolls
- Easy Small Batch Ciabatta Bread
- Homemade No Knead French Baguettes
Tried this recipe?
I'd love to hear what you think! Leave a comment and rating below to share your feedback. Your reviews help others discover this recipe and help me keep creating more free recipes for you. Snap a photo and tag me on social media @aheadofthyme too.

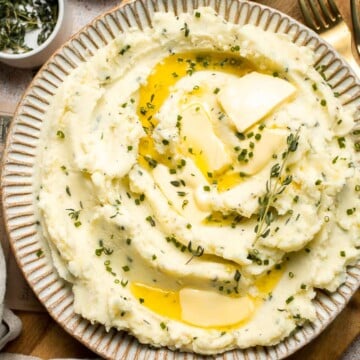
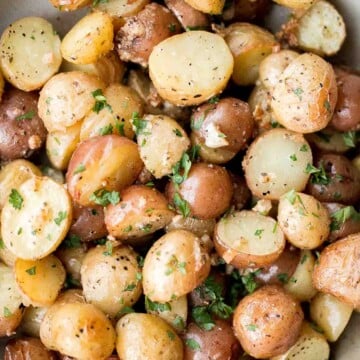
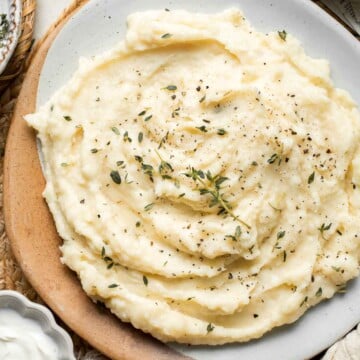
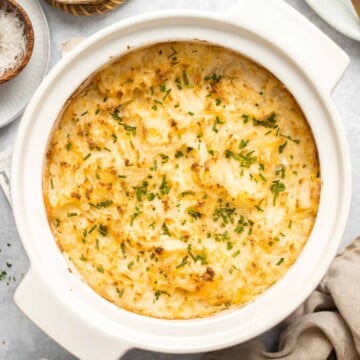
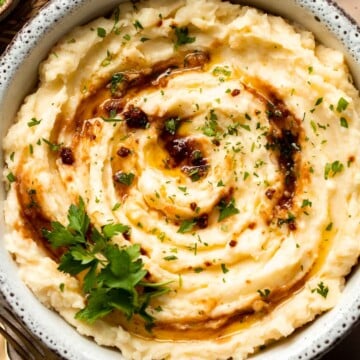
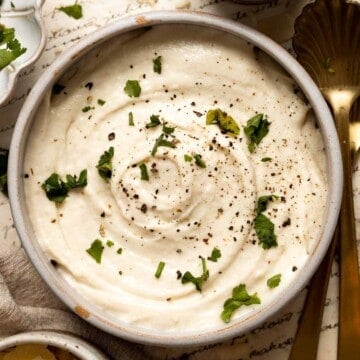
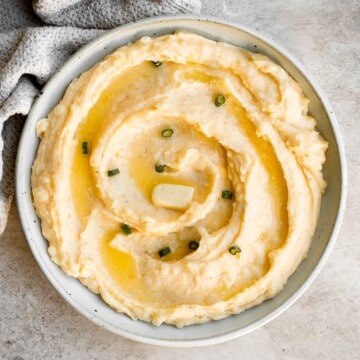
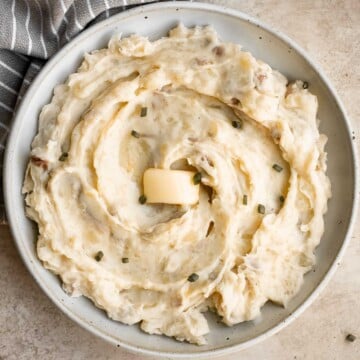
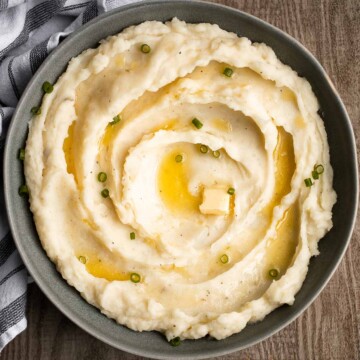
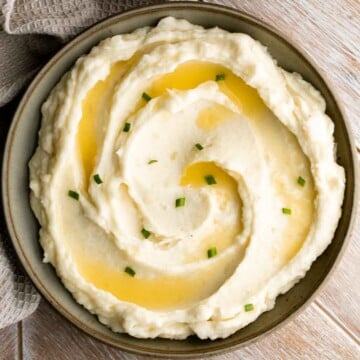
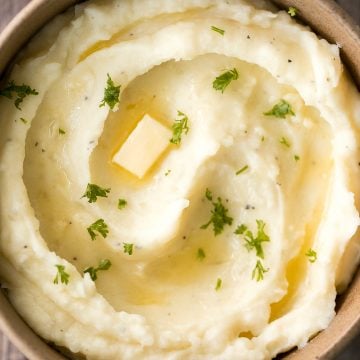
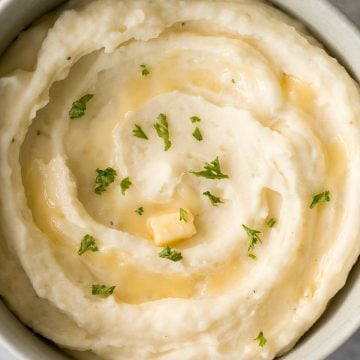
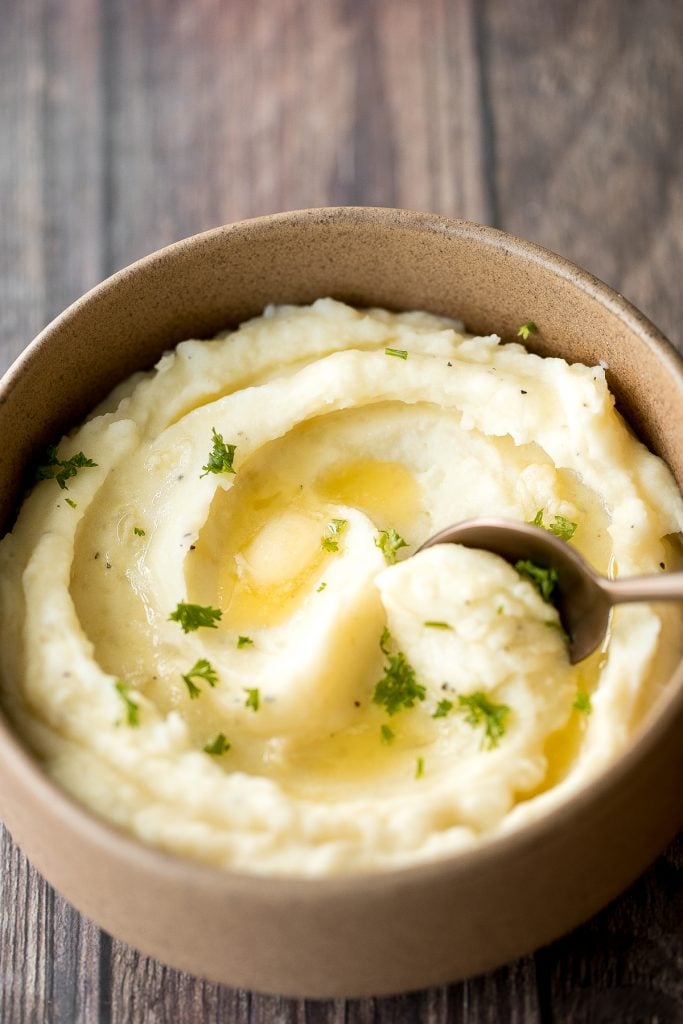
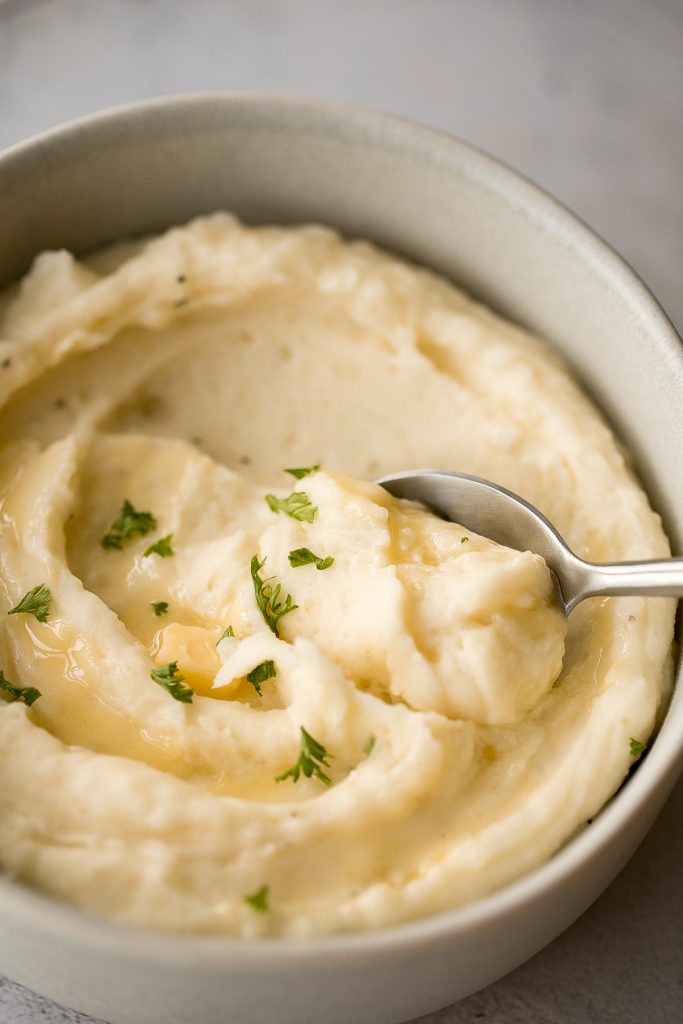
Garlic Mashed Potatoes with Sour Cream
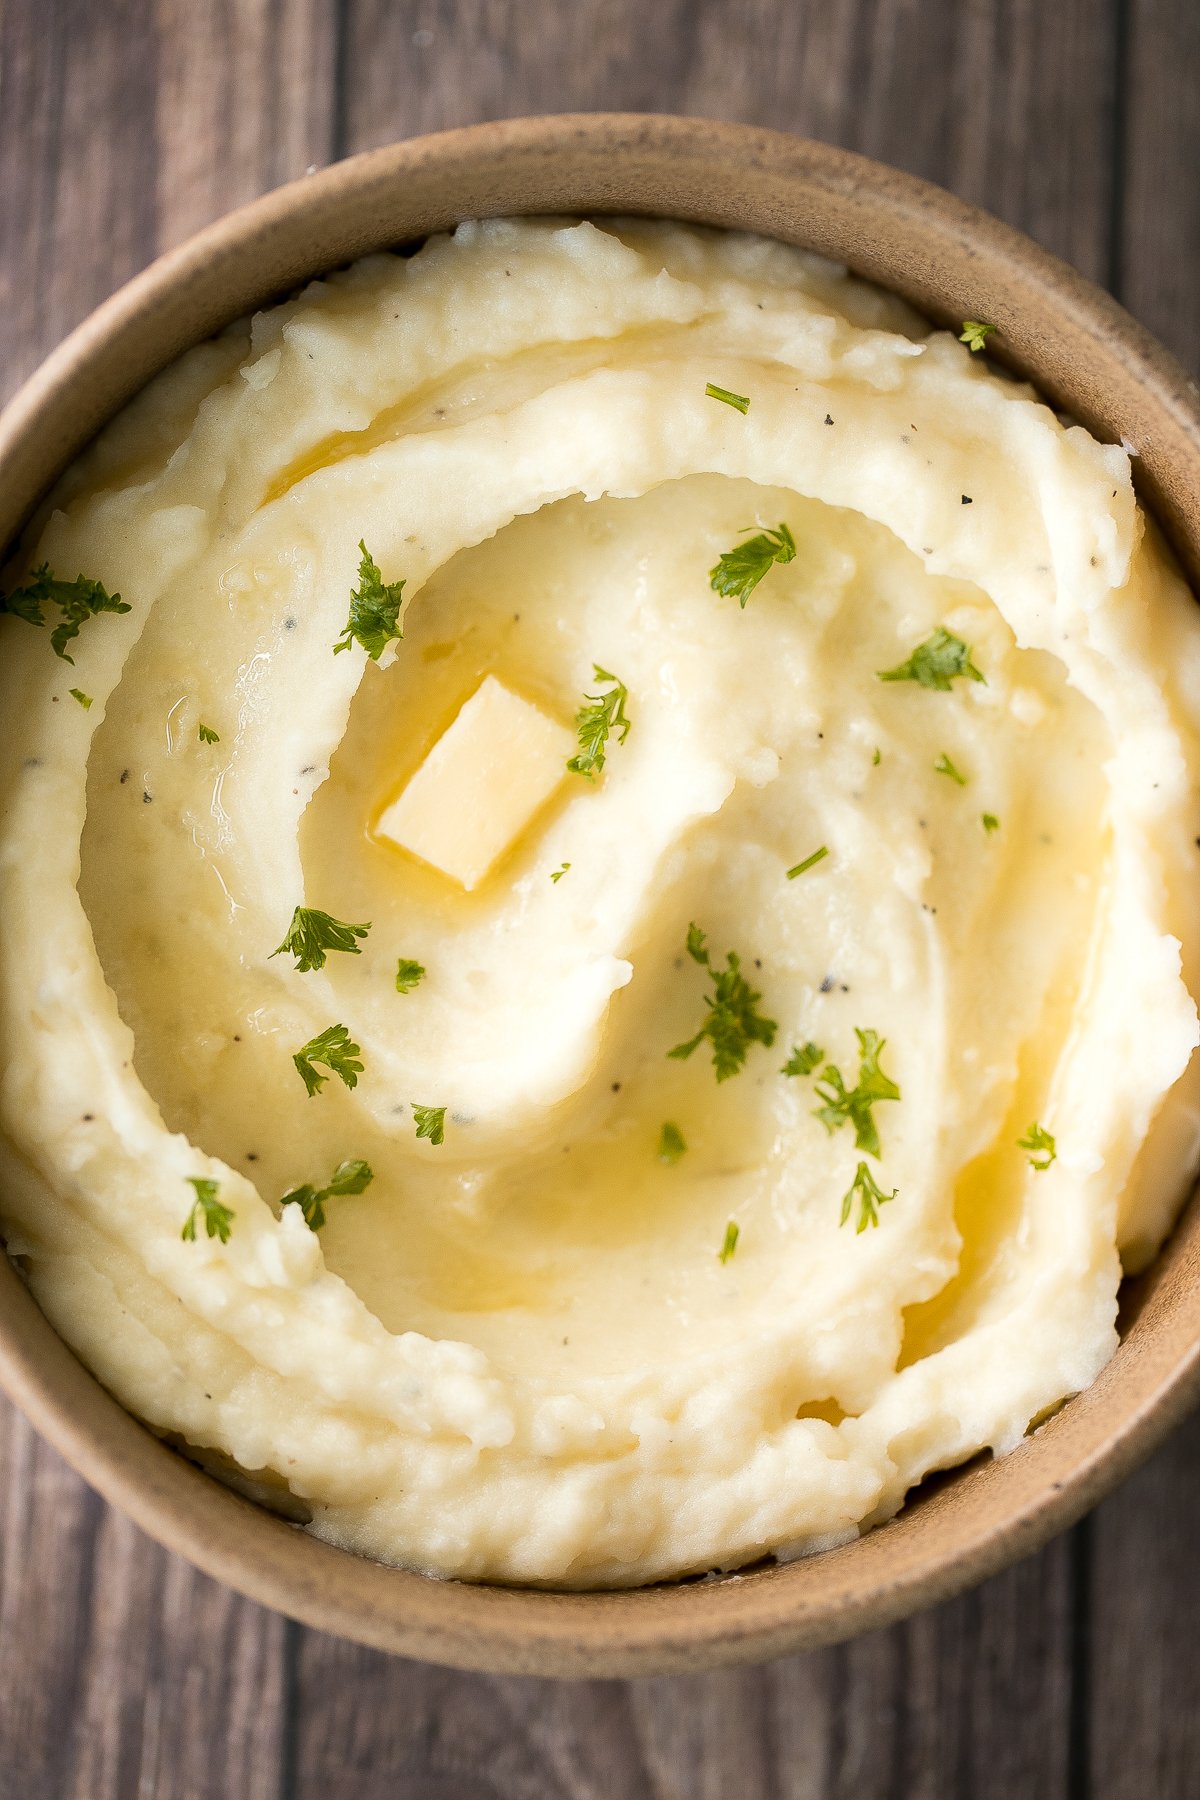
Velvety and smooth, garlic mashed potatoes with sour cream are the best and most flavourful mashed potatoes ever. They are garlicky, buttery, creamy, and all around comfort. Plus, this easy side dish can be made ahead of time to make dinner even easier.
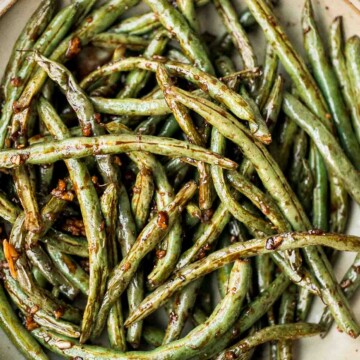
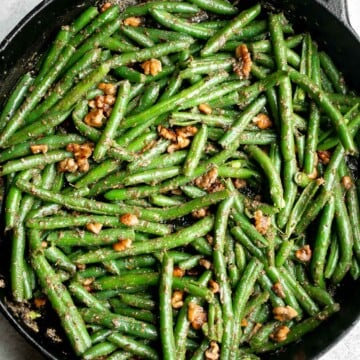
Serve garlic mashed potatoes on the side of pretty much any dish to instantly elevate it. Try it with steak, roast chicken, turkey, lamb chops, and salmon. And let's not forget it on your Thanksgiving dinner table, alongside garlic green beans, roasted butternut squash, and sweet potato casserole.
Ingredients
- potatoes - I would recommend Yukon gold or russet potatoes, or a combination of the two. They make for the creamiest potatoes when mashed.
- butter - I used unsalted butter. You can use salted butter but then do not add any additional salt.
- sour cream - can be substituted with cream cheese.
- whole milk - can be substituted with half-and-half cream, or half heavy cream and half milk.
- salt and pepper
- fresh parsley - optional, for garnish on top.
You will also need a large pot and a potato masher.
How to Make the Best Garlic Mashed Potatoes with Sour Cream
- Boil the potatoes. Place potatoes and whole garlic cloves in a large pot and cover with salted water (covering the potatoes by about an inch). Heat over high heat and bring to a boil. Reduce heat to low, cover, and simmer for 15-20 minutes, until potatoes are soft when you insert a fork.
- Drain and mash. Drain and place back in the pot. Use a potato masher (or a fork) to mash the potatoes and garlic.
- Add remaining ingredients. Add in the butter and sour cream and mix together with a spoon, until melted and incorporated into the potatoes. Stir in the milk and add salt and pepper, to taste.
- Serve. Remove from heat and transfer to a serving dish, garnish with parsley, extra butter and serve warm.

Tips for Creamy Garlic Mashed Potatoes
- Chop the potatoes into small pieces. Chop the potatoes into 1-inch pieces to ensure even and consistent cooking.
- Use a potato masher. Mash the potatoes with a simple potato masher and then mix all the ingredients together with a spoon. For extra creamy potatoes, use an electric hand mixer to mix the ingredients together after mashing.
- How to store: Store mashed potatoes in an airtight container in the refrigerator for up to 3 days.
- How to make ahead: You can make this up to 3 days ahead. Reheat in the microwave or oven. You can also reheat on the stove but you may need to add in some extra butter to make it nice and velvety before serving.
More Potato Recipes
- The Best and Creamiest Mashed Potatoes
- Creamy Potatoes Au Gratin
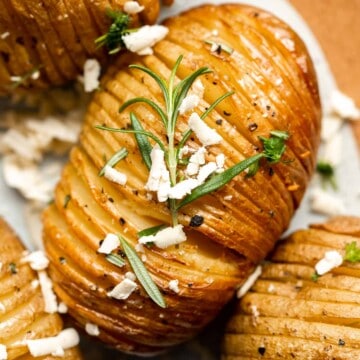
- Hasselback Potatoes with Garlic Herb Butter
- Crispy Air Fryer French Fries
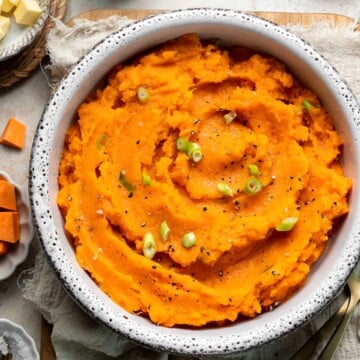
- Savoury Mashed Sweet Potatoes
- Slow Cooker Loaded Baked Potato Soup
Tried this recipe?
I'd love to hear what you think! Leave a comment and rating below to share your feedback. Your reviews help others discover this recipe and help me keep creating more free recipes for you. Snap a photo and tag me on social media @aheadofthyme too.
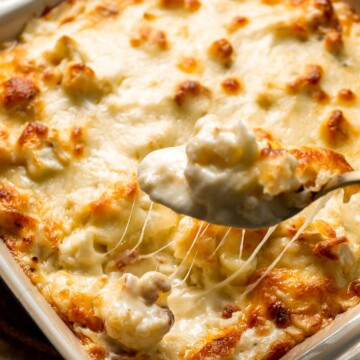
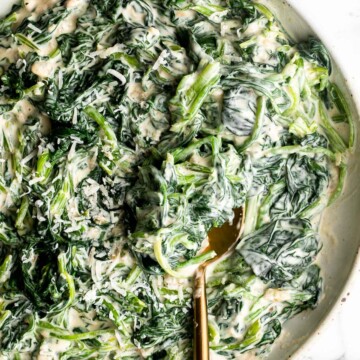
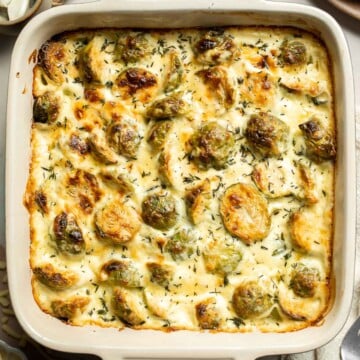
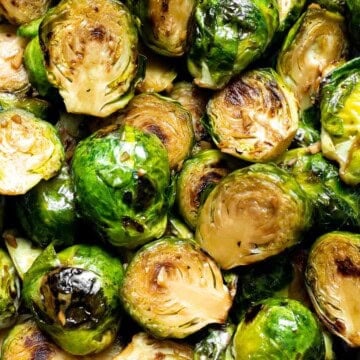
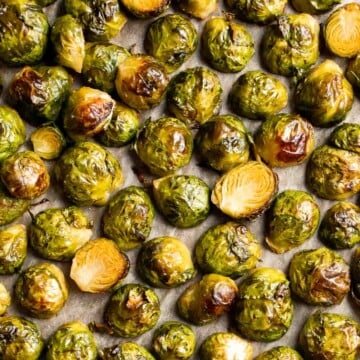
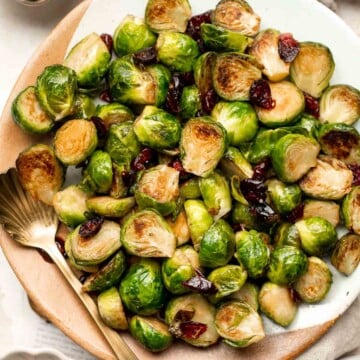
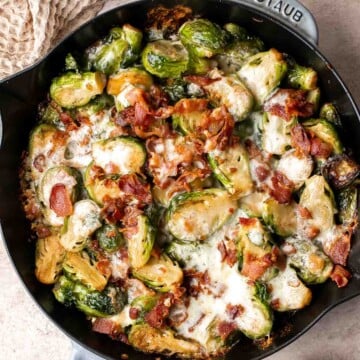
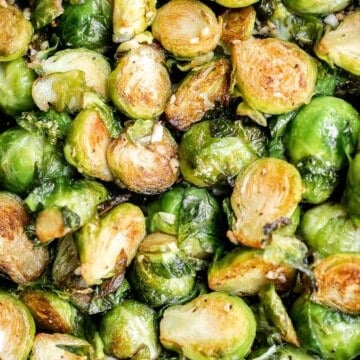
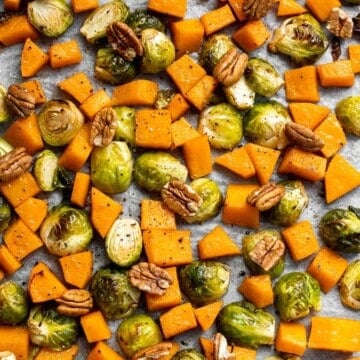
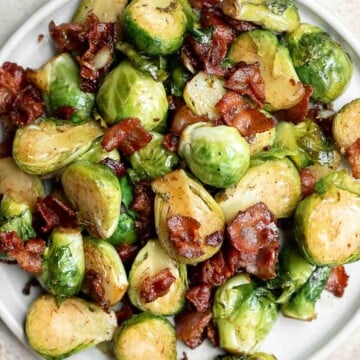
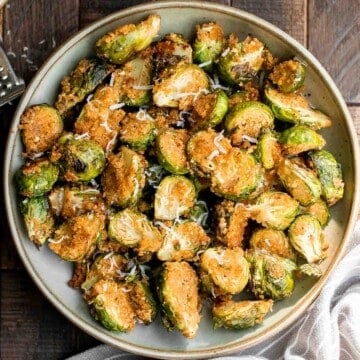
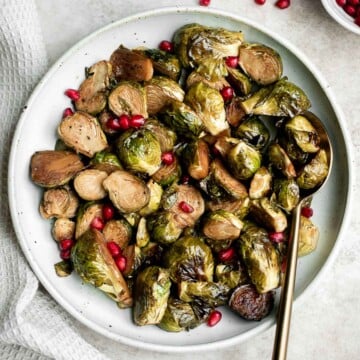
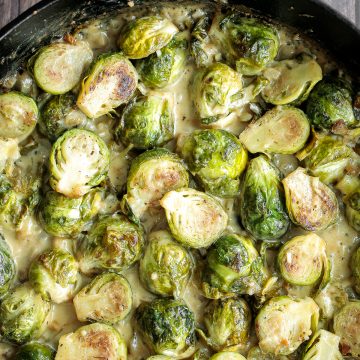
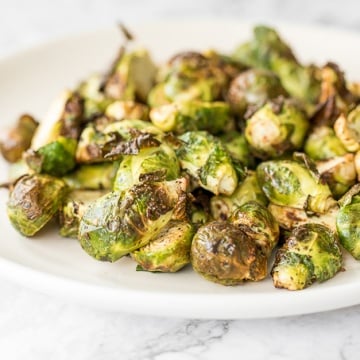
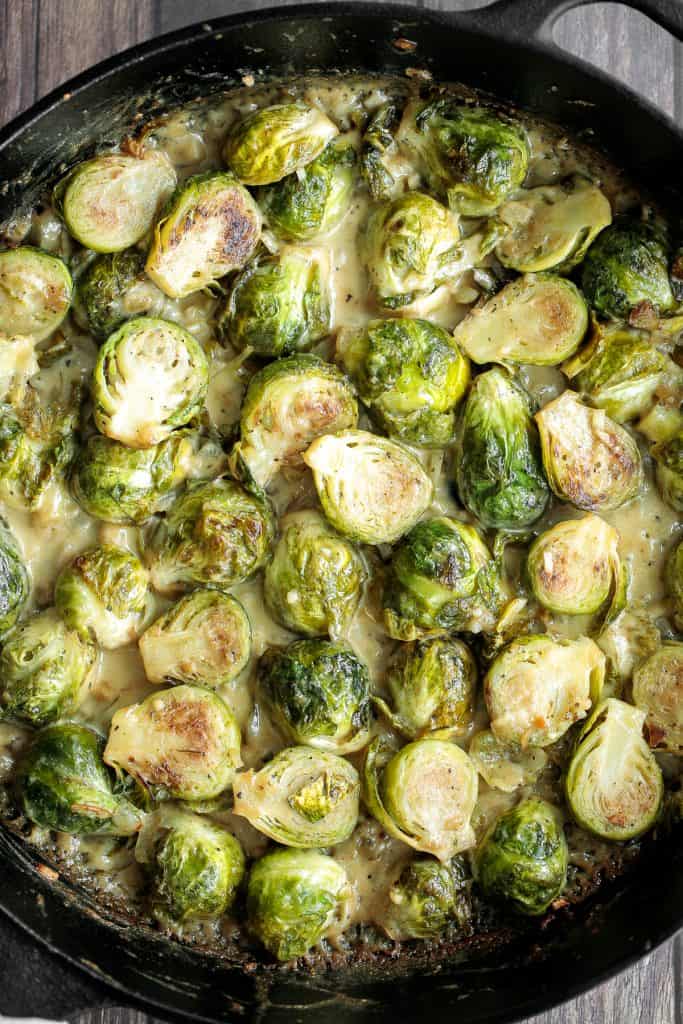
Creamy Brussels Sprouts Bake

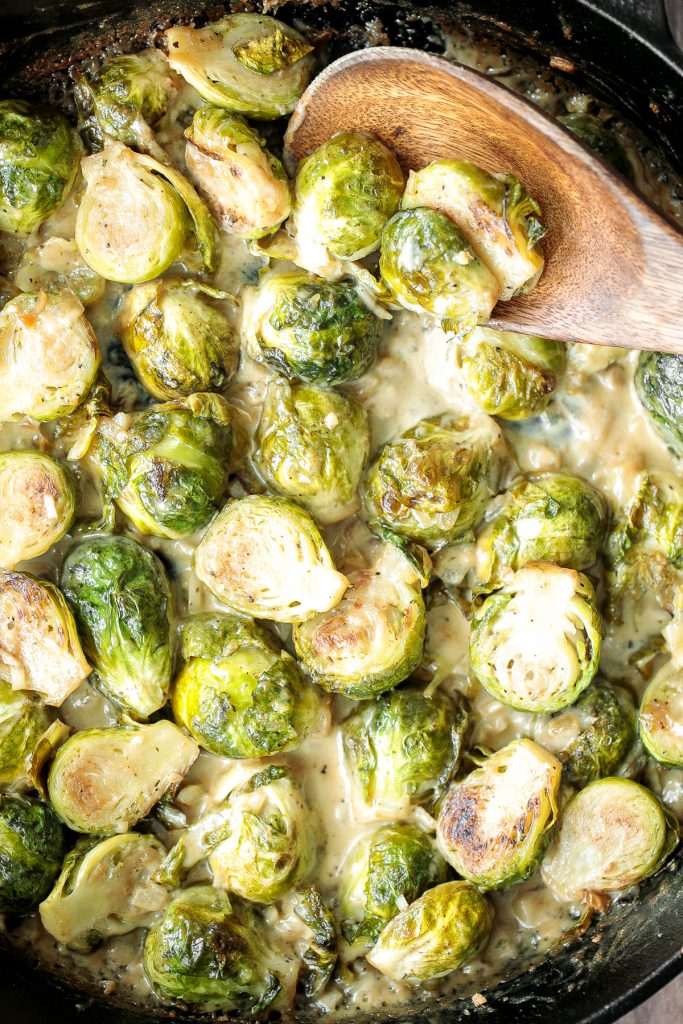
Delicious and creamy brussels sprouts bake is the ultimate comfort food, loaded with two types of cheese for so much flavour. It's garlicky, creamy, cheesy, flavourful and just so so good. It is one of the best ways to eat brussels sprouts and my favourite. Plus, it's so easy to make, from prep to table in under 30 minutes.
When you add cream and cheese into any dish, it is just instantly better. If you know, you know. This brussels sprouts bake has a creamy alfredo-like sauce that also gets amazing flavour from a little sautéed onions, garlic, and Italian seasoning. And the smell that will flow through your kitchen as you make this... might just be the best part.

Brussels sprouts always finds a way on our dinner table in the fall, and it has a permanent spot on our Thanksgiving dinner menu every year. We typically make easy roasted brussels sprouts or crispy air fryer brussels sprouts, but this year we decided to make everything on our table a little extra comforting. And boy are we glad that we did.
Some of our other favourite sides to serve in the fall and during the holidays are:
Ingredients
- brussels sprouts
- butter - can use olive oil instead.
- onions
- garlic
- Italian seasoning
- salt and pepper
- heavy cream - You can substitute with half-and-half cream, if desired.
- sharp white cheddar - You can also substitute this with mozzarella or use a combination of the 2.
- Parmesan cheese - You can also substitute with asiago cheese.
You will also need a cast-iron skillet (or an oven safe skillet). You could also sauté the ingredients in a regular skillet and then transfer into a casserole dish to bake.

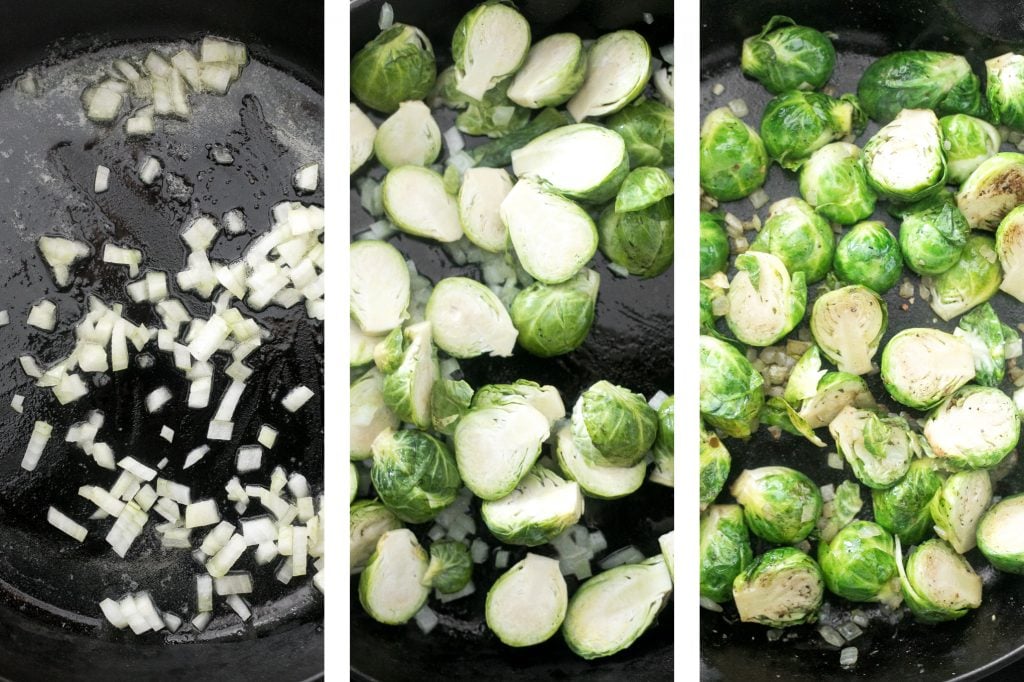
How to Make the Best Creamy Brussels Sprouts Bake
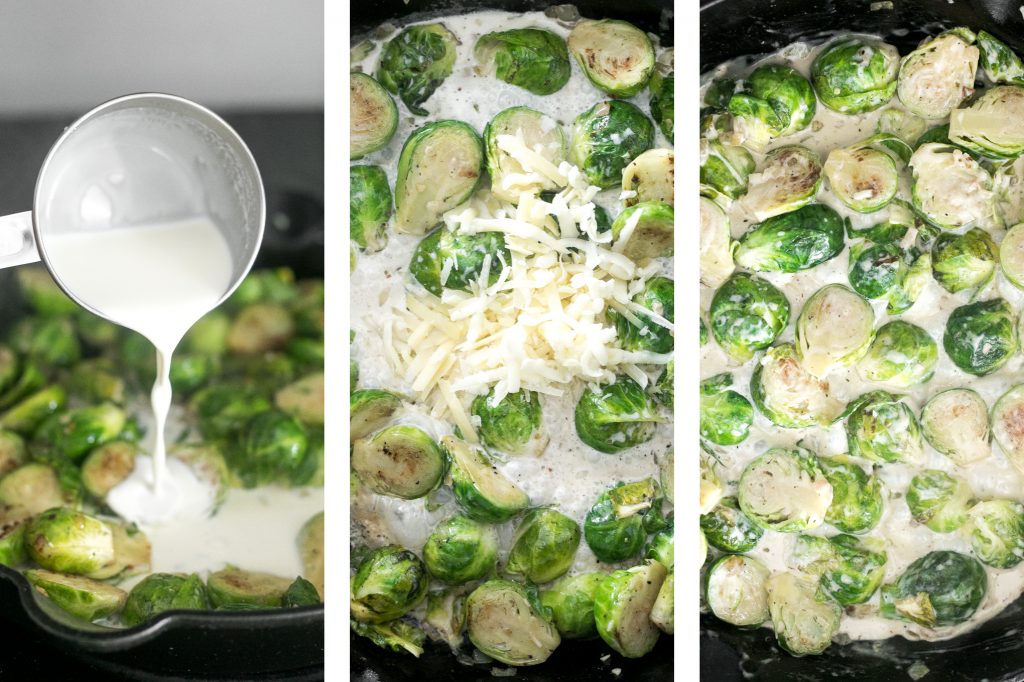
- Sauté the brussels sprouts. Melt butter in cast-iron skillet (or oven safe skillet) over medium high heat. Add onions and sauté until soft, about 2-3 minutes. Add brussels sprouts, Italian seasoning, salt and pepper. Sauté until the brussels sprouts are crispy and start to char, about 6 minutes. Add garlic, and stir until fragrant, about 1 minute.
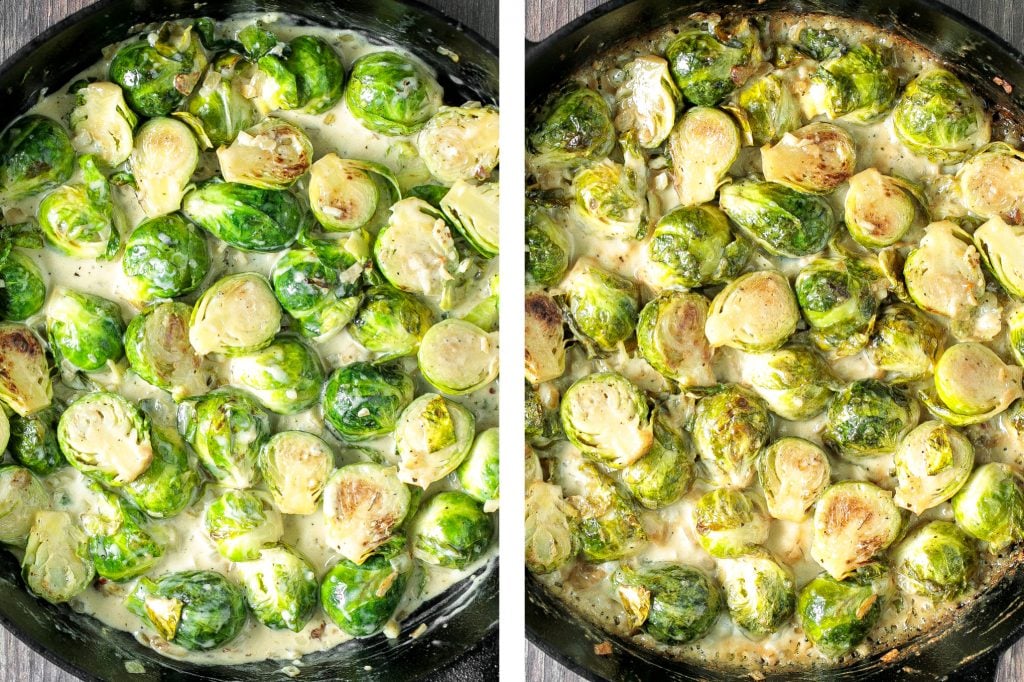
- Add in cream and cheese. Then, turn off the heat, and add cream, cheddar and Parmesan. Stir to combine and until cheese is melted, about 1 minute.
- Bake in the oven. Transfer skillet into a 375F preheated oven and bake for 15 minutes. To get it extra charred on top, place under the broiler on high for an extra 1-2 minutes. Keep a close eye on the broiler so that it does not burn.
Tips for Storing
- How to store: Store any leftover creamy brussels sprouts in an airtight container in the refrigerator for up to 4 days.
- How to reheat: Reheat leftovers in the microwave or over the stove on low heat
More Brussels Sprouts Recipes
- 12-Minute Crispy Air Fryer Brussels Sprouts
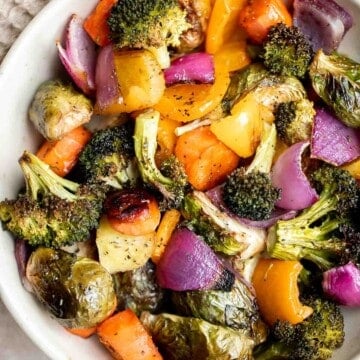
- One Pan Roasted Harvest Vegetables
- Easy Roasted Brussels Sprouts
- Maple Roasted Brussels Sprouts and Butternut Squash
- Roasted Brussels Sprouts Salad with Dijon Vinaigrette
- Air Fryer Vegetable "Stir Fry" with Tofu
Tried this recipe?
I'd love to hear what you think! Leave a comment and rating below to share your feedback. Your reviews help others discover this recipe and help me keep creating more free recipes for you. Snap a photo and tag me on social media @aheadofthyme too.
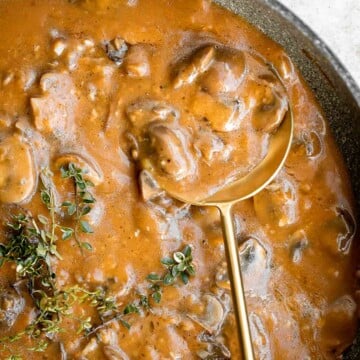
Soy Glazed Braised Turkey Breast with Five-Spice
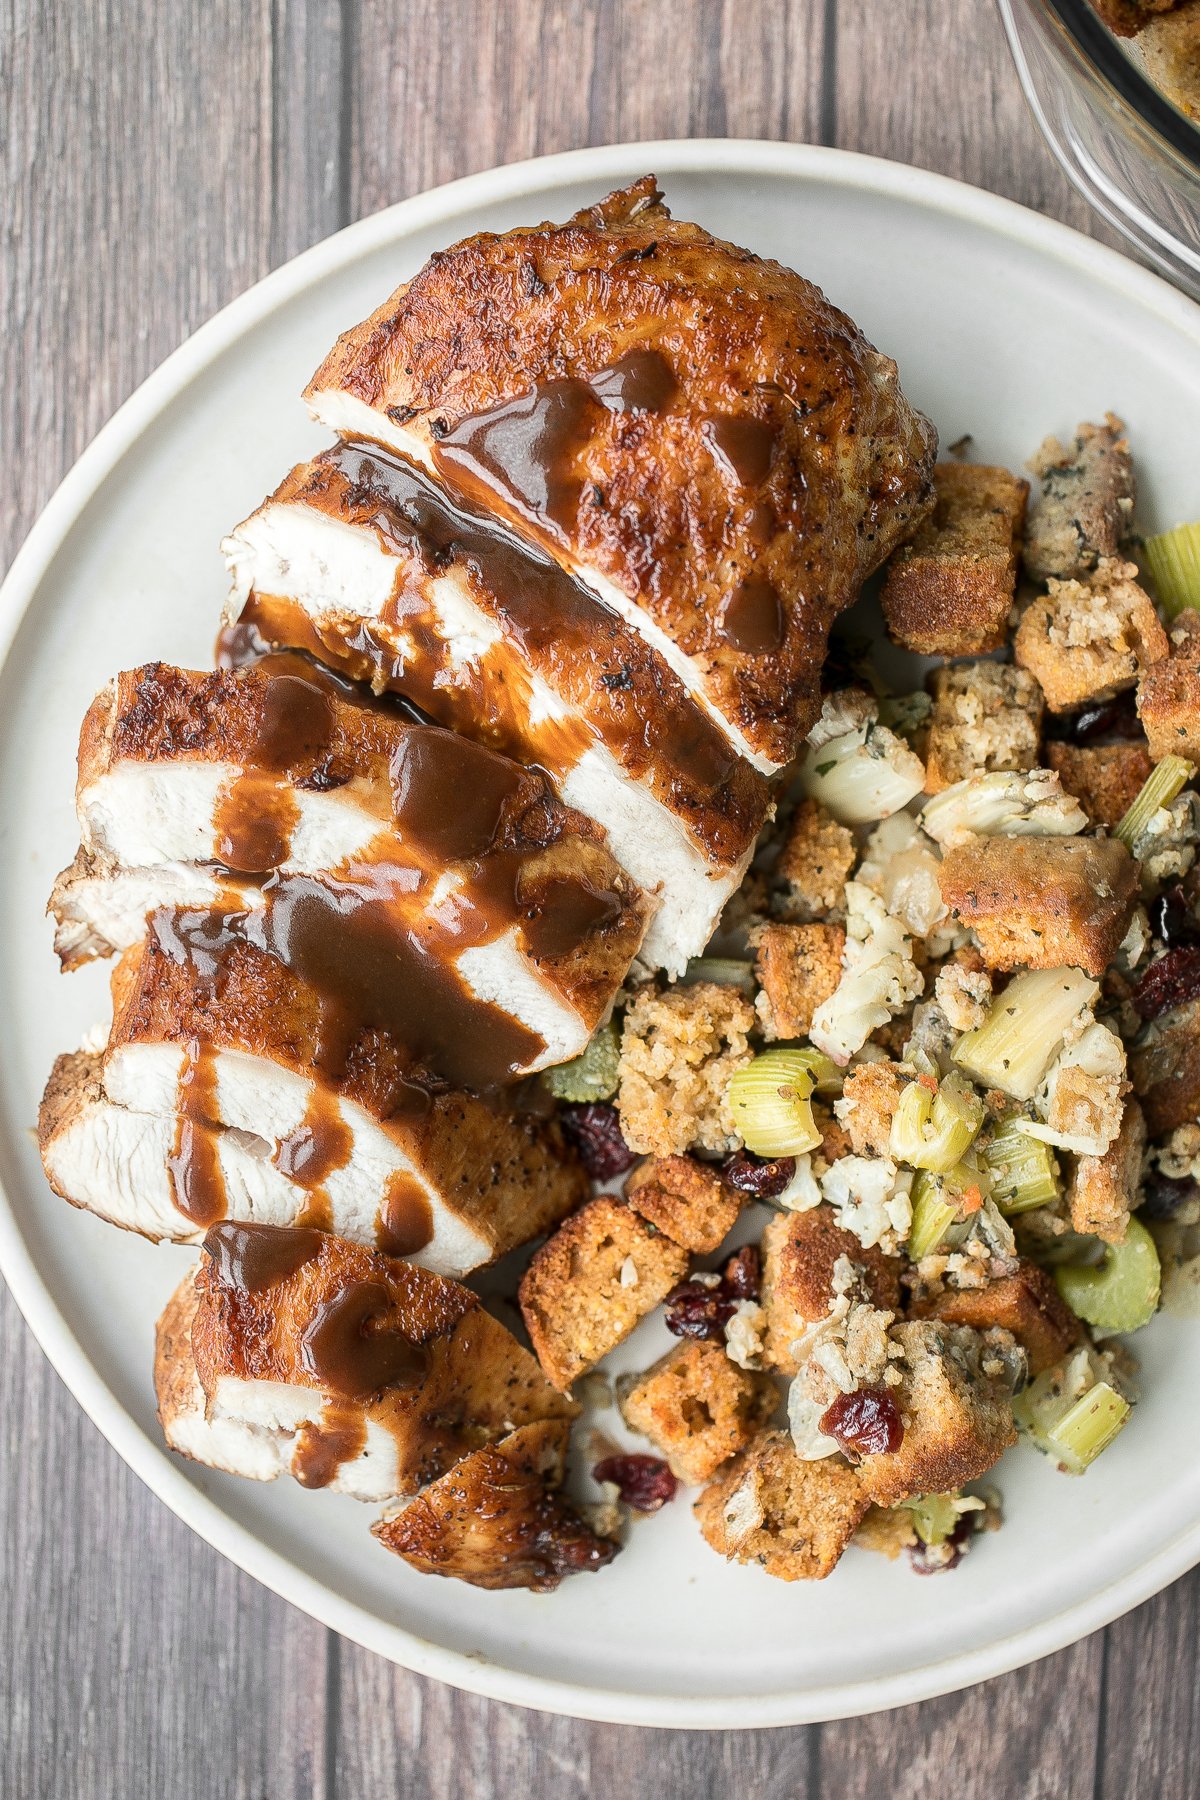
Soy glazed braised turkey breast with Asian five-spice is moist, tender, succulent and the juiciest turkey breast that you will make. It is so delicious, seasoned with Asian five-spice, and seared to perfection with a beautiful browned and crispy skin. Plus, use the pan juices to make a delicious, flavourful gravy in just minutes. Trust me guys, this one is a keeper.

What is Five-Spice?
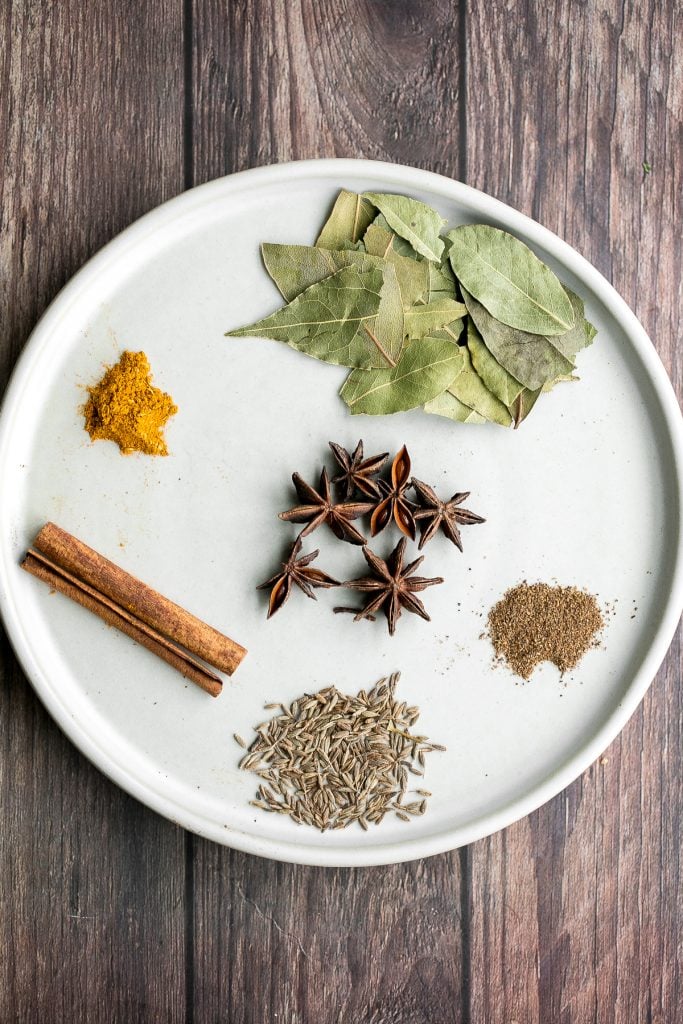
Five-spice is a mixture of spices used in Chinese cuisine and some other Asian cuisines. It balances 5 main flavours in Chinese cooking including sweet, sour and spicy. It is traditionally made with Sichuan peppercorns, star anise, cinnamon, fennel seeds and cloves, but can be made with other spices that incorporate the 5 main flavours.
Our version is made with Sichuan peppercorns, star anise, cinnamon, cumin seeds and yellow curry powder.
Ingredients in Five-Spice Braised Turkey
- turkey breast - a 2 to 2.5 lb. boneless turkey breast with the skin on. You can use a breast with the bone-on, but the cook time will be longer.
- olive oil
- salt and pepper
- brown sugar - helps give the skin it's beautiful brown colour when searing.
- garlic and ginger
- bay leaves
- five-spice seasoning - made with cinnamon stick, cumin seeds, yellow curry powder, Sichuan peppercorns and star anise.
- dark soy sauce - adds flavour and also adds beautiful colour to the skin.
- water
- gravy - made with turkey juices from the pan, water, and corn starch or all-purpose flour. See my easy 2-ingredient turkey gravy for more detailed instructions on how to make it.
You will also need a cast-iron skillet and a fine-mesh sieve (if making gravy from the pan juices).
How to Make the Best Soy Glazed Braised Turkey Breast with Five-Spice
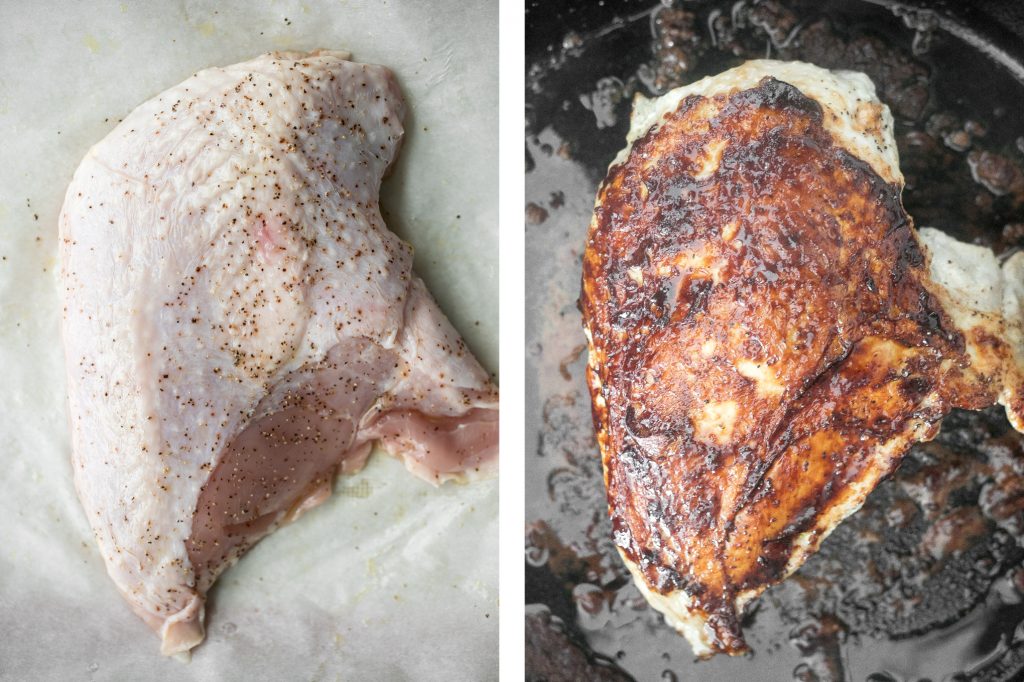
The first step is to prepare the turkey. Pat dry the turkey breast with a paper towel completely (to remove any excess liquid) before adding seasoning. This helps create extra crispy skin when roasting.
Then, in a small bowl, combine olive oil, salt and pepper and mix together. Generously rub the seasoning mixture over the turkey breast and let it rest on a clean plate for at least 15 minutes.
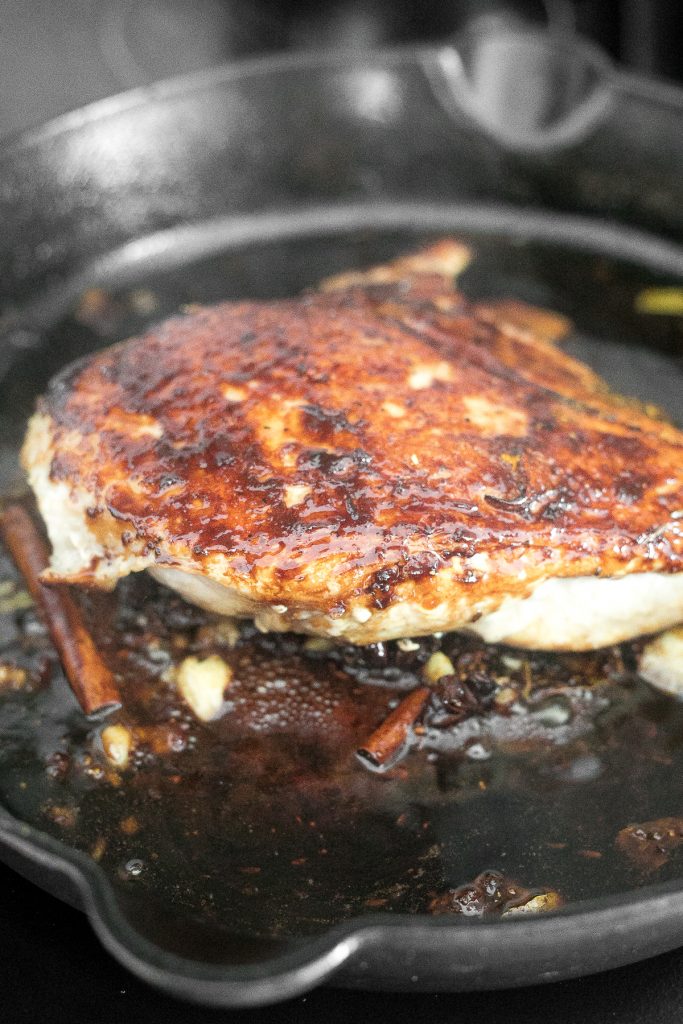
Next, let's sear the turkey. Heat a cast-iron skillet on the stove for 5 minutes over medium-high heat or in the oven. Once the skillet is sizzling hot, sear the turkey breast by placing it, skin side down, into the hot skillet and sear until the skin turns brown, about 5 minutes. Turn the turkey breast over and sear the other side for another 5 minutes. Transfer the turkey breast on a plate.
Then, add olive oil and brown sugar to the skillet. Cook for 1 minute until the brown sugar dissolves. Transfer the turkey breast back into the skillet with the skin side down and cook for another 3 minutes until the skin side turns dark brown.
Now, it's time to braise the turkey.
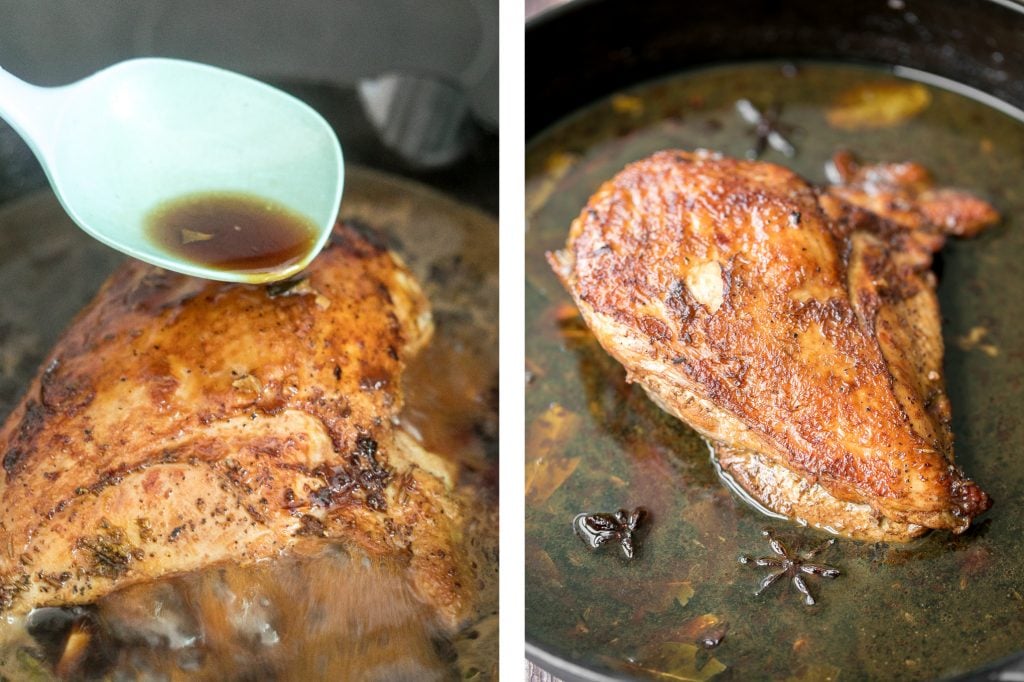
Turn the turkey breast over with the skin side up. Add garlic, ginger, bay leaves and all the five-spice seasoning items. Stir to cook until fragrant, about 2 minutes. Add soy sauce and water (about 1 cup of water). The liquid should be 1-inch deep, or cover approximately ⅓ of the thickness of the turkey breast. Bring it to a simmer.
Transfer the skillet into a 425F preheated oven and bake for 30 minutes, until the internal temperature for the turkey breast reaches 165F (use a meat thermometer to get an accurate reading). Drizzle some juice in the skillet over the breast every 10 minutes to help infuse the flavour.
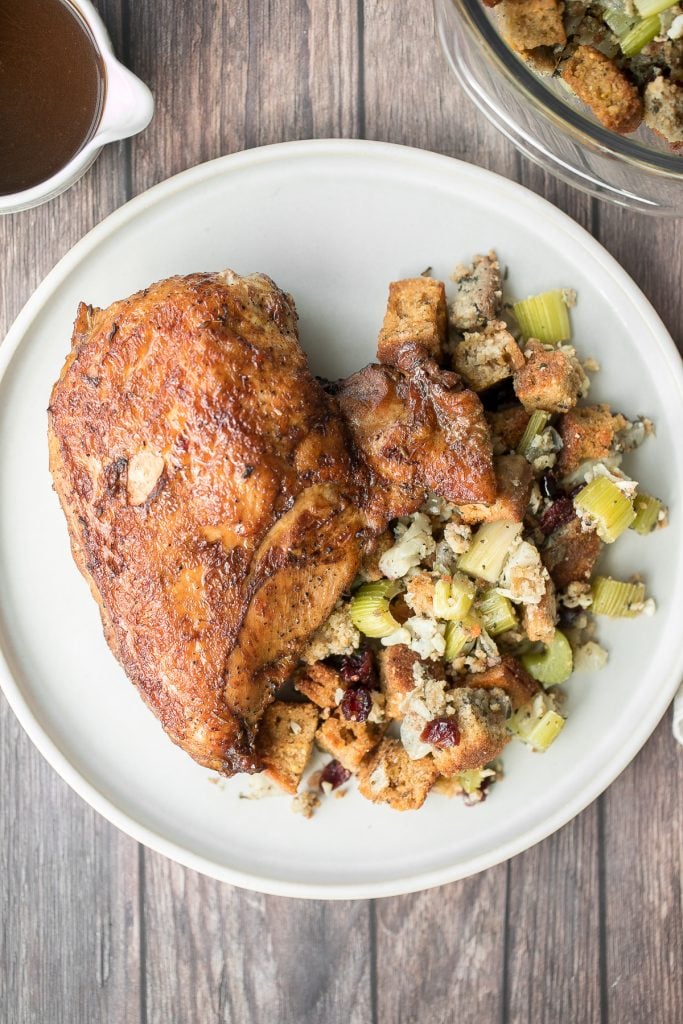
Remove the turkey breast from oven and place it on a large plate. Let the turkey rest for 15 minutes before slicing and serving.
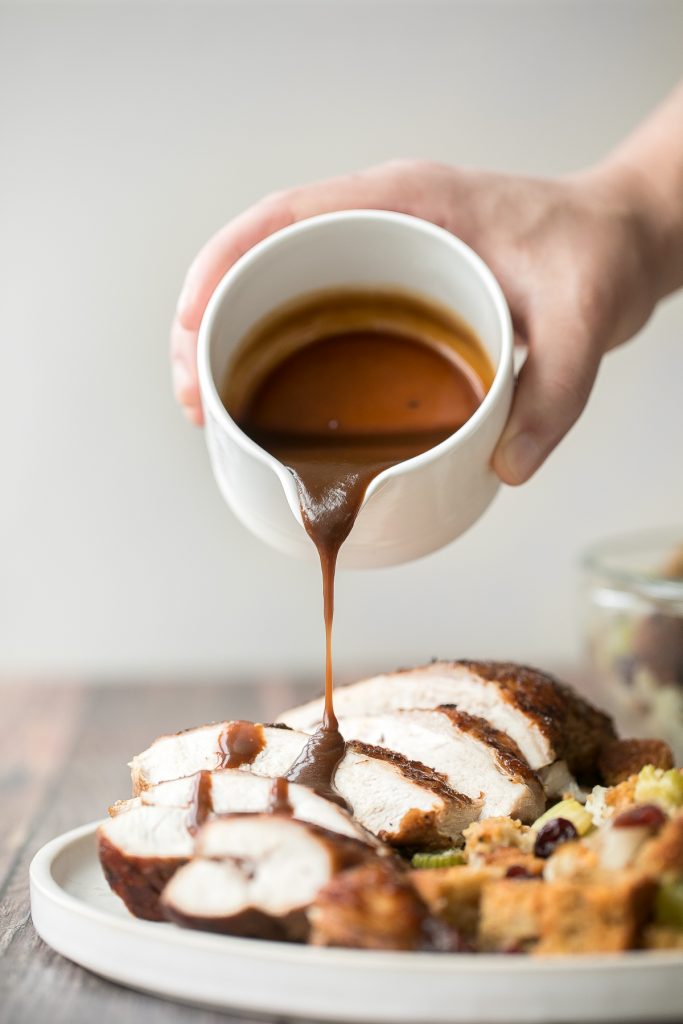
How to Make Turkey Gravy
Making a delicious and flavourful gravy from the turkey pan juices is so easy. First, strain the remaining liquid from the skillet through a fine-mesh sieve. Discard all the chunky bits of seasoning and spices. Add the liquid back in the skillet and cook over medium heat.
Combine water and cornstarch (or all-purpose flour) in a small bowl. Stir to dissolve and add the mixture in the skillet. Stir well to form into a smooth mixture and slowly bring it to a simmer. Keep stirring for another minute until the smooth mixture thickens. Transfer the gravy into a bowl and let it cool for 10 minutes.
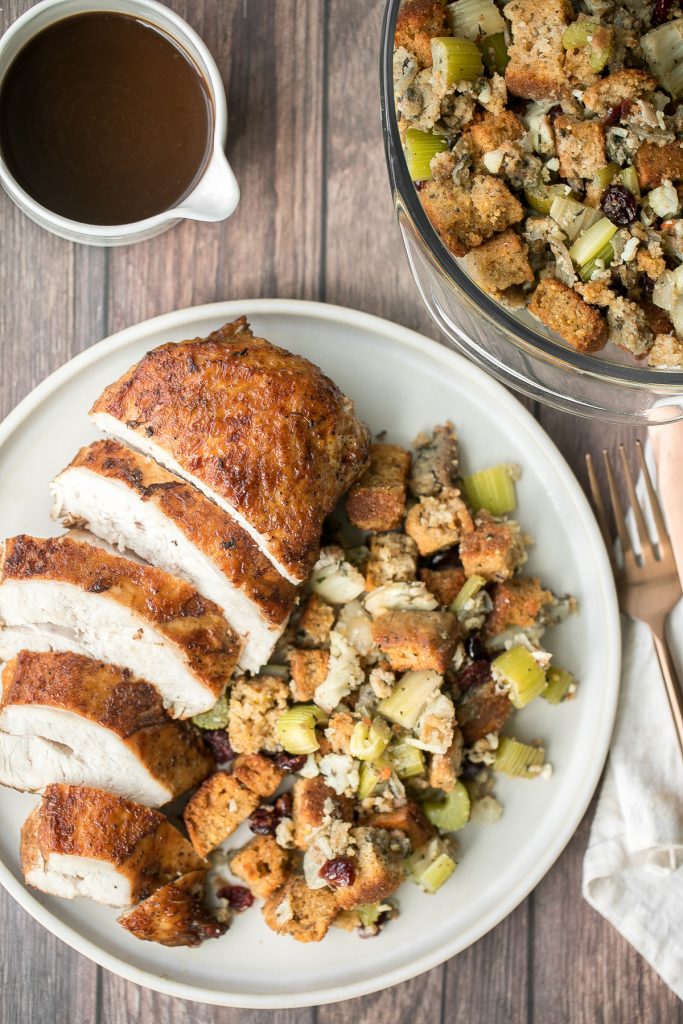
Slice the turkey breast and drizzle the gravy over the breast. Serve with mashed potatoes and stuffing on the side.
Tips and Frequently Asked Questions
- How do you know the turkey is cooked? Once the internal temperature on the turkey reaches 165F, then it is cooked. Use a digital meat thermometer inserted halfway inside the thickest part of the turkey to get a quick reading. Using a meat thermometer ensures that you never end up with undercooked or overcooked turkey.
- Can I make it without the skin? I highly recommend cooking this turkey with the skin. The skin is required to get that beautiful brown colour. You can certainly make it without the skin, but the results will not be quite the same.
- Can I make it with a larger turkey breast? Yes, absolutely. You will just have to adjust the cook time. The larger the turkey, the more time it will take to cook. Using a meat thermometer will make it easy to tell when the turkey is done.
- How do I make the gravy? Use the pan turkey juices to make your own homemade gravy. You will find easy instructions in the recipe below. You can also get more detailed instructions with pictures in our easy 2-ingredient turkey gravy. If you prefer to make larger batch of turkey gravy using turkey stock, check out our classic turkey gravy recipe.
- How long does turkey breast last? Store in an airtight container for up to 4 days in the refrigerator. You can also use any leftovers to make turkey fried rice or turkey wild rice soup.
What to Serve with Soy Glazed Braised Turkey Breast
This soy glazed braised turkey breast is the perfect family fall dinner and is ideal for a small, intimate Thanksgiving dinner, when there just isn't enough mouths to feed a whole roast turkey to.
I love to serve it along with creamy mashed potatoes, garlic green beans, sweet potato casserole, and cornbread stuffing.
Or, scroll through some other great sides to serve with this:
More Turkey Recipes
- Easy Juicy Roasted Turkey Breast
- Slow Cooker Turkey Breast
- The Best and Juiciest Whole Turkey
- Classic Homemade Turkey Gravy
- Easy 2-Ingredient Turkey Gravy
Tried this recipe?
I'd love to hear what you think! Leave a comment and rating below to share your feedback. Your reviews help others discover this recipe and help me keep creating more free recipes for you. Snap a photo and tag me on social media @aheadofthyme too.
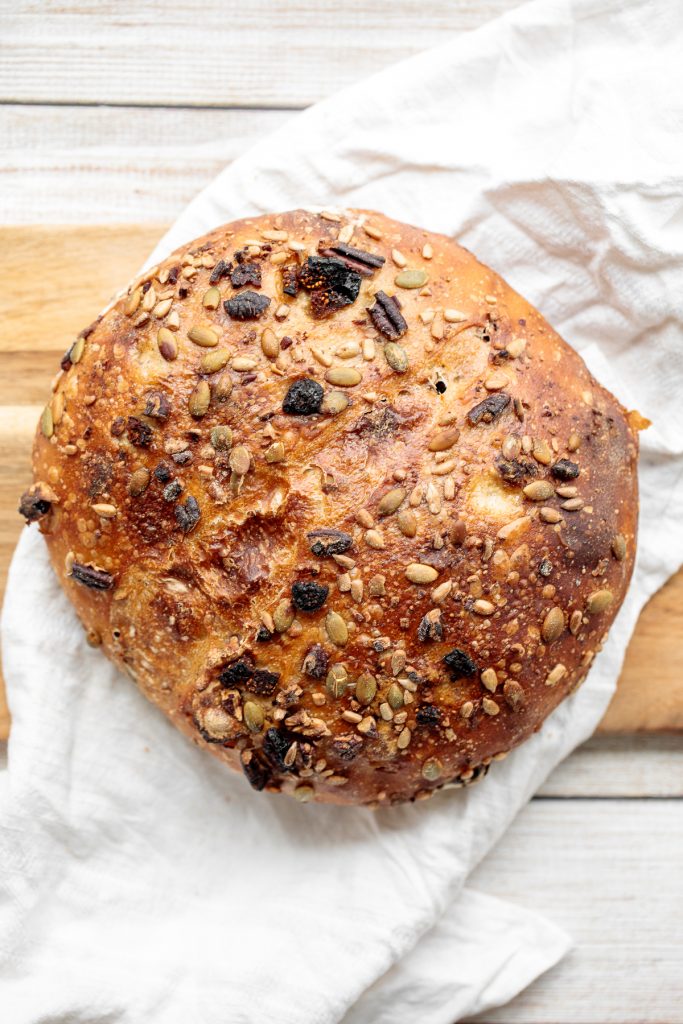
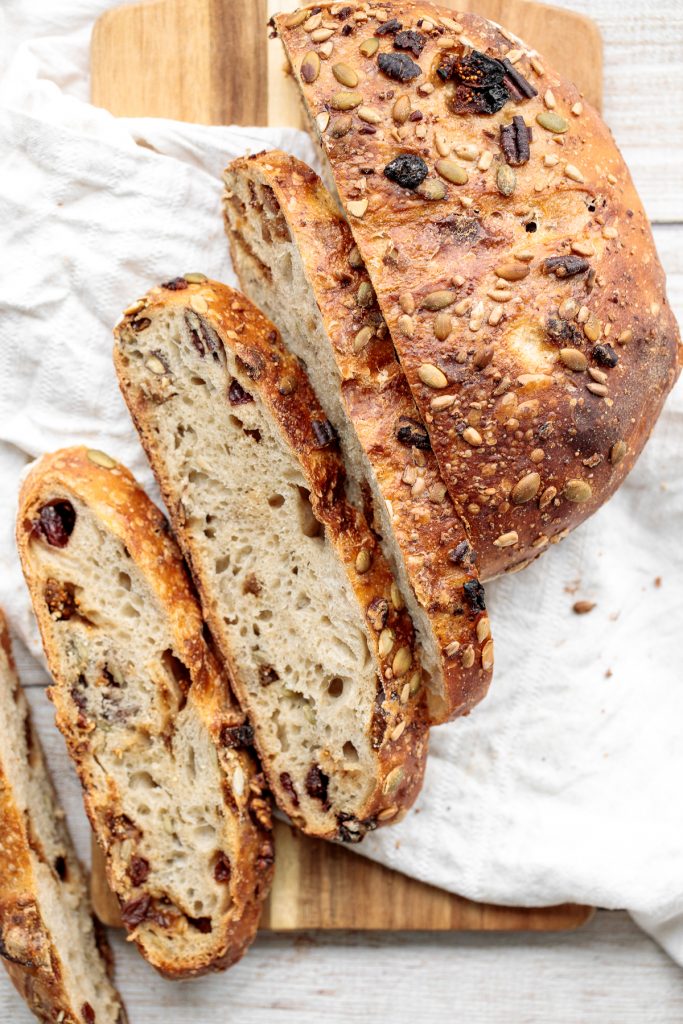
Fruit and Nut Sourdough Bread

Elevate your sourdough game with delicious fruit and nut sourdough bread. This sourdough is so chewy and airy, and has a signature crunchy crackly crust. It is so tasty and packed with dried figs, raisins and crunchy walnuts, and topped with pumpkin and sunflower seeds. The best part? You only need to put in 15-20 minutes of actual work to make this bread. So easy.
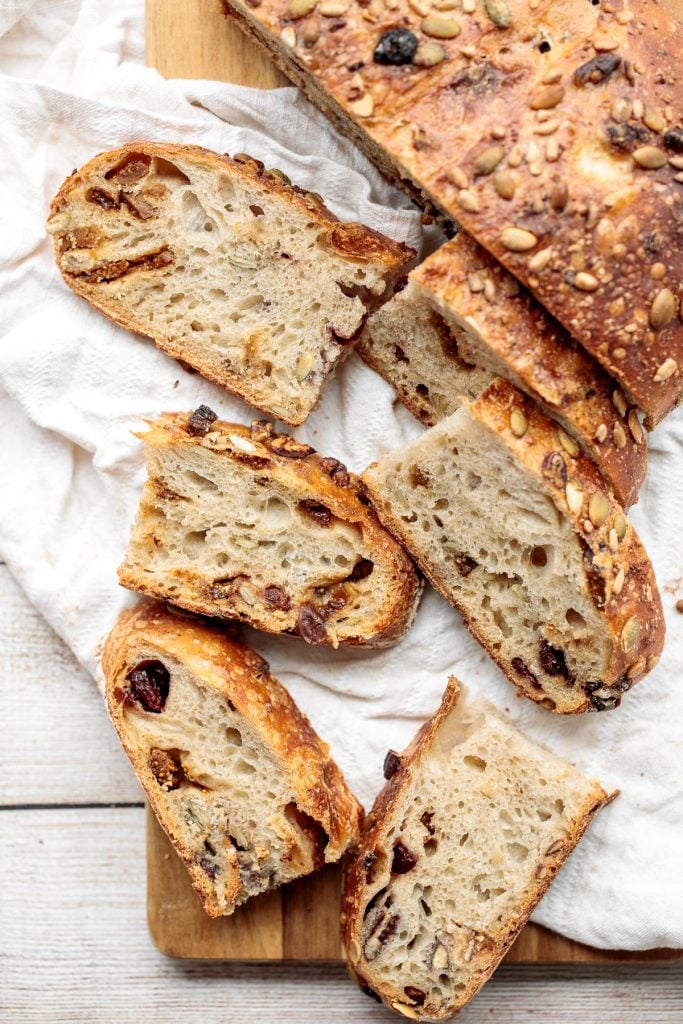
Weekends over here are for baking with sourdough bread. Ever since we created our mature sourdough starter, it's been a fresh loaf of bread every week (thank you Danny!) like our small batch sourdough bread, green olive artisan sourdough bread, and seeded whole wheat sourdough. This fruit and nut sourdough bread might actually be my new favourite. It's so delicious and feels so festive.
Ingredients in Fruit and Nut Sourdough Bread
- sourdough starter - make your own sourdough starter using flour and water. It takes about 7 days to create a mature starter.
- flour - both all-purpose flour and whole wheat flour used in this recipe.
- water
- salt
- dried fruit - I used dried figs and raisins. You can use any dried gummy fruits such as dried plums and apricots.
- nuts - I used walnuts but feel free to use any nuts. Pecans, almonds and pistachios are great options.
- seeds - a mixture of pepitas (raw pumpkin seeds) and sunflower seeds. You can also add in some sesame seeds, flax seeds and poppy seeds.
You will also need a digital scale, mixing bowl, bench scraper, proofing basket (or bowl with dish cloth), and scoring blade.
How to Make the Best Fruit and Nut Sourdough Bread
The steps in making this fruit and nut sourdough are essentially the same as making our regular small batch sourdough bread. All that you do differently is adding in fruits and nuts and topping the bread with seeds. In summary, here is what you need to do:
- Prepare the starter. If your sourdough starter is stored in the refrigerator and is not ready to go, take it out and feed it 12 hours in advance. Then, let it rise for 6 hours or until doubled in size. You can do a float test to check if it is ready.
- Prepare the dough. In a large mixing bowl, add sourdough starter, all-purpose flour, whole wheat flour, and water, and whisk to combine. Cover the bowl and let the dough rest for 30 minutes. Add salt and fold into the dough a few times to combine.
- Build the gluten in the dough. You can choose to either knead the dough by hand, OR stretch and fold the dough:
- To knead the dough by hand: Transfer the dough onto a clean dry surface and knead for 5 minutes. Cover the dough and let it rest for 5 minutes. Then knead again for another 5 minutes until smooth and supple. Cover and let the dough rest in a large bowl for 2.5 hours, or until it almost doubled in size
- To stretch and fold the dough: Apply some water on your hands and stretch and fold the dough in the bowl by folding the edges over to the centre, one edge at a time. Cover with plastic wrap and let the dough rest for 30 minutes. Repeat this stretch and fold step followed by a 30-minute rest, two more times. For the final rest, let the dough rest until it almost doubled in size, up to 90 minutes.
- Add fruit and nuts. Fold in the dried figs, raisins and walnuts into the dough, until evenly distributed.
- Shape the dough. Transfer dough to a floured surface and sprinkle dough with a little flour. Shape the dough into a tight ball by folding the edges over to the centre. Stretch the dough a little and fold all four sides to the centre like wrapping a present. Turn the dough over and use a bench scraper to push the dough back and forth to create a tight ball. Repeat this motion until the surface of the dough appears tight.
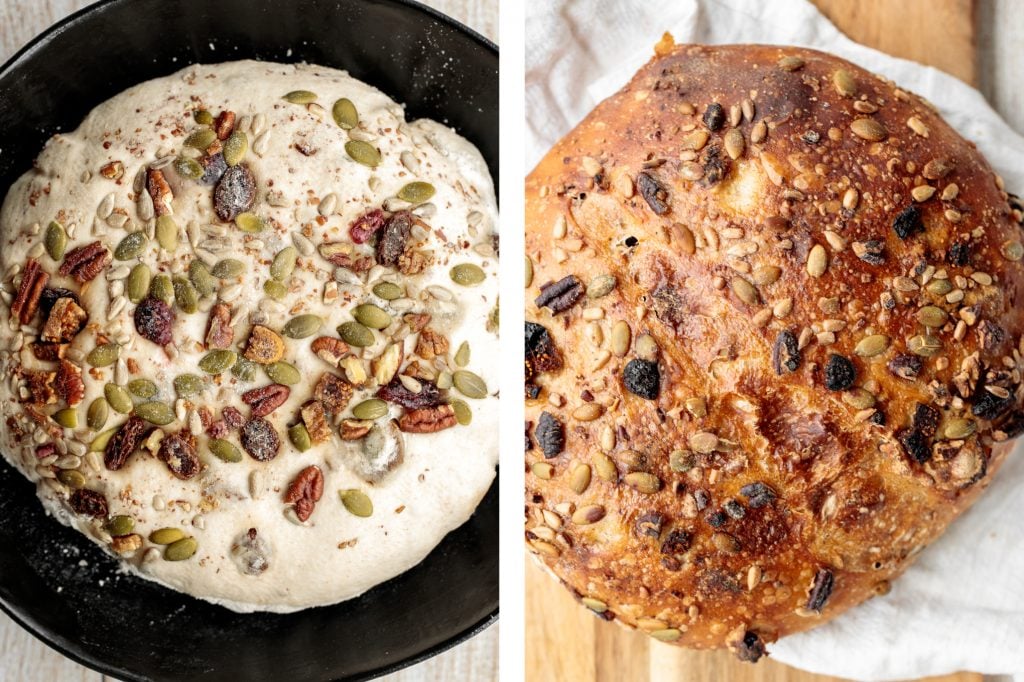
- Add seeds. Mix the pepitas and sunflower seeds together in a shallow bowl. Dampen the surface of the dough by lightly pressing the dough on a clean damp dish cloth and then dip it into the seeds. Swirl the dough to cover it evenly with seeds.
- Proof the dough. Place the ball of dough, with the seeded side down into a floured proofing basket (or a floured dishcloth-lined medium bowl). Cover and let it rest it at room temperature for approximately 3 to 3.5 hours (OR transfer bowl into the refrigerator and let the dough rest overnight for 8 to 12 hrs).
- Score the dough. Remove dough from bowl and place upside down into the centre of a 9x9-inch piece of parchment paper. Score the dough with deep cuts no more than ½ inch deep by gently snipping with scissors or carefully use a scoring blade. It may be harder with the blade as the top is covered with seeds. Place the dough with parchment paper back into the same bowl and cover with a towel until the oven is preheated.
- Bake the sourdough bread. Place a 4-quart Dutch oven with lid (or a medium oven-safe cooking pot (9-inches) with a metal lid) into the oven and preheat to 450° F. Carefully place dough with parchment paper into the preheated Dutch oven. Cover and bake for 30 minutes. Then, remove lid and continue to bake for another 20 minutes. Remove bread from the pot, and allow it to cool completely on a wire cooling rack for 1 hour.
Frequently Asked Questions
- How do I make sourdough starter? You will need 7 days create a fully mature starter using flour and water. Please refer to my sourdough complete starter guide for help. The guide also includes the top frequently asked questions.
- What is a float test? A float test will determine if your sourdough starter is ready for baking. To conduct the test, take out a spoonful of newly fed starter and drop it into a glass of room-temperature water. If it floats, the starter is ready. If it sinks, you either need to let the starter sit longer to develop more bubbles, or feed it again and let it sit until it passes the float test (usually 6-12 hours).
- How does the dough rise without commercial yeast? The dough will rise if using a fully mature sourdough starter (wild yeast). A lively and mature sourdough smells yeasty and a little fruity. You can check if your starter is ready by doing a float test. If the starter is not mature, the dough won't rise.
- How do I know the dough is well-kneaded? A well-kneaded dough is smooth and can hold its shape. When you give the well-kneaded dough a firm poke with your finger, the indentation should bounce right back. If it doesn't bounce back and stays like a dimple, keep kneading for a few minutes.
- Why did my dough not rise? There are a few reasons why this could happen. If you used a mature starter, then a possible reason for why the dough did not rise could be that it was over proofed. Do not over proof the dough. Over proofing will make the dough sticky and slack with a stronger sour taste. It will not rise and will be flat instead. You can prevent this by letting the dough rise at cooler temperature (such as in the refrigerator overnight).
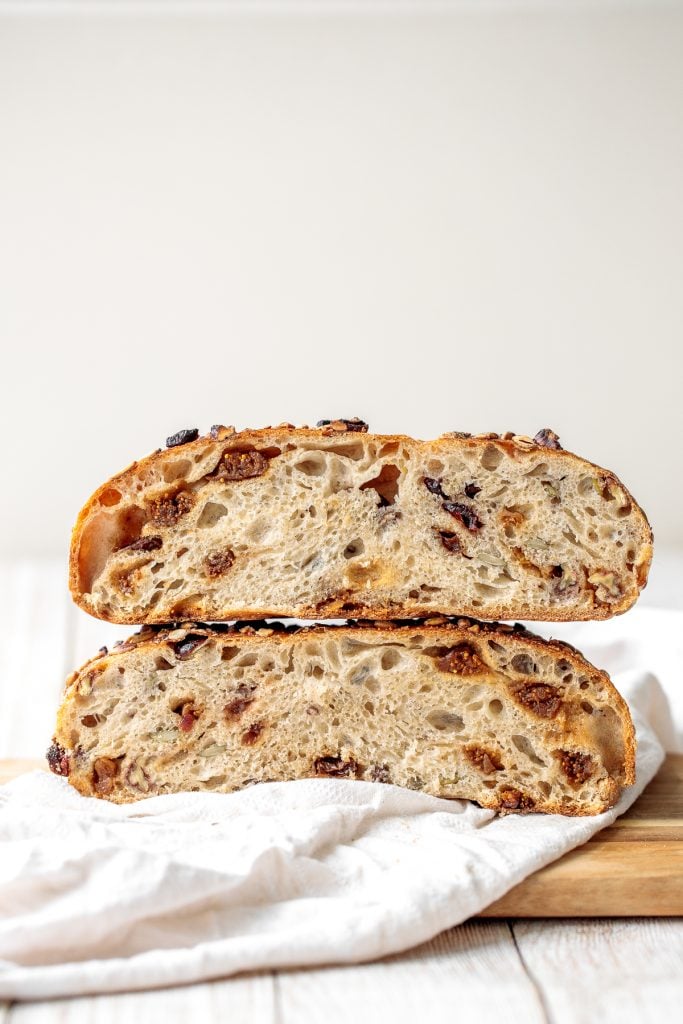
- How do I know the bread is done? To check if the bread is done, you can tap the bottom of the bread with your finger. The bread will sound hollow when it's done.
How to Store Sourdough
This fruit and nut sourdough bread will last for up to 2 days at room temperature. Cover it so that it does not dry out. You can also store in the refrigerator in an airtight container for up to 1 week. Slice and toast in the toaster or oven.
To freeze, wrap the sourdough tightly in plastic cling wrap and place into an airtight container or freezer bag, and store in the freezer for up to 3 months. If freezing, I would recommend slicing the bread first so that it is easy to reheat a slice or two at a time.
To reheat, toast in the toaster on the freezer setting, or let the bread thaw to to room temperature first and then reheat in the toaster, oven or air fryer.

More Sourdough Recipes
- Small Batch Sourdough Bread
- Artisan Green Olive Sourdough Bread
- Seeded Whole Wheat Sourdough Bread
- Savoury Chive Pancakes with Sourdough Starter
- Sourdough Cinnamon Roll Twist Bread
- Sourdough Discard Crackers with Sesame Seeds
- Small Batch Sourdough Pizza Crust
Tried this recipe?
I'd love to hear what you think! Leave a comment and rating below to share your feedback. Your reviews help others discover this recipe and help me keep creating more free recipes for you. Snap a photo and tag me on social media @aheadofthyme too.
Caramel Pecan Pie Cheesecake Bars
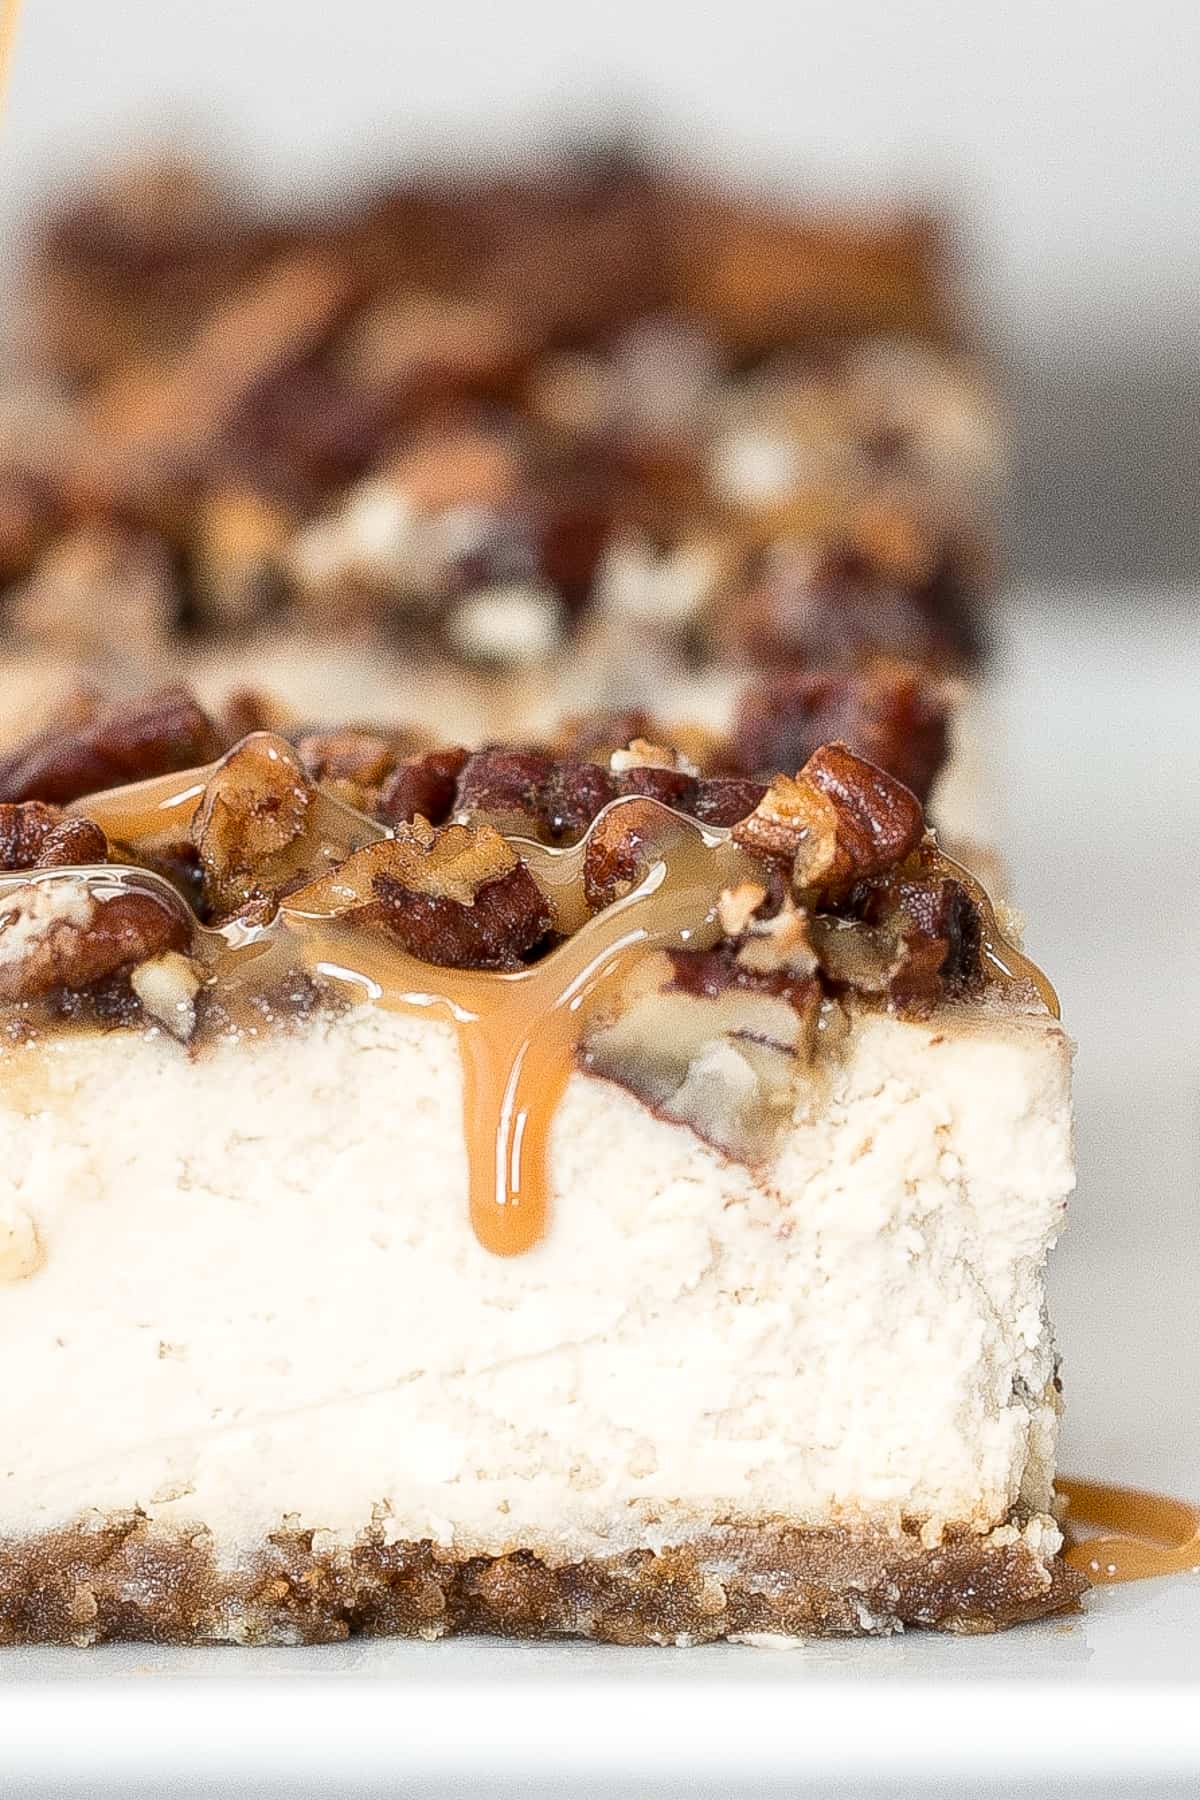
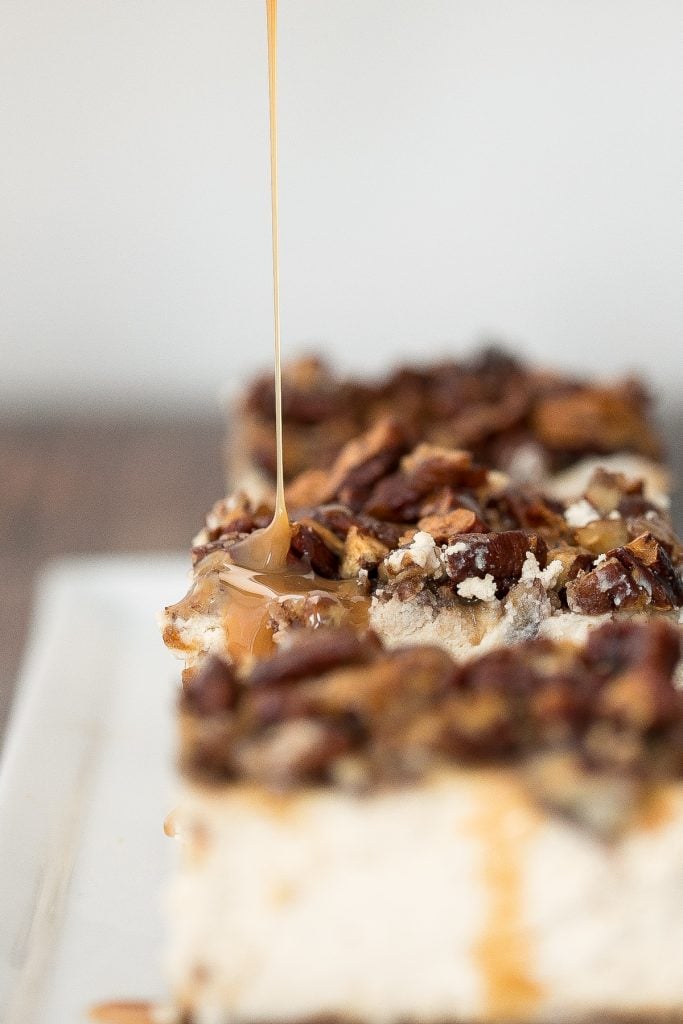
If you like cheesecake and you like pecan pie (hello friend!), then caramel pecan pie cheesecake bars are the fall dessert you. We are talking about decadent cheesecake with a buttery graham cracker crust, rich cheesecake filling, a caramel pecan topping that tastes like pecan pie, and an extra drizzle of sweet caramel sauce. So delicious and perfect for your Thanksgiving table, or just when you are craving something sweet this fall.
Every year, we like indulge in a mouthwatering cheesecake around Thanksgiving. Last year, it was healthier caramel apple fall cheesecake (which is also pretty amazing and on the healthier side). This year, I am all about indulging because let's face it, it's been a crazy year, so we all deserve it. Don't judge, but we may have finished these caramel pecan pie cheesecake bars in 3 days...between the 2 of us.
What is in Pecan Pie Cheesecake?
- graham cracker crust - made with graham cracker crumbs, brown sugar, and butter.
- cream cheese, softened to room temperature
- sour cream, at room temperature
- granulated sugar
- vanilla extract
- lemon juice
- white flour
- salt
- eggs
- pecans
- butter
- caramel sauce - you can use storebought or homemade. For a different flavour, try it with homemade salted caramel sauce. So delicious.
You will also need measuring cups and spoons, a mixing bowl, a hand mixer, parchment paper, an 8-inch square baking pan, and a large deep baking pan (for the water bath).
How to Make the Best Caramel Pecan Pie Cheesecake Bars
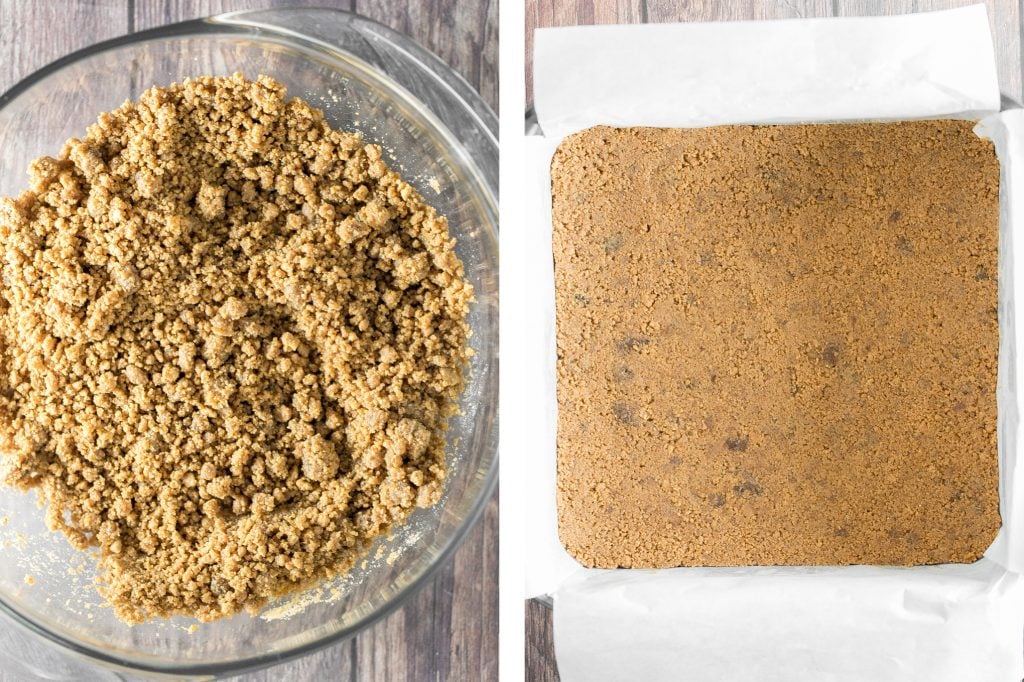
First, make the cheesecake crust. Lightly grease an 8-inch square baking pan and line it with parchment paper. (The parchment paper will help to remove the cheesecake out of the pan easily after baking).
In a medium bowl, stir together graham cracker crumbs and sugar. Gradually pour in melted butter, while stirring until mixed well. Press crumbs firmly into the parchment lined baking pan. Transfer the pan into the freezer to freeze the crust for 15 minutes, to allow the crust to harden.
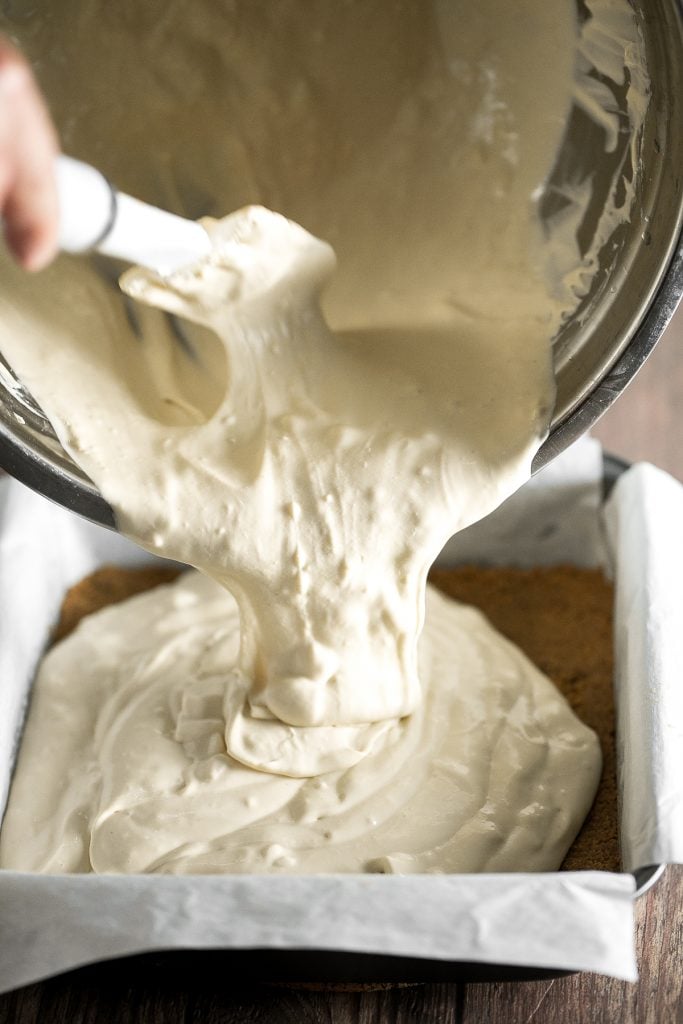
Next, make the cheesecake filling. In a large bowl, use a hand mixer to mix together cream cheese, sour cream, sugar, vanilla extract, lemon juice, flour, and salt, until well blended. Add eggs, one at a time, and beat until just blended (Do not overmix to avoid cracking during baking).
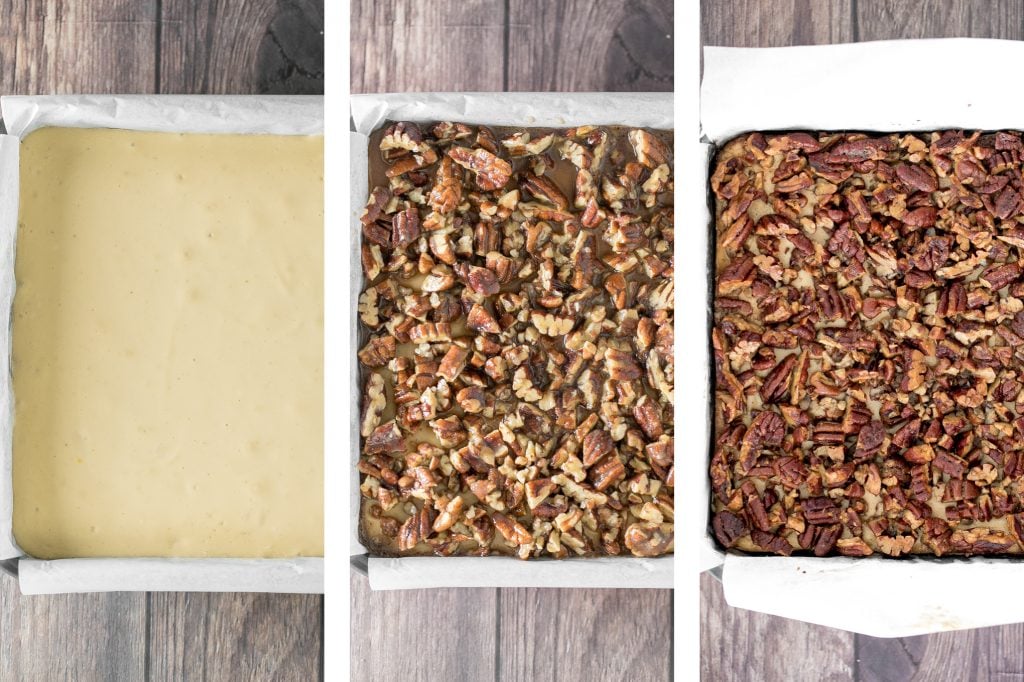
Now, assemble the cheesecake and bake. Pour filling into the cooled crust and smooth out the surface. Place the square pan into a large baking pan. Fill the pan with 1 inch (2 cm) deep of boiling water. Move the large baking pan into a preheated 350 F oven and bake for 45 minutes in the boiling water bath until the filling is set. (Baking in hot water bath helps prevent sudden temperature drop and cracking).
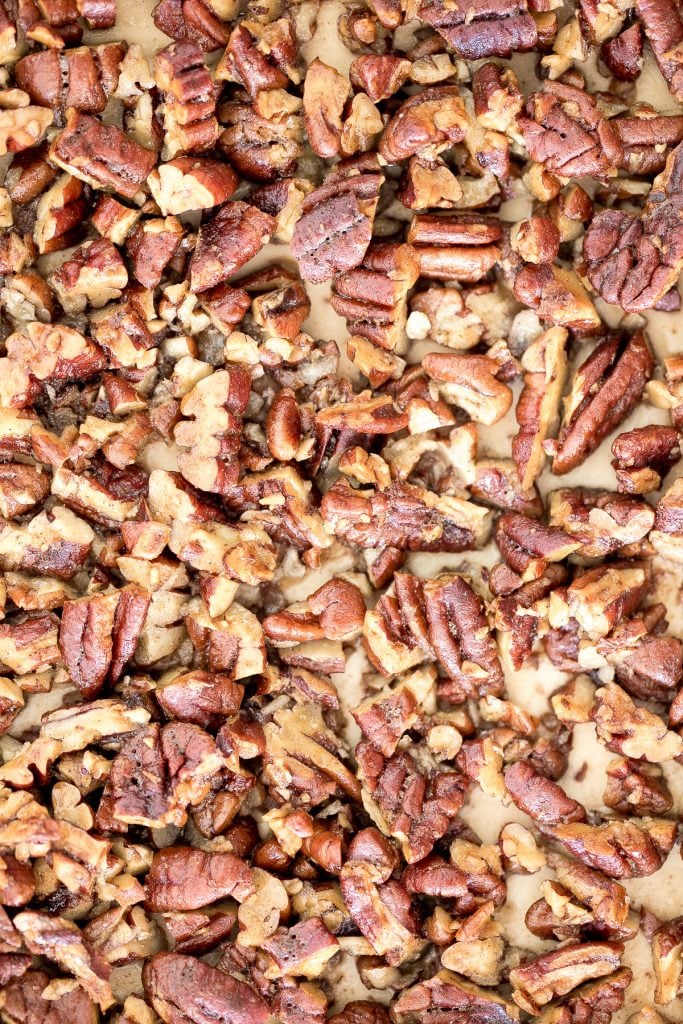
Then, add the pecan topping. In a medium bowl, stir to combine chopped pecans, melted butter and caramel sauce. Spread the mixture evenly over the top of the cheesecake using a spoon. Save any remaining caramel sauce in the bowl for garnish.
Place the baking pan back into the oven and continue to bake at 350F for 25-30 minutes until the pecan mixture is set. Take the pan out of the oven and allow the cheesecake to cool down to room temperature, about one hour. Then, carefully remove the cheesecake out of the pan using the lined parchment paper and place on a wire cooling rack. This helps the cheesecake crust from getting soggy while being refrigerated.
Transfer the cheesecake to the refrigerator overnight (or for at least 8 hours) to cool down and solidify. To serve, cut into slices and serve with remaining caramel sauce. Drizzle more caramel sauce on top, if desired.
How to Store Cheesecake
- In the refrigerator: Caramel pecan pie cheesecake can be stored in an airtight container in the refrigerator for up to 1 week. You can store it in the baking pan that you used and seal the top tightly with aluminum foil or cling wrap.
- In the freezer: You can also store pecan pie cheesecake in the freezer for up to three months. Tightly double-wrap the whole cheesecake or slices with aluminum foil or plastic wrap and place it inside an airtight container. When you are ready to serve and eat the cake, just take it out of the freezer and let it thaw overnight in the refrigerator.
More Cheesecake Recipes
- Healthier Caramel Apple Fall Cheesecake
- Easy No Crust Burnt Basque Cheesecake
- Caramel Cheesecake Brownies
- Creamy Mango Cheesecake
- Carrot Cake with Cheesecake Topping
- Classic New York Cheesecake
Tried this recipe?
I'd love to hear what you think! Leave a comment and rating below to share your feedback. Your reviews help others discover this recipe and help me keep creating more free recipes for you. Snap a photo and tag me on social media @aheadofthyme too.

25 Quick Chicken Recipes
If you are looking for some quick and easy weeknight dinner inspiration, then you have come to the right place. Today, I am sharing my 25 most popular and favourite easy and quick chicken recipes for dinner. From sheet pan chicken dinners, to skillet chicken, to slow cooker chicken, to one pot chicken and rice, I have got you covered. Plus, there are so many different flavors to choose from. The best part? These easy chicken recipes are perfect for busy weeknights because they are quick and ready in about 45 minutes or less.
Quick Chicken Recipes
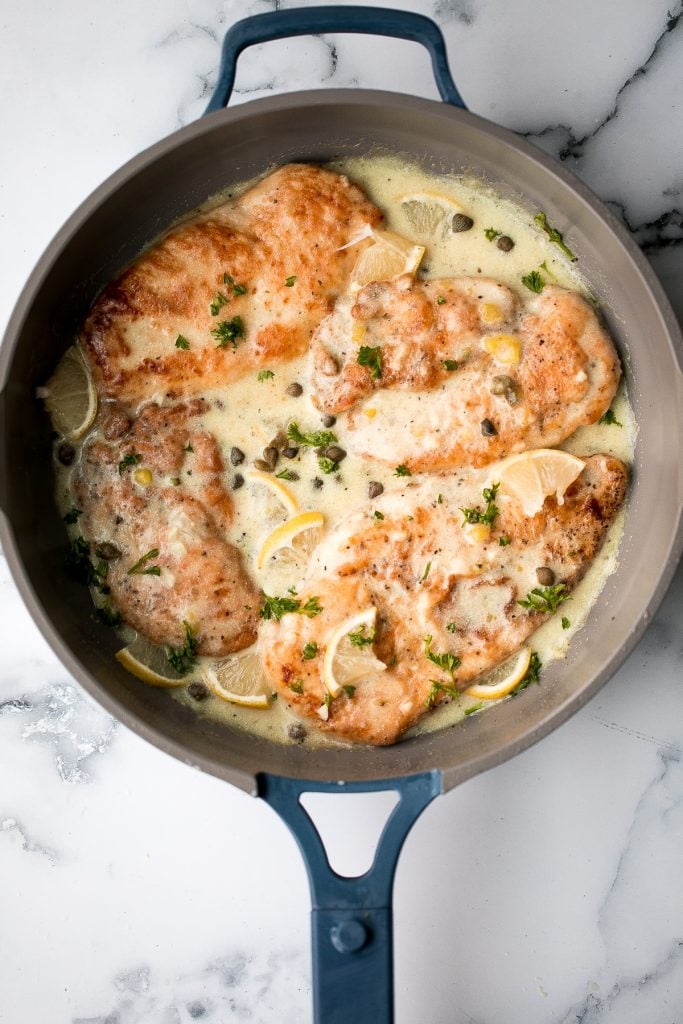
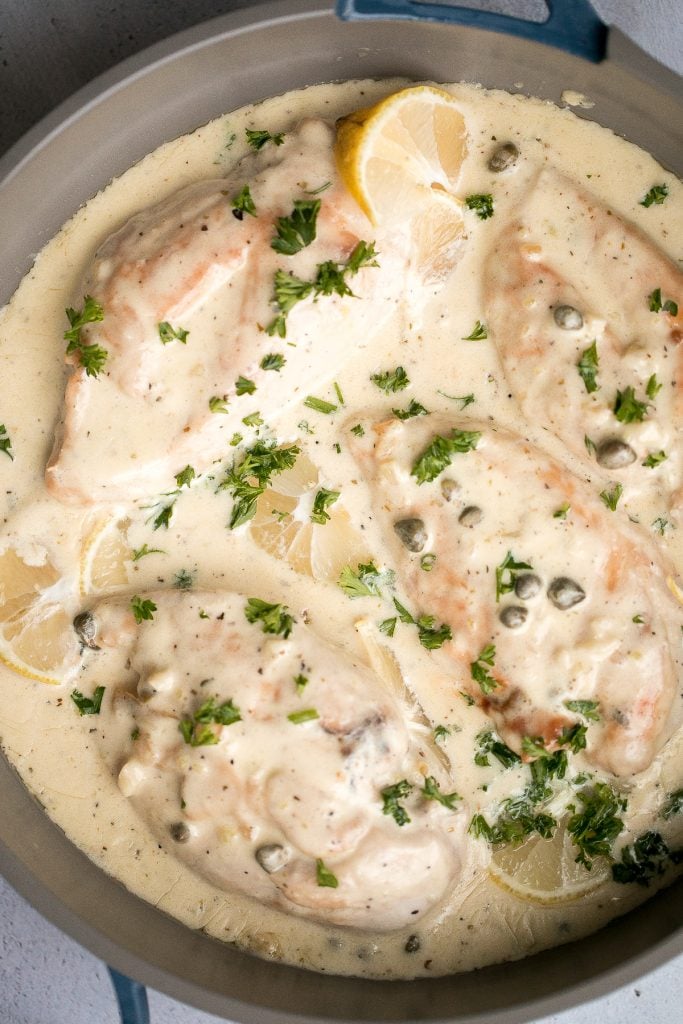
Quick and easy, creamy lemon chicken piccata is a simple and delicious 30-minute meal made with tender chicken breast in a light lemon sauce with capers. One of my favorite easy chicken dinners.
One Pan Garlic Roasted Chicken and Baby Potatoes
One pan garlic roasted chicken and baby potatoes is an easy to make, delicious, and wholesome meal for the entire family including the kids. Prep this sheet pan in 10 minutes.
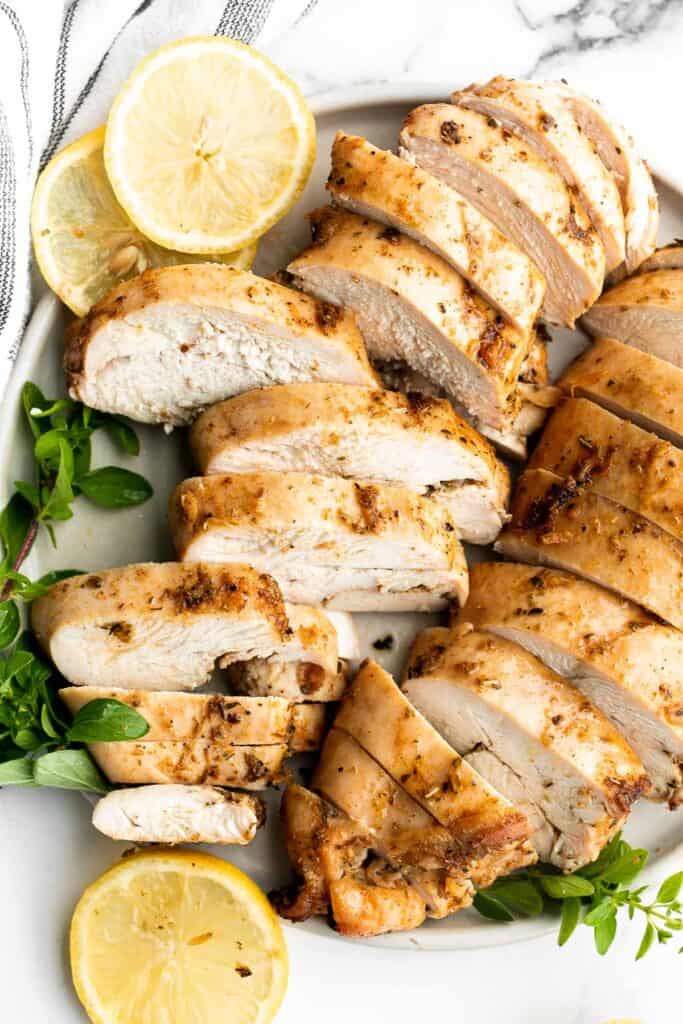
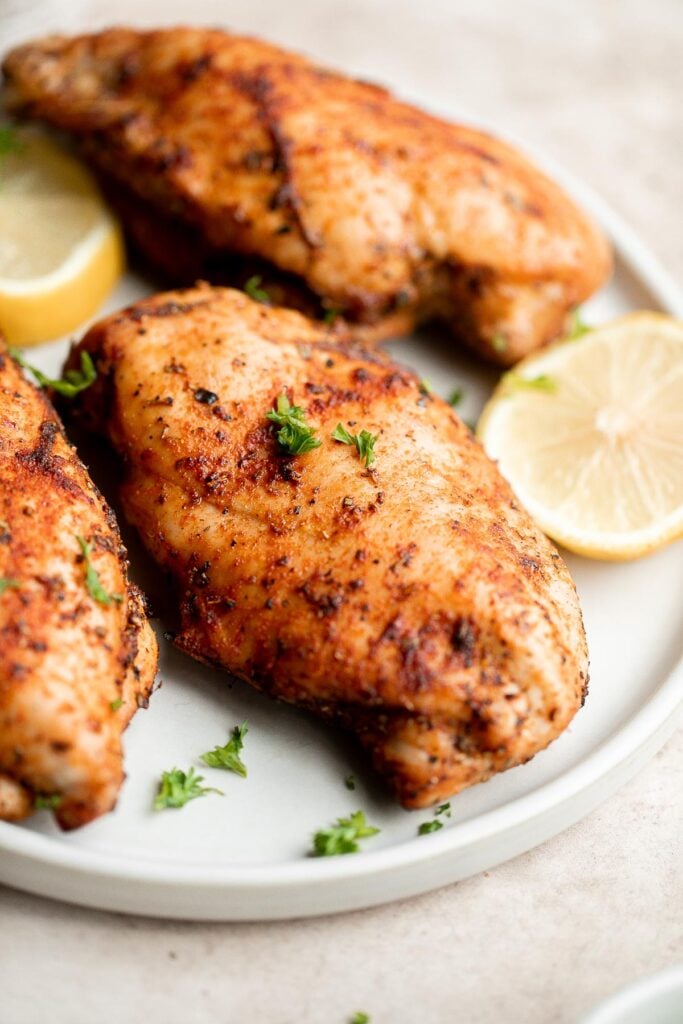
Juicy, tender, and moist, baked chicken breast with the best classic Greek souvlaki marinade is the most flavorful and delicious chicken dinner in under 30 minutes. Serve it on its own with greek lemon roasted baby potatoes or use in a Greek chicken salad.
Roasted Spatchcock Chicken (Butterflied Chicken)
Quick and easy roasted spatchcock chicken (butterflied chicken) seasoned with garlic and thyme is juicy, tender, delicious and flavourful with minimal prep. Top with fresh herbs and serve with creamy mashed potatoes and garlic green beans.
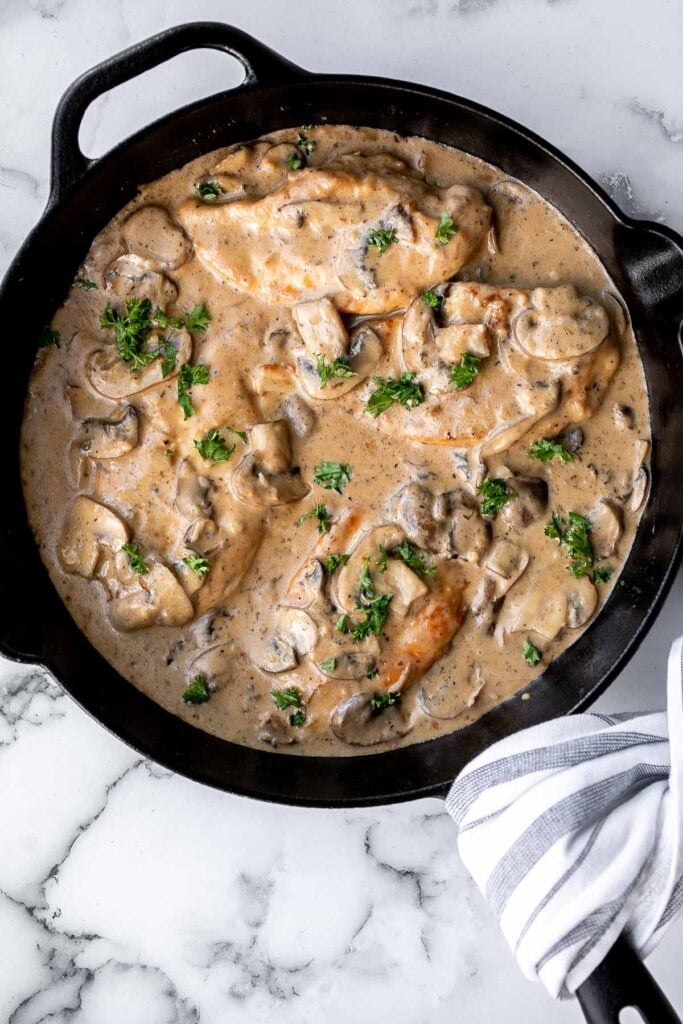
Chicken marsala in creamy mushroom sauce is a quick and easy 30-minute chicken dinner that is pure comfort food goals. A total crowd favourite.
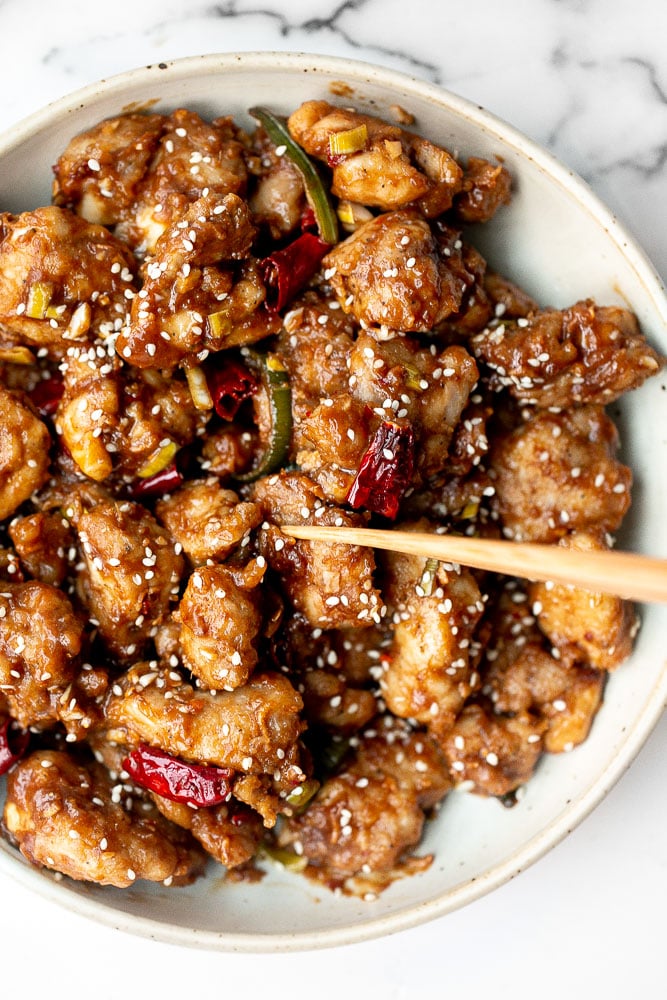
Baked General Tso's Chicken is a saucy, savoury, sweet, spicy Chinese-American takeout favourite made healthier with baked chicken, not fried.
Baked queso chicken with tomatoes is an easy, cheesy, delicious chicken dinner that takes just 30 minutes to cook with skinless chicken breasts. The best weeknight dinner.
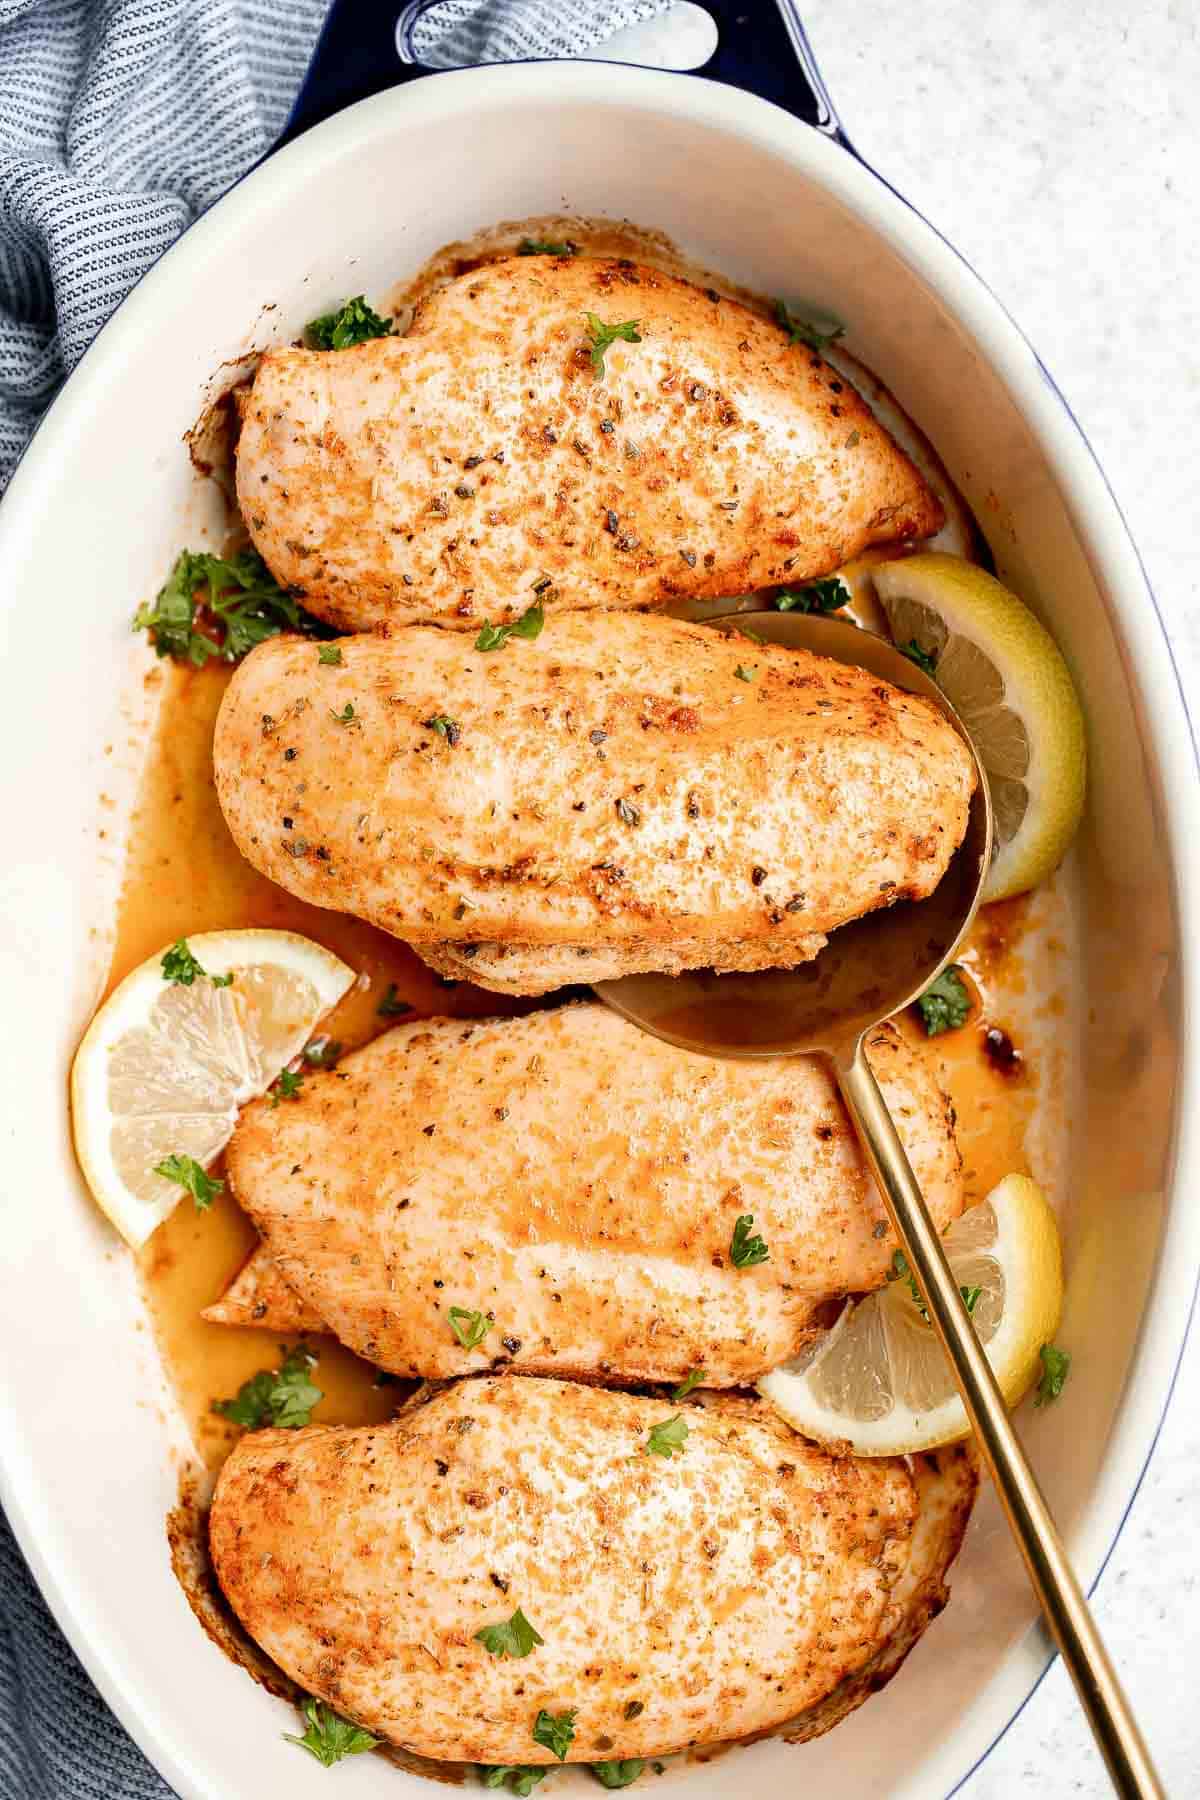
This Oven Baked Chicken Breast is juicy, tender, and delicious. It's quick and easy to make with a simple seasoning blend that packs on the flavor.
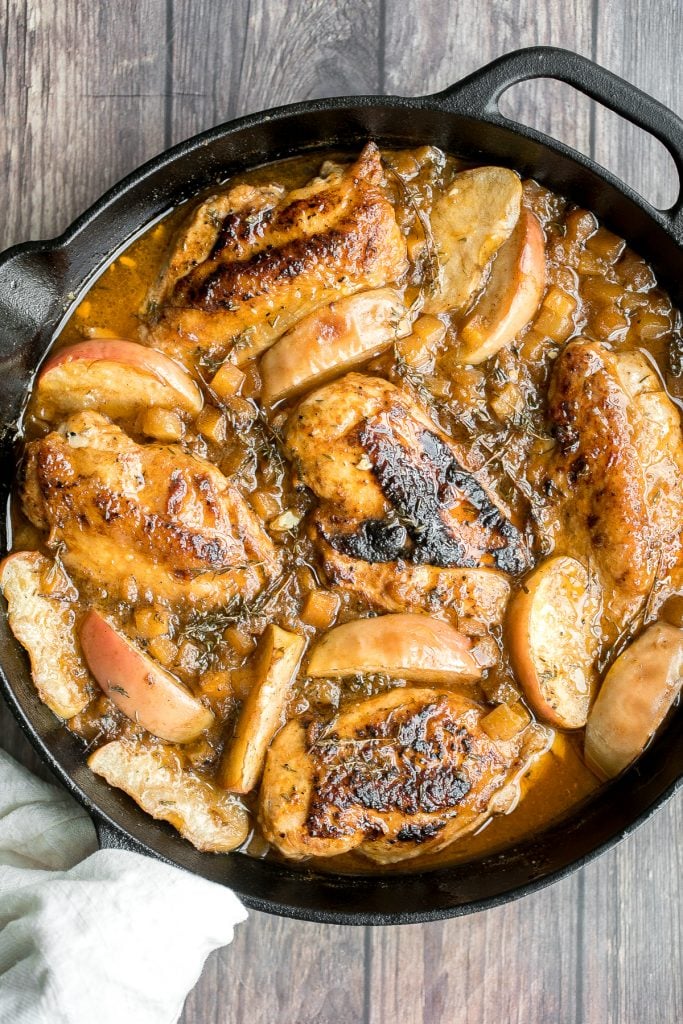
Apple Cider Chicken with Butternut Squash
One of my favourite chicken recipes is quick, easy, one pan apple cider chicken with butternut squash, apples, and thyme, cooked in an apple cider sauce. Serve this fall meal in just 40 minutes. Don't forget some crusty bread to soak up all that juice.
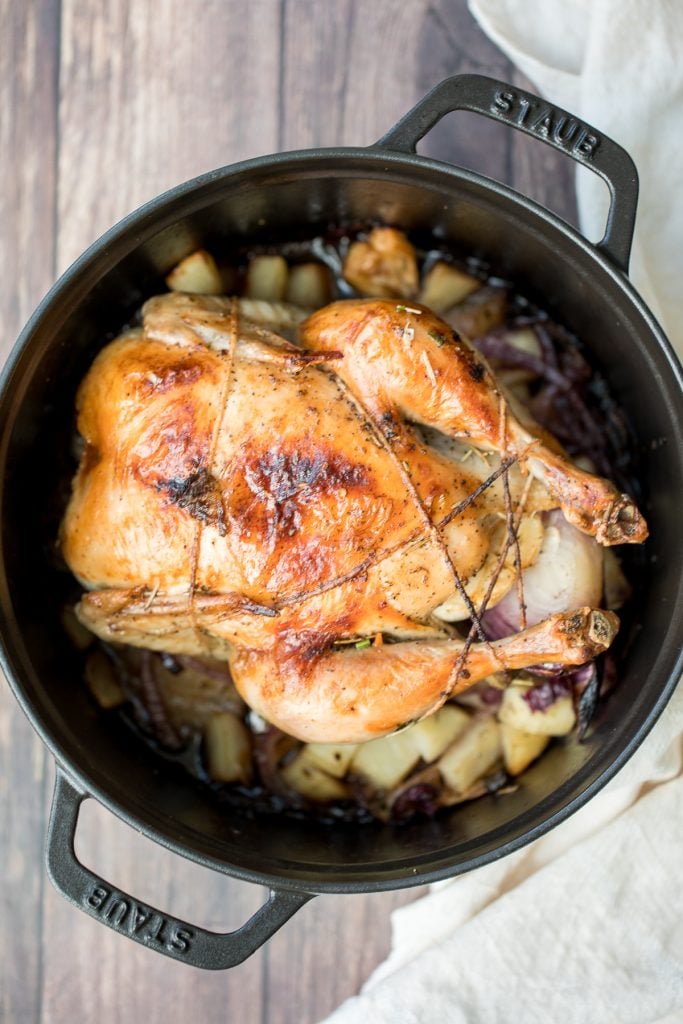
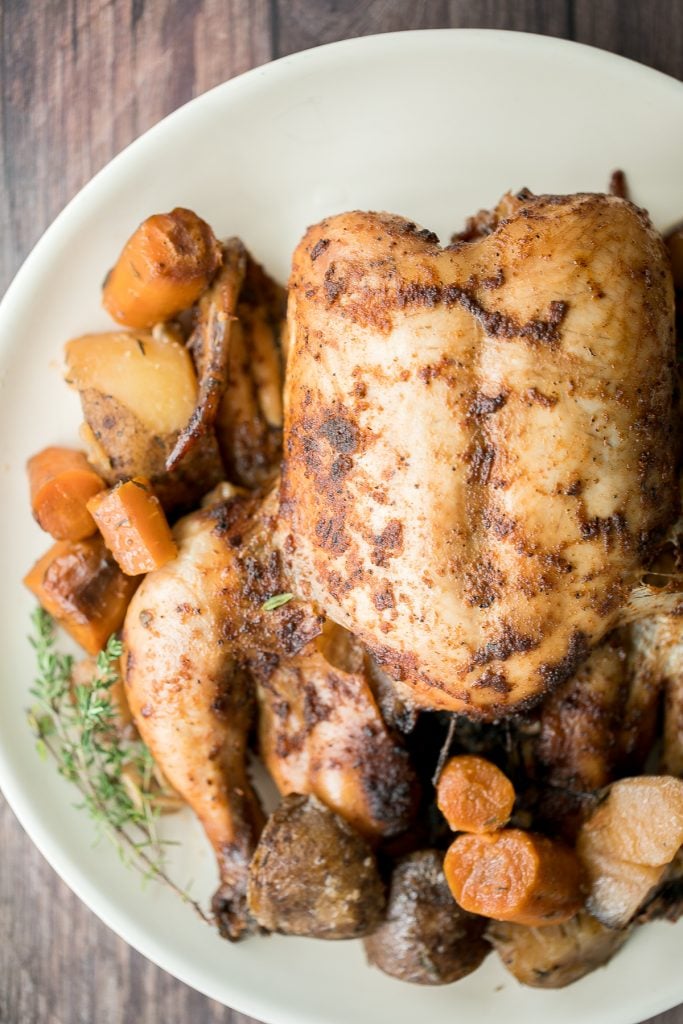
Dutch Oven Whole Roast Chicken
Easy Dutch oven whole roast chicken with the crispiest golden skin is juicy, tender and succulent and packed with flavour. Just takes 15 minutes to prep. Serve with creamy potatoes au gratin on the side.
Easy Chicken Parmesan (Parmigiana)
Easy chicken parmesan (parmigiana) with crispy breaded chicken, tomato sauce, and melted mozzarella and parmesan cheese. The best comfort winner winner chicken dinner.
Air fryer chicken breast is crispy on the outside, juicy and tender inside, and packed with flavor in every bite. Quick and easy dinner on busy weeknights.
Creamy Tuscan chicken with sun-dried tomatoes and spinach is a quick and easy 30 minute Italian chicken dinner that is delicious, flavorful, and comforting.

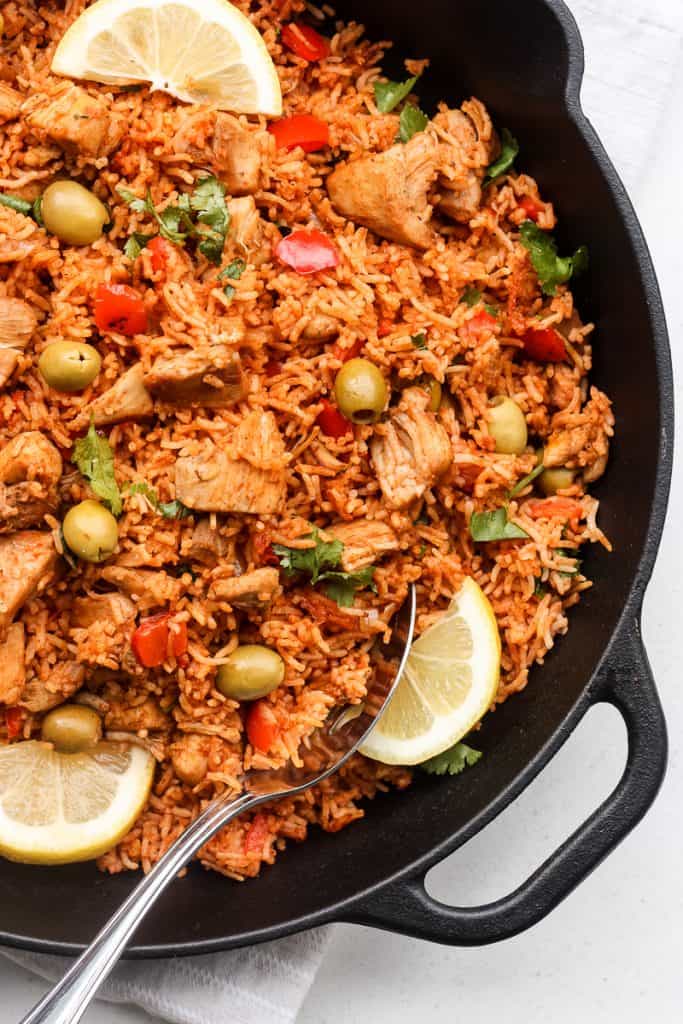
One Pot Spanish Chicken and Rice
Packed with flavour, real ingredients and vibrant colours, one pot Spanish chicken and rice is the perfect no fuss, no clean up weeknight meal.
Chinese Takeout Orange Chicken is a quick, easy, delicious meal ready in 30 minutes. It's healthier than takeout - can be pan-fried, air fried, or baked.

Baked caprese chicken is tender, juicy, and delicious, topped with burst tomatoes, mozzarella cheese, fresh basil, and a drizzle of balsamic glaze.

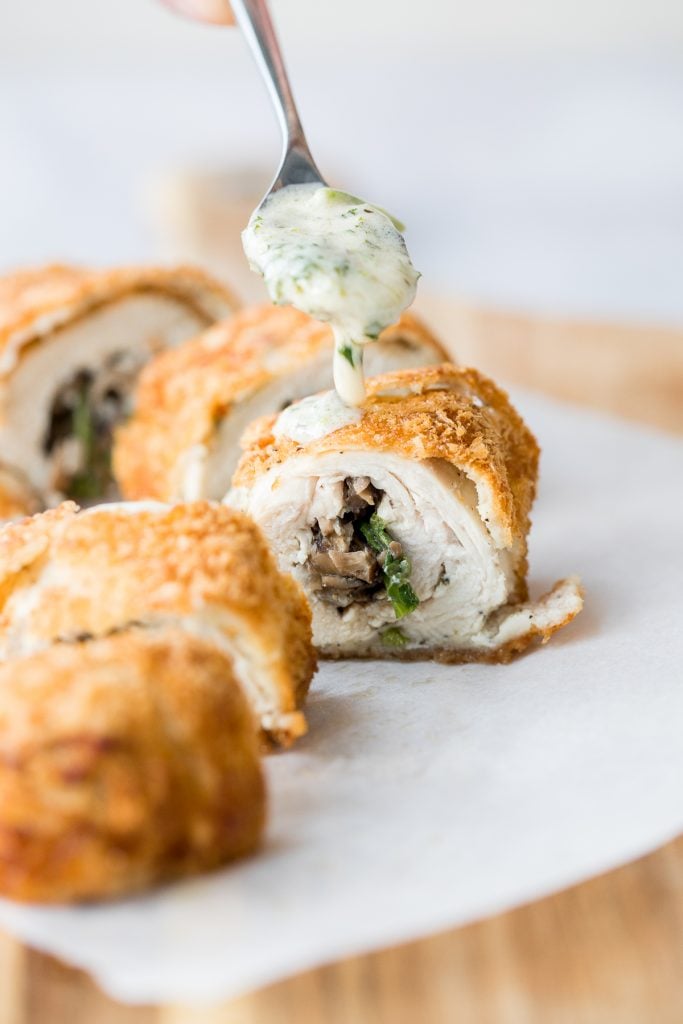
Creamy Chicken Roulade with Spinach and Mushrooms
Give your chicken breasts an upgrade by stuffing them to make fancy, juicy chicken roulade with spinach and mushrooms topped with a creamy alfredo sauce. Serve it over spaghetti alfredo with spinach and mushrooms.
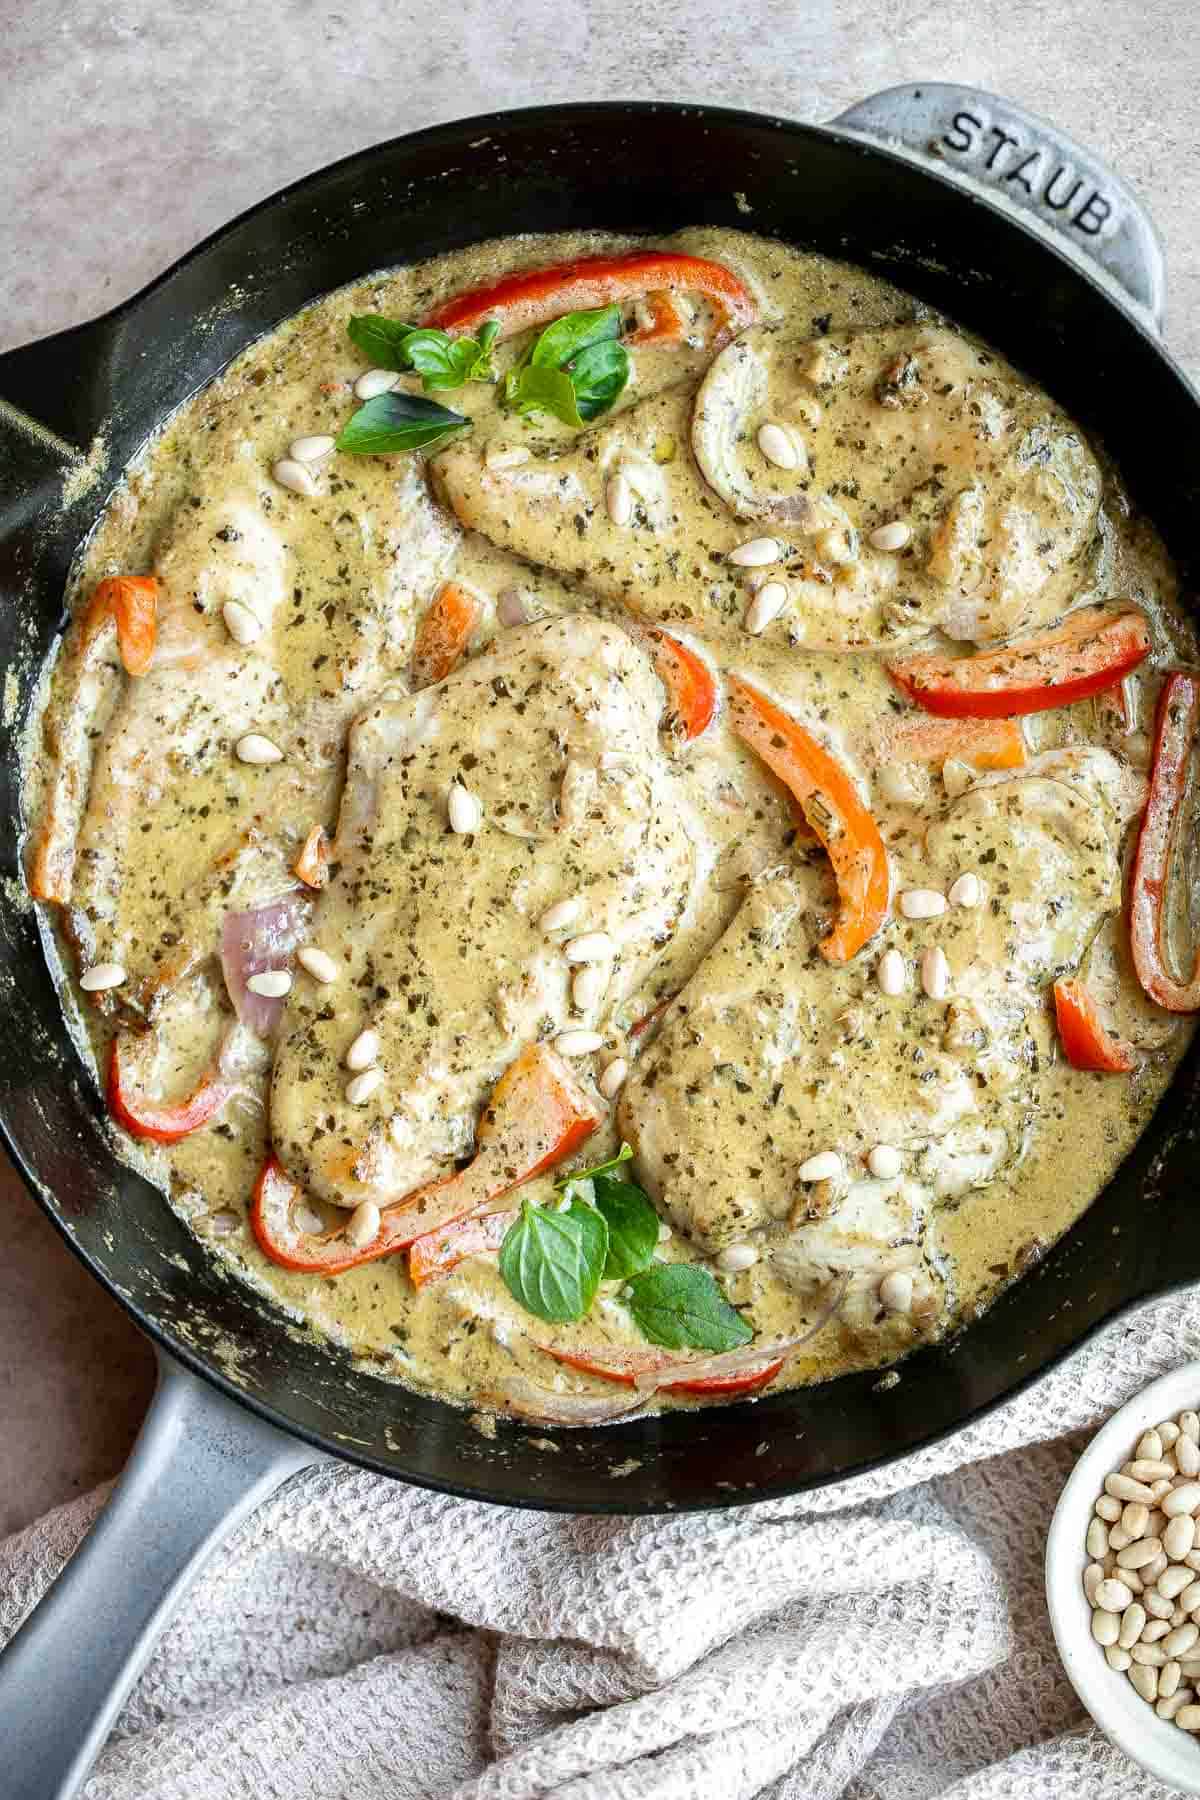
Creamy Pesto Chicken is a quick and easy 30 minute meal that needs to be on your family weeknight dinner rotation. It's rich, creamy, and delicious.
Skillet Chicken Thighs and Potatoes
Tender, juicy, and crispy one pan skillet chicken thighs and potatoes and carrots is an easy weeknight dinner on your dinner table in less than 45 minutes. Serve with a warm brussels sprouts salad on the side.
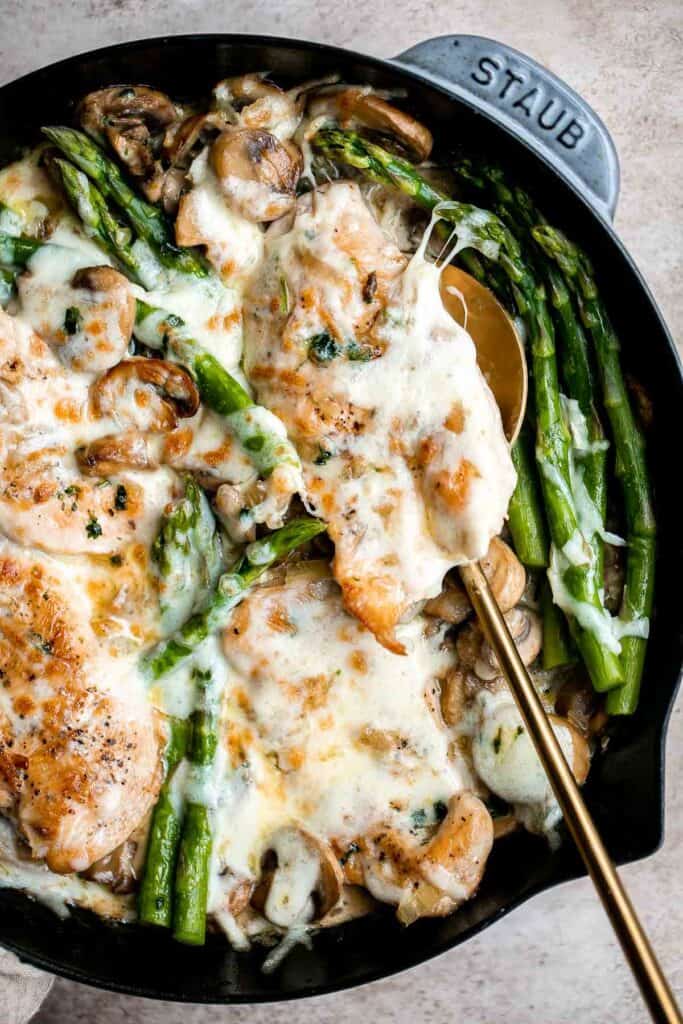
Chicken Madeira with sautéed mushrooms and tender crisp asparagus is topped with melty mozzarella cheese. Cheaper and better than the Cheesecake Factory!
Instant pot whole chicken with gravy is tender, juicy, and flavorful. It's the fastest way to cook a whole rotisserie chicken for dinner in just 40 minutes.
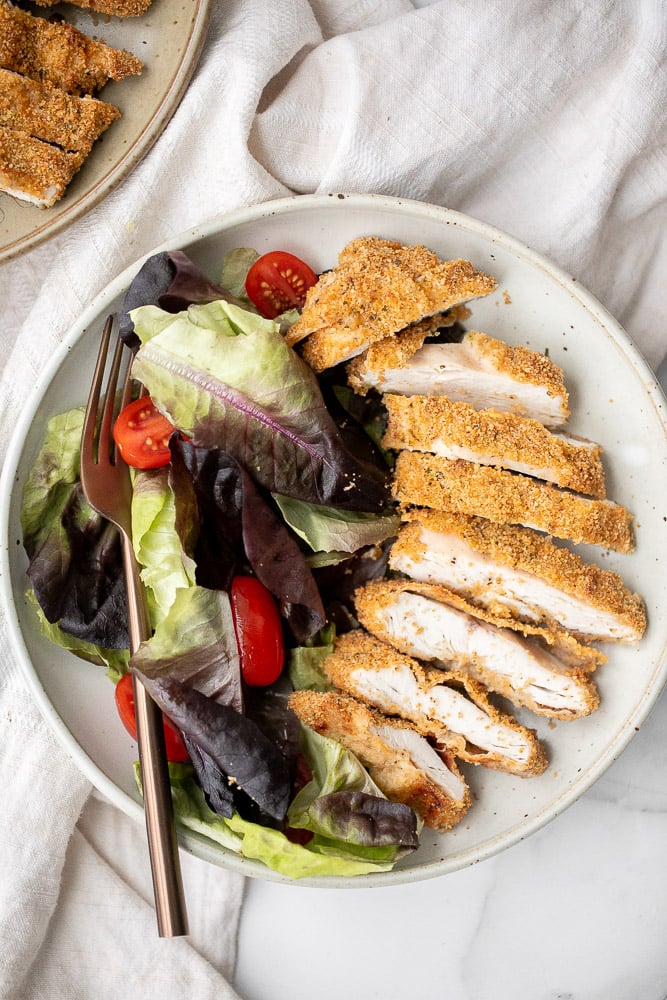
Baked parmesan crusted chicken is breaded in a herby parmesan breadcrumb mixture and baked until crispy perfection. So flavourful and delicious.
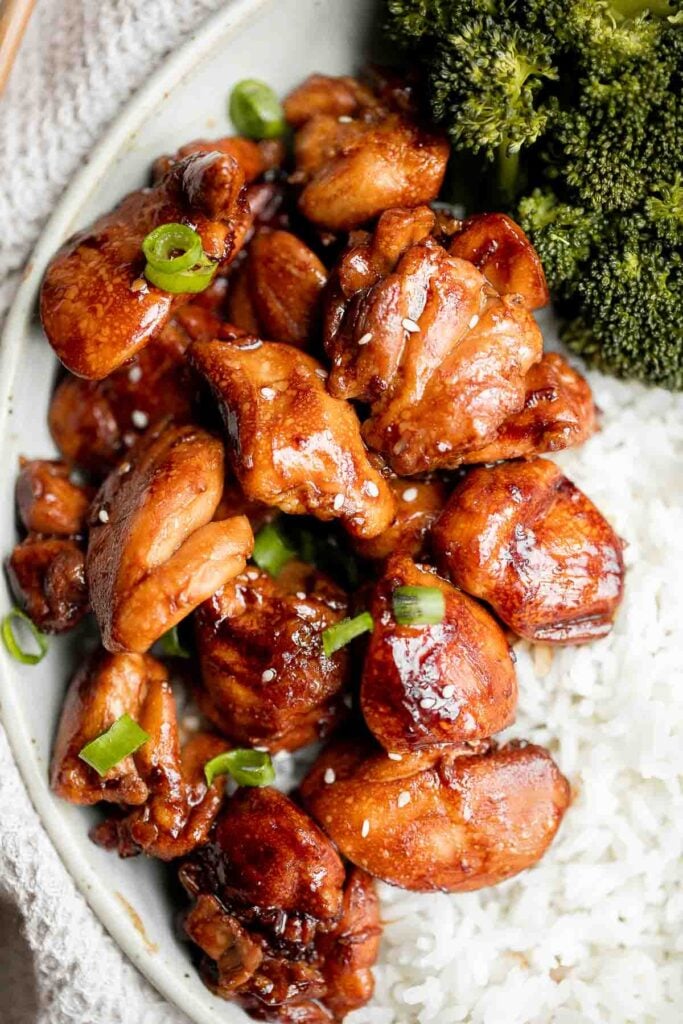
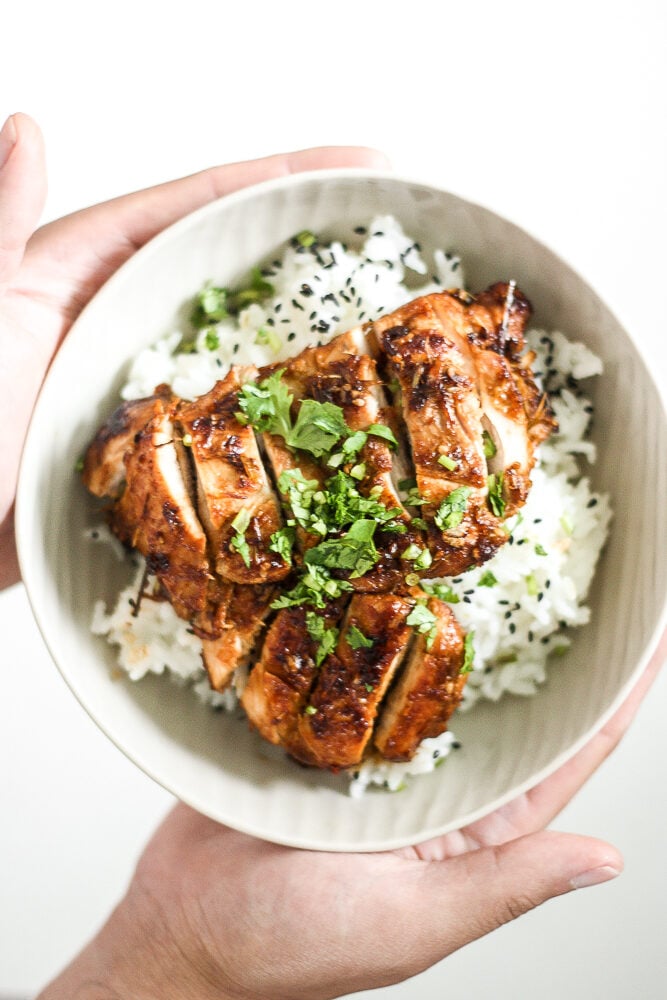
Teriyaki chicken is a quick easy chicken stir fry that is delicious, flavorful, healthy, and better and faster than takeout. Perfect for busy weeknights.
Sheet Pan Curry Chicken and Vegetables
Sheet pan curry chicken and vegetables with tender chicken thighs marinated in a delicious flavourful curry marinade is a complete one pan dinner with veggies. Serve with easy coconut rice or plain Basmati rice on the side.

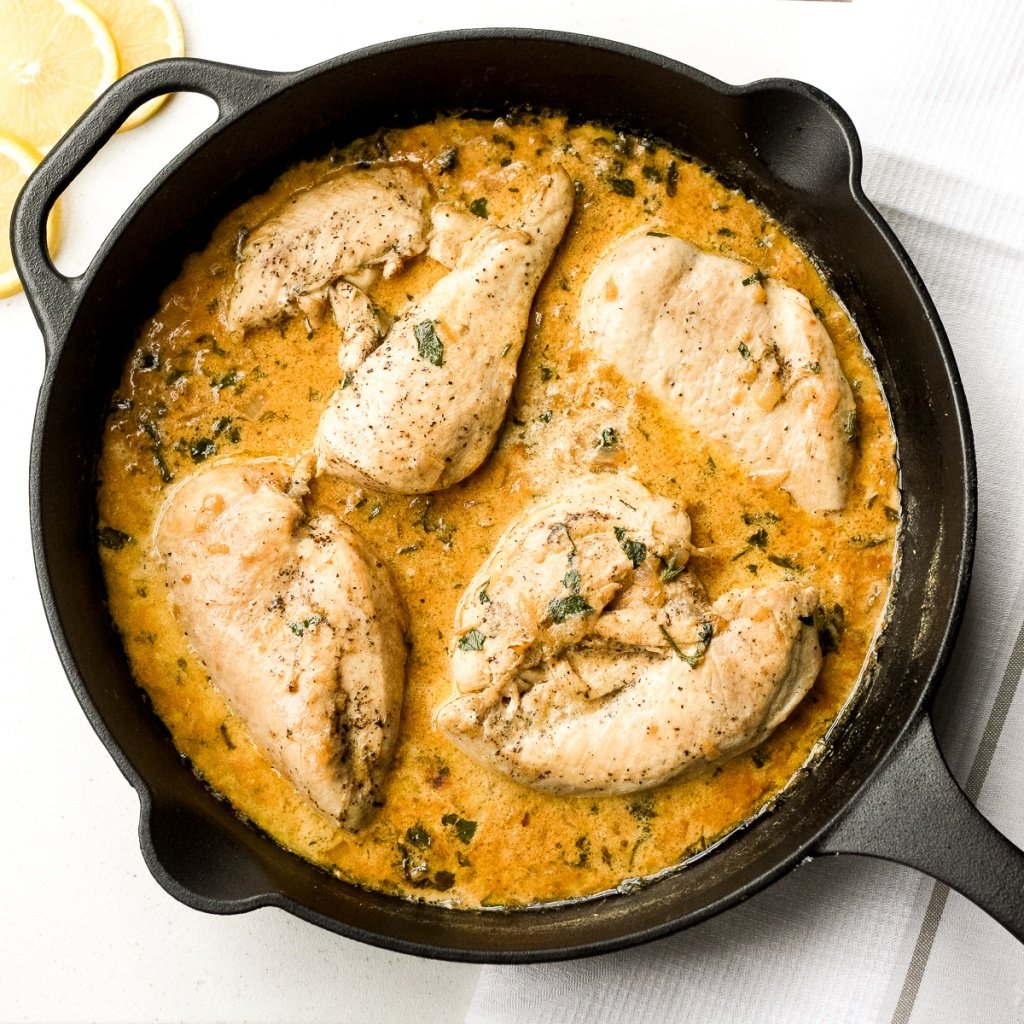
Creamy lemon parmesan chicken is a simple, quick and easy 30-minute meal that is packed with flavour. The most comforting and easiest weeknight dinner.
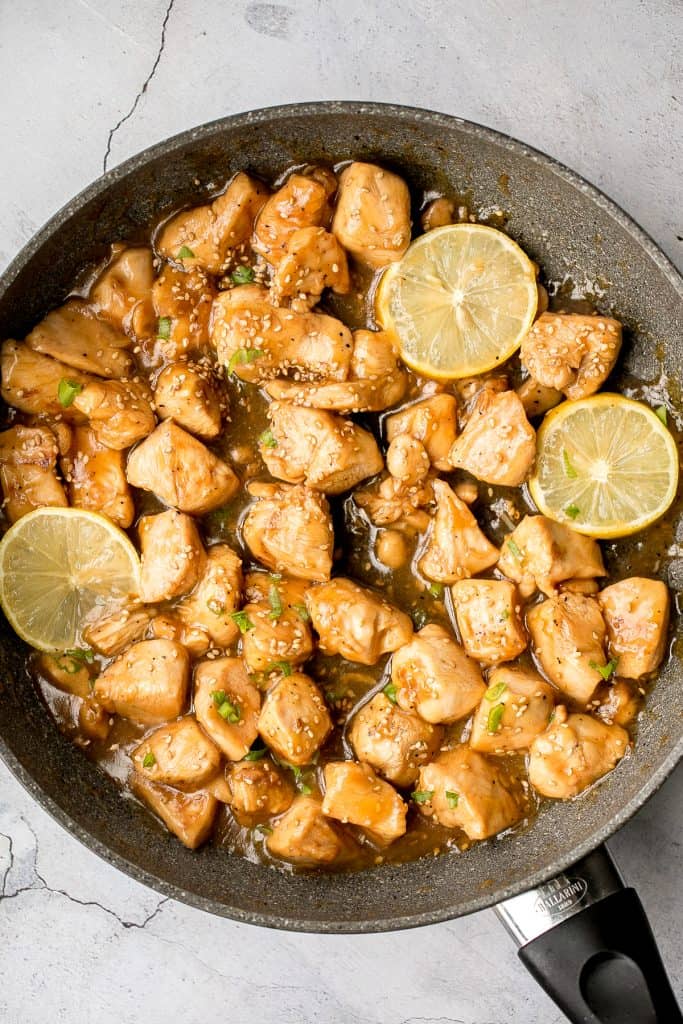
Better than takeout, healthy lemon chicken is a delicious, sticky chicken stir fry coated in a flavourful, sweet and tangy sauce. The best weeknight dinner.
Apple Dijon Braised Chicken Thighs
Tender and juicy apple dijon braised chicken thighs with potatoes is juicy, tender and so succulent that it falls off the bone, yet so crispy outside. Serve with Instant Pot Butternut Squash Soup and some bread to soak up all that juice. Try homemade ciabatta rolls or green onion dinner rolls.

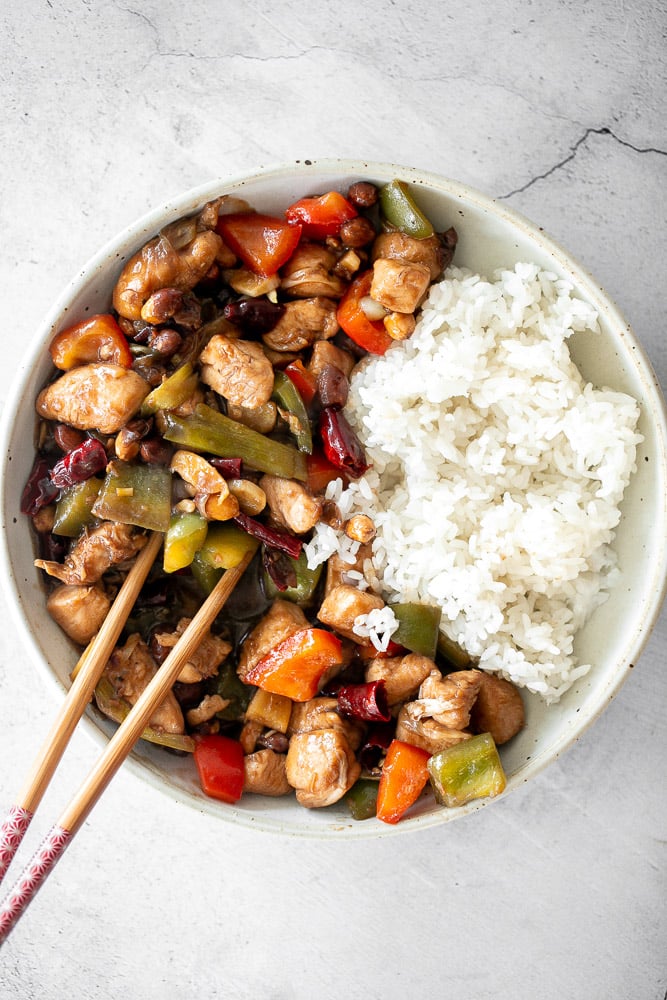
Kung Pao chicken is a Chinese chicken dish that is stir-fried with crisp vegetables and tossed in a delicious Asian sauce packed with flavour.
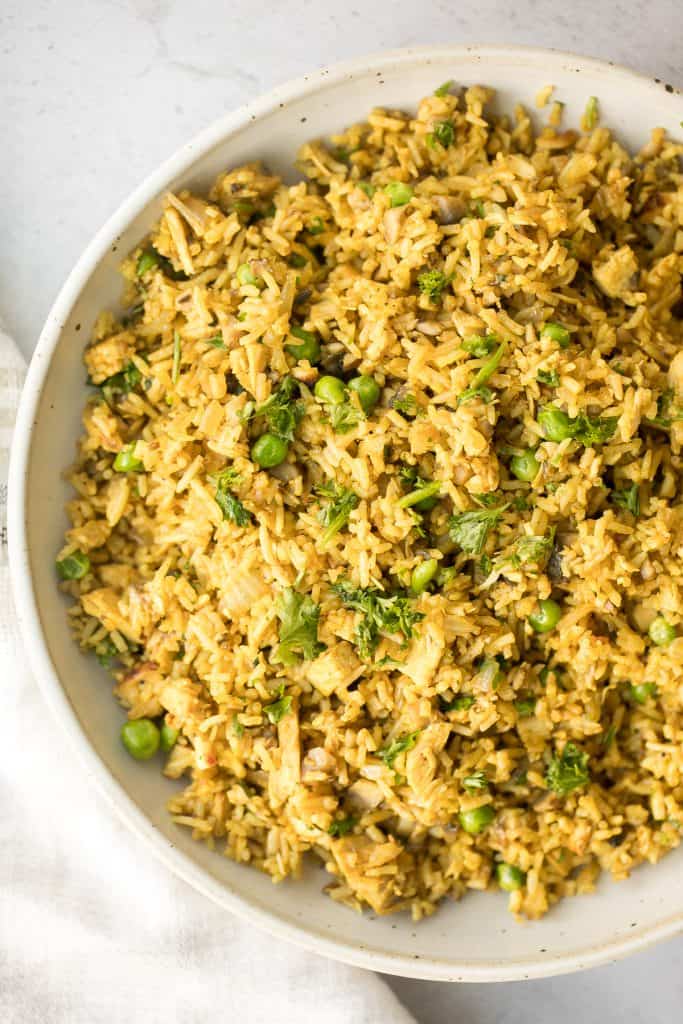
Flavourful curry chicken fried rice with chicken, mushrooms, peas, rice, and curry flavours is so easy to make in less than 10 minutes on busy weeknights. Serve with a fresh Chinese garlic cucumber salad on the side.
Skillet Chicken with Lemon Garlic Sauce
Delicious creamy skillet chicken with lemon garlic sauce is a one-skillet meal that is ready in 30 minutes. It's garlicky, saucy, creamy, and so flavourful. Bread is a must to dip into this delicious cream sauce. Try pull apart garlic bread or easy no yeast biscuits.
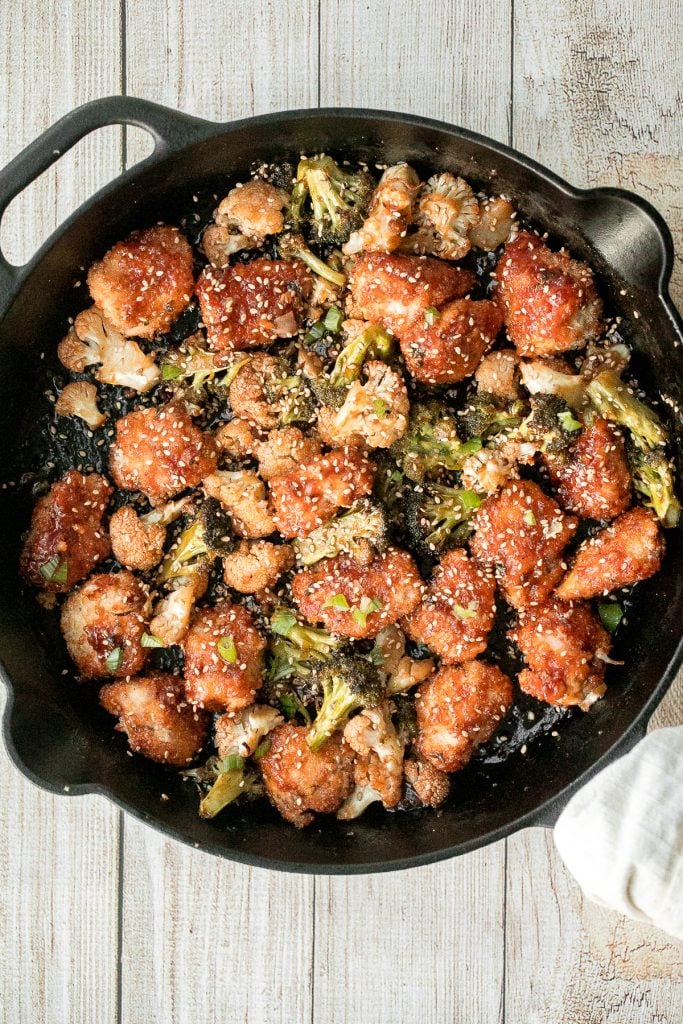
Better than takeout, baked sesame chicken with vegetables is delicious, flavourful, sticky and saucy. This healthier Chinese dish is quick and easy to make.
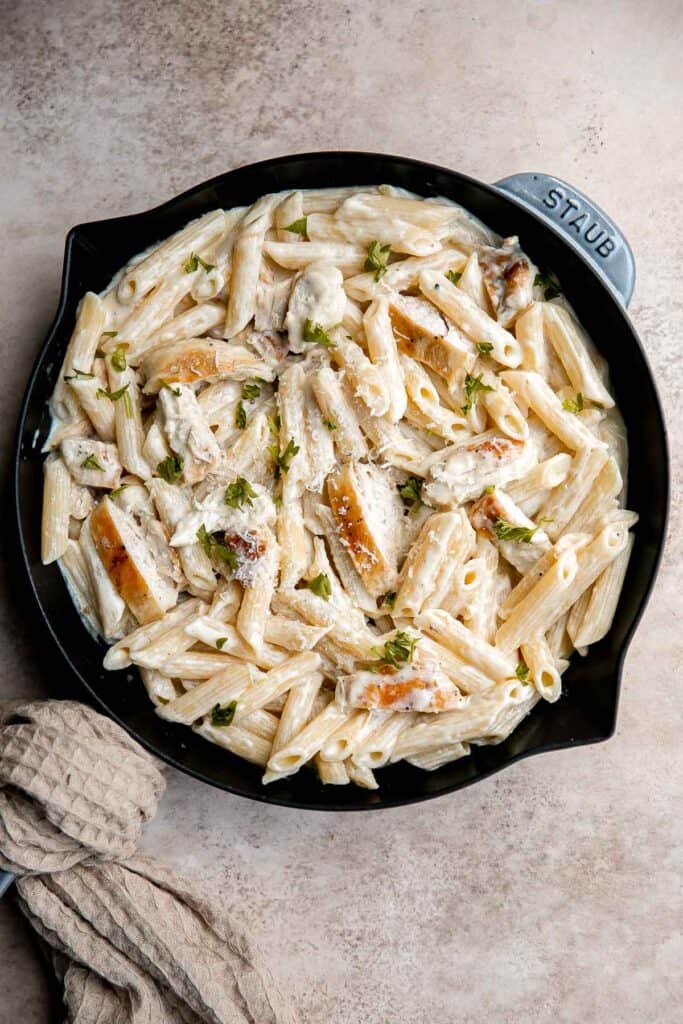
Chicken penne pasta is a quick and easy dinner that is delicious, rich, creamy, and flavorful. It's a family favorite that's ready in under 30 minutes.
Meal Prep Sheet Pan Balsamic Chicken and Vegetables
Quick and easy, throw everything into one pan, Asian-style meal prep sheet pan sesame balsamic chicken and vegetables is flavourful, juicy and tender. Serve with some steamed rice.
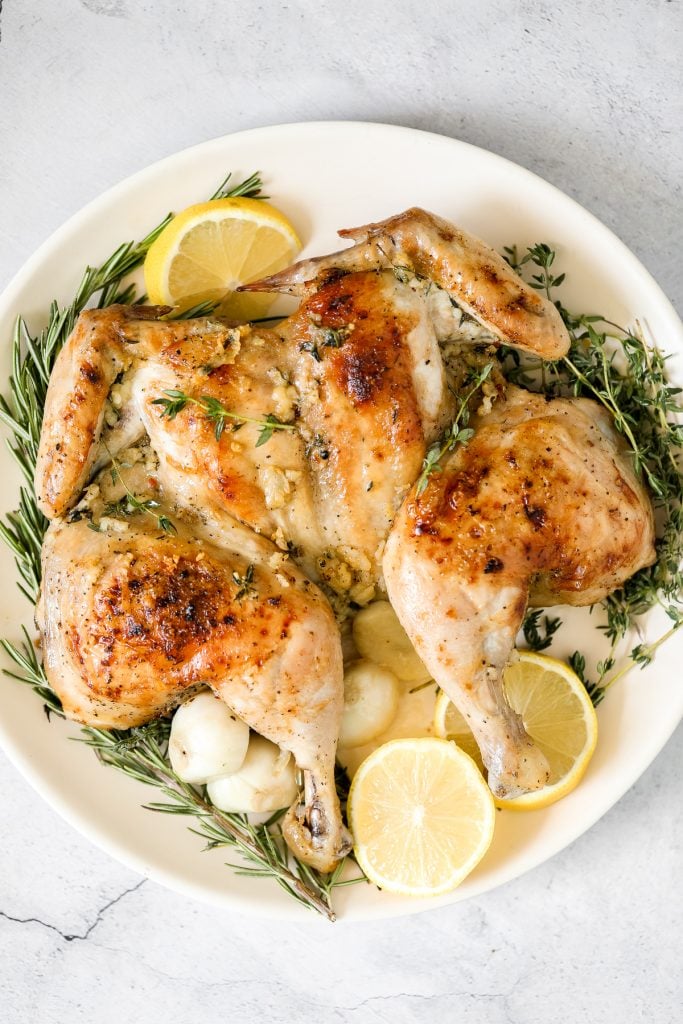
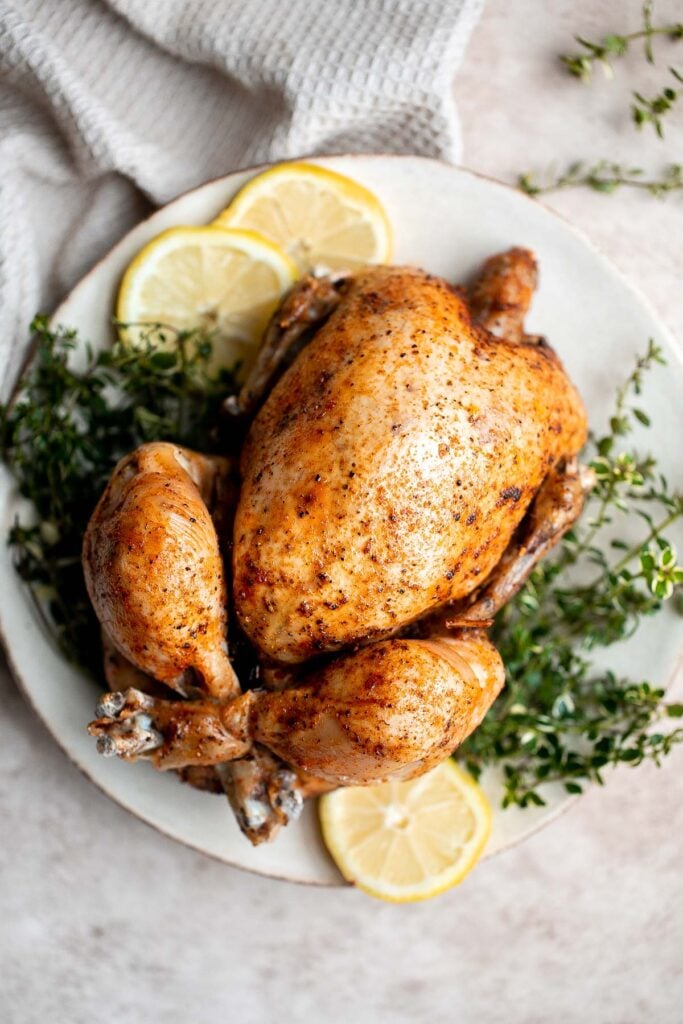
Greek Lemon Garlic Whole Roast Chicken
Easy Greek lemon garlic whole roast chicken is tender, juicy and succulent with the crispiest skin. Prep this flavourful one pan meal in just 15 minutes.
Sizzling and hot sheet pan chicken fajitas are on the table in less than 30 minutes. The best part is that you just throw the chicken, peppers, and everything into one sheet pan. Make it a total fiesta with some pico de gallo and fish tacos.

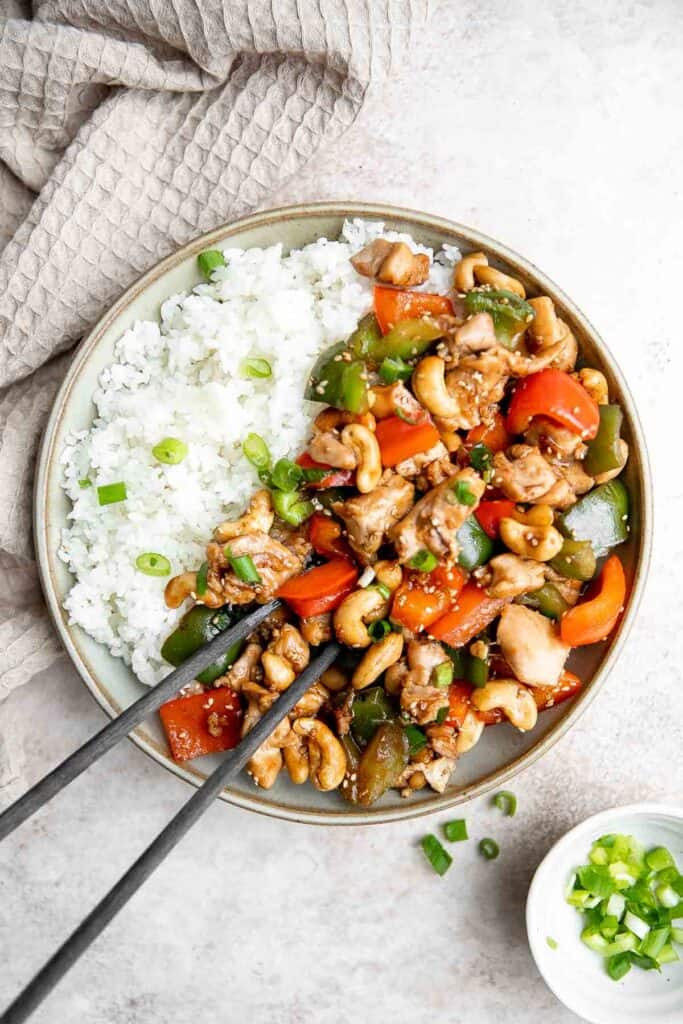
Cashew chicken is a quick and easy chicken stir fry ready in under 30 minutes. It's flavorful, delicious, and so much better and faster than takeout.
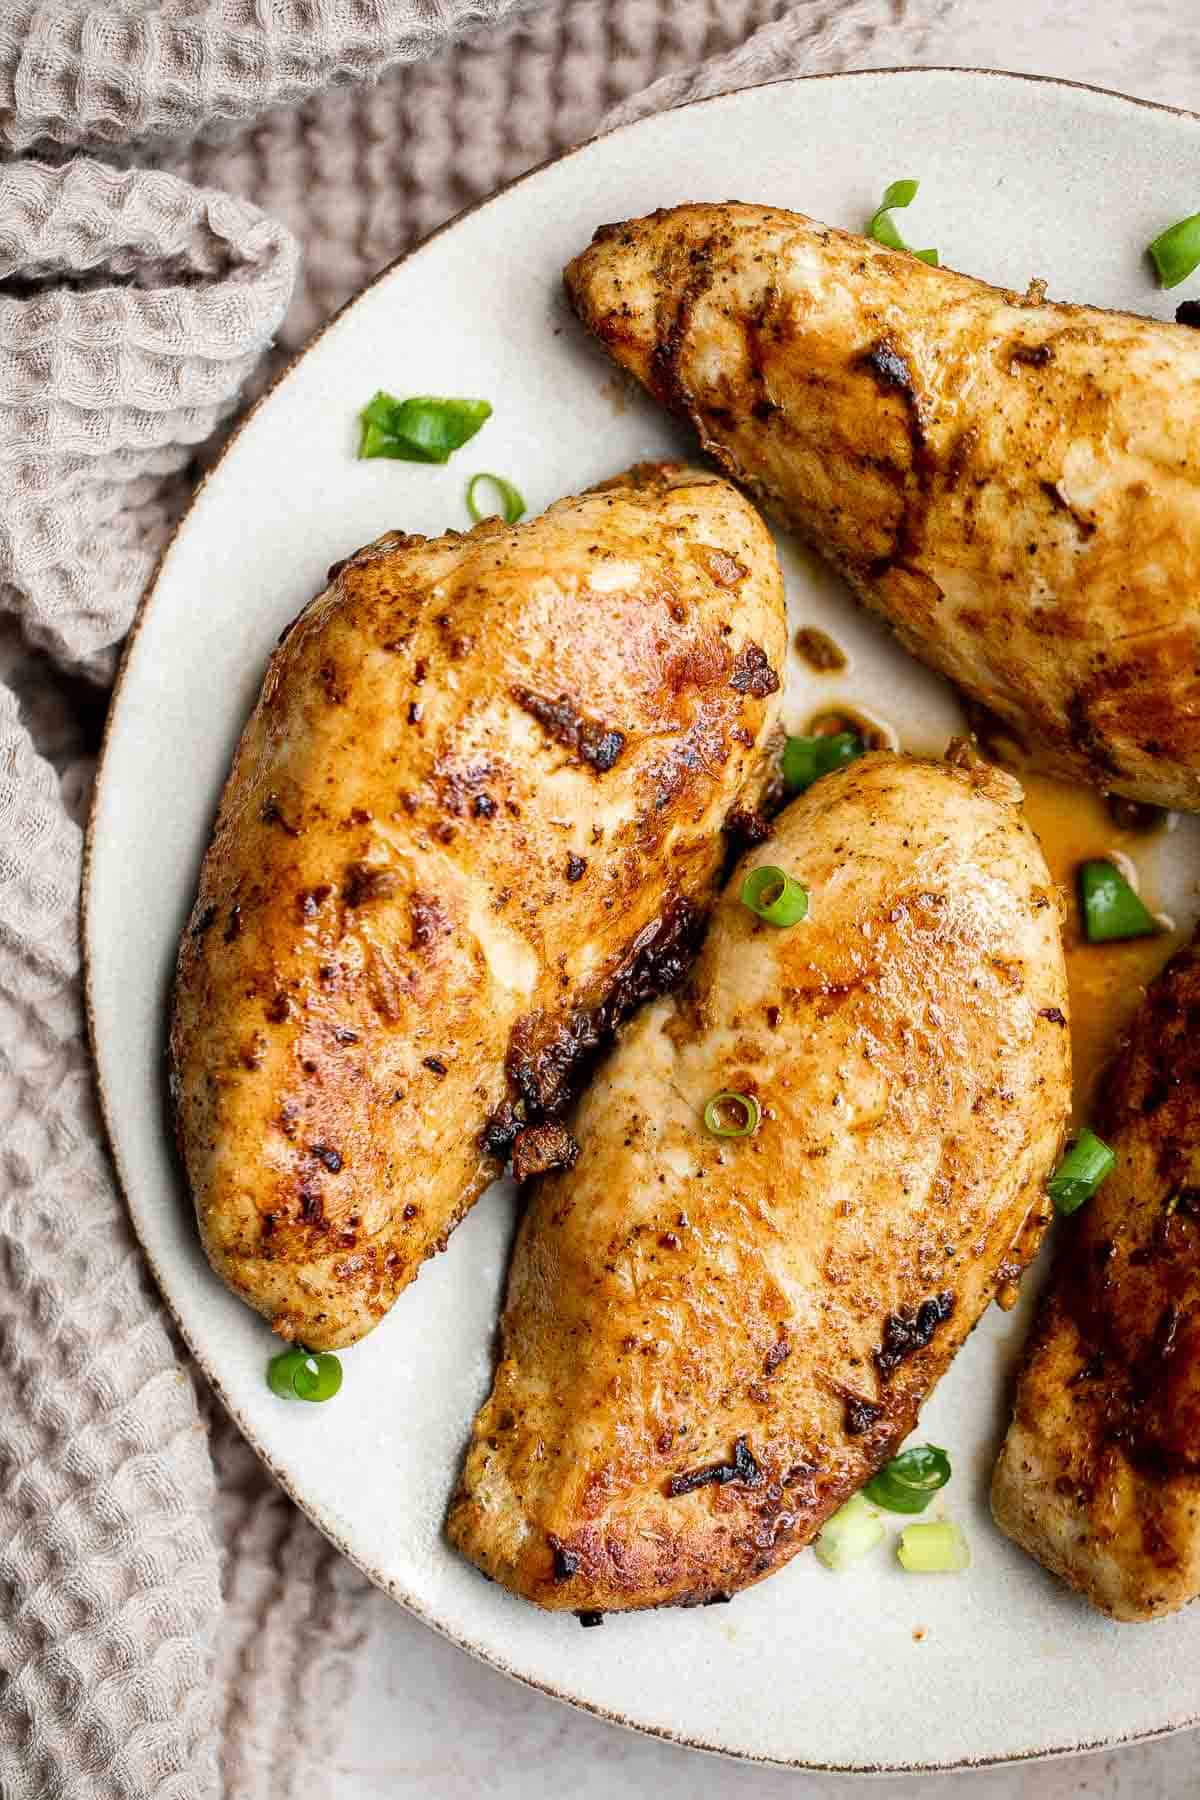
Mexican chicken breast is juicy, tender, and flavorful. It's easy to prep with a quick marinade before cooking on the stove, air fryer, or oven.
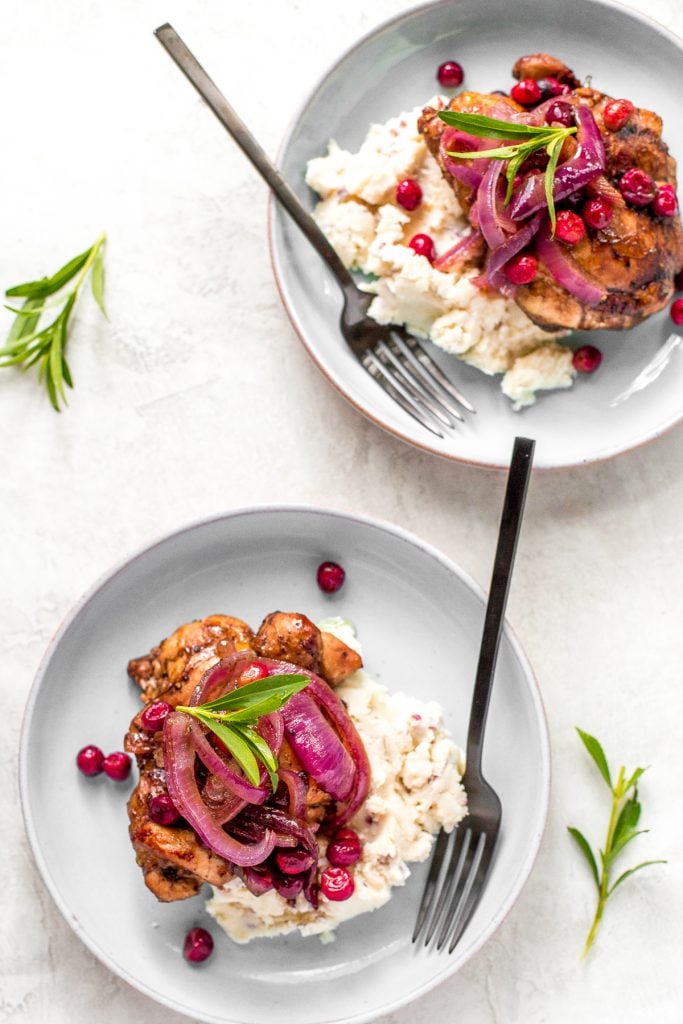
Roasted Balsamic Chicken with Cranberries
If you're scrambling to figure out dinner with less than 30 minutes on hand, this sweet and tangy roasted balsamic chicken with cranberries will save the day. Serve with some creamy mashed potatoes or garlic mashed cauliflower.
Slow cooker whole chicken is soft and tender and literally falls off the bone. It is the easiest way to cook a rotisserie chicken with a few minutes prep. Shred it and use it in lemon chicken orzo soup, 30-minute BBQ chicken pizza, or baked pasta with chicken.
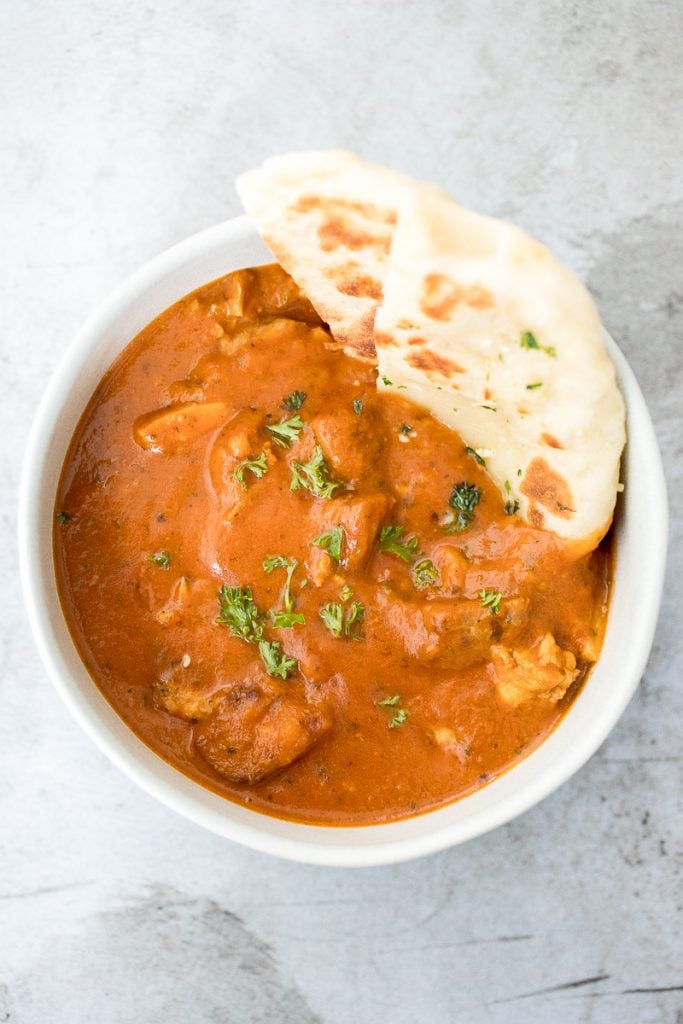
Better than takeout, make easy Indian butter chicken in just 30 minutes, with a creamy tomato-based sauce, charred chicken, and incredible spice + flavour. Serve with homemade garlic naan bread.
One Pot Coconut Curry Chicken and Rice
Creamy, delicious and flavourful, Thai-inspired one pot coconut curry chicken and rice is a 30-minute weeknight meal made with red curry and coconut milk.

Aromatic Asian pan-fried lemongrass chicken is healthy, gluten-free, and takes less than 25 minutes to prep and cook. Now that's what I call the perfect weeknight meal. Use any leftovers in a lemongrass chicken banh mi sandwich.
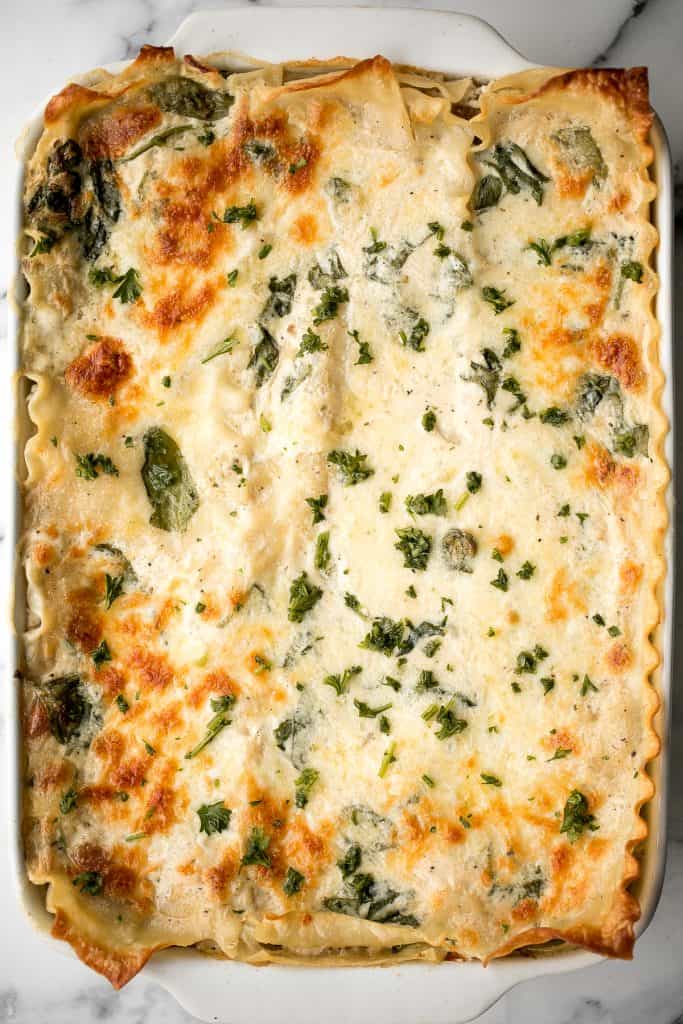
Creamy White Chicken and Spinach Lasagna
Creamy white chicken and spinach lasagna with tender shredded chicken is the most comforting creamiest cheesiest white lasagna. Easy to make ahead & freeze.
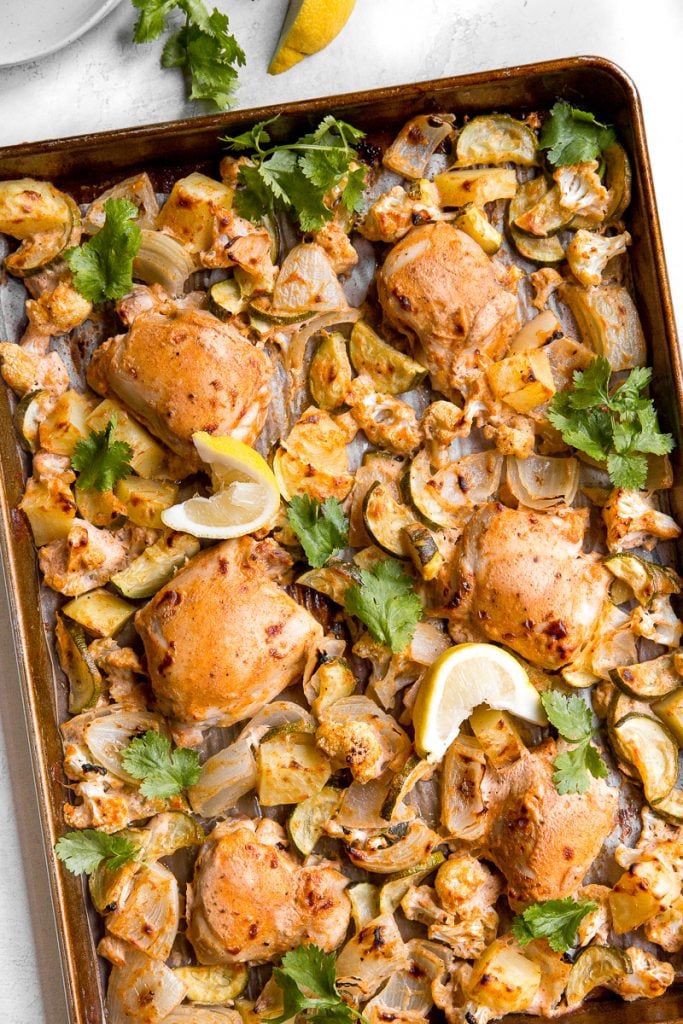
Tandoori Chicken Sheet Pan Dinner
In under 30 minutes, create intensely flavourful tandoori chicken sheet pan dinner loaded with vegetables, any night of the week. Good-bye takeout. Serve over easy coconut rice or plain Basmati rice.
Sticky crispy baked sweet chili chicken bites is better than takeout and so easy to make healthier at home. An easy dinner or game day appy.

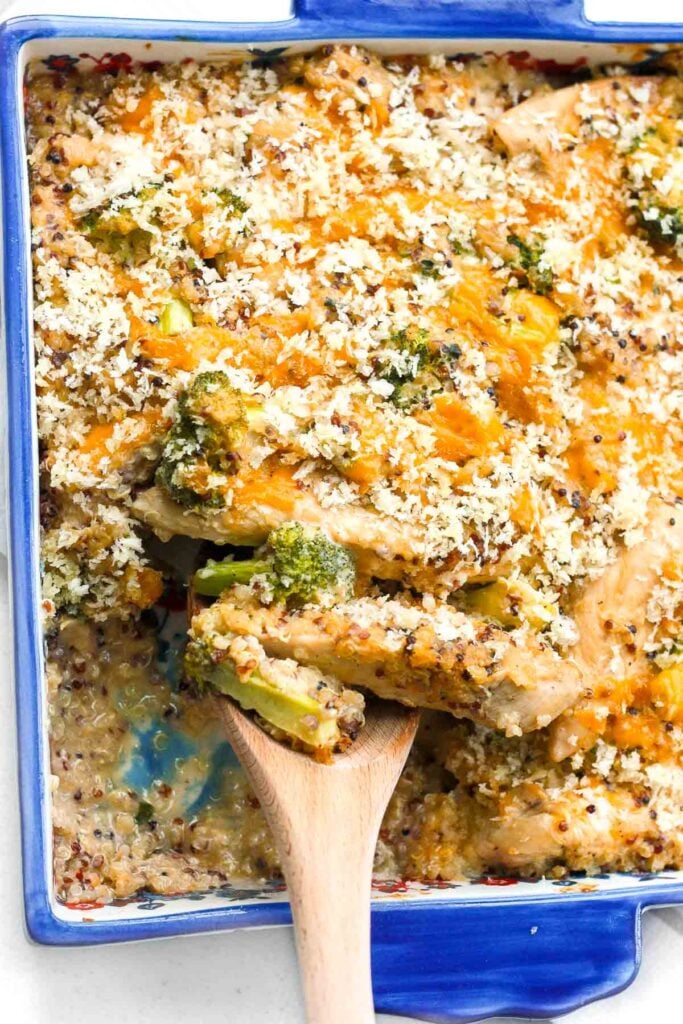
Creamy Chicken Broccoli and Quinoa Casserole
Nothing says comfort food better than a creamy chicken, broccoli and quinoa casserole made with fresh and healthy ingredients.
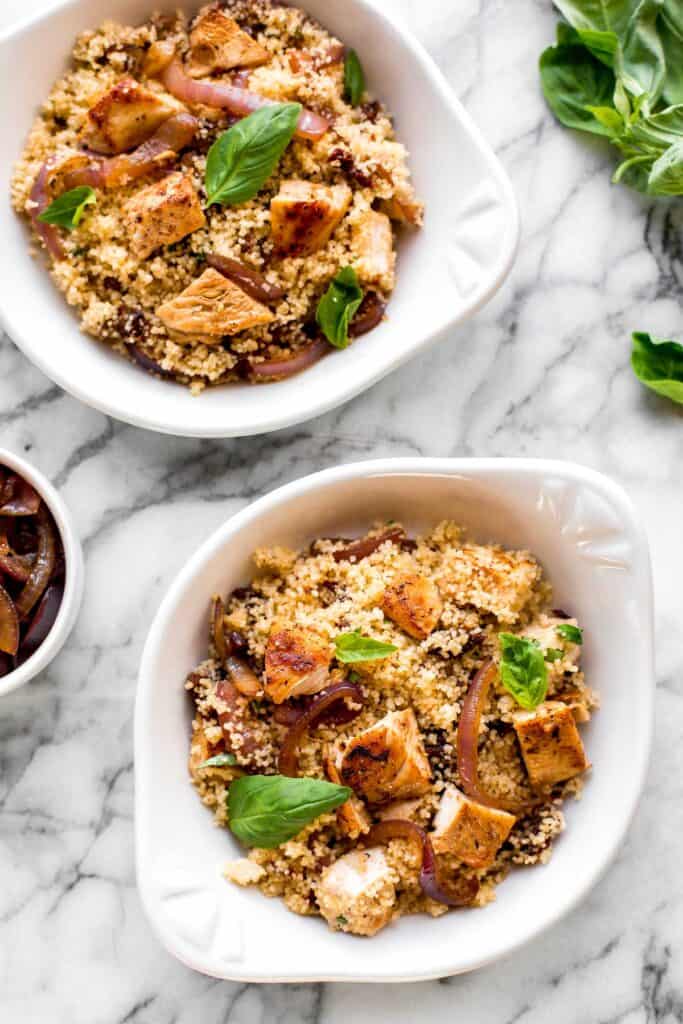
Chicken and Couscous with Sun-dried Tomatoes
Simple, healthy and flavourful chicken and couscous with sun-dried tomatoes is ready in under 30 minutes. The easiest weeknight dinner to make tonight!
Juicy long strips of chicken shaped perfectly for dipping and coated with a flawless crispy and crunchy exterior, baked crispy chicken strips are a pleaser.

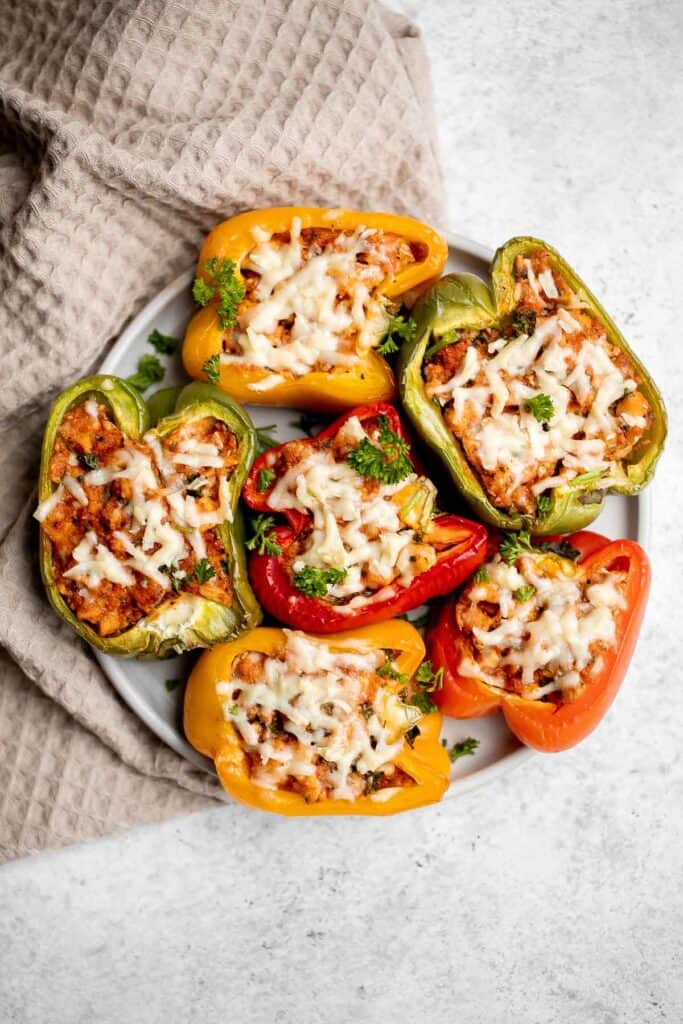
Chicken Parmesan Stuffed Peppers
Chicken parmesan stuffed peppers are delicious, flavorful, healthy, and filling, and combines two all-time favorites. Great for meal prep and freezes well.
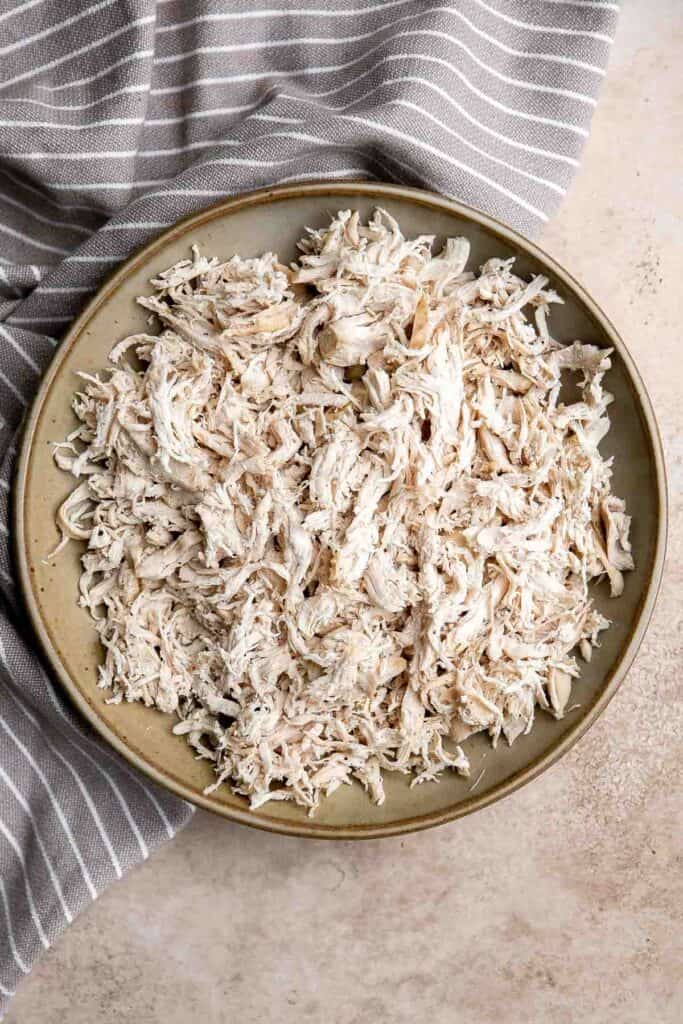
Shredded chicken is quick and easy to make (in three ways) and shred. It's a staple ingredient to add to other recipes such as soup, salads, and sandwiches.
How to Store Chicken Dinners
Store leftover chicken from any of these quick chicken recipes in an airtight container and place in the refrigerator for up to 3 days. Most of these chicken dinners are also freezer-friendly and can also be stored in the freezer for up to 3 months.
To reheat, simply reheat in the air fryer at 300F for 5-10 minutes, or in the oven at 300F for 10 minutes. You can also reheat on the stove over medium heat until fully warmed through. the oven at 350 F for 10 minutes. If heating from frozen, let it thaw first in the refrigerator and then reheat.
More Easy Dinner Recipes
- 60+ Easy Dinner Ideas
- 50 Best Chicken Breast Recipes
- 40 Best Pasta Recipes
- 60 Best Soup Recipes
- 25 Best Ground Beef Recipes
- 30 Best Shrimp Recipes
Did You Make Any of These Quick Chicken Recipes?
Please leave a comment and rating below, and let me know what you thought of this round up of quick and easy chicken recipes. Be sure to snap a picture and tag me on Instagram @aheadofthyme or share it on the Pinterest pin so that I can follow along.
HUNGRY FOR MORE? Don't forget to sign up for my email newsletter so that you don't miss any recipes. You can also follow along on Instagram and Pinterest for more recipe updates.
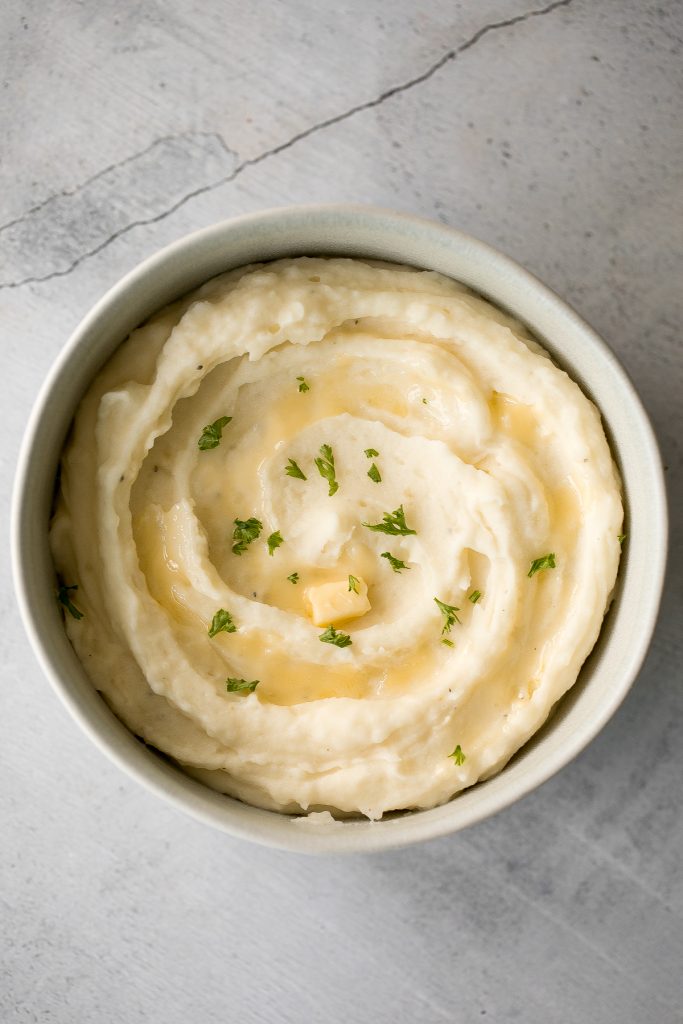
The Best and Creamiest Mashed Potatoes
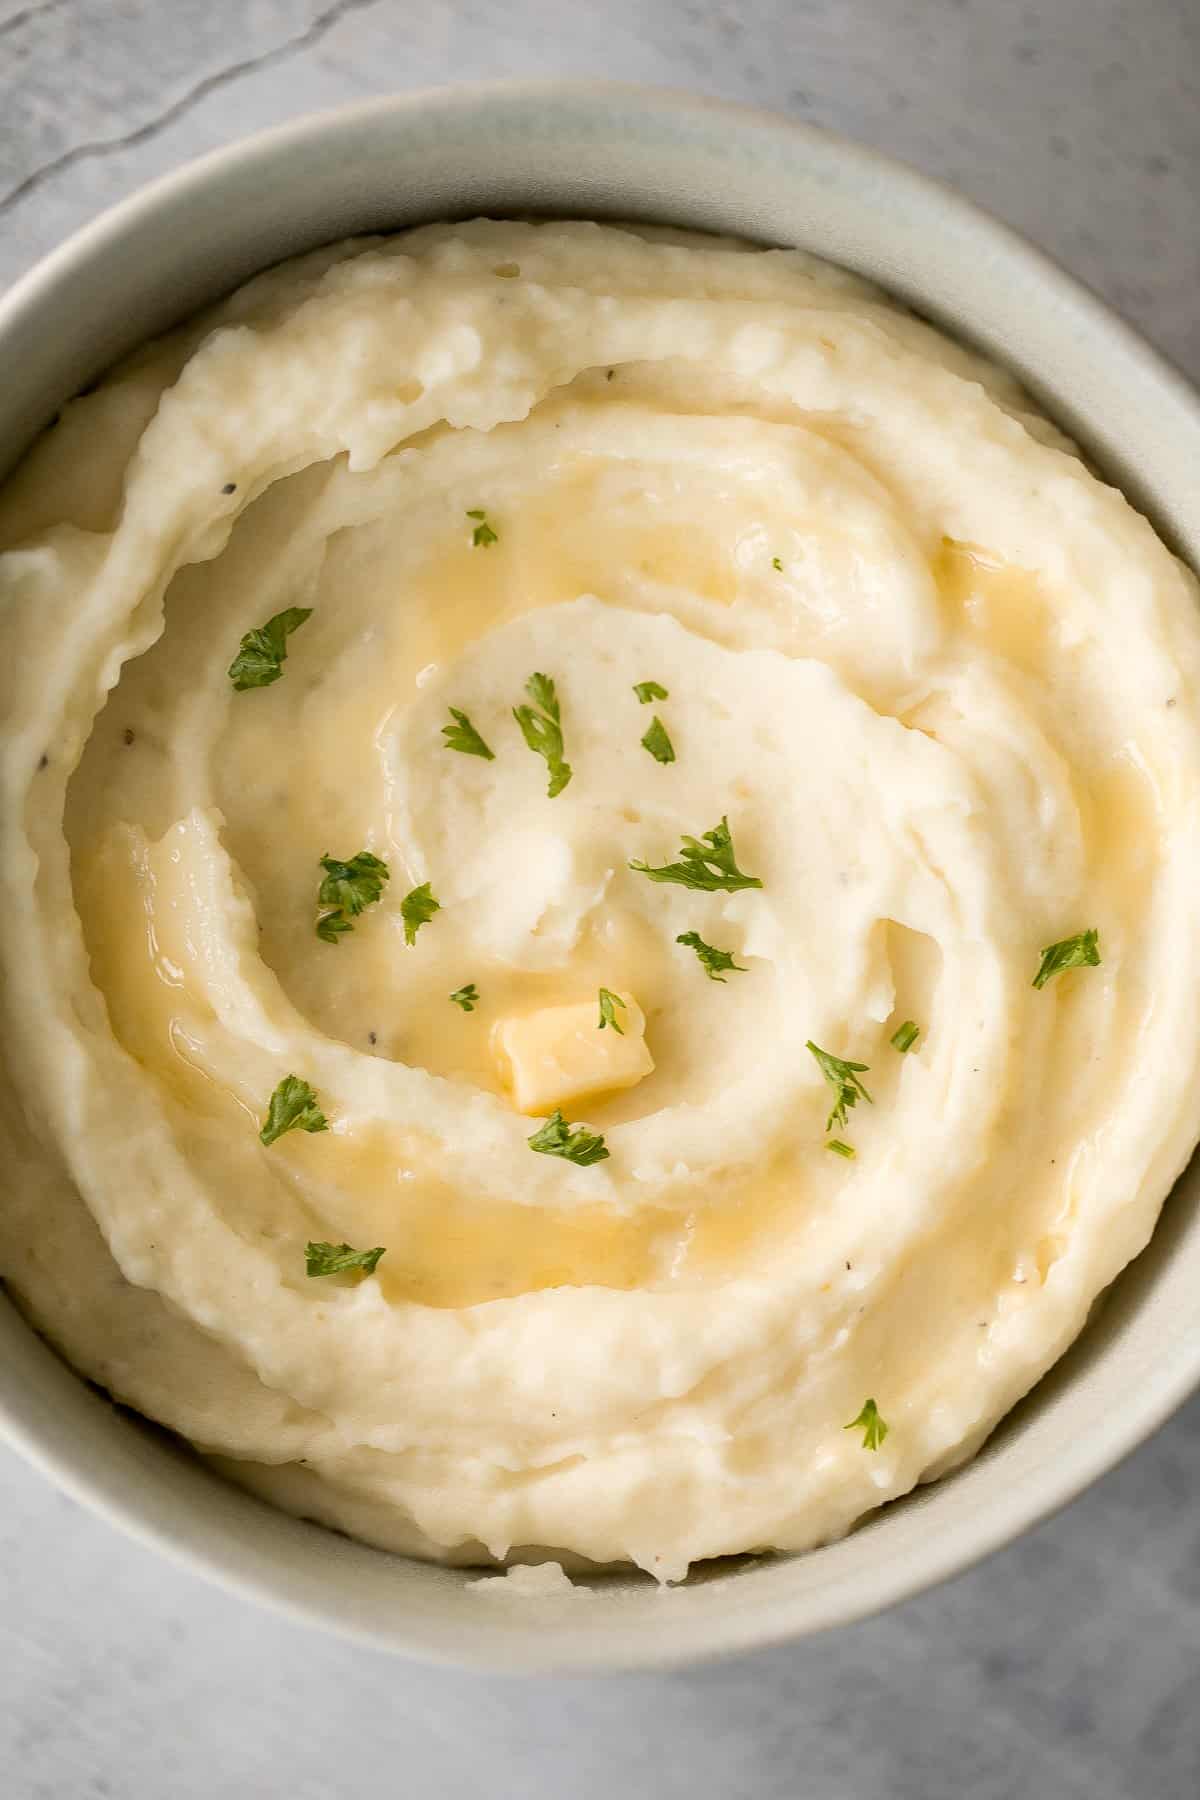
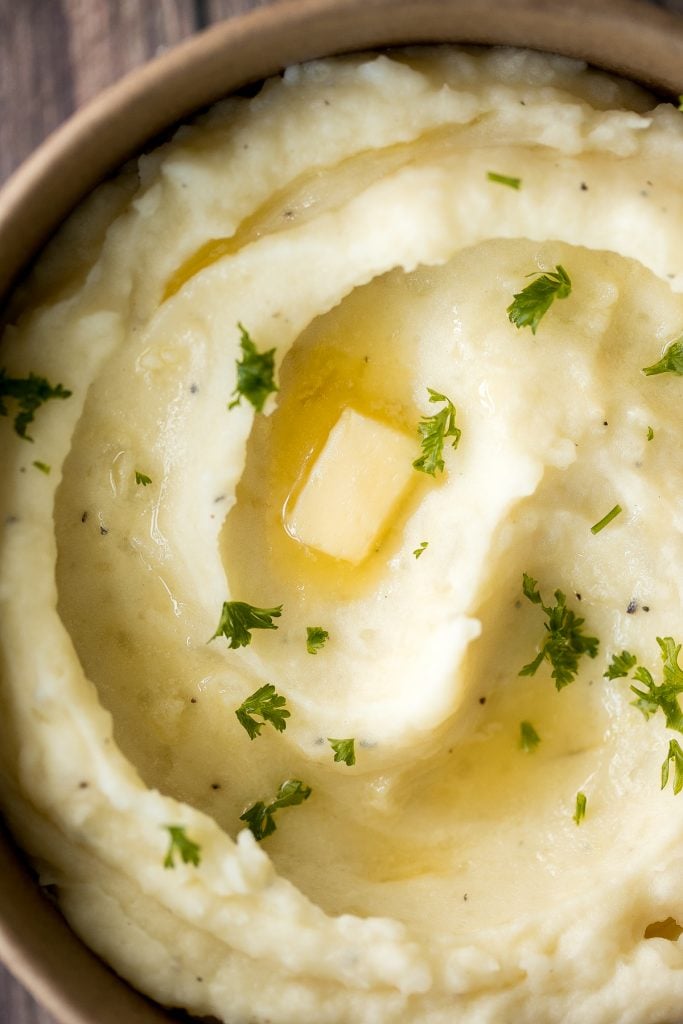
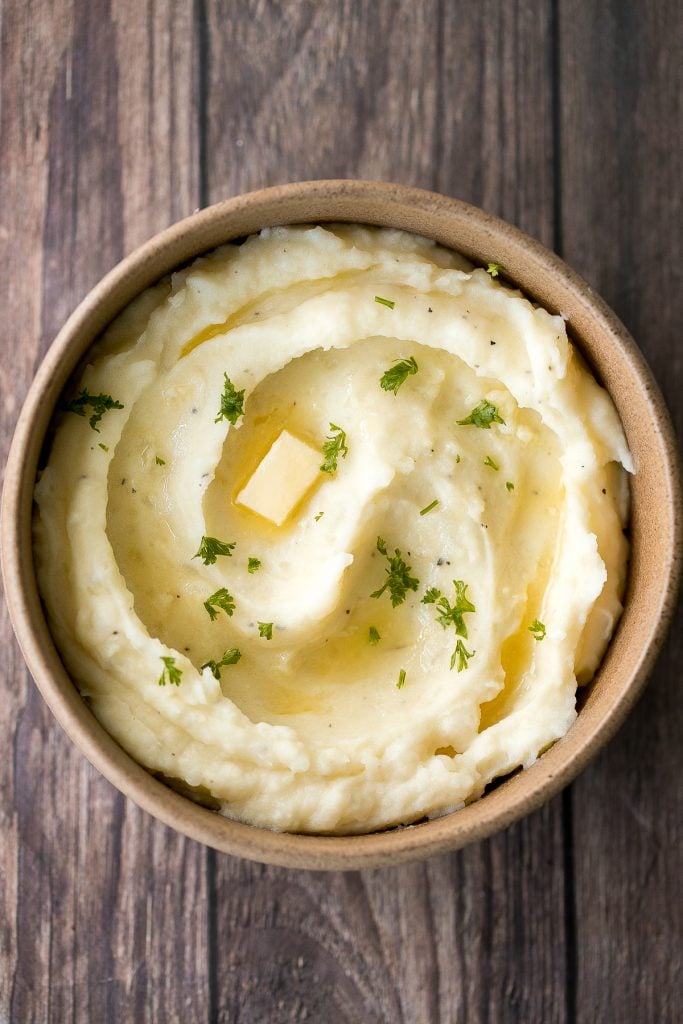
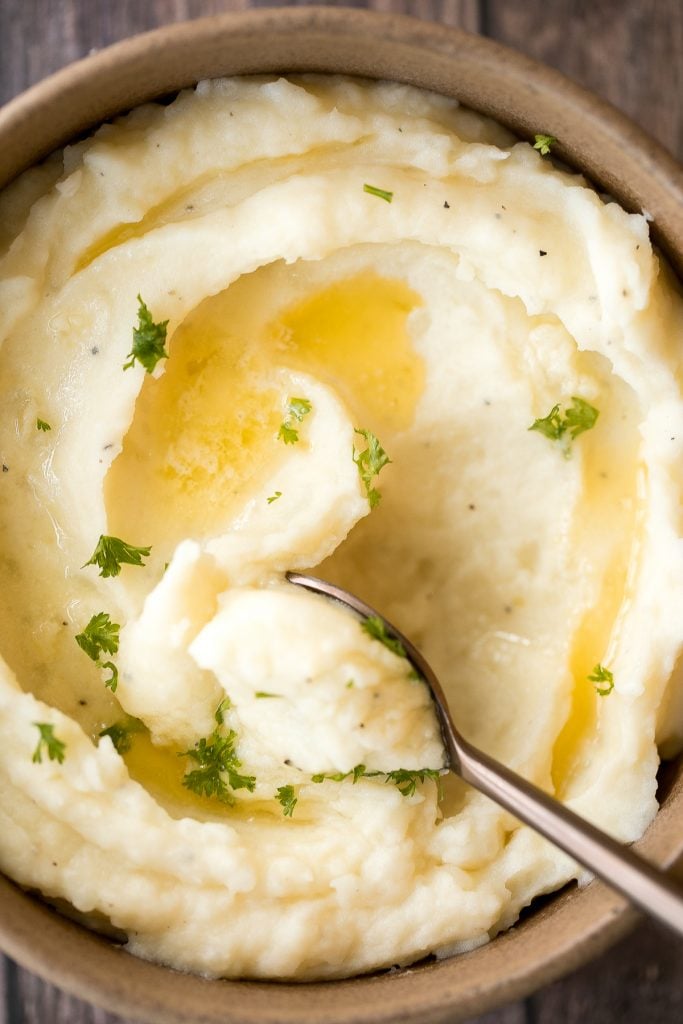
Creamy, buttery, and delicious, this is the best and creamiest mashed potatoes recipe you will ever find. It has the most velvety and smooth texture that literally melts in your mouth. The best part? It's so easy to make in under 30 minutes.
Ingredients and Substitutions
To make the best and creamiest mashed potatoes, you will need the following ingredients (full quantities in recipe card below):
- potatoes - I would recommend Yukon gold or russet potatoes, or a combination of the two. They make for the creamiest potatoes when mashed.
- butter - I used unsalted butter. You can use salted butter but then do not add any additional salt.
- cream cheese - can be substituted with sour cream.
- half and half cream - can be substituted with whole milk, or half heavy cream and half milk.
- salt and pepper
- fresh parsley - optional, for garnish on top.
You will also need a large pot, potato masher, and a hand mixer.
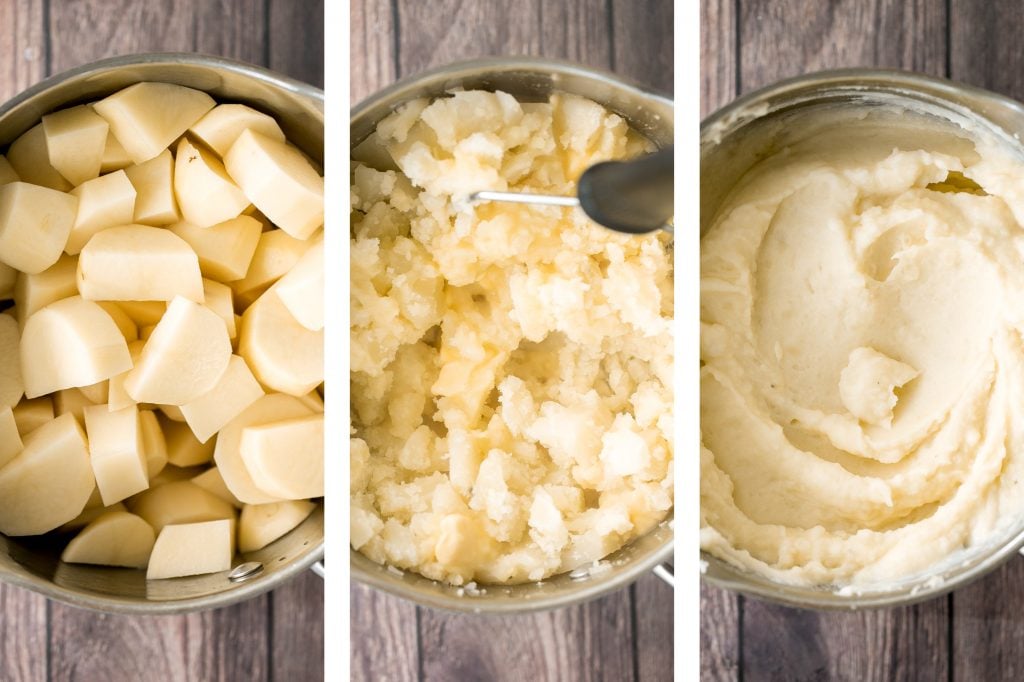
How to Make the Best and Creamiest Mashed Potatoes
- Boil the potatoes. Place potatoes in a large pot and cover with salted water to cover potatoes by about an inch. Heat over high heat and bring to a boil. Reduce heat to low, cover, and simmer for 15-20 minutes, until potatoes are soft when you insert a fork.
- Drain and mash. Drain potatoes and place back in the pot. Use a potato masher (or a fork) to mash the potatoes.
- Add remaining ingredients. Add in the butter and cream cheese and use an electric hand mixer to mix until melted and incorporated into the potatoes. Slowly add in the cream and continue to whisk with the electric mixer. Add salt and pepper.
- Serve. Remove from heat and transfer to a serving dish, garnish with parsley, extra butter and serve warm.
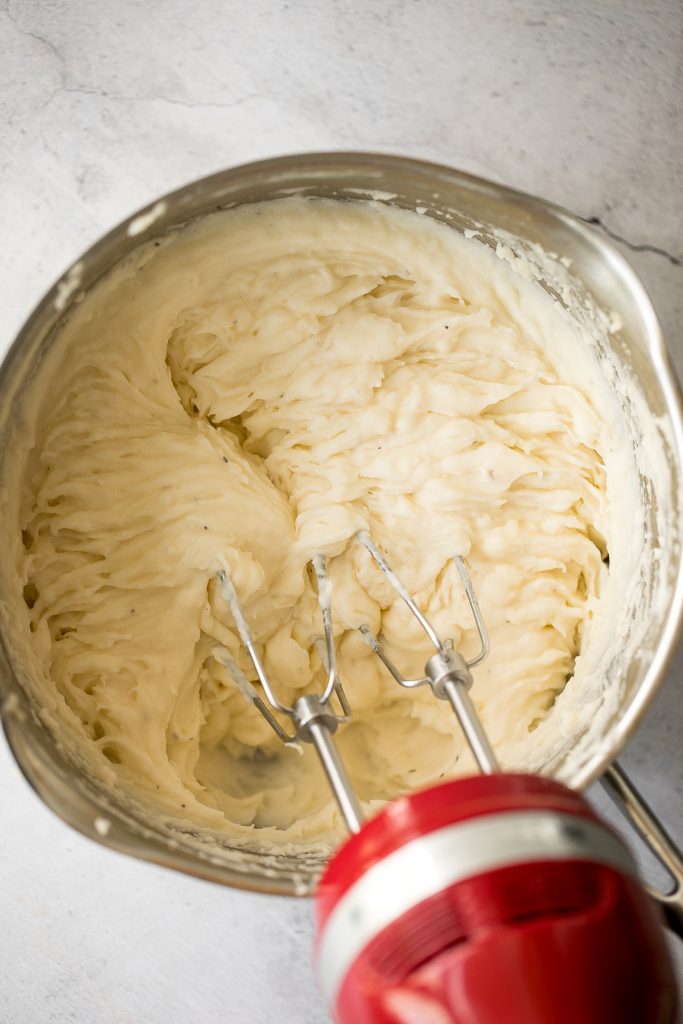
Tips for Making Creamy Mashed Potatoes
The secret to getting super smooth and fluffy mashed potatoes are:- Peel and chop the potatoes into small pieces. Peeling and chopping the potatoes into 1-inch pieces ensures that they are cooked evenly and therefore, soft and tender throughout.
- Use an electric mixer. First, mash the potatoes and then mix all the ingredients together with an electric hand mixer. The result is smoother, velvetier mashed potatoes.
- Don't hold back on the dairy. You don't want to skip out on the butter, cream or cream cheese. These ingredients help make this dish even smoother and creamier. It may not be the healthiest dish, but it is all around comfort food and so delicious. (If you are looking a healthier, no cream option, try my healthy mashed potatoes).
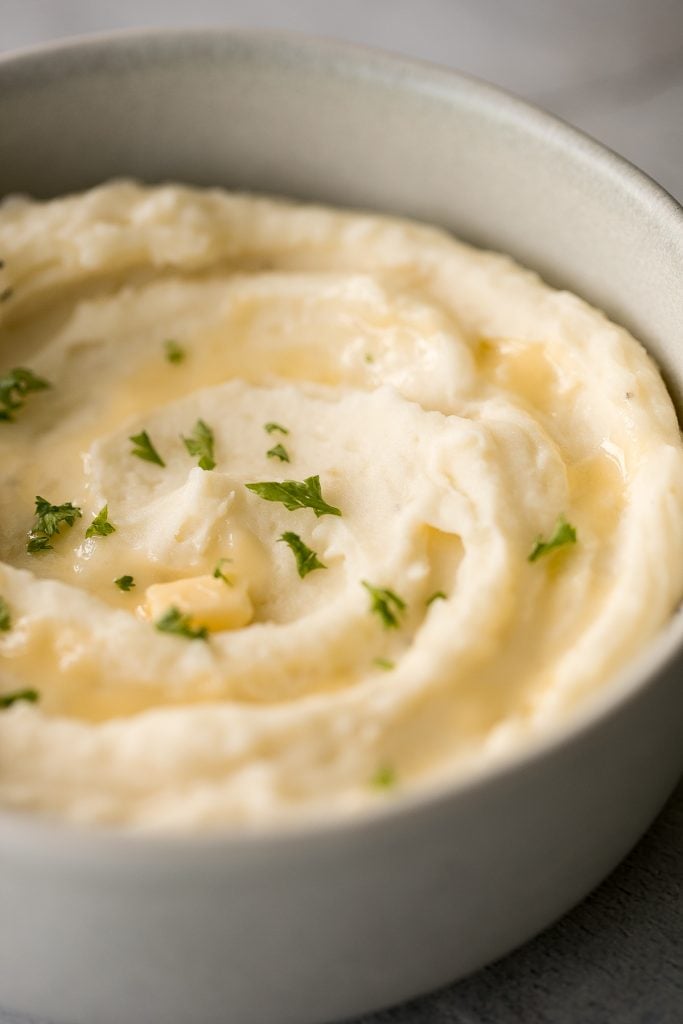
How to Serve Mashed Potatoes
Creamy mashed potatoes are the perfect side dish to pretty much any meal that you can think of. I like to pair it with roast chicken, steak, lamb chops, or turkey. And let's not forget it's spot on the Thanksgiving dinner table. Some of my other favourite sides to serve during the holidays are garlic green beans, roasted butternut squash, and sweet potato casserole.
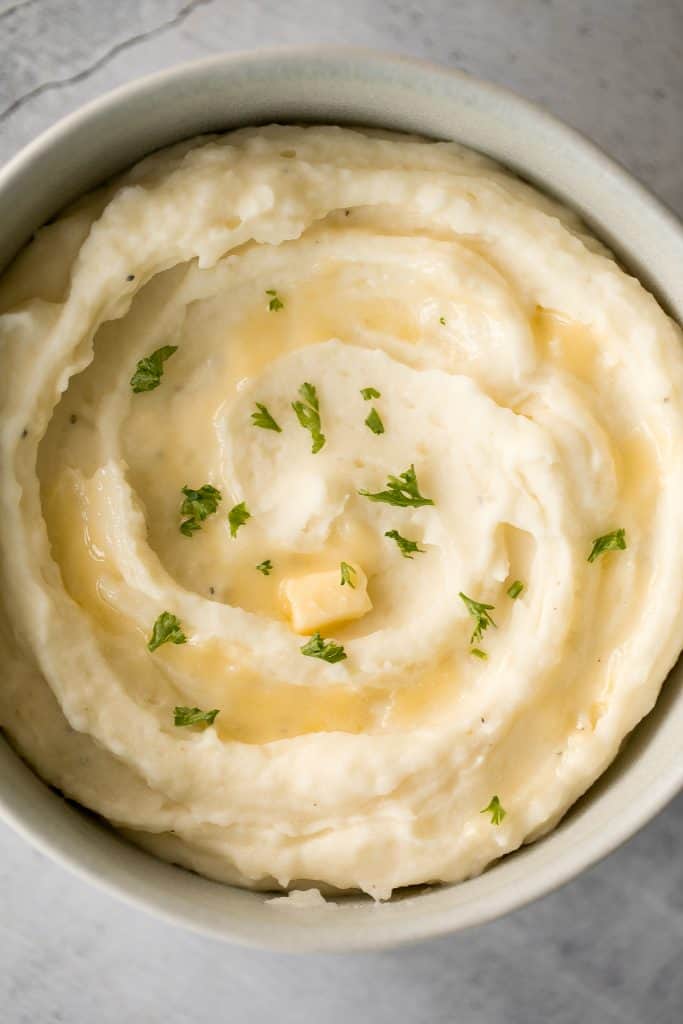
How to Make Ahead and Store
Preparing dinner, especially during the holidays, is super stressful, but thankfully making mashed potatoes isn't. This recipe is quick, easy and can be prepared up to 3 days ahead. If making it ahead, I would recommend leaving out the butter. Then, store in an airtight container in the refrigerator and reheat on the stove or microwave. Add the butter and serve. No one will know the difference.
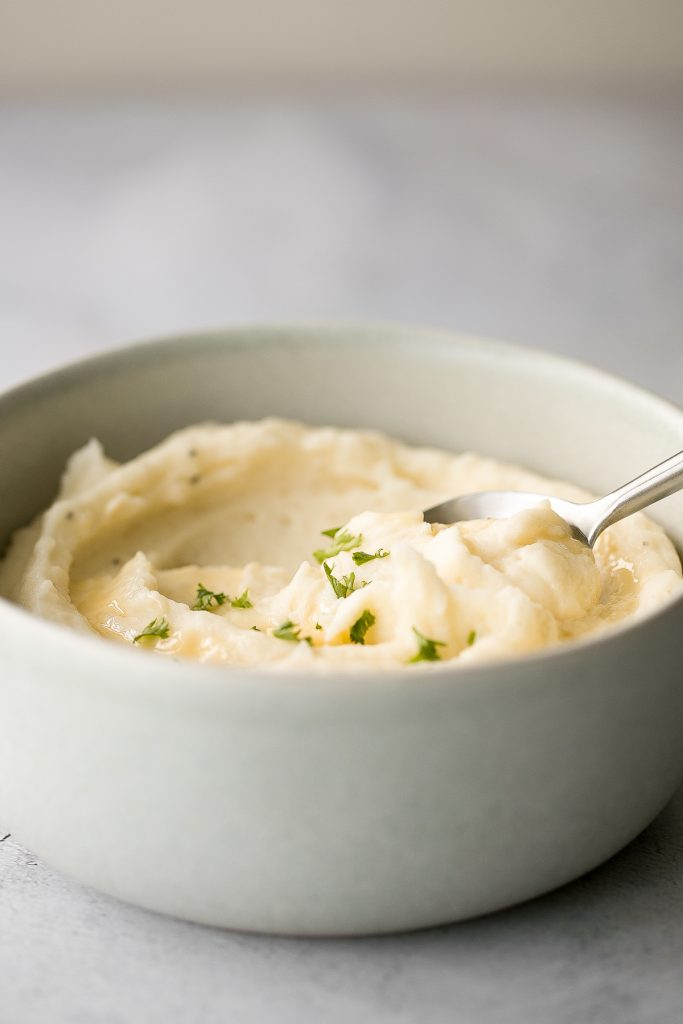
More Potato Recipes
- 40 Best Potato Recipes
- Creamy Potatoes Au Gratin
- Hasselback Potatoes with Garlic Herb Butter
- Crispy Air Fryer French Fries
- Savoury Mashed Sweet Potatoes
- Slow Cooker Loaded Baked Potato Soup
Tried this recipe?
I'd love to hear what you think! Leave a comment and rating below to share your feedback. Your reviews help others discover this recipe and help me keep creating more free recipes for you. Snap a photo and tag me on social media @aheadofthyme too.
This recipe was originally posted in October 2017. It has been completely updated with new photos and tips.

Sheet Pan Curry Chicken and Vegetables

Looking for a quick and easy weeknight dinner that is packed with flavour? Sheet pan curry chicken and vegetables is the answer that you are looking for. This sheet pan meal is made with flavourful, succulent and tender chicken thighs marinated in a delicious curry marinade with potatoes and carrots for a complete one pan chicken dinner. Plus, if you marinade the chicken in advance, you just need to to wait 30 minutes for dinner to be ready. Truly amazing.
It is no surprise that sheet pan dinners has become one of our go to dinner options. They are so quick and easy to put together, and usually means less dishes to clean up after. It's also a great because it is so customizable with whatever vegetables that you have on hand. Some of my other favourite sheet pan meals are sheet pan balsamic chicken and vegetables and sheet pan garlic roasted chicken and baby potatoes. These recipes usually take less than 45 minutes to prep and cook. The easiest weeknight dinners ever.
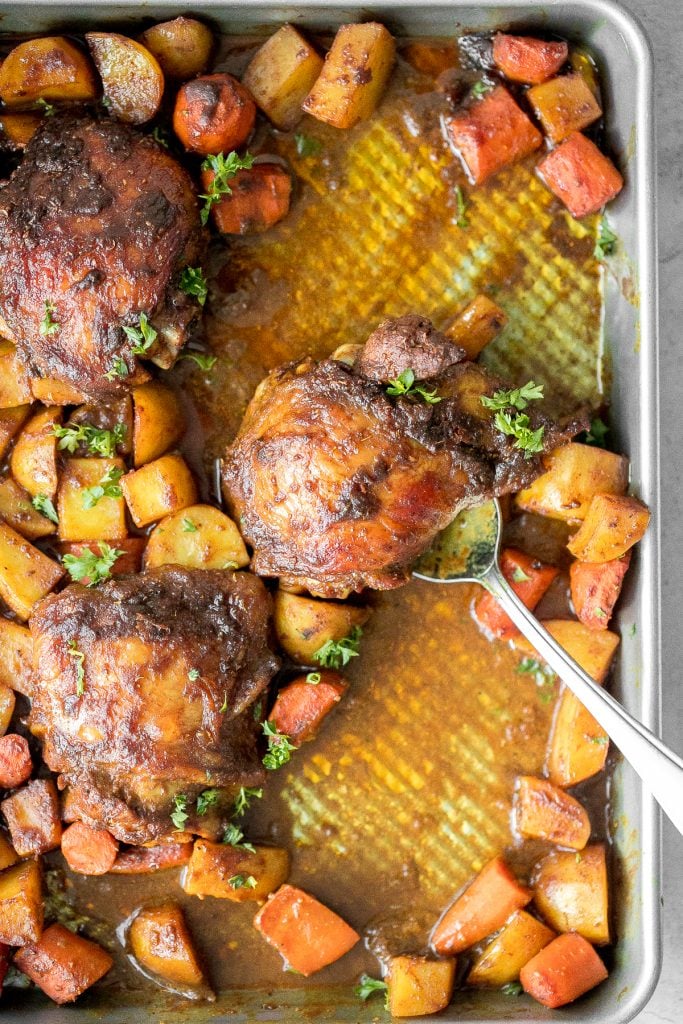
Ingredients
- chicken thighs - 4 skin-on, bone-in chicken thighs.
- chicken marinade - soy sauce, vegetable oil, paprika, yellow curry powder, cumin powder, balsamic vinegar, brown sugar, salt and pepper.
- potatoes - chopped into 1-inch cubes.
- carrots - chopped into 1-inch pieces.
- fresh parsley - for garnish on top.
You will also need measuring spoons, large mixing bowl, and a ¼ pan baking sheet.
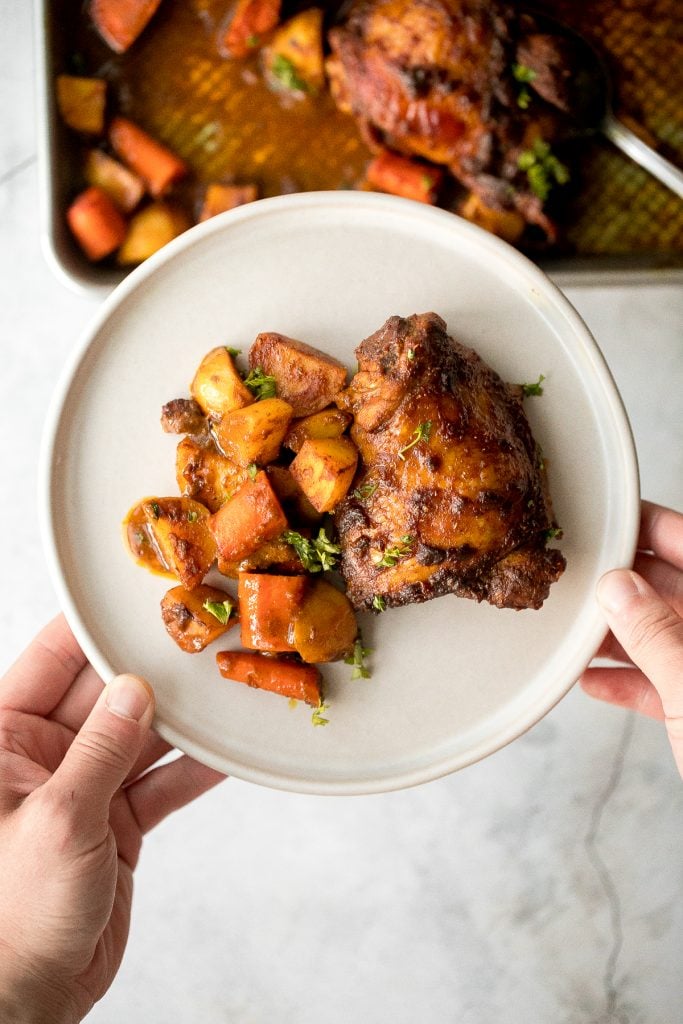
How to Make the Best Sheet Pan Curry Chicken and Vegetables
First, marinate the chicken thighs in a large large bowl with a simple and delicious curry marinade made with soy sauce, vegetable oil, paprika, yellow curry powder, cumin, balsamic vinegar, brown sugar, salt and pepper. Combine well to coat the chicken. Add in potatoes and carrots and toss to coat. Cover with cling wrap and place in the refrigerator to marinate for at least 1 hour up to overnight.
Next, preheat the oven to 400 F and arrange the chicken thighs (skin side up), potatoes, and carrots in a single layer on a ¼ pan baking sheet and bake for 30 minutes, until the skin is crispy and the internal temperature for the chicken reaches 165 F. Optionally, turn the broiler on high and broil for 2-3 minutes at the end. Broiling will make the skin extra crispy and golden brown.
Serve on its own or with a side of Basmati rice, and drizzle extra pan dippings on top with parsley.
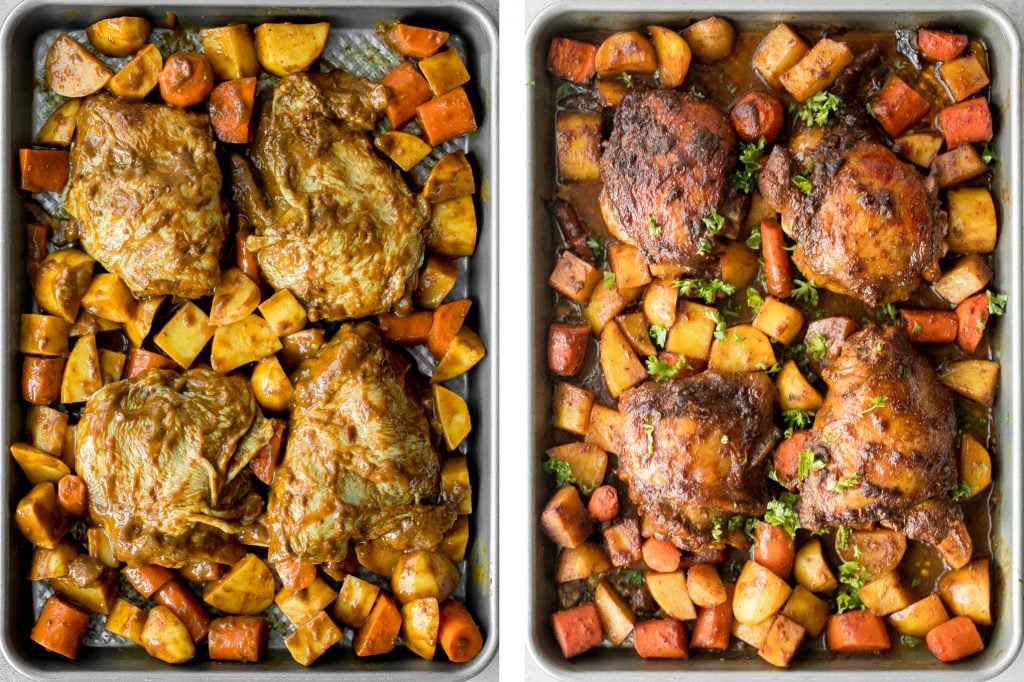
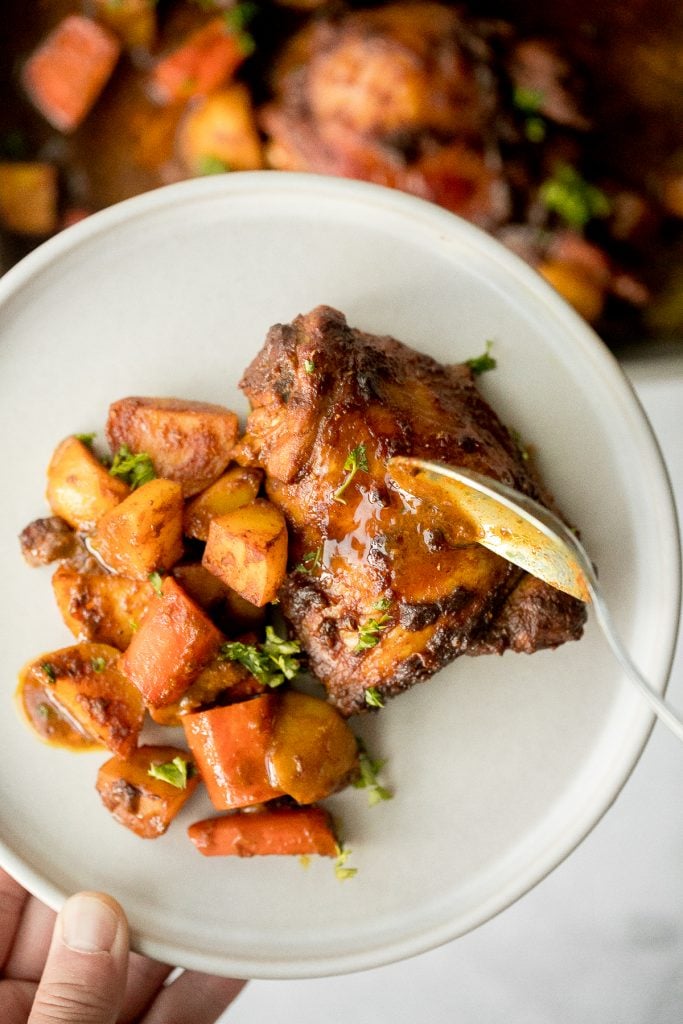
Sheet Pan Curry Chicken Tips
- How to customize: This is such an easy recipe to customize. That curry flavour goes with any vegetable so you can add in whatever you have on hand. Some of my favourites to add are cauliflower, broccoli, and sweet potatoes.
- How to store: Transfer any leftovers to an airtight container with the juices from the pan. Refrigerate for up to 4 days. To reheat, place in the microwave, air fryer at 300F for 5 minutes, or in the oven at 300F for 10 minutes.
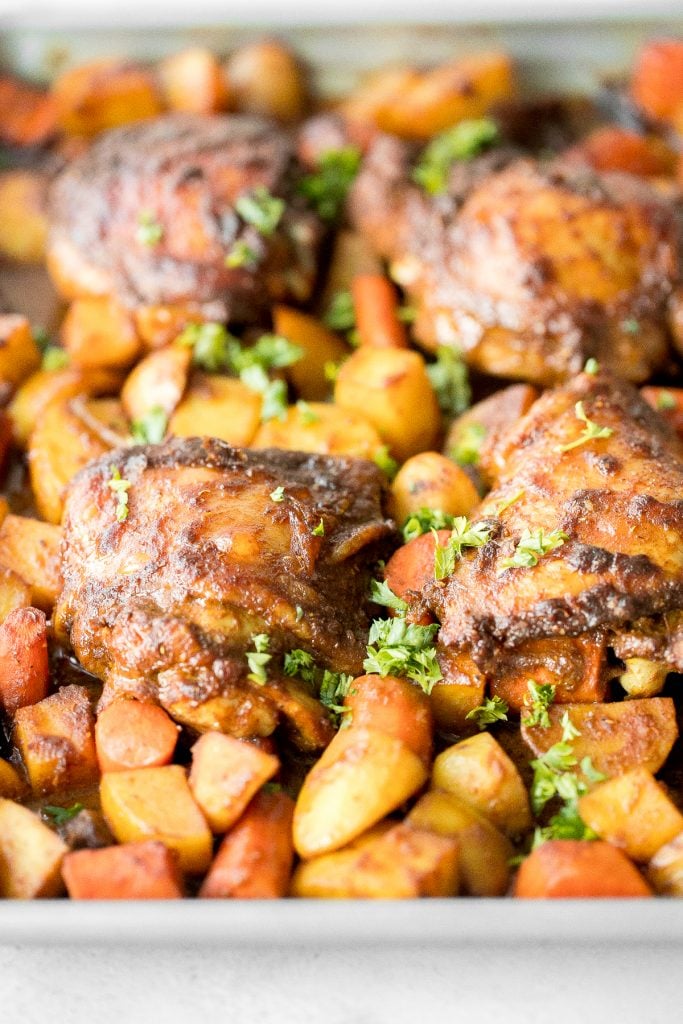
More Sheet Pan Recipes
- Sheet Pan Balsamic Chicken and Vegetables
- Sheet Pan Soy Glazed Chicken Thighs
- Tandoori Chicken Sheet Pan Dinner
- Sheet Pan Chicken Fajitas
- Sheet Pan Miso Salmon with Bok Choy
Tried this recipe?
I'd love to hear what you think! Leave a comment and rating below to share your feedback. Your reviews help others discover this recipe and help me keep creating more free recipes for you. Snap a photo and tag me on social media @aheadofthyme too.

Baked Maple Salmon
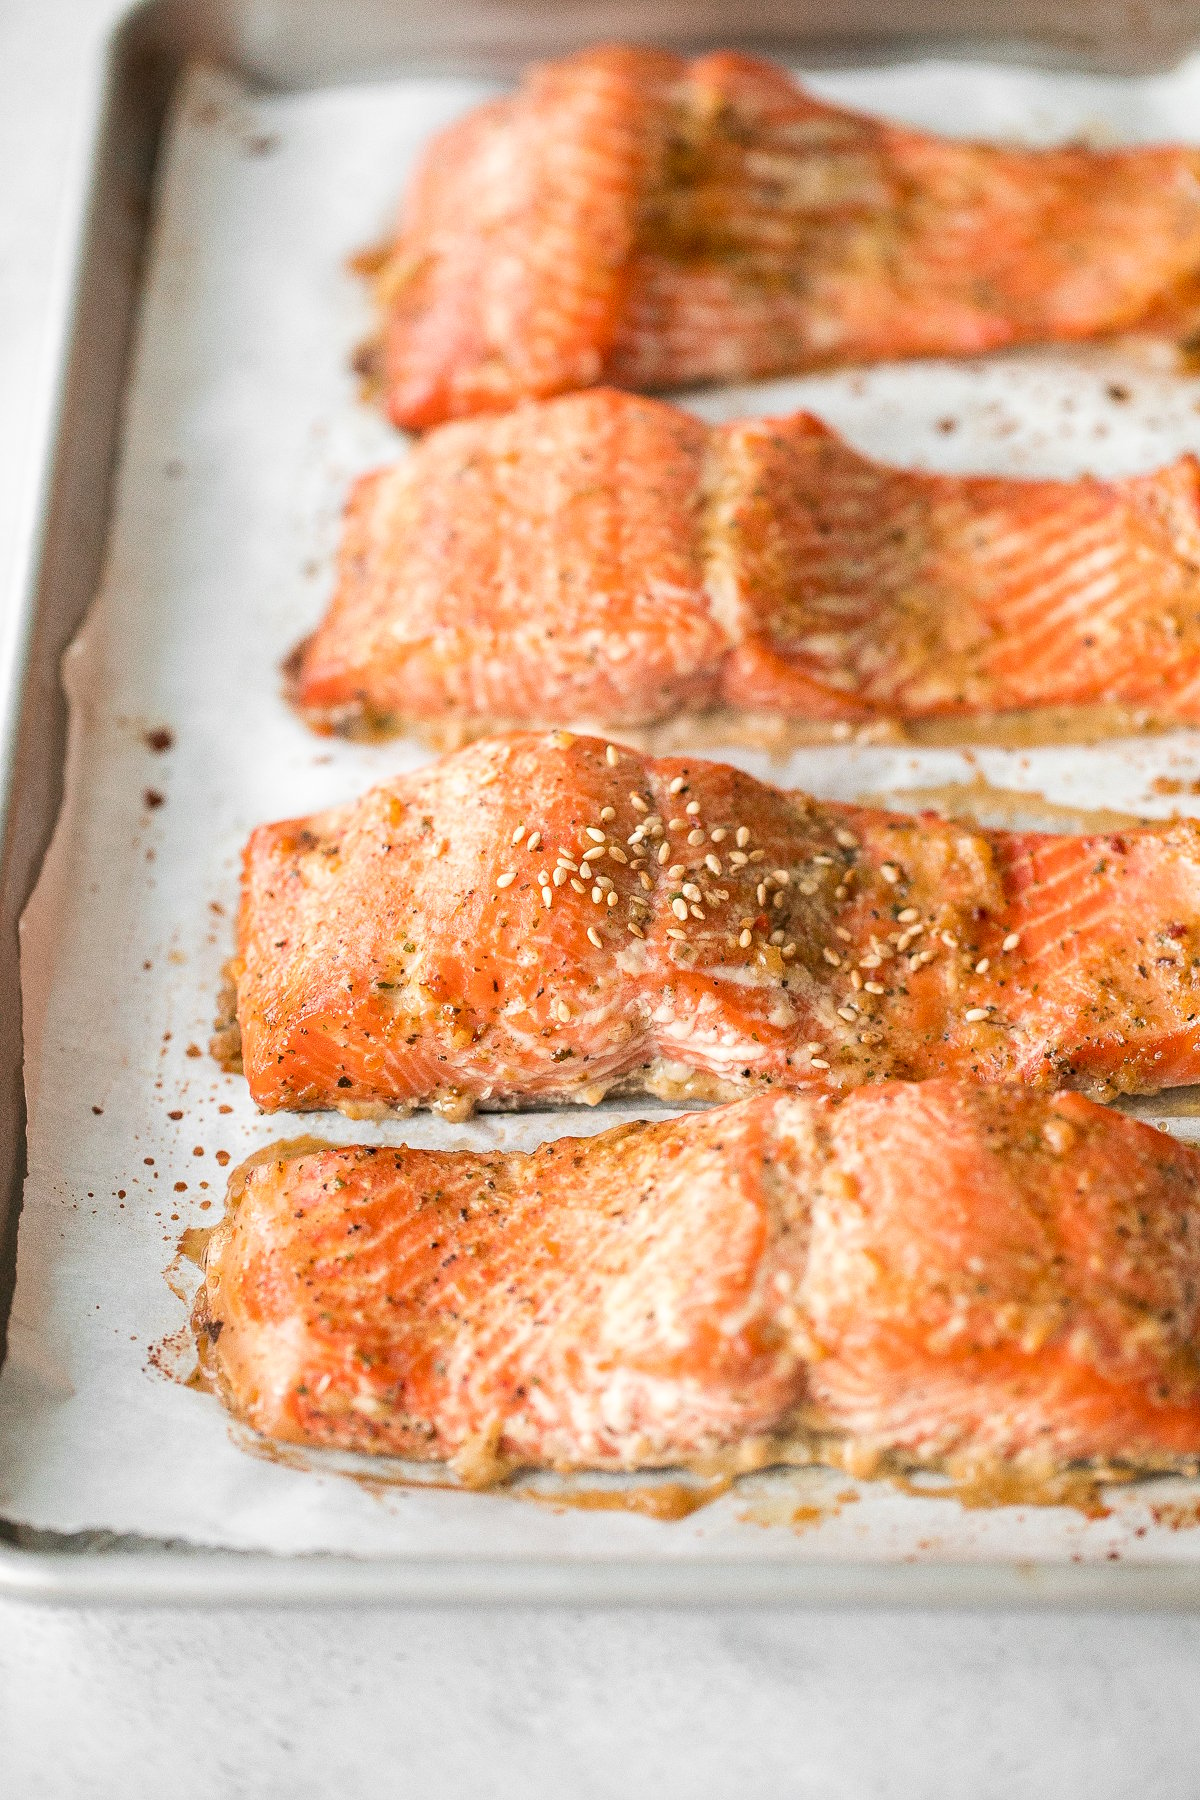
Quick and easy baked maple salmon with just a handful of ingredients might just become your newest favourite weeknight dinner. This go-to salmon is so delicious, flaky, and flavourful. It has the perfect balance between sweet and savoury with a delicious maple glaze. Make it in just 20 minutes.

It's currently peak salmon season here in BC, Canada, which means lots of fresh wild salmon available in the grocery stores. This is probably my favourite time of the year when it comes to food. I mean, why not thrown in some healthy baked salmon to balance out all the comfort foods we have been indulging on lately.
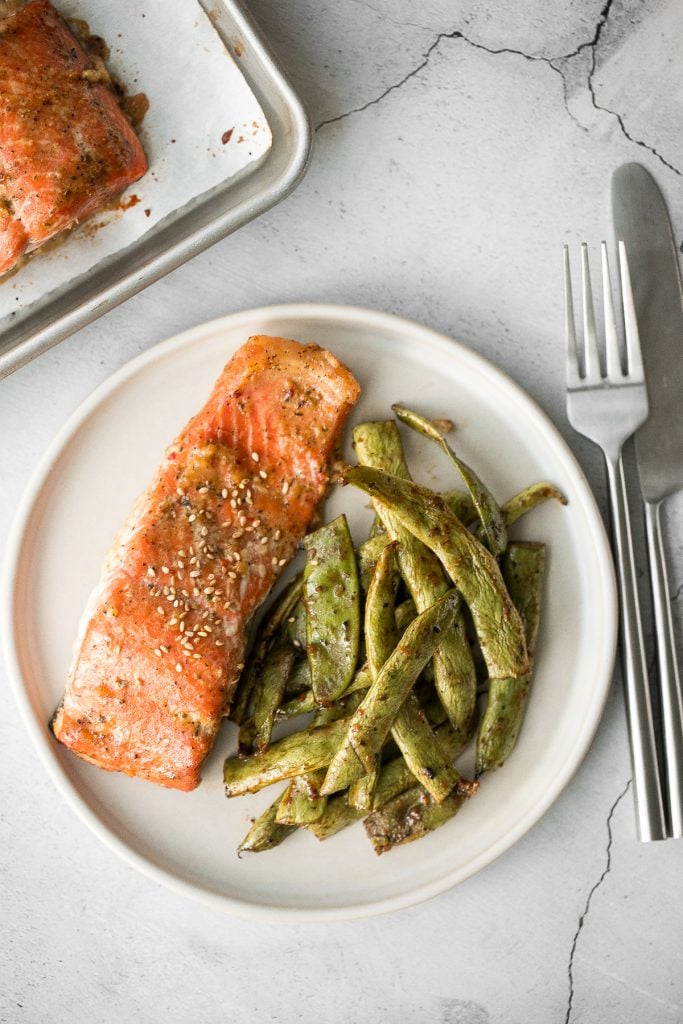
Ingredients
Here is the few simple ingredients that you will need to make this delicious baked maple salmon.
- salmon fillet
- maple syrup
- soy sauce
- olive oil
- garlic
- Italian seasoning
- black pepper
- sesame seeds - optional, for serving
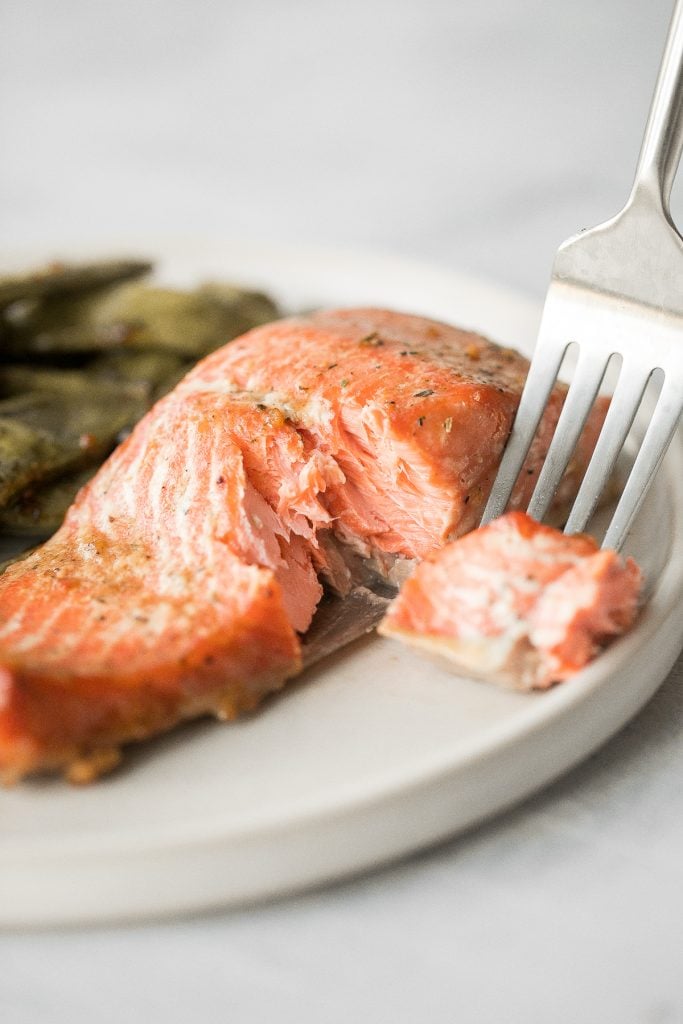
How to Make the Best Baked Maple Salmon
First, marinate the salmon. In a small bowl, whisk together maple syrup, soy sauce, olive oil, garlic, Italian seasoning, and black pepper. Place salmon fillets into a medium container and pour the maple syrup mixture on top to fully coat. Cover and place in the refrigerator and marinate for at least 30 minutes or overnight. (You can also marinate the salmon in a large ziploc back. Add in all ingredients and then press the air out of the bag and seal tightly. Press the marinade around the salmon to coat).
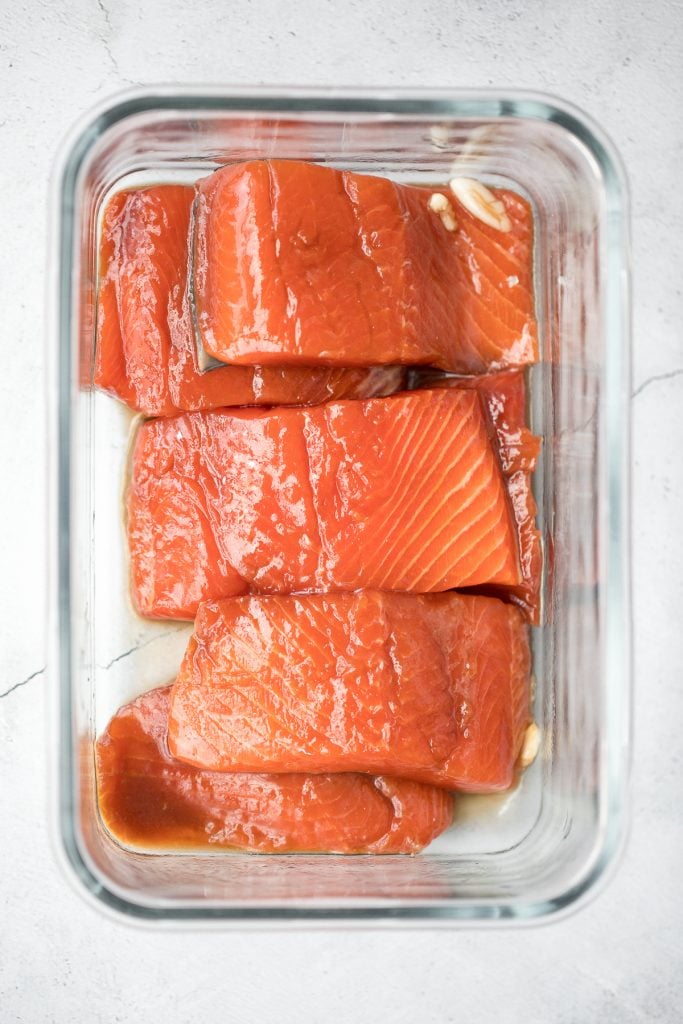
Then, bake the salmon. Remove the marinated salmon fillets out of the container and place them skin side down on a parchment lined baking sheet. Keep the marinade sauce to brush on later. Bake in a preheated 400F oven for 20 minutes, until cooked through and flaky. Brush the reserved marinade over the salmon halfway through baking for extra flavour.
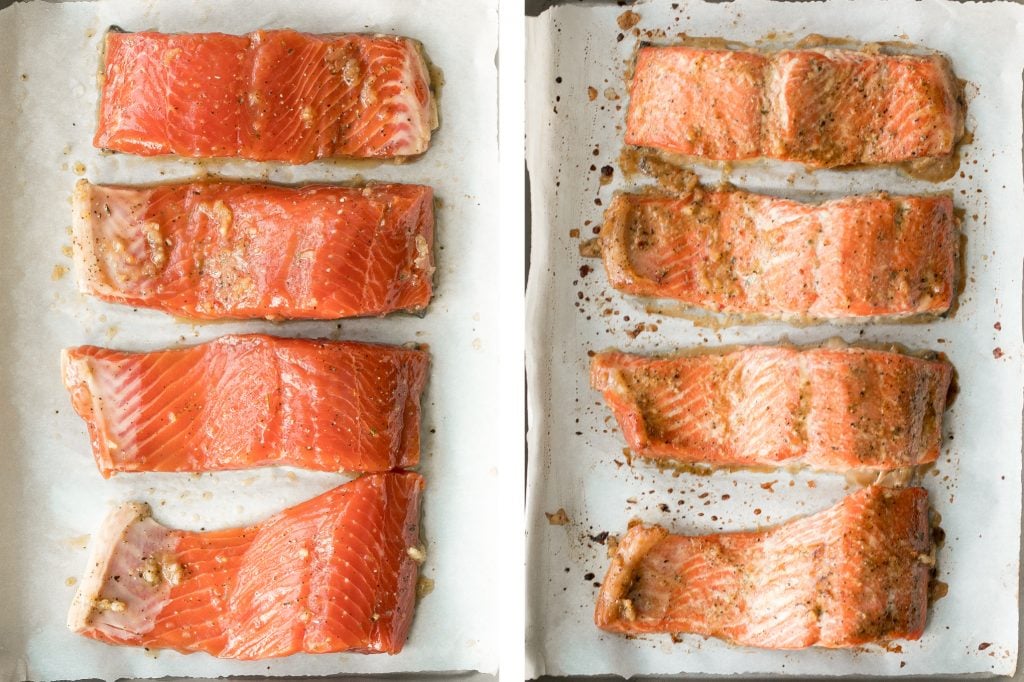
Transfer the salmon fillets onto a plate and let rest for 5 minutes. Sprinkle some sesame seeds on top (optional) and serve warm over steamed rice or some creamy mashed potatoes.
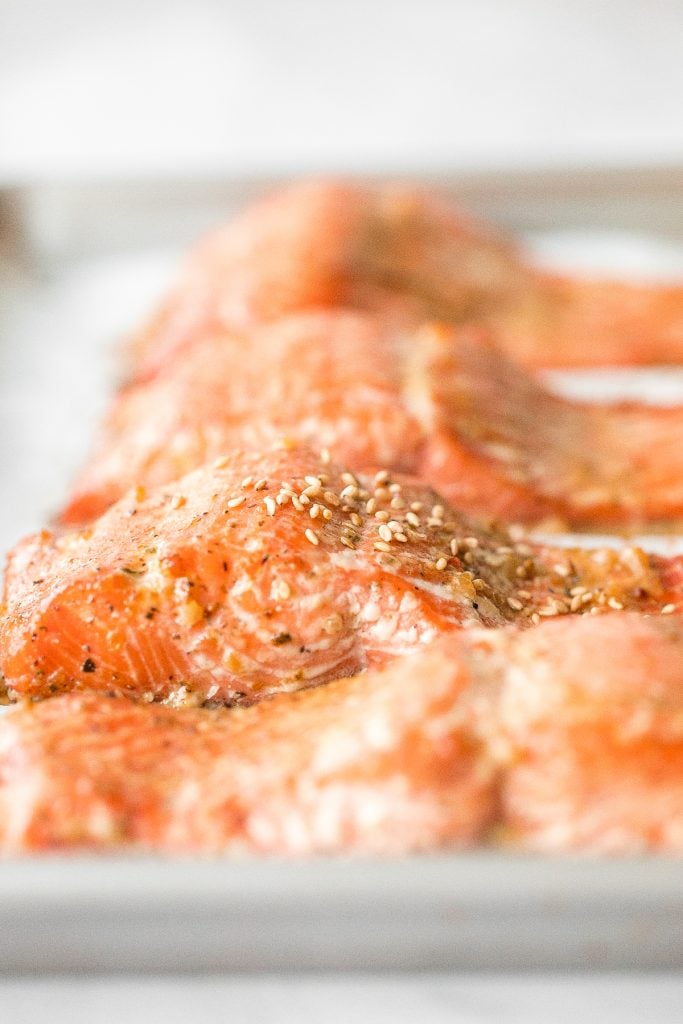
Other Ways to Cook Salmon
You can also cook this salmon in the air fryer or on the grill:
- How to cook salmon in the air fryer: Cook at 400 F for 10 minutes.
- How to cook salmon on the grill: Lightly brush some oil over a grill pan or use cooking oil spray. Preheat grill to medium high heat for 5 minutes. Place the salmon, skin-side up on the grill, at an angle across the ridges of the pan. Cook for 3 minutes until the fillet has distinctive grill marks. Turn the fillets 45 degrees and cook for another 2 minutes. Flip the salmon over and cook for another 5 minutes. If you want it well-done, cook for 7 minutes total on each side.
Tips for Serving and Storing Baked Maple Salmon
- How to serve. Serve baked maple salmon over steamed rice or some creamy mashed potatoes and a side of vegetables (garlic green beans, roasted asparagus or herb-roasted carrots are my favourites). You could also assemble it in an Asian rice bowl with corn, avocado, greens, cucumber, roe, and seaweed.
- How to store: Store in an airtight container in the refrigerator for up to 3 days.
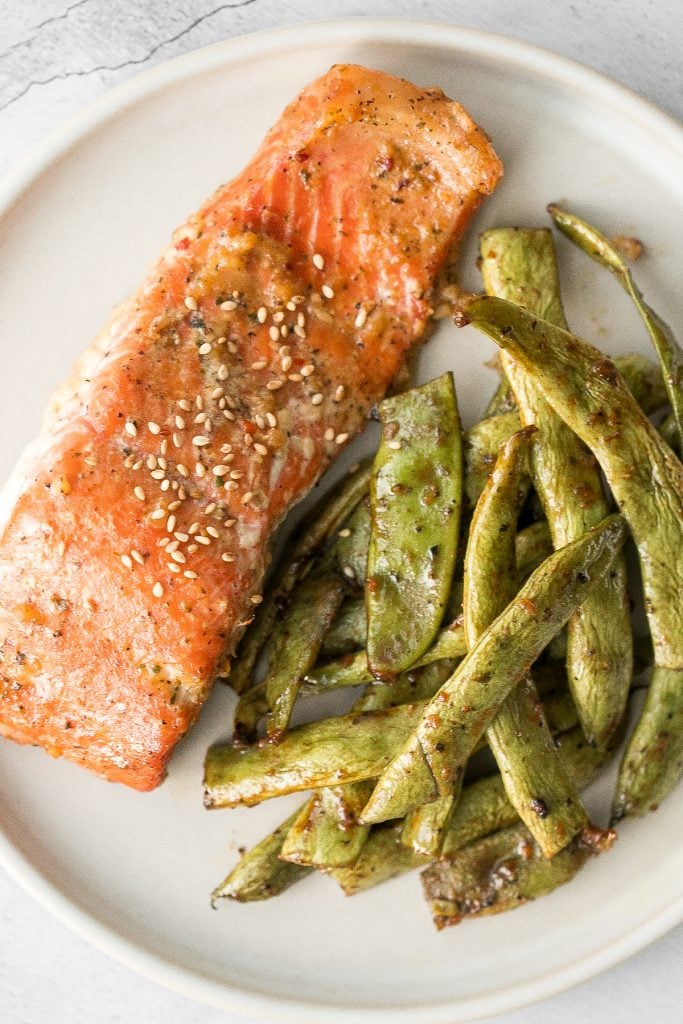
More Fish Recipes
- Grilled Teriyaki Salmon Rice Bowl
- Sheet Pan Miso Salmon with Bok Choy
- Black Cod with Black Bean Sauce
- Pistachio-Crusted Salmon
- Almond-Crusted Halibut with Lemon Garlic Butter
Tried this recipe?
I'd love to hear what you think! Leave a comment and rating below to share your feedback. Your reviews help others discover this recipe and help me keep creating more free recipes for you. Snap a photo and tag me on social media @aheadofthyme too.
Slow Cooker Whole Chicken

Easy slow cooker whole chicken is the easiest way to cook a whole rotisserie chicken with just a few minutes of prep. It is so soft and tender and the meat literally falls off the bone. This chicken is packed with flavour that is enhanced with balsamic vinegar and a simple seasoning blend. Plus, throw in some potatoes and carrots to soak up all the delicious chicken juices in this complete one pot meal.
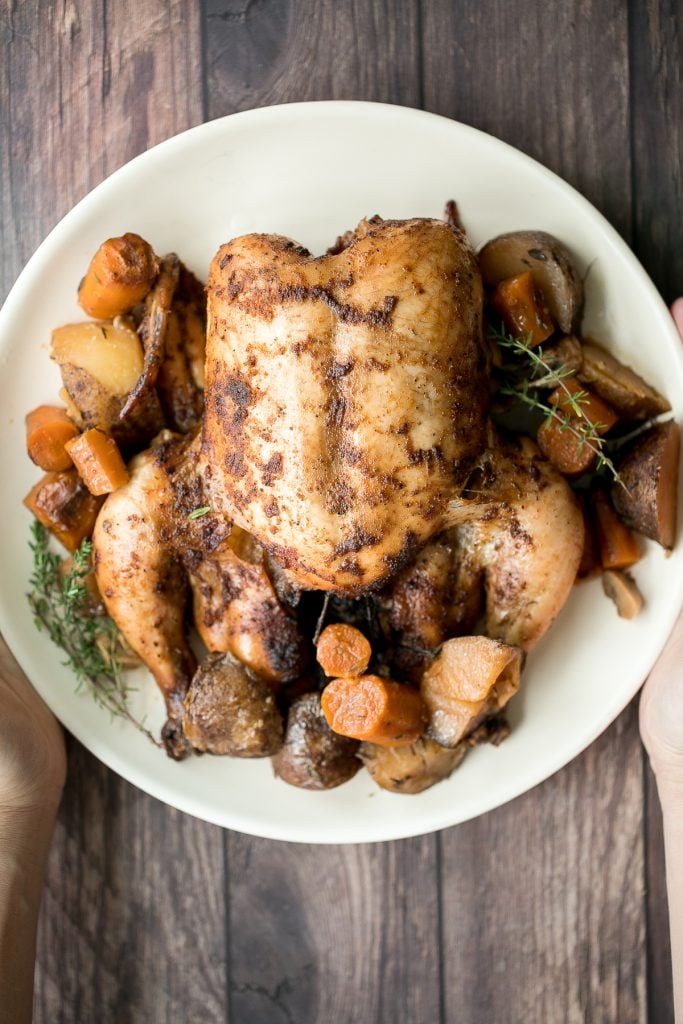
We have been really into making whole chickens this year. Remember our delicious dutch oven whole roast chicken and a roasted spatchcock chicken (butterflied chicken). And now, we have added a slow cooker chicken to the mix. The tenderness of the slow cooker chicken is truly unmatched. If you know, then you know. So it's kind of the perfect chicken to use in sandwiches and so many other recipes.
How to Use Leftover Whole Chicken
Here are some of the most popular ways to use up any leftover slow cooked rotisserie chicken:
- Add it to soups and stews. Shred the chicken and add it in lemon chicken orzo soup or in Indian butter chicken. When using leftover slow cooked chicken, it makes those recipes so much faster to make.
- Throw it in pasta. Use leftover chicken in baked pasta with chicken or add it to creamy alfredo with spinach and mushrooms.
- Top it on a salad. Add some chicken into a winter kale salad with apple cider vinaigrette or use it in a Mexican chicken caesar salad.
- Add it to pizza. Use shredded chicken as a topping in 30-minute BBQ chicken pizza or mushroom and arugula pizza.
The options are endless. You can use it in any recipe that calls for cooked chicken. Try it in BBQ chicken stuffed potatoes or butternut squash quesadillas with chicken.
Ingredients
To make this, you will need some simple ingredients:
- whole chicken - 2 to 3 lb. whole chicken with the neck and giblets removed.
- chicken seasoning - olive oil, balsamic vinegar, Worcestershire sauce (optional), brown sugar, paprika, salt and pepper.
- fresh thyme - to stuff inside the cavity.
- garlic - to stuff inside the cavity.
- onion
- potatoes
- carrots
- salt and pepper
Equipment used: slow cooker/crockpot and digital meat thermometer.
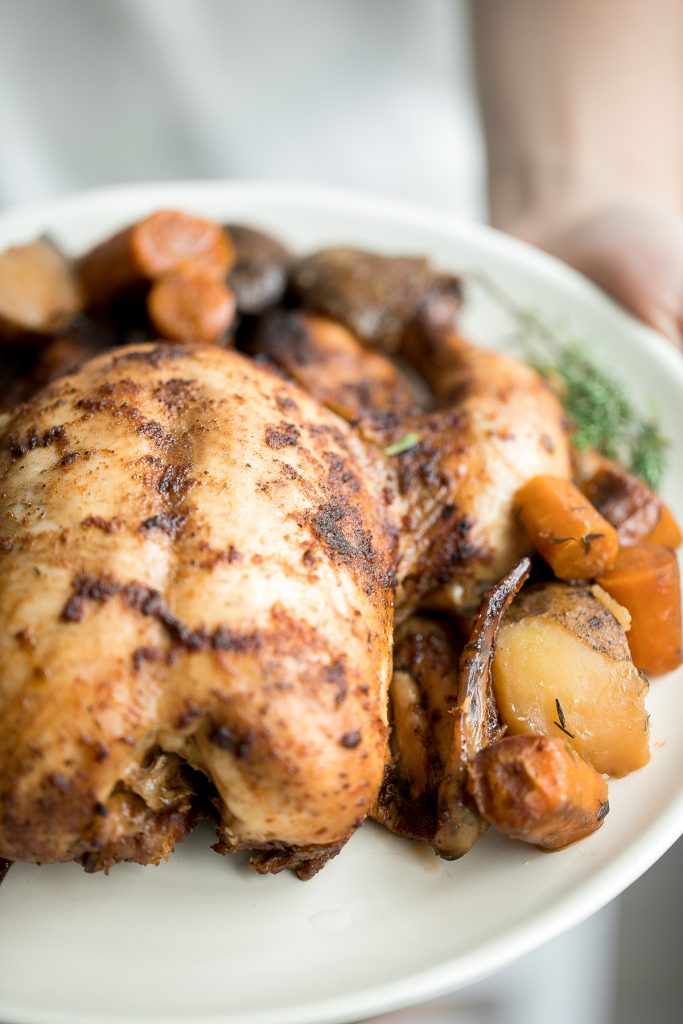
How to Make the Best Slow Cooker Balsamic Whole Chicken
First, prep the chicken. Pat dry the whole chicken with paper towel completely before adding seasoning.
In a bowl, combine all chicken seasoning ingredients and stir well into a smooth paste. Rub and spread the mixture over the entire chicken including inside the cavity. Wear disposable gloves to make it easier to clean up. Stuff the sprigs of thyme and half the garlic inside the cavity. Set the chicken aside on a plate.
Now, let's assemble everything into the slow cooker. Place the chopped onion, remaining half garlic, potatoes and carrots inside the slow cooker or crockpot and spread out evenly. Place the whole chicken on top with the breast side up.
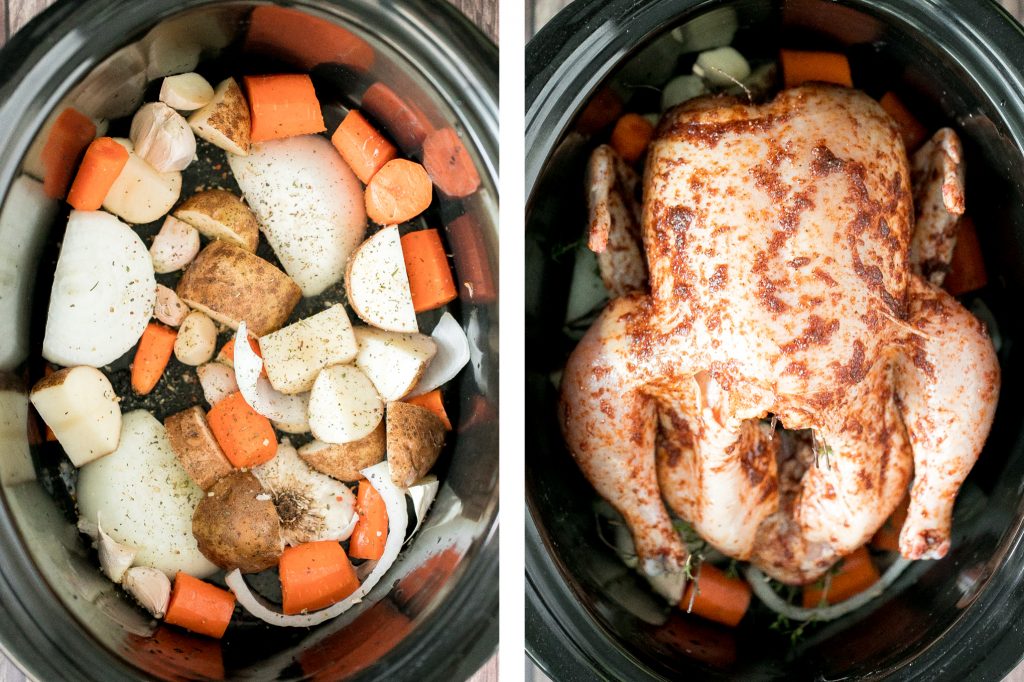
Cover and cook on low for 4 to 5 hours, or on high for 2 to 3 hours, until the internal temperature in the breast reaches 165 F as read on a digital meat thermometer. Depending on the size of the chicken and the brand of the slow cooker, the average cooking time varies between 4.5 to 6.5 hours on the low setting.
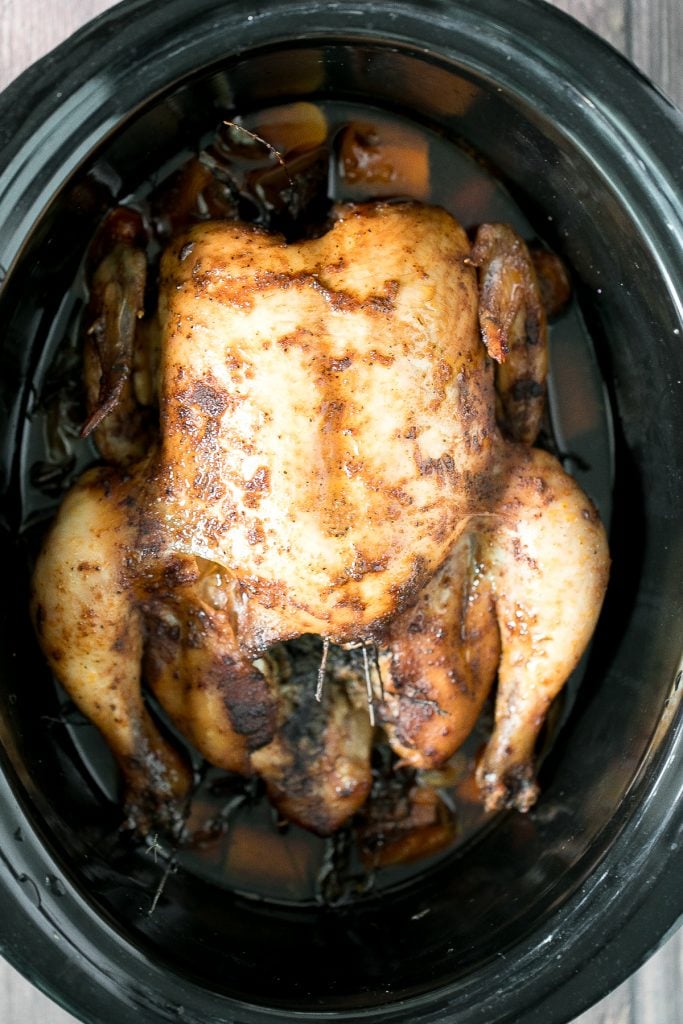
To get crispy skin, let's broil the slow cooked chicken. Carefully transfer the whole chicken with the breast side up onto a baking sheet. Note that the chicken is very soft and tender. Turn the broiler on high and broil for 3-4 minutes or until the skin turns brown and crispy.
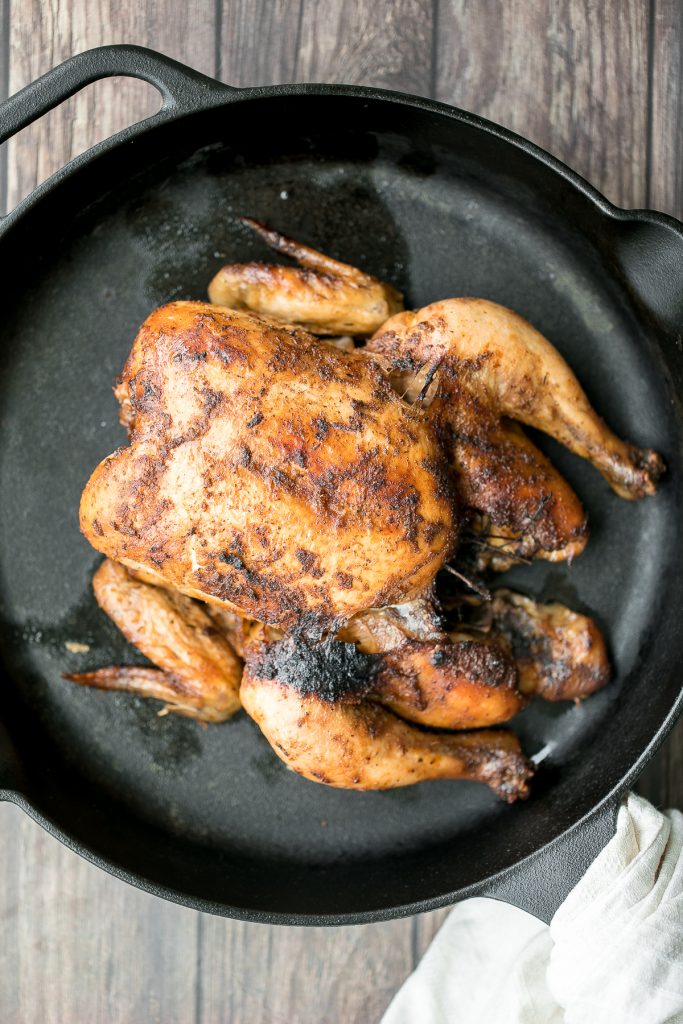
Place the chicken on a plate and let it cool for 15 minutes before slicing. Serve with the vegetables and drizzle on some drippings from the slow cooker.
Tips for Making Slow Cooker Chicken
- How to test when chicken is done: Use a digital meat thermometer so that you never end up with undercooked or overcooked chicken. Simply insert halfway inside the chicken breast to get a quick reading. Once the thermometer reads 165F, the chicken is done.
- How to get crispy skin: The secret to getting that perfect crispy skin is to broil the chicken after it's been slow cooked. This will give you soft and tender chicken meat but with crispy skin.
- How to store: Store in an airtight container for up to 4 days in the refrigerator.
How to Use Leftover Whole Chicken
The best thing about this soft and tender slow cooker chicken is that it is perfect for using in other recipes. Here are some of the most popular ways to use up any leftovers:
- Add it to soups and stews. Shred the chicken and add it in lemon chicken orzo soup or in Indian butter chicken. When using leftover slow cooked chicken, it makes those recipes so much faster to make.
- Throw it in pasta. Use leftover chicken in baked pasta with chicken or add it to creamy alfredo with spinach and mushrooms.
- Top it on a salad. Add some chicken into a winter kale salad with apple cider vinaigrette or use it in a Mexican chicken caesar salad.
- Add it to pizza. Use shredded chicken as a topping in 30-minute BBQ chicken pizza or mushroom and arugula pizza.
The options are endless. You can use it in any recipe that calls for cooked chicken. Try it in BBQ chicken stuffed potatoes or butternut squash quesadillas with chicken.
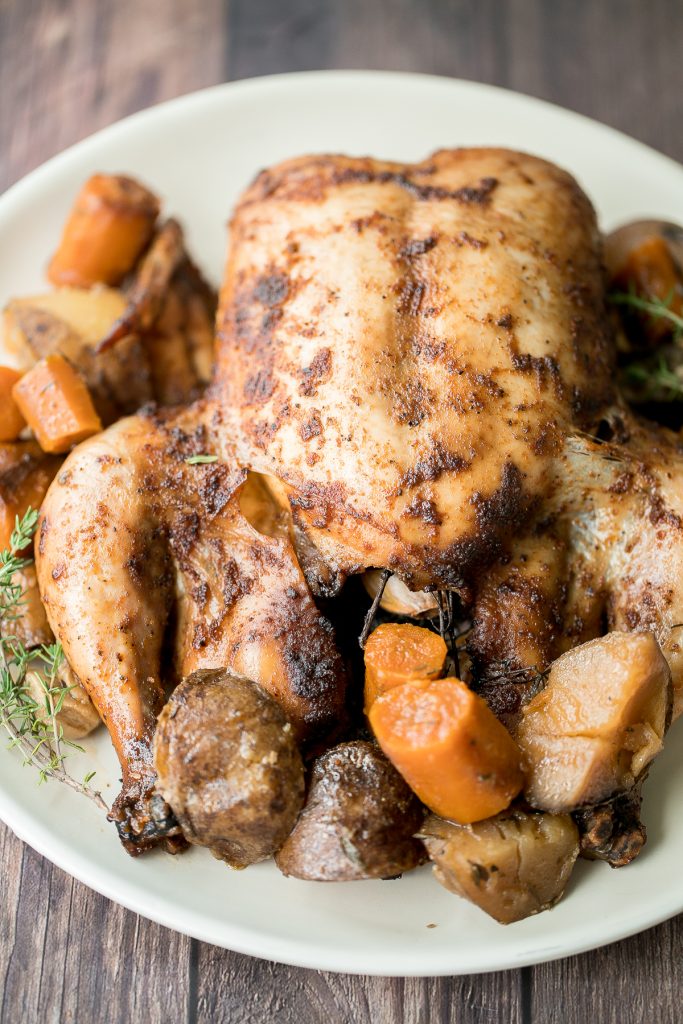
More Chicken Recipes
- Dutch Oven Whole Roast Chicken
- Apple Cider Chicken with Butternut Squash
- Roasted Spatchcock Chicken
- Skillet Chicken Thighs with Potatoes
- Sheet Pan Balsamic Chicken and Vegetables
- Apple Dijon Braised Chicken Thighs
Tried this recipe?
I'd love to hear what you think! Leave a comment and rating below to share your feedback. Your reviews help others discover this recipe and help me keep creating more free recipes for you. Snap a photo and tag me on social media @aheadofthyme too.
Leftover Turkey Wild Rice Soup
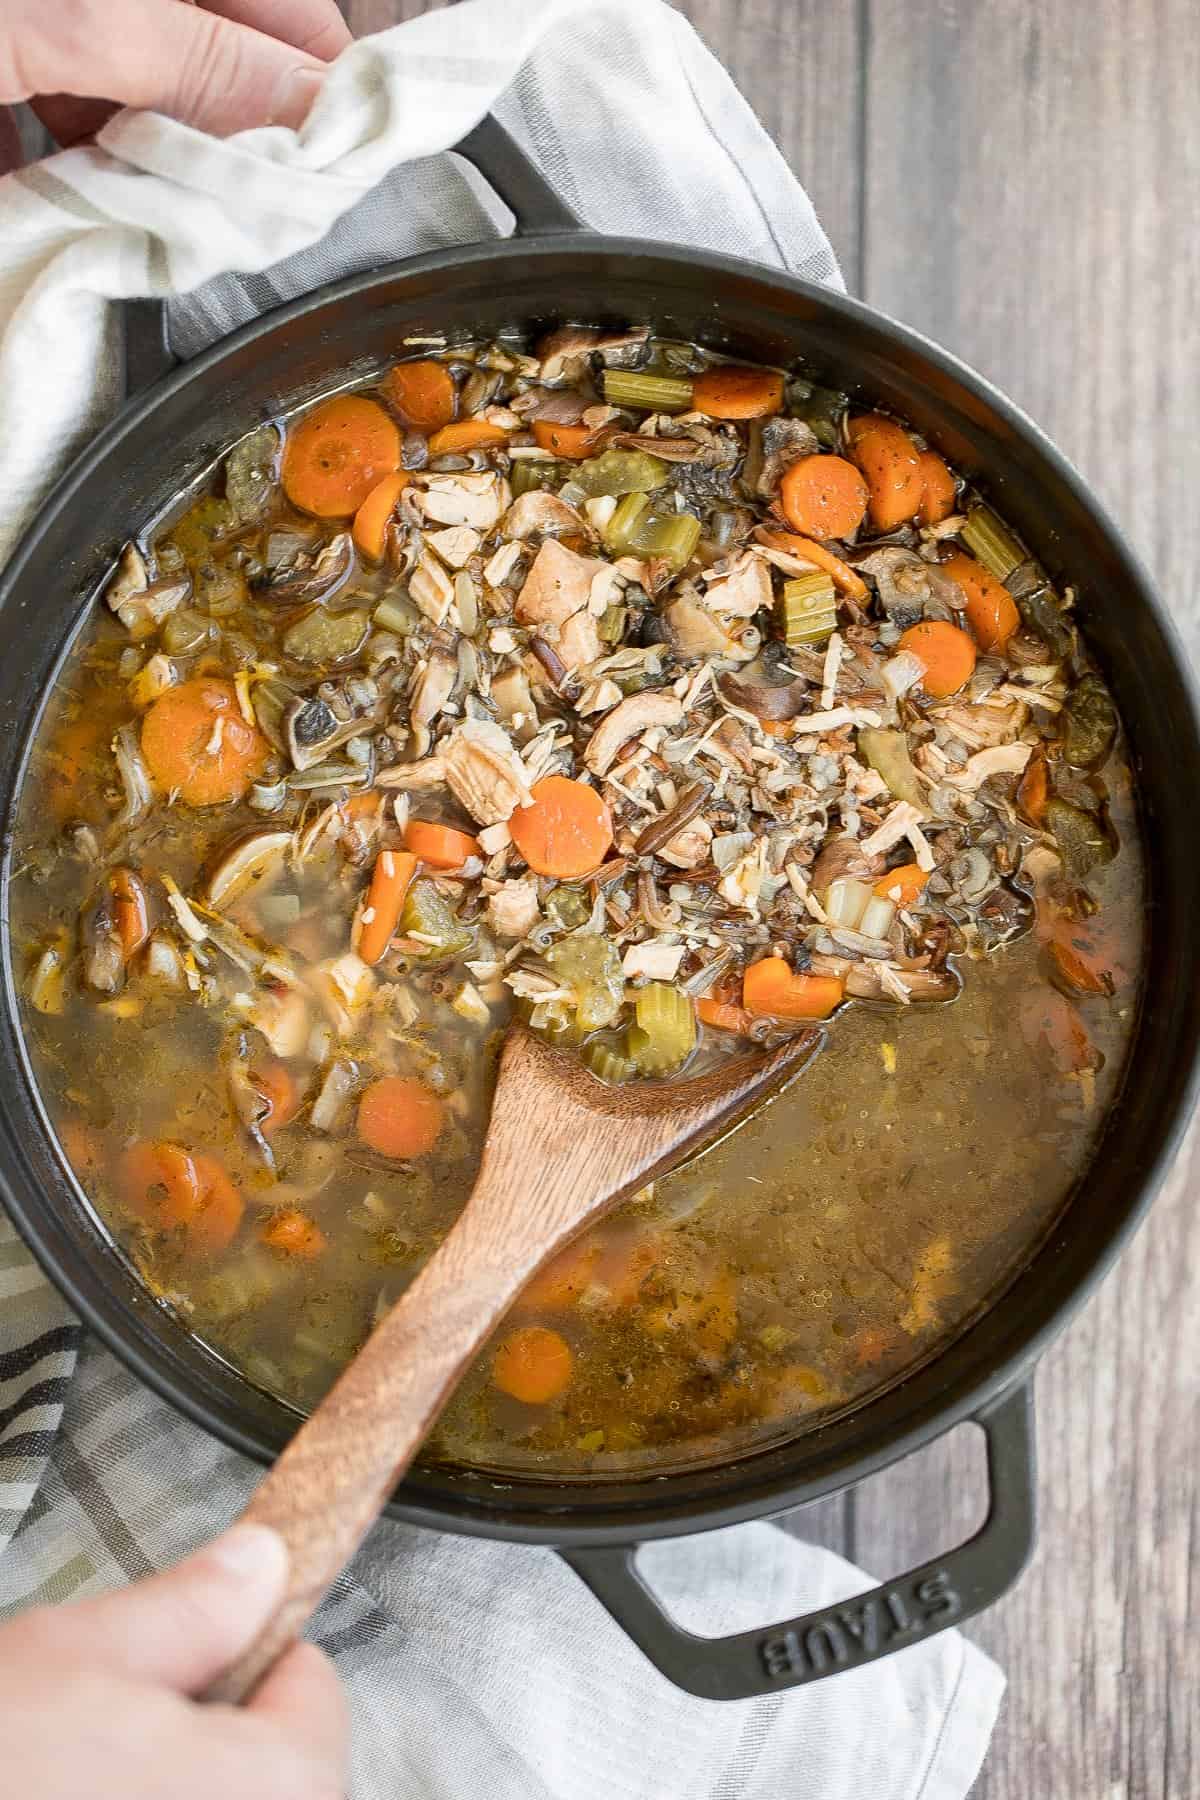
Wholesome and hearty one pot leftover turkey wild rice soup is the most comforting way to use up leftover turkey from Thanksgiving dinner or any turkey dinner. It is packed with cooked turkey, wild rice, mushrooms, and vegetables for a healthy and filling meal. It is so delicious and super easy to make with just 10 minutes of prep.

When the holidays start to roll around and I begin prepping my Thanksgiving dinner menu, I always think about what I am going to do with the leftovers. Does anyone else plan ahead like this? I love using turkey in turkey wild rice soup because it is just so warm and cozy and really hits the spot. Some of my other favourite ways to use up turkey leftovers are in leftover turkey fried rice, leftover Thanksgiving turkey sandwich, leftover turkey stuffed peppers, or creamy turkey orzo soup.
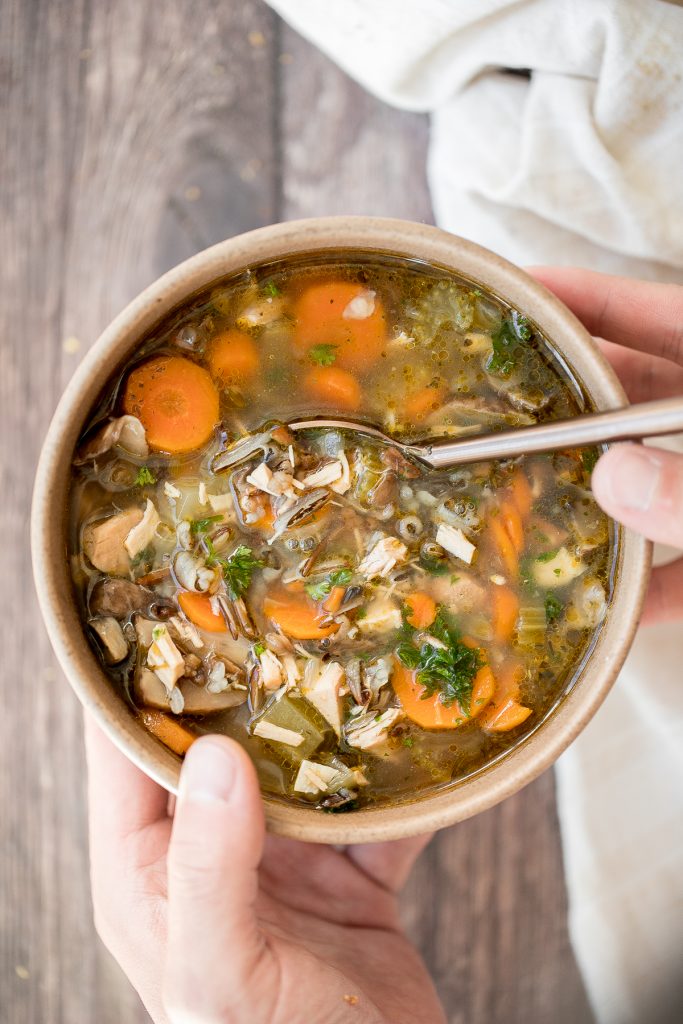
Ingredients
- cooked turkey - shredded or cut into ½ inch cubes.
- wild rice
- mushrooms
- vegetables - onion, celery, and carrots.
- olive oil
- fresh thyme
- bay leaves
- vegetable stock powder - You can also use chicken or turkey stock powder.
- salt and pepper
- water
- fresh parsley - to garnish on top.
You will also need a medium-large cooking pot. I used my 4 qt. dutch oven.
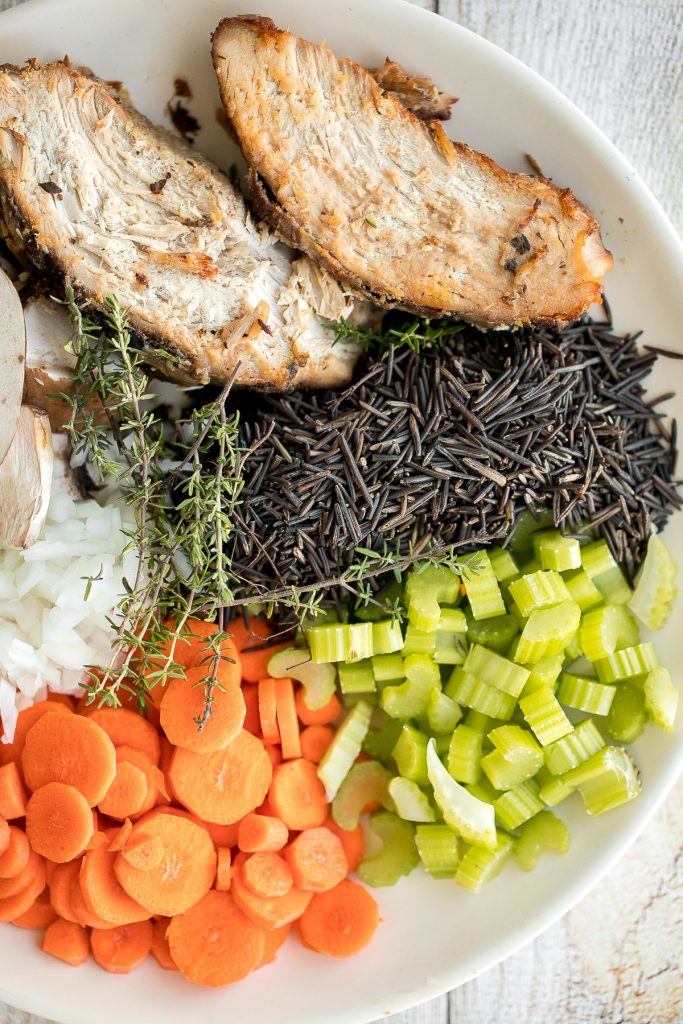
How to Make the Best Leftover Turkey and Wild Rice Soup
Heat oil in a medium-large cooking pot (or 4 qt. dutch oven) over medium-high heat for 2 minutes until sizzling hot. Add onion, celery, carrots, thyme and bay leaves, and sauté for 5 minutes until the vegetables are soft and fragrant.
Add turkey, rice and mushrooms. Stir and cook for another 3 minutes. Add vegetable stock powder, salt, and pepper. Stir well to mix. Add water and bring soup to a boil, about 5 minutes. Cover the lid and turn down to medium-low heat. Simmer for 35 to 40 minutes until most of the wild rice is soft and popped.
Remove the bay leaves and serve in soup bowls. Sprinkle parsley on top to garnish, and squeeze some lemon juice if desired.
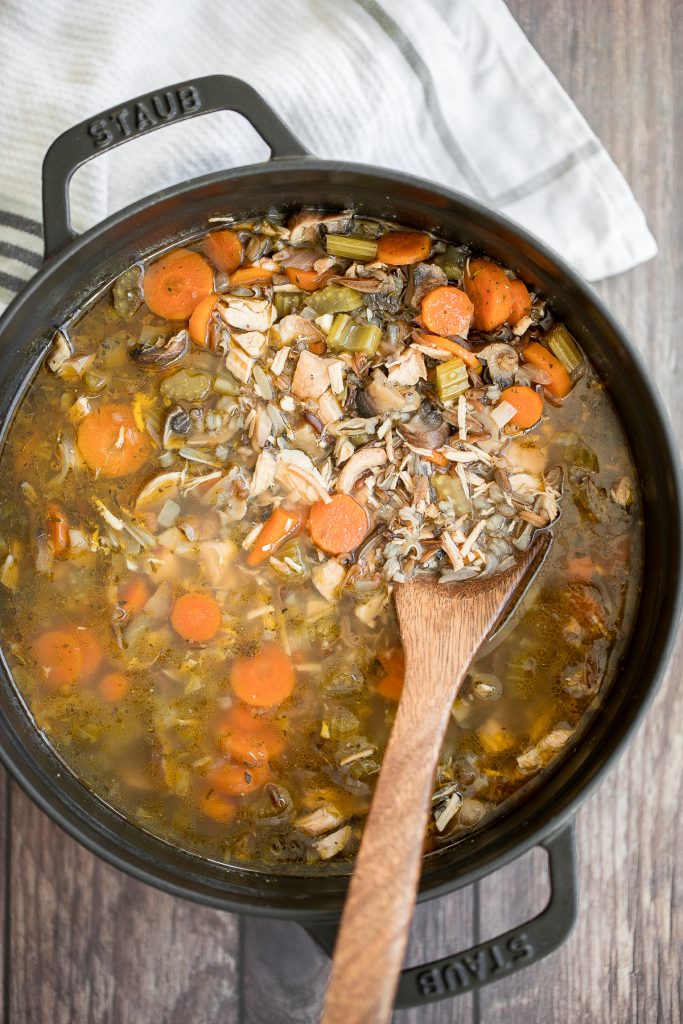
Tips for Making Turkey Soup
- How to make it creamy: To make this soup creamy, stir in ½ cup of half and half cream at the end, after the soup is done simmering.
- How to store: Keep the turkey wild rice soup in the pot (covered) and store in the refrigerator for up to 3 days. You can also transfer the soup into an airtight container for storing.
- How to reheat: Reheat in the microwave or on the stove for a few minutes until hot and serve.
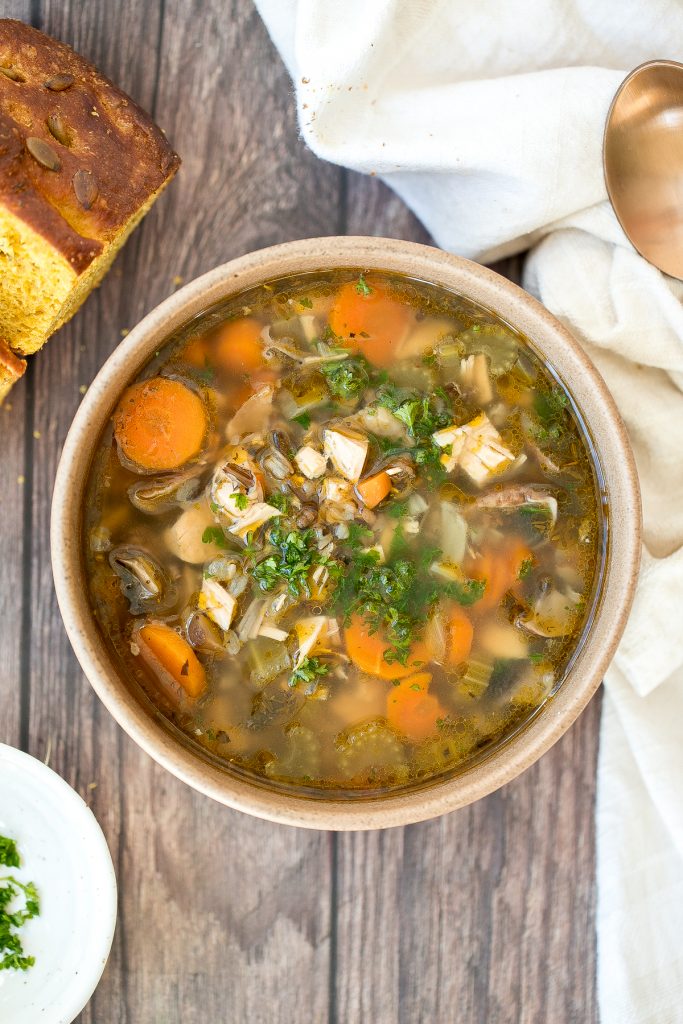
How to Serve Leftover Turkey Soup
A hearty soup like leftover turkey wild rice soup is great served on it's own with a side salad like a fall harvest salad with roasted butternut squash or an apple walnut salad, and crusty bread for dipping. Try pumpkin focaccia with fresh herbs or easy homemade biscuits with this. Or browse through all of our bread recipes.

More Soup Recipes
- Vegetarian Barley Mushroom Soup
- 30-Minute Butternut Squash Soup
- Sweet Potato Soup
- Lemon Chicken Orzo Soup
- Roasted Butternut Squash and Cauliflower Soup
- Creamy Mexican Corn Soup
- Roasted Butternut Squash Soup
Tried this recipe?
I'd love to hear what you think! Leave a comment and rating below to share your feedback. Your reviews help others discover this recipe and help me keep creating more free recipes for you. Snap a photo and tag me on social media @aheadofthyme too.

Sweet Potato Casserole with Pecans
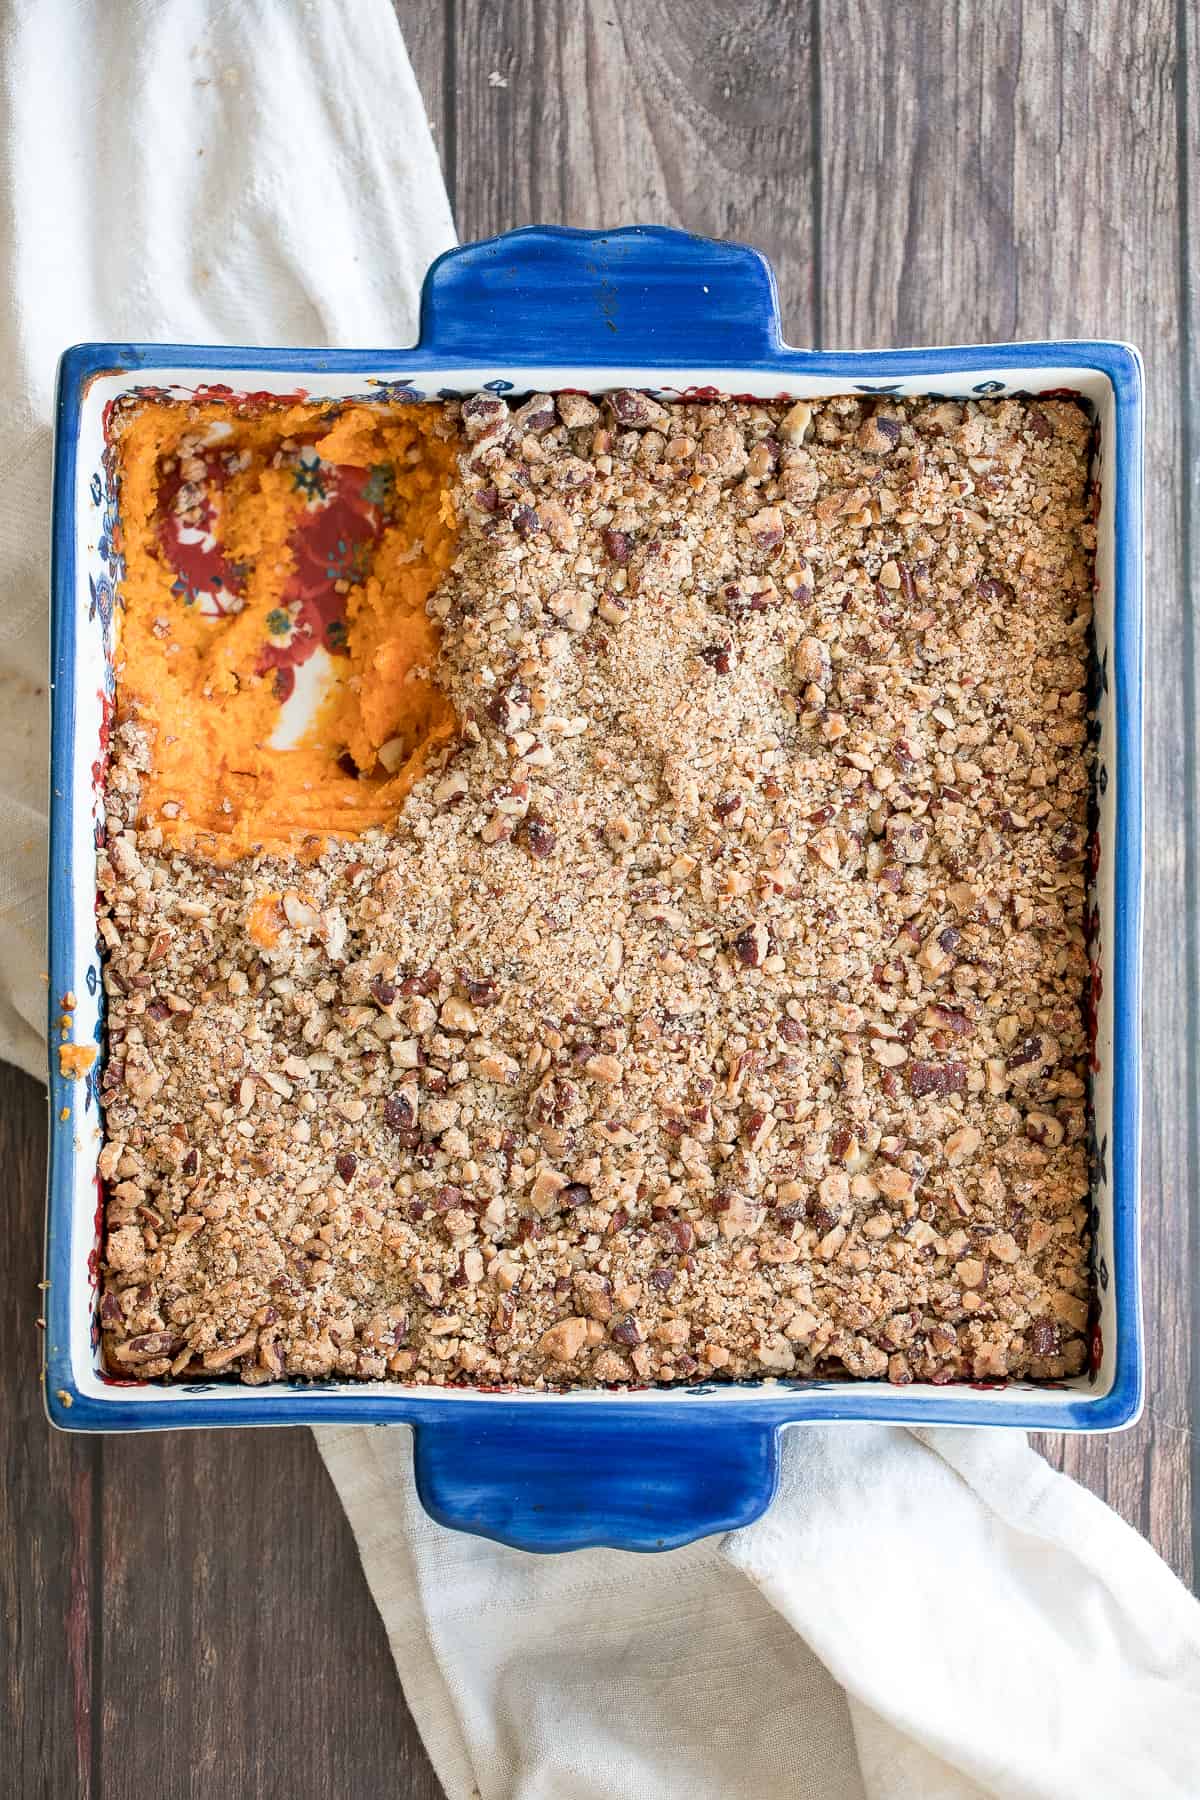
Sweet potato casserole with pecans is the perfect fall side dish and a staple for Thanksgiving dinner. This casserole is packed with soft and tender sweet potatoes and a buttery crunchy pecan topping instead of a traditional marshmallow topping.
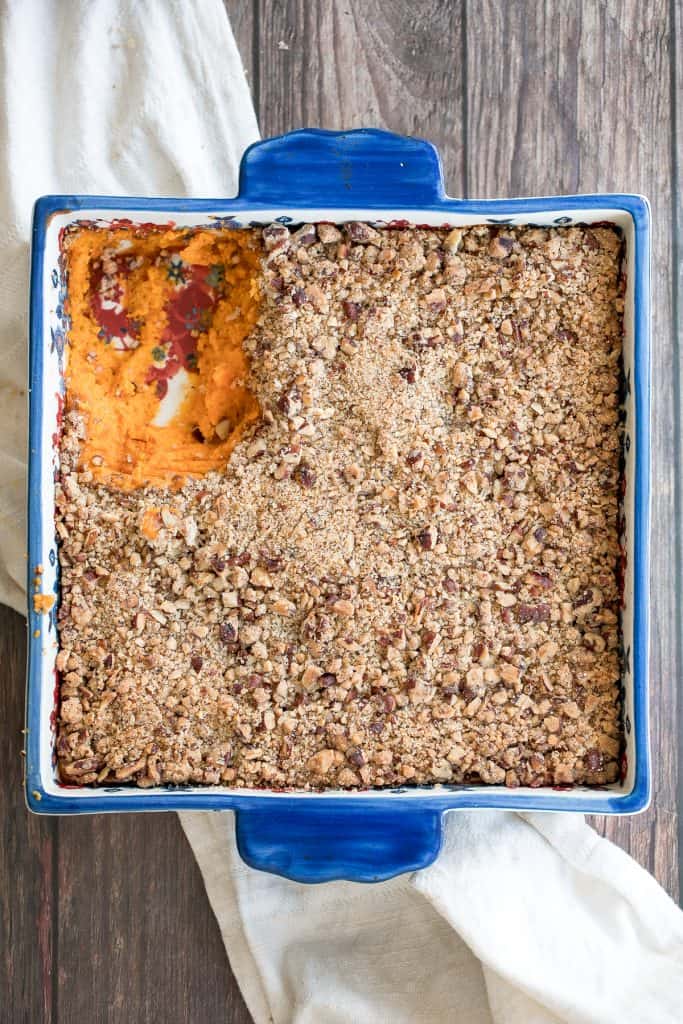
Sweet potato casserole is a dish that makes a Thanksgiving or a holiday dinner spread complete. Serve it along with some other classic side dishes such as creamy mashed potatoes, garlic green beans, and cornbread stuffing. Or scroll through some of my favourite sides below:
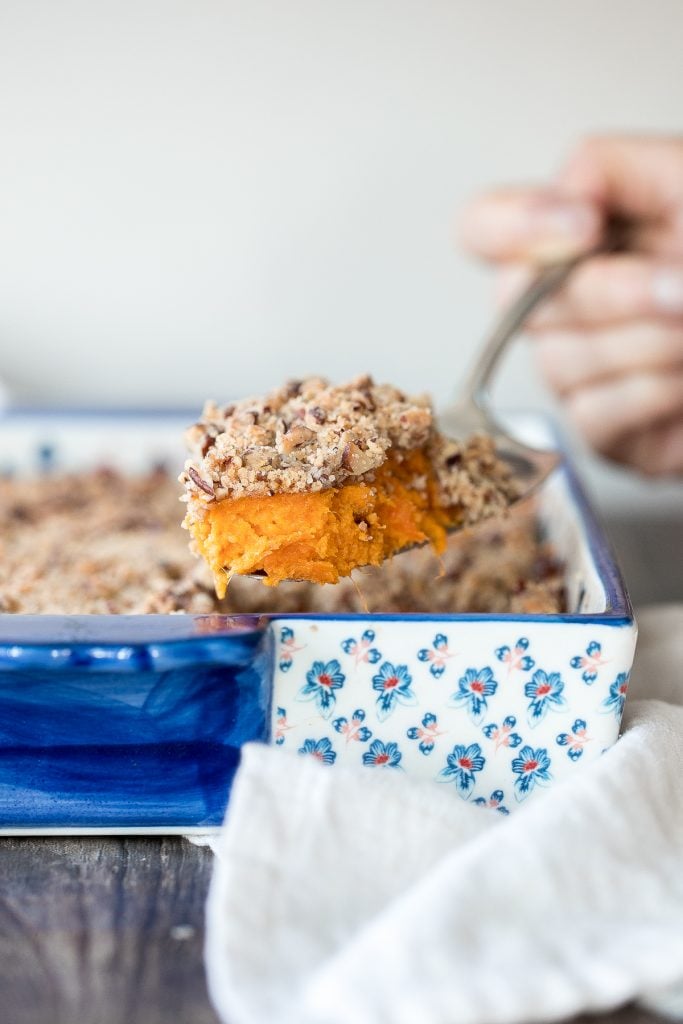
Ingredients
Here is what you will need to gather to make this casserole (full quantities and recipe in recipe card below):
- sweet potatoes - I used 3 medium sweet potatoes.
- heavy cream - you can also use half-and-half cream.
- butter
- eggs
- granulated sugar
- vanilla extract
- salt
- pecan topping - pecans, butter, sugar, and all-purpose flour.
You will also need measuring cups and spoons, mixing bowls, baking sheet pan, hand mixer, and a 9-inch square casserole dish.
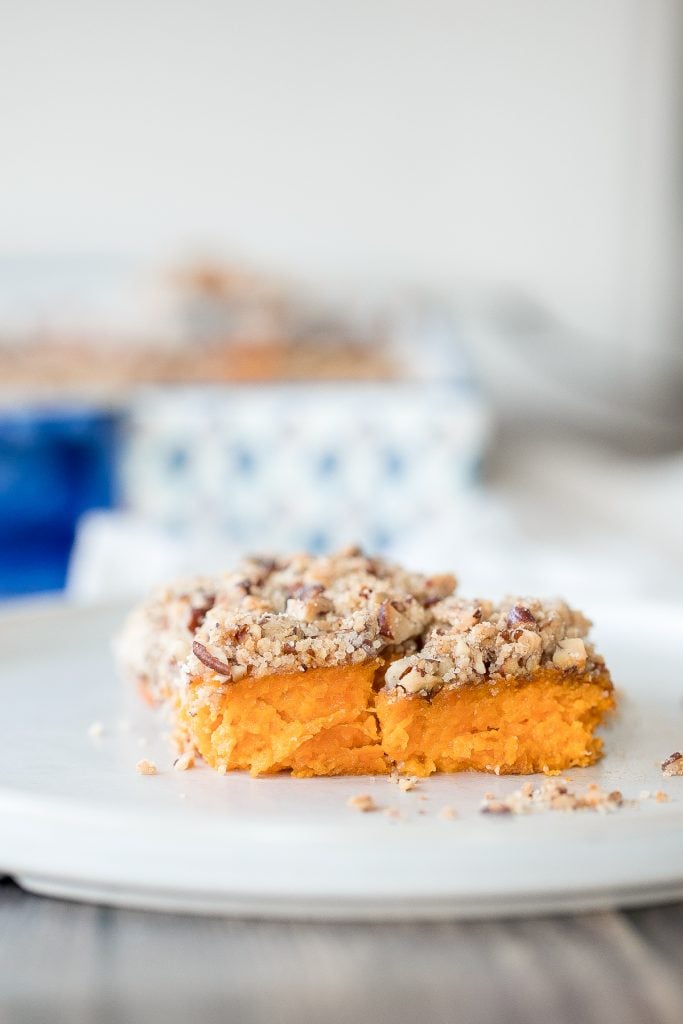
How to Make the Best Sweet Potato Casserole with Pecans
- Bake the sweet potatoes until soft and tender. Preheat the oven to 350 F and poke the sweet potatoes with a fork to make a few vents. Place on a lined baking sheet and bake for 1 hour until they are completely soft inside, and fork tender. If you can insert a fork easily into the flesh, then it is fork tender.
- Prepare the sweet potato filling. Cut the sweet potatoes in half and scoop out the flesh into a large mixing bowl. Add heavy cream, butter, eggs, sugar, vanilla extract and salt. Mix all the ingredients well with a hand mixer for 1-2 minutes until the mixture is smooth. Transfer the mixture into a 9-inch square baking dish. Gently tap the baking dish on the counter a few times to release any air bubbles and spread the mixture evenly.
- Prepare the pecan topping. In another large mixing bowl, combine pecans, softened butter, flour and sugar. Use your fingers to rub the butter into the flour until the mixture resembles coarse breadcrumbs. Spread the mixture evenly over the top of the sweet potatoes with a spoon.
- Bake the sweet potato casserole. Bake the casserole at 350 F for 35-40 minutes until golden brown on top. Set it aside to cool for 10-15 minutes before serving.
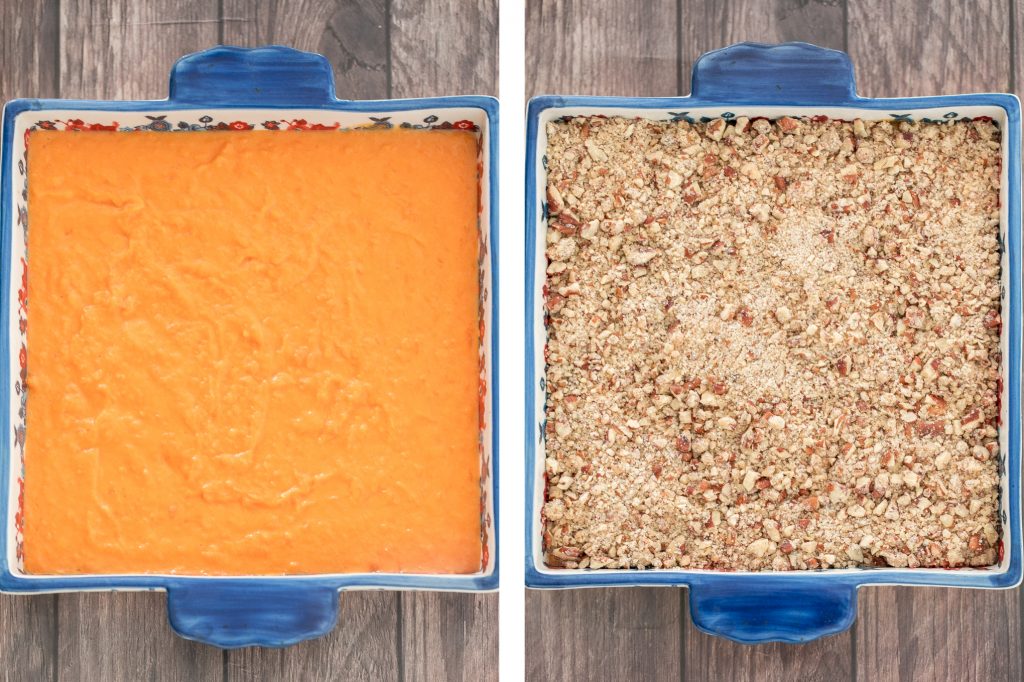
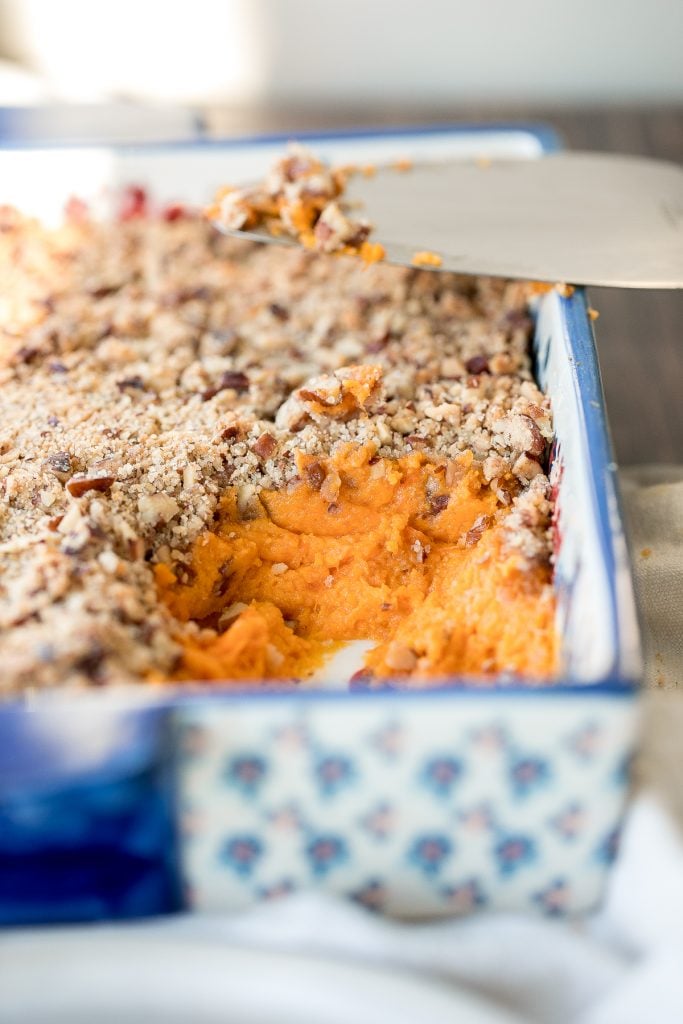
How to Make Ahead and Store Sweet Potato Casserole
- Make-ahead instructions: Prep and assemble the sweet potato casserole the night before. Prior to baking, cover and refrigerate it for up to 2 days. When ready to bake, take it out of the refrigerator and let it sit at room temperature for 30 minutes. Then, bake for 35-40 minutes at 350 F, as per recipe instructions.
- How to freeze: You can freeze the prepared but uncooked sweet potato casserole. Cover the dish tightly with aluminum foil and place in the freezer. I would recommend assembling the casserole in a disposable tin pan. You can freeze it for up to 3 months. When ready to bake, allow the casserole to defrost in the refrigerator or at room temperature. Then, bake for 35-40 minutes at 350 F, as per recipe instructions.
- How to store: Store any leftover casserole in an airtight container in the refrigerator for up to one week.
- How to reheat: Reheat leftover casserole in the oven at 300F for 15-20 minutes. You can cover the top with aluminum foil to prevent it from burning.
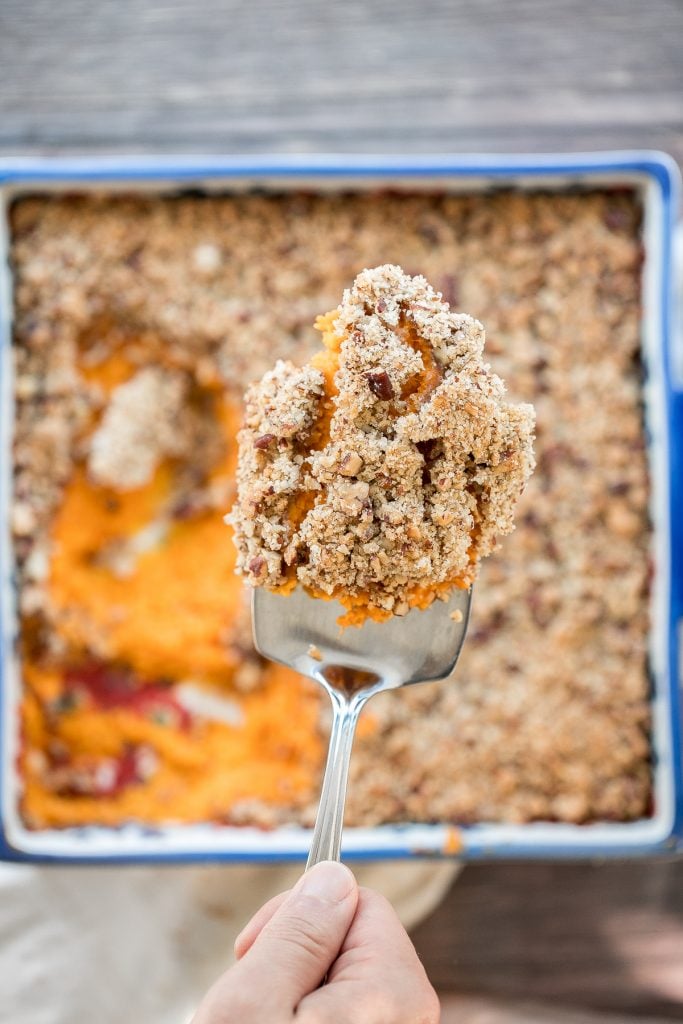
More Sweet Potato Recipes
- Sweet Potato Soup
- Savoury Mashed Sweet Potato
- Baked Sweet Potato Wedges with Honey Mustard
- Herb-Roasted Sweet Potatoes
- Yam and Sweet Potato Yellow Curry
Tried this recipe?
I'd love to hear what you think! Leave a comment and rating below to share your feedback. Your reviews help others discover this recipe and help me keep creating more free recipes for you. Snap a photo and tag me on social media @aheadofthyme too.
Easy 2-Ingredient Turkey Gravy

Introducing the easiest 2-ingredient turkey gravy you can ever make. This silky smooth gravy takes less than 10 minutes to prepare using turkey drippings from turkey that you are cooking anyways, whether it's a whole bird or just the breast or legs. Plus, you don't need to wait hours until your homemade turkey stock is ready, because you don't need any here. It's literally the easiest fool proof way to make turkey gravy.
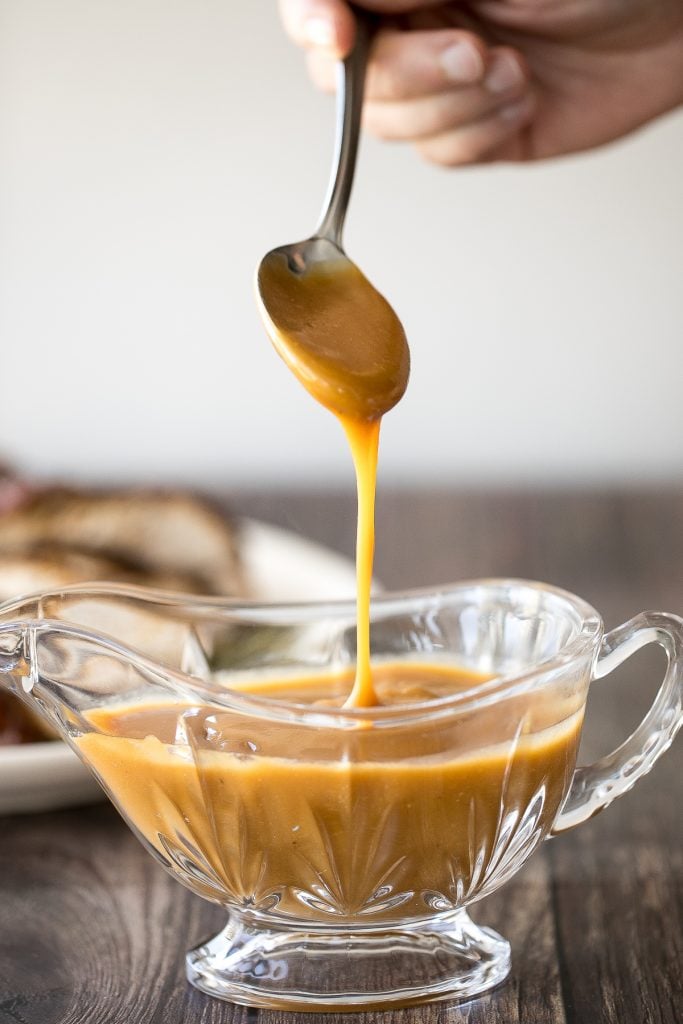
Ingredients
So I wasn't kidding when I said that there are only 2 ingredients in this recipe. All you need are:
- turkey drippings - this is everything that's left in your roasting pan after you cook your turkey including fat, bits of meat, and even any bits of vegetables that you roasted with (sometimes garlic or onions).
- all-purpose flour - this is what will thicken up your gravy in that beautiful smooth and creamy consistency that we love.
You are going to need a 8:1 ratio of drippings to flour. I used 2 cups of turkey drippings from my slow cooker turkey breast and ¼ cup of flour. I typically use all the drippings I have, and then adjust the flour to get the correct ratio.
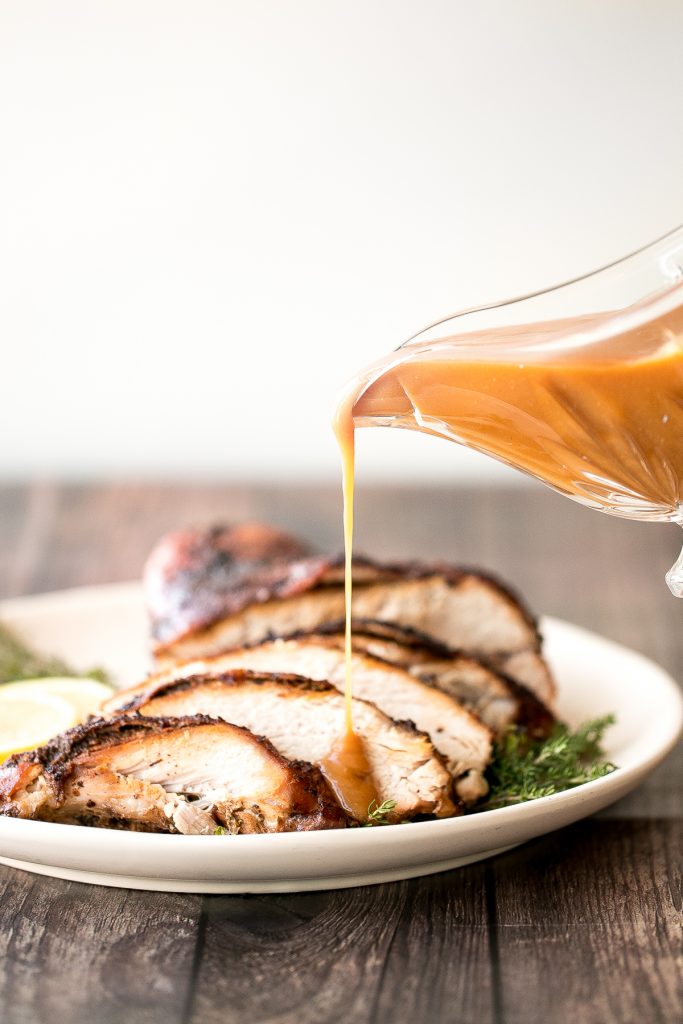
How to Make Easy 2-Ingredient Turkey Gravy
It also is quite simple to prepare this turkey in just 5 minutes. First, you want to pour the turkey drippings through a fine mesh sieve and into a small cooking pot. This is to remove any little chunky bits from the drippings or small vegetables that you may have cooked the turkey with.
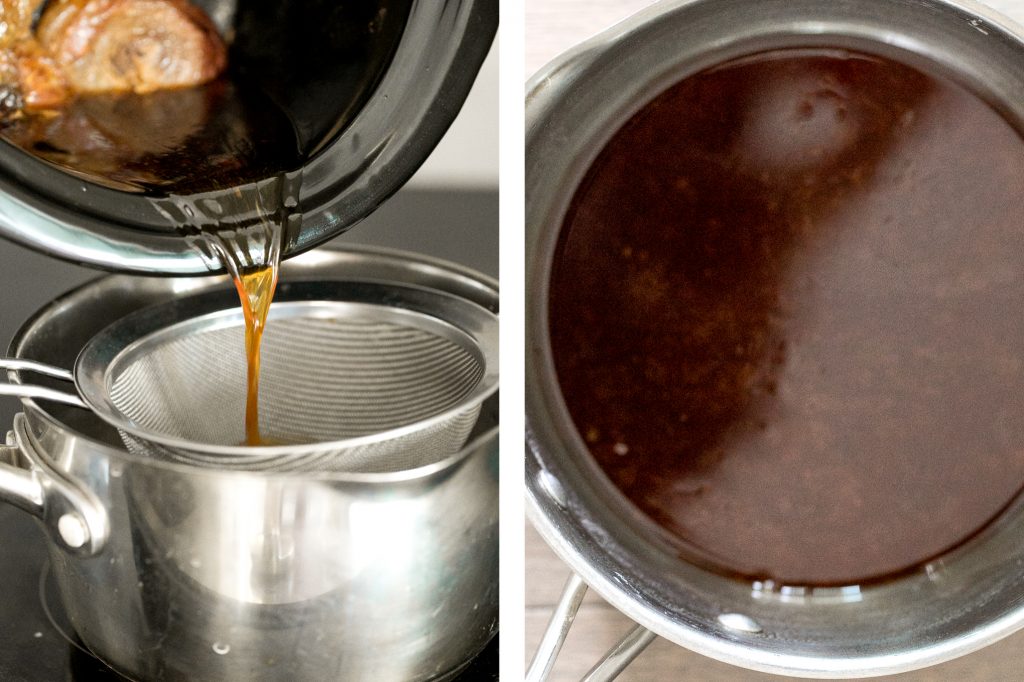
Then, add flour and whisk to combine. Make sure the flour is fully dissolved. Transfer the pot to the stove and heat over medium heat for 3-4 minutes, continuously stirring until gravy is thickened. Drizzle gravy over turkey and serve.
PRO TIP: If the gravy gets too thick, add one tablespoon of water at a time to thin it out. If it is too thin, whisk constantly and bring it to a boil to thicken, or whisk in ½ tablespoon of flour at a time.
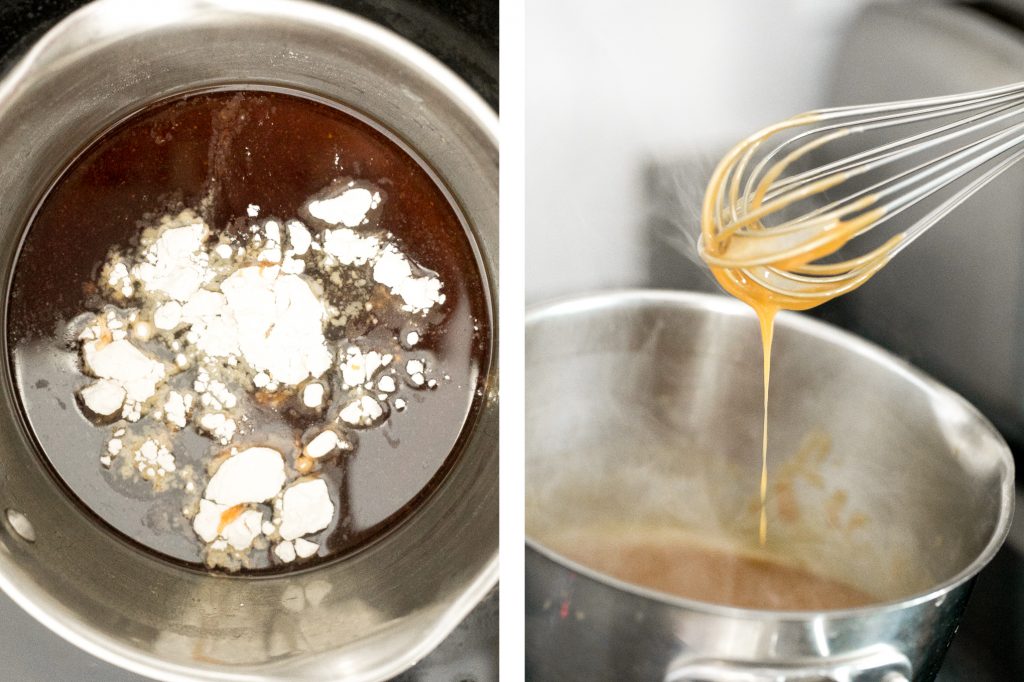
Turkey Gravy with Stock vs. No Stock
When I am roasting a whole turkey, I tend to make a classic turkey gravy using turkey drippings and homemade turkey stock, since I can easily make the stock using the turkey neck and giblets, while I am roasting the turkey. But when I am making turkey breast or turkey legs, then this is my go-to gravy to make, since there is always lots of turkey drippings to turn into a delicious and easy gravy. Especially if I am making slow cooker turkey breast, the quantity of drippings are kind of unbelievable. There is a LOT.
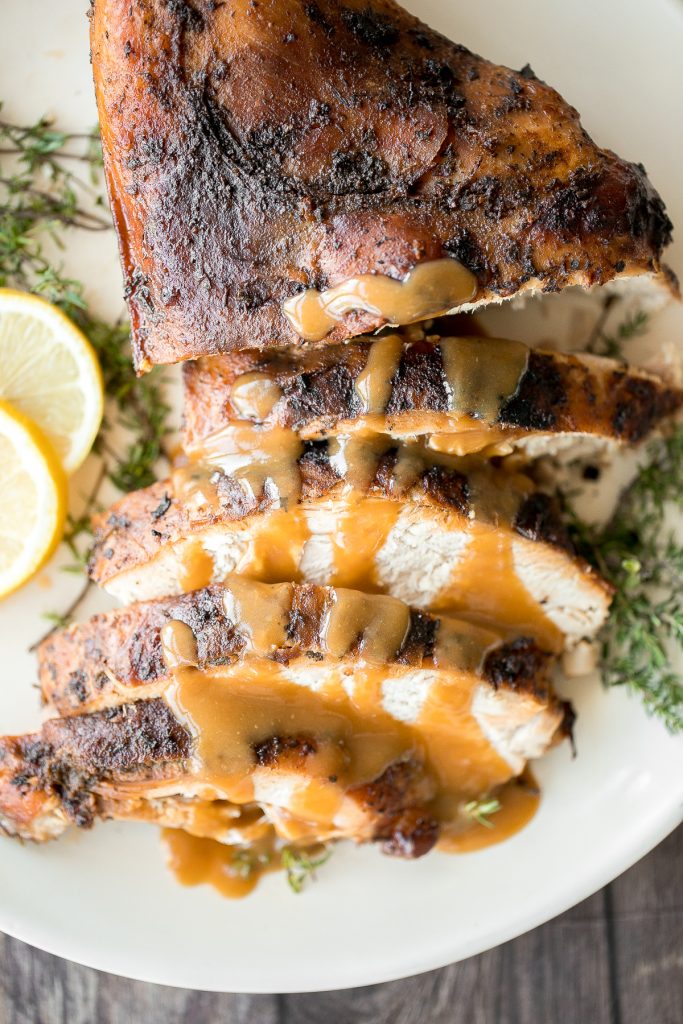
Tips for Storing Turkey Gravy
- How to store: Store leftover gravy in an airtight container for up to 3 days in the refrigerator.
- How to reheat: Reheat in a saucepan on medium-low until and add water, a tablespoon at a time, until desired consistency is reached.
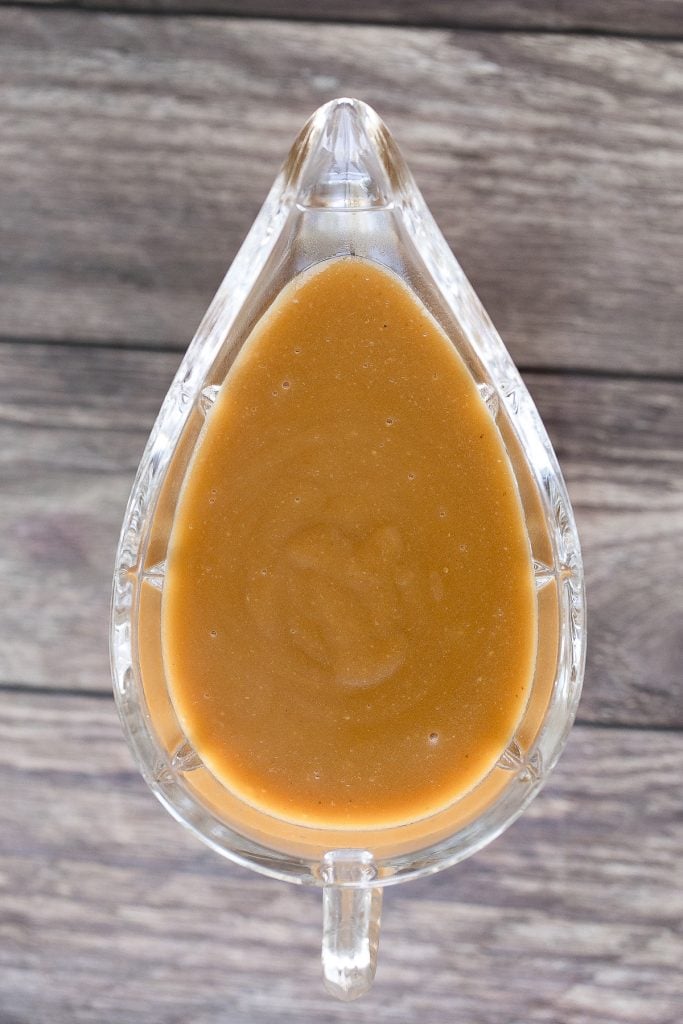
More Thanksgiving Recipes
- Classic Homemade Turkey Gravy
- Easy Make-Ahead Cranberry Sauce
- Vegetarian Cornbread Stuffing
- Cranberry Walnut Apple Stuffing
- The Best and Creamiest Mashed Potatoes
- 10 Minute Nutty Green Beans
- Savoury Mashed Sweet Potatoes
Tried this recipe?
I'd love to hear what you think! Leave a comment and rating below to share your feedback. Your reviews help others discover this recipe and help me keep creating more free recipes for you. Snap a photo and tag me on social media @aheadofthyme too.
15 Thanksgiving Bread Recipes
First comes the turkey, then comes the sides, then comes the bread in the bread basket. Thanksgiving bread is a crucial part of your Thanksgiving dinner holiday meal. Spread some butter on it to start off your meal, dip it into your Thanksgiving soup, or use it to soak up all that extra gravy on your plate. From cornbread, to dinner rolls, to biscuits, and crusty bread, I have got you covered. Today I am sharing my 15 most popular and favourite Thanksgiving bread recipes.
Best Thanksgiving Bread Recipes
Quick and easy pumpkin dinner rolls are soft and fluffy, flaky and butter, and perfect to serve alongside Thanksgiving dinner.
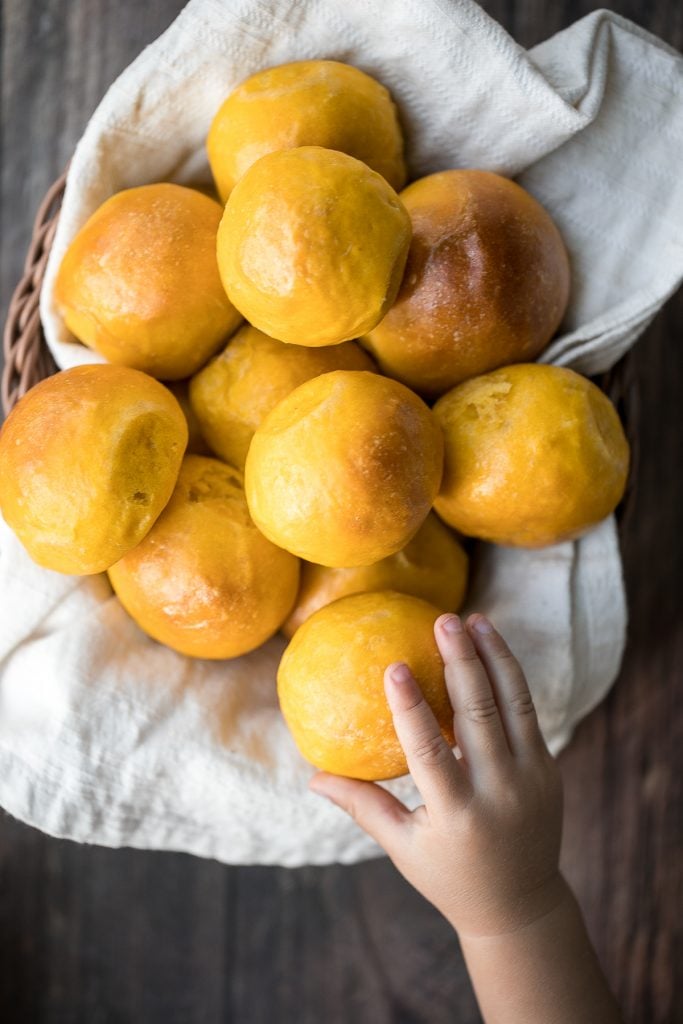
Sweet and savoury, buttery rosemary cornbread is soft and moist with golden crispy edges, flavourful and delicious, and so easy to make this holiday season.
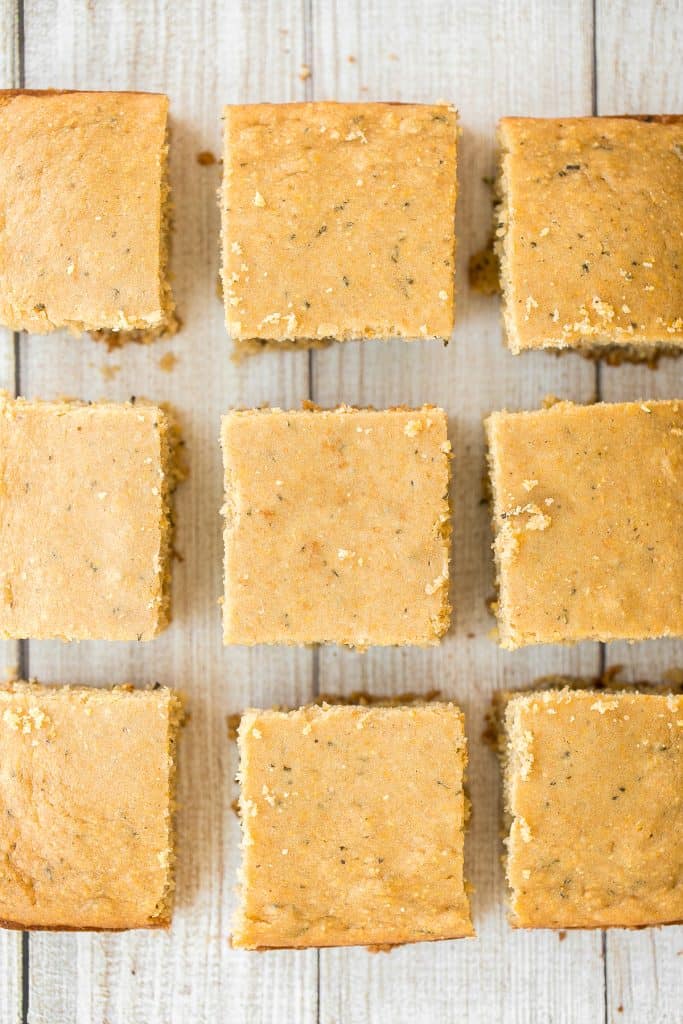
Notoriously light and fluffy with a little fold in the middle, these Parker House Rolls are the perfect dinner roll. They're buttery and incredibly tender.
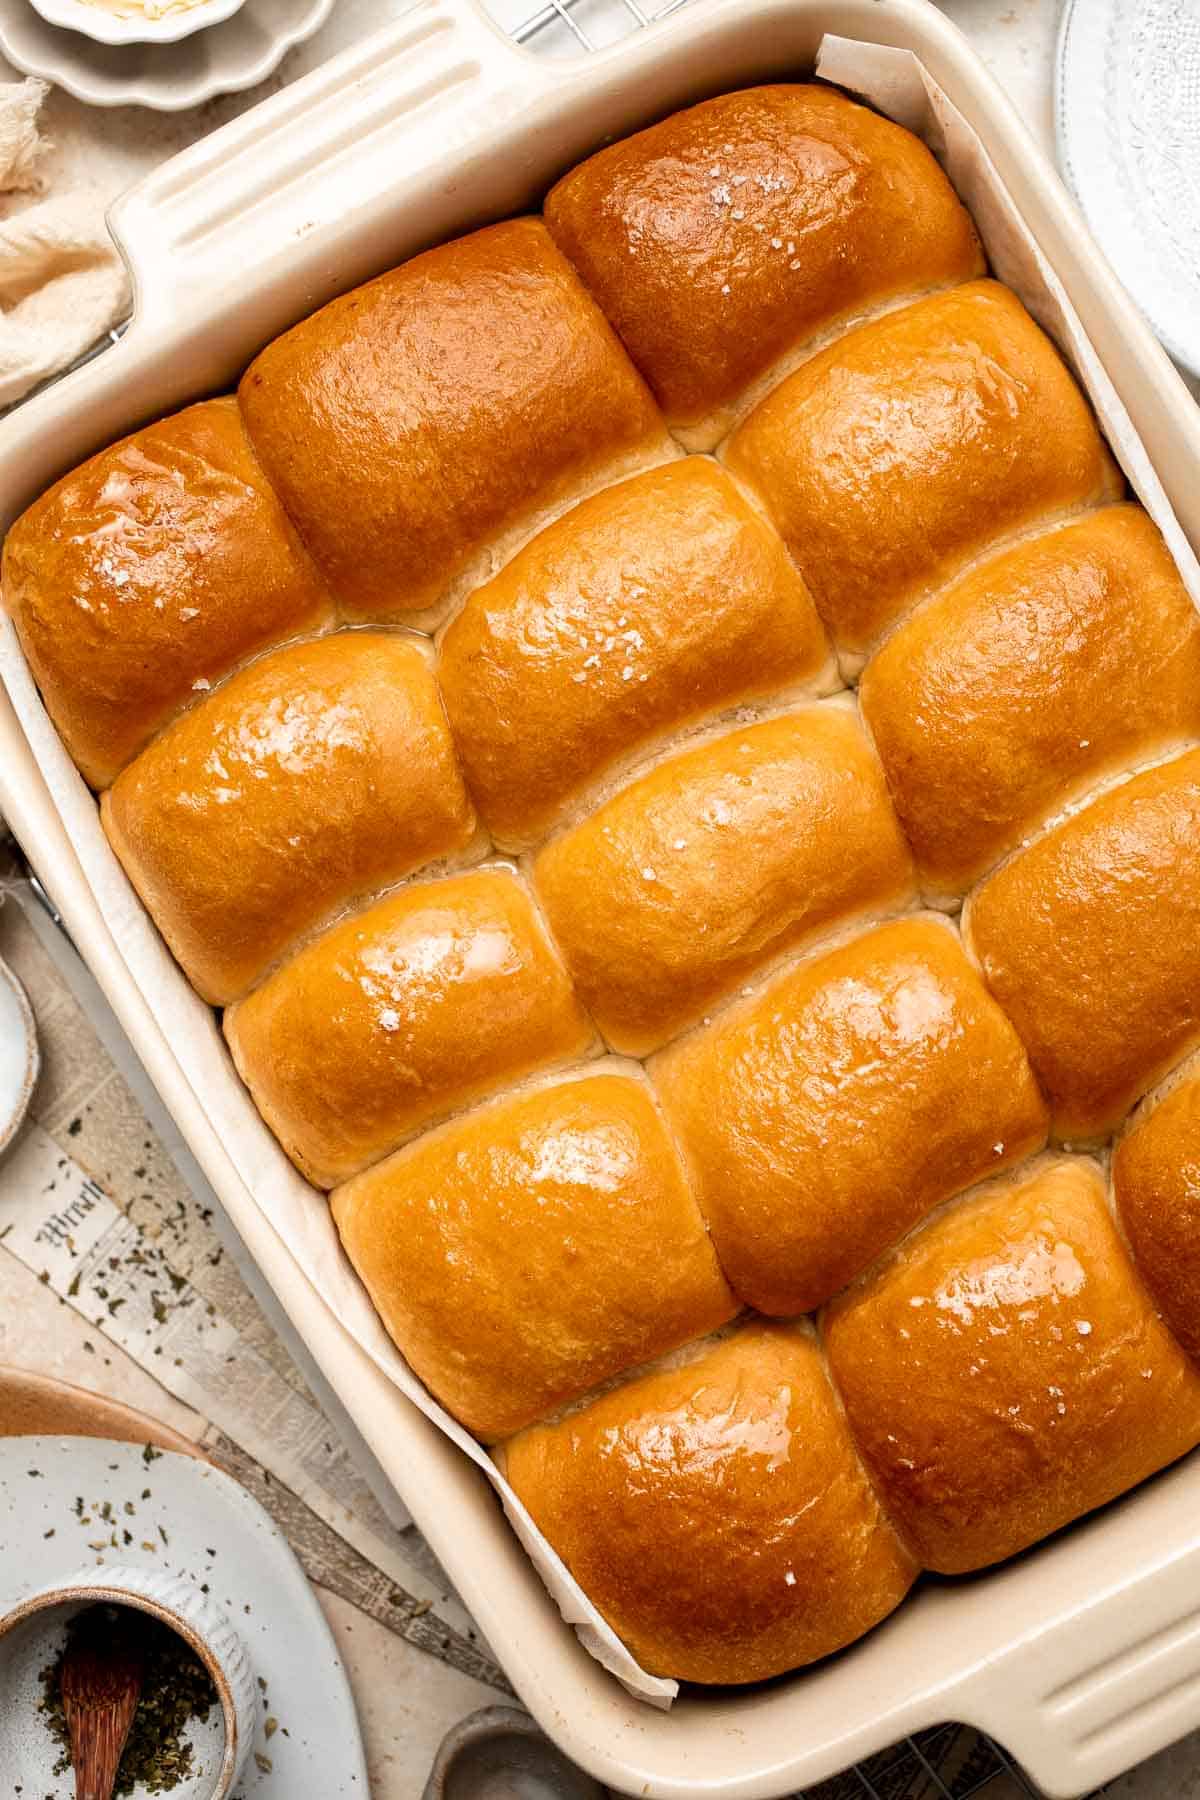
Easy Rosemary Garlic Focaccia Bread
No knead, easy rosemary garlic focaccia bread is thick with a perfect golden and crispy texture on the outside, but soft, fluffy and tender inside.
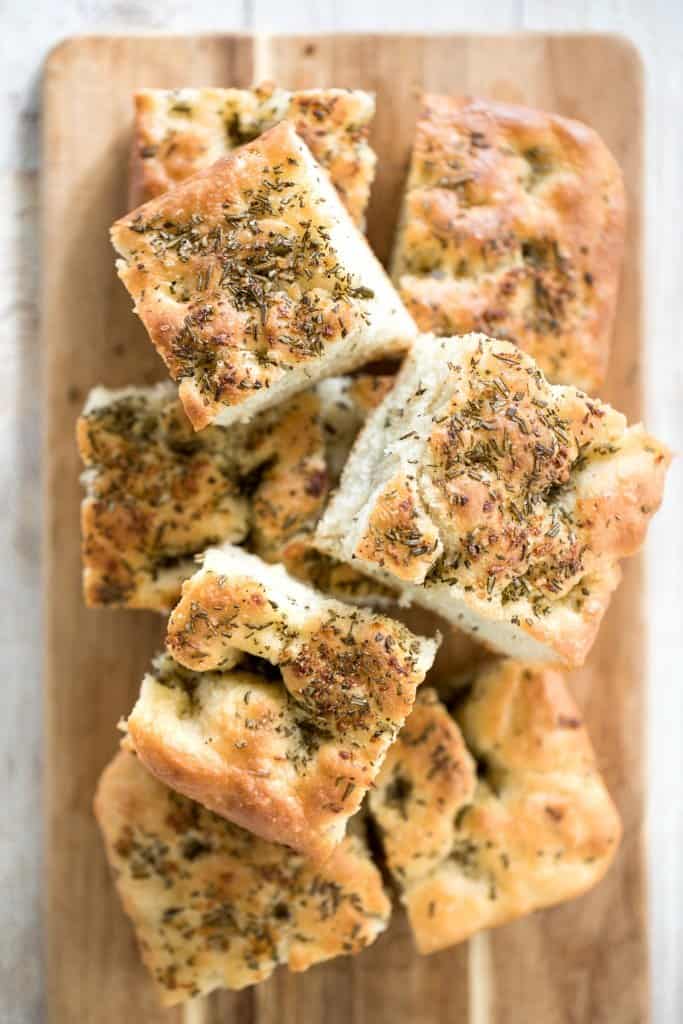
These classic Buttermilk Biscuits are perfectly tender with buttery, flaky layers. Quick and easy to make in just 30 minutes using a handful of ingredients.

Pumpkin Cornbread is a sweet and savory side dish loaded with real pumpkin, and is moist, fluffy, and crumbly with crisp edges.
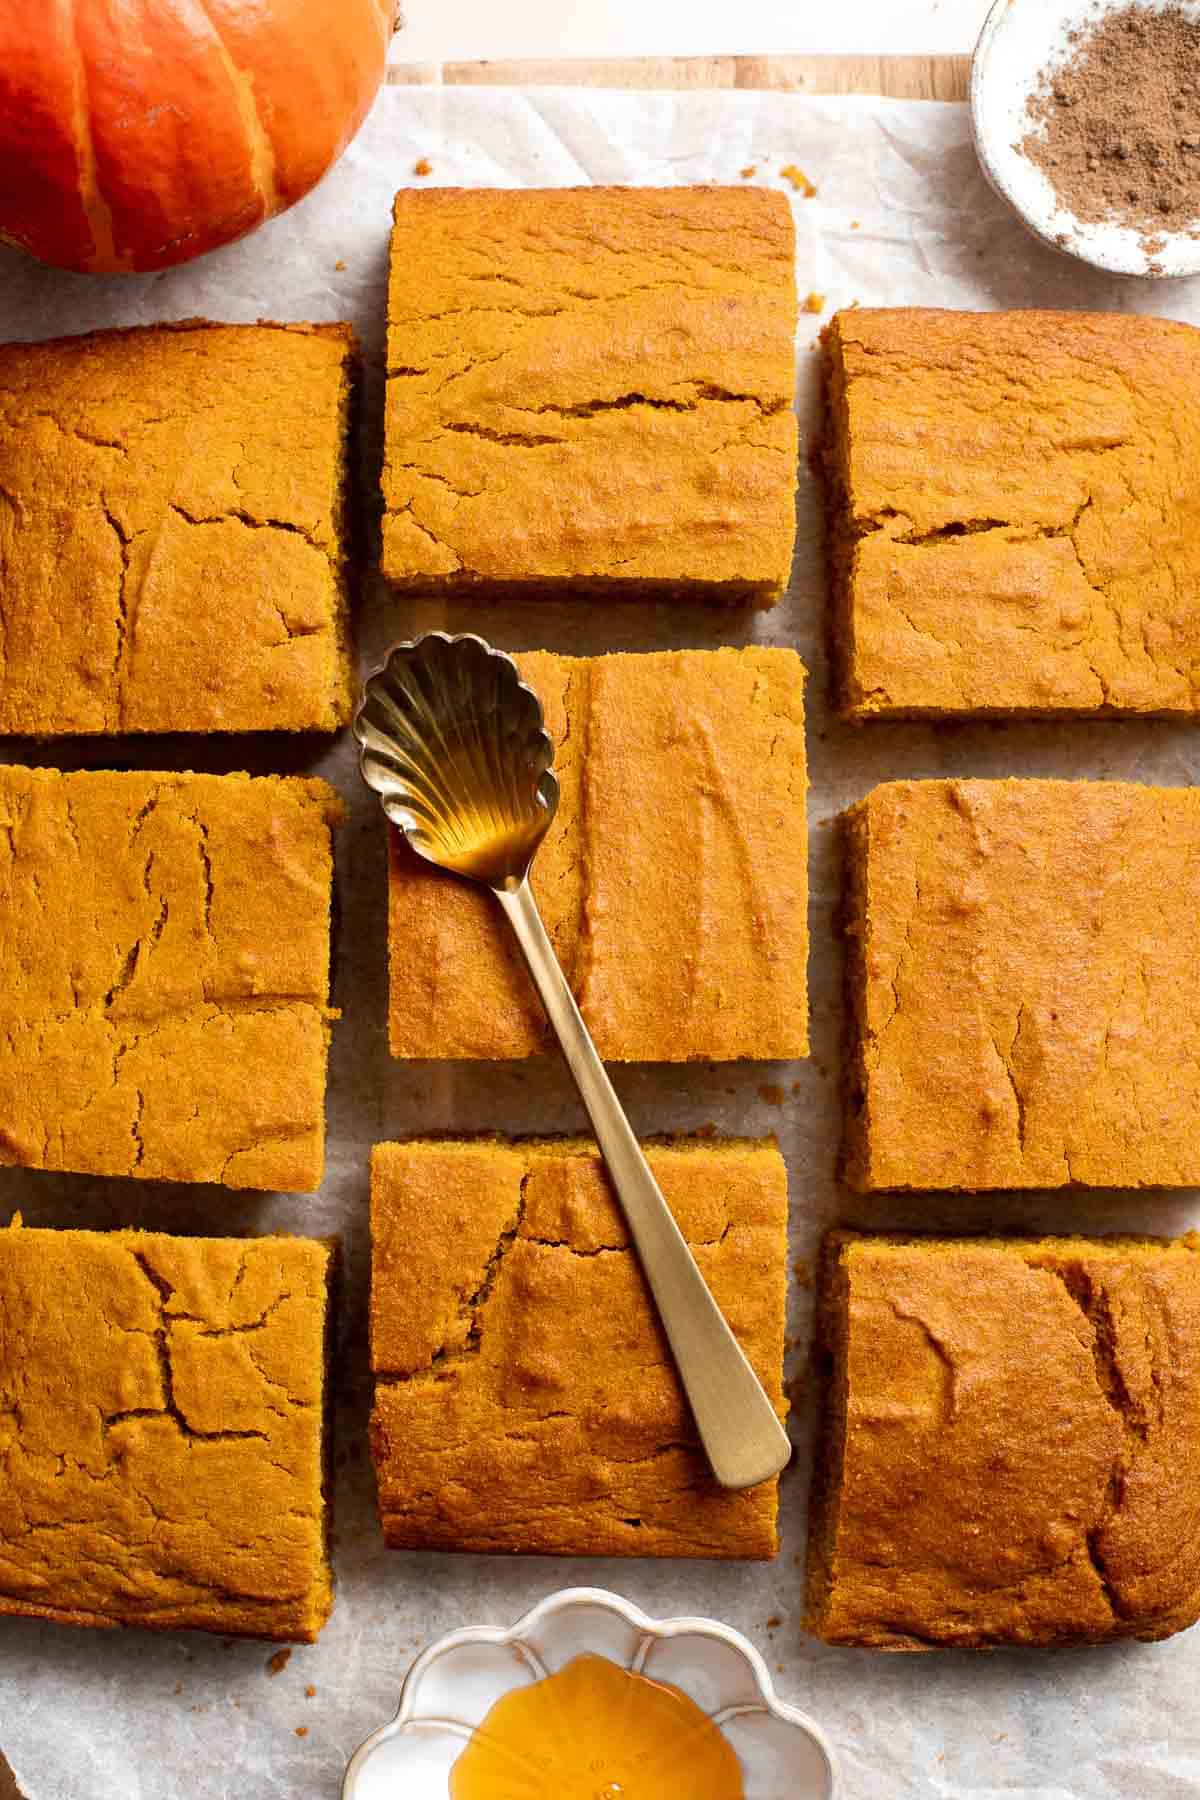
Potato Dinner Rolls are soft, light, and fluffy. These quick and easy dinner rolls are loaded with leftover mashed potatoes and simple pantry staples.
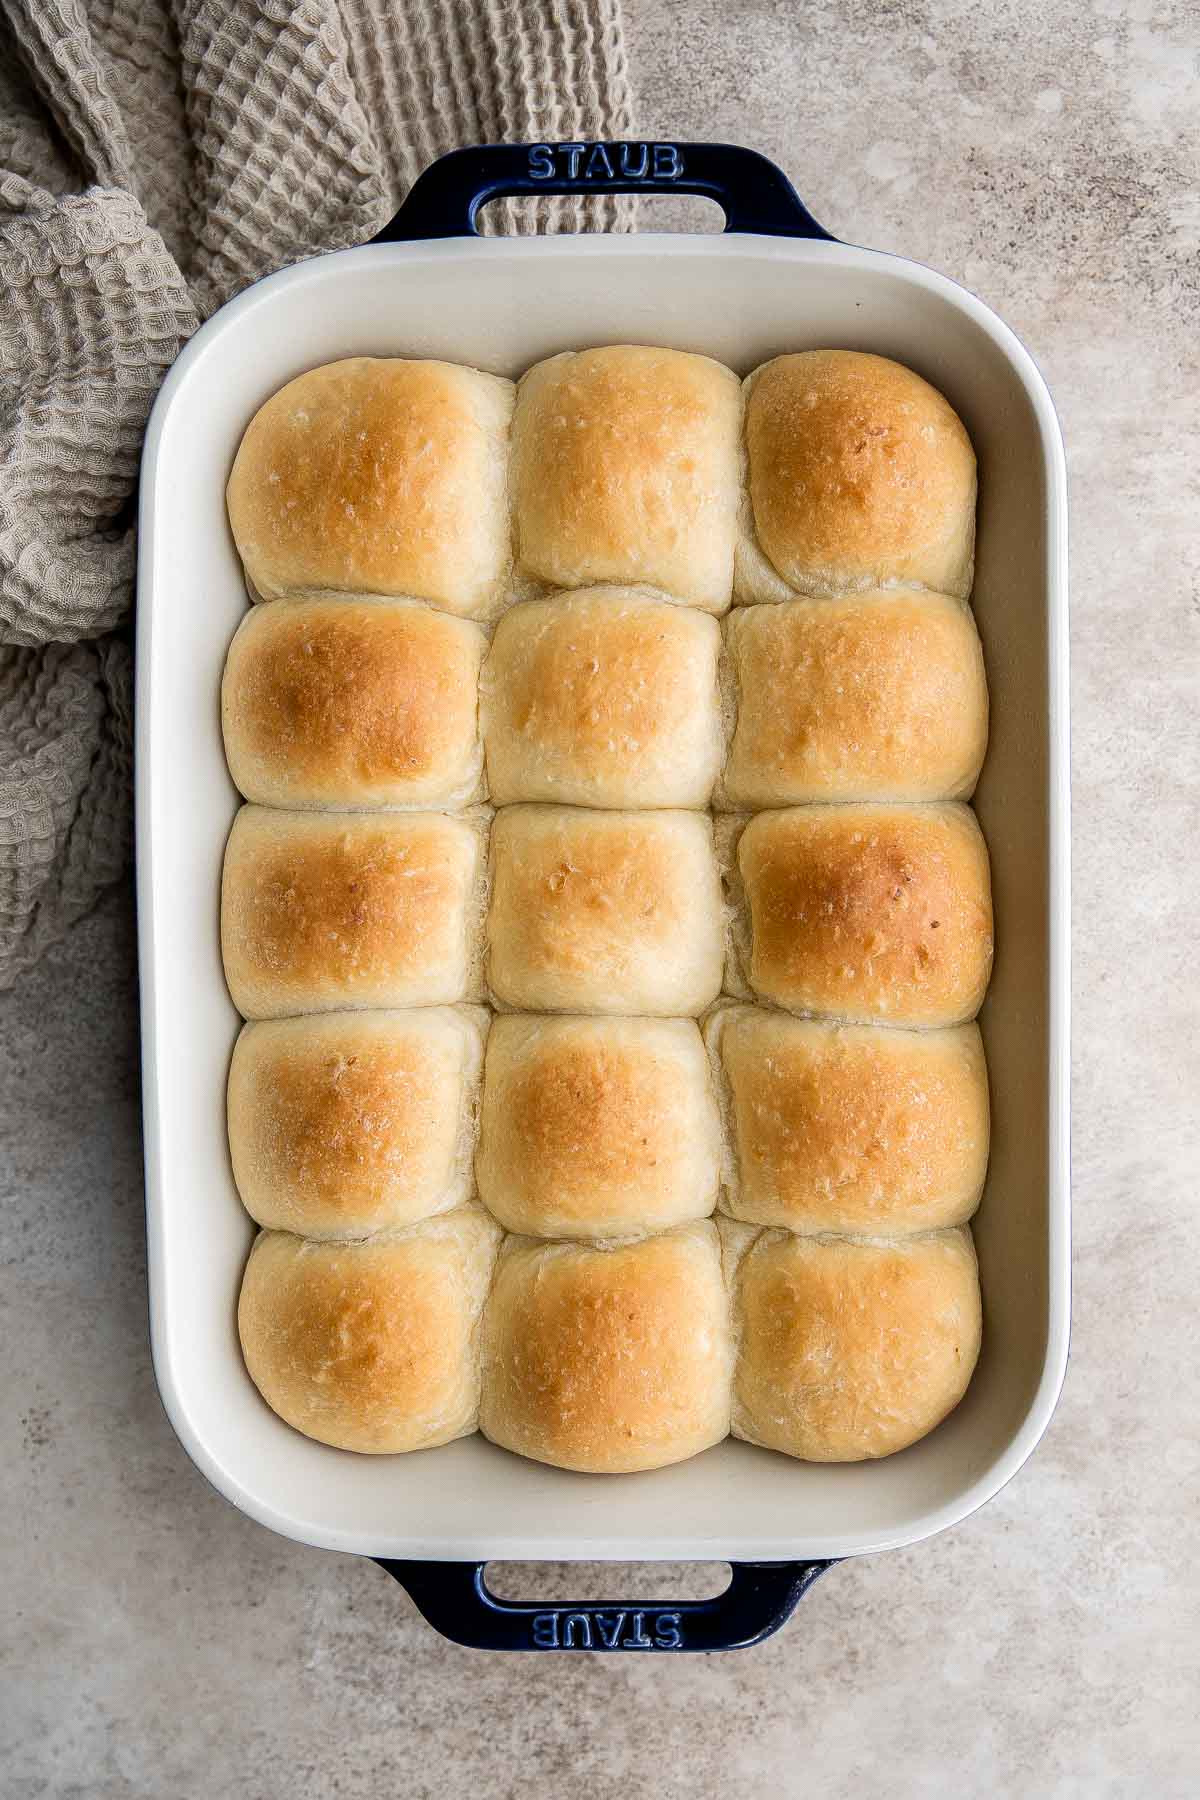
Pumpkin Focaccia with Fresh Herbs
Delicious, easy pumpkin focaccia bread with fresh herbs is soft, fluffy, and springy, yet so crispy on the outside. Just 15 minutes of actual prep required.

Flaky Cornmeal Cheddar Biscuits
Flaky cornmeal cheddar biscuits are simple, buttery, cheesy, and so delicious. These savoury biscuits with perfect golden tops are quick and easy to make.
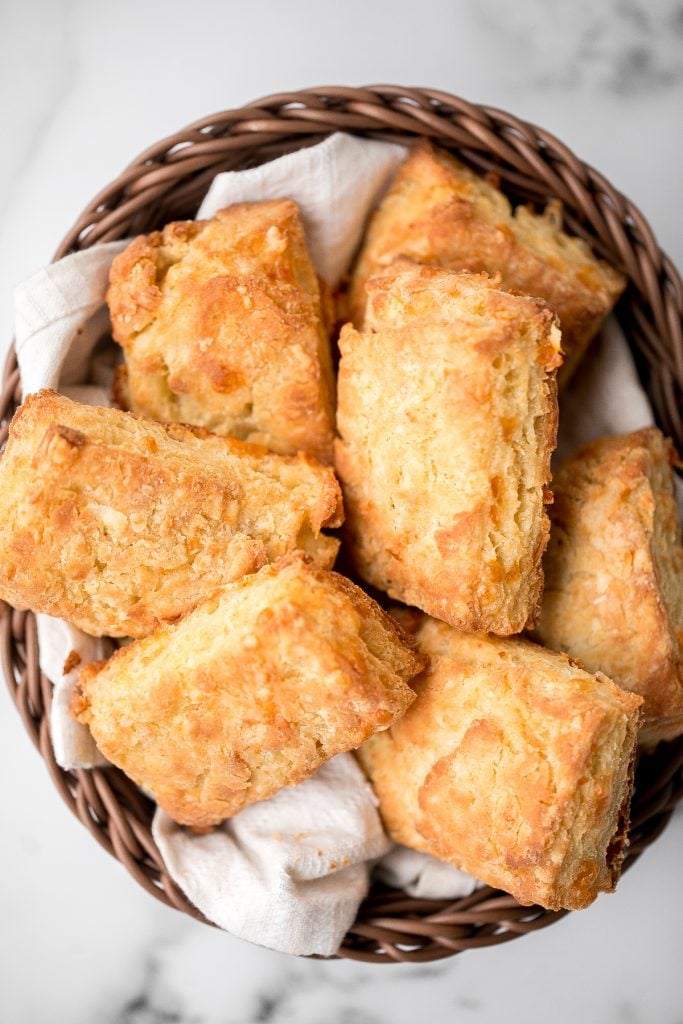
Soft garlic breadsticks are fluffy, airy, buttery, and delicious. They're an easy recipe that is perfect for beginners at baking bread.
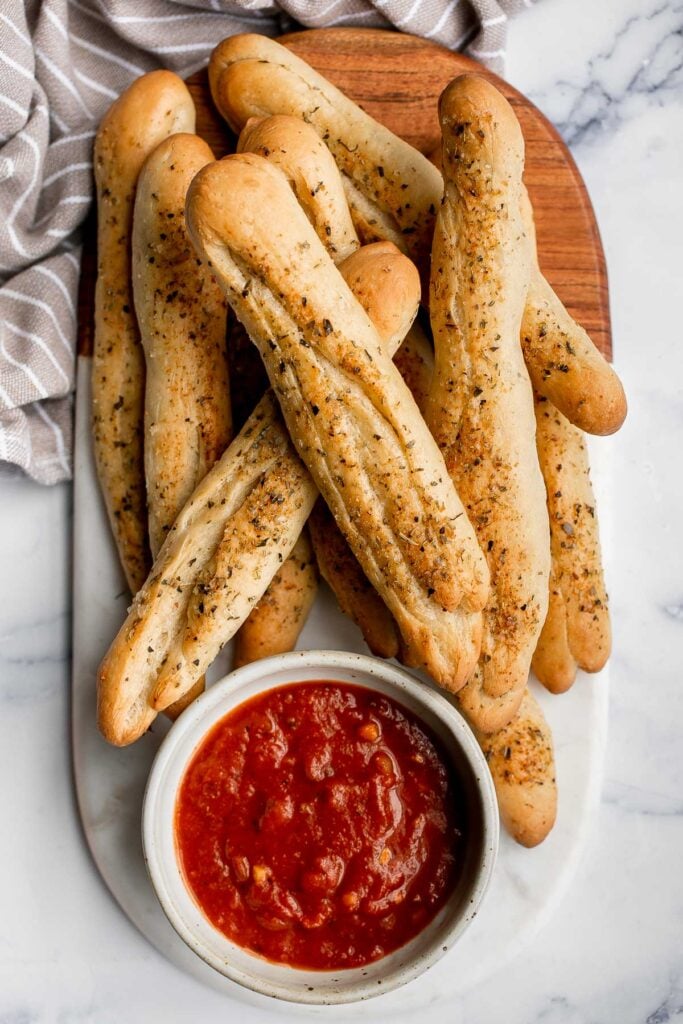
Easy small batch ciabatta rolls are fluffy and airy with a perfect crunchy, crackly crust. They take only 10 minutes to prepare and require no kneading.
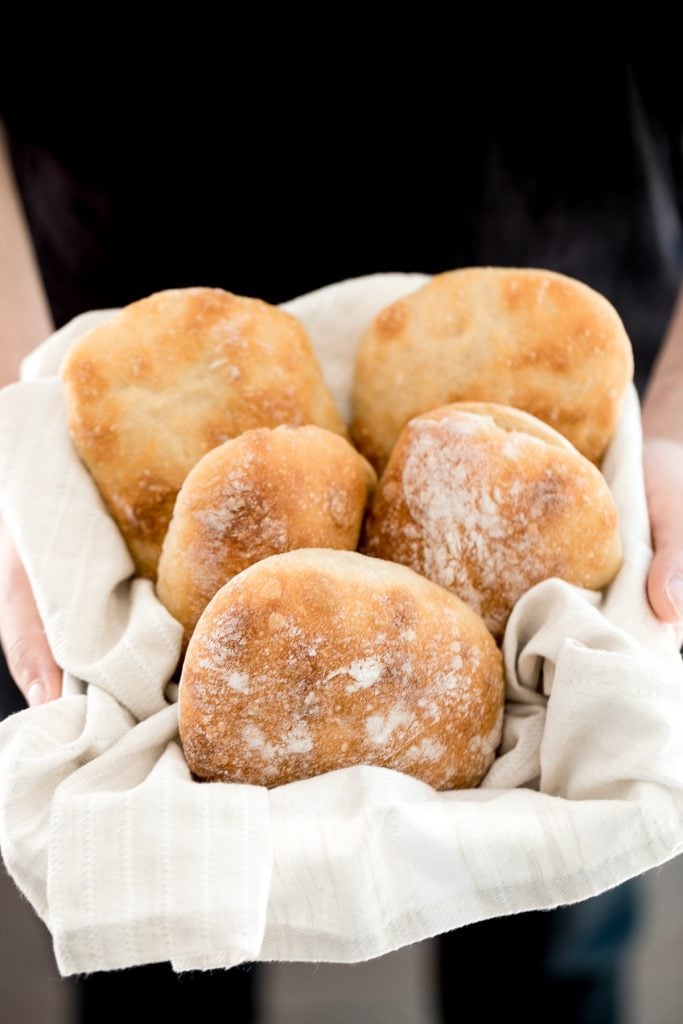
Easy Cornbread Muffins are moist, fluffy, tender, and sweet. They're the perfect side dish to serve with a Southern barbecue or Thanksgiving holiday dinner.
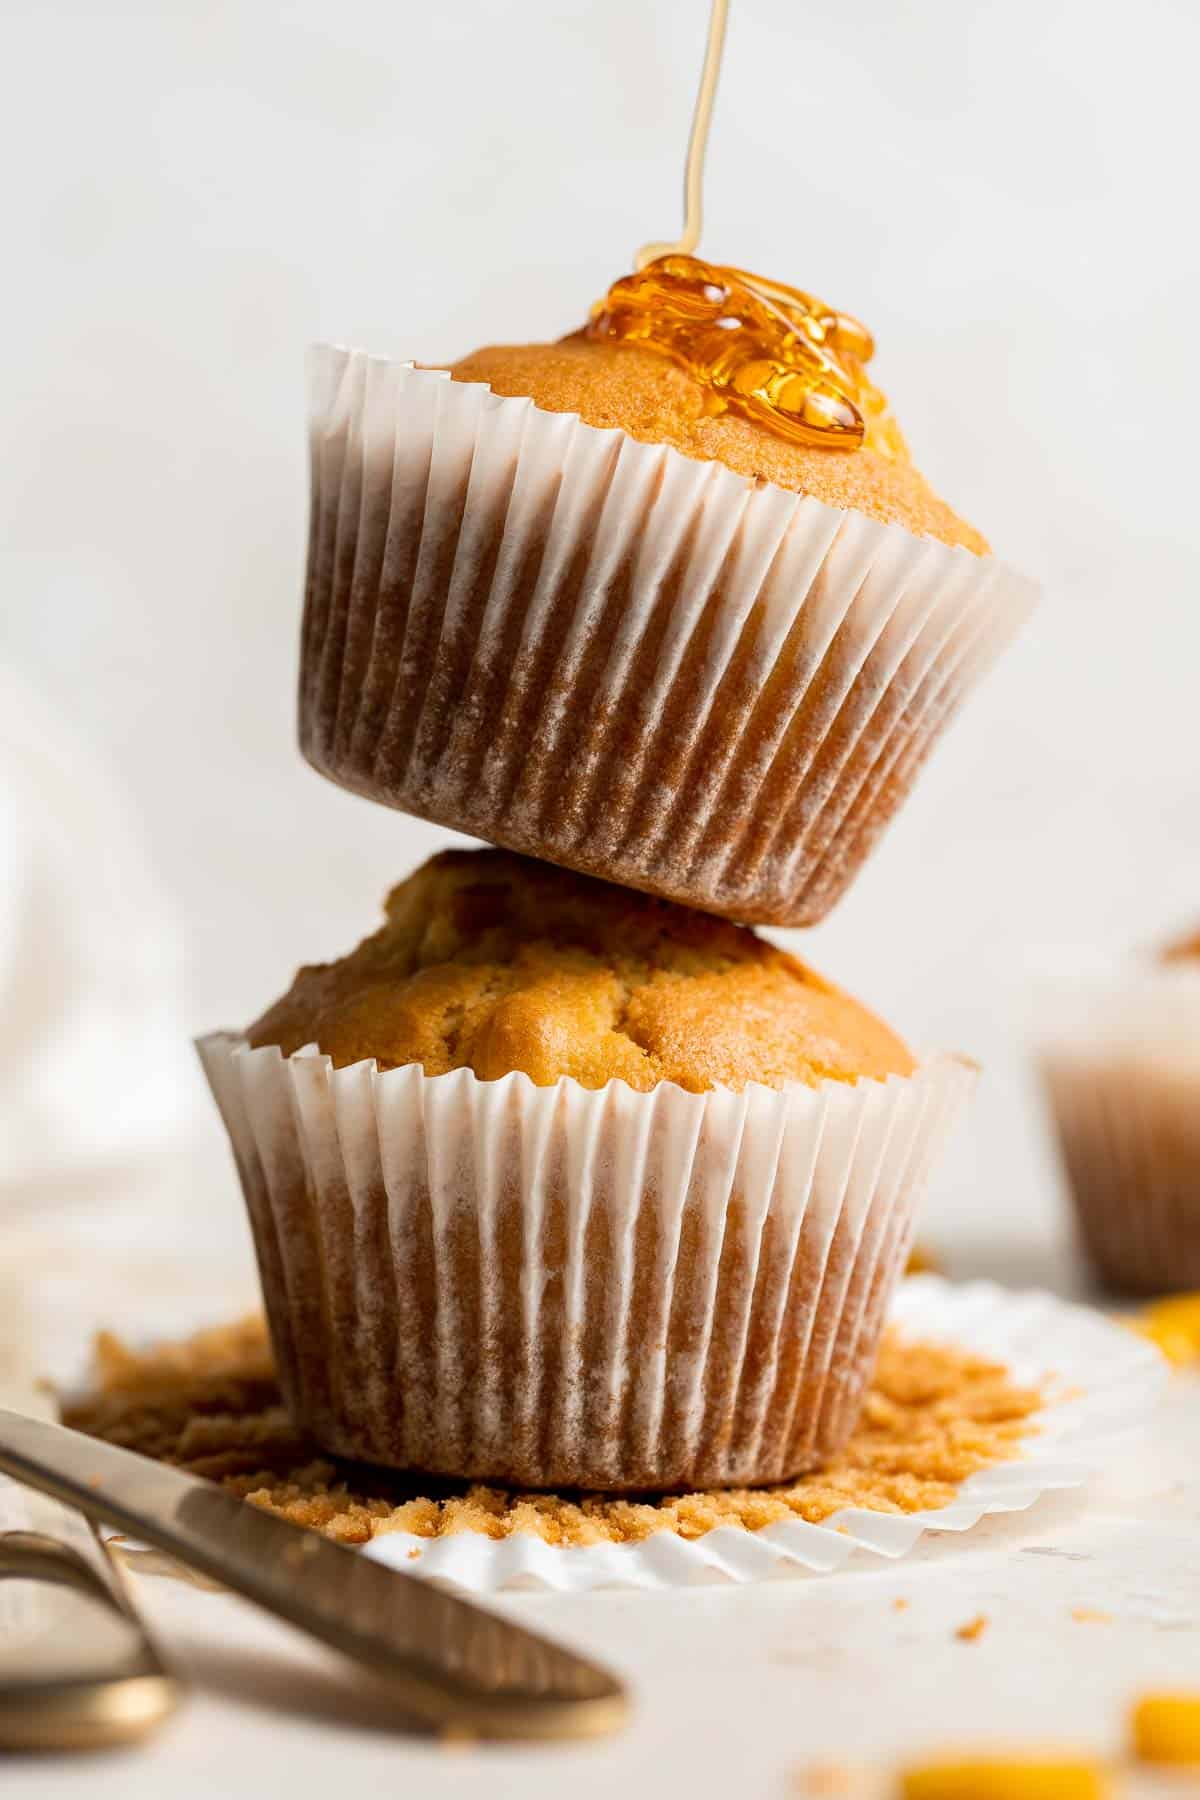
Flaky, fluffy, buttery, and soft, these easy homemade biscuits come together with only a handful of ingredients you already have at home! To serve, brush the tops of the biscuits with melted butter and serve with your holiday meal.
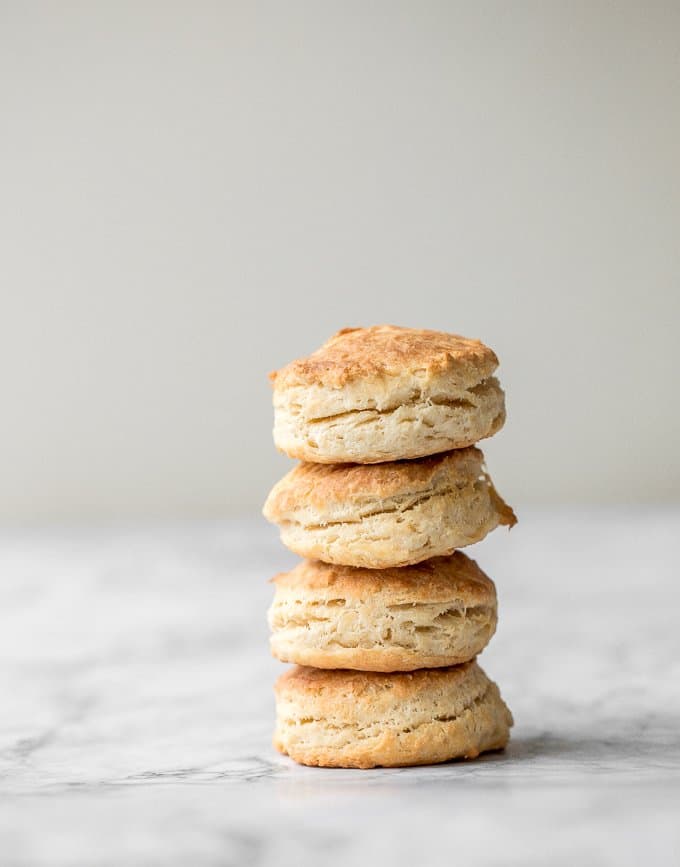
No knead sesame bread is chewy, springy and airy with the perfect crunchy crust coated with sesame seeds. Easy to make with 10 minutes prep and no kneading.
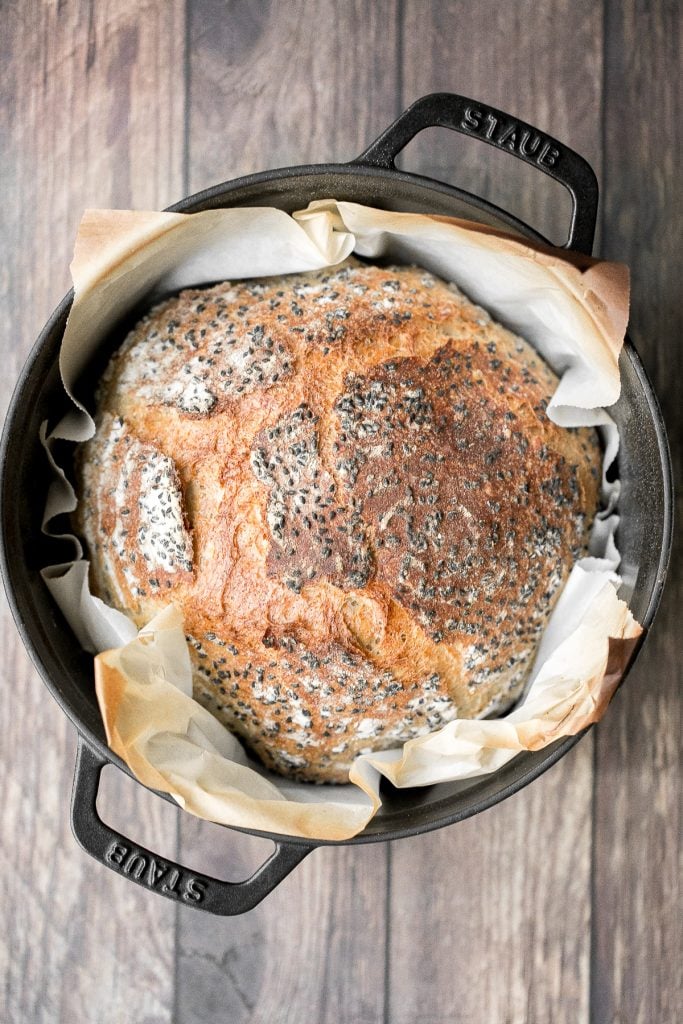
Garlic knots are fluffy on the inside, crispy on the outside, and topped with delicious savory garlic herbed butter that will have you begging for more.
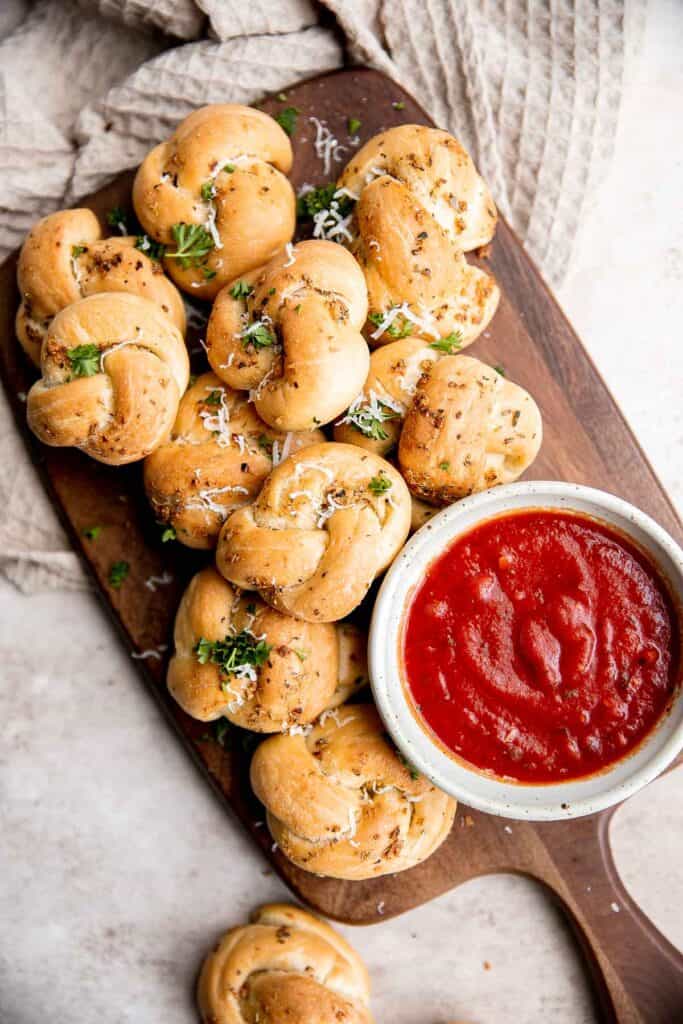
Flaky Garlic Cheddar Biscuits are a simple but delicious and flavorful no yeast bread that is ready for the oven with less than 15 minutes prep. They also make a great leftover breakfast so make a big batch.
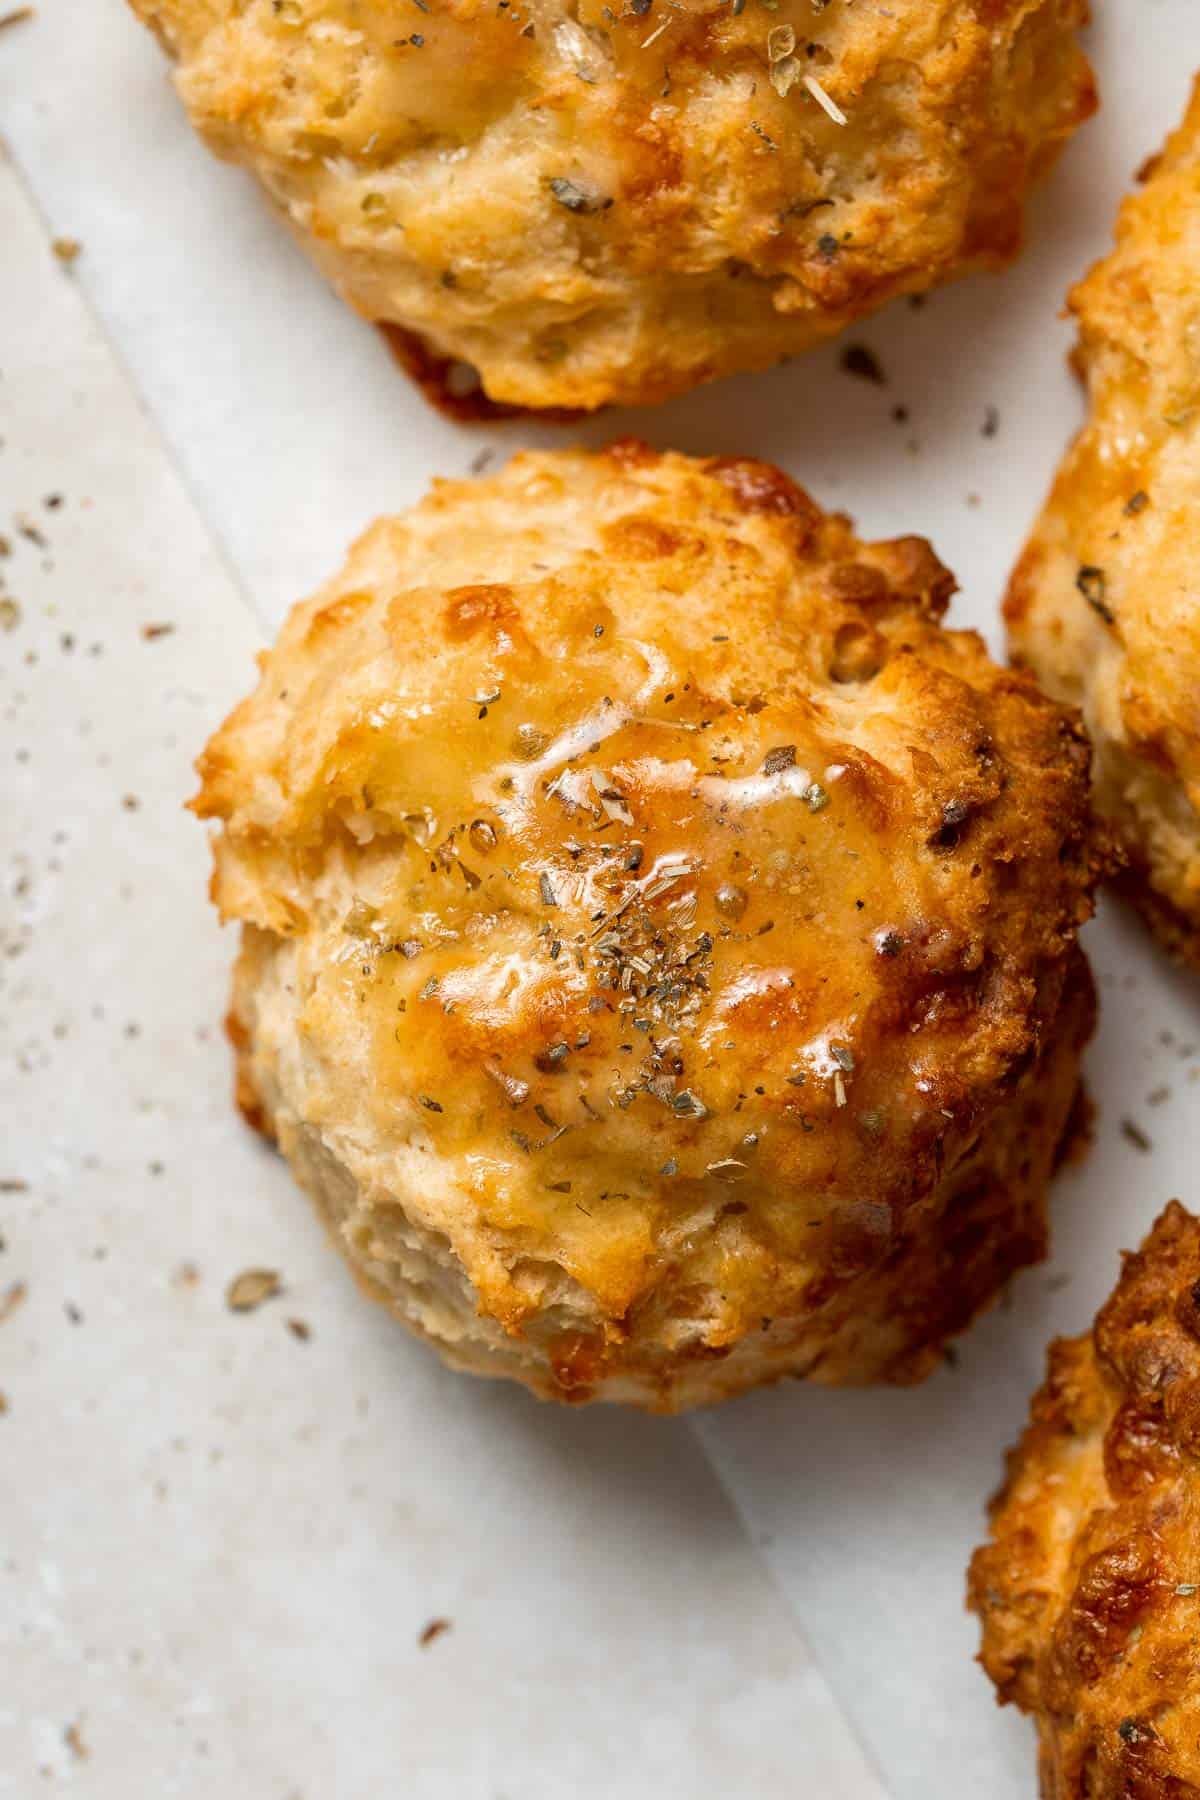
No Knead Tomato Focaccia Bread
Easy no knead tomato focaccia is so flavourful, packed with olive oil, tomatoes and fresh herbs. It's crispy and golden outside, fluffy and pillowy inside.
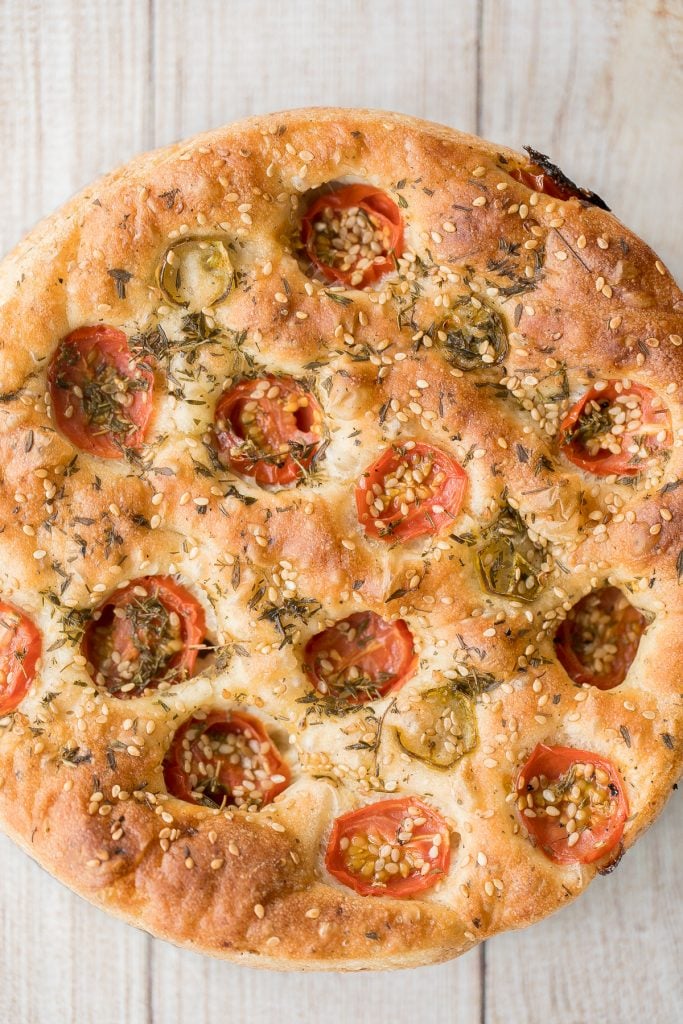
Beautiful three-strand braided loaves of easy challah bread are light, soft and fluffy, with a golden brown crust. Rich in flavour and slightly sweet.
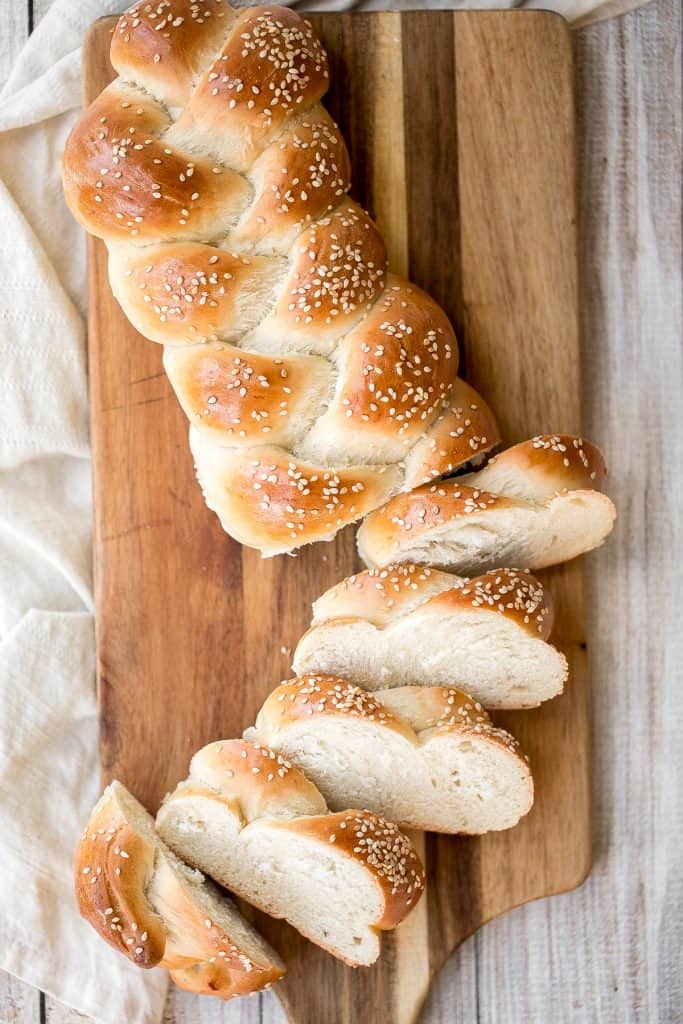
Pull apart garlic bread is fluffy, buttery, flavourful, melts in your mouth, and tears easily for optimal sharing. You don't need any other bread at the dinner table.
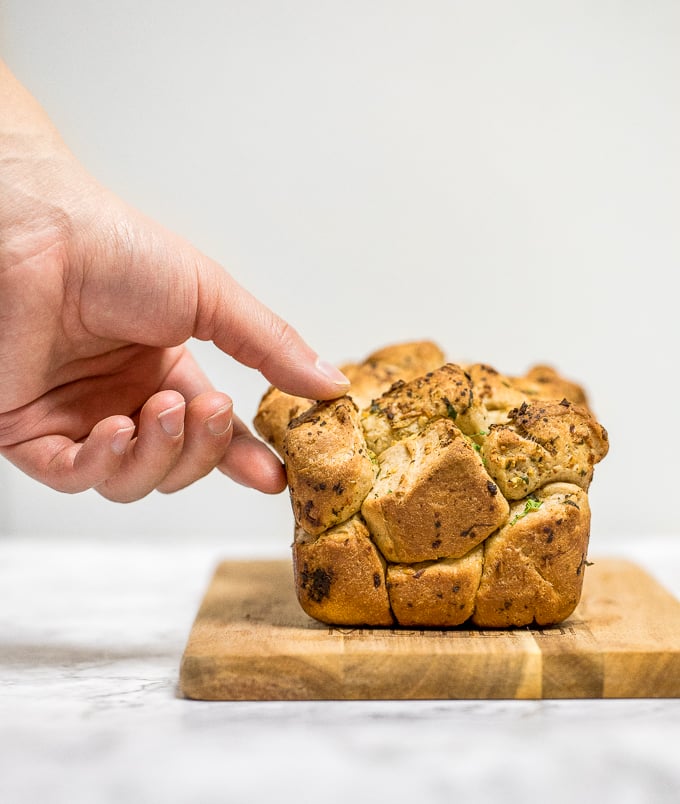
Soft and fluffy, quick dinner bread rolls are loaded with green onions and topped with flaked sea salt and sesame seeds. Ready in just 1.5 hours.
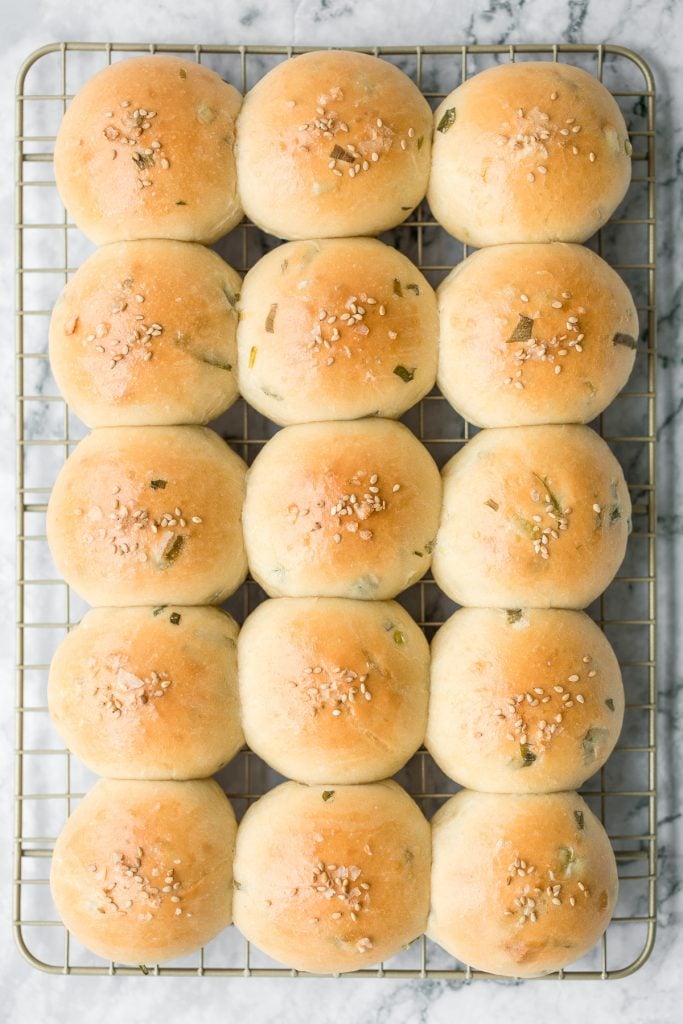
If you have never made bread before, then homemade, fluffy and airy small batch no-knead bread with a perfect crust is the best artisan bread to start with.
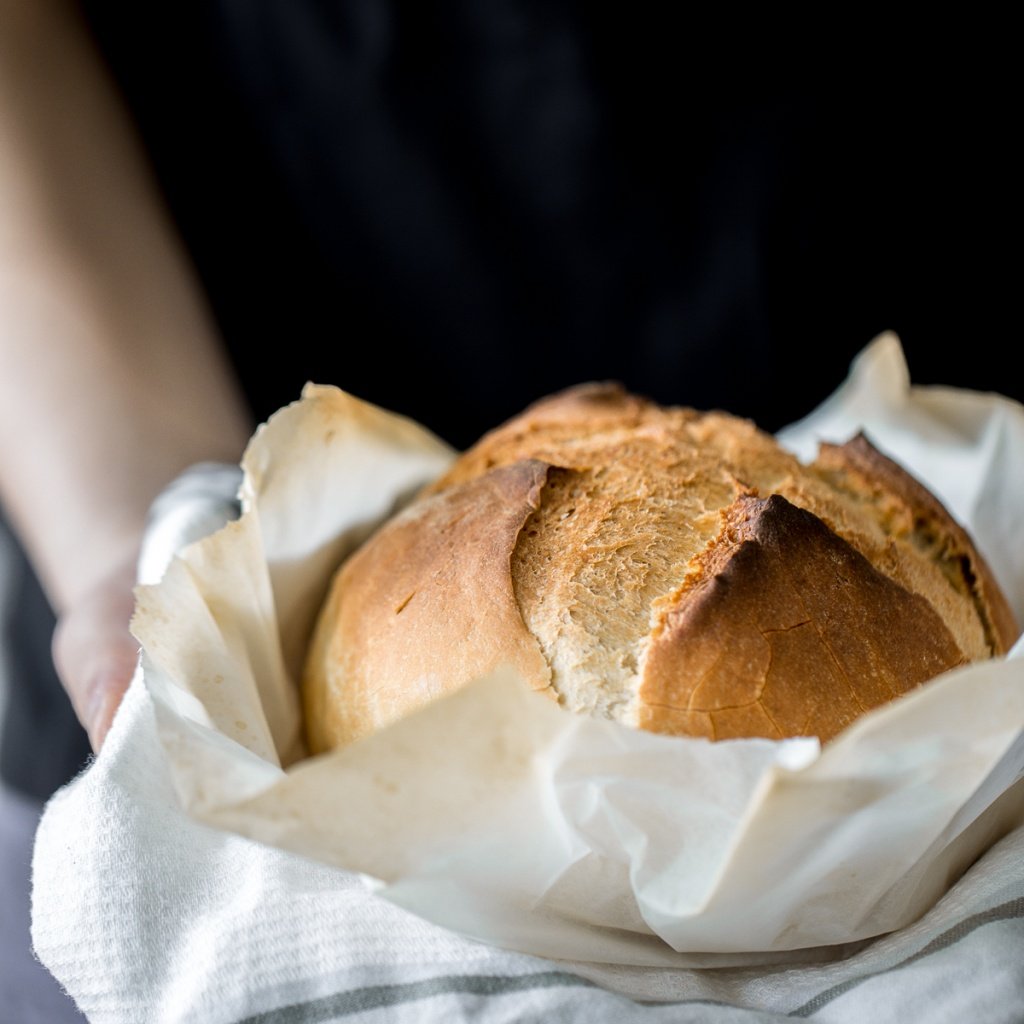
Quick and Easy Skillet Dinner Rolls are soft, fluffy, and served warm right out of the oven making them the only bread recipe you'll need with dinner.
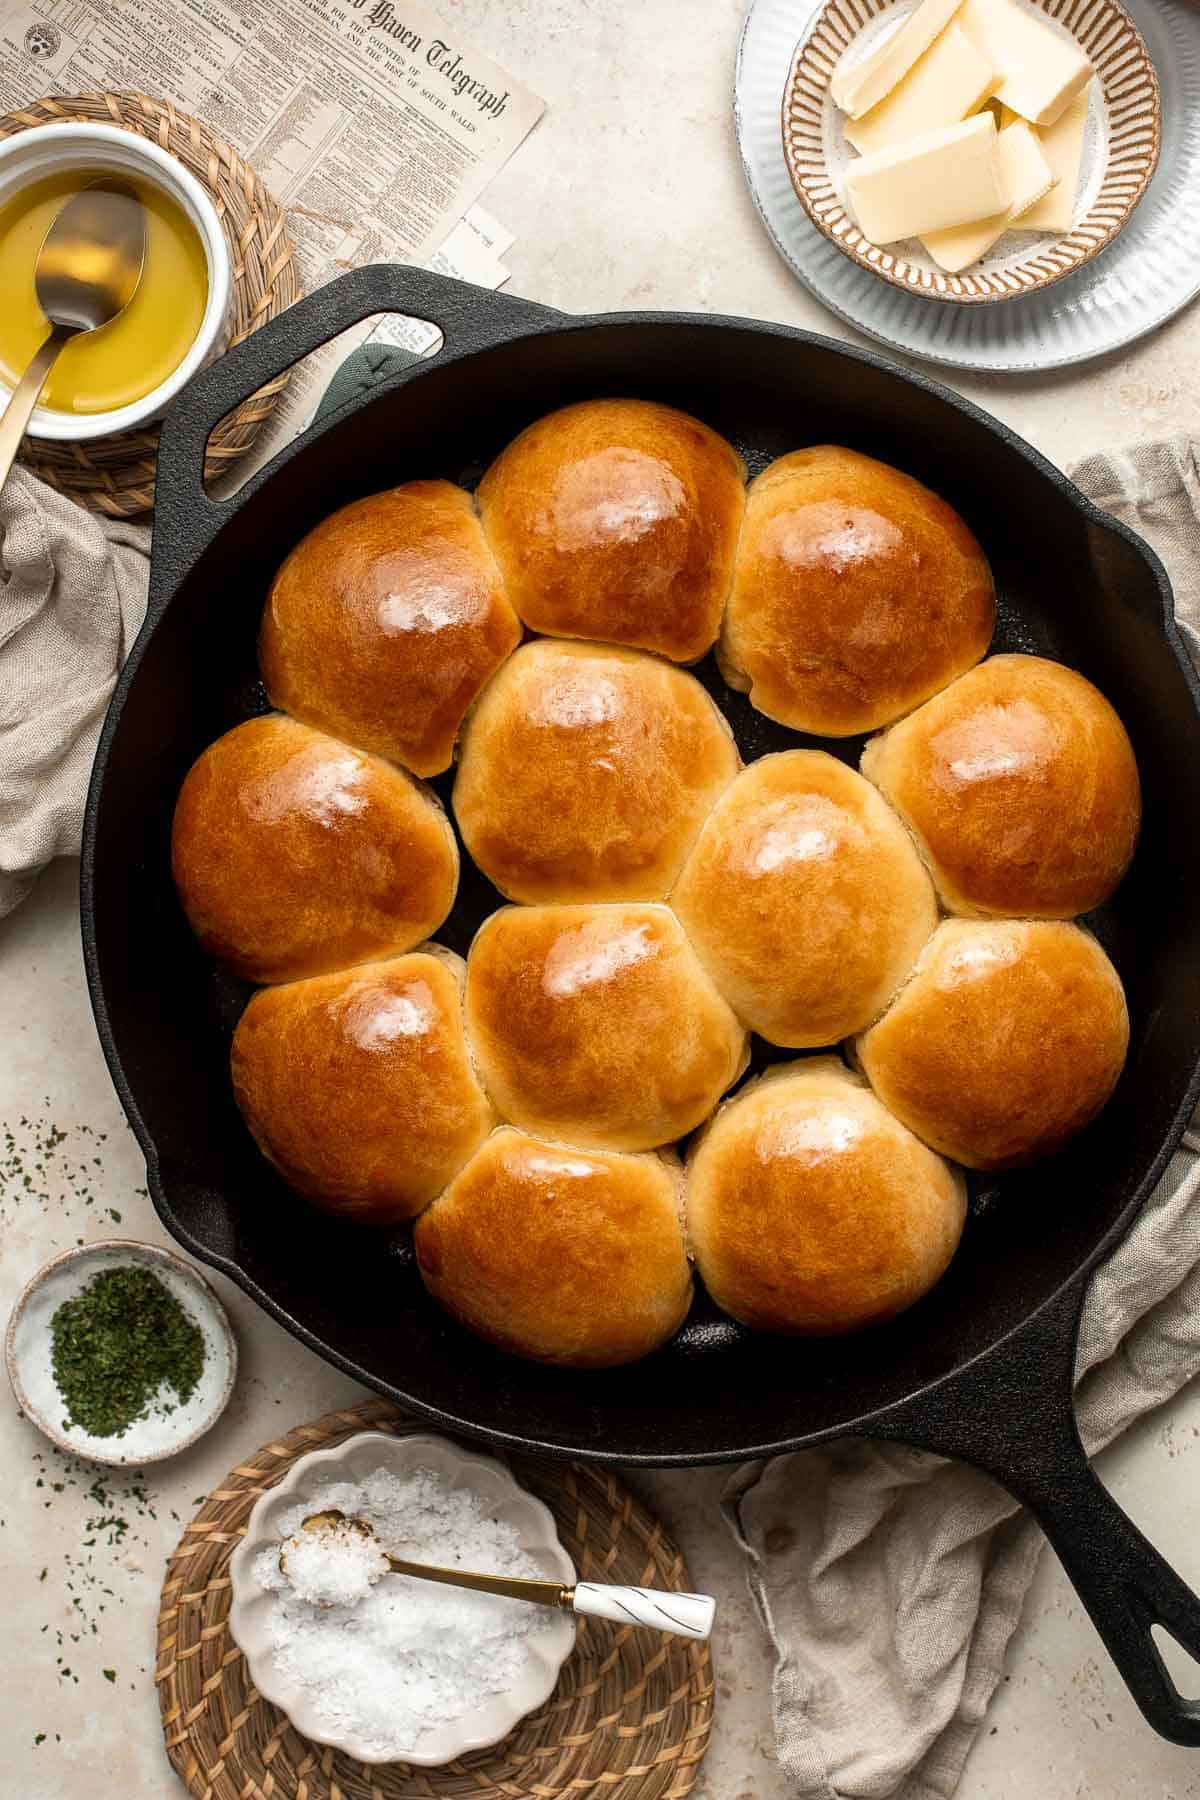
Small batch sourdough bread is airy and chewy with a crisp crust and a mild flavour. It takes less than 15 minutes of actual prep and requires no kneading.
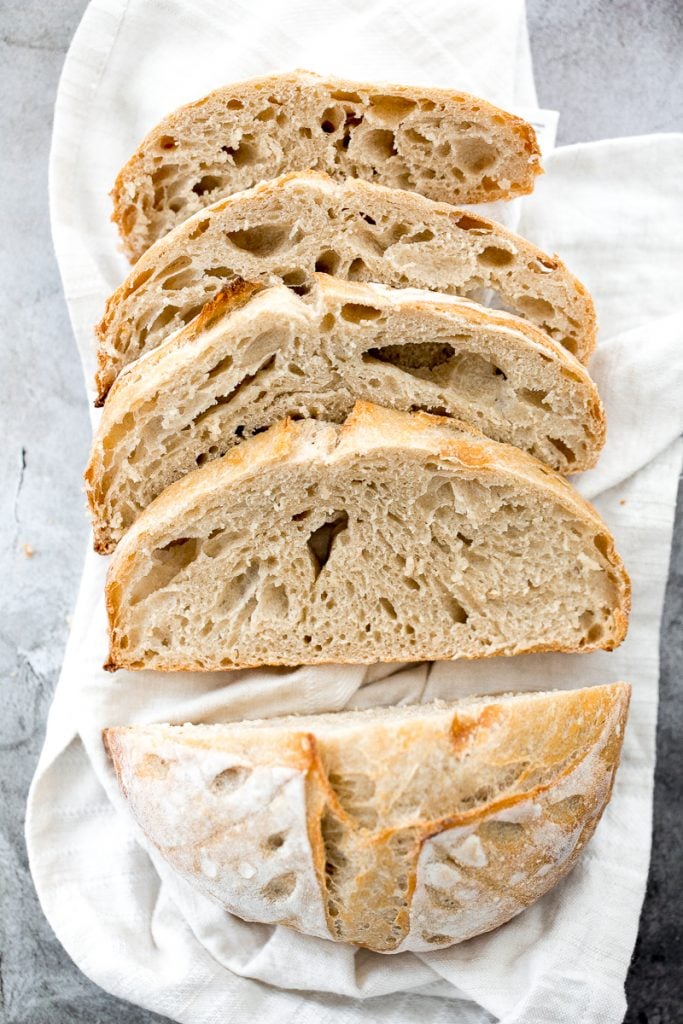
Quick and easy, 90-minute cheesy garlic dinner rolls are soft and fluffy, buttery and garlicky, and full of cheese inside. The perfect side for dinner.
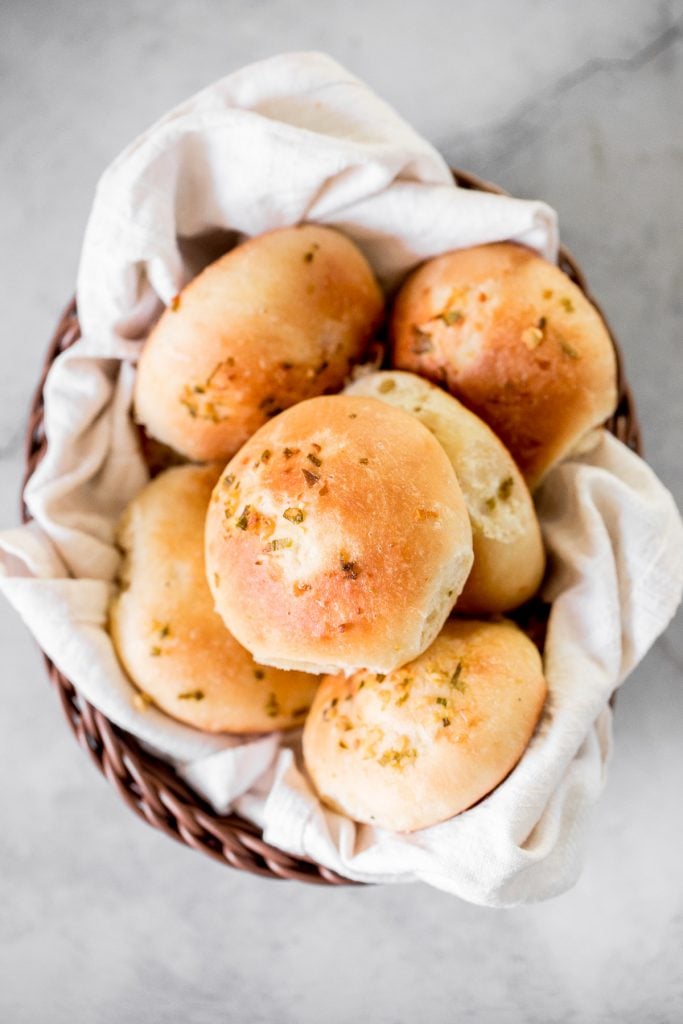
How to Make Ahead and Store Thanksgiving Bread
You can make all of these Thanksgiving bread recipes ahead of time. You can store at room temperature for a few days, in the refrigerator for up to one week, and in the freezer for up to 3 months. To get them nice and warm, just toast them in the air fryer at 350 F for about 5 minutes, or in the oven at 350 F for 10 minutes. If heating from frozen, let it thaw first and then reheat. Making bread days before Thanksgiving will make things so much easier on the day of your holiday meal.
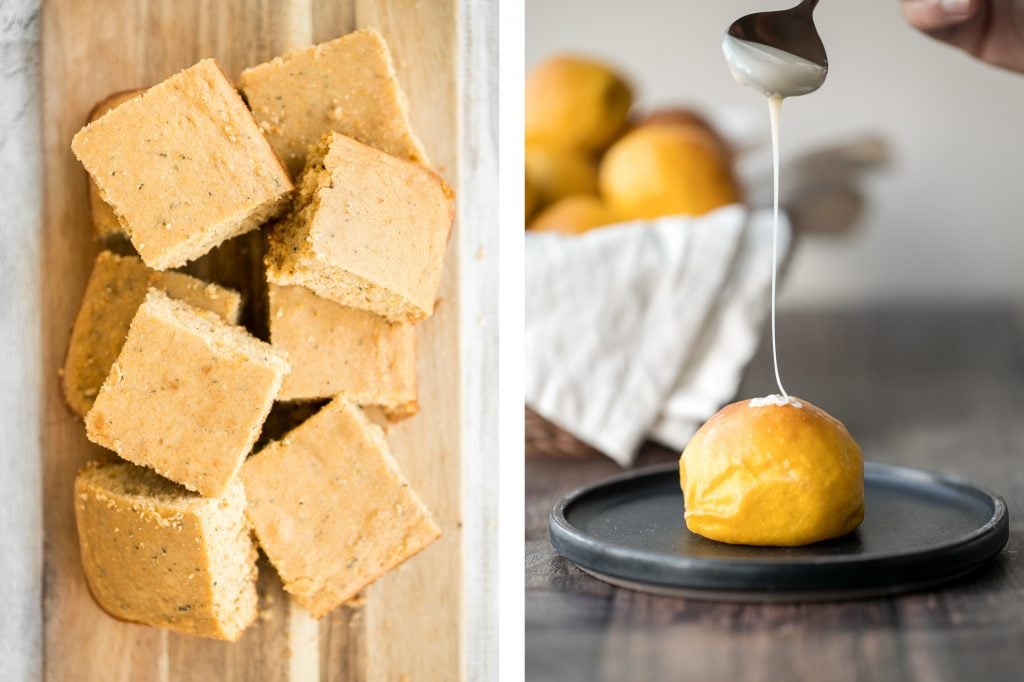
More Thanksgiving Recipes
Make a batch or two of bread to serve on your Thanksgiving dinner menu. Some of my favourite dishes to serve every year are:
- The Best and Juiciest Whole Roast Turkey
- Easy Juicy Roasted Turkey Breast
- Vegetarian Cornbread Stuffing
- Cranberry Walnut Apple Stuffing
- Classic Homemade Turkey Gravy
- Easy Make-Ahead Cranberry Sauce
- The Best and Creamiest Mashed Potatoes
- 10 Minute Nutty Green Beans
- Savoury Mashed Sweet Potatoes
More Thanksgiving Recipe Collections
- 40 Best Thanksgiving Main Dishes
- 50 Best Thanksgiving Side Dishes
- 30 Best Thanksgiving Appetizers
- 25 Best Thanksgiving Dessert Recipes
Did You Make Any of These Thanksgiving Bread Recipes?
Please leave a comment and rating below, and let me know what you thought of this round up of recipes. Be sure to snap a picture and tag me on Instagram @aheadofthyme or share it on the Pinterest pin so that I can follow along.
HUNGRY FOR MORE? Don't forget to sign up for my email newsletter so that you don't miss any recipes. You can also follow along on Instagram and Pinterest for more recipe updates.
Sautéed Garlic Green Beans
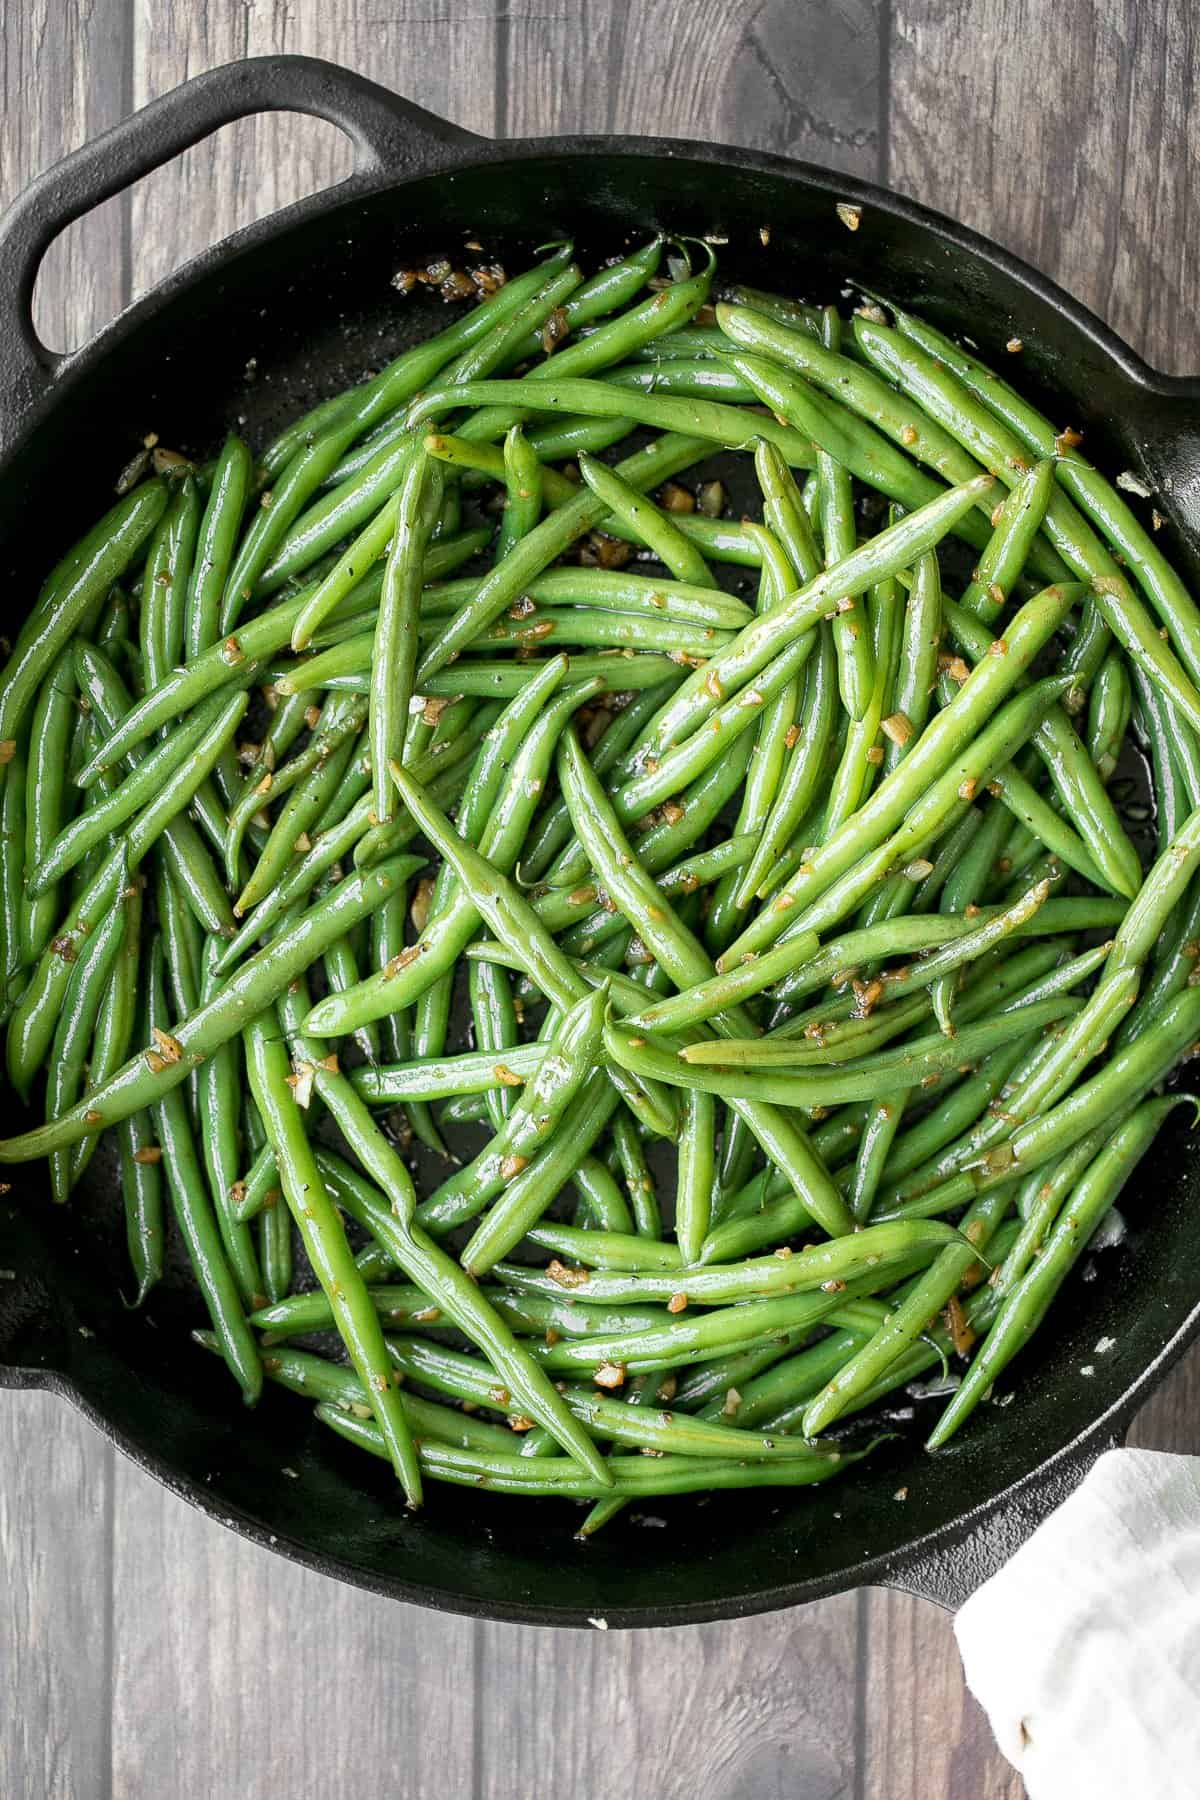
Buttery sautéed garlic green beans is a simple side dish that is quick, easy and delicious. These vibrant green beans have the best crispy yet slightly tender texture. Make this easy side dish in just 10 minutes to elevate any meal. So so good.

Sautéed garlic green beans are the perfect side dish to any meal. I like to pair it with roast chicken, steak, lamb chops, and turkey. But my favourite way to serve this is for Thanksgiving dinner, alongside some of my favourite sides such as creamy mashed potatoes, roasted butternut squash, and potatoes au gratin. And don't forget the cranberry sauce and stuffing.
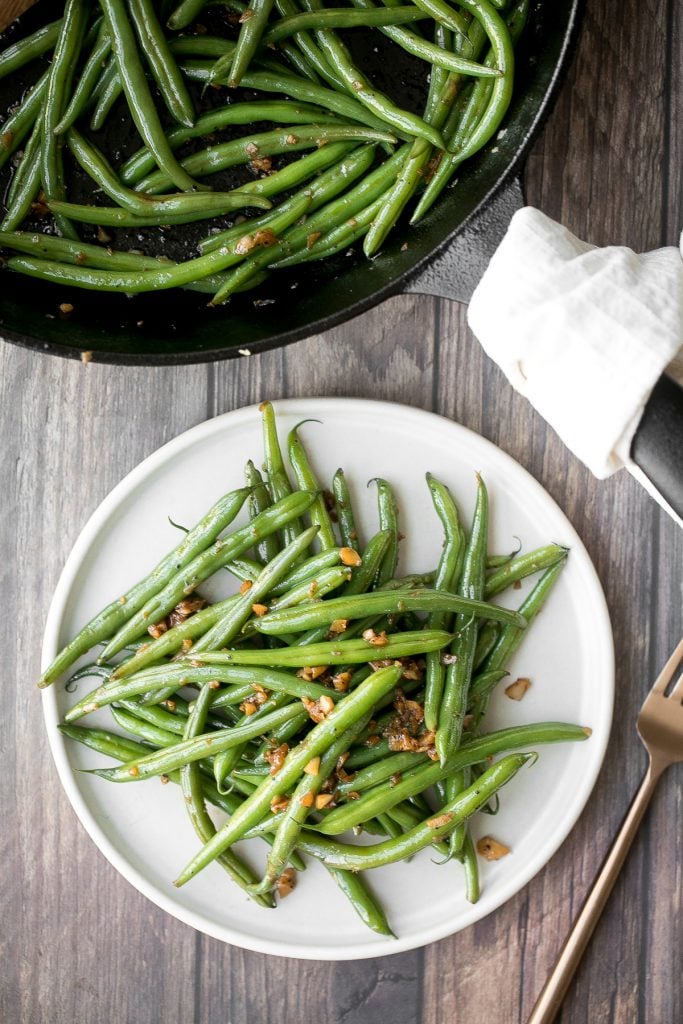
Ingredients
You will need just a handful of simple ingredients for this recipe:
- green beans - trim them by lining them up and cutting the ends off with a knife.
- garlic - lots of garlic.
- butter - you can also use olive oil.
- soy sauce - adds a hint of flavour.
- salt and pepper
You will also need a medium pot and a skillet.

How to Make the Best Sautéed Garlic Green Beans
In a medium pot, bring 5 cups of water over medium high heat. Add green beans in the boiling water and cook for 4-6 minutes until tender. Drain and set aside.
In a large skillet, heat butter over medium high heat for 2 minutes until it melts and sizzles. Add garlic and sauté for 2-3 minutes until the garlic turns golden brown and is fragrant.
Add the cooked green beans and sauté for another 2-3 minutes. Stir well to coat the green beans with butter garlic sauce. Add soy sauce, salt and pepper. Stir well to mix evenly, about 1 minute.
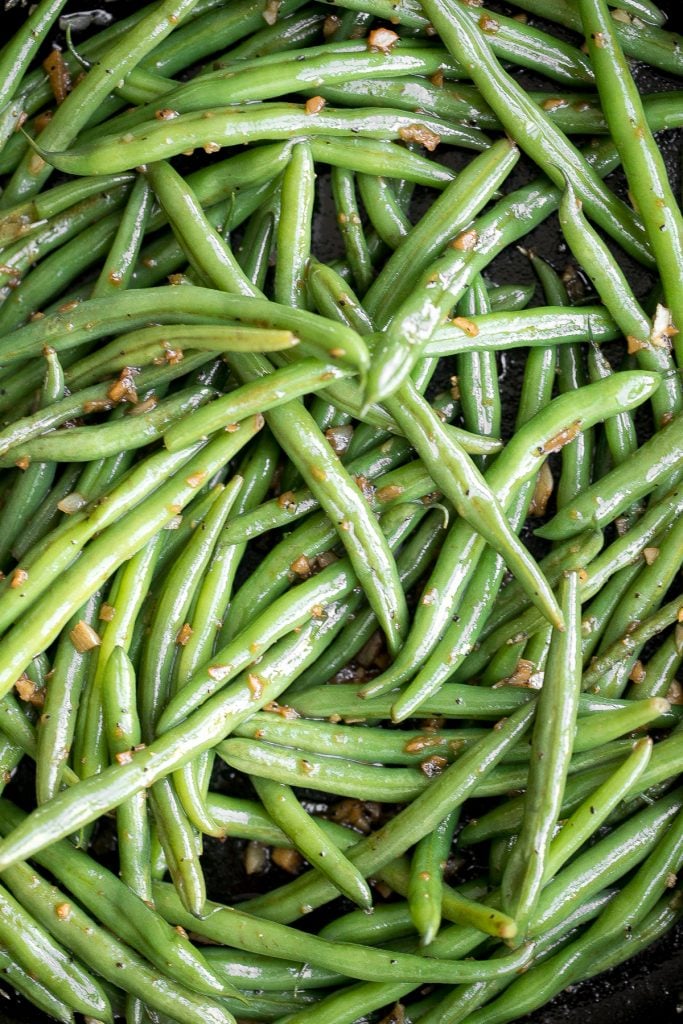
Tips for Making Green Beans
- How to store: Store green beans in an airtight container for up to 4 days in the refrigerator. Reheat for a few minutes on the stove over medium heat.
- How to use frozen green beans: Allow the green beans to thaw and then them straight into the skillet. You do not need to boil them first.
- How to customize: There are so many ways that you can customize this side dish. Some popular ingredients that you can add are crispy bacon, Parmesan cheese, and toasted crushed almonds or pecans.
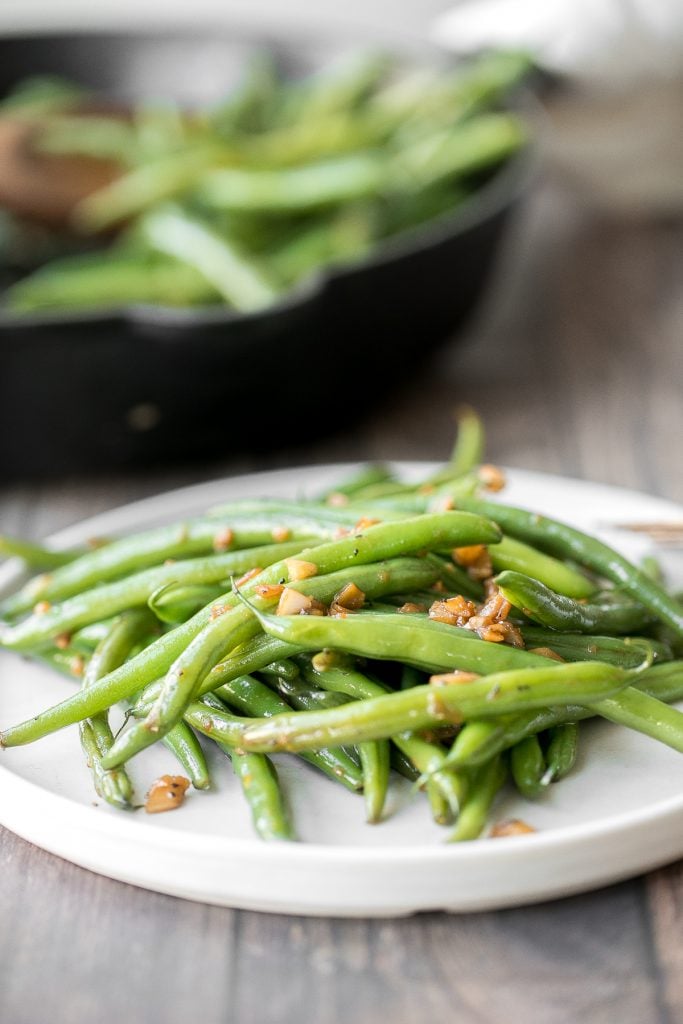
More Green Bean Recipes
Tried this recipe?
I'd love to hear what you think! Leave a comment and rating below to share your feedback. Your reviews help others discover this recipe and help me keep creating more free recipes for you. Snap a photo and tag me on social media @aheadofthyme too.
Leftover Turkey Fried Rice

Leftover turkey fried rice with lean and delicious cooked turkey, light and fluffy rice, perfectly scrambled eggs, colourful vegetables, and classic Asian seasonings, is just what your healthy meal planning menu needs. Plus, it's made in one skillet in just 10 minutes. Hello new favourite easy weeknight dinner!
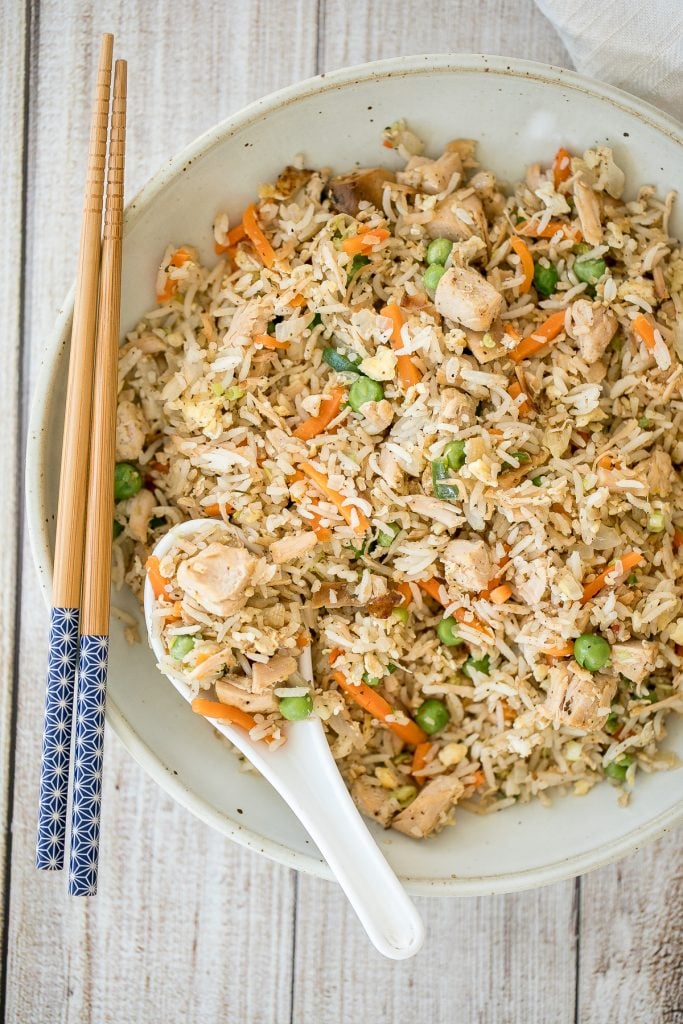
With Thanksgiving coming up in less than a week, it's never too early to start planning ahead on what to do with all those delicious turkey leftovers, especially if you are like me and end up with a big stash of crave-worthy turkey meat after the holidays. Turkey fried rice is the perfect way to use it up in another meal that the whole family will love.
I love using turkey meat in fried rice because it is a super versatile protein that just soaks up all of the delicious Asian flavours that are thrown in there.
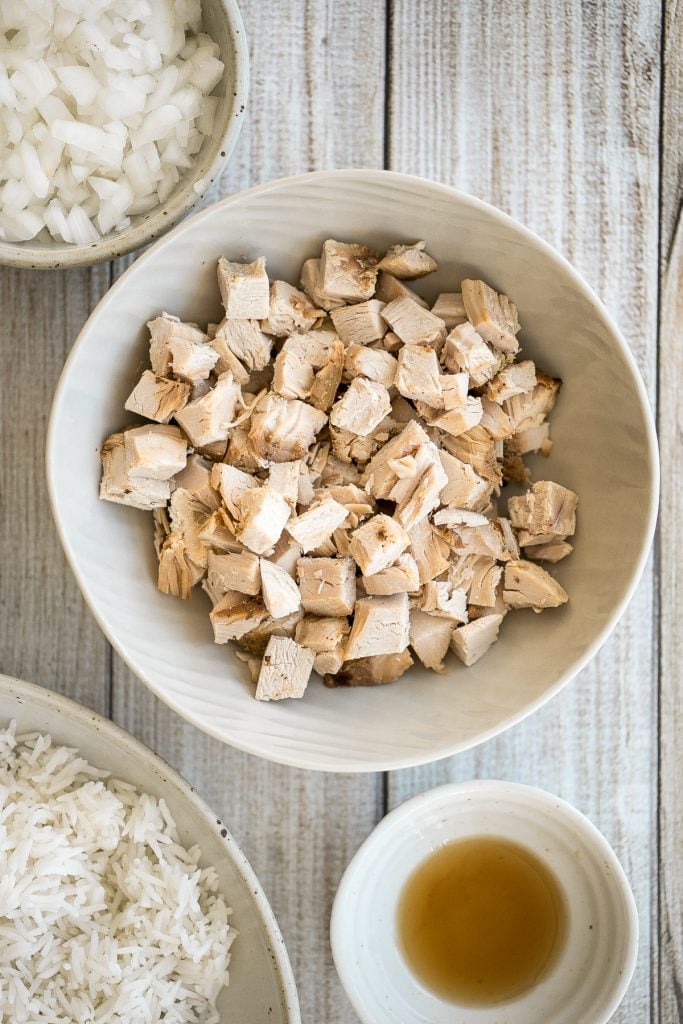
I have partnered with the Turkey Farmers of Canada to bring you this delicious leftover turkey fried rice recipe. All images and opinions expressed are my own.
Ingredients in Turkey Fried Rice
- leftover cooked turkey - you will need 1.5 cups of leftover shredded or cubed cooked turkey. I used turkey breast (about one-third to half of one breast) but you can use any part of the turkey. This is a great way to use up leftovers that you may have from a whole roasted turkey, roasted turkey breast, or slow cooker turkey breast.
- white rice - freshly cooked works best in this recipe, but you can easily use leftover rice. You will just need to add some water (up to ¼ cup) to soften the rice.
- eggs - a staple in fried rice dishes.
- vegetable oil - required for any stir-fry.
- onions
- garlic
- jalapeño pepper - optional, for a spicy kick
- green onions
- carrots and peas - I used a frozen vegetable mix to make it easy. You can add them into the stir fry directly from the freezer.
- seasonings - soy sauce, sesame oil, vegetable stock powder (or chicken stock powder), white pepper, salt and ground black pepper.
- white sesame seeds (for garnish)
You will also need a large wok or skillet.
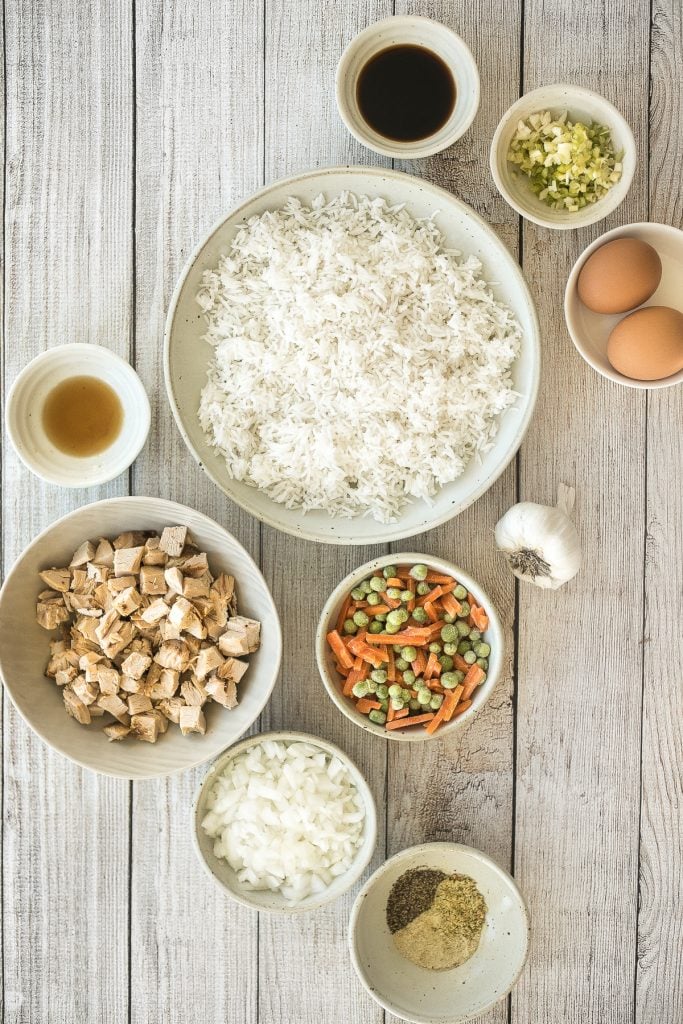
How to Make the Best Leftover Turkey Fried Rice
Leftover turkey fried rice is so easy and convenient to make. It takes about 5 minutes to prep, and just 10 minutes to stir-fry.
First, heat oil in a large wok or skillet over medium high heat for 2 minutes until the oil sizzles and shimmers. Add onions and garlic and sauté with a spatula for 2 minutes until fragrant. Stir in jalapeño (if using).
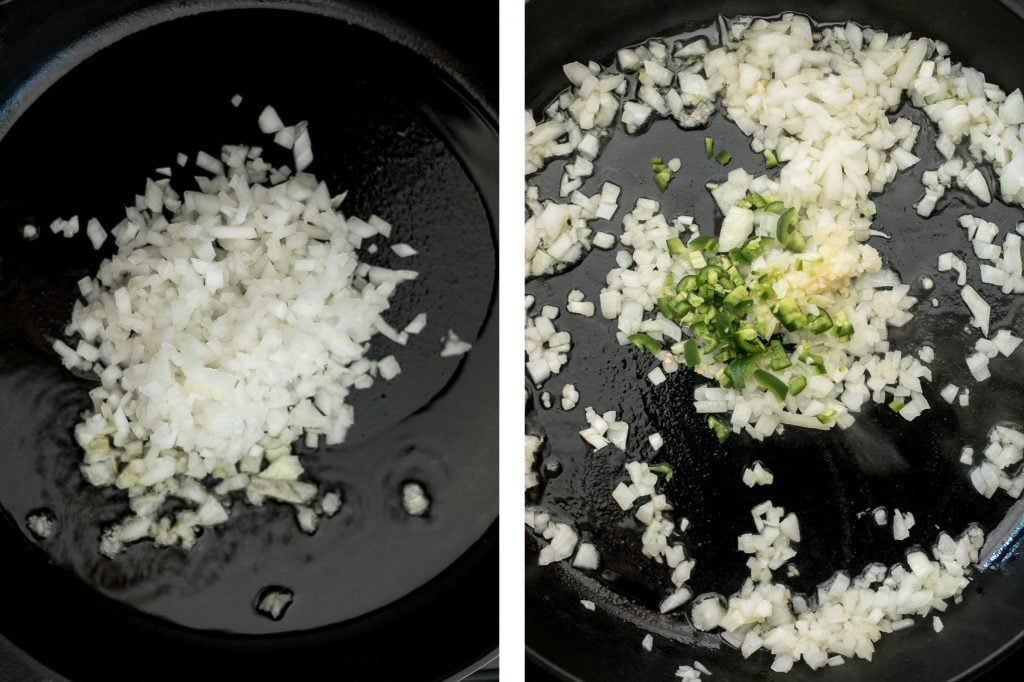
Add shredded or cubed turkey and stir to combine, about 1 minute. Move the turkey mixture to one side of the skillet and add eggs to the empty space in the skillet. Stir the eggs until scrambled and cooked through, yet still tender, about 1 minute. The eggs should be springy and bright in colour, and not too dry at this stage. Stir to combine all ingredients together.
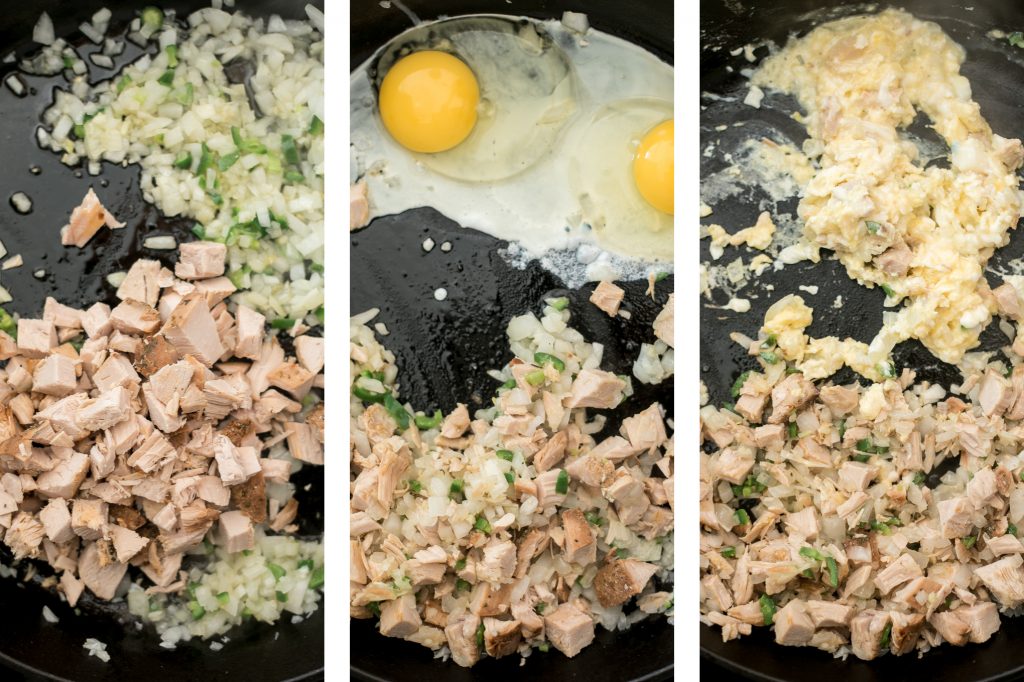
Add cooked rice and all seasoning including soy sauce, sesame oil, vegetable stock powder, white pepper, salt and black pepper. Stir well to combine, about 2 minutes. If rice is not soft enough, add up to ¼ cup of water to soften it.
Add carrots and peas, and stir fry for 2 minutes to evenly mix and distribute the ingredients. Then, stir in green onions.
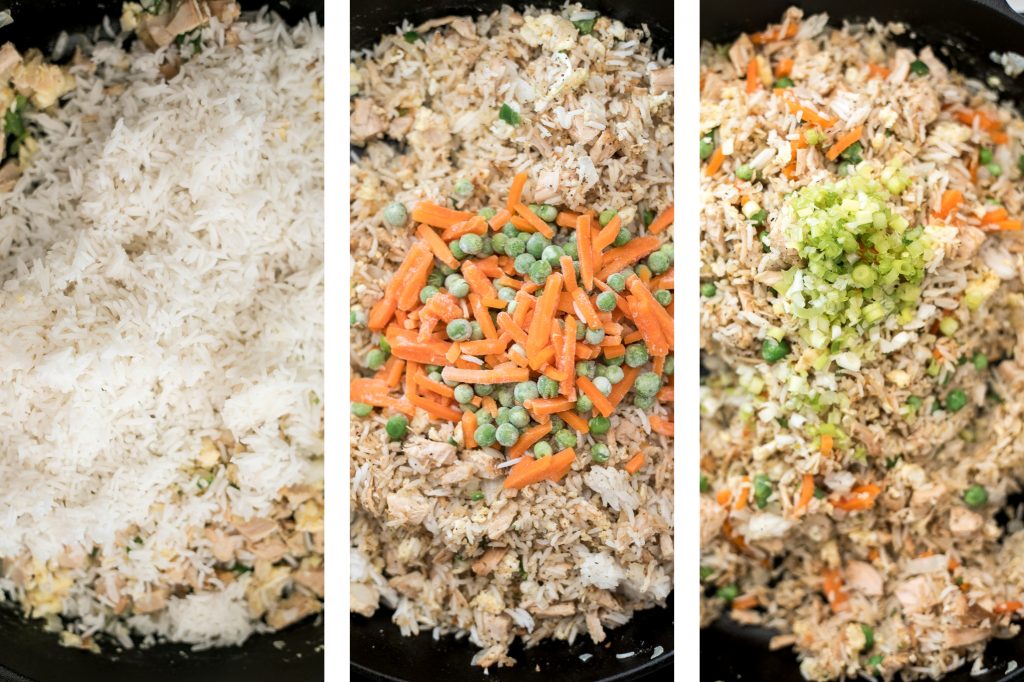
Serve hot on a plate and sprinkle sesame seeds on top.
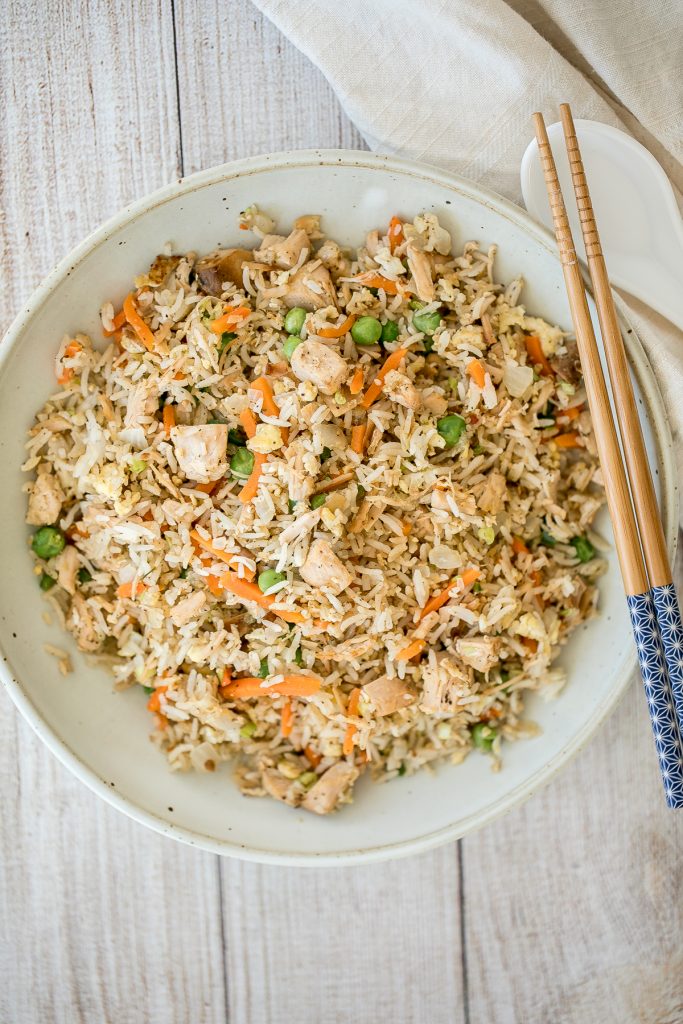
Leftover Turkey Fried Rice Variations
Turkey is great at taking on different flavours across all cuisines. Here are some ways that you can change up the flavours in this fried rice:
- Customize the vegetables: You can throw in whatever vegetables that you have on hand, just chop them up into bite-sized pieces. Some of my favourites to use are bean sprouts, cabbage, cauliflower and broccoli.
- Customize the seasoning:
- Add in a spoonful of teriyaki sauce for a Japanese twist.
- Add in spoonful of satay sauce for a Malaysian twist.
- Replace the soy sauce with fish sauce and add in some roasted peanuts for a Thai variation.
- Add in a spoonful of BBQ sauce for another variation.
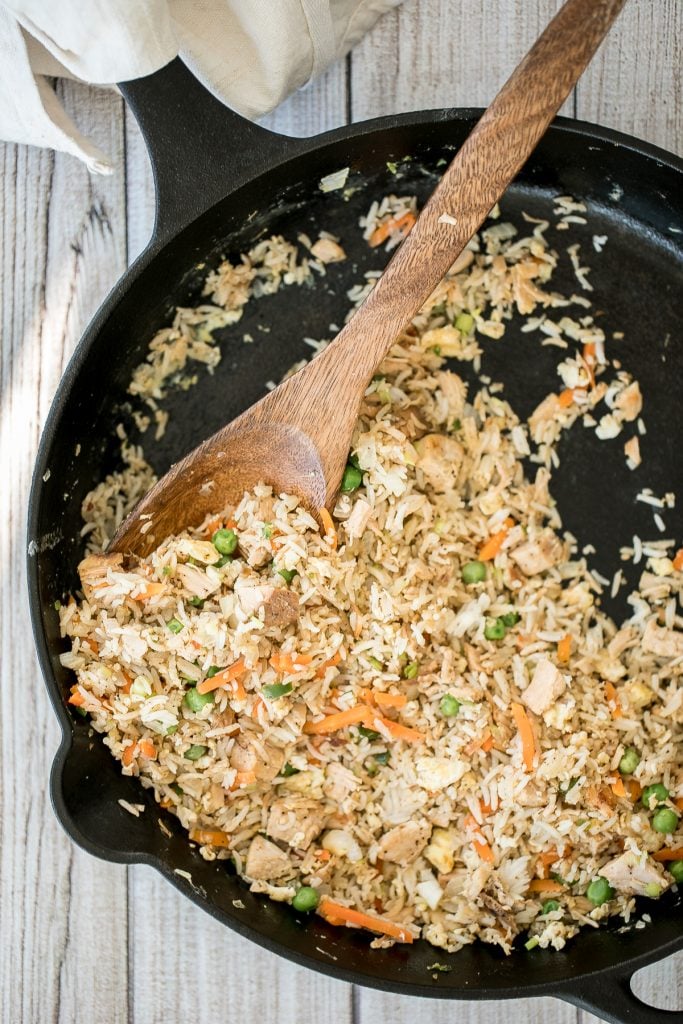
Tips and Tricks
- Prep the ingredients. Have all your ingredients prepped and ready and within hands reach before you begin. Cooking fried rice is a very fast process and things move fast. Being prepared will ensure that the process goes smoothly.
- Continuously stir. Cooking a good stir-fry is all about continuously stirring over high heat. This ensures an even distribution of heat and even cooking. I usually use 2 spatulas to stir fry evenly and quickly.
- How to store. Store fried rice in an airtight container for up to 3 days in the refrigerator. You can reheat in the microwave or for a few minutes on a skillet.
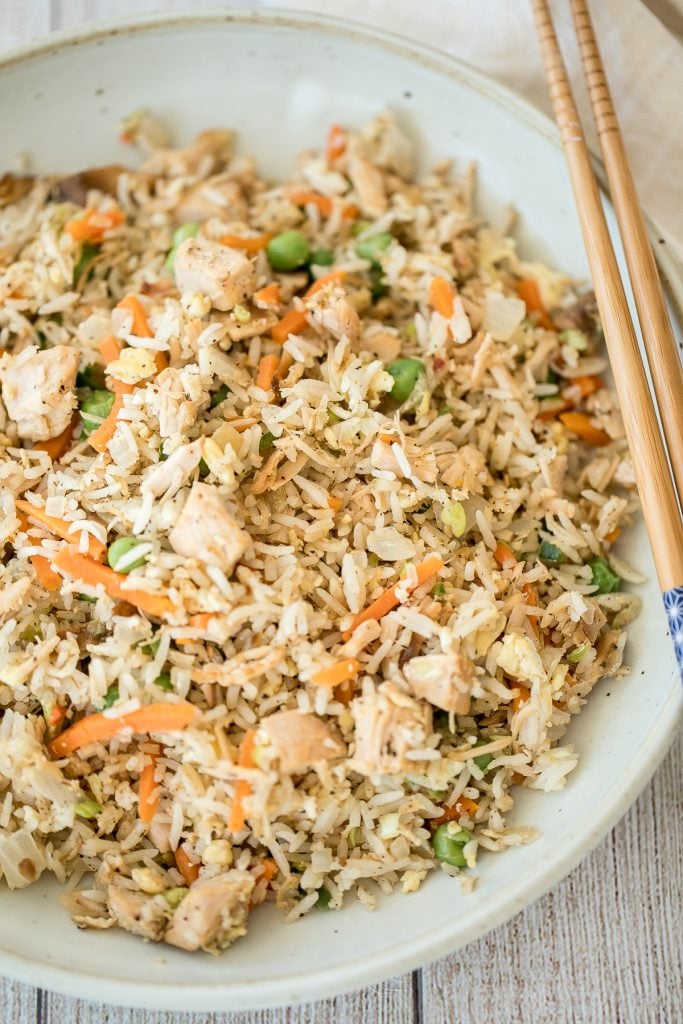
More Leftover Turkey Recipes
- Leftover Turkey Stuffed Peppers
- Creamy Turkey Orzo Soup
- Leftover Turkey Wild Rice Soup
- Turkey Tetrazzini with Spinach
- Leftover Thanksgiving Turkey Sandwich
Tried this recipe?
I'd love to hear what you think! Leave a comment and rating below to share your feedback. Your reviews help others discover this recipe and help me keep creating more free recipes for you. Snap a photo and tag me on social media @aheadofthyme too.
Vegetarian Cornbread Stuffing
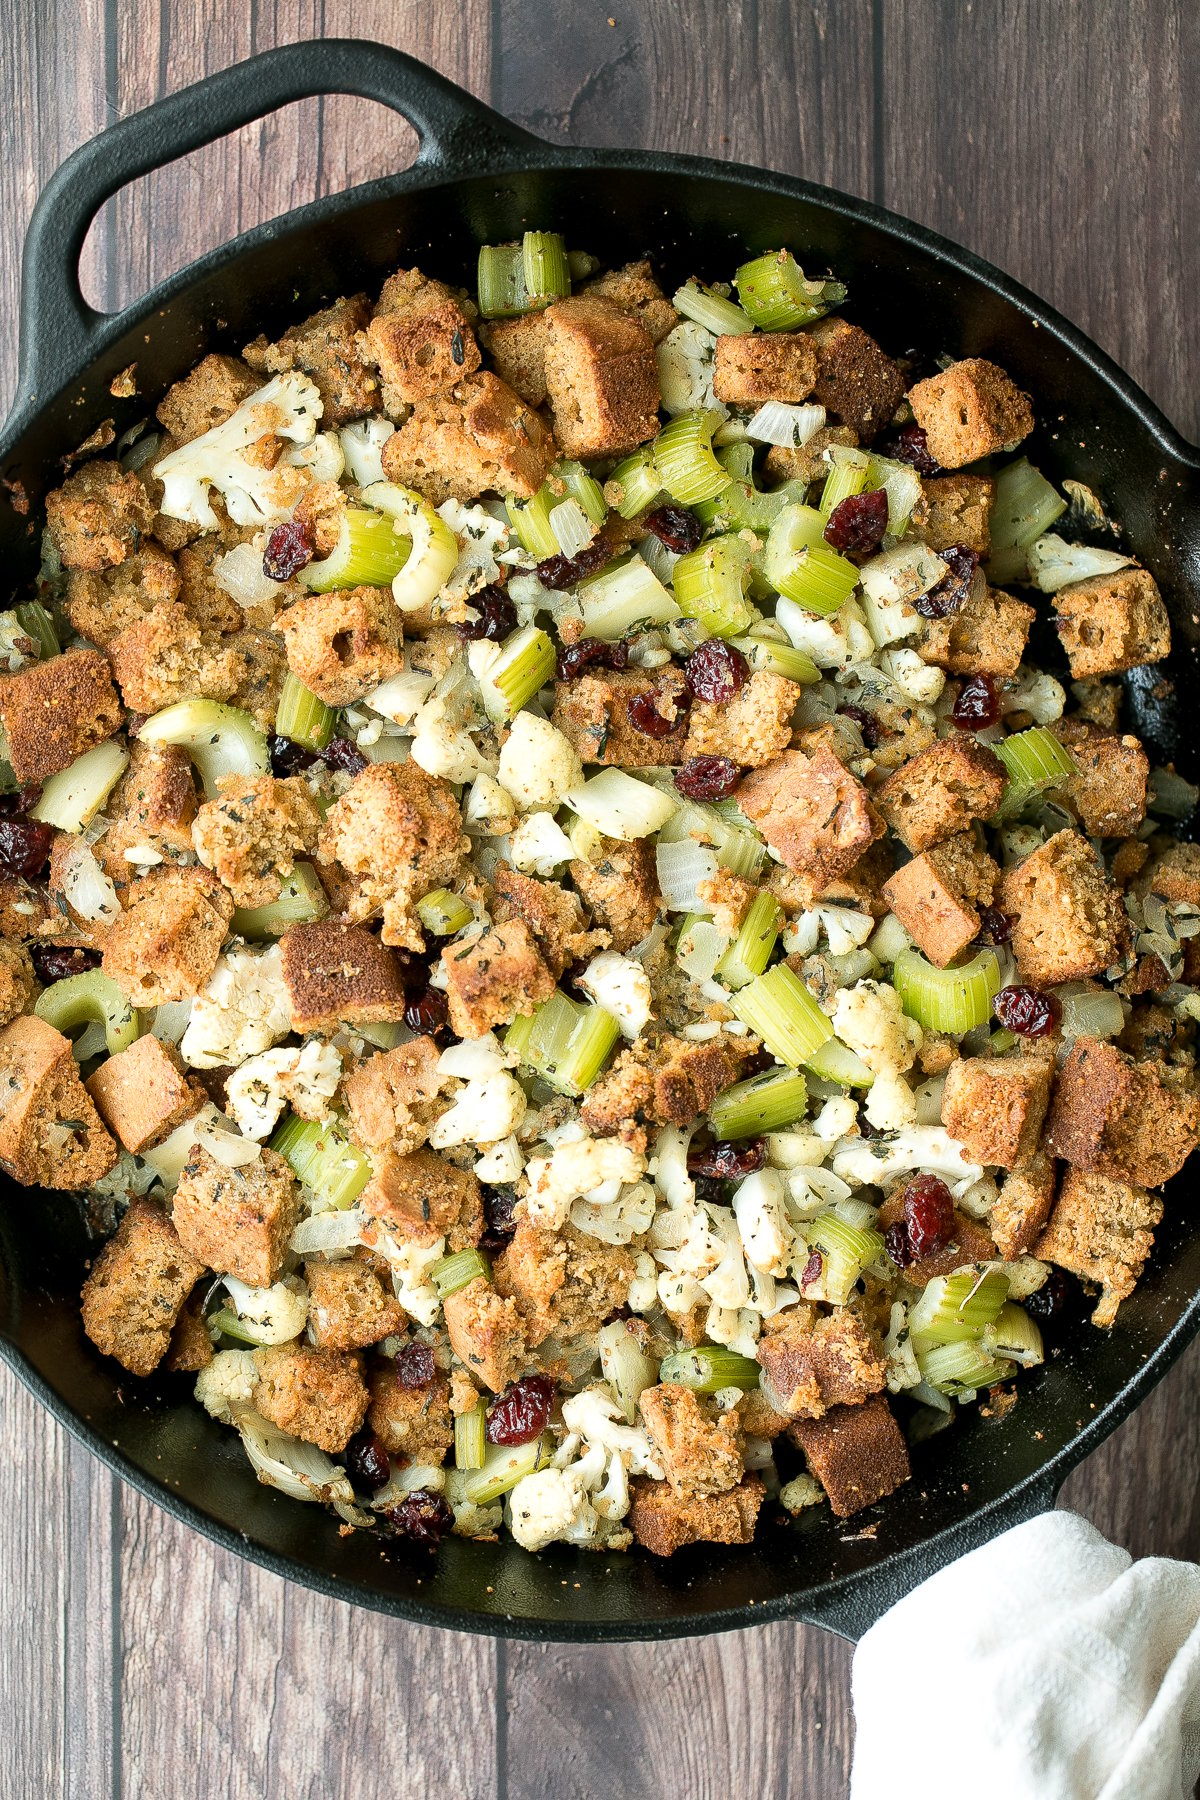
Easy vegetarian cornbread stuffing is the perfect side to serve at your Thanksgiving holiday dinner. It is so flavourful, moist and soft inside, and crispy and golden on top. This stuffing is packed with toasted cornbread, savoury celery and onions, sweet dried cranberries, and fresh thyme, and is all mixed with vegetable stock. It is easy to make ahead of time and can even be prepped a day in advance.
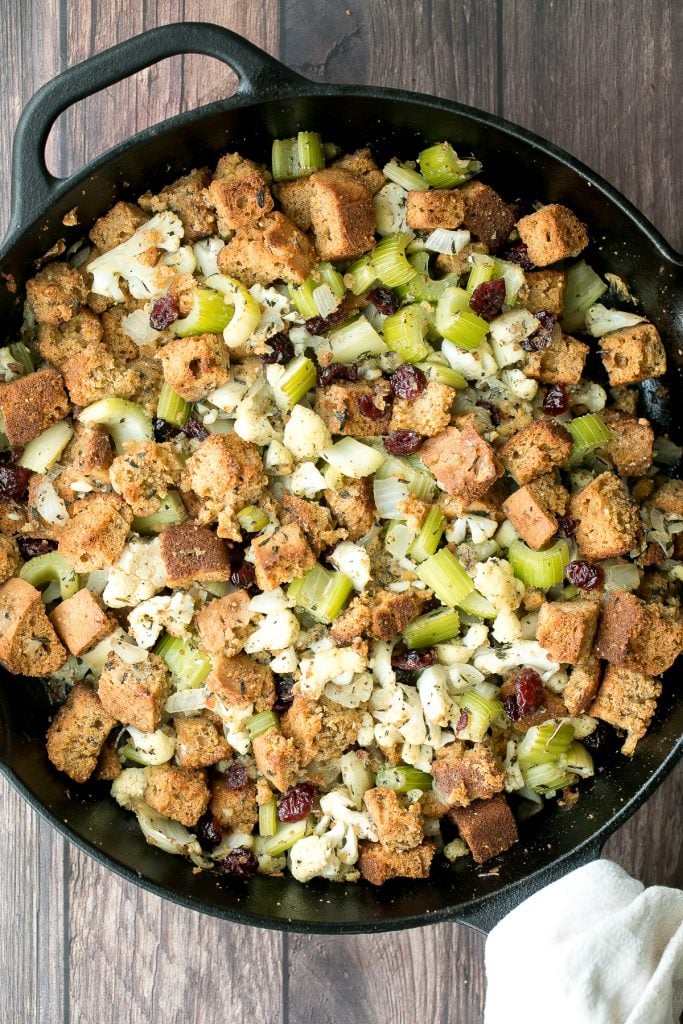
Thanksgiving dinner is all about the side dishes, and stuffing is kind of the ultimate Thanksgiving side dish. But if you want to make something a little different from the usual stuffing made with bread (like my cranberry walnut apple stuffing), why not try cornbread dressing? Cornbread just adds such a comforting and unique flavour to this stuffing. Especially if you use my rosemary cornbread... hello extra herby flavour!
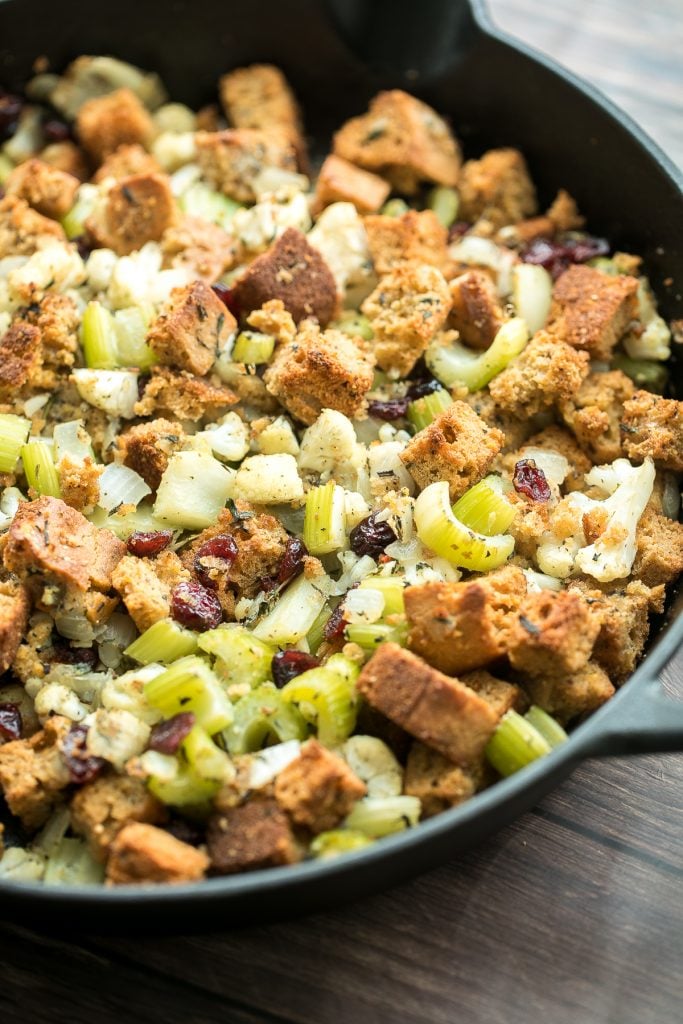
Ingredients
- cornbread - you can use homemade or storebought cornbread, cut into 1-inch cubes. I used my rosemary cornbread in this recipe. You can also break up any leftover cornbread muffins into 1-inch pieces.
- olive oil
- onions
- garlic
- celery
- cauliflower
- fresh thyme
- salt and pepper
- vegetable stock - you can also use chicken stock or turkey stock.
- dried cranberries
- egg
You will also need a cast-iron skillet and large baking sheet pan.
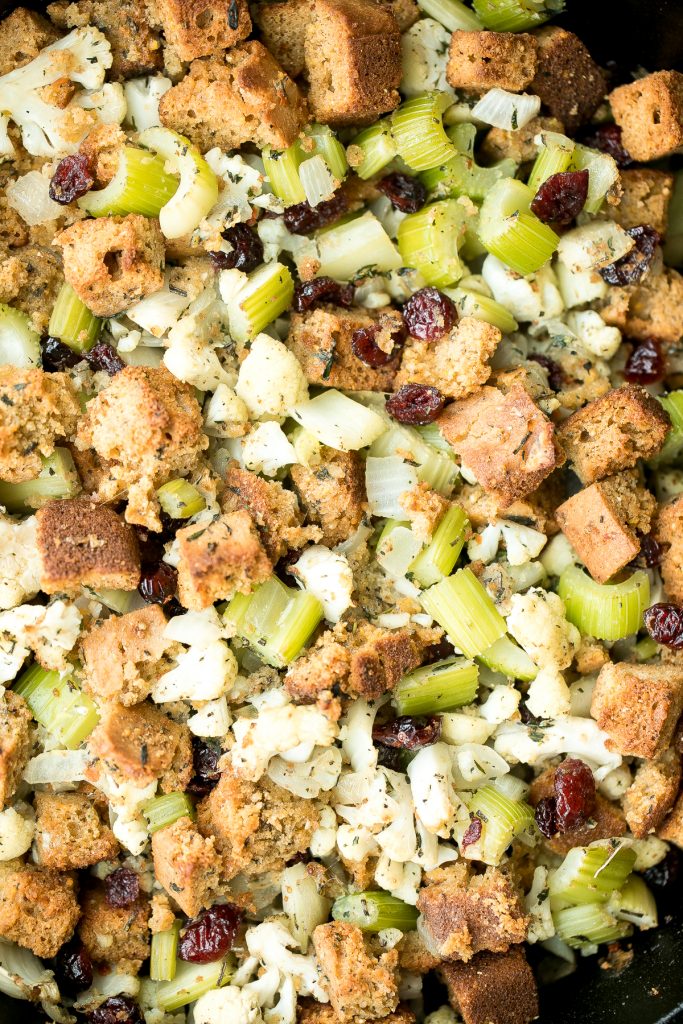
How to Make the Best Vegetarian Cornbread Stuffing
First, you need to toast your cornbread. Preheat the oven to 350 F. While the oven is preheating, evenly arrange the cubed cornbread onto a large baking sheet pan. Transfer into the oven (while the oven is still preheating) and keep it in the oven for a total of 20 minutes. This helps the cornbread dry out and become crunchy. Alternatively, you can let the cubed cornbread dry out on the kitchen counter overnight.
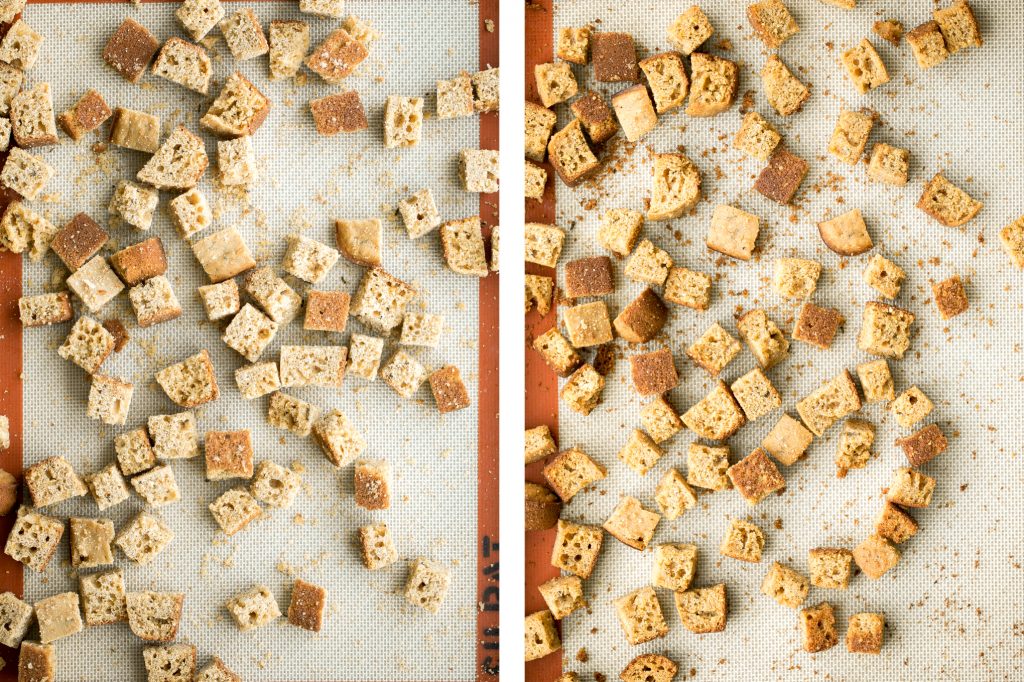
Now, let's prepare the vegetables. Heat oil in a large cast-iron skillet over medium-high heat for 2 minutes until the oil is hot and starts to sizzle and shimmer. Add onions and garlic and sauté for 2 minutes until fragrant. Add celery and cauliflower and sauté for 5 minutes, or until the vegetables are soft. Season with thyme, salt and pepper. Stir well to combine.
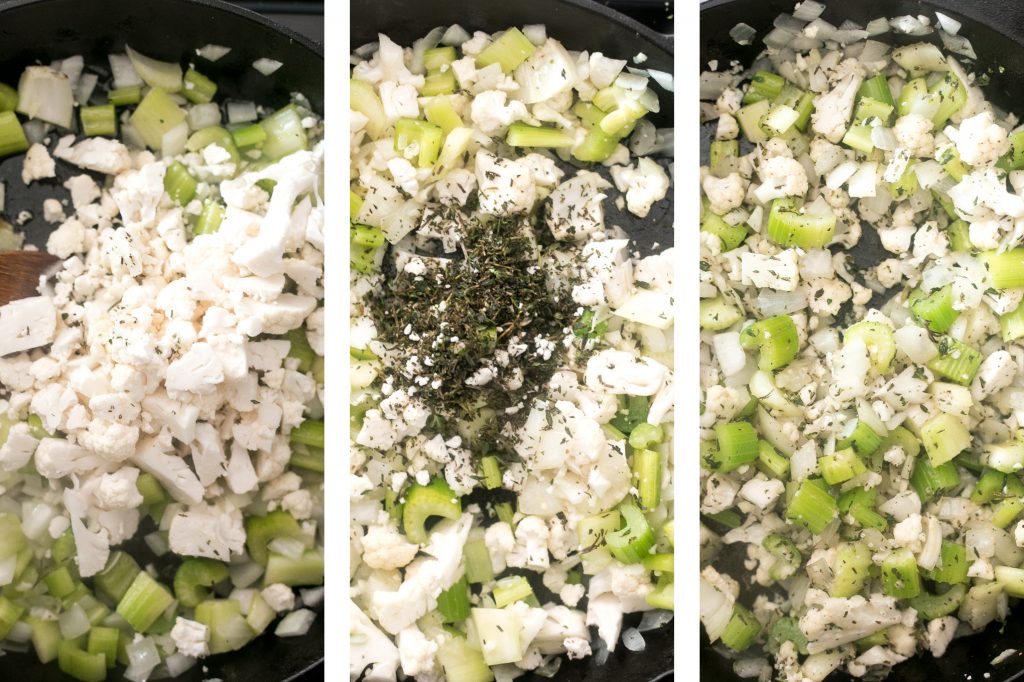
Remove the skillet and allow the vegetable mixture to cool down to room temperature, about 10 minutes. Then, add in beaten egg, vegetable broth, and dried cranberries and stir to combine. Add toasted cornbread and gently fold it in with a spatula.
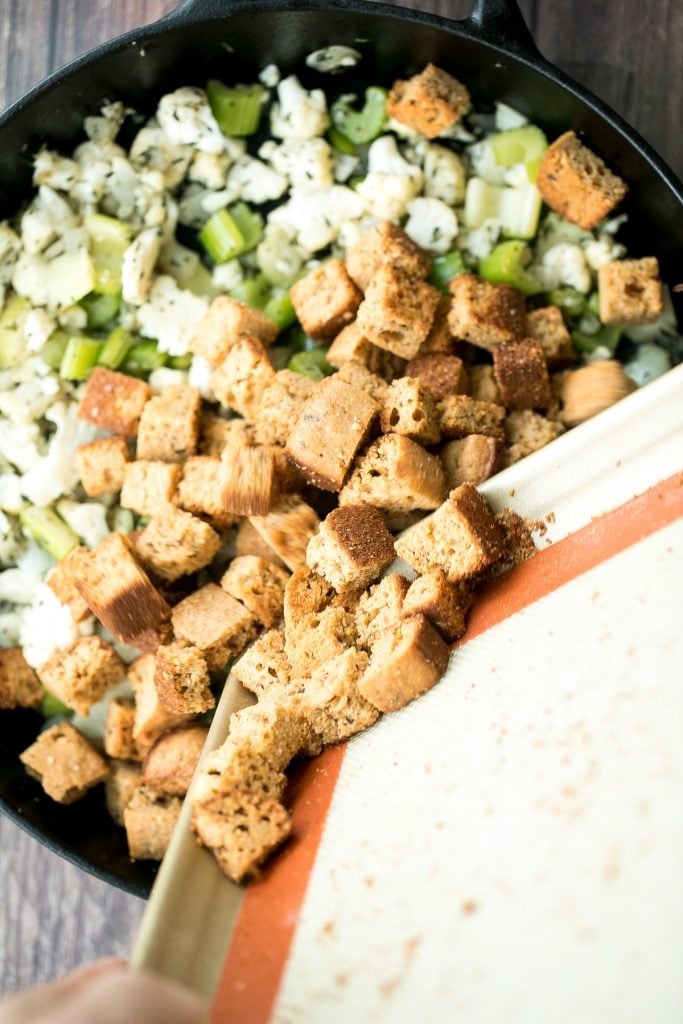
Transfer the skillet into the oven and bake for 25 minutes until the cornbread becomes golden brown. If you do not have a cast-iron or oven-safe skillet, you can transfer everything into a large casserole dish or sheet pan and bake.
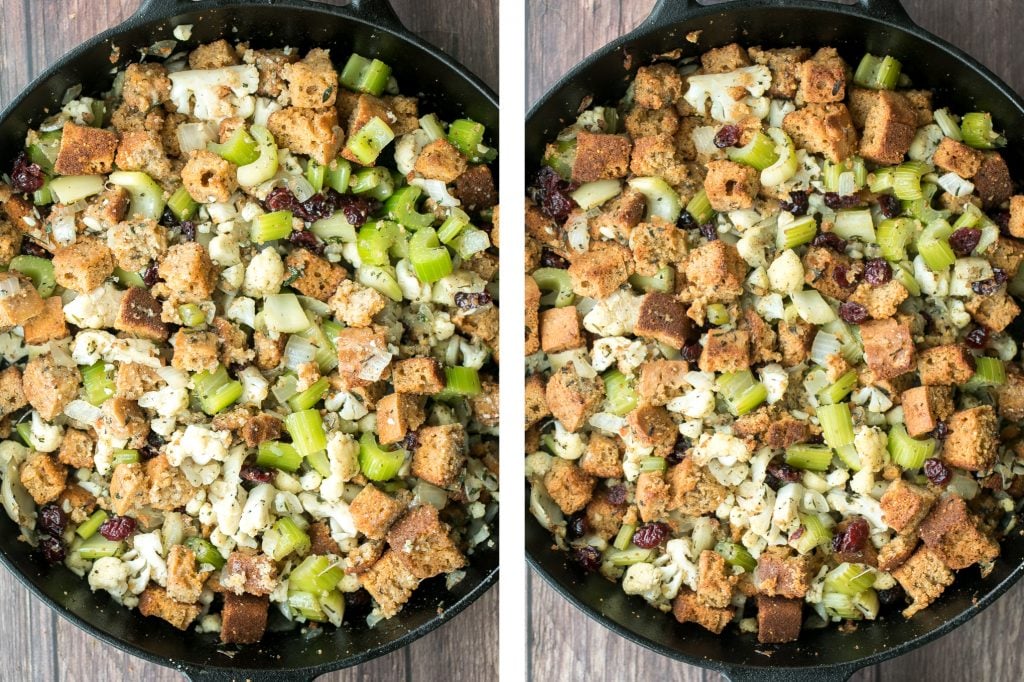
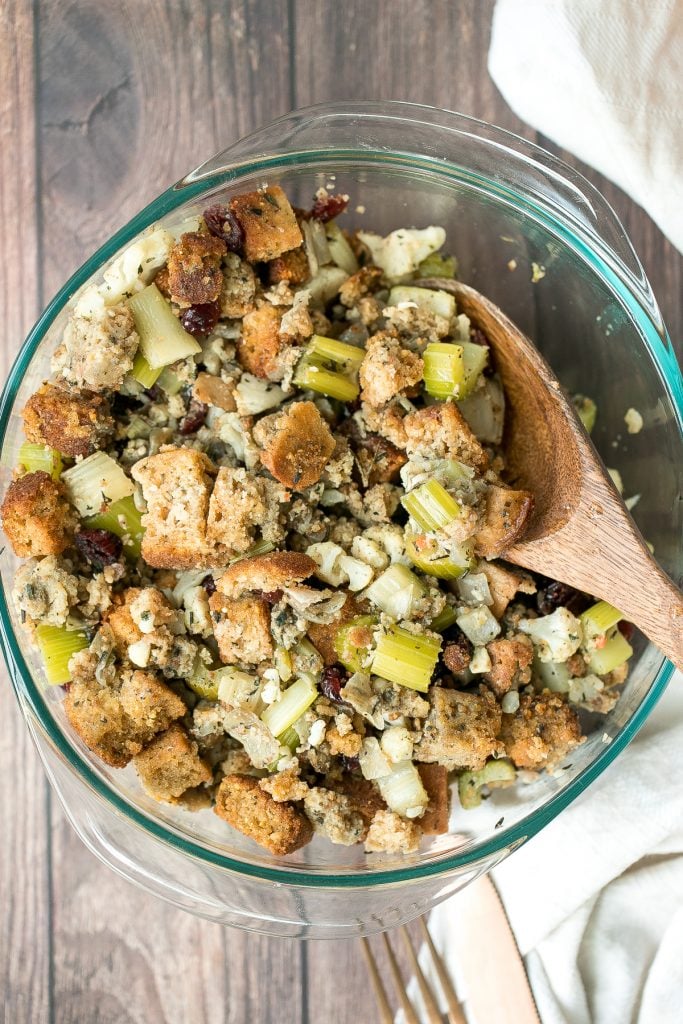
Tips for Preparing Cornbread Stuffing
- How to customize: You can easily customize this stuffing with other ingredients. Some of my favourites to add are pecans, walnuts, apples or pears. It is also very popular to add in some sliced sausage.
- How to toast cornbread: It is a key step that the cornbread you use is toasted or dried out. Otherwise, you will end up with stuffing that is extra soggy. You can easily toast the cornbread in the oven while it is preheating, or you can let it dry out on the counter overnight.
- How to make stuffing in advance:
- You can prepare the cornbread several days in advance. Toast the cornbread in the oven or let it dry out overnight at room temperature..
- You can prepare the stuffing up to a day in advance. Prepare it up until the point where you add the cornbread. Do not add in the cornbread. Cover tightly and store in the refrigerator for up to one day in advance. When ready to bake, place the stuffing on the counter and allow it to come to room temperature. Then, gently fold in the toasted cornbread and bake according to recipe instructions.
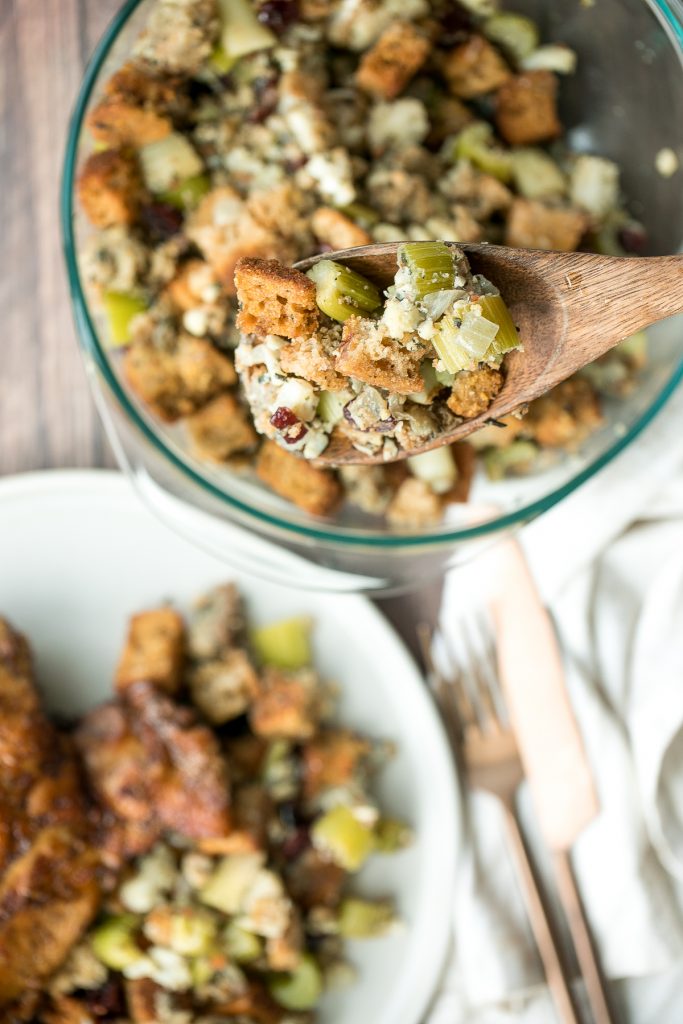
More Thanksgiving Sides
- Cranberry Walnut Apple Stuffing
- Classic Homemade Turkey Gravy
- Easy Make-Ahead Cranberry Sauce
- The Best and Creamiest Mashed Potatoes
- 10 Minute Nutty Green Beans
- Savoury Mashed Sweet Potatoes
Tried this recipe?
I'd love to hear what you think! Leave a comment and rating below to share your feedback. Your reviews help others discover this recipe and help me keep creating more free recipes for you. Snap a photo and tag me on social media @aheadofthyme too.
Sautéed Garlic Mushrooms

Buttery sautéed garlic mushrooms are silky smooth and tender with an incredible caramelization and earthy rich flavour. It's such a simple side dish to prepare in under 15 minutes. Try it once and you might never serve mushrooms any other way.
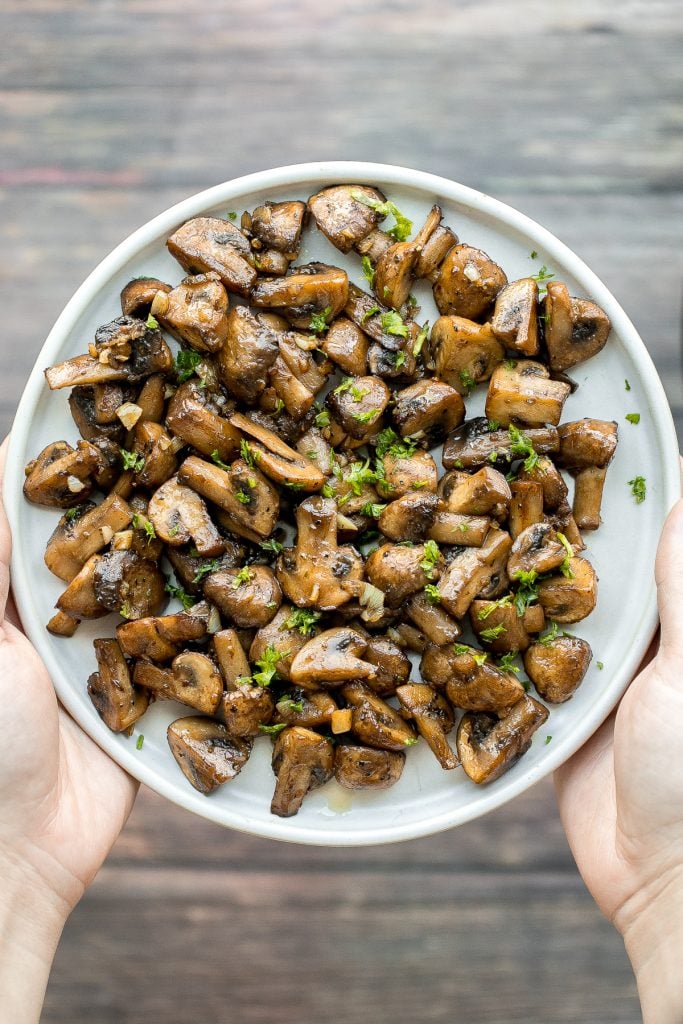
Sautéed garlic mushrooms are the perfect side dish to your meal. You can serve on the side of your dinner, lunch or even breakfast. It pairs so well with a ribeye steak or roast chicken, or on top of a classic juicy hamburger or fettuccine alfredo pasta. For breakfast? Serve it on the side of mediterranean scrambled eggs. You won't regret it.
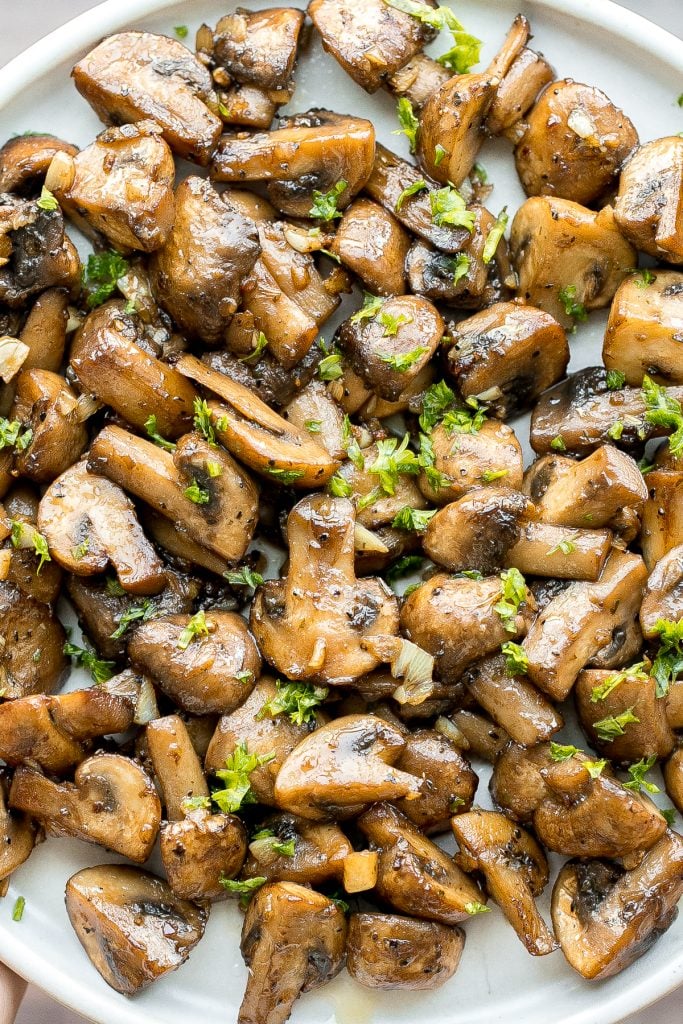
Ingredients
You will need just a few simple ingredients to make these garlic mushrooms:
- mushrooms - you can use white or brown mushrooms. I like them quartered but you can also slice them if you prefer.
- butter
- Italian seasoning
- salt and pepper
- soy sauce - soy sauce is a secret ingredient that will enhance the caramelization process. It helps the mushrooms develop a characteristic rich brown colour by slowly breaking down its natural sugar.
- garlic
- fresh parsley - optional, to garnish on top.
You will also need a cast-iron skillet or frying pan.
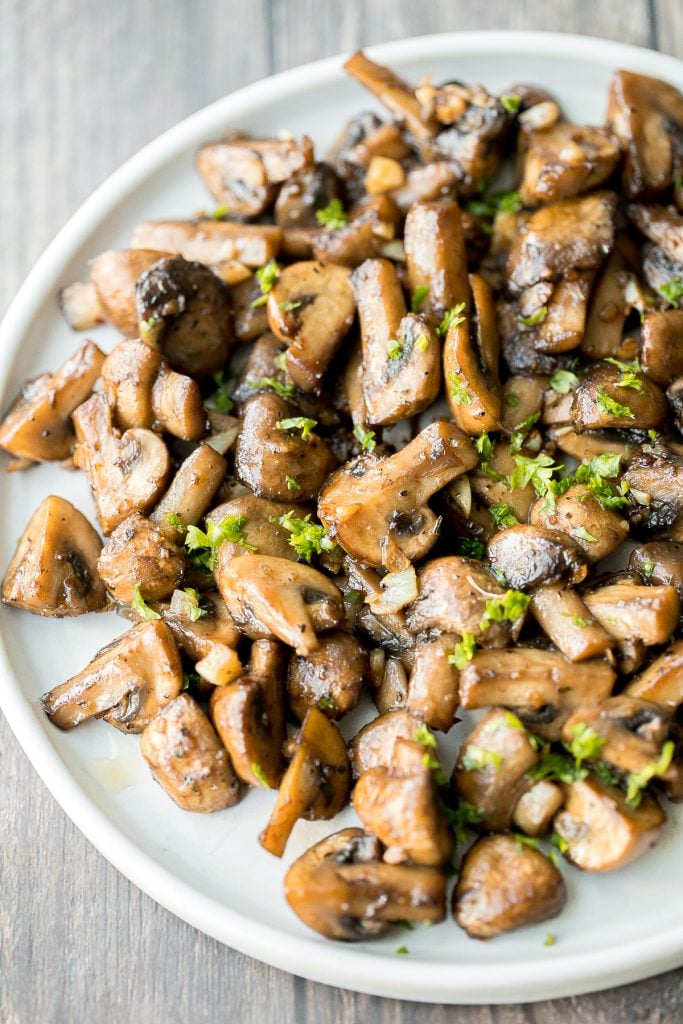
How to Make the Best Sautéed Garlic Mushrooms
Melt butter in a large cast-iron skillet or frying pan over medium-high heat for 2 minutes until it starts to sizzle. Add quartered mushrooms and sauté for 5-7 minutes until the mushrooms start to shrink and lose moisture. Stir occasionally to cook evenly. You don't want to stir it too often.
Add Italian seasoning, salt and pepper. Stir well to mix and continue to cook the mushrooms for 2-3 minutes until they turn golden brown (but not dark brown yet). Salt will further remove water inside the mushrooms. Add soy sauce and garlic. Sauté for another 2-3 minutes.
Serve sautéed garlic mushrooms on a plate and garnish with parsley on top.
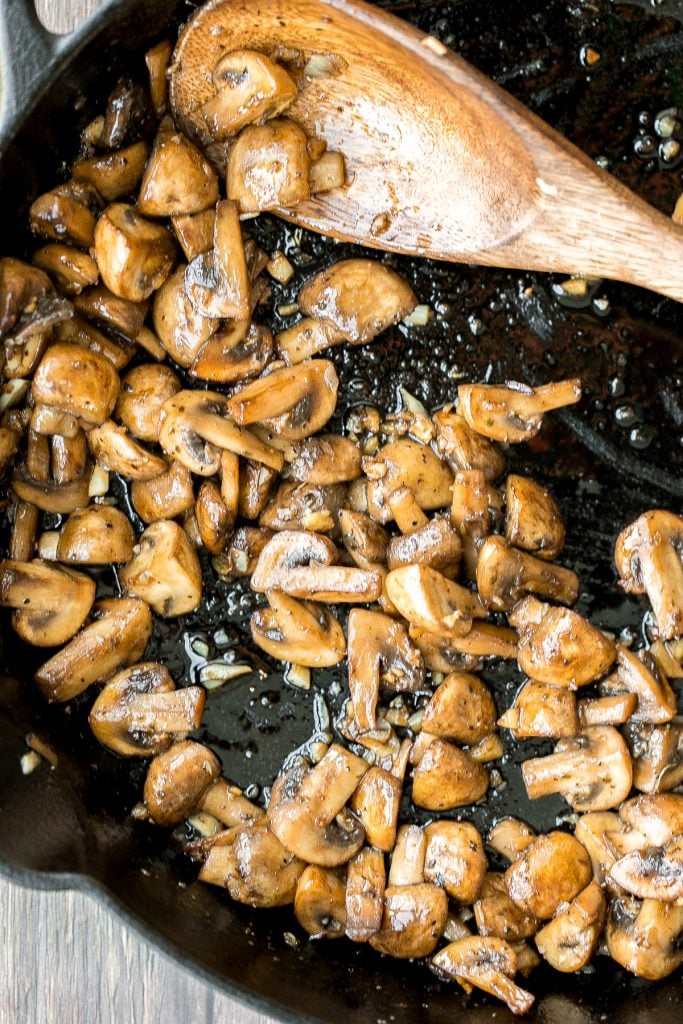
Tips for Caramelizing Mushrooms
- Do not overcrowd the pan. By not overcrowding, the mushrooms will cook evenly and have the space to caramelize to perfection.
- Stir occasionally. This will put the mushrooms in the best position to caramelize.
- Don't skip the soy sauce. Soy sauce helps add that beautiful rich brown colour to the mushrooms and also helps in the caramelization process.
- How to store. Store in an airtight container for up to 4 days in the refrigerator. Reheat for a few minutes on the stove over medium heat.

More Mushroom Recipes
- Spaghetti Alfredo with Spinach and Mushrooms
- Creamy Chicken Roulade with Spinach and Mushrooms
- Roasted Garlic Asparagus and Mushrooms
- Vegetarian Mushroom Barley Soup
- Mushroom and Arugula Skillet Pizza
- Vegetarian Stuffed Mushrooms
Tried this recipe?
I'd love to hear what you think! Leave a comment and rating below to share your feedback. Your reviews help others discover this recipe and help me keep creating more free recipes for you. Snap a photo and tag me on social media @aheadofthyme too.
Pumpkin Focaccia with Fresh Herbs
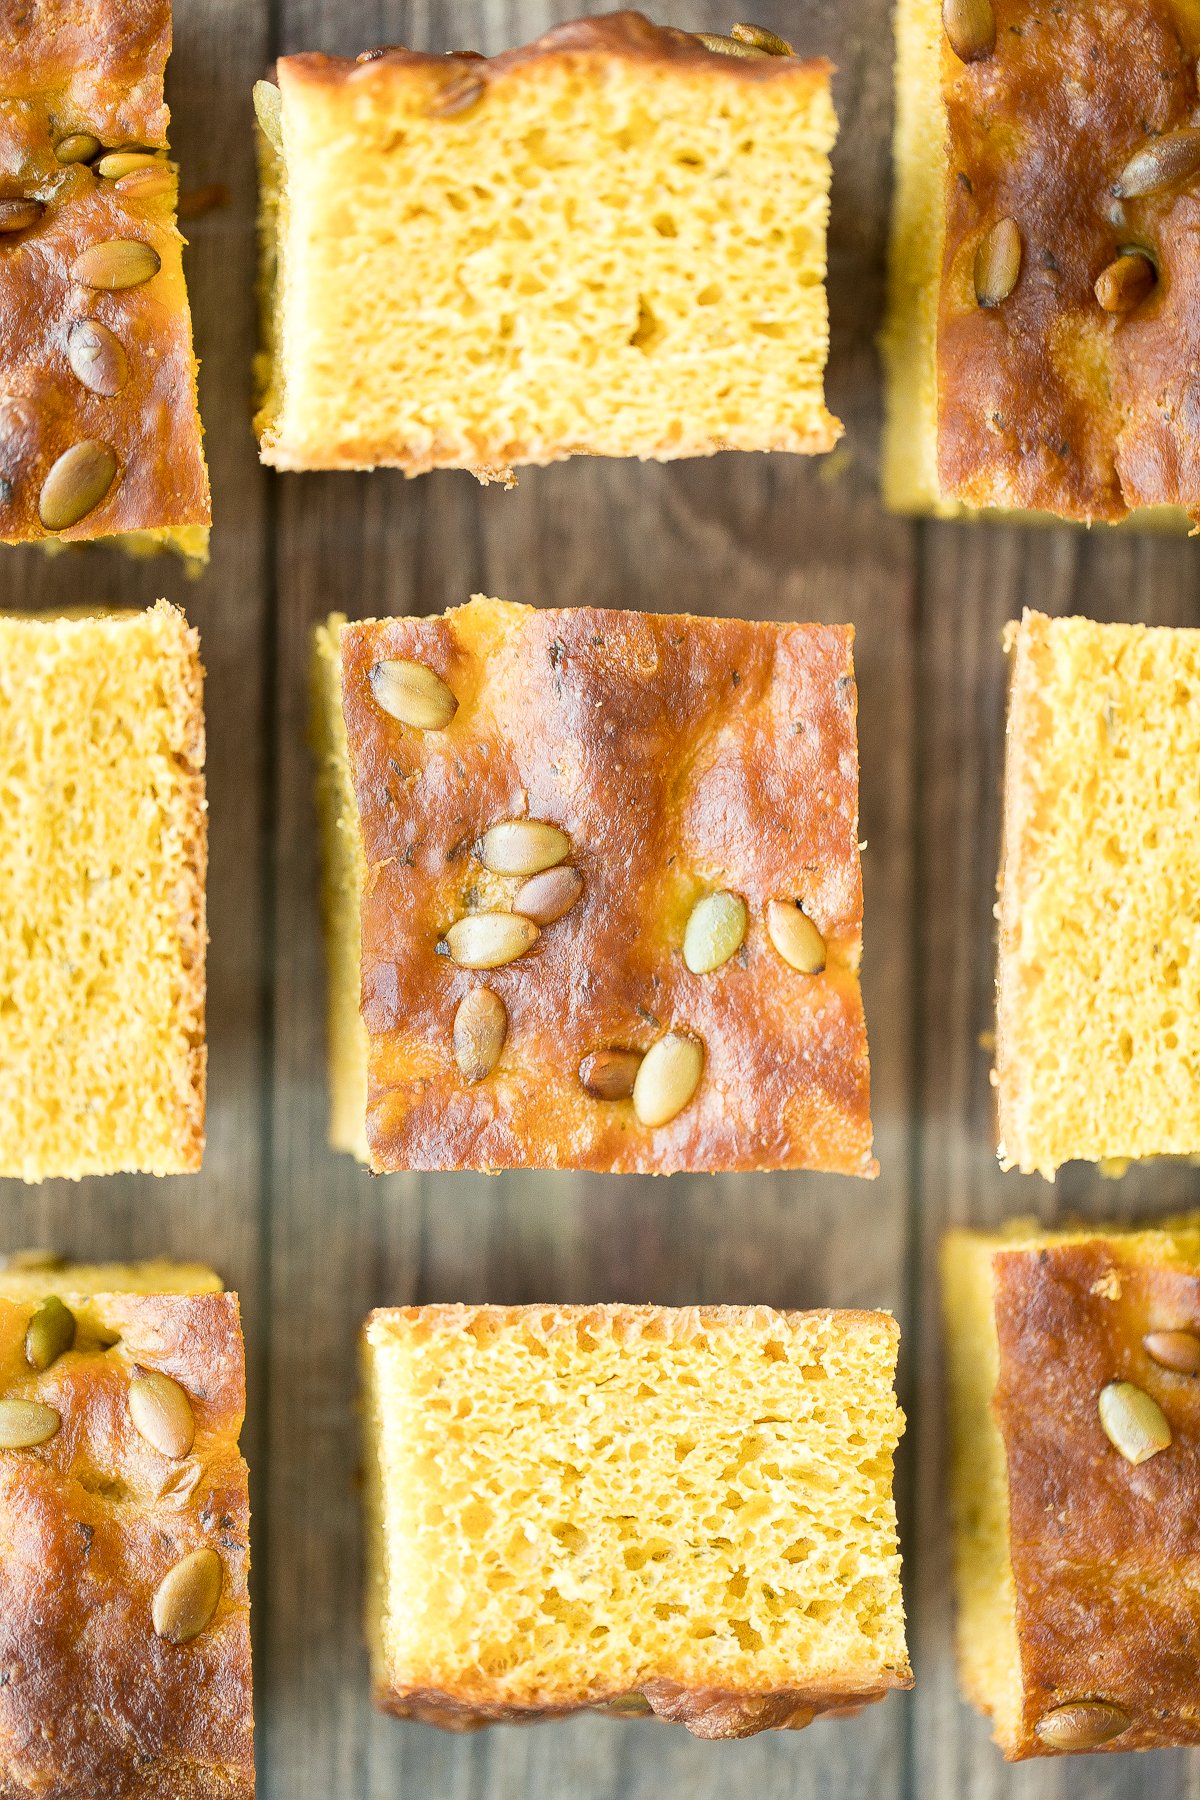
Easy pumpkin focaccia bread with fresh herbs is my newest favourite fall bread. This delicious bread is soft, fluffy, and springy, yet perfectly golden and crispy on the outside edges. Plus, it's packed with pumpkin (hello healthy vegetable!), and seasoned with fresh fall herbs making is so delicious and flavourful. But the best part might just be that it only takes 10-15 minutes of actual prep work from you. So so easy.
If you know me then you know that I love a good easy bread. Focaccia is one of my favourites (see my Easy Rosemary Garlic Focaccia Bread or my Easy No Knead Tomato Focaccia). Why? Well because you just need to put in the most minimal amount of effort, but the results are pretty amazing.
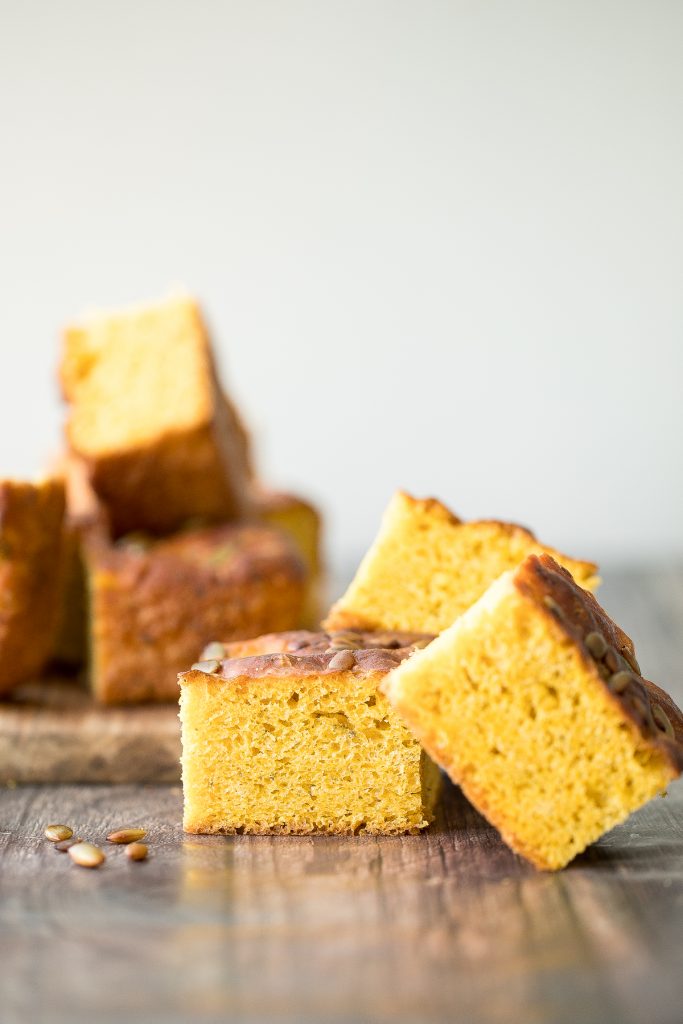
Ingredients
- active dry yeast + water - letting the yeast sit in some water for 5 minutes will activate it and is what will make the dough rise.
- all-purpose flour
- pumpkin puree - you will need just ½ cup for a subtle pumpkin flavour. I used canned pumpkin but homemade pumpkin puree will work as well.
- fresh herbs - thyme, rosemary, and sage.
- olive oil - olive oil is what gives focaccia it's crispy outer texture and flavour.
- salt
- toppings - pumpkin seeds and salt flakes.
You will also need mixing bowls and an 8-inch square baking pan. I also highly recommend a kitchen scale for the most accurate measurements.
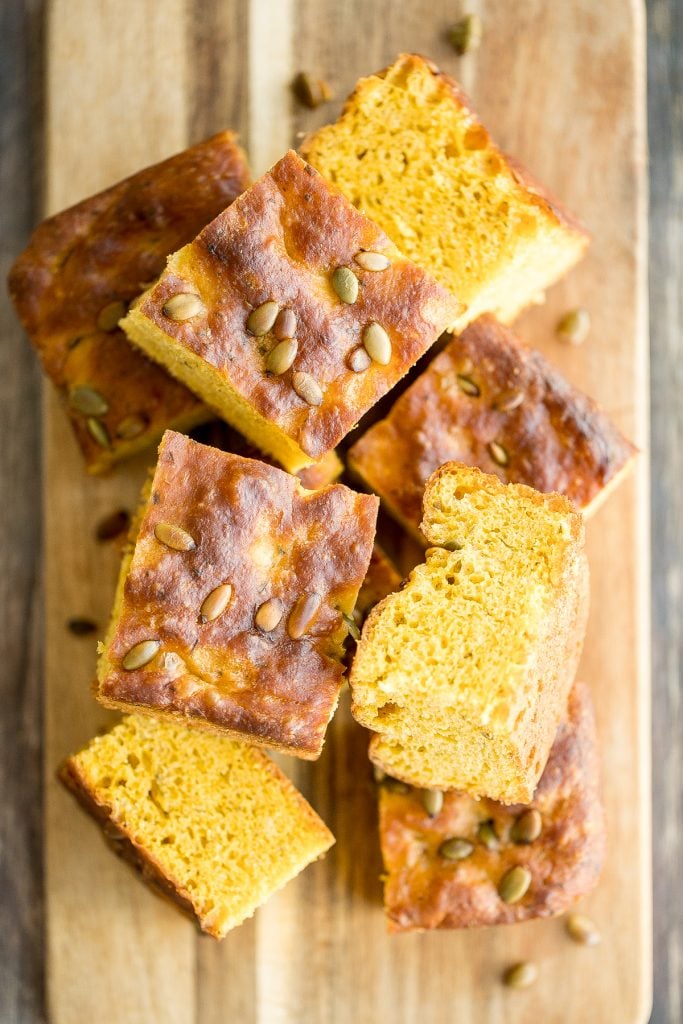
How to Make the Best Pumpkin Focaccia with Fresh Herbs
First, prepare the dough.
In a small cup, dissolve yeast in water and stir to mix together. Let it sit for 5 minutes to activate the yeast.
In a large mixing bowl, whisk together flour, thyme, rosemary, sage, and salt. Add yeast mixture, pumpkin puree and 1 tablespoon olive oil into the bowl. Stir with a silicone spatula to combine until it forms a shaggy dough, scraping down the sides of the bowl (there should be no dry flour particles visible).
Transfer the dough onto a clean surface and knead for 5 minutes until it turns into a smooth dough ball. Transfer the dough back into the bowl and drizzle and spread a little bit of oil over dough with your hands to help prevent it from drying out. Cover the bowl with plastic cling wrap and let it sit at room temperature for up to 2 hours, until doubled in size.
Now, let's shape the focaccia.
Spread a teaspoon of olive oil into an 8-inch square baking pan. Transfer the dough into the pan with a spatula and spread it to cover the pan (if the dough is a bit sticky, you can use some water or oil to help with handling the dough). Press the dough with your fingers to make dimples. Sprinkle pumpkin seeds on top.
In a small bowl, combine 1 tablespoon water and the remaining oil (about 2 teaspoons). Stir to mix well and drizzle the oil mixture over the dough. Sprinkle salt flakes on top.

Time for final proofing.
You can either proof overnight in the refrigerator or for one hour at room temperature:
- Option 1: Cover the pan with plastic cling film or cloth and let it rest in the refrigerator overnight. The dough will continue to rise slowly and become bubbly. The slow overnight fermentation makes the focaccia taste even better.
- Option 2: If you want to eat the focaccia bread on the same day, simply let the dough rise for another hour at room temperature until almost double in size.
Bake the focaccia.
Preheat oven to 425 F. Transfer the baking pan straight from the refrigerator into the oven and bake for 30 minutes until golden brown. Let cool for 20 minutes before slicing.
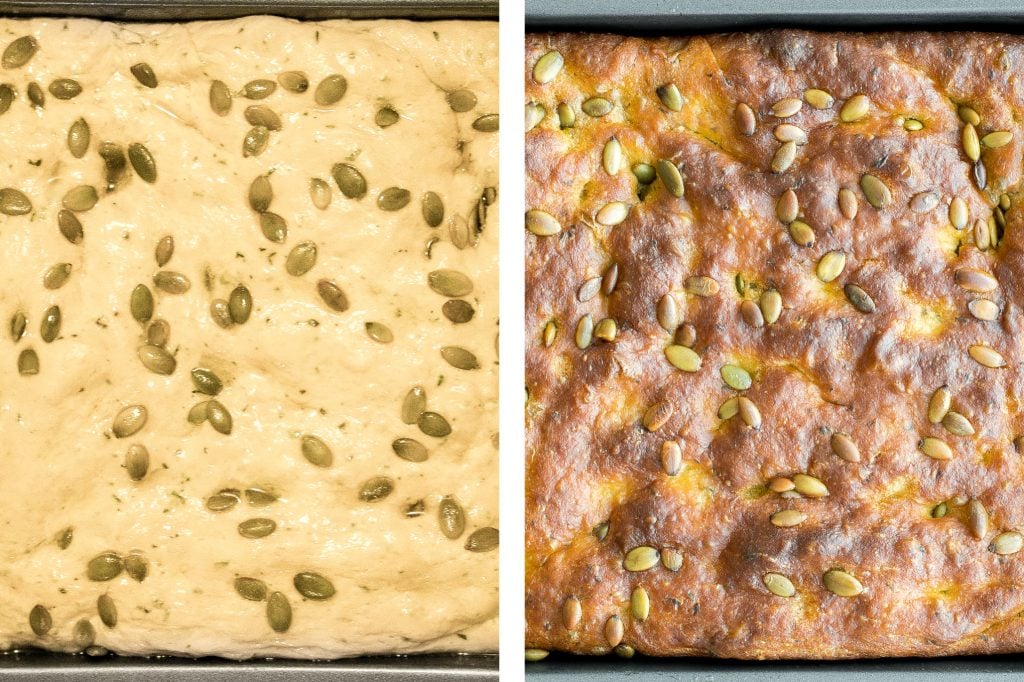
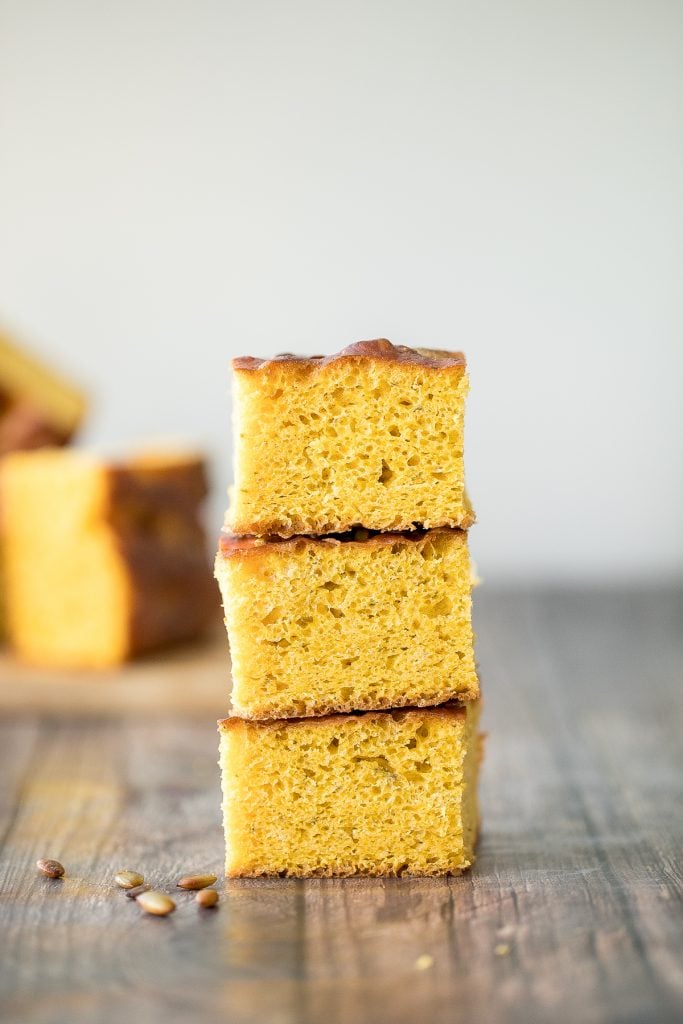
Tips for Storing Focaccia
- How to store: Store focaccia bread in an airtight container or ziploc bag at room temperature for up 2 days, or in the refrigerator for up to one week.
- How to freeze: Wrap the entire loaf or individual slices tightly in plastic cling wrap and place into an airtight container or freezer bag. Store in the freezer for up to 3 months.
- How to reheat: Reheat focaccia bread in the air fryer at 350 F for 5-7 minutes, or in a 350 F preheated oven for 10-12 minutes. If frozen, then allow it to thaw to room temperature first and then reheat.
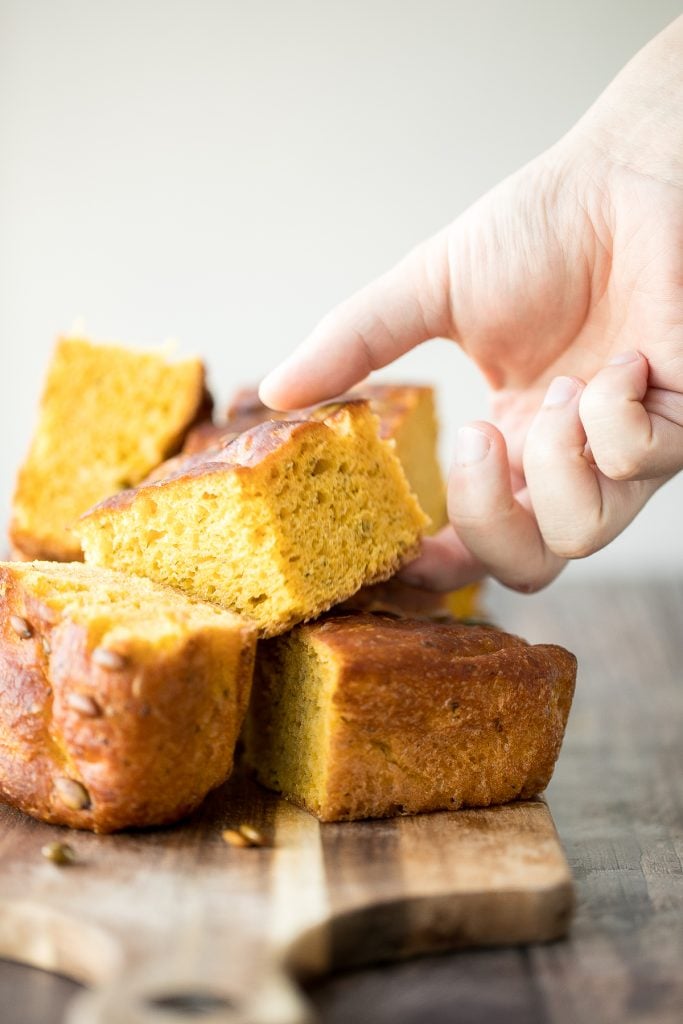
How to Serve Pumpkin Focaccia Bread
Pumpkin focaccia bread pairs so well with a warm and cozy fall soup. Some of my favourites to pair with this are roasted butternut squash soup, creamy cauliflower and garlic soup, and sweet potato soup.
It also is a great bread to serve alongside any fall dinner, especially for a Thanksgiving or holiday dinner. For a smaller Thanksgiving meal, serve it with slow cooker turkey breast, mashed sweet potatoes, and nutty green beans.
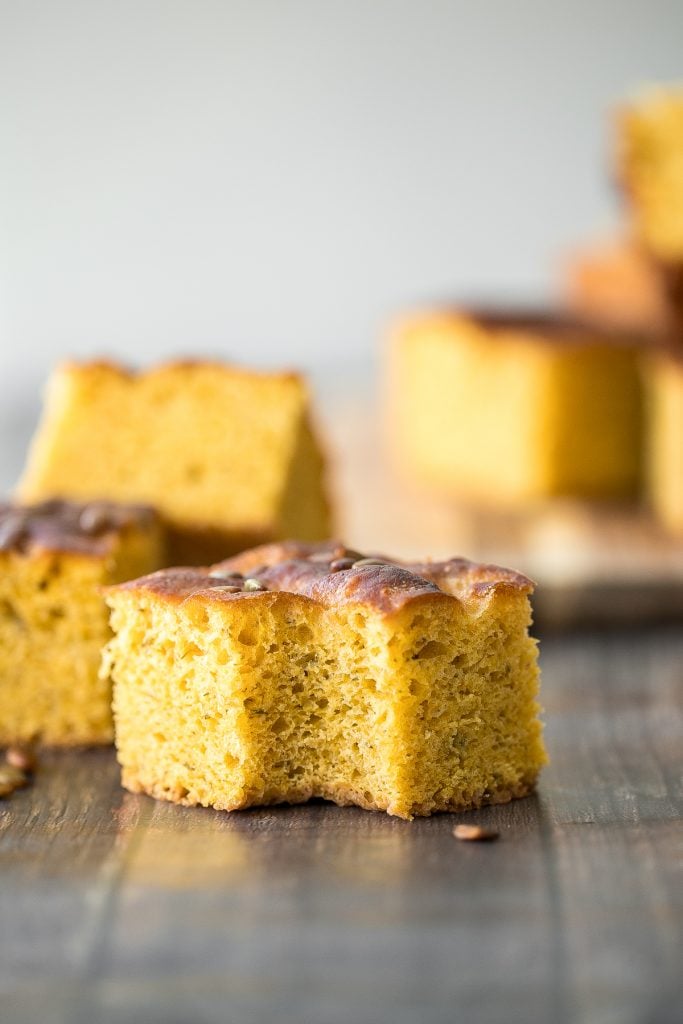
More Bread Recipes
- Easy Rosemary Garlic Focaccia Bread
- Easy No Knead Tomato Focaccia
- Pumpkin Dinner Rolls
- Pull-Apart Garlic Bread
- Small Batch Sourdough Bread
- Small Batch No Knead Bread
- Easy Small Batch Ciabatta Rolls
- Homemade No Knead French Baguettes
Tried this recipe?
I'd love to hear what you think! Leave a comment and rating below to share your feedback. Your reviews help others discover this recipe and help me keep creating more free recipes for you. Snap a photo and tag me on social media @aheadofthyme too.
Curried Chickpea Stuffed Acorn Squash
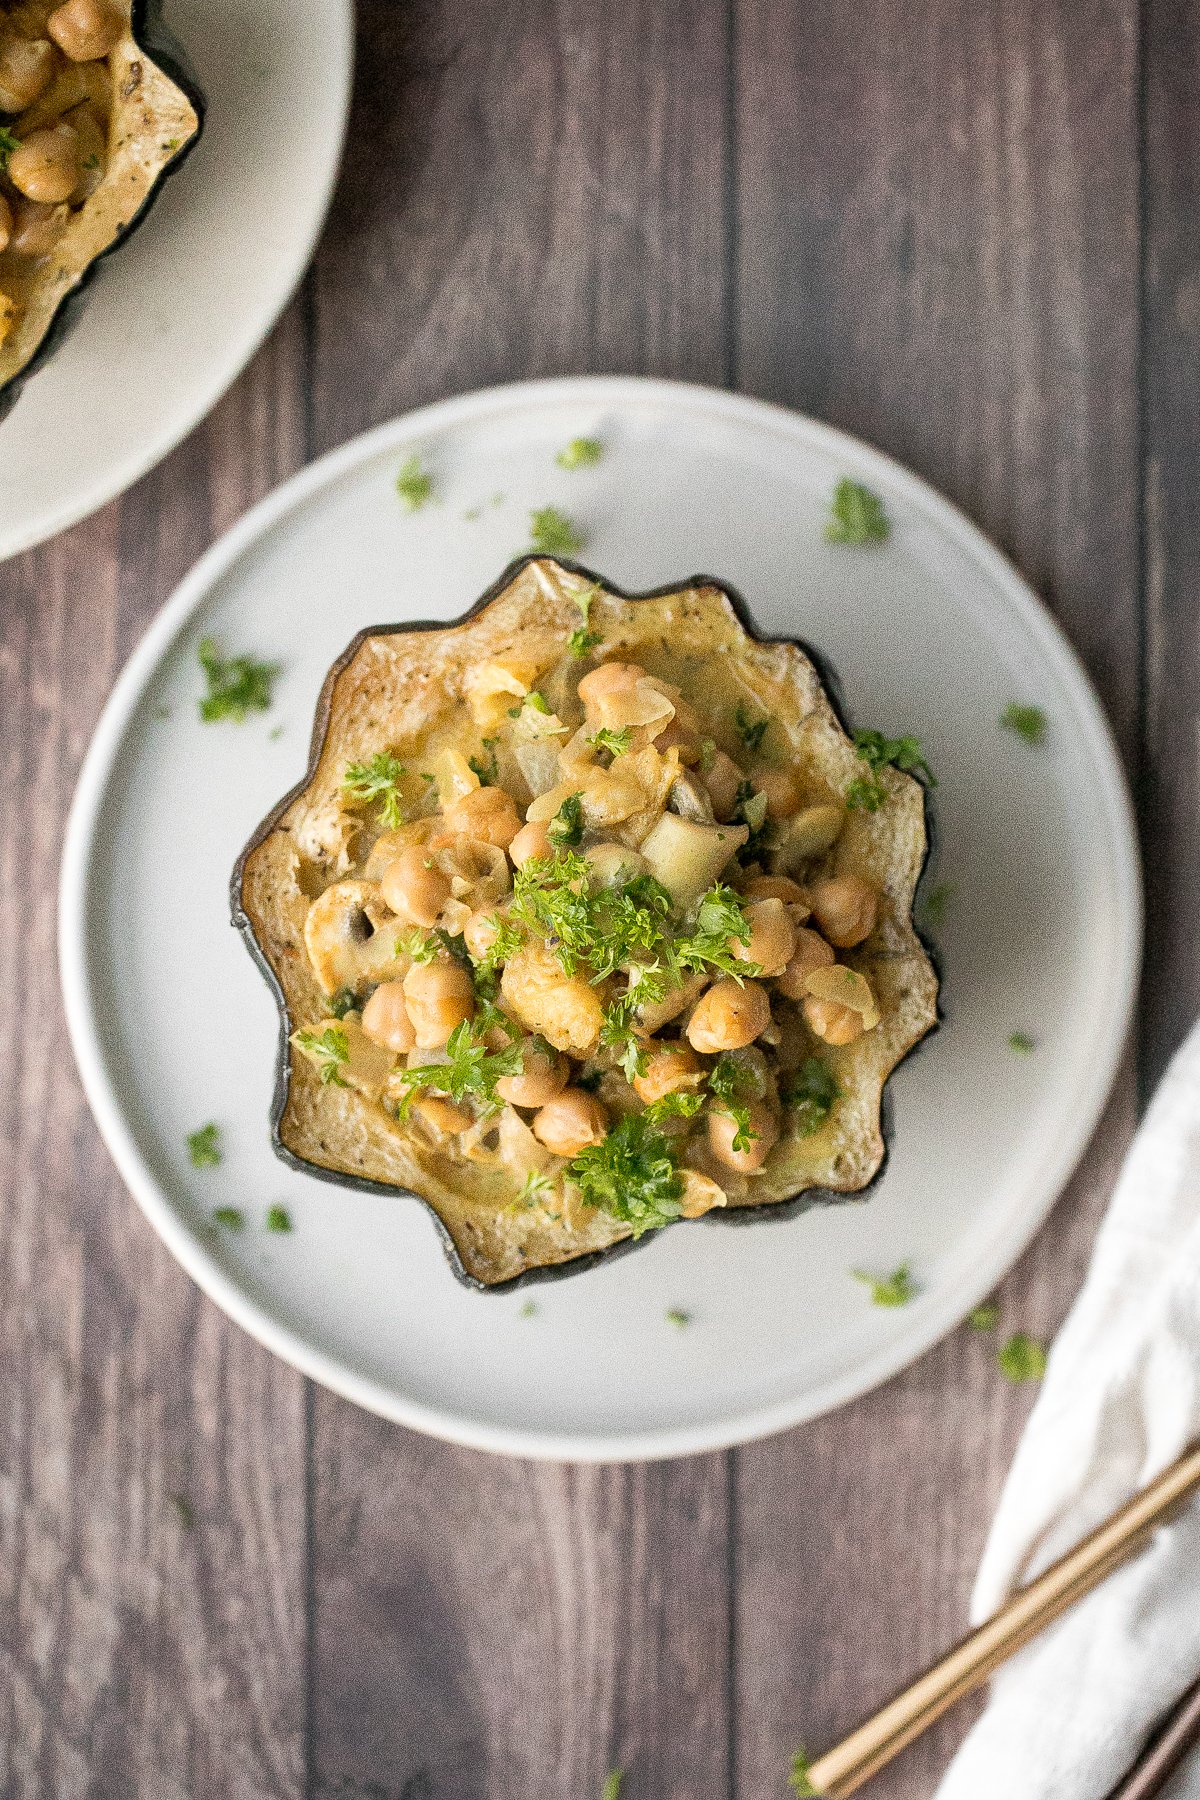
Wholesome and hearty, curried chickpea stuffed acorn squash is incredibly comforting and warm with aromatic curry flavours. This vegan and gluten-free fall meal is packed with chickpeas, mushrooms, and creamy coconut milk, with a sprinkle of fresh herbs on top. Serve it as a holiday main dish or divide it into smaller portions and serve as a side. The best part? You only need about 10 minutes to prep this. It's so quick and easy.

Curried chickpea stuffed acorn squash is a great vegetarian dinner to serve any day of the week this fall season. It pairs really nicely with some long-grain white rice or coconut rice.
But, it feels extra warm and comforting to serve stuffed acorn squash as a vegetarian main or side dish on your Thanksgiving holiday dinner. Some other holiday sides to serve are roasted butternut squash, mashed potatoes, nutty green beans, and rosemary cornbread. Or browse through all my favourite Thanksgiving sides below:
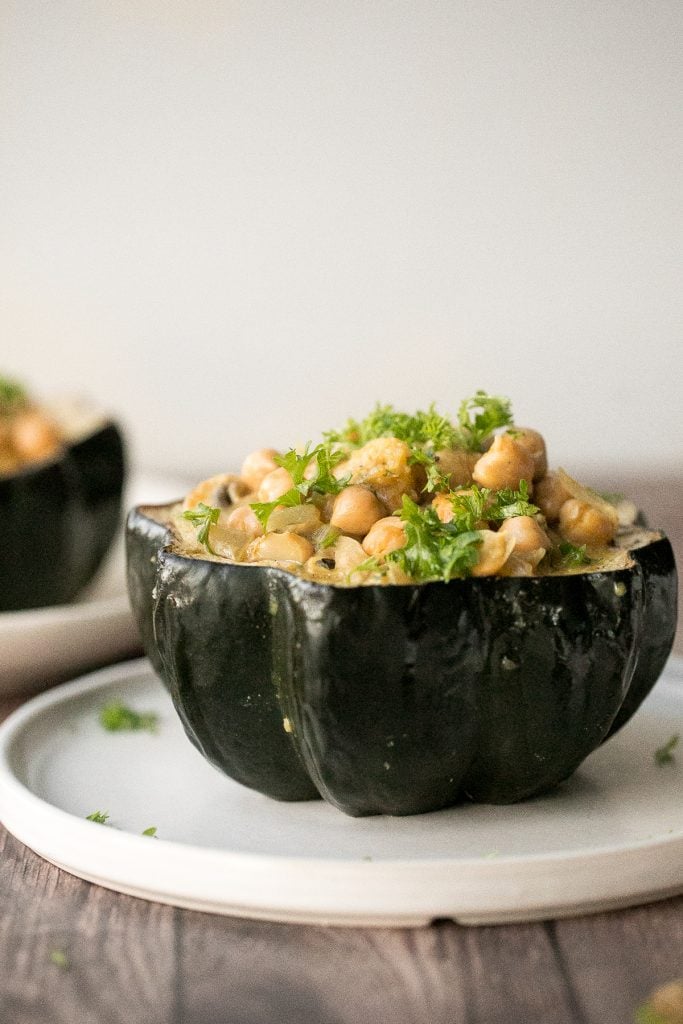
Ingredients
- acorn squash
- oil - olive oil and vegetable oil
- fresh thyme
- onion
- mushrooms
- chickpeas
- yellow curry powder
- cumin powder
- soy sauce
- coconut milk
- fresh parsley
- salt and pepper
You will also need a baking sheet and a medium cooking pot.
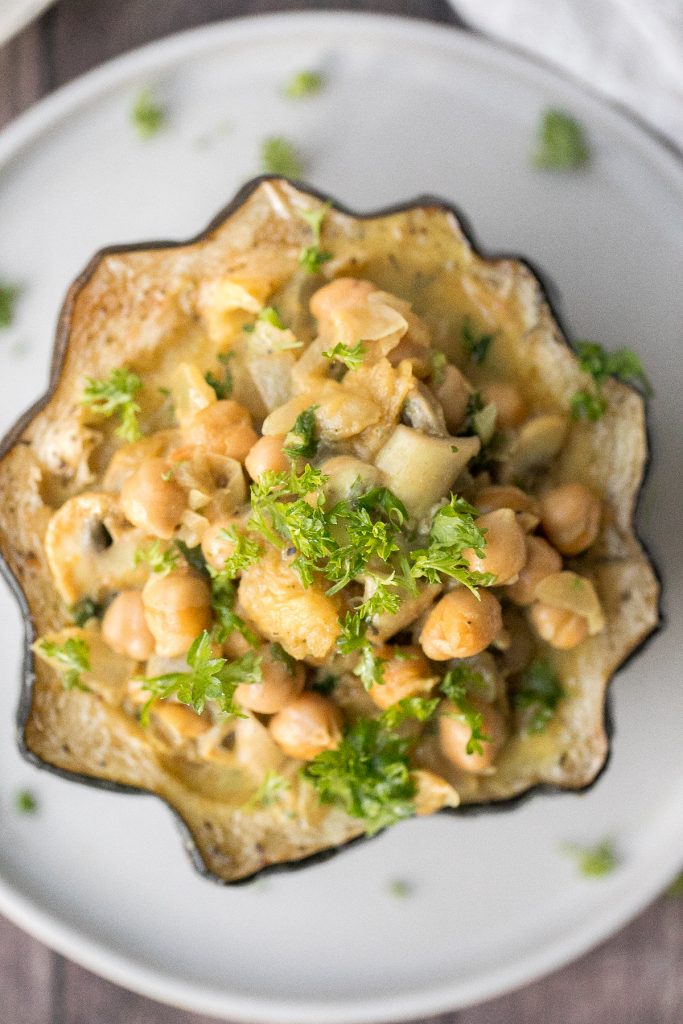
How to Make the Best Curried Chickpea Stuffed Acorn Squash
First, roast the acorn squash:
Prepare the squash by cutting it in half crosswise and remove the seeds with a spoon. Drizzle olive oil over the squash and sprinkle chopped thyme on top.
Place the squash on a lined baking sheet and bake for 40 to 45 minutes in a 350 F preheated oven, until fork tender. If you can insert a fork easily into the flesh, then it is fork tender. Set the squash aside and let it cool down to room temperature.
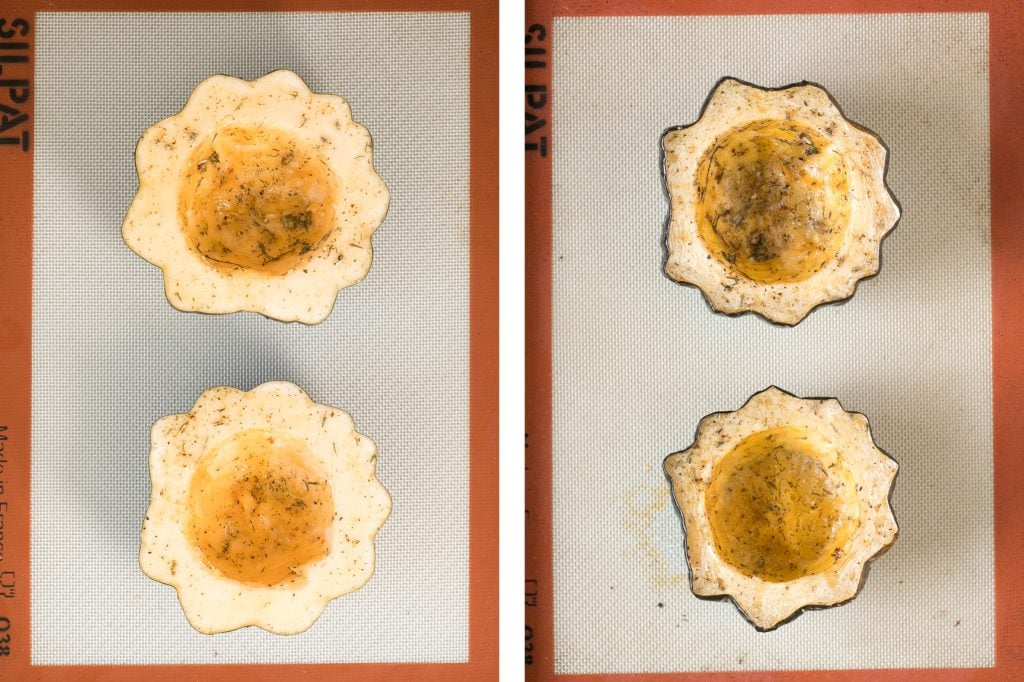
Then, prepare the curried chickpeas:
Heat oil in a medium cooking pot over medium high heat for 2 minutes until sizzling hot. Add onions and mushrooms. Sauté for 2-3 minutes until tender and fragrant.
Add chickpeas and stir to combine, about 1 minute. Add yellow curry powder, cumin powder and soy sauce. Stir well to mix, about 2 minutes.
Add coconut milk and bring to a boil. Turn heat down to medium and simmer for 5 minutes uncovered. Turn off the heat and let it sit for another 5 minutes. Add parsley, salt and pepper and stir to combine.
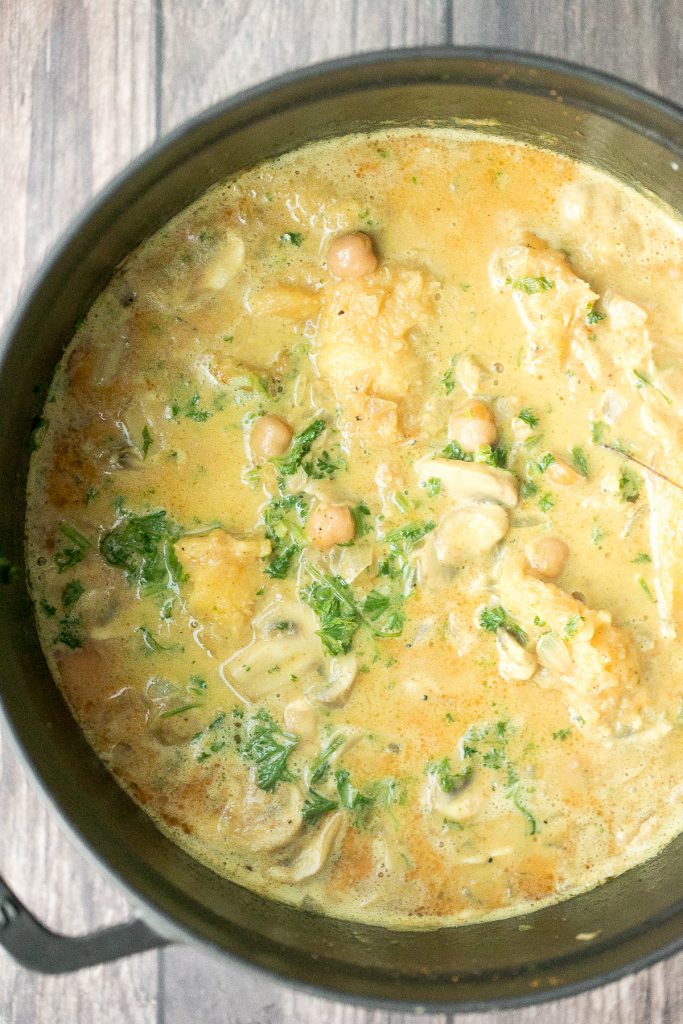
Lastly, assemble the stuffed acorn squash:
Scoop out a little pulp and add it into the chickpea mixture in the pot. Leave the acorn squash shell about ½-inch thick. Stir well to incorporate the pulp and the chickpea mixture.
Divide and transfer the chickpea mixture evenly into the two half shells and sprinkle extra parsley on top for garnish. Serve on its own or with a side of rice.
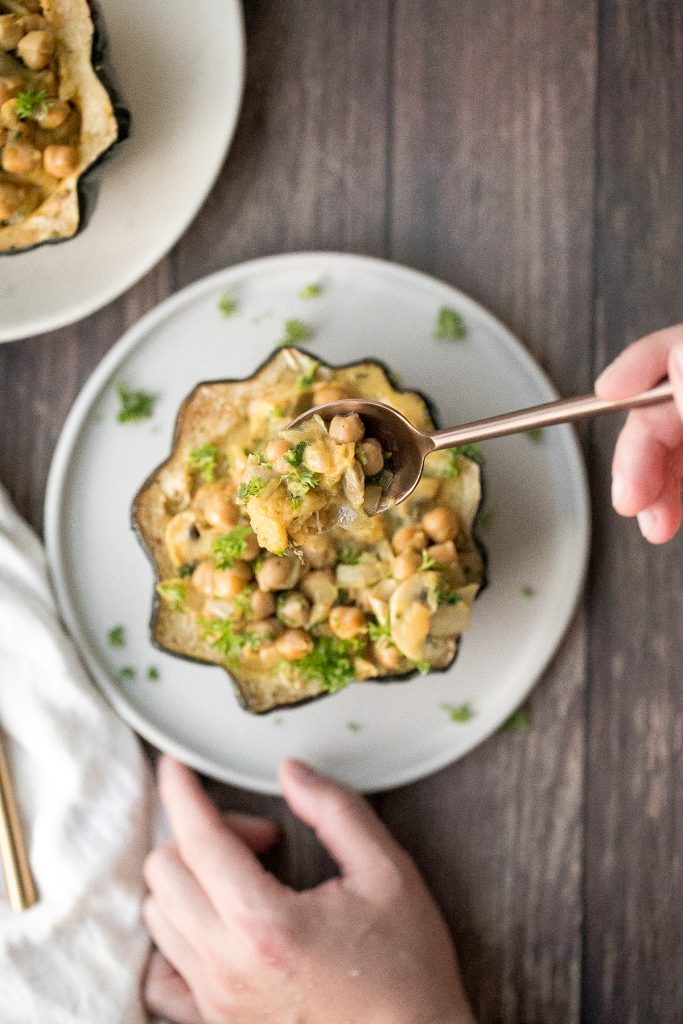
Tips
- Make ahead instructions: You can easily make this the day before. Store the roasted acorn squash separately from cooked curried chickpeas, in the refrigerator. Assemble the stuffed squash on the day you want to serve it. Prior to assembling, reheat the stuffed squash in the oven at 350F for 10 minutes, and the curried chickpeas on the stovetop.
- Customize the vegetables: You can create your own recipe with any vegetables or protein that you want. Some examples include cauliflower, broccoli, green peas, corn and carrots. You can also add ground meat or shredded chicken.
- How to store: Place stuffed acorn squash in an airtight container or in a ziploc bag, and store in the refrigerator for up to 3 days. To reheat, transfer to a 350 F oven or air fryer for 10 minutes.
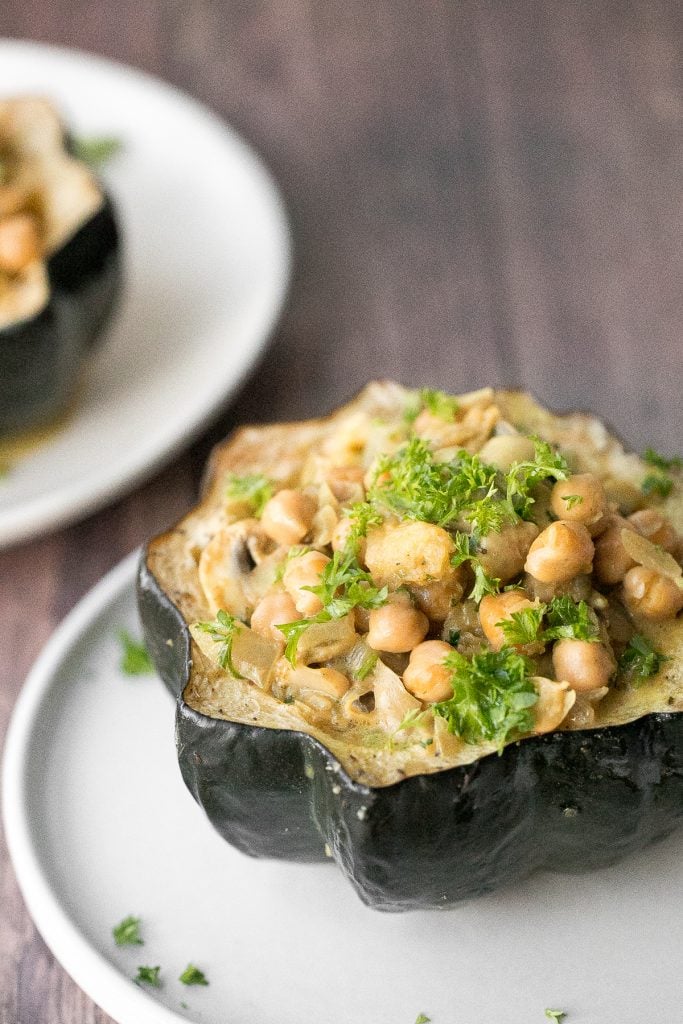
More Squash Recipes
- Stuffed Butternut Squash with Wild Rice
- Roasted Butternut Squash
- Butternut Squash Carbonara Pasta
- One Pan Roasted Harvest Vegetables
- Roasted Butternut Squash Soup
- Butternut Squash "Pumpkin" Bread
- Fall Harvest Salad with Butternut Squash
Tried this recipe?
I'd love to hear what you think! Leave a comment and rating below to share your feedback. Your reviews help others discover this recipe and help me keep creating more free recipes for you. Snap a photo and tag me on social media @aheadofthyme too.
Pumpkin Chocolate Chip Cookies
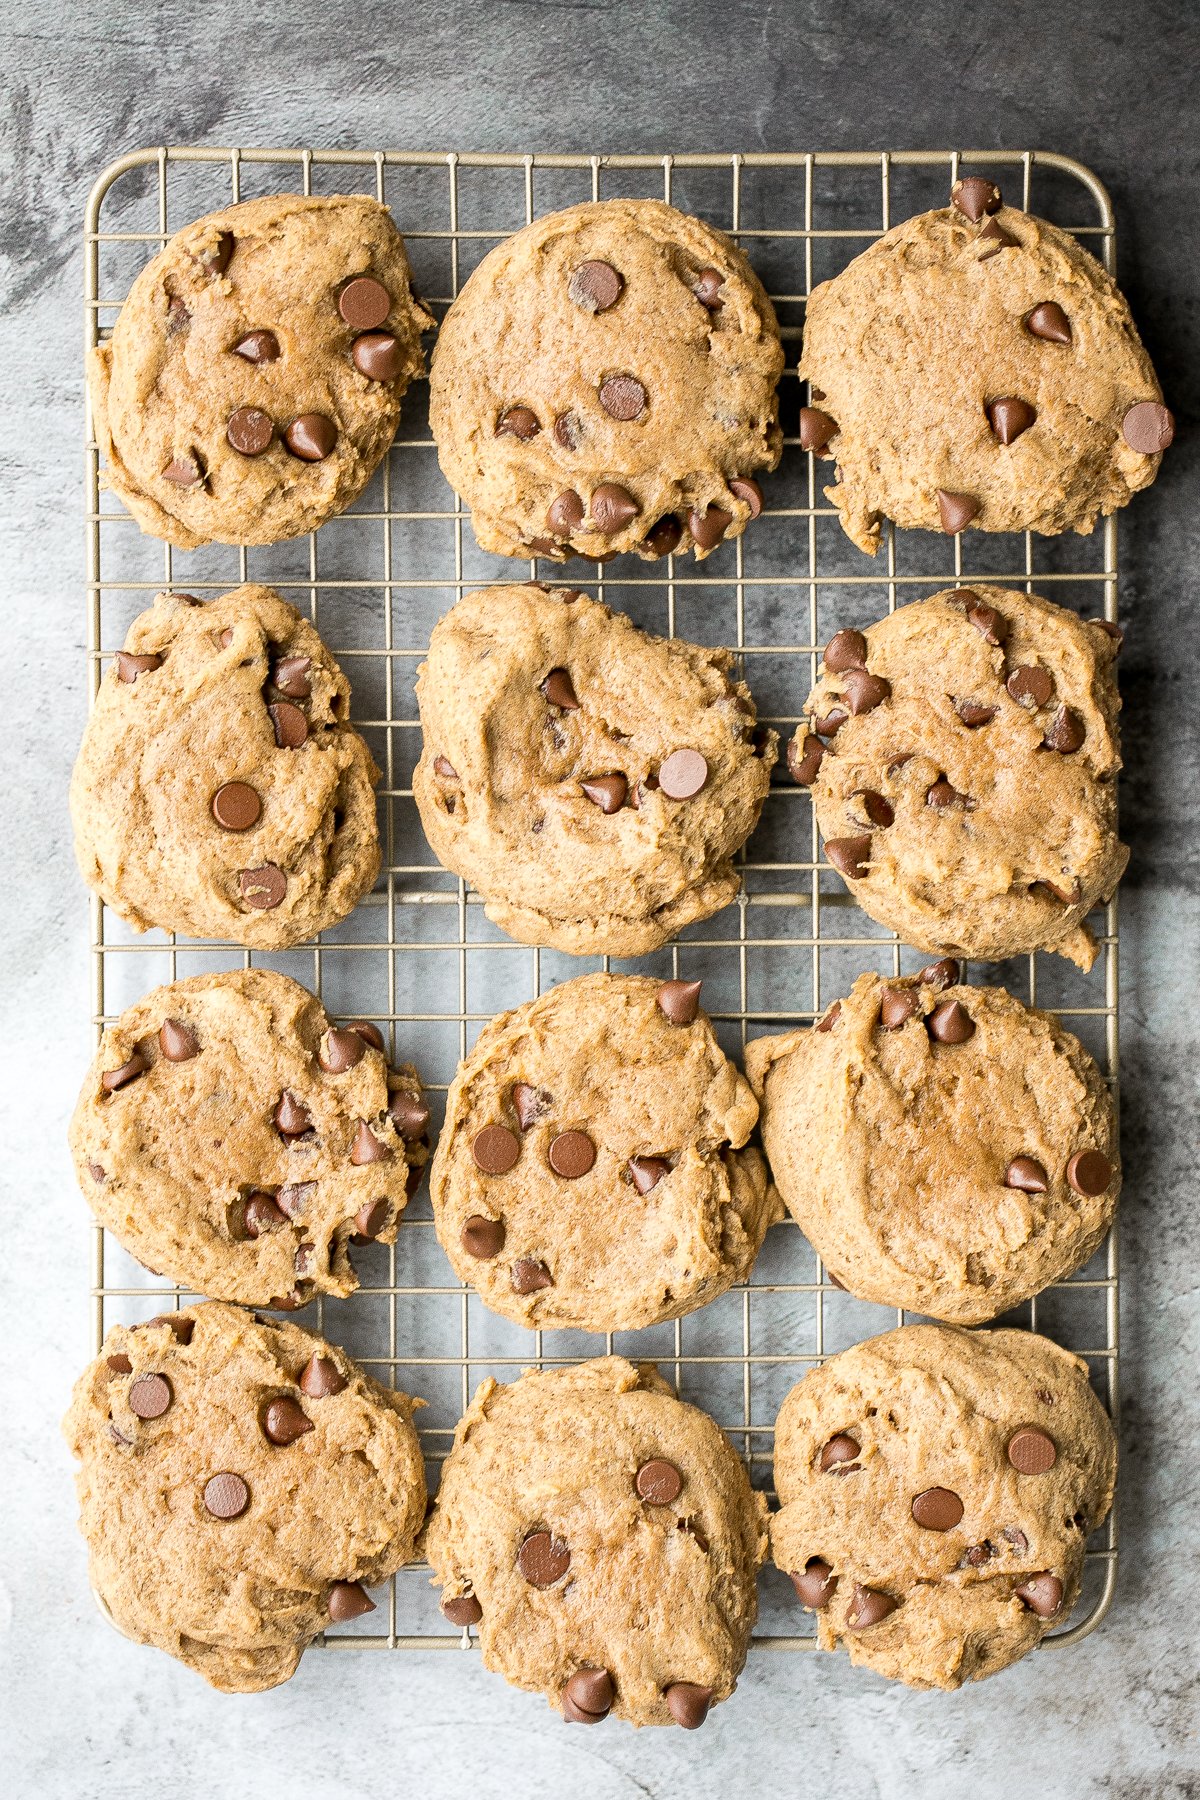
Pumpkin chocolate chip cookies. Yes you read that right. It's basically when pumpkin bread meets chocolate chip cookies. These pumpkin cookies are thick, fluffy, chewy and slightly cakey bites of chocolate chip pumpkin bread heaven. The best part? It requires no chill time so you can make them with a few simple steps and in under 20 minutes (including prep).
If you are a big fan of chocolate chip pumpkin bread, then these cookies are made for you. They satisfy your cravings in a little bite-sized form.
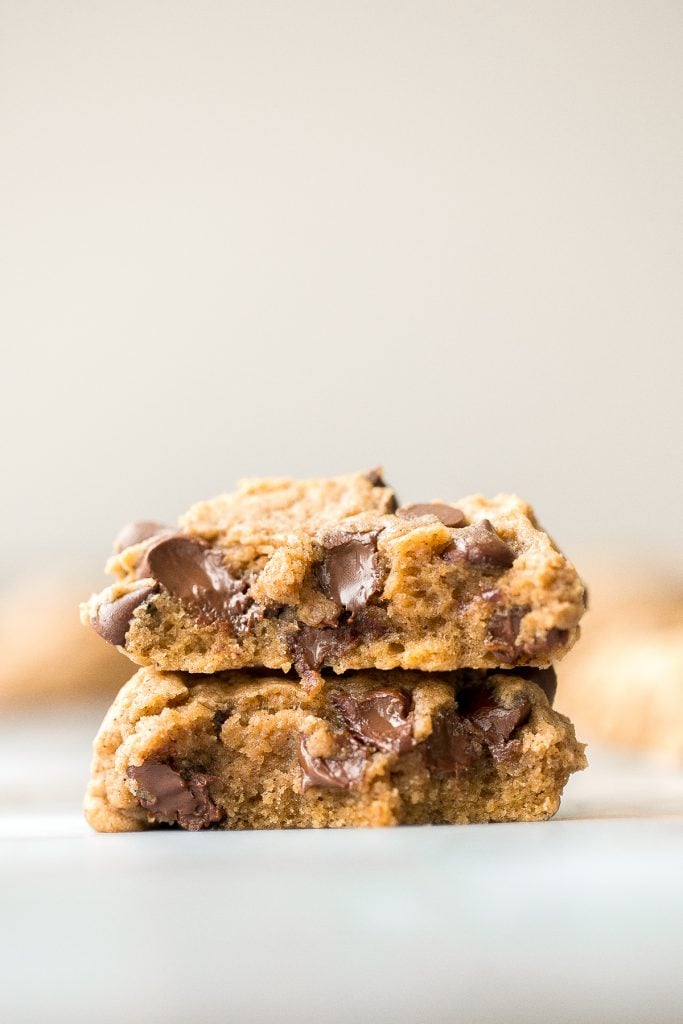
Ingredients
- salted butter - you can also use unsalted butter, but then add a pinch of salt to the dry ingredients.
- brown sugar
- egg
- vanilla extract
- pumpkin puree - either homemade or canned pumpkin. If using canned pumpkin, made sure it is pure pumpkin and not pumpkin pie filling.
- all-purpose flour
- baking powder + baking soda
- ground cinnamon
- pumpkin pie spice
- semi-sweet chocolate chips - you can also use chocolate chunks.
You will also need measuring cups and spoons, mixing bowls, hand mixer, medium cookie scooper, large ½ sheet baking pan, and silpat silicone mat (or parchment paper).

How to Make the Best Pumpkin Chocolate Chip Cookies
In a small mixing bowl, cream together butter and sugar until light and fluffy. Add egg, vanilla, and pumpkin puree, and whisk until smooth. In a large mixing bowl, combine flour, baking powder, baking soda, cinnamon, and pumpkin pie spice. Whisk until combined.
Pour wet ingredients into dry ingredients and beat together with a hand mixer until just combined. Then fold in half cup of chocolate chips.
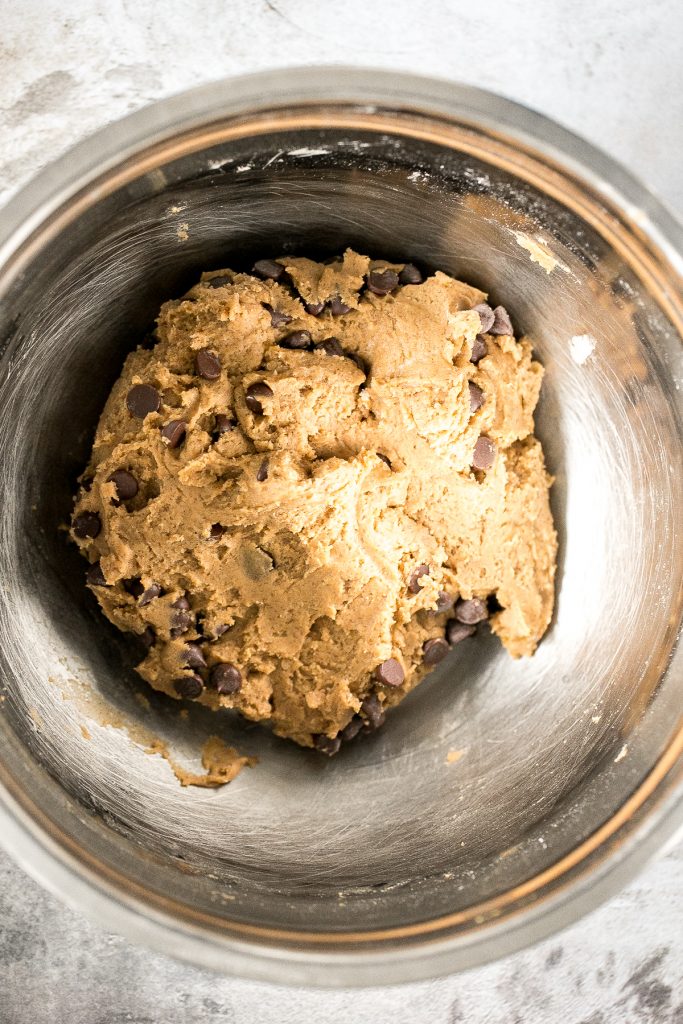
Use a medium cookie scooper to scoop out the cookies (about 2 tablespoons per scoop). Space them about an inch apart on a large ½ sheet baking pan lined with a silpat silicone mat or parchment paper. Then, use the back of a spoon to slightly flatten the cookies. Press remaining chocolate chips on top of the cookies.
Bake for 10-12 minutes in a 350 F preheated oven until the edges start to brown.
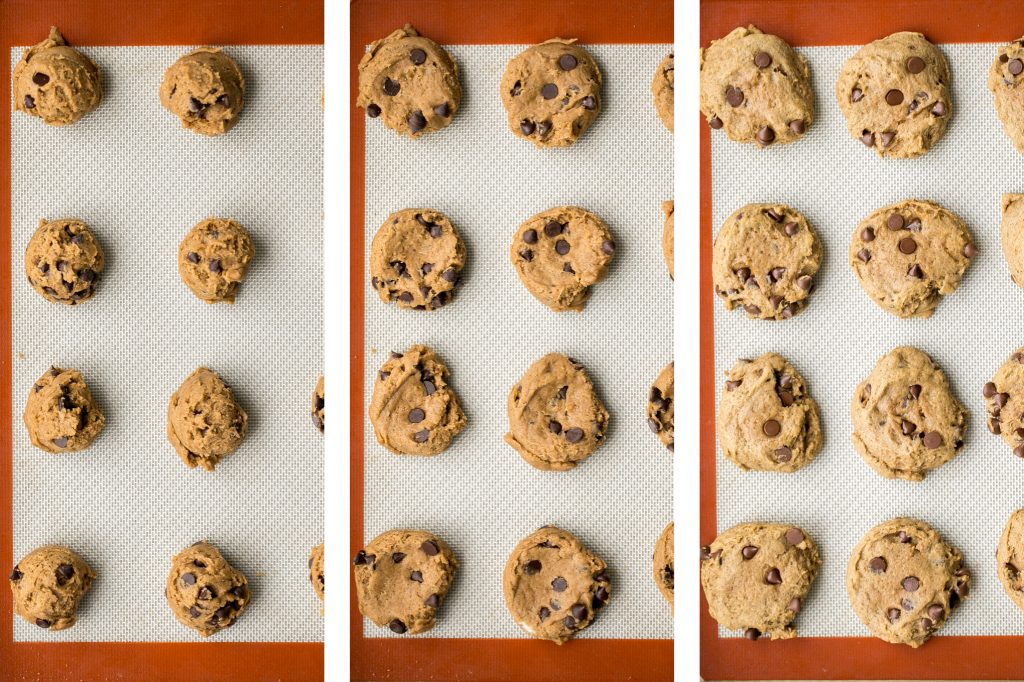
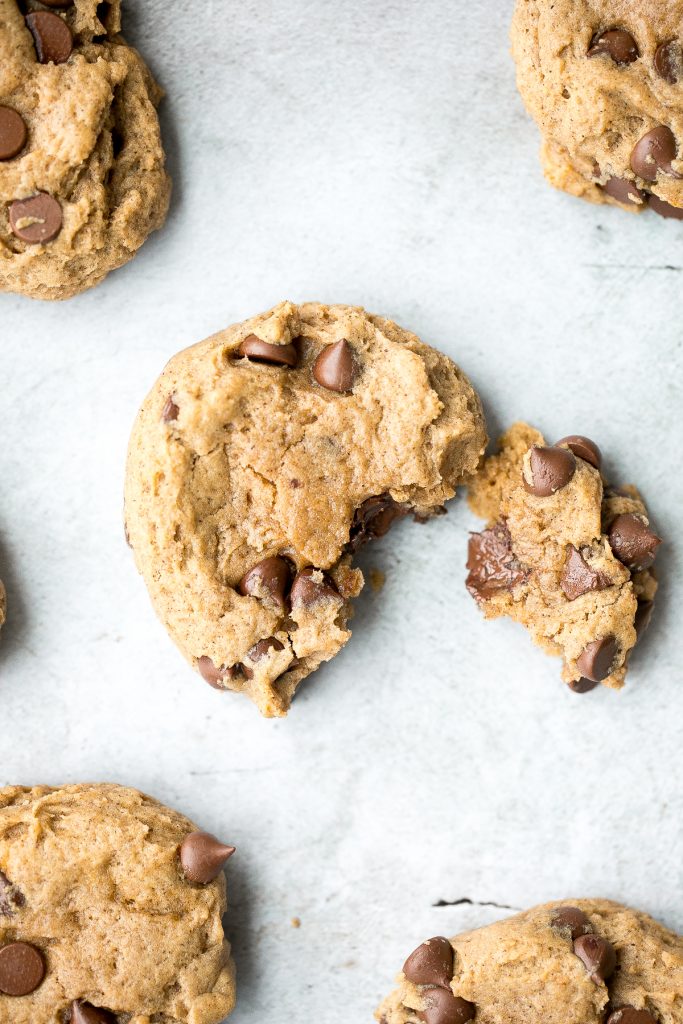
How to Store
Store pumpkin cookies in an airtight container at room temperature for up to 1 week, or freeze for up to 3 months.
How to Use Leftover Pumpkin Puree
Since this recipe uses ¼ cup of pumpkin puree, you may be looking for ways to use up leftover pumpkin puree. Here are some recipes to try:
- Small Batch Chocolate Chip Pumpkin Bread
- Pumpkin Cinnamon Rolls
- Mini Glazed Pumpkin Scones
- Pumpkin Pie Granola
- Mini Pumpkin Pies
- Pumpkin Dinner Rolls
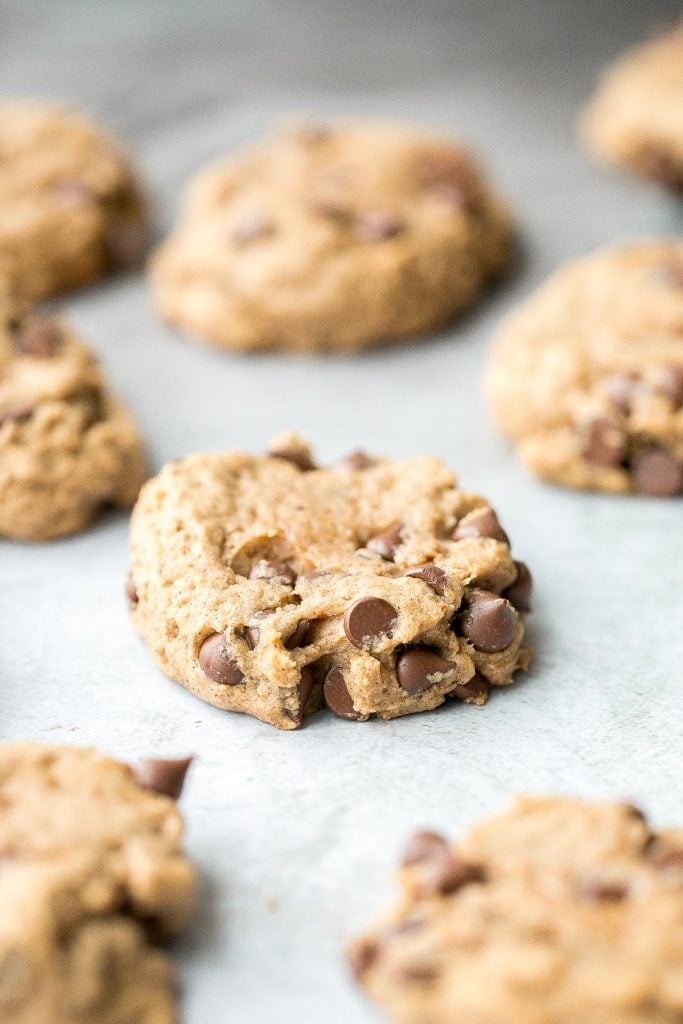
More Cookie Recipes
- Chocolate Chunk Peanut Butter Cookies
- Soft and Chewy White Chocolate Cranberry Cookies
- Chocolate Chip Banana Bread Cookies
- The Best Soft and Chewy Peanut Butter Cookies
- Chocolate-Dipped Shortbread Heart Cookies
- The Best Chewy Chocolate Chip Oatmeal Cookies
- Easy Sugar Cookies
Tried this recipe?
I'd love to hear what you think! Leave a comment and rating below to share your feedback. Your reviews help others discover this recipe and help me keep creating more free recipes for you. Snap a photo and tag me on social media @aheadofthyme too.

Apple Cider Chicken with Butternut Squash
If you are thinking about trying a new, easy skillet chicken dinner this fall, let it be one pan apple cider chicken with butternut squash. This delicious recipe is packed with juicy and tender chicken breast with seared crispy skin, warm butternut squash, sweet apples, and fresh thyme, all cooked in an apple cider sauce. It is so delicious and flavourful with all the classic fall flavours. The best part? This easy one pan recipe ready in under 40 minutes, making it the most warm and comforting fall weeknight meal ever.
Ingredients
- chicken breasts - 5 boneless, skin-on chicken breasts. You can remove the skin if you like, and skip the searing step.
- olive oil
- paprika
- salt and pepper
- butternut squash - you can use 2 cups of either fresh or frozen butternut squash diced into ¼-inch cubes. Small cubes will make the squash super tender and almost mash into the sauce. For a little more structure, cut into ½ inch cubes.
- apple
- fresh thyme
- apple cider sauce - made with apple cider (NOT apple cider vinegar), butter, mustard, brown sugar, and soy sauce.
You will also need a cast-iron skillet or oven safe skillet (a deep sheet pan will also work), and a meat thermometer.
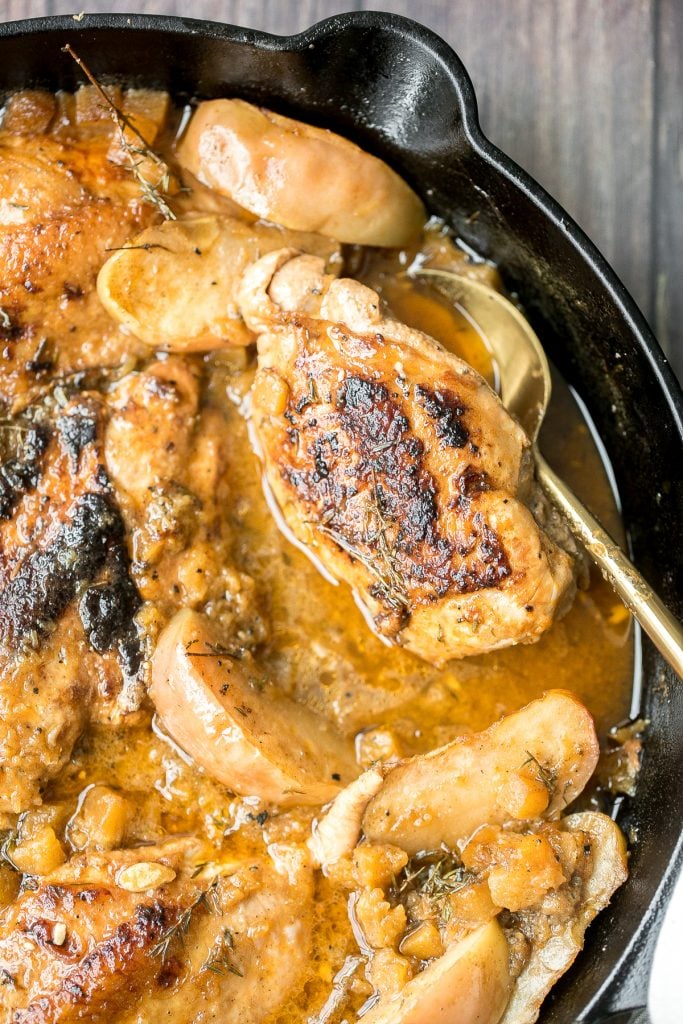
How to Make the Best Apple Cider Chicken with Butternut Squash
- Prep the chicken. Pat dry each chicken breast with a paper towel completely before adding seasoning. This helps create extra crispy skin when searing and roasting.
- Season the chicken. In a small bowl, combine olive oil, paprika, salt and pepper in a small bowl and mix well with a spoon to combine. Generously smear the seasoning mixture over the chicken breasts and let it rest on a clean plate for at least 15 minutes.
- Sear the chicken. Heat an oven-safe or cast-iron skillet on the stove for 5 minutes over medium high heat. Once the skillet is sizzling hot, sear the chicken breasts by placing them skin side down until the skin turns brown, about 4-5 minutes. Transfer the chicken breasts on a plate to rest.
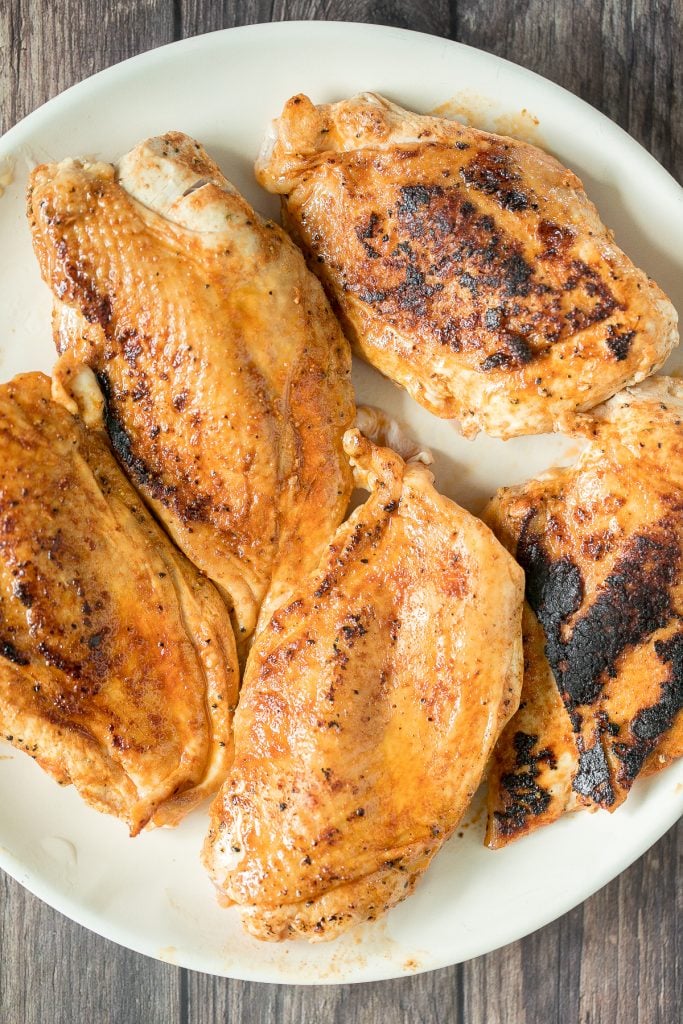
- Prepare apple cider sauce. On the same skillet, turn down the heat to medium and add apple cider, butter, mustard, brown sugar, and soy sauce. Stir to combine. Bring the sauce mixture to a simmer and stir until it forms a smooth texture. Remove from heat and transfer the chicken breasts back to the skillet with the skin side up.
- Prepare butternut squash. In a large mixing bowl, add butternut squash, sliced apples, thyme, and remaining tablespoon of olive oil. Toss to combine. If using frozen butternut squash, make sure to defrost first and pat dry to remove excess water. Transfer the butternut squash and apple mixture to the skillet and spread it around the chicken.
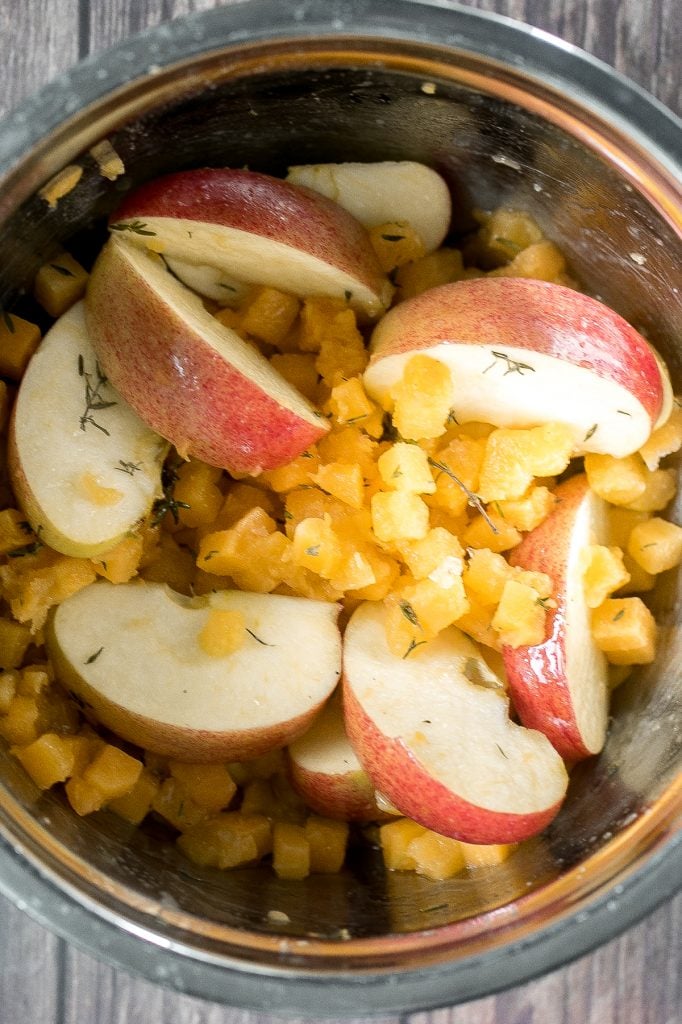
- Bake. Transfer the entire skillet into a 420F preheated oven and bake for 20 minutes until the skin is crispy and golden brown and the internal temperature for the chicken reaches 165F on a meat thermometer.
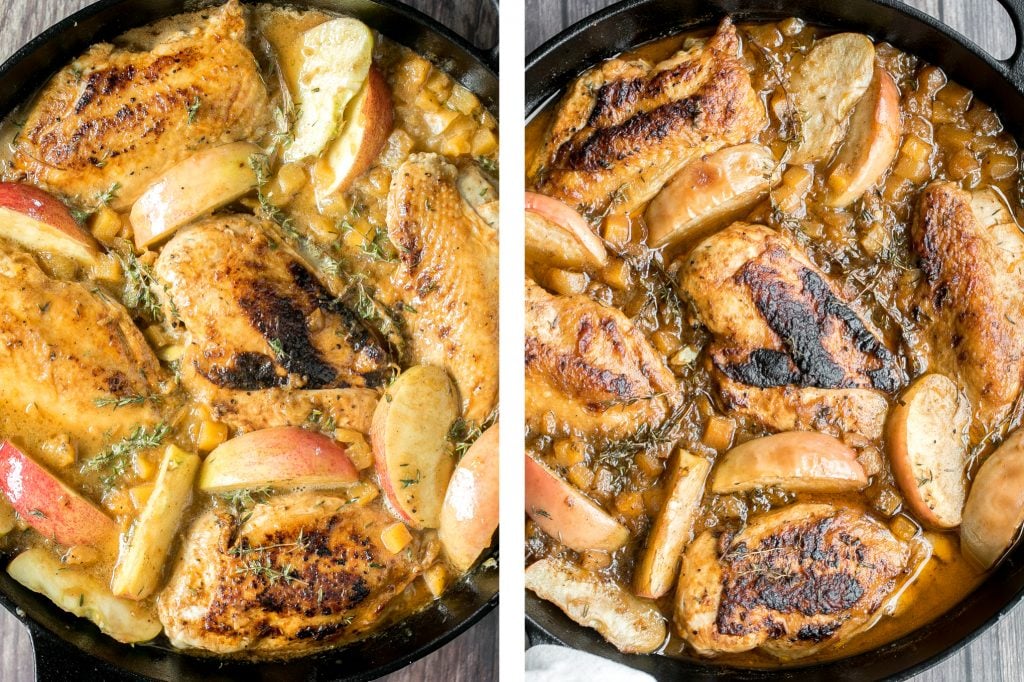
- Serve. Serve the chicken and butternut squash on a plate and drizzle some apple cider sauce from the skillet on top.
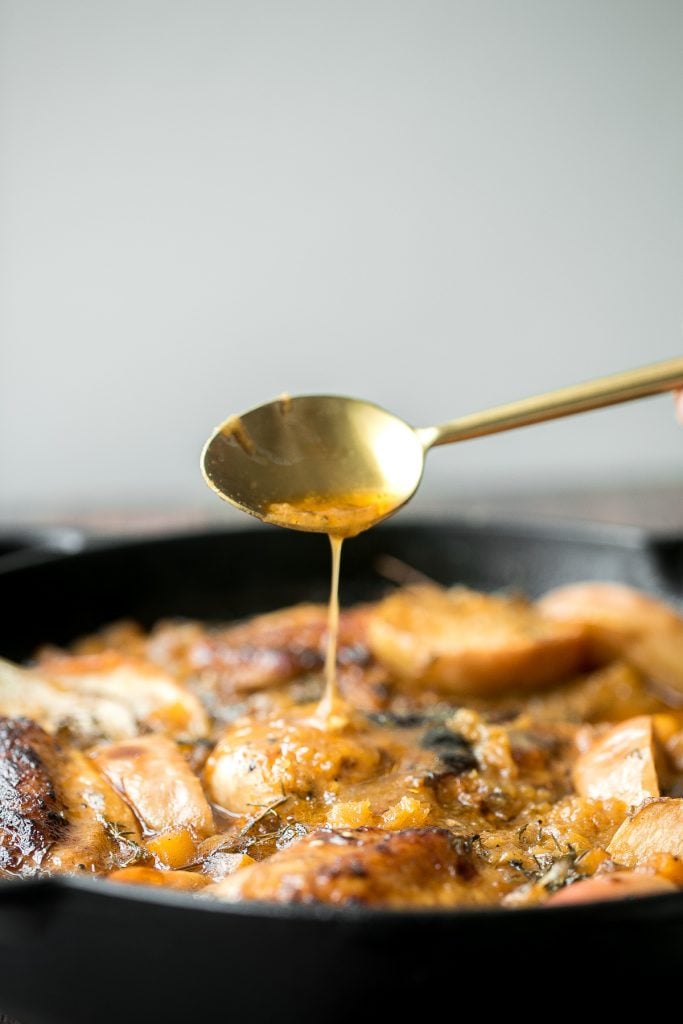
How to Serve Apple Cider Chicken
You can serve this one pan recipe completely on it's own with the delicious butternut squash and apple that just soaks up all the flavours of the apple cider sauce. It also goes really well on top of some creamy mashed potatoes or mashed cauliflower.
And since we don't want to waste any of that amazing apple cider sauce in the pan, you need some warm crusty bread to soak it all up. Try it with artisan no knead bread, no yeast biscuits, or sliced French baguettes.
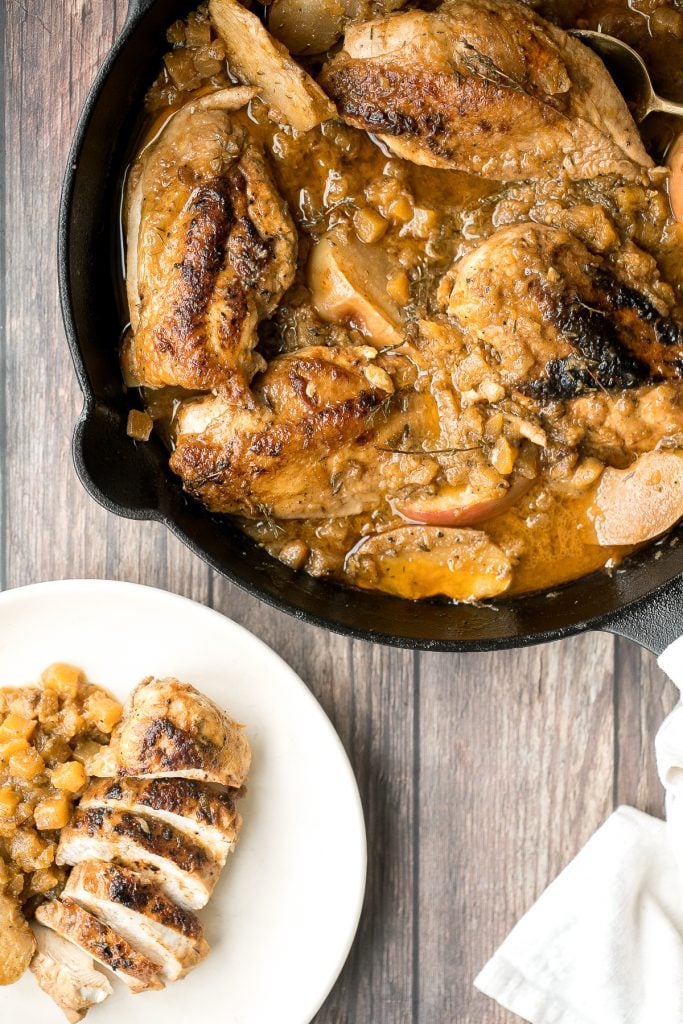
How to Store
Store cooked chicken and butternut squash with all the juices from the pan in an airtight container, and refrigerate for up to 4 days. Reheat in the microwave or oven at 300F for 5-10 minutes.
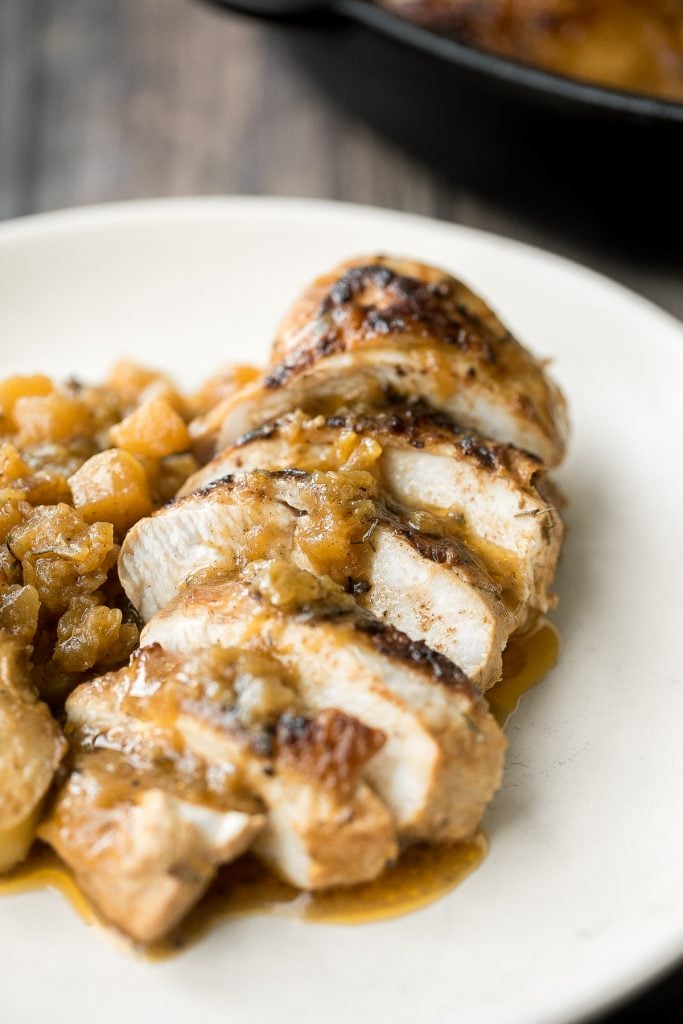
More One Pot Chicken Recipes
- Apple Dijon Braised Chicken Thighs
- Skillet Chicken Thighs and Potatoes
- Creamy Skillet Chicken with Lemon Garlic Sauce
- One Pot Spanish Chicken and Rice
- Roasted Spatchcock Chicken
- Dutch Oven Whole Roast Chicken
Tried this recipe?
I'd love to hear what you think! Leave a comment and rating below to share your feedback. Your reviews help others discover this recipe and help me keep creating more free recipes for you. Snap a photo and tag me on social media @aheadofthyme too.
Creamy Pumpkin Hummus
Calling all hummus lovers. Let me introduce you to life-changing creamy and dreamy pumpkin hummus. I mean, do you see that texture? This healthy and vegan hummus is so flavourful and delicious, packed with all the classic hummus ingredients for that flavour that you know and love, but with added (and subtle) pumpkin. Make it with just a few pantry staples and in under 5 minutes. So so easy to make.
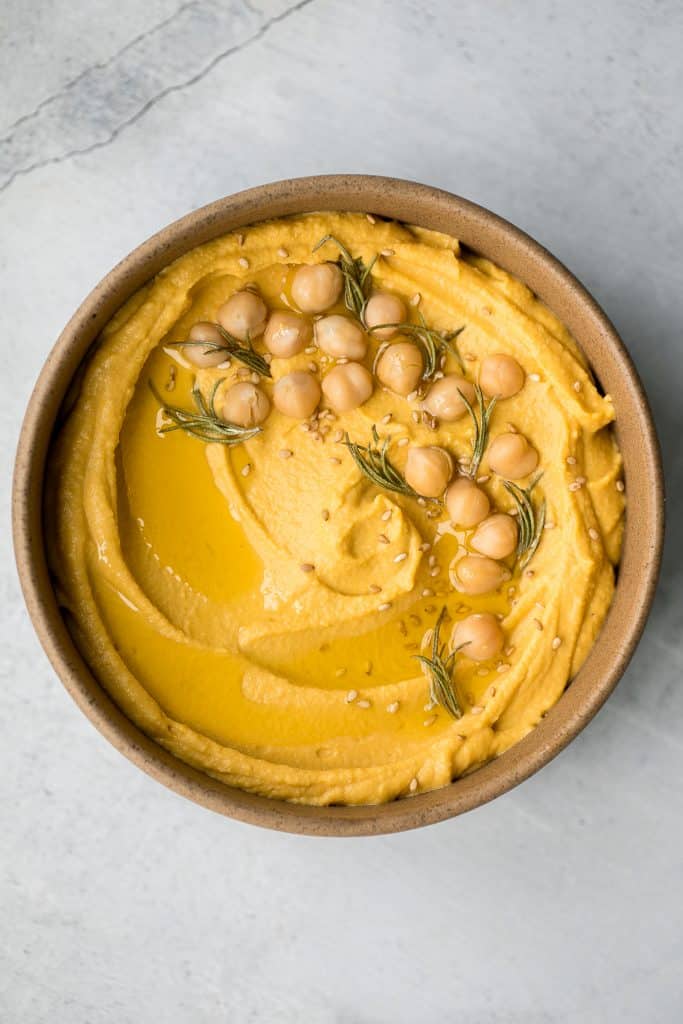
I love anything quick and easy, especially when it tastes this good. So you can say that I am currently pretty obsessed with pumpkin hummus. It's the perfect fall snack to serve all day every day and makes the perfect appetizer to serve on your Thanksgiving holiday menu. I mean, who can say no to healthy and delicious. Plus, it's such a great way to sneak in vegetables (hello pumpkin!).
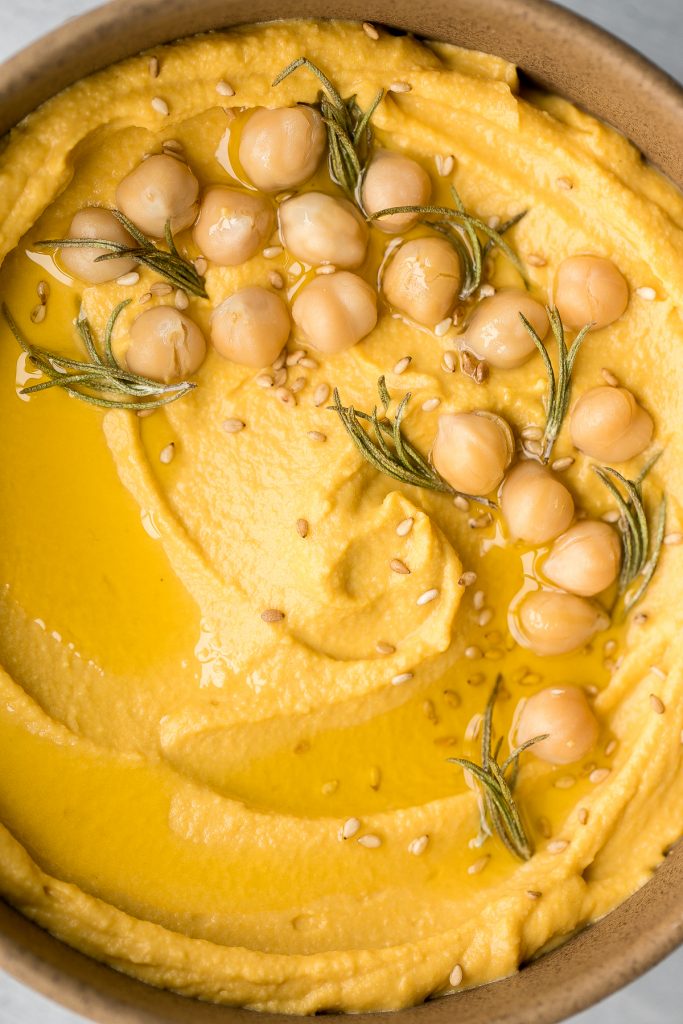
Ingredients in Pumpkin Hummus
- chickpeas - canned chickpeas with some reserved canned water.
- reserved canned water - this is the secret to getting really creamy hummus.
- pumpkin puree - you will need ⅔ cup of pumpkin puree. You can used canned pumpkin or homemade pumpkin puree. If using canned, there are a lot of ways you can use up that extra puree. Try pumpkin scones, chocolate chip pumpkin bread, mini pumpkin pies, pumpkin granola, or pumpkin cinnamon rolls.
- tahini sesame paste
- garlic
- olive oil
- lemon juice
- maple syrup - just a hint of maple syrup to complement the pumpkin flavour.
- salt
- toppings - chickpeas, sesame seeds, herbs (try rosemary or thyme), olive oil.
You will also need a blender or food processor.
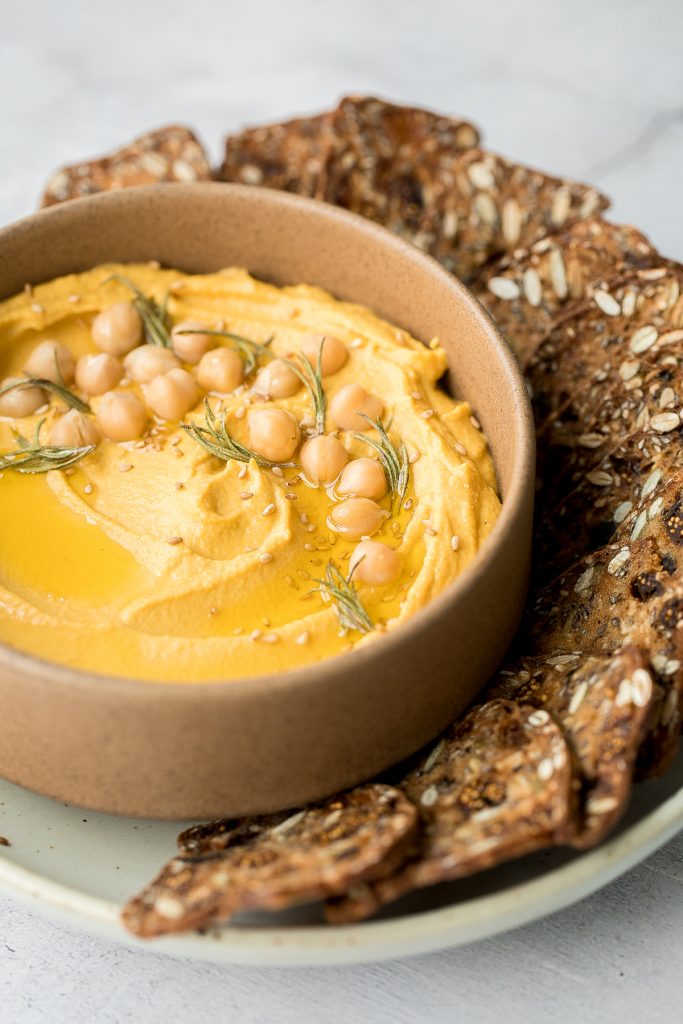
How to Make the Best Creamy Pumpkin Hummus
There is really just one step to making this creamy hummus. Just add all ingredients into a heavy duty blender (or a food processor) and pulse mix until fully combined and creamy. You may want to reserve a few of the chickpeas to add on top.
Then, transfer to a dipping bowl. Add some chickpeas, sesame seeds, and fresh herbs on top, and drizzle on some olive oil.
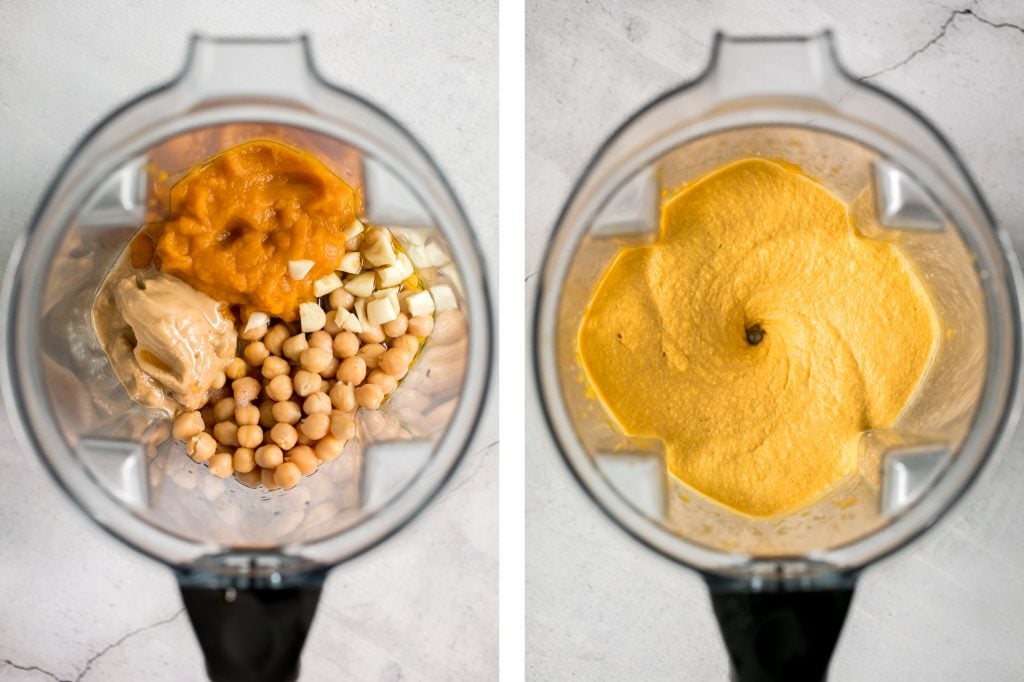
How to Serve Hummus
The best think about hummus is that there are so many different options when it comes to serving it. You can serve it with bread such as crackers, pita bread, naan flatbread, or crusty sourdough. You can keep it completely gluten-free and serve with an assortment of fruit such as sliced apples and pears, or veggies. Or use it as a spread in a Thanksgiving sandwich or vegan hummus wrap.
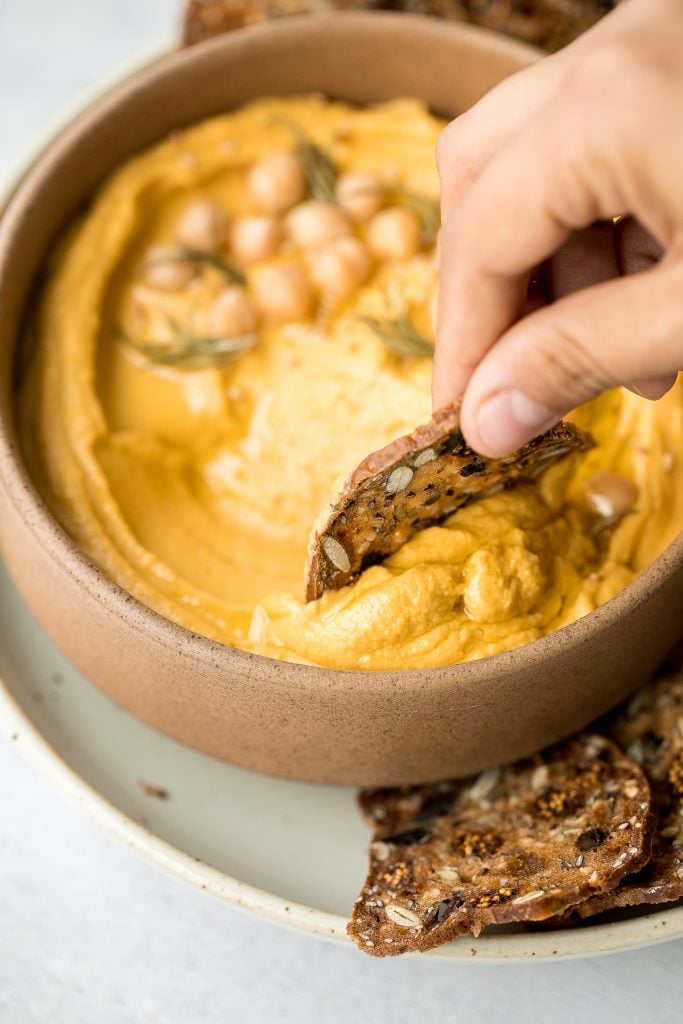
How to Store
Store creamy pumpkin hummus in an airtight container in the refrigerator for 7-10 days, or in the freezer for up to 3 months. To serve, let it thaw in the refrigerator until ready to serve.
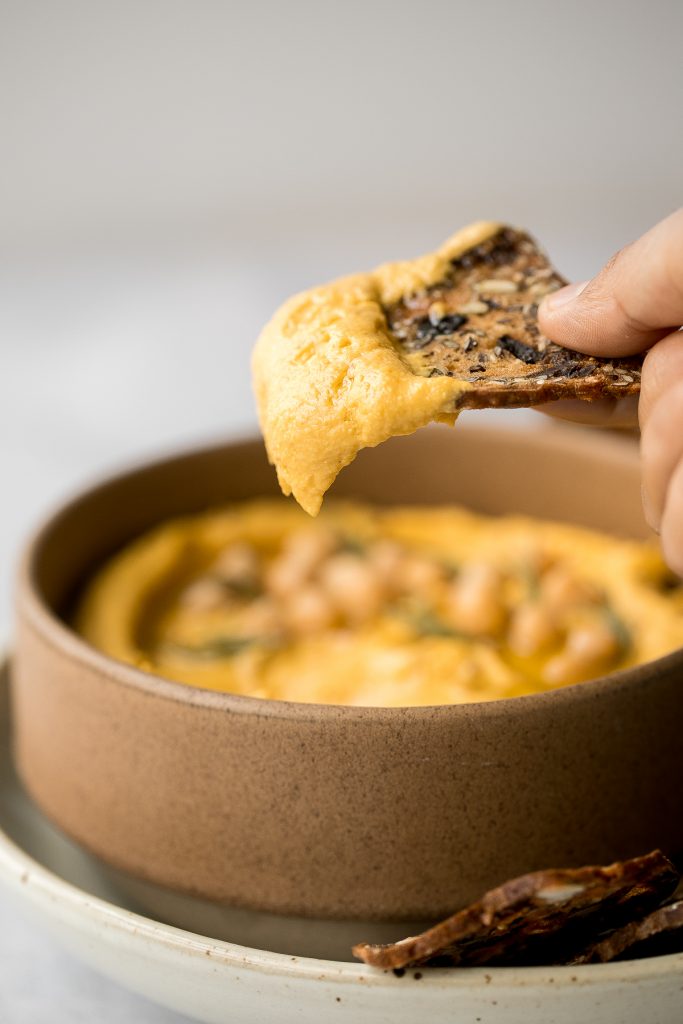
More Dips and Spreads
- Smooth and Creamy Hummus
- Easy Tzatziki Sauce (Yogurt Cucumber Dip)
- Creamy Avocado Hummus
- Caramelized Onion Dip
- Baba Ganoush Eggplant Dip
- Baked Spinach Dip
Tried this recipe?
I'd love to hear what you think! Leave a comment and rating below to share your feedback. Your reviews help others discover this recipe and help me keep creating more free recipes for you. Snap a photo and tag me on social media @aheadofthyme too.
Vegetarian Mushroom Barley Soup

Wholesome and hearty vegetarian mushroom barley soup is the coziest soup you can make all season. It's healthy, filling, and so delicious, packed with pearl barley, mushrooms and carrots. Plus, this one pot meal is super easy to make with just 10 minutes of prep on the stove top or in a slow cooker. You can also make it a few days ahead of time or freeze it for a rainy day.
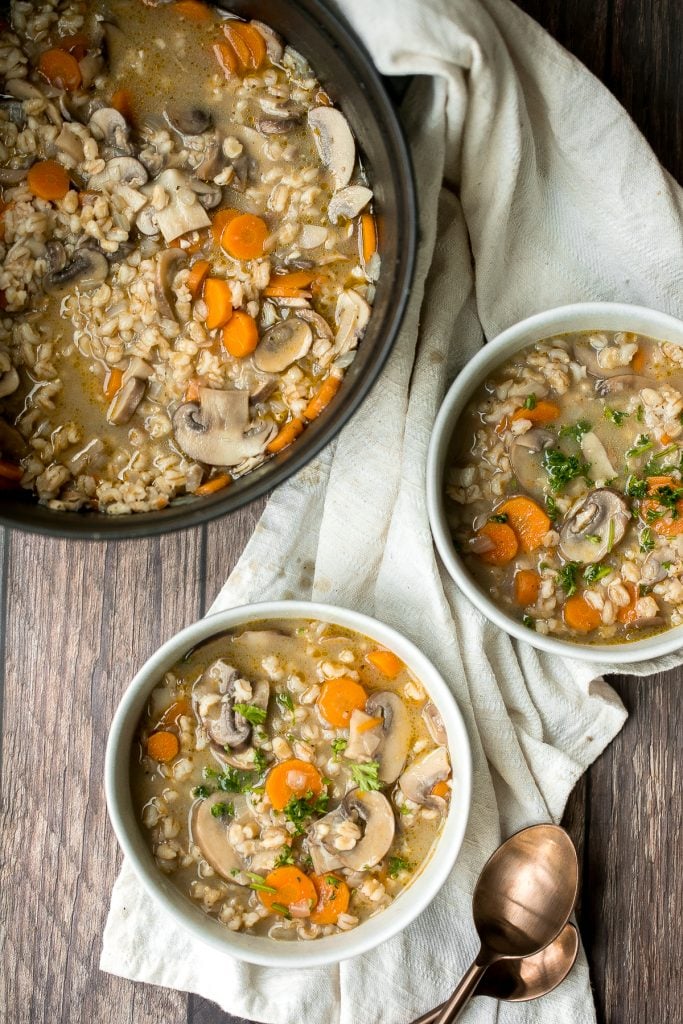
Ingredients
- vegetable oil
- onion + garlic
- vegetables - I used carrots and mushrooms in this soup. You can also add in other vegetables that you like such as celery, potato, sweet potato and green beans.
- barley - I used pearl barley in this soup.
- water
- vegetable stock powder - I used vegetable stock powder to keep the soup vegan. You can also use chicken or beef stock powder.
- salt and pepper
- fresh parsley - for garnish.
You will also need a medium-large cooking pot (I love making soup in the my 4 qt. dutch oven) or a slow cooker.

How to Make the Best Vegetarian Mushroom Barley Soup
First, heat oil in a medium-large pot (or Dutch oven) over medium high heat for 2 minutes until the hot oil sizzles and shimmers. Add onion, garlic and carrots. Sauté until fragrant and onion is soft and tender, about 4 minutes.
Then, add mushrooms and continue to sauté for about 3 minutes. You should notice the mushrooms start to brown a little.
How to Cook on the Stovetop
Add barley and water (add enough water to cover 4 inches above the ingredients in the pot, about 5-6 cups). Season the soup with vegetable stock powder, salt and pepper and bring it to a boil, stirring occasionally to prevent the barley from sticking to the bottom of the pot.
Turn the heat down to low and cover. Simmer for 1 hour until the barley is soft and tripled in size. The barley should be soft but still chewy.
How to Cook in the Slow Cooker
Transfer sautéed vegetables to the bottom of the slow cooker. Add in water, barley, and seasoning (vegetable stock powder, salt and pepper). Cover and cook on low for 6-7 hours.
Serve in a bowl and garnish with parsley.
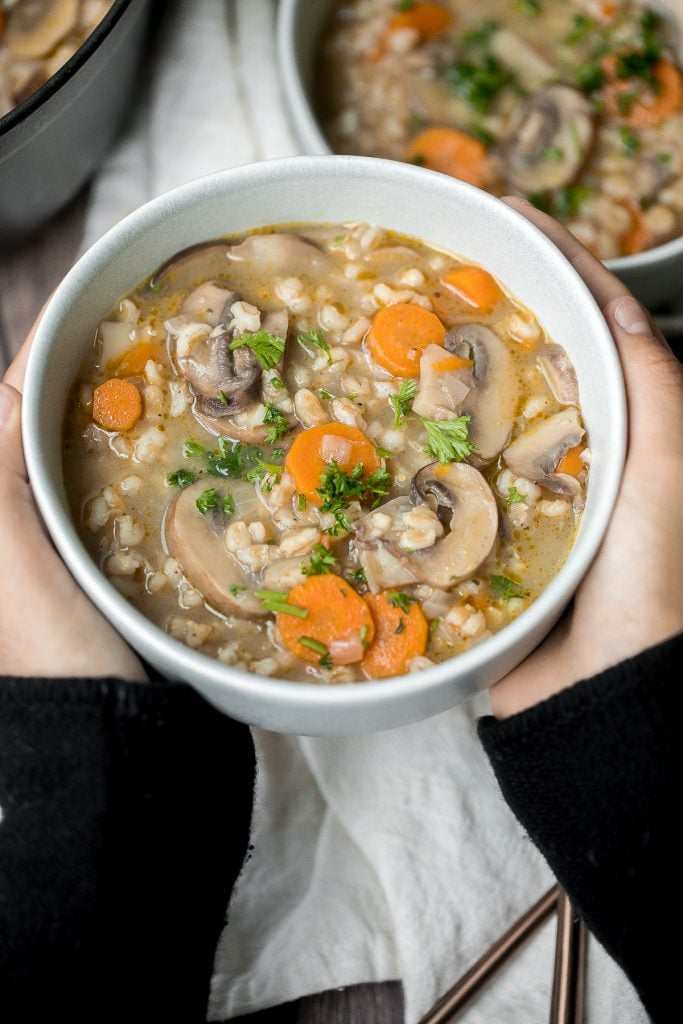
How to Serve Mushroom Barley Soup
My favourite way to serve a hearty soup like mushroom barley soup is with a side of crusty homemade bread to soak it all up. Some of my favourites are easy homemade biscuits, garlic rosemary focaccia bread, easy ciabatta rolls, no knead artisan bread and sourdough bread. Or browse through all of our bread recipes.
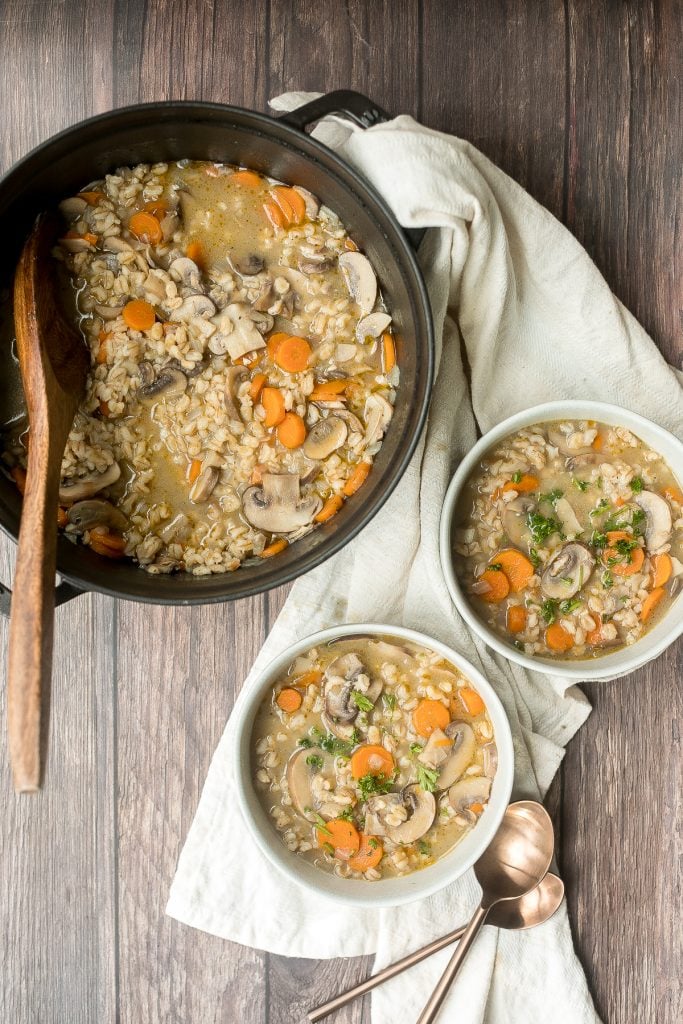
Tips on Storing
- How to store: Keep the barley soup in the pot (covered) and store in the refrigerator for up to 5 days, or transfer it into an airtight container and store in the fridge.
- How to freeze: Freeze barley soup in an airtight container or large freezer bag and freeze for up to 3 months. To serve, thaw in the refrigerator or on the kitchen counter, and then reheat on the stove and serve.
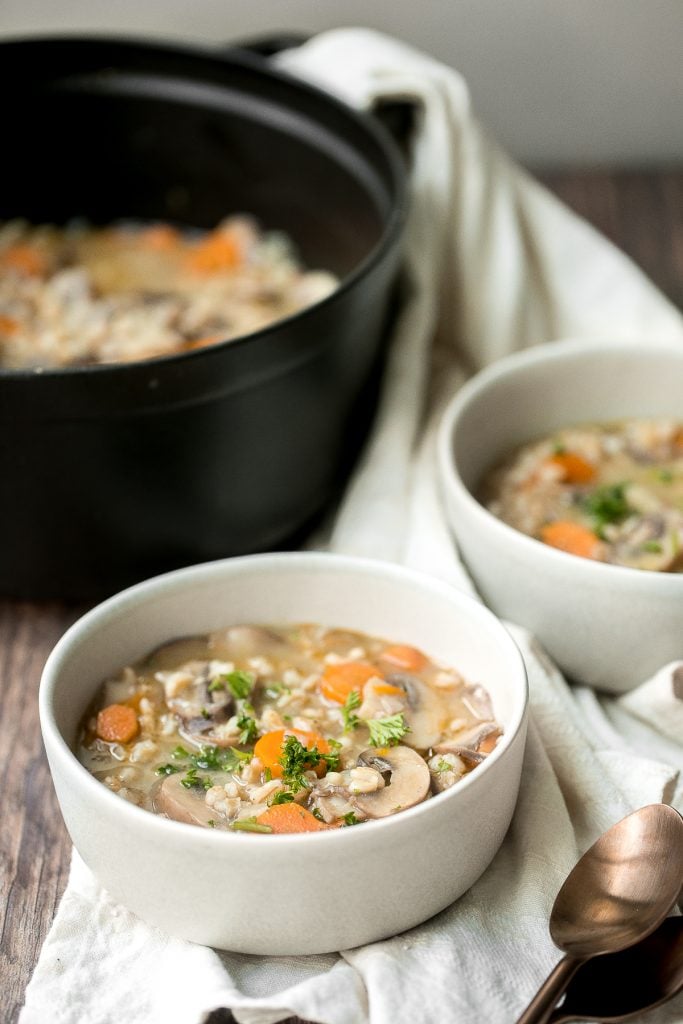
More Soup Recipes
- 30-Minute Butternut Squash Soup
- Sweet Potato Soup
- Roasted Butternut Squash and Cauliflower Soup
- Lemon Chicken Orzo Soup
- Roasted Butternut Squash Soup
- Creamy Mexican Corn Soup
This easy vegetarian mushroom barley soup forms a part of my 25 warm and cozy fall soup recipes. Follow the link to check out all of my 25 fall favourite soups.
Tried this recipe?
I'd love to hear what you think! Leave a comment and rating below to share your feedback. Your reviews help others discover this recipe and help me keep creating more free recipes for you. Snap a photo and tag me on social media @aheadofthyme too.
30 Best Butternut Squash Recipes
Looking for the best butternut squash recipes? Well then you are in the right place. Butternut squash is my favourite fall vegetable to cook with in the cooler months. Hands down. It's just so warm and comforting and makes any dish feel cozy. Plus, there is literally nothing that you cannot make with this veggie. Today, I am sharing my 30 most popular and best easy butternut squash recipes, from soups and salads, to side dishes and mains, to tarts and dessert. So if you are looking for "what to make with butternut squash", I've got you covered.
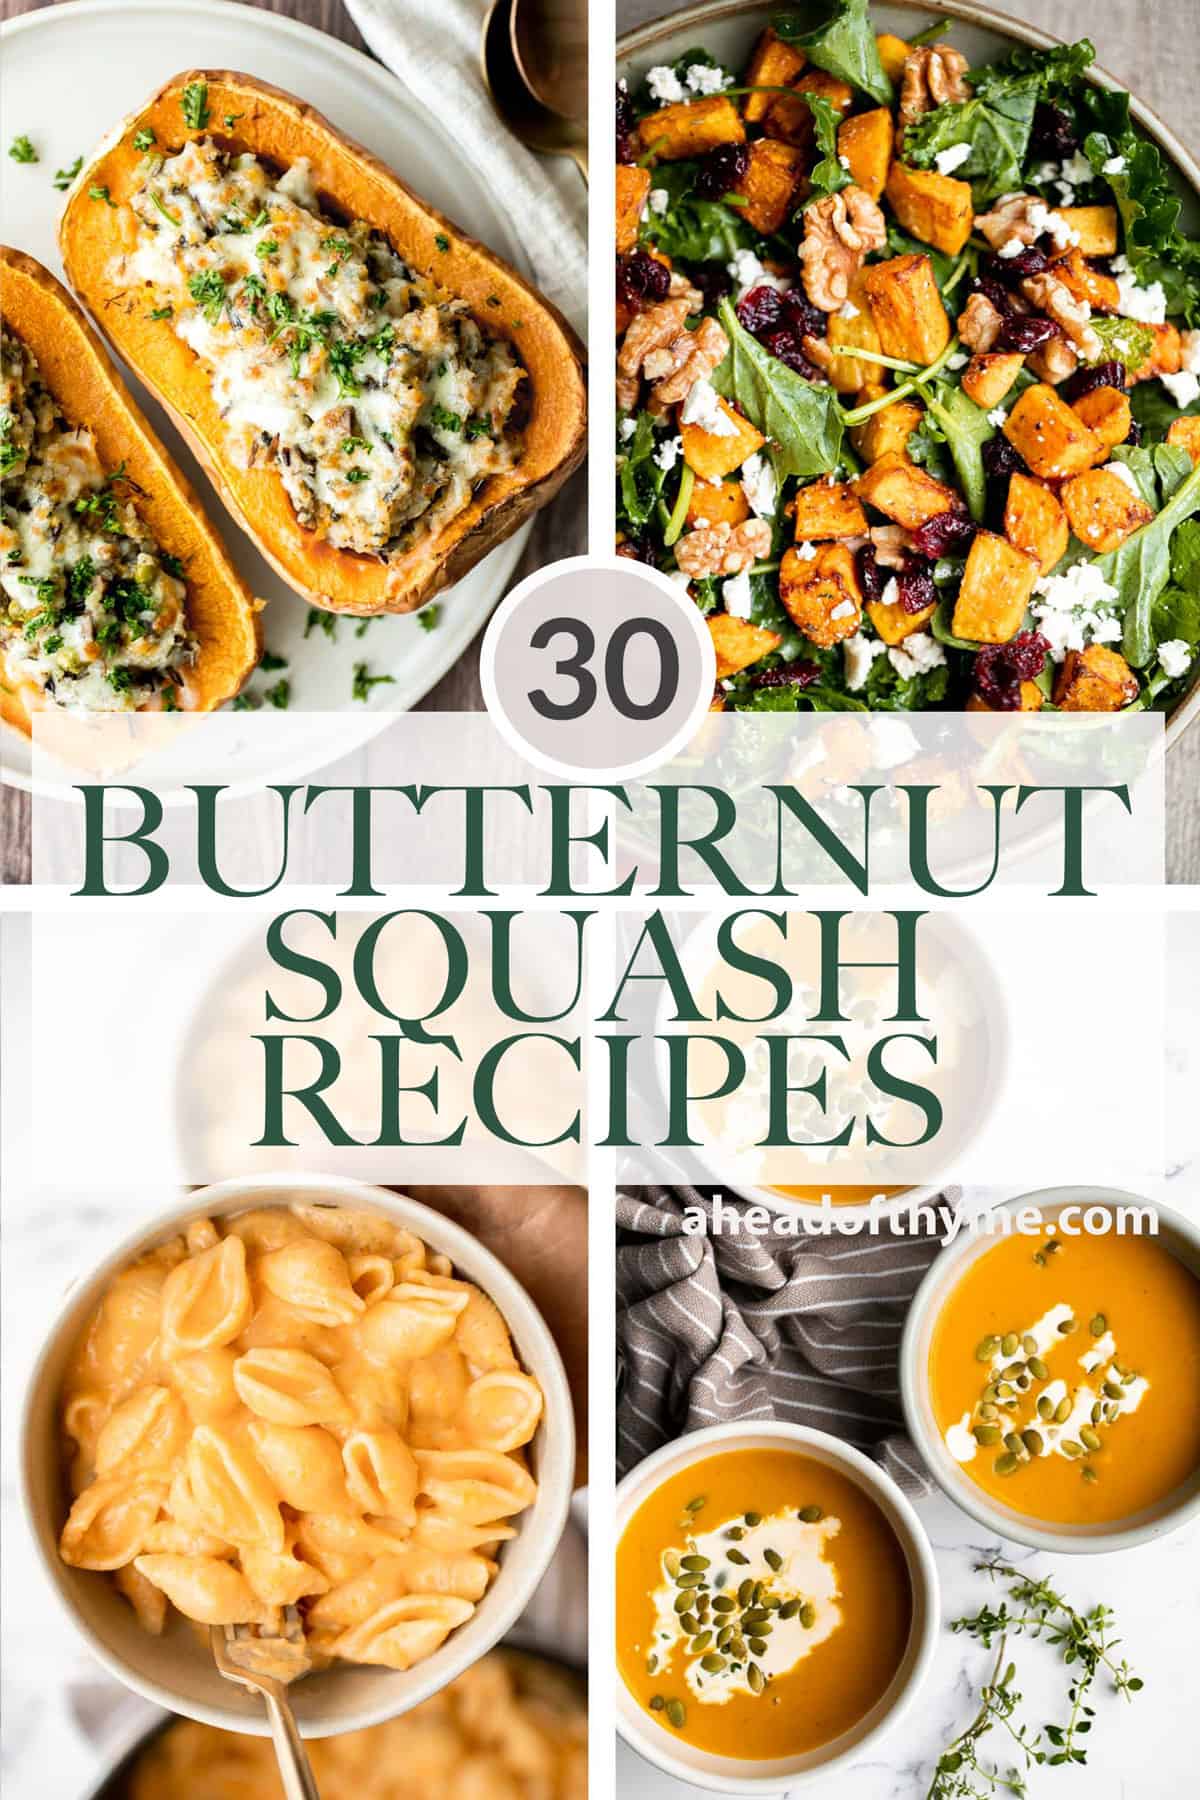
Best Butternut Squash Recipes
This roasted butternut squash soup is the most popular soup on Pinterest, and for good reason. It is a bowl of comfort that just sums up the taste of the holidays in one spoon. Serve this vegan soup with some homemade ciabatta rolls on the side.

Stuffed Butternut Squash with Wild Rice
Healthy, hearty and wholesome butternut squash with wild rice and mushrooms is an easy cozy vegetarian dinner or side dish for fall. It pairs so nicely with a juicy roasted turkey breast and nutty green beans.

Maple Roasted Brussels Sprouts and Butternut Squash
Maple Roasted Brussels Sprouts and Butternut Squash are a quick, easy, flavorful, and delicious Thanksgiving side dish that you need this holiday season.
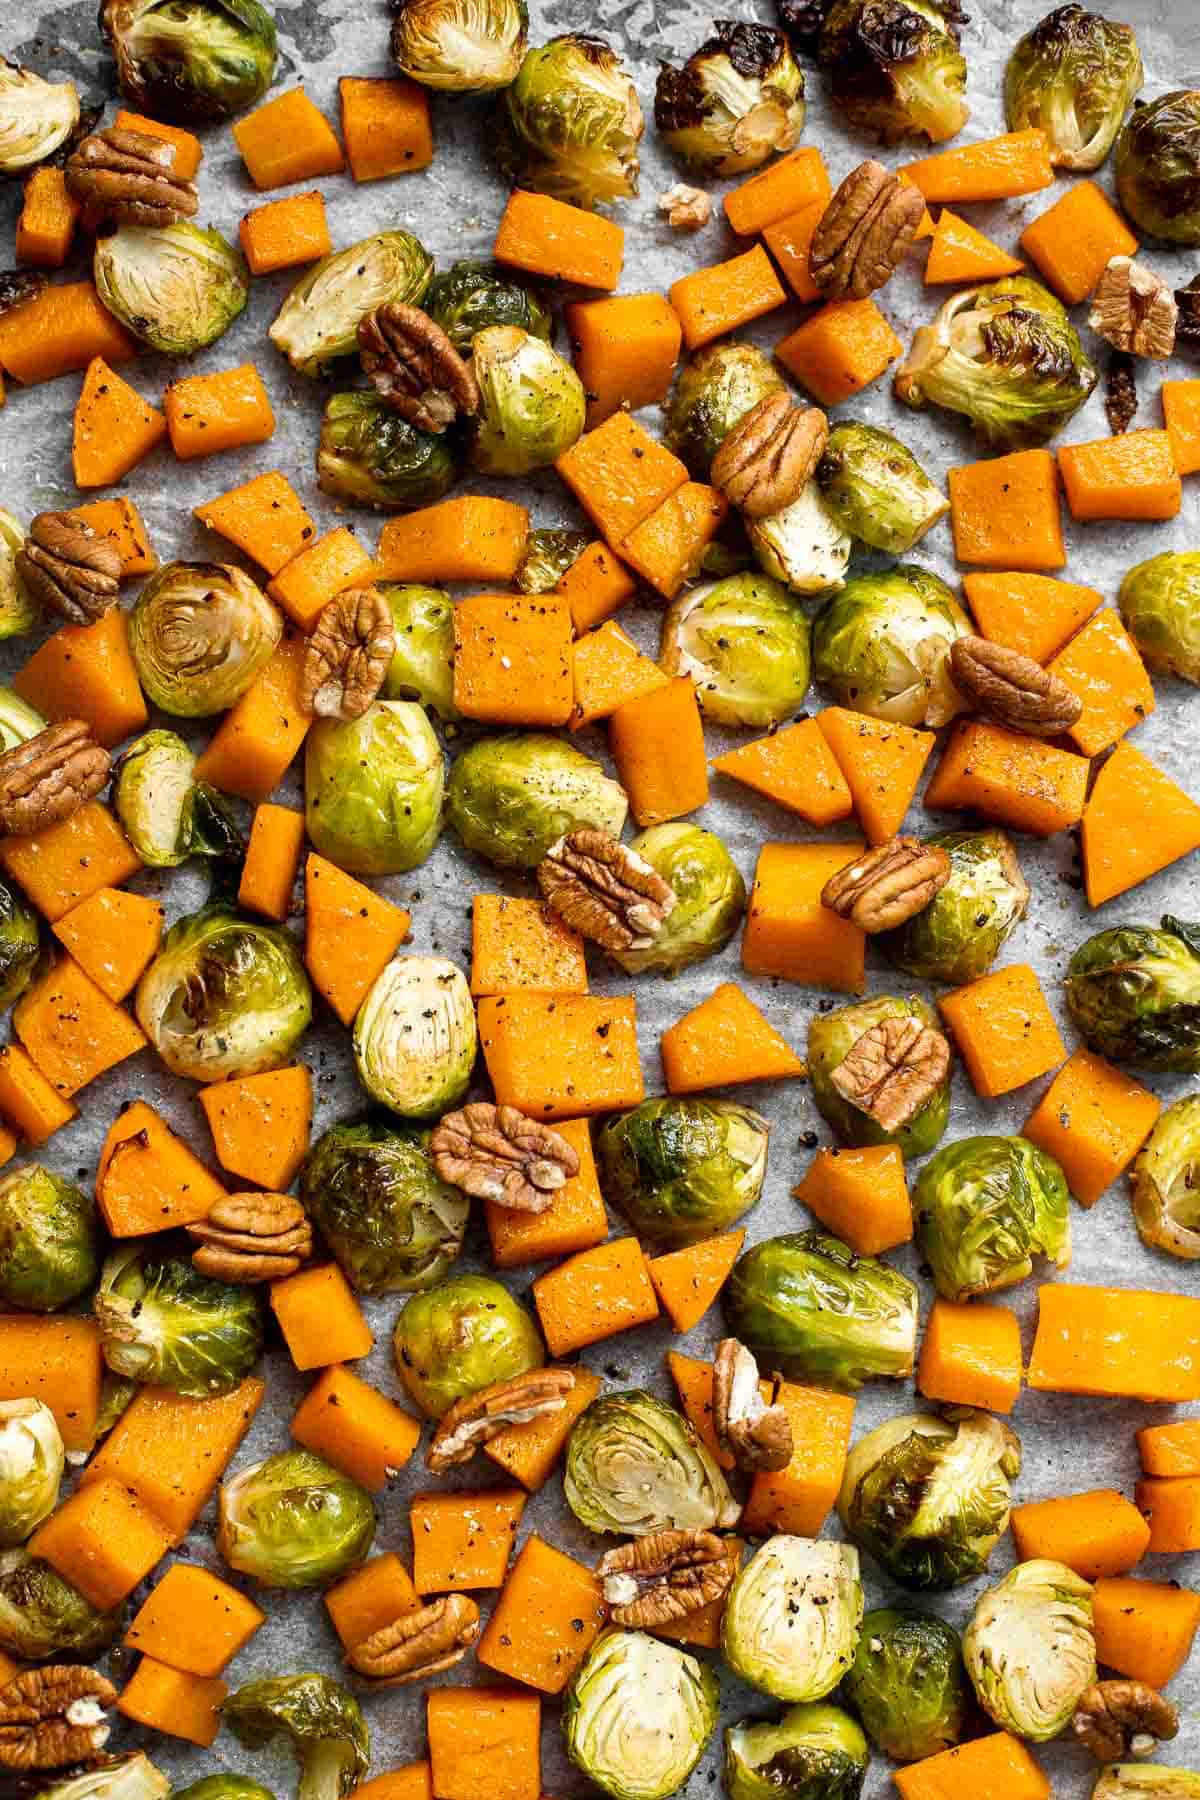
Butternut Squash Mac and Cheese
Butternut squash mac and cheese is a flavorful and delicious fall twist on a classic, with a rich and creamy sauce that is secretly loaded with veggies.
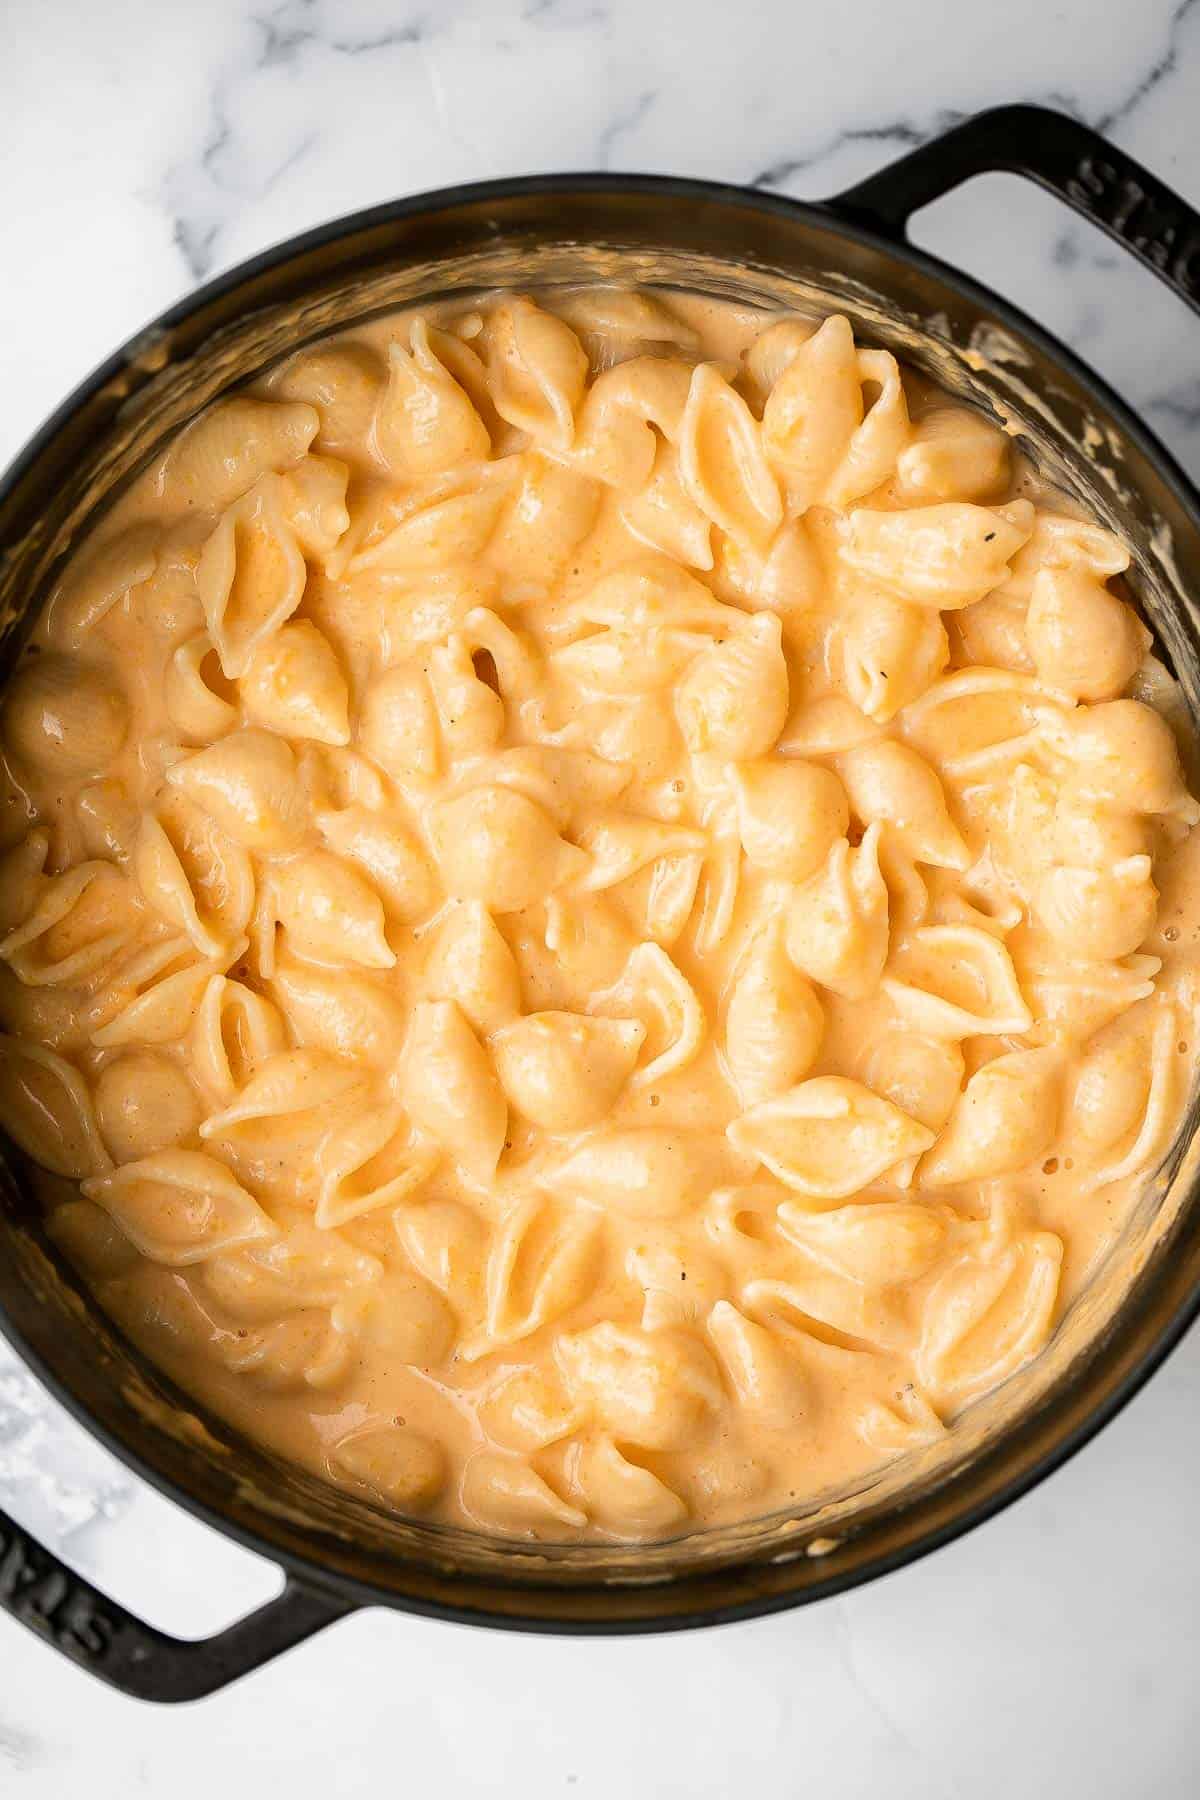
Butternut Squash Risotto is warm, satisfying, and naturally vegetarian - ideal for a quiet fall dinner or a show-stopping entree at your next autumn party.
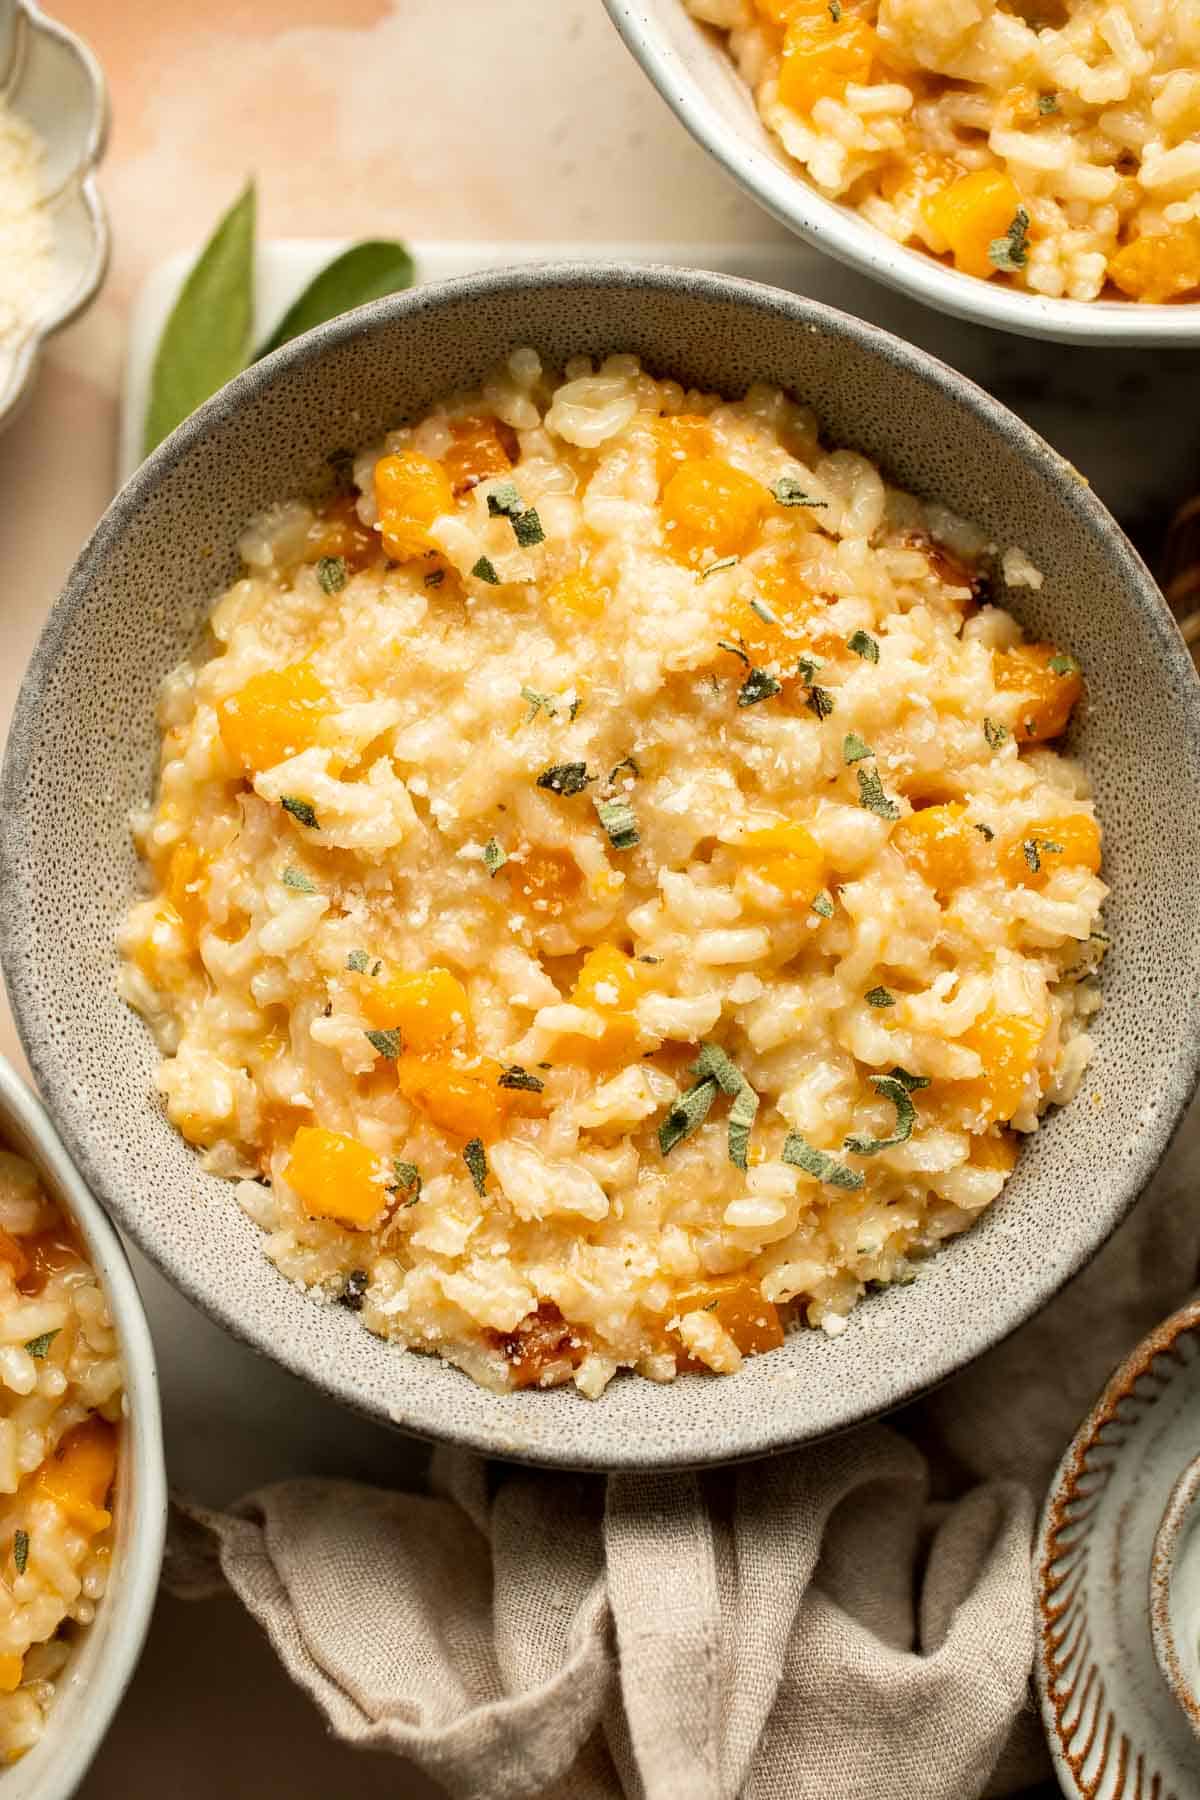
Roasted butternut squash is the easiest vegan side dish you need this fall. It has a ton of flavour with just a few simple pantry staples. I like to serve this alongside a whole roast chicken and mashed potatoes.
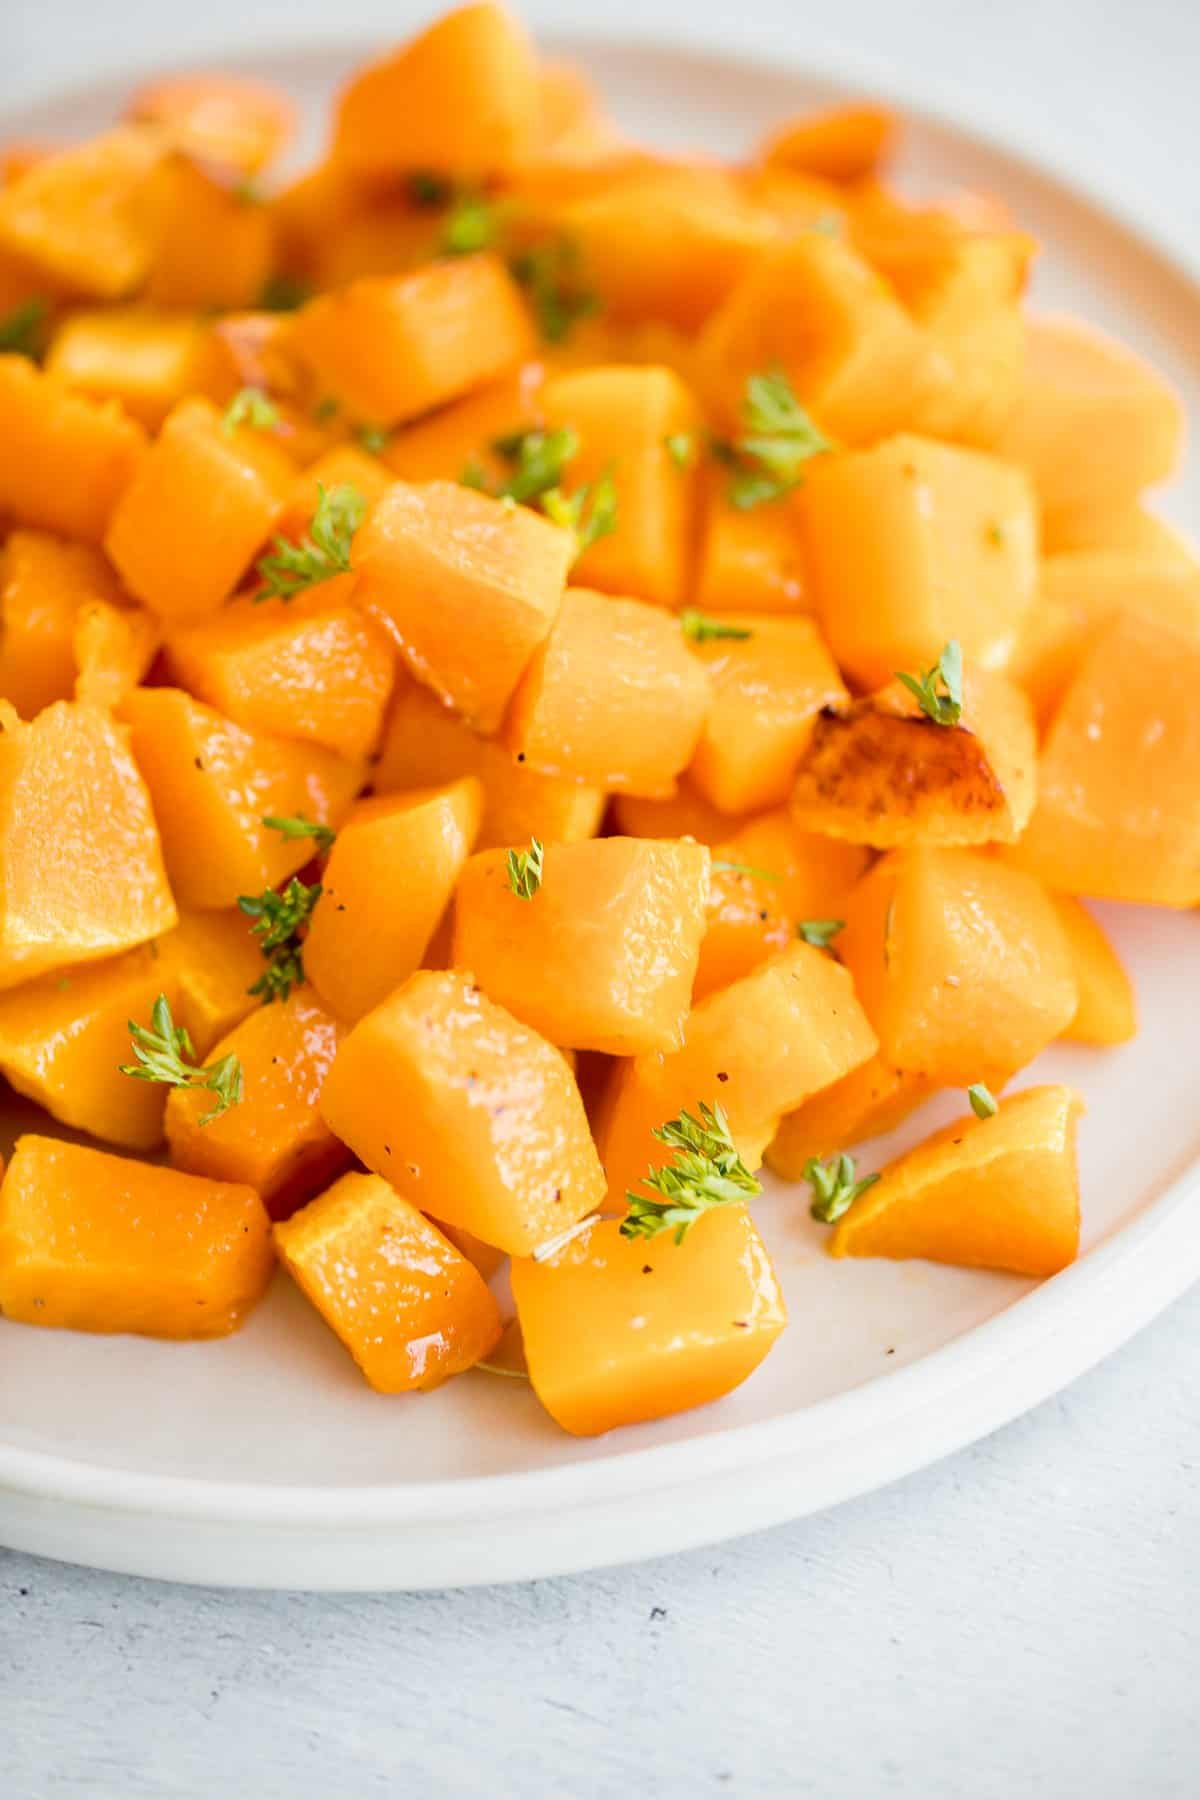
Butternut squash salad is a light meal that's loaded with fall flavors - roasted butternut squash, baby kale, walnuts, dried cranberries, and feta.
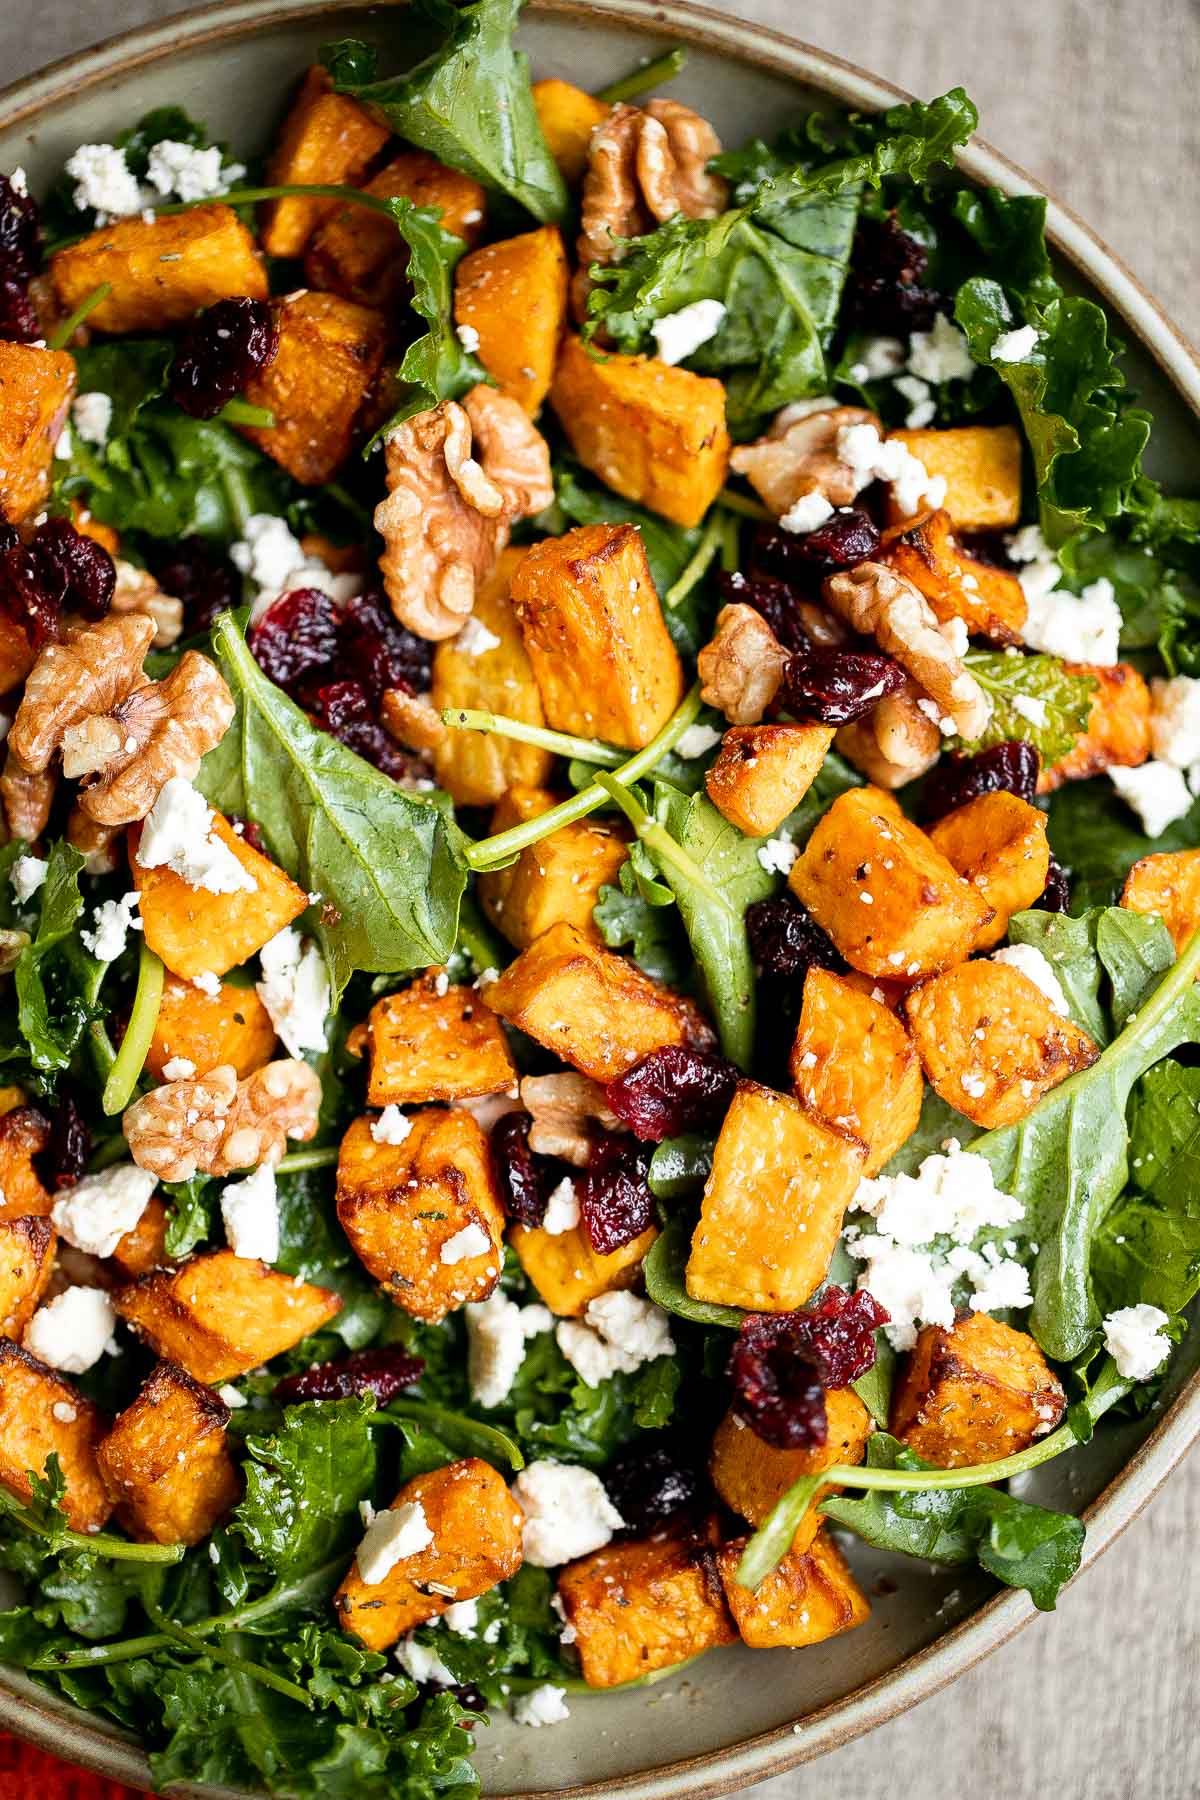
Mashed butternut squash is the perfect side dish for fall - creamy, smooth, and delicious, with the perfect balance between sweet and savory fall flavors.
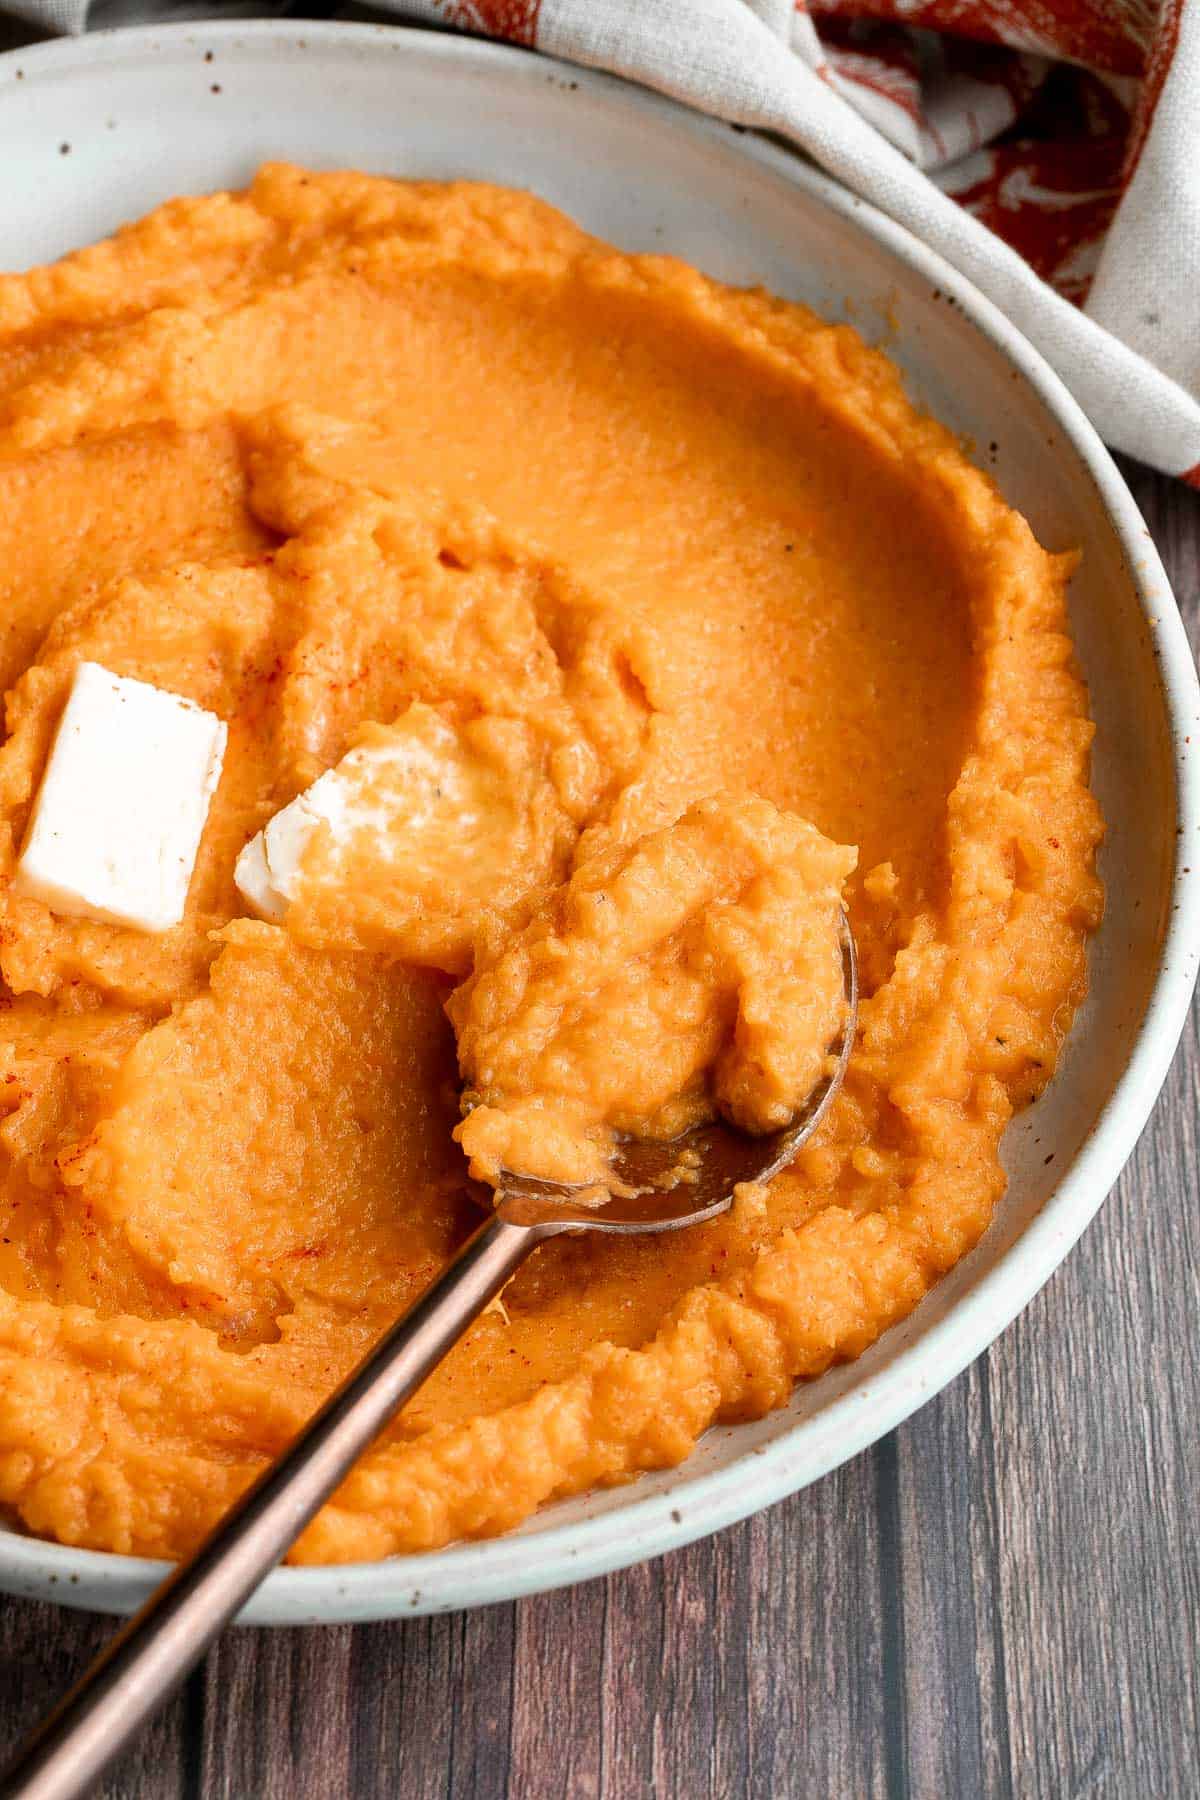
Move over pumpkin, there is a new loaf in town! Butternut Squash Bread is moist, fluffy, flavorful, and brings the pumpkin spice season to your home.
Roasted Butternut Squash and Cauliflower Soup
Creamy roasted butternut squash and cauliflower soup has all the fall feels and is vegan and gluten-free. Plus, it's super easy to make in a sheet pan. Serve it with some green onion dinner rolls or pumpkin dinner rolls on the side.
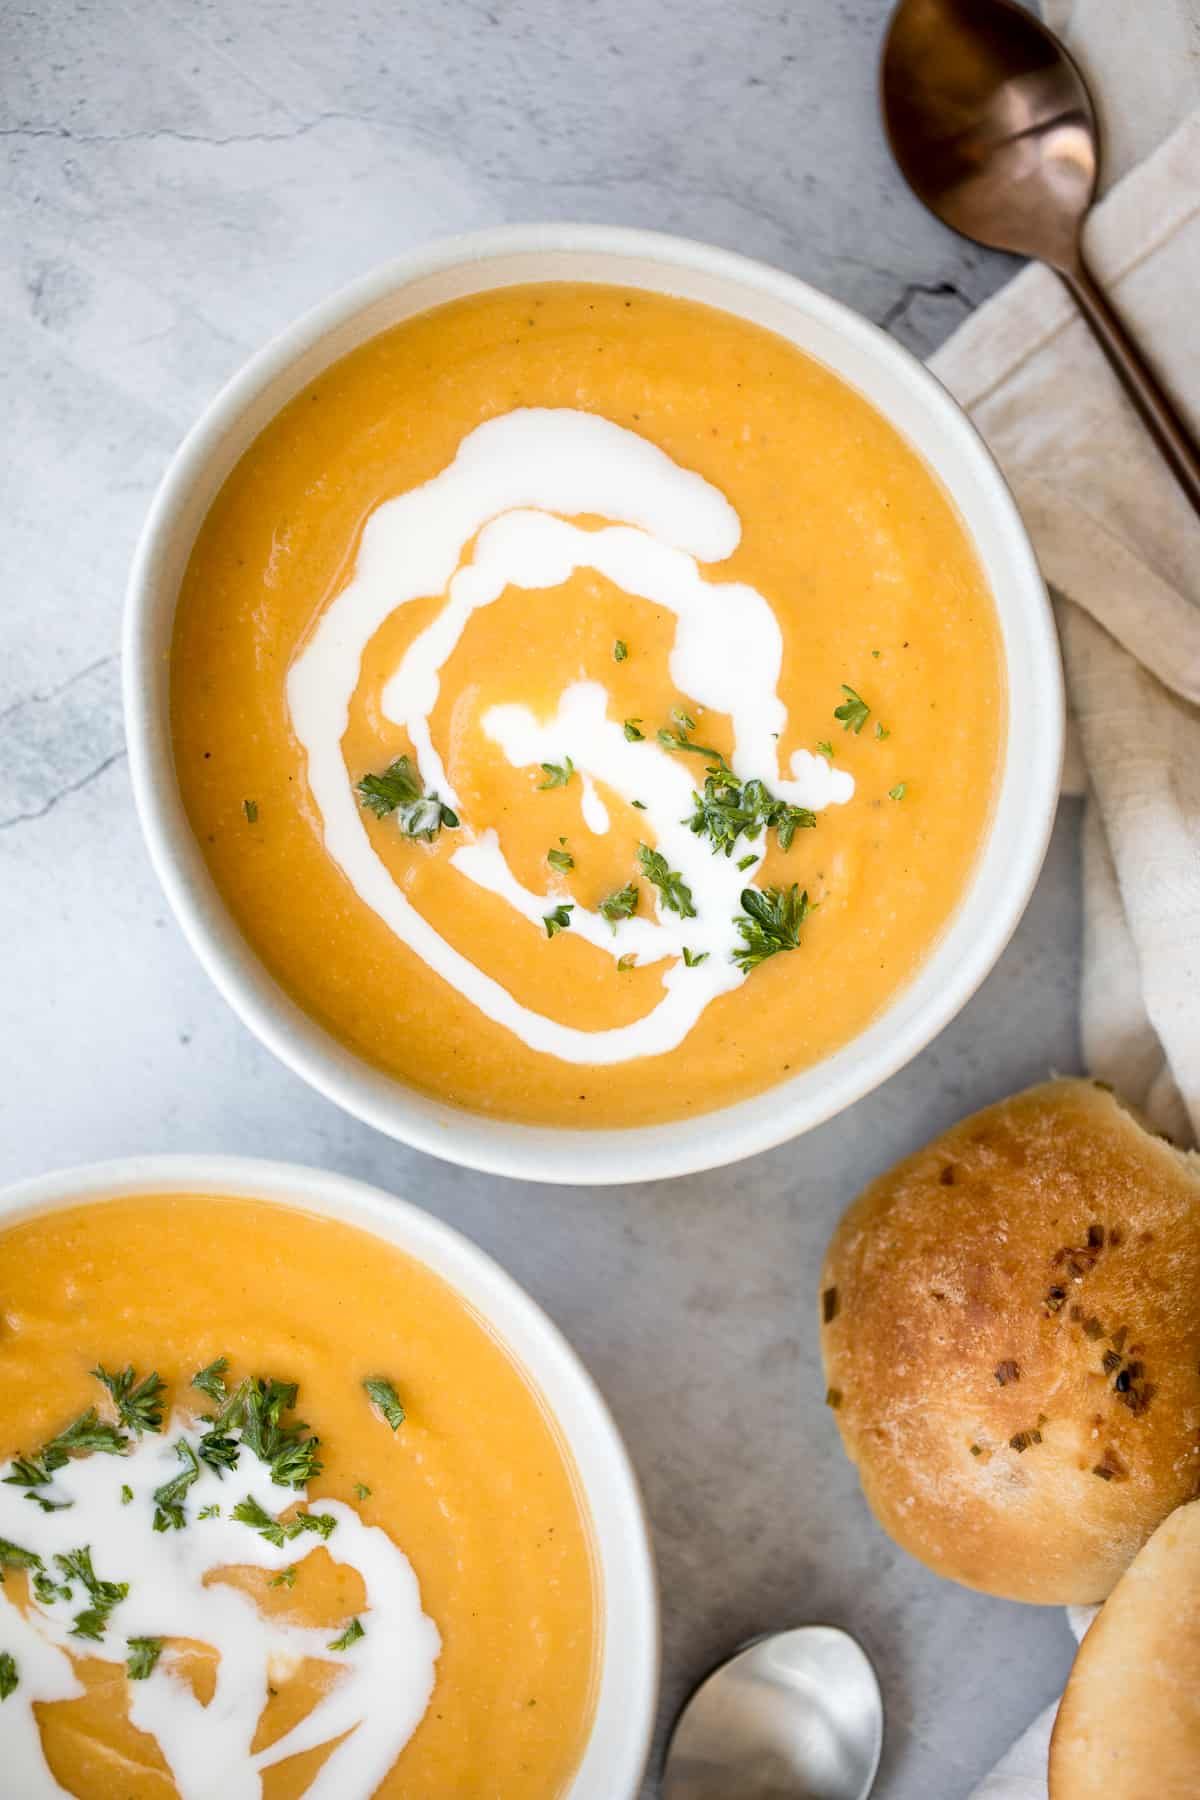
Butternut Squash Curry with Chickpeas
Butternut squash curry with chickpeas is a rich hearty one pot meal that will satisfy your fall comfort food cravings. Great for weeknight family dinners.
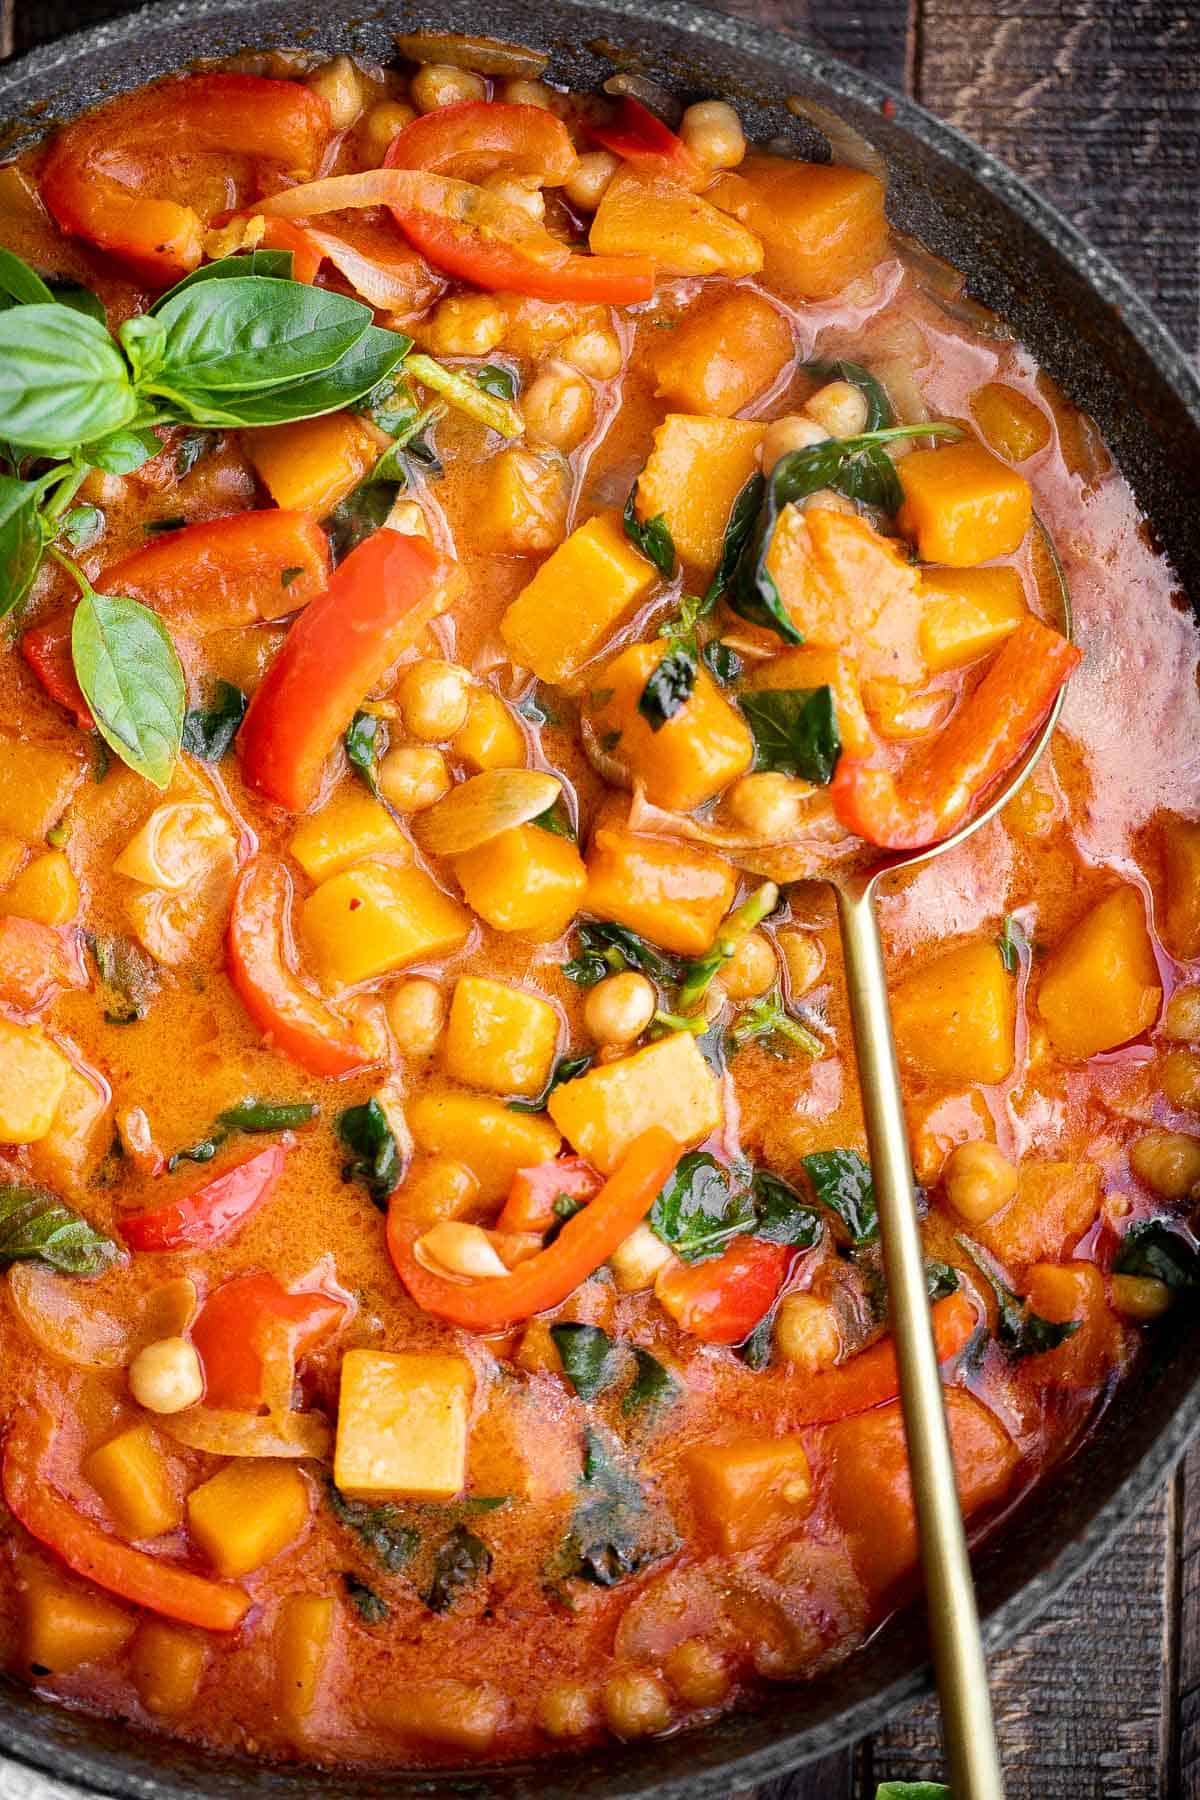
Butternut Squash Carbonara Pasta
If you like traditional carbonara, you are going to love creamy butternut squash carbonara pasta with Parmesan, bacon and sage. The best fall comfort food. Don't forget some crusty no knead bread to soak up all that delicious pasta sauce.
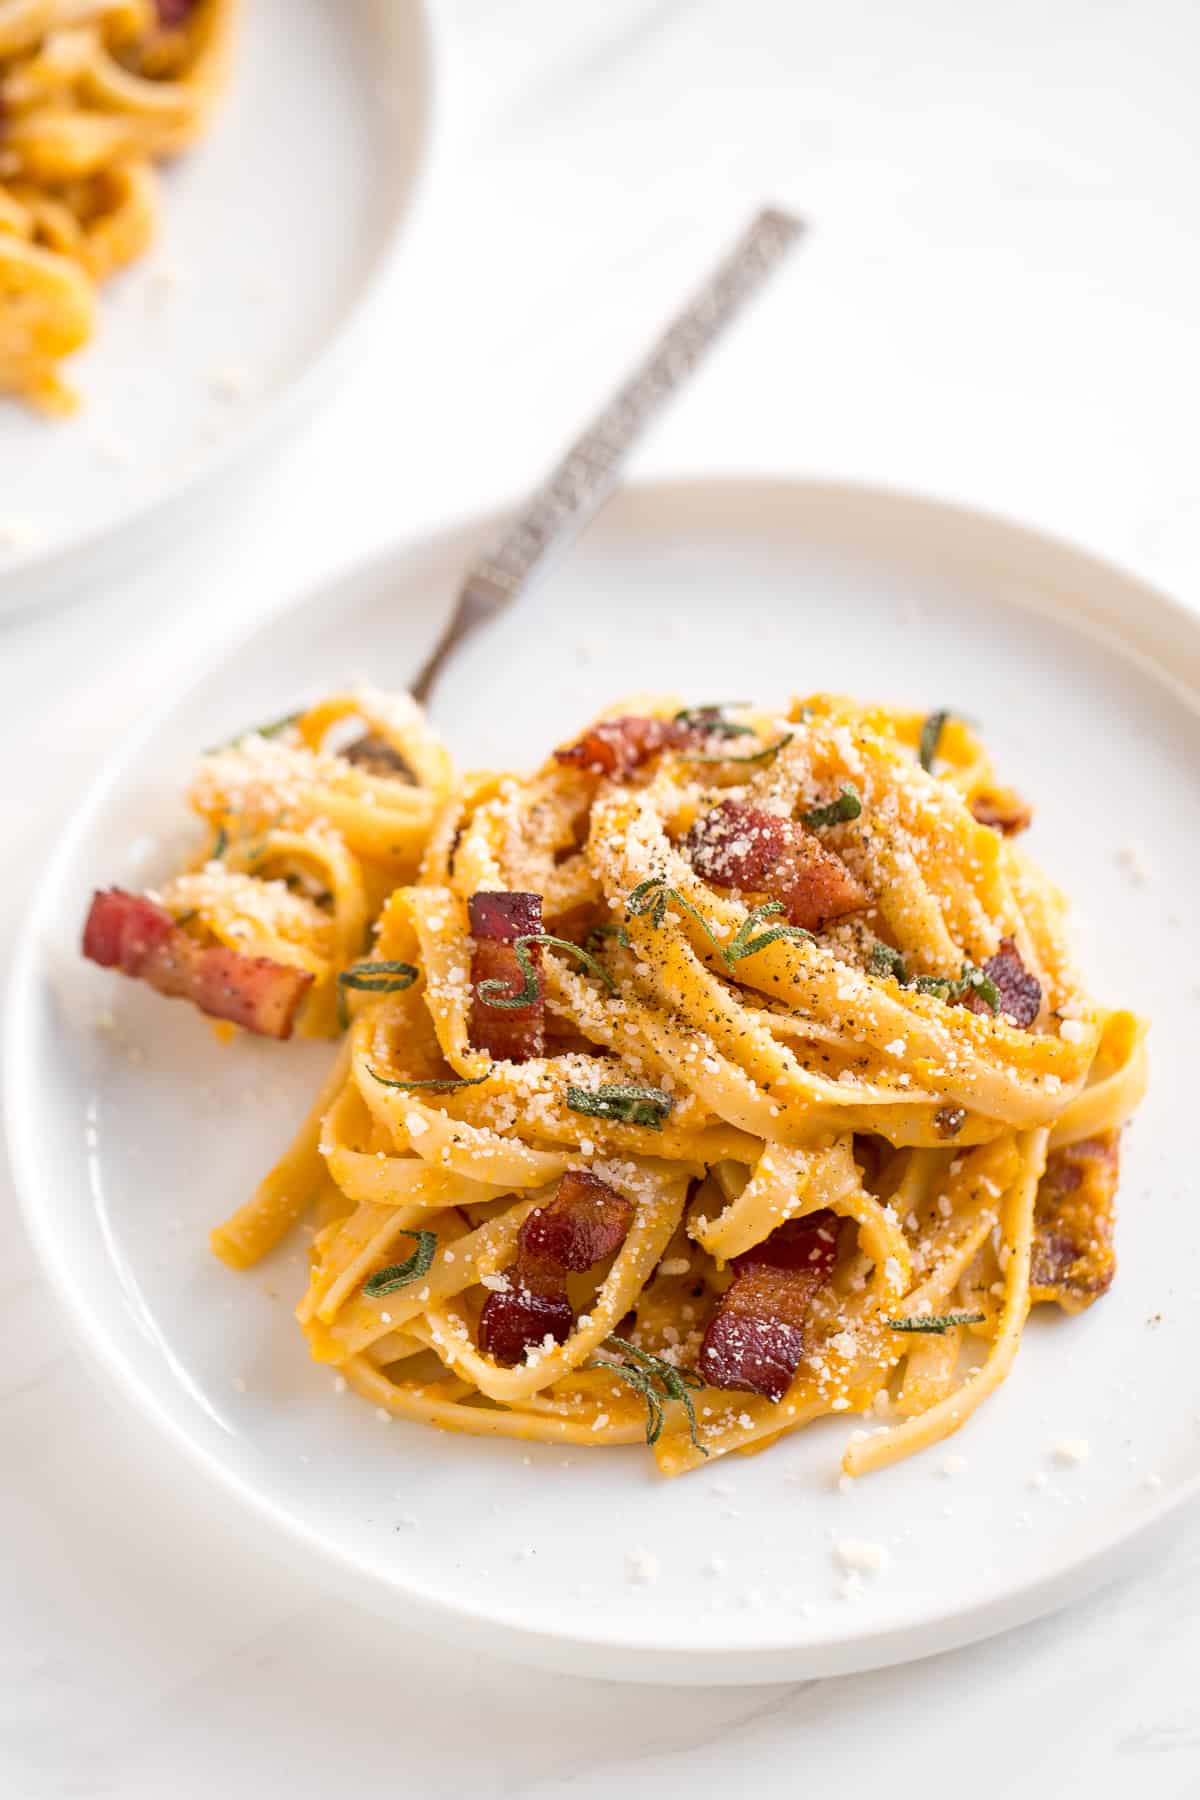
Butternut Squash Quesadillas with Kale and Chicken
Quick and easy butternut squash quesadillas with chicken and kale is the best fall weeknight meal. It's flavourful, so cheesy, and has the perfect crunch. Plus, the combination of butternut squash and kale together is just meant to be.
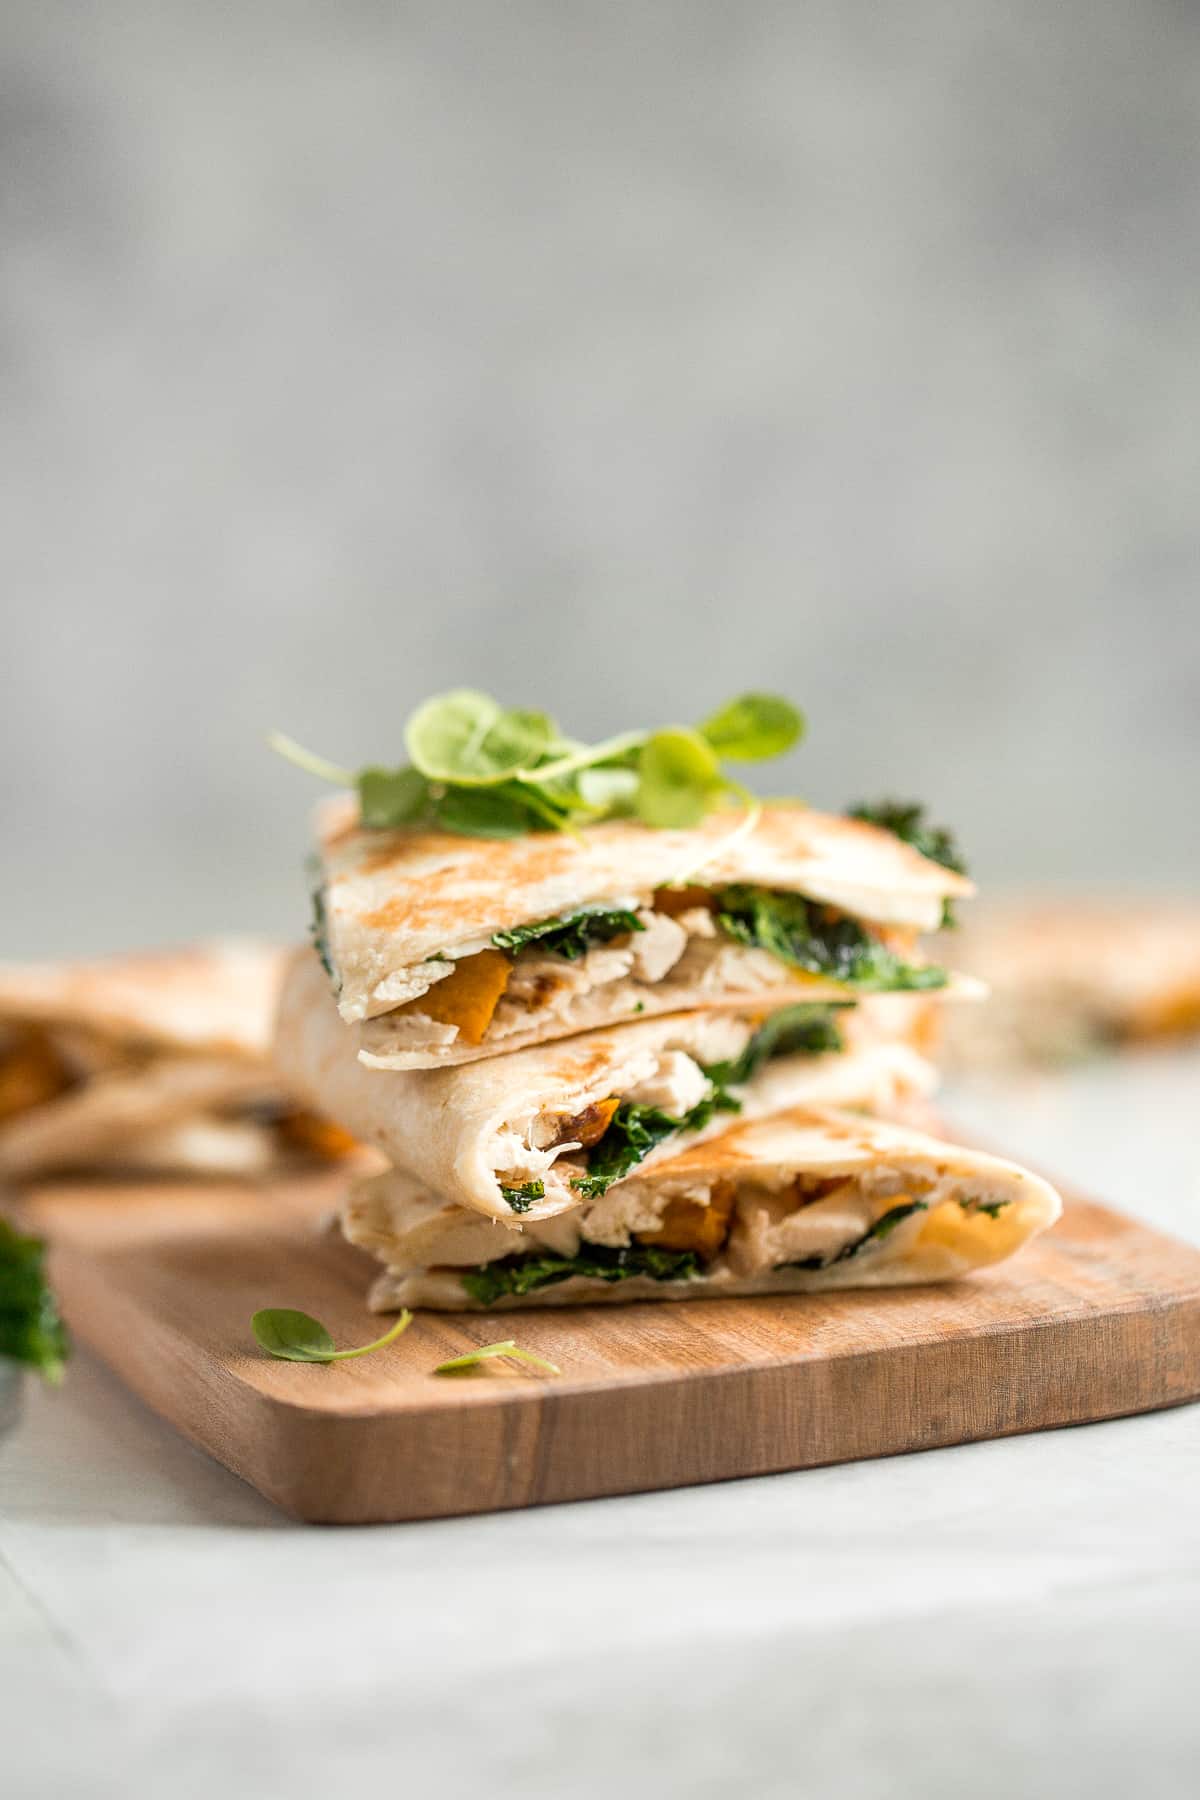
Make creamy pumpkin hummus in under 5 minutes with a few pantry staples including canned pumpkin. It's the best healthy and delicious fall snack or appy. Plus, easily switch the pumpkin for butternut squash puree. Serve with homemade pita bread or crackers.

Instant Pot Butternut Squash Soup
Instant pot butternut squash soup is the perfect fall dish to cook in your pressure cooker - warm, cozy, comforting, and creamy. Make in 15 minutes.
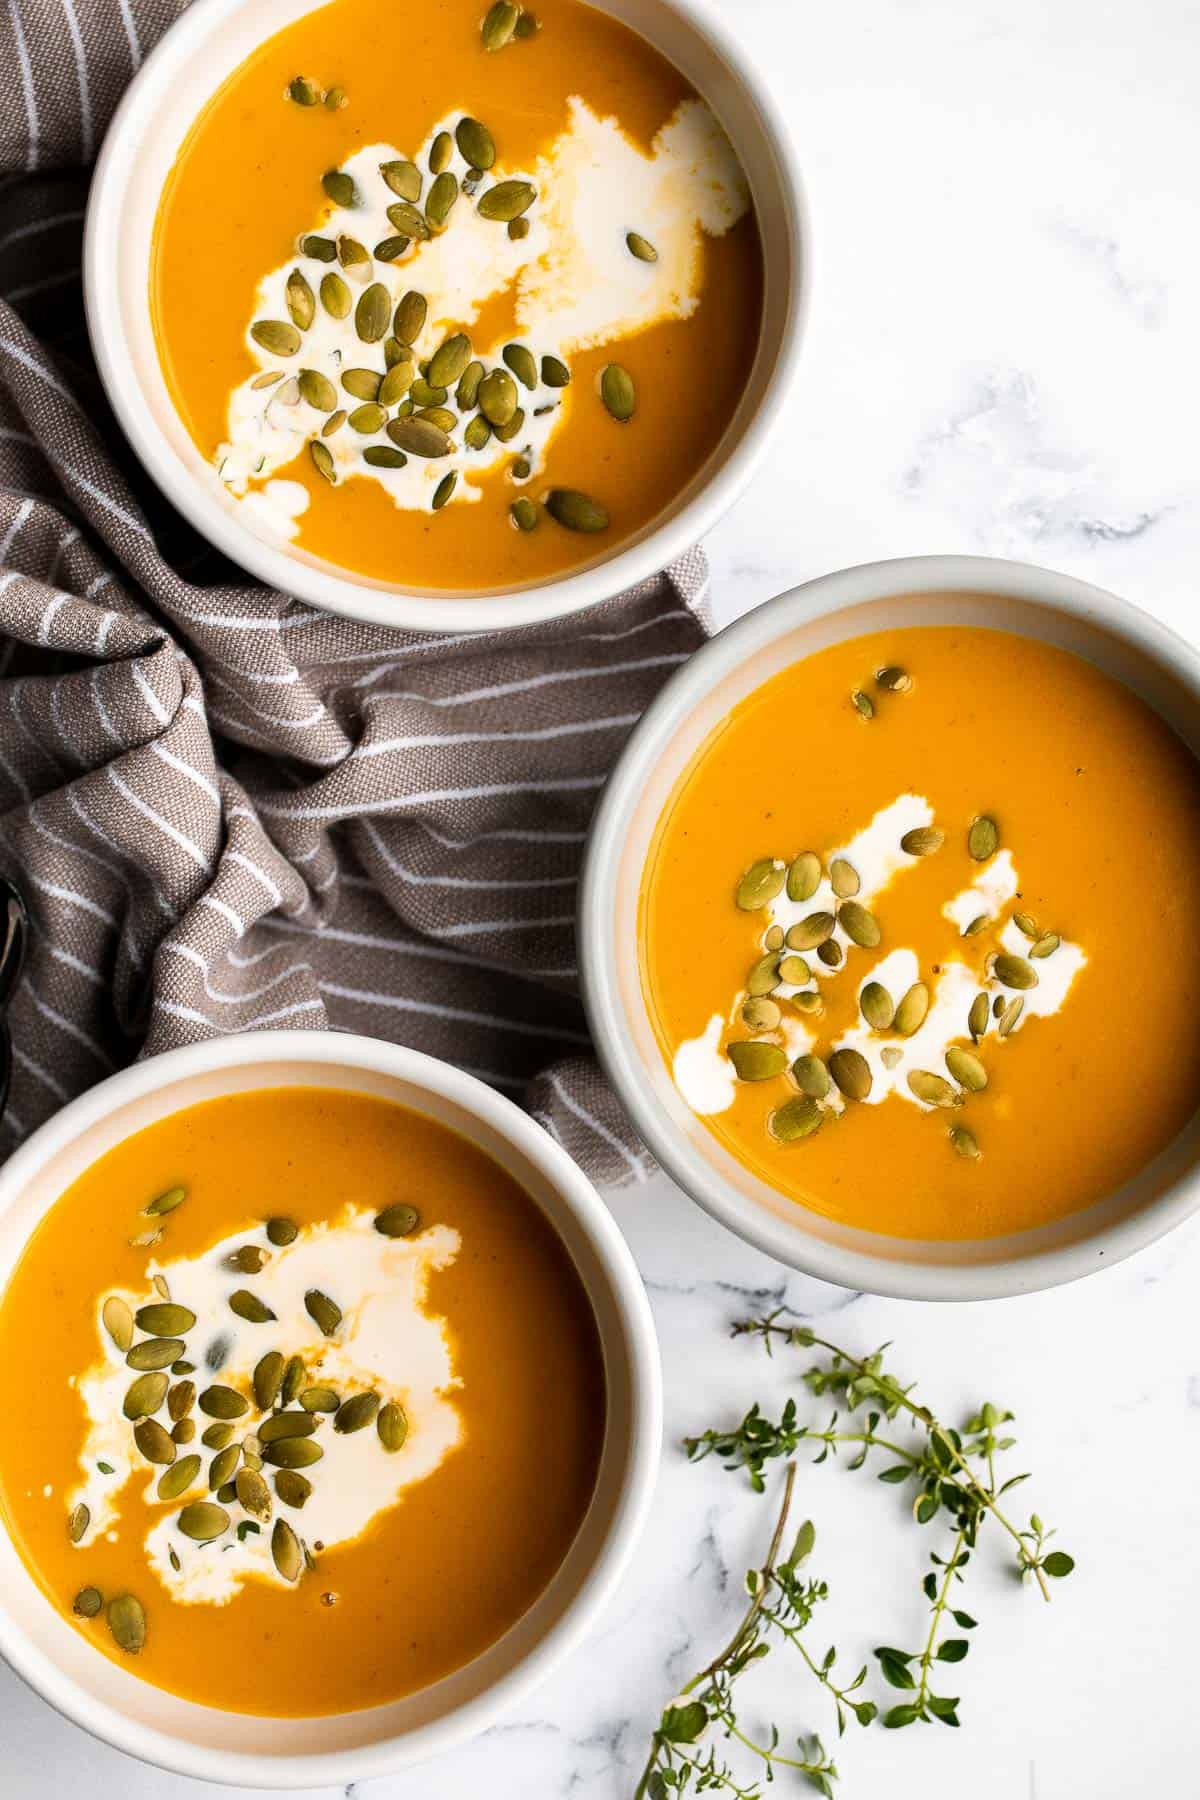
Butternut squash lasagna is a delicious, warm and cozy vegetarian lasagna to make this fall when the your family is craving major comfort food this fall.

This Butternut Squash Quinoa Salad is easy to make, ready in under an hour, delicious, and loaded with health benefits. It's the perfect fall salad.
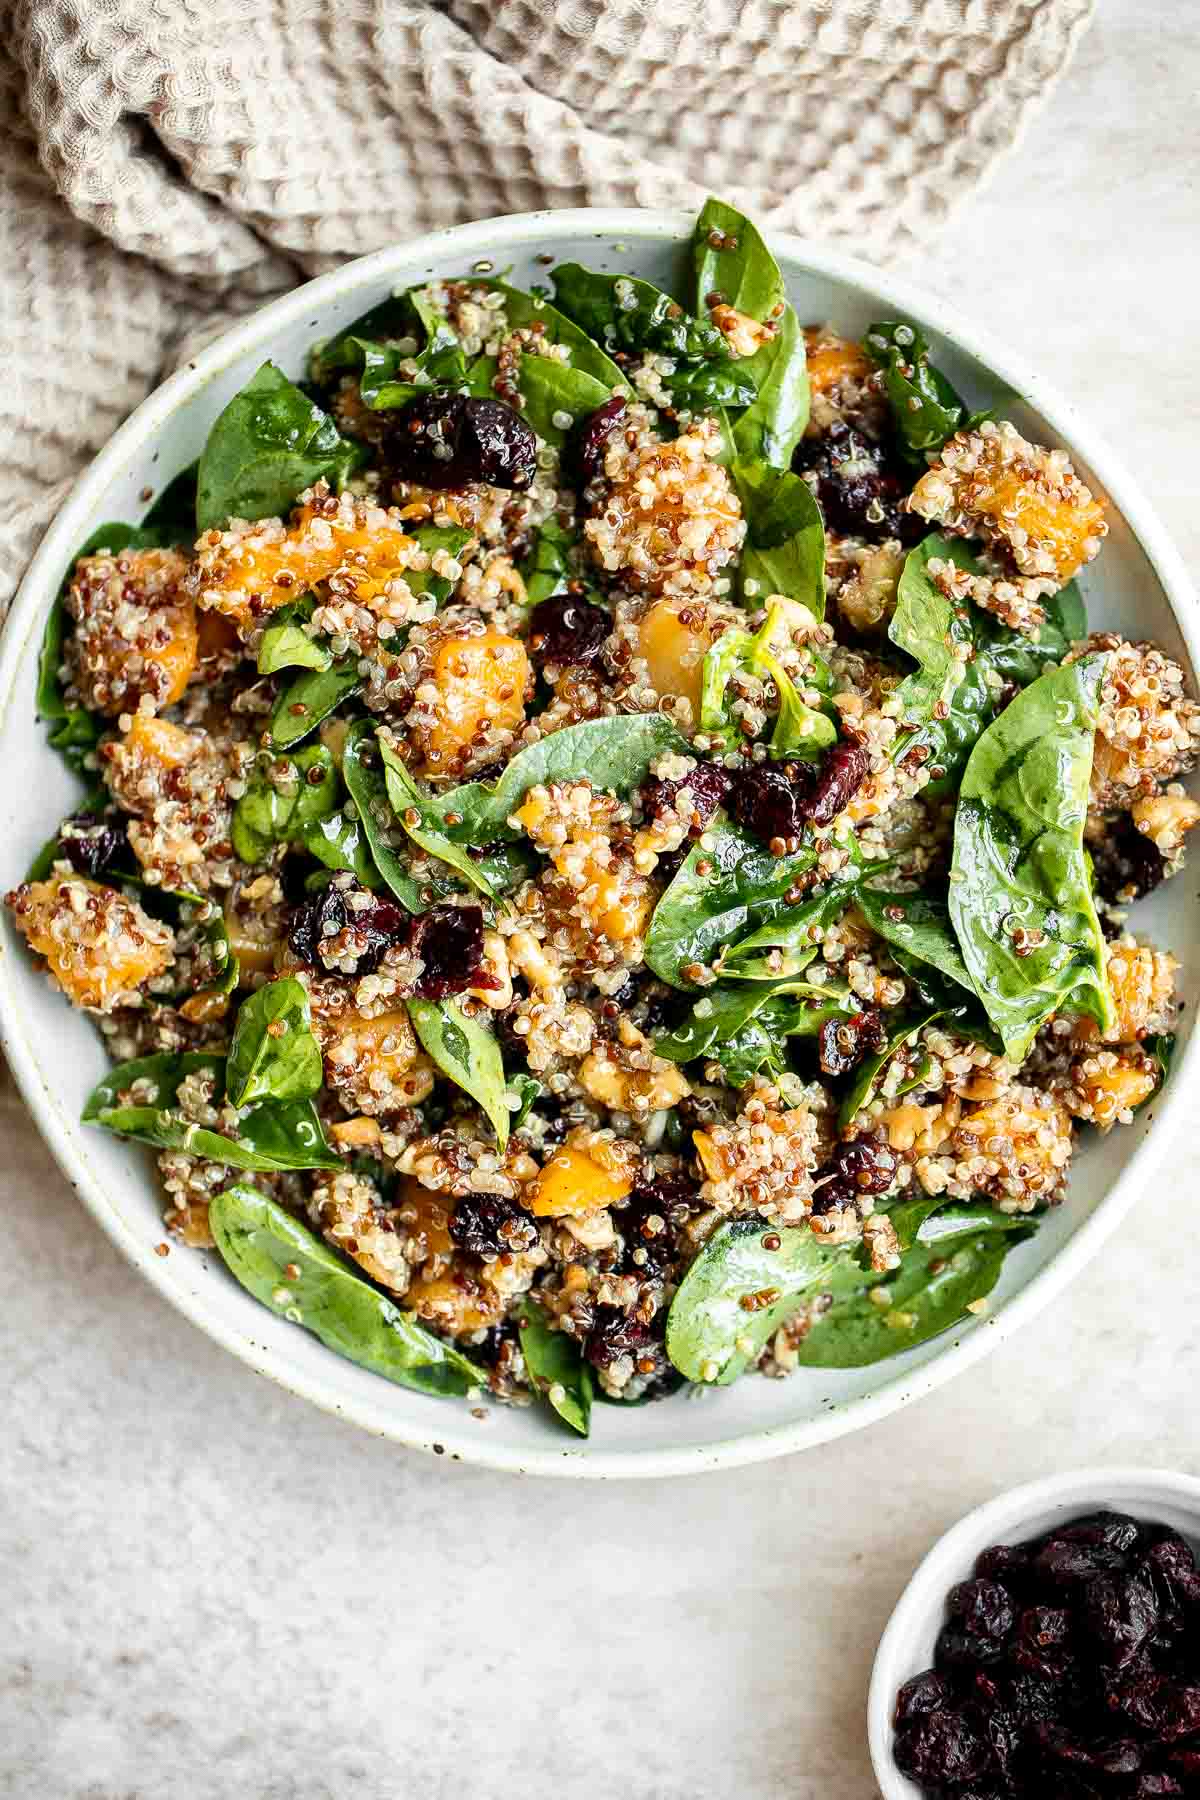
One Pan Roasted Harvest Vegetables
One pan roasted harvest vegetables with butternut squash, brussels sprouts and baby potatoes is the best fall side dish. So easy to prep in just minutes. Add this classic side to your Thanksgiving dinner menu.
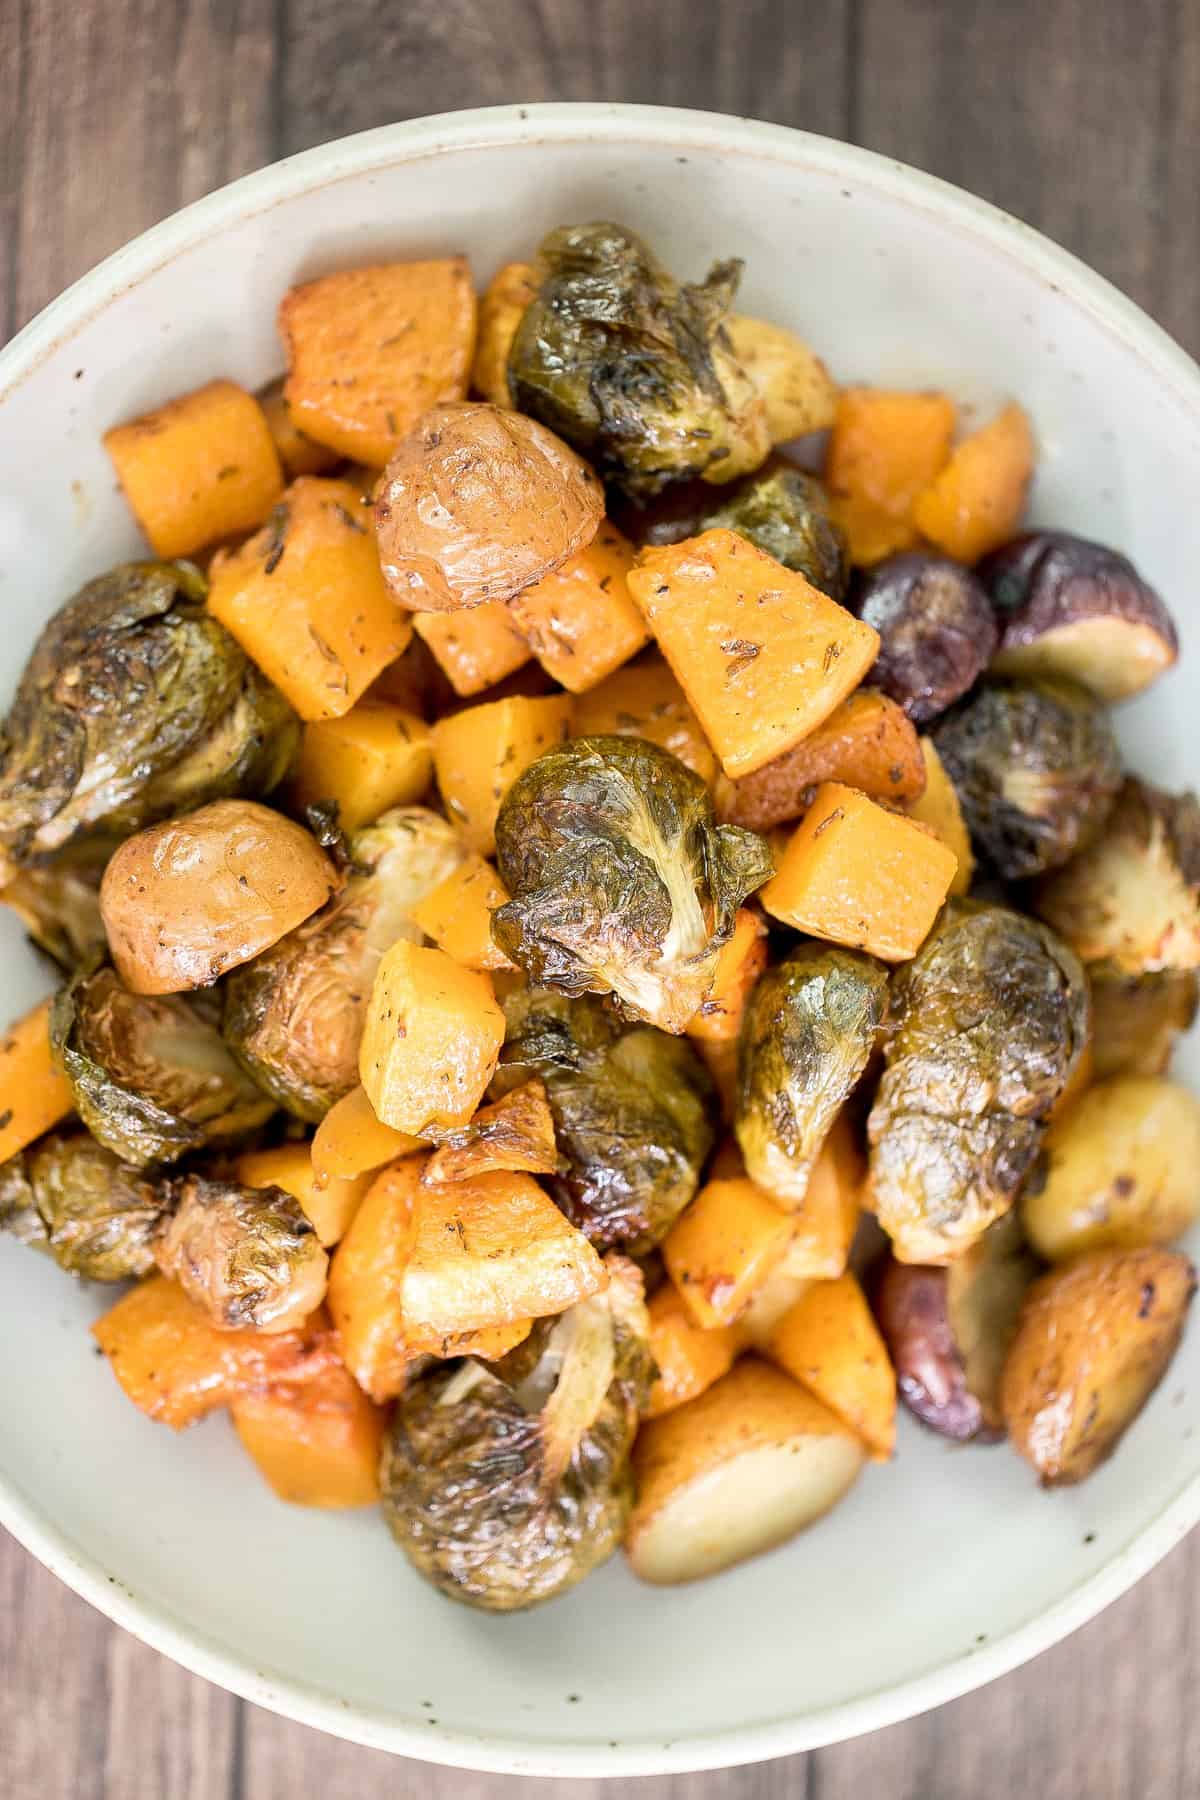
Pumpkin Chickpea Coconut Curry
Warm yourself up this fall with a big bowl of comforting pumpkin chickpea coconut curry with cashews. Easily substitute the pumpkin in this vegan and gluten-free recipe for butternut squash. Serve it with a side of easy coconut rice.
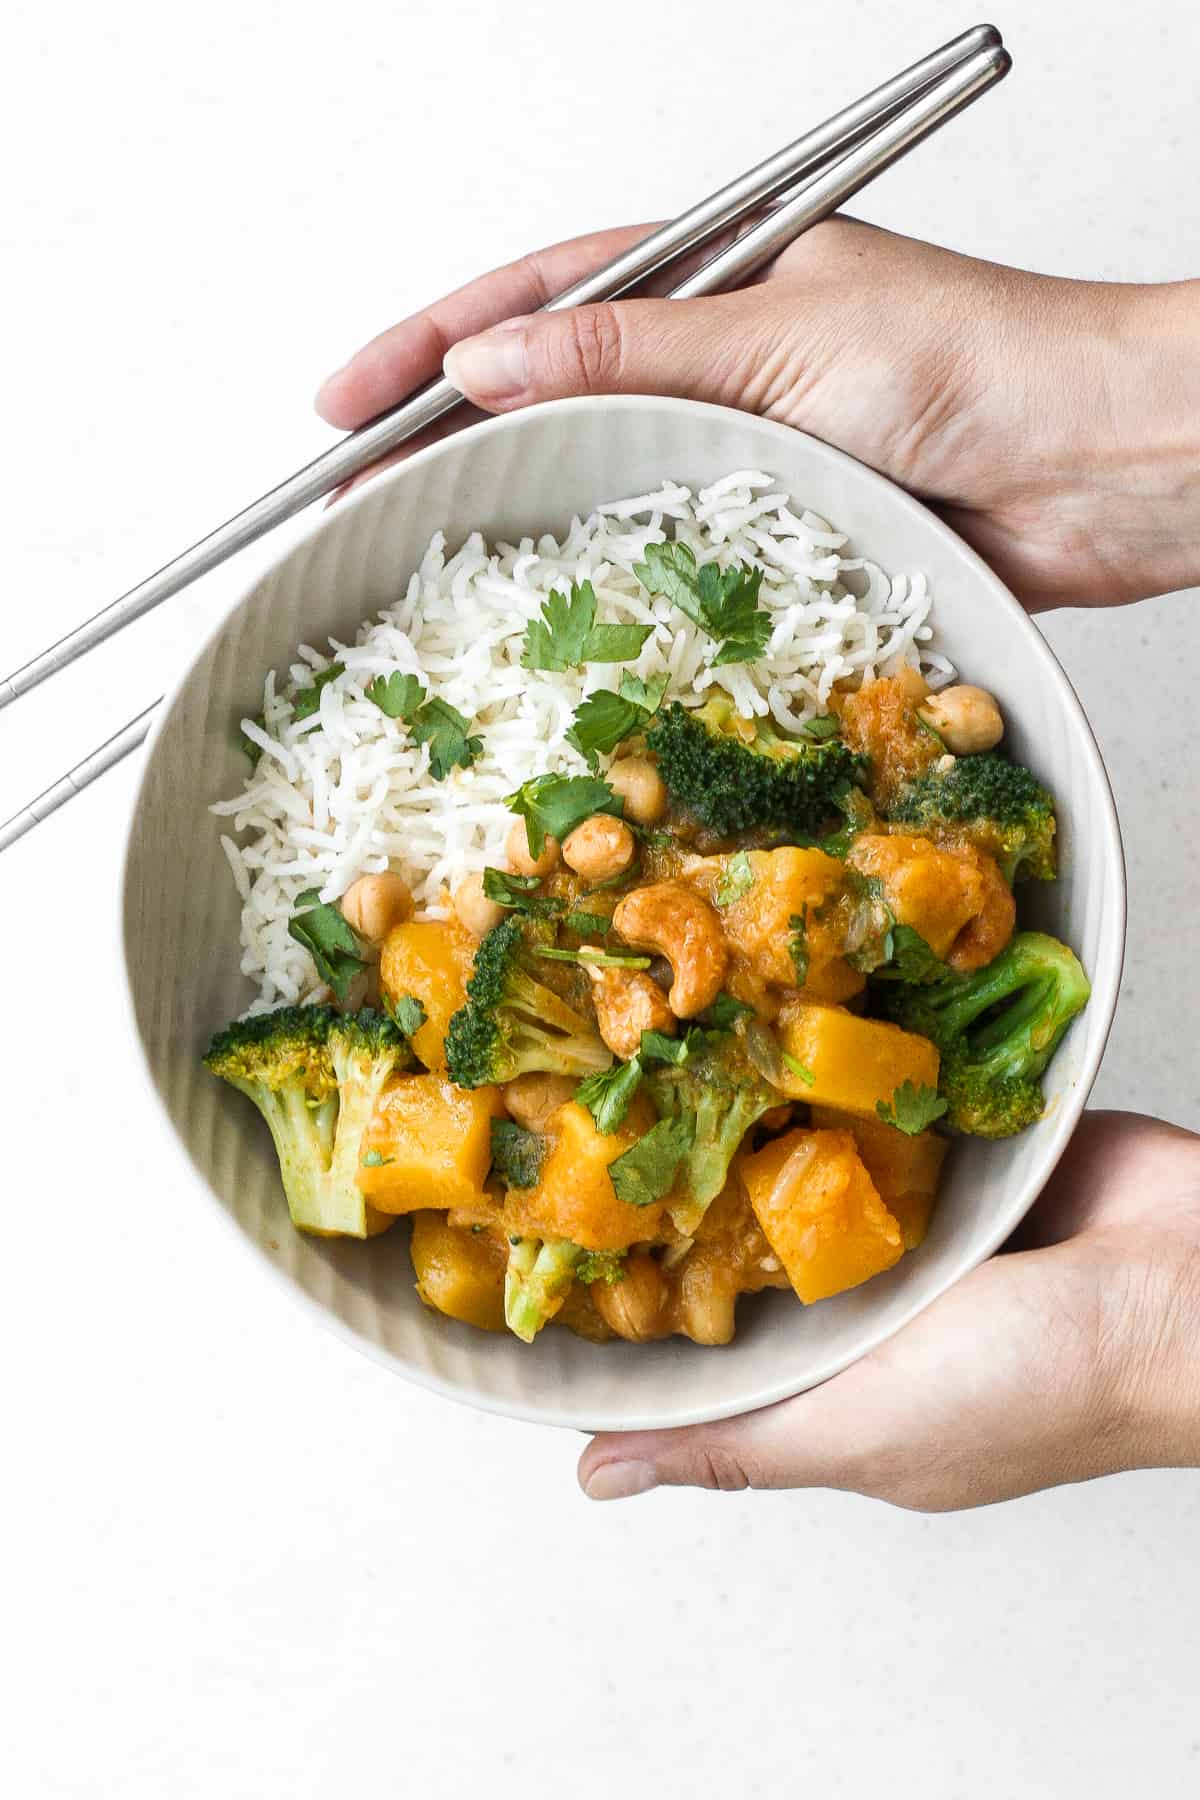
Air fryer butternut squash is a healthy side dish that is crispy on the outside and soft inside. It's faster than roasting in the oven and needs less oil.
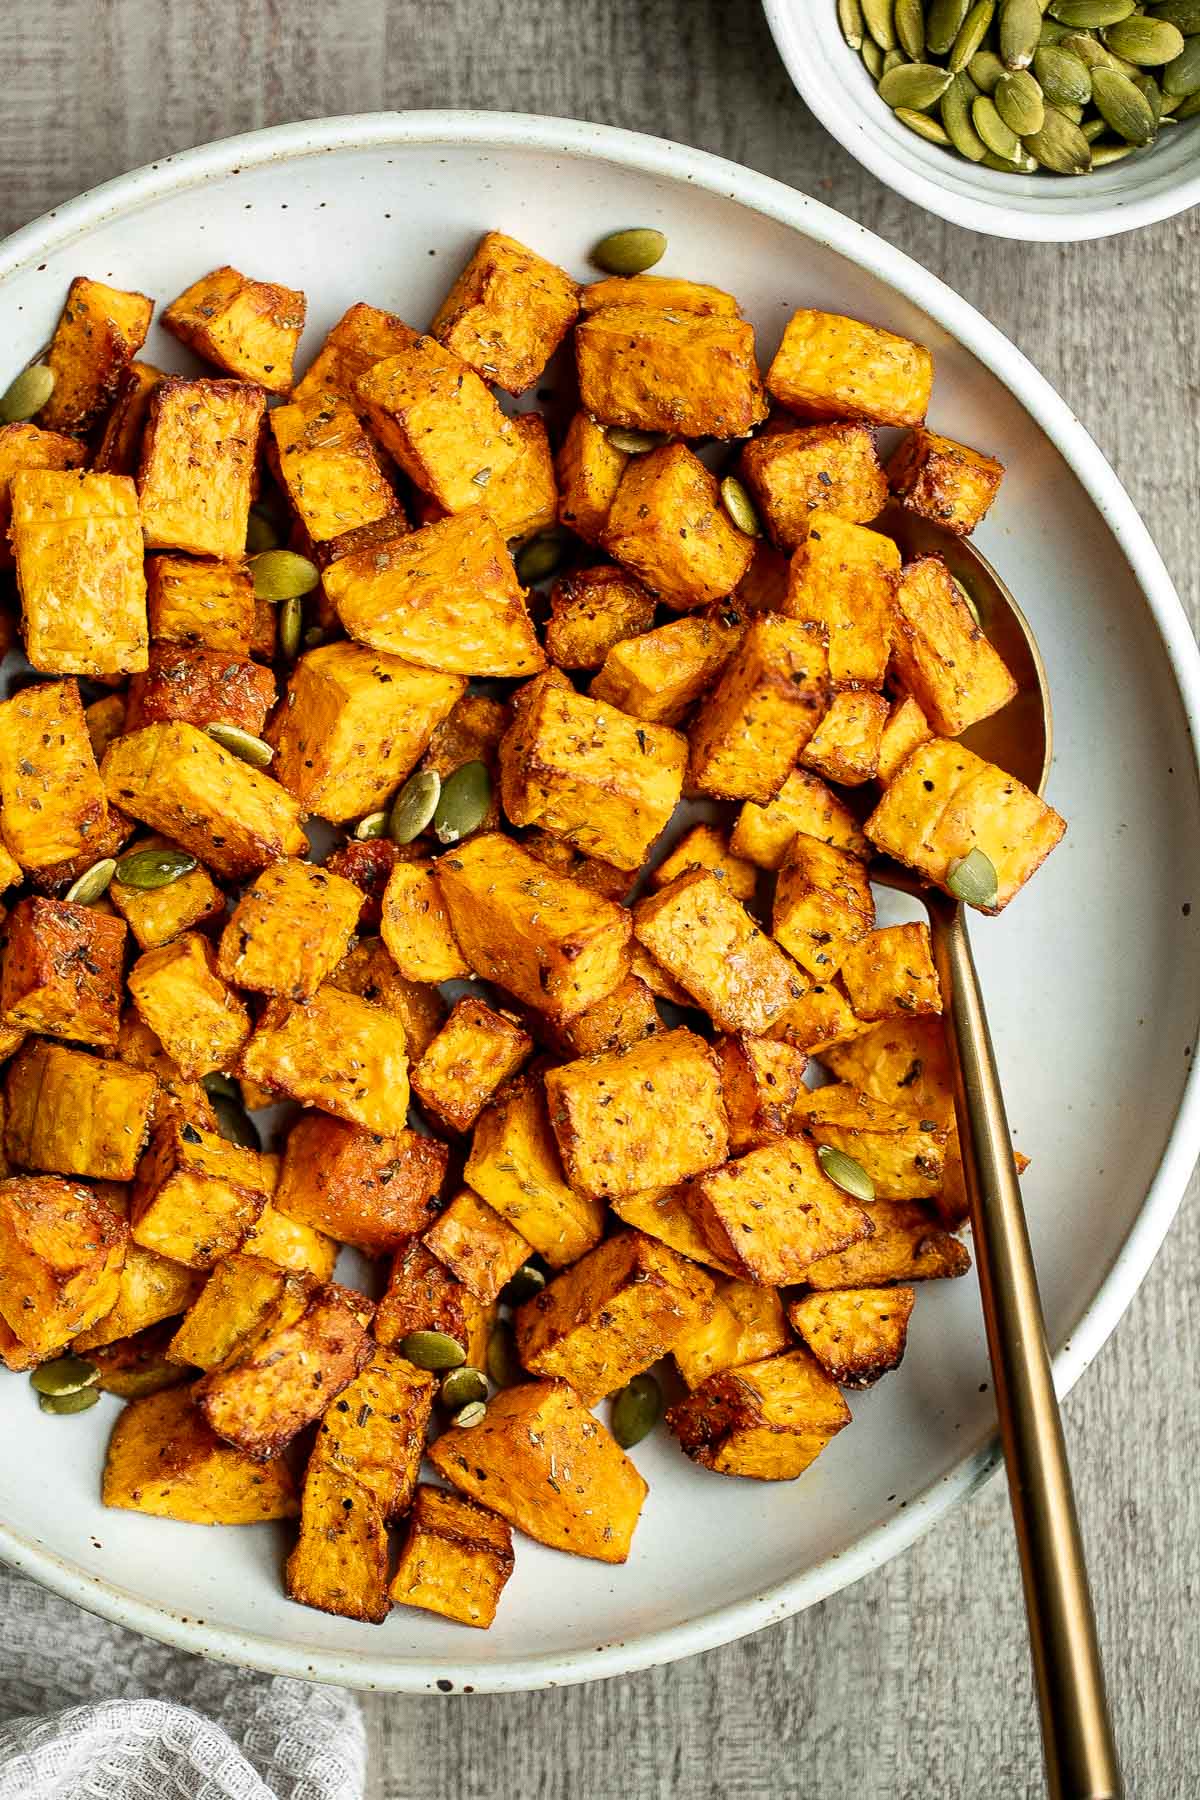
30-Minute Butternut Squash Soup
Another variation on butternut squash soup, this quick and easy 30-minute butternut squash soup is simple yet packed with flavour, is naturally vegan and gluten-free, and can be made ahead of time. Serve it with some toasted sourdough bread.
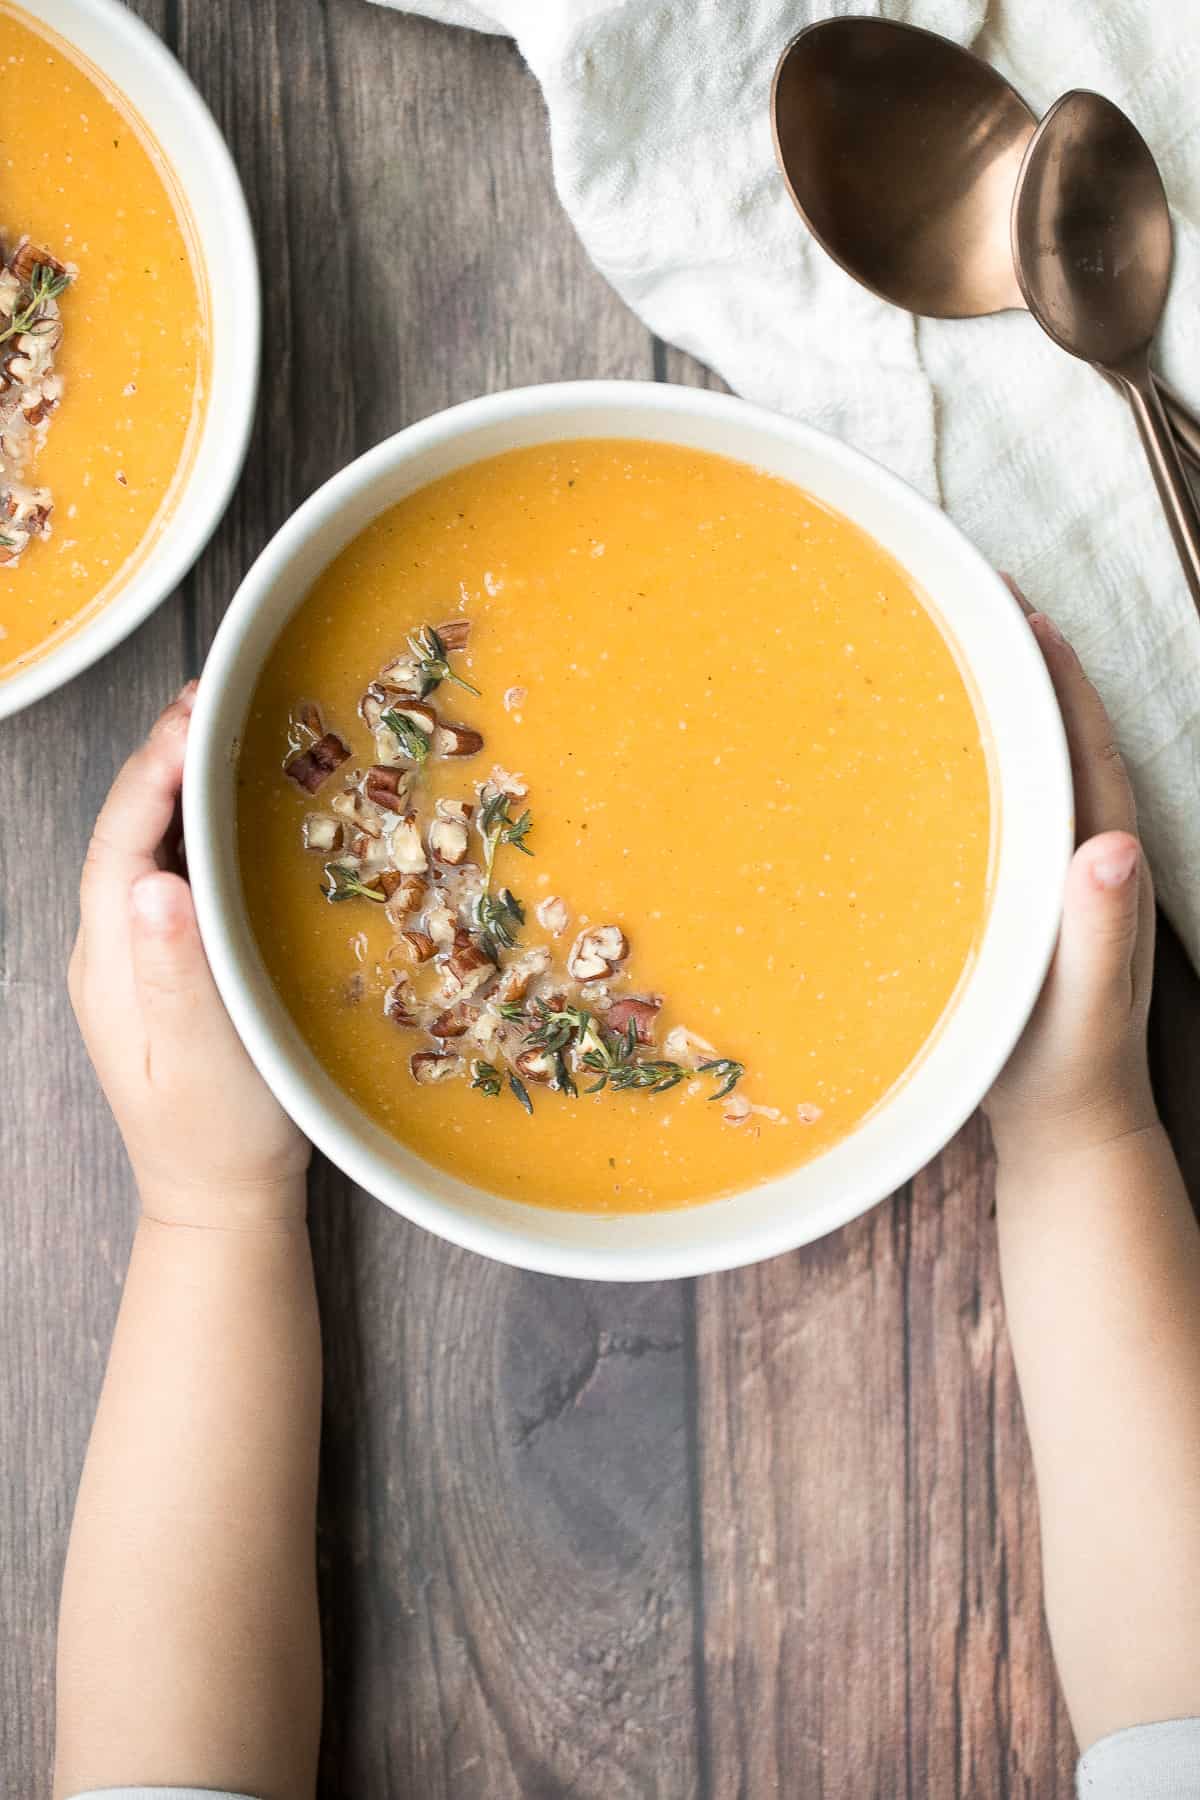
Fall Harvest Salad with Butternut Squash and Apple
Fall harvest salad with roasted butternut squash and apple is the only salad recipe you need this fall or winter. It's healthy, wholesome, and nourishing.
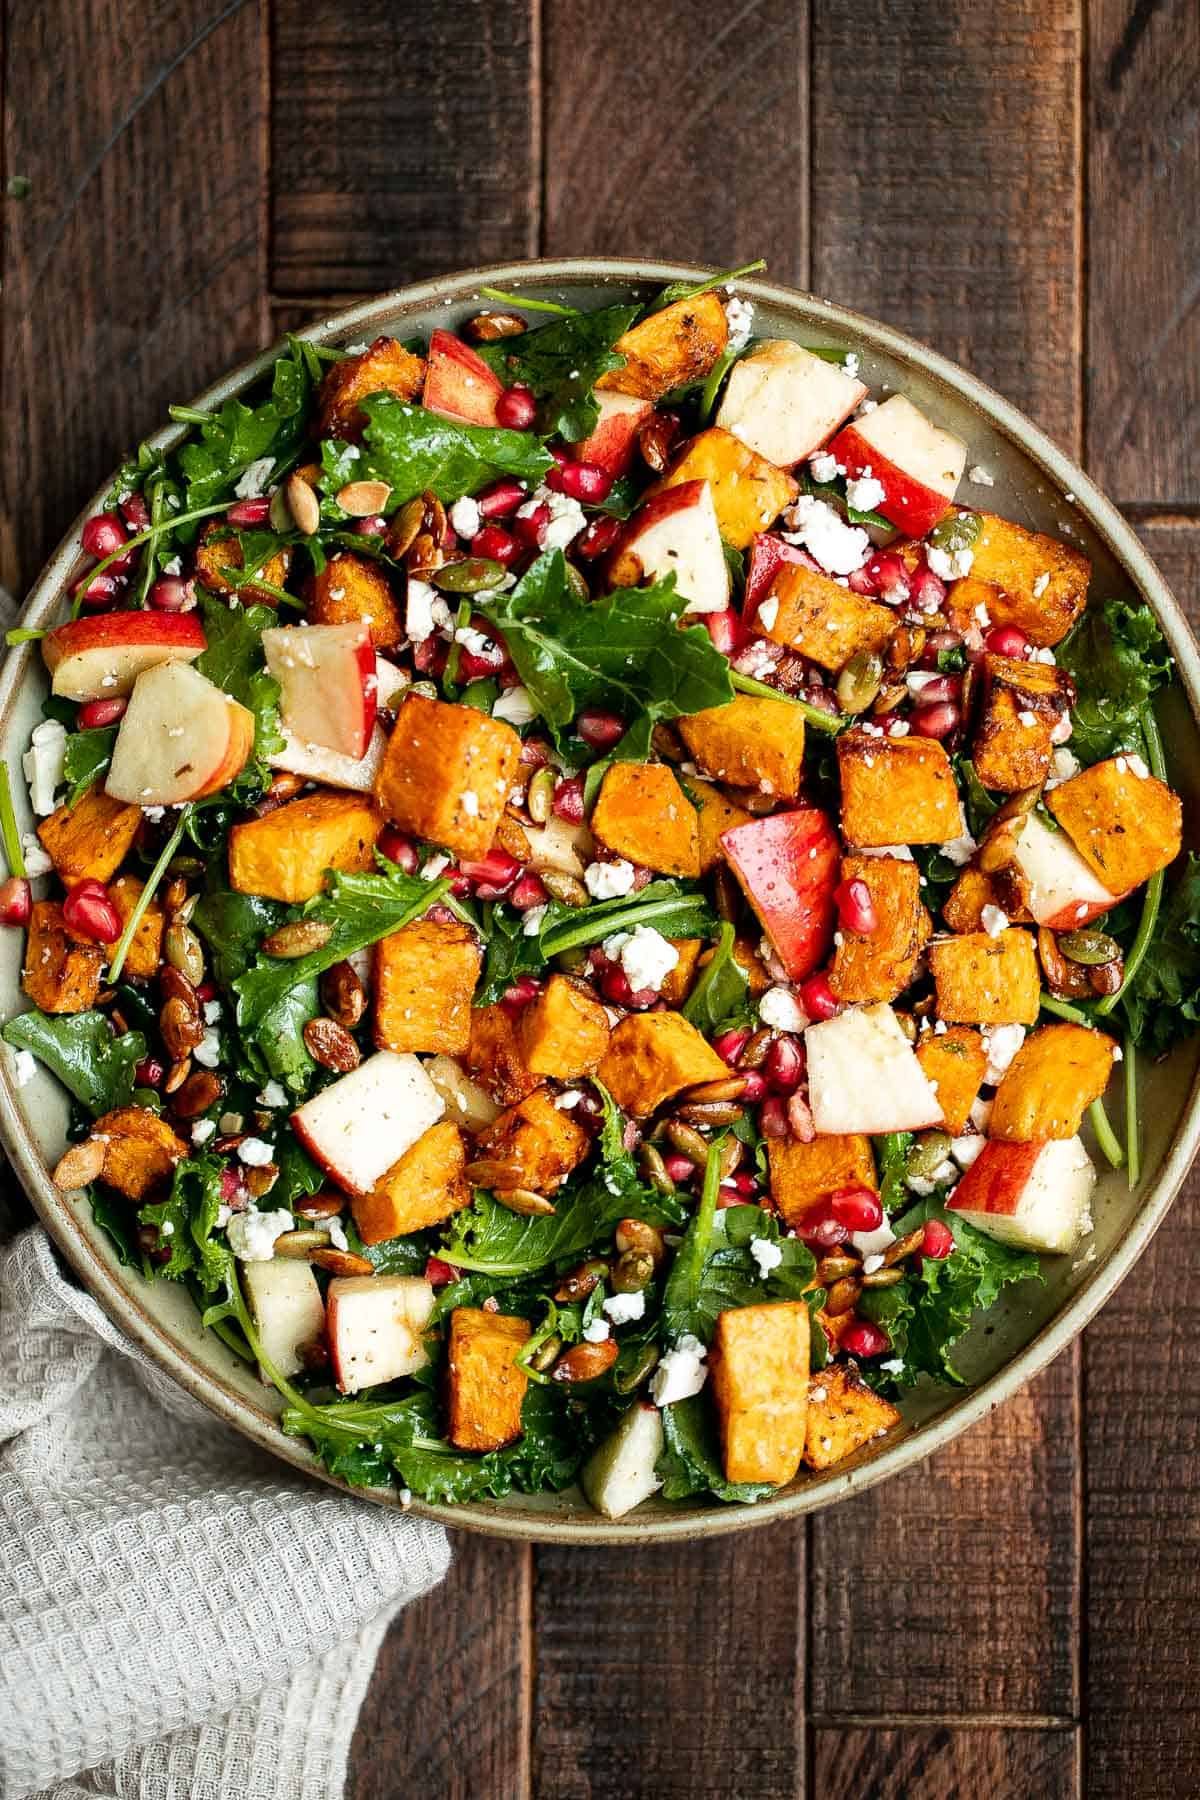
Butternut Squash Galette (Free-Form Tart)
This butternut squash galette (free-form tart) is the perfect meal any time of day. Serve it with some scrambled eggs for breakfast or alongside a big winter kale salad with apple cider vinaigrette for lunch or dinner.
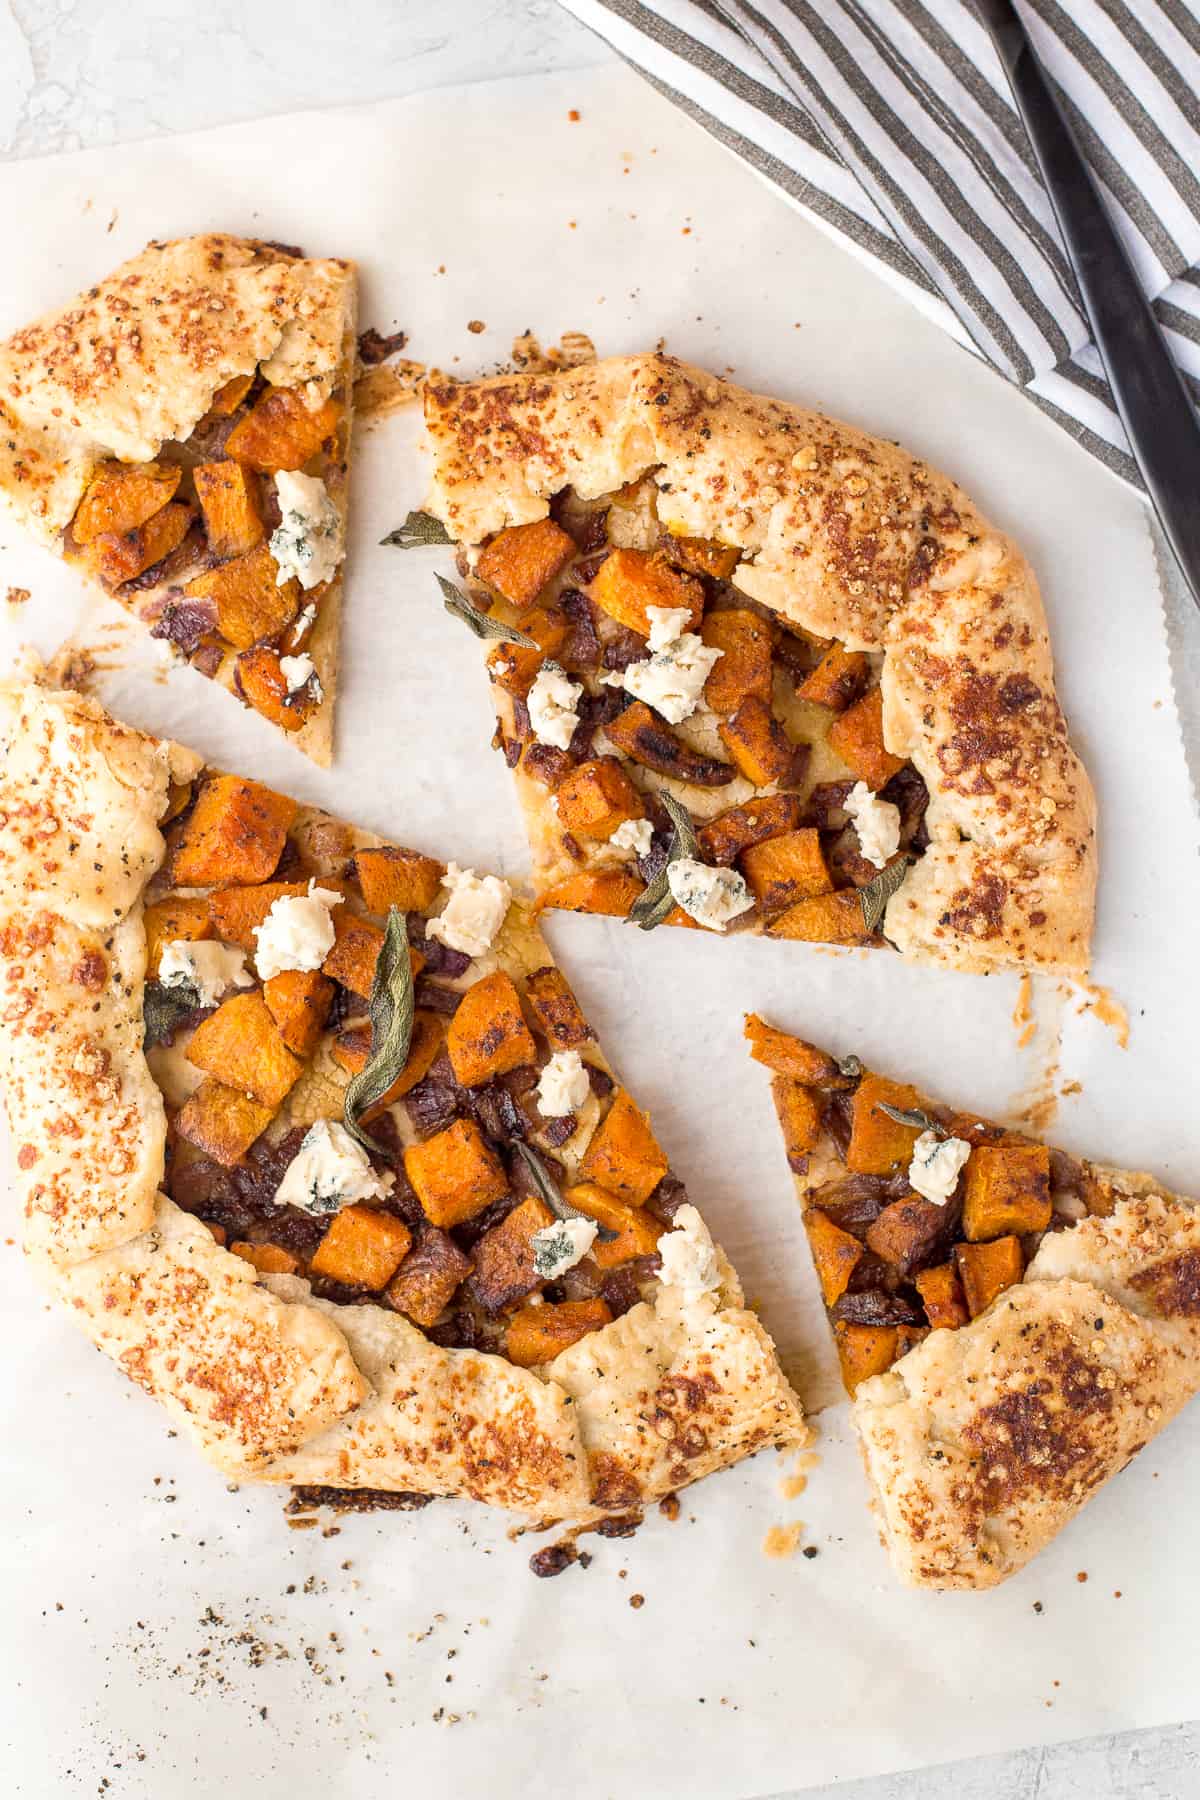
Here is another delicious soup -- butternut squash and apple soup with toasted croutons. It's got sweetness from apple and carrots, a kick from onions and curry powder, and it's just all around comfort food... without the guilt.

Apple Cider Chicken with Butternut Squash
Quick, easy, one pan apple cider chicken with butternut squash, apples, and thyme, cooked in an apple cider sauce. Serve this fall meal in just 40 minutes.
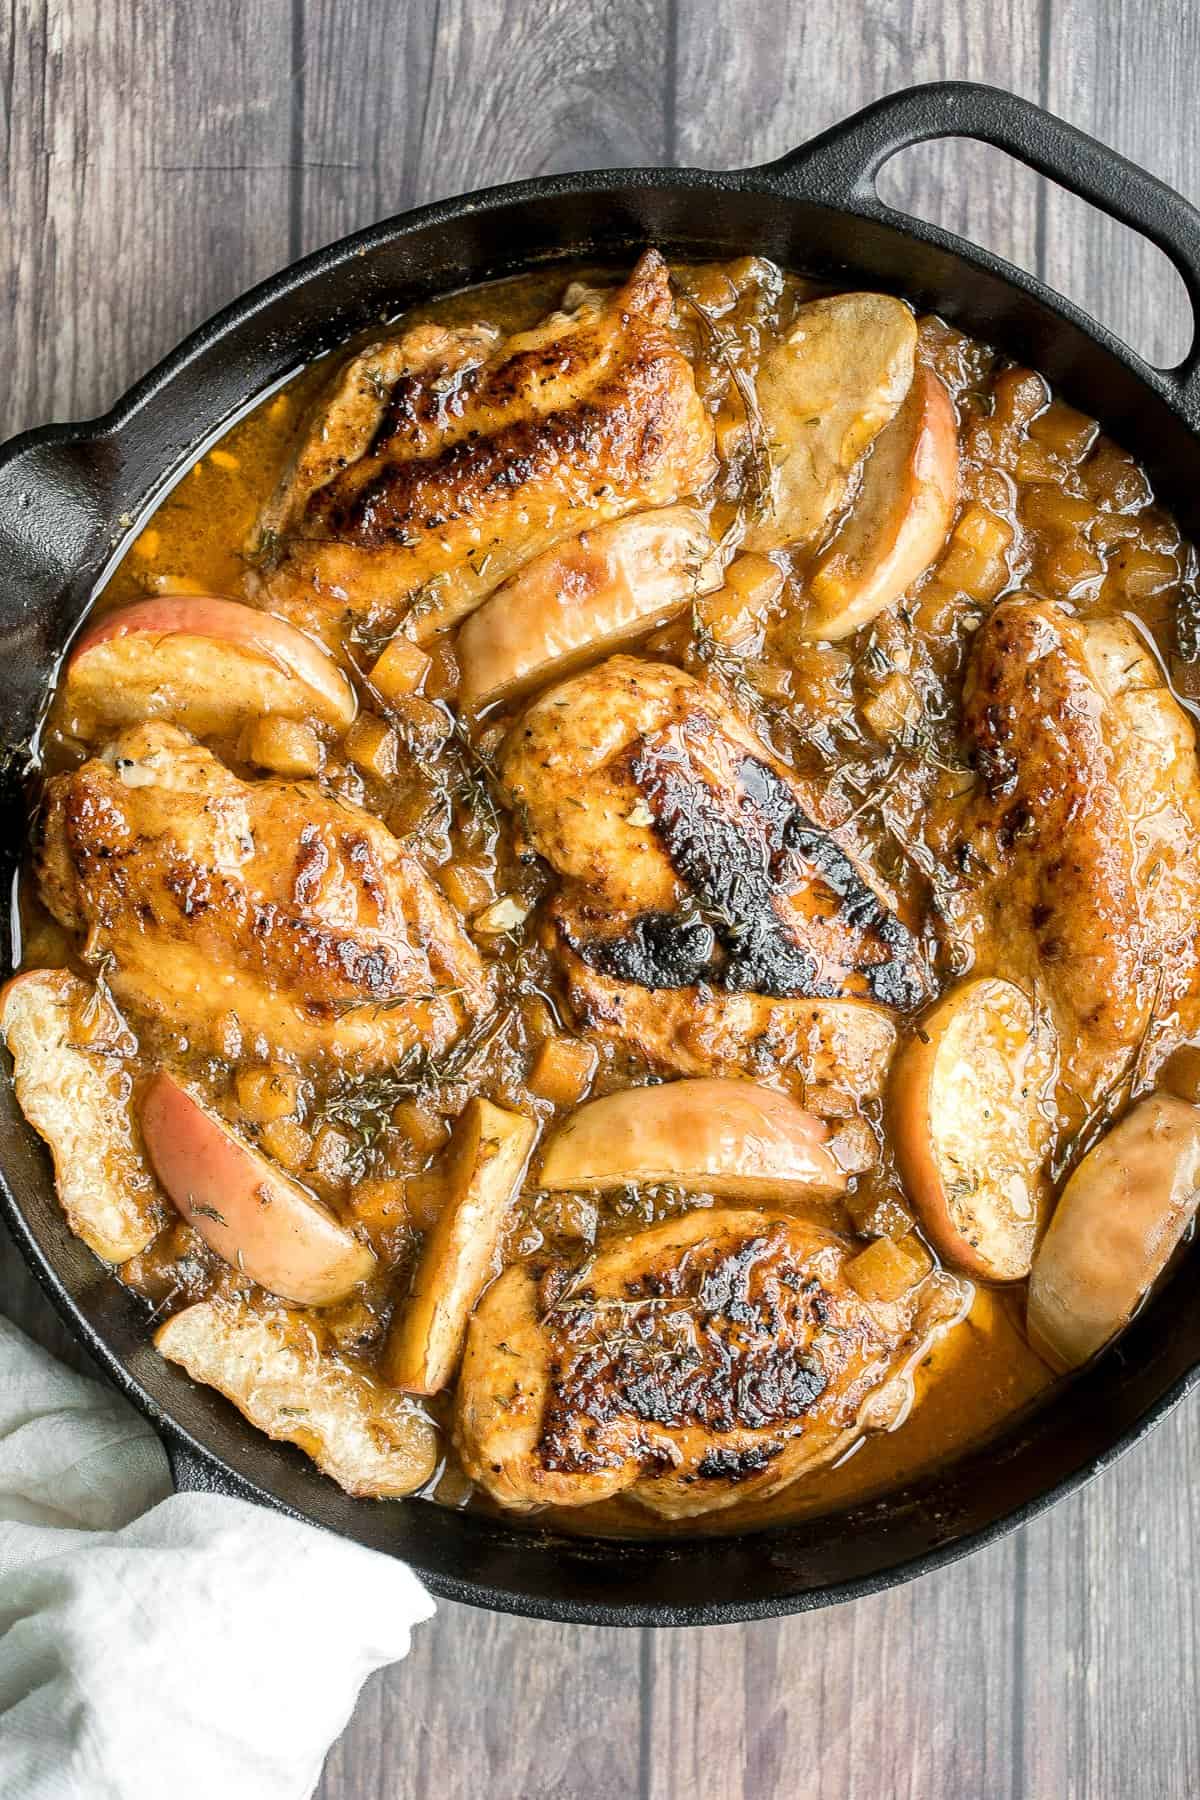
Warm Lentil Salad with Butternut Squash and Shiitake Mushrooms
This warm lentil salad with butternut squash and shiitake mushrooms is the most comforting vegetarian main. Completely satisfying on its own or served with roasted spatchcock chicken or salmon.
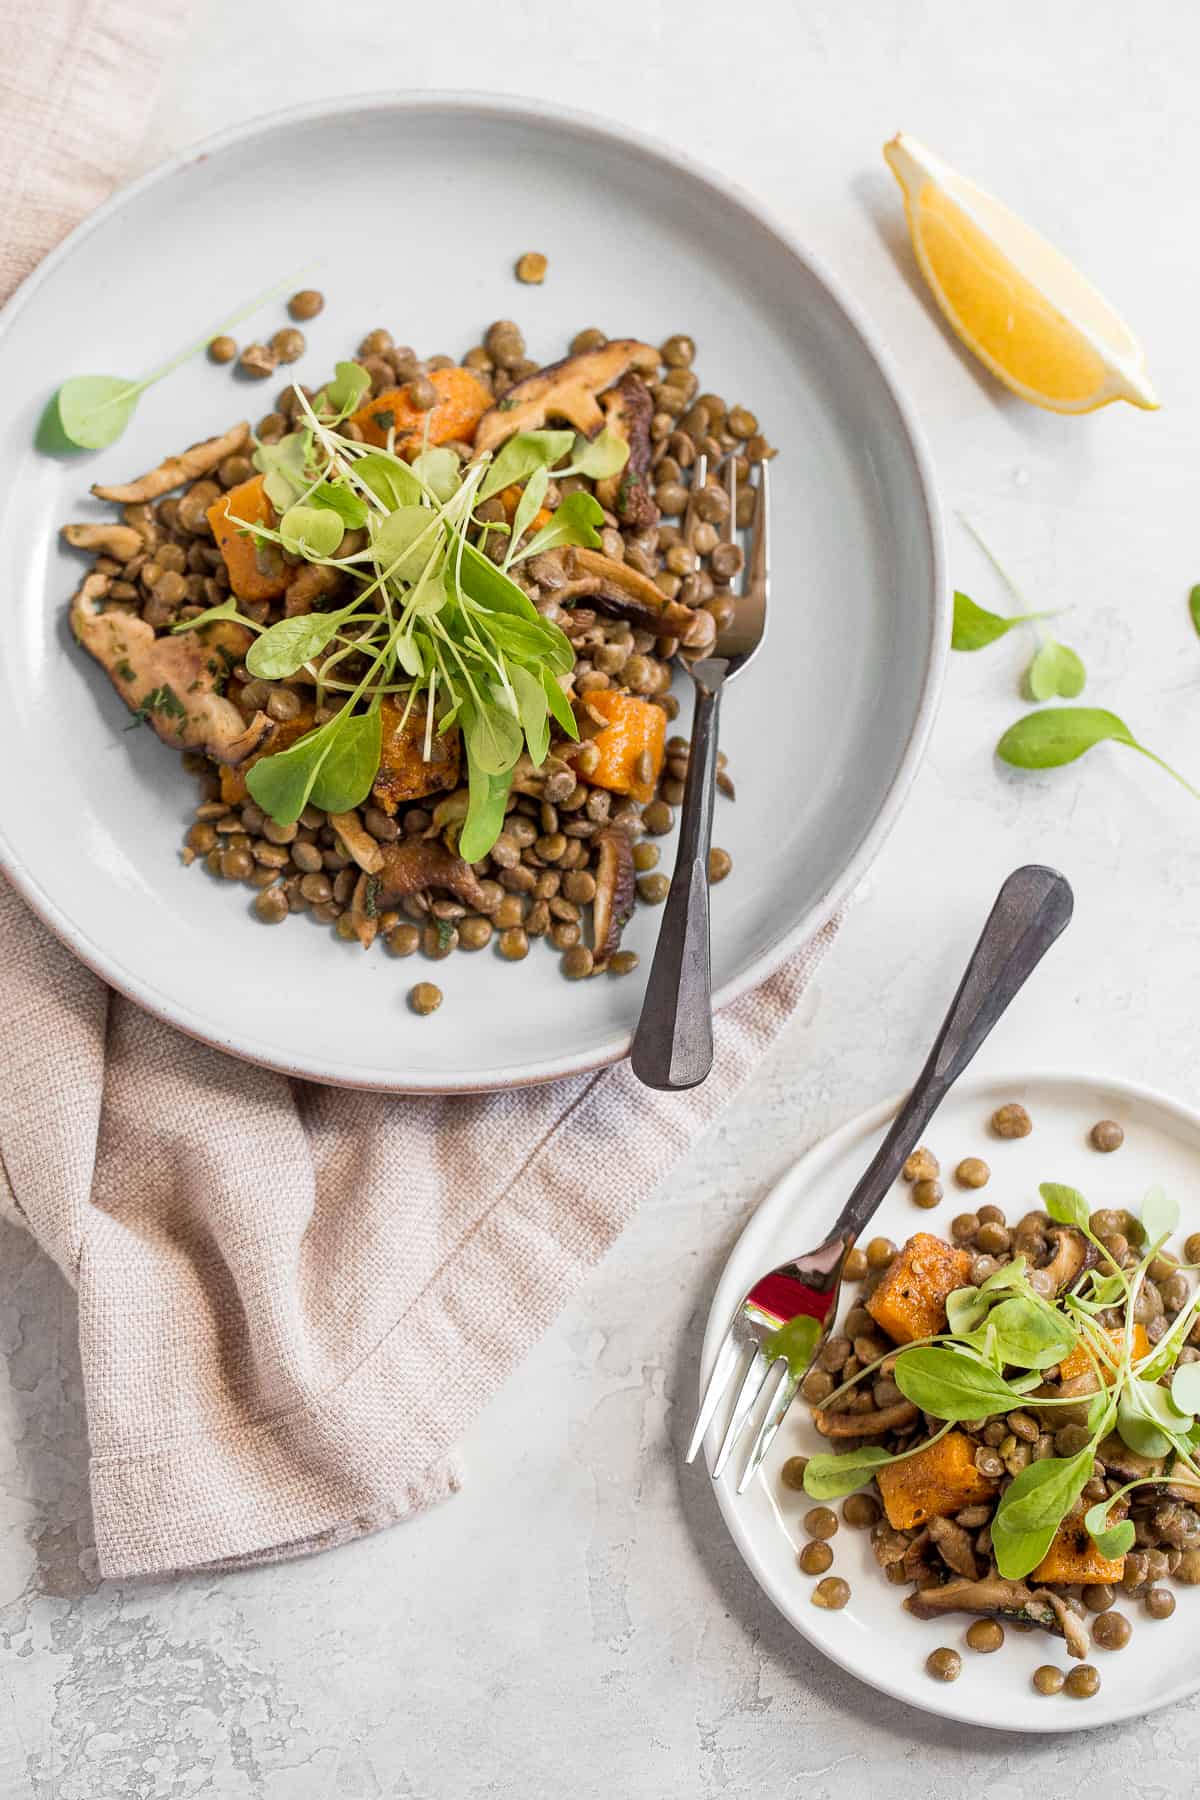
Coconut Curry Pumpkin Soup is rich, creamy, flavorful, and delicious. This vegan soup is ready just over 35 minutes with minimal prep and in one pot. Easily substitute the pumpkin in the recipe for butternut squash, you won't even know the difference.
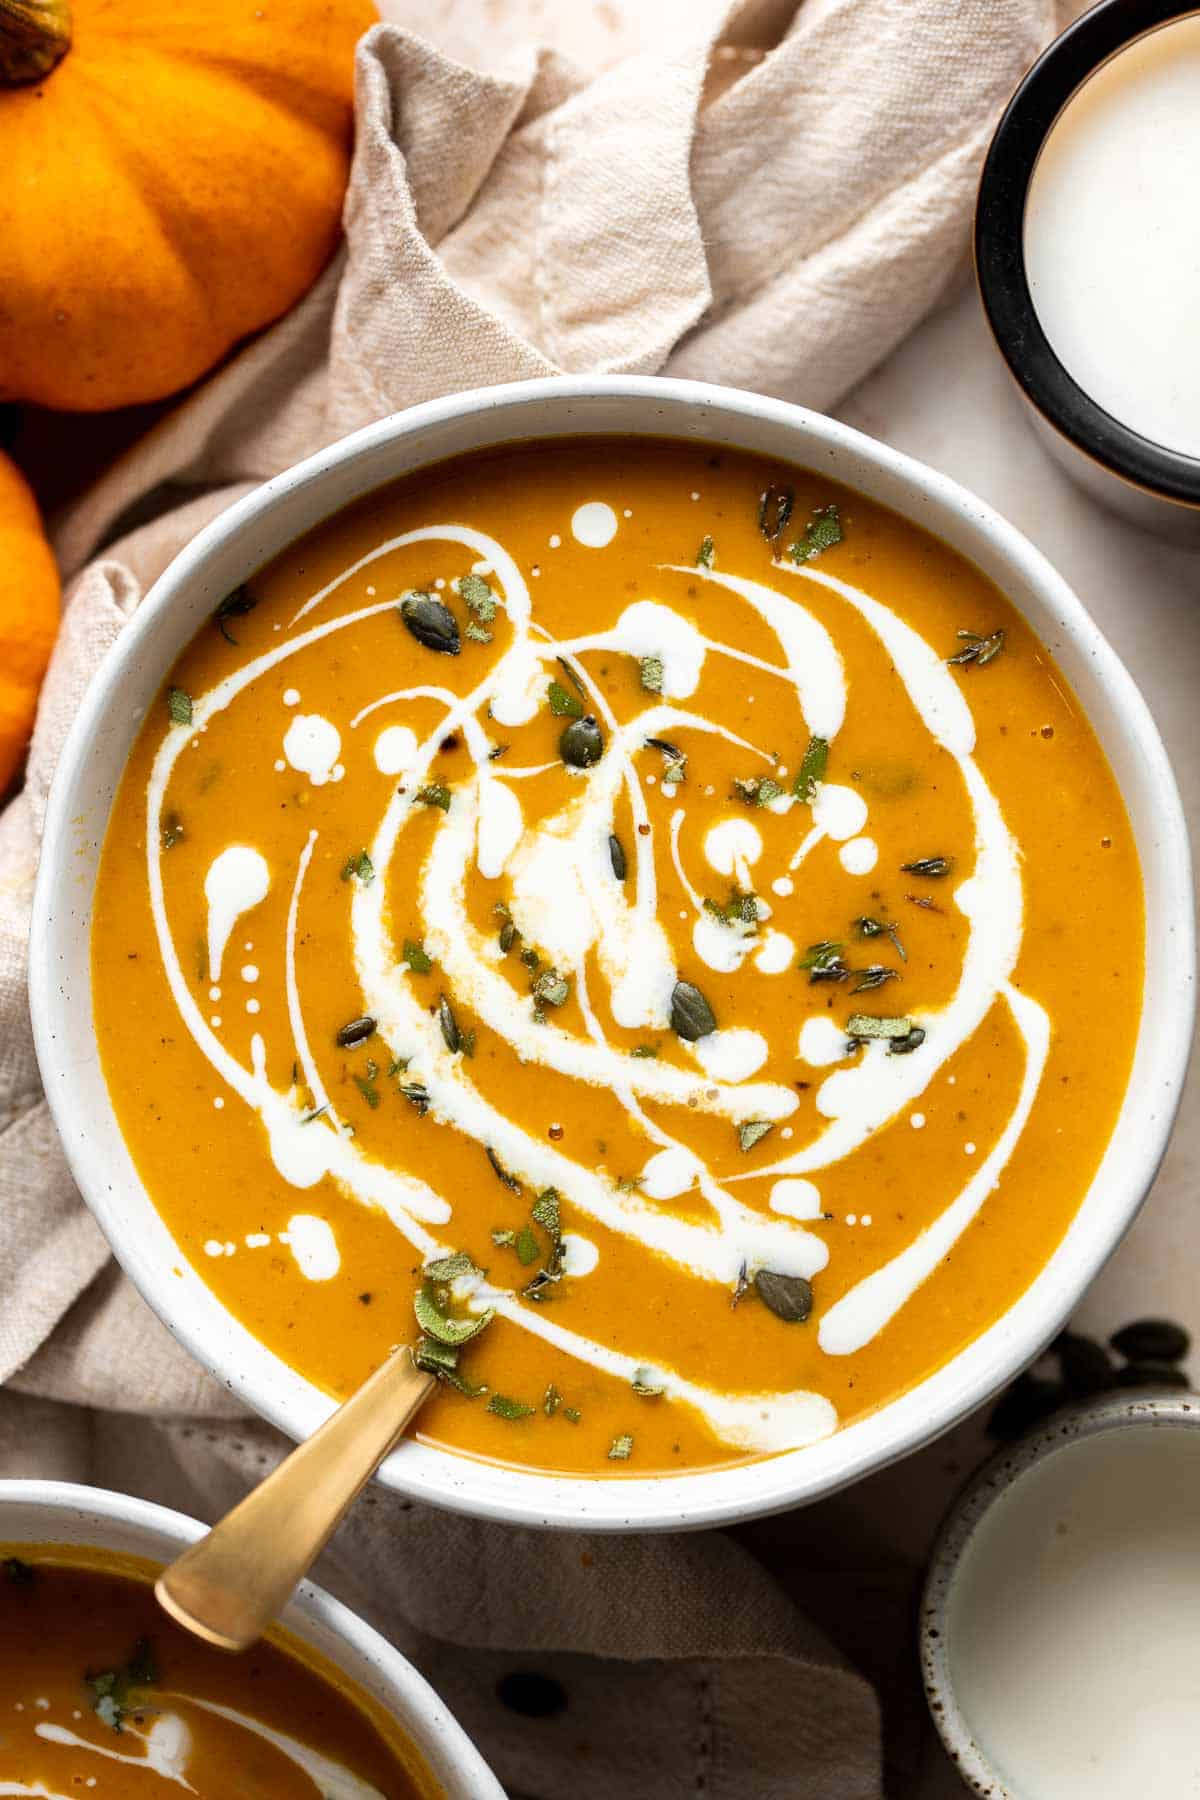
This simple and healthy Thanksgiving Salad is loaded with greens, seasonal veggies, pomegranate seeds, and pecans, all tossed in a homemade vinaigrette.
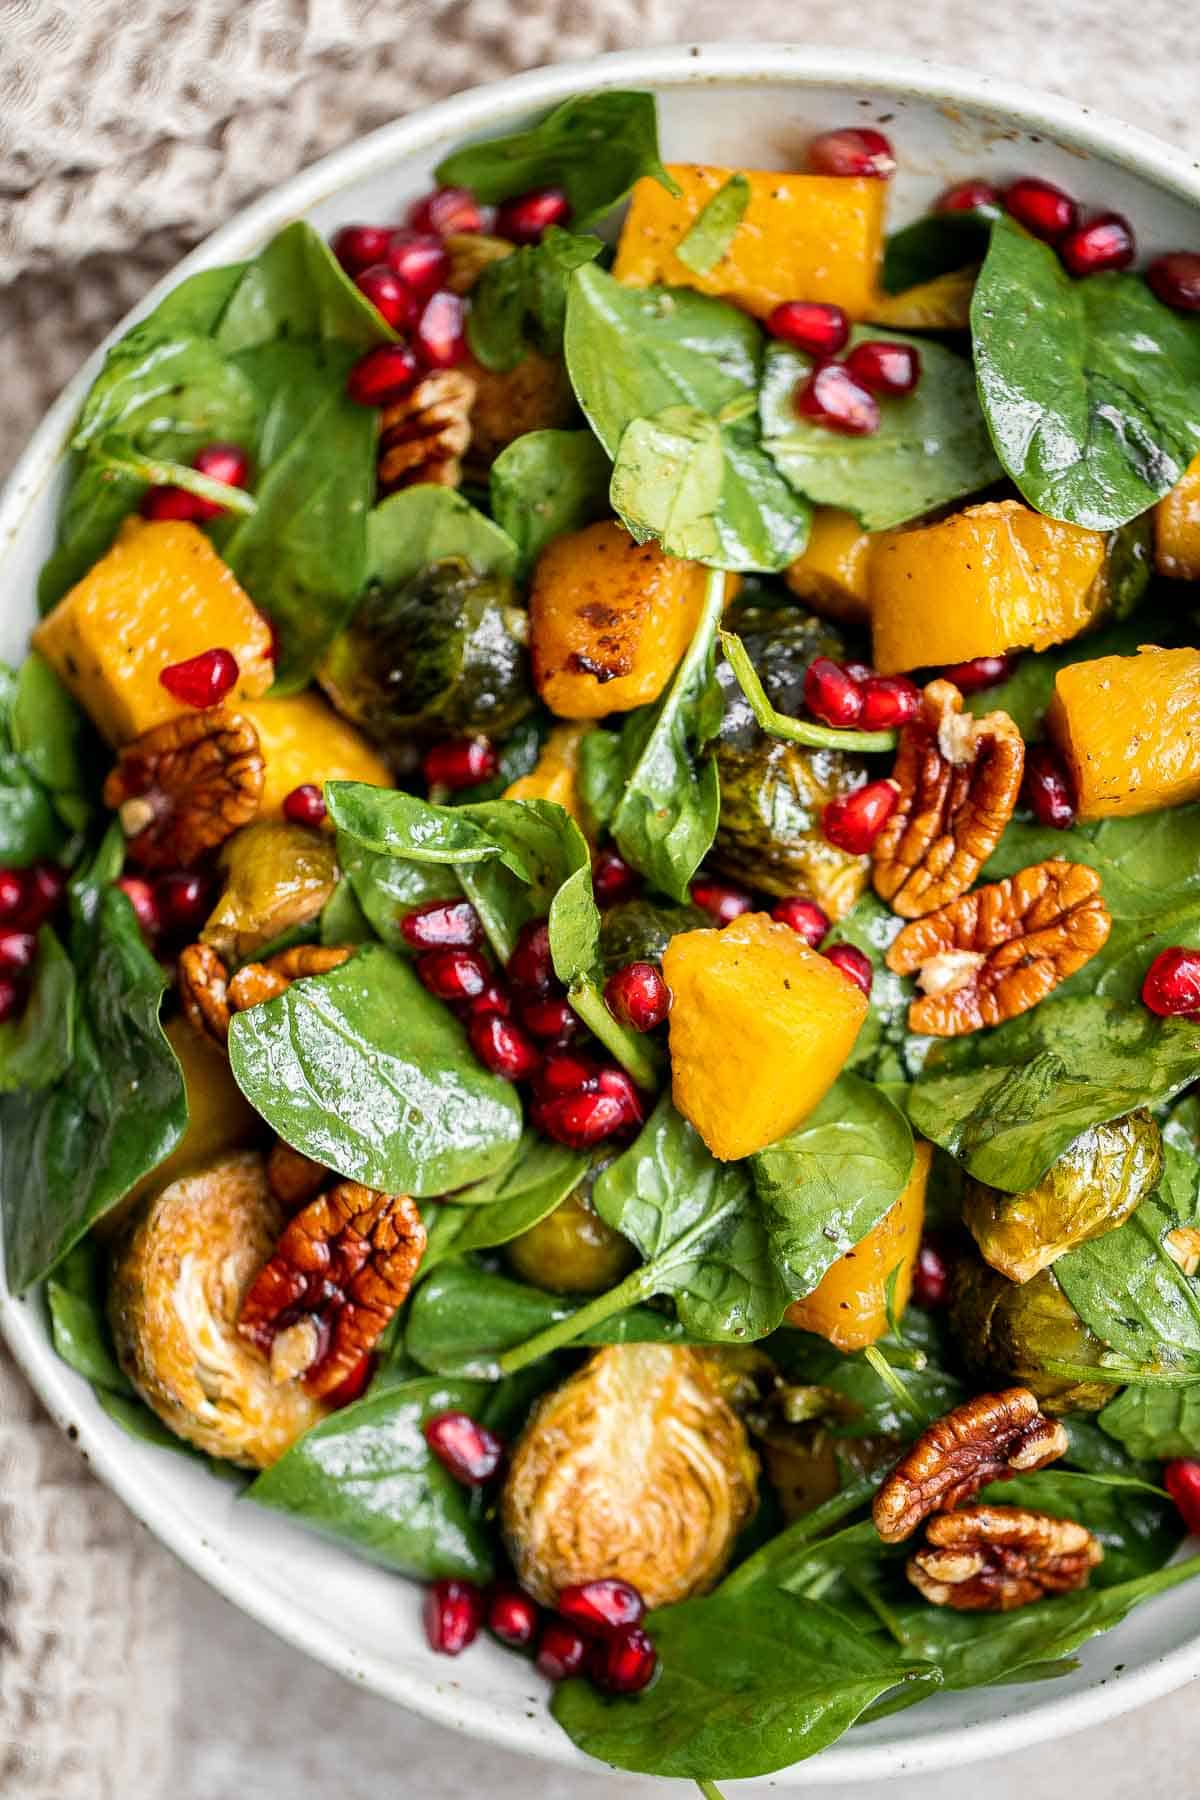
Did You Make Any of These Butternut Squash Recipes?
Please leave a comment and rating below, and let me know what you thought of this round up of easy butternut squash recipes. Be sure to snap a picture and tag me on Instagram @aheadofthyme or share it on the Pinterest pin so that I can follow along.
HUNGRY FOR MORE? Don't forget to sign up for my email newsletter so that you don't miss any recipes. You can also follow along on Instagram and Pinterest for more recipe updates.
Mini Pumpkin Pies (Small Batch)

Do you ever crave pumpkin pie but don't want to make an entire pie? Well then, small batch mini pumpkin pies are for you. These bite-sized pumpkin treats with the perfect flaky buttery crust are filled with that delicious pumpkin pie filling that we all love and crave, and topped with cinnamon spiced whipped cream. The biggest difference is that these mini pies have a much higher pie crust to filling ratio, which means you get that delicious browned pie crust edge in every single bite. Make a batch and satisfy even your strongest pumpkin pie cravings.
Small batch mini pumpkin pies are perfect when you are craving pie but know that won't be able to finish the whole pie. These mini pies are perfect for 2 to 4 people, or if you are like me, maybe just for one person (yes, true story... I finished these all in 2 days...). They are also a great treat to serve for a small and intimate fall dinner party or Thanksgiving dinner. If feeding a larger crowd, I recommend doubling the recipe.

Ingredients in Mini Pumpkin Pies
- pie crust - you will need 125 grams of pie dough (or one single 9-inch pie crust). I used half of a batch of our super flaky puff pastry pie dough recipe.
- pumpkin puree - You can use canned pumpkin puree or homemade puree. If you are using canned pumpkin, make sure it is pure pumpkin and not pumpkin pie filling.
- condensed milk
- brown sugar
- pumpkin spice blend
- salt
- egg
- whipped cream - optional, for topping.
You will also need measuring cups and spoons, mixing bowl, and a 12-tin muffin pan.
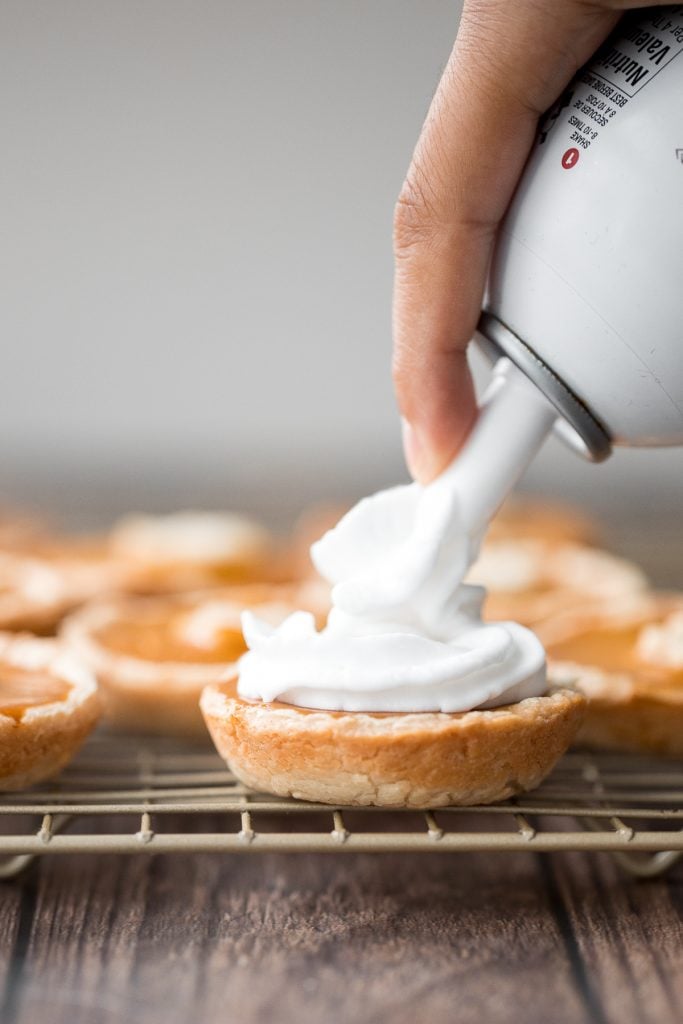
How to Use Leftover Pumpkin Puree
I used canned pumpkin puree for this recipe, so I had some leftover puree on hand. There are many ways to use up canned pumpkin in other recipe. Some of my favourite ways are:
- Small Batch Chocolate Chip Pumpkin Bread
- Pumpkin Cinnamon Rolls
- Mini Glazed Pumpkin Scones
- Pumpkin Pie Granola
- Pumpkin Dinner Rolls
- Pumpkin Focaccia Bread

How to Make the Best Small Batch Mini Pumpkin Pies
- Make the pumpkin pie filling. In a large mixing bowl, whisk together pumpkin puree, condensed milk, brown sugar, pumpkin spice, and salt. Add in egg and whisk into smooth and even mixture. Set aside.
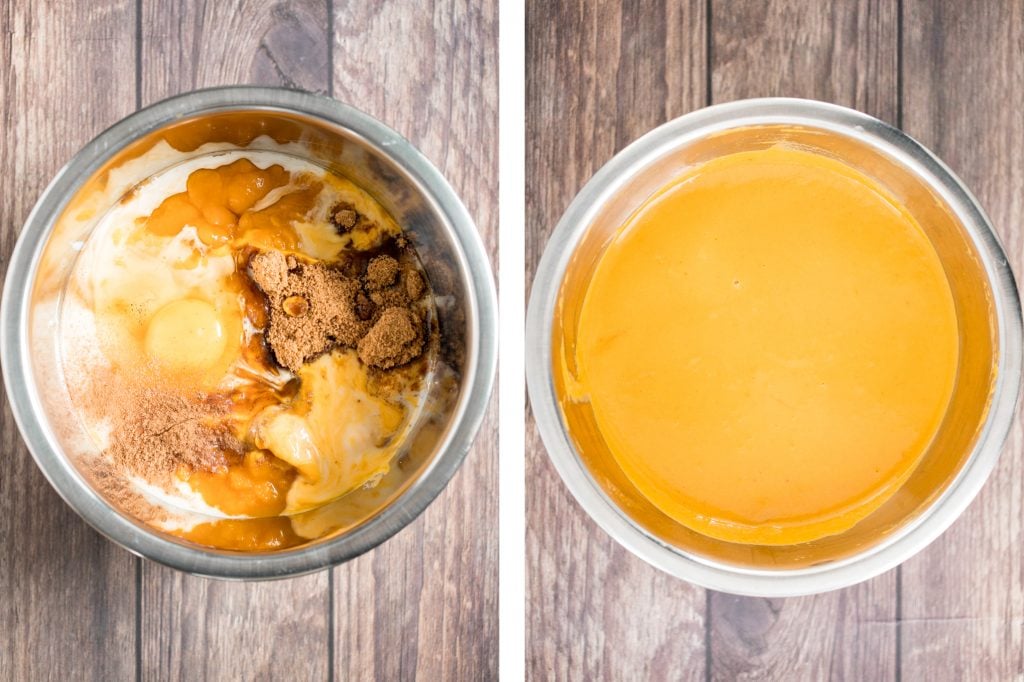
- Roll out the pie dough. Roll the pie dough into a large circle approximately ⅛-inch thick. Use a 3.5-inch round cookie cutter (or the rim of the pumpkin puree can) to cut out 9 circles. Use any scrap pieces of pie crust to cut out small pieces for garnish on top such as leaves.
- Shape the pie crust. Gently press each pie dough circle into each cavity of a standard 12-cup muffin pan and snuggly fit it in. It will cover up to half of the height of each cavity (it will not completely come up to the top). You will fill 9 cavities. Do not over stretch the pie crust to maintain even thickness. Then, use a fork to pleat the edges of the crust.
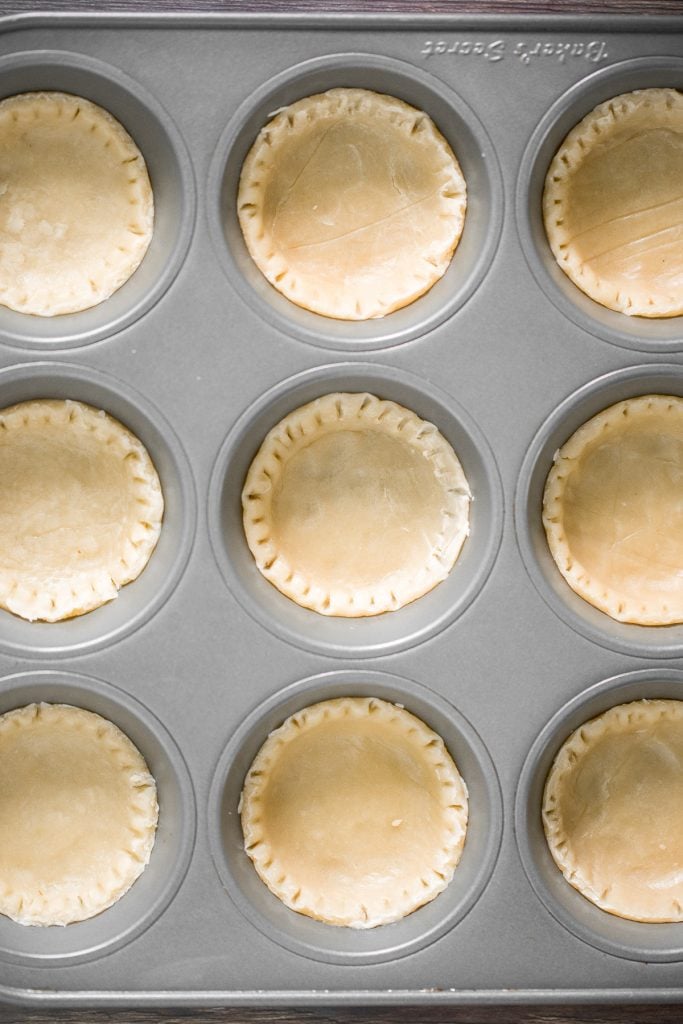
- Assemble the pumpkin pies. Add about 1.5 tablespoons of pumpkin filling into each pie crust, filling it about ¾ of the way up to the top of the crust. Do not overfill as the filling will expand during baking. If you have small shapes that you cut out from the scraps, you can place them on top.
- Bake. Transfer the muffin pan into the preheated 375 F oven and bake for 20 minutes until the crust is lightly golden brown and the pumpkin filling is set. Remove the muffin pan from the oven and let it rest at room temperature for at least 20 minutes.
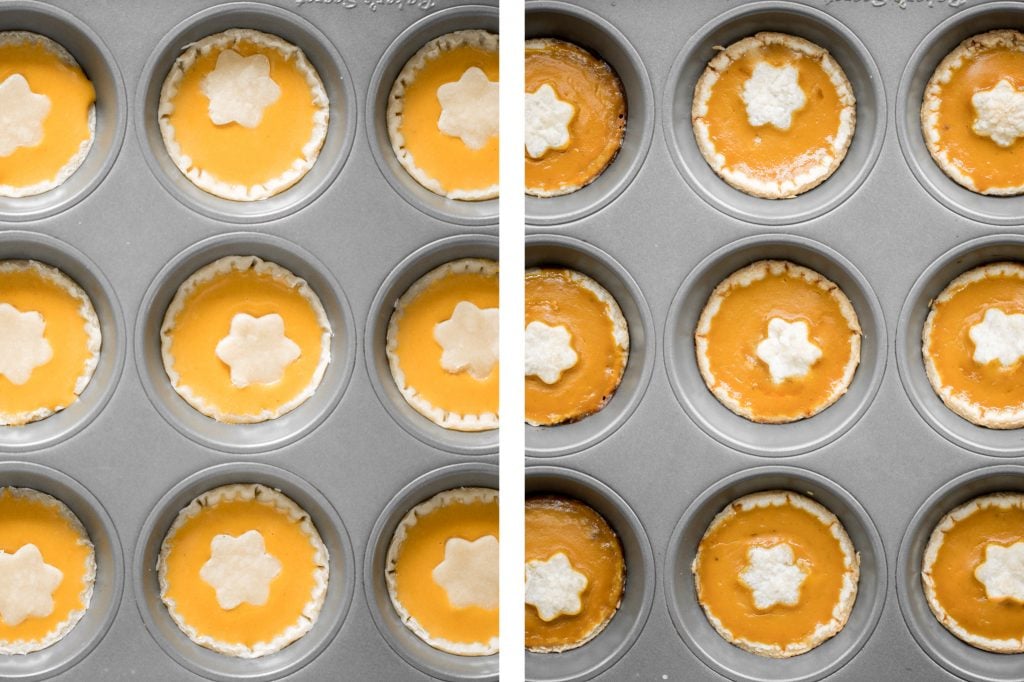
How to avoid cracking: The pumpkin filling might crack from the temperature drop once you remove them from the oven. If topping with whipped cream, then it won't matter if the filling cracks. But if you want to avoid any cracking, you can turn off the oven 5 minutes early and leave the muffin pan inside for another 15 minutes to let the pies cool off slowly and avoid cracking.

Tips
- How to serve: Serve these mini pumpkin pies warm or cold. Gently remove the mini pumpkin pies from the cavities and add whipping cream on top and a sprinkle of pumpkin spice blend or cinnamon.
- How to store: Once cooled to room temperature, store in an airtight container for up to 3 days in the refrigerator.

More Pumpkin Recipes
- Classic Thanksgiving Pumpkin Pie
- Small Batch Chocolate Chip Pumpkin Bread
- Pumpkin Pie Granola
- Pumpkin Pie Bundt Cake with Cream Cheese Glaze
- Mini Glazed Pumpkin Scones
Tried this recipe?
I'd love to hear what you think! Leave a comment and rating below to share your feedback. Your reviews help others discover this recipe and help me keep creating more free recipes for you. Snap a photo and tag me on social media @aheadofthyme too.

Butternut Squash Quesadillas with Chicken and Kale
When you are looking for a quick and easy fall-inspired meal that is comforting, warm and cozy, then butternut squash quesadillas with chicken and kale is exactly what you need. It's flavourful, so cheesy, and has the perfect crunch. These quesadillas are packed with cooked shredded chicken, butternut squash, kale and two cheeses -- goat cheese for a little tang, and mozzarella for that cheesy pull that everyone knows and loves in a quesadilla. The most satisfying fall weeknight meal.
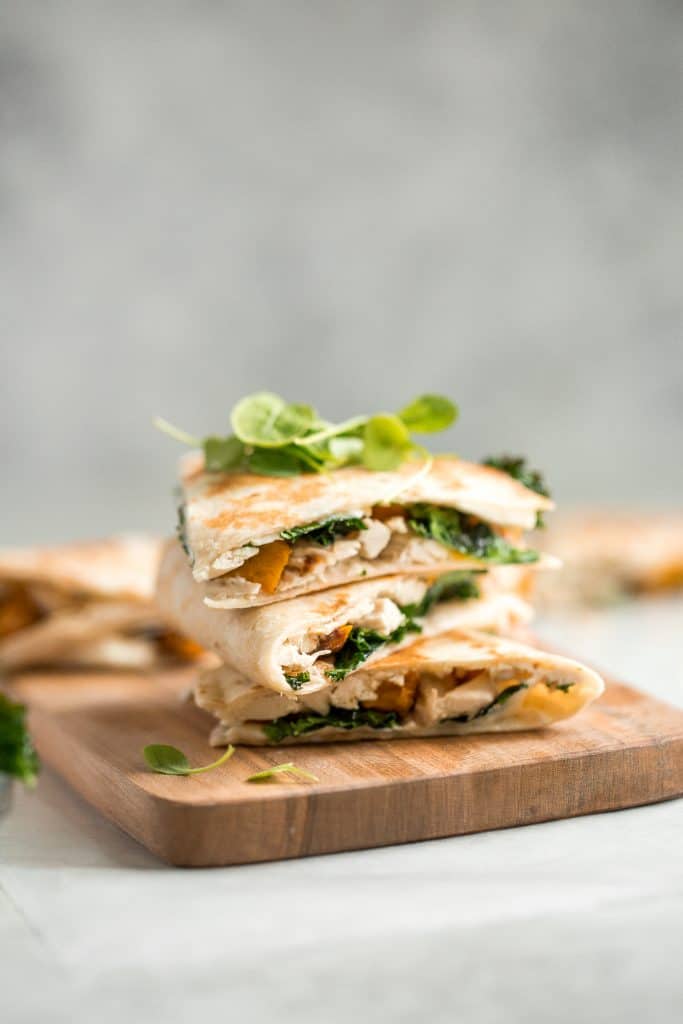
The pairing of flavours in this butternut squash quesadilla are kind of next level. I mean, obviously my favourite seasonal ingredient right now is butternut squash. But put it together with kale and you will discover some kitchen magic. These two are just made for each other. Plus, they create a pretty amazing display of colour together.
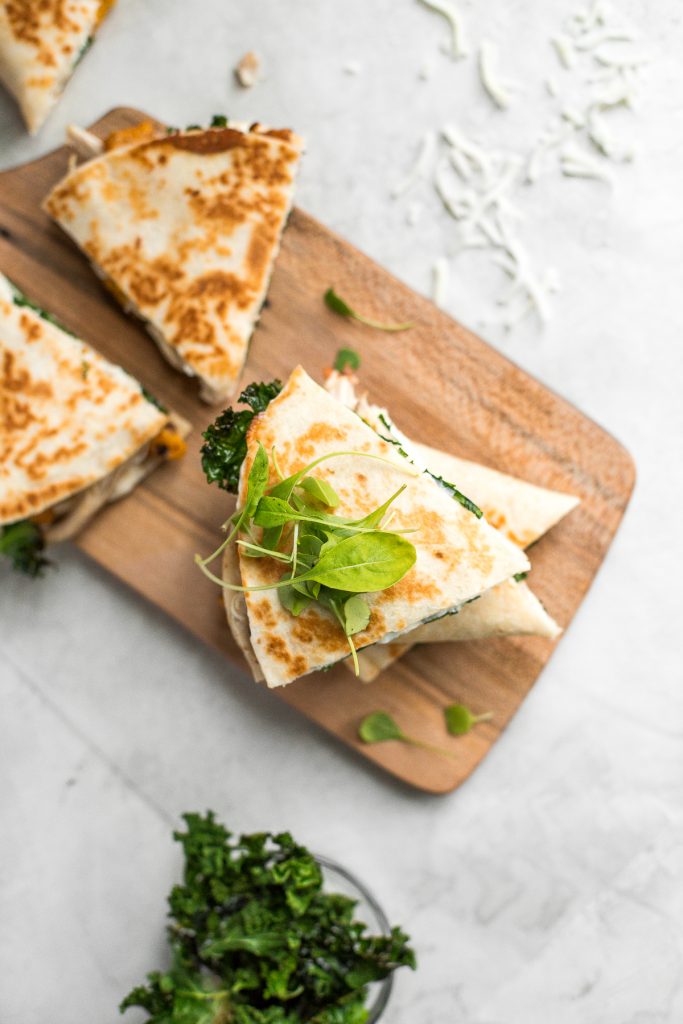
Ingredient Notes
To make these easy Butternut Squash Quesadillas, you will need the following ingredients (full measurements in recipe card below):
- butternut squash - 1 medium squash peeled and cut into ¼ inch cubes. You can also use pre-cut butternut squash that is usually quite easy to find this time of year at your local grocery store.
- seasoning for butternut squash - roast the squash in olive oil, garlic powder, onion powder, cinnamon, salt and pepper.
- kale
- shredded chicken - I used about ⅔ of a whole roast chicken (or 2-3 cups of shredded chicken). This recipe is a great way to use up leftover whole roast chicken or roasted spatchcock chicken. You can also pick up a cooked rotisserie chicken if you want to make things even easier. Just pull the meat off the bone while the chicken is still warm, and use the leftovers in dishes all week long.
- tortillas
- goat cheese
- mozzarella cheese
- fresh thyme or micro greens - optional, for garnish.
You will also need a large baking sheet and griddle (or skillet).
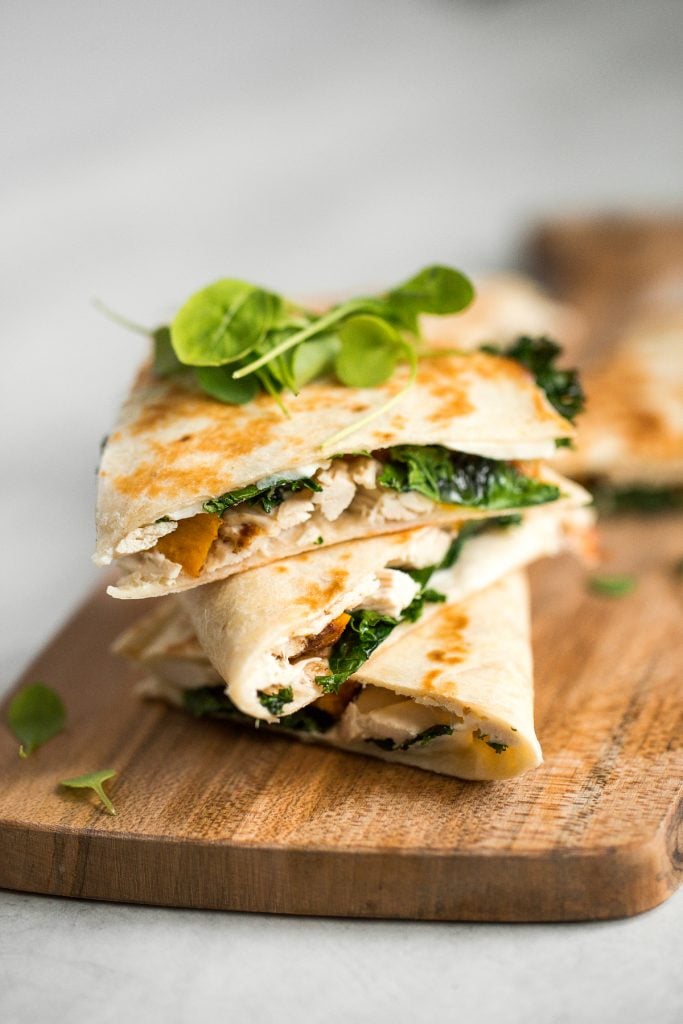
How to Make the Best Butternut Squash Quesadillas with Chicken and Kale
- Roast the butternut squash. Preheat oven to 425 F. Place cubed butternut squash on a lined baking sheet and drizzle with 1 tablespoon olive oil. Add garlic powder, onion powder, cinnamon, 1 teaspoon salt, and pepper, then toss to combine. Roast until squash is tender and lightly browned, about 15-20 minutes, then remove from pan and set aside.
- Roast the kale. On the same baking sheet, add kale, remaining tablespoon olive oil and remaining teaspoon salt. Toss to combine, then roast for 7-9 minutes, or until kale is crispy.
- Assemble the quesadillas. To prepare the quesadillas, lay tortillas out on a large cutting board. Spread 1 oz. of goat cheese (about 1.5 tablespoons) on half of each tortilla. Layer the cooked butternut squash, kale, and cooked shredded chicken on top, dividing equally amongst the tortillas. Top with 1 oz. mozzarella cheese on each tortilla, then fold the tortilla over to seal.
- Grill the quesadillas. Heat a large griddle or skillet over medium-high heat. Coat with nonstick spray then cook quesadillas until cheese has melted and tortillas are lightly browned, about 3 minutes per side. Cut into wedges, garnish with herbs if desired, and serve immediately.
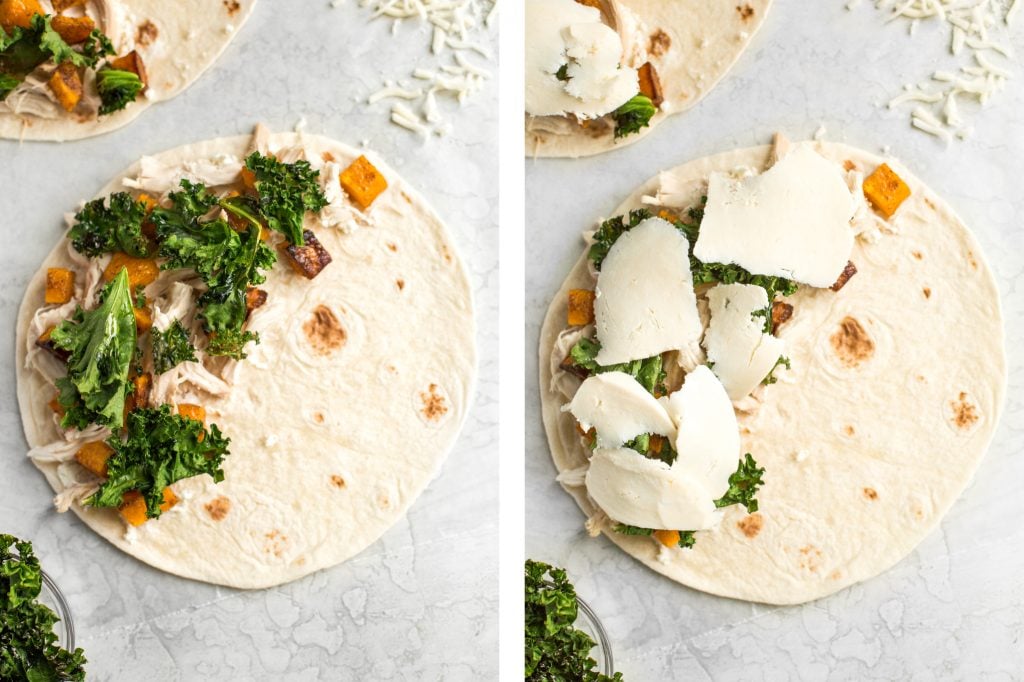
Tips on Making Quesadillas
- How to customize: One of the great things about quesadillas is that you can use whatever ingredients that you have on hand. Throw in some corn kernels or even sweet potato. You can also make it vegetarian by swapping out the chicken for black beans.
- How to store: To store, wrap each butternut squash quesadilla tightly in aluminum foil and store in the refrigerator for up to 3 days or in the freezer for up to 3 months.
- How to reheat: These butternut squash quesadillas reheat really well. Just reheat on a non-stick pan for a few minutes on each side, or in the oven at 300 F until warmed and crispy, approximately 20 minutes if refrigerated or 30 minutes from frozen. You can also reheat in the air fryer at 300 F for about 10-15 minutes.
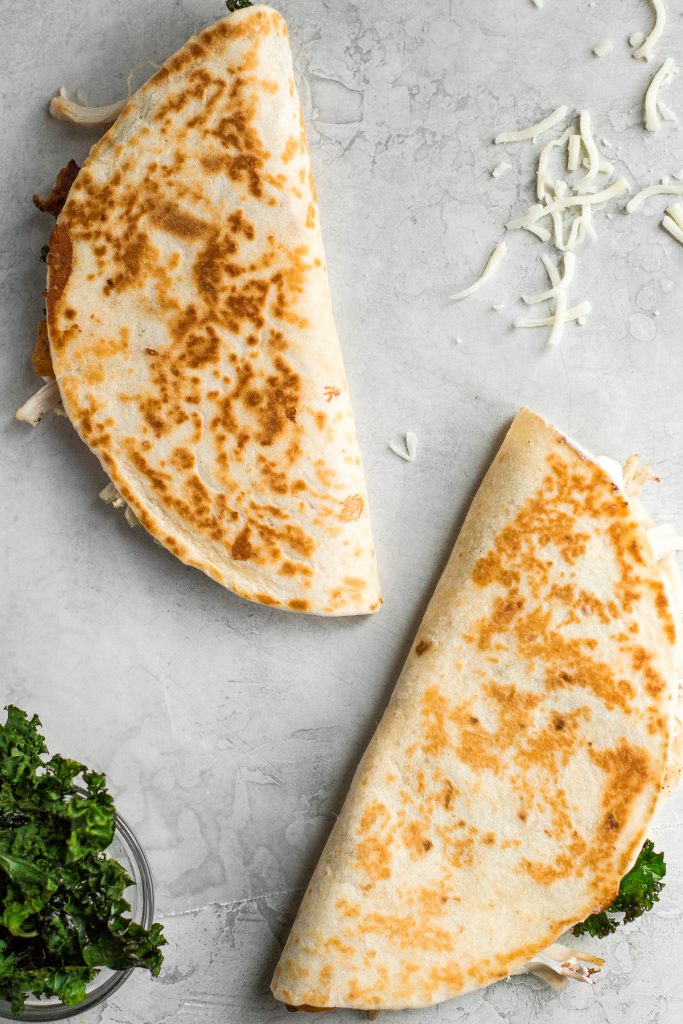
More Butternut Squash Recipes
- Stuffed Butternut Squash with Wild Rice
- Roasted Butternut Squash Soup
- Butternut Squash Carbonara Pasta
- Roasted Butternut Squash
- One Pan Roasted Harvest Vegetables
- Butternut Squash "Pumpkin" Bread
- Fall Harvest Salad with Butternut Squash
Tried this recipe?
I'd love to hear what you think! Leave a comment and rating below to share your feedback. Your reviews help others discover this recipe and help me keep creating more free recipes for you. Snap a photo and tag me on social media @aheadofthyme too.
Skillet Chicken Thighs and Potatoes
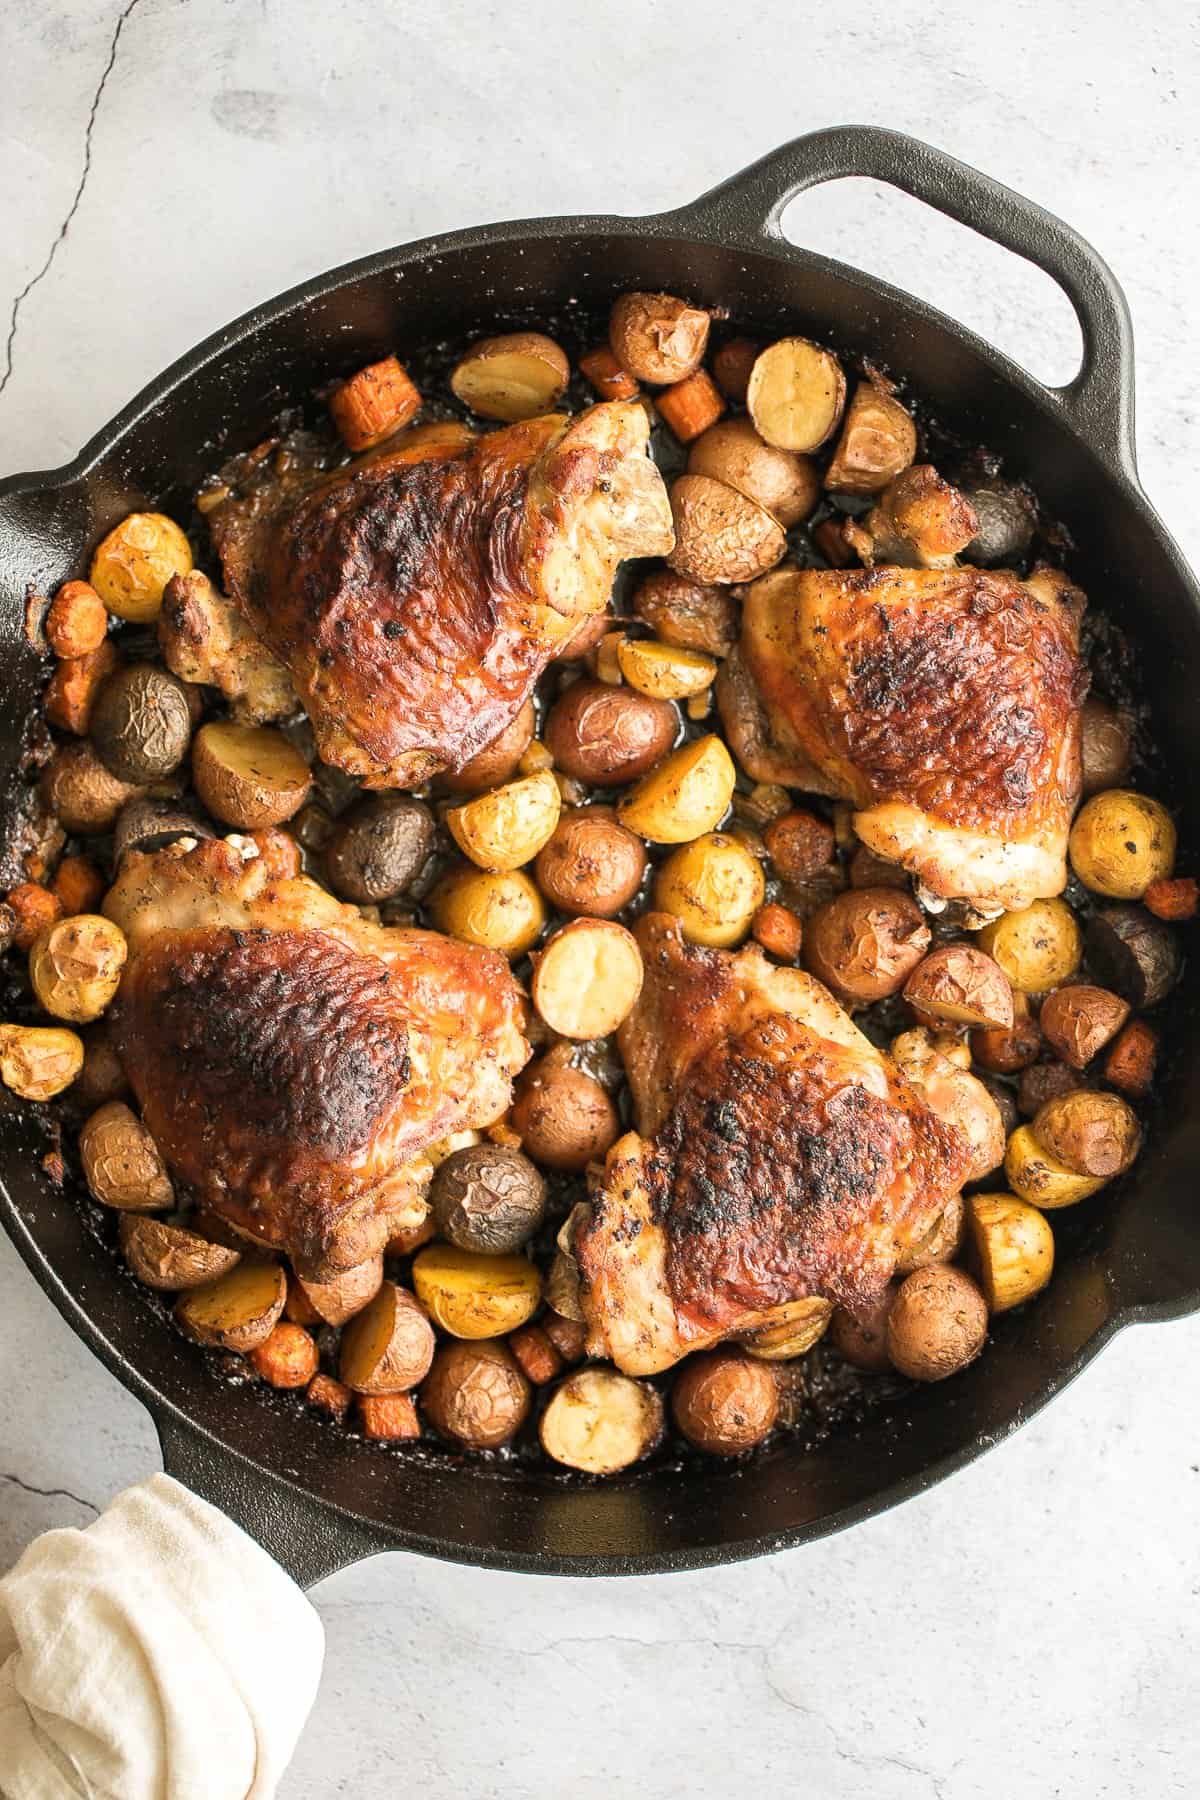
Tender and juicy one pan skillet chicken thighs and potatoes and carrots is an easy weeknight dinner that can be on your dinner table in less than 45 minutes. Packed with succulent, tender chicken thighs with the crispiest skin, and comforting potatoes and carrots that are immersed in incredible flavour. This wholesome one pan chicken dinner one that we regularly make on repeat over here. It's just that good.
Ingredients
- chicken thighs - 2 lbs of chicken thighs. Depending on the size of the thighs, that could be 4-8 thighs. I used 4 very large thighs.
- seasoning - this dish is seasoned with a few very simple ingredients, but with so much flavour. I used Italian seasoning, paprika, salt and pepper.
- butter - for searing the chicken. You can also use olive oil and keep the dish dairy-free.
- onion
- garlic
- baby potatoes - 2 cups of halved baby potatoes (about 20-25 baby potatoes). You can also used regular sized potatoes, just cut them into bite sized pieces.
- carrots - I like carrots to add some variety, but feel free to leave them out if you prefer.
You will also need a cast-iron skillet or dutch oven.
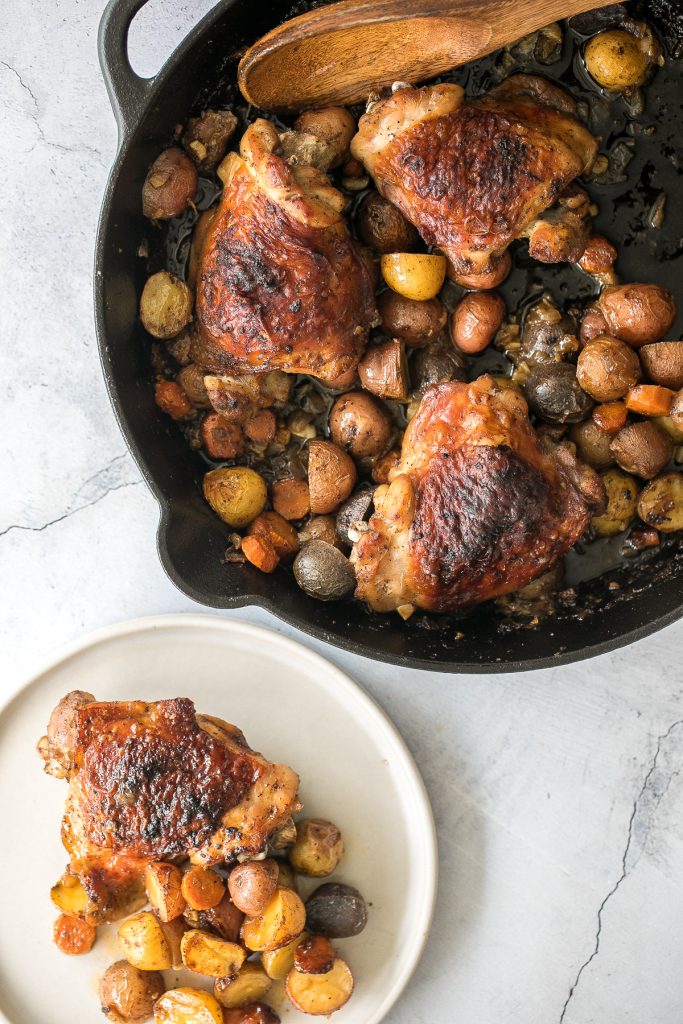
How to Make the Best One Pan Skillet Chicken Thighs and Potatoes
First, prep the chicken. Pat dry each chicken thigh with a paper towel completely before adding seasoning. This helps create extra crispy skins when searing.
Then, apply the seasoning rub. In a medium bowl, add Italian seasoning, paprika, salt, and pepper mix well to combine. Generously rub ¾ of the seasoning mixture all over the chicken thighs, on both sides (using disposable gloves helps make clean up easier).
Add onions, garlic, potatoes, and carrots to the bowl with the remaining seasoning mixture. Toss to combine.
Now, let's sear the chicken. Melt the butter in a cast-iron skillet (or dutch oven) over medium high heat for 1-2 minutes until hot. Place the chicken thighs with the skin side down on the skillet, and sear for 2-3 minutes until the skin turns brown and crispy. Flip the chicken over and cook on the other side for another 2 minutes. Remove the chicken thighs from the skillet and place them on a plate.
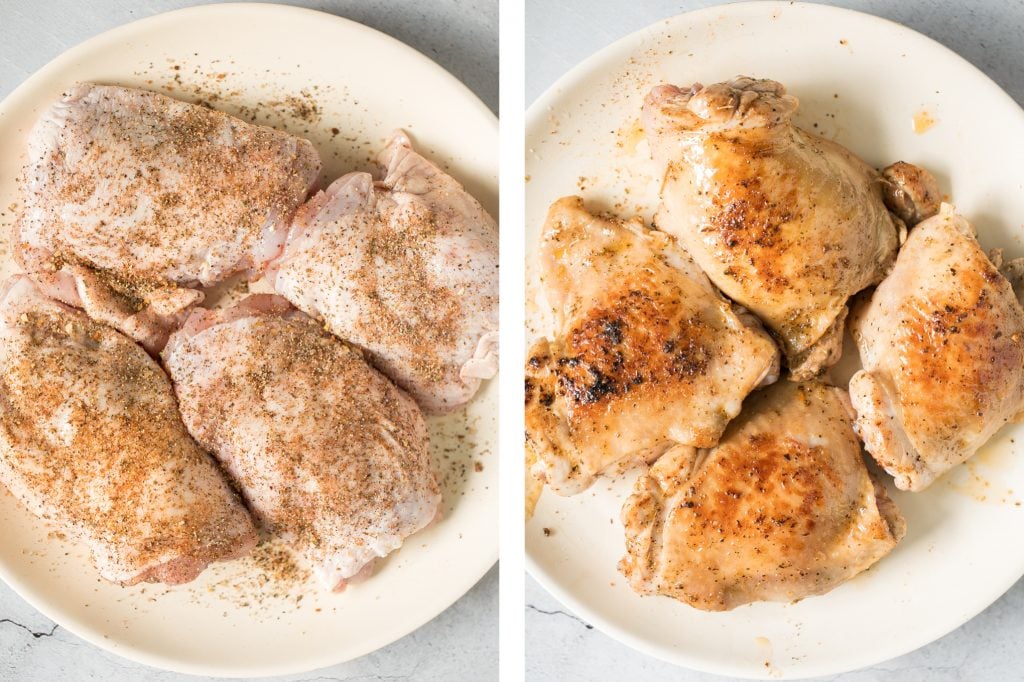
On the same skillet, add the vegetables and stir well to combine. Cook for 3-4 minutes until onions are soft and start to slightly brown. Remove from heat and place chicken thighs on top, skin side up.
Transfer the skillet into a preheated 400 F oven and bake for 30-40 minutes, until the internal temperature for the chicken thighs reaches 165F, as read on a meat thermometer. Remove the skillet from the oven and let it rest for 10 minutes before serving.
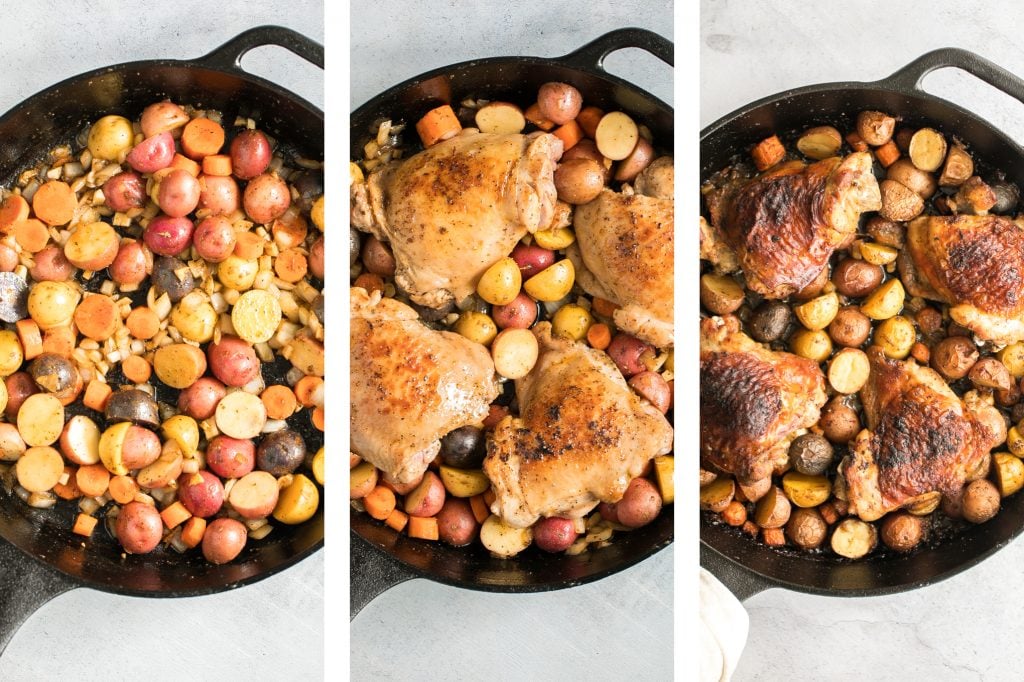
How to Serve Skillet Chicken
The beauty of this skillet recipe is that it is a one pan recipe, meaning you don't need to make anything else to serve it with. You have the chicken alongside delicious roasted potatoes and carrots.
I like to also serve a warming fall soup on the side (such as creamy cauliflower and garlic soup or 30-minute butternut squash soup) or a fresh crisp salad.
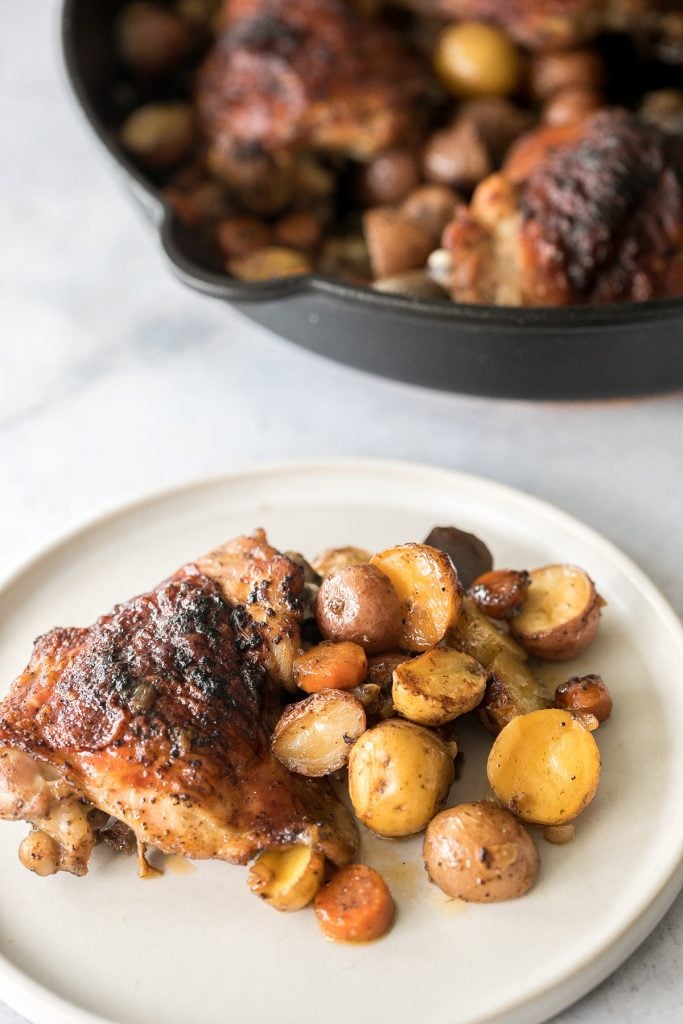
How to Store Chicken
Store cooked chicken thighs in an airtight container with the vegetables and any juices from the pan. Refrigerate for up to 4 days. To reheat, place in the microwave, air fryer, or oven at 300F for 5-10 minutes.
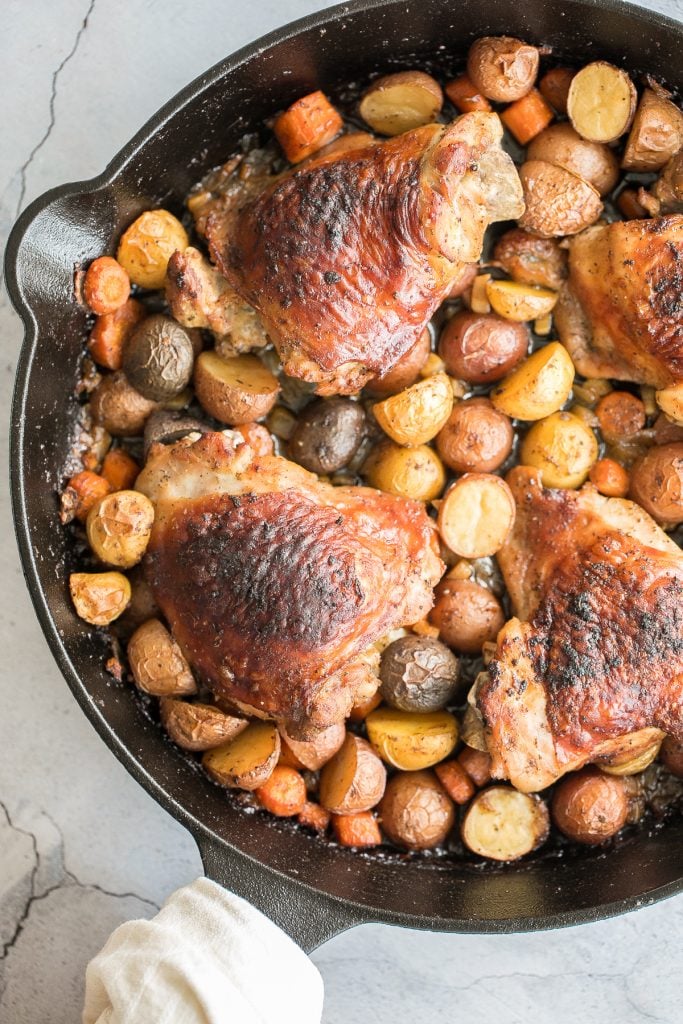
More One Pan Chicken Recipes
- Apple Dijon Braised Chicken Thighs
- Creamy Skillet Chicken with Lemon Garlic Sauce
- Meal Prep Sheet Pan Balsamic Chicken and Vegetables
- Sheet Pan Soy-Glazed Chicken Thighs
- One Pot Spanish Chicken and Rice
- Dutch Oven Whole Roast Chicken
Tried this recipe?
I'd love to hear what you think! Leave a comment and rating below to share your feedback. Your reviews help others discover this recipe and help me keep creating more free recipes for you. Snap a photo and tag me on social media @aheadofthyme too.
Easy Pumpkin Dinner Rolls

Quick and easy pumpkin dinner rolls are soft and fluffy and make the perfect bread roll to serve this fall. They are flaky and buttery and packed with warm and comforting pumpkin for a subtle yet not overpowering flavour. The best part? You only need to spend 15 minutes of actual prep work to make these.
I love to pair our meals with a side of bread. My go to recipes have always been our skillet dinner rolls and green onion dinner rolls, but now I'm all about these easy pumpkin dinner rolls. They are the perfect bread to serve with a classic warm and cozy fall dinner, especially on Thanksgiving.
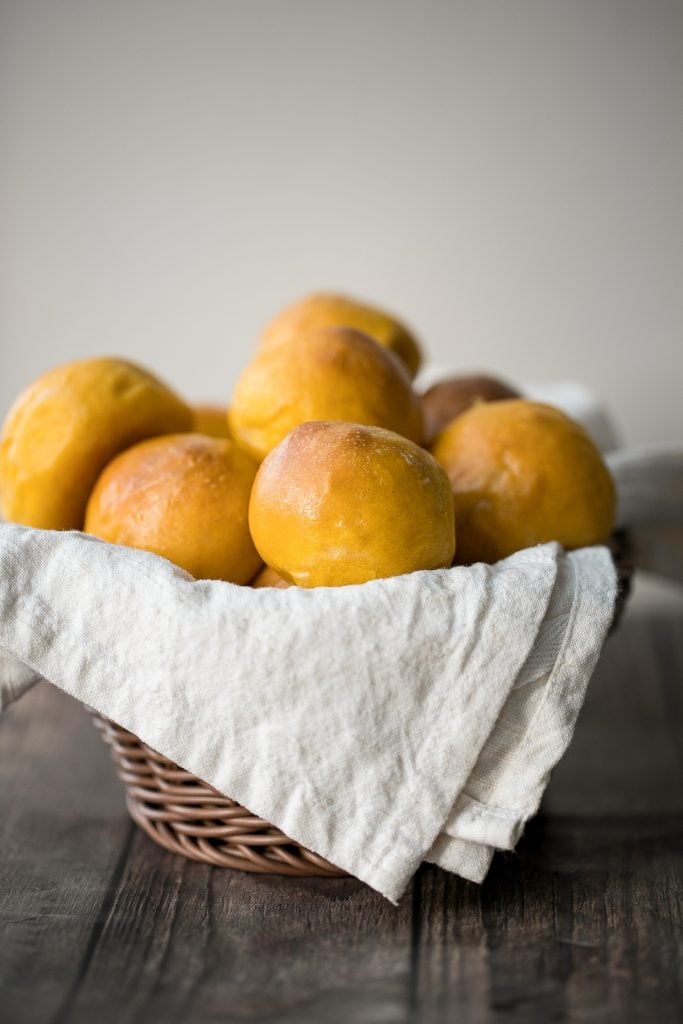
Ingredients
- pumpkin puree - I used canned pumpkin puree (do not use pumpkin pie mix). You can also used homemade pumpkin puree.
- all-purpose flour
- milk and butter - adds fat content for fluffier and softer rolls.
- eggs - leavening agent to promote rising.
- active dry yeast or instant yeast
- granulated sugar - helps the dough rise faster by "feeding" the yeast.
- salt
- melted butter - optional for brushing on top of the rolls at the end for an extra shiny top.
- condensed milk - optional, for serving.
You will also need a kitchen scale or measuring cups and spoons, mixing bowl, and a quarter sheet baking pan.
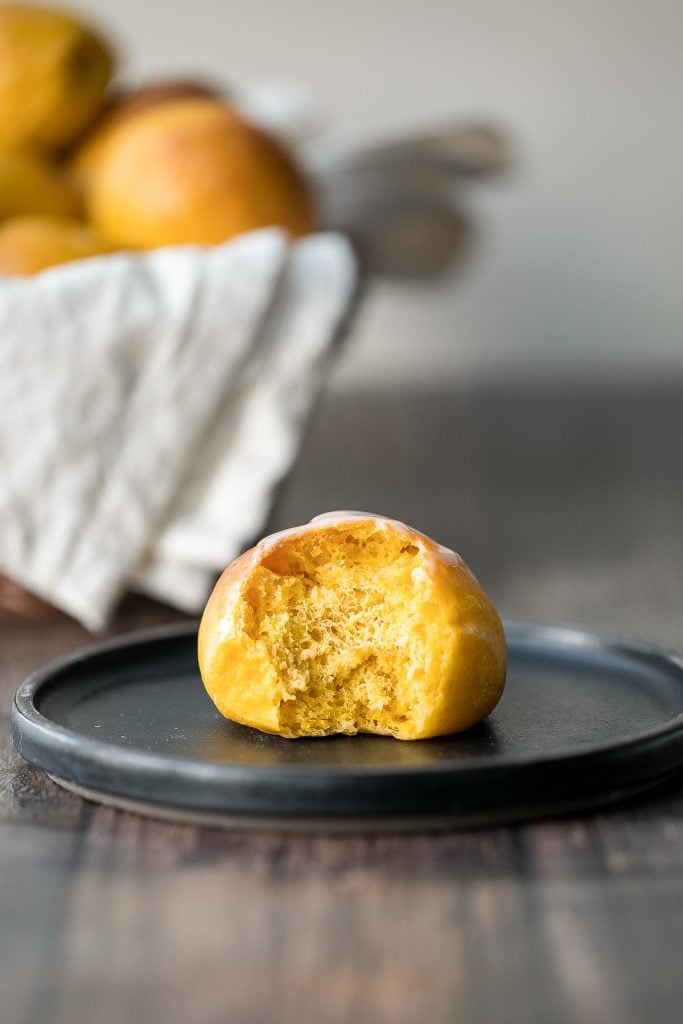
How to Make the Best Pumpkin Dinner Rolls
- Prepare the dough. In a large bowl, add pumpkin puree, milk, butter, one egg, yeast, sugar, and salt together in a large mixing bowl. Whisk to combine, about one minute. Add flour and stir well to combine until there are no dry flour visible in the bowl. Make sure to scrape down the sides of the bowl with a spatula.
- Knead the dough. Transfer the dough onto a clean and lightly greased surface. The oil will help keep the dough from sticking to your hands initially. You can also lightly oil your hands. Knead the dough until the dough is smooth and not sticky at all. It should take less than 5 minutes of kneading by hand to achieve a non-sticky and smooth dough ball.
Tips for Kneading Dough
- How to knead dough: Knead the dough by pushing it down and outward using the palms of your hands. Fold the dough in half toward you and press down. Repeat this motion by pushing the dough down and outward, and then folding over towards you. This helps build up gluten strength in dough that is responsible for making the bread fluffy.
- How to test if dough is well-kneaded: A well-kneaded dough is smooth and can hold its shape. You can test the dough by giving it a firm poke with your finger. The indentation should bounce right back. If it doesn't bounce back and stays like a dimple, keep kneading for a few more minutes.
- Proof the dough (first rise). Transfer the kneaded dough back into the bowl. Lightly apply some oil over the dough with a brush and cover the bowl with the lid. Let it rise for 1 hour or until doubled in size.
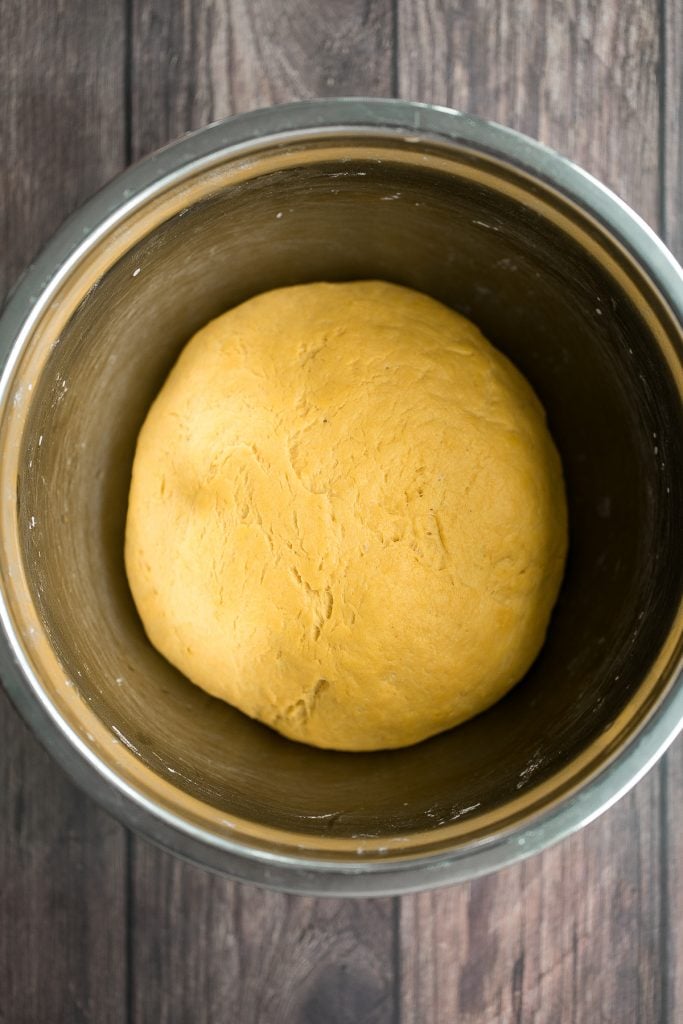
- Shape the rolls. Transfer the dough onto a clean surface and deflate the dough ball by punching the air out or pressing down with a rolling pin. Roll the dough into a log and divide it into 15 equal pieces with a knife or bench scraper. Cover the dough with a damp cloth or cling wrap to prevent it from drying. Take one piece at a time and shape each piece into a smooth ball.
- Proof the rolls (second rise). Transfer the dough balls to a greased quarter sheet baking pan. Cover the baking tray with aluminum foil or seal it in a large Ziploc bag and let the rolls rise for one hour. The rolls should almost double in size.
PRO TIP: Letting the dough rise in a warmer area will help the rolls rise faster. I leave my baking sheet in the oven (turned off) and leave another pan filled with boiling water at the bottom of the oven to help the rolls rise (proof) faster.
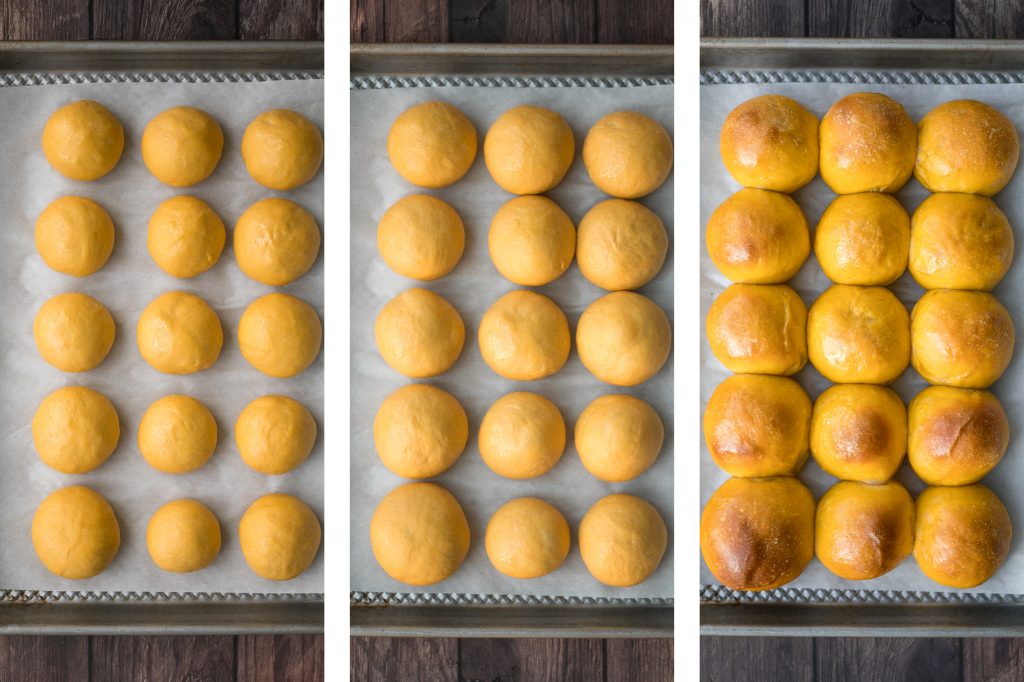
- Bake the rolls. Bake in a preheated 375 F oven for 20 minutes, or until the tops are golden brown. Lightly brush some melted butter on top and let the rolls cool on a wire rack for 15 minutes before serving.
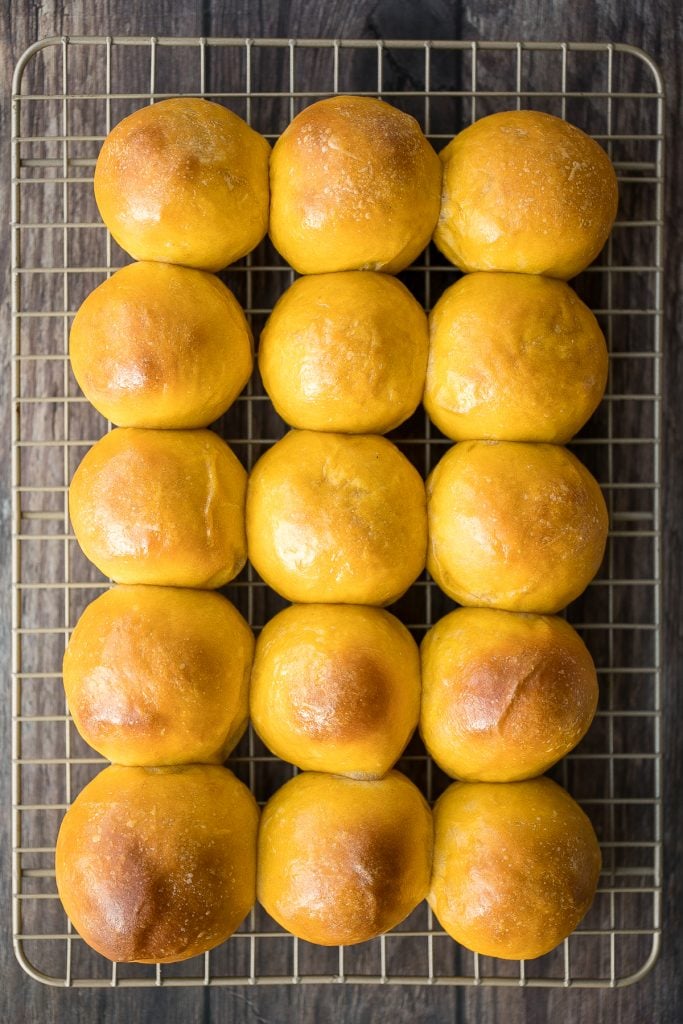
How to Serve Pumpkin Dinner Rolls
Serve these pumpkin dinner rolls on their own with a drizzle of sweet condensed milk. It is so delicious. Or serve it alongside a classic fall meal. Some of my favourites with apple dijon braised chicken thighs (the dinner rolls are perfect for soaking up all the juice), roasted butternut squash soup (or any of my favourite fall soups), and creamy skillet chicken with lemon garlic sauce.
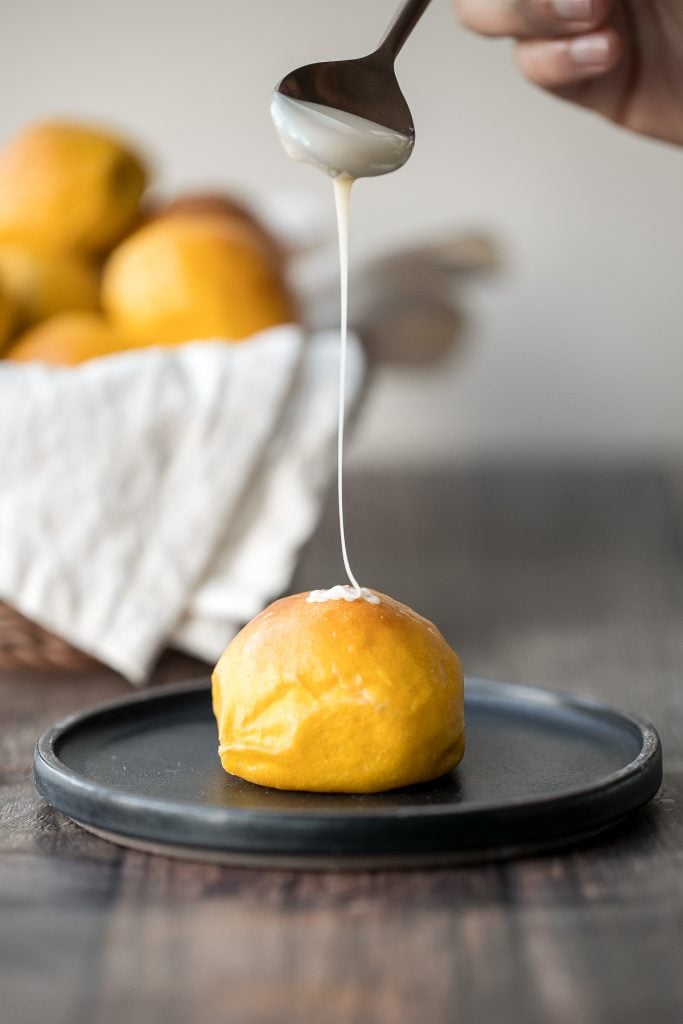
How to Store Dinner Rolls
Store in an airtight container at room temperature for up to 3 days or in the refrigerator for up to one week. To reheat, place them in the oven for 7-8 minutes at 300 F, or in the air fryer for 5 minutes at 300 F.
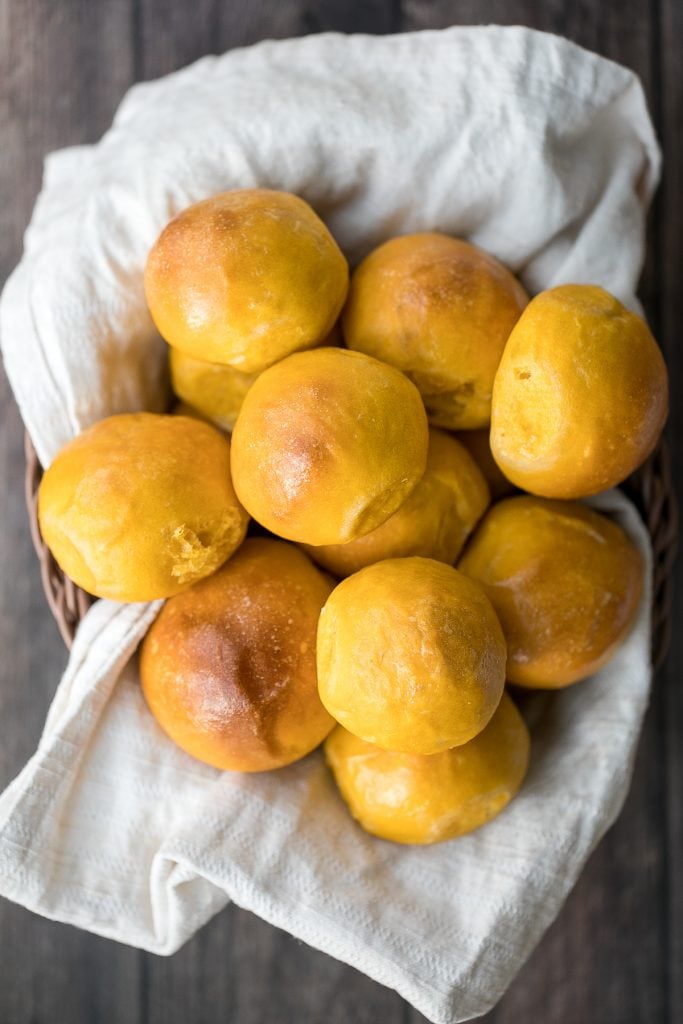
More Easy Bread Recipes
- Rosemary Cornbread
- Homemade No Yeast Biscuits
- Easy Cornbread Muffins
- Garlic Cheddar Biscuits
- Green Onion Dinner Rolls
Tried this recipe?
I'd love to hear what you think! Leave a comment and rating below to share your feedback. Your reviews help others discover this recipe and help me keep creating more free recipes for you. Snap a photo and tag me on social media @aheadofthyme too.
Curry Chicken Fried Rice
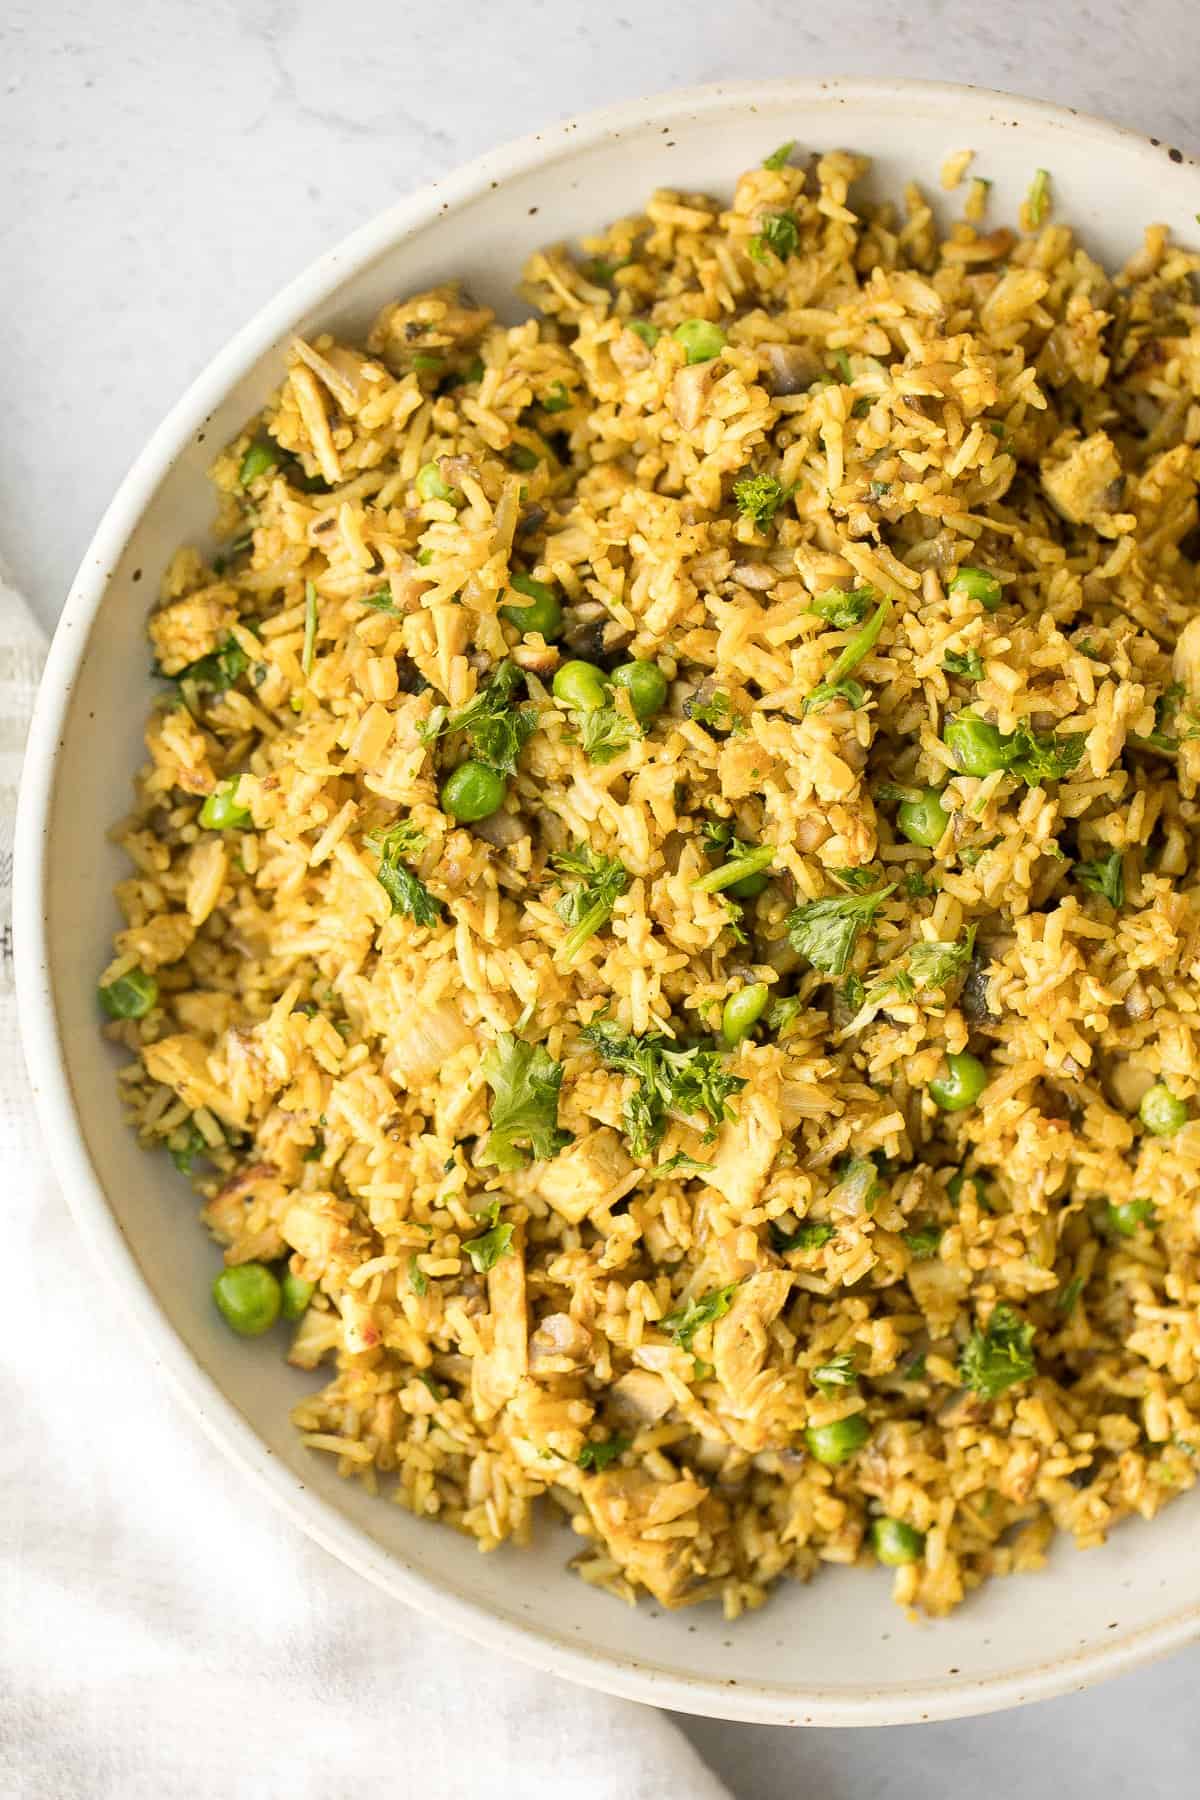
It doesn't get any easier and tastier than curry chicken fried rice, packed with chicken, mushrooms, peas, rice, and curry flavours. So so delicious. Plus, you can whip up this super quick and easy one pan chicken dinner in less than 10 minutes. The dream weeknight dinner right here folks.
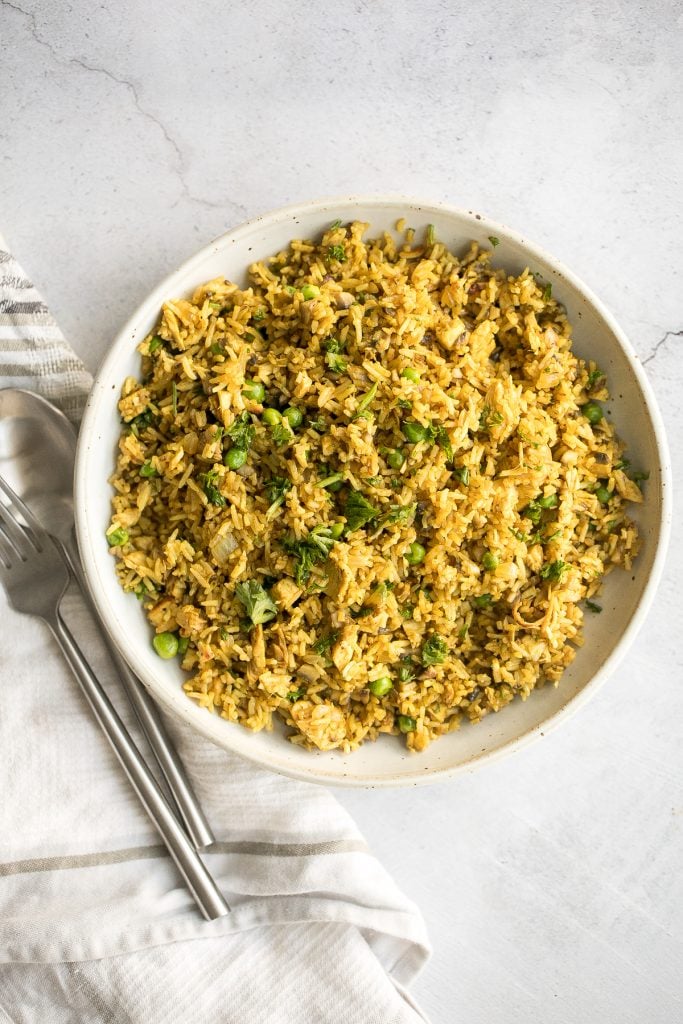
Fried rice is one of our go to meals because it is so quick and easy to make, and a great way to use up any vegetables that are sitting in the fridge. Some of my other favourites are vegetarian fried rice and seafood fried rice with shrimp. All of these recipes take just 10 minutes or less to make. They are literally the easiest weeknight dinners.
Ingredients in Curry Chicken Fried Rice
- vegetable oil - needed to stir fry.
- onions and garlic - for flavour.
- chicken breast - cooked boneless and skinless chicken breast, cut into ½ inch cubes. I prefer chicken breast, but you can use any part of the chicken. This is a great way to use up any leftovers from a whole roast chicken or roasted spatchcock chicken.
- mushrooms - or use any vegetables that you have on hand. Some of my favourites that go really well with this are broccoli and cauliflower.
- long grain white rice - you can use freshly cooked rice or leftover rice.
- peas - I used frozen peas directly from the freezer.
- yellow curry powder
- soy sauce
- salt and pepper
- fresh parsley - to garnish at the end.
You will also need a large wok or skillet.
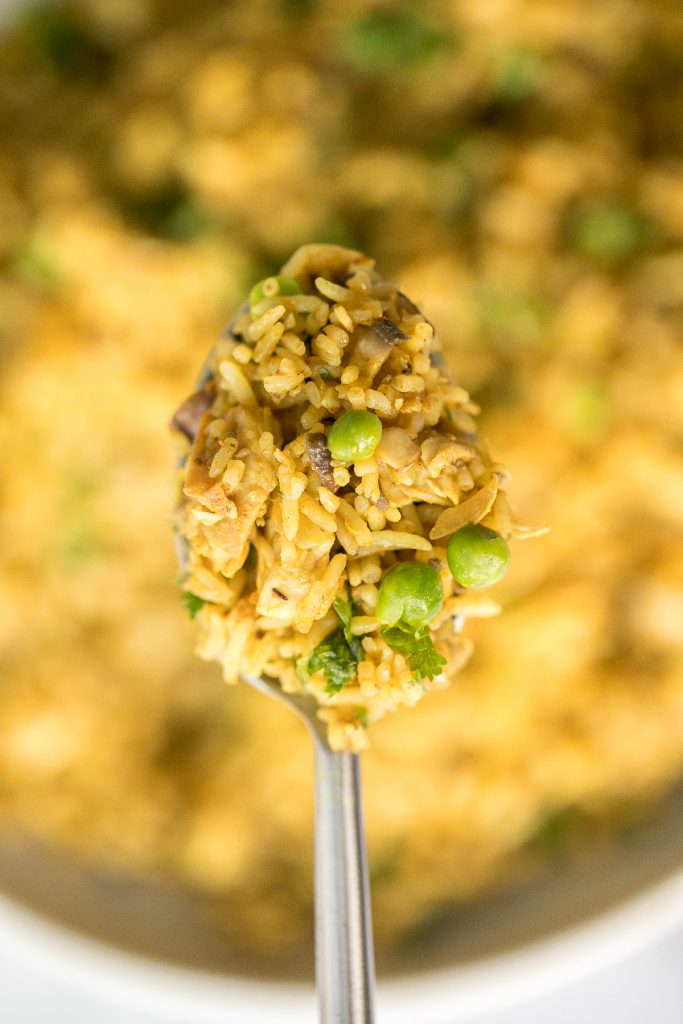
How to Make the Best Curry Chicken Fried Rice
First, heat oil in a large wok or skillet. over medium high heat for 2 minutes until the oil starts to sizzle and shimmer. Add onions and garlic, and sauté for 2 minutes until fragrant. (Optional: You can add in 1 or 2 beaten eggs and stir fry until fluffy).
Add cubed chicken and mushrooms. Stir fry for another minute to combine. Add in cooked rice and frozen peas. Stir fry for 2 minutes with a spatula to mix everything together.
Add all the seasoning including curry powder, soy sauce, salt and pepper. Stir for another 2 minutes to combine to evenly distribute the seasonings.
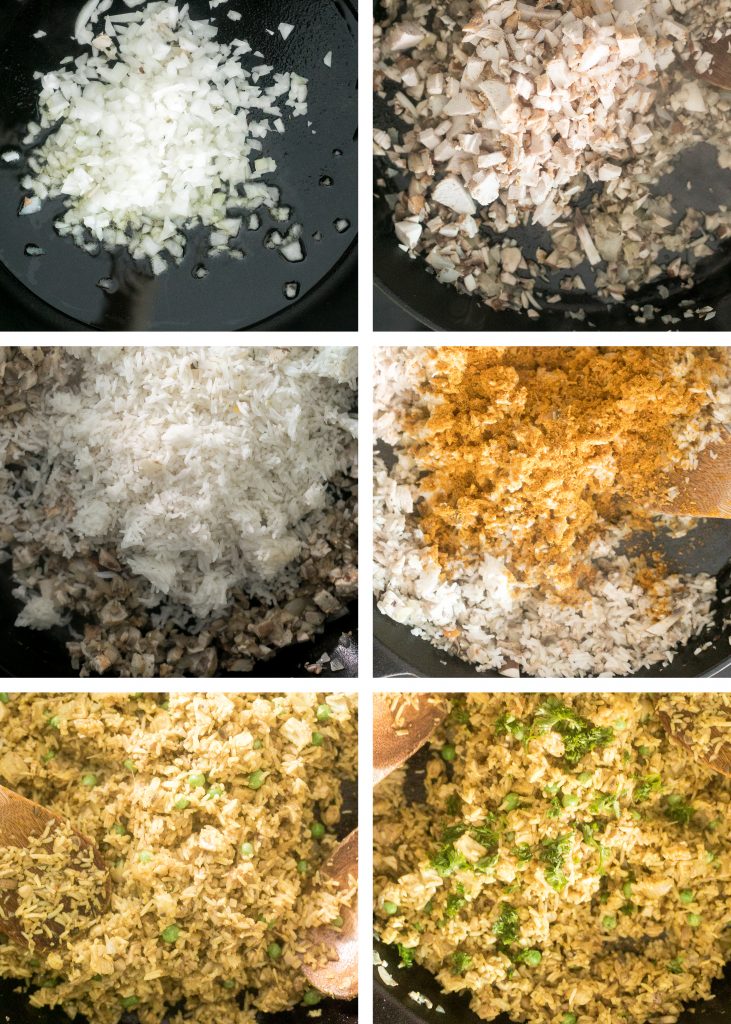
Serve warm on a plate and garnish with chopped parsley.
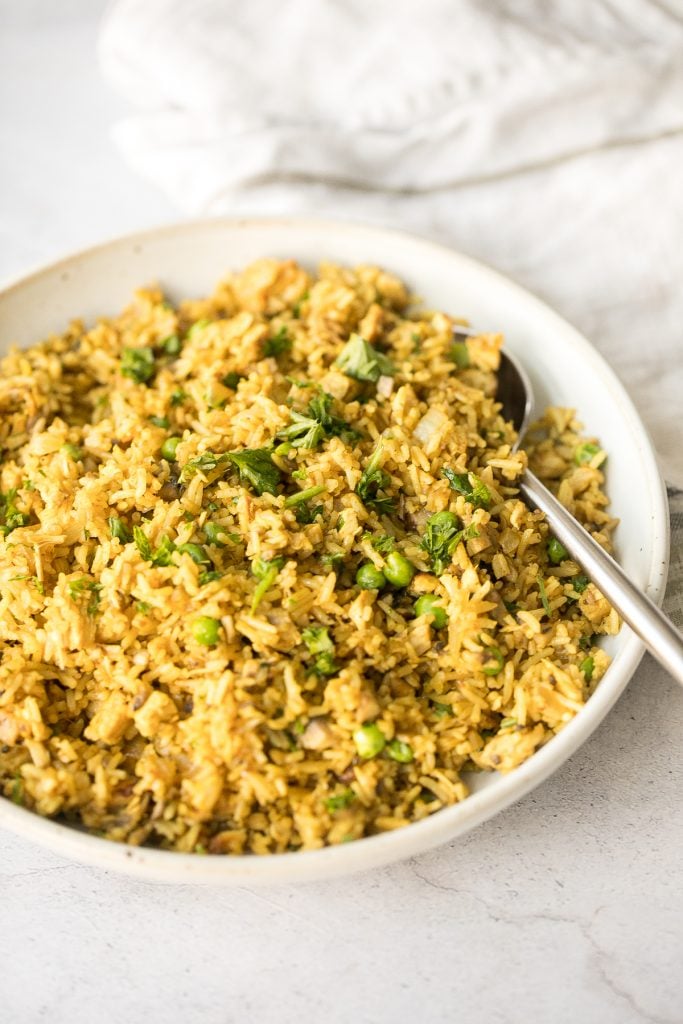
How to Store Fried Rice
I prefer fried rice when it is freshly cooked. But you can easily store any leftovers in an airtight container for up to 3 days in the refrigerator. To reheat, place in the microwave or heat on a skillet over the stove for a few minutes.
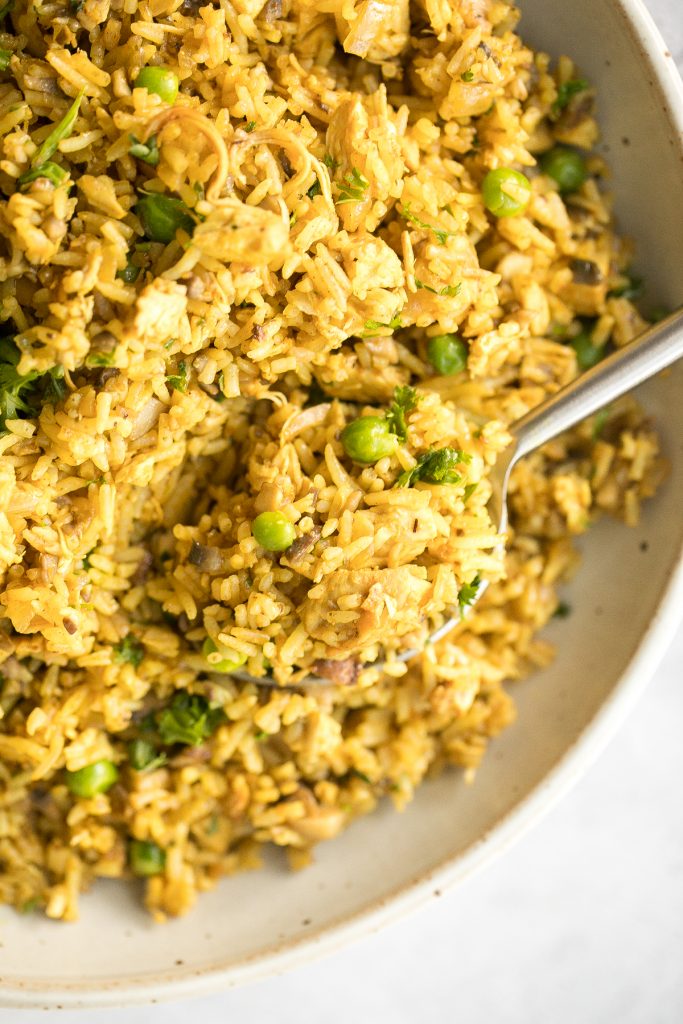
More Rice Recipes
- 10-Minute Vegetarian Fried Rice
- Leftover Turkey Fried Rice
- 10-Minute Seafood Fried Rice
- One Pot Coconut Curry Chicken and Rice
- One Pot Spanish Chicken and Rice
Tried this recipe?
I'd love to hear what you think! Leave a comment and rating below to share your feedback. Your reviews help others discover this recipe and help me keep creating more free recipes for you. Snap a photo and tag me on social media @aheadofthyme too.
Stuffed Butternut Squash with Wild Rice
Healthy, hearty, and wholesome stuffed butternut squash with wild rice is an easy and cozy vegetarian comfort food for fall. Tender roasted butternut squash is stuffed with a combination of wild rice and white rice, earthy mushrooms, and sweet peas. Top it with some melty cheese for ultimate comfort, or leave out the cheese and keep this meal vegan. Serve it as a gluten-free side dish on your fall dinner menu or as a vegetarian entree all on it's own. It's that good.
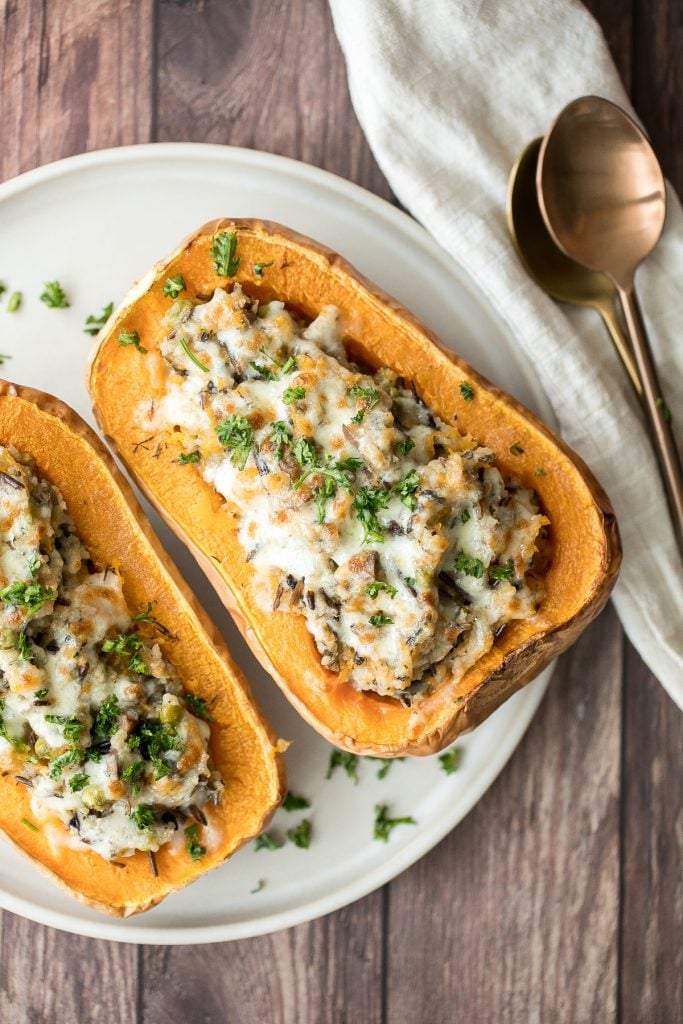
Ingredients in Stuffed Butternut Squash
- butternut squash
- fresh thyme
- olive oil
- rice - I used a combination of Basmati white rice and wild rice.
- vegetable oil
- onions
- mushrooms
- green peas
- vegetable stock powder
- salt and pepper
- shredded cheddar cheese or mozzarella cheese - optional but adds extra comfort. Leave it out if keeping the recipe vegan.
- fresh parsley - for garnish.
You will also need a baking sheet pan and a medium pot or Dutch oven.

How to Make the Best Wild Rice Stuffed Butternut Squash
First, roast the butternut squash. Cut the butternut squash in half lengthwise and remove seeds with a spoon. Place butternut squash, cut side up, onto a baking sheet pan. Brush on some oil and sprinkle chopped thyme on top. Bake in a preheated 350 F oven for 45 mins, or until soft. Insert a fork to check doneness. If it's fork tender, it's ready.
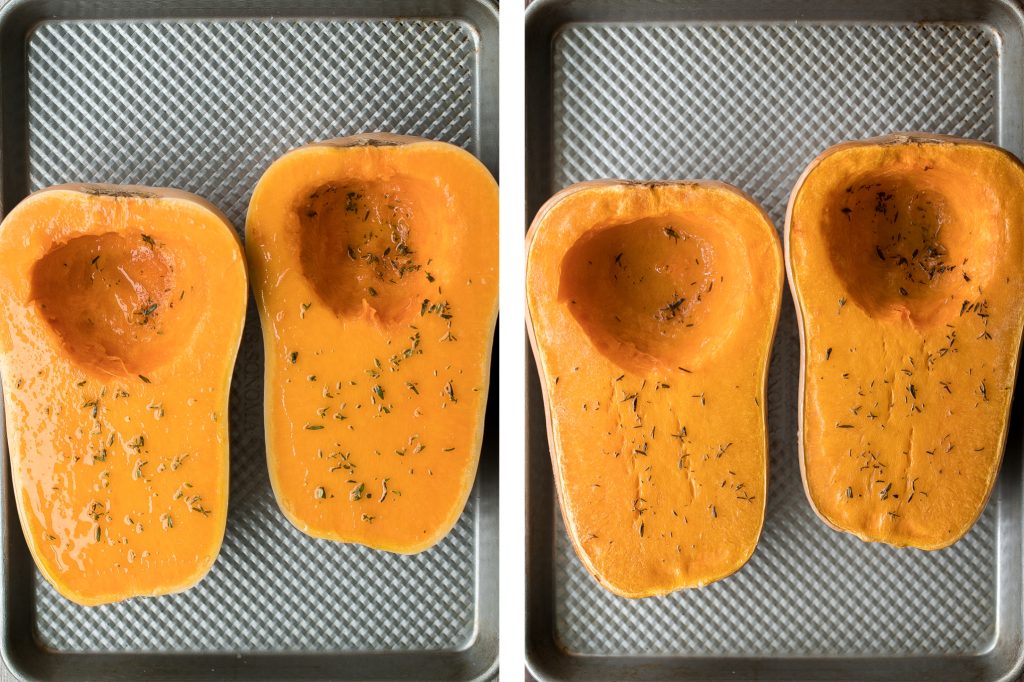
Meanwhile, prepare the rice. Heat oil in a medium pot or Dutch oven over medium high heat for 2 minutes until hot. Add onions and mushrooms and sauté for 2-3 minutes until onions are soft. Then, add rice and stir well to combine. Add vegetable stock powder, salt, and pepper. Mix well and cook for 5 minutes.
Add approximately one cup of water (water level should be one inch above the mixture) and bring it to a simmer over medium heat. Turn heat down to low, cover and simmer for 25-30 minutes. Check occasionally to see if the liquid is absorbed. Turn off the heat and let it sit for another 10 to 15 minutes. The rice is still cooking by the residual heat. Gently fluff the rice. Note that this rice mixture is supposed to be a little mushy.
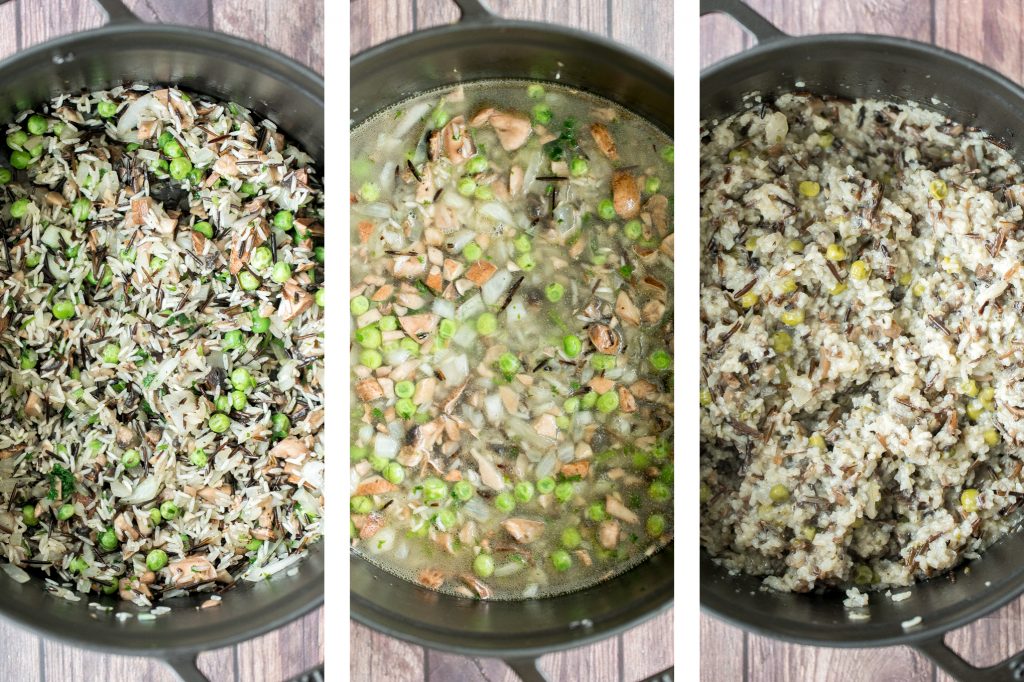
Now, let's assemble the stuffed butternut squash. Once the squash is fork tender and cooled down, scoop out the pulp, leaving the butternut squash shell at ½-inch thick. Add the pulp to the rice, and stir well to combine. Transfer the rice mixture evenly amongst the two shells.
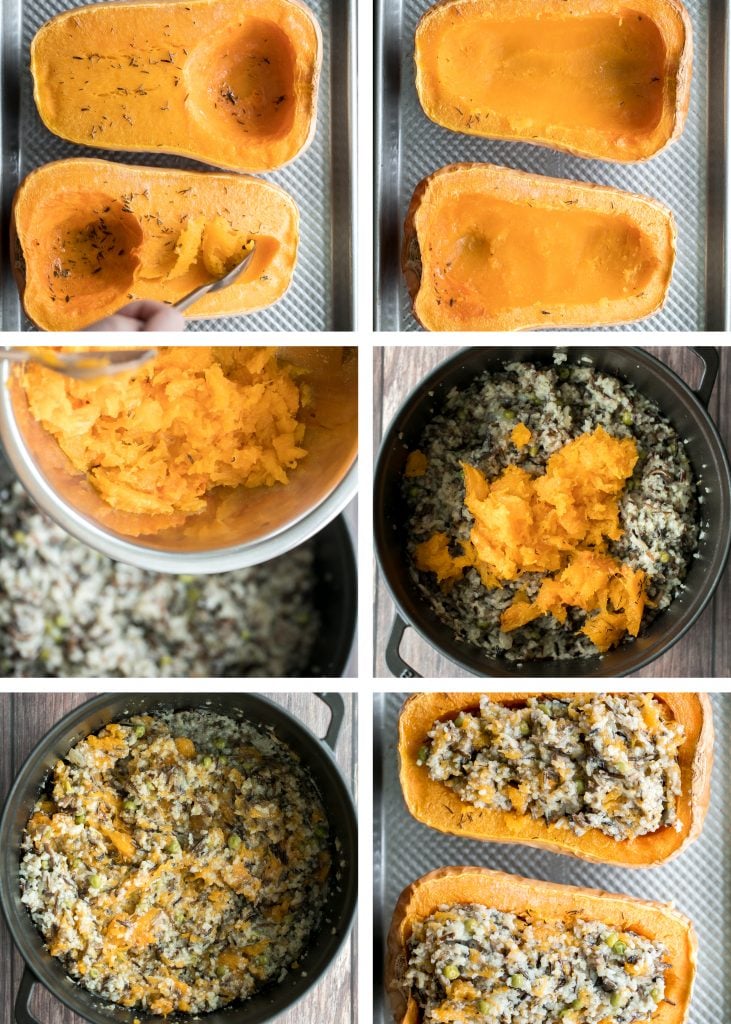
Sprinkle cheese on top (optional). If topping with cheese, place the stuffed squash back into the oven and broil on high for 3 minutes, or until the cheese melts and turn golden brown on top. Keep a close eye on the broiler as things can burn quickly.
Let the stuffed butternut squash cool for 5 minutes before serving. Sprinkle fresh parsley on top.

How to Serve Butternut Squash
Stuffed butternut squash with wild rice and mushrooms is a great wholesome vegetarian dinner on it's own, or serve as a side dish alongside a whole roast chicken or spatchcock chicken.
It is also the perfect side to serve at your Thanksgiving holiday dinner. Some other holiday sides to serve are mashed potatoes, nutty green beans, roasted sweet potatoes, and rosemary cornbread.
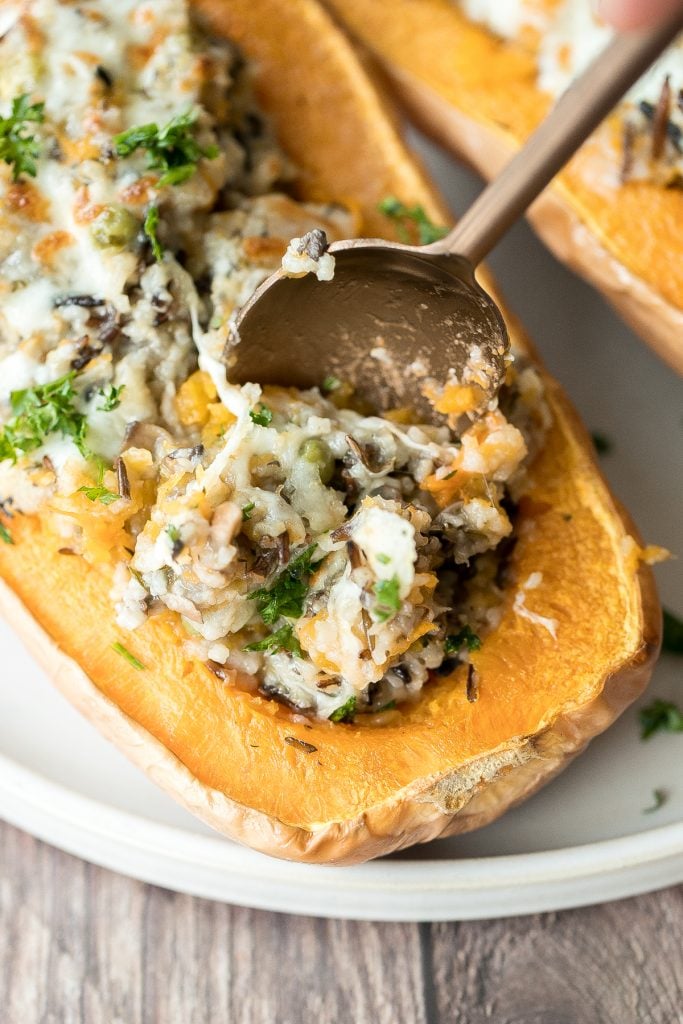
Frequently Asked Questions
- Can I make this ahead of time? Yes, you can make this the day before and the store the roasted squash and cooked rice separately in the refrigerator. Assemble it the next day when you want to serve it. I would heat it up the assembled squash in the oven at 350F for 10 minutes. Then, add shredded cheese and place under the broiler on high for 3 minutes to melt.
- Can I make the rice in a rice cooker? Absolutely, you can precook the rice to save some time, since it is much faster to cook rice in a rice cooker. When you are preparing the rice as per the recipe instructions, add it in cooked and stir fry it with the vegetables and seasonings. Then assemble the squash.
- Can I add other vegetables? Yes, of course. Create your own recipe with any vegetables or meat choice that you like. Some great options are celery, cauliflower, apples, and cranberries. For meat choices, try ground meat or sausage.
- How do I store? To store, place stuffed butternut squash in an airtight container or in a ziploc bag, and store in the refrigerator for up to 3 days. To reheat, transfer to a 350 F oven or air fryer for 10 minutes.

More Butternut Squash Recipes
- Roasted Butternut Squash
- Butternut Squash Carbonara Pasta
- One Pan Roasted Harvest Vegetables
- Roasted Butternut Squash Soup
- Butternut Squash "Pumpkin" Bread
- Fall Harvest Salad with Butternut Squash
Tried this recipe?
I'd love to hear what you think! Leave a comment and rating below to share your feedback. Your reviews help others discover this recipe and help me keep creating more free recipes for you. Snap a photo and tag me on social media @aheadofthyme too.
Rosemary Cornbread

Sweet and savoury, buttery rosemary cornbread is the only bread side dish you need this holiday season. This cornbread is soft and moist with golden crispy edges. It is packed with the flavour of traditional cornbread but with an added fresh wintery taste of rosemary. Plus, it's the easiest recipe ever with a few simple ingredients, 10 minutes of prep, and no mixer required. Now that's what I am talking about!
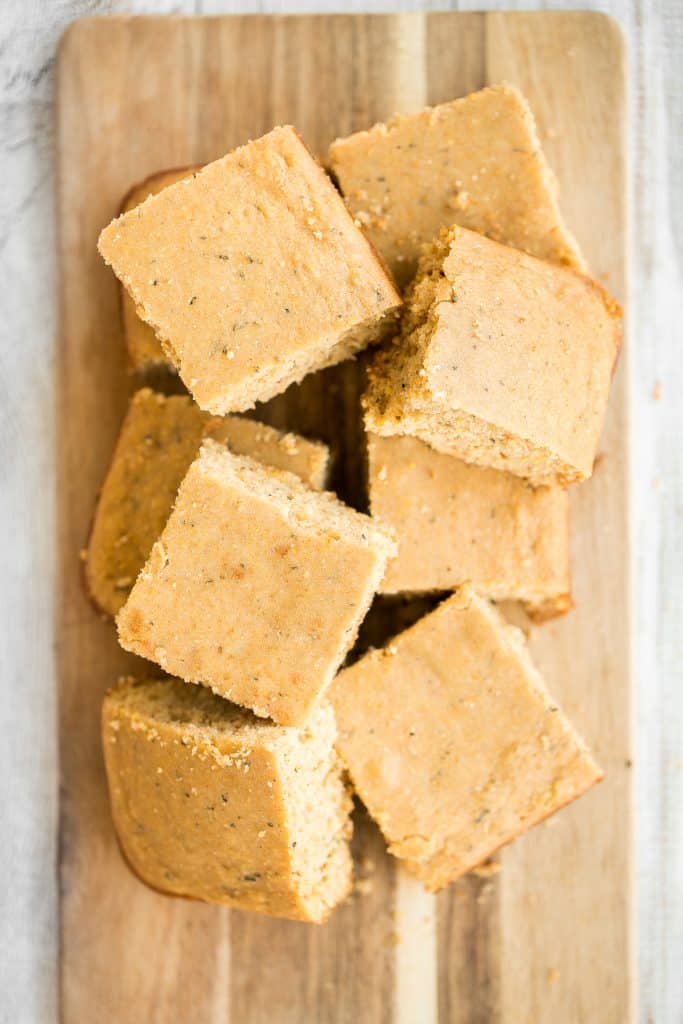
Ingredients in Rosemary Cornbread
- all-purpose flour
- cornmeal - I used a fine cornmeal.
- fresh rosemary - adds a warm and cozy fall and wintery flavour.
- baking powder and baking soda - leavening agents to promote rising.
- salt
- milk
- vegetable oil - helps keep the cornbread super moist.
- egg
- brown sugar - a little sweetness to complement the balance out the savoury flavour of the rosemary.
- maple syrup - optional, for serving.
You will also need measuring cups and spoons, mixing bowls, and an 8-inch square pan.
What is Cornmeal?
Cornmeal is dried ground corn (almost like flour) that ranges from fine to coarse in texture. I use a fine cornmeal in this recipe, but you can certainly use a coarser one. It will give a slightly different texture, but just as delicious.
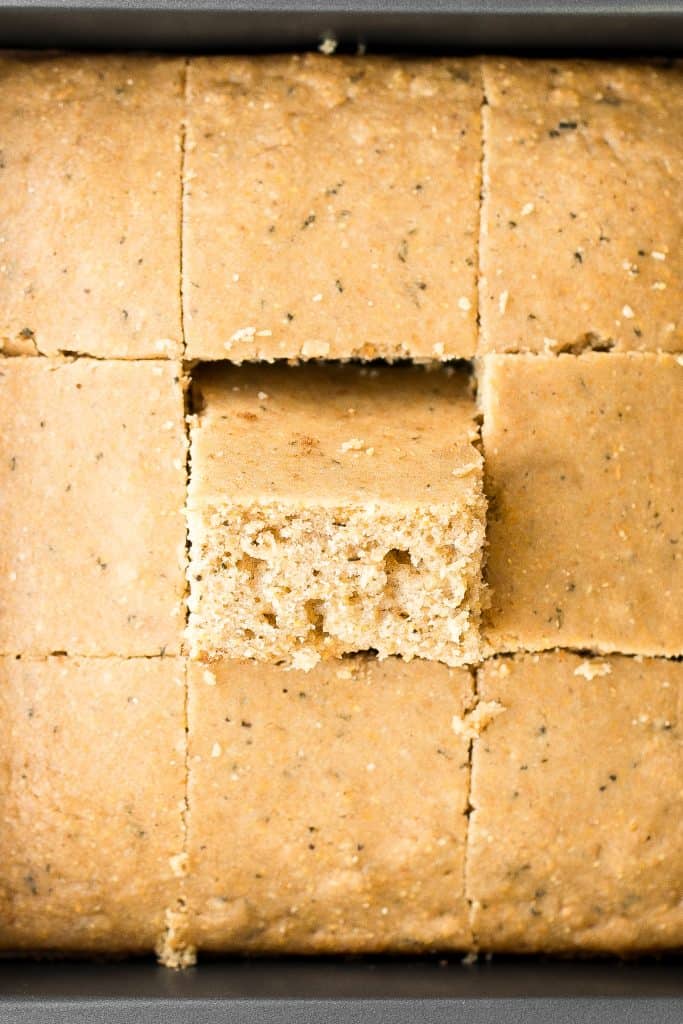
How to Make the Best Rosemary Cornbread
- Combine dry ingredients. In a large mixing bowl, whisk together flour, cornmeal, baking powder, baking soda, salt and rosemary. Set aside.
- Combine wet ingredients. In a medium mixing bowl, whisk together milk, vegetable oil, egg, and brown sugar, until smooth and the sugar is dissolved.
- Pour wet ingredients into dry ingredients. Pour the liquid mixture into the dry mixture. Stir with a silicone spatula to combine until no dry flour is visible in the bowl. Make sure to scrape down the sides of the bowl with the spatula. Do not overmix. The mixture will be fairly wet.
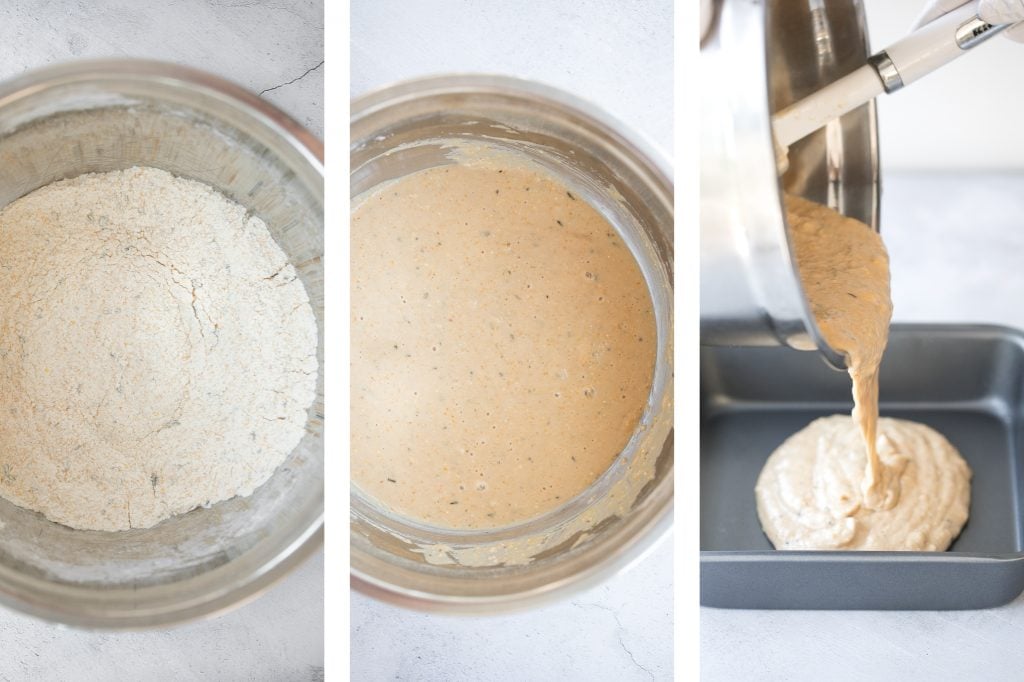
- Bake. Pour the mixture into a greased 8-inch square pan. Tap the pan to release some trapped air bubbles, if any. Transfer the pan into the 400F preheated oven and bake for 20 minutes until golden brown. Remove the pan from the oven and let it cool for 15 minutes before serving. Slice and serve with a drizzle of maple syrup (optional).
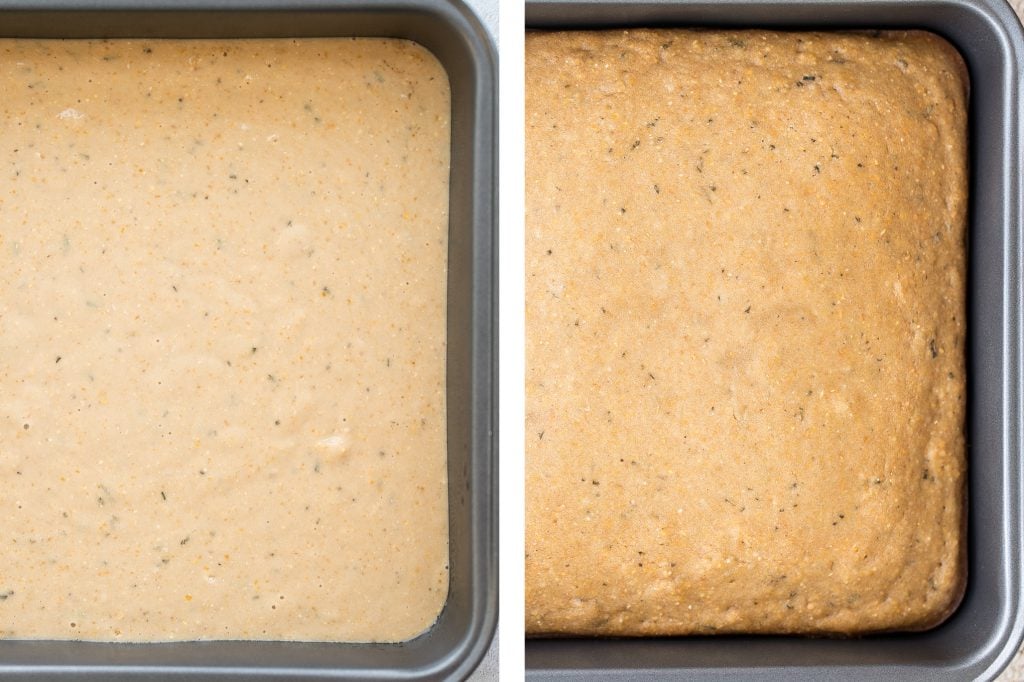
How to Serve Cornbread
Cornbread is a great side dish to serve alongside a warm and cozy bowl of soup. Some of my favourites are roasted butternut squash soup, sweet potato soup, and coconut curry lentil soup.
It is also the perfect side to serve alongside your Thanksgiving dinner. Some other great sides to add to your Thanksgiving menu are mashed potatoes, nutty green beans, and roasted butternut squash. You can also make a batch to use in a cornbread stuffing.

How to Store Cornbread
Store cornbread in an airtight container at room temperature for up to 3 days. You can also freeze them in an airtight container or freezer bag for up to 3 months. To thaw, place in the refrigerator or kitchen counter, then reheat in the microwave, air fryer or oven at 350 F for 5-10 minutes.
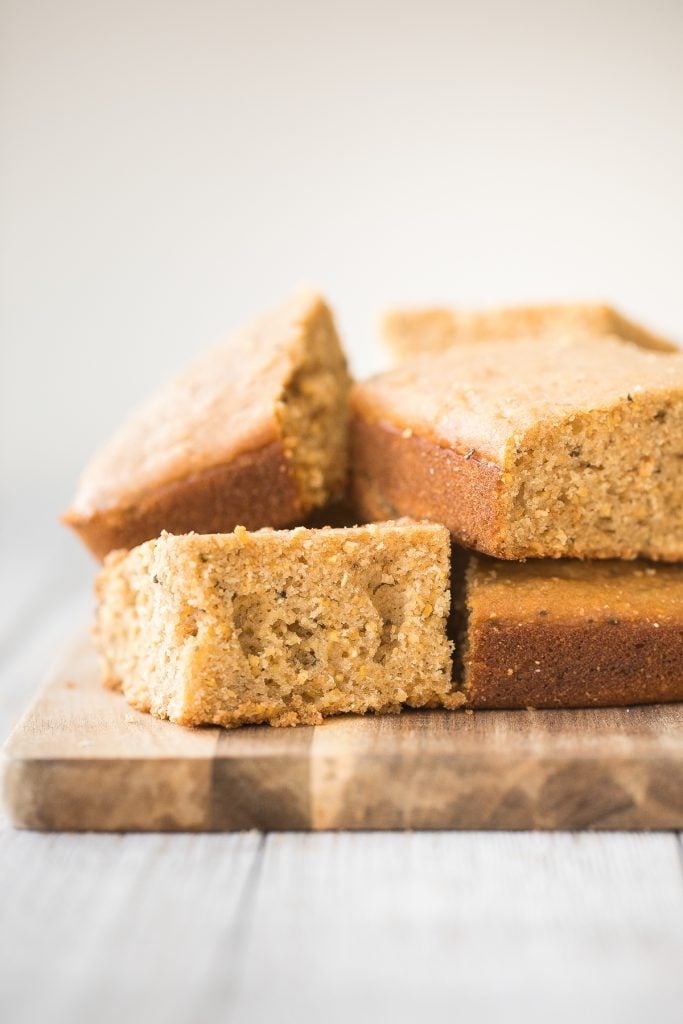
More Easy Bread Recipes
- Easy Cornbread Muffins
- Homemade No Yeast Biscuits
- Garlic Cheddar Biscuits
- Green Onion Dinner Rolls
- Pumpkin Dinner Rolls
Tried this recipe?
I'd love to hear what you think! Leave a comment and rating below to share your feedback. Your reviews help others discover this recipe and help me keep creating more free recipes for you. Snap a photo and tag me on social media @aheadofthyme too.
Pumpkin Cinnamon Rolls

Soft, fluffy and buttery, these pumpkin cinnamon rolls are packed with fall flavours of pumpkin, layered in cinnamon pumpkin spice sugar with a generous drizzle of cream cheese icing on top. Every single roll is so soft and moist in the centre. You may want to make a double batch of this cozy fall treat because they do not last long. Luckily, they are actually quite easy to make, making it one of my favourite weekend baking projects to take on.
So it's official, these are the best cinnamon rolls that we have made. If you are a fan of regular cinnamon rolls, like the flavours in our cinnamon roll twist bread, then you will love this fall version.
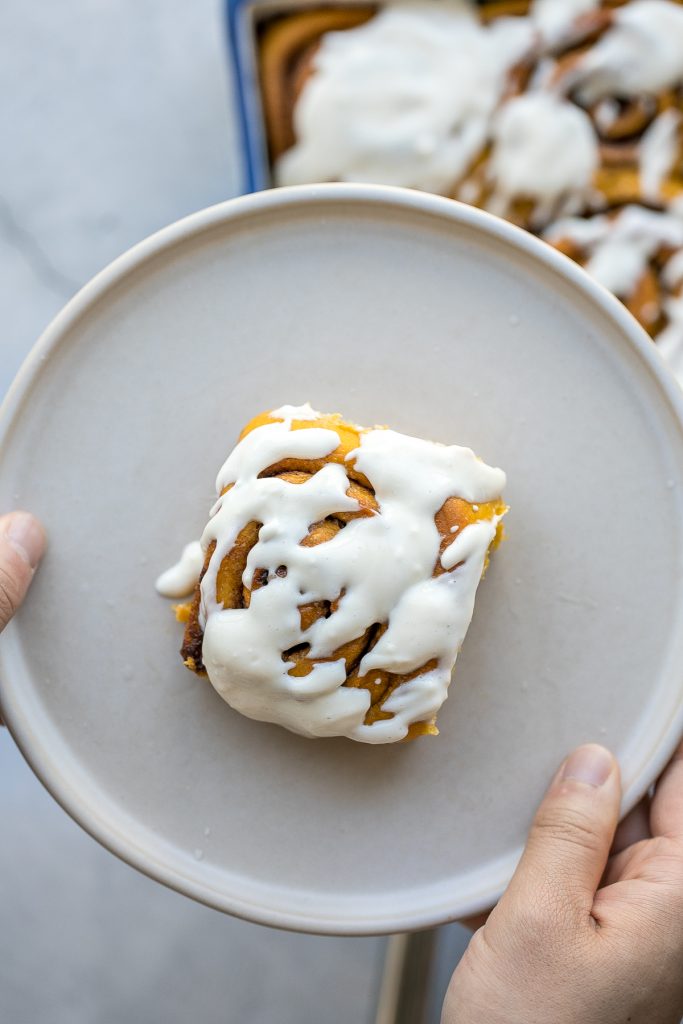
Ingredients
- all-purpose flour
- active dry yeast
- pumpkin puree
- sugar
- milk
- butter
- egg
- salt
- cinnamon roll filling - butter, brown sugar, cinnamon, pumpkin pie spice blend.
- cream cheese topping - cream cheese icing made with cream cheese, milk, honey (or maple syrup), and confectioners' sugar.
You will also need a rolling pin and an 8-inch square pan.
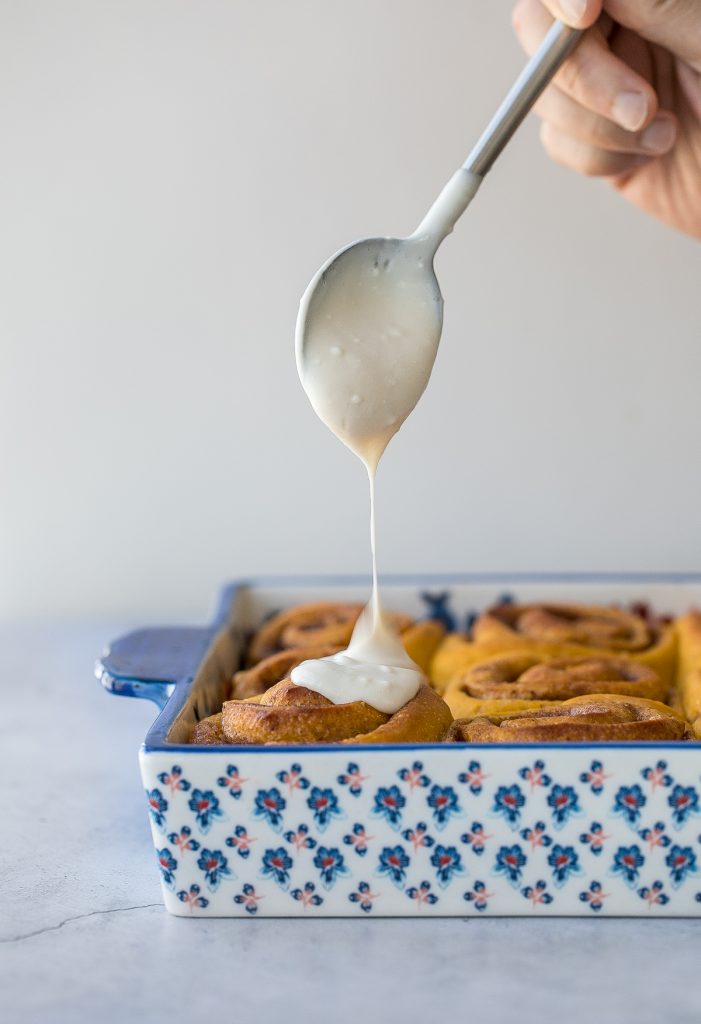
How to Make the Best Pumpkin Cinnamon Rolls
In a large bowl, dissolve yeast and sugar in milk, and stir to mix together. Let the mixture rest for 5 minutes to activate the yeast. Then, add in pumpkin puree, flour, softened butter, egg and salt. Stir well with a spatula until no dry flour particles are visible. Make sure to scrape off any remaining flour from the sides of the bowl.
Transfer the dough mixture onto a clean and dry surface. Knead the dough for 5 minutes until it turns into a soft and smooth dough ball. Because of the high fat content (butter and milk) in this recipe, the dough is much easier to knead by hand and does not require a stand mixer.
Transfer the dough back into the mixing bowl, lightly grease the dough ball with vegetable oil and cover with a lid. Let it rise at room temperature for 1 hour or until it doubles in size. Covering the dough with oil will help prevent the dough from losing moisture and drying out.
How to Shape Cinnamon Rolls
- Roll out the dough. Transfer the dough onto a floured surface and roll it out into a rectangle of about 20x12 inches wide using a rolling pin.
- Add buttery pumpkin spice layer. Gently spread softened butter evenly over the rolled dough. Then, whisk together brown sugar, ground cinnamon and pumpkin pie spice blend in a small bowl. Sprinkle the mixture evenly over the top of the butter.
- Shape the cinnamon rolls. Roll up the dough tightly into a log and pinch the end edges to seal. Cut into 9 even pieces using a knife or bench scraper, about 2 inches wide each. Arrange the rolls flat on their side into a greased 8-inch square pan.
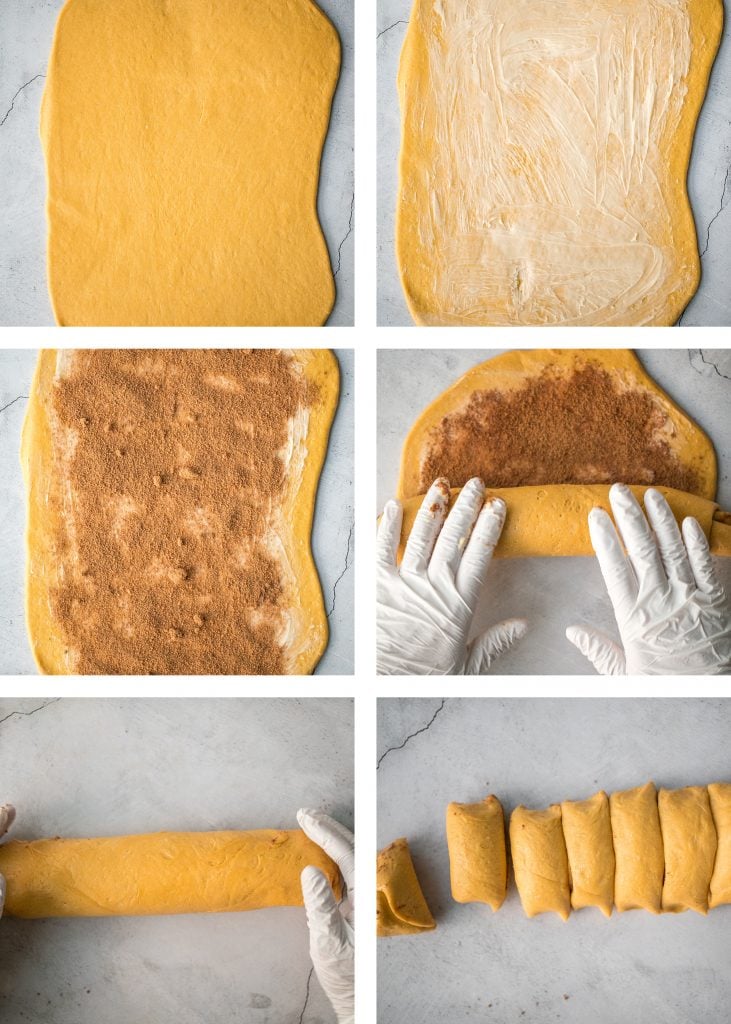
Then, cover the pan with plastic wrap (or seal it in a large Ziploc bag) and let it rise (second rise) for 1 hour or until the rolls double in size. Optionally, you can let the rolls rise slowly in the sealed Ziploc bag in the refrigerator overnight and bake it straight away in a preheated oven the next day.
To bake, preheat the oven to 350 F. Transfer the pan to the oven and bake for 30 minutes, until golden brown. Let it cool for 10 minutes.
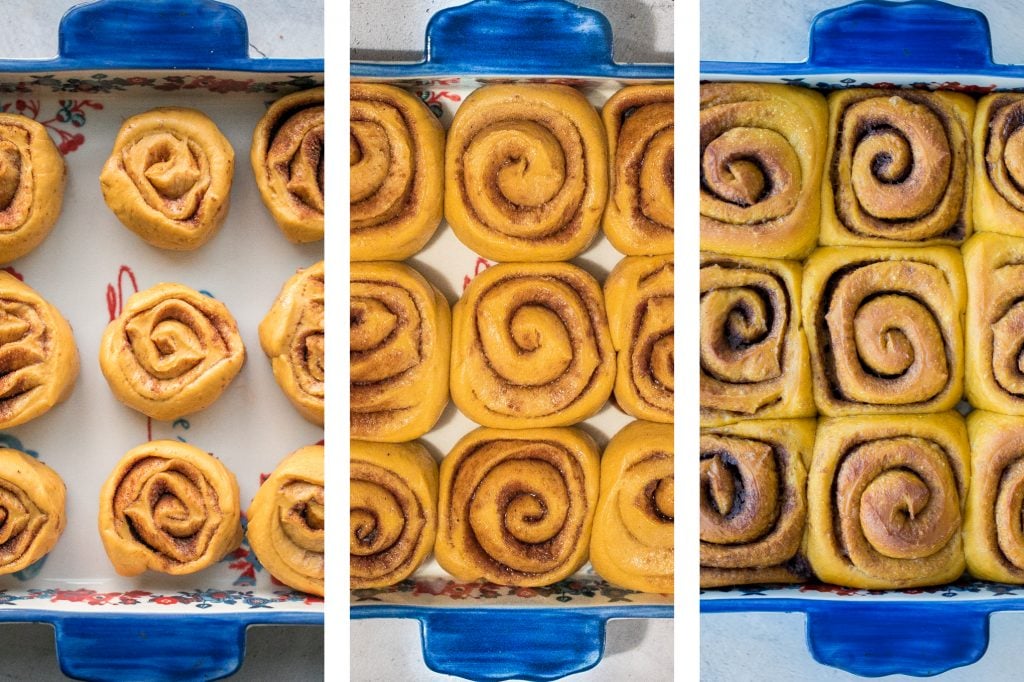
How to Make Cream Cheese Icing
Combine cream cheese, milk, honey and confectioners' sugar in a bowl and mix well with a handheld mixer (or with a whisk) until the mixture becomes smooth. Drizzle the cream cheese icing over cinnamon rolls and serve.
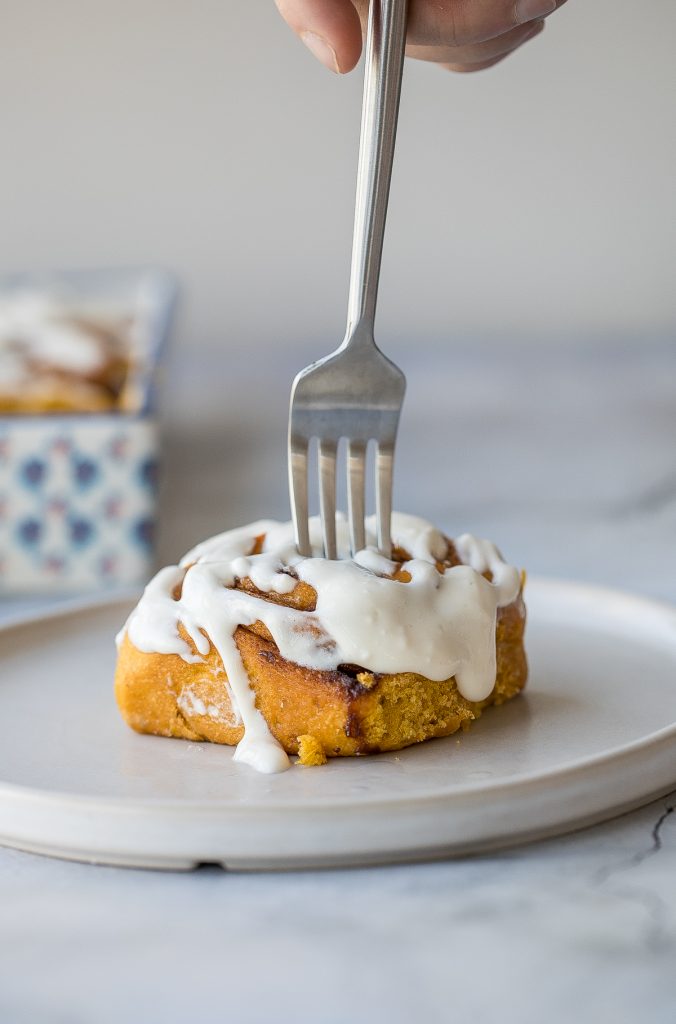
How to Store Cinnamon Rolls
Pumpkin cinnamon rolls are best served fresh out of the oven with a fresh coat of cream cheese glaze on top that literally melts from the warmth. To store, store the cinnamon rolls and cream cheese glaze separately:
- cinnamon rolls: Store in an airtight container at room temperature for up to 3 days. Reheat in the microwave, air fryer or oven.
- cream cheese icing: Store in an airtight container in the refrigerator for up to one week.
You can also freeze the cinnamon rolls in an airtight container for up to 3 months in the freezer.
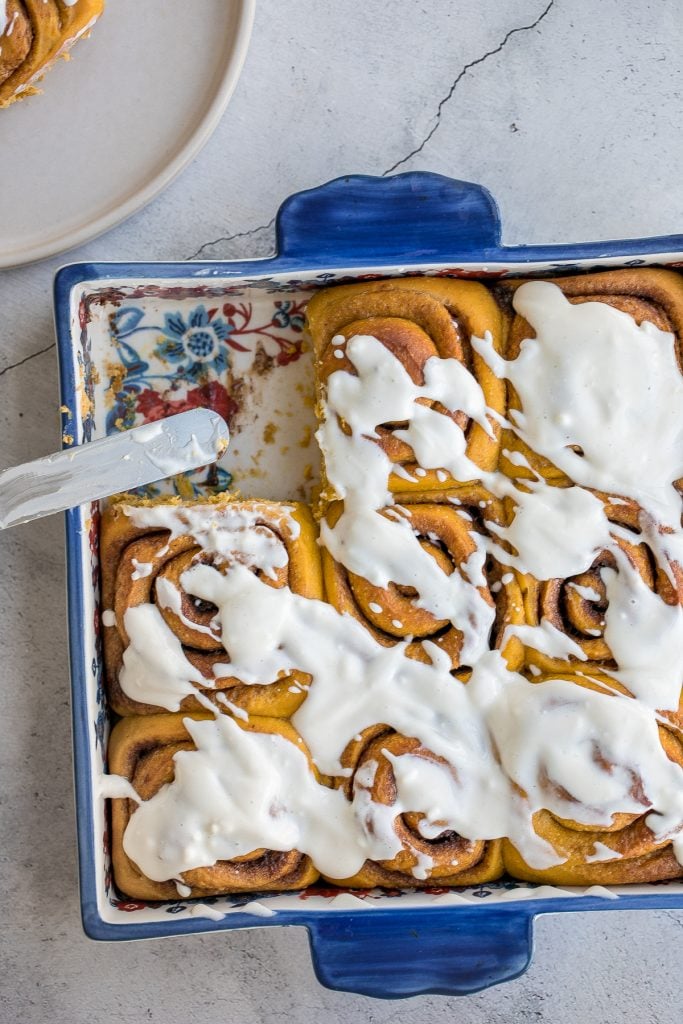
More Pumpkin Recipes
- Small Batch Chocolate Chip Pumpkin Bread
- Pumpkin Pie Granola
- Classic Thanksgiving Pumpkin Pie
- Pumpkin Pie Bundt Cake with Cream Cheese Glaze
- Mini Glazed Pumpkin Scones
Tried this recipe?
I'd love to hear what you think! Leave a comment and rating below to share your feedback. Your reviews help others discover this recipe and help me keep creating more free recipes for you. Snap a photo and tag me on social media @aheadofthyme too.
Apple Dijon Braised Chicken Thighs

Tender and juicy apple dijon braised chicken thighs with potatoes and carrots is packed with incredible flavours that will have you craving for more. It's garlicky, has classic fall flavours with apple, and a hint of dijon mustard. So so delicious. And the chicken? The chicken is juicy, tender and so succulent that it literally falls off the bone, yet super crispy on the outside. But my favourite part is probably how incredibly easy it is to prepare in one pot or skillet. And the leftovers are even better.
What is Braised Chicken?
Braised chicken refers to the method used to cook the chicken. This two-part method requires you to first sear the chicken for an ultimate crispy skin. Second, you need to add some liquid to allow the chicken to stew or simmer in the juices. This results in chicken that is super tender and succulent, yet crispy on the outside.
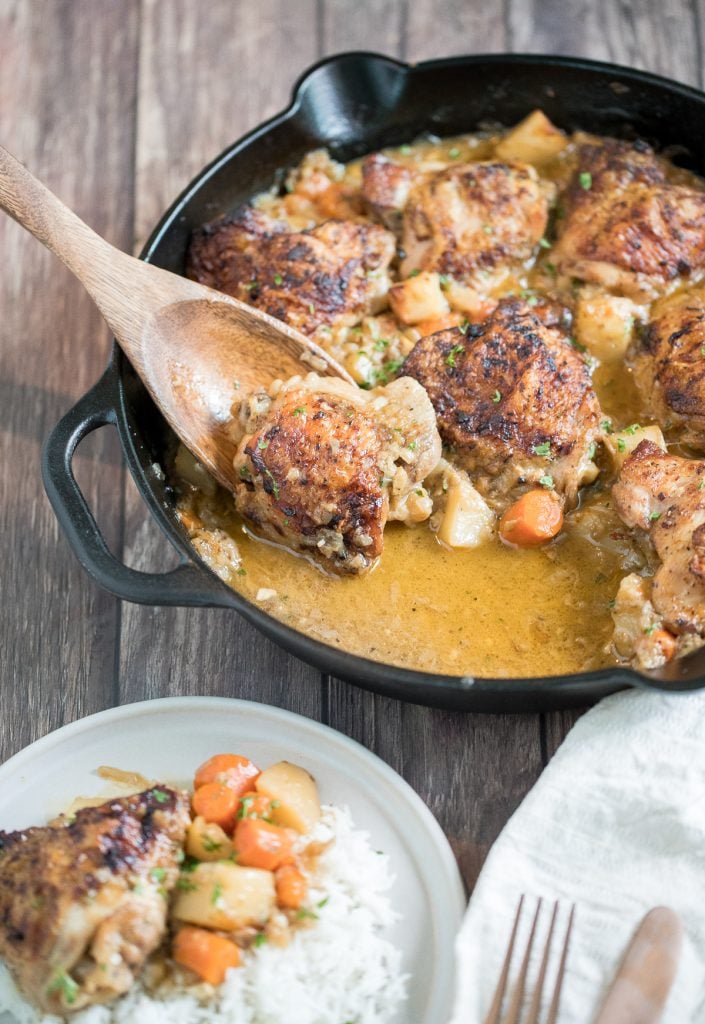
Ingredients in Apple Dijon Chicken
- chicken thighs
- chicken seasoning - olive oil, Italian seasoning, salt and pepper.
- apple
- dijon mustard
- onions and garlic
- potatoes
- carrots
- paprika
- soy sauce
- water - liquid to braise the chicken.
- parsley - for garnish.
You will also need a cast-iron skillet or dutch oven.
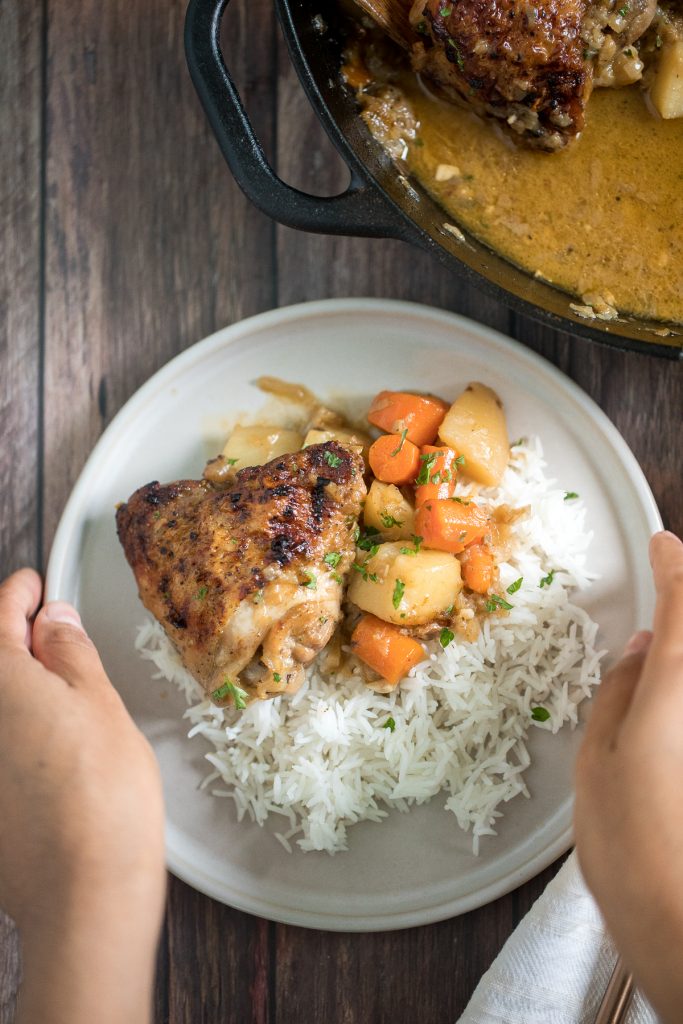
How to Make the Best Apple Dijon Braised Chicken Thighs
- Prep the chicken. Pat dry each chicken thigh with a paper towel completely before adding seasoning. This helps create extra crispy skins when searing. Add olive oil, Italian seasoning, salt, and pepper in a bowl and mix well with a spoon to combine. Generously smear the seasoning mixture all over the chicken thighs, on both sides (using disposable gloves helps make clean up easier).
- Sear the chicken. Heat the remaining olive oil in a cast-iron skillet over medium high heat for 2 minutes until the oil starts to sizzle and shimmer. Place the chicken thighs with the skin side down on the skillet, and sear for 2 minutes until the skin turns brown and crispy. Flip the chicken over and cook on the other side for another 2 minutes. Remove the chicken thighs from the skillet and place them on a plate.
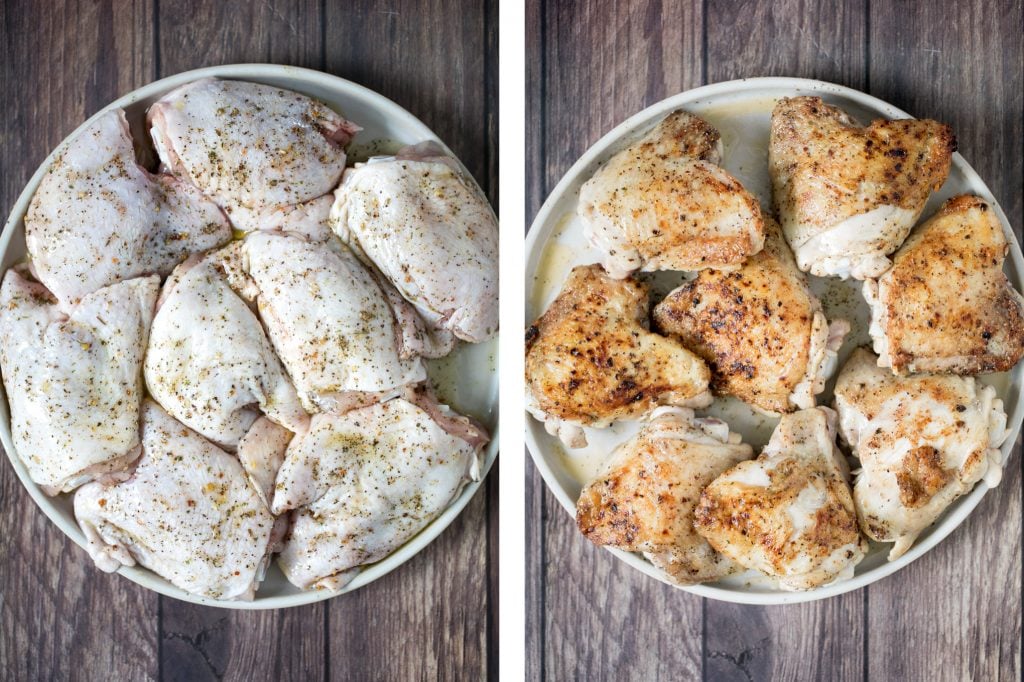
- Sauté vegetables. On the same skillet, add chopped onions, garlic, grated apple and paprika, and stir well to combine. Cook for 2 minutes until fragrant. You should notice the onions and garlic start browning. Add in potatoes and carrots. Stir well with a spatula to combine. Add in Dijon mustard and soy sauce. Mix well to coat the mixture evenly with seasoning.
- Simmer. Place the chicken thighs on top of the vegetable mixture, with the skin side facing up. Add 2 cups of water (the liquid mixture should cover about ⅓ of the chicken thighs in height). Bring the mixture to a simmer.
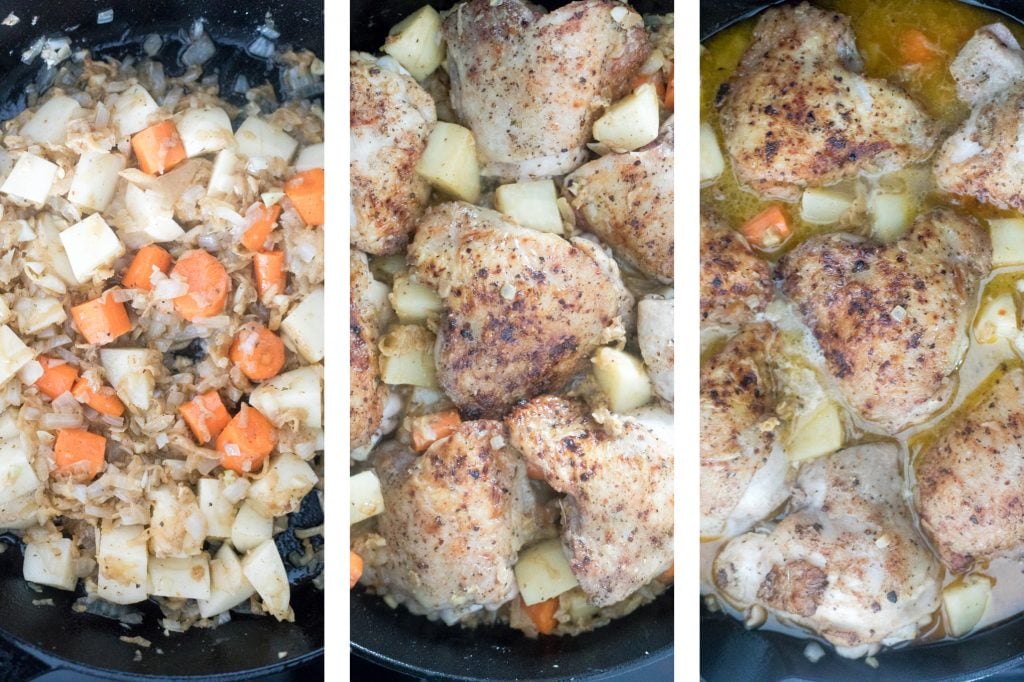
- Bake. Transfer the skillet into the preheated 450 F oven and bake for 35 minutes, until the internal temperature for the chicken thighs reaches 165F. The liquid mixture should thicken nicely. Remove the skillet from the oven and let it rest for 10 minutes before serving. If the liquid has not thickened enough and it is still too watery, place the skillet back on the stove and bring to a simmer for another 10 minutes, or until desired consistency is reached.

How to Serve Braised Chicken
Serve braised chicken with a rice pilaf or plain basmati rice, and drizzle the extra liquid from the skillet over top of the rice and chicken thighs. Garnish with chopped parsley on top. Don't forget some bread to soak up all the juice from the bottom of the skillet. I love to dip some homemade no yeast biscuits or ciabatta rolls in there. So delicious.
If you are looking to add some more sides in addition to the vegetables in the pan, try creamy mashed potatoes, nutty green beans, or easy roasted cauliflower.
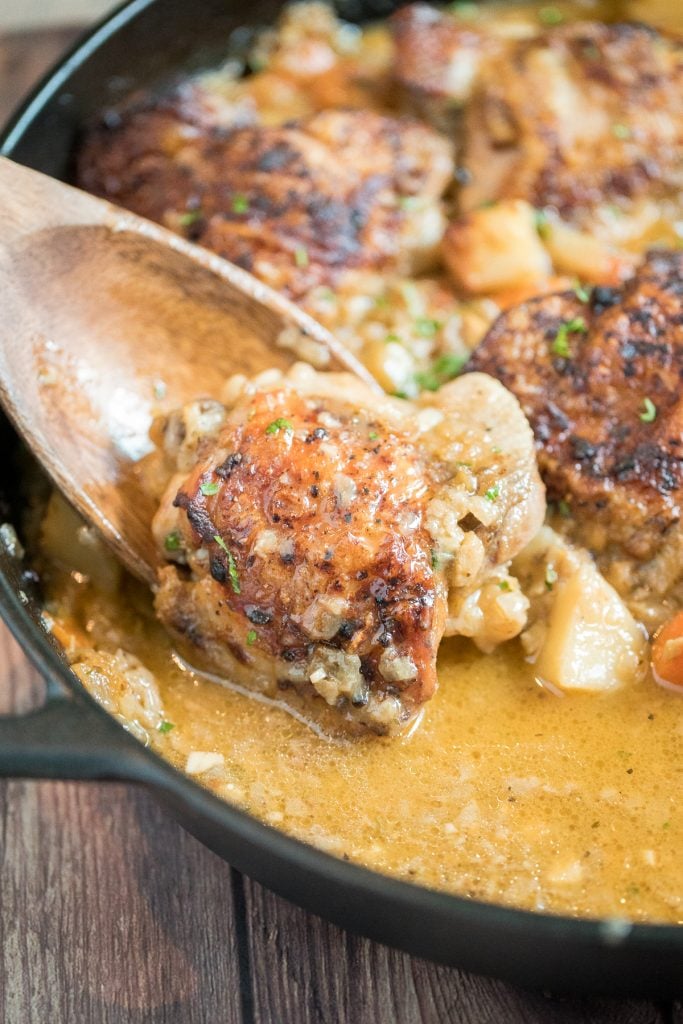
How to Store Braised Chicken
This recipe makes for some incredibly delicious leftovers. That's just how it goes when you braise meat, the leftovers just get even better. To store, transfer to an airtight container with any juice that is left in the pan and place in the refrigerator for up to 4 days.
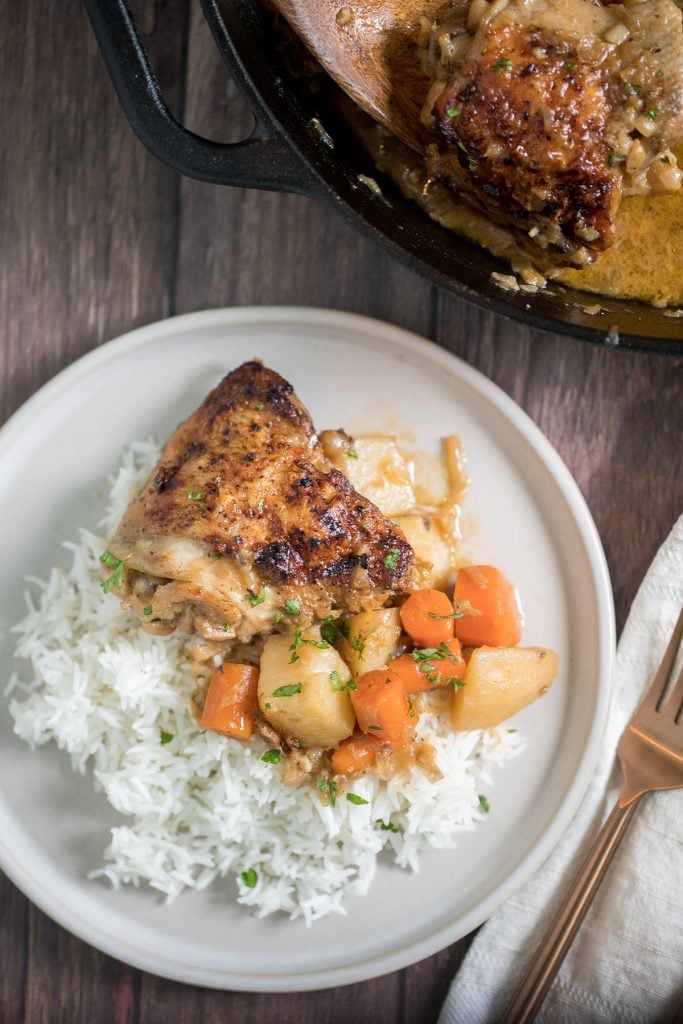
More One Pan Chicken Recipes
- Meal Prep Sheet Pan Balsamic Chicken and Vegetables
- Roasted Spatchcock Chicken (Butterflied Chicken)
- Sheet Pan Soy-Glazed Chicken Thighs
- One Pot Spanish Chicken and Rice
- Chicken Thighs with Green Beans and Potatoes
- One Pot Coconut Curry Chicken and Rice
- Dutch Oven Whole Roast Chicken
Tried this recipe?
I'd love to hear what you think! Leave a comment and rating below to share your feedback. Your reviews help others discover this recipe and help me keep creating more free recipes for you. Snap a photo and tag me on social media @aheadofthyme too.

Butternut Squash Carbonara Pasta
Creamy butternut squash carbonara pasta is one of the absolute best fall pasta dishes I've ever made. Linguine pasta is tossed in a butternut squash pasta sauce made with seasoned roasted butternut squash, Parmesan cheese and eggs, and tossed with crisp bacon and pan-fried sage. If you're a lover of traditional carbonara, you are going to go crazy over this fall and winter version. This butternut squash pasta is fall comfort food at it's finest.

The best part of it all? Probably the amazing aroma escaping from the butternut squash that is roasting away in the oven seasoned with garlic and cinnamon. It is truly incredible. But just wait until you have that flavour in your mouth. It's that familiar warm fall flavour we all know and love. And once roasted, the squash goes for a quick spin in a food processor and turns into an amazingly thick and creamy sauce, with no cream.
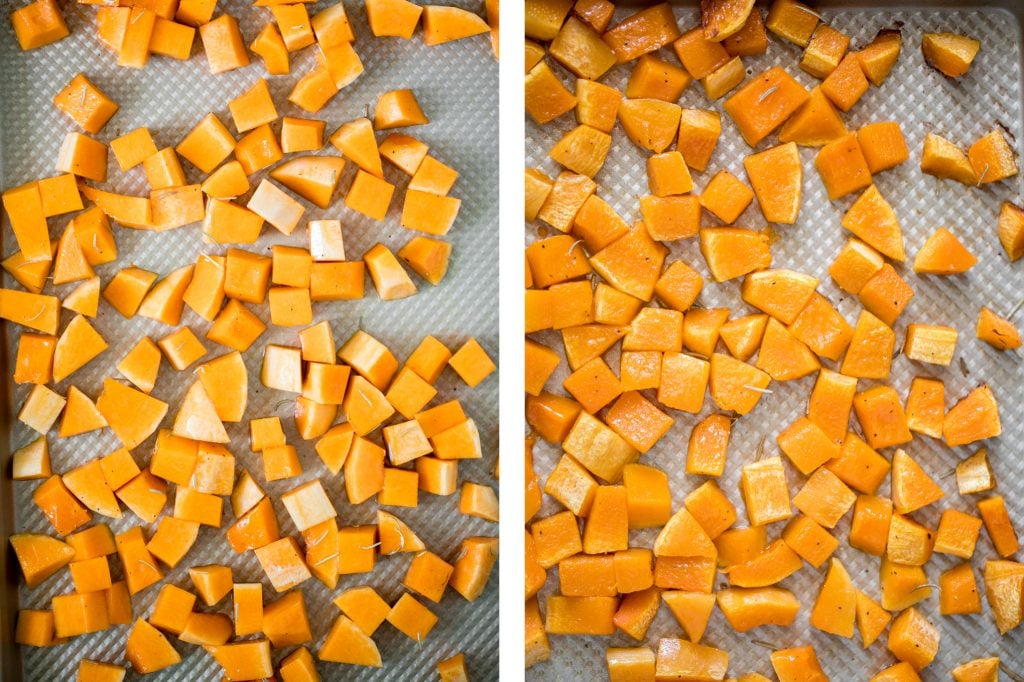
Ingredients
To make this delicious butternut squash pasta, you will need the following ingredients (full measurements in recipe card below):
- butternut squash - you will need one large butternut squash chopped up into 1-inch cubes. You can also use 1 + ¼ cup butternut squash puree to make this recipe even easier and quicker.
- olive oil - for roasting the squash.
- salt and pepper
- garlic powder - you can use pressed or minced garlic if you prefer.
- onion powder
- cinnamon
- bacon
- large onion
- sage
- linguine pasta
- egg yolks
- Parmesan cheese
You will also need a ½ pan baking sheet pan for roasting the butternut squash, a large skillet and a large pot.
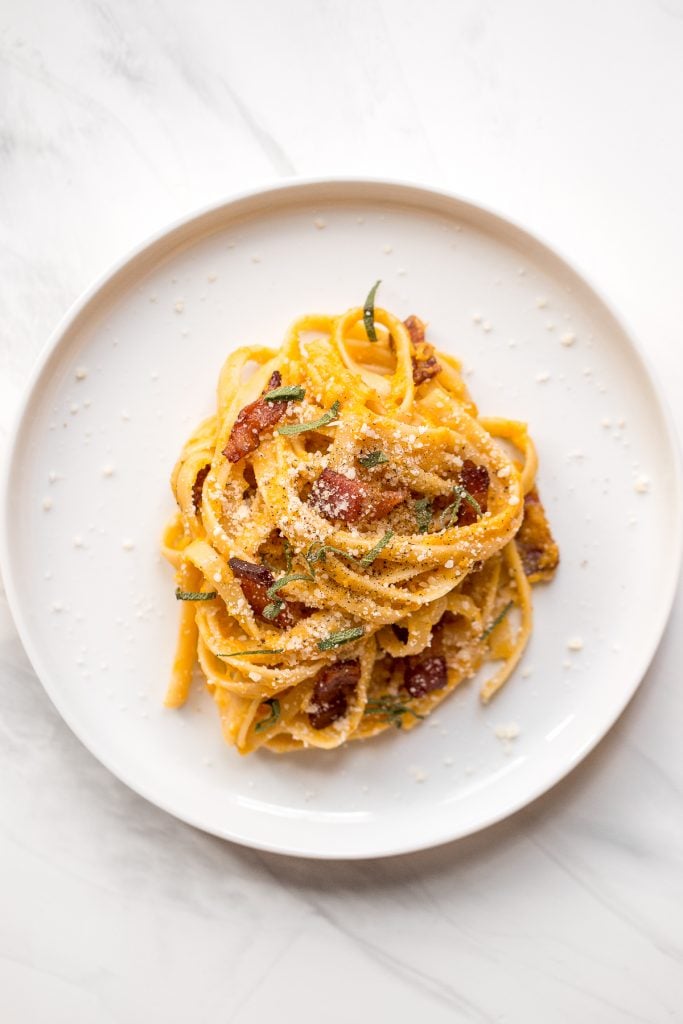
How to Make the Best Butternut Squash Carbonara Pasta
- Roast the butternut squash. Preheat oven to 400 F. Place chopped butternut squash on a large rimmed baking sheet pan. Add olive oil, salt, black pepper, garlic powder, onion powder, and cinnamon. Toss to combine. Roast until tender, approximately 20-25 minutes. Remove and let cool slightly.
- Cook the bacon. While the squash is cooking, heat a large skillet over medium-high heat. Add bacon and cook, stirring occasionally, until crisp, about 6-8 minutes. Transfer bacon to a paper towel-lined plate to drain.
- Sauté onions and sage. Remove all but 1 tablespoon of bacon fat in the skillet. Add onion and cook for about 6-8 minutes until translucent. And chopped sage and cook for one more minute. Turn off heat and set aside.
- Cook the pasta. Cook the pasta in a large pot of boiling salted water until al dente, or in accordance with package instructions. Drain, reserving 1 cup of the pasta cooking water.
- Prepare the pasta sauce. Add the slightly cooled squash to a food processor and puree until smooth. Slowly drizzle in ¼ cup of reserved pasta water and pulse. Transfer the squash puree to the skillet with the onion and sage, and add in egg yolks and Parmesan cheese. Use a whisk to combine while everything is still warm - it will slightly cook the eggs.
- Combine pasta with sauce. Add pasta and bacon and toss to combine. (If pasta sauce is too thick, slowly drizzle in more of the reserved cooking liquid).
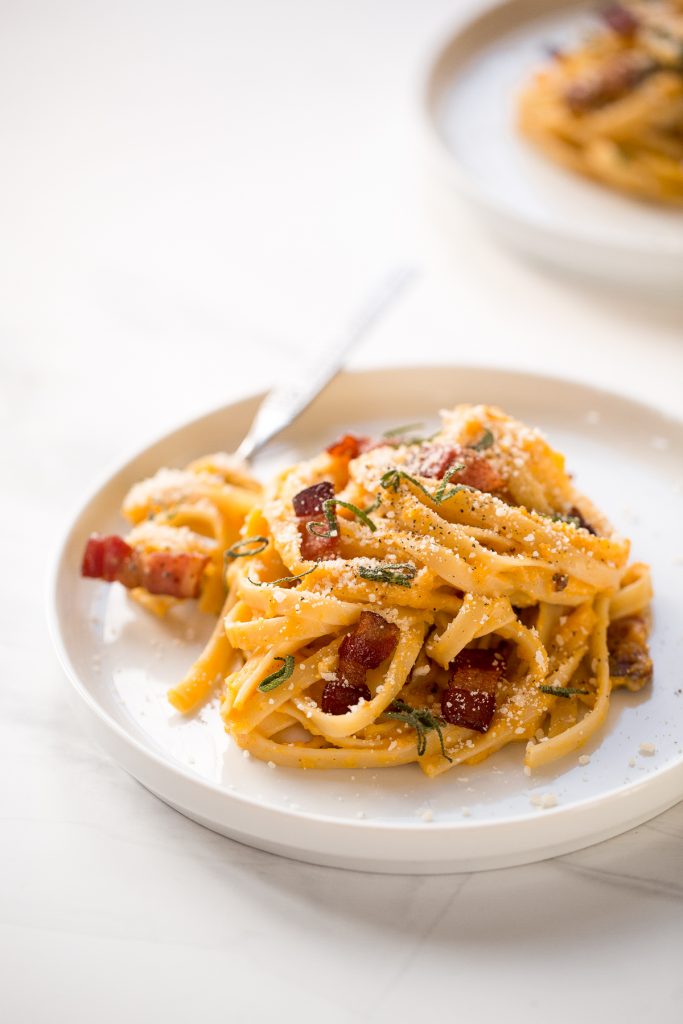
How to Serve
Plate the pasta on individual plates or in bowls and top with additional Parmesan cheese, chopped sage, and lots of freshly grated black pepper (it makes the dish!), and serve immediately. Every bite packs so much flavour. I can think of no better way to spend a cool winter evening than wrapped up in a bowl of this pasta.
I also like to balance this out with a fresh salad on the side. My favourites to serve with this are winter kale salad with apple cider vinaigrette or fall harvest salad with roasted butternut squash or brussels sprouts salad.
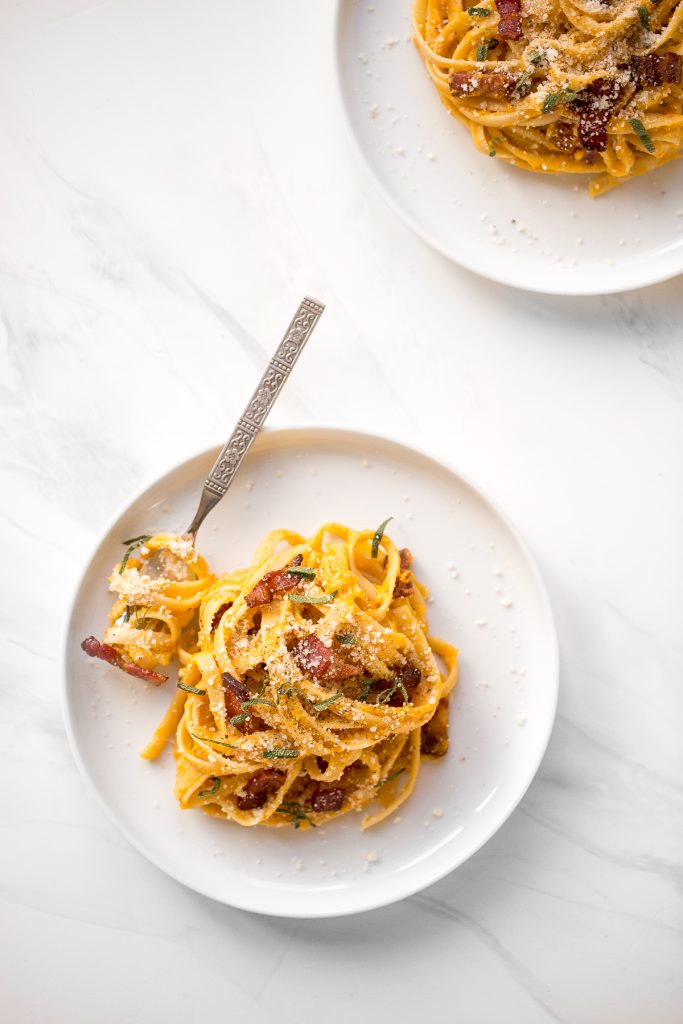
More Butternut Squash Recipes
- Roasted Butternut Squash Soup
- 30-Minute Butternut Squash Soup
- Stuffed Butternut Squash with Wild Rice
- Roasted Butternut Squash
- Butternut Squash Quesadillas with Chicken and Kale
- Butternut Squash Galette
Tried this recipe?
I'd love to hear what you think! Leave a comment and rating below to share your feedback. Your reviews help others discover this recipe and help me keep creating more free recipes for you. Snap a photo and tag me on social media @aheadofthyme too.
- « Previous Page
- 1
- …
- 33
- 34
- 35
- 36
- 37
- …
- 40
- Next Page »