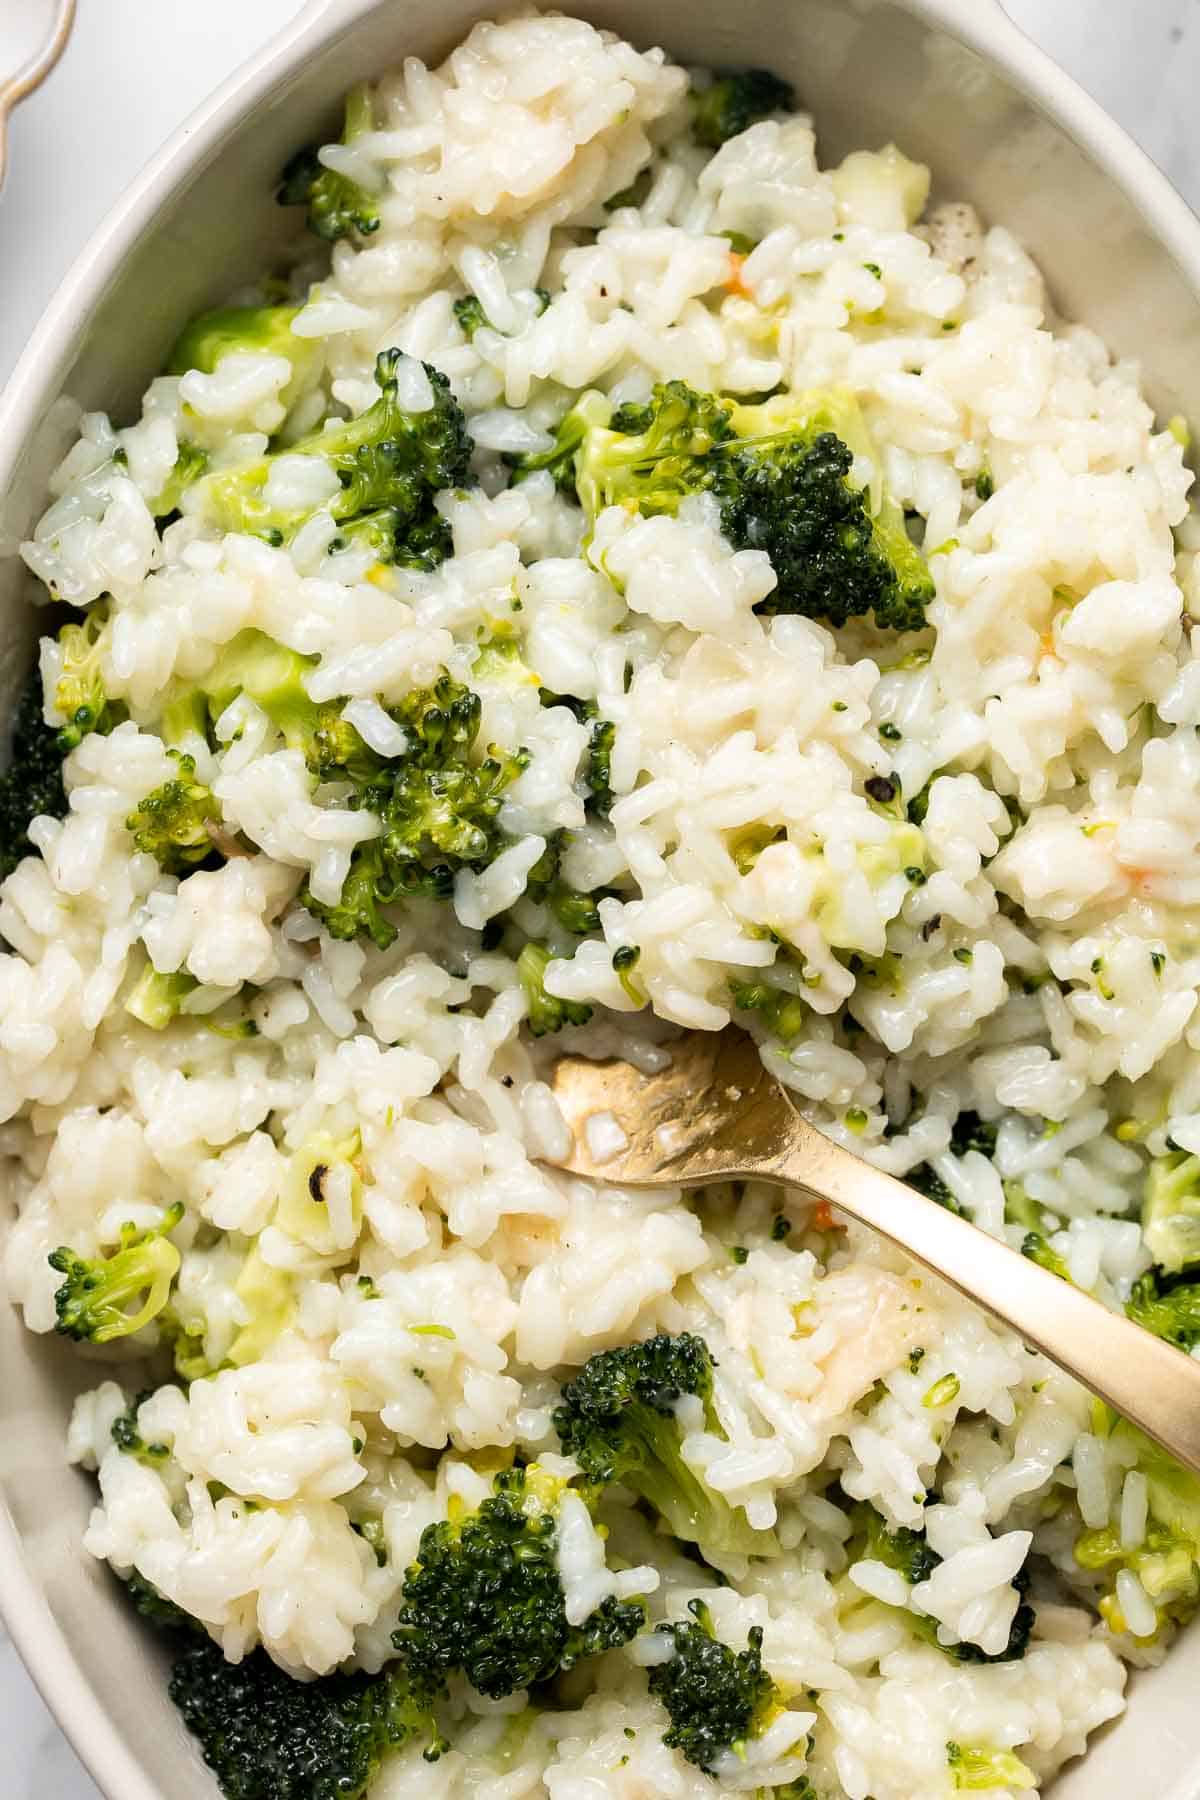
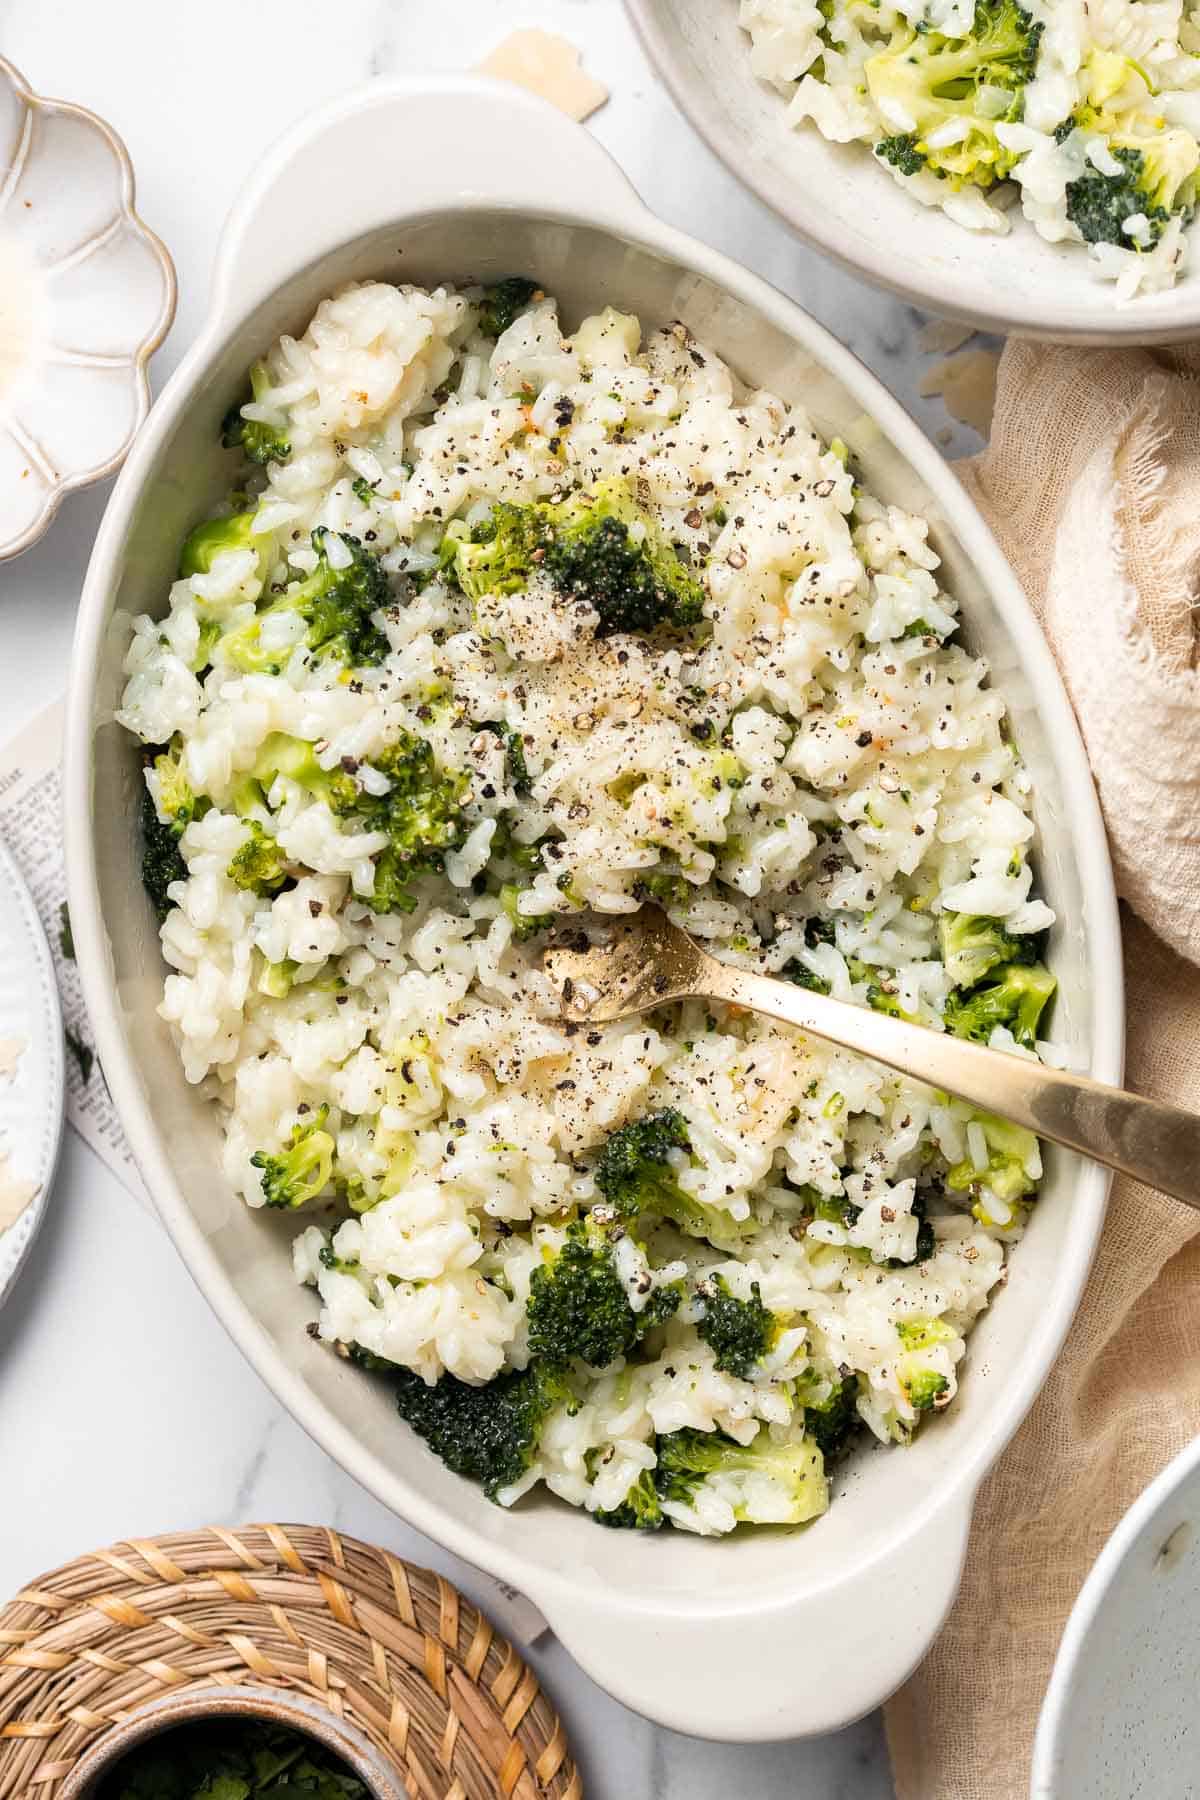
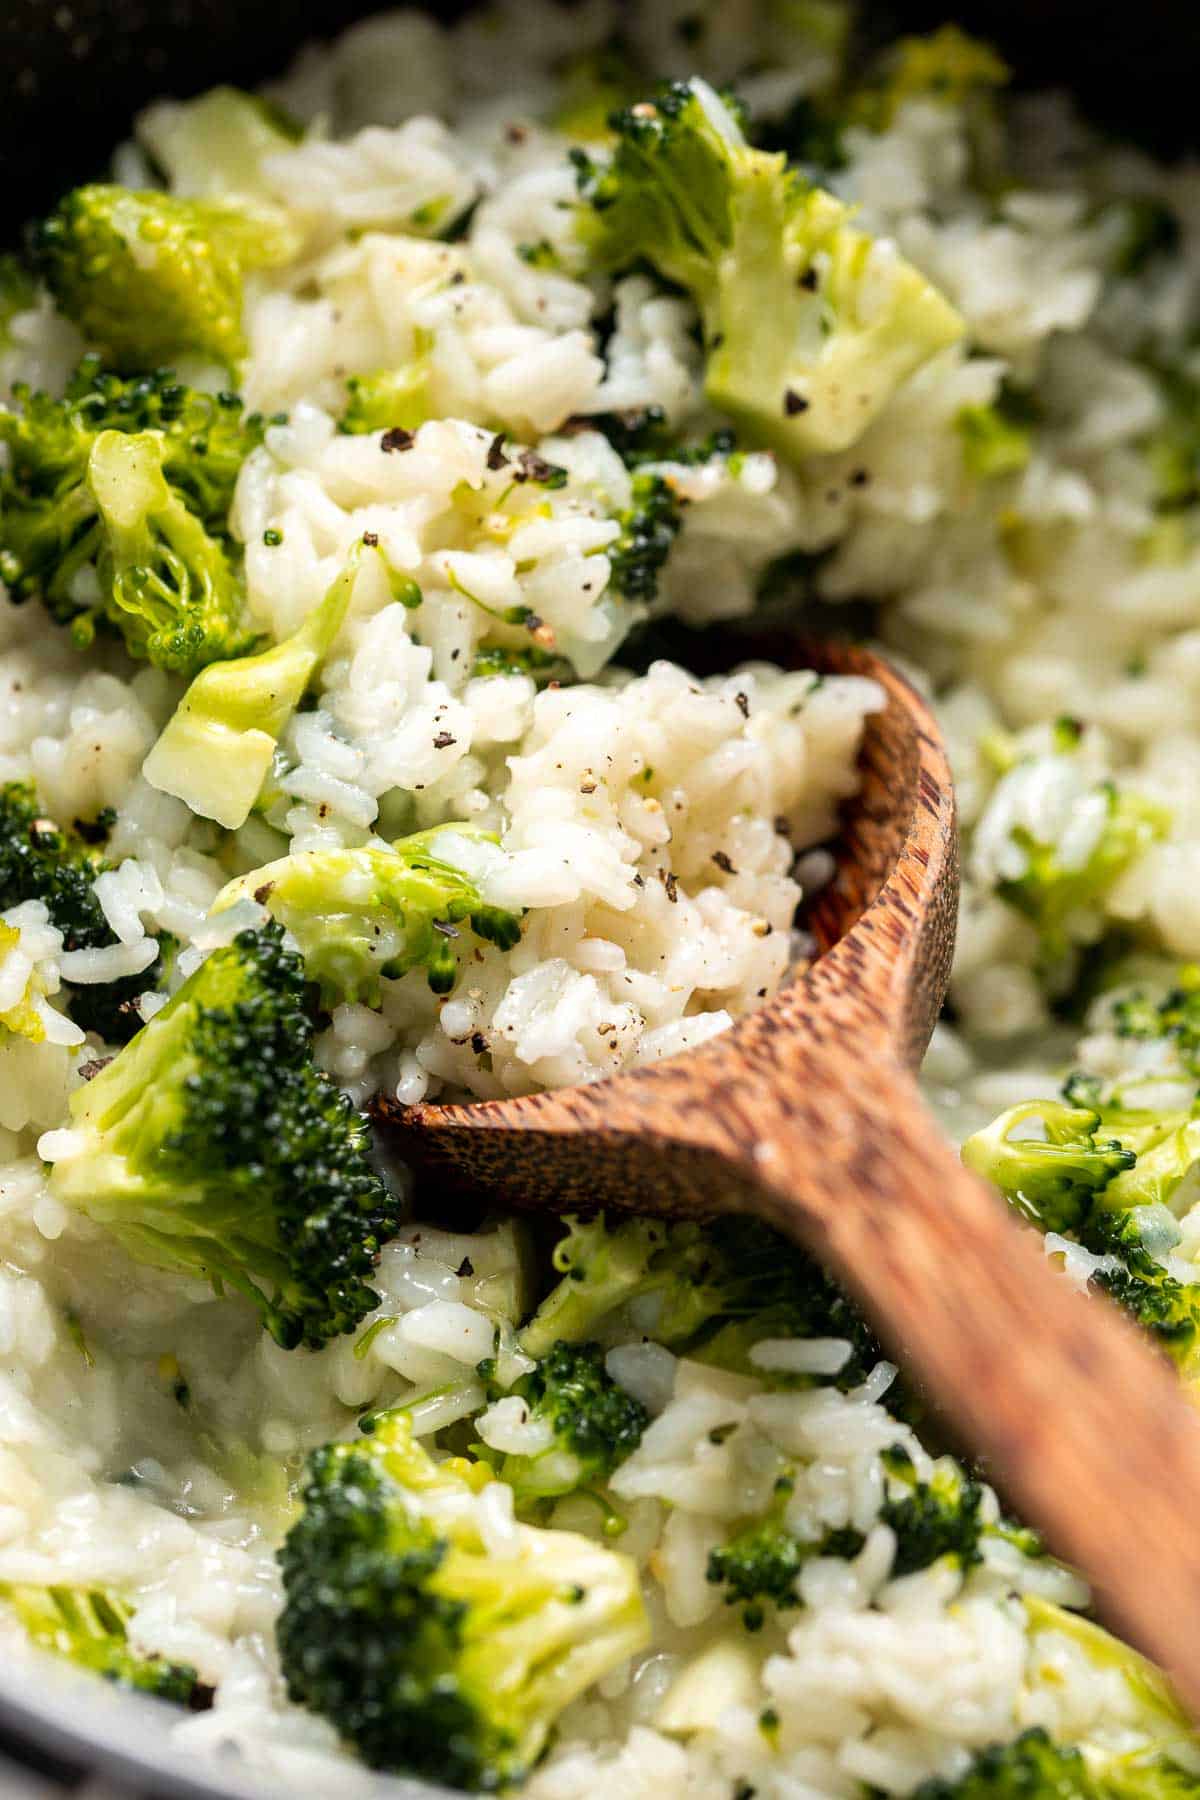
Broccoli Rice is the perfect side dish: creamy, cheesy, healthy, and filling. Plus, it's all made in one pot! Melty parmesan cheese, fluffy rice, and tender bite-sized broccoli come together to make this quick and easy recipe an excellent addition to almost any meal - and sure to please even the pickiest eaters.
Plus, you don't need any special equipment or exotic ingredients to make this cheesy broccoli rice, just a handful of grocery staples that you probably already have on hand! In just over half an hour, you can have hot, fragrant rice with broccoli ready to plate and serve for lunch or dinner.
Why You'll Love this Broccoli Rice
- Cheesy broccoli flavor. Broccoli and cheese are a classic combination that's enjoyed by adults and kids alike. You're not likely to get any complaints when you serve this cheesy broccoli rice - in fact, your family will probably request it from time to time!
- An all-occasion side dish. Broccoli, rice, and cheese pair well with just about everything - so you can call on this recipe for weeknight dinners or special occasions! It's especially helpful when you're not sure what to make.
- Wholesome ingredients. There are certainly ready-made freezer aisle versions of this dish, but this homemade broccoli rice is better by far because of the fresh, wholesome ingredients and lack of preservatives and artificial flavors.
Ingredient Notes
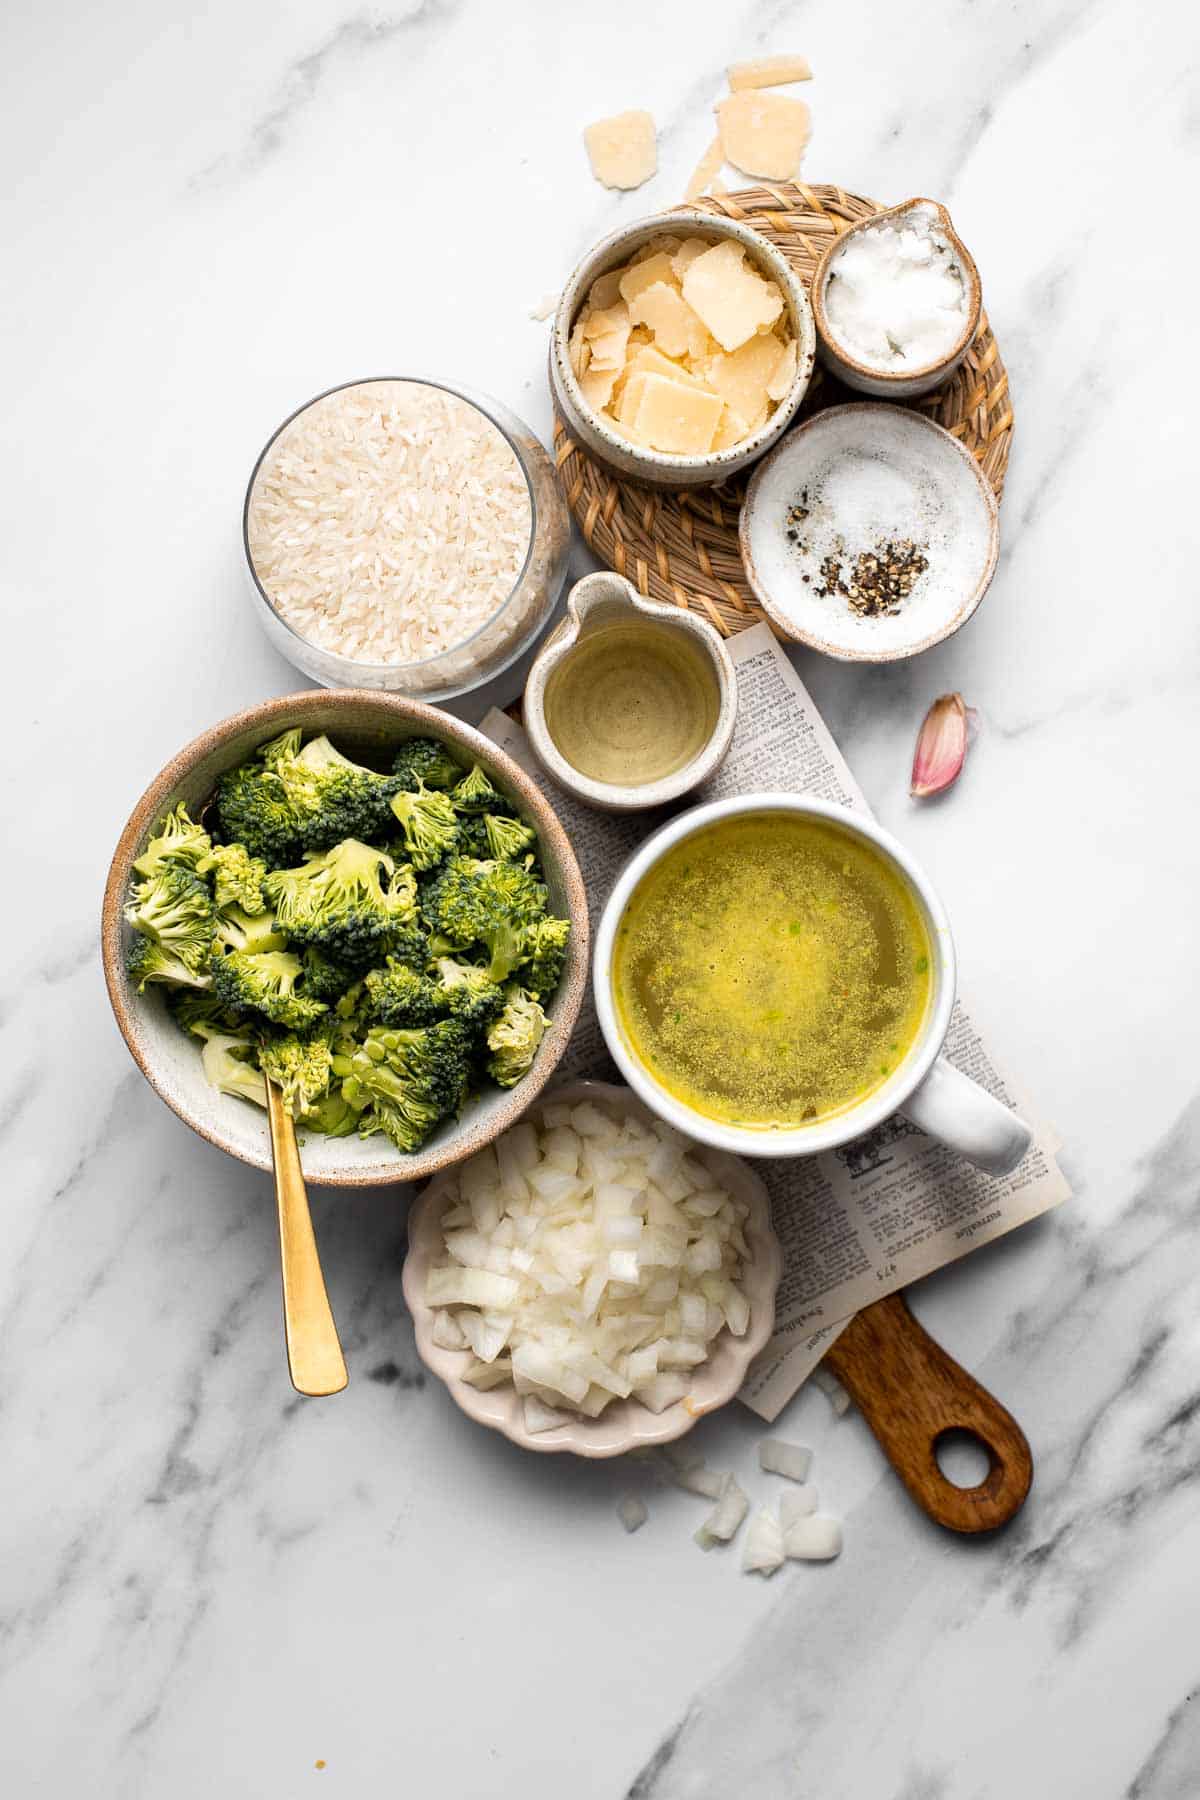
To make this cheesy one pot Broccoli Rice, you will need the following ingredients (full measurements in recipe card below):
- coconut oil - avocado oil or olive oil will also work.
- yellow onion - white onion or even red onion are okay to use if you don't have yellow onion on hand.
- garlic - fresh garlic will be the most flavorful, but you can also use 1 teaspoon of pre-minced garlic for every clove called for in the recipe.
- long grain white rice - if you're out of long grain white rice (such as Basmati rice or Jasmine rice), you can use short-grain rice or a long grain brown rice, but the cooking time may need to be adjusted depending on the type you choose.
- vegetable broth - if you are not on a vegetarian diet, you can use chicken broth or even substitute with water if you are out.
- olive oil - you can also use vegetable oil or avocado oil.
- broccoli - use fresh broccoli or frozen pre-cut florets if that's more convenient for you.
- parmesan cheese - asiago cheese, pecorino romano, cheddar, or nutritional yeast flakes can all be swapped for the parmesan cheese in this recipe. Using nutritional yeast will make this recipe vegan-friendly.
- salt and pepper
You will also need measuring cups and spoons and a cooking pot.
How to Make the Best Broccoli Rice
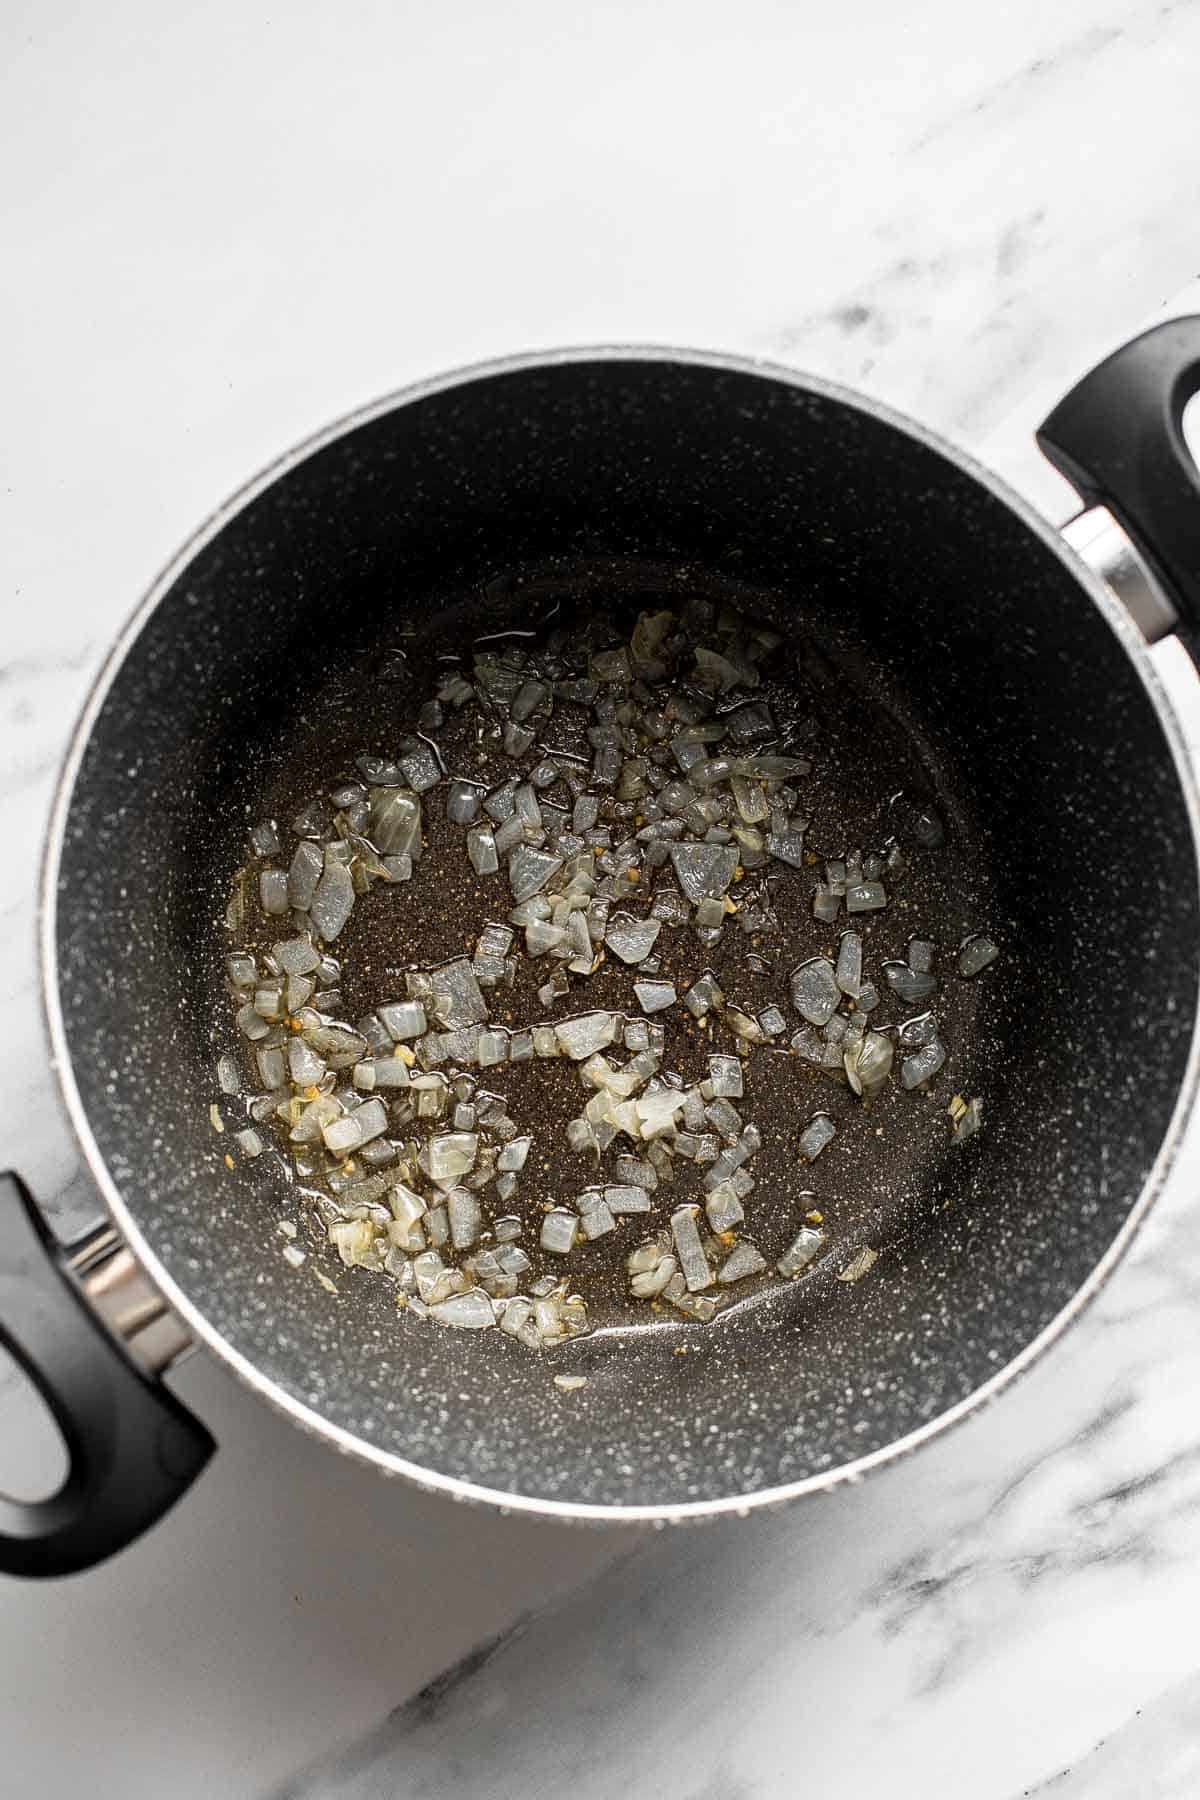
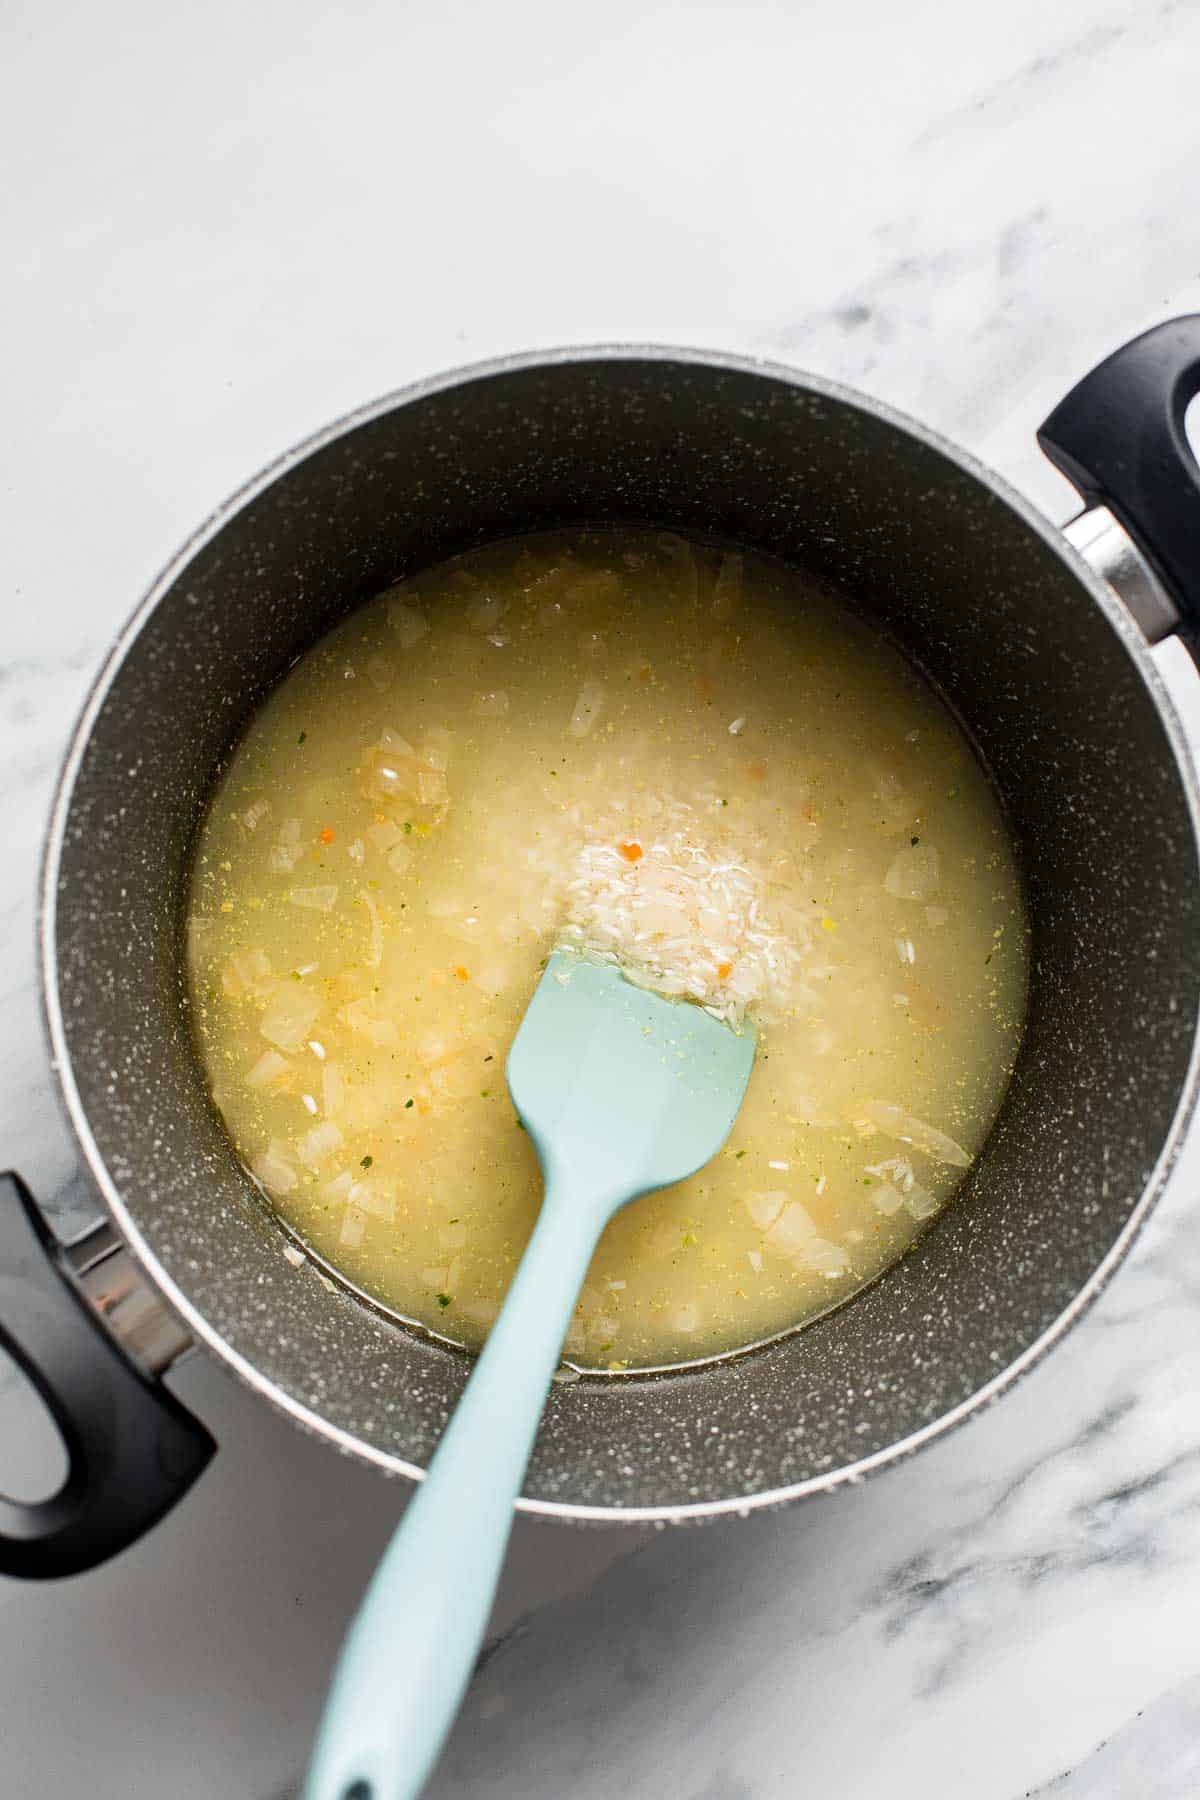
- Sauté aromatics. Heat coconut oil in a large pot over medium-high until the hot oil sizzles, about 1 minute. Add onion and garlic and sauté until fragrant, about 1-2 minutes.
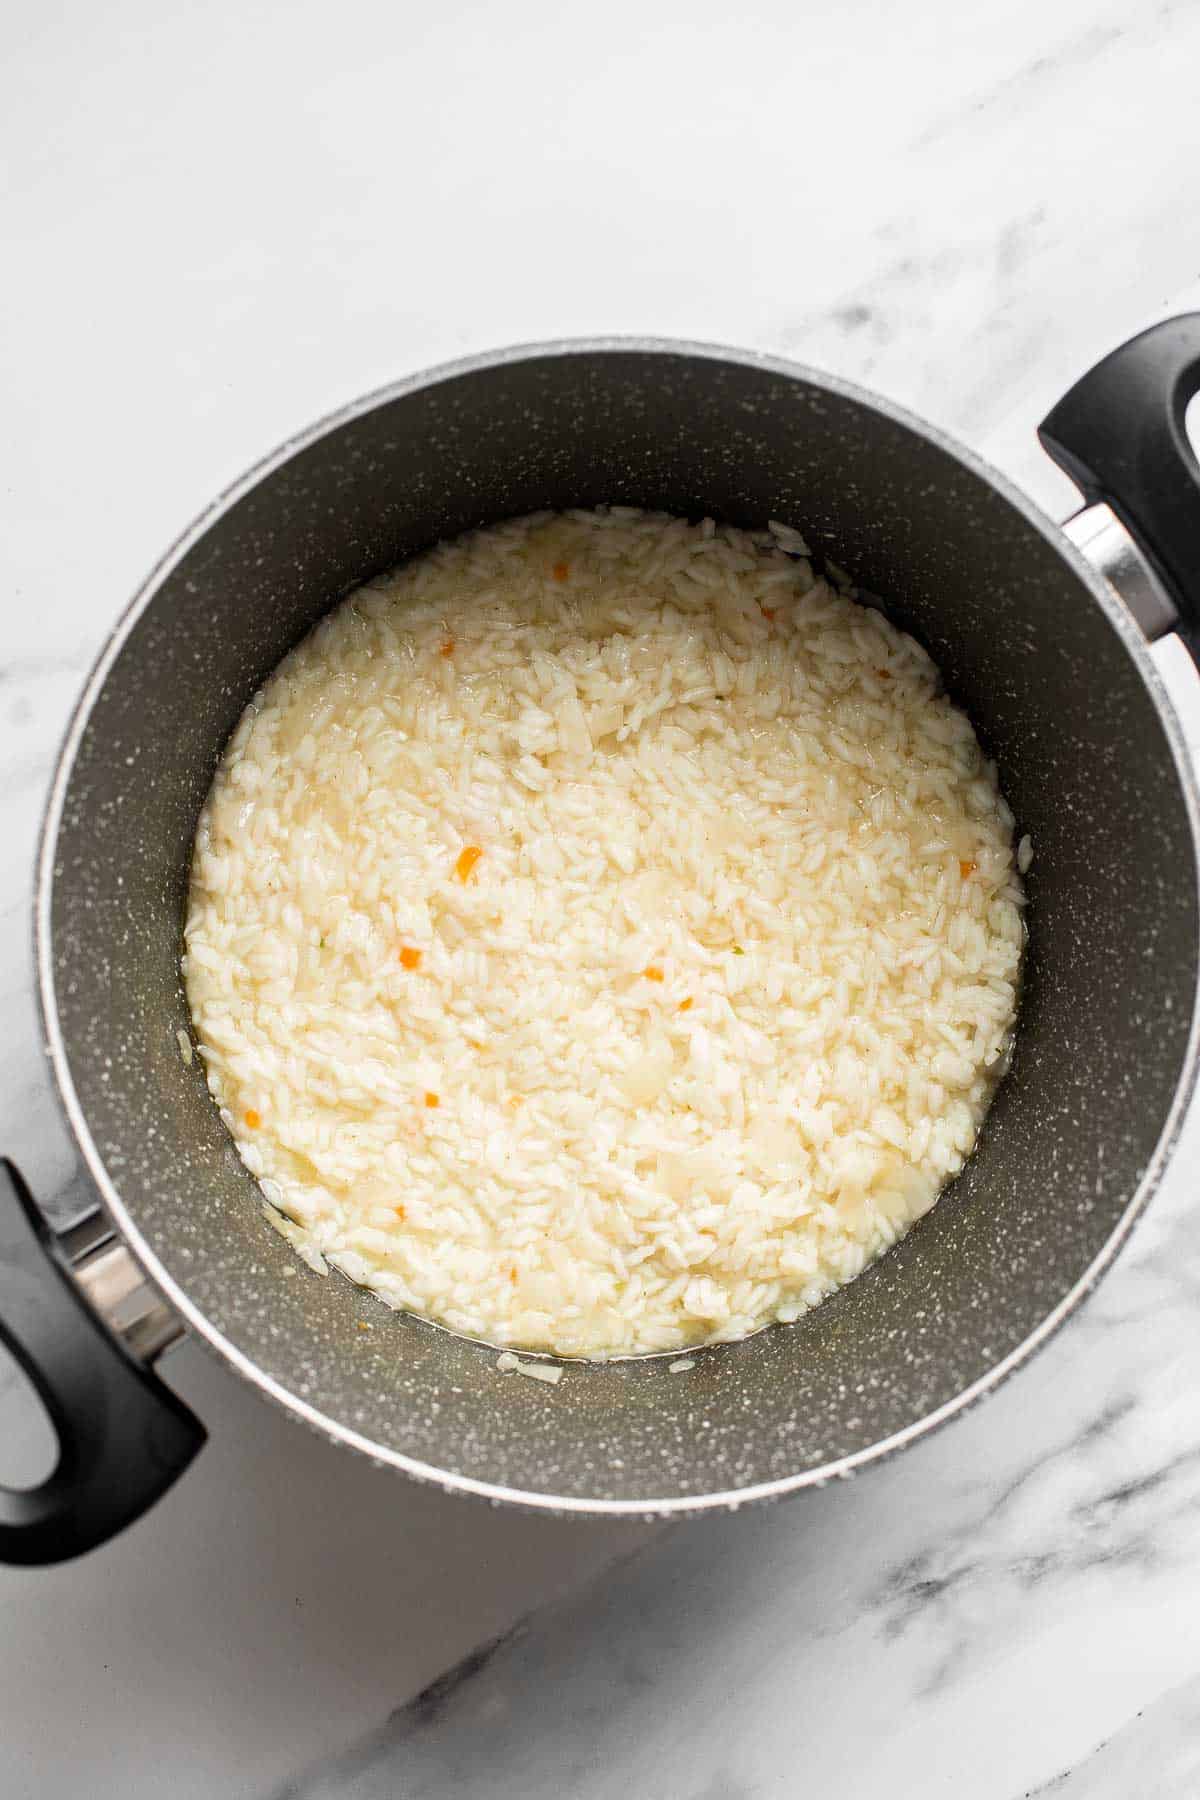
- Simmer. Add rice and broth. Cover the pot and bring it to a boil. Turn the heat down to low and let the rice simmer until most of the liquid is absorbed, about 10-12 minutes.
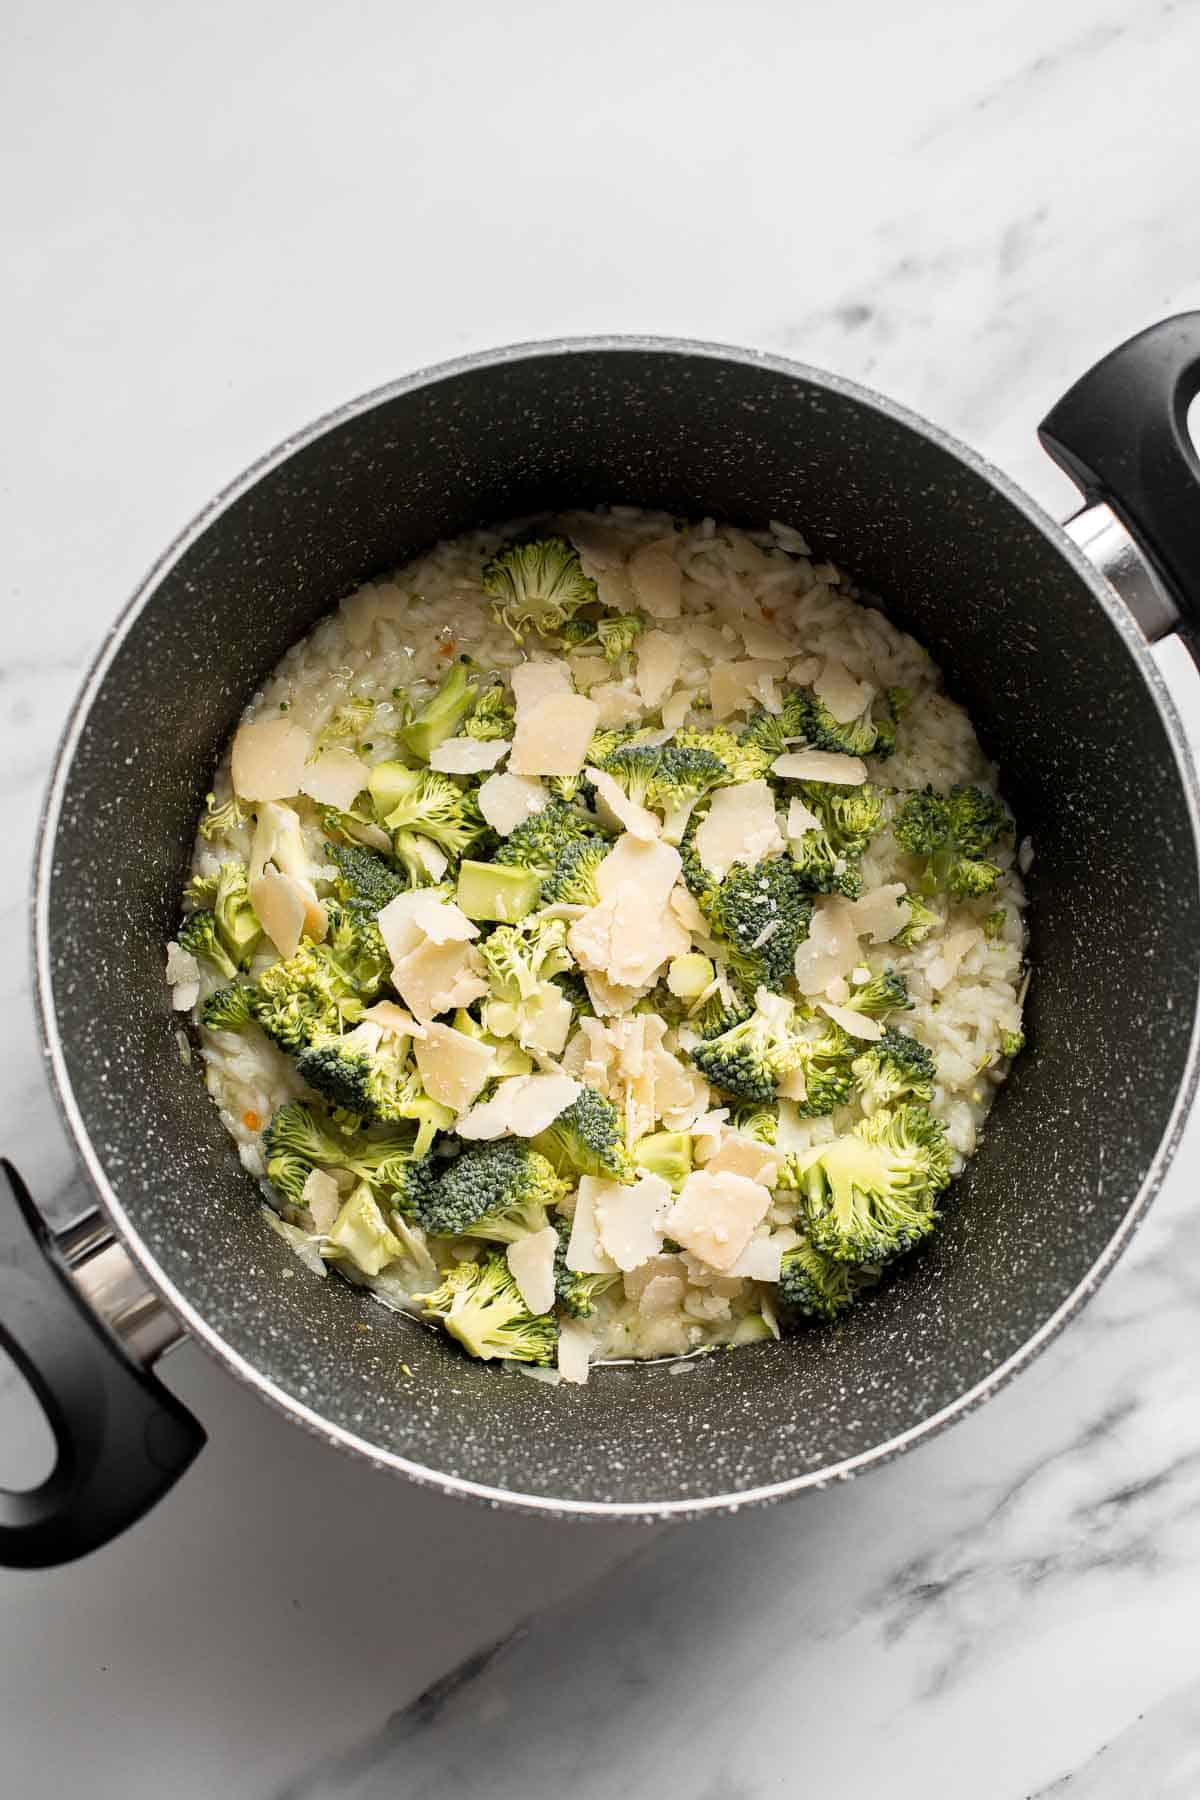
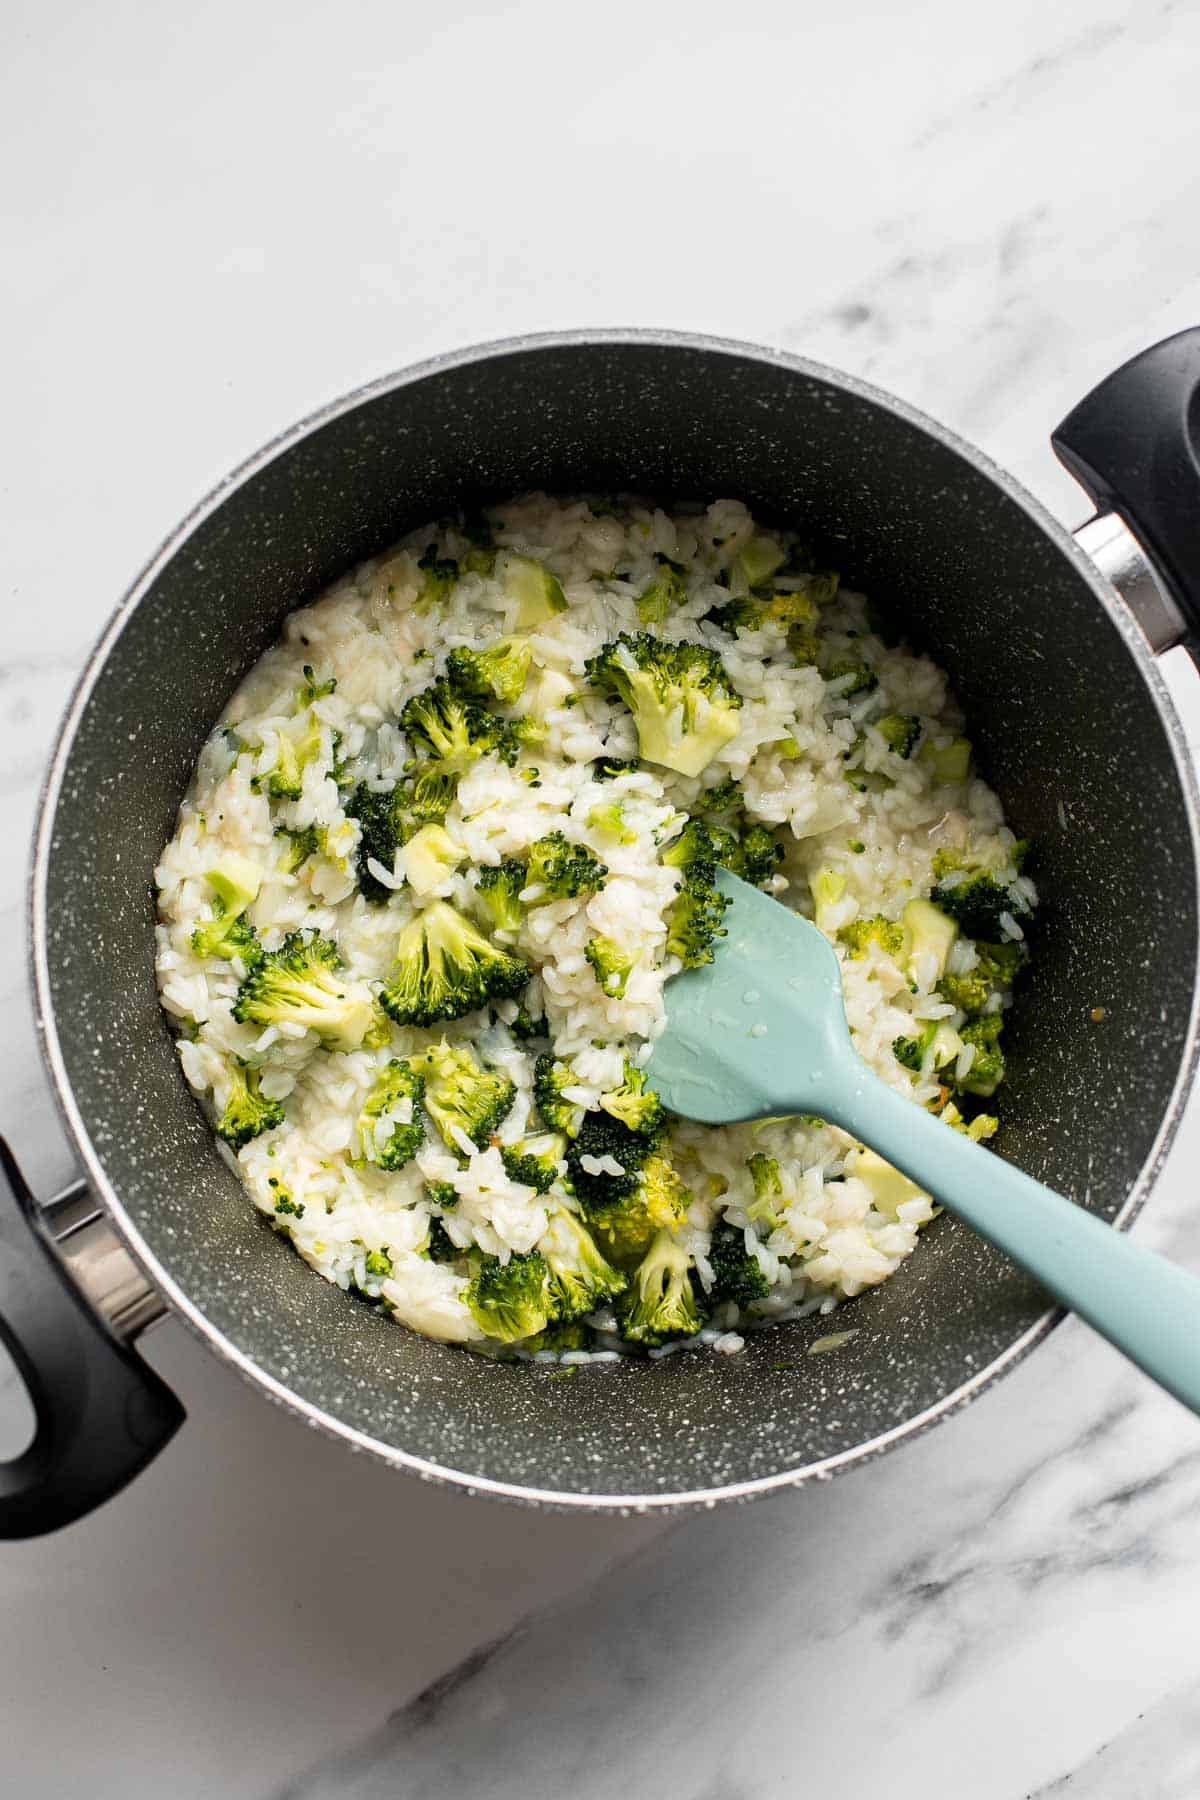
- Add broccoli. Add olive oil, broccoli, and Parmesan cheese and continue cooking for 2-3 minutes until the broccoli is tender and the cheese has melted, stirring constantly.
- Season. Season with salt and pepper and serve immediately.
Recipe Variations
- Make it extra cheesy. If you're a big fan of cheese, you can take the cheesiness to the next level by transferring the broccoli rice to a casserole dish or deep baking pan and sprinkling it with extra cheese before popping it under the broiler for a few minutes to give it a bubbly, cheesy crust.
- Add a cooked protein for a one-dish dinner. You can kill two birds with one stone by adding bite-sized pieces of leftover chicken, ham, turkey, or other cooked protein to this dish a few moments before removing it from the heat to make a more filling dish!
- Give it a lemon flavor. Make lemon broccoli rice by squeezing fresh lemon juice over the cooked rice and broccoli. You can also stir in some lemon zest for extra lemony flavor.
- Make curried broccoli rice. Add in some curry powder and cook the rice in coconut milk instead of broth.
How to Serve
This Broccoli Rice is delicious served on its own, or as a side dish to a main entree like grilled chicken, a fancy roast, or almost any kind of meatball.
Some of our favorite meaty dishes to serve with this are:
Incorporate this side into your usual dinner rotation and figure out your favorite combination of dishes!
Recipe Tips and Tricks
- Cut the broccoli into the same size. Make sure your broccoli florets are about ½-inch in size. This will ensure even cooking and will also make eating easier since they are small and bite-sized.
- Meal prep for easy lunches. This broccoli rice stores well and reheats well. You can make it up to 4 days ahead for easy lunches throughout the week.
- Use leftovers creatively. Repurpose leftovers into something new and fun. Try a broccoli rice frittata by mixing the leftovers with beaten eggs, cheese, and any other leftover veggies or meats you have on hand. Pour the mixture into a hot, oiled pan and cook until set, then transfer to the oven to finish cooking. See our Vegetable Frittata recipe for tips.
Storing and Freezing Instructions
How to Store
Transfer cooled broccoli rice into an airtight container and refrigerate for up to 4 days.
How to Reheat
Reheat in the microwave on high in 10-second increments until heated through or on the stovetop over medium-low heat until warm.
How to Freeze
Transfer the cheesy broccoli and rice into a freezer-safe container and freeze for up to 3 months. Allow it to thaw in the refrigerator overnight before reheating in the oven or microwave.
More Rice Recipes
- 30 Best Rice Recipes
- Coconut Rice
- Steamed Rice
- Vegetarian Fried Rice
- Cilantro Lime Rice
- Pineapple Fried Rice
Tried this recipe?
I'd love to hear what you think! Leave a comment and rating below to share your feedback. Your reviews help others discover this recipe and help me keep creating more free recipes for you. Snap a photo and tag me on social media @aheadofthyme too.

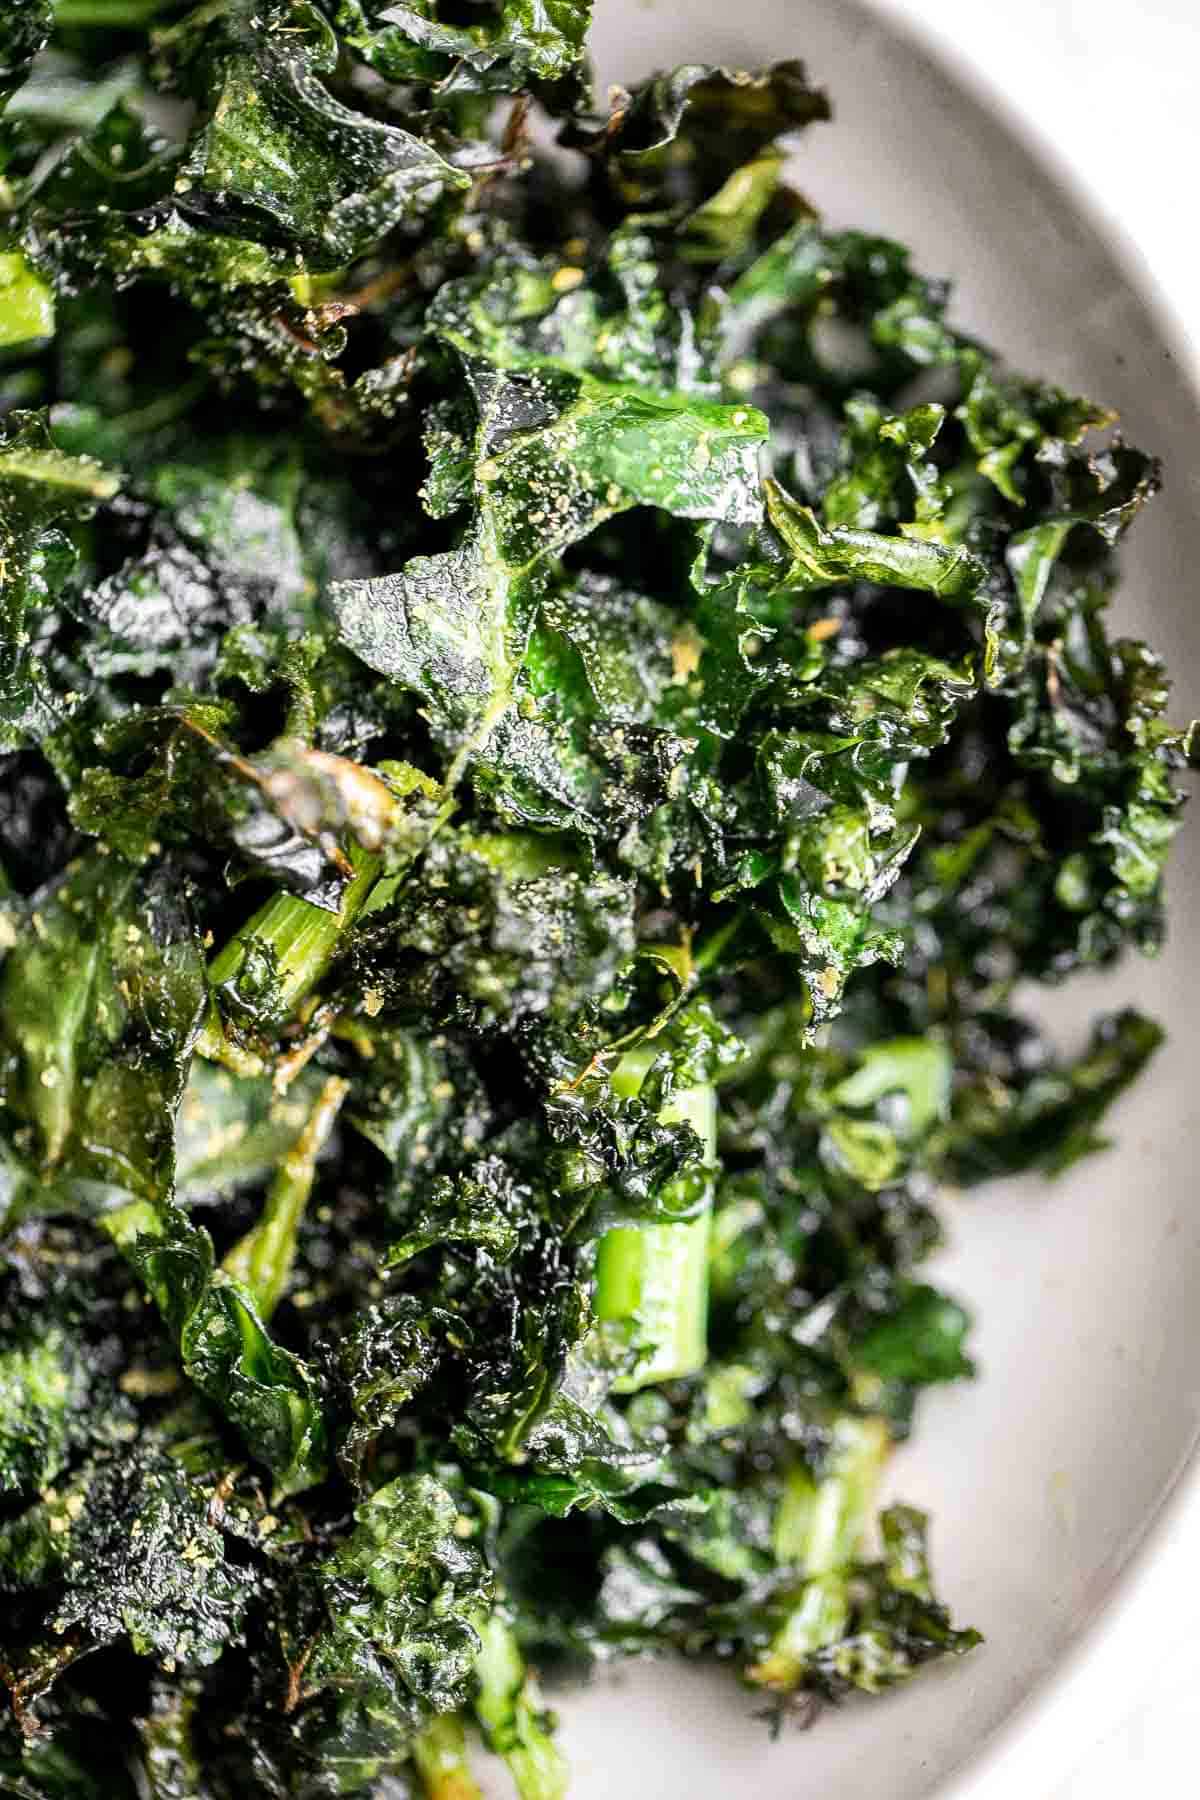
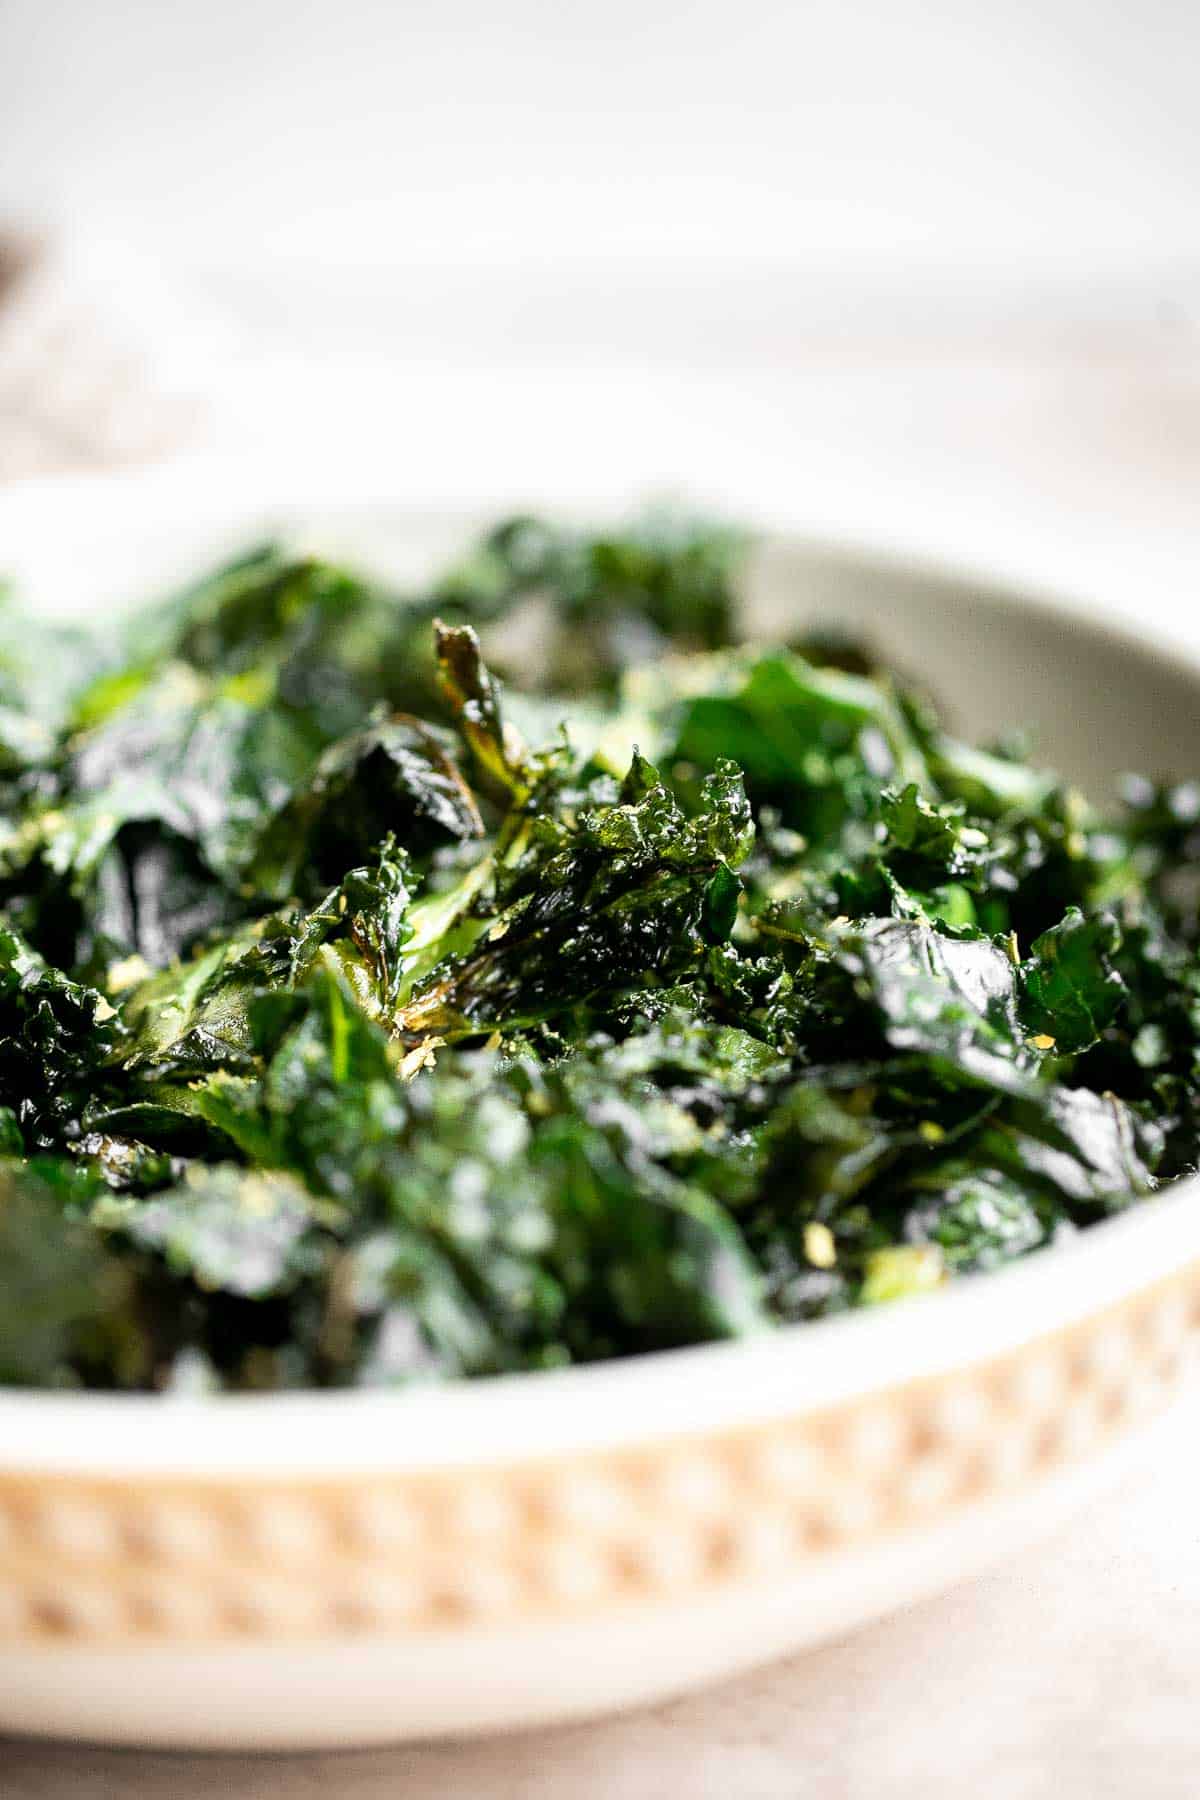
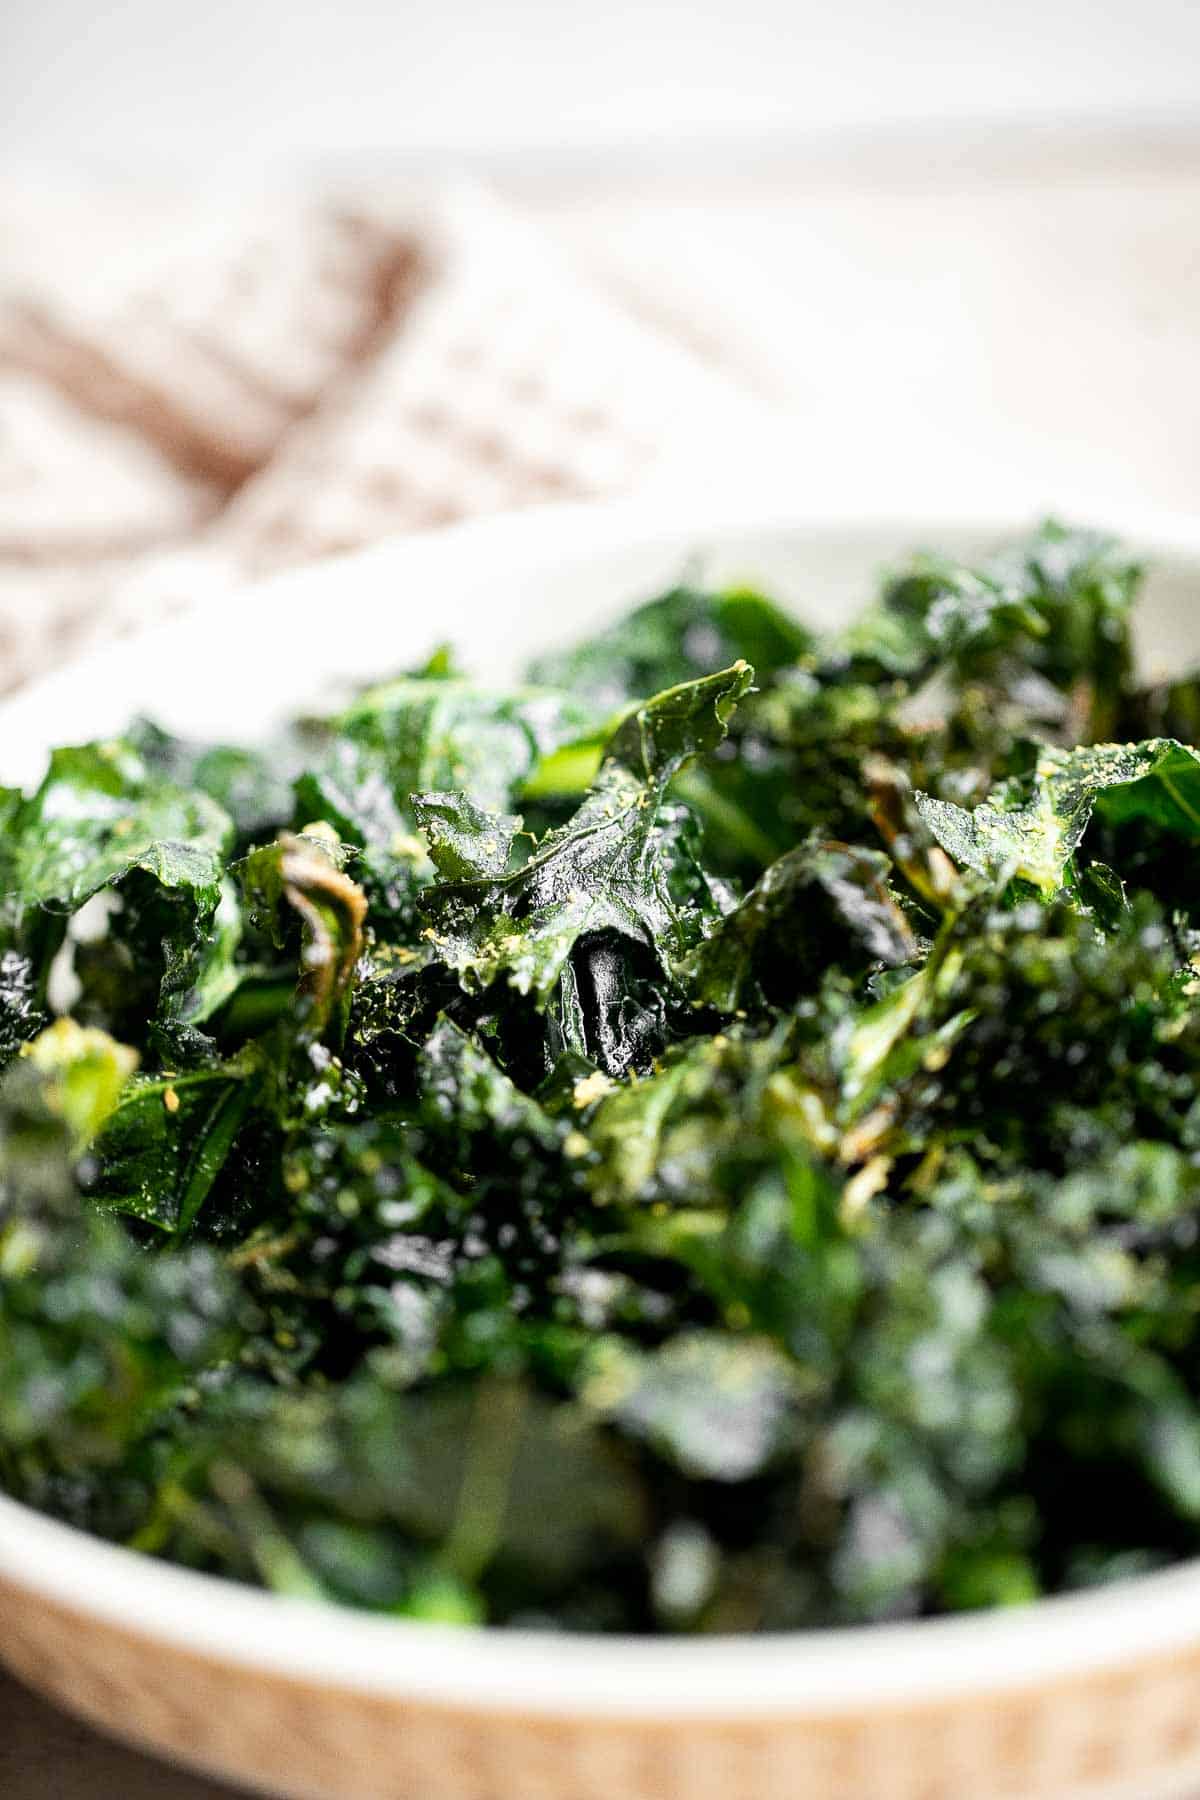
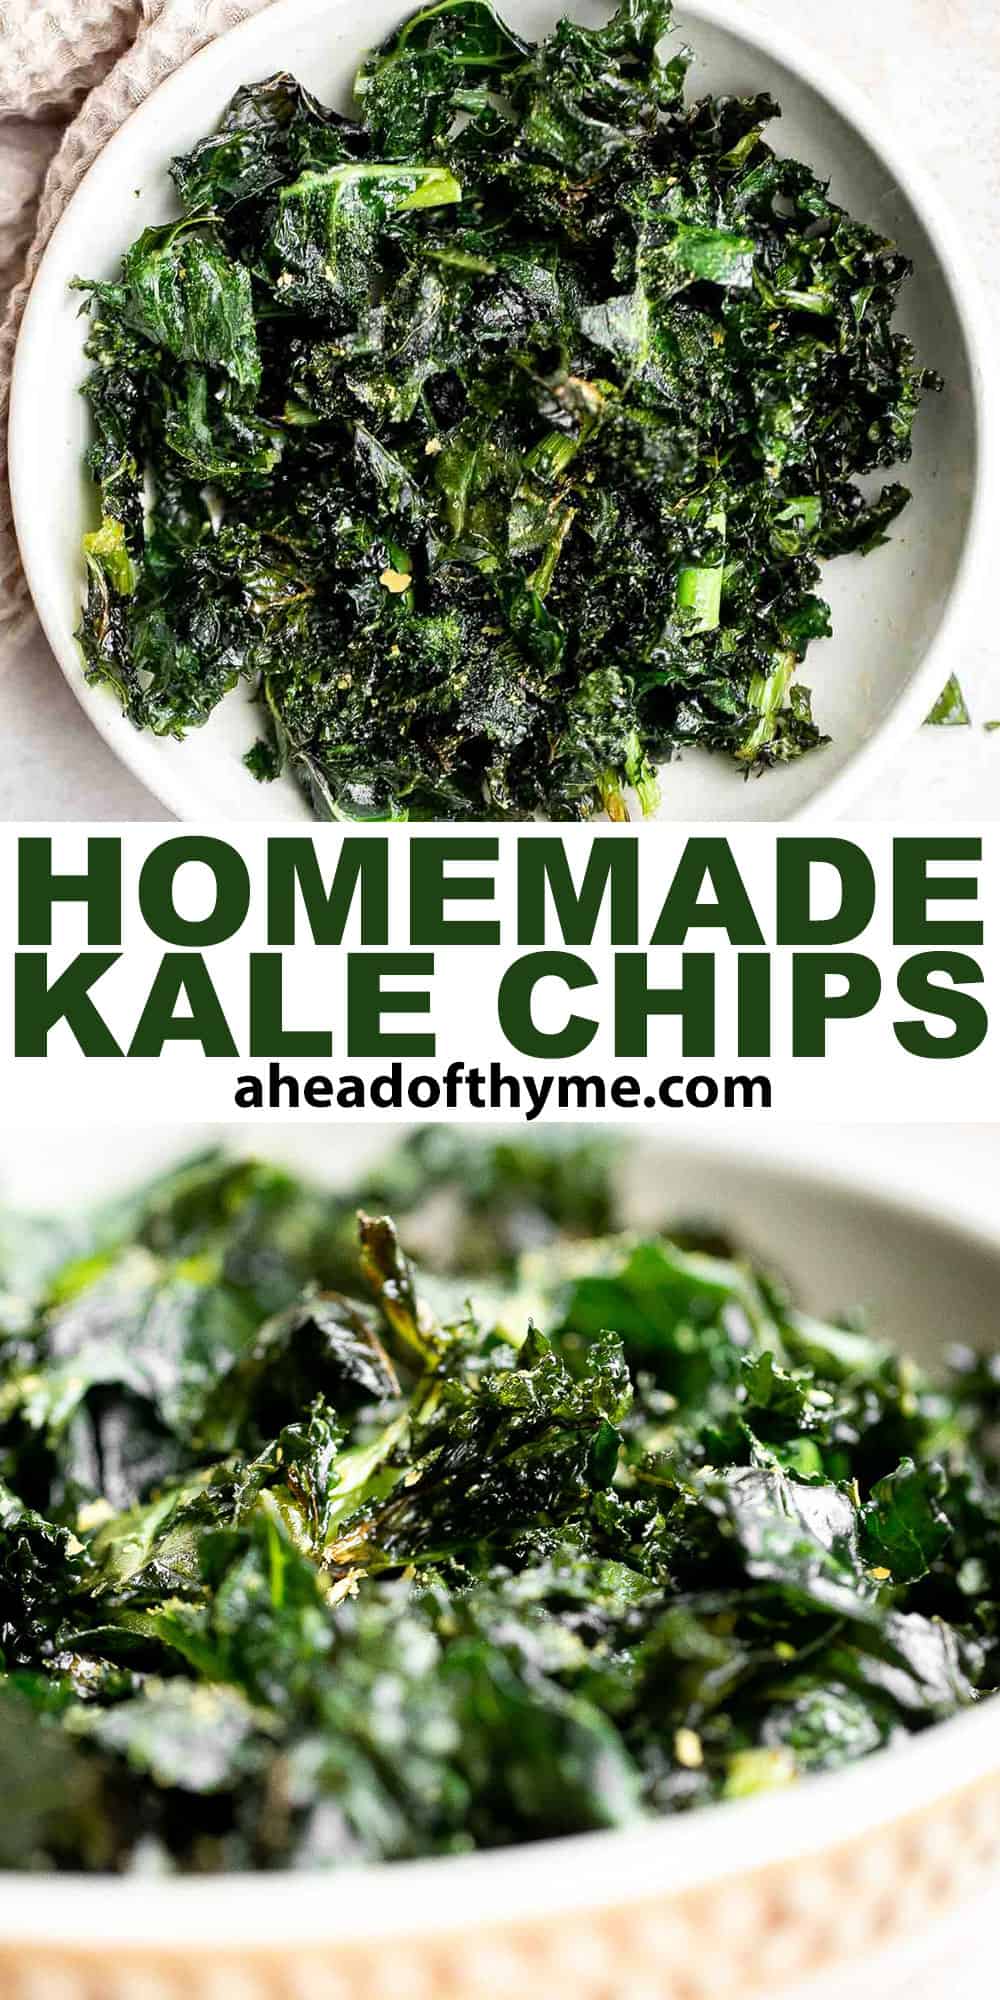
Kale Chips
You'll never want to buy chips after trying these incredibly crispy homemade Kale Chips! They're lighter than air with a satisfying crunch and a healthy dusting of nutritional yeast. They're completely vegan, easy to make, healthy, and downright irresistible!

All you need is an oven or air fryer to turn leafy kale into toasted-to-perfection veggie chips. After a quick massage with oil, you'll cook them and then season - that's it! Try it out and find out why these baked kale chips are the ultimate healthy snack.
Why You'll Love these Kale Chips
- Quick and easy snack. It takes only five minutes of active preparation to get these kale chips in the air fryer or oven to shrink down and become impossibly light and crunchy! Perfect for snacking any time of day or night.
- Only 3 ingredients. Possibly the best part of these air fryer kale chips is simplicity - you only need three ingredients to make these chips to satisfy snack cravings! There are no preservatives or artificial ingredients in these homemade chips.
- They're healthy. Kale is packed with vitamins, minerals, antioxidants and fiber - something you won't find in regular store-bought chips that are made from corn, soy, or potatoes. They are seasoned with nutritional yeast making them vegan "cheesy" kale chips!
Ingredient Notes
To make these easy Kale Chips, you will need the following ingredients (full measurements in recipe card below):
- kale - this recipe works with most types of kale, so use your favorite! Green, red, or purple kale, Lacinato (dino) kale or curly kale.
- avocado oil - olive oil will also work, and you can even use coconut oil in a pinch but it may add a slight coconuty to the chips.
- nutritional yeast - you can substitute the nutritional yeast for a spice blend or even grated cheese like parmesan or asiago.
You will also need measuring spoons and a half sheet baking pan or air fryer.
How to Make the Best Kale Chips (2 Ways)
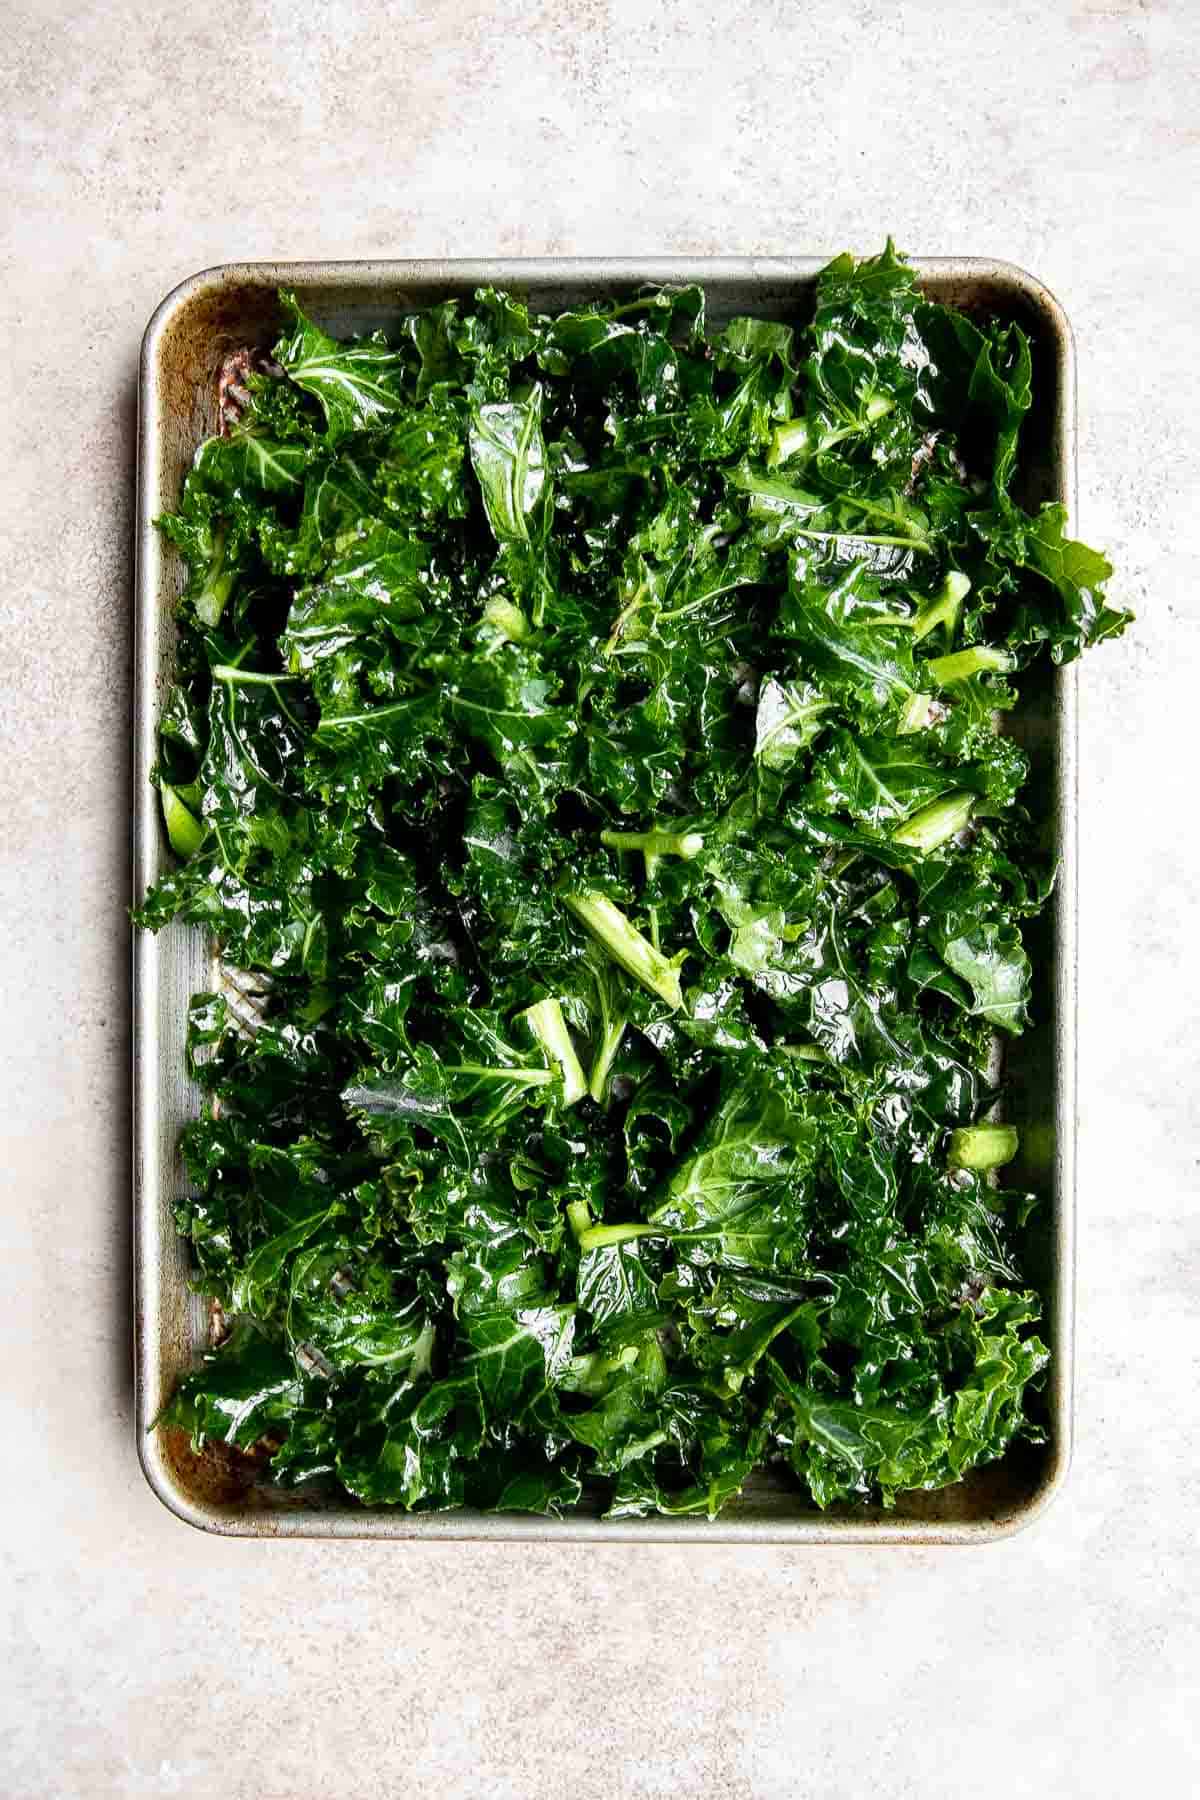
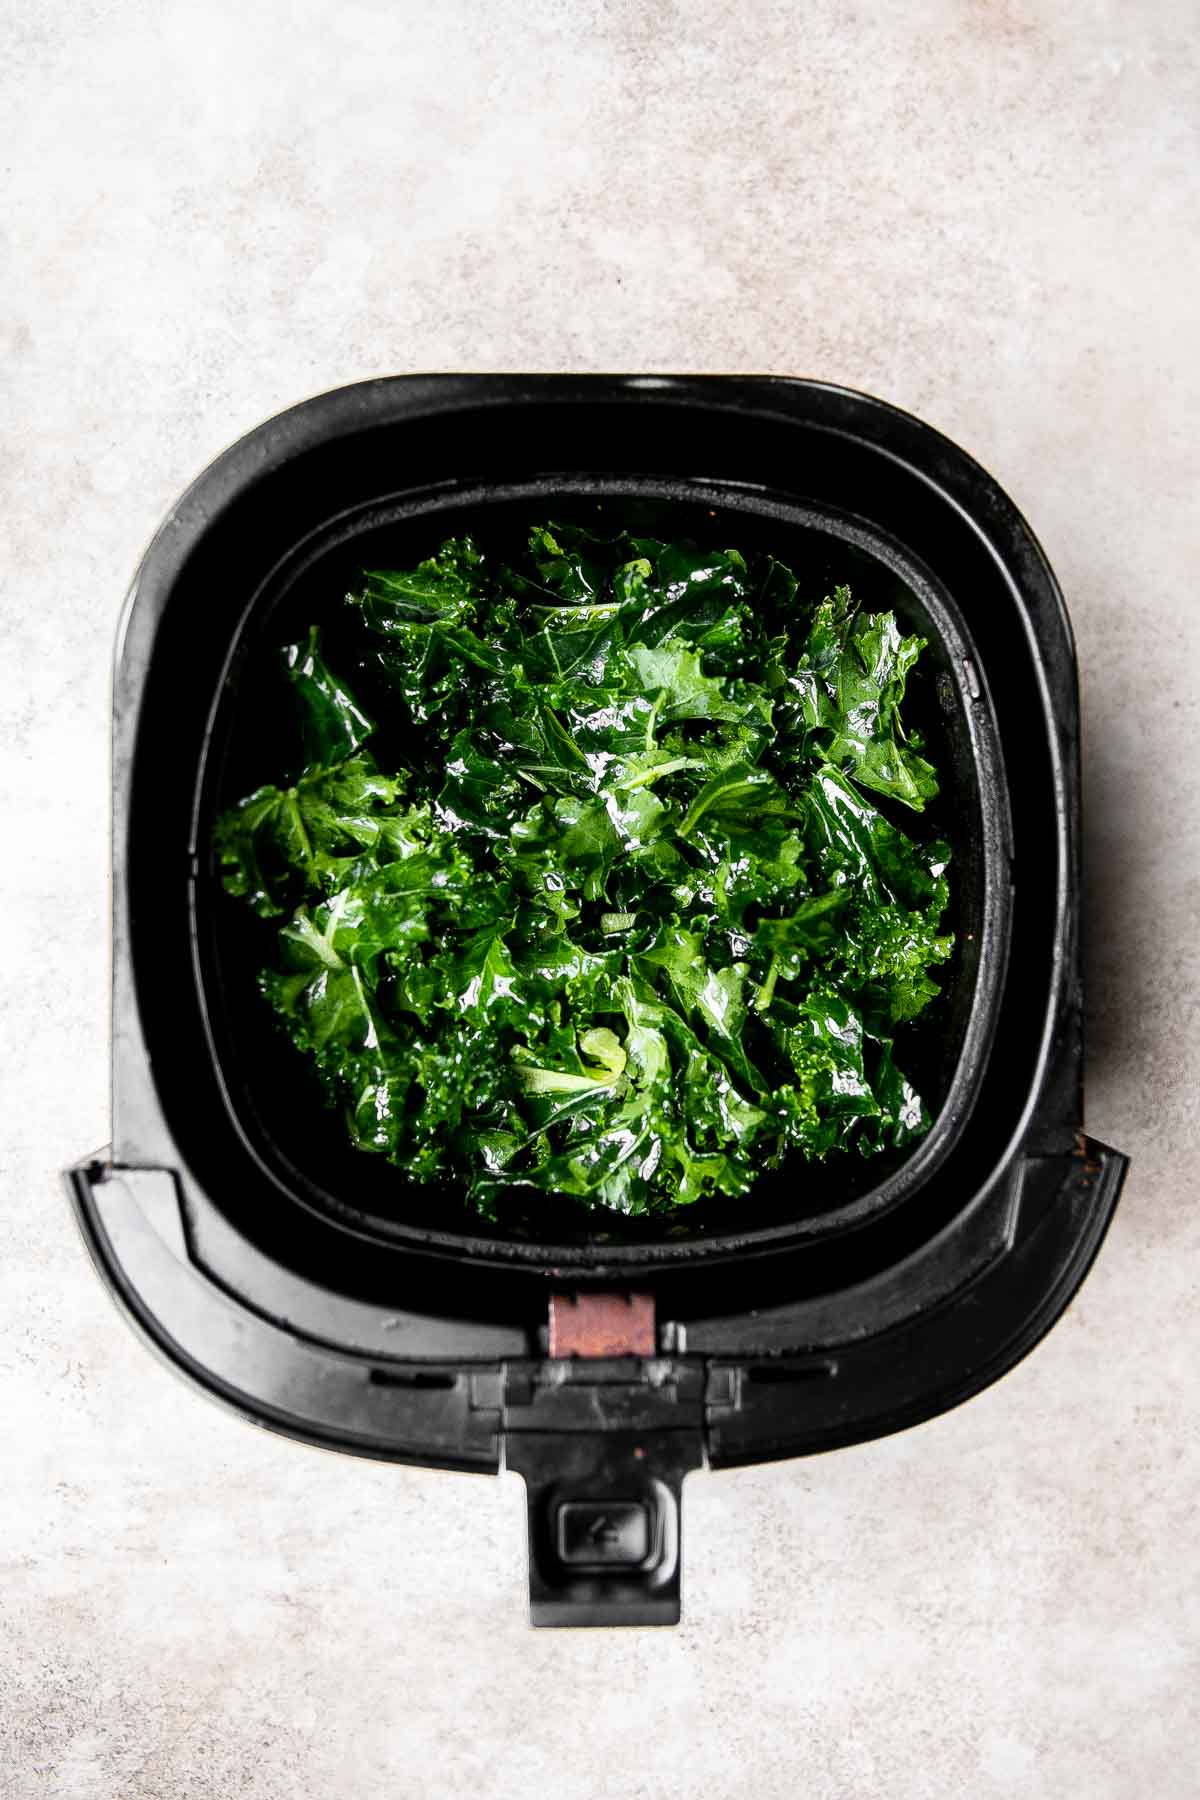
- Prep kale. In a large mixing bowl, add chopped kale and drizzle with oil. Gently massage the oil into the kale until well coated. This is to prevent the kale from getting burnt during cooking.
- Cook. Cook the kale in the oven or in the air fryer.
Oven Baked Kale Chips
Arrange the kale leaves in a single layer on a large half sheet baking pan. Bake in a 400F preheated oven for 12-15 minutes until crispy.
Air Fryer Kale Chips
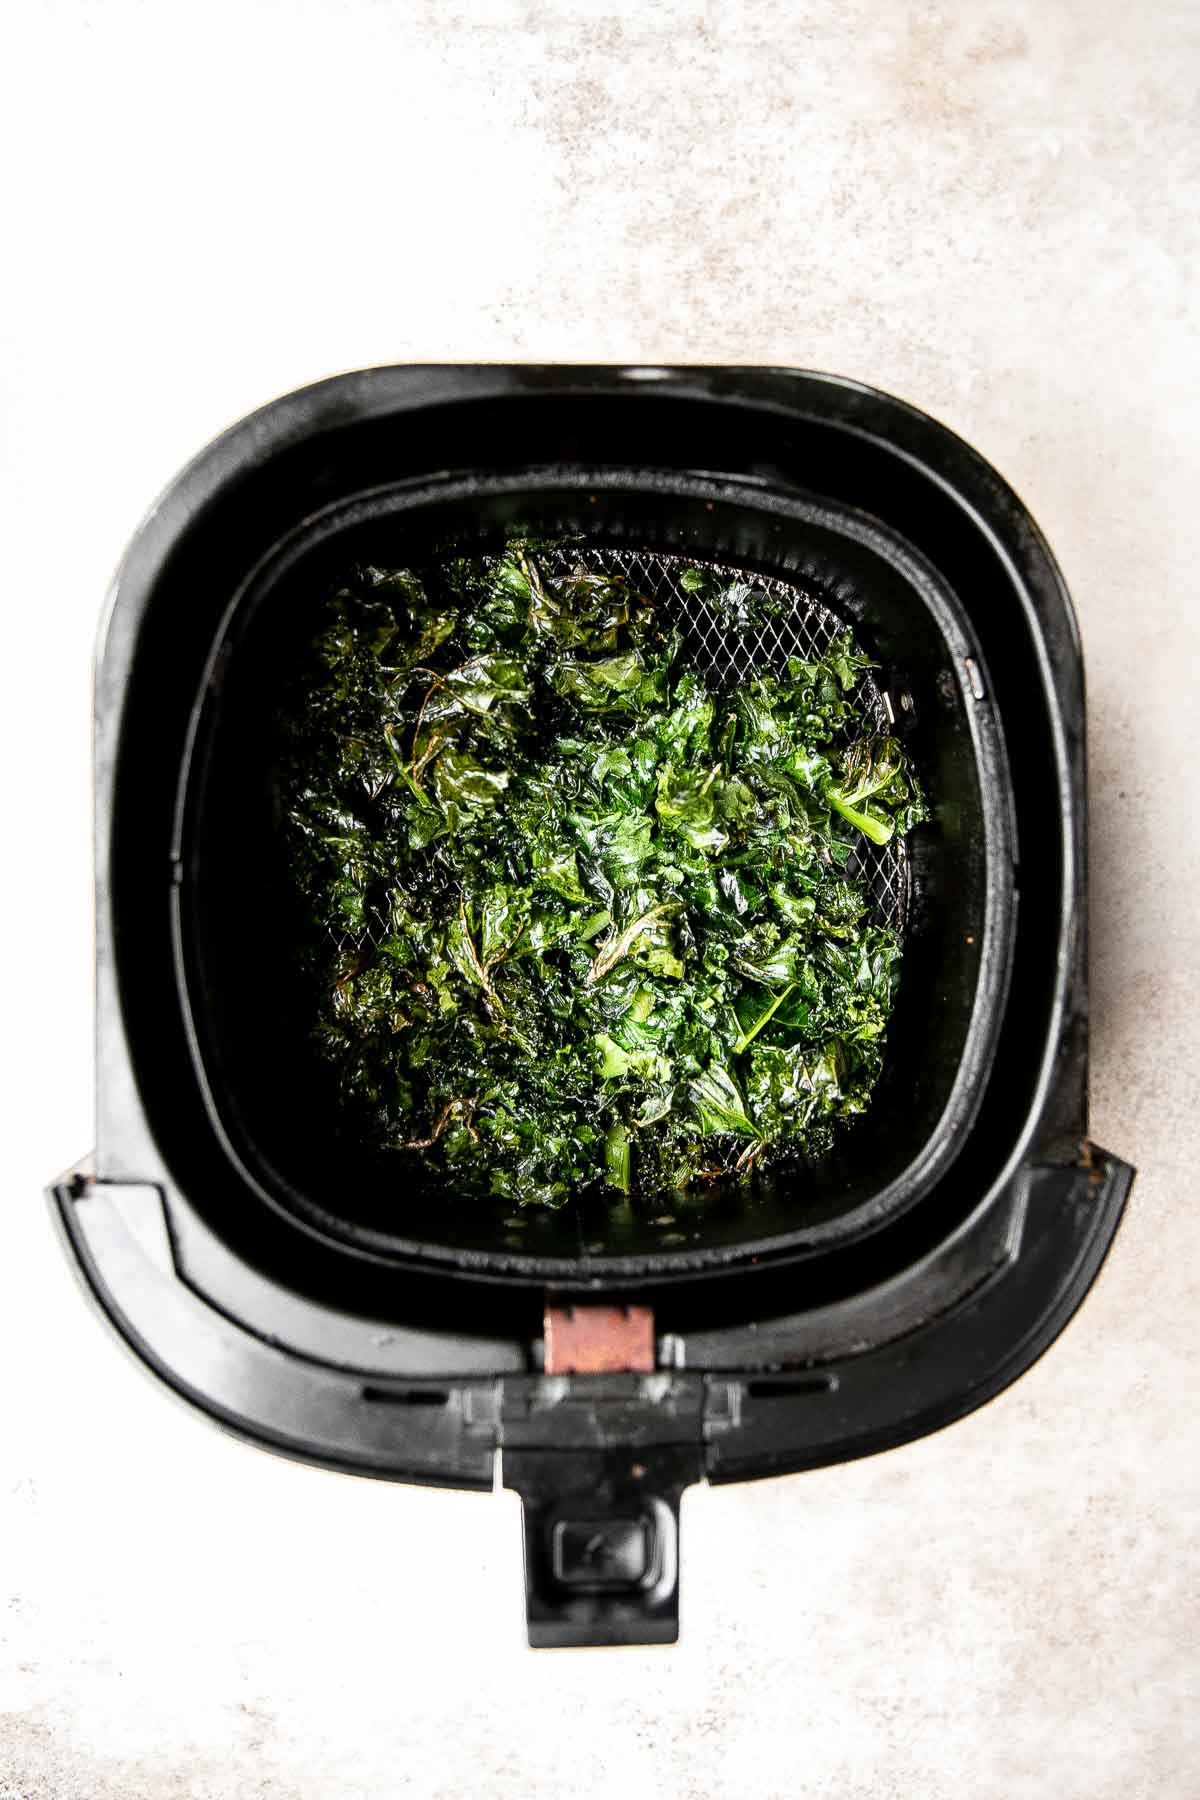
Add kale in the airfryer basket until full. It's fine to overlap the leaves and they shrink a lot during cooking. Air fry the kale at 350F for 8-10 minutes until crispy. Shake the basket once halfway during cooking.
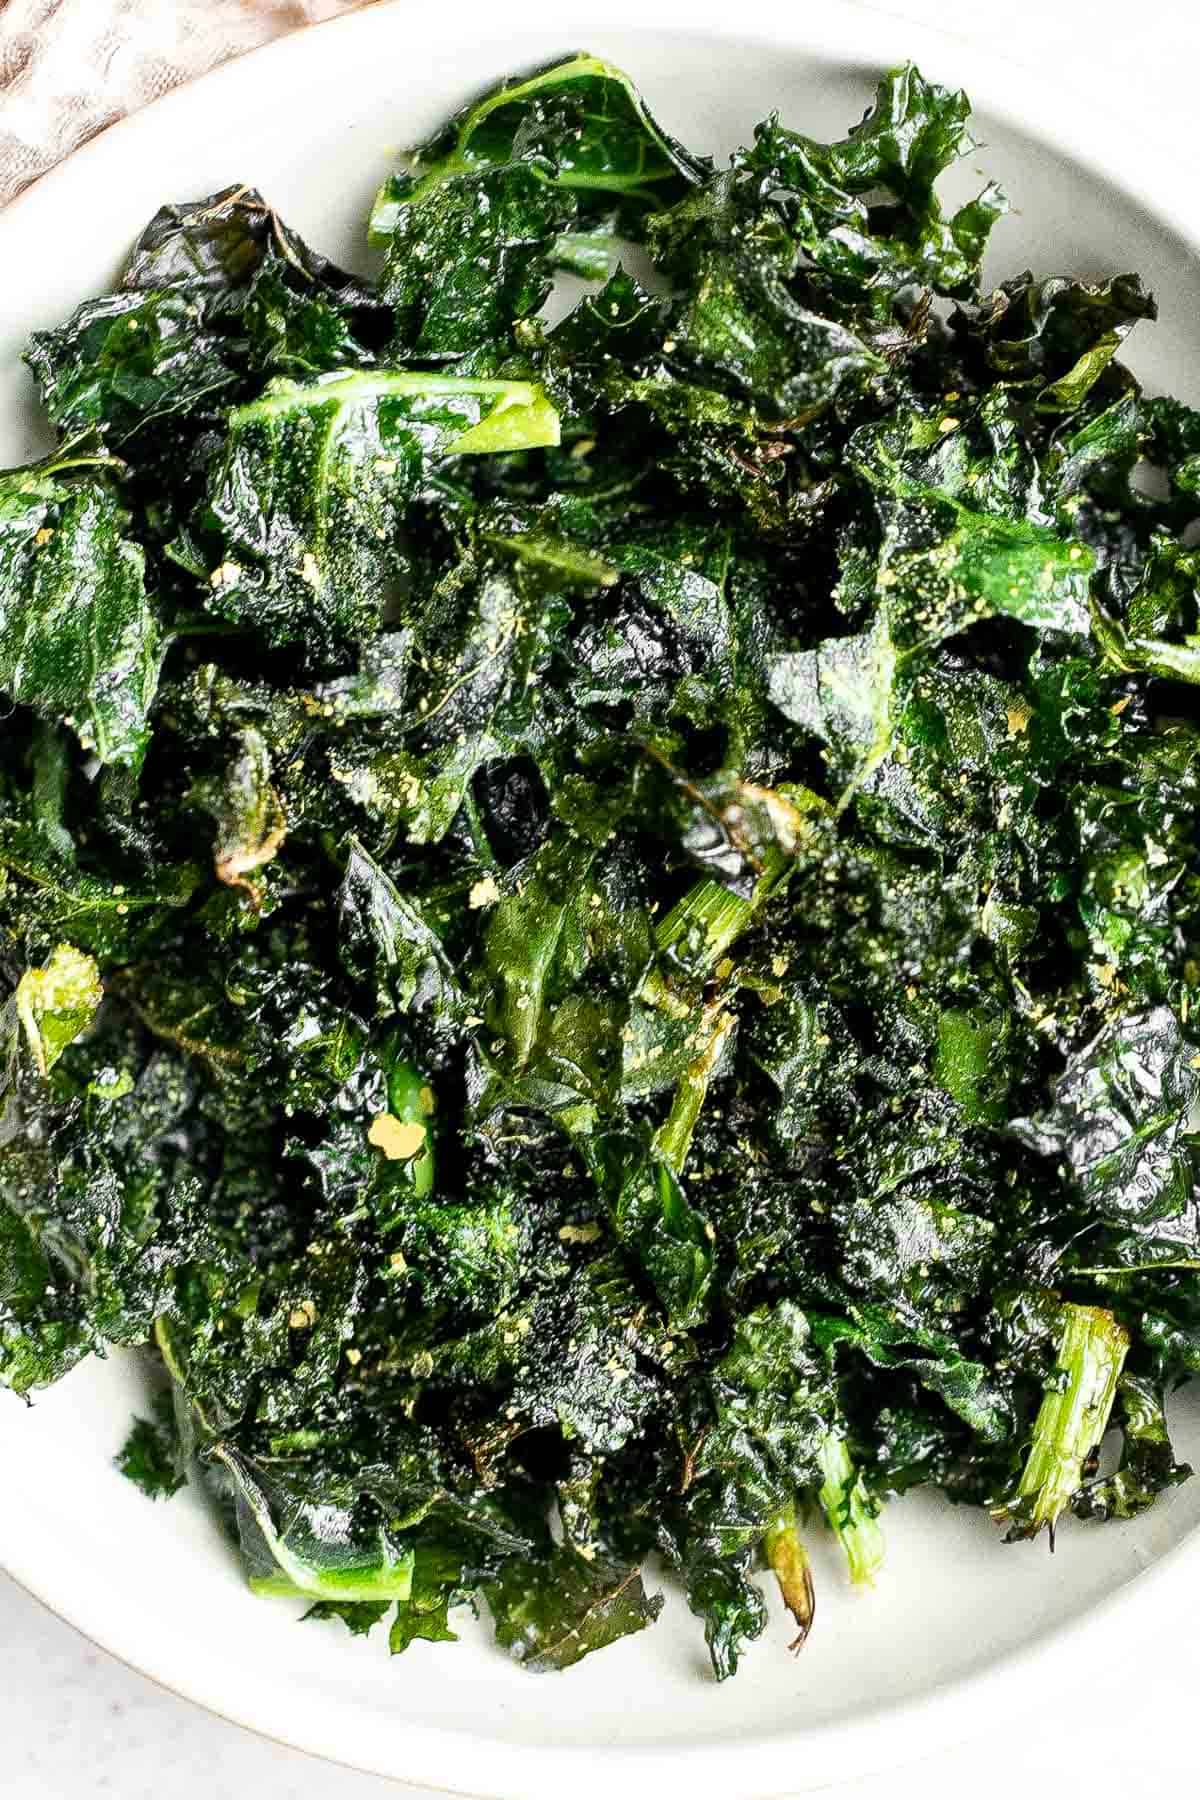
- Season: Sprinkle with nutritional yeast and serve immediately.
Flavor Variations
These kale chips are the perfect canvas for your favorite spices. You can even mimic the flavor of your favorite store-bought chip with the right combination of seasonings! Try:
- Salt and vinegar: This classic flavor combination is achieved by tossing the kale chips in 3-4 tablespoons of white vinegar and about 1 teaspoon salt before baking.
- Cheese: Sprinkle the cooked kale chips in with grated parmesan or cheddar.
- Spiced: Season with a combination of your favorite spices before cooking including garlic powder, paprika, or cumin. To spice it up, add red pepper powder.
- Barbecue: Add a barbecue seasoning blend to give these baked kale chips a smoky flavor.
How to Serve
Kale Chips are a delicious snack served on its own. If you are hosting a party or event at your home and are serving kale chips as part of a bigger spread of healthy snacks, try these:
For more options, see our 50 Best Healthy Snacks.
Recipe Tips and Tricks
- Serve with dip. A light-weight dip is great for these airy, crispy kale chips. They can't hold a lot of weight, so stick to a more liquid-style dip like whipped hummus or runny ranch to make sure you can get the dip from dish to mouth.
- Offer as an alternative to roasted vegetables or raw salad. These nutritious kale chips are a great alternative to a veggie or greens side at lunch and dinner. The crispy texture and ability to eat them with just fingers sometimes makes them more enticing than usual plant-based sides.
Storing and Freezing Instructions
How to Store
Store leftover kale chips in a Ziploc bag or other airtight container at room temperature in a cool, dry place out of direct sunlight for up to 3 days. You can serve them at room temperature.
How to Freeze
You can technically freeze kale chips, but they won't come out of the freezer as crispy as they went in and they may wilt a bit or get soggy. To freeze, transfer kale chips to a freezer bag and freeze for up to three months. Reheat them straight from frozen in the oven or air fryer to crisp them up again.
More Kale Recipes
- Kale Caesar Salad
- White Bean Soup with Kale
- Butternut Squash Quesadillas with Kale
- Creamy Tortellini Soup with Sausage
- Sweet Kale Salad
Tried this recipe?
I'd love to hear what you think! Leave a comment and rating below to share your feedback. Your reviews help others discover this recipe and help me keep creating more free recipes for you. Snap a photo and tag me on social media @aheadofthyme too.
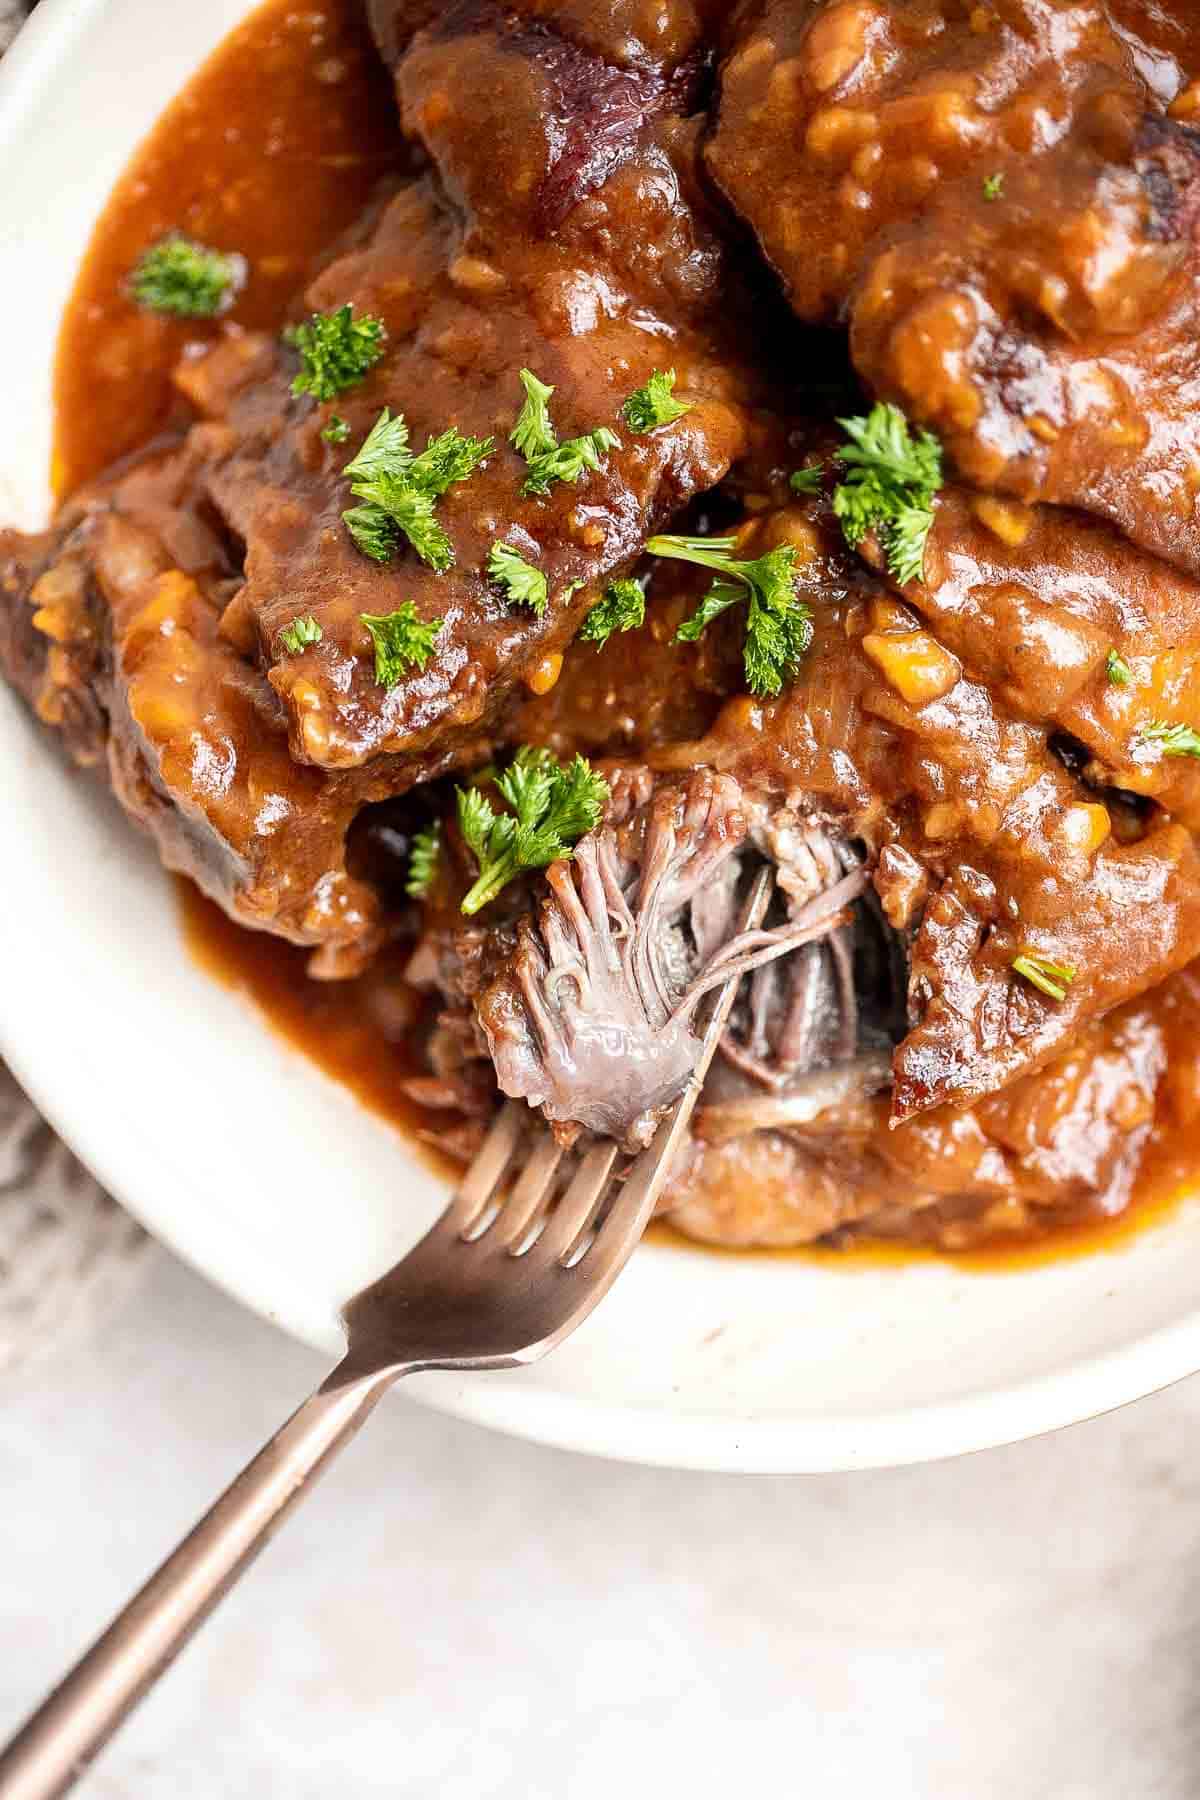
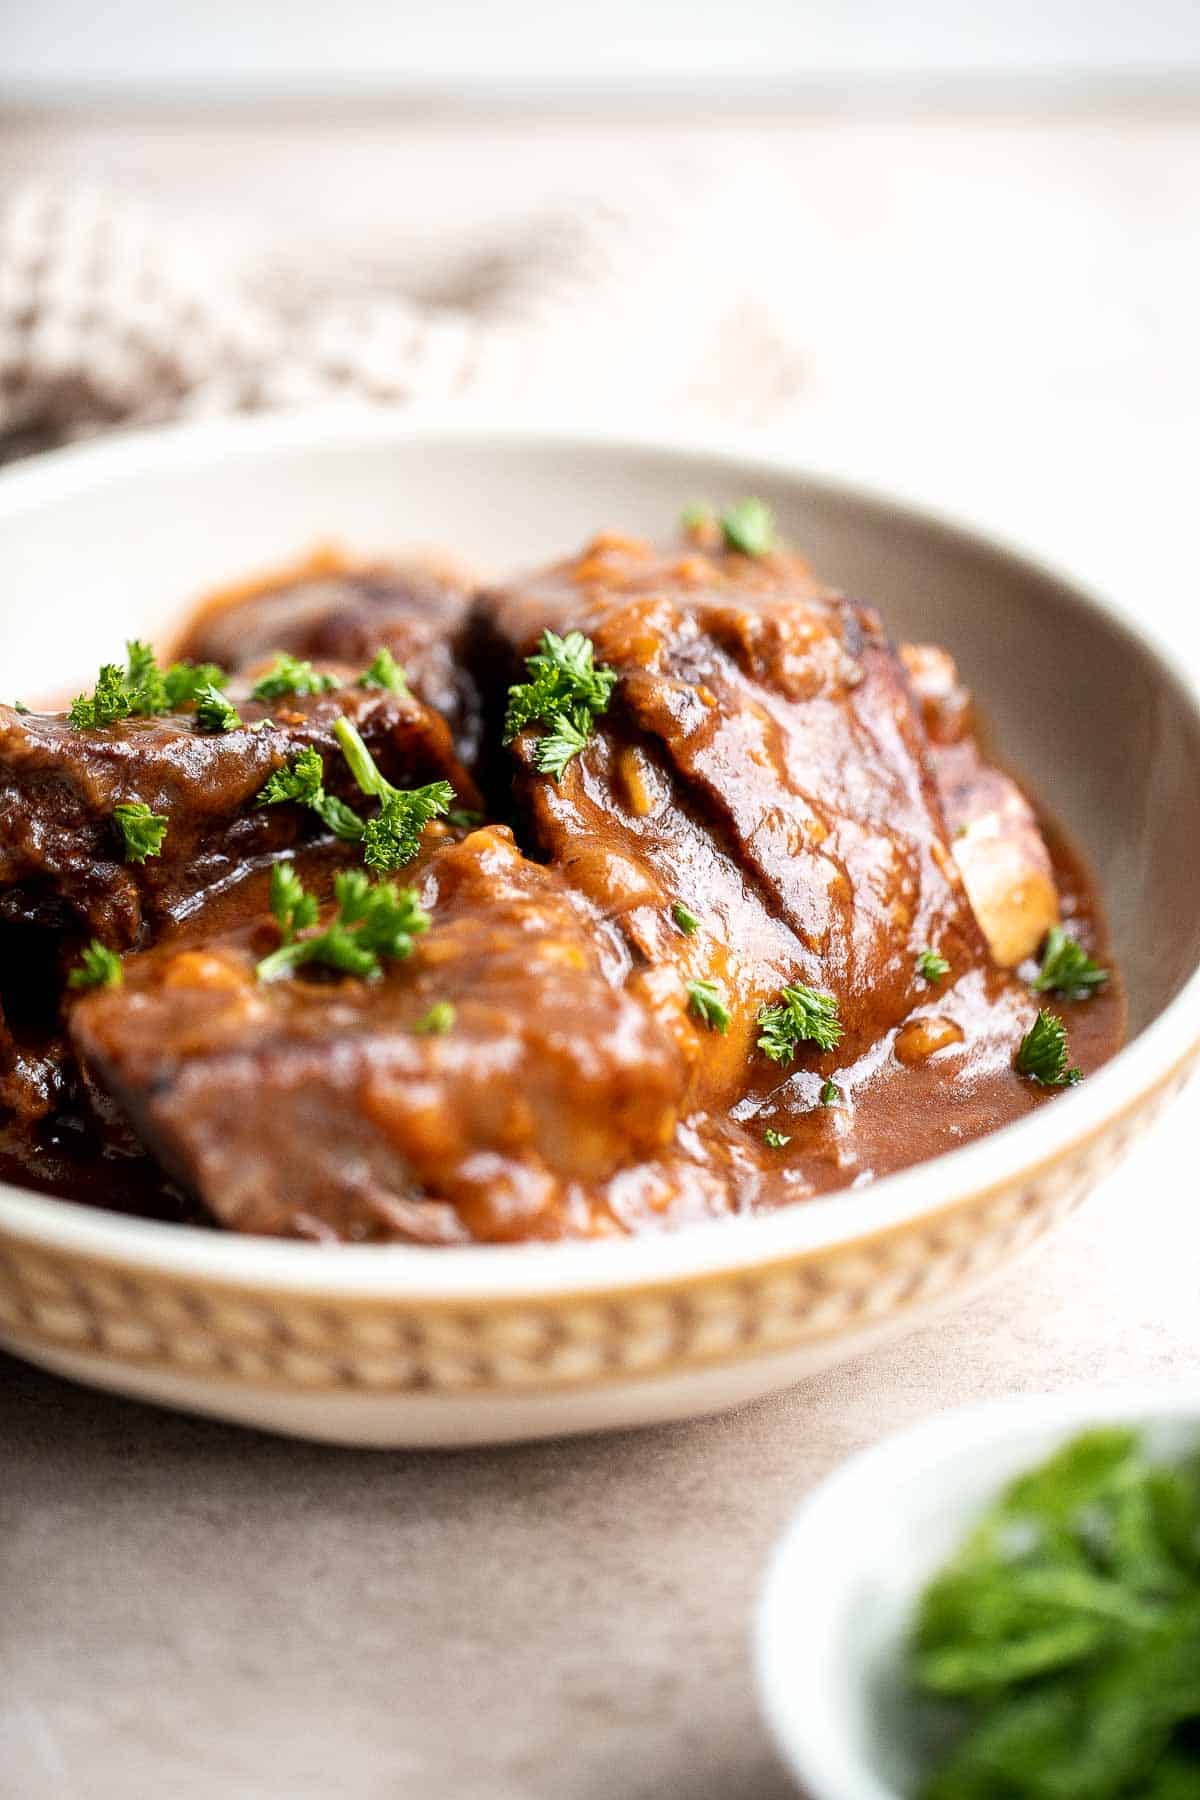
Instant Pot Short Ribs
Instant Pot Short Ribs are rich, tender, and delicious. These short ribs literally fall-off-the-bone after being braised in the pressure cooker in a red wine broth with potatoes for a one-pot meal that feels elegant enough to serve on an anniversary, but is easy enough to make for weeknight dinner or casual game day party.
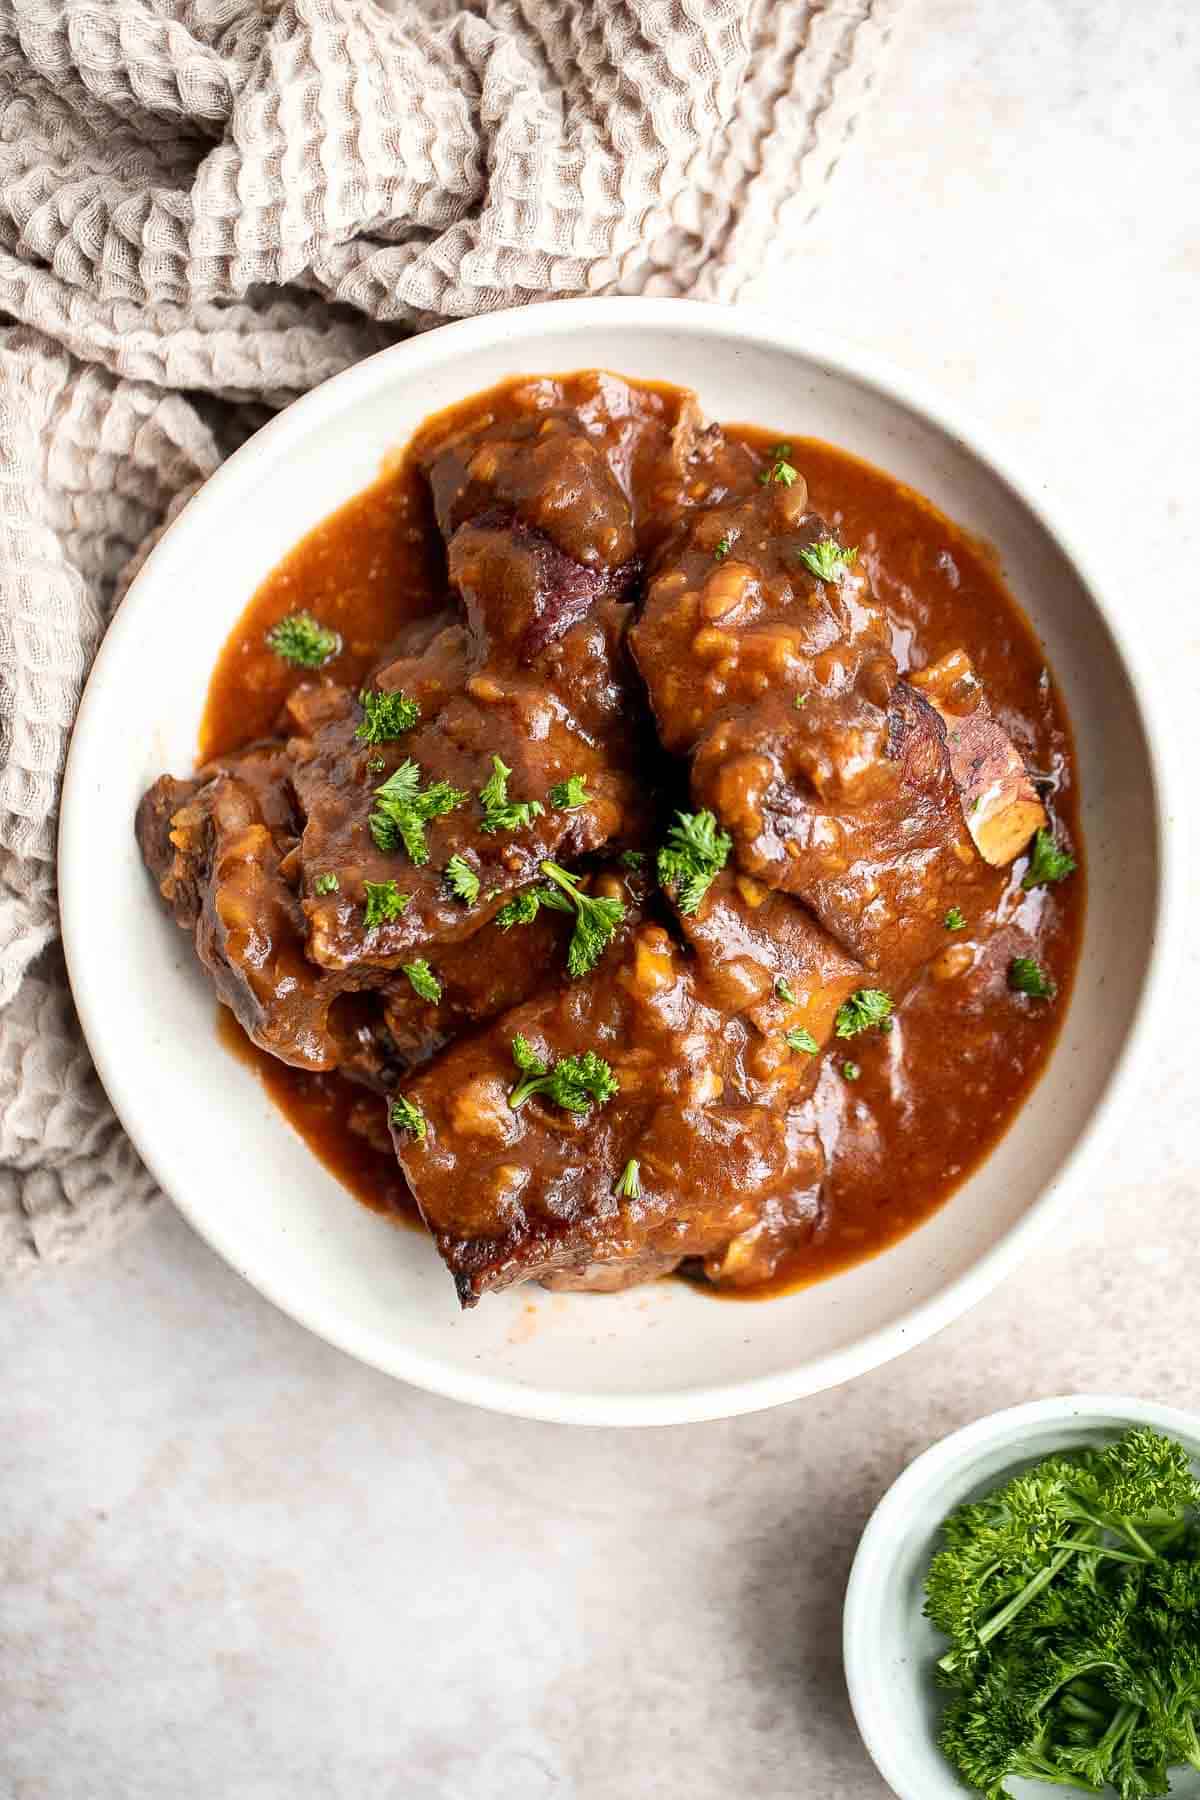
The best part? These pressure cooker short ribs are incredibly easy to make from scratch in under an hour. The accompanying potatoes make it a satisfying meal on its own, but you can also choose to serve it with dinner rolls and simple sides (see our ideas below!) to make it go further.
If you love these short ribs, you will love our Slow Cooker Korean Short Ribs too.
Why You'll Love these Instant Pot Short Ribs
- Easy to make in a pressure cooker. Instant Pot short ribs are as easy to make as they are delicious! After just five minutes of prep, you'll pop them into your Instant Pot for a quick sear and then a high-pressure cook to finish them off.
- Ready in under an hour! Even though they taste like an hours-long labor of love, these ribs only take 55 minutes to complete, from beginning prep to final plating.
- Perfect for special occasions. These succulent pressure cooker short ribs are braised in a red wine broth for rich flavor and tender, fall-off-the-bone meat - perfect for fancy dinner parties and romantic date nights for two, but just as good as an appy on Game Day.
Ingredient Notes
To make these easy Instant Pot Short Ribs, you will need the following ingredients (full measurements in recipe card below):
- beef short ribs - this recipe will also work with chuck roast, though the texture will be slightly different.
- avocado oil - olive oil or any vegetable oil is also okay to use if you don't have avocado oil.
- onion - shallots will work similarly, just use two in place of the onion.
- garlic - fresh garlic will always provide the best flavor, but you can use pre-minced garlic or garlic paste for convenience.
- red wine - not a fan of red wine or don't have any on hand? Use tart fruit juice like cranberry or cherry juice instead. Balsamic vinegar will also work.
- Worcestershire sauce - if you don't have Worcestershire sauce on hand, you can use the same measure of soy sauce or coconut aminos.
- tomato paste - an equal amount of tomato sauce will work in a pinch.
- granulated sugar - if you need to make a swap, you can use an equal measure of honey, maple syrup, or your favorite sugar alternative.
- beef broth - you can use plain water in place of the beef broth for milder flavor.
- red potatoes - Yukon golds are a good substitute for red potatoes if you have some on hand. You can also use baby potatoes - just triple the quantity since they are smaller.
- cornstarch - you can also use all-purpose flour.
- salt and pepper
You will also need measuring cups and spoons and a pressure cooker such as an Instant Pot.
How to Make the Best Instant Pot Short Ribs
- Prep the short ribs. Use a paper towel to pat the short ribs completely dry. Set aside on a plate.
- Sear the short ribs. On the Instant Pot, turn the Sauté function on high. Add oil and heat until the hot oil sizzles, about 1-2 minutes. Add the short ribs and sear until golden brown on all sides, about 4 minutes per side. The ribs don't need to be fully cooked at this point. Transfer onto a plate and set aside.
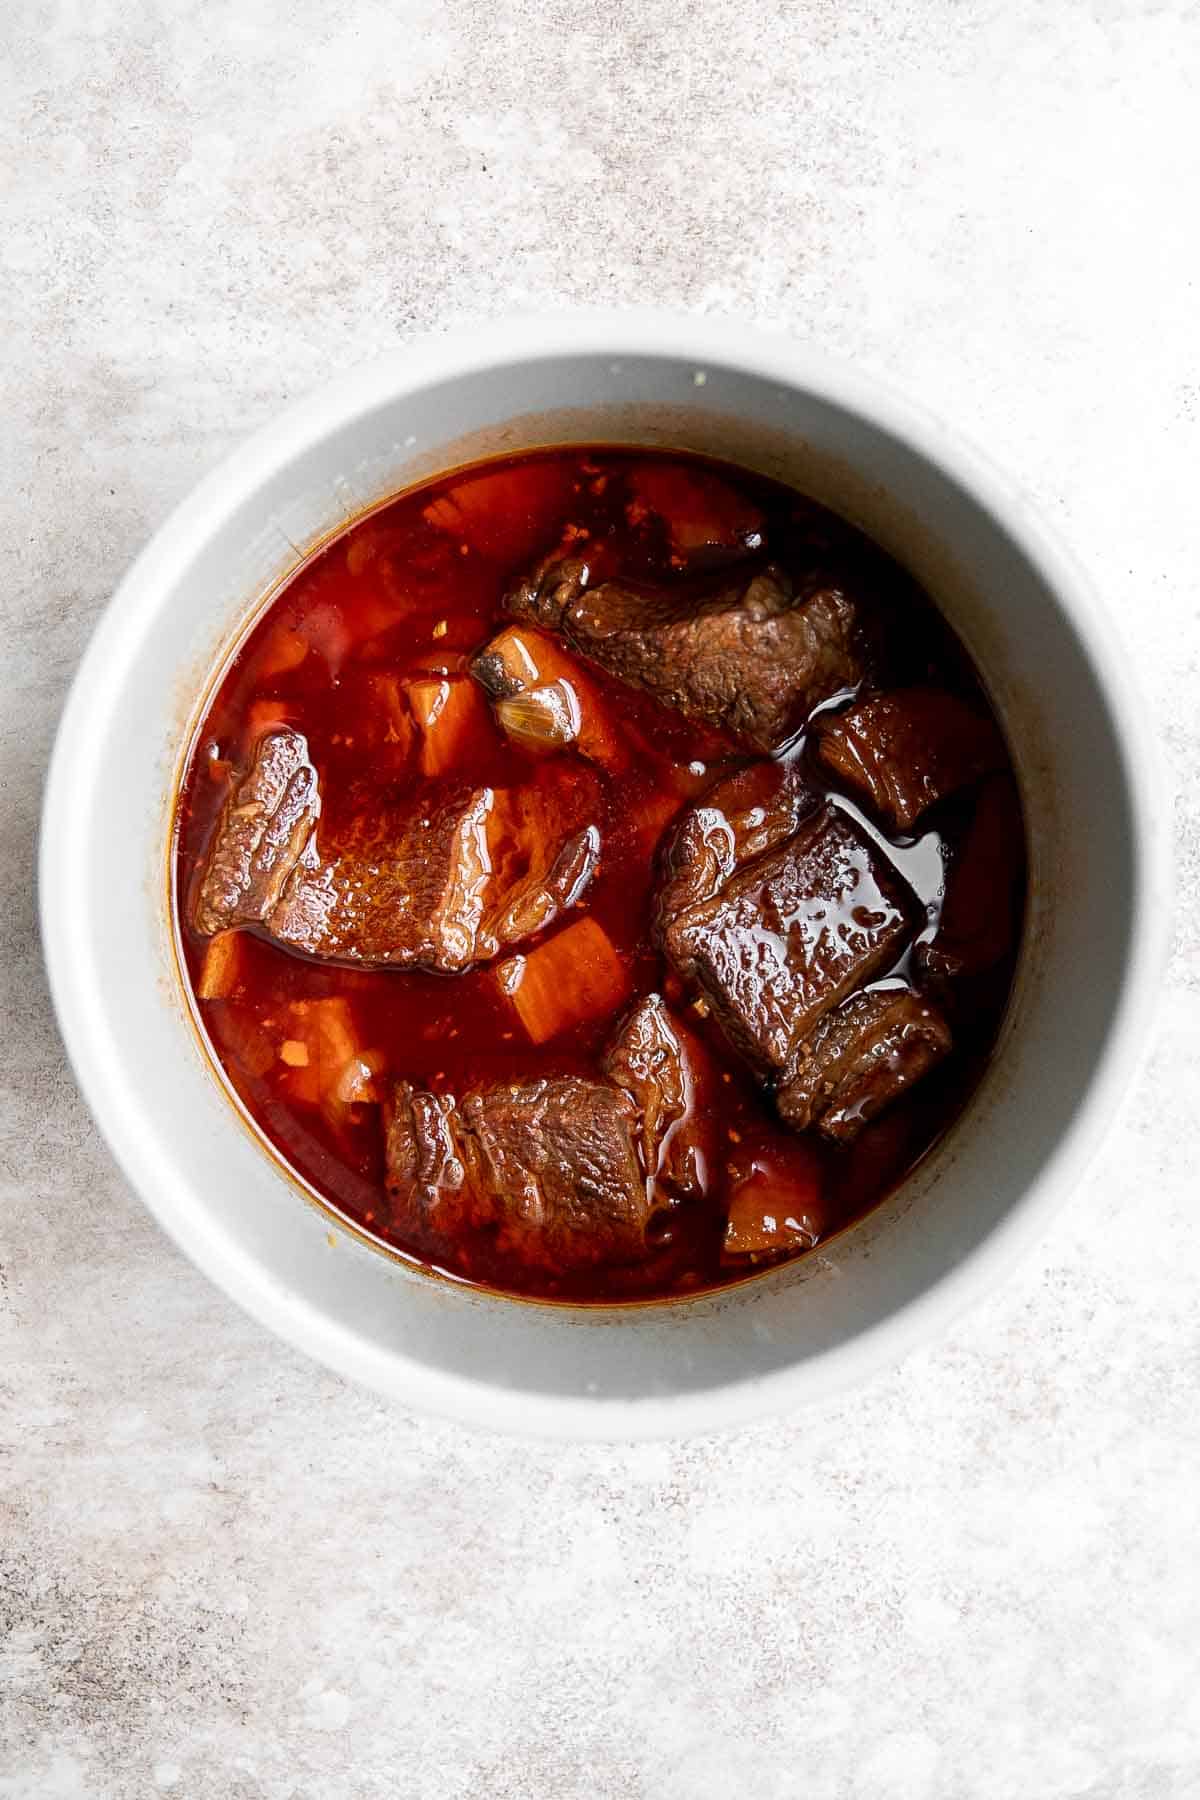
- Make sauce. Add onions and garlic and cook until fragrant, about 2 minutes. Add wine and Worcestershire sauce. Stir well to deglaze the pot. Add tomato paste, sugar, and broth and mix well until smooth.
- Add potatoes. Return the ribs to the pot and add potatoes.
- Pressure cook. Close the lid and switch the Instant Pot to the pressure cooking mode on manual High and seal the lid (the steam release knob must be turned to the sealed position). Pressure cook the ribs until tender (the meat falls off the bone), about 45 minutes.
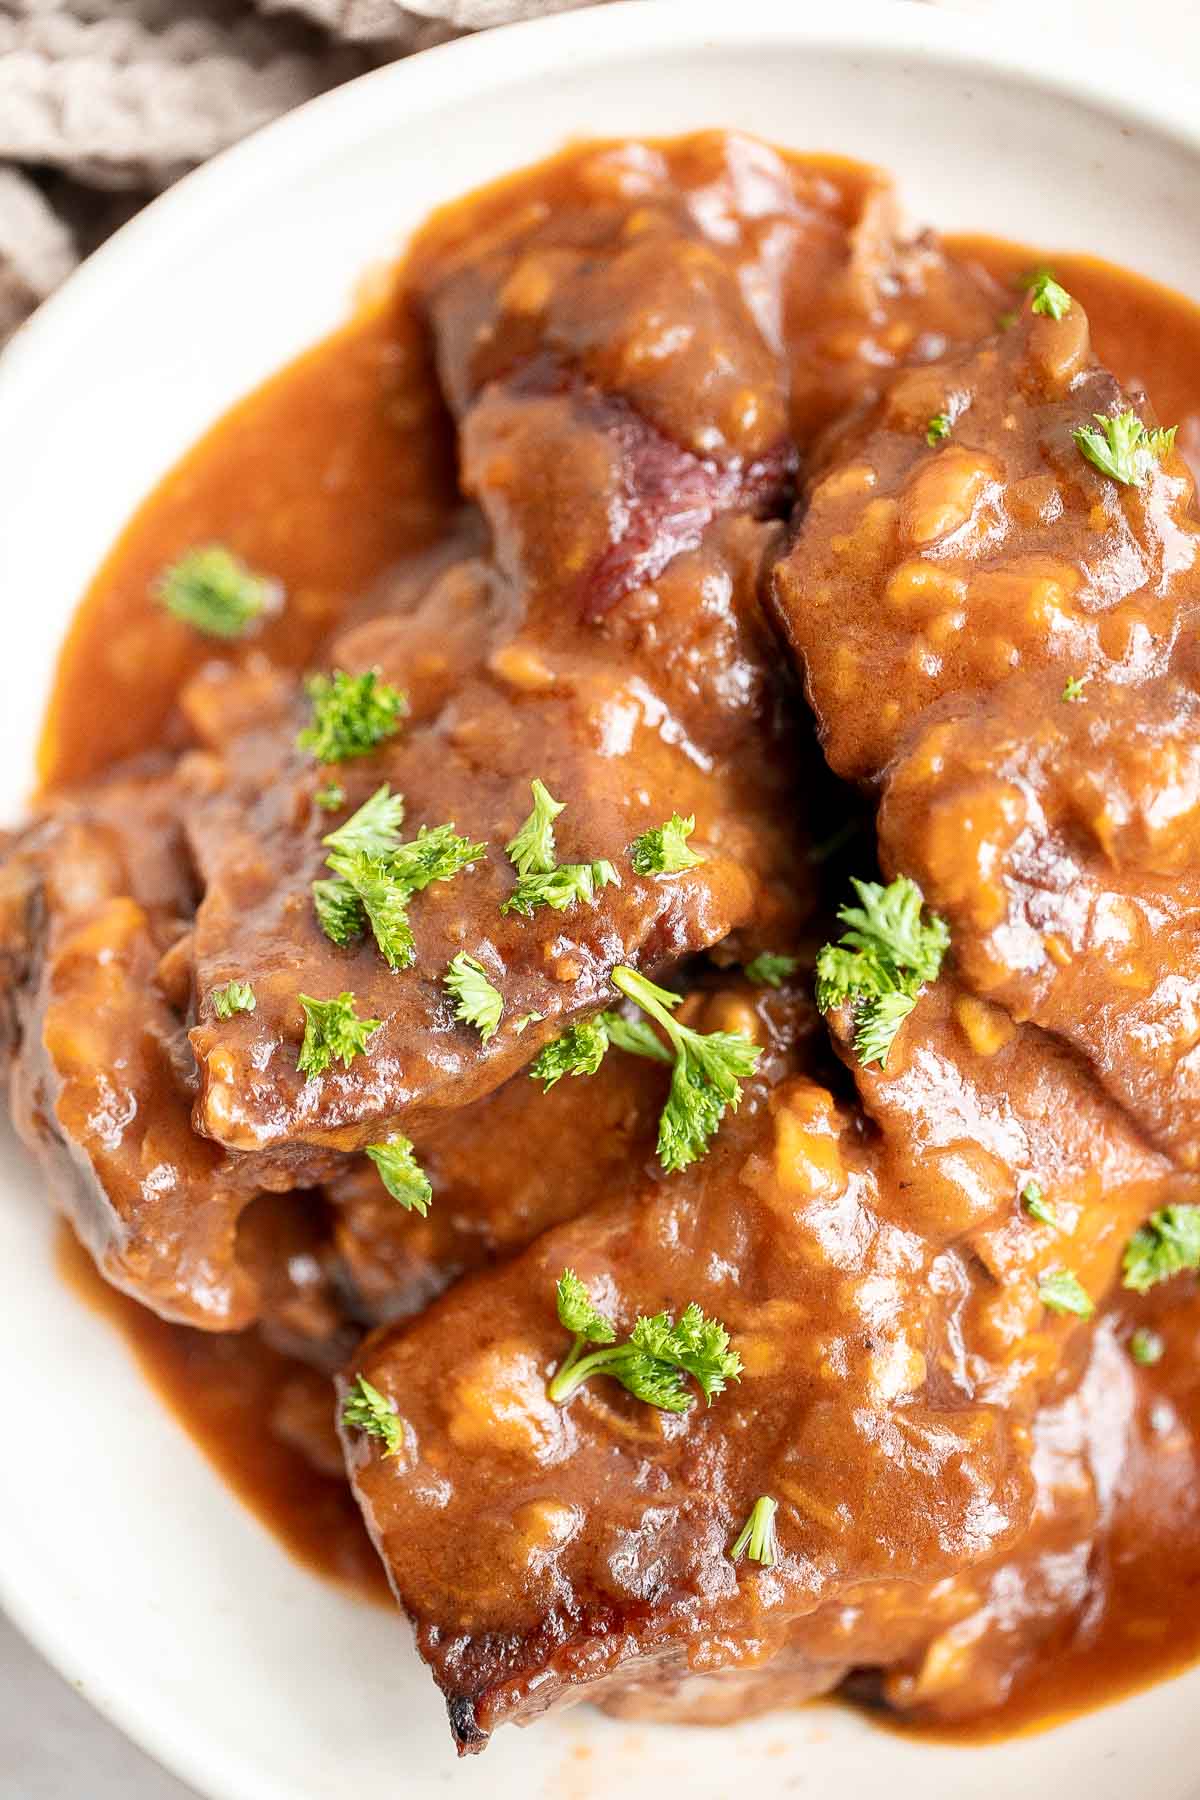
- Quick release. Once the time is up, quick release the remaining pressure by turning the steam release valve to the venting position. Season with salt and pepper, to taste.


- Thicken the sauce (optional). Optionally, to thicken the sauce for serving, mix cornstarch into 2 tablespoons of water and whisk to combine into a slush. Stir in the cornstarch slurry to the pot. Switch the Sauté function back on high and cook until the sauce has thickened to a desired consistency, about 2-3 minutes.
How to Cook Short Ribs on the Stove or Slow Cooker
If you don't have an instant pot or pressure cooker, you can prepare the short ribs in a Dutch oven or large pot over the stove, or in a slow cooker.
- Over the stove: Follow the same steps but in a Dutch oven or large pot over the stove over medium heat. When ready to simmer, cover the lid and simmer over low heat for 2 hours.
- In the slow cooker: Follow the same steps in a pot over the stove, then transfer to a slow cooker before simmering and cook on high for 4-5 hours.
How to Serve
Serve these Instant Pot Short Ribs as an appetizer on game day or as a complete meal with roasted vegetables or salad. They pair exceptionally well with roasted root vegetables or broccoli, or you can choose to pair them with a basic salad. Some of our favorite side dishes to pair with these ribs are:
- Crispy Smashed Potatoes
- Mascarpone Mashed Potatoes
- Balsamic Roasted Broccoli
- Garden Salad
- Herb Roasted Sweet Potatoes
- Oven Baked Vegetables
Recipe Tips and Tricks
- Choose your short ribs wisely. Short ribs can vary in the ratio of bone-to-meat, which will affect the cooking time and ultimately the quality of the final dish. Make sure your ribs have at least one and a half inches of meat on top of the ribs and a healthy marbling of fat for best results!
- Pat the ribs completely dry. Use paper towels to pat each rib completely dry. This will ensure that they sear quickly and properly. If the ribs are too wet, it will not form a golden crust in time.
- Add herbs. Switch the flavors by adding in some fresh herbs before pressure cooking. Parsley, thyme, and dill are good options.
Storing and Freezing Instructions
How to Store
Store leftover short ribs in an airtight container and refrigerate for up to 4 days.
How to Reheat
Reheat leftover short ribs on a skillet over medium-low heat until warmed through. You can also reheat in the microwave in 30-second increments until hot.
How to Freeze
Remove the meat from the rib bones once the ribs have cooled and place the meat in a freezer safe container or freezer bag. Freeze for up to 3 months. Allow the meat to thaw in the refrigerator overnight before reheating.
More Instant Pot Recipes
- 30 Best Instant Pot Recipes
- Instant Pot Whole Chicken
- Instant Pot Beef Curry
- Teriyaki Chicken
- Instant Pot Mashed Potatoes
- Instant Pot Chicken Fried Rice
Tried this recipe?
I'd love to hear what you think! Leave a comment and rating below to share your feedback. Your reviews help others discover this recipe and help me keep creating more free recipes for you. Snap a photo and tag me on social media @aheadofthyme too.

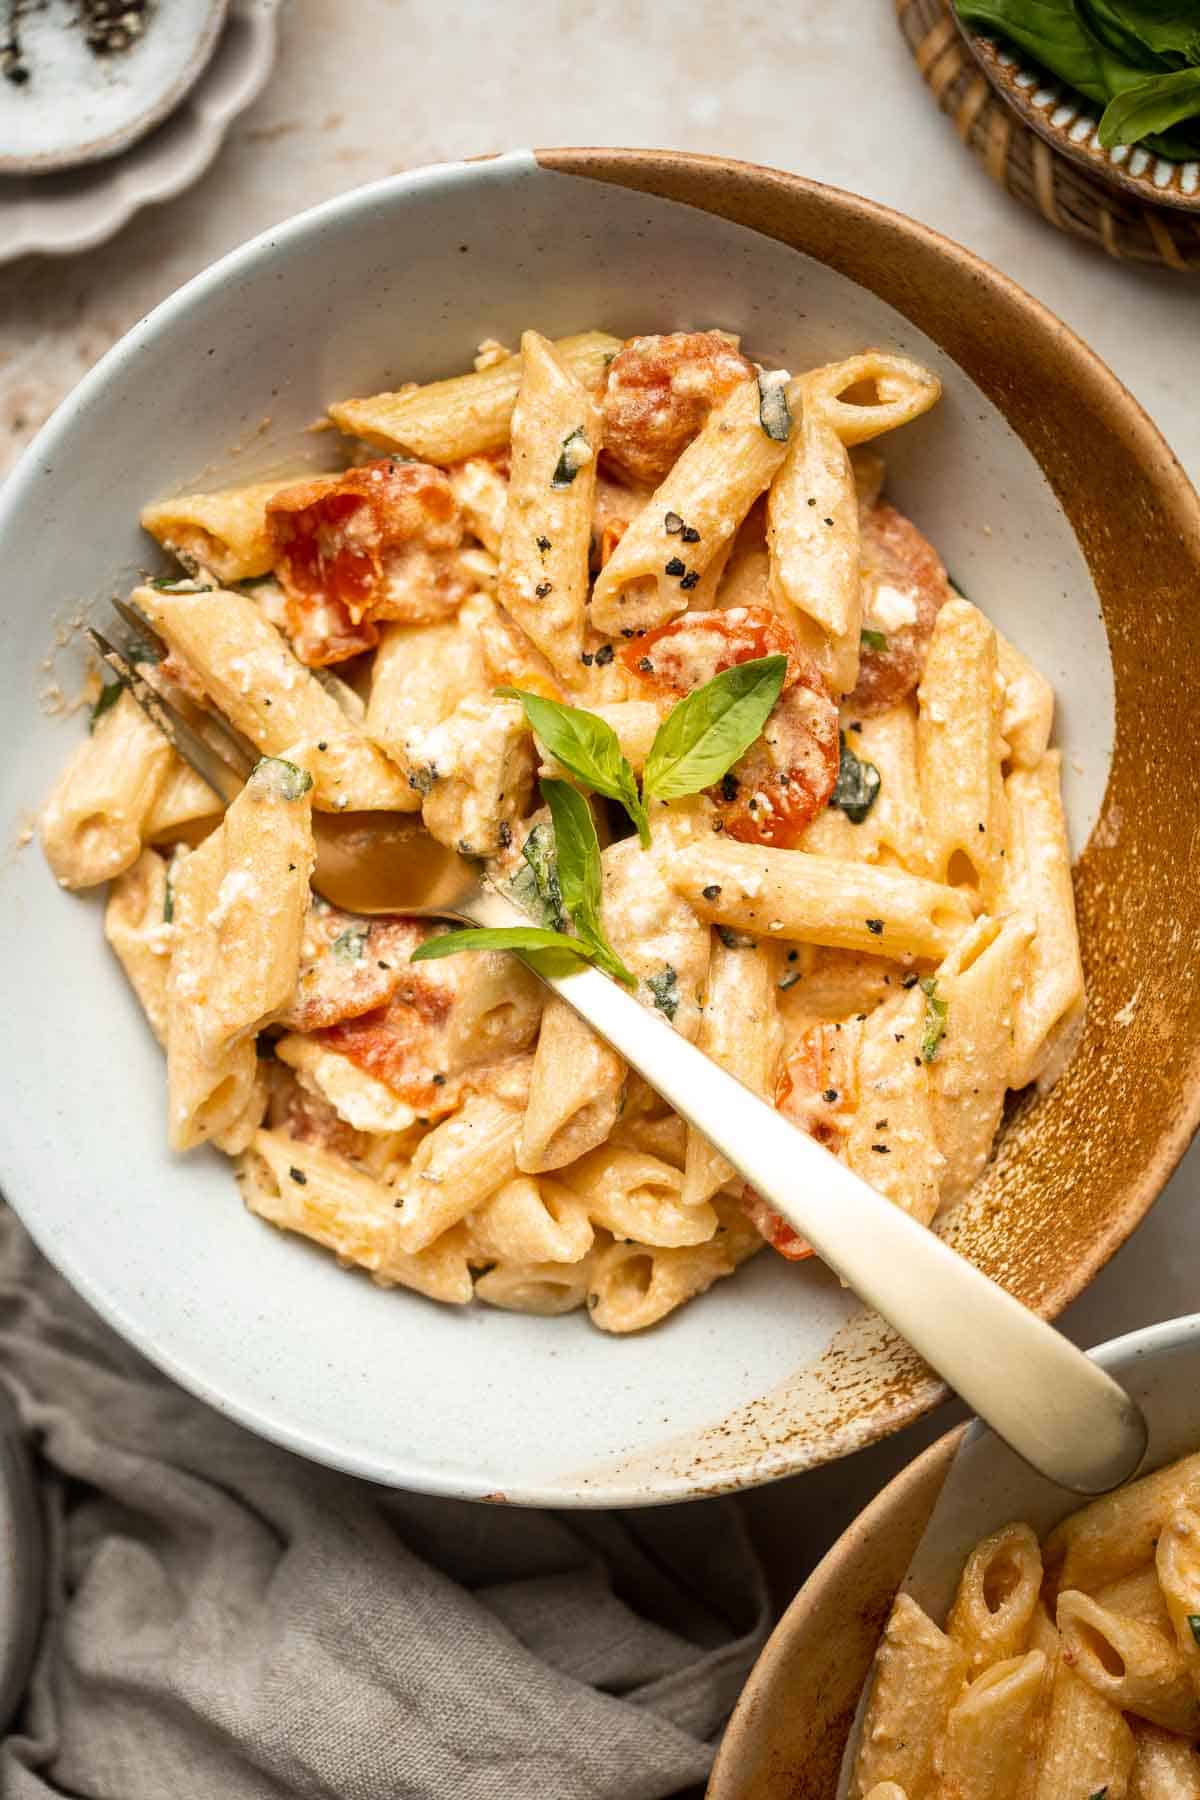
Baked Feta Pasta
Baked Feta Pasta is a quick and easy weeknight dinner recipe that is creamy, delicious, and flavorful - the whole family will love it! With easy to follow simple instructions and just a handful of ingredients including a whole block of feta, bursting cherry tomatoes, and tender pasta, it's no wonder that this Tiktok pasta went viral.
This viral feta pasta takes just 10 minutes of prep work, while the rest of the time is spend roasting feta in the oven, and boiling pasta. It's a low maintenance and mostly hands-free dish that you need to add to you weekly dinner rotation. This baked pasta is not quite a one-pot meal, but it's just as easy and more than satisfying when served alone or with simple side dishes.
Why You'll Love this Baked Feta Pasta
- Minimal prep work. This recipe is incredibly simple and requires hardly any work, but the flavor payoff is huge! If you can boil pasta and preheat an oven, you can have this creamy baked feta pasta on the table in well under an hour - 40 minutes to be exact!
- Cheesy tomato basil sauce. This simple recipe is so good because of the oven-made sauce. Bursting cherry tomatoes, roasted garlic, creamy feta, and fresh basil transform into the most craveable pasta sauce ever.
- Perfect for busy evenings. Baked feta pasta is the ideal weeknight dinner because it's so easy to make! It's a fuss-free, hands off meal that is great for when you want a delicious homemade meal but don't have a lot of time or energy to cook.
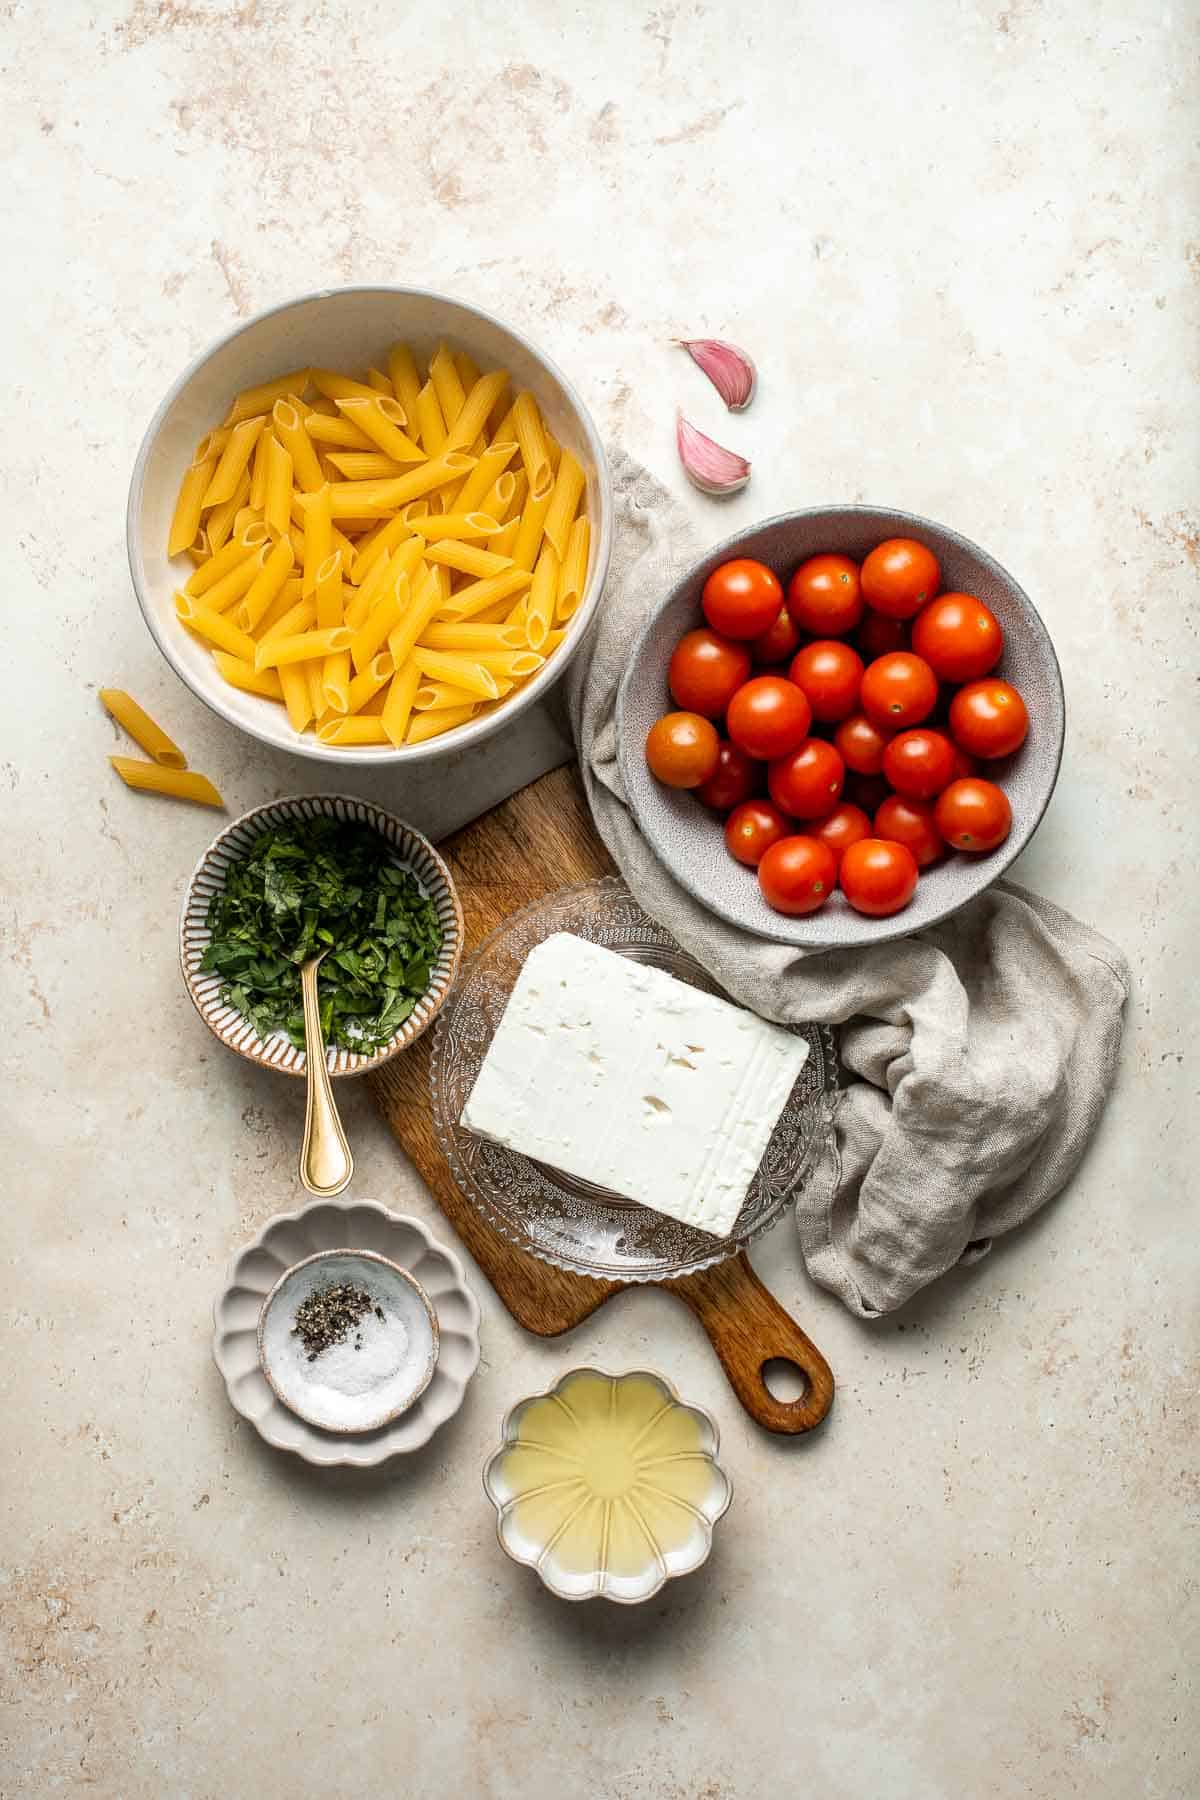
Ingredient Notes
To make this delicious Baked Feta Pasta, you will need the following ingredients (full measurements in recipe card below):
- olive oil - avocado oil would work in place of olive oil if you need a substitute.
- cherry tomatoes - grape, plum, or Campari tomatoes will also work in a pinch.
- garlic - if you don't have fresh garlic on hand, you can use one teaspoon of minced garlic for each clove.
- feta cheese
- pasta - the viral version of this baked feta pasta uses penne, but you can use any similar-sized pasta noodles. Rotini, bow tie, or rigatoni are great options.
- fresh basil - you can also use dried basil (though it will have a slightly different texture) or other soft herbs like parsley or dill.
- salt and pepper
You will also need measuring cups and spoons, mixing bowl, 9x13-inch casserole pan, and cooking pot.
How to Make the Best Baked Feta Pasta
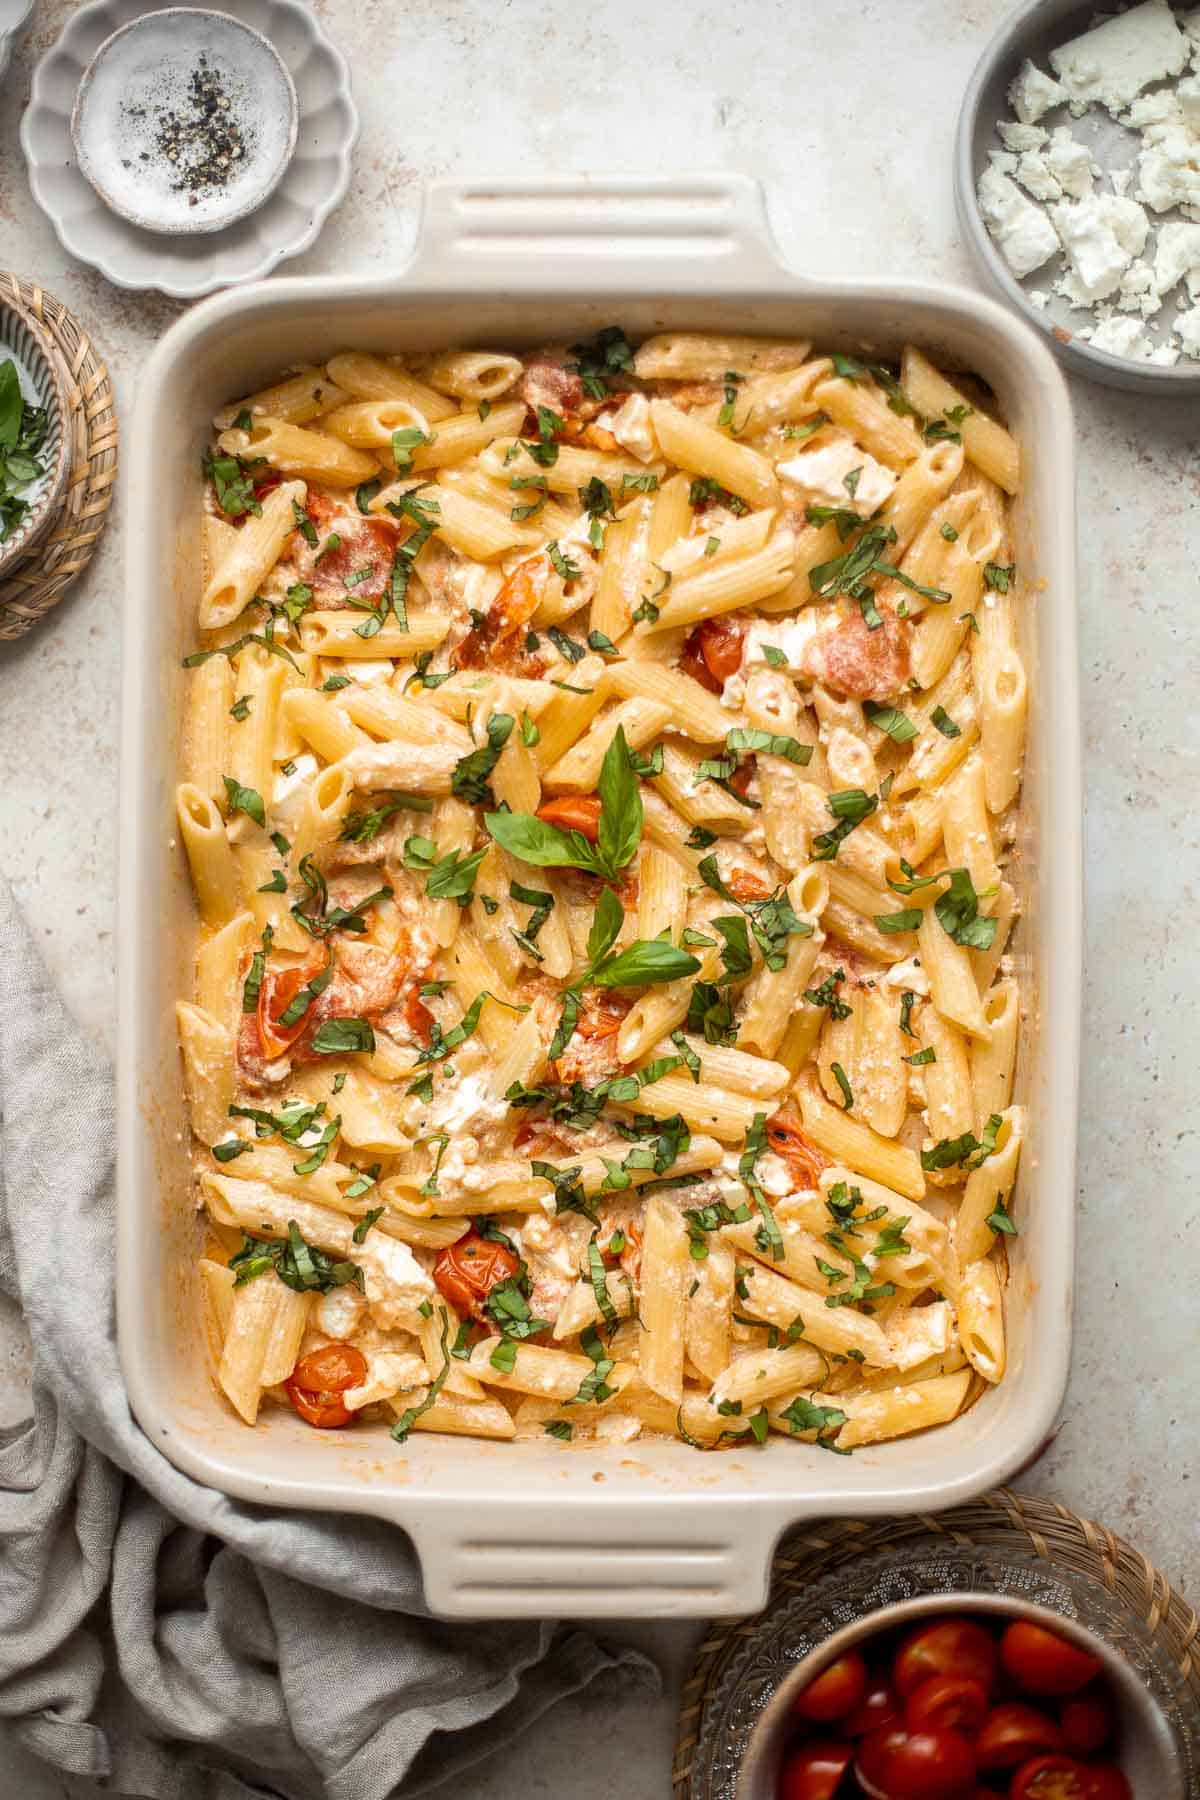
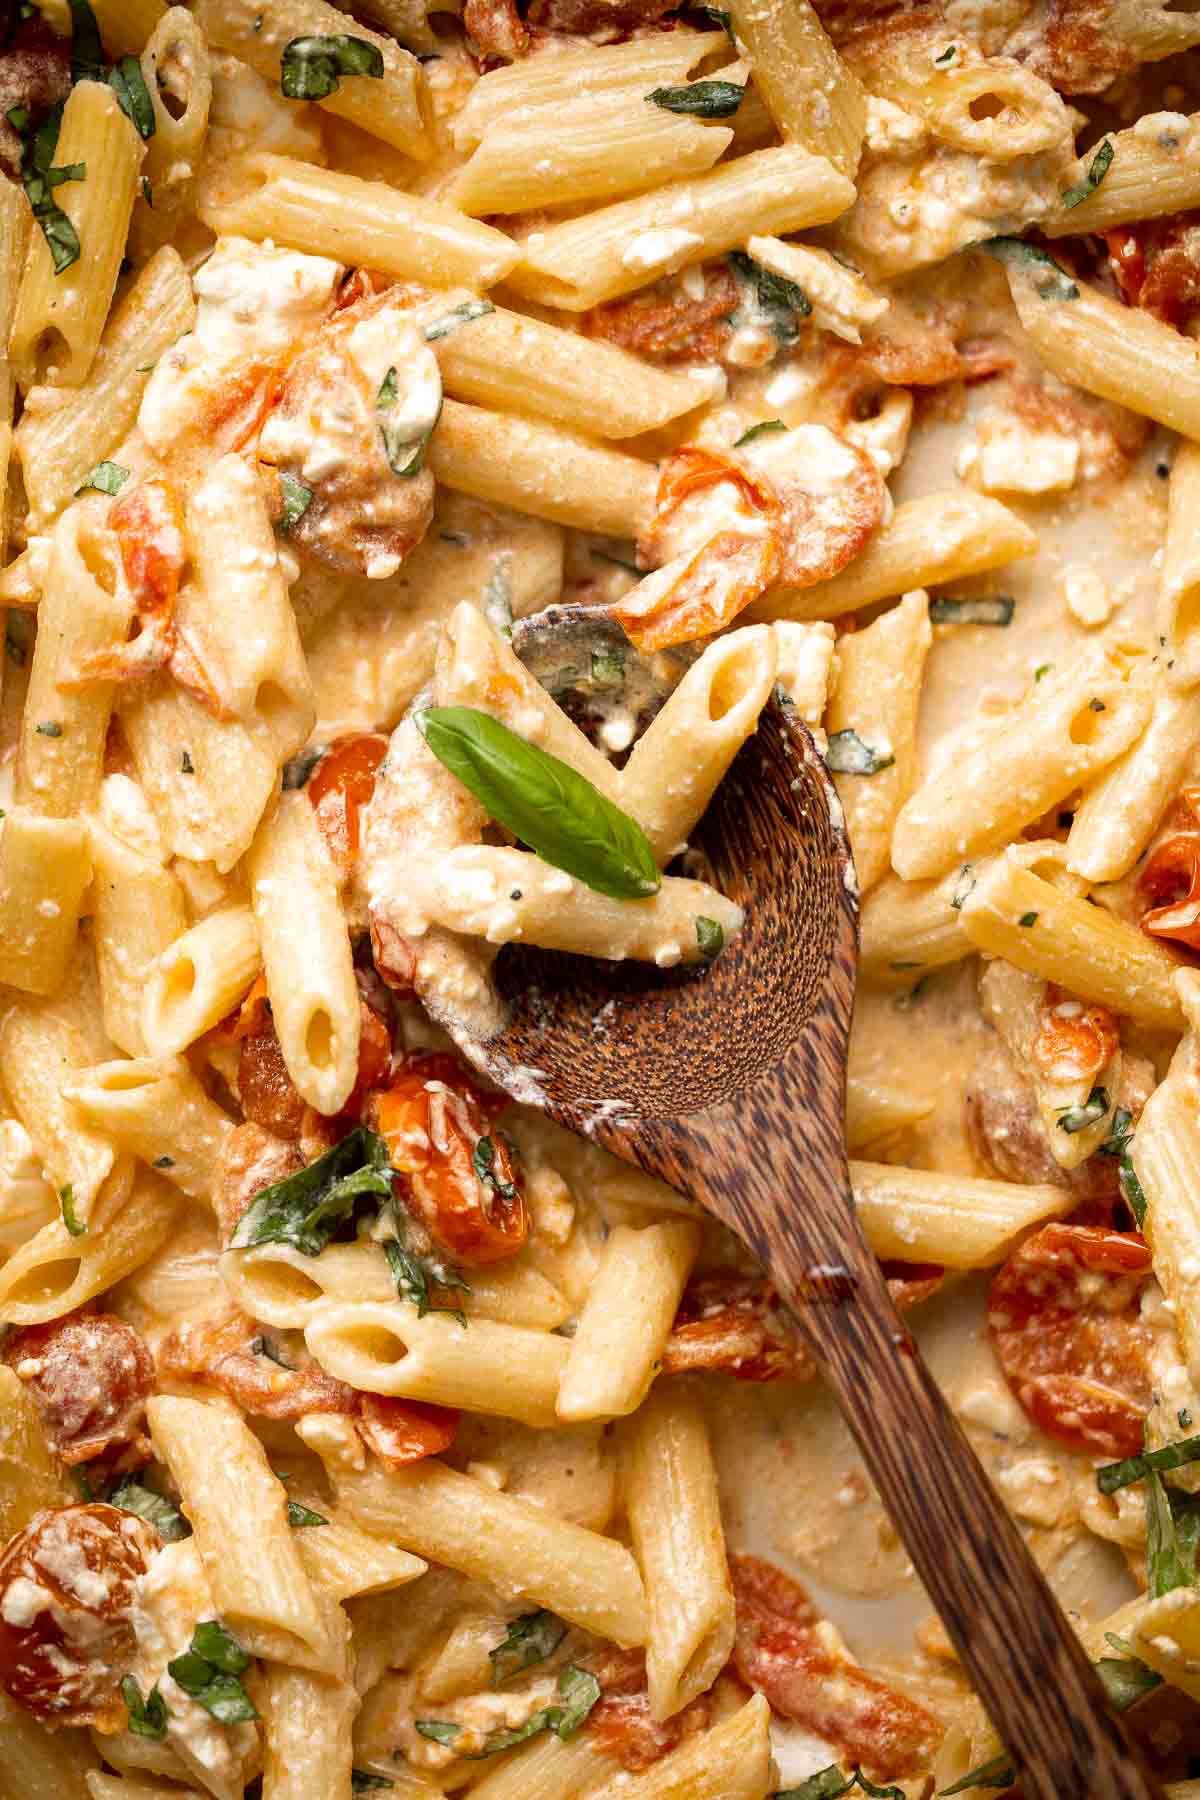
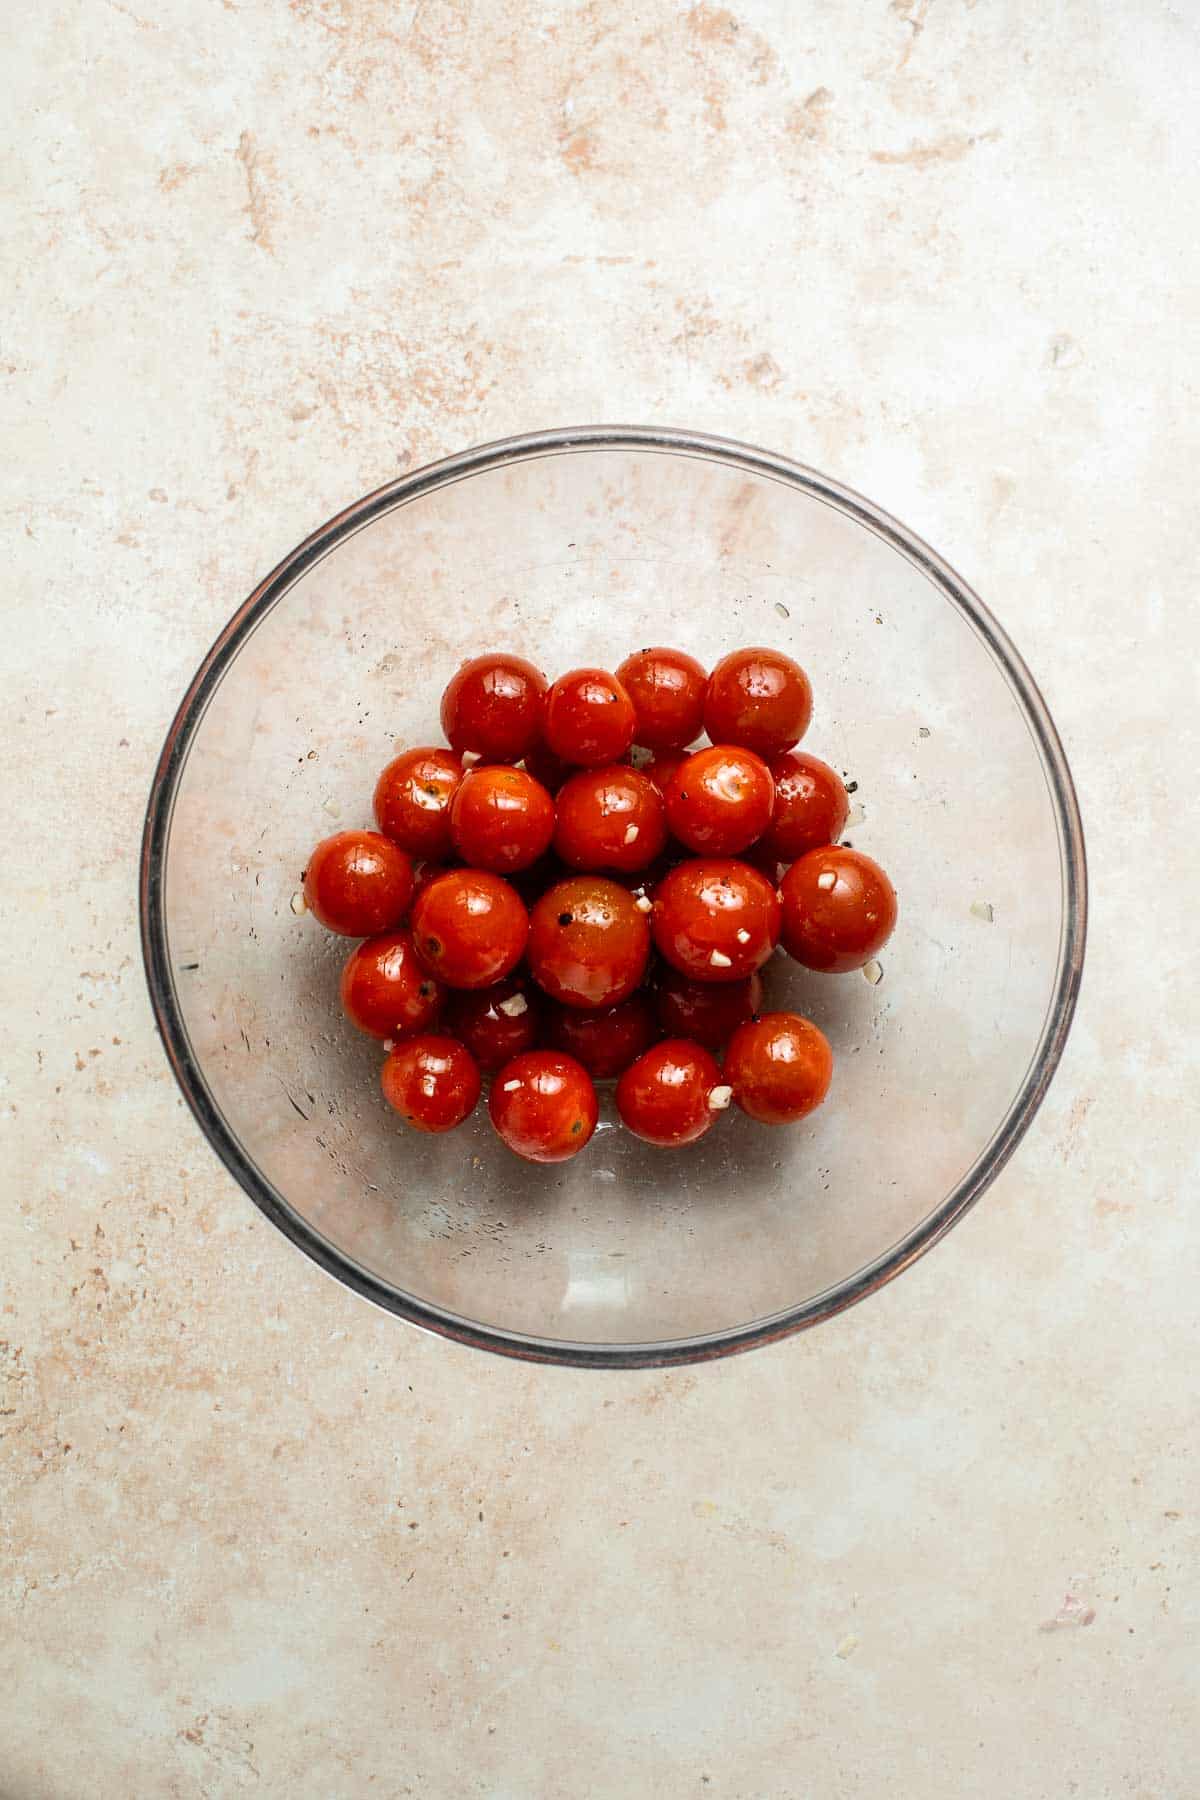
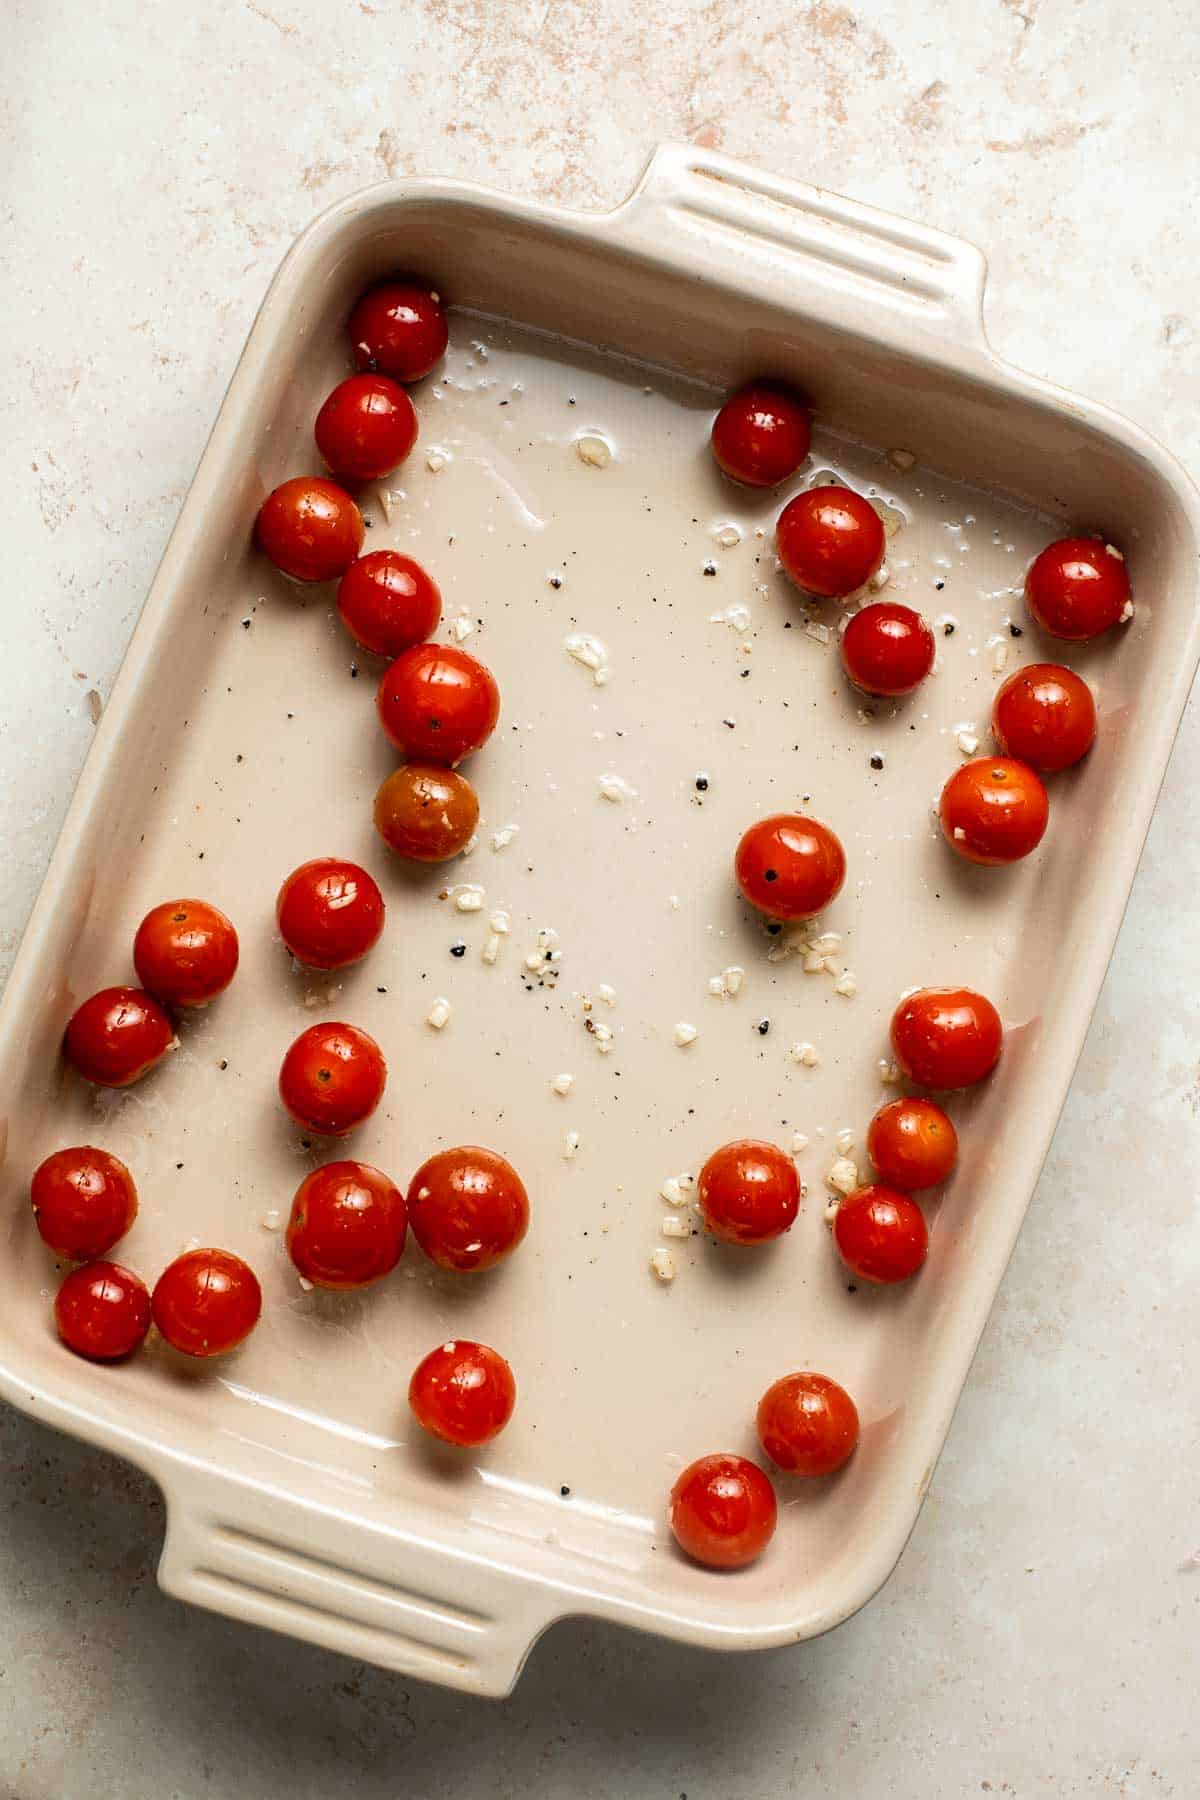
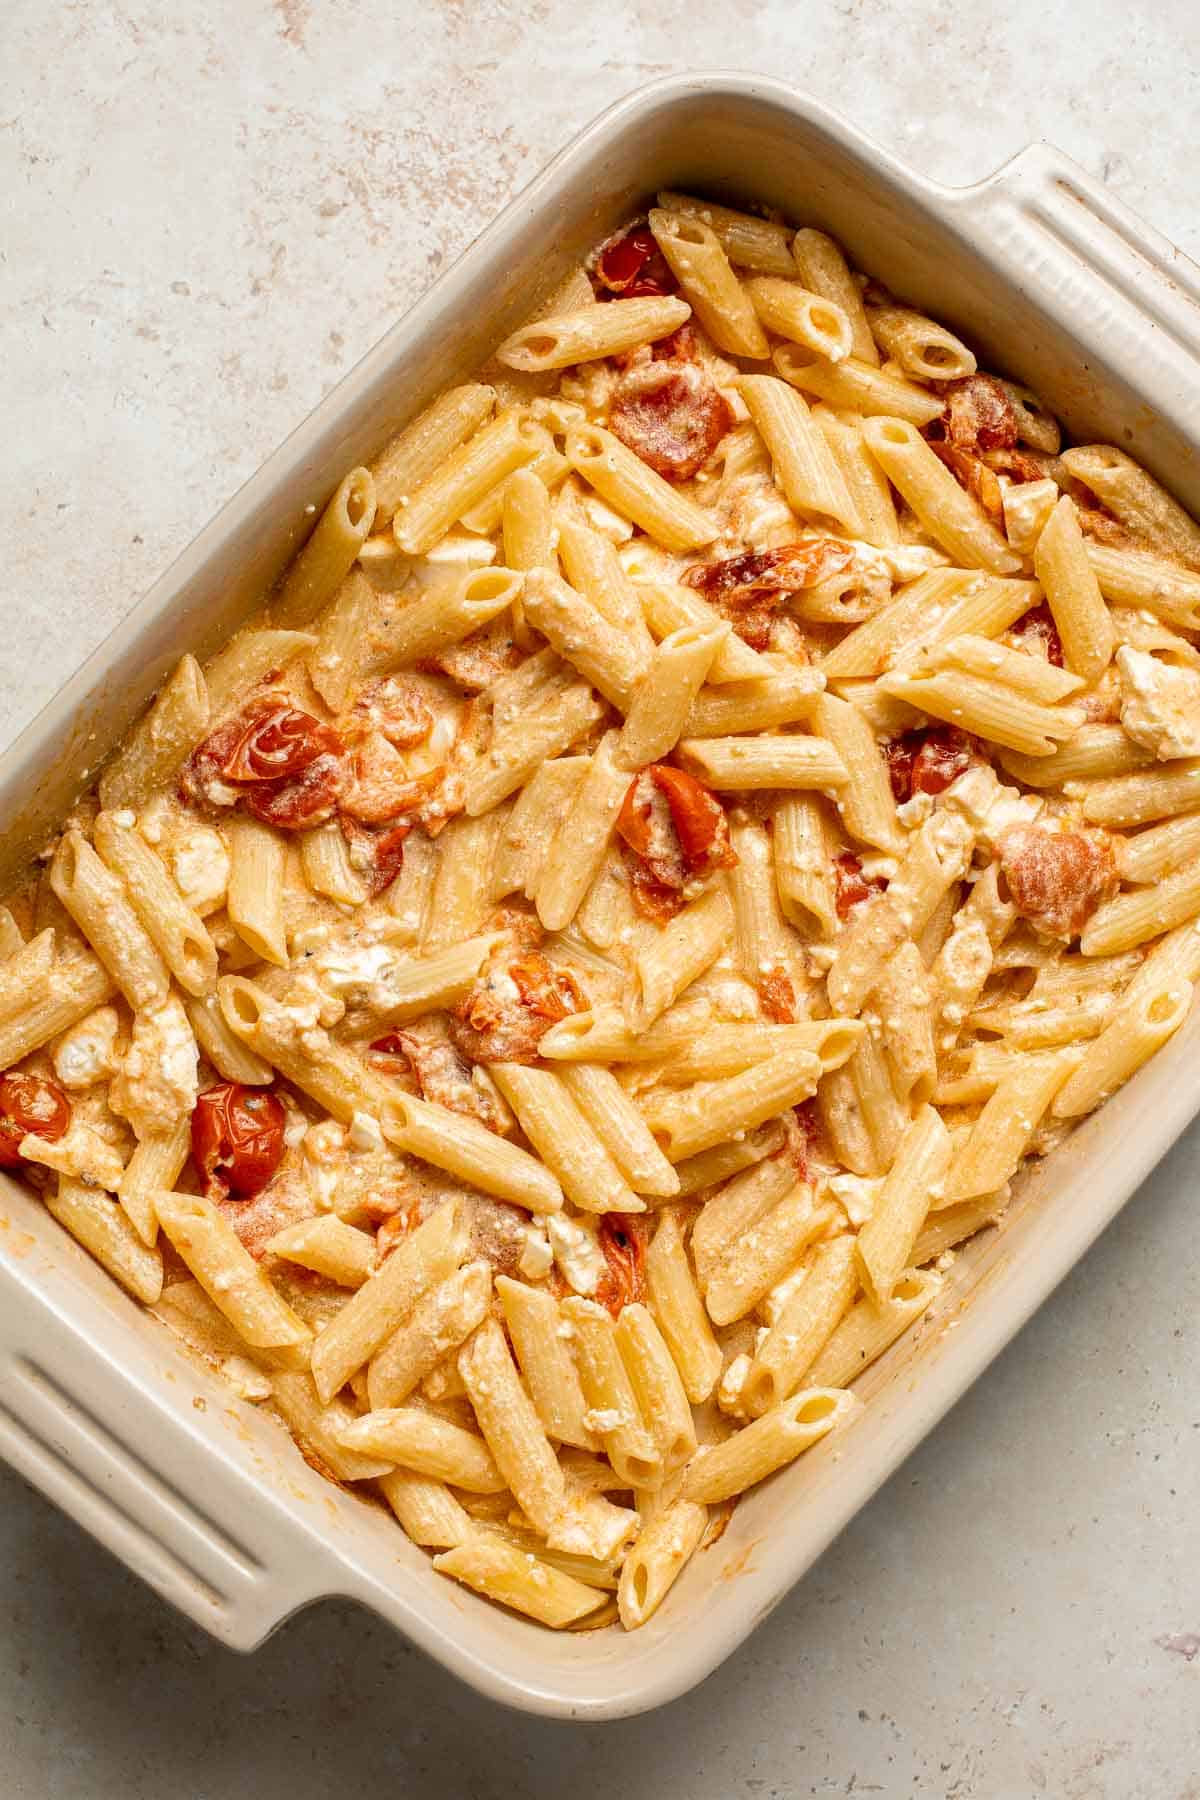
- Season tomatoes. In a large mixing bowl, combine olive oil, cherry tomatoes, garlic, salt, and pepper. Toss well to coat. Transfer to a 9x13-inch casserole pan.
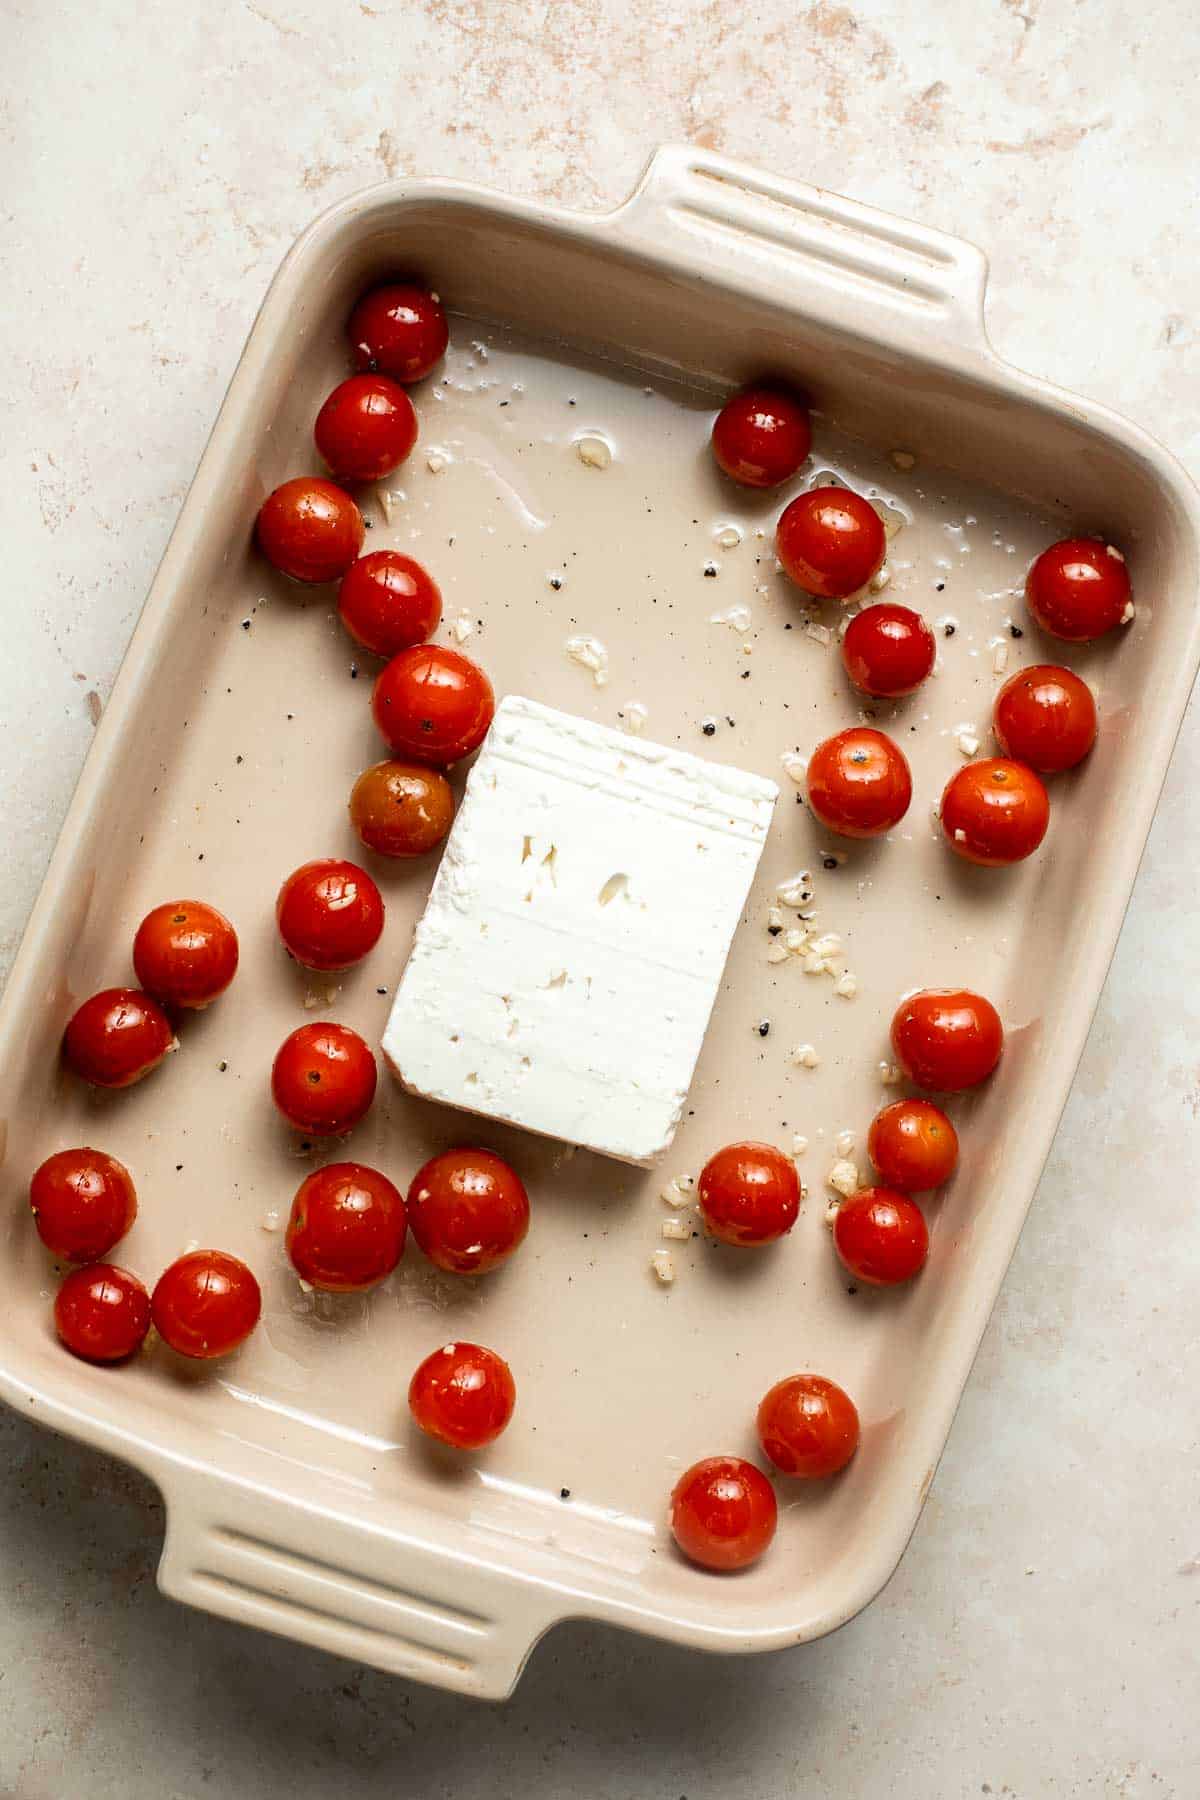
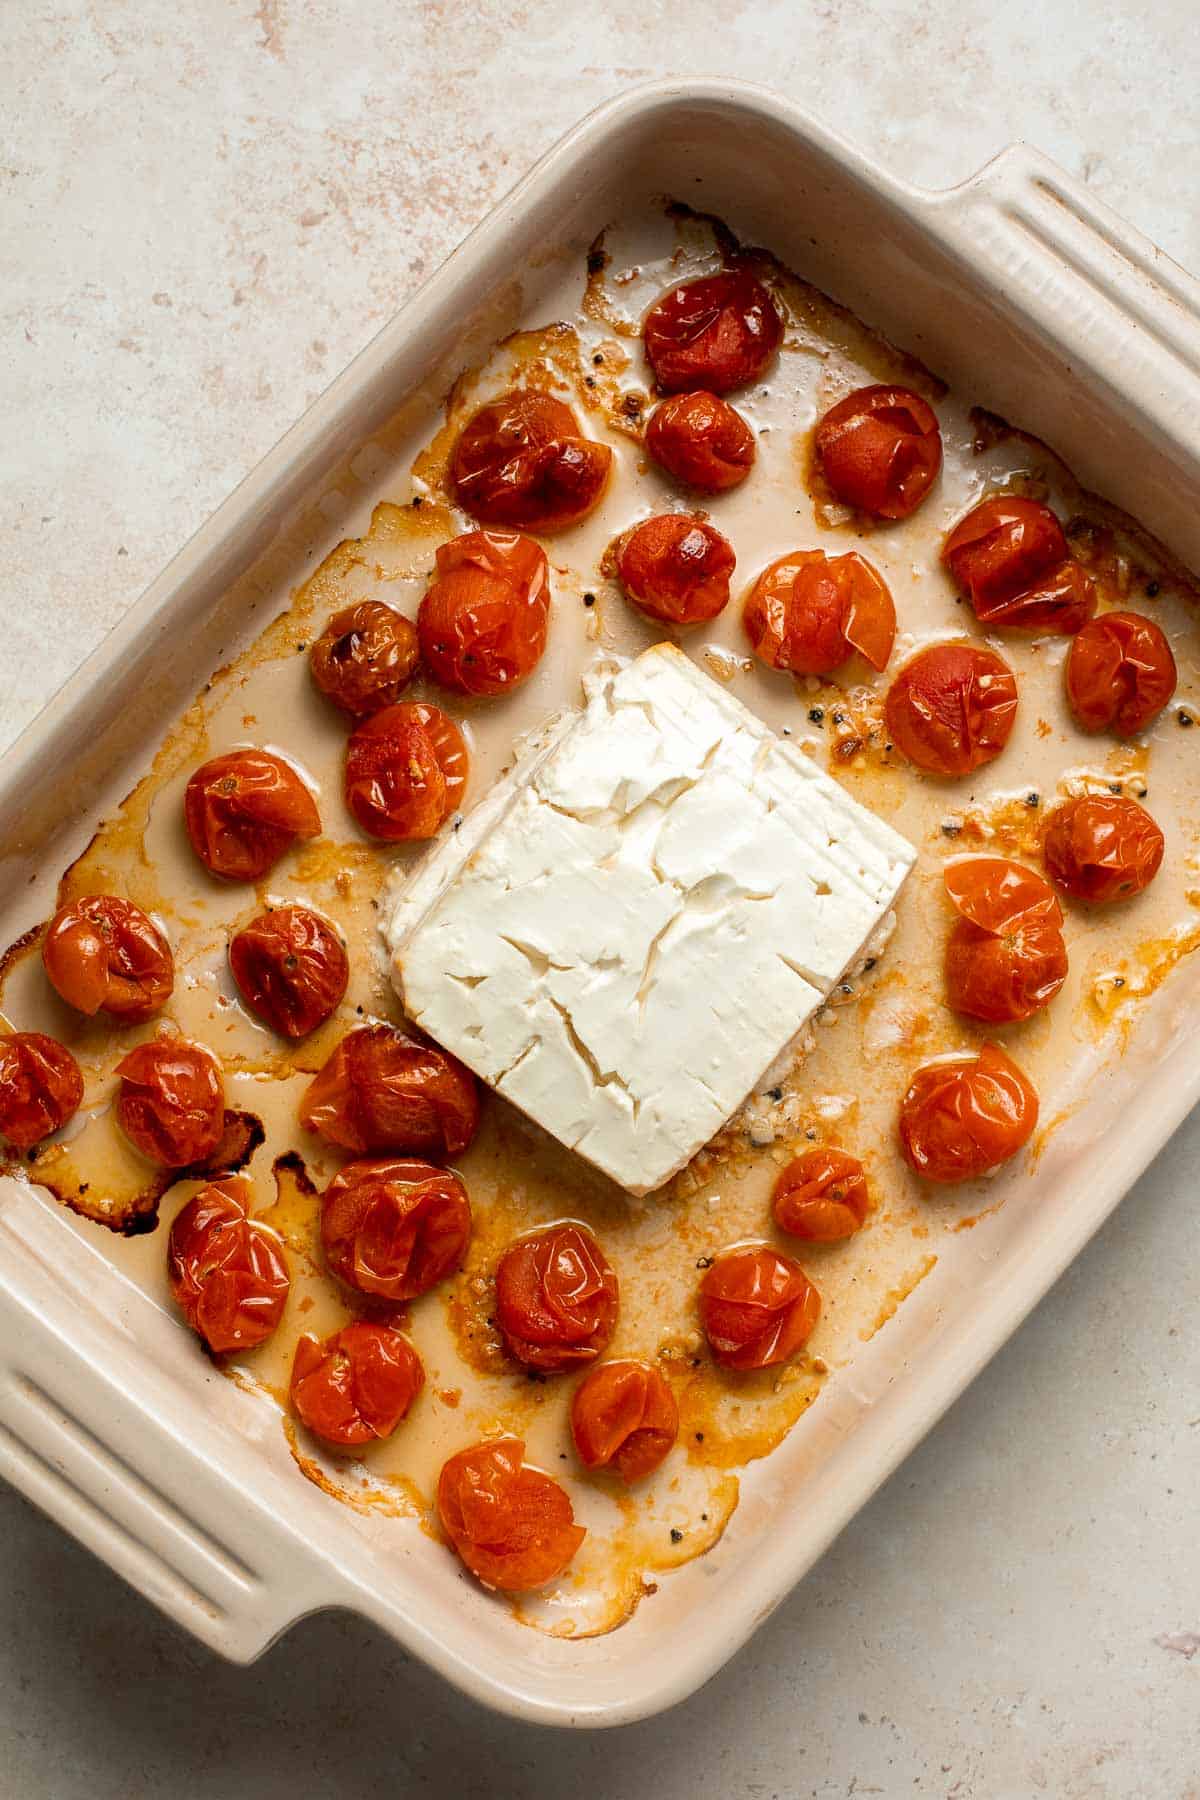
- Add feta. Place a block of feta cheese in the centre of the casserole dish and bake in a 375F preheated oven until the tomatoes have burst and the feta has softened, about 30 minutes. Optionally, broil on HI for 3-5 minutes until the cheese turns golden brown.
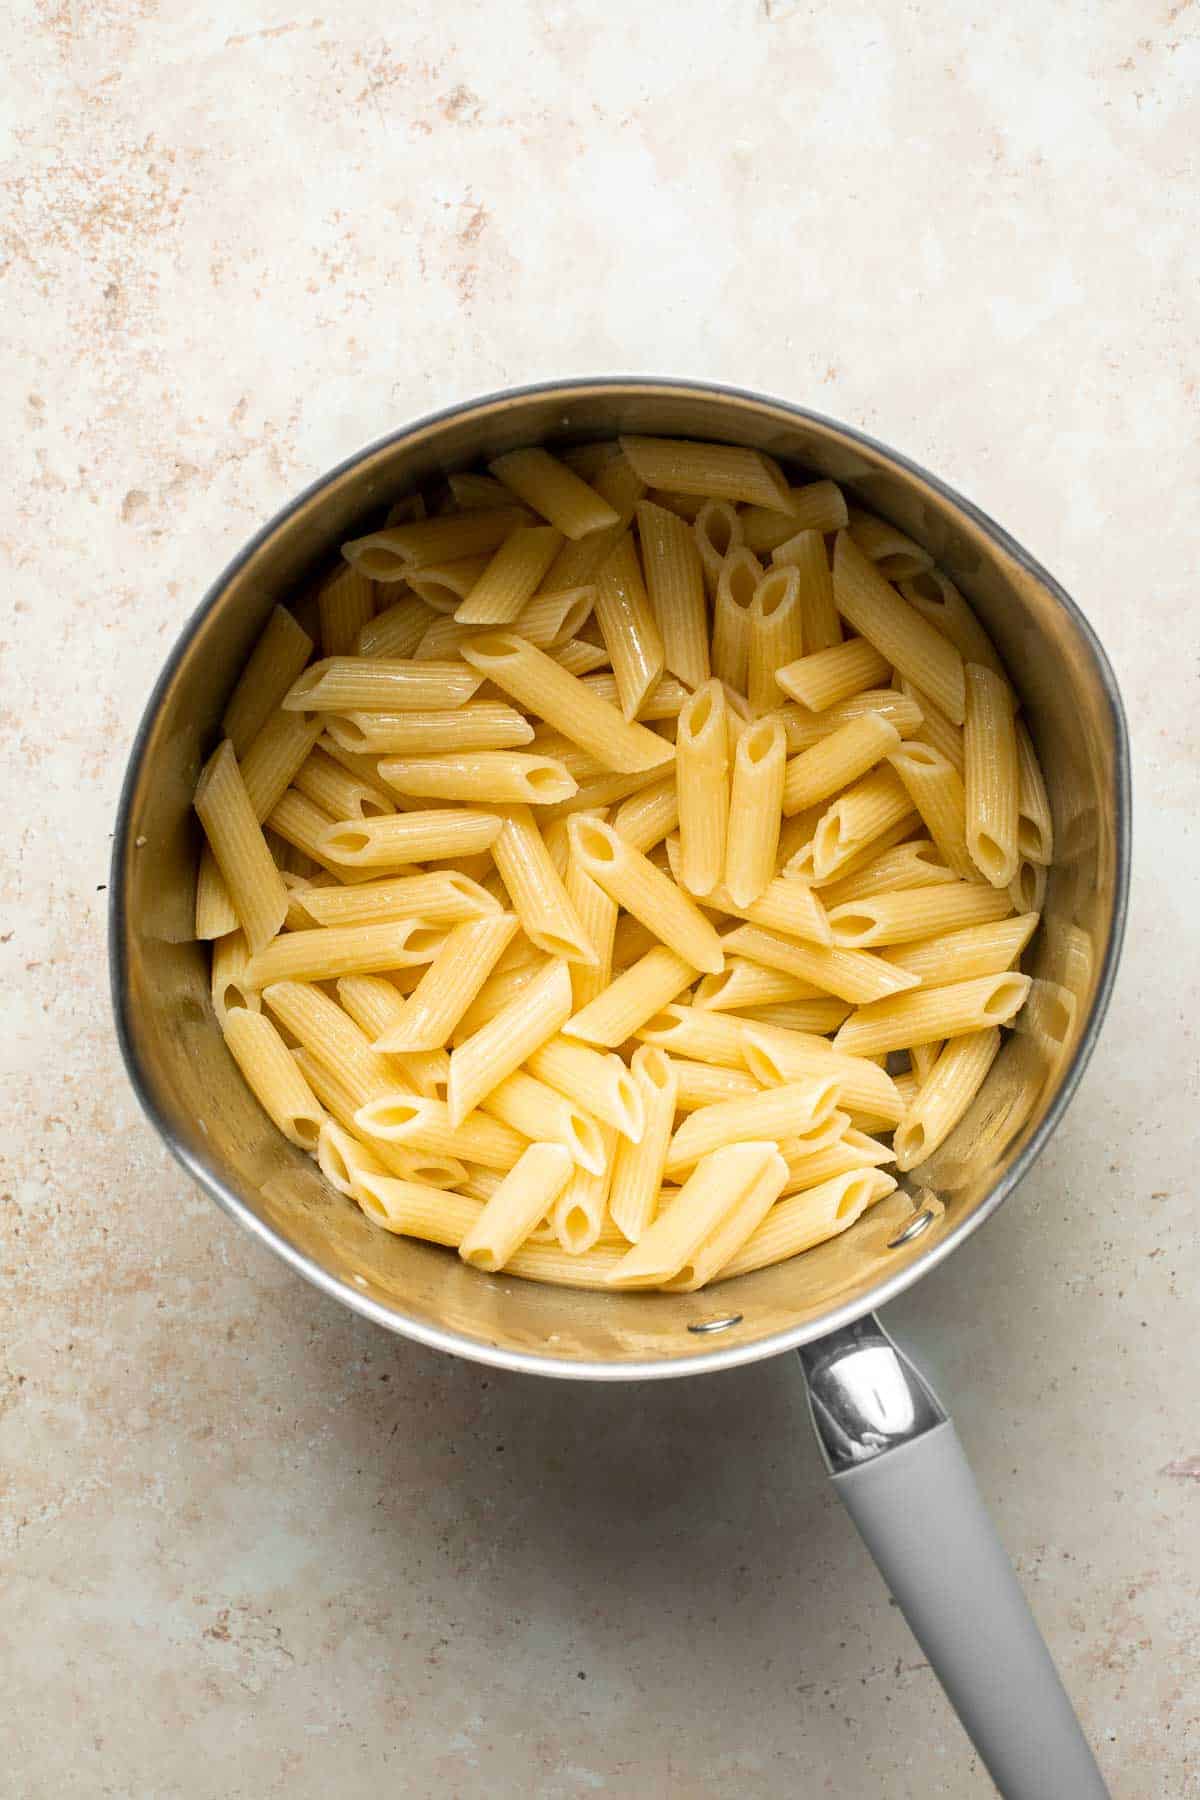
- Make pasta. While the cheese is baking, bring a large pot of salted water to a boil over medium-high heat. Add pasta and cook until al dente (fully cooked but still firm) according to package directions, about 10 minutes. Reserve ½ cup pasta water and drain.
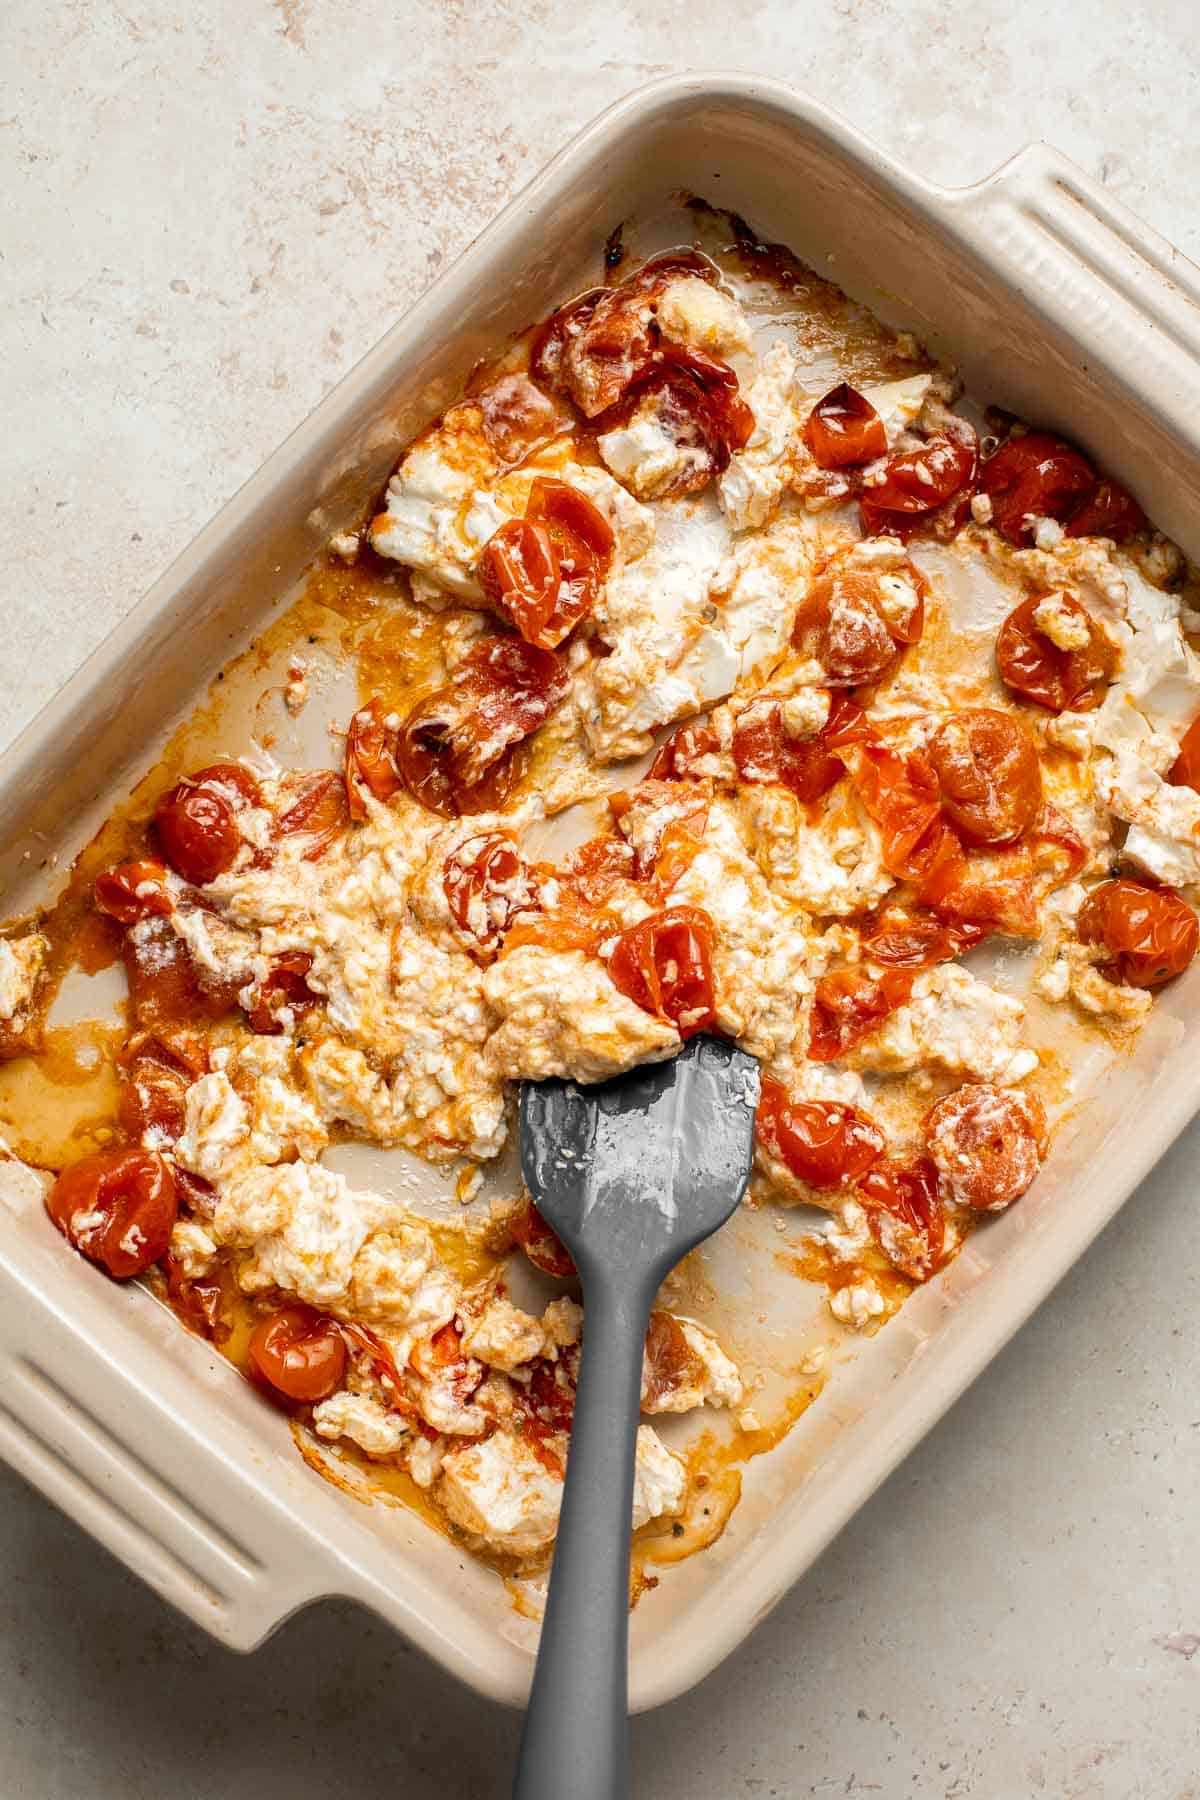
- Combine. Add the cooked and drained pasta to the casserole dish and toss well to coat. Slowly stir in some pasta water if needed (if the cheese sauce is too thick).
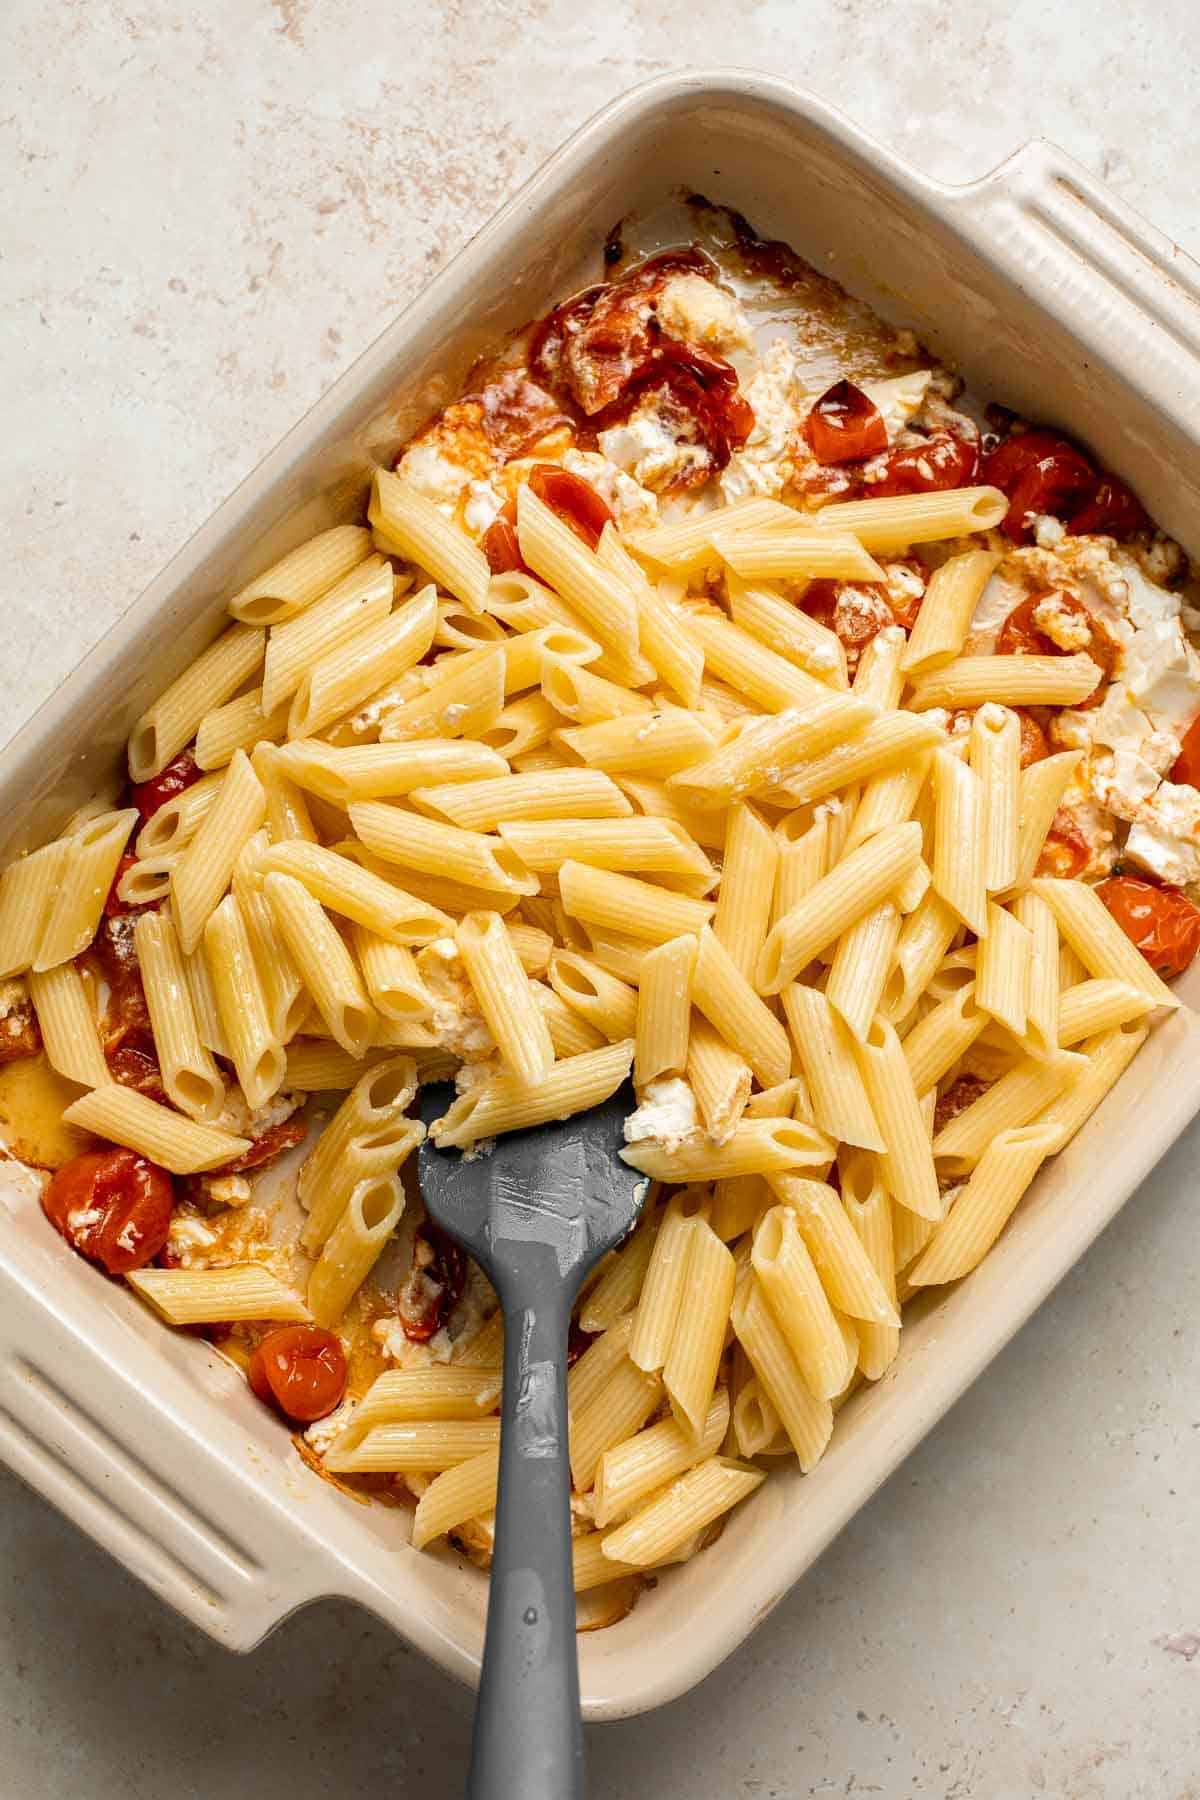
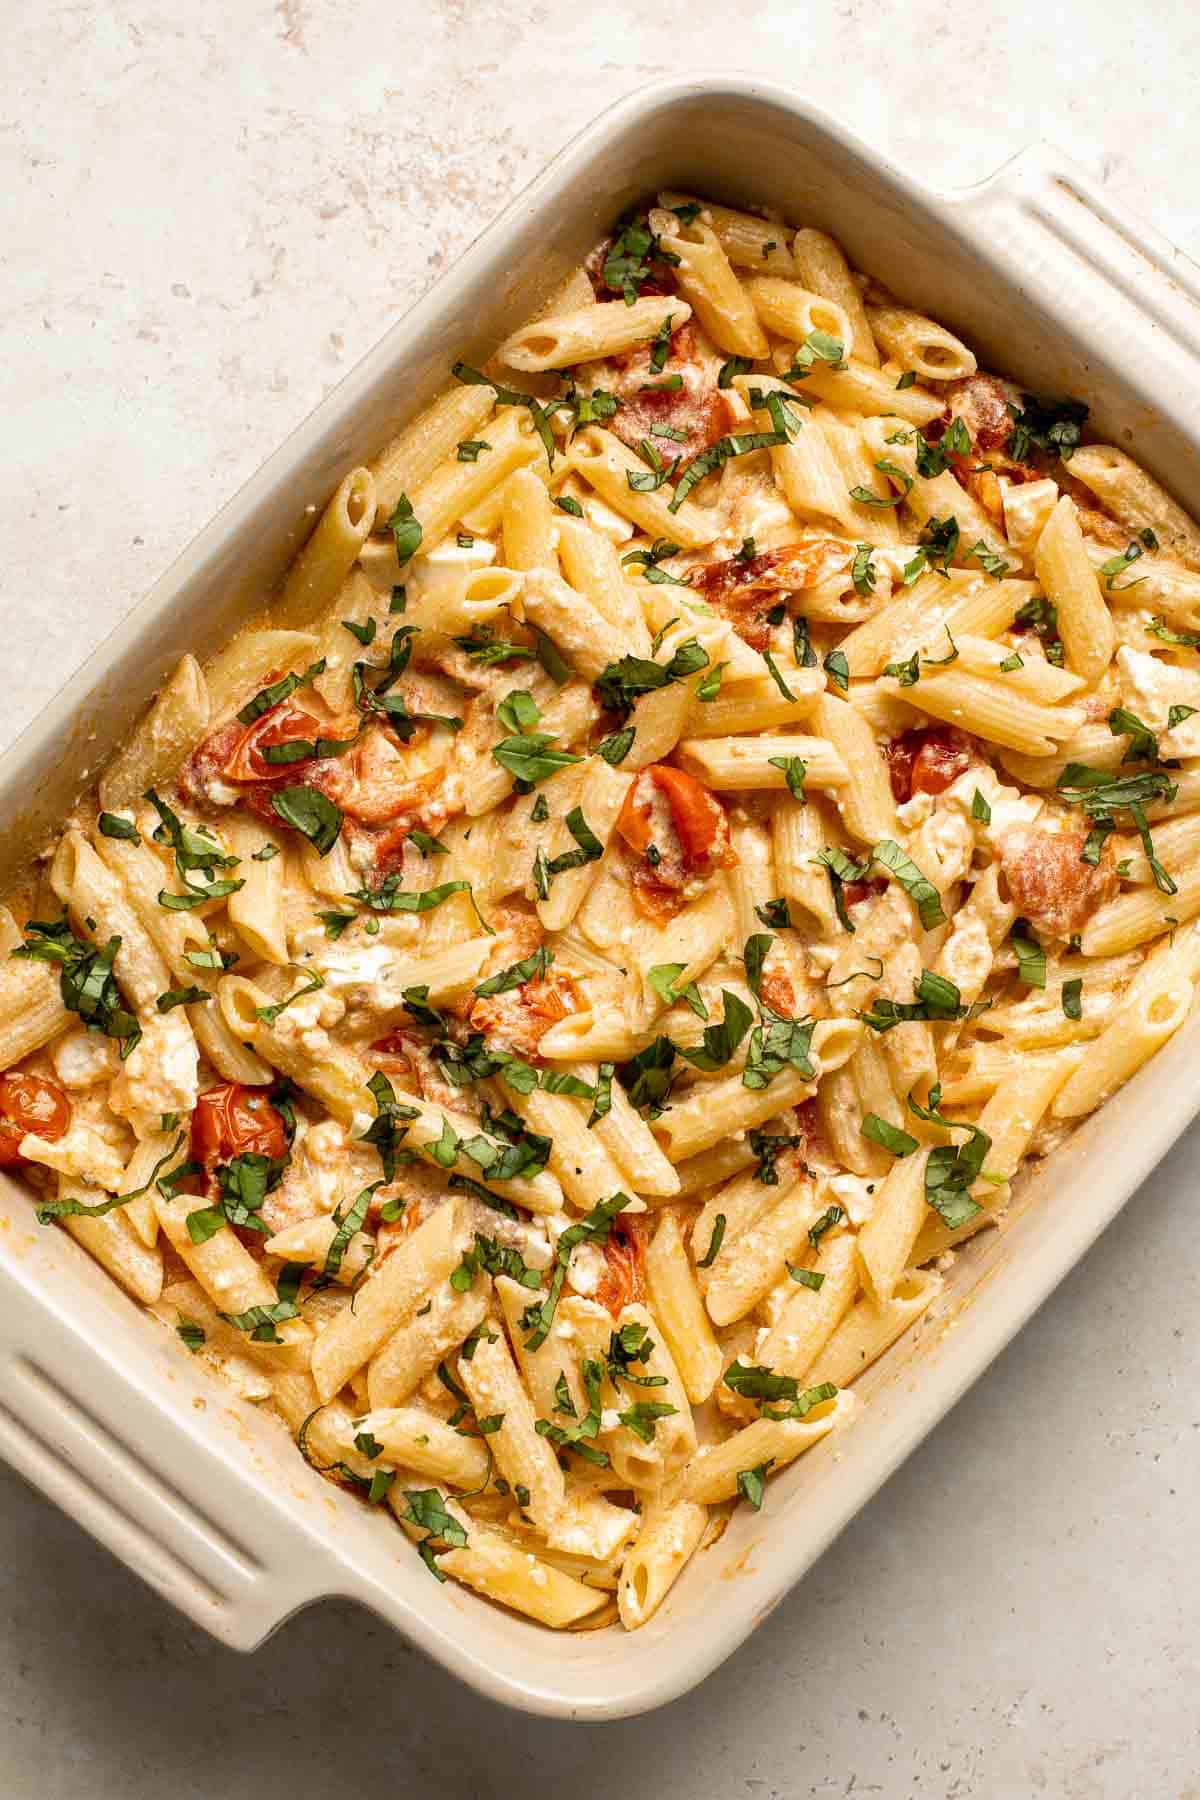
- Serve. Stir in basil and serve warm.
Recipe Variations
- Add more veggies. Add in other veggies when you are roasting the cherry tomatoes. Some options include green peppers, onions, broccoli, and zucchini. You can also blanch some spinach and stir it in with the cooked pasta.
- Add pesto. Switch up the flavor by stirring in some Basil Pesto when you toss in the cooked pasta. It is so good.
- Add a protein. You can stir in some cooked meat along with the cooked pasta. Try chicken, ground turkey, or ground beef. Make sure it is fully cooked before tossing in.
How to Serve
This Baked Feta Pasta is delicious served with classic pasta sides like salad, bread, and veggies. Some of our favorites to serve with this pasta bake are:
- Kale Caesar Salad
- Garlic Breadsticks
- Balsamic Roasted Broccoli
- Mediterranean Couscous Salad
- Cheesy Garlic Bread
- Sautéed Brussels Sprouts
See our 30 Best Side Dishes for Pasta for more.
Recipe Tips and Tricks
- Use high-quality ingredients. Because of the simplicity of the recipe, using higher-quality ingredients will yield the best flavors and textures in the final dish. Spring for a good Greek feta and a nice olive oil and you'll taste the difference!
- Pack leftovers for lunch. Leftovers of this creamy baked feta pasta are perfect to pack for school or work lunch the next day. It can be easily reheated in a microwave or enjoyed cold straight from the lunchbox.
Storing and Freezing Instructions
How to Store
Baked feta pasta can be transferred to an airtight container and refrigerated for up to 4 days.
How to Reheat
Reheat in the microwave on high power in 90-second increments, stirring occasionally until heated through. You can also reheat on the stove in a pan over medium-low heat for a few minutes until warmed through.
How to Freeze
Transfer leftovers to a freezer-safe container or freezer bag and freeze for up to 3 months. For the best texture, allow the feta pasta to defrost in the refrigerator overnight before reheating.
More Pasta Recipes
- 40 Best Pasta Recipes
- Pasta Bake with Sausage (Baked Ziti)
- Chicken Penne Pasta
- Cheesy Tortellini and Sausage Bake
- Mascarpone Pesto Pasta
- Baked Ravioli
Tried this recipe?
I'd love to hear what you think! Leave a comment and rating below to share your feedback. Your reviews help others discover this recipe and help me keep creating more free recipes for you. Snap a photo and tag me on social media @aheadofthyme too.

40 Best Game Day Recipes
When it comes to Game Day, it's all about gathering with friends and family and snacking on delicious food. We are sharing over 40 best game day recipes including everything from cheesy dips, classic chicken wings, bite-sized appetizers. and more. There is something for everyone to enjoy while they root for their team (including vegetarian, gluten-free, and kid-friendly options too!).

Best Game Day Recipes
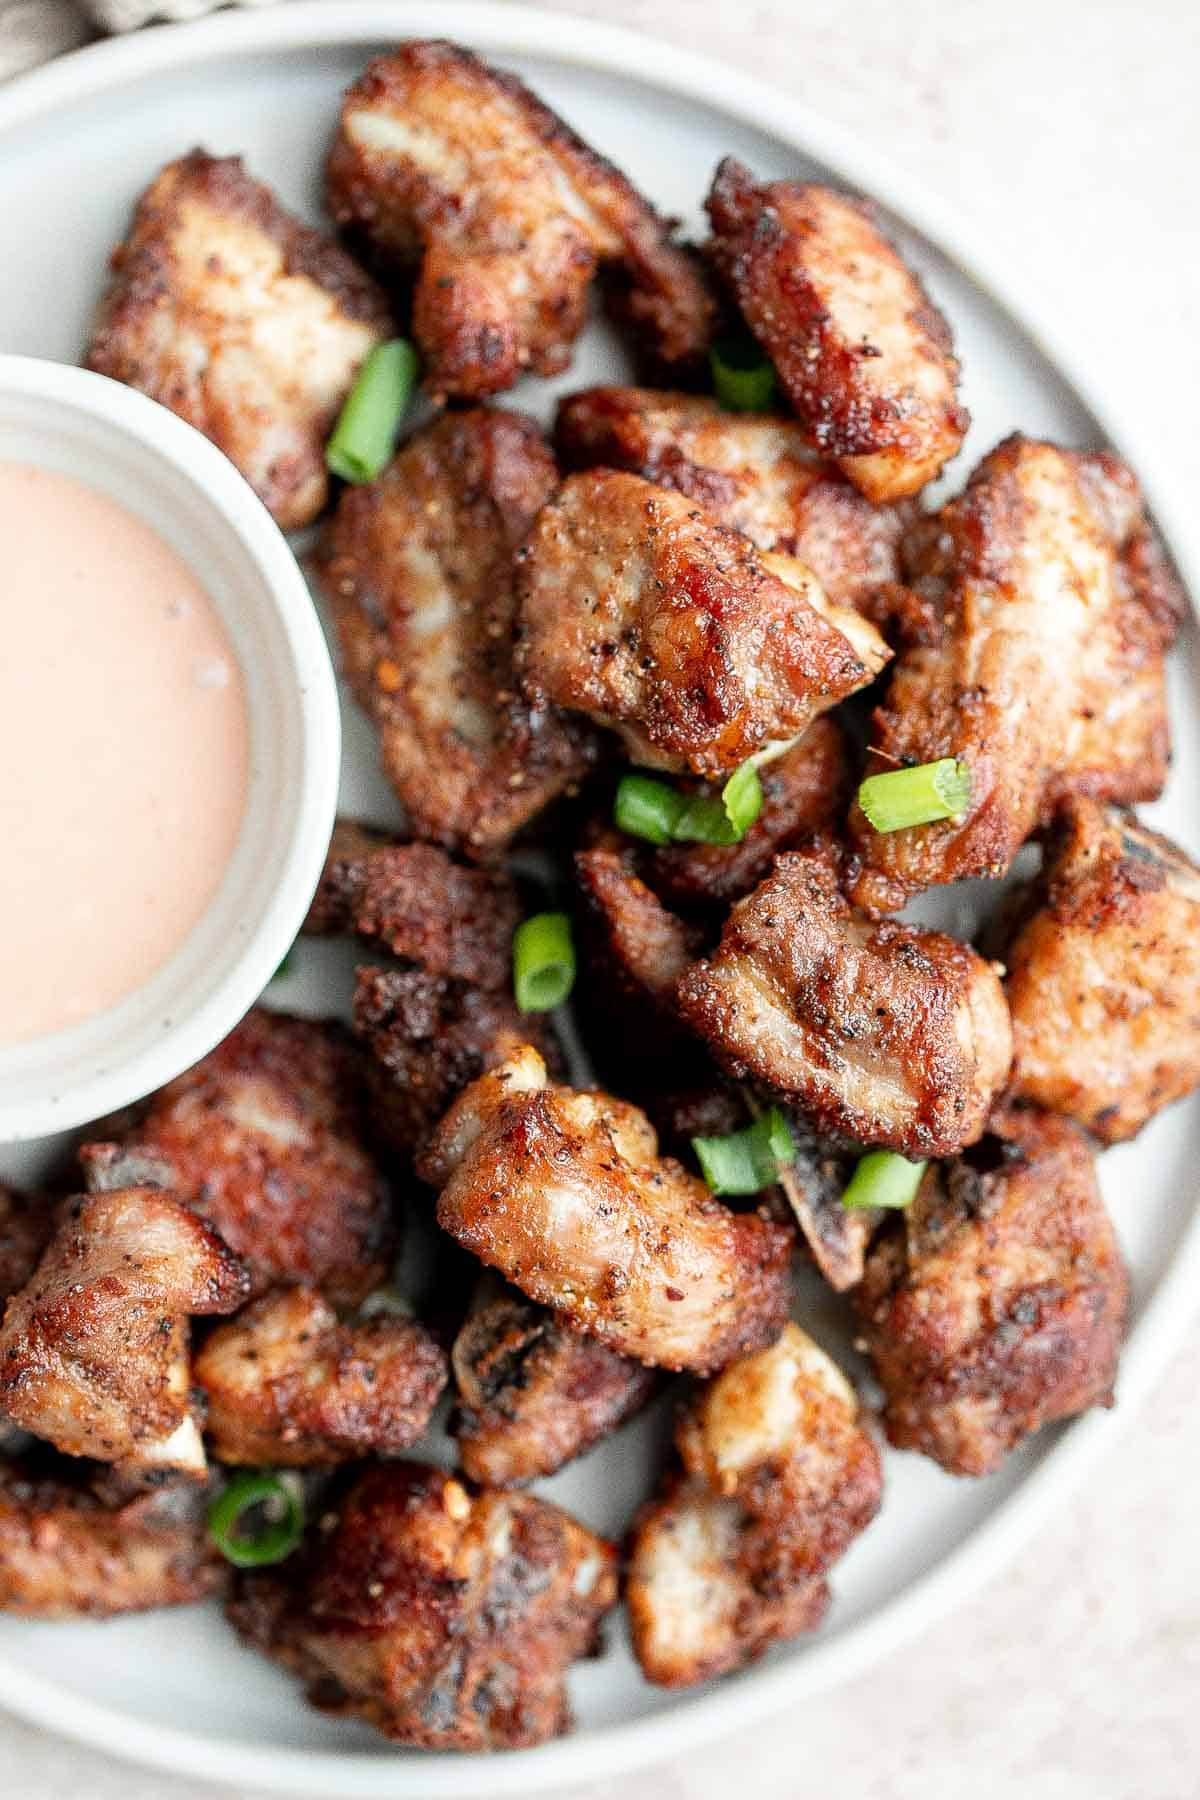
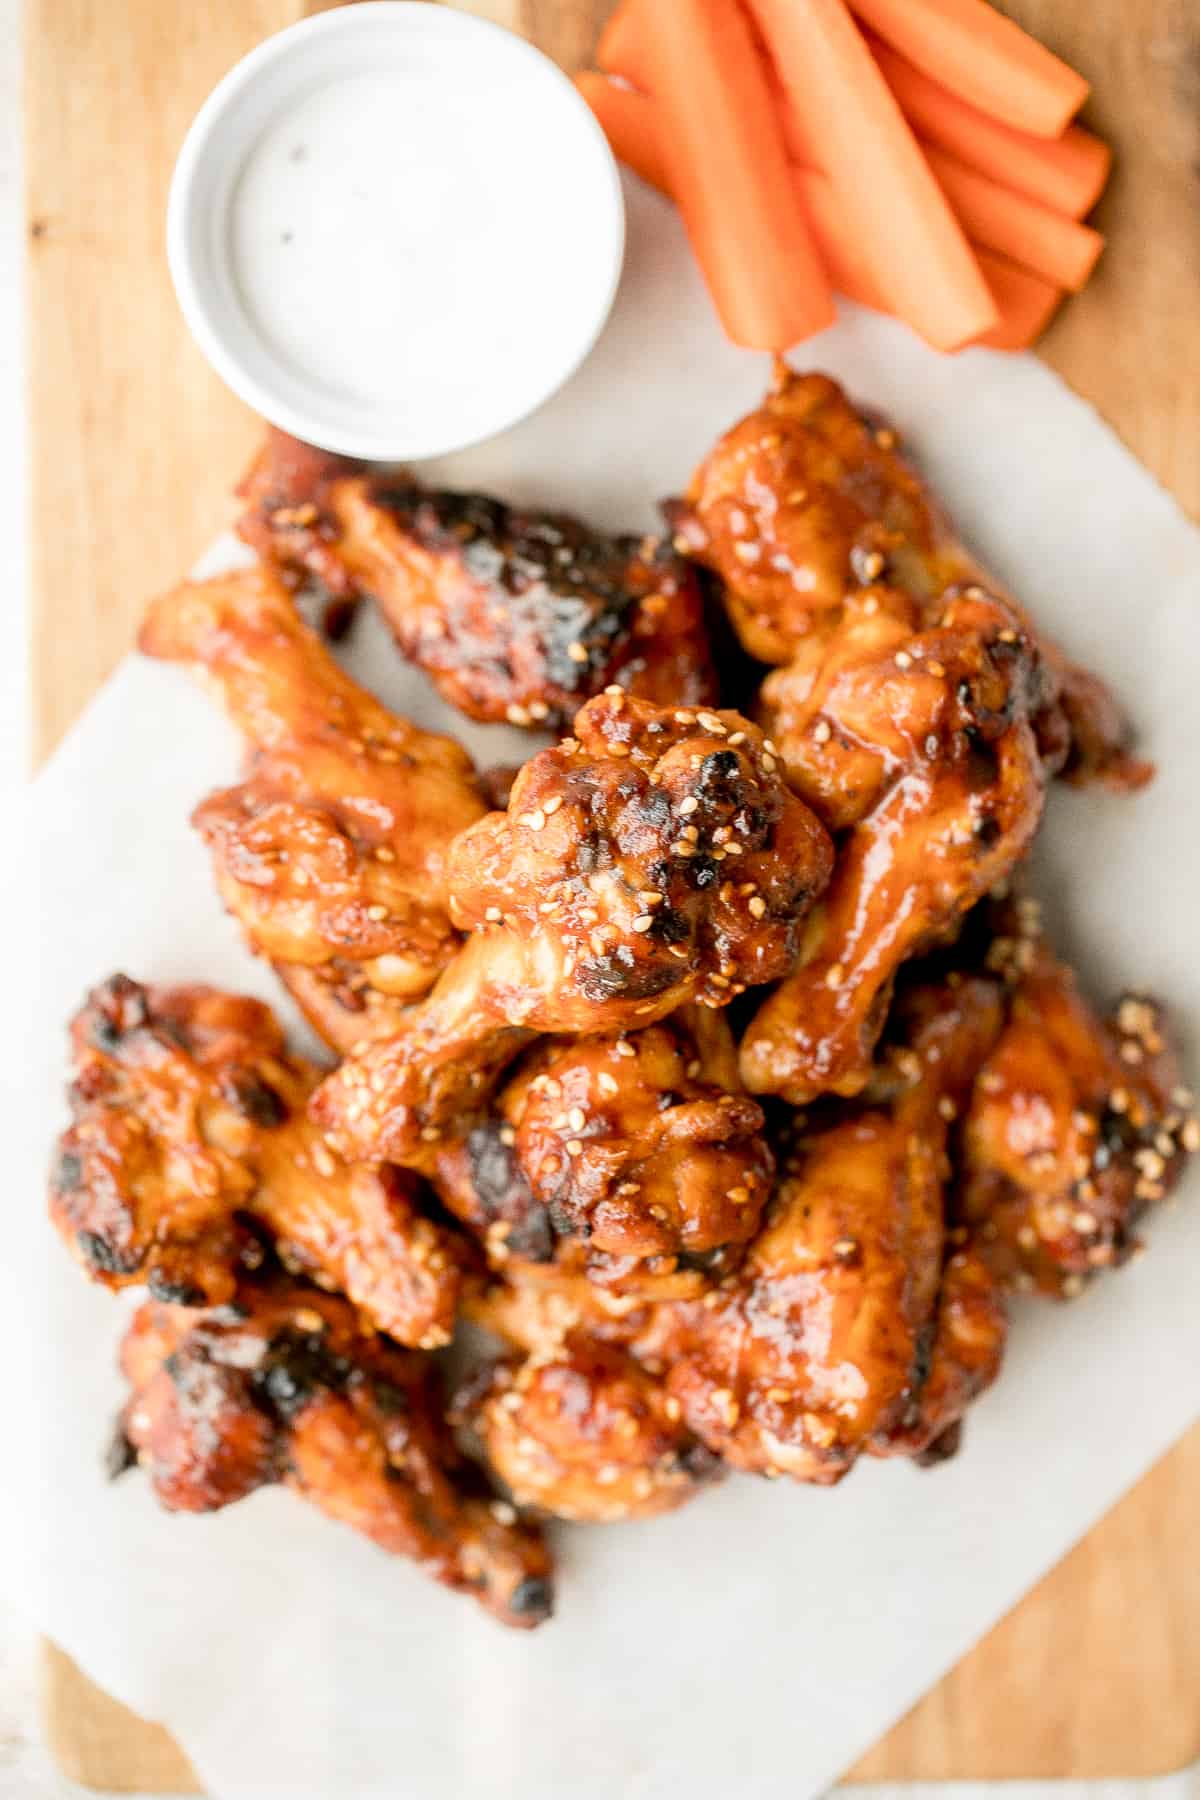
Is it even game day without game day buffalo hot wings? This classic appetizer is a total crowd pleaser and one of my most popular Super Bowl recipes.

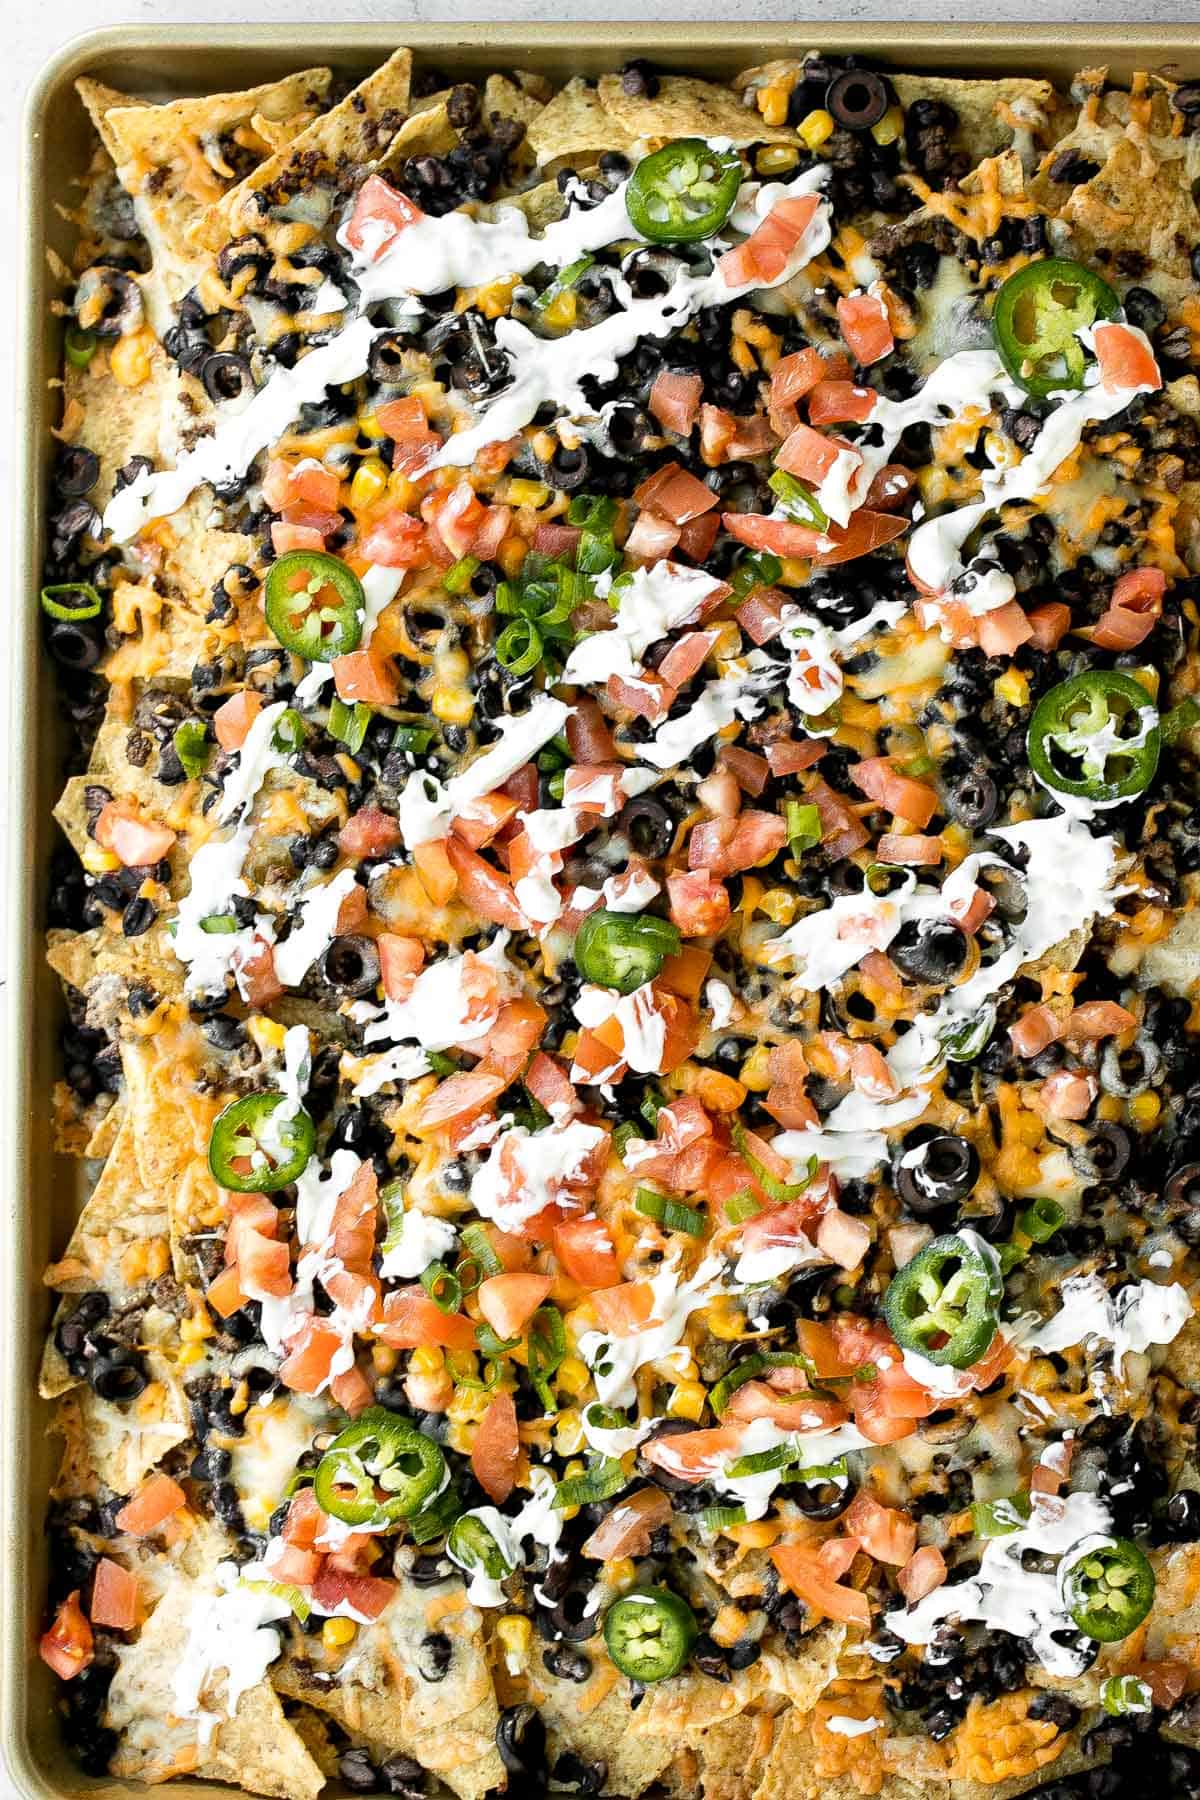
Oven-baked loaded sheet pan nachos are a crowd pleaser for an easy weeknight dinner or a crave-worthy appetizer to serve on game day. It's one of my favourite Super Bowl recipes of all time.
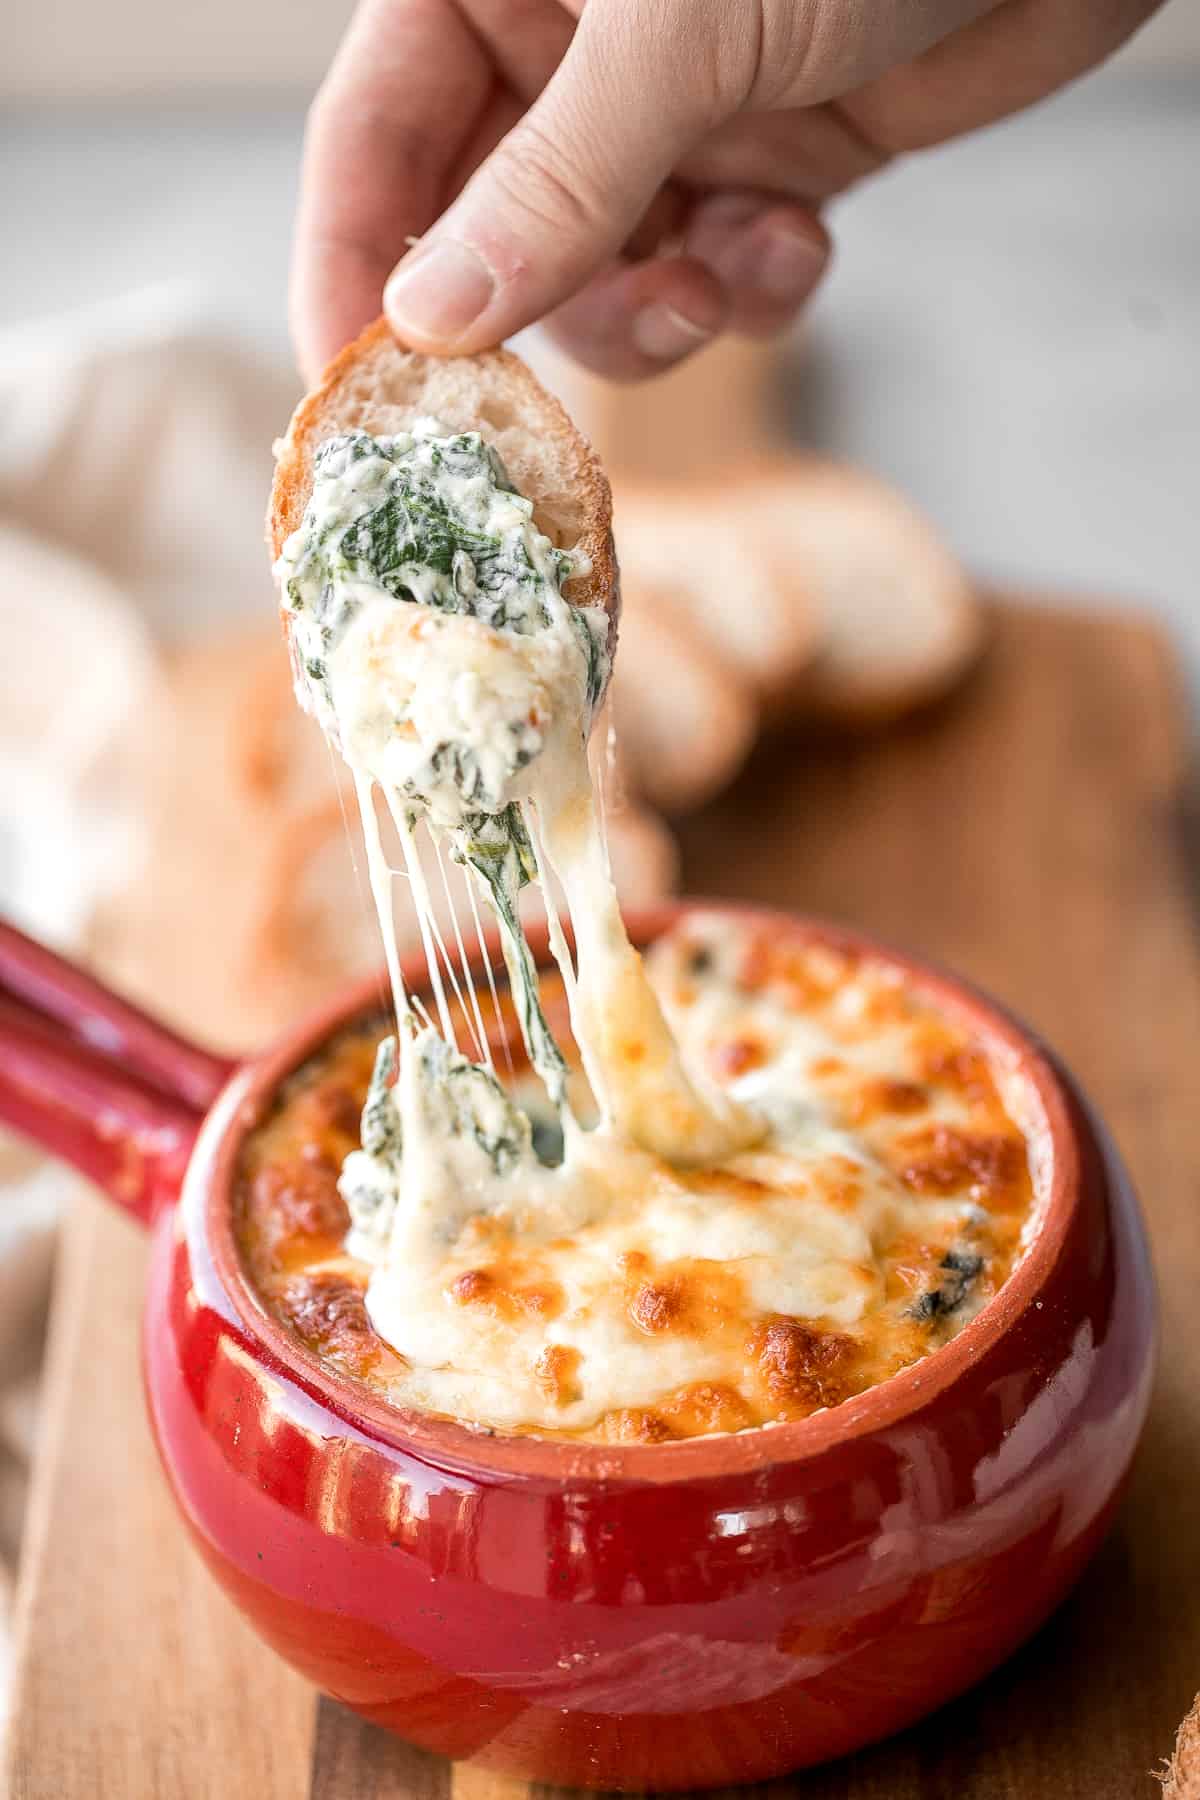
Warm, rich, creamy baked spinach dip is a delicious and easy appetizer that is baked until warm and melty. Easy to make ahead and a total crowd pleaser. It's one of my favourite Super Bowl recipes of all time.
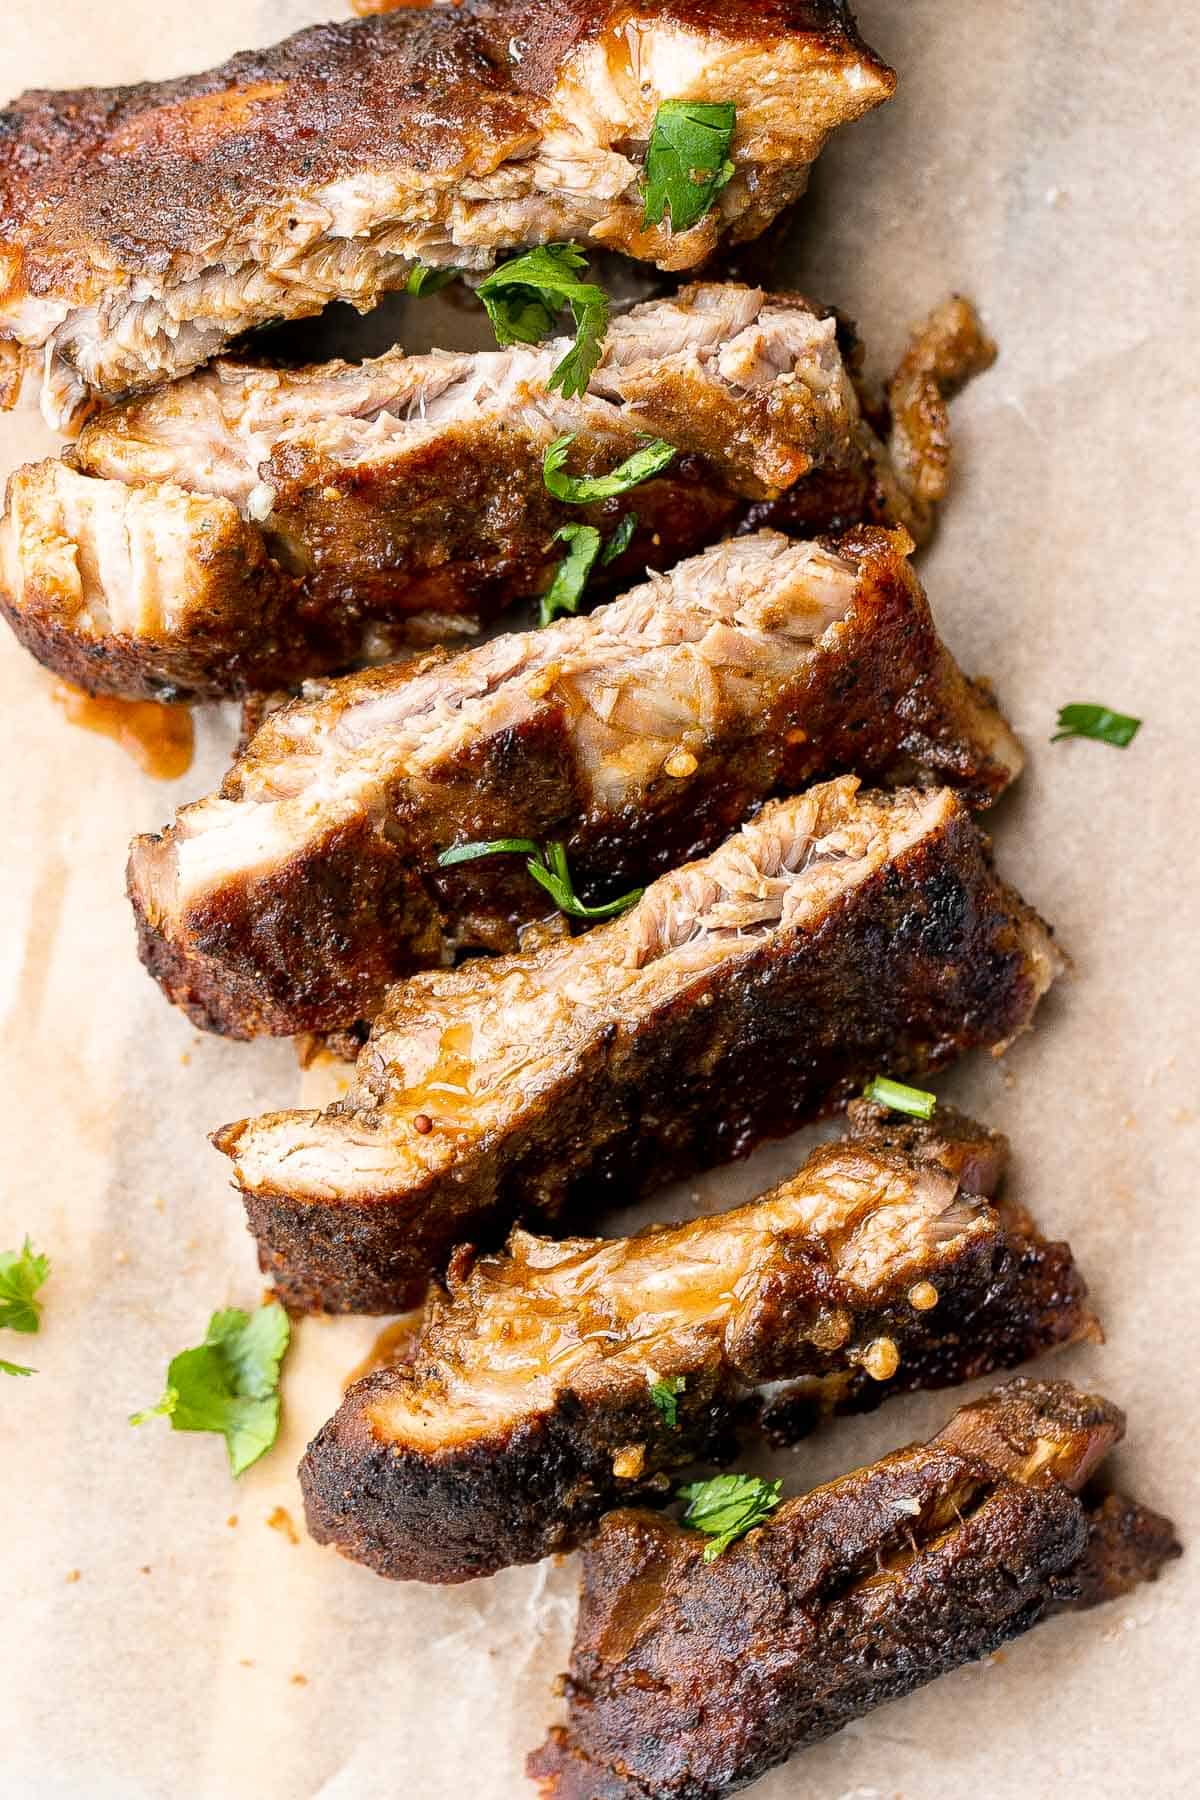
Slow cooker BBQ ribs are juicy, saucy, and tender -- the meat literally falls right off the bone. Add this easy recipe to your list of crockpot recipes.
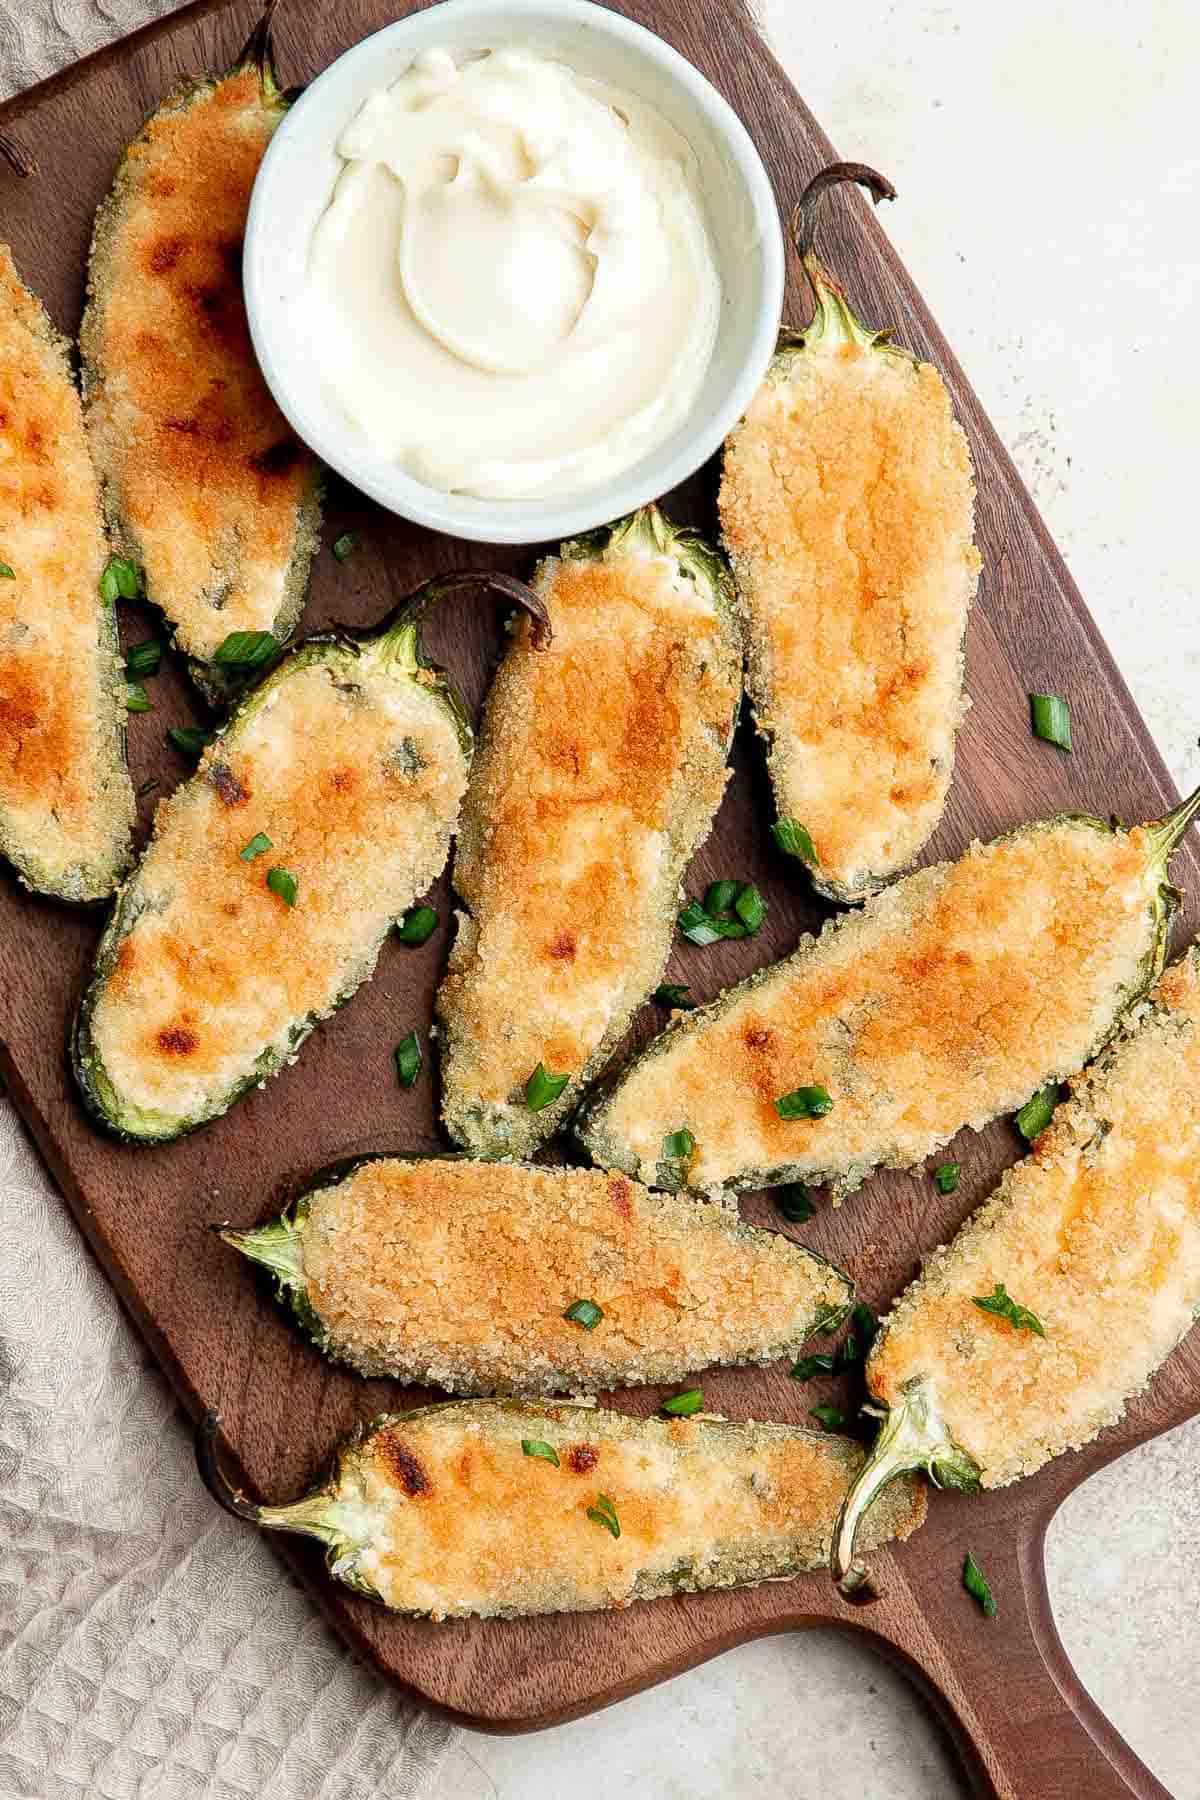
Jalapeño poppers are the perfect appetizer - spicy, crispy, cheesy, and creamy, toasted to golden brown perfection. Plus easy to make ahead and freeze well.
Baked miso garlic chicken wings are crispy, delicious, and easy to make. They're marinated in a savoury Asian marinade, and cooked in the oven or air fryer.

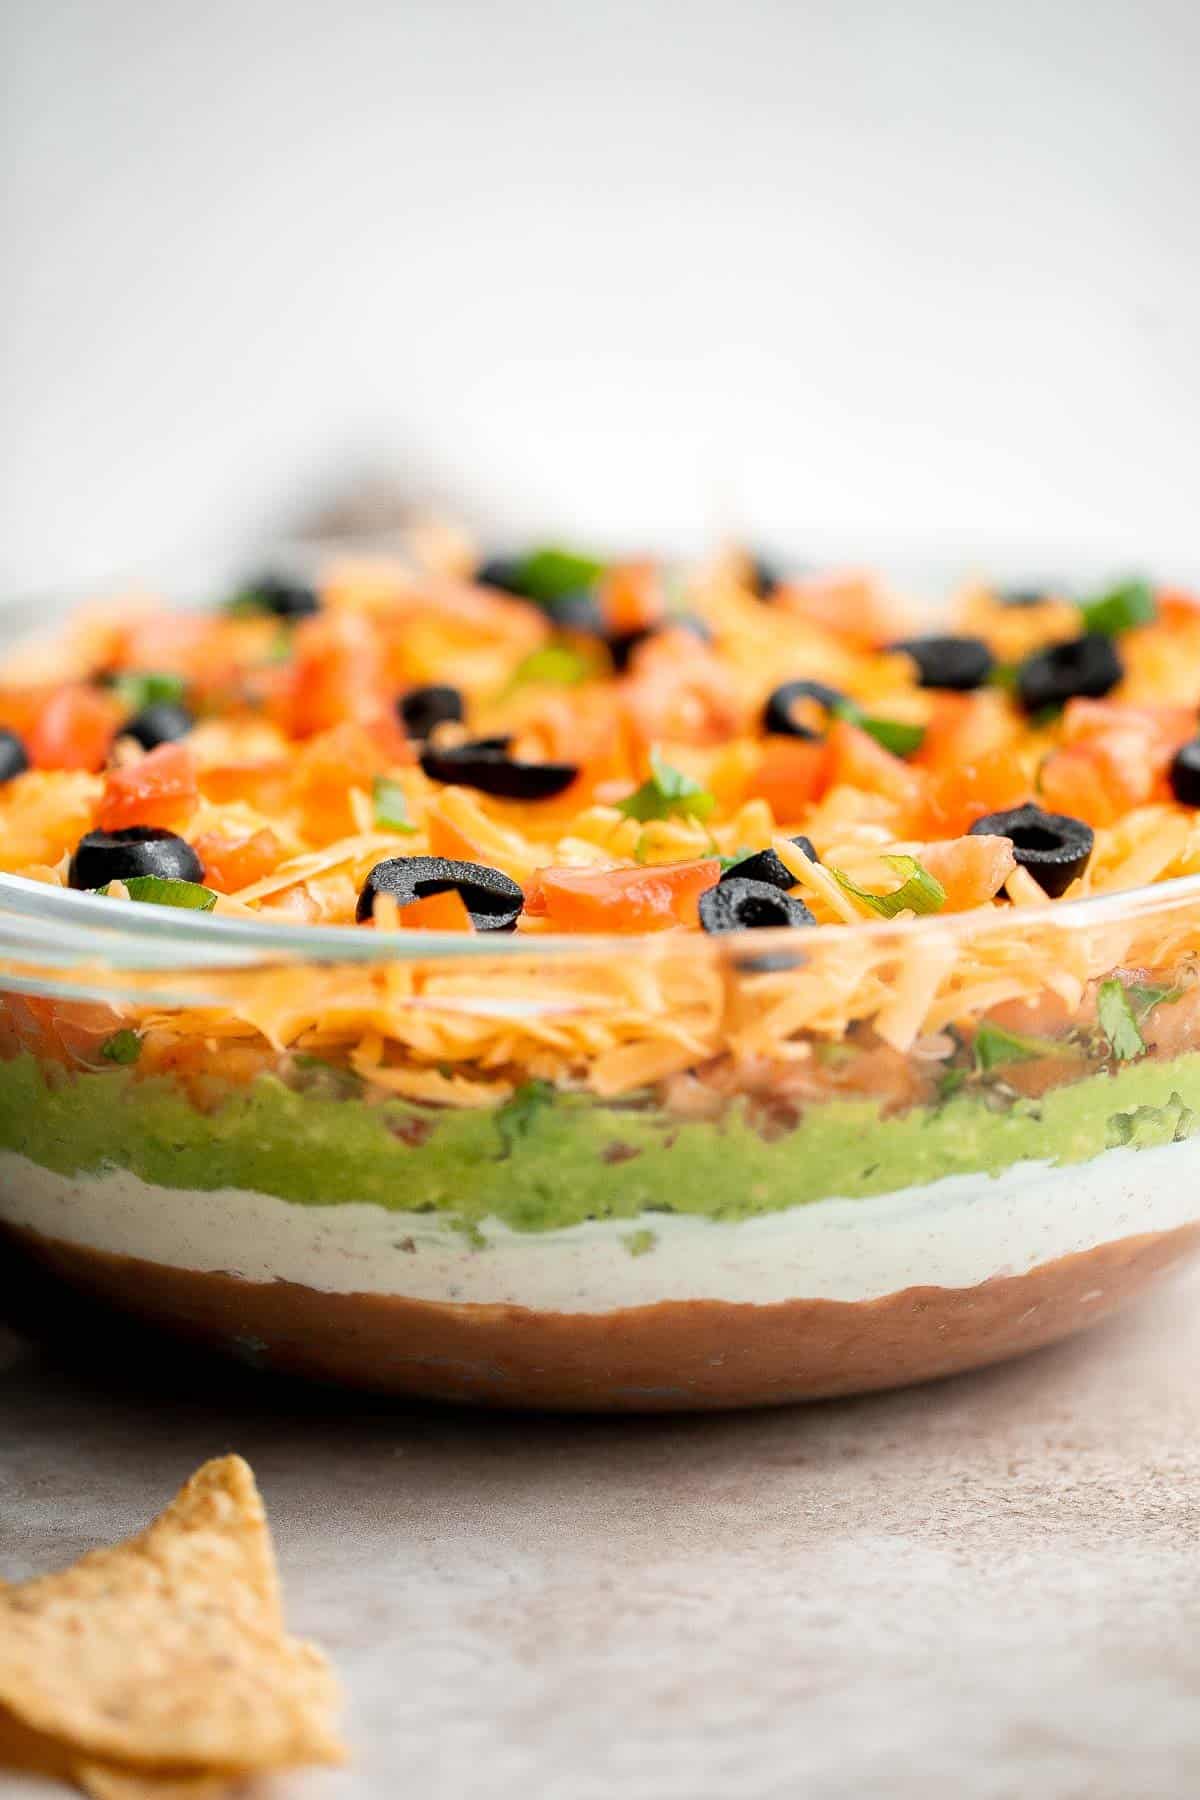
This easy and delicious 7 layer dip is the perfect dip to serve at your next party, made with layers of beans, guacamole, salsa, cheese, and more.
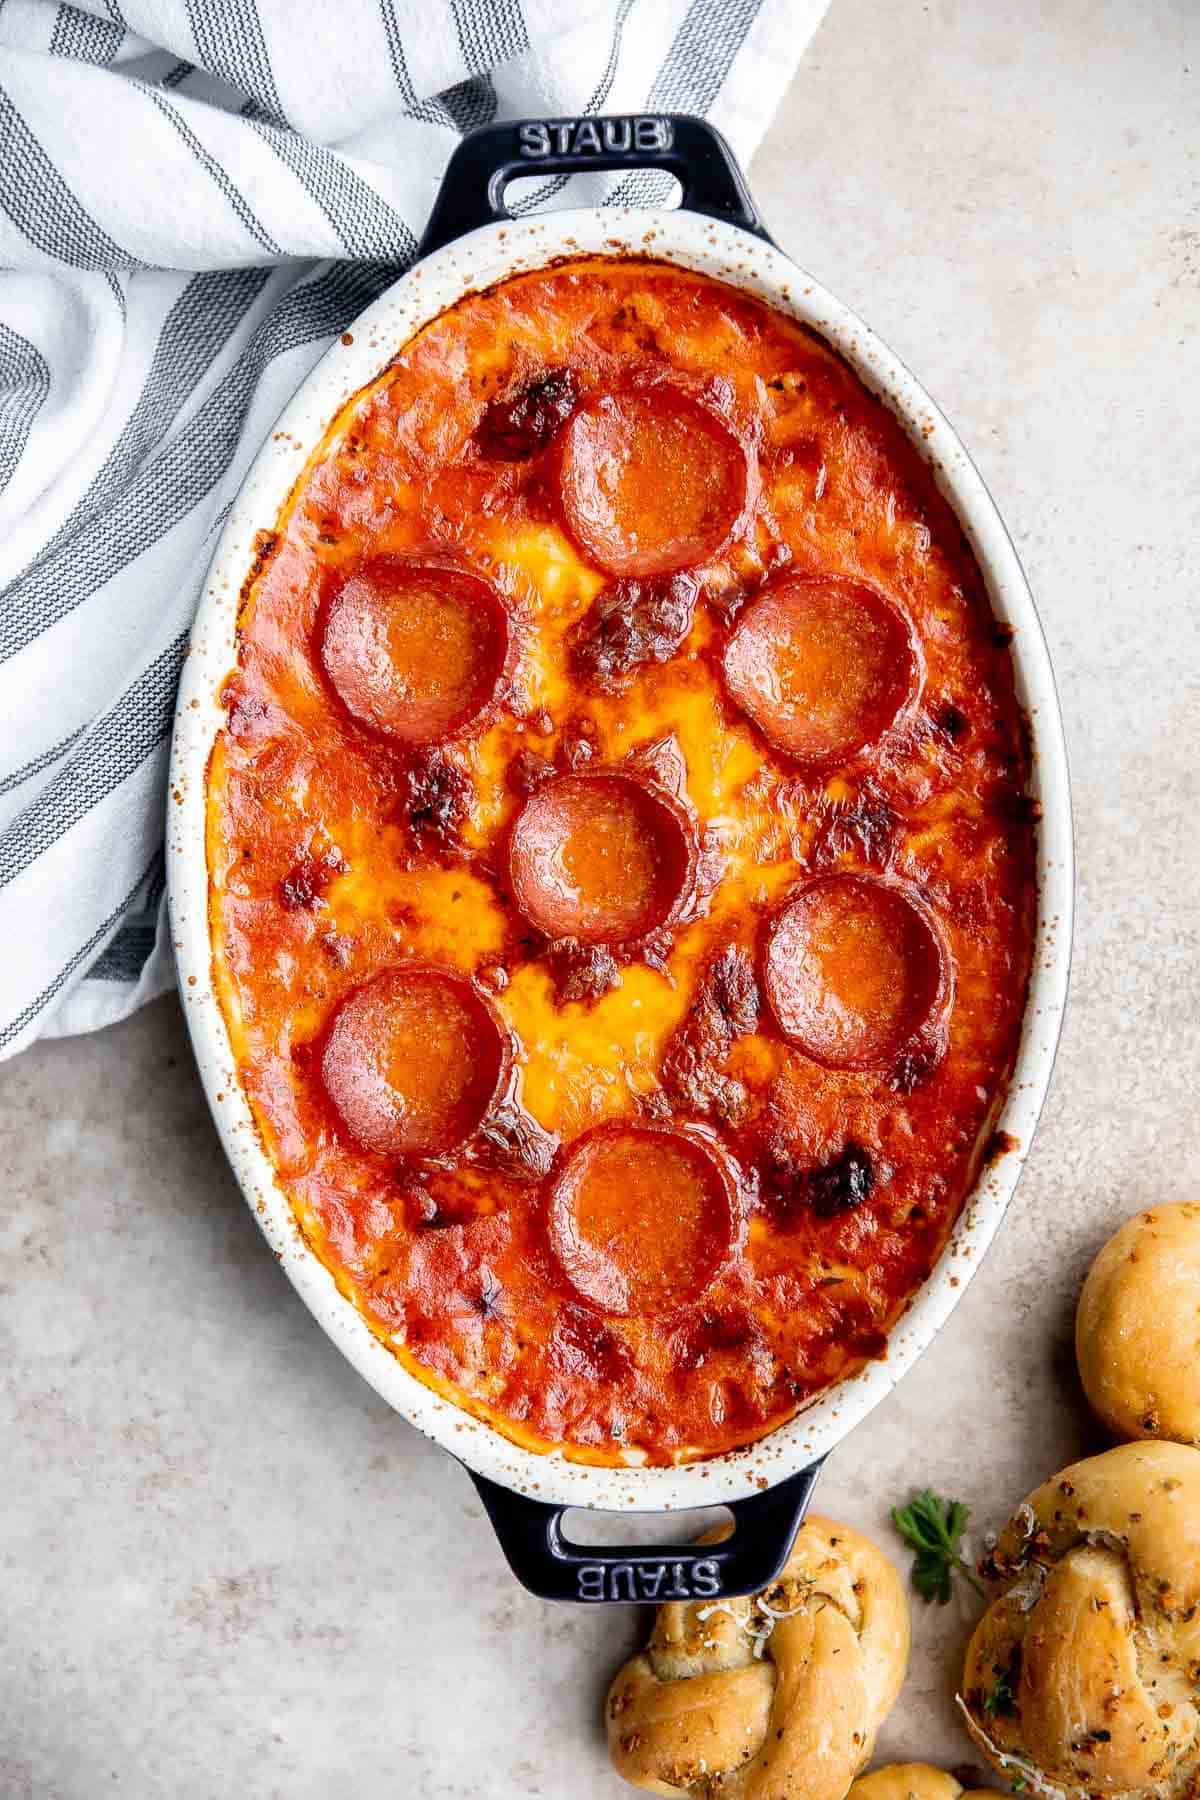
Easy pepperoni pizza rolls are crispy on the bottom, tender and chewy inside, packed with pepperoni and cheese, and baked until bubbly.

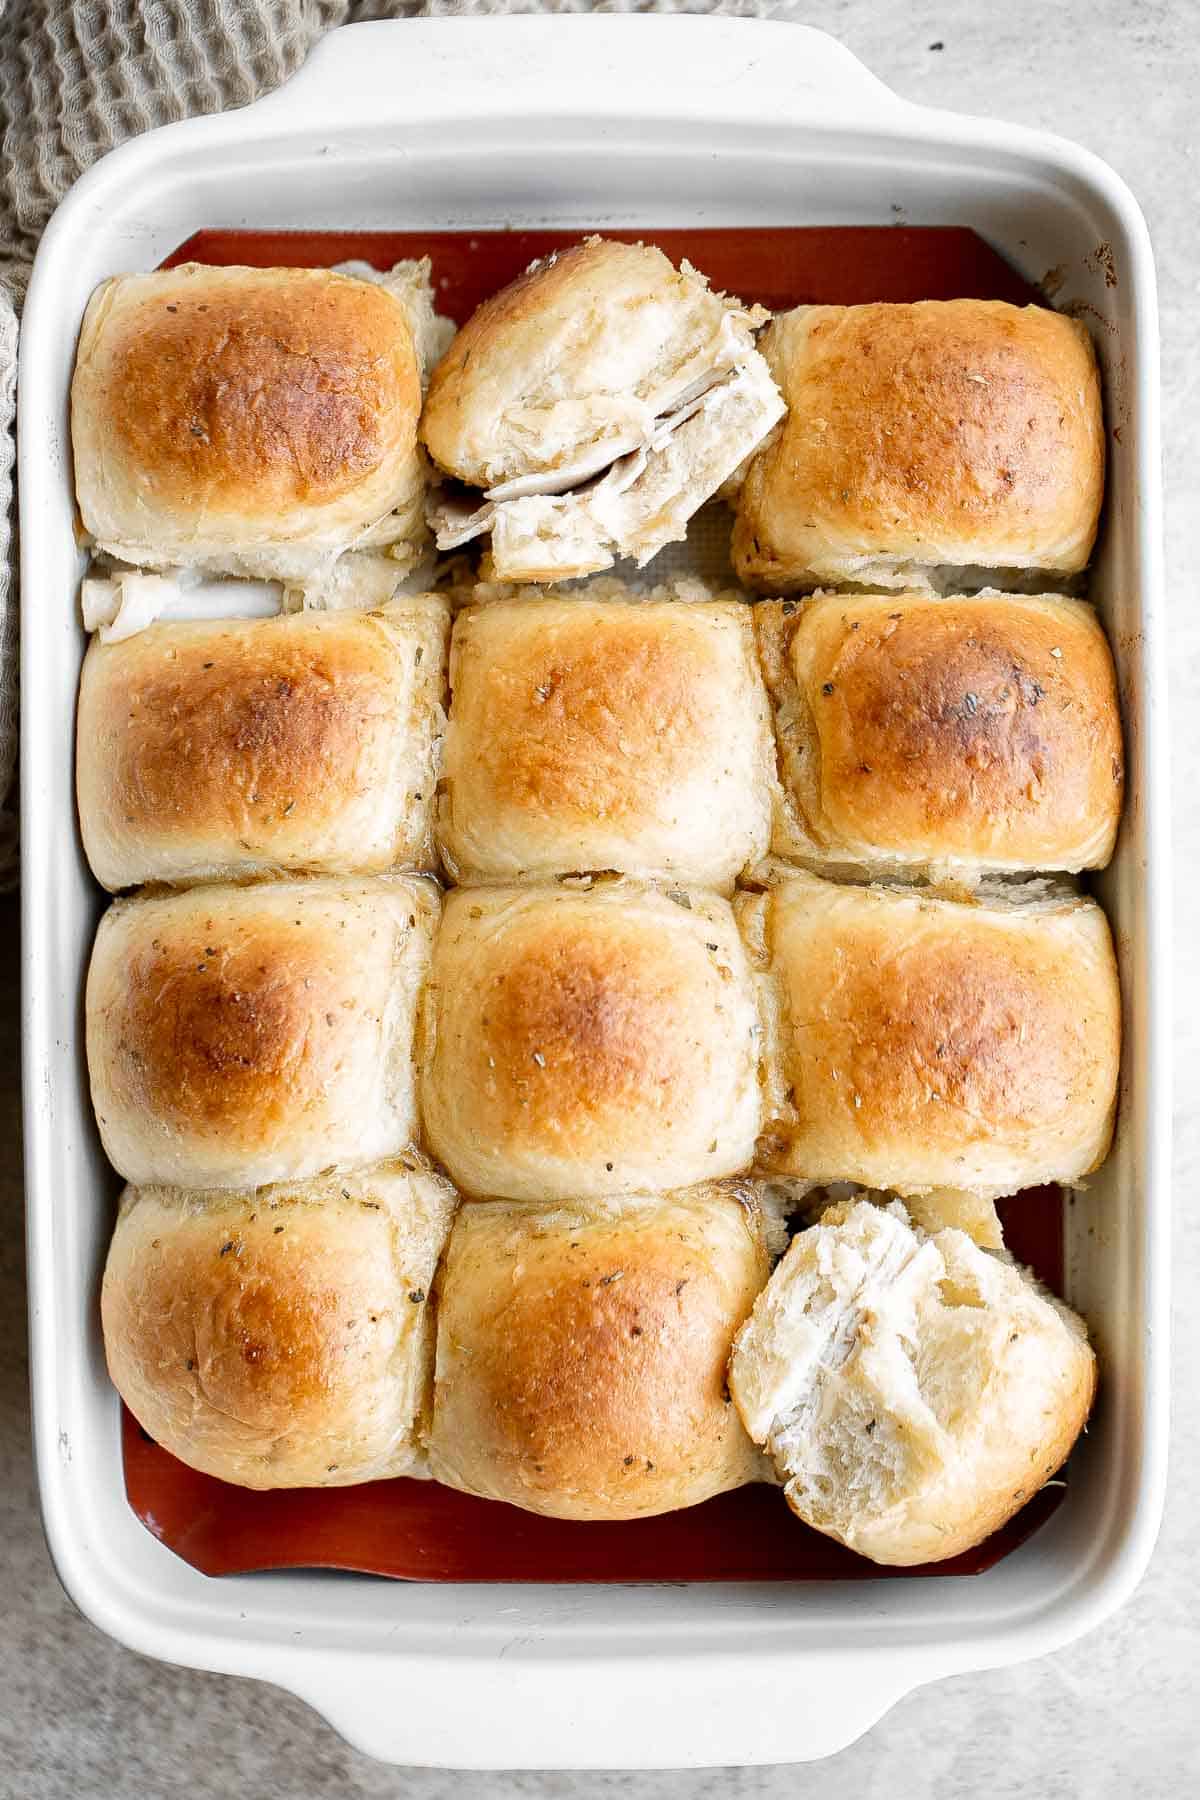
Turkey and Cheese Sliders are quick and easy, made with deli meat and Swiss cheese filled inside soft Hawaiian dinner rolls topped with a buttery sauce.
Homemade Tater Tots with Bacon
Homemade tater tots with bacon are golden and crispy on the outside, yet soft and tender inside. They're packed with flavour and a total family favourite.

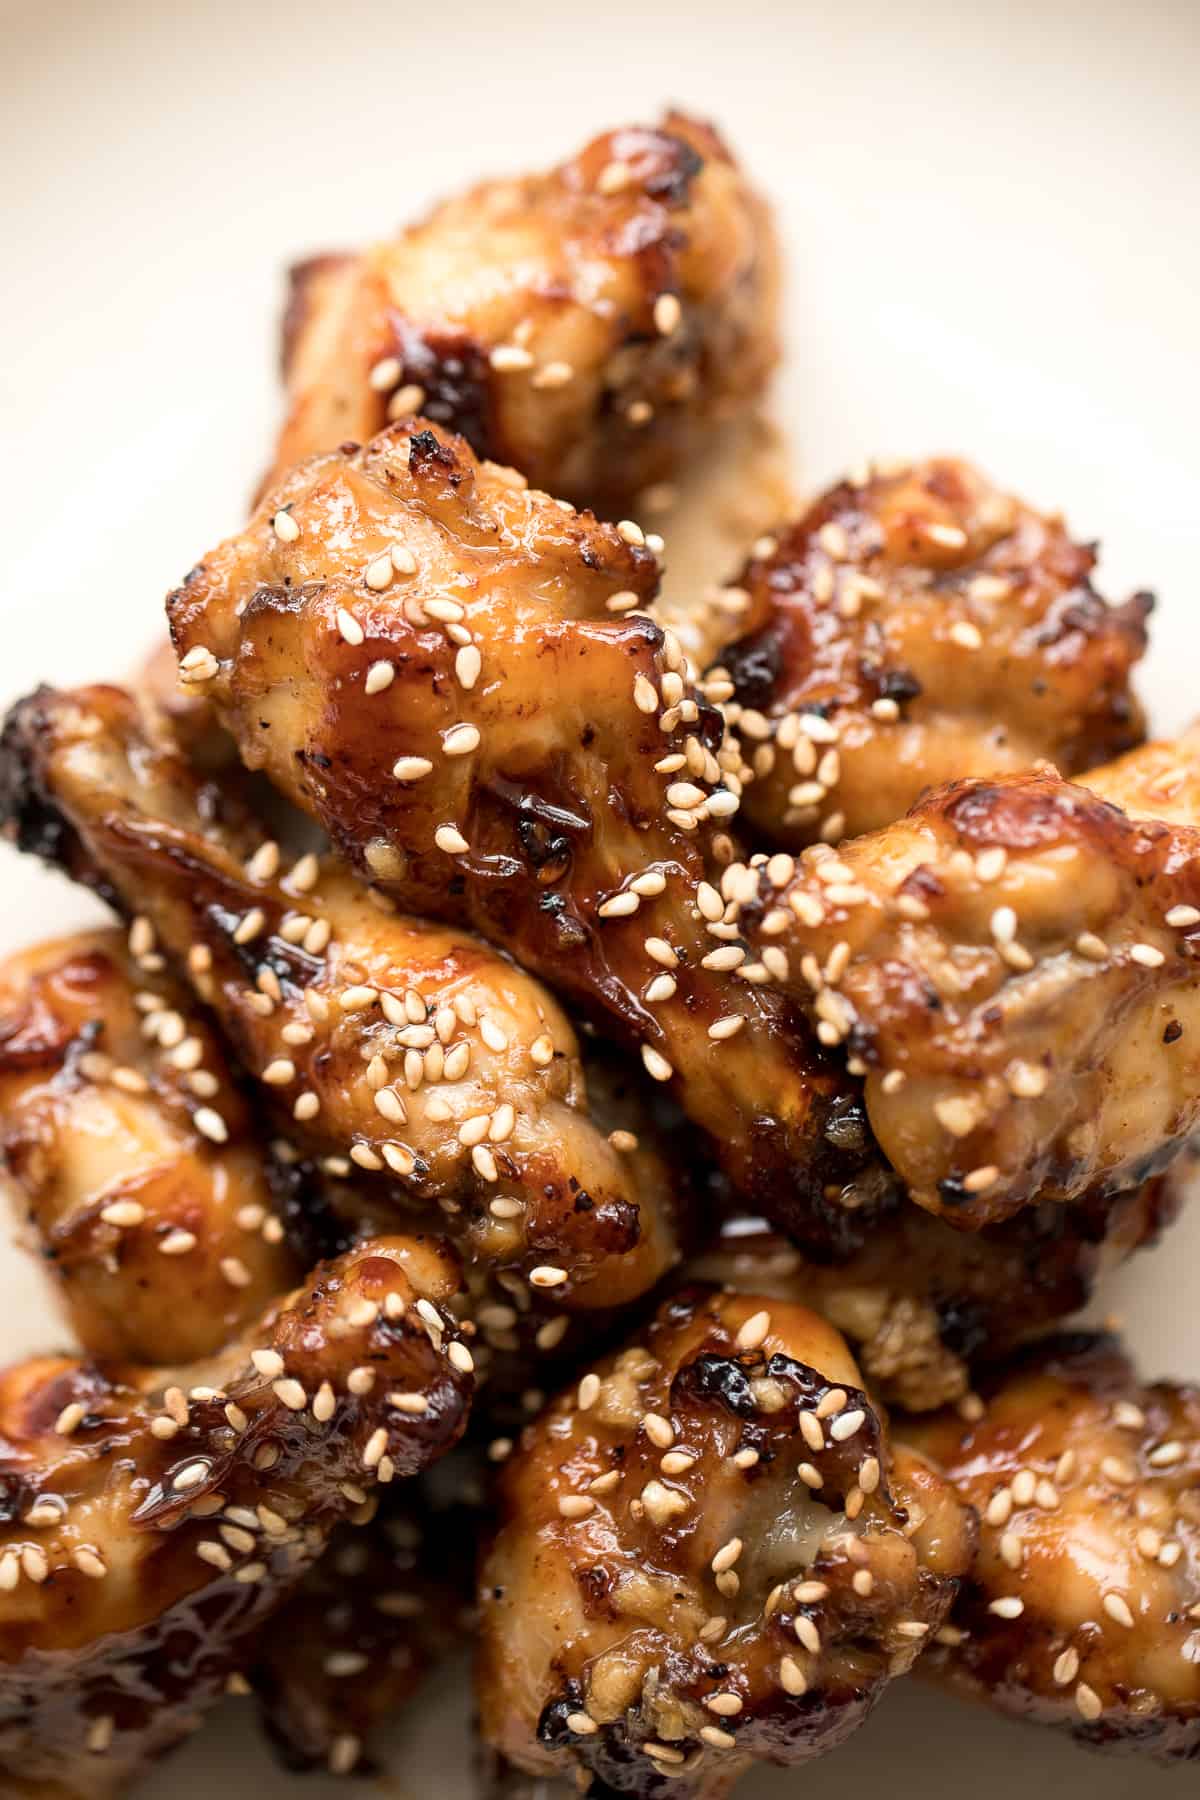
These sweet and sticky honey garlic chicken wings are baked or air fried until crispy and tossed in a honey garlic sauce. So crave-worthy and so easy to make.
Baked Chicken Quesadillas are cheesy, crispy, flavorful, and delicious. This family-friendly recipe is quick and easy to make in just 30 minutes!

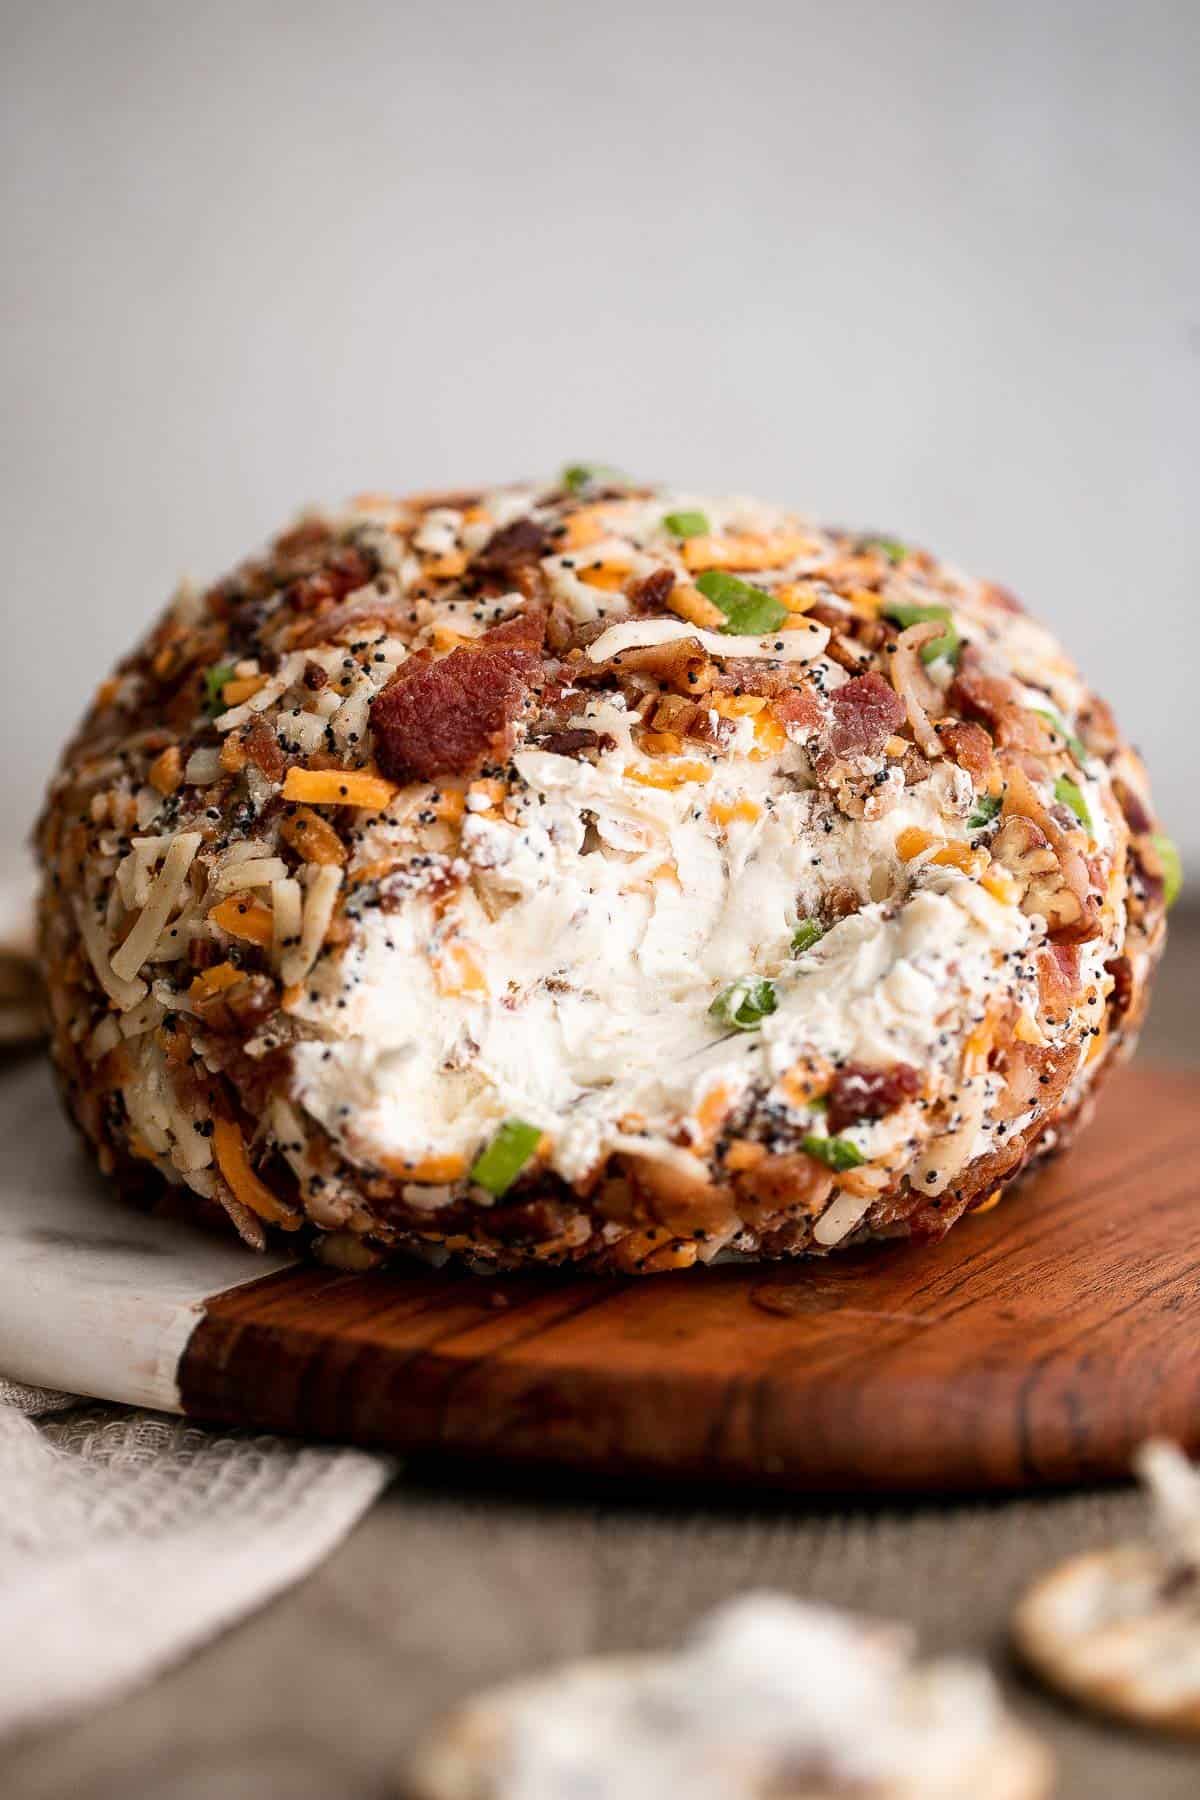
Bacon cheddar cheese ball is an easy to make appetizer and delicious showstopper at holiday parties or game day. It's creamy, cheesy, and nutty.
Skillet Neapolitan Margherita Pizza
Quick and easy skillet Neapolitan margherita pizza has an iconic thin and soft crust with a perfectly crisp exterior, and simple and fresh toppings.

Sticky crispy baked sweet chili chicken bites is better than takeout and so easy to make healthier at home. An easy dinner or game day appy.

Cheesy Garlic Bread is toasty and crispy on the outside, tender and soft inside with a garlic butter and melty cheese on top. Make in under 20 minutes!

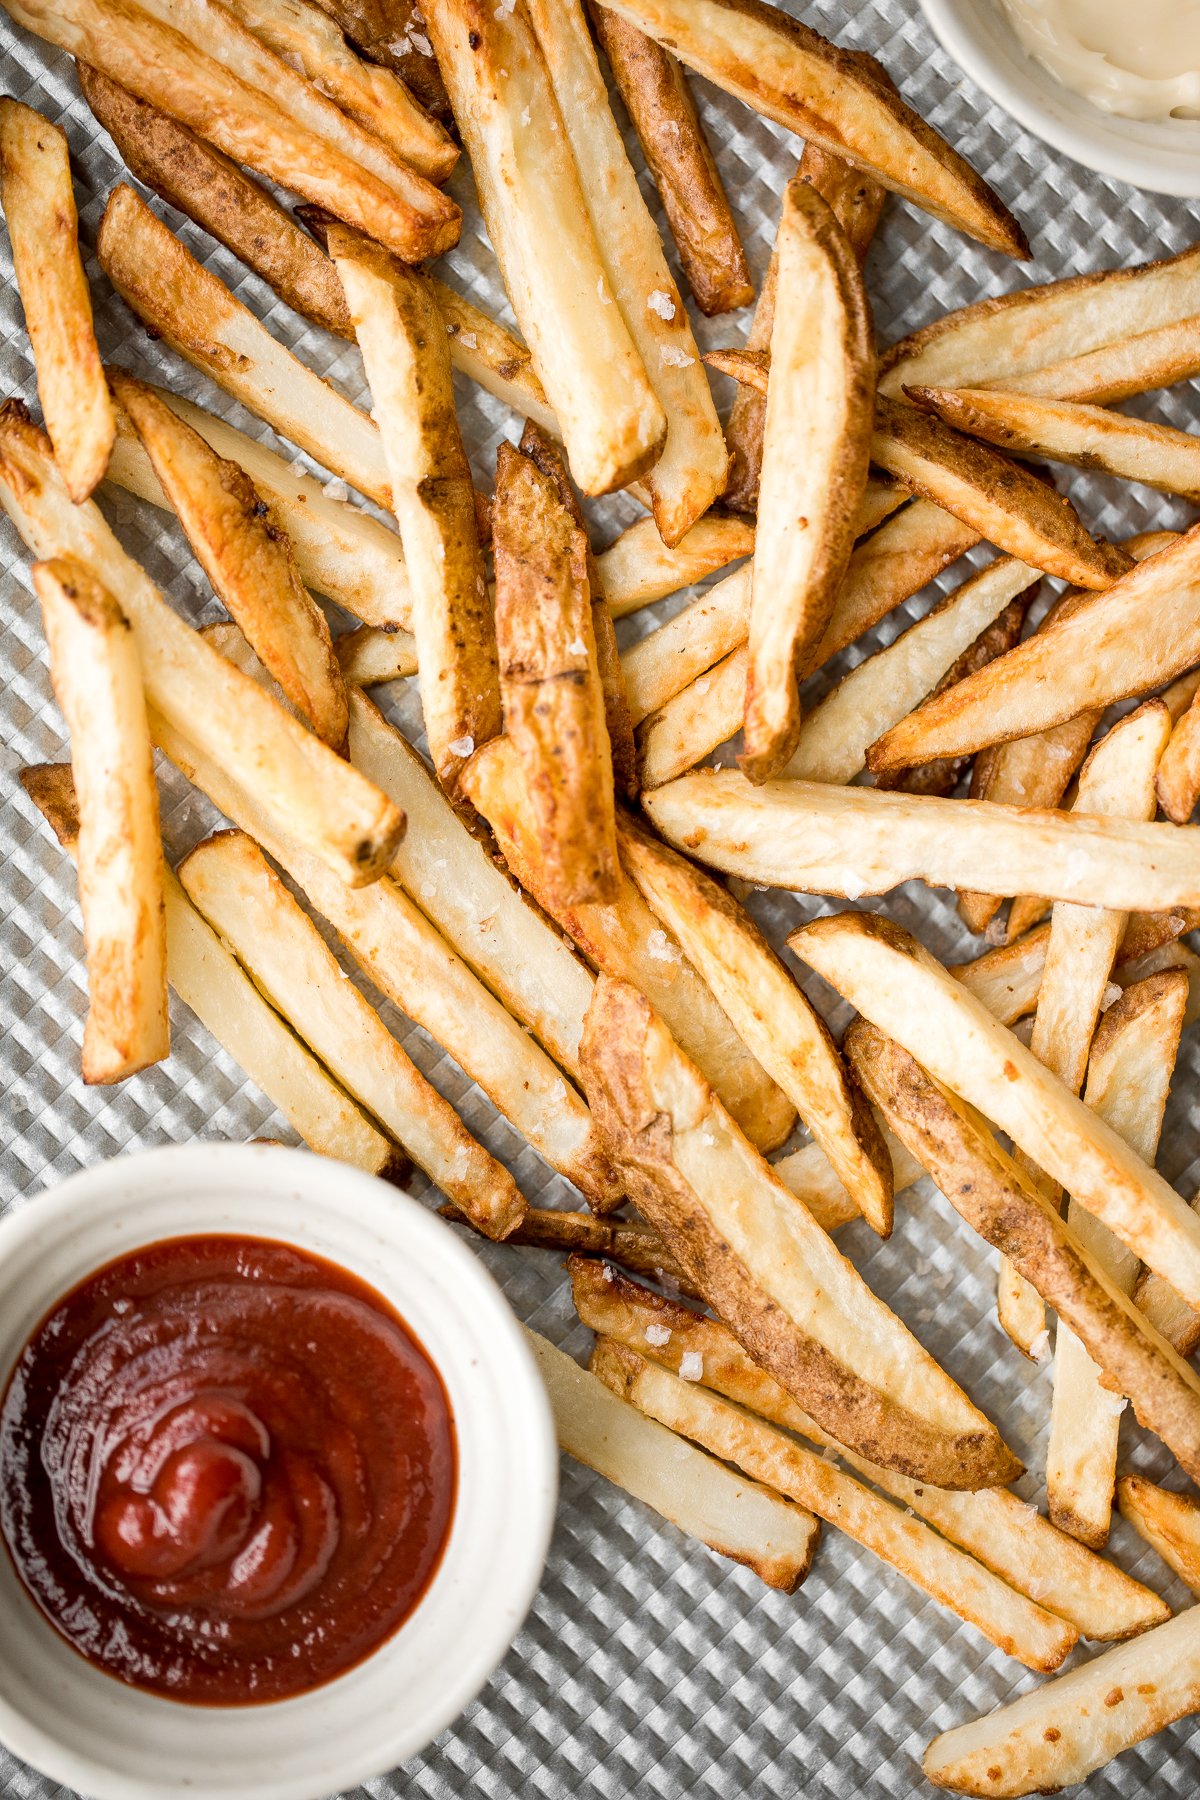
Super crispy air fryer french fries are tender and fluffy on the inside and crunchy on the outside. Make this healthier french fry in just 12 minutes!
Crunchy, cheesy, and paired with an awesome dipping sauce, these baked mozzarella sticks are just as amazing as what you would find in a restaurant.

Homemade Taquitos are crispy, delicious and flavorful. These rolled tacos are filled with seasoned ground beef and melty cheese - and can be fried or baked!

Pepperoni pizza dip is creamy, rich, comforting, and delicious. This appetizer is easy to make, easy to prepare ahead of time, and easy to eat.
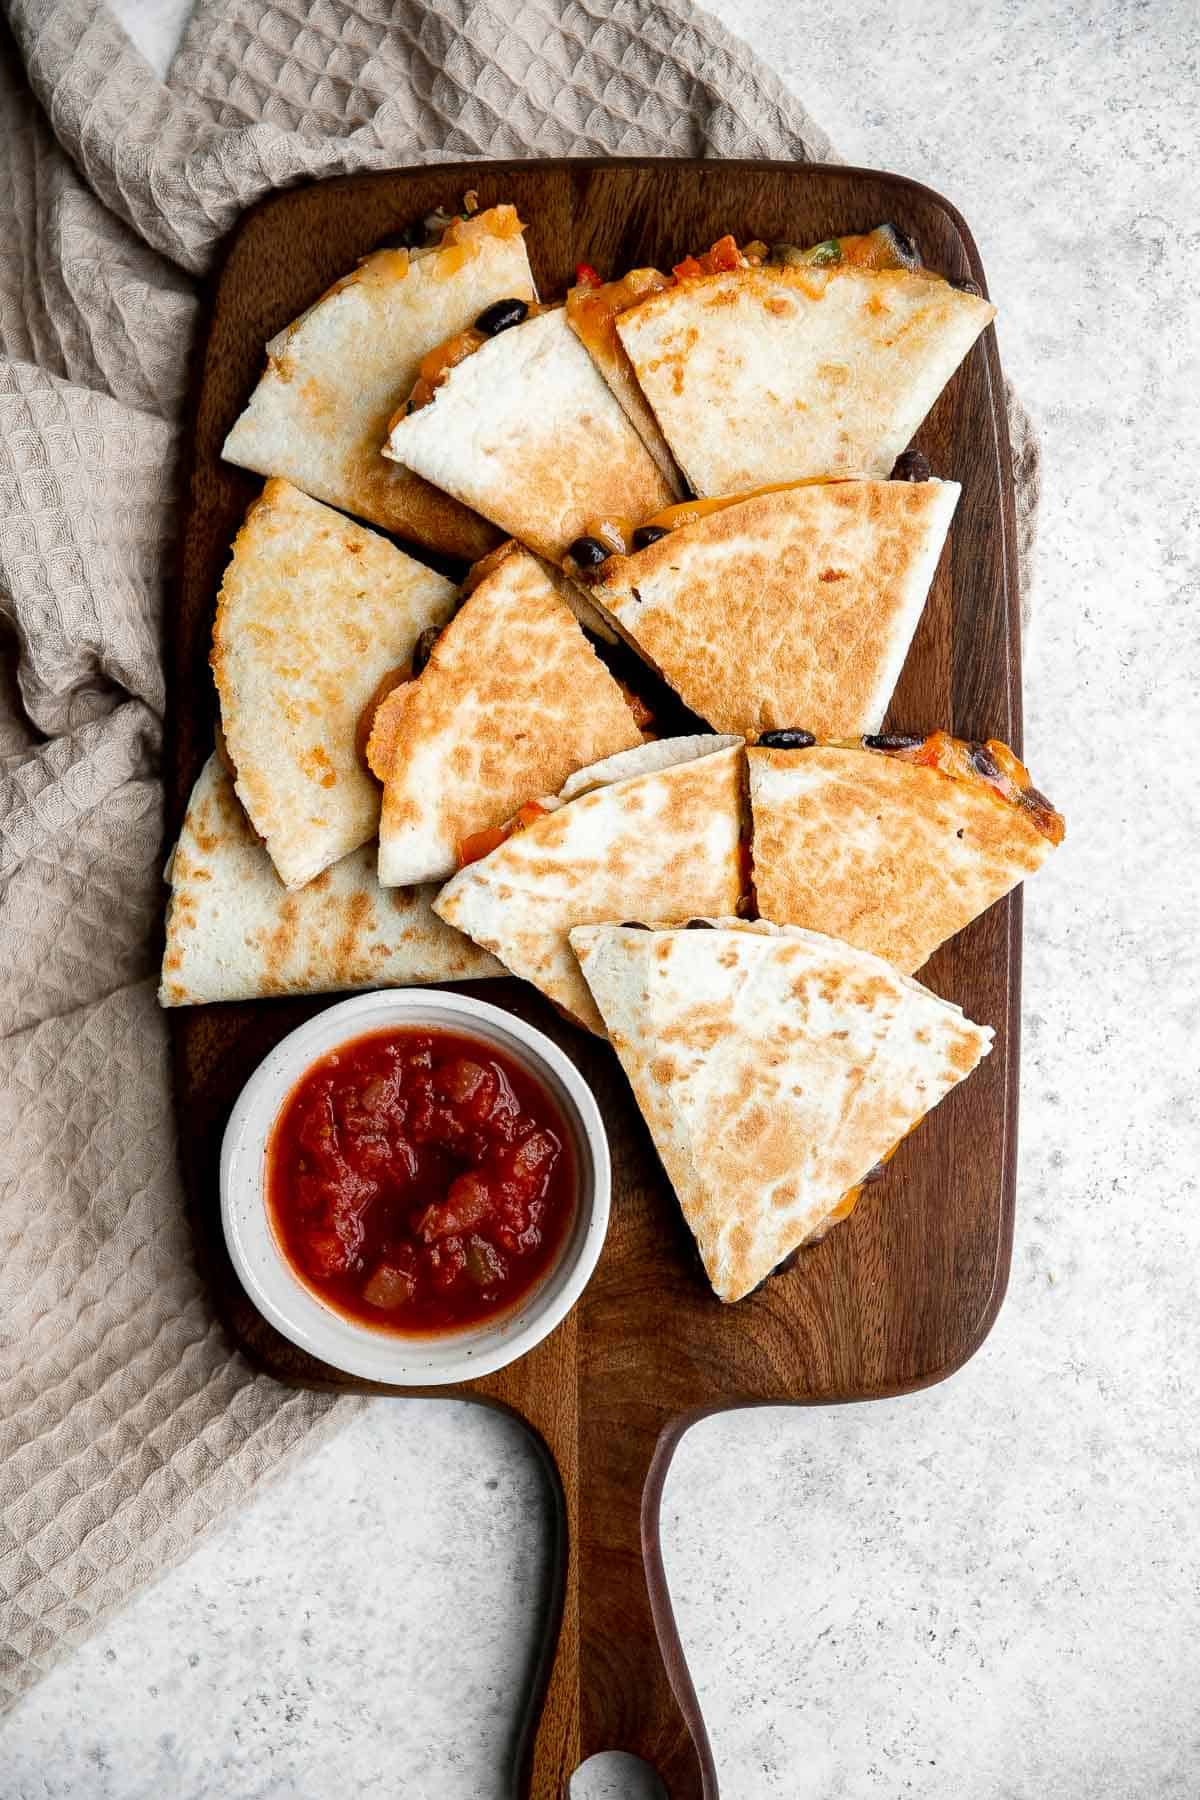
Vegetarian quesadillas are quick and easy, completely customizable, loaded with veggies and beans. Serve this kid-friendly Mexican meal for lunch or dinner.
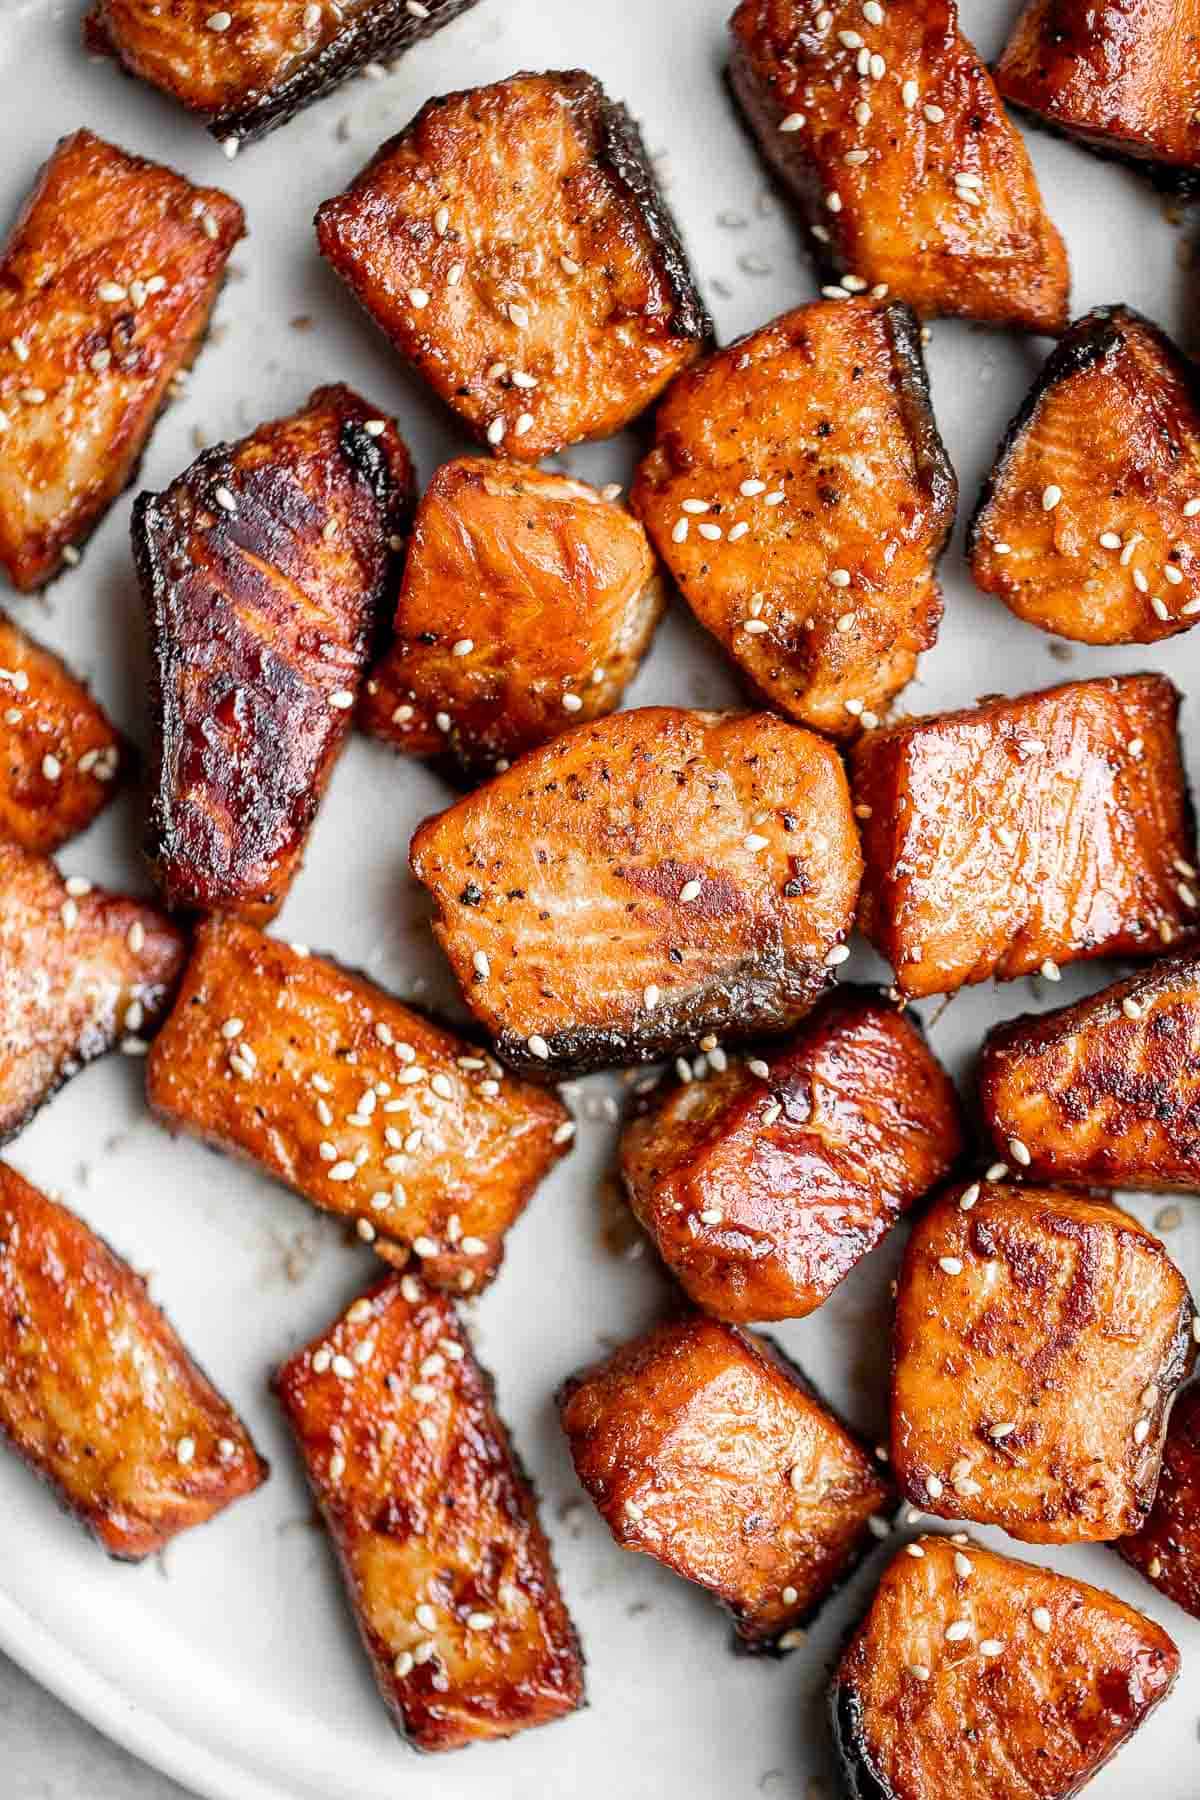
Salmon Bites are flavorful and delicious bite-sized pieces of salmon cooked until tender with crispy, golden edges and coated with an homemade sticky glaze.
Pigs in a blanket from scratch are a delicious and easy appetizer or snack to make for your next party or gathering - juicy, cheesy, flaky, and buttery.

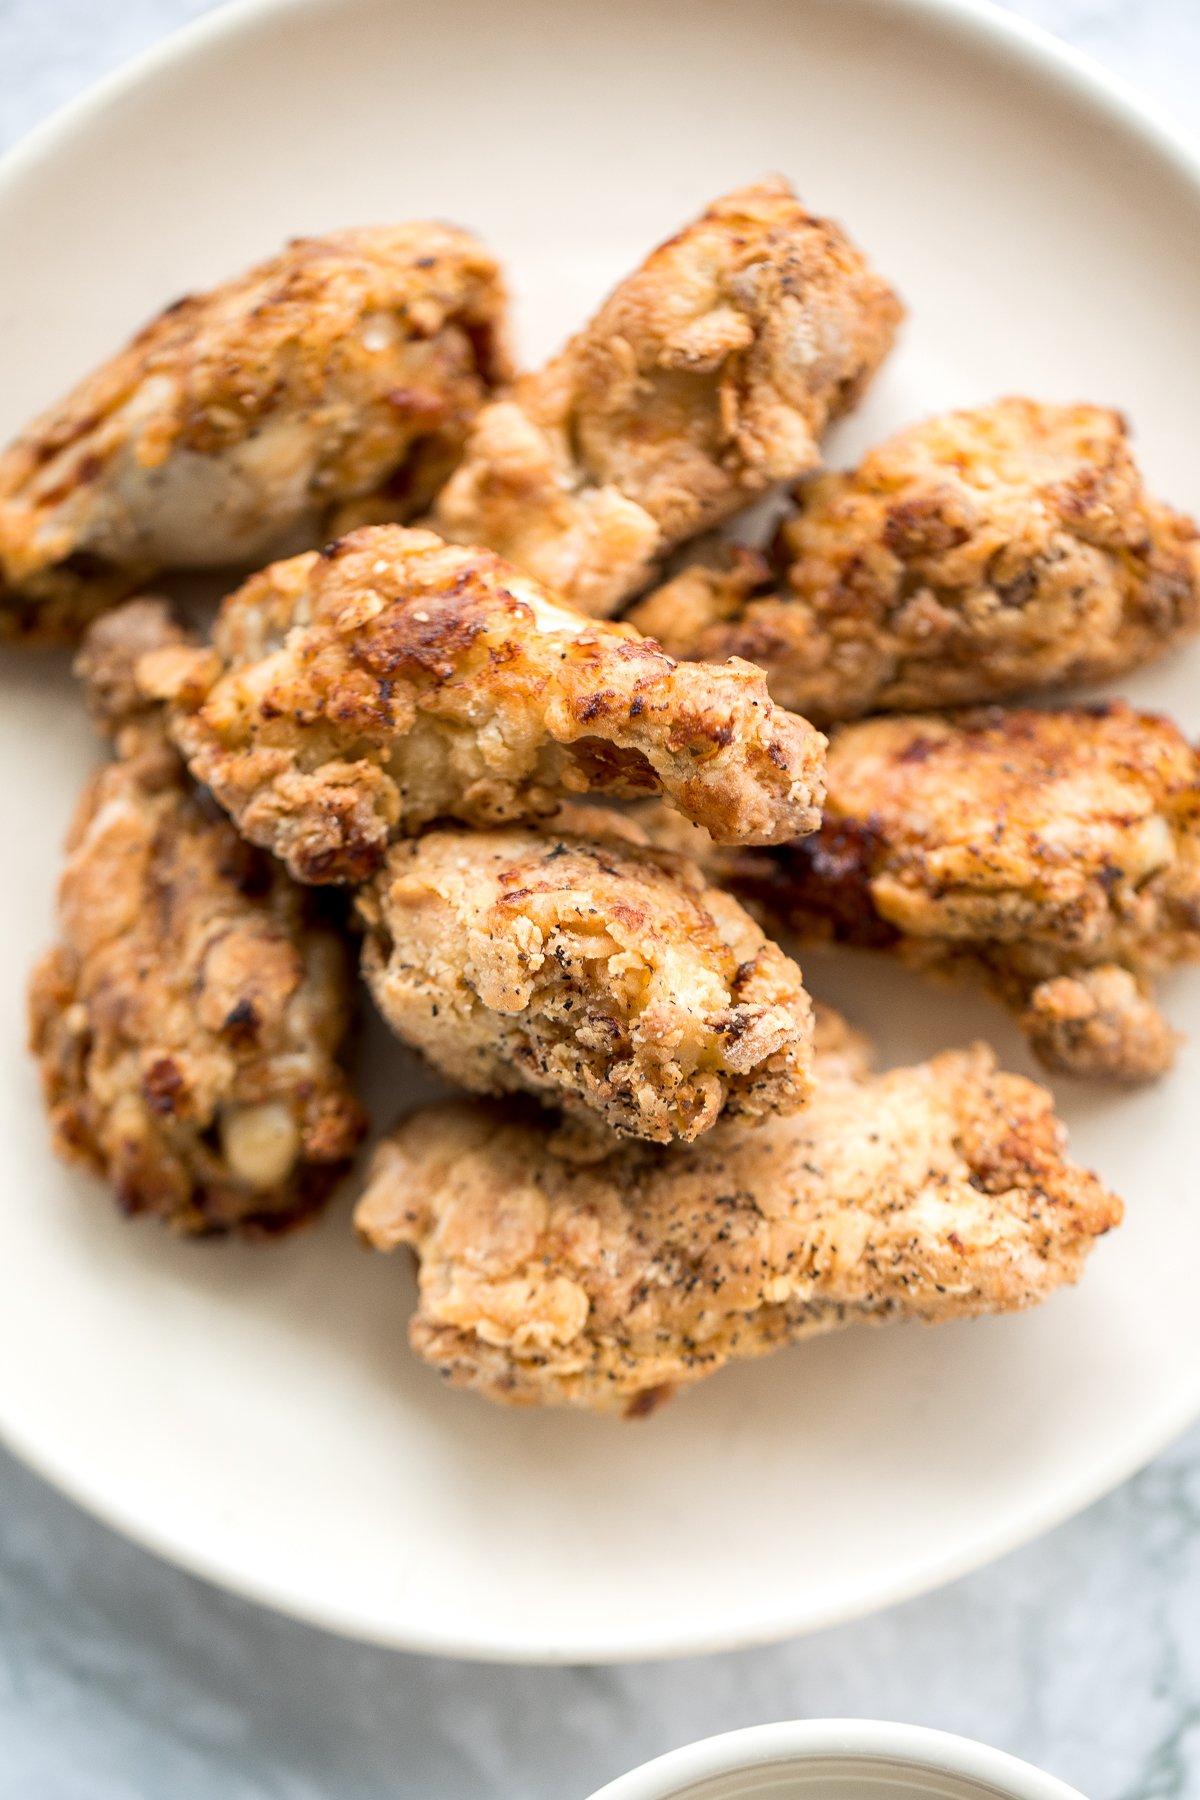
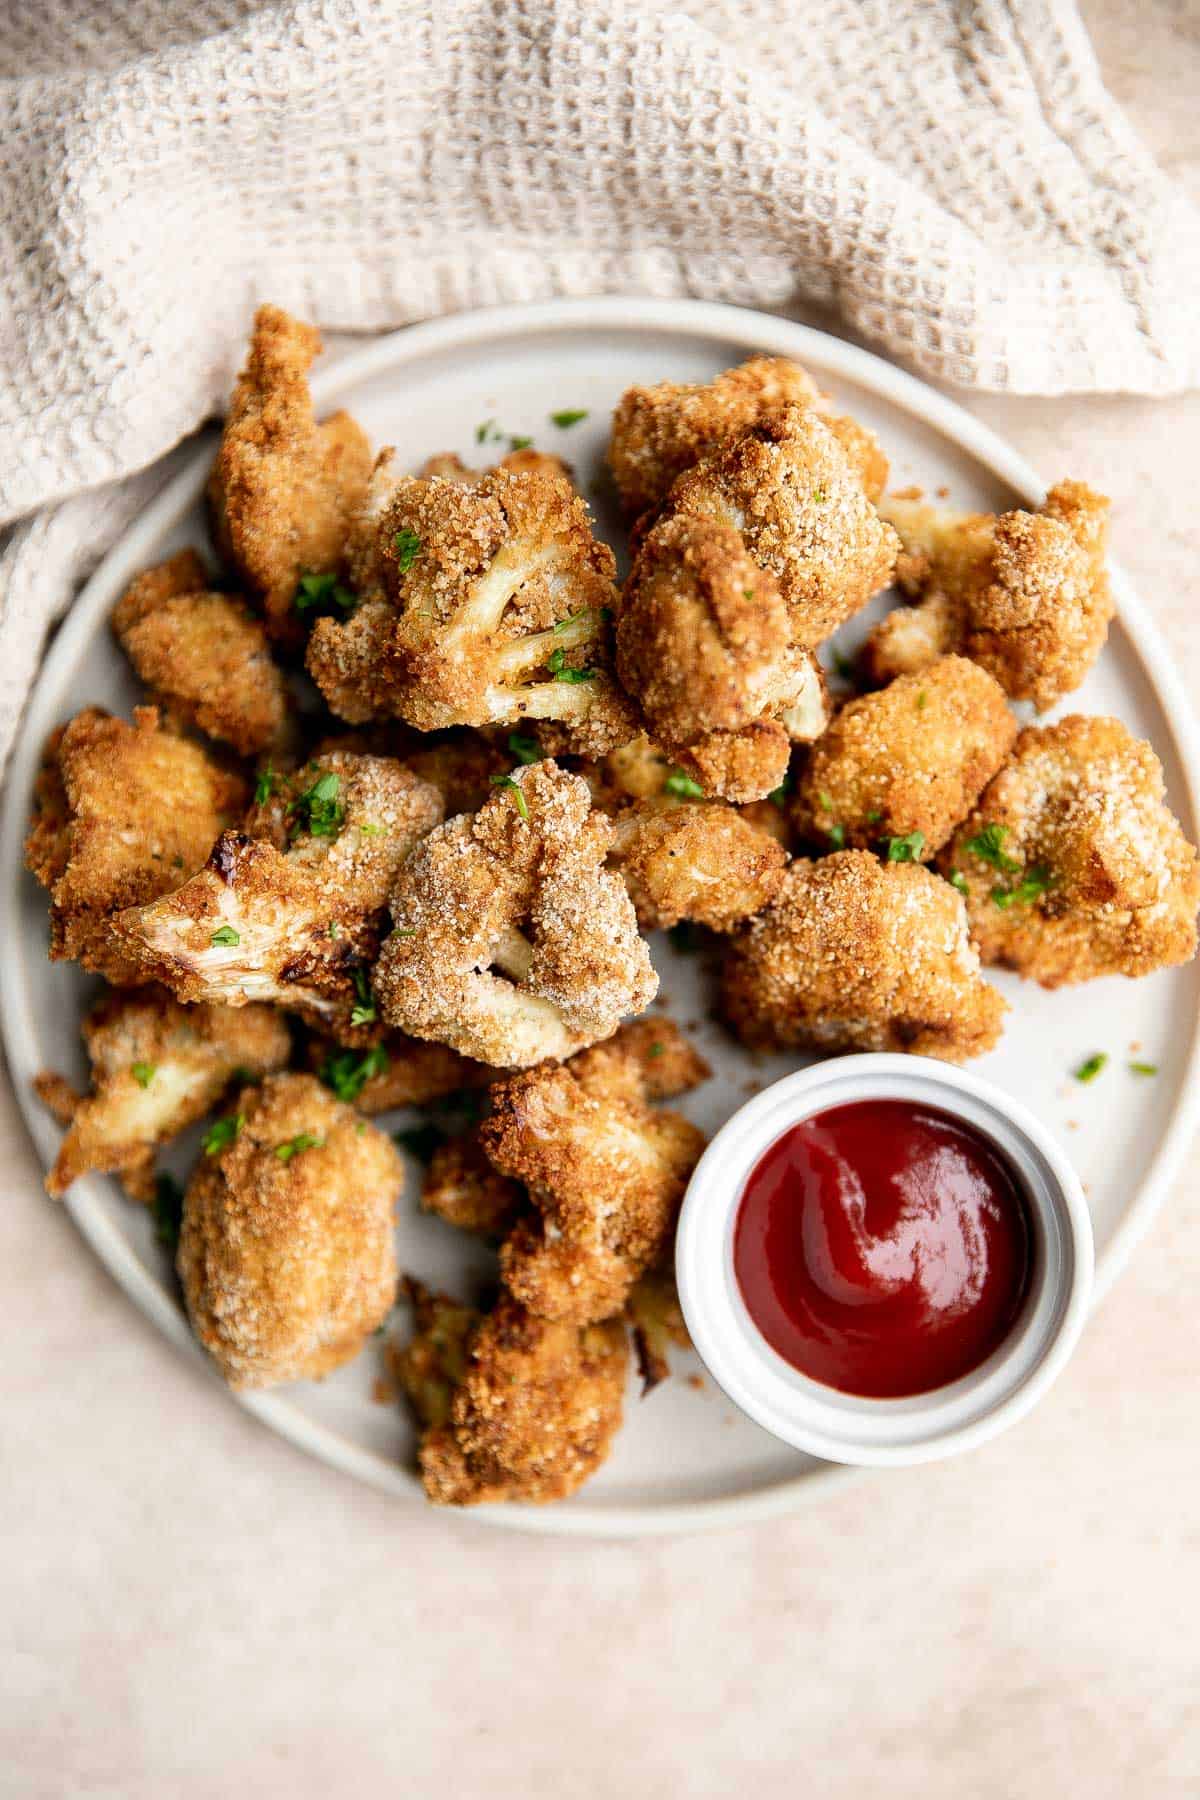
The Best Breaded Fried Chicken Wings (Air Fryer)
The BEST breaded fried chicken wings -- extra crispy and crunchy outside, tender and juicy inside. You can't even tell they're air fried, not deep-fried!
Air fryer short ribs are crispy, flavorful, and delicious. The easy marinade ensures they're tender and juicy inside, while the air fryer makes them crispy.
Homemade artichoke dip is a warm, creamy dip loaded with tender artichoke hearts. This easy to make appetizer is tangy, cheesy, and all-around delicious!
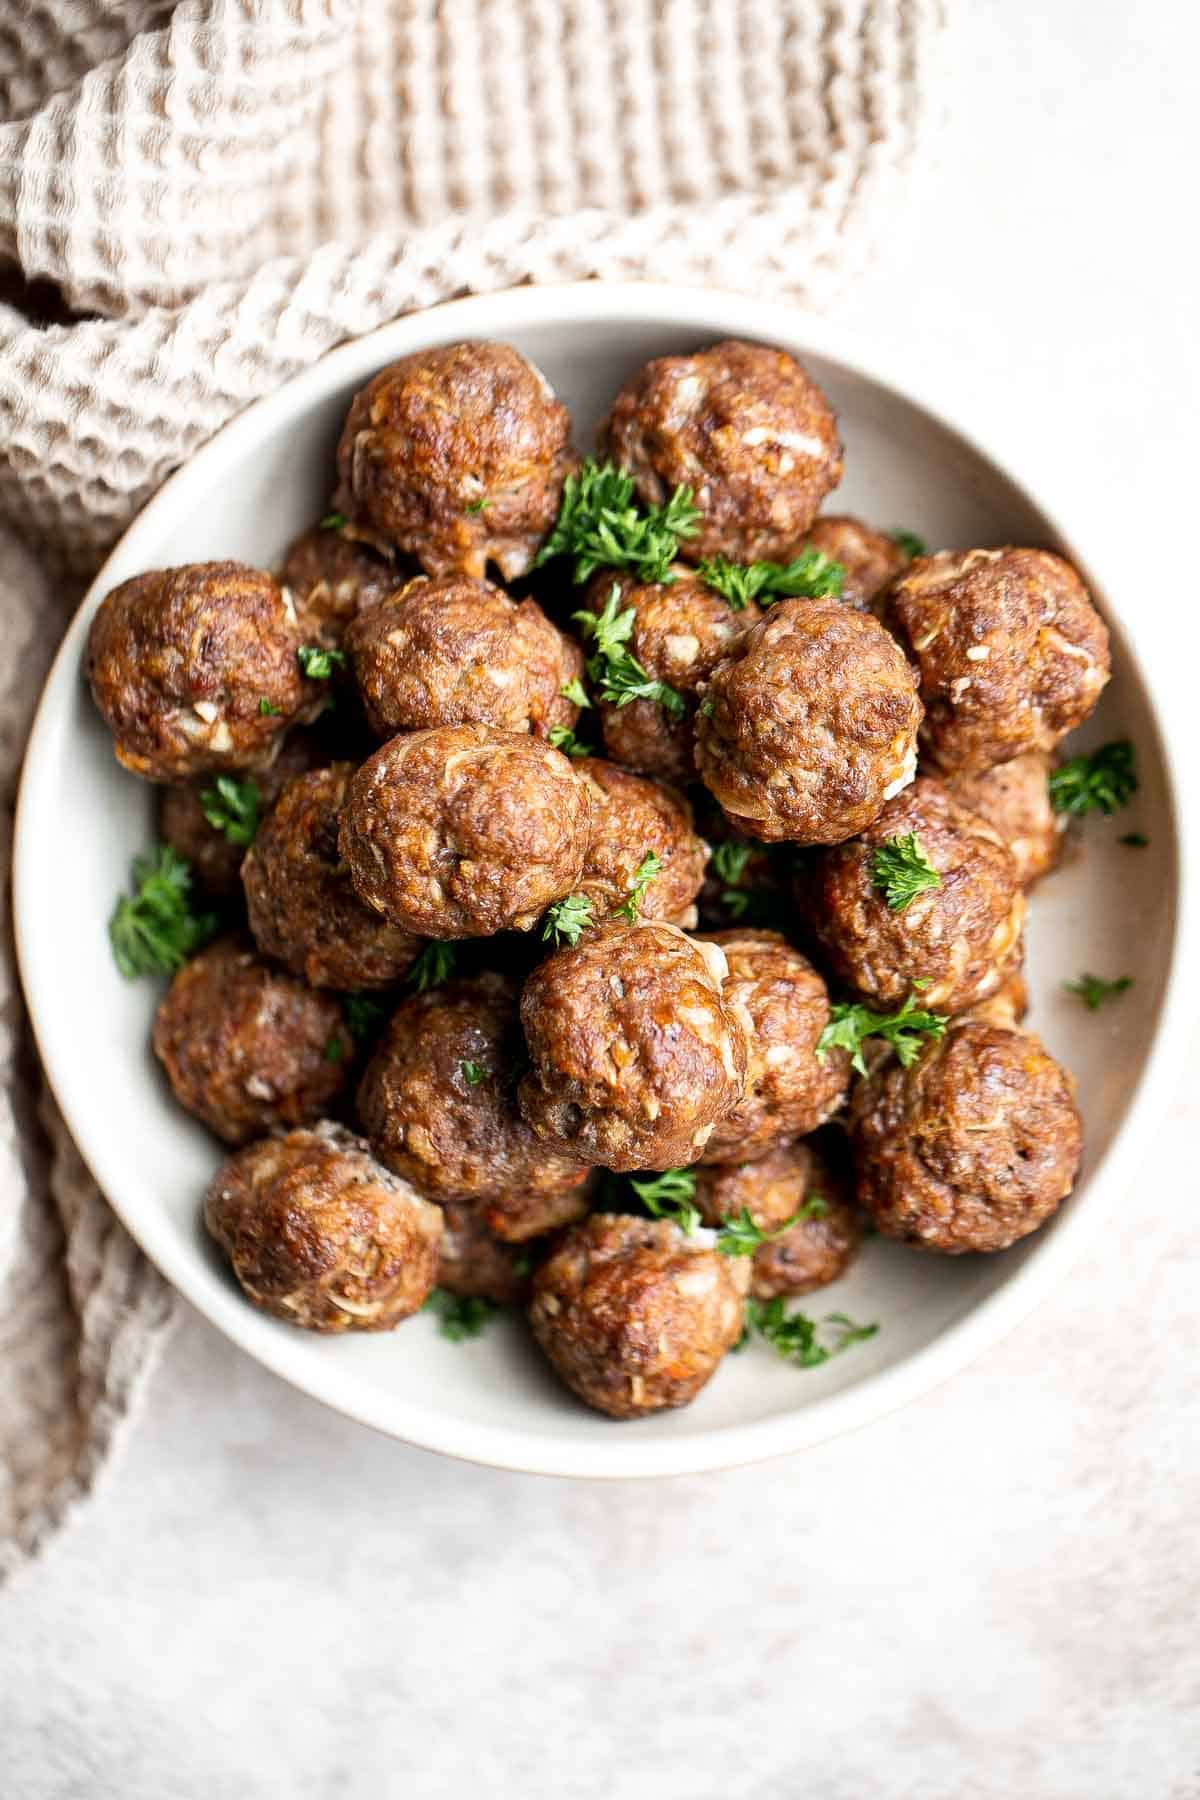
Easy Baked Meatballs are juicy, tender, loaded with flavor, and kid-friendly. Enjoy delicious homemade meatballs in under an hour using simple ingredients.
Homemade chili nachos are crispy, cheesy, delicious, and flavorful. This modern twist on a Mexican classic are the best way to use up any leftover chili.

Say goodbye to store-bought popcorn and hello to homemade Kettle Corn - sweet and salty, loved by all, and quick and easy to make with just 4 ingredients.

Sweet and sticky, baked BBQ chicken wings are perfectly crispy, so delicious, and smothered in barbecue sauce. They are the perfect game day appetizer.
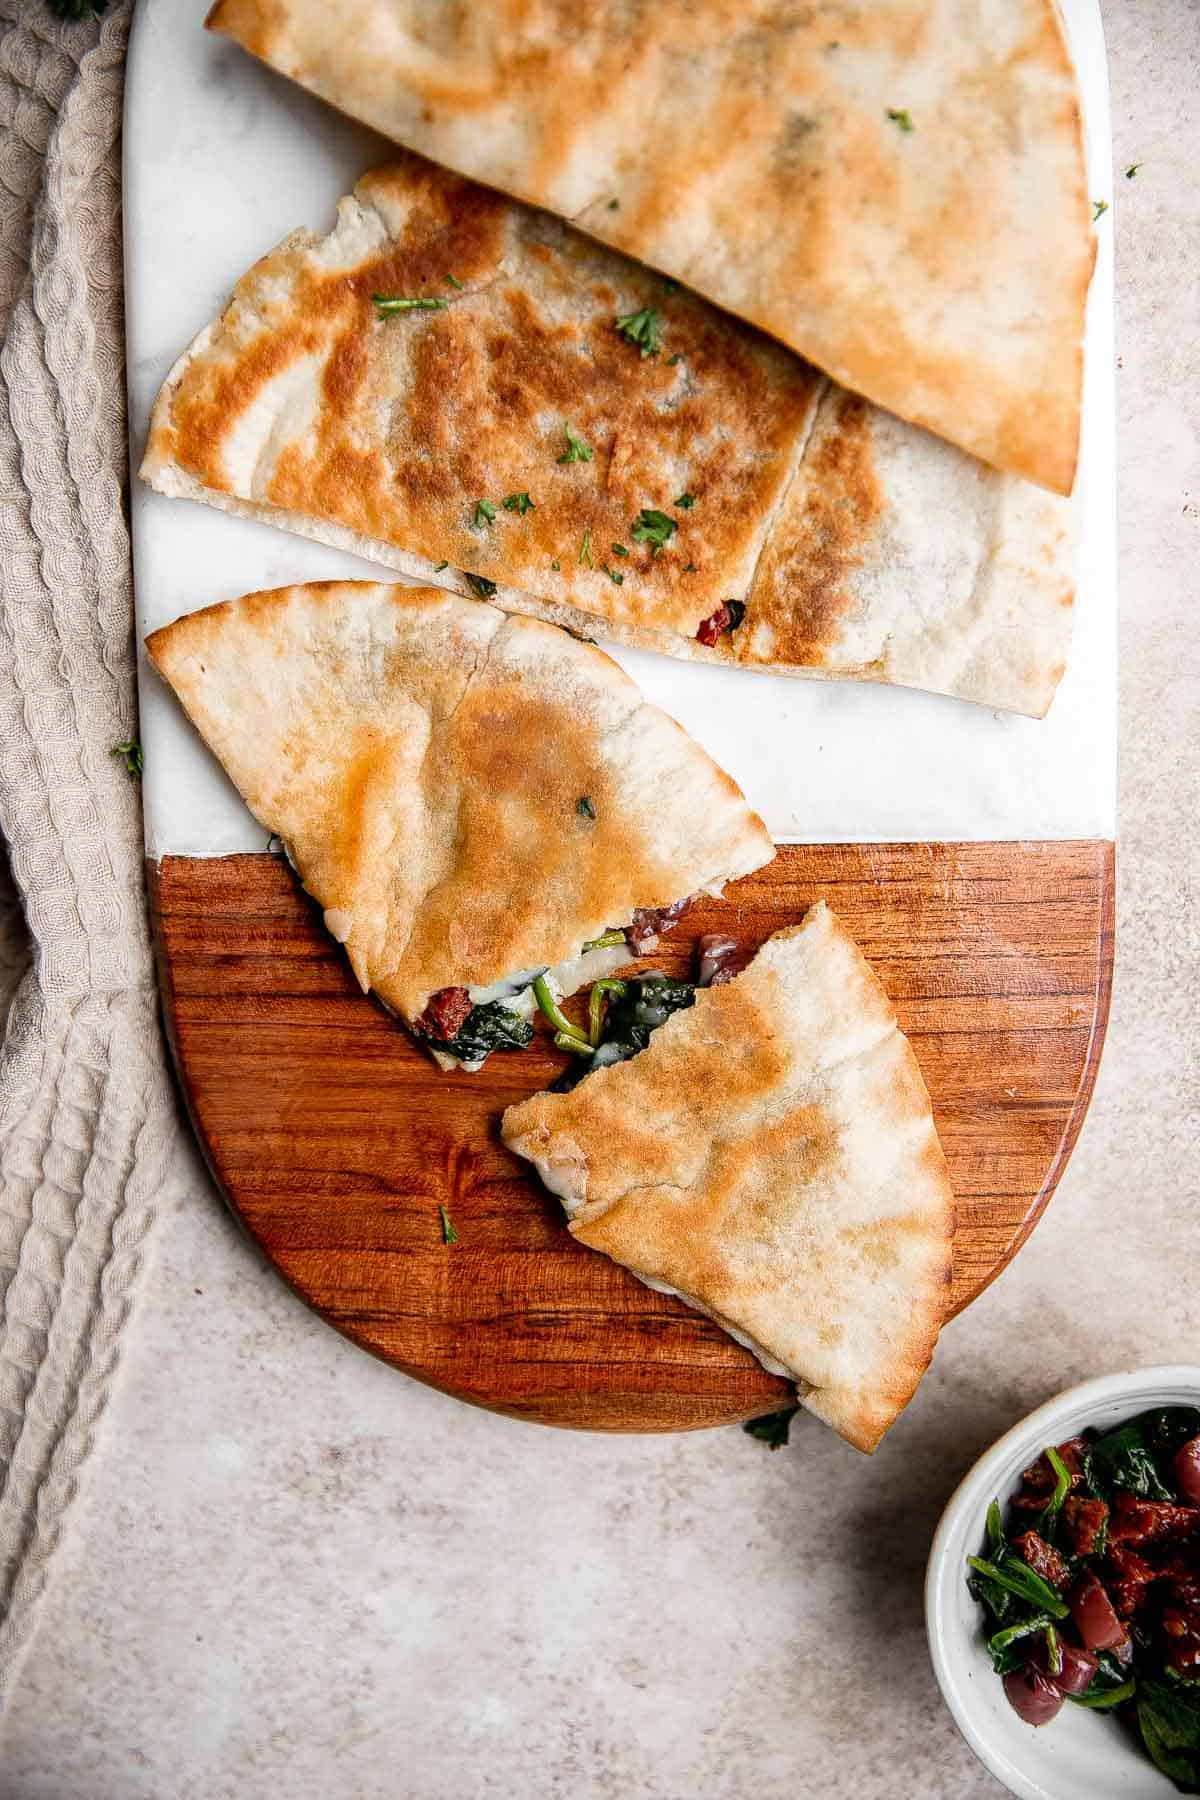
Quick easy pita grilled cheese is loaded with Mediterranean flavors of spinach, olive, and sun-dried tomato stuffed inside pita bread with cheddar cheese.
Incredibly tasty, this easy and basic guacamole takes less than 5 minutes to make. It is the perfect dip for a Mexican-inspired Super Bowl party.

Bacon Wrapped Jalapeño Poppers
Bacon wrapped jalapeño poppers are crispy on the outside, creamy and cheesy inside, spicy, and wrapped in bacon. Easy to make in the air fryer or oven.

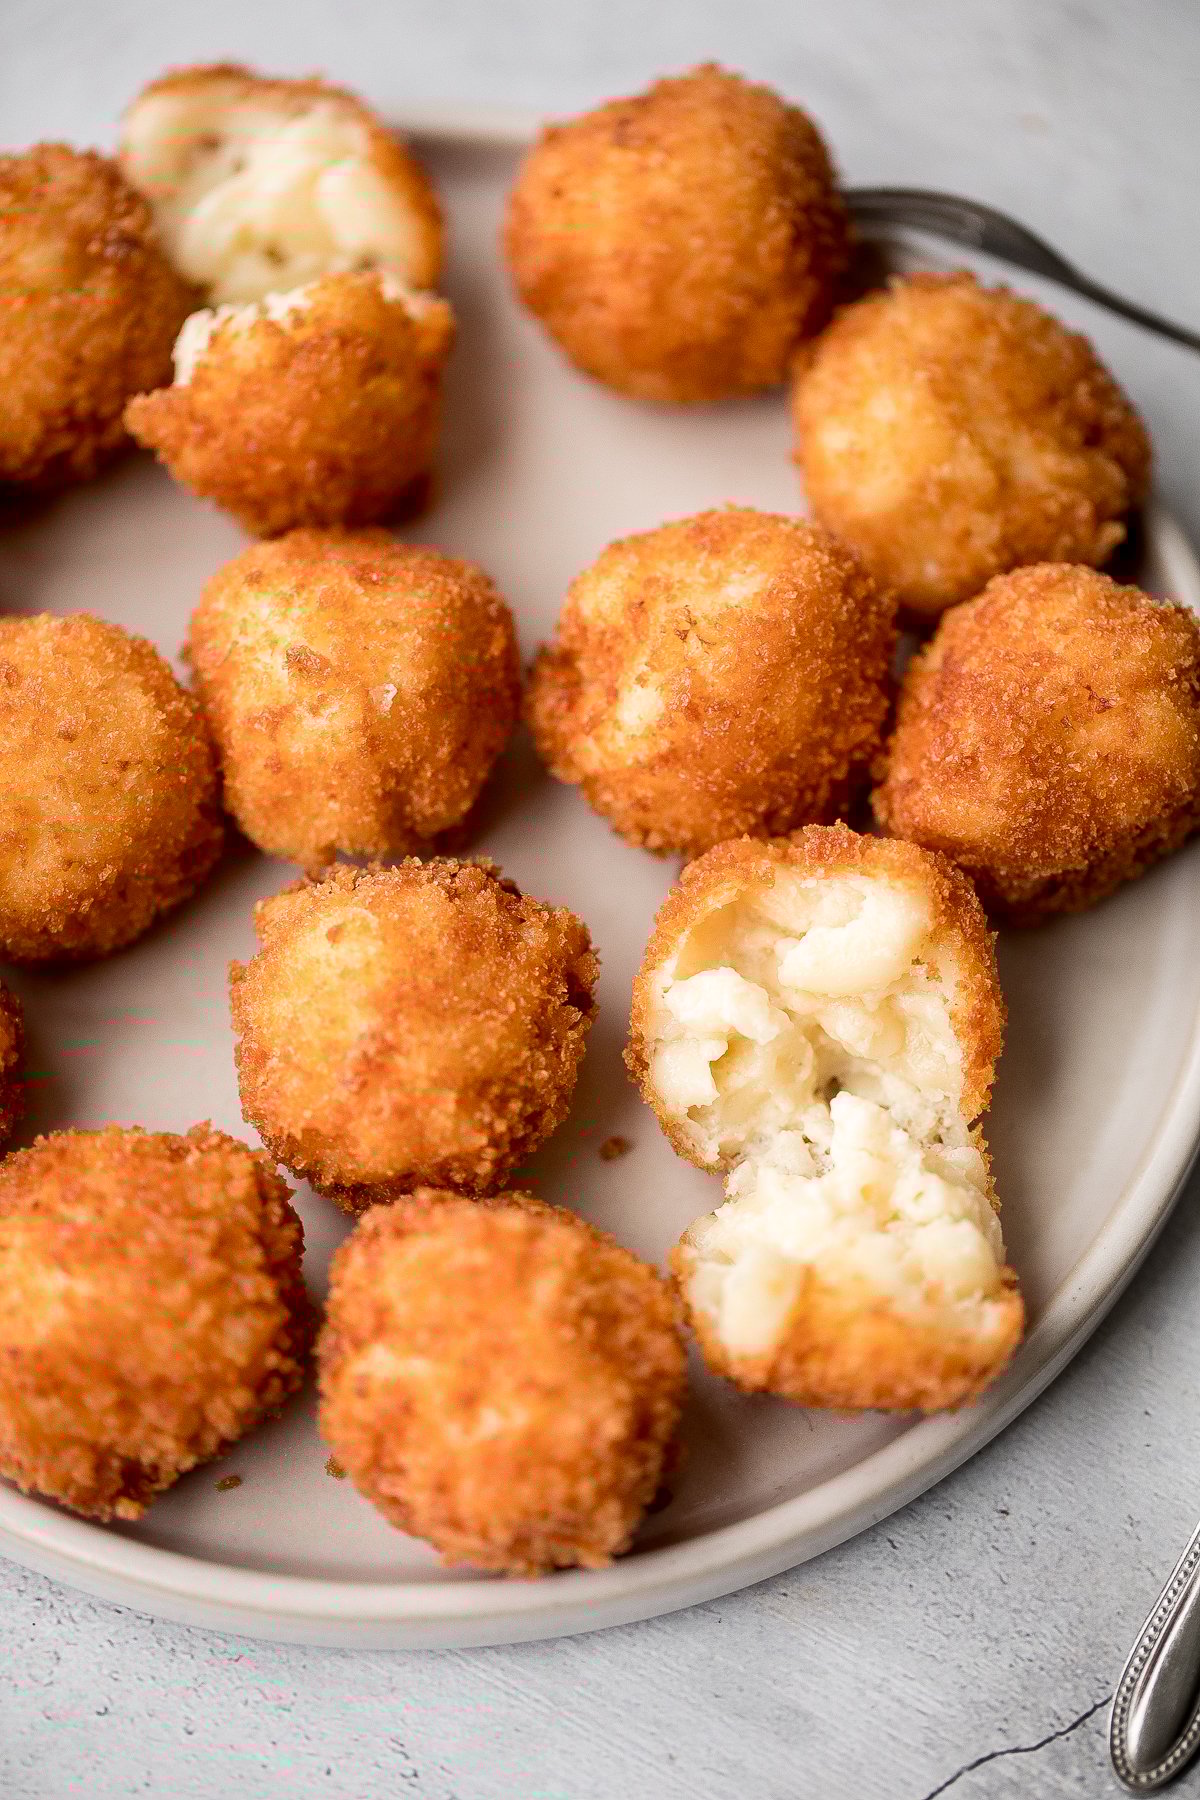
Fried mac and cheese balls are crispy on the outside, creamy and cheesy on the inside, and have the perfect crunch. Best way to use leftover mac and cheese. It's one of the newest additions to my collection of Super Bowl recipes.
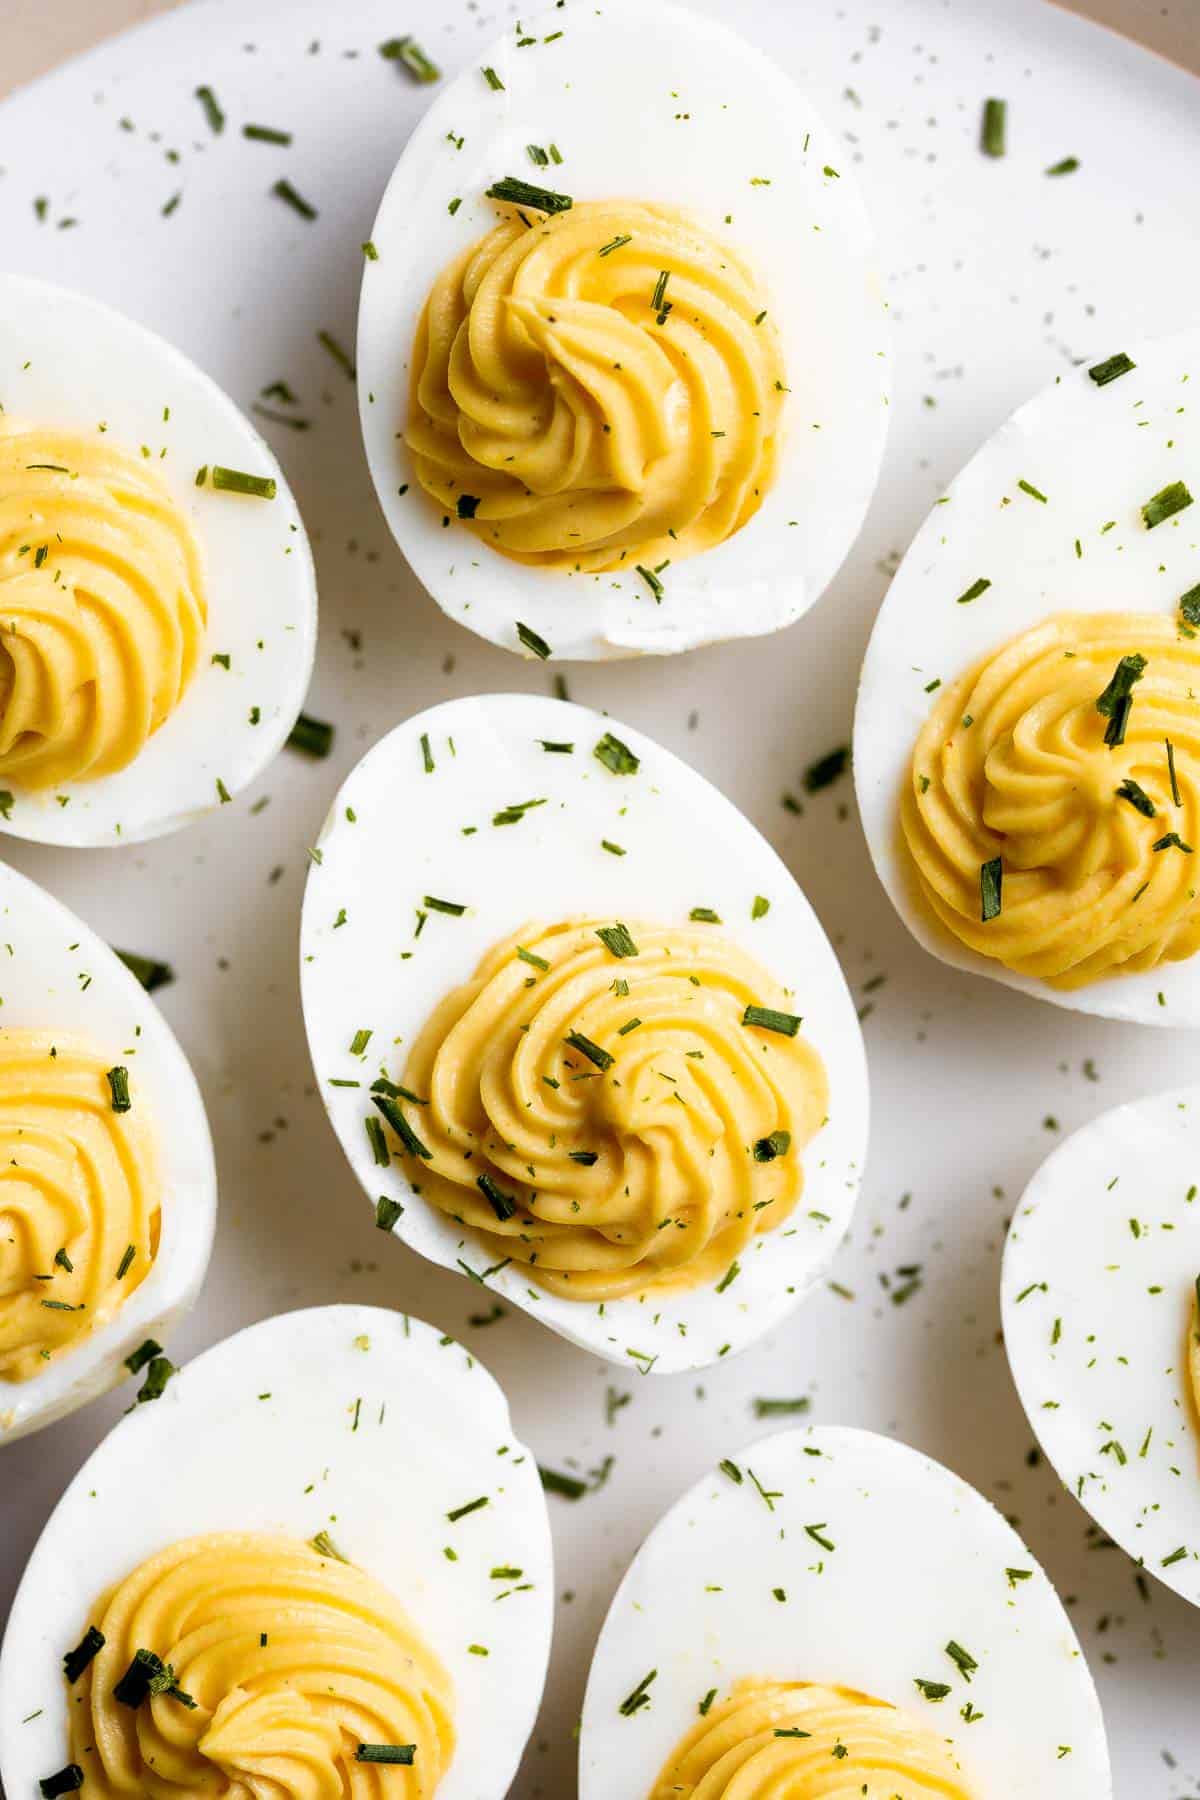
Classic deviled eggs are a simple, easy, and healthy appetizer to make when you need something quick for brunch, picnics, barbecues, potlucks, or Easter.
Honey mustard chicken wings are crispy on the outside but juicy and tender inside. Baked in an air fryer or oven, they have the best texture and flavor.
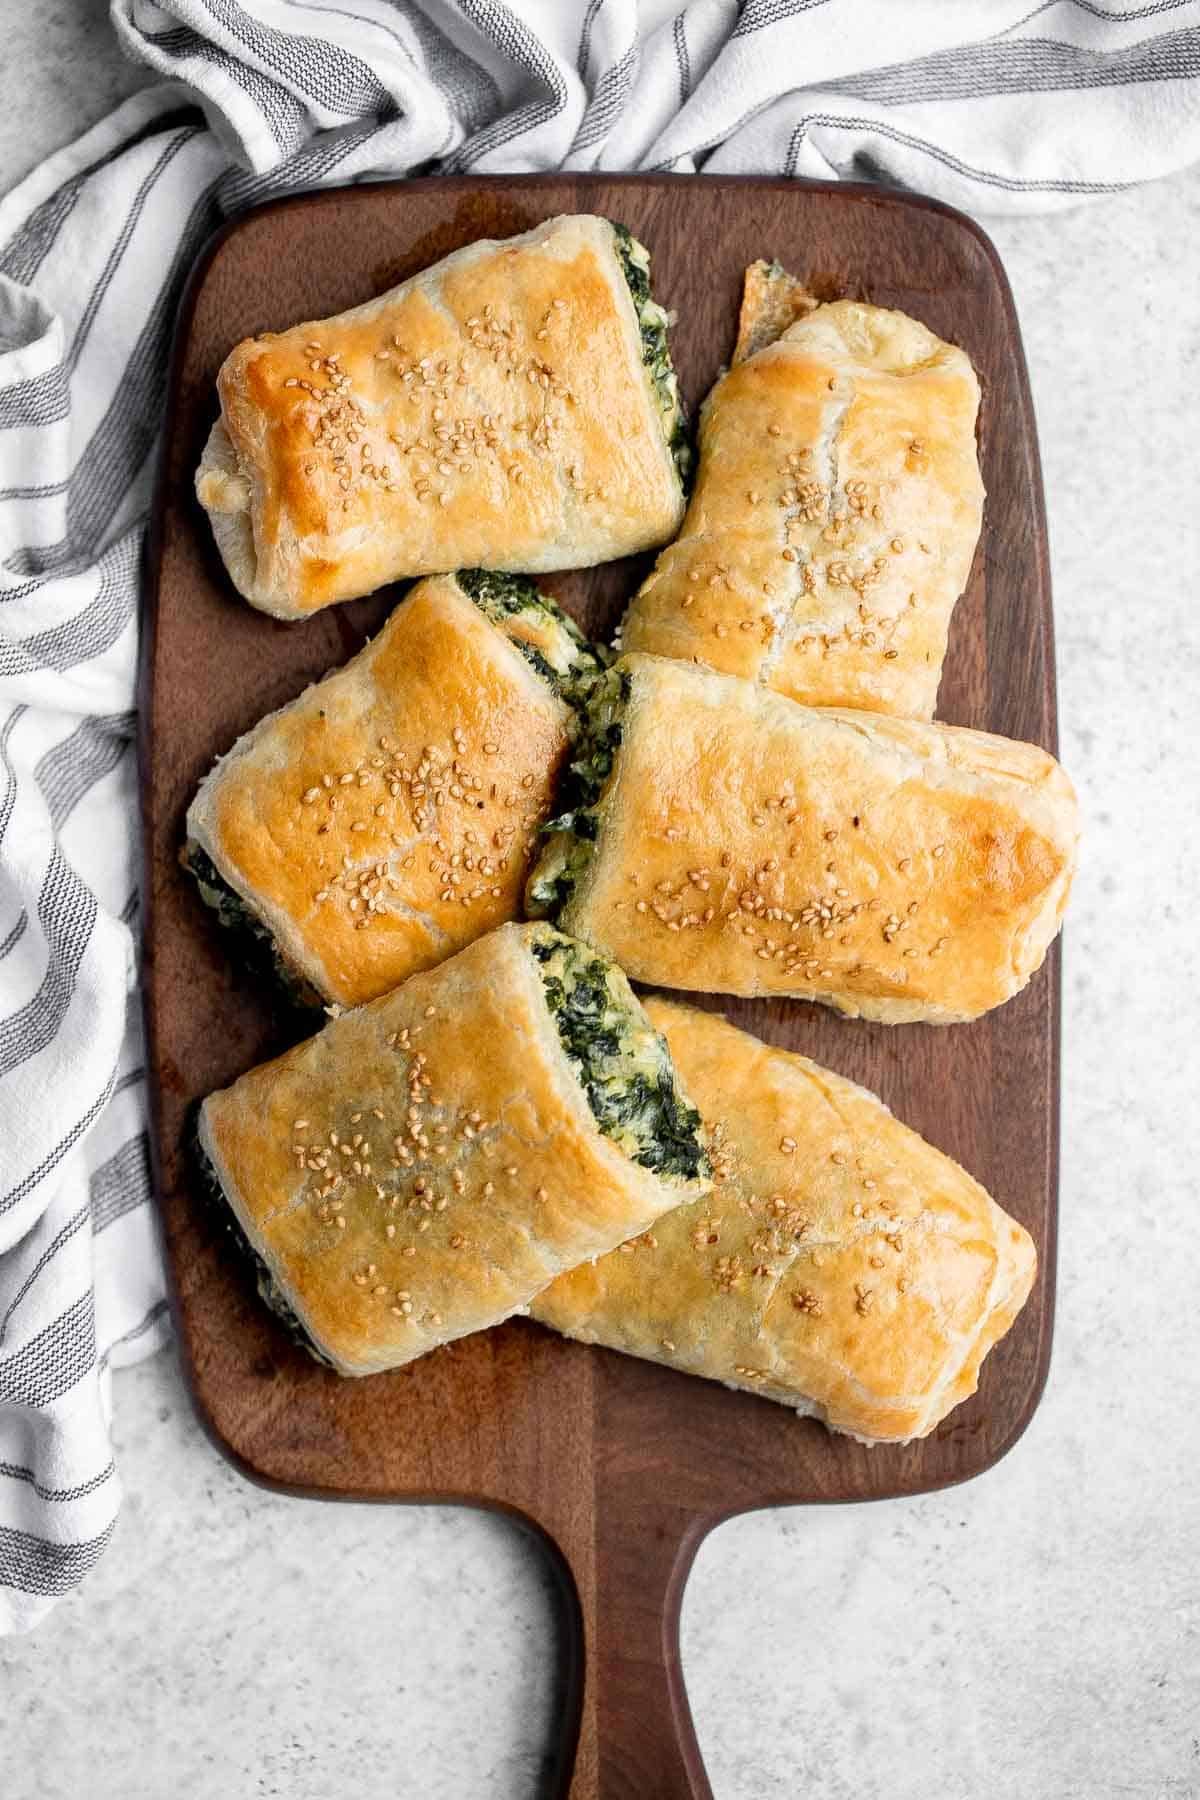
Spinach cheese rolls are an easy appetizer that's creamy, cheesy, comforting, and delicious. Serve as an appy at parties, for a school lunch, or snack.
Vegan Queso is a 5-minute dip that is creamy, cheesy, and perfectly spiced to mimic the classic dip - without any dairy! It tastes like the real thing!
Forget delivery and make sweet, tangy, and smoky BBQ chicken pizza from the comfort of your own home in under 30 minutes. The easiest weeknight dinner.

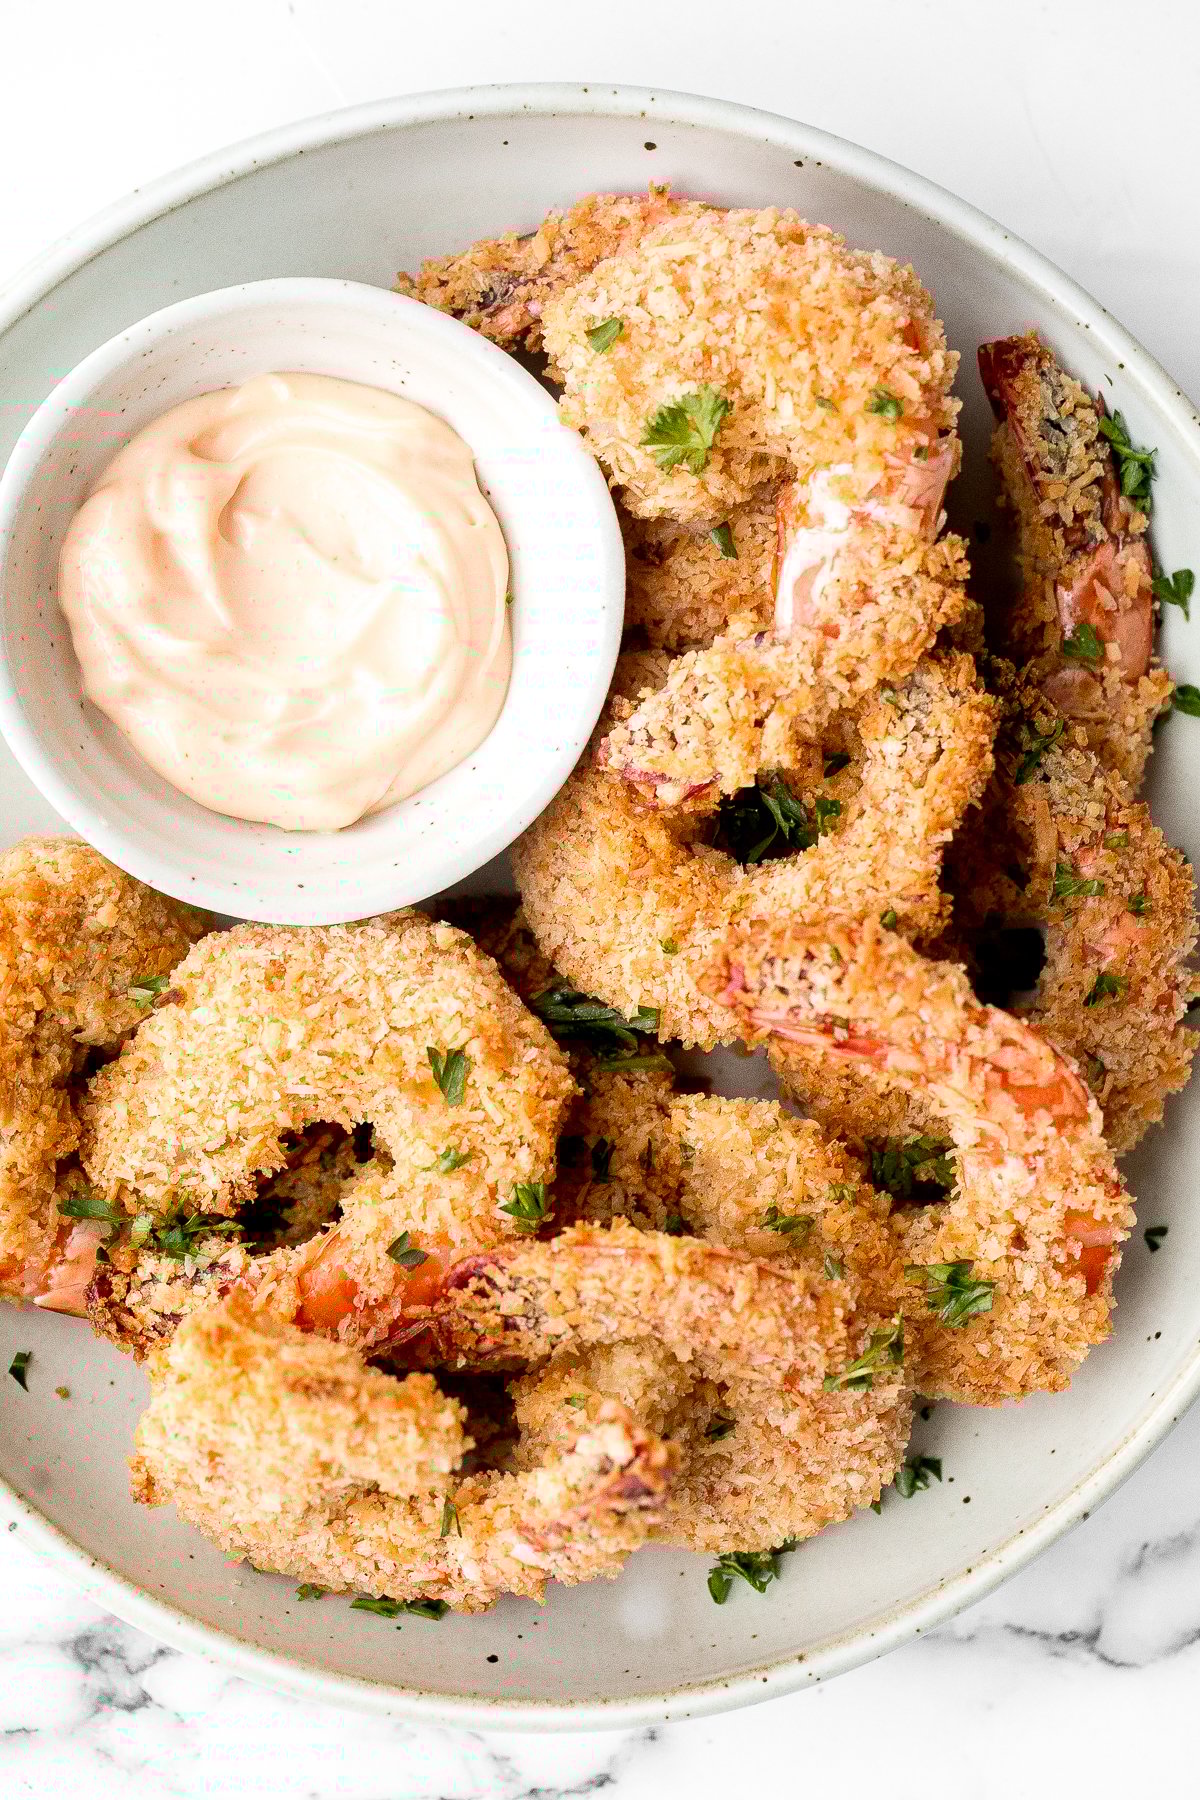
Crispy baked coconut shrimp is a delicious appetizer that is easy to make in 30 minutes. They are more flavourful, tastier and healthier than takeout.
Instant Pot Short Ribs are rich, tender, and delicious. These short ribs fall-off-the-bone after being braised in a red wine broth in the pressure cooker.
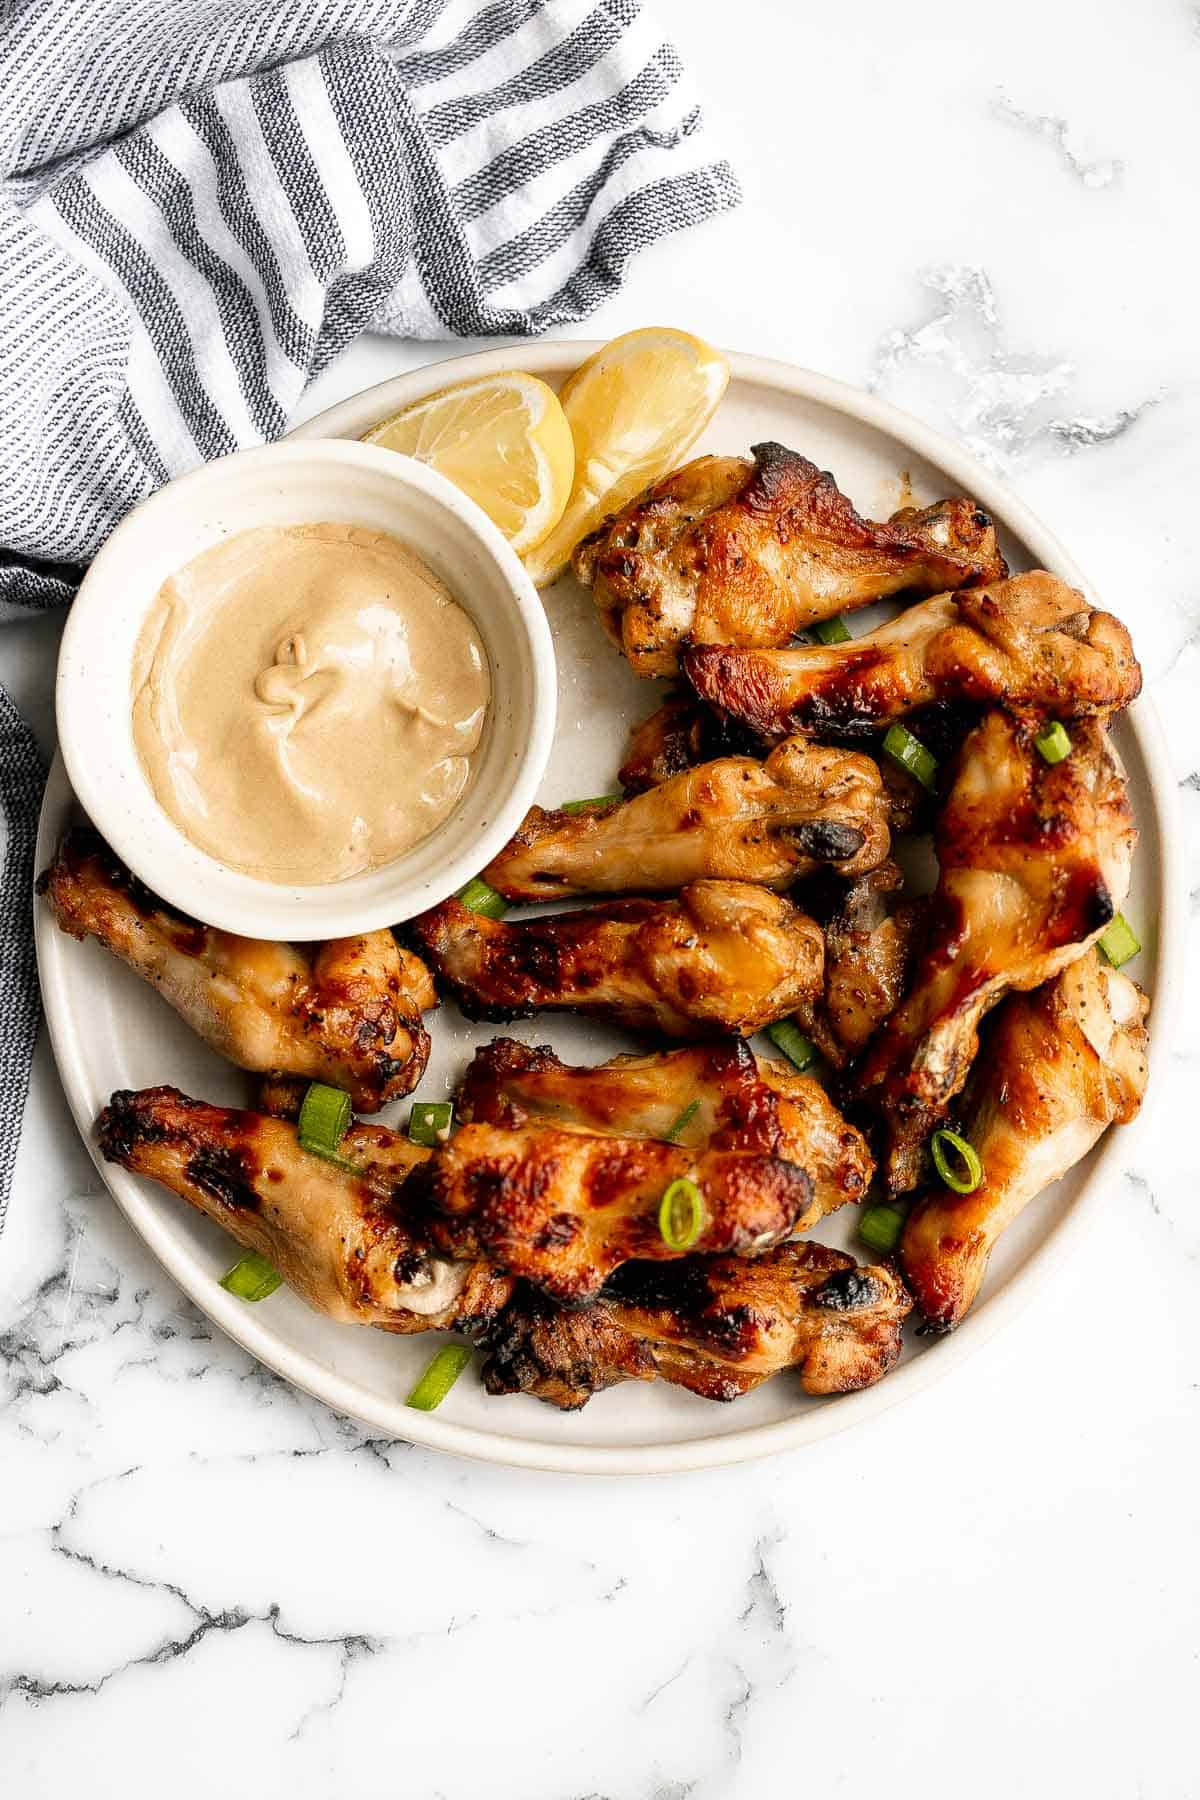
Jamaican jerk chicken wings with delicious crispy skin and tender and juicy meat are loaded with flavor. They're easy to make on the oven, grill, air fryer.

More Game Day Foods
- 75+ Easy Appetizers
- 20 Best Dip Recipes
- 50 Best Finger Foods
- 50 Best Healthy Snacks
- 60 Best Super Bowl Recipes
Did You Make Any of These Game Day Recipes?
Please leave a comment and rating below, and let me know what you thought of this round up of game day recipes. Be sure to snap a picture and tag me on Instagram @aheadofthyme or share it on the Pinterest pin so that I can follow along.
HUNGRY FOR MORE? Don't forget to sign up for my email newsletter so that you don't miss any recipes. You can also follow along on Instagram and Pinterest for more recipe updates.
Red Velvet Cupcakes
These Red Velvet Cupcakes with cream cheese frosting are delicious, rich, and perfectly sweet to match their beautiful appearance. Moist and fluffy red velvet cake batter with a deep cocoa flavor is perfectly balanced by a homemade vanilla cream cheese frosting and festive sprinkles on top in these Valentine's Day cupcakes.

You don't need professional baking experience to make these Pinterest-worthy Valentine's cupcakes - just a spare hour and standard baking ingredients! Plus, you can switch up the sprinkles to match any holiday you are celebrating.
They're perfect for special occasions like Valentine's Day, Christmas parties, or milestones. You will have so much fun making them - especially for fans of red velvet cake who will fall head over heels in love with these cupcakes!
Why You'll Love these Red Velvet Cupcakes
- Festive and delicious. The gorgeous crimson color of the cupcakes contrasted by the white frosting and topped with pink and red sprinkles make for a stunning Valentine's Day treat. Plus, you can switch up the sprinkles for other holidays. Use red and green for Christmas.
- Delectable cream cheese frosting. Red velvet and cream cheese are a classic flavor combination - it's almost impossible to think of one without the other! The richness of the cream cheese perfectly compliments the cocoa flavor of red velvet.
- Better than store-bought cupcakes. Freshly made without artificial ingredients, these scrumptious, homemade red velvet cupcakes will win over store-bought cupcakes every time! Plus, you can alter the ingredients to fit your specifications - see the ingredient notes below for tips.

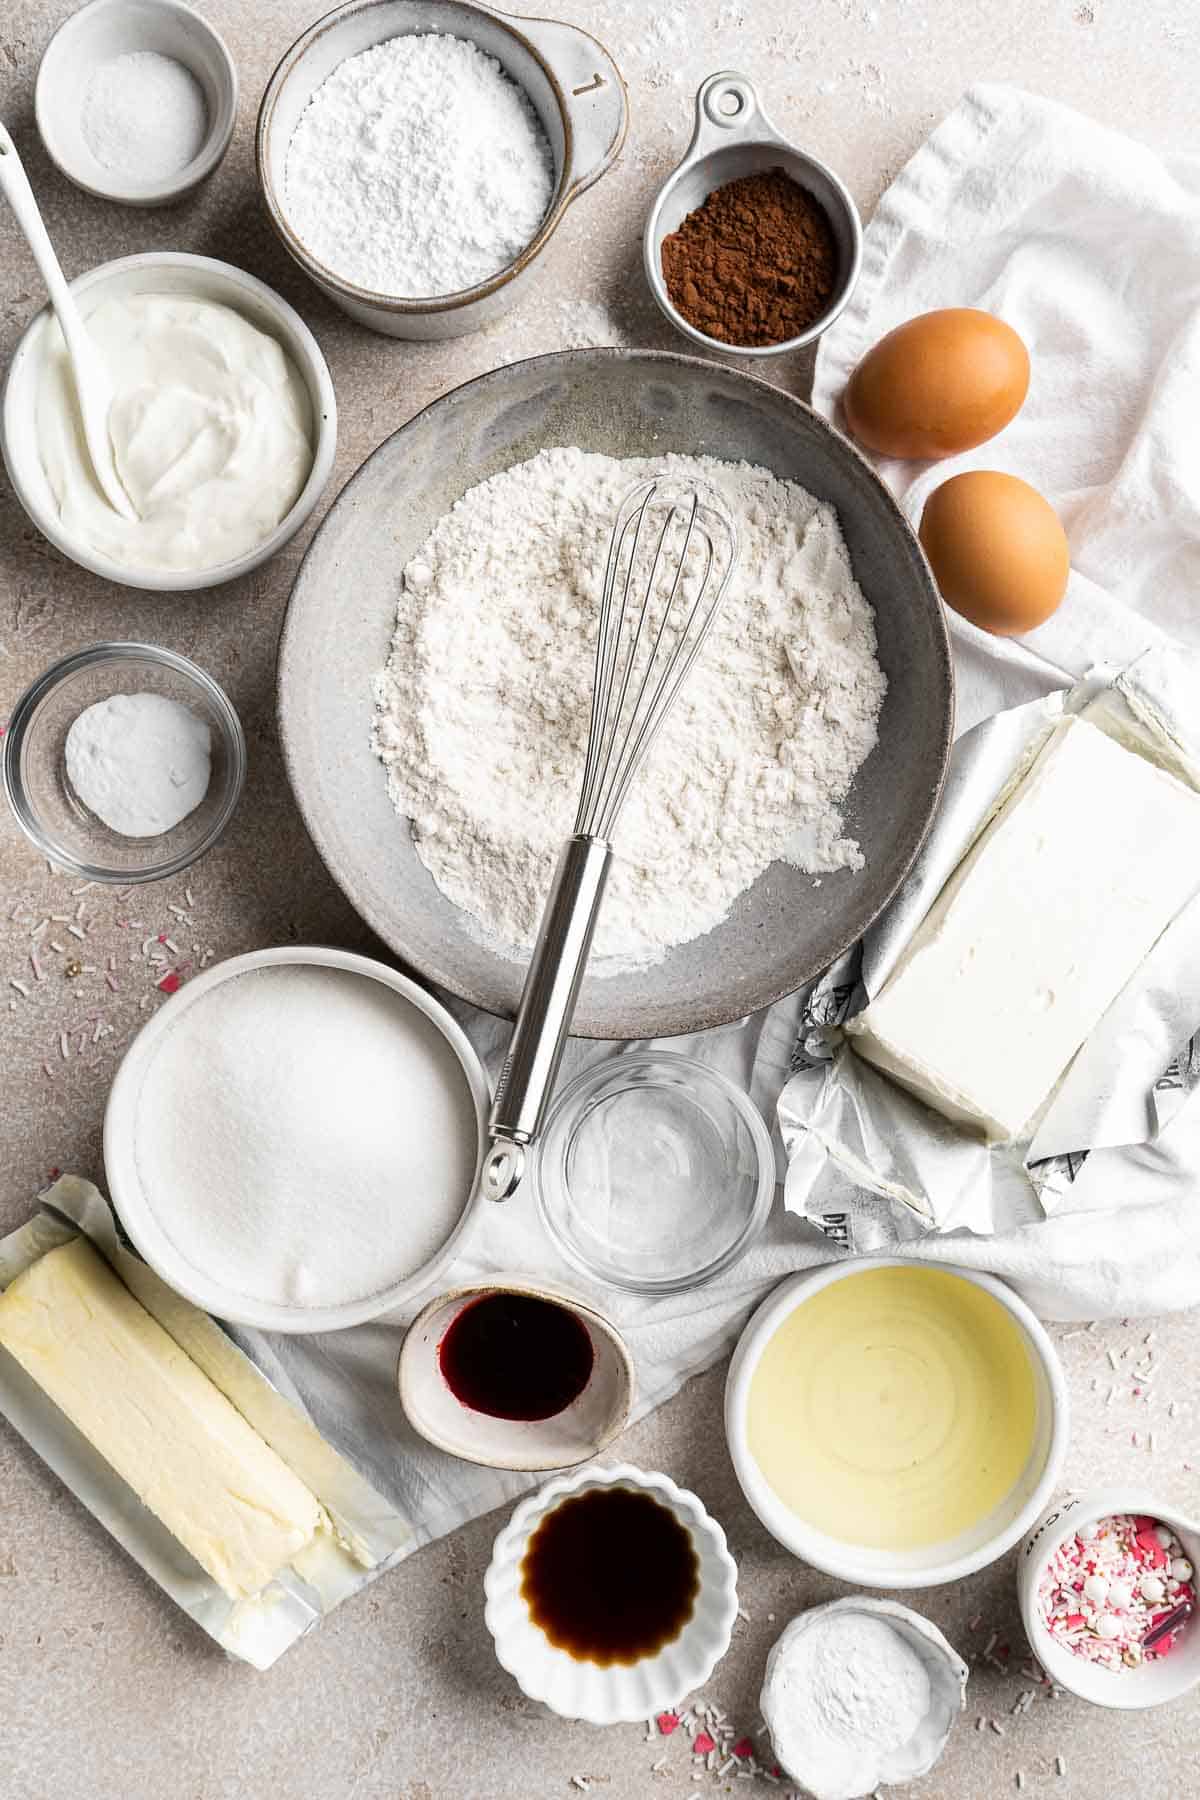
Ingredient Notes
To make this cute Red Velvet Cupcakes, you will need the following ingredients (full measurements in recipe card below):
- all-purpose flour - to make the cupcakes gluten free, replace the regular all-purpose flour with a gluten free measure for measure flour instead. The texture of the cupcakes will change a bit.
- Dutch cocoa powder - Dutch cocoa powder is a little darker and richer than standard cocoa powder, but if you don't have it on hand, use dark cocoa powder or natural coca powder.
- baking powder + baking soda
- salt
- unsalted butter - unsalted butter will give you the most control over the flavor of the cupcakes, but you can use salted butter if you need to-just omit or reduce the salt called for in the recipe.
- sugar
- eggs - applesauce is a great substitute for eggs in a pinch. Use ¼ cup applesauce for every egg called for in the recipe.
- vegetable oil - you can also use avocado oil or another neutral oil with a high smoke point.
- sour cream - make sure to use full-fat sour cream for the best result. You can also use full-fat Greek yogurt as a good substitute.
- vanilla - either extract or vanilla bean paste would work just fine in equal amounts.
- red gel food coloring - using gel food coloring ensures that you get a vibrant color without diluting the batter with liquid. If you can't find gel coloring, use a very concentrated liquid food coloring instead.
- white vinegar - the same measure of apple cider vinegar will also work.
- cream cheese - mascarpone cheese will produce a similar result if you need to swap the cream cheese.
- confectioners sugar - a finely ground sugar alternative like confectioners-style Swerve will also work.
- red and pink sprinkles - or substitute with your favorite sprinkle mix.
Baking Tools and Equipment
You will also need the following baking tools and equipment:
- measuring cups and spoons
- mixing bowls
- stand mixer or hand mixer
- 12-tin muffin pan
- cupcake liners
- large piping bag
- Wilton 1M tip
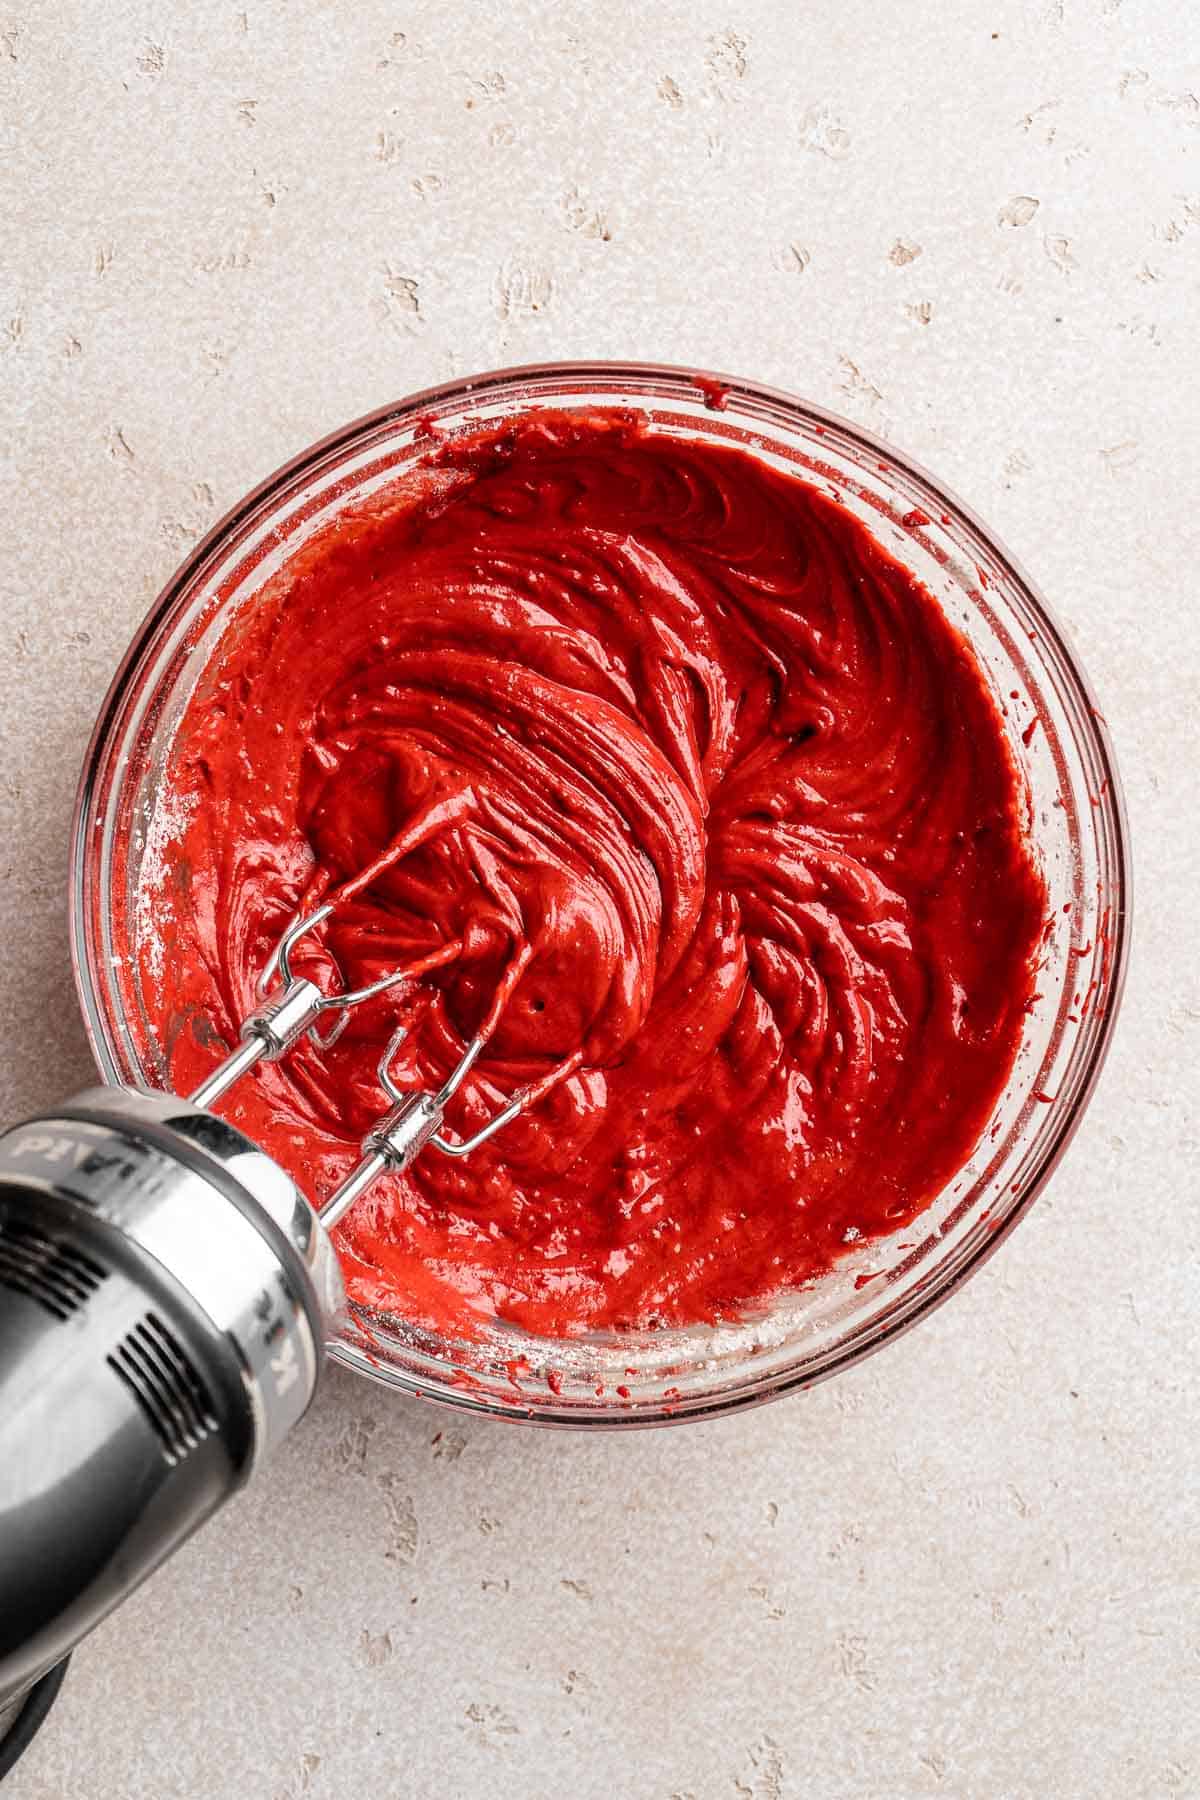
How to Make the Best Red Velvet Cupcakes
- Combine dry ingredients. In a medium mixing bowl, add flour, cocoa powder, baking powder, baking soda, and salt. Whisk to combine and set aside.
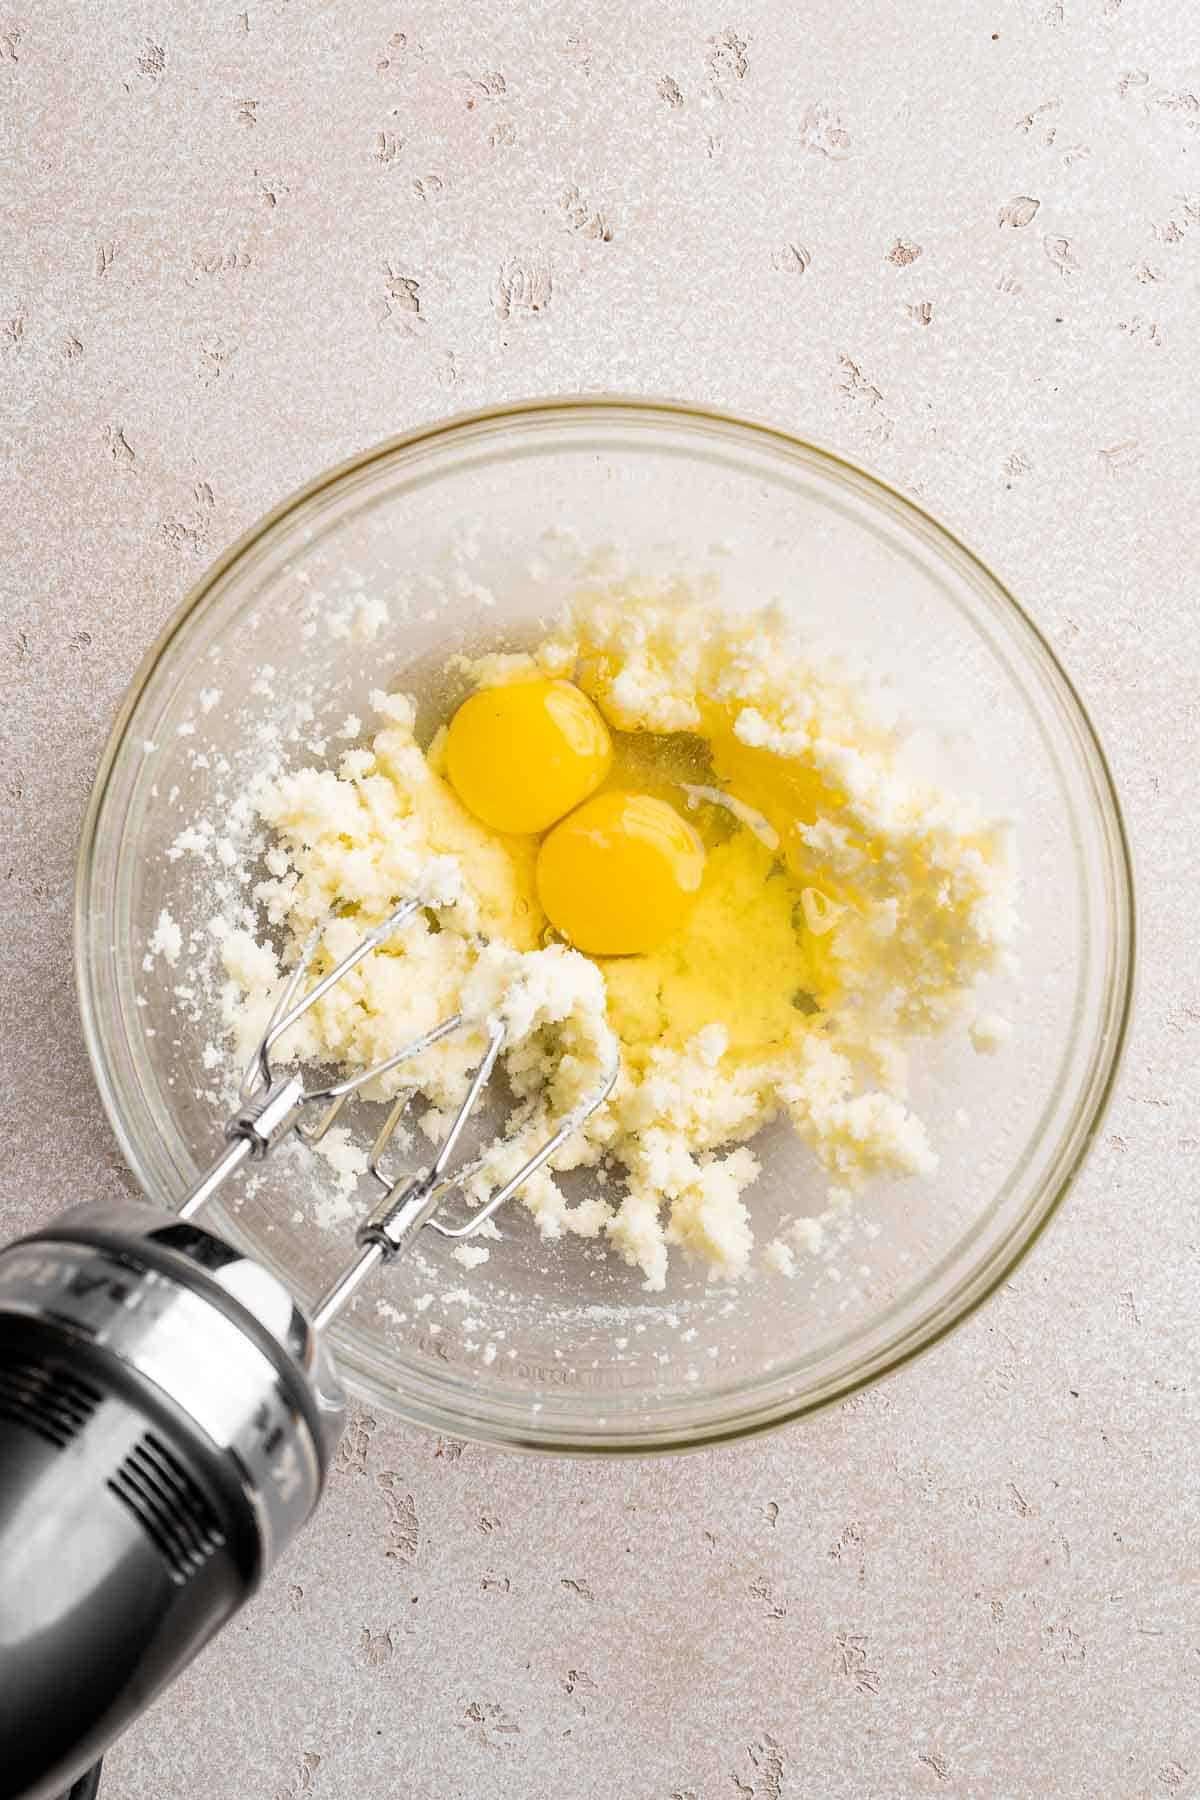
- Cream butter and sugar. In a separate large mixing bowl, add the softened butter and sugar, then beat together with an electric hand mixer (or use a stand mixer) for 4-5 minutes on high, until light and fluffy.
- Add eggs. Add in the eggs and beat until well-combined.

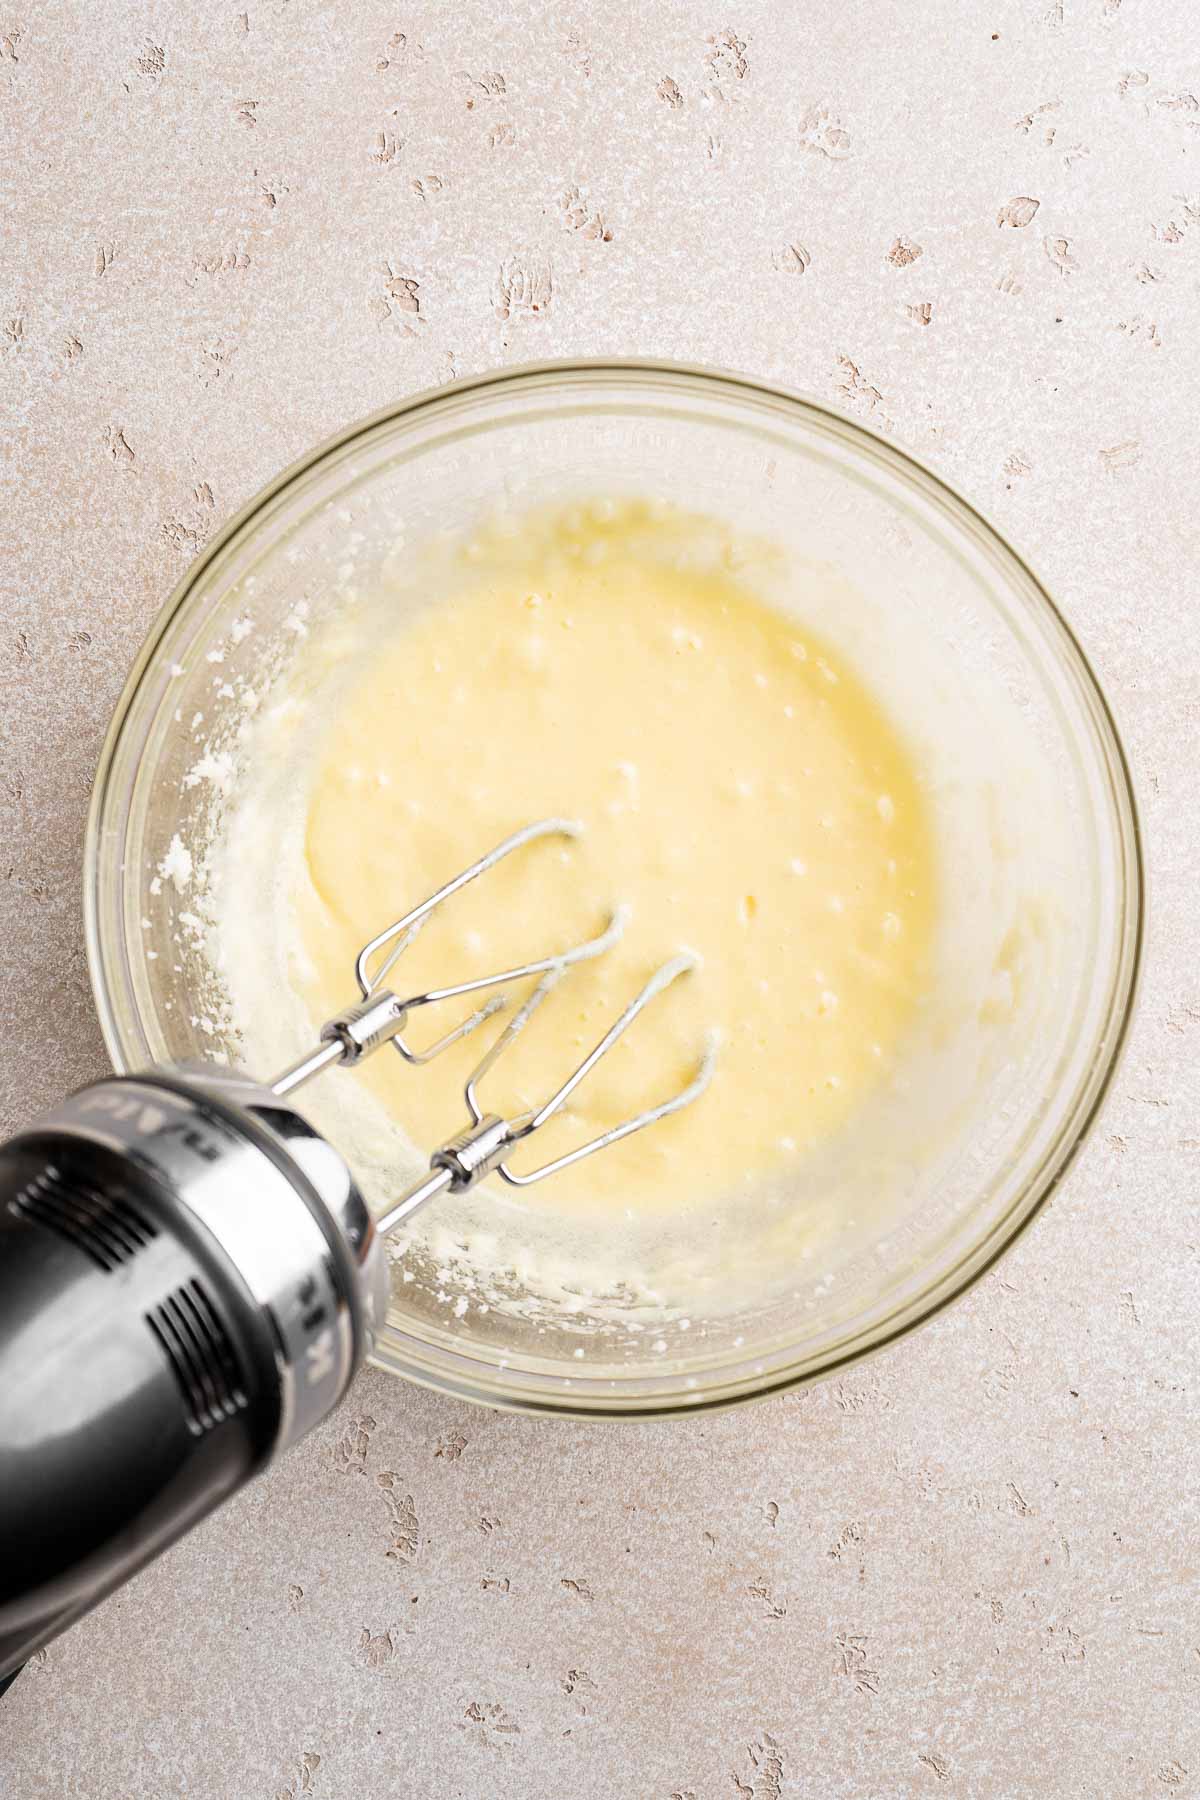
- Add remaining wet ingredients. Add oil, sour cream, vanilla, red food colouring, and vinegar, then beat again until combined and smooth.
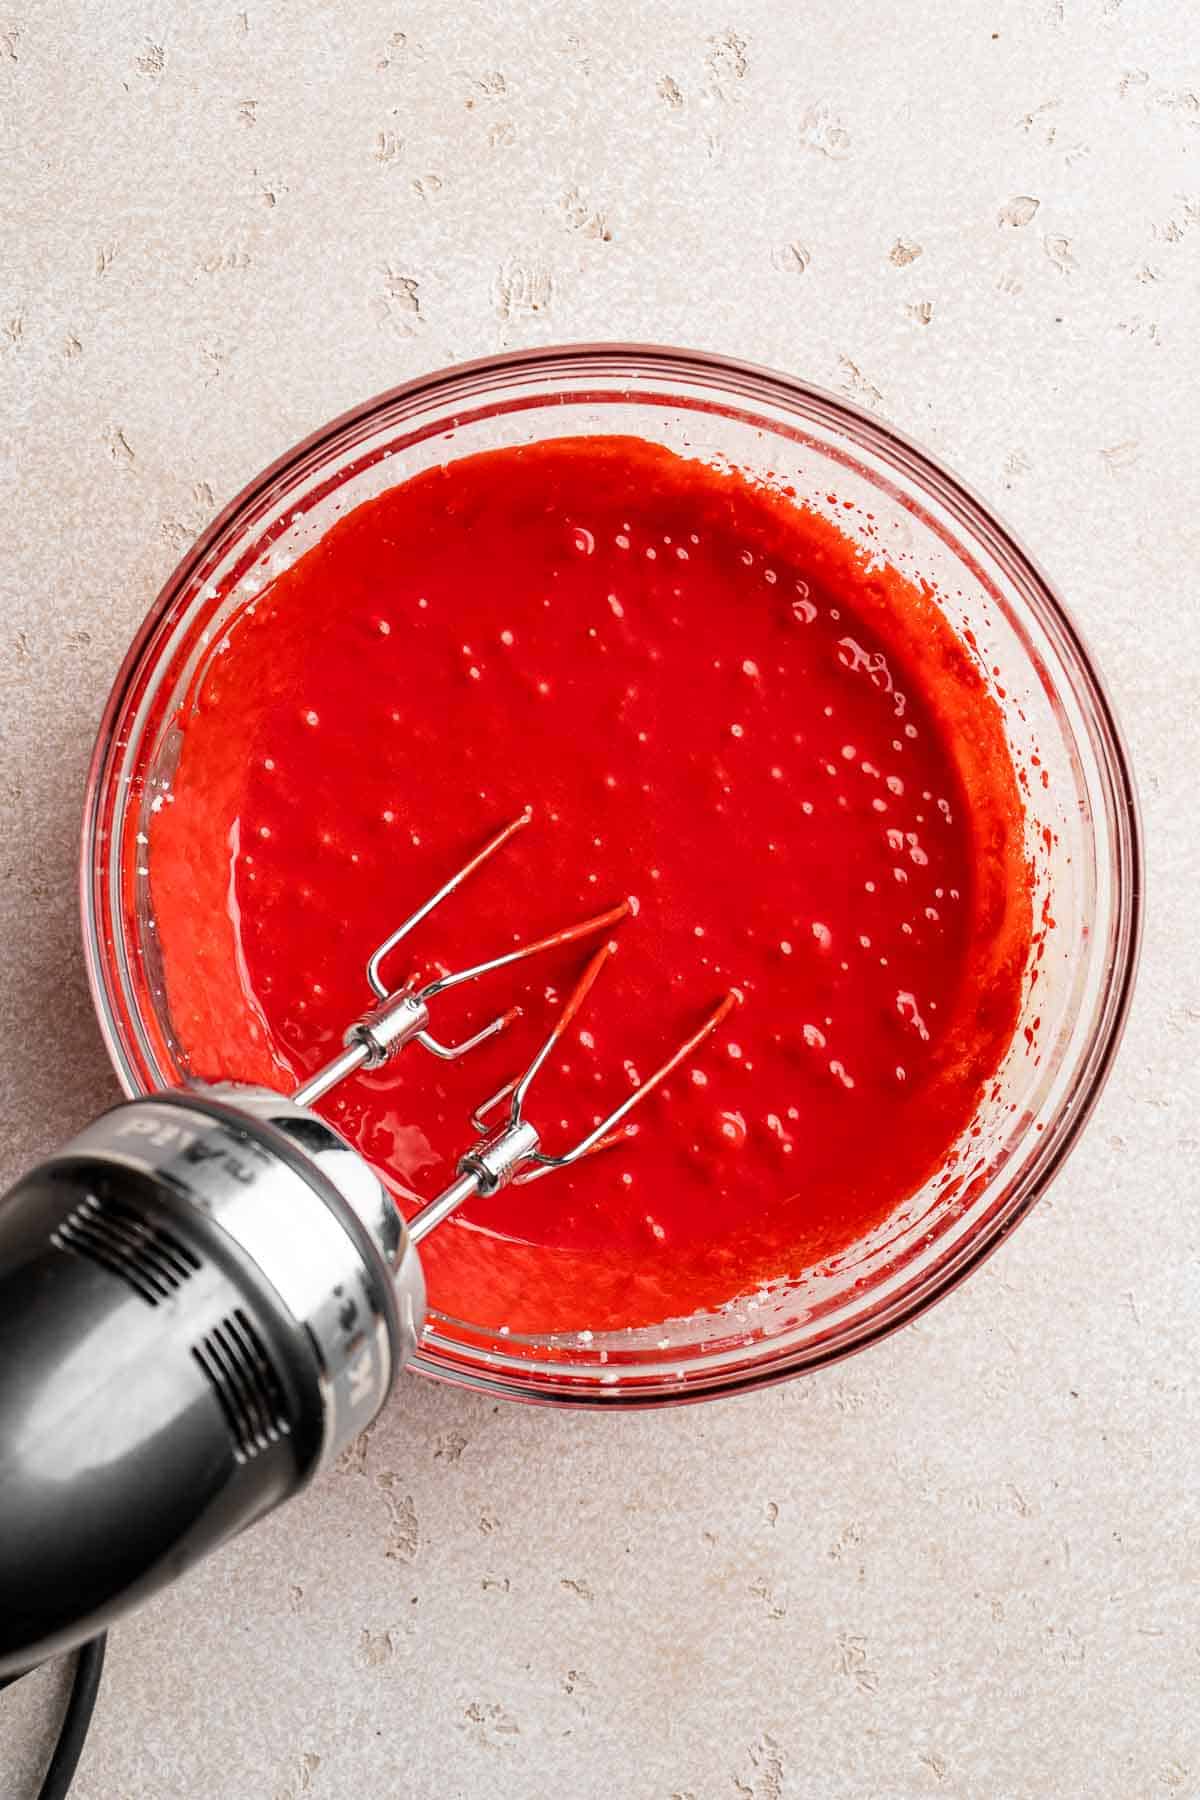
- Add dry ingredients. Add the whisked dry ingredients into the bowl, then beat on low speed until just combined and smooth.

- Scoop batter. Line a 12-tin muffin pan with cupcake liners. Divide the batter into the liners. You can use a cookie scoop to easily add the batter to the liners.
- Bake. Bake in a 350F preheated oven for 20 minutes, or until an inserted toothpick comes out clean. Allow the cupcakes to cool in the pan for 5 minutes, then transfer to a wire cooling rack to cool completely before frosting.

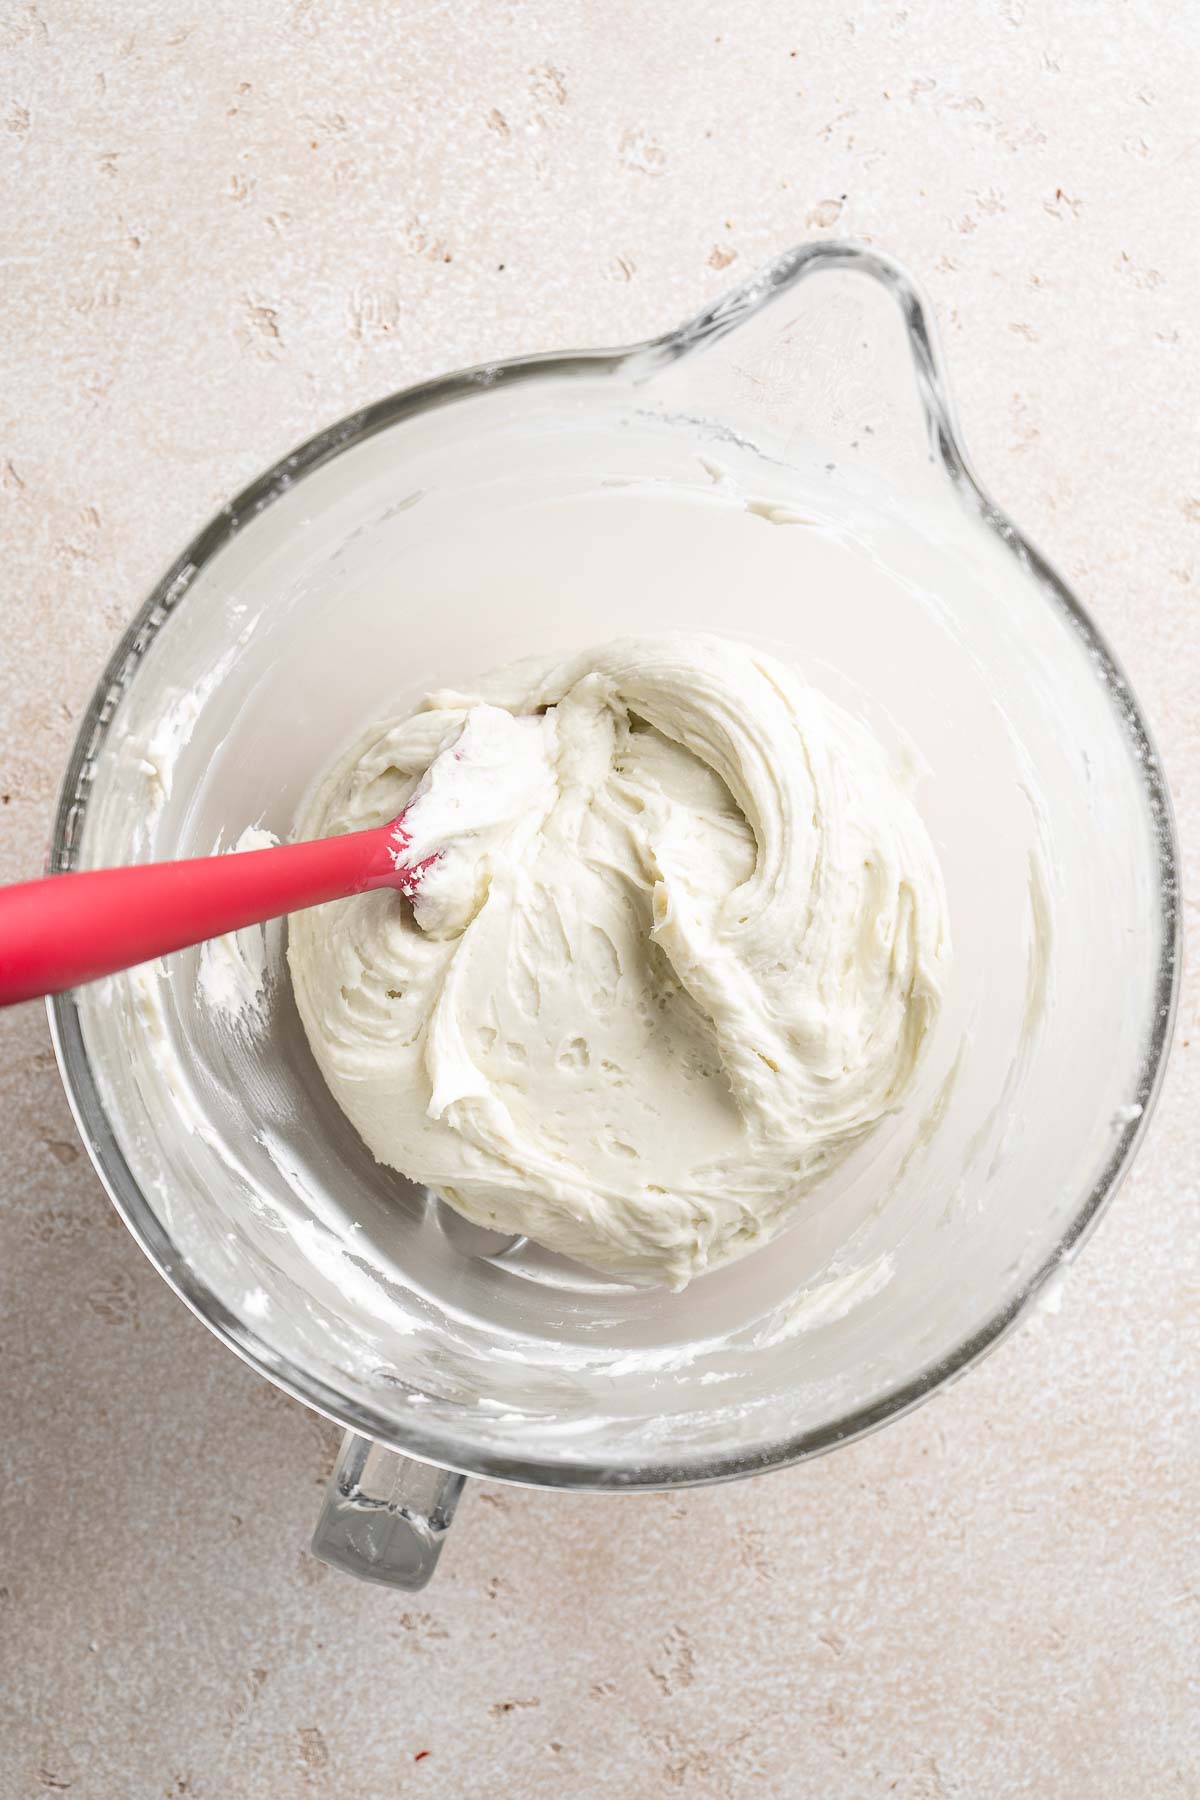
How to Make Cream Cheese Frosting for Cupcakes
- Beat cream cheese. In a stand mixer fitted with the whip attachment, beat together the butter and cream cheese at medium-high speed for about 2 minutes, or until fluffy. (You can also beat in a mixing bowl with a hand mixer)
- Add sugar. Scrape the sides of the bowl, then gradually add in confectioners' sugar in small additions, beating on low between each addition and scraping at the sides.
- Beat. Add vanilla and salt. Turn stand mixer to high speed and beat for 2-3 minutes.
Piping Red Velvet Cupcakes
- Transfer the frosting into a large piping bag fitted with a Wilton 1M tip.
- Carefully pipe the frosting in a classic swirl pattern onto each cupcake. Start in the center and move in a circular pattern closer to the edges, then move up and back towards the center.
- Top each cupcake with with sprinkles and serve.

Recipe Tips and Tricks
- Go all out with the decorations! These red velvet cupcakes are great any time of year, but they're especially popular for Christmas and Valentine's Day celebrations. Switch up the colors and shapes of the sprinkles or add cupcake toppers to reflect the occasion.
- Use a Ziploc bag to ice the cupcakes. Not a professional frosting piper? That's okay! If you don't have a piping bag handy, you can still decorate the cupcakes with a simple swirl of frosting by using a Ziploc bag with a corner cut out.
- Make ahead for easy party prep. If you're hosting a Valentine's Day or Galentine's party, you can make these cupcakes a few days ahead of time and store them at room temperature unfrosted until you're ready to decorate them the day of the party. This will keep them soft and moist.
How to Serve
Red Velvet Cupcakes are a delicious treat to serve for dessert or a midday sweet snack. It also pairs really well with a glass of milk or a drink such as:

Storing and Freezing Instructions
How to Store
Because of the cream cheese frosting, you'll need to refrigerate these red velvet cupcakes in an airtight container for up to 5 days.
How to Freeze
You can also freeze these red velvet cupcakes. If you are planning to do this, I recommend freezing them before frosting.
More Dessert Recipes
- 40 Best Valentine's Day Dessert Recipes
- Moist Chocolate Cupcakes
- Red Velvet Cookies
- Molten Chocolate Lava Cakes
- Red Velvet Crinkle Cookies
- Moist Vanilla Cupcakes
Tried this recipe?
I'd love to hear what you think! Leave a comment and rating below to share your feedback. Your reviews help others discover this recipe and help me keep creating more free recipes for you. Snap a photo and tag me on social media @aheadofthyme too.

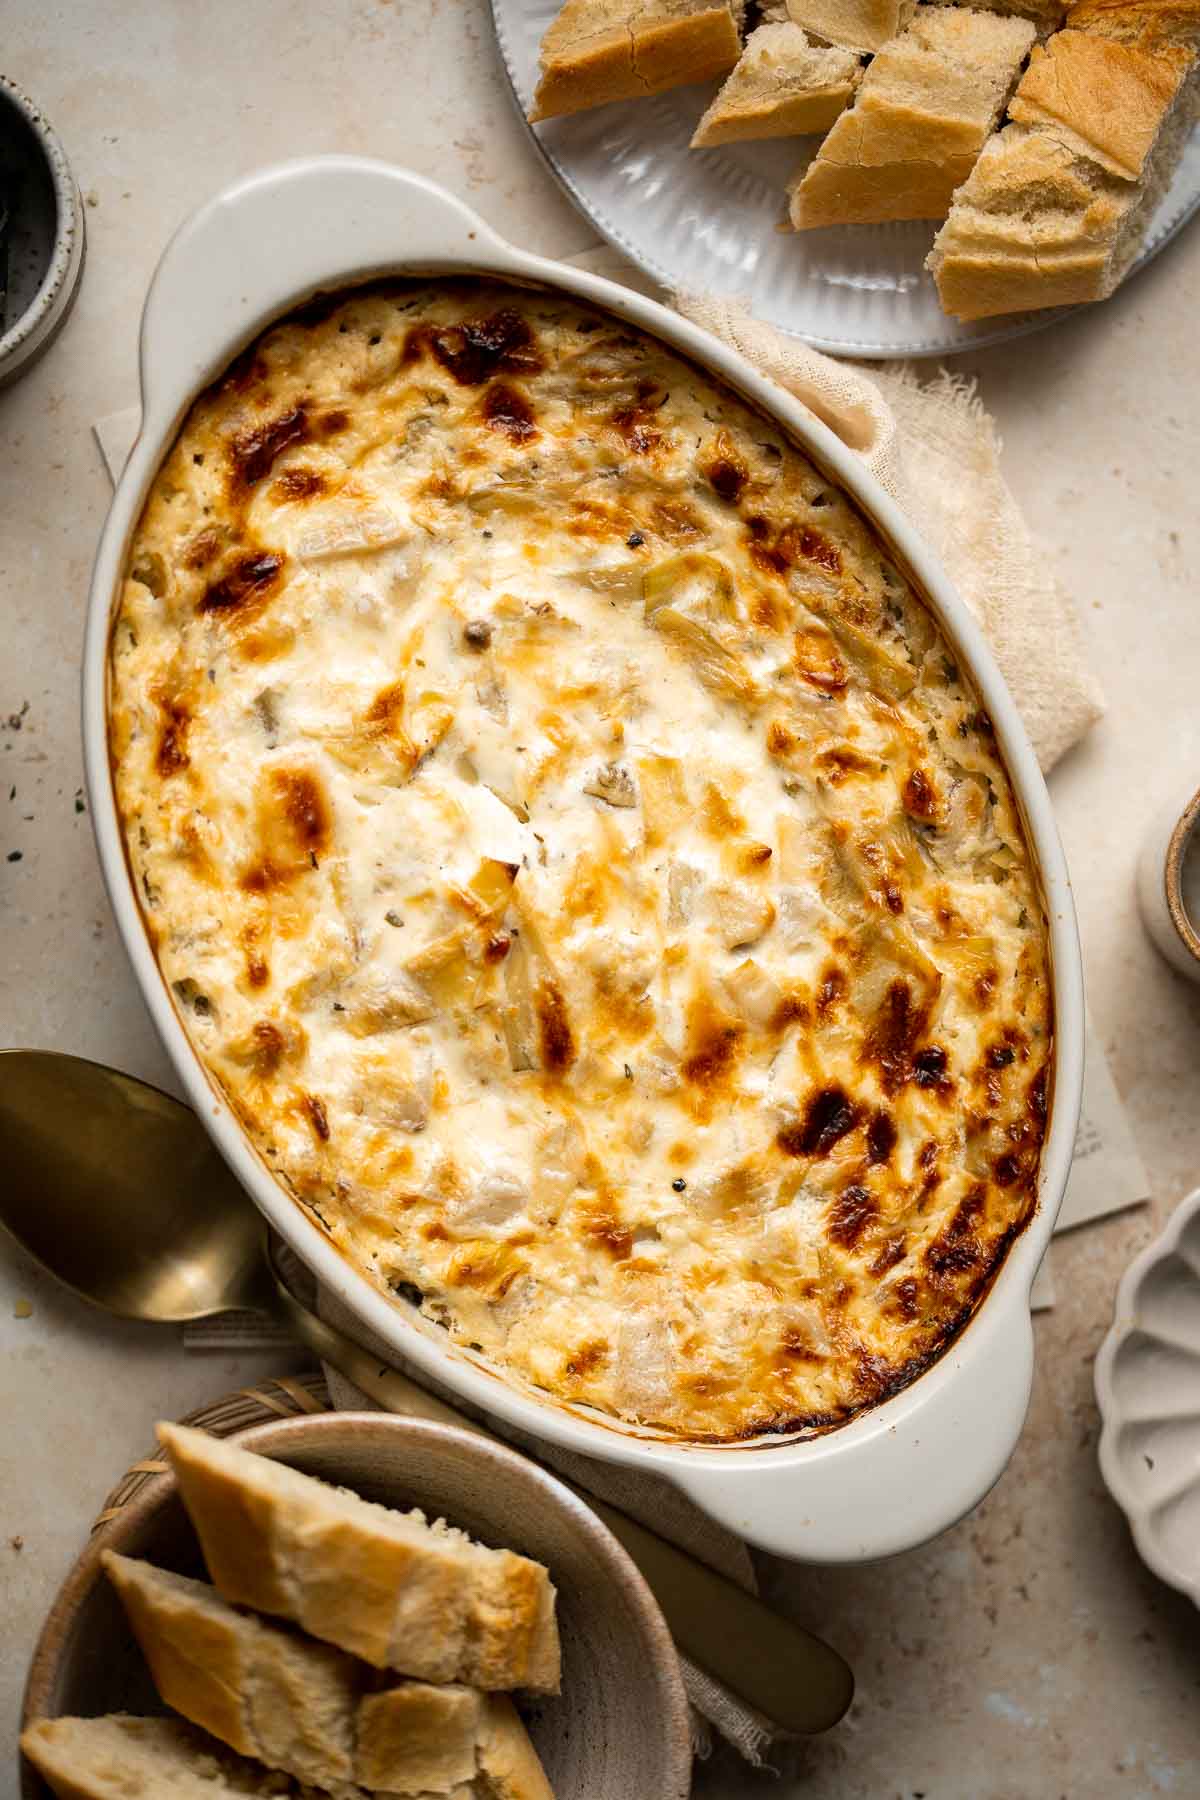
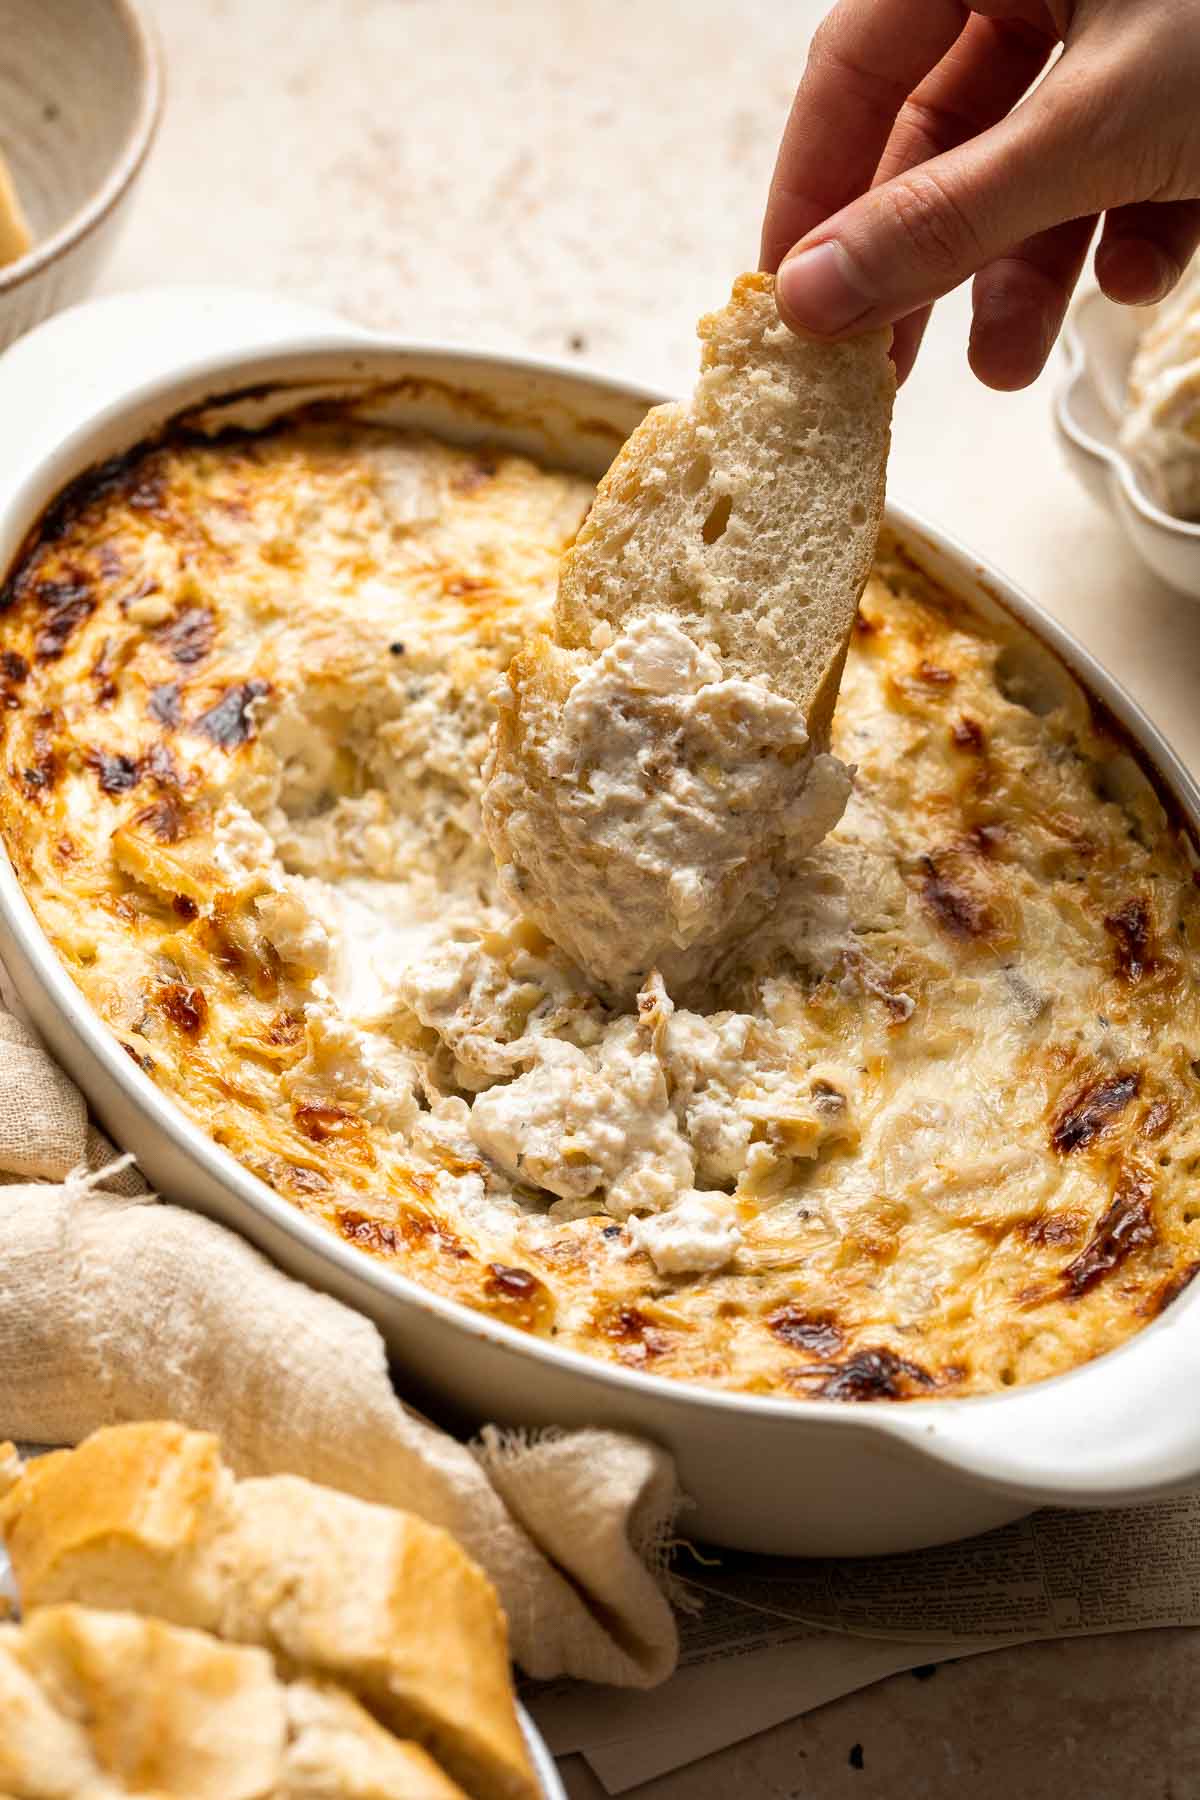
Creamy Artichoke Dip
Take your hosting game to the next level with this homemade artichoke dip - a warm, creamy dip loaded with tender artichoke hearts. This easy-to-make appetizer is tangy, cheesy, and all-around delicious!
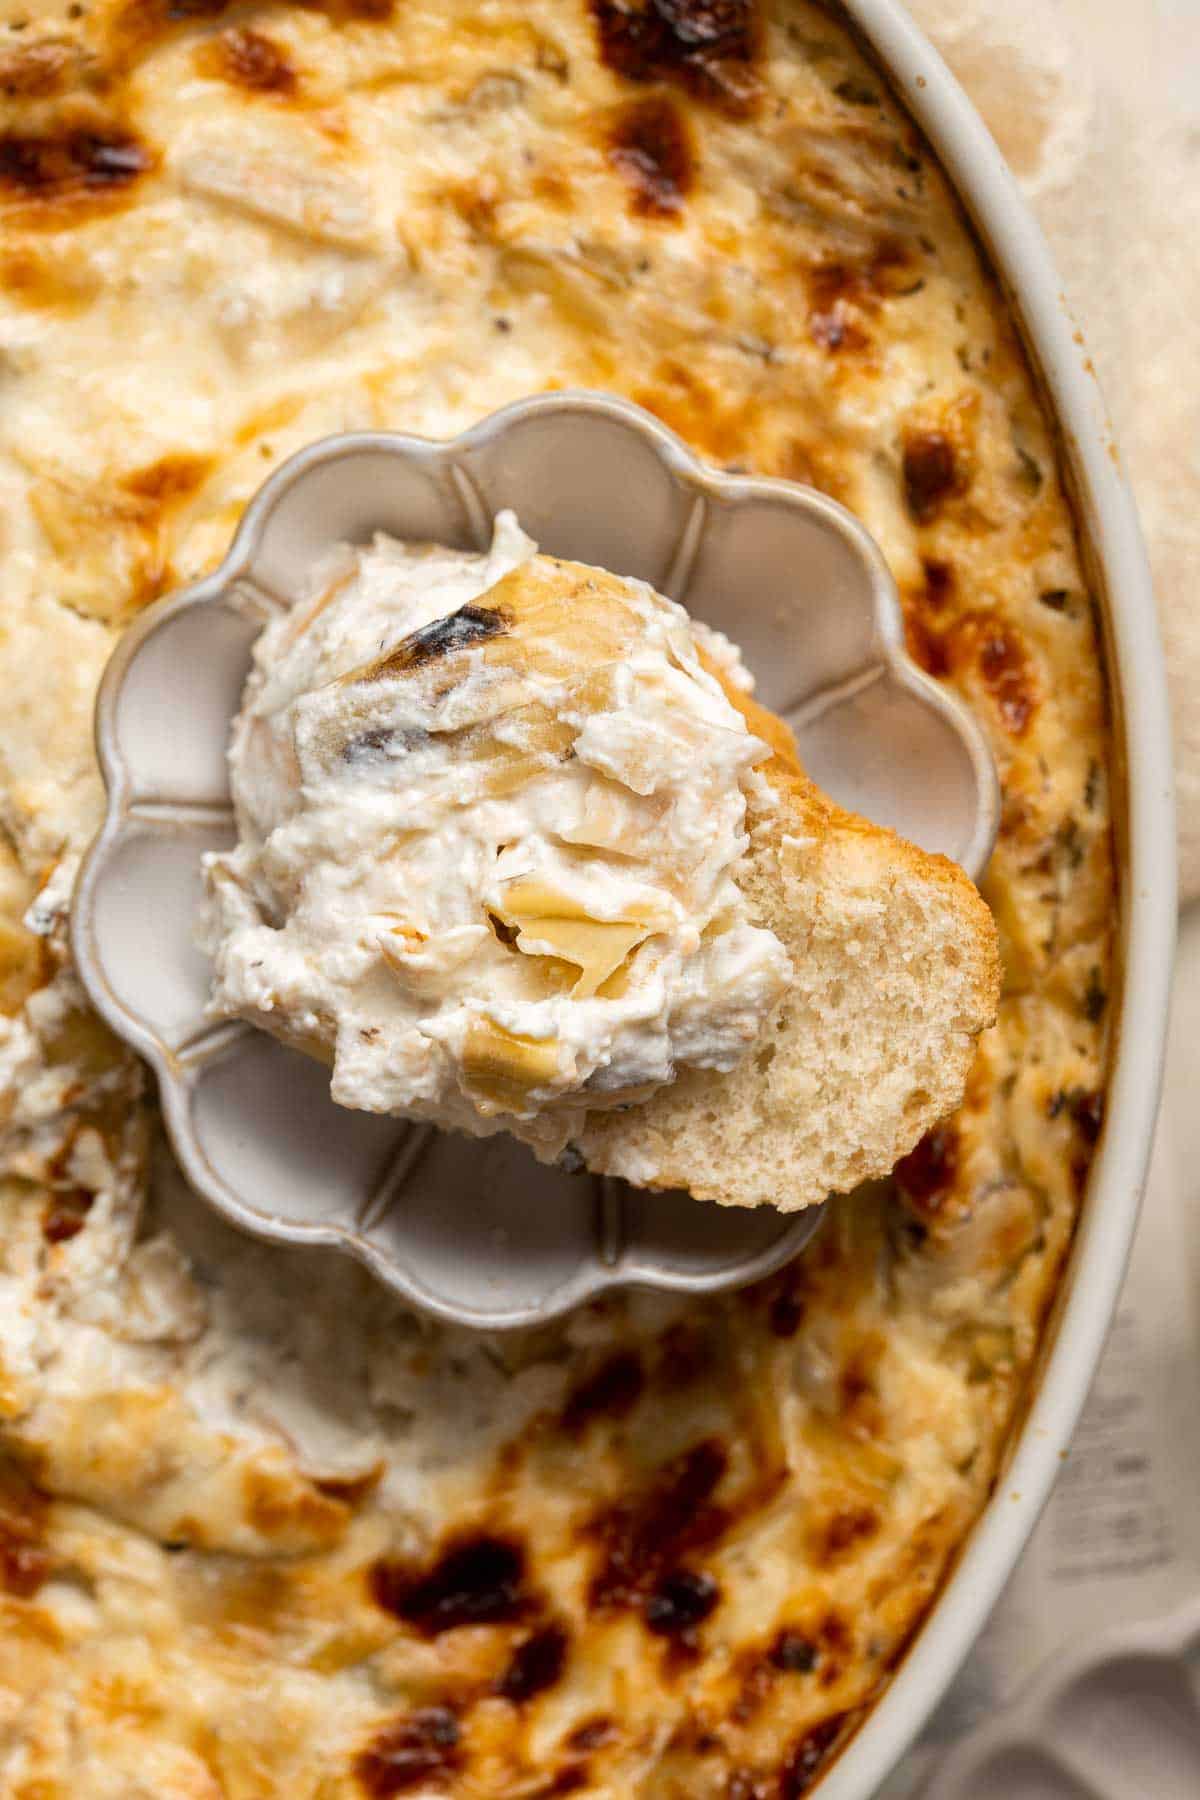
The best part is that it only takes half an hour and 8 simple ingredients to get this dip table-ready for your guests to dig in. Serve warm with sliced baguette, crunchy veggies, or your favorite crackers for dipping! You'll love making this delicious dip as much as your guests will love eating it.
Why You'll Love this Creamy Artichoke Dip
- Requires less than 10 minutes of prep. Seriously, under ten minutes! All you have to do is combine the ingredients and pop them in the oven and bake this gooey, delicious artichoke dip.
- Better than store-bought. You'll never buy pre-made artichoke dip again once you see how easy it is to make it homemade. Plus, you can control the ingredients (no artificial flavors and filler ingredients here!) and tweak the flavor to your preferences.
- Perfect for parties. Whether you're having a casual get-together for the Super Bowl or hosting extended family for the holidays, this creamy artichoke dip will satisfy snacky crowds.
Ingredient Notes
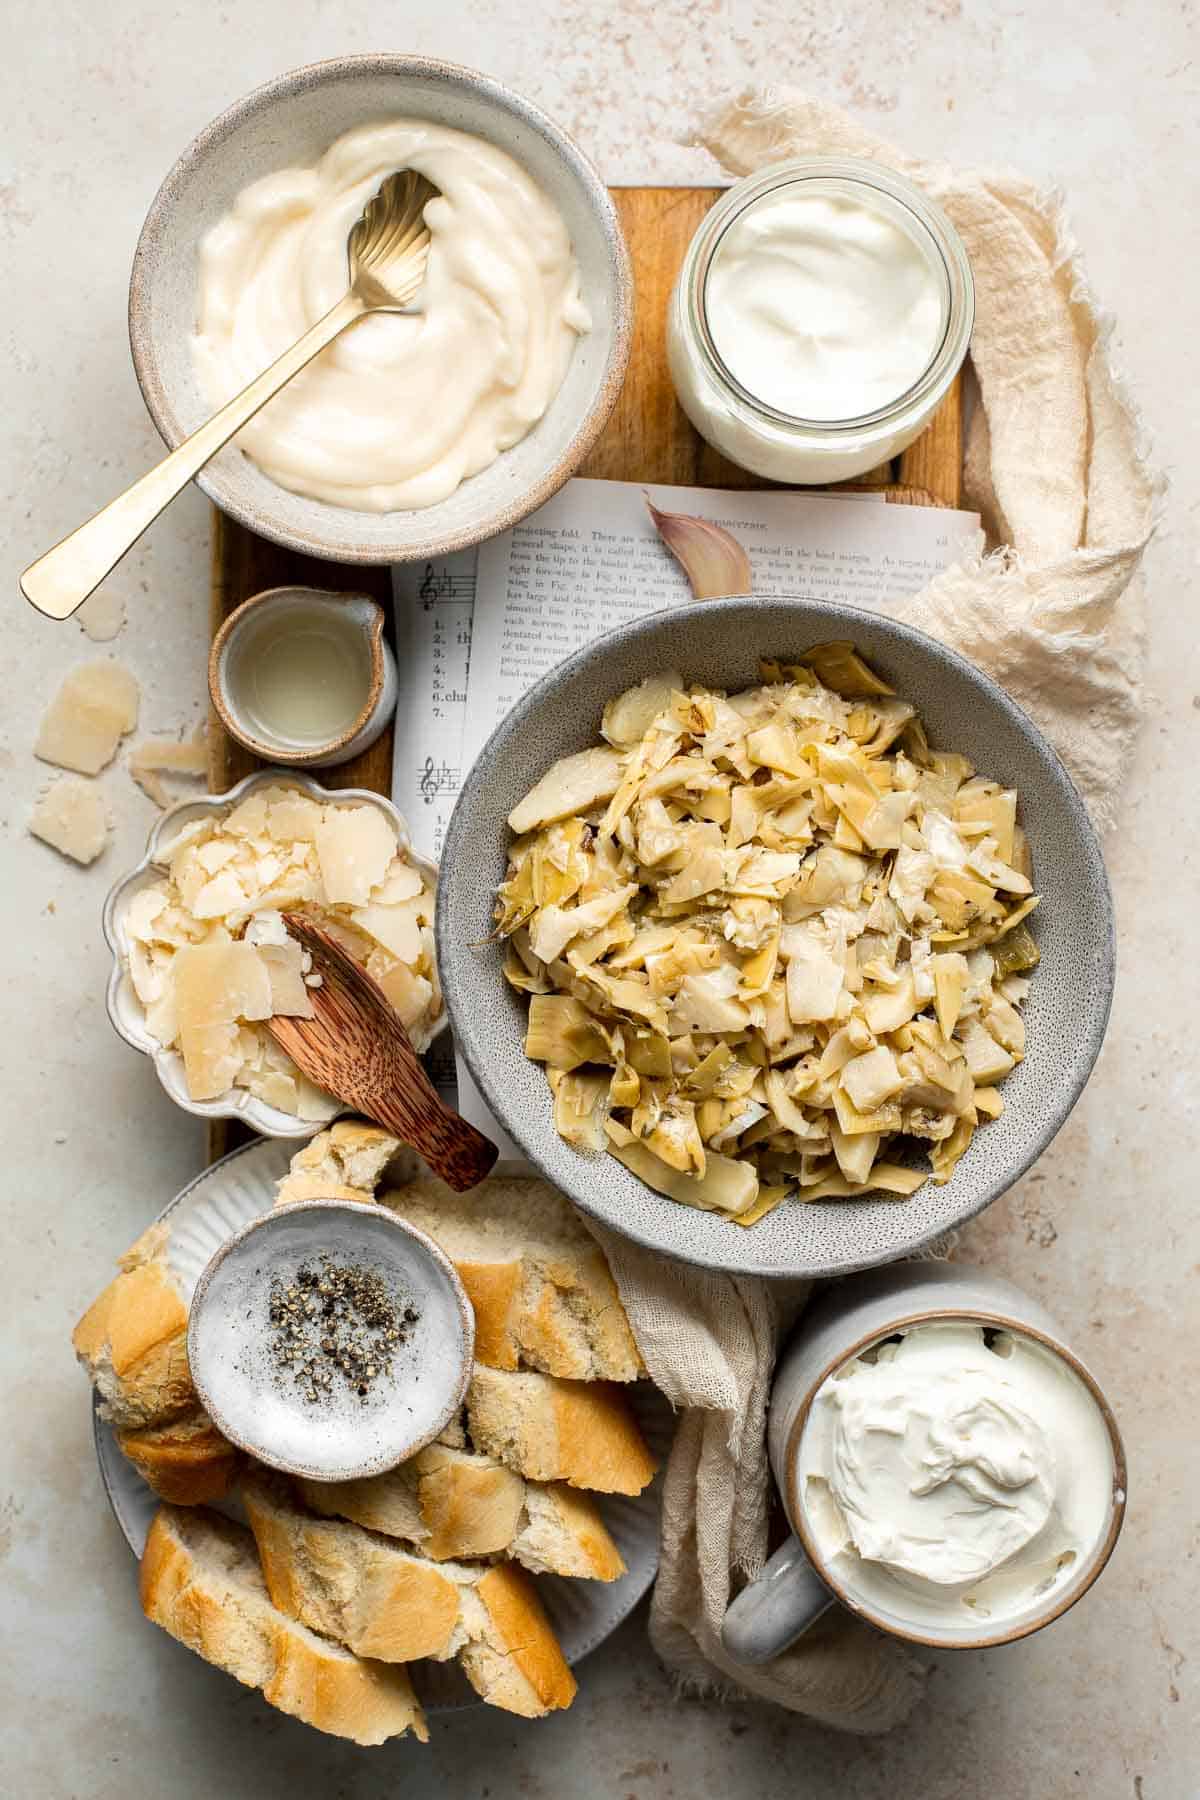
To make this easy and creamy Artichoke Dip, you will need the following ingredients (full measurements in recipe card below):
- artichoke hearts - artichoke hearts from a can or jar will work best in this recipe, and will save you the headache of cooking the artichokes yourself from scratch - although you totally could if you wanted to.
- cream cheese - you can swap the cream cheese in this recipe for mascarpone cheese or a blended cottage cheese if needed.
- sour cream - plain greek yogurt will also work in place of sour cream.
- mayonnaise - use your favorite kind, whether homemade or store bought.
- garlic - fresh garlic is always best for flavor, but you can sub one teaspoon of minced garlic or garlic paste in place of each clove in the recipe.
- lemon juice - freshly-squeezed lemon juice is ideal, but you can also use lemon juice concentrate or an equal measure of white wine vinegar instead.
- parmesan cheese - if necessary, you can swap the parmesan for asiago, parmesan-style vegan cheese, or nutritional yeast instead.
- black pepper
You will also need measuring cups and spoons and a mixing bowl.
How to Make the Best Creamy Artichoke Dip
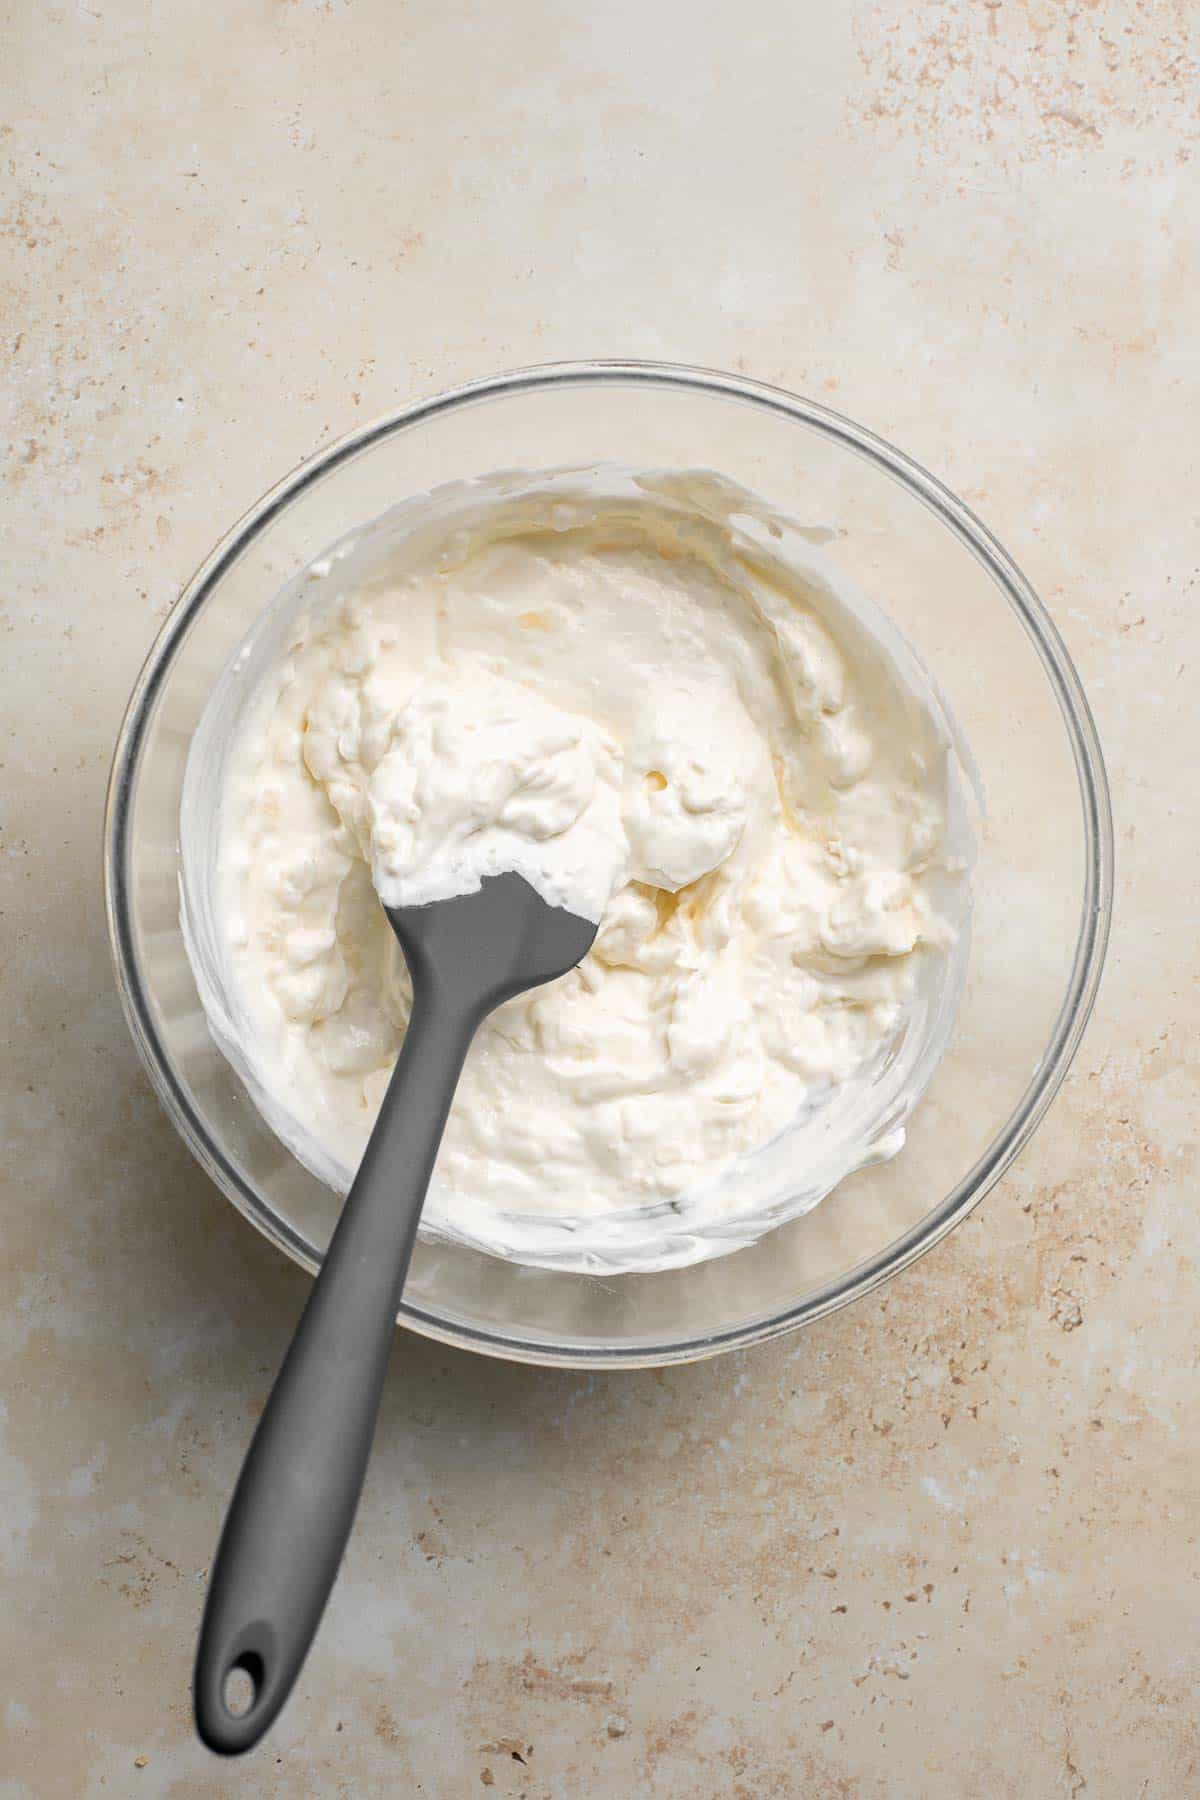
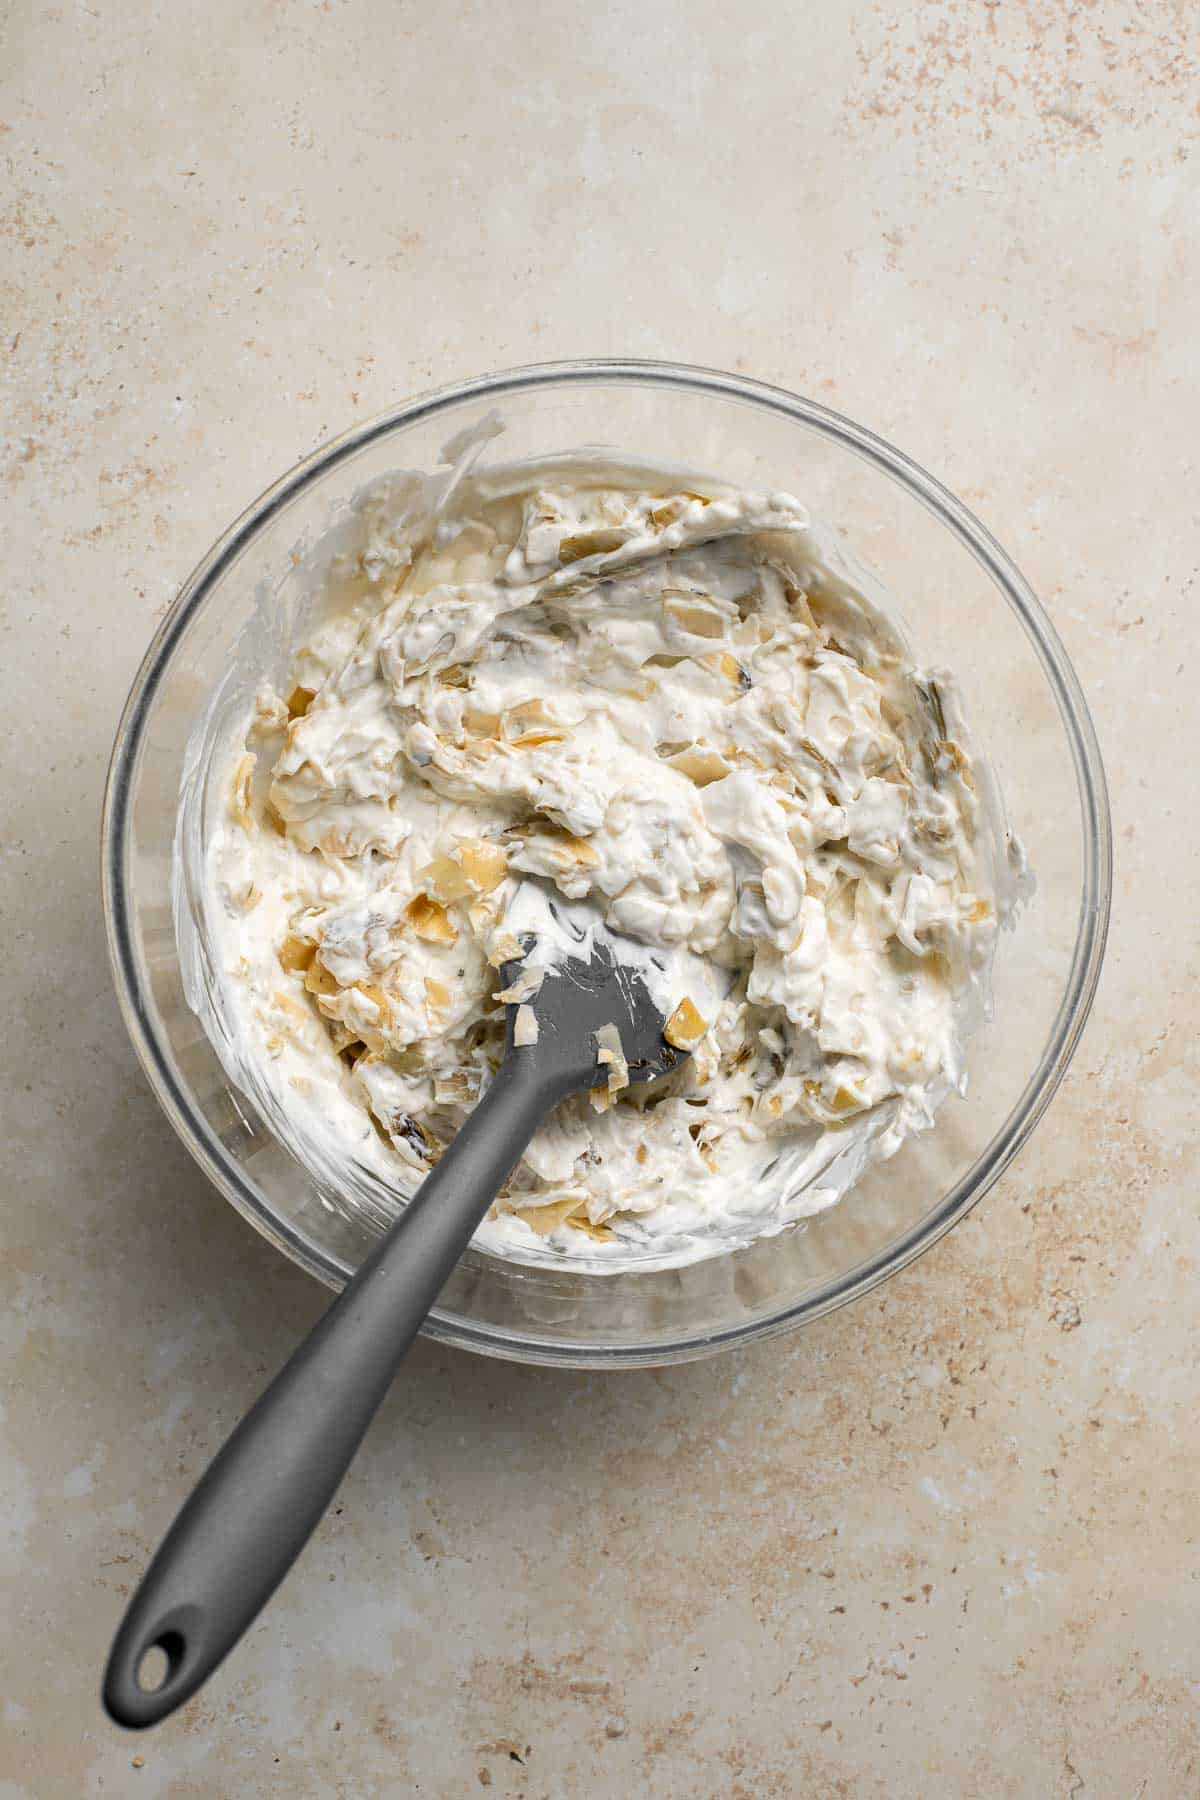
- Combine ingredients. In a large mixing bowl, combine cream cheese, sour cream, mayonnaise, garlic, lemon juice, parmesan, and black pepper. Stir until evenly combined. Add artichokes and mix until well incorporated. Make sure you have drained the artichokes well beforehand.
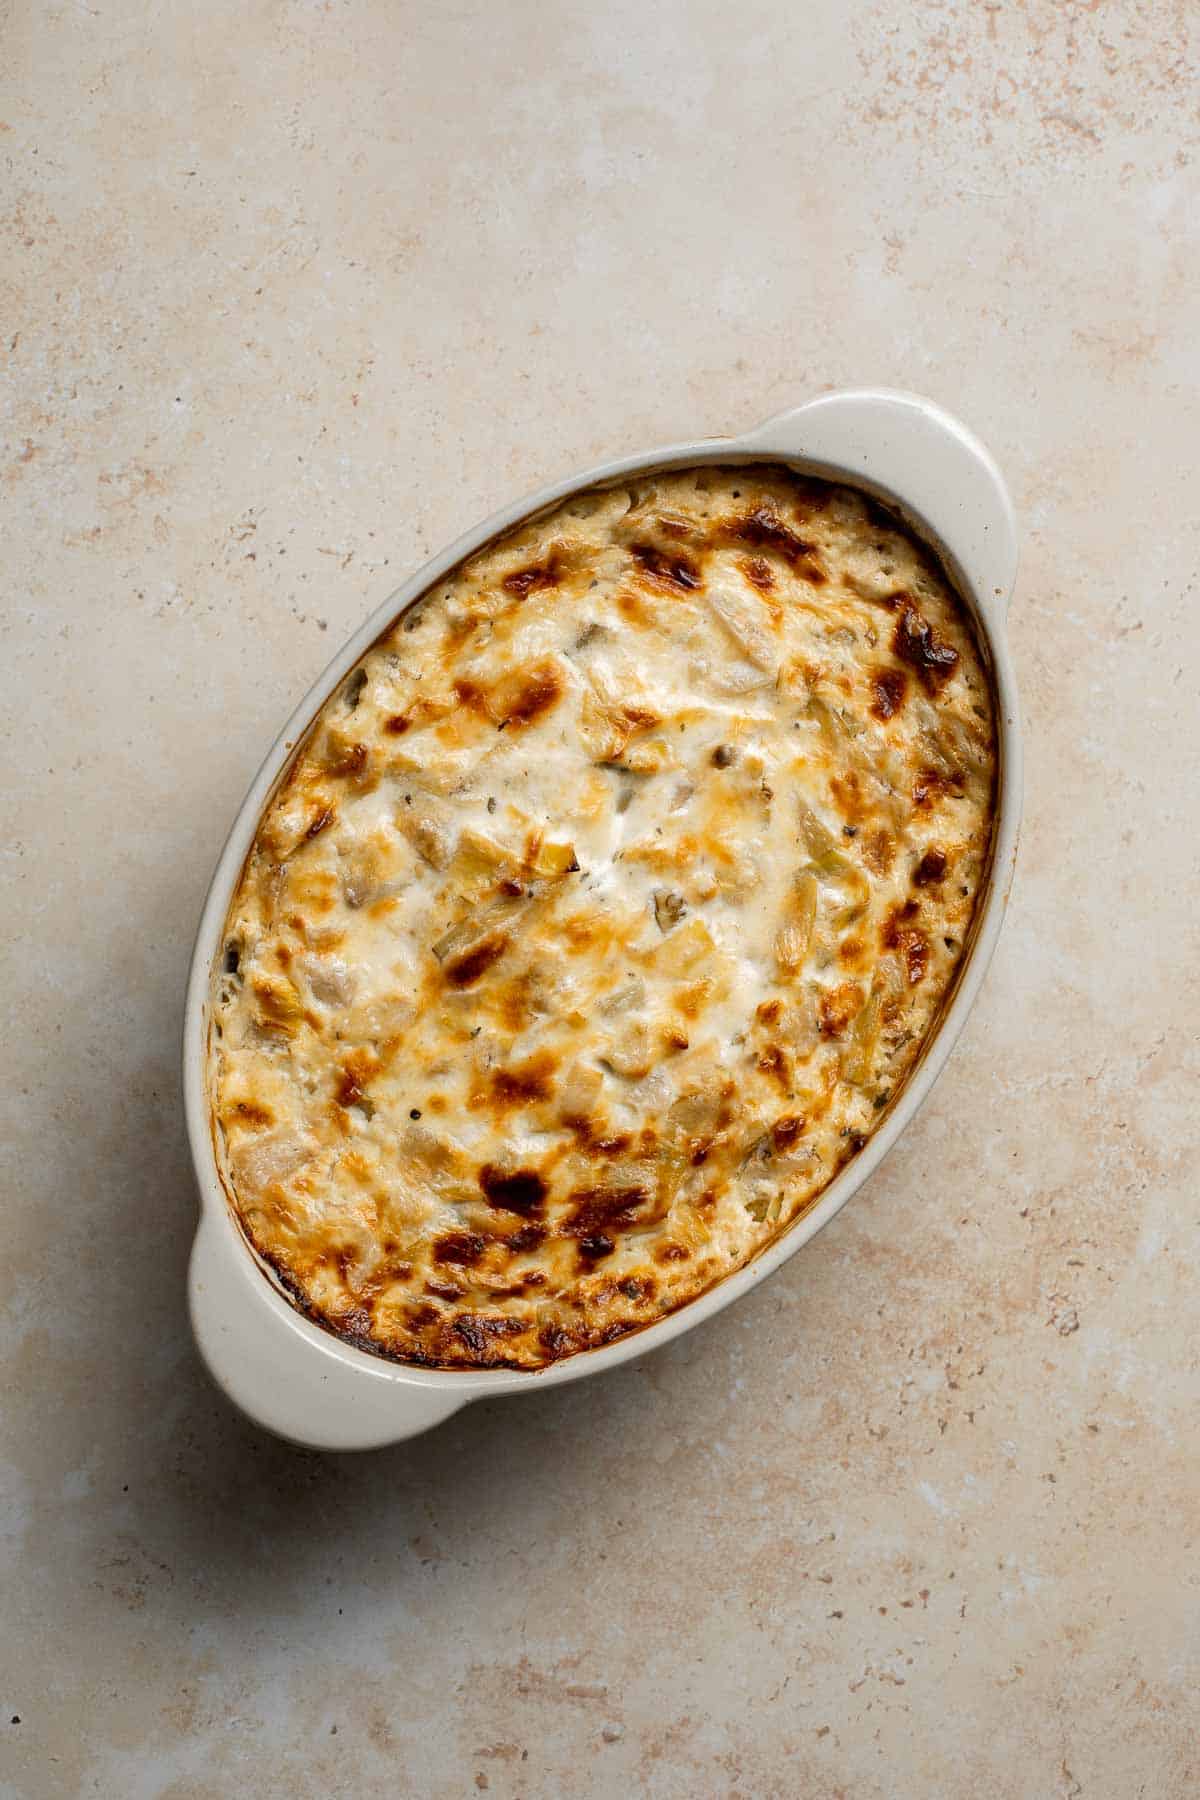
- Bake. Spoon the mixture evenly into a small round 1-quart baking dish. Bake in a 350F preheated oven for 20 minutes until bubbly and heated through. Serve immediately with baguette slices, crackers, veggies, or chips.

Recipe Variations
- Add spinach. Turn this recipe into a creamy artichoke and spinach dip by adding in ½ cup of frozen spinach that has been thawed, well drained, and chopped.
- Spice it up. Spice up this dip with some red pepper powder or cayenne powder. Adjust the amount to your liking.
- Make it cheesier. Add a layer of shredded cheese on top before baking to add another layer of melty and gooey cheese on top.
How to Serve
Serve artichoke dip with a side of your favorite dipping items including:
- baguette slices - this rich, heavy dip needs something a little more substantial. Any sturdy sliced bread or toast should work.
- crackers
- veggies
- chips
Recipe Tips and Tricks
- Assemble it in a storage container. Make cleanup even easier on yourself by assembling the dip in a baking dish you can easily store, either by covering it in plastic cling wrap or popping on a compatible lid.
- Offer artichoke leaves for dipping. If you're a big fan of artichoke, you can double down on the artichoke flavor by serving the dip with steamed artichoke leaves that you can dip and discard.
- Make sure to set a timer. This recipe is incredibly easy, but there is potential for things to go wrong. Make sure you set your oven timer so you don't overcook the dip, which would make it greasier and harder to eat - and you can end up burning the top.
- Use leftovers creatively. You can use leftovers to create something new like this delicious Spinach Artichoke Pasta but an artichoke only version using this dip.
Storing and Freezing Instructions
How to Store
Cover any leftover artichoke dip tightly with plastic cling wrap or transfer to an airtight container and refrigerate for up to 5 days.
How to Reheat
Reheat in a 300F preheated oven for 5-10 minutes until hot, or reheat in the microwave.
How to Freeze
Once the dip has completely cooled, transfer it to a freezer-safe container and freeze for up to 3 months. Defrost in the refrigerator overnight before reheating.
More Dip Recipes
- 20 Best Dip Recipes
- Baked Spinach Dip
- Caramelized Onion Dip
- Pizza Dip
- Baked Ricotta
- Queso Mexican Cheese Dip
Tried this recipe?
I'd love to hear what you think! Leave a comment and rating below to share your feedback. Your reviews help others discover this recipe and help me keep creating more free recipes for you. Snap a photo and tag me on social media @aheadofthyme too.

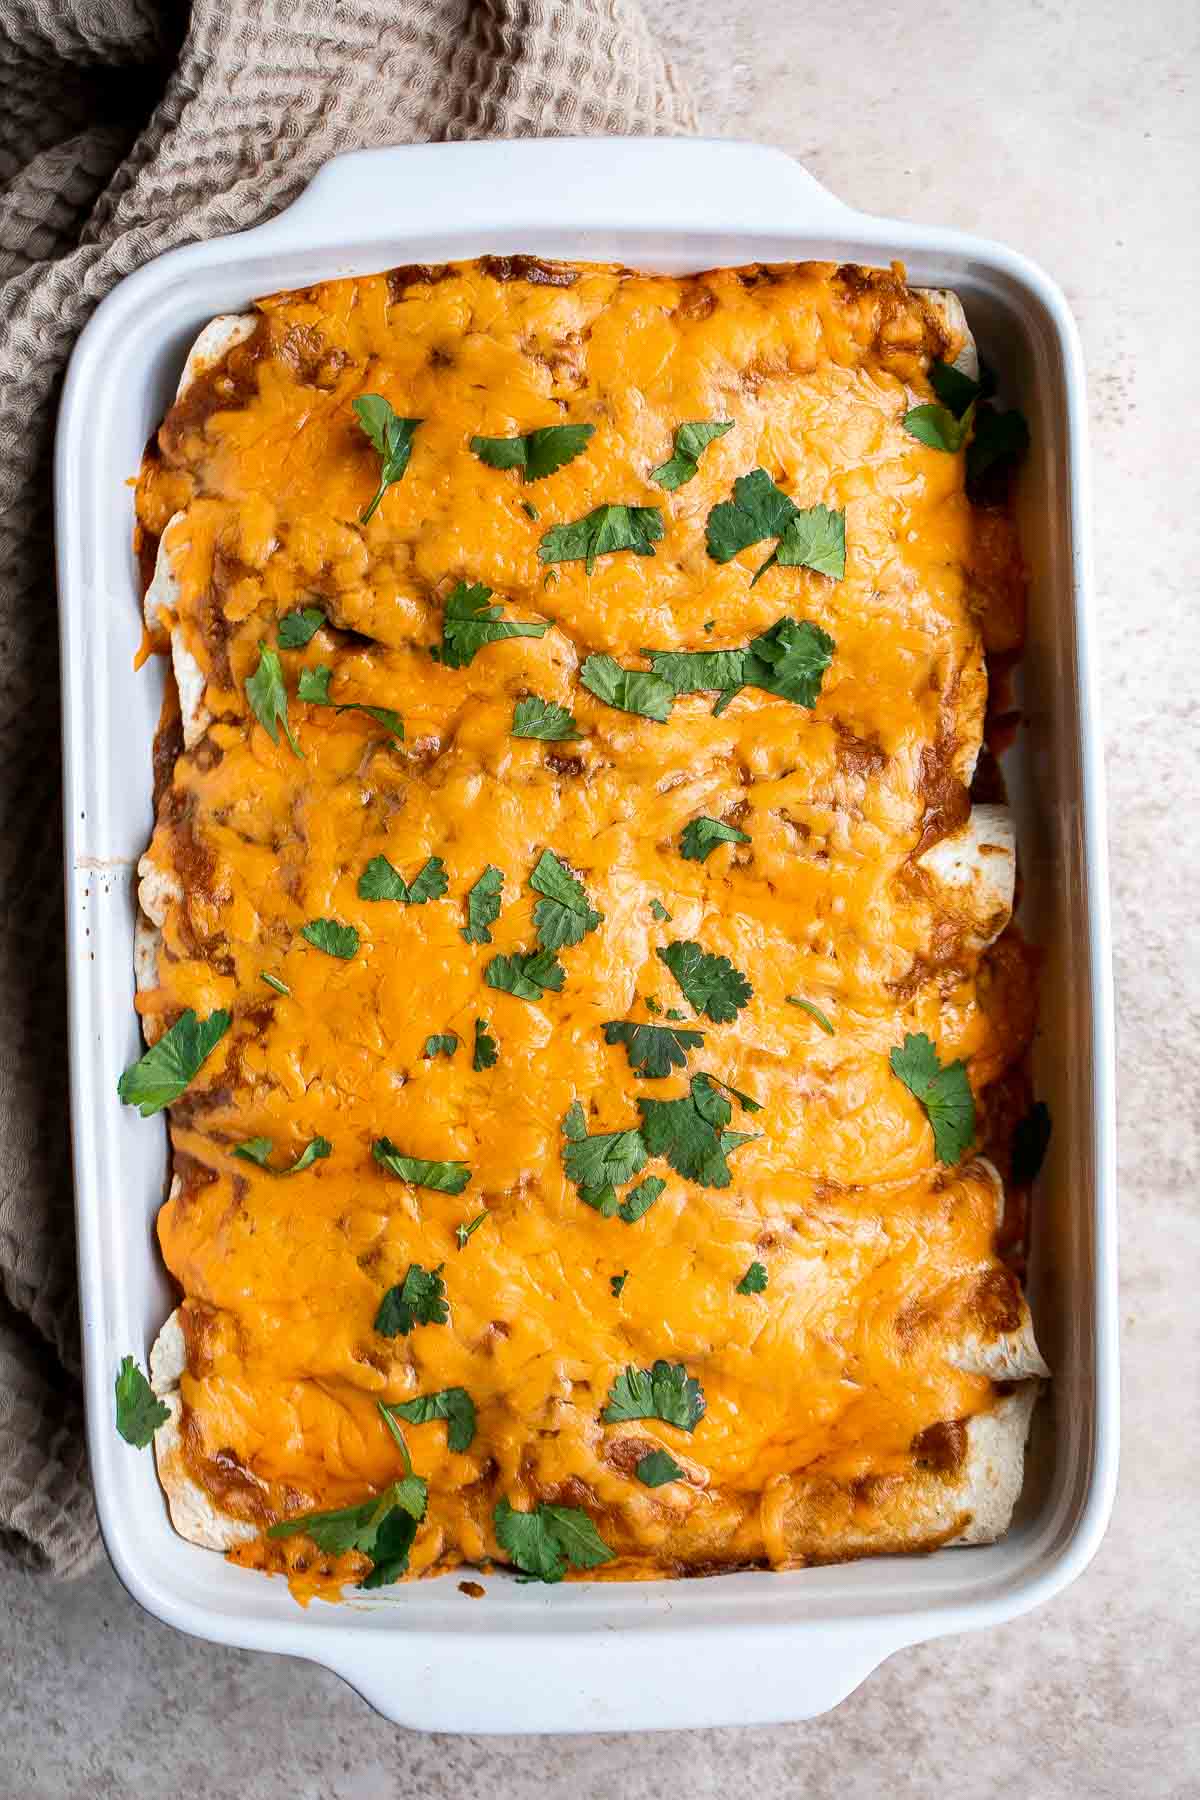
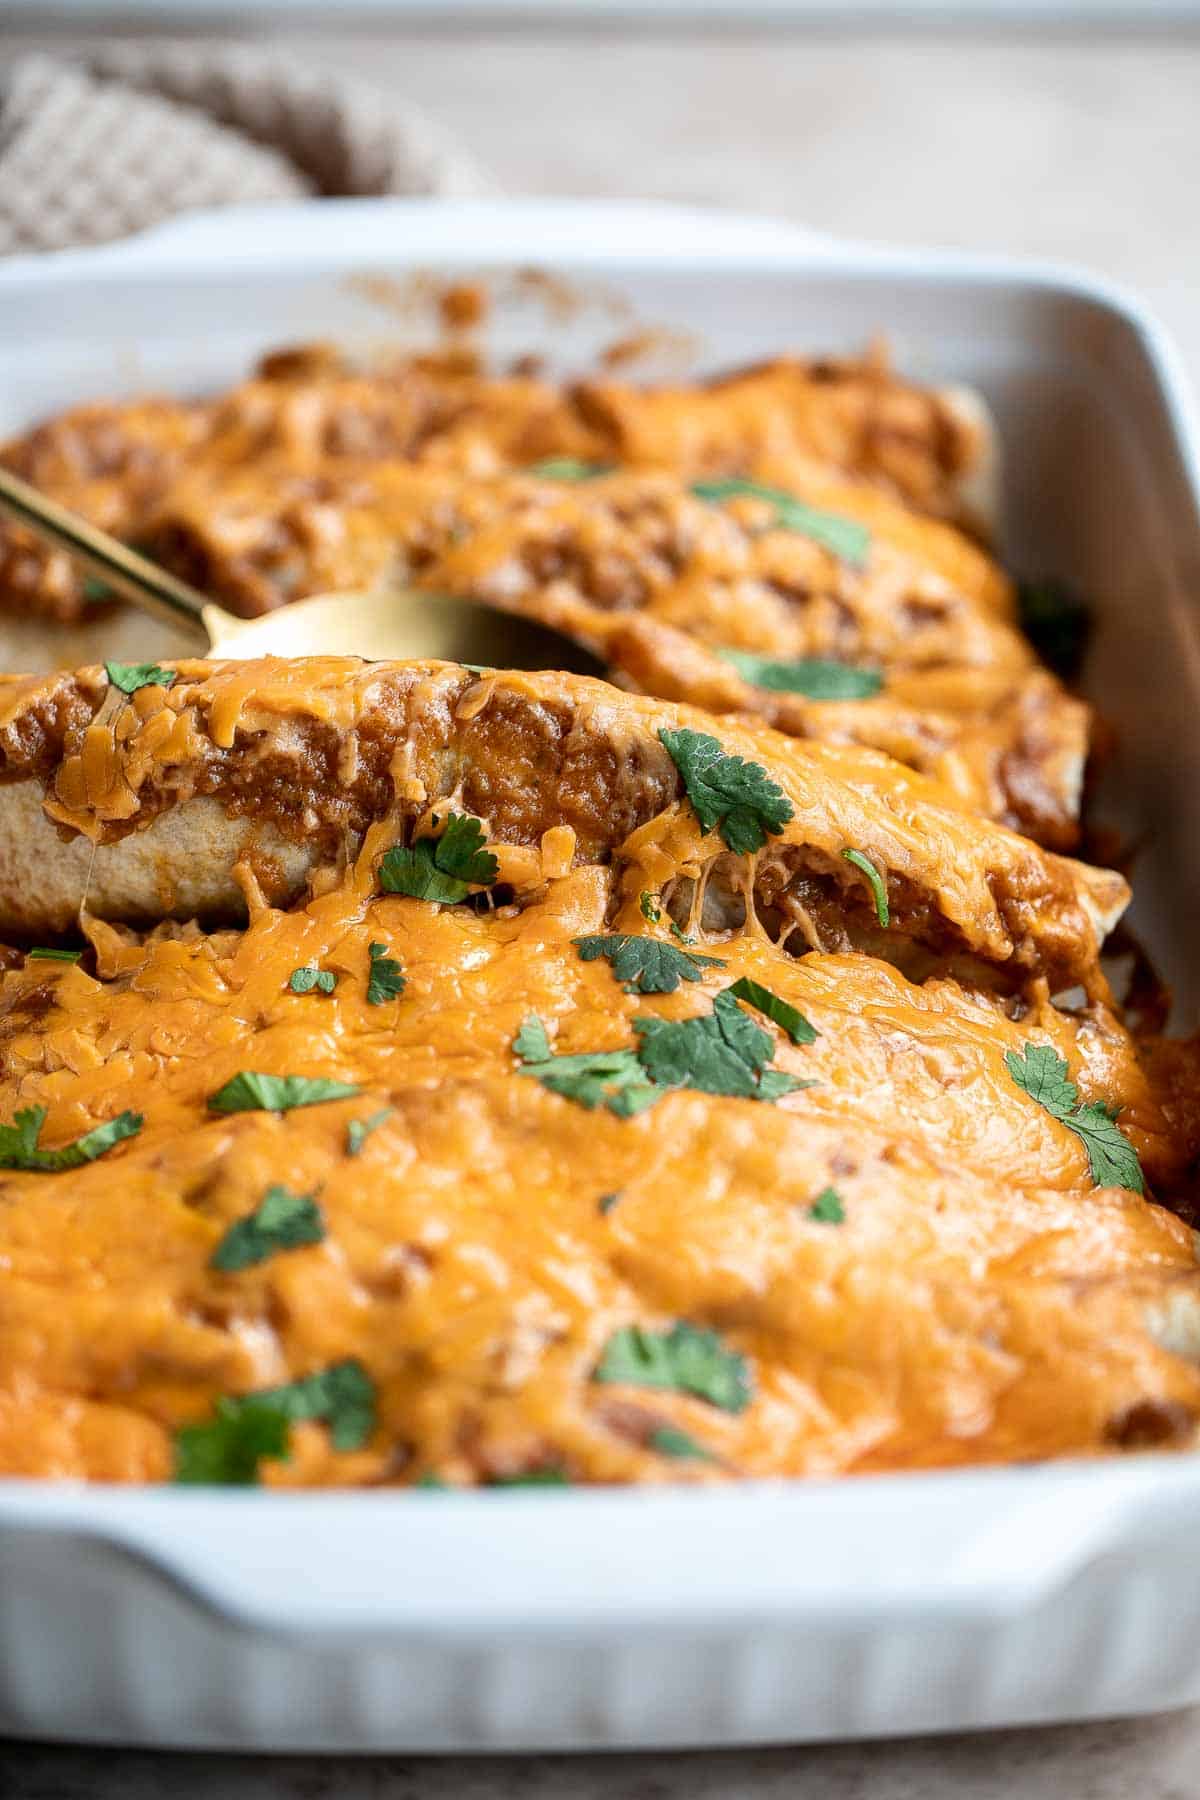
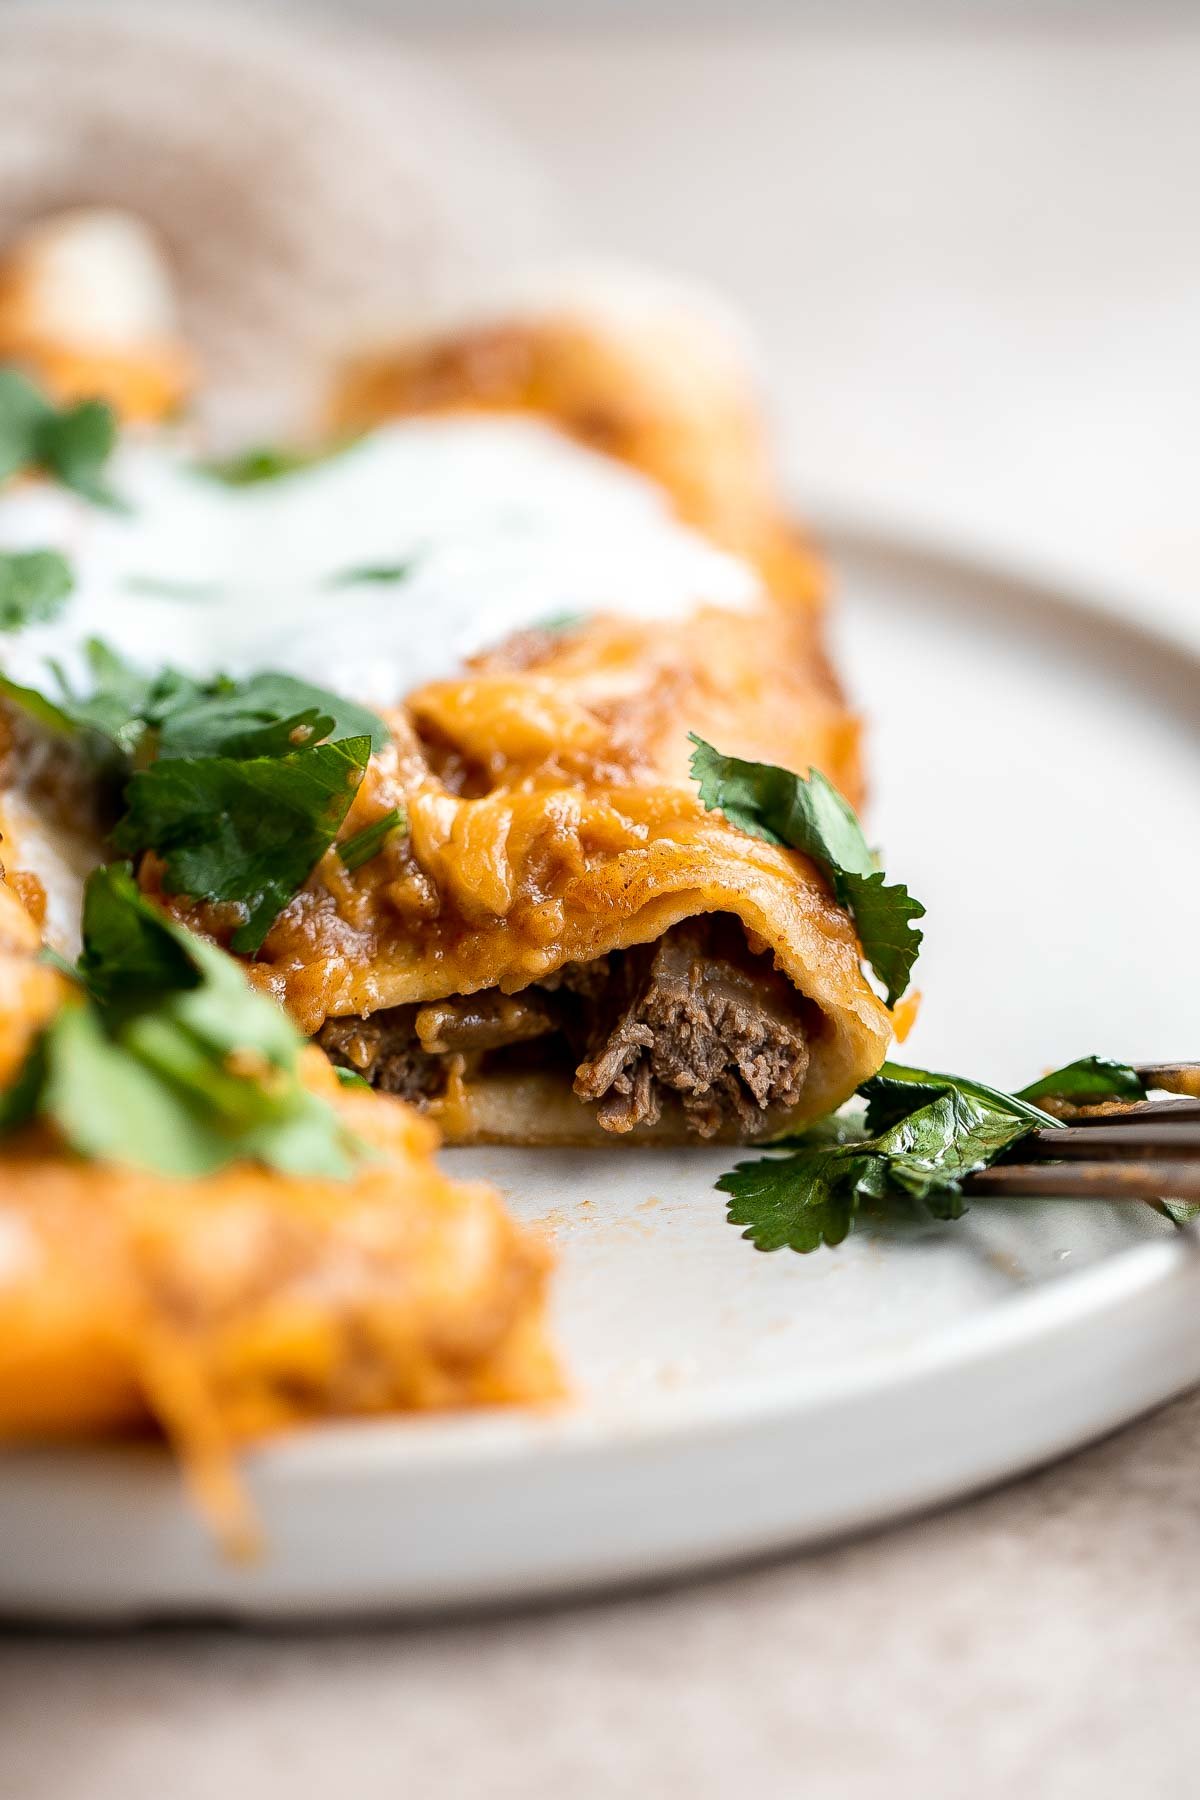
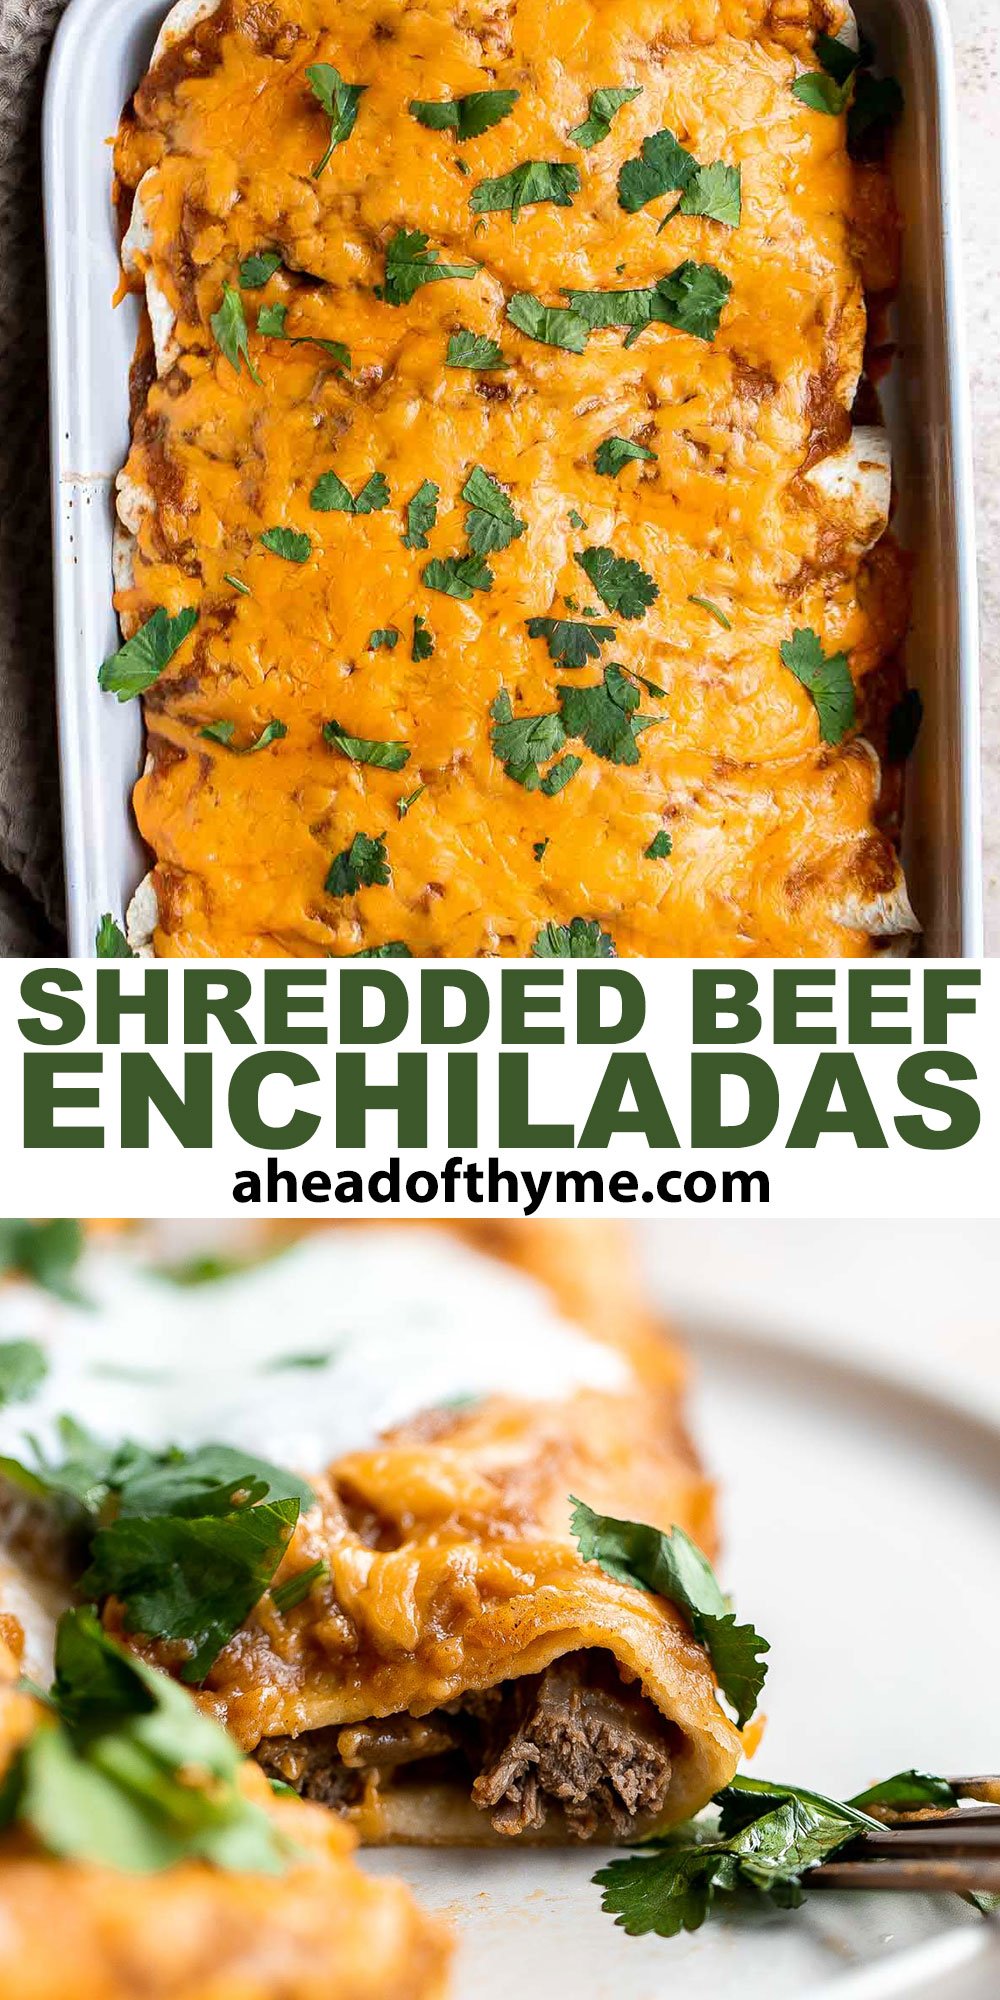
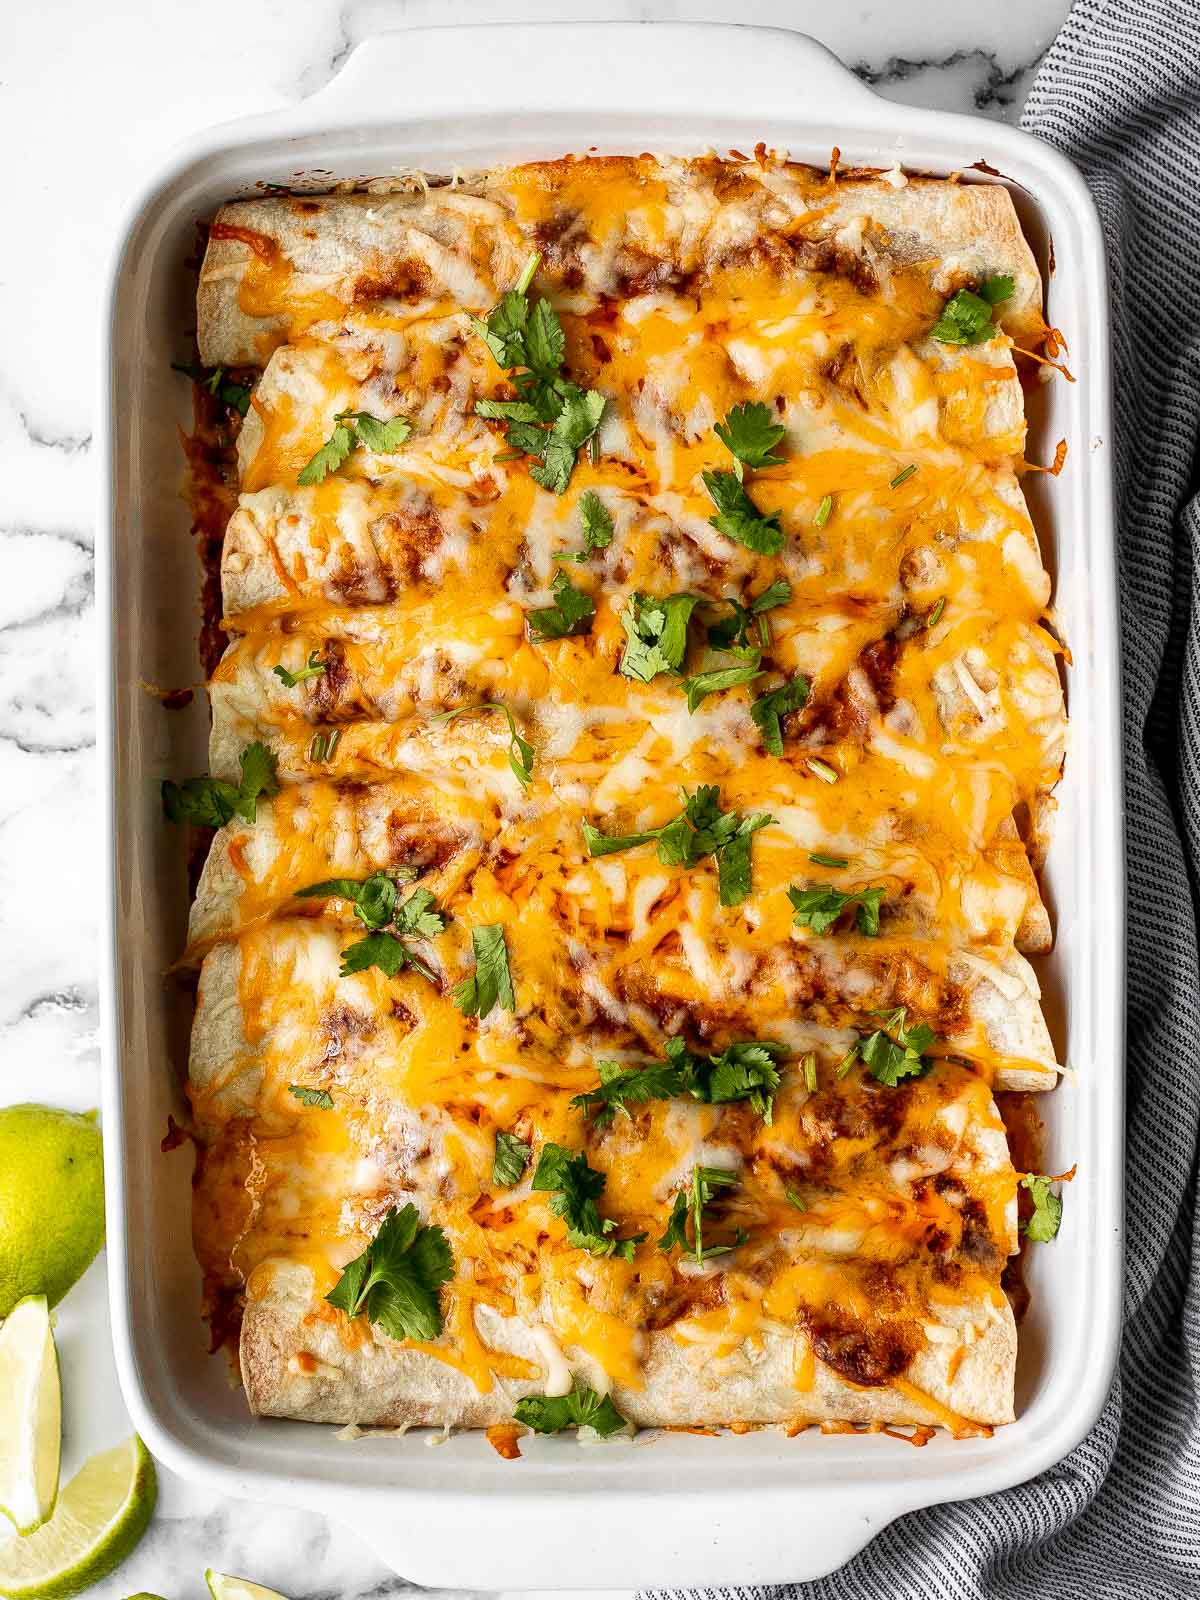
Shredded Beef Enchiladas
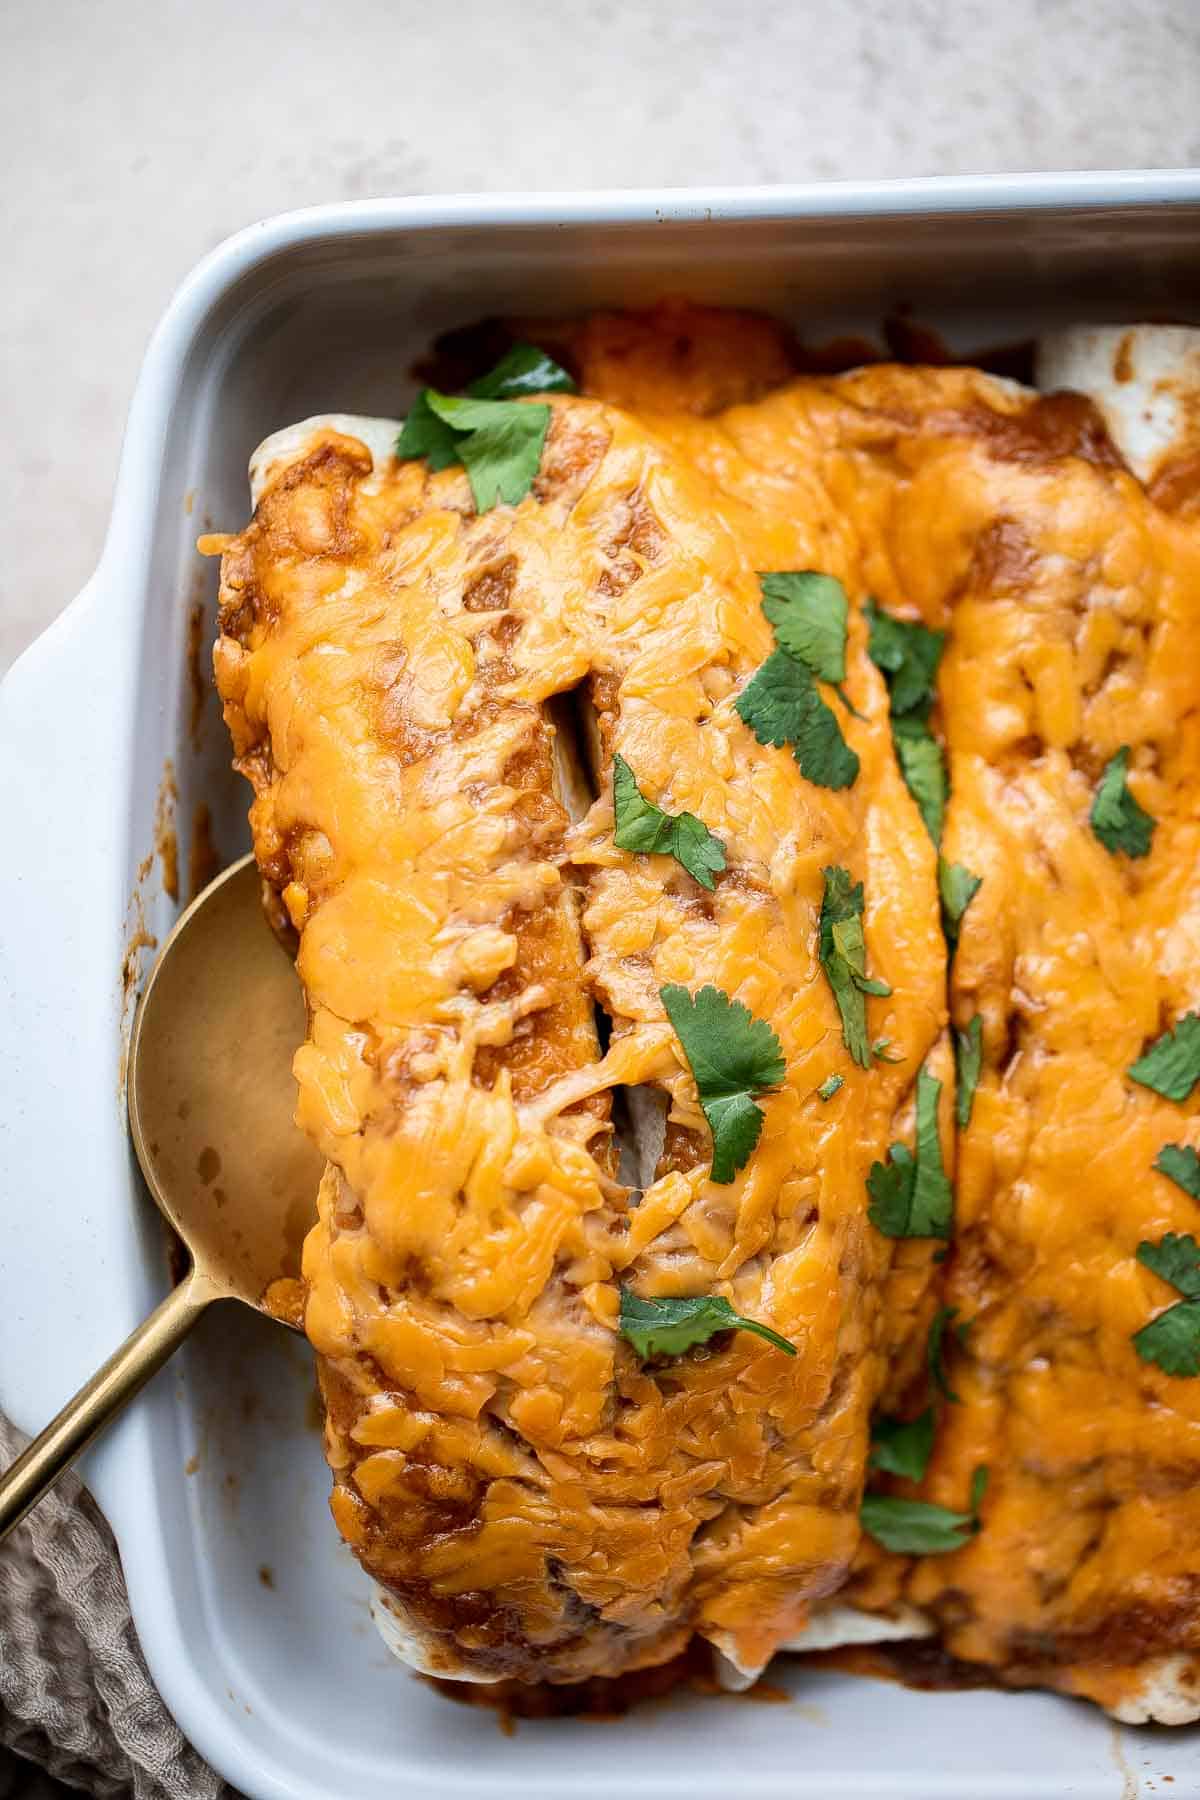
Shredded Beef Enchiladas are flavorful, saucy, and cheesy. They are easy to make using just a few ingredients including leftover beef, tortillas, enchilada sauce, and cheese. Serve this delicious kid-friendly meal for family dinner tonight.
Mexican comfort food is perfect to make when you want to get out of your normal dinner routine. With it's bold flavors, these beef enchiladas are delicious on their own or as part of a Mexican fiesta with Cilantro Lime Rice and beans.
Why You'll Love Shredded Beef Enchiladas
- Quick and easy. You can have a filling and delicious meal in just 40 minutes with these shredded beef enchiladas - and it only requires 10 minutes of actual prep work. Which means you can sit back and relax while your comforting meal is baking in the oven.
- Simple ingredients. You only need 4 ingredients to make these delicious leftover beef enchiladas: tortillas, shredded beef, enchilada sauce, and cheese. That's it. Then, it's up to you whether you want to add any toppings or not.
- Loaded with flavor. You would be amazed at how much flavor these enchiladas have thanks to the enchilada sauce (we used our homemade Enchilada Sauce). Plus, when you bake them in the oven, the result is crispy, cheesy tops and perfectly blended flavours that tastes amazing.
- The best way to use leftover beef. We love making Carne Asada, Pot Roast or Roast Beef on Sundays - and one of the biggest reasons why is because of all the leftovers that we end up. Imagine repurposing Sunday night leftovers into flavorful and delicious beef enchiladas. So good.
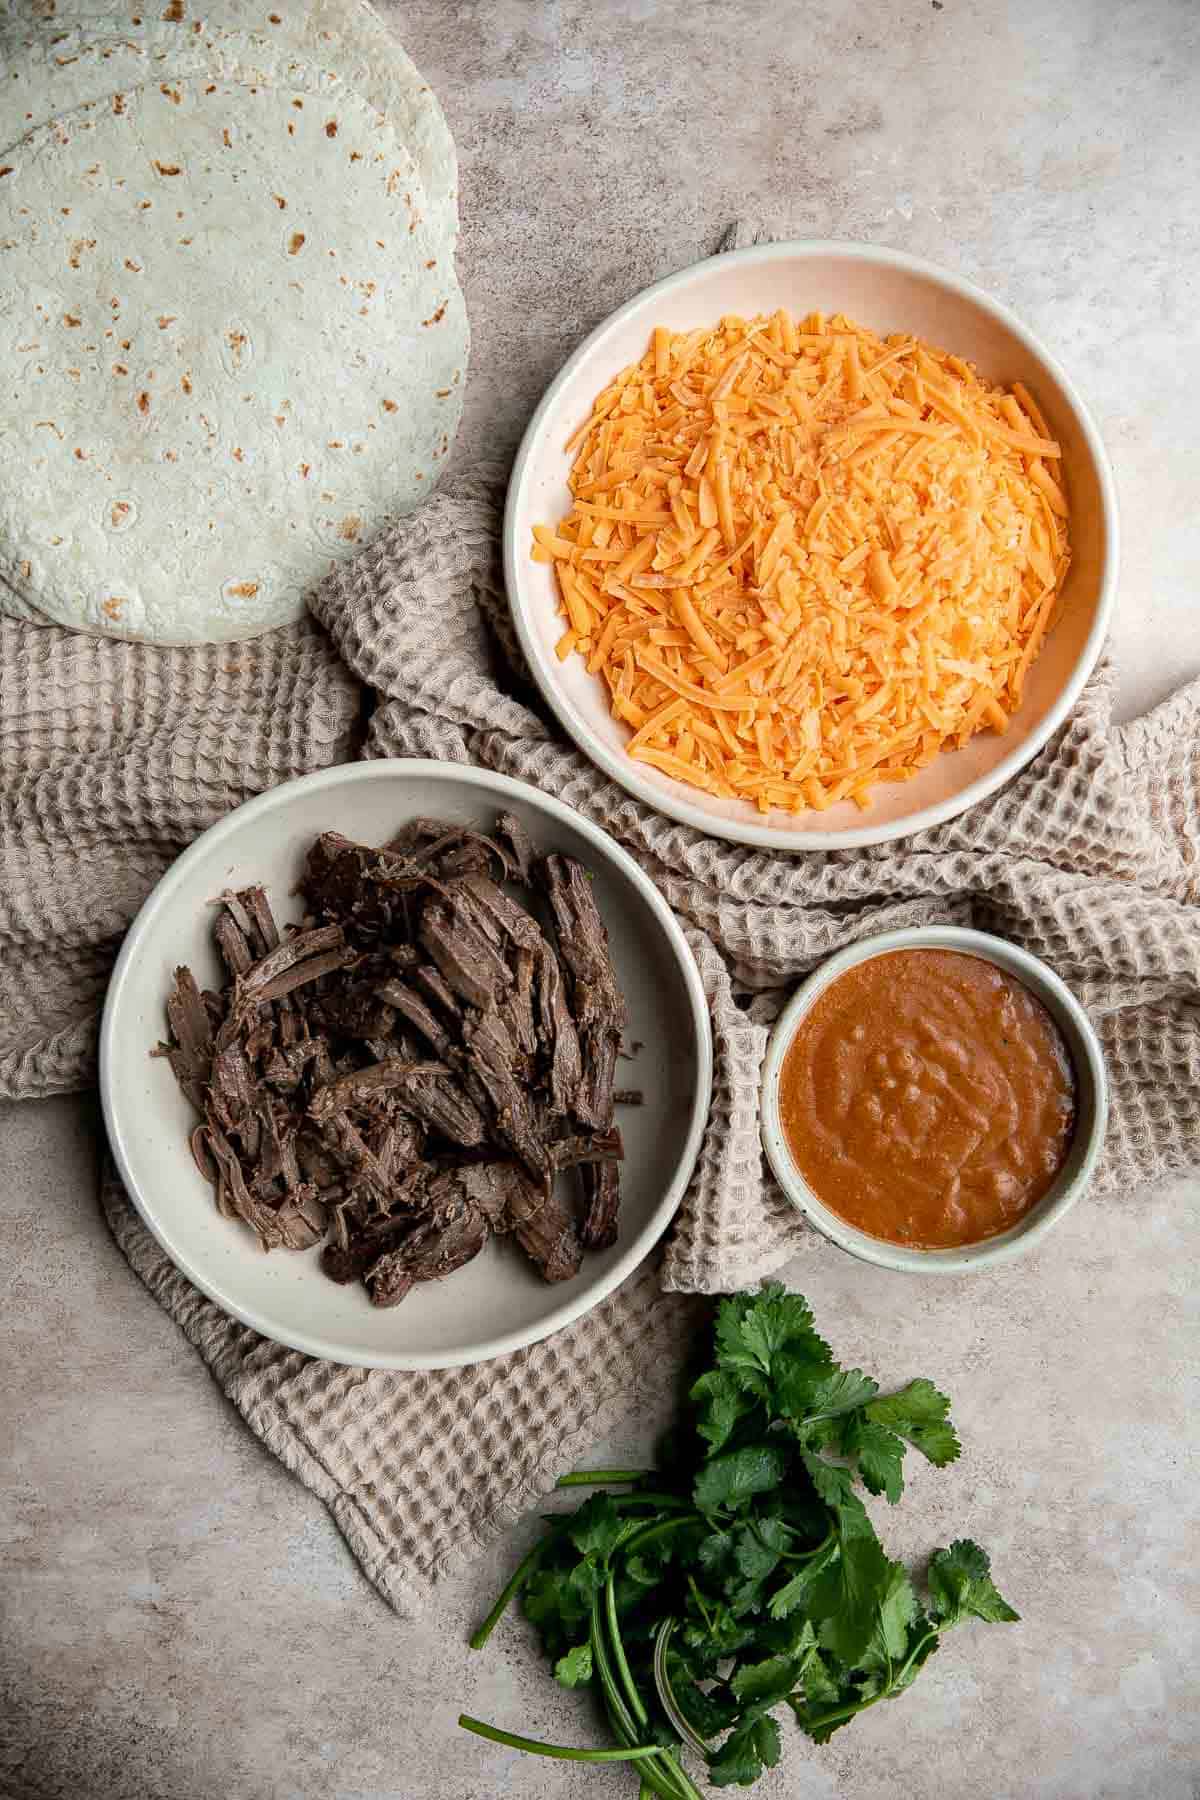
Ingredient Notes
To make easy Shredded Beef Enchiladas, you will need the following ingredients (full measurements in recipe card below):
- red enchilada sauce - if you prefer green enchilada sauce, you can use it in place of the red sauce at a 1:1 ratio. If you like to make yours from scratch, you can do that as well! We made a batch of our homemade red enchilada sauce in just minutes.
- cooked beef - You can slice up leftover Carne Asada or feel free to use lefotver beef from a Pot Roast or Roast Beef.
- cheddar cheese - sub for Monterey Jack , marble cheddar, mozzarella, or your favorite shredded cheese, if desired. Any cheese that melts well will work.
- flour tortillas - flour tortillas will be the most flexible and easy to work with, but you can use corn tortillas instead. Warming them up before filling them will help prevent them from crumbling and breaking.
- toppings - we added sour cream, cilantro, and lime juice, but toppings are completely optional. Many people like to use greek yogurt as a high-protein alternative to sour cream. You could also add avocado, green onions, pico de gallo, or guacamole.
You will also need measuring cups and spoons and a 9x13 baking pan.
How to Make the Best Shredded Beef Enchiladas
First, assemble and roll up the enchiladas.
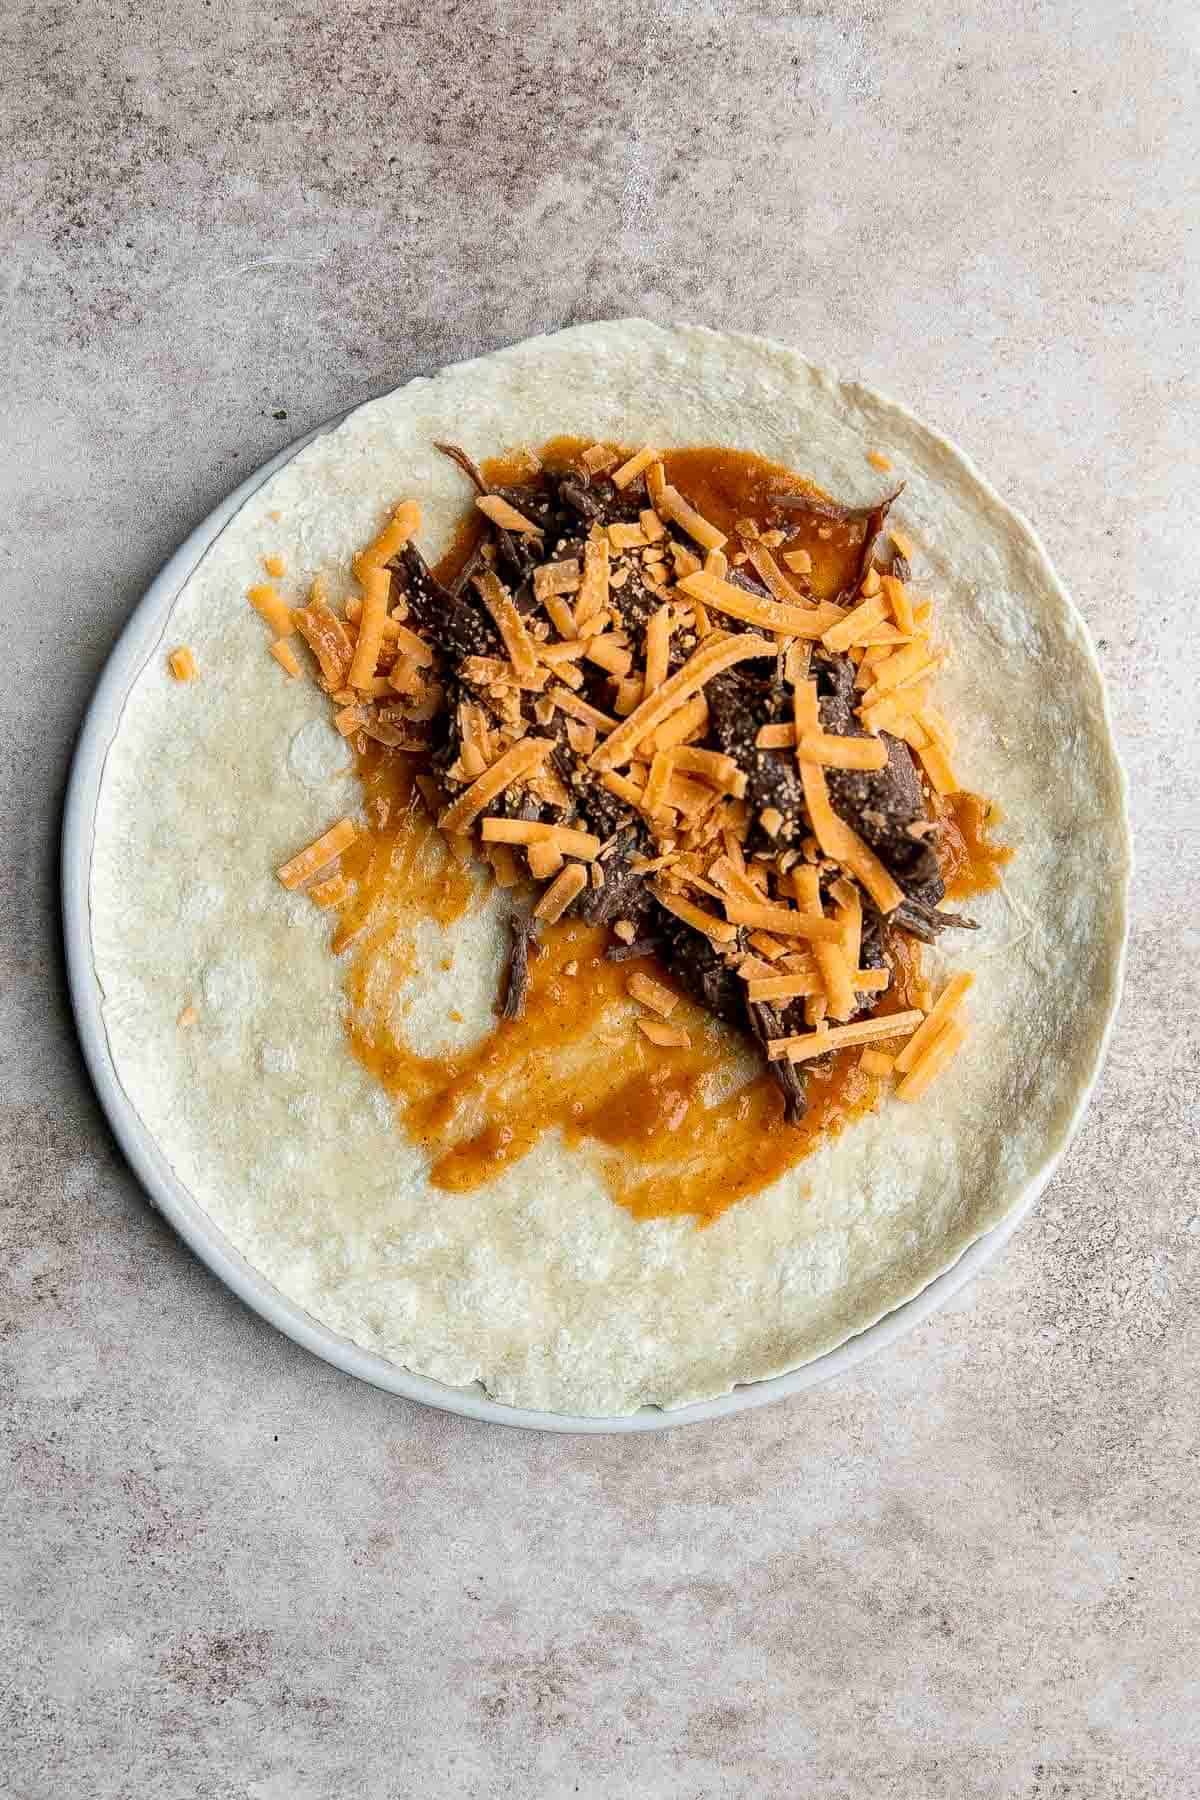
- Enchilada sauce. On each tortilla, spread 1-2 tablespoons of enchilada sauce on the bottom.
- Beef. Add ⅓ cup shredded beef in the centre.
- Cheese. and 2 tablespoons cheese on top.
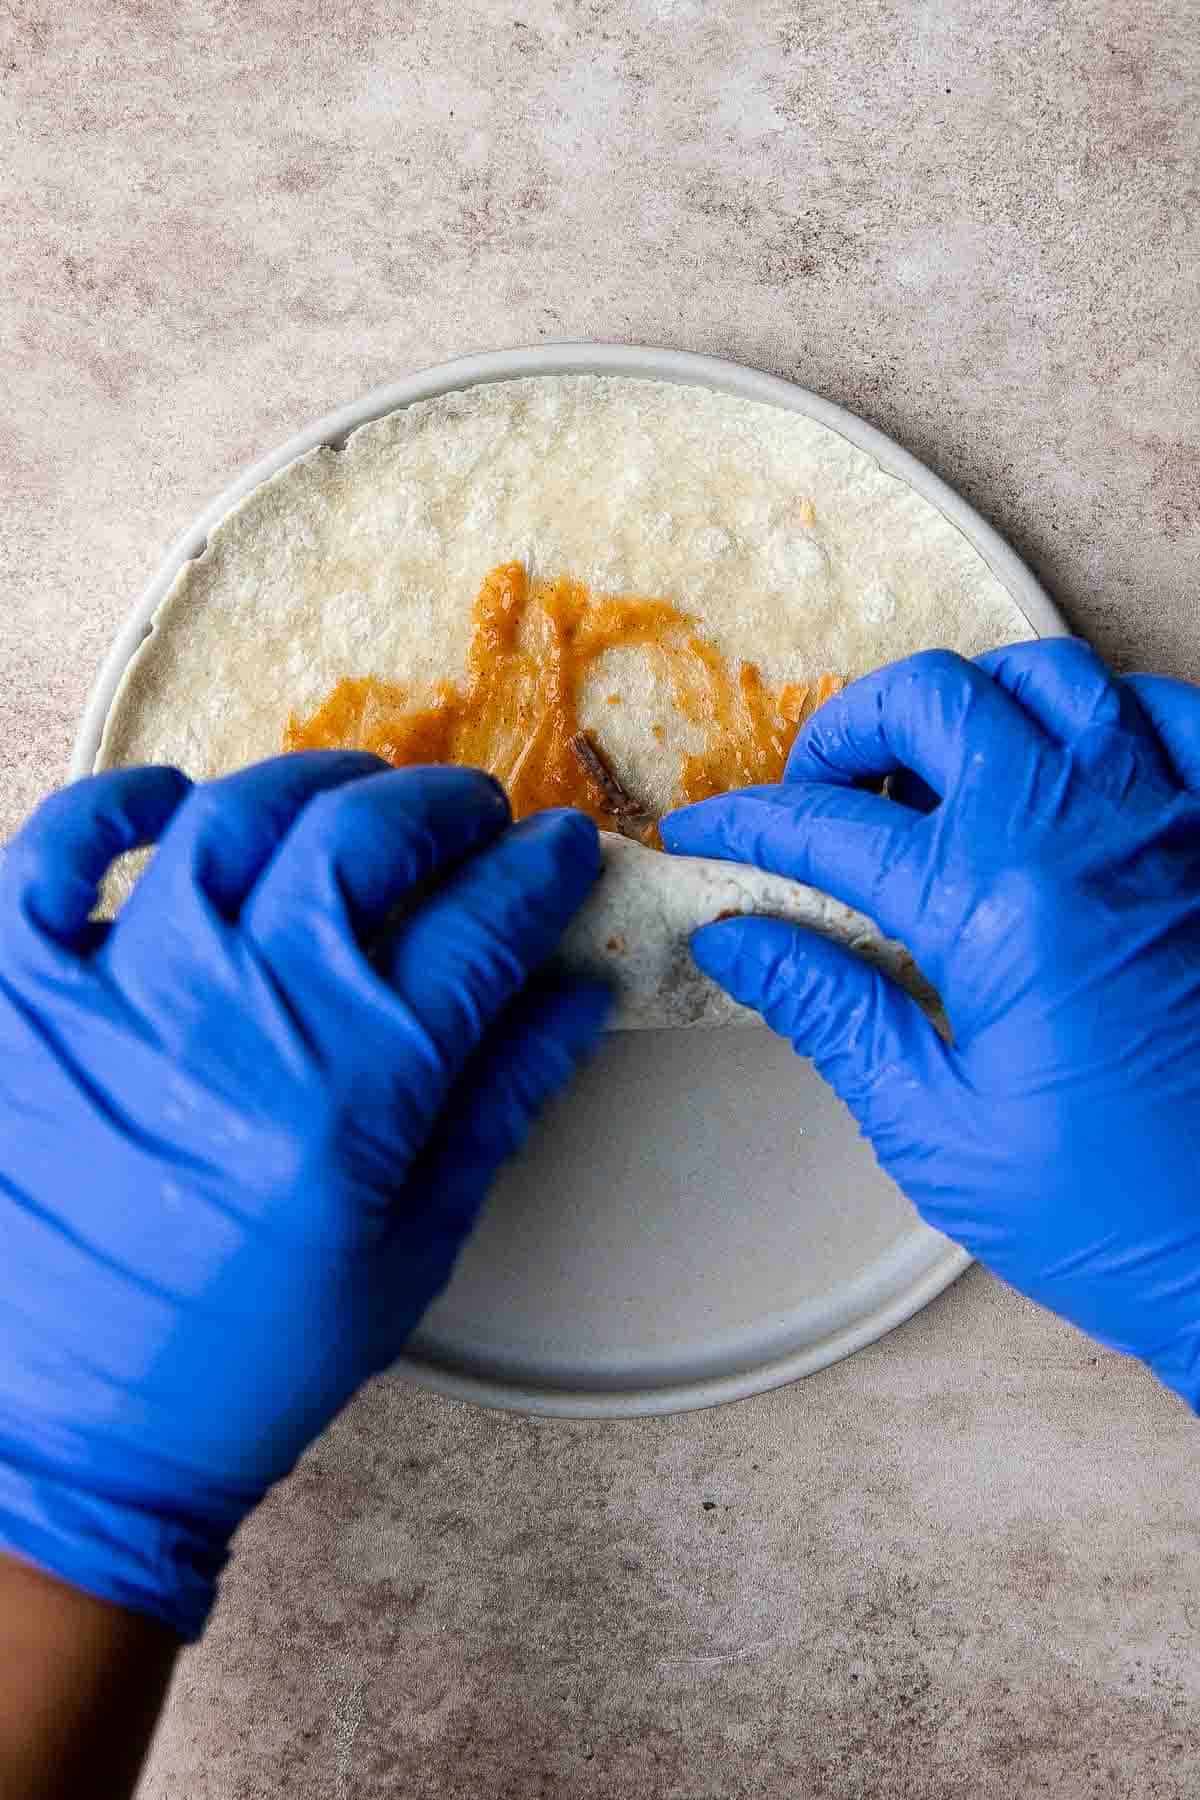
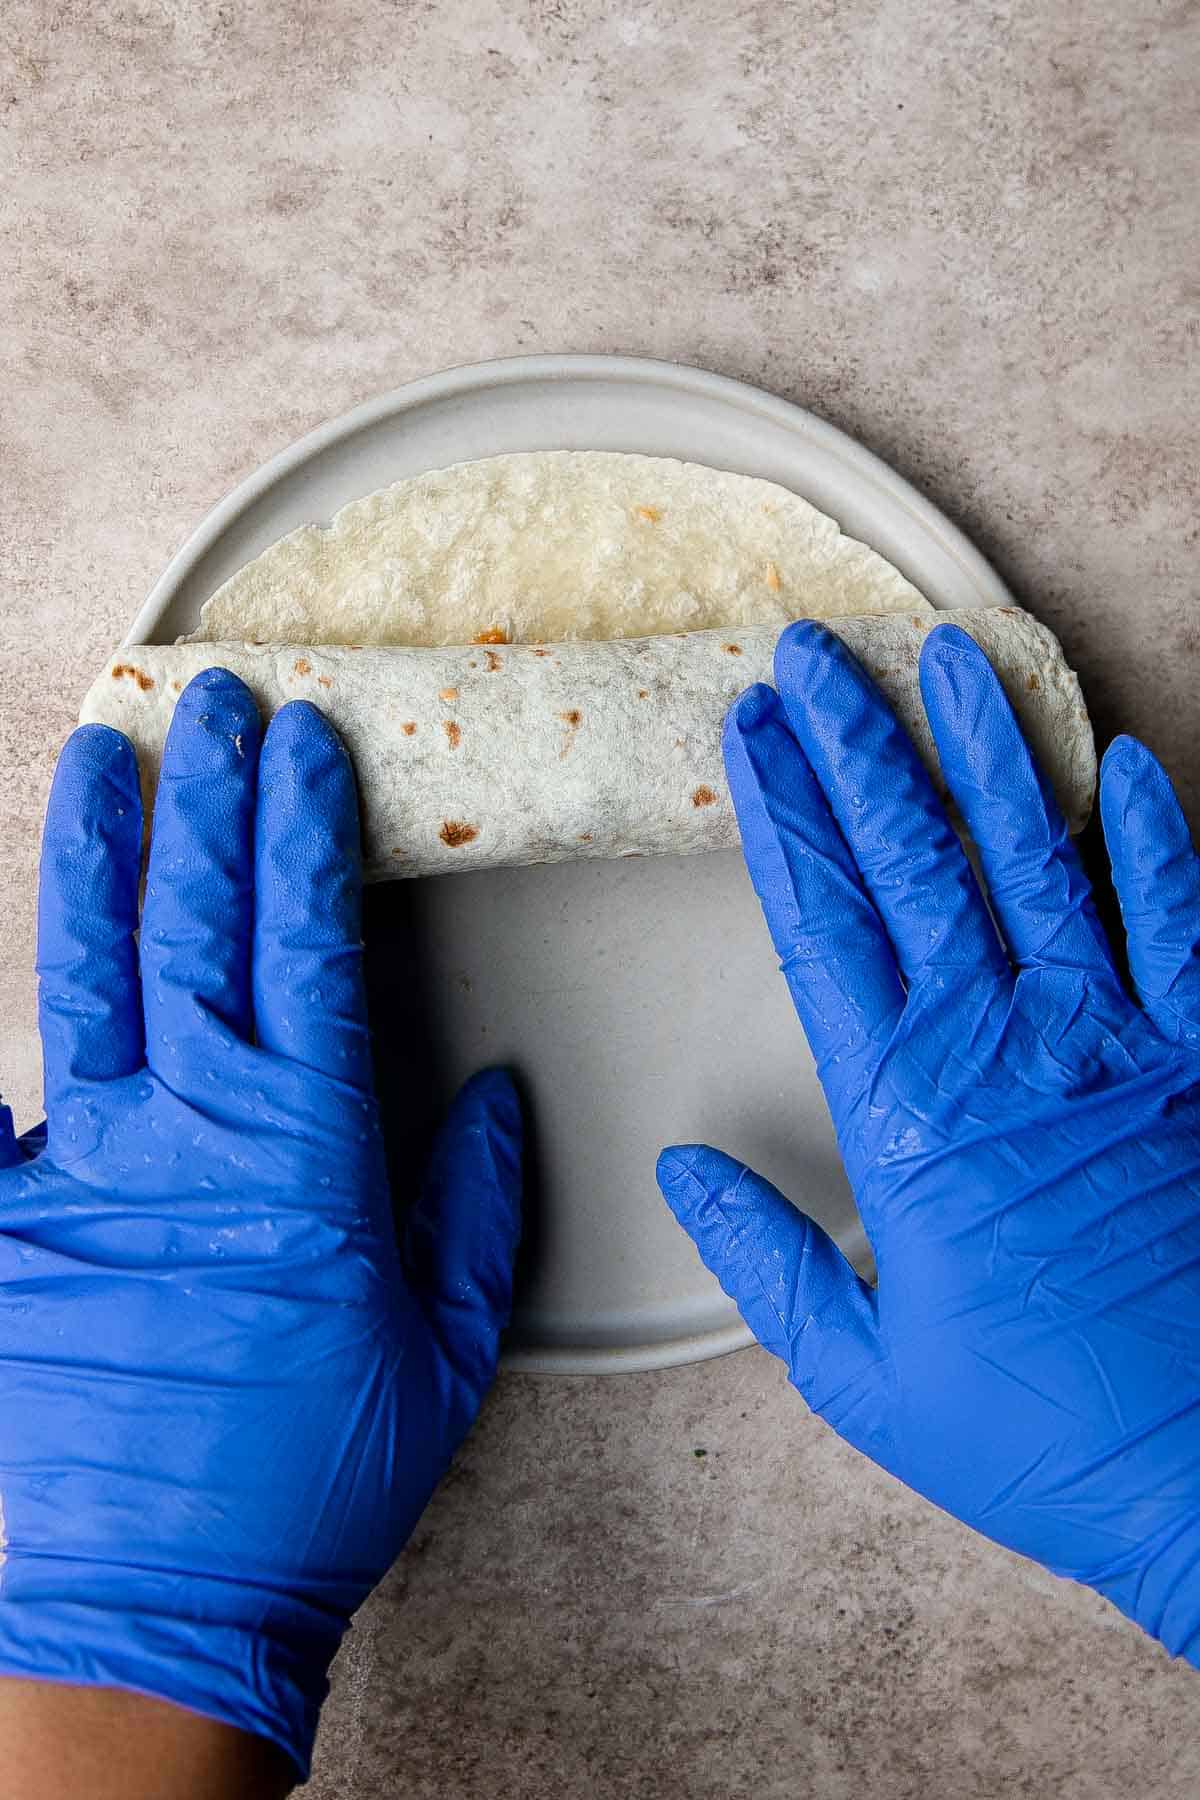
- Roll. Carefully roll the tortilla up. Repeat with the remaining filling and tortillas.
Assemble the casserole pan.
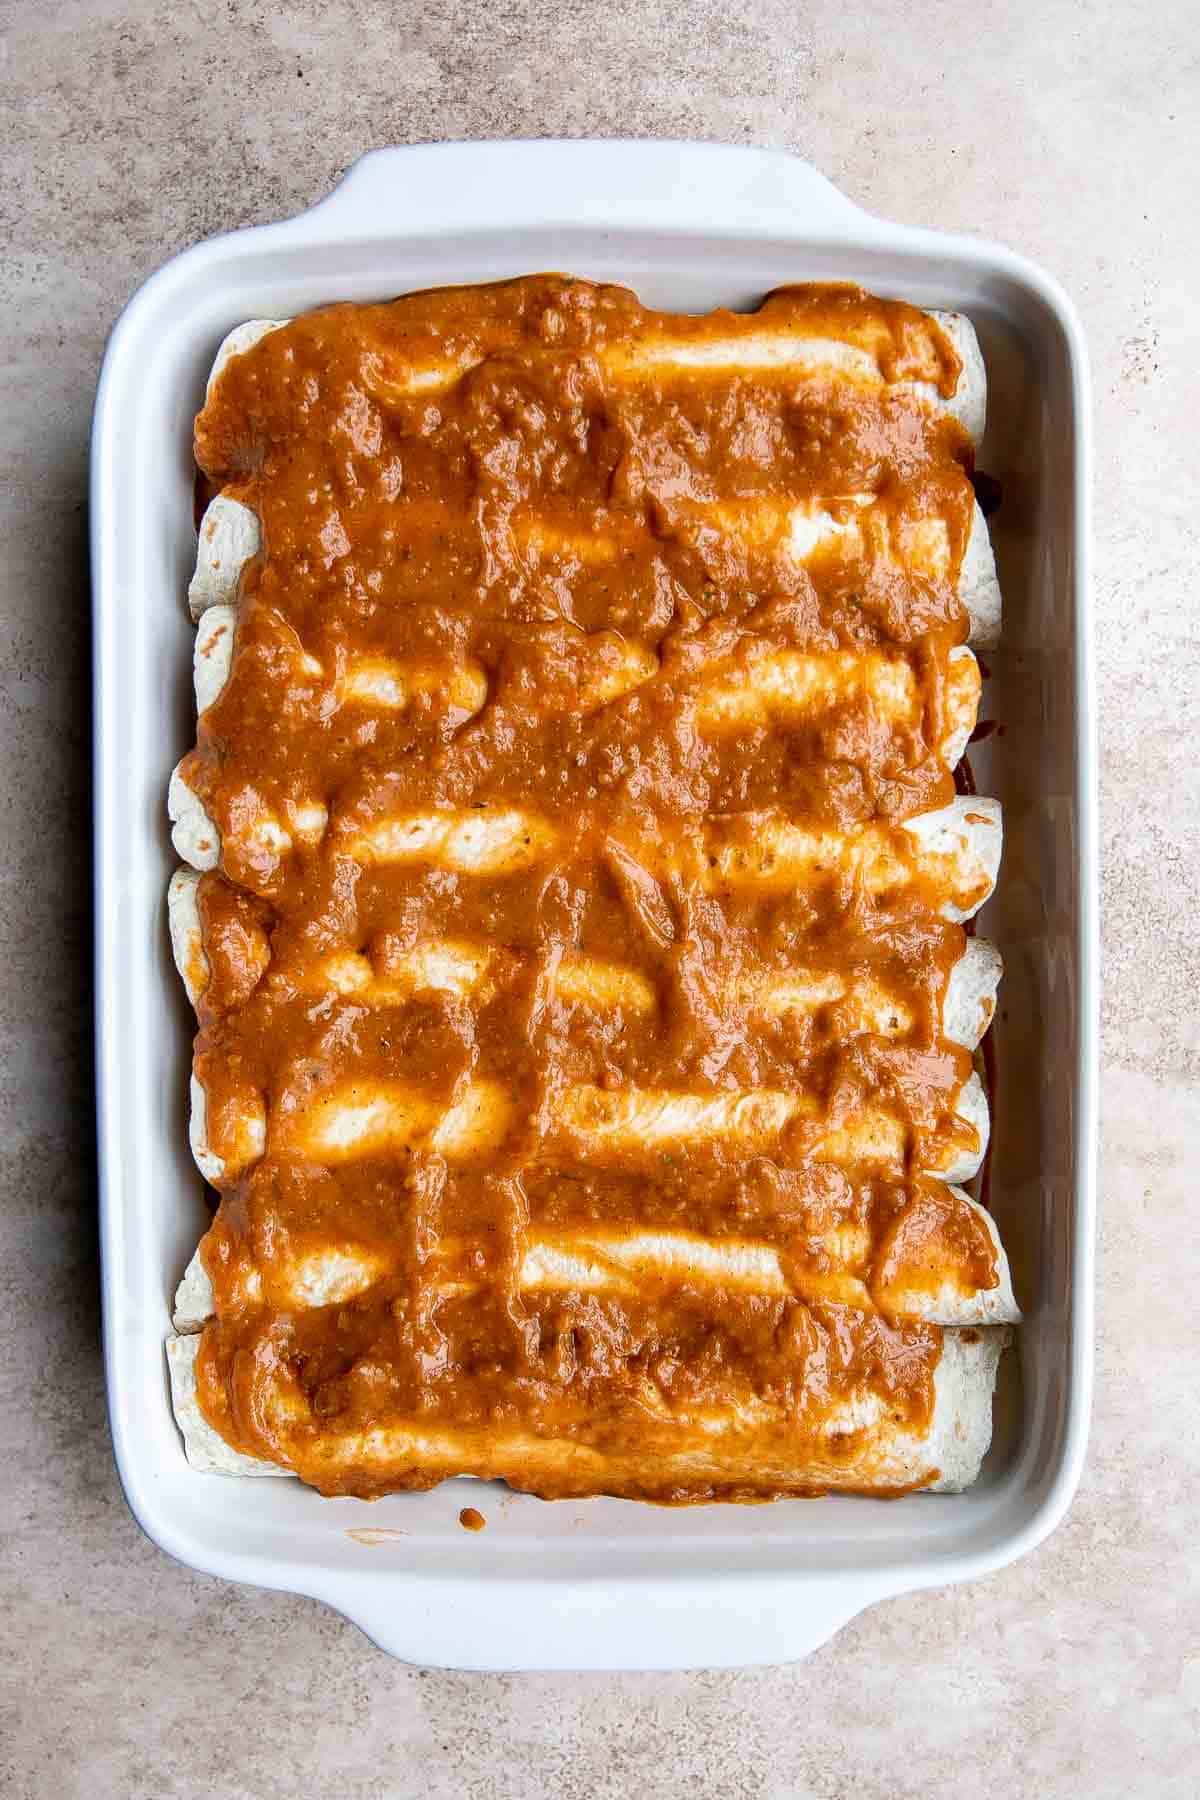
- Enchilada sauce. Spread ¼ cup enchilada sauce onto a 9x13-inch casserole pan.
- Rolled tortillas. Arrange the rolled tortillas seam side down in the casserole pan.
- Add toppings. Spread the remaining enchilada sauce evenly on top and sprinkle with the remaining cheese.

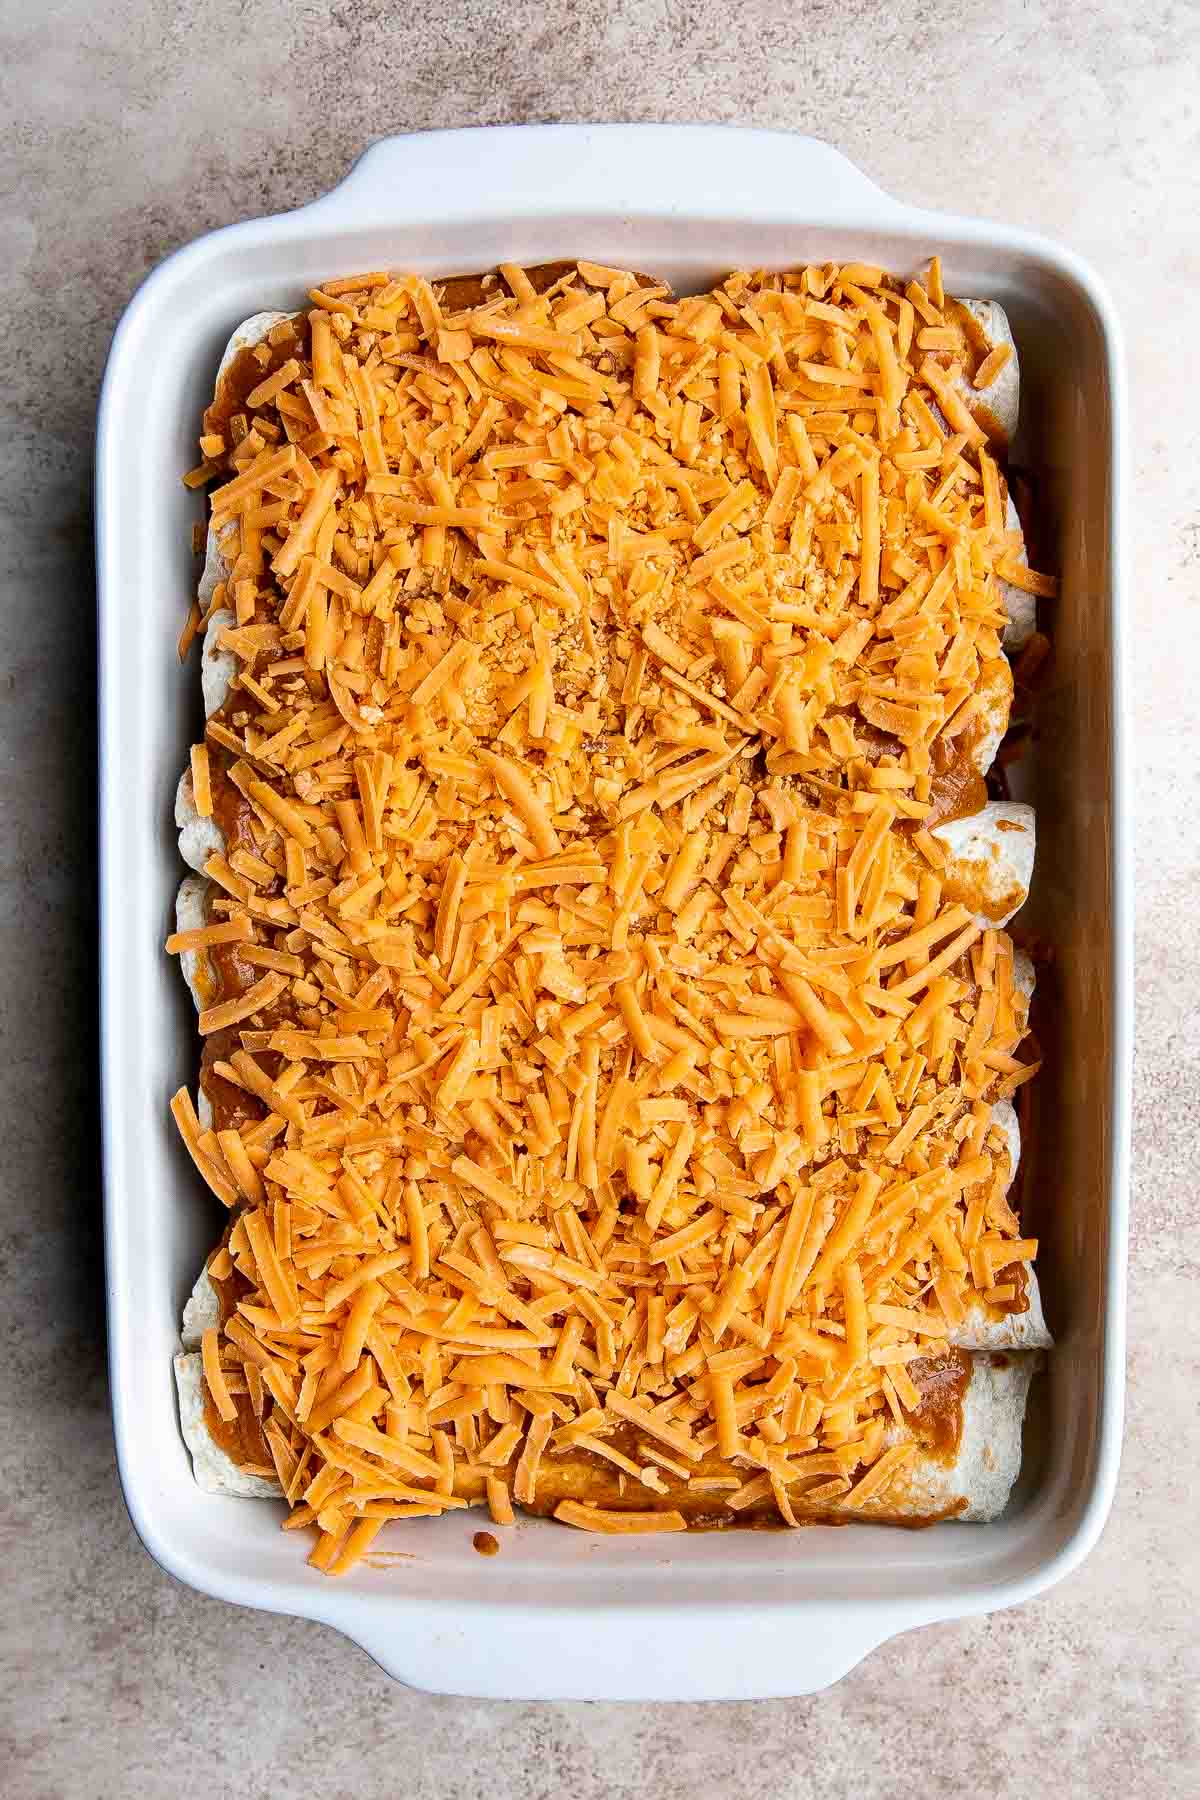
Bake and serve.
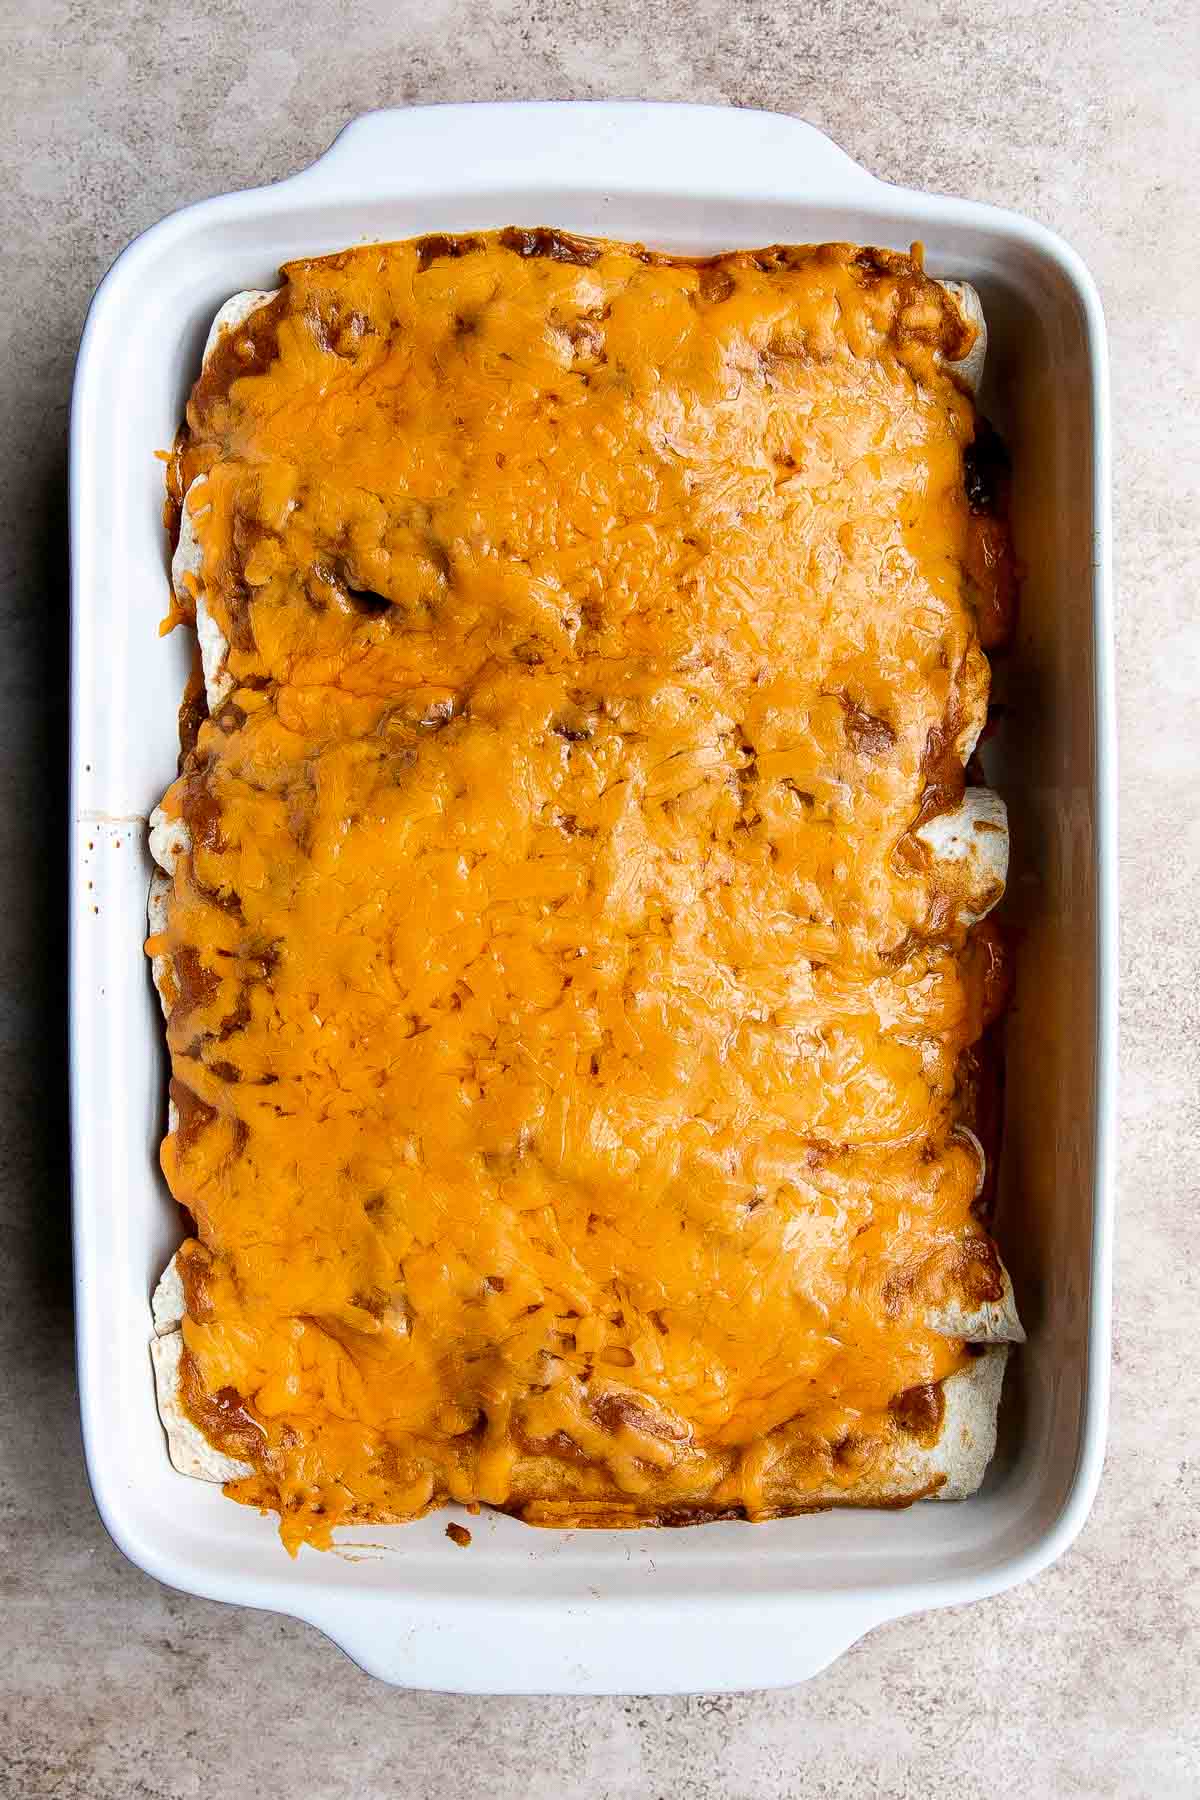
Cover the pan with aluminum foil and bake in a 350F preheated oven for 15 minutes. Remove the cover and bake uncovered for another 8-10 minutes until the melted cheese turns golden brown. Let rest for 5 minutes.
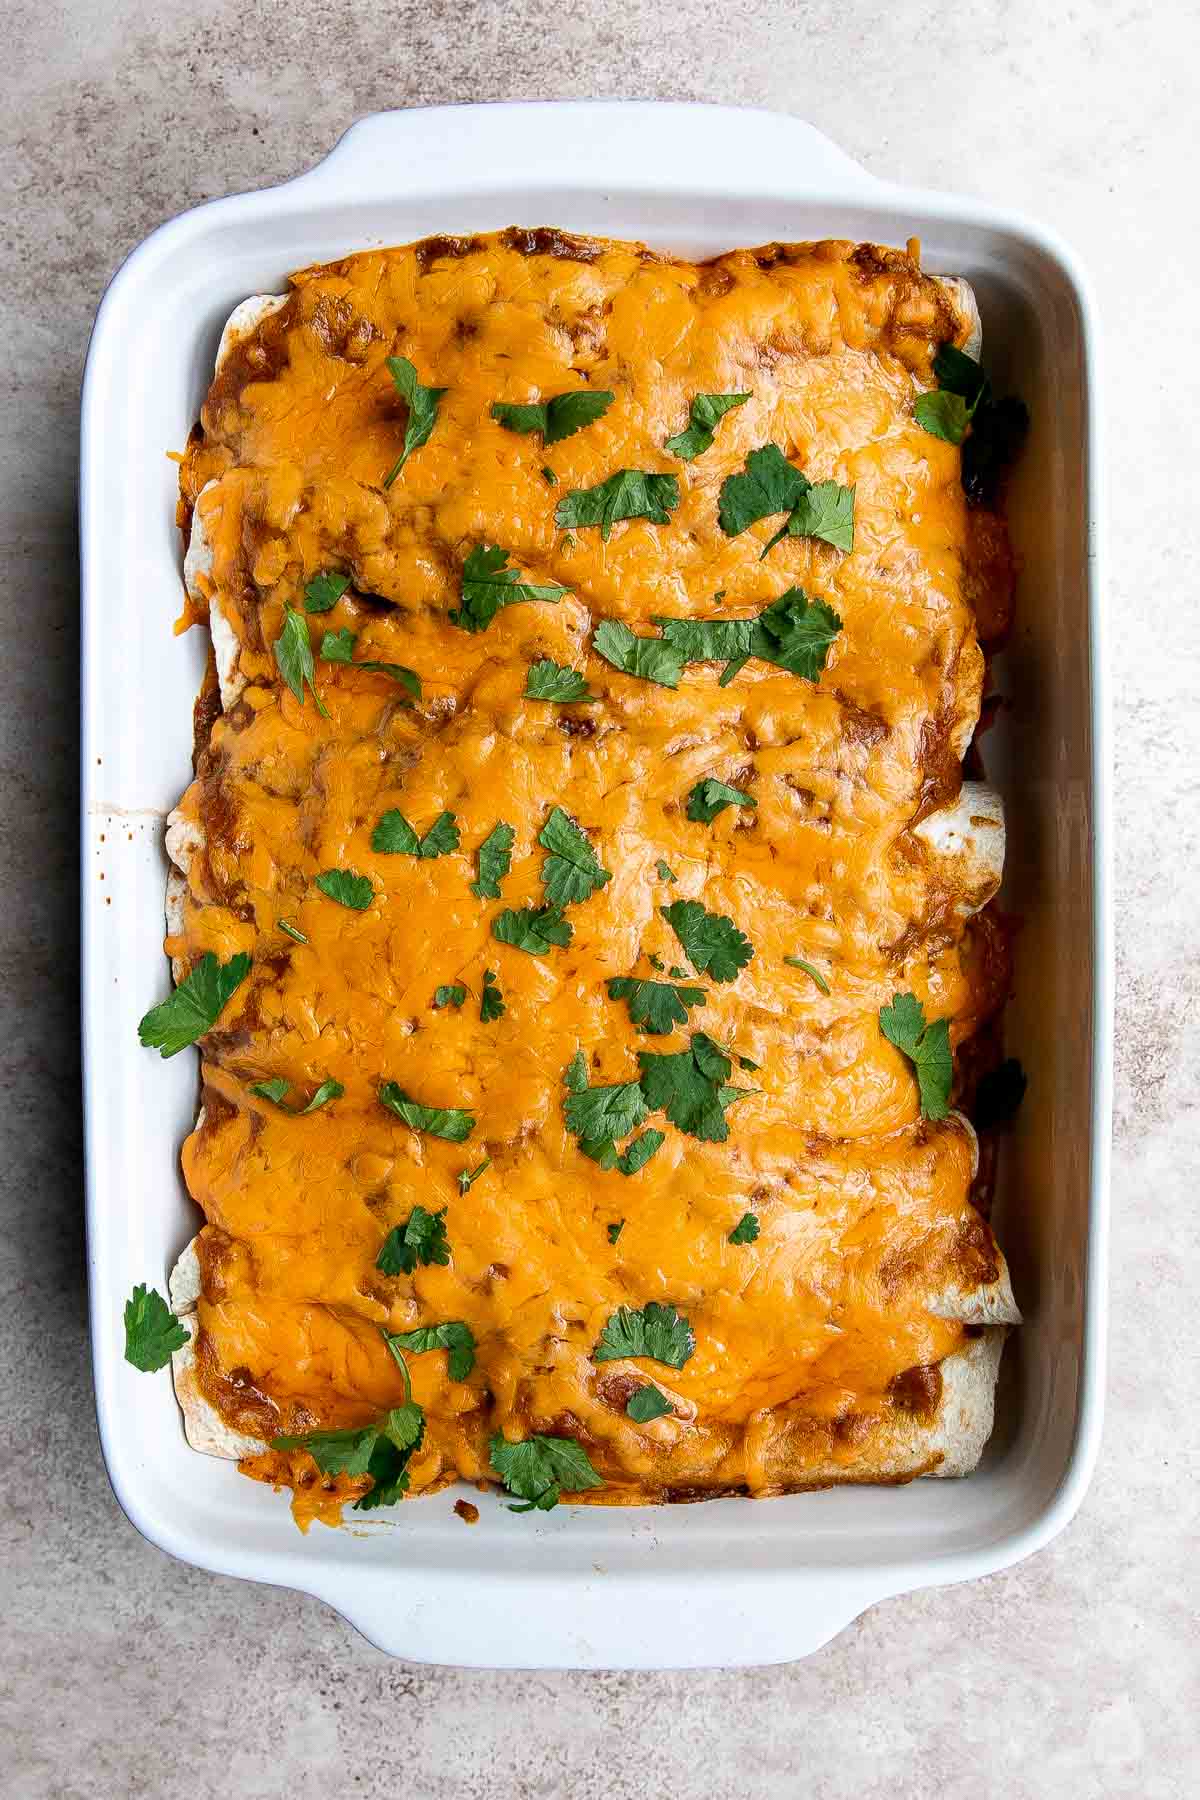
Serve warm with cilantro, sour cream, and lime juice if desired.
Recipe Variations
- Make it spicy. Make these enchiladas spicy by using a spicy enchilada sauce, or stirring in some chili powder or hot sauce to your enchilada sauce. You can also bring up the heat by adding in diced jalapeños to the filling before rolling it up.
- Add beans. Add black beans, Refried Beans, or pinto beans into the filling before rolling up the tortillas.
- Make green enchiladas. Turn these into green beef enchiladas (verde) by using green enchilada sauce or salsa verde instead of red sauce.
How to Serve
Shredded Beef Enchiladas are delicious served on their own with a side of sour cream, Guacamole, or Pico de Gallo Salsa. Or pair them with Mexican sides like rice and beans.
Some of our favorite Mexican-inspired side dishes to serve with these enchiladas are:
Recipe Tips and Tricks
- Use soft tortillas. You will be able to easily roll the tortillas without any cracking if they are soft. If your tortillas are stiff, heat them briefly in a dry skillet or wrap them in a damp towel and microwave for a few seconds.
- Roll tightly. Roll the filled tortillas tightly to keep the filling in place and to prevent them from unrolling. You will need to roll them tightly to be able to fit all 9 in the the pan.
- Prep for the freezer. Beef enchiladas are a great freezer meal to make ahead of time and then store in the freezer for an easy dinner on a lazy day. Just prep them as directed in the freezer (store in a freezer-safe casserole pan) and cover tightly with aluminum foil. Once you're ready to bake, preheat the oven as normal and increase the baking time to get perfectly-cooked enchiladas.
Storing and Freezing Instructions
How to Store
Once the beef enchiladas have cooled completely, transfer them to an airtight container and refrigerate for up to 4 days.
How to Freeze
Place leftover enchiladas in a freezer bag and freeze for up to 3 months. Allow them to thaw overnight in the refrigerator before reheating.
How to Reheat
You can reheat enchiladas in the microwave, oven, or air fryer.
- Reheat in the microwave: Cover the top, but allow the air to escape in they are in a container. Reheat in 20-second increments until hot.
- Reheat in the oven or air fryer: Reheat beef enchiladas in the oven at 350F for 15 minutes, or in the air fryer for 5-10 minutes until hot.

More Leftover Beef Recipes
Tried this recipe?
I'd love to hear what you think! Leave a comment and rating below to share your feedback. Your reviews help others discover this recipe and help me keep creating more free recipes for you. Snap a photo and tag me on social media @aheadofthyme too.
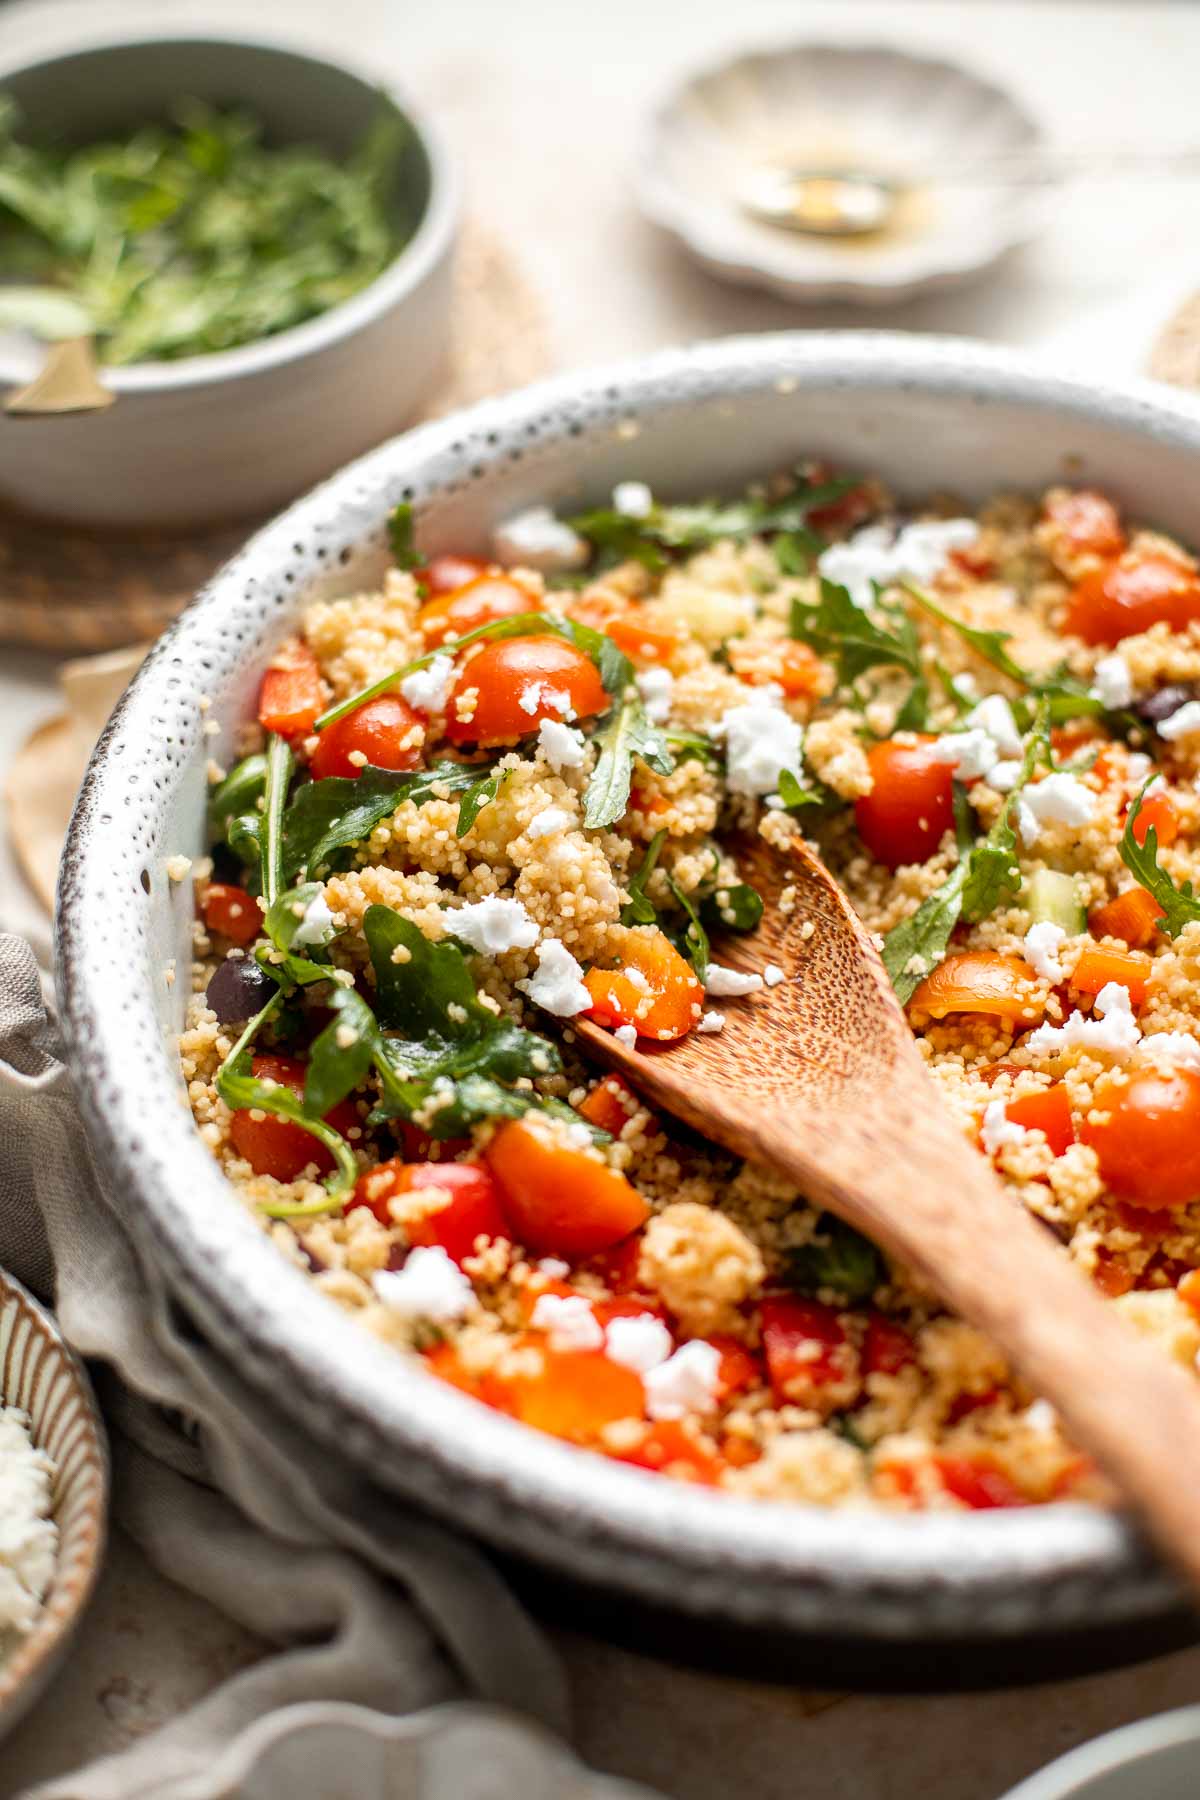
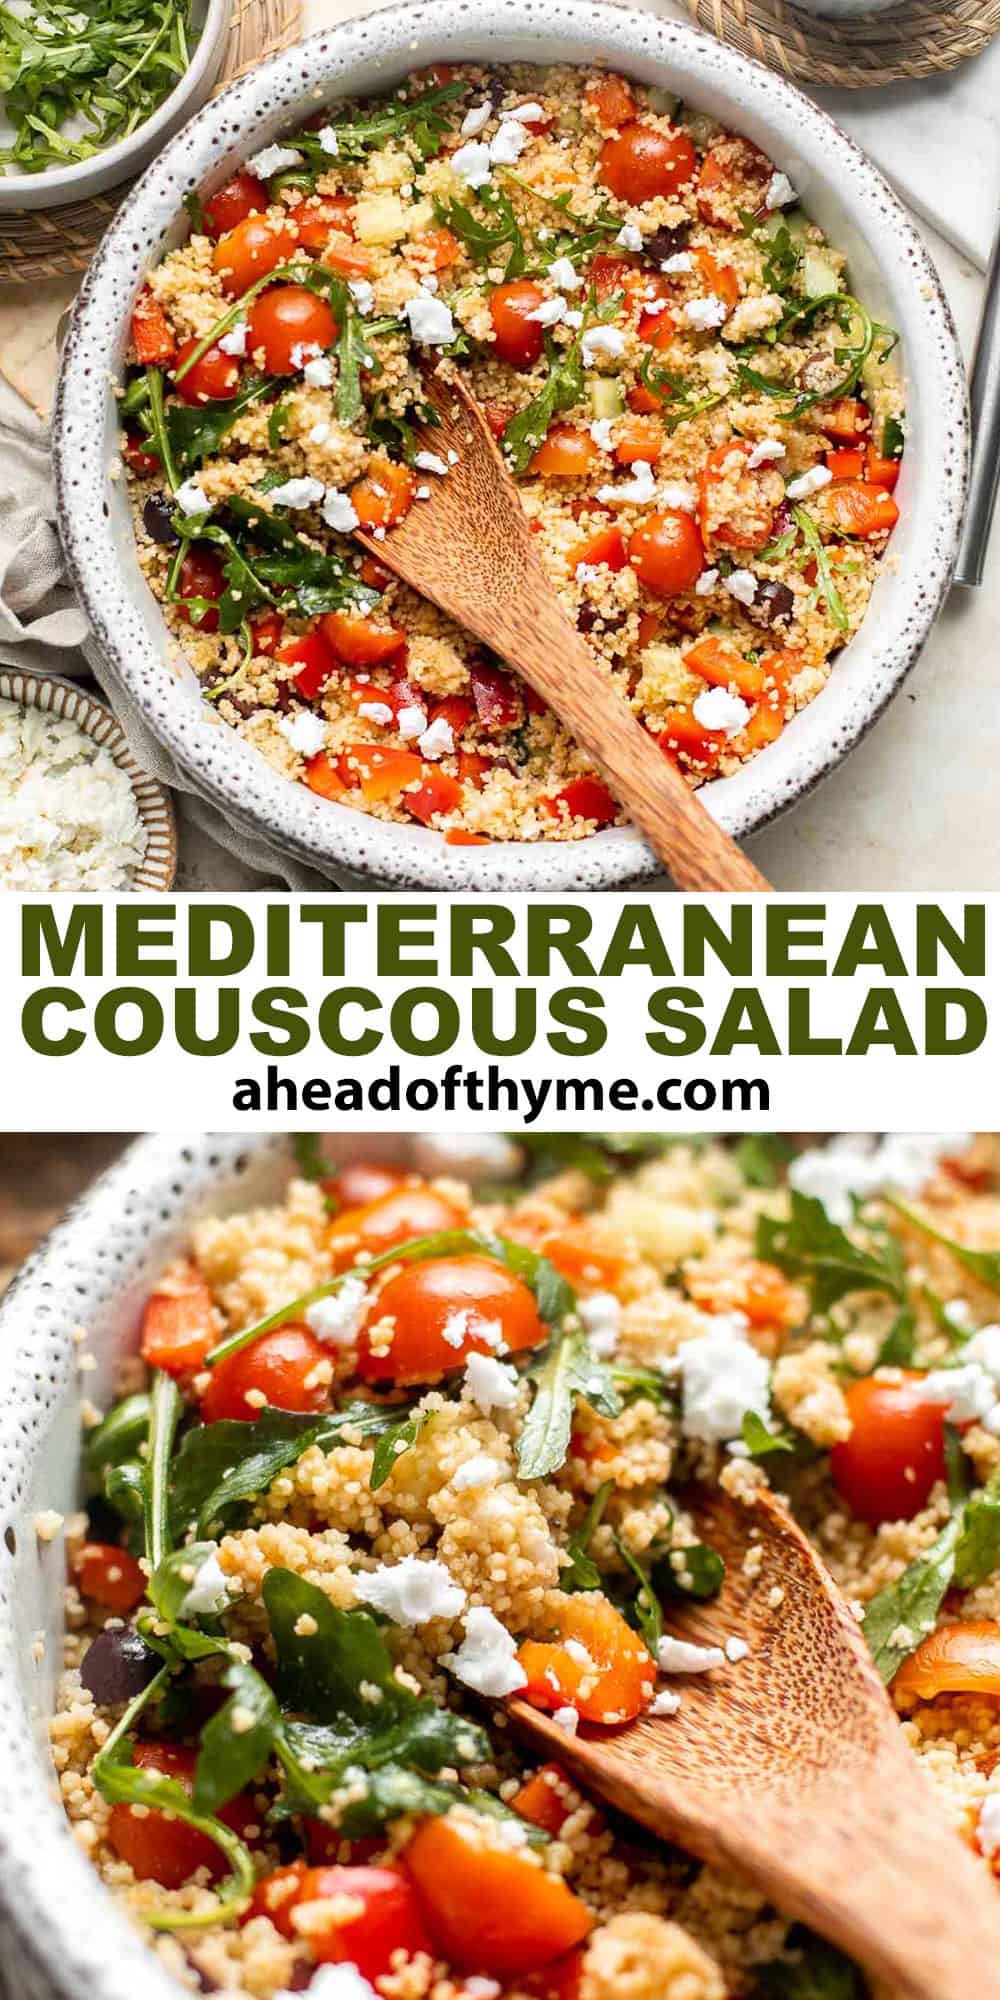
Mediterranean Couscous Salad
Mediterranean Couscous Salad is a healthy, flavorful, and easy to make salad that you need to try this season. It's packed with Mediterranean ingredients including couscous, fresh veggies, and feta cheese all tossed in a tangy homemade vinaigrette dressing.

This nourishing couscous salad takes only half an hour to make from start to finish, making it the perfect go-to dish for when you need something fresh and fast! Serve it for a quick lunch or light dinner - or add it to your meal prep list for delicious lunches throughout the week.
Why You'll Love this Mediterranean Couscous Salad
- Packed with veggies. Cherry tomatoes, bell peppers, cucumbers, olives, garlic, and arugula make this Mediterranean couscous salad just as healthy as it is delicious.
- Super versatile. This flavorful couscous salad is great on its own as a light lunch or dinner or as a stunning side dish in a larger meal! It's also simple enough to eat any day of the week and delectable enough for special occasions, too.
- Easy to make. Mediterranean couscous comes together in just 30 minutes with a few simple steps: make the couscous, chop the veggies, make the vinaigrette, and assemble! It really couldn't be easier.
- Great for meal prep. This couscous salad with a filling vegetarian meal that stores really well (in fact it may even taste better the next day!) - so it's perfect to meal prep for a healthy work lunch. It's healthy, nourishing, and keeps you full.
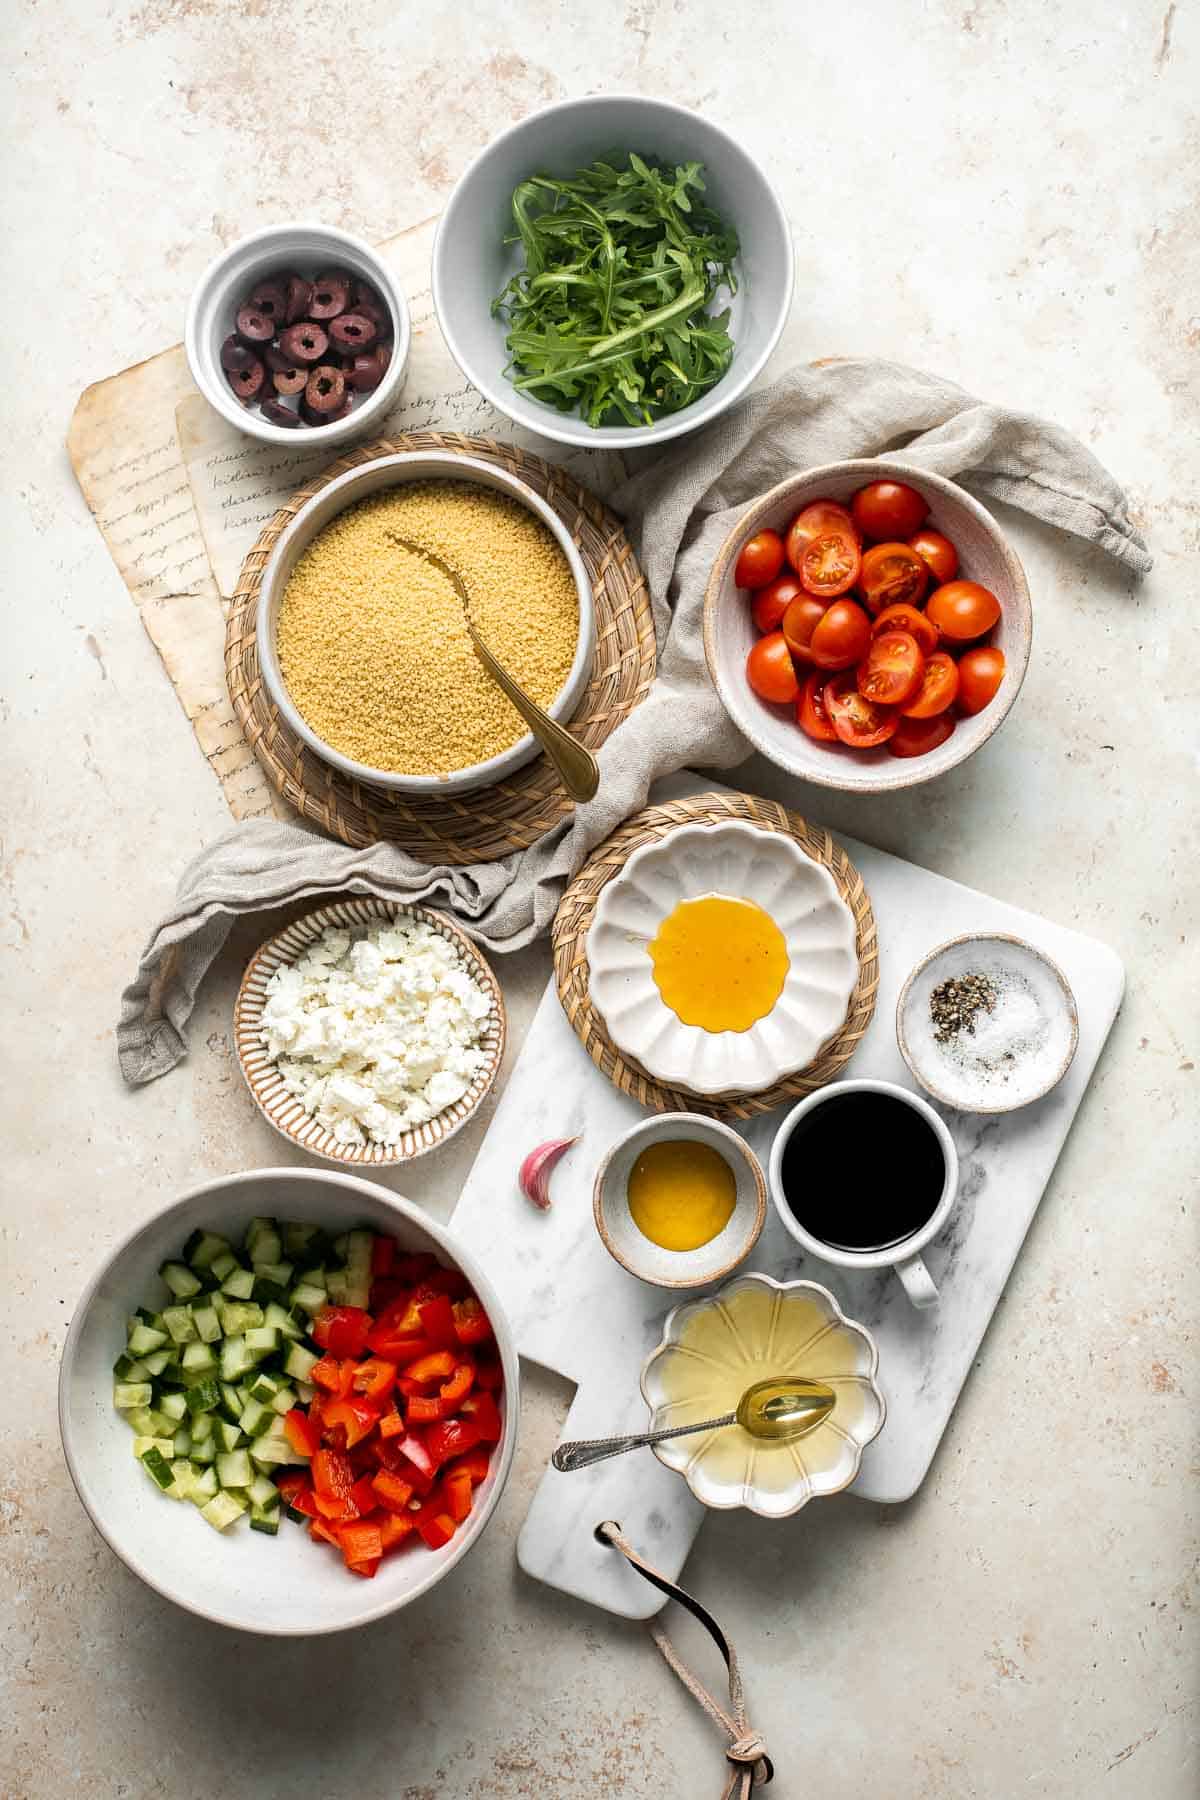
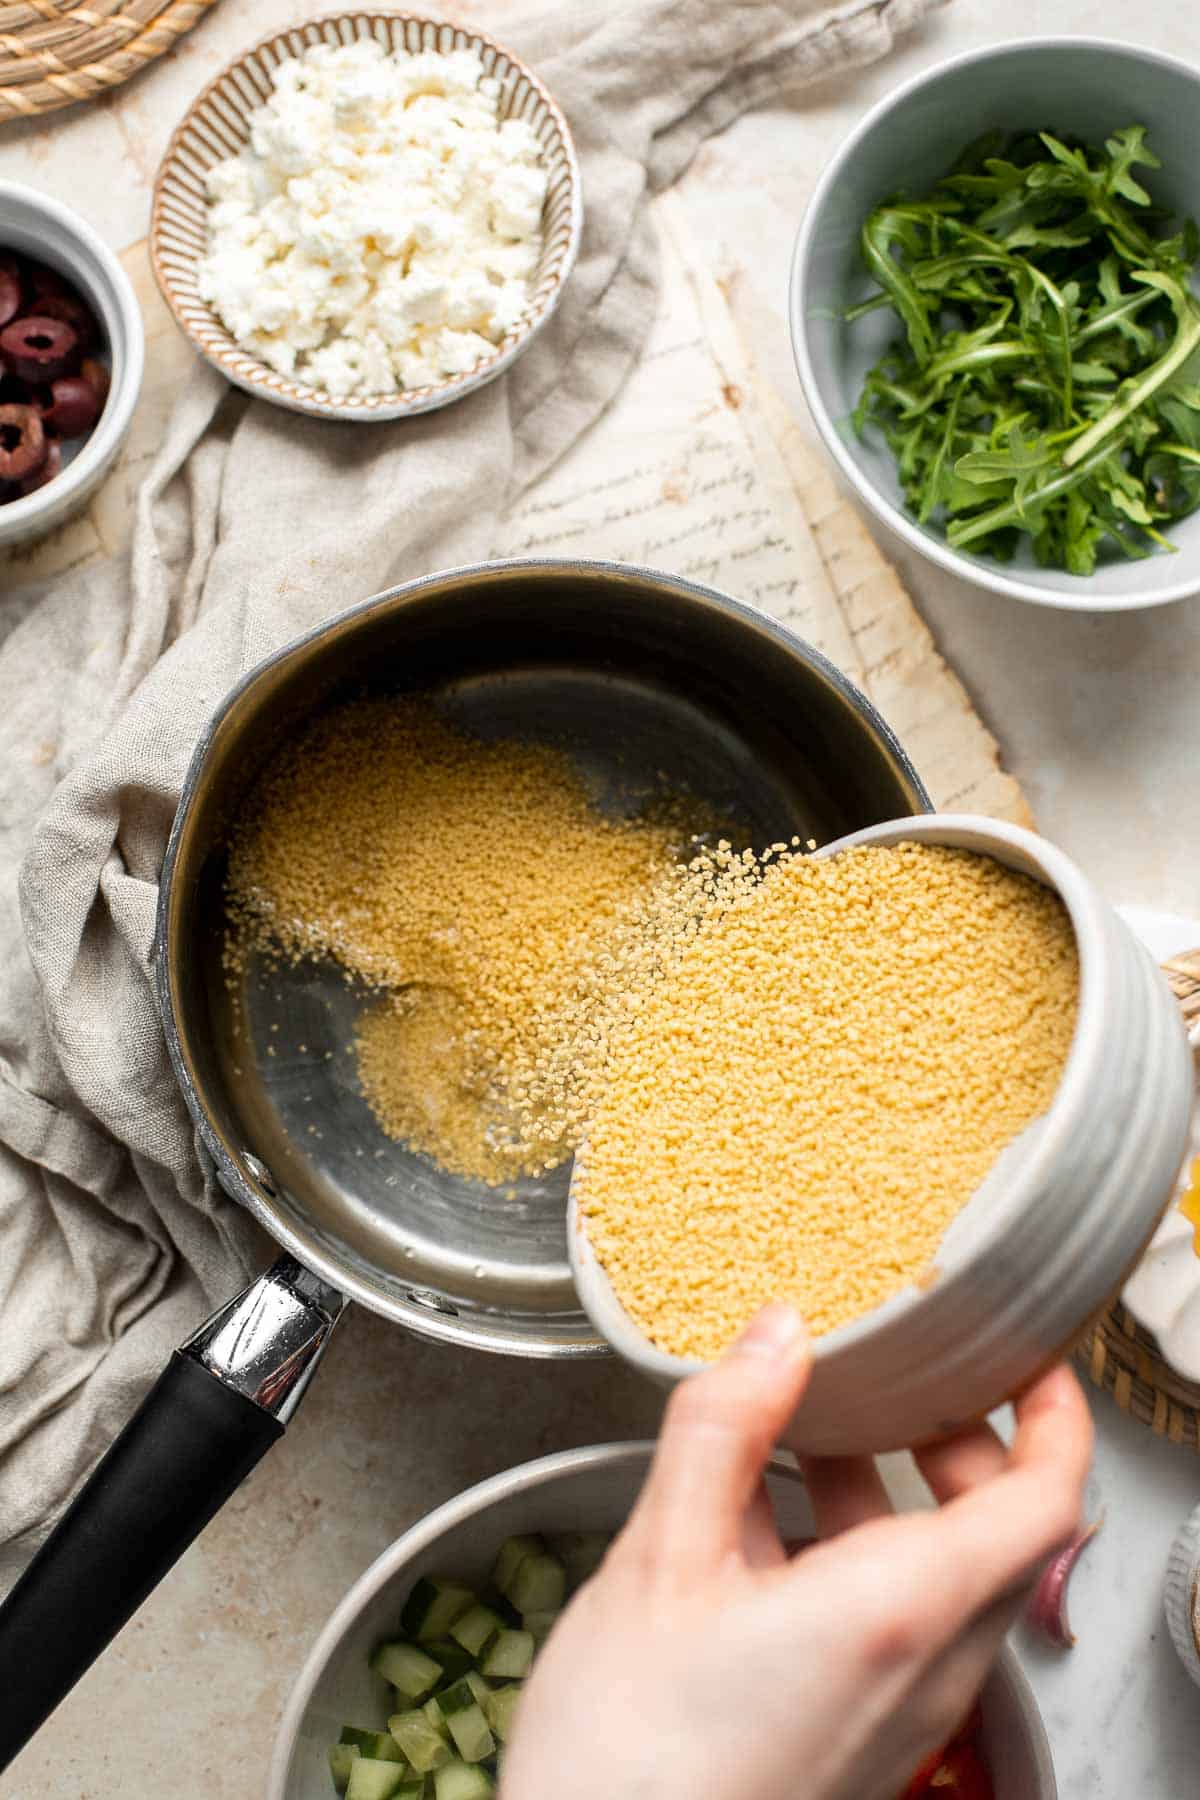
Ingredient Notes
To make this delicious Mediterranean Couscous Salad, you will need the following ingredients (full measurements in recipe card below):
- couscous - you can use your favorite couscous such as Moroccan, Israeli or pearled couscous. You will also need water, olive oil, and salt to cook the couscous in. Avocado oil or vegetable oil can also be used instead.
- cherry tomatoes - if you don't have cherry tomatoes, use grape or plum tomatoes instead. You can also cut a large tomato into one-inch pieces.
- arugula - We often use baby spinach if we don't have spinach but you can substitute with any salad greens that you like. Try kale romaine lettuce, or mixed greens.
- red bell pepper - yellow or orange bell pepper would work if you don't have red bell pepper available, but green bell pepper may change the flavor slightly (but it works too).
- English cucumber - any kind of cucumber would work, but we think English cucumbers are the best for this recipe as they're slightly sweet and not as seedy as other varieties.
- kalamata olives - or swap for your favorite type of olive.
- feta cheese - you can also try a firm goat cheese or crumbled tofu in place of the feta.
- balsamic vinegar - if you don't have balsamic vinegar on hand, you can use the same amount of red wine vinegar or apple cider vinegar.
- olive oil - avocado oil or vegetable oil can also be used instead of olive oil.
- garlic - you can swap 1 fresh garlic clove for 1 teaspoon of minced garlic.
- dijon mustard - a brown or stone-ground mustard would also work.
- honey - an equal measure of maple syrup would work, but the flavor will be altered a bit.
- salt and pepper
You will also need measuring cups and spoons, mixing bowl, and serving bowl.
How to Make the Best Mediterranean Couscous Salad
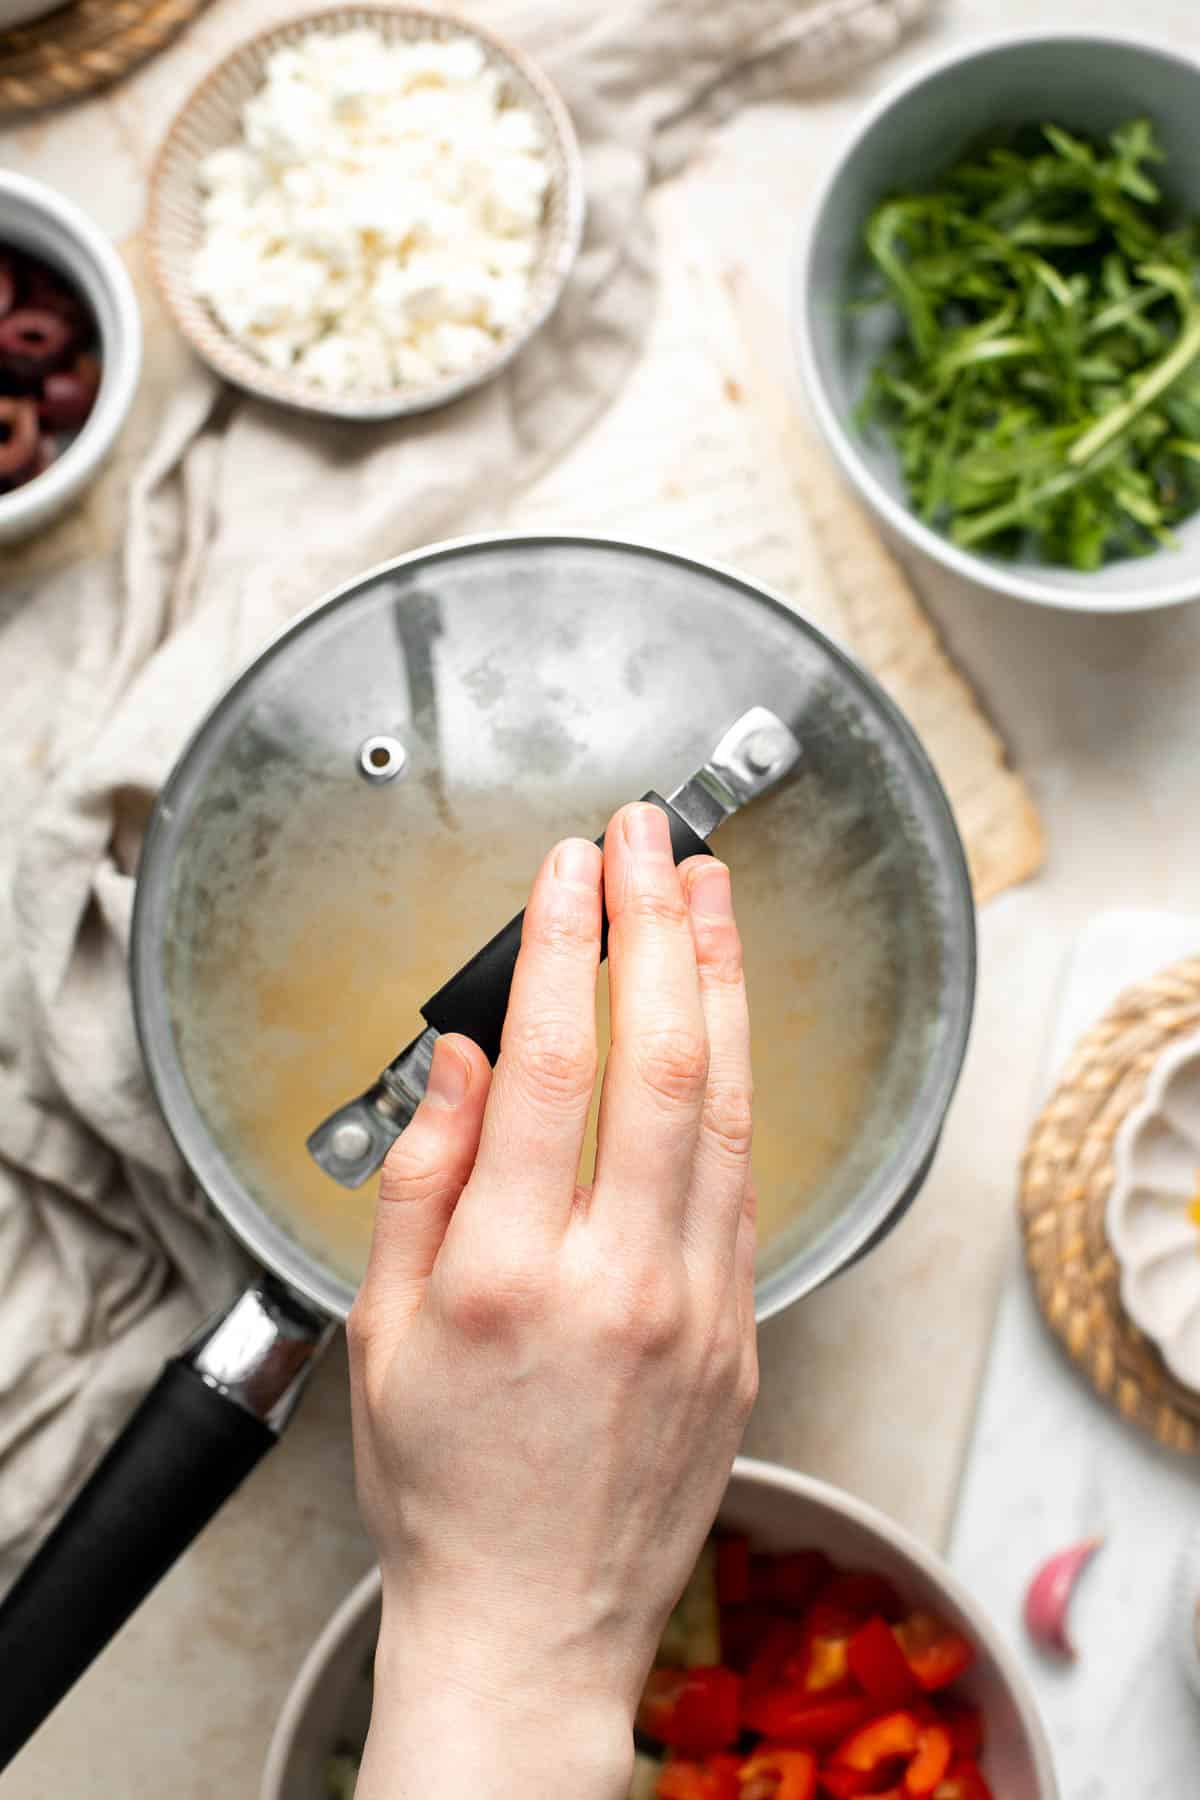
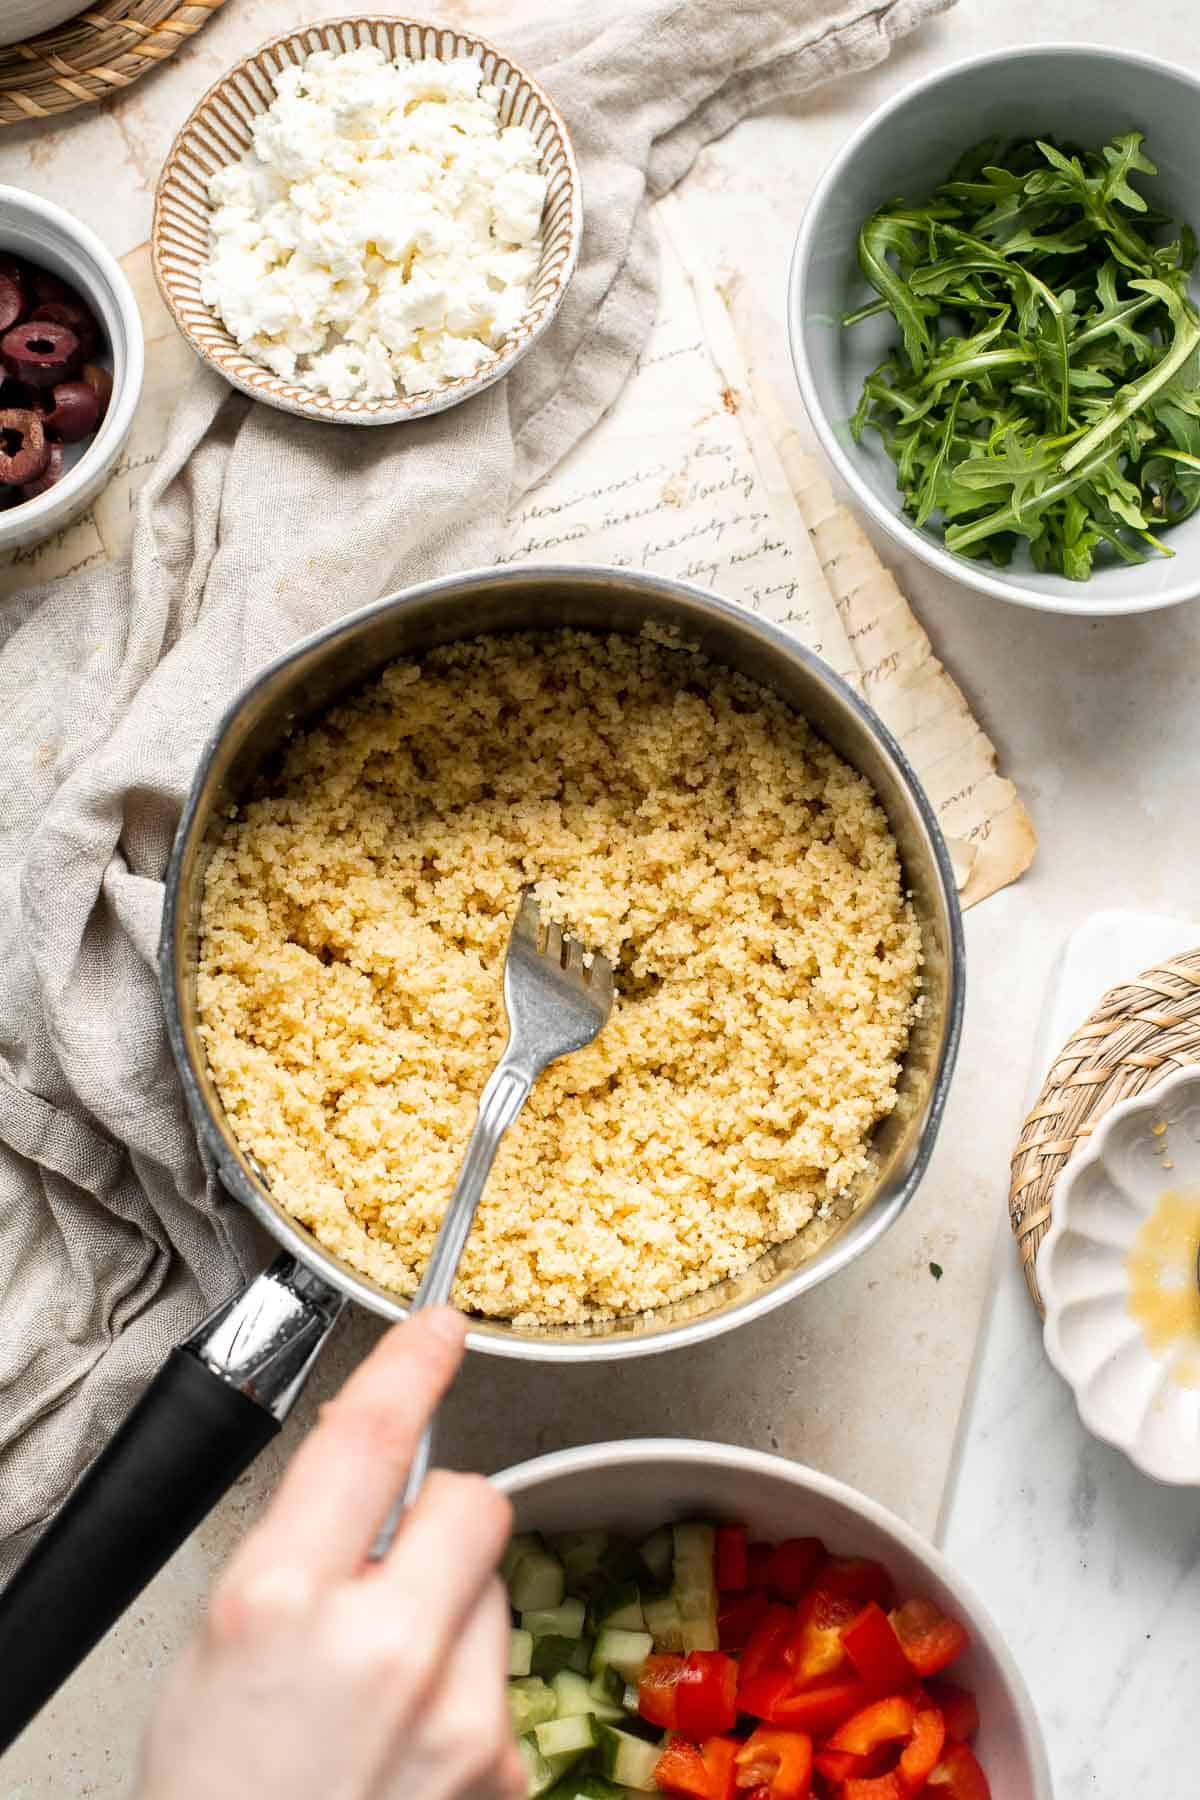
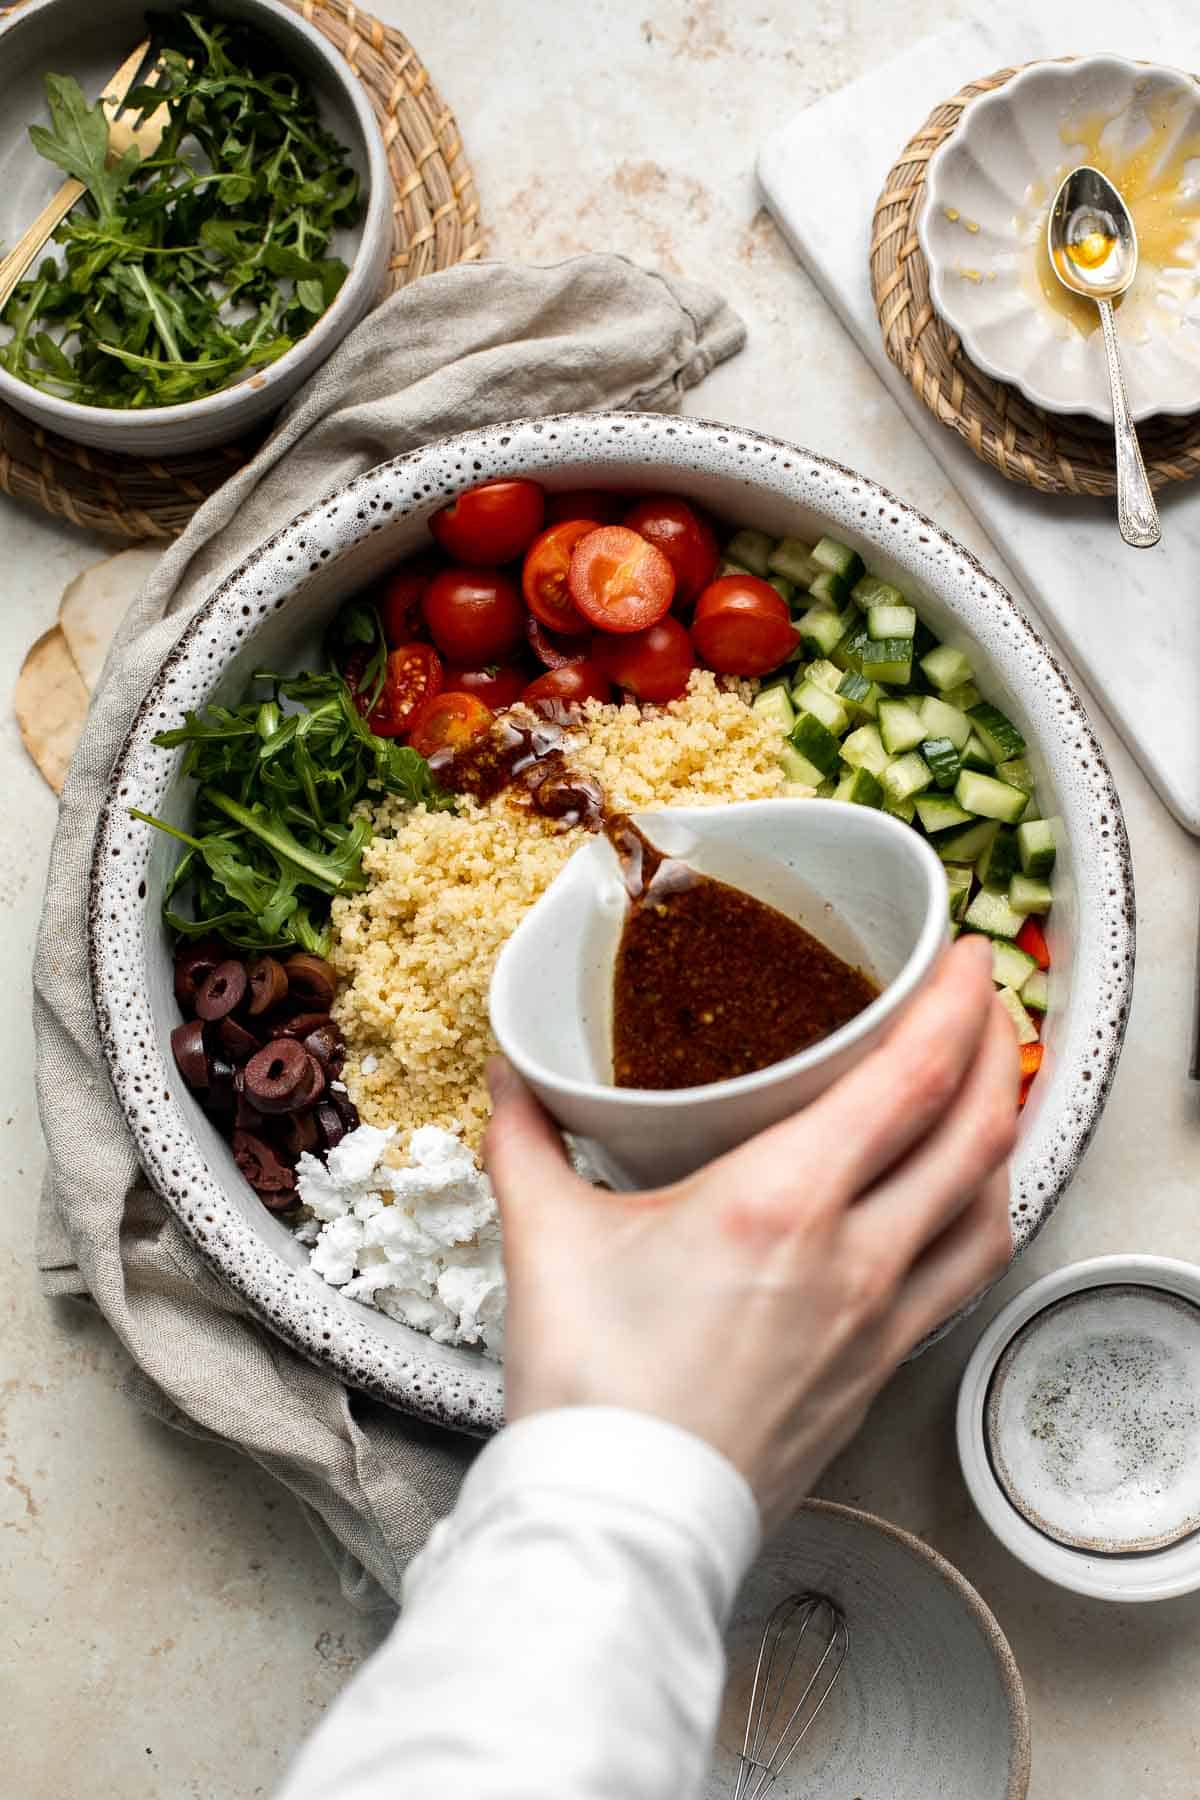
- Cook the couscous. In a medium saucepan, bring the water, salt, and oil to a boil over medium high heat, about 3-4 minutes. Turn off the heat, stir in the couscous, and close the lid. Let the couscous steam for 5 minutes. Use a fork to fluff the couscous and break up any clumps. Set aside and let cool to room temperature, about 15 minutes.
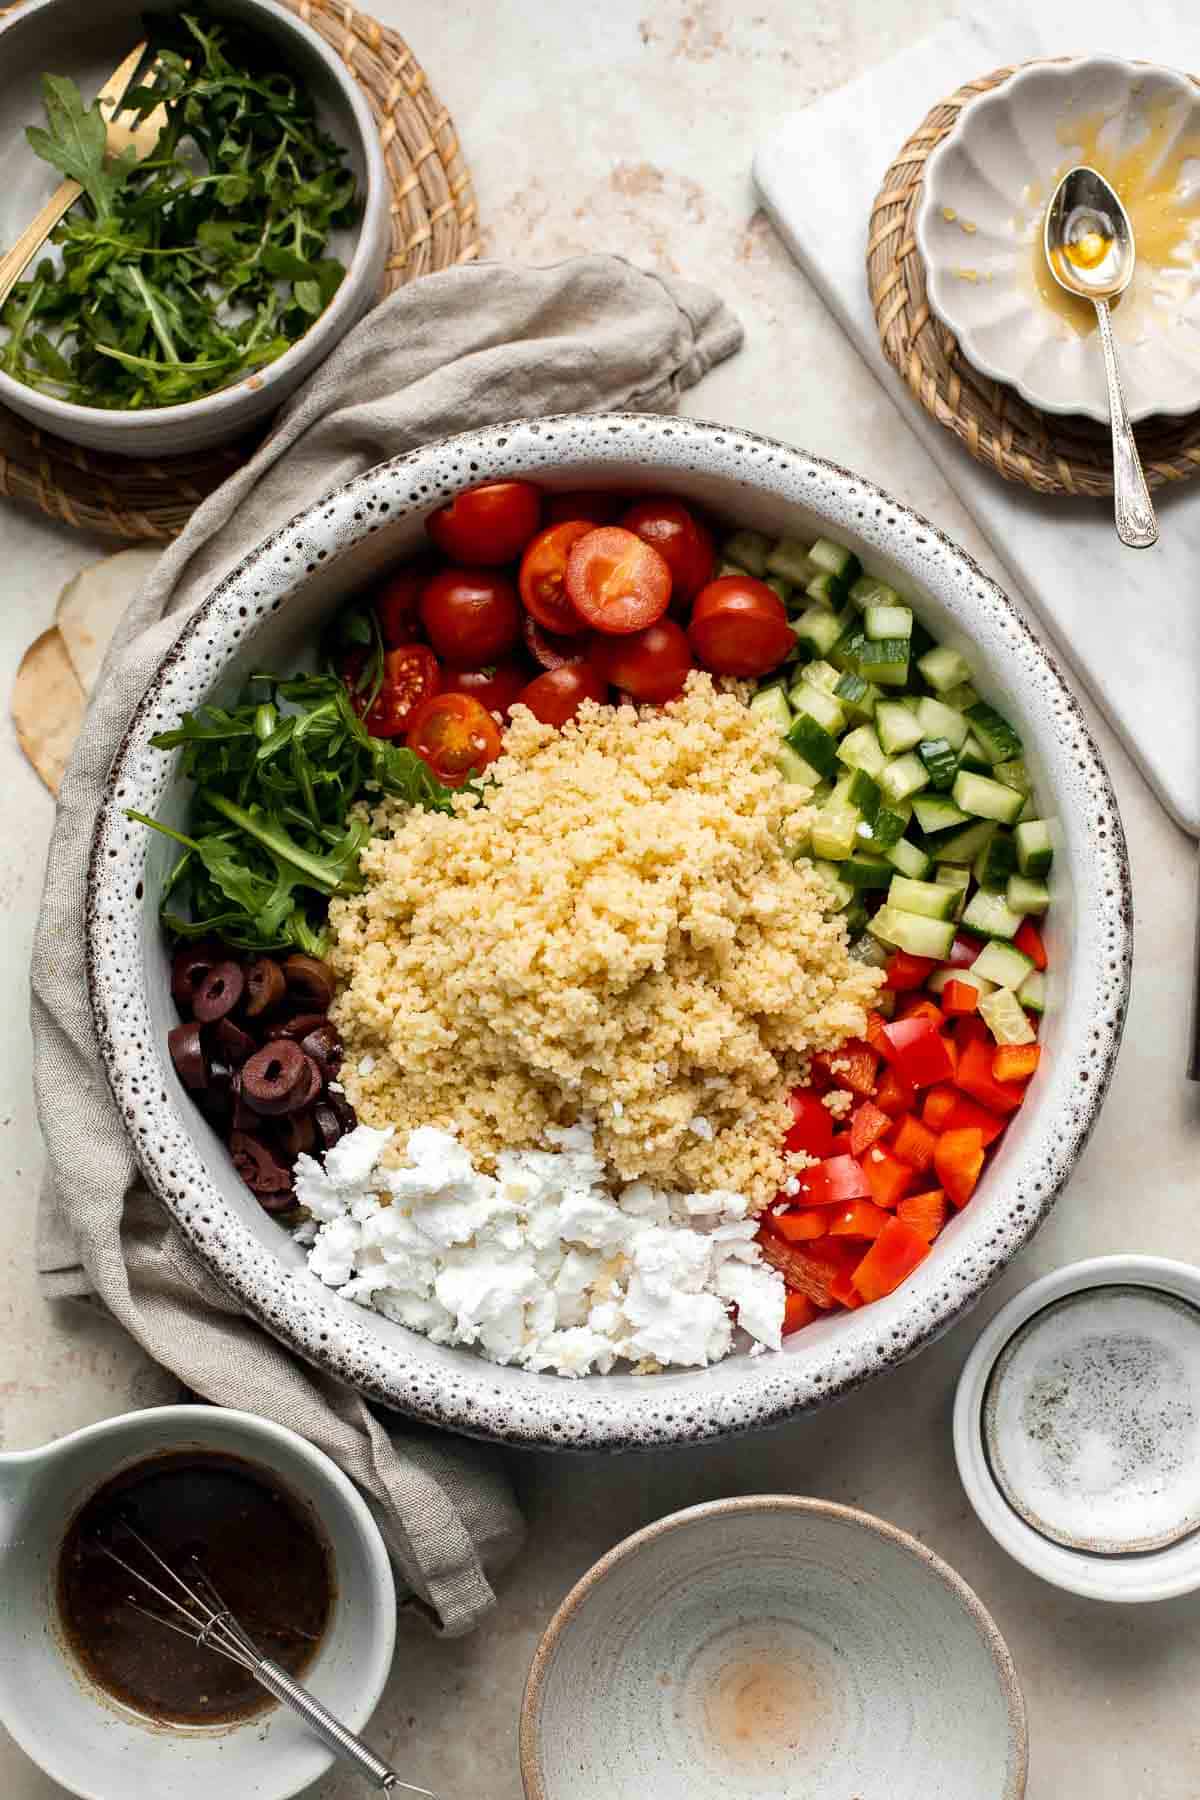
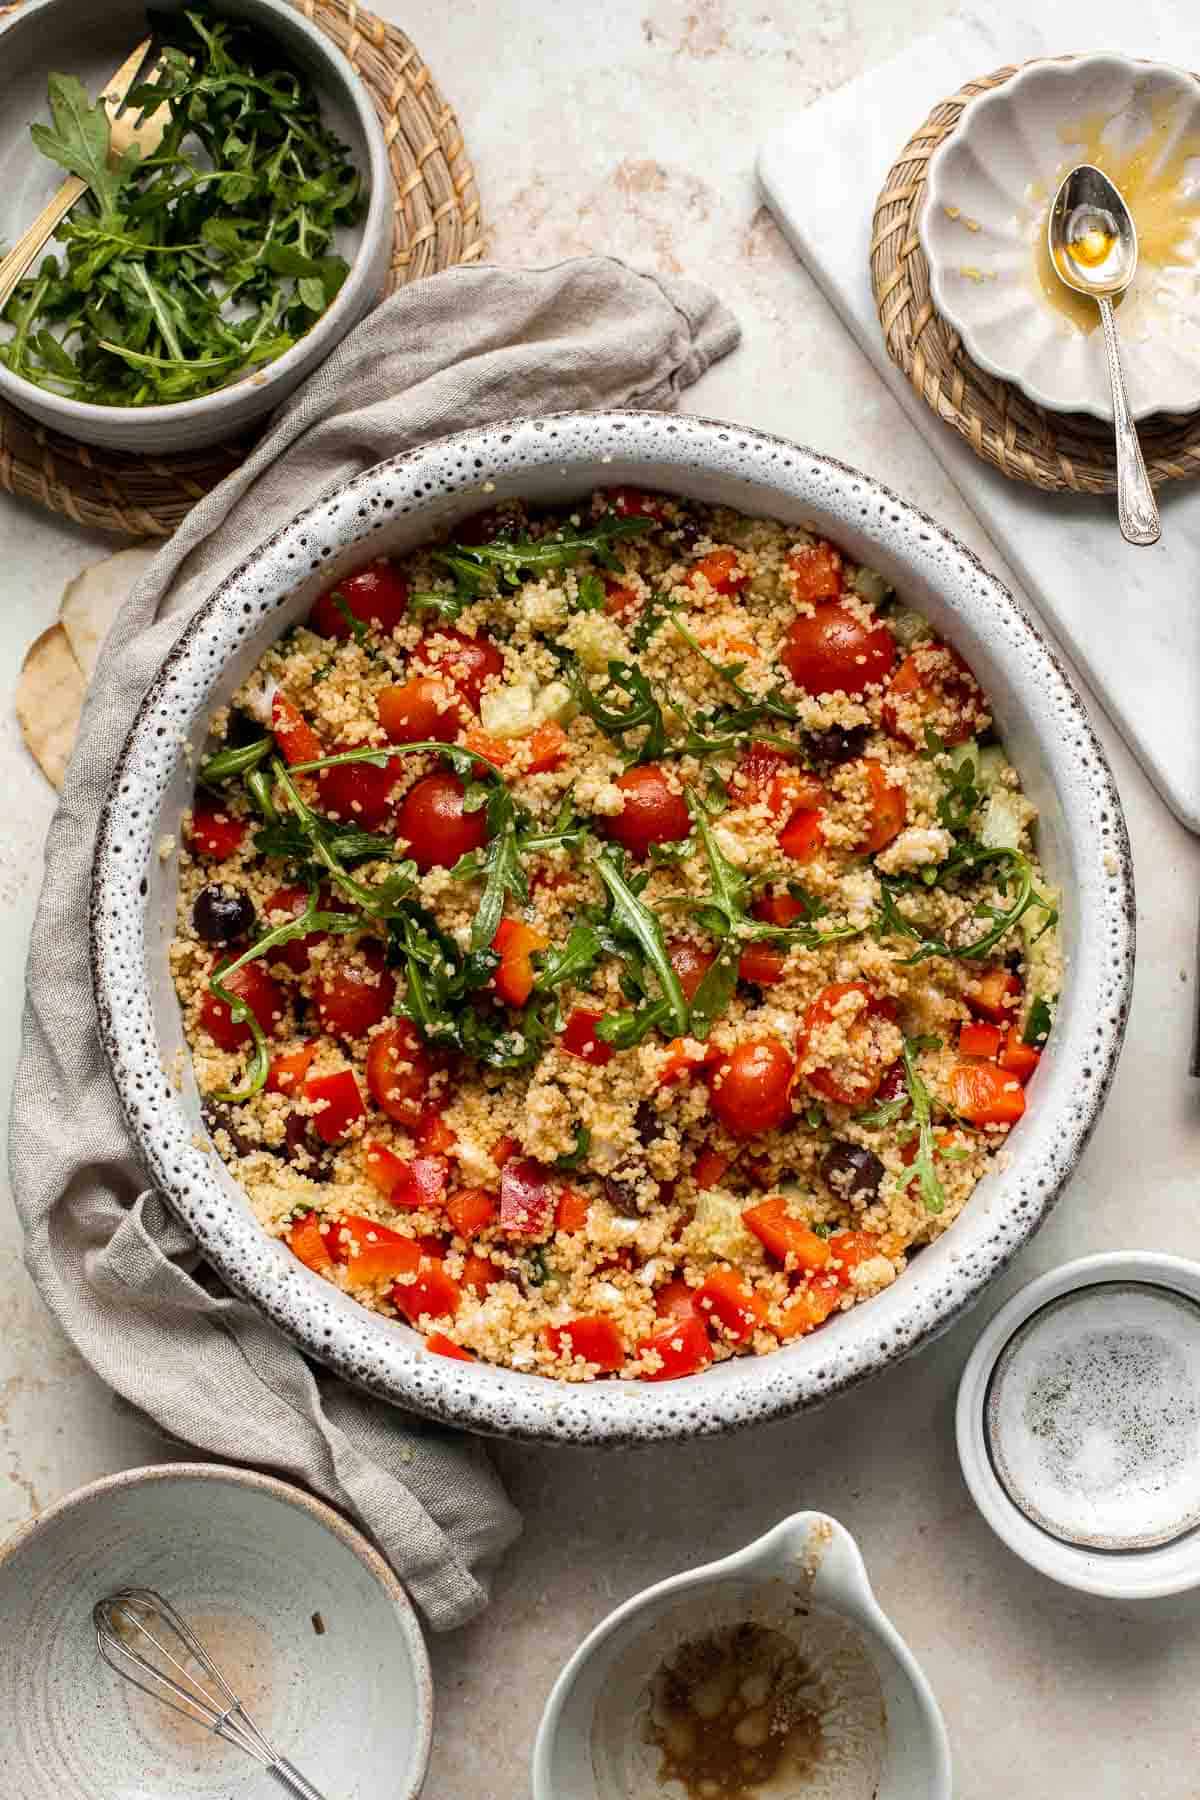
- Assemble the salad. In a large serving bowl, add the cooked couscous, cherry tomatoes, arugula, bell pepper, cucumber, olives, and feta cheese.
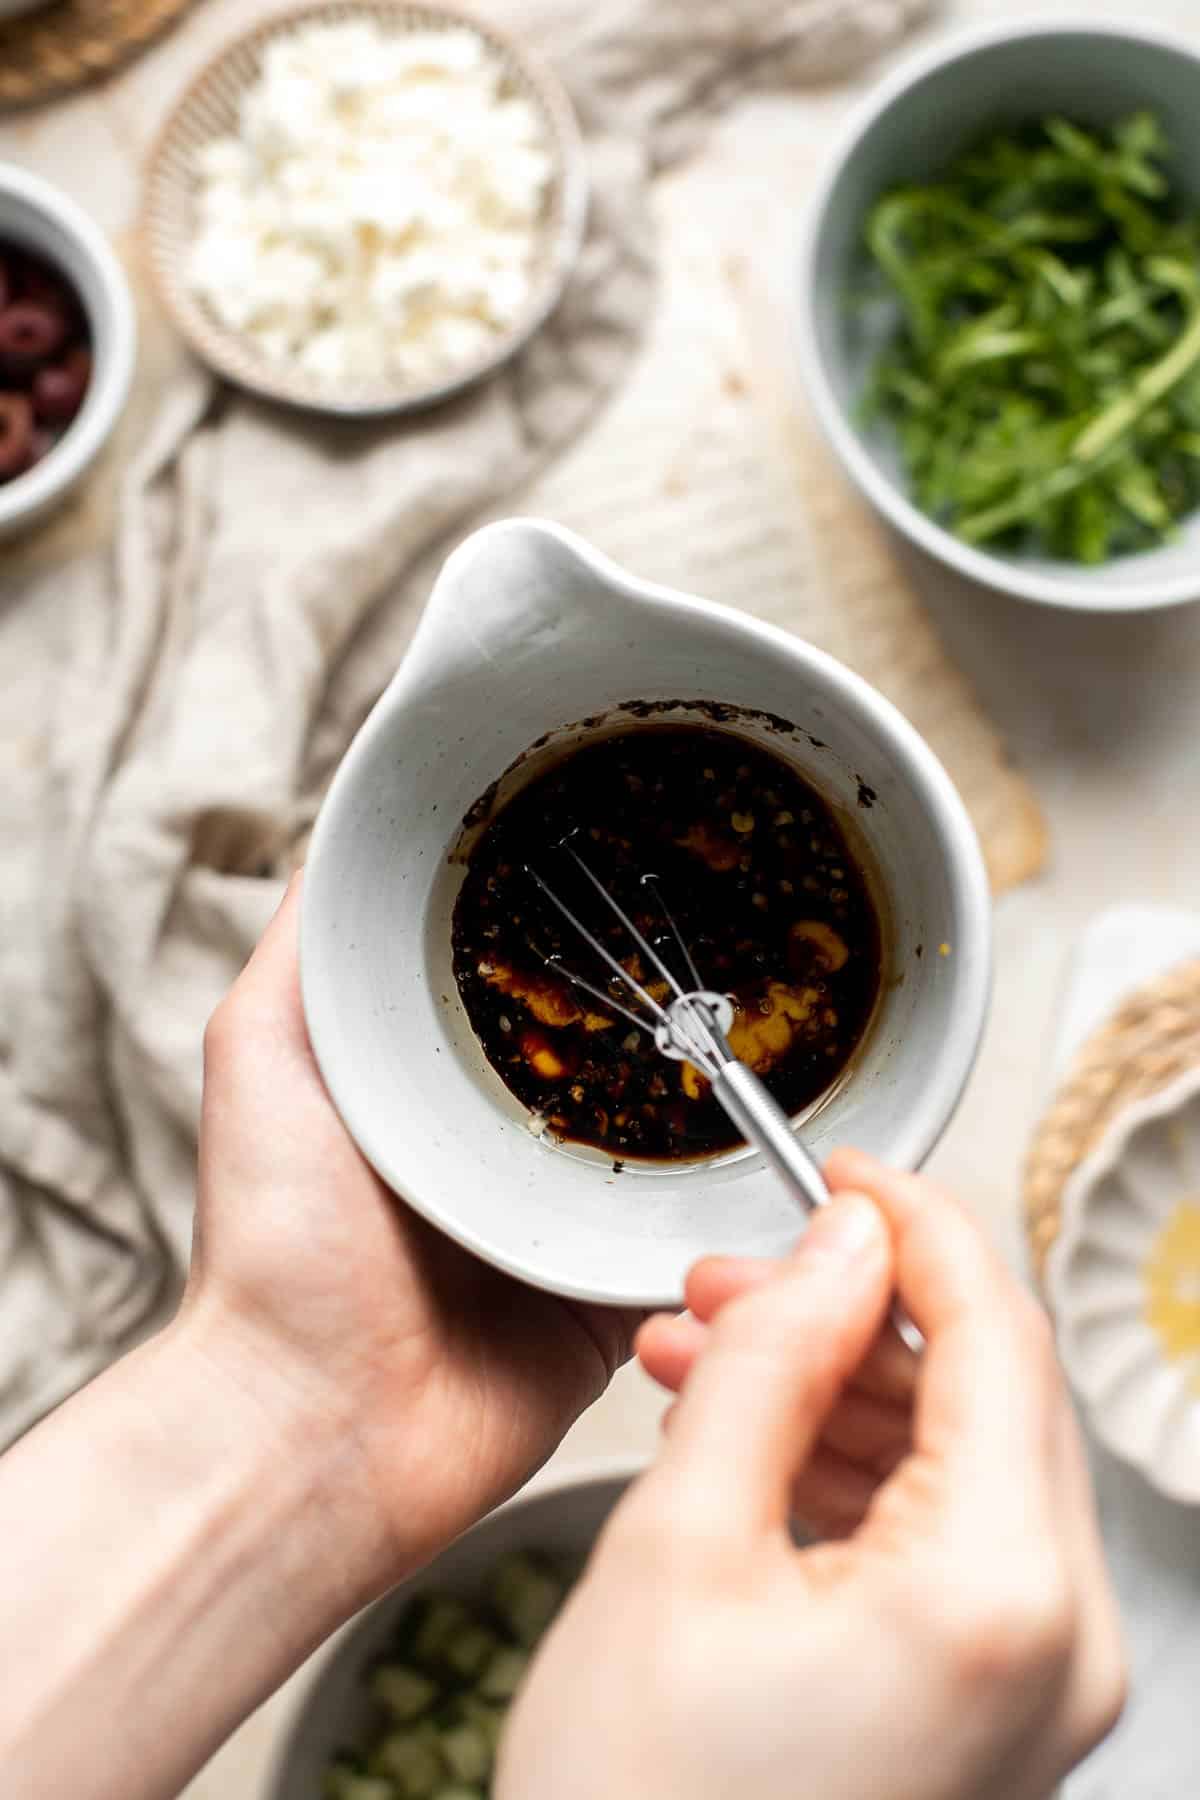
- Make dressing. In a small mixing, whisk together balsamic vinegar, oil, garlic, dijon mustard, honey, salt, and pepper until smooth.
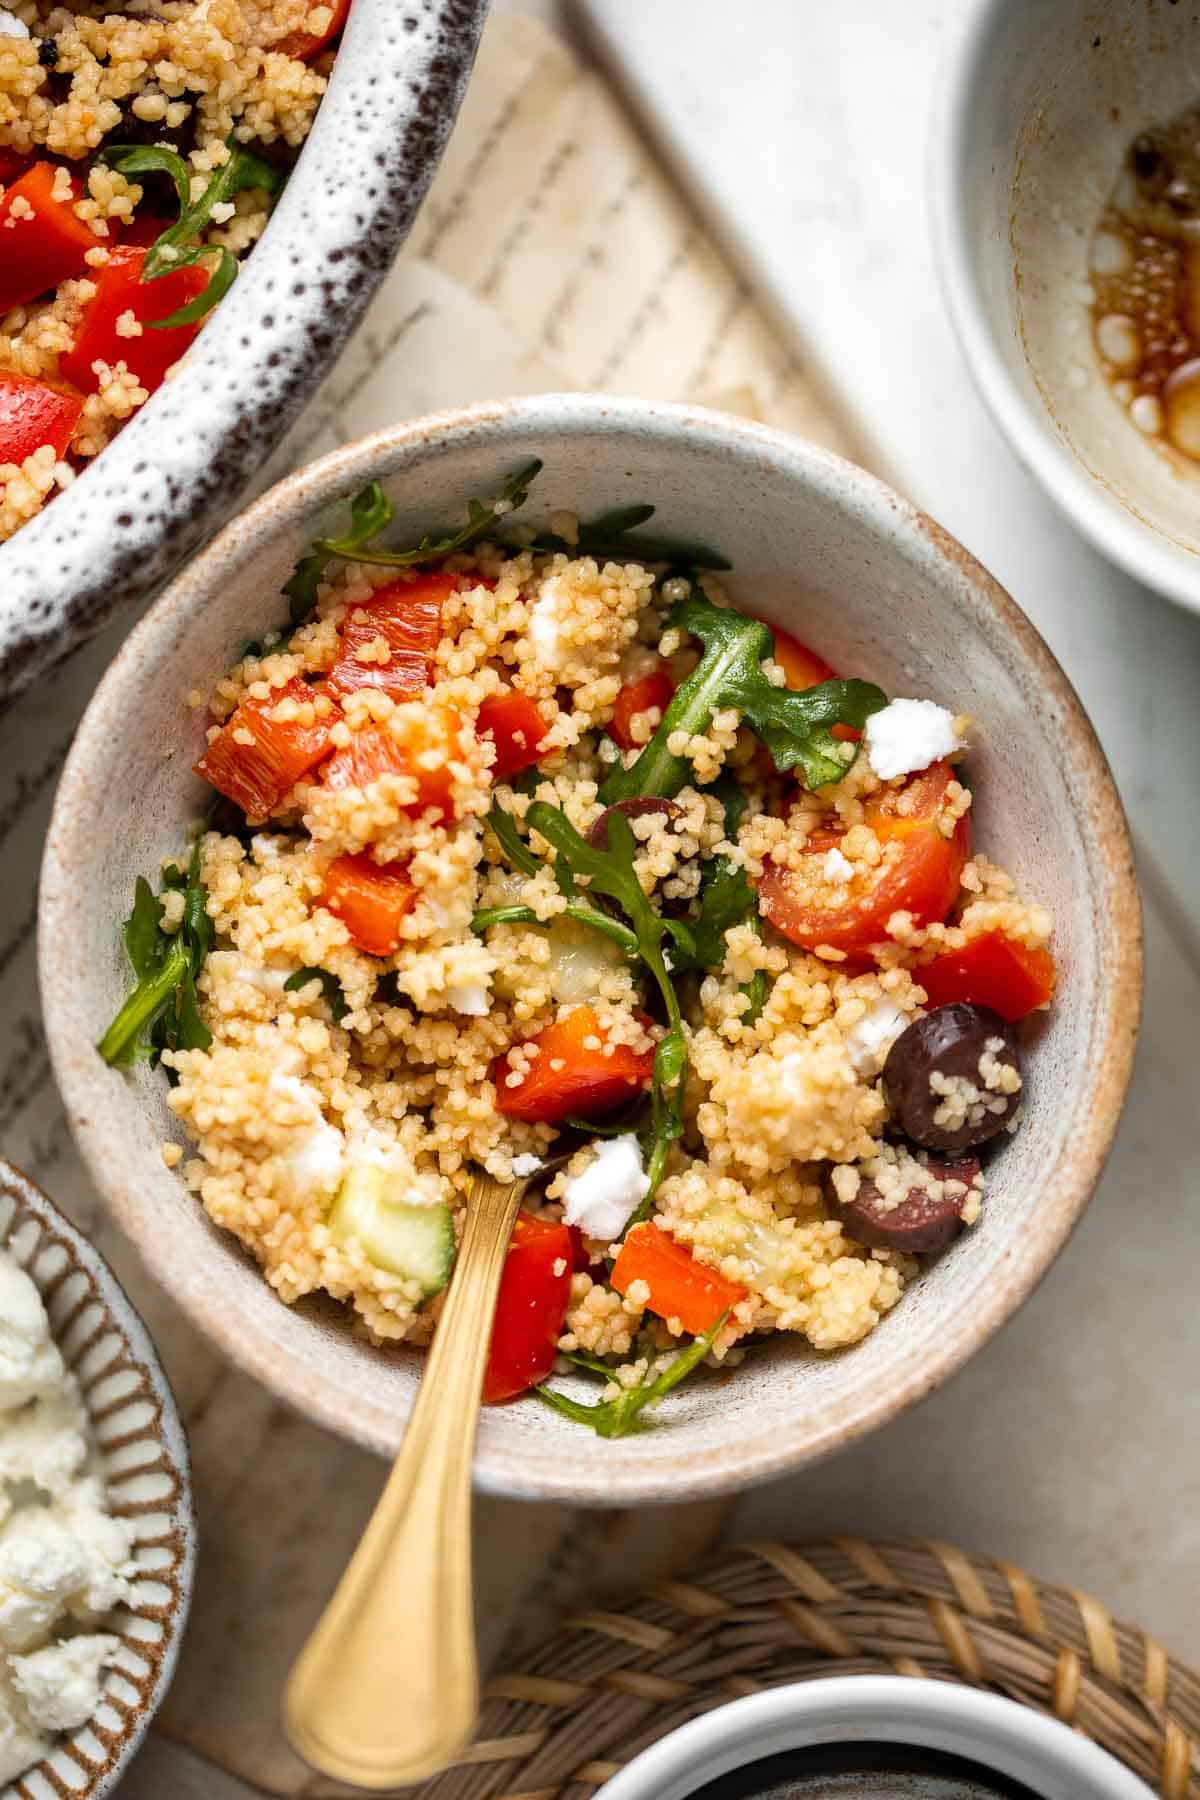
- Toss and serve. Pour the vinaigrette dressing over the salad and toss well to coat. Serve immediately or let the salad sit for up to 30 minutes to allow the flavors to infuse into each other.
Recipe Tips and Tricks
- Fluff the couscous. Fluff the couscous before adding it to the salad to prevent clumping.
- Let it sit. You can serve this couscous salad immediately, or let it sit in the refrigerator for at least 30 minutes to allow the flavors to infuse into eachother.
- Add a protein. Make this salad even more filling than it already is by adding in a protein such as chickpeas, grilled chicken, or seafood.
- Make ahead for easy serving. This is an ideal dish to make a few hours or even a whole day ahead of serving. Many people even think that Mediterranean couscous salad is even better as leftovers because the flavors deepen when they marinate overnight! Just give it a quick toss before serving.
How to Serve
While this tangy Mediterranean Couscous Salad is super satisfying on its own, you can make it go a little farther when feeding your family by pairing it with a simple baked or grilled protein for a well-rounded meal. Try chickpeas, chicken, beef, lamb, or fish.
Some of our favorite Mediterranean entrees and sides to serve with this are:
- Balsamic Chicken Kebabs
- Falafel
- Stuffed Eggplant
- Greek Salmon
- Baked Greek Chicken Breast
- Garlic Butter Shrimp
- Mediterranean Chicken Patties
- Greek Souvlaki Lamb Skewers
Storing and Freezing Instructions
How to Store
Transfer leftover couscous into an airtight container and refrigerate it for 4-5 days.
How to Freeze
You can freeze this Mediterranean couscous salad in a freezer safe container for up to 3 months, though some of the vegetables may change in texture once frozen and thawed. It is best to freeze just the couscous undressed. Then, thaw the couscous overnight in the refrigerator, add your veggies, and toss in the dressing.
More Mediterranean Salad Recipes
- 40 Best Salad Recipes
- Mediterranean Orzo Pasta Salad
- White Bean Salad
- Mediterranean Chickpea Wedge Salad
- Mediterranean Brown Rice Salad
- Buckwheat Salad
Tried this recipe?
I'd love to hear what you think! Leave a comment and rating below to share your feedback. Your reviews help others discover this recipe and help me keep creating more free recipes for you. Snap a photo and tag me on social media @aheadofthyme too.
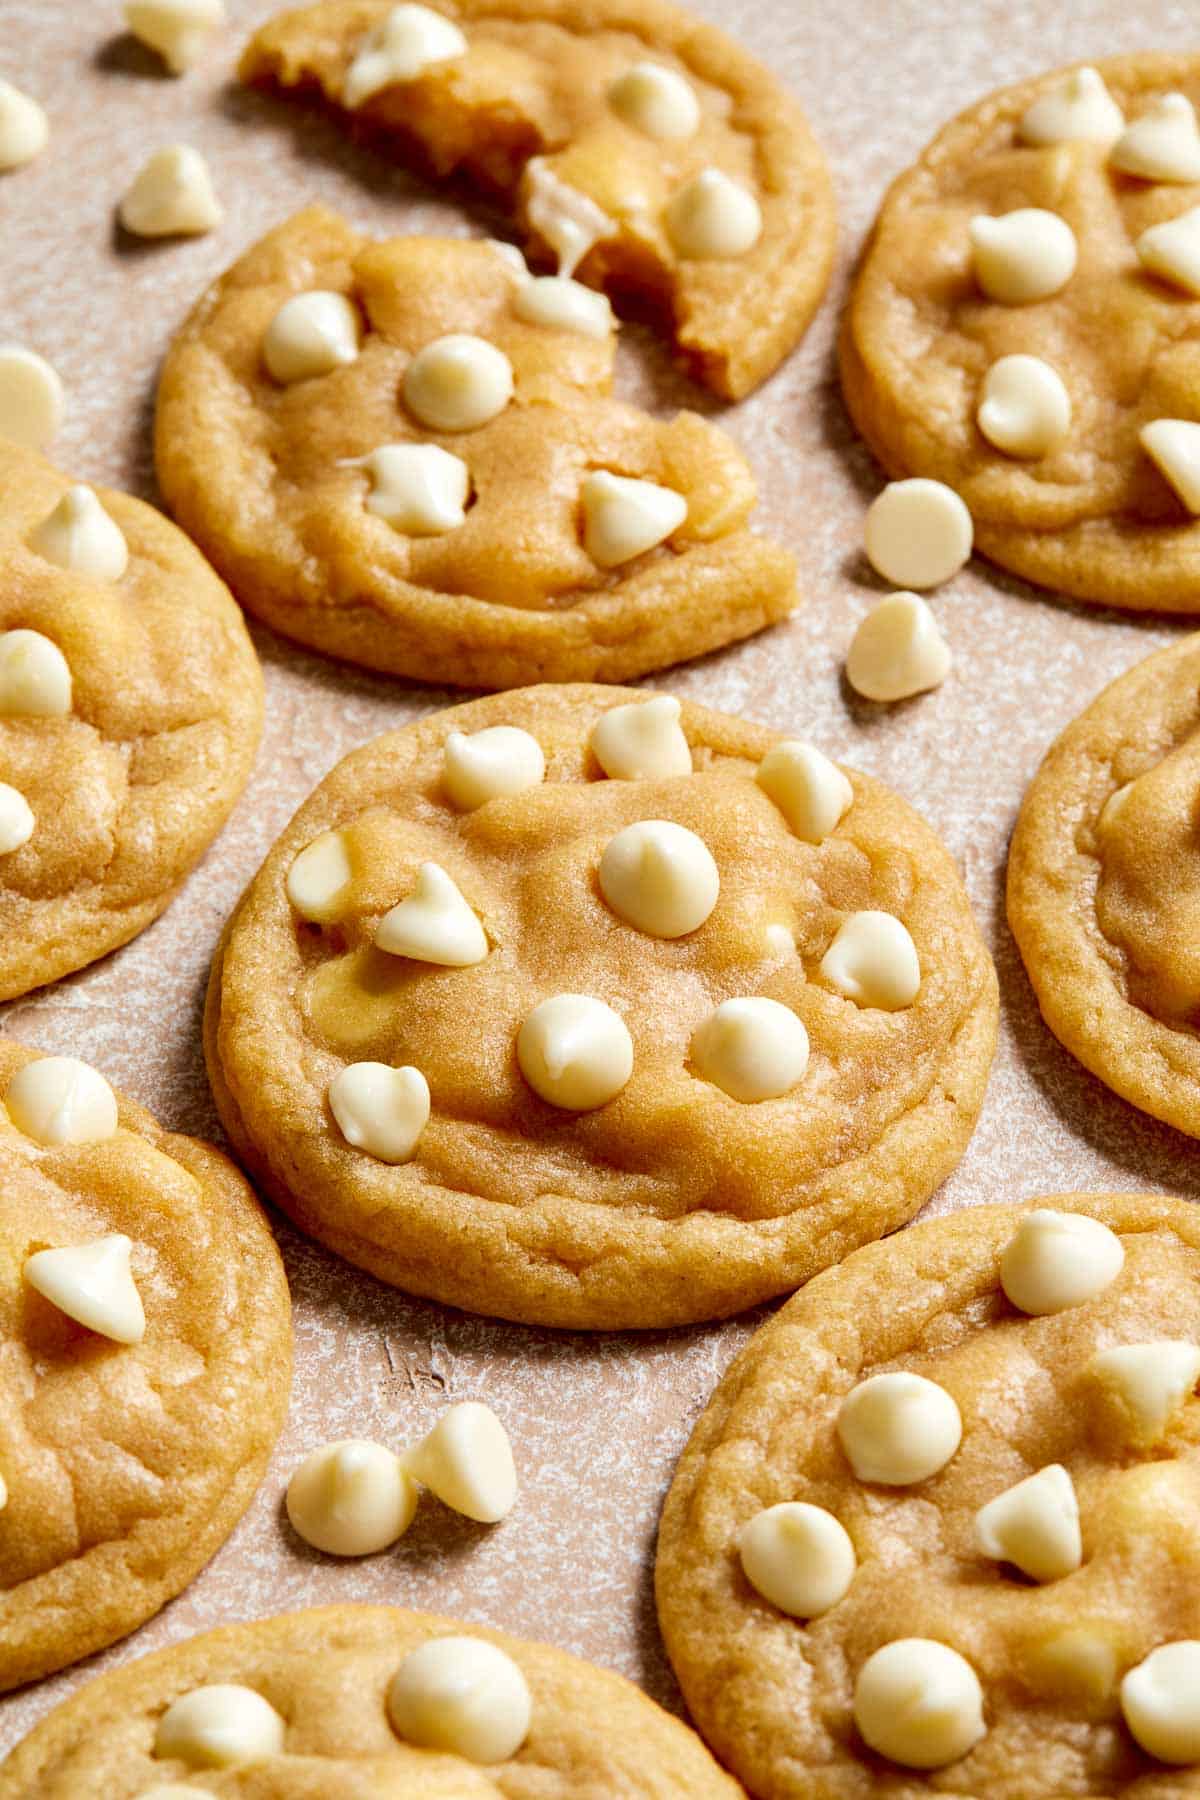
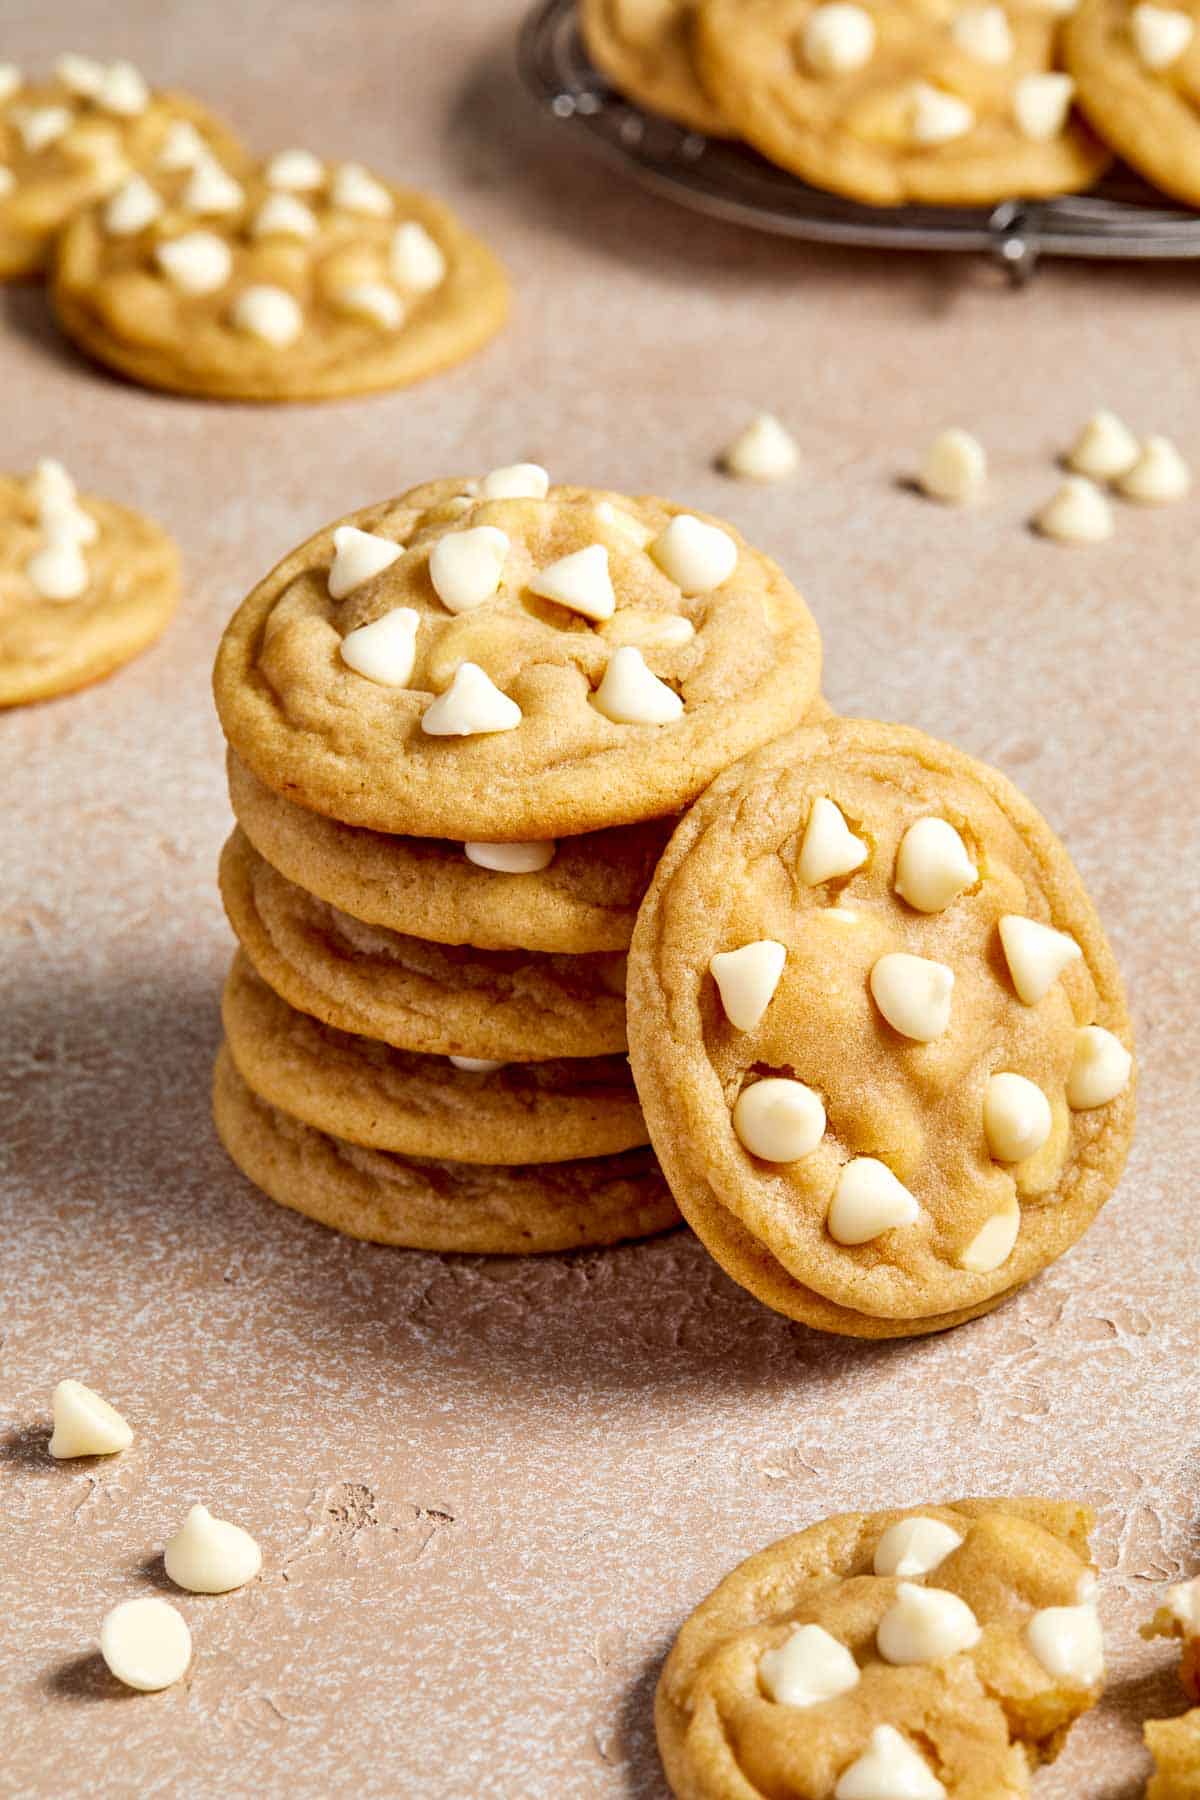
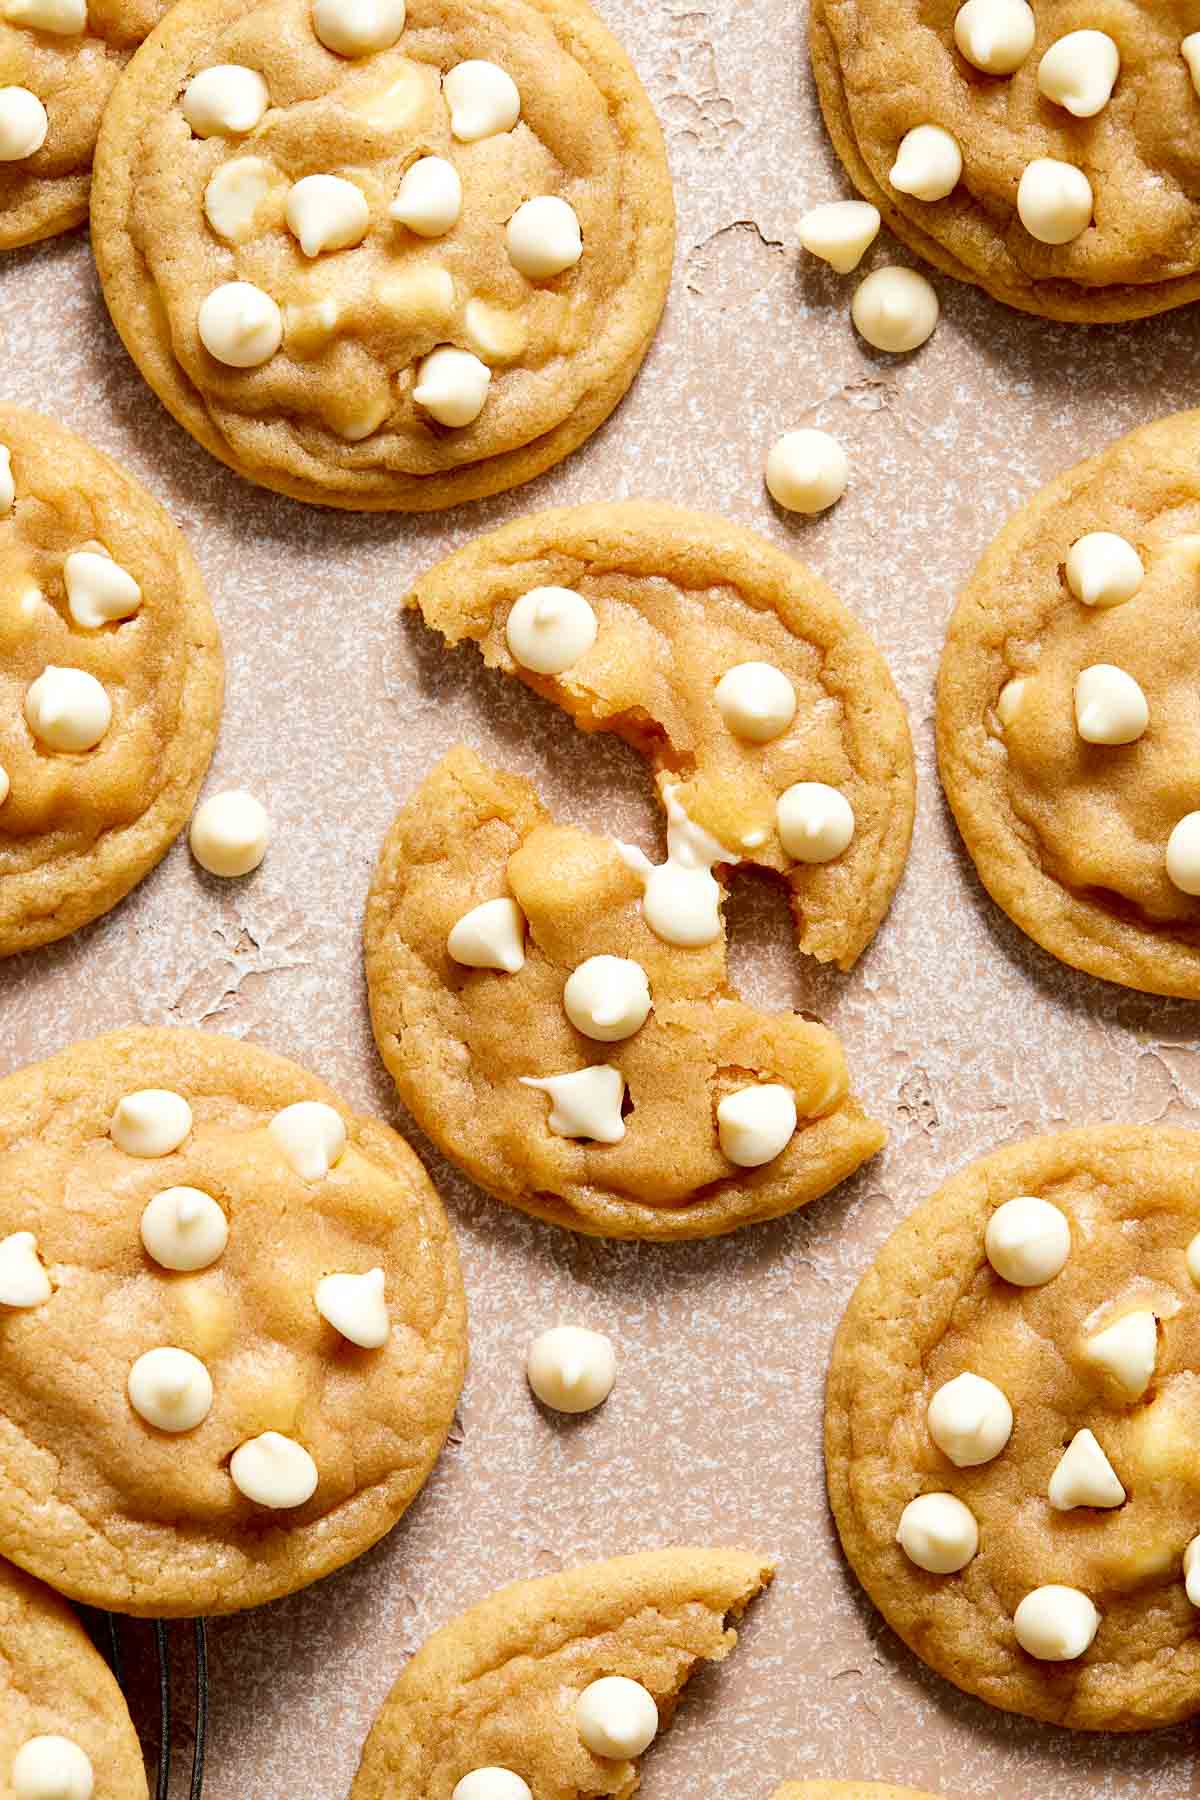
White Chocolate Chip Cookies
White Chocolate Chip Cookies are soft and chewy with perfect golden crisp edges, and loaded with gooey white chocolate chips. These easy to bake cookies are quick to make in one bowl and ready to eat in under 20 minutes - with no chilling required!
Plus, the cookie dough and bake cookies store well and are freezer-friendly so you can have a white chocolate chip cookies on demand whenever you feel like it! Serve them for a sweet breakfast, as a coffee break snack, or a dessert after dinner.
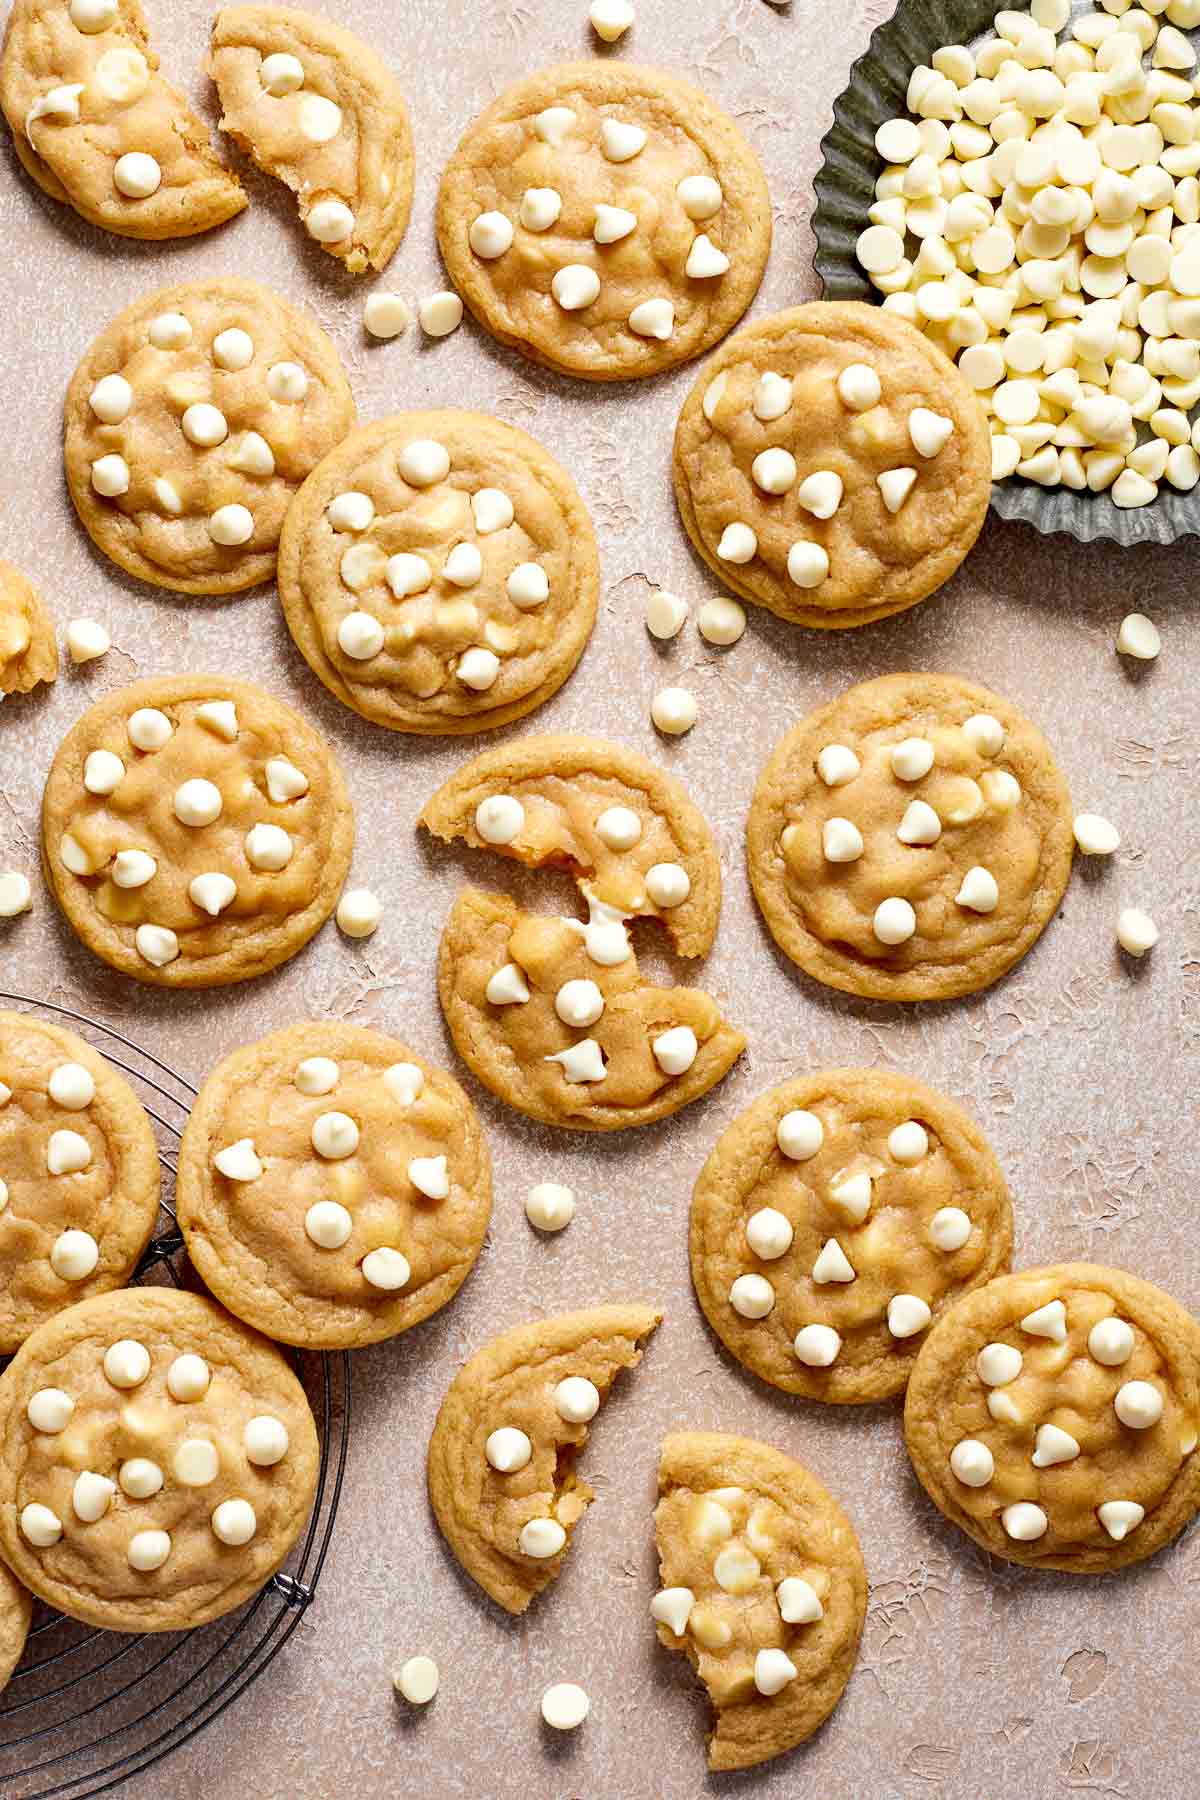
Why You'll Love these White Chocolate Chip Cookies
- Ready in under 20 minutes. These white chocolate cookies are so quick to make. It takes just a handful of minutes to whip up the cookie dough, scoop them into balls, and bake. There is no chilling required! Imagine warm freshly baked cookies straight from the oven in under 20 minutes. Perfect for a last minute dessert craving!
- Made with simple ingredients. These white chocolate cookies are made with standard baking staples that every baker will have stocked in their pantry and refrigerator including butter, eggs, sugar, vanilla, and flour.
- A twist on a classic. These easy cookies are a twist on the classic Chocolate Chip Cookie, as it's made with white chocolate instead of regular chocolate chips. The white chocolate adds a subtle sweetness and a creamy texture, and is a great option for those who prefer a sweeter cookie.
Ingredient Notes
To make these easy White Chocolate Chip Cookies, you will need the following ingredients (full measurements in recipe card below):
- butter - if you're out of unsalted butter, you can use salted butter if it's what you have on hand. Just don't add any extra salt that is called for in the recipe.
- light brown sugar - use dark brown sugar if you don't have the light version.
- granulated sugar - you can use your favorite granulated sugar or sugar substitute here, like coconut sugar, date sugar, erythritol, stevia, or monk fruit.
- eggs
- vanilla extract - vanilla bean paste can be used in place of extract at a 1:1 ratio for richer flavor.
- all-purpose flour - if you or someone in your family has a sensitivity to gluten, use a measure-for-measure gluten free flour instead. Note that the texture will be different.
- baking soda
- salt
- white chocolate chips - you can substitute use white chocolate chunks or substitute with your favorite kind of chocolate chips (semi-sweet, butterscotch, or peanut butter chips).

Baking Equipment
You will also need the following baking tools and equipment:
- measuring cups and spoons
- mixing bowls
- hand mixer or stand mixer
- cookie scoop
- half sheet baking pan and silicone baking mat (or parchment paper)
- wire cooling rack
How to Make the Best White Chocolate Chip Cookies
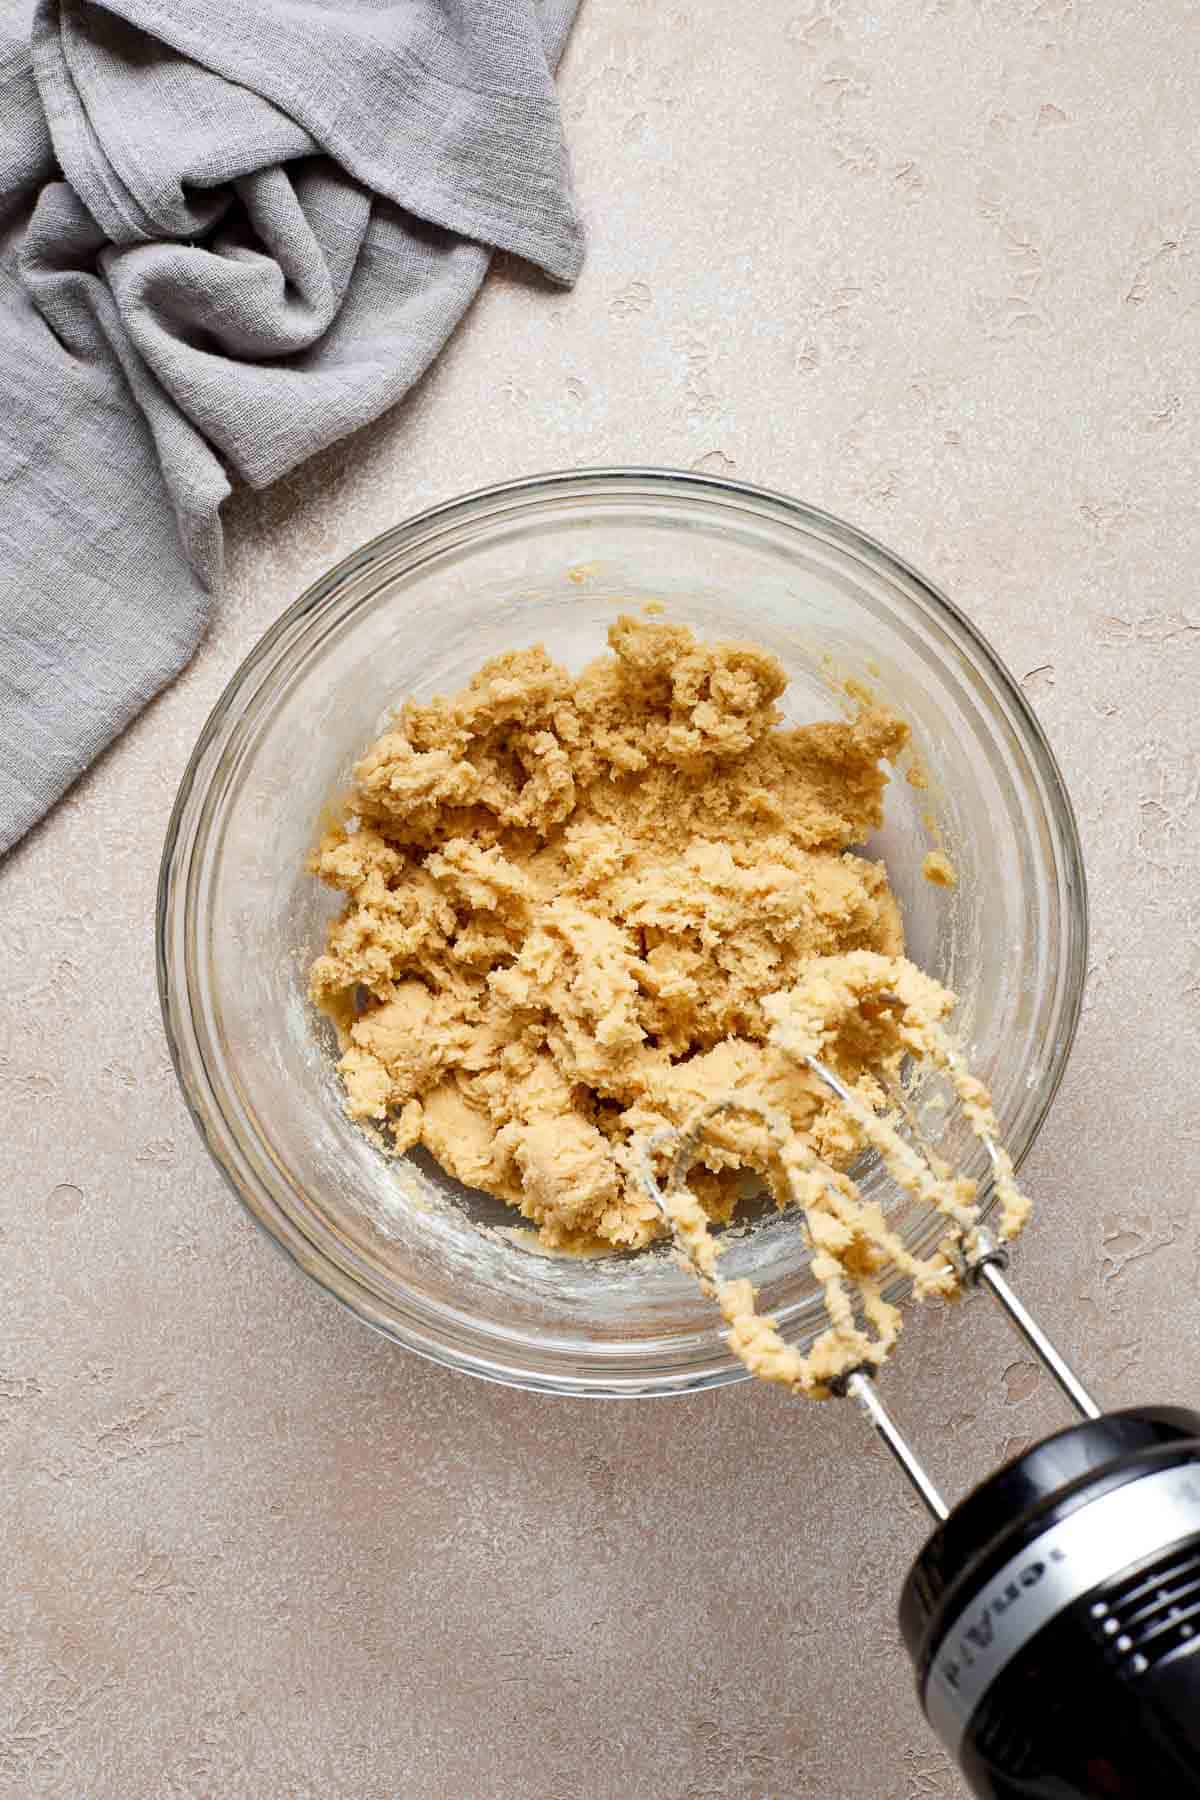
- Make cookie dough. In a large mixing bowl, use a hand mixer or stand mixer cream together butter and sugars on medium speed until light and fluffy, about 2 minutes. Add egg and vanilla, and beat on low until incorporated. Add flour, baking soda, and salt. Beat until just combined.
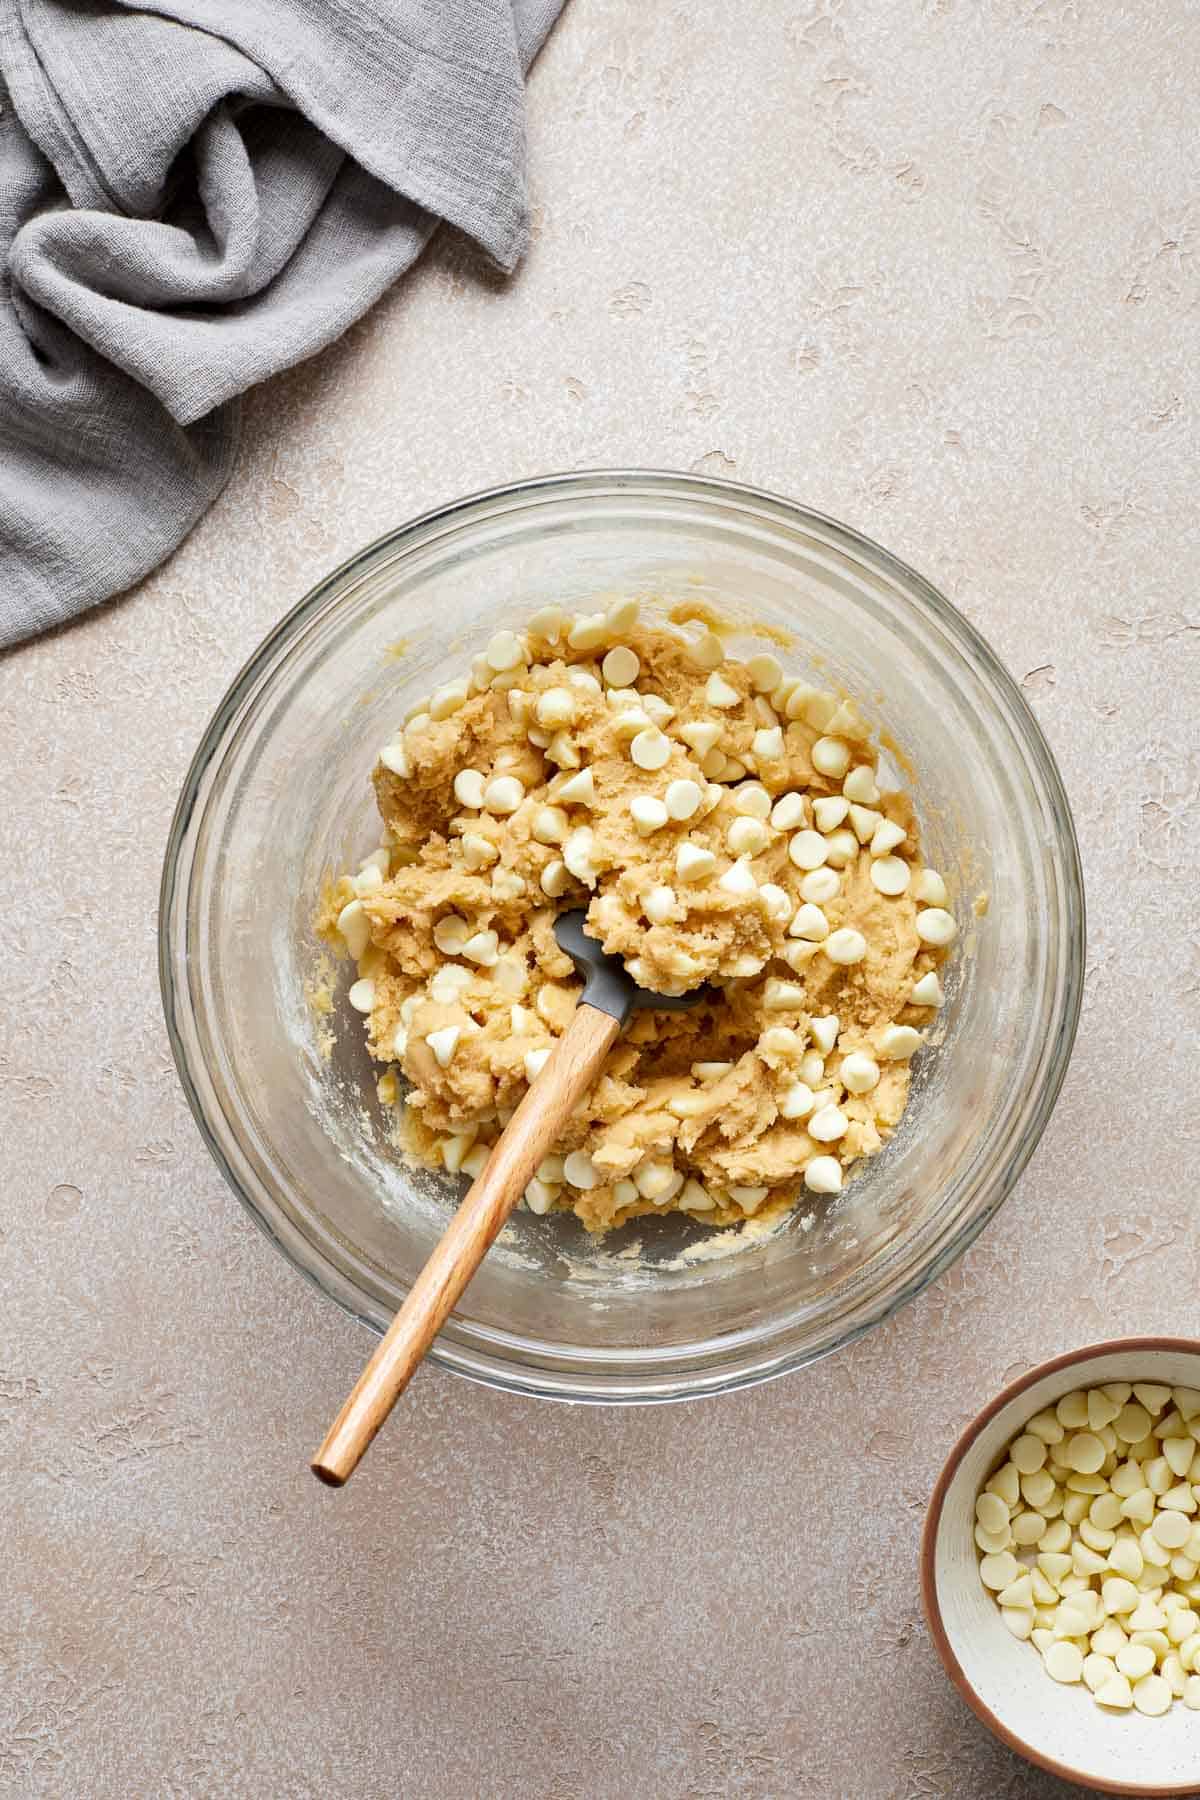
- Add chocolate chips. Fold in ¾ cup white chocolate chips.

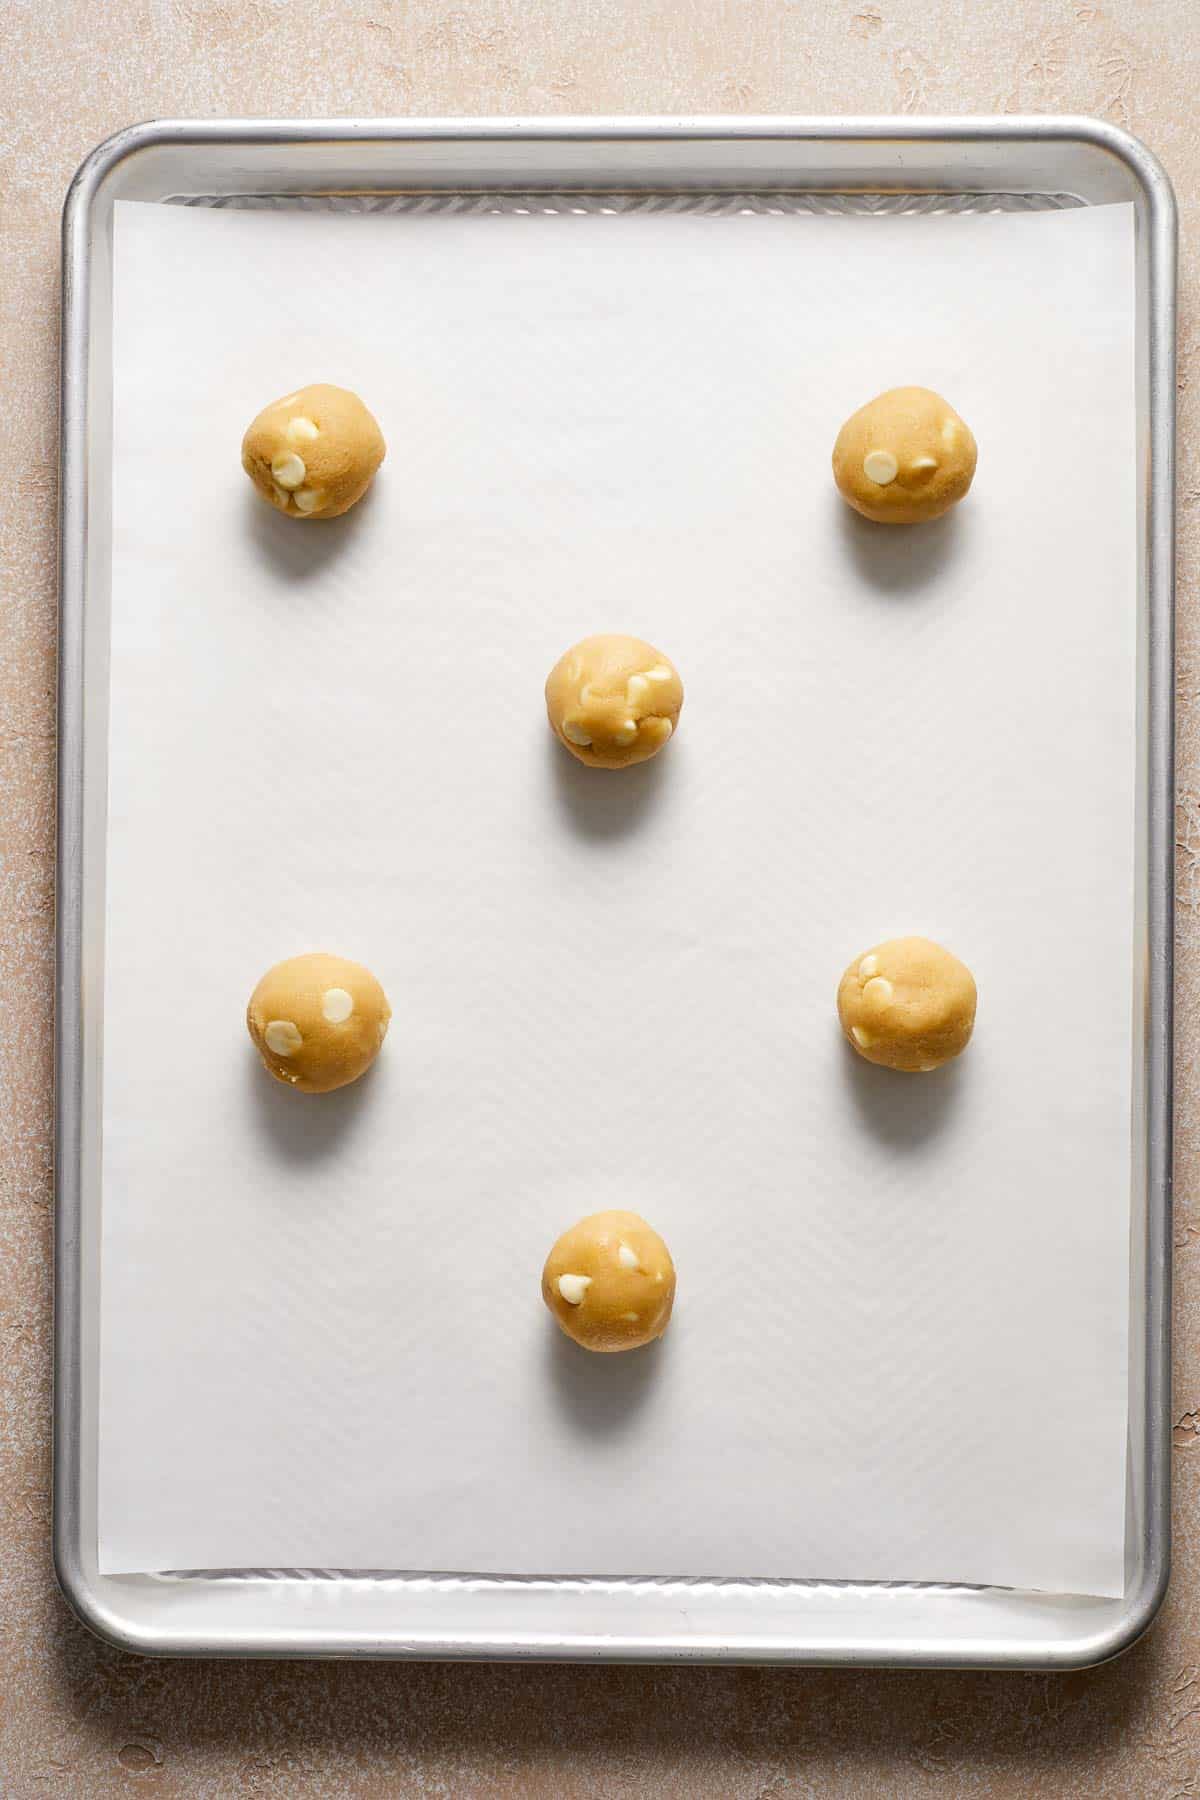
- Scoop cookies. Line a large half sheet baking tray with a silicone baking mat or parchment paper and set aside. Use a medium cookie scoop to scoop out 2 tablespoons of cookie dough. Use your hands to roll it into a ball. Place the cookie balls onto the lined baking sheet, spaced at least 2 inches apart (you can fit about 6-8 on a large cookie sheet).
- Bake. Bake in a 350F preheated oven for 8-10 minutes, until edges just start to brown. Do not overbake. The cookies may not look done in the middle, but they will continue to cook as they are cooling.
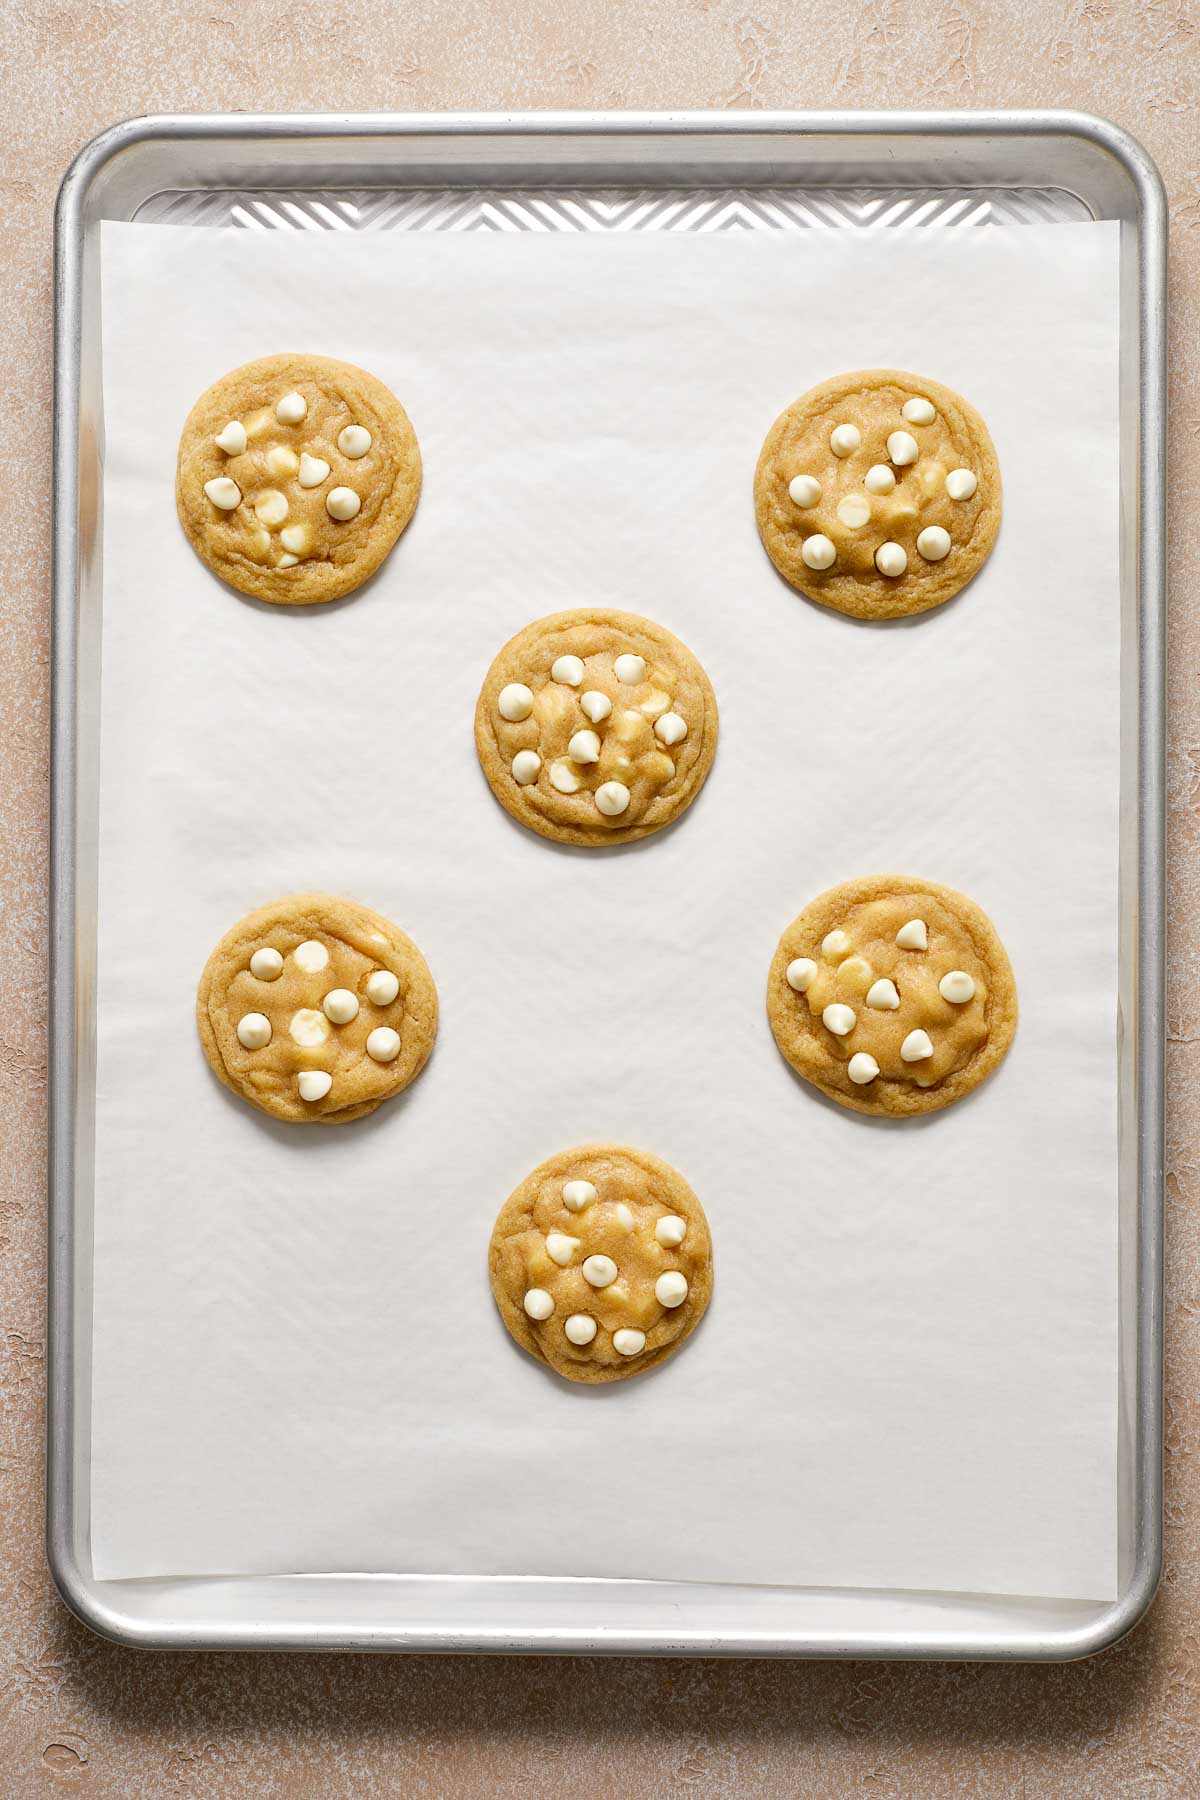
- Cool. Remove from oven and allow the cookies to cool in the baking sheet for 5 minutes, then carefully press in the remaining white chocolate chips into the top of the cookies. and transfer to a wire cooling rack to cool completely.
Recipe Variations
- Add nuts. For a nutty twist, fold in ½ cup of chopped pecans, walnuts, almonds, or macadamia nuts. They add flavor as well as a delicious crunch.
- Add cocoa powder. Substitute ¼ cup of flour with cocoa powder for a chocolate cookie base.
- Add dried fruits. Add in dried cranberries or raisins for extra sweetness and texture.
- Add warm spices. Adding some cinnamon or nutmeg for extra flavor.
How to Serve
We love serving freshly baked white chocolate chip cookies with a scoop of Vanilla Ice Cream or a glass of fresh milk. Some other delicious drinks to pair with these cookies are:
Recipe Tips and Tricks
- Brown the butter. If you have extra time, you can brown and cool the butter before making the dough to give these cookies a richer depth of flavor. You can also brown large batches of butter and freeze 2 tablespoons at a time in ice cube trays for easy use in recipes like this.
- Make the dough ahead. Frozen cookie dough can last for several months. Having a batch of ready-to-bake cookies on hand will make your life so much easier - especially when a sweet craving hits at the last minute.
- Set cold ingredients out. You will need to bring all the ingredients to room temperature before mixing the ingredients. The butter and egg can be set out around an hour before you start to prepare the cookie dough so they have time to slowly warm up to room temperature.
Storing and Freezing Instructions
How to Store
Keep leftover white chocolate chip cookies in an airtight container at room temperature for up to 1 week. You can also store the in the fridge for up to one month, but they may lose some of their chewiness. To add the moisture back in, reheat the cookies in the microwave.
How to Freeze
White chocolate chip cookies freeze really well. Let them cool completely first to room temperature, then store in an airtight container or freezer bag for up to 3 months. Thaw in the refrigerator overnight before serving.
How to Freeze Cookie Dough
To freeze the white chocolate cookie dough before baking, scoop out the cookie balls and place on a parchment paper lined baking sheet. Transfer the baking sheet to the freezer and freeze for 1 hour until hard. Then, transfer the cookie dough balls into a freezer bag and store for up to 3 months. To bake, thaw the cookie dough balls in the refrigerator overnight. Then, bake according to recipe instructions. You may need to add a couple minutes to the cook time if the cookie dough is not at room temperature before baking.
More Cookie Recipes
- 50 Best Cookie Recipes
- Chocolate Chip Cookies
- White Chocolate Cranberry Cookies
- Red Velvet Cookies
- Oatmeal Raisin Cookies
- Chocolate Chunk Peanut Butter Cookies
Tried this recipe?
I'd love to hear what you think! Leave a comment and rating below to share your feedback. Your reviews help others discover this recipe and help me keep creating more free recipes for you. Snap a photo and tag me on social media @aheadofthyme too.

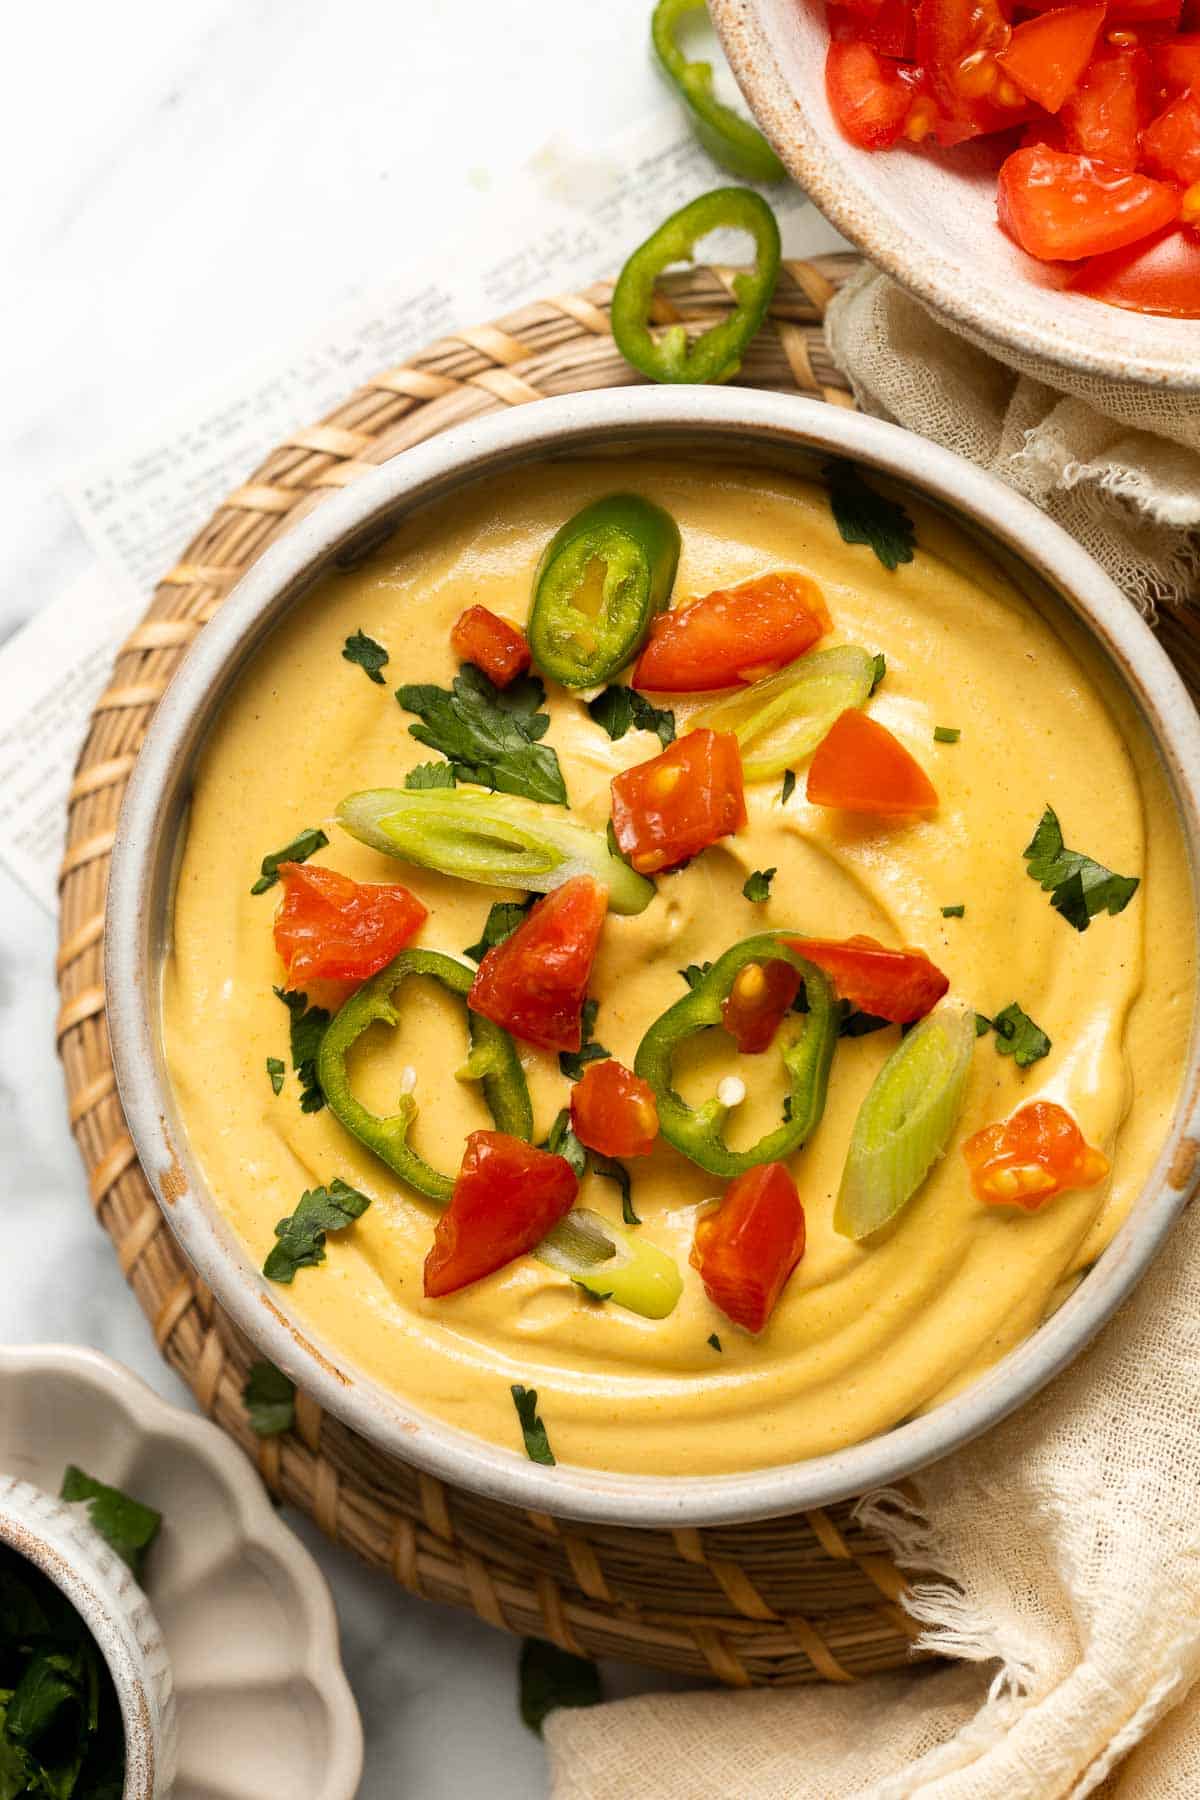
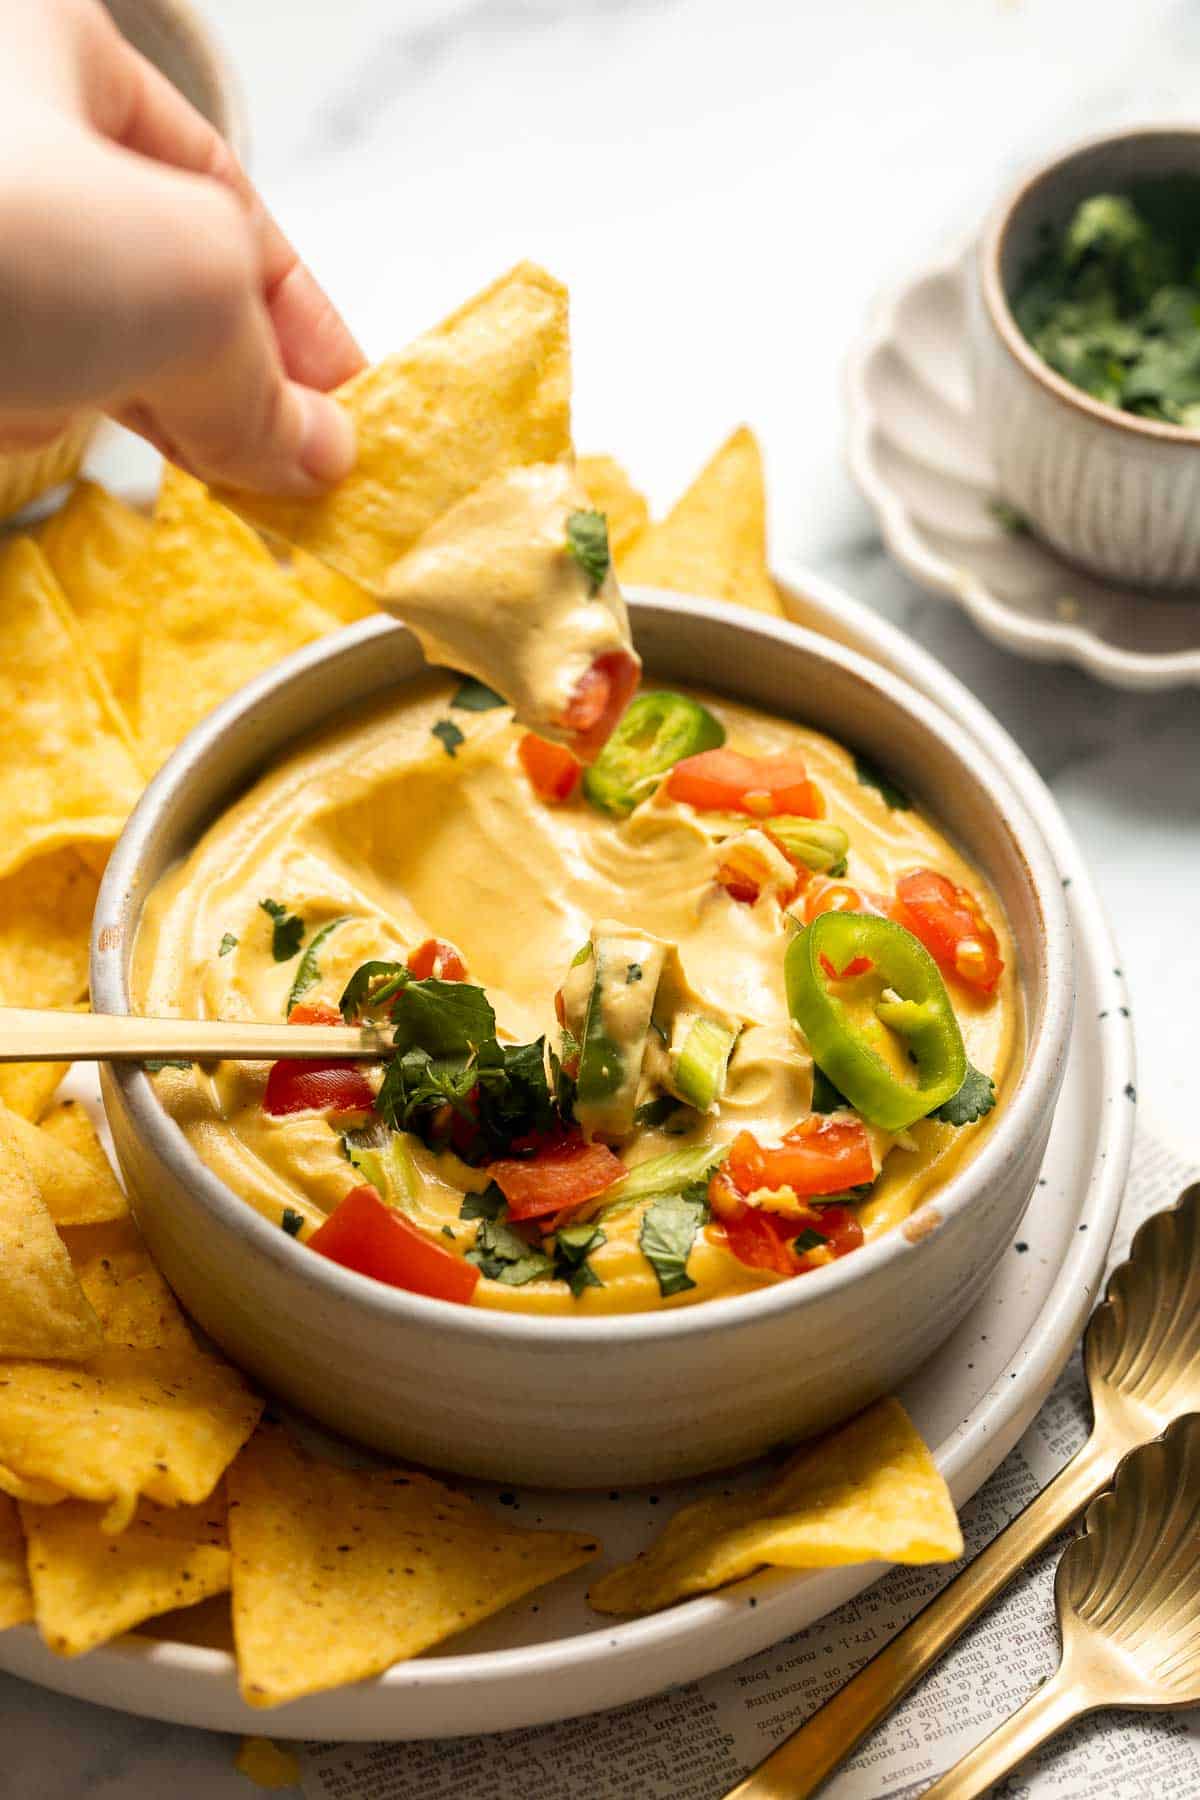
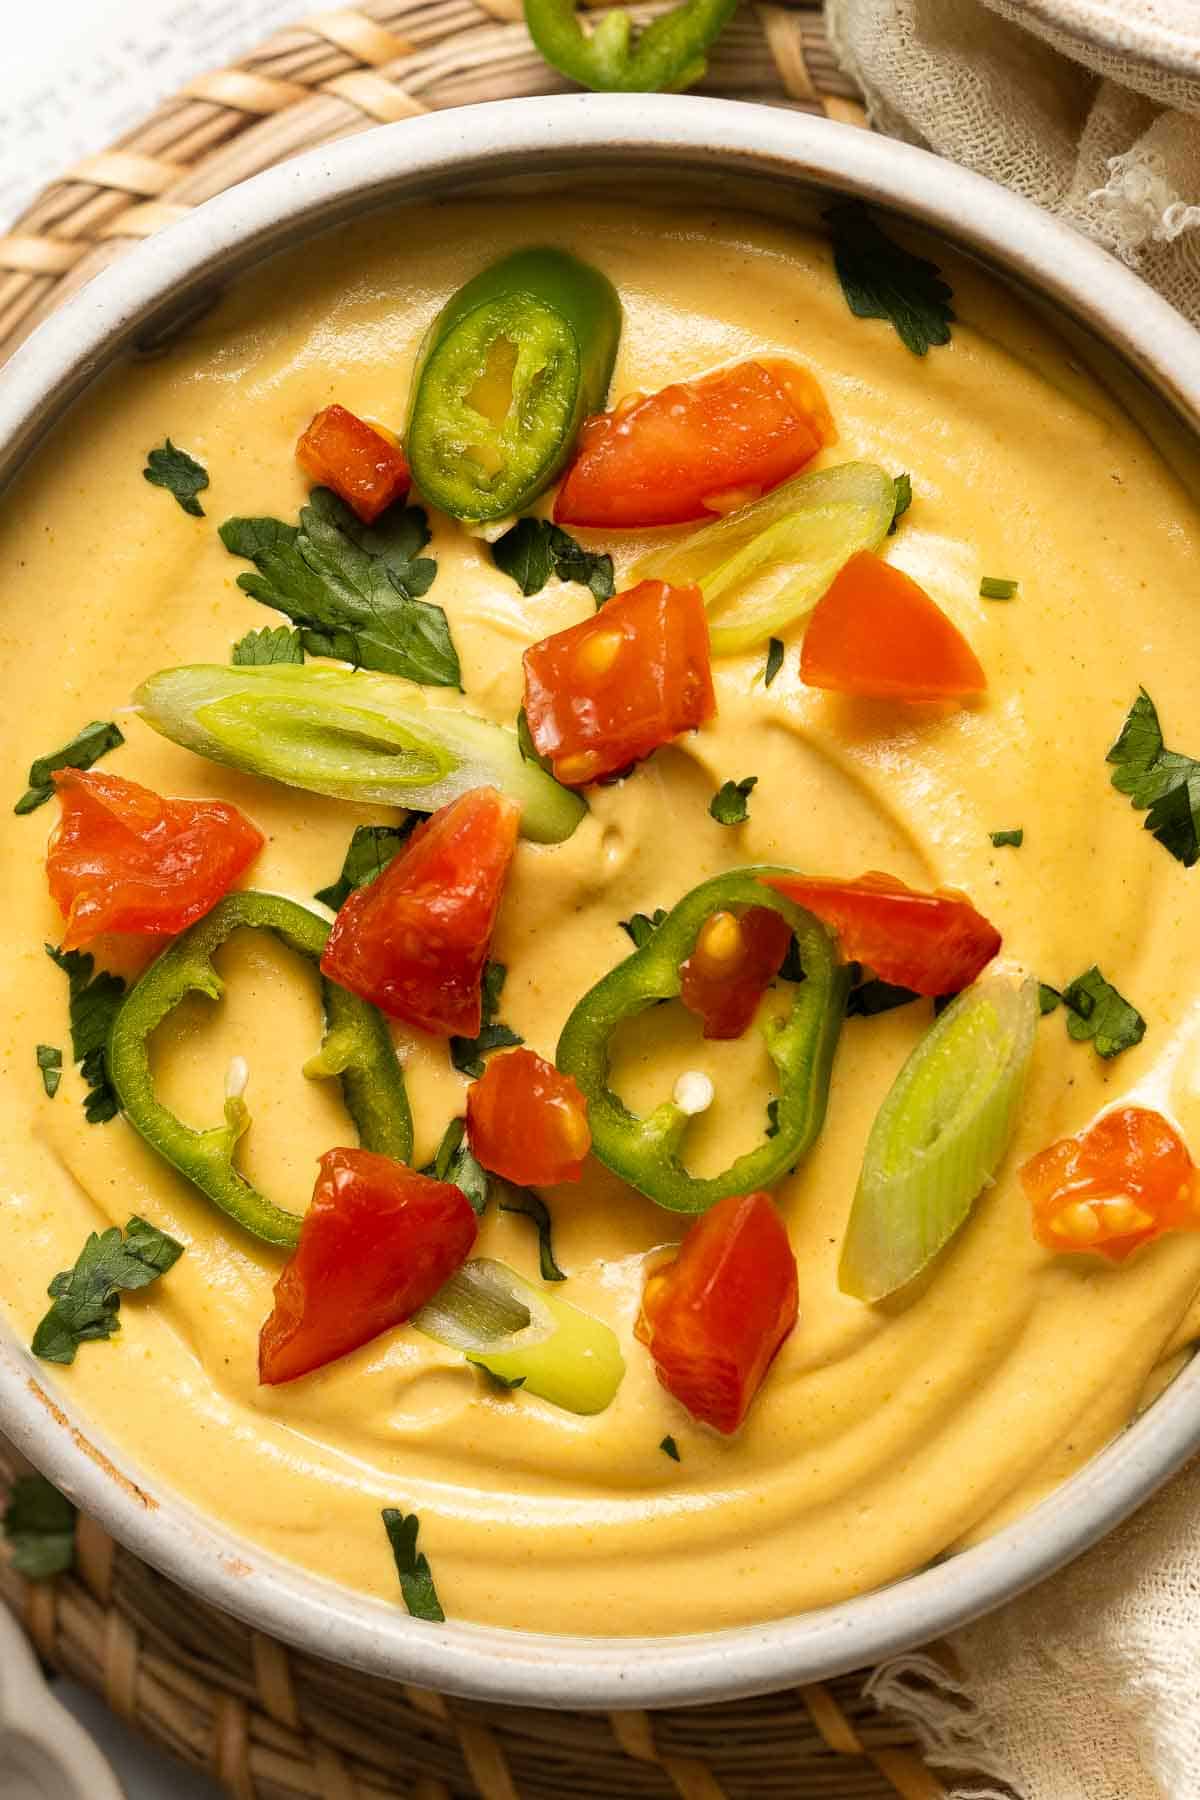
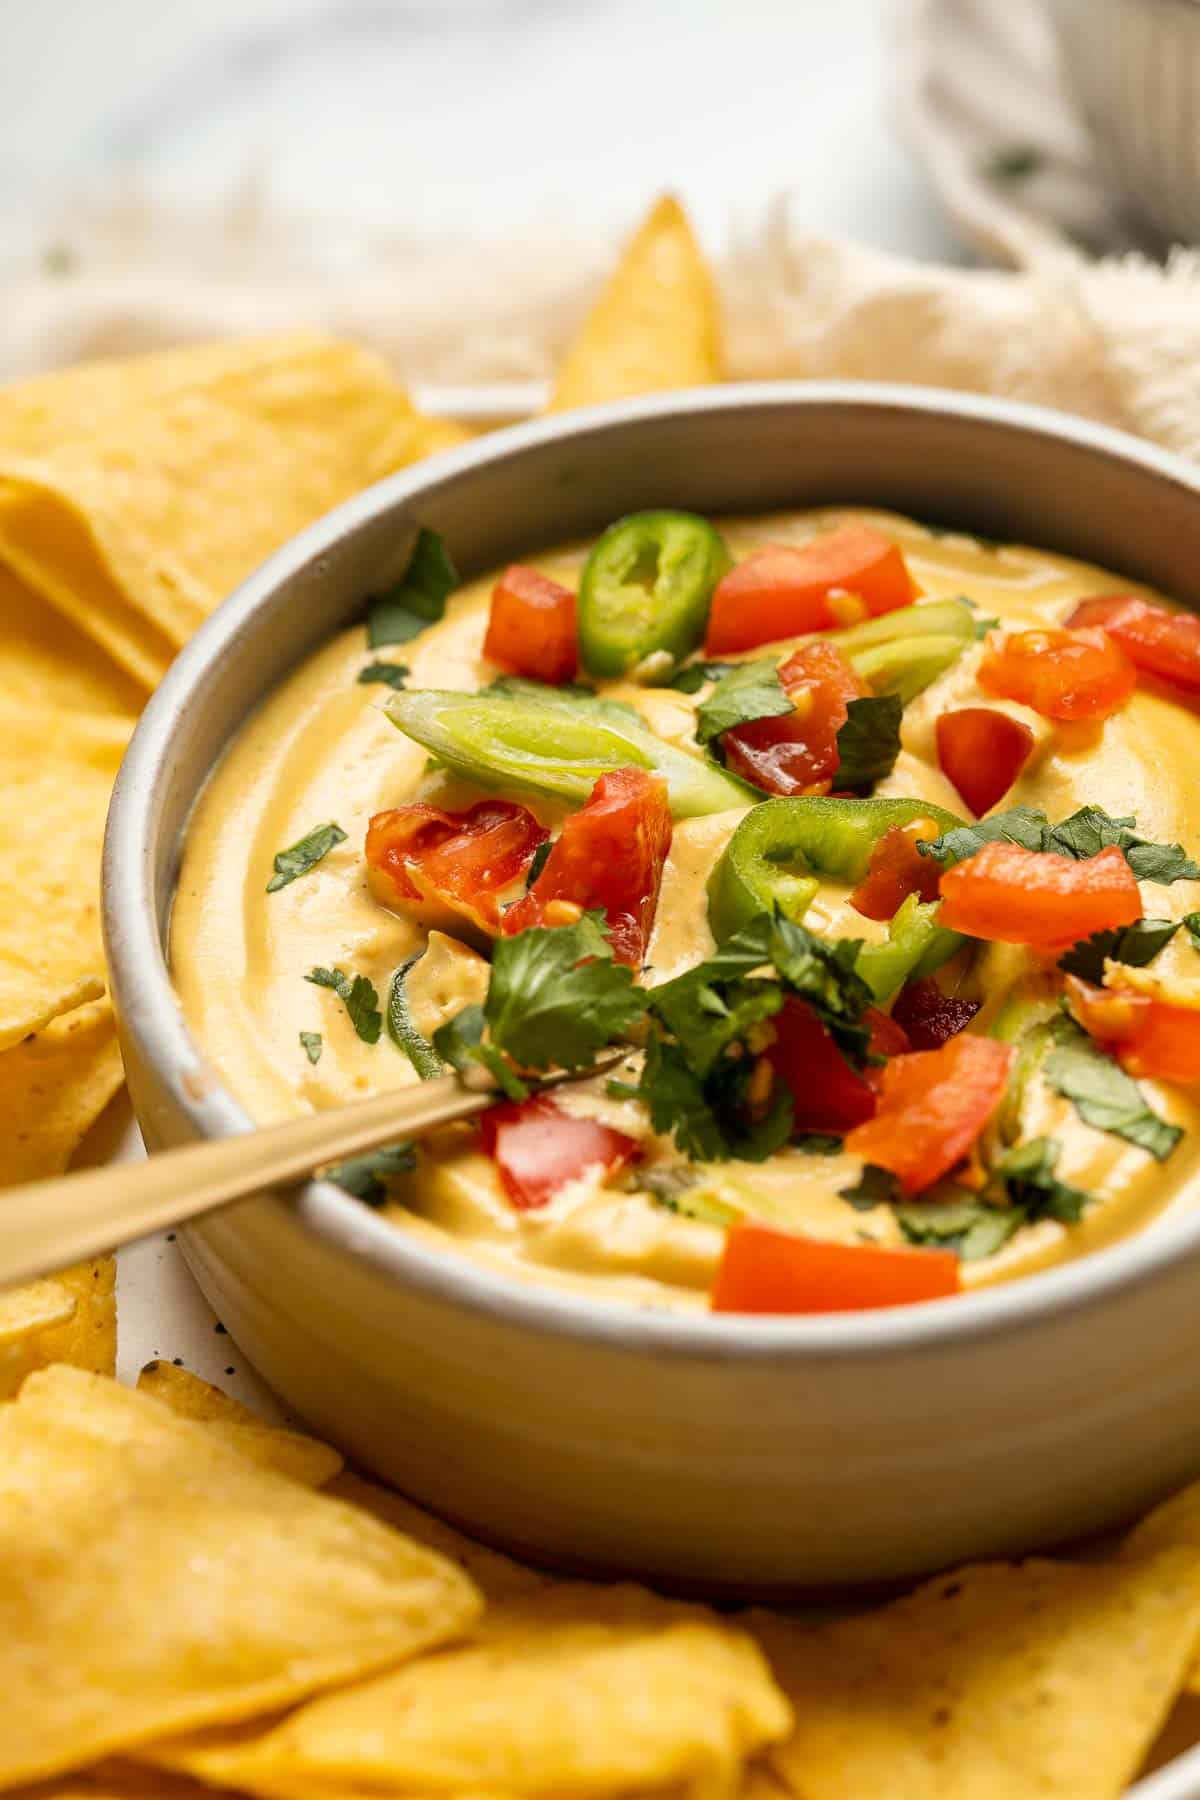
Vegan Queso
Vegan Queso is creamy, cheesy, and perfectly spiced to mimic the classic dip - without any dairy! It tastes like the real thing but you wouldn't know it! Raw cashews are blended with a handful of simple ingredients like jalapeños and nutritional yeast in just 5 minutes to make this dairy-free Mexican queso with classic flavors.
Why You'll Love this Vegan Queso
- Rich and creamy dip. Even without cream, cheese, or dairy of any kind, this vegan queso delivers the perfect velvety-smooth texture to pair with crunchy tortilla chips. You won't even miss the dairy!
- Classic queso flavors. This homemade vegan queso has all the classic flavors including jalapeño, tomatoes, and nutritional yeast "cheese". Plus, we serve it Tex Mex style with all the fixings to transfer this vegan cheese dip into the type of queso you'd devour before dinner at your favorite Mexican restaurant!
- Quick and easy to make. This vegan queso dip is so quick and easy to make, requiring only a blender and a few minutes of time. It's the perfect appetizer for game day parties and can be served hot or cold, depending on your mood. Get your chips ready!
- Great for special occasions. Game days, holidays, and dinner parties are all ideal opportunities to showcase this incredible vegan cheese dip as an appetizer, though it's easy enough to make for a snack any day of the week.
- Homemade queso is healthy. When you make vegan queso at home, you know exactly what is going into your dip so you can pick high-quality ingredients. Plus, store-bought dips are often full of preservatives, additives, and artificial colors and flavors.
Ingredient Notes
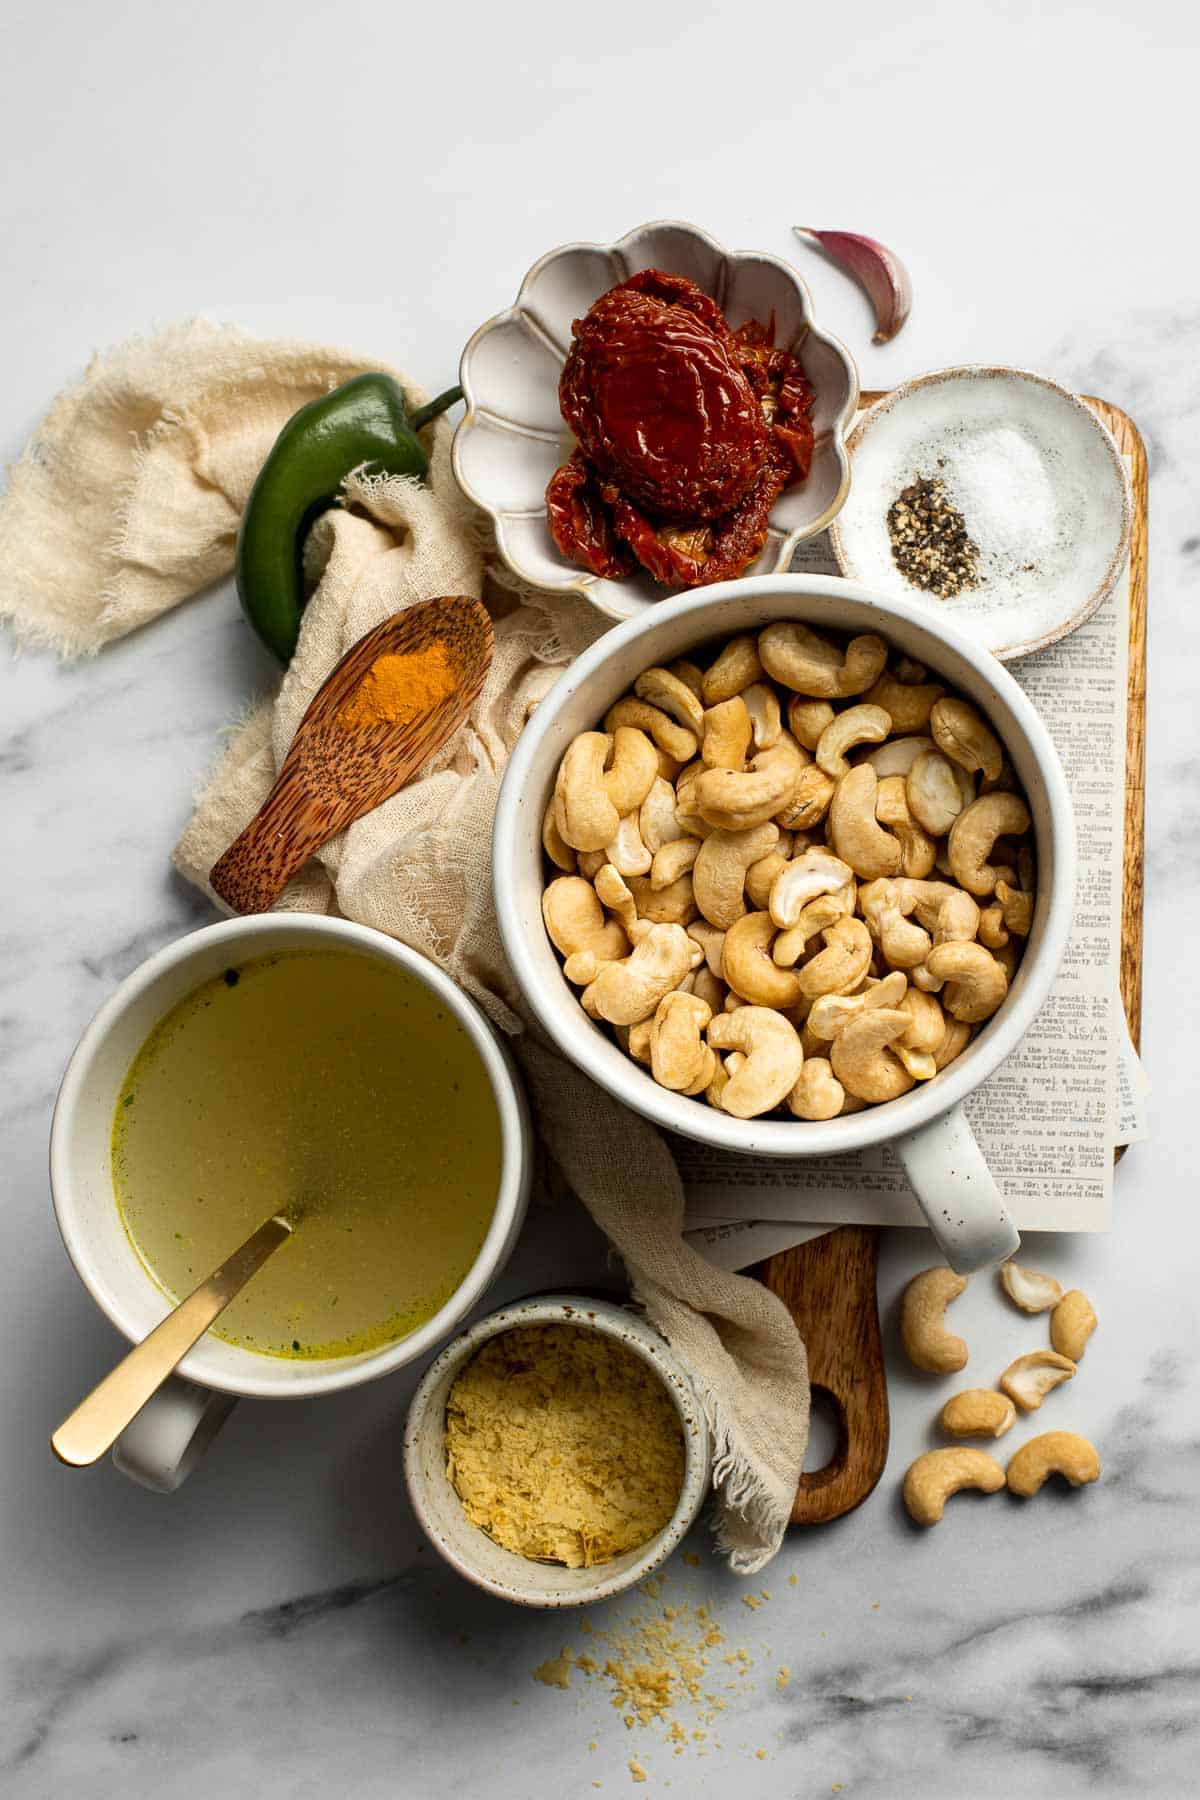
To make this delicious Vegan Queso, you will need the following ingredients (full measurements in recipe card below):
- raw cashews - for the creamiest, cheese-like texture, stick with raw, unroasted cashews. You can also try raw pine nuts as a substitute.
- vegetable stock - homemade veggie stock or store-bought are both fine. Whatever is more convenient for you.
- garlic - fresh garlic is always best for flavor, but you can also use 1 teaspoon of prepared minced garlic for each clove in the recipe.
- sun-dried tomato - if you don't have sun-dried tomatoes on hand, you can use a teaspoon of tomato paste in its place.
- jalapeño - find jalapeño too spicy? Swap it for half of a green bell pepper or omit it altogether.
- turmeric - an equal measure of ground cumin or a mild curry powder can be substituted for the turmeric. It will slightly alter the taste though.
- nutritional yeast - nutritional yeast can be found in the spice or baking aisle at your local grocery store. To add a similar taste, you can also try a bit of soy sauce or brewer's yeast.
- salt and pepper
Optional Toppings
- cilantro - if you don't like cilantro, you can substitute another soft herb like parsley or basil instead.
- jalapeño
- green onions - chives will also work in a pinch, but it will change the flavor slightly.
- tomato - fresh tomato will work best, but you can use half a can of diced tomatoes if necessary. Just make sure to drain them and remove all extra liquid first!
- tortilla chips - chef's choice! Choose from blue corn, yellow corn, scoopable chips, or make your own if you're feeling ambitious. You can also top with tortilla strips.
You will also need measuring cups and spoons and a blender or food processor.
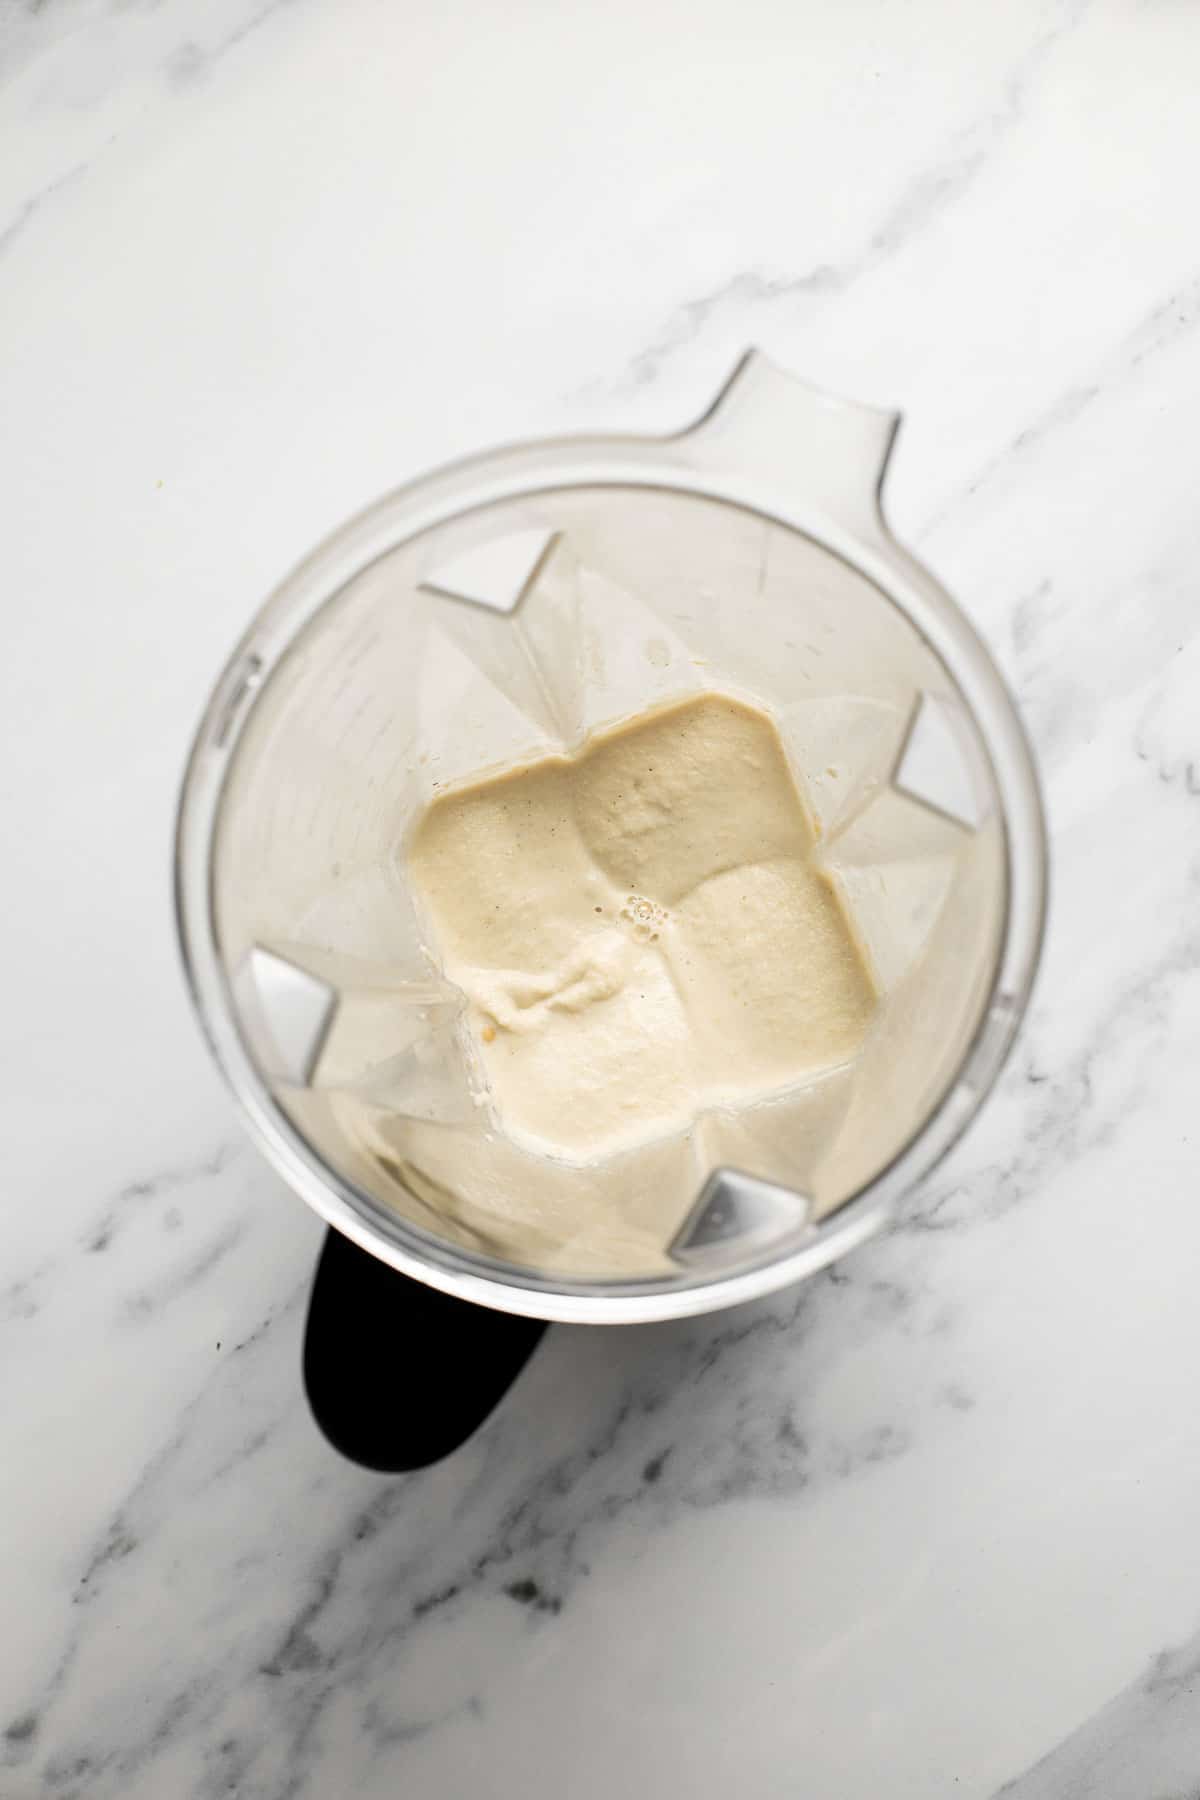
How to Make the Best Vegan Queso
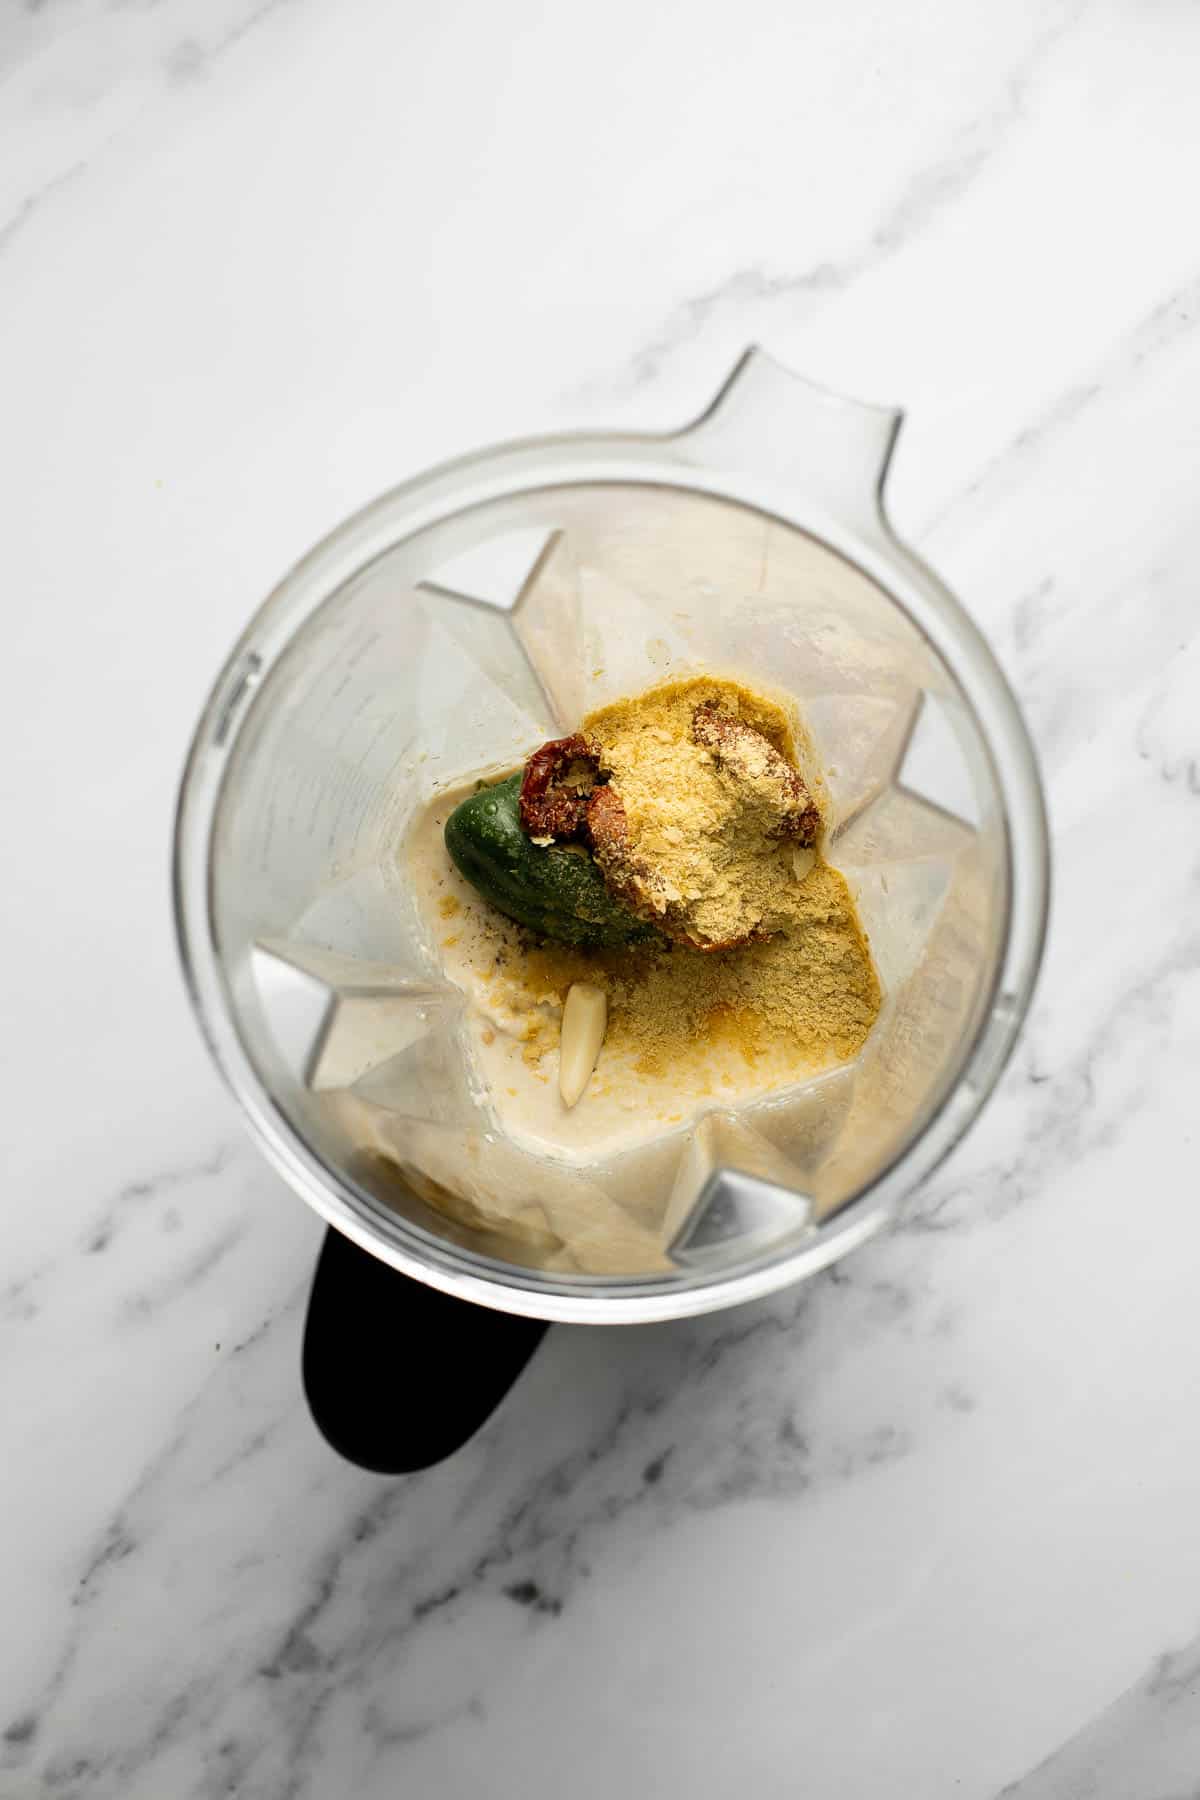
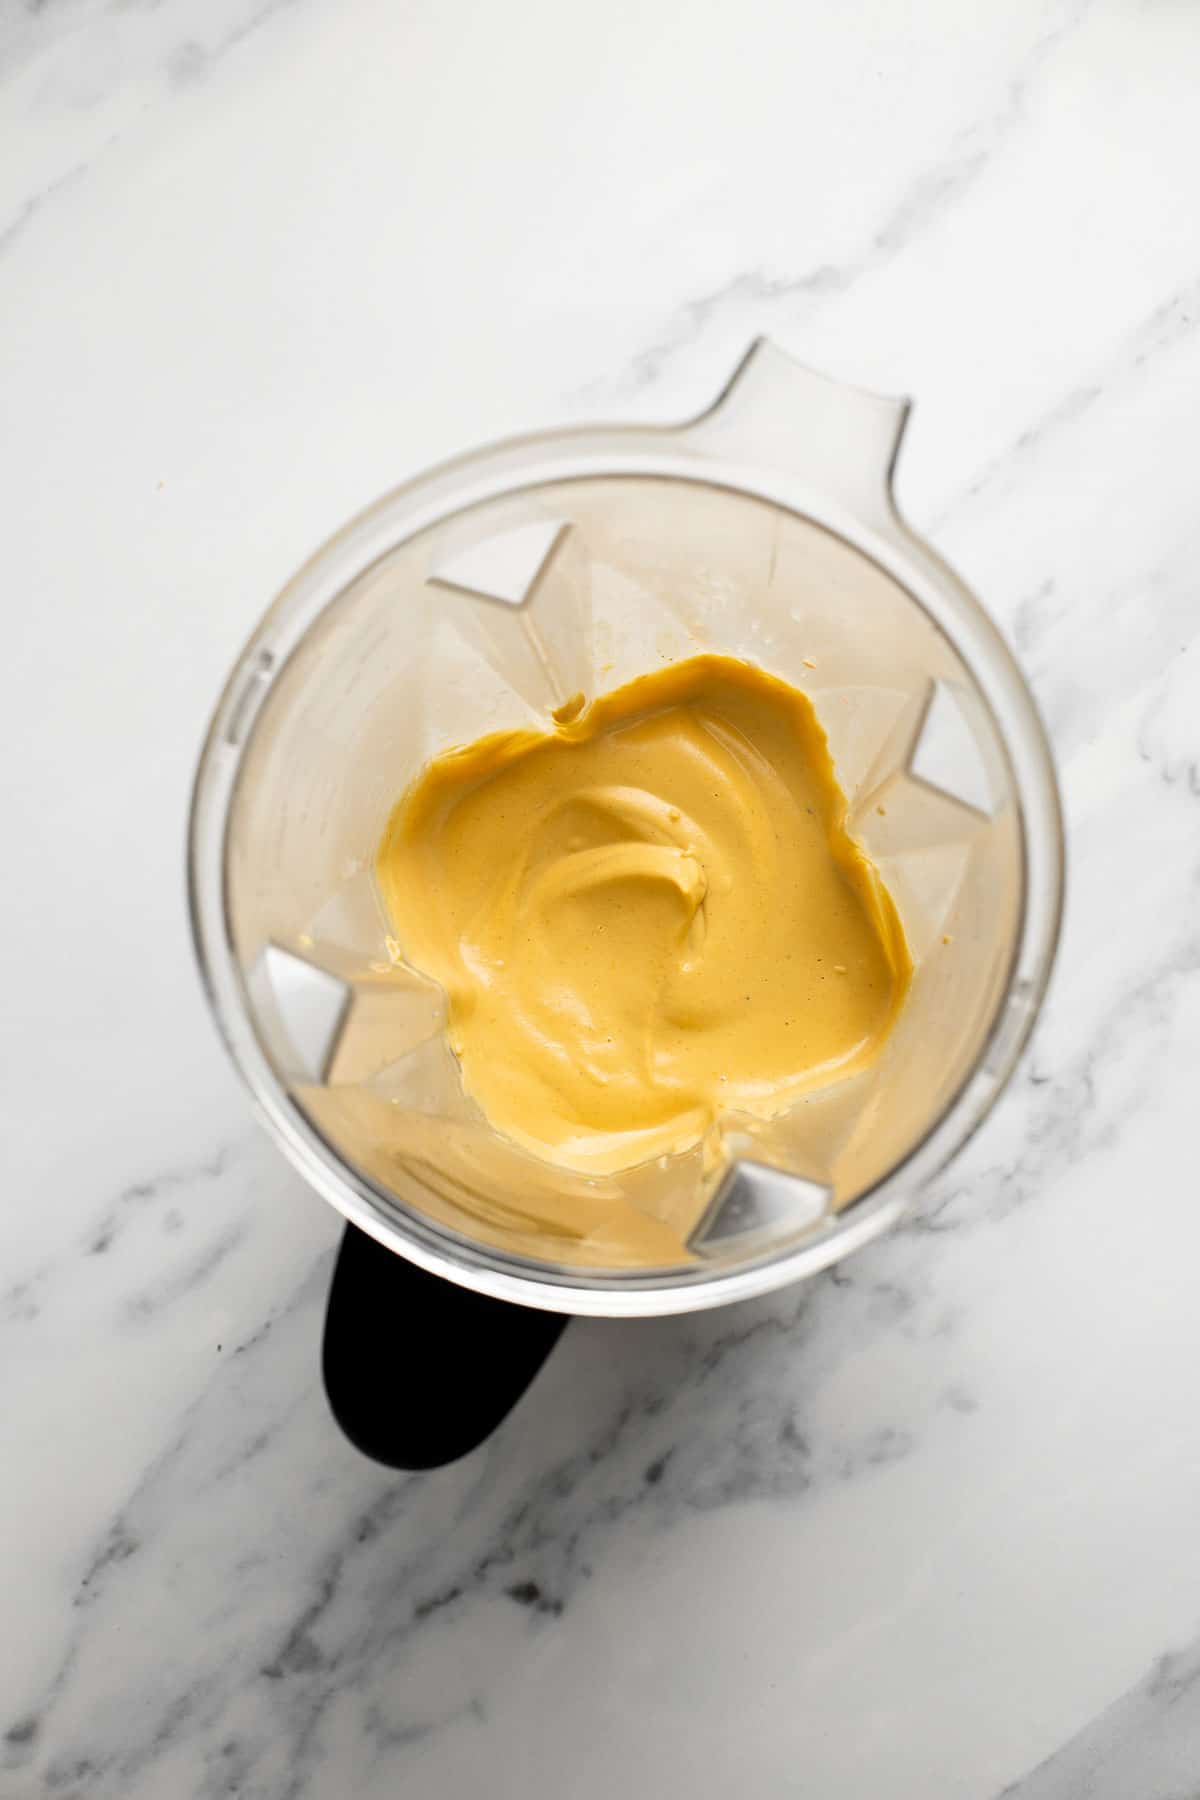
- Blend cashews. In a blender, add cashews and vegetable stock. Blend until smooth, about 1-2 minutes.
- Combine ingredients. Add the remaining ingredients and blend until smooth and thickened, about 1 minute. You can serve this cold or warm. If serving warm, use warm vegetable stock.
- Add toppings. Transfer to a round serving bowl. Top with optional toppings such as chopped cilantro, jalapeno pepper slices, diced tomato, and green onions.
- Serve. Serve immediately with tortillas strips or chips for dipping.

Recipe Tips and Tricks
- Make ahead to simplify game day prep. If you're hosting a Game Day party or gathering, you can make day-of preparations a little easier by making this easy vegan queso a day ahead of time! Then serve cold or quickly reheat when you're ready to serve. Keep scrolling for storing and reheating instructions.
- Experiment with different flavors. Transform this dip for any and all occasions by swapping out some of the spices or toppings. The creamy cashew base is the perfect canvas to try new things. Try chili powder, paprika, or cumin.
- Get the creamiest texture. Use a heavy duty blender or high-speed food processor to get the best smooth and creamy consistency. Some people also swear by soaking the cashews in water for a few hours to soften before blending to make the queso even creamier.
How to Serve
Serve this Vegan Queso with a classic side of tortilla chips or tortilla strips, or you can switch things up and use it for dunking Veggies, Quesadillas, and Crackers.
You can also pour it over Sheet Pan Nachos, add it to Ground Beef Tacos, or add a dollop to Chicken Tortilla Soup or Beef Chili.
You can also serve this vegan dip with chips as part of a Mexican themed party along with some of our favorite Mexican-inspired dishes:
- Chicken Enchiladas
- Beef Taco Soup
- Fish Tacos with Lime Crema
- Beef and Bean Burritos
- Chicken Fajitas
- Cauliflower Tacos
For more, see our 30 Best Mexican Recipes.

Storing and Freezing Instructions
How to Store
Transfer leftover vegan queso to an airtight container and refrigerate for up to five days.
How to Reheat
Reheat in the microwave on high in 10-second increments, stirring in between bursts until it's heated to the desired temperature. You can also reheat in a pan on the stove over medium-low heat until warmed through.
How to Freeze
You can even freeze vegan queso! Place in a freezer-safe container or freezer bag and freeze for up to 3 months. Allow the queso to defrost in the refrigerator overnight and blend again to re-incorporate the ingredients in case of separation. Then serve cold or reheat if desired.
More Dip Recipes
Tried this recipe?
I'd love to hear what you think! Leave a comment and rating below to share your feedback. Your reviews help others discover this recipe and help me keep creating more free recipes for you. Snap a photo and tag me on social media @aheadofthyme too.

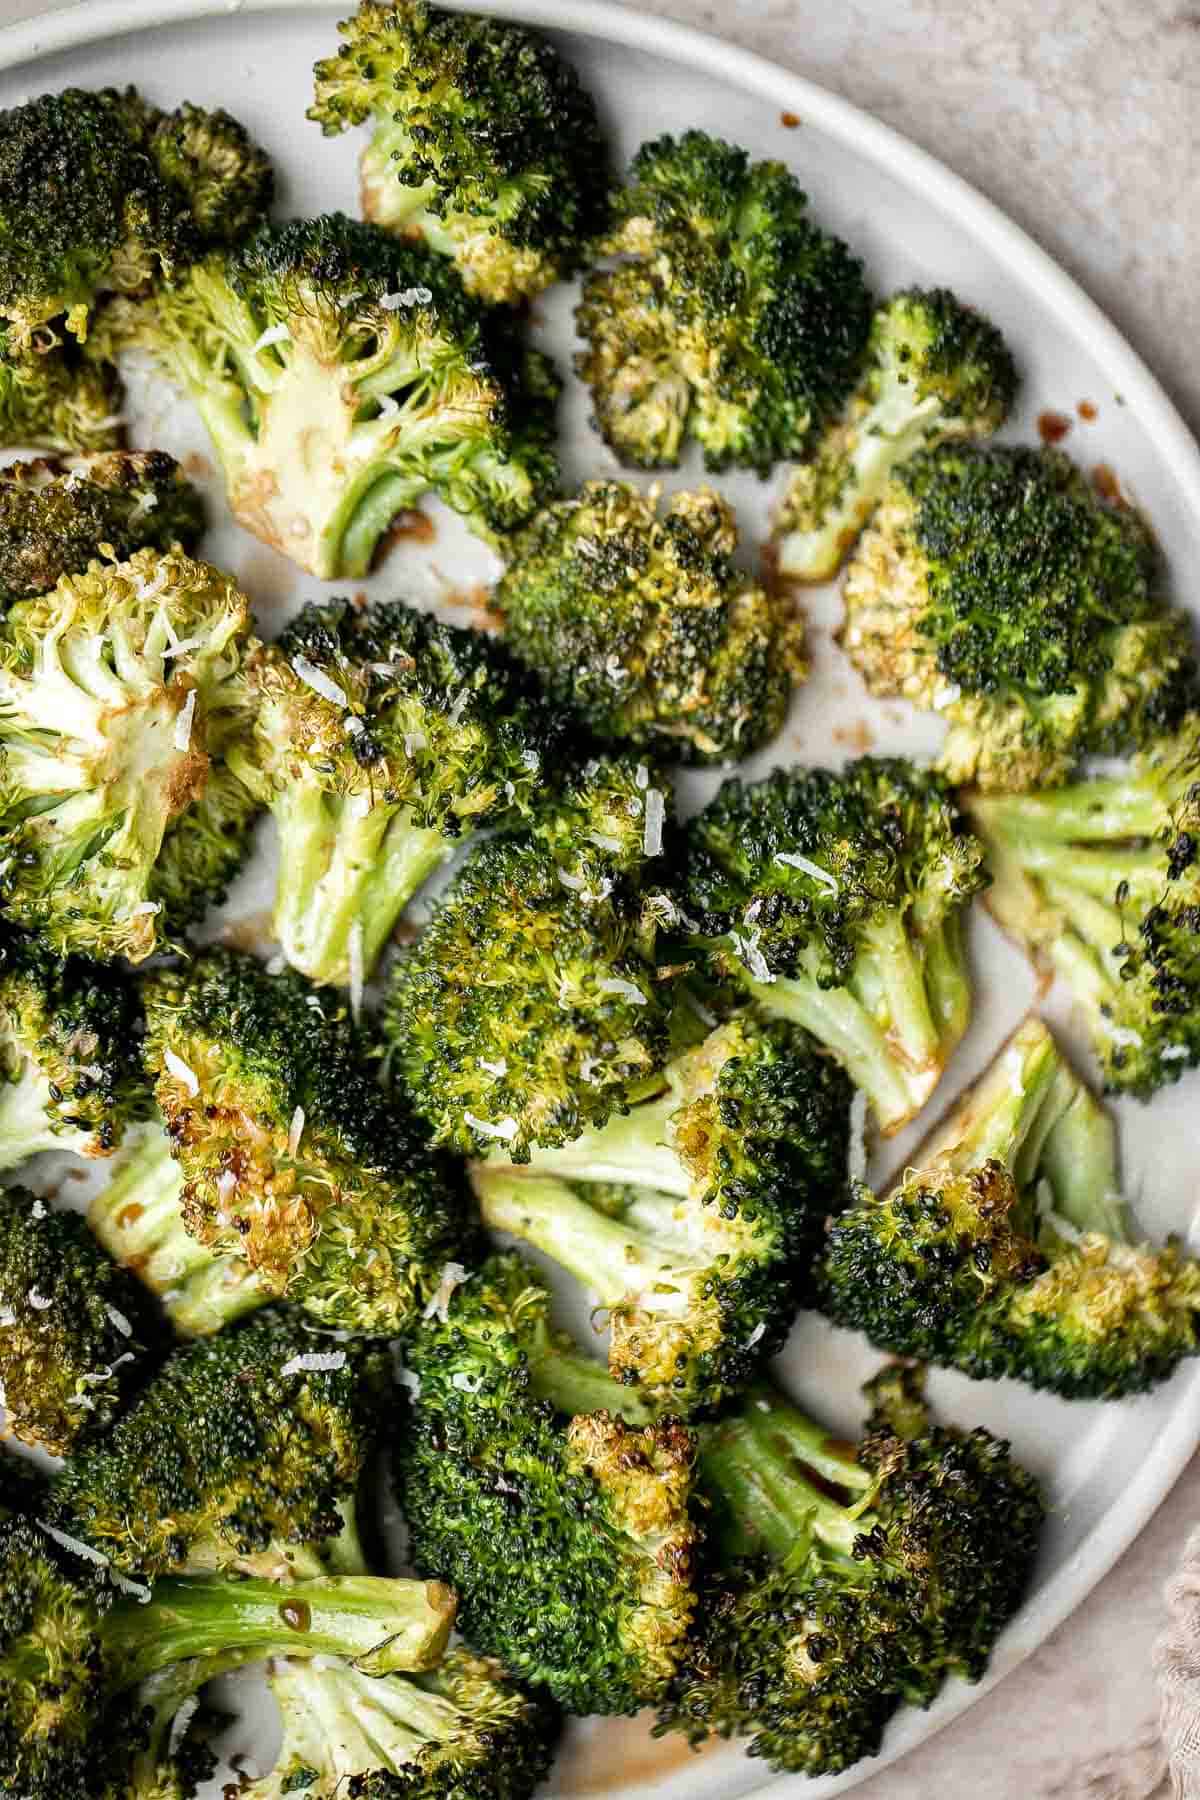
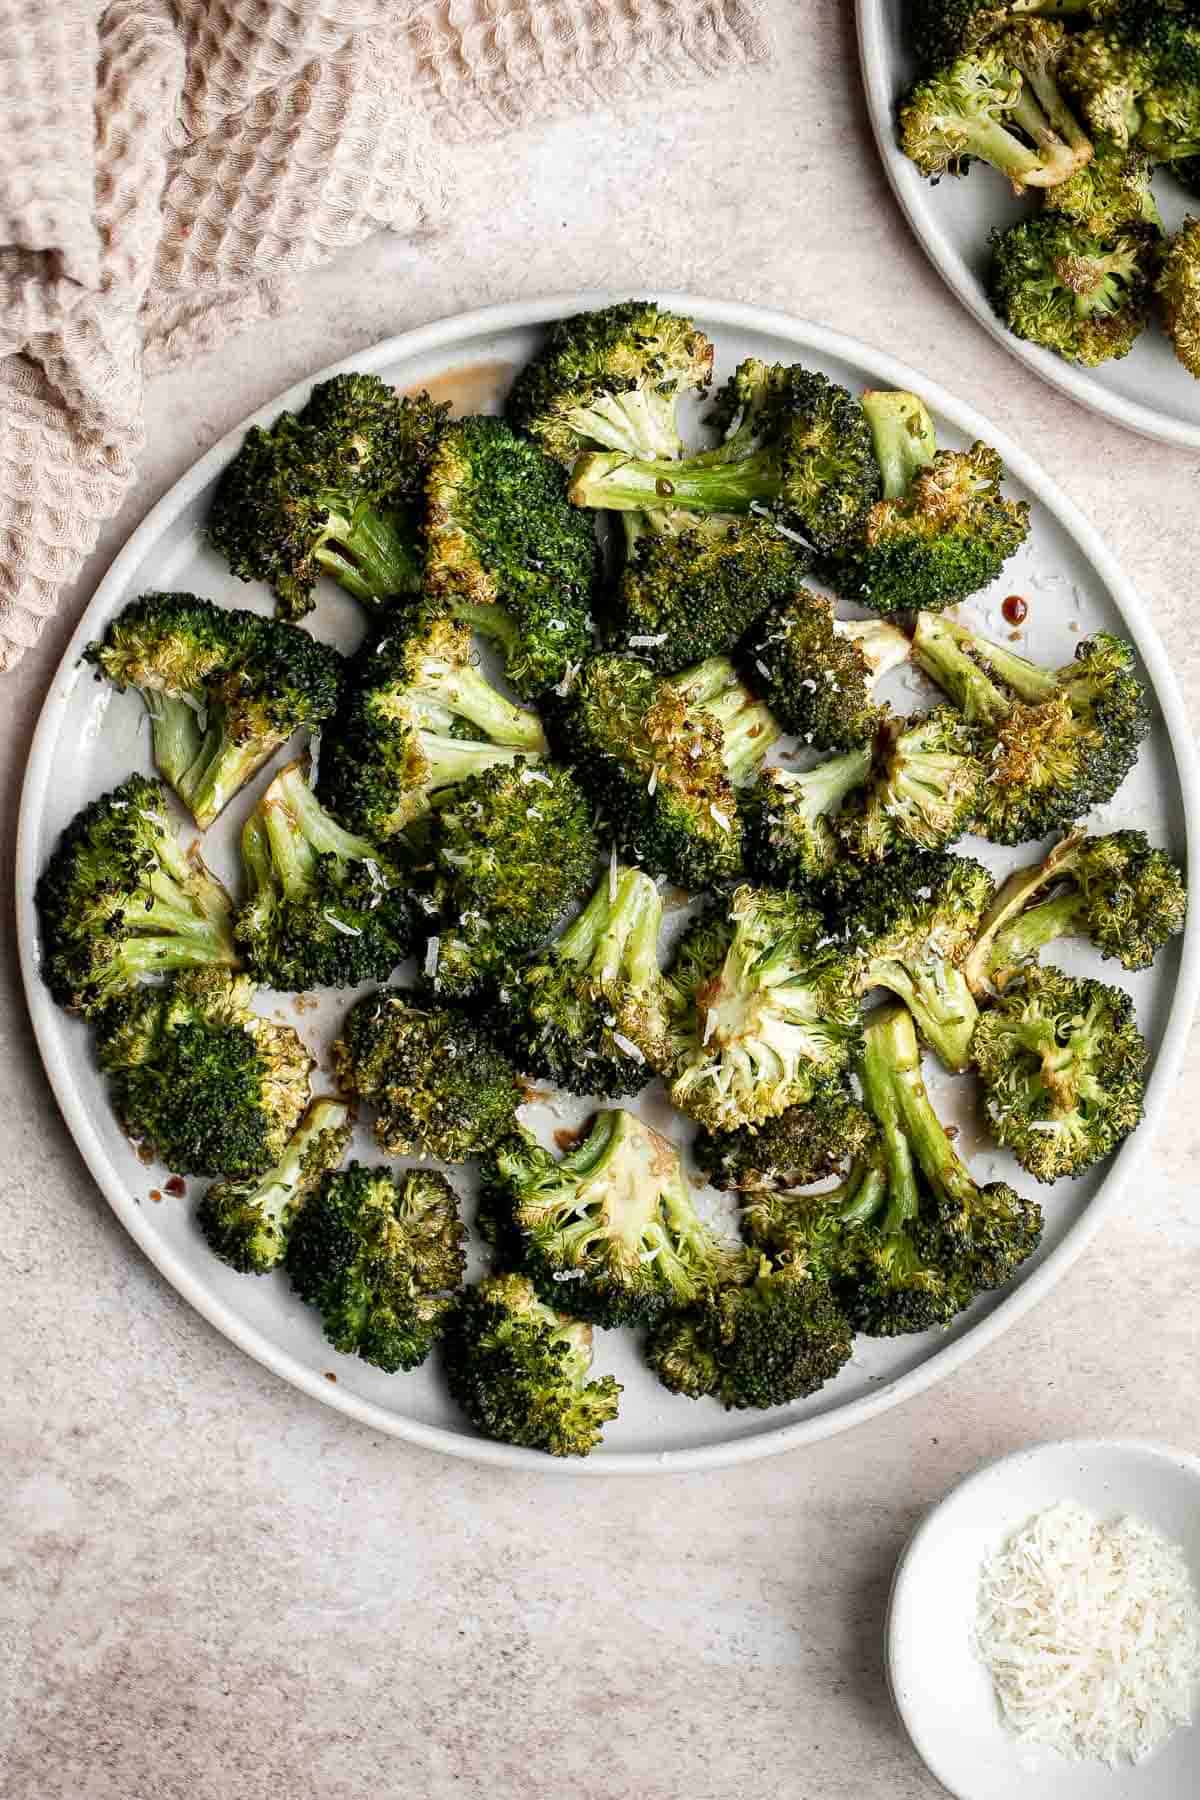
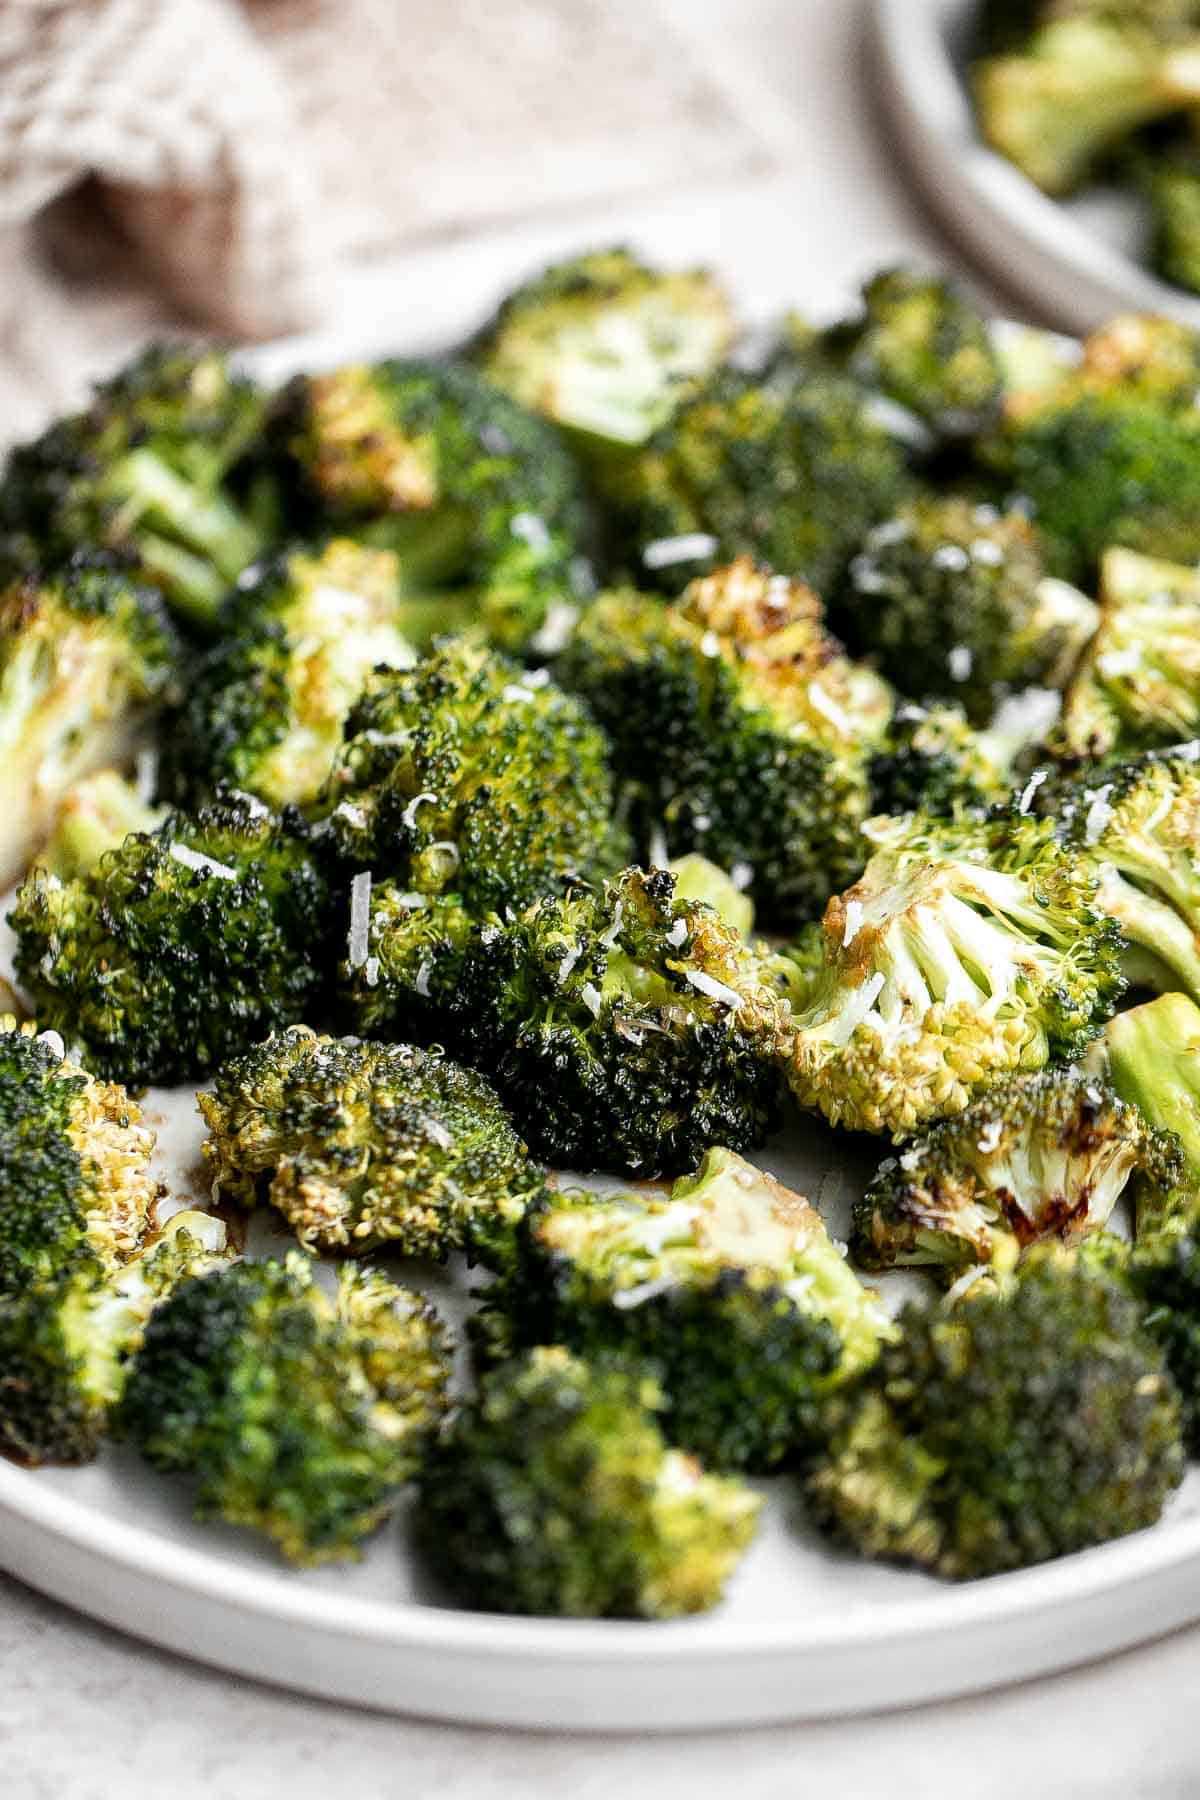
Balsamic Roasted Broccoli
Balsamic Roasted Broccoli is a quick and easy side dish made with tender, crispy broccoli florets tossed in a simple homemade glaze made with just 5 ingredients. This low maintenance recipe takes just 25 minutes to make, and most of that time is spent in the oven.
Roasted Broccoli is one of our favorite easy side dishes to make, but add a balsamic vinegar glaze and you've turned that side into something even more flavorful, delicious, and mouthwatering. It requires very little seasoning thanks to the balsamic glaze and pairs well with everything from chicken to beef to fish. It's a one side fits all!
Why You'll Love this Balsamic Roasted Broccoli
- Sweet and savory flavor. The combination of the tangy balsamic vinegar and the salty parmesan cheese create a perfectly balanced flavor that will win over veggie haters. Plus, you can easily recreate the flavor profile and use it for all your favorite roasted vegetable dishes!
- They have the best texture. This oven baked broccoli are crisp on the edges, yet soft and tender inside. You could even crisp them up more by turning on the broiler for a few minutes if you want.
- Perfect side for any occasion. Because it's so simple, flavorful, and only requires 5 minutes of active prep work, this broccoli is a wonderful side dish for any and every occasion. Just prep it and pop it in the oven while you work on the rest of the meal! Perfect for busy weeknights, but also a stress-free side for fancy dinner parties.
- Can easily be made vegan. If you need a vegan side option for a dinner guest or family member, you only need to make one easy swap to make this dish fully vegan without losing much flavor. Check out the ingredient notes below for details.
Ingredient Notes
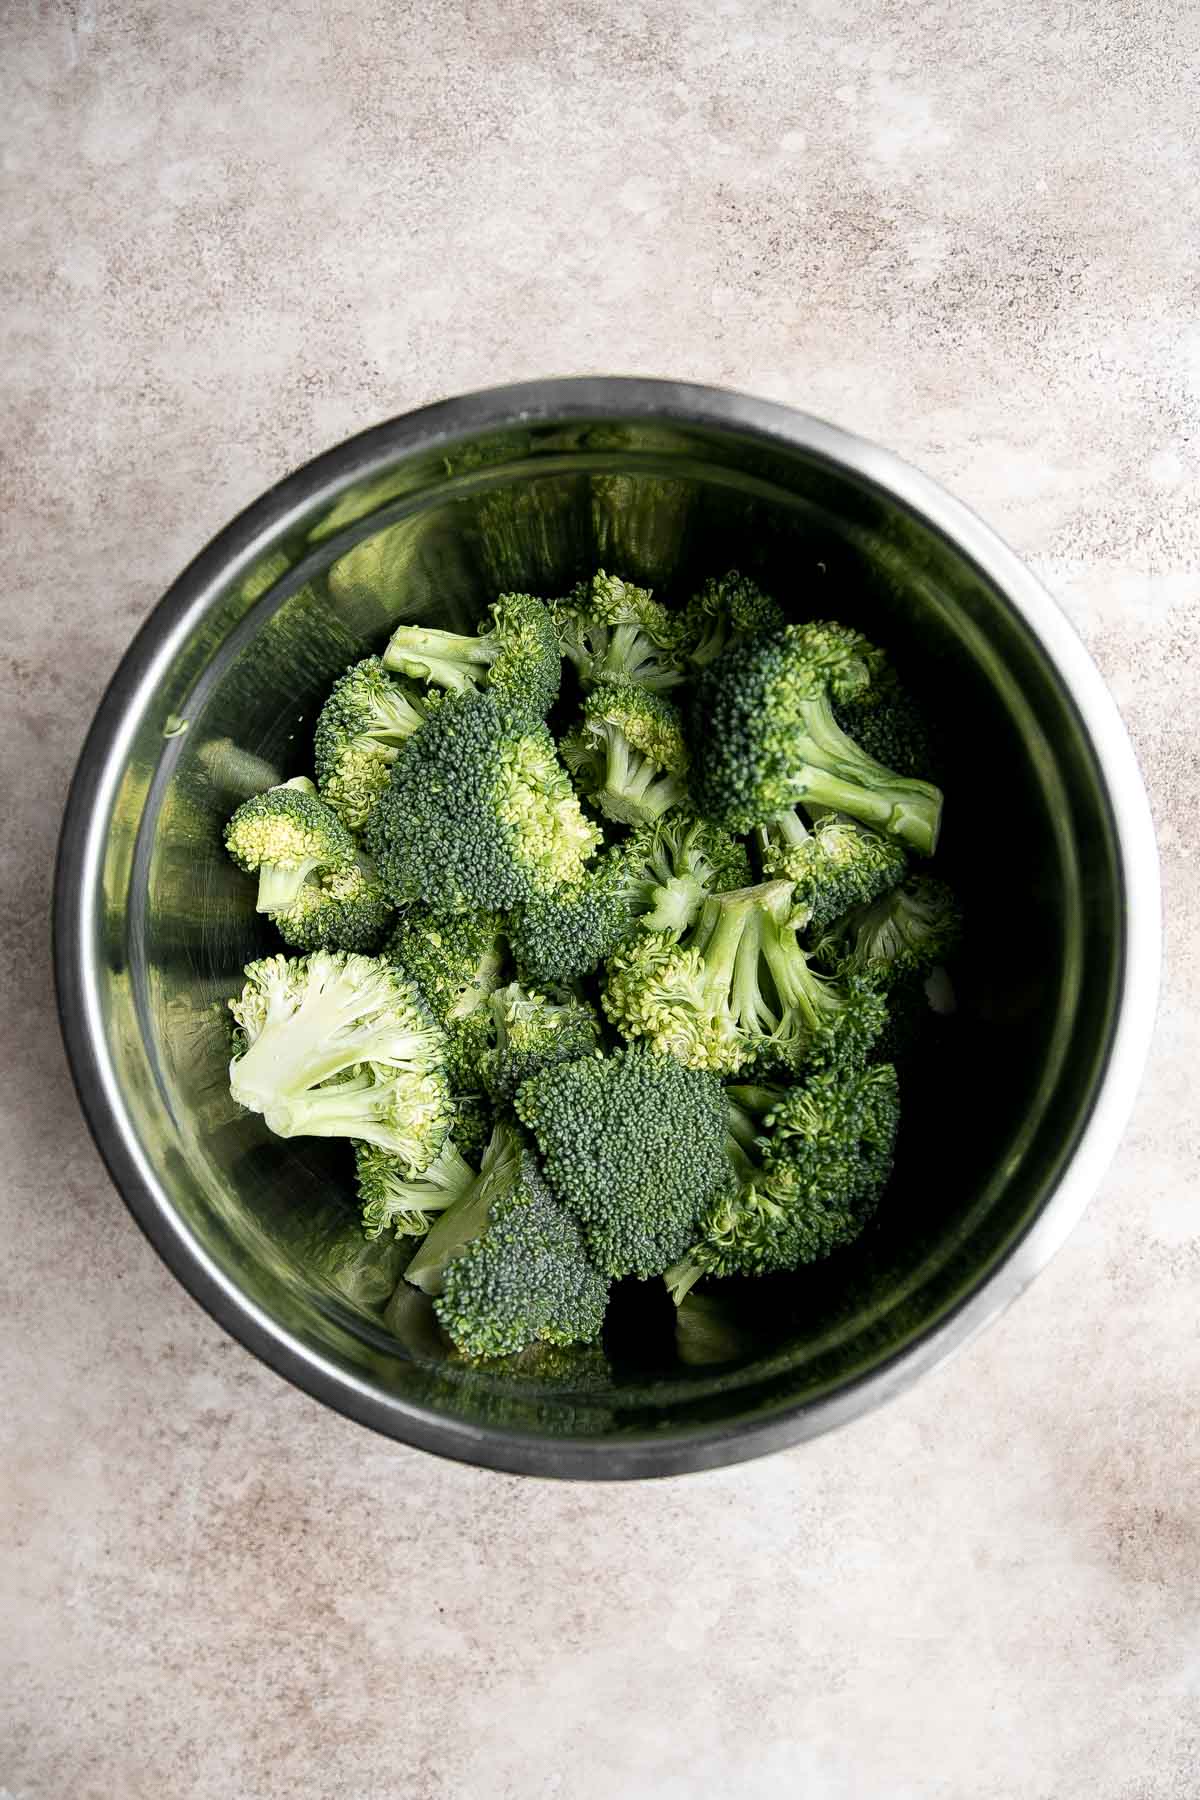
To make quick and easy Balsamic Roasted Broccoli, you will need the following ingredients (full measurements in recipe card below):
- broccoli - We prefer fresh broccoli florets for this recipe but you could accomplish a similar result with frozen broccoli florets. You'll get perfectly roasted broccoli either way, but you may need to add a few minutes to the roasting time if you use frozen.
- olive oil - avocado oil or another neutral oil with a high smoke point will work in place of the olive oil.
- balsamic vinegar - if you're out of balsamic vinegar, red wine vinegar or apple cider vinegar will yield a similar flavor.
- garlic powder
- salt and pepper
- parmesan cheese - the parmesan is completely optional and is added after cooking for flavor. Omit it if you have lactose sensitivity or if you'd like to make a completely vegan version of the recipe. You can also use a vegan parmesan-style cheese substitute instead.
You will also need measuring cups and spoons, a mixing bowl, and a large half sheet baking pan.
How to Make the Best Balsamic Roasted Broccoli
- Prep. Preheat the oven to 375F and position the oven rack in the top position.
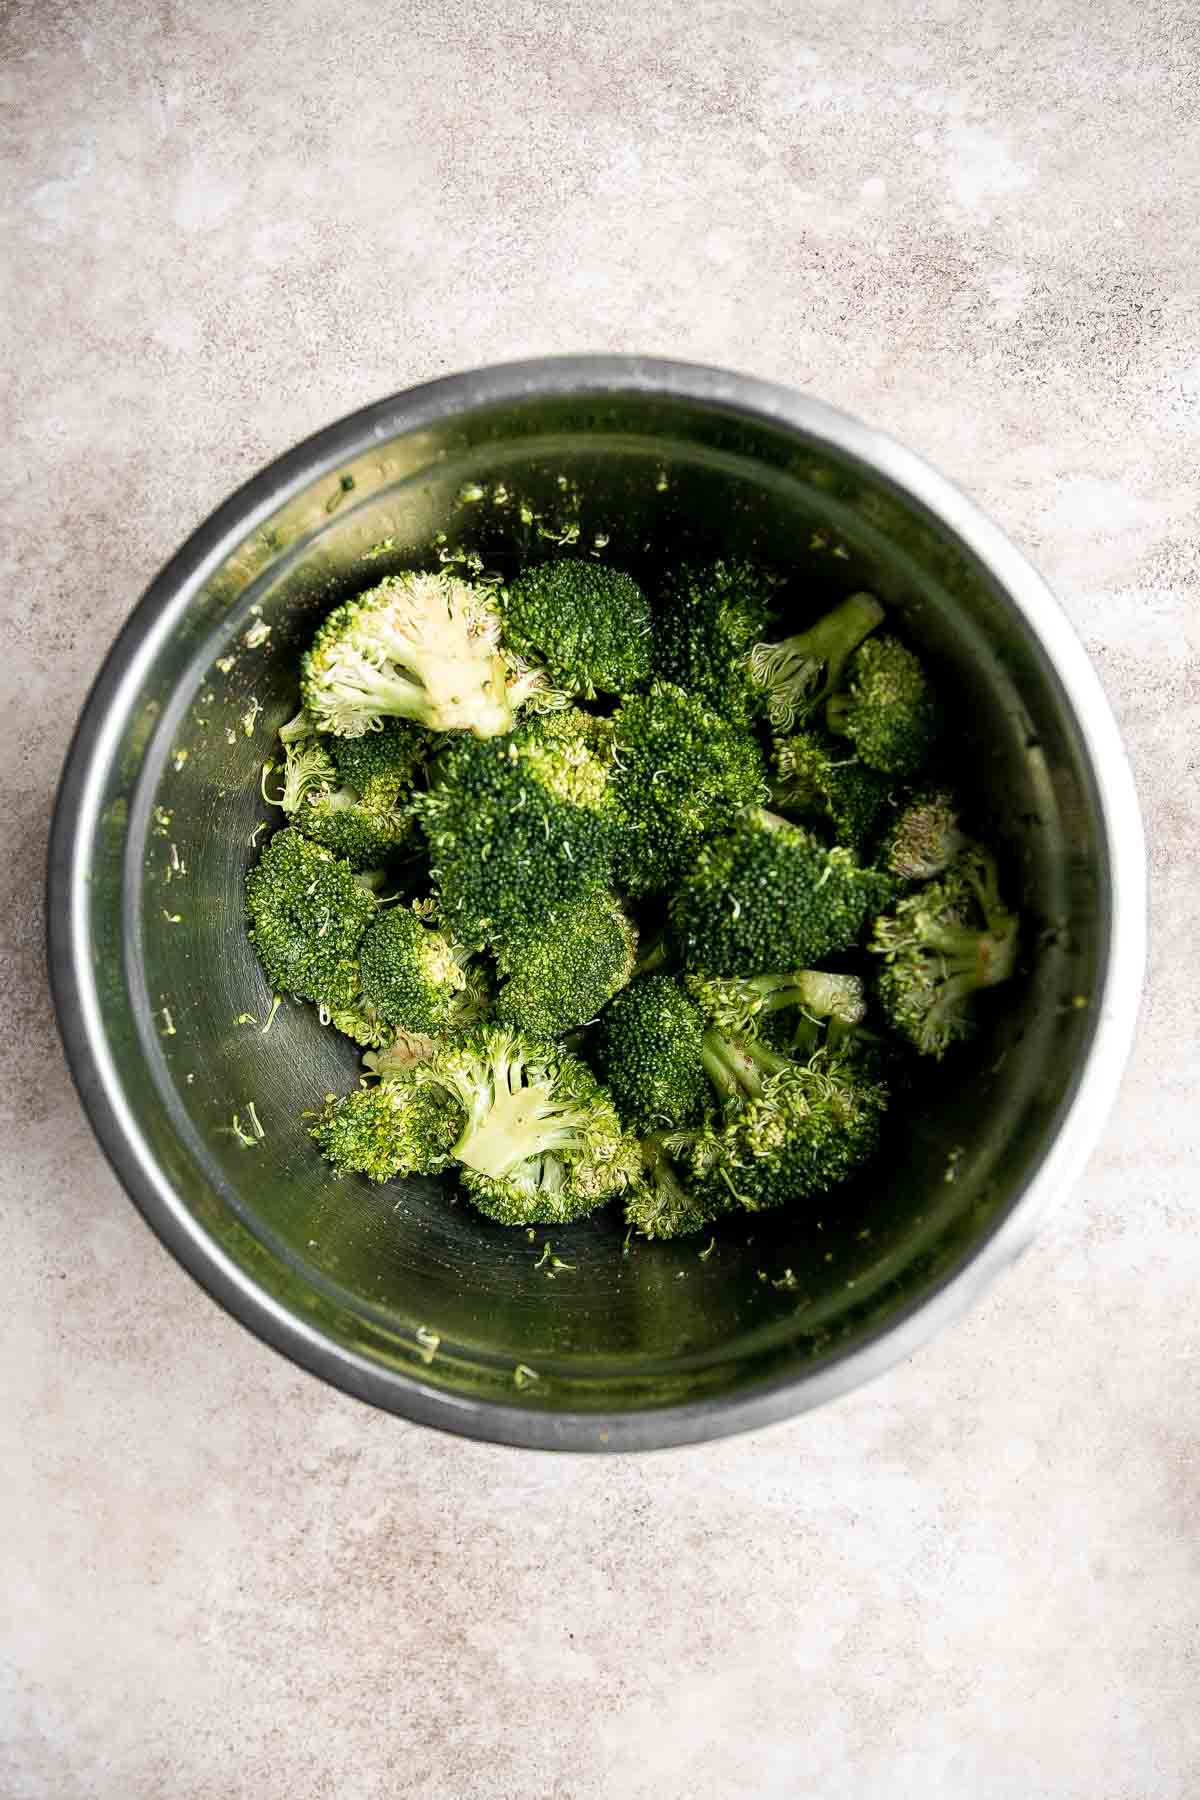
- Season broccoli. In a large mixing bowl, add broccoli, olive oil, balsamic vinegar, garlic powder, salt, and pepper. Toss to combine until the broccoli is well coated.
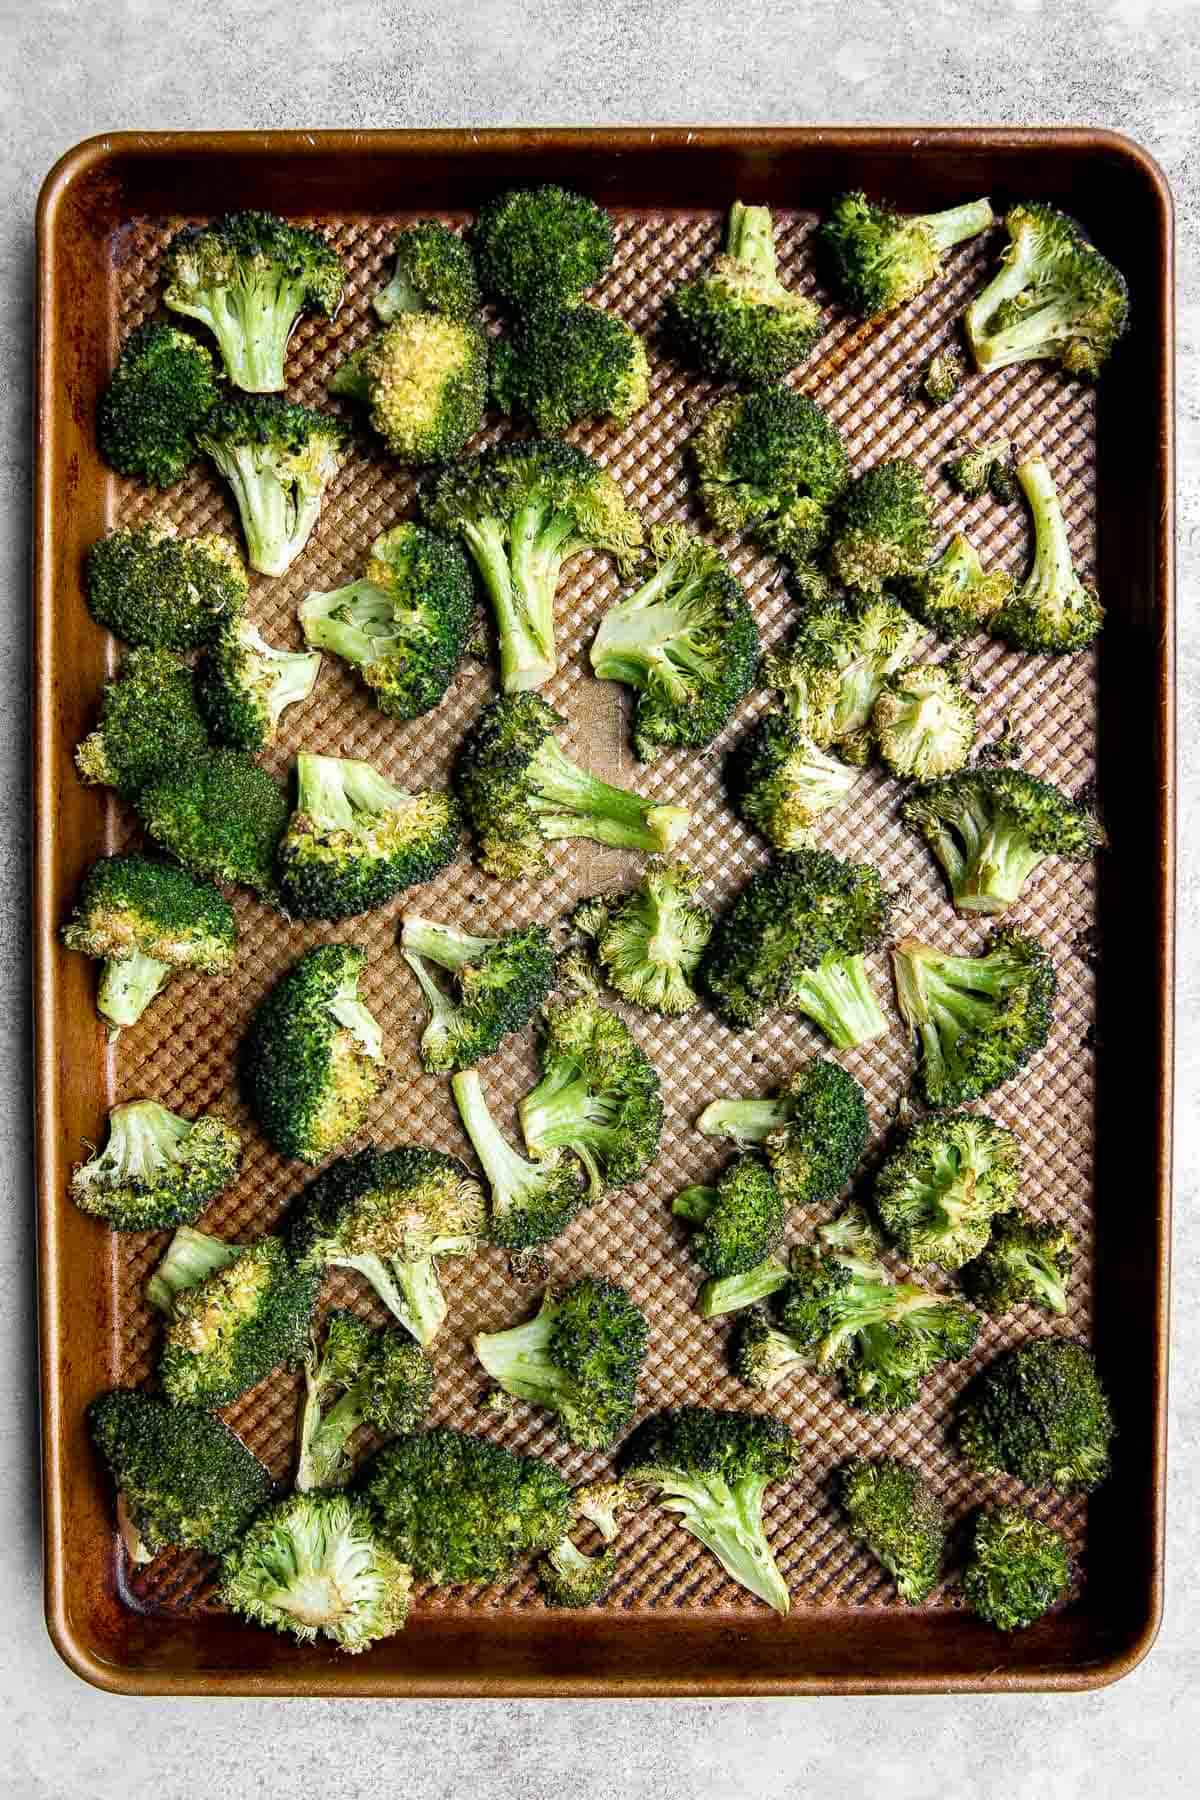
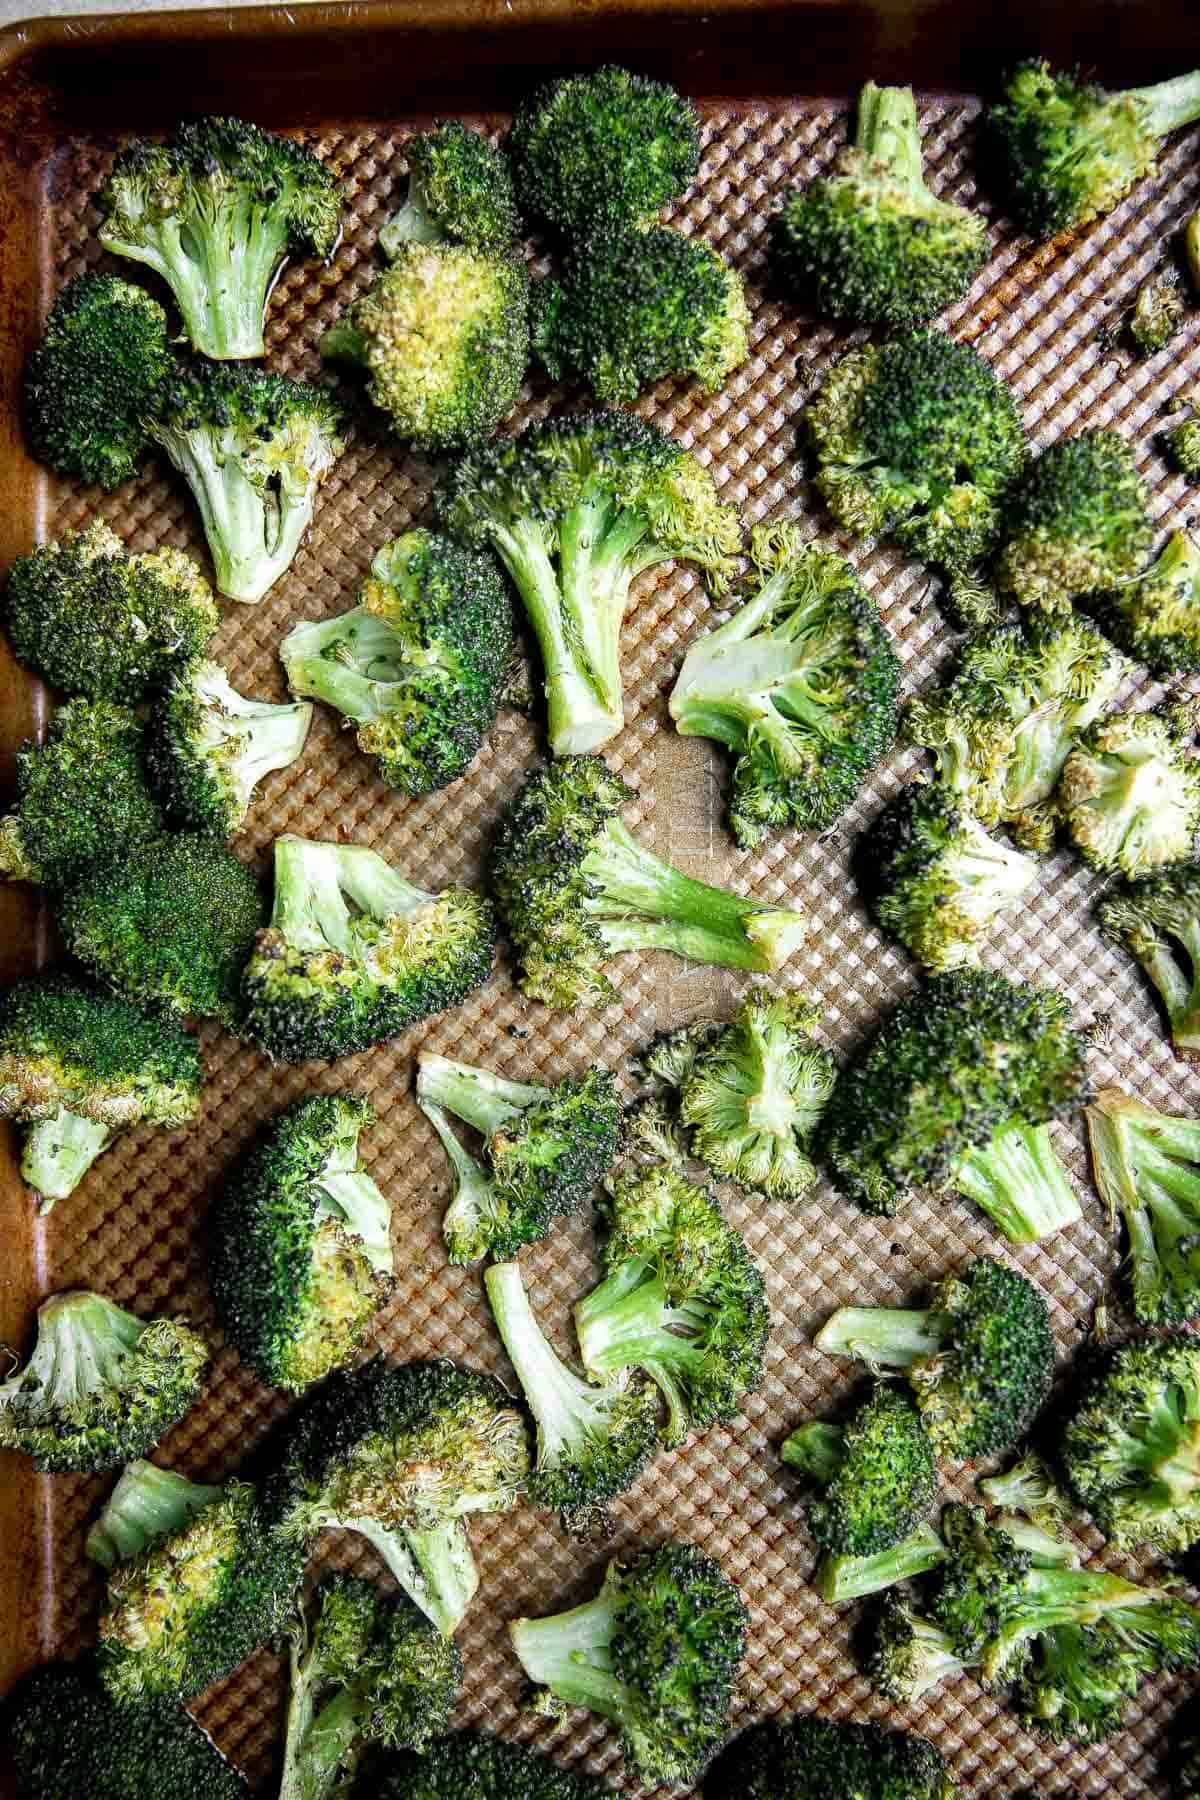
- Bake. Arrange the broccoli in a single layer on a large half sheet baking pan. Bake until tender and lightly browned, about 20 minutes.

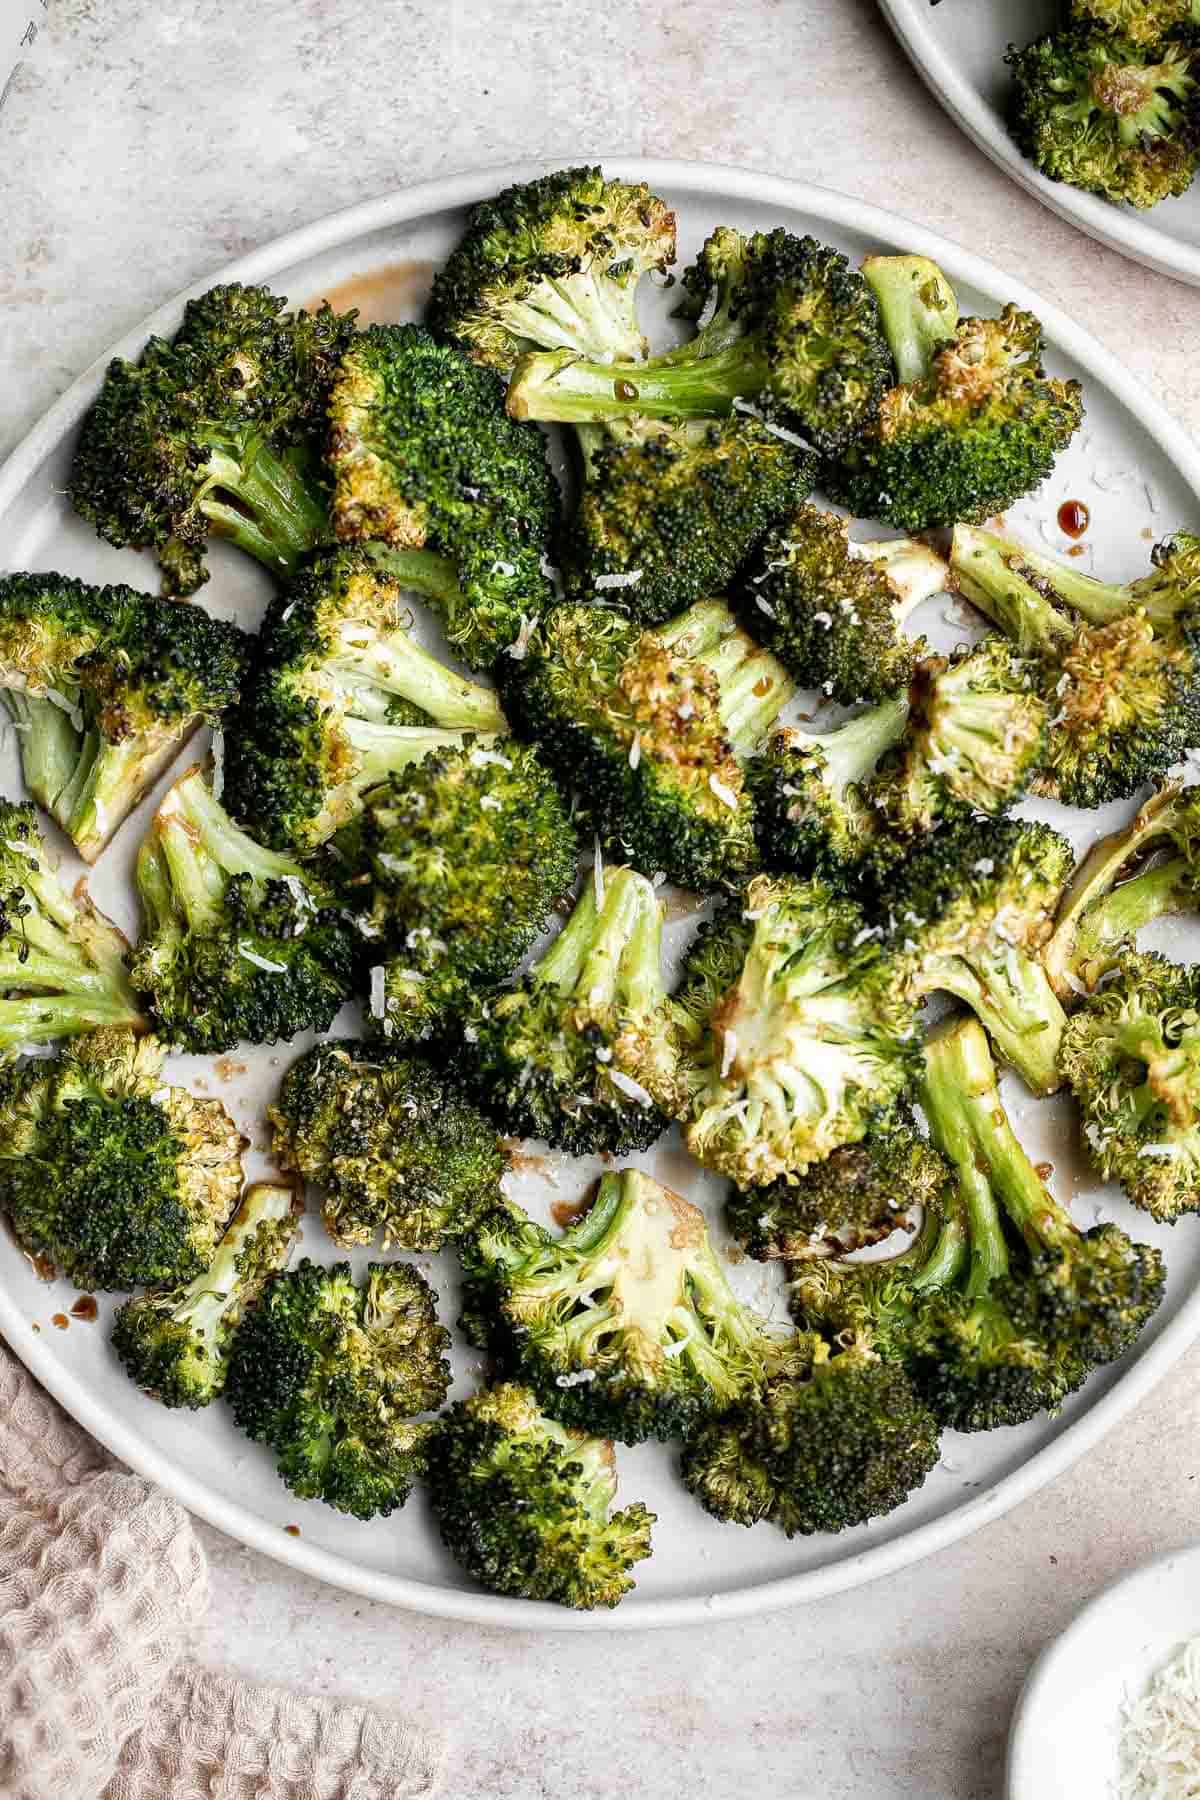
- Serve. Sprinkle with parmesan and serve with a drizzle of extra balsamic vinegar on top if desired.
Recipe Variations
You can customize this recipe by adding in other ingredient to switch up the flavor profile. Try:
- Spices. A sprinkle of cumin, smoked paprika, or red pepper flakes can add a nice smoky flavor and a bit of heat.
- Herbs. Add in your favorite fresh herbs such as thyme, rosemary, or basil either before or after roasting.
- Nuts. Add some nuts like pine nuts, pecans, or almonds for an extra crunch and nutty flavor.
- Dried fruits. Adding dried fruits such as dried cranberries, raisins, or drued apricots can add sweetness and extra depth of flavor to the broccoli..
- Bacon. Chop up some bacon and cook it over the stove before tossing it into the broccoli to give it a smoky and salty flavor.
How to Serve
Balsamic Roasted Broccoli can be served with almost anything - whether you are serving it with a simple weeknight dinner or a fancy dinner party. Some dinner entrees that we like to serve these veggies with are:
- Homemade Hamburger Helper
- Salmon Bites
- Pecan Crusted Chicken
- Baked Ravioli
- Prime Rib Roast
- Garlic Butter Shrimp
- Oven Baked Chicken Breast
Recipe Tips and Tricks
- Cook evenly. Cut the broccoli into florets of similar size, so that they cook evenly.
- Crisp them up more. These veggies are crisp on the edges and tender inside but you can crisp them up even more. Simply turn on the broiler for 1-2 minutes at the end. But keep a close eye on the broccoli as things can burn quickly in the broiler.
- Add leftovers to lunches. Upgrade packed lunches by replacing raw broccoli with this elevated balsamic roasted broccoli. It's just as tasty served cold or reheated in the office microwave or air fryer.
- Serve with everyday dinners or on special occasions. This broccoli is easy enough to make on busy weeknights when you're serving chicken nuggets, but sophisticated enough to serve for romantic date nights or dinner parties with a special roast.
Storing and Freezing Instructions
How to Store
Once cooled to room temperature, place leftover roasted broccoli in an airtight container and refrigerate for up to 5 days.
How to Reheat
Reheat leftover veggies in a 300 F preheated oven, air fryer, or toaster oven for 5-10 minutes until hot and crispy. You can also reheat in the microwave but it may loose its crispy texture.
How to Freeze
Transfer the broccoli to a freezer-safe container or freezer bag and freeze for up to 3 months. For the best texture, allow it to thaw overnight in the refrigerator before reheating and serving.
More Broccoli Recipes
- 40 Best Vegetable Sides
- Air Fryer Broccoli
- Light Cream of Broccoli Soup
- Roasted Broccoli Grilled Cheese
- Microwave Steamed Broccoli
- Broccoli Cheese Casserole
Tried this recipe?
I'd love to hear what you think! Leave a comment and rating below to share your feedback. Your reviews help others discover this recipe and help me keep creating more free recipes for you. Snap a photo and tag me on social media @aheadofthyme too.
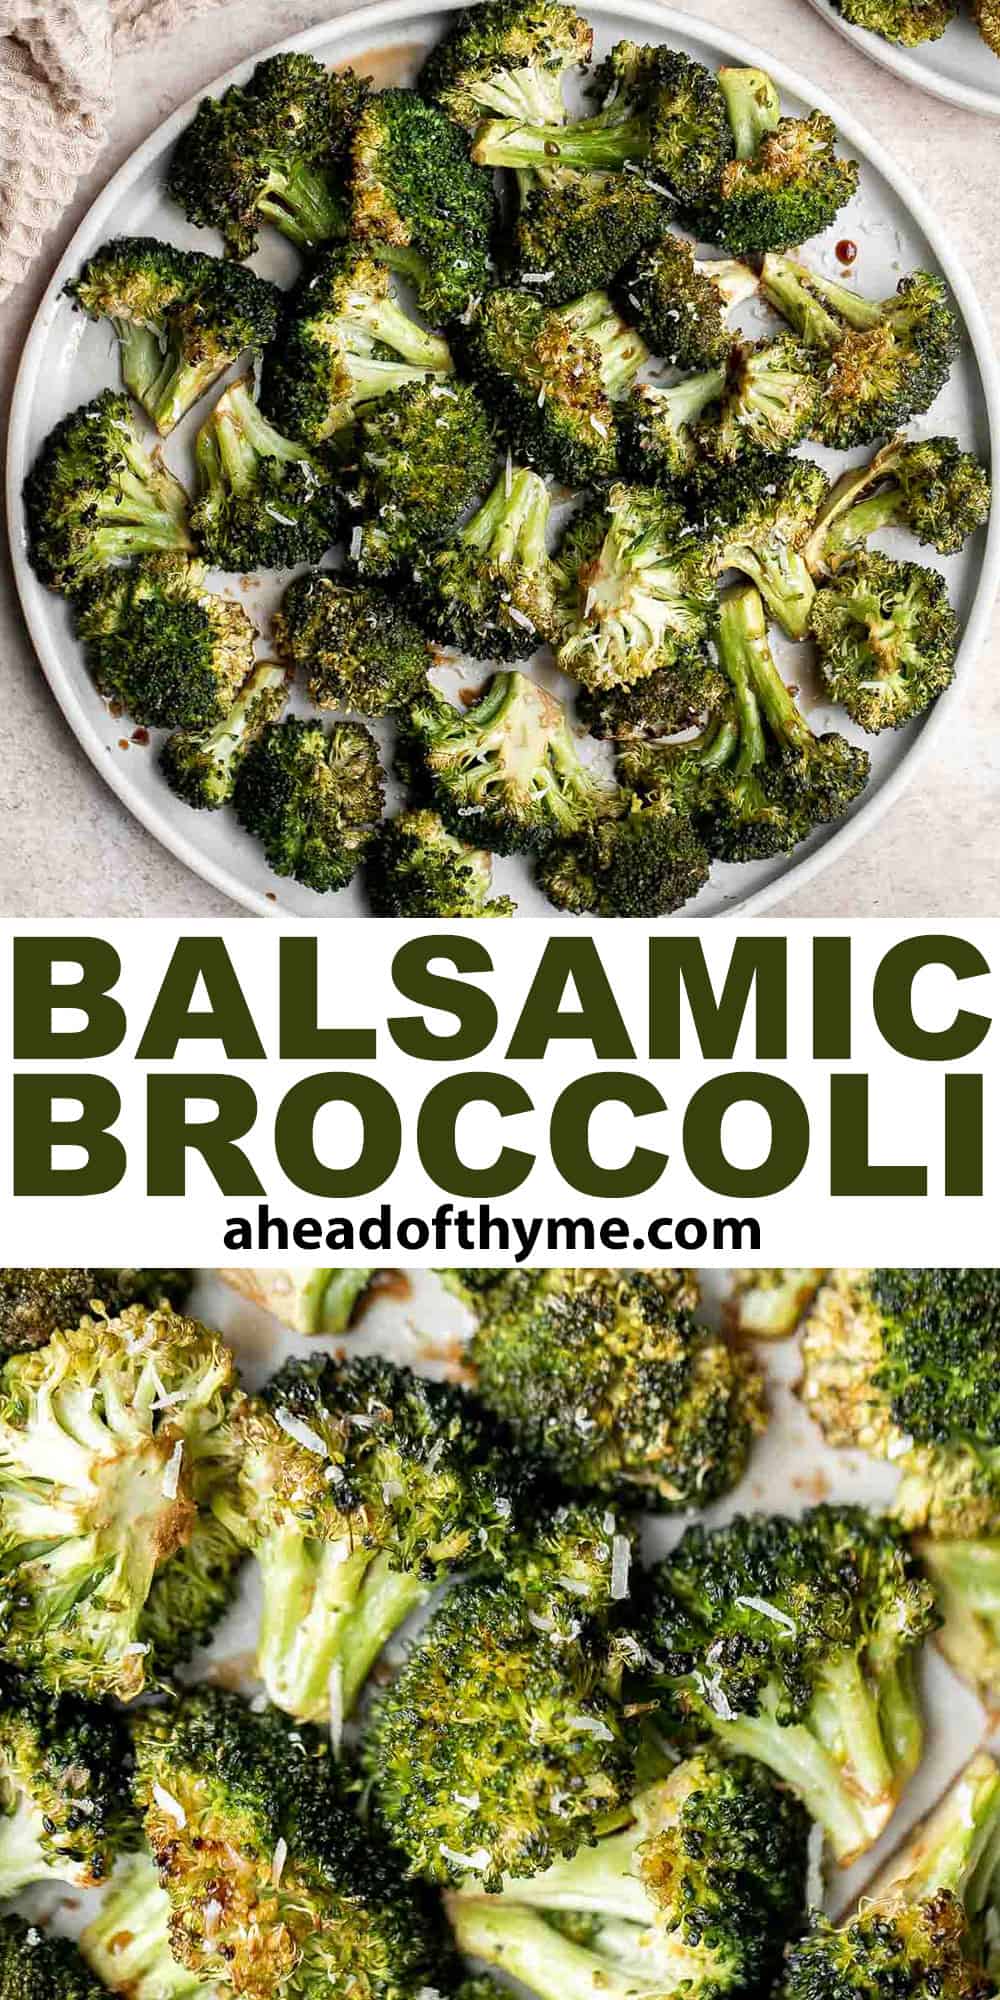
Salmon Bites
Salmon Bites are a flavorful and delicious meal that is quick and easy to make with a handful of simple ingredients. Bite-sized portions of salmon are cooked until tender with crispy, golden edges and coated with a homemade, sweet and sticky Asian glaze.
If you like salmon, you'll love these salmon bites. They're easy to make, hard to forget, and perfect as an appetizer, lunch, or dinner. In just 25 minutes, you can get these savory bites ready to serve along with rice, vegetables, noodles, or greens. Easy, delicious, and nutritious, you'll never feel guilty serving teriyaki salmon bites - and your whole family will love them!
Why You'll Love these Salmon Bites
- Fast and easy recipe. These salmon bites are not only bite-sized flavor powerhouses, they're also incredibly quick and simple to make. You can have hot salmon bites on the table in under half an hour, which is perfect for mid-day lunches, snacks, or even dinner when you want something nutritious but easy.
- Savory honey sesame soy glaze. The mouthwatering glaze on these salmon bites is similar to teriyaki sauce and is made with sesame oil, soy sauce, honey, and a little bit of lemon juice - a perfect balance of sweet, salty, tangy, and umami!
- Loved by all ages. Fish can sometimes be tricky to serve to younger kids, but these nugget-sized salmon bites are kid-friendly and often a much more appealing option to the 10 and under crowd! Of course, adult salmon-lovers will find these irresistible as well.
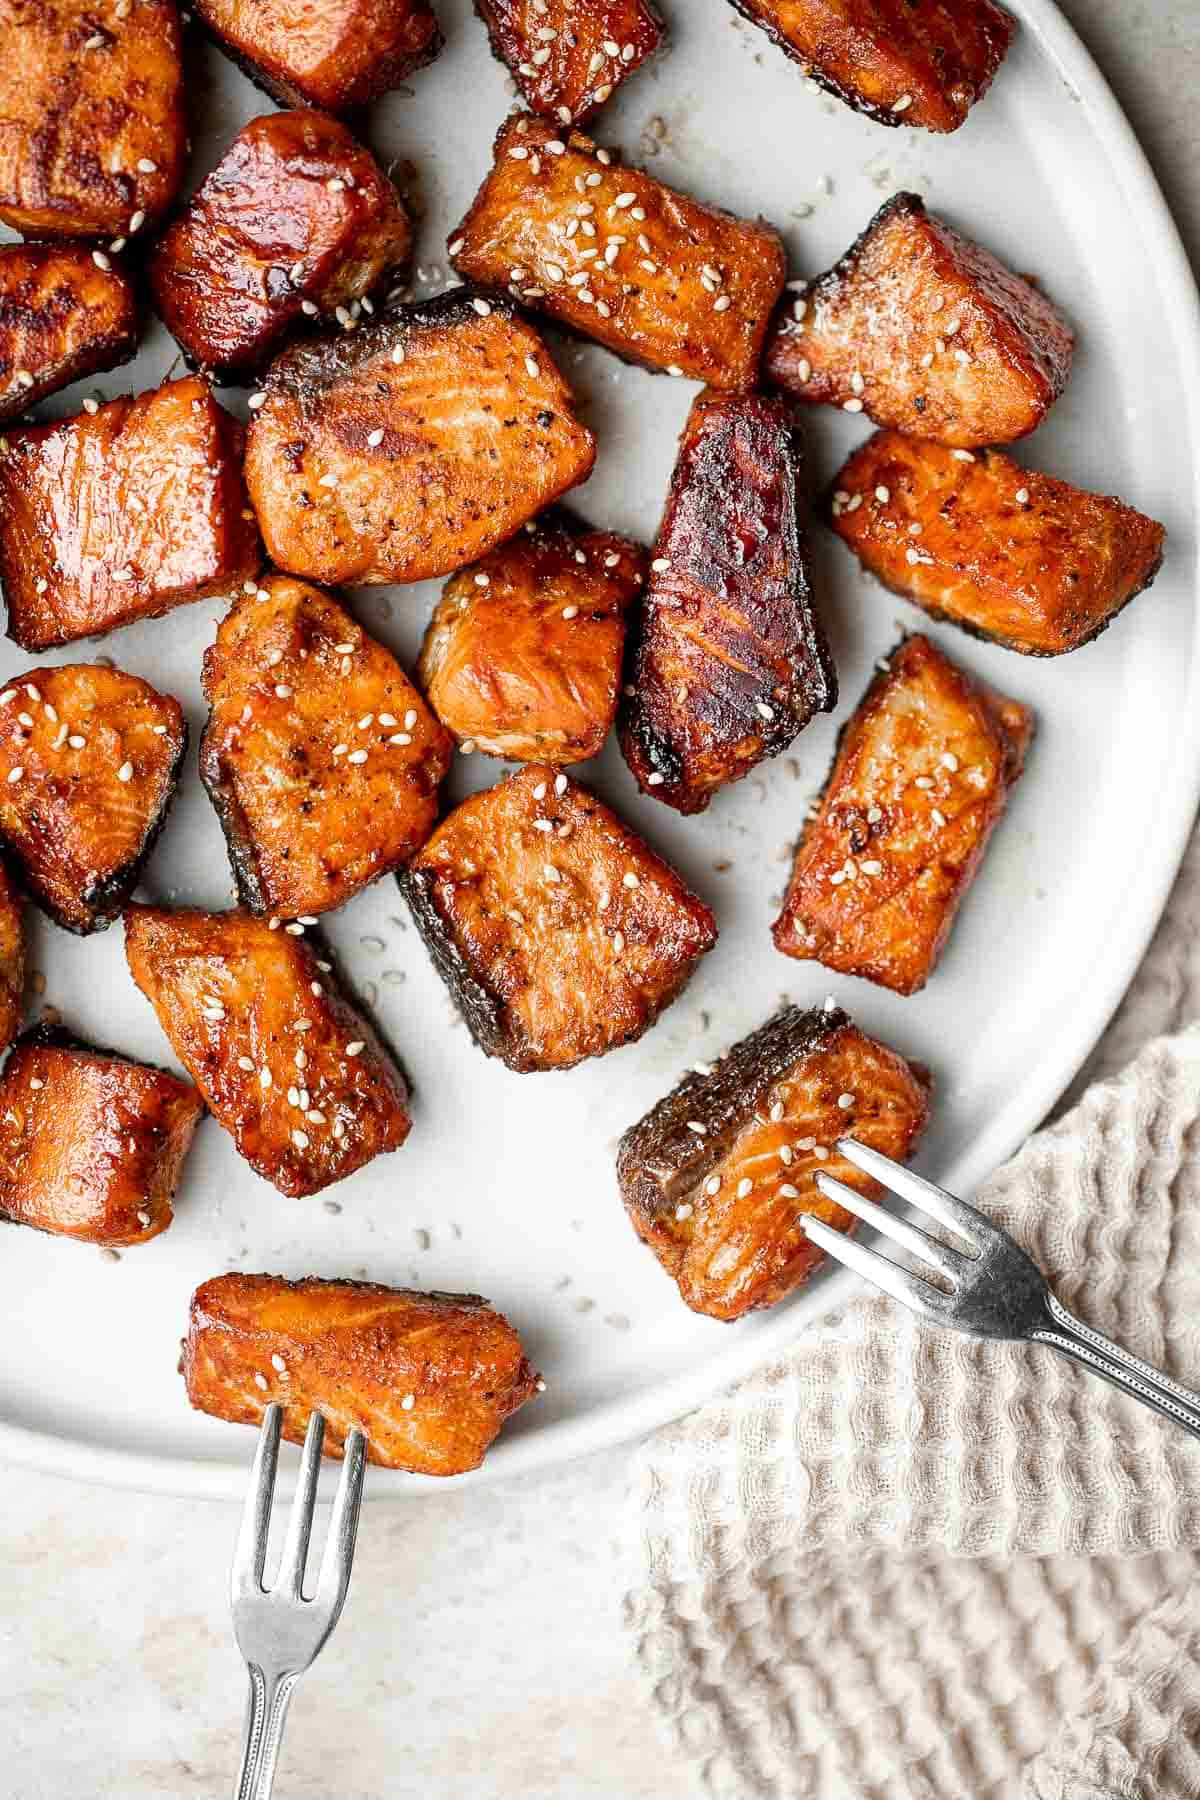
Ingredient Notes
To make these delicious, quick and easy Salmon Bites, you will need the following ingredients (full measurements in recipe card below):
- salmon fillet - this recipe works best with a fresh salmon fillet, but you can use a large (thawed) frozen fillet as well.
- paprika - if you're out of paprika, you can try cayenne or chili powder instead, depending on your heat tolerance.
- garlic powder - for garlic powder, you can substitute dried minced garlic or a single clove of finely minced fresh garlic.
- salt + pepper
- vegetable oil - coconut oil, avocado oil, olive oil, or another oil with a high smoke point will work just as well.
- soy sauce - coconut aminos or gluten-free soy sauce are both acceptable swaps for the soy sauce. You could also try a low-sodium soy sauce if needed.
- honey - if you're out of honey, an equal amount of white or brown sugar will create a similar flavor and help thicken the glaze, but it may take a little longer to dissolve.
- sesame oil - if you're not a fan of sesame, you can omit this ingredient.
- lemon juice - freshly squeezed lemon juice is always best for flavor, but you can use concentrated lemon juice if that's what you have on hand!
You will also need measuring cups and spoons, mixing bowls, and large skillet.
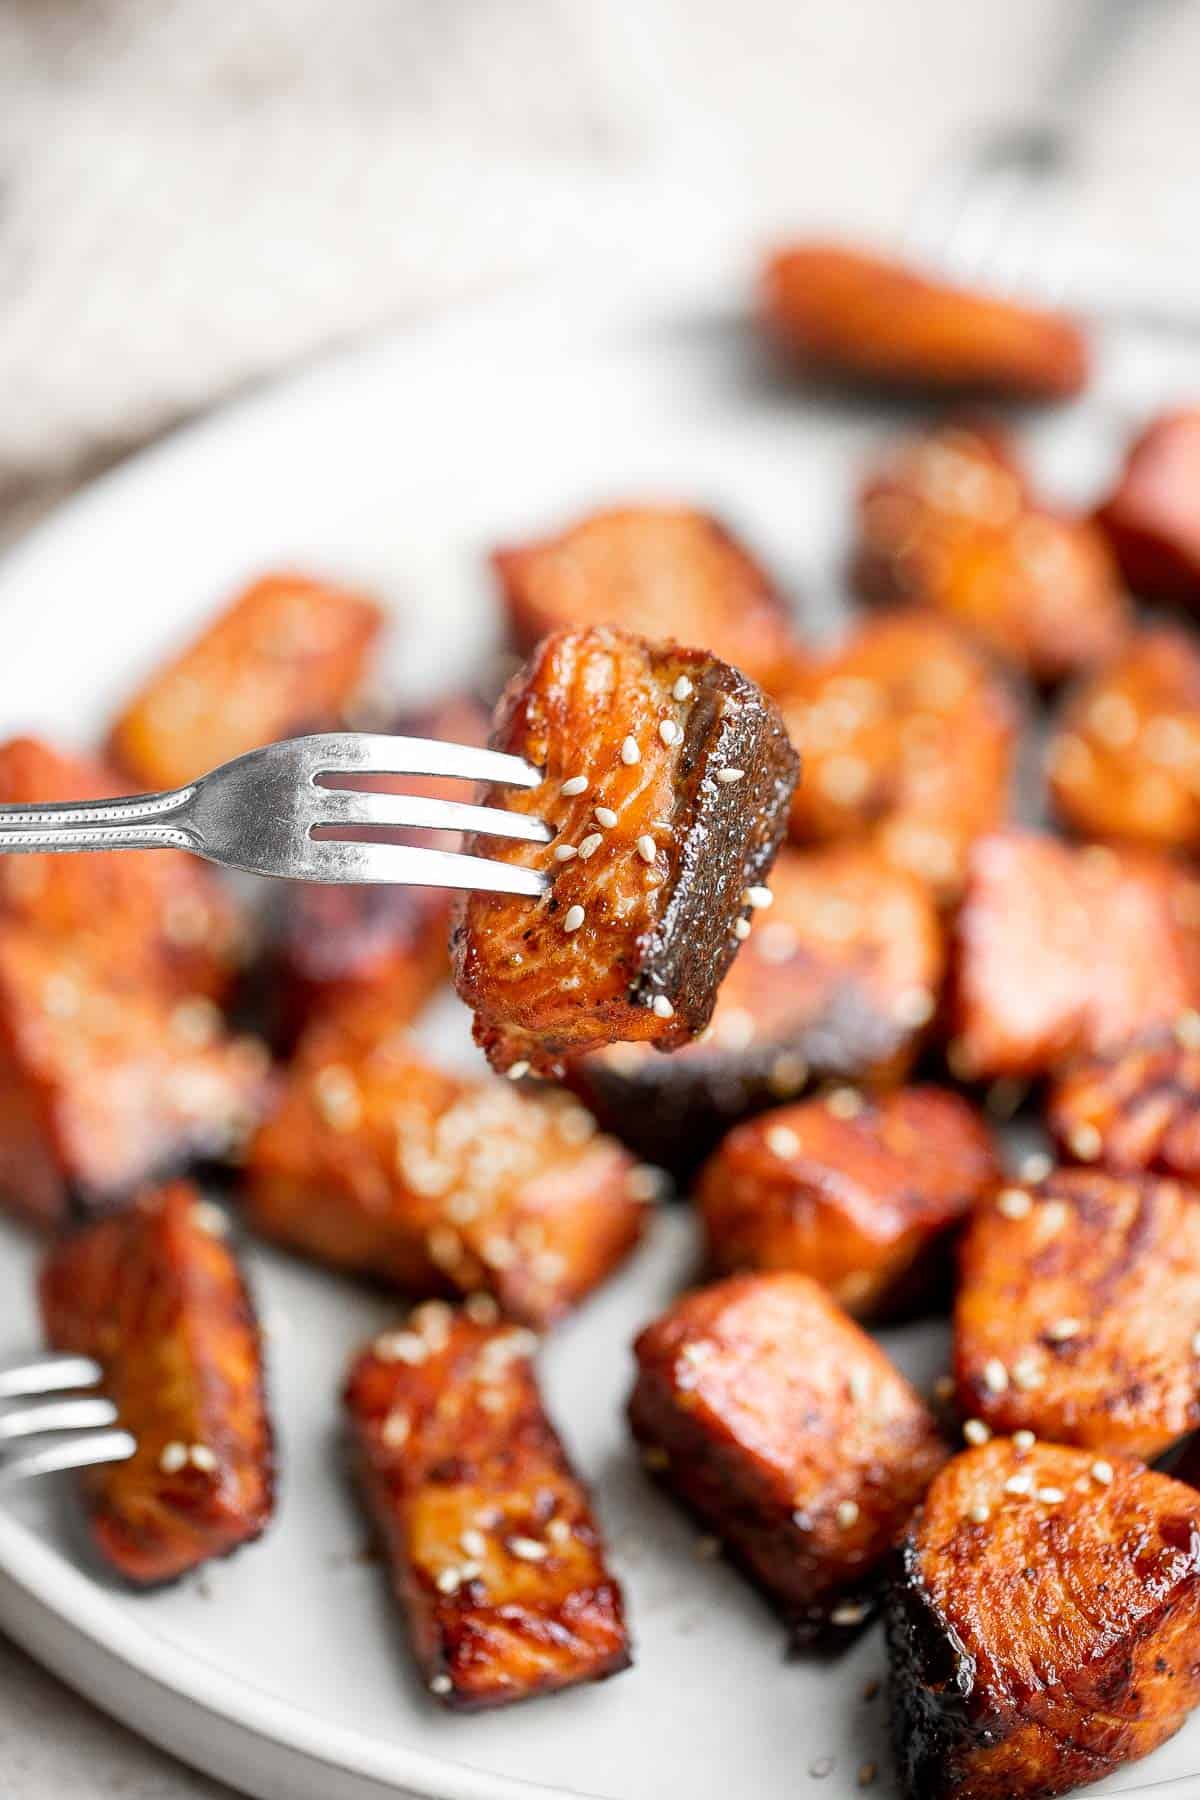
How to Make the Best Salmon Bites
- Season salmon. In a medium mixing bowl, add chopped salmon, 1 teaspoon oil, paprika, garlic powder, salt, and pepper. Toss well to coat and set aside for 10 minutes.
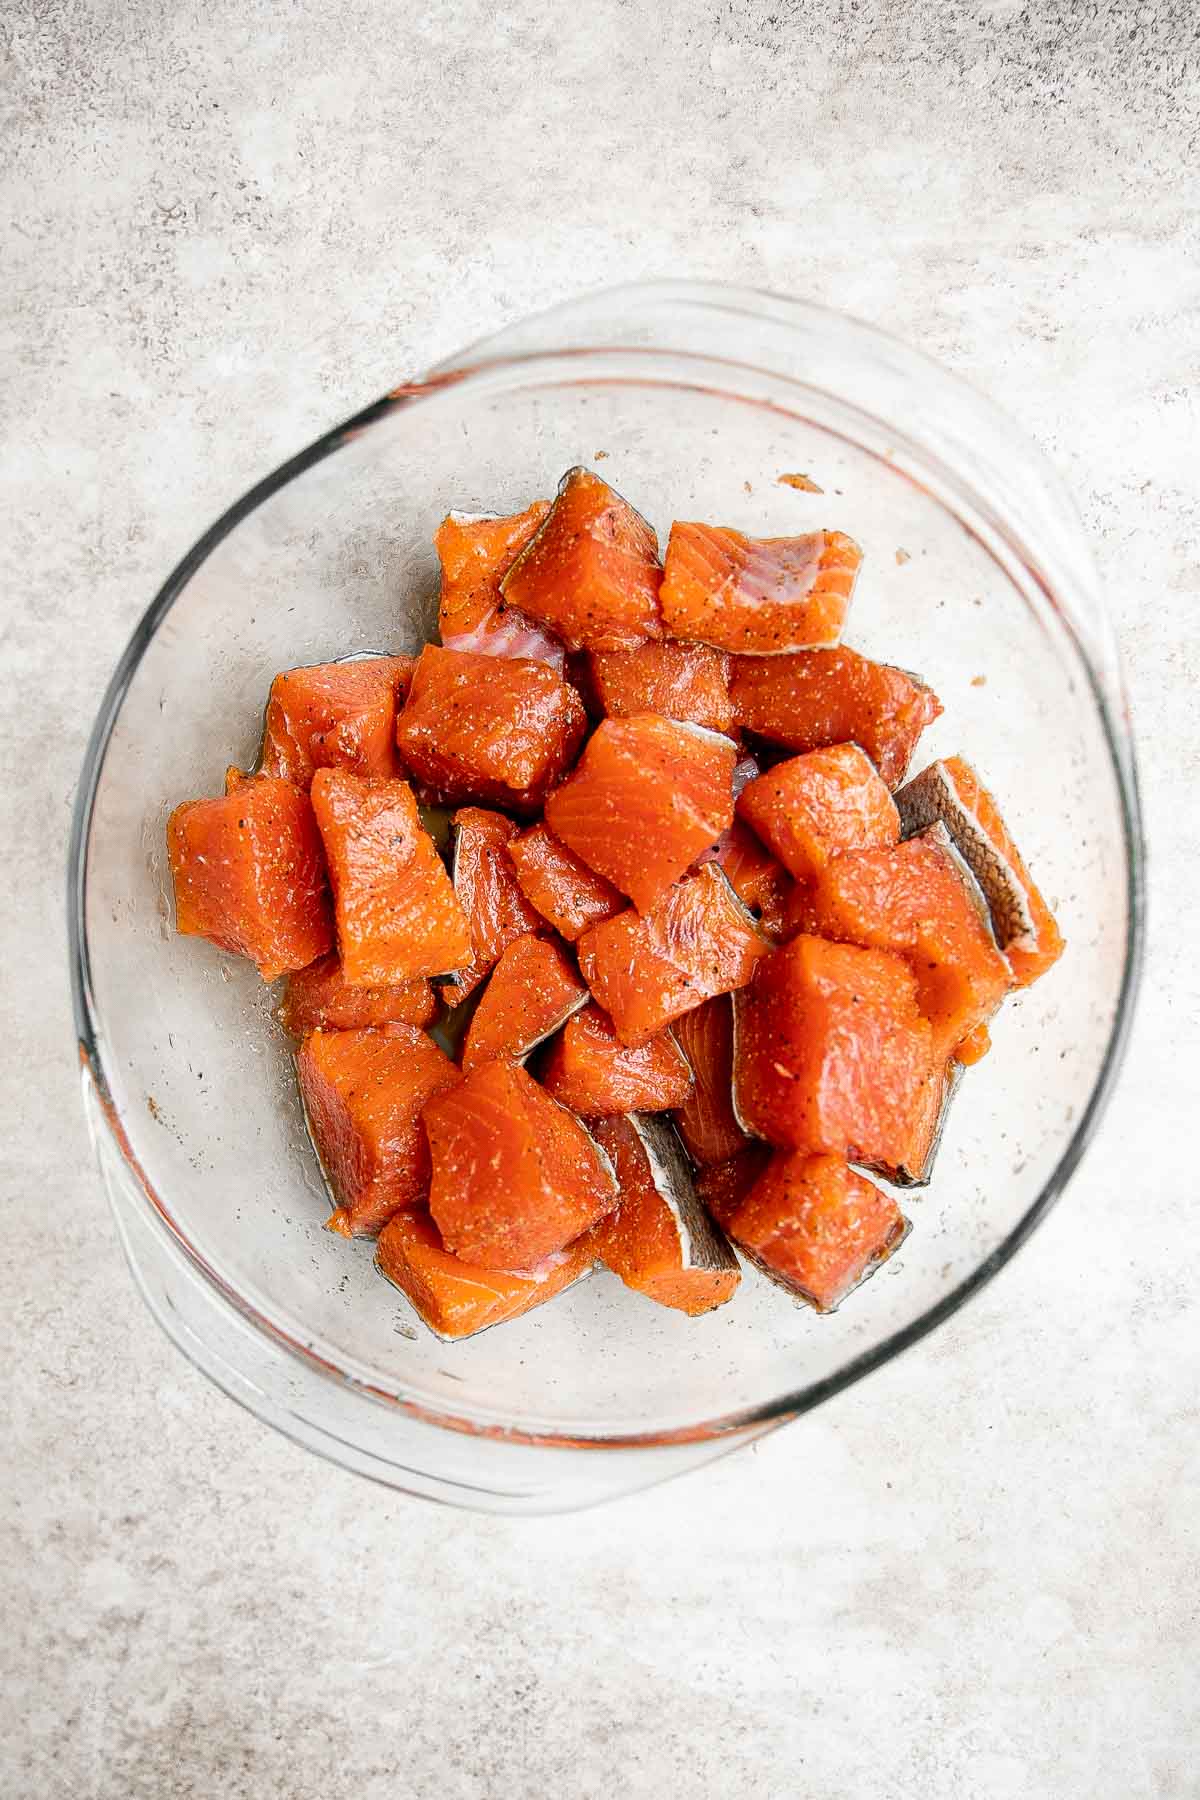
- Sear salmon. Heat remaining oil in a large skillet over medium-high heat until the hot oil sizzles, about 1-2 minutes. Sear the salmon pieces (skin side down first) until golden browned and fully cooked, about 5-6 minutes per side. Do not move the salmon around during cooking. When salmon is cooked, the flesh will turn opaque, and it will flake easily when you insert a fork.

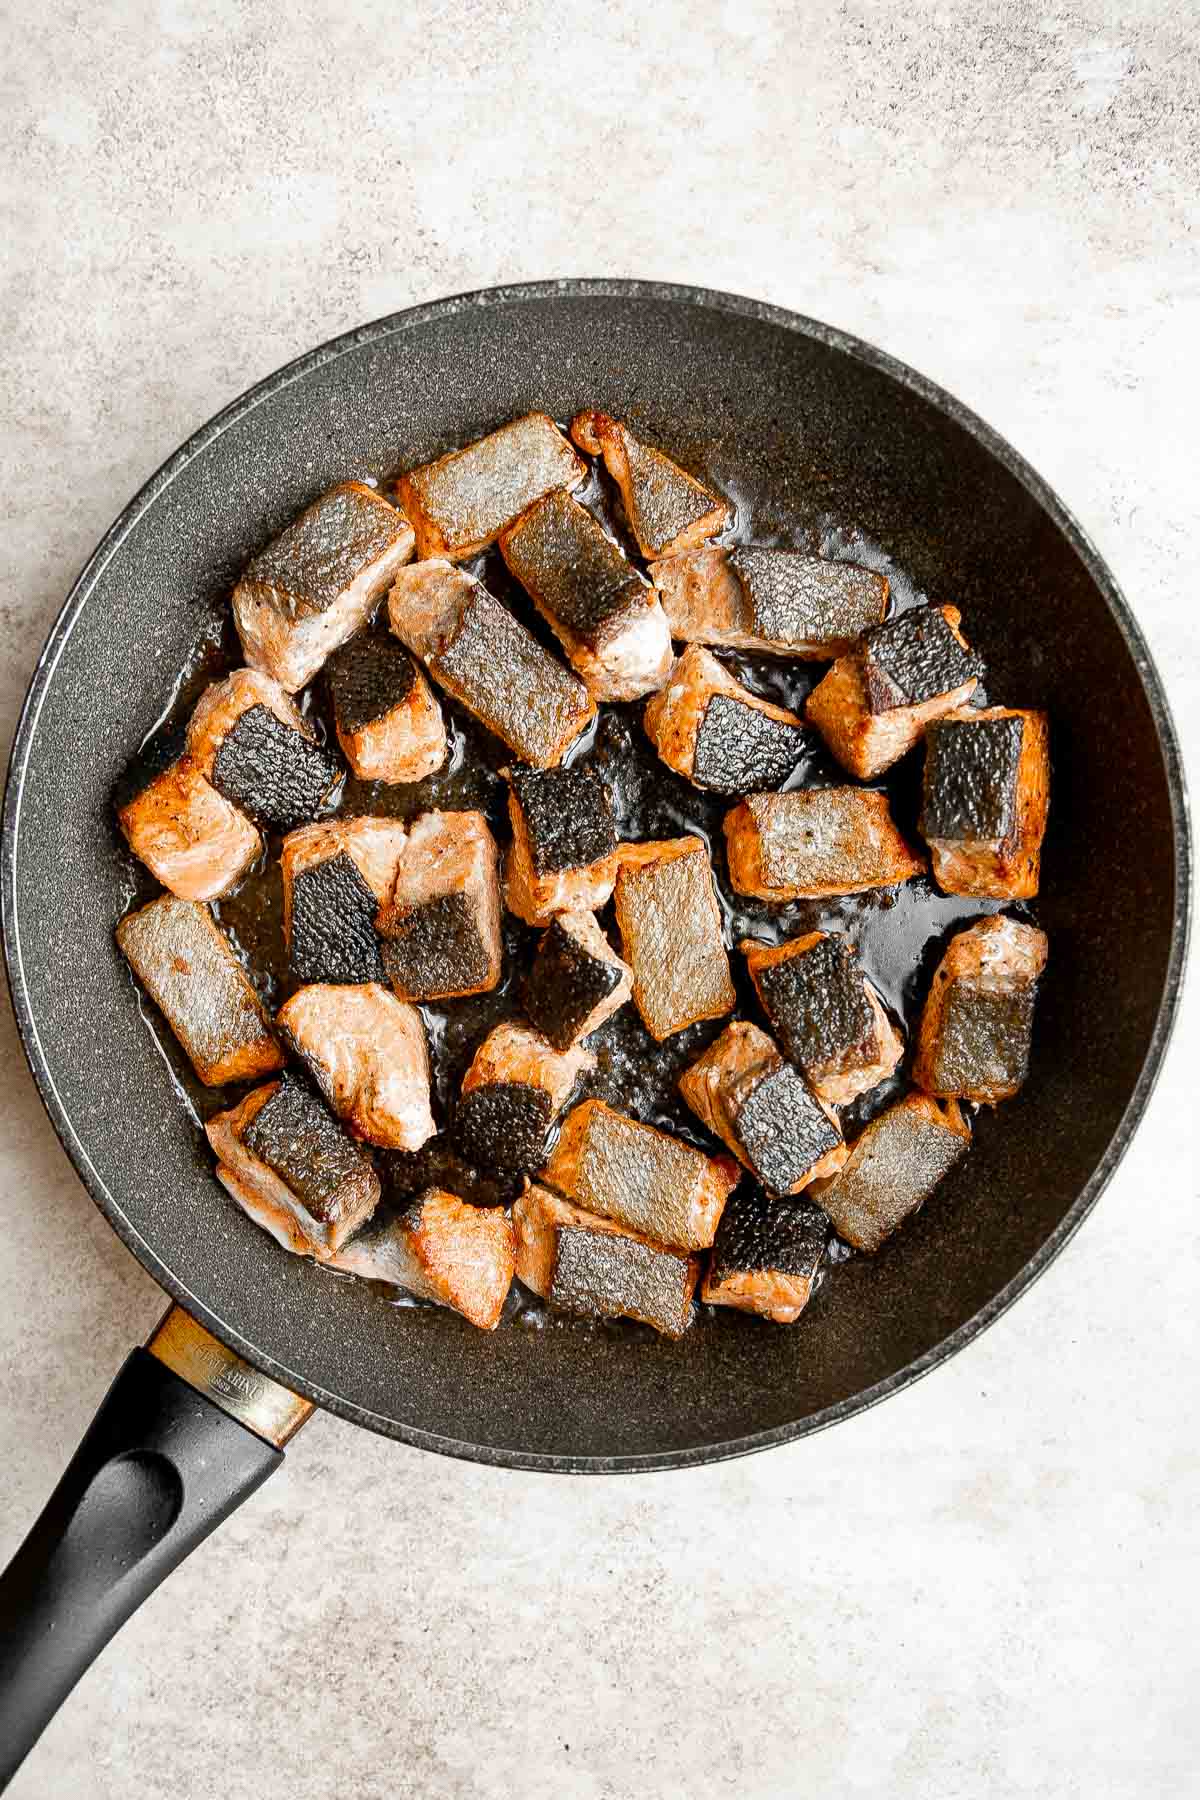
- Make sauce. In a small mixing bowl, whisk together soy sauce, honey, sesame oil, and lemon juice until smooth.
- Coat salmon. Pour the sauce over the salmon. Toss well to coat the salmon bites in the sauce and cook for another 1-2 minutes until browned.
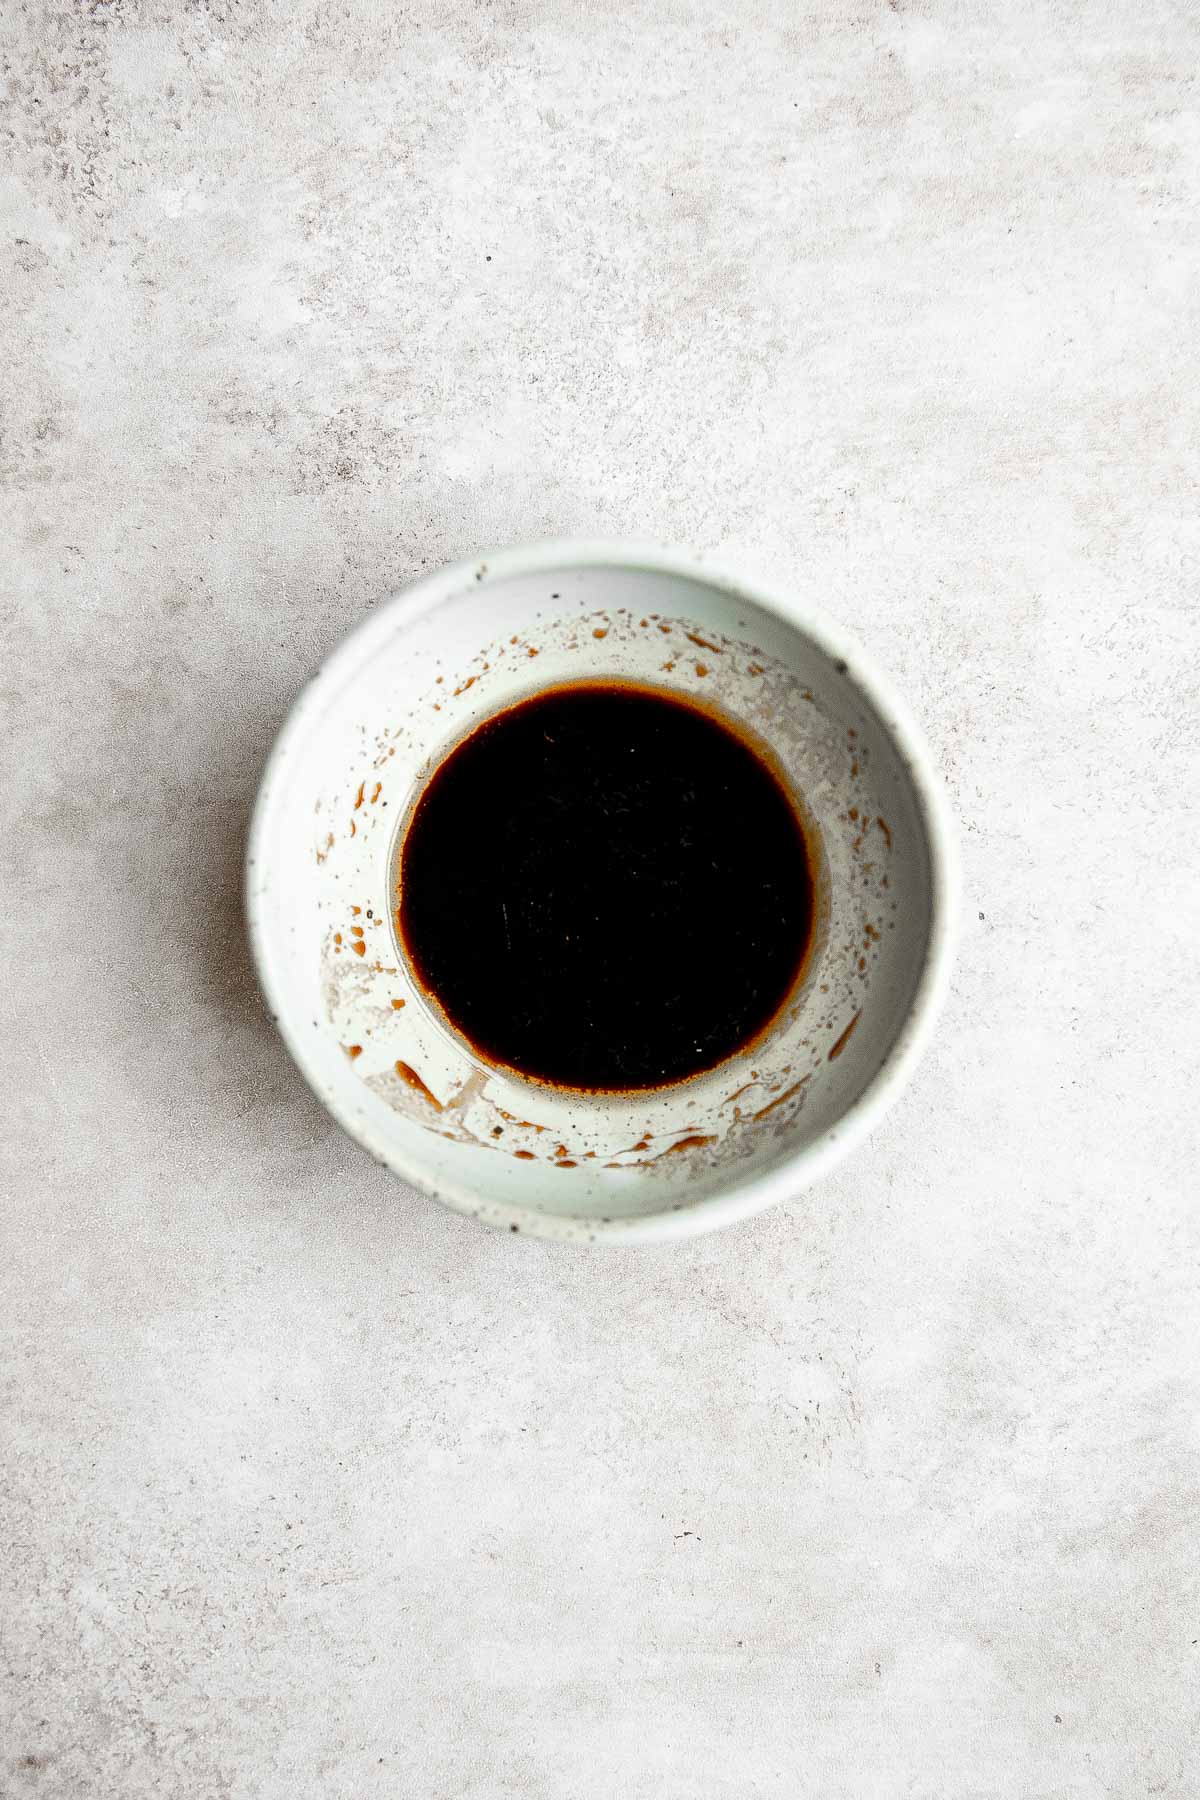
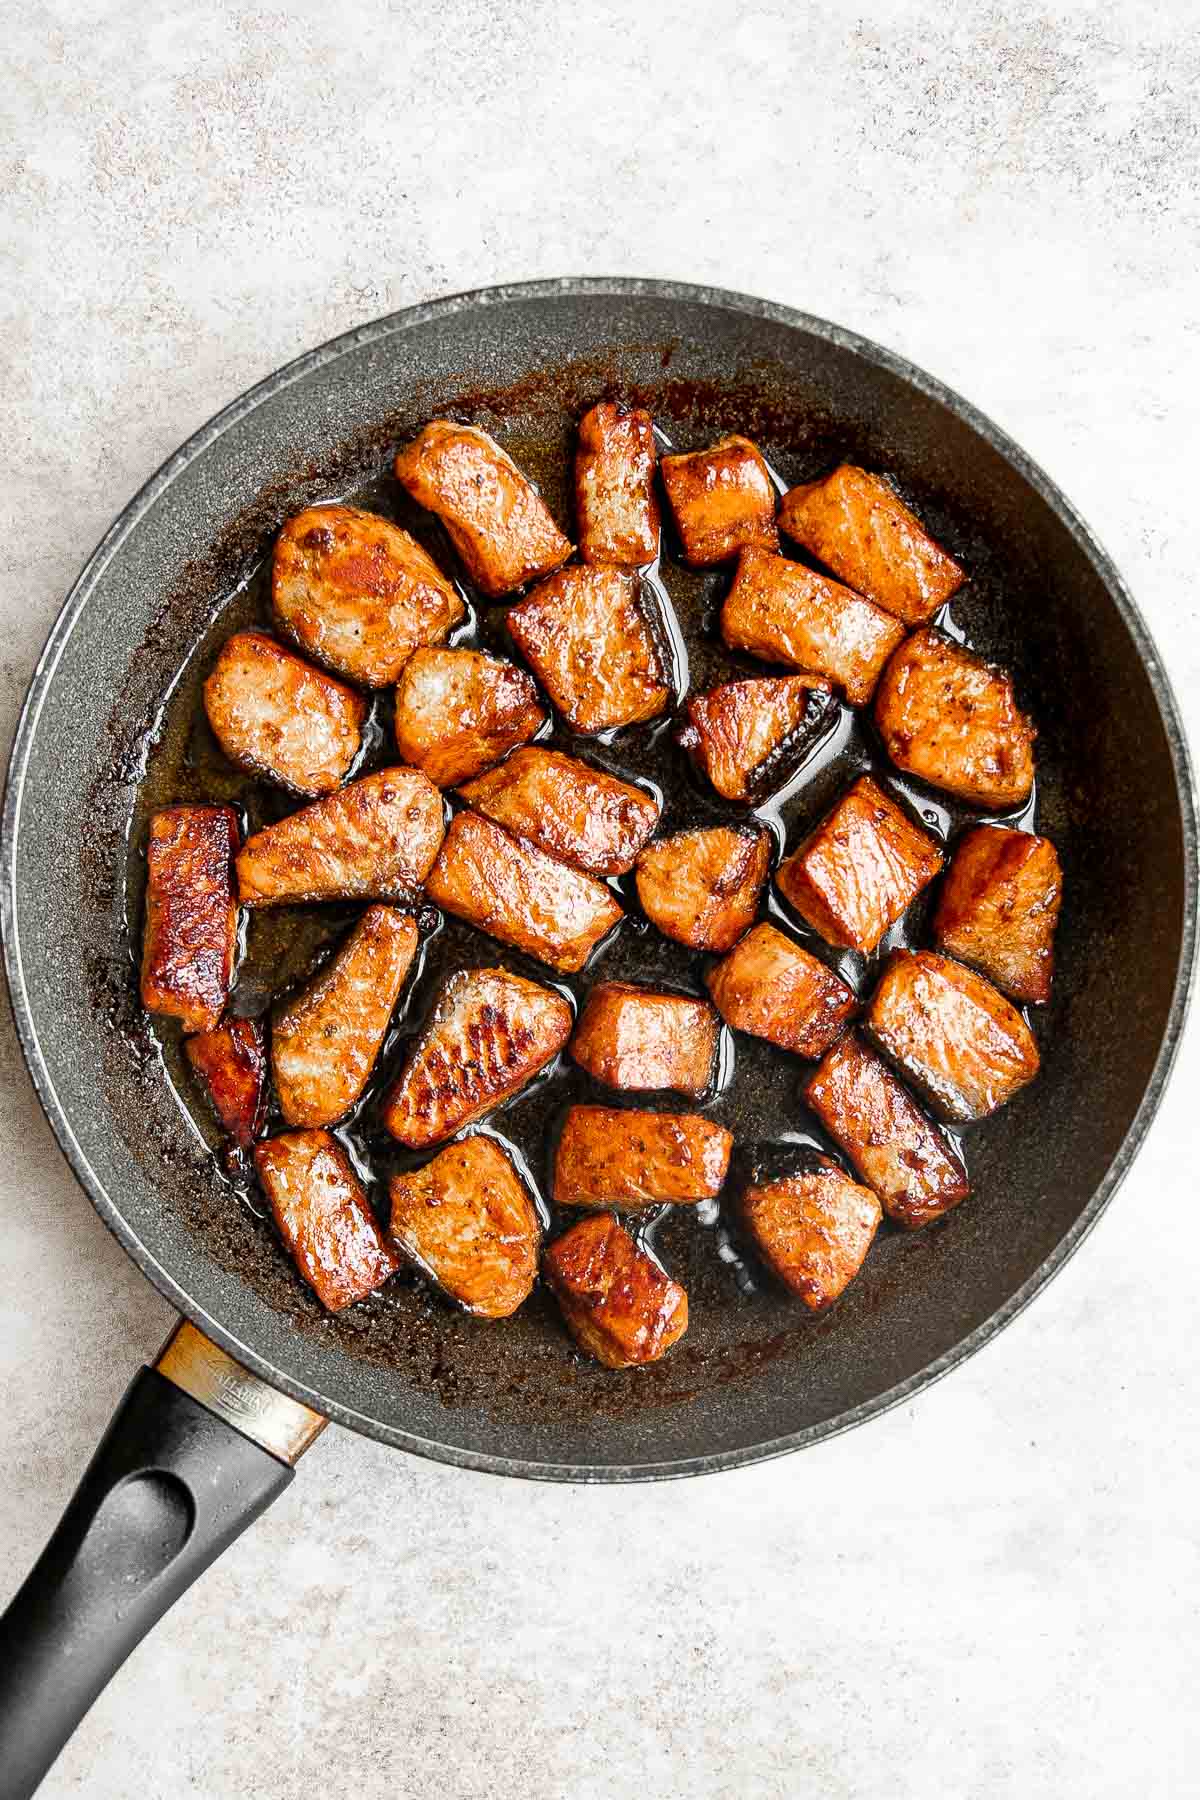
- Serve. Use tongs to remove the salmon bites and place on a serving plate. Garnish with white sesame seeds and serve immediately.
Recipe Variations
There are so many ways to switch up the flavors of these salmon bites. Instead of adding our Asian-inspired sauce to the salmon, try these flavor variations:
- Greek: Add a drizzle of lemon juice and season the cooked salmon with fresh dill.
- Italian: Toss the cooked salmon in a mixture of olive oil, lemon juice, and oregano.
- Cajun: Before cooking, season the salmon bites with a mixture of Cajun seasoning, paprika, and cayenne pepper.
How to Serve
Salmon Bites are delicious served on their own as an appy with a dipping sauce such as Spicy Mayo, Creamy Sesame Sauce, or Ranch Dip.
You can also serve these fish bites as a complete meal with some sides including:
Recipe Tips and Tricks
- Use leftovers creatively. You can add leftover salmon bites to salads, wraps, stir-fries, and more! Use your imagination and you'll never have to eat the exact same dish twice!
- Add stir-fried veggies. You can make extra glaze for stir-fried vegetables to streamline the flavors into a complete meal.
- Try another cooking method. We pan-seared the salmon bites but you can also cook them over high heat on the grill or in the oven under the broiler. This will create a nice crust on the outside while keeping the inside moist and tender.
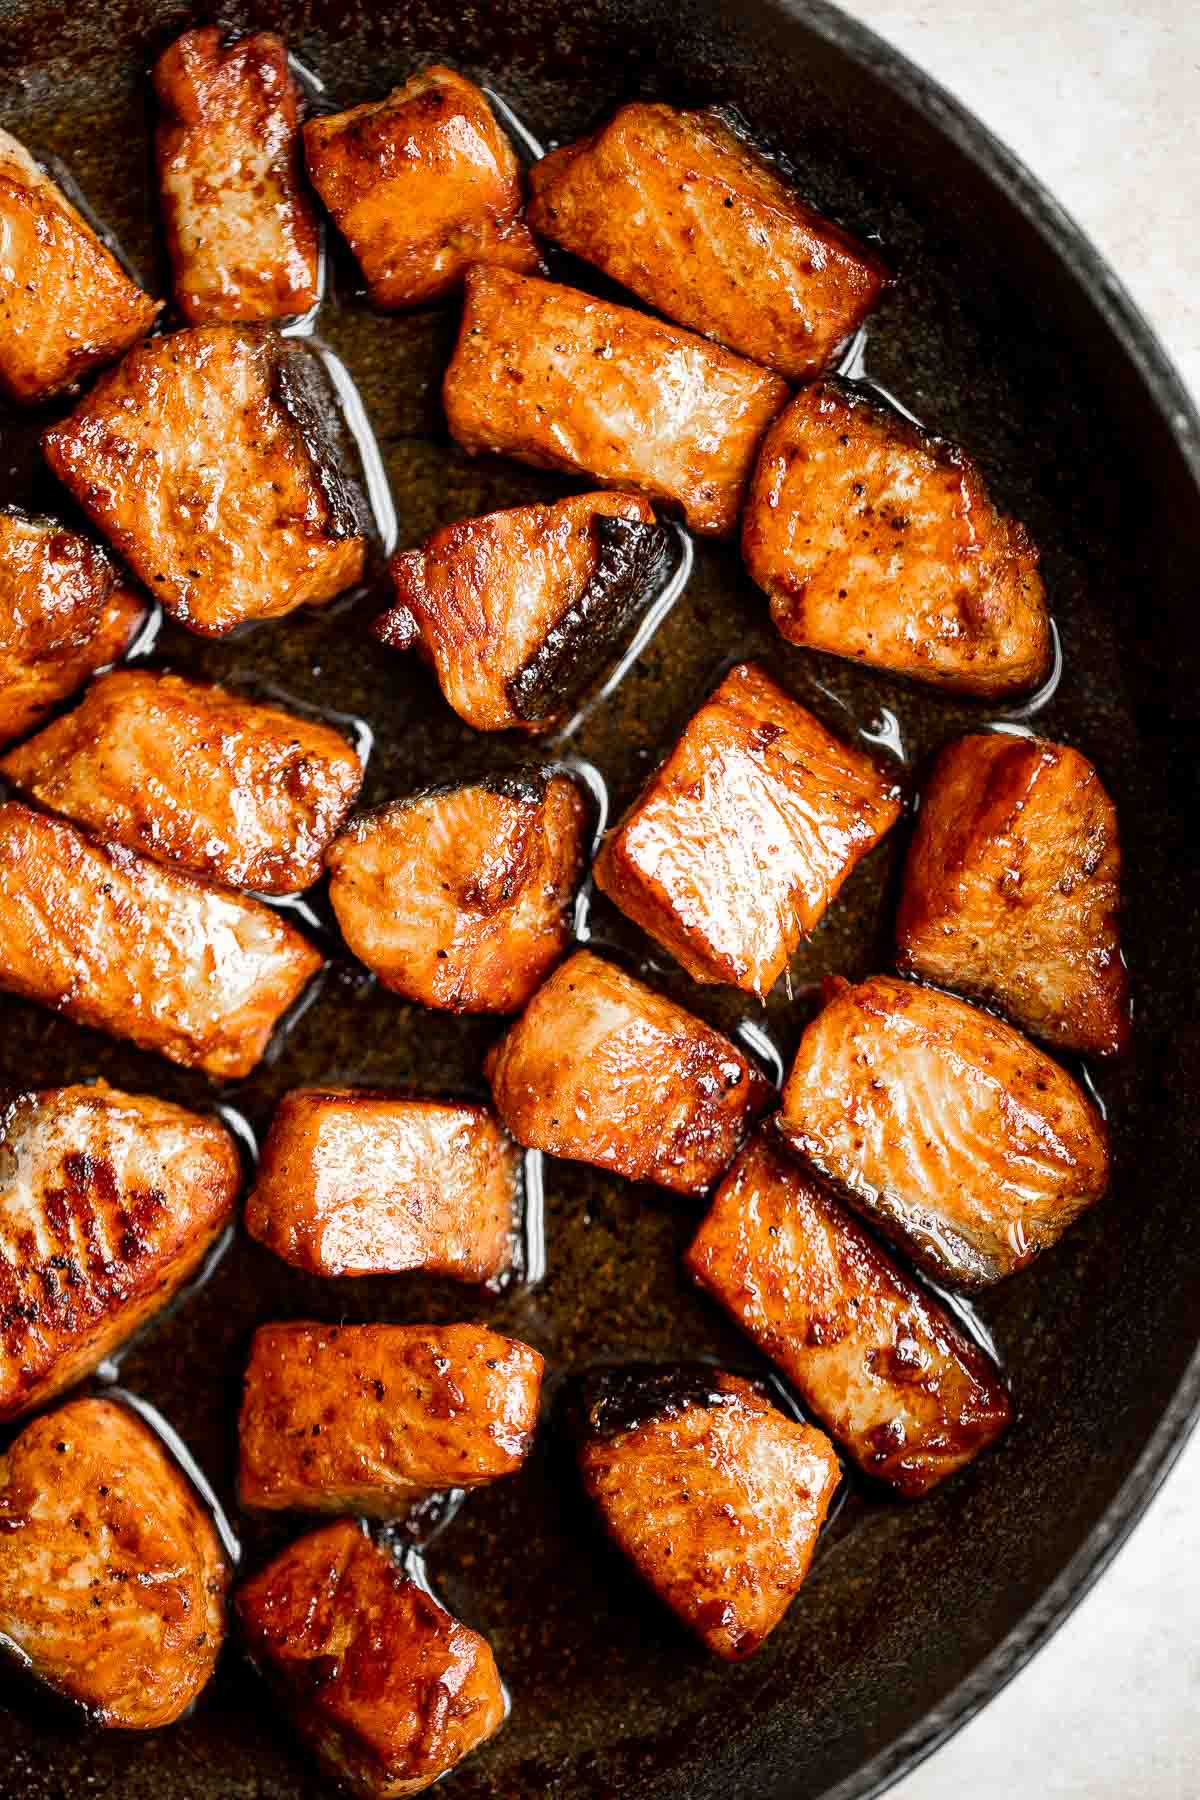
Storing and Freezing Instructions
How to Store
Transfer leftover salmon bites to an airtight container and store in the refrigerator for up to 2 days. Make sure to freeze it if you're not able to finish it in that time frame.
How to Reheat
You can serve leftovers cold or warm. To reheat, hear in a 300F preheated oven or air fryer for a few minutes until warmed through, on the stove over medium-low heat, or in the microwave until warmed through. Be careful not to overheat as they can become dry and tough.
How to Freeze
Wrap the cooled salmon tightly in plastic cling wrap or place it in a sealed freezer bag and freeze for up to 3 months. Allow the salmon to thaw overnight in the fridge before serving.
More Salmon Recipes
- 15 Best Salmon Recipes
- Teriyaki Salmon
- Coconut Curry Salmon
- Garlic Butter Salmon
- Honey Garlic Glazed Salmon
- Salmon Burgers
Tried this recipe?
I'd love to hear what you think! Leave a comment and rating below to share your feedback. Your reviews help others discover this recipe and help me keep creating more free recipes for you. Snap a photo and tag me on social media @aheadofthyme too.

Thai Sweet Potato Yellow Curry
Sweet Potato Yellow Curry is a flavorful and delicious vegetarian dish that is quick and easy to make any day of the week. This comforting Thai curry is loaded with starchy vegetables simmered in a creamy and rich coconut curry sauce with spinach and peanuts for added flavor and crunch.
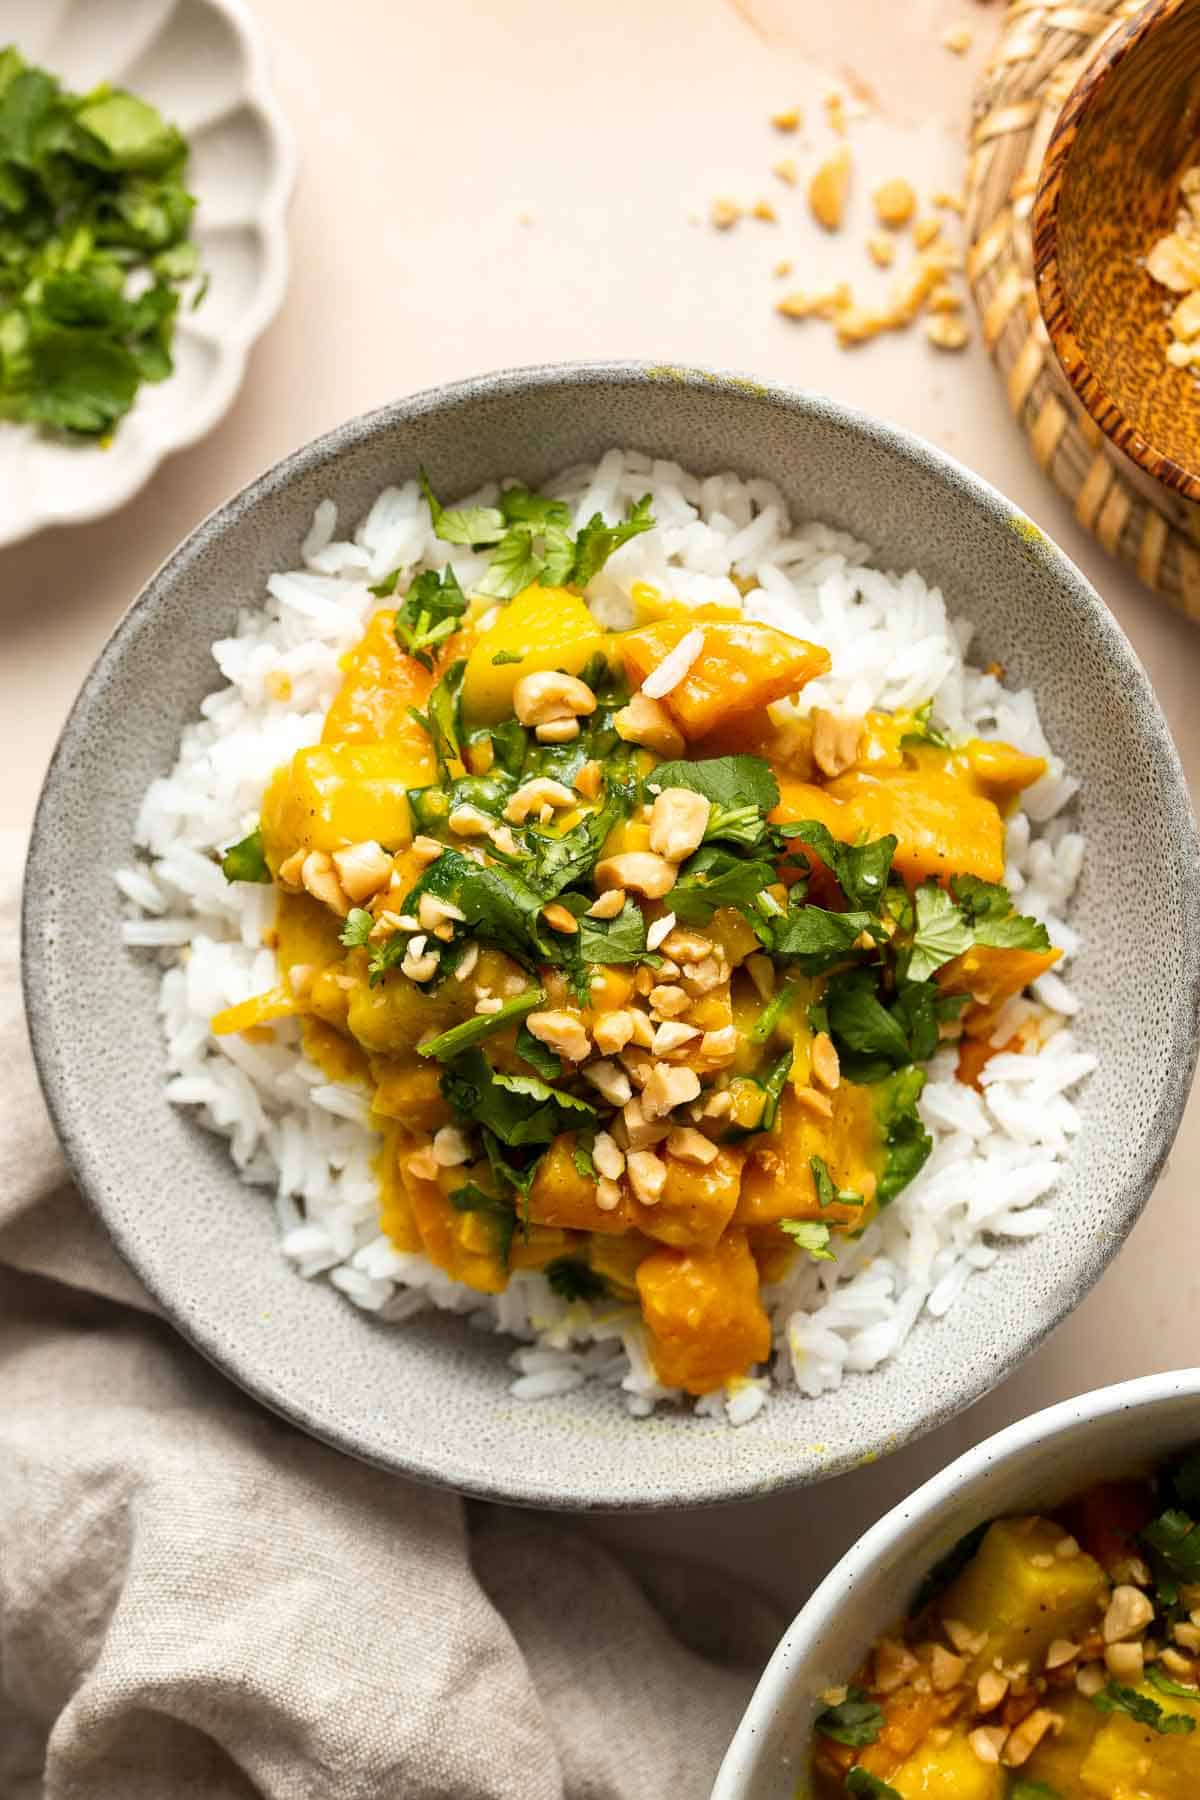
Make this one-pot potato curry in under 30 minutes and serve over rice or alongside fresh naan for an easy meal that everyone loves. This meatless dish suites a variety of diets too: vegetarian, gluten-free, dairy-free - and can easily be made vegan too.
Why You'll Love this Sweet Potato Yellow Curry
- Delicious vegetarian entree. This vegetarian Thai yellow curry is a satisfying option for meatless meals, and it can be made completely vegan by changing just one ingredient (see ingredient notes below for details!). It's also gluten-free and dairy-free so it's a meal that will satisfy many dietary restrictions.
- Ready in just half an hour. Not only is this vegetarian curry delicious, it's quick and easy too! It takes only 30 minutes to prepare this homemade sweet potato curry, and only 5-10 minutes of that time is active preparation. It's easy enough to make in a hurry on busy weeknights but delicious enough to serve for special occasions, too!
- Easy to make. This Thai yam and sweet potato curry recipe is easy to follow too. After just a few minutes of chopping vegetables, you're ready to start cooking for real! Sauté the veggies, add the coconut milk, simmer, add seasonings and serve. So easy!
- Bursting with flavor. The combination of vegetables, naturally sweet coconut milk, and yellow curry paste guarantee an explosion of flavor in every bite. Don't forget the lime juice and fish sauce that add extra umami at the end.

Ingredient Notes
To make this easy and delicious Sweet Potato Yellow Curry, you will need the following ingredients (full measurements in recipe card below):
- vegetable oil - any other kind of cooking oil will work such as avocado oil, olive oil, or coconut oil.
- sweet onion - yellow onions are closely related to sweet onions and can be used as a substitute, but they're much smaller so you may need to use a whole one instead of a half.
- sweet potato - make sure to thoroughly wash and dry your sweet potatoes before using in this recipe.
- yam - though they're often confused with sweet potatoes, yams are a completely separate vegetable. If you can't find any in your local store, add more sweet potatoes instead.
- yellow curry paste - both homemade or store-bought curry paste will work equally well in this recipe. If you don't have yellow curry paste, you can use red curry paste or green curry paste but note that the flavor is slightly different.
- coconut milk - the full-fat canned version works best in curry recipes because it's the perfect creaminess. You can also use a reduced-fat version, but note that it won't be as creamy although the flavor will be the same.
- cornstarch slurry - cornstarch slurry (cornstarch dissolved in water) is used as a thickening agent to improve the texture of the curry. If you like your curry on the thinner side, you can omit the cornstarch slurry.
- spinach - you can substitute with swiss chard or baby kale or leave out the spinach if you prefer.
- Thai fish sauce - the fish sauce in this recipe is optional and can be omitted to make the recipe vegan.
- lime juice - fresh lime juice works best, but lime juice concentrate will work if you're all out.
- chopped peanuts - chopped peanuts add crunch, but if someone in your family is allergic, you can omit them.
- cilantro - fresh chopped cilantro and/or basil add a pop of green and a hint of fresh herby flavor to the yam curry.
You will also need measuring cups and spoons and a wok or skillet with high sides.
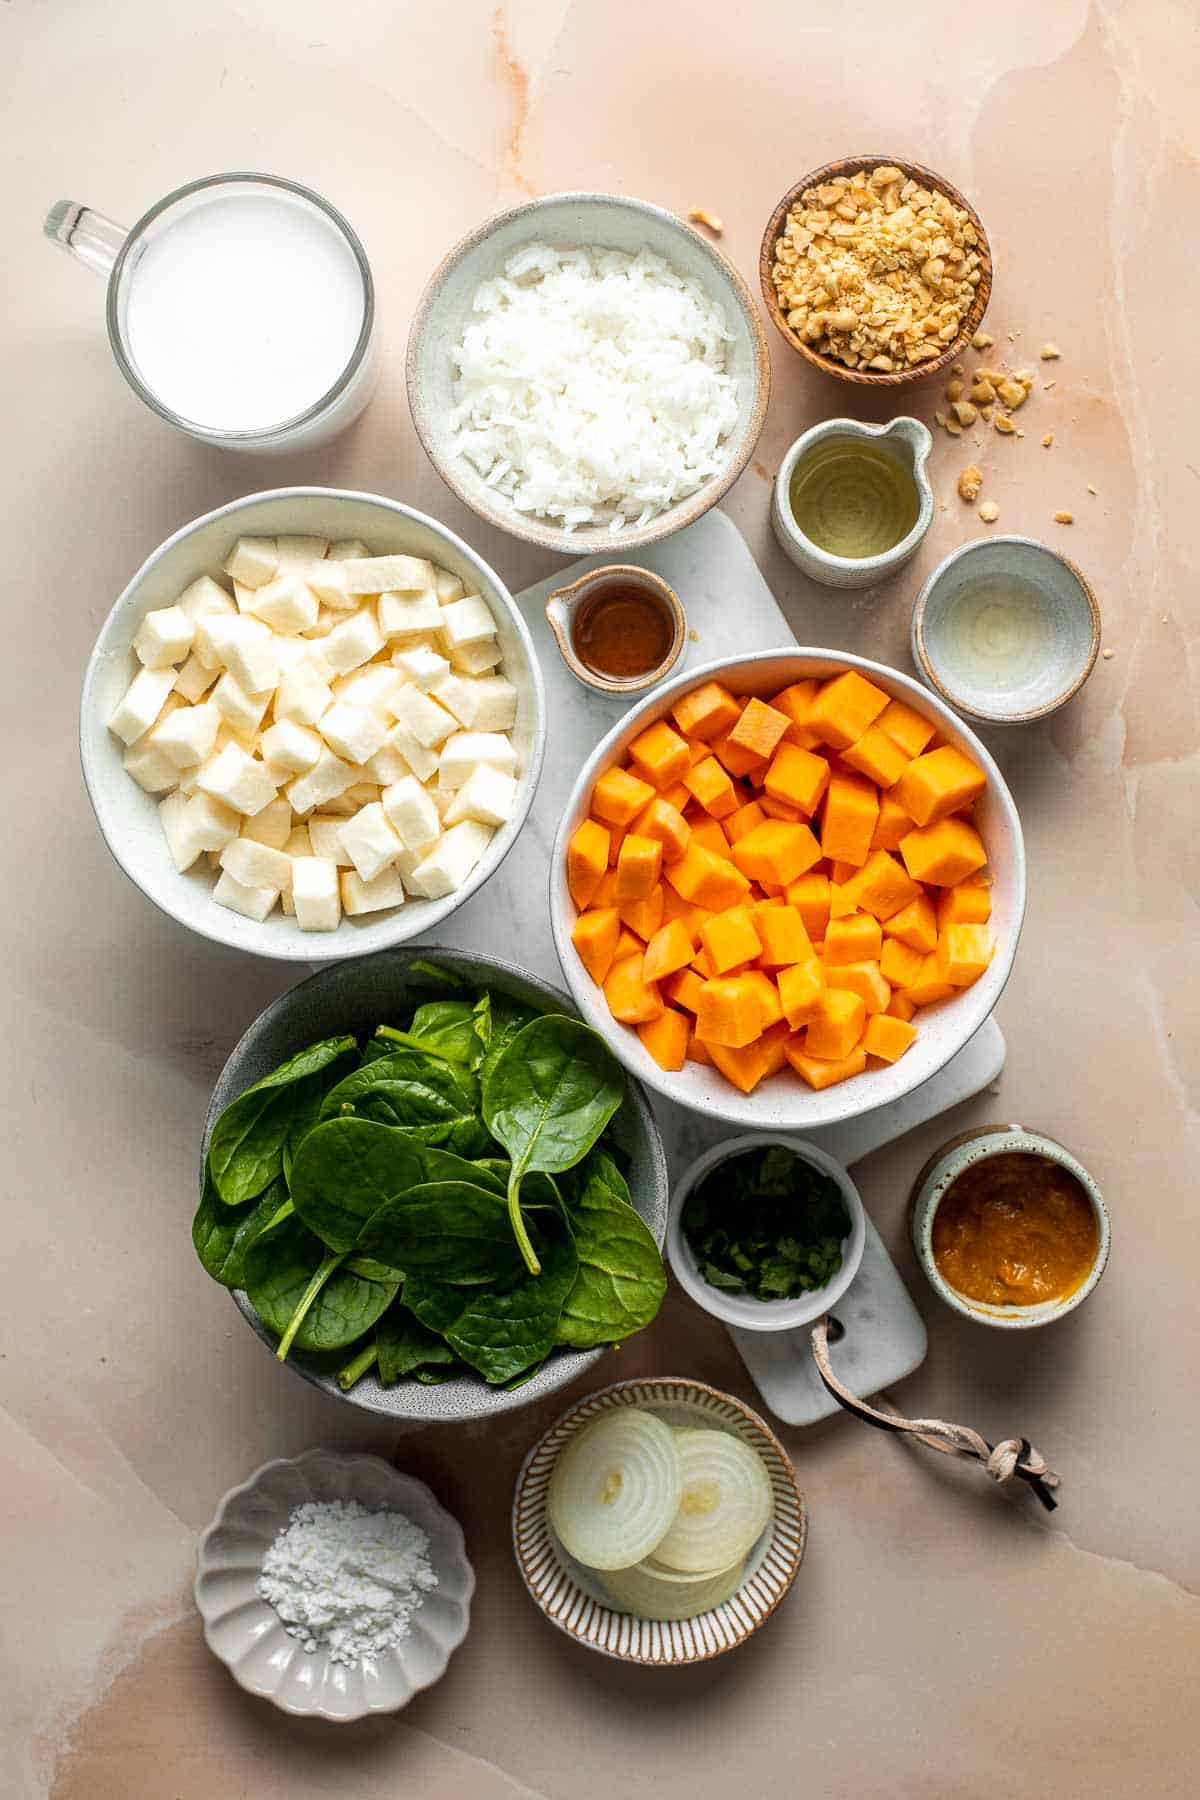
How to Make the Best Sweet Potato Yellow Curry
- Cook vegetables. In a wok or large skillet with high sides, heat oil over medium heat. Sauté the sweet onions until soft and translucent, about 3-4 minutes. Add the cubed sweet potato, yam, and yellow curry paste. Stir until combined.
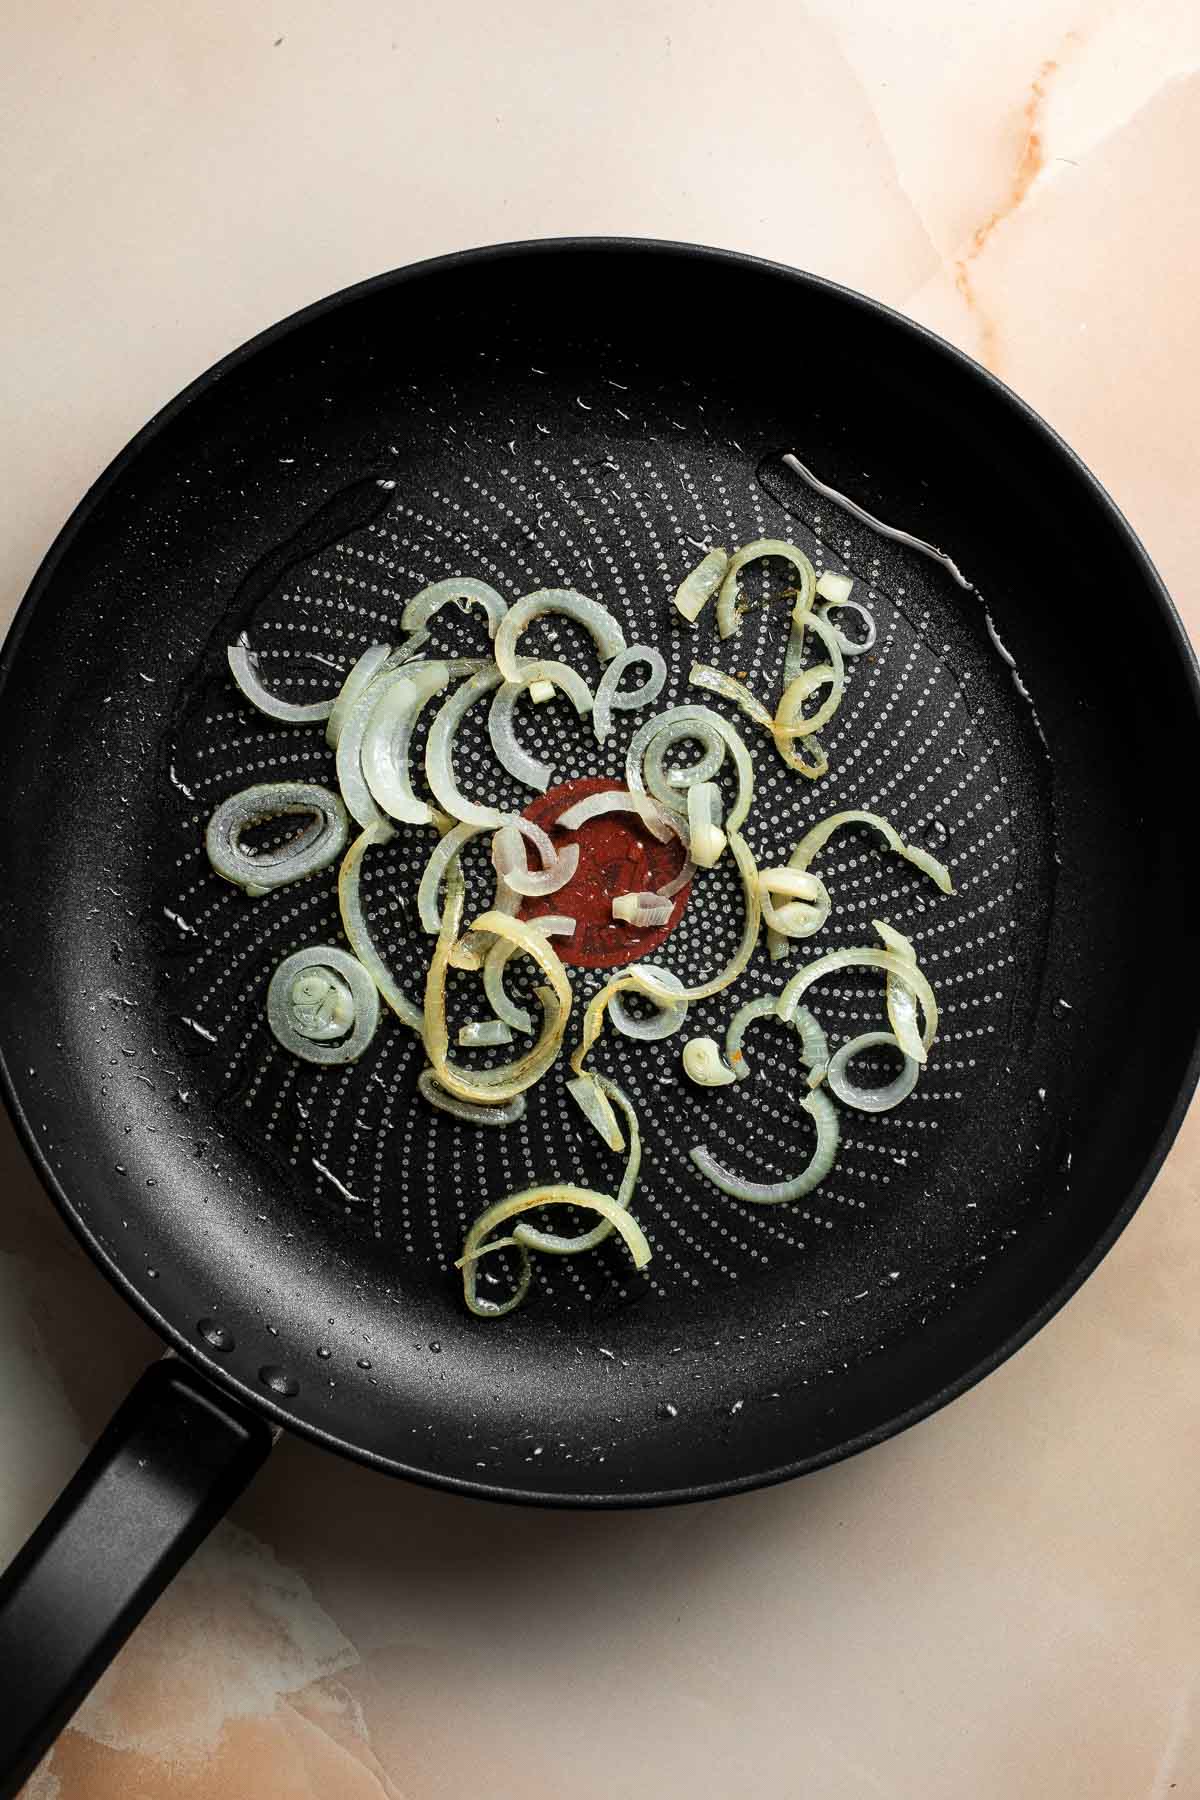
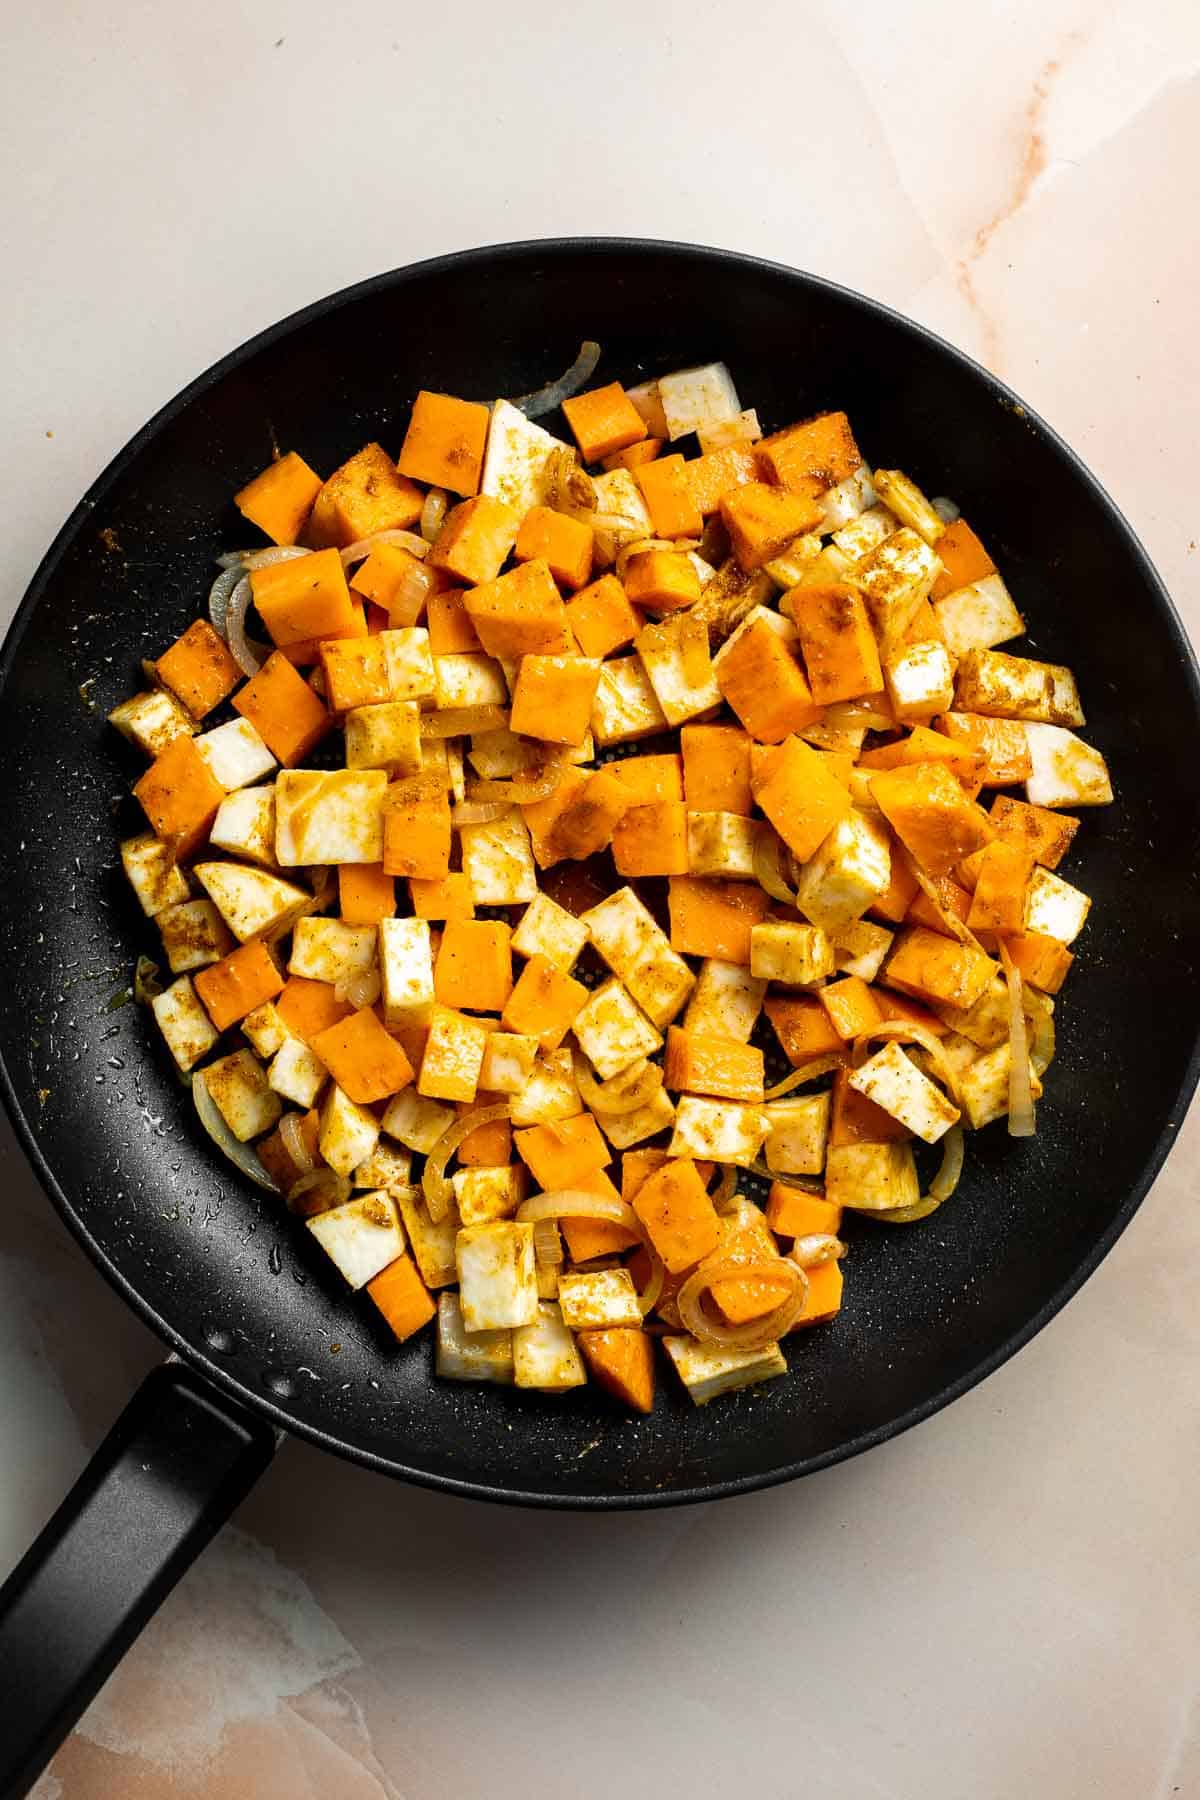
- Add coconut milk. Stir in the coconut milk. In a small mixing bowl, stir together the cornstarch and cold water until the cornstarch is dissolved. Add the mixture to the pan and stir to incorporate.

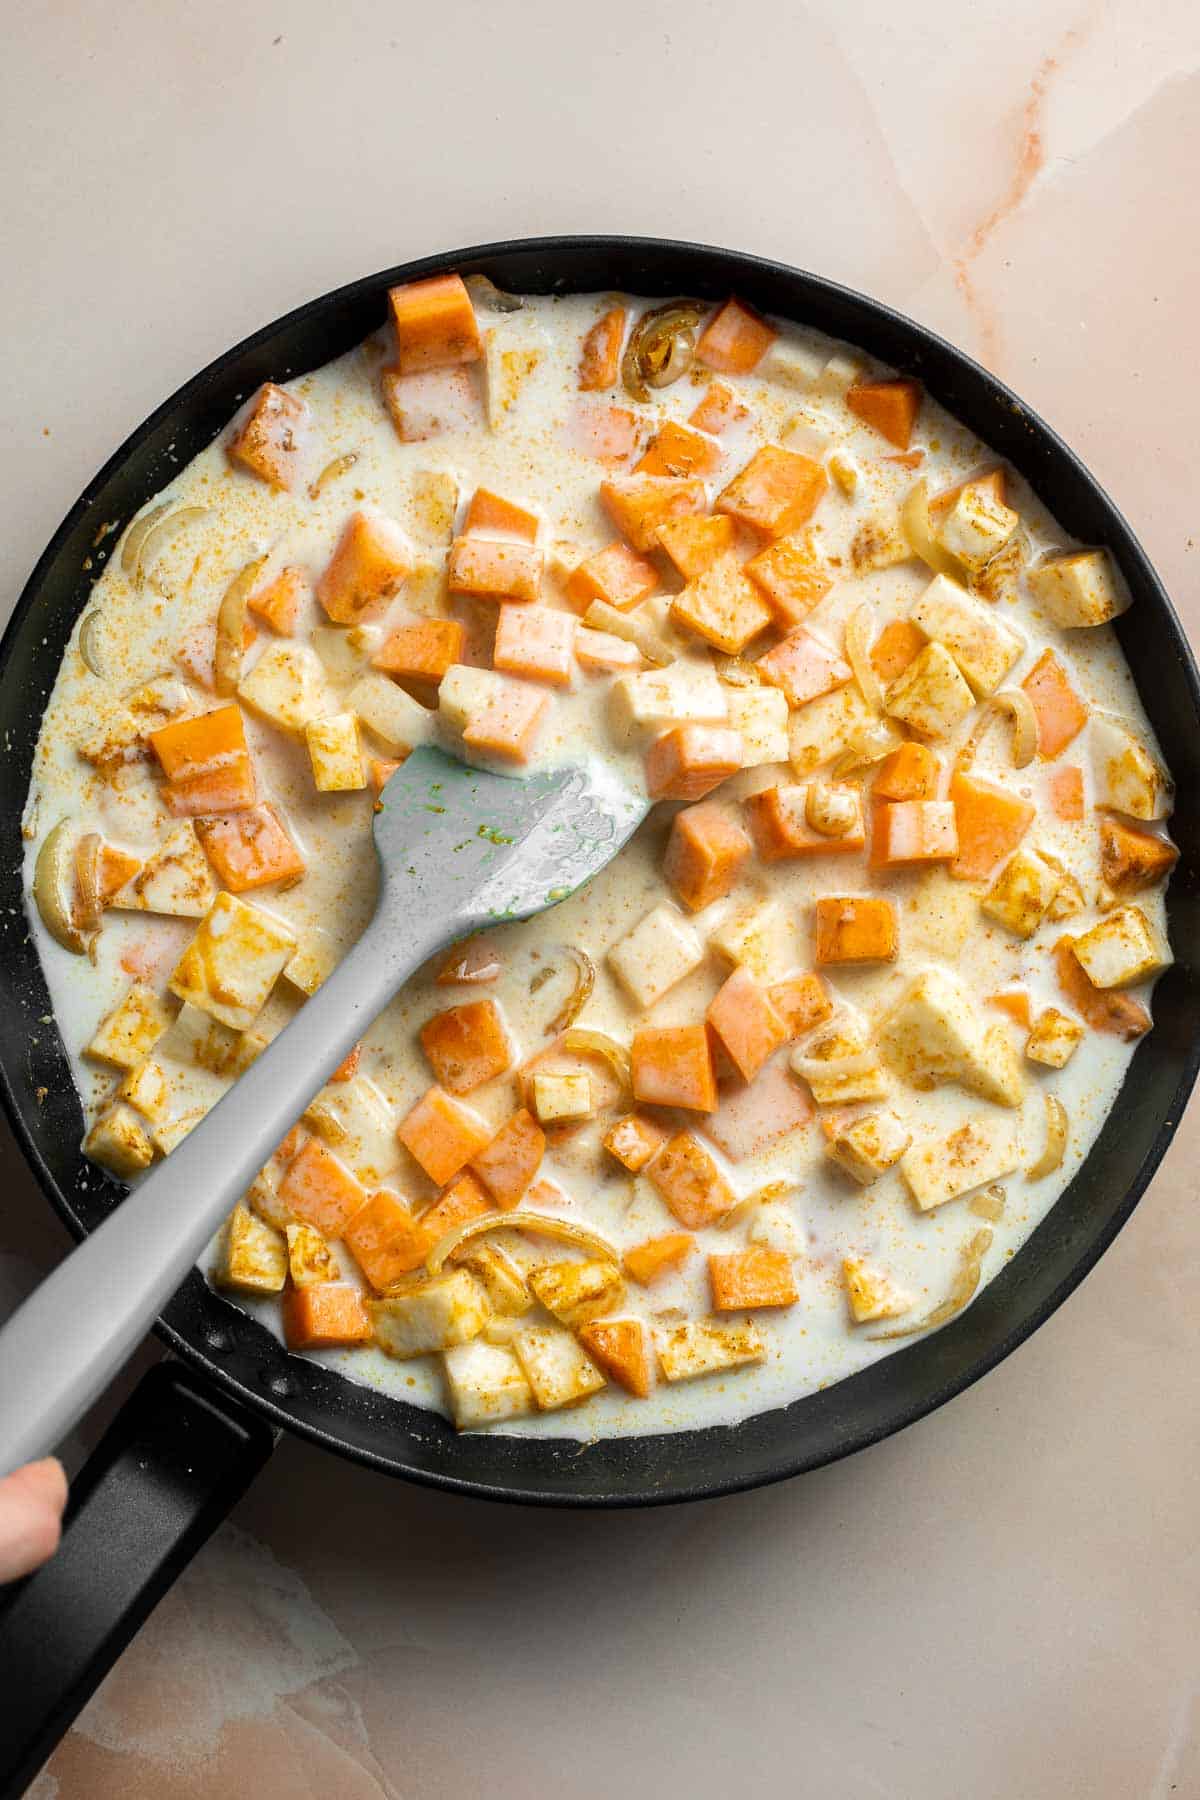
- Simmer. Turn the heat down to low and cover. Simmer for 15-20 minutes, or until the sweet potatoes are tender.
- Add seasoning. Stir in spinach, fish sauce (optional), lime juice, and ¼ cup of peanuts. Cook for 1 minute, then remove from heat.
- Serve. Serve warm and garnish with chopped peanuts and fresh cilantro, if desired.
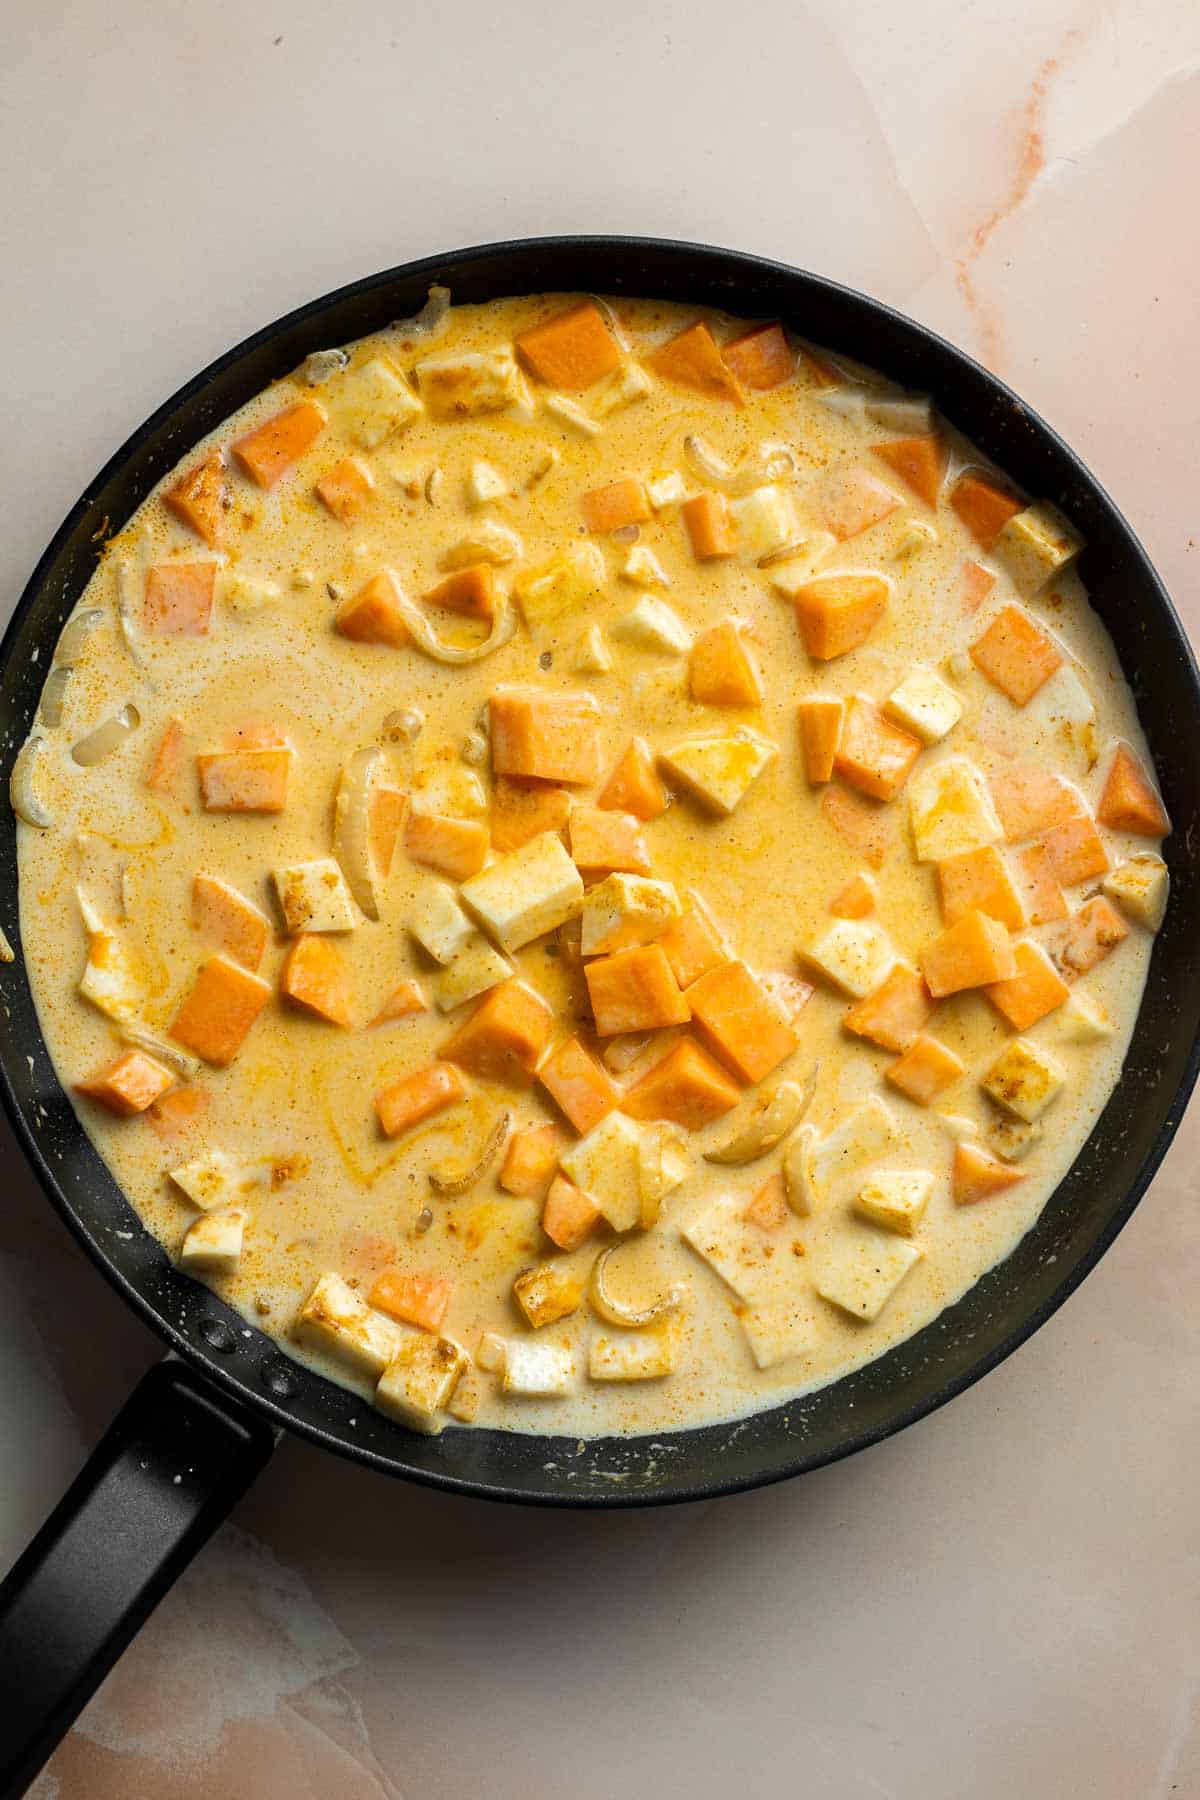
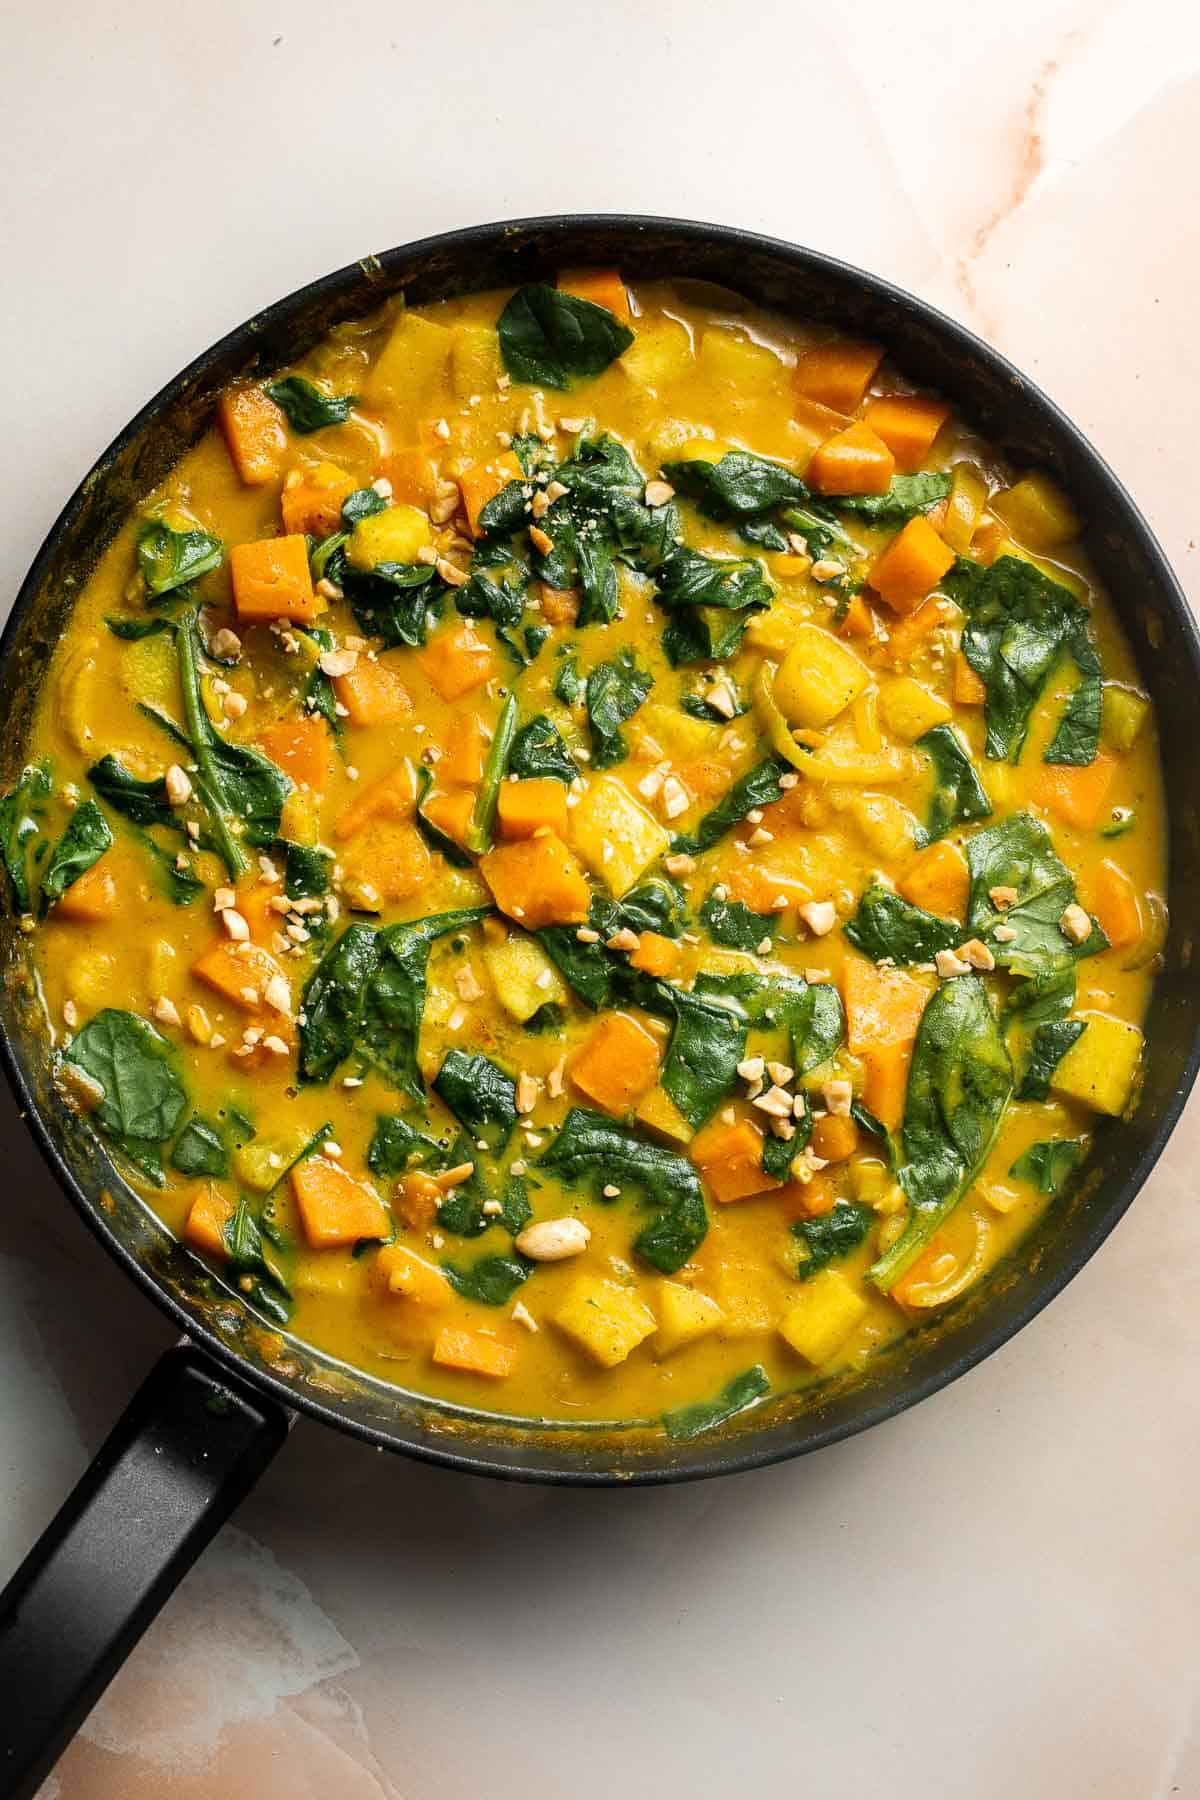
How to Serve
This Thai Sweet Potato Yellow Curry is typically served over rice, but you can serve the curry alone or with other sides if necessary. Some of our favorite sides to serve with this are:
- rice - serve this curry over Steamed Rice or if you have some extra coconut milk on hand, make a pot of Coconut Rice.
- naan - naan is a classic bread companion to curry, and it's easy to make at home. Check out our Garlic Naan Recipe for step-by-step instructions.
- salad - some of our favorite Asian inspired salads to serve with this vegetarian curry are: Thai Mango Salad, Asian Chopped Salad, and a Garden Salad with Creamy Sesame Dressing.
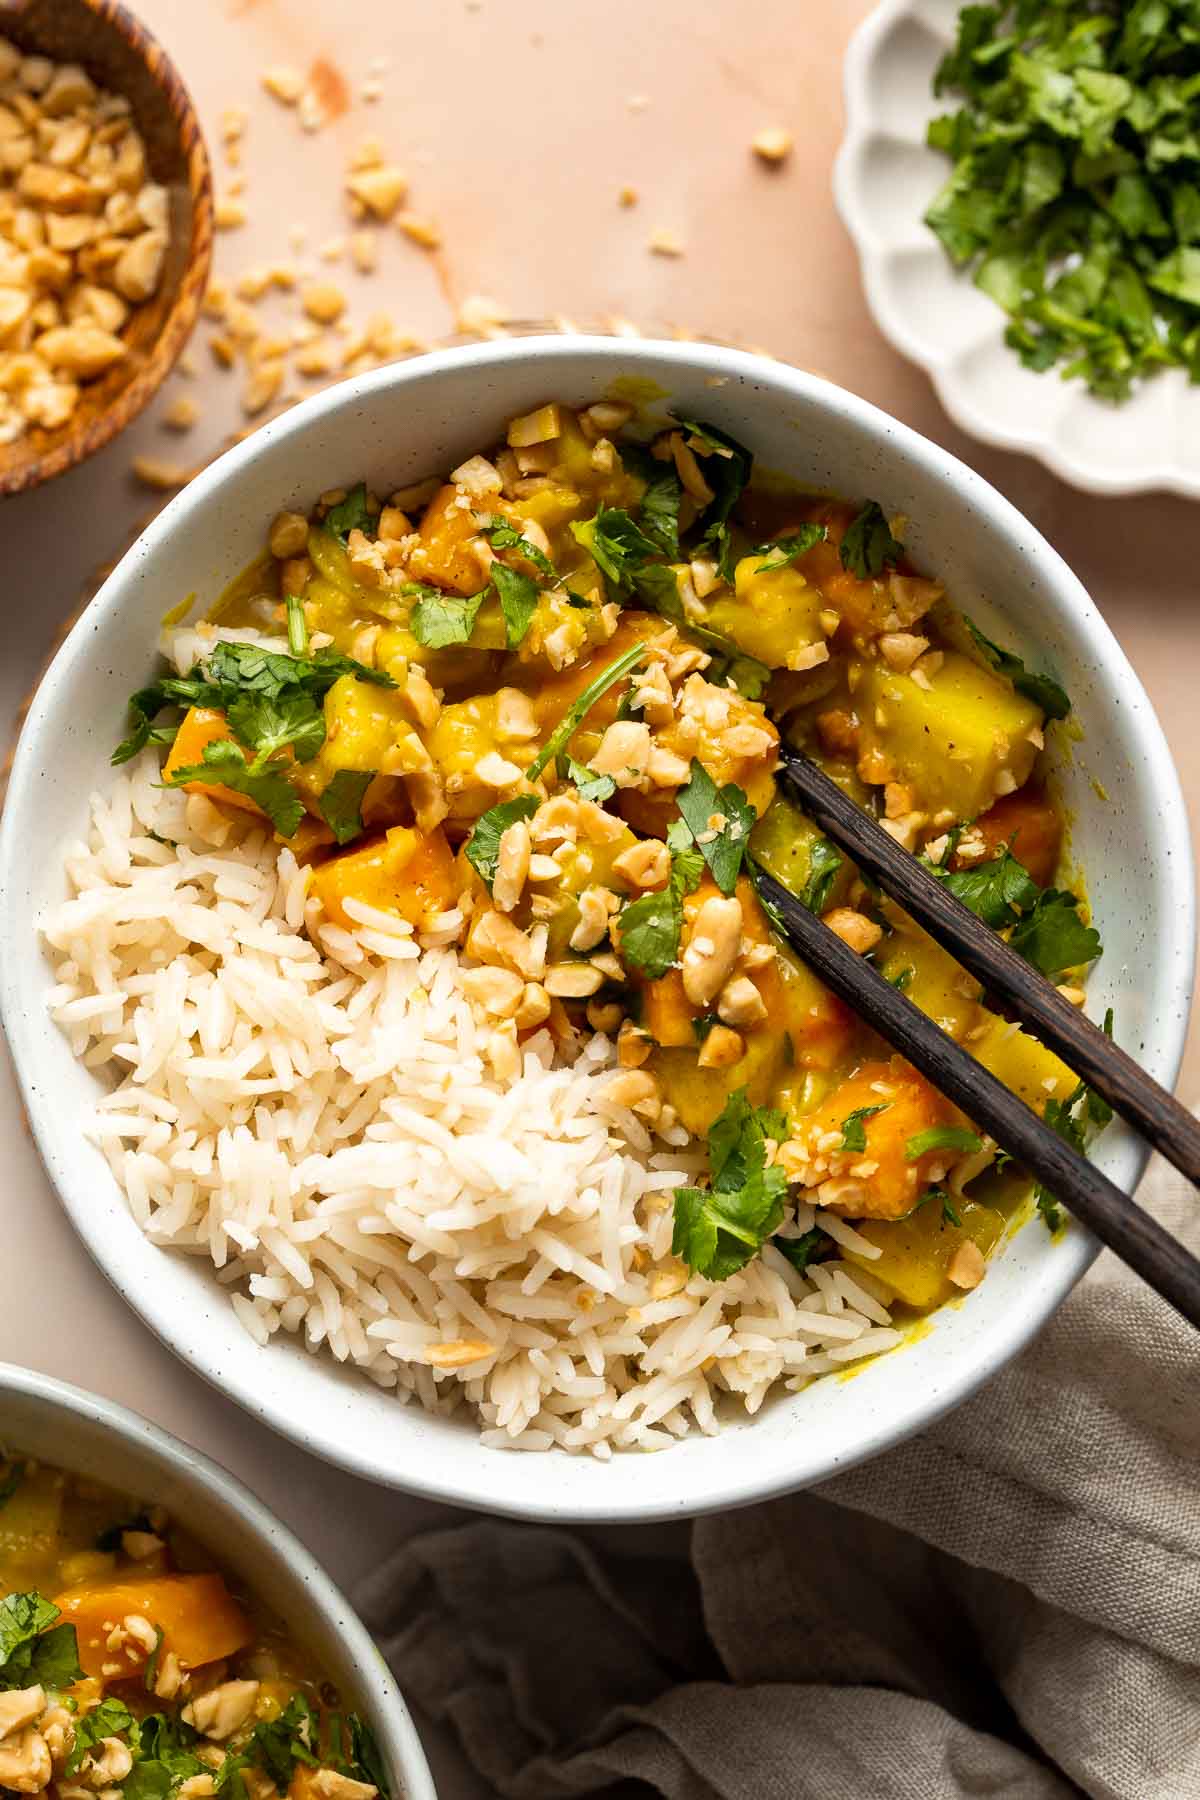
Recipe Tips and Tricks
- Make it spicy. Make this a spicy curry by adding in chili powder or other spicy ingredients. Adjust the heat level to your liking by adding more or less.
- Add protein. You can add in some protein such as chicken, beef, or fish. Sear the meat first until cooked on all sides. Then, set it aside and add is in just before you are about to simmer the curry.
- Let it sit. You can serve the curry immediately, or let it sit first for a few minutes to allow the flavors to meld together. In fact, it's this reason that leftovers taste even better the next day!
- Make ahead and freeze for easy meals. Prepare this vegetarian curry for busy weeknights by doubling the recipe and freezing portions to get ahead. Add frozen curry to a crockpot on low for a few hours or follow the instructions below for thawing before reheating.
Storing and Freezing Instructions
How to Store
Transfer leftover sweet potato curry to an airtight container and refrigerate for up to 5 days.
How to Reheat
Reheat this vegetarian curry on the stovetop over medium-low heat or in the microwave in 30-second intervals until heated through to the desired temperature.
How to Freeze
Once cooled to room temperature, place leftovers in a freezer-safe airtight container (such as a plastic soup container or freezer bag) and freeze for up to 3 months. Allow the curry to thaw overnight in the refrigerator before reheating.
More Curry Recipes
- Coconut Lamb Curry
- Instant Pot Beef Curry
- Thai Turkey Meatballs in Coconut Curry
- Indian Butter Chicken
- Coconut Curry Salmon
- Thai Coconut Red Curry with Prawns
Tried this recipe?
I'd love to hear what you think! Leave a comment and rating below to share your feedback. Your reviews help others discover this recipe and help me keep creating more free recipes for you. Snap a photo and tag me on social media @aheadofthyme too.

Oreo Brownies
Oreo Brownies are a rich and decadent dessert that is quick and easy to make from scratch using simple ingredients. These fudgy brownies have triple the chocolate, are loaded with Oreo cookies, and have a classic crinkly crackly top.
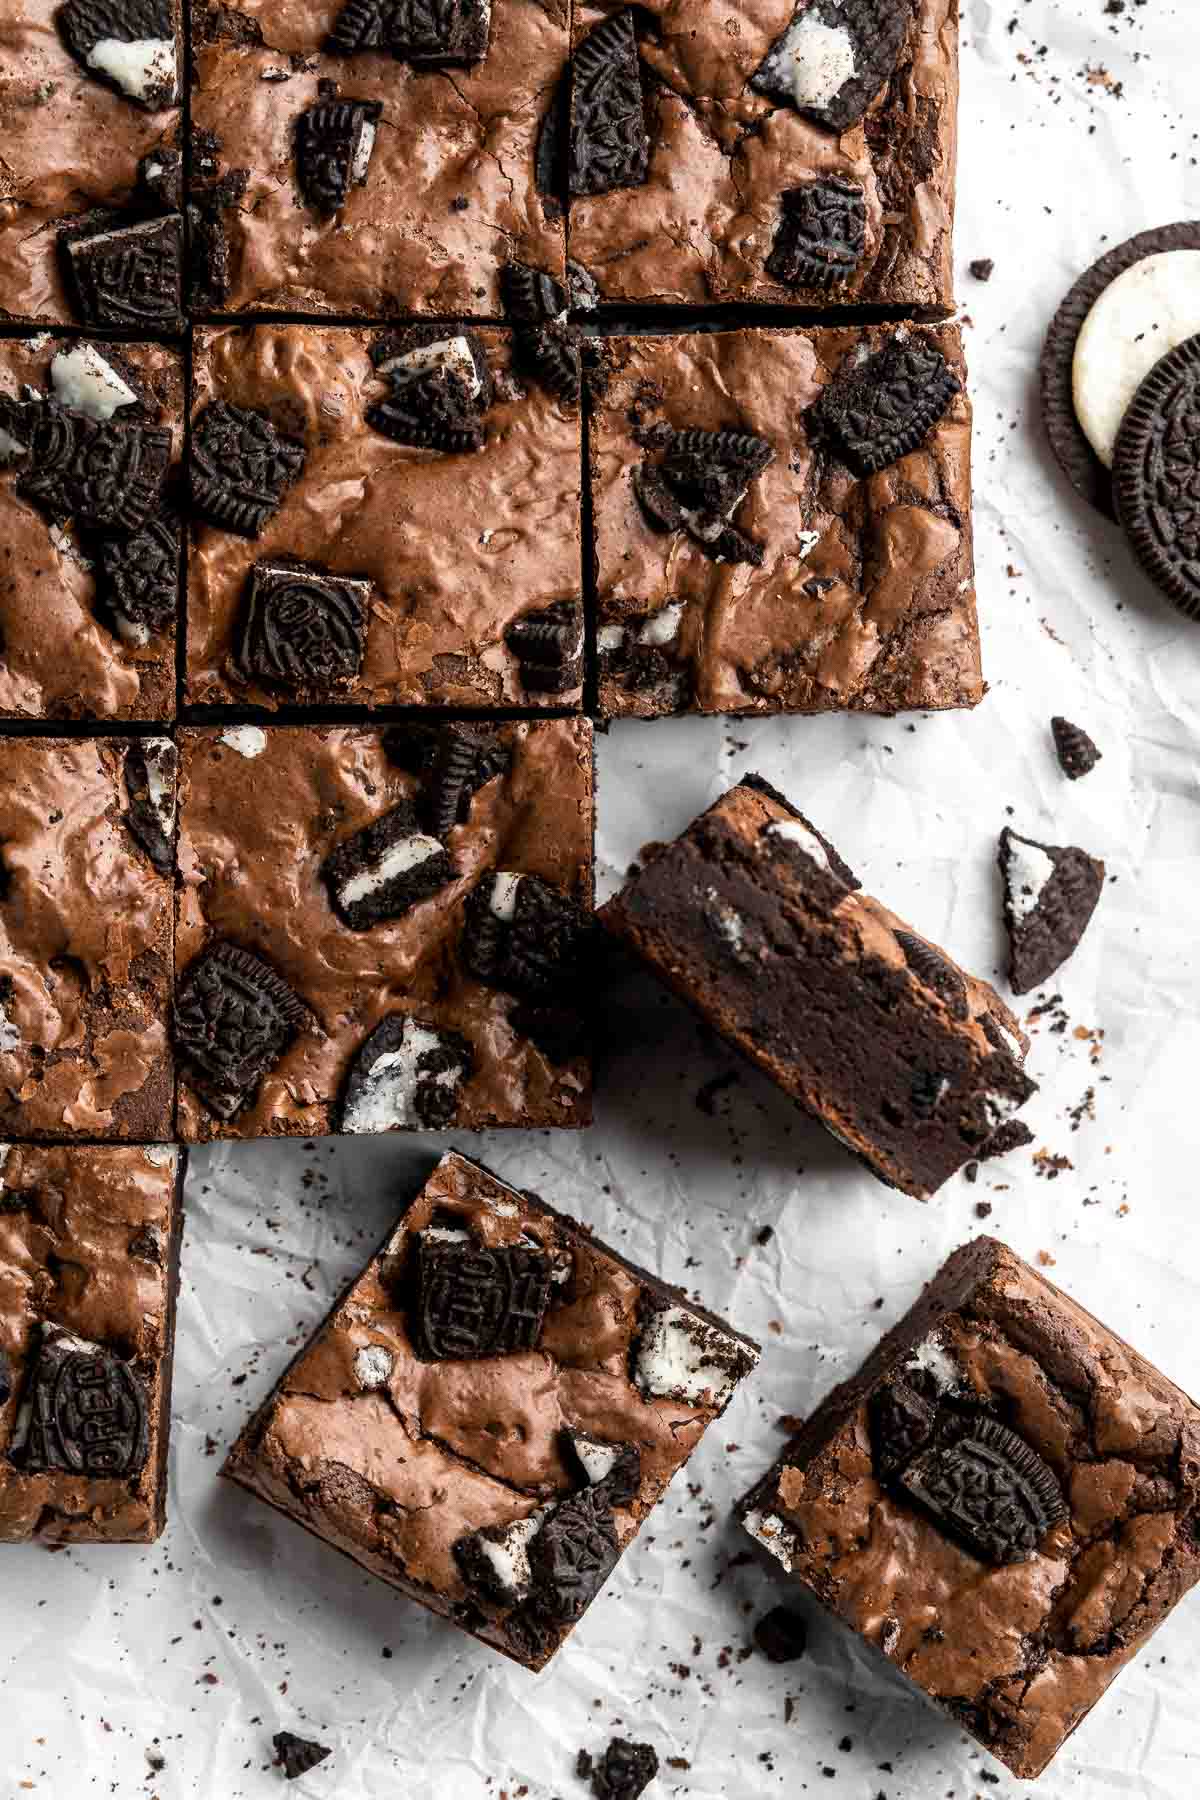
These brownies with oreos are quick to make in about 30 minutes, but they are also easy to store and freezer-friendly so are a great dessert to make ahead of time. It's always a good idea to have brownies on hand whenever you need a last minute dessert that you don't have to think about - perfect for dinner parties, movie nights, or quite nights at home when a sweet craving hits.
Why You'll Love these Oreo Brownies
- Gooey, fudgy texture. These fudgy brownies with oreos get their texture from the perfect ratio of ingredients (fat to flour) and the perfect cook time. These 2 factors in this recipe are critical to ensuring you get fudgy and moist brownies every time.
- Triple the chocolate. These brownies are packed with real chocolate, cocoa powder, and chocolate sandwich cookies (Oreos) giving you triple the richness and flavor. Every slice is rich, decadent, and delicious. I mean who doesn't love chocolate?
- Quick and easy to make from scratch. These Oreo brownies are so quick and easy to make, ready in just over half an hour, including prep! There is no chilling required or waiting around. Just mix your batter together, spread in a pan, bake, and enjoy. This may become your new go-to dessert when you need to make something delicious and impressive at the last minute.
- Minimal clean up. These brownies with oreos are almost a one bowl recipe. You only dirty a cuople of dishes - the bowl that you melt the chocolate in, and the mixing bowl that you make the batter. Less dishes is gives this recipe extra brownie points!
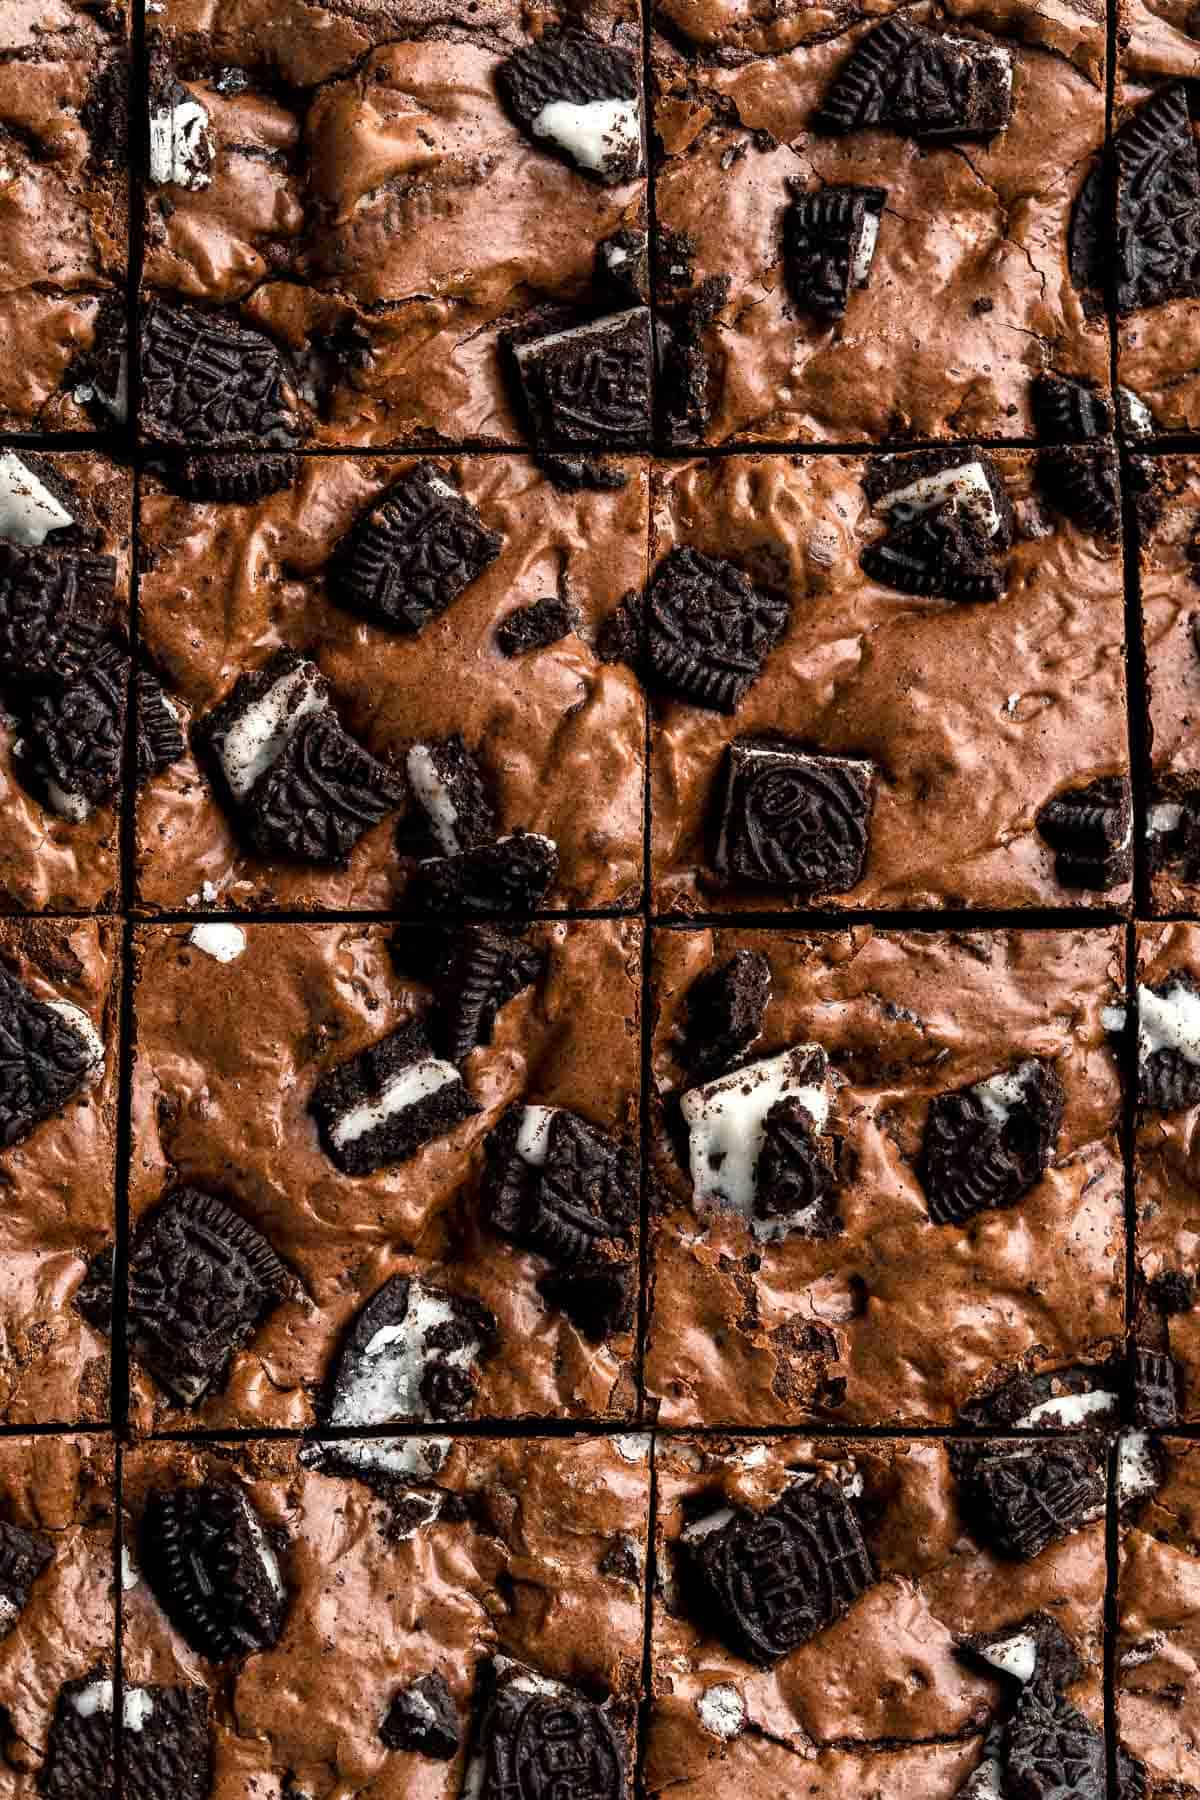
Ingredient Notes
To make this indulgent Oreo Brownies, you will need the following ingredients (full measurements in recipe card below):
- oreos - we use regular classic oreos in this recipe, but you can use your favorite kind. Try golden oreos, double chocolate, birthday cake, mint oreos, and so on. The choice is yours!
- semi-sweet chocolate - you can substitute with dark chocolate if you prefer the deeper flavor in the brownies.
- butter
- sugar - sugar is an essential ingredient in most desserts, but you can replace it in this recipe with your favorite sugar alternative such as raw sugar, coconut sugar, stevia, or Swerve.
- eggs - the eggs is what gives these brownies their classic crinkly top. You can replace with egg substitutes for a vegan option, but note that you will not get that same crackly top.
- vanilla extract
- all-purpose flour - you can easily make these brownies gluten-free by swapping the wheat flour for a measure-for-measure gluten free flour substitute.
- cocoa powder - use a Dutch process cocoa powder for a richer and more intense flavor with a deeper color. You can also use natural cocoa powder if you don't have it though.
- salt
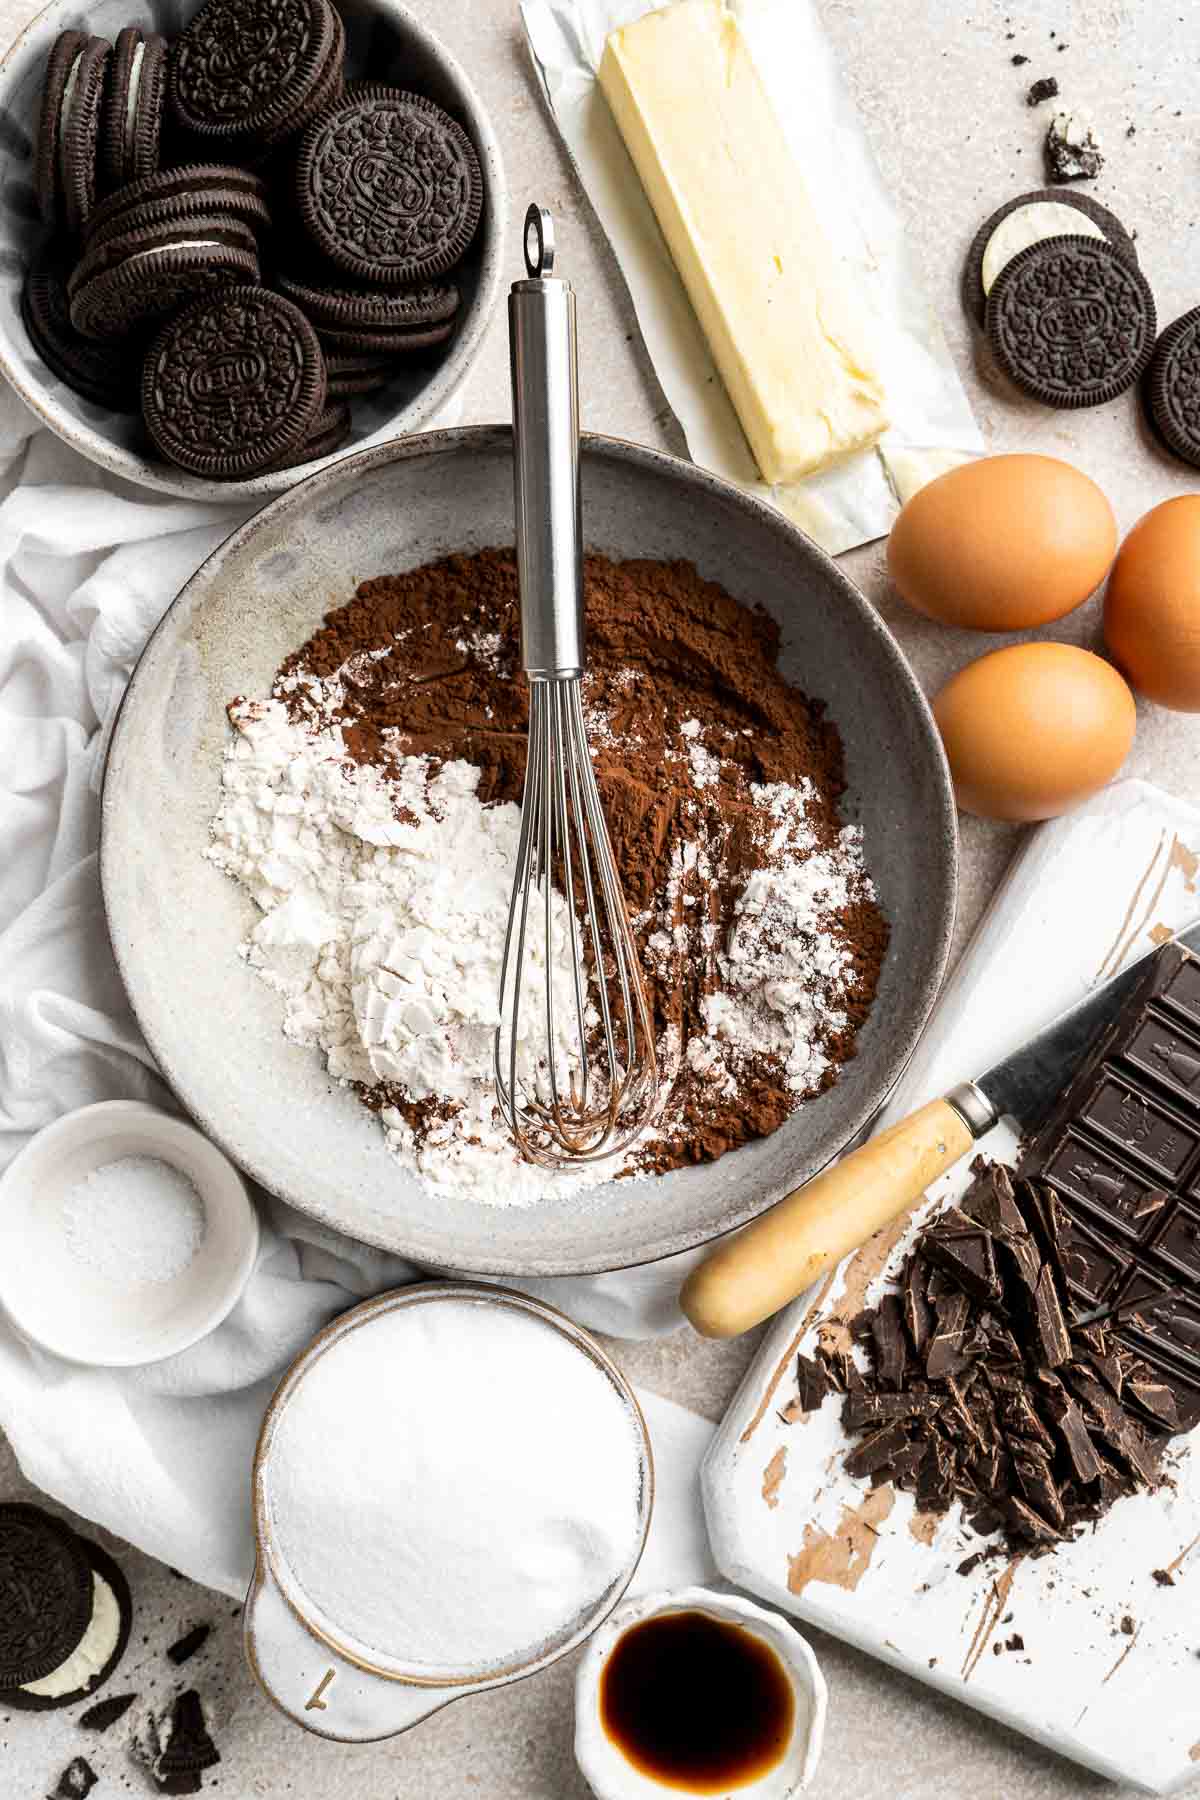
Baking Equipment
You will also need the following baking tools and equipment:
- measuring cups and spoons
- mixing bowls
- 9-inch square baking pan
- parchment paper
- wire cooling rack
How to Make the Best Oreo Brownies
- Melt chocolate. Melt the chocolate with butter in a medium heatproof bowl over a pan of simmering water. Make sure the bottom of the bowl does not touch the water, or you will burn the chocolate. Whisk until melted and smooth. Remove from heat and let it cool down for a few minutes.
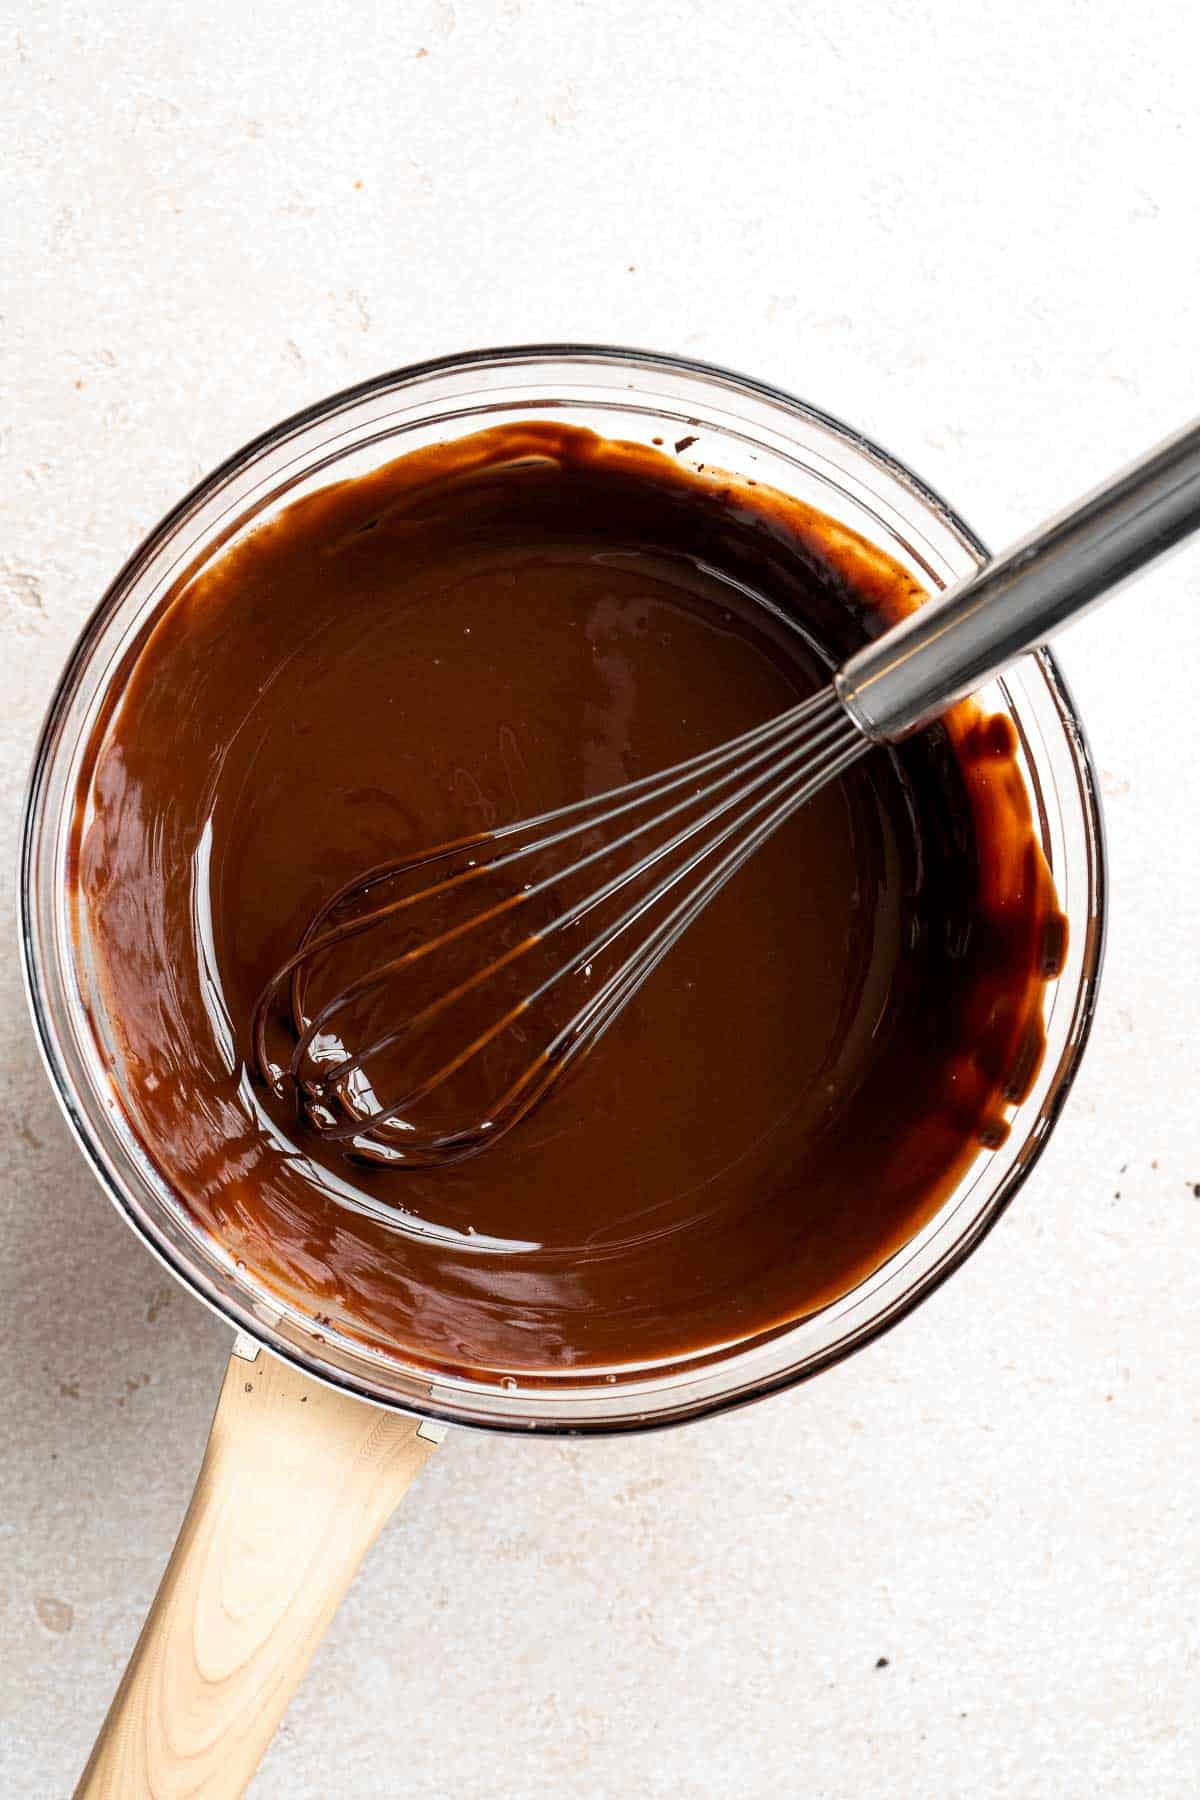
- Make batter. In a large mixing bowl, combine the eggs and sugar. Beat with a hand mixer on medium speed for 3-4 minutes. This will ensure that the brownies have a classic crinkly top. Stir in vanilla.
- Add chocolate. Gradually, pour the chocolate mixture into the egg mixture, and continuously whisk together until combined.
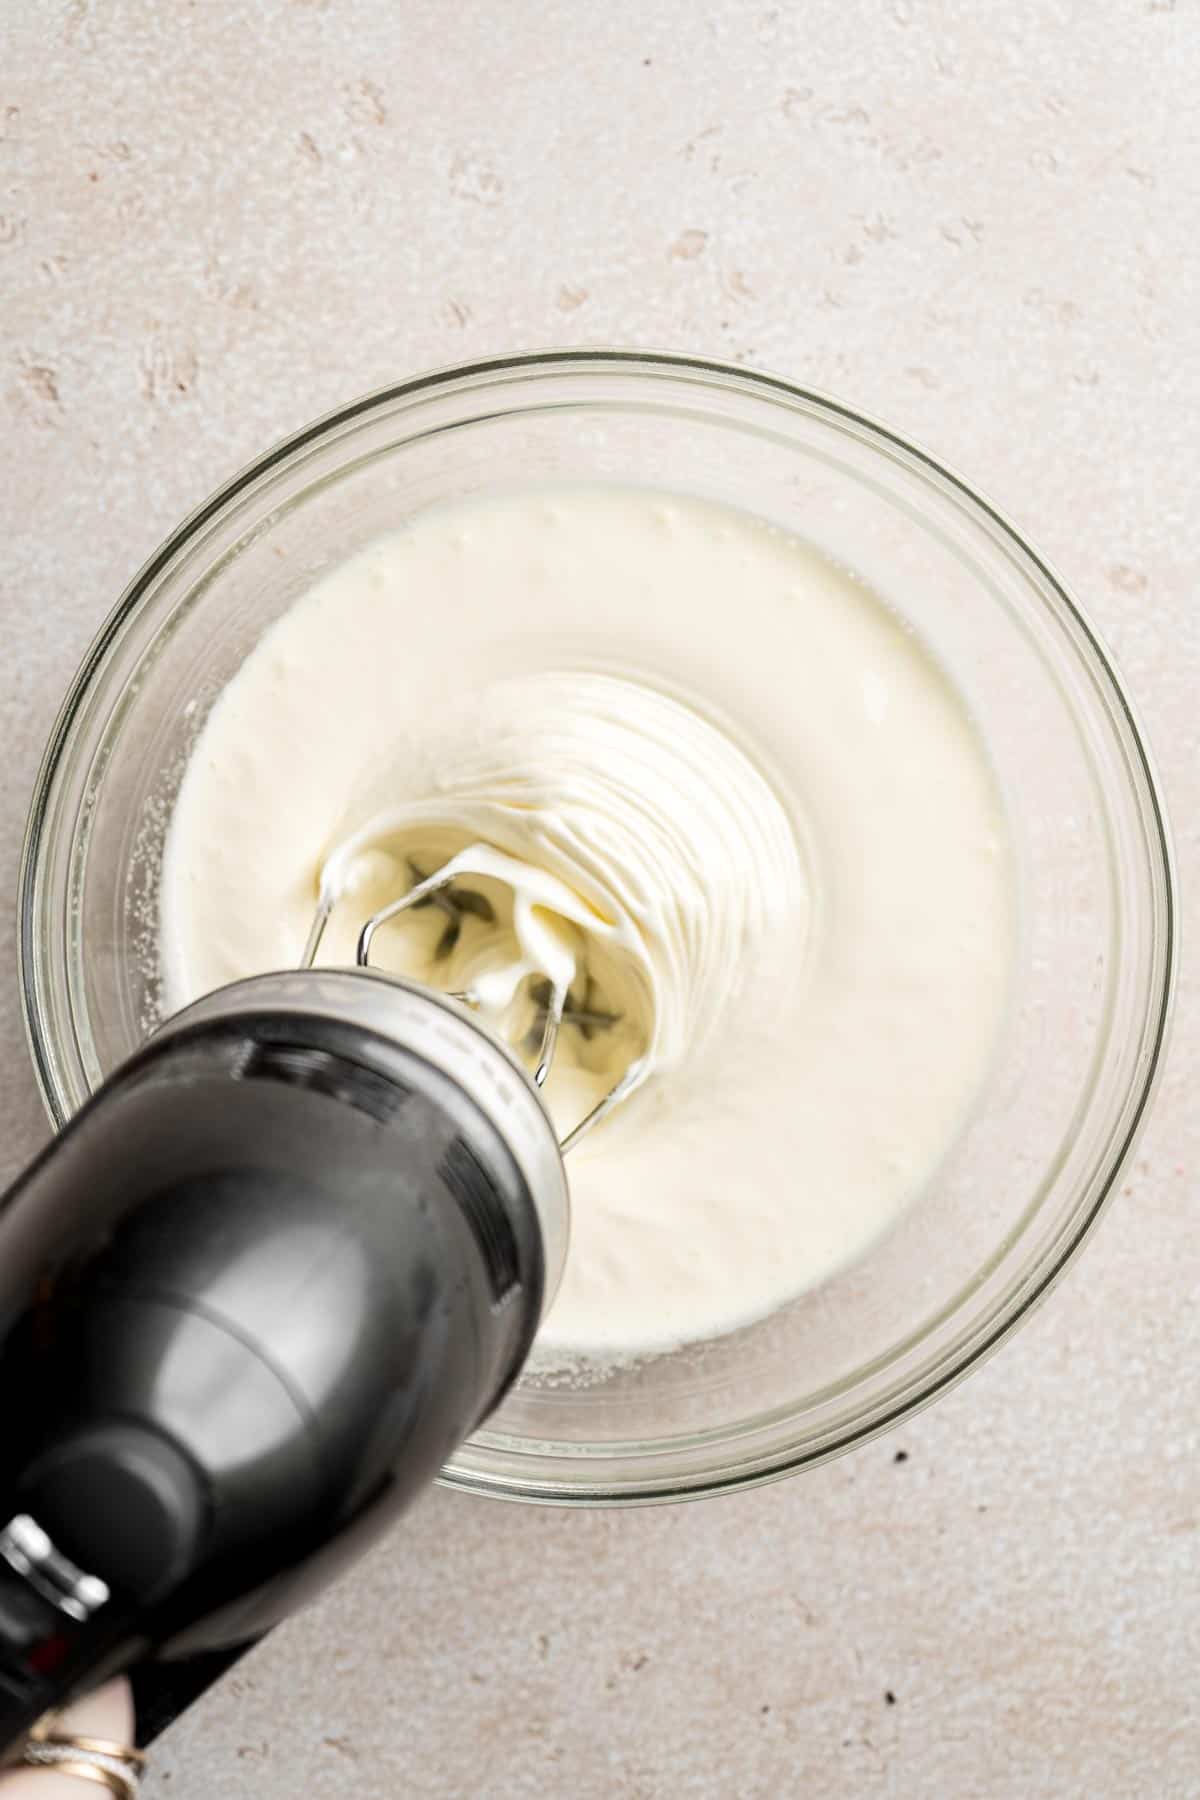
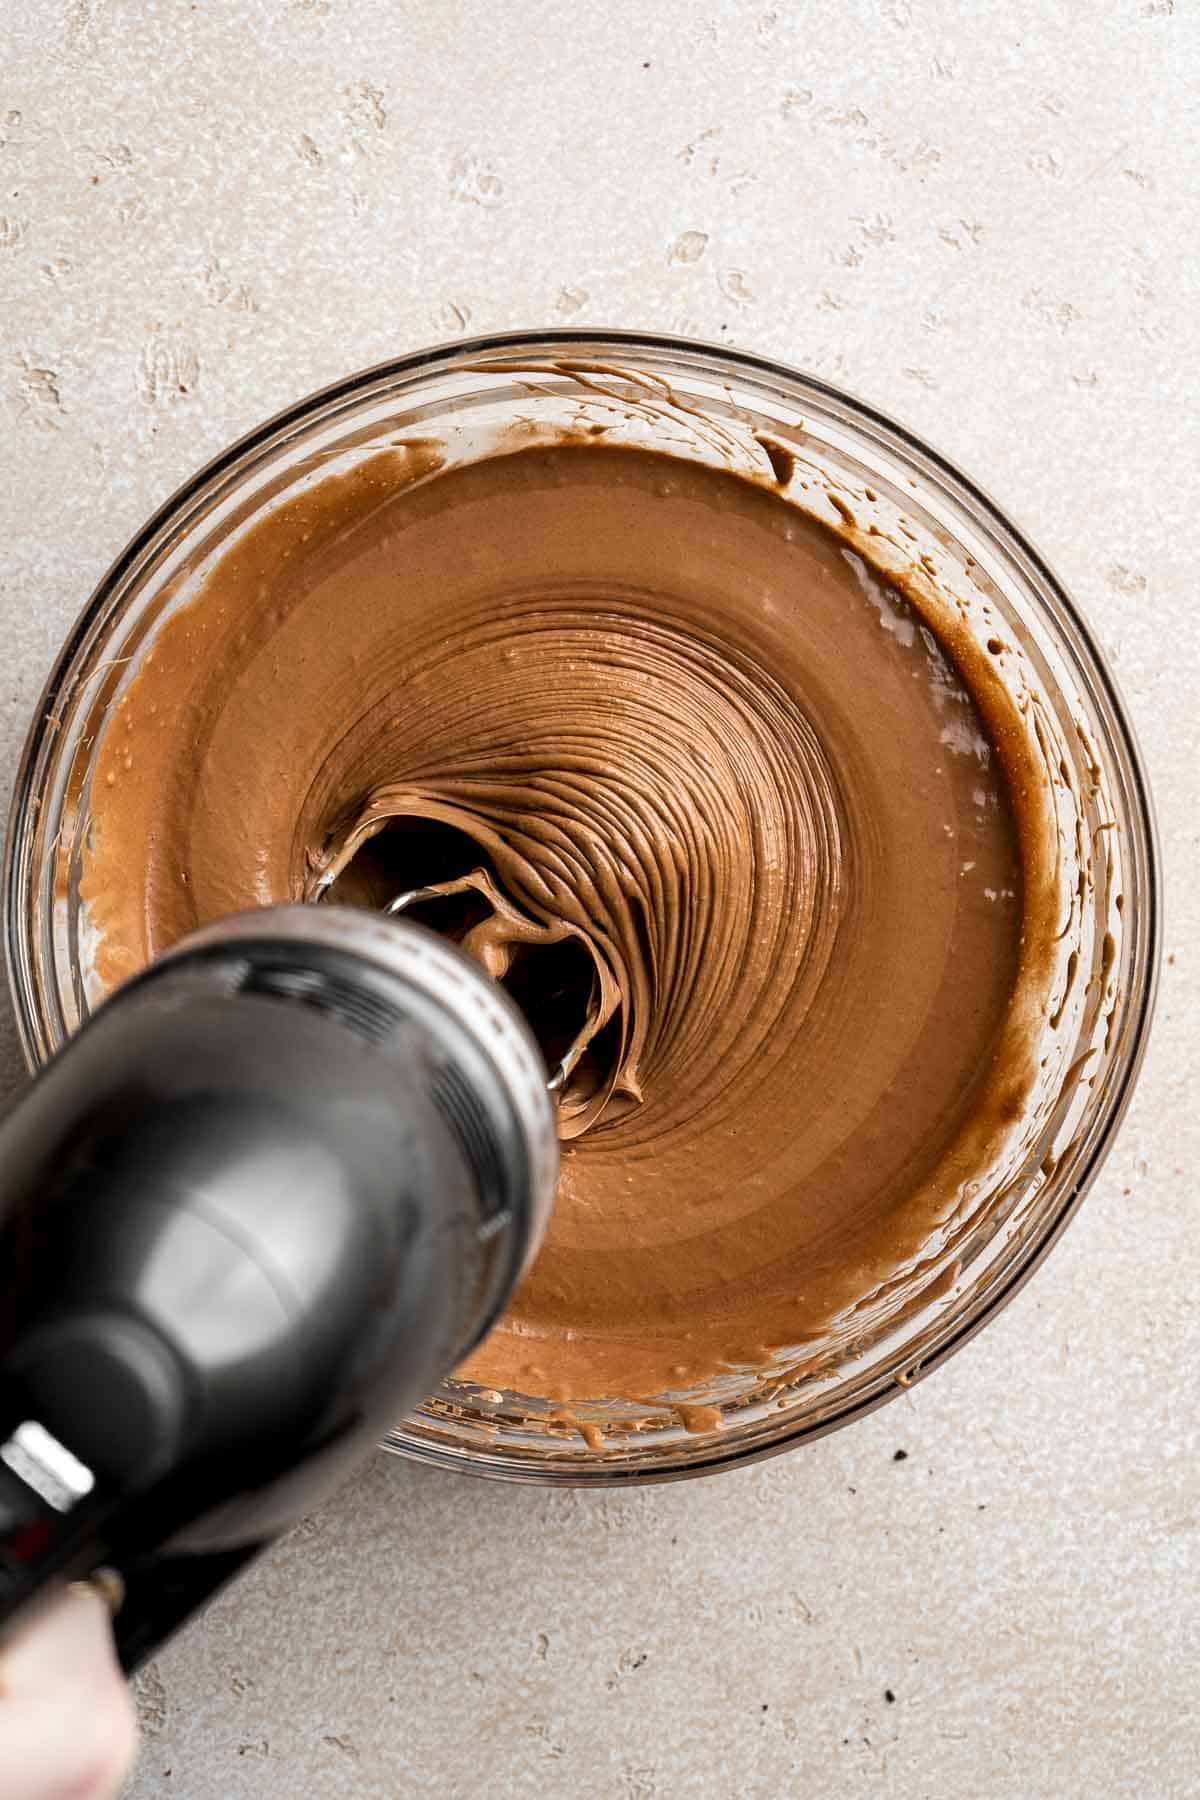
- Add dry ingredients. Whisk together the flour, cocoa powder, and salt in another mixing bowl. Add the dry ingredients to the wet ingredients and fold together using a large silicone spatula until just combined.
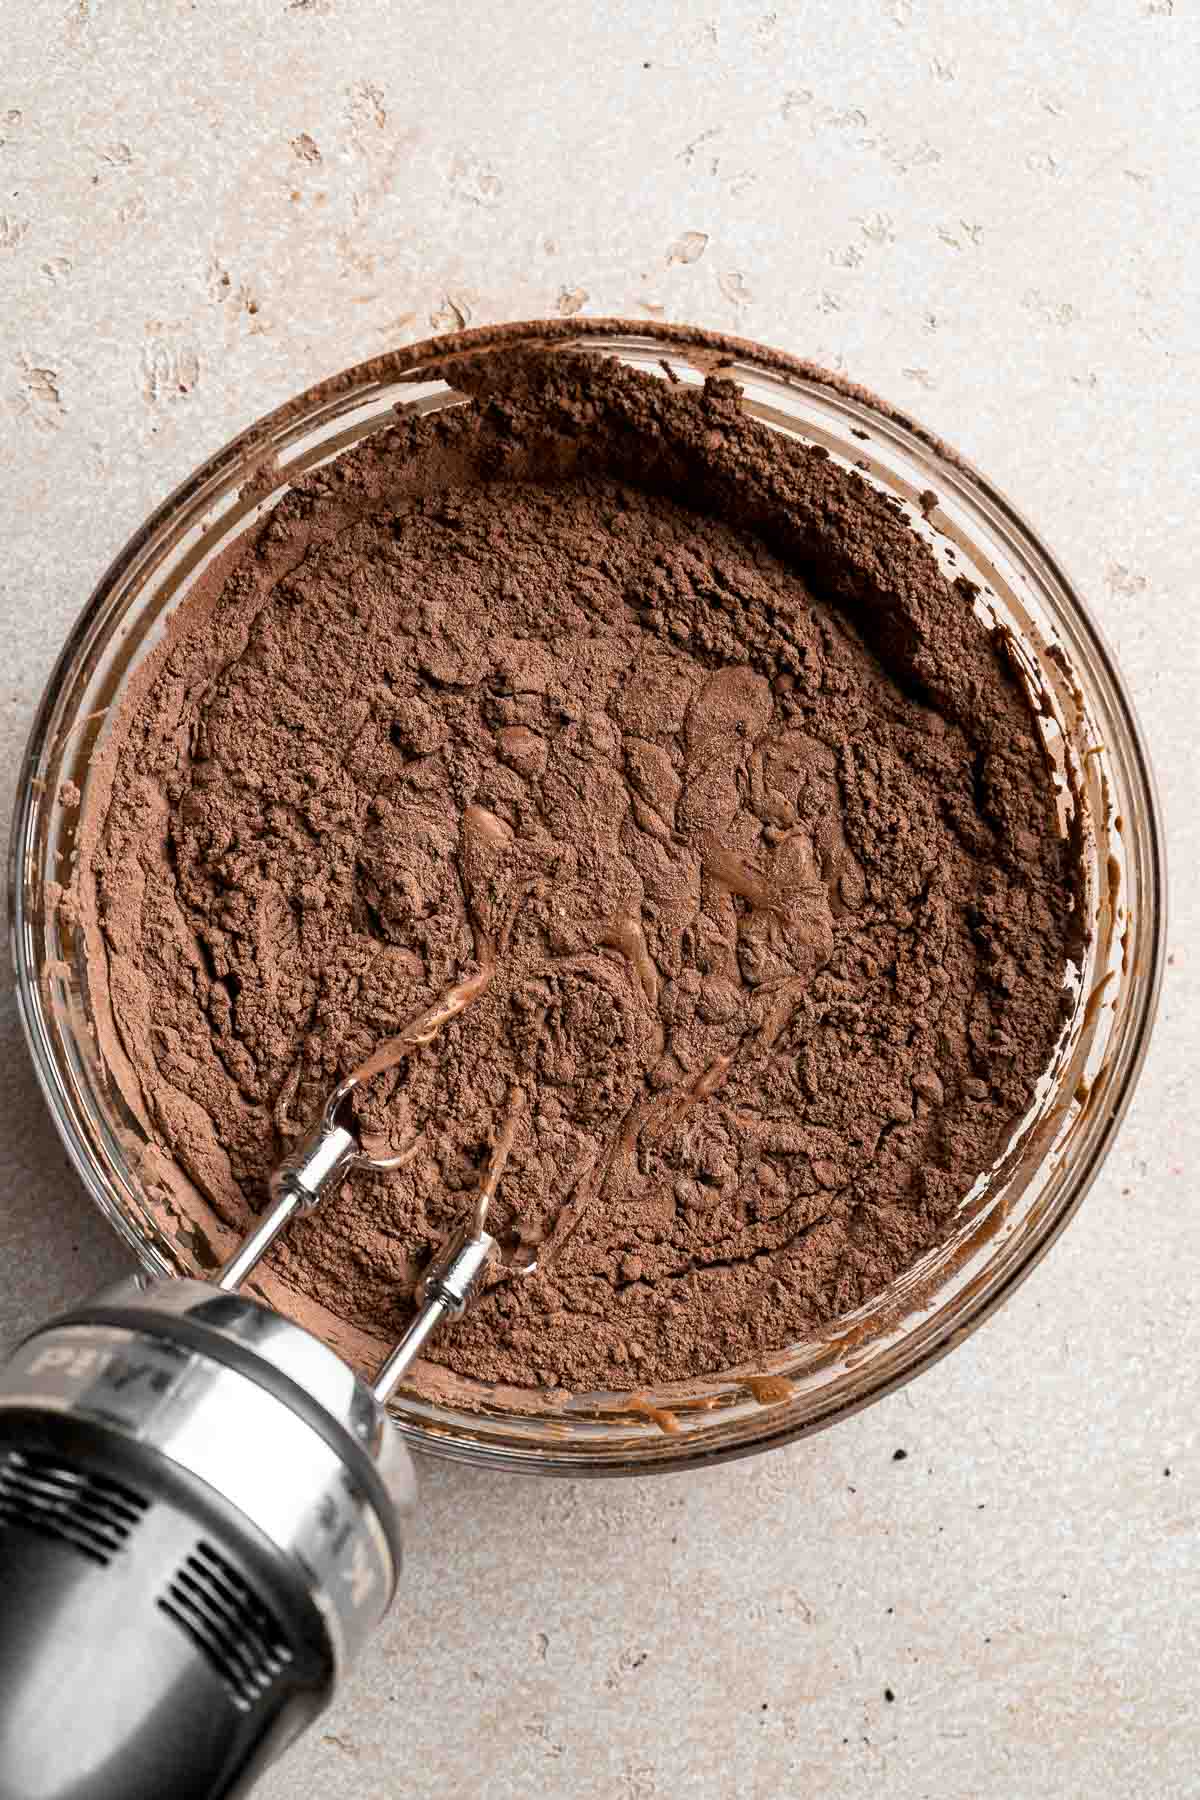
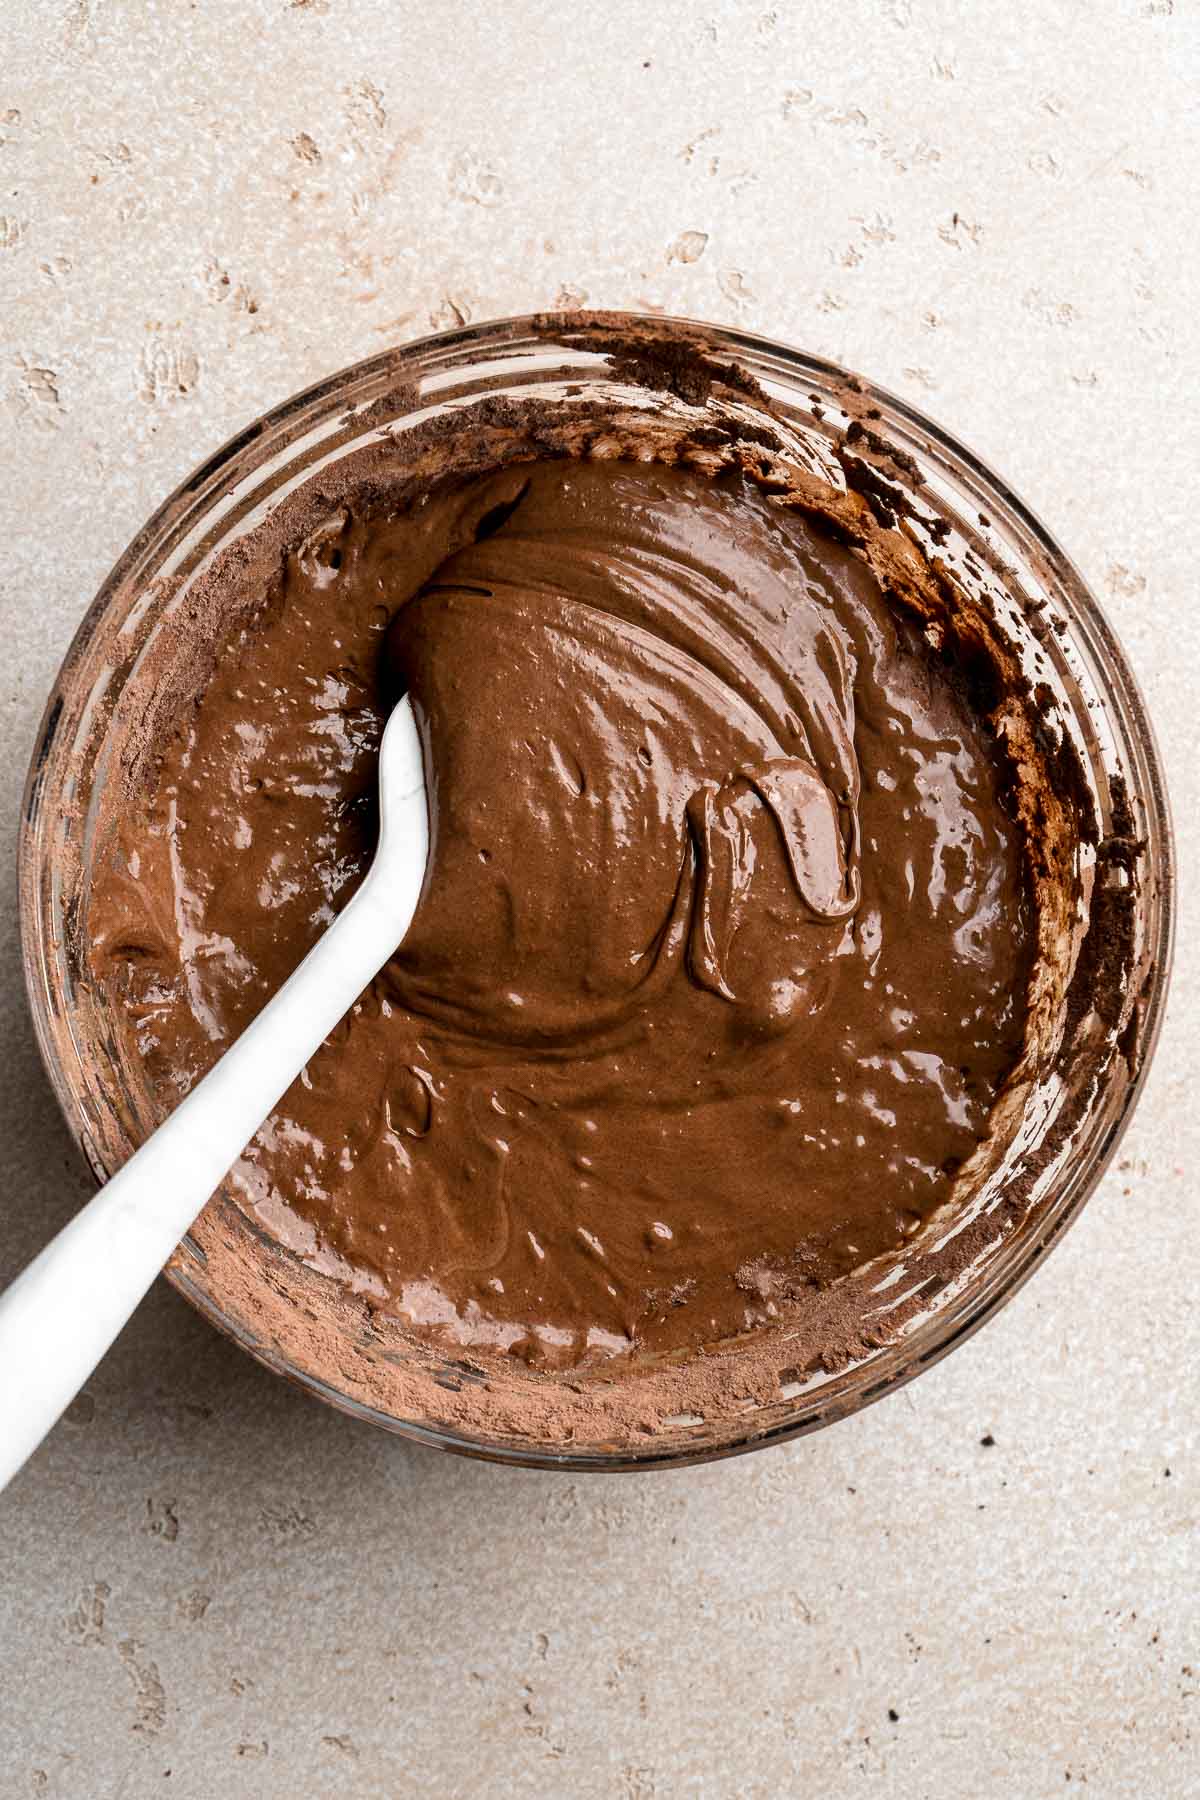
- Add oreos. Fold in half of the oreos - do not over mix.
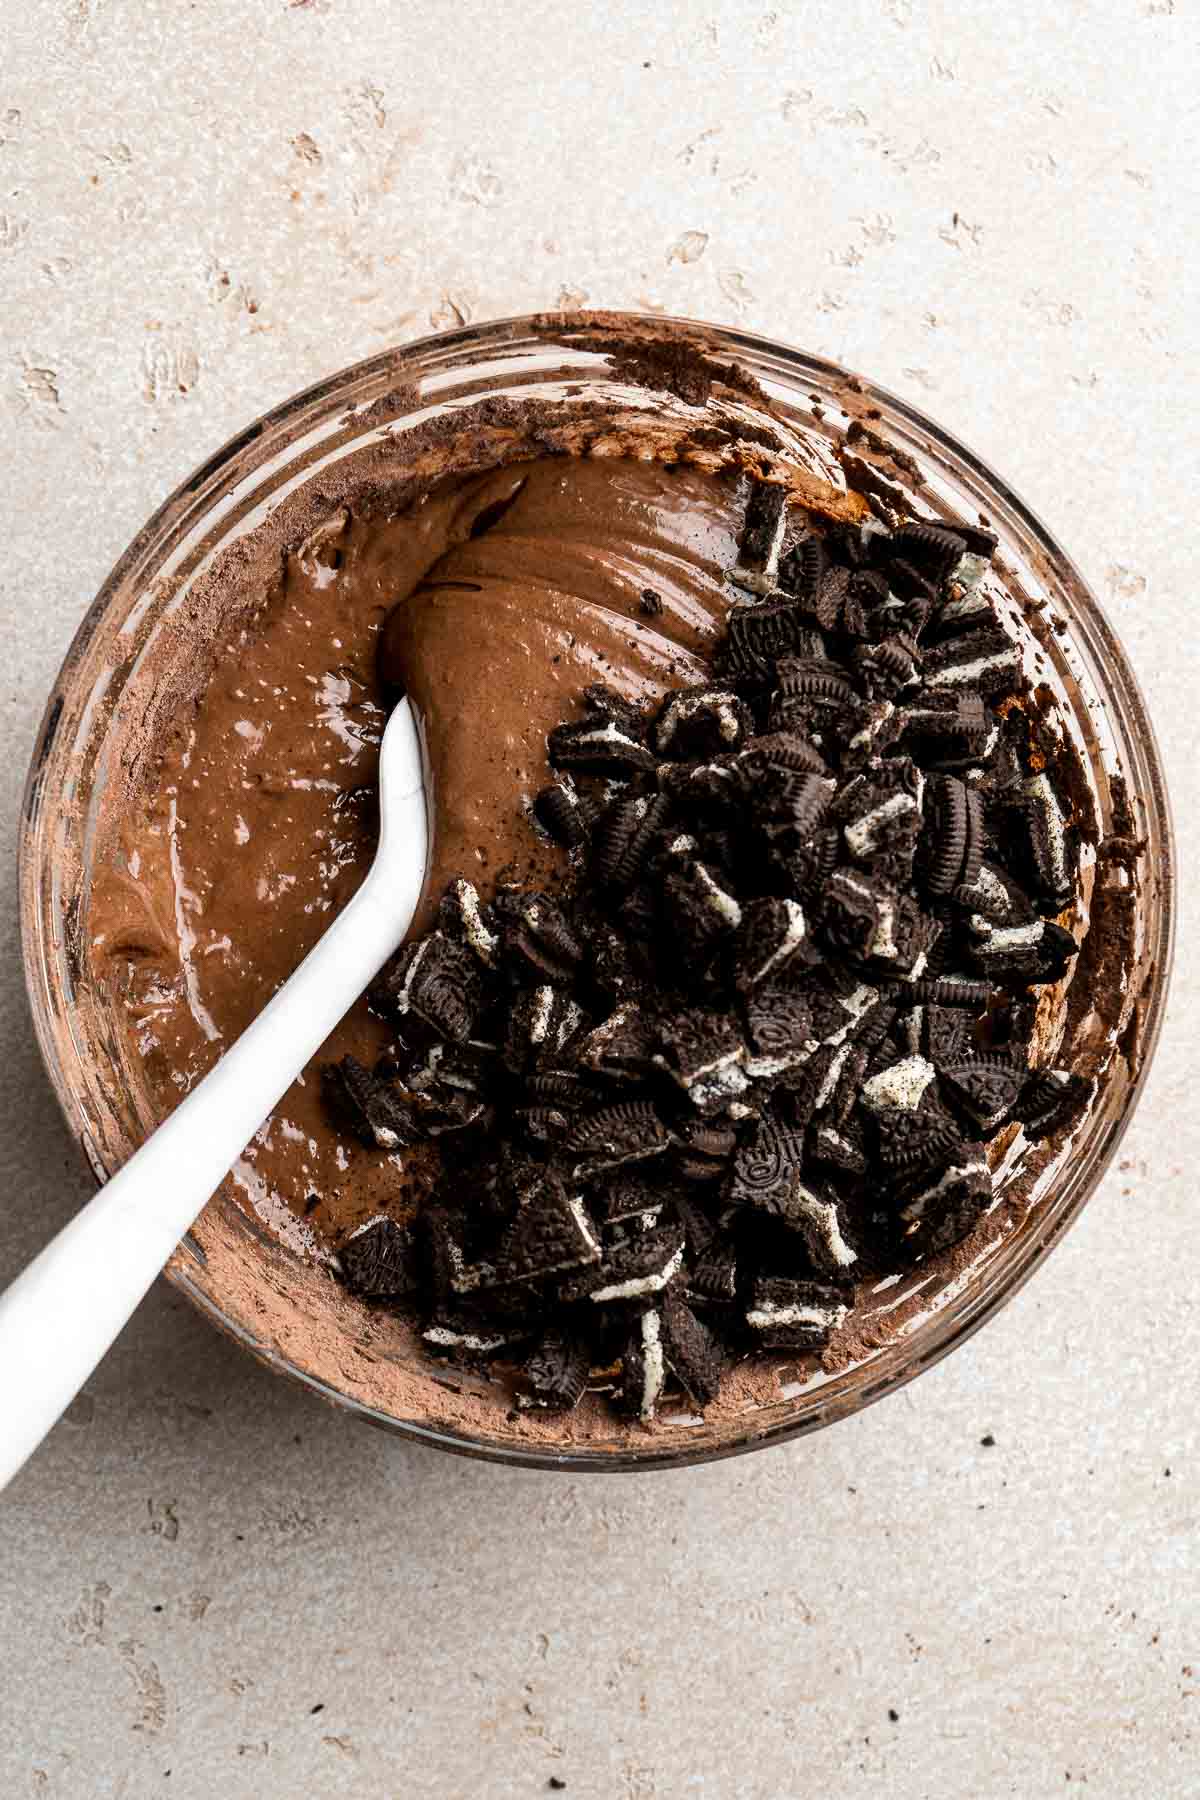
- Fill pan. Grease a 9-inch square baking pan and line it with parchment paper so that it hangs over two sides to make it easy to life the brownies out of the pan when baked. Transfer the thick batter into the prepared baking pan, smoothing out the top. Press the remaining oreos on top.
- Bake. Bake in a 350°F preheated oven for 25-30 minutes, until a toothpick inserted comes out clean with moist a few moist crumbs attached. Bake for 25 minutes for a super fudgy brownie, bake for 30 minutes for a more cakey texture.
- Serve. Once the brownies are done, remove the baking pan from the oven and place it on a wire cooling rack. Once cooled completely, lift it out of the pan and cut into 16 squares.
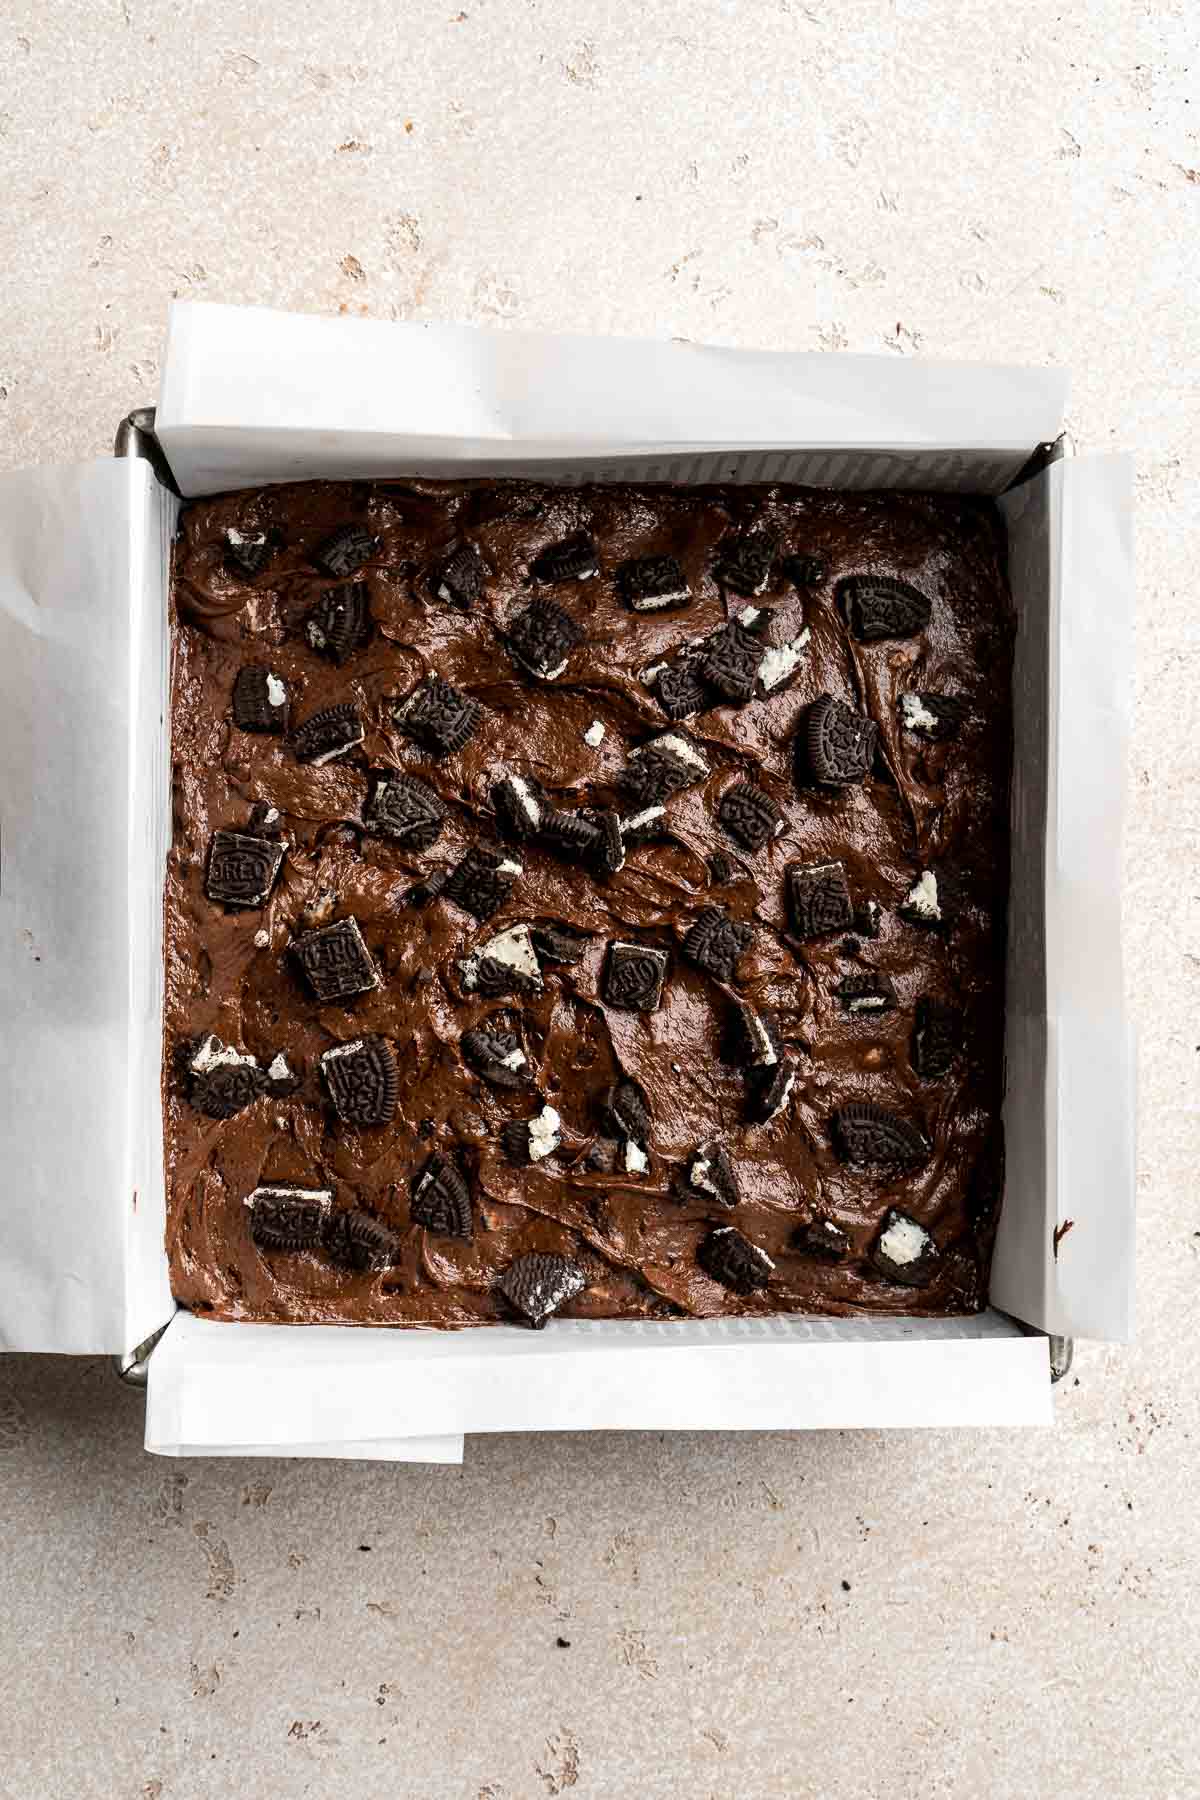
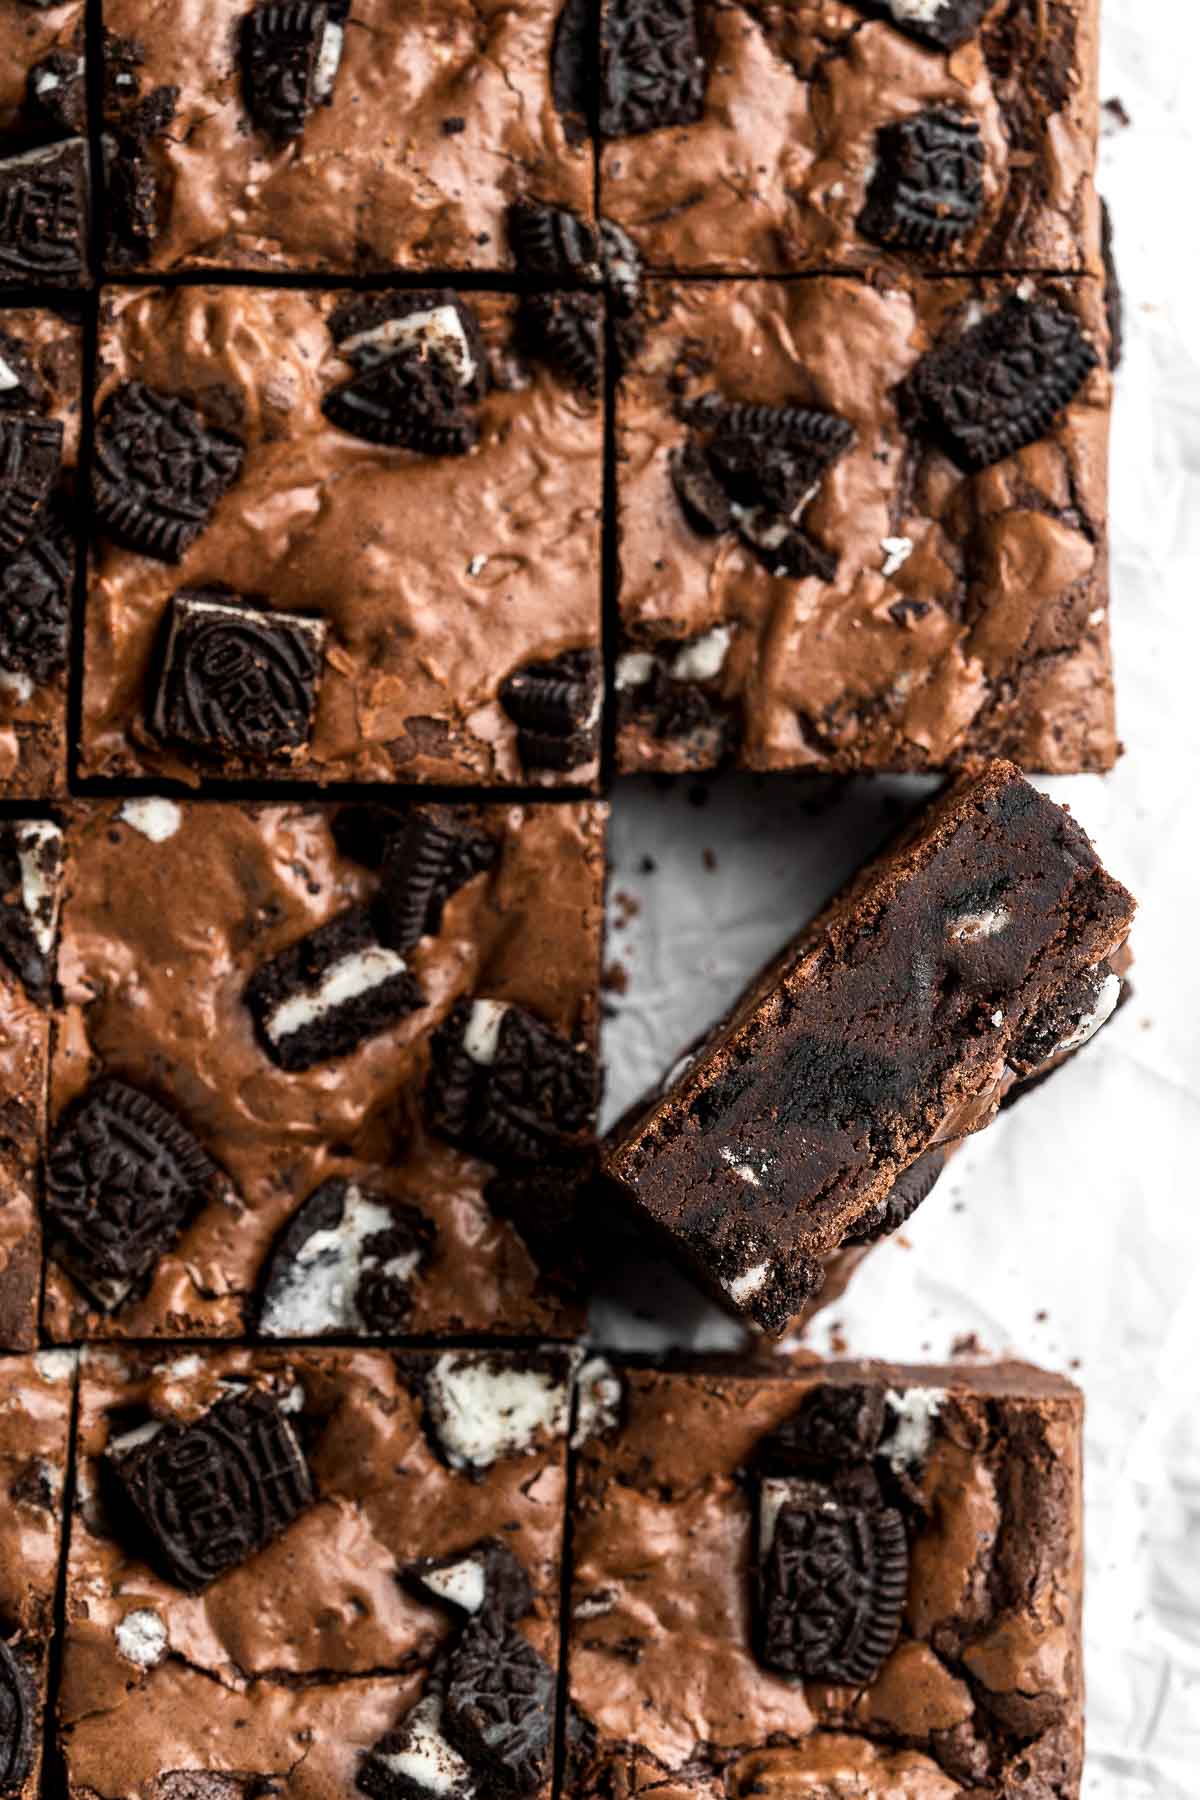
Recipe Variations
- Use different oreos. We used classic oreos, but you can switch things up by using different oreos such as double stuffed oreos or mint oreos.
- Get creative with mix-ins: Mix in your favorite mix ins to switch it up. Try a cup of mini marshmallows, chocolate chips, or crushed nuts into the brownies batter, along with the crushed oreos.
- Add salted caramel. Make salted caramel oreo brownies by baking the brownies without any oreos pressed in on top. Once cooled, add a layer of Salted Caramel Sauce on top and then press in the extra oreos. You can also make the brownies as is and just drizzle the caramel on top with flaked salt.
- Drizzle with chocolate. Make these brownies extra chocolately by drizzling melted chocolate on top. You can try dark chocolate, semi-sweet chocolate, or white chocolate.
How to Serve
Oreo Brownies are delicious warm, at room temperature, or cool. I love them with warm with a scoop of cold vanilla ice cream. They also pair really nicely with a tall glass of milk or a delicious warm drink. Some of our favorites to serve with oreo desserts are:
- White Hot Chocolate
- Slow Cooker Apple Cider
- Matcha Latte
- Golden Milk Turmeric Latte
- Peppermint Hot Chocolate

Recipe Tips and Tricks
- Try boxed brownie mix. For a quicker option, use boxed brownie mix instead. Then, just fold in the oreos and press extra oreos on top. So easy!
- Make in a 9x13-inch pan. You can make these brownies in a 9x13-inch baking pan simply by doubling the recipe. You will also need to increase the baking time by about 5 more minutes.
Storing and Freezing Brownies
How to Store
Once the oreo brownies have completely cooled to room temperature, you can store them in an airtight container (or wrapped in plastic cling wrap or aluminum foil) for up to 3 days at room temperature in a cool place and out of direct sunlight. They will stay fresh and soft for days! You can store even longer for up to a week in the fridge.
How to Reheat
Serve oreo brownies at room temperature or serve warm out of the oven or reheated. To reheat, place in a 350F preheated oven, air fryer, or toaster oven and heat for 5-10 minutes until warm and gooey. You can also reheat in the microwave for 10-20 seconds until warm.
How to Freeze
Once cool, place oreo brownies in a freezer bag or airtight container and freeze for up to 3 months. You can also slice them first and wrap individually in plastic cling wrap before placing in a freezer bag. When ready to serve, take out the portion that you want and thaw overnight in the refrigerator. Then, bring to room temperature before serving, about 20 minutes on the kitchen counter.
More Chocolate Recipes
- 45 Best Chocolate Desserts
- Fudgy Brownies
- Oreo Truffles
- Molten Chocolate Lava Cake
- Chocolate Thumbprint Cookies
- Flourless Banana Brownies
Tried this recipe?
I'd love to hear what you think! Leave a comment and rating below to share your feedback. Your reviews help others discover this recipe and help me keep creating more free recipes for you. Snap a photo and tag me on social media @aheadofthyme too.

Potato Onion Pierogi
Potato Onion Pierogi is a flavorful and delicious dumpling recipe that is made from scratch with simple ingredients. These Polish perogies are filled with a creamy mixture of potatoes, caramelized fried onions, and cream cheese. It's comfort food at it's finest.
You can make this traditional pierogi recipe entirely from scratch at home (even the wrappers!) using a few household staples. Plus, you can serve them fresh or freeze them for later for an easy meal on busy weeknights that you can cook from frozen.

What are Perogies?
Perogies (or pierogis) are a type of dumpling that originated in Eastern Europe countries such as Poland and Ukraine, and have since become popular all over the world. They are made with a round dough wrapper that is filled with various ingredients. The filling almost always includes potatoes and can be mixed with cheese, onions, and/or meats. This comfort food can be boiled or pan-fried and served with sour cream and fried onions as an appetizer, main dish, or side dish.
Why You'll Love These Potato Onion Pierogi
- Homemade pierogies taste better. These potato onion perogies are made with common refrigerator and pantry staples you likely have at home. Plus, making them homemade means that you are in control of the ingredients that are going in so you can make sure that they are fresh and high-quality.
- They are so flavorful. These pierogies are made with delicious caramelized onions both in the filling and served with it on top. The onions are caramelized in butter for an amazing flavor that can't be beat. You can also add your own unique flavors and seasonings to customize them to your liking.
- Make ahead and freezer-friendly. You can freeze leftovers and save them for a rainy day or intentionally make a double or triple batch to stock the freezer for super easy weeknight dinners for months to come. In fact, you can freeze both cooked or uncooked pierogies - and you can reheat directly from frozen!
- They are fun to make. Just like any dumpling, making pierogies from scratch is a fun experience that you can get the kids to help with too. We love wrapping dumplings as a family and it's become a monthly tradition around here (yup, we make ahead big batches).

Ingredient Notes
To make these delicious homemade potato onion pierogi, you will need the following ingredients (full measurements in recipe card below):
Potato Onion Filling
- russet potatoes - russet potatoes are the best variety for mashing, making them perfect for perogies. Their high starch content makes them light, fluffy, and soft when cooked and mashed. You can substitute them for whatever kind of potato you have on hand, but the texture will be different. A good substitute is Yukon gold potatoes because they're also quite creamy.
- onion
- butter
- cream cheese - cream cheese gives these homemade perogies a creamier taste and texture. You can substitute it with mascarpone cheese for a similar taste and texture.
- salt and pepper
Dumpling Dough
We like making Homemade Dumpling Wrappers for all our dumpling recipes. It's easy to make at home! But if you are looking for convenience, feel free to use approximately 30 store-bought wrappers.
For homemade dumpling dough, you will need:
- all-purpose flour - if you have celiac or gluten sensitivities, you can substitute the all-purpose flour in this recipe for measure-for-measure certified gluten free flour, though the texture of the dough for the perogies won't be as smooth as dough made with wheat flour. Either way, use a high-quality flour for the best results.
- salt
- water
- sour cream - sour cream adds a fluffier texture to the dough, but it's completely optional. It also makes the dough more pliable and easy to work with.
- egg
Equipment
You will also need measuring cups and spoons, large pot, large skillet, potato masher or fork, rolling pin, 3-inch round cookie cutter or glass rim, and sheet pan.
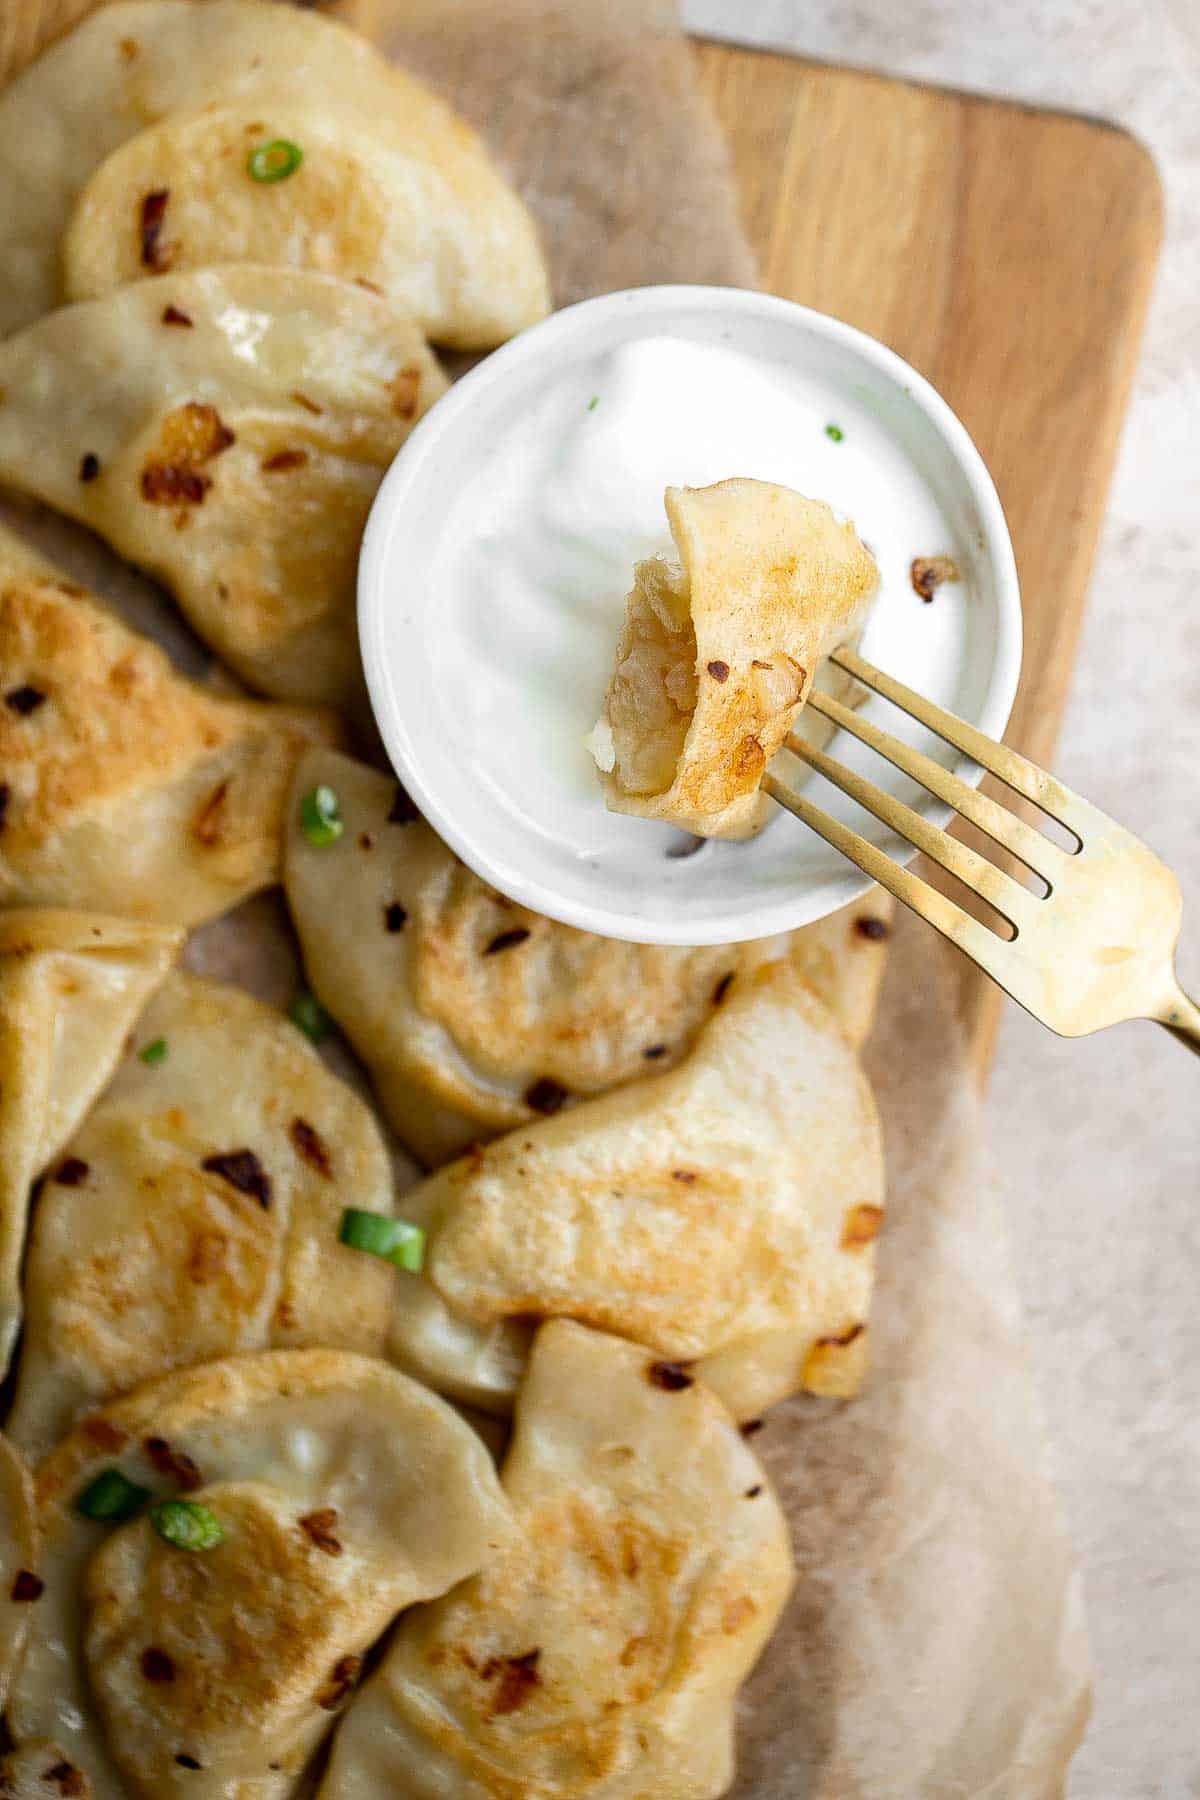
How to Make Potato Onion Pierogi Filling
- Boil potatoes. Place potatoes in a large pot. Add water to cover the top of the potatoes by about an inch. Add 1 teaspoon of salt and stir well to dissolve. Bring it to a boil over medium-high heat and cook until potatoes fork tender, about 20 minutes. Insert a fork to check doneness.
- Mash. Drain the water and use a potato masher or fork to mash the potatoes until smooth.
- Fry onions. In a large skillet, melt butter over medium-high heat. Add diced onion and sauté until the onions are caramelized and crispy, about 10 minutes. Stir occasionally to brown the onions evenly.
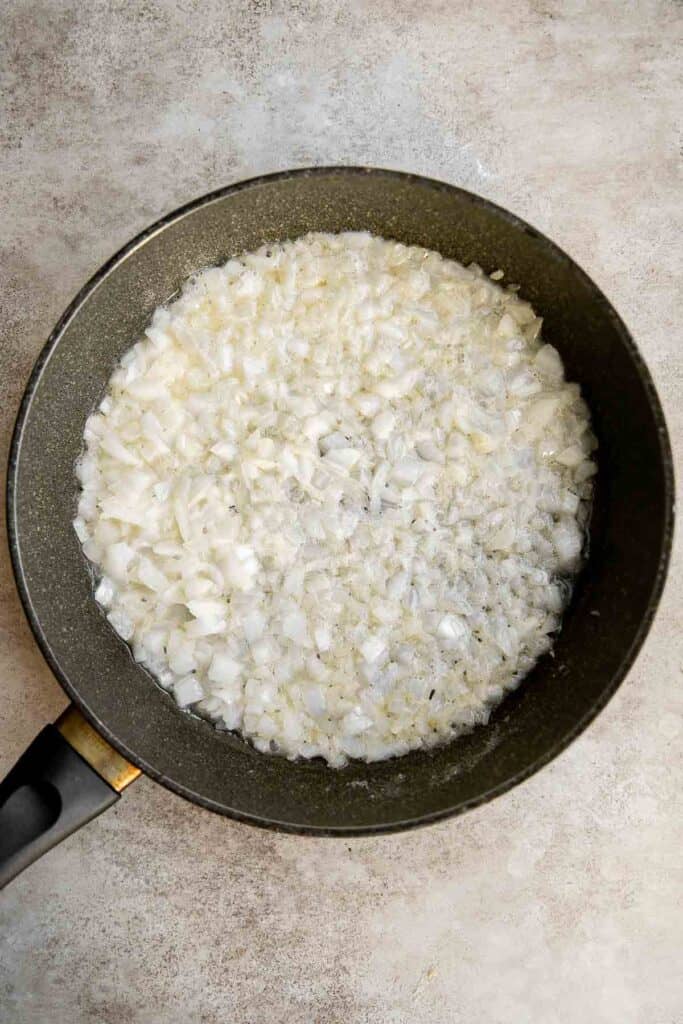
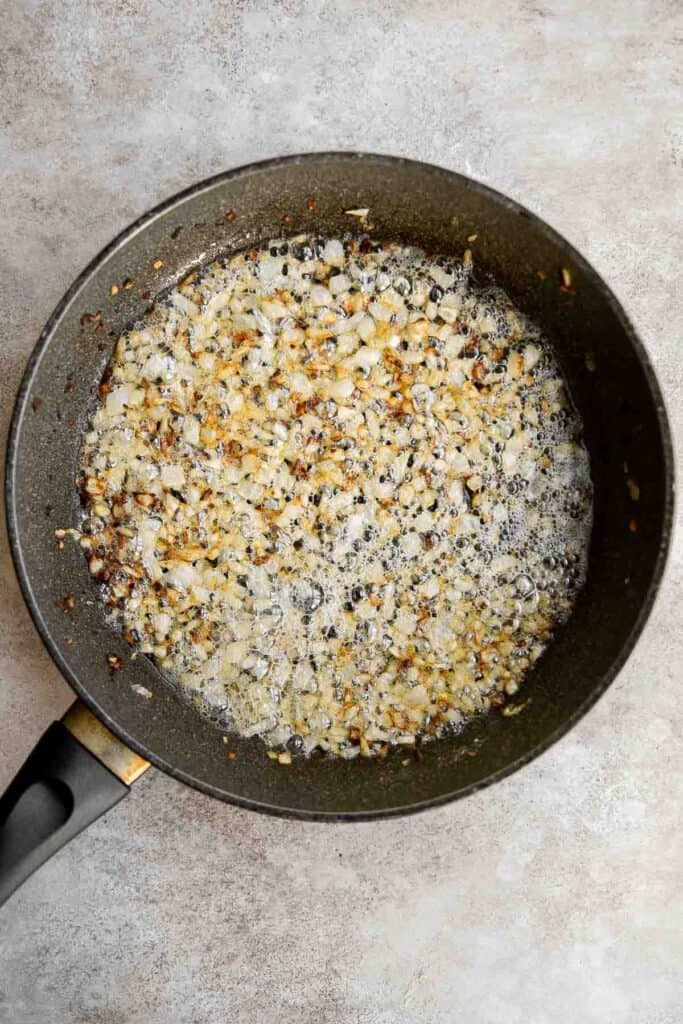
- Make filling. Set aside 2 tablespoons of fried onions for serving and add the remaining onions to the mashed potatoes, along with cream cheese, salt, and pepper. Stir well until evenly mixed. Let the filling cool to room temperature or refrigerate until ready for use.
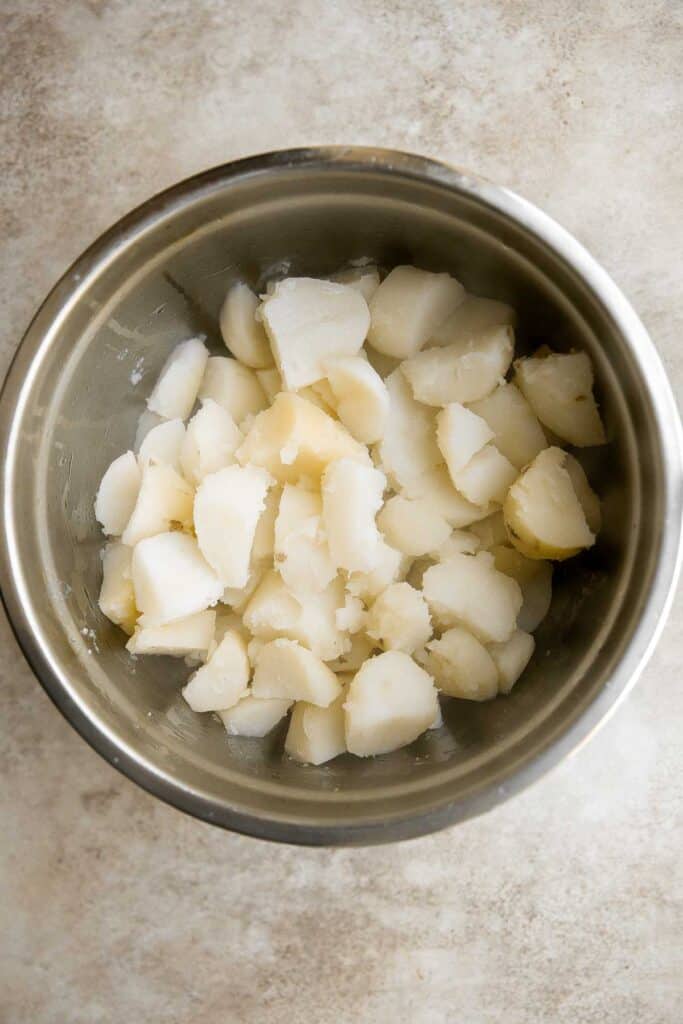
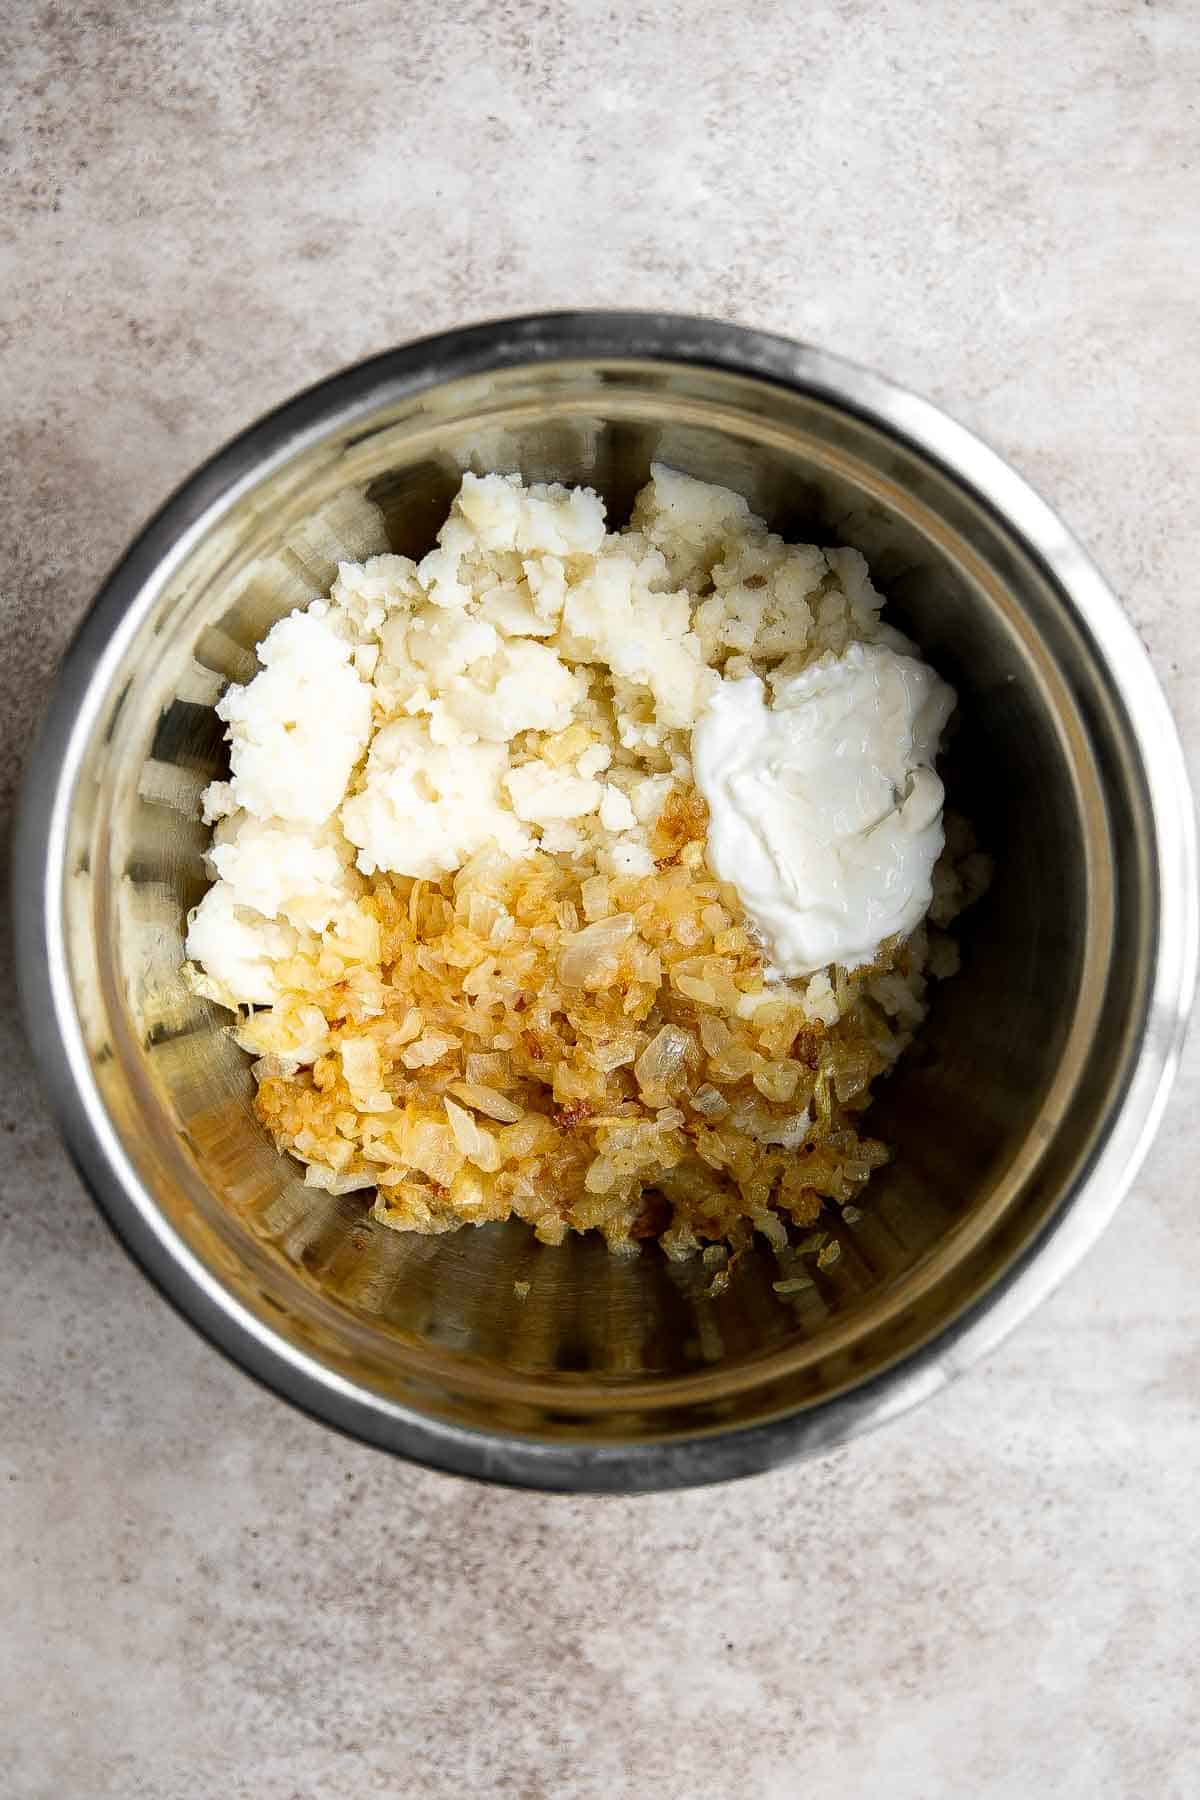
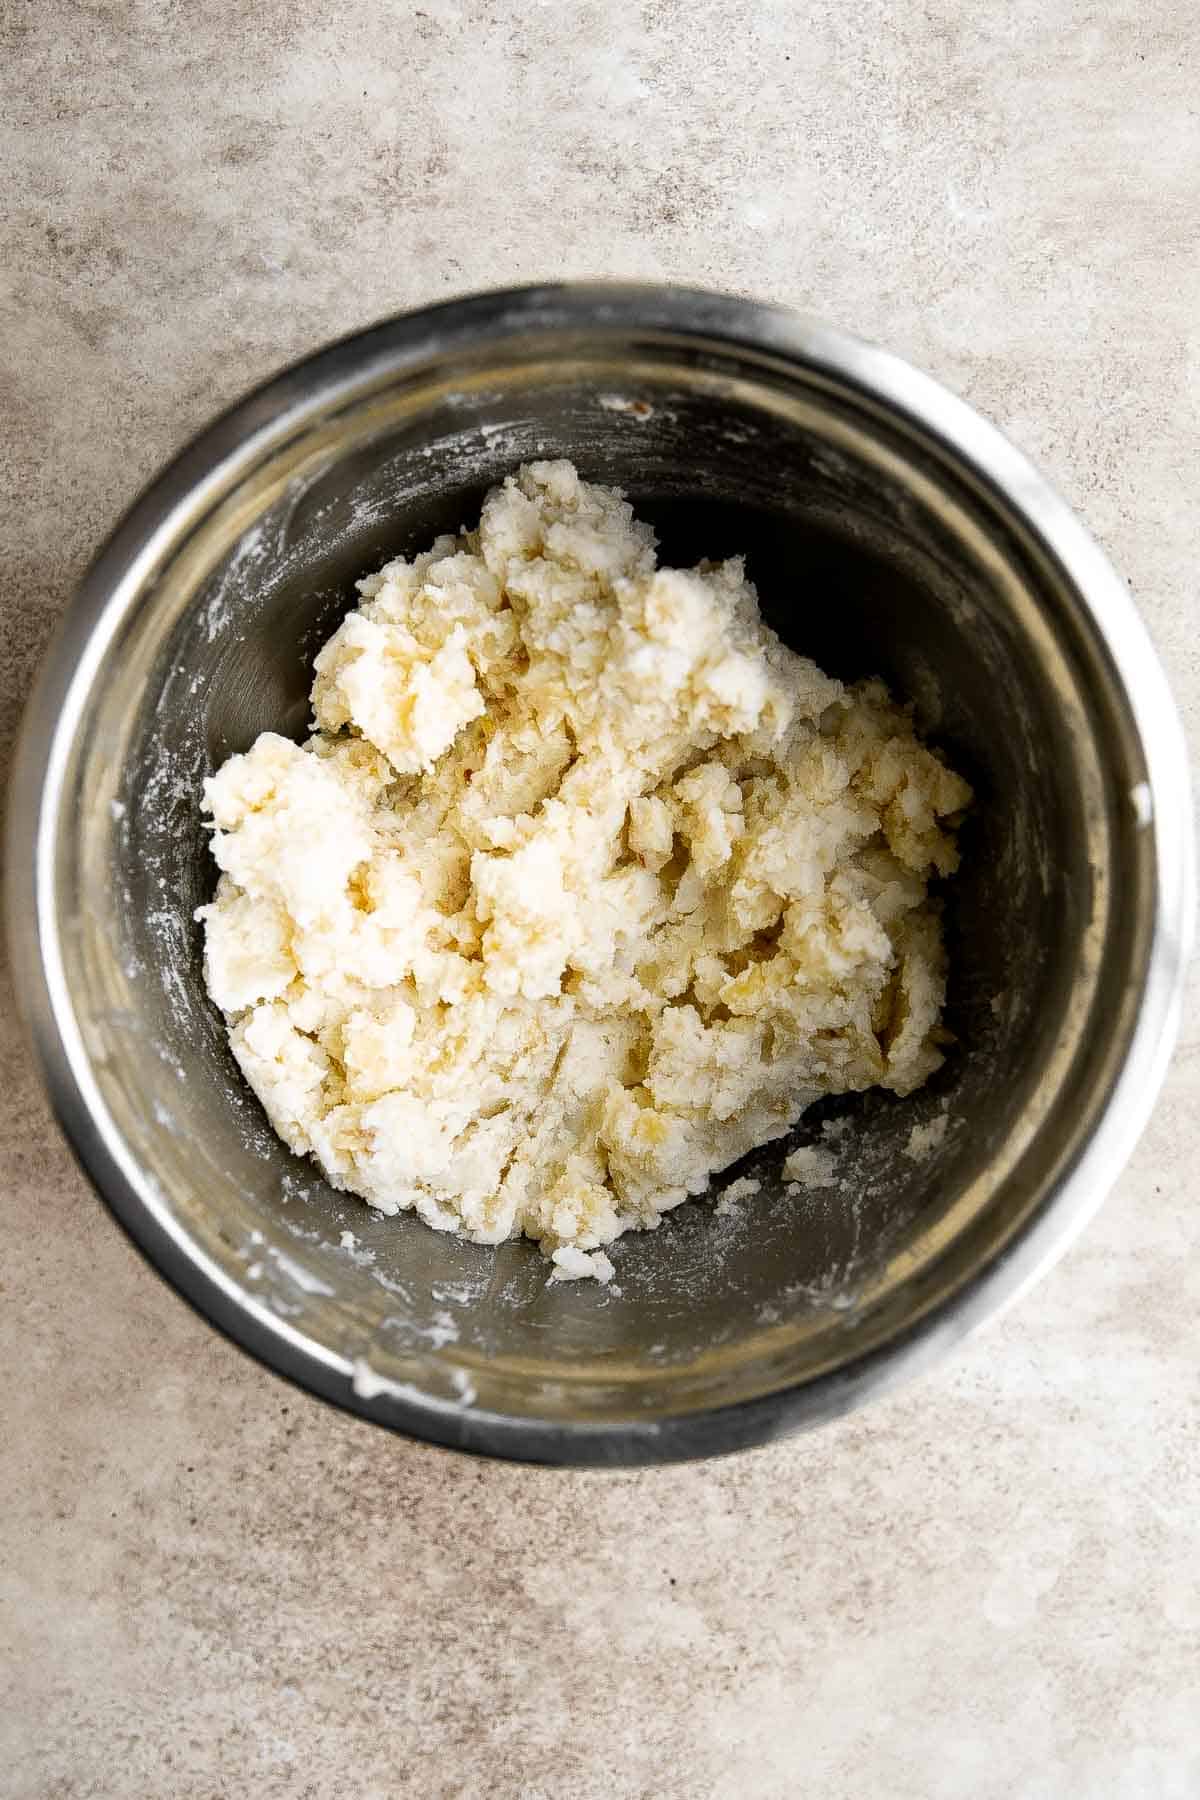
How to Make Pierogi Wrappers from Scratch
- Make dough. In a large mixing bowl, whisk together flour and salt until evenly combined. Add water, sour cream (if using) and egg. Stir well with a spatula until no dry flour is visible. Make sure to scrape off any remaining flour on the sides of the bowl.
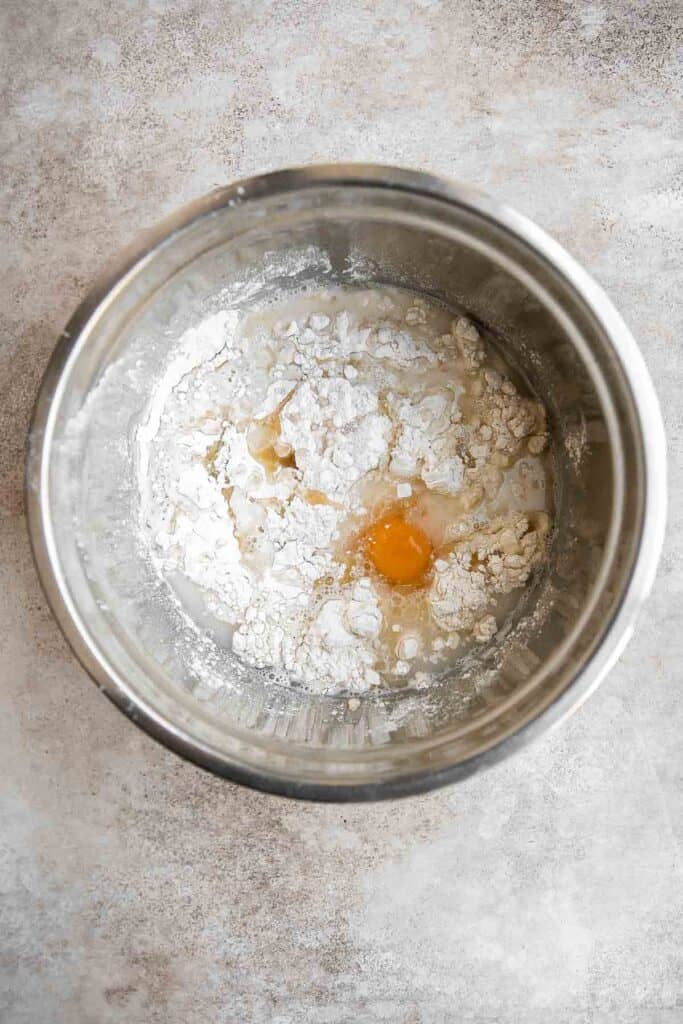
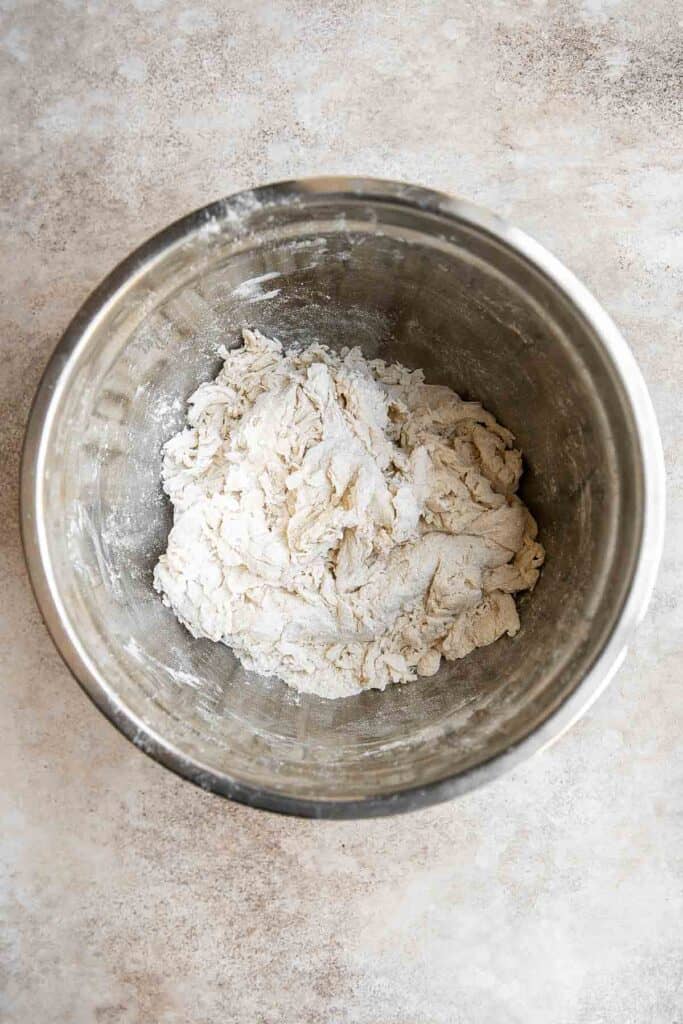
- Knead. Transfer the dough onto a clean and dry surface. Knead the dough until it turns into a soft and smooth dough ball, about 10 minutes. You can also knead the dough on medium speed in a stand mixer for 10 minutes until smooth.
Tips for Kneading Dough
- How to knead dough: Knead the dough by pushing it down and outward using the palms of your hands. Fold the dough in half toward you and press down. Repeat this motion by pushing the dough down and outward, and then folding over towards you. This helps build up gluten strength in dough that is responsible for making the bread fluffy.
- How to test if dough is well-kneaded: A well-kneaded dough is smooth and can hold its shape. You can test the dough by giving it a firm poke with your finger. The indentation should bounce right back. If it doesn't bounce back and stays like a dimple, keep kneading for a few more minutes.
- Rest. Cover the dough with plastic cling wrap and let it rest for 10 minutes. Use a bench scraper or knife to divide the dough into 4 pieces.
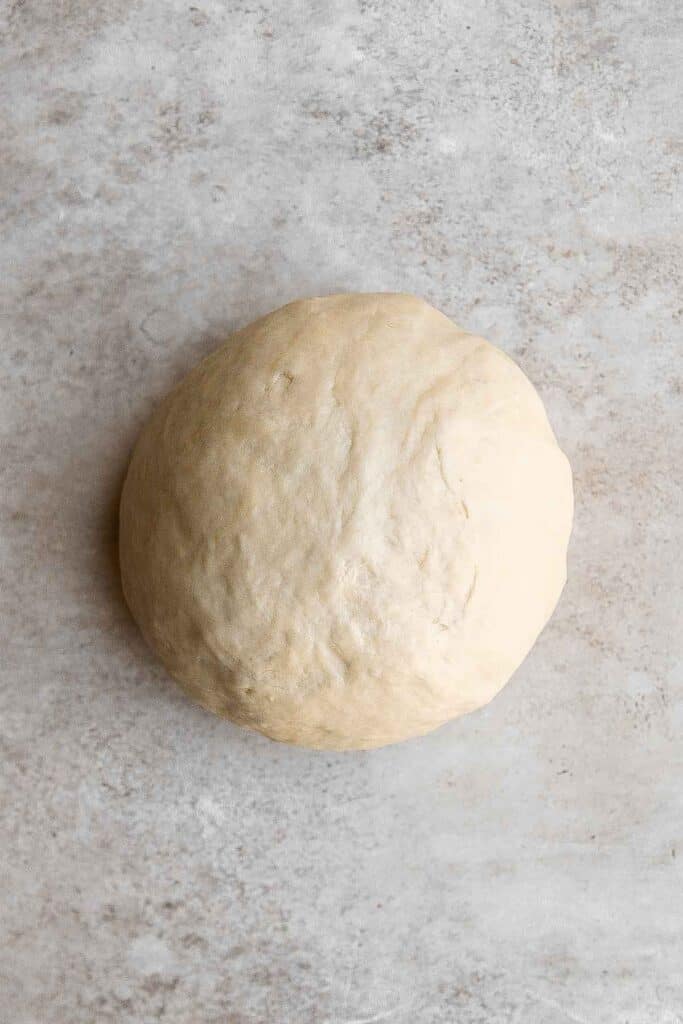
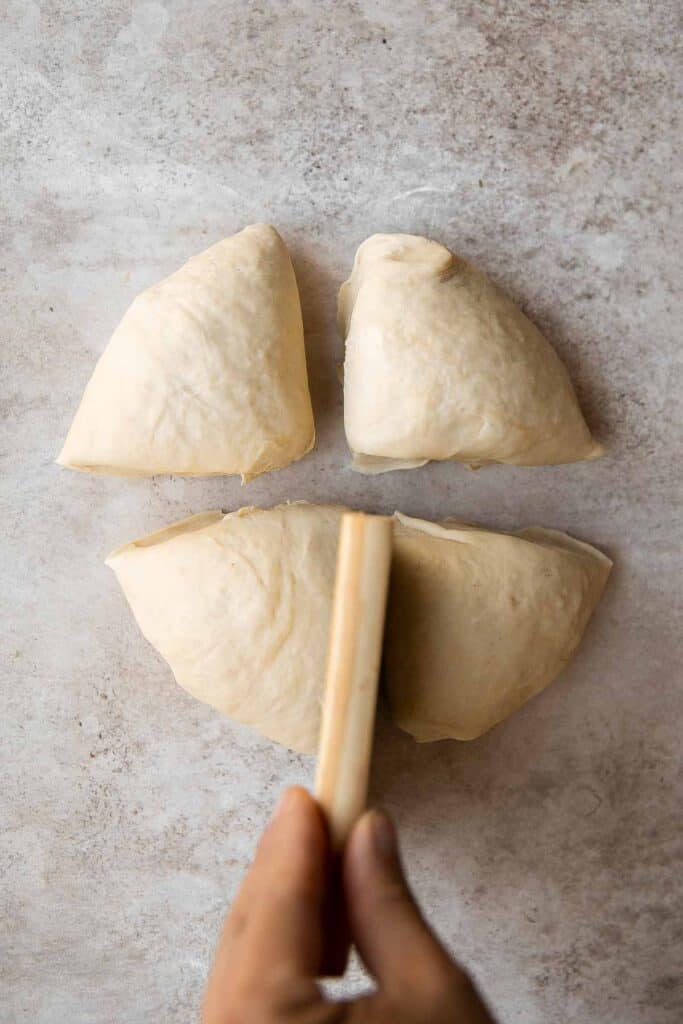
- Roll. Lightly flour a clean surface and a rolling pin. Take one piece of dough at a time and use a rolling pin to roll it out to 1/16-inch thickness. Sprinkle with flour if needed.
- Cut out. Use a 3-inch round cookie cutter to cut out circles from the dough. Repeat with the remaining dough balls.
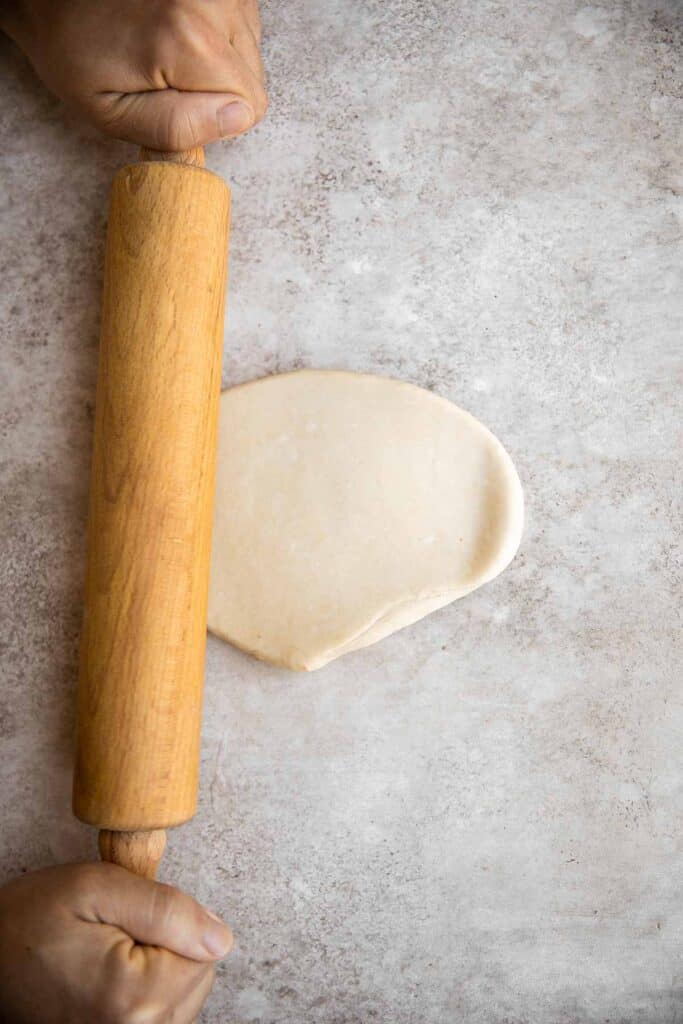
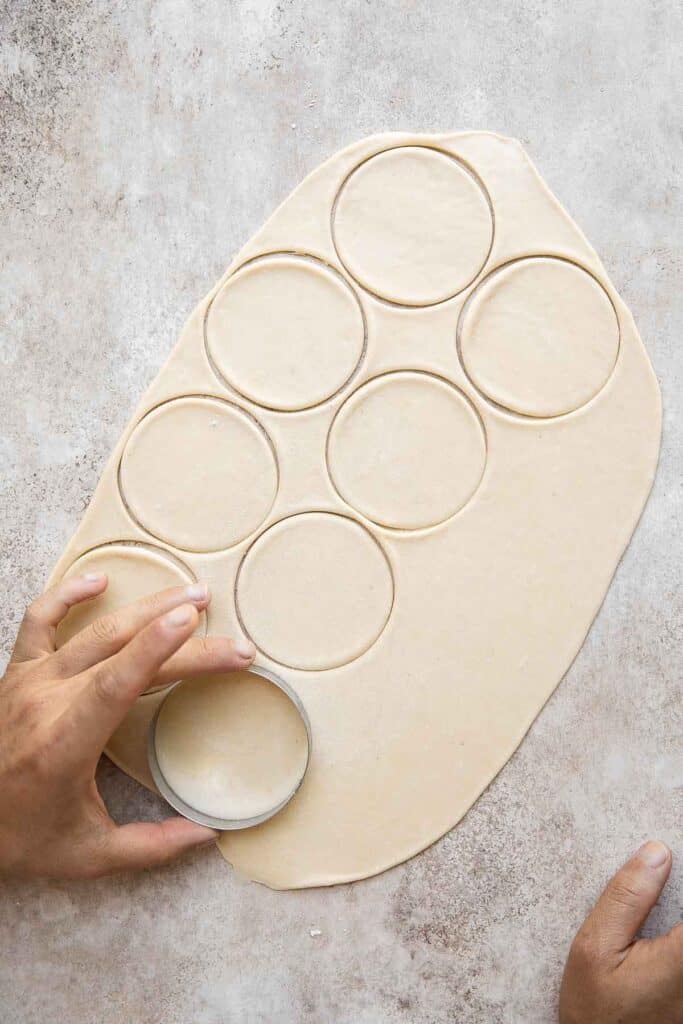
- Repeat. Combine the scraps into one dough ball and re-roll and repeat until all the dough is used up.
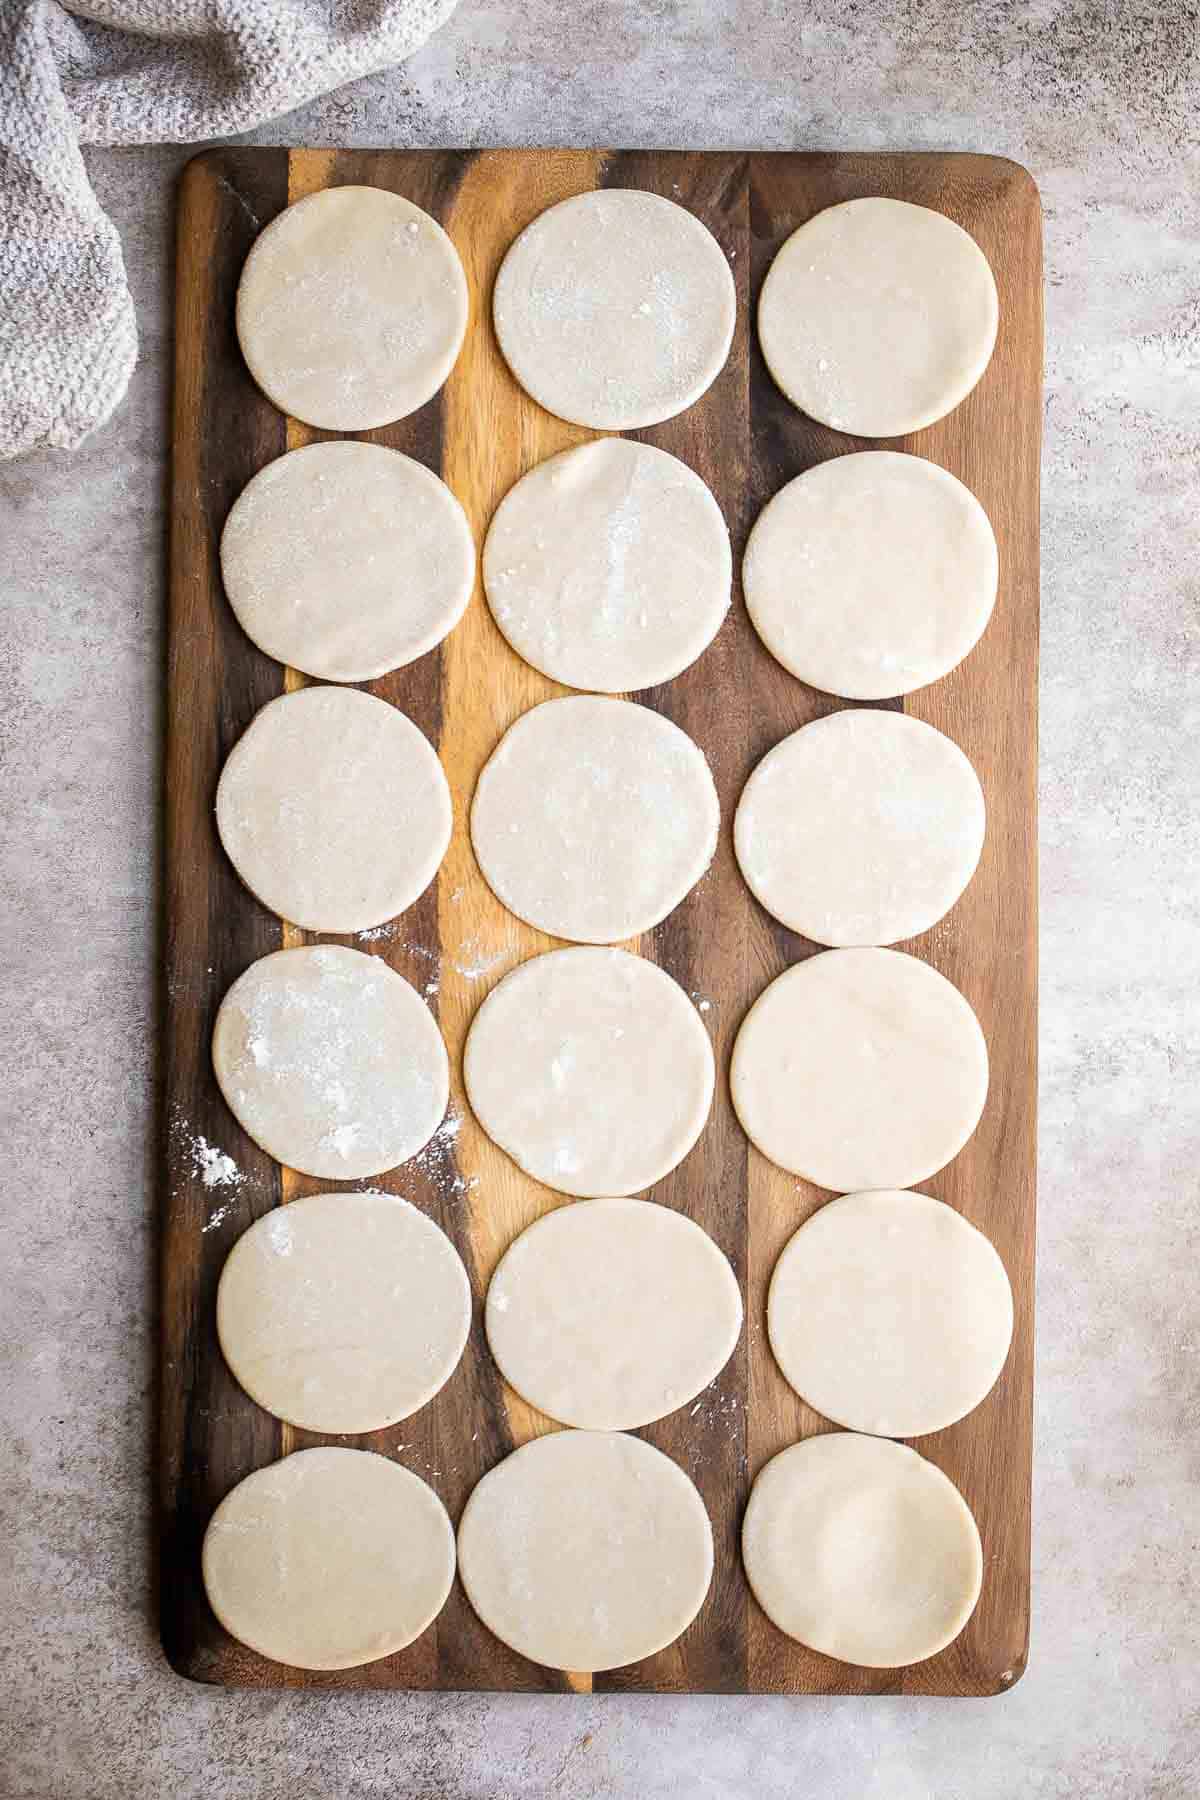
How to Assemble Pierogis
- Prepare edges for sealing. Prepare a small bowl of water for dipping your fingers into. Take one pierogi wrapper at a time and place it in your palm. Dip your finger into water and smear it along the edge of the wrapper.
- Add filling. Add a tablespoon of filling onto the centre of the wrapper.
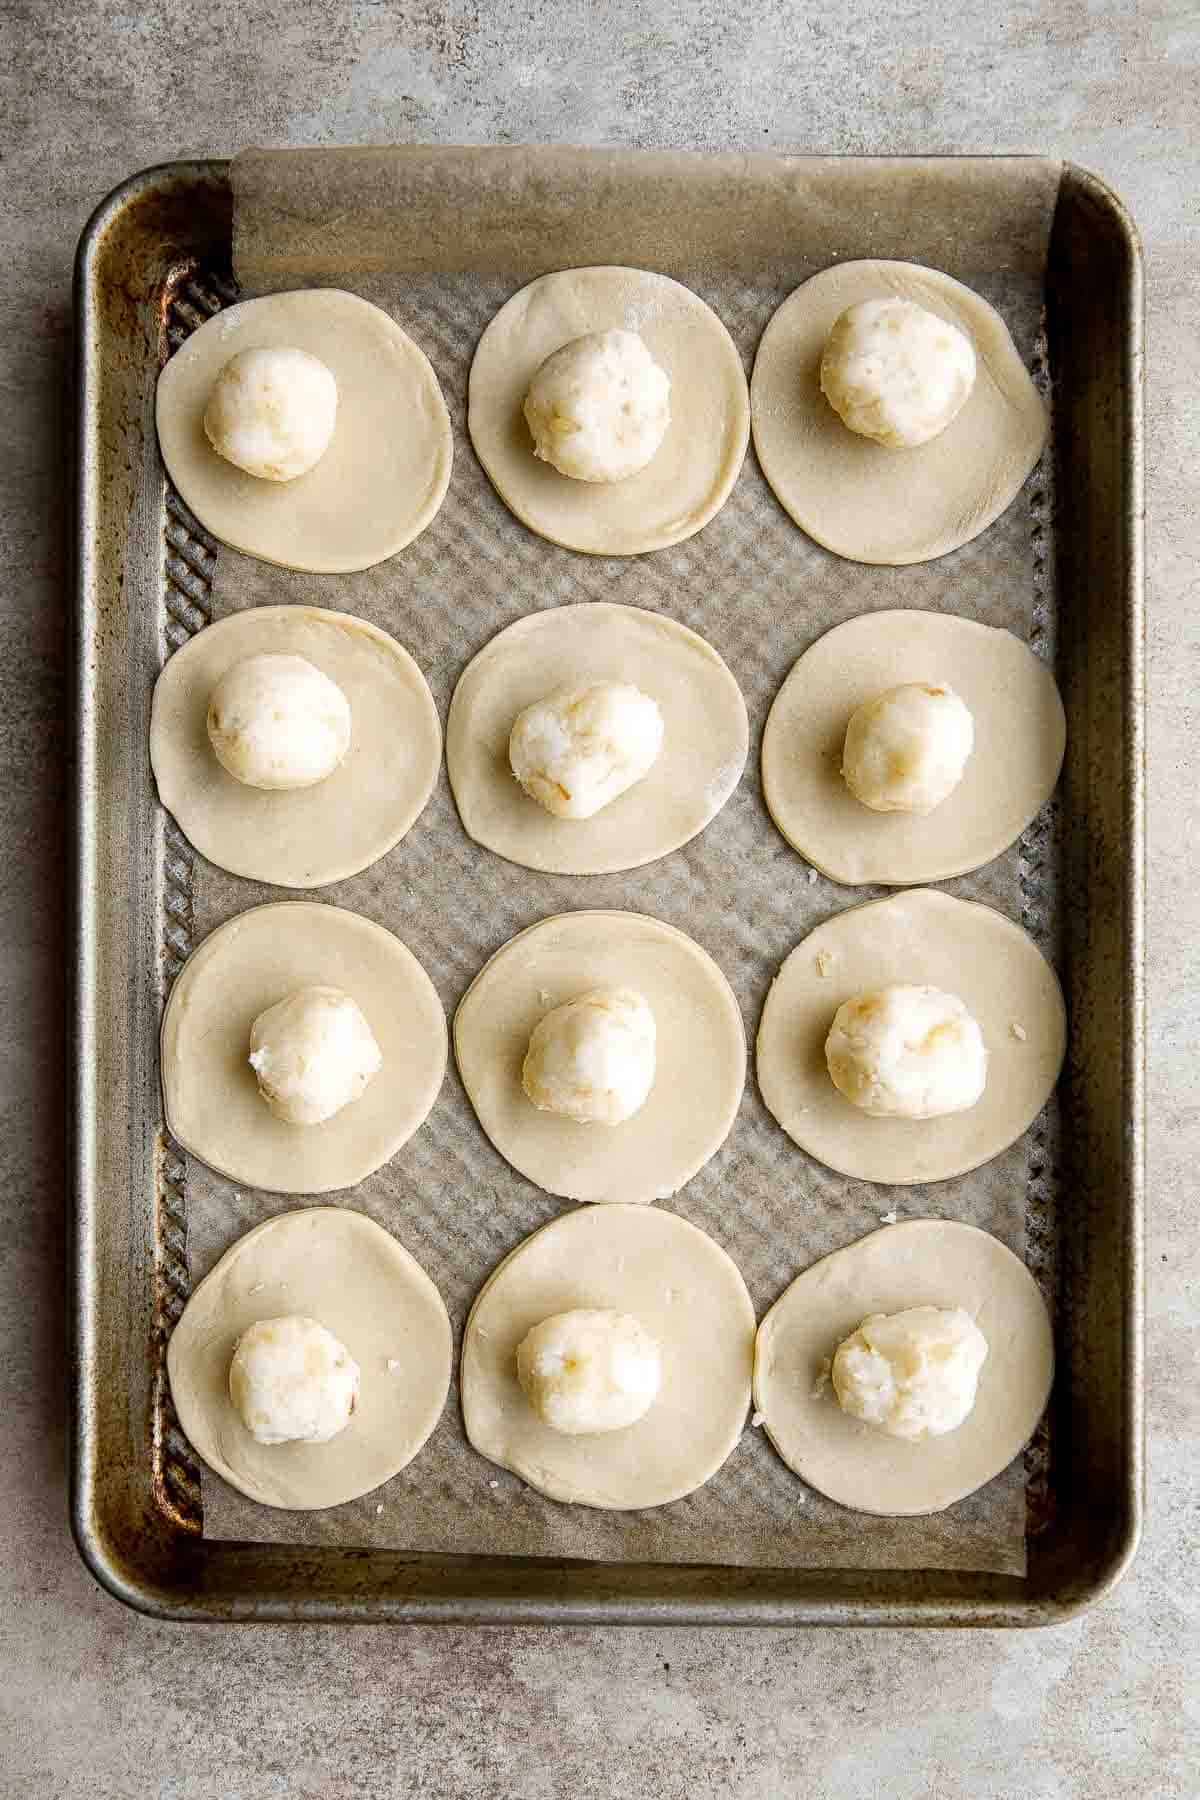
- Fold. Fold the wrapper over into a half-moon shape and enclose the filling inside.
- Seal. Press the edges together to seal, or pleat the edges together with your finger.
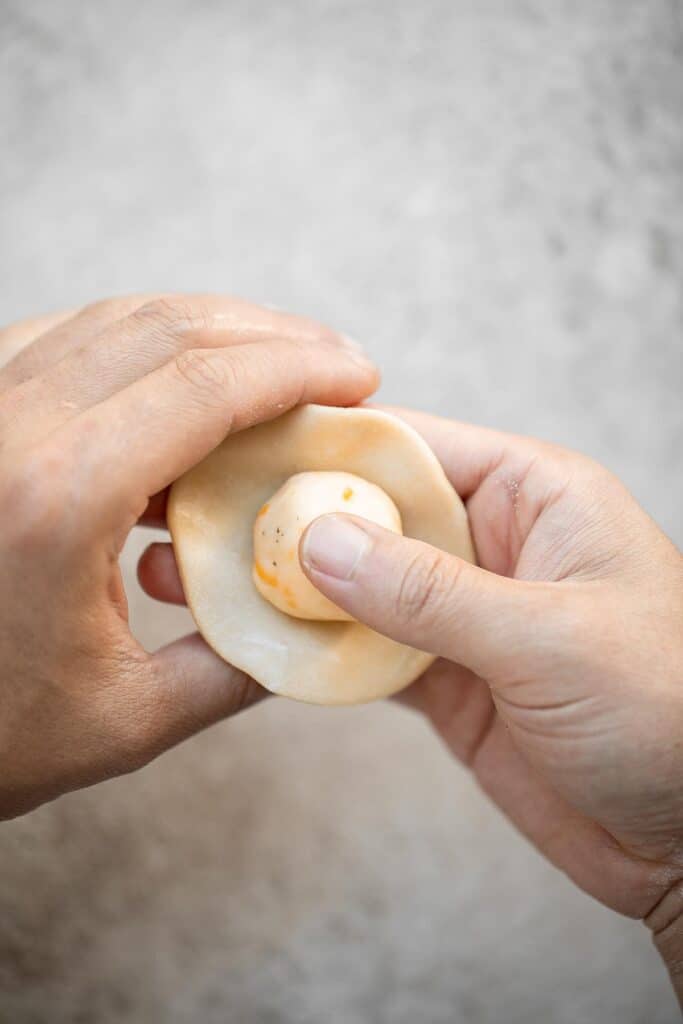

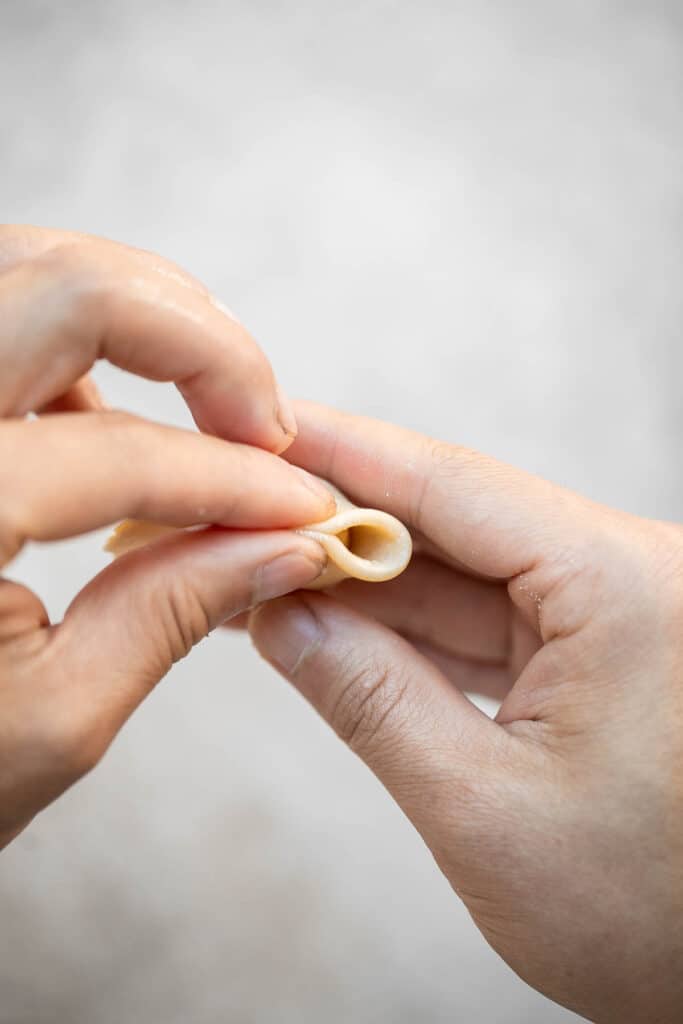
- Repeat. Place the pierogies on a parchment-lined baking tray. Repeat with all wrappers. Cover with a tea towel to prevent the wrappers from drying out until ready to cook.
How to Cook Perogies
- Boil. Add perogies (in batches) to a large pot of boiling water and cook until they are floating, about 3-5 minutes. Drain the pierogies well.
- Fry. In the large skillet (can use the same skillet used for the fried onions), melt butter over medium-heat. Add the drained perogies and continue to cook until golden-brown, about 3-4 minutes per side.
- Add onions. Add reserved fried onions and heat until warm, about 1-2 minutes. Serve the perogies with fried onions, sour cream, and green onions, if desired.
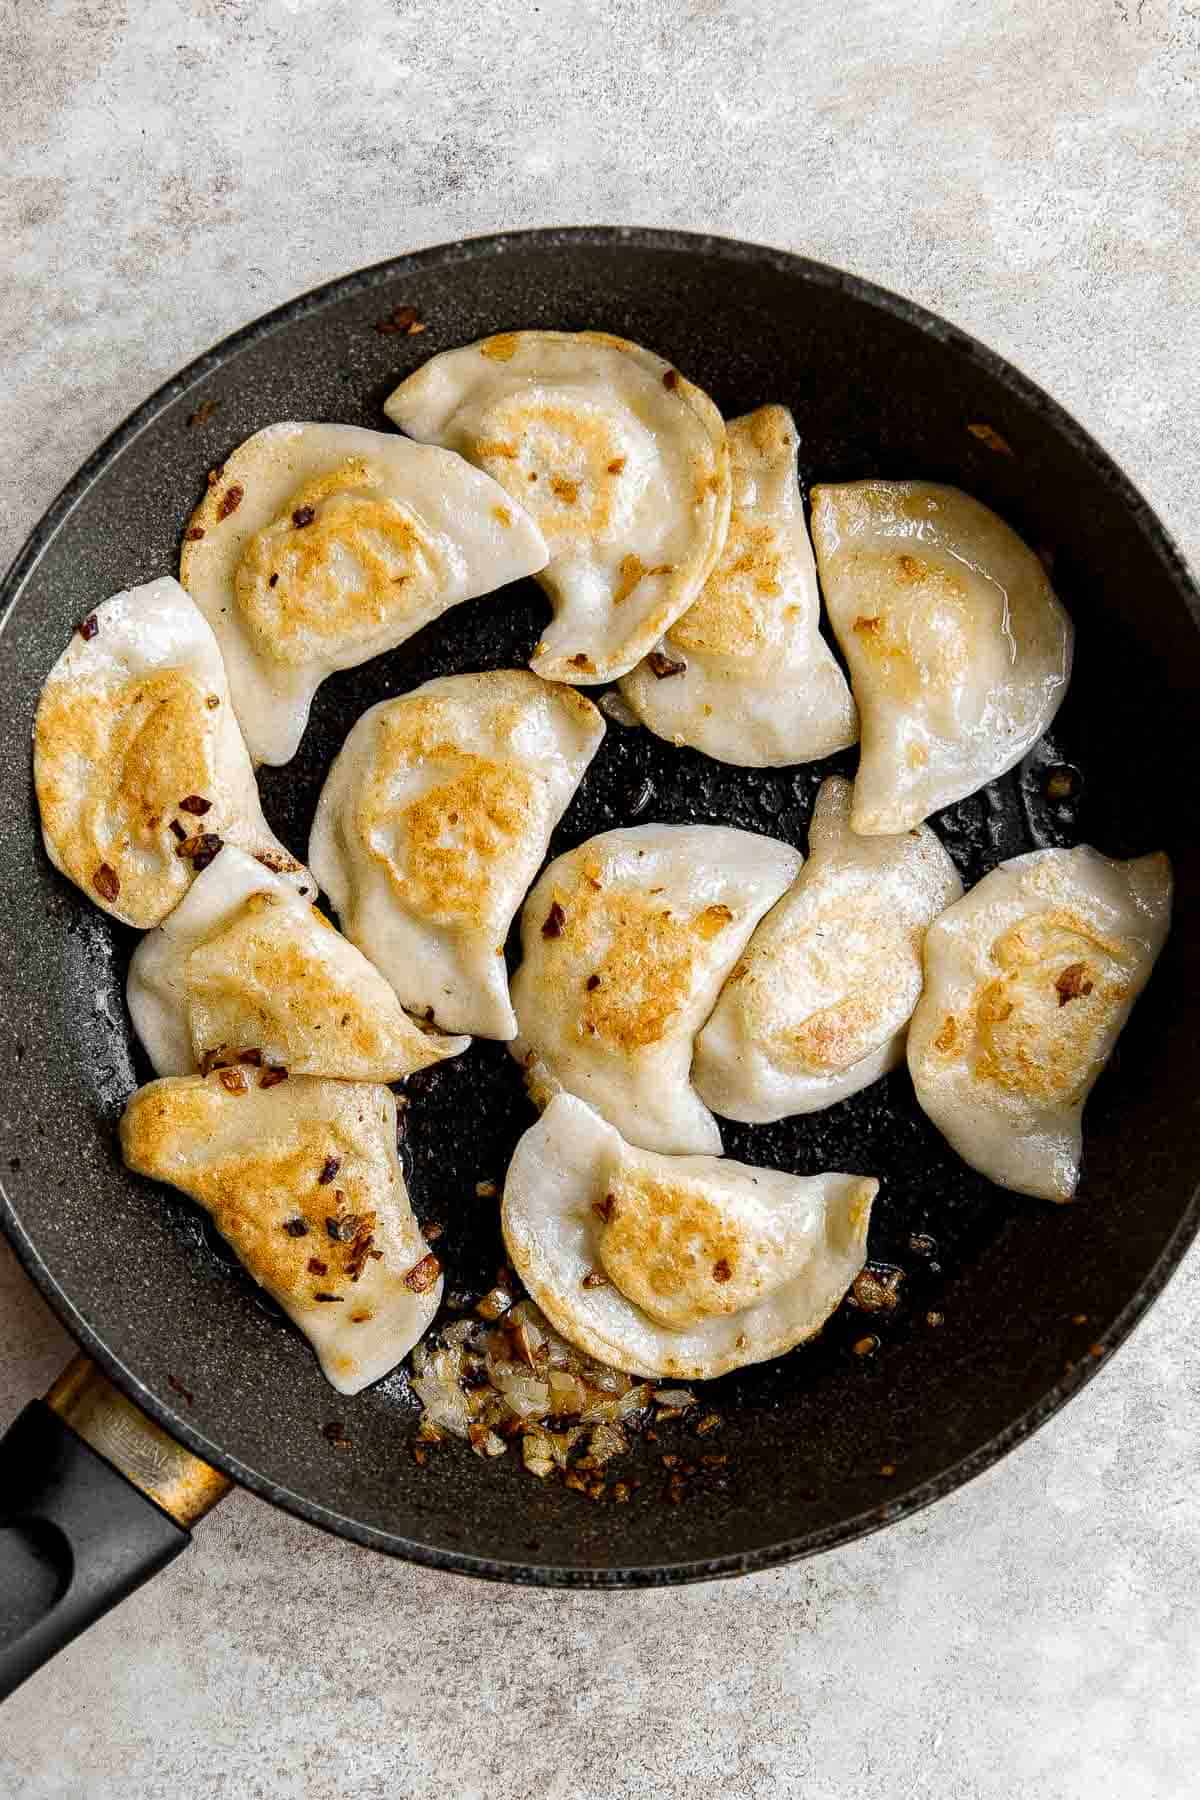
Recipe Variations
- Add meat: Add cooked bacon or sausage to the filling for protein.
- Add veggies: Add in other vegetables such as spinach or kale for a healthier twist, or sautéed mushrooms for a more earthy flavor.
- Substitute the potatoes: Substitute the potatoes with sweet potatoes or butternut squash for a slightly sweeter flavor.
- Add herbs. Change the flavor profile by adding in fresh herbs to the filling such as parsley or dill.
How to Serve
Serve potato onion pierogies on their own as is, or with a dollop of sour cream, green onions, and fried onions on top. Bacon bits also are a great touch of crunch and flavor.
You can also turn these dumplings into a full meal when paired with side dishes such as:
- Borscht (Beet Soup)
- Oven Roasted Vegetables
- Christmas Salad
- Brussels Sprouts with Bacon
- White Bean Soup with Kale
- Green Beans Almondine
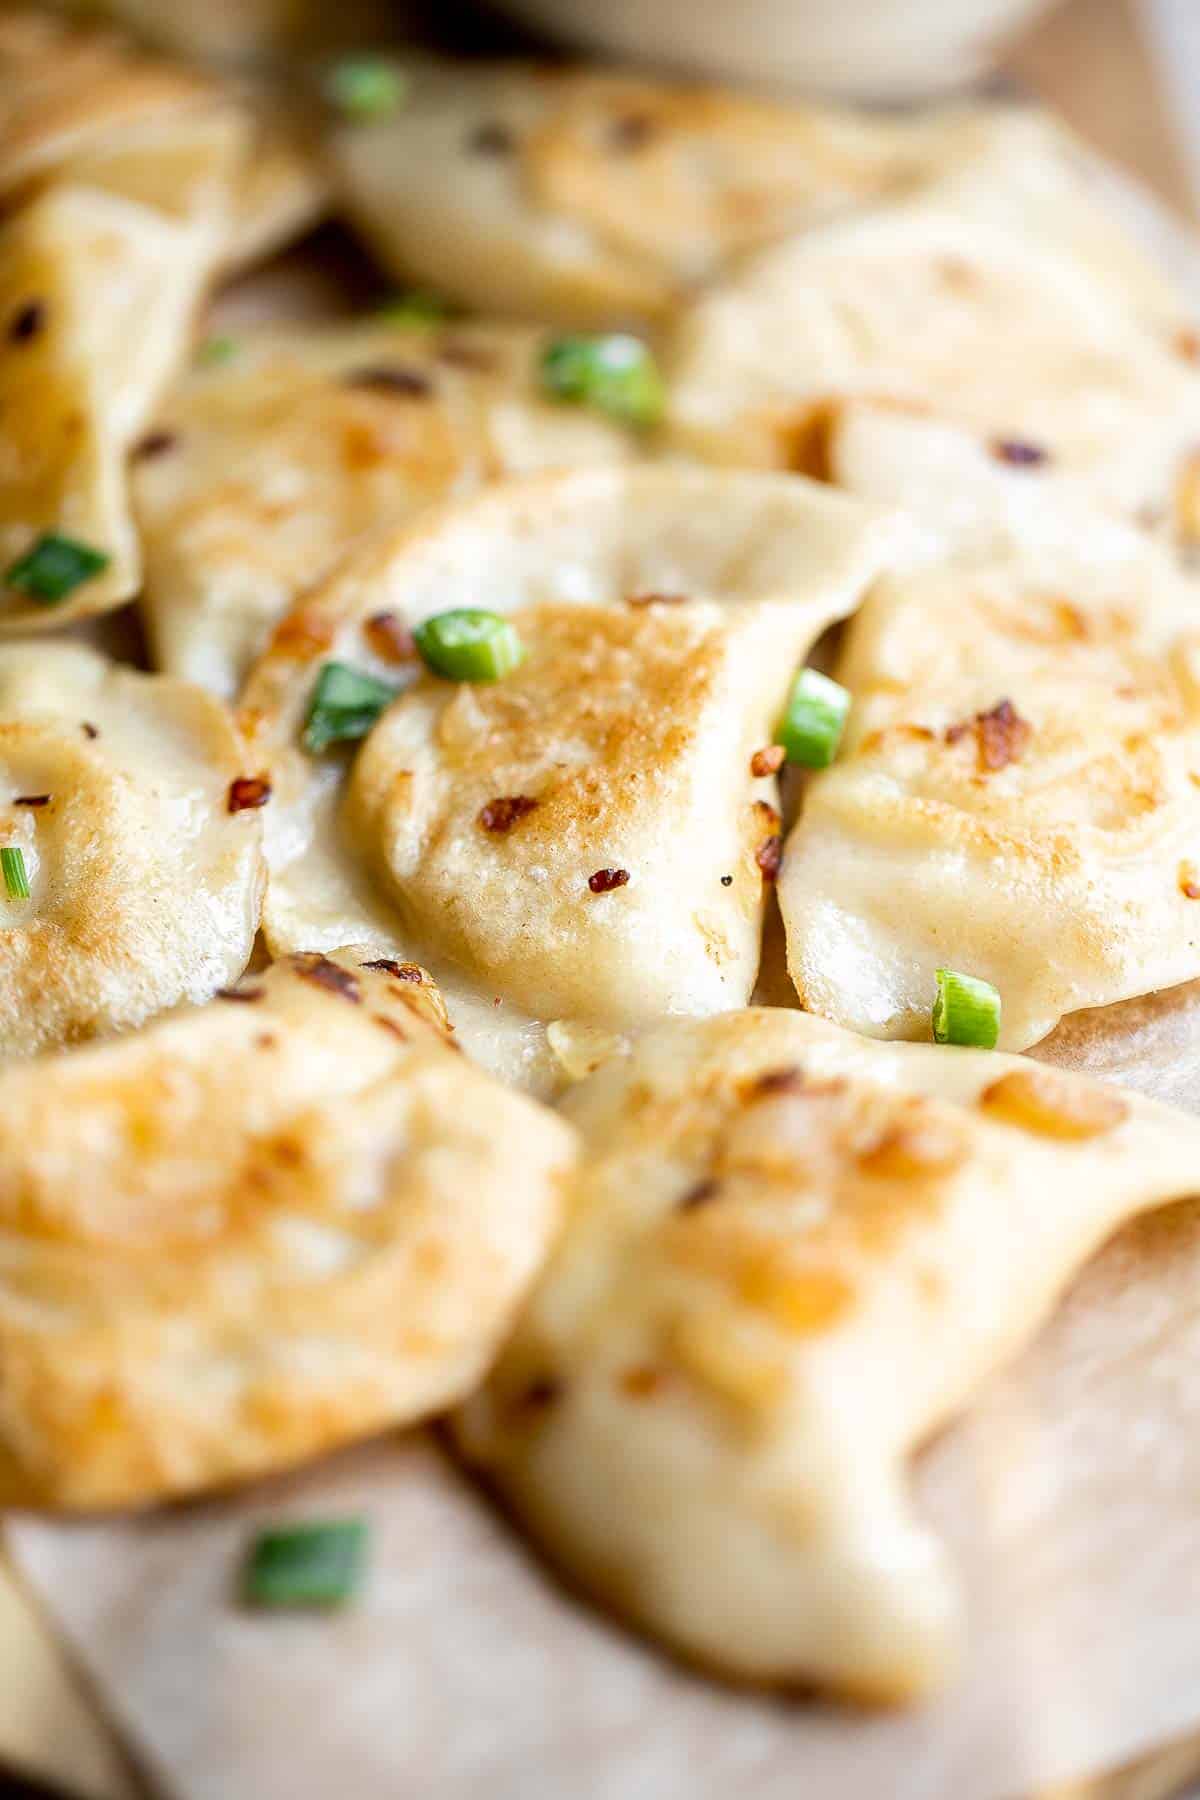
Recipe Tips and Tricks
- Experiment with different filling combinations. These potato and onion perogies are so delicious as it is (fried onions does wonders!), but you can try incorporating other ingredients such as ground meat, shredded meat, bacon, fresh herbs, and cooked mushrooms to change things up.
- Knead the dough. If making dumpling dough, make sure to knead the dough well to ensure it's smooth and elastic. Also remember to allow the dough to rest before rolling it out.
- Cut uniform dumpling wrappers. Use a round cookie cutter or the rim of a glass to cut out perfectly uniform circles for the pierogi wrappers.
- Make them ahead of time. Pierogi are freezer-friendly and store for up to 3 months in there. You can also cook them directly from frozen so make a big batch for easy dinners on a lazy day.
Storing and Freezing Instructions
How to Store
Place cooked or uncooked perogies in a single layer in an airtight container and refrigerate for up to three days.
How to Freeze
You can freeze both cooked or uncooked perogies. Place the perogies on a parchment-lined baking sheet and freeze for two hours. Then, transfer to an airtight container or plastic freezer bag and freeze for up to 3 months. Reheat cooked pierogi directly from frozen, or cook uncooked pierogi directly from frozen (adding a couple of minutes to the cook time).
How to Reheat
Reheat by boiling refrigerated perogies for 5-8 minutes or frozen perogies for 7-10 minutes. You can also reheat by microwaving uncovered in a microwave-safe container on high for 5-7 minutes.
More Appetzier Recipes
- 75+ Easy Appetizer Recipes
- Homemade Potato and Cheese Perogies
- Cheesy Garlic Bread
- Baked Ricotta
- Pork Dumplings
- Fried Goat Cheese Balls
- Mashed Potato Cakes
Tried this recipe?
I'd love to hear what you think! Leave a comment and rating below to share your feedback. Your reviews help others discover this recipe and help me keep creating more free recipes for you. Snap a photo and tag me on social media @aheadofthyme too.

Hasselback Potatoes
These Hasselback Potatoes are infused with garlic butter and feature signature cuts that make these potatoes crispy on the outside and tender on the inside. The smell of buttery garlic with fresh herbs will make you salivate before they're even done baking.
Plus, it's way easier to make this fancy side dish than you might think! Spend just minutes to make the garlic butter, add slices to your potatoes, combine them, and pop into the oven to let magic happen. Garlic hasselback potatoes complete almost any meal and pair especially well with roasted or grilled proteins.
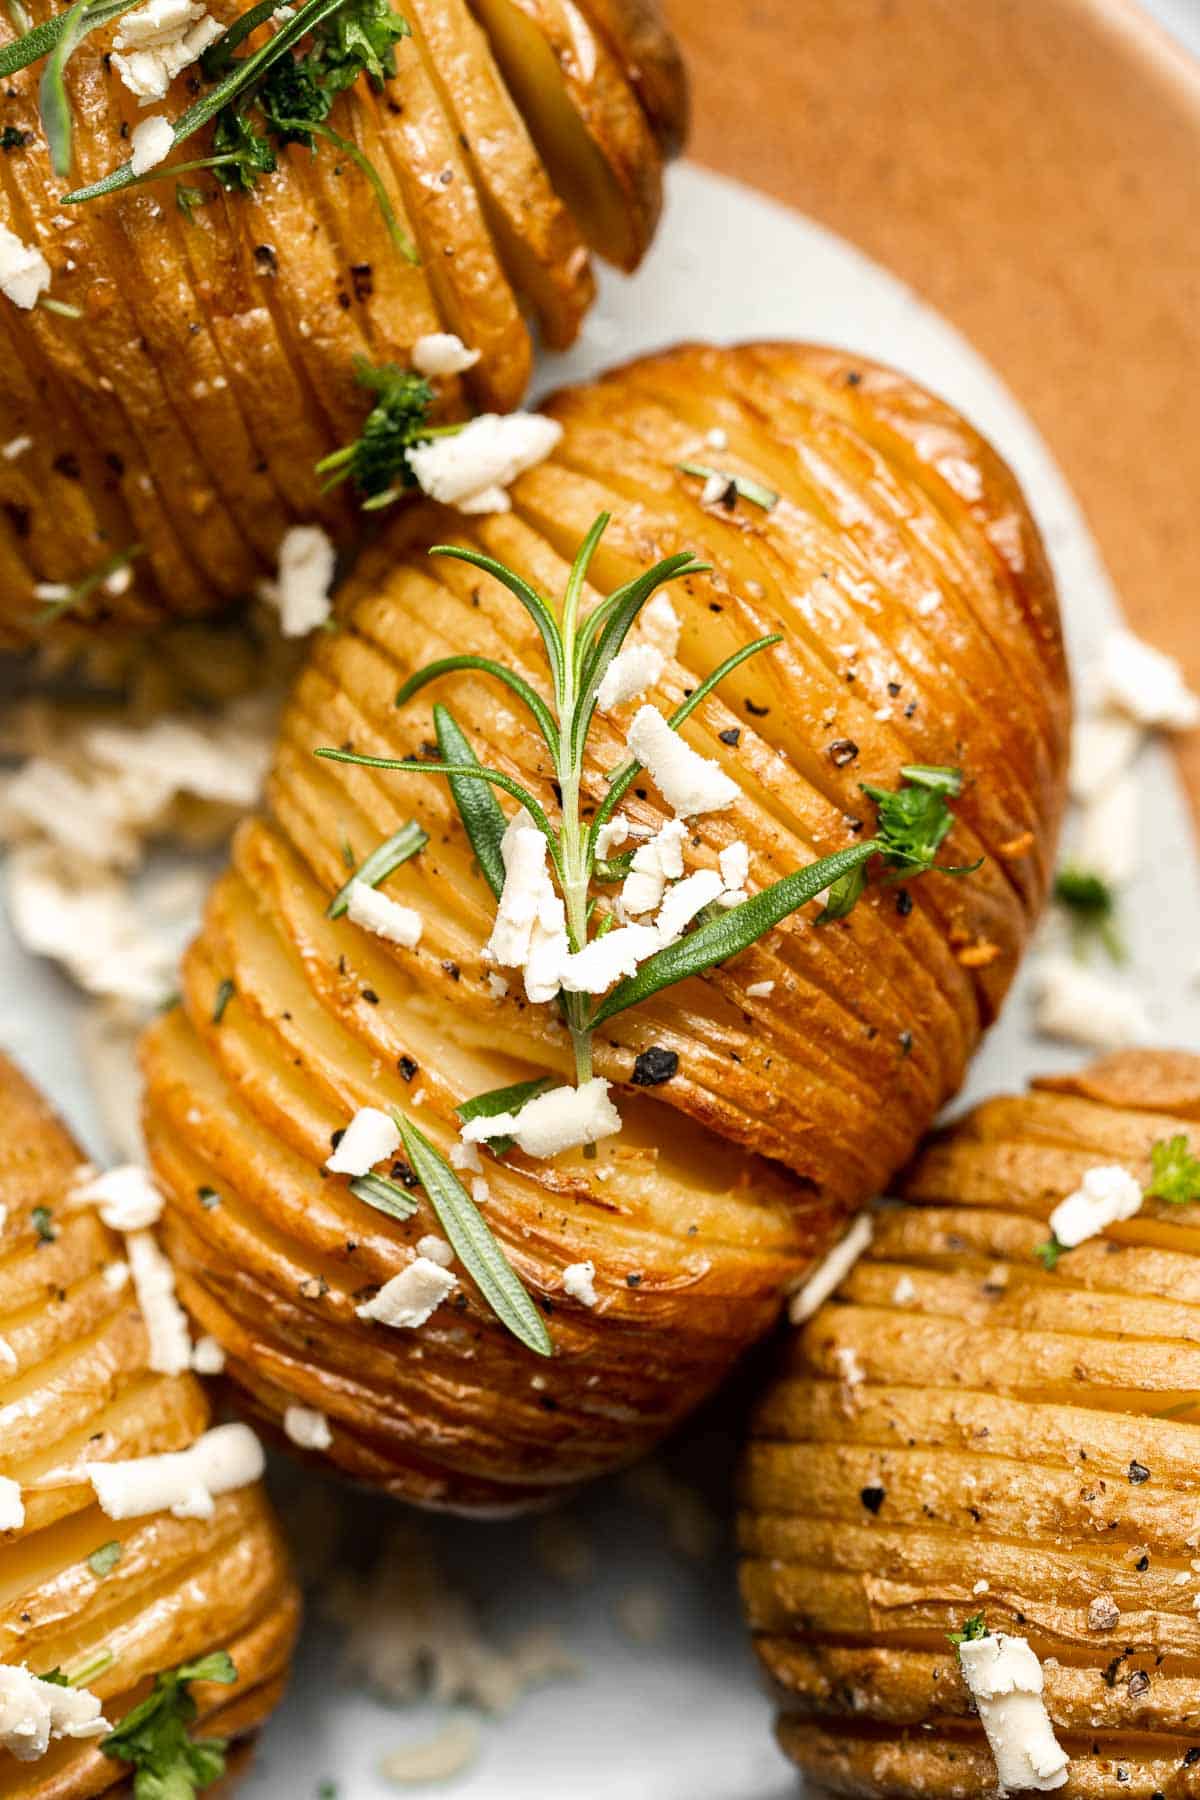
If you didn't already know, I am kind of obsessed with potatoes. I love them baked, mashed, fried, roasted, au gratin, in a poutine, and basically prepared in any way that potatoes can be prepared. Hasselback potatoes with garlic herb butter are kind of my new favourite: an elegant potato side dish with lots of flavor that can't be beat.
Why You'll Love these Hasselback Potatoes
- Quick and easy prep. This fancy potato side isn't as time-intensive as it may look! It actually takes only 10-15 minutes to get these garlic butter hasselback potatoes ready to bake in the oven, and the oven does most of the work.
- Delicious garlic butter flavor. The secret to making these potatoes taste as good as they look is in the garlic butter. This amazing fragrant butter is infused with the flavors of garlic and fresh herbs which makes an irresistible combo that your whole family will love.
- The best texture. These garlic hasselback potatoes are perfectly crispy on the outside and tender, buttery amazingness on the inside. Just the texture you want when it comes to potatoes. Move over mashed potatoes, there is a new spud in town and it is taking over the holiday dinner table!
- Perfect for special occasions. Hasselback potatoes are an excellent side for dinner parties, anniversaries, and other special occasions because they are fancy but don't take a lot of time or expertise to make. But, you don't have to wait until the holidays to enjoy them - they are easy enough to make for weeknight dinners too.
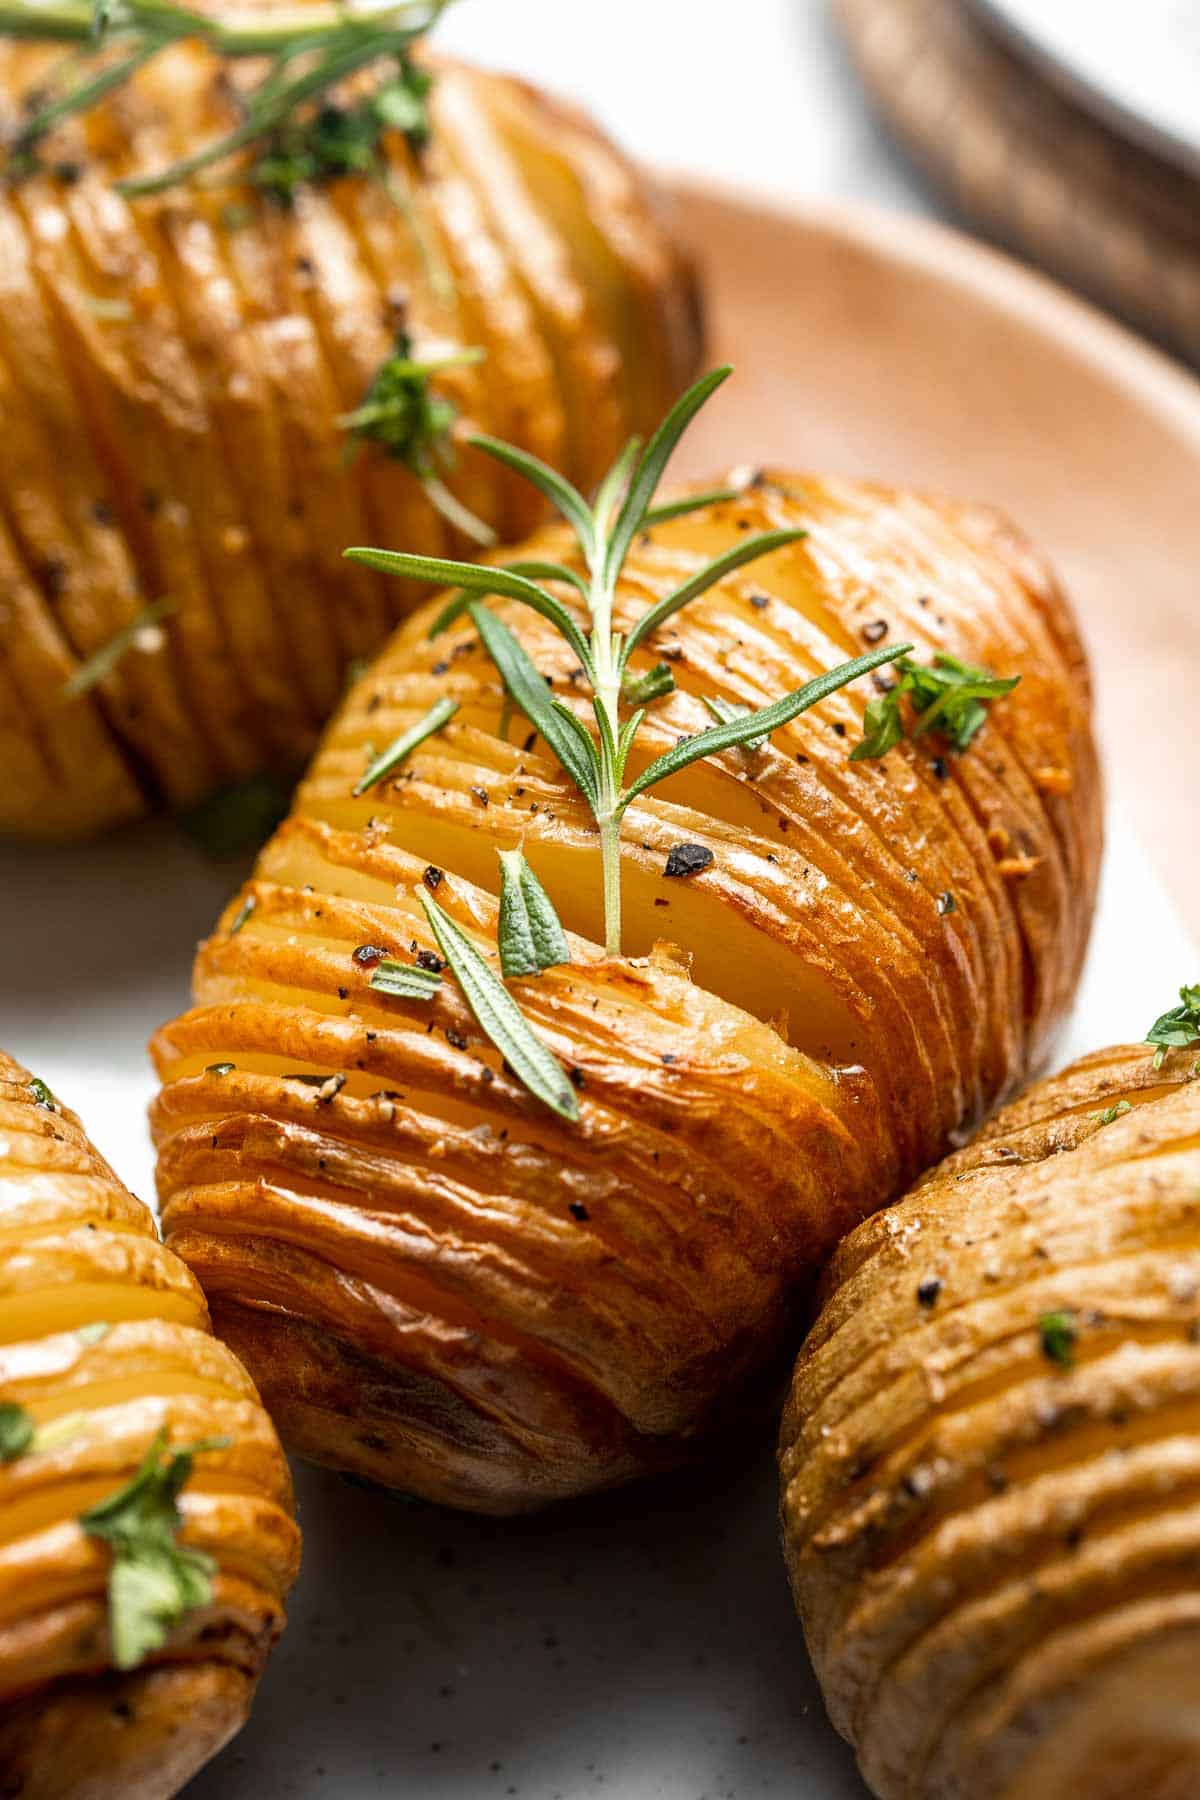
Ingredient Notes
To make these easy and delicious Hasselback Potatoes, you will need the following ingredients (full measurements in recipe card below):
- unsalted butter - unsalted butter gives you the most control over the flavor, but you can use salted if it's all you have on hand. Just make sure you adjust the amount of salt used in the recipe.
- garlic - you can pre-minced garlic by swapping 1 teaspoon for each clove.
- rosemary - fresh rosemary will be the most fragrant and flavorful, but you can also use dried rosemary if you're in a pinch.
- potatoes - for this recipe, use russet or yukon gold potatoes and make sure to thoroughly wash and dry them before seasoning.
- fresh herbs - soft herbs like parsley, basil, dill, and thyme are perfect for these hasselback potatoes.
- parmesan cheese - asiago or cheddar cheese will also work in place of the parmesan.
- salt and pepper
You will also need measuring cups and spoons, small skillet, quarter sheet baking pan, and sharp knife.
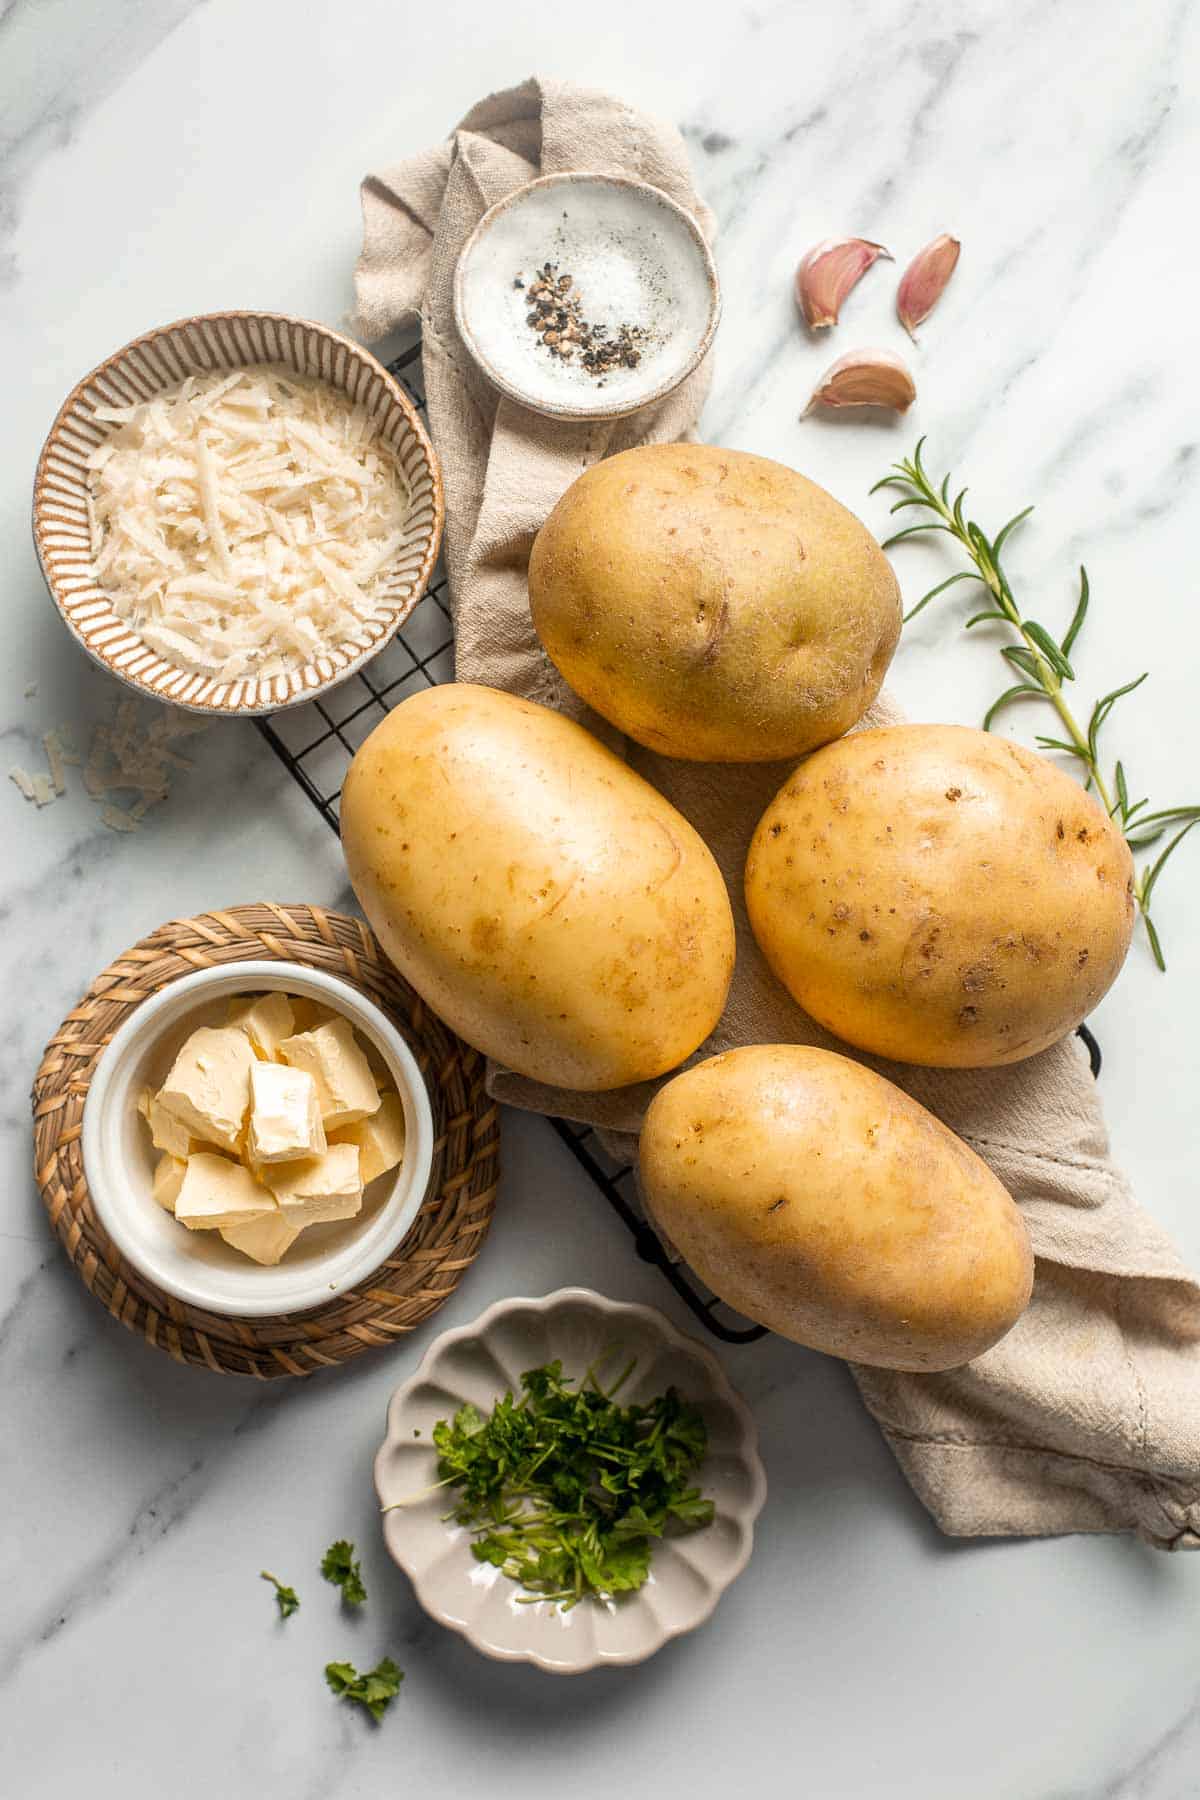
How to Make the Best Hasselback Potatoes with Garlic Butter
- Make the garlic herb butter. In a small skillet or saucepan, head butter over medium heat. Once the butter starts to melt, add garlic and rosemary and heat until the butter has completely melted and the garlic is fragrant. Remove from heat and set aside to allow the flavours to infuse into the butter.
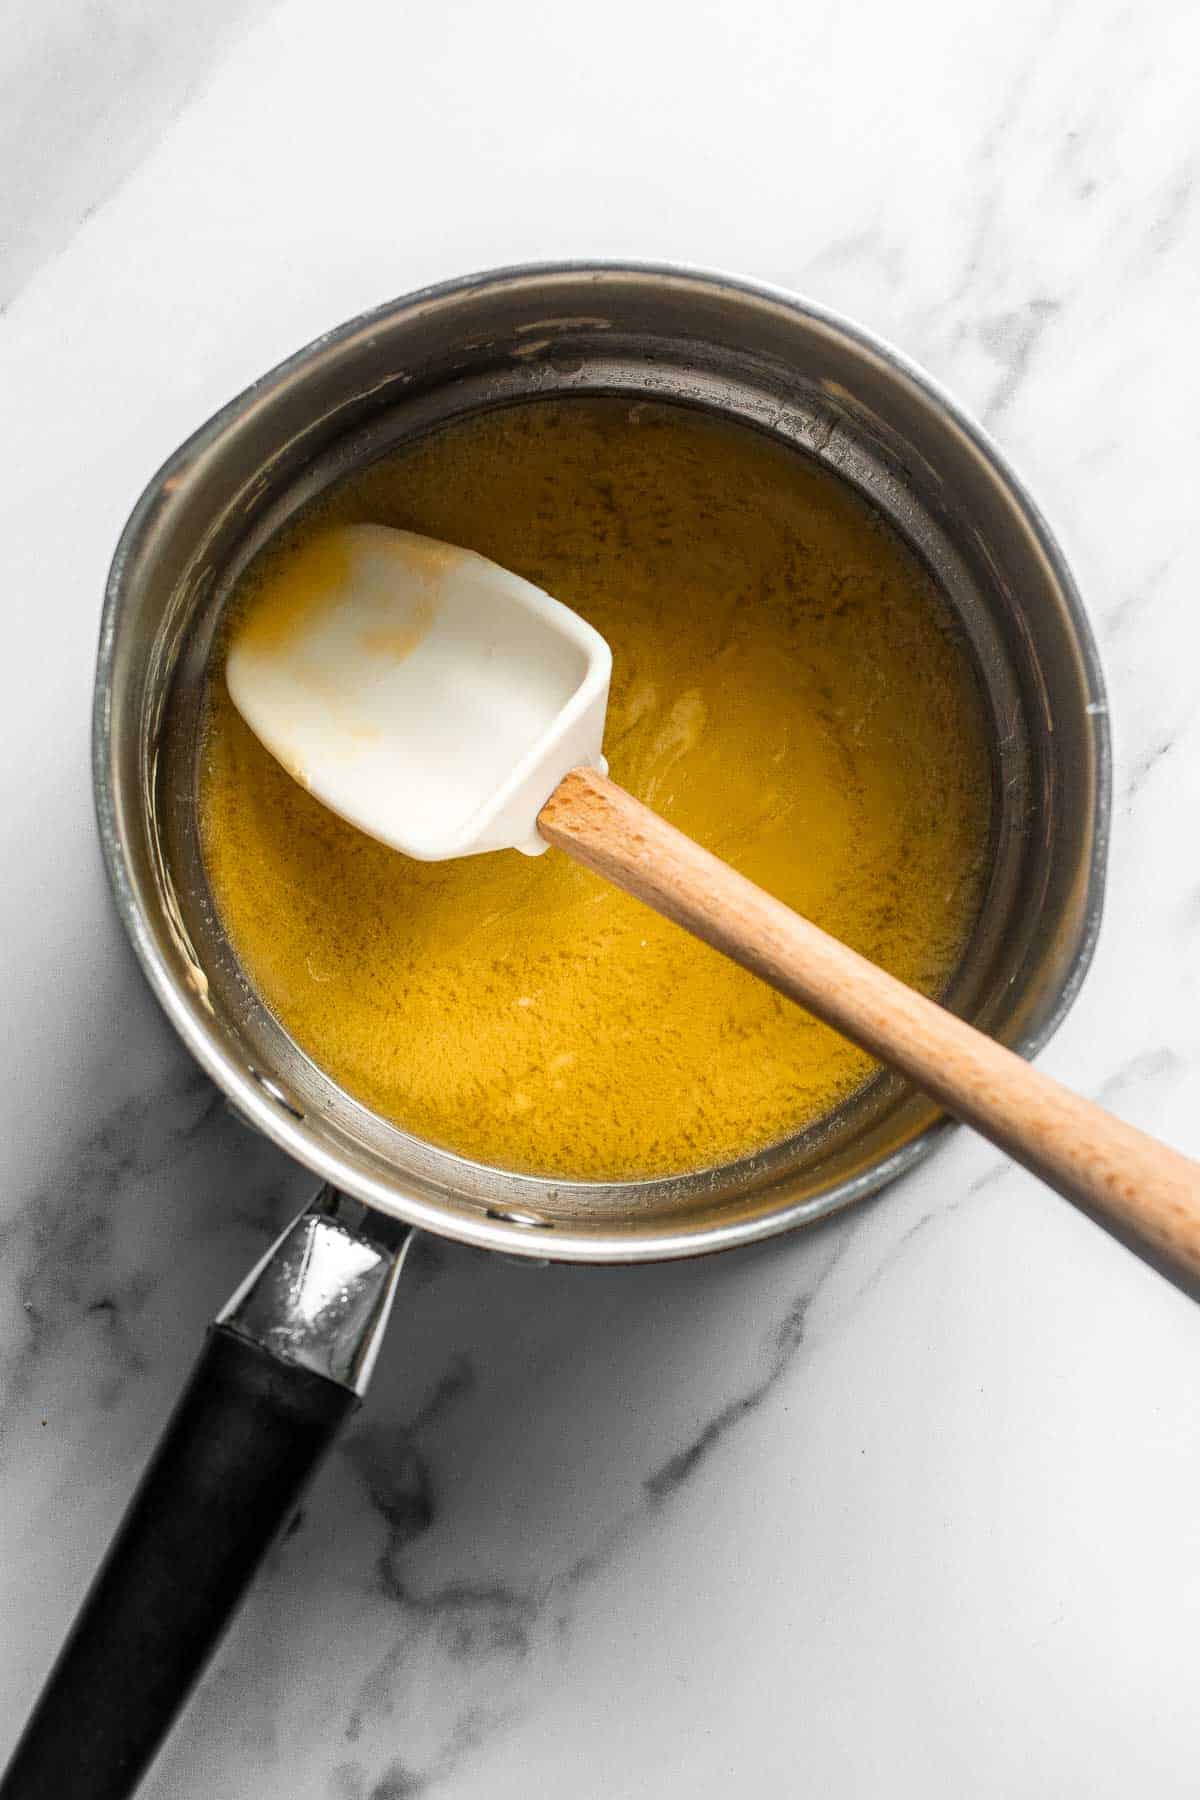
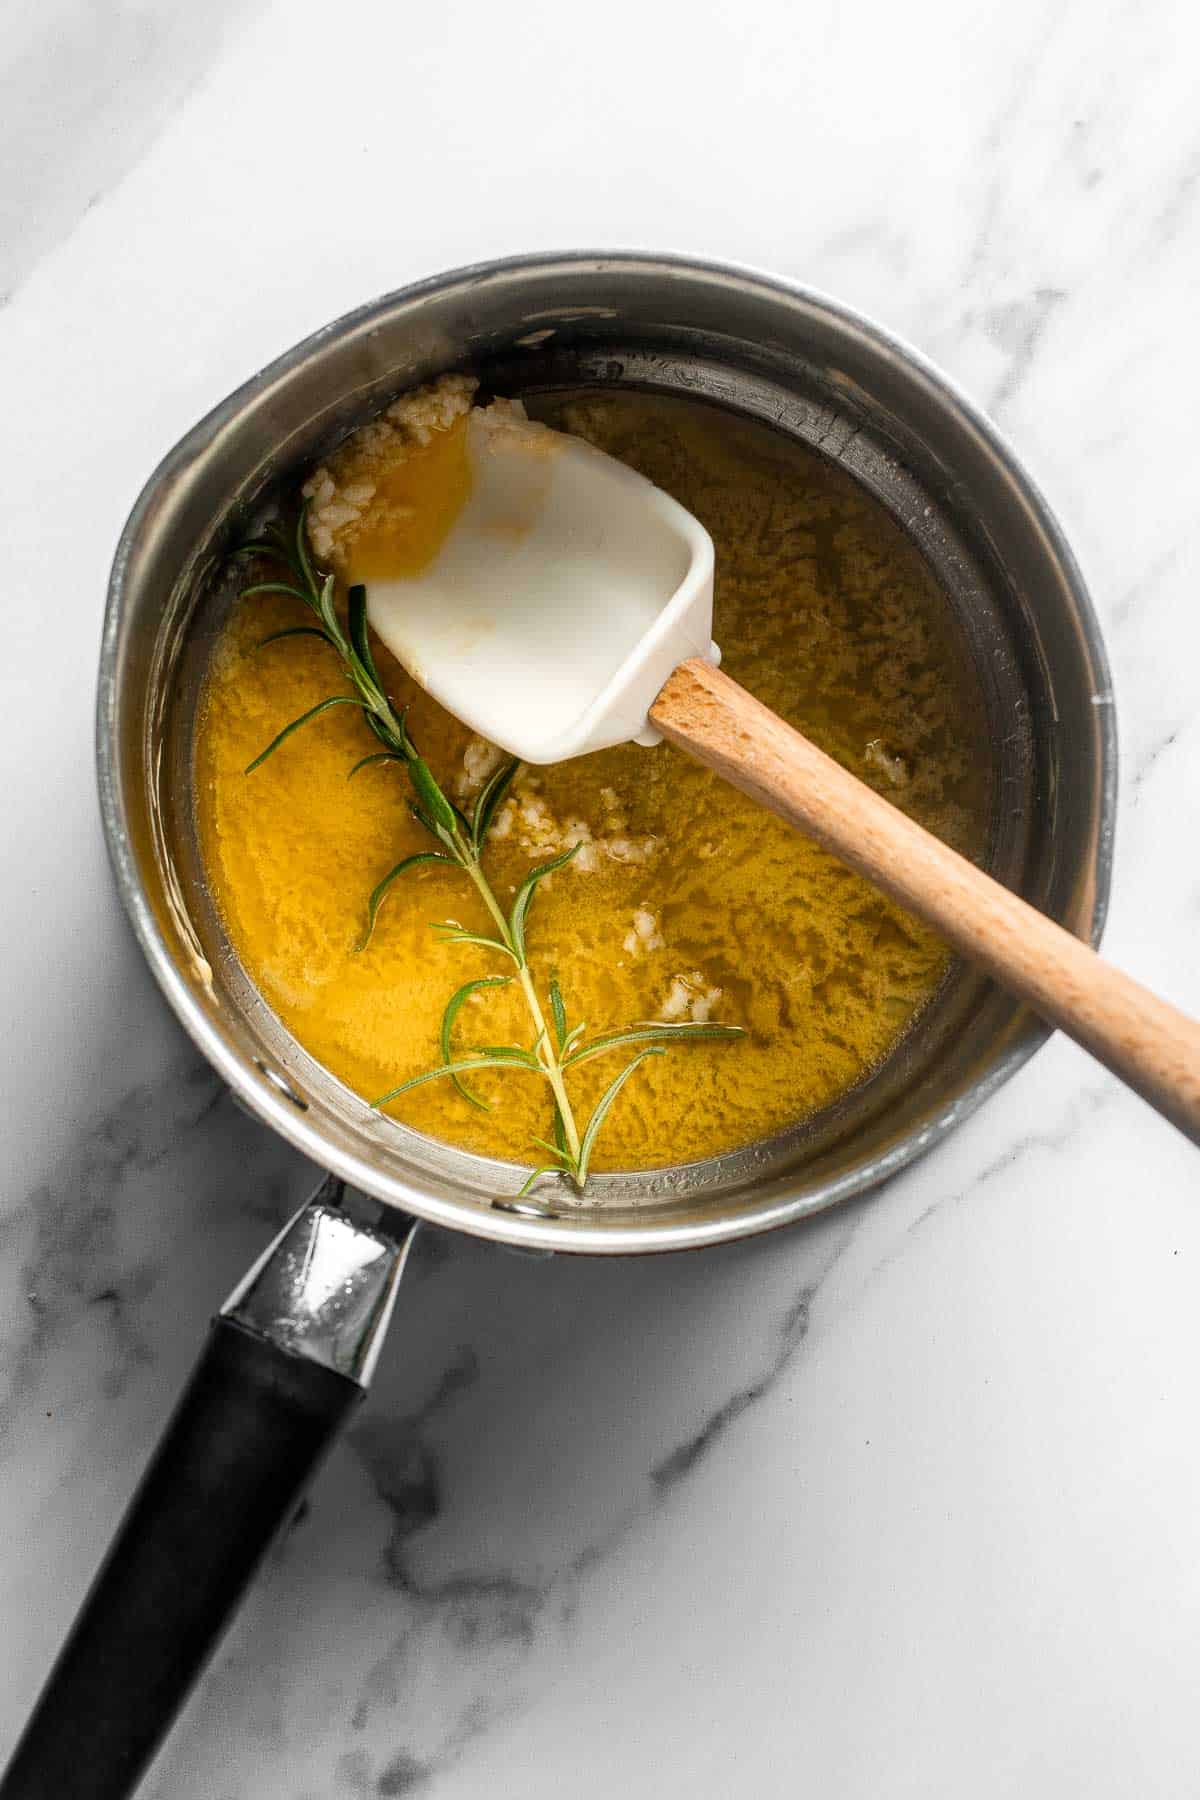
- Slice potatoes. Lay each potato down flat. If your potatoes are rolling around, you can slice a small layer off the bottom so that it can sit flat (optional). Using a sharp knife, cut crosswire slices into the potato, spaced about ⅛-inch to ¼-inch apart. Do not slice all the way through - make sure to leave about ¼-inch of the potato in tact from the bottom. Repeat with remaining potatoes.
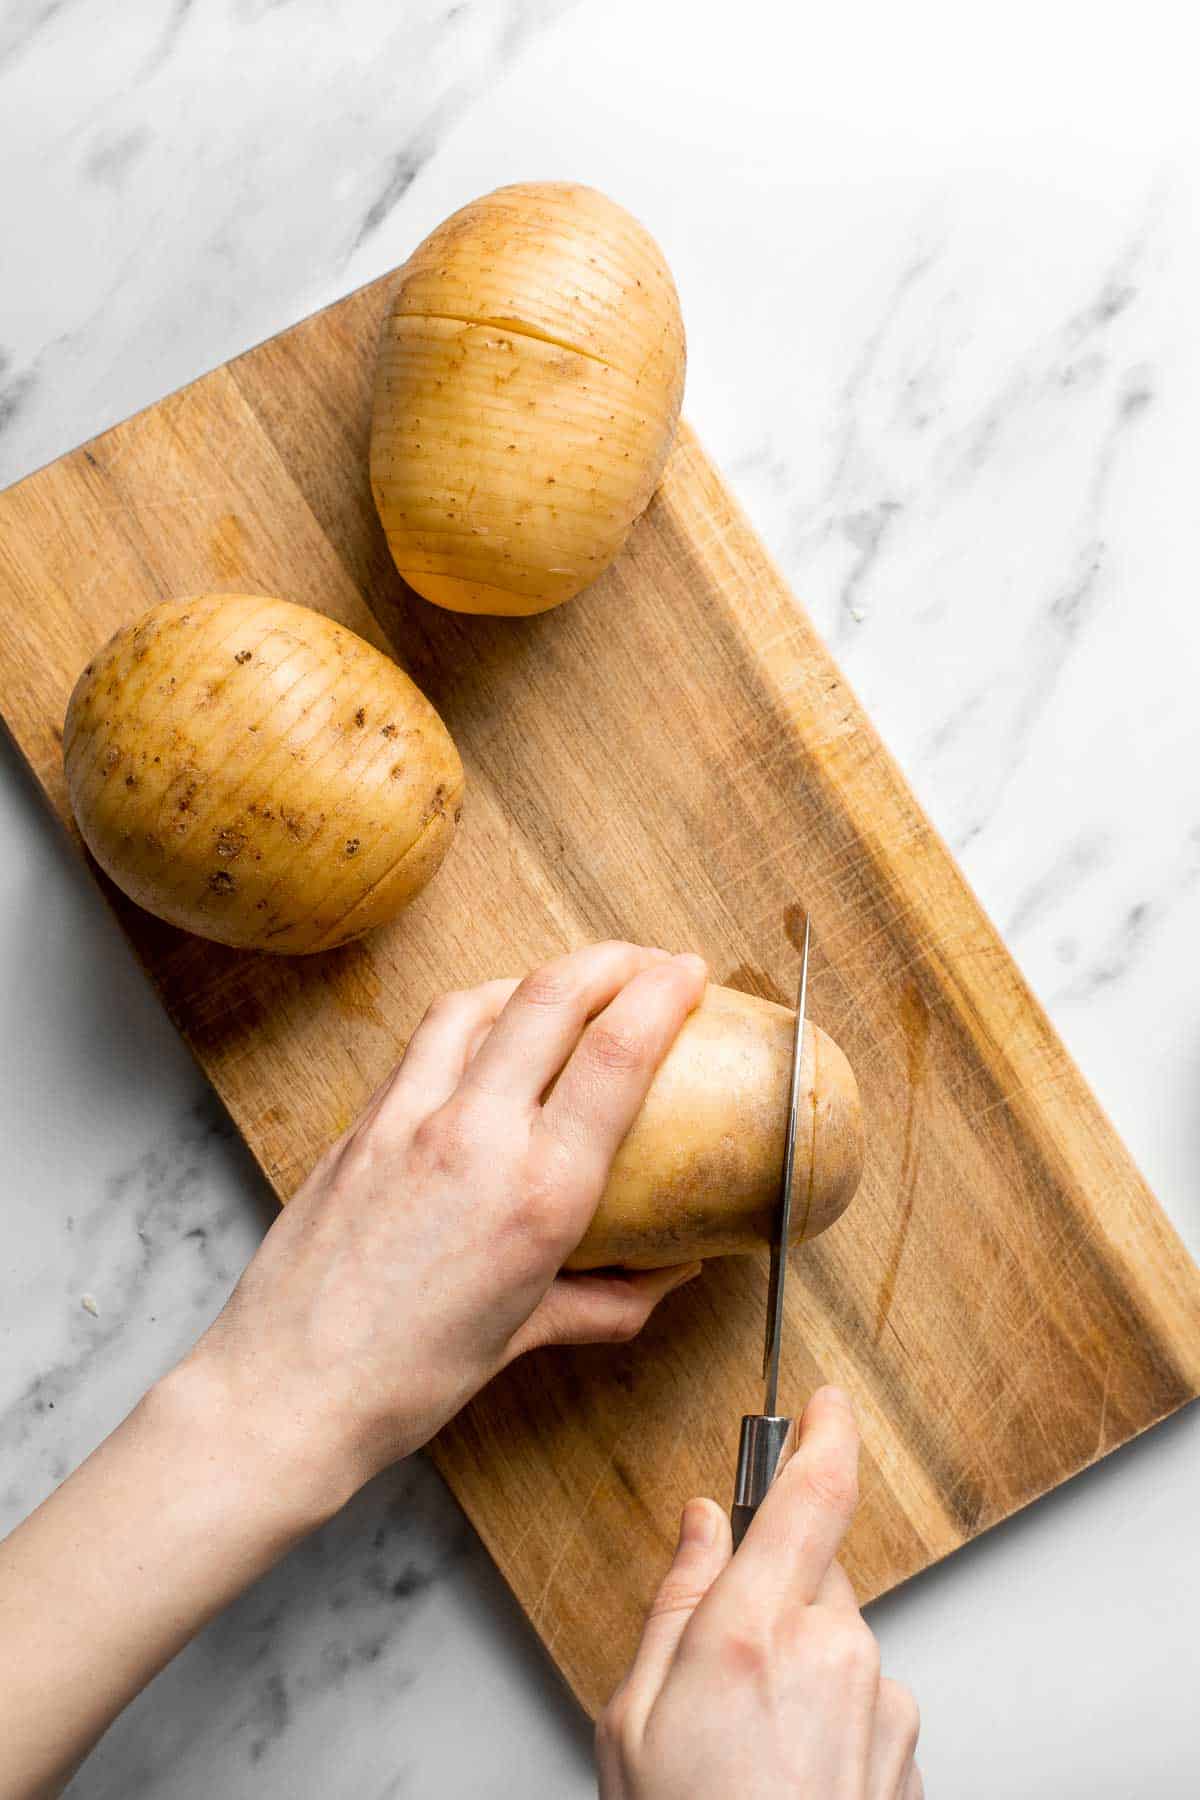
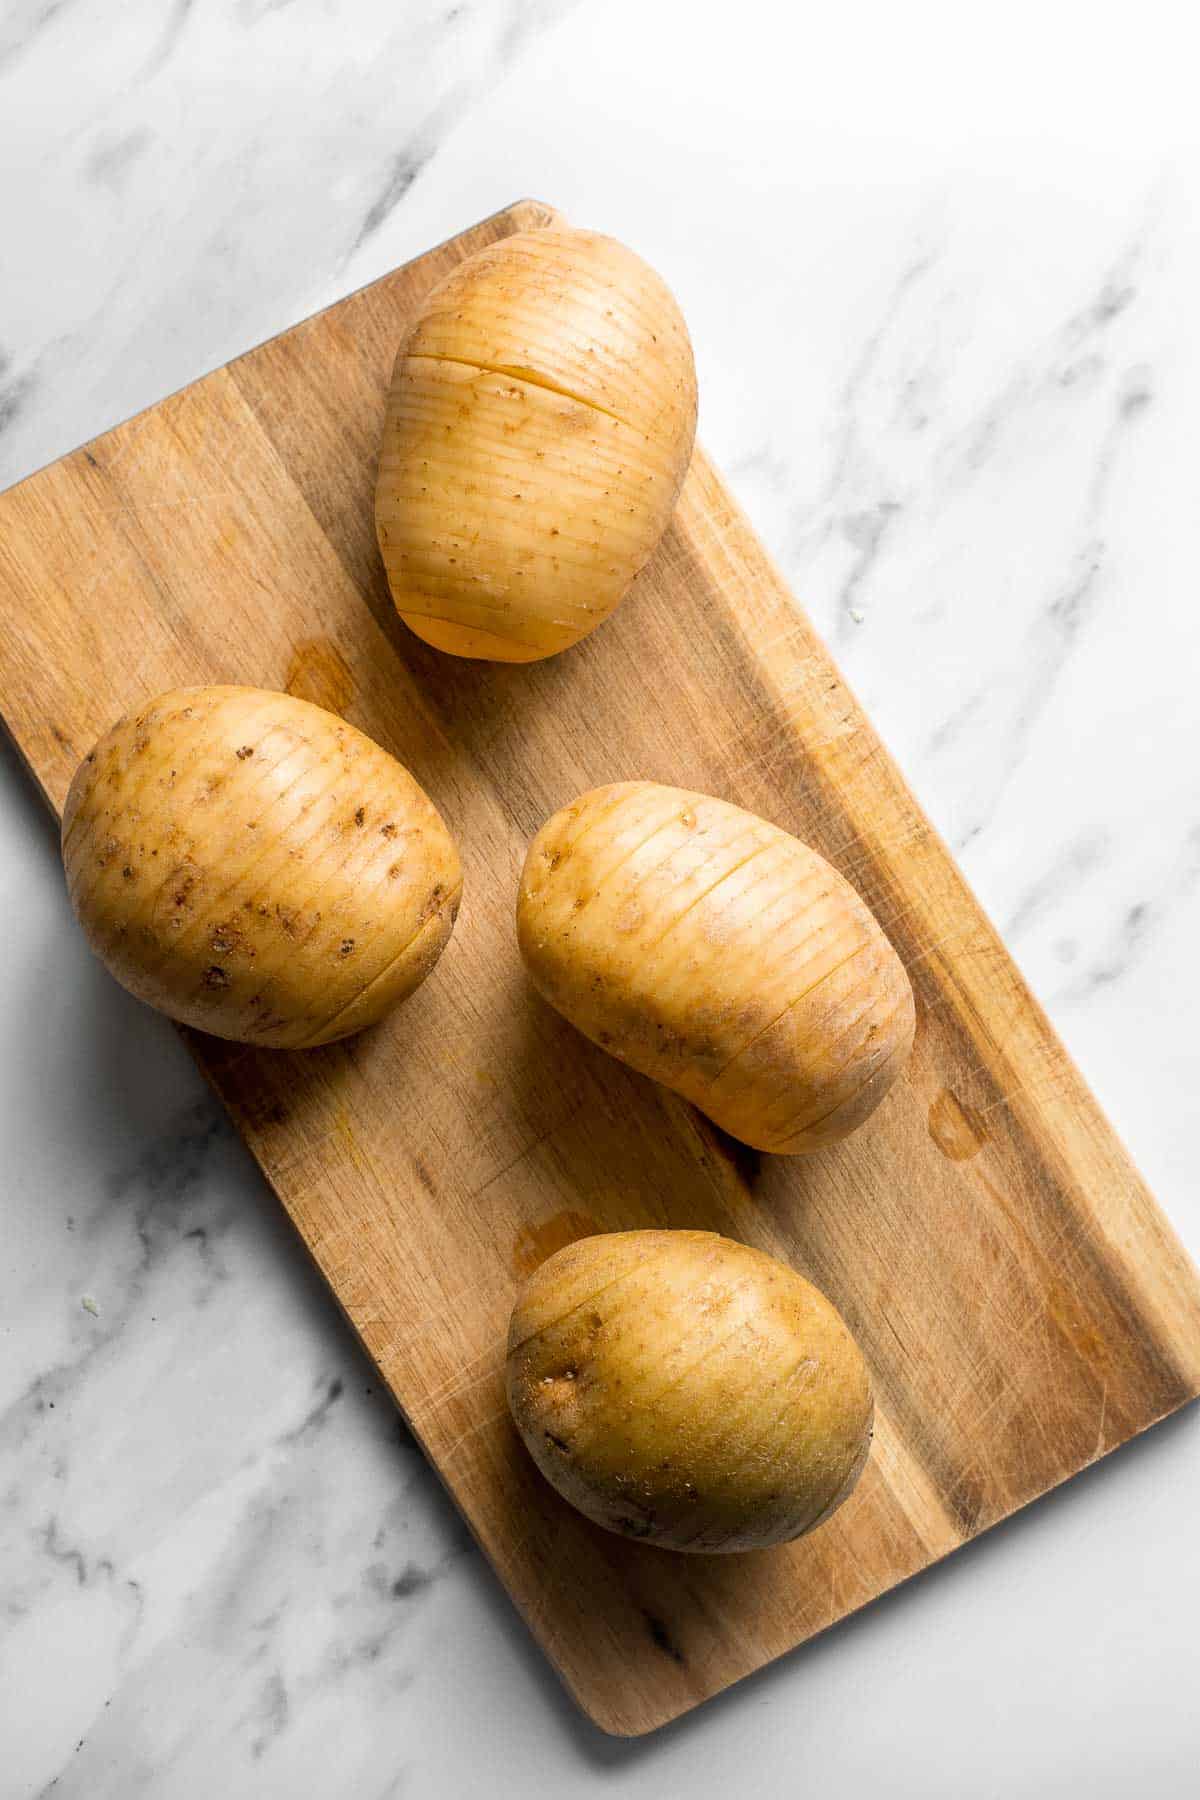
- Add garlic butter. Brush the potatoes with half of the garlic herb butter.
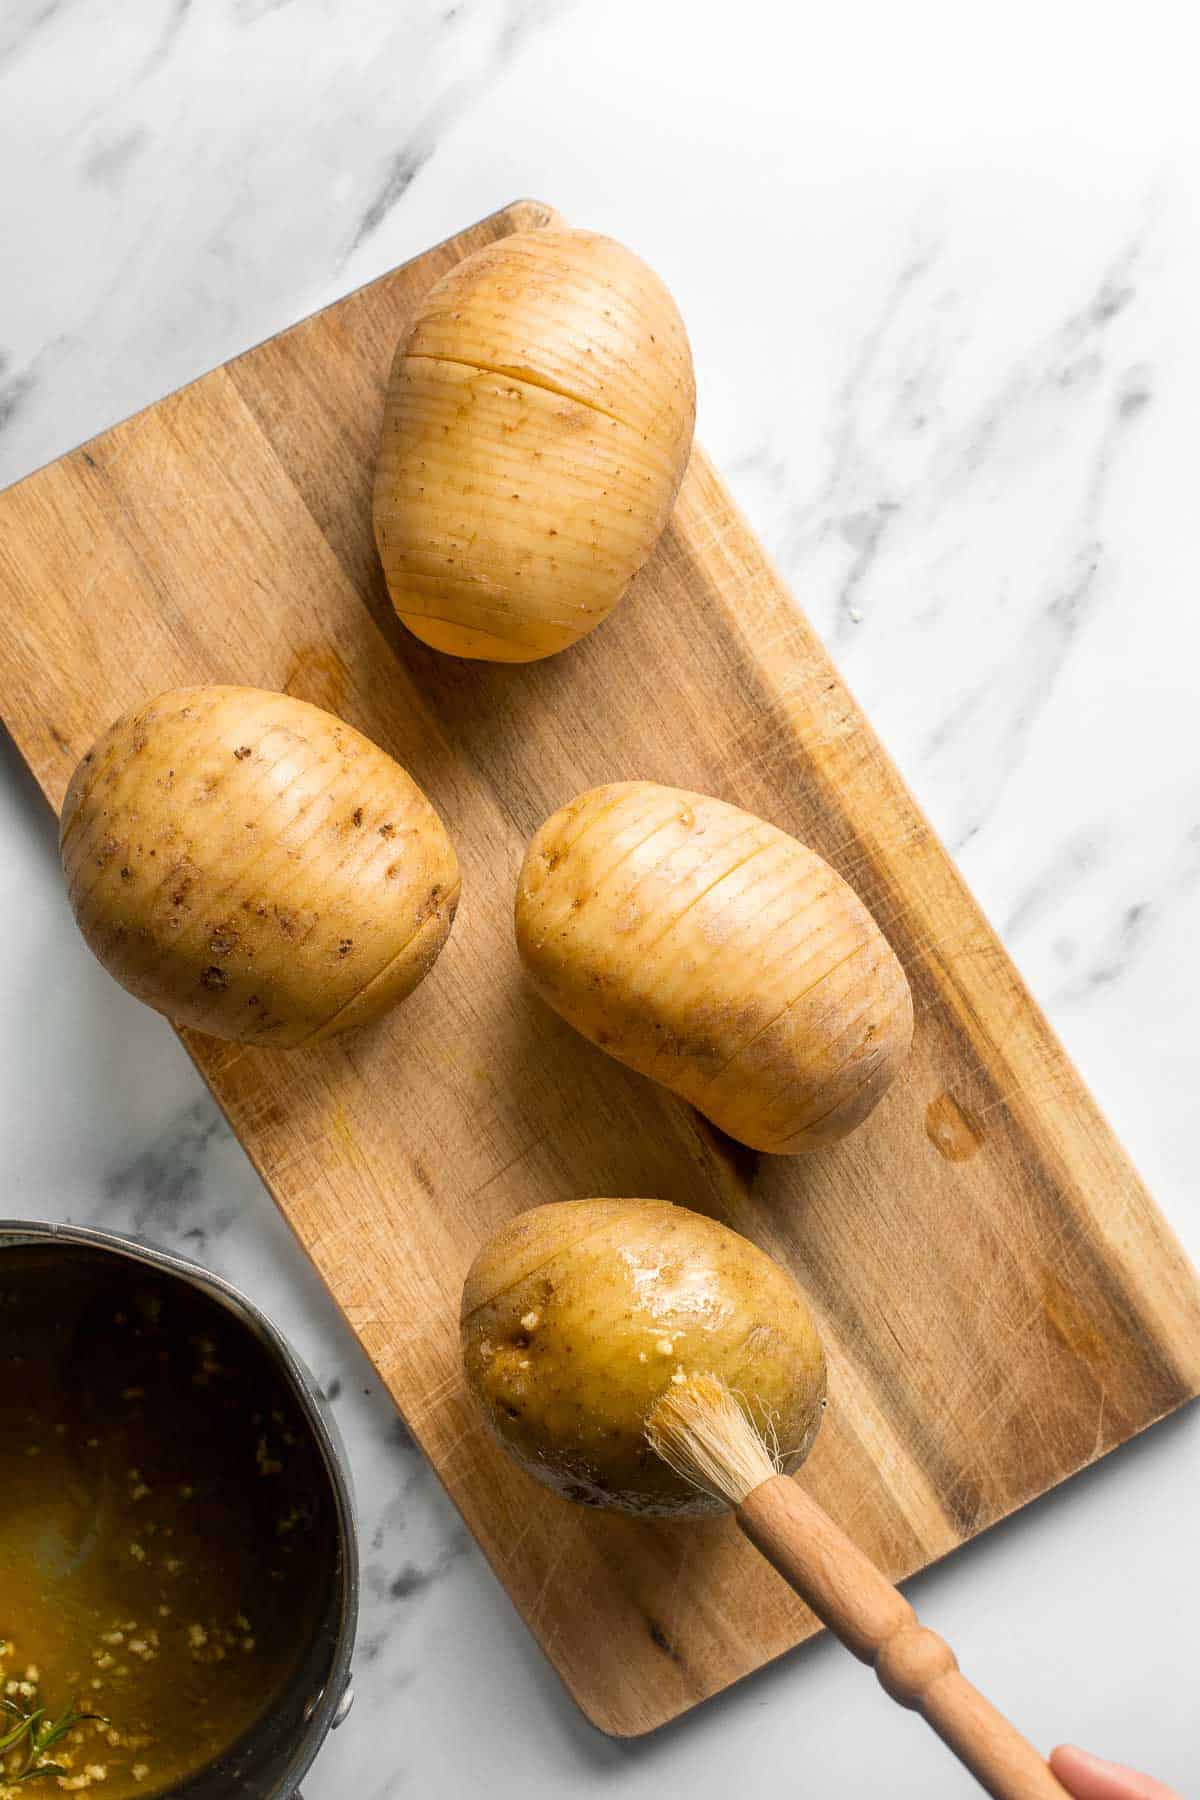
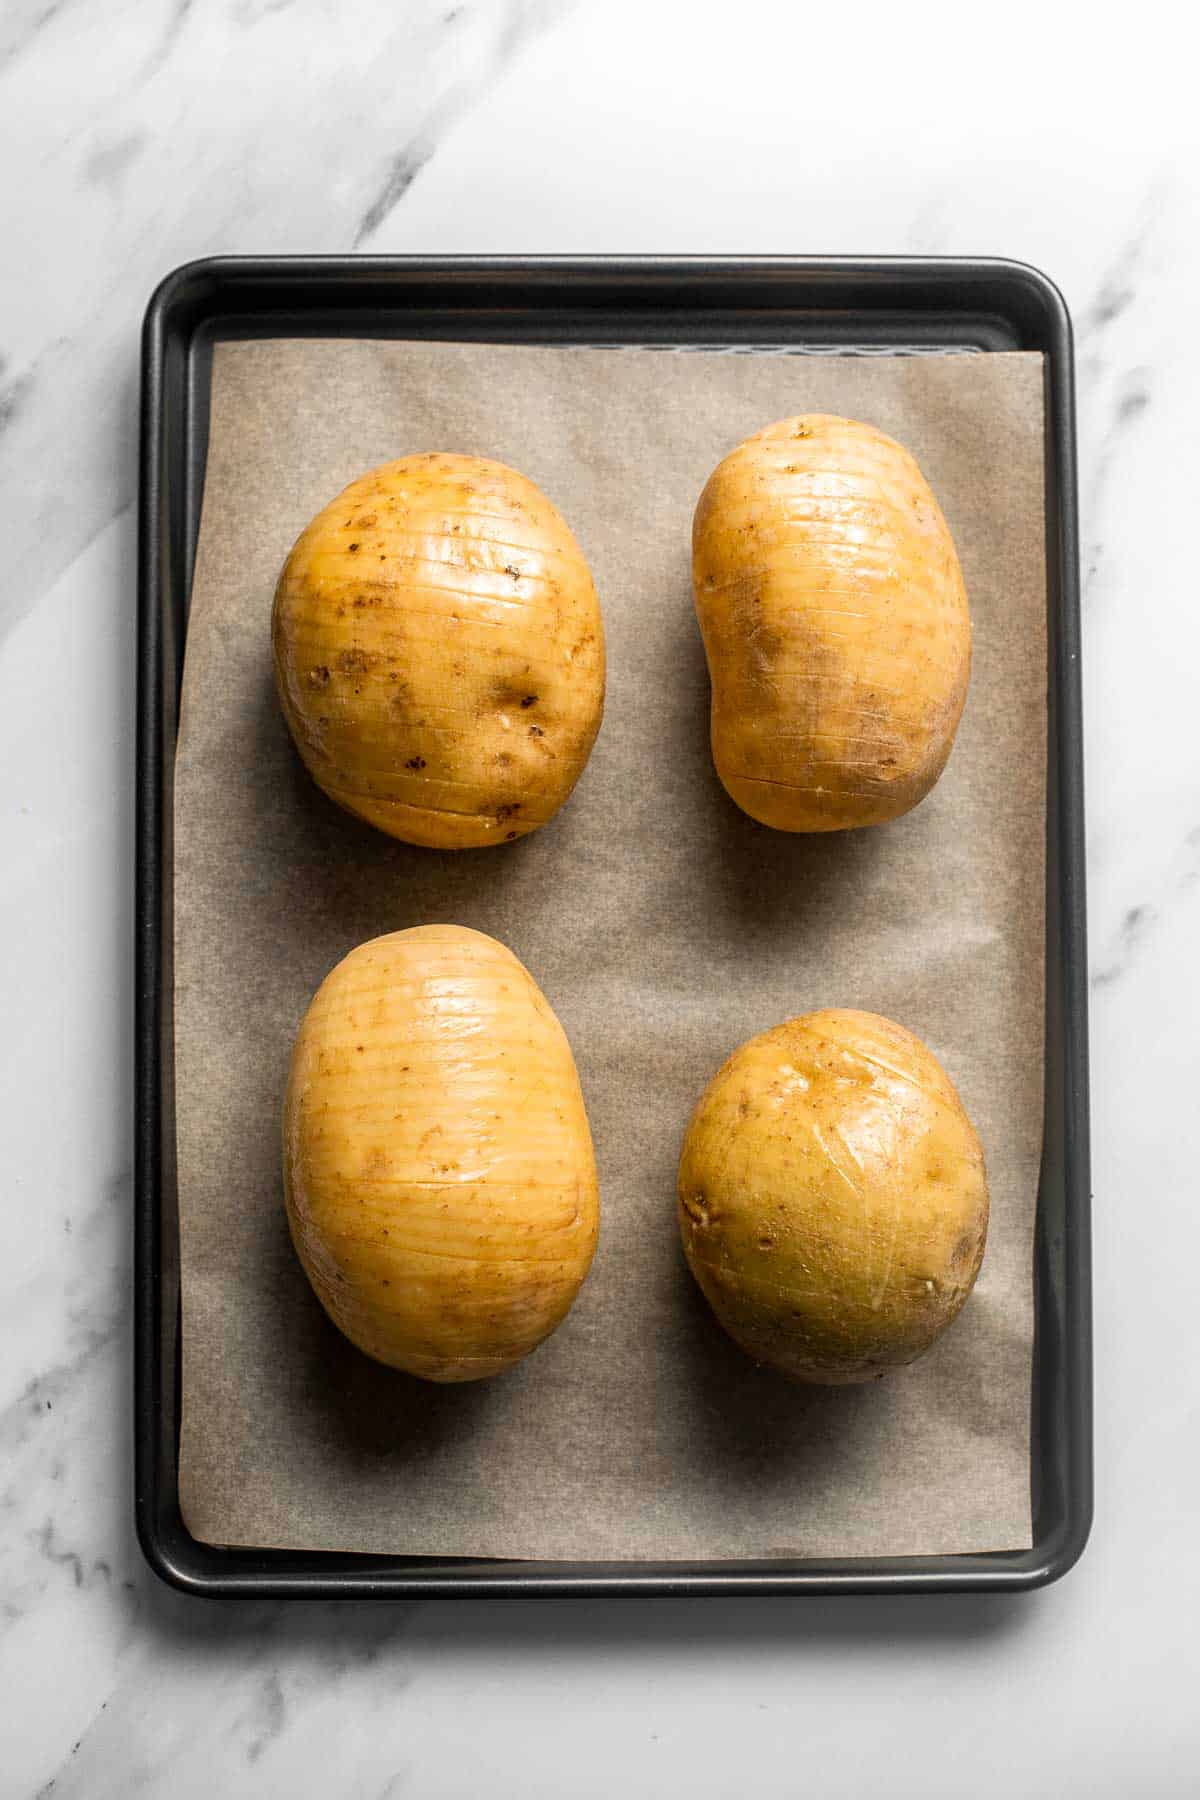
- Bake. Place potatoes on a quarter sheet baking pan lined with parchment paper and bake in a 425F preheated oven for 25 minutes.
- Define slices. Take the potatoes out of the oven and gently separate the slices slightly using a butter knife.
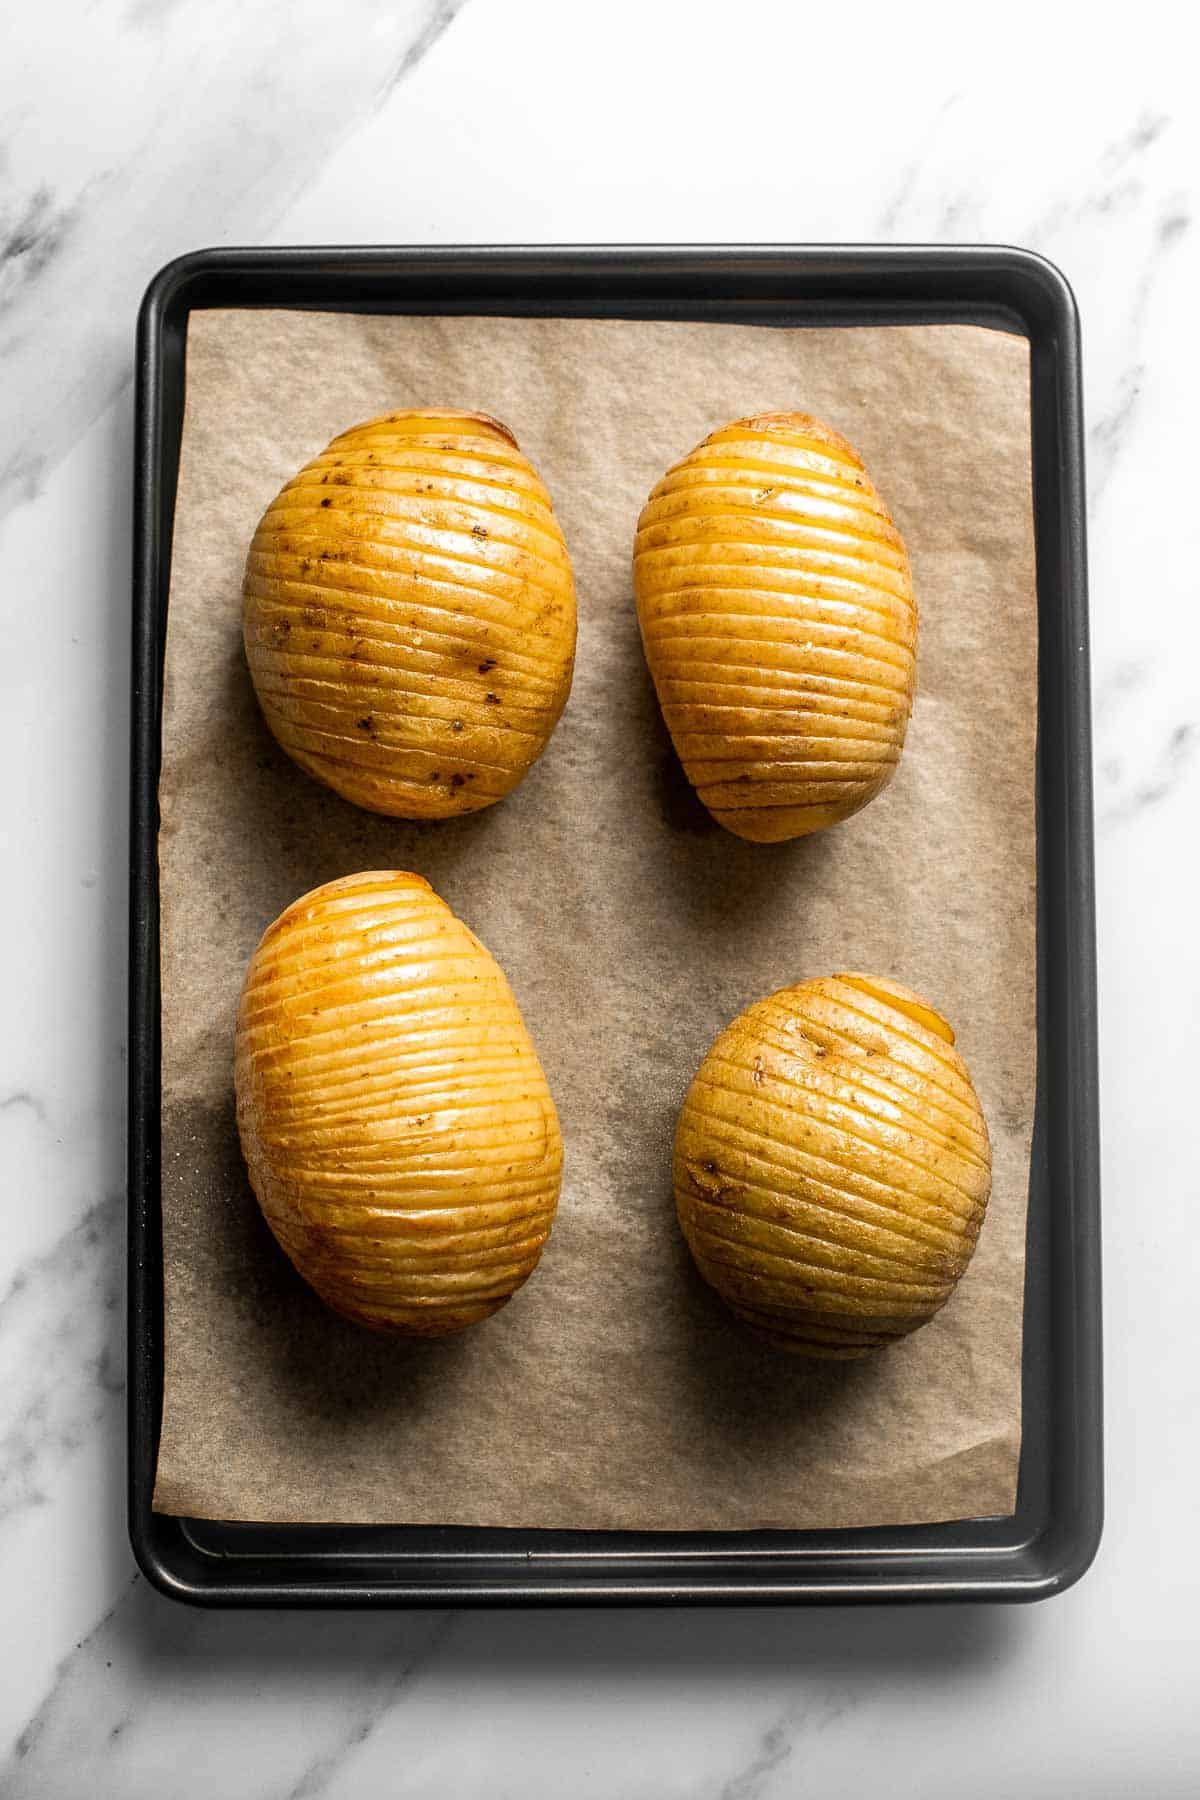
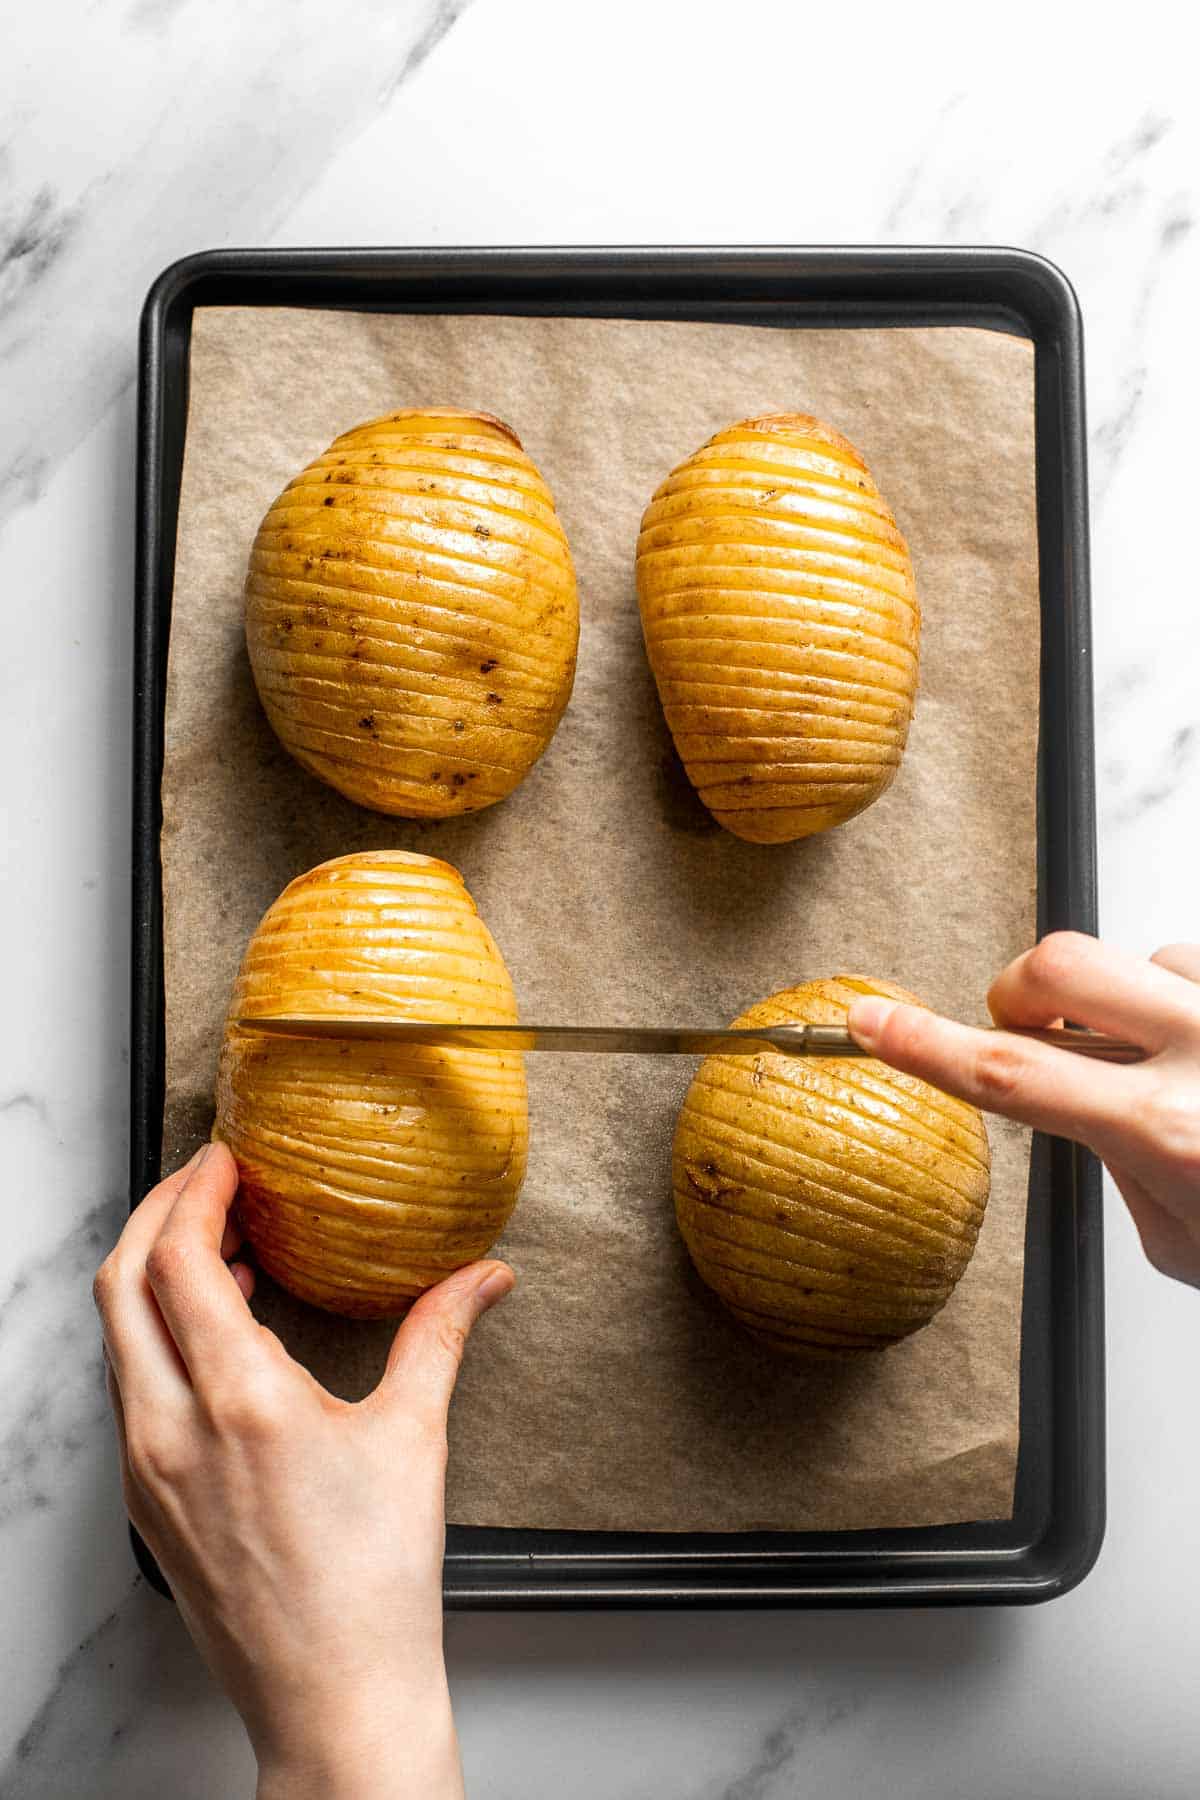
- Add more garlic butter. Brush on more garlic herb butter, making sure you get it in between each slice. You may need to reheat the butter first if it has hardened too much. Season with salt and pepper.
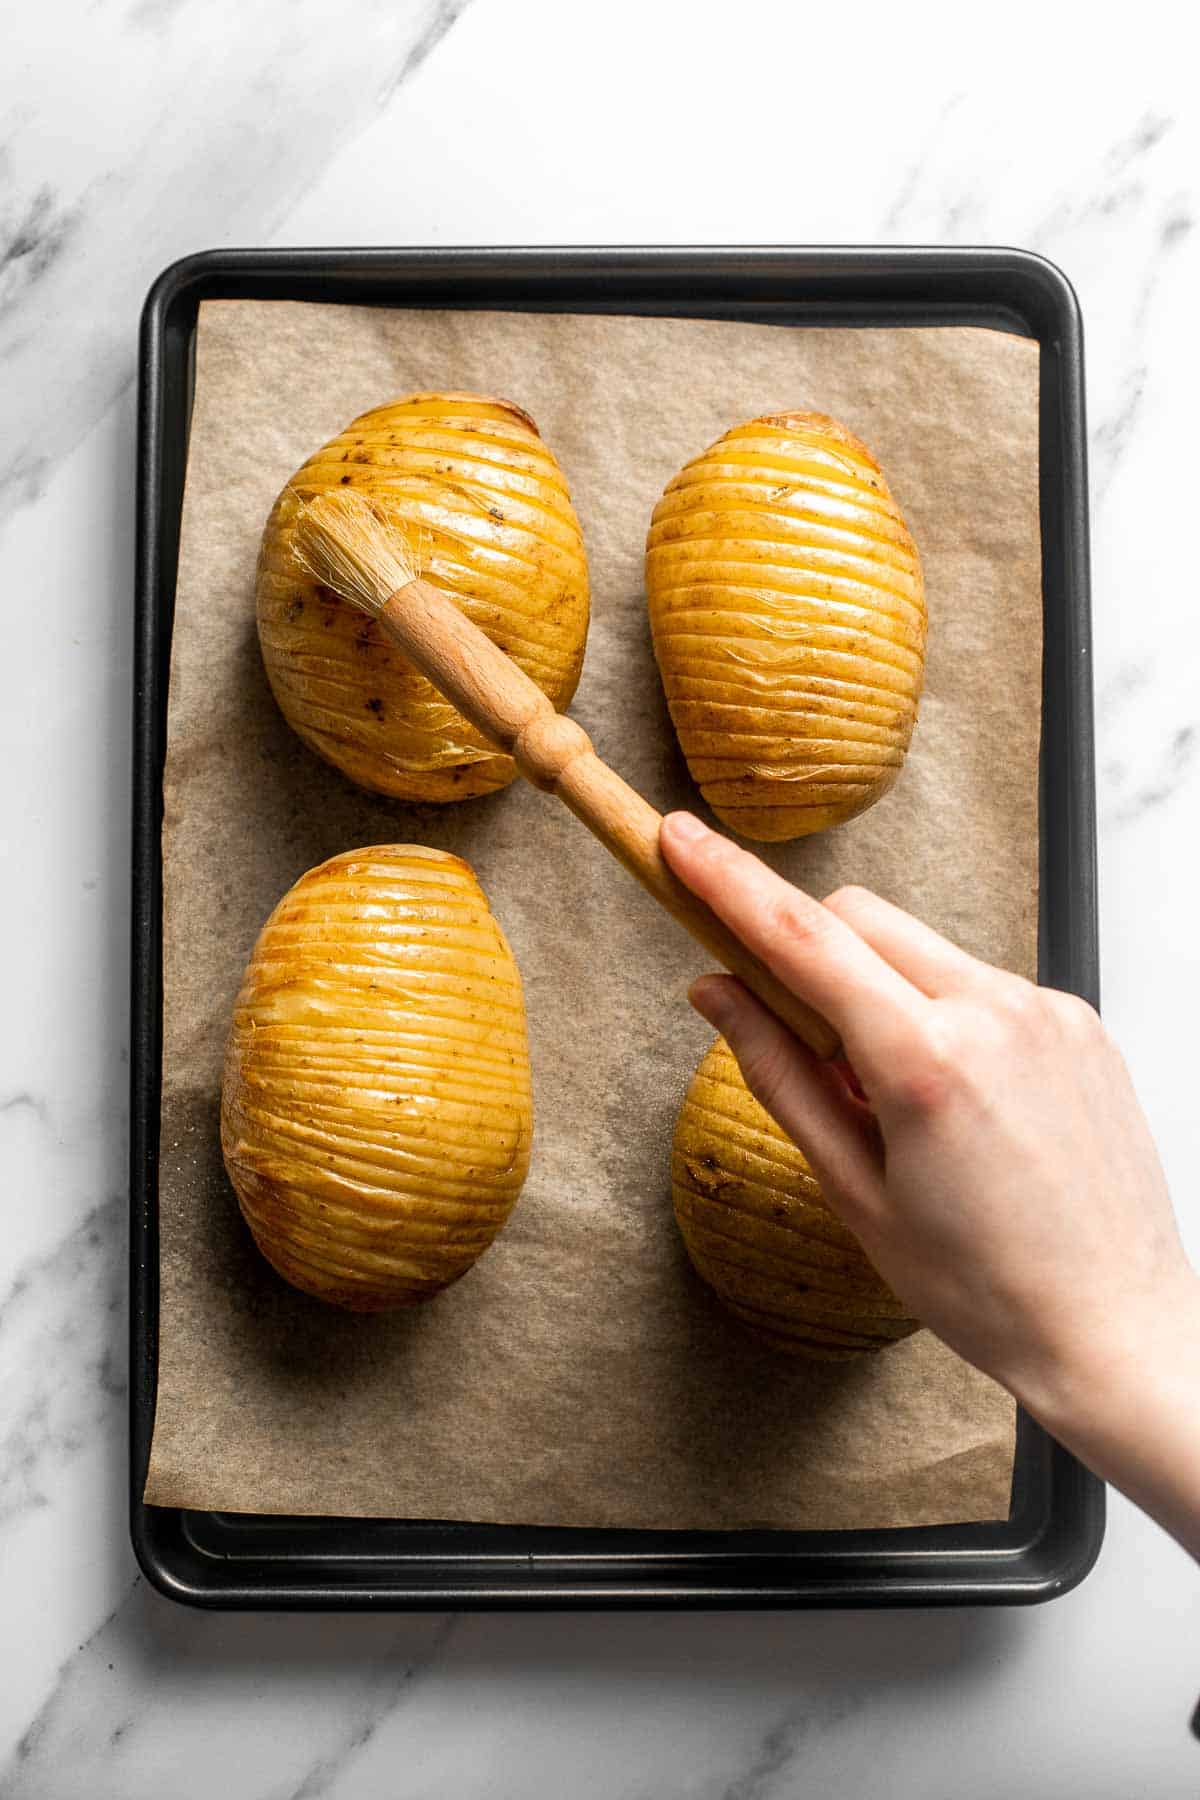
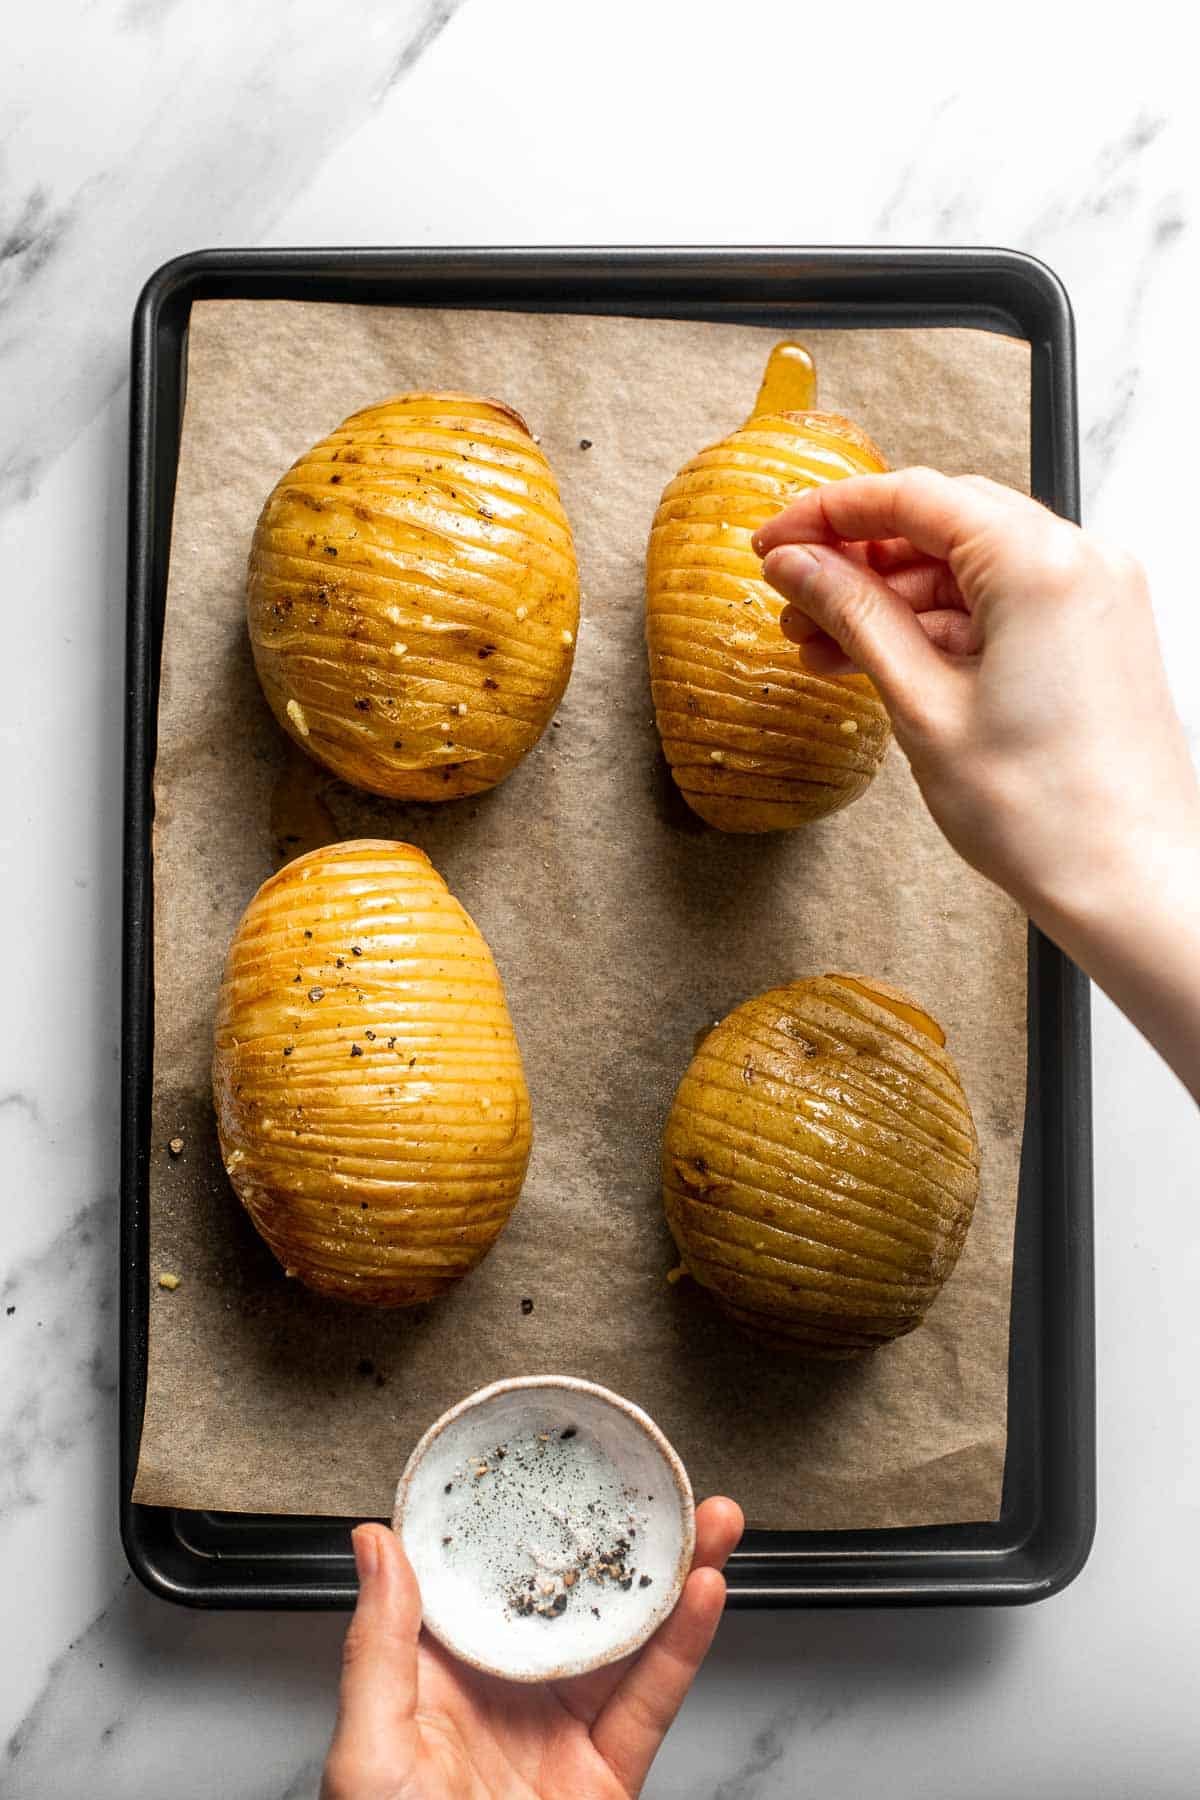
- Bake again. Place the potatoes back into the oven and bake for an additional 35-40 minutes, or until the outsides are golden brown and crispy.
- Serve. Top with fresh herbs and parmesan cheese (optional), and serve immediately. You can also pop the potatoes back in the oven for a few minutes to lightly melt the Parmesan cheese, if desired.
Recipe Tips and Tricks
- Short on time? Make them ahead! You can make the garlic butter ahead of time and even slice up the potatoes and refrigerate or freeze them before cooking to speed up prep time. If storing, I recommend storing the potatoes immersed in water to prevent the exposed slices from oxidizing. Just make sure to thoroughly dry the potatoes before baking.
- Use tools to slice the potatoes. If you're worried about accidentally slicing through the potatoes, place wooden chopsticks, wooden spoons, or skewers on either side of the potato while cutting to act as a bumper, preventing your knife from going all the way through.
- Brush the garlic butter twice. The key to getting the most out of the herb garlic butter is to brush the butter on the potatoes in the beginning and then brush them on again halfway.
How to Serve
Hasselback potatoes can be served with almost many main course entree. We like to make a complete meal and serve it with simple salad, dinner rolls, and a centerpiece roasted protein like chicken, fish, beef, or pork. Some of our favorite to serve with this potato side are:
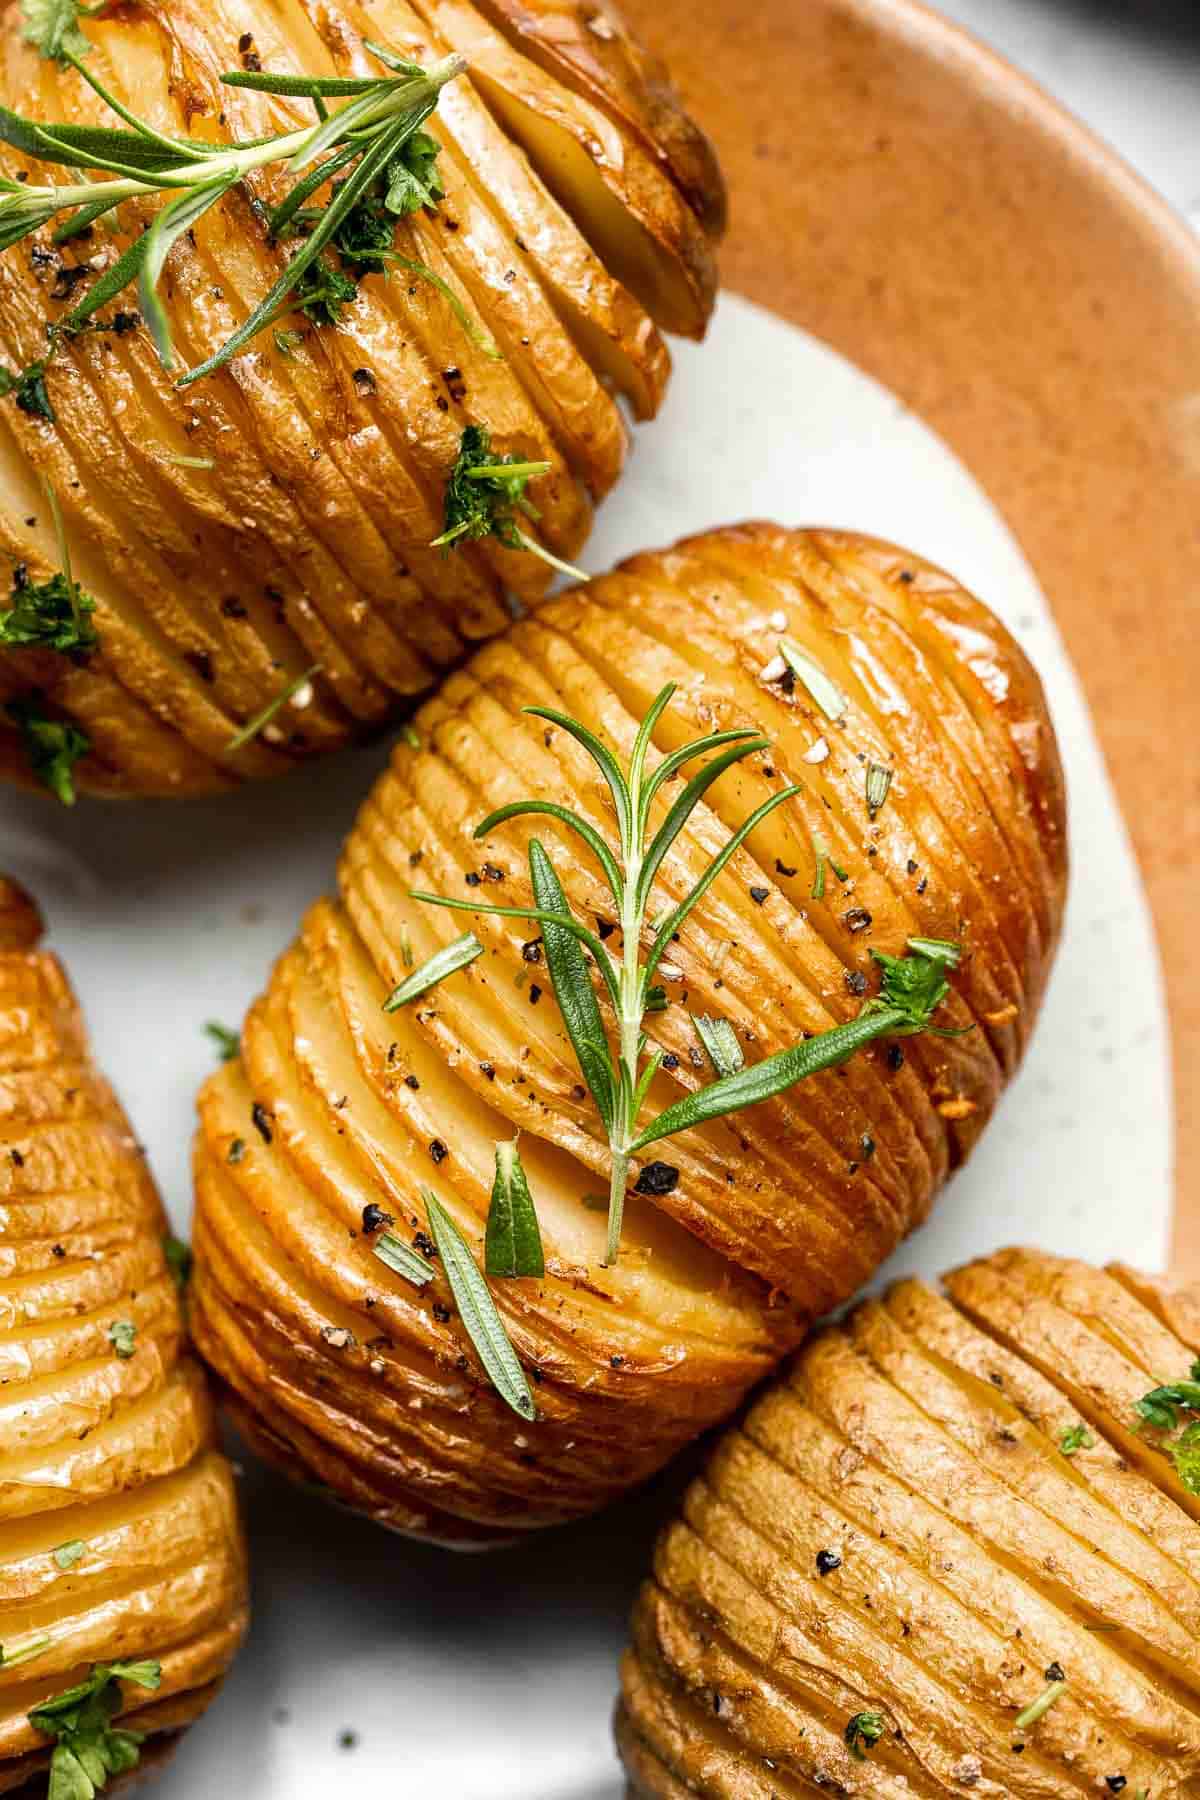
Storing and Freezing Instructions
How to Store
Place leftover potatoes in an airtight container and store in the fridge for up to 5 days. Reheat in the oven at 425℉ for 15-20 minutes.
How to Freeze
Store leftovers in a freezer-safe container and freeze for up to 3 months. Cook them straight from frozen by baking at 425℉ for 20-25 minutes.
More Potato Recipes
- 30 Best Potato Side Dishes
- Crispy Smashed Potatoes
- Crispy Leaf Potatoes
- Scalloped Potatoes
- Air Fryer French Fries
- Breakfast Potatoes
Tried this recipe?
I'd love to hear what you think! Leave a comment and rating below to share your feedback. Your reviews help others discover this recipe and help me keep creating more free recipes for you. Snap a photo and tag me on social media @aheadofthyme too.

Oatmeal Raisin Cookies
Oatmeal Raisin Cookies are soft and chewy loaded with hearty oats and a touch of sweetness from the raisins. This one bowl recipe is quick and easy to make using simple pantry staple ingredients in under 20 minutes - and no chilling required!
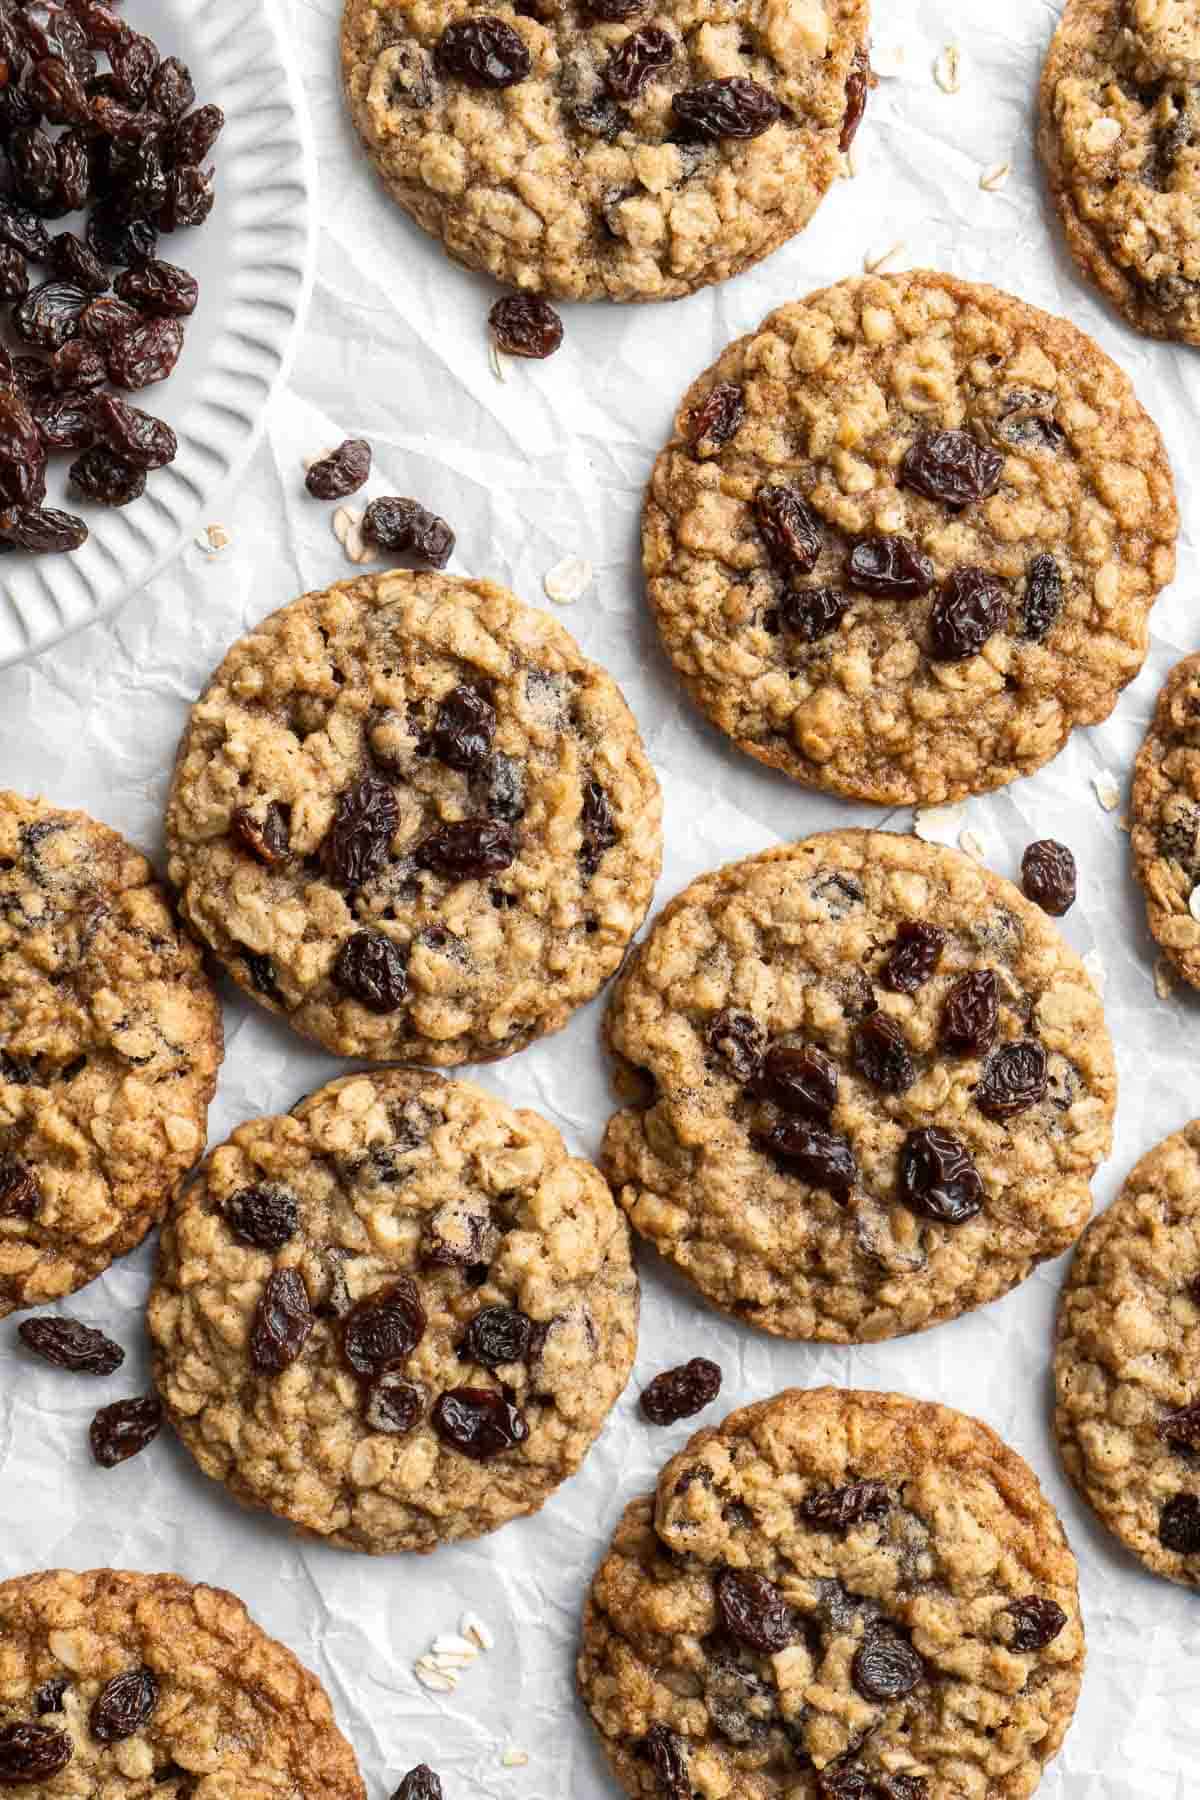
These oatmeal cookies are the perfect cookie recipe to make when you are craving a sweet treat or snack at the last minute no matter what time of day it is. Whether you're looking for a sweet breakfast, an afternoon pick-me-up, or a dessert after dinner, these raisin oatmeal cookies will hit the spot.
Why You'll Love these Oatmeal Raisin Cookies
- Classic soft and chewy cookies. Oatmeal raisin cookies are a classic cookie that many of us grew up with. These cookies have the best texture with warm, chewy oats and sweet raisins that is hard to resist.
- Quick and easy to make. These oatmeal cookies with raisins are so easy to make with just 10 minutes of prep, and another 8 minutes in the oven. Plus, they are made with simple ingredients that you probably already have in your pantry. They're perfect for a last minute dessert or snack.
- They are freezer-friendly. These oatmeal cookies (whether baked or unbaked) are freezer-friendly too. Which means that you can freeze the cookies or cookie dough and enjoy cookies on demand whenever the craving hits.
- Oats are healthy. The oats in these oatmeal raisin cookies are a great source of dietary fiber, which can help keep you feeling full and satisfied until meal time. This makes them a great option for a snack or even breakfast on-the-go.
- They're customizable. One of my favorite things about these oatmeal cookies is that they can be easily customized to suit your preferences. You can add different types of nuts, seeds, or dried fruits to give them a unique twist.
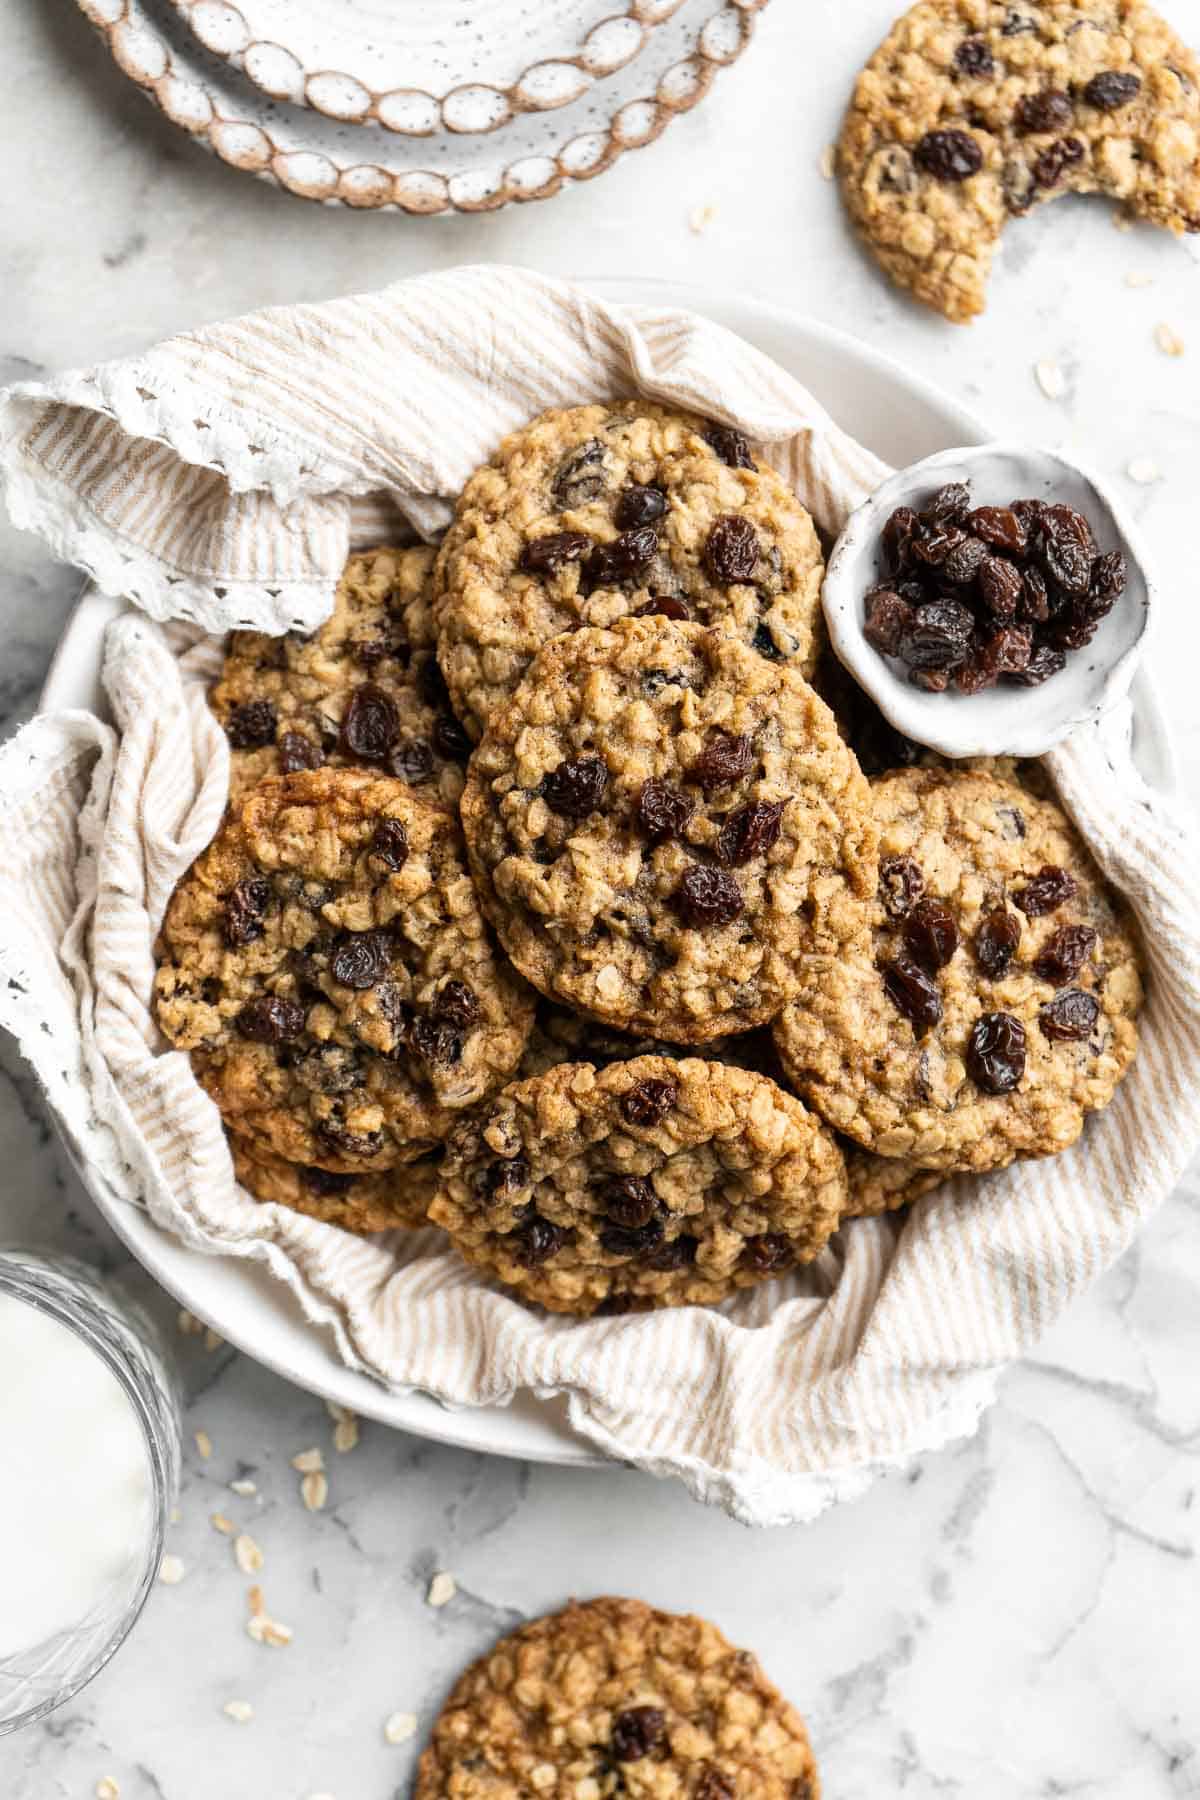
Ingredient Notes
To make these easy Oatmeal Raisin Cookies, you will need the following ingredients (full measurements in recipe card below):
- unsalted butter - bringing the butter up to room temperature is crucial when it comes to creaming the butter and sugars properly otherwise the cookies will overly spread. We also use unsalted butter for more control over the flavor in this recipe, but if you only have salted butter - use it and omit the salt called for in the recipe.
- sugar - you will need both light brown sugar and granulated sugar in this recipe.
- eggs
- vanilla extract - vanilla bean paste can also be substituted at a 1:1 ratio.
- all-purpose flour - if you or someone in your family has a sensitivity to gluten, use a measure-for-measure gluten free flour instead such as oat flour.
- old fashioned rolled oats - use rolled oats and not quick oats which will change the texture quite a lot.
- baking soda
- salt - if you choose to use salted butter in this recipe, omit the salt here.
- raisins - you can also substitute with dried cranberries, chopped dried dates, or chopped dried figs if you prefer.
- walnuts - feel free to use other chopped nuts such as pecans, almonds, or pistachios - or omit nuts altogether to suit your tastes.
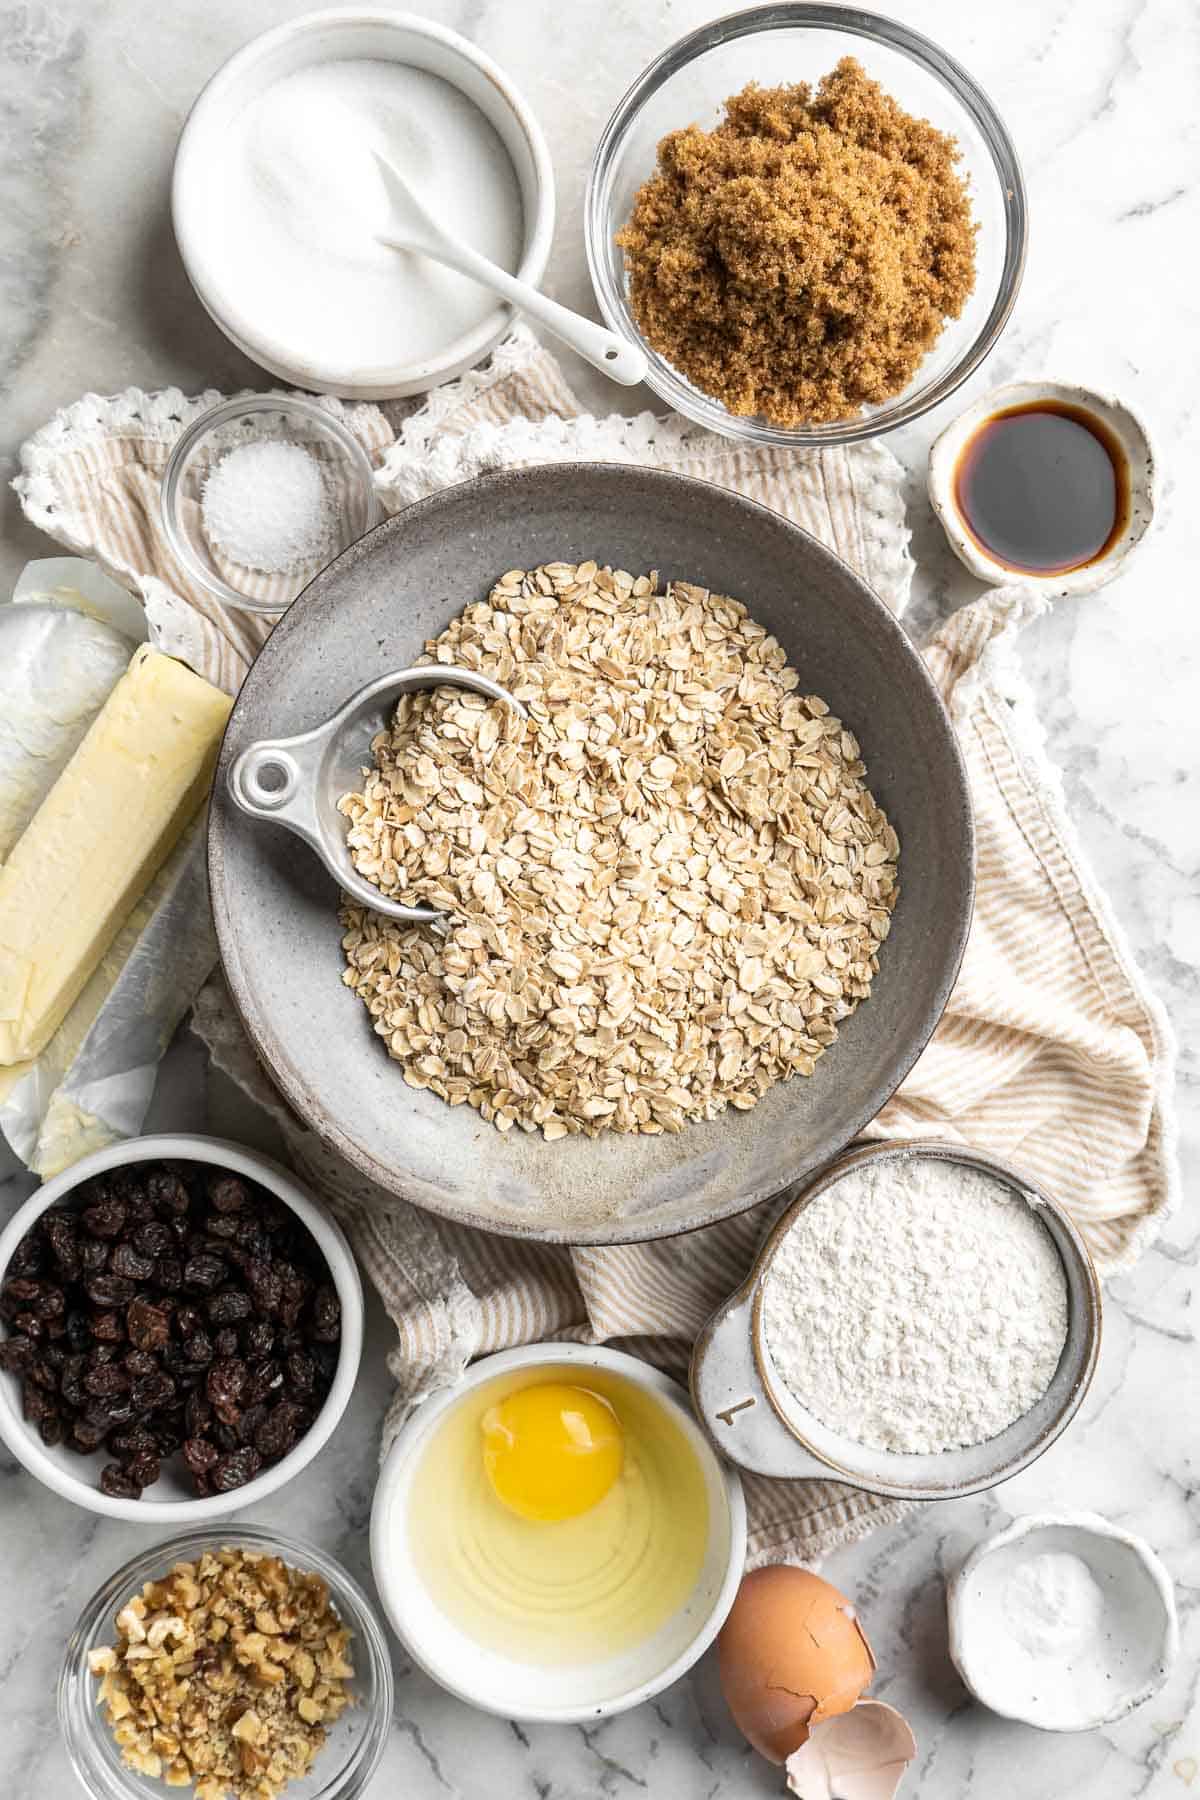
Equipment Needed
You will also need the following kitchen tools and equipment:
- measuring cups and spoons
- mixing bowls
- hand mixer or stand mixer
- cookie scoop
- half sheet baking pan and silicone baking mat (or parchment paper)
- wire cooling rack
How to Make the Best Oatmeal Raisin Cookies
- Combine wet ingredients. In a large bowl, cream together the butter, granulated sugar, and brown sugar using a stand mixer or an electric hand mixer, about 4-5 minutes until light and fluffy. Add in the egg and vanilla and continue to beat until incorporated.
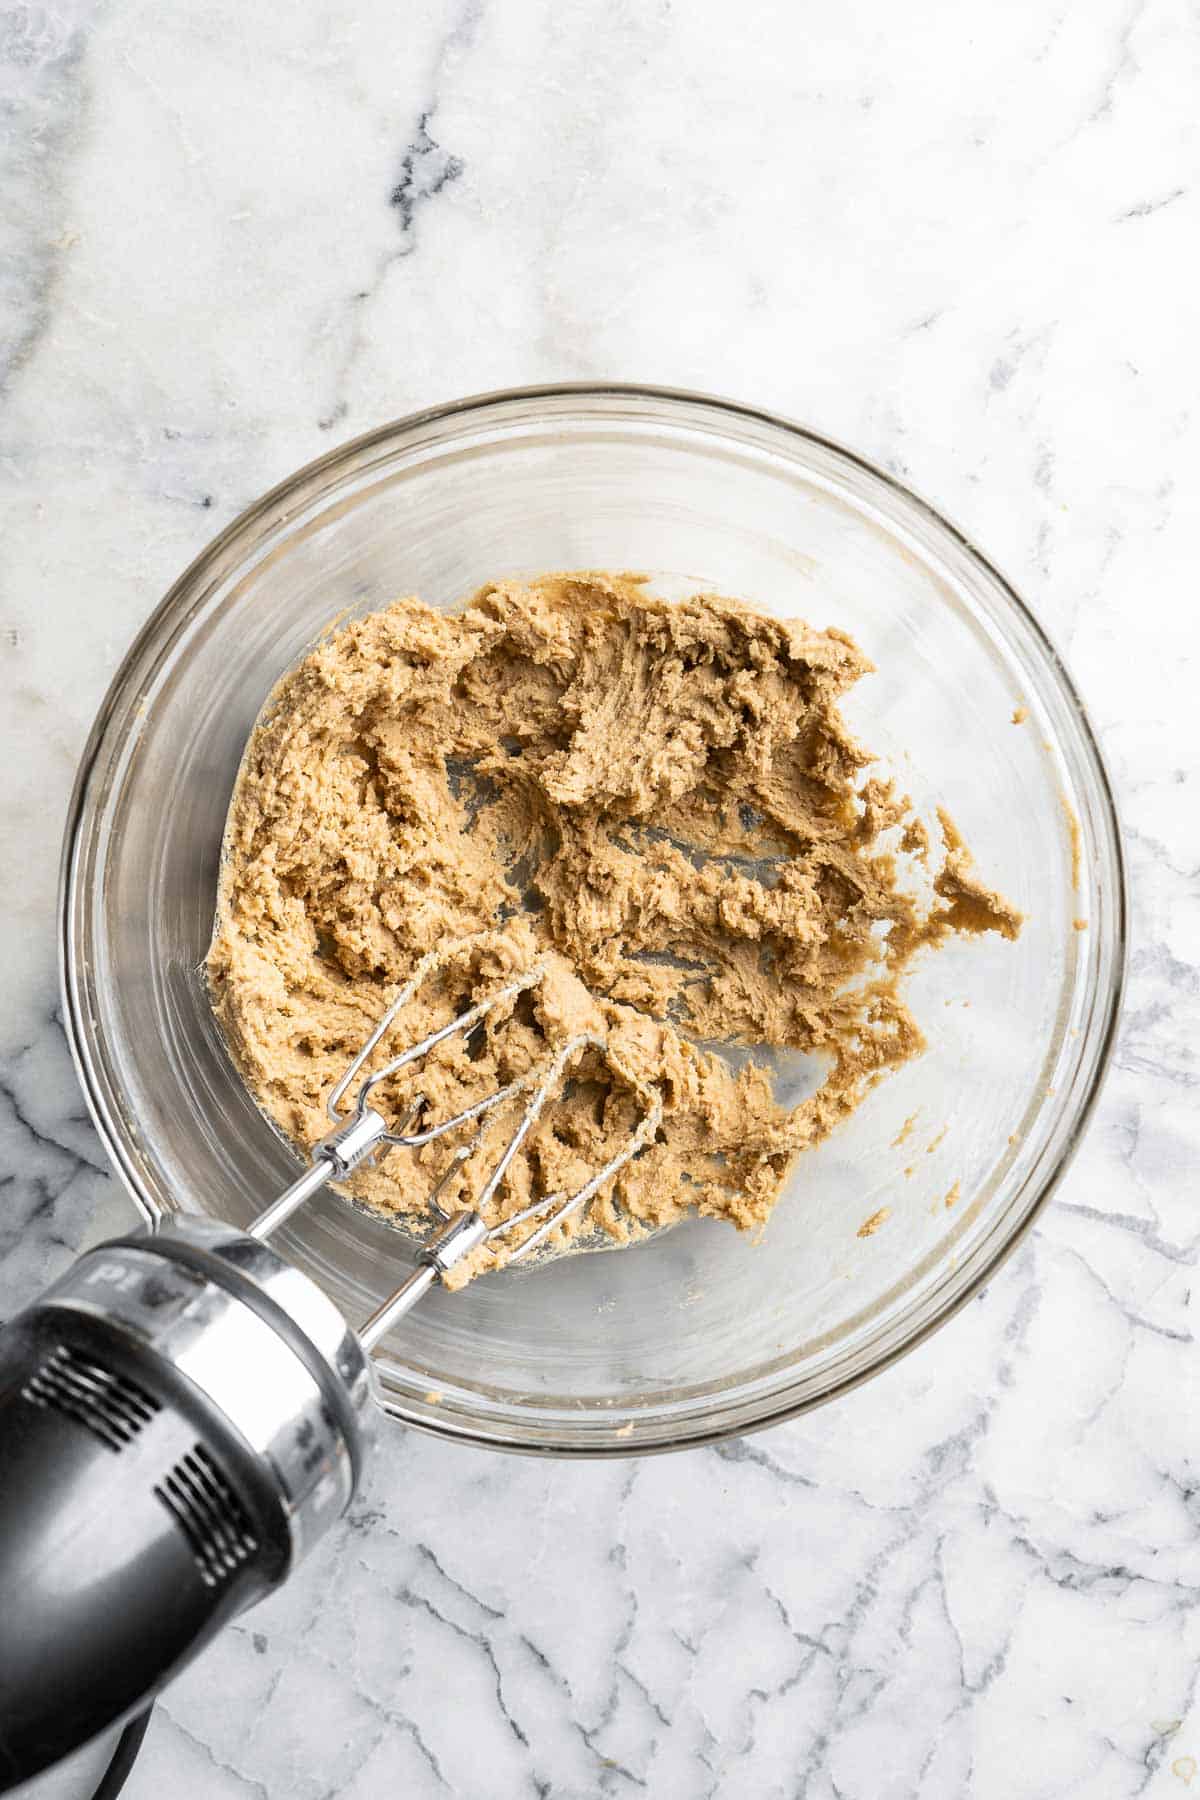
- Add dry ingredients. Add in the flour, oats, baking soda and salt and beat on low until combined.
- Stir in mix ins. Stir in the raisins and walnuts.
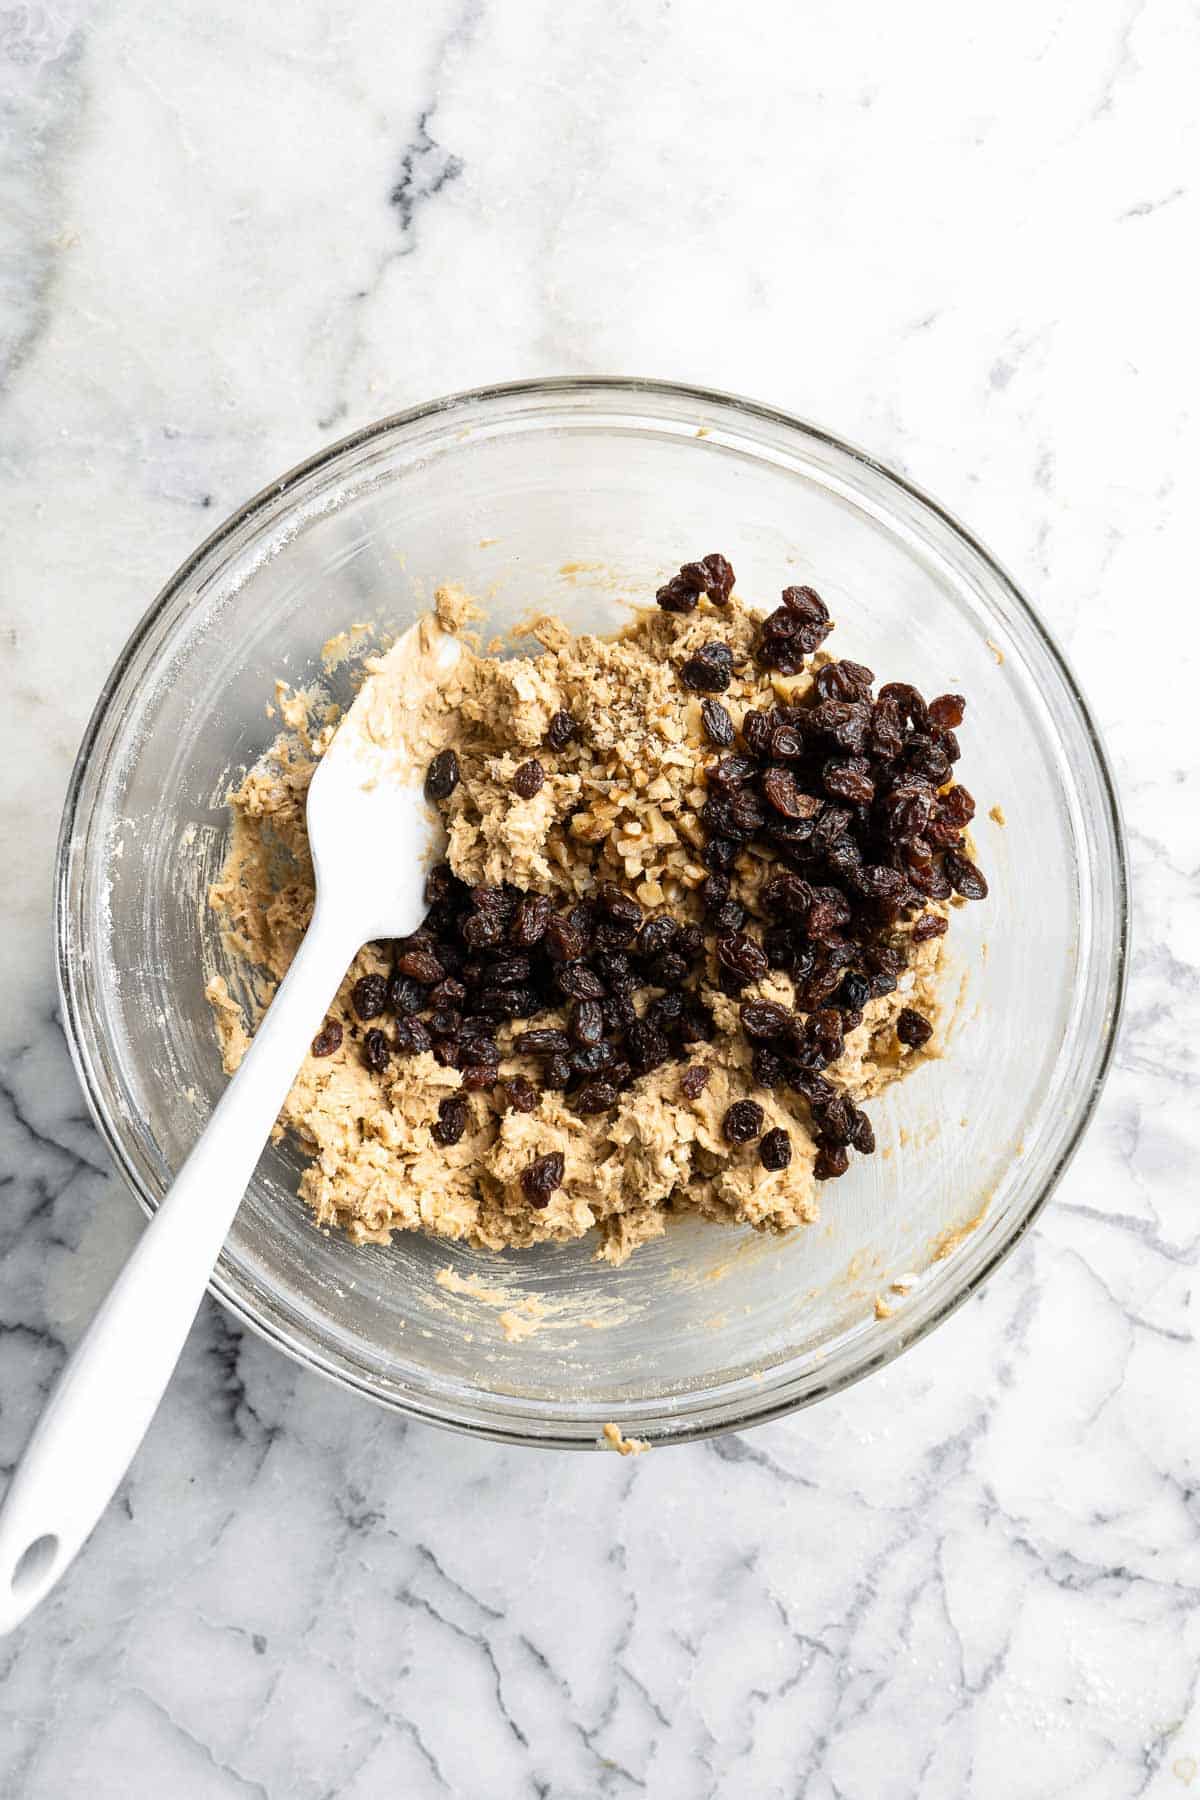
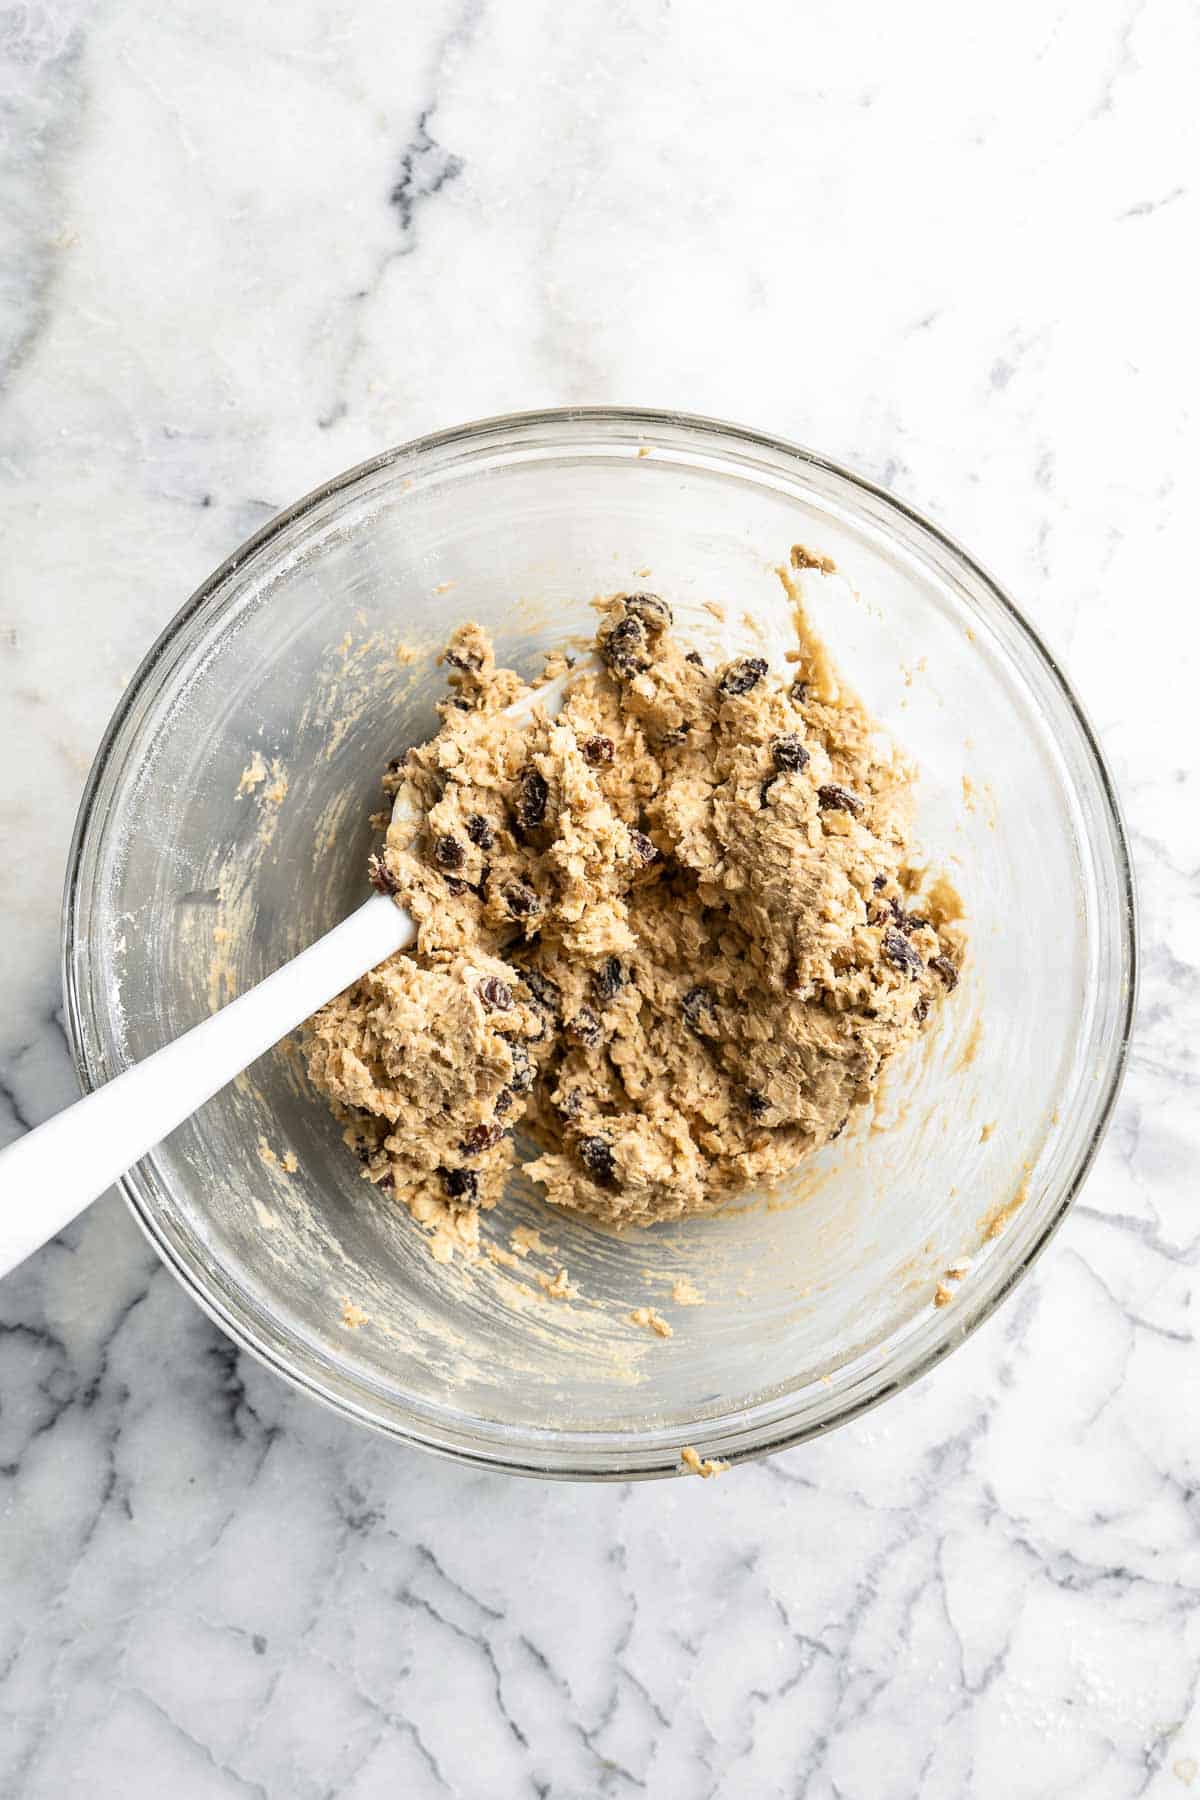
- Scoop cookies. Scoop out 2 tablespoons of dough and place onto a lined cookie sheet about 2 inches apart.
- Bake. Bake in a 350F preheated oven for 8 to 10 minutes until golden brown on the edges. Allow the cookies to cool on the baking sheet for 5 minutes, then cool completely on a wire rack.

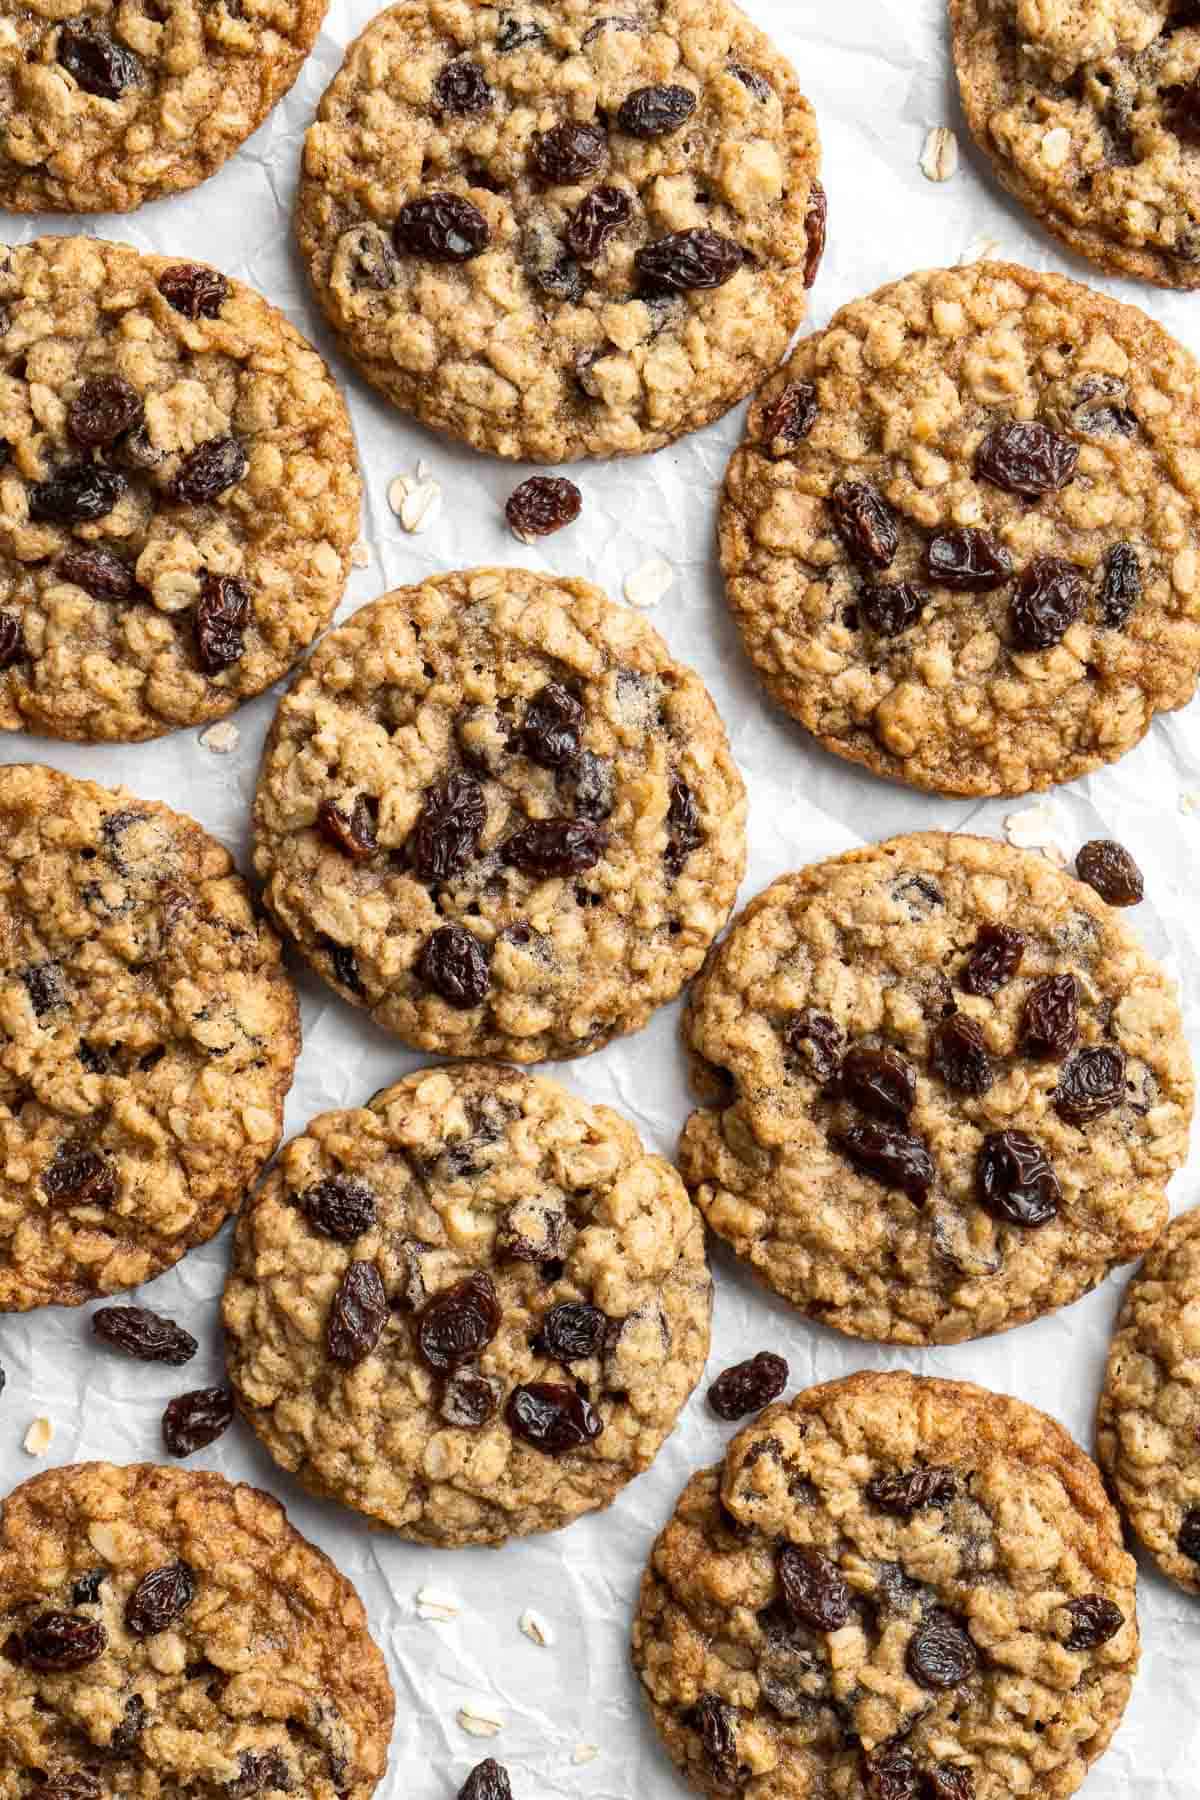
Recipe Variations
- Add chocolate chips. Semi-sweet chocolate chips or chunks will add delicious flavor into these cookies. You can also use dark chocolate or white chocolate -whatever you prefer!
- Drizzle in chocolate. Melt some dark or white chocolate and drizzle it over these cookies for a chocolately twist.
- Add peanut butter. Add peanut butter to the dough for a protein boost and a nutty flavor.
- Gluten-free oatmeal raisin cookies. Use oat flour instead of all-purpose flour for a gluten-free option.
How to Serve
Serve these Oatmeal Raisin Cookies warm with a scoop of Vanilla Ice Cream or at room temperature. I like to serve it with a tall glass of milk or a warm drink like coffee or tea. Some of my favorite drinks to serve with these are:
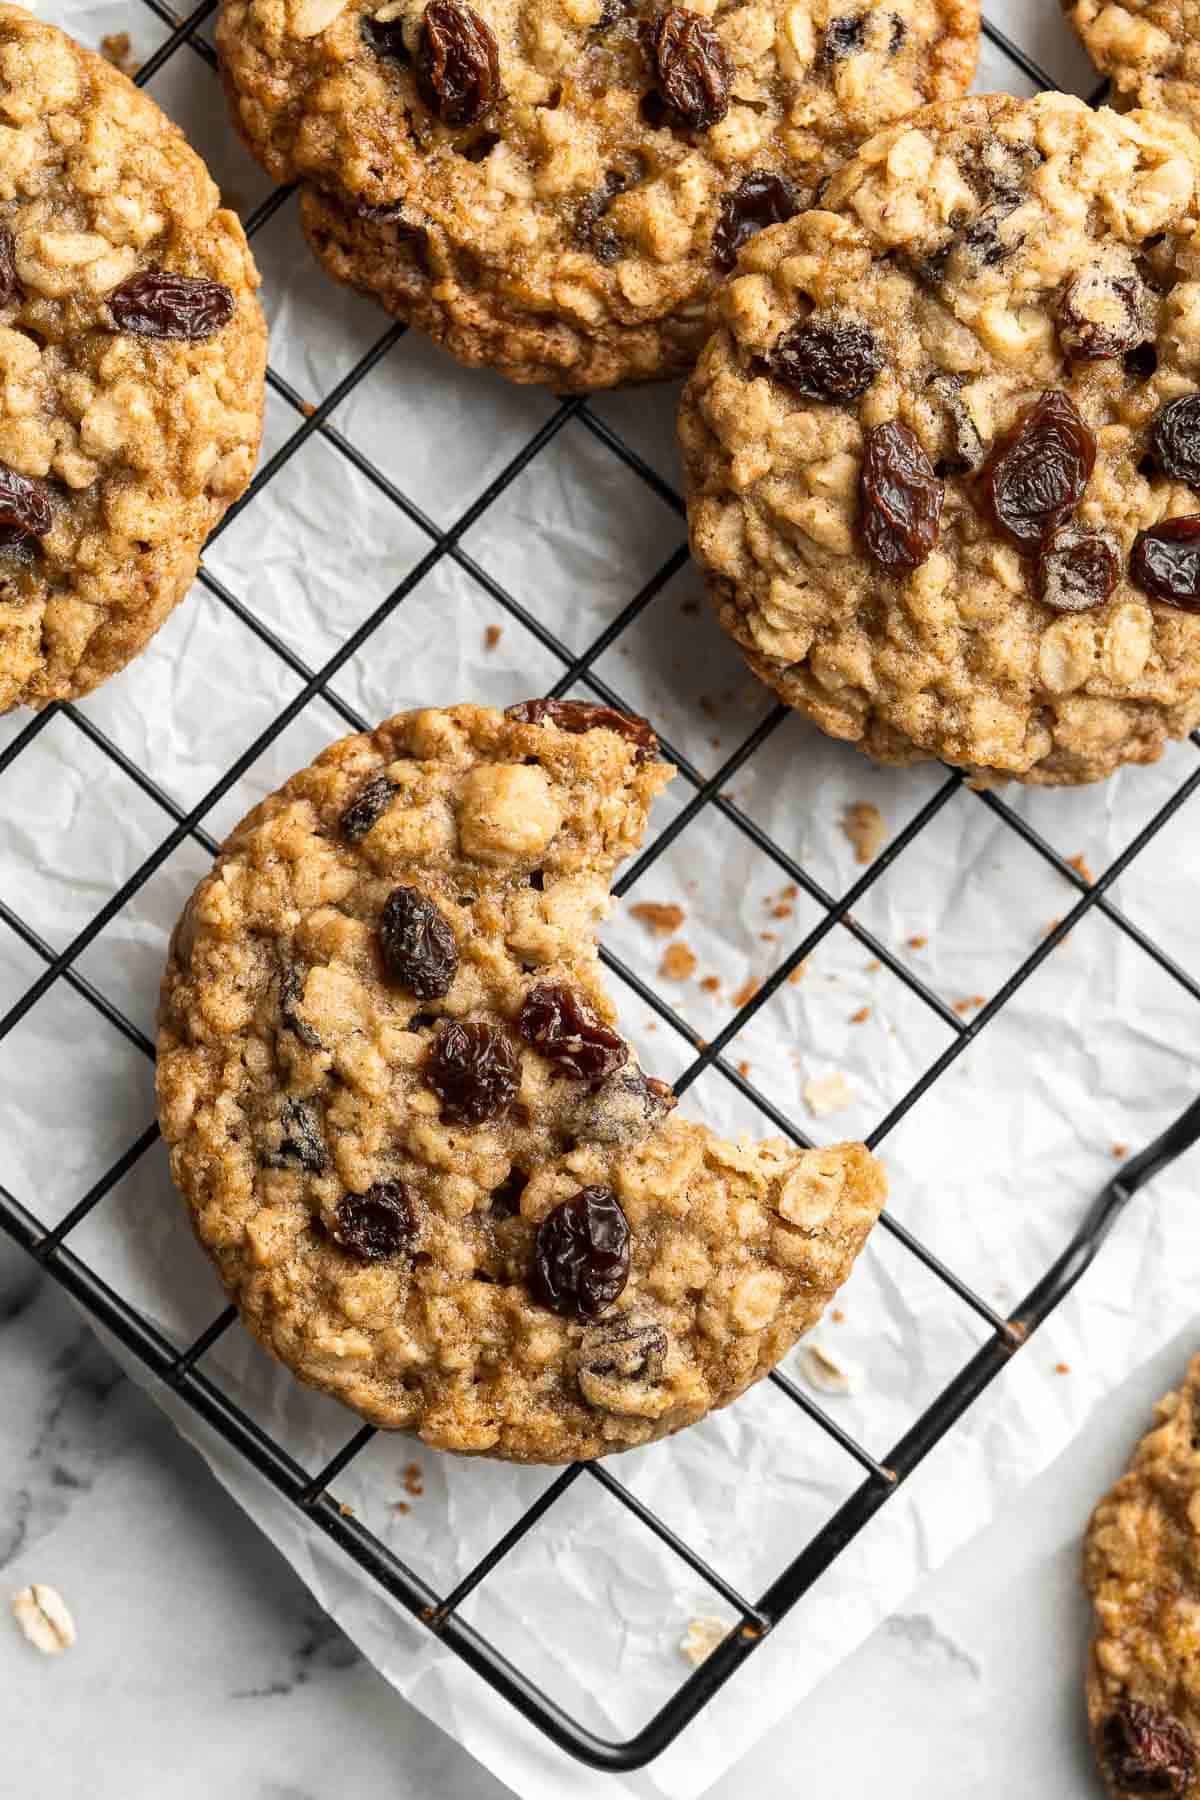
Recipe Tips and Tricks
- Brown the butter. If you have extra time, you can brown and cool the butter first, and then making the dough with browned butter for richer flavored cookies. See how to make brown butter in our Banana Bread Cookies recipe. You can also brown large batches of butter and freeze them in ice cube trays and quickly use in recipes to save time.
- Prepare the dough ahead of time. Frozen cookie dough keeps for up to 3 months. Having a batch of ready-to-bake cookie balls on hand will make your life easier. You can have cookies to bake on demand whenever the craving hits!
Storing and Freezing Instructions
How to Store
Store leftover oatmeal cookies in an airtight container at room temperature for up to 1 week. You can also store them in the fridge for up to one month, but they may lose some of their chewiness. To add moisture back in, reheat the refrigerated cookies on a microwave-safe plate for 5-15 seconds until warm or in the air fryer at 300F for about a minute.
How to Freeze
Oatmeal raisin cookies freeze well both baked and before baking. To freeze baked cookies, let them cool completely first, then store in an airtight container or freezer bag for up to 3 months. When ready to serve, allow them to thaw overnight in the refrigerator and then reheat or place on the counter to bring them up to room temperature (about 15-20 minutes).
How to Store and Freeze Cookie Dough
To store cookie dough before baking, cover the mixing bowl with plastic cling wrap and store for up to 3 days. To bake the cookies, allow the dough to come to room temperature, then scoop and bake.
To freeze cookie dough, scoop out the cookie balls and place on a lined baking sheet. Transfer the baking sheet to the freezer and freeze for 1 hour until hard. Then, transfer the cookie dough balls into a freezer bag and store for up to 3 months. To bake, thaw the cookie dough balls in the refrigerator overnight or at room temperature until thawed. Then, bake according to recipe instructions.
More Cookie Recipes
- 50 Best Cookie Recipes
- Chewy Chocolate Chip Oatmeal Cookies
- Chocolate Chip Cookies
- Fruitcake Cookies
- White Chocolate Cranberry Cookies
- Coconut Macaroons
Tried this recipe?
I'd love to hear what you think! Leave a comment and rating below to share your feedback. Your reviews help others discover this recipe and help me keep creating more free recipes for you. Snap a photo and tag me on social media @aheadofthyme too.

30 Side Dishes for Pasta
Who doesn't love pasta for dinner? It's a comfort food staple in many households, but sometimes it can be hard coming up with new and interesting side dishes to go along with it. If you are wondering "what to serve with pasta", you are in the right place. We are sharing over 30 of the best side dishes for pasta including salads, crusty breads, roasted vegetables, and more.
Whether want a healthy option or something indulgent, you'll find it here. So next time you're looking for what goes with pasta, be sure to try out one of these delicious side dishes to complete your meal.
Best Side Dishes for Pasta
Kale Caesar Salad is a delicious, healthy twist on classic Caesar salad with all the traditional flavors but added crunch and rich earthiness of fresh kale.

Cheesy Garlic Bread is toasty and crispy on the outside, tender and soft inside with a garlic butter and melty cheese on top. Make in under 20 minutes!
Lemon parmesan asparagus is a delicious way to serve a classic spring vegetable. This side dish is quick and easy to make in less than 20 minutes.
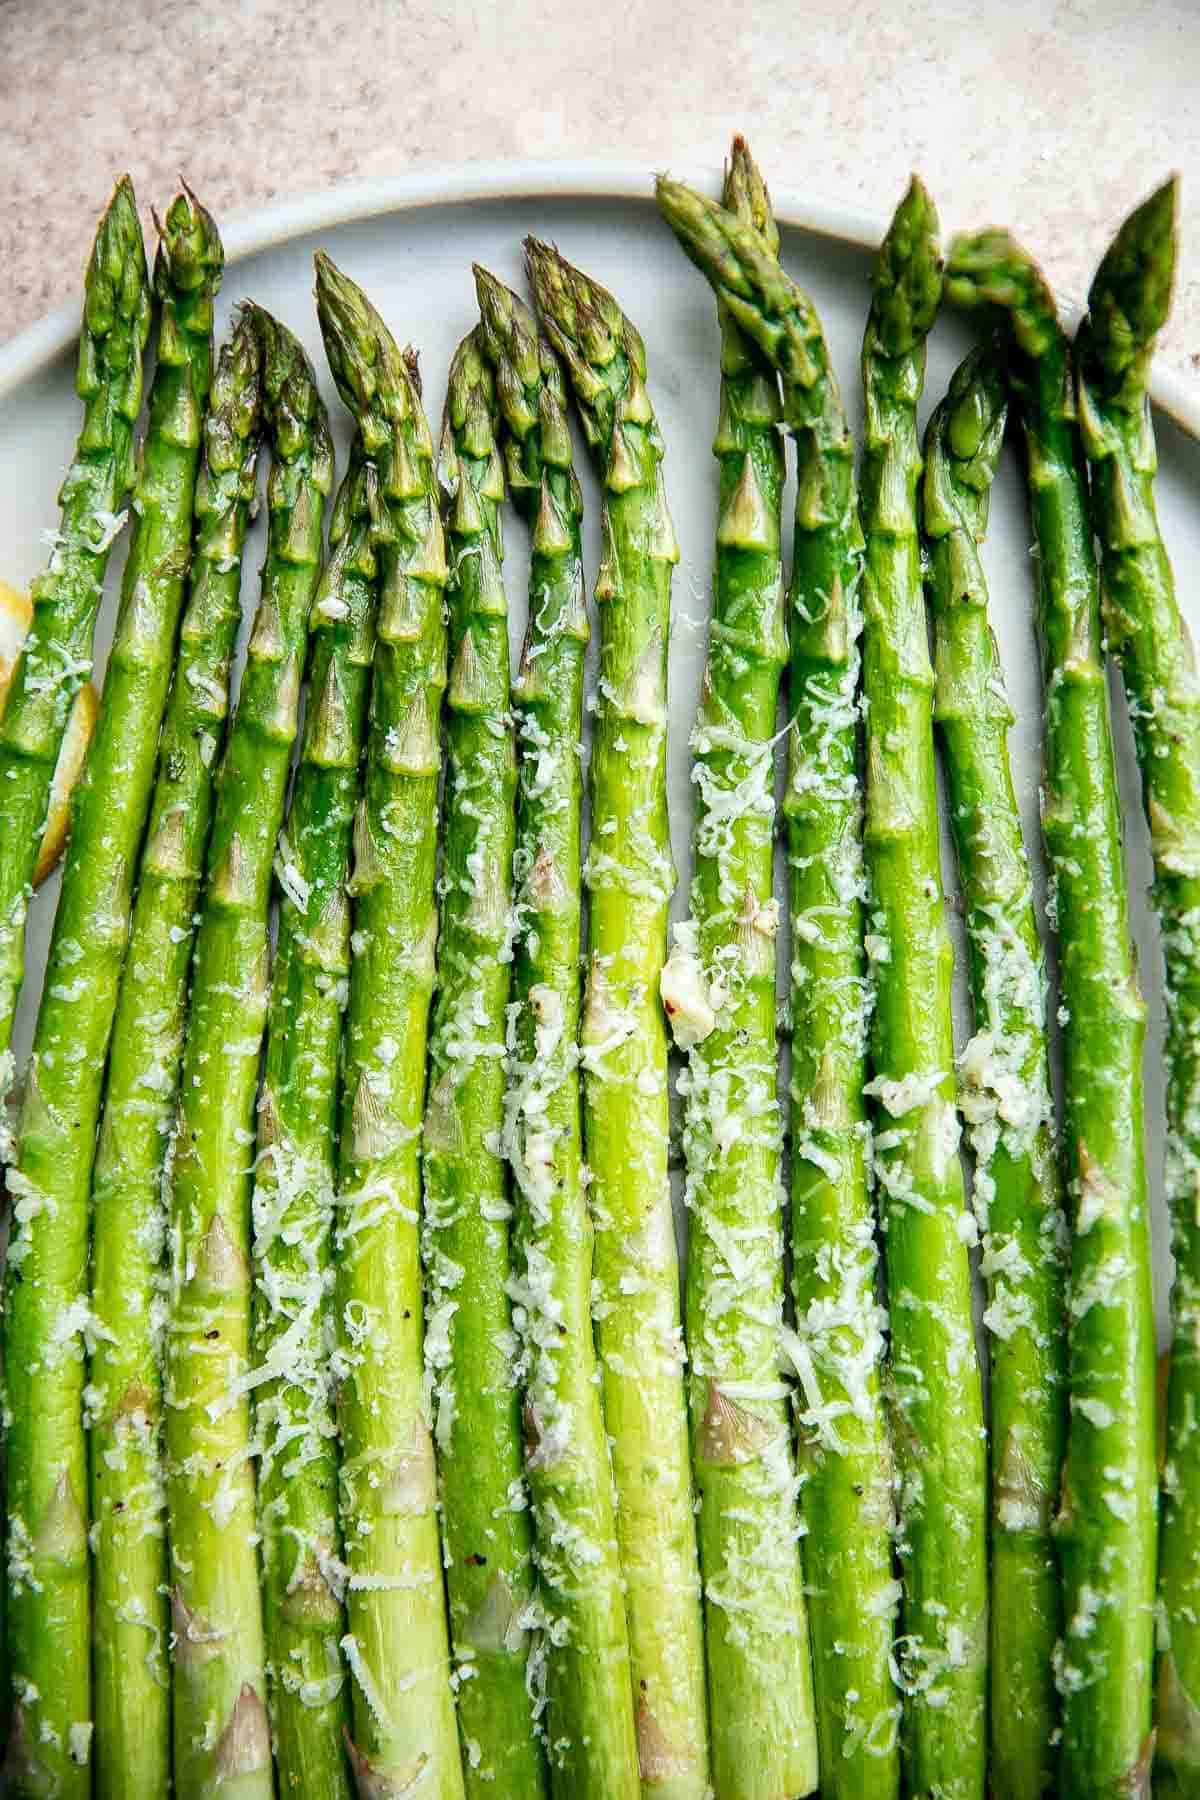
Easy Tomato Bruschetta with Balsamic Glaze
Tomato bruschetta with balsamic glaze is an easy Italian appetizer topped with tomatoes, onions, garlic, basil and olive oil. Delicious, fresh and simple.
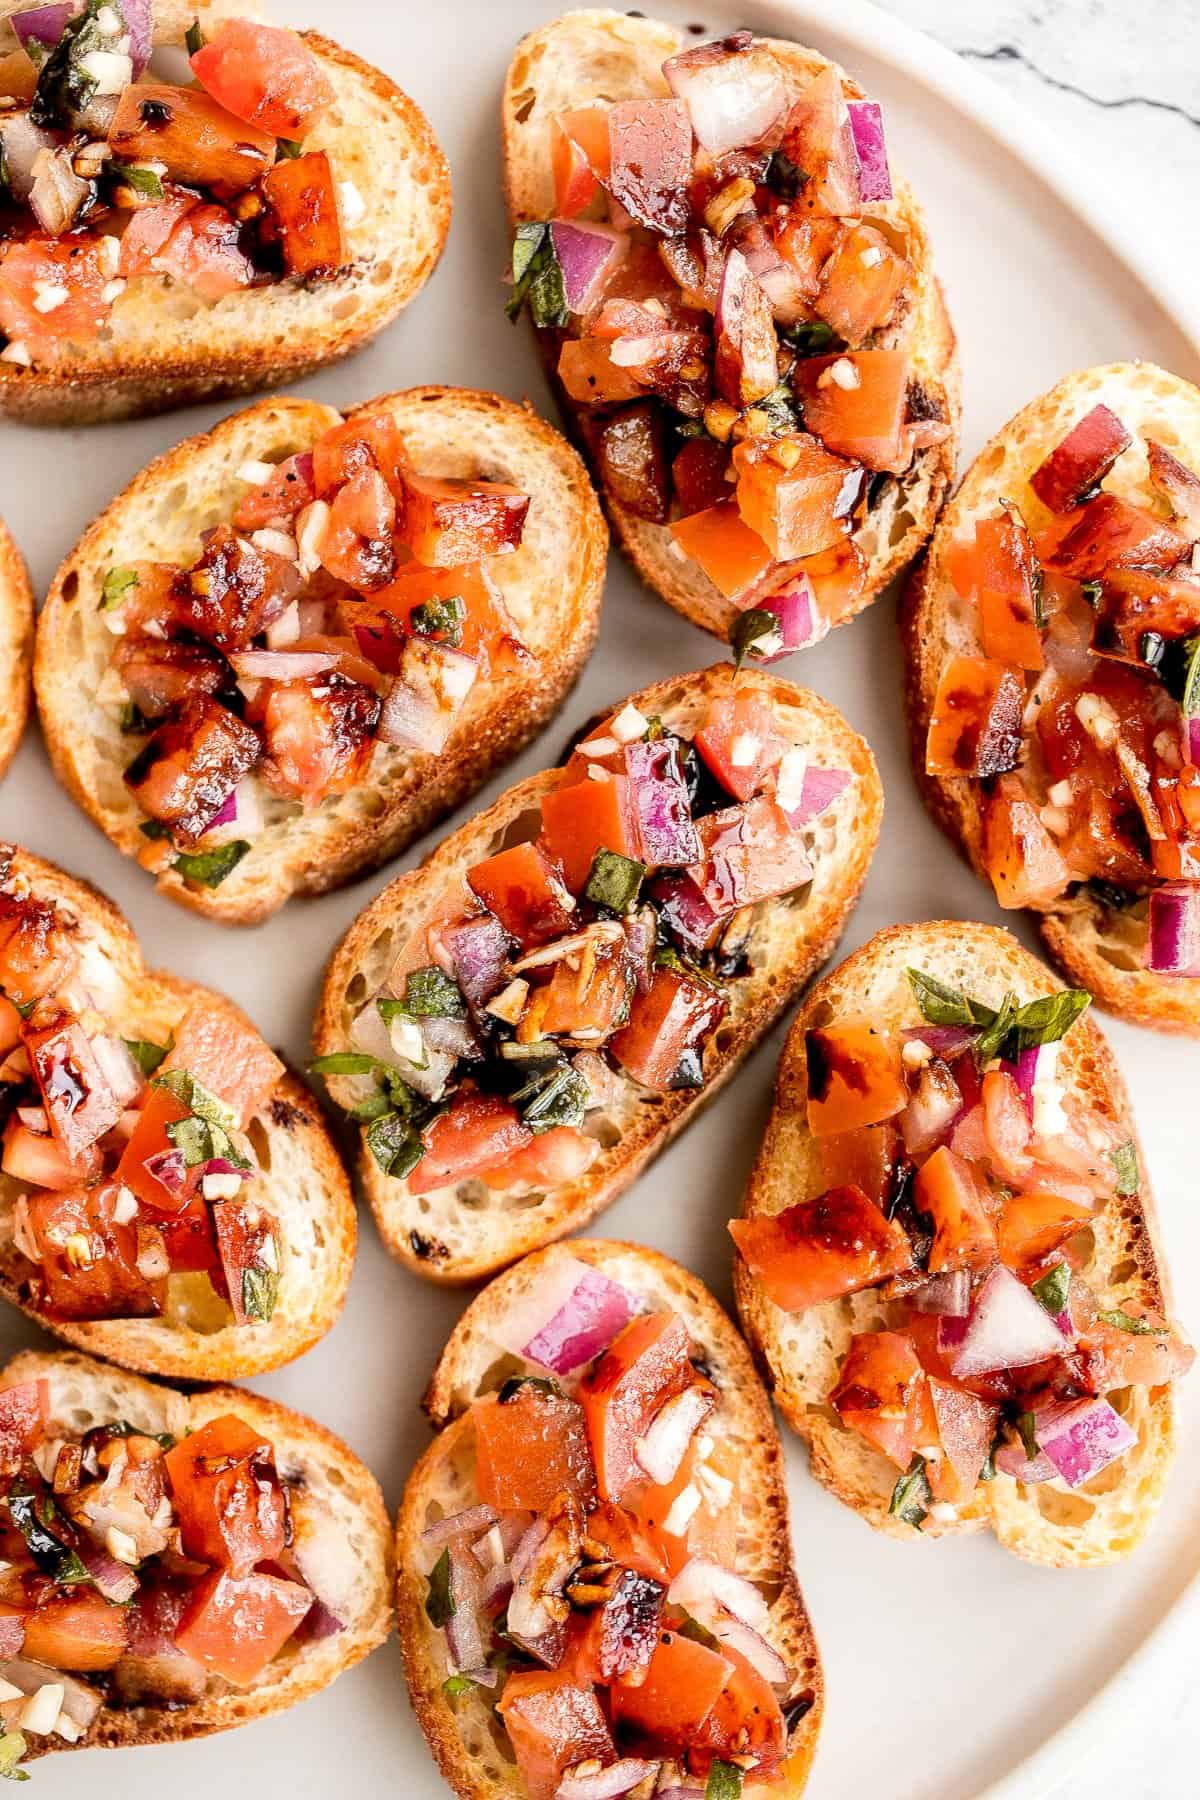
Tomato and Mozzarella Caprese Salad
Quick and easy tomato and mozzarella caprese salad is a fresh, light, and delicious summer salad, made with just a few simple ingredients in 10 minutes.
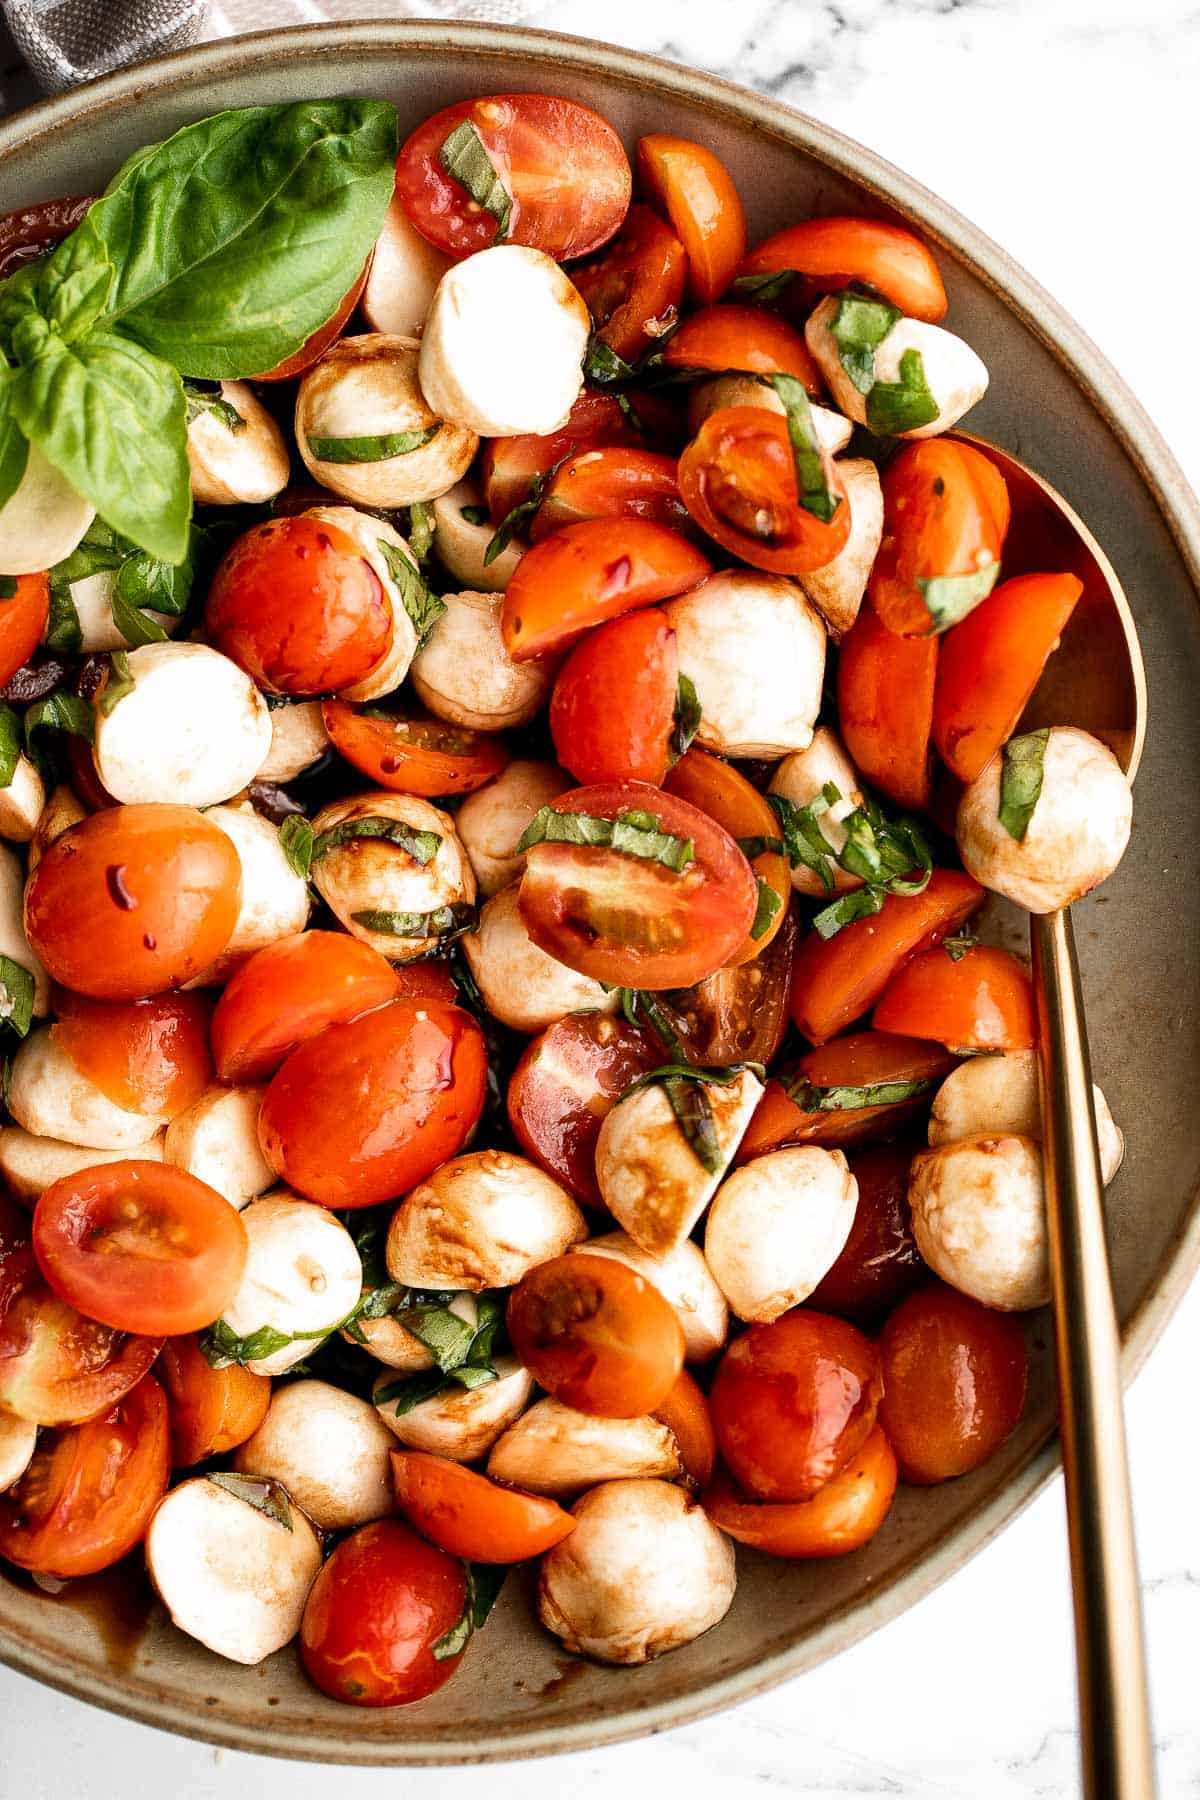
Soft garlic breadsticks are fluffy, airy, buttery, and delicious. They're an easy recipe that is perfect for beginners at baking bread.
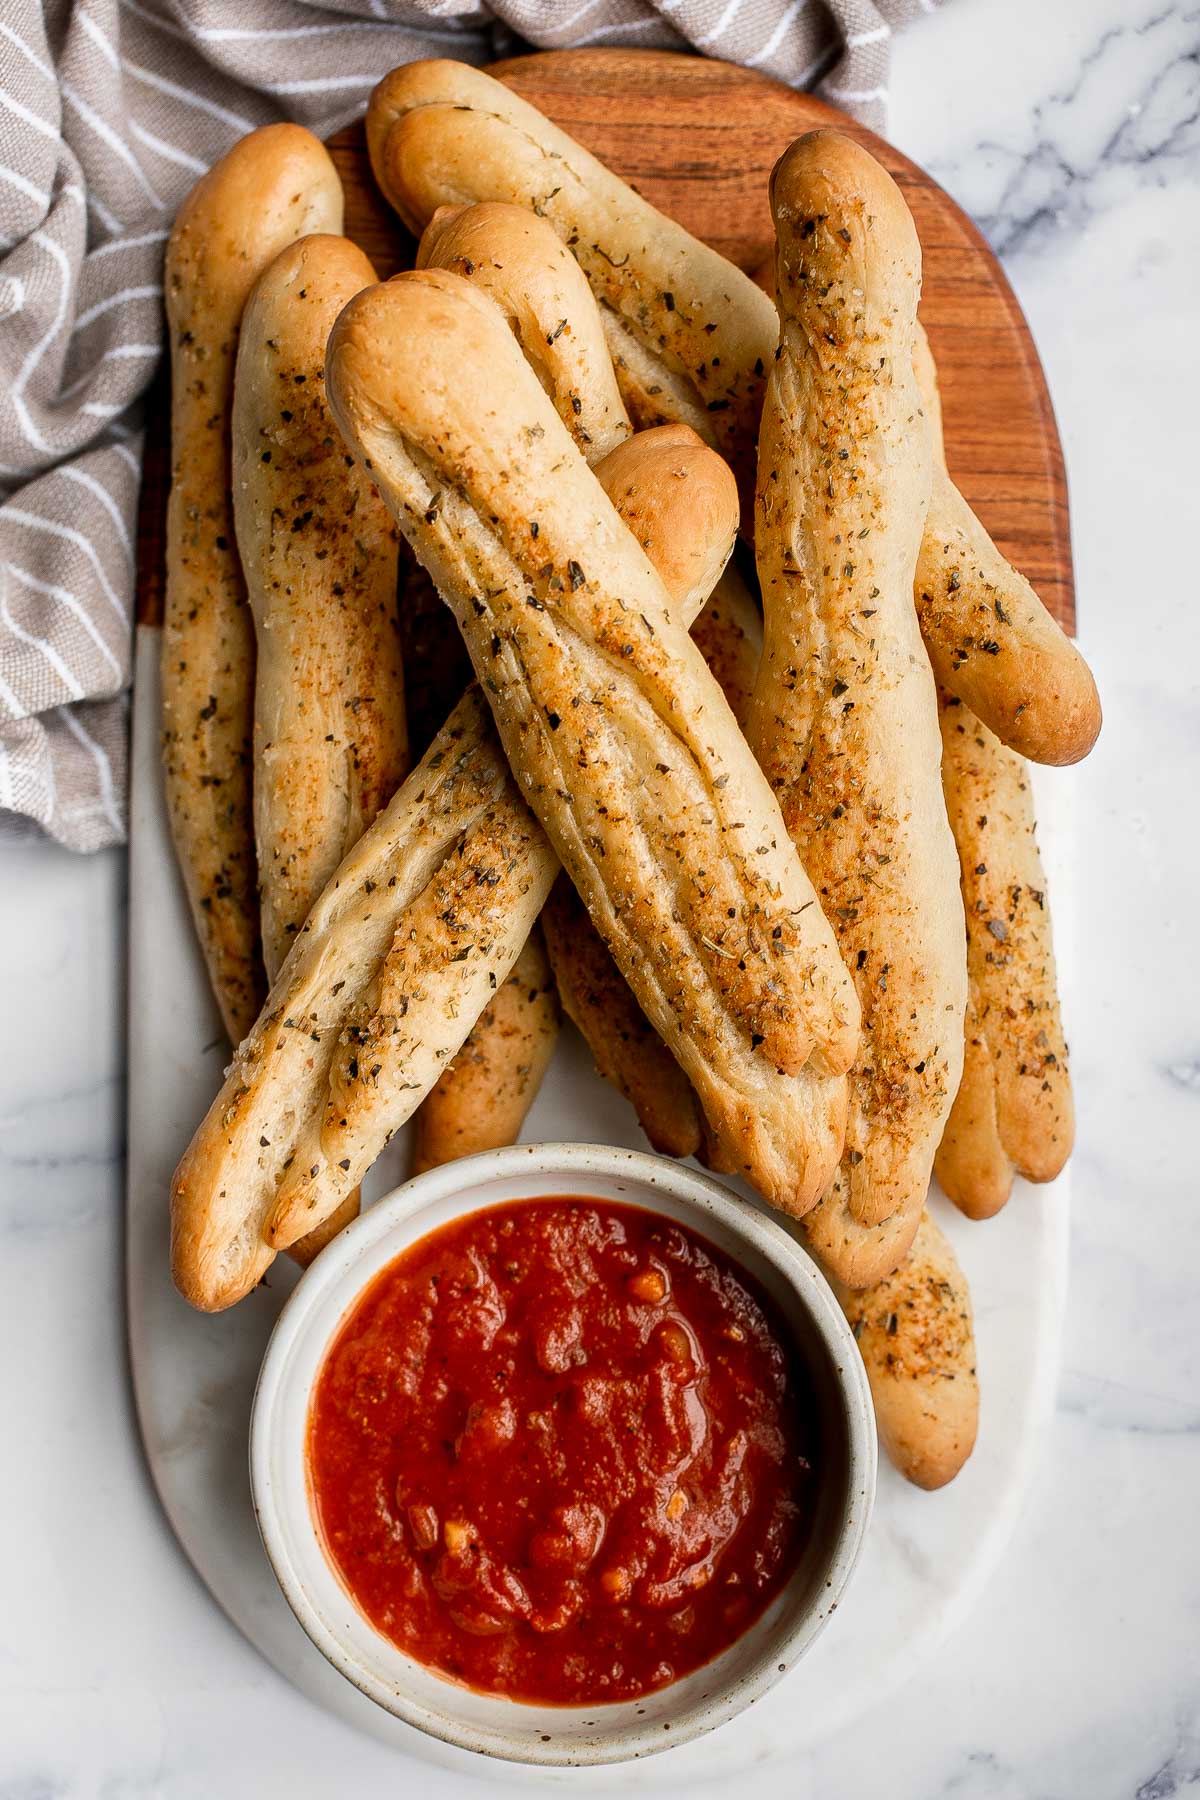
This Mediterranean Stuffed Eggplant is delicious, filling, and healthy. This vegetarian dinner is loaded with veggies and topped with bubbly cheese.
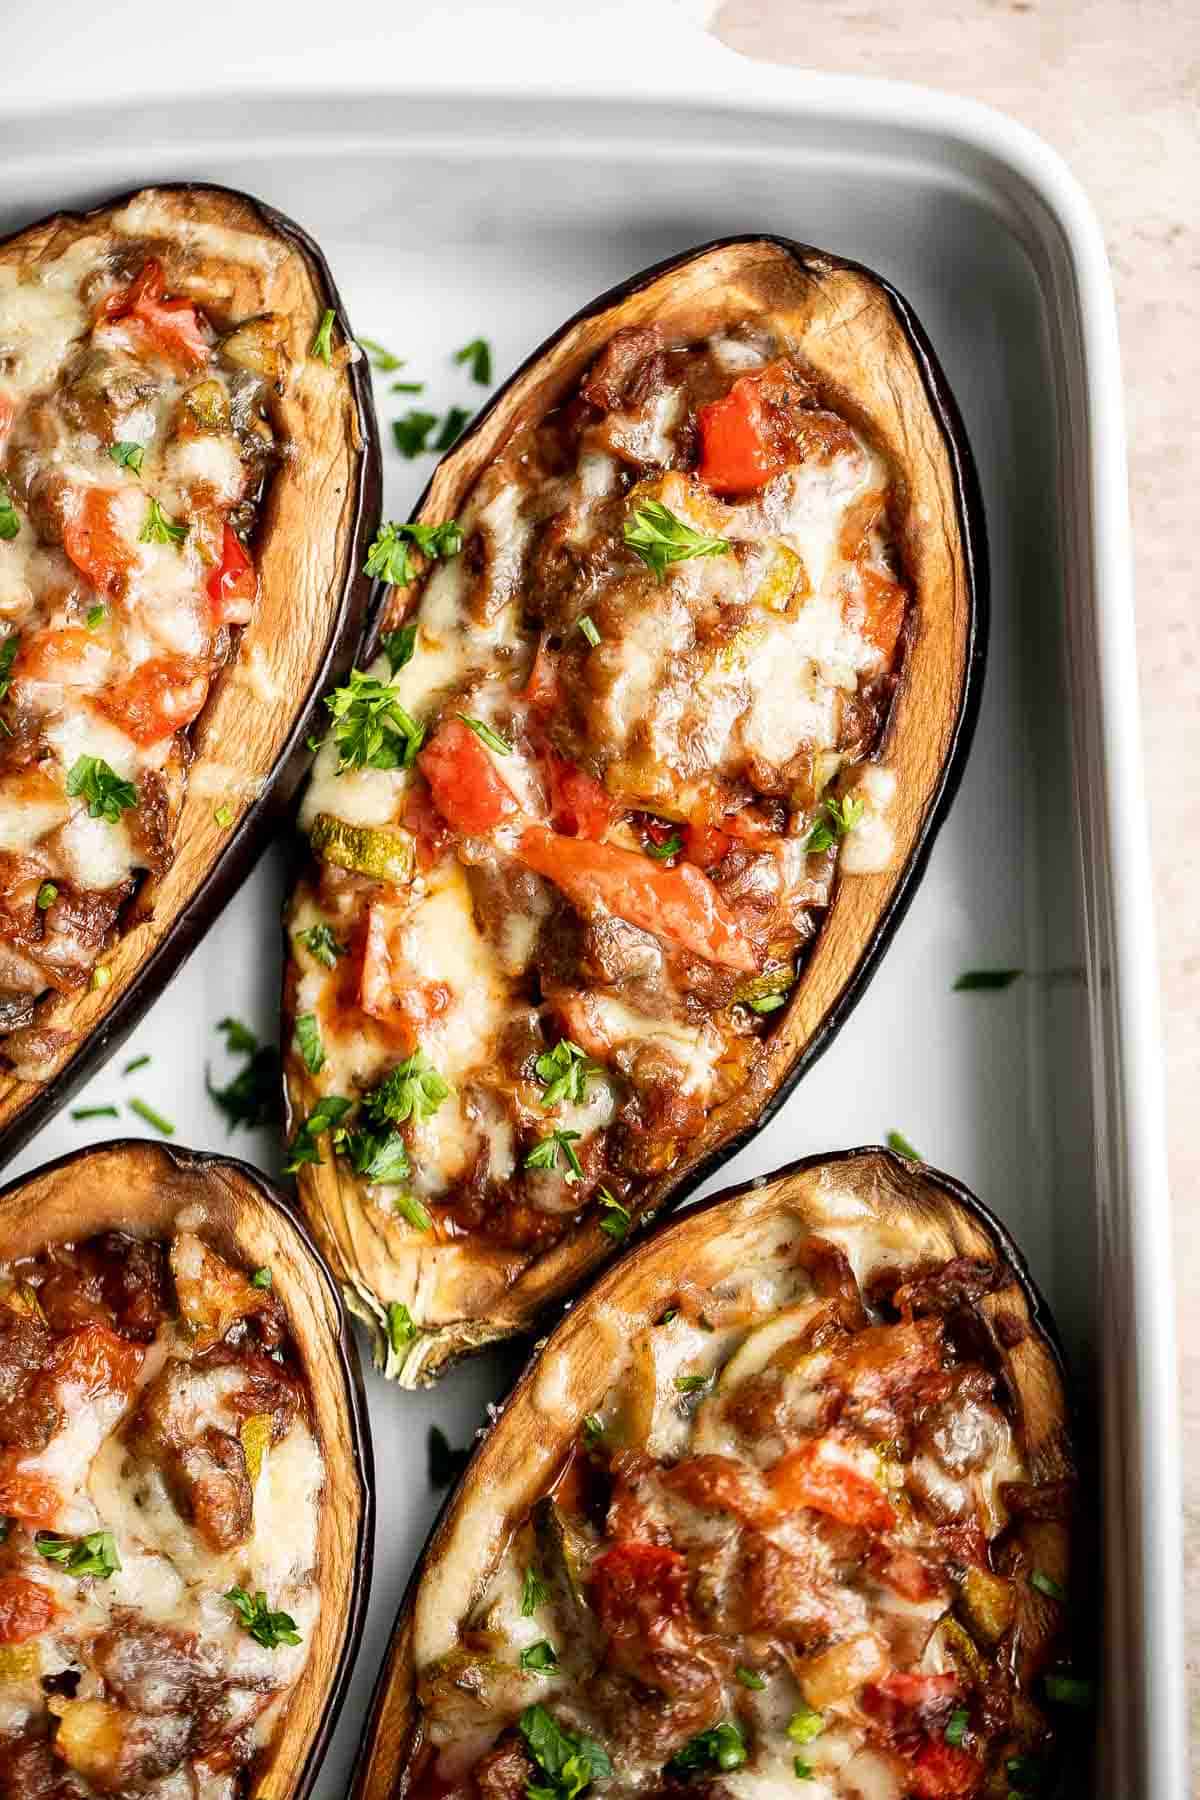
Antipasto skewers with tortellini are a quick, easy, and delicious appetizer with the best parts of a traditional antipasto platter but easier to eat.
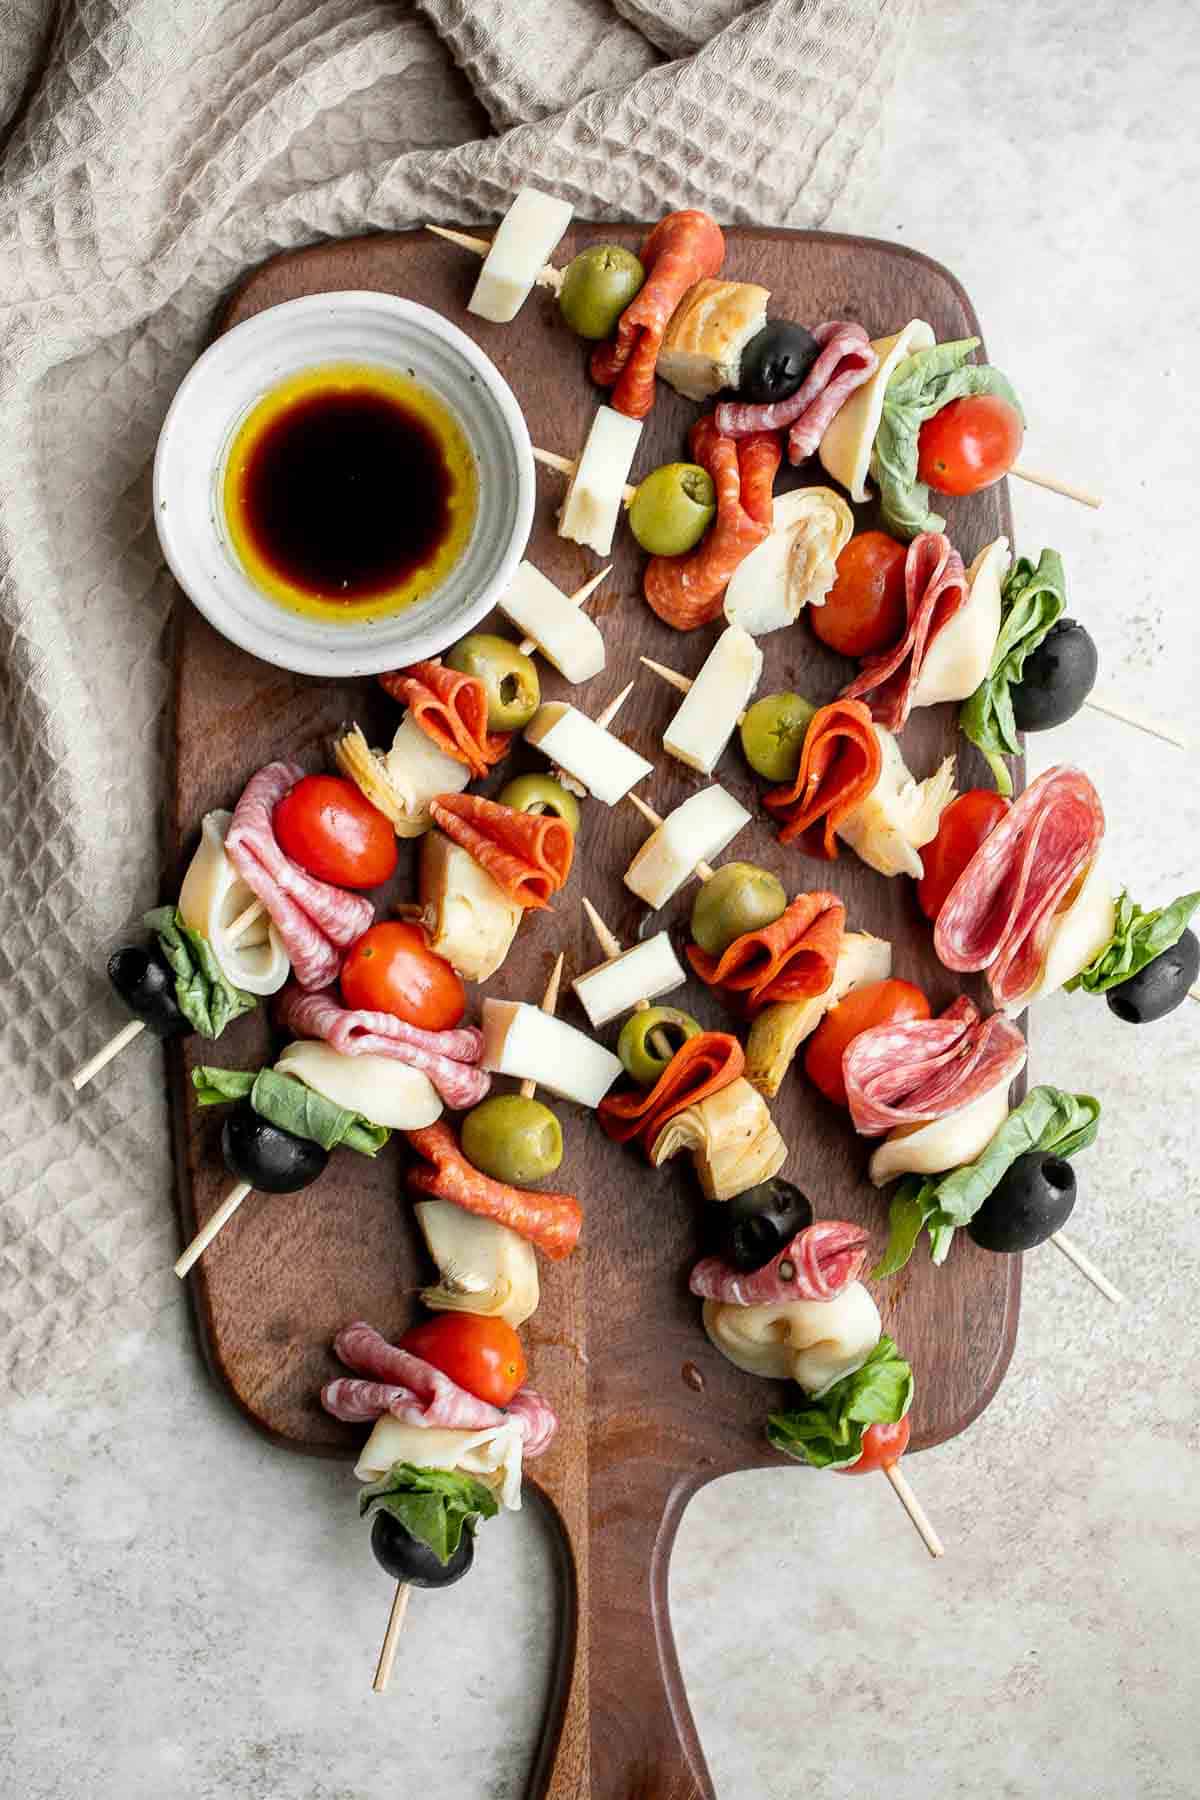
Quick and easy air fryer broccoli is a healthy side dish that takes just six minutes to cook in the air fryer. It's crispy, delicious, and flavorful.
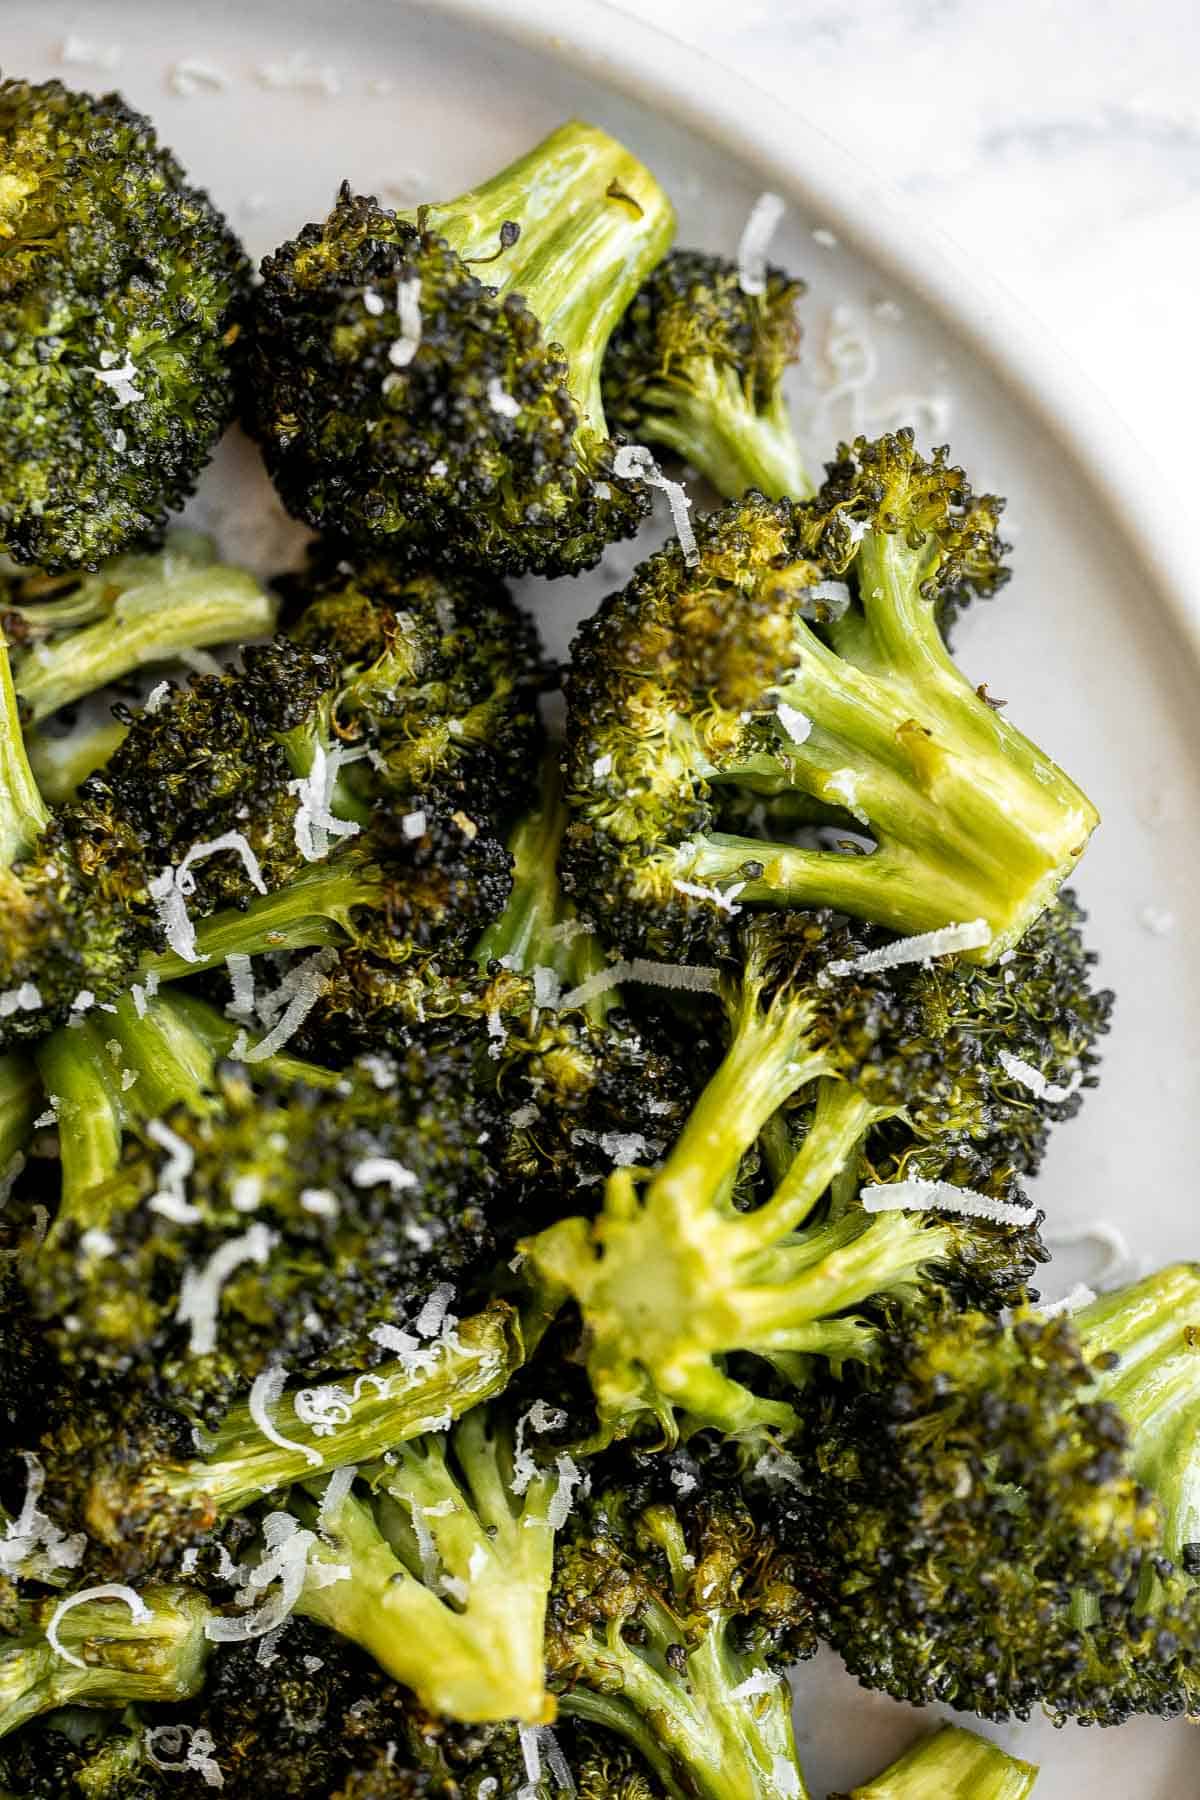
Simple tomato cucumber avocado salad with a delicious lemon vinaigrette is a light and refreshing salad that comes together in literally 5 minutes.
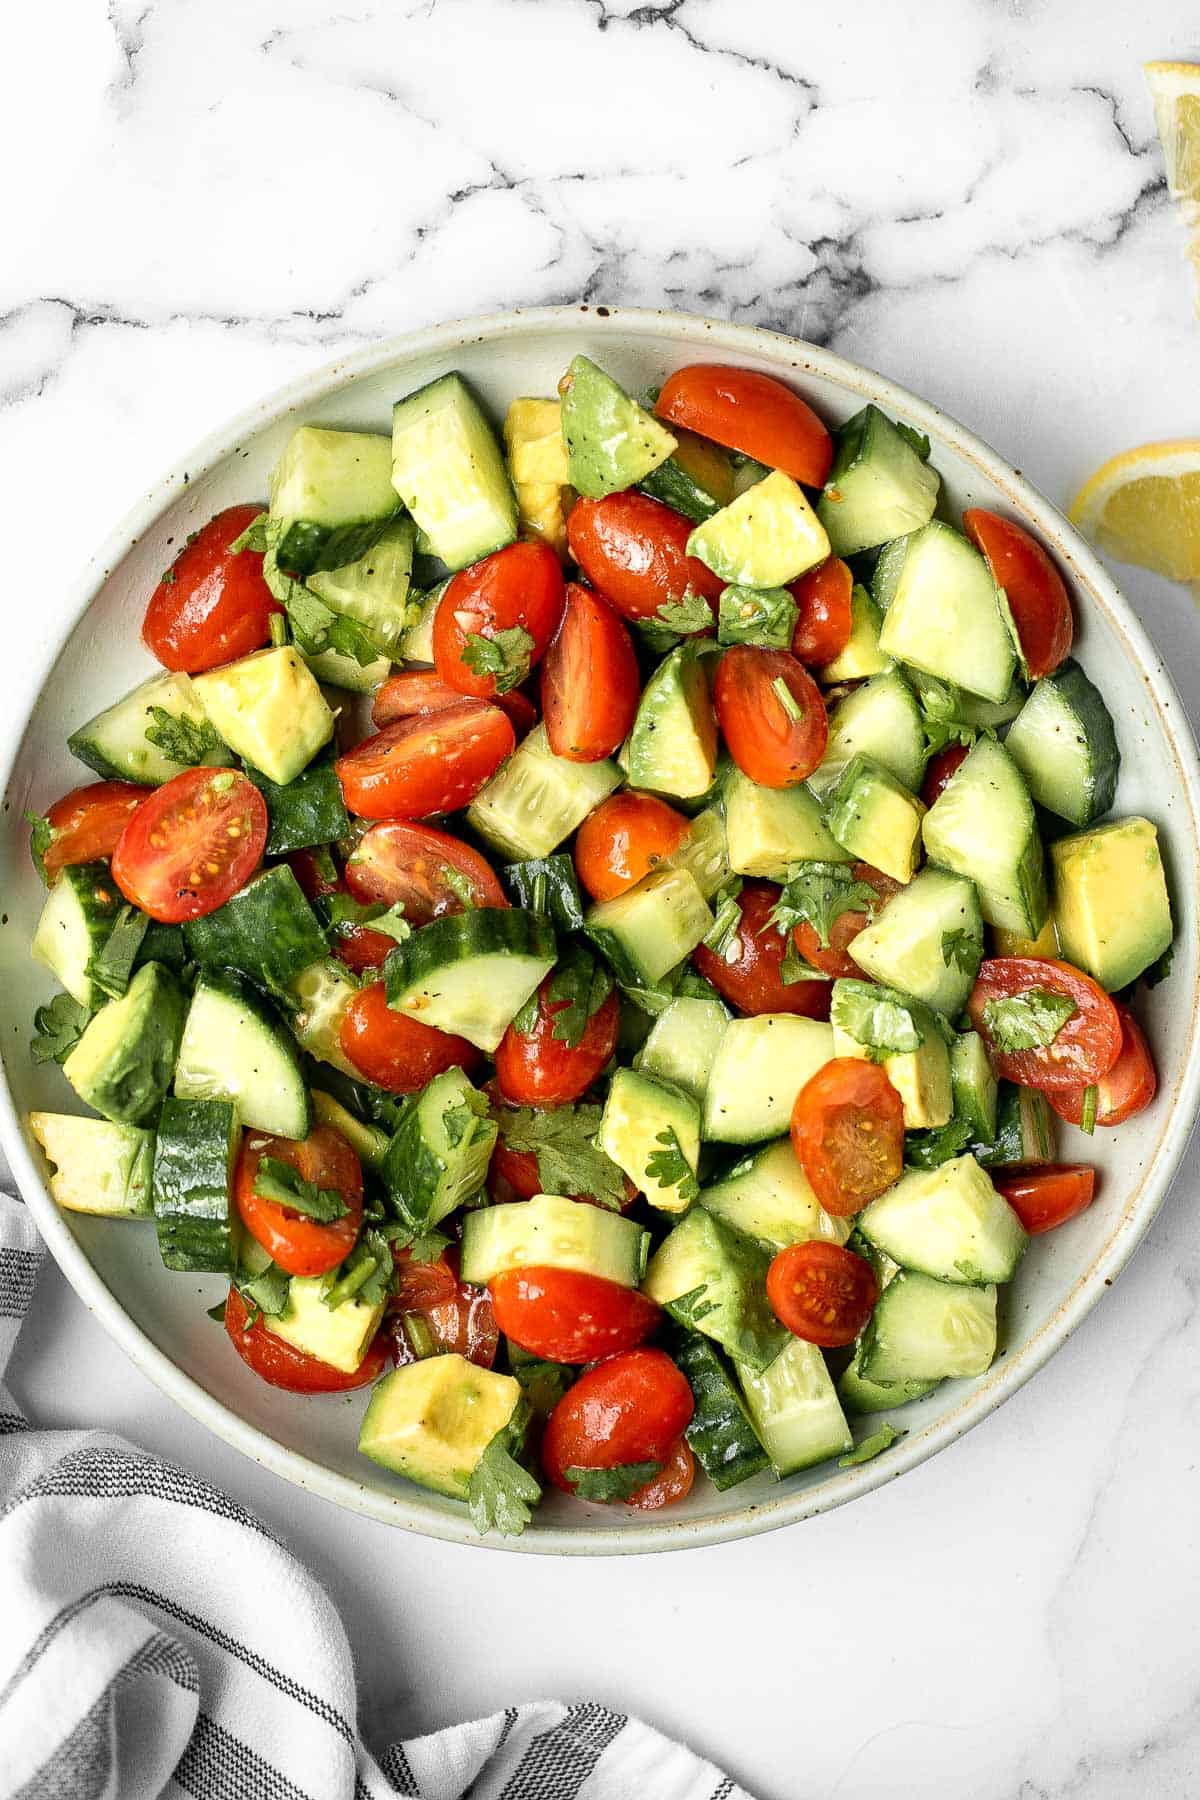
Garlic knots are fluffy on the inside, crispy on the outside, and topped with delicious savory garlic herbed butter that will have you begging for more.
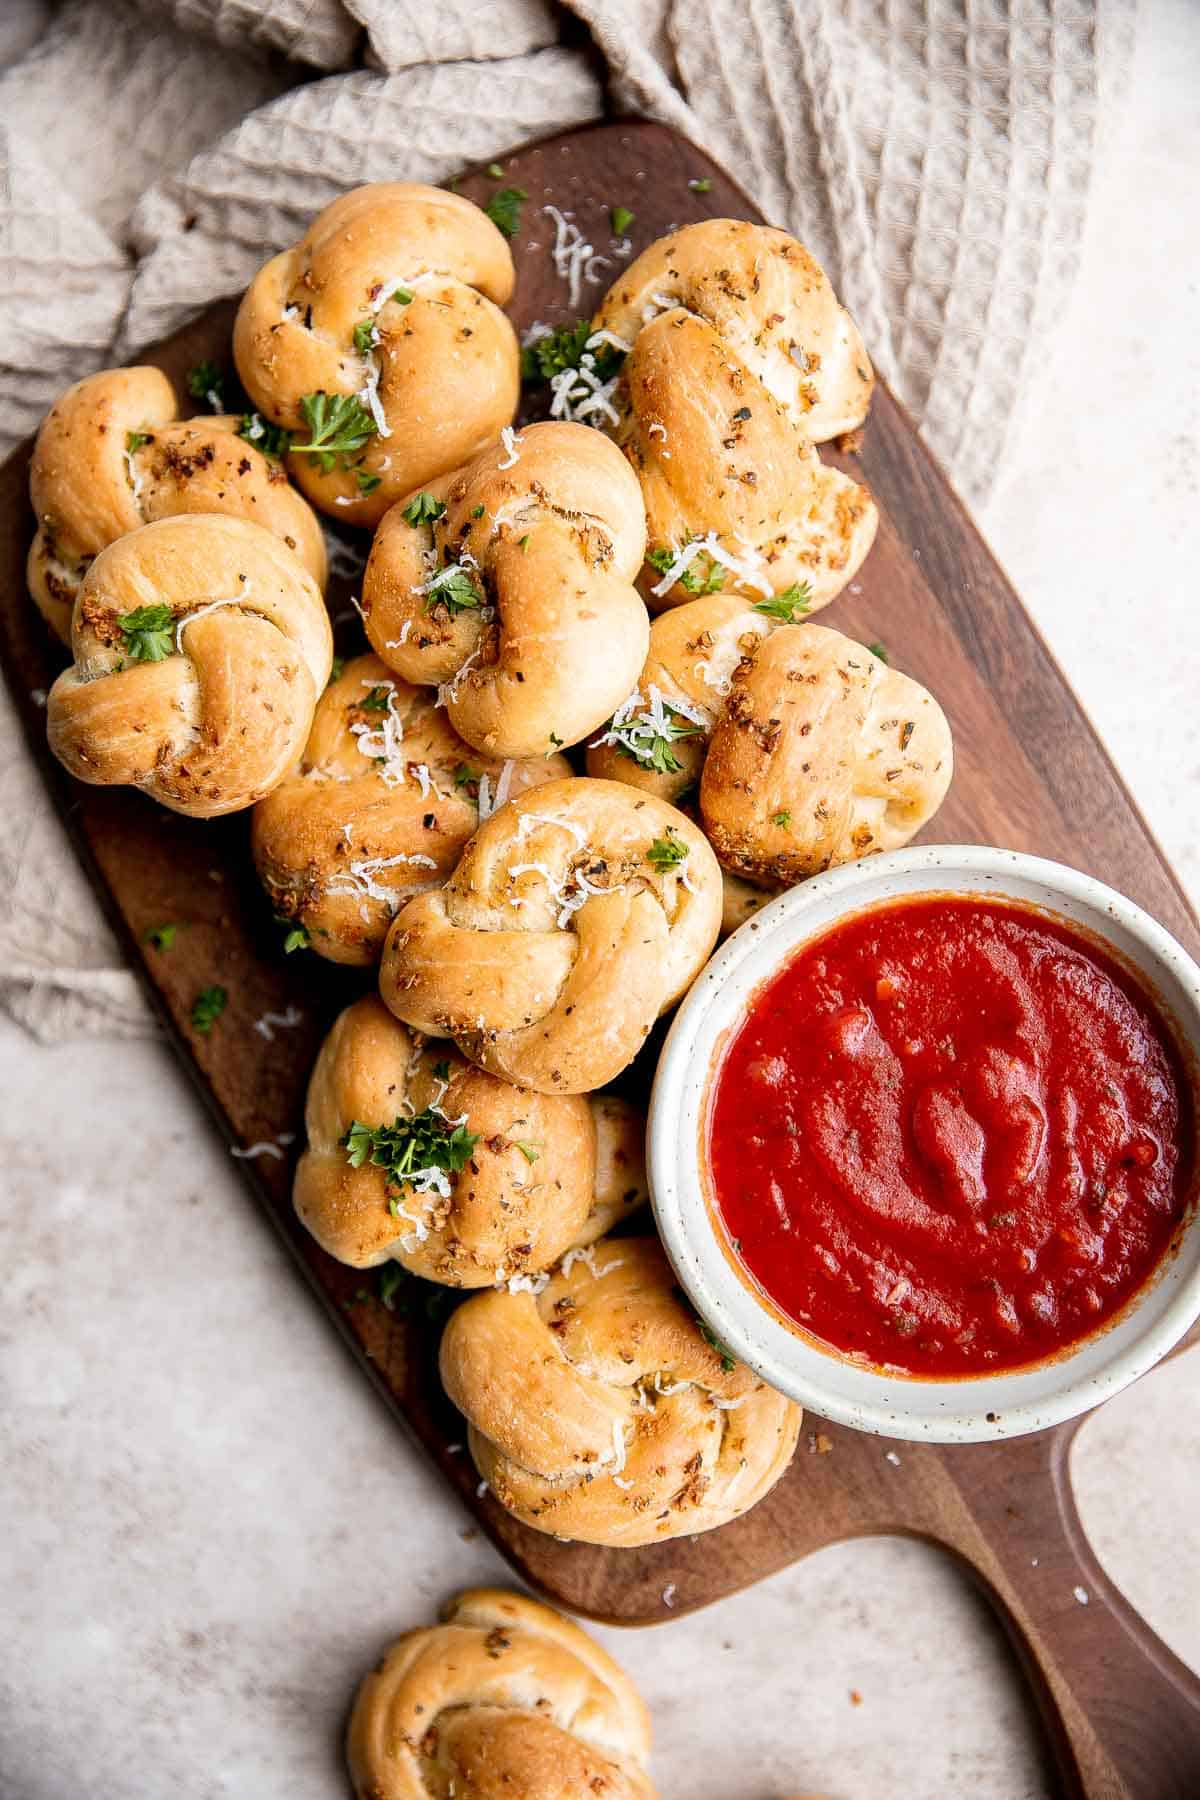
Sautéed Brussels Sprouts are a quick and easy side dish made with just 5 ingredients and ready to serve in only 15 minutes. They're vegan and keto too.

Whipped ricotta crostini is a fancy easy appetizer to make in just minutes or prepare in advance and assemble before serving. A total crowd pleaser.
Creamed spinach is a rich, creamy, and delicious side dish to make this fall. Easy to make ahead and reheats well - perfect for Thanksgiving holiday dinner.
Mediterranean White Bean Salad is loaded with cannellini beans, veggies, feta, and fresh herbs, tossed in a homemade Greek dressing. Perfect for meal prep!
Easy small batch ciabatta rolls are fluffy and airy with a perfect crunchy, crackly crust. They take only 10 minutes to prepare and require no kneading.
Pesto green beans is a simple side dish that is quick and easy to make in under 10 minutes, tossed in buttery toasted walnuts and pesto. So delicious.
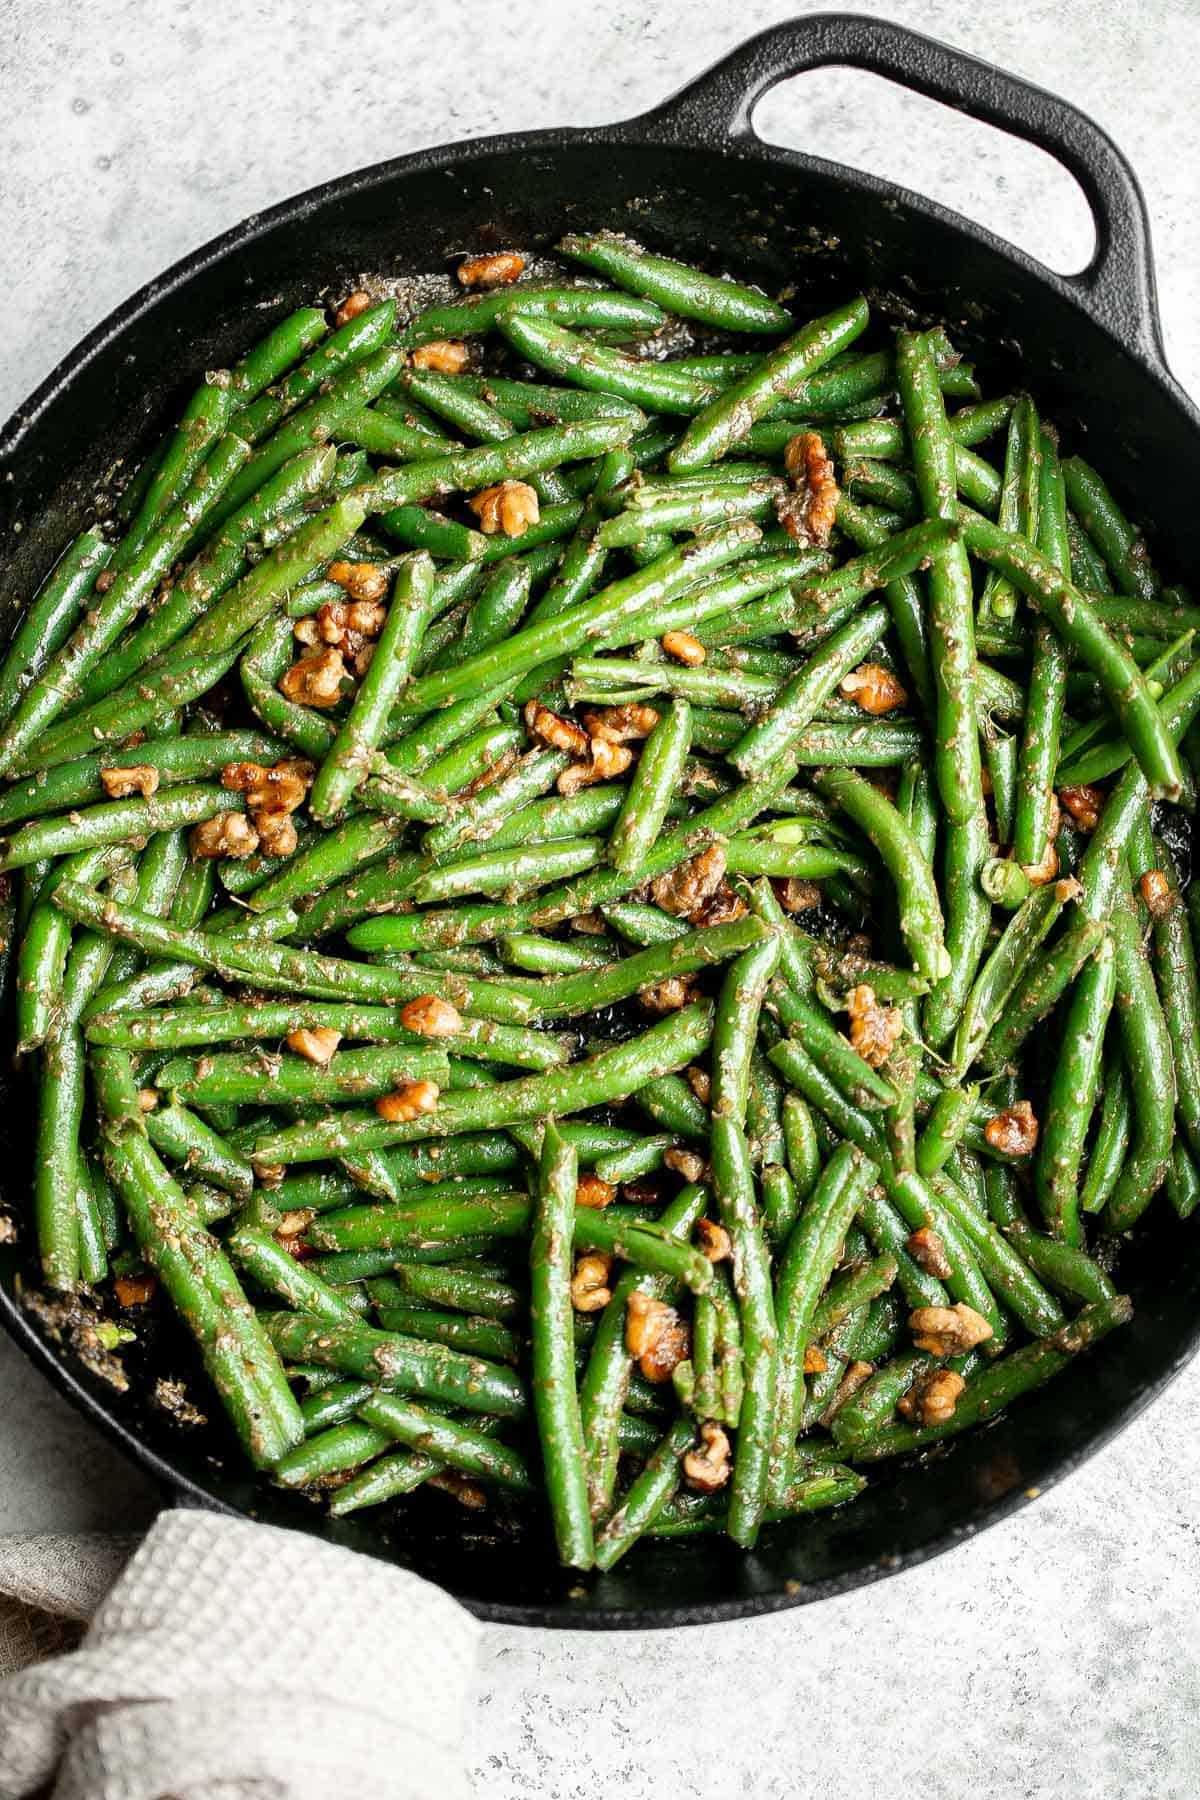
Parmesan Crusted Brussels Sprouts
Parmesan crusted Brussels sprouts are a quick, easy, delicious side dish that's perfectly crispy outside and soft and tender inside. Ready in 30 minutes.

Vegetarian stuffed mushrooms are a delicious, flavorful, healthy, and nutritious appetizer. Plus, quick and easy to make in under 30 minutes including prep!
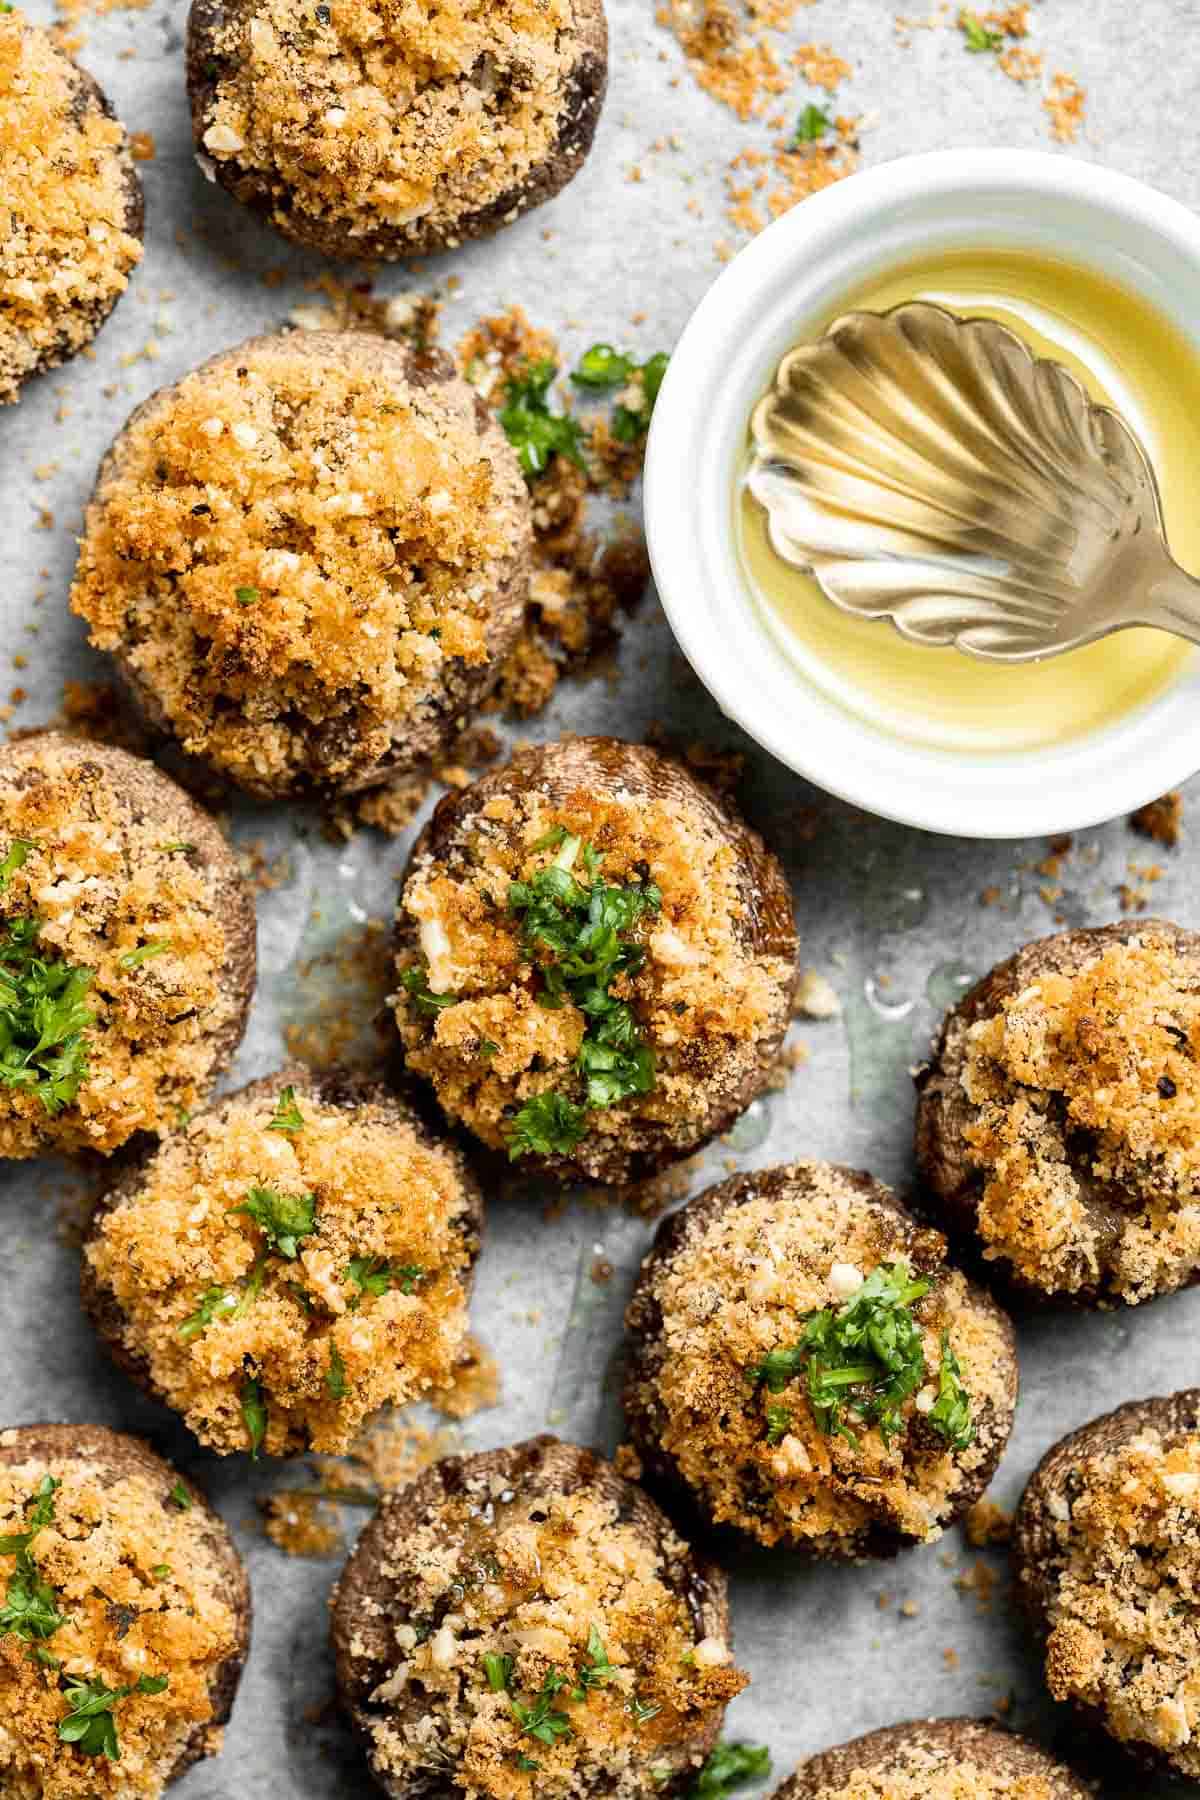
Shaved Brussels Sprout Salad is a delicious fall salad packed with fresh sprouts, apples, cranberries, and crunchy seeds, tossed in a homemade vinaigrette.
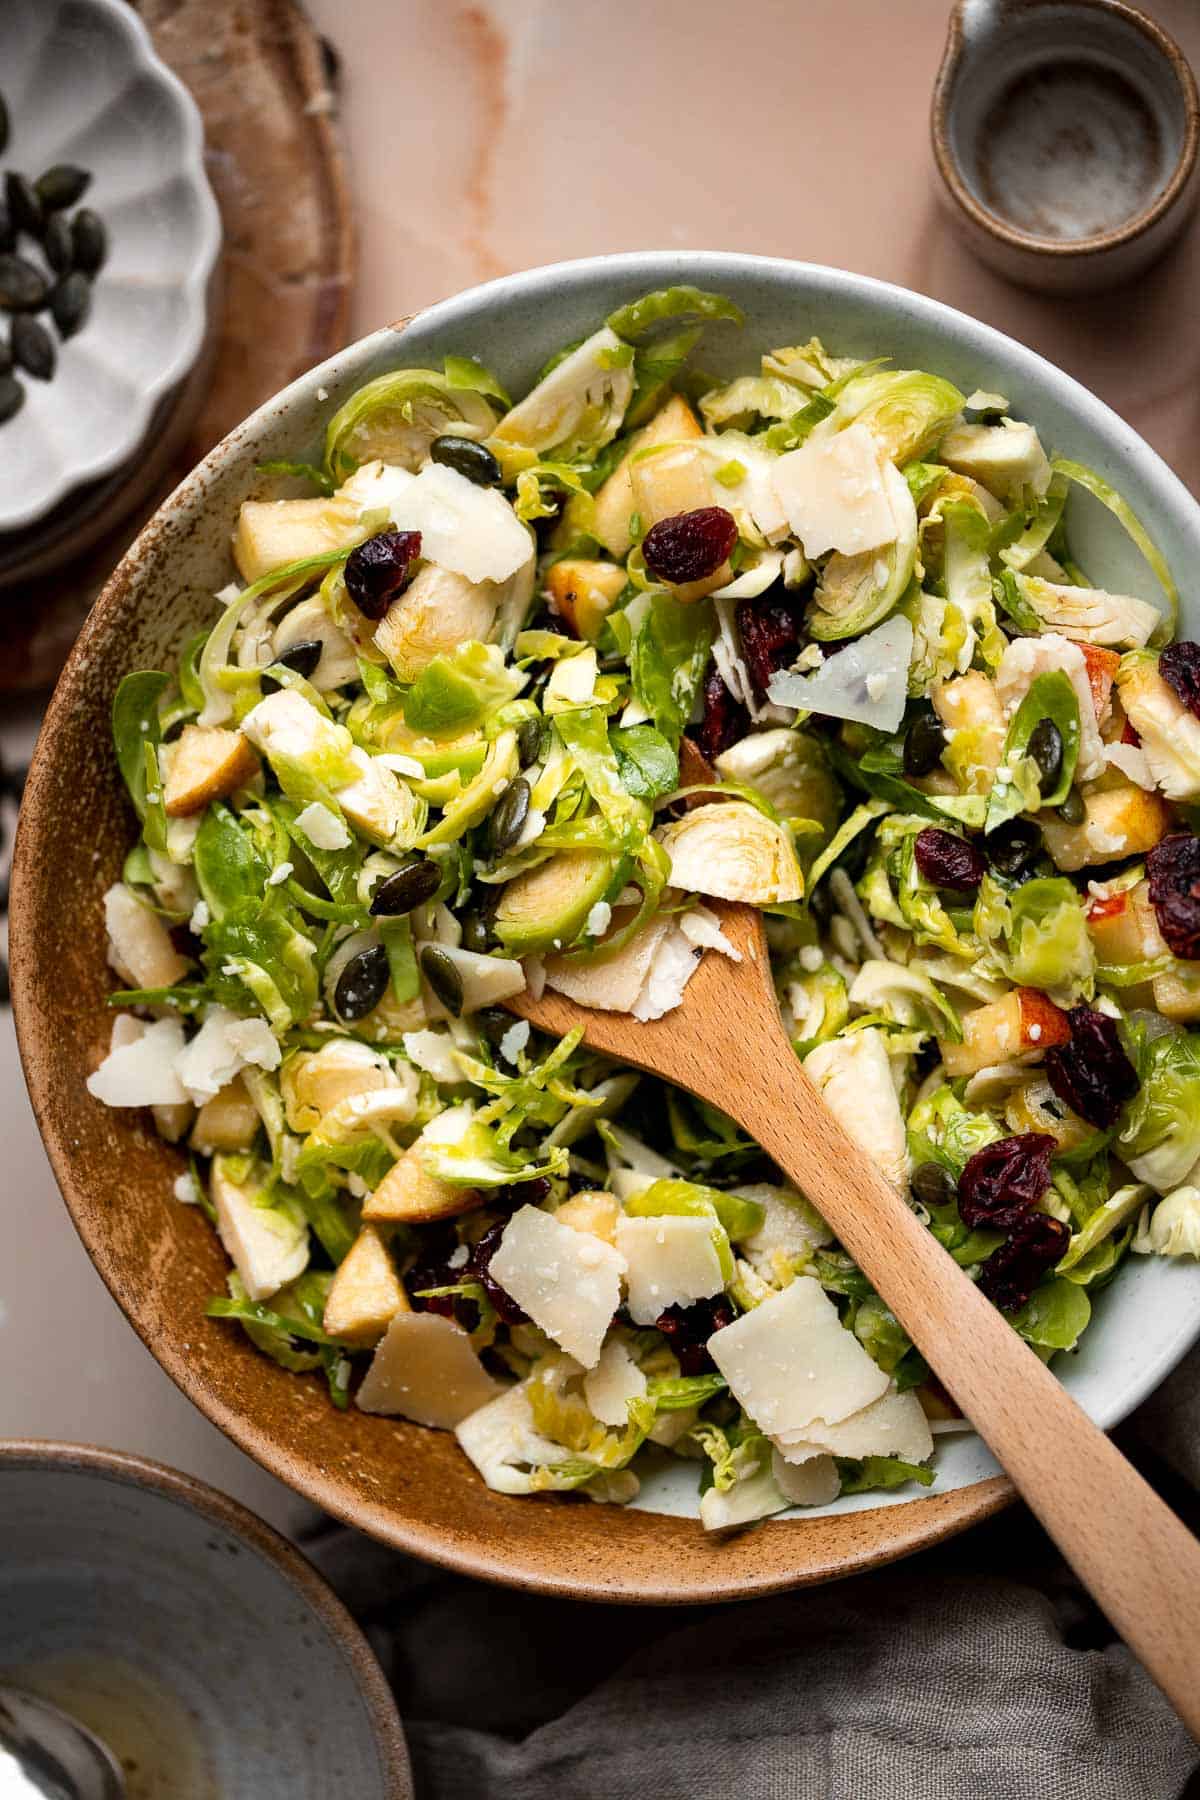
Cheesy Baked Zucchini with Marinara
Cheesy Baked Zucchini with Marinara will save your weeknight dinner routine (and the kids love it too!). It's low carb, vegetarian, gluten-free, and keto.
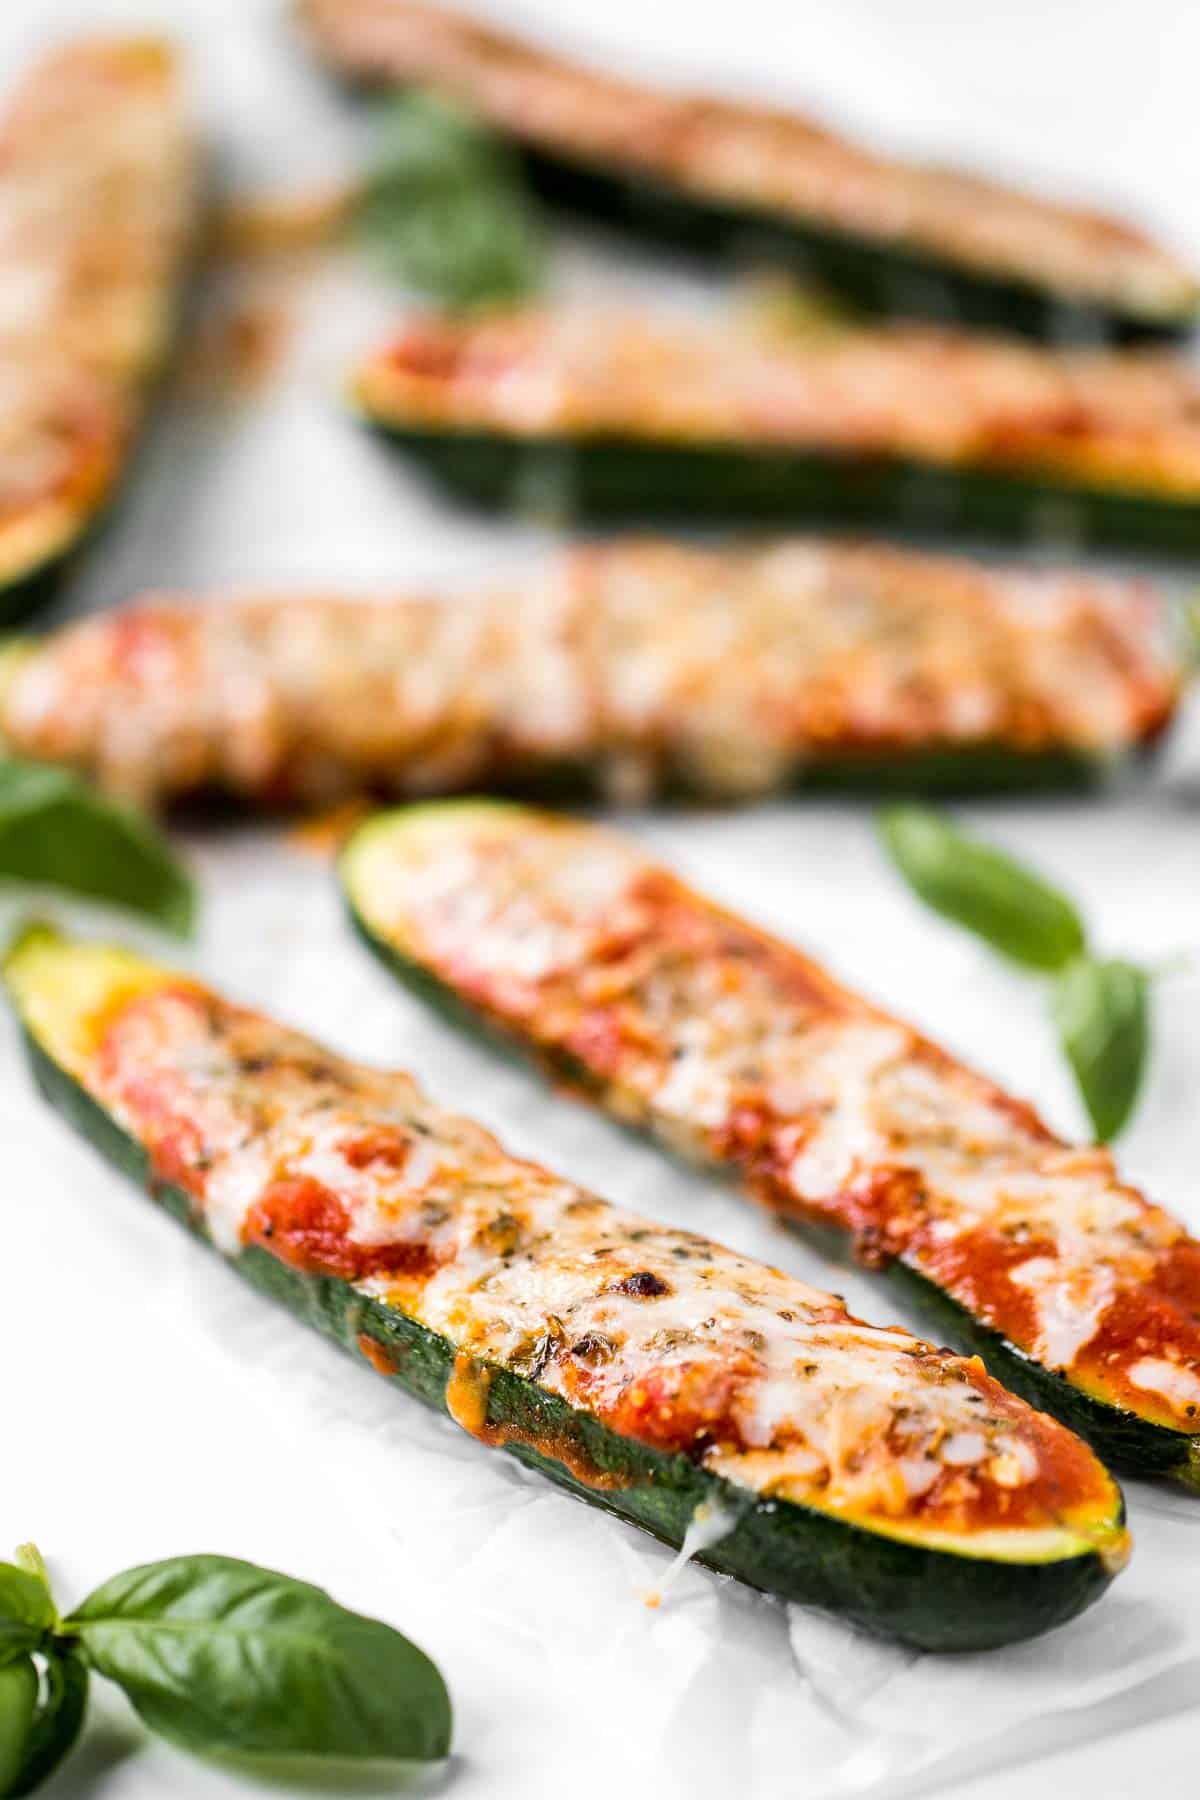
Pull apart garlic bread is fluffy, buttery, flavourful, melts in your mouth, and tears easily for optimal sharing. You don't need any other bread at the dinner table.

Prosciutto Wrapped Asparagus and Melon
Prosciutto wrapped asparagus and melon are salty, sweet, and juicy. They are easy to make with a handful of simple ingredients, then cooked on the grill.
Green Beans Almondine is buttery, garlicky, and nutty. This classic French side dish is quick and easy to make, and loaded with flavor and texture.
Mediterranean Chickpea Wedge Salad
Mediterranean chickpea wedge salad combines chickpeas, crunchy vegetable toppings, and hummus dressing for a delicious deconstructed falafel flavour.
Whipped feta crostini with a herby olive topping is quick and easy snack or appetizer that is ready in less than 20 minutes - or 10 minutes if you're fast.
Buttery sautéed garlic mushrooms are silky smooth with an incredible caramelization and earthy rich flavour. A simple side dish in under 15 minutes.
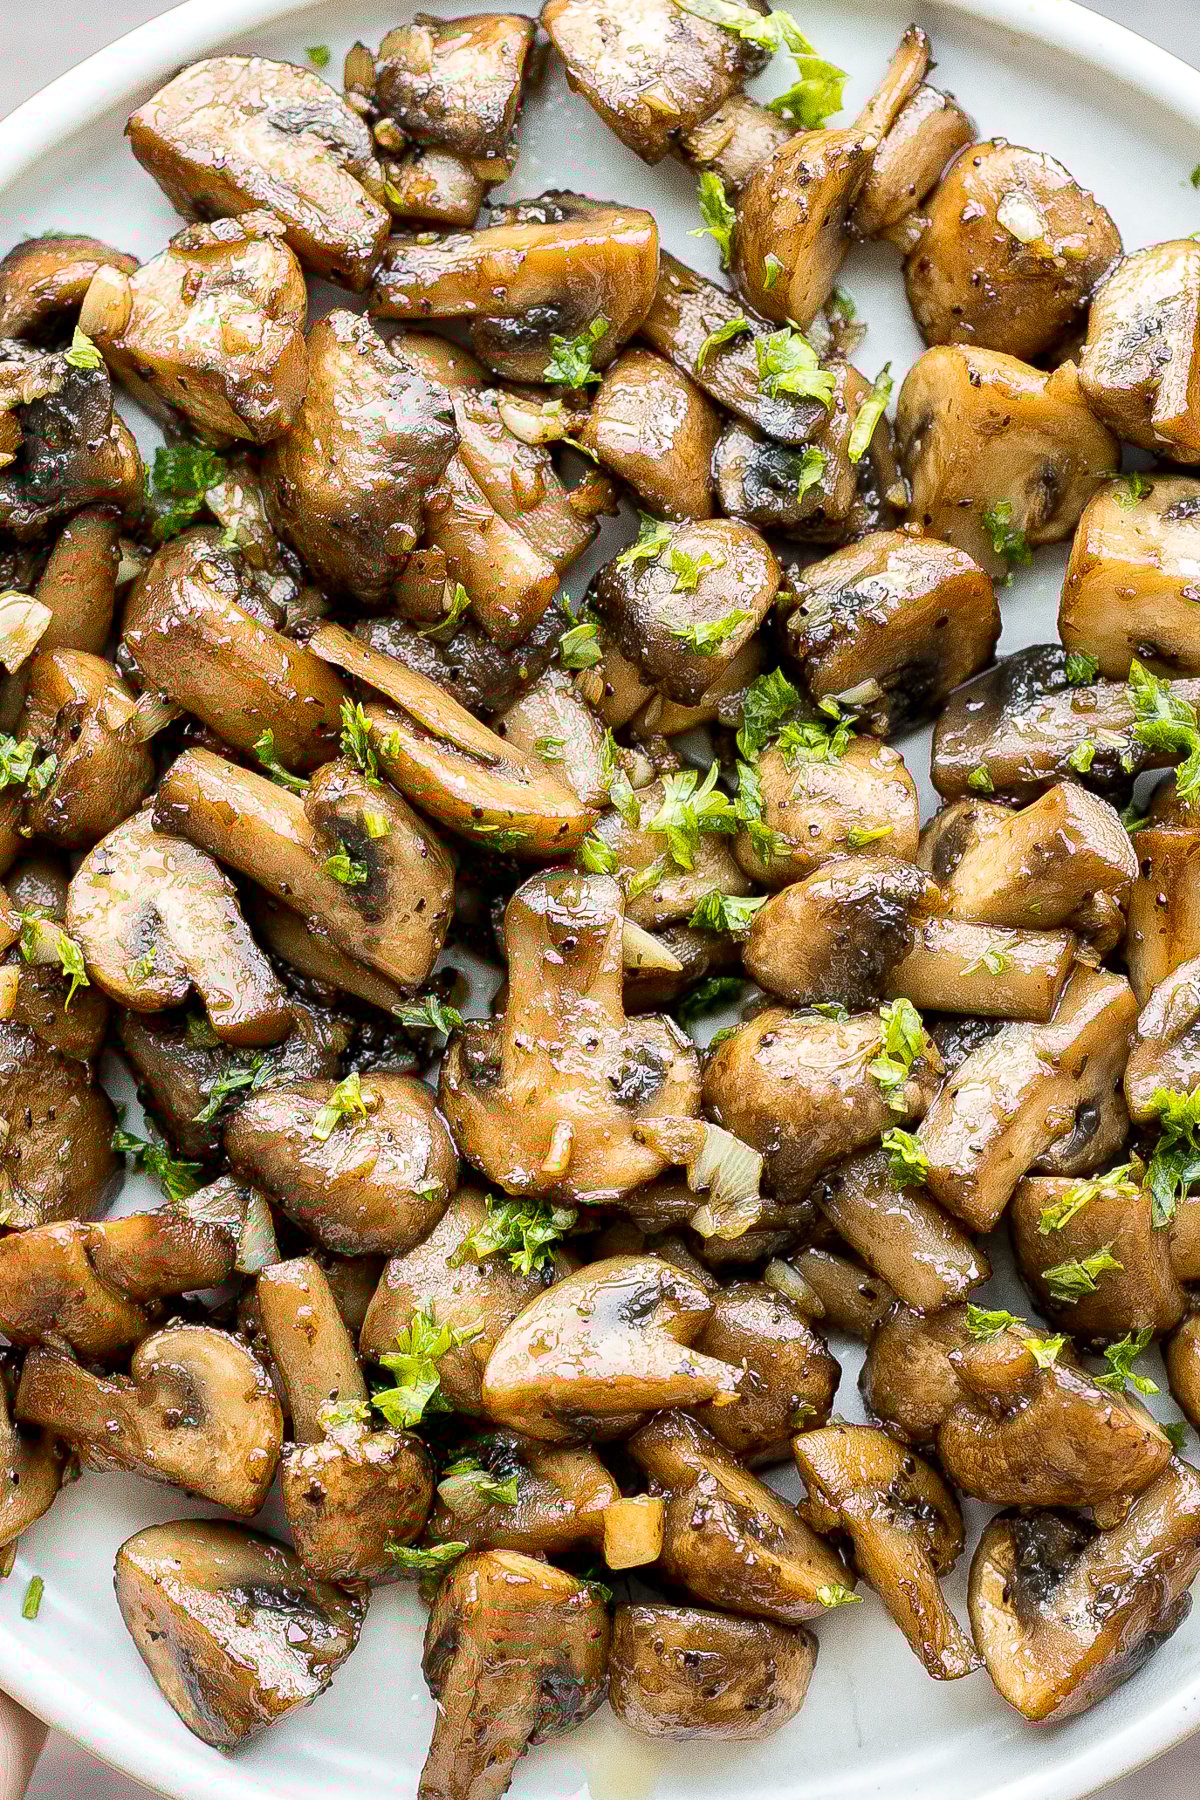
Bacon Wrapped Brussels Sprouts
Bacon wrapped brussels sprouts are the sweet, savory, and salty appetizer that you need at your next holiday gathering this fall. Simple and easy to make.

Classic Caesar Salad is fresh, crisp, delicious, and flavorful. With three simple ingredients tossed in a creamy Caesar dressing, it's ready in minutes.
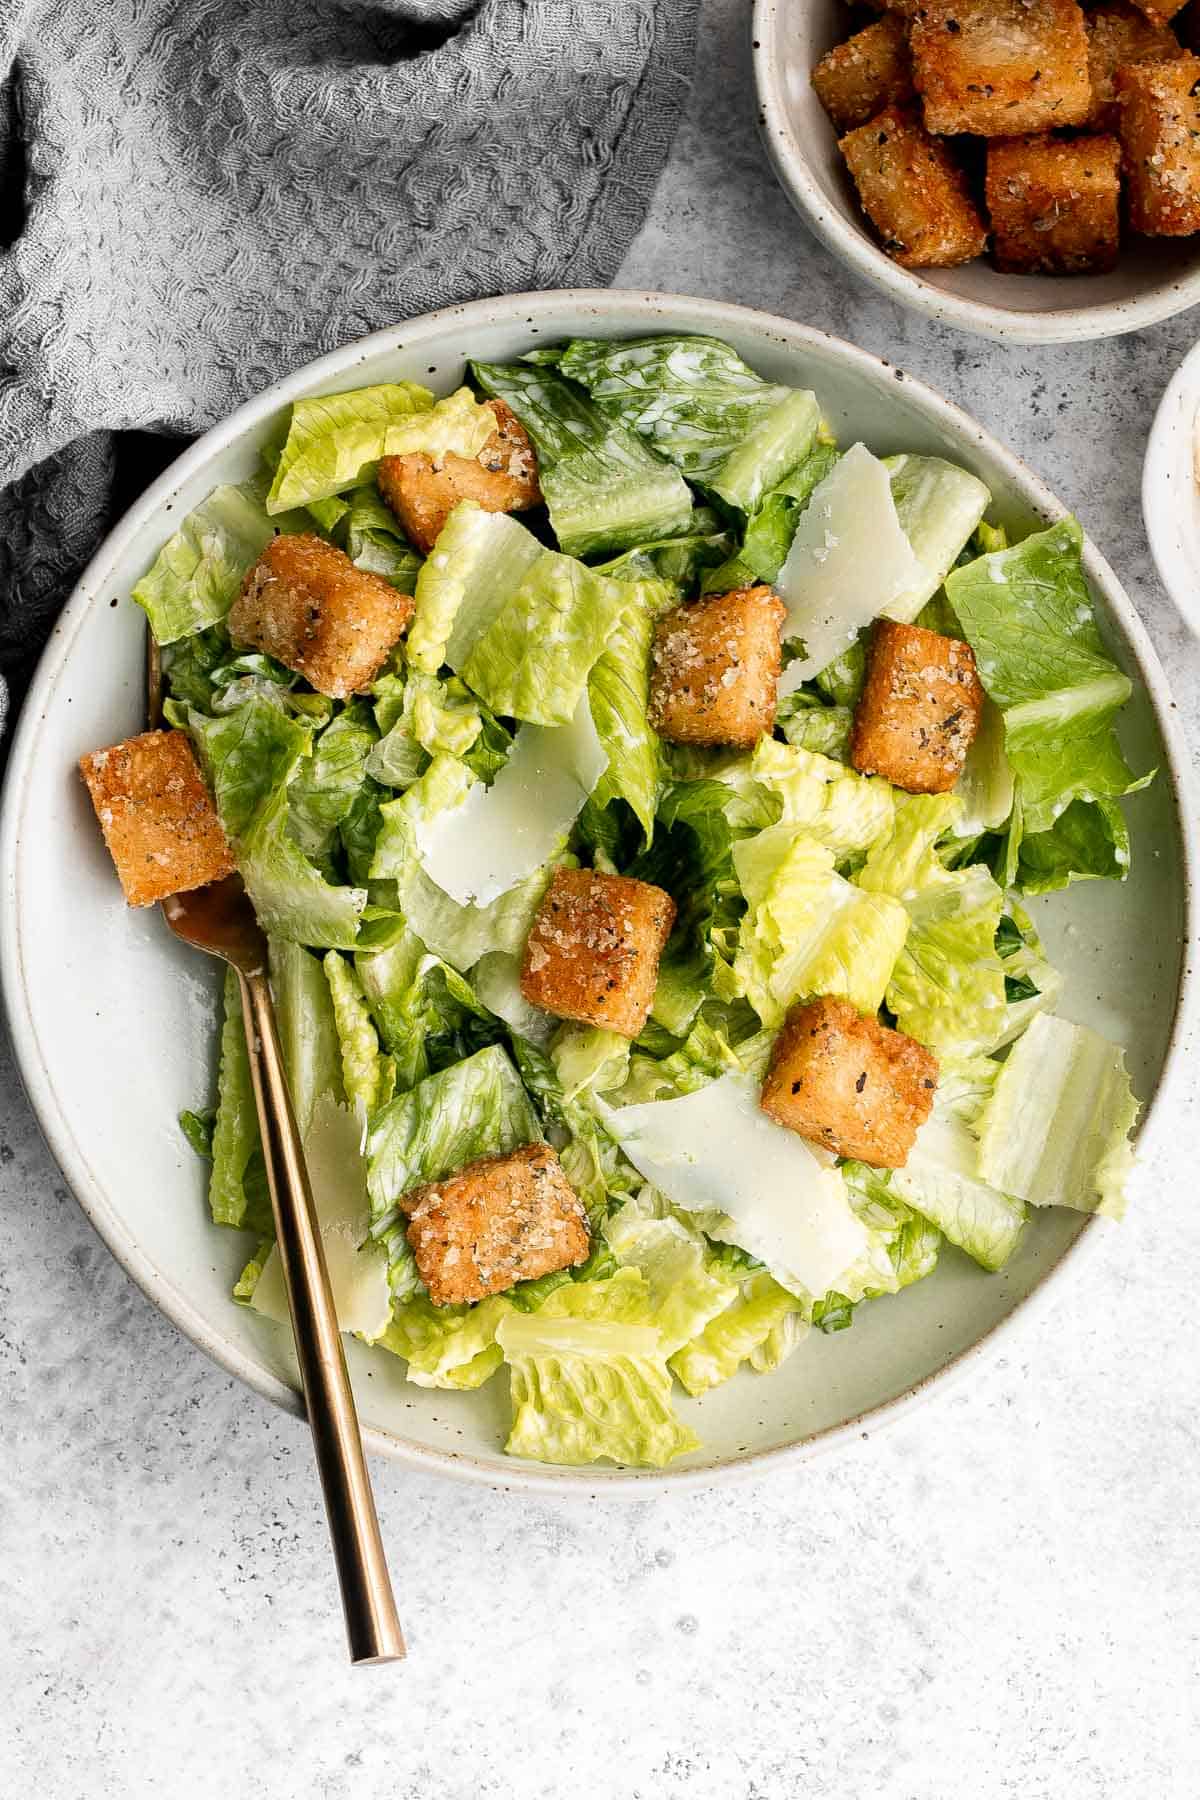
More Side Dish Recipes
- 25 Side Dishes for Soup
- 25 Side Dishes for Chicken
- 40 Vegetable Side Dishes
- 25 Side Dishes for Salmon
- 25 Side Dishes for Steak
- 50 Best Finger Foods
Did You Make Any of These Easy Side Dishes for Pasta?
Please leave a comment and rating below, and let me know what you thought of this round up of pasta side dishes. Be sure to snap a picture and tag me on Instagram @aheadofthyme or share it on the Pinterest pin so that I can follow along.
HUNGRY FOR MORE? Don't forget to sign up for my email newsletter so that you don't miss any recipes. You can also follow along on Instagram and Pinterest for more recipe updates.
Matcha Latte
Homemade Matcha Latte is an earthy green tea drink topped with warm, frothy milk and can be sweetened to your liking for a perfectly balanced, cozy drink. It's creamy, light, and delicious. It's good for you too - loaded with antioxidants and helps benefit overall health.
Making matcha tea at home is so much easier than you think! It takes just five minutes and three ingredients to create the perfect green tea latte to start your day or power you through the afternoon.
What is Matcha?
Matcha is a type of green tea that is grown and produced in Japan. The green tea leaves are ground into a fine powder and consumed completely, unlike typical green tea that is brewed in the leaves which are not consumed.
Matcha has a unique, slightly bitter taste and is rich in antioxidants and other beneficial compounds.
Why You'll Love this Matcha Latte
- It's healthy. Matcha has numerous health benefits! It's loaded with antioxidants and can help liver, heart, and brain health. In some studies, it has even been linked to preventing cancer.
- Easy to make at home. You will be pleasantly surprised at how easy it is to make matcha tea lattes at home. Simply whisk the matcha with some water, add more water, and top with frothed milk.
- The foamy and creamy texture. Arguably the best part of a latte is the texture! A warm, creamy drink with a thick layer of foam is comforting and feels like a hug in a cup. This green tea latte has both, plus a balanced, sweet-but-not-sugary taste for the ultimate warm beverage.
- No artificial ingredients. The few ingredients in this matcha tea are all derived from natural sources - just matcha, hot water, and milk of your choice. No processed sugar, preservatives, or other complicated ingredients here!
- It's a great alternative to coffee. A matcha latte is a great little pick-me-up treat that you can reach for when you're just not feeling coffee, and easy enough that you could make it every morning at home instead of going out to a fancy cafe.
Ingredient Notes
To make this easy Matcha Latte at home, you will need the following ingredients (full measurements in recipe card below):
- matcha powder - use unsweetened matcha powder to control the amount of added sugar in your drink, and make sure to use a high-quality matcha powder (at least culinary grade matcha powder).
- hot water
- maple syrup - this is completely optional, depending on how sweet you like your lattes. You can also use honey, simple syrup, or agave in place of the maple syrup if you prefer. If you like your matcha less sweet, you can reduce the amount of syrup or omit it altogether.
- milk - use the milk of your choice. Both dairy and non-dairy options like almond, coconut, soy, or oat milk will work well in this matcha latte recipe.
You will also need a cup, bamboo whisk (or regular whisk), cooking pot, and a milk frother, French press, or whisk.
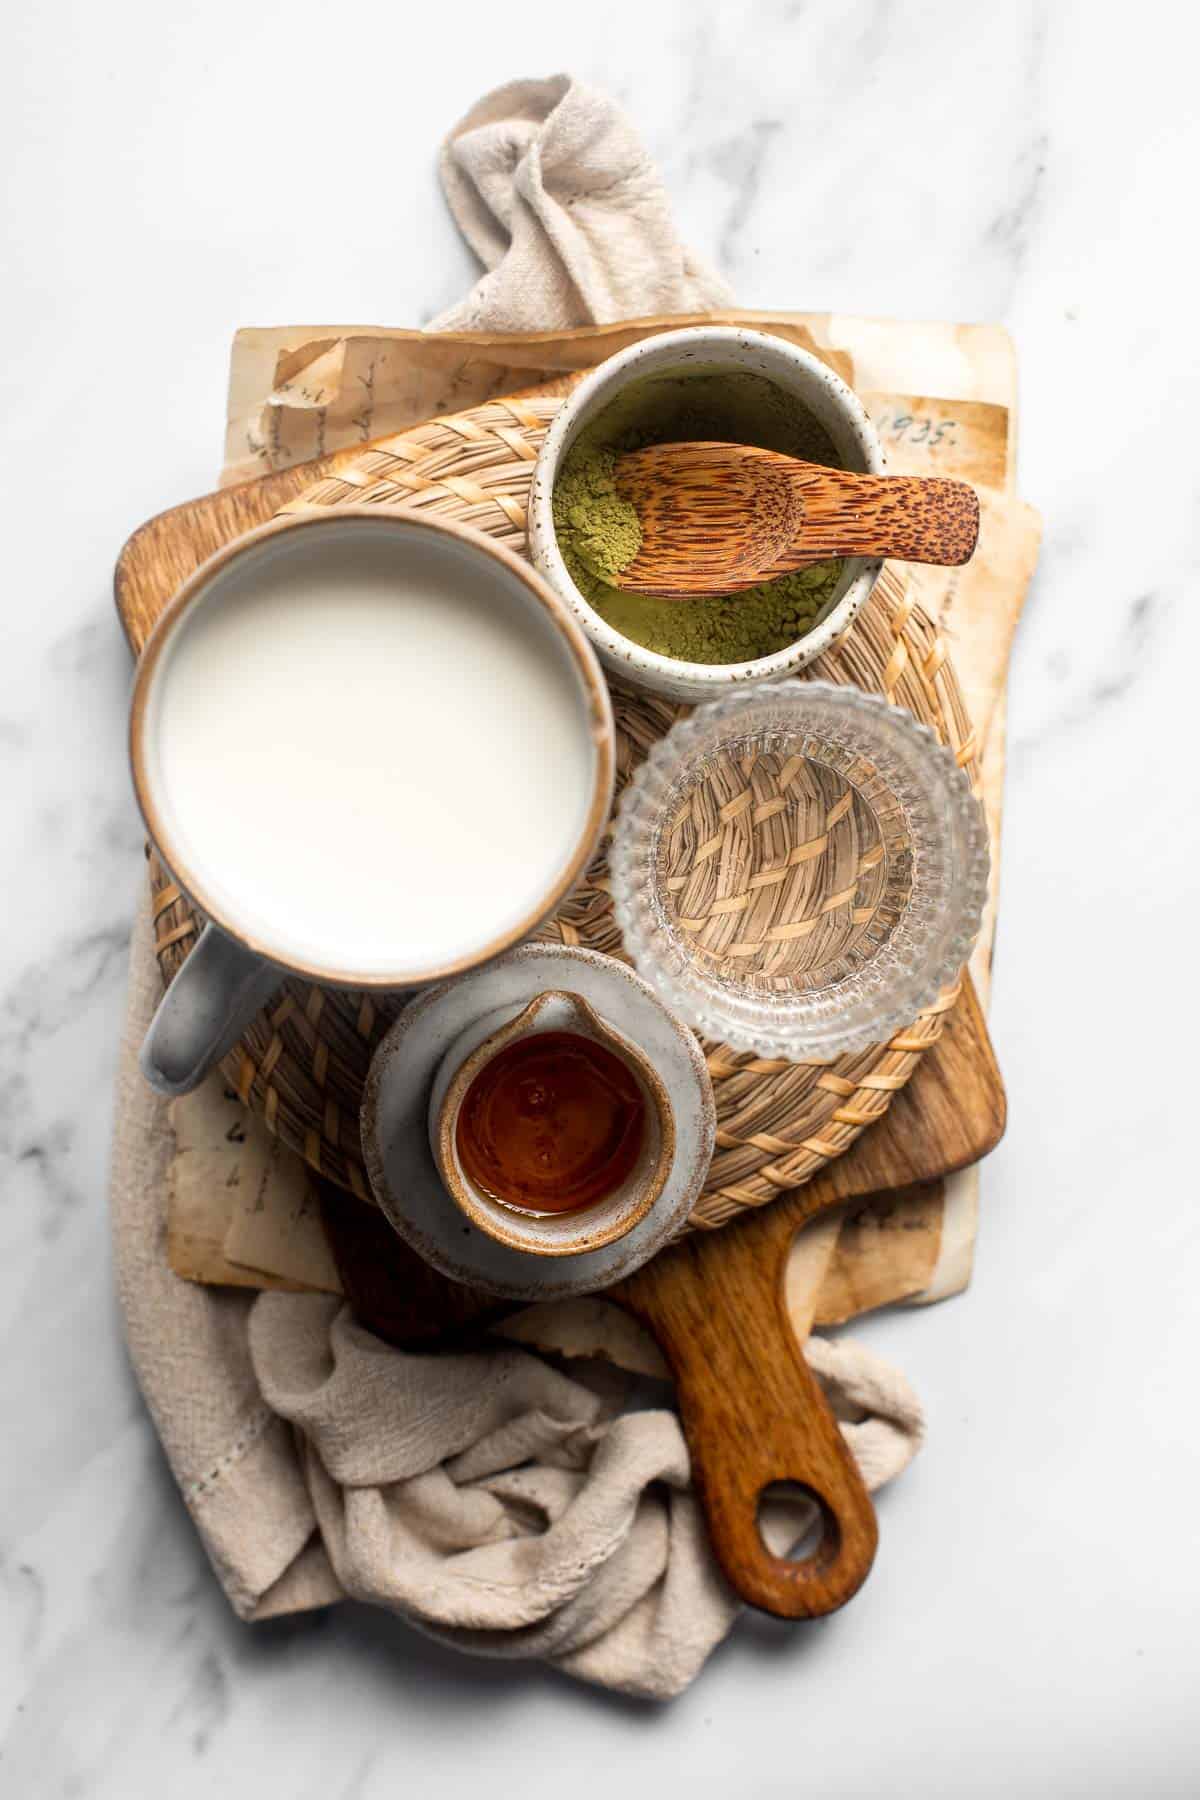
How to Make the Best Matcha Latte
- Whisk matcha. In a cup or measuring cup, add matcha with 2 tablespoons of the water. Use a bamboo whisk (chasen) or regular to whisk to whisk the mixture into a paste. I recommend moving the whisk up and down in a "W" shape to break apart the matcha clumps rather than in circles which isn't as effective.
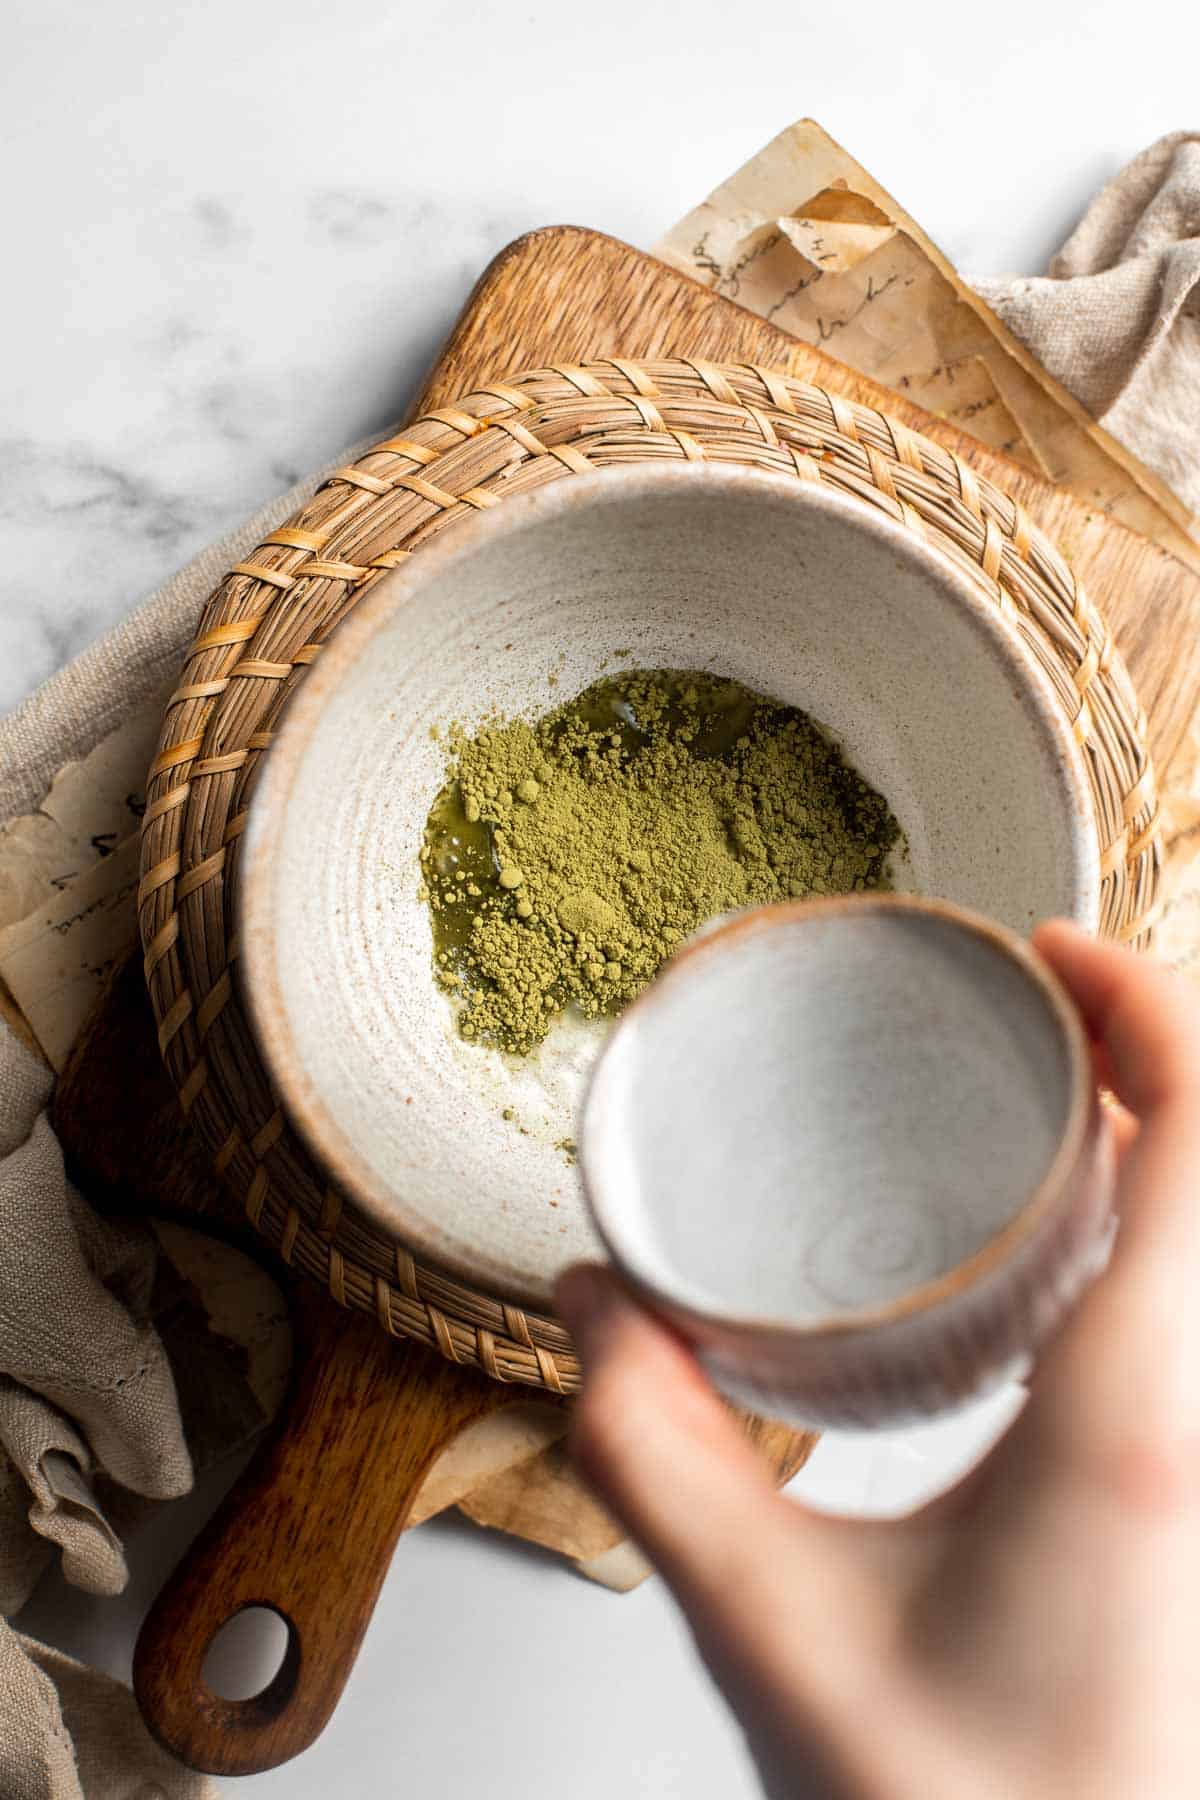
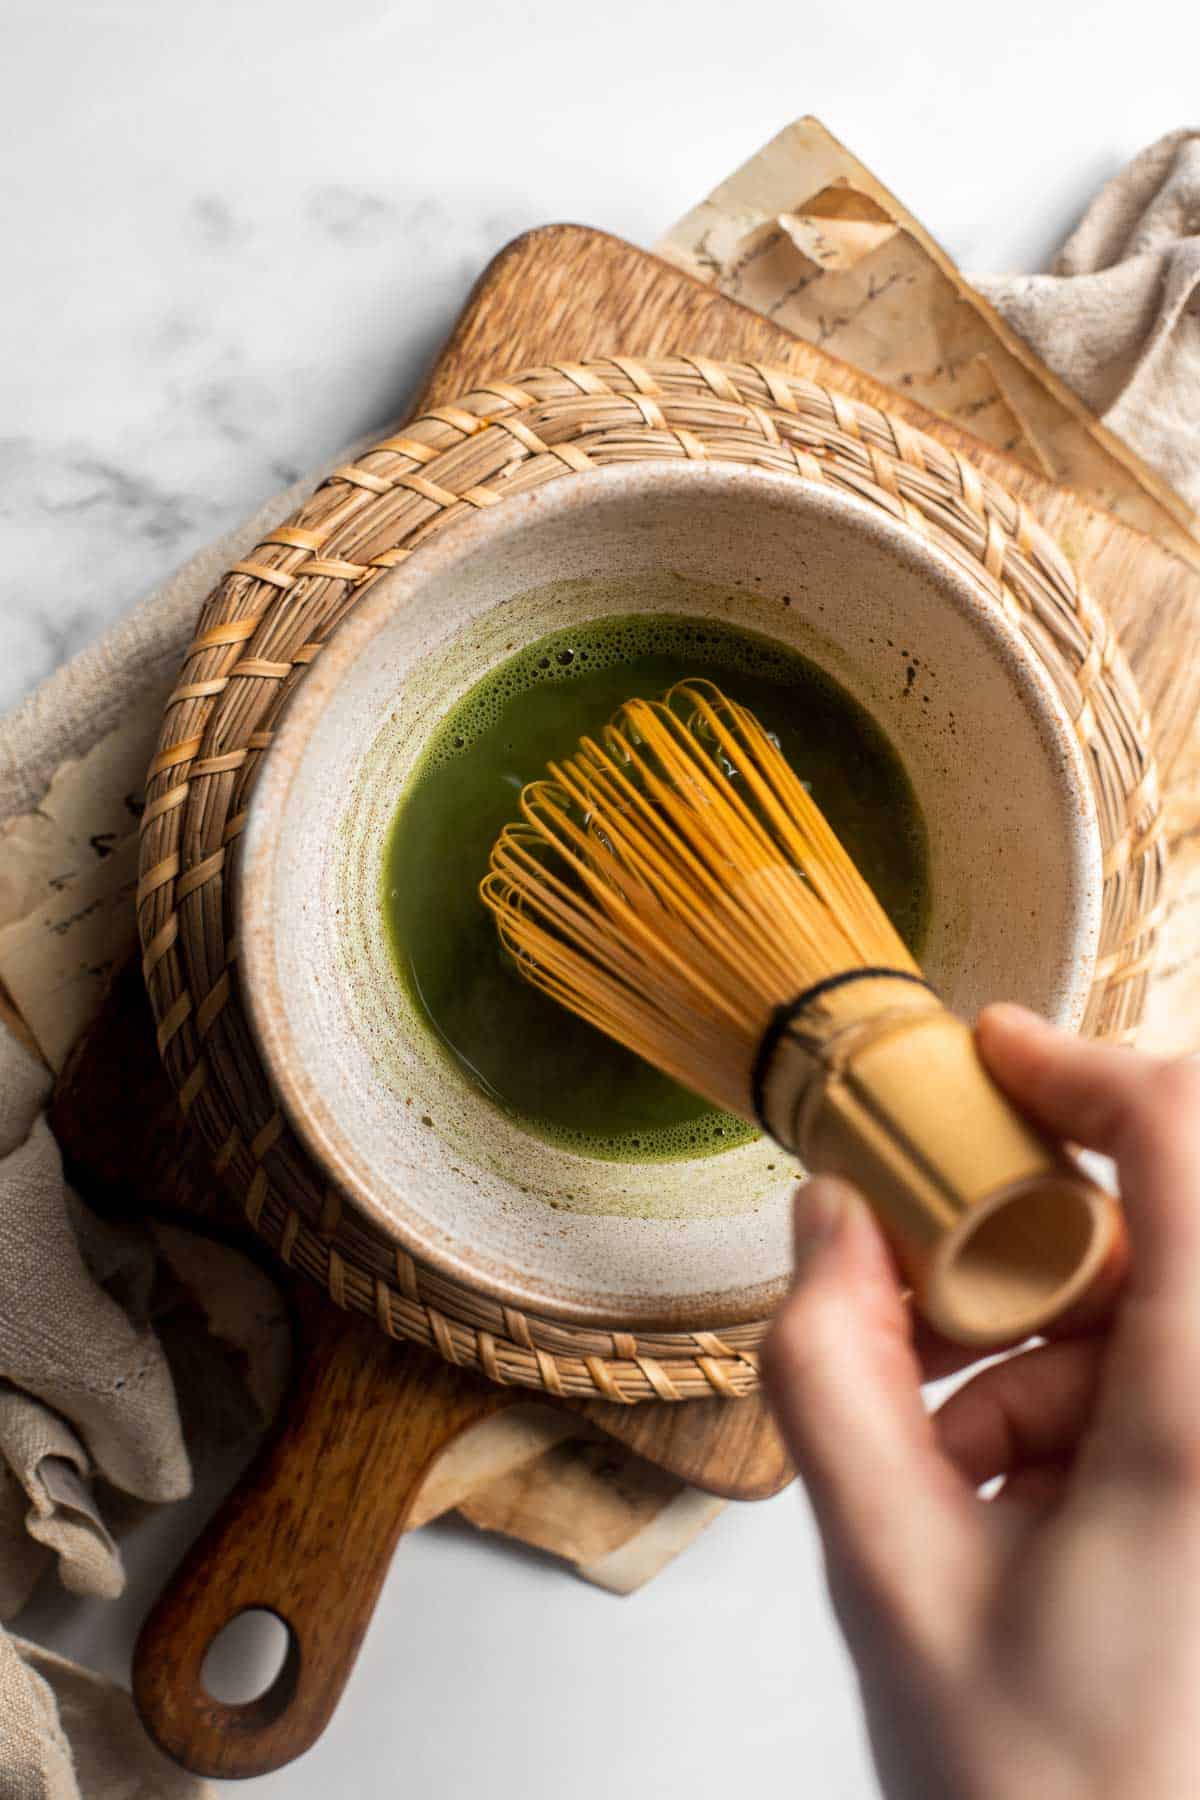
- Add hot water. Stir in remaining hot water and maple syrup (if using).
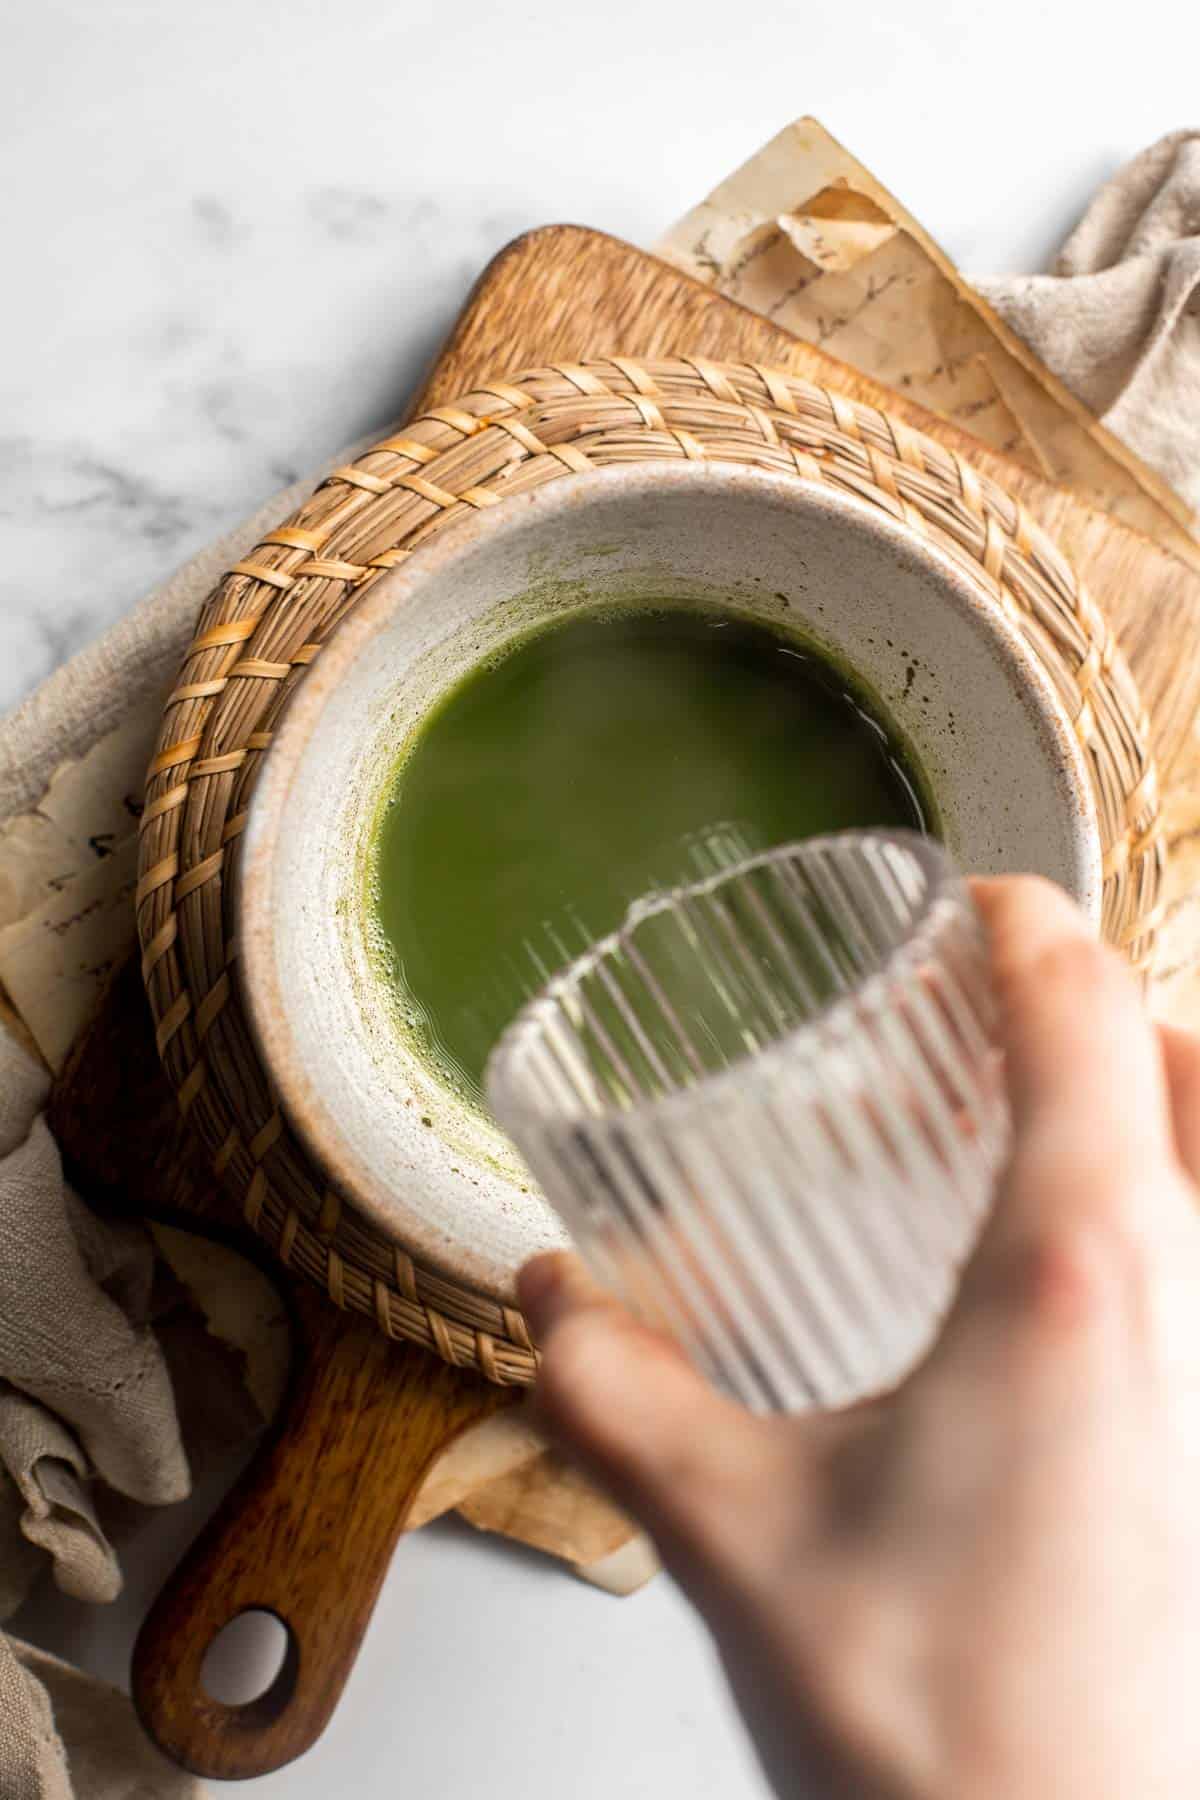
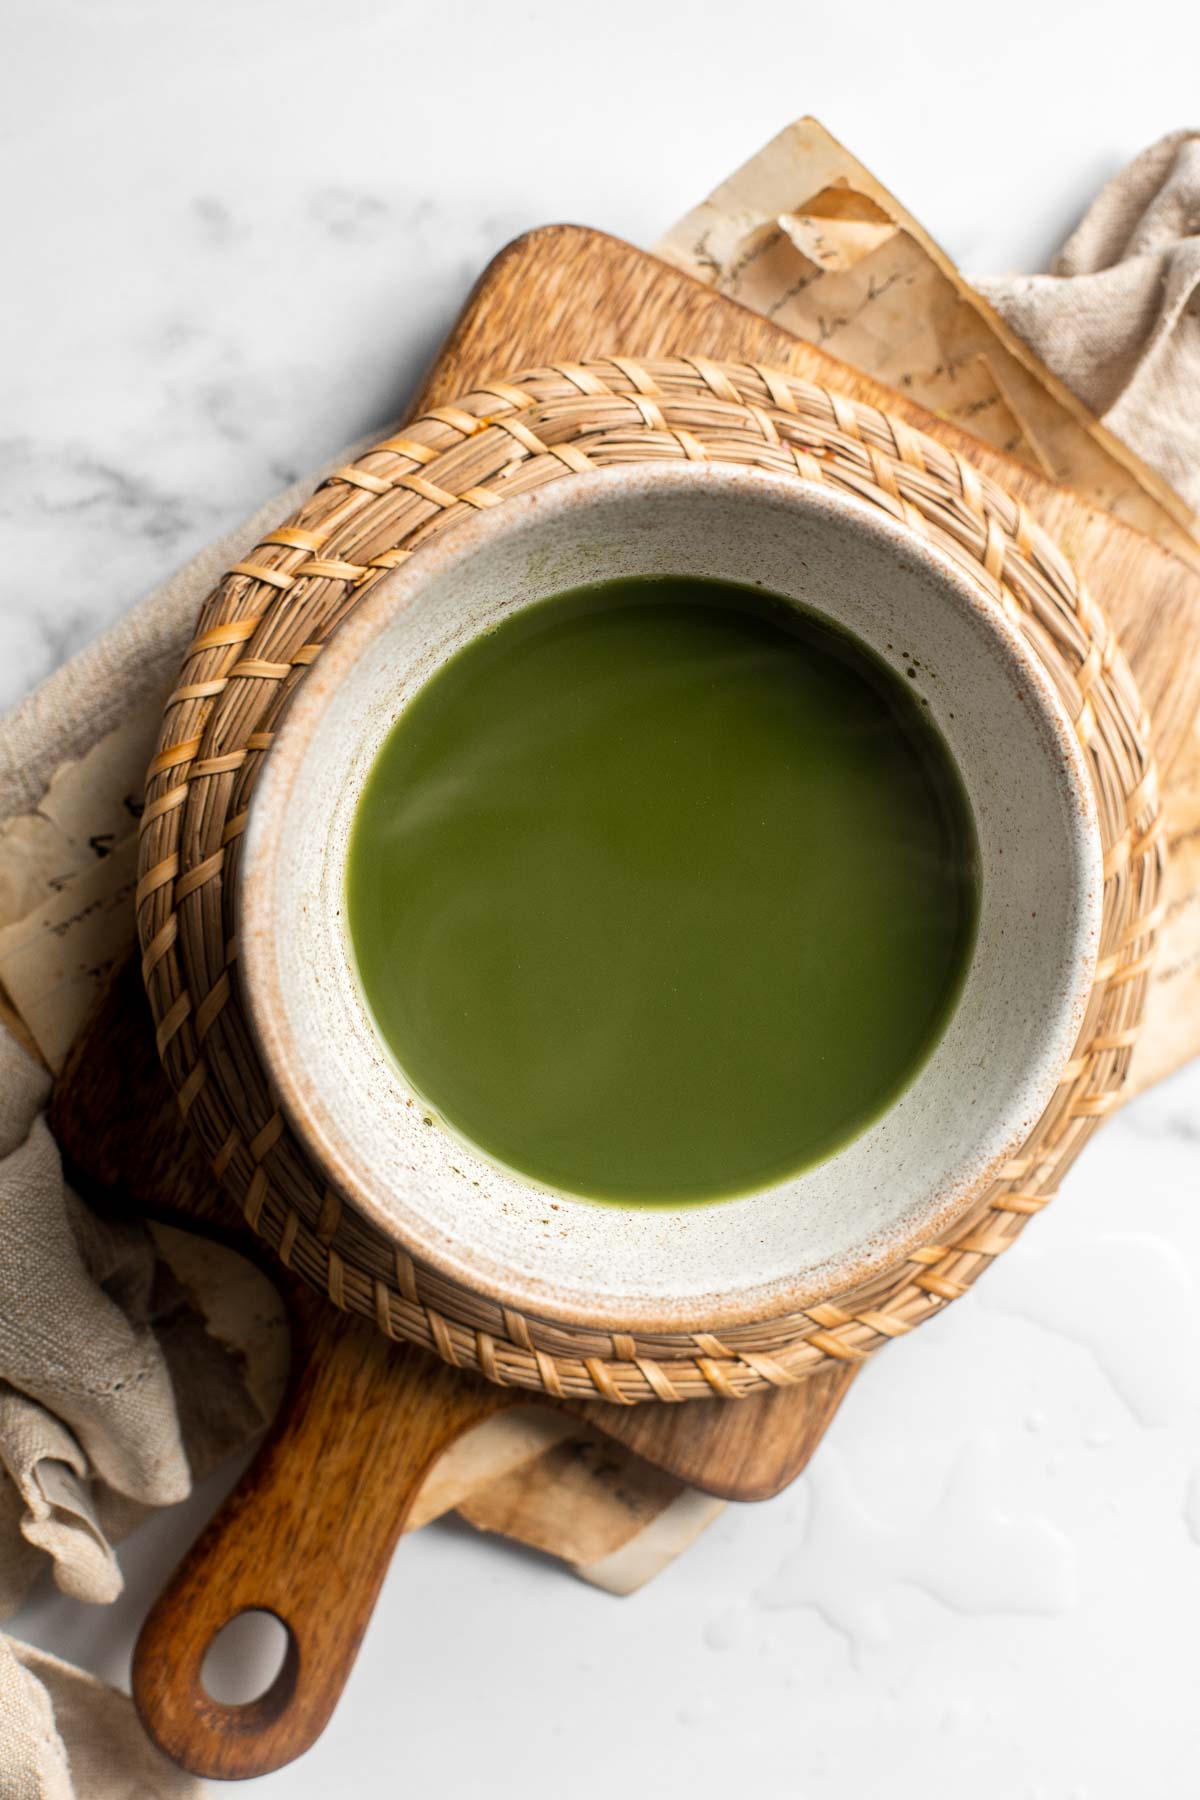
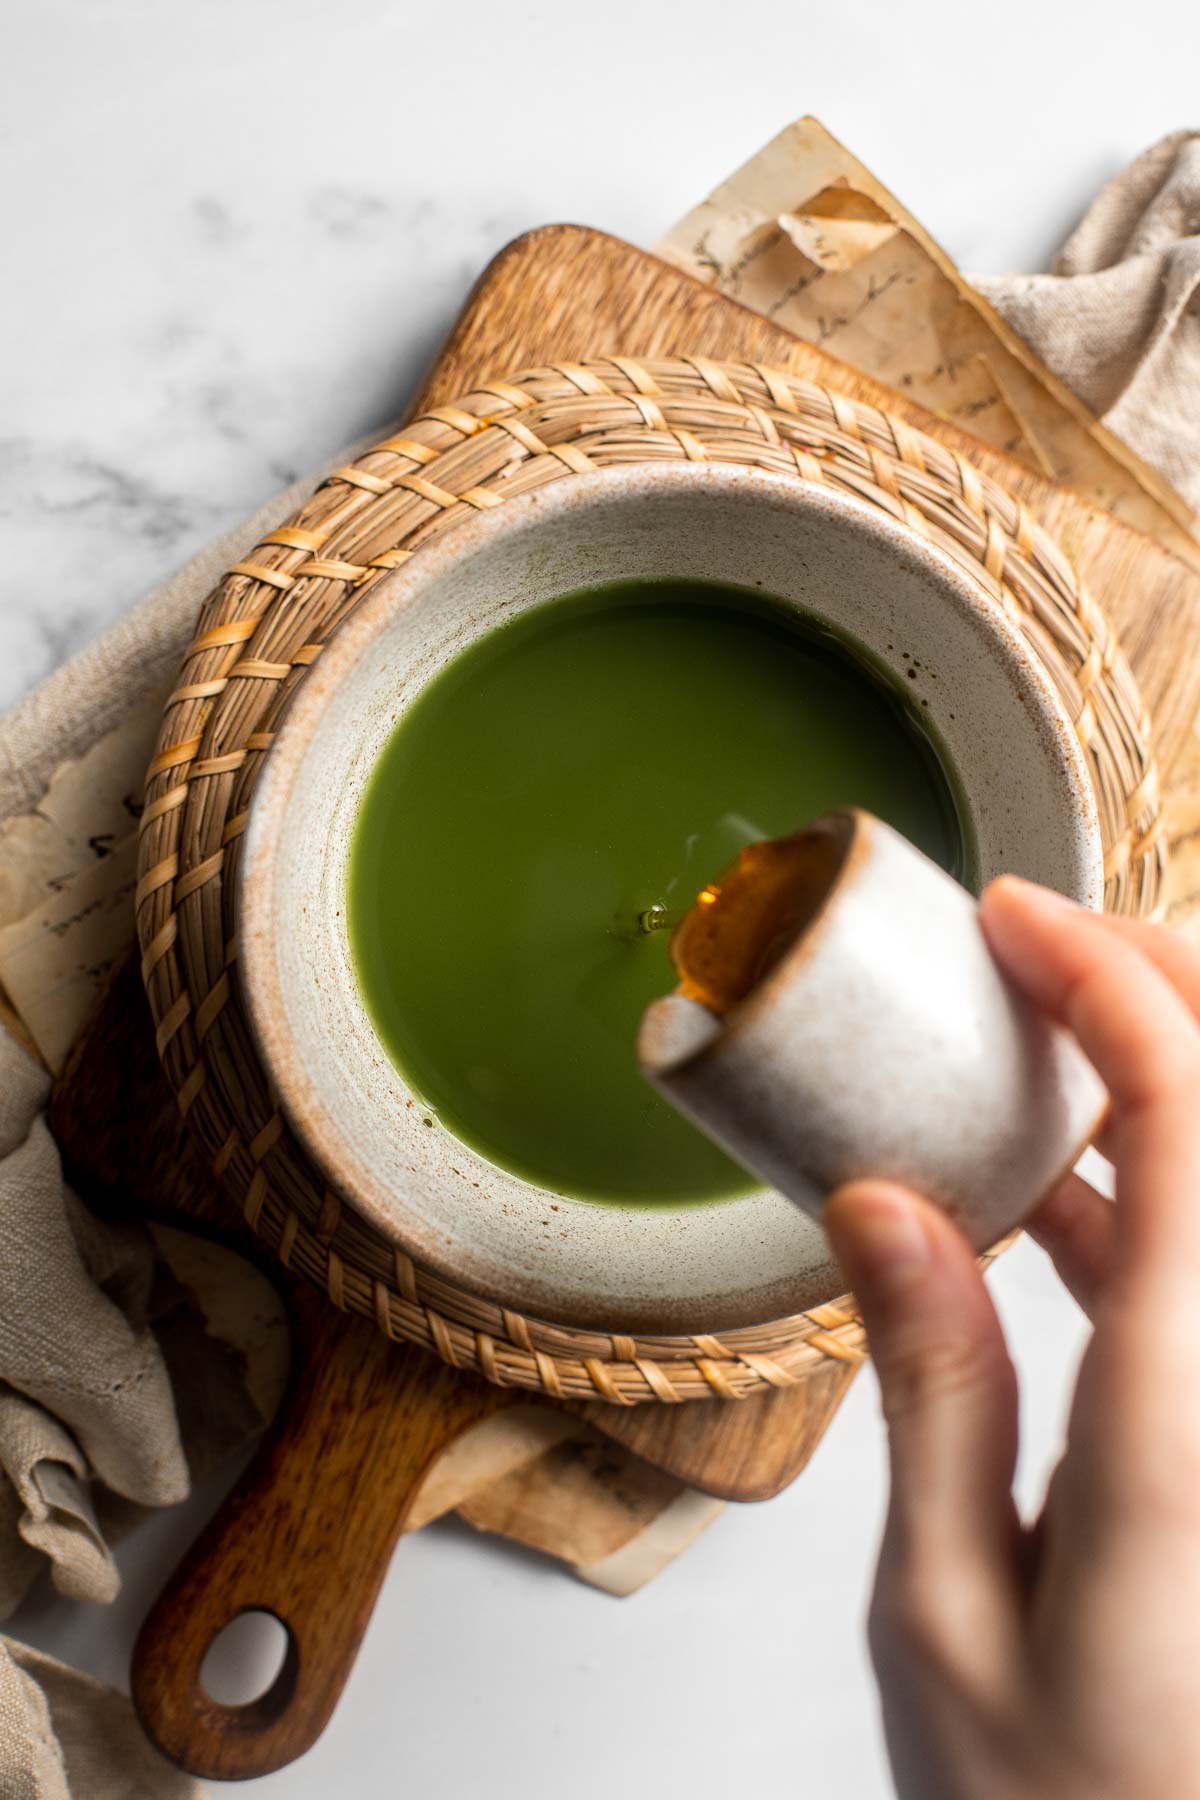
- Froth milk. Heat the milk in a pot on the stove until warm and steaming, about 3-5 minutes. Then, use a milk frother, French press, or whisk to froth the milk until foamy.

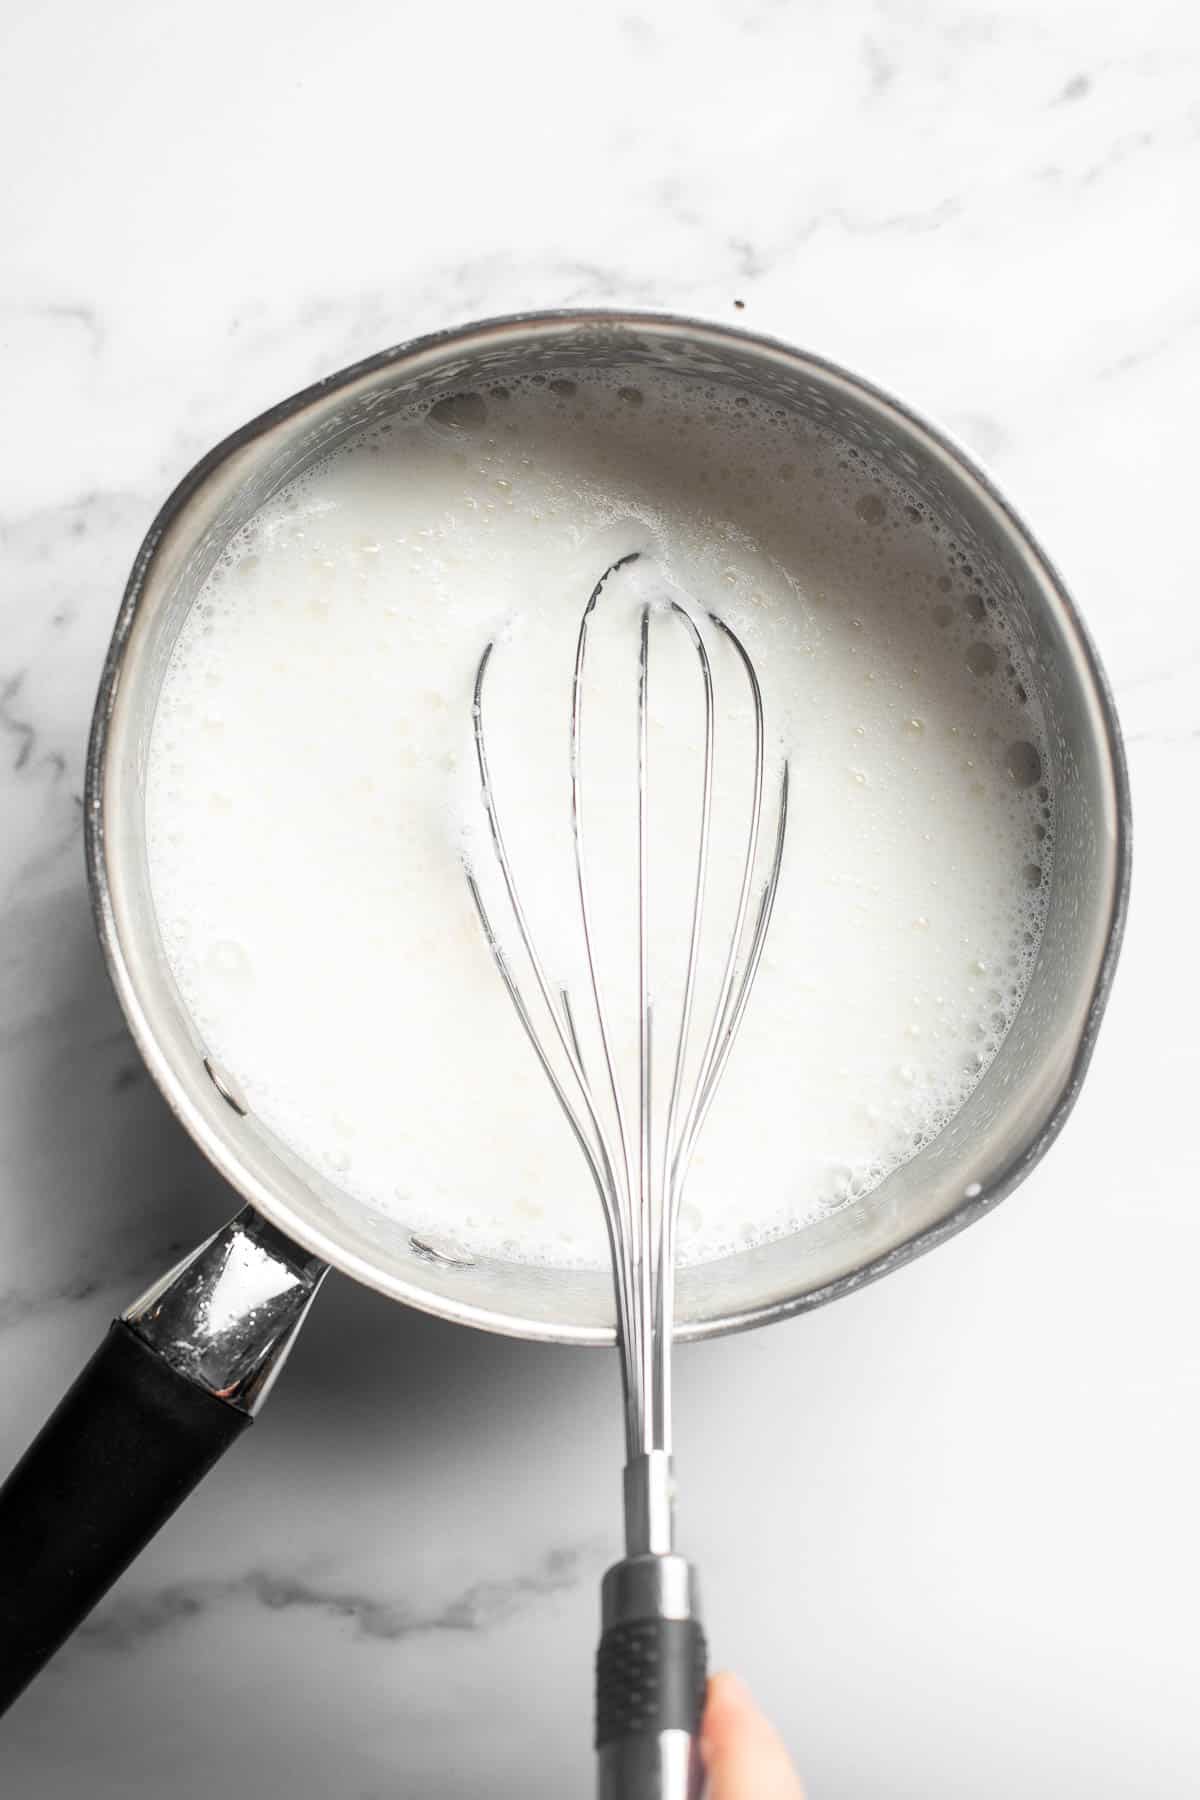
- Assemble latte. Divide the matcha mixture into 2 cups. In each cup, add half of the frothed milk into the center. You can get creative and play around with patterns on top (try a leaf!). Serve immediately.
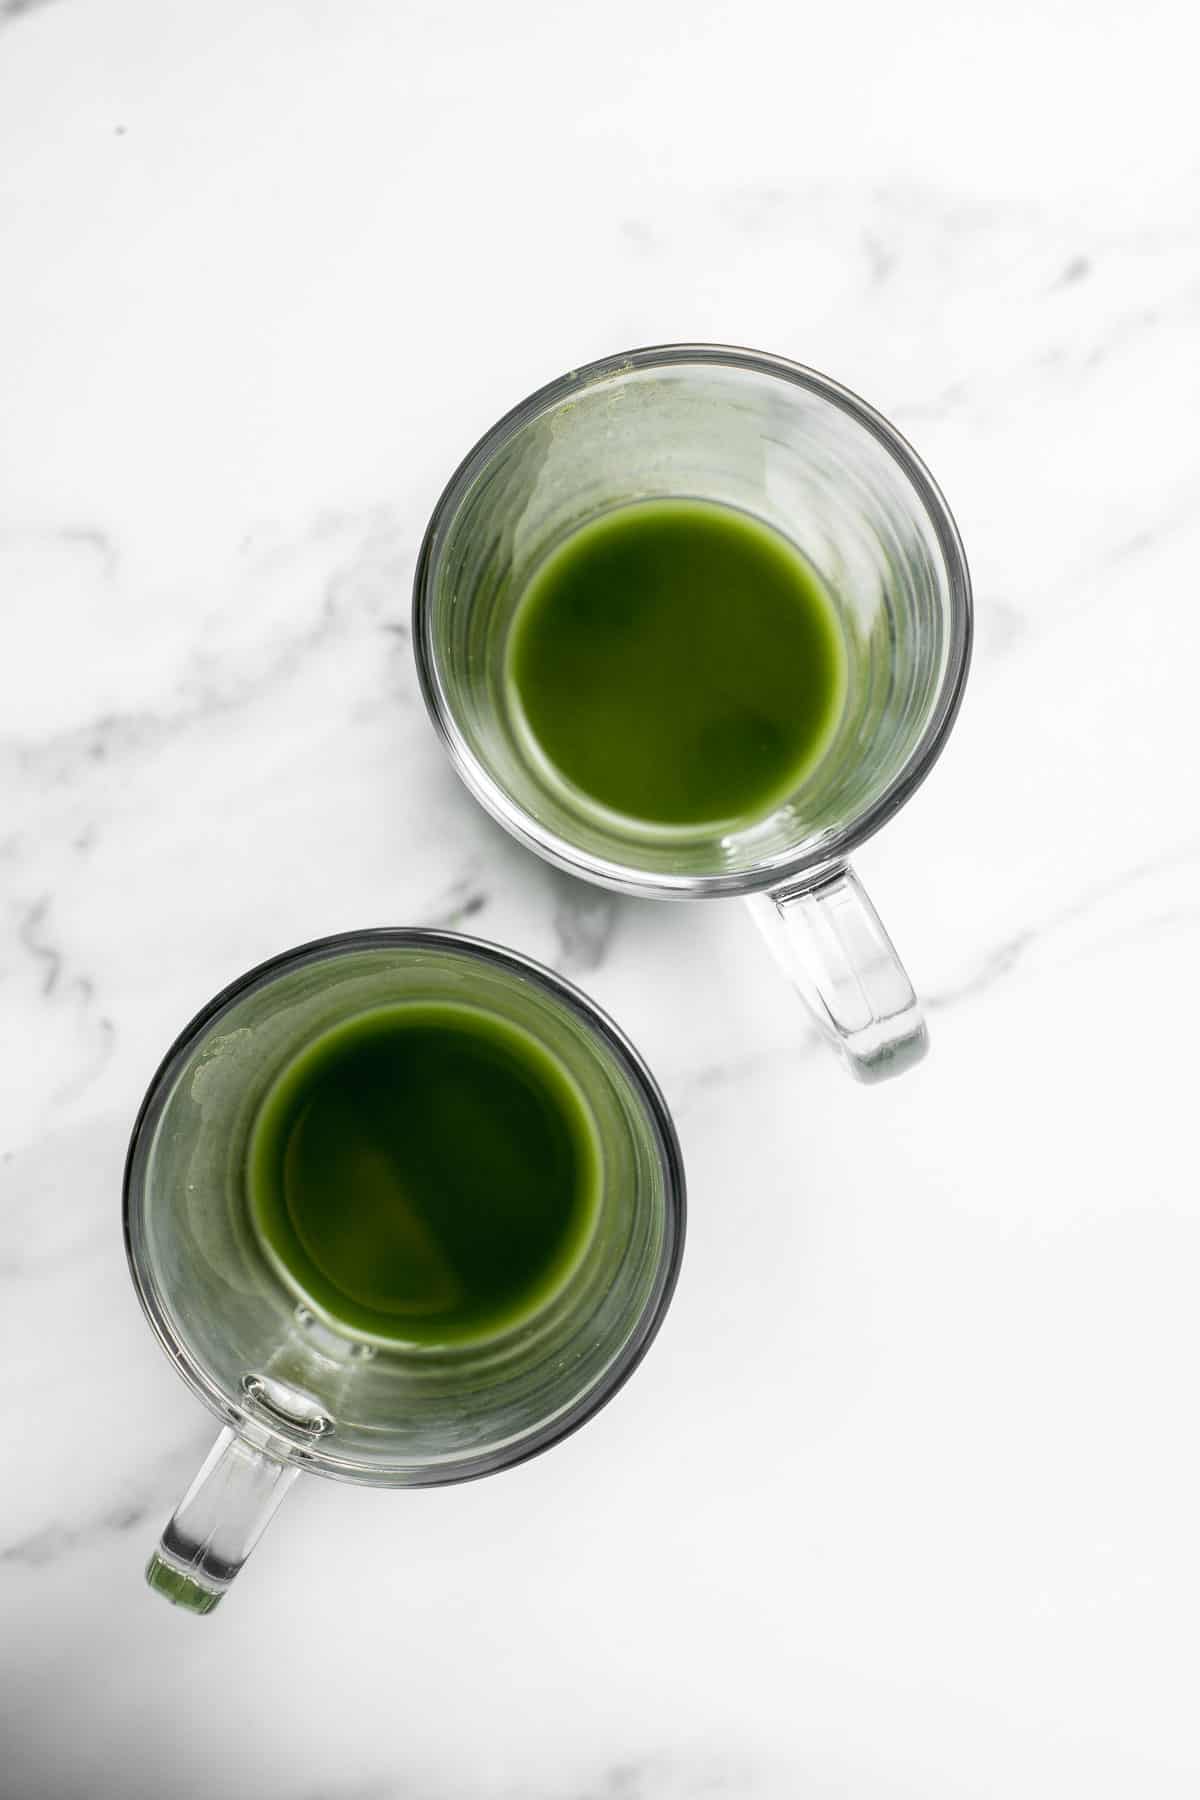
Recipe Variations
- Vanilla matcha latte. Make a vanilla matcha latte by adding some vanilla extract or vanilla bean.
- Spiced matcha latte. Mix in spices like cinnamon or ginger for a spiced matcha latte.
- Mint matcha latte. Add peppermint extract or a few drops of peppermint oil to make a mint matcha latte.
- Matcha latte float. Top the matcha latte with a scoop of Vanilla Ice Cream to make a matcha latte float.
- White chocolate matcha latte. Stir in some melted white chocolate into the matcha tea mixture until melted before topping with frothed milk.
How to Serve
Matcha Latte is a classic cozy drink to enjoy with a tea time treat. Some of our favorite tea time cookies to serve with this are:
- Almond Crescent Cookies
- Chocolate Thumbprint Cookies
- Chocolate Chip Cookies
- Whipped Shortbread Cookies
- Italian Ricotta Cookies
- Lemon Drop Cookies

Recipe Tips and Tricks
- Add your favorite flavors. Is your usual drink of choice a mocha latte? Add some chocolate syrup to make a mocha matcha! You can add any of your favorite flavors to make your ideal matcha latte.
- Decorate your matcha latte. You can use a drink stencil and loose matcha powder, cinnamon, or cocoa powder to create simple images on top of your matcha latte and make the experience even more special.
- Recipe for one. If you want to make just one green tea latte, simply divide the ingredients in half.
Storing and Freezing Instructions
How to Store
Matcha lattes are best served fresh as the components may separate when refrigerated and the frothed milk may change texture.
How to Freeze
Freezing matcha lattes will result in separation, but you can prep matcha ahead of time by following steps 1 and 2 (no milk) and then freezing the matcha mixture in an ice cube tray. Then, when ready to make your latte, simply thaw the ice cubes and prepare the frothed milk to pour on top.
More Drink Recipes
- Matcha Milk Tea
- Golden Milk Turmeric Latte
- White Hot Chocolate
- Iced Latte
- Ginger Turmeric Tea
- Slow Cooker Apple Cider
Tried this recipe?
I'd love to hear what you think! Leave a comment and rating below to share your feedback. Your reviews help others discover this recipe and help me keep creating more free recipes for you. Snap a photo and tag me on social media @aheadofthyme too.

Baked Ravioli
Baked Ravioli is simple and delicious comfort food that is perfect for a weeknight family dinner or for entertaining. With some pantry and refrigerator staples, a few easy steps, you can serve a flavor-packed homemade ravioli casserole that is loved by all. It's hearty, comforting, and kid-friendly.
Nothing is more satisfying than homemade comfort food at home after a long day. This casserole-style ravioli bake is easy to prepare, taking only 20 minutes to get ready for the oven. With layers of hearty meat and tomato sauce, ravioli, and gooey melty cheese, and seasoned with fresh garlic and Italian herbs, this dish will make your mouth water as the flavors come together. Plus, leftovers store well and may even taste better the next day!
Why You'll Love this Baked Ravioli
- An easy comforting family dinner. This easy baked ravioli casserole will take just 20 minutes of prep before popping into the oven to bake until gooey and bubbly perfection. Just make the meat sauce, assemble the casserole layers, and bake. It is a carb-loaded, protein-rich, family-friendly dish that is perfect for sharing.
- Loaded with flavor. This baked ravioli is kind of like a lazy lasagna, with similar same flavors to a traditional lasagna. It's made using pantry staples and fresh ingredients. We do not use ready-made cheese sauce or bottled tomato sauce because it is super easy to make everything from scratch. You'll enjoy hearty seasoned beef, tomato-based sauce, shredded cheese, and pasta (ravioli) all seasoned with garlic, parsley, and onions.
- Meal prep for easy weeknight dinners. Plus, leftovers can be stored easily for special lunchs and dinners all week. In fact, a ravioli bake can be added to your freezer stash to be saved for a later date when you don't have the time or energy to make a meal from scratch. You'll thank yourself when you can skip takeout and serve homemade baked ravioli instead!
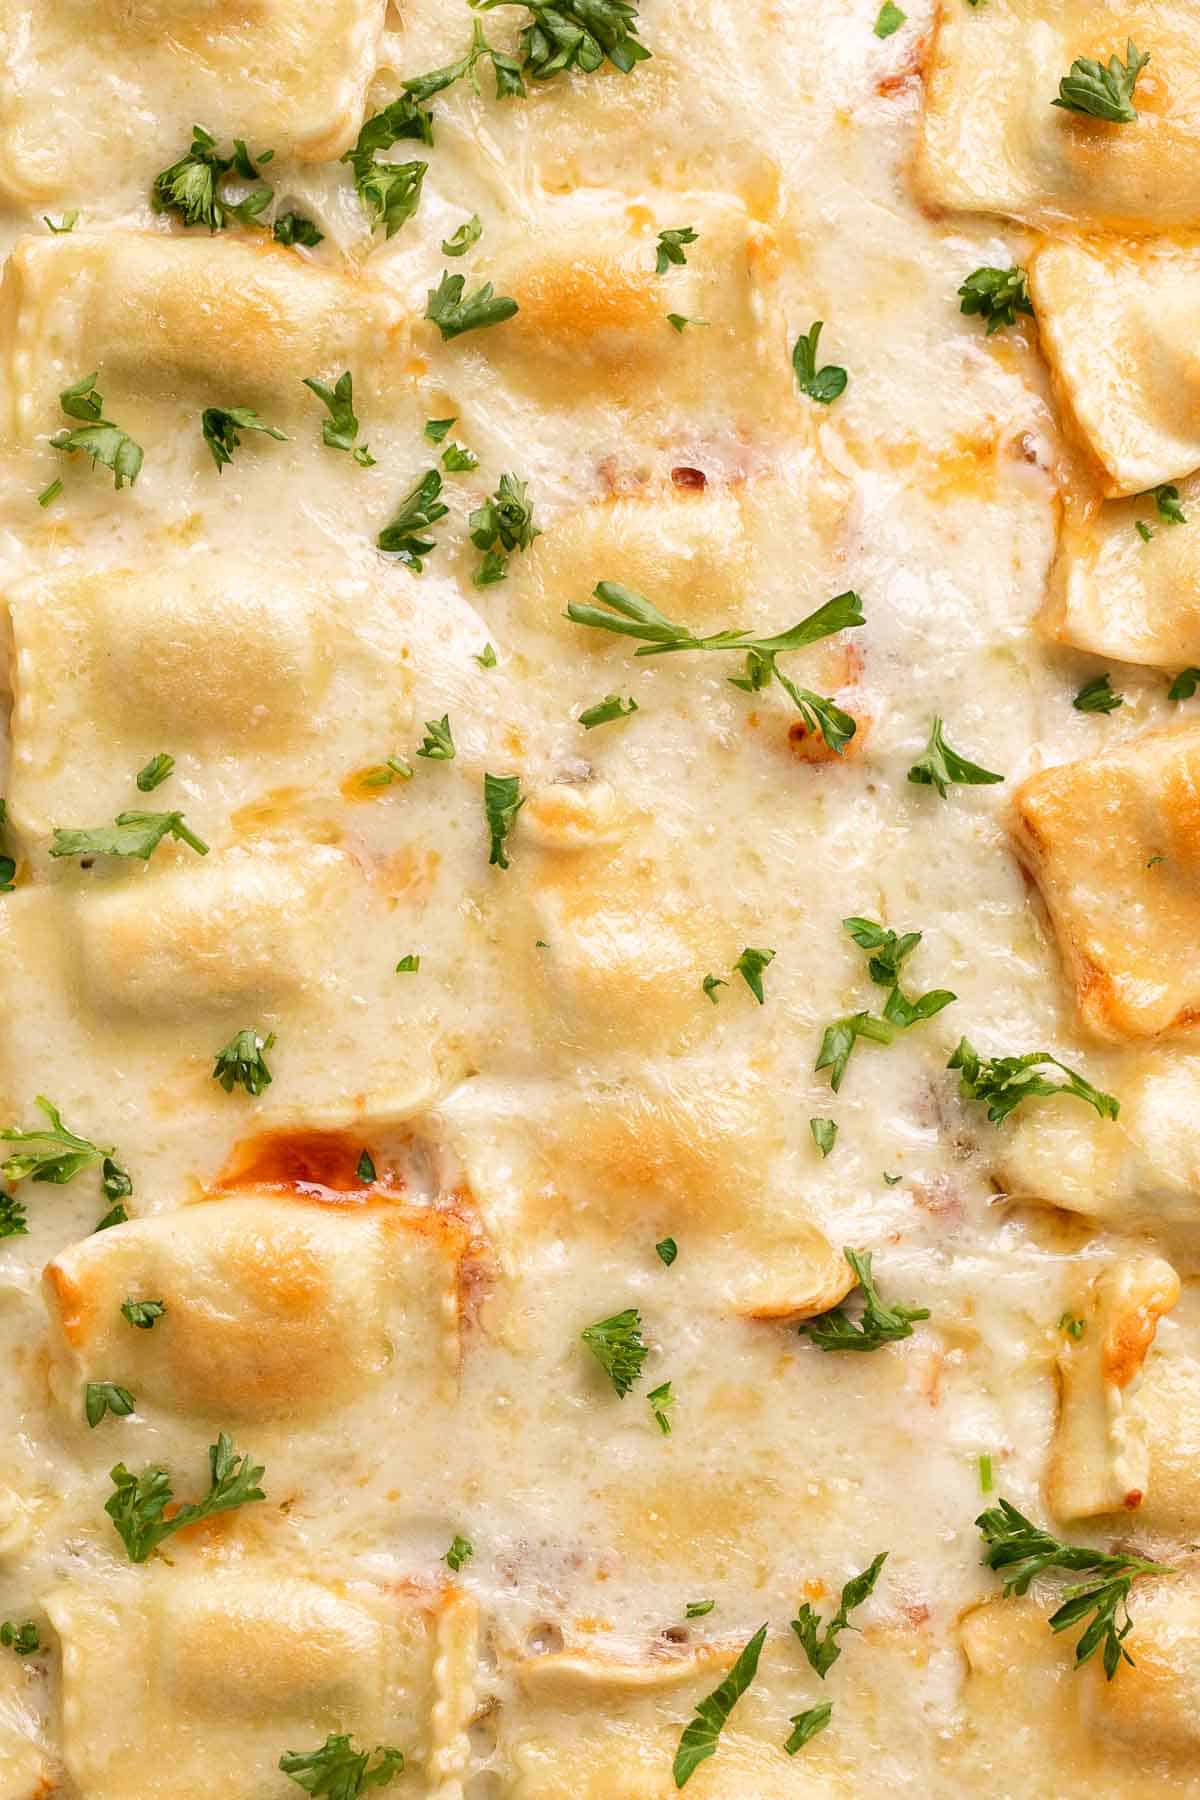
Ingredient Notes
To make this delicious Baked Ravioli, you will need the following ingredients (full measurements in recipe card below):
- olive oil - I used olive oil but feel free to use other neutral oils like avocado oil or vegetable oil.
- ground beef - use an 80/20 meat-to-fat ratio for best results. This will give you a meaty and less greasy sauce. If you are looking for a lighter alternative, use ground chicken or ground turkey instead.
- onion + garlic - these aromatics add so much flavor to this baked pasta casserole.
- tomato sauce + tomato paste - this forms the based of the meat sauce.
- parsley - you can also use dried parsley or Italian seasoning. Add in 1 tablespoon of dried herbs instead of the amount of fresh called for.
- salt
- ravioli - you can make your own raviolis and refrigerate them ahead of time or you can use store-bought ravioli. Make sure to use the fresh refrigerator kind (not the canned kind or dried). We used cheese ravioli, but feel free to use your favorite kind.
- mozzarella
- parmesan - asiago or pecorino romano are great substitutes for parmesan if you need to make a swap.
You will also need measuring cups and spoons, a large pot (such as a 4 quart Dutch oven), and a 9x13-inch casserole pan.
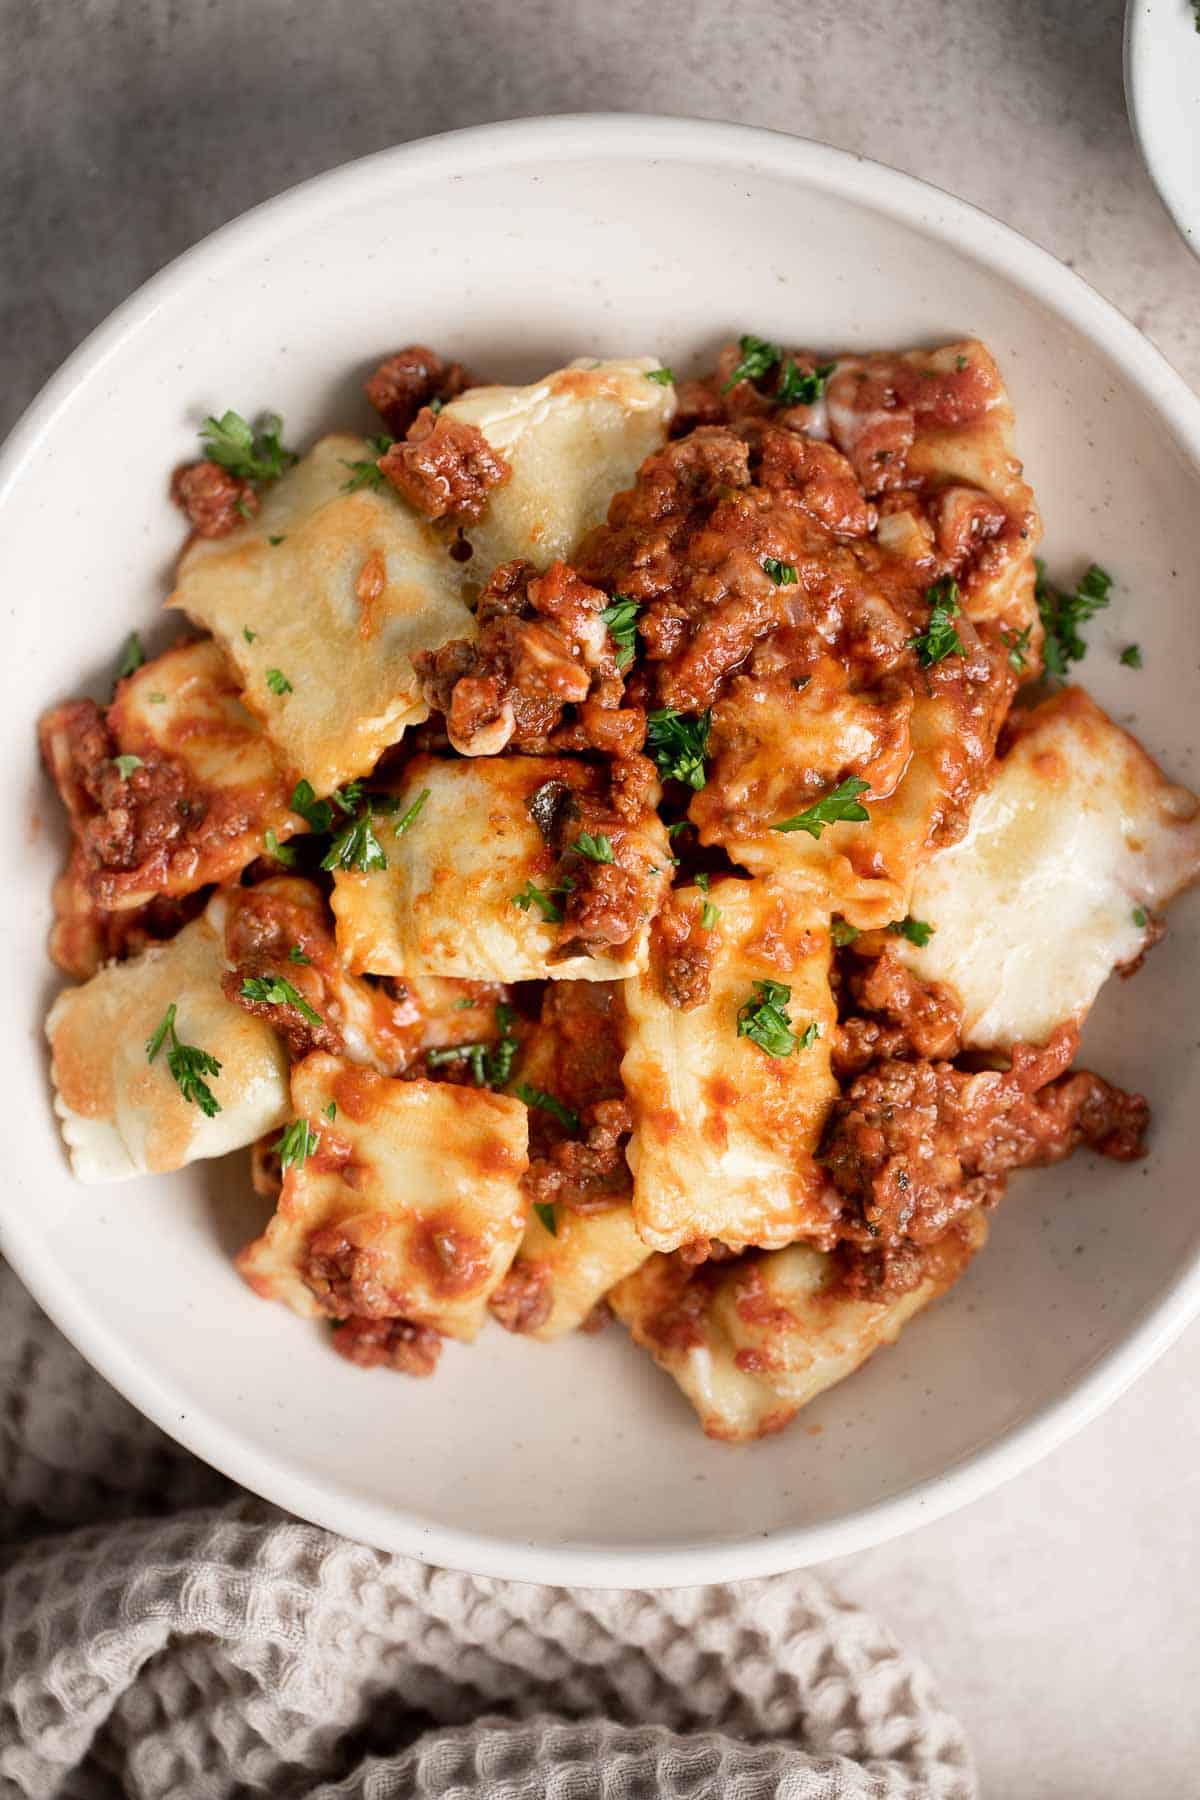
How to Make the Best Baked Ravioli
First make the meat sauce.
- Cook ground beef. Heat oil in a large pot or 4 quart Dutch oven for 2 minutes over medium-high heat until the oil is sizzling hot. Add ground beef and cook for 5-7 minutes until browned.
- Add aromatics. Add onion and garlic. Stir well to combine and continue cooking for 3-4 minutes until tender.
- Add sauce. Pour in tomato sauce, tomato paste, parsley, and salt. Stir well to combine.
- Simmer. Bring the meat sauce to a simmer. Then, turn the heat down to low and let it simmer for 10 minutes uncovered. Set aside.
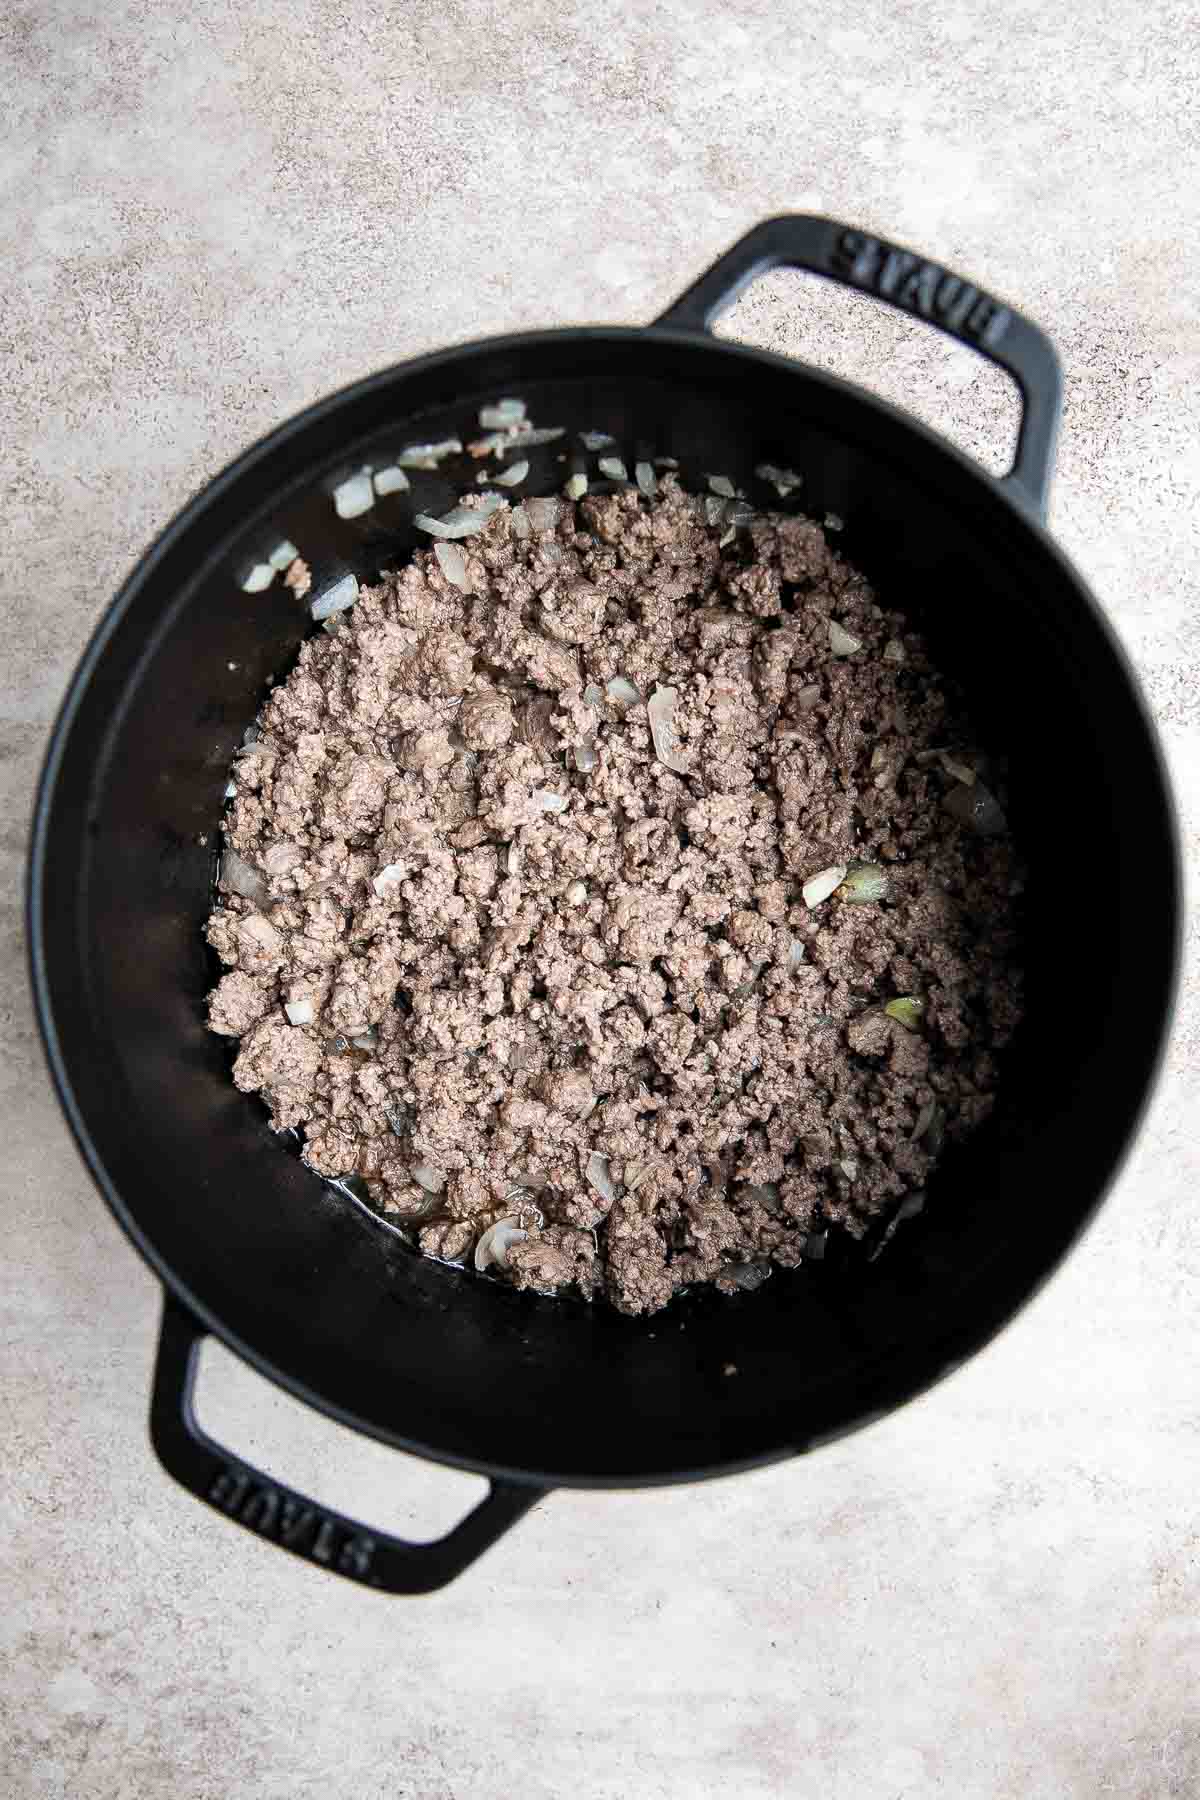
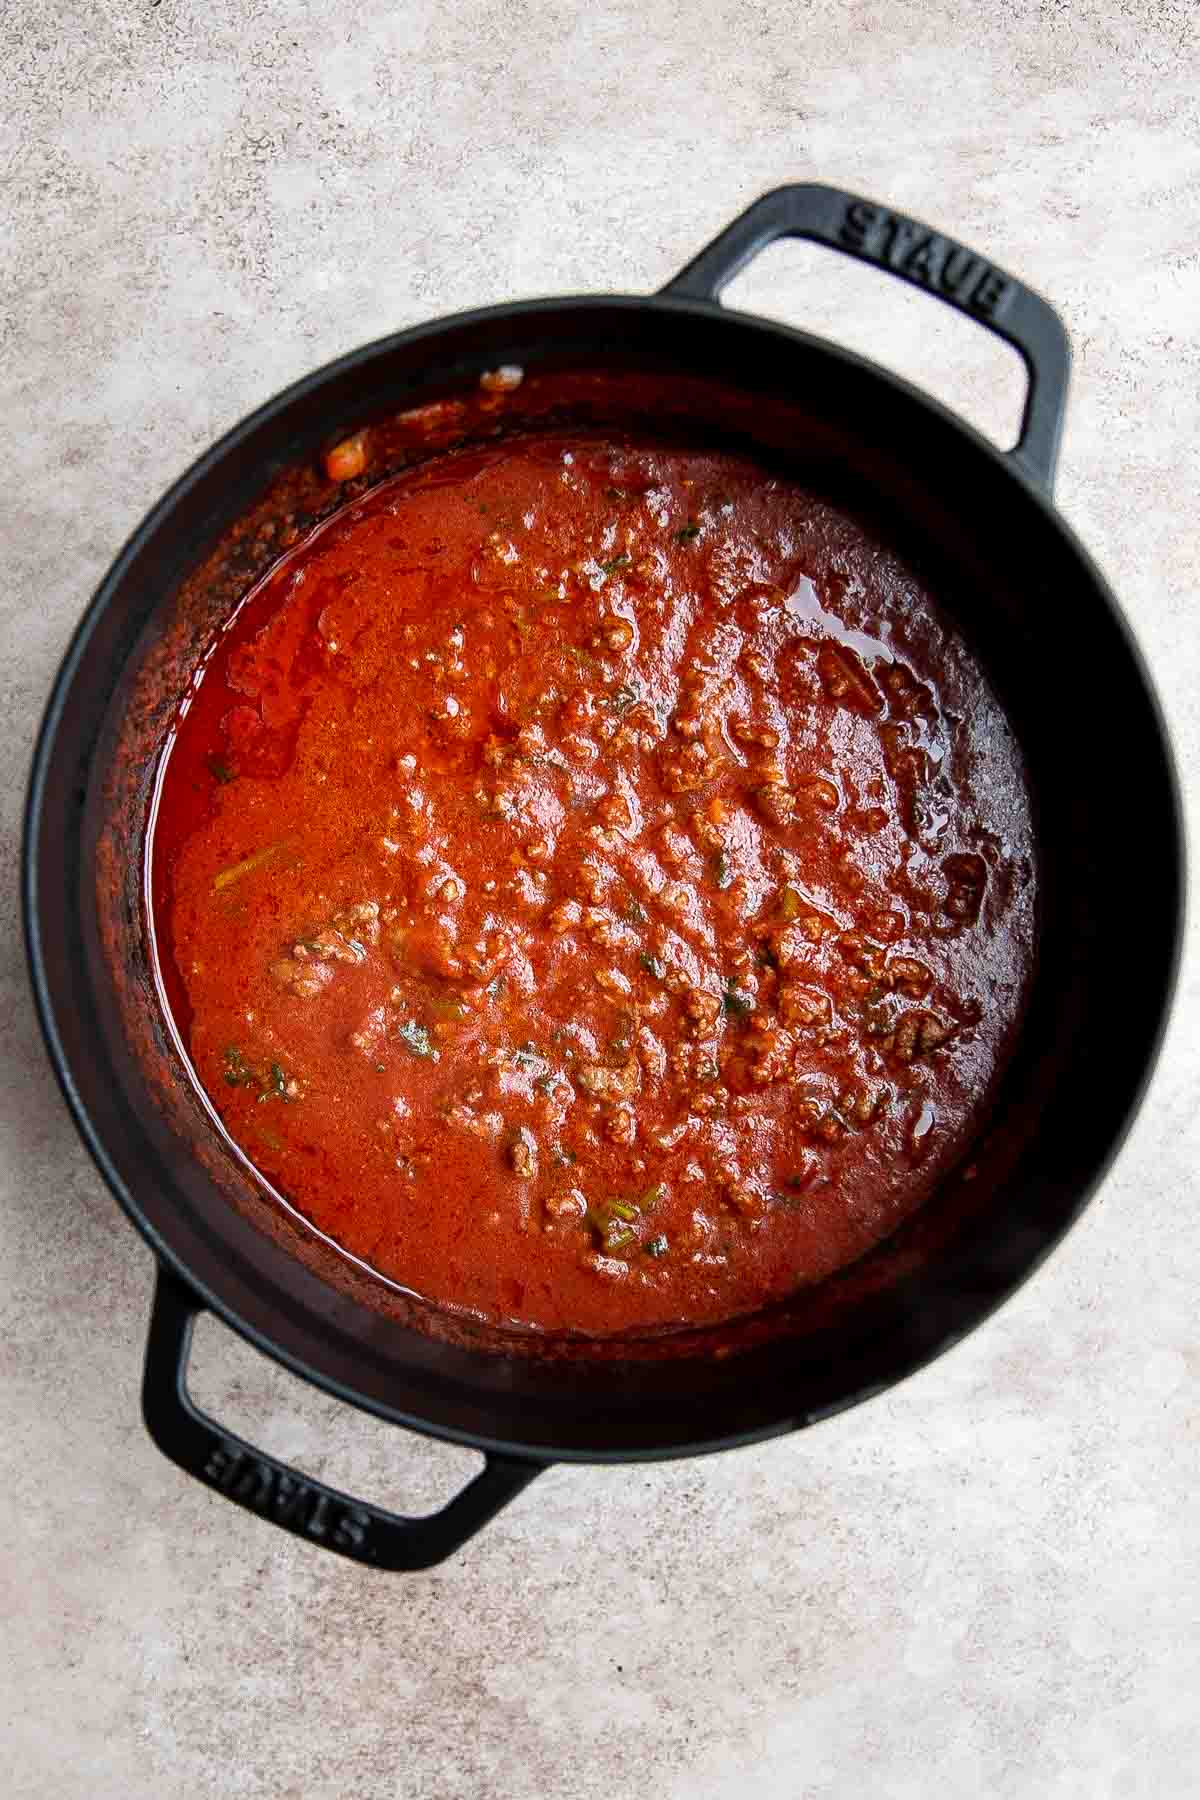
Next, assemble the baked ravioli:
In a 9x13-inch casserole pan, layer the baked ravioli in the following way:
- Sauce: Evenly spread 1 cup of the meat sauce on the bottom of the pan.
- Ravioli: Place a third (⅓) of the ravioli evenly in a single layer over the meat sauce.
- Cheese: Spread 1 cup mozzarella cheese evenly over the ravioli.
- Sauce: Spread another 1 cup of the meat sauce evenly on top.
- Ravioli: Place ⅓ of the ravioli evenly in a single layer over the meat sauce.
- Cheese: Sprinkle 1 cup mozzarella cheese evenly over the ravioli.
- Sauce: Evenly spread the remaining of the meat sauce on top.
- Ravioli: Place the remaining ⅓ of ravioli in a single layer over the meat sauce.
- Cheese: Spread the remaining mozzarella cheese evenly over the ravioli and top with parmesan cheese.
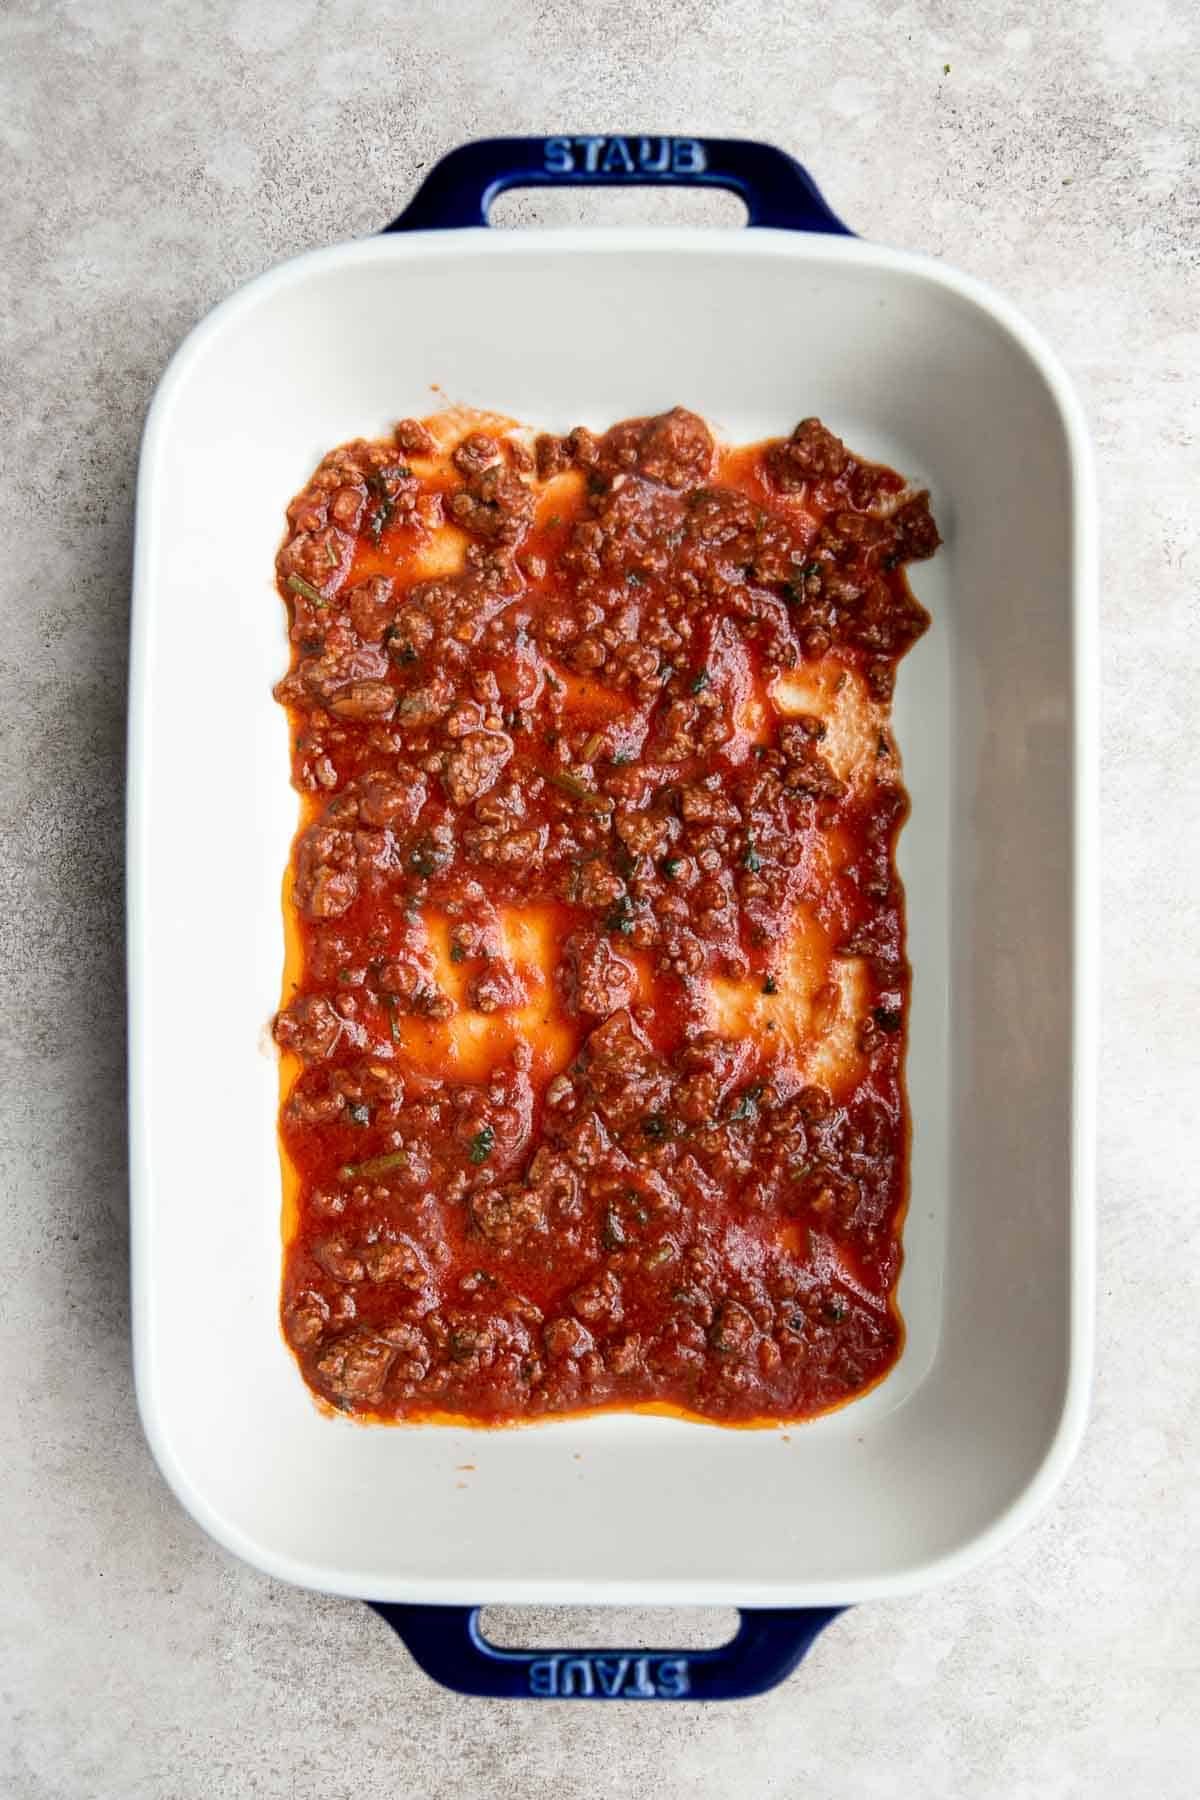
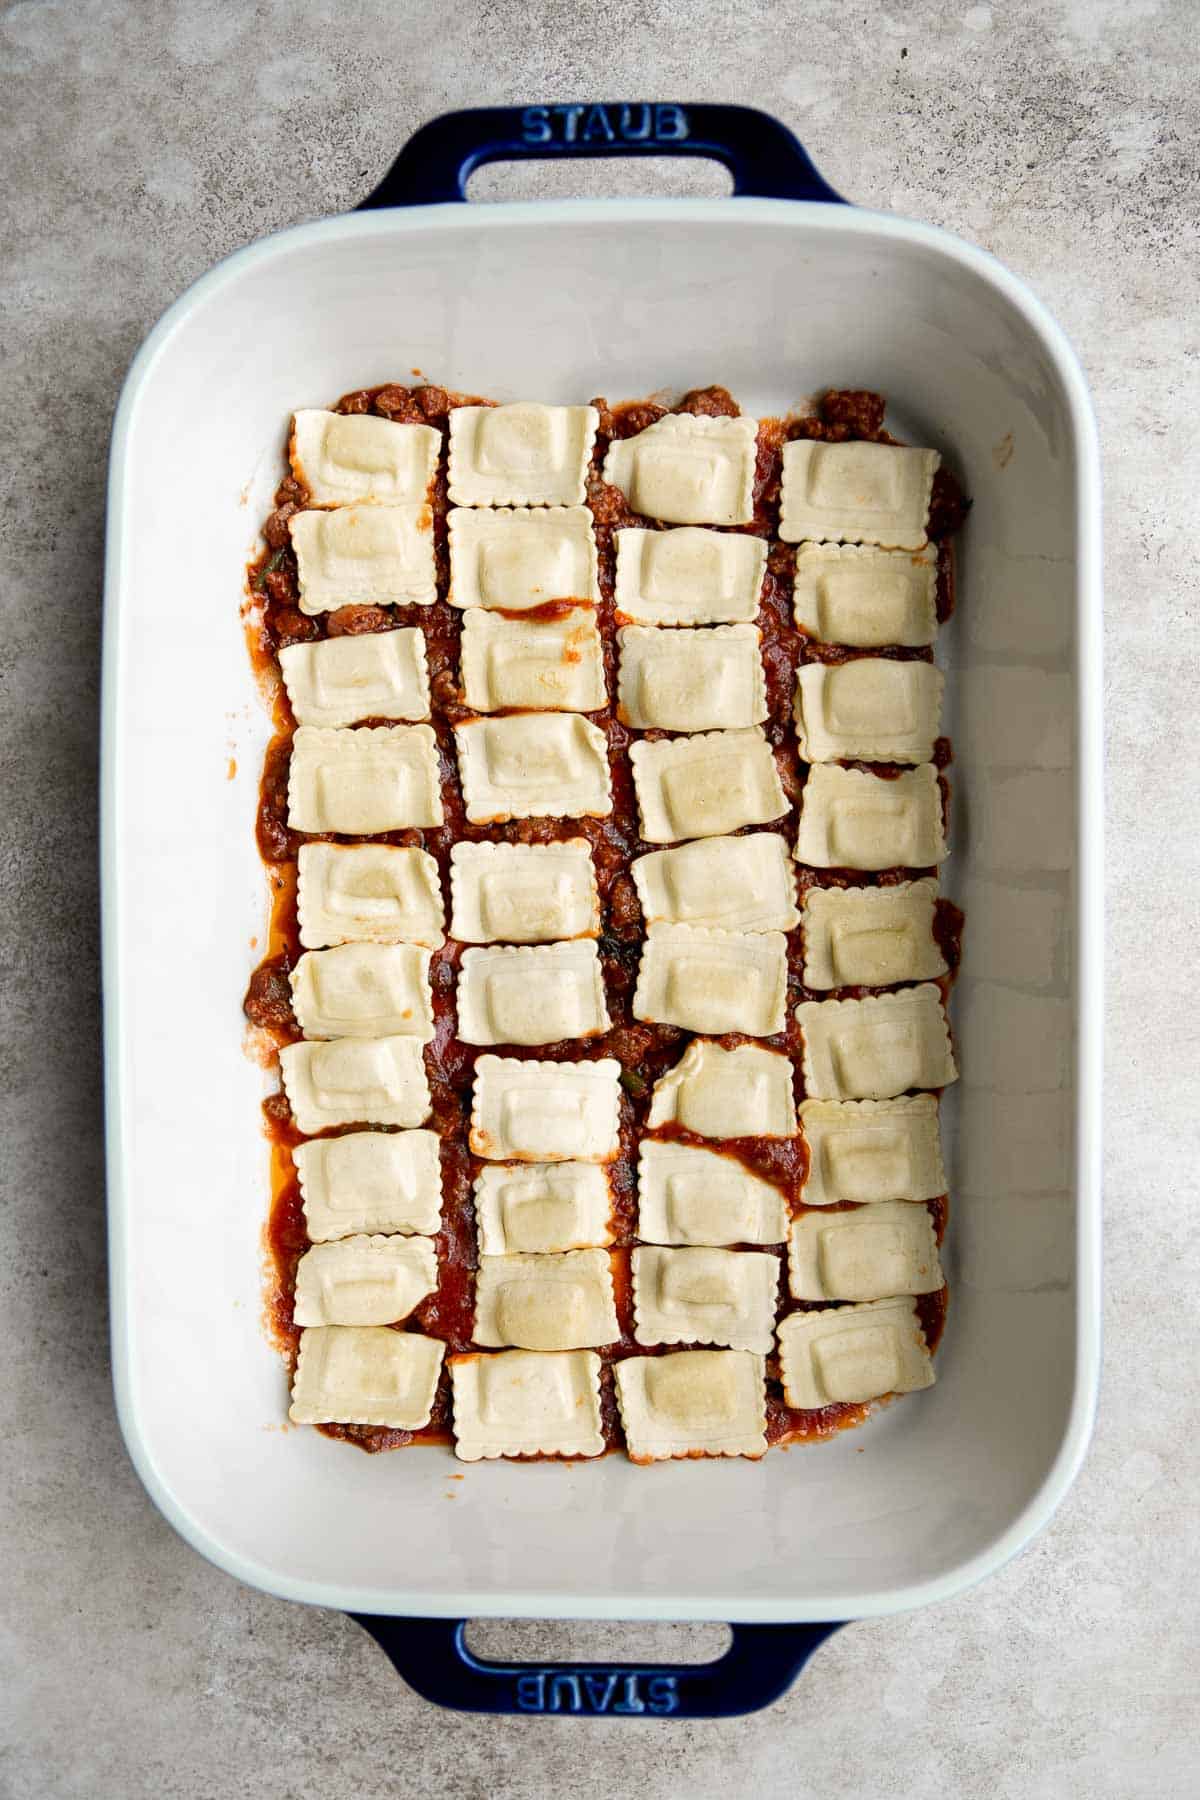
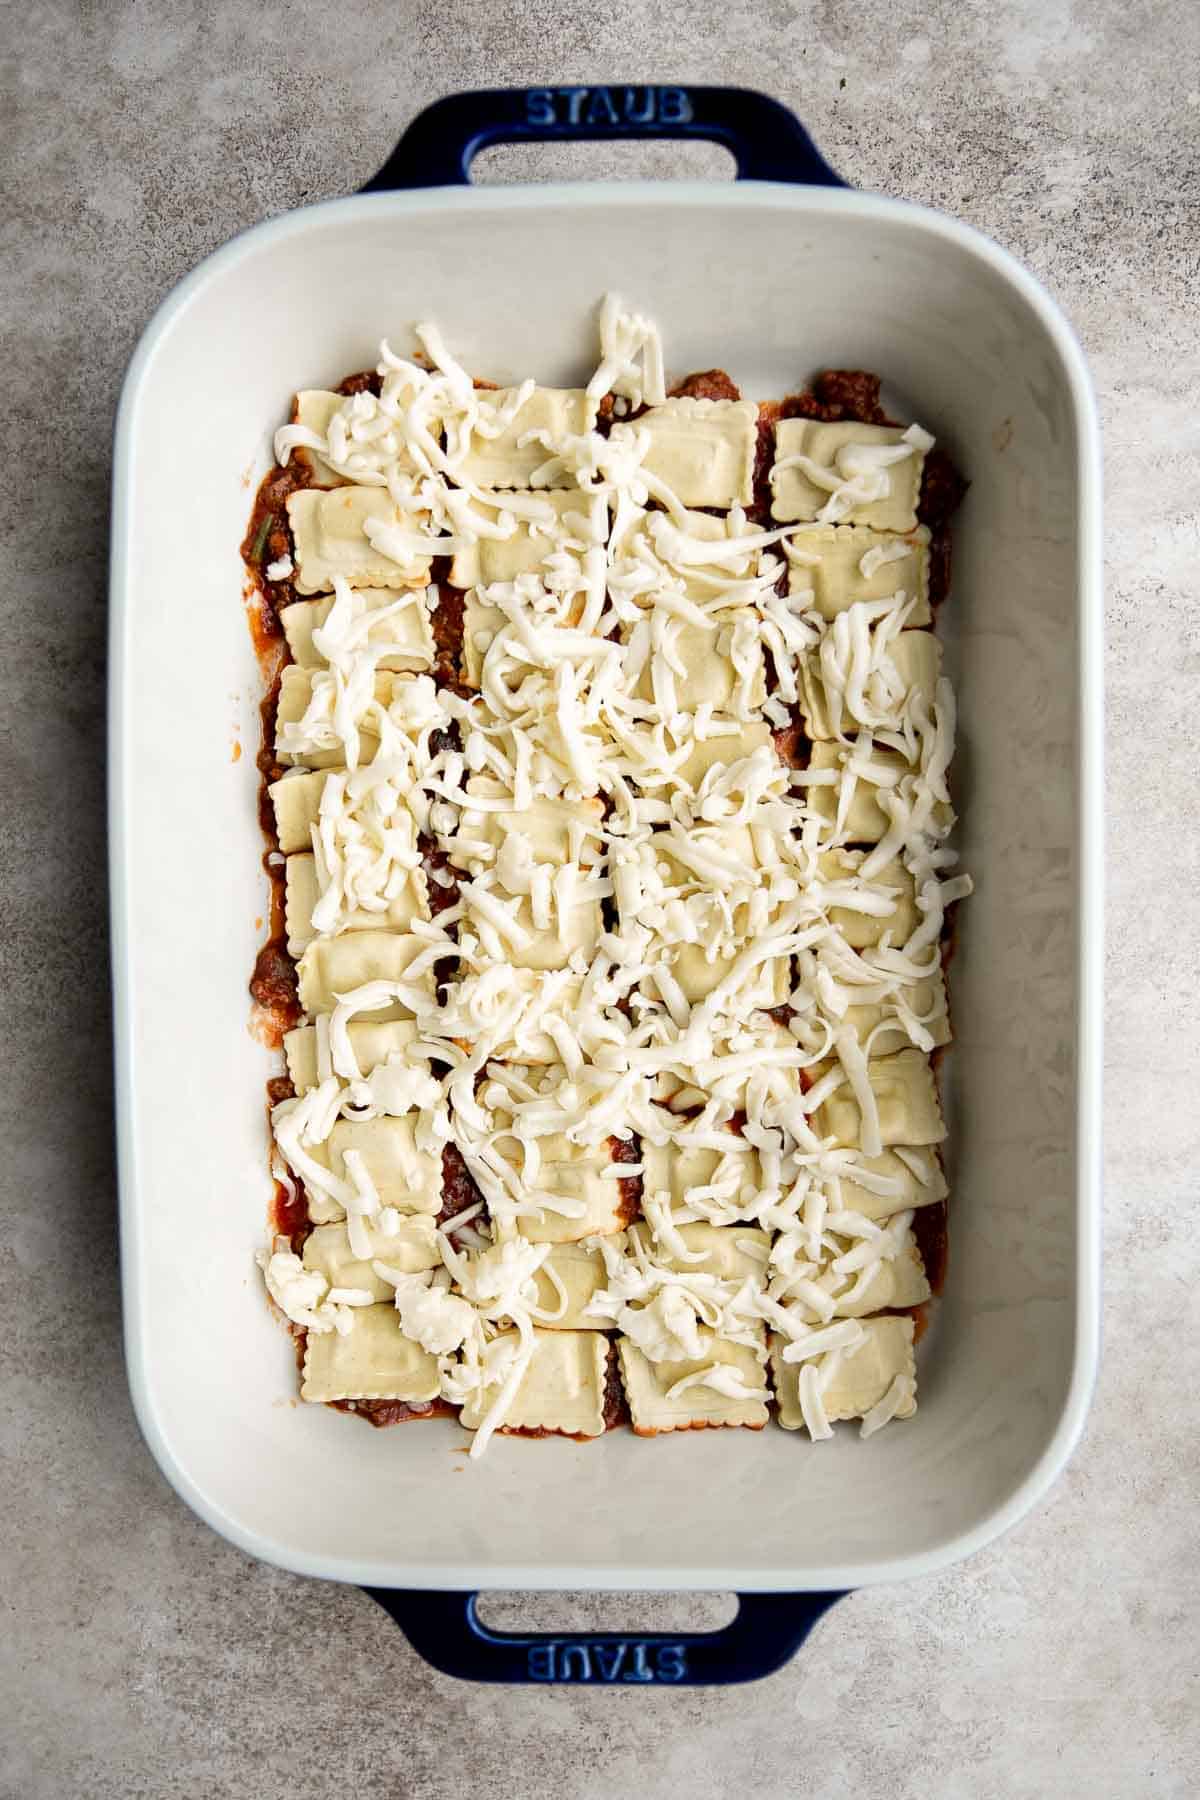
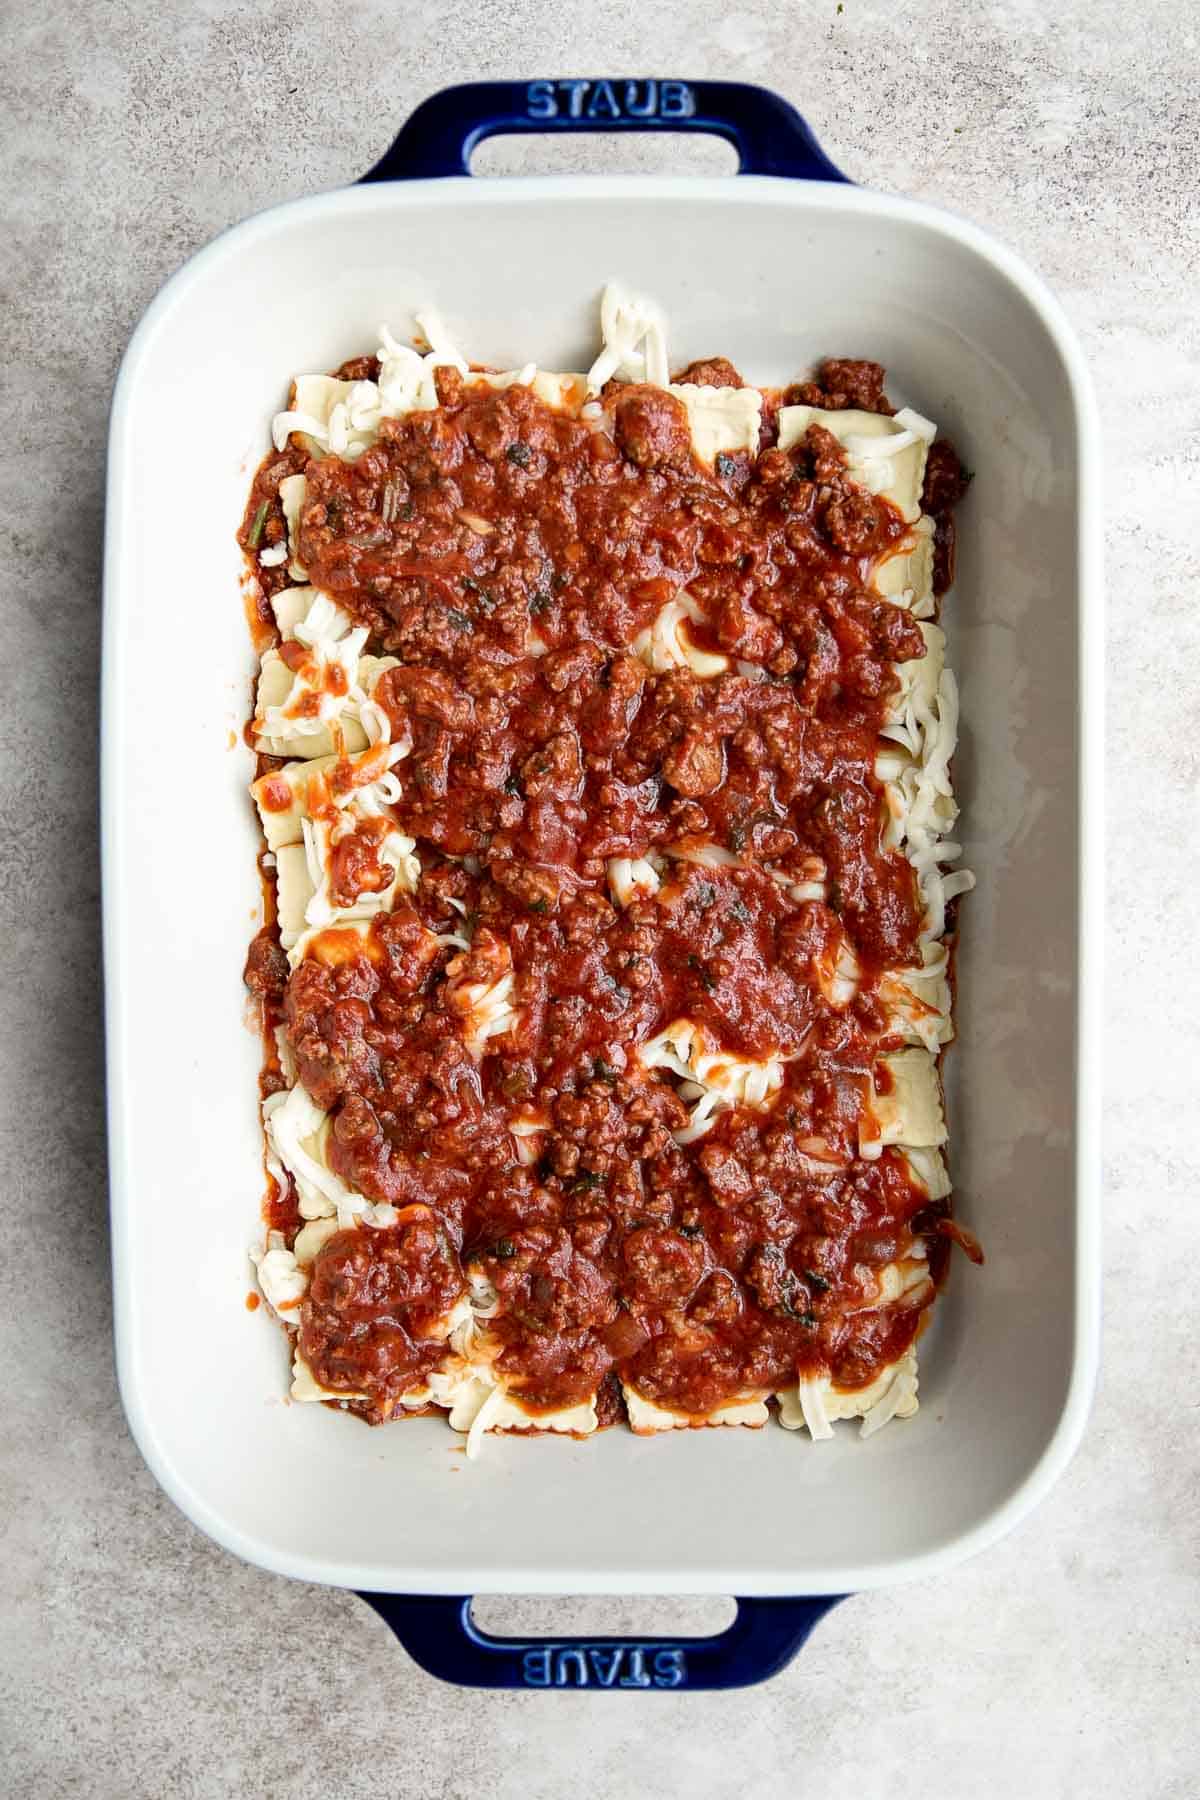
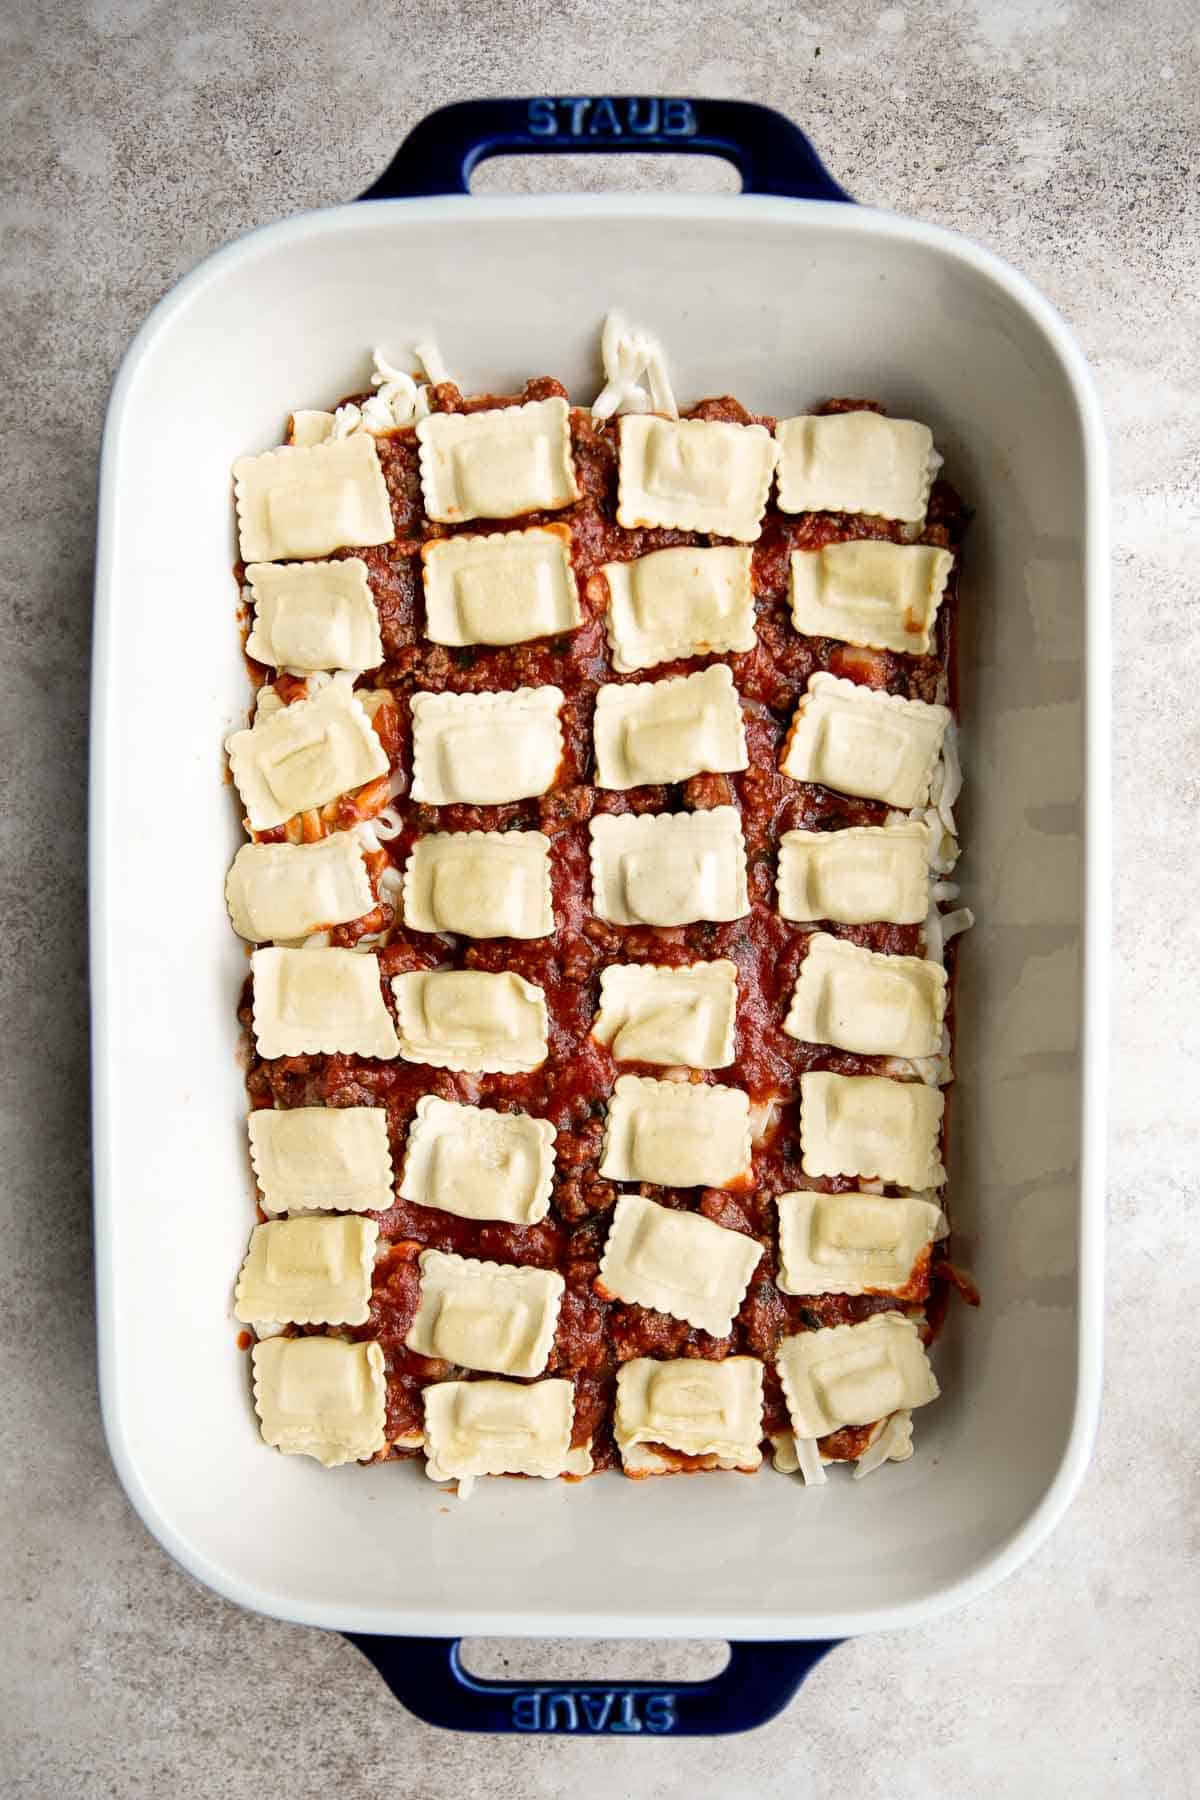
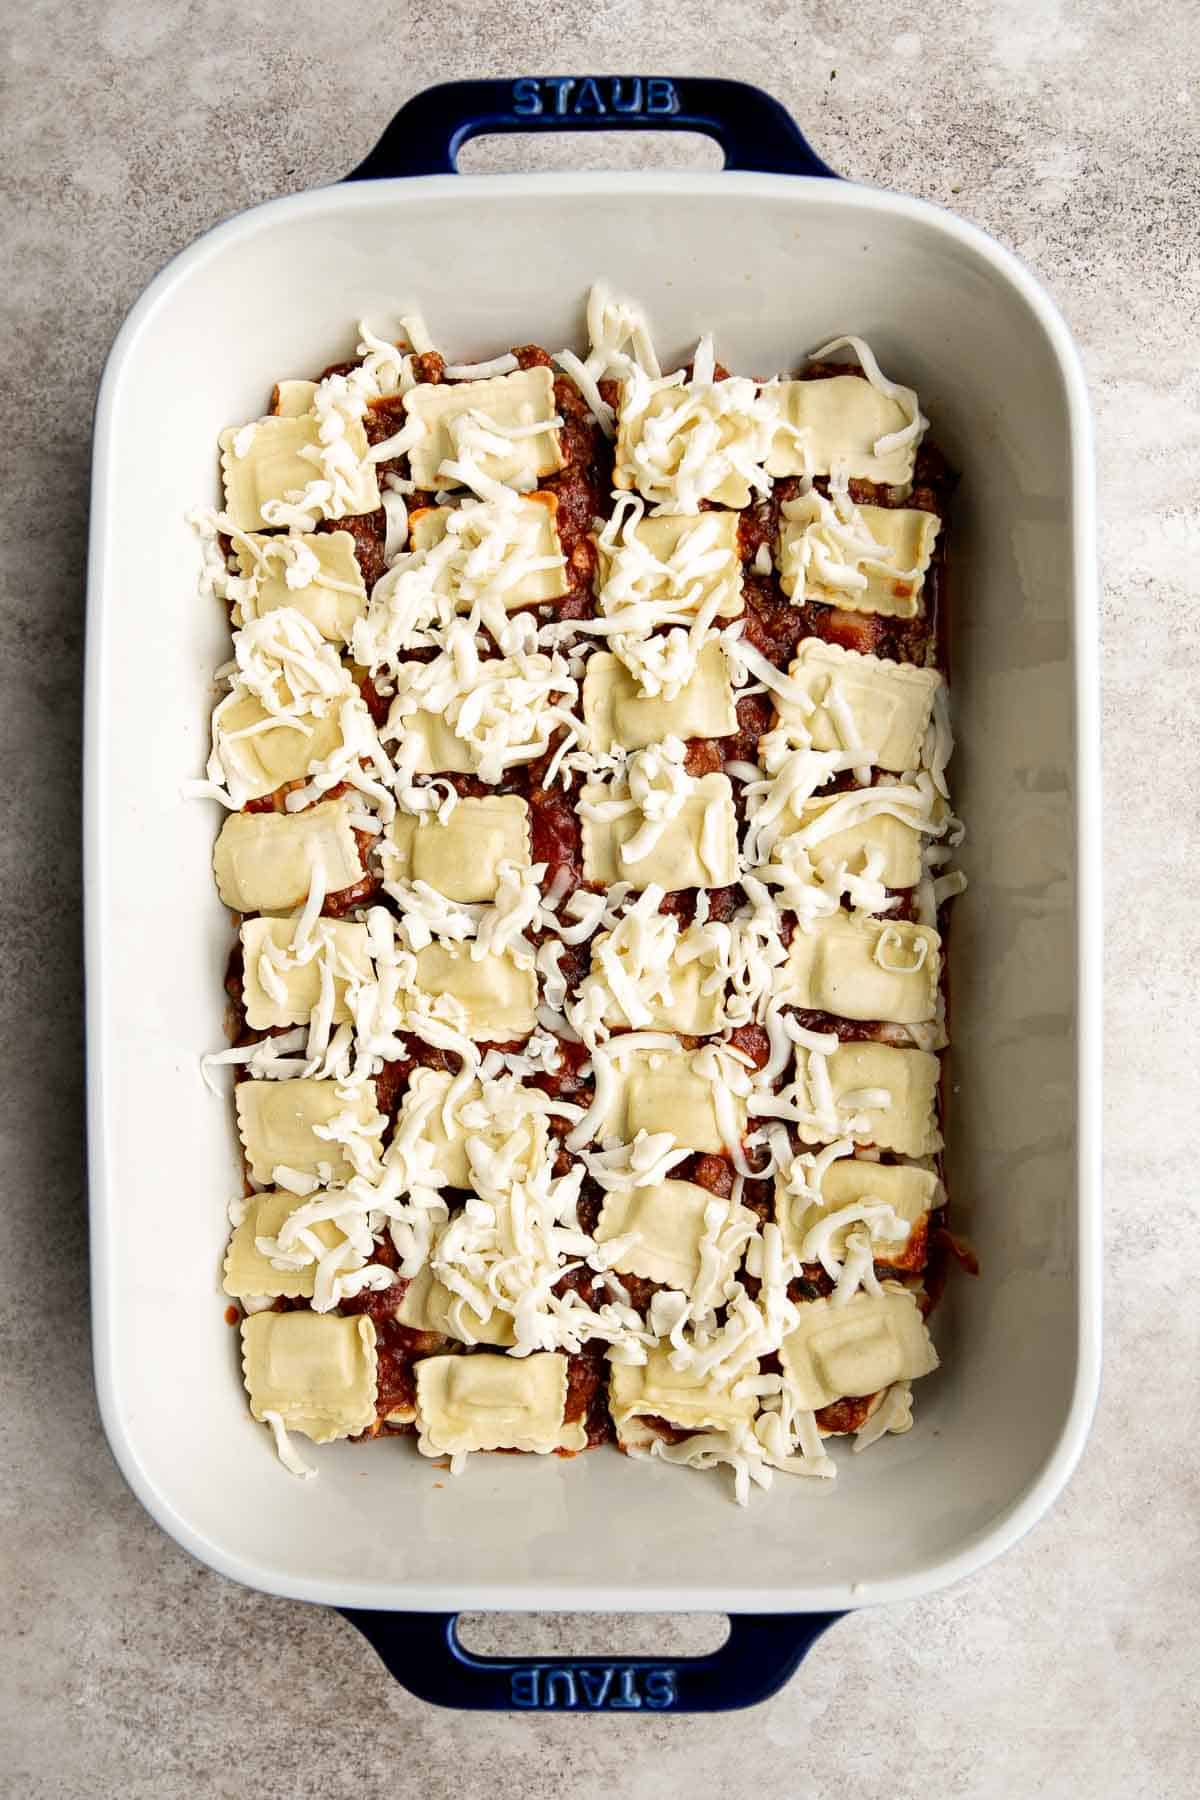
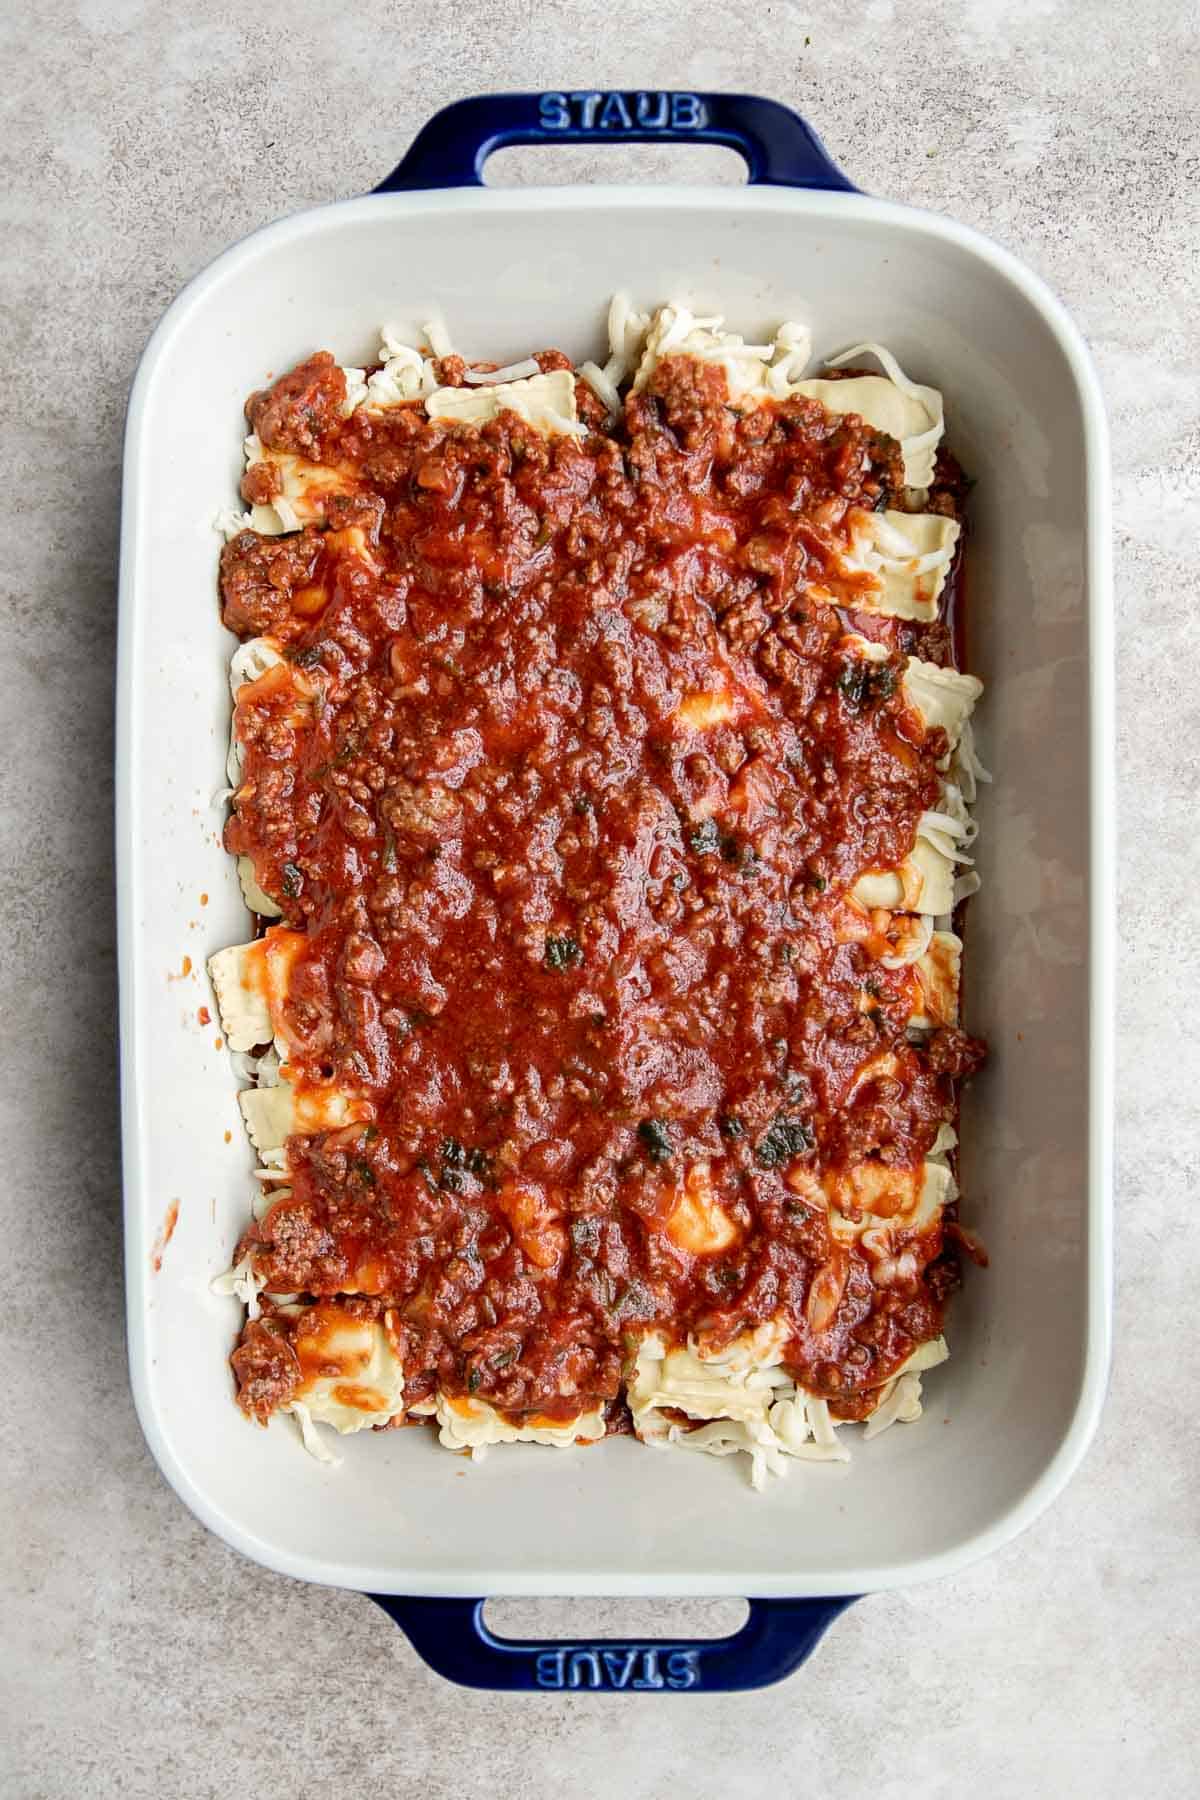
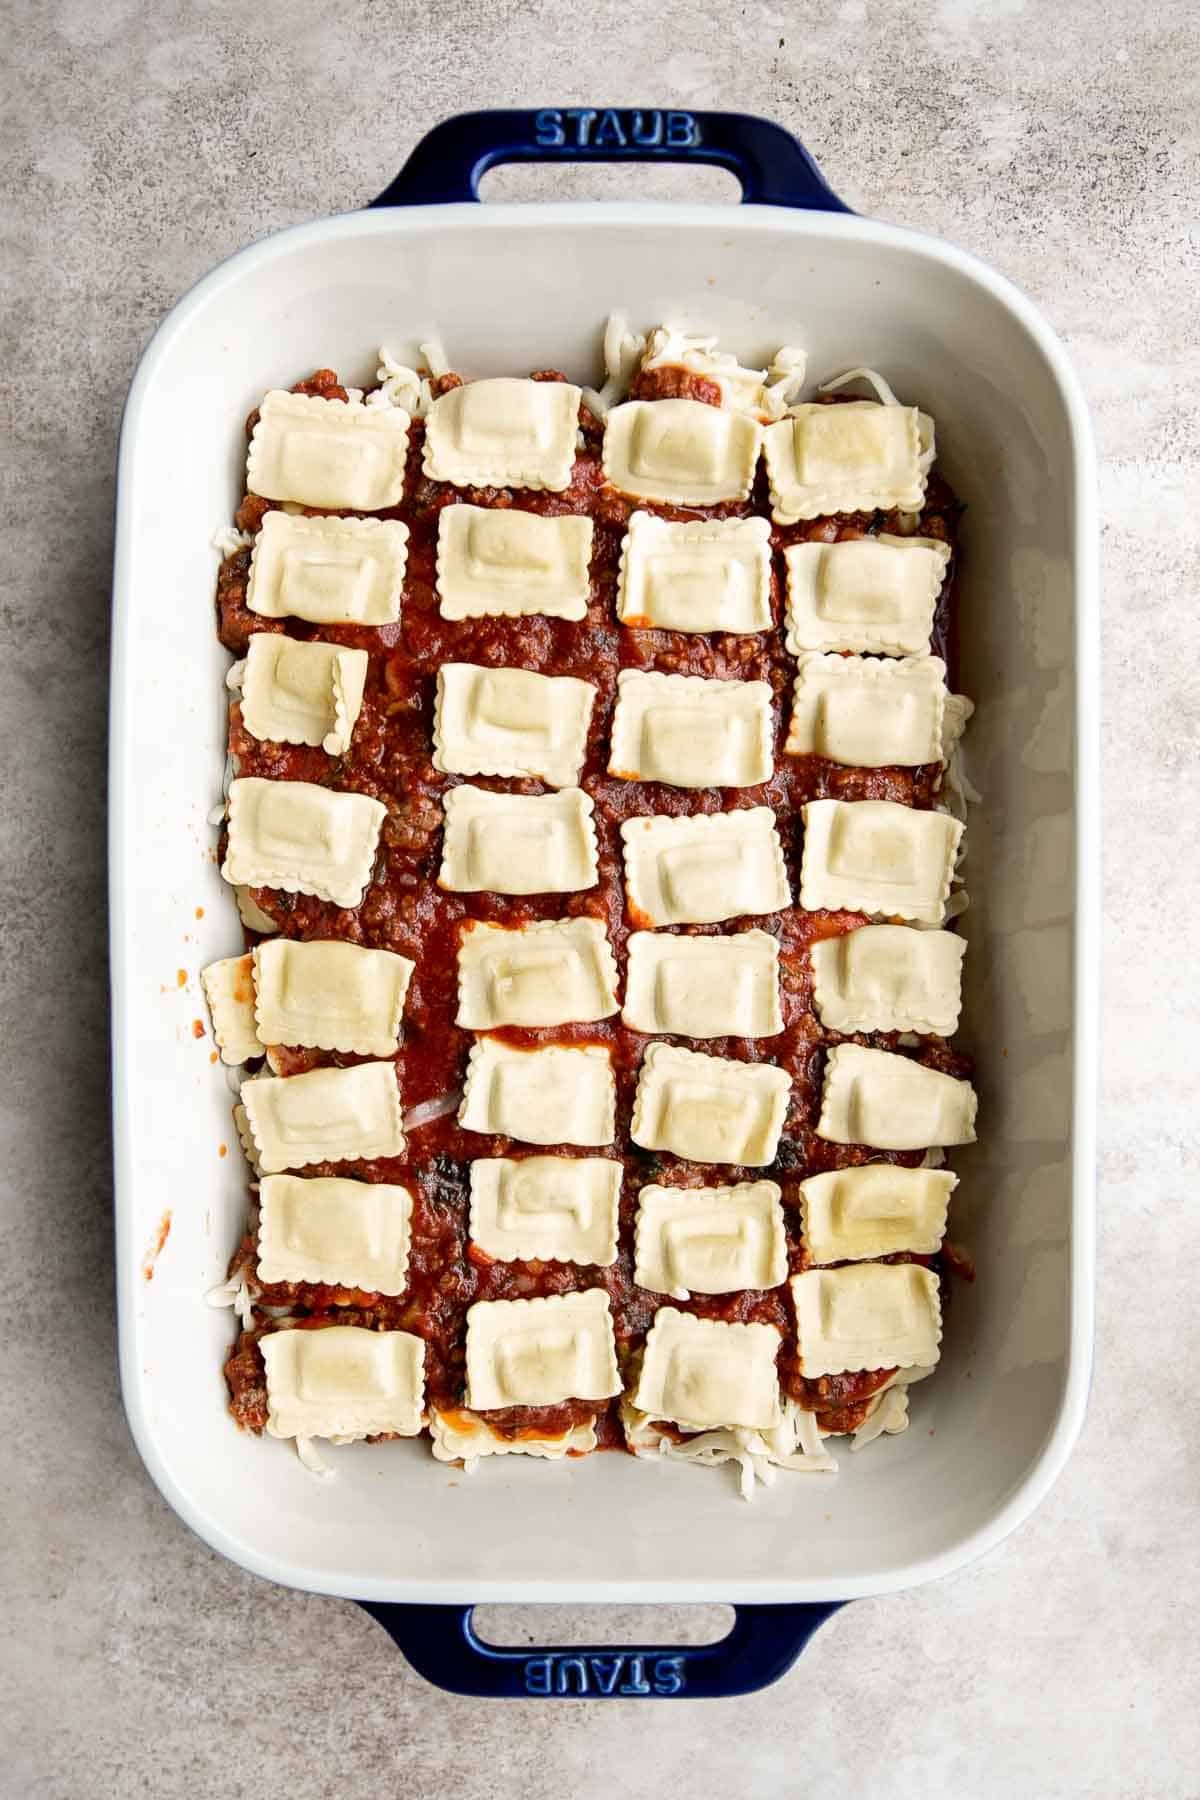
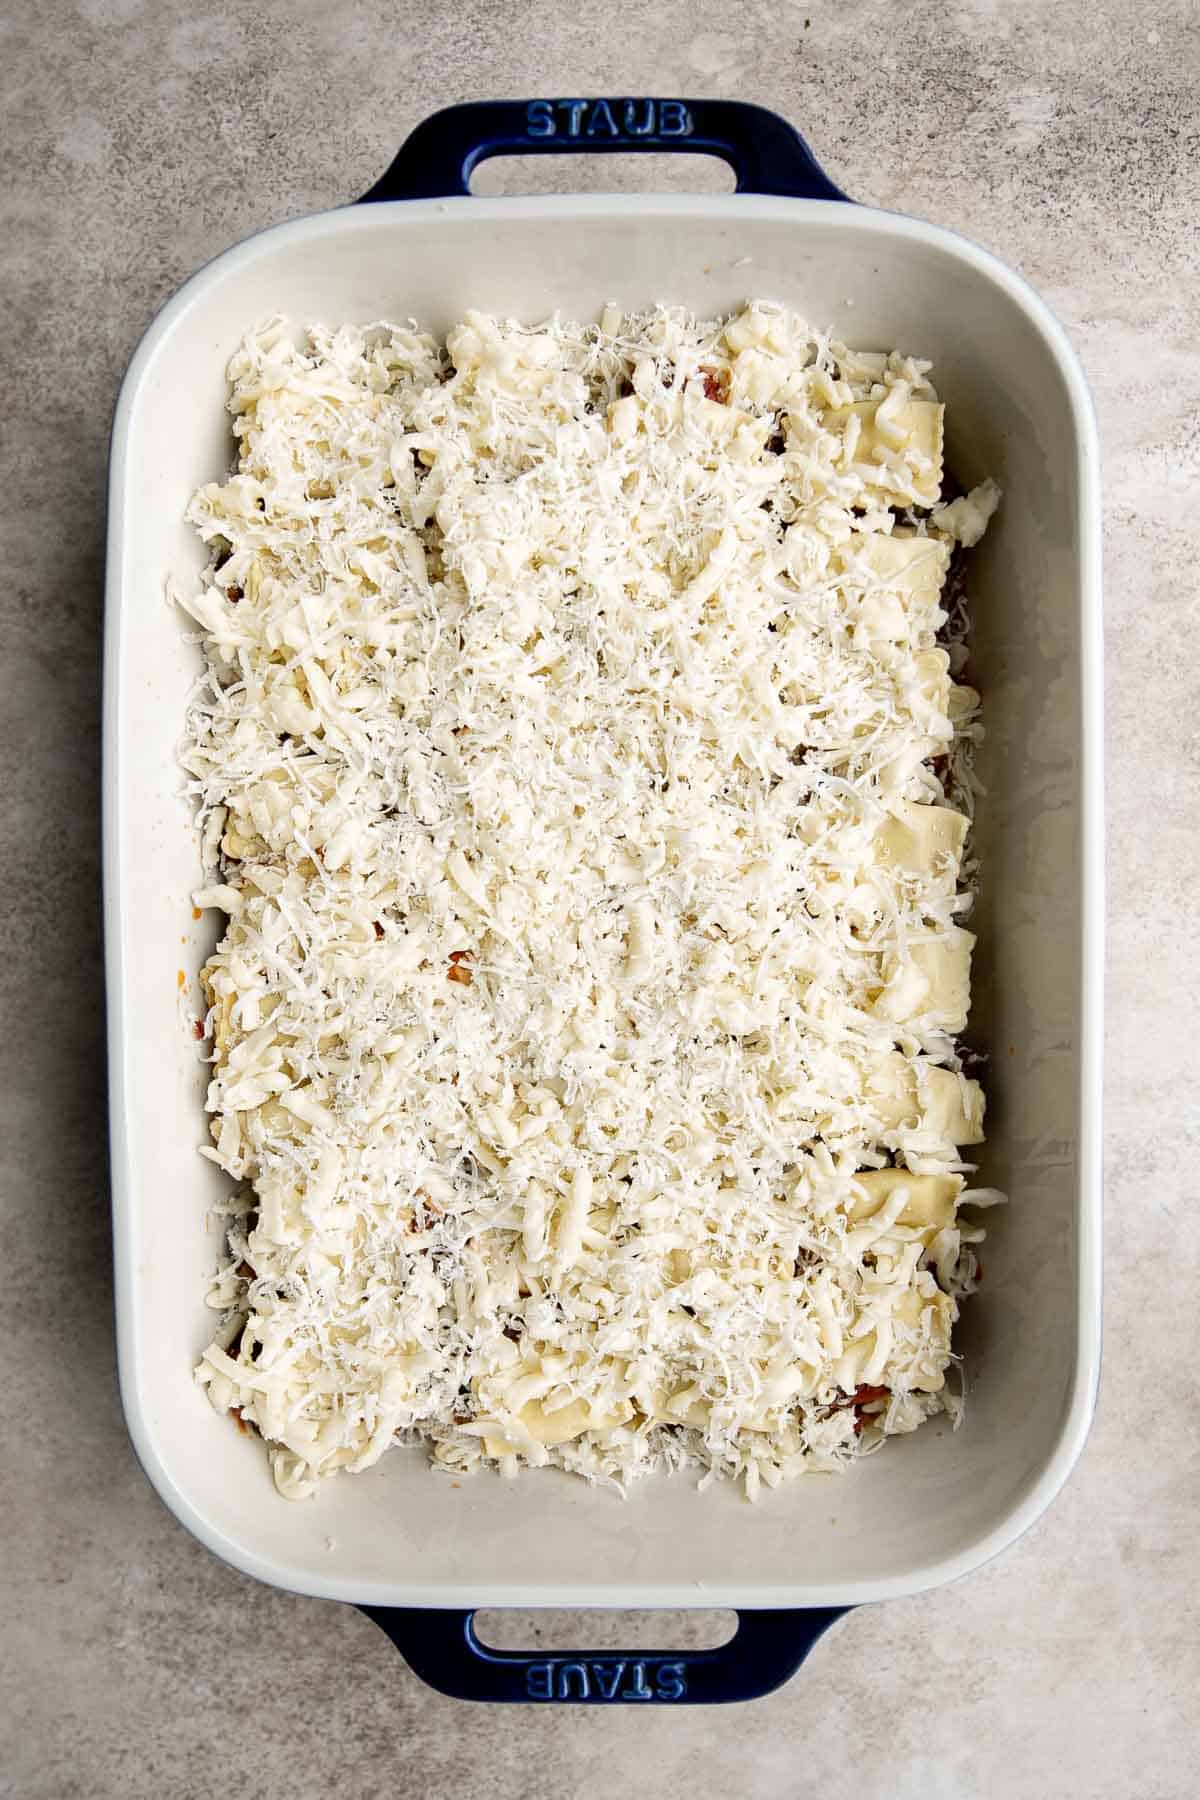
Bake the ravioli.
- Grease foil. Lightly grease a large piece of aluminum foil and cover the casserole pan with the greased side inside. Greasing the foil prevents the melted cheese from sticking to the foil while baking.
- Bake covered. In a 350F preheated oven, bake the ravioli covered for 45-50 minutes.
- Bake uncovered. Then, remove the foil and bake uncovered for another 20 minutes or until the melted cheese turns golden brown and bubbly.
- Broil (optional). Optionally, turn on broiler on high and broil for 3-4 minutes to get a crispy and brown cheesy crust. But keep a close eye on the broiler as things can burn quickly.
- Cool. Let the baked ravioli cool for 10 minutes before serving. Sprinkle on some chopped parsley, if desired.

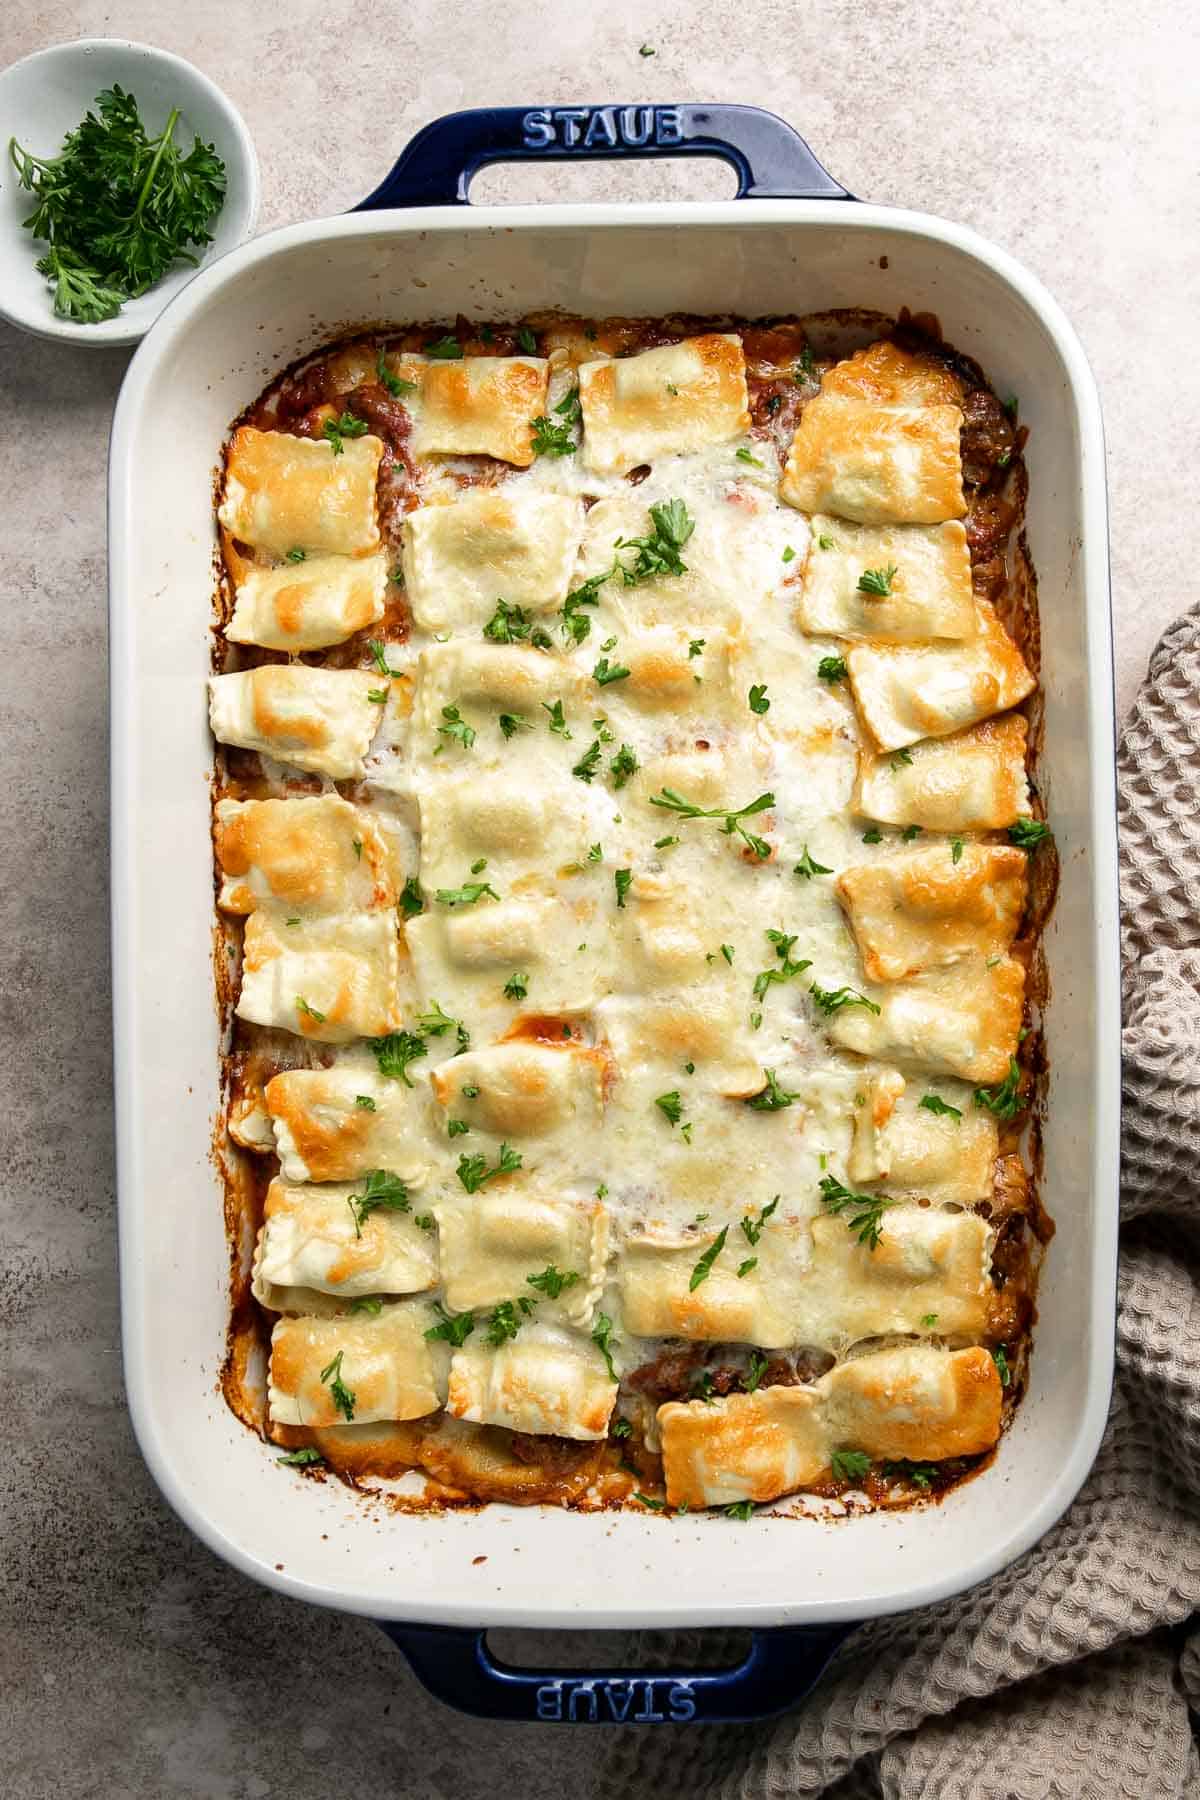
Recipe Variations
- Try different kinds of ravioli: Ravioli can come in many different shapes and sizes, and the fillings will differ greatly - some may include vegetables, some with cheese, and some may include meat. If you're feeling adventurous, try using different types of ravioli to find your favorite combinations. To keep it vegetarian, try cheese ravioli, spinach and cheese ravioli, or mushroom ravioli.
- Mix in vegetables: You can add vegetables to the meat sauce in the baked ravioli to make it more nutritious and flavorful. Some good options include diced bell peppers, sliced mushrooms, or chopped spinach.
- Spice it up: Add some chili pepper or hot sauce to the meat sauce to add some heat.
- Change the protein: We added ground meat to this ravioli, but you can easily switch up the protein with ground lamb, ground turkey, or sausage.
- Make it vegetarian: To make this recipe vegetarian, stick to vegetarian ravoili such as cheese, and omit the ground beef. You could bulk up the sauce with veggies or leave it simple.
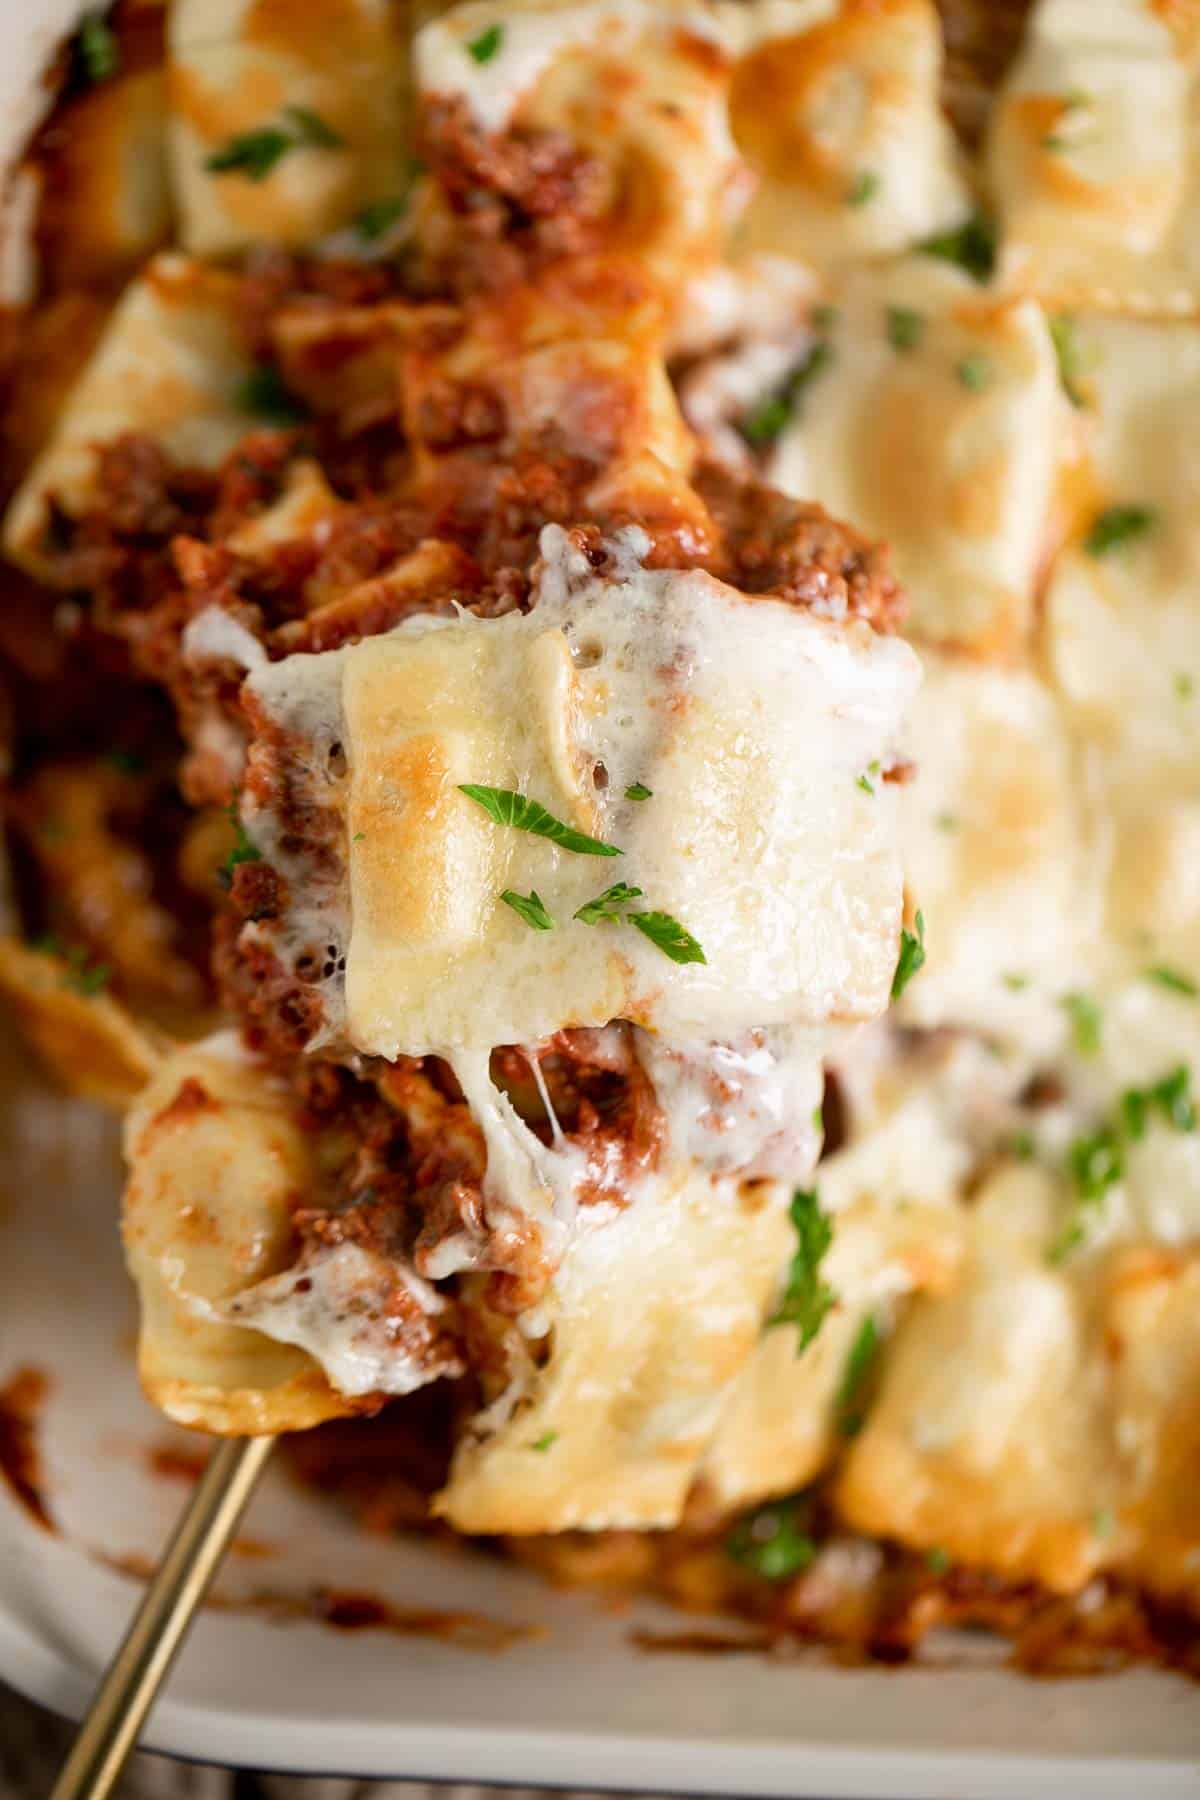
How to Serve
Serve Baked Ravioli on it's own for a filling, kid-friendly meal that the whole family will love. You can also serve it with some delicious sides for a complete meal. Our favorites include:
- Side salads: Serve the baked ravioli with a side of mixed greens or a Caesar salad for a well-rounded meal. Try: Kale Caesar Salad, Garden Salad, or Greek Salad.
- Garlic bread: Garlic bread is a classic pairing with any pasta dish. You can make your own garlic bread by toasting slices of bread and spreading them with a mixture of melted butter and minced garlic. Try: Cheesy Garlic Bread, Garlic Breadsticks, or Garlic Knots.
- Roasted vegetables: Roasted vegetables, such as broccoli, asparagus, or bell peppers, make a tasty and healthy side dish with comfort foods. Try: Oven Roasted Vegetables, Roasted Cauliflower, Microwave Steamed Broccoli, and Pesto Asparagus.
- Soup: A smooth and creamy soup is the perfect compliment to baked ravioli. Try: Tomato Basil Soup, Lemon Asparagus Soup with Parmesan, and Creamy Garlic Cauliflower Soup.
Storing and Freezing Instructions
How to Store
Transfer the baked ravioli to an airtight container and refrigerate for up to five days.
How to Reheat
Reheat in a 350F preheated oven for 10-15 minutes until warm, in the microwave on high power for 60-90 seconds, or on a pan on the stove over medium-low heat until heated through.
How to Freeze
Once cooled to room temperature, place the baked ravioli in a freezer-safe container and freeze for up to 3 months. Allow the ravioli to thaw overnight in the refrigerator before reheating. You can also reheat straight from frozen in the microwave or oven but you will need to add more time to reheat.
More Baked Pasta Recipes
- 40 Best Pasta Recipes
- Pasta Bake with Sausage (Baked Ziti)
- Lasagna Roll Ups
- Cheesy Tortellini and Sausage Bake
- Ground Turkey Pasta Bake
- Meat Lasagna
Tried this recipe?
I'd love to hear what you think! Leave a comment and rating below to share your feedback. Your reviews help others discover this recipe and help me keep creating more free recipes for you. Snap a photo and tag me on social media @aheadofthyme too.
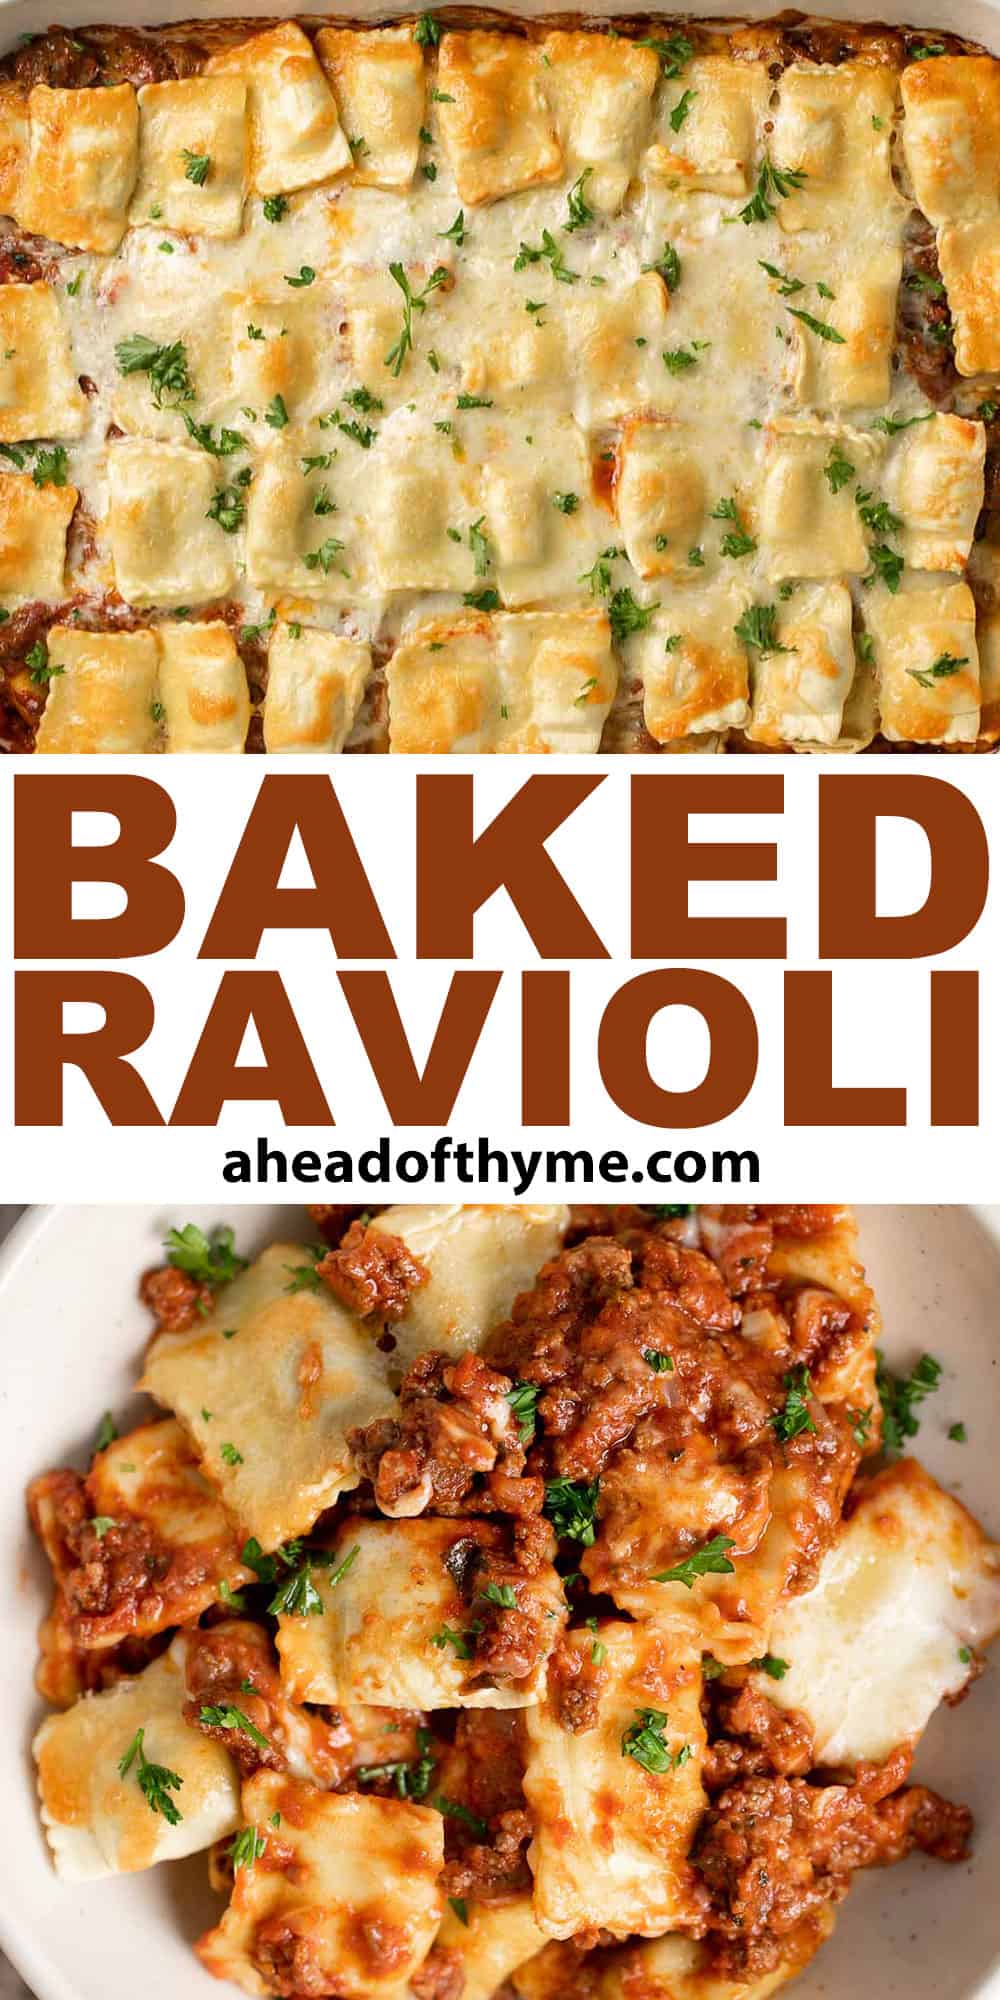
Kale Caesar Salad
Kale Caesar Salad is a delicious and healthy twist on the classic Caesar salad. It's got all the traditional flavors but with the added crunch and rich earthiness of fresh kale. It's a perfect lunch recipe or side dish at family dinners.
Classic Caesar salad is one of the most popular types of salad in the world, but this kale Caesar might surpass it! It's not just delicious - it's also incredibly quick and easy to make! In as little as five minutes, you can have a family-sized kale Caesar salad ready to serve. This year-round staple can't be beat in terms of simplicity and satisfaction.
Why You'll Love this Kale Caesar Salad
- A delicious twist on classic Caesar salad. While the most important ingredients remain the same, the addition of kale reinvents this Caesar salad and makes it even better.
- Simple ingredients. It only takes five common ingredients to make this easy and delicious Caesar salad with kale, and you might already have some of them on hand! With fresh greens, creamy dressing, and toppings (such as croutons and Parmesan cheese) for an extra layer of deliciousness.
- Perfect for all occasions. Kale caesar salad with kale is great as a side dish for casual dinners, on its own as a quick lunch, or as the salad course for a more formal dinner. It's also good for potlucks and carry-ins.
- It's packed with nutrients. Kale is a superfood that is high in vitamins K, A, and C, as well as calcium and iron. It's also a great source of fiber, which can help to keep you feeling full and satisfied.
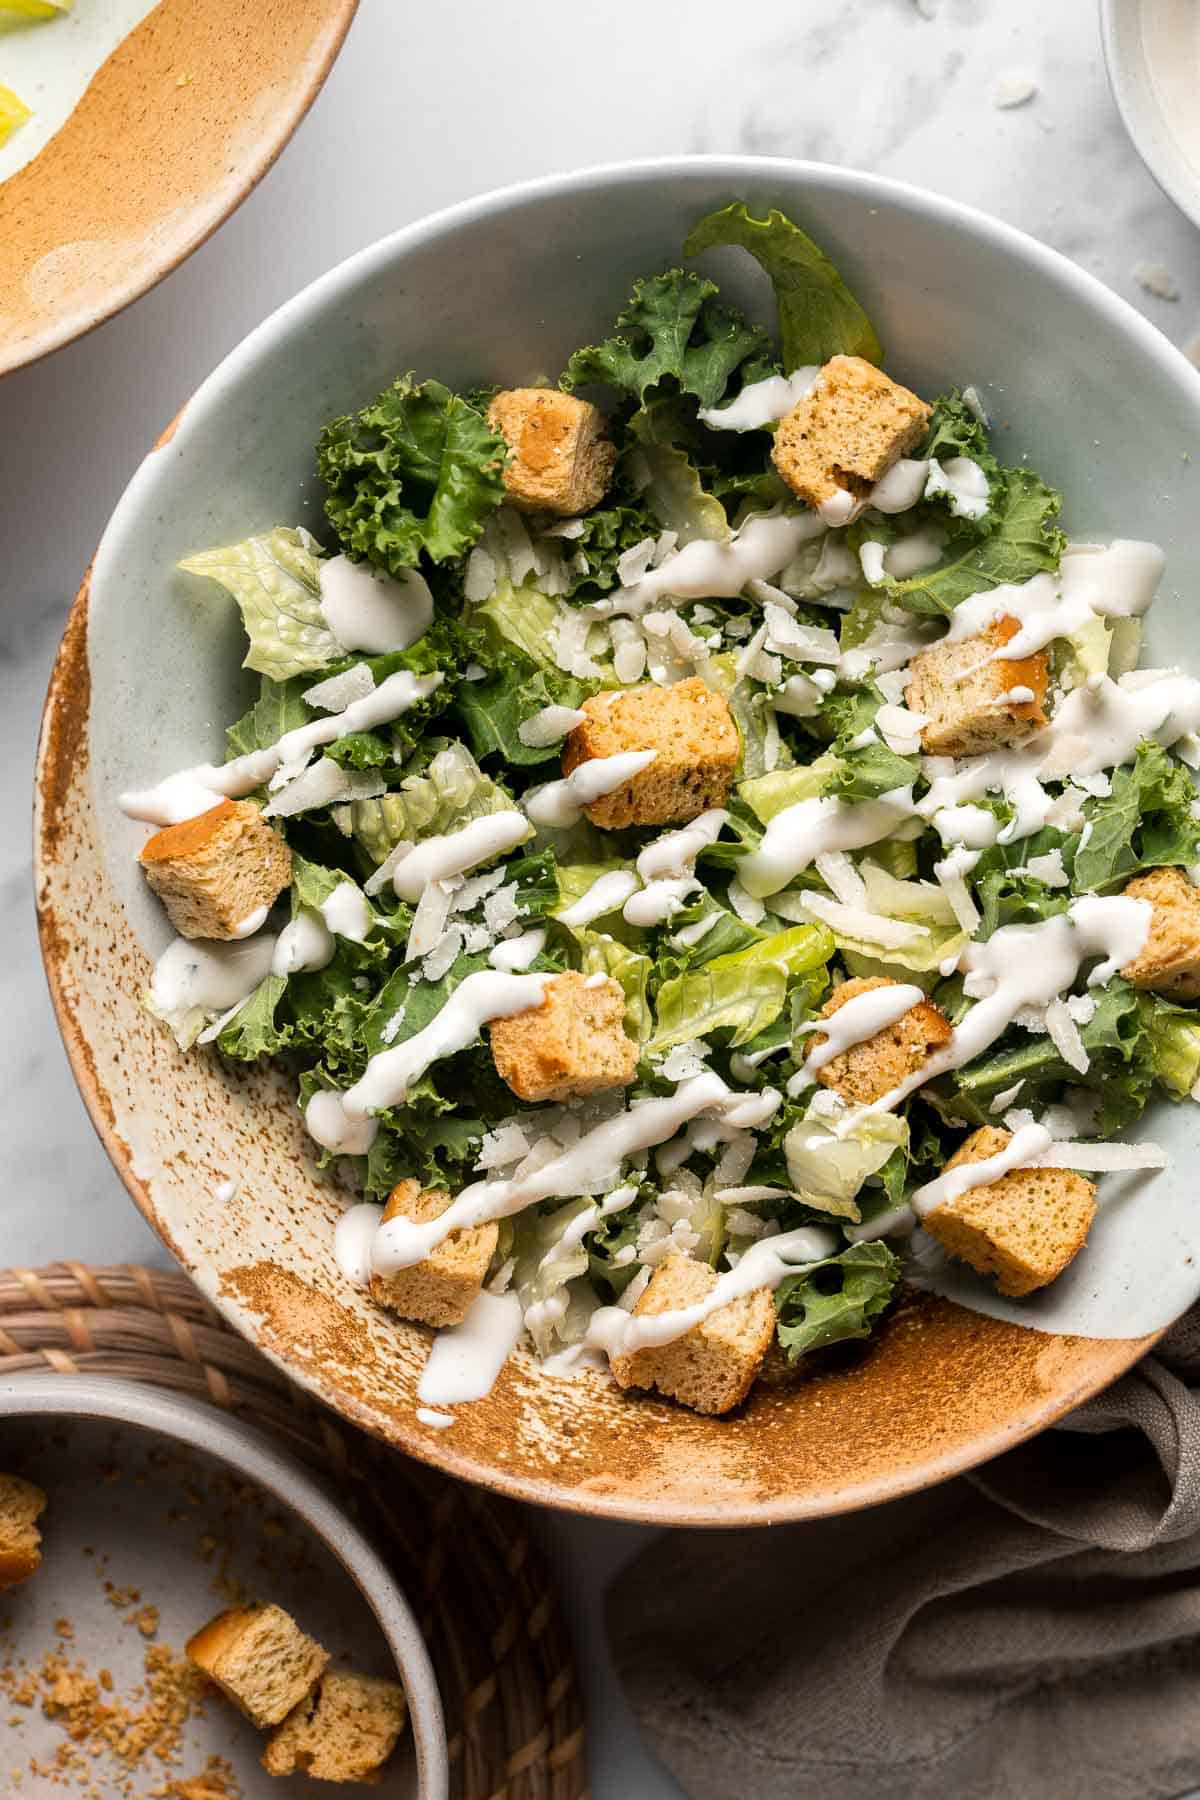
Ingredients and Substitutions
To make this easy Kale Caesar Salad, you will need the following ingredients (full quantities in recipe card below):
- kale - a fresh bunch is recommended here but you can also use pre-cut bags of kale to make it even easier to make this kale Caesar. If you don't have kale on hand, you can use another leafy green in this salad. Some good options include spinach, romaine lettuce, or mixed greens.
- romaine lettuce - romaine is classic in Caesar salads, but if you don't have it on hand, you can use more butter lettuce or iceberg lettuce instead. You can also use more kale instead.
- parmesan cheese - asiago or pecorino romano would also work in place of the parmesan cheese in this recipe. For a vegan substitute, try nutritional yeast.
- croutons - seasoned or unseasoned croutons are fine - it's up to your personal preference. For a healthier alternative, you can use another type of crunchy topping. Some good options include toasted nuts, seeds, or rolled oats. You can also omit the croutons entirely.
- Caesar salad dressing - you can use your favorite Caesar dressing or make one yourself! There are also dairy-free and vegan options in stores for those with a dairy allergy or other restrictions.
You will also need measuring cups and a large serving bowl (or mixing bowl).
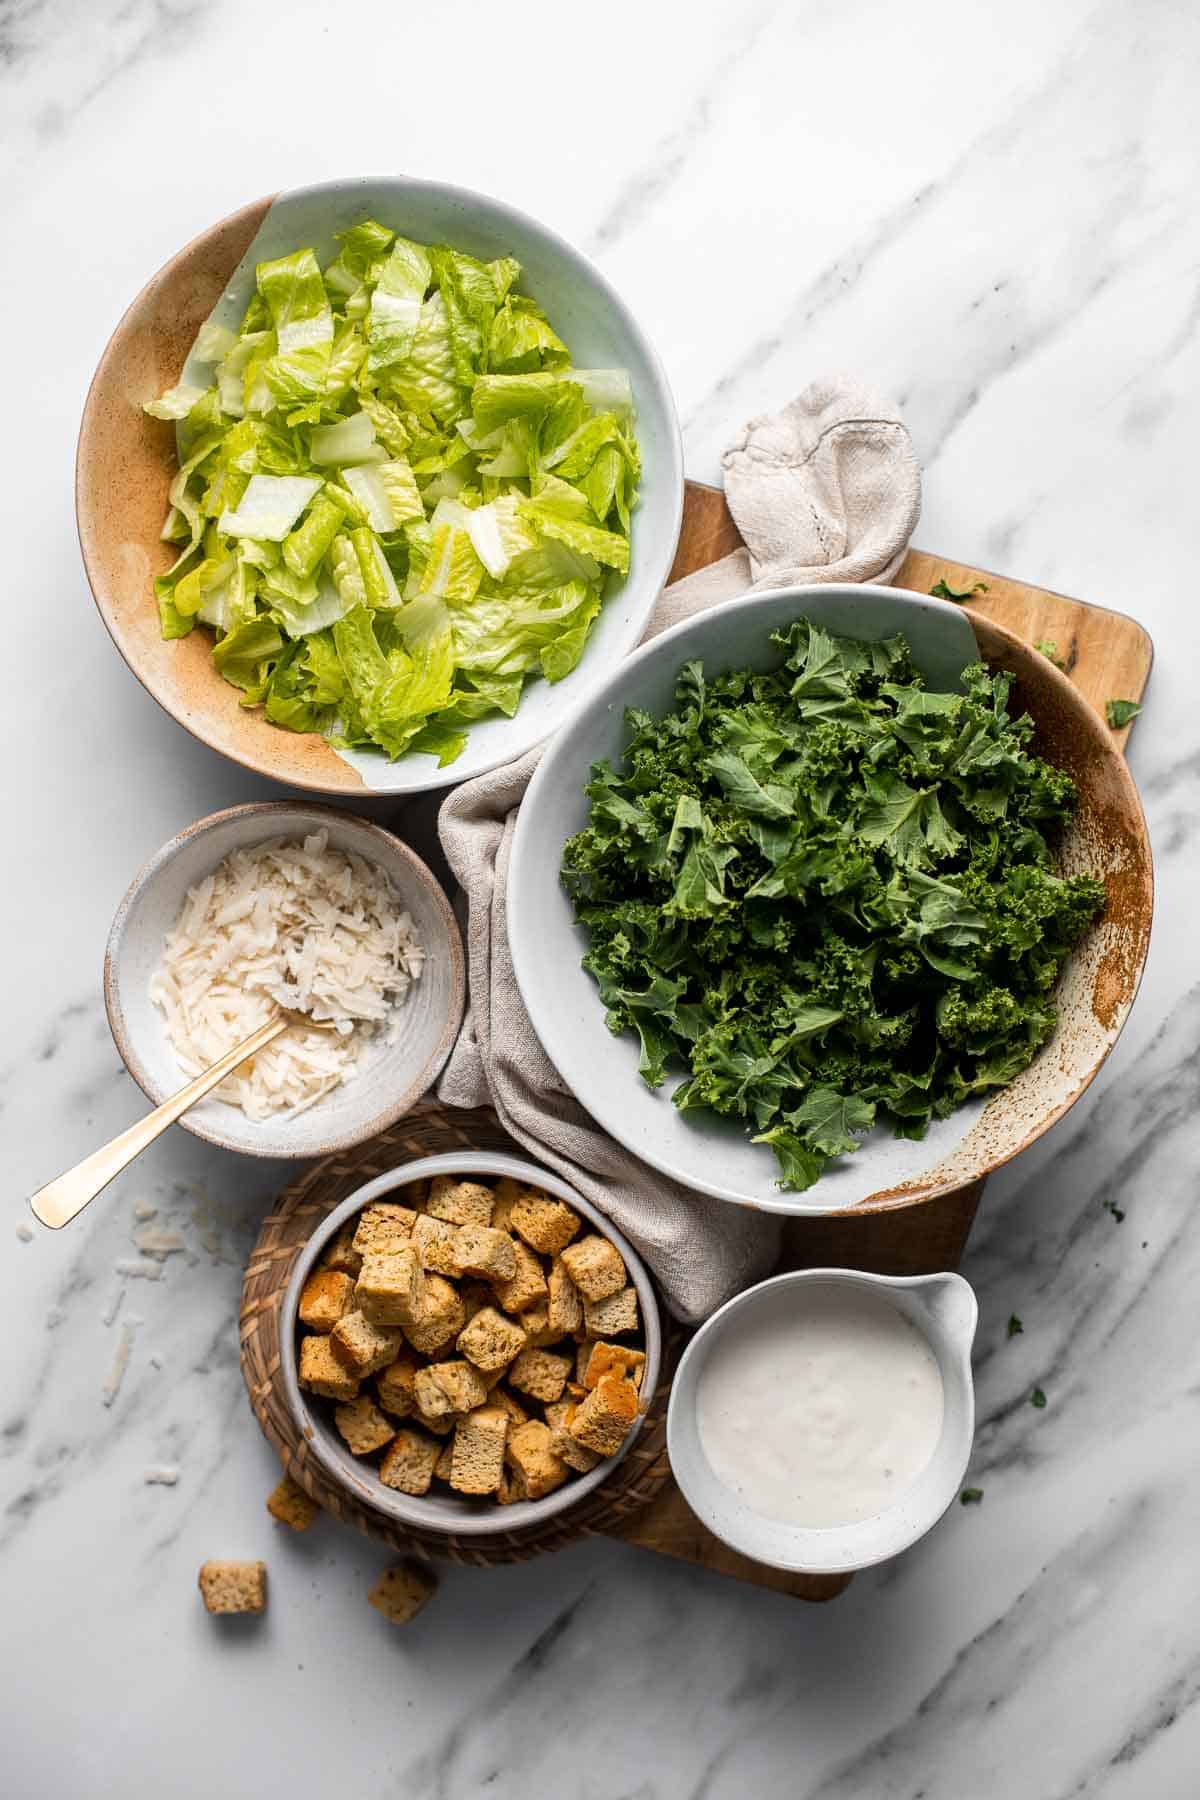
How to Make the Best Kale Caesar Salad
In a large serving bowl, combine kale, romaine lettuce, parmesan, and croutons.


Drizzle salad with Caesar salad dressing and toss gently to combine. Serve immediately.
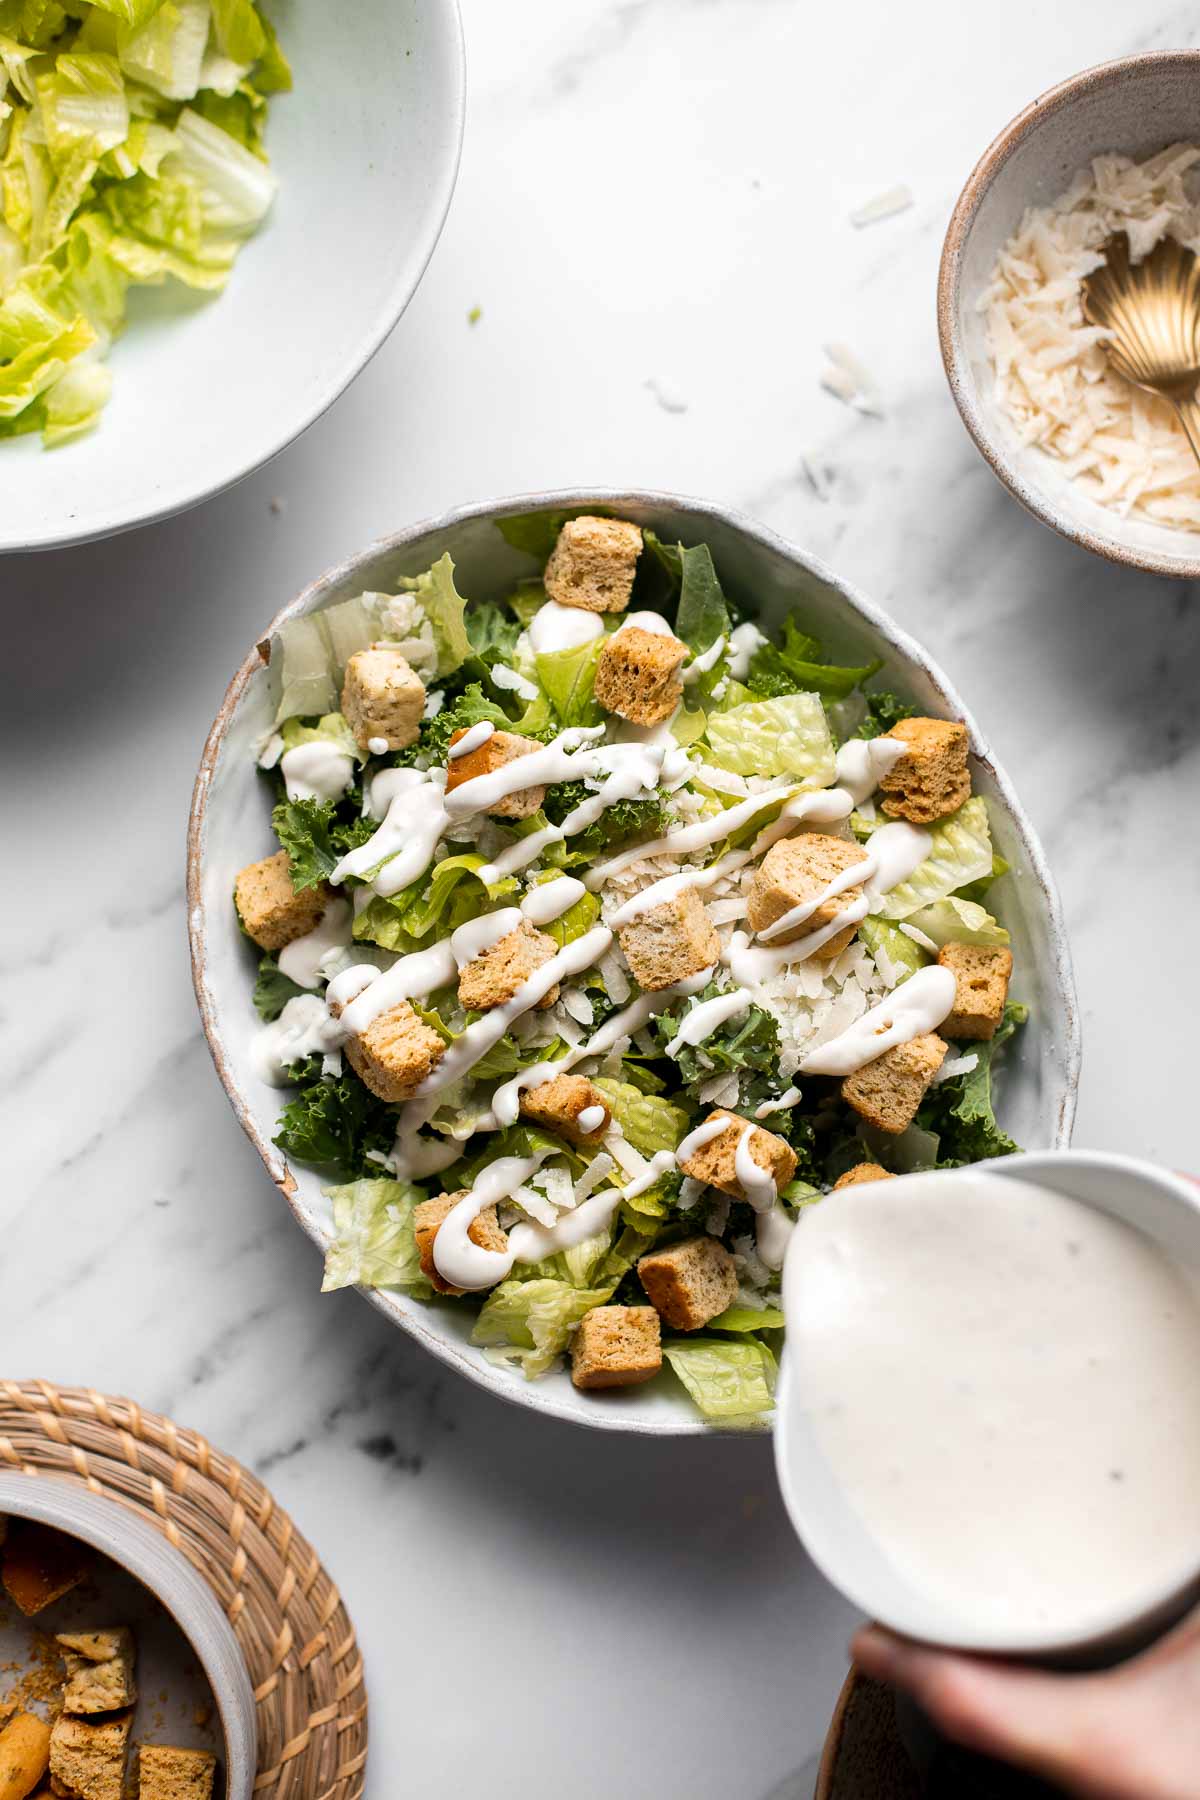
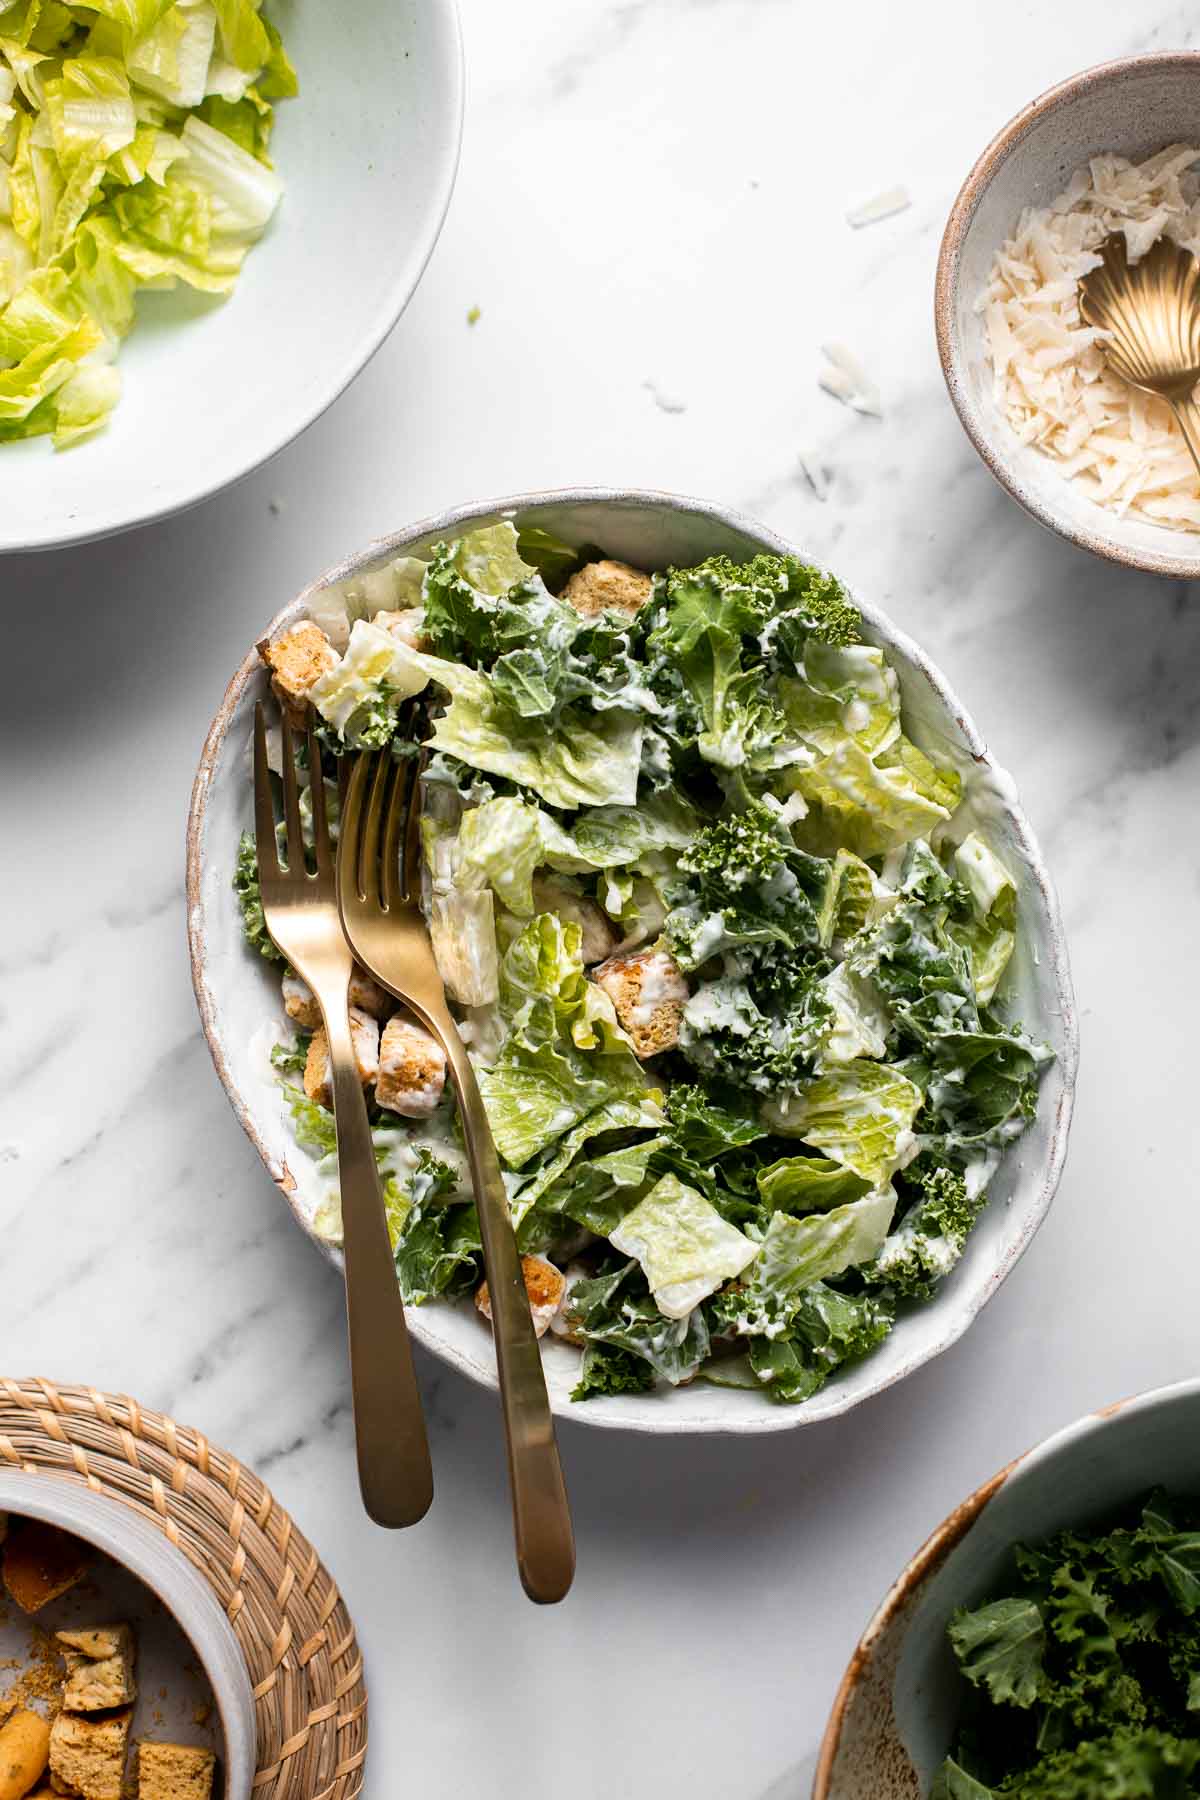
Recipe Variations
- Add some protein. Add in some protein to this kale salad such as grilled chicken, shrimp, or salmon to make this a more filling meal. You could also add in tofu or hard-boiled eggs for a plant-based protein boost.
- Mix it up with different greens. If you're not a fan of kale, you can use any leafy green in this recipe. Spinach, romaine, and mixed greens all work well.
- Add other veggies. Add in extra veggies like sliced avocado and cherry tomatoes for a burst of flavor and extra nutrients to this salad.
- Make it vegan. To make this recipe vegan, simply use a vegan Caesar dressing and substitute the Parmesan cheese with nutritional yeast.
How to Serve
You can serve this Kale Caesar Salad as a light lunch, side dish, or as a main meal with some added protein such as grilled chicken or tofu. Caesar salad is traditionally served alongside a simple star protein such as fish, steak, and chicken for a wholesome dinner.
Some of our favorite mains to serve with this kale salad are:
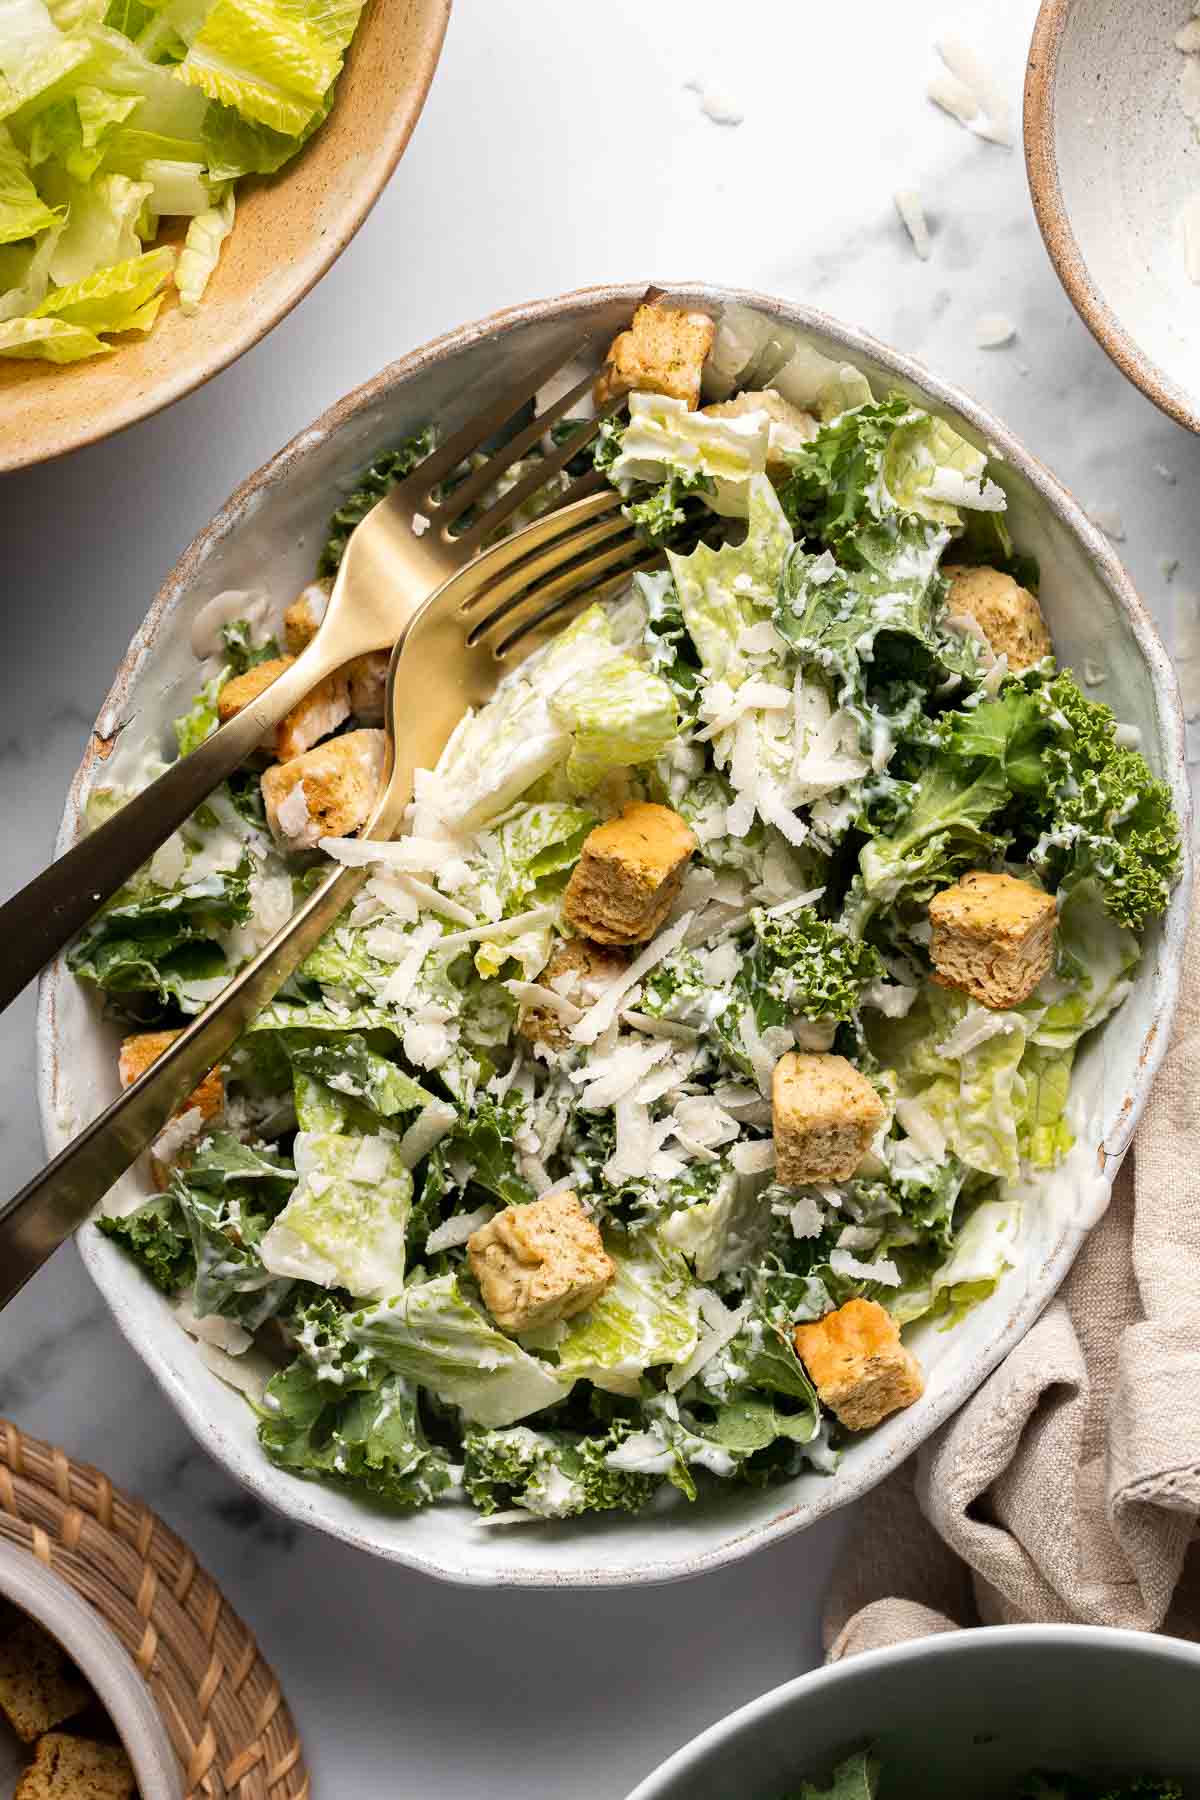
Recipe Tips and Tricks
- Make your own Caesar dressing. If you've got time on your hands, you can make your own Caesar Salad Dressing in just minutes for the freshest flavor.
- Make your own croutons. You can also make homemade croutons (try our Rice Croutons for a twist!).
- Make ahead tips: It's best to assemble the salad just before serving, as the kale can become wilted if it sits in the dressing for too long. However, you can definitely prep the dressing (if making it from scratch) ahead of time to make the final assembly faster. Just keep the dressing in the fridge until you're ready to use it (up to 1 week).
- How to use leftover dressing. If you have any leftover homemade dressing, you can use it to make more salad, try it as a dipping sauce for vegetables, or use as a marinade for grilled chicken or tofu.
Storing and Freezing Instructions
How to Store
For best results, store the undressed salad separately from the dressing to prevent wilting and remove the croutons. Store the undressed salad in an airtight container in the refrigerator for up to 5 days.
If the salad has been dressed, you can store in an airtight container in the fridge for up to 3 days. I recommend removing the croutons and adding new ones before serving as they will get soggy the longer they are stored. When you are ready to serve the salad, remove it from the refrigerator and give it a good stir to distribute the dressing evenly. You may need to add a little bit more dressing to the salad if it has absorbed a lot of the dressing while it was stored in the refrigerator. Then, add fresh croutons and serve.
How to Freeze
It's not recommended to freeze salads as the greens will wilt and change texture.
More Salad Recipes
- 40 Best Salad Recipes
- Sweet Kale Salad
- Caesar Salad
- Mexican Caesar Salad
- Lemon Kale Salad
- Winter Kale Salad with Apple Cider Vinaigrette

Avocado Toast with Poached Egg
Avocado Toast with Poached Egg is the perfect recipe to make when you don't have a lot of time to cook but still looking for something delicious, healthy, and nutritious for breakfast. In about 5 minutes with just a handful of ingredients, you can create a drool-worthy plate of egg and avocado toast.
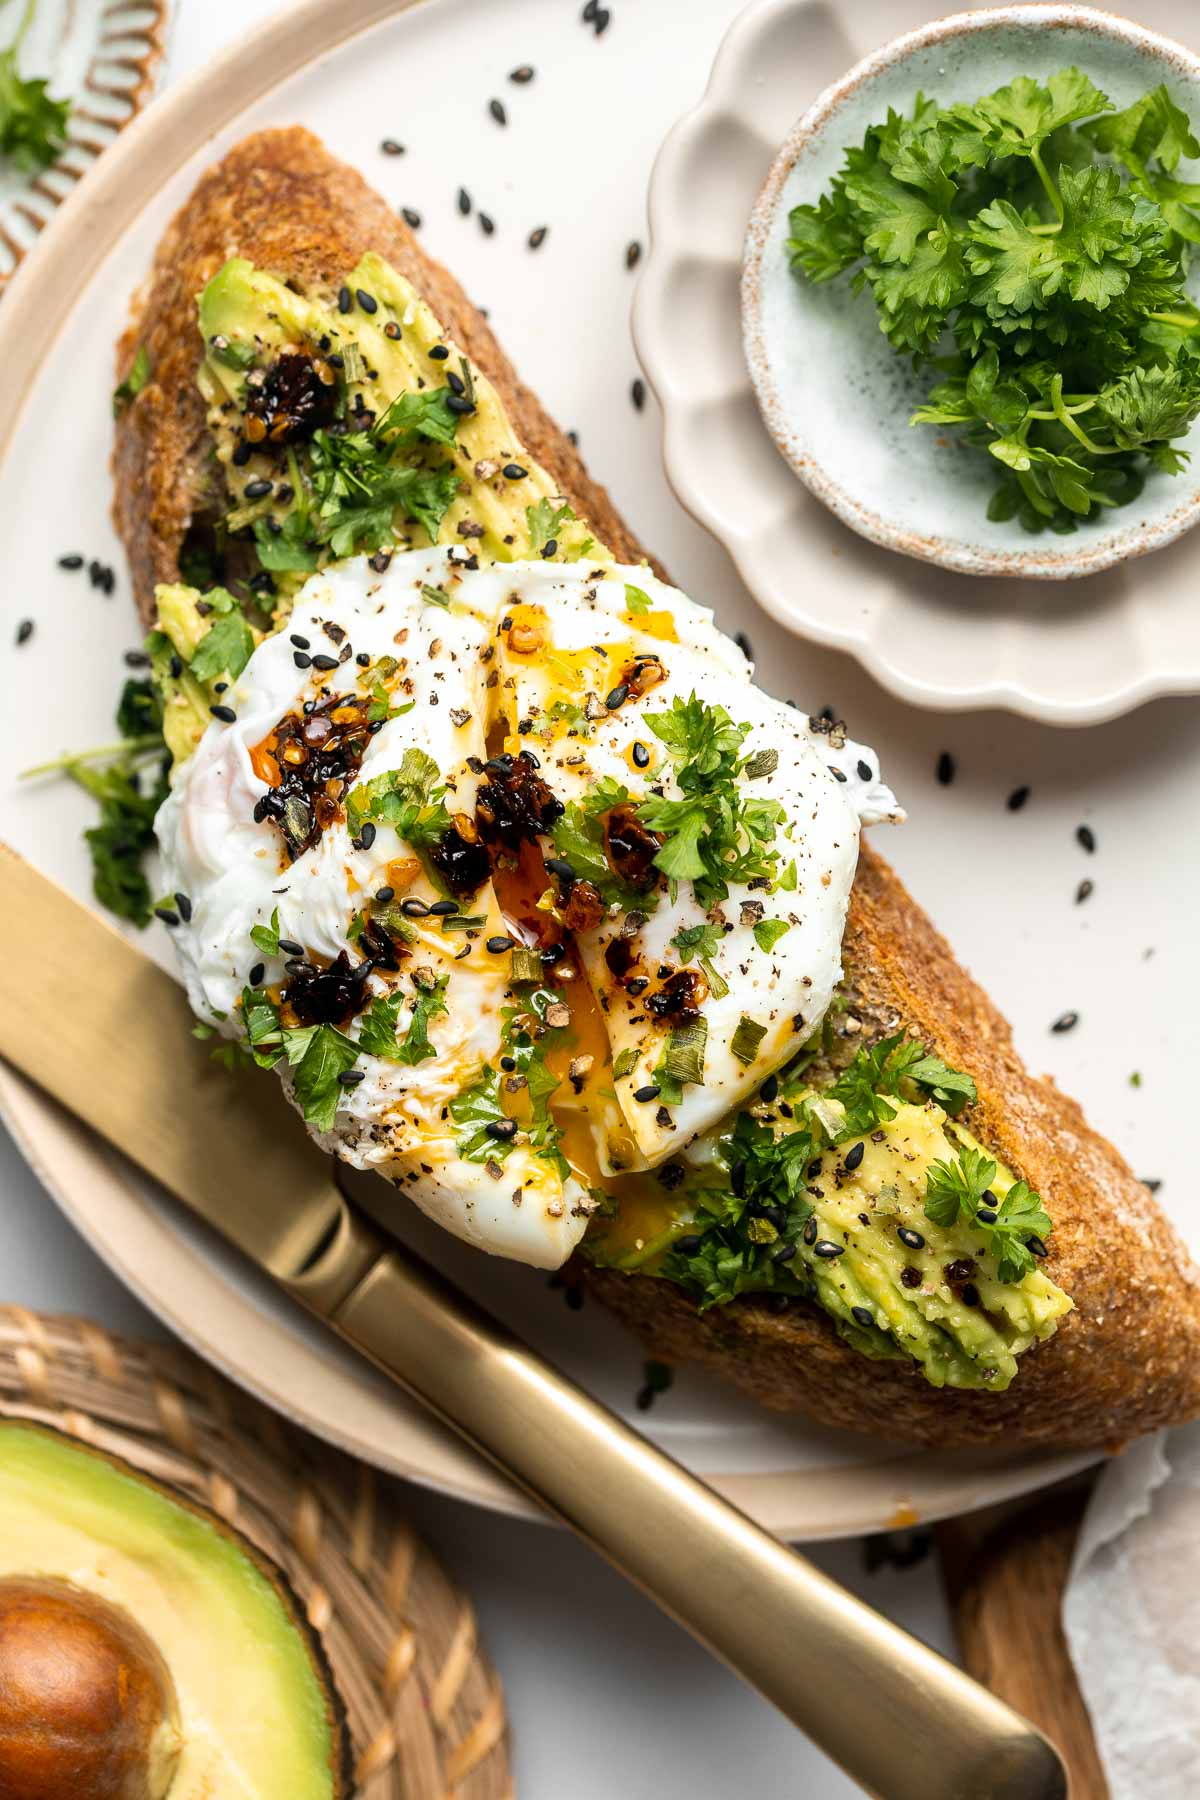
Avocado toast has been a trending food for what feels like years now, and for good reason. This poached egg and avocado toast has the perfect balance of flavors and textures: crunchy toast, tender egg, and soft avocado. It's so easy (and way cheaper) to make at home. Just gather your ingredients, poach the eggs, slice the avocado, toast the bread, and assemble.
Why You'll Love this Avocado Toast with Egg
- Great any time of day. Poached egg and avocado toast can be eaten as for breakfast, snacktime, lunch, or even dinner. No matter how you choose to serve avocado toast, it is a delicious and satisfying meal. There's never a bad time for this avocado toast!
- It's a healthy meal. Thanks to whole grain bread, eggs, and avocado, this recipe is nutrient-dense. Avocados are loaded with healthy monounsaturated fats, vitamins, and minerals. Eggs are a good source of protein and vitamin D. Whole grain bread also provides a source of added fiber.
- Quick and easy. Making avocado toast at home is easy and a lot cheaper than buying it at a local restaurant. It takes only a couple minutes to prep and about five minutes of to poach the eggs. It couldn't be faster to get a hearty loaded toast on the table.
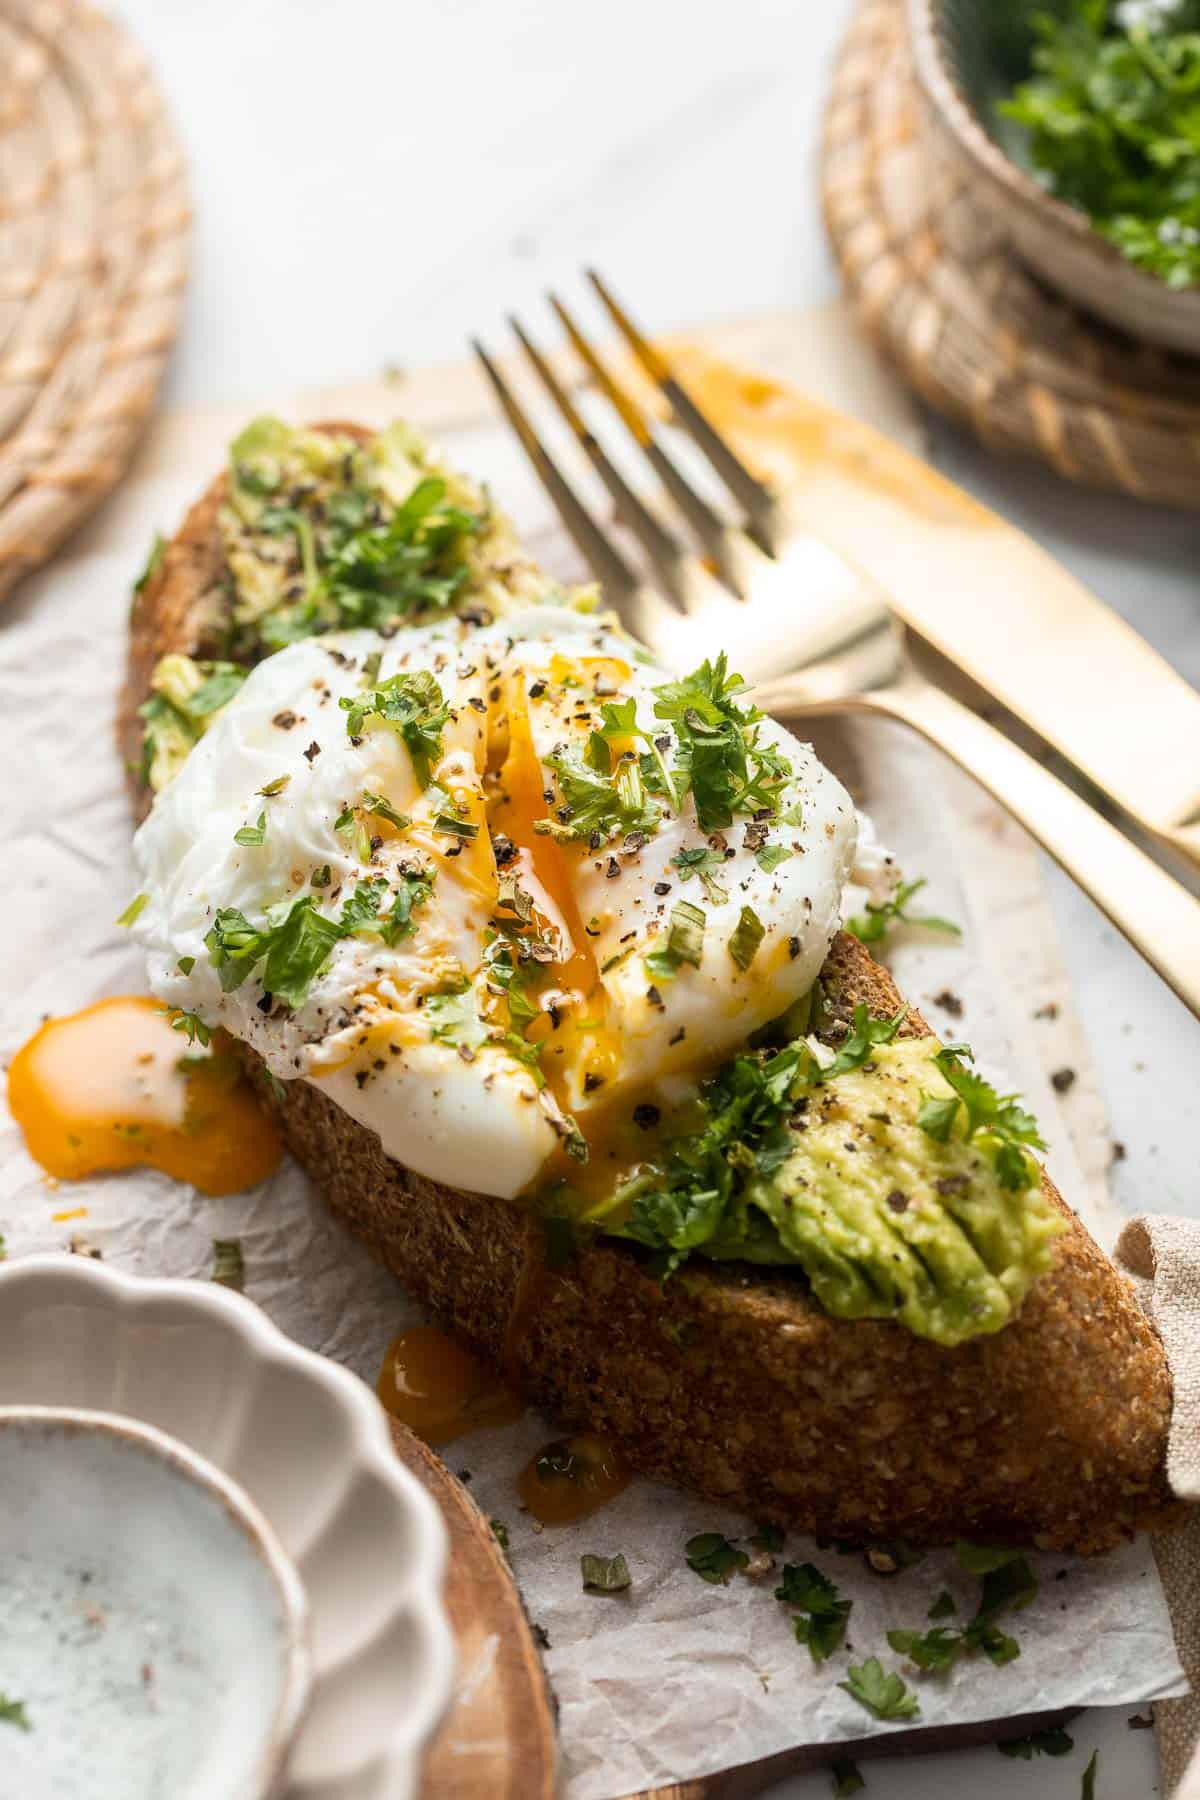
Ingredient Notes
To make this easy Avocado Toast with Poached Egg, you will need the following ingredients (full measurements in recipe card below):
- eggs - you can omit the eggs if you're allergic or follow a vegan diet - just stick to the avocado toast instructions instead.
- white vinegar - white wine vinegar or lemon juice in equal amounts will also work here.
- sliced whole grain bread - use an oval-shaped loaf that's big enough to hold the egg but not so big that there's a lot of empty surface around the egg. If you think you might need to add a second egg, the loaf is probably too big.
- avocado - check to make sure the avocado is perfectly ripe by giving it a gentle squeeze - if it gives a little bit, it's ready to enjoy! This recipe is a great way to use up any avocado that is in your fridge that you need to use ASAP before it starts to go bad.
- salt and pepper
- parsley - if you can't find fresh parsley, dried parsley flakes will also work! You can also substitute with any fresh herbs that you like. Try dill, cilantro, or oregano.
You will also need a medium saucepan, slotted spoon, and toaster.
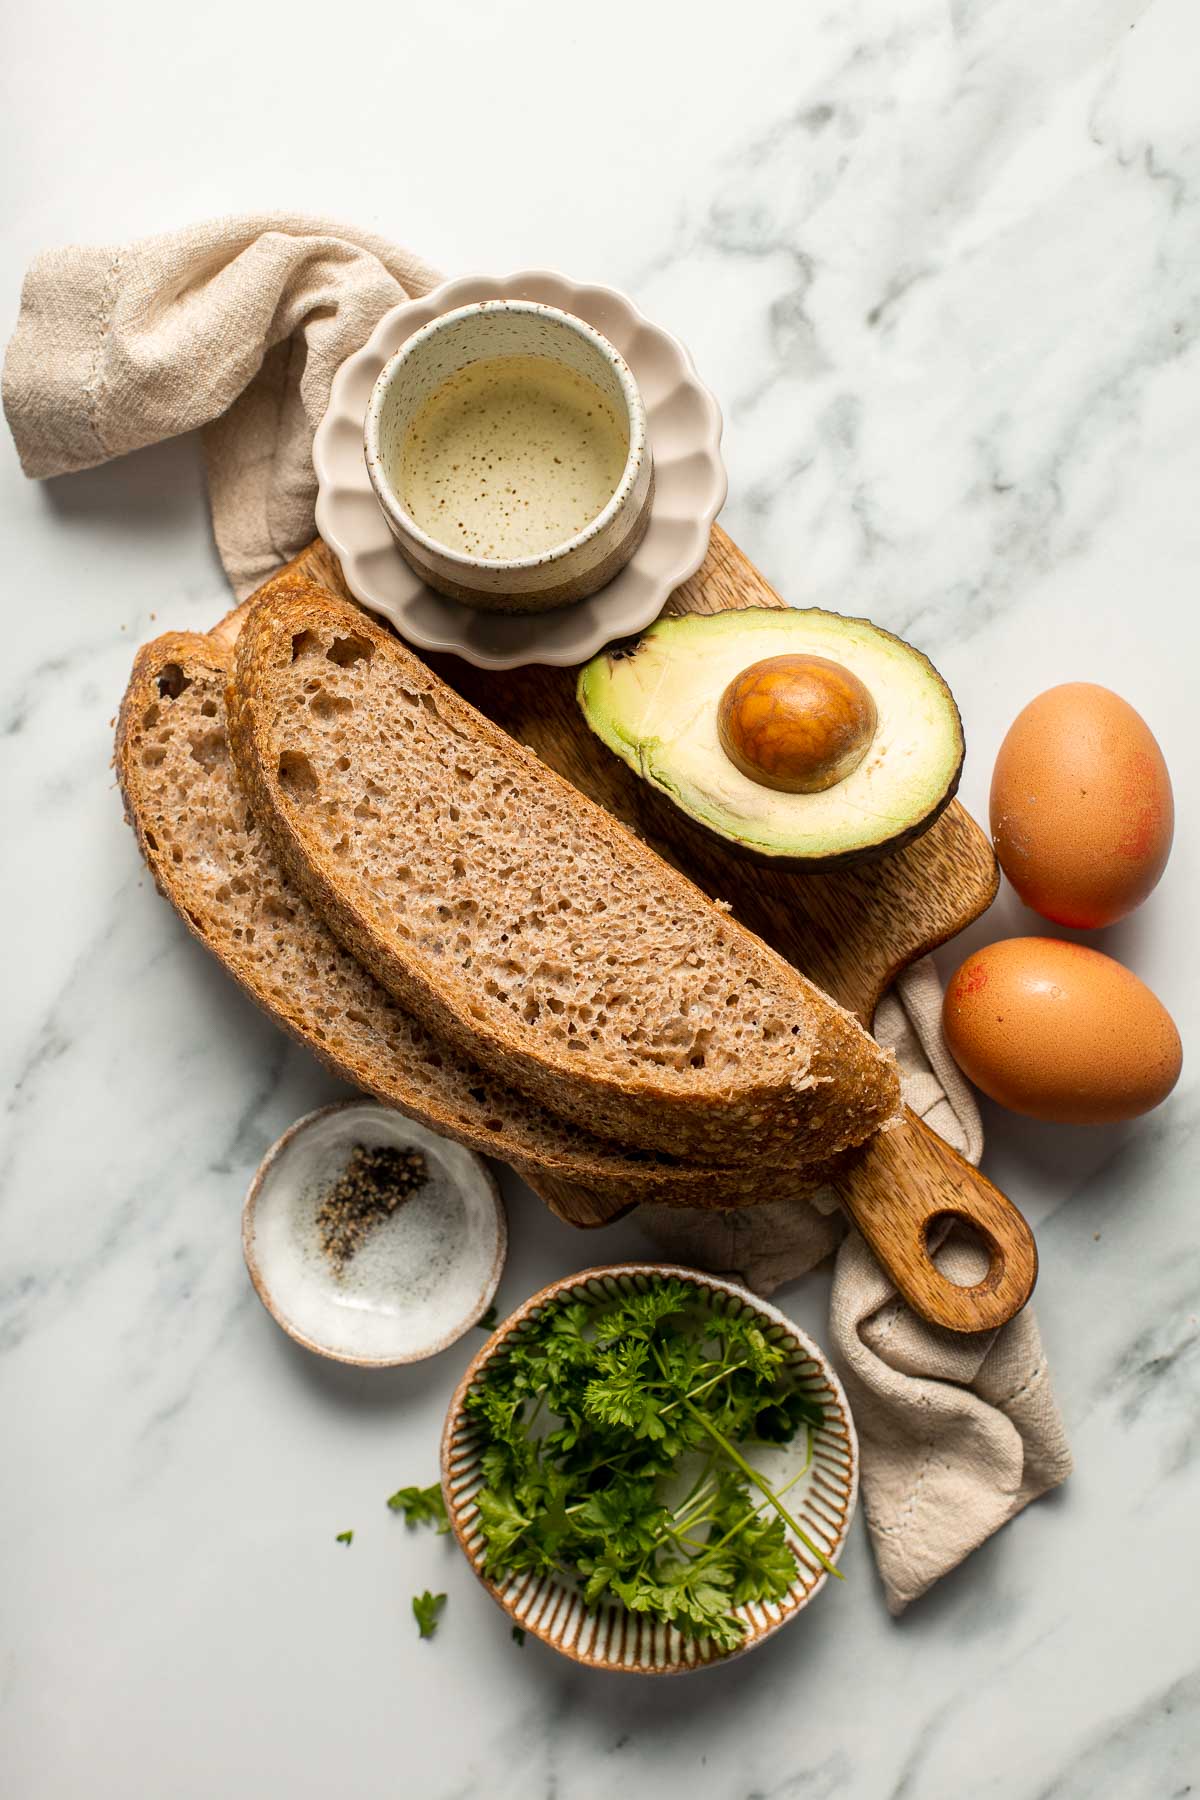
Toppings
For added flavor, add more toppings. We added fresh parsley and also sprinkled on some sesame seeds and a drizzle of chili oil. Some other great options include paprika, pickled red onions, olive oil, nuts, or feta cheese.
How to Make the Best Avocado Toast with Egg
- Crack eggs. Crack each egg into their own small bowl, being careful not to break the yolk.
- Poach the eggs. Bring a medium saucepan filled with water to a boil, then add vinegar. Lower heat until water is simmering. Gently lower the eggs into the simmering water and cook for 4 minutes, or until egg whites are set and yolks are soft and runny. Carefully remove the eggs with a slotted spoon.
- Toast. Toast the bread in the toaster and place the sliced avocado over the toast. Smash it slightly with a fork on top of the toast.
- Assemble. Top each toast with a poached egg. Sprinkle with salt, pepper, and fresh parsley.
Recipe Variations
- Make it spicy: Many people prefer their avocado toast with a little kick! Sprinkle on some red pepper flakes or drizzle on some hot sauce to add your desired amount of heat.
- Mediterranean avocado toast: Top your avocado toast with some diced tomato, sliced olives, and crumbled feta cheese for a Mediterranean twist.
- Add smoked salmon: Instead of an egg, top your avocado toast with some thinly sliced smoked salmon, a squeeze of lemon juice, and a sprinkle of dill.
- Add bacon: Add some crispy bacon to your avocado toast for a savory and satisfying twist.
- Southwest avocado toast: Top your avocado toast with some diced red bell pepper, black beans, and a sprinkle of cumin and chili powder for a Southwest-inspired twist.
- Pesto avocado toast: Instead of plain avocado, mash some avocado with a little bit of pesto and spread it on your toast, before topping with the poached egg.
- Caprese avocado toast: Top your avocado toast with some sliced tomato, fresh basil, and a sprinkle of balsamic vinegar for a Caprese-inspired version.
How to Serve
This Avocado and Poached Egg Toast is delicious served on its own for breakfast or a snack, or served with some delicious brunch side dishes such as:
- Breakfast Potatoes
- Green Detox Smoothie
- Golden Milk Turmeric Latte
- Fruit Salad
- Oat Porridge
- Bacon or Sausage
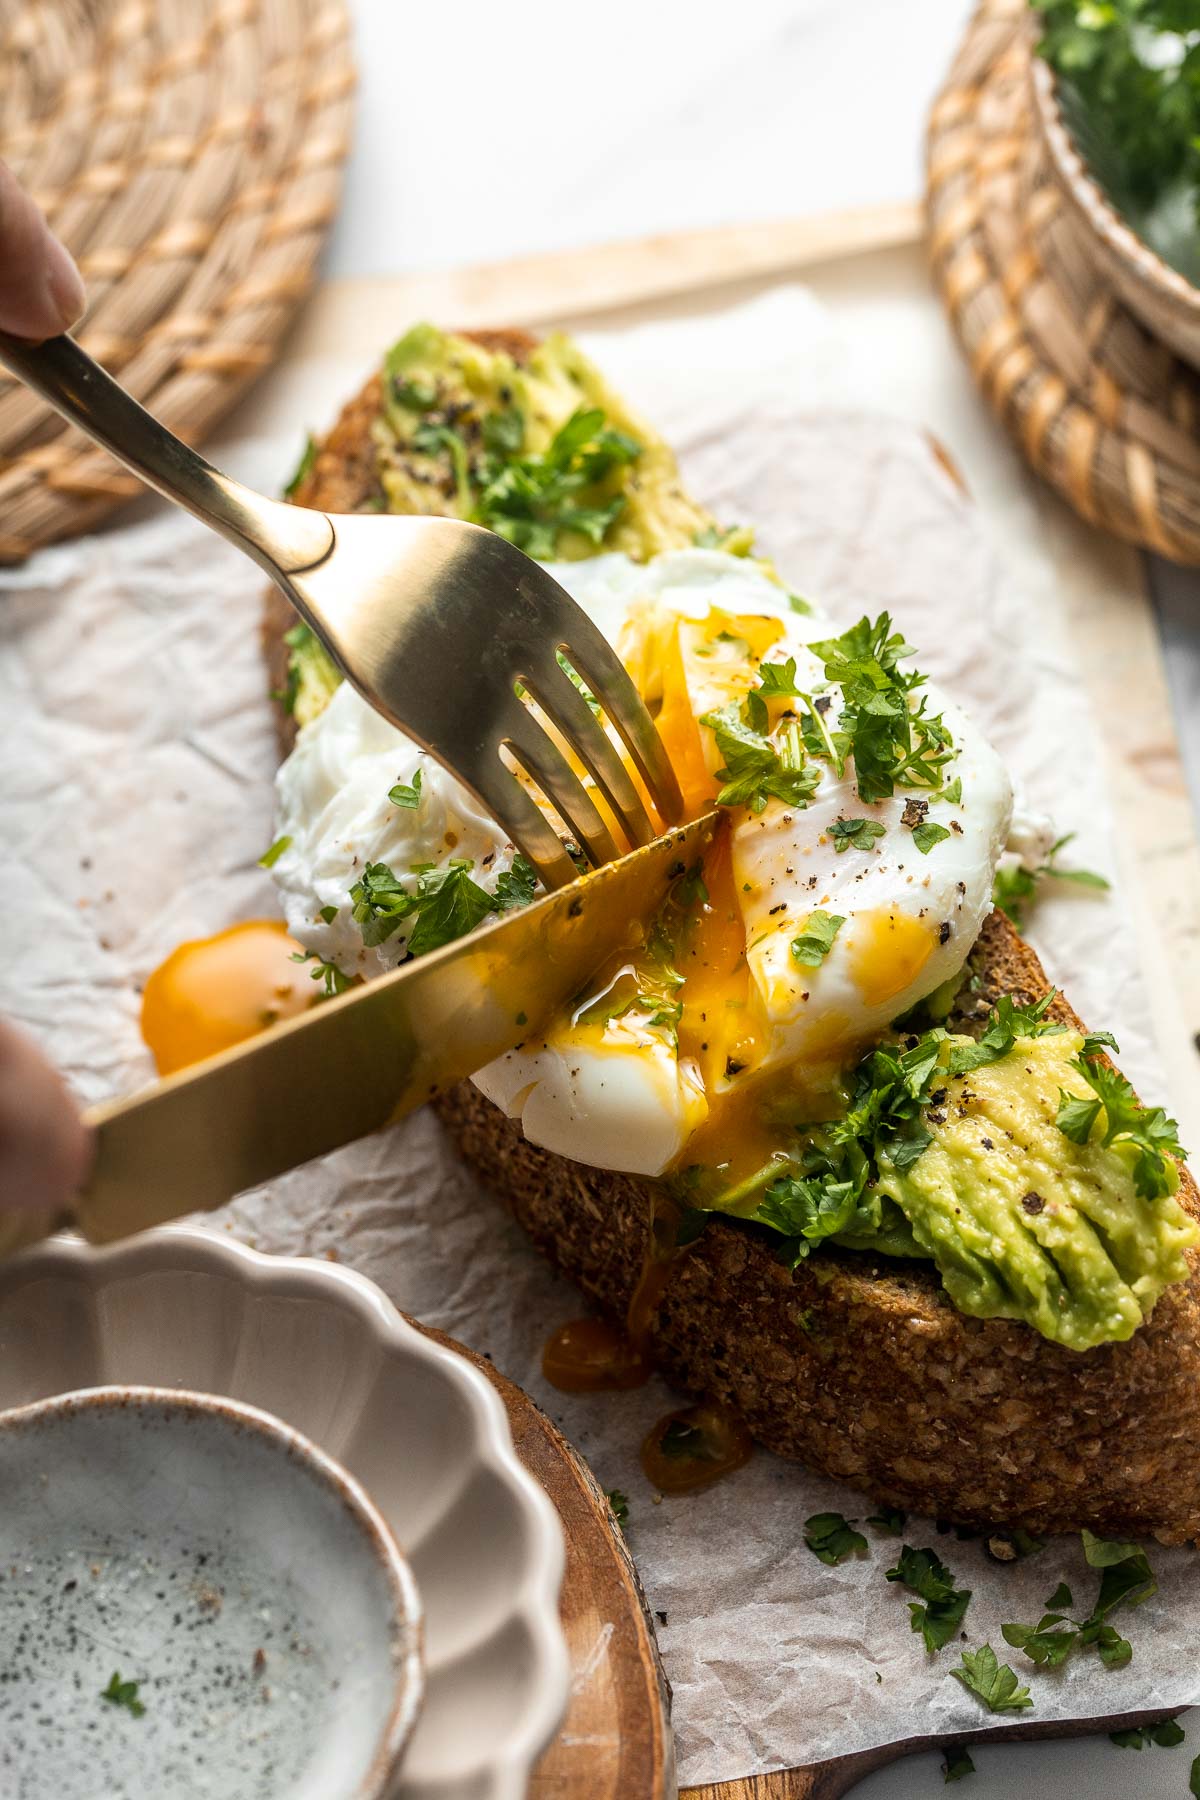
Recipe Tips and Tricks
- Use an avocado slicer perfect slices. Speed things up a little by using a special avocado tool called an avocado slicer to get perfectly even and uniform slices in seconds.
- Use homemade bread for a truly from-scratch experience. If you're into baking, try making your own artisan bread loaf to use for avocado toast! It will taste even fresher and make the egg and avocado toast that much better. See our 50 Best Bread Recipesama.
Frequently Asked Questions
A poached egg is typically done when the whites are fully cooked and the yolk is still soft. To test if your poached egg is done, gently prod the yolk with the tip of a knife. If it is still soft and jiggly, the egg is done. If it is firm and solid, the egg is overcooked.
Yes, you can make avocado toast with any kind of egg including fried egg, scrambled eggs, or hard-boiled eggs. To top with a fried egg, simply fry the egg in a little bit of oil or butter until the whites are cooked and the yolk is at your desired level of doneness.
Yes, you can make this toast vegan by simply omitting the egg or using a vegan egg alternative. There are a variety of vegan egg alternatives that can be used to make avocado toast including tofu scramble, chickpea scramble, or store-bought vegan egg replacers.
Storing Instructions
How to Store
Egg and avocado toast is best eaten right away, but you can store leftovers in a Ziploc bag or airtight container in the fridge overnight. The bread will get a little bit soggy, so keep that in mind when deciding when to eat your toast.
It's not recommended to freeze prepared avocado toast with poached eggs. You may choose to freeze individual ingredients, but cooked and combined, the toast ingredients will not fare well when frozen.
More Breakfast Recipes with Eggs
- 50 Best Breakfast Ideas
- Mediterranean Scrambled Eggs
- Vegetable Frittata
- Breakfast Strata
- Deviled Eggs
- Egg Muffins
Tried this recipe?
I'd love to hear what you think! Leave a comment and rating below to share your feedback. Your reviews help others discover this recipe and help me keep creating more free recipes for you. Snap a photo and tag me on social media @aheadofthyme too.
Chicken Chow Mein
Chicken Chow Mein is a classic Chinese noodle dish that is quick and easy to make at home. Made with tender chicken, crisp vegetables, and a homemade Asian sauce, these noodles are a well-rounded meal that is savory, flavorful, and delicious.
These stir fry noodles with leftover chicken takes only 20 minutes to make - they're faster, healthier, and better than ordering takeout. It's a family friendly dinner that is perfect for busy weeknights.
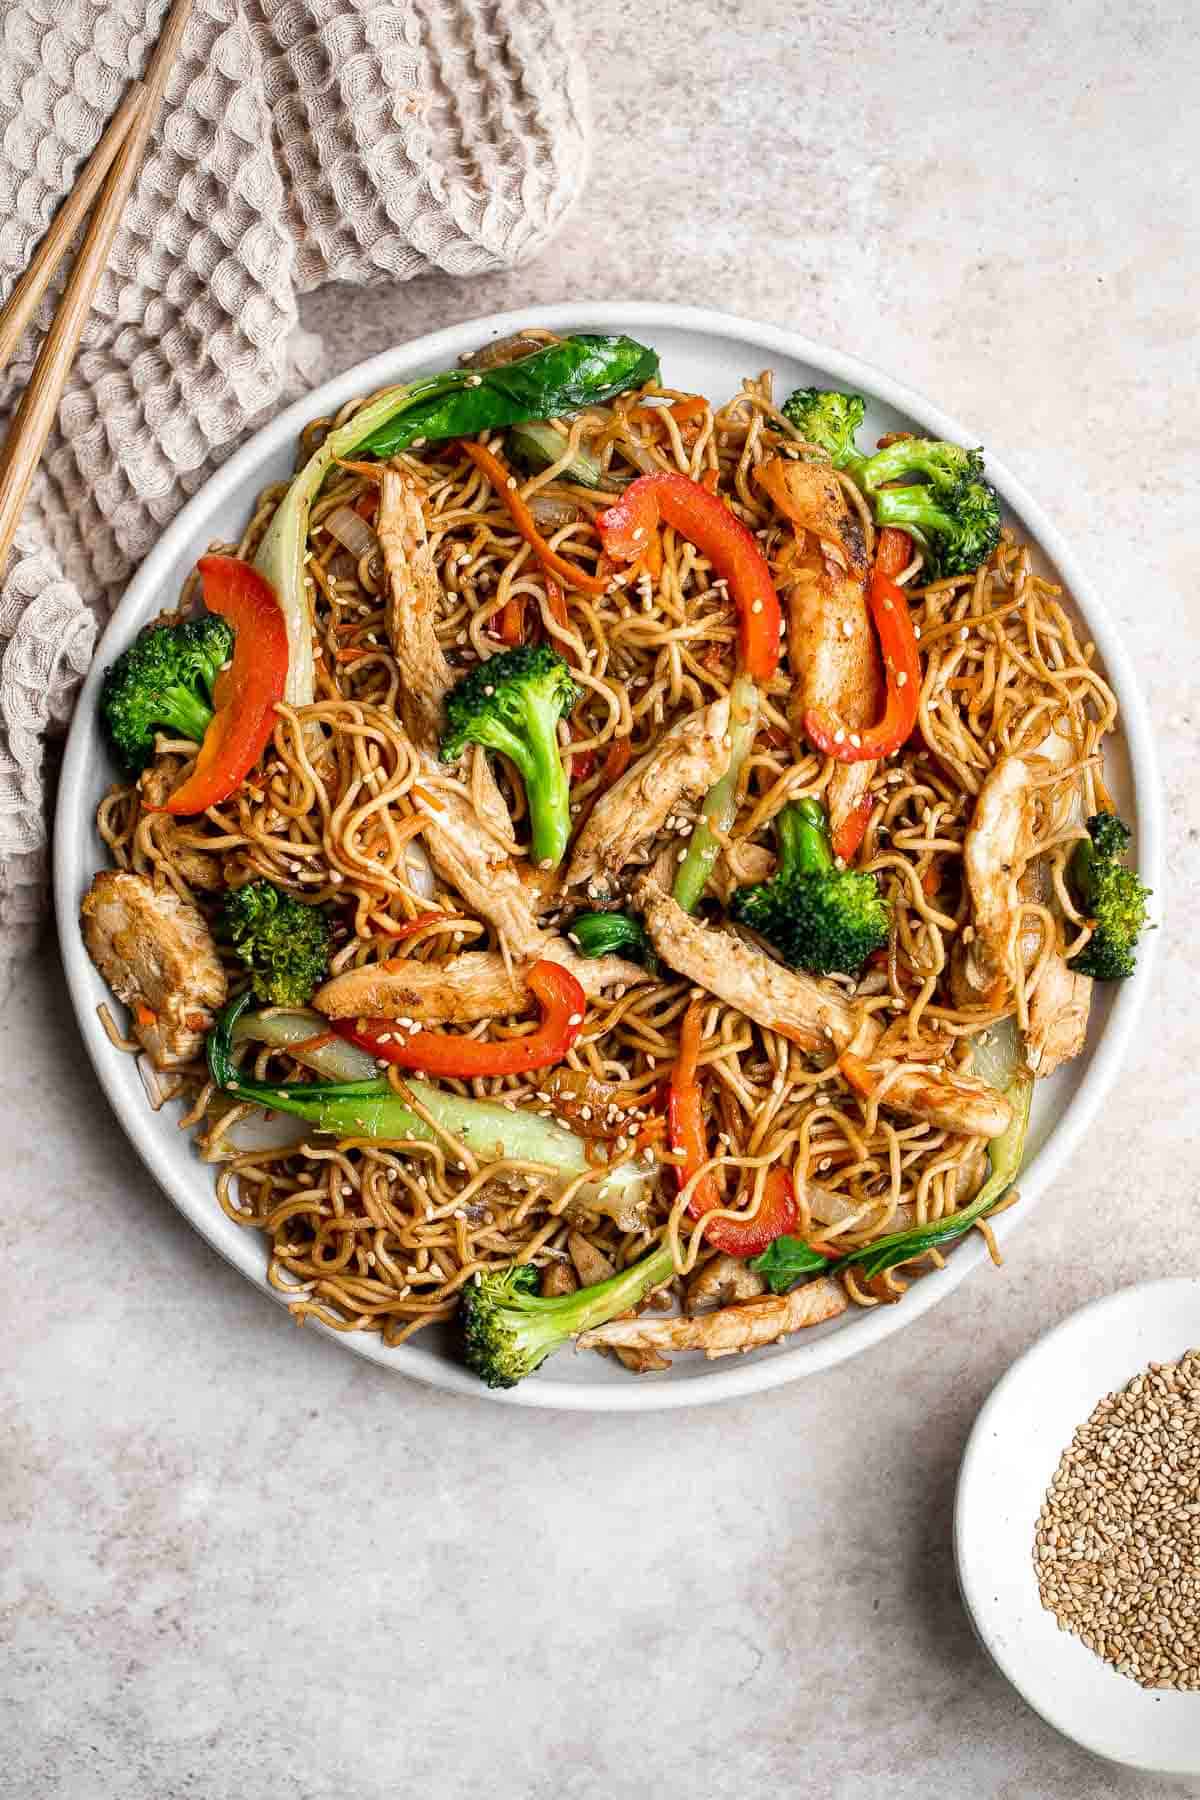
Why You'll Love these Chicken Chow Mein
- A healthier (and cheaper) alternative to takeout. You are in control of the ingredients when you make chow mein from scratch. Save some money and some room in your daily sodium intake by making these stir fry noodles with leftover chicken at home. It's just as fast as ordering out - if not faster!
- Made with leftovers. This stir fry noodle recipe comes together quickly because it includes already-cooked chicken that is leftover from your dinner the night before. You can also use a rotisserie chicken or leftover turkey. This recipe is also a great way to clean out any veggies from your fridge.
- Ready in 20 minutes. Chicken chow mein might just be your new go-to for a quick meal on busy weeknights. In only 20 minutes you can have a satisfying, nutritious meal on the table. It is quick and easy to make, requiring just a few simple ingredients and minimal prep time.
- Flavorful and delicious. The combination of tender chicken, crisp vegetables, and savory sauce is a winning combination that is sure to please the whole family.
- Easy to customize. You can also customize these leftover chicken noodles to suit your tastes by adding in different vegetables, making it spicy, or even switching out the protein for something else. It's the perfect dinner to make on busy weeknights or for a quick lunch.
Ingredient Notes
To make these easy and delicious Chicken Chow Mein, you will need the following ingredients (full measurements in recipe card below):
- chicken - you will need cooked chicken for this recipe. You can make some specifically for this recipe (such as our Oven Baked Chicken Breast or Air Fry Chicken Breast) or use leftovers you already have. You can also use a rotisserie chicken from the store.
- noodles - chow mein noodles are thin, wheat-based noodles that are used in many Chinese dishes. You can find them at many supermarkets or specialty stores. Alternatively, you can use other types of thin noodles, such as vermicelli rice noodles, udon noodles, or even spaghetti.
- vegetables - We used onions, carrots, bell peppers, bok choy, and broccoli (cut them fresh or use pre-cut broccoli from the produce section to cut back on the work and prep time!). You can also use any vegetables that you have on hand or that you enjoy.
- avocado oil - olive oil, vegetable oil, and coconut oil are good substitutes for avocado oil.
- ginger - fresh ginger will have the best flavor, but you can use the same measure of ginger paste or minced ginger in its place. Ginger adds a warm and spicy note to the chow mein and pairs well with the other ingredients.
- soy sauce - soy sauce can vary in saltiness, so you may want to adjust the amount used in the recipe to your liking. Start with less and add more as needed. You can use regular soy sauce or try using a low-sodium variety to reduce the salt content. You can also substitute with coconut aminos or gluten-free soy sauce.
- rice vinegar - if you don't have rice vinegar, use white wine or regular white vinegar instead.
- sesame oil - sesame oil adds a rich, nutty flavor to the stir fry, but you can omit it if you don't have it.
- black pepper
- white sesame seeds - you can also use black sesame seeds or a mix of the two.
You will also need measuring cups and spoons, large mixing bowl, and skillet or wok.
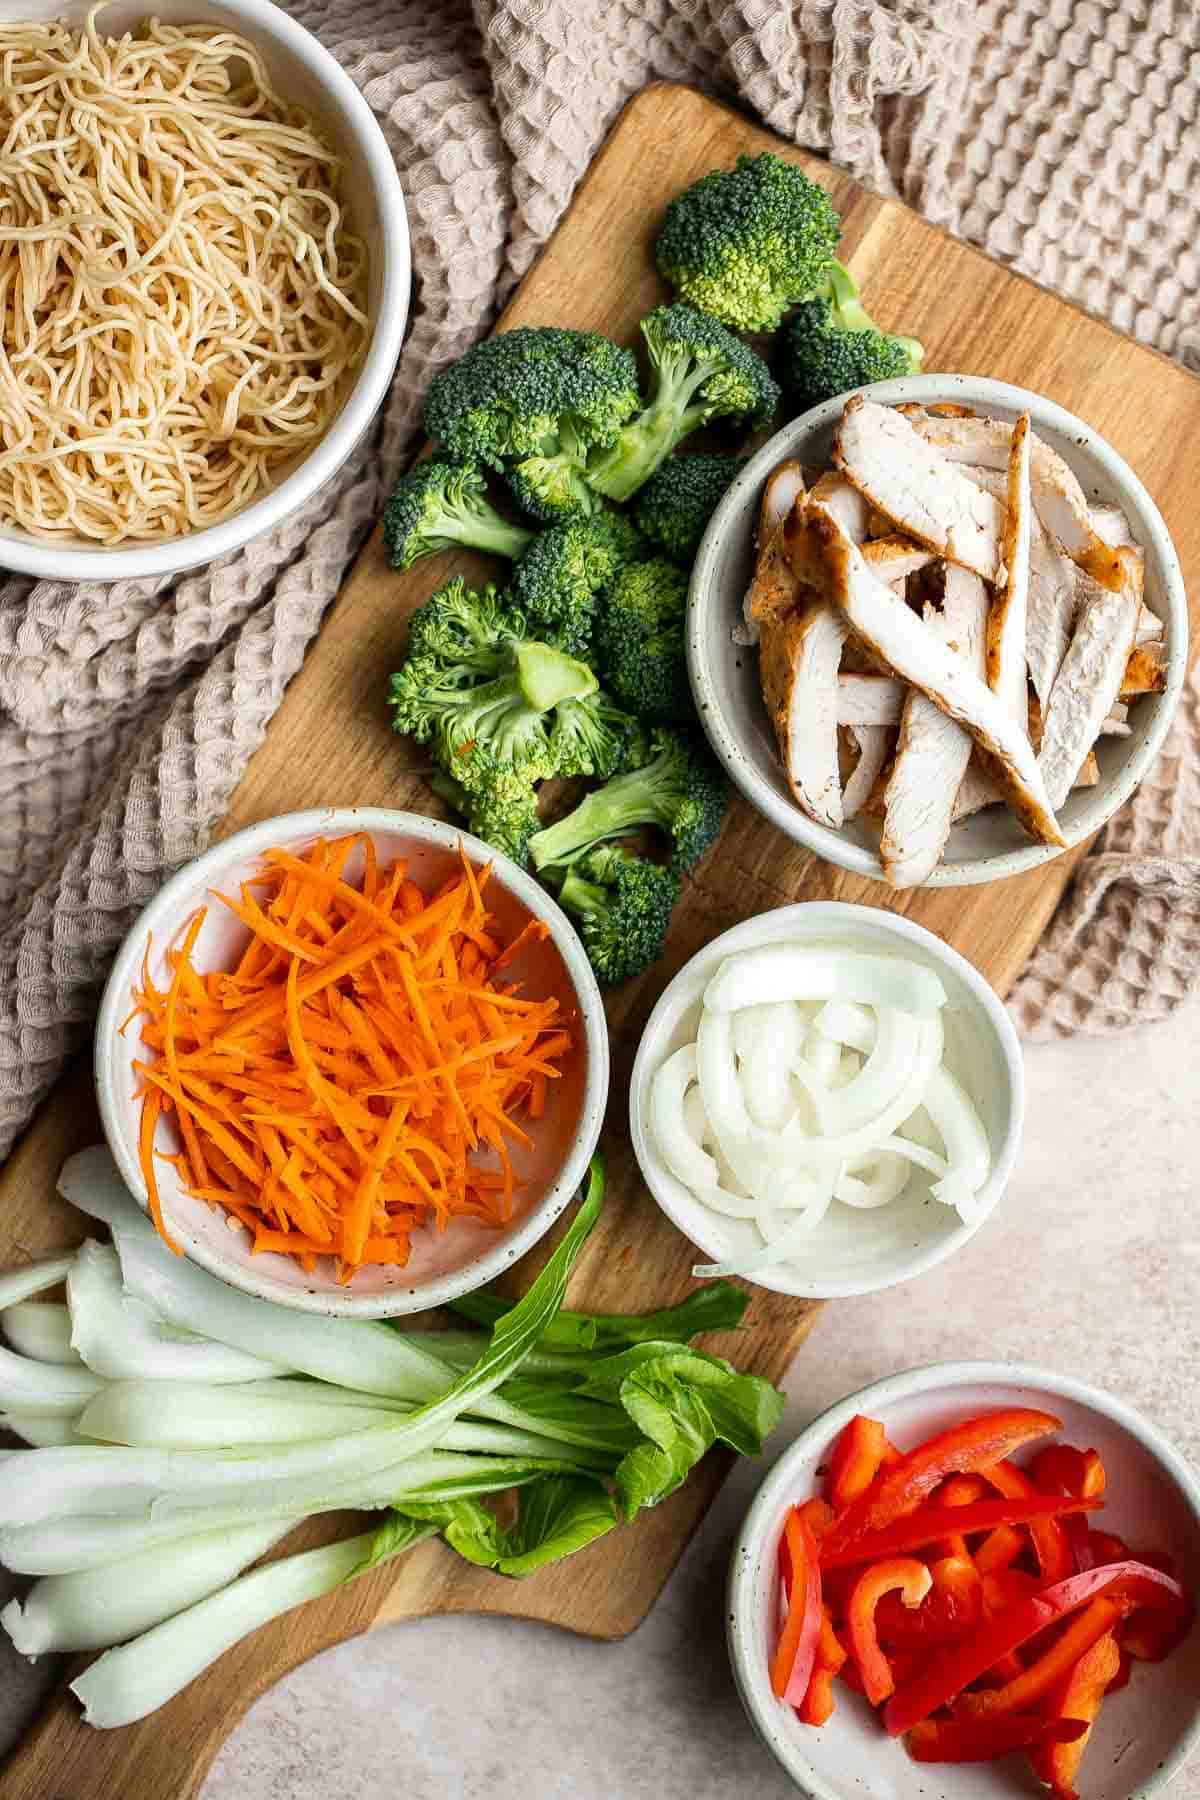
How to Make the Best Chicken Chow Mein Noodles
- Soak noodles. Soak the dry noodles in a large mixing bowl filled with hot water for 1 minute, or according to the package instructions. Drain well and set aside.
- Sauté veggies. Heat oil in a large skillet over medium-high heat until sizzling hot, about 1 minute. Add onion and sauté until fragrant, about 1 minute. Add carrot, bell pepper, bok choy, and broccoli, and cook until tender, about 2-3 minutes.
- Add chicken. Add cooked chicken and ginger. Use a spatula to mix well until evenly distributed.
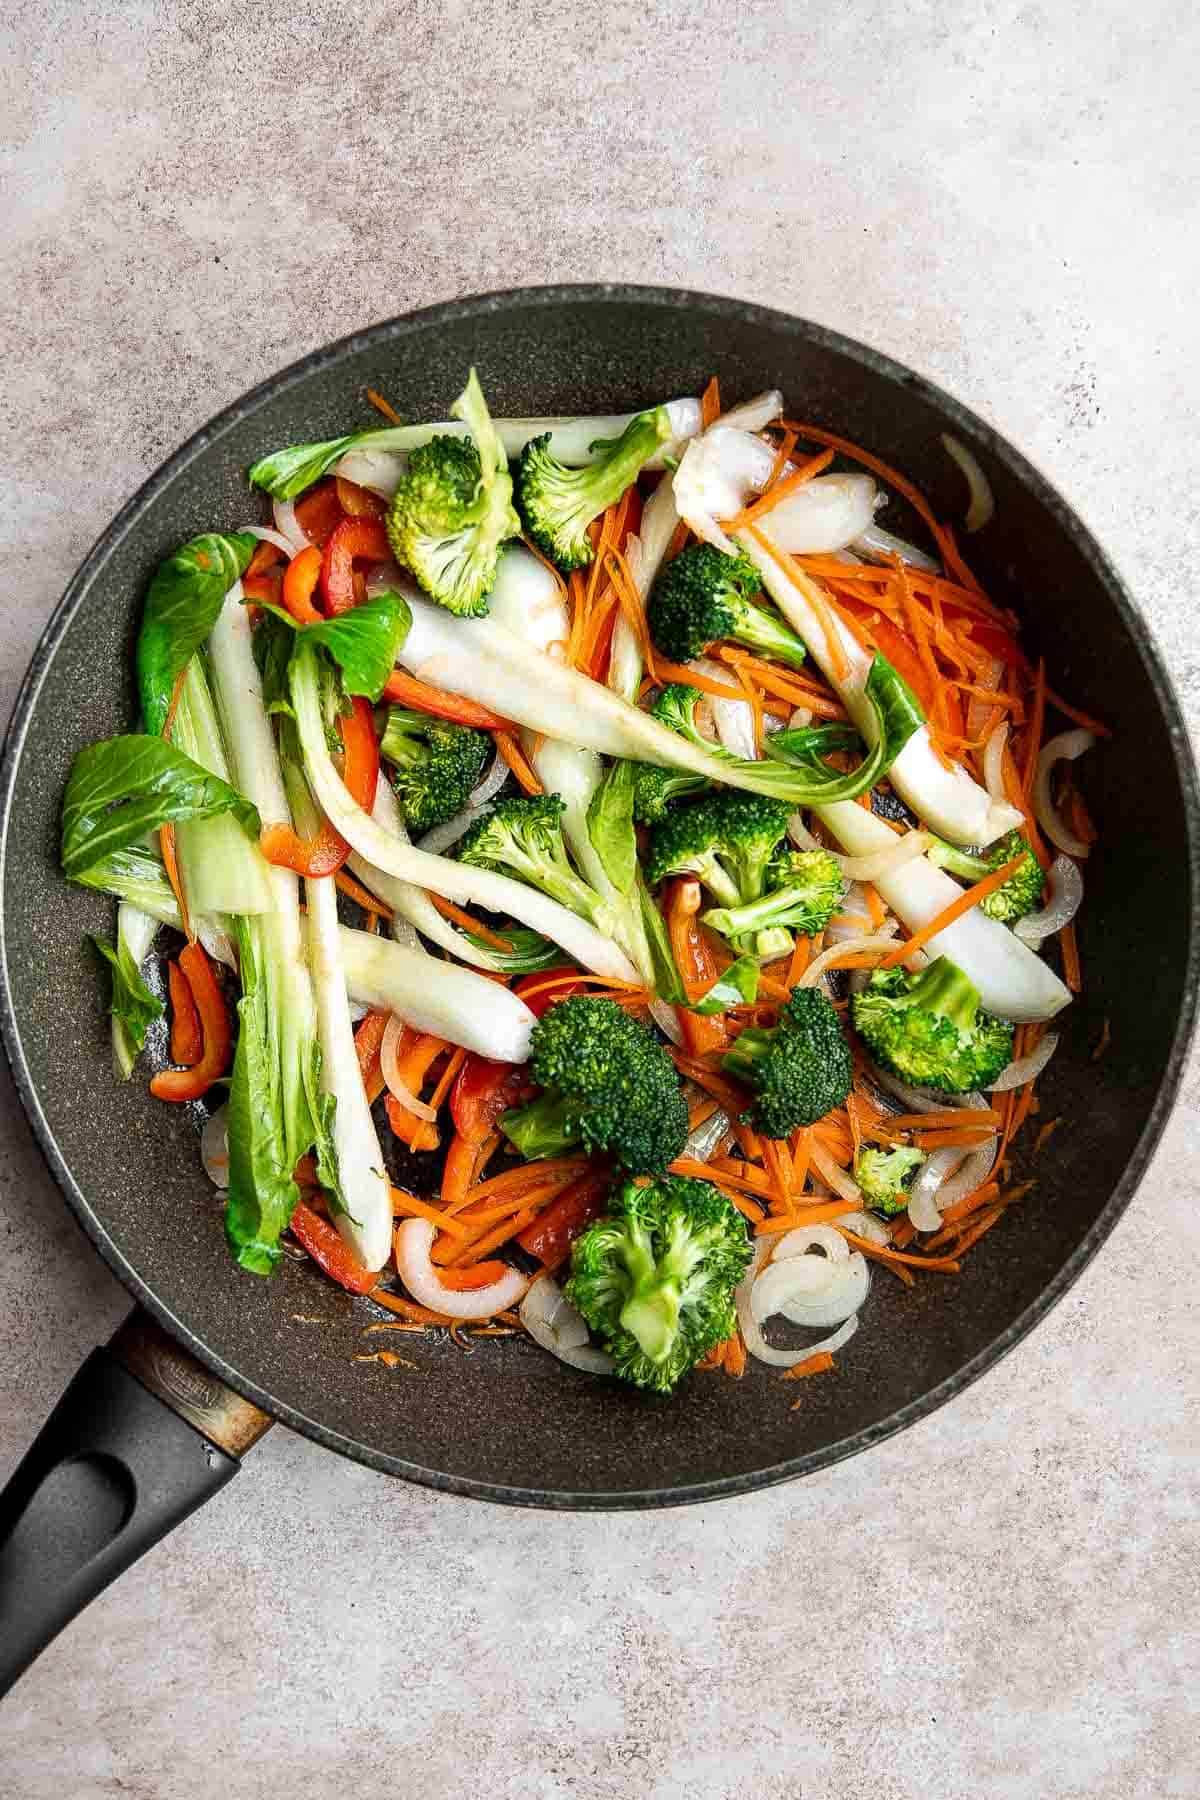

- Add noodles. Stir in the soaked and drained noodles, and cook for 1 minute.
- Add sauce. Add soy sauce, vinegar, sesame oil, and black pepper. Toss well and cook for another 1-2 minutes until evenly coated.
- Serve. Garnish with sesame seeds and serve immediately.
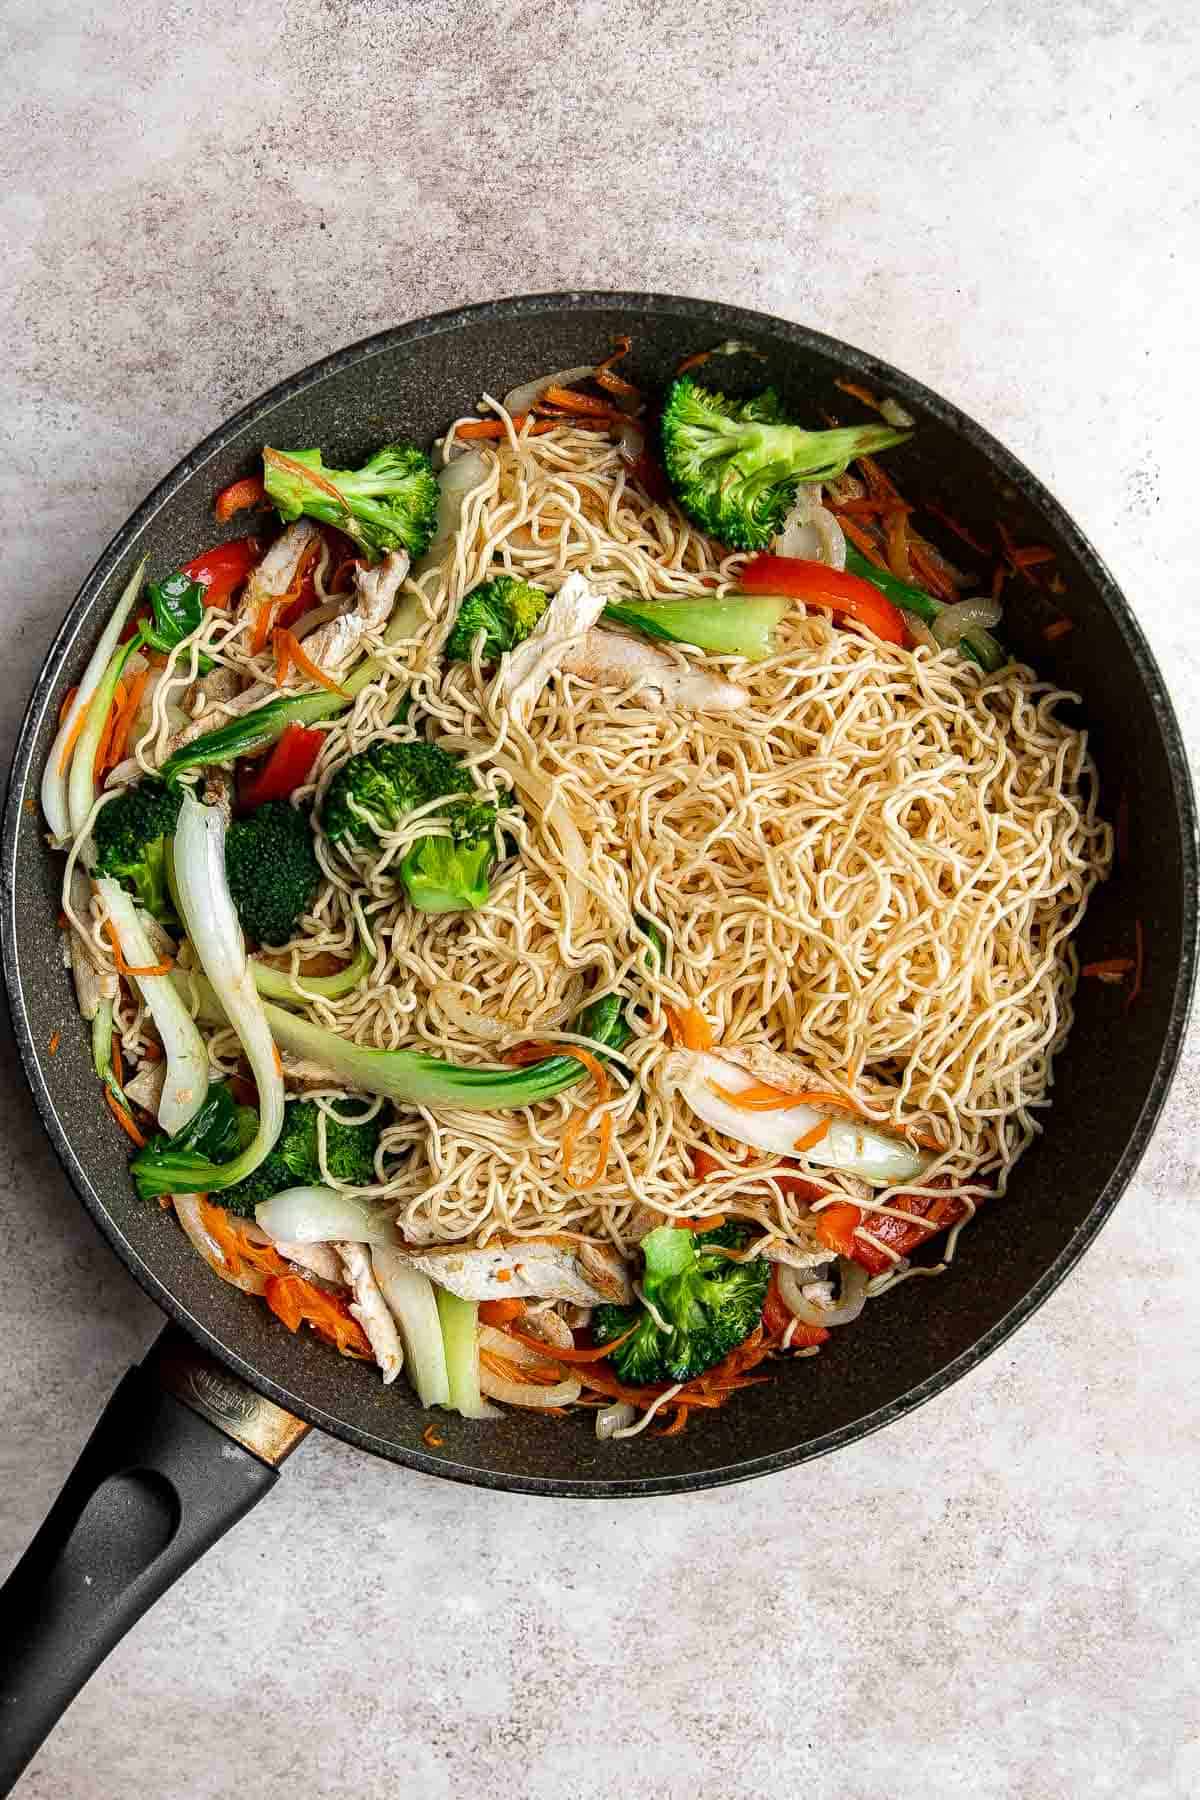
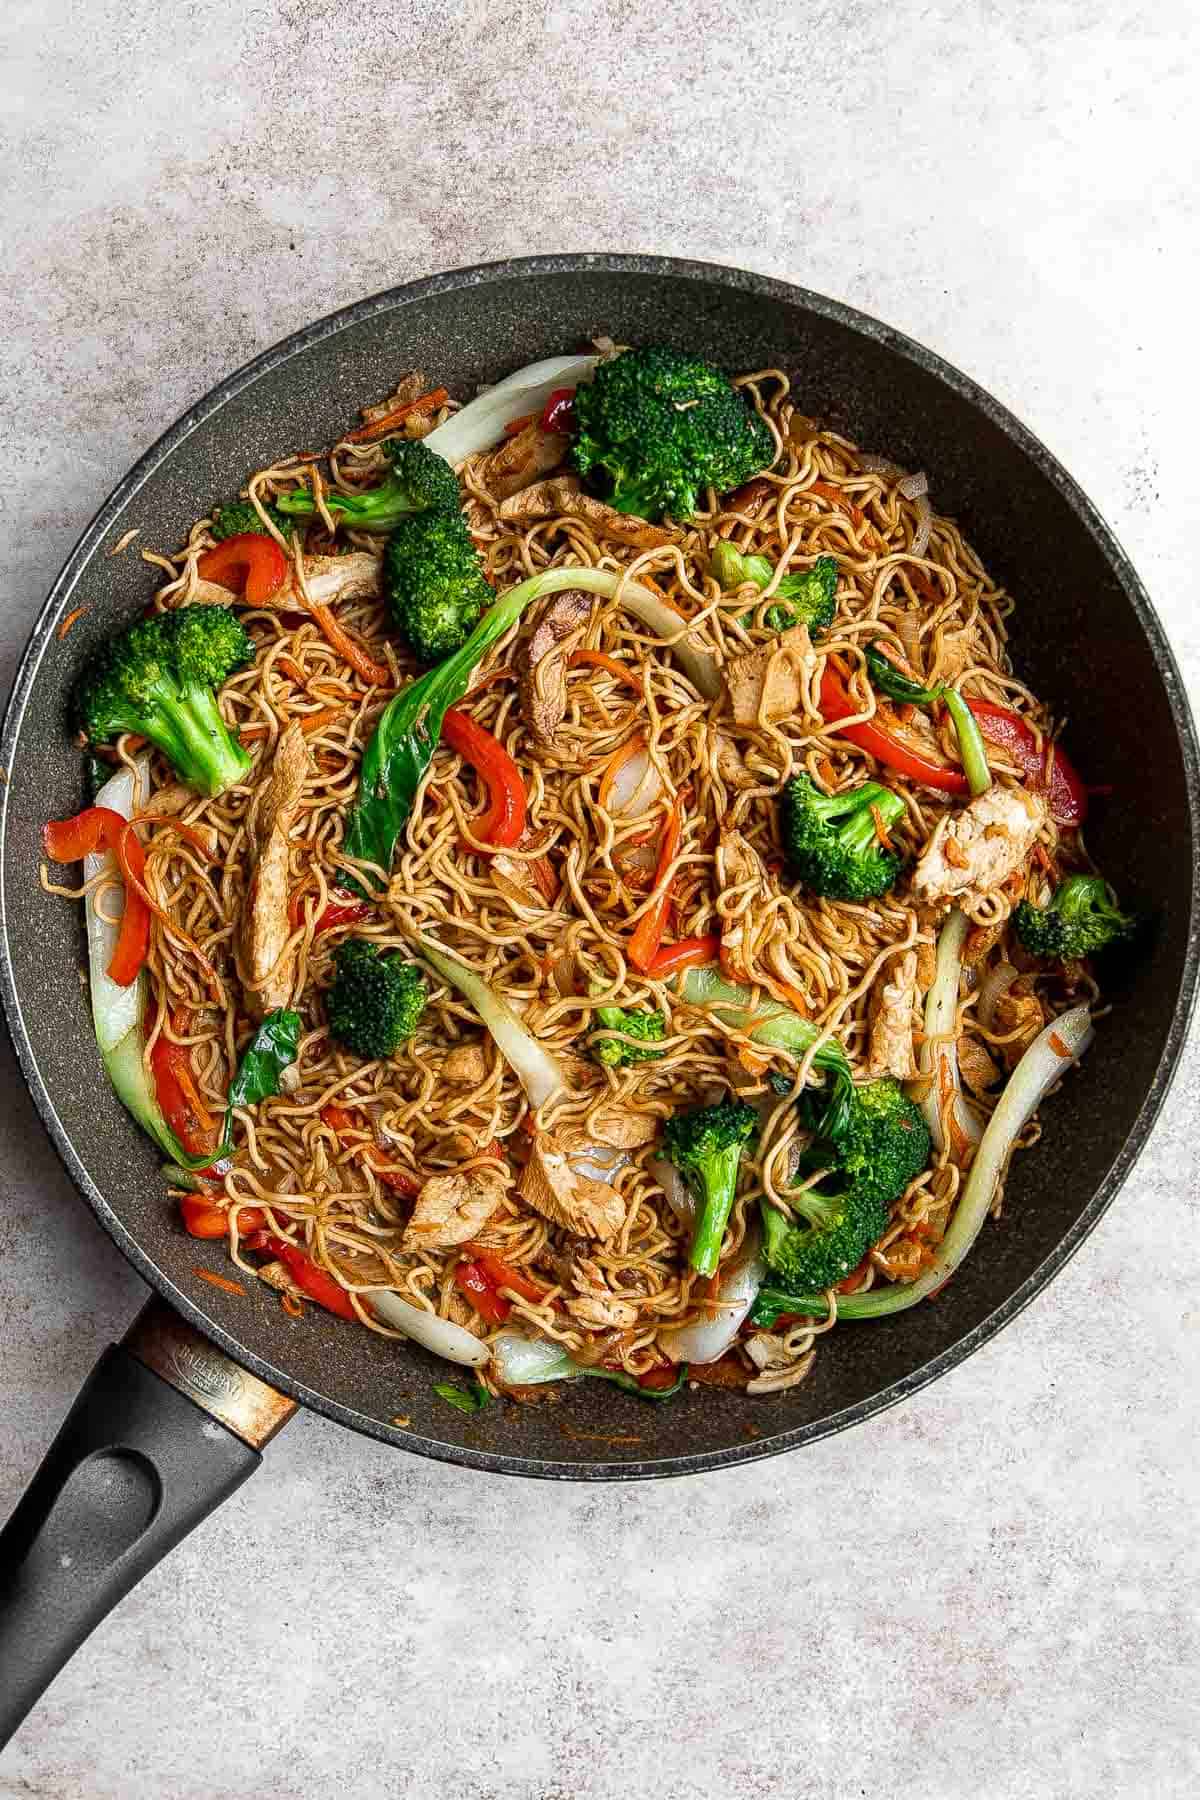
Recipe Variations
- Switch up the protein: You can switch up the protein in this chow mein to anything you have on hand. Try it with cooked shrimp, tofu, beef, or even leftover turkey.
- Load up the veggies. You can make this stir fry even healthier by adding more veggies like peas, cauliflower, corn, zucchini, mushrooms, and more.
- Spice it up. Like your stir fry on the spicy side? Add your favorite Asian-style hot sauce like szechuan sauce or gochujang to give it a little more kick. You can calso add a little extra chili sauce or some diced fresh chili peppers.
- Add herbs: Fresh herbs, such as cilantro or basil, can add a bright and refreshing flavor to this chow mein. Stir them in just before serving.
How to Serve
Chicken Chow Mein is delicious and filling meal on its own, or served as part of a complete meal with sides. Here are some of my favorite side dishes to serve these noodles with:
- Vegetables: Serve chicken noodles with a side of steamed or roasted vegetables, such as Oven Roasted Vegetables, Tofu and Mushroom Stir Fry, Roasted Garlic Green Beans, Air Fryer Broccoli, or Stir Fried Lotus Root.
- Rice: Serve chow mein over a bed of Steamed White Rice or brown rice.
- Dumplings: Chicken chow mein is a classic pairing with Chinese dumplings. You can find dumplings at many supermarkets or specialty stores, or you can make your own. Try our Beef Potstickers, Vegetarian Egg and Chive Dumplings, or Pork Dumplings.
- Salad: Serve with an Asian style salad such as Chinese Garlic Cucumber Salad or Asian Chopped Salad.
- Dim Sum: You can also serve these Chinese chicken noodles with other bite-sized snacks such as Chive Pancakes, Spicy Chili Oil Wontons, or Steamed Scallion Buns.
Whether you are enjoying it on its own, with a side of rice, or as part of a larger Chinese feast, these stir fried chicken noodles are sure to be a hit.
Recipe Tips and Tricks
- Make ahead and freeze for an even speedier meal. Combine the chicken, spices, vegetables, and noodles and freeze without the sauce for a toss-and-sauce lunch or dinner. Add the oils, soy sauce, and vinegars and cook as directed when you're ready!
- Try rotisserie chicken. This recipe calls for leftover cooked chicken. You can quickly make some such as our Oven Baked Chicken Breast or Air Fry Chicken Breast. You can also pick up a rotisserie chicken from the store and use that. We cut our chicken up but you can also shred it (see How To Make Shredded Chicken). Your choice!
- Cut the vegetables into uniform sizes. Cut the veggies into evenly sized pieces so that they cook evenly, are easier to eat, and look good in the finished dish.
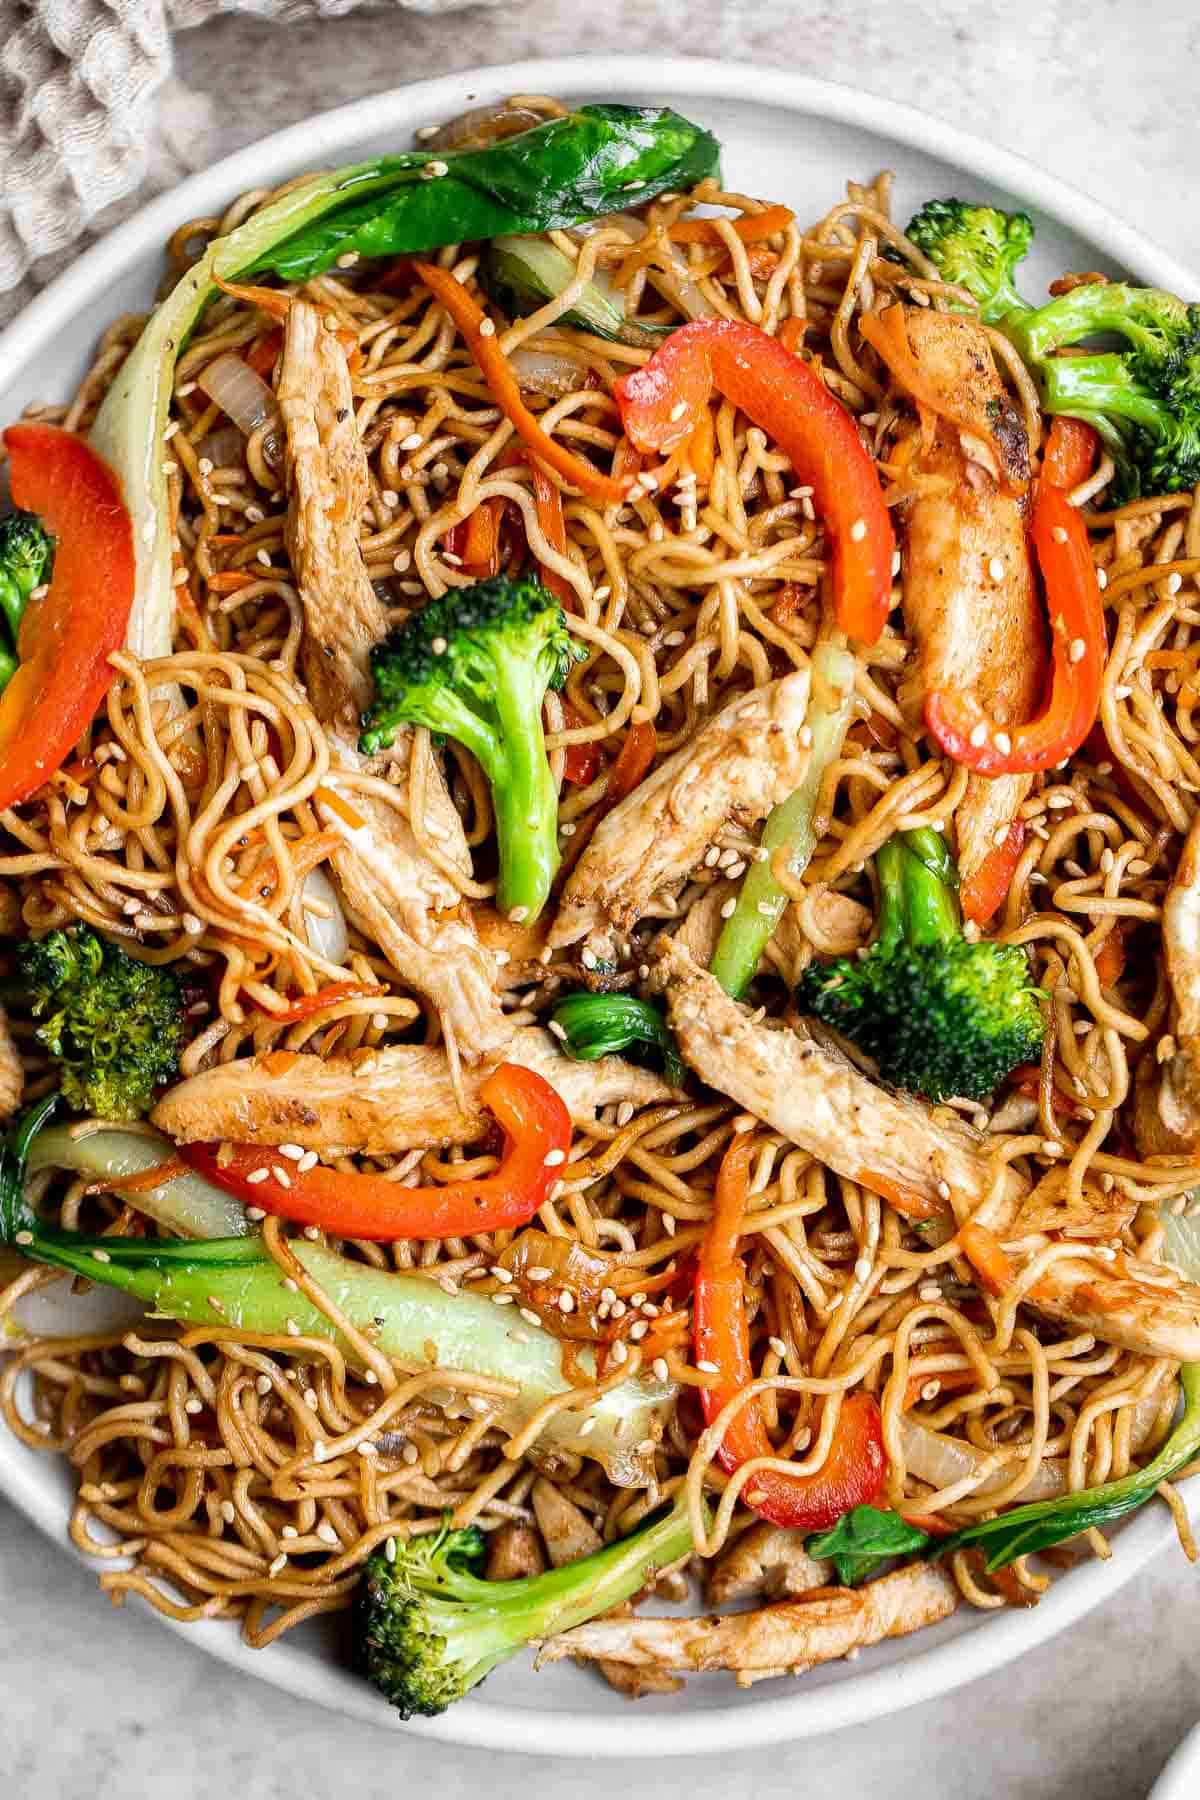
Storing and Freezing Instructions
How to Store
Transfer leftover chicken chow mein to an airtight container and store in the refrigerator for up to 4 days. Leftovers can be reheated in a skillet on the stove over medium-low heat until warmed through, or in the microwave
How to Freeze
Allow the chow mein to cool to room temperature first, then transfer it to a freezer bag or airtight container and freeze for up to 3 months. Thaw the chicken noodles overnight in the refrigerator before reheating it.
More Noodle Recipes
- 25 Best Noodle Recipes
- Peanut Noodles
- Beef Noodle Stir Fry
- Vegetarian Chow Mein
- TikTok Ramen
- Pork Noodles
Tried this recipe?
I'd love to hear what you think! Leave a comment and rating below to share your feedback. Your reviews help others discover this recipe and help me keep creating more free recipes for you. Snap a photo and tag me on social media @aheadofthyme too.

Honey Mustard Dressing
Honey mustard dressing is a sweet and tangy sauce that is perfect for adding flavor to salads, sandwiches, meats, and more. With just a few simple ingredients, it is easy to make and adds a ton of flavor to any meal. Plus, it's ready in just minutes.
Making salad dressing from scratch is so much better, tastier, and healthier than store-bought. You might never go back to bottled dressing after realizing just how easy it is to make at home. Homemade honey mustard dressing also means you can customize the ingredients to your liking.
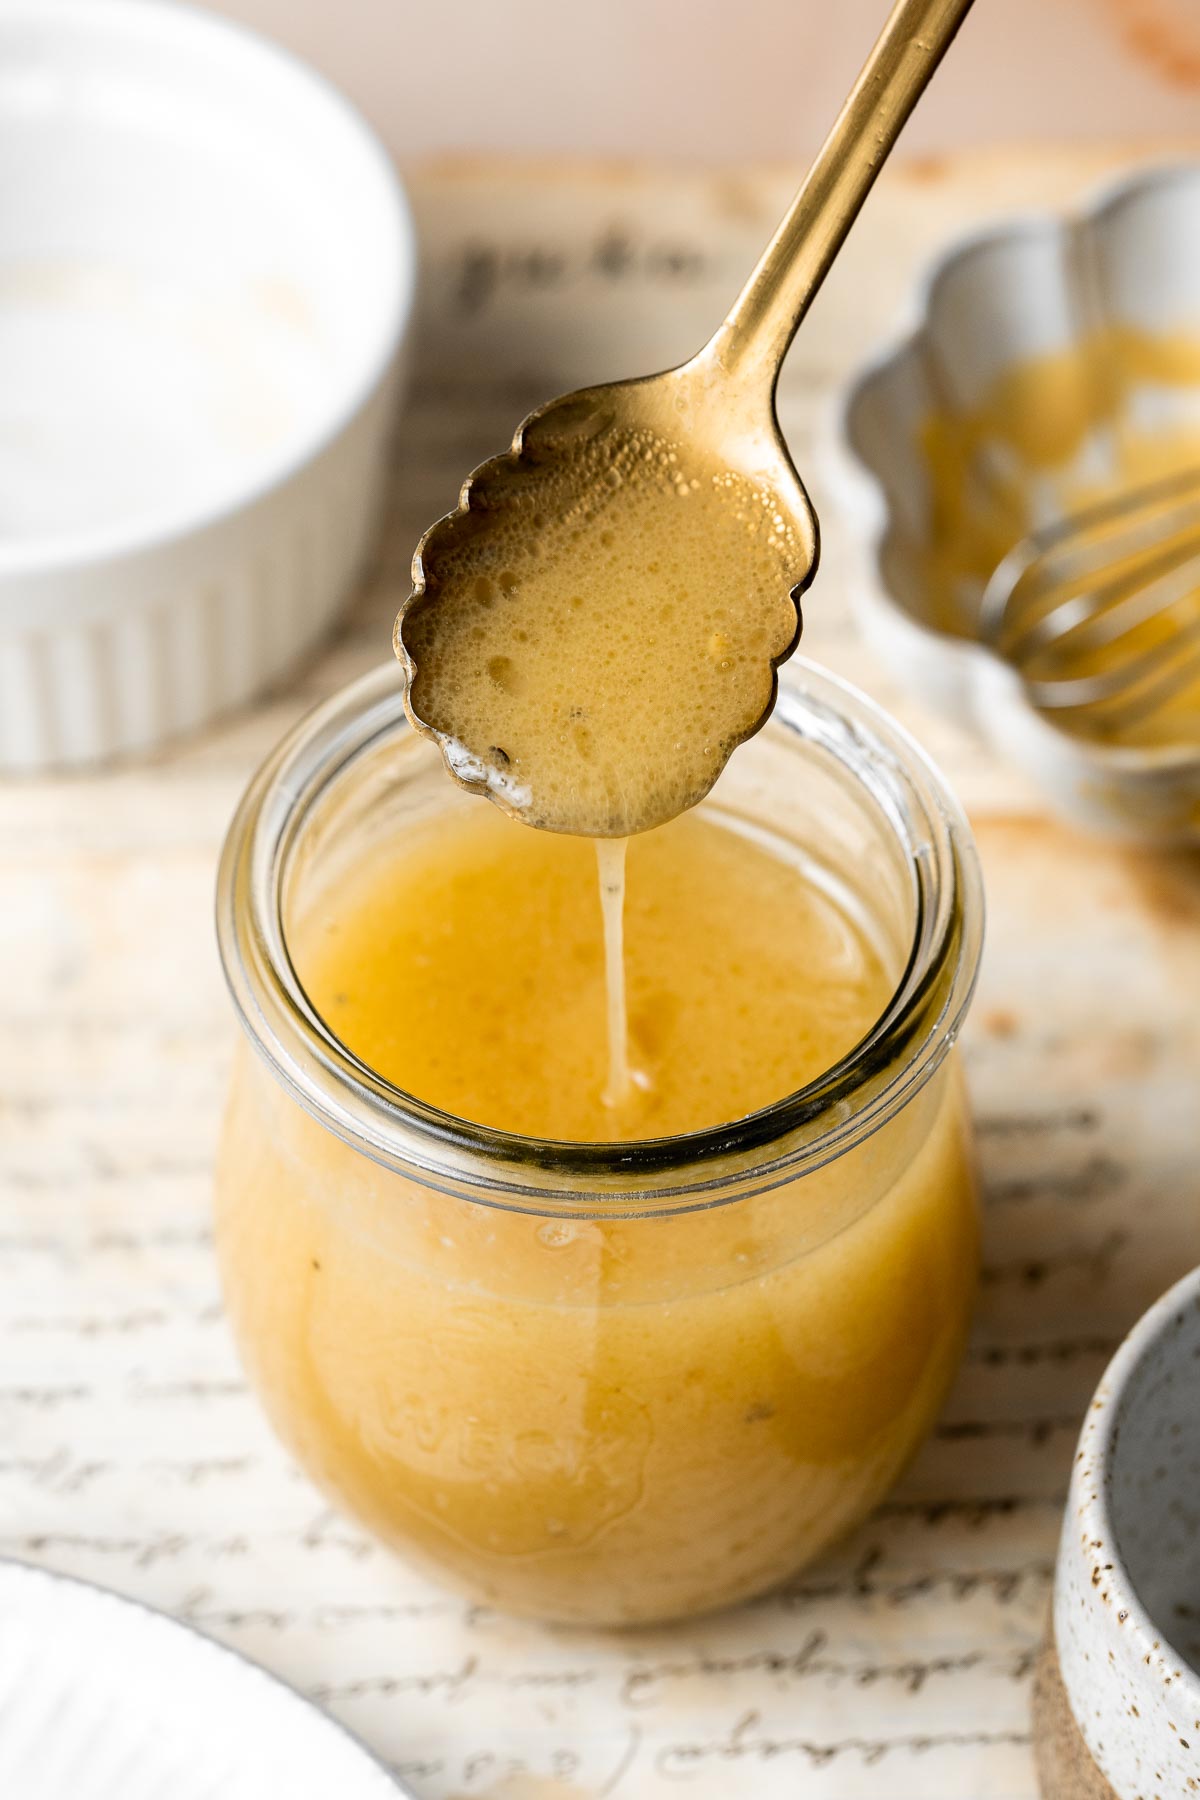
Why You'll Love this Honey Mustard Dressing
- Quick and easy to make from scratch. If you have never made salad dressing at home before, you may not know how easy it is to make. Simply mix the ingredients together until well combined. That is it. There is no reason to buy store-bought dressing when it's this easy to make it at home.
- Healthier than store-bought. Honey mustard dressing is a healthier alternative to many other types of dressing and sauces, which typically contain preservatives, fillers, additives, sugar, or artificial flavors. This homemade dressing is made with real ingredients.
- It contains health benefits. Honey mustard dressing is a healthy and nutritious condiment that is low in calories and free of artificial ingredients. Mustard is a good source of antioxidants and has anti-inflammatory properties, while honey is a natural sweetener that is lower on the glycemic index than refined sugars.
- Use it in so many dishes. Add honey mustard salad dressing to salads, as a sandwich spread, as a dip, or even a marinade for meats. However you use it, this dressing adds delicious flavor to any dish.
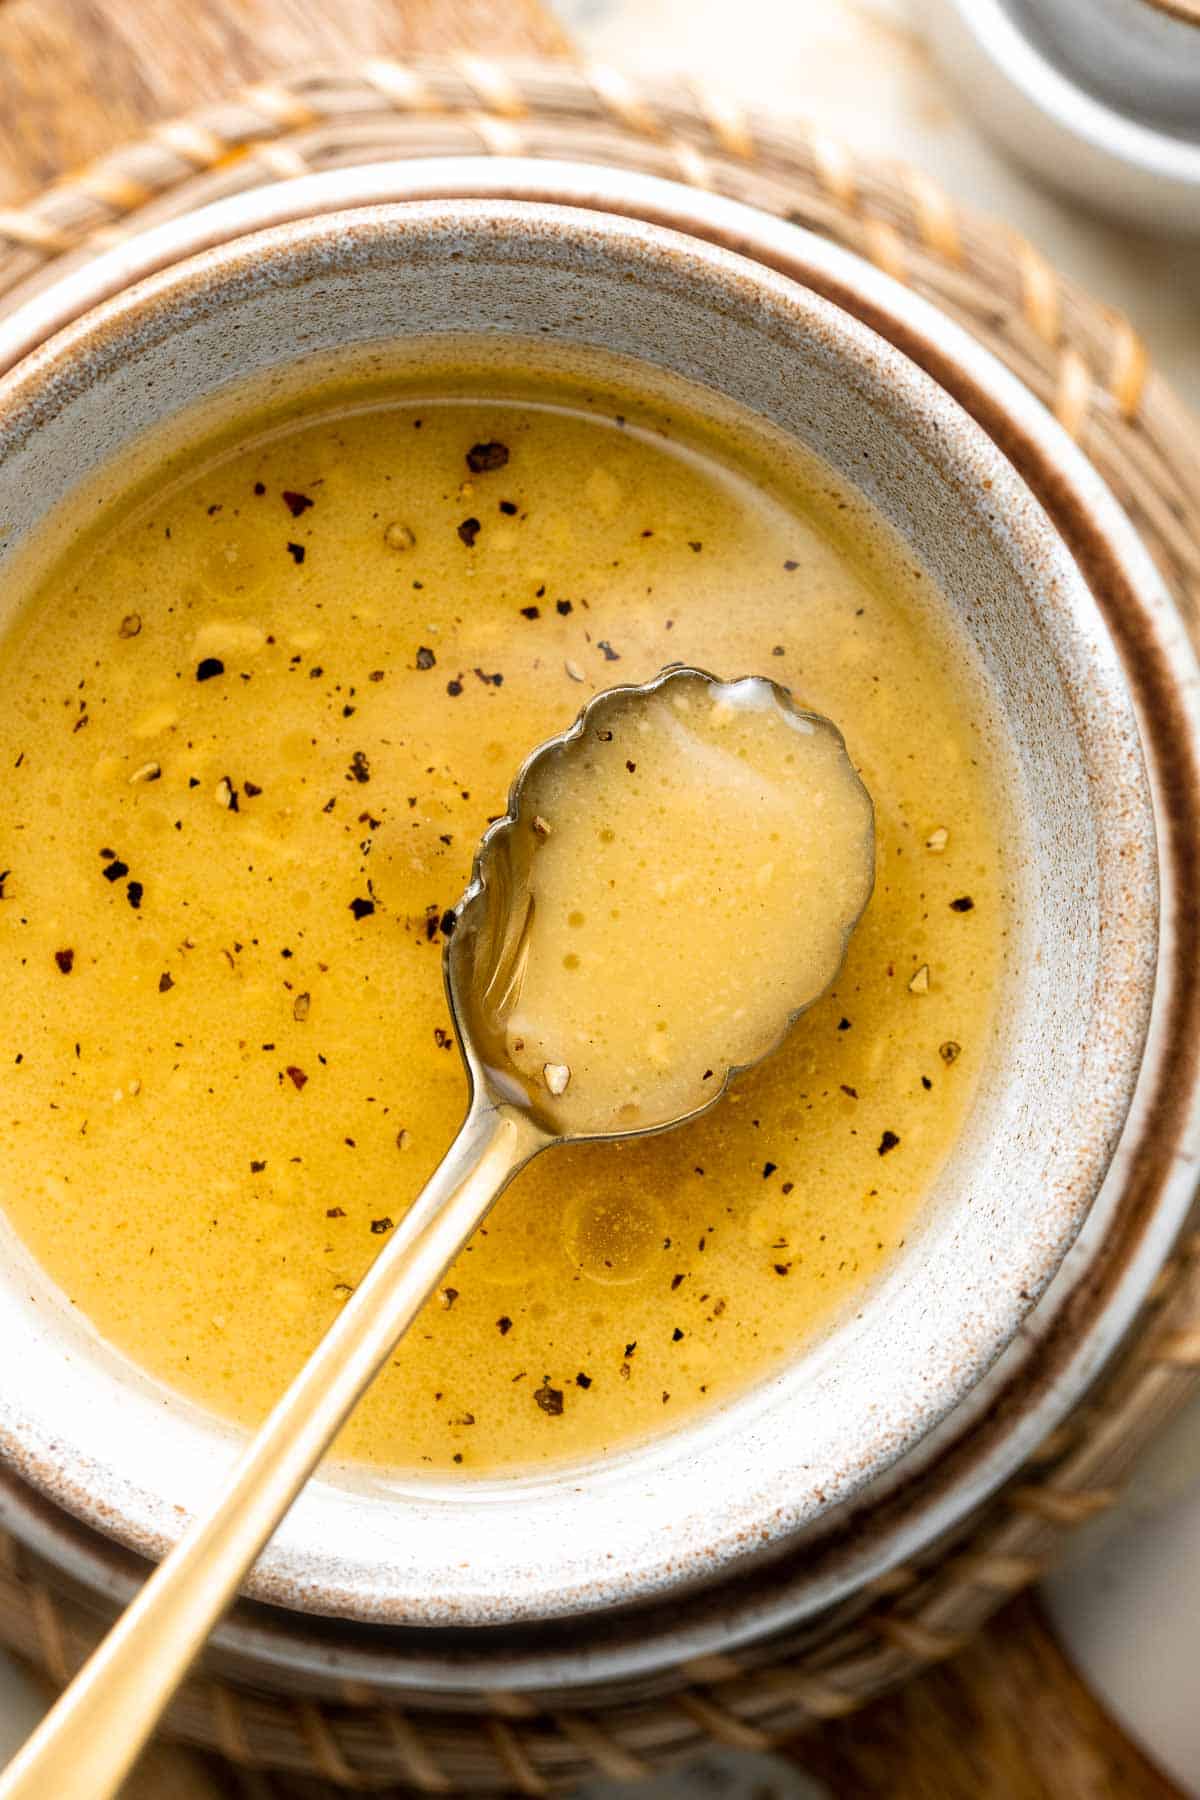
Ingredient Notes
To make this easy Honey Mustard Salad Dressing, you will need the following ingredients (full measurements in recipe card below):
- honey - adds sweetness and balances out the tang of the mustard. Look for a high-quality, pure honey for the best flavor.
- Dijon mustard - adds tang and flavor. You can substitute with other types of mustard such as yellow mustard or brown mustard.
- olive oil - helps to emulsify the dressing and adds richness and flavor.
- apple cider vinegar - adds acidity and balance to the dressing. You can use different types of vinegar in place of the apple cider vinegar in the recipe, including white vinegar, red wine vinegar, or balsamic vinegar.
- lemon juice - also helps to balance out the sweetness of the honey.
- salt and pepper
You will also need measuring cups and spoons, mixing bowl, and a mason jar or airtight container for storage.
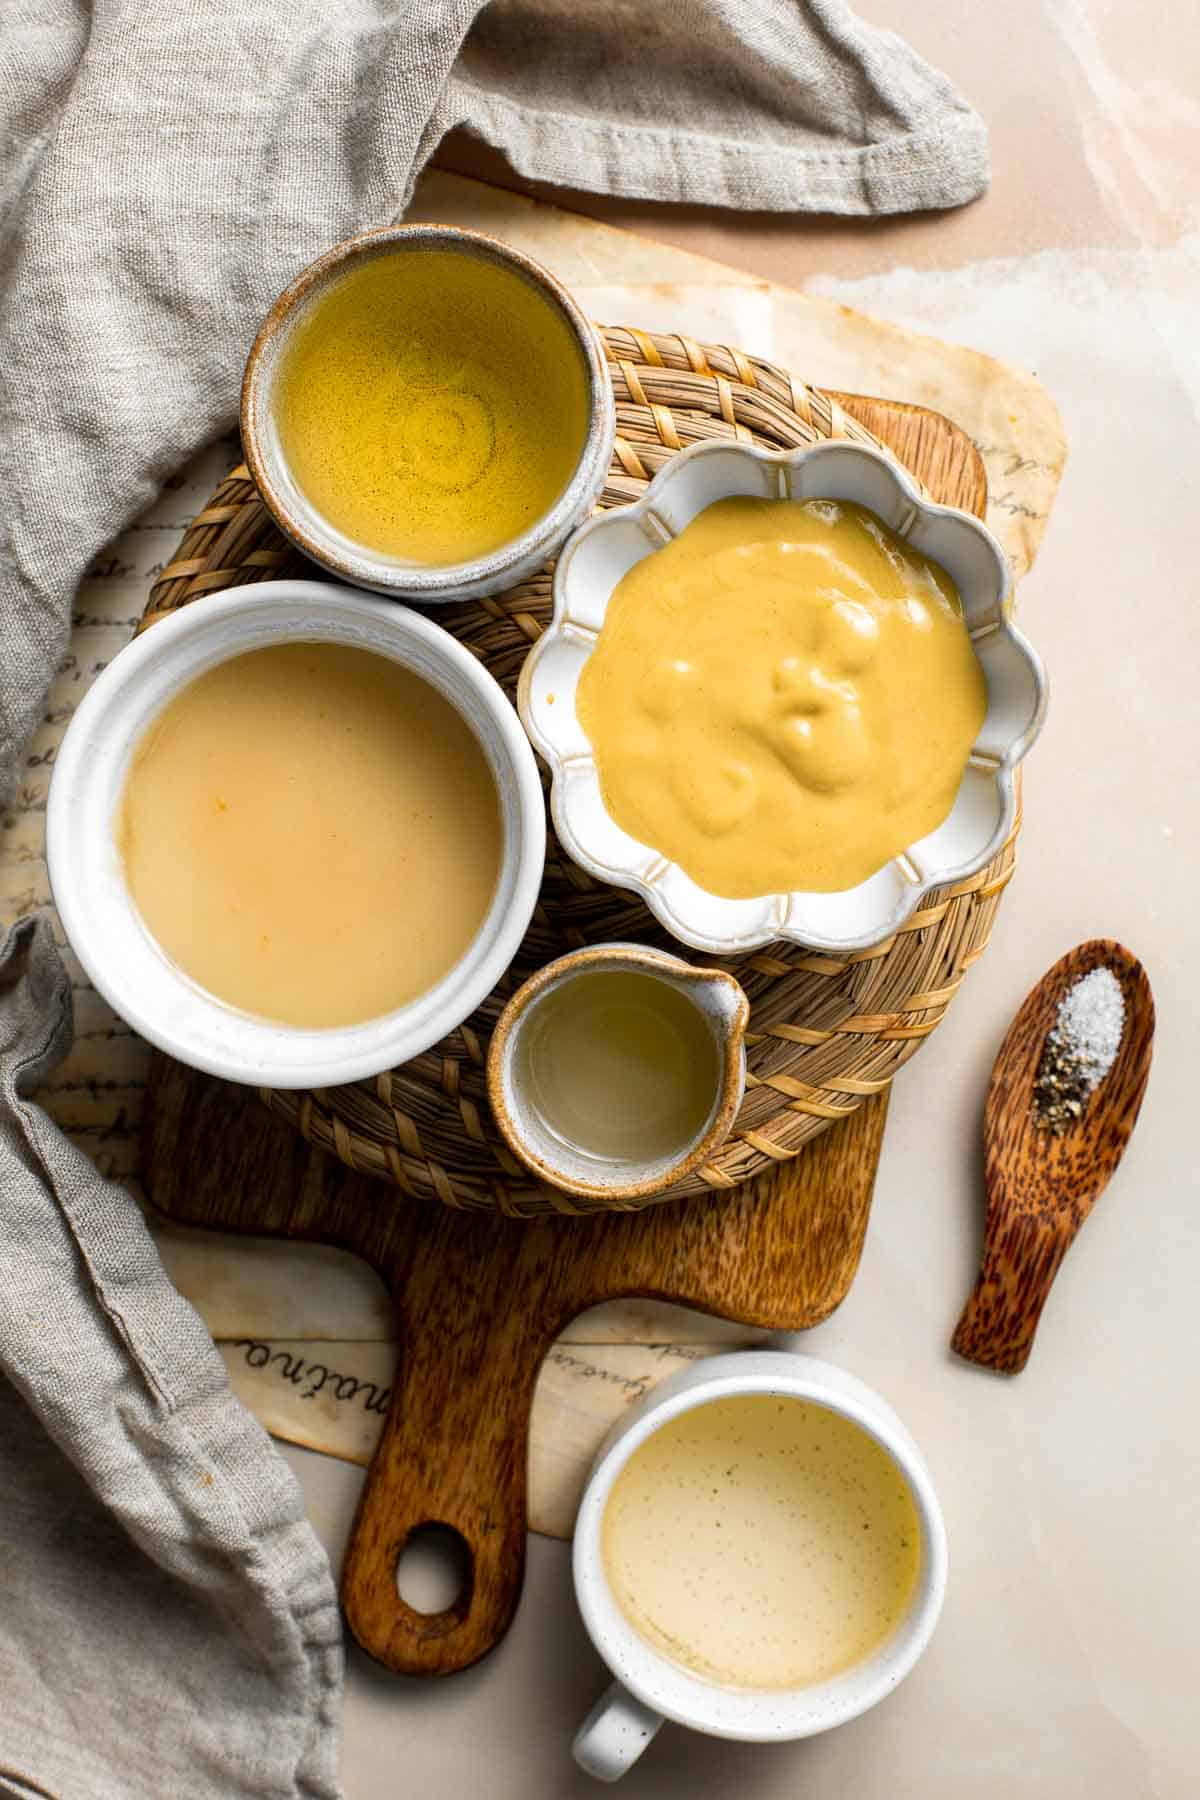
How to Make the Best Honey Mustard Dressing
- In a medium mixing bowl, combine all the ingredients. Use a whisk to mix together and stir well to combine.
- Store in airtight jar (like a mason jar) in the refrigerator for up to 2 weeks.
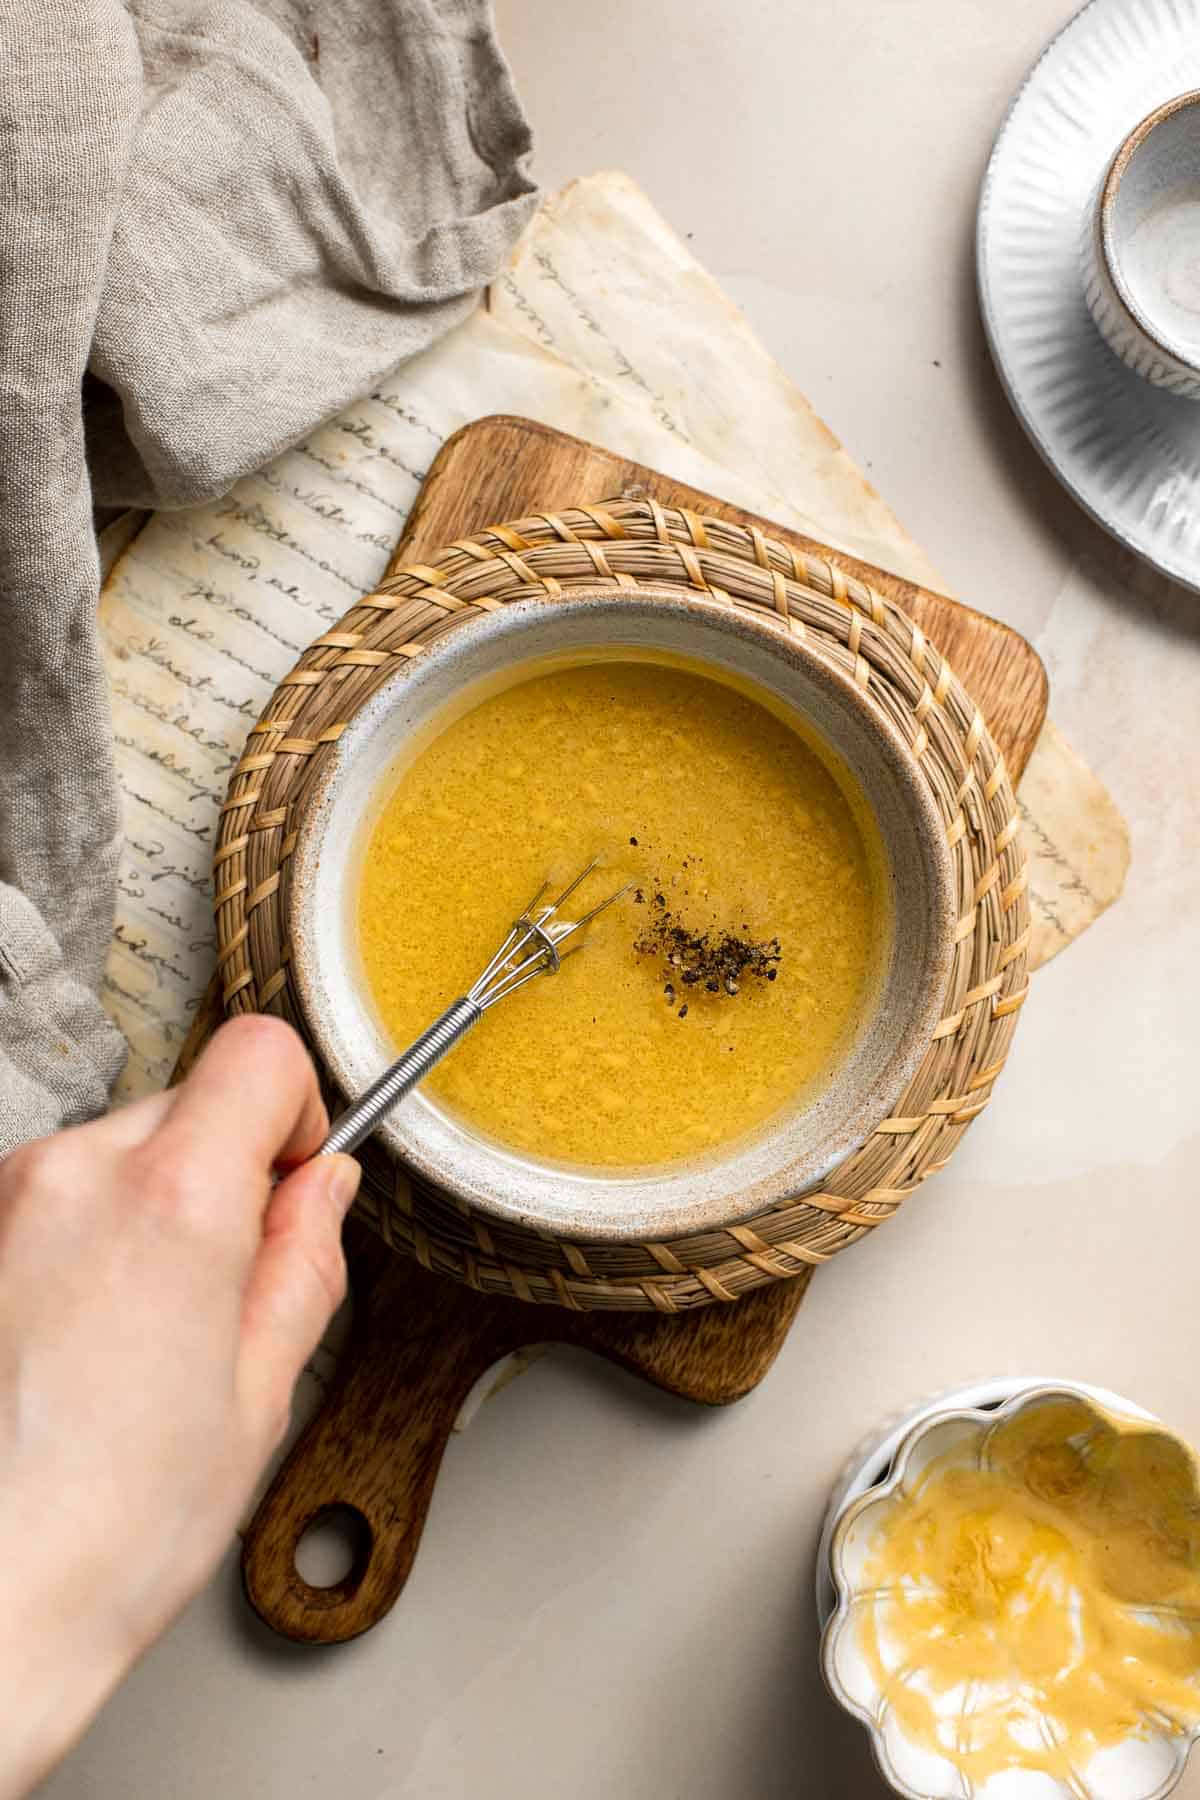
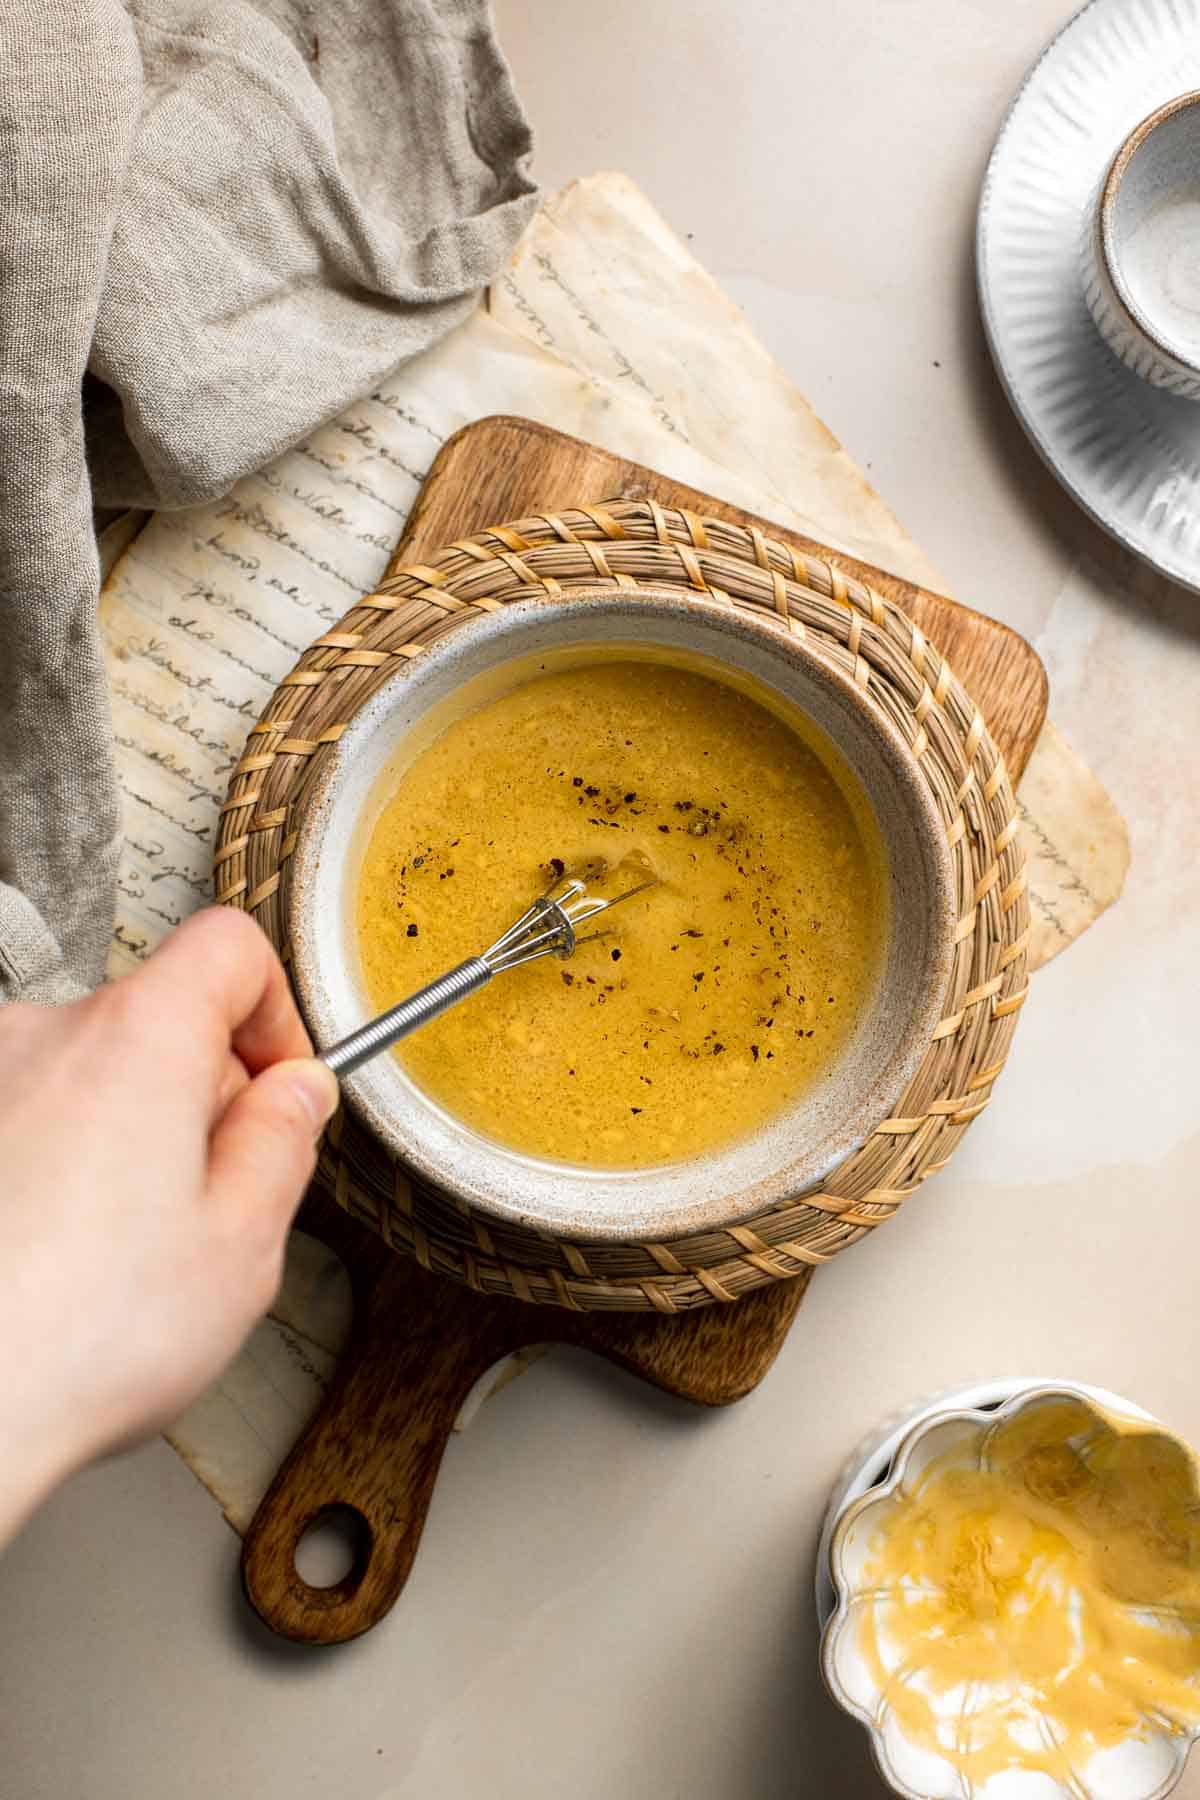
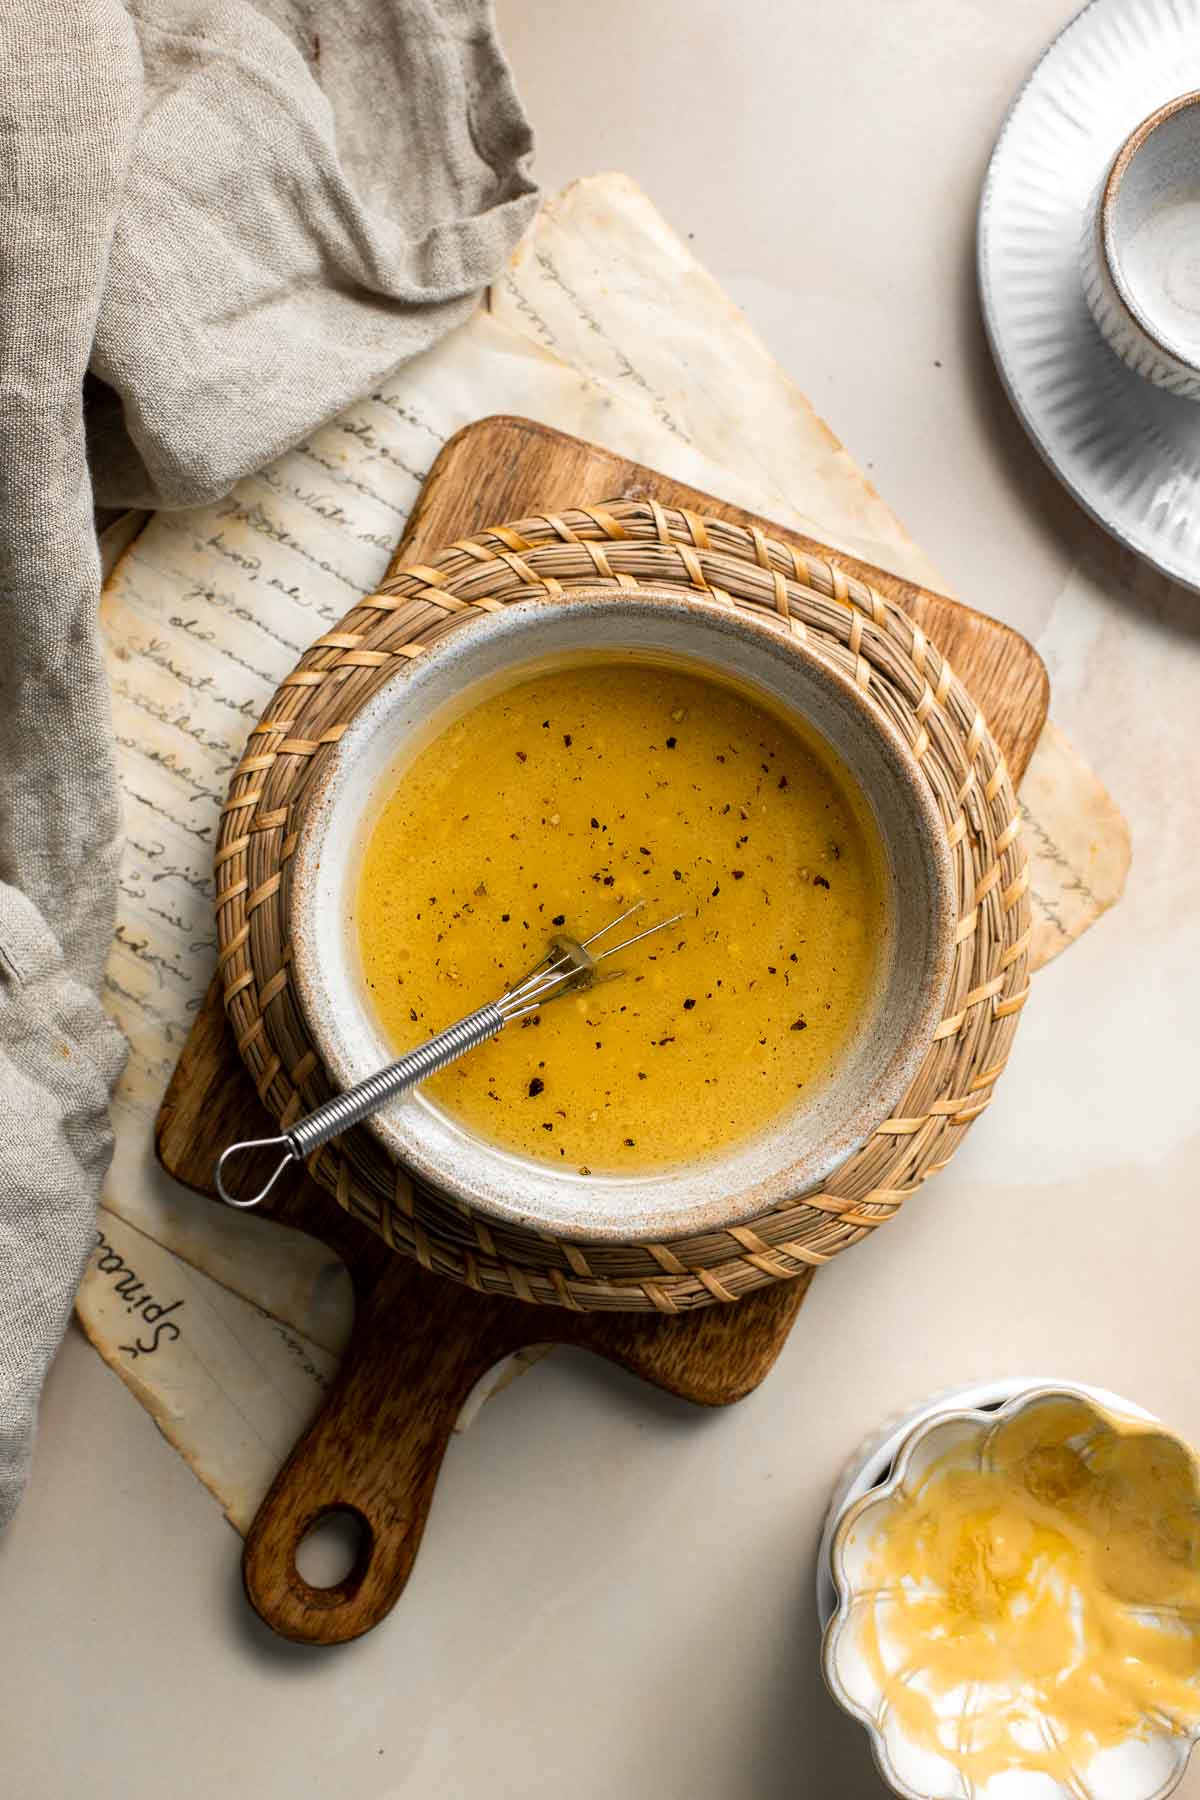
Recipe Variations
One of the great things about making honey mustard dressing from scratch is that you can easily customize it and make your own.
- Add herbs: Fresh herbs, such as parsley, dill, or basil, can add a bright and refreshing flavor to the dressing. Simply chop the herbs and stir them into the dressing.
- Mix in spices: You can add spices to the dressing to give it extra flavor and depth. Some good options include paprika, cumin, or chili powder.
- Add creaminess: Add some yogurt, sour cream, or mayonnaise to add creaminess and extra flavor to the dressing.
- Add extra sweetness: If you want a sweeter dressing, you can add a little extra honey or try mixing in some maple syrup or agave nectar.
How to Serve
Honey mustard dressing pairs can be used to add flavor to a variety of different dishes. Use this dressing as:
- Salad dressing. Drizzle honey mustard dressing over a salad of mixed greens, cherry tomatoes, and croutons for a delicious and satisfying meal. You can use it to dress any of your favorite salads. We used it in this Christmas Salad, but it works well in Tomato Cucumber Avocado Salad, Garden Salad, Fruit Salad, or grain bowls.
- Sandwich spread. Use honey mustard dressing as a spread for sandwiches. It pairs well with a variety of fillings including as turkey, ham, cheese, and avocado. You can also use it as a condiment in burgers and hot dogs.
- Dipping sauce. Use this honey mustard dressing as a dip for raw vegetables, such as carrots, celery, bell peppers, cauliflower, and cucumbers in a Veggie Tray. You can also use it as a dip for fried foods such Chicken Tenders, French Fries, or Baked Chicken Wings.
- Marinade for meats. You can also use honey mustard dressing as a marinade for grilled chicken or pork. Simply coat the meat with the dressing and let it marinate in the refrigerator for a few hours before grilling.
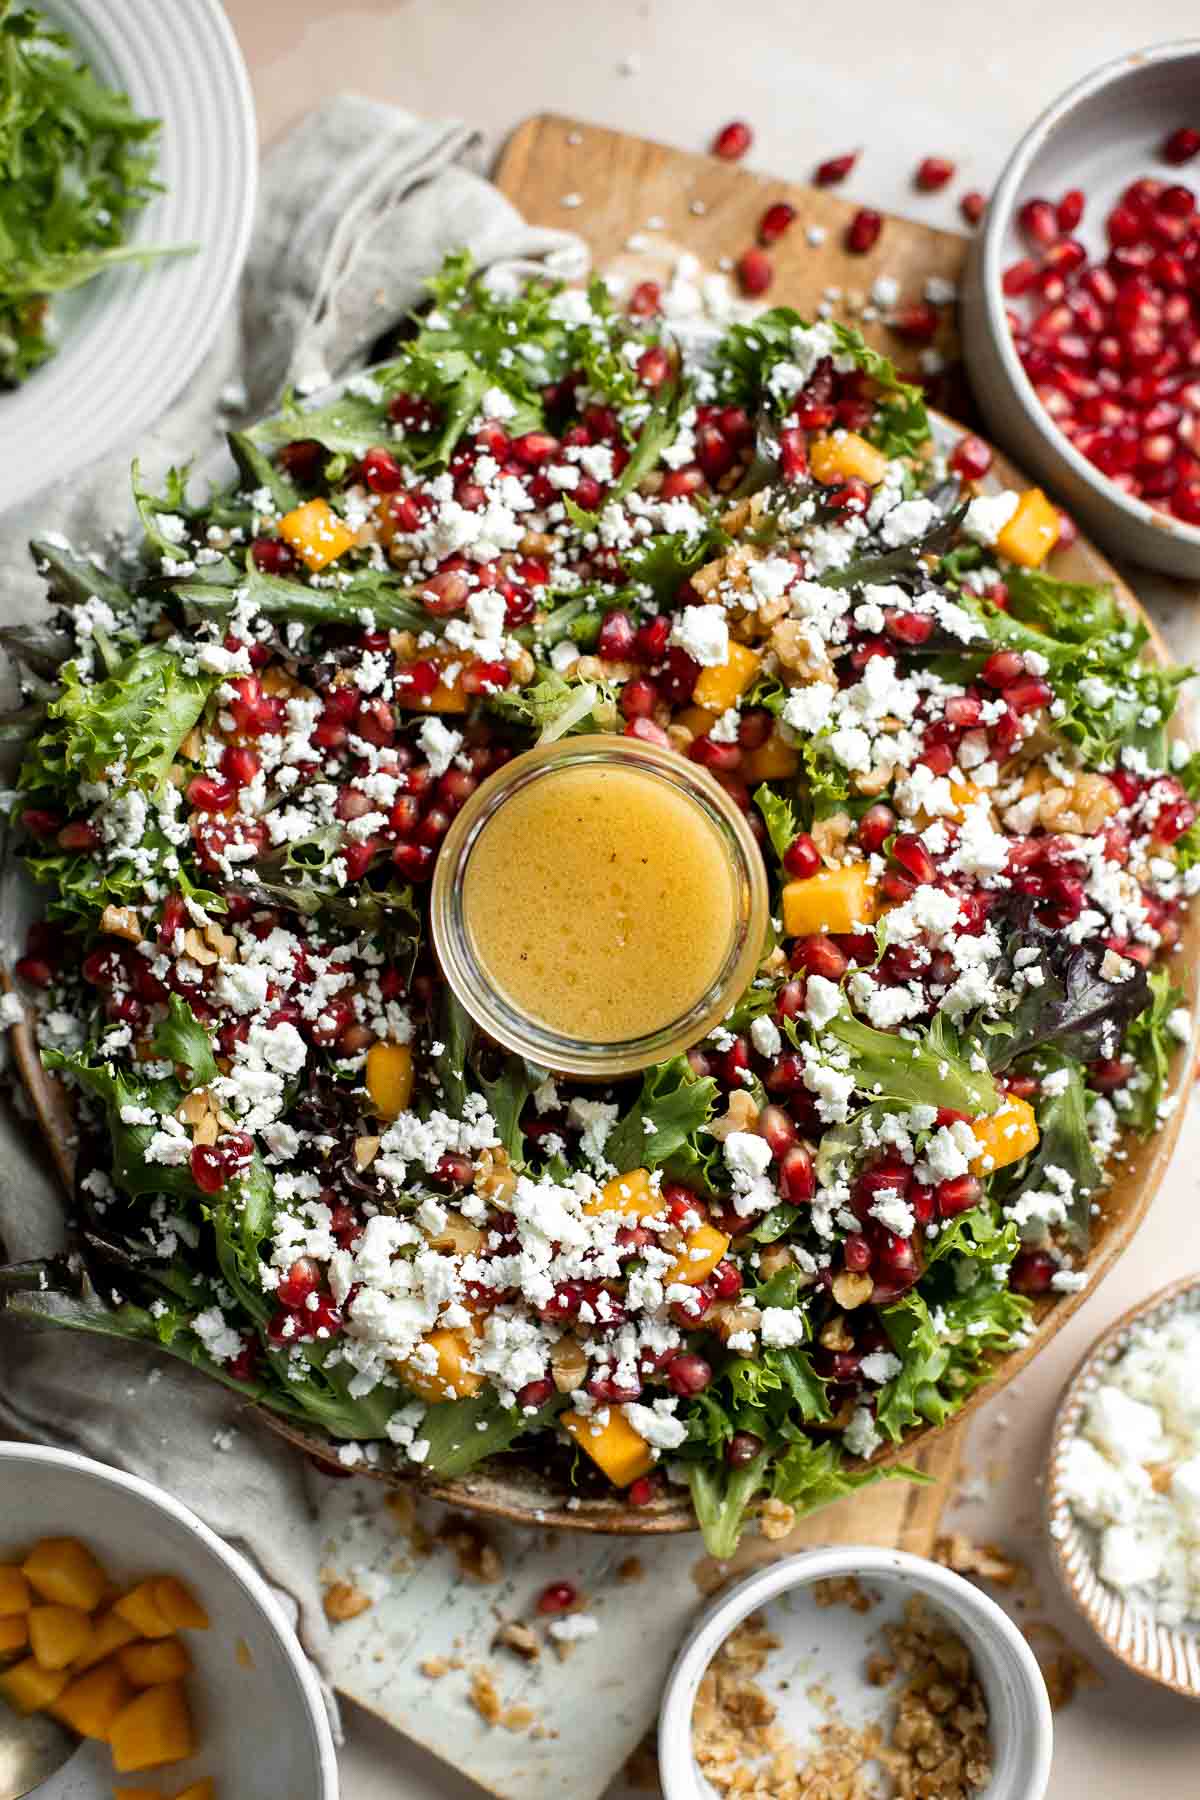
Recipe Tips and Tricks
- Use high-quality ingredients. Using quality ingredients, such as pure honey and good-quality vinegar, will give the dressing the best flavor and taste.
- Adjust the ratio of ingredients to your liking. The ratio of mustard to honey to vinegar in this recipe can be adjusted to your liking. You can use more or less of any ingredient to suit your taste.
- Whisk the ingredients together. Whisking the ingredients together until they are well combined will help to emulsify the dressing and give it a smooth and creamy texture.
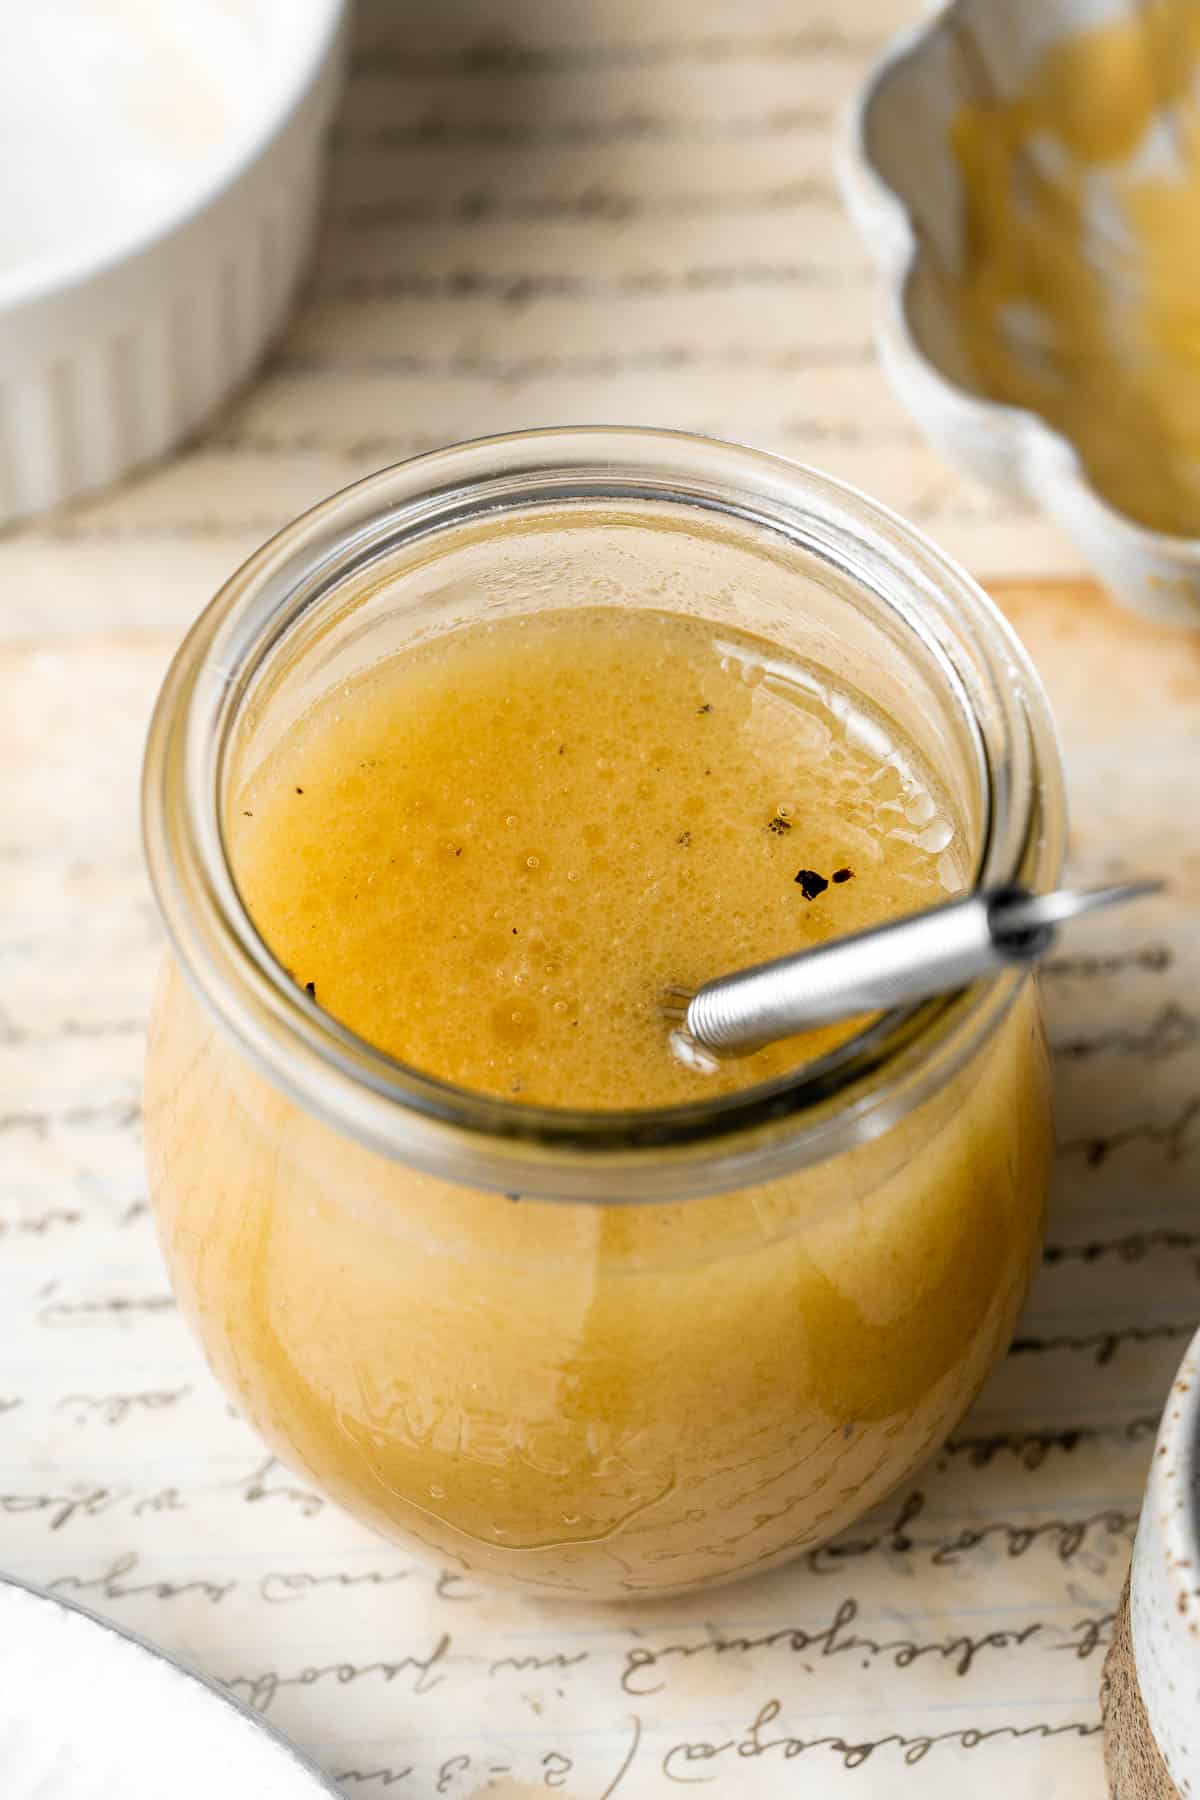
Storing Instructions
Since homemade dressings lack preservatives, they are better for you but don't last as long as store-bought. Store homemade honey mustard dressing an airtight container or mason jar in the refrigerator for up one week.
It is not recommended to freeze this honey mustard dressing as the texture may be not be the same when thawing.
More Salad Dressing Recipes
- Southwest Salad Dressing
- Caesar Salad Dressing
- Creamy Cilantro Lime Dressing
- Greek Salad Dressing
- Creamy Sesame Dressing
- Homemade Italian Dressing
Tried this recipe?
I'd love to hear what you think! Leave a comment and rating below to share your feedback. Your reviews help others discover this recipe and help me keep creating more free recipes for you. Snap a photo and tag me on social media @aheadofthyme too.
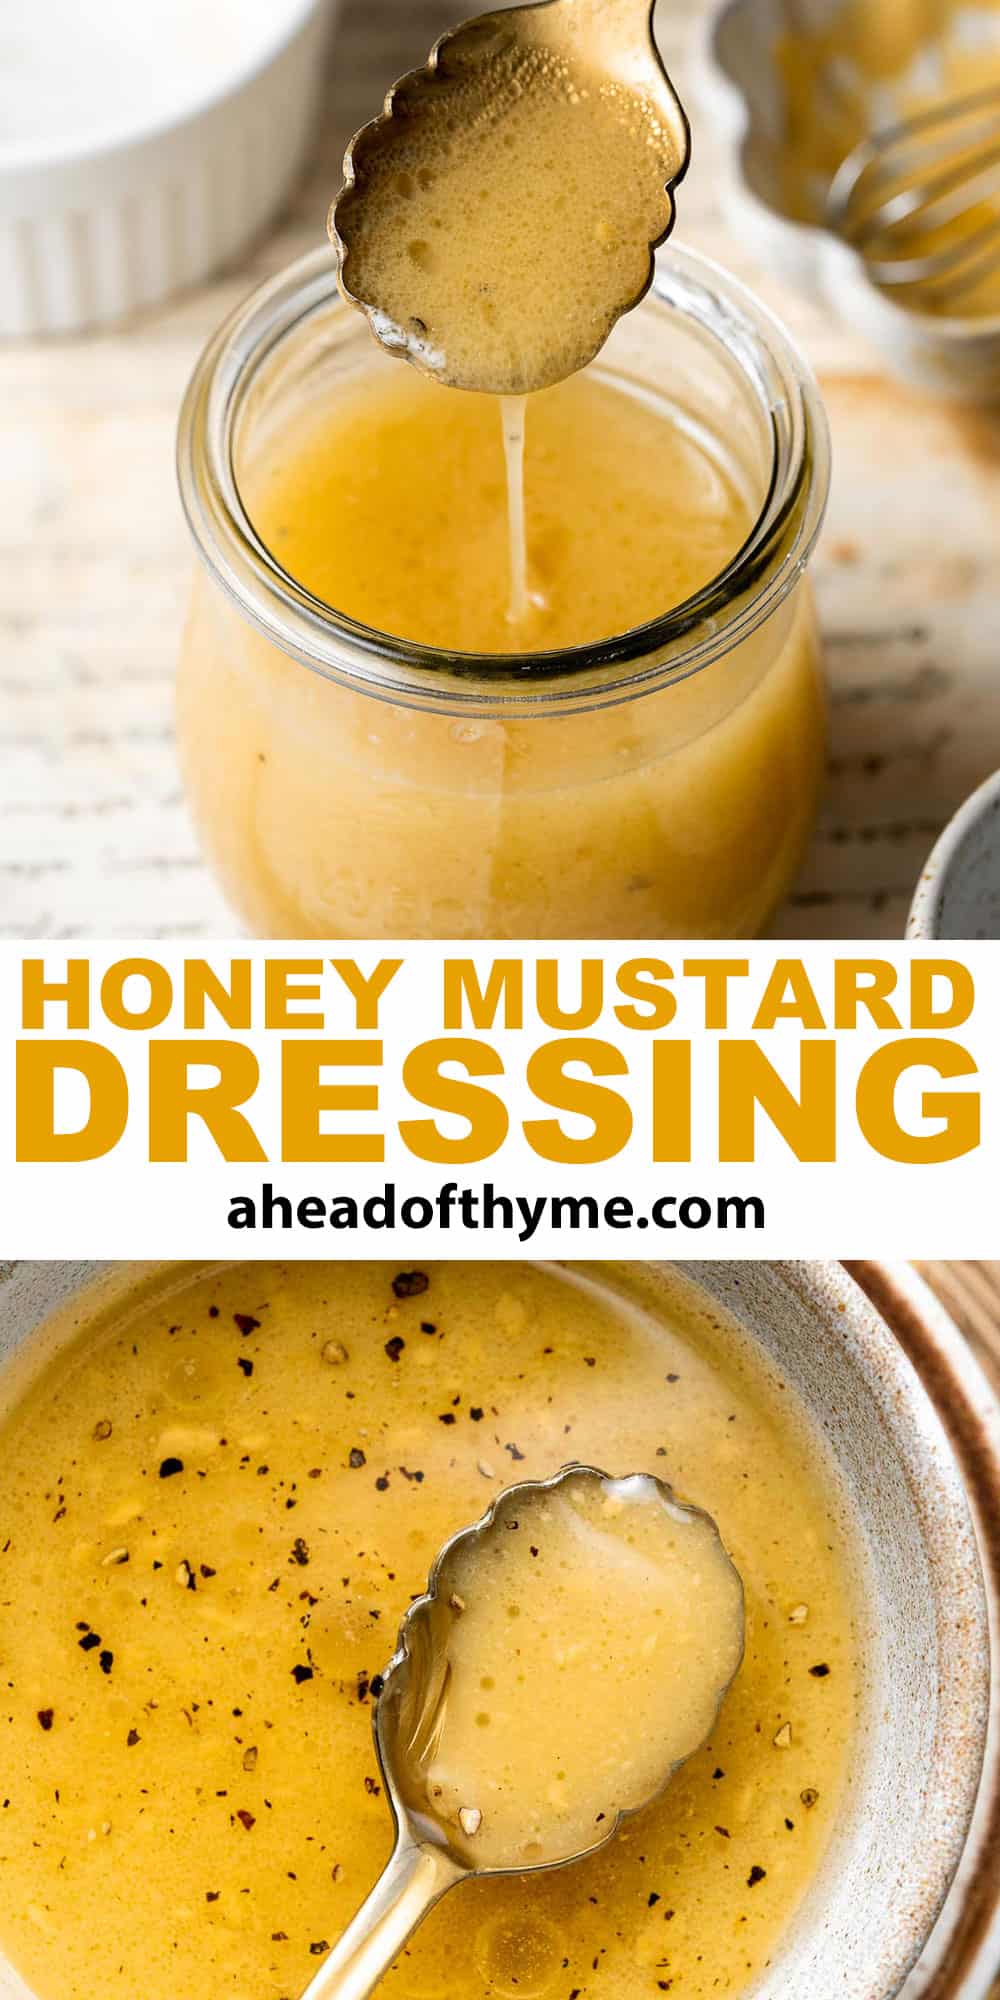
Chicken and Dumplings
Chicken and Dumplings are a classic chicken soup that is hearty, comforting, and nourishing. It's loaded with chicken, homemade dumplings, and a flavorful creamy broth. This homemade soup is also quick to make in one pot in just 40 minutes - perfect for weeknight family dinners.

Whether you're craving warm comfort food, fighting a cold, or just craving a hot meal in a hurry, this chicken and dumplings recipe will be your new go-to. Plus, you can save time and use a store-bought rotisserie chicken or leftover chicken from the fridge.
Why You'll Love these Chicken and Dumplings
- It's a classic comfort dish. Cold weather and bad days are instantly made better with a steaming hot bowl of chicken and dumplings! Juicy chicken, tender dumplings, and soul-warming broth are just what the doctor ordered.
- Ready in 40 minutes. It takes less than an hour to make this chicken soup recipe completely from scratch. Just follow our easy recipe and you'll have a warm, comforting pot of chicken and dumplings ready in no time - making it perfect for busy weeknight family dinners. Plus, you can make it even faster by using leftover cooked chicken or a rotisserie chicken.
- A one pot meal. With this old fashioned chicken and dumplings, everything is cooking in the same pot, meaning there is only one pot to clean along with the mixing bowl that you used to make the dumpling batter.
- It's freezer friendly. Chicken and dumplings store well and freeze well so you can turn this into multiple meals to have on hand to satisfy cravings or serve a crowd when you're short on time and energy. You can make a big batch ahead of time and add to your freezer stash for easy reheating.

Ingredient Notes
To make this delicious Chicken and Dumplings soup, you will need the following ingredients (full measurements in recipe card below):
- avocado oil - feel free to substitute with vegetable oil or olive oil.
- chicken thighs or breasts - use boneless chicken thighs and breasts. You can choose to leave the skin on or off. You can also substitute with leftover cooked chicken!
- butter - use unsalted butter for the most control of the amount of sodium in the recipe, or use salted butter and reduce or omit the additional salt called for in the recipe.
- onion - white onions, yellow onions, shallots, or vidalia onions all work.
- carrots - parsnips will work in place of the carrots if you're all out.
- celery
- Italian seasoning - you can use a store bought or a homemade Italian seasoning blend, whichever you prefer!
- flour - all-purpose flour or a gluten-free substitute should produce a similar result.
- chicken broth - you can use homemade stock or store-bought. You can also swap it for veggie stock if you want or need to.
- salt and pepper
- heavy cream - you can also use milk for a slightly less creamy result.
- baking soda + baking powder
- green onions or chives
You will also need measuring cups and spoons, a large cooking pot, and a mixing bowl.
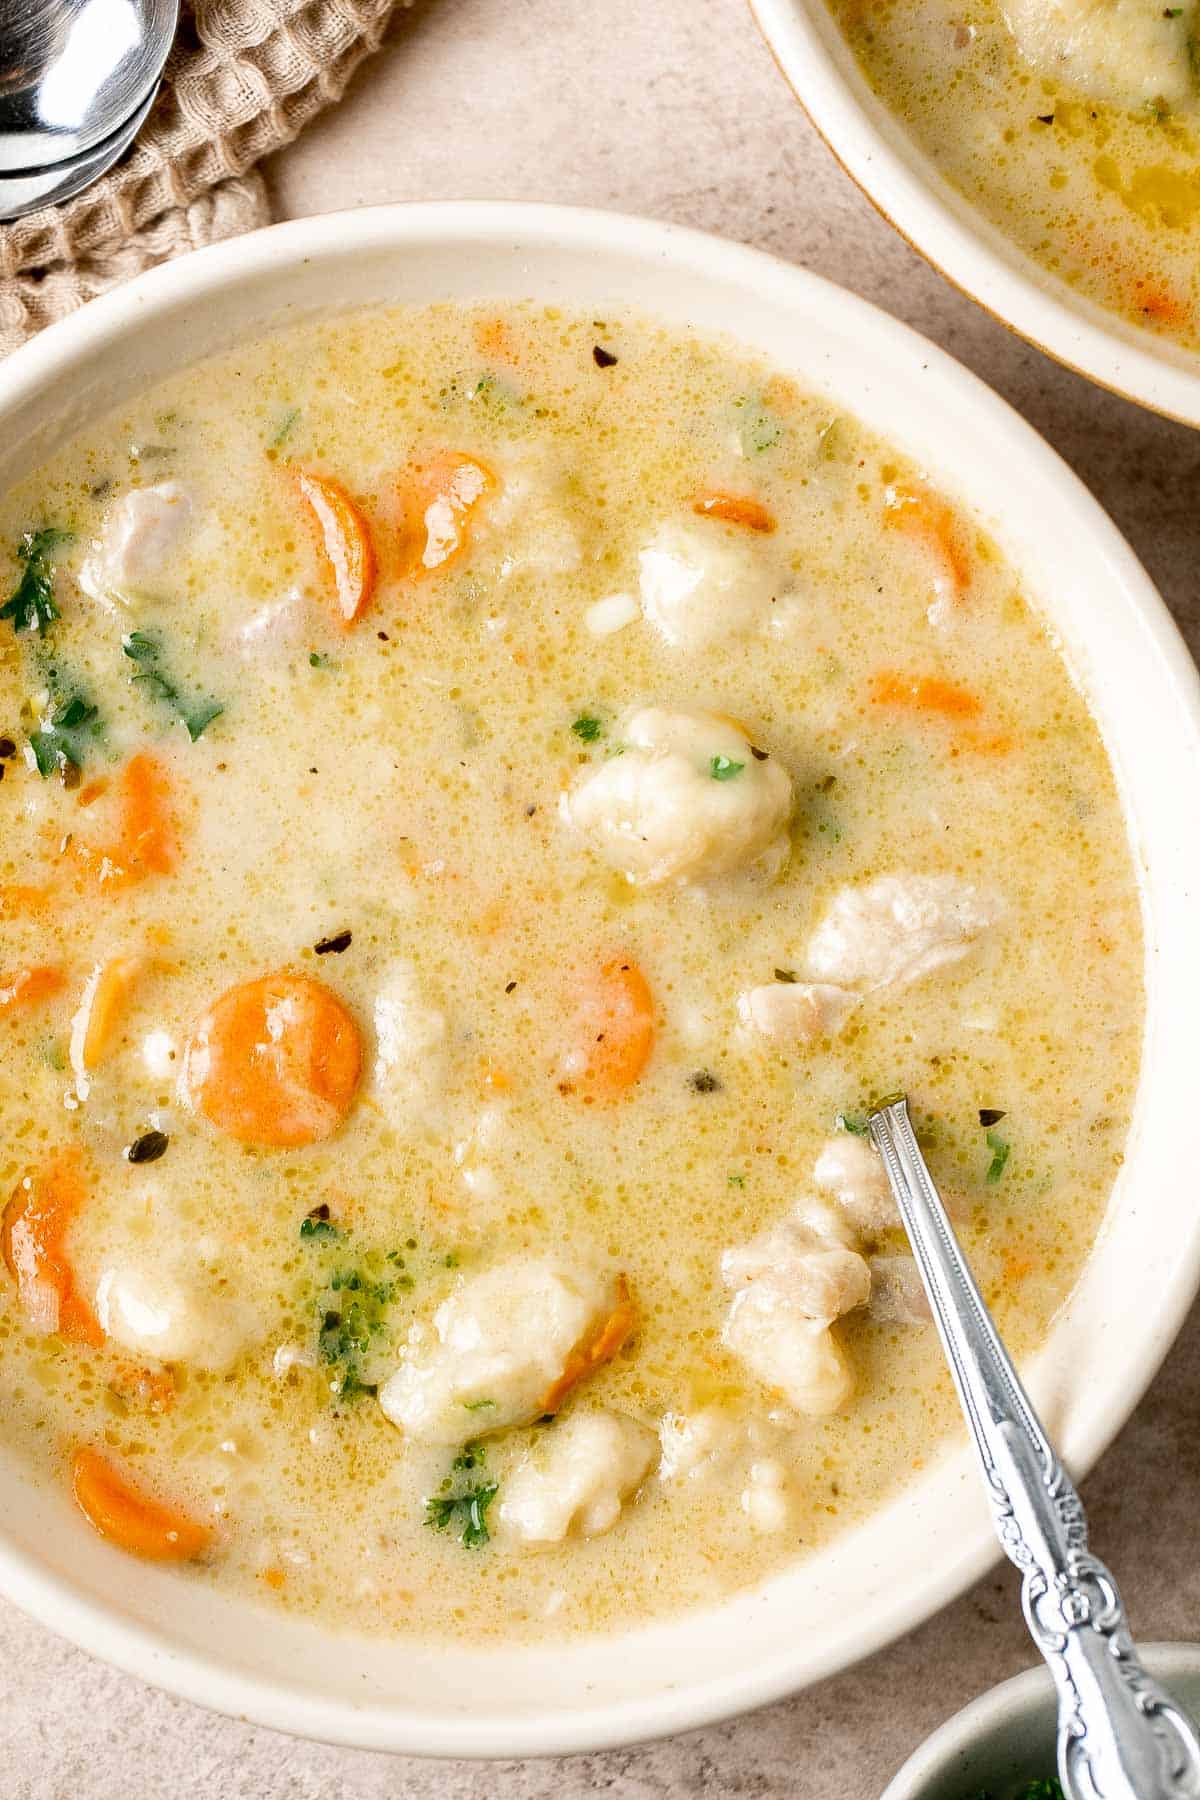
How to Make the Best Chicken and Dumplings
- Cook chicken. Heat oil in a large pot over medium-high heat until sizzling hot, about 1-2 minutes. Add chicken and cook until golden brown on all sides, about 3-4 minutes. Transfer onto a large plate and set aside.

- Sauté aromatics. In the same pot, add butter and heat until melted, about 1 minute. Add onion, garlic, carrots and celery and sauté until tender, about 3-4 minutes. Stir in Italian seasoning until well combined.
- Thicken. Add flour and mix well until thickened to a paste, about 1 minute.
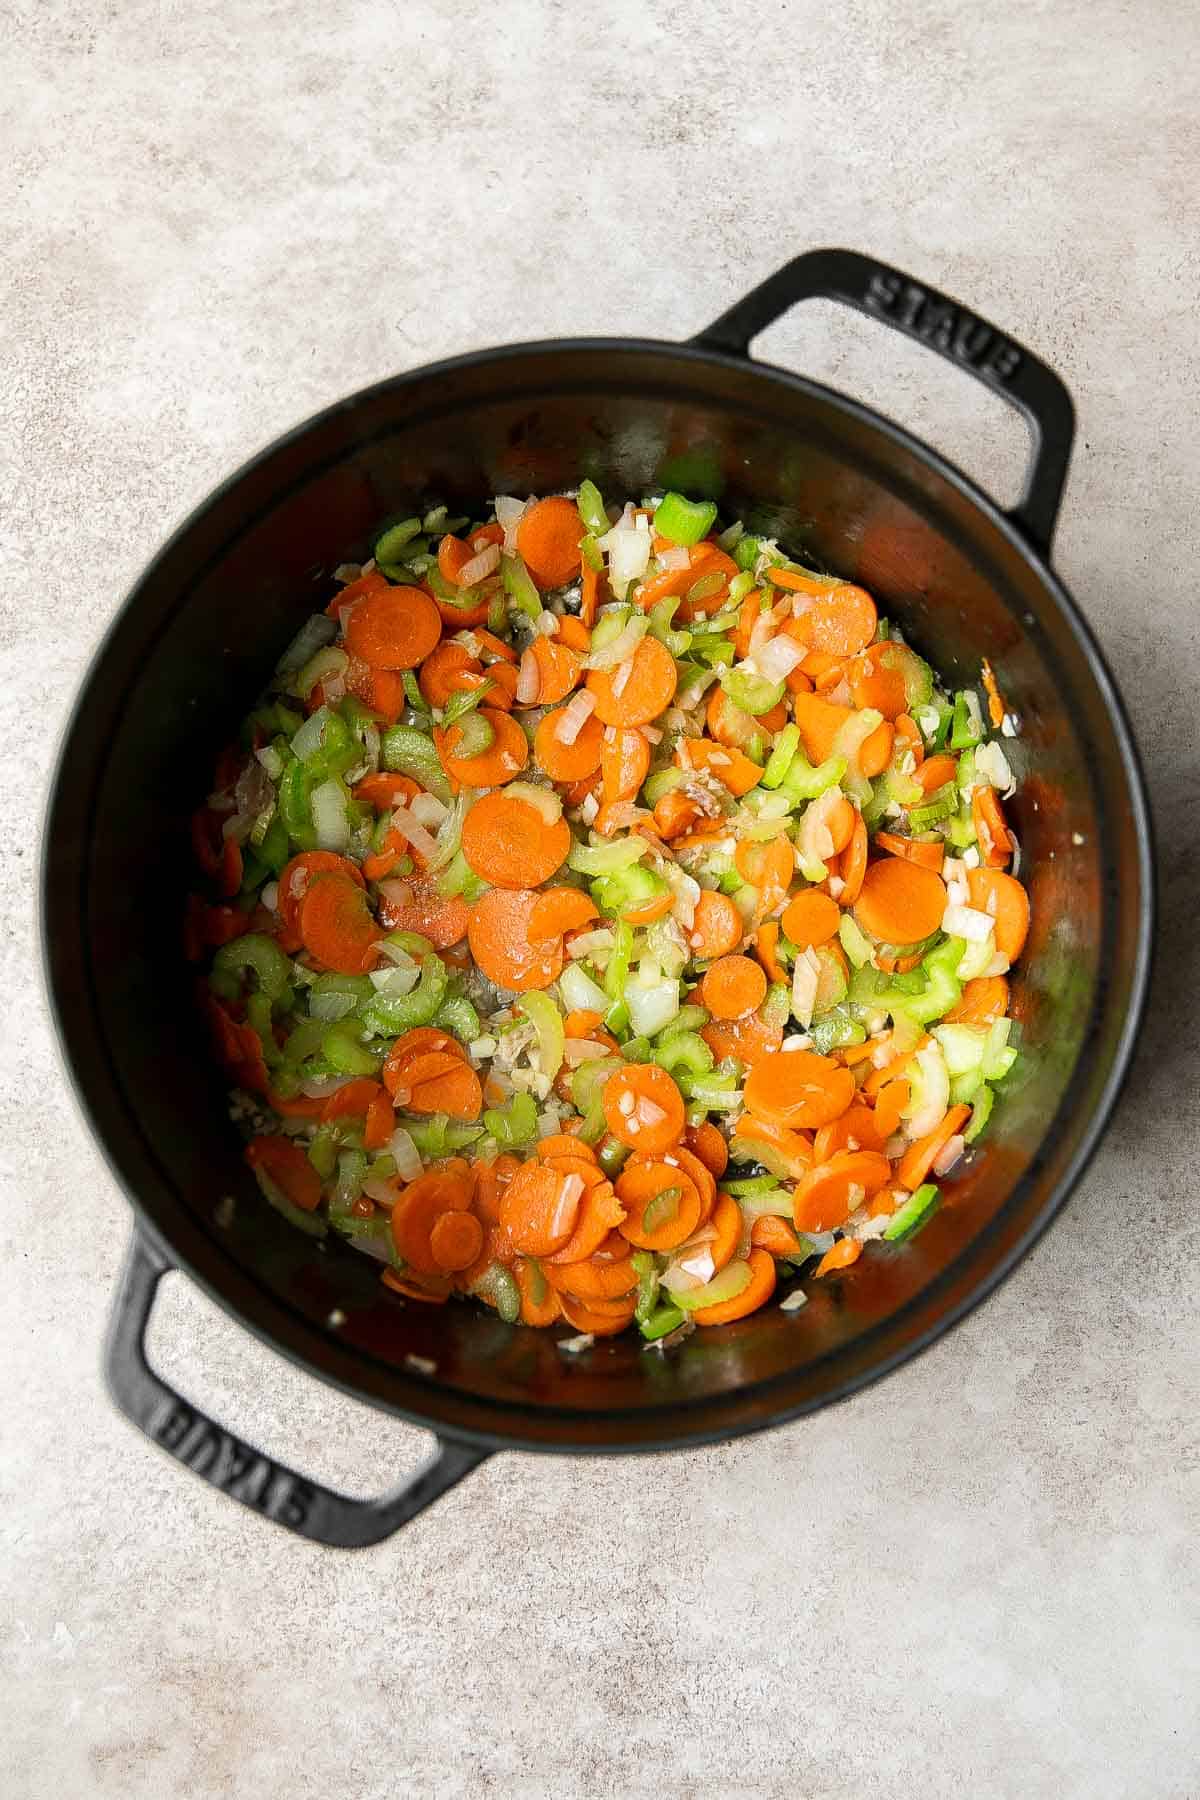
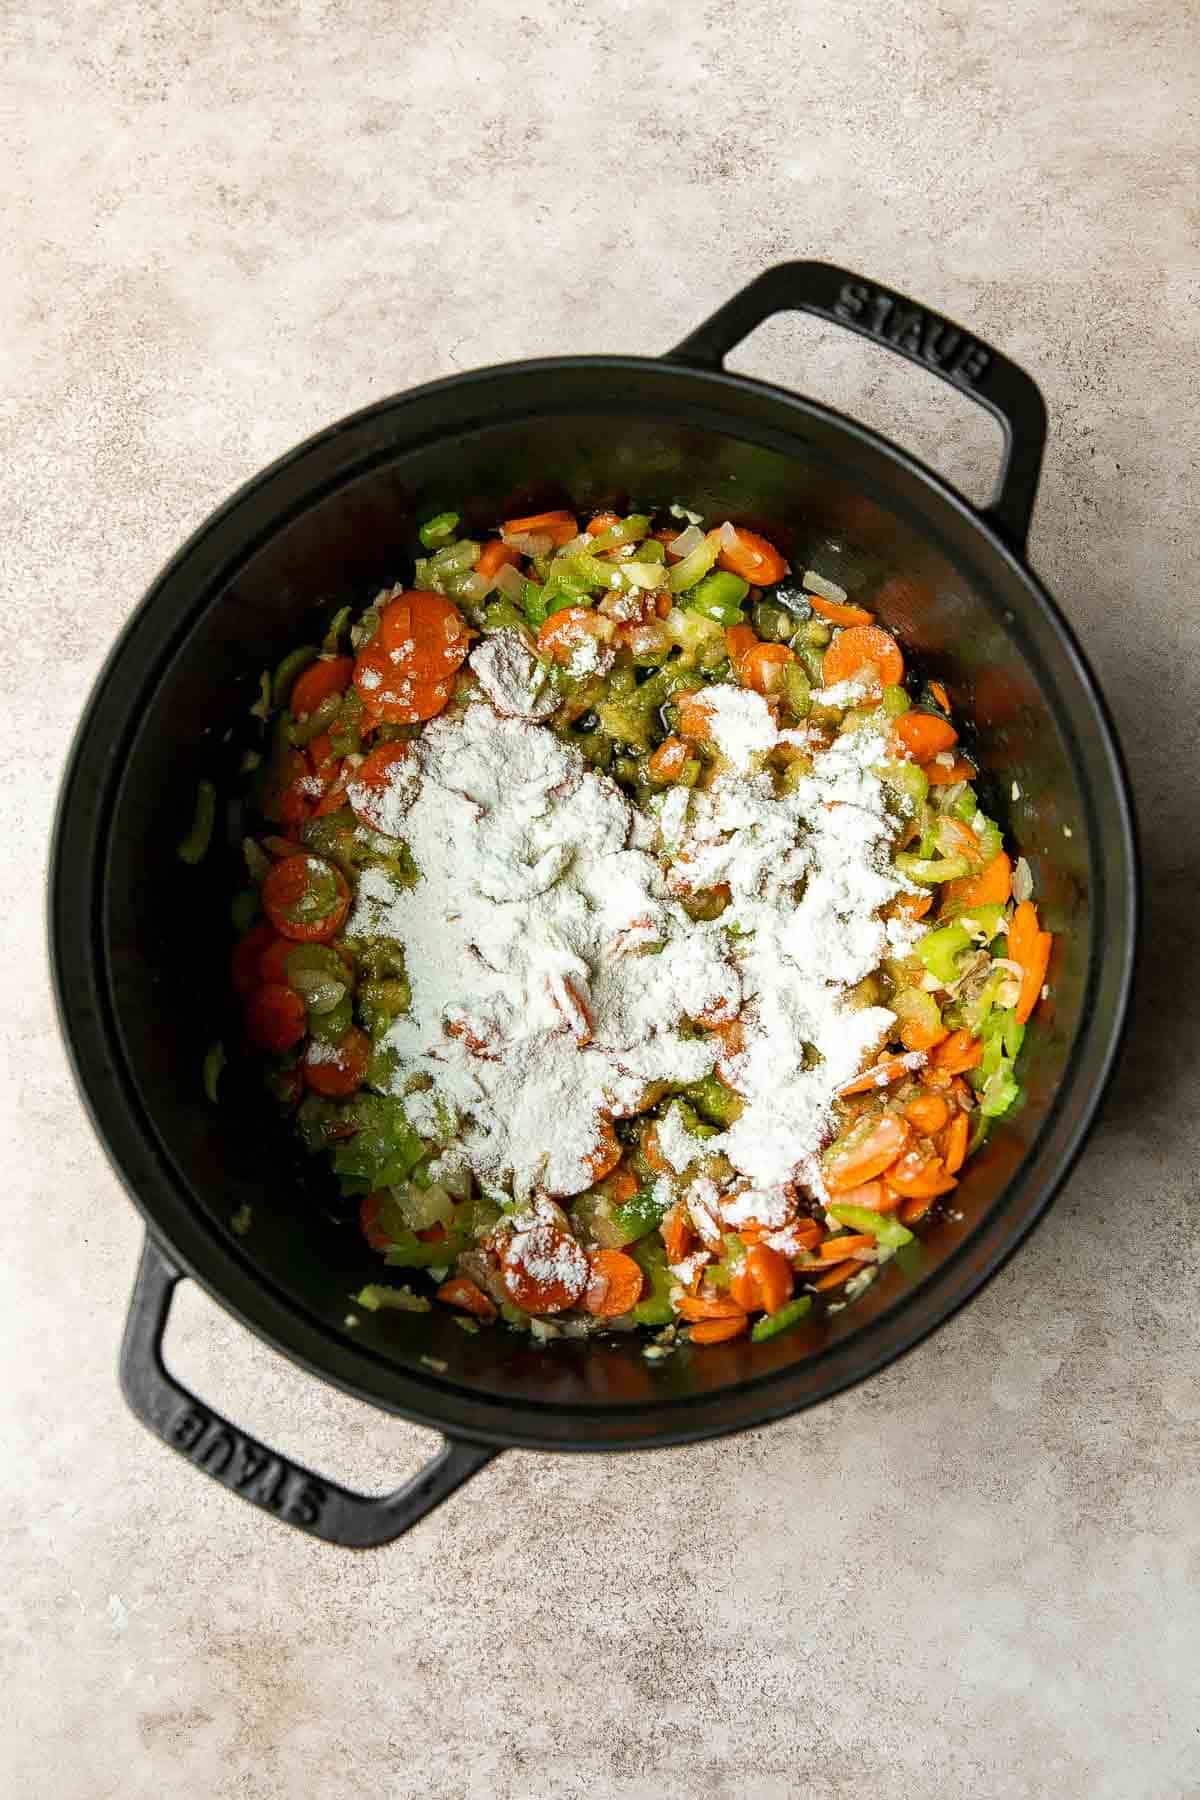
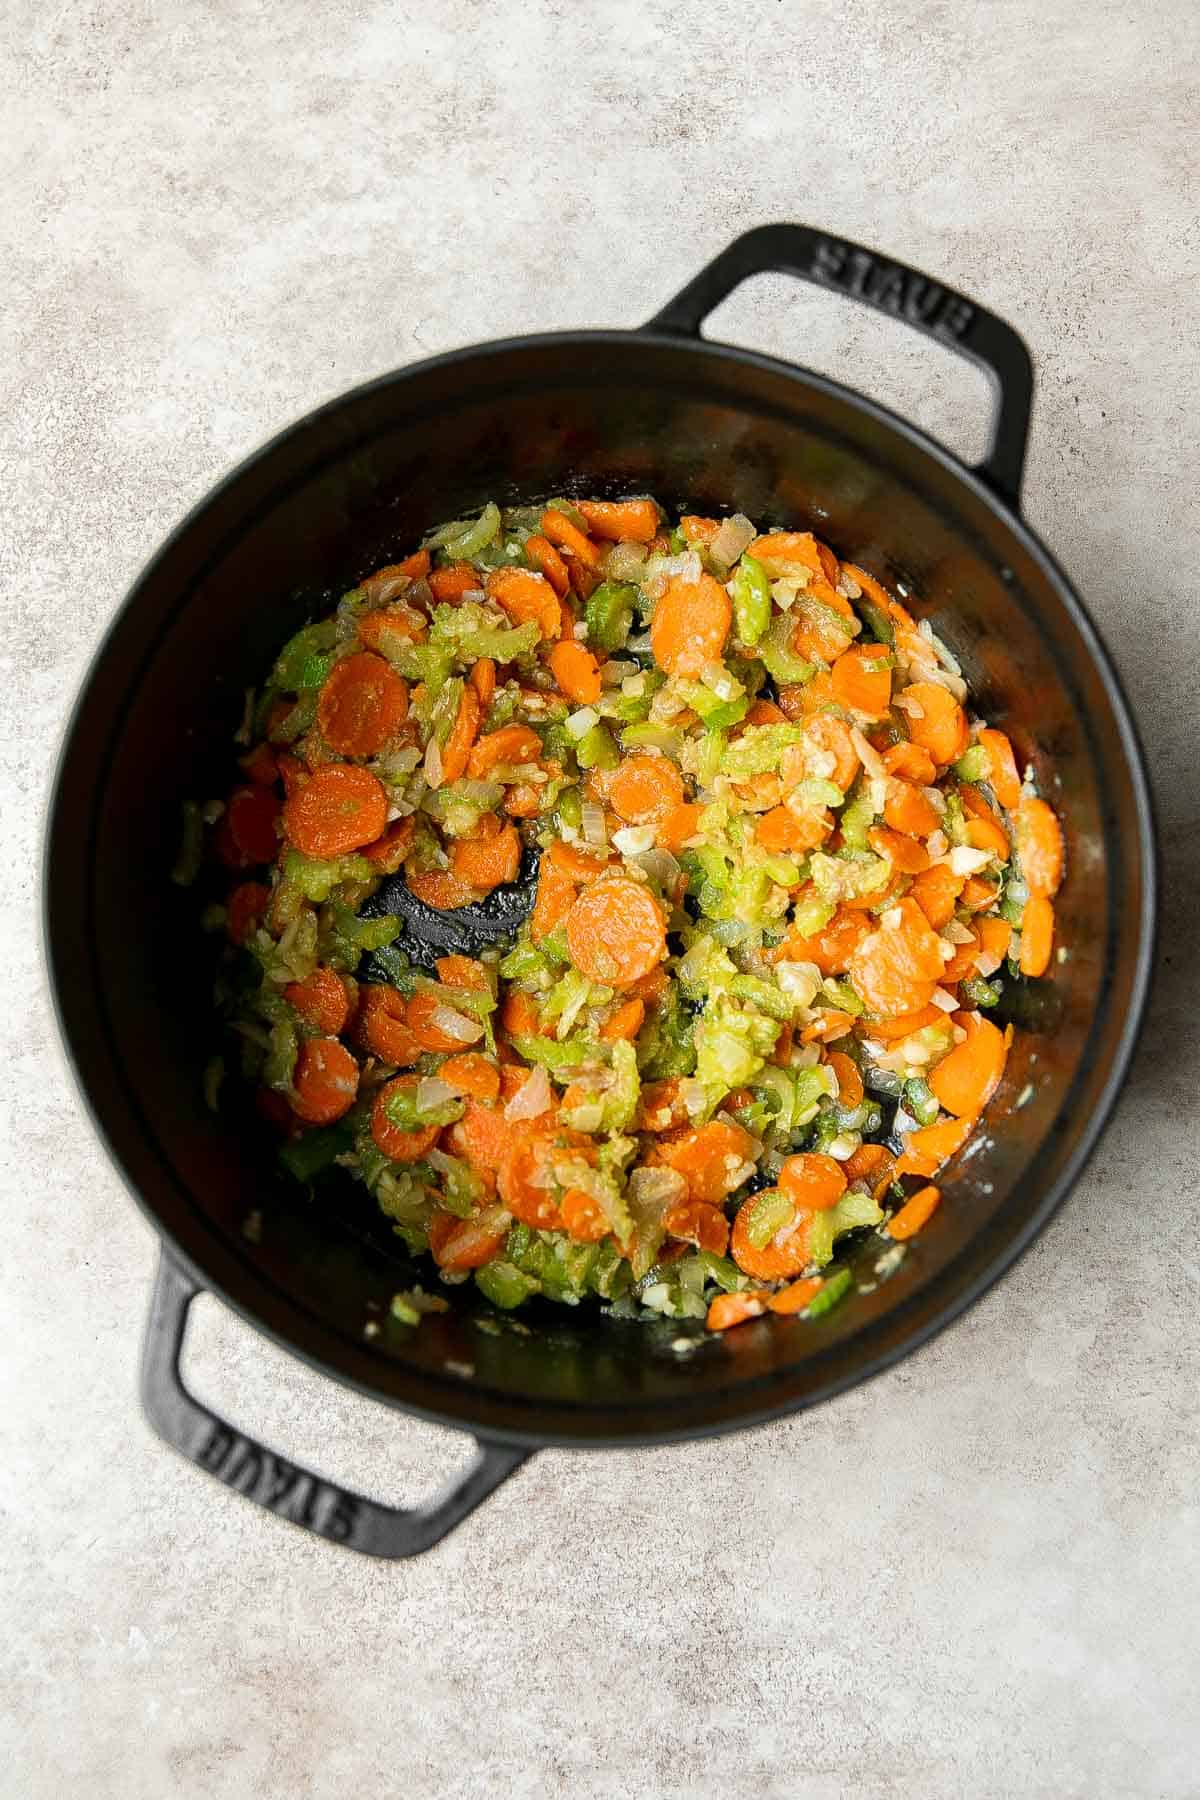
- Add broth. Slowly add chicken broth and stir constantly until evenly distributed. Return the chicken to the pot and bring the soup to a gentle simmer over low heat, about 10 minutes. Season with salt and pepper to taste.
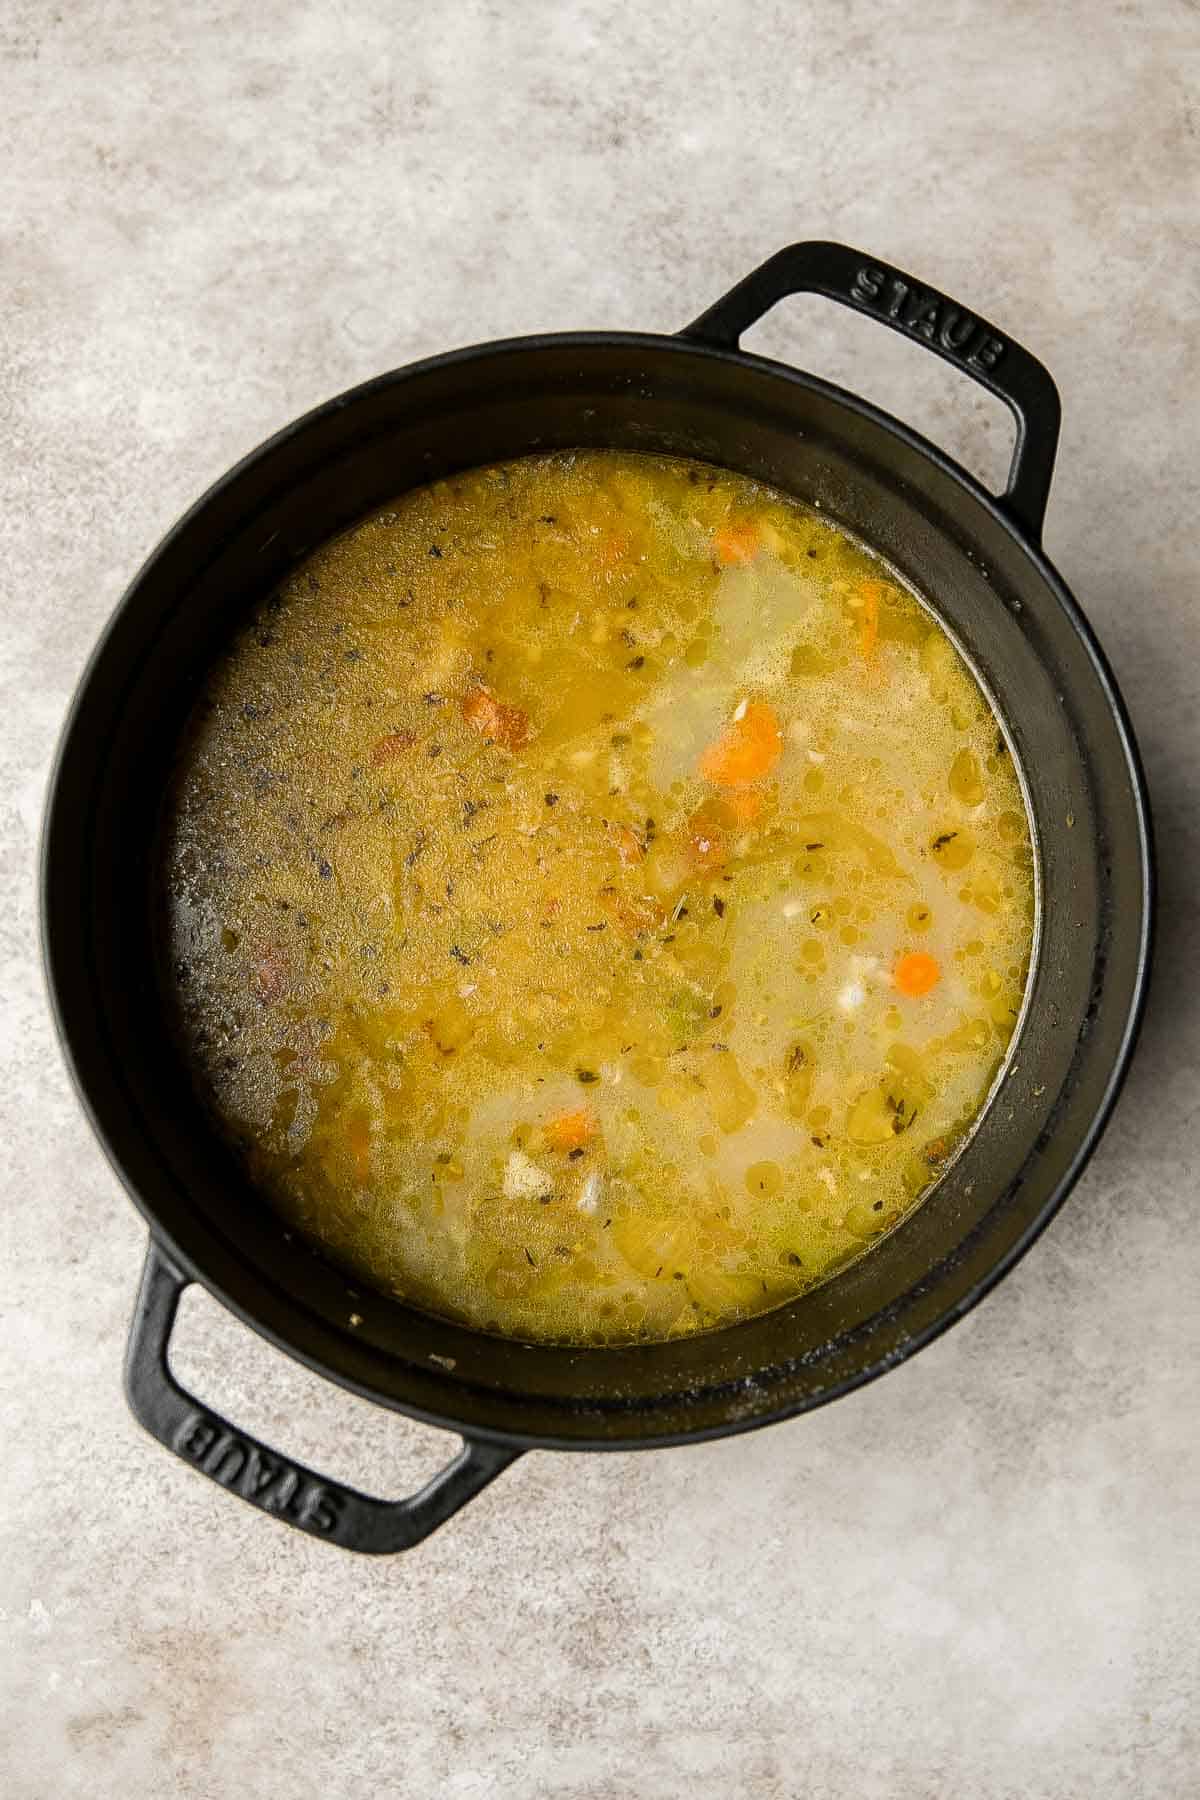
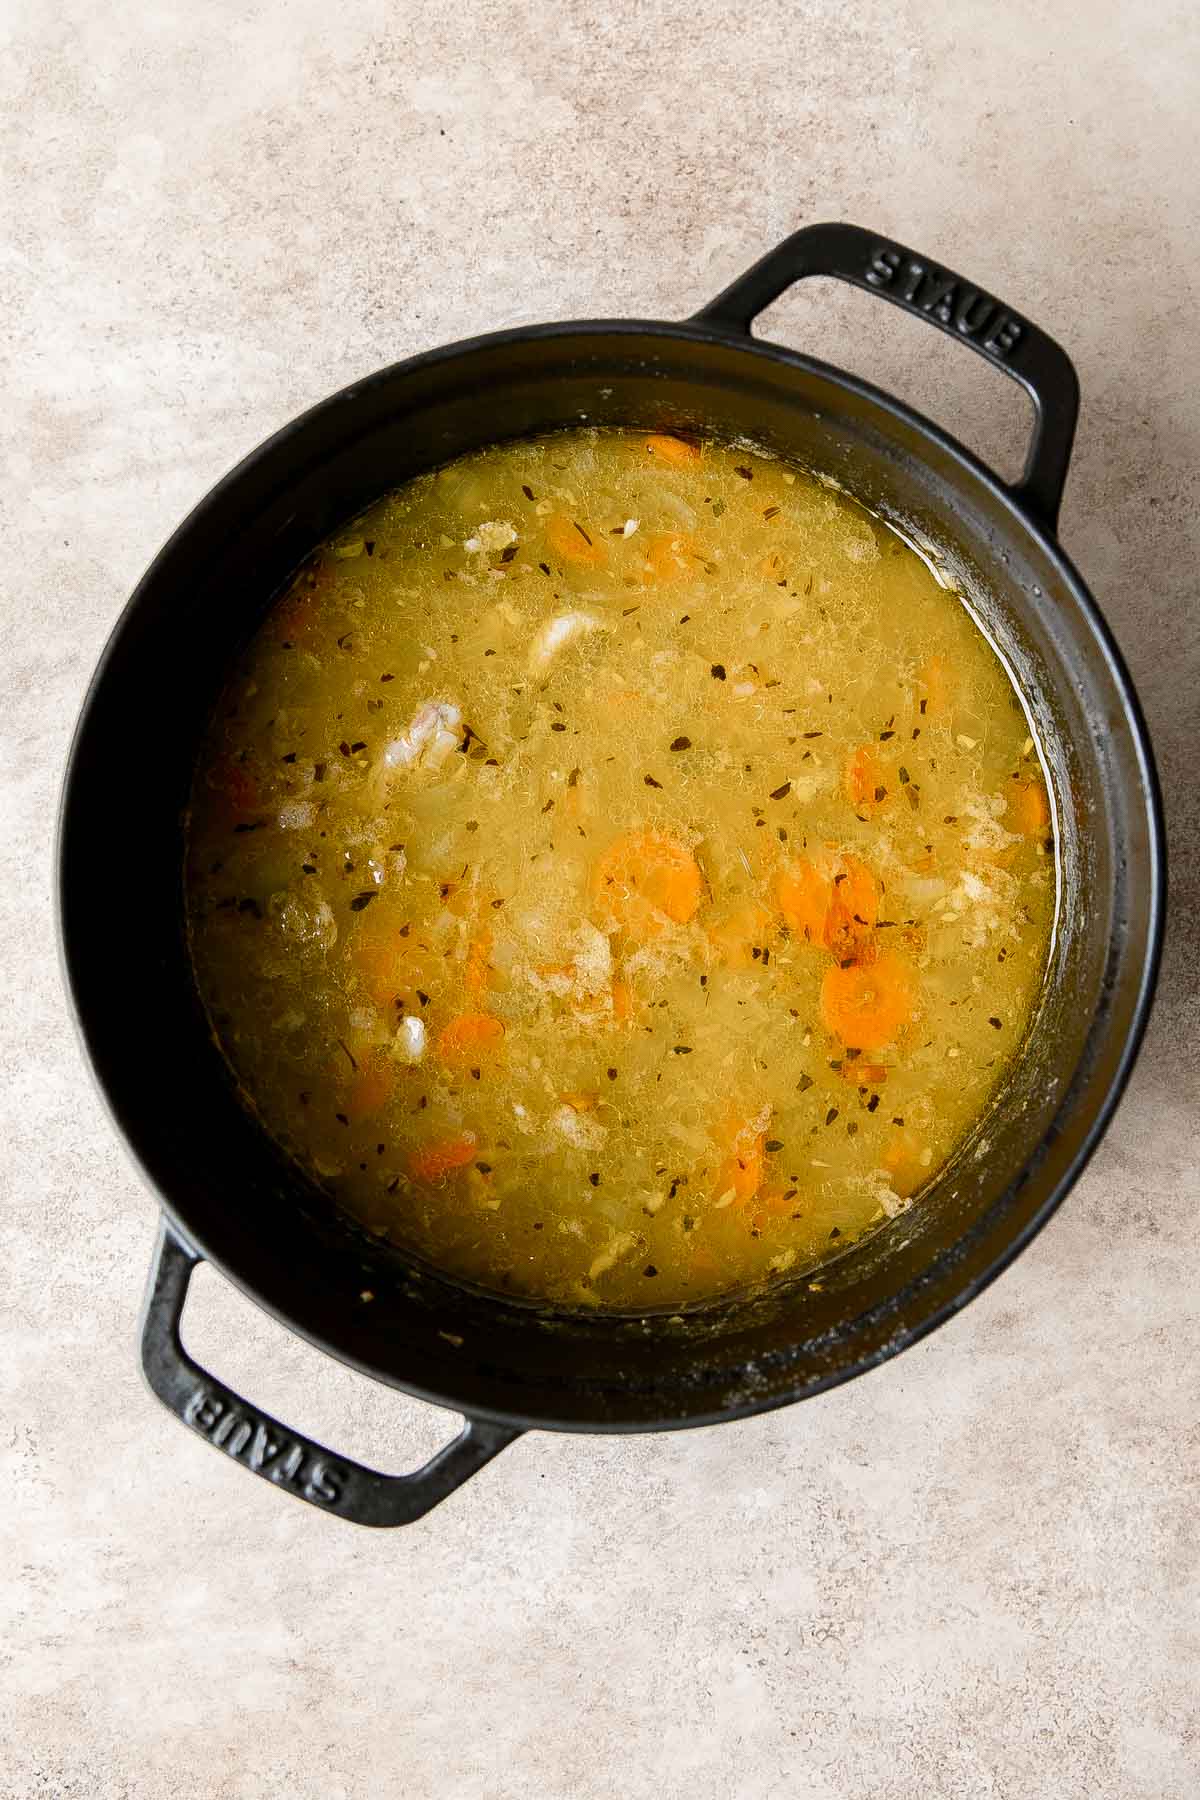
- Prepare the dumplings. While the soup is simmering, whisk together flour, salt, baking soda, baking powder, green onions until evenly combined. Slowly add oil and milk and mix until just combined. Once the batter forms into a soft dough, use a spatula or spoon to fold in the dry pieces that haven't been incorporated. Be careful not to overmix. Note that the dough will be slightly sticky.
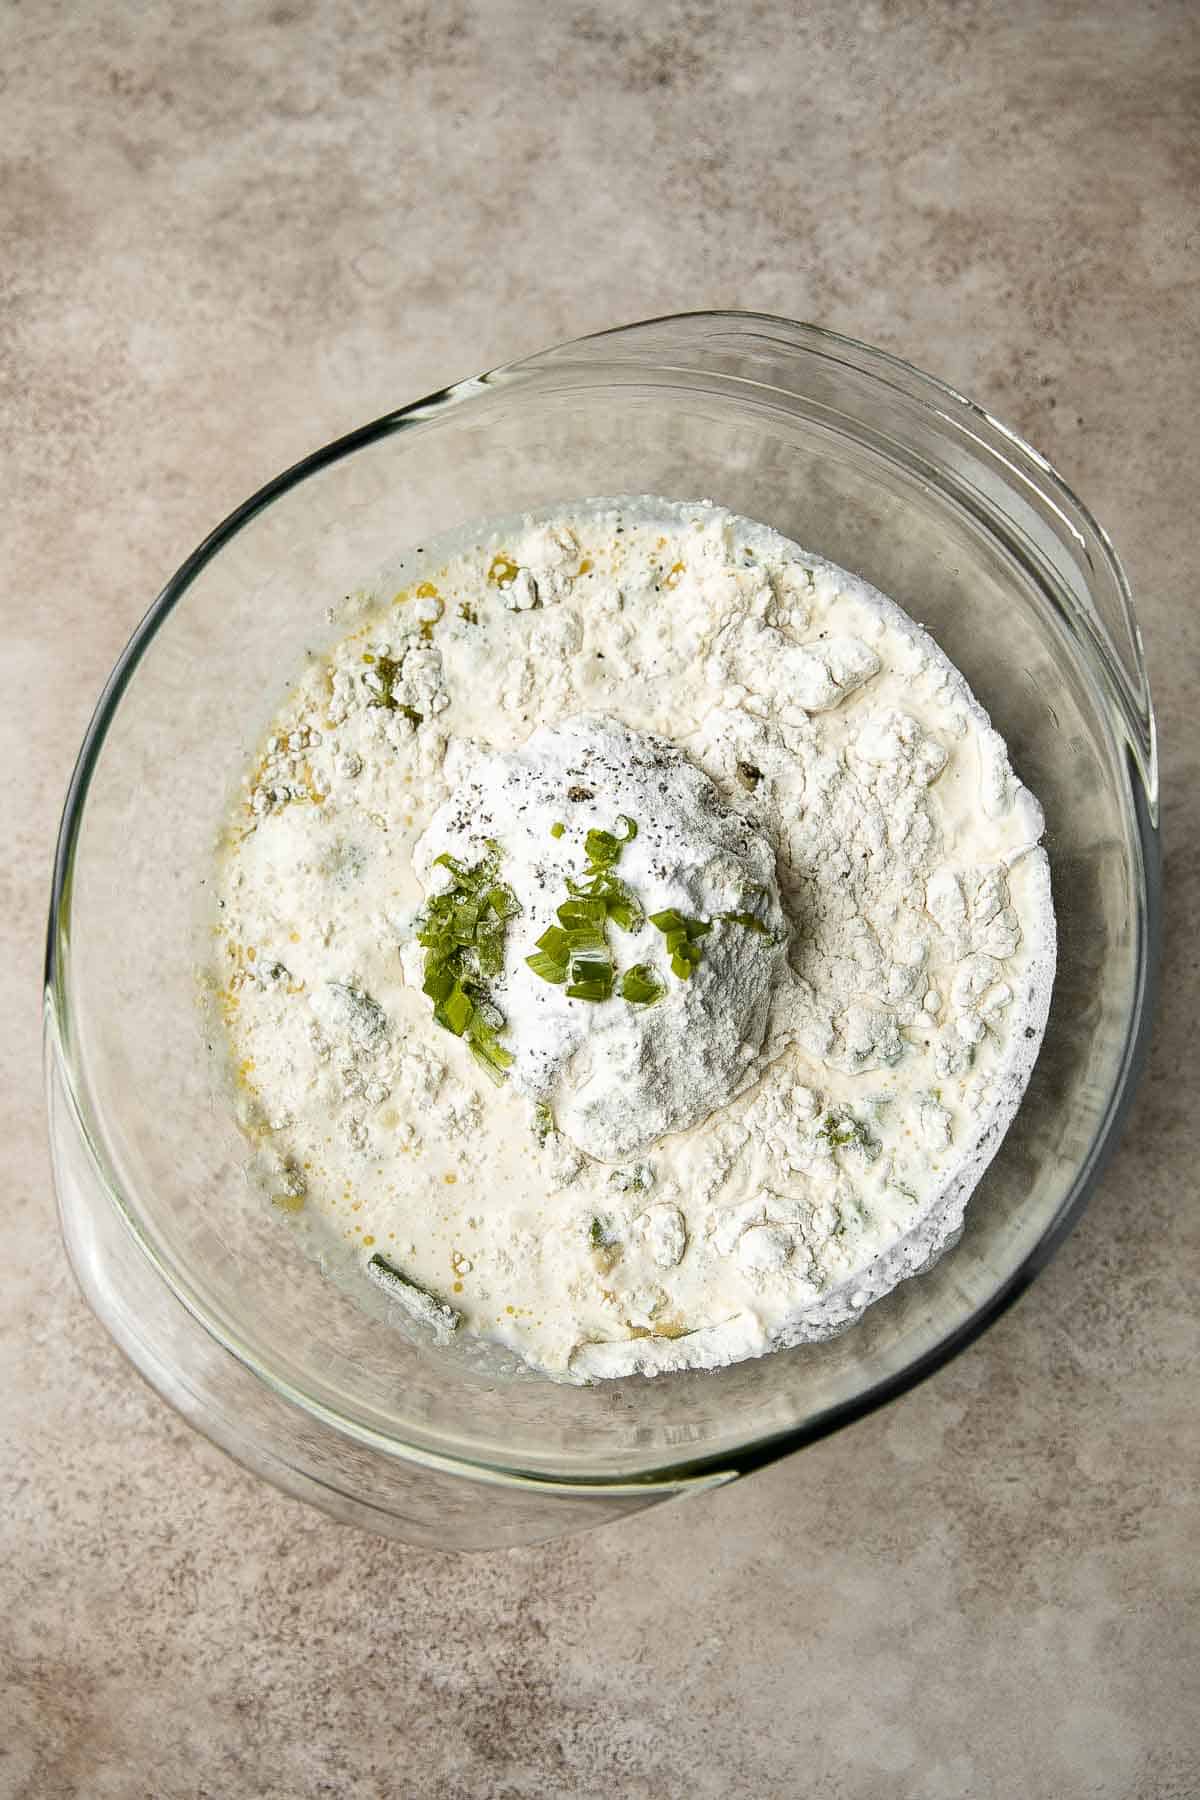
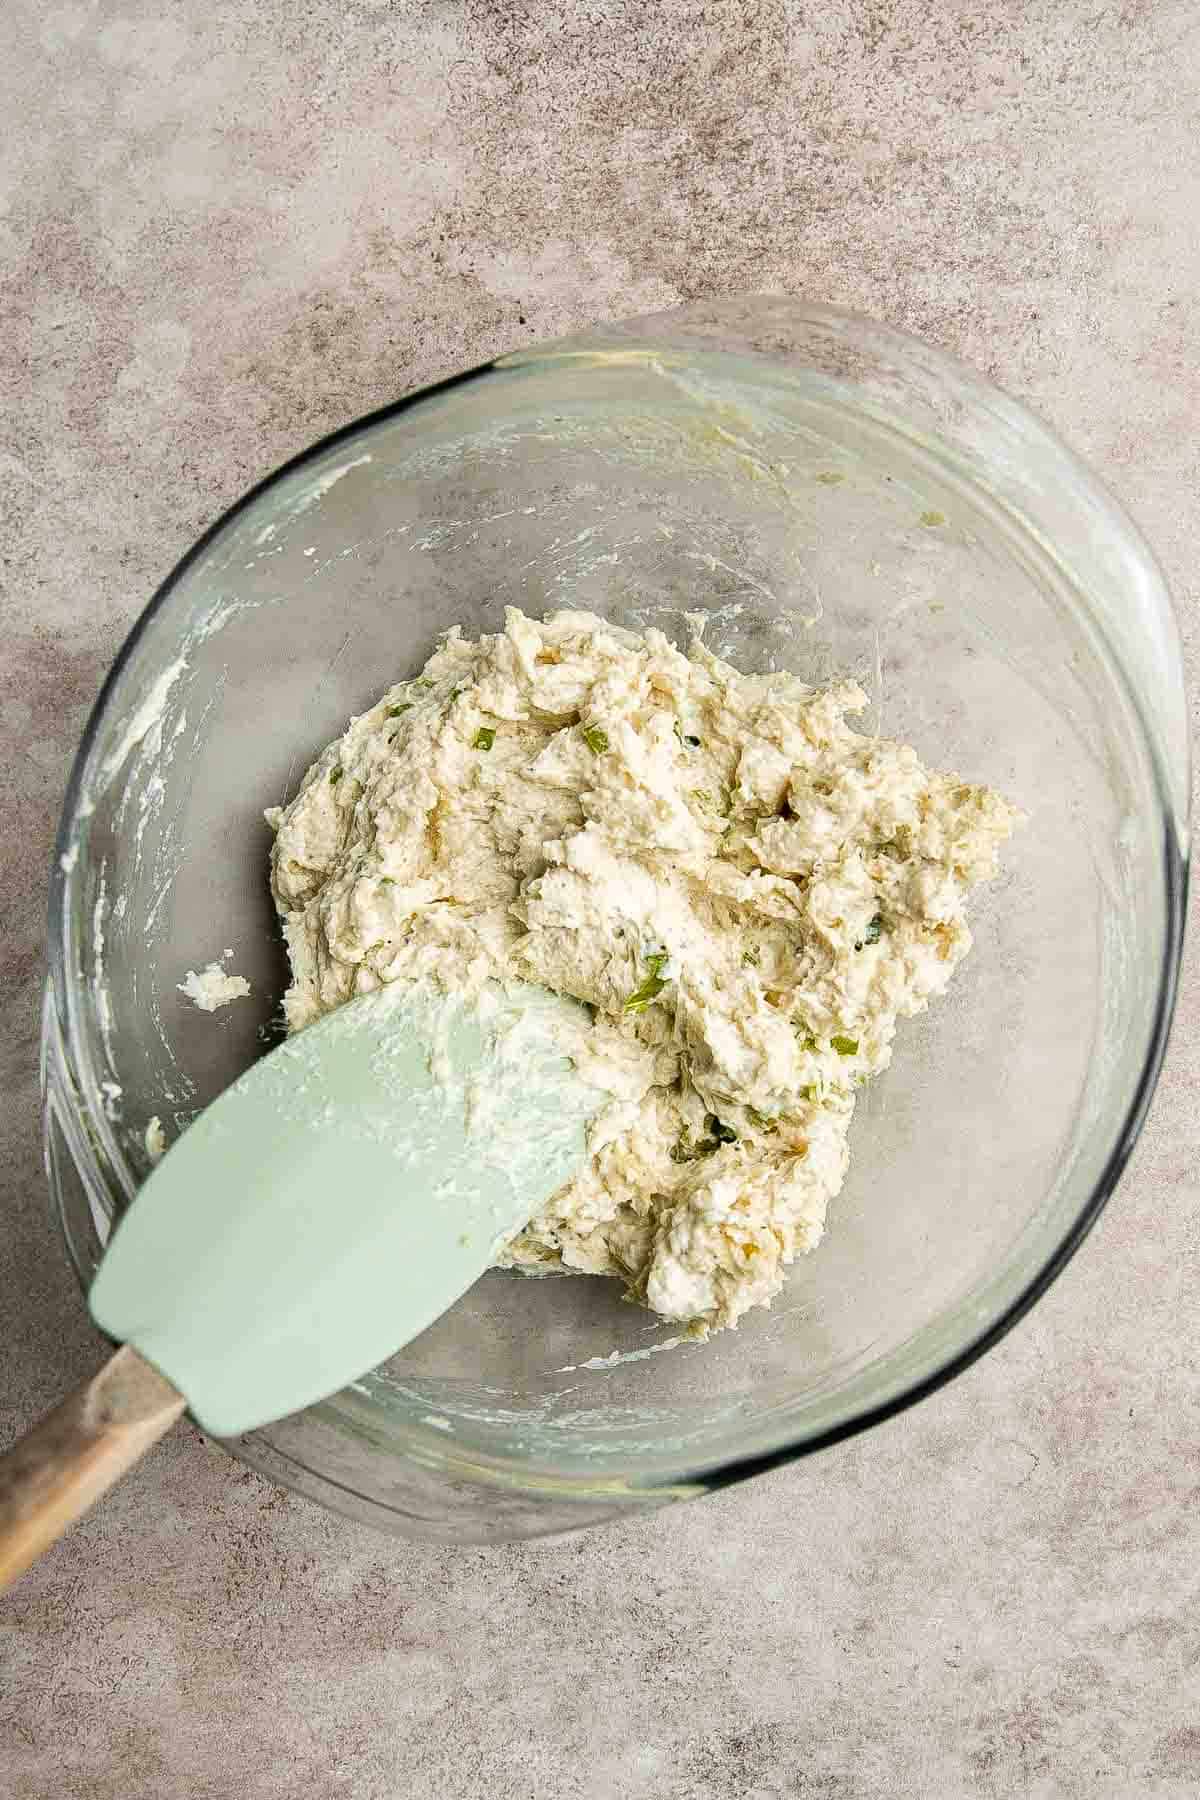
- Add dumplings. Scoop about 1 tablespoon of batter at a time and add into the soup (the dumplings will expand quite a bit once cooked). Continue to simmer over low heat until the dumplings are fully cooked through, about 5 minutes.
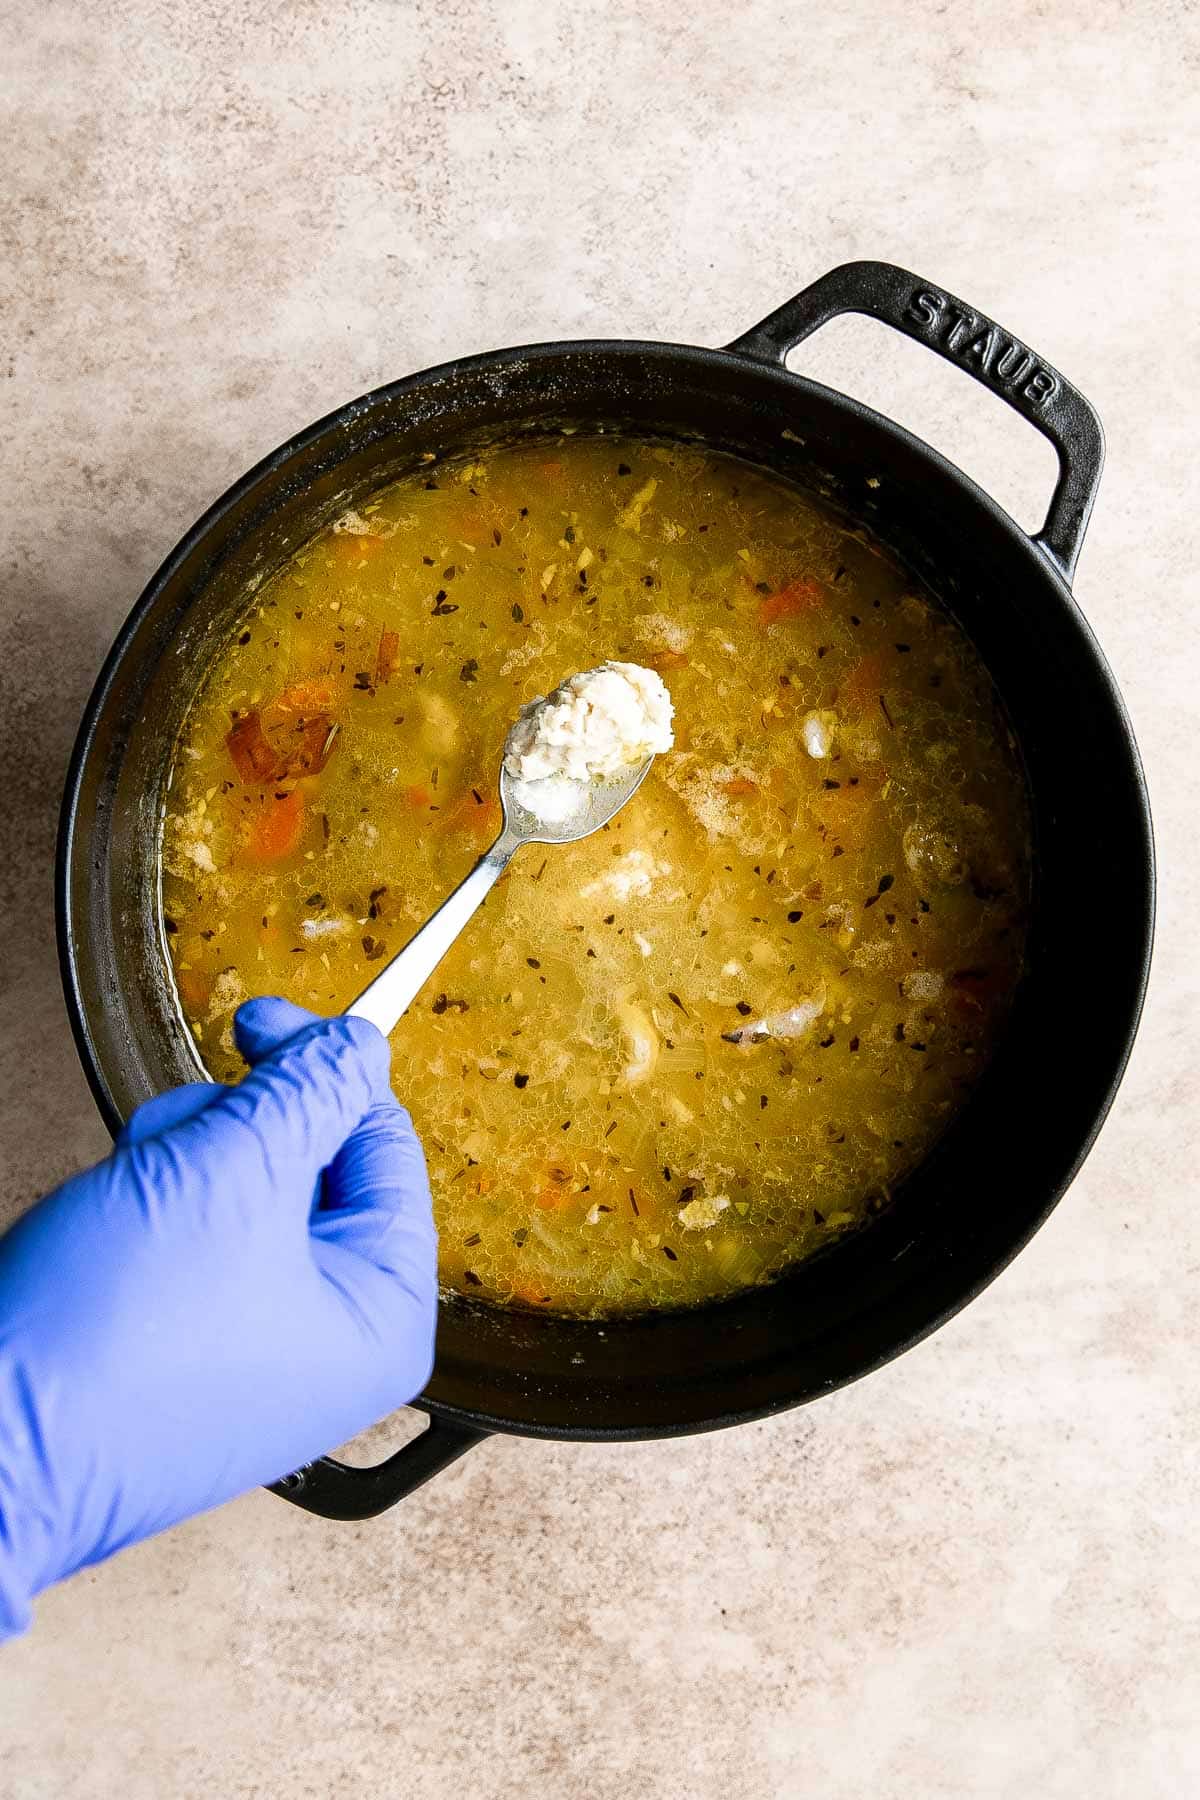
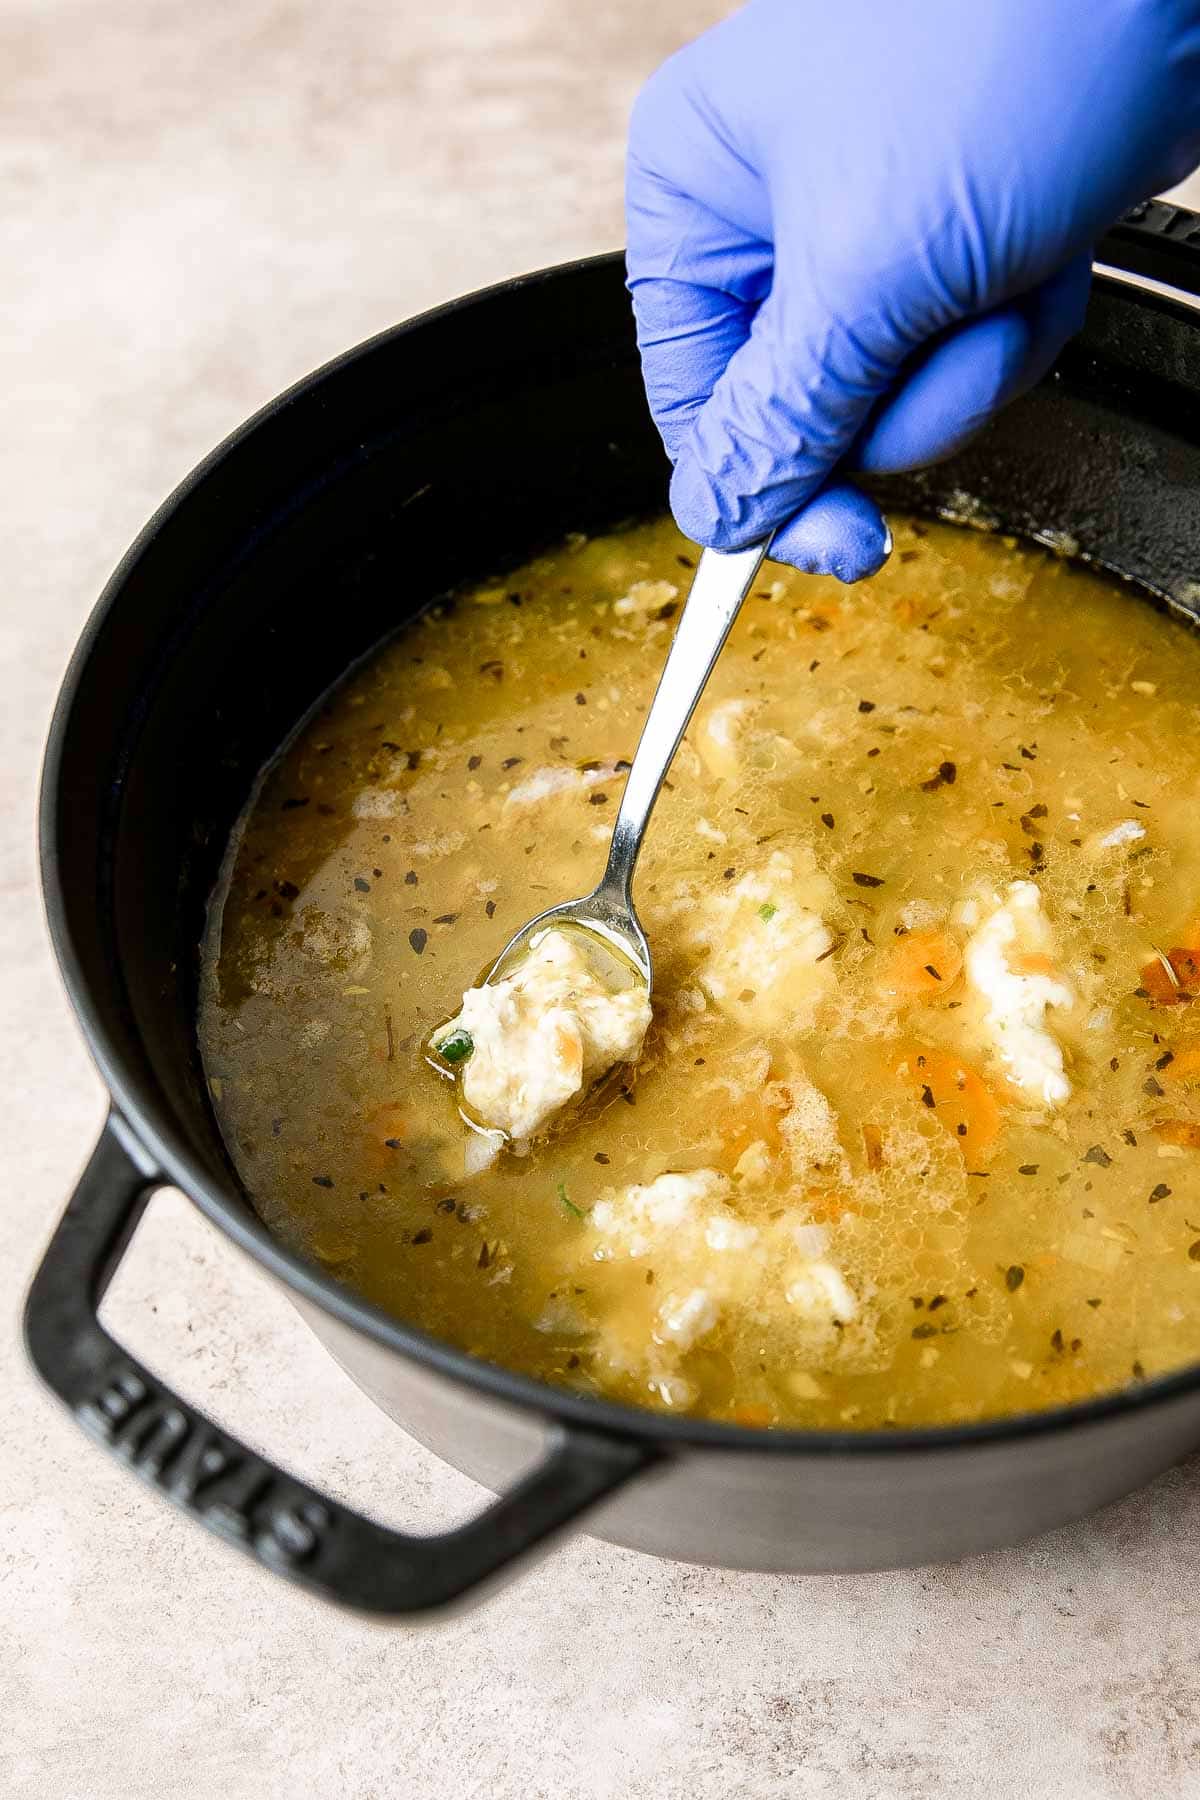
- Serve. Stir in cream and serve immediately.
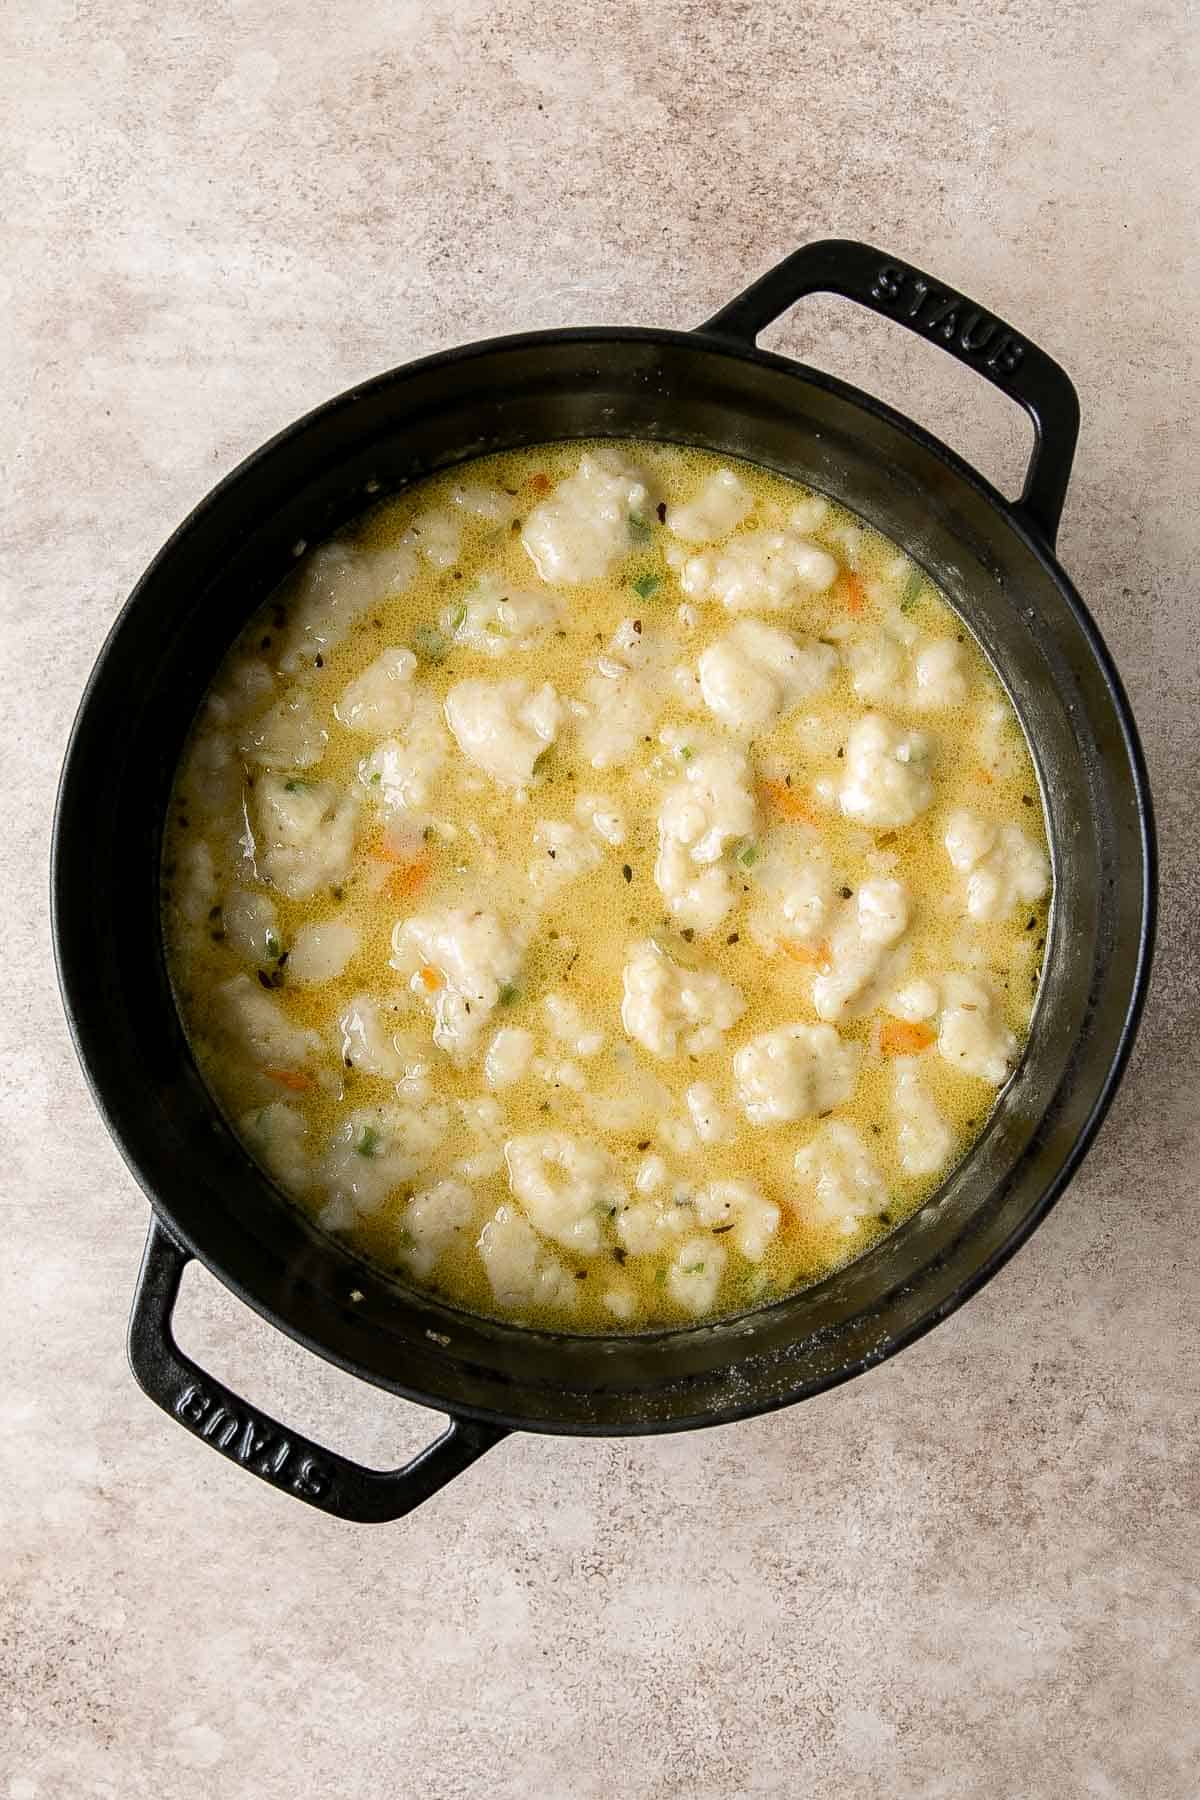
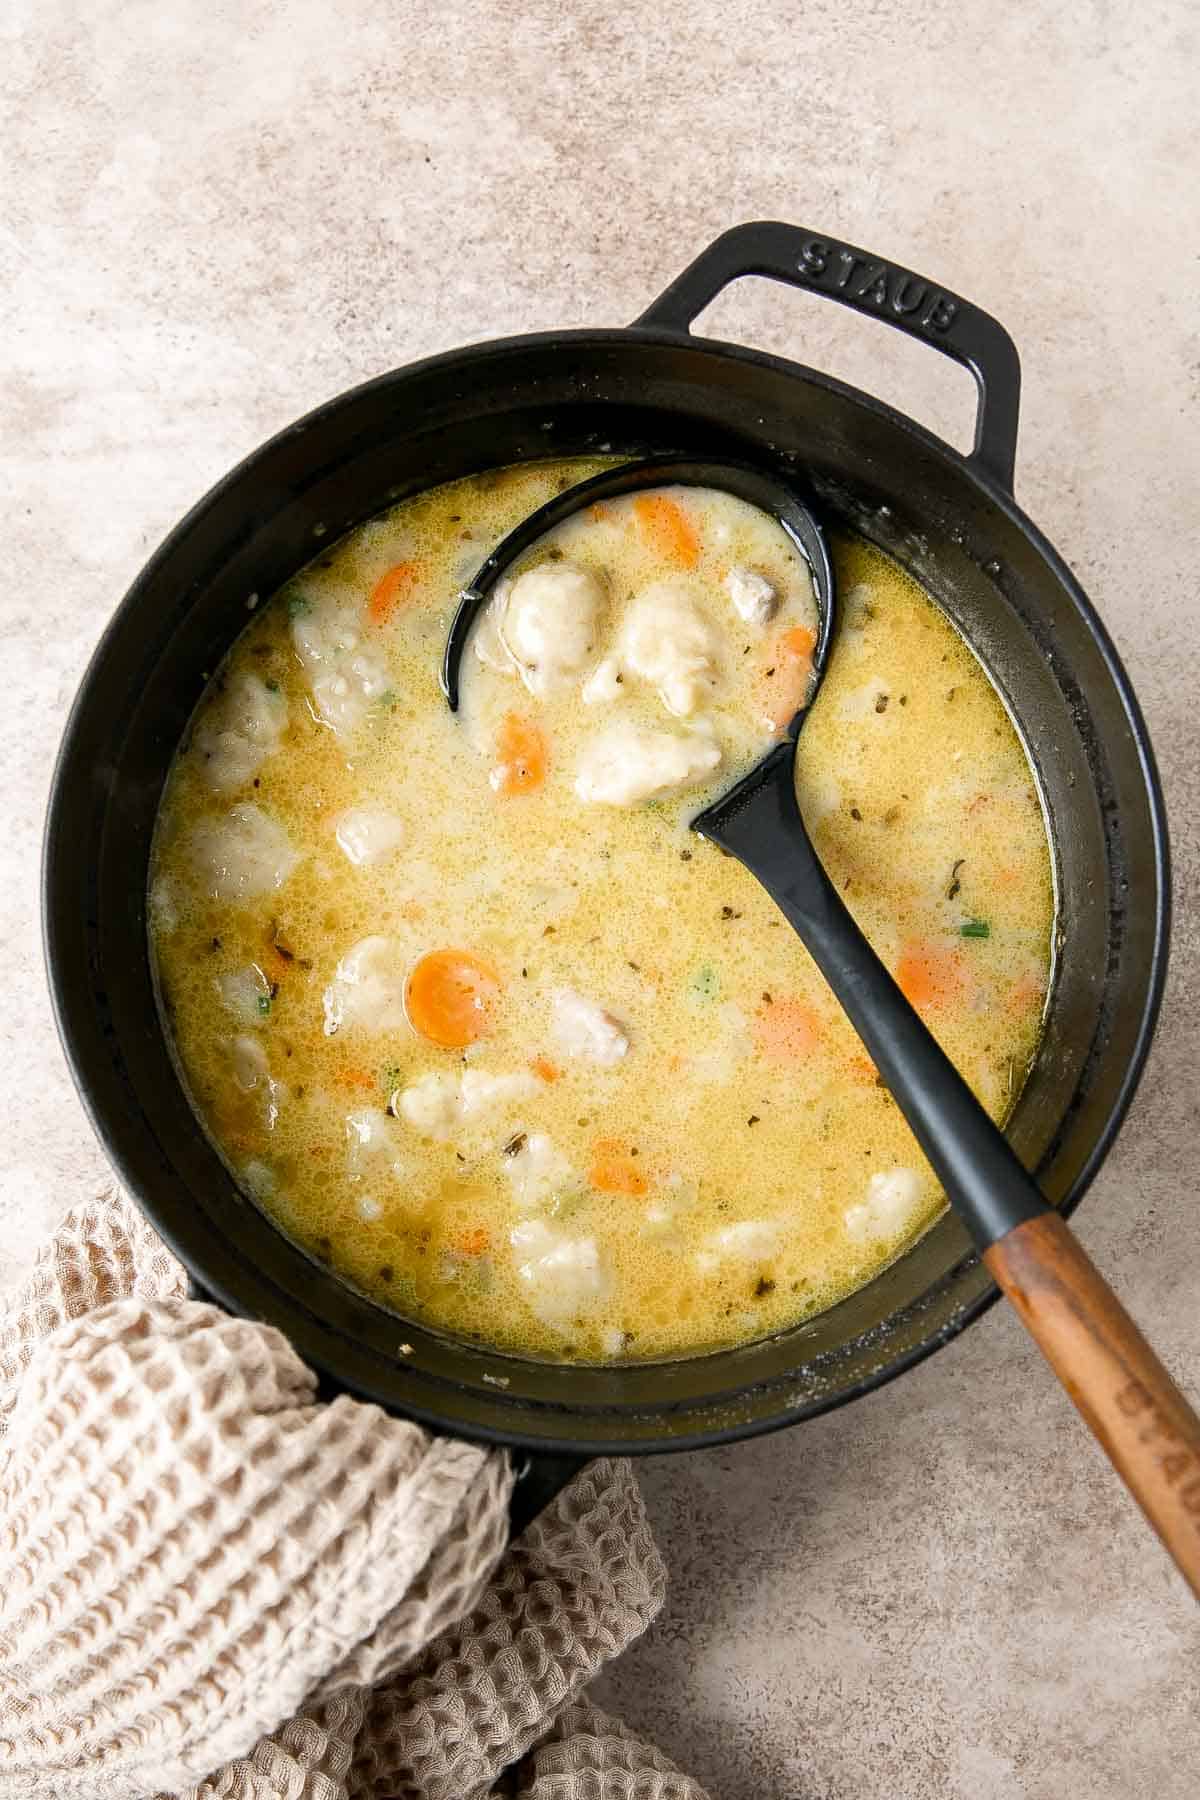
Recipe Tips and Tricks
- How to customize. You can customize this chicken and dumplings soup by adding in other veggies. Frozen peas are a common ingredient to add. But you can get creative! Try frozen corn or spinach.
- Use leftover chicken. You can substitute the chicken with cooked shredded chicken or leftover rotisserie chicken. Just skip the first step where you cook the chicken, and add it in when the recipe calls for the cooked chicken to be added in. So easy!
- Easy on the dumpling dough. Don't get too eager with a mixer when making the dumplings! Overmixing the dough will make tough dumplings, not the soft, tender kind we all crave when we think of chicken and dumplings.
- Adjust the consistency. Everyone has a unique preference when it comes to the consistency of their chicken and dumplings - and it usually comes down to the way it was prepared when they were growing up. If you want a thicker broth, allow the soup to simmer a bit longer or add a bit of cornstarch mixed with water to thicken the liquid. If the soup is too thick, add a little water or broth to thin it out
How to Serve
Chicken and dumplings are the star of the show and don't need any fancy accompaniments to impress. Steamed vegetables, easy mashed potatoes, or your favorite greens salad will do nicely!
Some of our favorite sides to serve with this chicken soup are:
- Oven Roasted Vegetables
- Mascarpone Mashed Potatoes
- Sweet Kale Salad
- Air Fryer Vegetables
- Lemon Parmesan Asparagus
- Caesar Salad
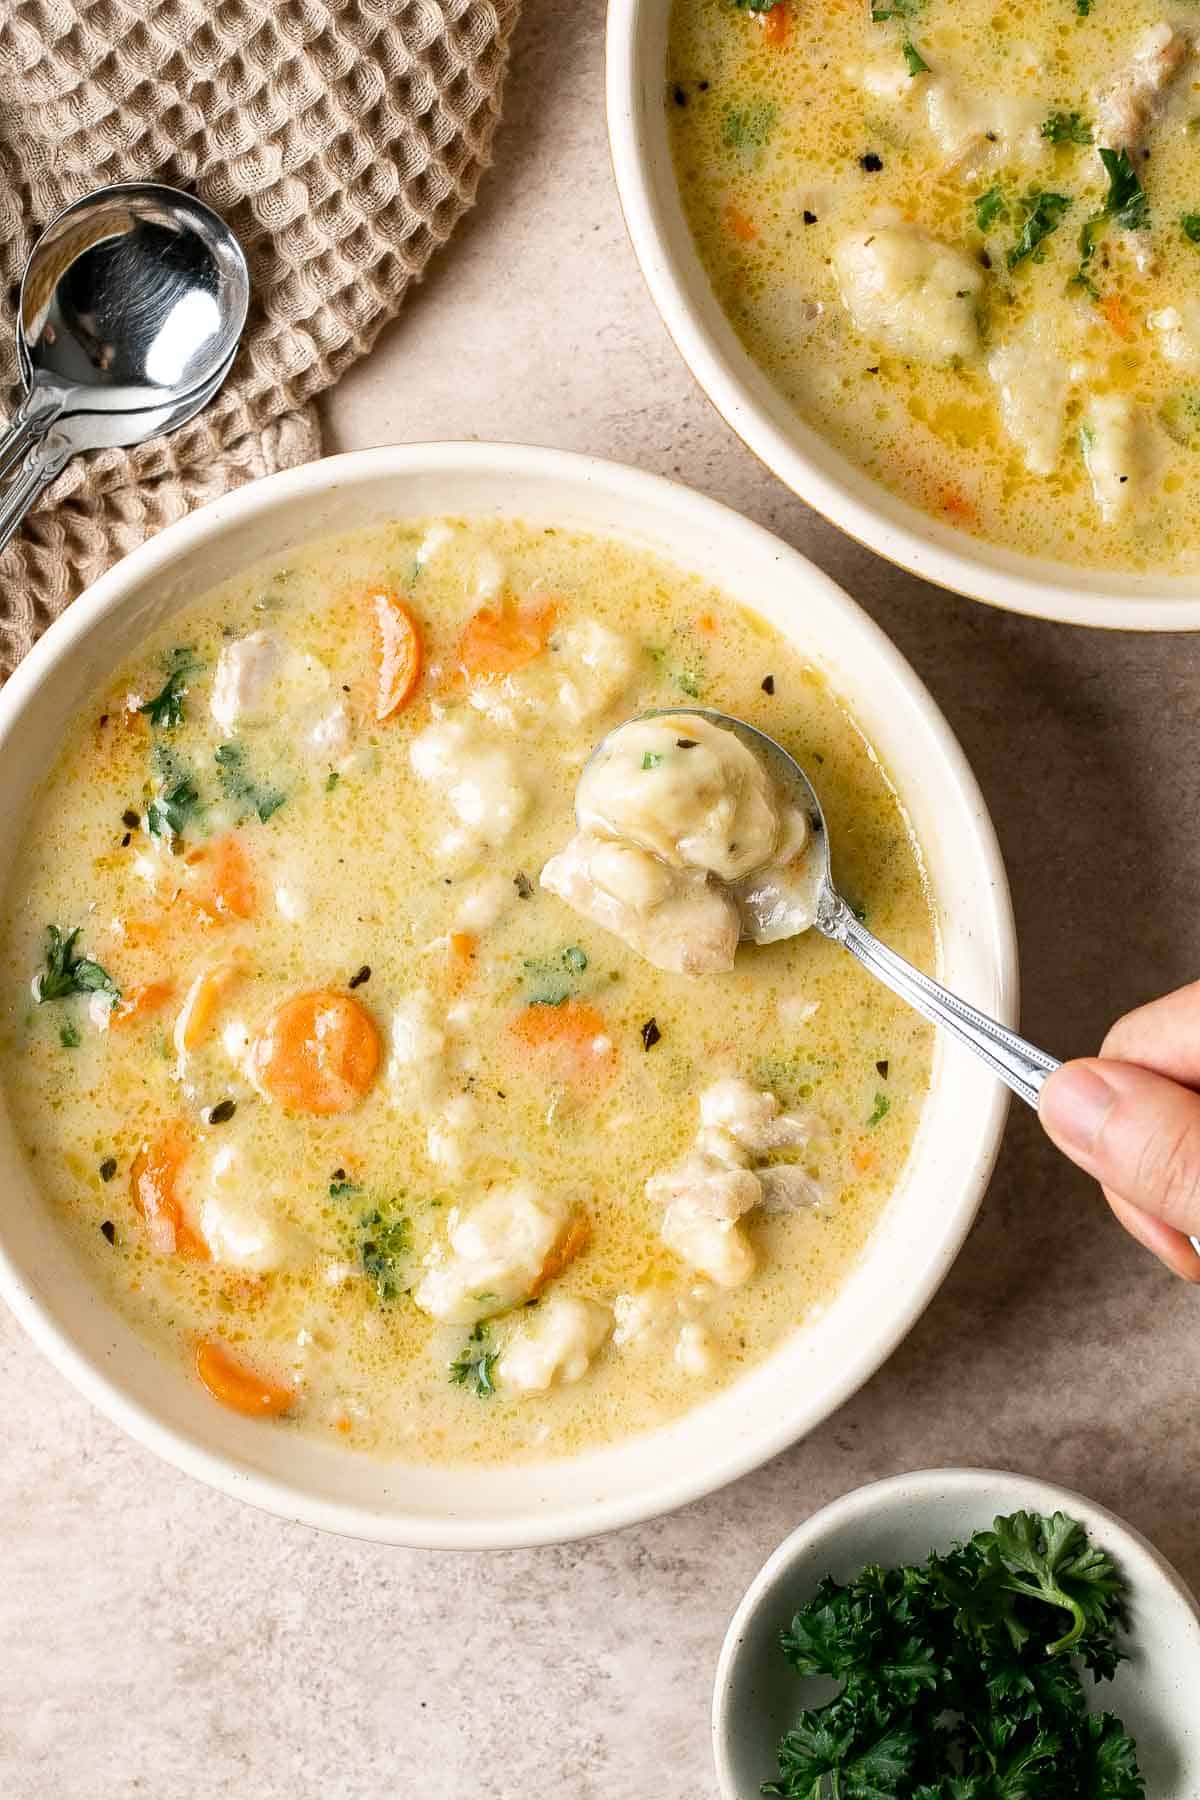
Storing and Freezing Instructions
How to Store
Once the chicken and dumplings have cooled completely, transfer the soup to an airtight container and refrigerate for up to four days.
How to Reheat
Reheat leftover chicken and dumplings in a cooling pot on the stovetop over medium-low heat until warmed through. You may need to add a splash of water to thin out the consistency if it has thickened up too much when stored. You can also reheat in the microwave.
How to Freeze
Once cooled, transfer the chicken and dumplings to a large Ziploc bag or another freezer-safe airtight container (such as a plastic deli container) and freeze for up to 3 months. When you're ready to eat it, thaw it overnight in the refrigerator or use a warm water bath to release it from the container before reheating it using your method of choice.
More Chicken Soup Recipes
- 60 Best Soup Recipes
- Chicken Potato Soup
- Lemon Chicken Orzo Soup
- Chicken Tortilla Soup
- Chicken Noodle Soup
- White Chicken Lasagna Soup
- Chicken and Rice Soup
Tried this recipe?
I'd love to hear what you think! Leave a comment and rating below to share your feedback. Your reviews help others discover this recipe and help me keep creating more free recipes for you. Snap a photo and tag me on social media @aheadofthyme too.

How to Cook Quinoa
Making the perfect fluffy quinoa at home is quick and a lot easier to make than you think! Learn how to cook quinoa perfectly every time using our simple recipe including tons of tips and tricks, variations, and answers to frequently asked questions.
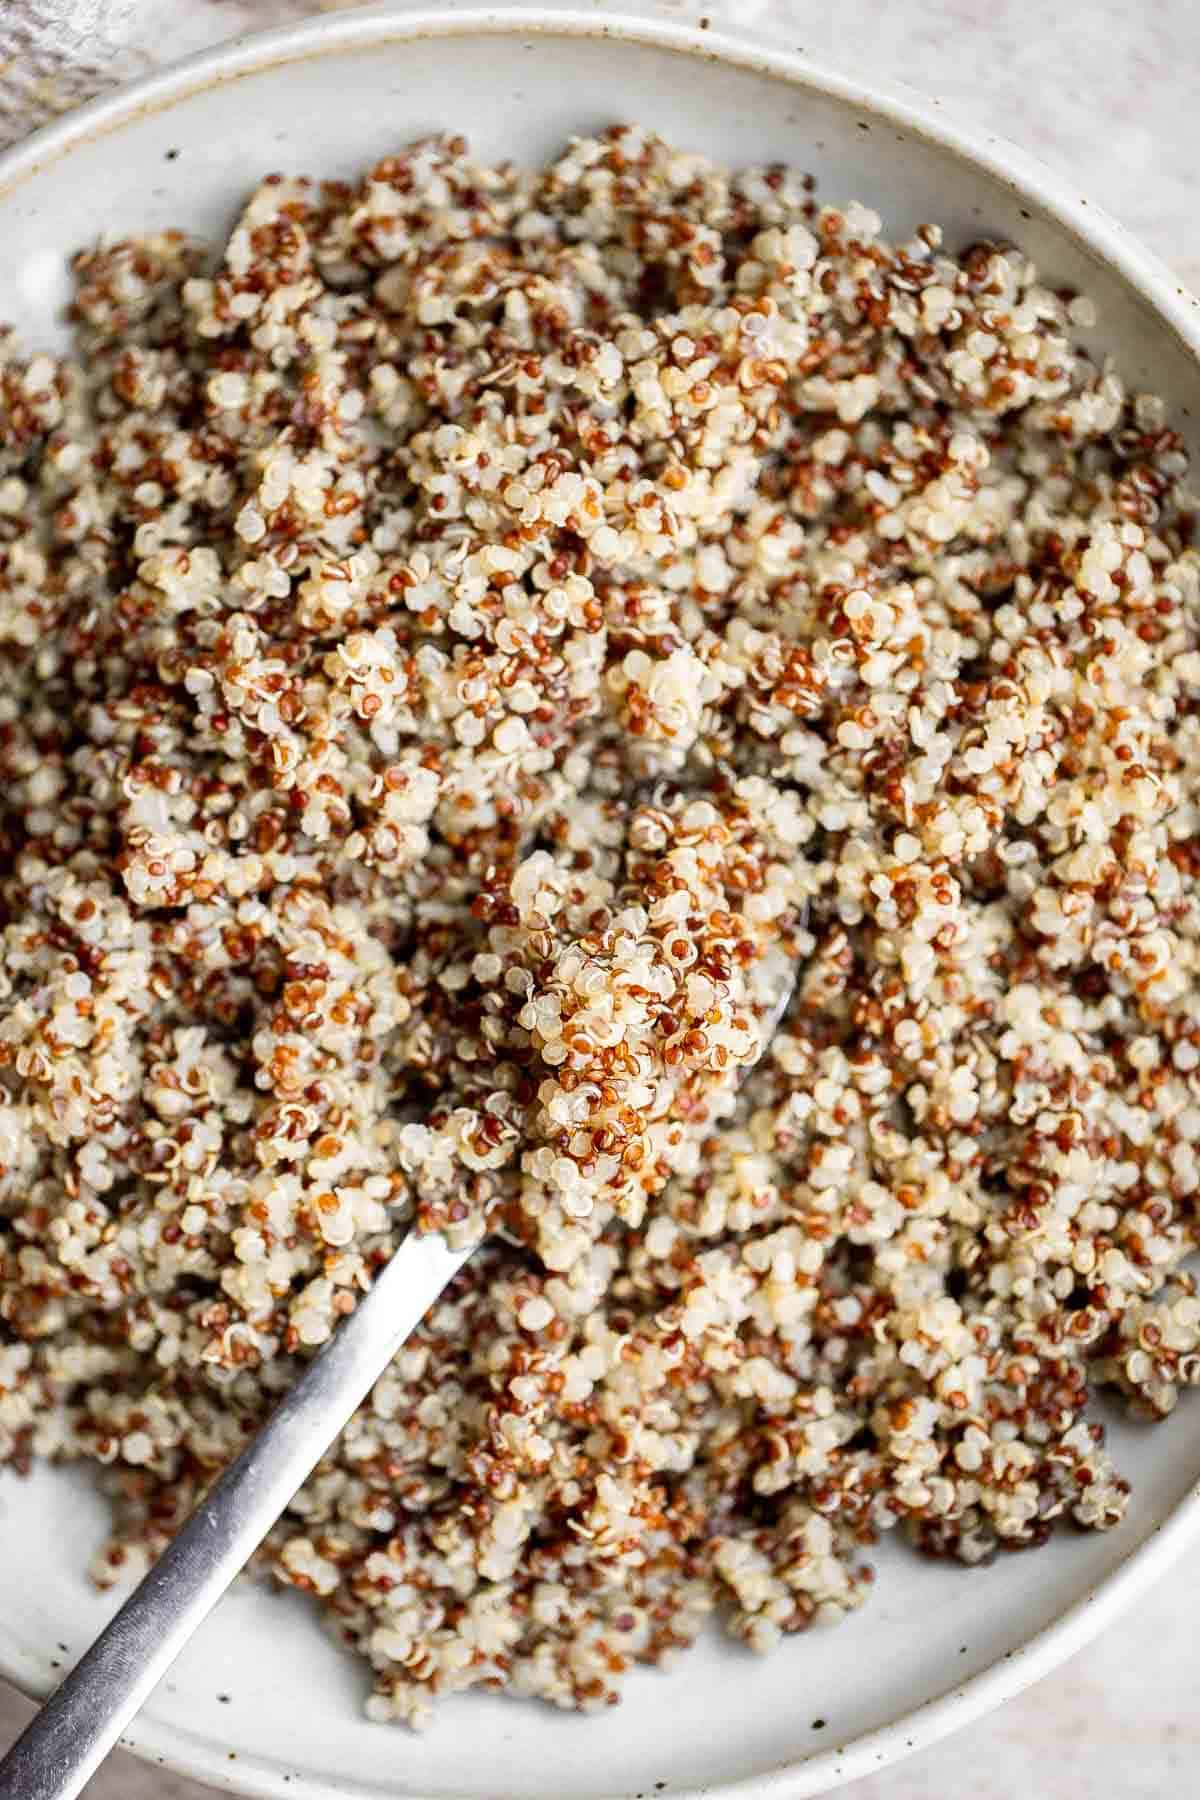
Why should you learn to make quinoa at home? This ancient grain has been used in cooking for thousands of years and has recently become a popular health food all around the world. Quinoa a delicious and easy-to-cook ingredient that you can always count on - as long as you know how to cook it correctly.
What is Quinoa?
Quinoa is often thought of as a grain, but it's actually a seed that behaves like a grain when cooked. It starts as tiny, hard, shell-coated balls (usually white but can also be red or black). When cooked, the hard shell gives way and the seed absorbs water, becoming soft and fluffy similar to rice and other grains.
Quinoa is packed with fiber, protein and other nutrients. It cooks quickly and can be enjoyed in any number of ways, making it a popular choice when it comes to mealtime for both vegans and non-vegans alike!
Quinoa was first grown in the Andes but it has become quite popular in recent years and is now grown all over the world, yet it's still mostly grown in Peru and Bolivia.
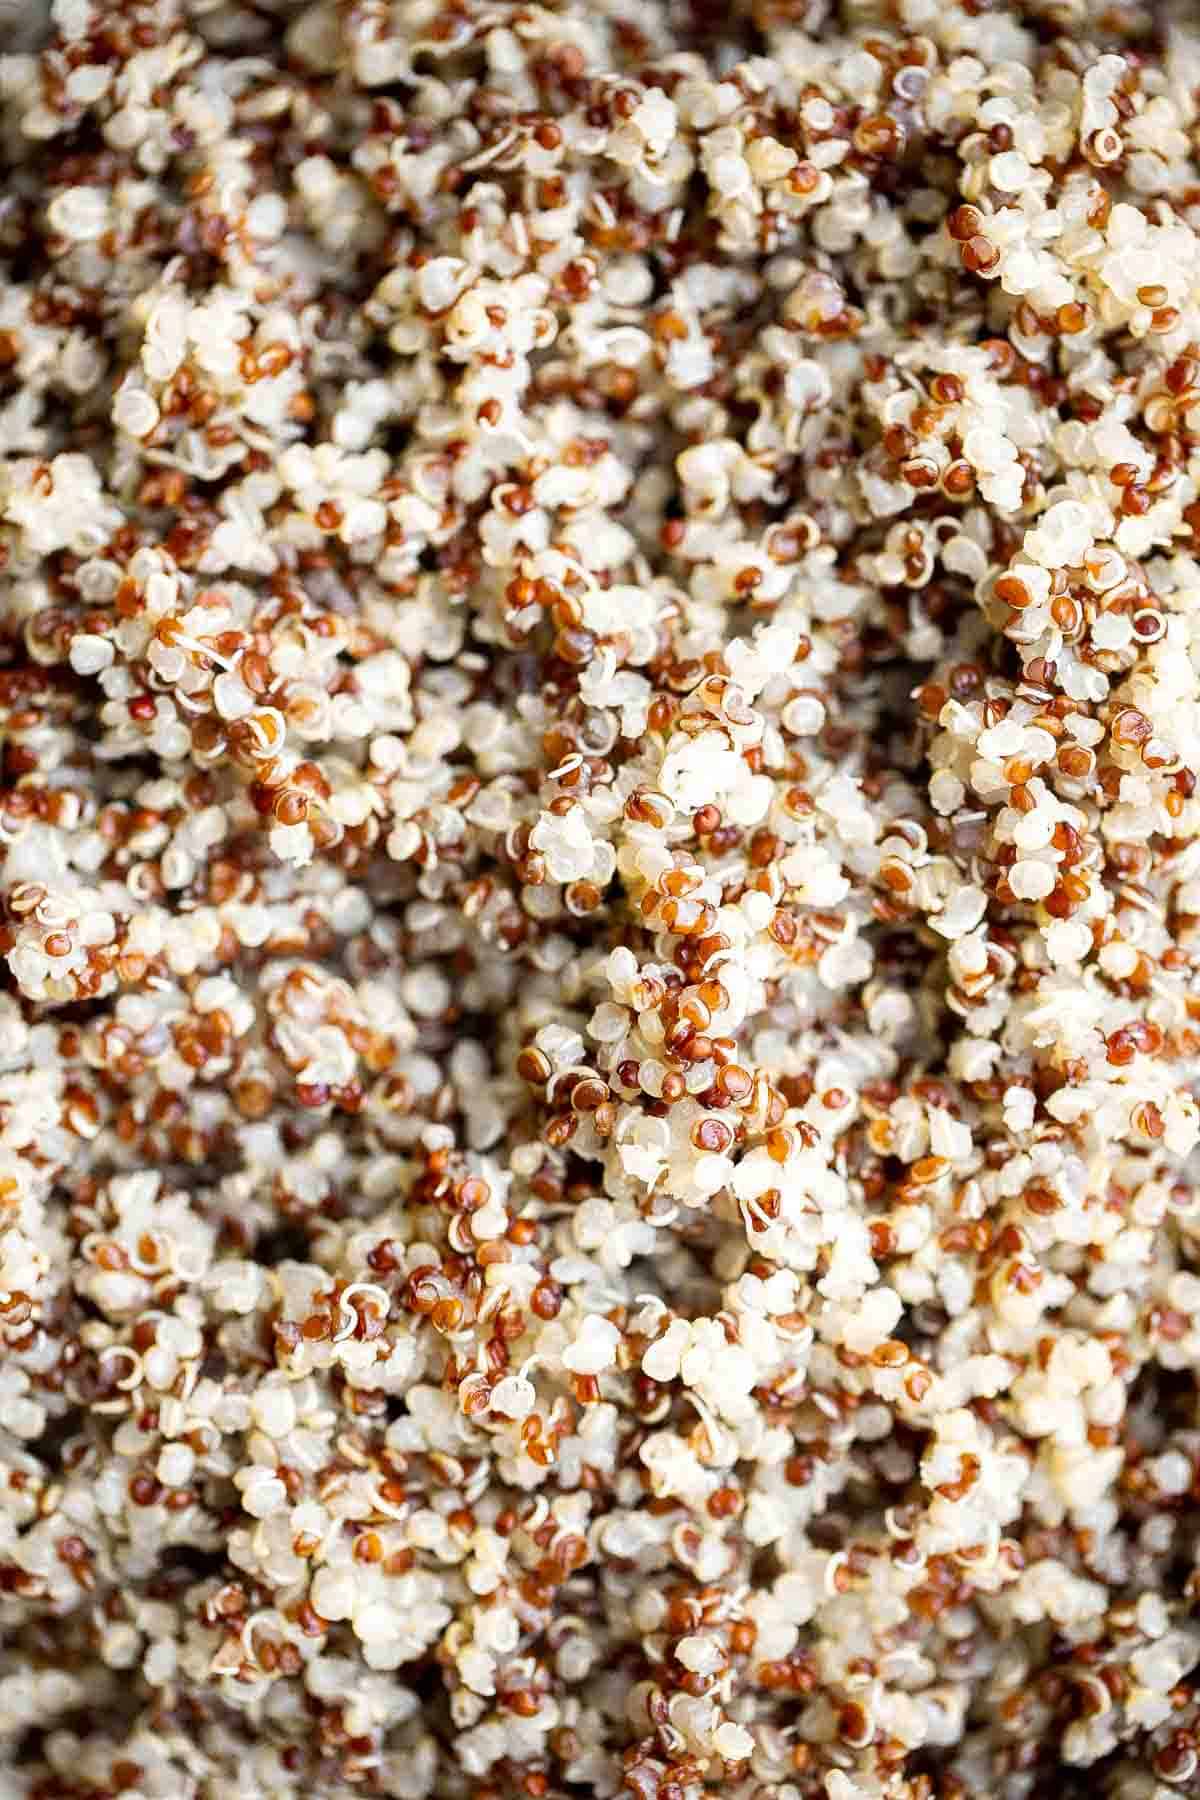
Why You'll Love this Quinoa Recipe
- It's versatile. Quinoa can be used in almost any savory dish you can think of! It's a perfect ingredient to sprinkle over soups and salads, light enough to be served as a side dish, but filling enough to be a main dish all on its own with some extra ingredients.
- Packed with protein and fiber. Quinoa naturally contains a high level of protein. As a seed, it also has a lot of fiber, making it a healthy addition to any meal. Quinoa has become especially popular as a protein in plant-based dishes - but it's also a favorite among meat eaters too.
- Great for vegan and vegetarian dishes. Quinoa is loaded with plant-based protein, making it an ideal meat substitute or base for all kinds of vegetarian dishes.
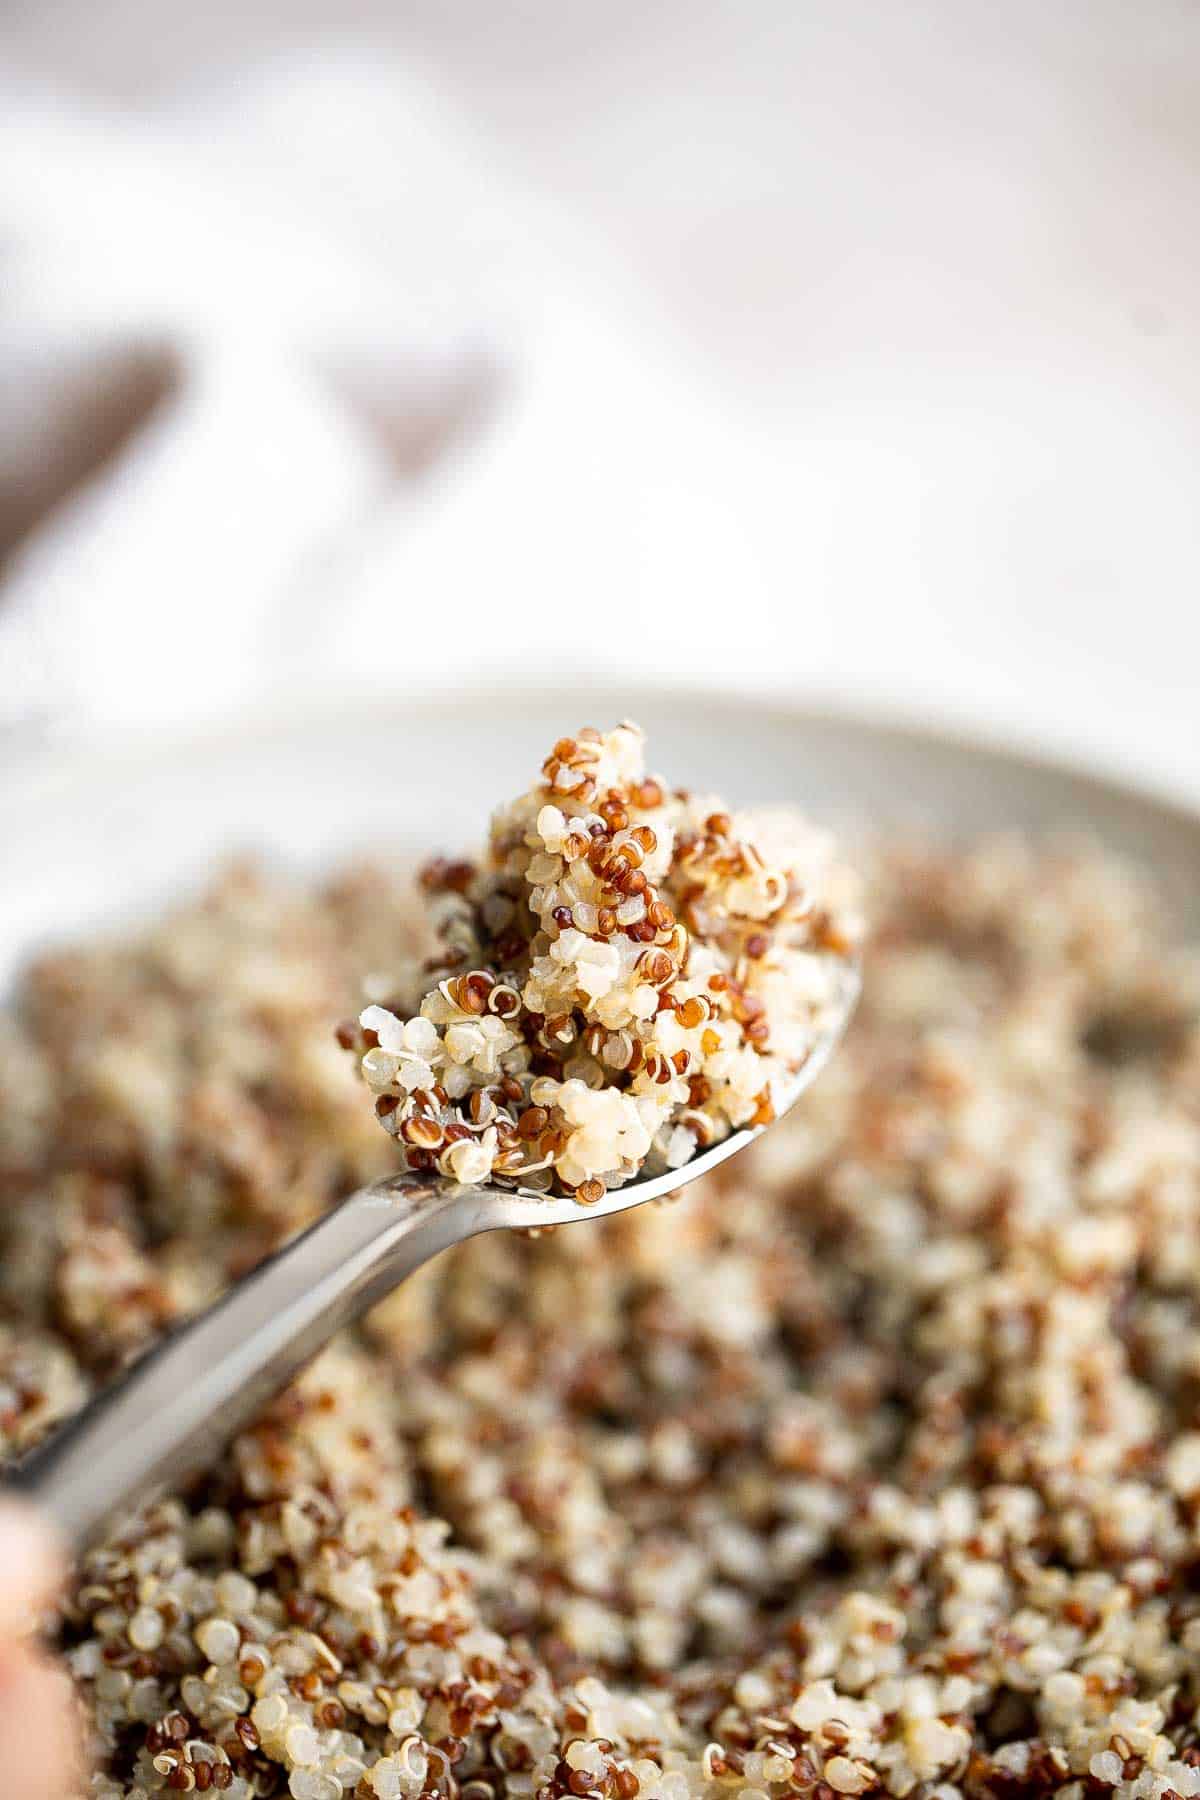
Ingredient Notes
To make quinoa at home, you will need the following ingredients (full measurements in recipe card below):
- quinoa - this recipe will work for all colors of quinoa such as white, black, and red, or any combination of the three.
- olive oil - you can also use avocado oil or ghee in place of the olive oil called for in this recipe.
- water
You will also need measuring cups and spoons, fine mesh sieve or colander and a cooking pot.
How to Cook the Best Quinoa
- Rinse. In a large fine-mesh colander, rinse the quinoa thoroughly under cold running water for 1 minute (this helps to remove the bitter taste in quinoa). Drain well.
- Boil. In a medium cooking pot, add the rinsed and drained quinoa, water, and olive oil. Bring to boil over medium heat, about 5 minutes.
- Simmer. Cover with the lid and reduce the heat to low. Simmer for 15 minutes until the quinoa is tender and the water has been absorbed.
- Rest. Remove from heat and allow the cooked quinoa rest for another 5 minutes. (You will notice that the grains have popped open).
- Serve. Fluff with a fork and serve.
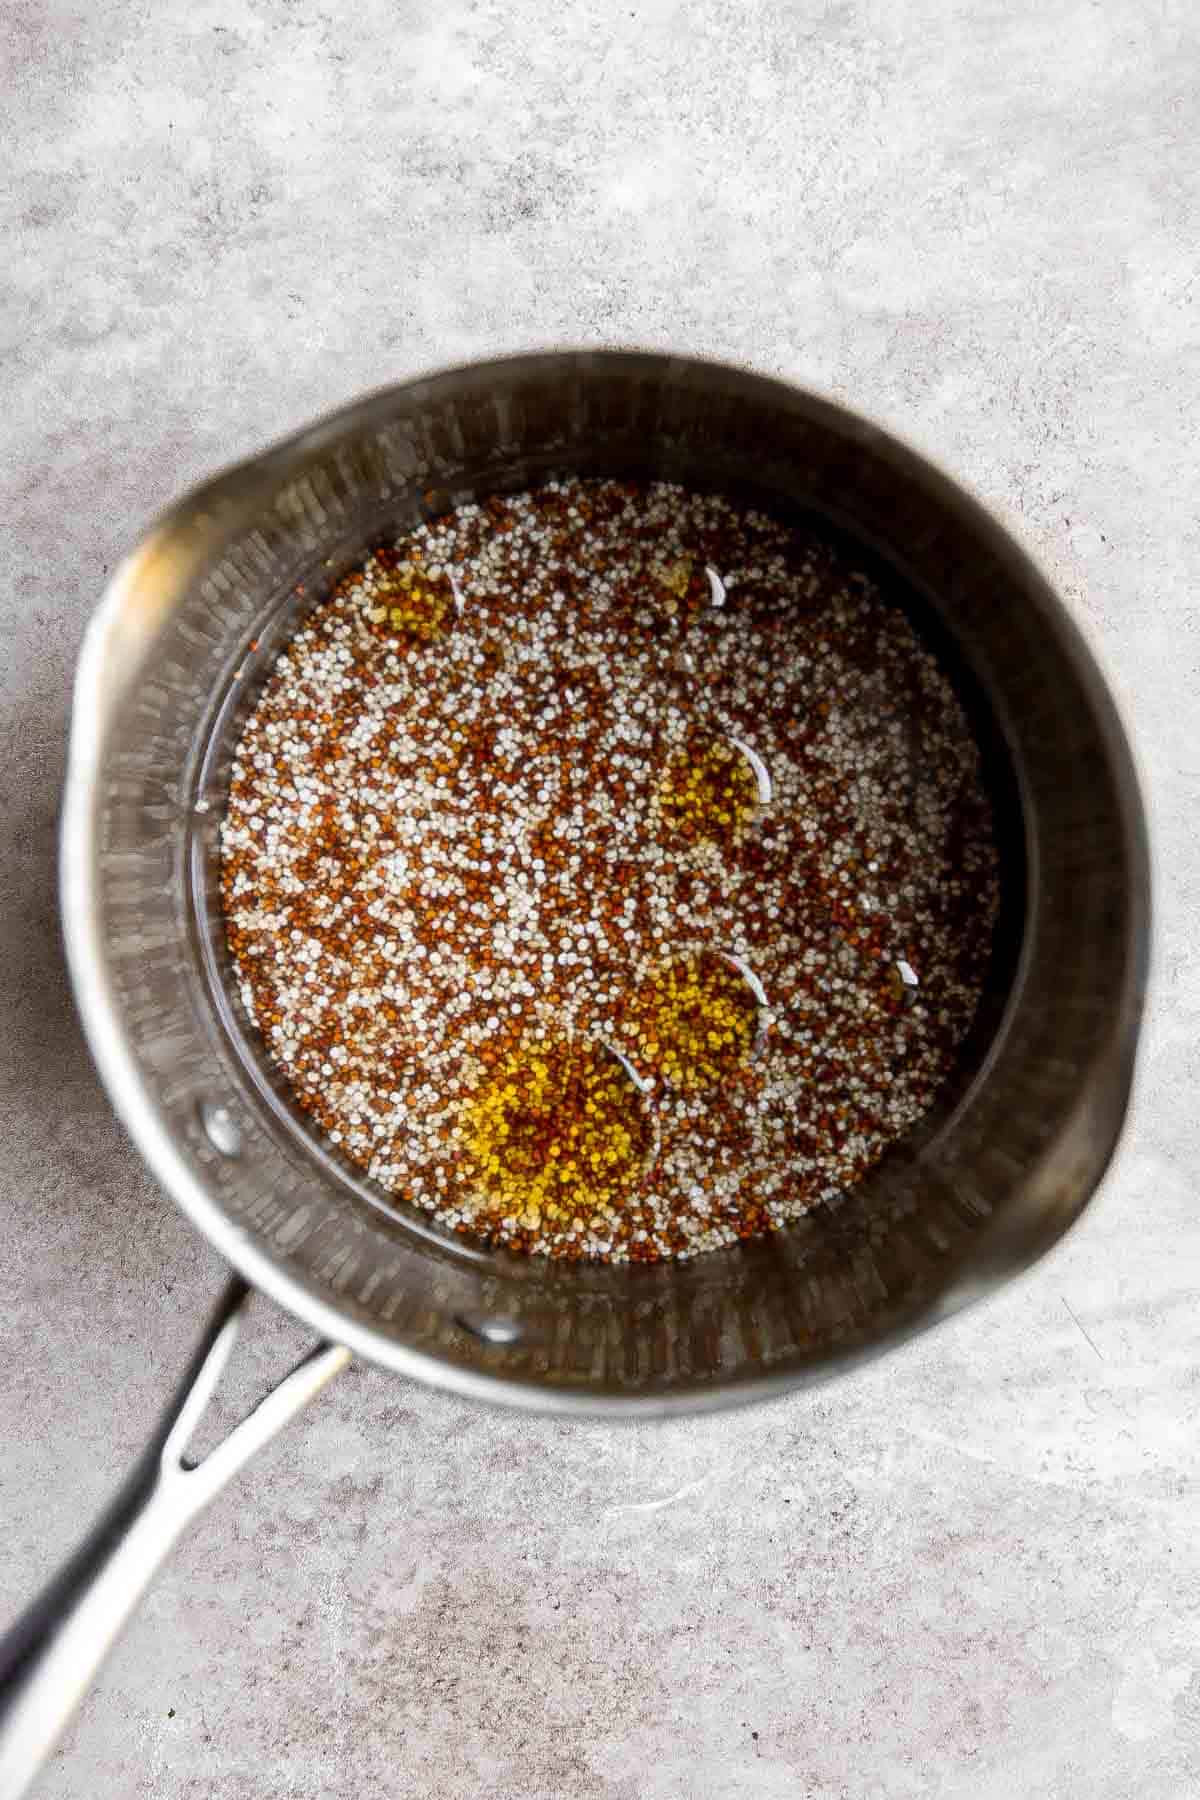
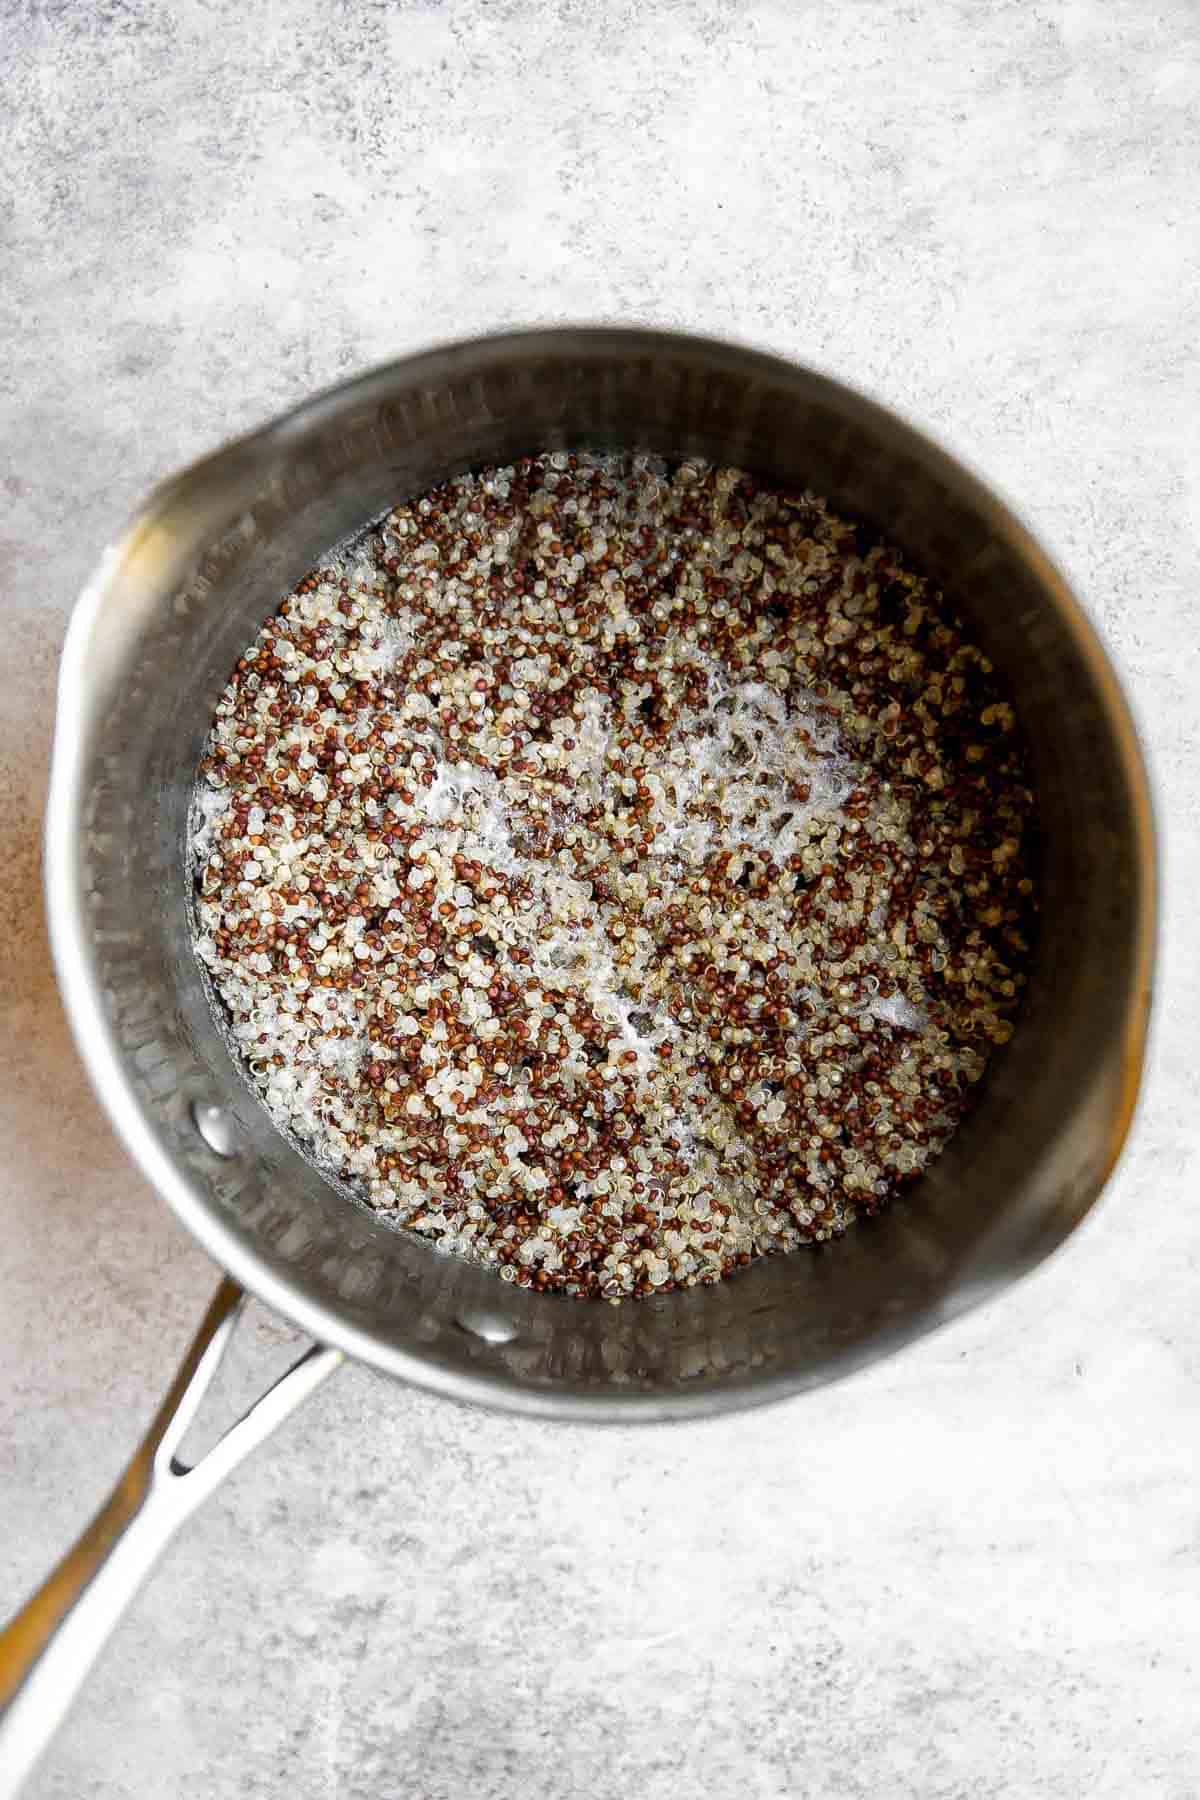
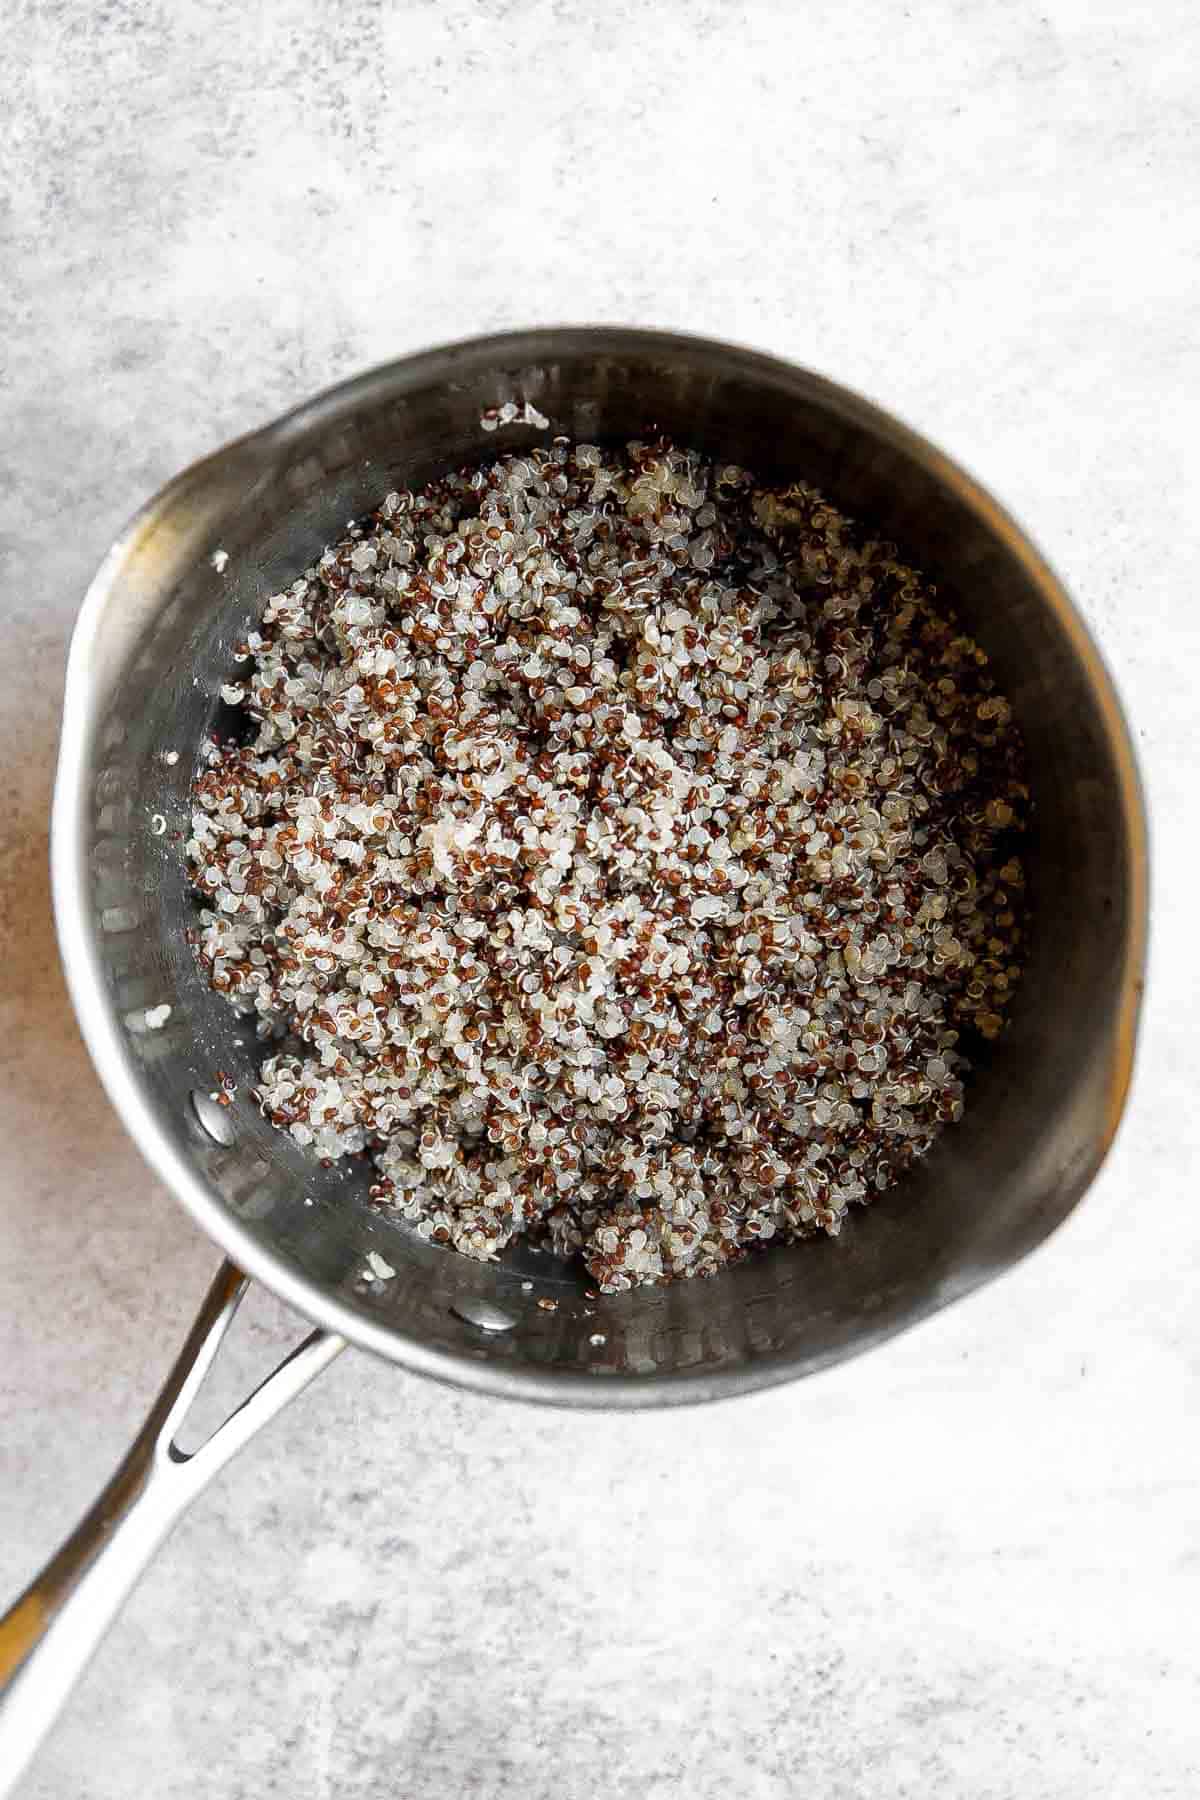
Recipe Variations
- Instant Pot (Pressure Cooker) Quinoa. You can also make this quinoa in an Instant Pot or pressure cooker for a more hands-off approach. Add your ingredients to a pressure cooker on high pressure for 3 minutes, and then allow the pressure to release naturally for 10 minutes. Fluff with a fork as normal and serve!
- Lemon Garlic Quinoa. Once cooked, add the zest of half a lemon, a squeeze of lemon juice, and ½ teaspoon of garlic powder (or more, depending on your preference) as well as a sprinkling of salt and freshly ground black pepper for a lemony, garlicky quinoa that pairs well with everything!
- Mediterranean Quinoa. Once cooked, add one quarter to half cup each of raw diced tomatoes, cucumbers, kalamata olives, red onion, and feta cheese for an easy Mediterranean quinoa!
How to Serve
Quinoa is incredibly versatile and can be served in so many different ways. It's a great ingredient to use in a main dish or to serve as a side dish. Some of our favorite ways to use quinoa are:
- Salads - quinoa is an ideal topping for salads and compliments the flavors of greens and other vegetables nicely. Toss quinoa in with other salad components for an even more filling dish! Try our Butternut Squash Quinoa Salad or Quinoa Spinach Power Salad.
- Soups, Stews, and Casseroles - you can add cooked quinoa to soups, chilis, stews, and casseroles of all kinds to add texture and boost the fiber and protein content.
- Burgers and Wraps - you can form the quinoa into shapes and turn it into patties or leave as a loose grain to add to wraps, burgers, and more.
- Meatballs and Fritters - quinoa makes a great meat alternative in dishes that typically contain animal products, like meatless meatballs or Vegetarian Bolognese!
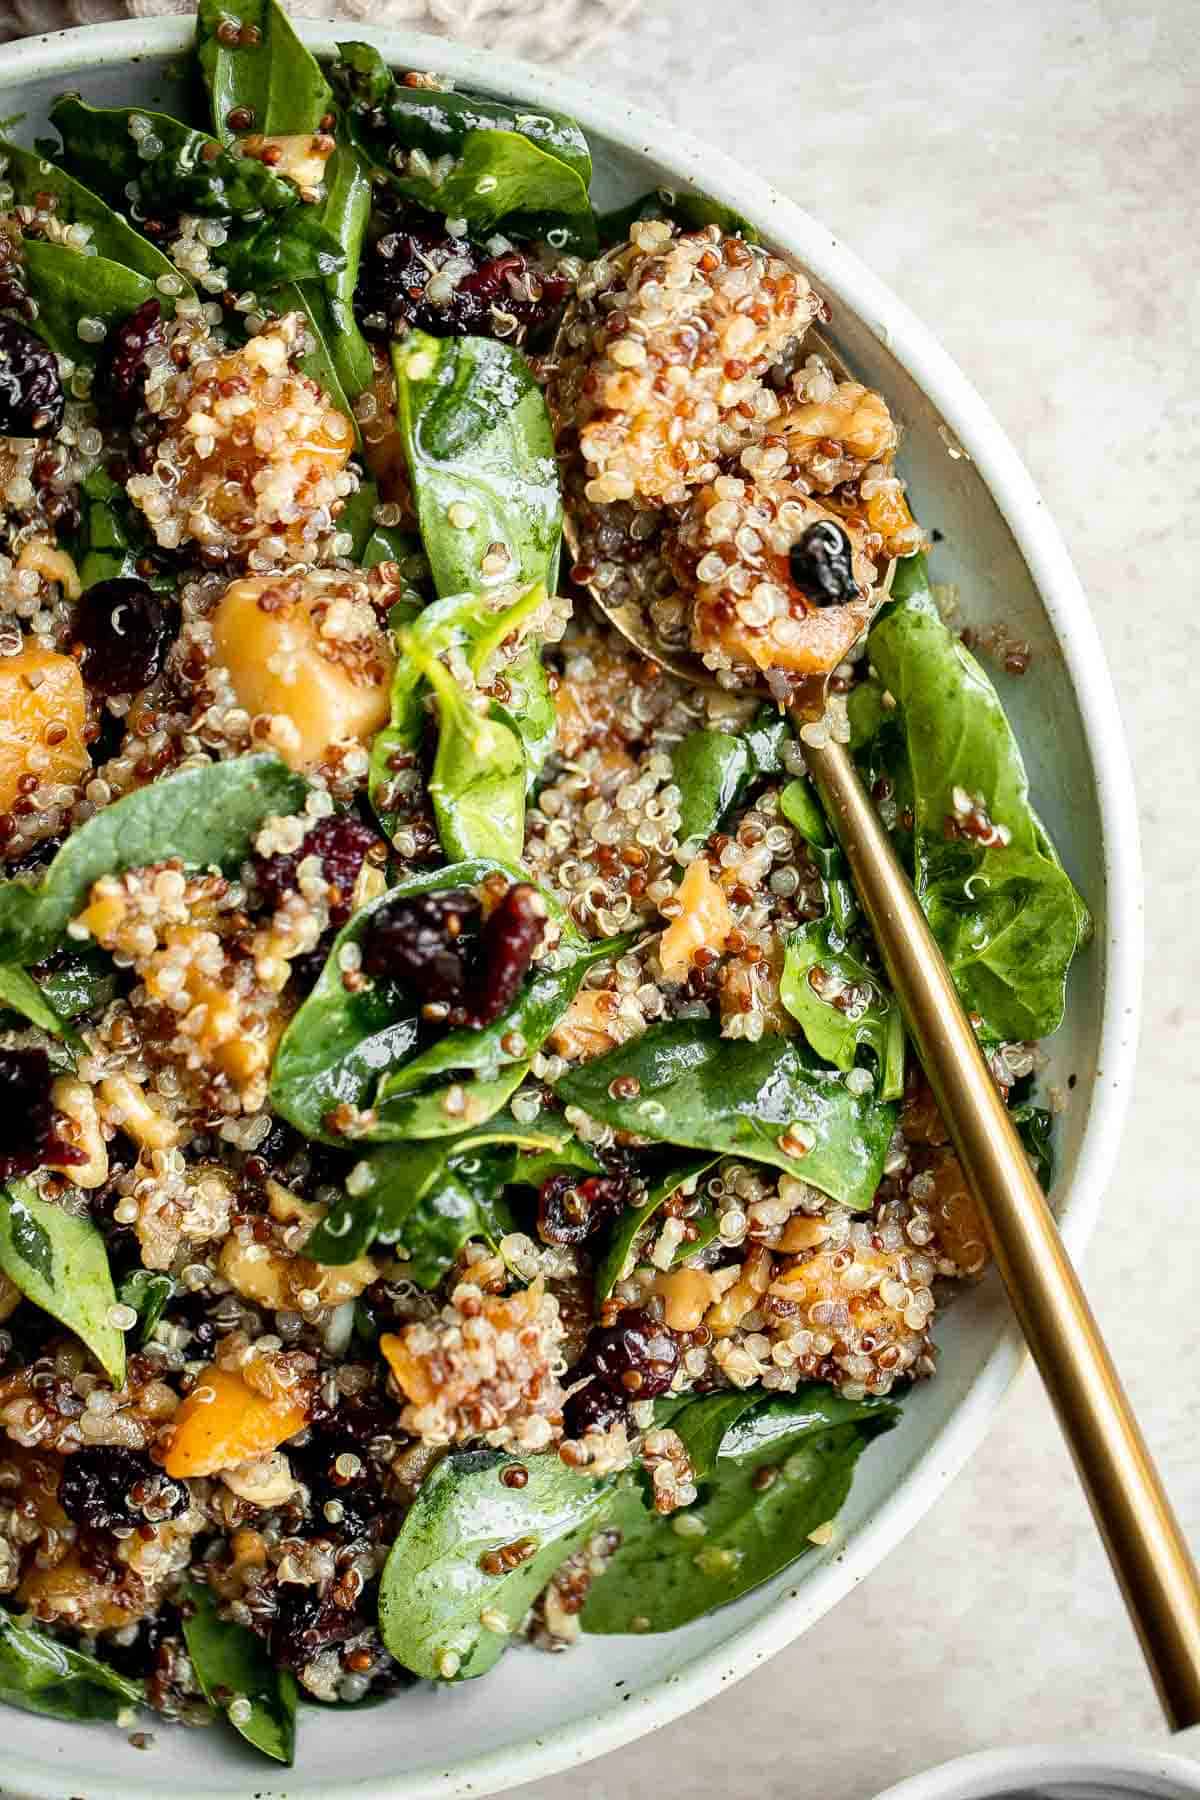
Recipe Tips and Tricks
- Use broth instead of water for a more flavorful quinoa. Try swapping out the water in this quinoa recipe for your favorite broth - veggie, chicken, beef, or seafood broth will work. You can use store-bought or homemade broth to add flavor and some nutritional benefits as well.
- Use a fine mesh sieve to rinse the quinoa. While there are several ways to rinse your quinoa, using a fine mesh sieve or other fine strainer will make rinsing easier and lowers the risk of losing a few seeds and making a mess.
- Hold off on the salt. Wait until the quinoa is cooked before adding salt and other seasonings. If you add it before, it may not disperse evenly and will absorb into the quinoa, making it easy to oversalt the grains.
Frequently Asked Questions
Yes, it is absolutely necessary to rinse quinoa every time you cook quinoa! There's a coating on the outside of the shells that tastes bitter and unpleasant, plus dust and other particles from processing the seeds.
Giving the quinoa a quick rinse (it only takes a minute or two, promise!) before cooking it removes the bitterness and makes sure you get fluffy, tasty, perfectly cooked quinoa every time!
You can tell when the quinoa is done because all the liquid will have evaporated or will have been absorbed into the quinoa and the seeds have become soft. If the quinoa has turned mushy or chewy, the quinoa has been overcooked and you'll want to start over to get the consistency right. If your grains are crunchy, the quinoa's been undercooked.
Yes, quinoa is a great ingredient to meal prep! Whether you're getting a head start on dinners for the week or trying to create a varied menu with limited ingredients, quinoa is the grain for you. It cooks quickly, stores well, reheats beautifully, and can easily be incorporated into all kinds of dishes!
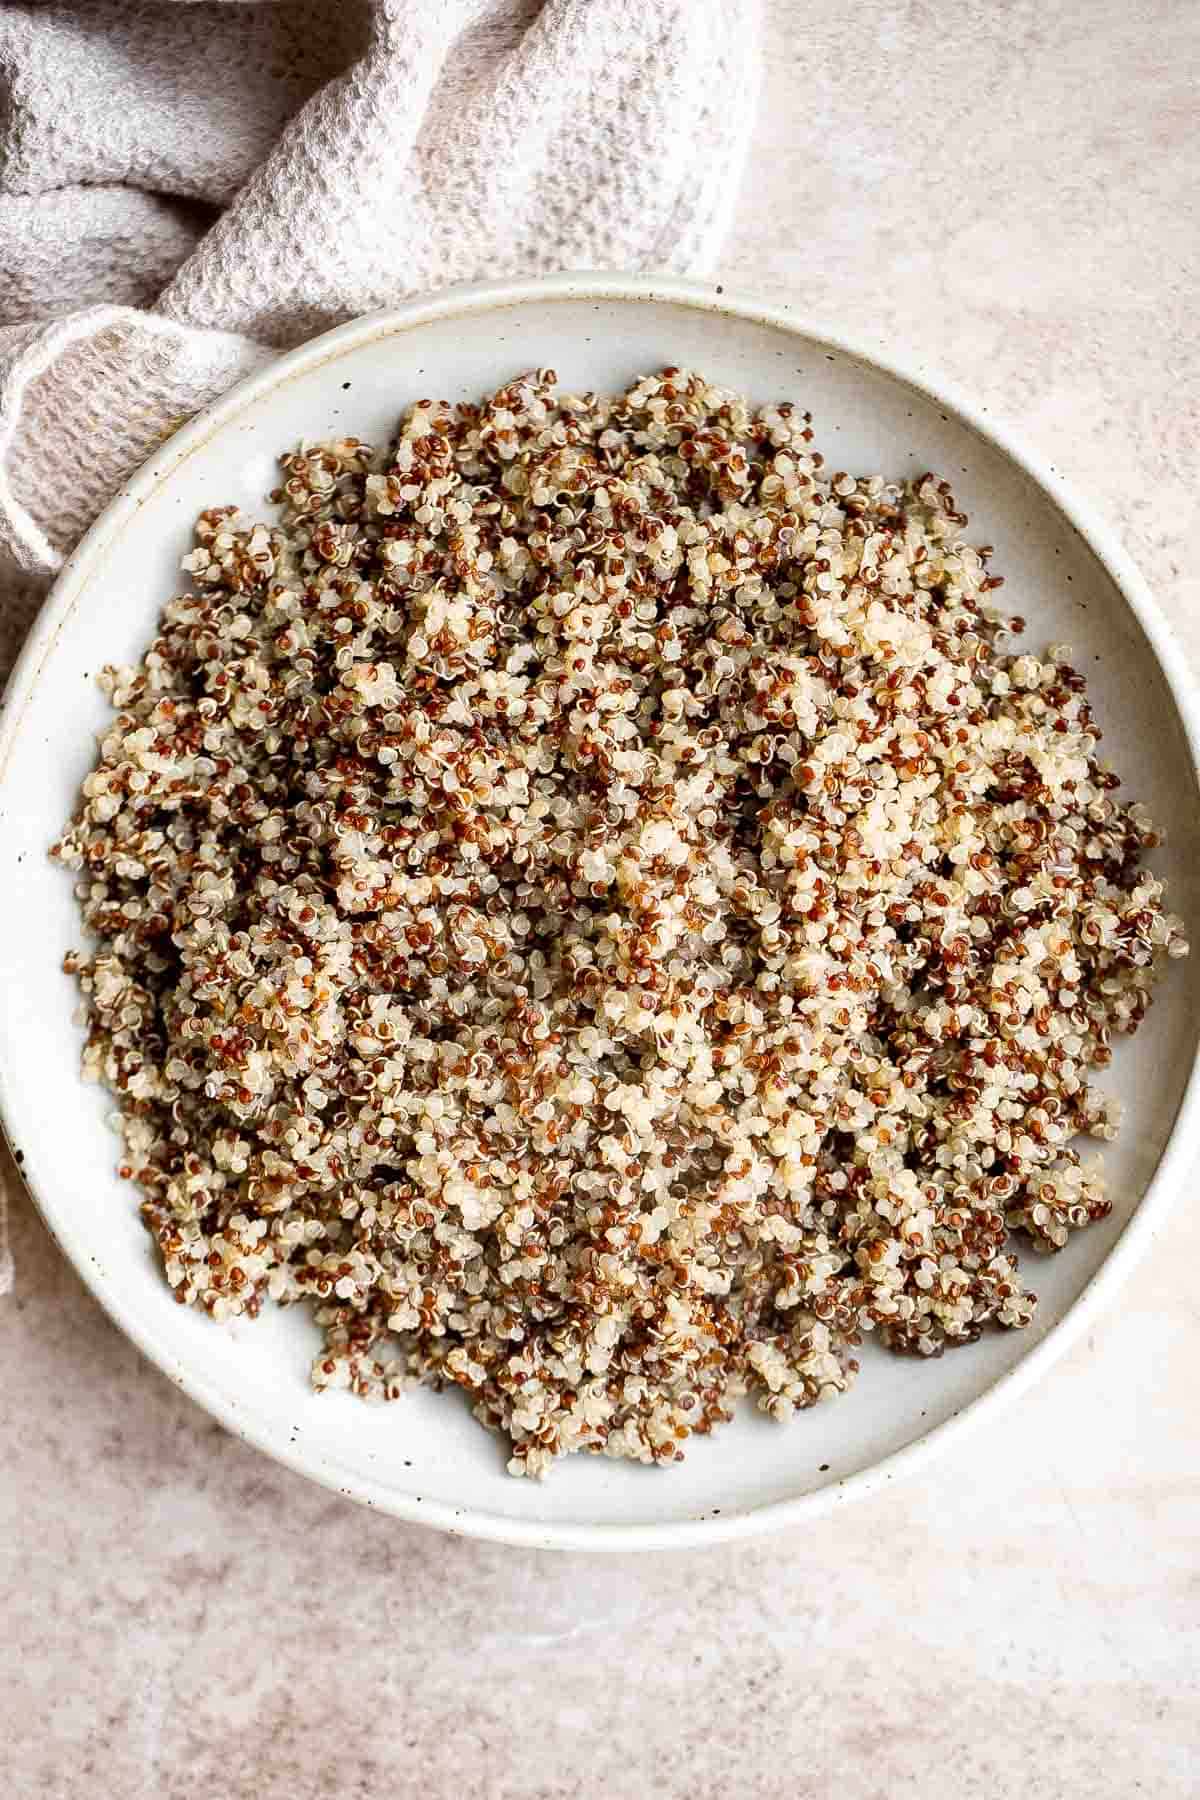
Storing and Freezing Instructions
How to Store
Once the cooked quinoa has cooled completely to room temperature, transfer it to an airtight container and store in the refrigerator for up to five days.
How to Freeze
Transfer leftover quinoa into an airtight, freezer-safe container or freezer bag. Store in the freezer for up to 3 months. I recommend labelling the container with the date for easy reference.
More Recipes with Grains
- Quinoa Spinach Salad
- Vegetarian Bolognese
- Steamed Rice
- Mediterranean Brown Rice Salad
- Falafel
- Chicken Broccoli and Quinoa Casserole
Tried this recipe?
I'd love to hear what you think! Leave a comment and rating below to share your feedback. Your reviews help others discover this recipe and help me keep creating more free recipes for you. Snap a photo and tag me on social media @aheadofthyme too.
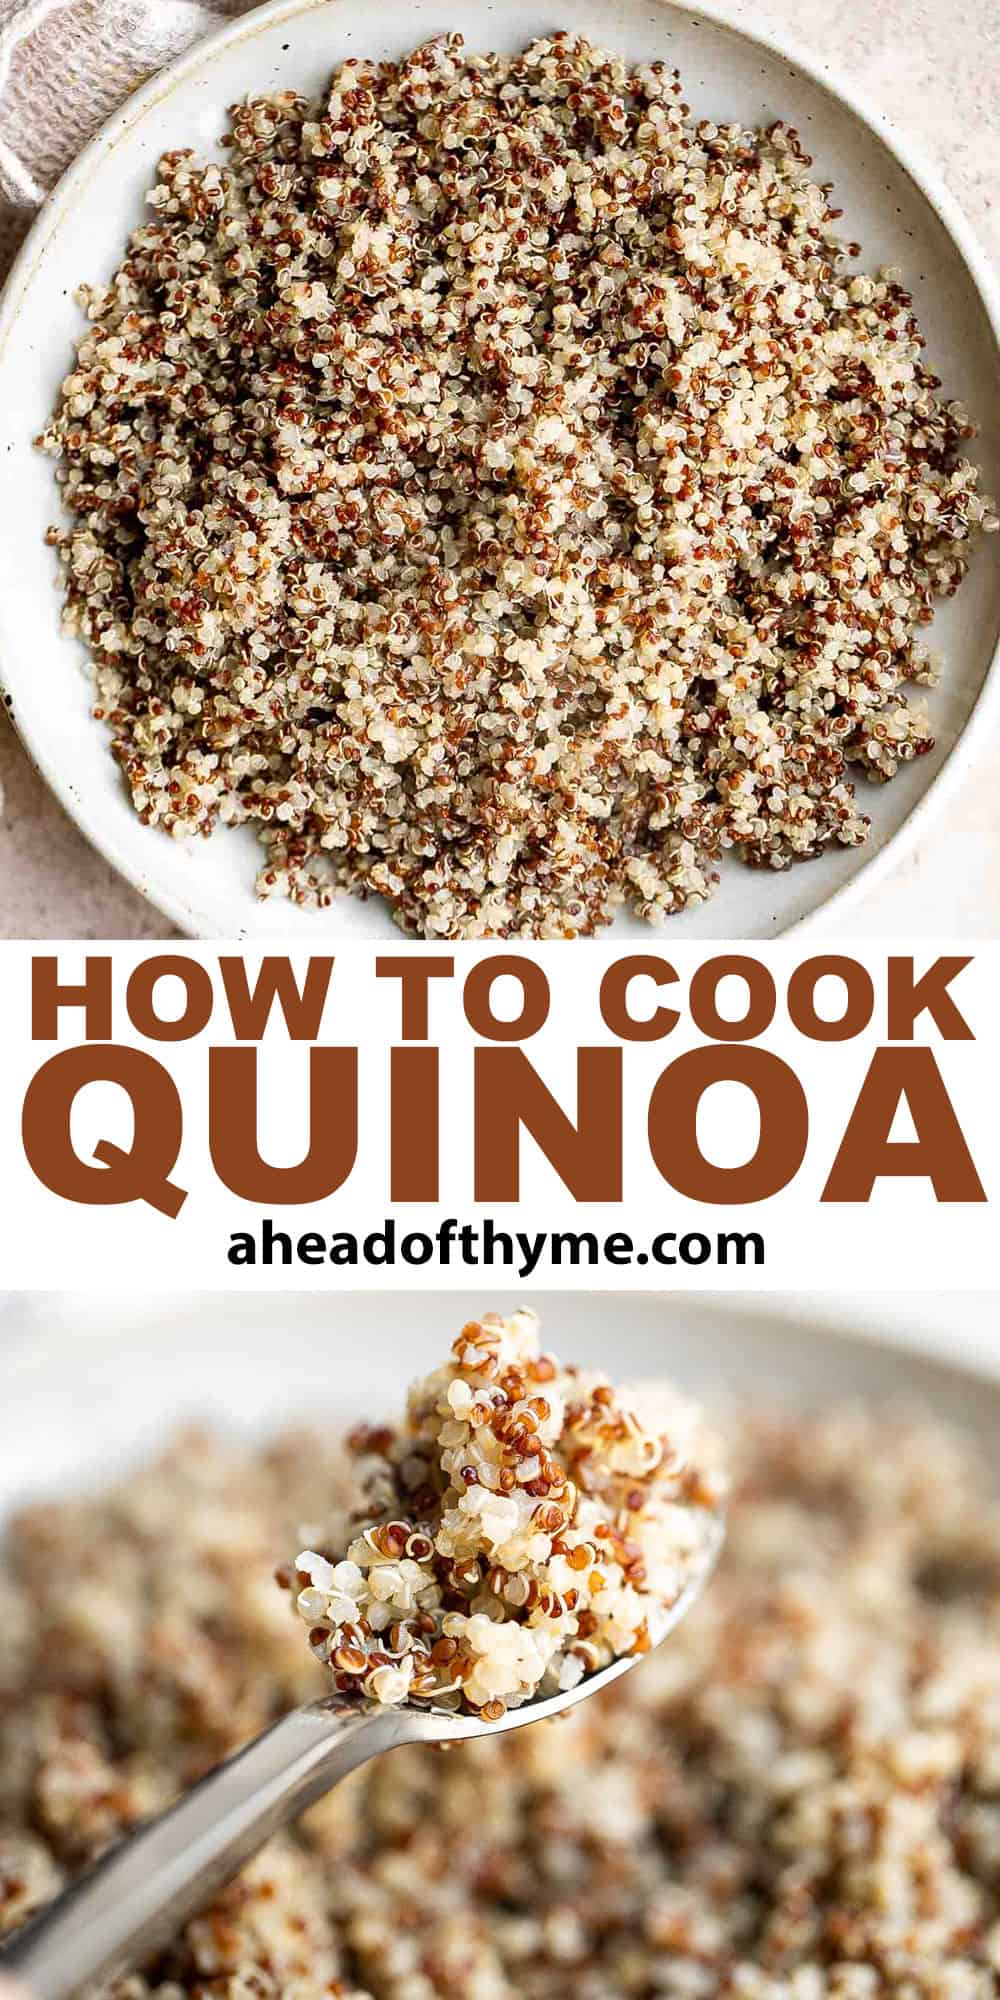
Green Detox Smoothie
This Green Detox Smoothie is quick and easy to make, delicious and nutritious, and is loaded with antioxidants, nutrients, and vitamins. It provides a quick energy boost making it the perfect after workout snack or breakfast on the go.
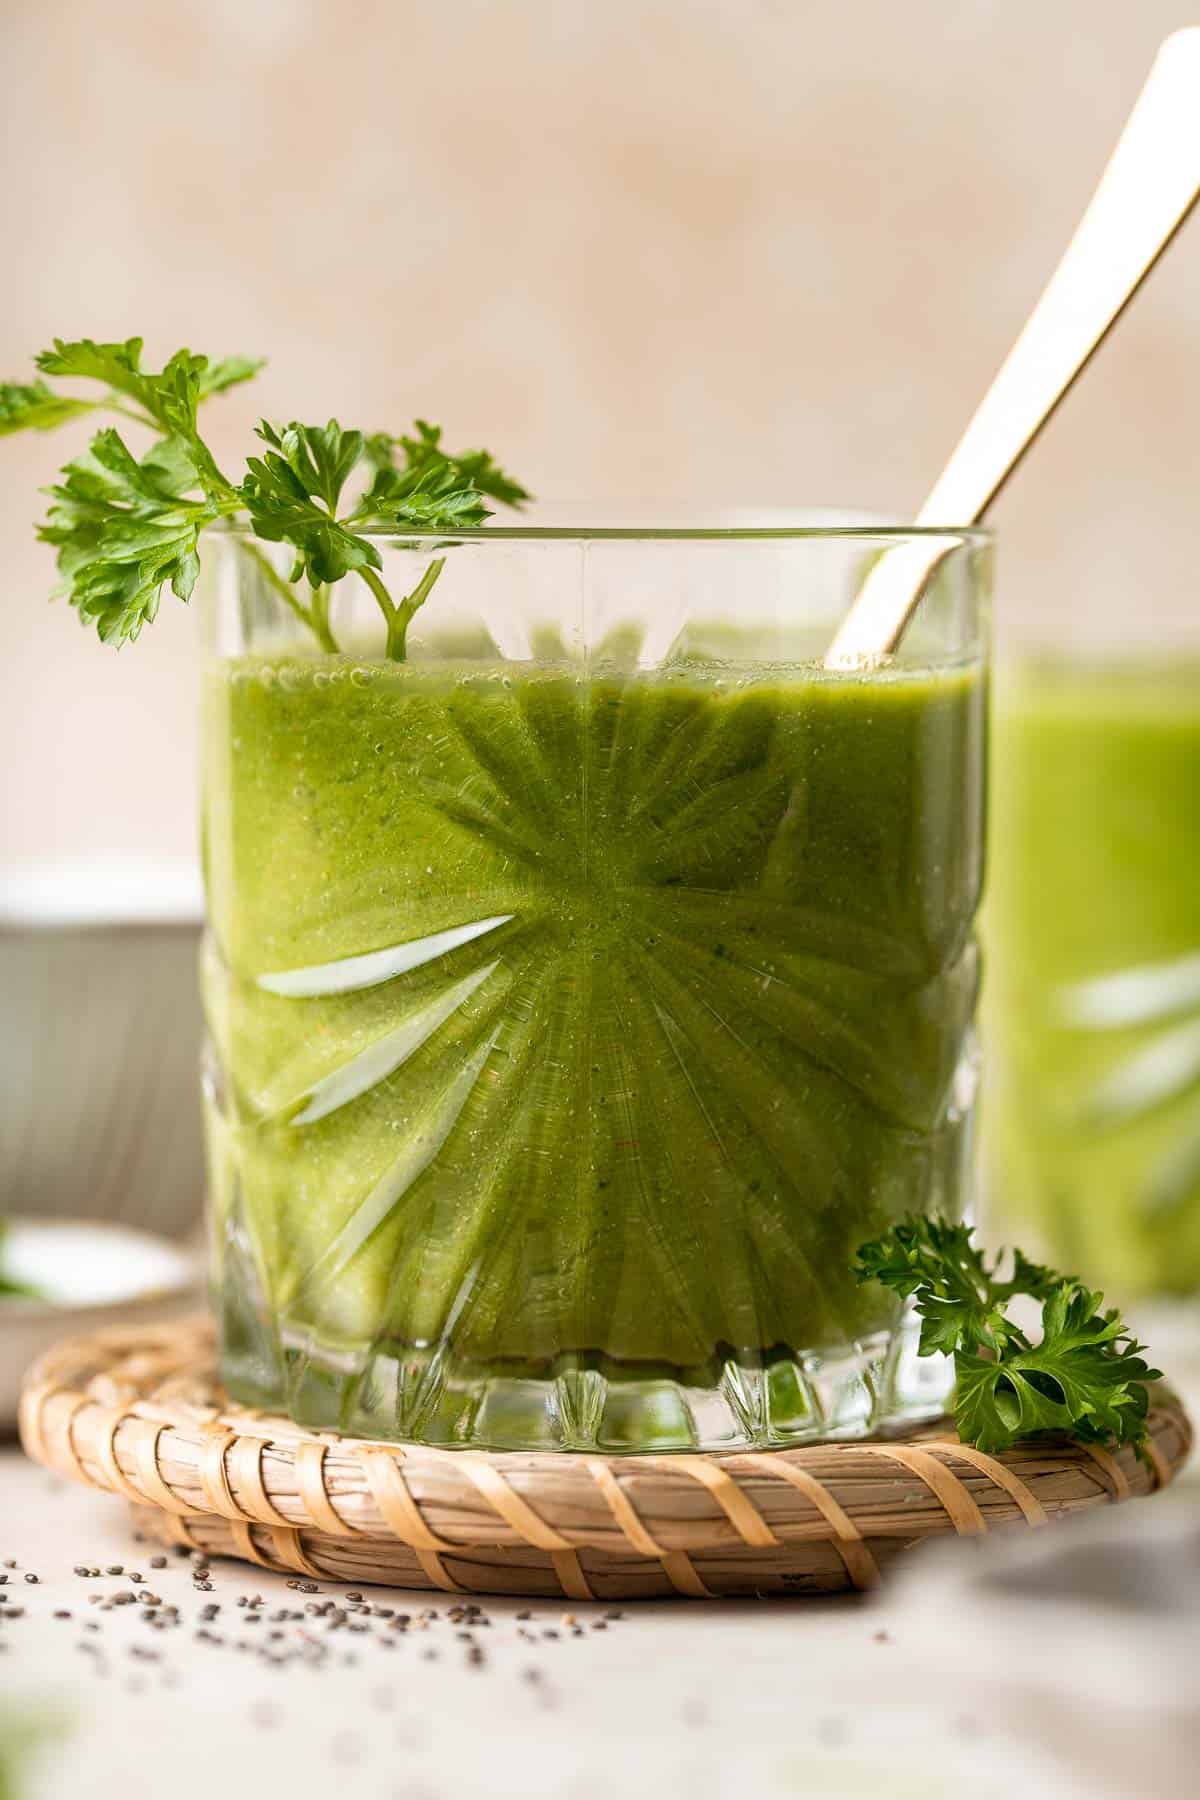
Make this vibrant detox smoothie with a handful of simple and fresh ingredients in just 5 minutes. It will give you everything you need in the morning and it will help you get back on track and detoxify your body. Follow the recipe as is for the most powerful antioxidant and anti-inflammatory effects, or feel free to customize it with other fruits and veggies you have on hand.
Why You'll Love this Green Detox Smoothie
- Loaded with fresh ingredients. This healthy green detox smoothie is loaded with fresh fruits and vegetables including spinach, parsley, banana, apple, grapefruit, and ginger.
- Quick and easy to make. This green smoothie is one of the easiest drinks to make for breakfast on the go or a quick after workout snack. This 5 minute recipe makes hectic mornings a lot easier to handle.
- A true detox drink. The base of this vegan smoothie is made with spinach and parsley which both have powerful anti-inflammatory and antioxidant abilities. And combined with the fact that these greens are very low in calories, you're left with one of the most nutrient-dense foods ever. Spinach also soaks up environmental toxins from our bodies, neutralize heavy metals, chemicals, and pesticides, and protect our livers.
- It's healthy and nutritious. Smoothies are a quick and easy way to get your daily dose of fruits and vegetables. I think that this detox smoothie is the most delicious way to get in your a dose of your daily vitamins and minerals. Plus, it's filling and provides you with the energy you need to get through the morning.
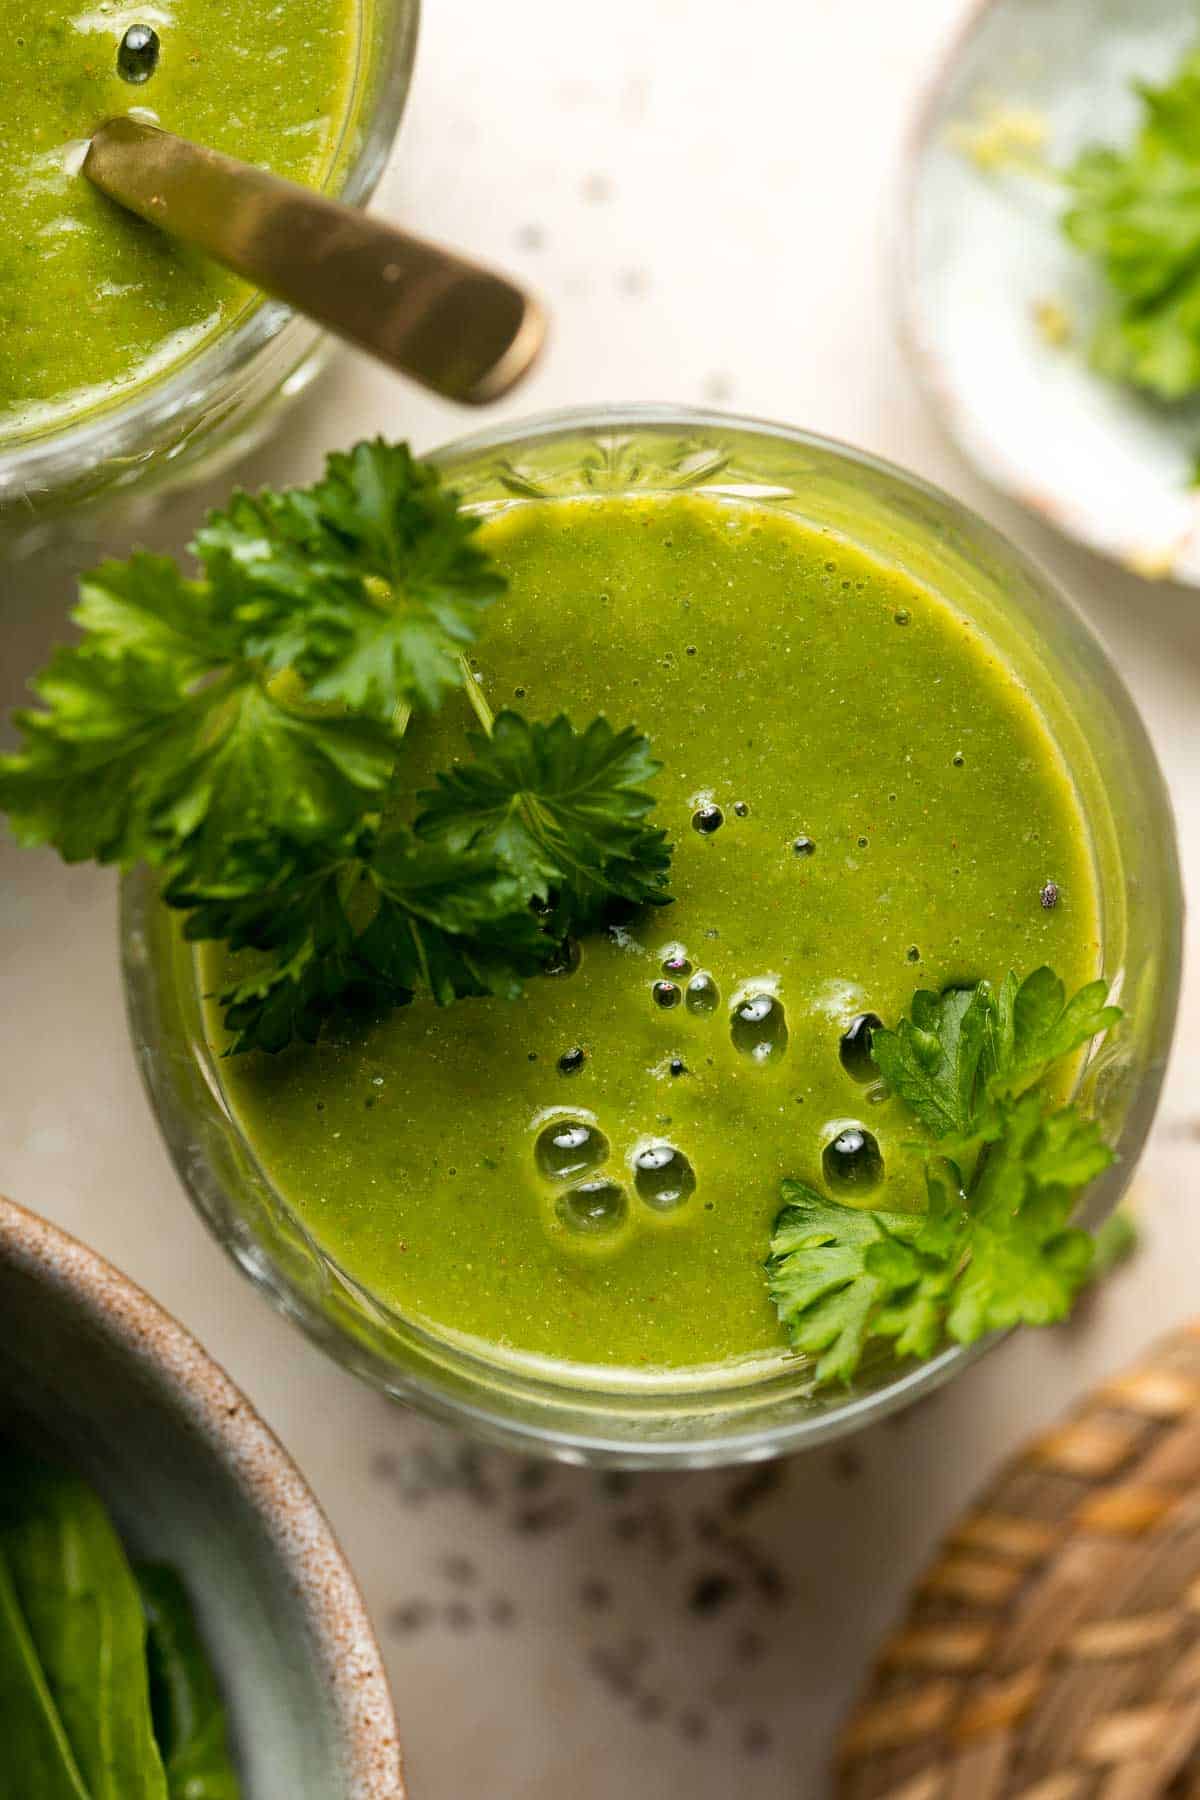
Ingredient Notes
To make this healthy Green Detox Smoothie, you will need the following ingredients (full quantities in recipe card below):
- spinach - the base of this smoothie is spinach, which obviously is also responsible for it's bright and vivid colour. Spinach is the perfect base ingredient because it has a milder flavour than other green, leafy vegetables such as chard or kale, and it is rich in nutrients, vitamins, and minerals. It's a great source of vitamin c, vitamin a, manganese, zinc, and selenium, just to name a few. Spinach also contains anti-aging properties and decreases the risk of heart diseases, diabetes, neurodegenerative diseases, and obesity.
- parsley - this is a secret and unexpected ingredient. Parsley is also rich in antioxidants and vitamins and it is kind of known for it's amazing anti-inflammatory properties and positive effect on our liver and kidneys. In fact, for many centuries, parsley has been used to help treat kidney stones and urinary tract infections.
- banana - helps to thicken the smoothie, add natural sweetness, and add more vitamins and minerals.
- apple - helps to thicken the smoothie, add natural sweetness, and add more vitamins and minerals.
- grapefruit - grapefruit packed with nutrients, vitamins and minerals with disease fighting properties. Having grapefruit helps our liver and provides an extra immunity boost. If you don't have any on hand, feel free to substitute with a citrus fruit of your choice such as orange or pomelo.
- coconut water - for a hint of coconut flavor, or substitute with water if you don't have any on hand. You can also substitute with milk for a creamier option.
- fresh ginger
- lemon juice - freshly-squeezed lemon juice is packed health-promoting antioxidants to prevent stress and protect against chronic diseases. You can also substitute with freshly squeezed lime juice.
- chia seeds - feel free to substitute with flax seeds or hemp seeds.
- maple syrup or honey - this is optional if you want to add a little sweetness to the smoothie.
You will also need measuring cups and spoons and a blender.
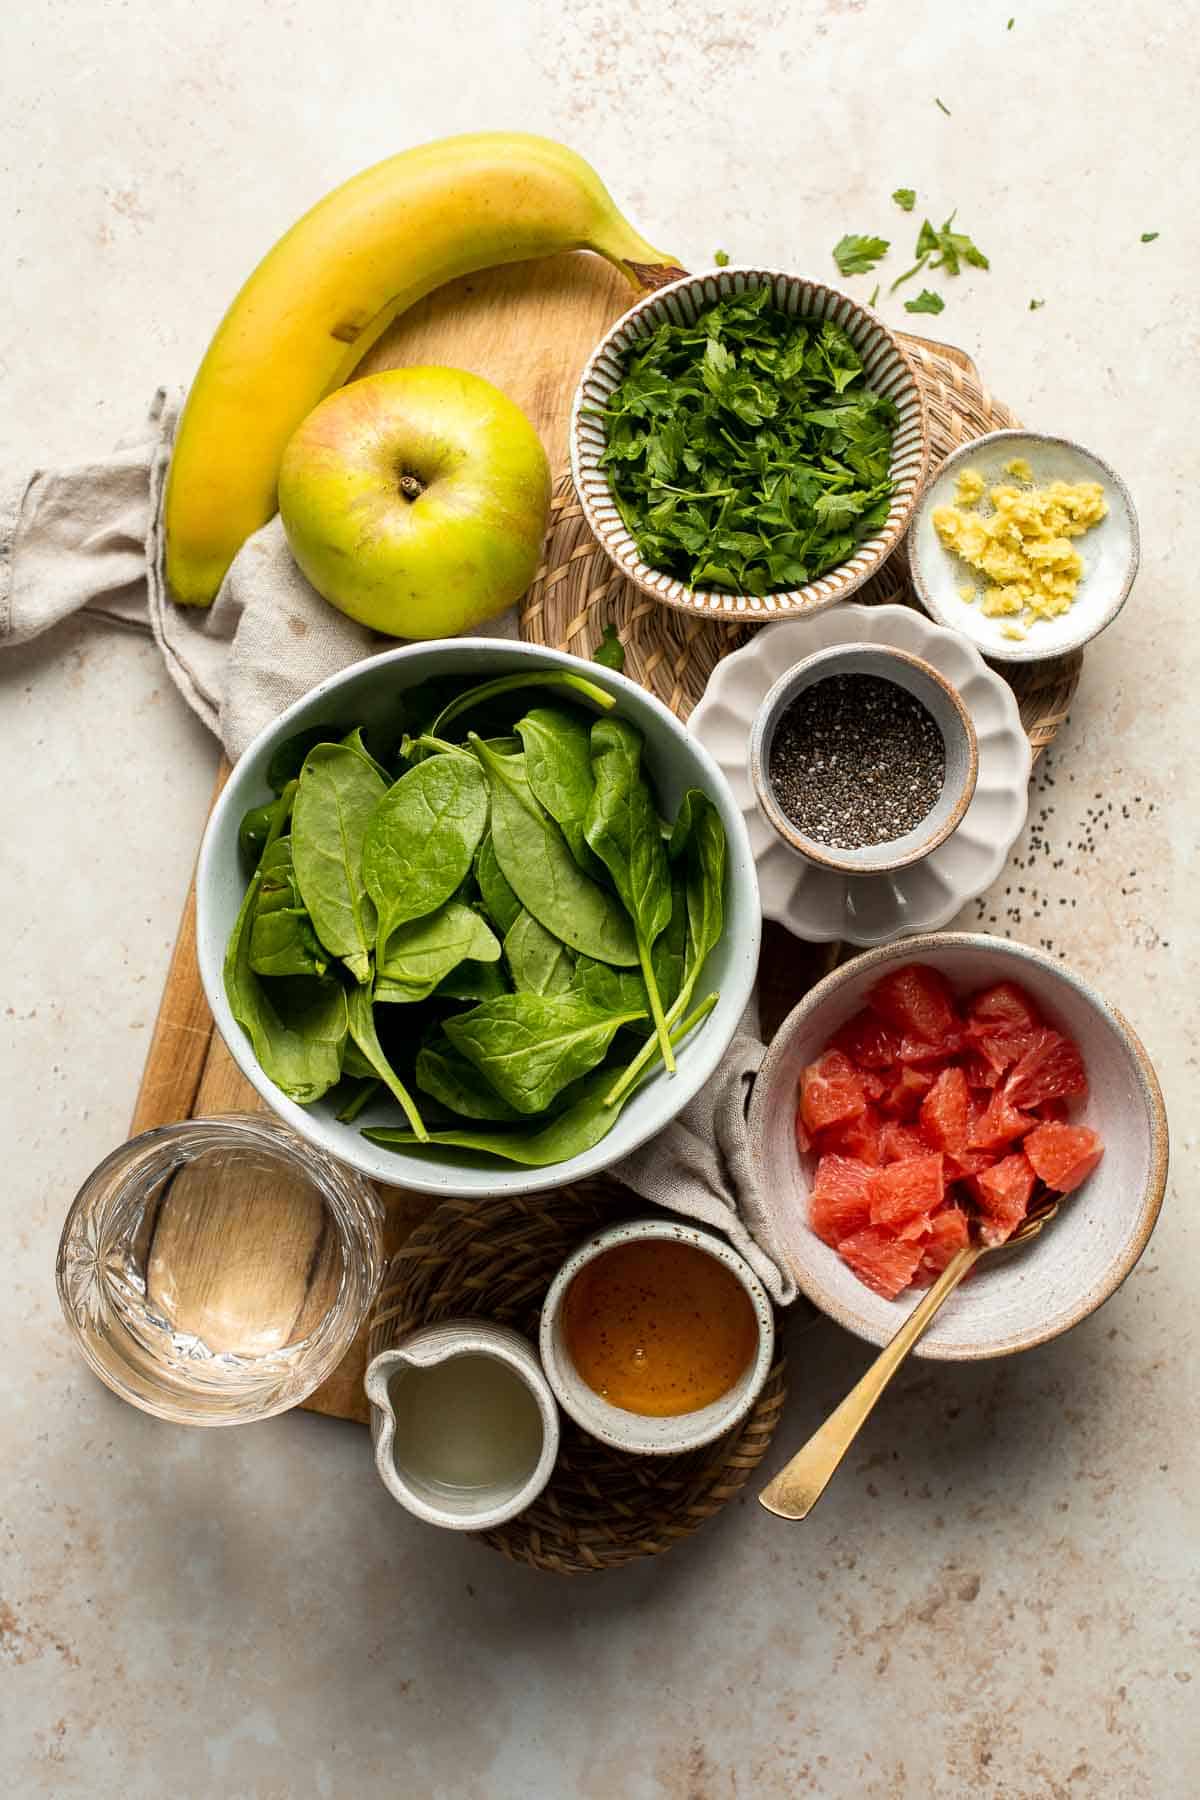
How to Make the Best Green Detox Smoothie
First, combine all ingredients into a blender. Blend until perfectly smooth, about 1 minute.
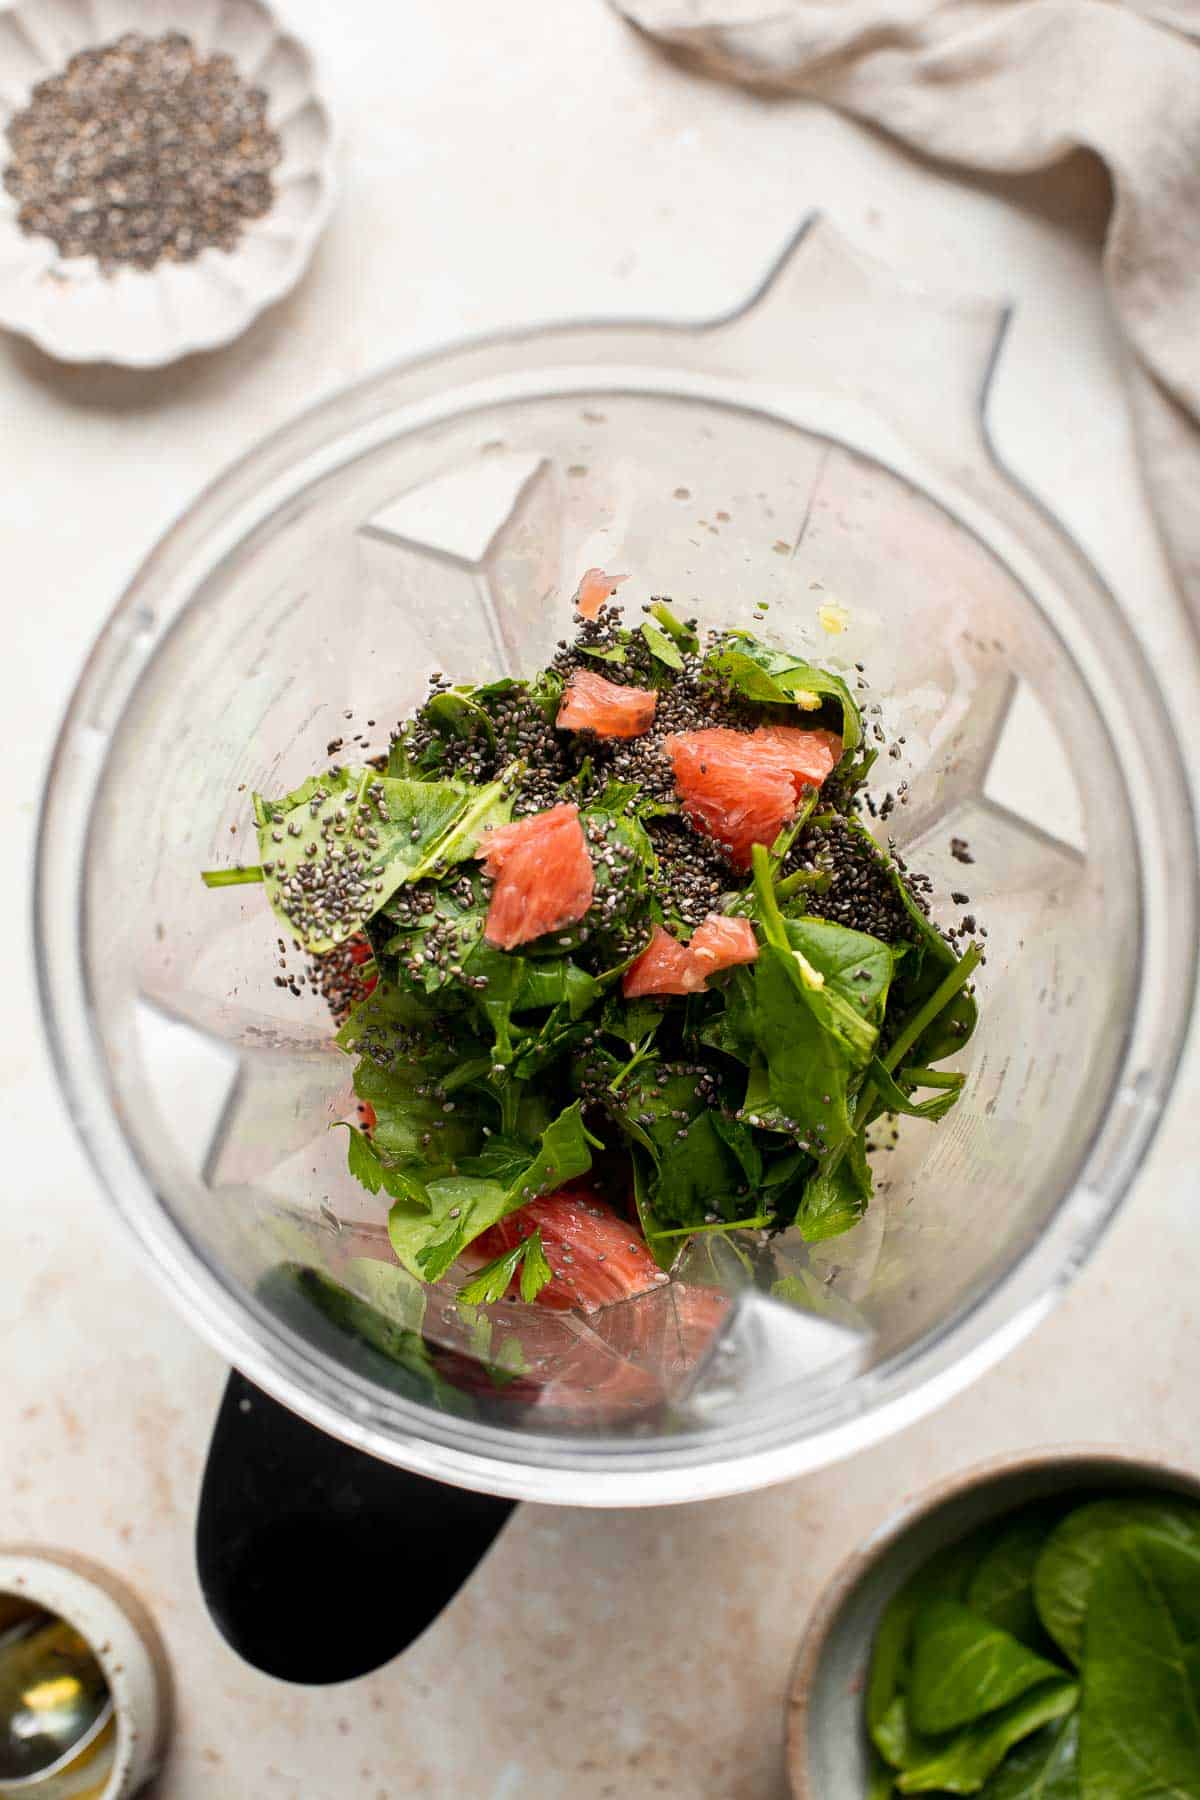
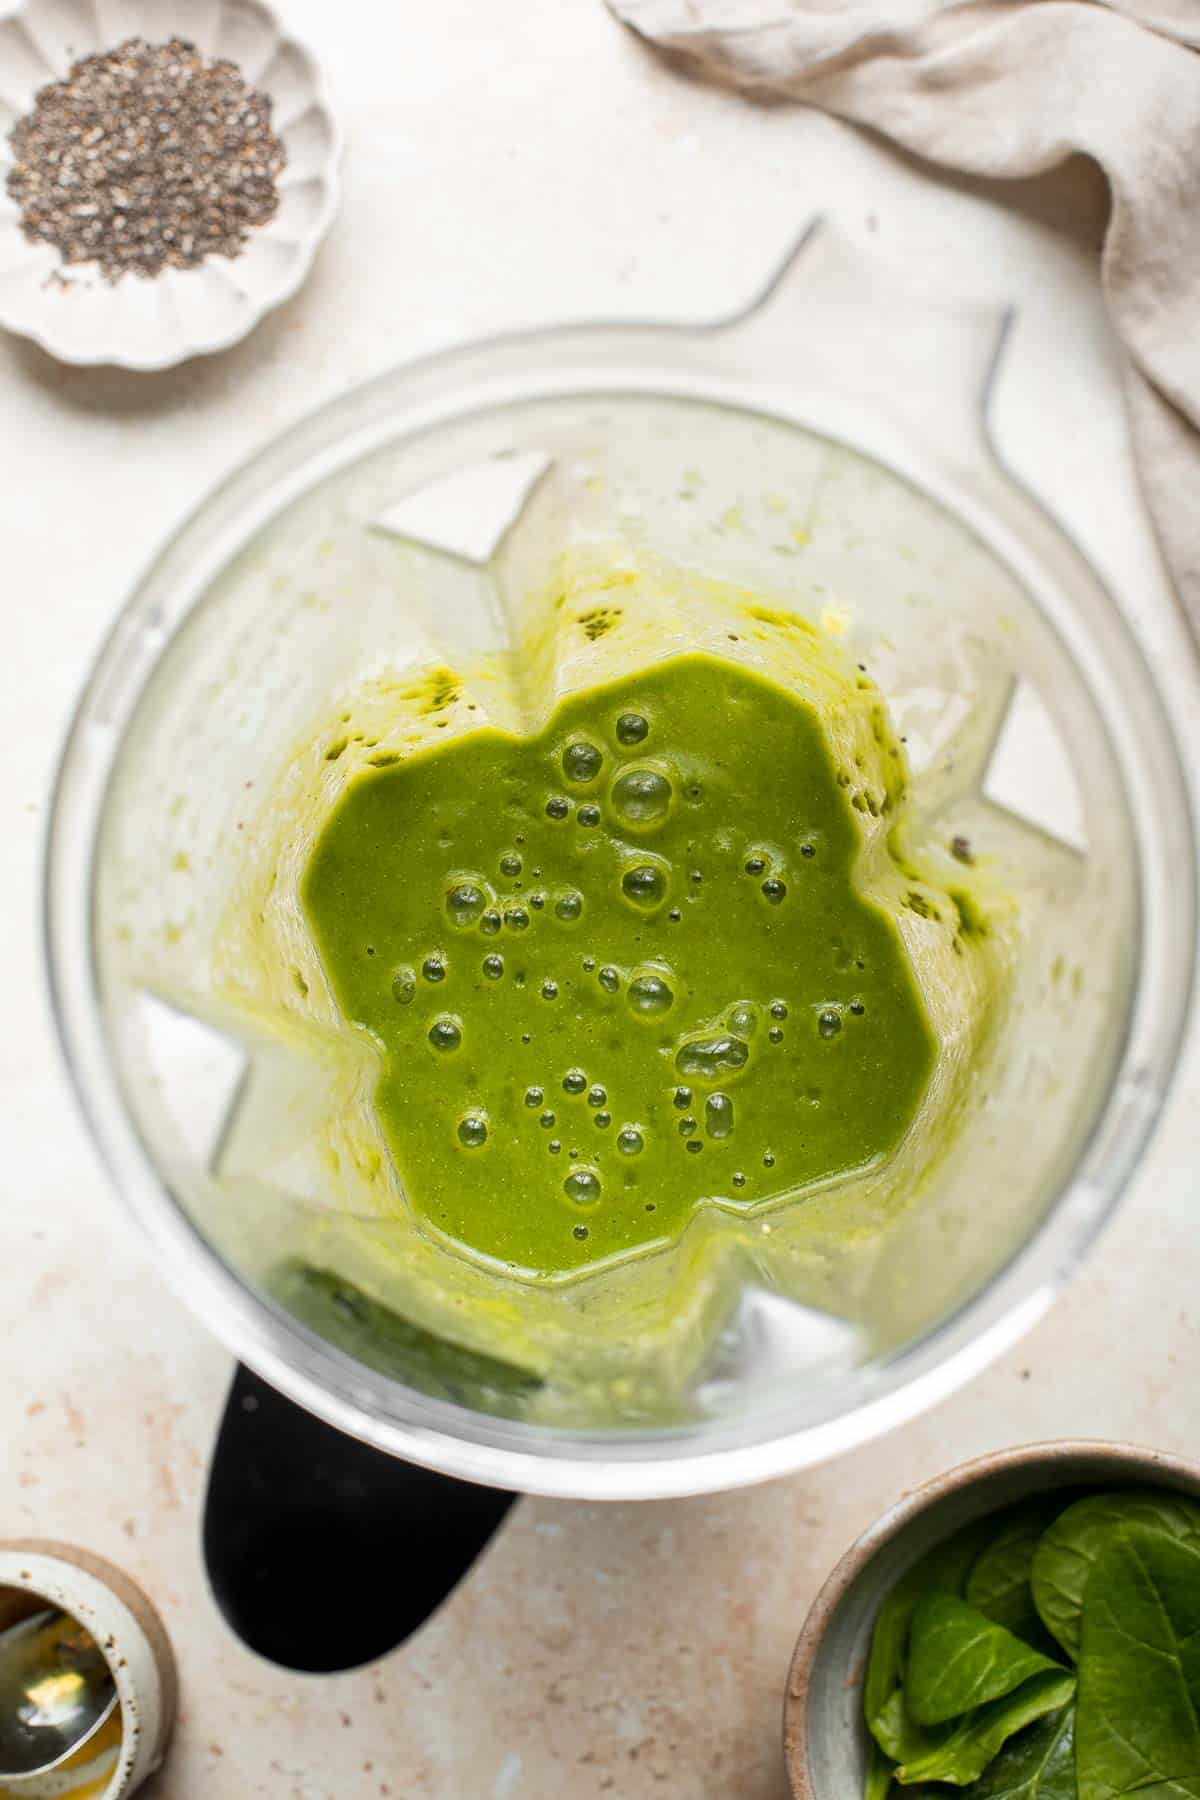
Then, pour into two large glasses (or jars) and serve immediately.


Recipe Tips and Tricks
- Customize it. You can customize this smoothie by adding in nuts or nut butters, changing up the fruit, adding in some shredded coconut, or sweetening it with maple syrup or honey, if desired.
- Use a good blender. The key to a smooth smoothie is a good heavy duty blender. If your blender is not strong enough, you will still end up with a delicious smoothie, but it could have chunks in it.
- Add protein powder. You can add in some protein powder to turn it into a great source of protein as well.
- Use frozen fruit. Feel free to use frozen fruit instead of fresh ones for a more icy texture and cooler consistency.
Storing and Freezing Instructions
How to Store
This green detox smoothie is best served immediately. If you happen to have any leftovers, store the smoothie an airtight container in the refrigerator for up to 1 day. Give it a quick stir before drinking.
How to Freeze
To freeze, transfer the leftover smoothie to an airtight container and freeze for up to 3 months. When ready to drink, take it out of the freezer and allow it to defrost slightly on the counter for about 10-15 minutes.
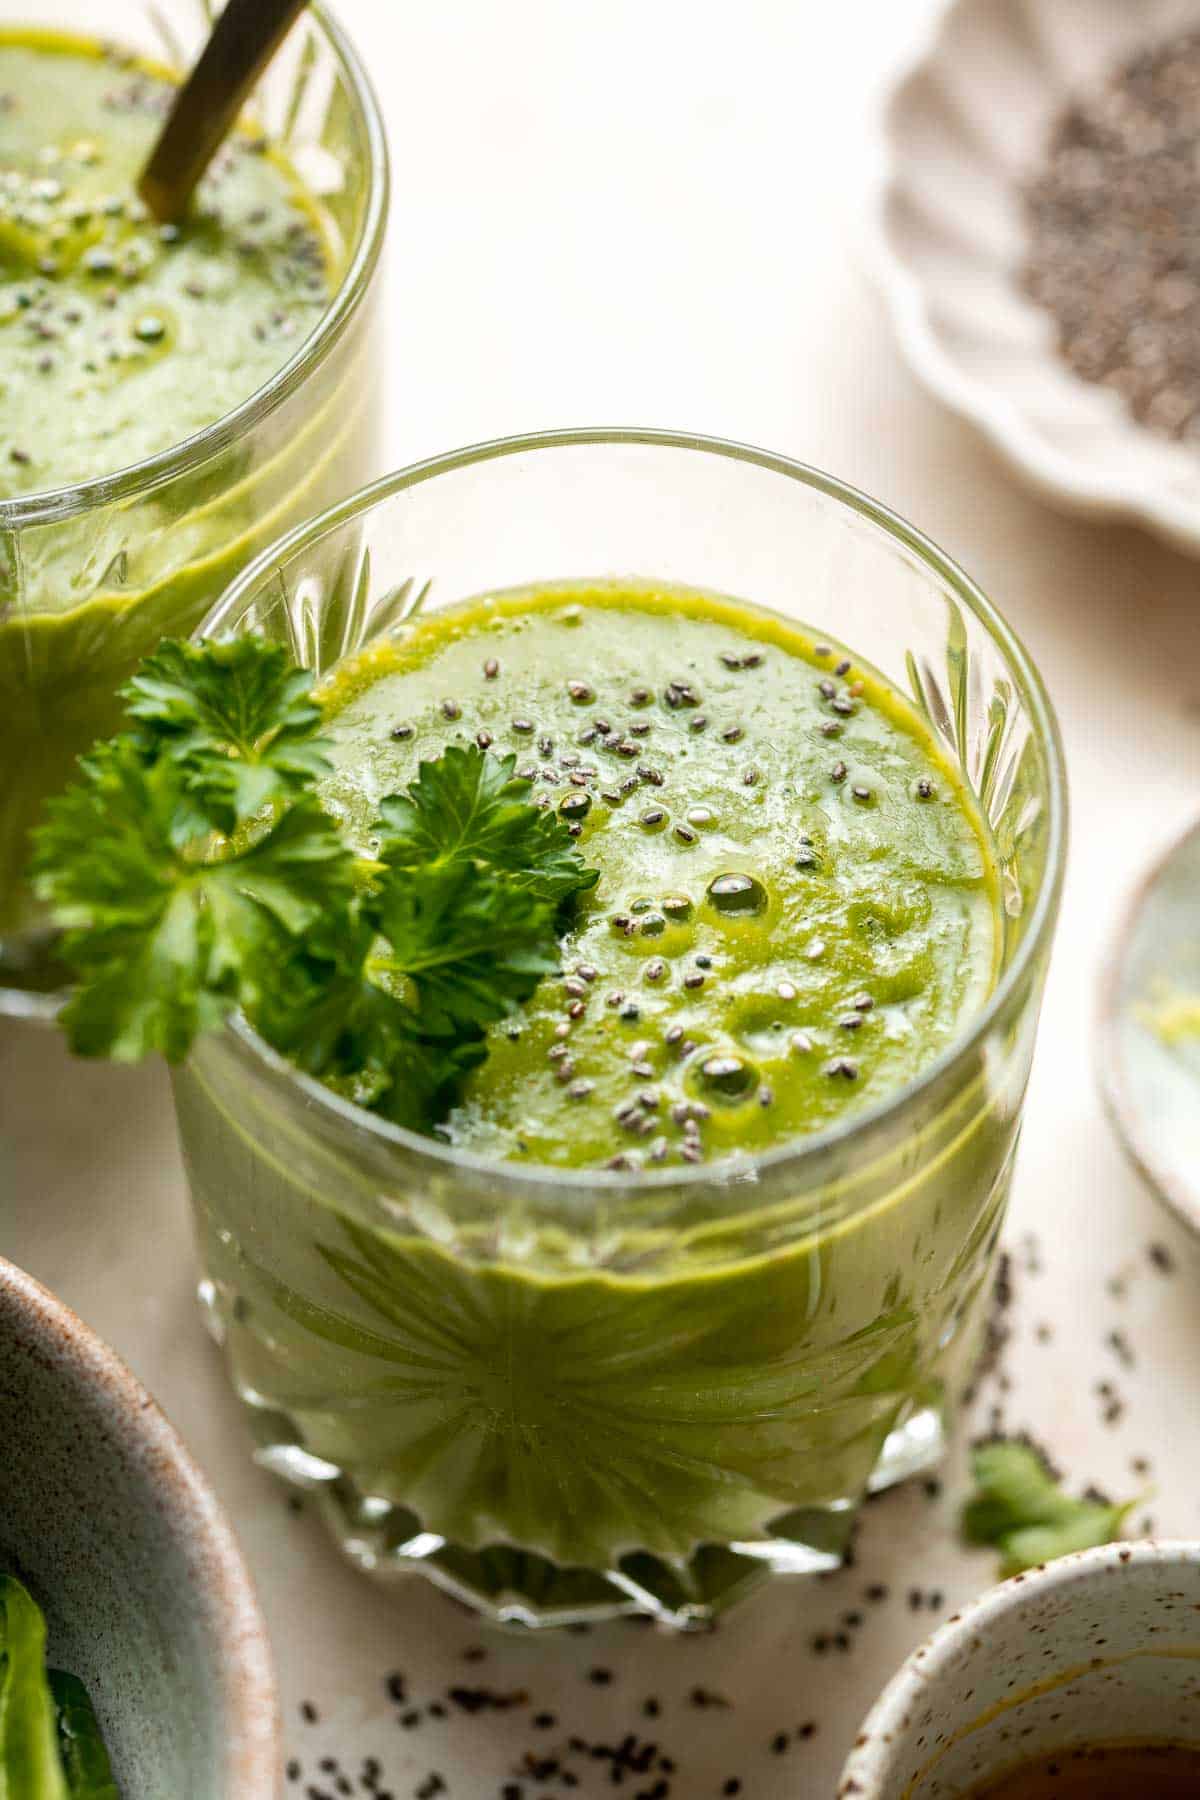
More Smoothie Recipes
- Green Smoothie Bowl
- Healthy Mango Yogurt Smoothie
- Strawberry Banana Smoothie
- Majoon (Banana and Date) Smoothie
- Healthy Apple Pie Fall Smoothie
- Mango Pineapple Tropical Smoothie Bowl
Tried this recipe?
I'd love to hear what you think! Leave a comment and rating below to share your feedback. Your reviews help others discover this recipe and help me keep creating more free recipes for you. Snap a photo and tag me on social media @aheadofthyme too.
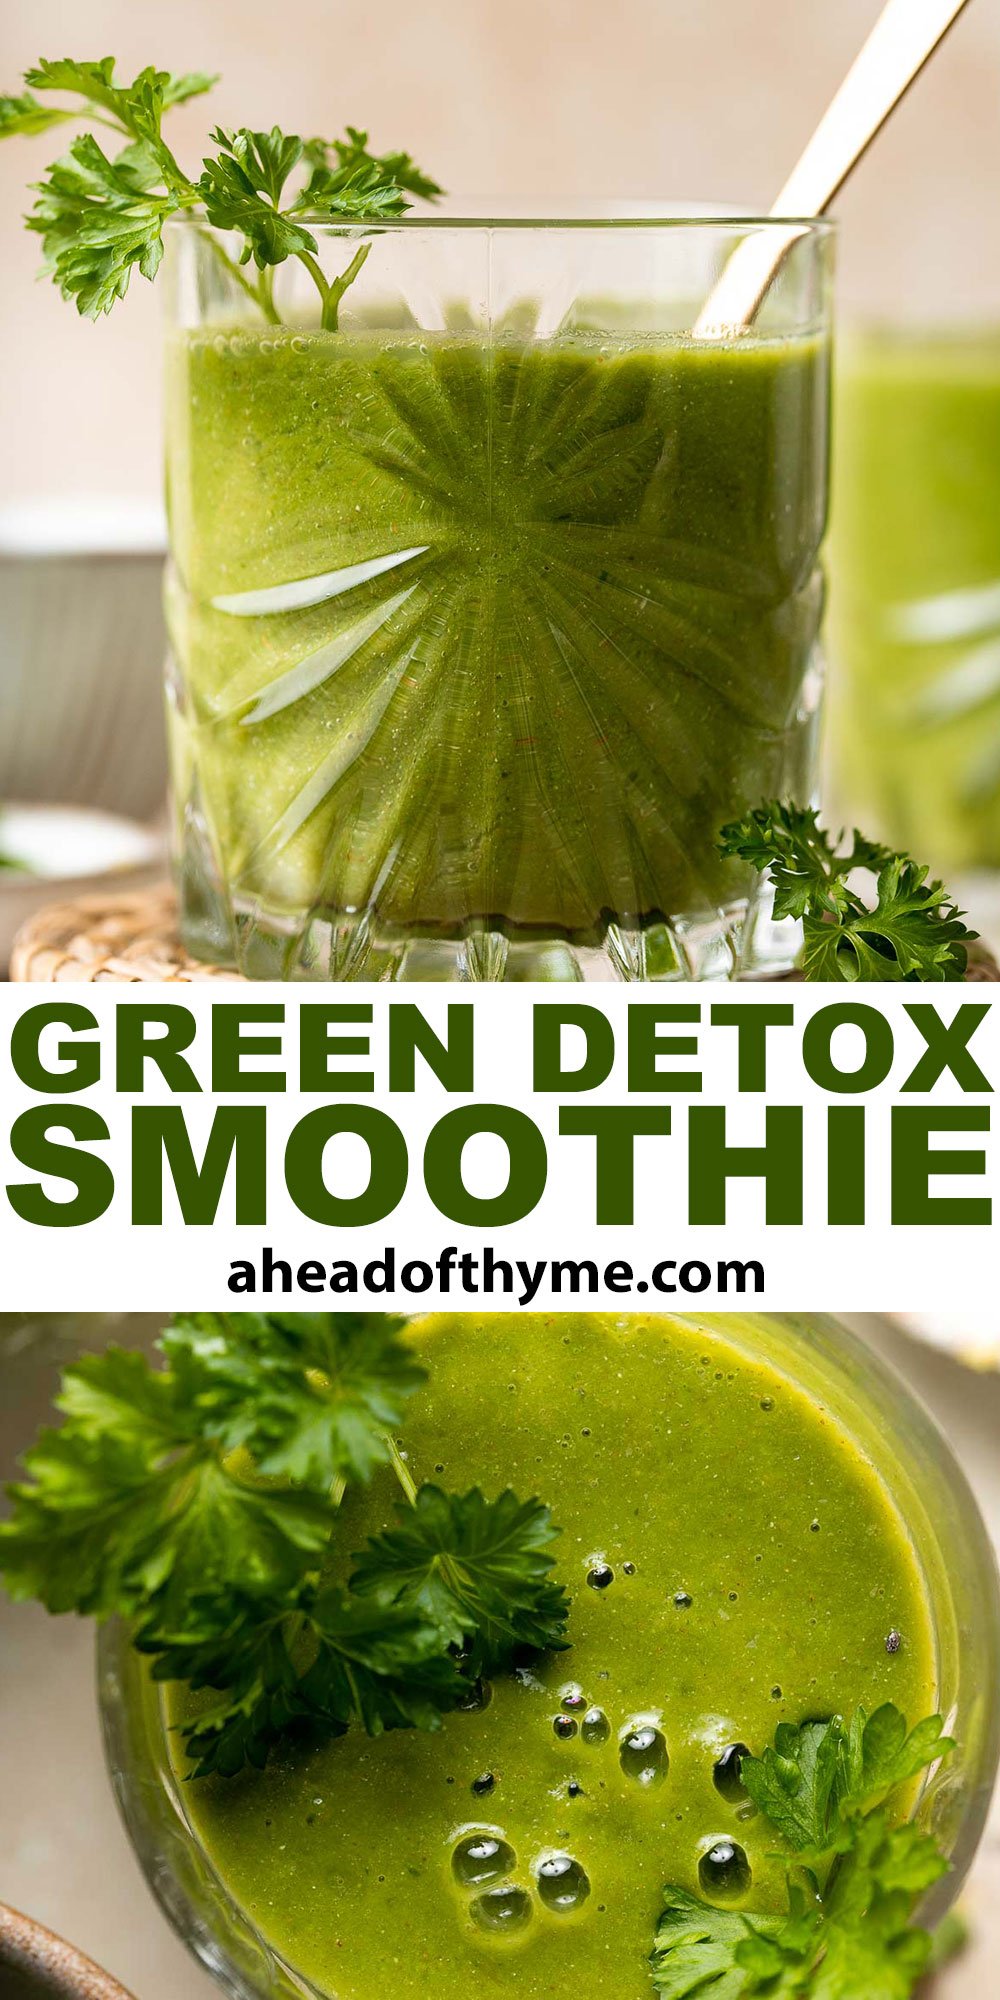
Cheesy Garlic Bread
Cheesy Garlic Bread is toasty and crispy on the outside, tender and soft inside with a garlic butter spread topped with melty cheese. This comforting appetizer is easy to make in under 20 minutes - including prep!
No matter when or how it's served, for garlic bread with cheese is always one of the best parts of any meal. The whole family will go wild for it! From the moment you take one bite, you'll never want to go back to freezer garlic bread again.
Why You'll Love this Cheesy Garlic Bread
- Real ingredients. Ditch the ready-made garlic bread from the freezer aisle and make this garlic bread instead! It's made with just a few whole, uncomplicated ingredients that you're probably already familiar with.
- Ready in 20 minutes. It takes only five minutes to make this garlic bread recipe before you can pop into in the oven to toast and melt the cheese. After 15 minutes, you'll have hot, gooey, garlicky cheese bread on the table!
- The best flavors and texture. A simple combination of French bread, butter, minced garlic, cheese, and some seasoning come together to make a side with a cheesy crust, soft center, and rich flavor that will entice dinner guests to finish it completely before they even look at the rest of the meal! It's fast, fresh, and oh-so-tasty. Love at first bite!
- Delicious side to a comforting dinner. Garlic bread with cheese is the ultimate companion to comforting dinners, especially Italian entrees such as spaghetti, lasagna, baked ziti, penne, and even macaroni!
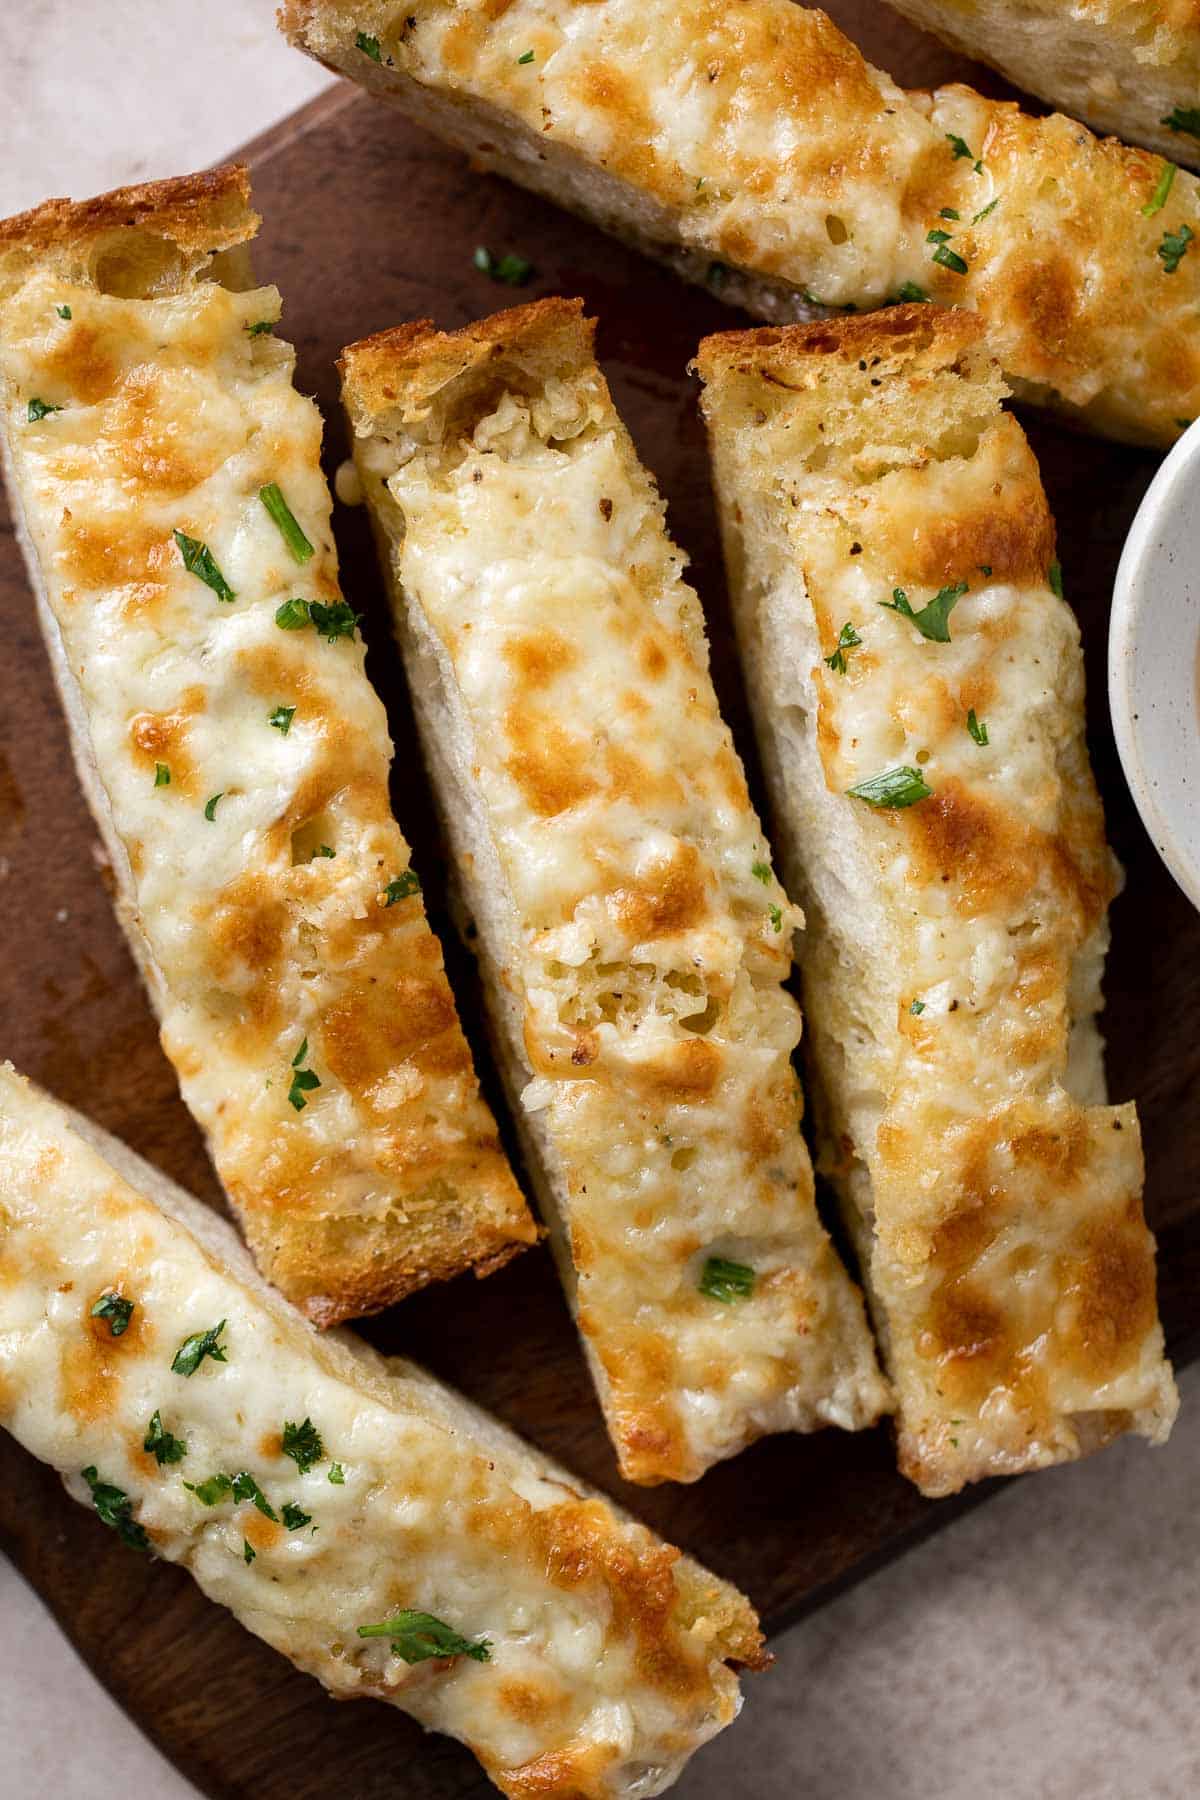
Ingredient Notes
To make this delicious Cheesy Garlic Bread, you will need the following ingredients (full measurements in recipe card below):
- French bread - you can make a loaf at home for this garlic bread, use a store-bought loaf, or swap out the french bread with a rustic italian, ciabatta, or sourdough bread instead.
- butter - this recipe calls for salted butter, but you can use unsalted butter and add salt to taste as needed.
- olive oil
- garlic - freshly minced garlic provides better flavor, but you can use 1 teaspoon of minced garlic from a jar for every clove called for in the recipe.
- salt and pepper
- mozzarella - you can also use a plant-based mozzarella substitute or a similar cheese like provolone.
- parmesan - try swapping the parmesan for pecorino romano, asiago, or a vegan-friendly substitute like nutritional yeast.
- parsley - you can use dried parsley flakes if you don't have fresh parsley on hand.
You will also need measuring cups and spoons, half sheet baking pan, and mixing bowl.
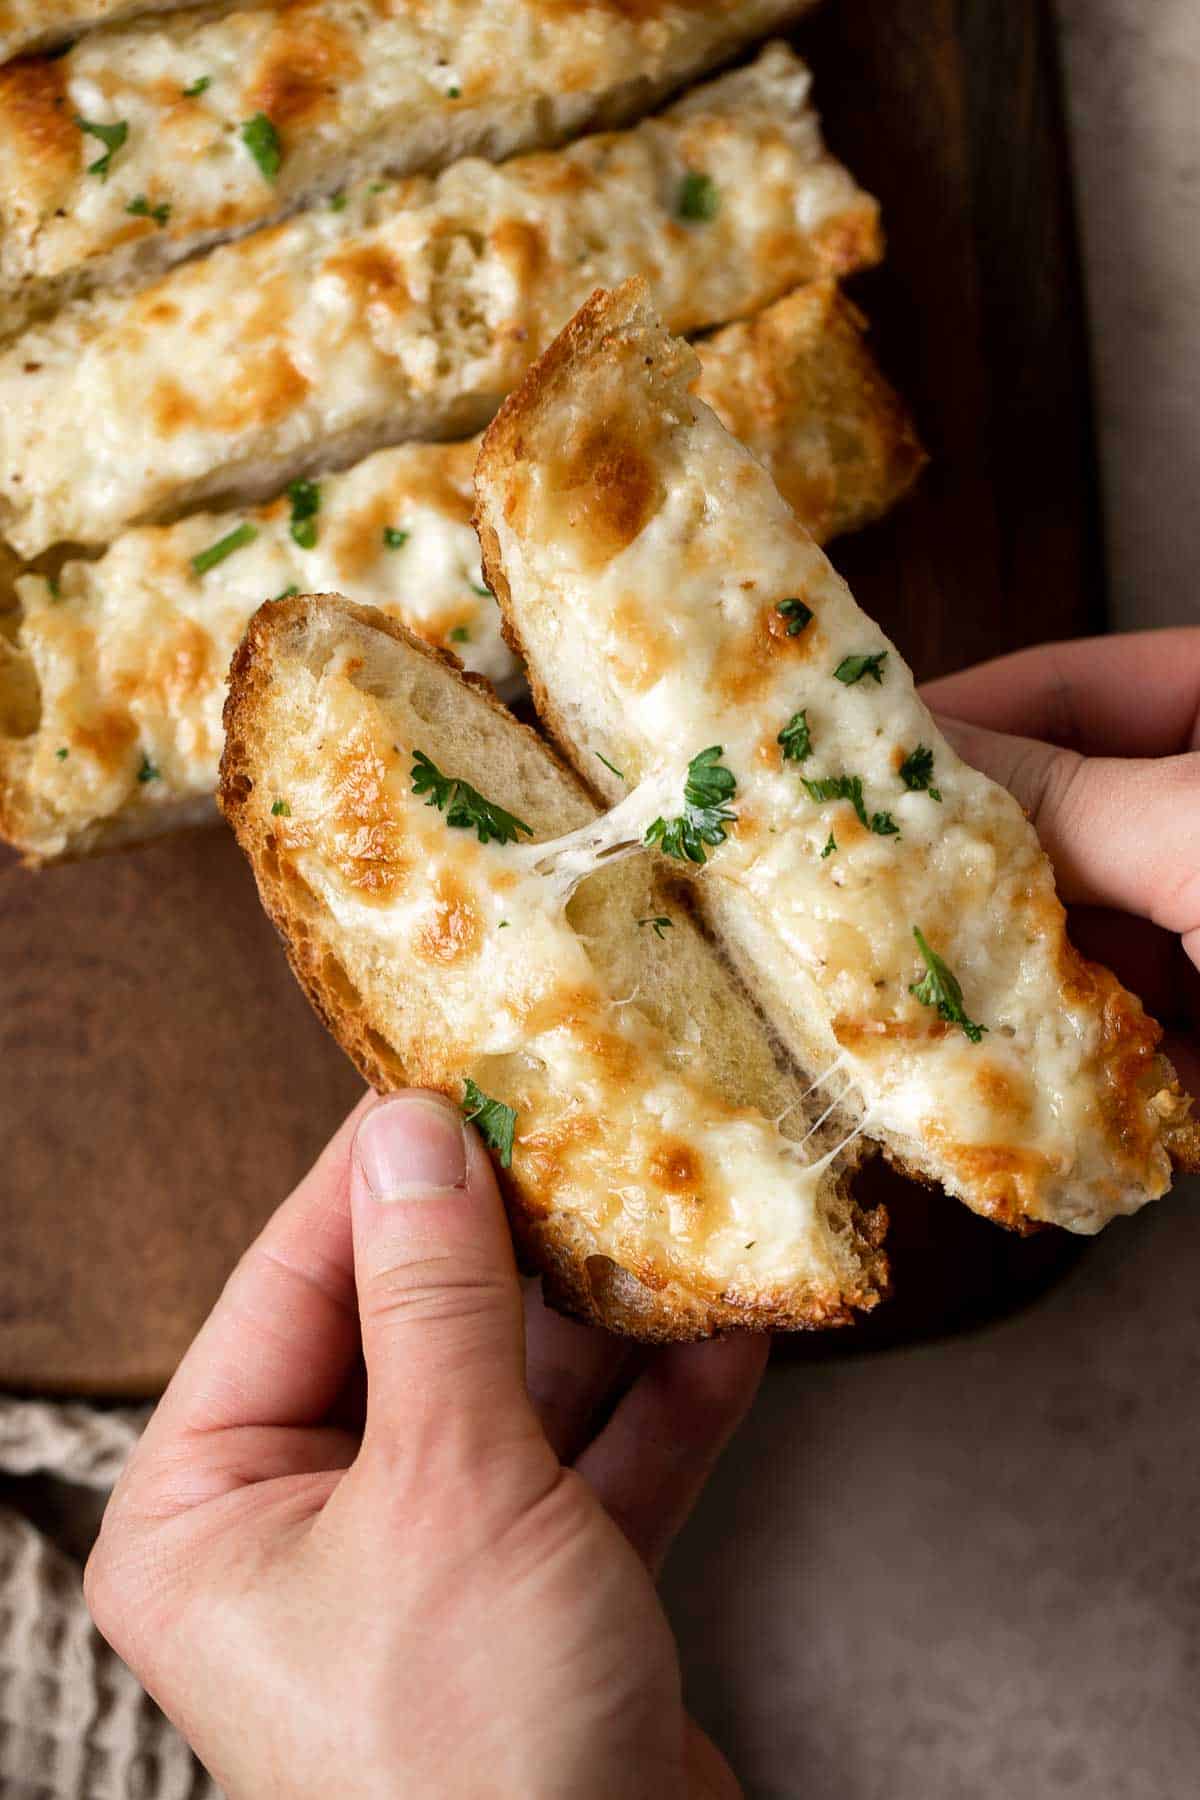
How to Make the Best Cheesy Garlic Bread
- Slice bread. Slice the French bread in half, lengthwise. Place the bread, cut side up, on a large half sheet baking pan lined with parchment paper or a silicone baking mat.
- Make garlic topping. In a small mixing bowl, add butter, olive oil, garlic, salt, and pepper and stir to combine until smooth. Spread the garlic mixture evenly over the halved bread.
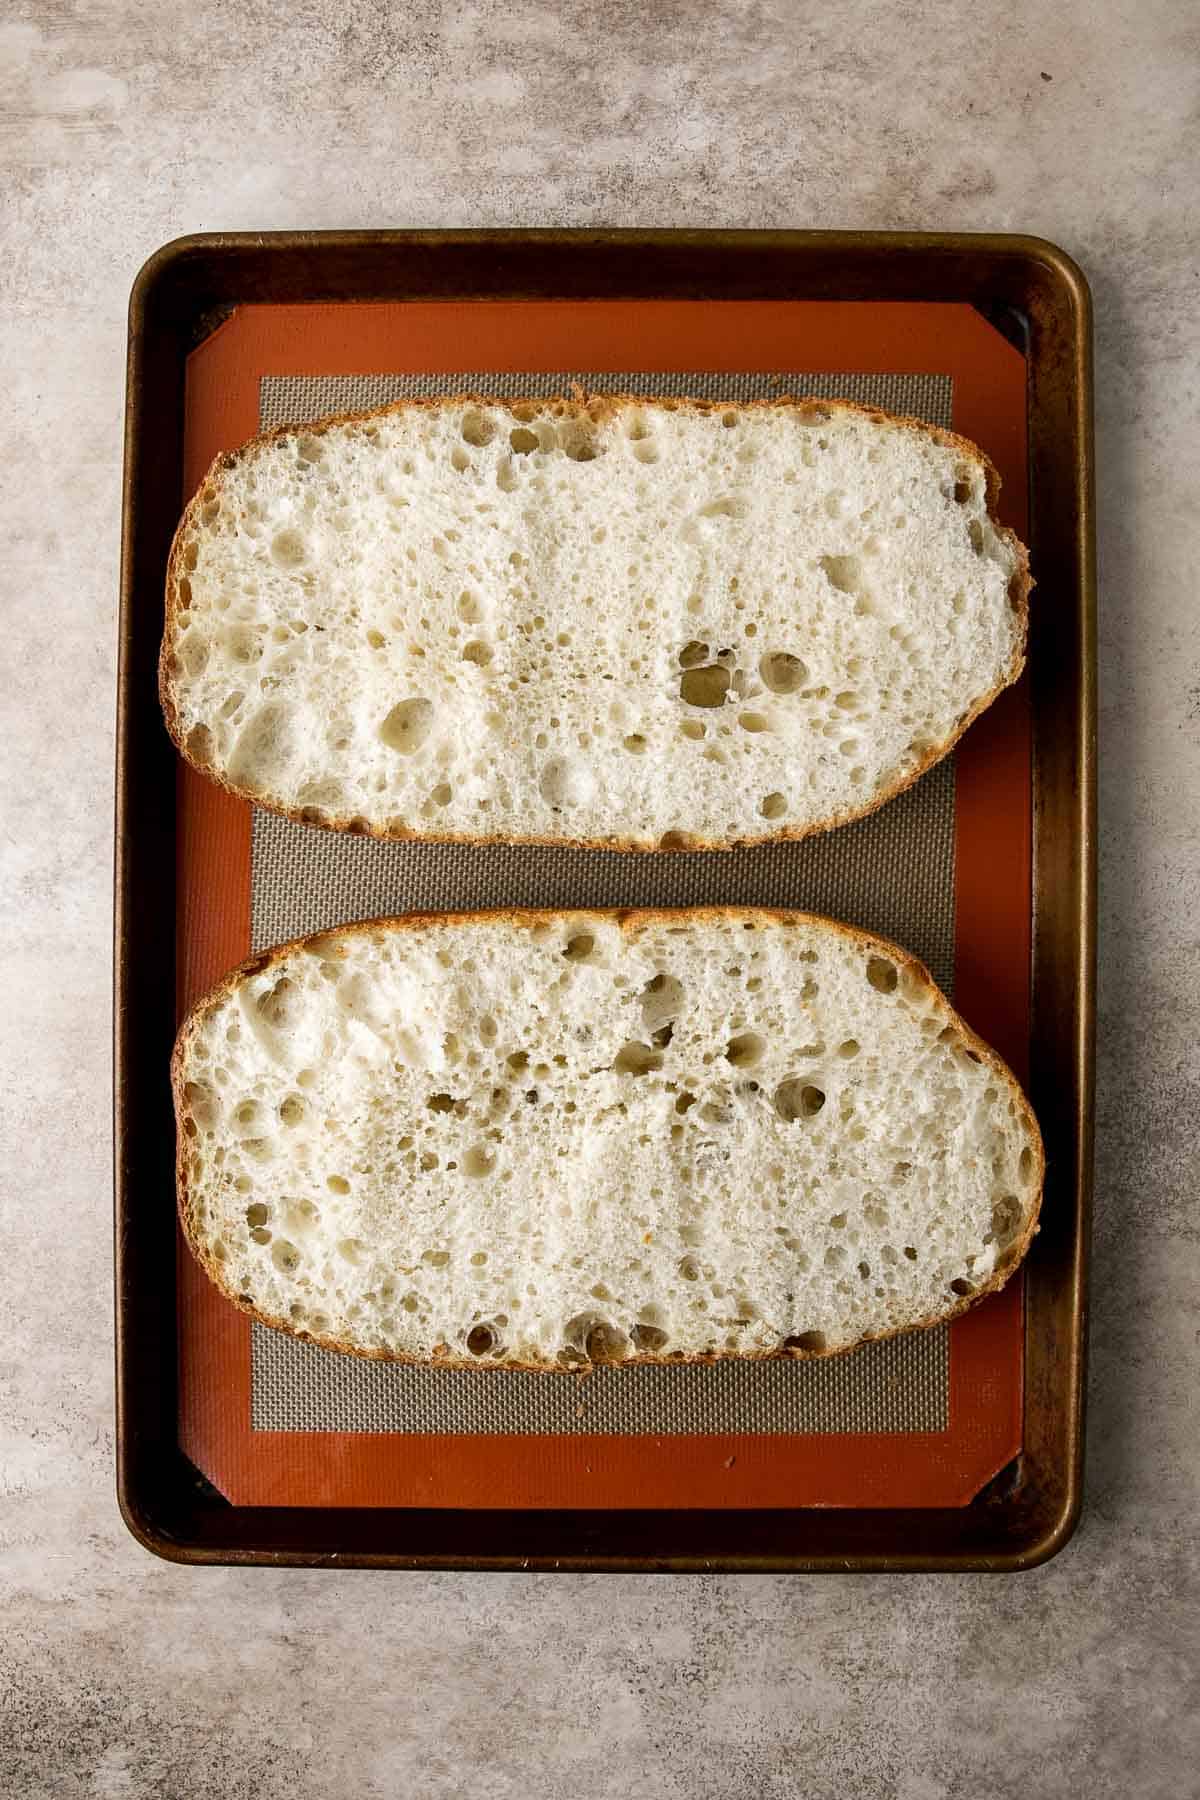
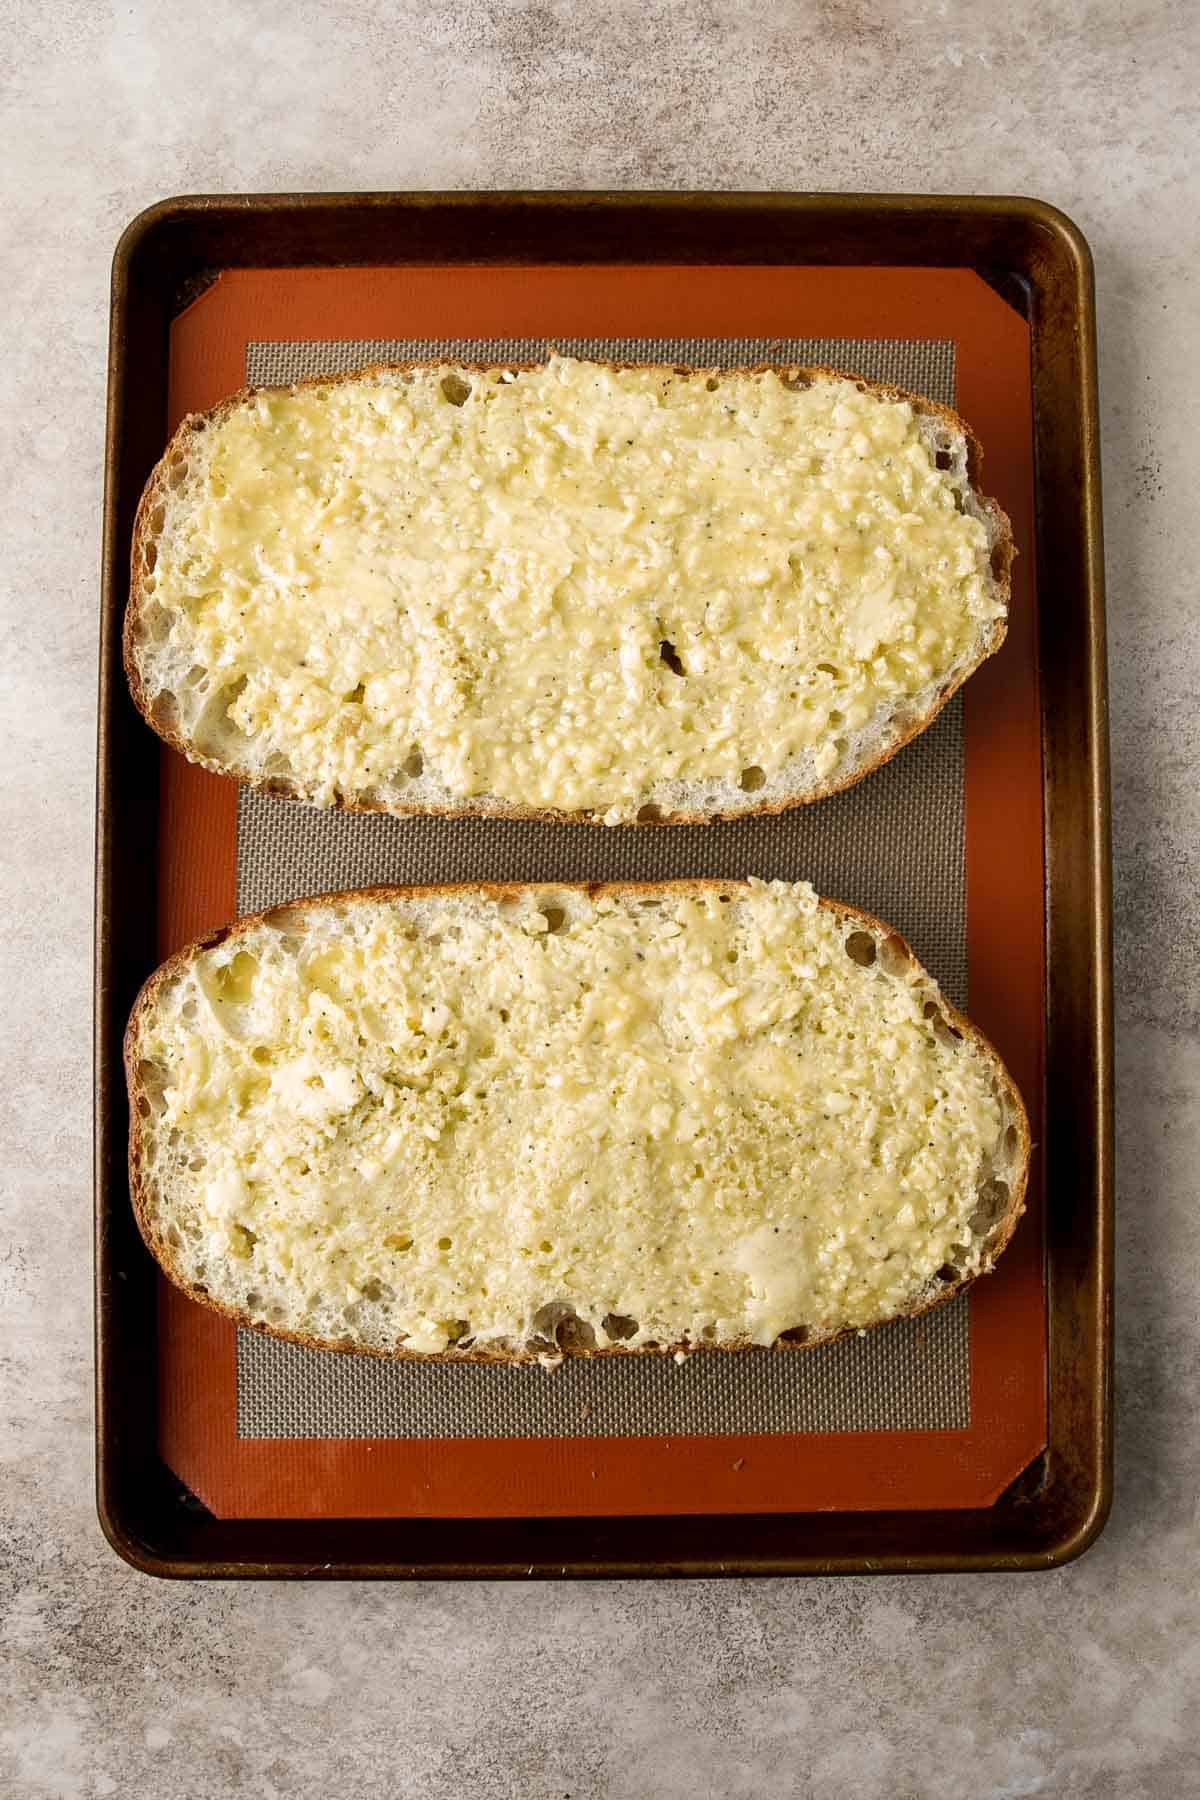
- Add cheese. Top with mozzarella cheese and parmesan cheese.
- Bake. Bake in a 375F preheated oven for 12-15 minutes or until the cheese is melted and bubbly.
- Broil. Turn on the broiler and broil on HI for another 1-2 minutes until the cheese becomes golden brown and the edges of the bread become crispy.
- Serve. Slice and serve.
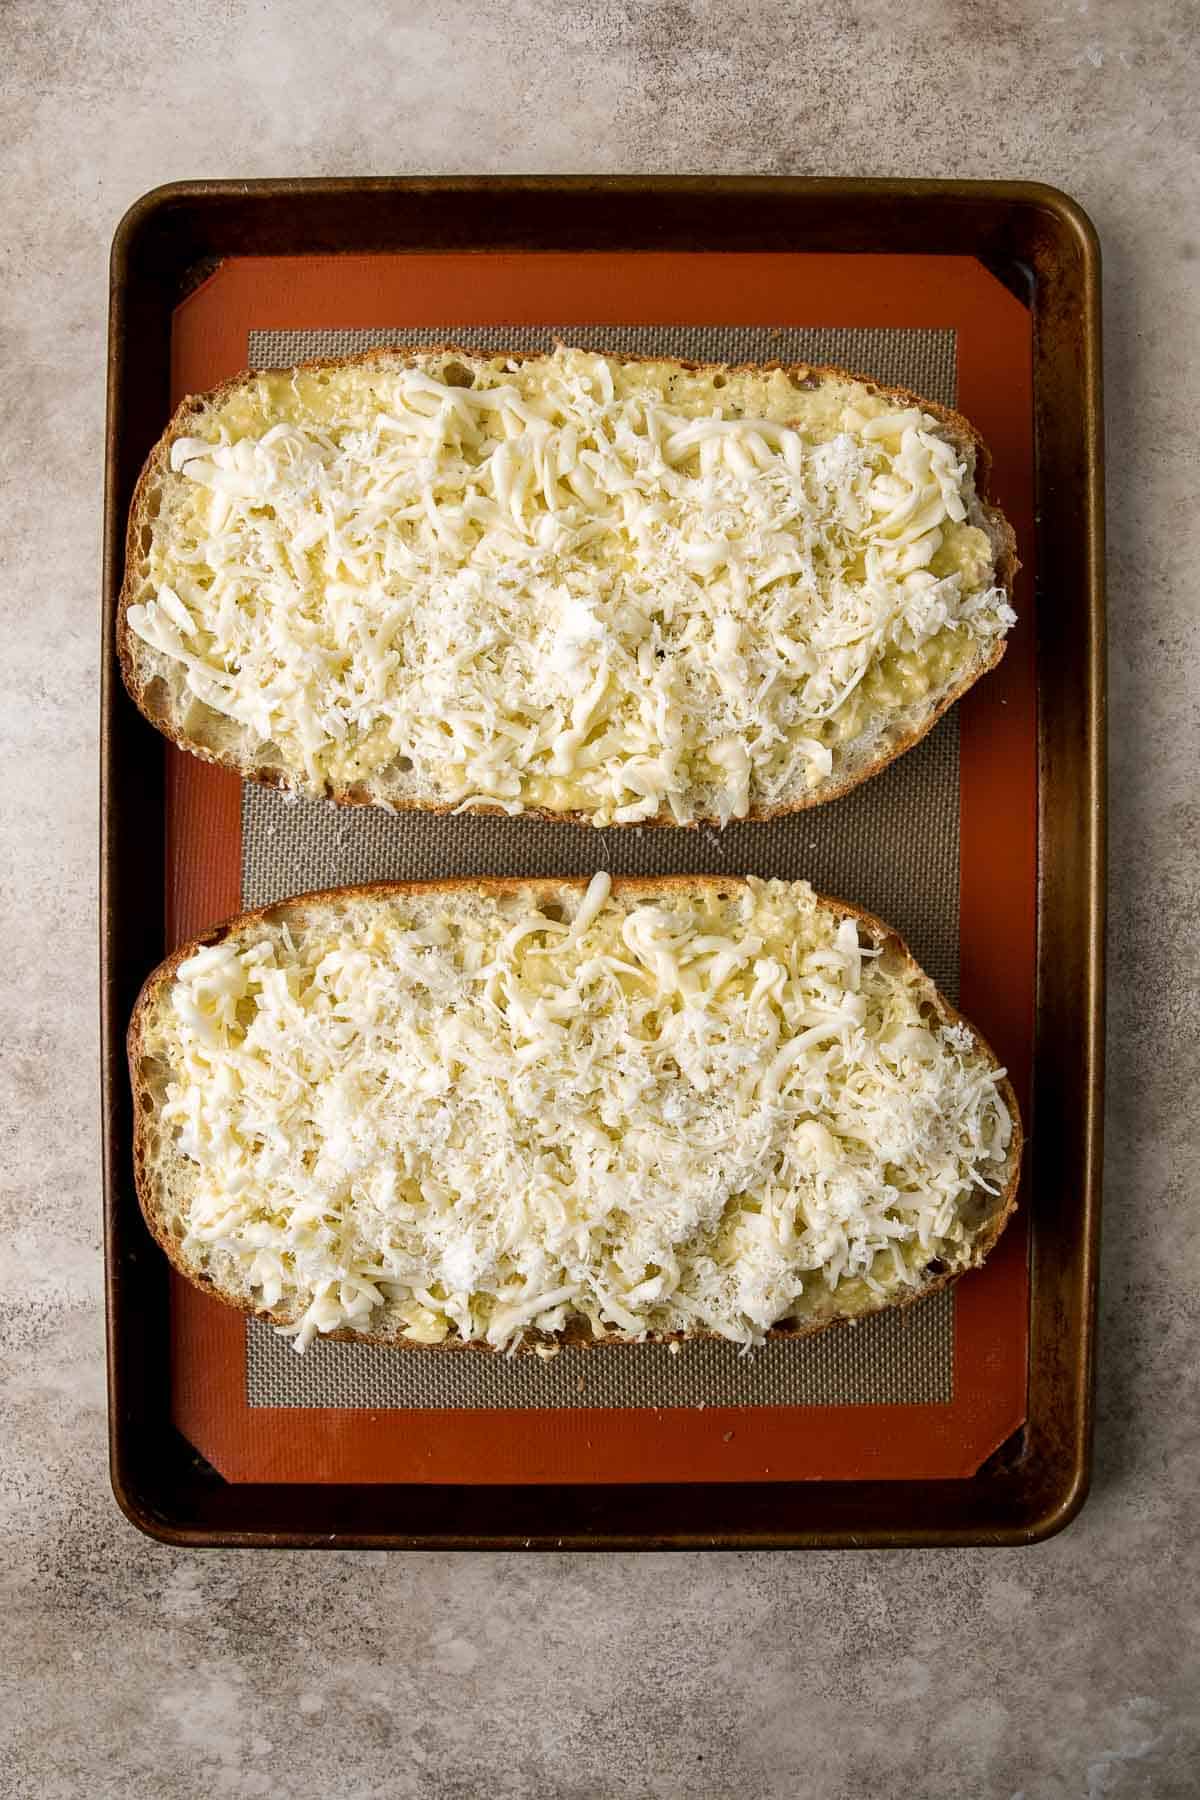
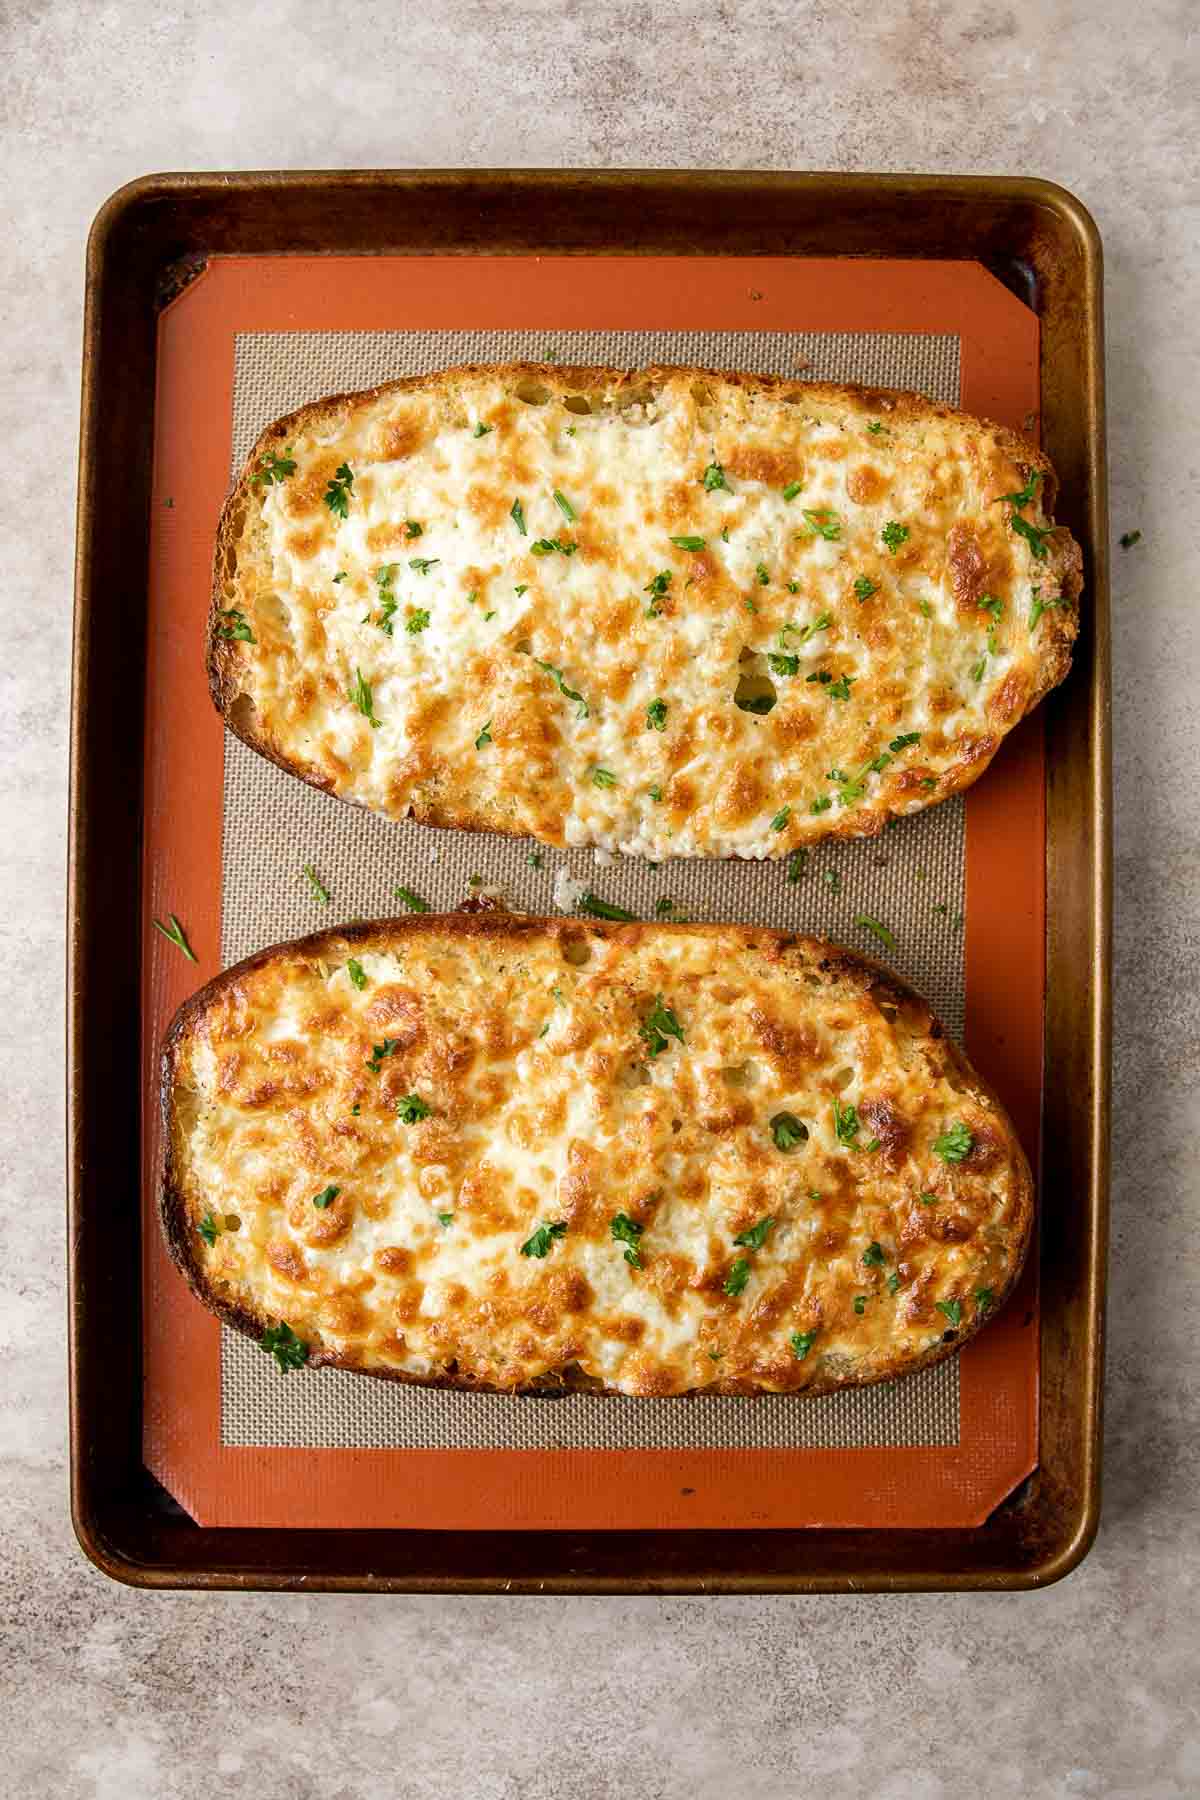
Recipe Variations
- Switch up the cheese. You can easily customize garlic bread by switching up the cheese that you use on top. Opt for a cheese that melts well such as provolone, cheddar, or gouda.
- Change the herbs. We topped our garlic bread with fresh parsley. You can change it with other fresh herbs such as oregano, thyme, or basil for a total flavor twist. You could even use dried herbs such as dried parsley, Italian seasoning or oregano.
How to Serve
We like serving Cheesy Garlic Bread on its own as a quick appetizer or snack or with a side of marinara for dipping. You can also serve it with an Italian-inspired dinner including chopped salads, hearty soups, and practically any kind of pasta!
Some of our favorite meals to serve garlic bread with are:
- Asparagus Chopped Salad
- Minestrone Soup
- Creamy Pesto Chicken Pasta
- Caesar Salad
- White Bean Soup with Kale
- Vegetarian Bolognese
Recipe Tips and Tricks
- Don't cut it all right away. Garlic bread will store better if it's uncut because it creates fewer edges to dry out. If you're not completely certain you'll go through the entire batch in one sitting, cut a few pieces at a time and store the remainder of the loaf (if you have any leftover).
- Make ahead and freeze. You may already know this, but garlic bread is incredibly freezer-friendly! Prepare the ingredients as instructed and then skip the oven and freeze the uncooked garlic bread on a sheet pan before wrapping tightly in plastic cling wrap and storing in the freezer for up to 3 months, for an even easier side that you can quickly grab and bake directly from frozen.
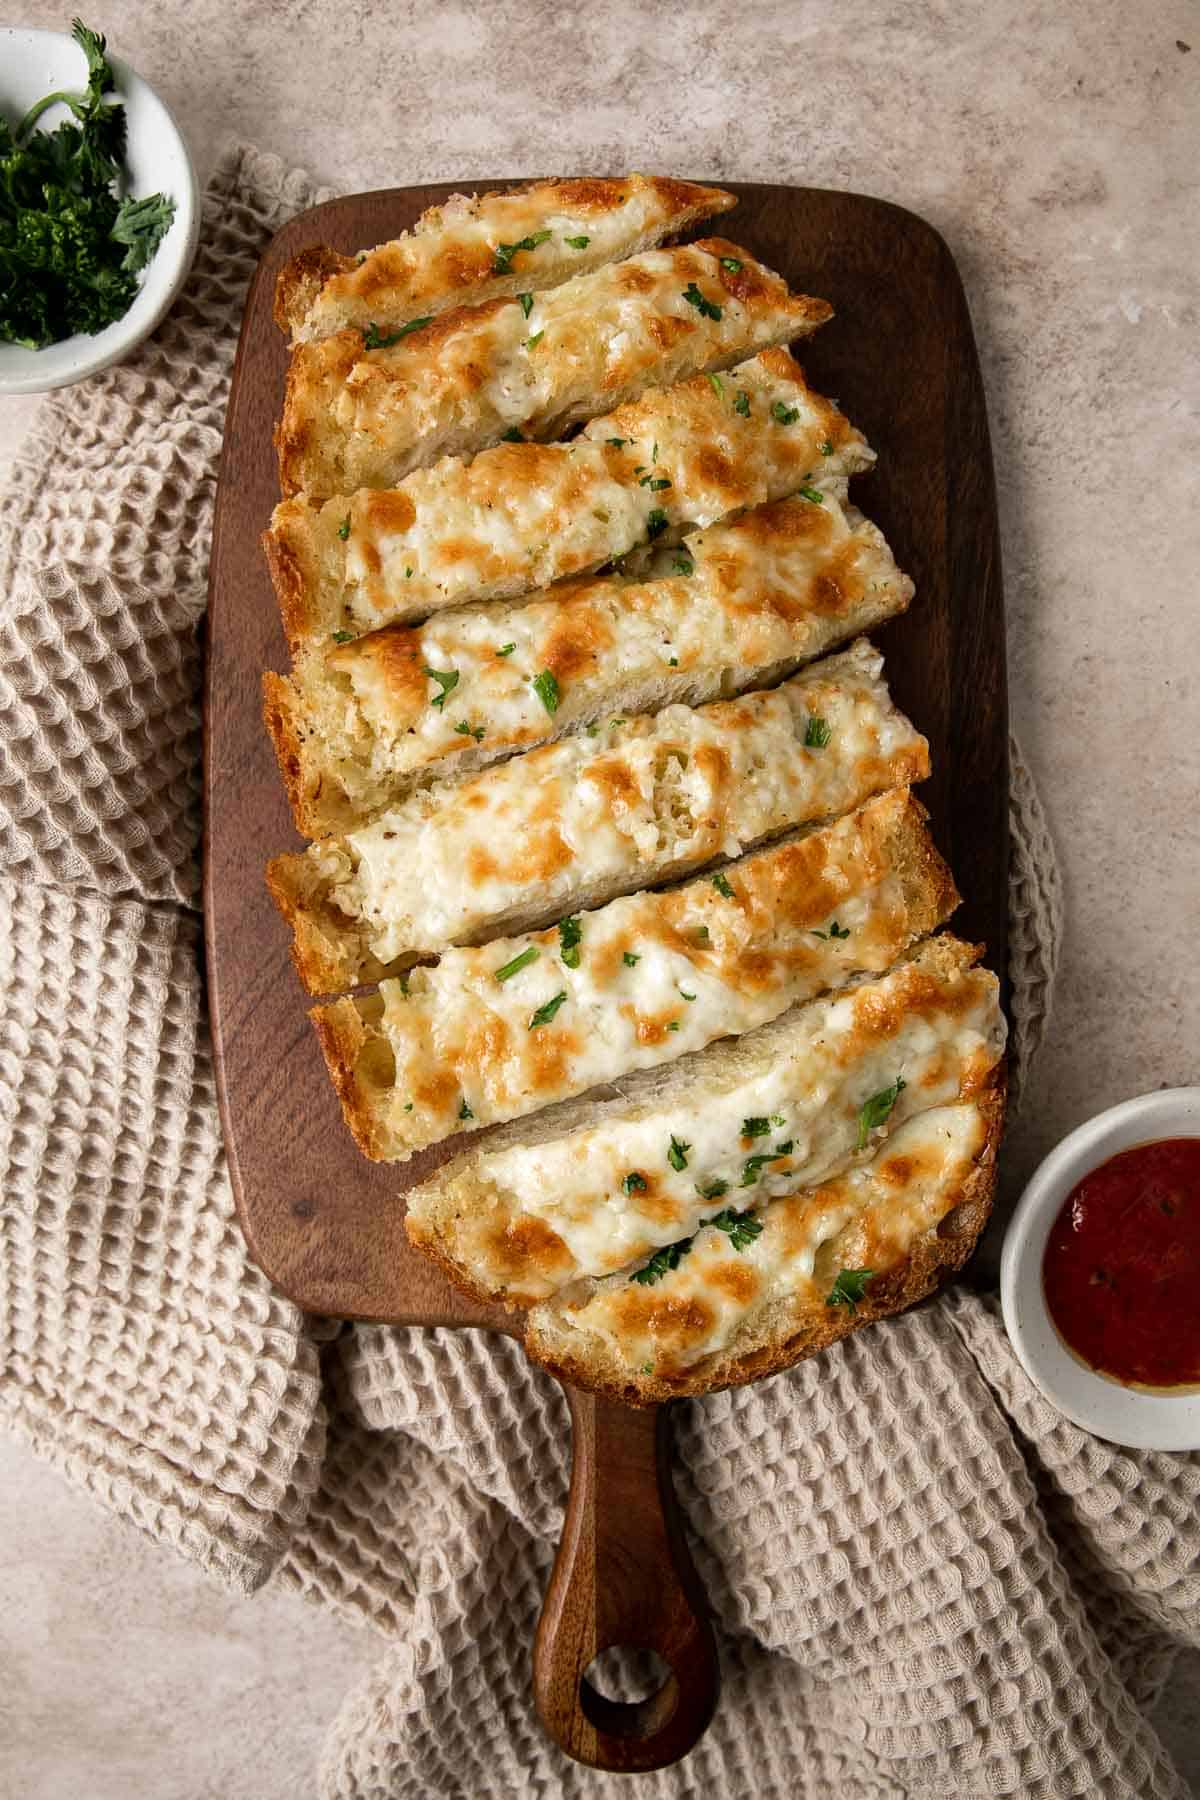
Storing and Freezing Instructions
How to Store
You can store leftover cheesy garlic bread in an airtight container on the counter for 2-3 days or refrigerate it for up to one week.
How to Reheat
Reheat garlic bread in a 300F preheated oven for 10-15 minutes until warm and cheesy is melty again.
How to Freeze
Wrap pieces of garlic bread individually in plastic cling wrap and then transfer to a freezer bag and freeze for up to 3 months. You can reheat it without thawing in the oven or air fryer. Just add a few minutes to the reheating time.
More Cheesy Appetizer Recipes
- 75+ Easy Appetizer Recipes
- Cheesy Garlic Dinner Rolls
- Baked Ricotta
- Fried Goat Cheese Balls
- Baked Mozzarella Sticks
- Jalapeño Poppers
Tried this recipe?
I'd love to hear what you think! Leave a comment and rating below to share your feedback. Your reviews help others discover this recipe and help me keep creating more free recipes for you. Snap a photo and tag me on social media @aheadofthyme too.

25+ Easy Air Fryer Recipes
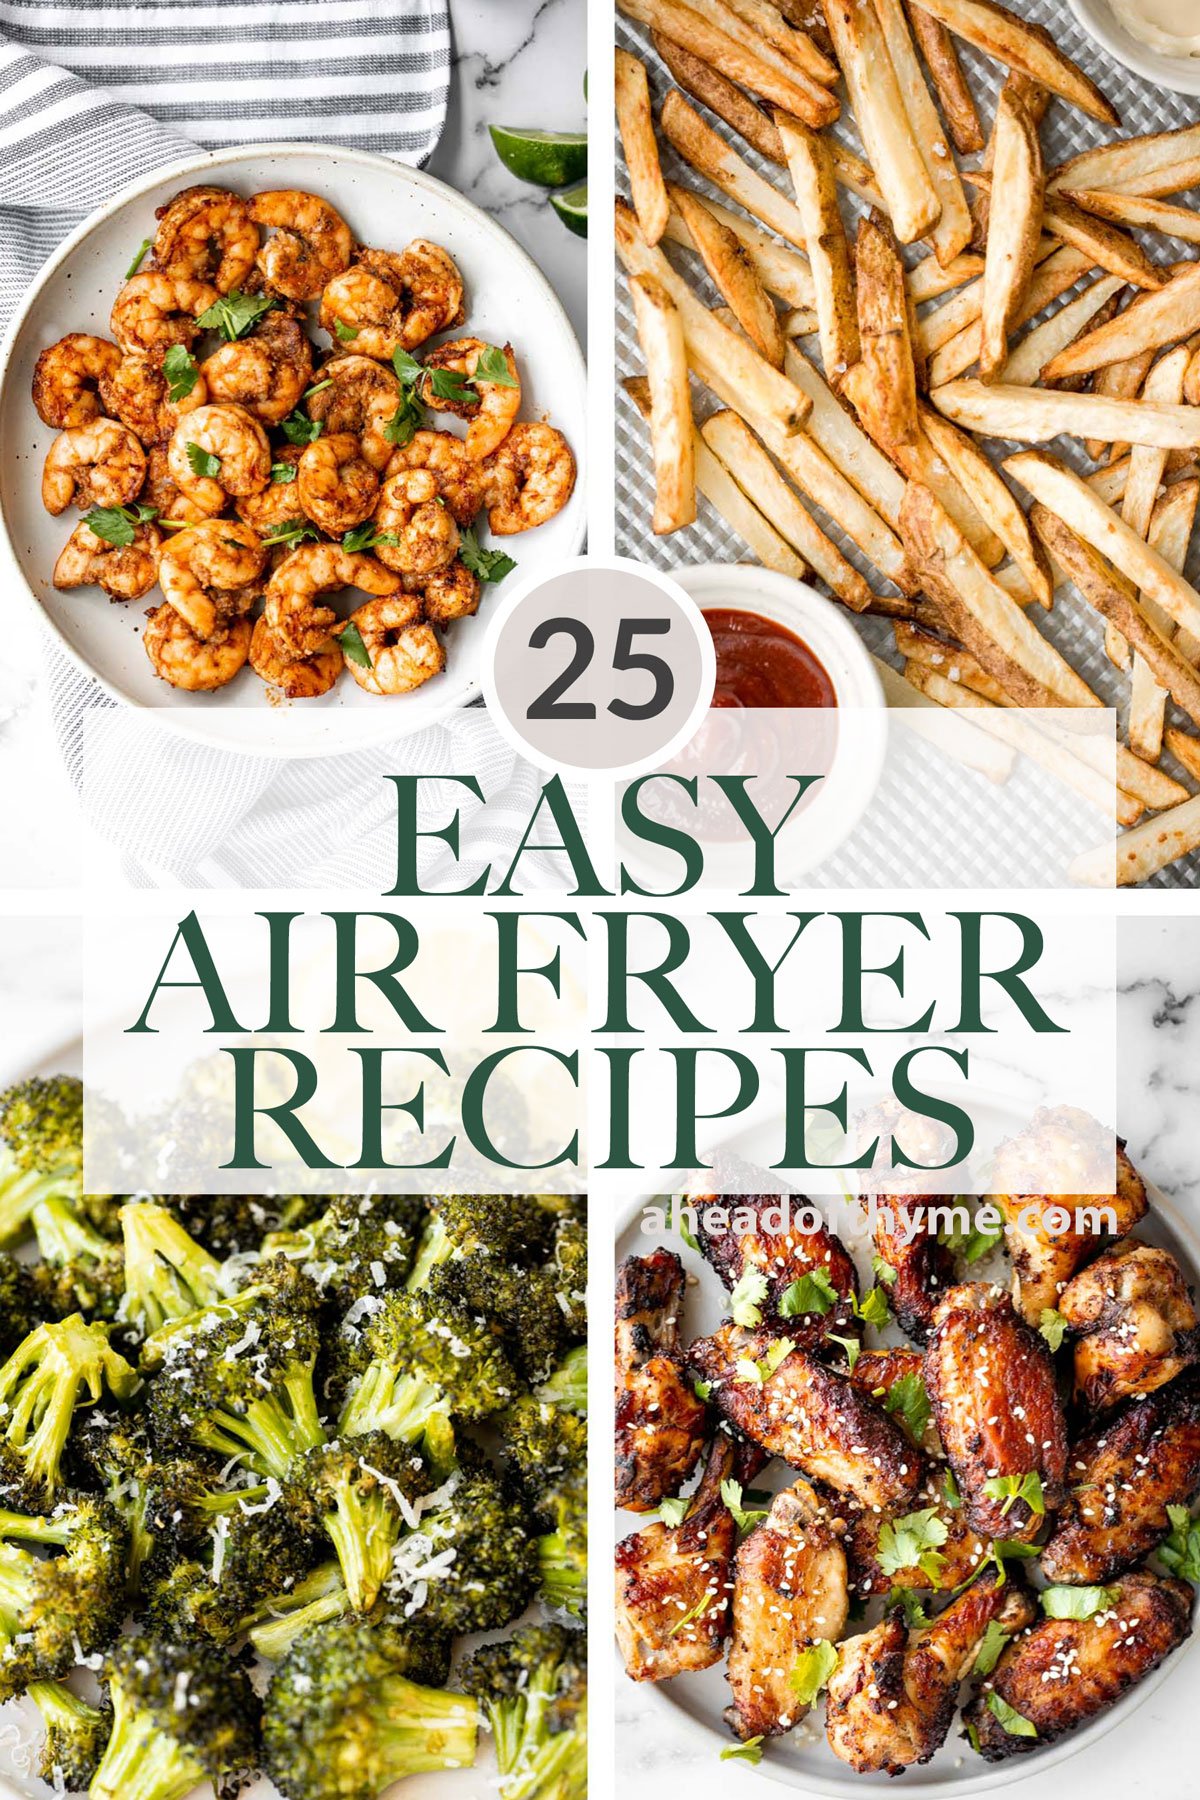
Wondering what to make for dinner in your air fryer? Whether you just purchased your first air fryer and can't wait to try air fryer recipes, or have had your air fryer for years but are looking for something different to cook with it, then you have come to the right place. We have rounded up over 25 of the best easy air fryer recipes including roasted vegetables in the air fryer, air fried meat like chicken, beef, and lamb, all the air fryer seafood including salmon and shrimp, and air fryer snacks (hello apple chips!). Plus, most of these recipes are quick and easy with minimal prep - perfect for busy weeknights.
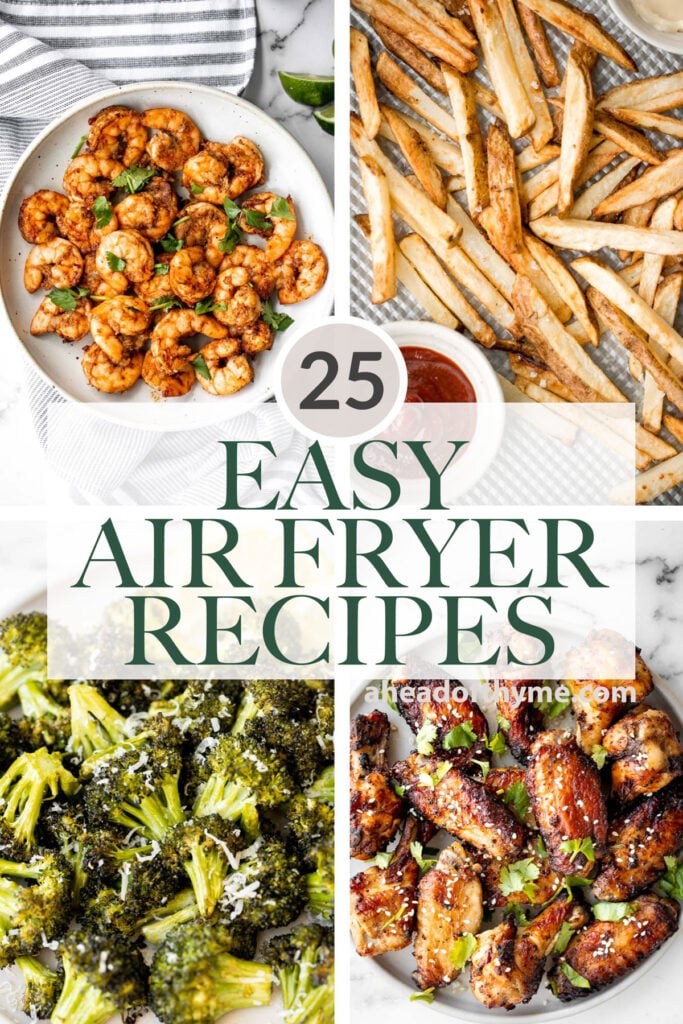
Our Best Air Fryer Recipes
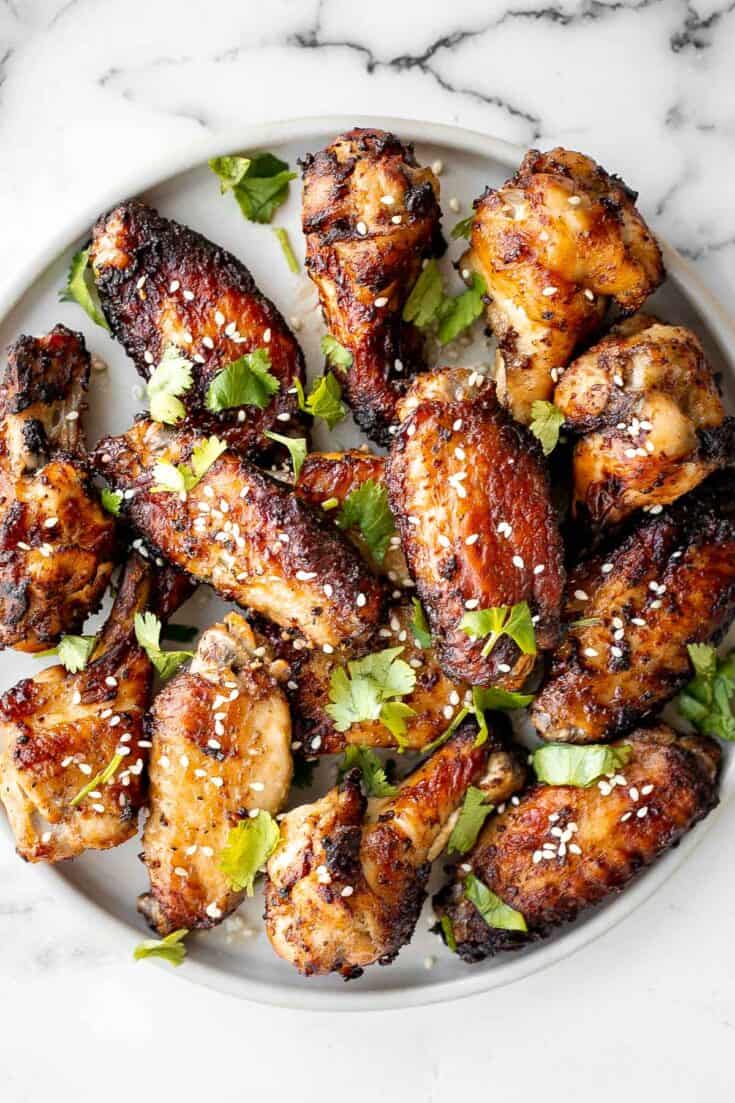
Miso Garlic Chicken Wings
Baked miso garlic chicken wings are crispy, delicious, and easy to make. They're marinated in a savoury Asian marinade, and cooked in the oven or air fryer.

Crispy Air Fryer French Fries
Super crispy air fryer french fries are tender and fluffy on the inside and crunchy on the outside. Make this healthier french fry in just 12 minutes!
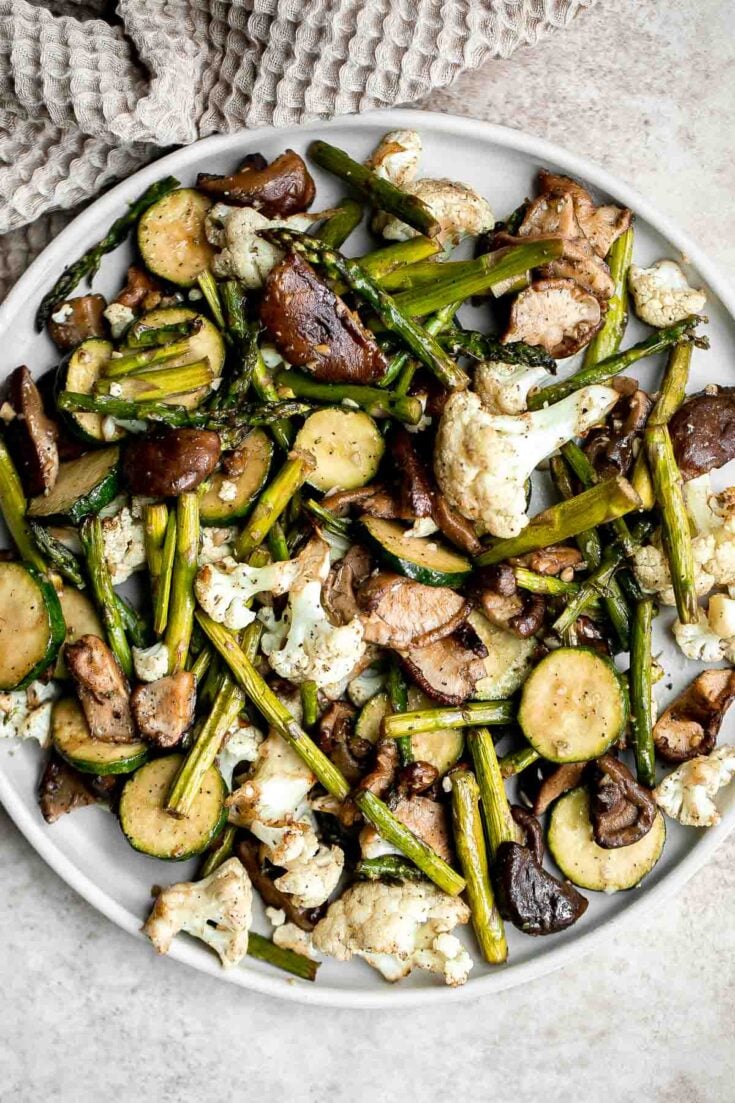
Air Fryer Vegetables
Air fryer vegetables are healthy, flavorful, and delicious. This vegan side dish is quick and easy to make in the air fryer in under 15 minutes.
Sticky Honey Garlic Meatballs
Sticky honey garlic meatballs are a delicious and flavourful 30-minute meal to add to your weekly dinner rotation. A total crowd pleaser. Air fryer instructions in recipe tips.
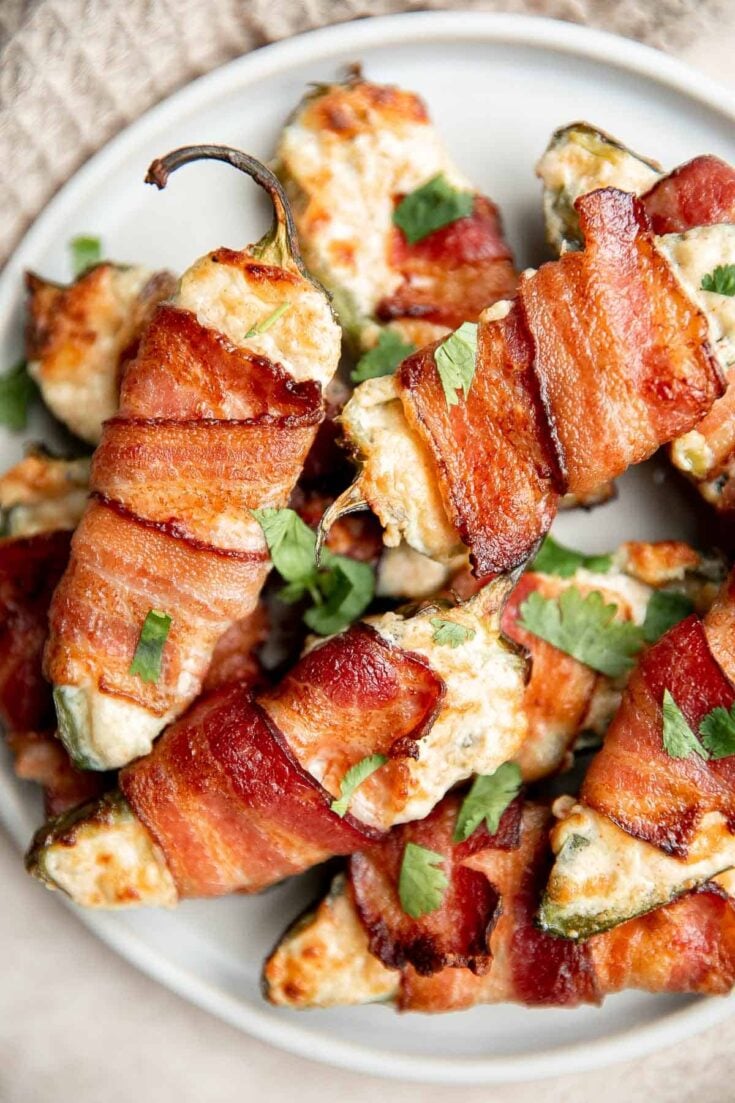
Bacon Wrapped Jalapeño Poppers (Air Fryer)
Bacon wrapped jalapeño poppers are crispy on the outside, creamy and cheesy inside, spicy, and wrapped in bacon. Easy to make in the air fryer or oven.
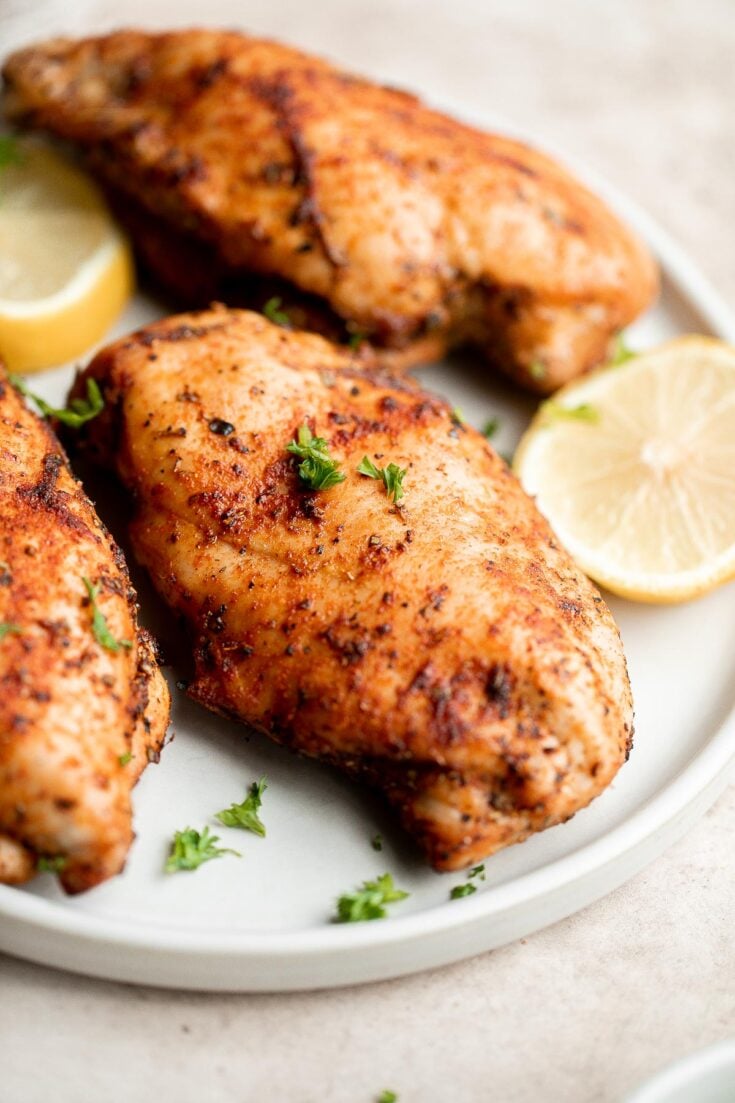
Air Fryer Chicken Breast
Air fryer chicken breast is crispy on the outside, juicy and tender inside, and packed with flavor in every bite. Quick and easy dinner on busy weeknights.
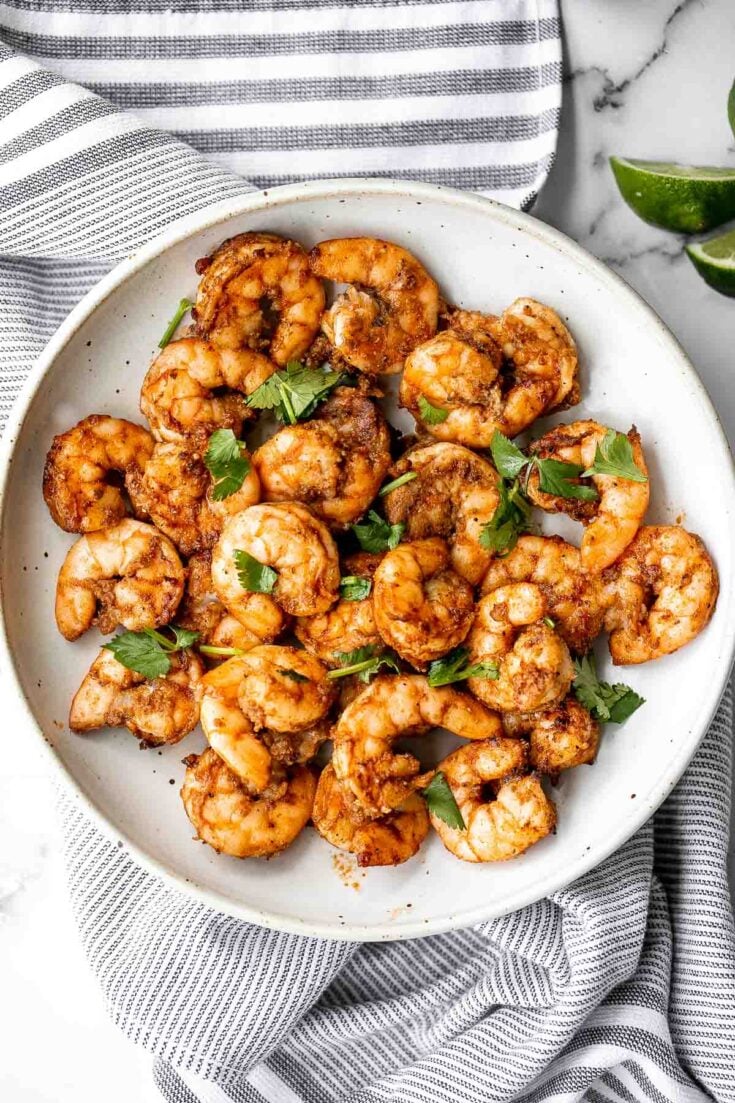
Air Fryer Mexican Shrimp
Air fryer Mexican shrimp is juicy, tender, fresh, and delicious. It's packed with classic Mexican flavors and ready in just 10 minutes. So quick and easy.
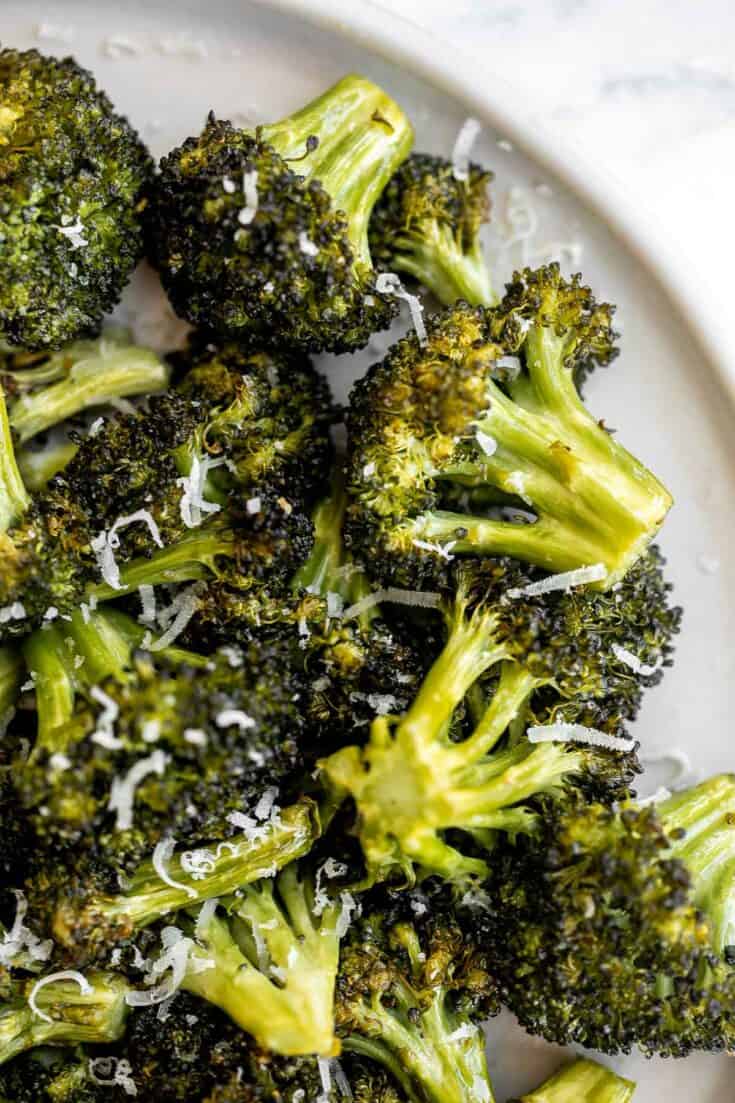
Air Fryer Broccoli
Quick and easy air fryer broccoli is a healthy side dish that takes just six minutes to cook in the air fryer. It's crispy, delicious, and flavorful.

Greek Salmon
Greek salmon is delicious, flaky, and tender. This healthy oven-baked salmon is packed with Mediterranean flavors and is ready in just 20 minutes. Air fryer instructions included in recipe tips.

Air Fryer Chicken Tenders
Air fryer chicken tenders are juicy and moist inside while crispy and golden brown outside. A healthy, delicious, and quick kid-friendly recipe.
Air Fryer Vegetables and Side Dishes
Roasted Garlic Green Beans (Air Fryer or Oven)
Quick easy roasted garlic green beans are tangy, sour, savoury, and sweet, with a tender and crunchy texture. Make them in the oven or air fryer in minutes.

Crispy and tender, easy air fryer baby potatoes are a healthier take on a classic side dish without compromising taste or texture. Cooks in just 20 minutes.
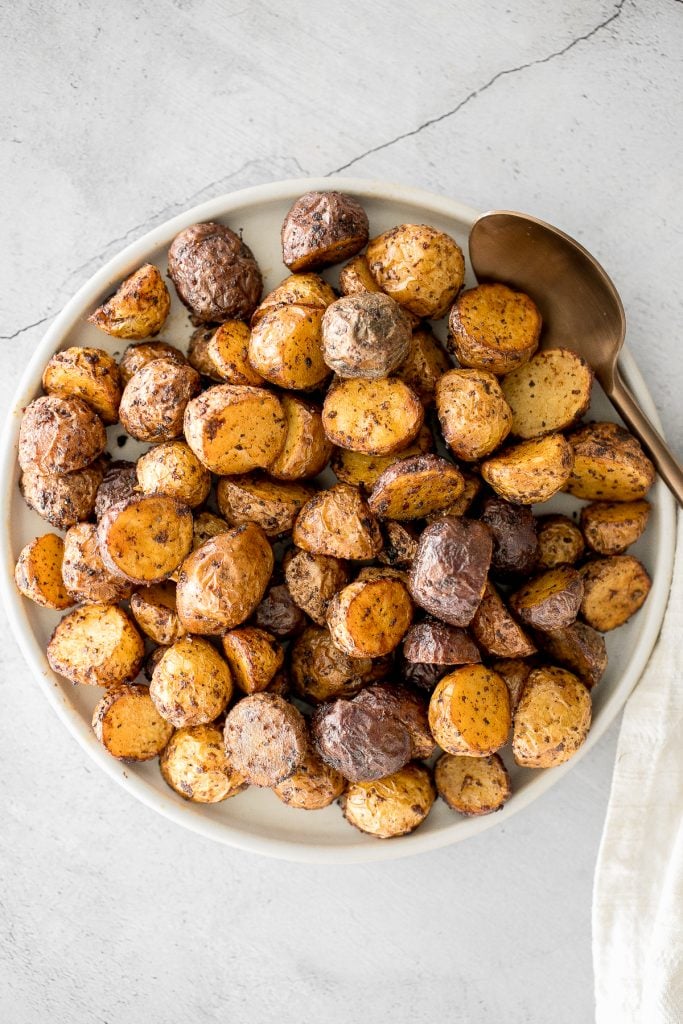
Crispy Roasted Air Fryer Brussels Sprouts
Tender and crispy roasted air fryer brussels sprouts cooks in less than 12 minutes with very little oil. It is a holiday table game changer.
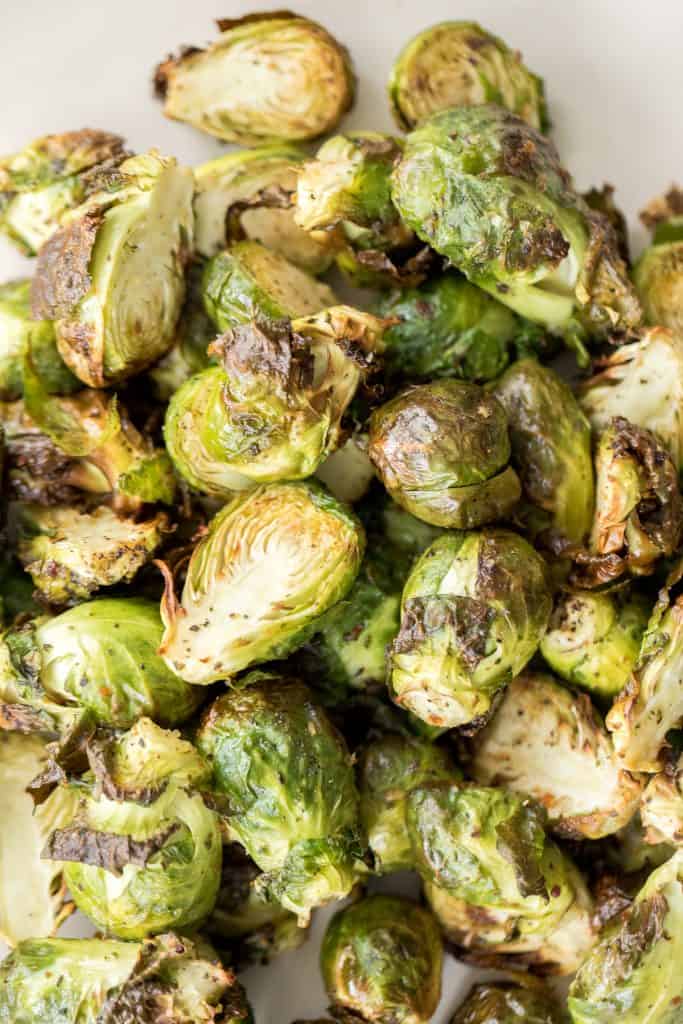
Air fryer cauliflower bites have a crispy breaded coating outside, yet tender and light inside. They are bite-sized, flavorful, easy to make, and healthy.
Air Fryer Vegetable "Stir Fry"
Simple air fryer vegetable "stir-fry" with tofu is the ultimate easy dinner ready in less than 10 minutes. It's healthy, vegan and gluten-free.
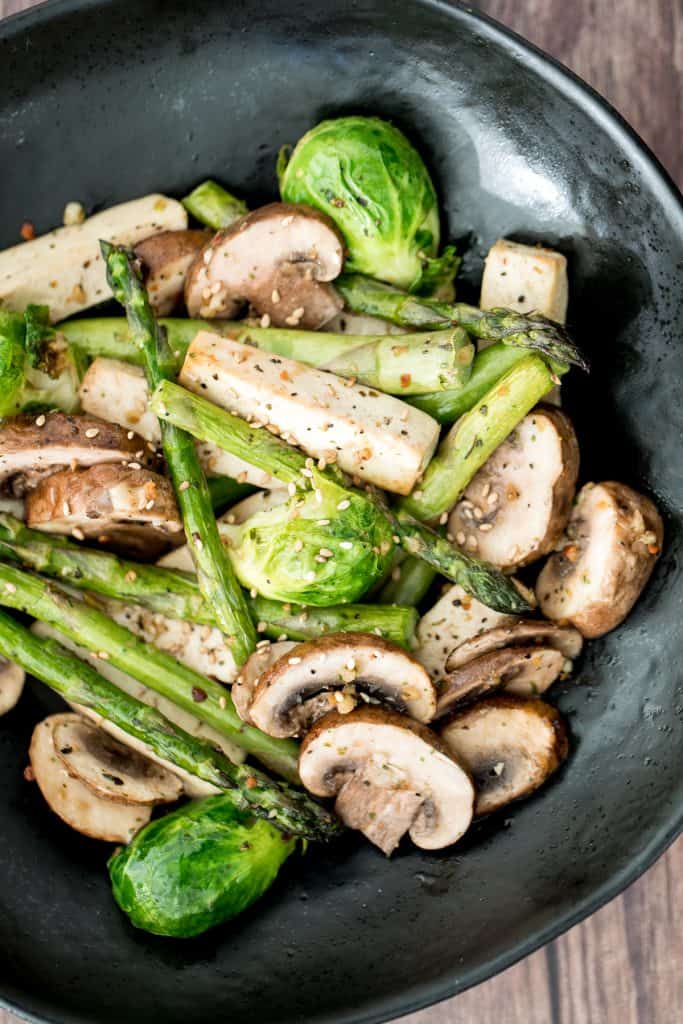
Crisp on the outside and tender inside, air fryer asparagus cooks in just 6 minutes! It is tossed in very little olive oil with garlic and seasonings.

Air fryer butternut squash is a healthy side dish that is crispy on the outside and soft inside. It's faster than roasting in the oven and needs less oil.
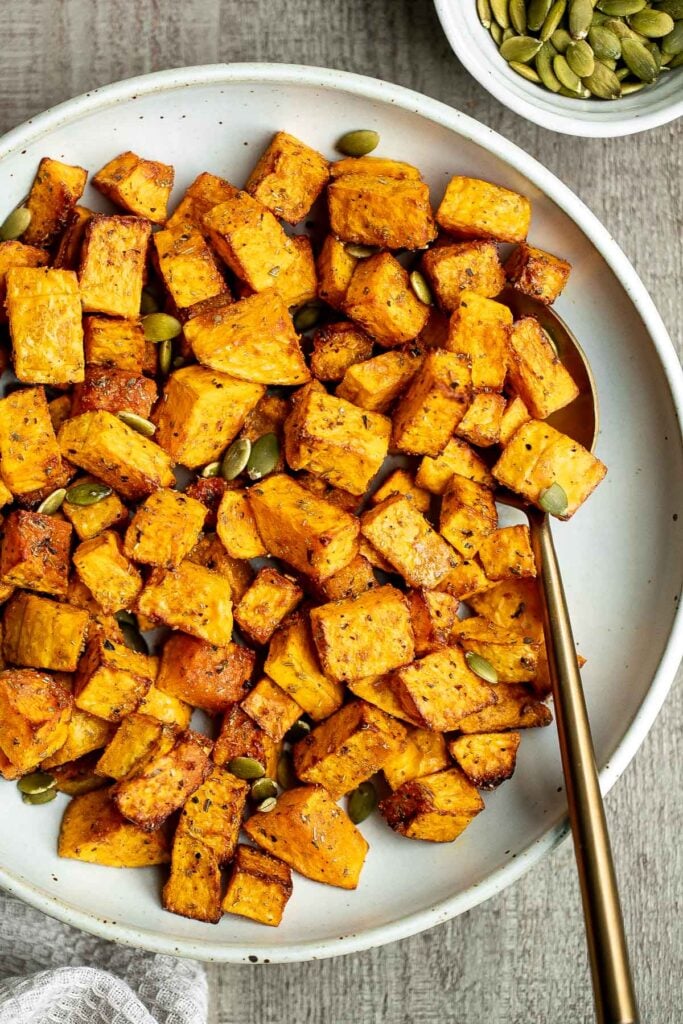
Homemade falafel are delicious, golden brown and crispy on the outside, fluffy tender and soft inside. Plus, they're vegan, loaded with plant-based protein. Air fryer instructions in recipe

Air Fryer Chicken and Turkey
The Best Breaded Fried Chicken Wings (Air Fryer)
The BEST breaded fried chicken wings -- extra crispy and crunchy outside, tender and juicy inside. You can't even tell they're air fried, not deep-fried!
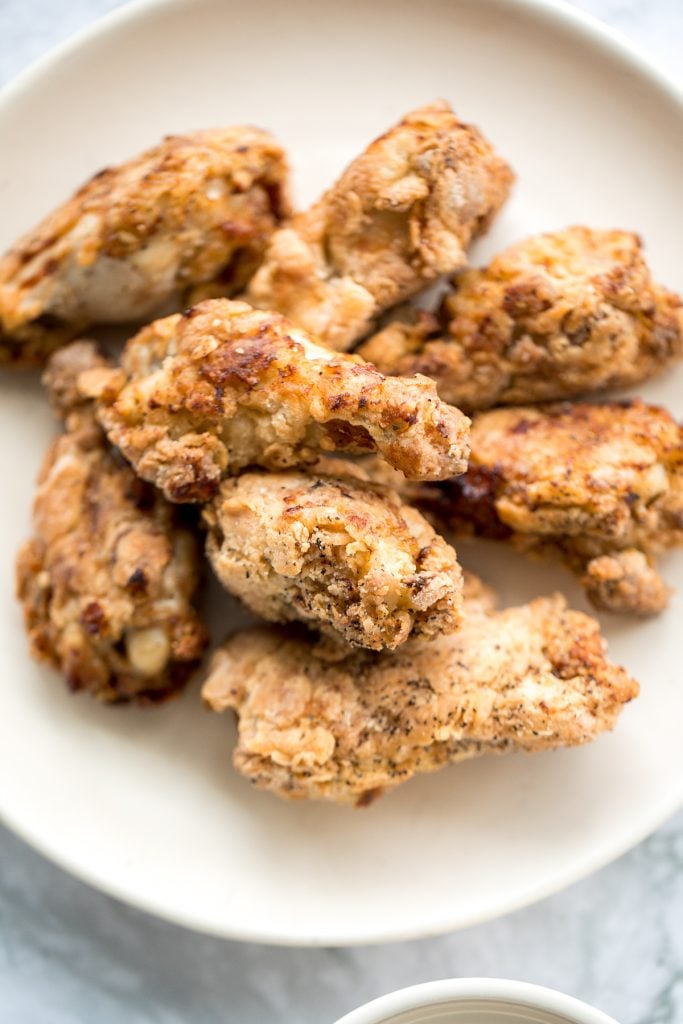
Air fryer chicken thighs are the crispiest, tastiest, and juiciest chicken you'll eat. They take just 25 minutes to cook - perfect for busy weeknights.
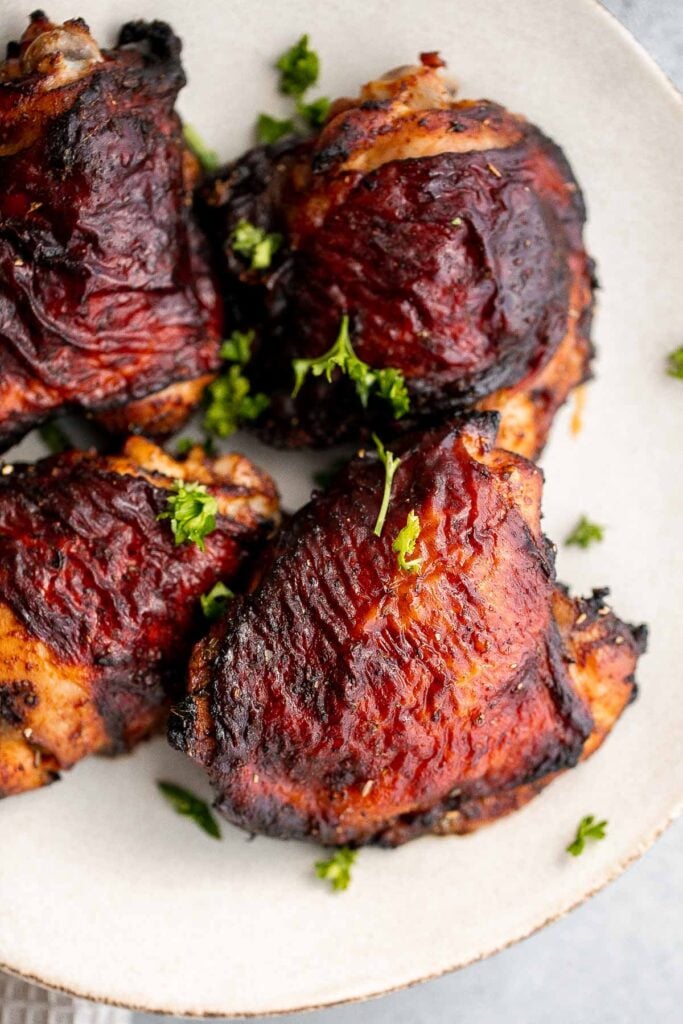
Sticky crispy baked sweet chili chicken bites is better than takeout and so easy to make healthier at home. An easy dinner or game day appy. Air fryer instructions in recipe tips.

Homemade chicken shawarma (donair) with juicy tender chicken marinated in Middle Eastern spices and wrapped in pita bread is easy to make at home. Serve with garlic yogurt sauce or tahini sauce.
Mexican chicken breast is juicy, tender, and flavorful. It's easy to prep with a quick marinade before cooking on the stove, air fryer, or oven.
Delicious, moist and juicy Mediterranean chicken patties have everything you want in one bite: protein, veggies, herbs, and they're quick and easy to make. Serve it on it's own, with hamburger buns, or a side of Basmati rice. Air fryer instructions in recipe tips.
Sweet chili turkey meatballs are delicious, tender and juicy, loaded with classic Thai flavors, and quick and easy to make. Savory, sweet, and tangy. Air fryer instructions in recipe tips.
Air Fryer Beef and Meat
Juicy, tender, and delicious 18-minute air fryer lamb chops is marinated in a dijon sauce and will change the way you cook lamb forever.
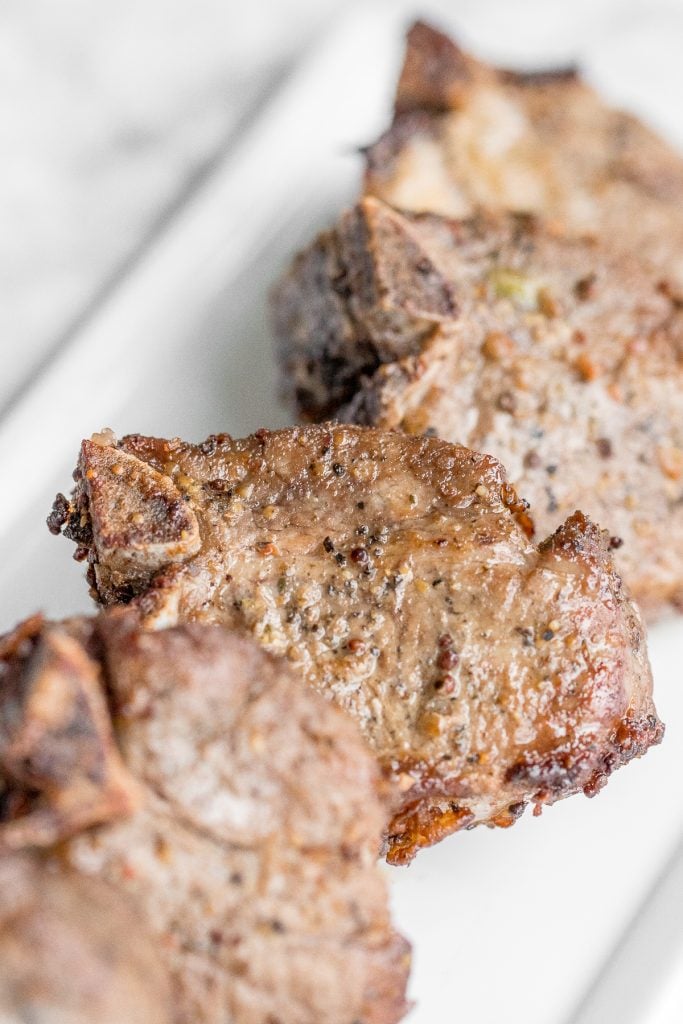
Bacon Wrapped Brussels Sprouts
Bacon wrapped brussels sprouts are the sweet, savory, and salty appetizer that you need at your next holiday gathering this fall. Simple and easy to make. Air fryer instructions in recipe tips.
Delicious, comforting homemade Swedish meatballs are seared and smothered in a creamy gravy sauce and taste so much better than IKEA meatballs. Air fryer instructions in recipe tips.
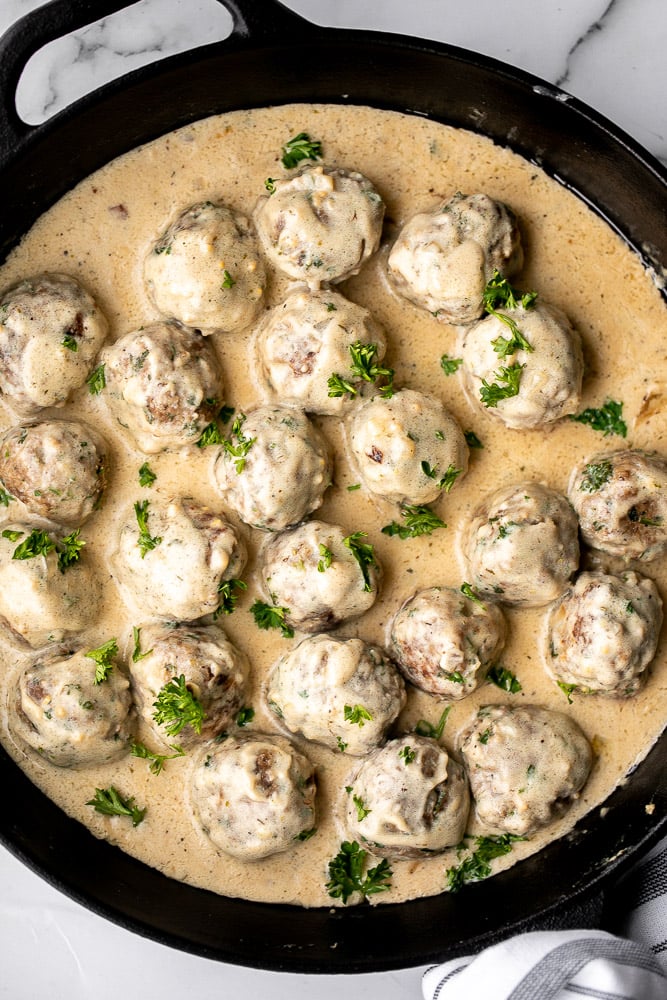
Homemade Tater Tots with Bacon
Homemade tater tots with bacon are golden and crispy on the outside, yet soft and tender inside. They're packed with flavour and a total family favourite.
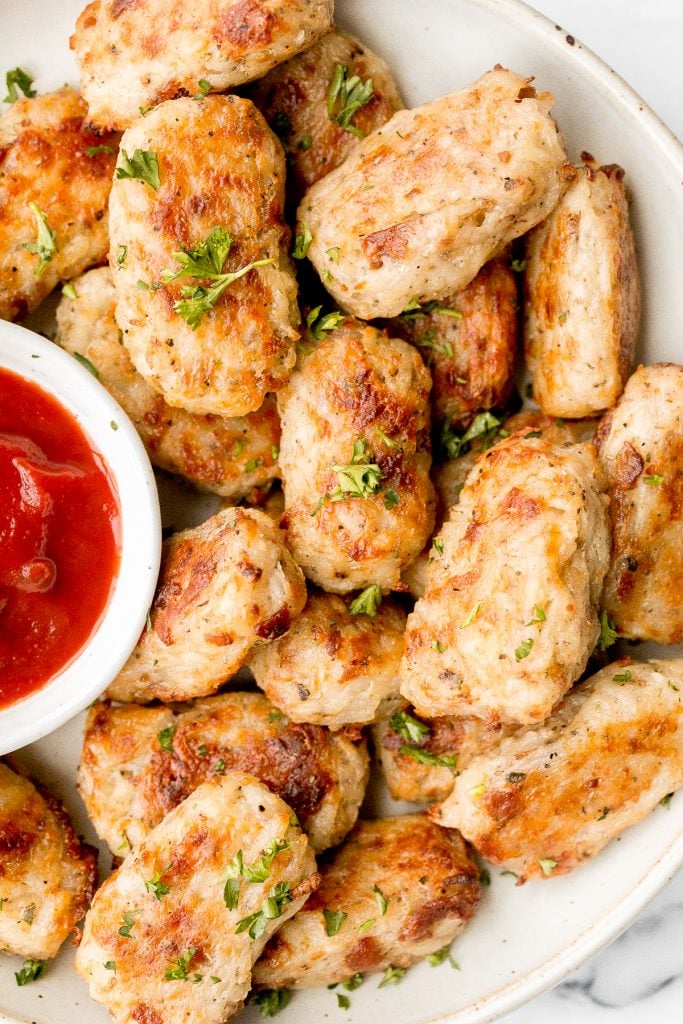
Air fryer short ribs are crispy, flavorful, and delicious. The easy marinade ensures they're tender and juicy inside, while the air fryer makes them crispy.
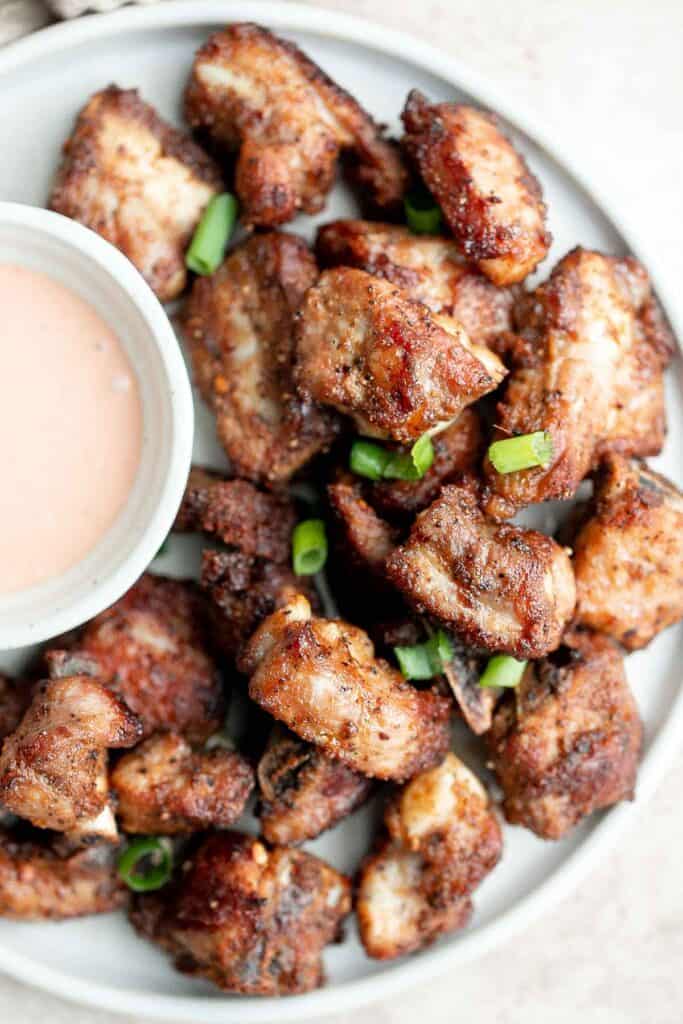
Korean beef steak rice bowl is loaded with tender and juicy strips of beef, marinated vegetable sides (banchan), and kimchi. Make it in under 30 minutes!
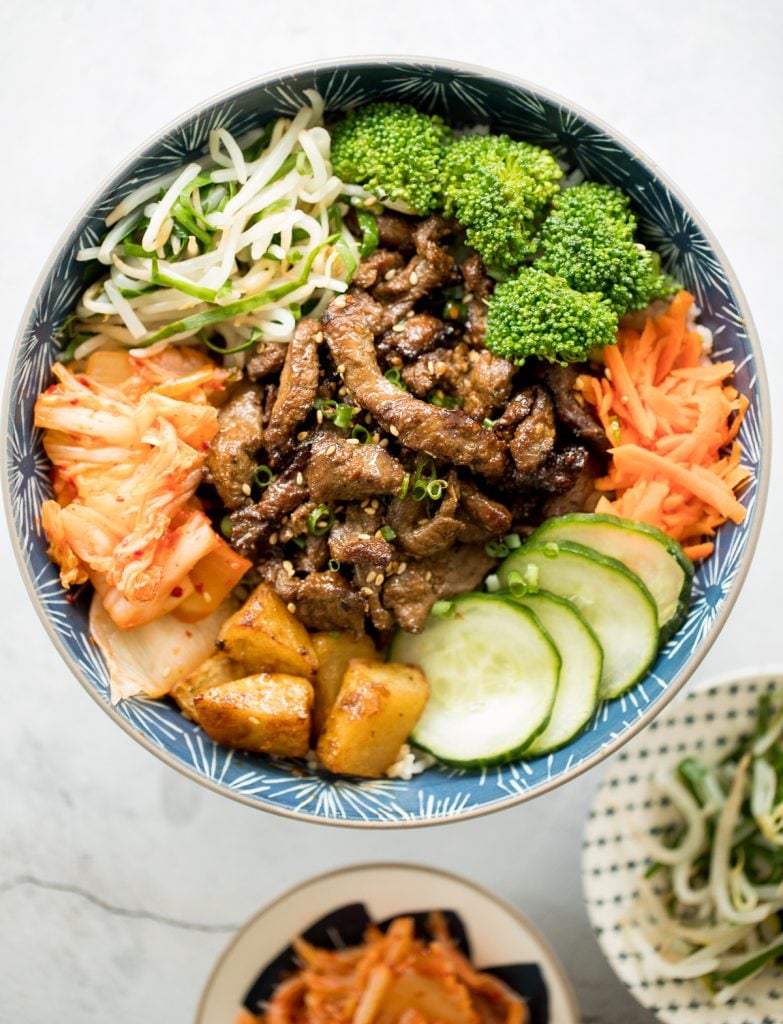
Greek meatballs are juicy, tender, flavorful, and delicious. They are quick and easy to make in 30 minutes or even faster in the air fryer, and freezer-friendly. Serve with tzatziki sauce.
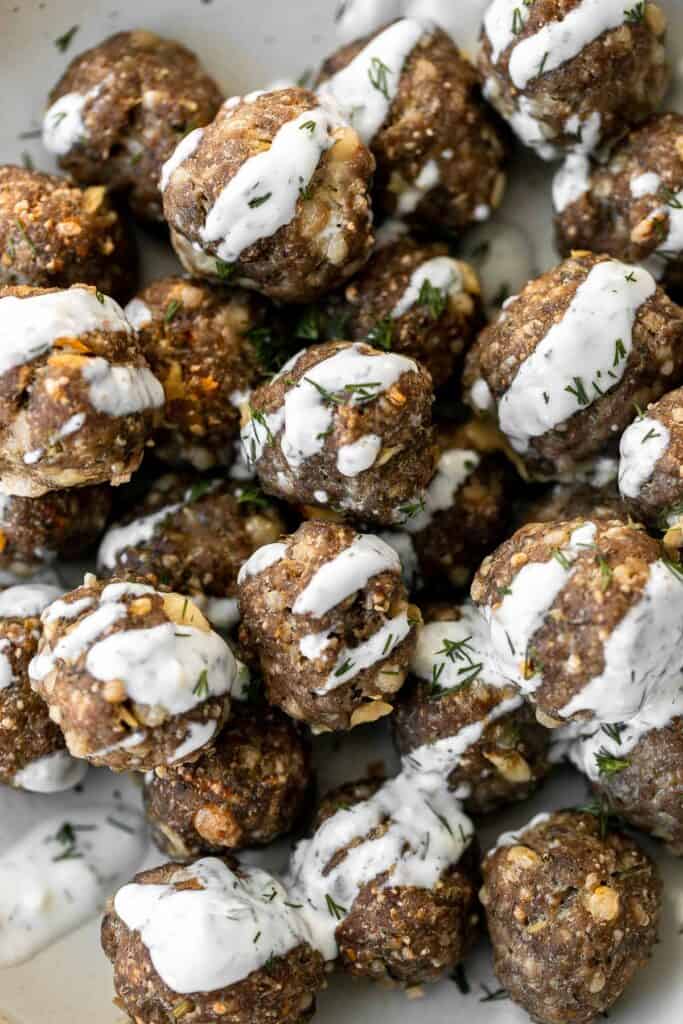
Sweet and sour pork is a delicious, quick and easy Chinese stir fry that takes just 30 minutes to make. Serve this homemade takeout over steamed rice. Cook the pork in the air fryer before tossing into the stir fry.
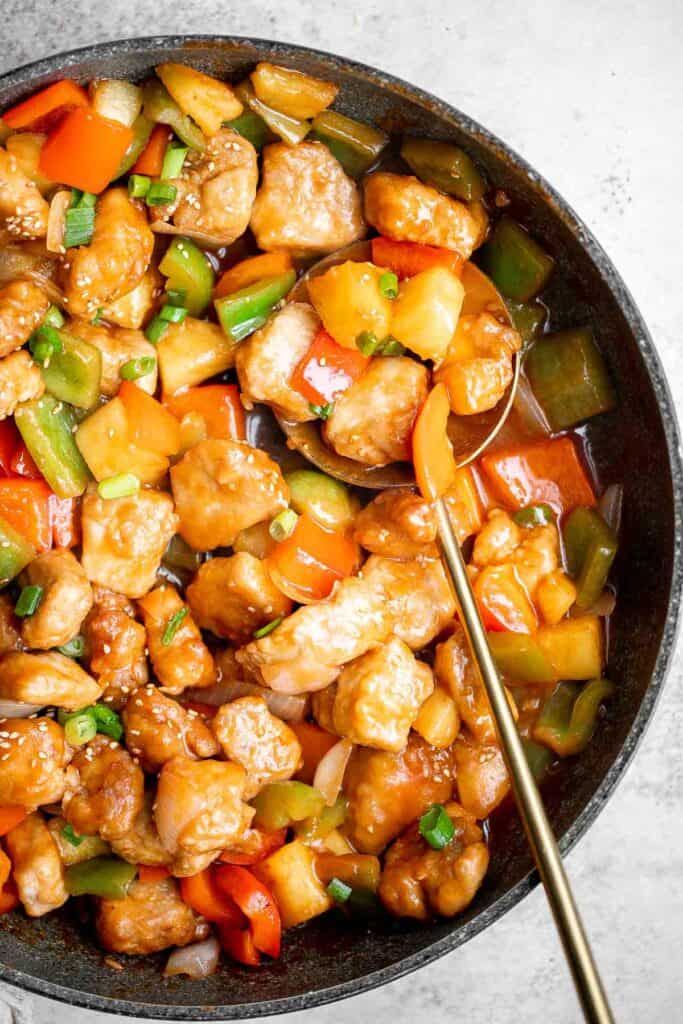
Fusion-style Korean beef steak tacos are made with tender, flavour-packed slices of beef and topped with caramelized pineapple, kimchi, and spicy mayo.
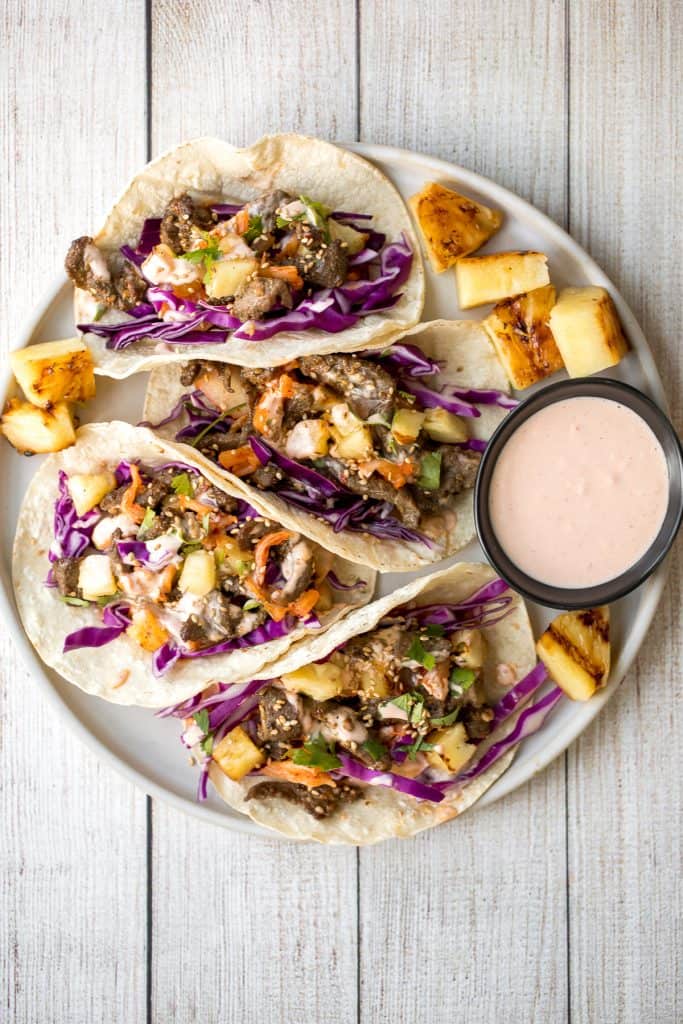
Lion's Head Chinese Meatballs are tender and juicy homemade pork meatballs packed with Asian seasonings and tossed in a sweet and sticky sauce.

Char siu (Chinese BBQ pork) is a delicious, flavorful, traditional roasted pork dinner slathered in a distinct sticky, sweet, savory barbecue sauce glaze. Air fryer instructions in recipe tips.
Air Fryer Seafood
Air Fryer Black Cod with Black Bean Sauce
Flaky, oily, and tender air fryer cod with black bean sauce is bursting with flavour and takes less than 20 minutes to make. The perfect Chinese New Year dinner.
Sticky and sweet, easy honey garlic glazed salmon is one of the best salmon recipes to add to your weeknight dinner rotation. Ready in under 25 minutes. Air fryer instructions included in recipe tips.
10-minute air fryer jumbo shrimp is juicy and tender on the inside, and crispy on the outside. It's so flavourful and garlicky with Asian seasonings.
Baked miso salmon brings traditional Japanese flavours to the forefront, with a healthy and delicious meal that's easy to make on busy weeknights. Air fryer instructions included in recipe tips.
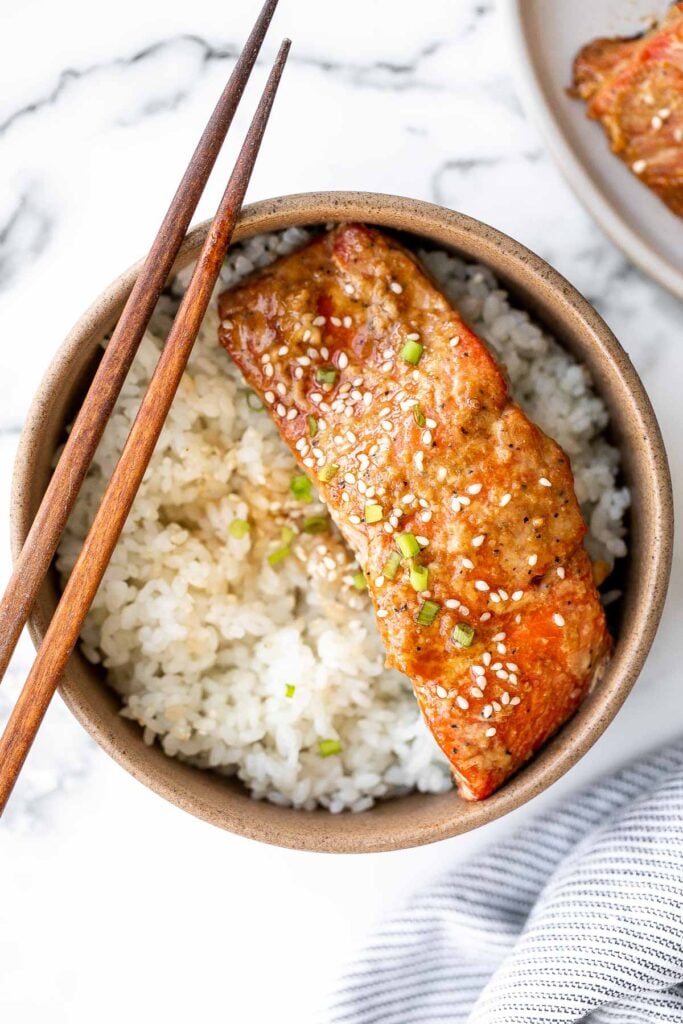
Quick and easy baked maple salmon is so delicious, flaky and flavourful with the perfect balance between sweet and savoury. The best weeknight dinner. Air fryer instructions included in recipe tips.
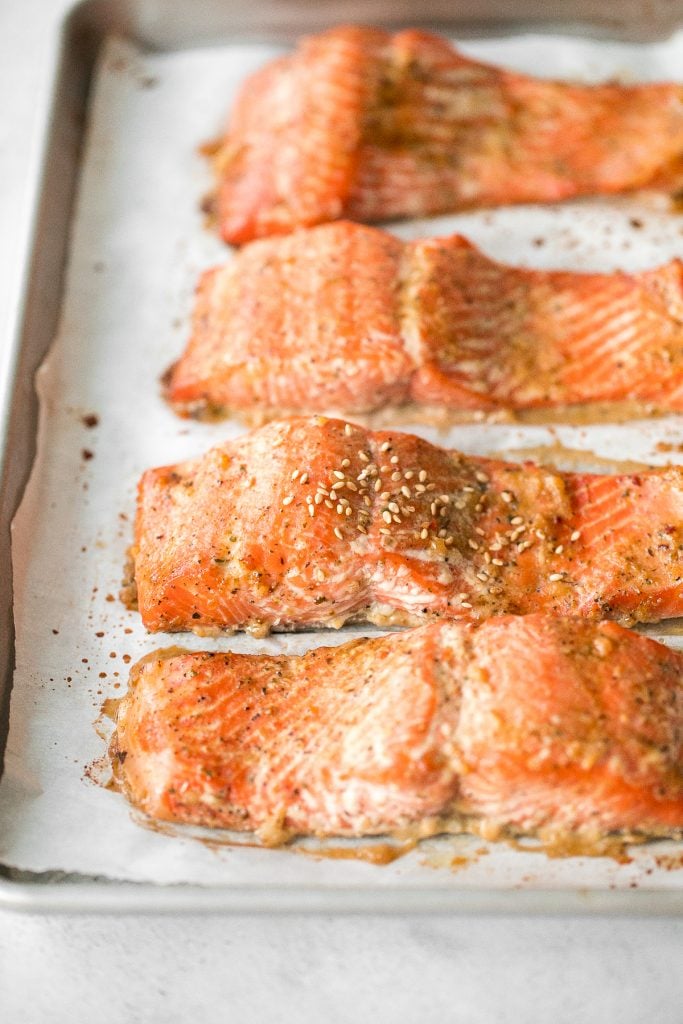
Air Fryer Snacks
One-ingredient homemade baked apple chips are healthy, light, crispy and crave-worthy. Plus, unlike most store-bought chips, these contain no added sugar. Air fryer instructions in recipe tips.
Enjoy street vendor roasted chestnuts at home in three different ways - roast in the oven, cook over the stove, or in the air fryer.
Better than takeout, light and crispy fried vegetarian spring rolls are packed with a tender mushroom and cabbage vegetarian filling in a crunchy skin. Air fryer instructions in recipe tips.

Mashed potato balls are a delicious appetizer that is crisp on the outside and soft, tender, and cheesy inside. Best way to use leftover mashed potatoes! Air fryer instructions in recipe notes.

Storing and Reheating Air Fryer Recipes
- Make ahead instructions: You can make some of these air fryer recipes and store in the refrigerator for a few days or even in the freezer for up to 3 months. You can also prep the ingredients in advance and store in the refrigerator until ready to use.
- How to store: Store any leftovers in airtight containers in the refrigerator or possible even in the freezer. Check the individual recipe for complete storing instructions and to see if the recipe is freezer-friendly.
- How to reheat: Most of the leftovers can be reheated in the air fryer at 300F for 5-10 minutes until warmed through. If heating from frozen, let it thaw first and then reheat.
Did You Make Any of These Easy Air Fryer Recipes?
Please leave a comment and rating below, and let me know what you thought of this round up of these easy air fryer recipes. Be sure to snap a picture and tag me on Instagram @aheadofthyme or share it on the Pinterest pin so that I can follow along.
HUNGRY FOR MORE? Don't forget to sign up for my email newsletter so that you don't miss any recipes. You can also follow along on Instagram and Pinterest for more recipe updates.
Breakfast Potatoes
Breakfast Potatoes are crispy on the outside while soft and tender inside - just how we like it! Simply seasoned with paprika, garlic, salt, and pepper, these skillet potatoes are delicious and flavorful.
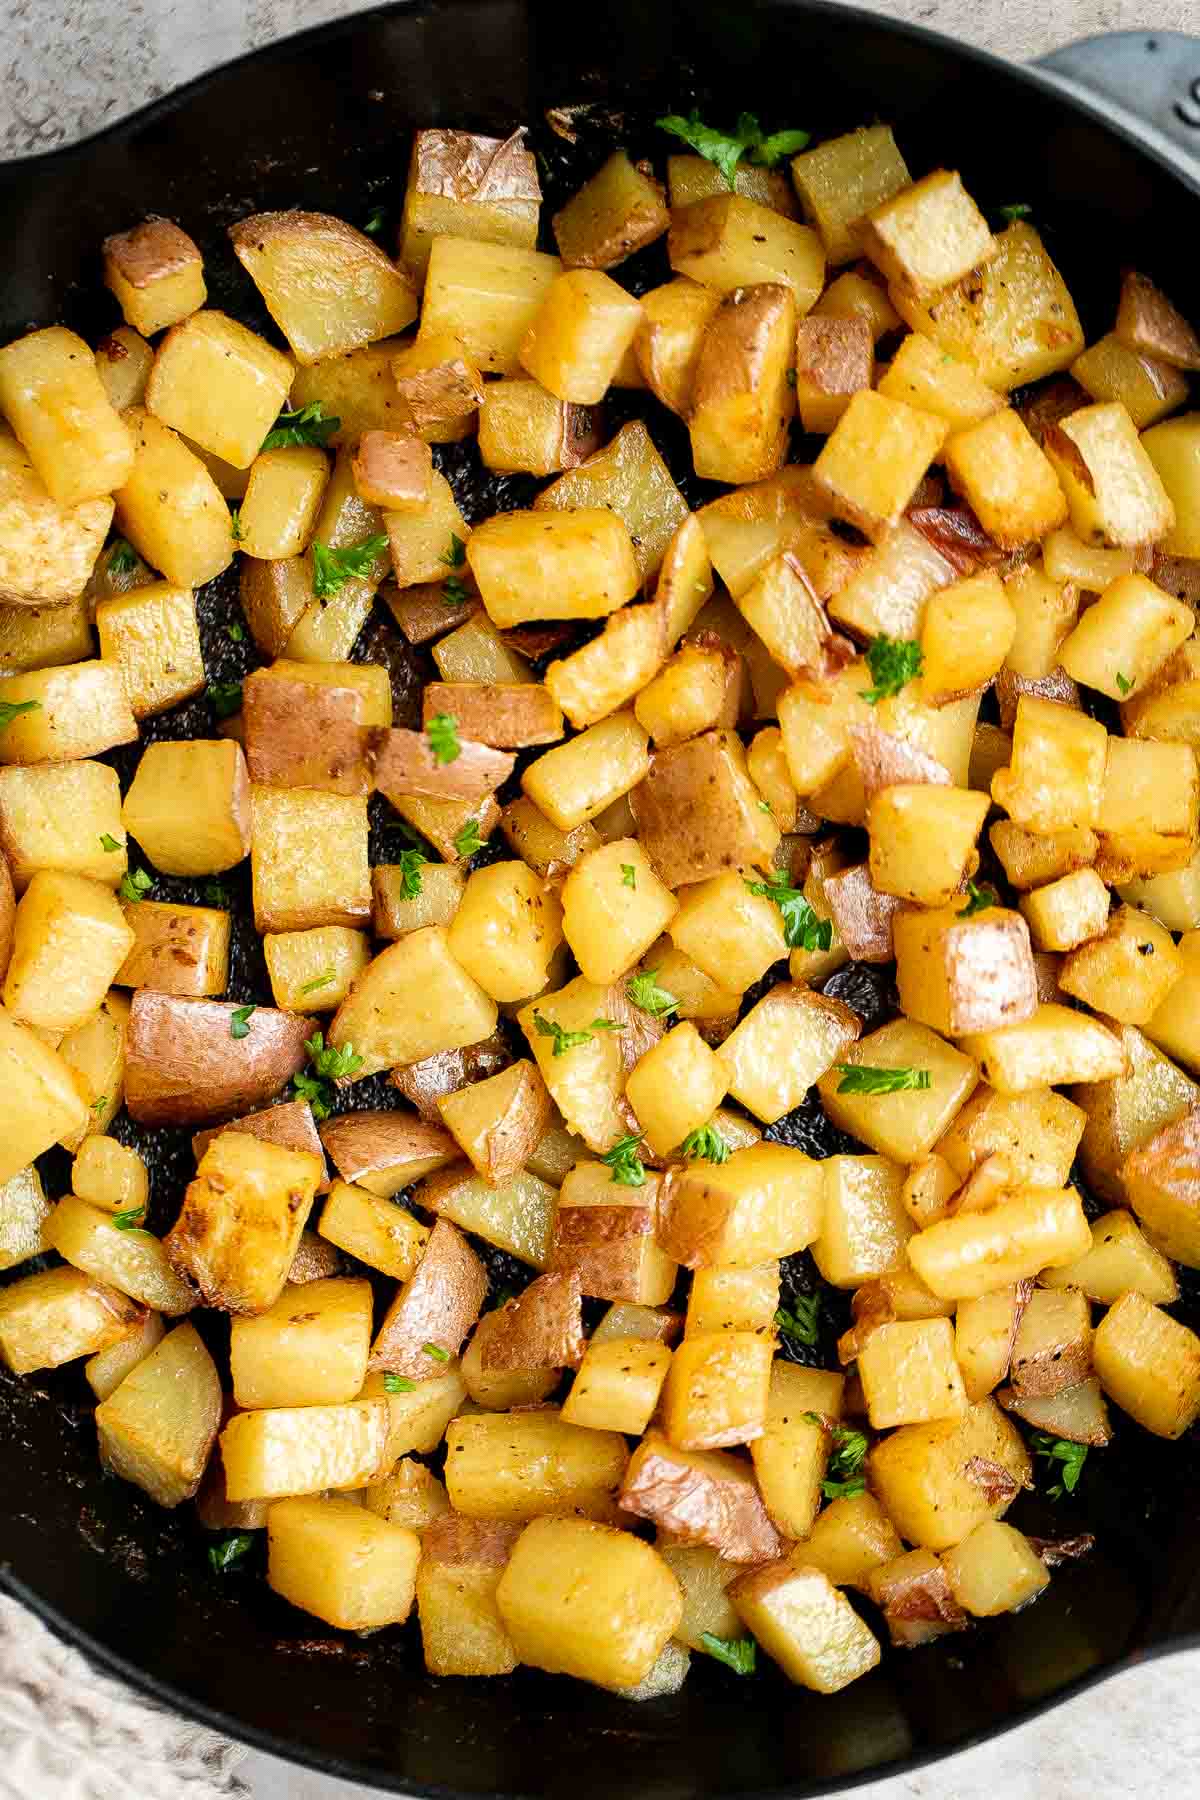
Potatoes have been a breakfast classic for as long as they've existed, and these crispy breakfast potatoes are an easy way to prepare them! Ready in just 20 minutes (including prep!), this low-maintenance side is a great addition to your breakfast and brunch plans for busy holiday mornings and beyond.
Why You'll Love these Breakfast Potatoes
- They're ready in under half an hour. These quick and easy potatoes are ready in just under 30 minutes, and it only takes a few minutes of dicing and seasoning to get them ready to cook, so you'll have some time to work on other breakfast dishes.
- Easier to make than hash browns. These breakfast potatoes share a similar flavor and crispines to hash browns but with less work! No grating needed, just a quick dice, a toss in oil and spices, and quick cooking on the skillet. You can also pop into the oven for a quick broil to crisp up the edges even more if you'd like.
- Great for weekend brunch. This is a great way to quickly make a lot of potatoes for a crowd, making it the perfect recipe to whip out on weekend brunch or for holiday breakfasts such as Christmas morning or any of the surrounding days when you've got a lot of people to feed in a hurry.
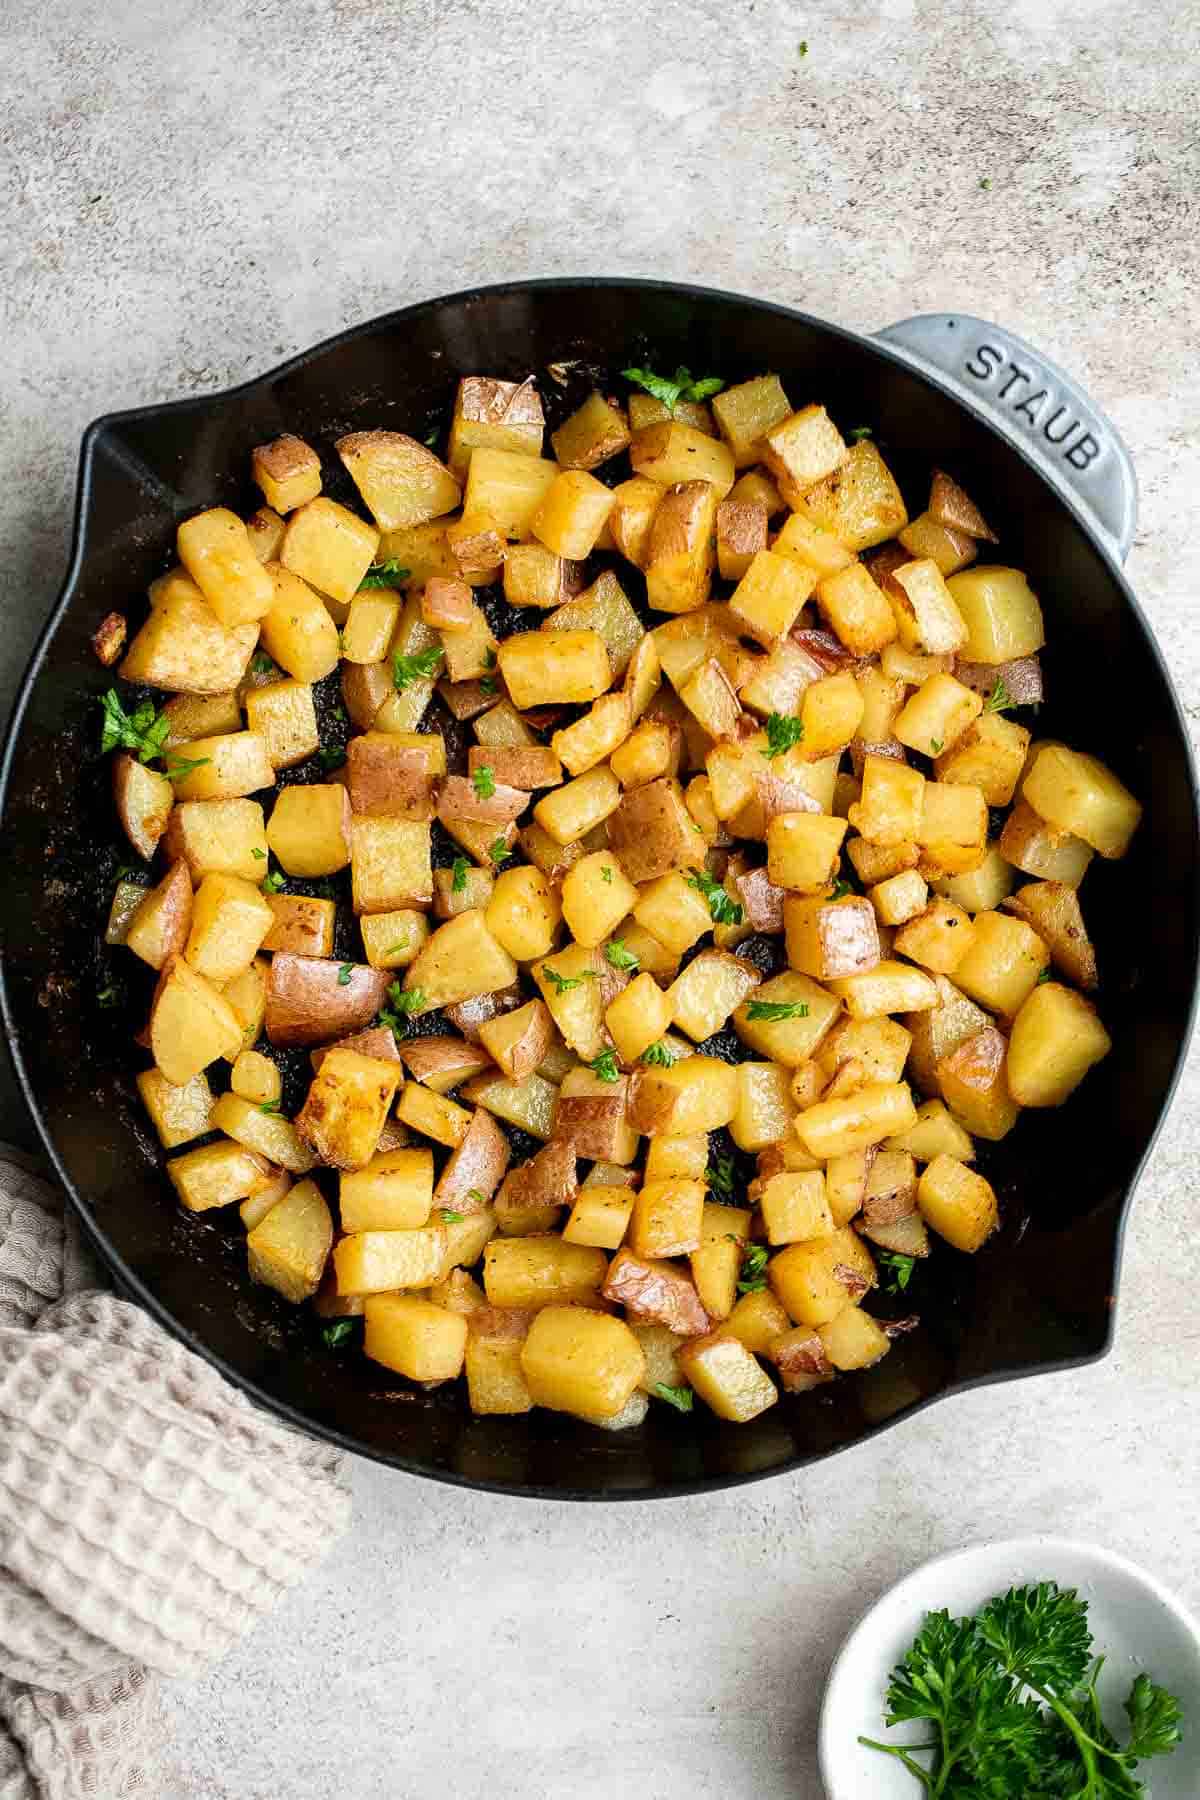
Ingredient Notes
To make these easy Breakfast Potatoes, you will need the following ingredients (full measurements in recipe card below):
- potatoes - we used red potatoes because they get nice and tender while keeping their shape. We also kept the skin on because it looks gorgeous but it's up to you. You can substitute with whatever type of potatoes you have on hand, including a frozen, pre-diced variety to make preparing breakfast potatoes even faster. A good substitute are yukon gold potatoes.
- olive oil - any oil with a high smoke point (like avocado oil) will also work.
- paprika - if you don't have paprika on hand, you can try using a little chili powder, cayenne powder, or chipotle powder for a similar taste.
- garlic powder - you can substitute this with 2 cloves of garlic (minced).
- salt and pepper
- parsley - we topped these potatoes with fresh parsley but you can use any herbs that you want - dill, oregano, thyme, or chives. Or leave out the herbs completely.
You will also need measuring cups and spoons and a skillet (I used a 10-inch cast iron skillet for easy transfer to the oven).
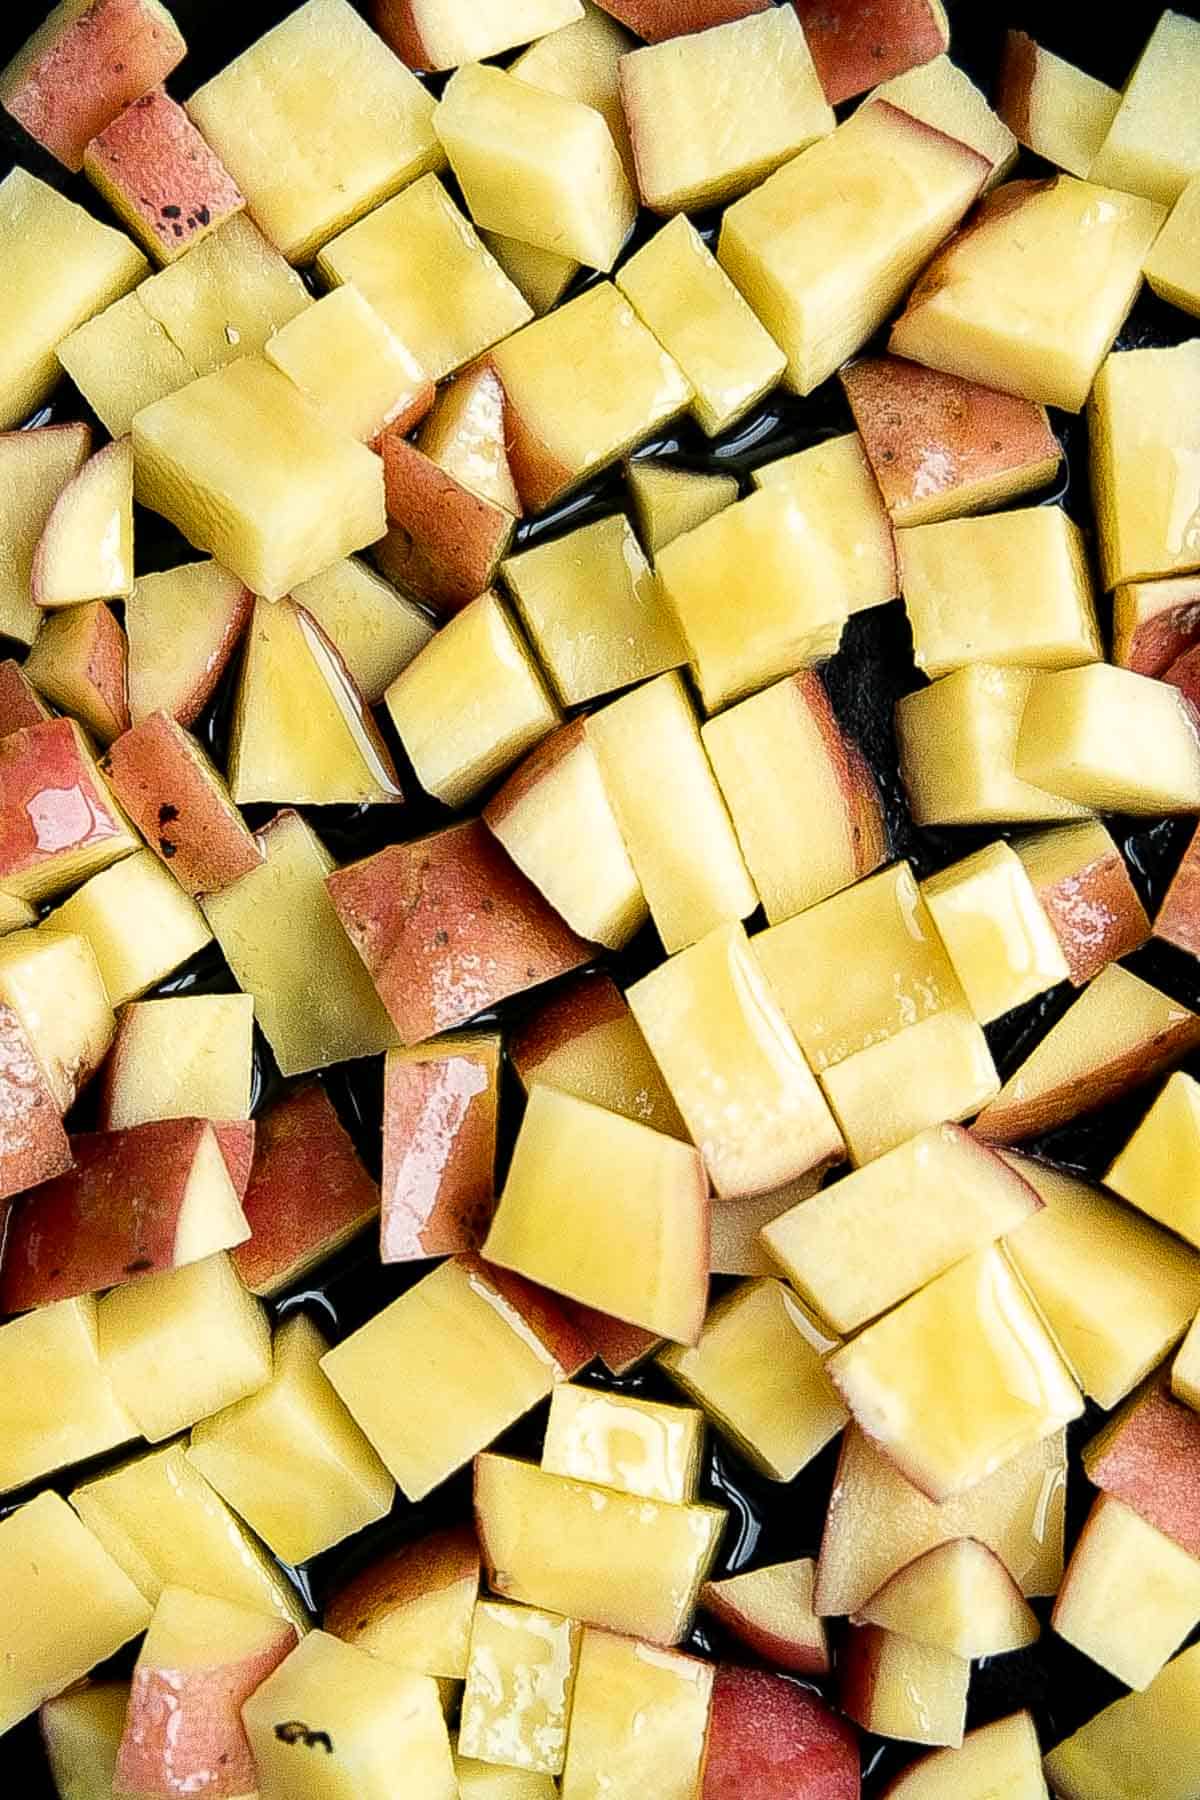
How to Make the Best Breakfast Potatoes
- Cook potatoes. Heat oil in a large oven-proof skillet (10-inch cast iron skillet) over medium heat until hot, about 1 minute. Add cubed potatoes and toss well to coat. Cook without stirring for 5 minutes.
- Add seasoning. Add paprika, garlic powder, salt, and pepper. Stir well until evenly combined. Continue cooking for another 8-10 minutes until tender, stirring occasionally.
- Broil (optional). Transfer the skillet into the oven and broil on HI for 2-3 minutes until golden brown and crispy. Alternatively, cook another 5 minutes on the stove until crisp on the outside.
- Serve. Serve immediately.
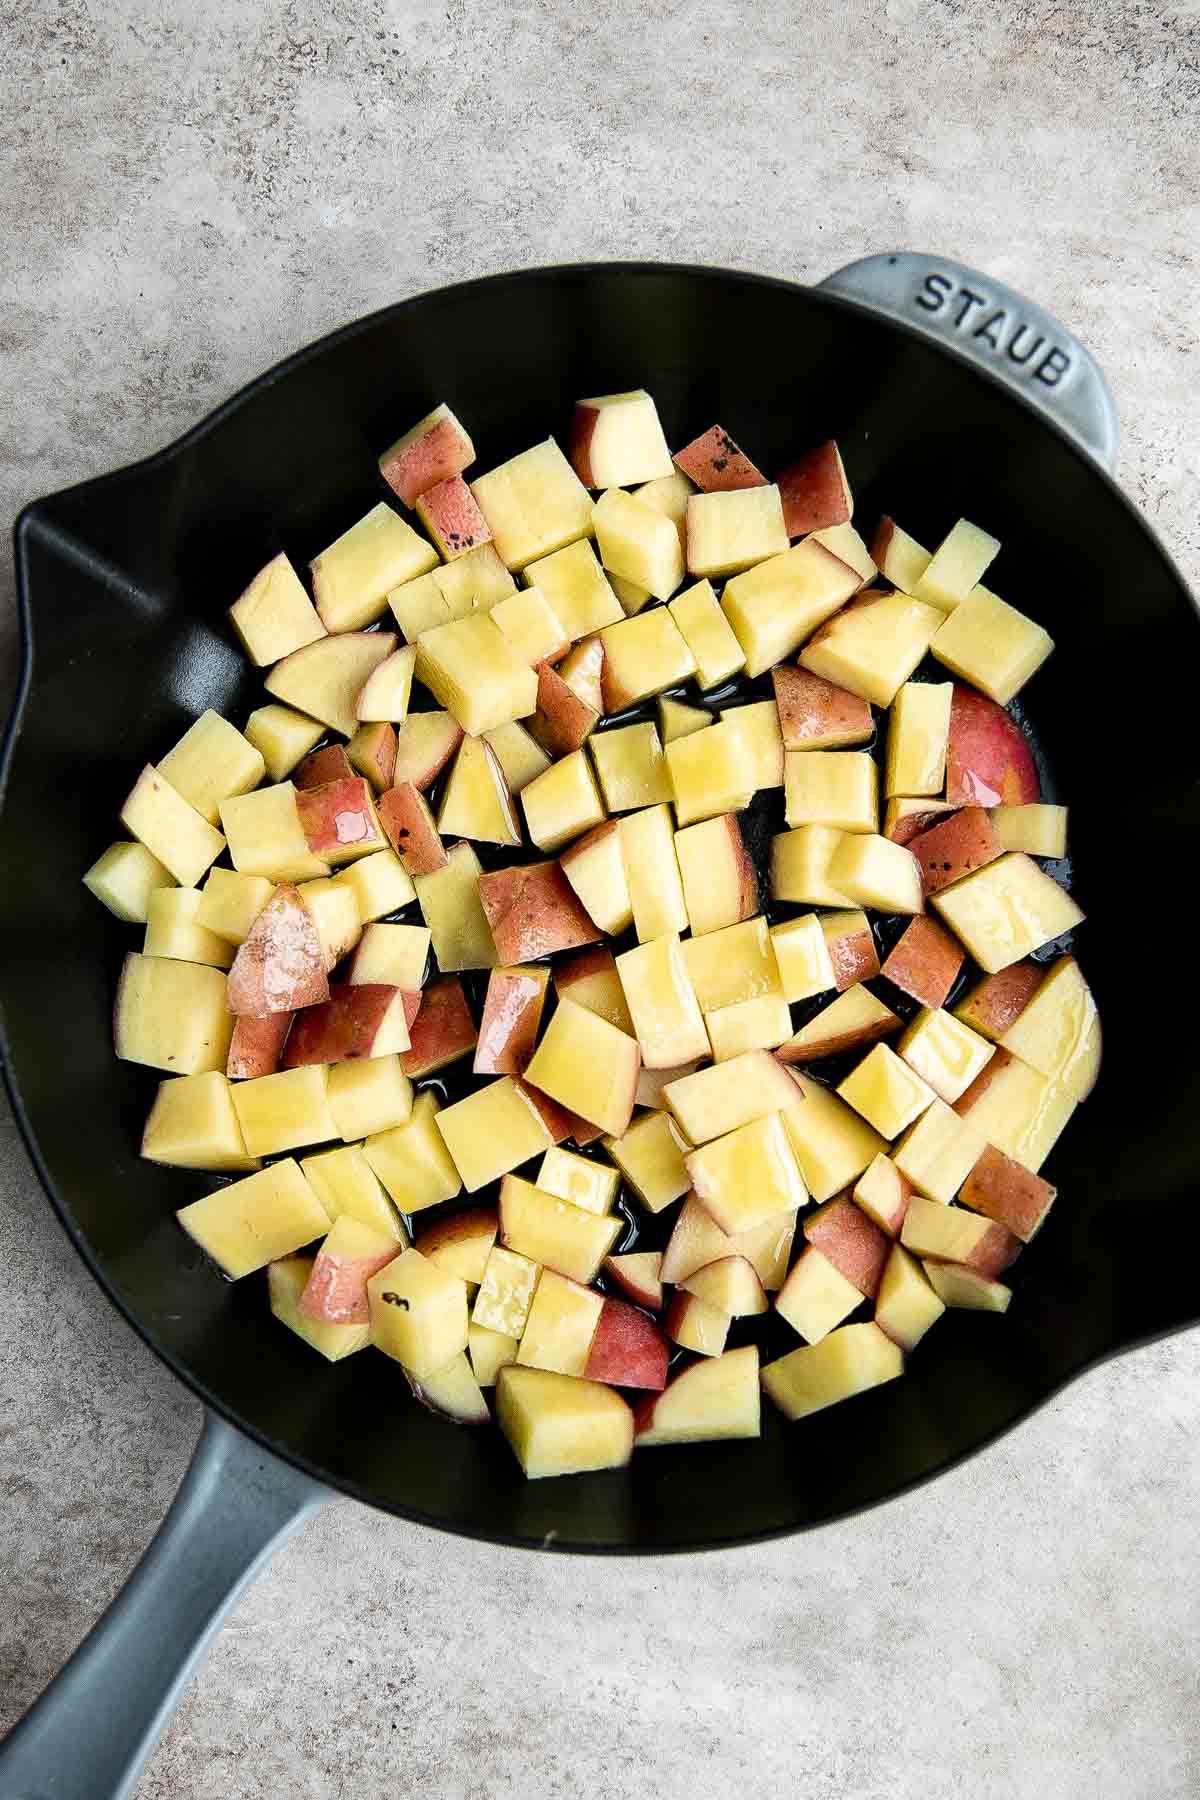
Recipe Variations
- Add some heat. Make these breakfast potatoes hot! Serve with tabasco sauce for those that like their potatoes more on the spicy side.
- Make them cheesy. Cheese and potatoes are a match made in heaven. Grate some parmesan or cheddar over the top and pop them back in the oven for a minute or two until the cheese melts. You could also toss in some feta.
- Get creative with seasoning. Play around with different seasonings to change up these potatoes each time you make them! Try cumin, curry powder, or a taco seasoning blend.
- Top with herbs. We served our potatoes with fresh parsley sprinkled on top. You can try different fresh herbs such as dill, chives, thyme, or basil.
How to Serve
Serve these Breakfast Potatoes as part of a full breakfast or brunch spread. They are great served on the side of:
Recipe Tips and Tricks
- Cut the potatoes the same size. Making sure that the potatoes are all the same size is important when it comes to even cooking. Otherwise, the bigger pieces will be underdone, while smaller pieces will be too mushy.
- How to cook in the air fryer. Prepare the potatoes and toss with seasoning until combined. Cook in the air fryer at 350F for 10-12 minutes, shaking the basket halfway through cooking.
Storing and Freezing Instructions
How to Store
Store breakfast potatoes in the refrigerator in an airtight container for up to 4 days.
How to Reheat
Reheat in a 300F preheated oven for 10 minutes, in a 350F air fryer for 5 minutes, or on the stovetop until crispy and heated through.
How to Freeze
Arrange the potatoes in a single layer on a parchment paper lined baking pan and freeze until solid, about 1-2 hours. Then transfer to a freezer bag and freeze for up to 3 months. You can reheat them straight from frozen in the oven, air fryer, or on the stovetop. Just add a few extra minutes to the reheating time.
More Potato Recipes
- 30 Best Potato Side Dishes
- Crispy Smashed Potatoes
- Egg and Potato Breakfast Casserole
- Mashed Potato Cakes
- Potato Dinner Rolls
- Hasselback Potatoes
Tried this recipe?
I'd love to hear what you think! Leave a comment and rating below to share your feedback. Your reviews help others discover this recipe and help me keep creating more free recipes for you. Snap a photo and tag me on social media @aheadofthyme too.

Madeleines
Classic Madeleines are soft and spongy mini cakes with a signature shell shape and a dusting of sugar on top. These delicious French butter cakes look complicated to make but are a lot easier than you think!
Enjoy delicate madeleines dipped in hot cocoa or coffee, alongside tea, or eat them on their own as a special snack throughout your day. They are perfect to serve on holidays and special occasions or whenever you are craving a sweet treat.
What are Madeleines?
Madeleines are little, individual cakes that are often referred to as cookies because of their size - you can pick one up and eat like a cookie.
They are baked in a madeleine pan which helps to mold them into their classic shell shape on one side with a bump on the other side.
Why You'll Love these Madeleines
- Light and soft texture. The texture of these little cookie cakes are unlike any other - soft, light, and spongy.
- Buttery and lemony. These madeleines have a delicate balance of buttery richness, vanilla flavor, and a hint of citrus thanks to the addition of lemon zest.
- Only 15 minutes to prep. It only takes a few minutes to get these French butter cakes ready to chill - just beat the eggs and sugar together, add the lemon zest and vanilla, fold in the dry ingredients and then add the butter. That's it! Standard cookie procedures.
- Classic shell shape. Classic madeleines are known for their signature scalloped surface - a beautiful, classy cookie that makes any occasion a little more special. You will need a madeleine pan to get that classic shape and pattern.
Ingredient Notes
To make these classic Madeleines, you will need the following ingredients (full measurements in recipe card below):
- all-purpose flour - measure the flour properly. Do not use the measuring cup to scoop the flour, instead fluff the flour first then spoon the flour into the measuring cup and level off. For the most accurate results, use a kitchen scale.
- baking powder
- salt
- eggs - eggs should be room temperature for baking madeleines.
- granulated sugar - you can use whatever version of granulated sugar you like, including coconut sugar or cane sugar. Just beware that other alternatives like stevia will alter the overall taste of the cookies.
- vanilla extract - an equal amount of vanilla bean paste can be substituted for the vanilla extract.
- lemon zest - this adds a hint of citrus that balances out the other flavors so well. You can also use orange zest or leave it out completely if you prefer.
- unsalted butter - use unsalted butter in baking to control the flavor. If you need to use salted, omit the additional salt in the recipe.
- confectioners' sugar - this is optional, for dusting on top. You can also use powdered Swerve for the most similar flavor.
Baking Equipment
You will also need the following baking tools and equipment:
- measuring cups and spoons
- mixing bowl
- stand mixer (or hand mixer)
- madeleine pan
- wire cooling rack
How to Make the Best Madeleines
- Combine dry ingredients. Add flour, baking powder and salt to a mixing bowl and whisk to combine. Set aside.

- Whip eggs and sugar. Add eggs to stand mixer fitted with the whip attachment (or a mixing bowl with a hand mixer). Turn the stand mixer on low and mix the eggs for about 1 minute to break the eggs up. Once the eggs look foamy, turn the mixer to medium and begin sprinkling in the sugar, 1 tablespoon at a time, every 30 seconds or so.
- Add flavors. When all of the sugar has been added, add in the vanilla and lemon zest and turn the stand mixer to high and beat for 2-3 more minutes, or until it looks about triple in volume. Remove the bowl from the stand mixer.
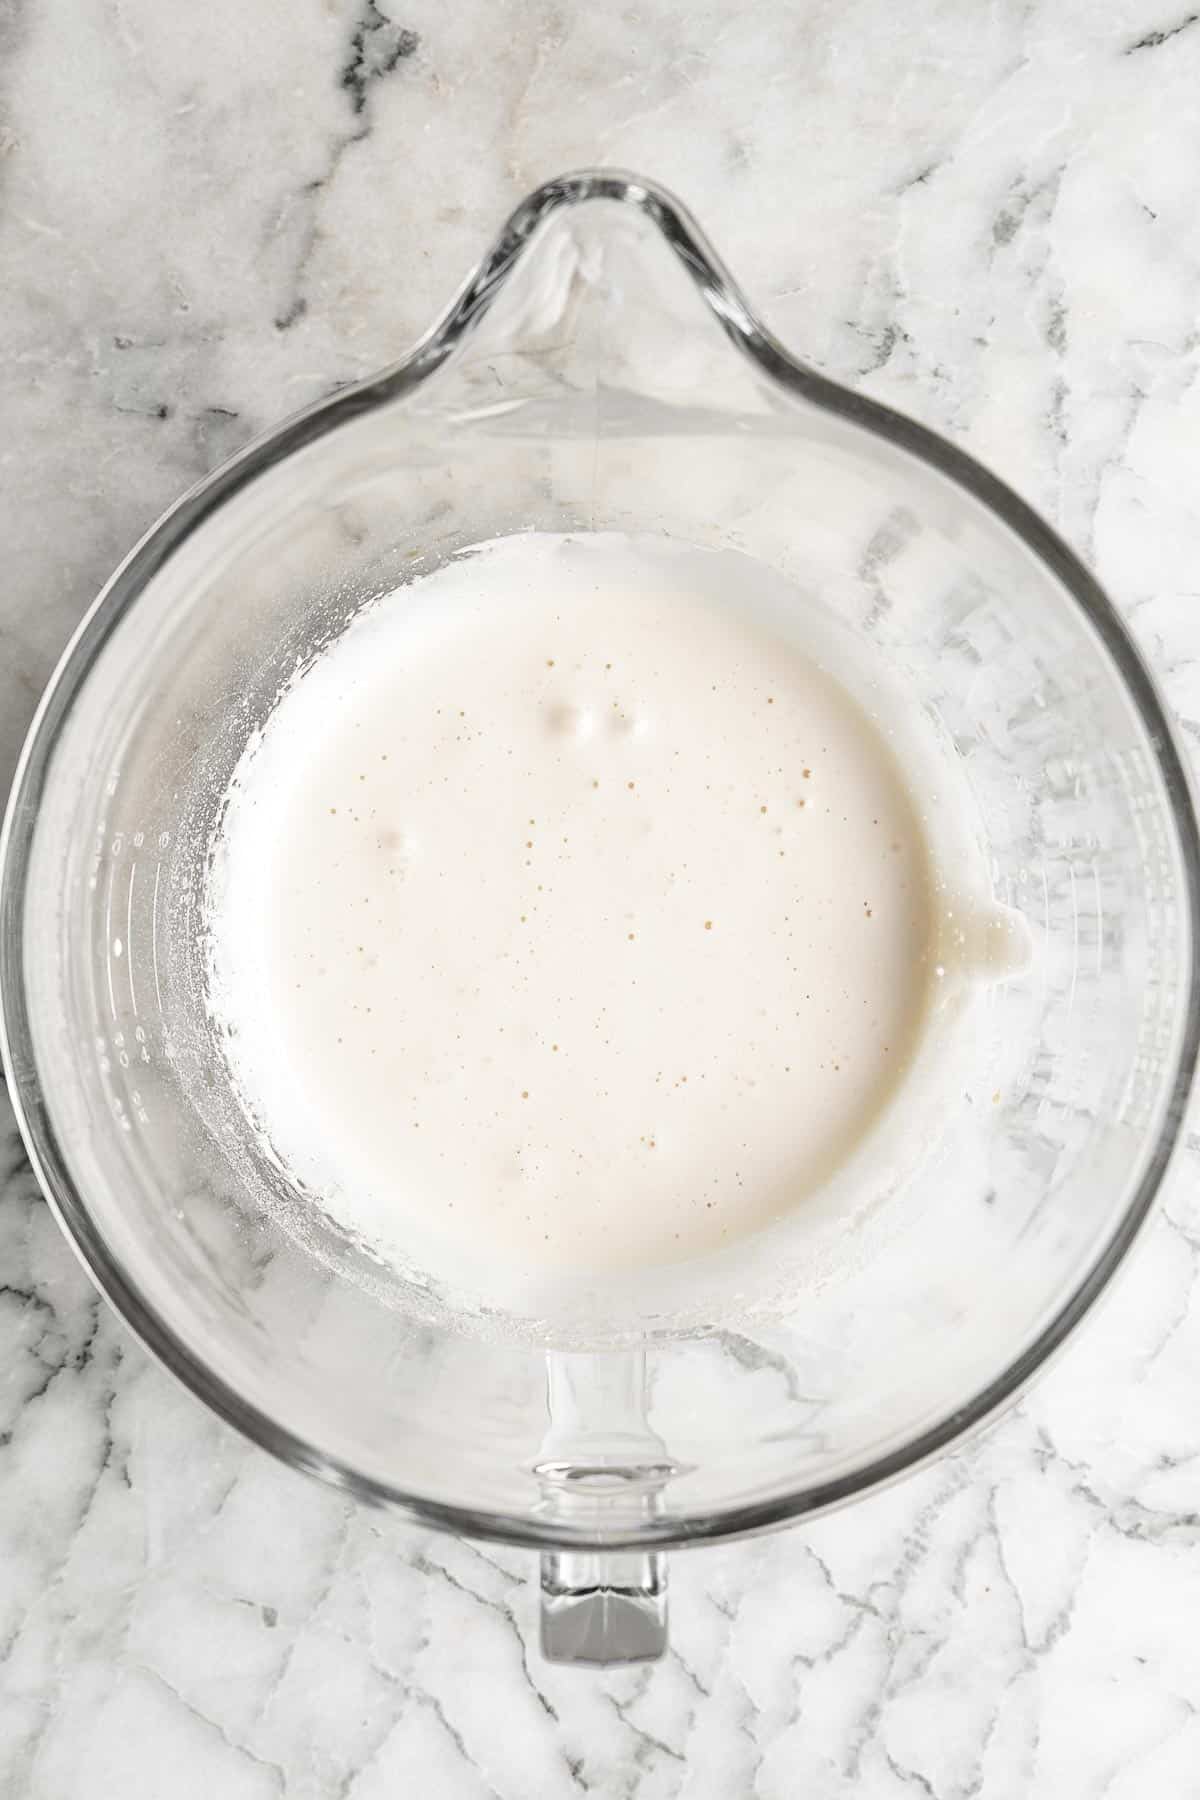
- Add dry ingredients to wet ingredients. Sift the dry ingredients over the wet ingredients. Use a silicone spatula to fold the dry ingredients delicately into the batter until combined.
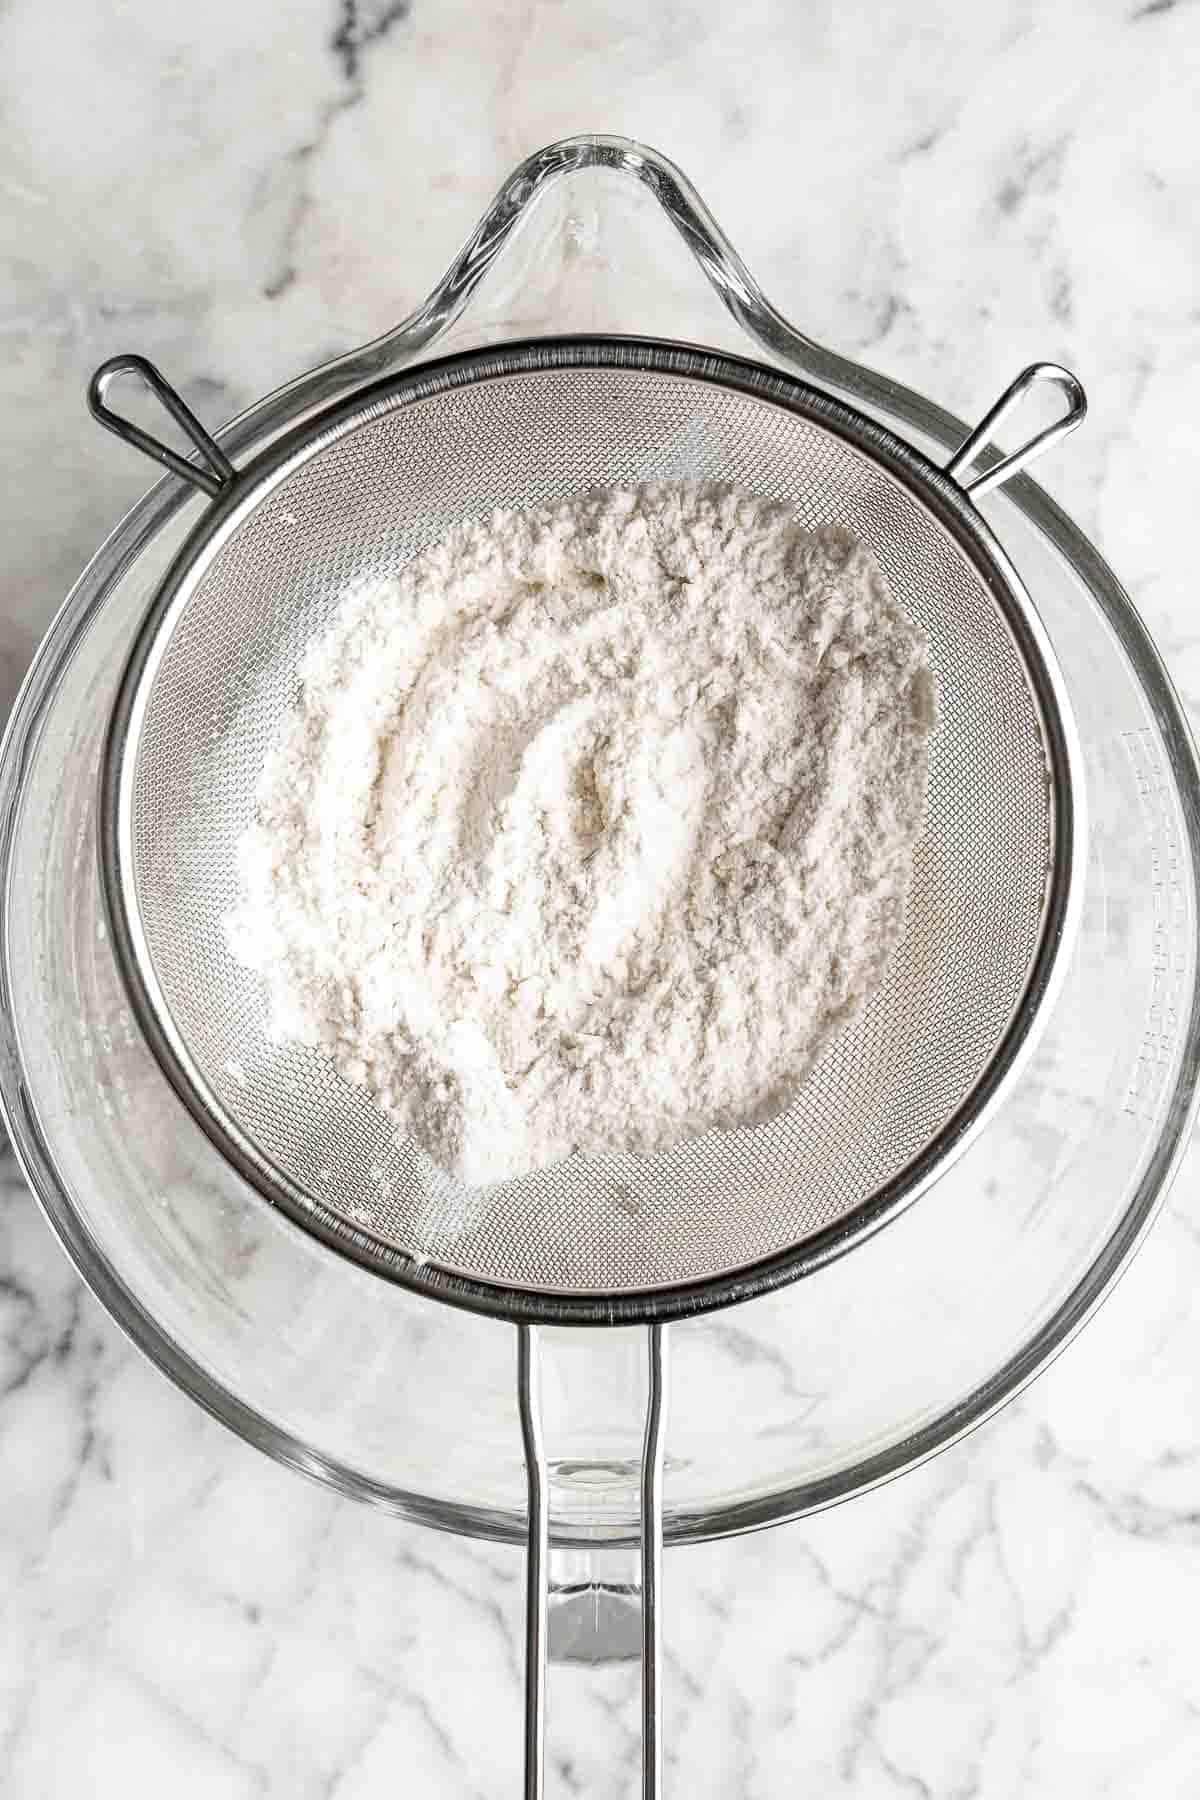
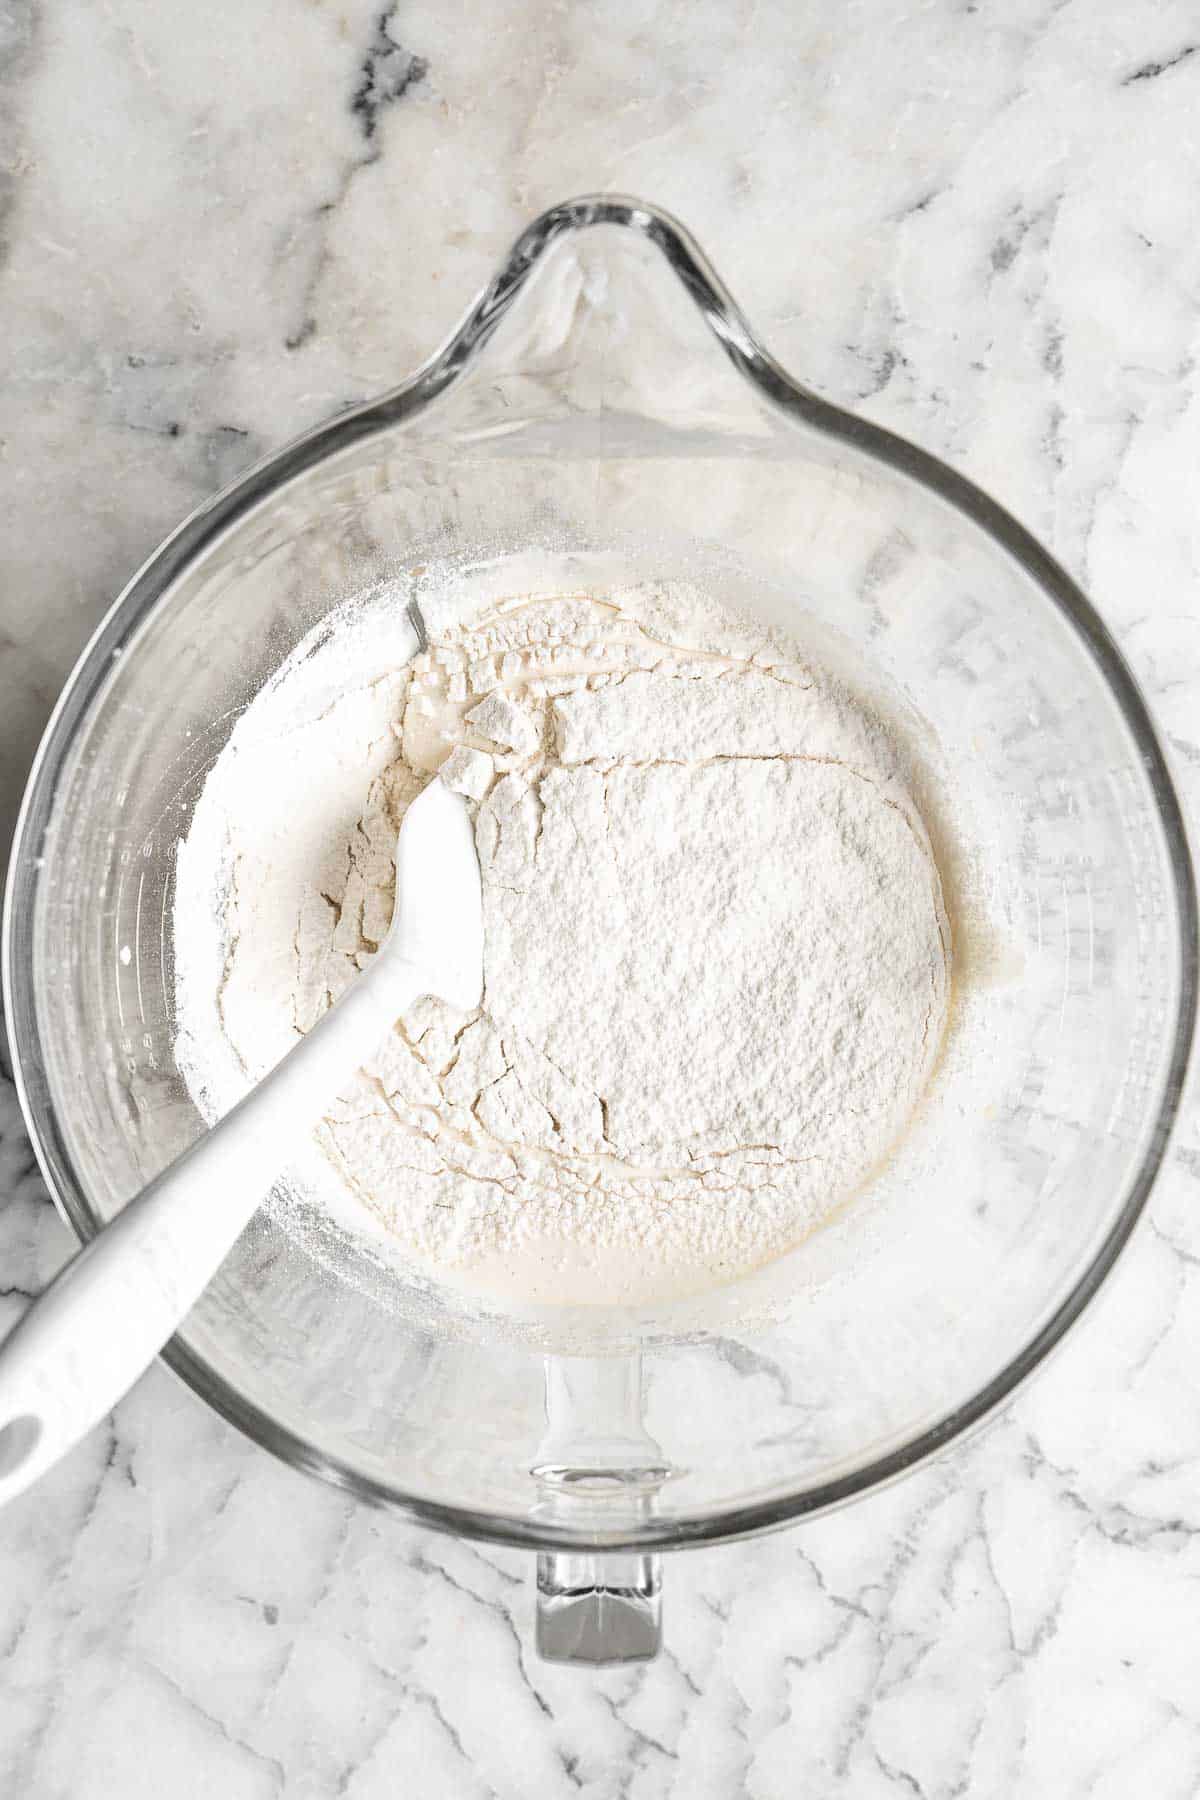
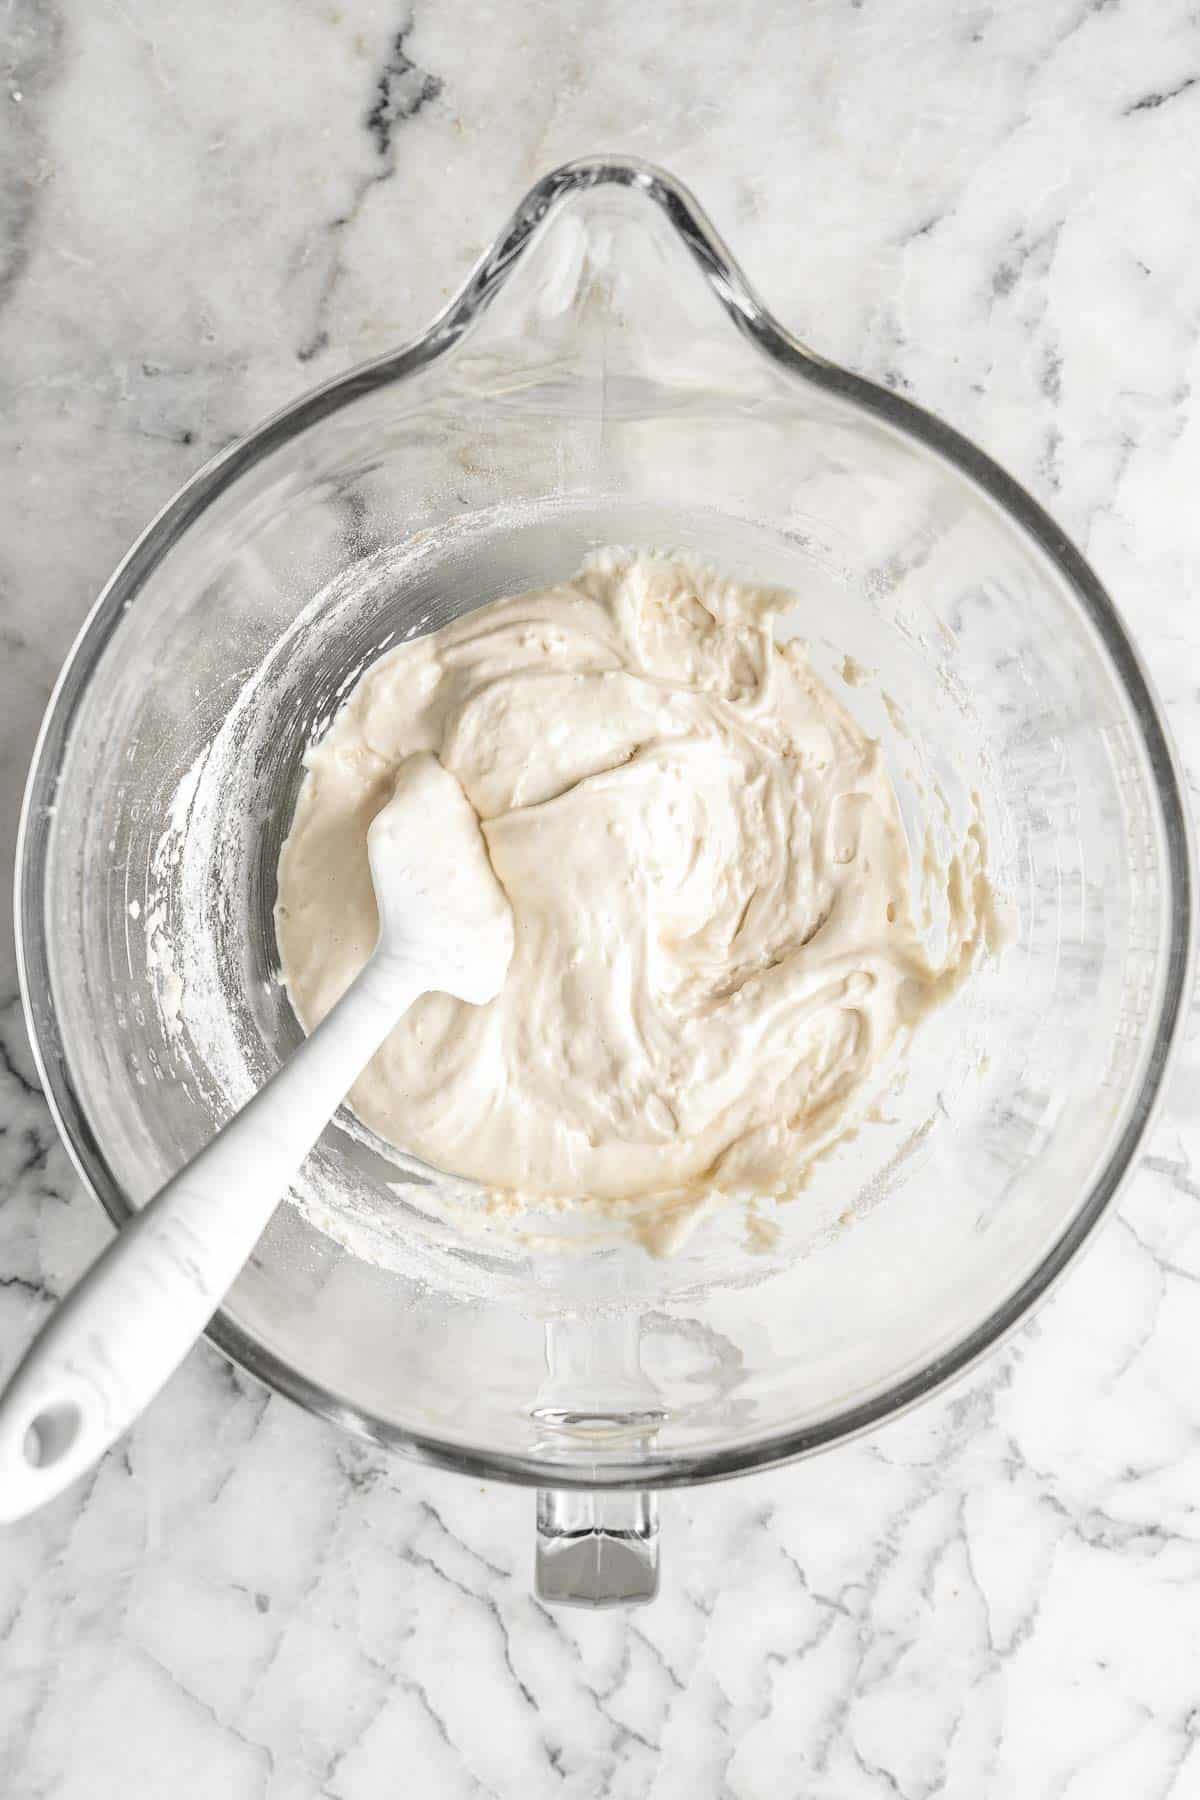
- Prep butter. Scoop some batter into the melted butter and fold together.
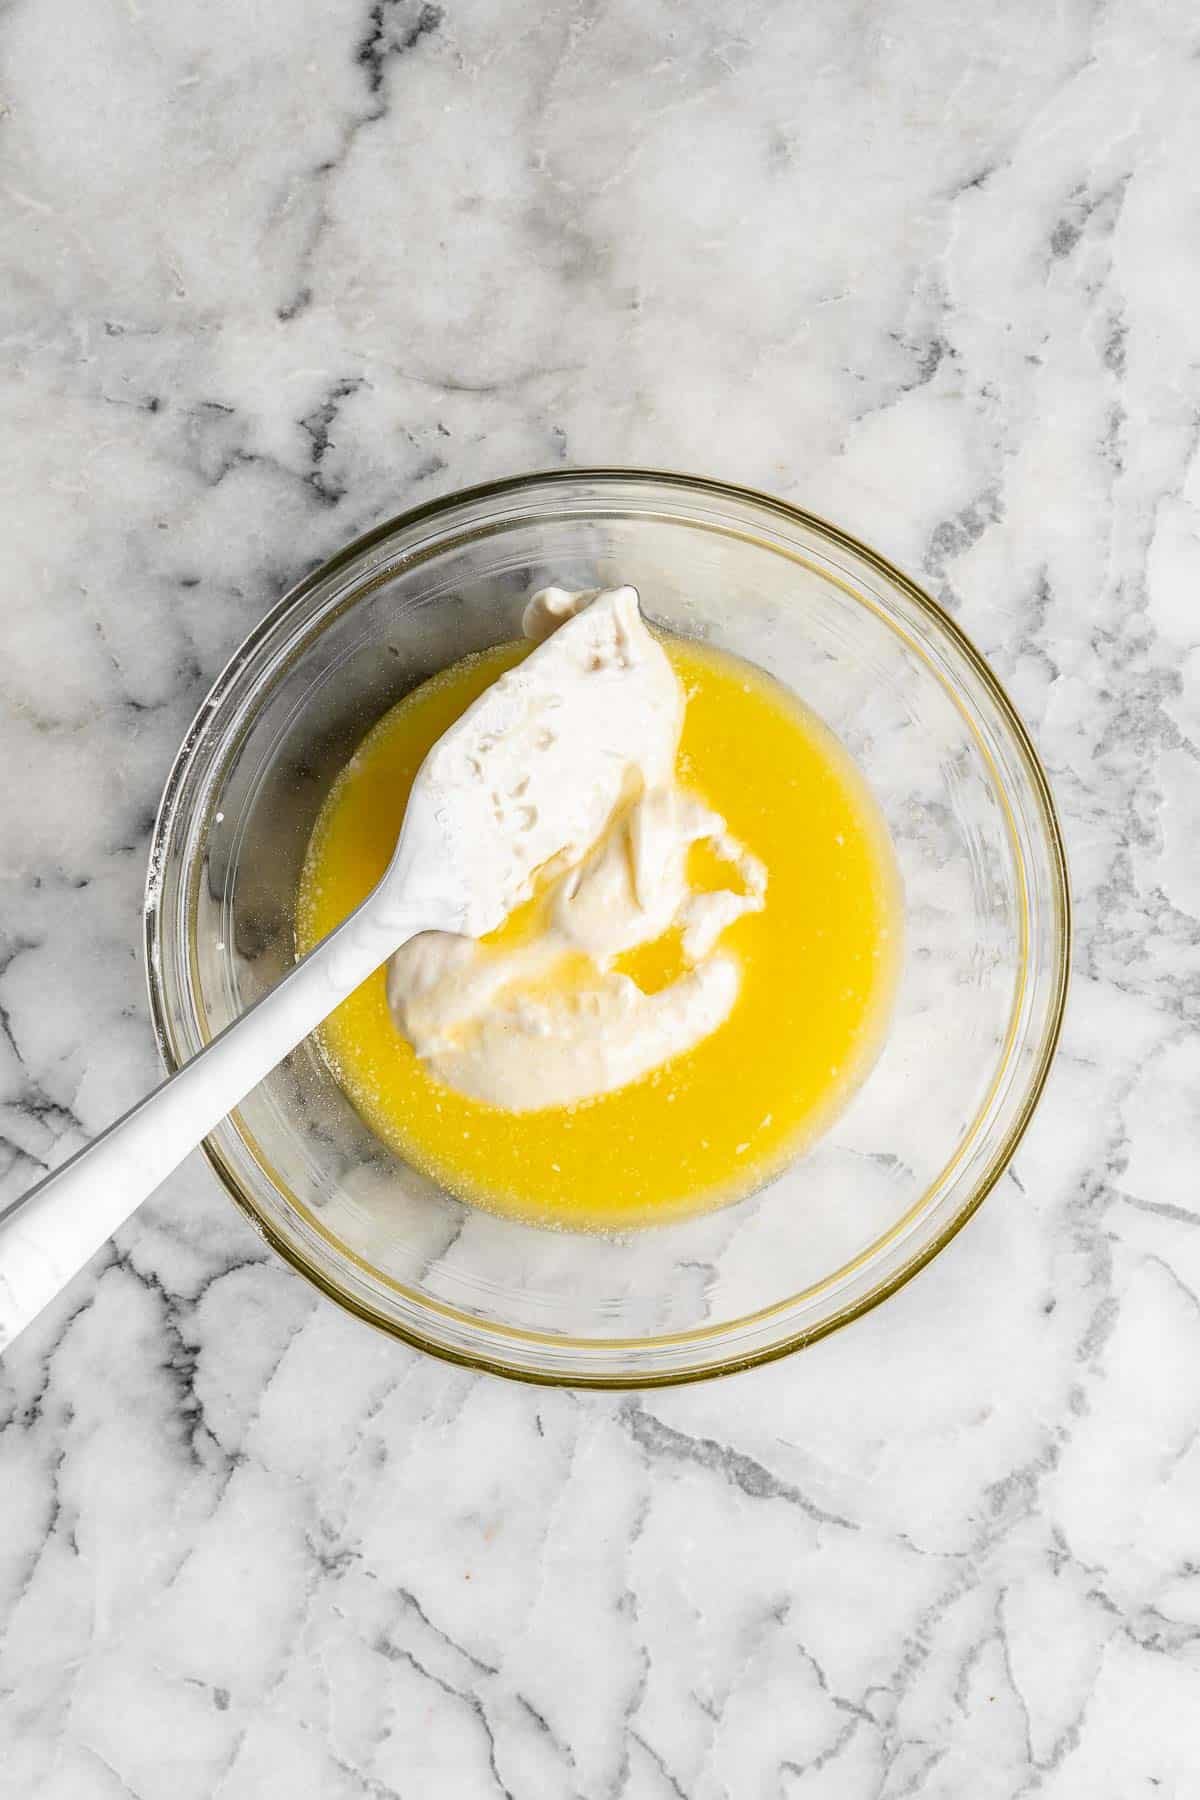
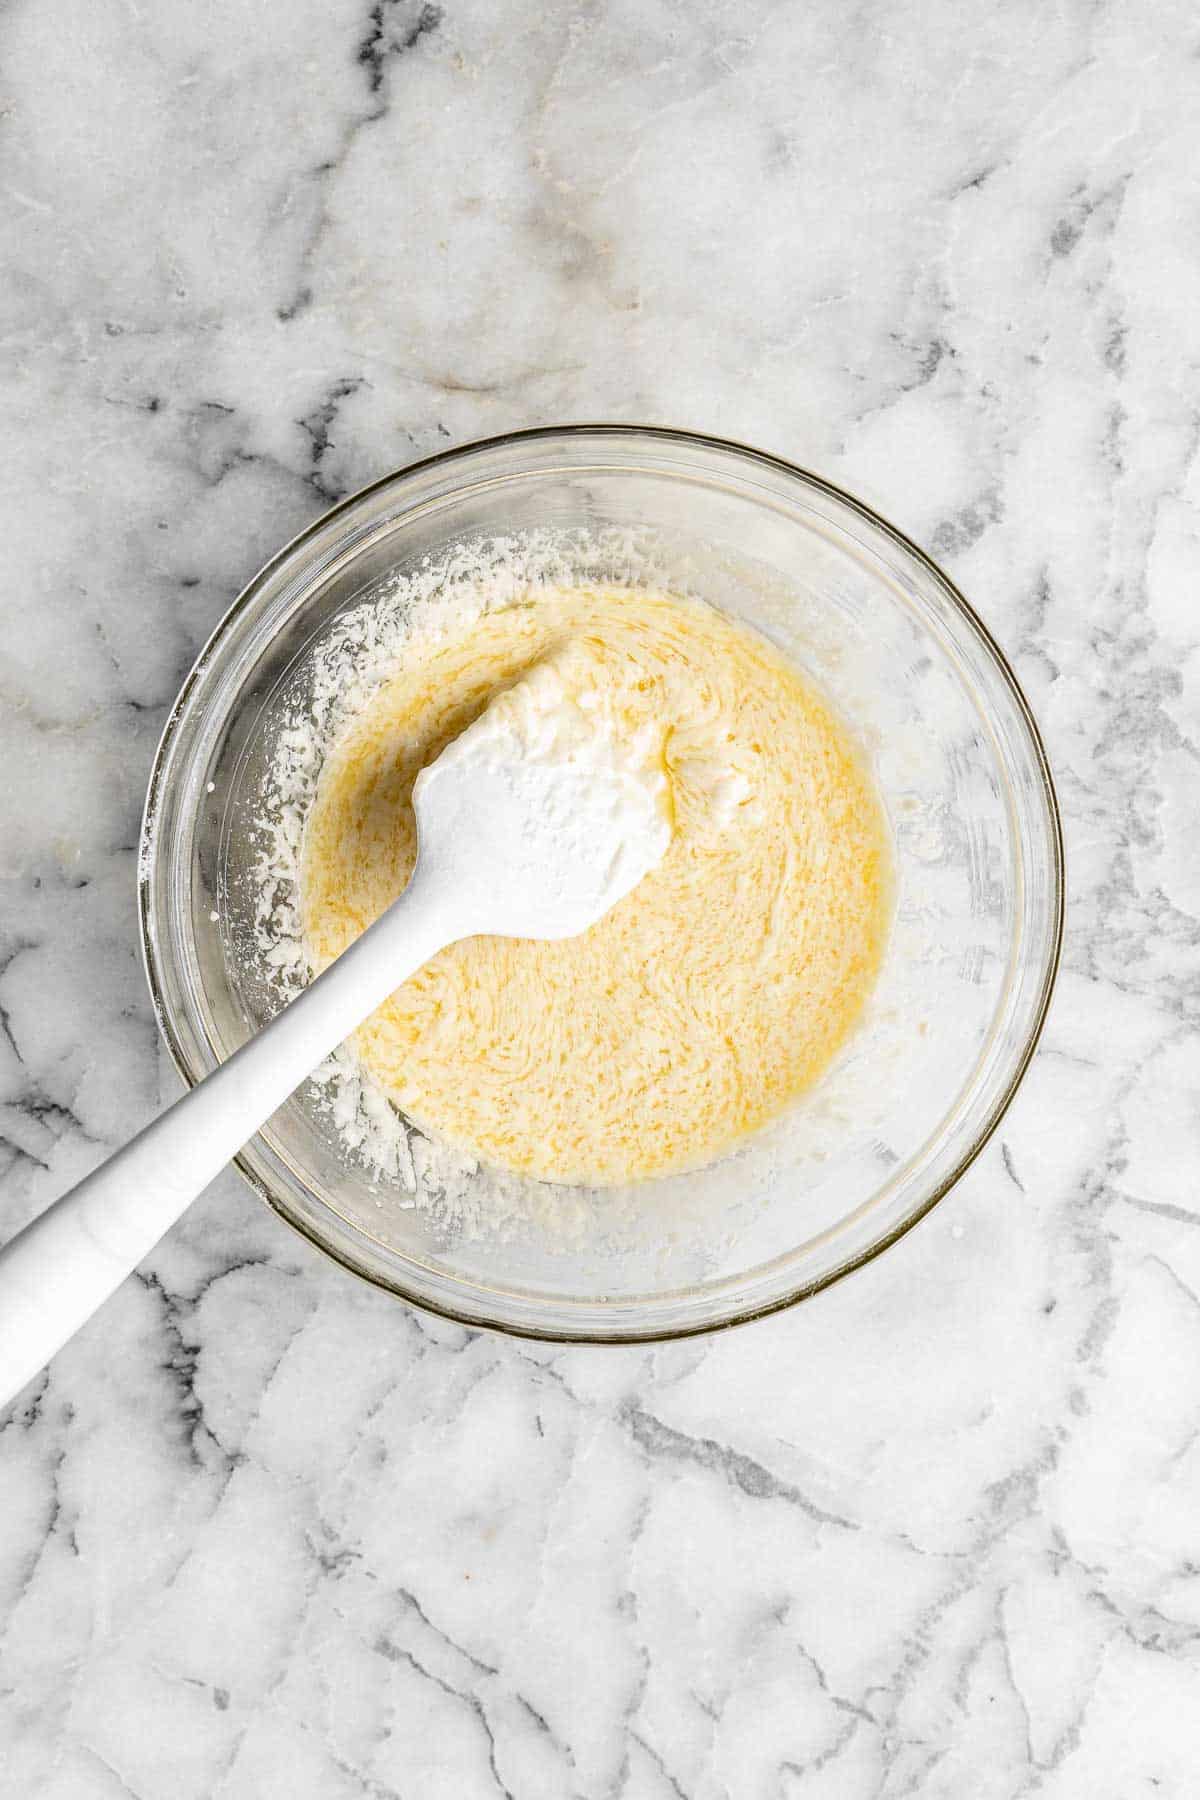
- Add butter. Then pour that into the rest of the batter, and delicately fold until combined again, making sure that the batter isn't deflated.
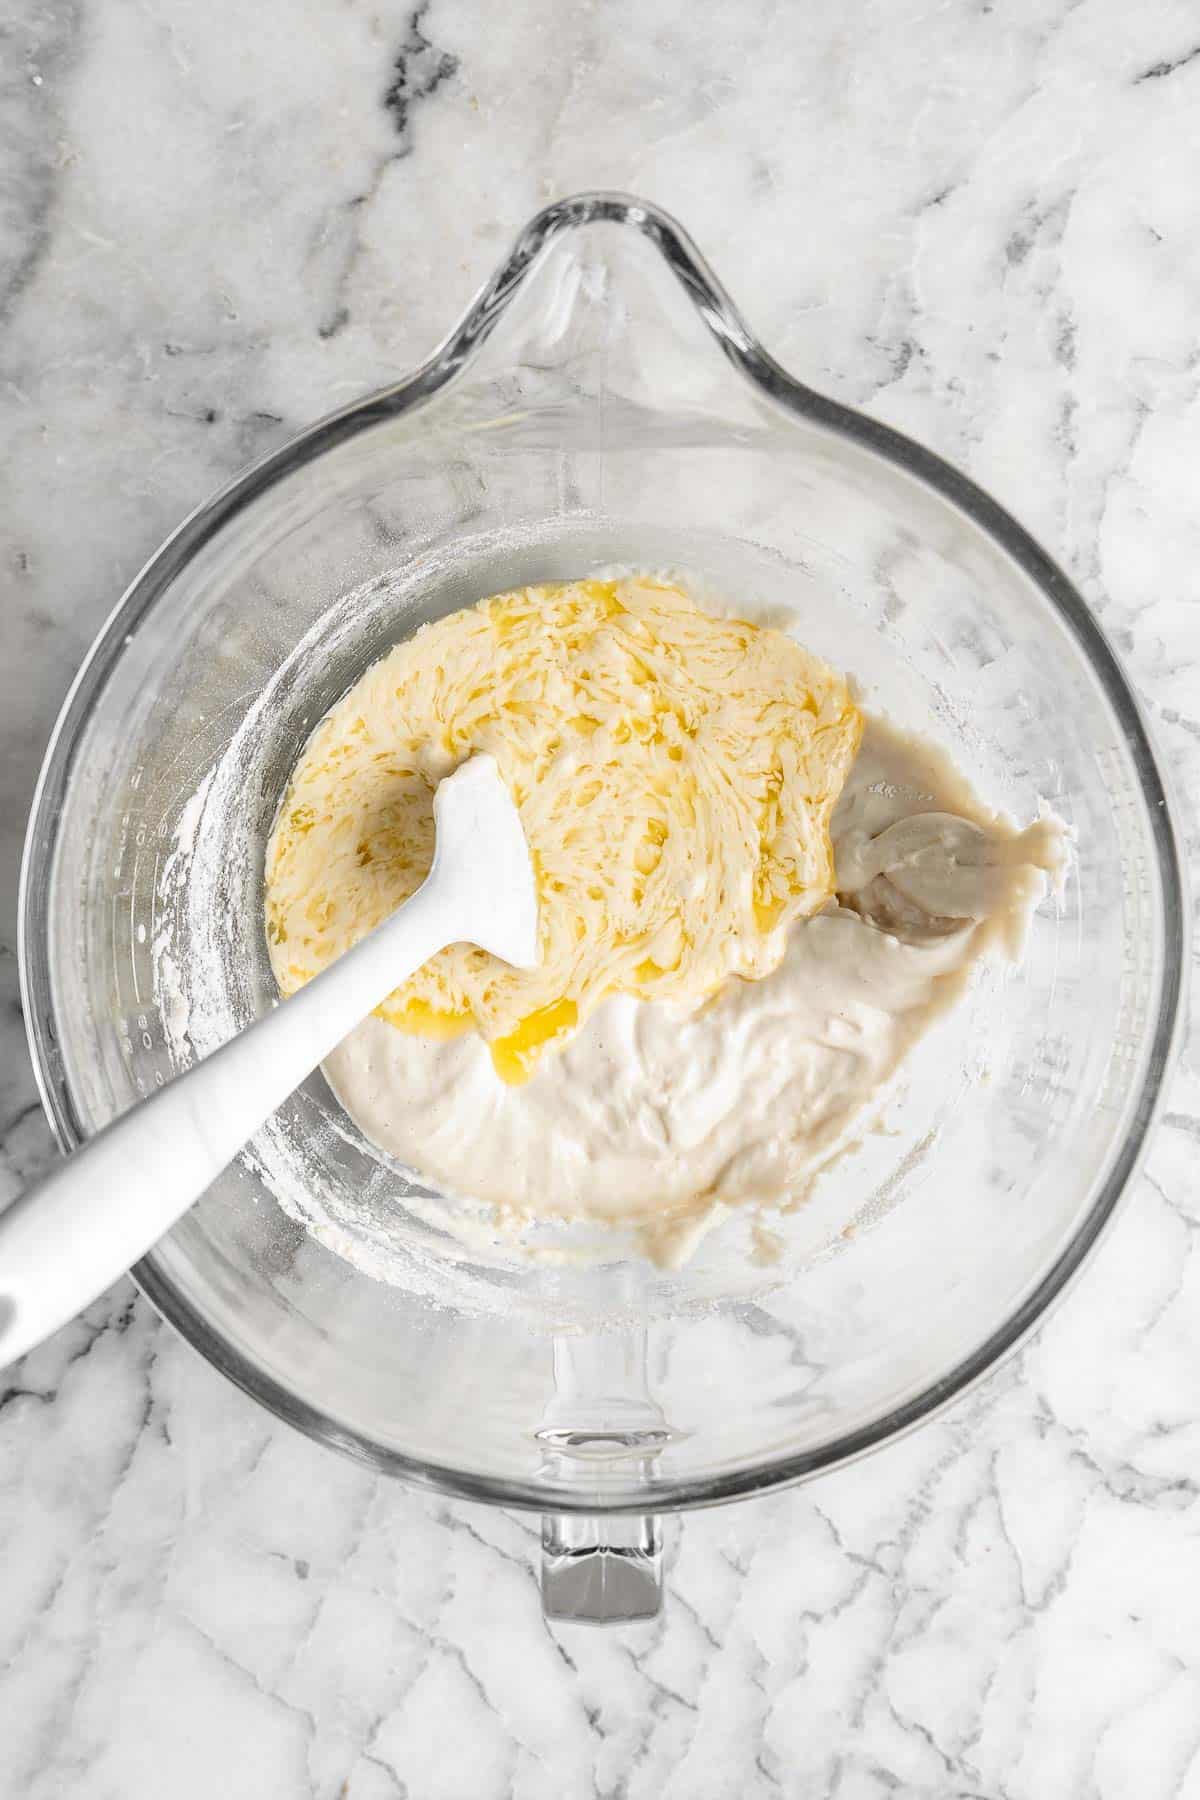
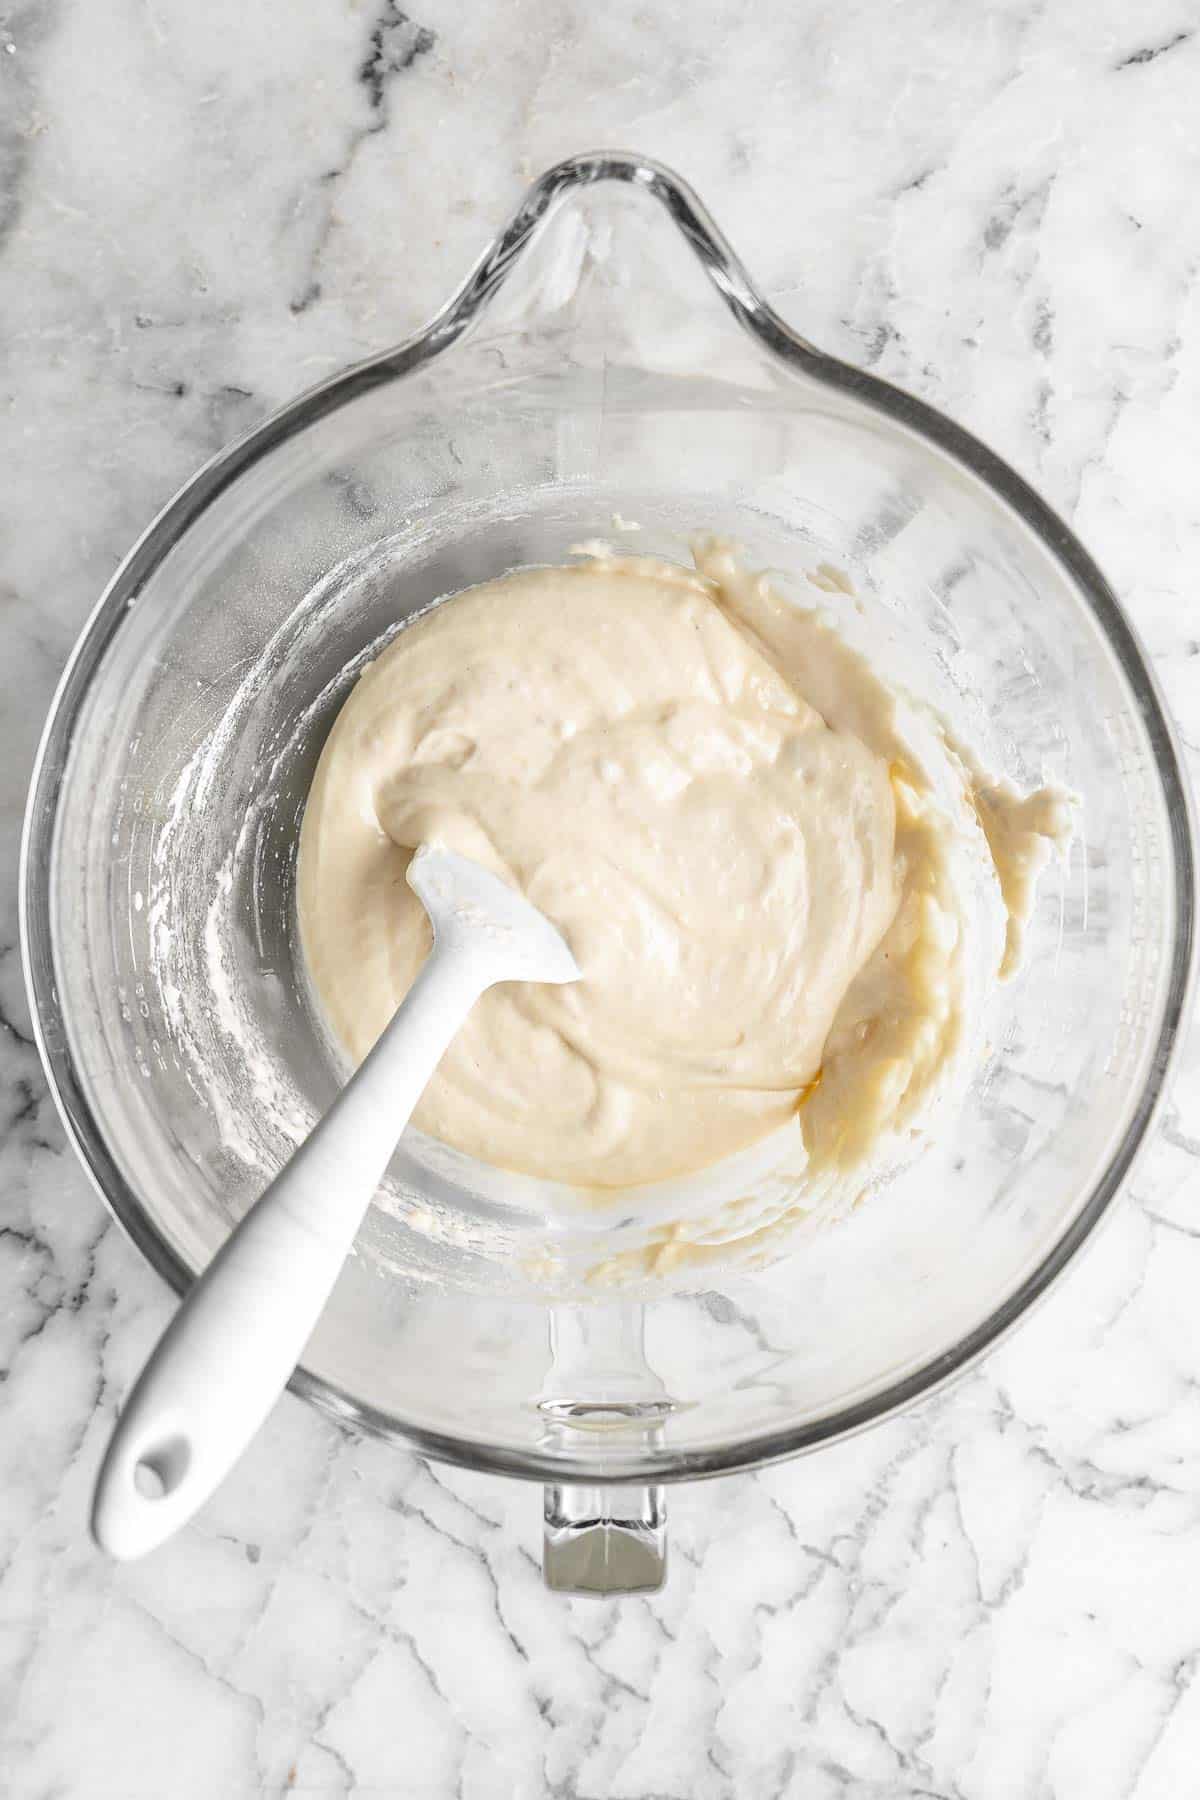
- Rest. Place plastic cling wrap over the bowl and let the batter rest in the fridge for at least 4 hours (up to 12 hours). The longer you let it rest, the taller the humps on the back with be.
- Prep for baking. When you're almost ready to bake, preheat the oven to 375°F. Prepare a madeleine pan by brushing with very soft butter or spray with cooking oil spray. Place the prepared pan into the freezer for 20 minutes.
- Scoop batter. While the pan is in the freezer, remove the rested batter from the fridge and give the batter 2 or 3 stirs. Scoop the batter into a large piping bag, then cut the tip off the piping bag. Remove the pan from the freezer and fill each cavity ⅔ full with batter. Place the pan back into the freezer for 5 more minutes.
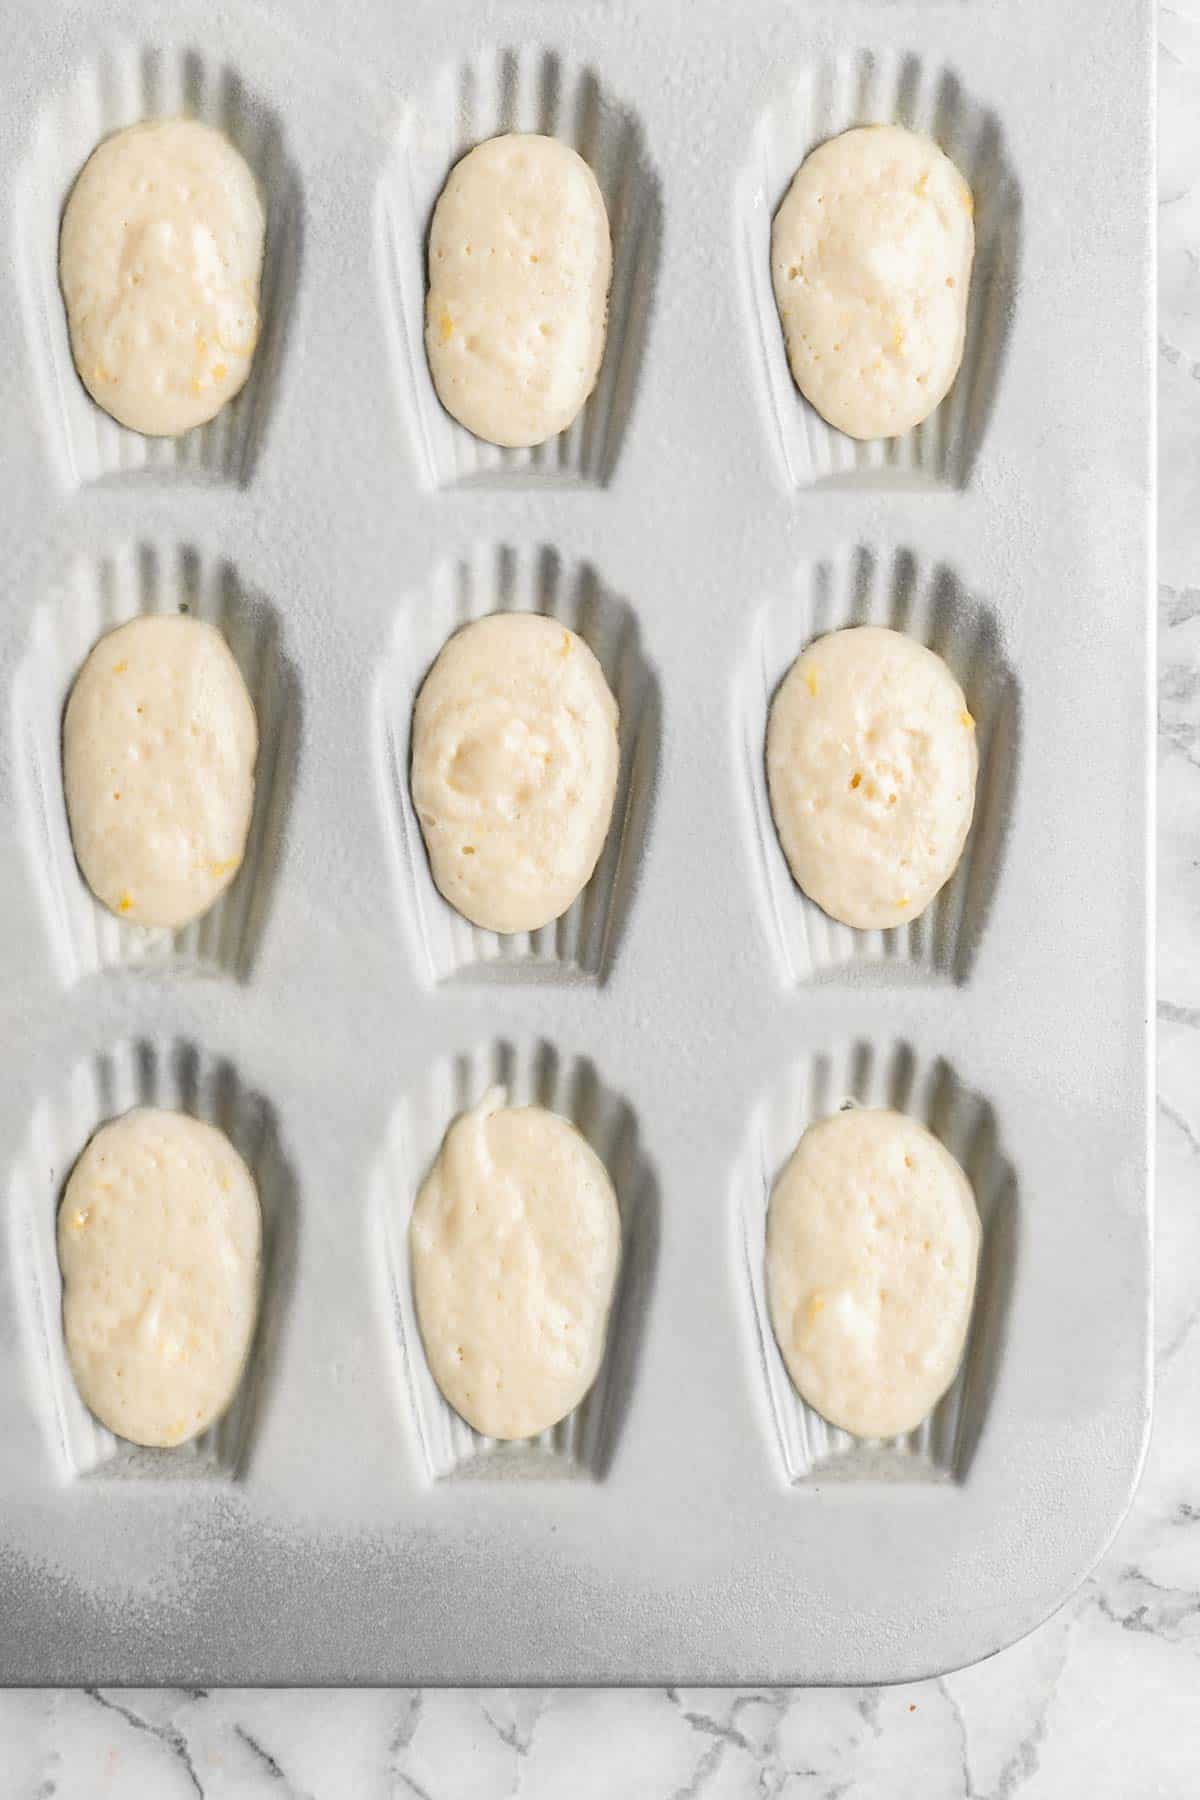
- Bake. Remove the pan from the freezer and bake for 9 minutes, until bouncy. Allow the madeleines to cool in the pan for 30 minutes, then carefully pop each madeleine out and place onto a wire rack to cool completely.
- Dust with sugar. Once completely cooled, dust each madeleine with confectioners sugar (optional).

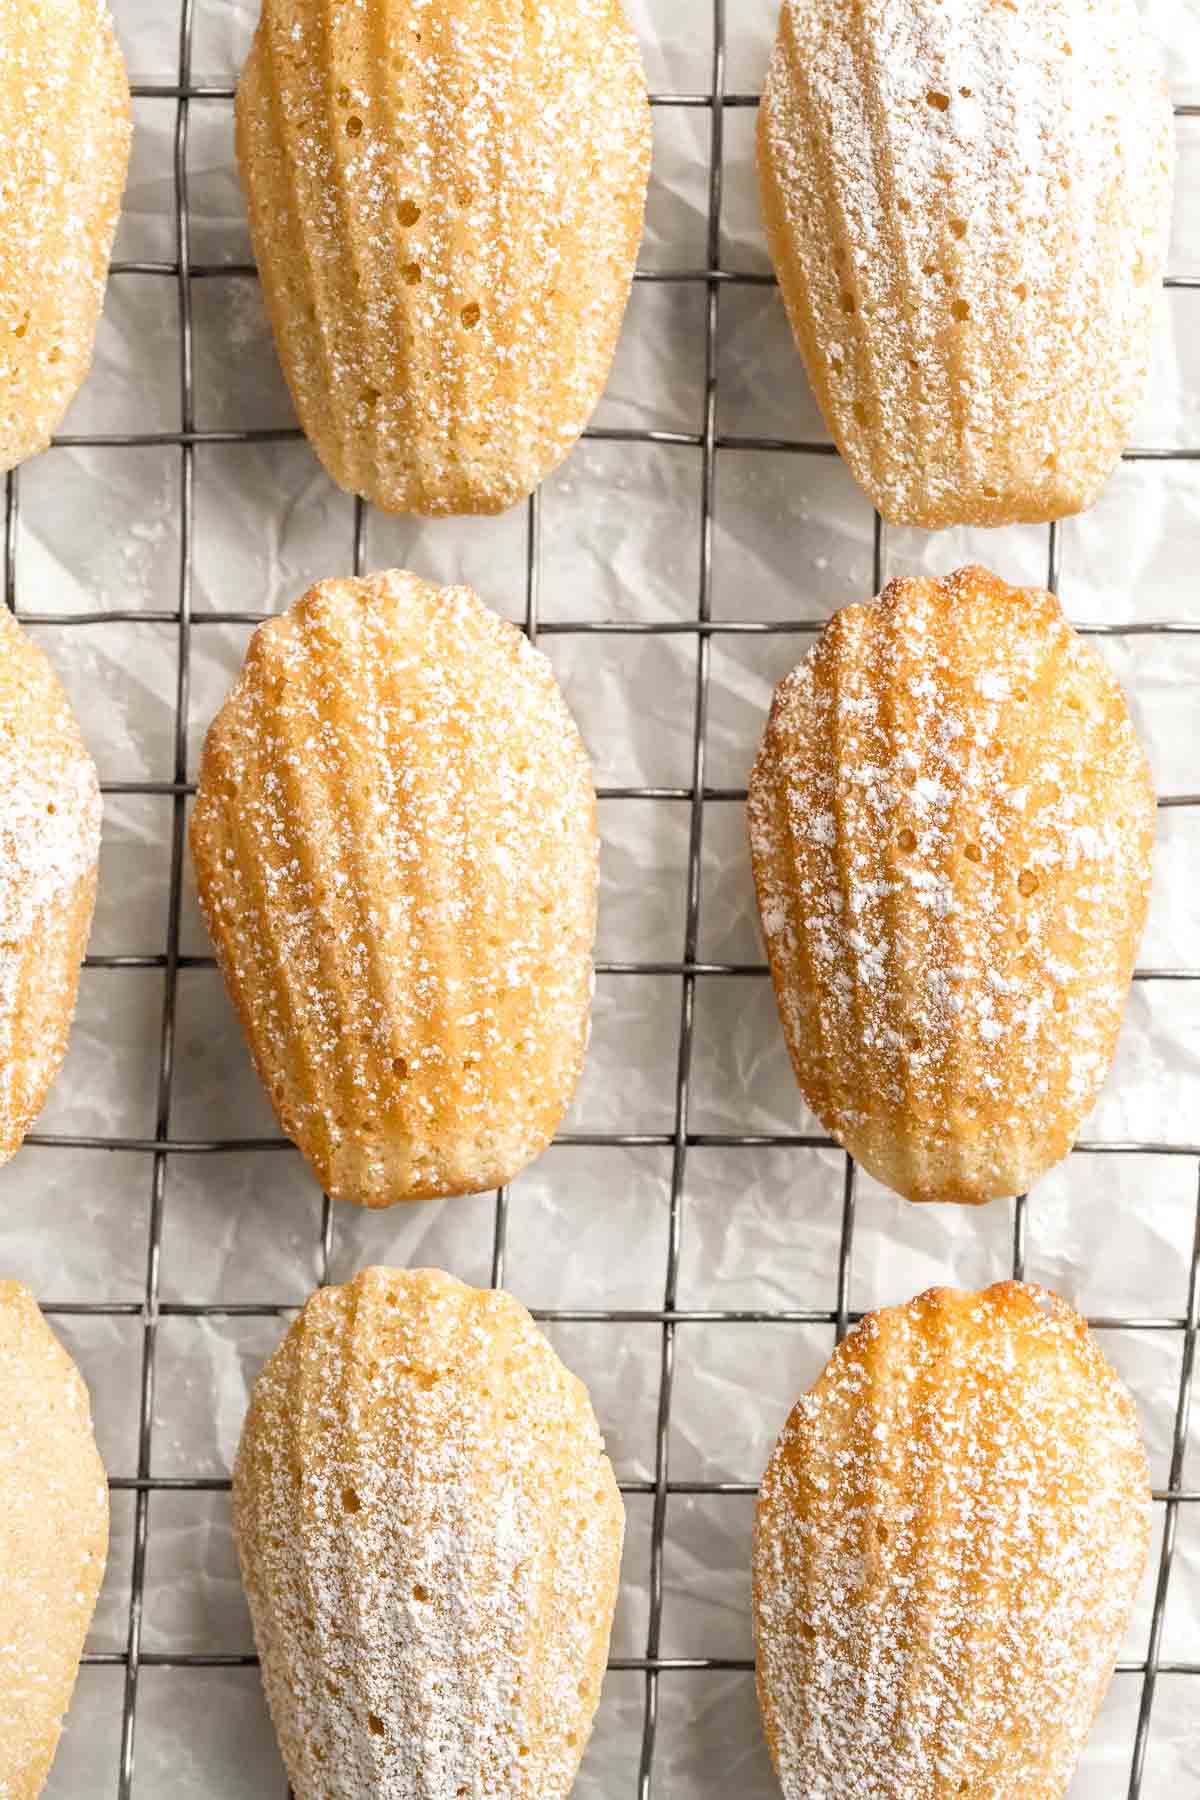
Recipe Variations
- Dip them in chocolate. A popular and widely-loved variation of madeleines includes a quick dunk in the melted chocolate of your choice, like white, milk, semi-sweet, or dark chocolate.
- Add nuts. Once dipped in chocolate, immediately add some crushed nuts to stick to the chocolate. Try pistachios, pecans, or almonds.
- Add sprinkles. Similarly, add sprinkles on top of the melted chocolate. This way, you can also customize these madeleines based on the particular holiday or theme you are celebrating.
- Make chocolate madeleines. For chocolate madeleines, simply substitute 2 tablespoons of the flour with ¼ cup unsweetened cocoa powder.
How to Serve
These delicious Madeleines are a classic tea time treat. Serve them with a warm drink like:
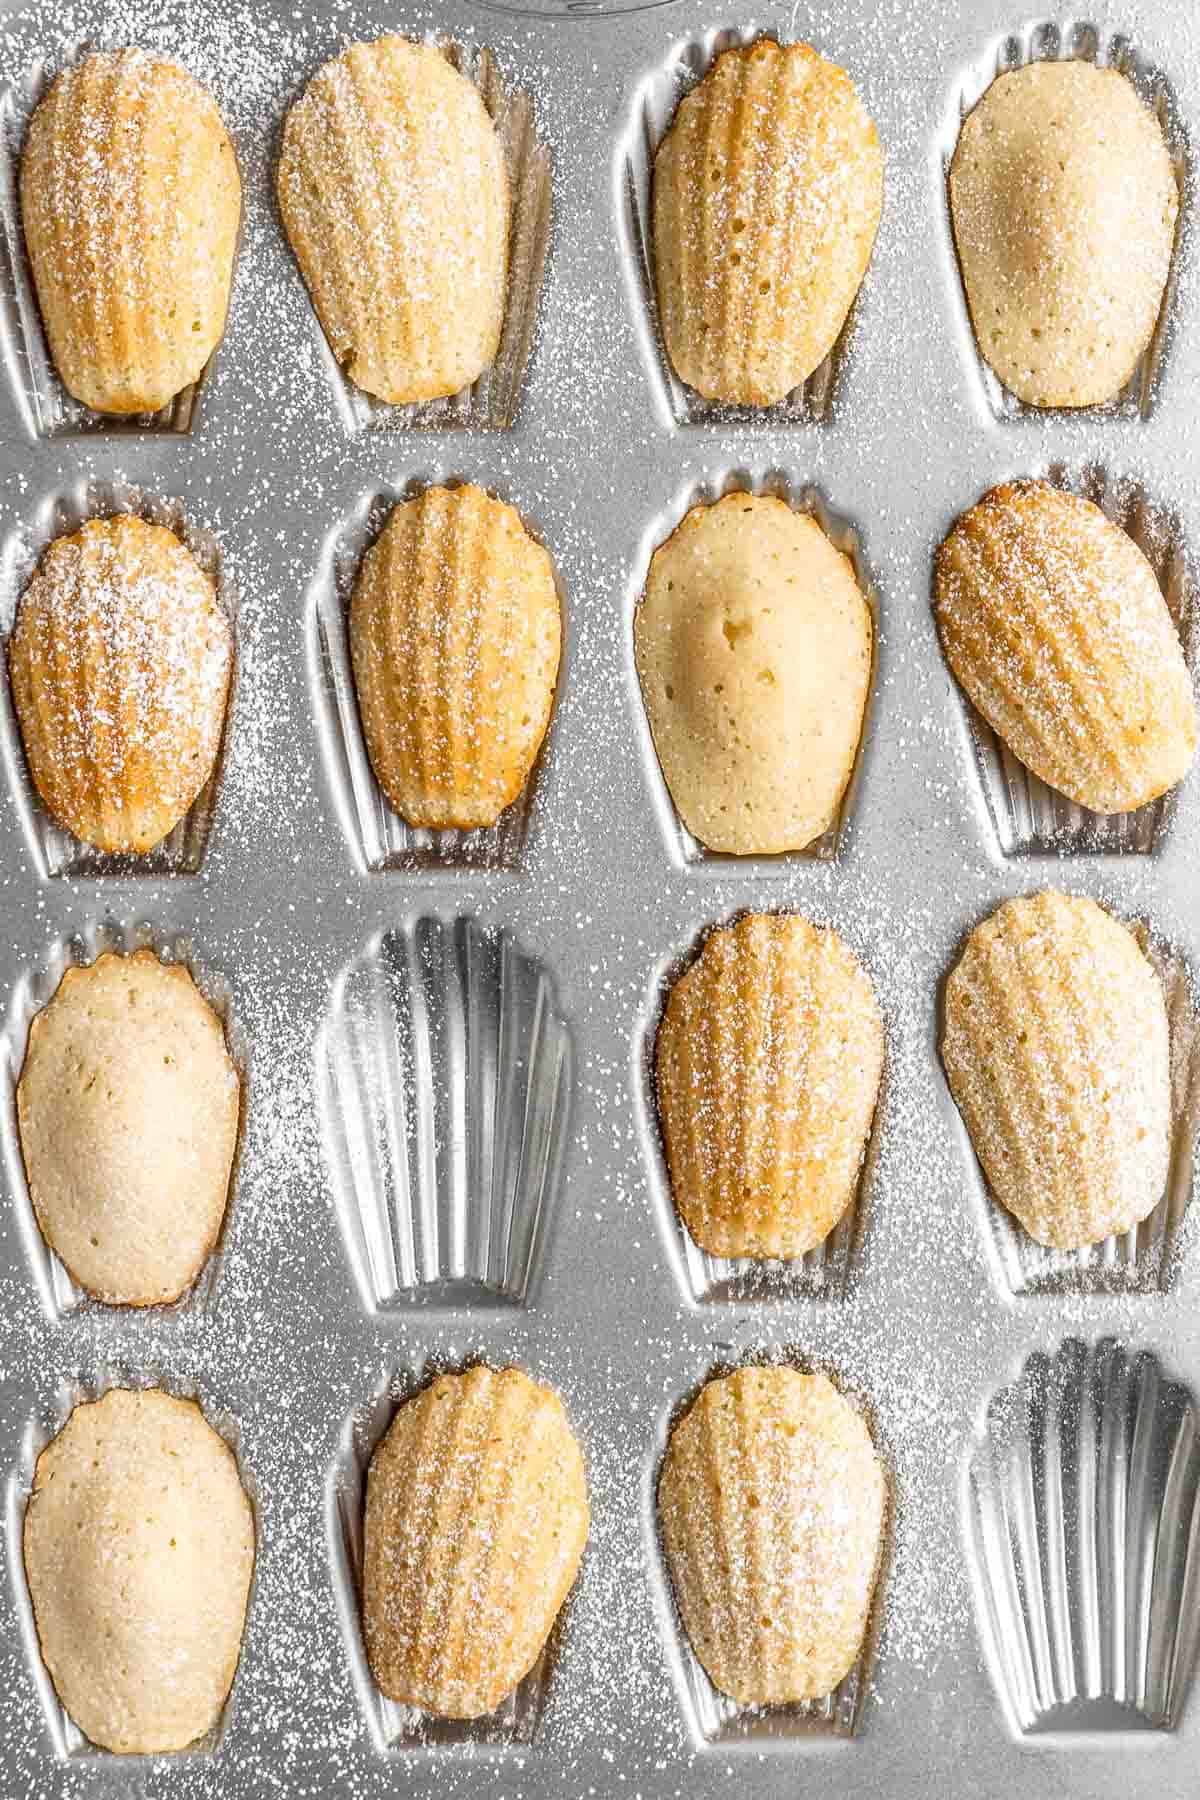
Recipe Tips and Tricks
- Use a kitchen scale. If you have a kitchen scale, use it. It's especially important to measure the flour properly. Too much flour will cause the madeleines to be dense and dry rather than light.
- Allow the batter to rest. It is important to allow the batter to rest for the full 4 hours. This may seem long but it helps the batter to thicken and and is crucial for getting the classic bump or hump that madeleines are known for.
- Wait for them to cool before adding sugar. Patience is key! Wait for them to cool before dusting them with confectioners' sugar or the sugar will melt into them.
Frequently Asked Questions
No, you need a madeleine pan in order to make these mini cakes with the iconic shell grooves.
Gently poke one madeleine with your finger. If it bounces back, it's done. You can also check with a toothpick. If a toothpick inserted into one comes out clean, it's done baking.

Storing and Freezing Instructions
How to Store
Store leftover madeleines in an airtight container at room temperature for up to 2 days or in the refrigerator for up to five days, though you may want to eat or freeze them immediately as they're prone to drying out quickly.
How to Freeze
Wrap each madeleine individually in plastic cling wrap, then place all of the wrapped cookies in a freezer bag and freeze for up to three months.
More Dessert Recipes
- Lemon Drop Cookies
- Italian Rainbow Cookies
- Molten Chocolate Lava Cakes
- Lemon Curd Cookies
- Lemon Loaf with Lemon Glaze
- Moist Vanilla Cupcakes
Tried this recipe?
I'd love to hear what you think! Leave a comment and rating below to share your feedback. Your reviews help others discover this recipe and help me keep creating more free recipes for you. Snap a photo and tag me on social media @aheadofthyme too.
Baked Ricotta
Baked ricotta is creamy, smooth, and flavorful. This delicious warm dip is packed with Parmesan and seasoned with dried herbs for the ultimate cheesy dip experience. It's an easy to prepare appetizer (5 minutes of prep!) that is perfect to serve during the holidays - or any time of the year!
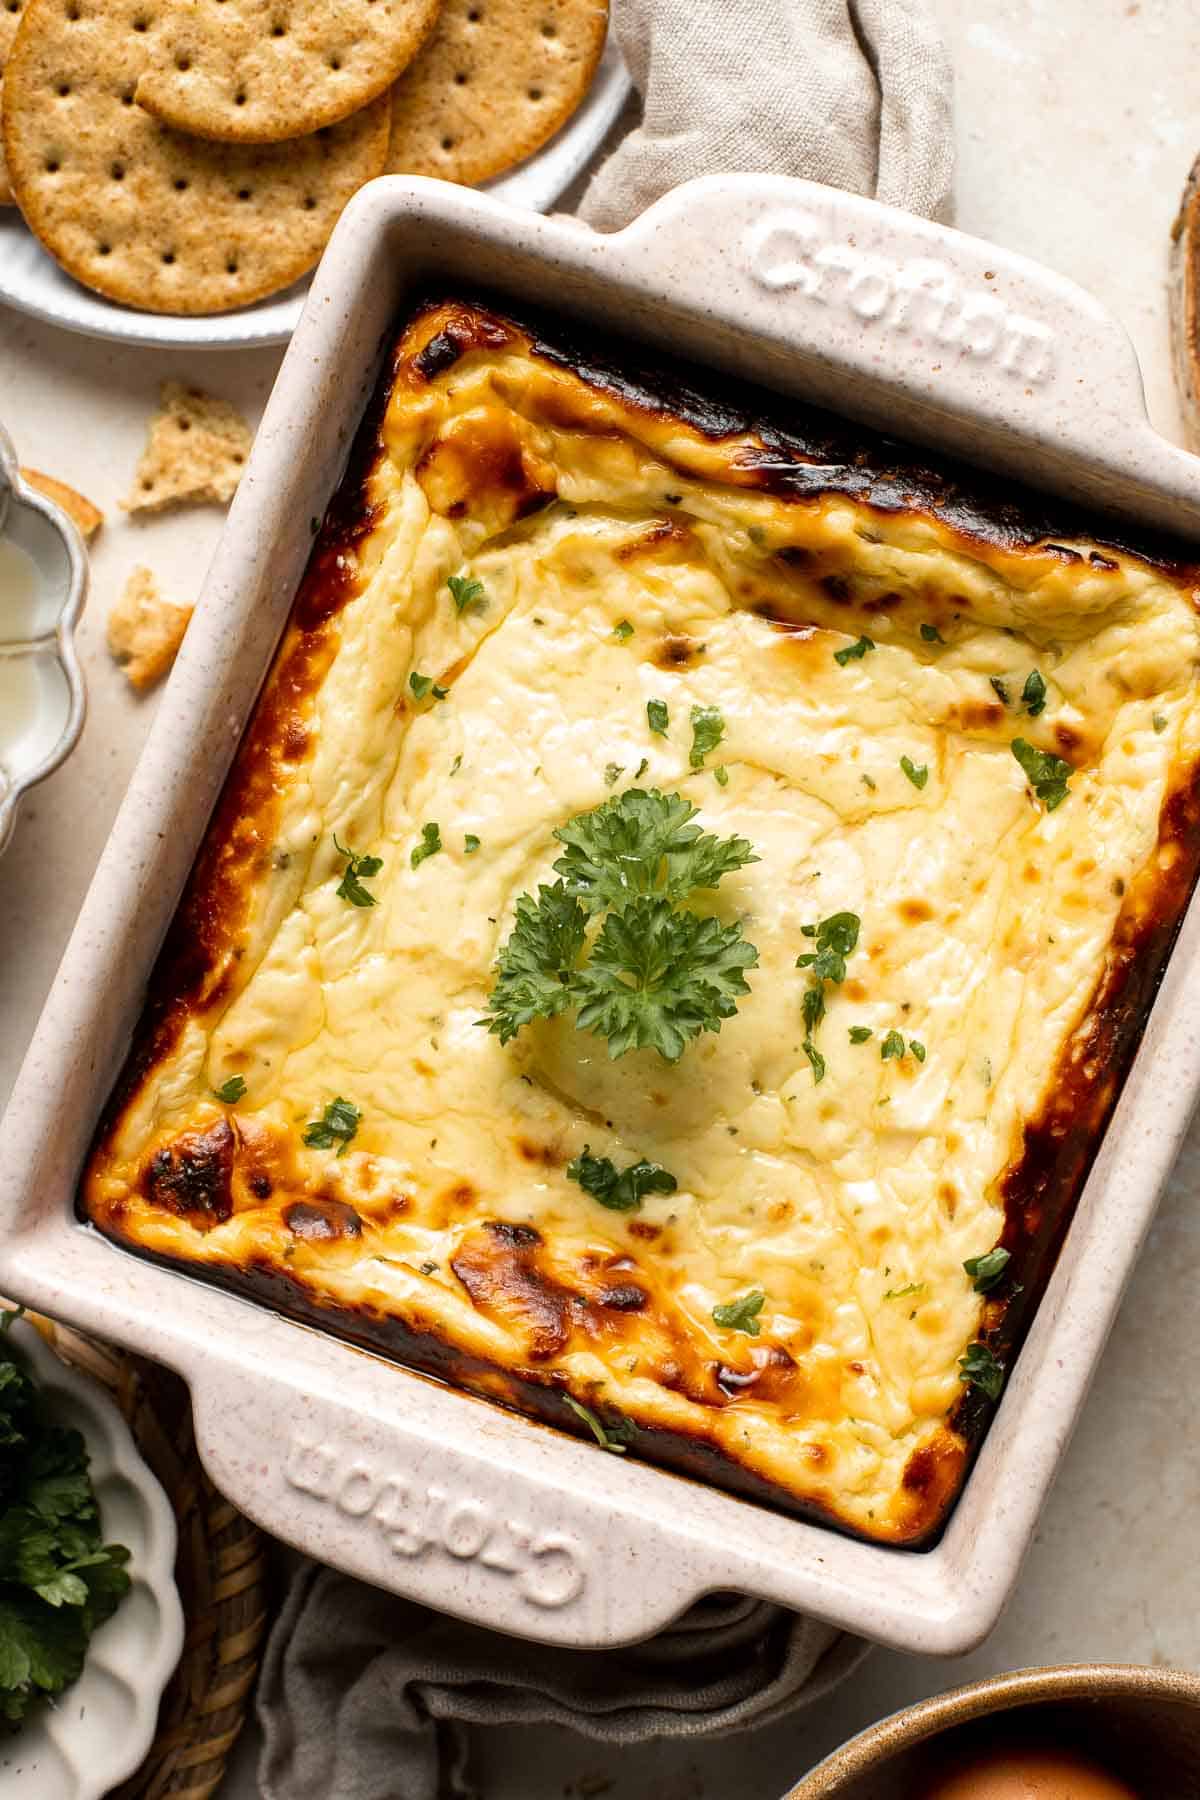
Plus, it takes just 30 minutes to bake in the oven before you can serve up this warm dip. It's fast, easy, and delicious - everything you want in a holiday appetizer. Serve with toasted bread, crackers, and/or veggies.
Why You'll Love this Baked Ricotta
- Rich and creamy. When it's baked, ricotta becomes even thicker, smoother, and more spreadable as the water content in the cheese evaporates. This warm ricotta dip is cozy and perfect!
- Mouthwatering Italian flavors. Parmesan cheese, Italian seasoning, red pepper flakes, and fresh parsley take this ricotta from good to amazing. The delicious aroma will fill your kitchen while the ricotta bakes and your whole family will be ready to dig right in.
- Easy snack or appetizer. Baked ricotta is a prime candidate for the snack table at your next gathering. It takes five minutes to prep the ingredients before it goes in the oven to heat up - perfect for baking while you're preparing other dishes or putting the final touches on your holiday party.
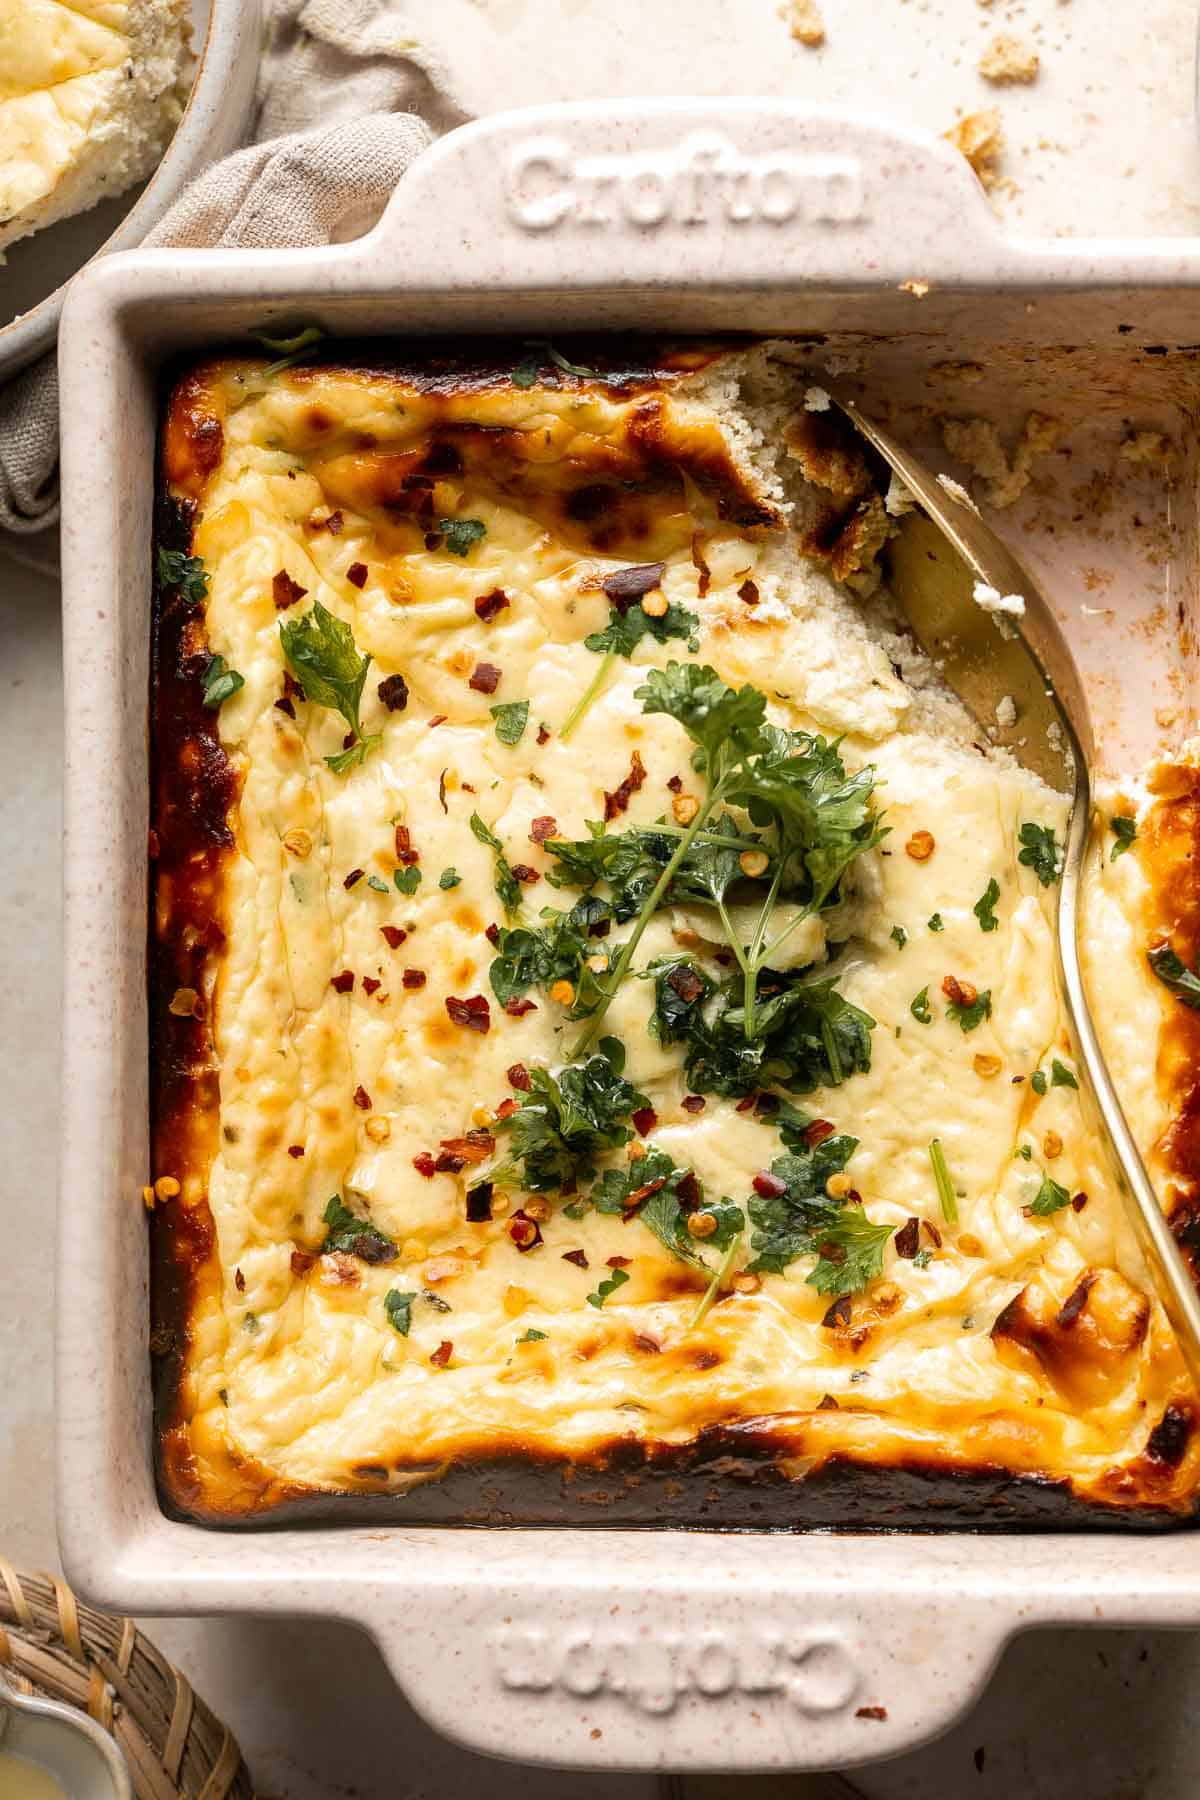
Ingredient Notes
To make this easy Baked Ricotta, you will need the following ingredients (full measurements in recipe card below):
- ricotta cheese - use whole milk ricotta for the best results.
- eggs
- parmesan cheese - grated asiago or pecorino Romano can be used in place of the parmesan here.
- Italian seasoning - you can use a homemade blend, store-bought blend, or a different spice blend to suit your tastes. A similar substitute would be to use dried oregano instead.
- red pepper flakes - gives the warm ricotta dip a little bit of a kick, but you can reduce the amount or completely omit them for a milder flavor.
- olive oil - add a drizzle on top when serving. This is optional but highly recommended.
- parsley - you can also use other fresh herbs to garnish this dish. Try thyme, rosemary, or dill.
- for serving - serve with crostinis, baguettes, or your favorite crackers. Veggies like broccoli, carrots, sliced bell peppers, snow peas, celery, and endive also make great dippers for this baked ricotta.
You will also need measuring cups and spoons, mixing bowl, and small baking dish (1.5 quart baking dish).
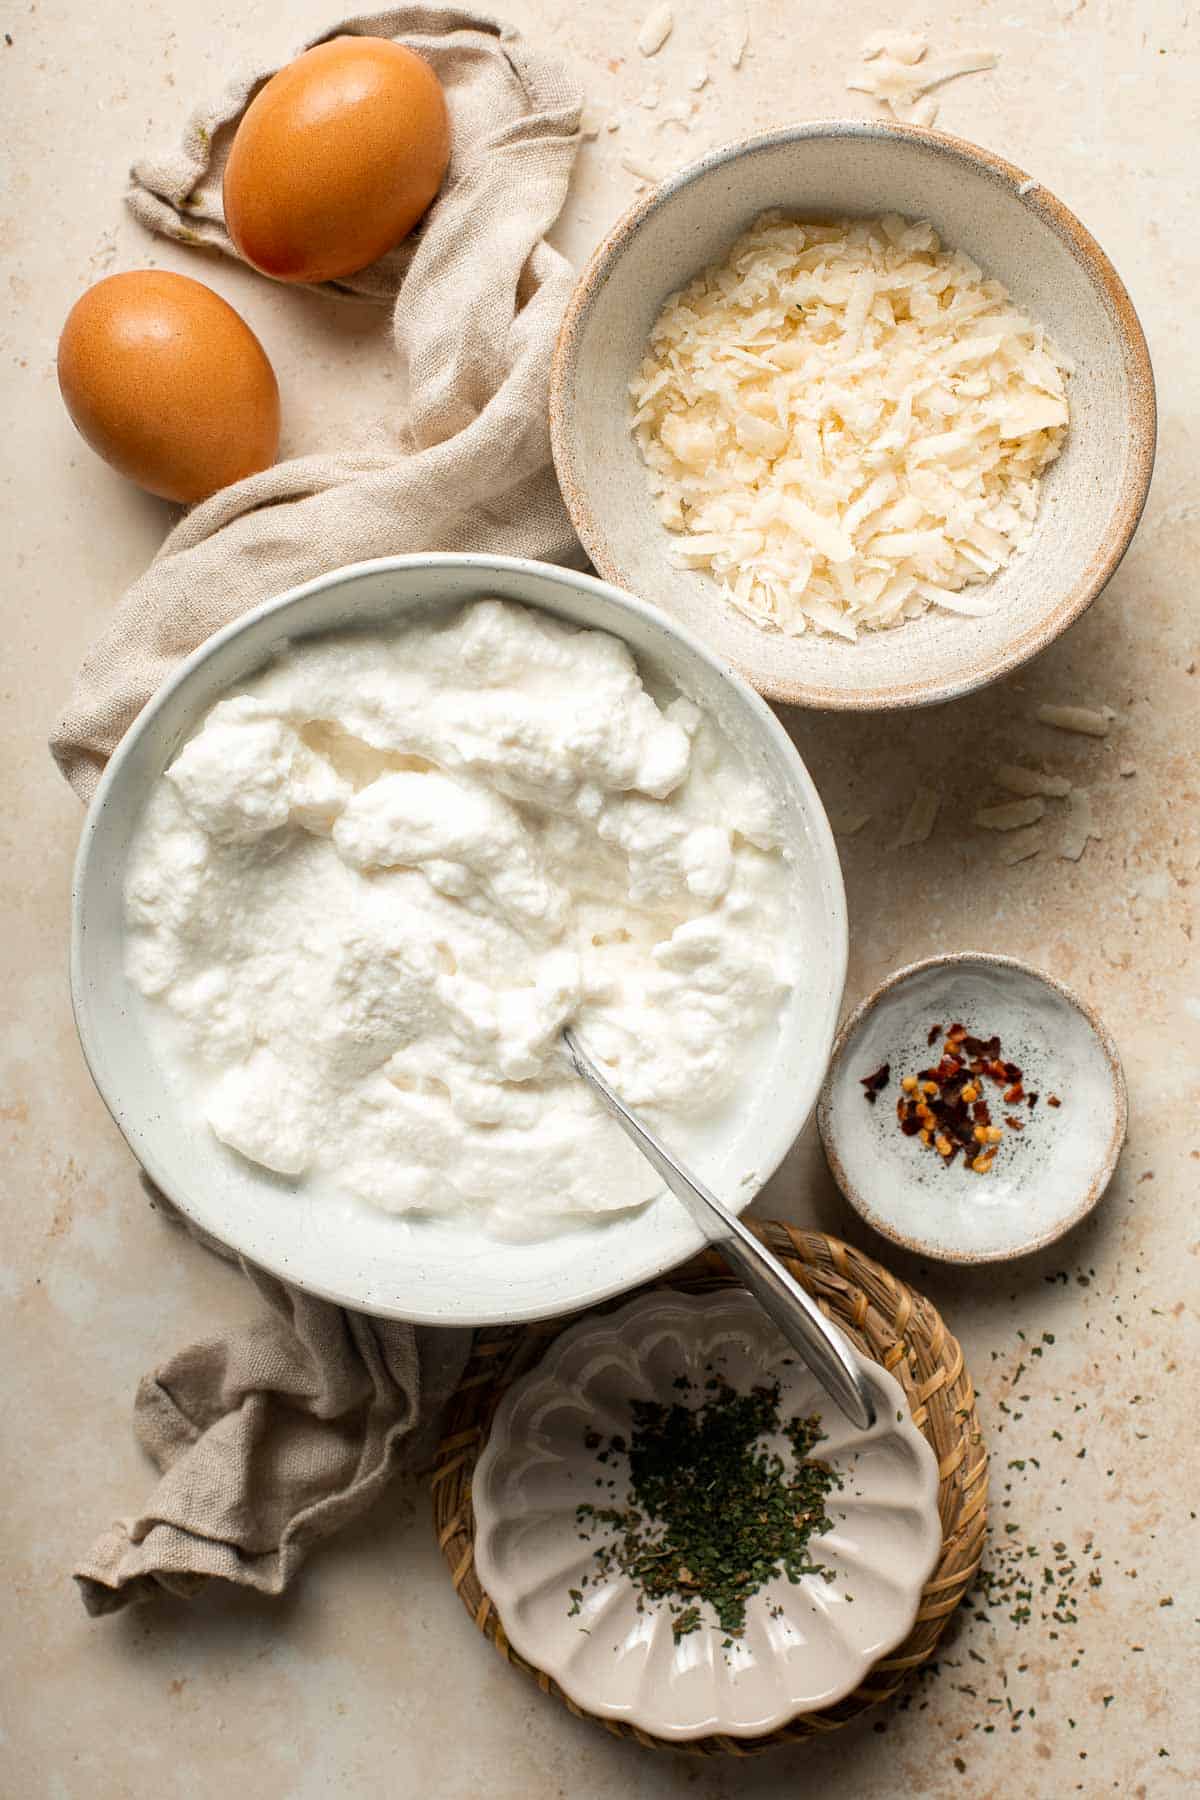
How to Make the Best Baked Ricotta
- Combine ingredients. In a large mixing bowl, combine ricotta, eggs, 1 cup Parmesan cheese, Italian seasoning, and red pepper flakes. Stir to combine.
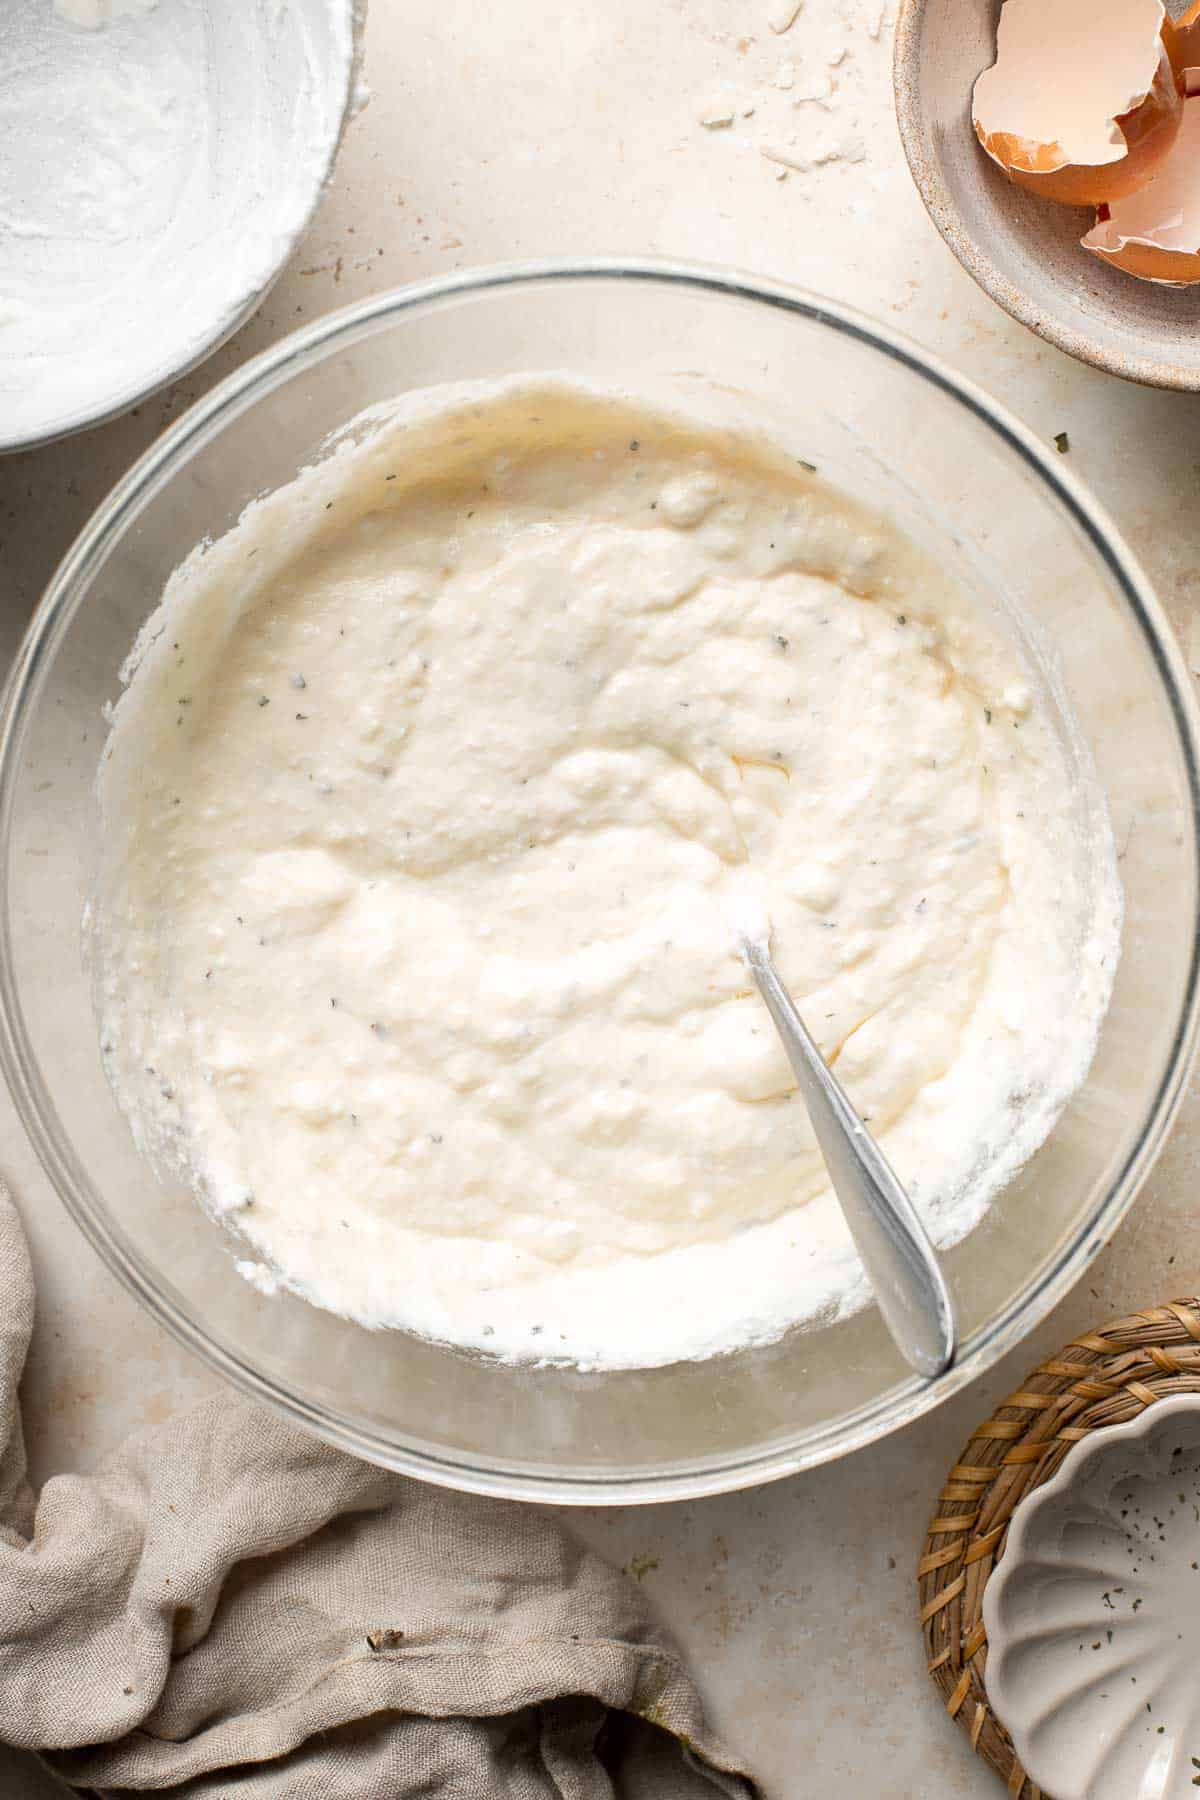
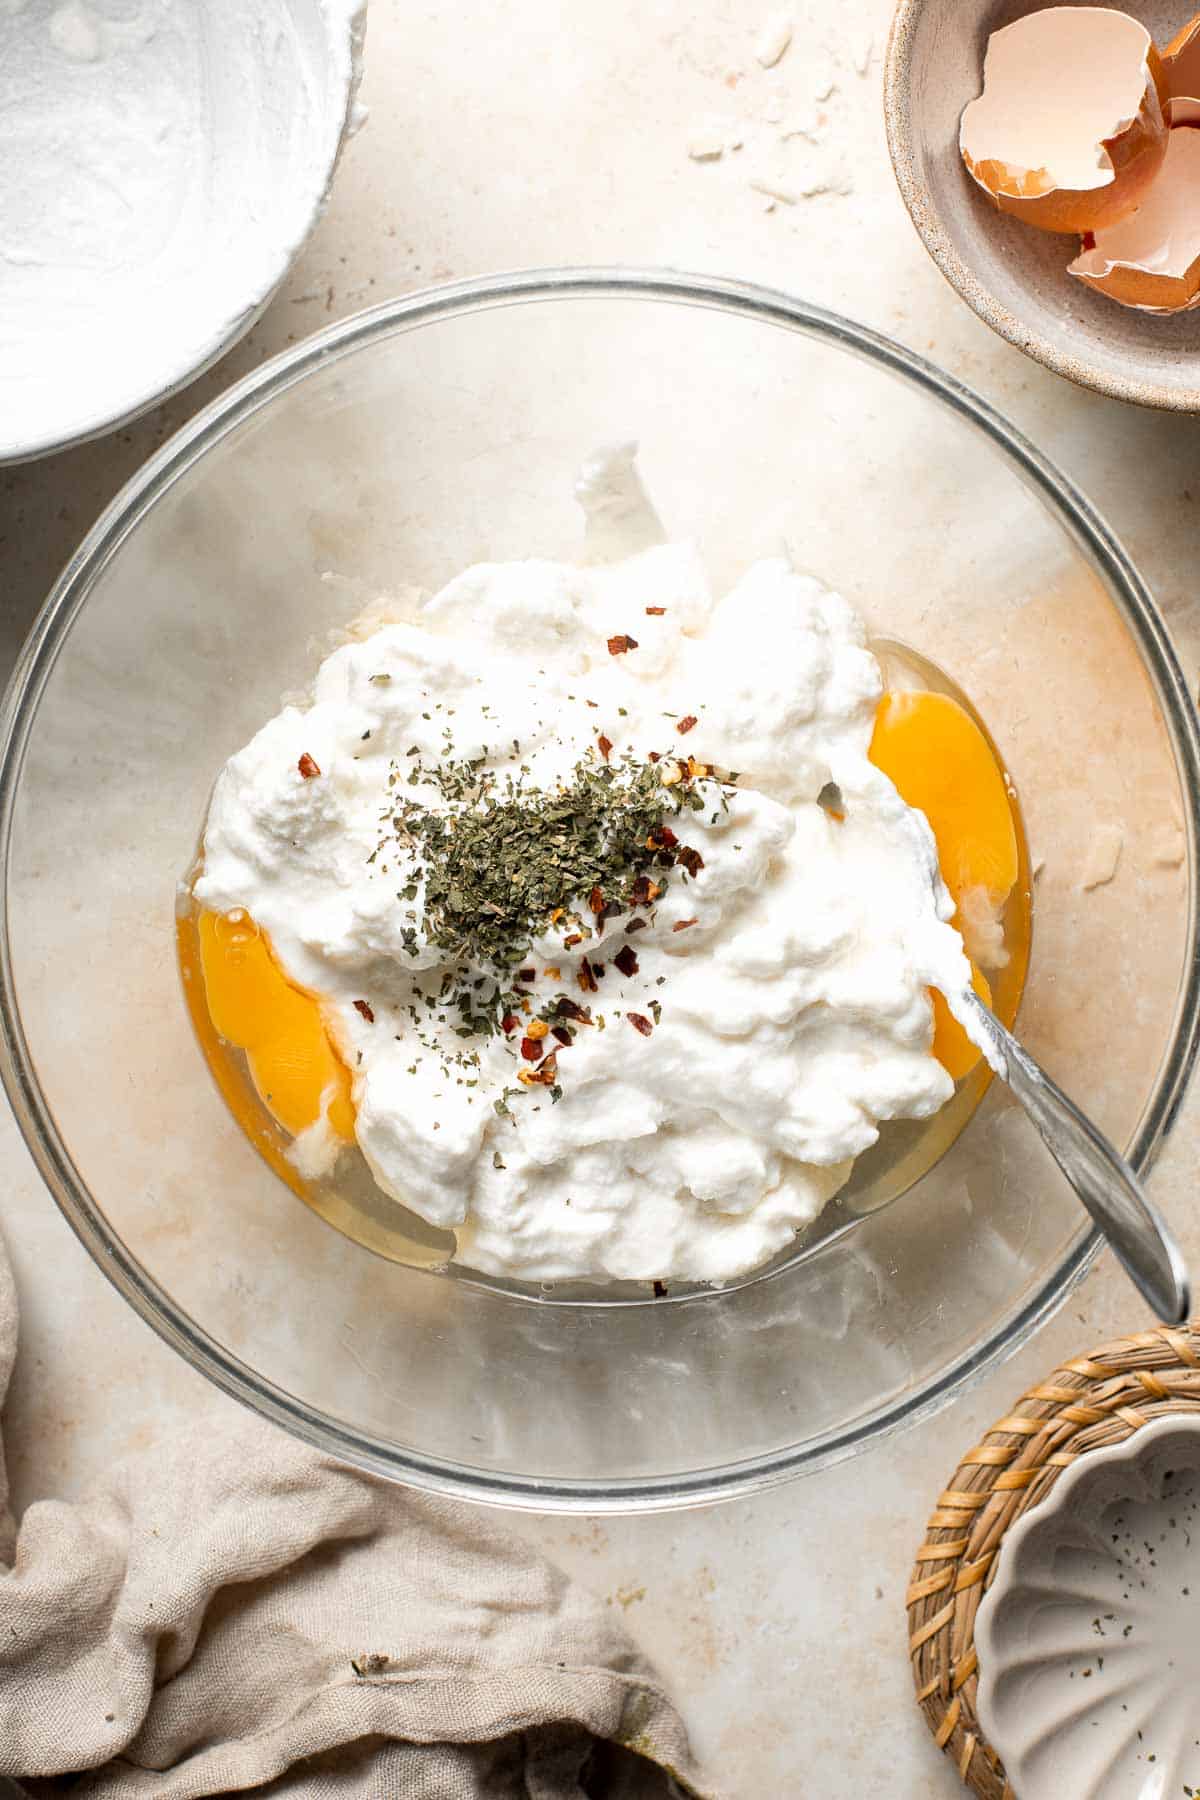
- Bake. Transfer mixture into a small baking dish (1.5 quart baking dish). Bake in a 400F preheated oven for 30 minutes until the ricotta is puffy and golden brown.
- Serve. Serve warm with a drizzle of olive oil on top and fresh herbs. Serve with toasted bread, crackers, and/or veggies.
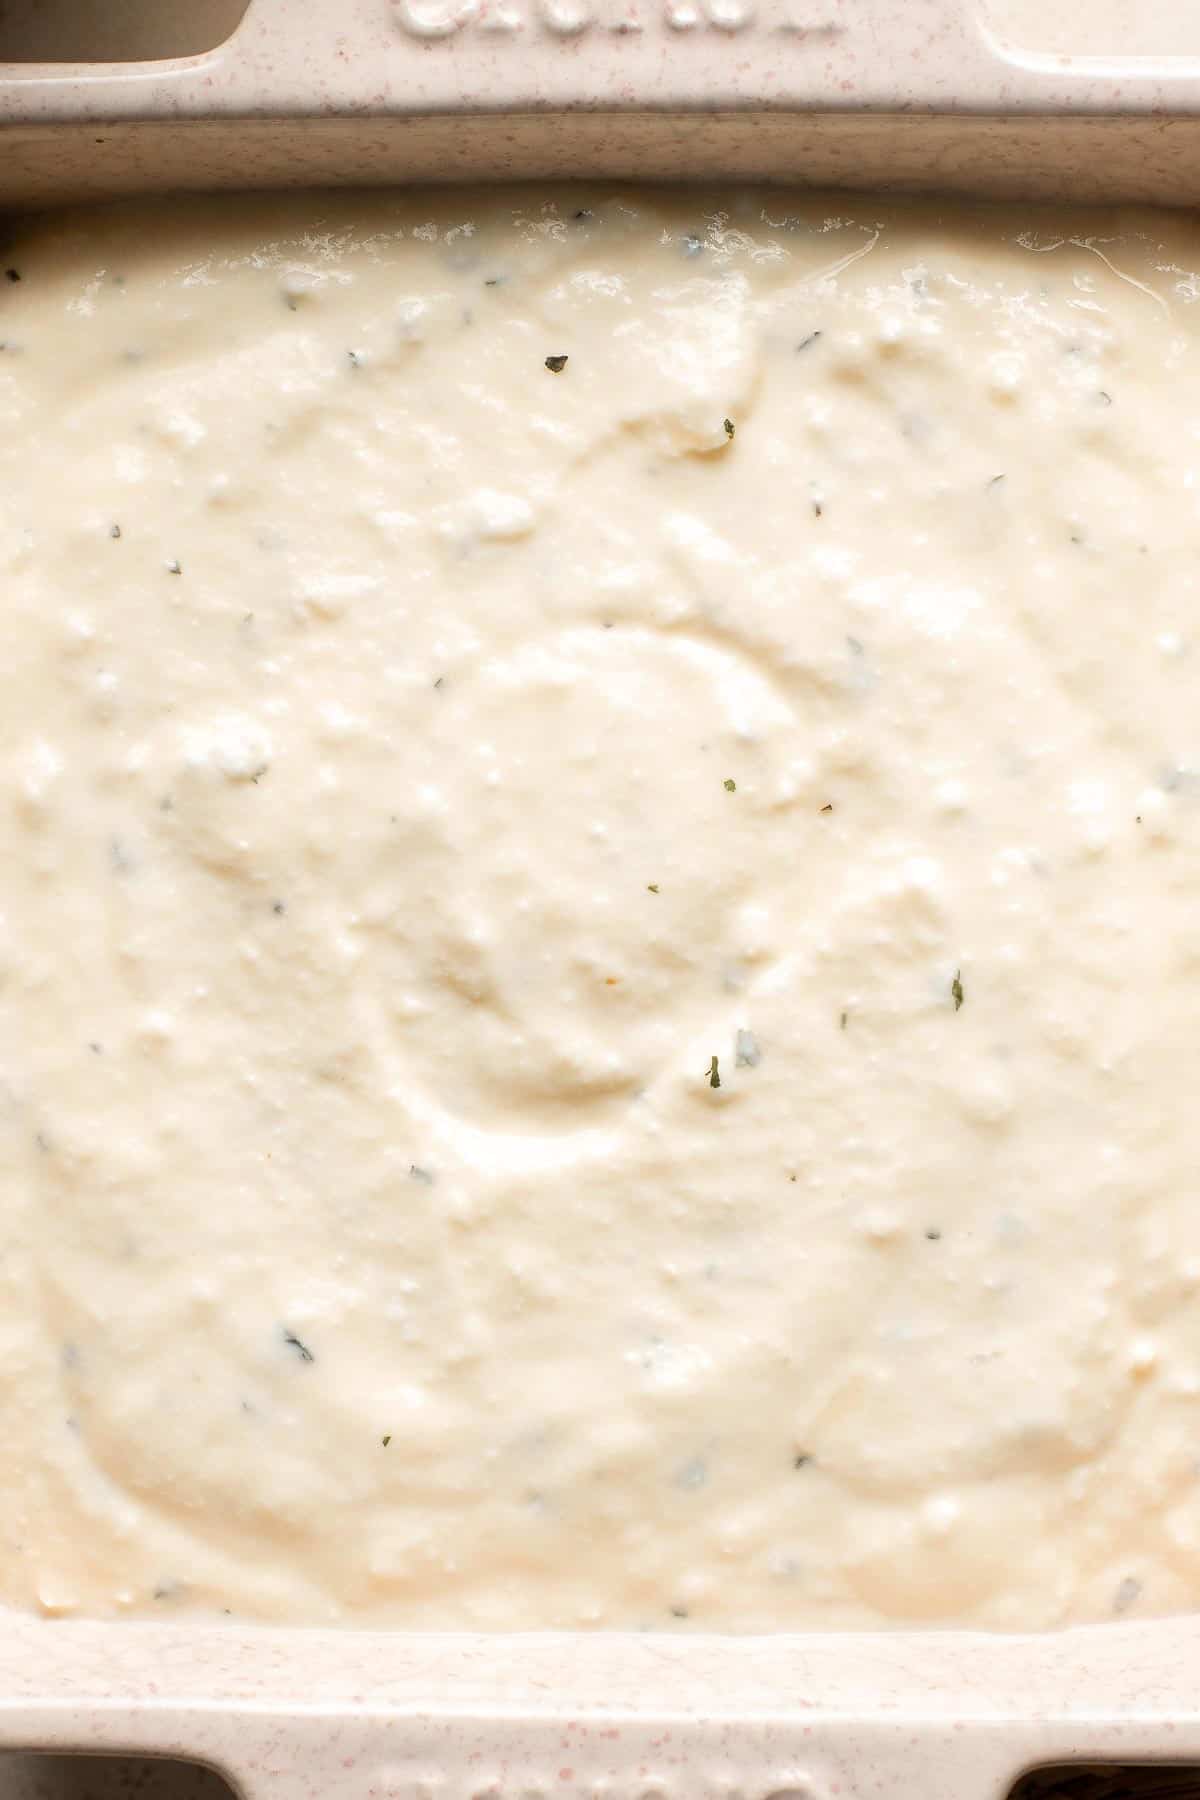
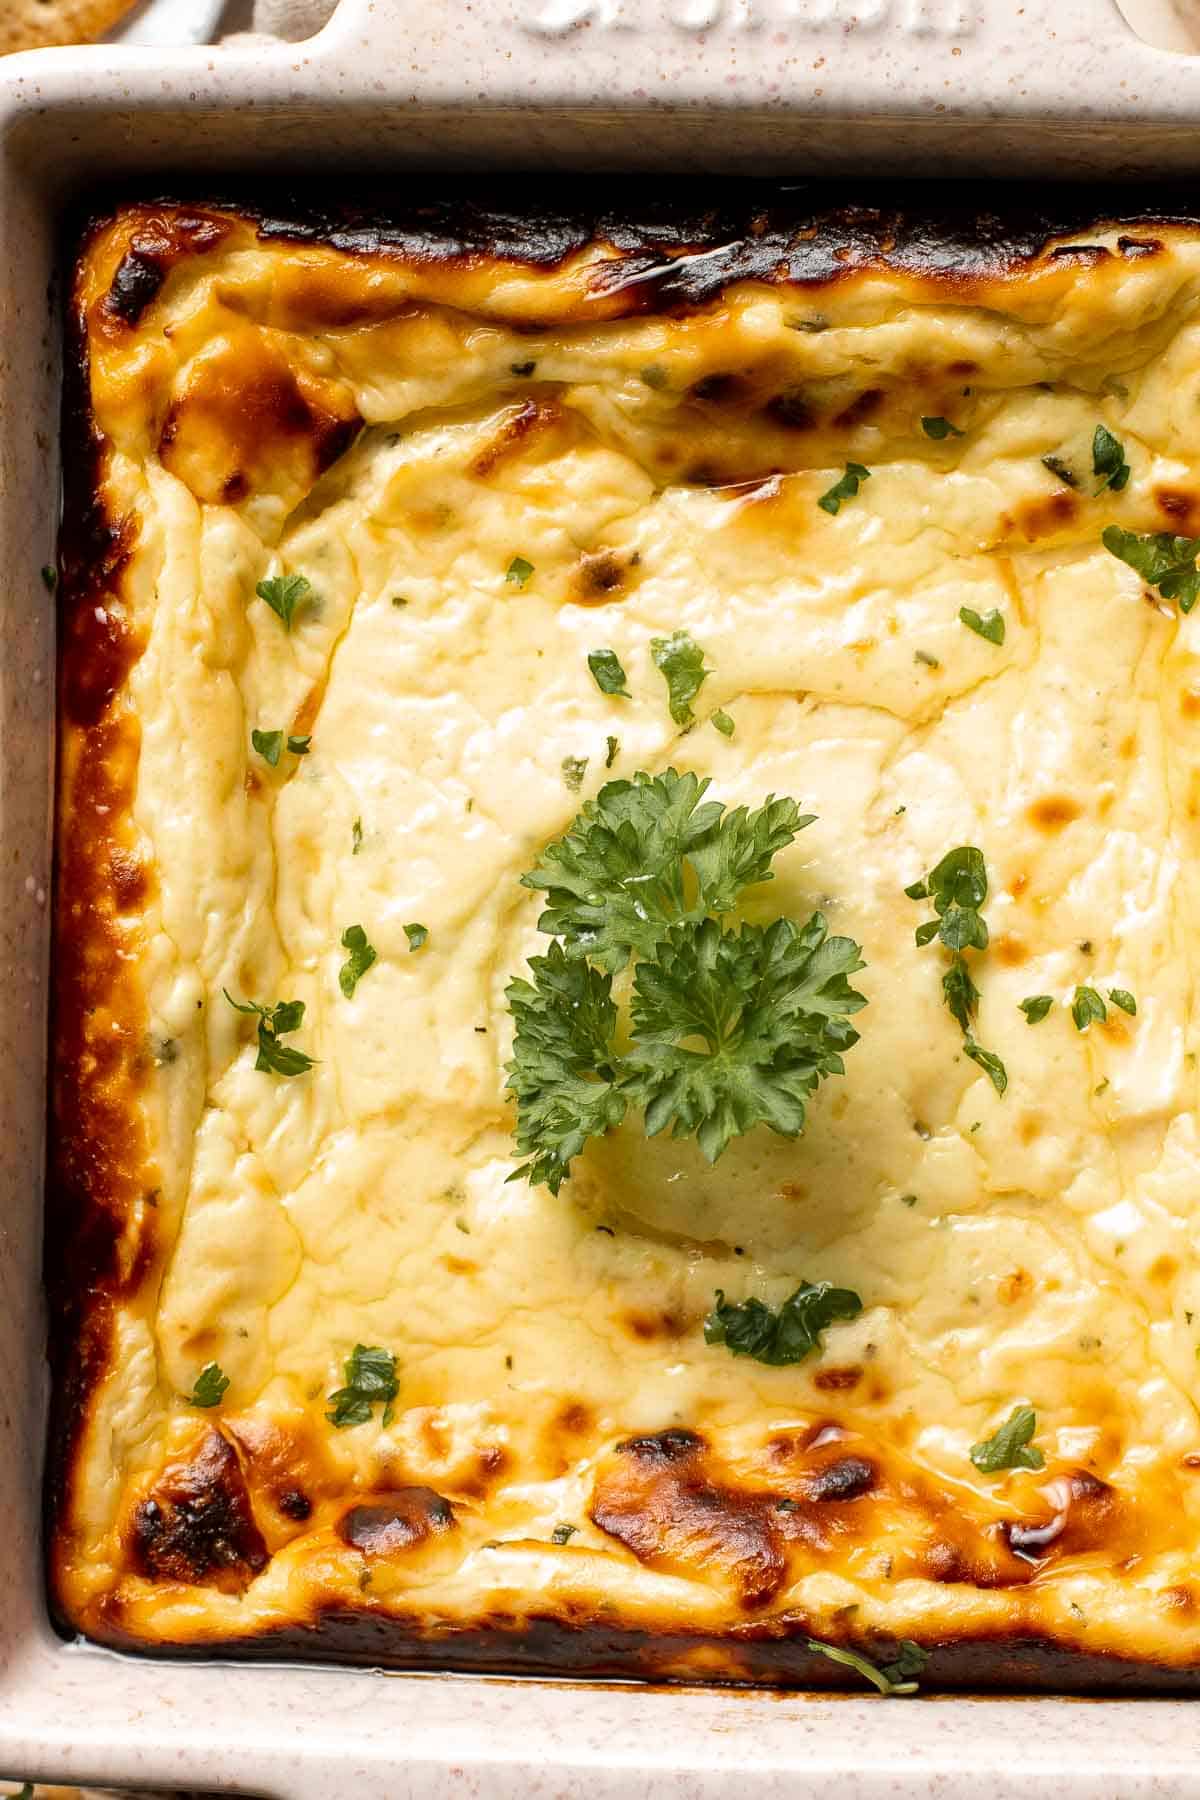
How to Serve
Serve Baked Ricotta with crackers, toasted bread, or veggies for dipping. It is also great to include as part of a platter with:
Recipe Tips and Tricks
- Serve as a starter or a late-night snack. Warm ricotta dip obviously makes a great appetizer to set out while you're waiting on the main meal, but don't forget about a few hours after lunch or dinner when guests are still hanging out and starting to get hunger pangs again!
- Make your own ricotta. Ricotta is one of the easiest cheeses to make at home. If you have extra time on your hands and want a little bit of a challenge, make a batch of homemade ricotta to use in this dip!
- Repurpose leftover baked ricotta. Ricotta goes with everything - add leftover baked ricotta to bagels and sandwiches, pastas, salads, and more to make the most of this dish!
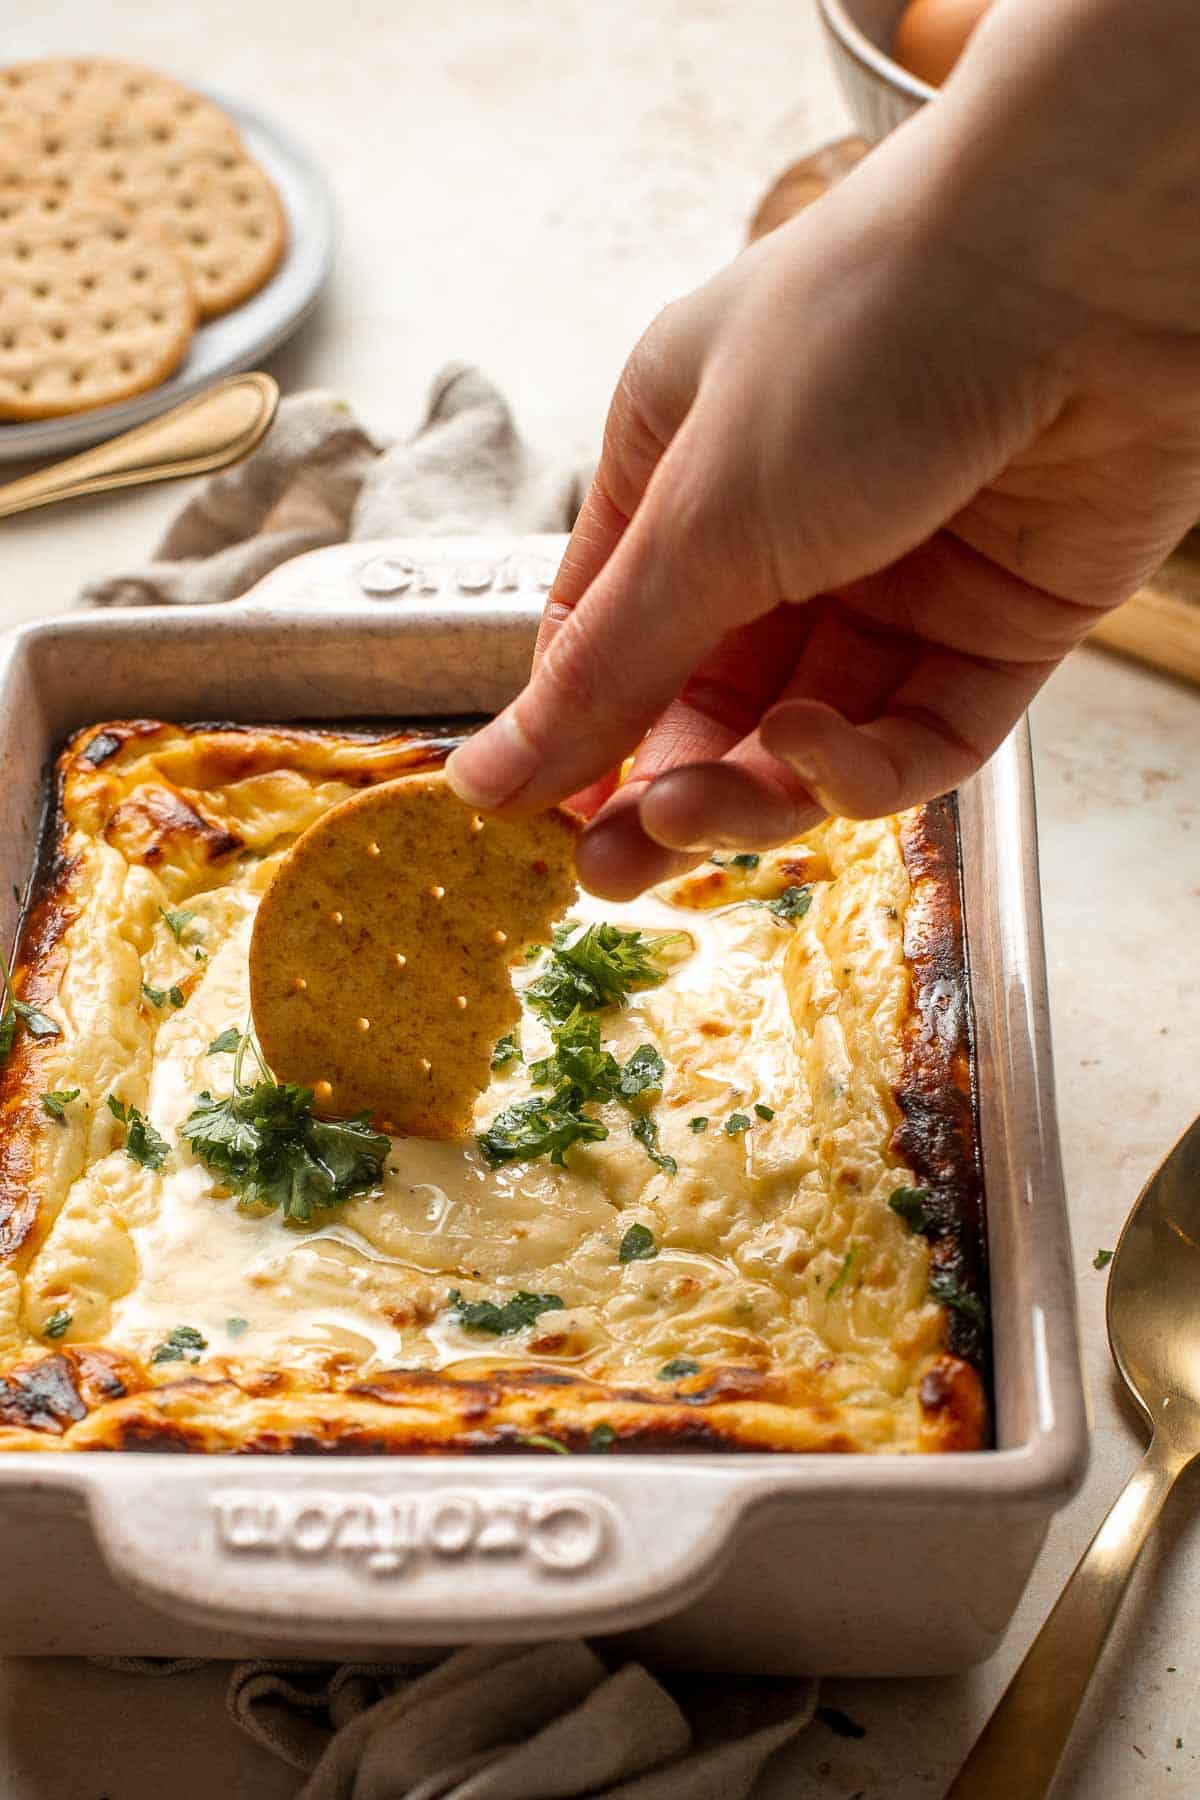
Frequently Asked Questions
Baked ricotta (or fresh ricotta, for that matter) doesn't typically freeze very well, as the high water content causes the cheese to separate when it's frozen and thawed.
This recipe works best with whole milk ricotta, but you can make a vegan version with crumbled tofu. The texture will be different, but it's a delicious alternative. An easy vegan replacement for eggs is aquafaba (also known chickpea liquid, usually from a can). Use 3 tablespoons per egg in this recipe - so 6 tablespoons in total.
Storing Instructions
How to Store
Transfer leftover baked ricotta to an airtight container or cover the serving dish tightly with plastic cling wrap and refrigerate for up to 1 week.
How to Reheat
Reheat leftovers in a 300F preheated oven for 10-20 minutes until warm.
More Cheese Recipes
- Whipped Ricotta Dip
- Fried Goat Cheese Balls
- Italian Ricotta Cookies
- Baked Mozzarella Sticks
- Whipped Feta
- Queso Mexican Cheese Dip
Tried this recipe?
I'd love to hear what you think! Leave a comment and rating below to share your feedback. Your reviews help others discover this recipe and help me keep creating more free recipes for you. Snap a photo and tag me on social media @aheadofthyme too.

Peppermint Brownies
Peppermint Brownies are rich and decadent with a fudgy brownie base, a delicious minty chocolate ganache layer, and crushed candy canes sprinkled on top. These quick and easy Christmas brownies made from scratch are the perfect dessert to bake for holiday parties and events.
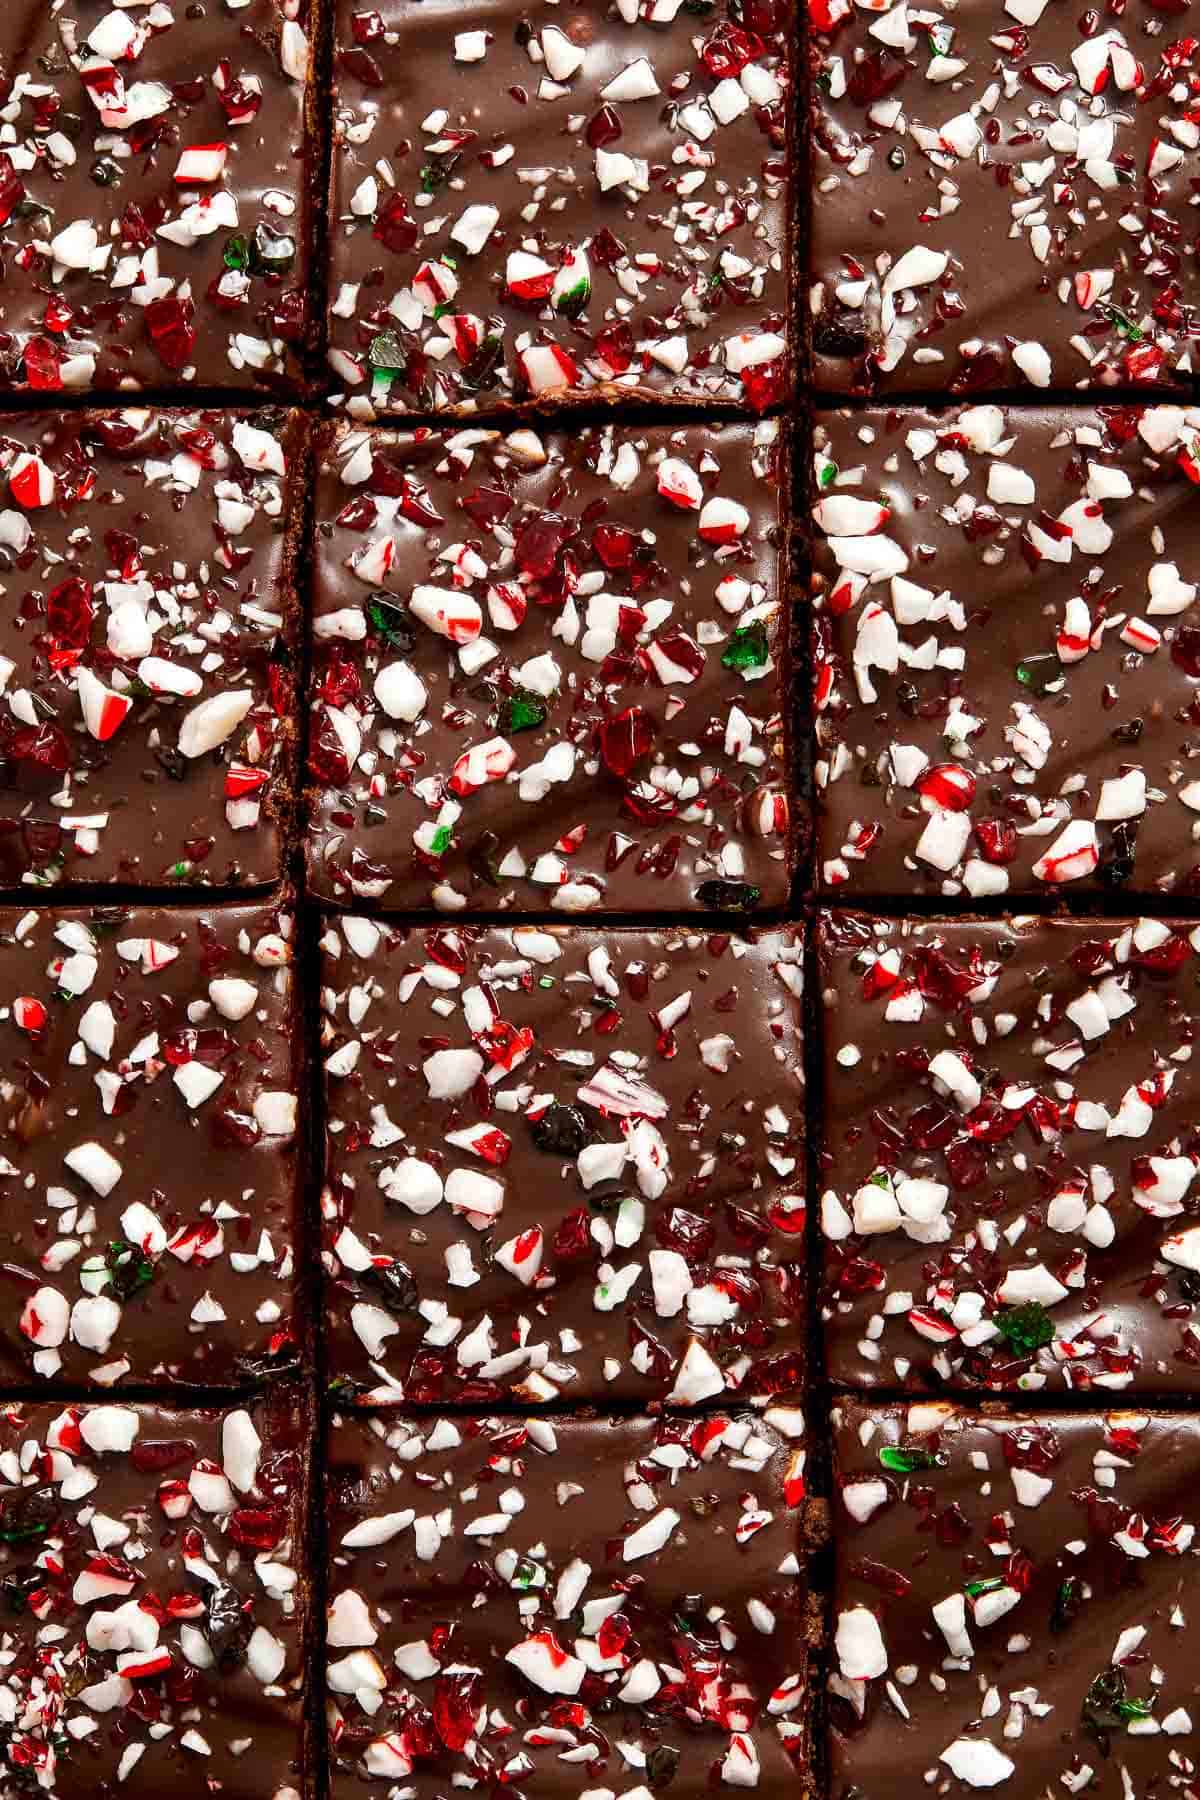
They're easy to make homemade with simple baking staples that you likely already have in your pantry. Plus, they are easy to store and freezer-friendly so you can make them ahead of time to save you some stress when you have guests over, or as an easy treat on demand when you are having a last minute sugar craving.
Why You'll Love these Peppermint Brownies
- Triple the chocolate. These Peppermint Brownies uses melted chocolate and cocoa powder in the brownie batter, plus more chocolate in the ganache topping. It's rich, decadent, and delicious. I mean it's chocolate are talking about!
- Festive holiday flavor. If you've ever spent a little too much time at the dessert table agonizing over the decision between gooey, chocolatey Brownies and Chocolate Peppermint Bark, this peppermint brownie recipe is for you. No more difficult choices - now you get both flavor profiles in one easy dessert!
- Quick to make. These Christmas brownies are ready in just under 2 hours, which may seem like a long time to make. But, an hour of that they are chilling, and 35 minutes of that they are baking, so really you need to spend 15 minutes of actual prep time to make them. This may become your new go-to holiday dessert when you need to make something impressive but don't have a lot of time.
- Easy to make from scratch. You'll start with baking the fudgy brownies, and while they're are cooling, you can start preparing the ganache topping. Then add it to the brownies, sprinkle on crushed candy canes or peppermint candies and let it set. The hardest part will be waiting for these candy cane brownies to cool down enough to eat!
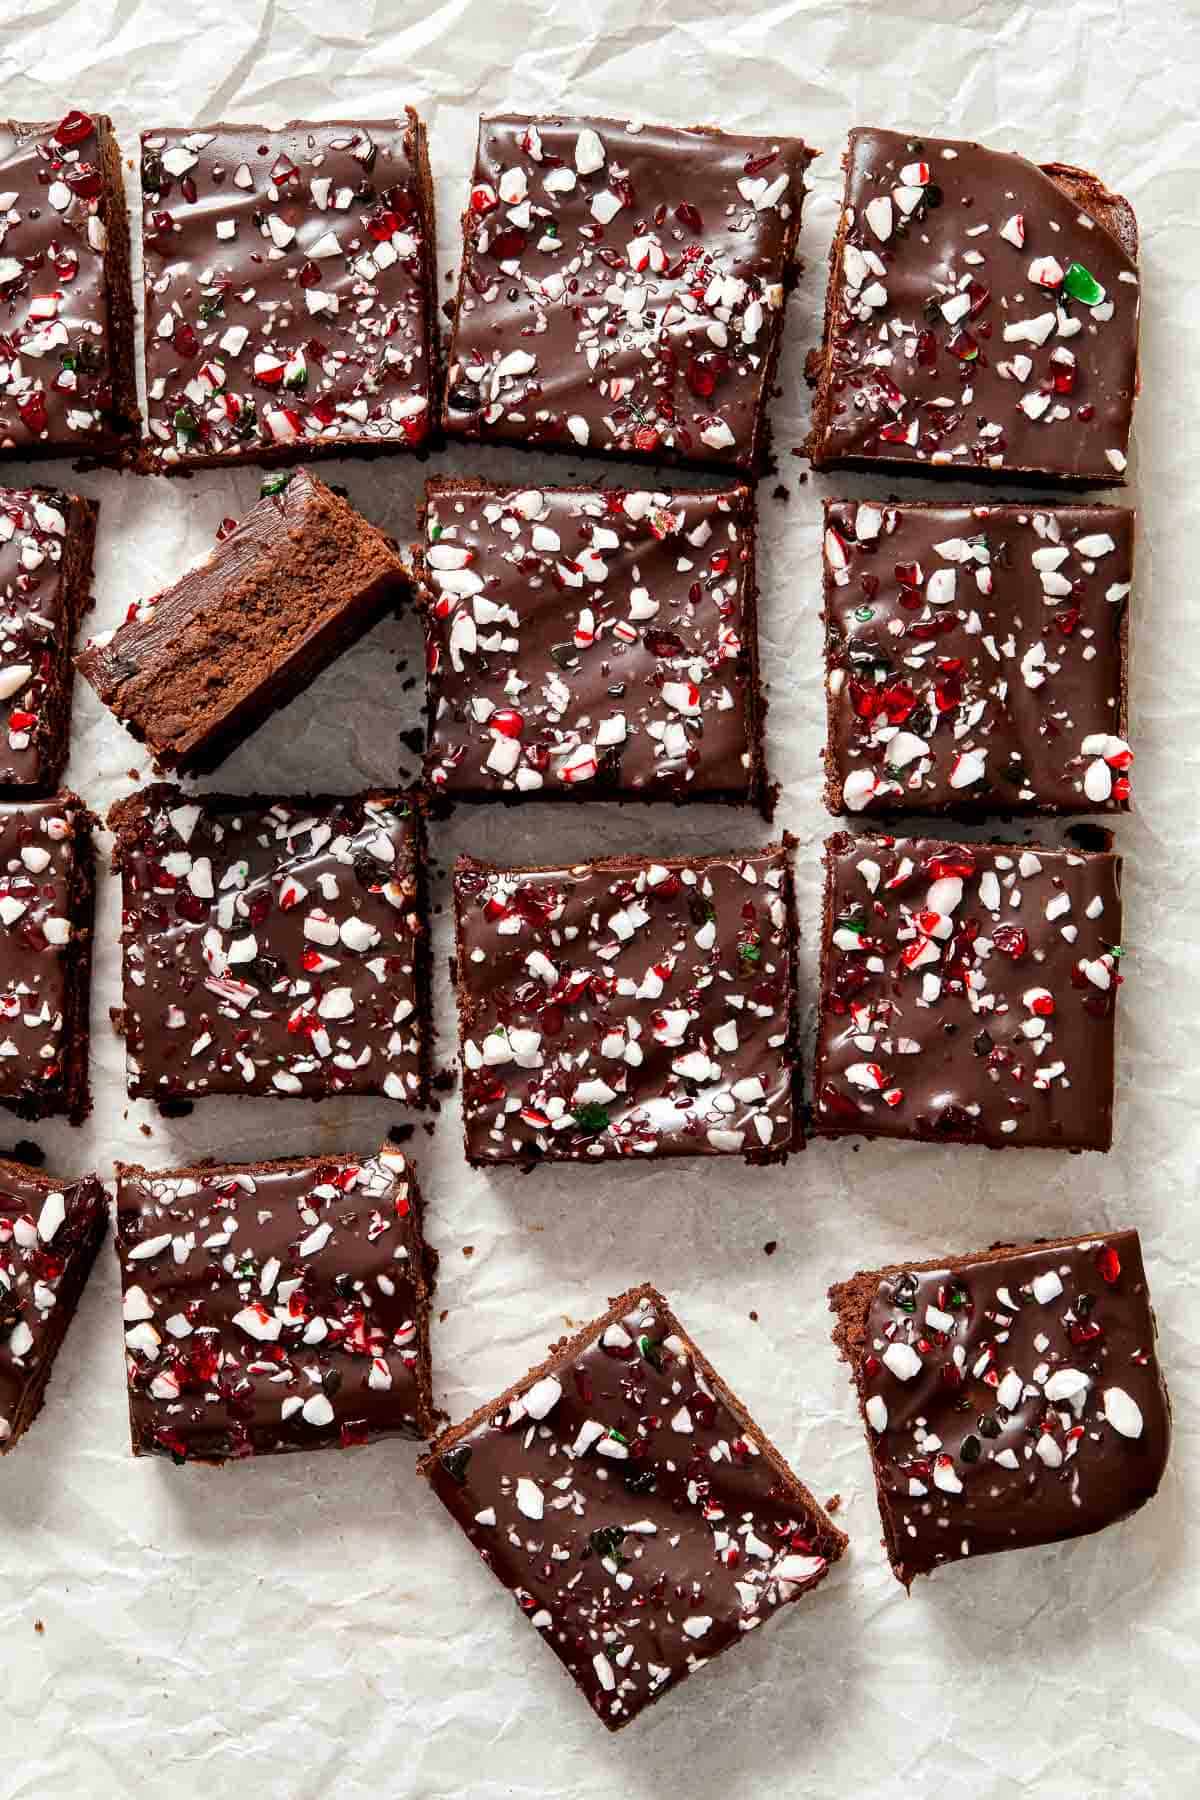
Ingredient Notes
To make these delicious Peppermint Brownies, you will need the following ingredients (full measurements in recipe card below):
- semi-sweet chocolate - you can also use dark chocolate if you prefer the deeper flavor in the brownies and/or the ganache topping.
- butter
- sugar - sugar is an essential ingredient in most desserts, but you can replace it in this recipe with your favorite sugar alternative, like raw sugar, coconut sugar, stevia, or Swerve.
- brown sugar - the same goes for brown sugar. Try a 1:1 brown sugar alternative if you need to.
- eggs - the eggs in the brownie batter can be replaced with flaxseed eggs, which are made by combining 1 tablespoon of flax meal with 3 tablespoons of water per egg. Let the mixture set for 10 minutes before using in the recipe.
- vanilla extract
- all-purpose flour - you can easily make these peppermint brownies gluten-free by swapping the wheat flour for a measure-for-measure gluten free flour substitute.
- cocoa powder
- salt
- heavy cream - an essential ingredient in chocolate ganache.
- peppermint extract - adds an extra minty flavor to the ganache topping.
- chopped candy canes - to sprinkle on top.
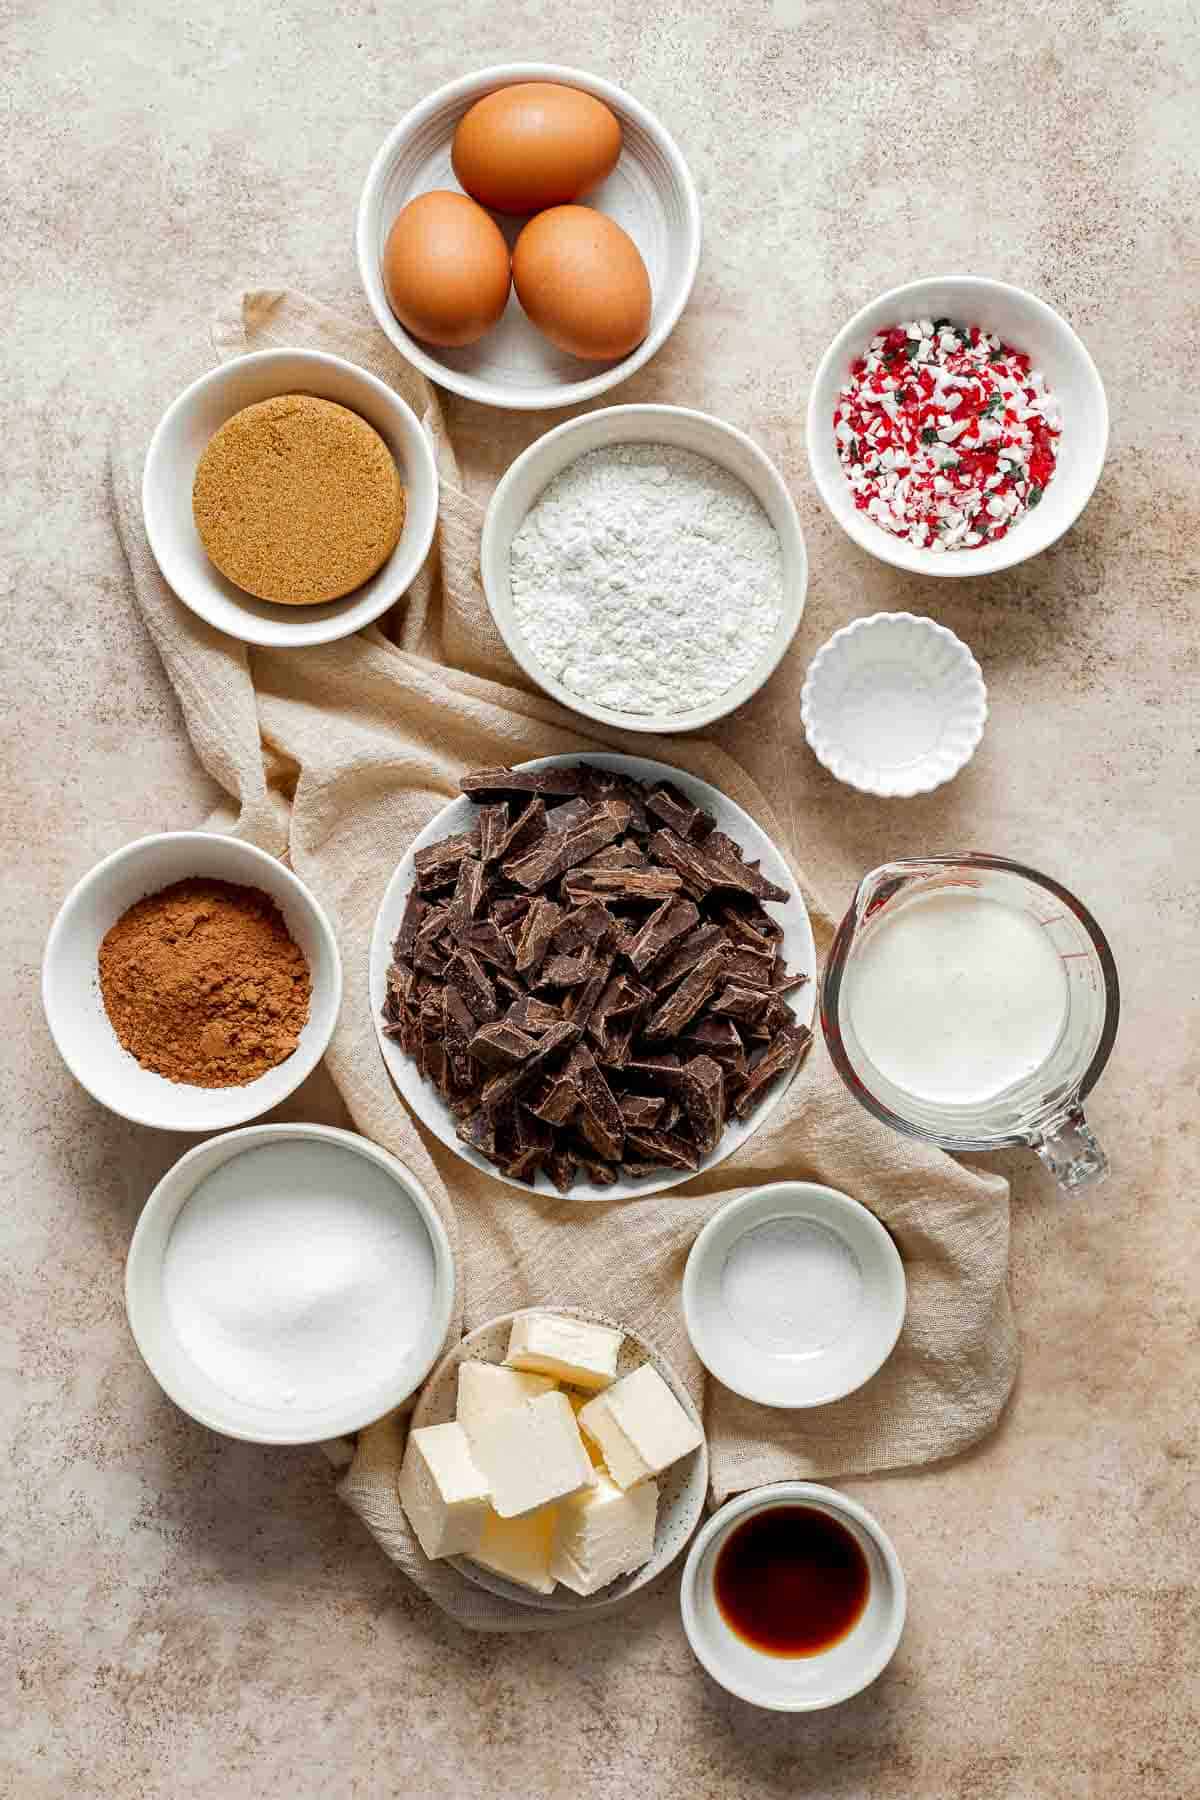
Baking Equipment
You will also need the following baking tools and equipment:
- measuring cups and spoons
- mixing bowls
- 9-inch square baking pan
- wire cooling rack
How to Make the Best Peppermint Brownies
First, make the brownie layer.
- Melt chocolate. Melt the chocolate with butter in a medium heatproof bowl over a pan of simmering water. Make sure the bottom of the bowl does not touch the water, or you will burn the chocolate. Whisk until melted and smooth.
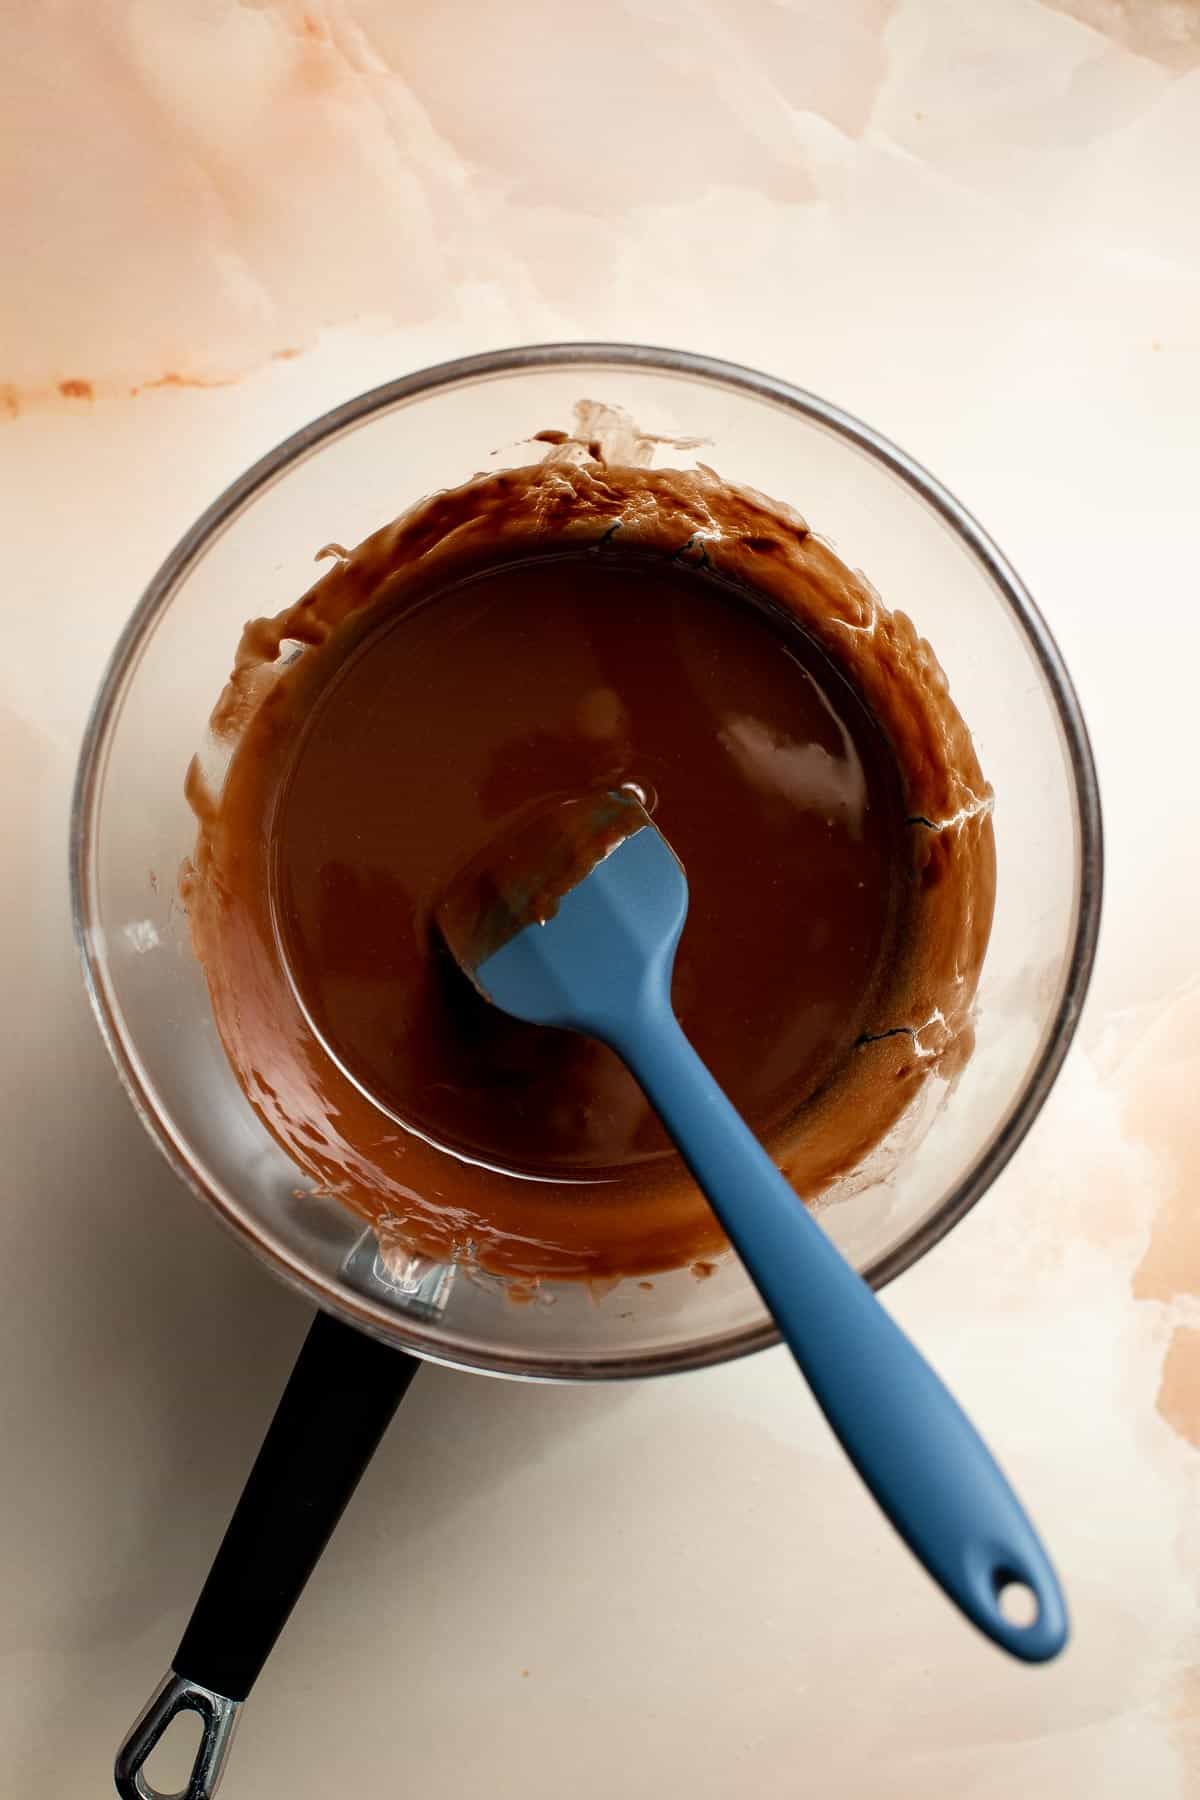
- Add sugar. Remove from heat and add sugars into the chocolate mixture and whisk until completely combined. Let the chocolate mixture cool for a few minutes.
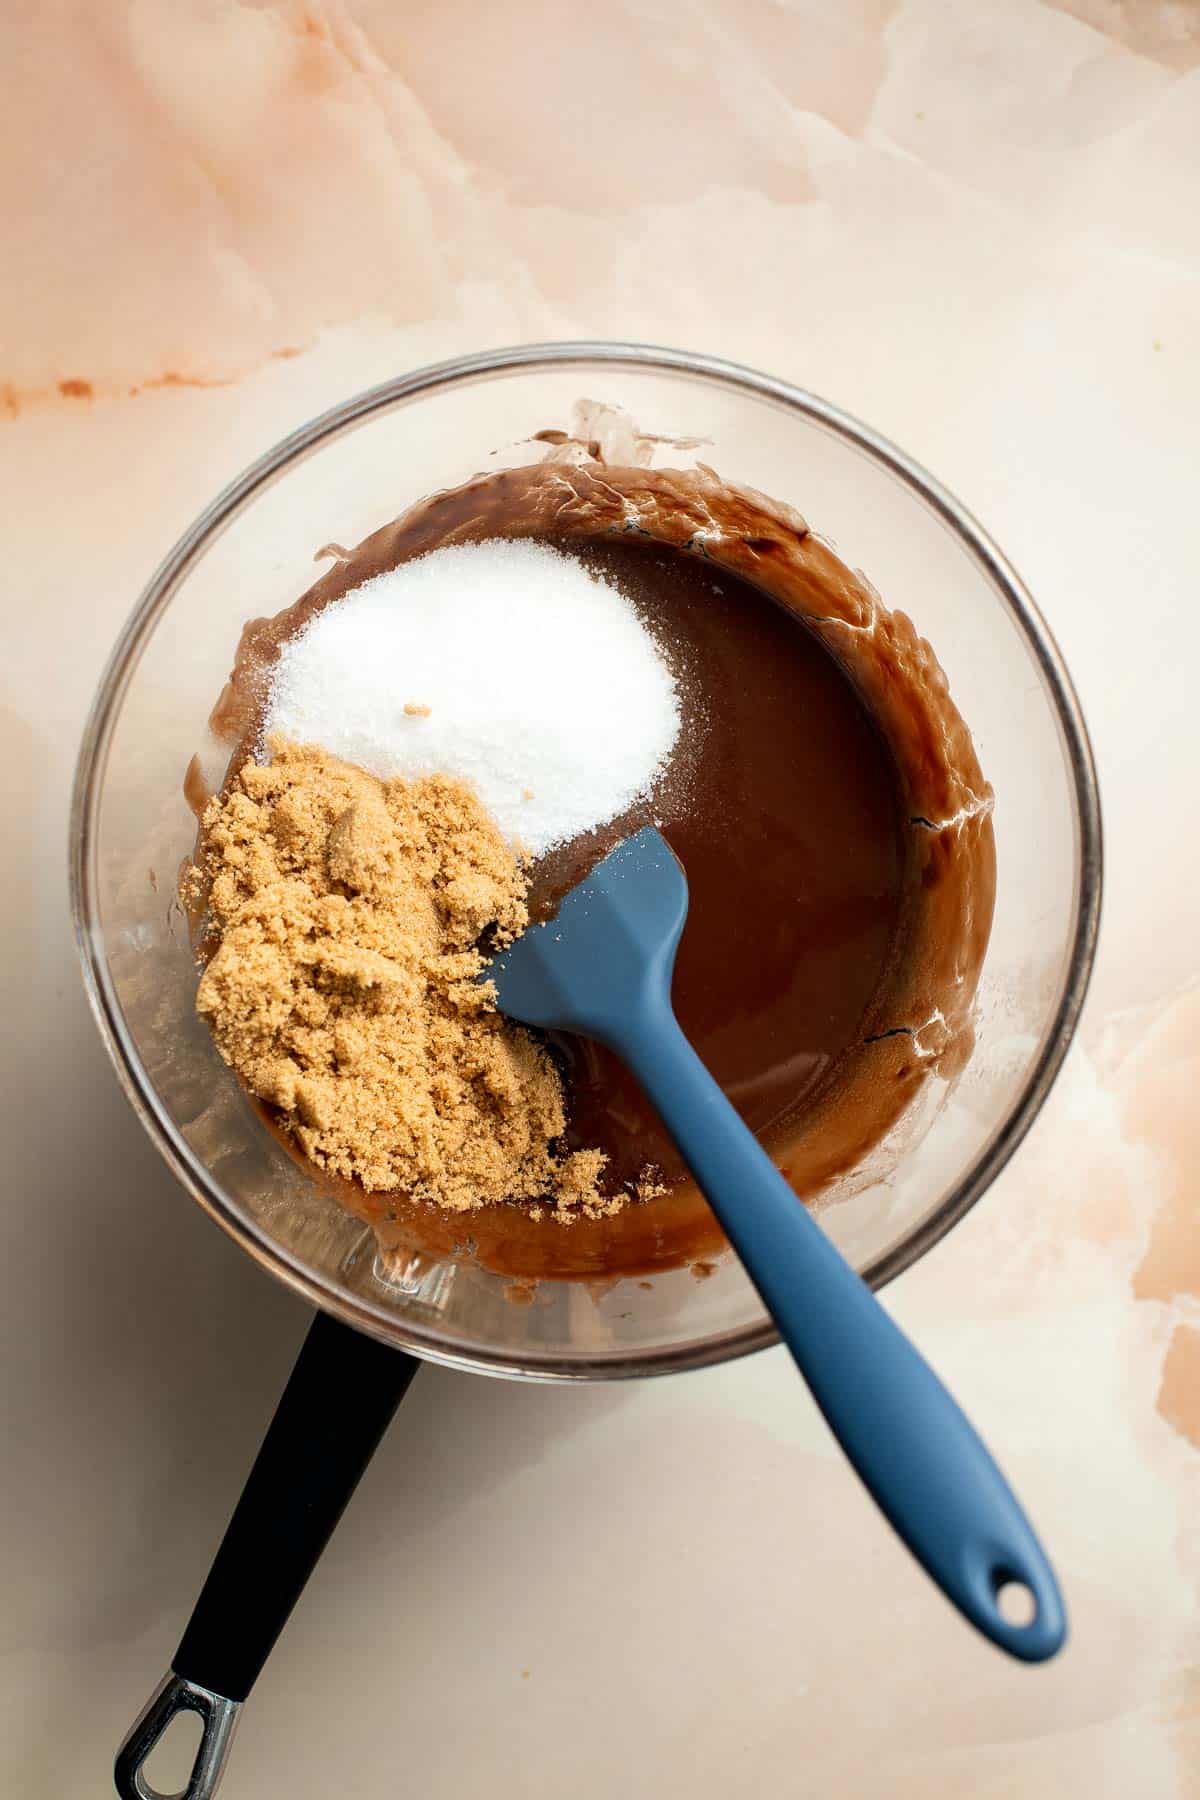
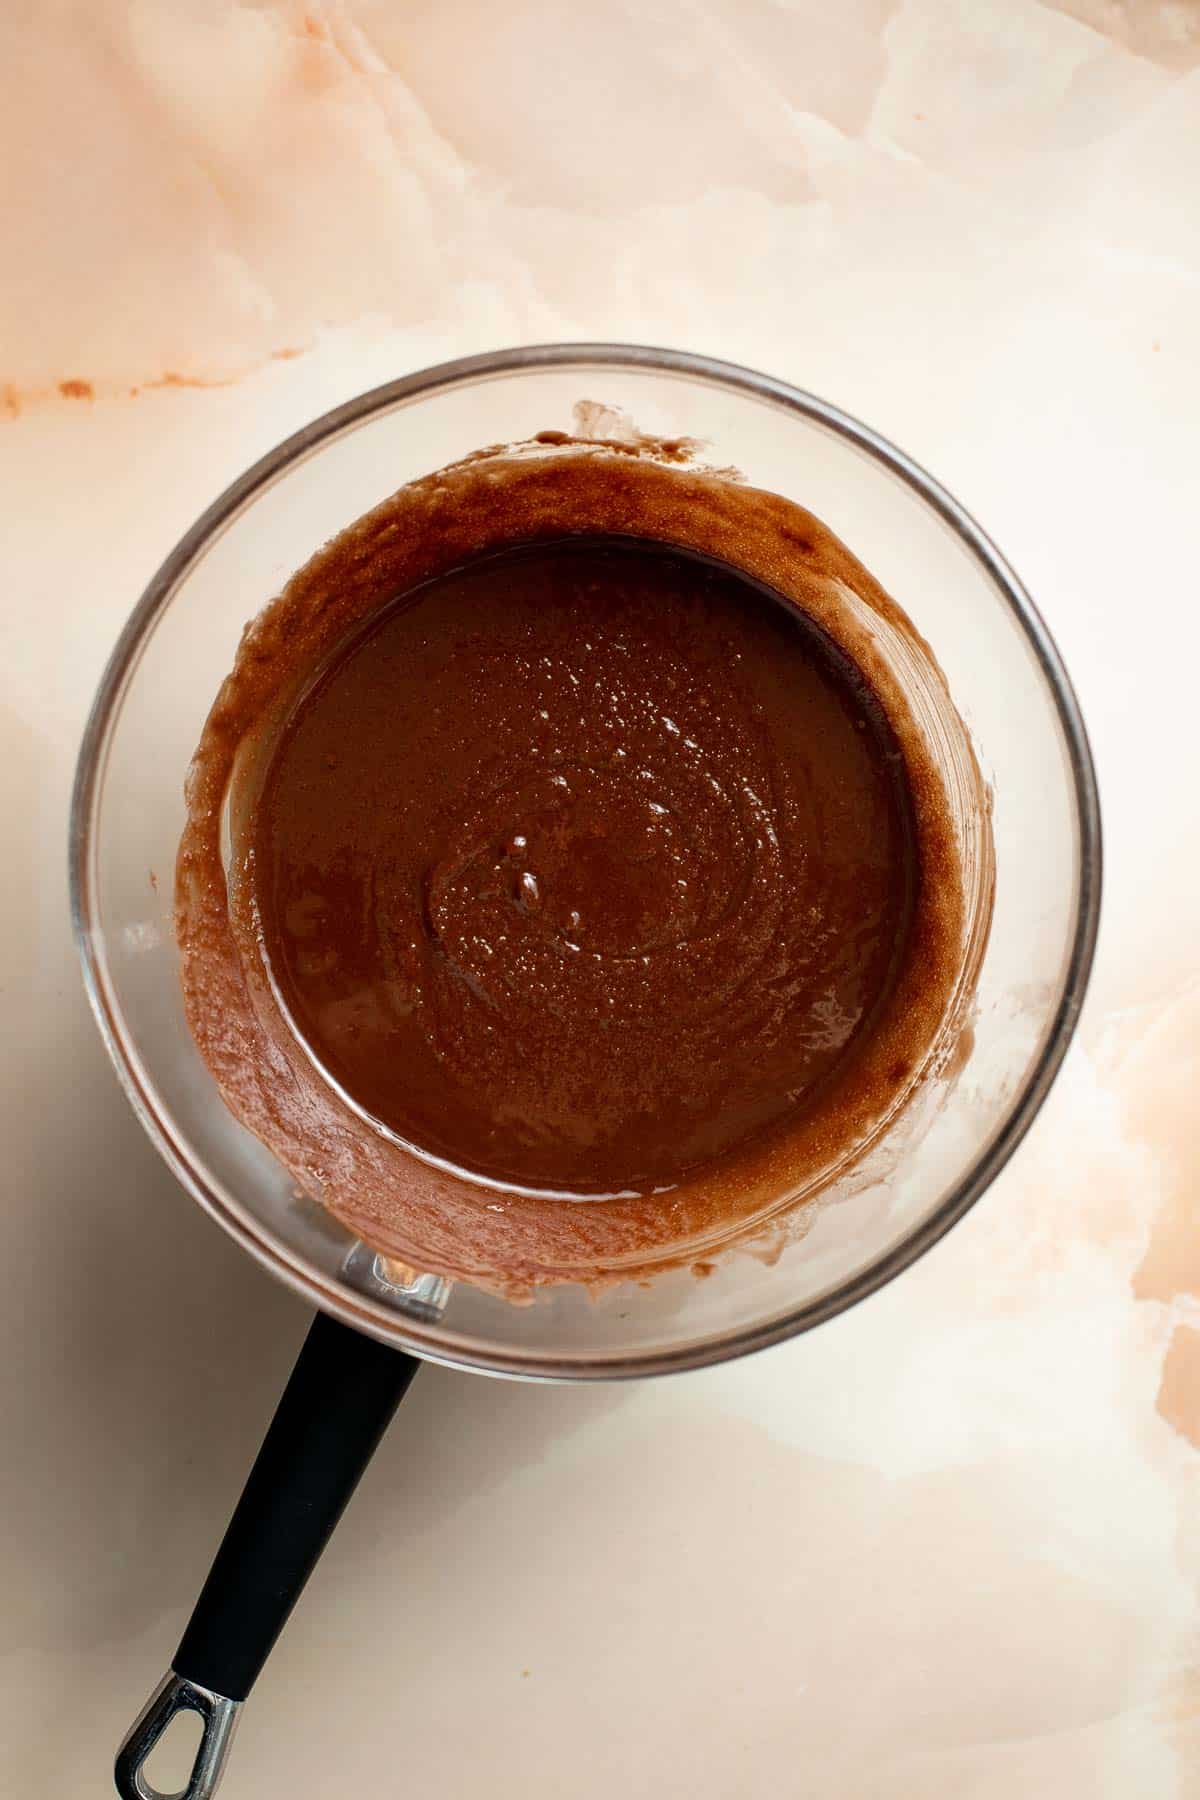
- Add wet ingredients. Add in eggs and vanilla, and beat with a hand mixer on medium speed for 2 minutes.
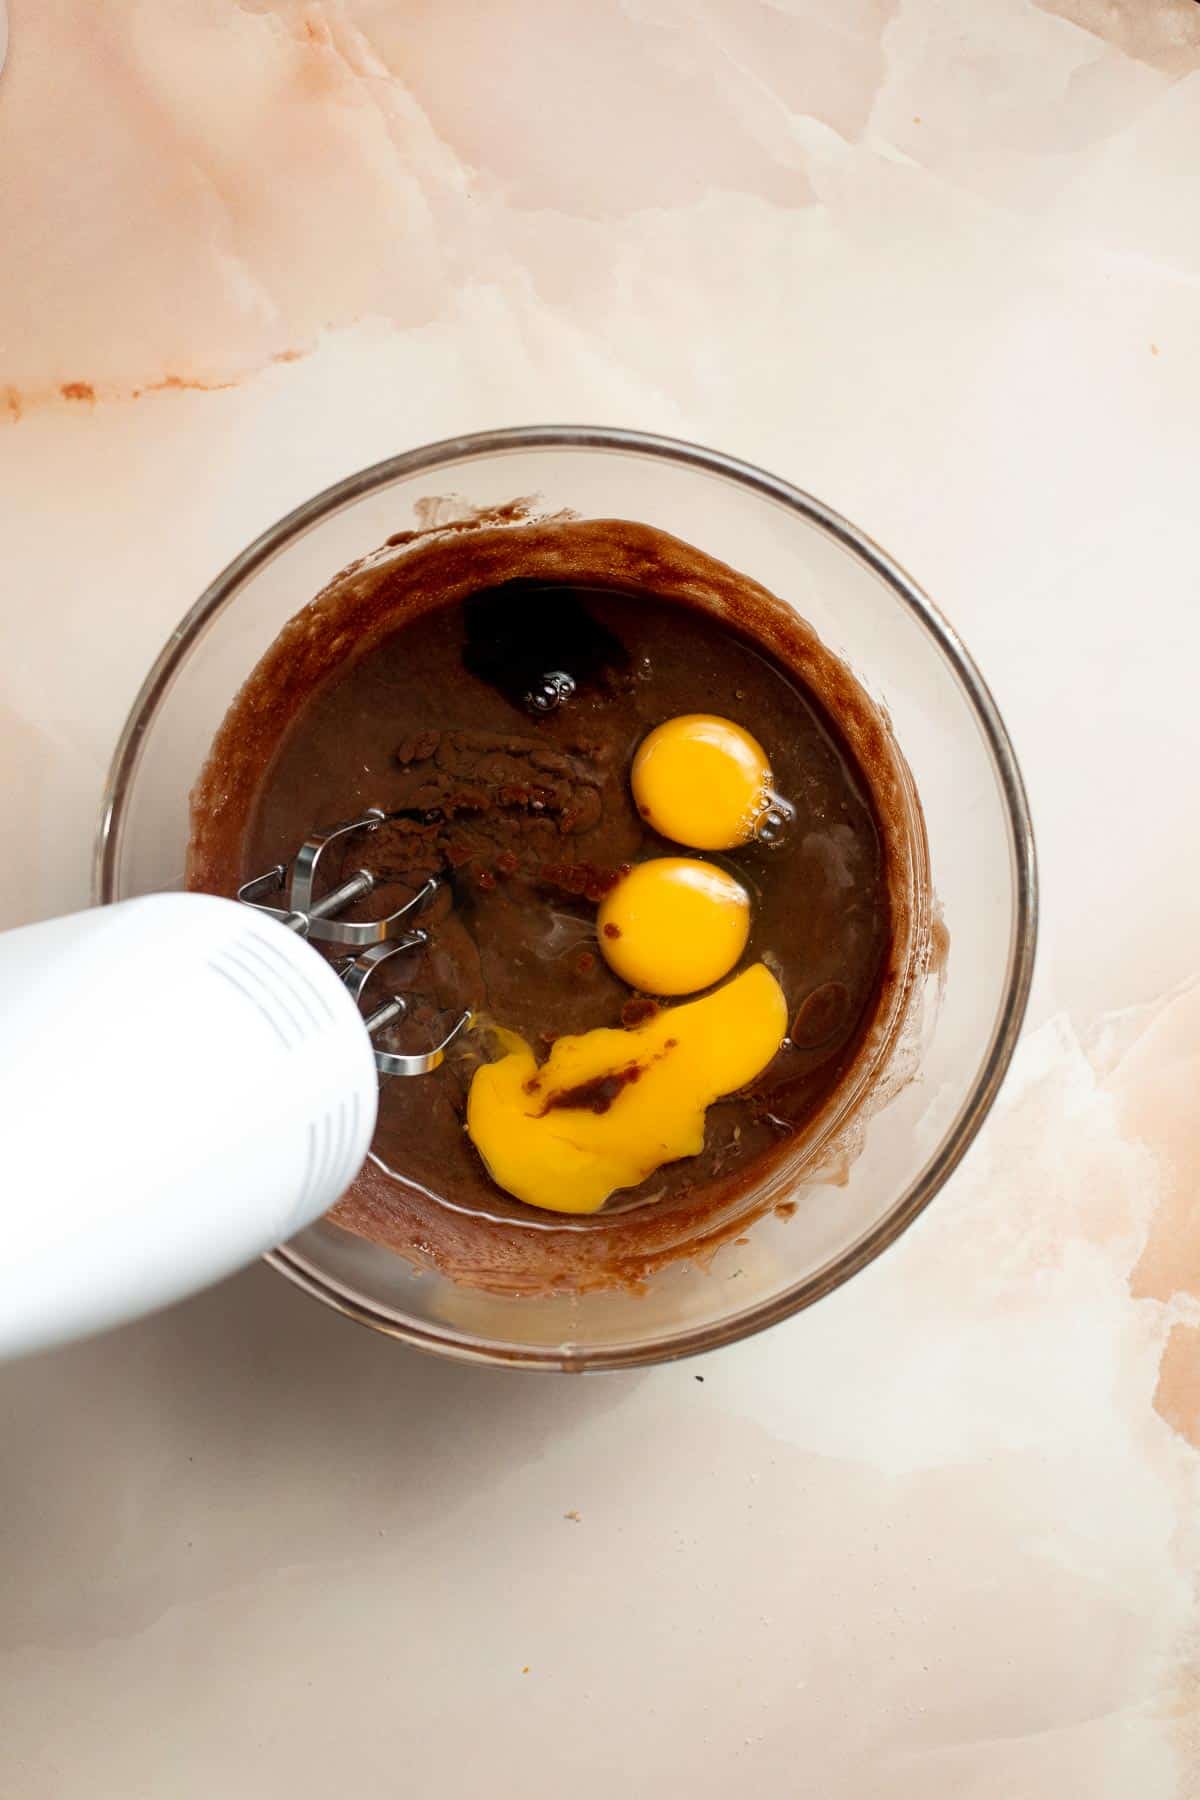
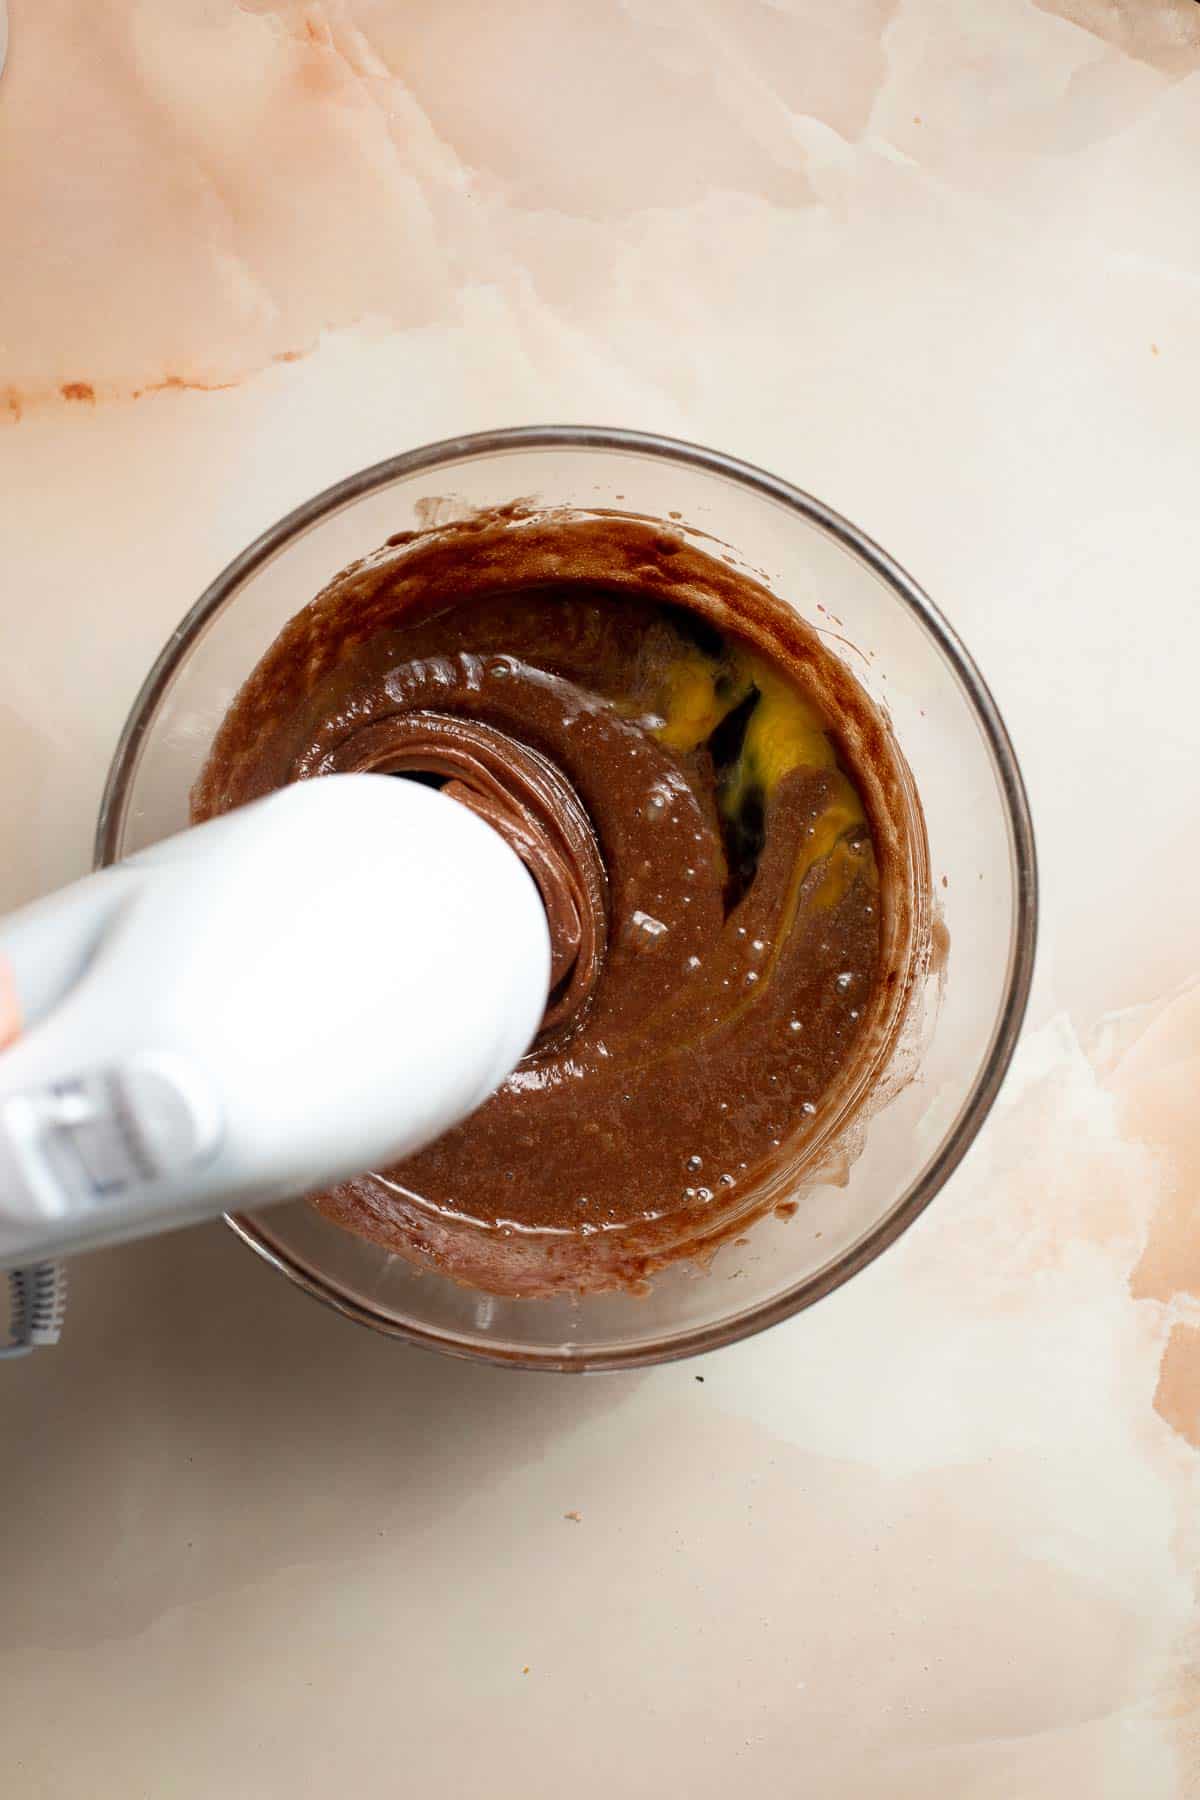
- Add dry ingredients. Add in flour, cocoa powder, and salt and fold together using a large silicone spatula until just combined.
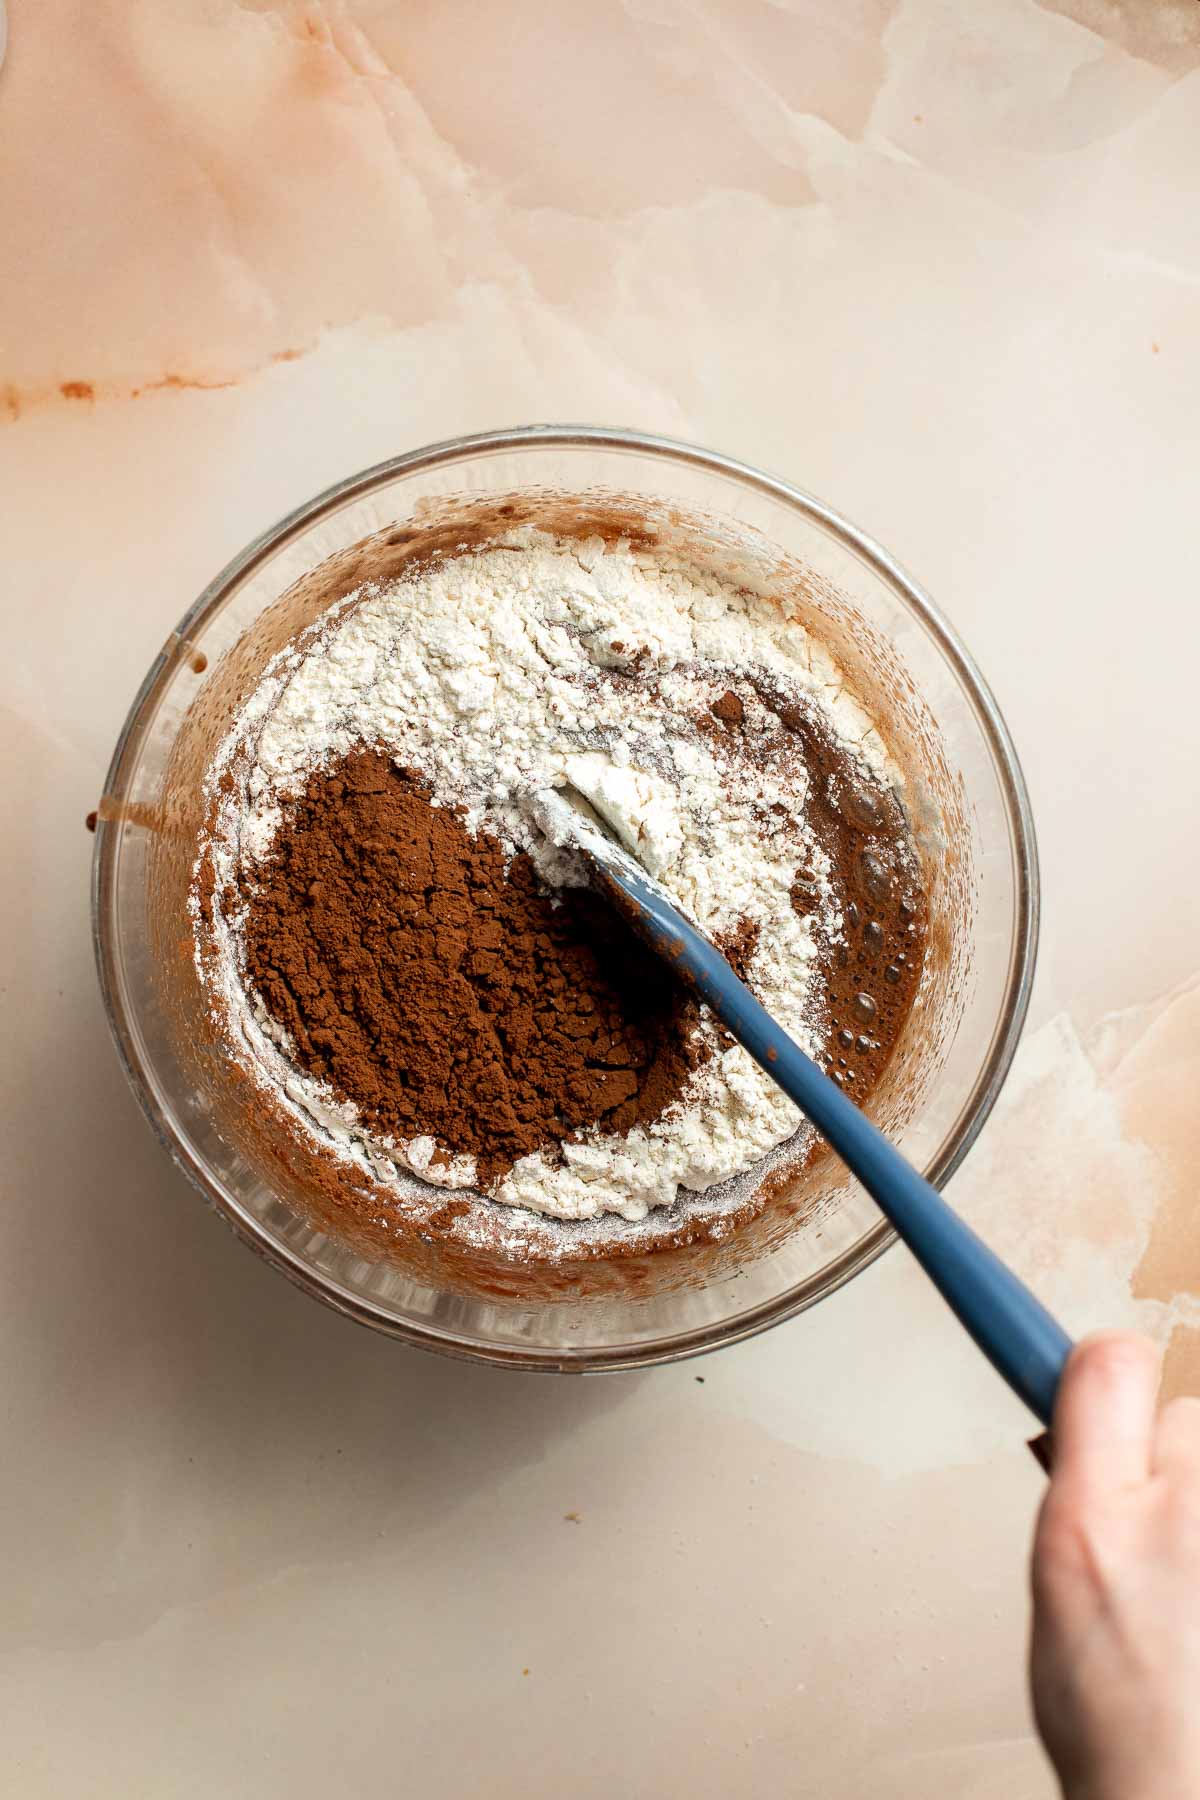
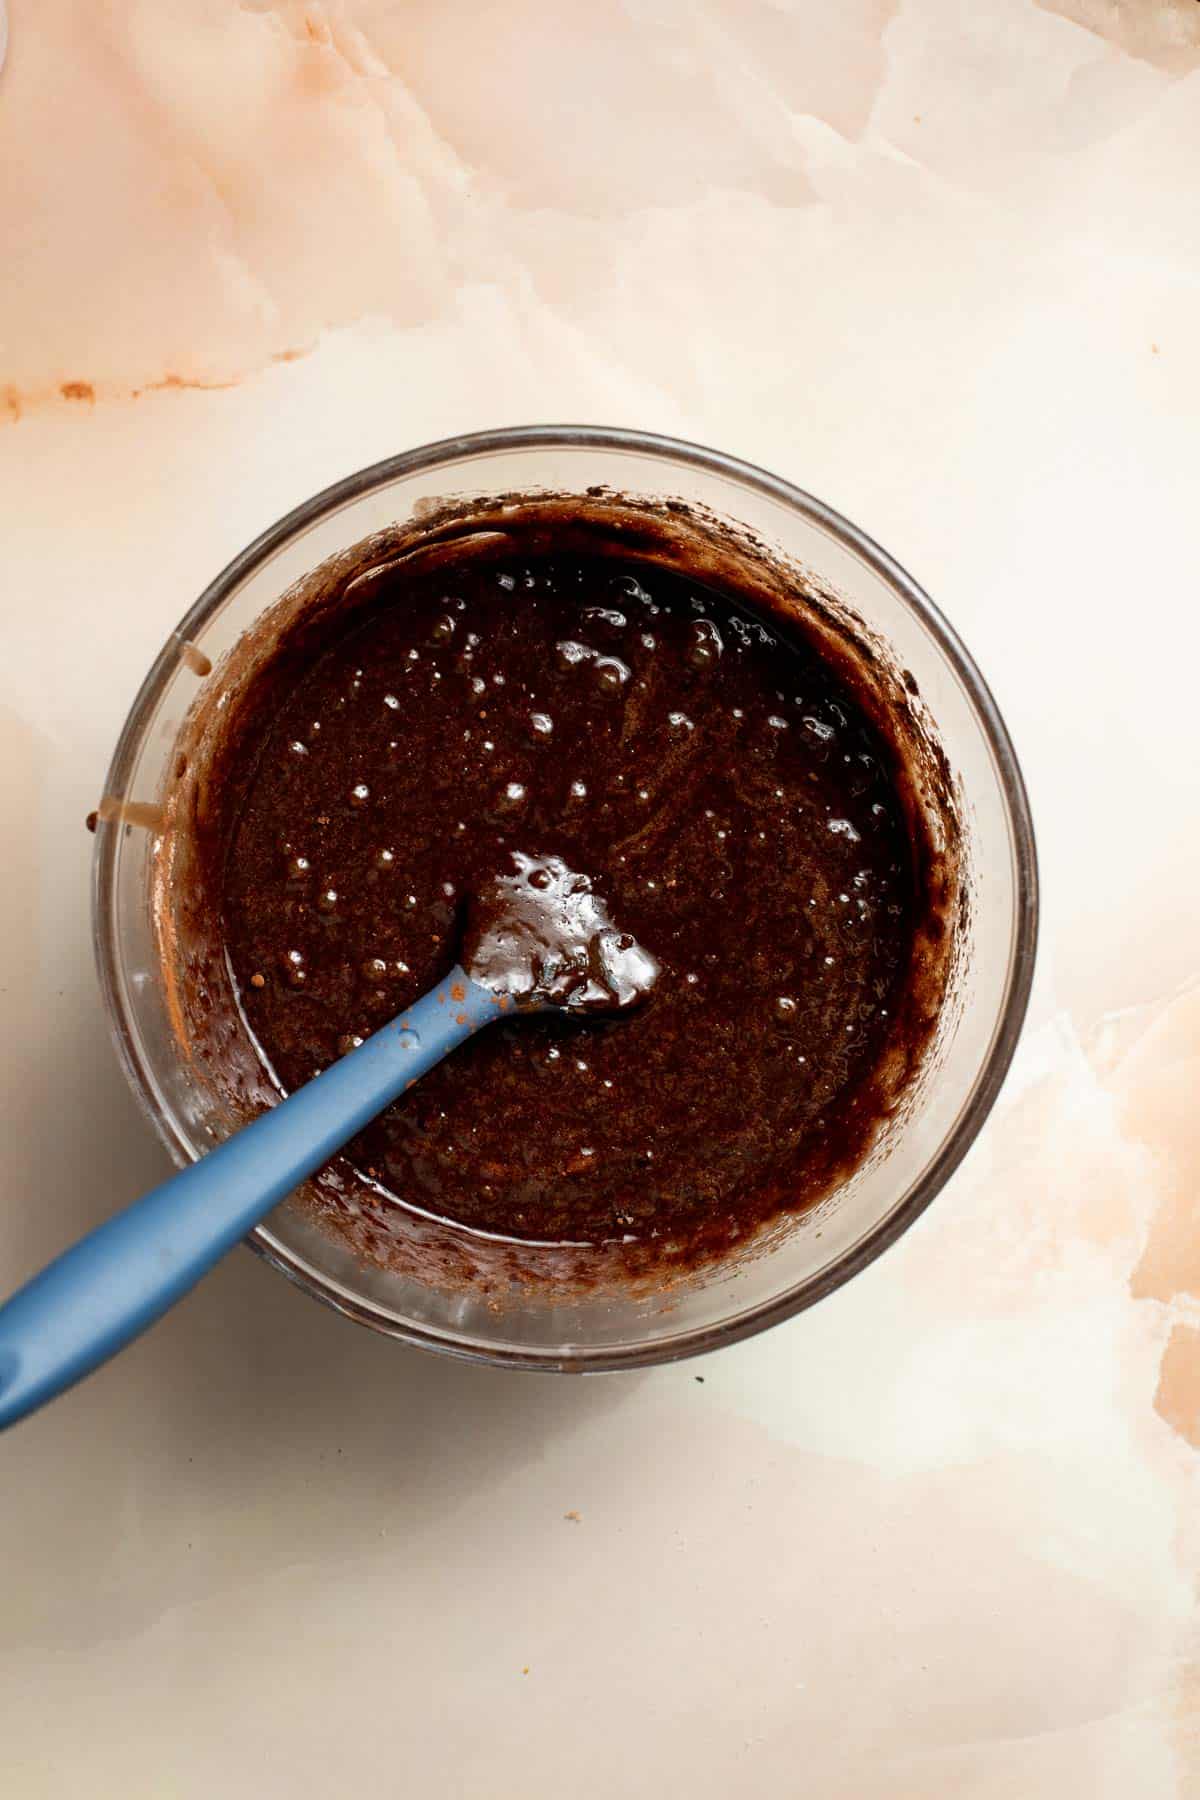
- Fill pan. Grease a 9-inch square baking pan and line it with parchment paper so that it hangs over two sides to make it easy to life the brownies out of the pan when baked. Transfer the thick batter into the prepared baking pan.
- Bake. Bake in a 350°F preheated oven for 30-35 minutes, until a toothpick inserted comes out clean with moist a few moist crumbs attached. Place the baking pan on a wire cooling rack to cool completely.
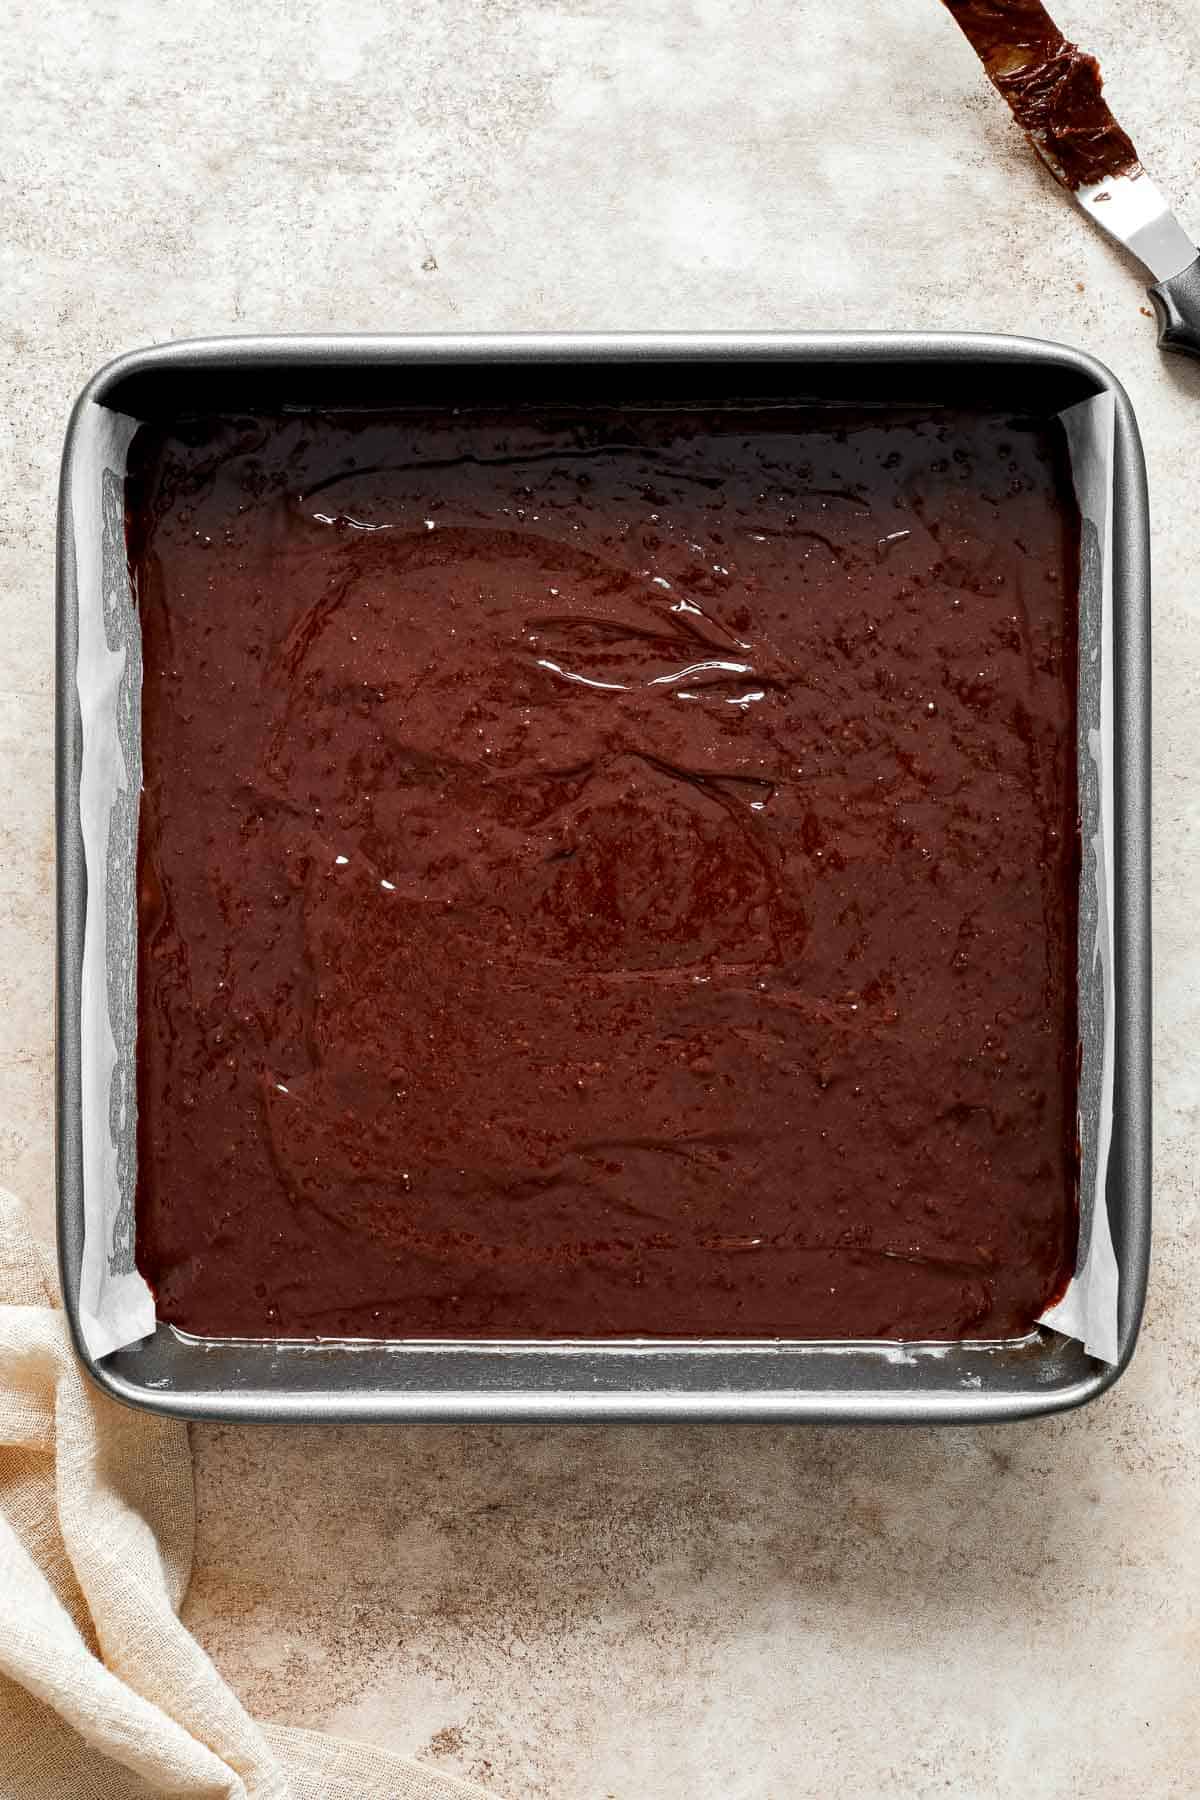
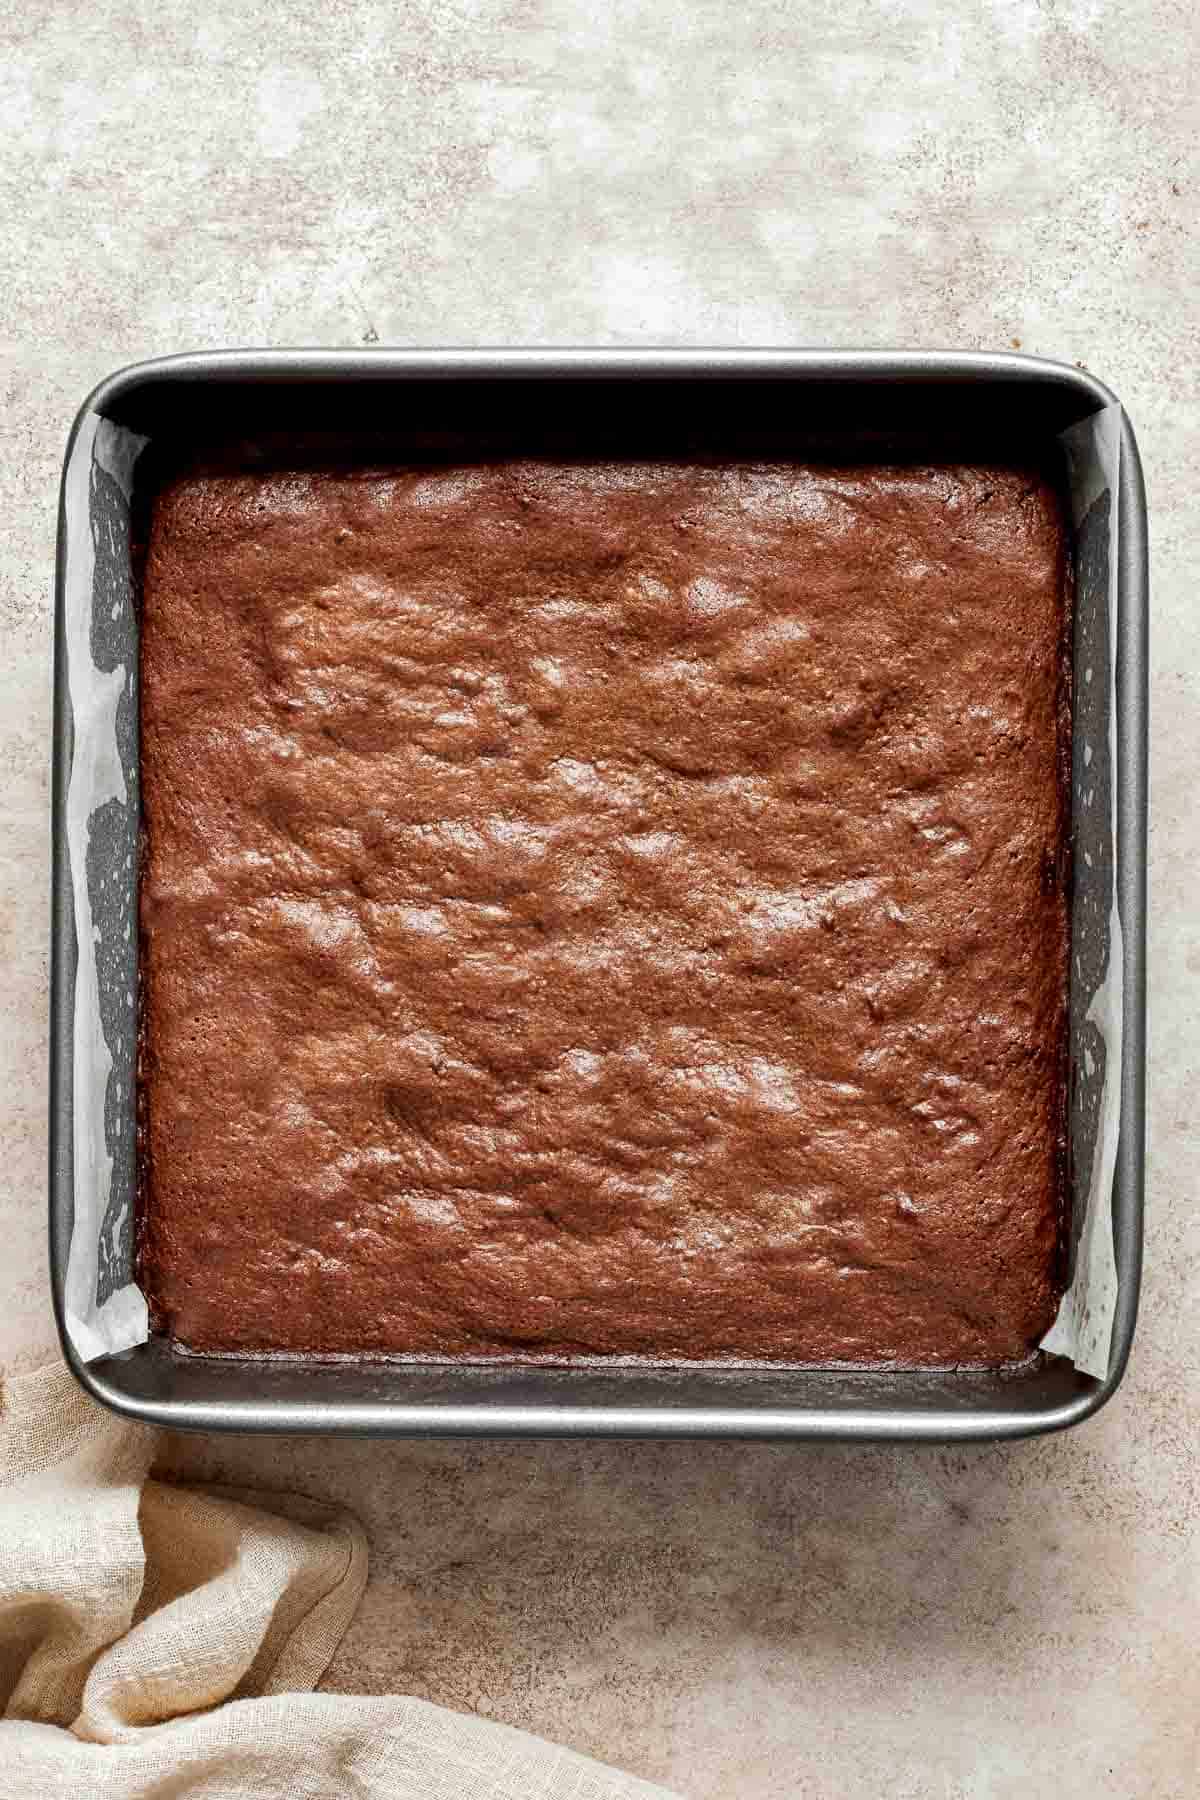
Second, make the peppermint ganache topping.
- Prep chocolate. Place chopped chocolate into a medium mixing bowl.
- Heat cream. Heat the heavy cream in a small saucepan until it begins to simmer. Immediately remove from heat before it begins to boil.
- Add cream to chocolate. Pour hot cream over top of the chopped chocolate and let it sit for 5 minutes to allow it to soften the chocolate. Use a spoon to slowly stir until completely smooth and creamy. Stir in the peppermint extract.
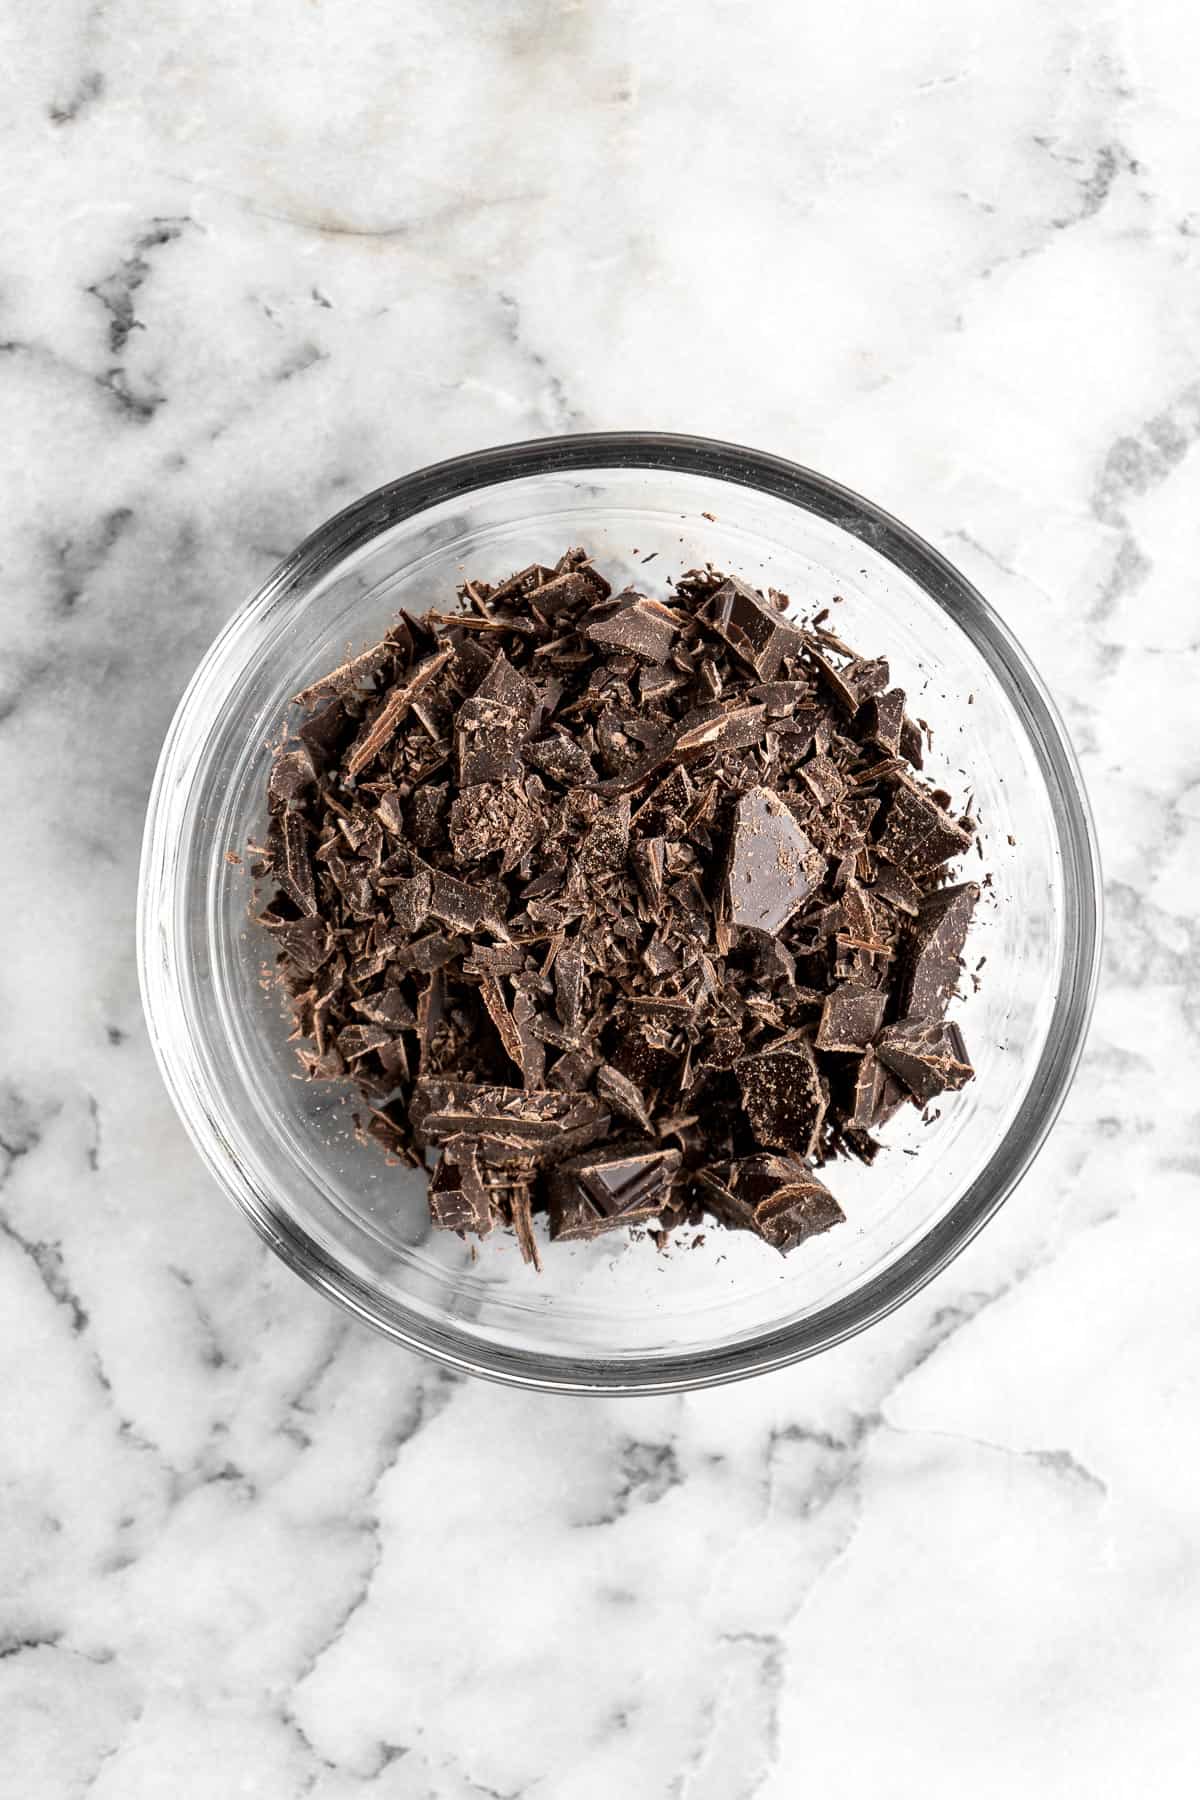
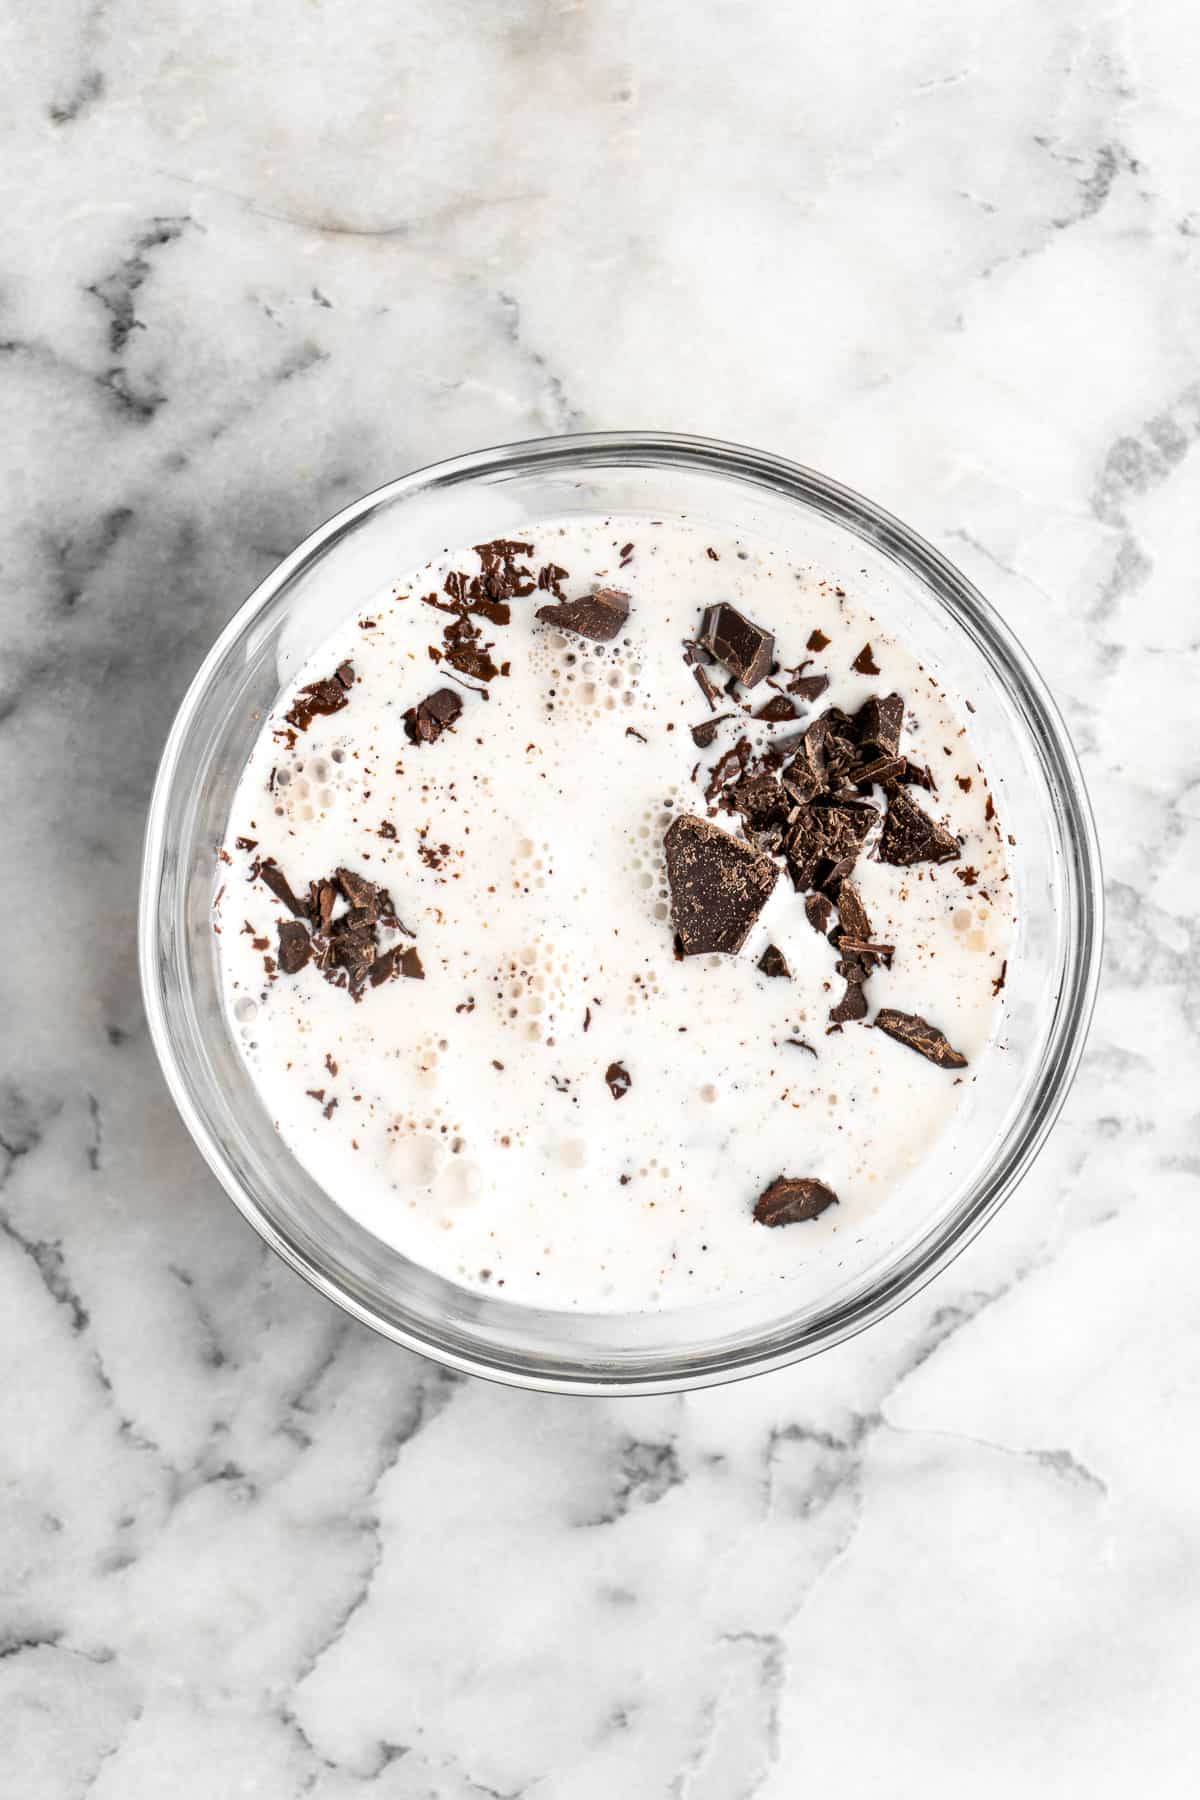
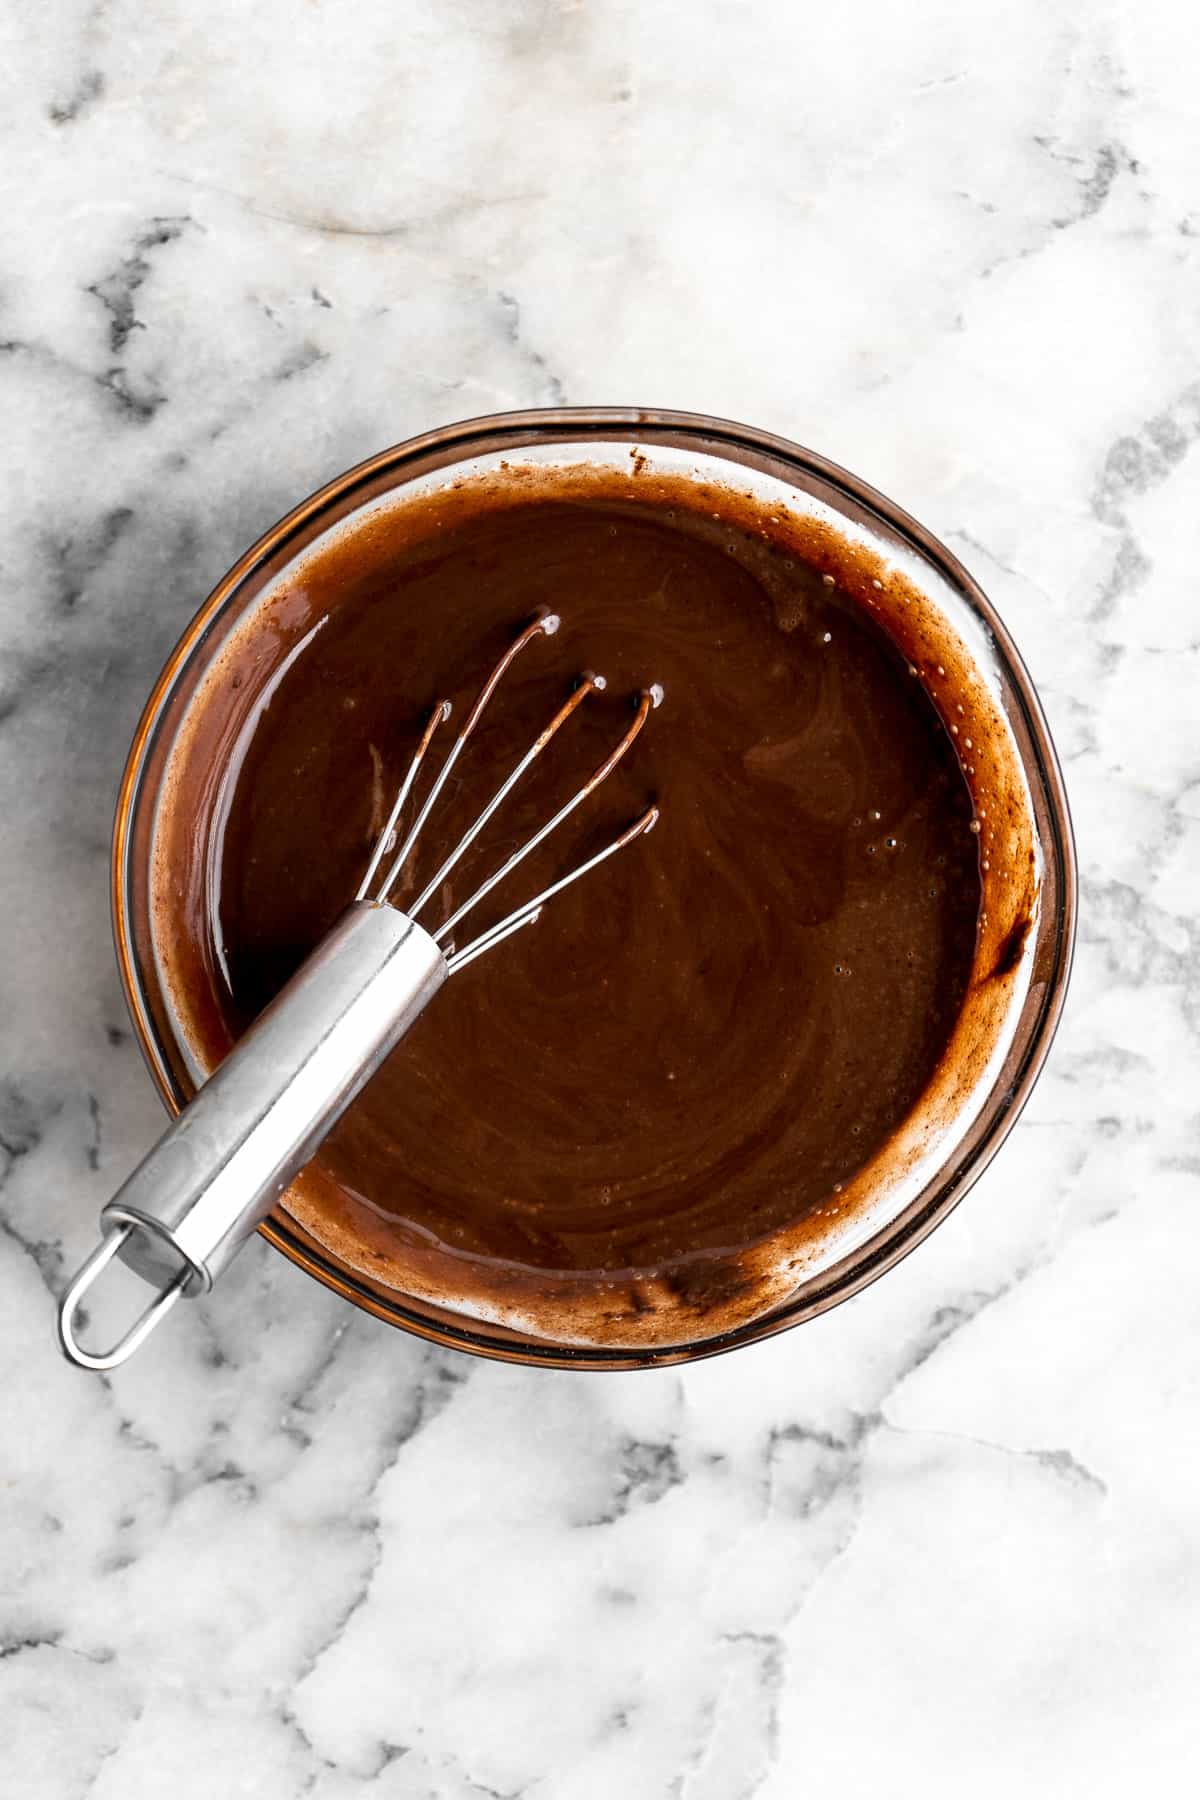
- Spread ganache. Spread the ganache evenly over the cooled brownies.
- Add candy canes. Sprinkle crushed candy canes on top.
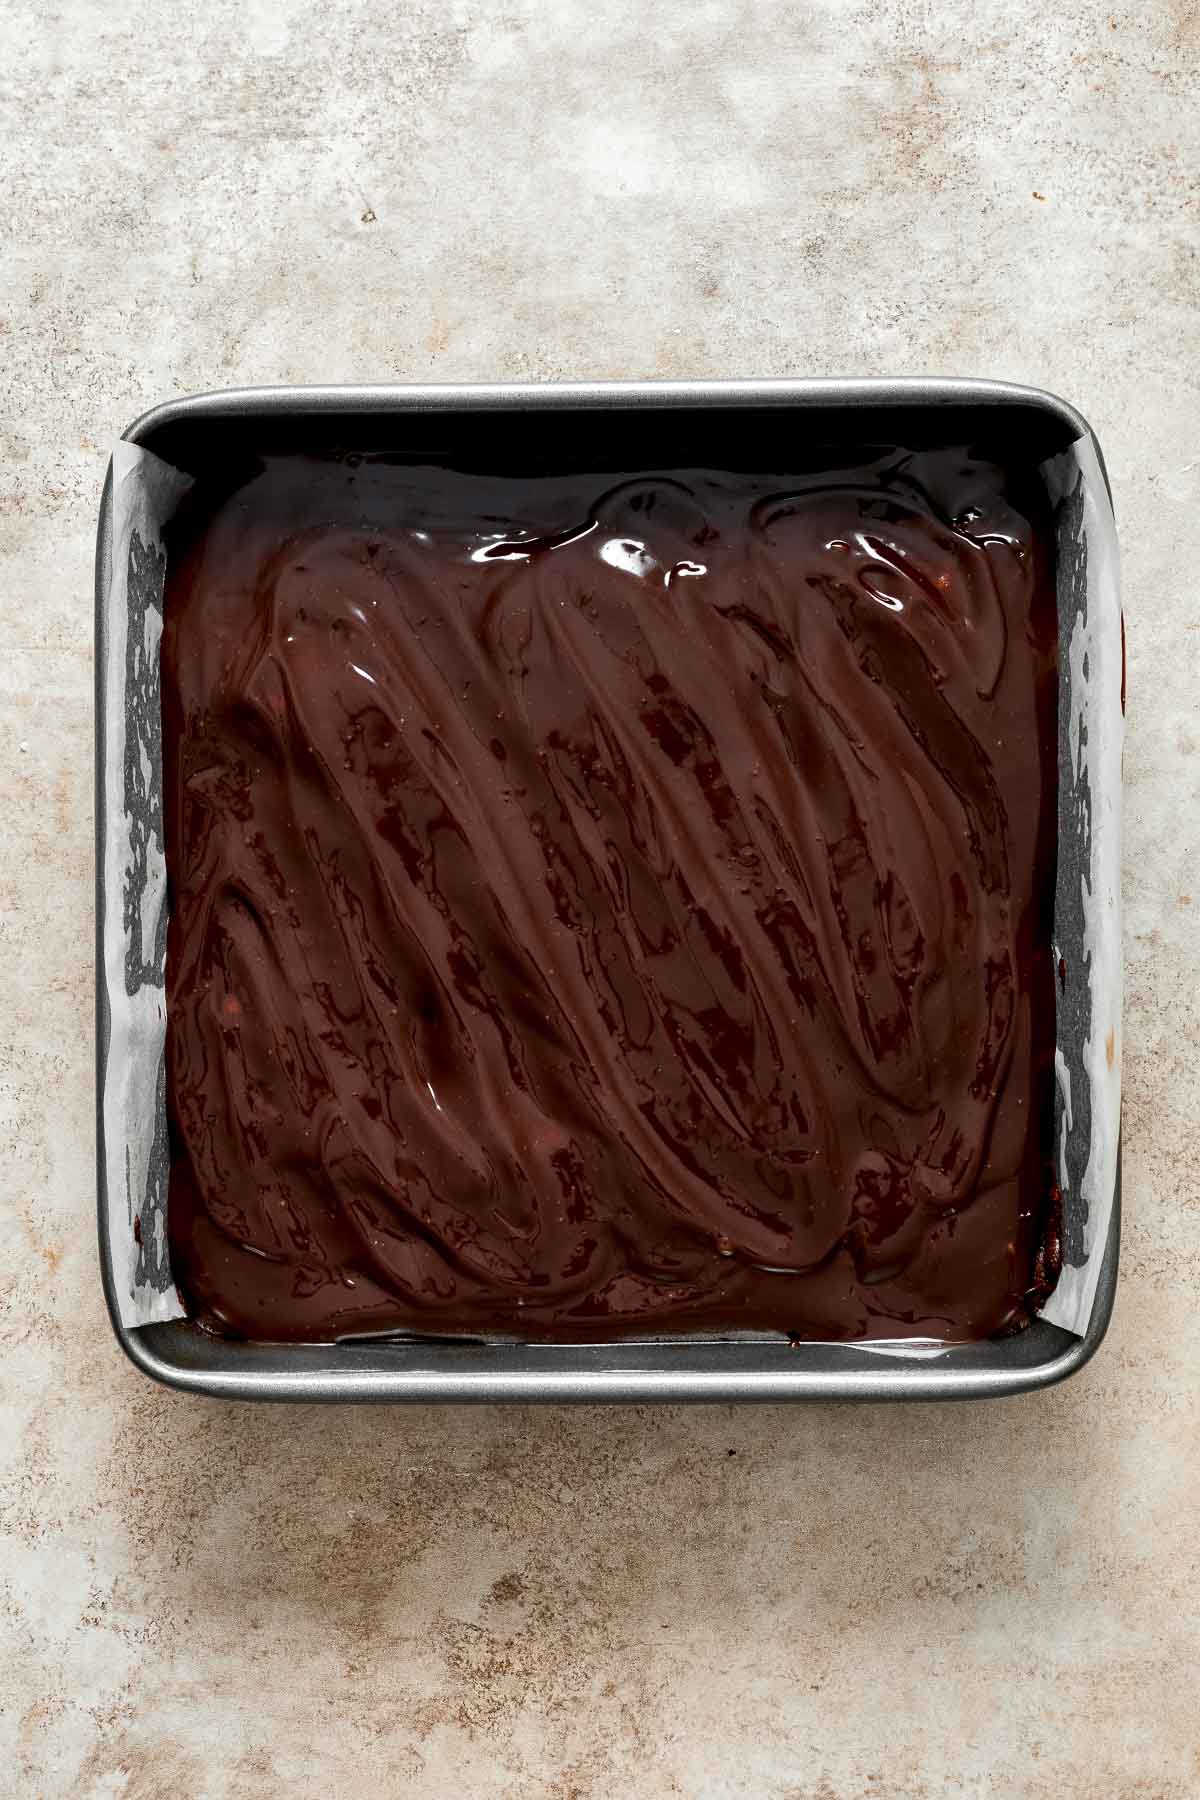
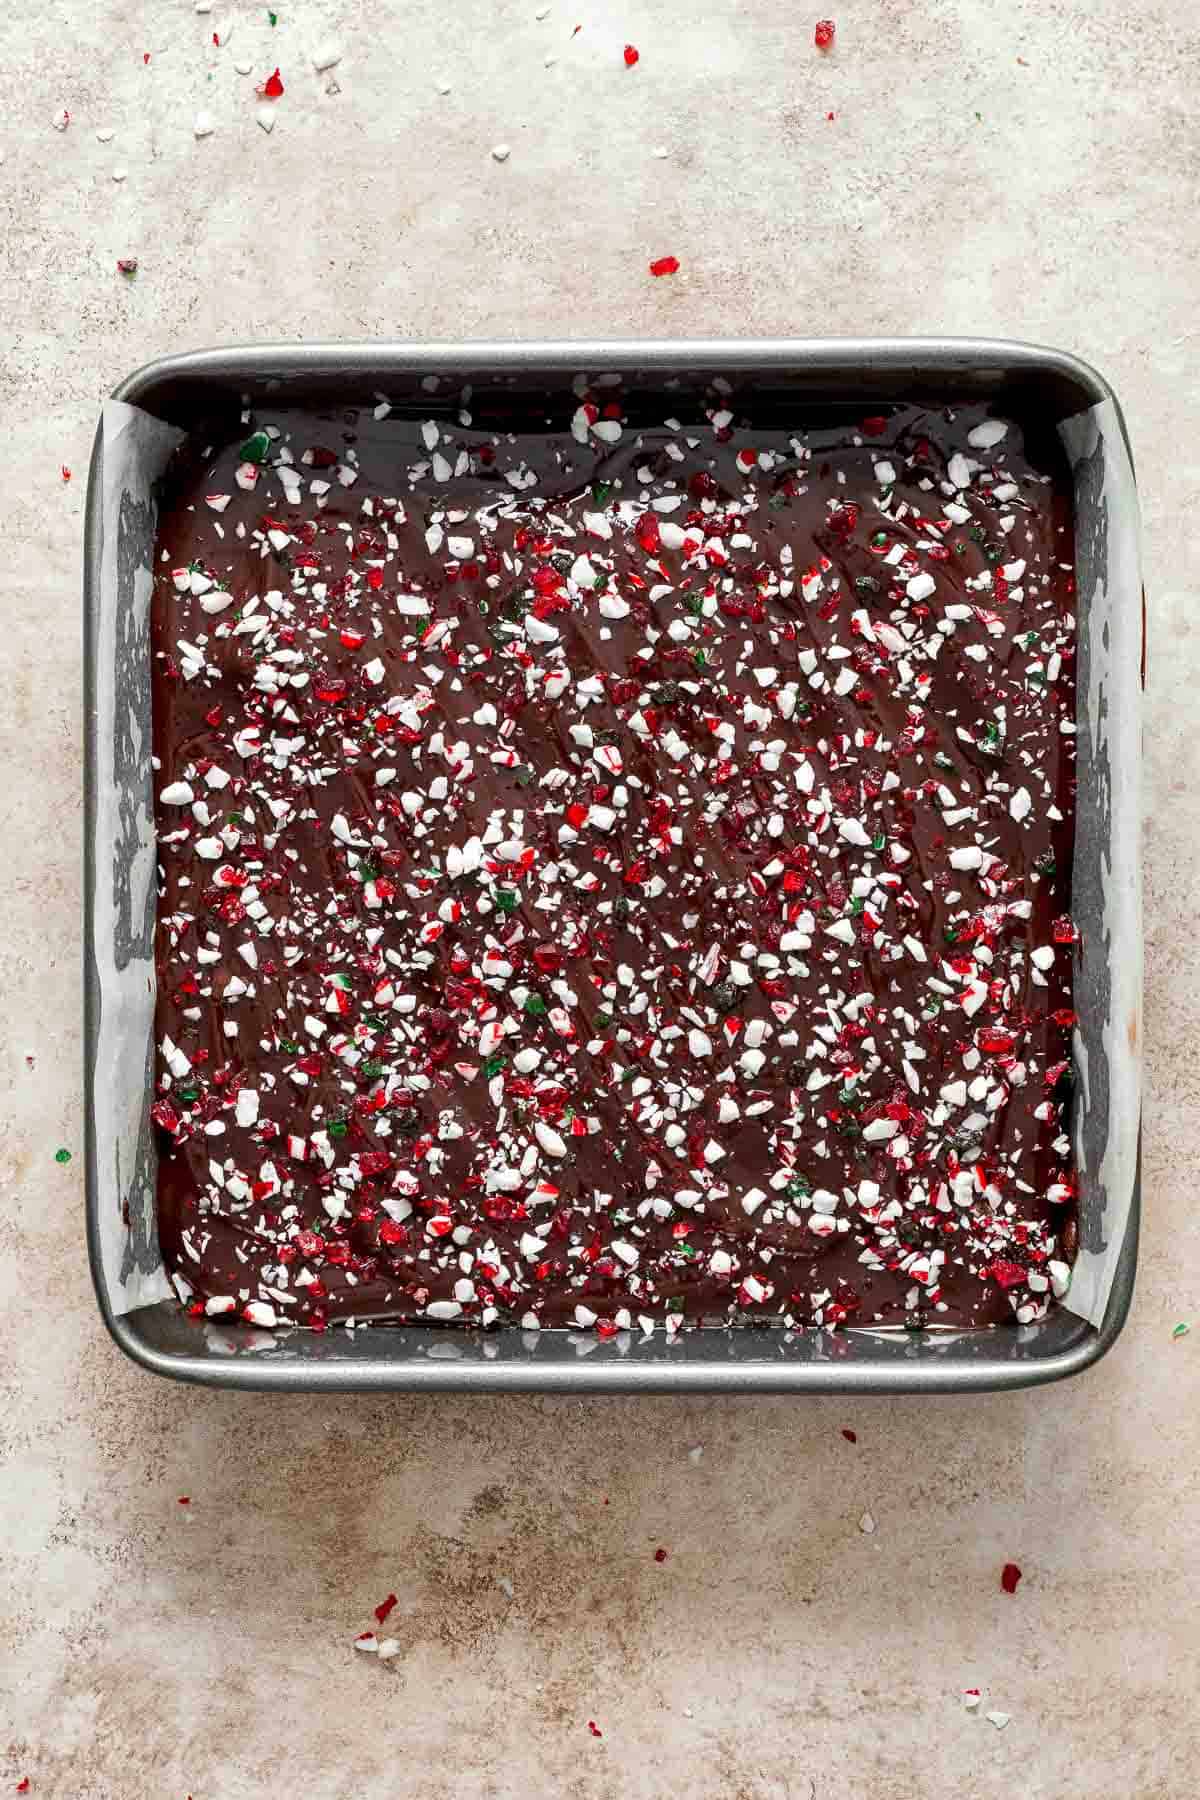
- Chill. Refrigerate for 1 hour to allow ganache to set. Then, use a sharp knife to cut the brownies in to 16 squares and serve. For clean cuts, wipe the knife after each cut.
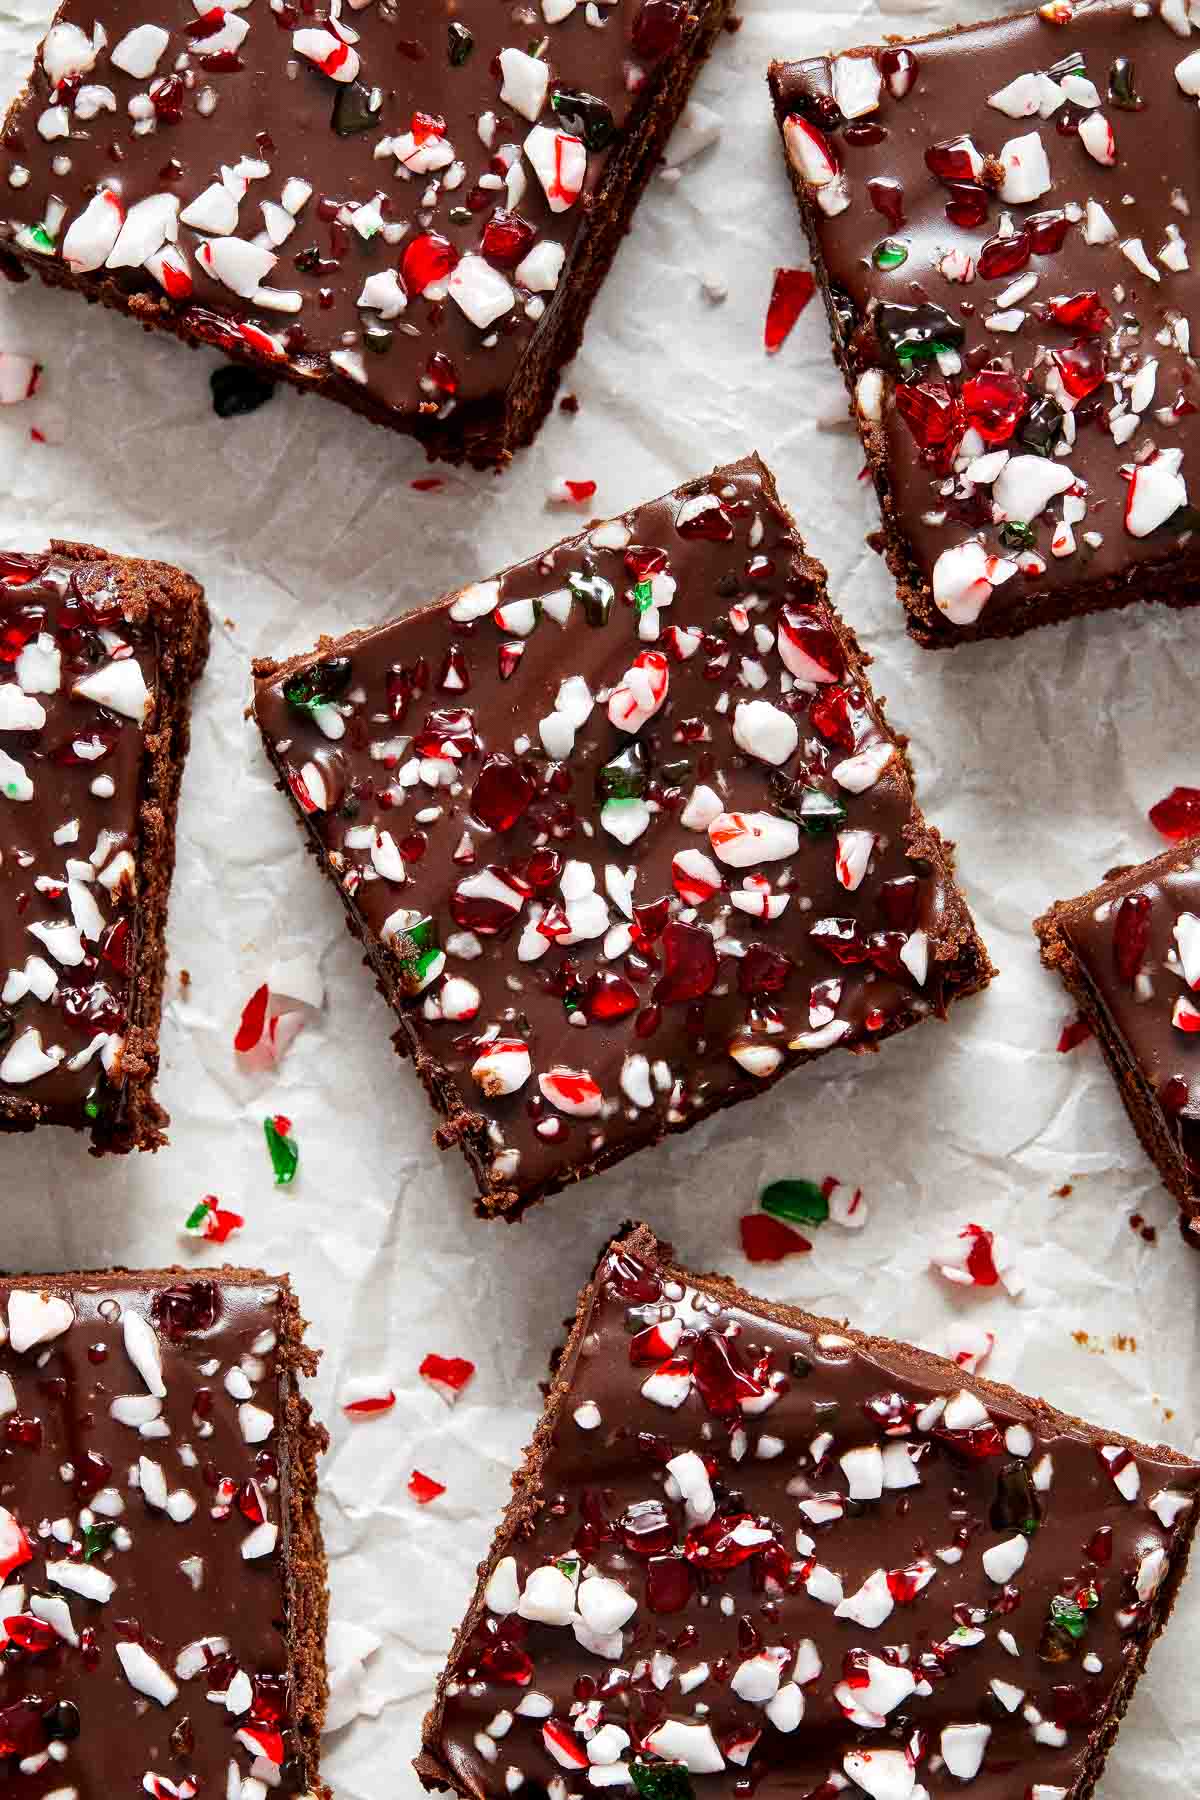
Recipe Variations
- Get creative with mix-ins: Mix in a cup of mini marshmallows, chocolate chips, or crushed nuts into the brownies batter.
- Add sprinkles. Add Christmas colored sprinkles on top instead of crushed peppermints, or make these any time of the year using colored sprinkles that match the theme you are going for. You can also omit the peppermint extract in that case.
- Make white chocolate ganache: Use white chocolate in the ganache instead for a white chocolate peppermint topping.
How to Serve
Peppermint Brownies are delicious warm (but a bit messier), at room temperature, or cool. These brownies are especially delicious with a scoop of cold vanilla ice cream. I actually like it better warm with ice cream. To reheat up a but, place in the microwave for 10-20 seconds until warm.
Brownies are also delicious with a tasty drink. Some of our favorites to serve with these peppermint treats are:

Recipe Tips and Tricks
- Make sure brownies have cooled. Before spreading on the ganache, make sure the brownies have cooked completely. Otherwise the ganache will melt everywhere and you'll end up with a gooey mess.
- Try boxed brownie mix. For a quicker option, use boxed brownie mix instead. Then, prepare the ganache and spread on the baked brownies.
- Double the recipe. You can make these brownies in a 9x13-inch baking pan simply by doubling the recipe. You will also need to increase the baking time about 5 more minutes.
Storing and Freezing Instructions
How to Store
Once the peppermint brownies have completely cooled, you can store them at room temperature in an airtight container for up to 3 days - make sure to keep them cool and out of direct sunlight. They will stay fresh for days! You can also tightly wrap them in plastic cling wrap or aluminum foil. You can store them longer for up to a week in the fridge.
How to Freeze
You can store peppermint brownies before or after frosting with ganache. Once cool, place in a freezer bag or airtight container and freeze for up to two months. You can also slice them first and wrap individually in plastic cling wrap before placing in a freezer bag. When ready to serve, take out the portion that you want and thaw overnight in the refrigerator. Then, bring to room temperature before serving, about 20 minutes on the kitchen counter.
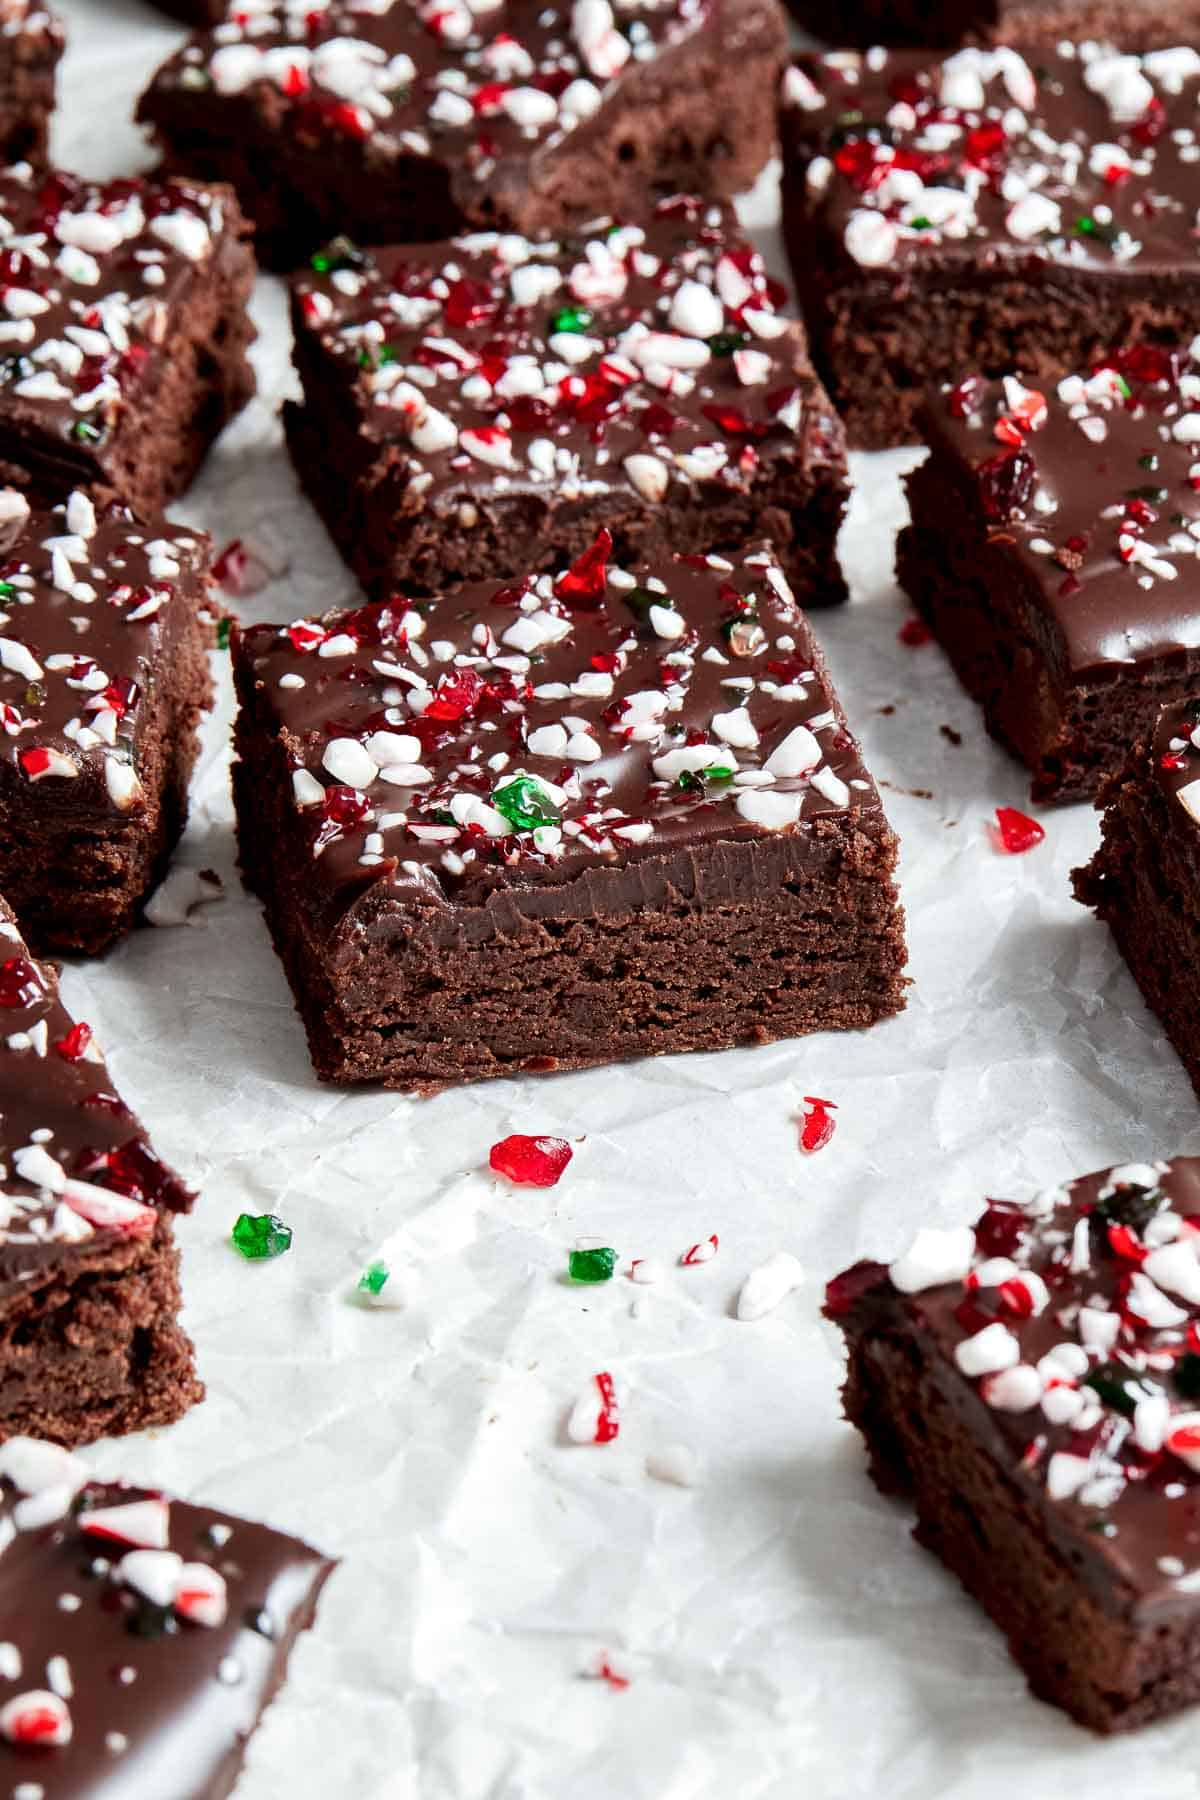
More Peppermint Recipes
- 30 Best Christmas Dessert Recipes
- Peppermint Macarons
- Chocolate Peppermint Christmas Bark
- Peppermint Hot Chocolate
- Peppermint Snowball Cookies
- Candy Cane Cookies
Tried this recipe?
I'd love to hear what you think! Leave a comment and rating below to share your feedback. Your reviews help others discover this recipe and help me keep creating more free recipes for you. Snap a photo and tag me on social media @aheadofthyme too.

Oat Porridge
Oat Porridge is a healthy, delicious breakfast that's great for all ages. This homemade porridge is fragrant with warm, comforting notes of maple syrup, vanilla, and cinnamon - the most perfect way to heat up on cold winter mornings. It's creamy. It's rich. It's just plain cozy.
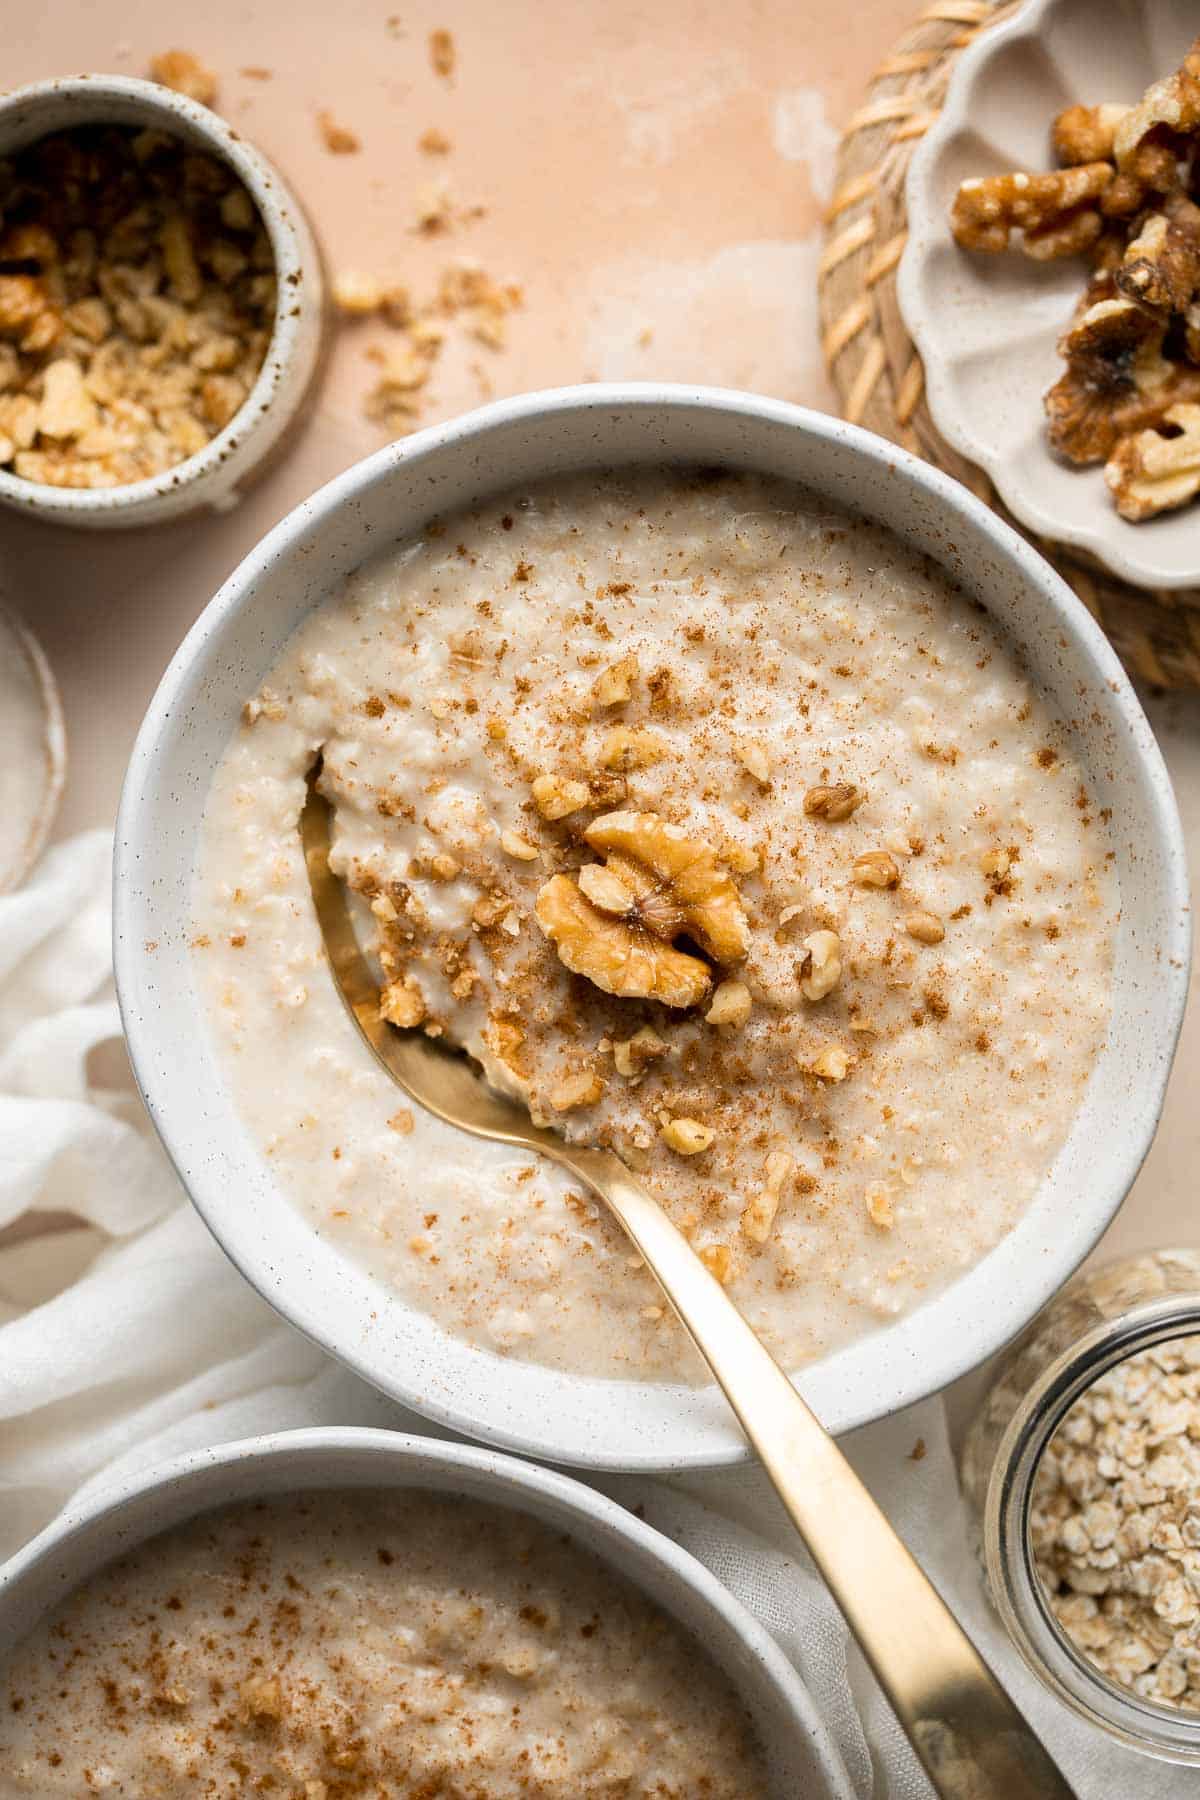
Plus, it's quick and easy to make oatmeal porridge from scratch. In just ten minutes you can whip up enough hot porridge for your whole family, using ingredients you probably already have in your pantry. It takes no time at all to get breakfast ready with this recipe, so you can focus on getting everyone ready for the day ahead.
Why You'll Love this Oat Porridge
- Quick and easy breakfast. Hot porridge makes a fast, wholesome breakfast that can be whipped up on even the most hectic mornings. It takes only five minutes to prep the ingredients and five minutes to cook! Plus, oat porridge gives me the energy boost I need to make it through my mornings.
- Naturally vegan and gluten-free. This particular oatmeal porridge is made with almond milk, making it perfect for vegans and vegetarians without any substitutions. It is also gluten-free but you have to make sure that you are using certified gluten-free oats to be sure.
- No processed sugar. Unlike a lot of the ready-made mixes, this quick homemade porridge is sweetened using maple syrup (or honey) instead of processed sugars. In fact, you leave out the sweetener completely, or adjust it to your desired level of sweetness.
- Great for winter mornings. With cozy and warm flavors, this oatmeal porridge is a perfect for cold fall and winter mornings, especially Christmas morning! To make the perfect Christmas morning breakfast, decorate this porridge with some cinnamon powder. You can create a christmas tree, heart, or a happy face garnish and put an instant smile on your children's faces.
- Easy to customize. The combination of milk, cinnamon, and vanilla just does something amazing to your taste buds. These ingredients were made for each other! And the best part is that you don't have to ever get sick of this porridge because there are so many ways to change up this recipe. Use this recipe as a base for a basic porridge and experiment with different combinations of nuts and fruits.
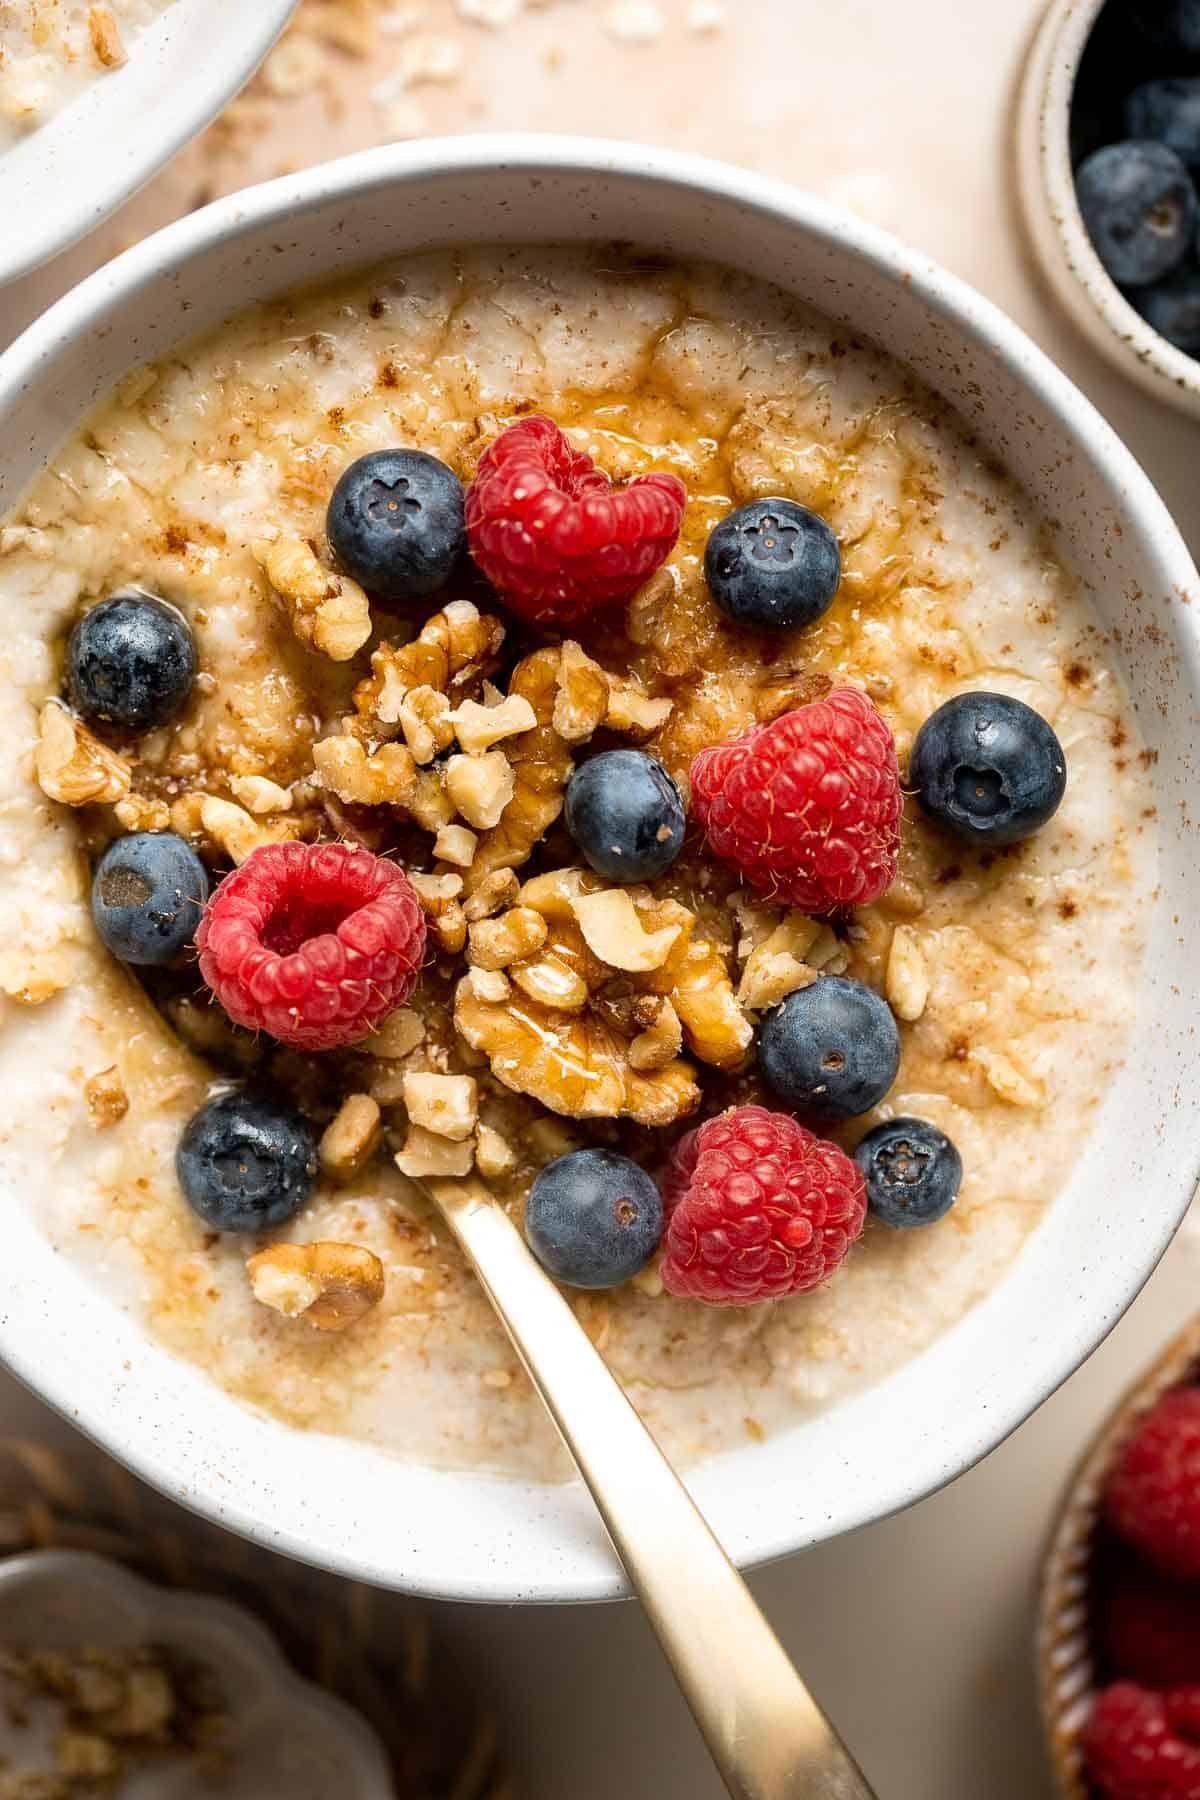
Ingredient Notes
To make this quick and easy Oat Porridge, you will need the following ingredients (full measurements in recipe card below):
- rolled oats - make sure to use rolled oats (whole oats) and not quick oats. You could use quick oats but it will change the consistency and make it more mushy. Also, use certified gluten-free oats if someone in your family is celiac or has a gluten intolerance.
- milk - you can use other dairy or non-dairy milk. Try almond milk, soy milk, or cow's milk.
- water
- maple syrup - you can also use the same measure of honey, brown sugar, or white sugar to sweeten the oatmeal porridge. Use maple syrup or sugar to keep the recipe completely vegan. You can also adjust the amount to suit your level of sweetness, and can even leave it out completely if you wish.
- salt
- vanilla extract - vanilla bean paste can be used in place of the vanilla extract at a 1:1 ratio. You could also leave this out completely if you wish.
- ground cinnamon - you can use store-bought or grind your own at home.
- walnuts - this is optional to sprinkle on top. You can also use other nuts such as pecans, pistachios, or almonds.
You will also need measuring cups and spoons and a medium saucepan.
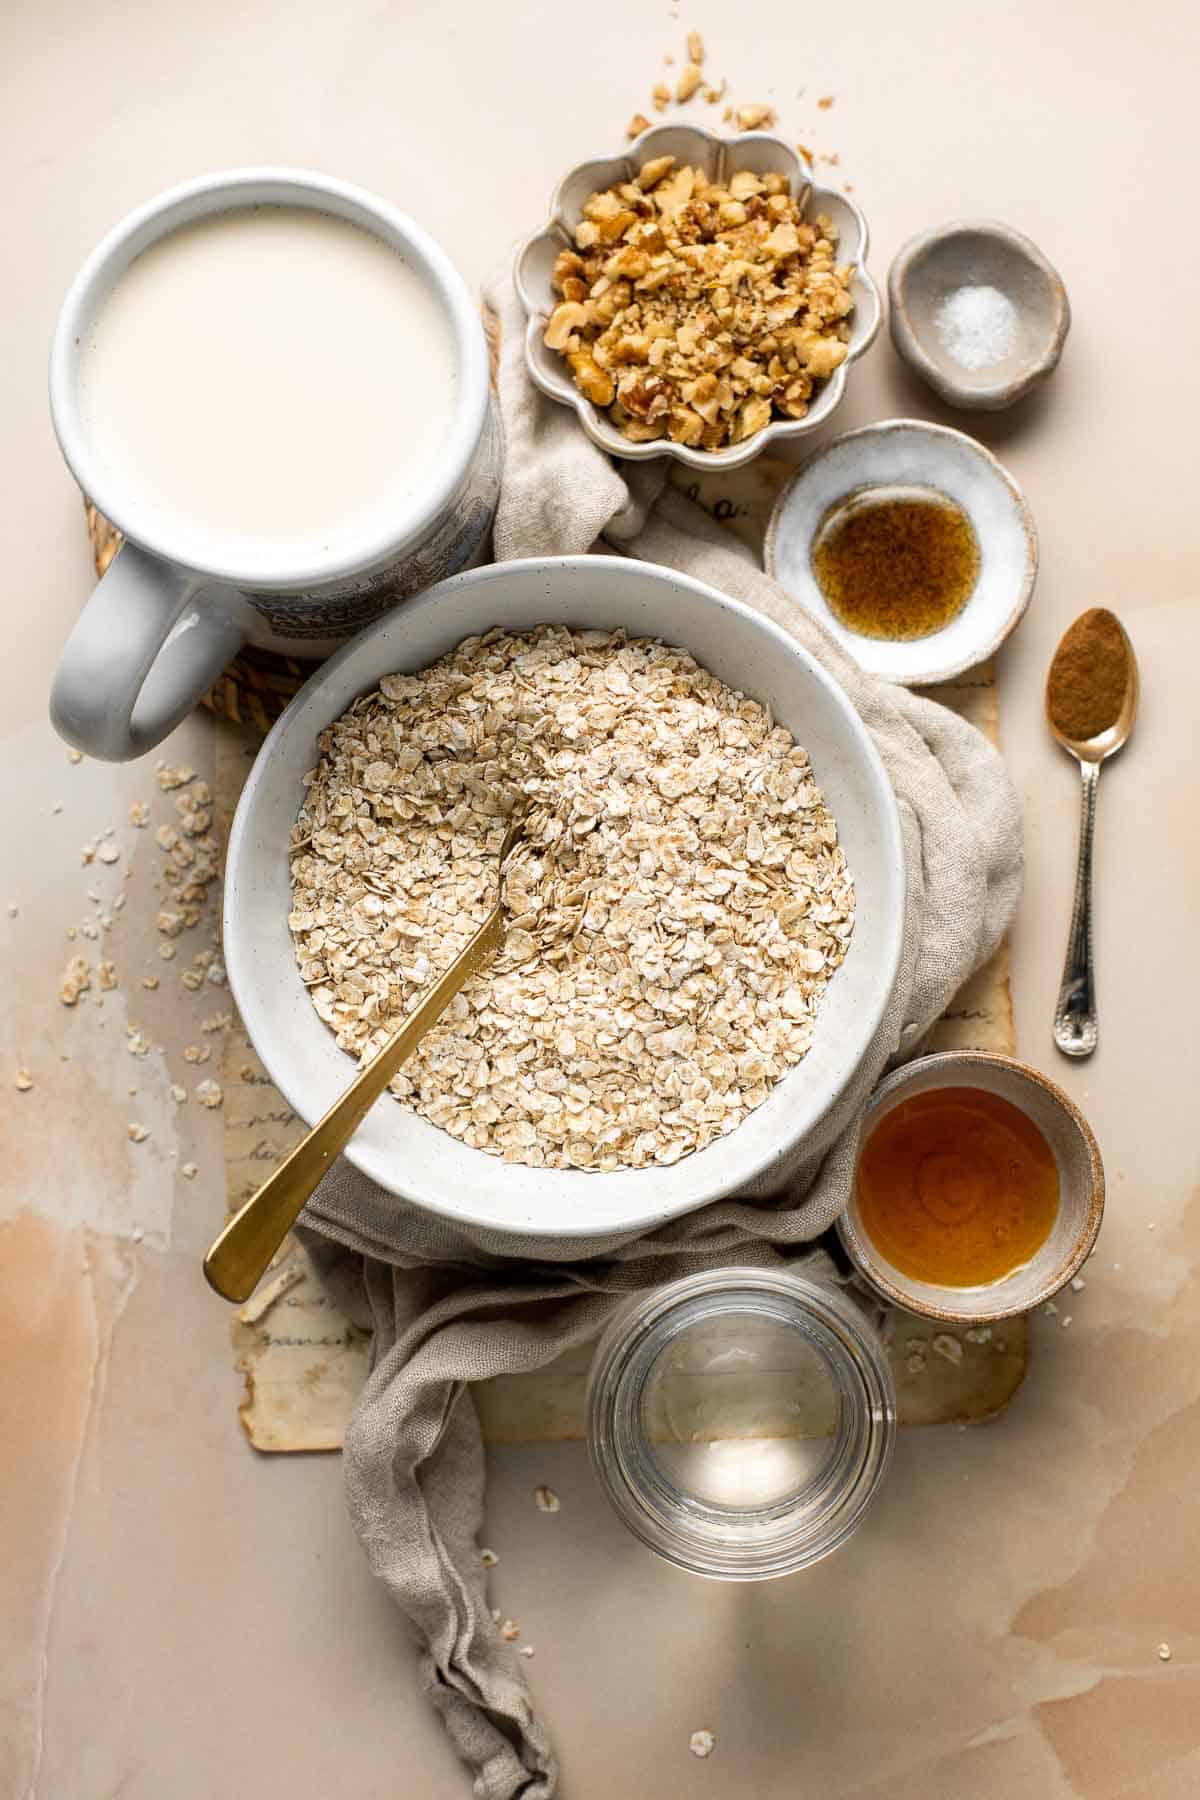
How to Make the Best Oat Porridge
- Combine ingredients. In a medium saucepan, add oats, milk, water, honey, salt, and vanilla. Stir well and heat over medium heat.
- Simmer. Bring mixture to a simmer, and continue to for 5 minutes, stirring often.
- Serve. Divide into serving bowls and serve with your favorite toppings such as a sprinkle of cinnamon on top and chopped walnuts.
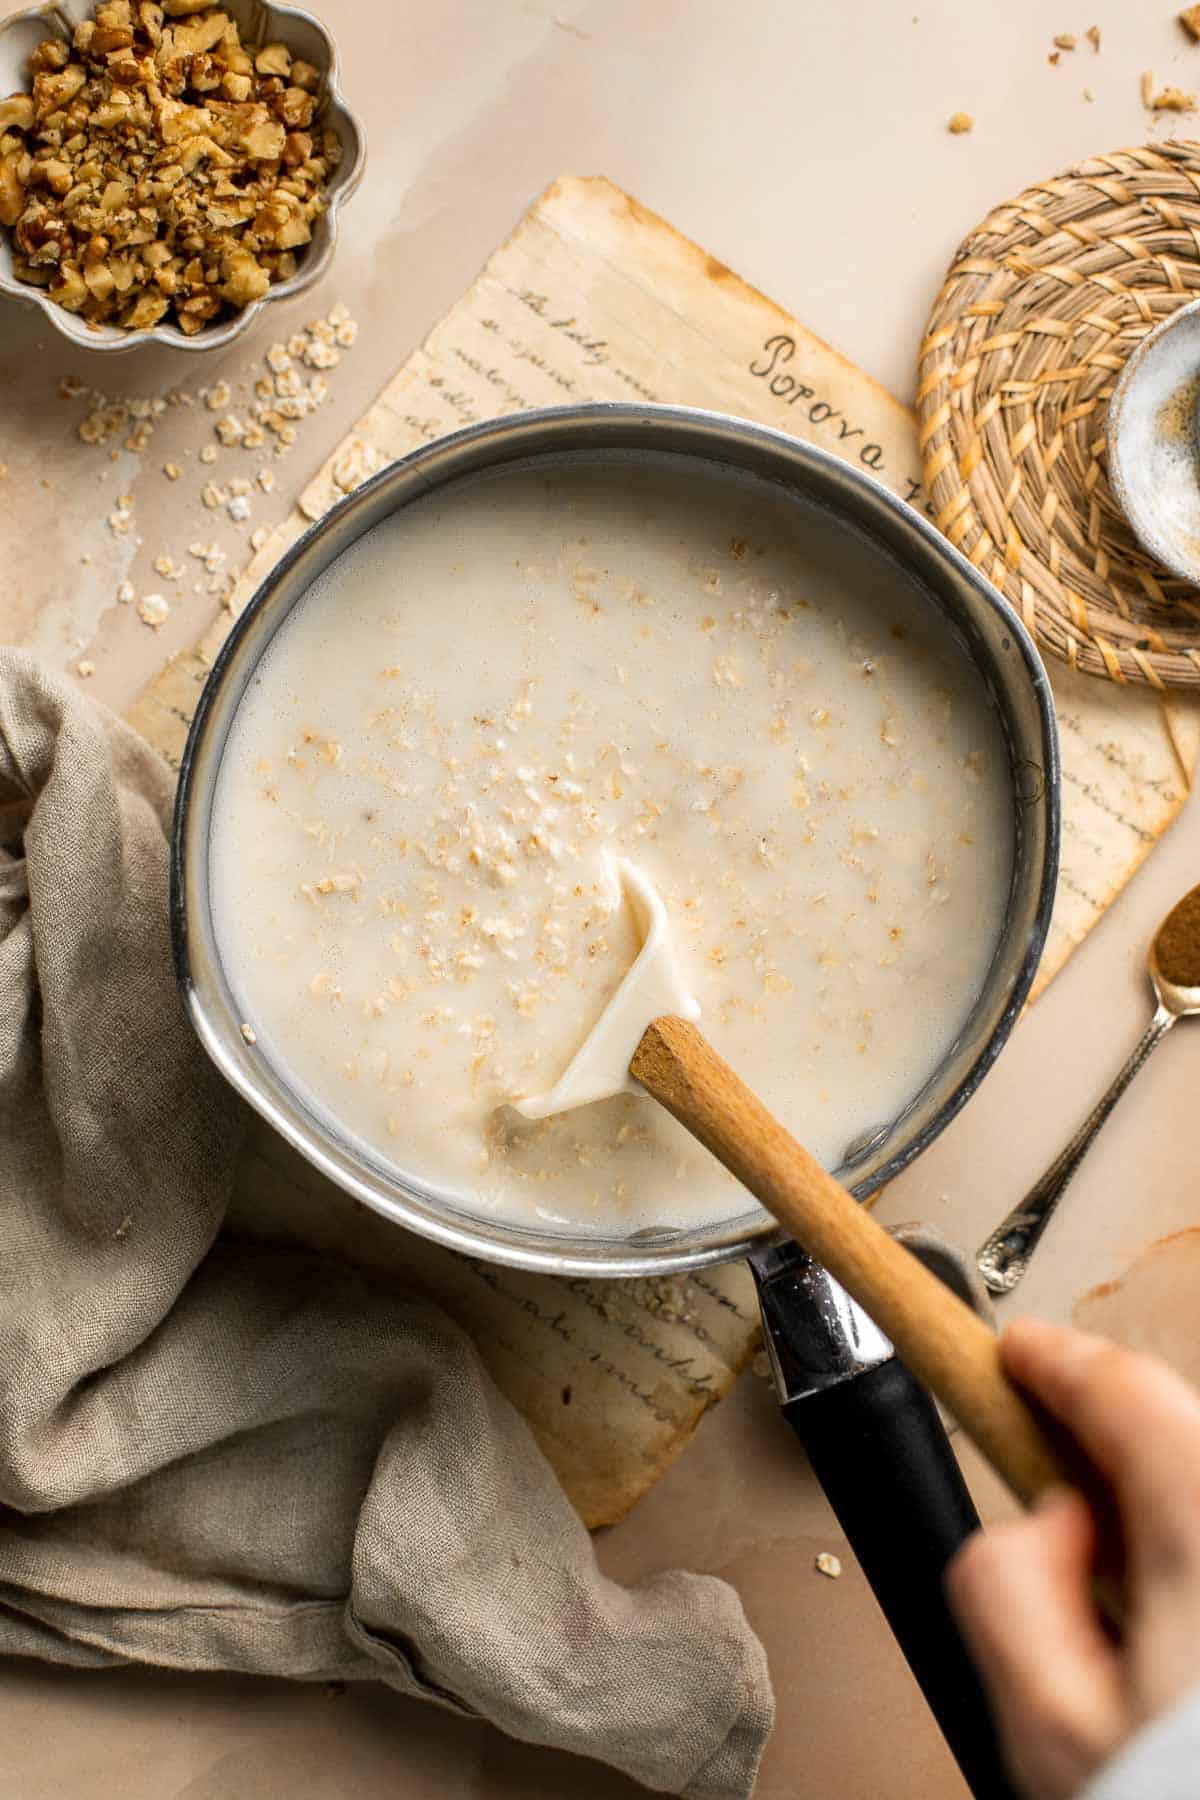
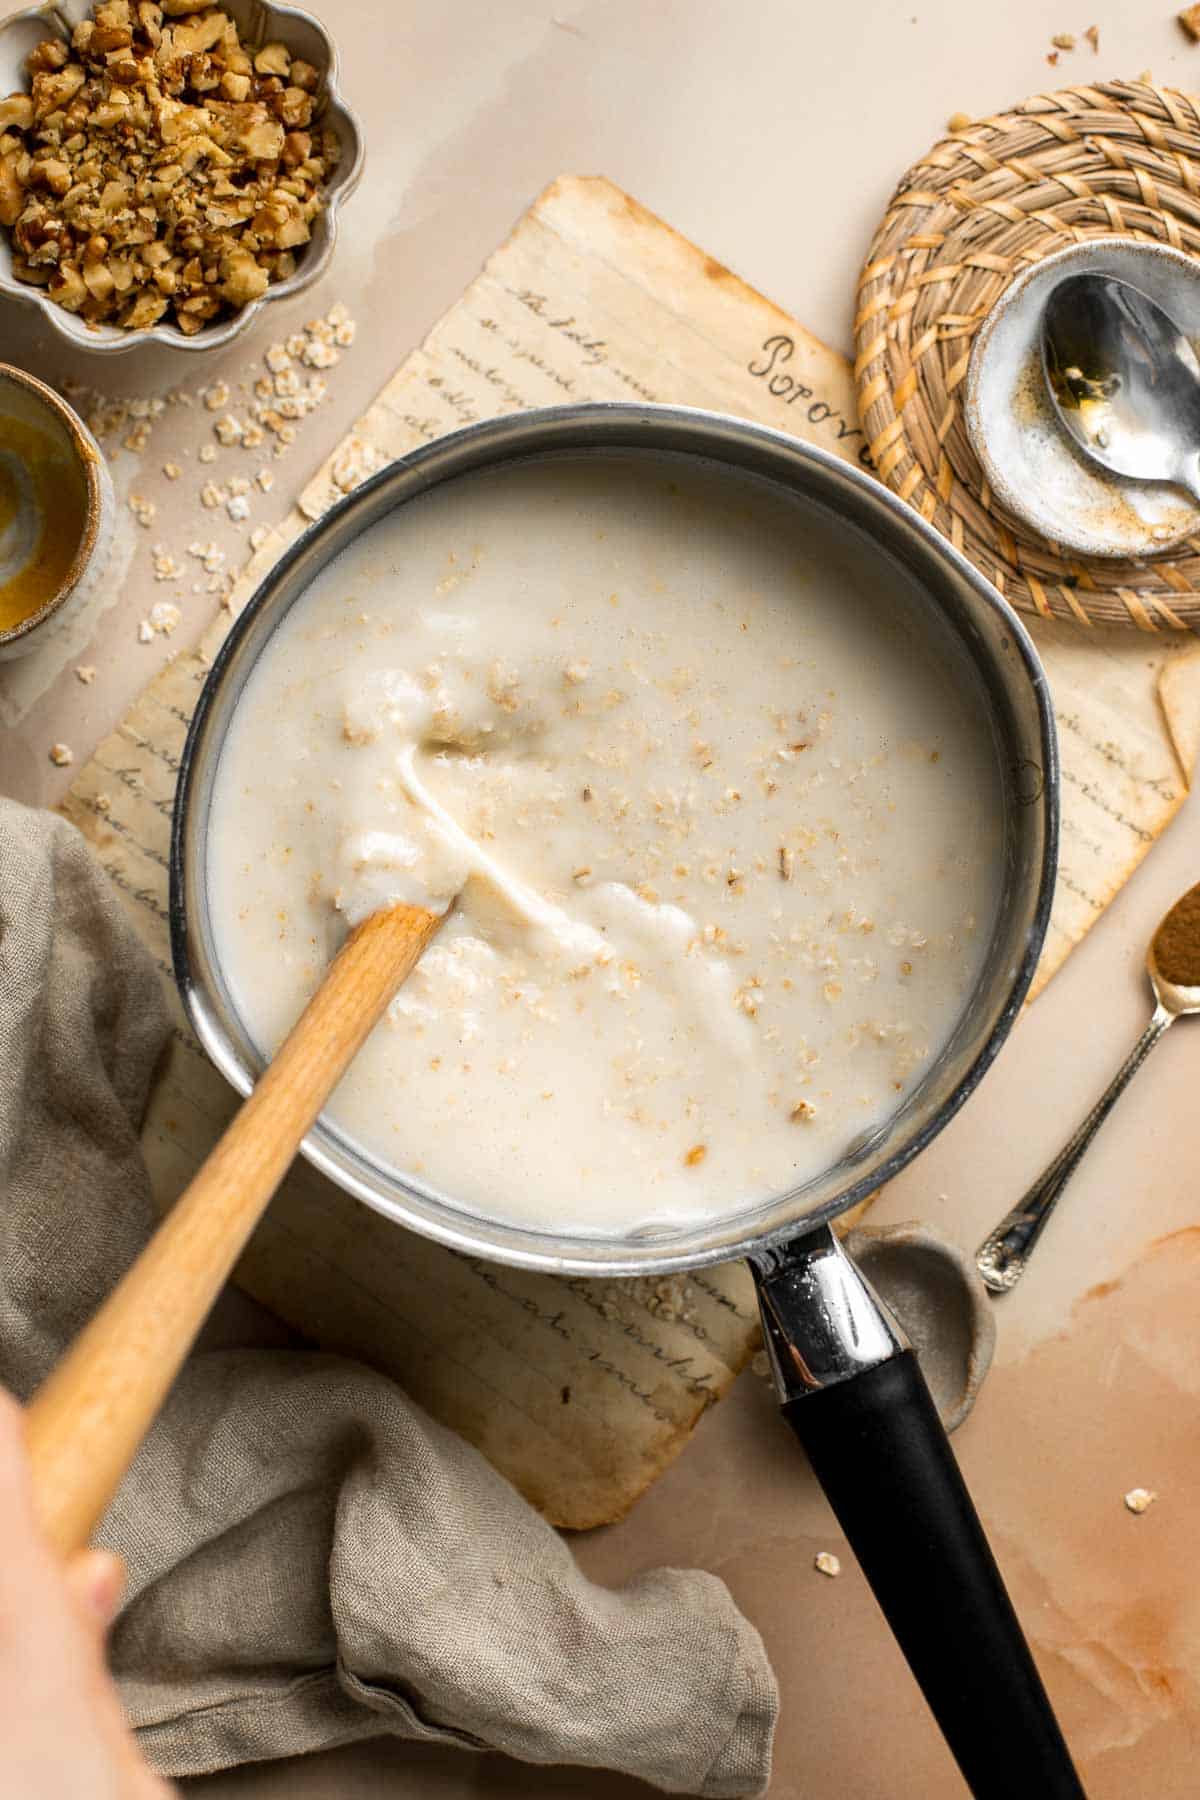

Porridge Variations
- Add fruit. You can add fresh, frozen or dehydrated fruits into your porridge. You can also add them on top as a garnish and mix in slowly as you eat. Try it with apples, banana, and berries.
- Change the spices. We adding cinnamon and vanilla, but it is completely optional. Some other spices to add to your oatmeal include pumpkin pie spice blend, nutmeg, ginger, cardamom, or almond extract.
- Add sweet treats. Add in some chocolate chips or sprinkles. This is also a great way to get the kids to eat porridge. You can also customize the sprinkles based on any holiday that you are celebrating.
- Make it nutty. We topped our porridge with walnuts, but you can use any nuts that you like. Try almonds, pistachios, pecans, or hazelnuts.
How to Serve
Serve this oatmeal porridge on it's own or add in your favorite mix-ins including fruits, nuts, and sprinkles, and a drizzle of honey or maple syrup. I also like preparing a big batch as part of a lunch spread along with some other brunch favorites including:
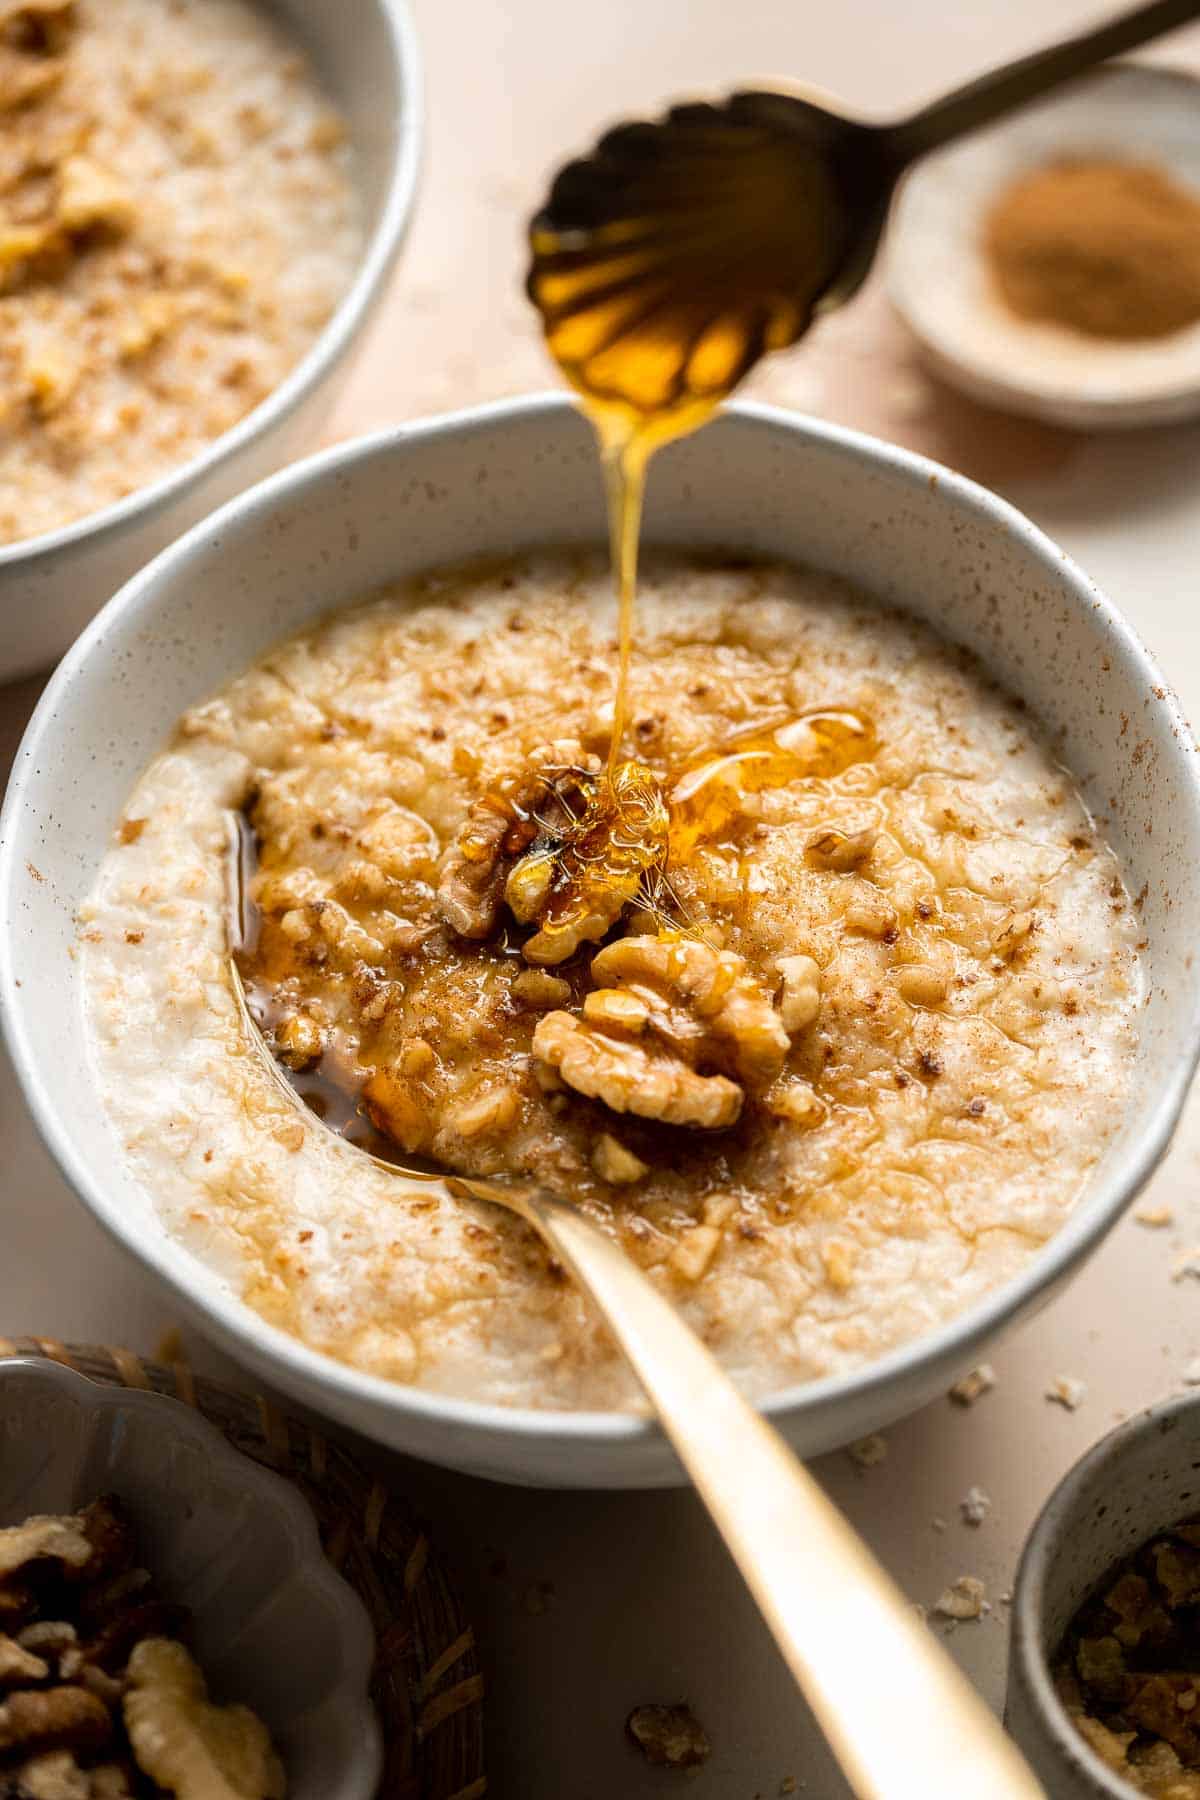
Recipe Tips and Tricks
- Try also baking your oats. You can easily bake the cooked oat porridge (or leftover porridge) for a few minutes to create a chewy crust layer and a more casserole-like texture.
- Pair with fresh fruit and bacon. Hot oatmeal porridge is great on its own, but it also makes a great companion to crispy bacon and bananas, strawberries, melons, blueberries, and apples.
- Turn leftovers into a smoothie. You can take your leftover porridge and combine it with your favorite fruits (I like banana and berries), add some spinach, and thin it out with more water and milk. You can also just follow your favorite smoothie recipes and a spoonful of oatmeal for added nutrients and flavor.
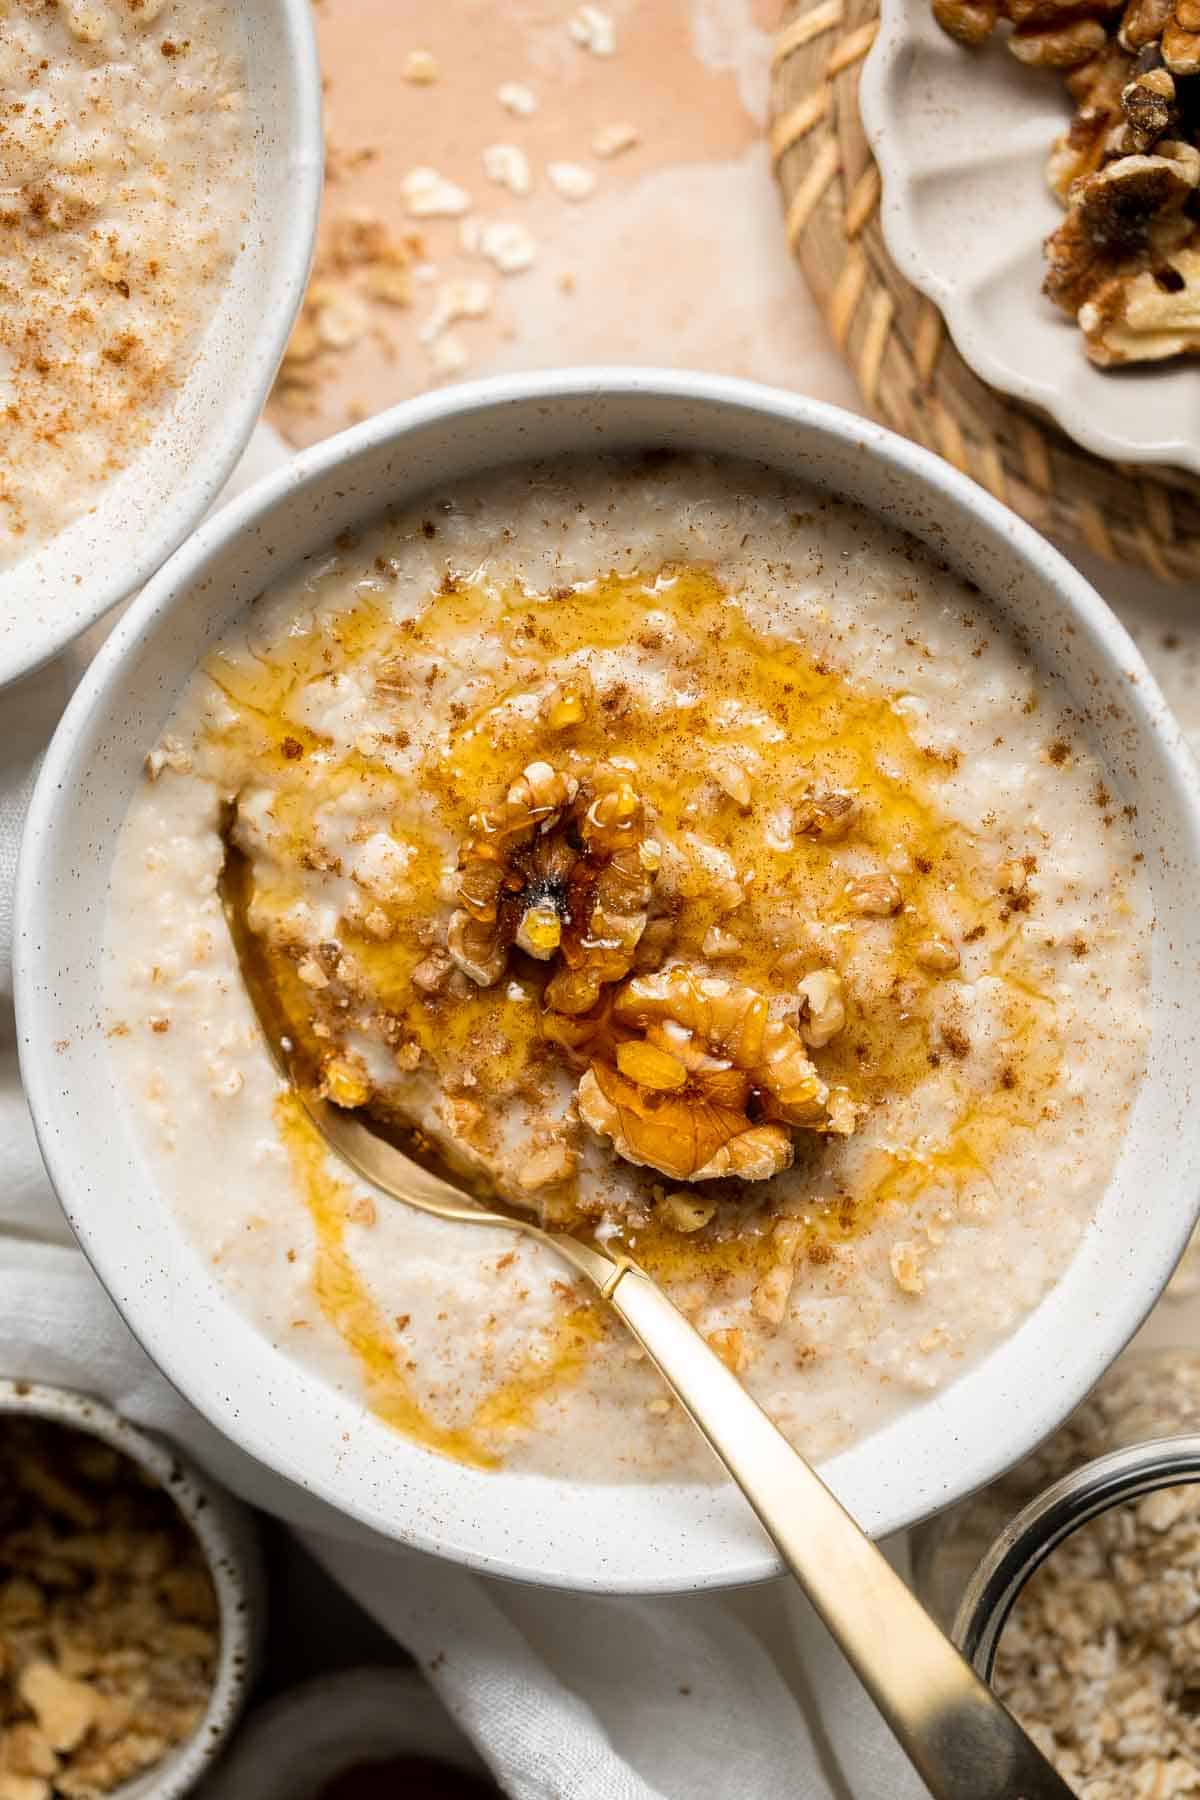
Storing and Freezing Instructions
How to Store
Once the oat porridge has cooled to room temperature, transfer it to an airtight container and refrigerate it for up to 6 days.
How to Reheat
You can reheat leftover porridge in the microwave or on the stove. To reheat in the microwave, place the oatmeal in a microwave-safe dish and heat on high for 1-2 minutes until warm. You can reheat in a saucepan on the stove over medium-low heat until warm, stirring occasionally. You may need to add a splash of water if the oatmeal has thickend too much when stored in the fridge.
How to Freeze
Spoon leftover oatmeal porridge into a freezer bag and freeze flat. When you're ready to reheat it, thaw overnight in the fridge or use a warm water bath to release the oatmeal from the bag. I recommend freezing in portions for easy reheating just the amount that you want.
More Breakfast Recipes
- 50 Best Breakfast Ideas
- Cinnamon Apple Baked Oatmeal
- Breakfast Strata
- Chia Seed Pudding
- Fruit and Yogurt Parfait with Granola
- No Bake Protein Breakfast Energy Bites
Tried this recipe?
I'd love to hear what you think! Leave a comment and rating below to share your feedback. Your reviews help others discover this recipe and help me keep creating more free recipes for you. Snap a photo and tag me on social media @aheadofthyme too.
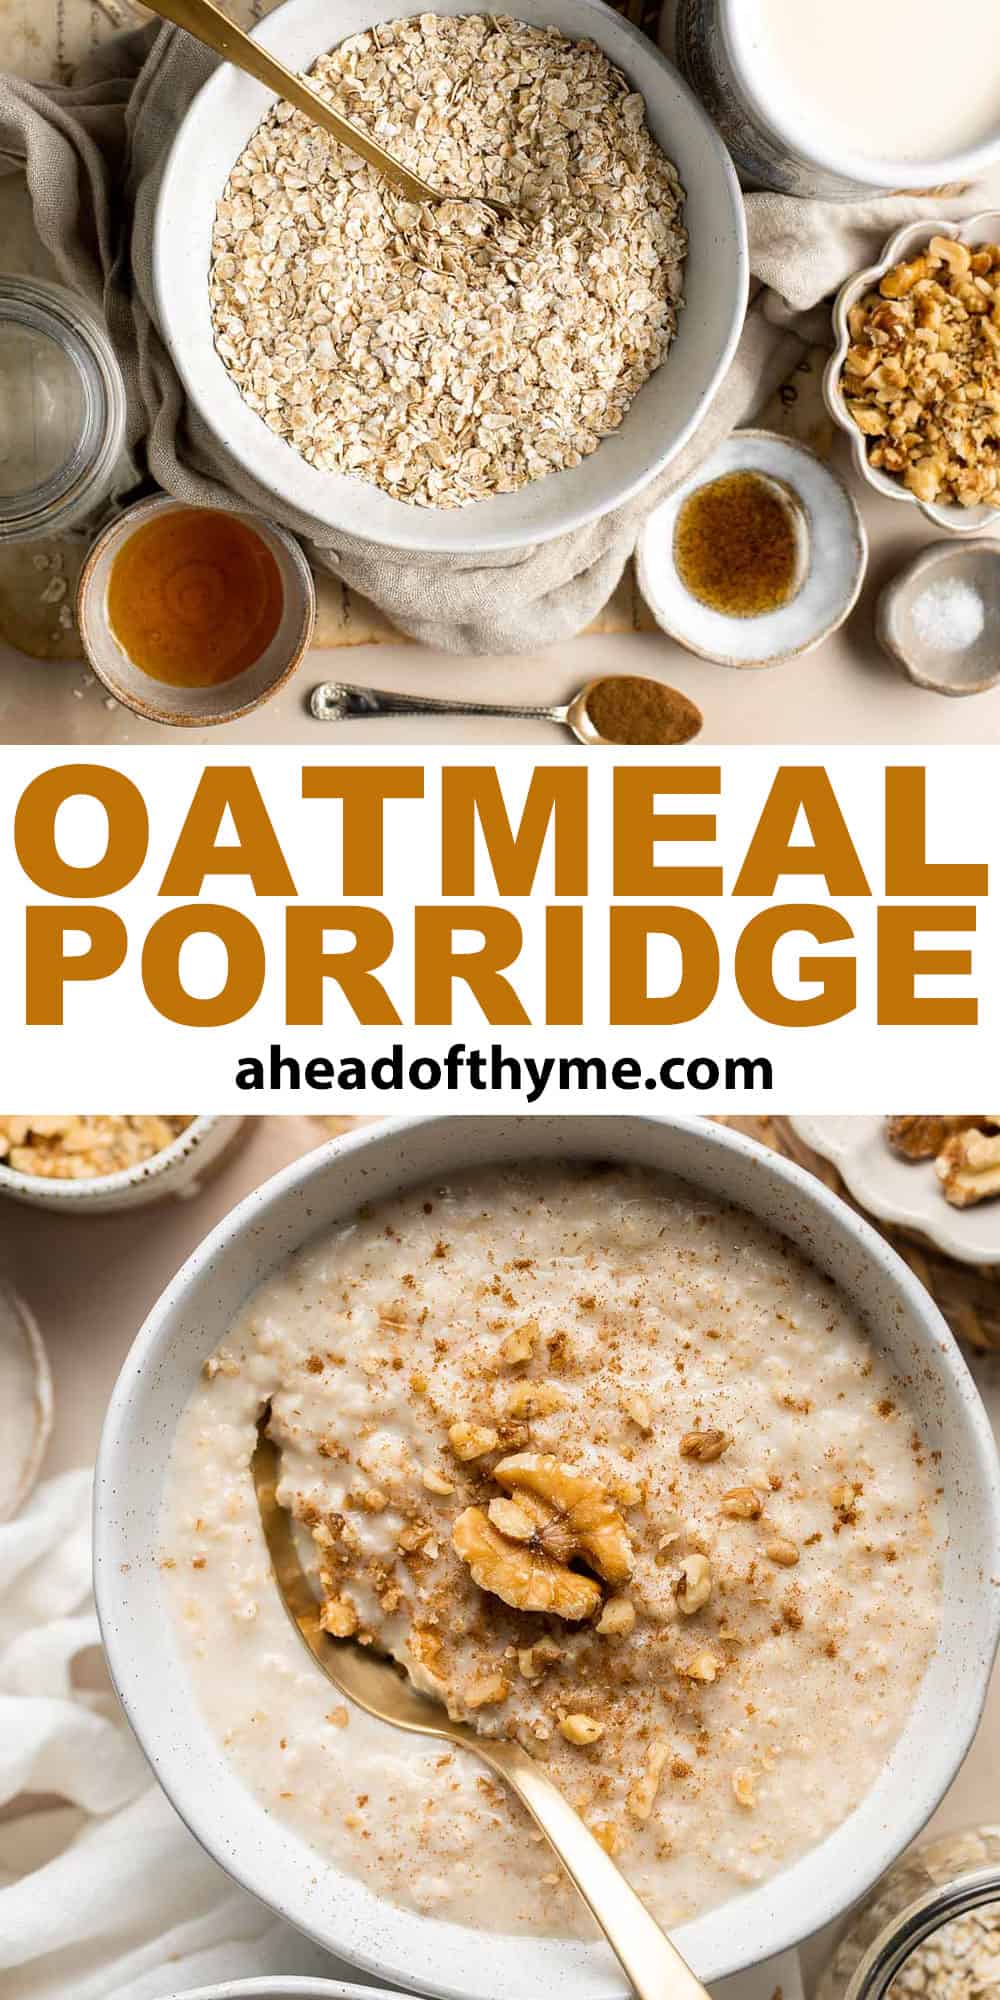
75+ Easy Appetizer Recipes
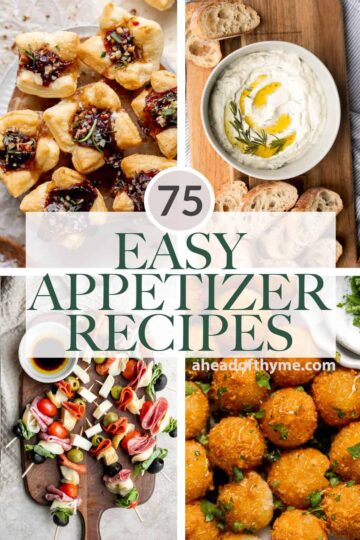
Looking for some easy appetizers to make for your next dinner party, happy hour with friends, game day, or work potluck? Well, you are in luck! We are sharing over 75 of our best easy appetizer recipes to snack on including bite-sized finger foods, delicious dips, shareable snack platters, holiday appetizers, and more.
Plus, there is an easy appetizer recipe for everyone, including comforting cheesy snacks, healthy and gluten-free appys, and vegetarian and vegan appetizers. Plus, tons of kid-friendly options too.

Easy Appetizer Recipes
Antipasto skewers with tortellini are a quick, easy, and delicious appetizer with the best parts of a traditional antipasto platter but easier to eat.
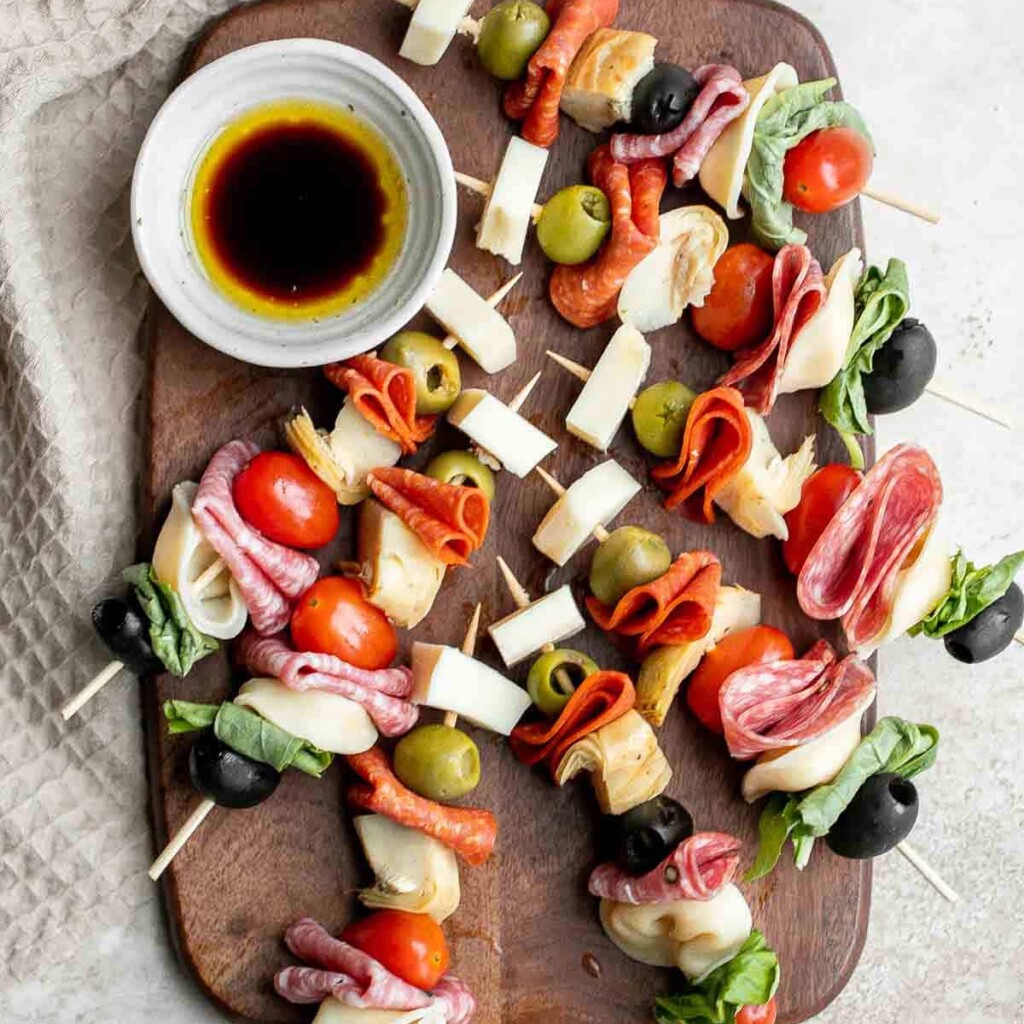
Warm, rich, creamy baked spinach dip is a delicious and easy appetizer that is baked until warm and melty. Easy to make ahead and a total crowd pleaser. It's one of my favourite dip recipes of all time.
Easy Tomato Bruschetta with Balsamic Glaze
Tomato bruschetta with balsamic glaze is an easy Italian appetizer topped with tomatoes, onions, garlic, basil and olive oil. Delicious, fresh and simple.

Sticky honey garlic meatballs are a delicious and flavourful 30-minute meal to add to your weekly dinner rotation. A total crowd pleaser.
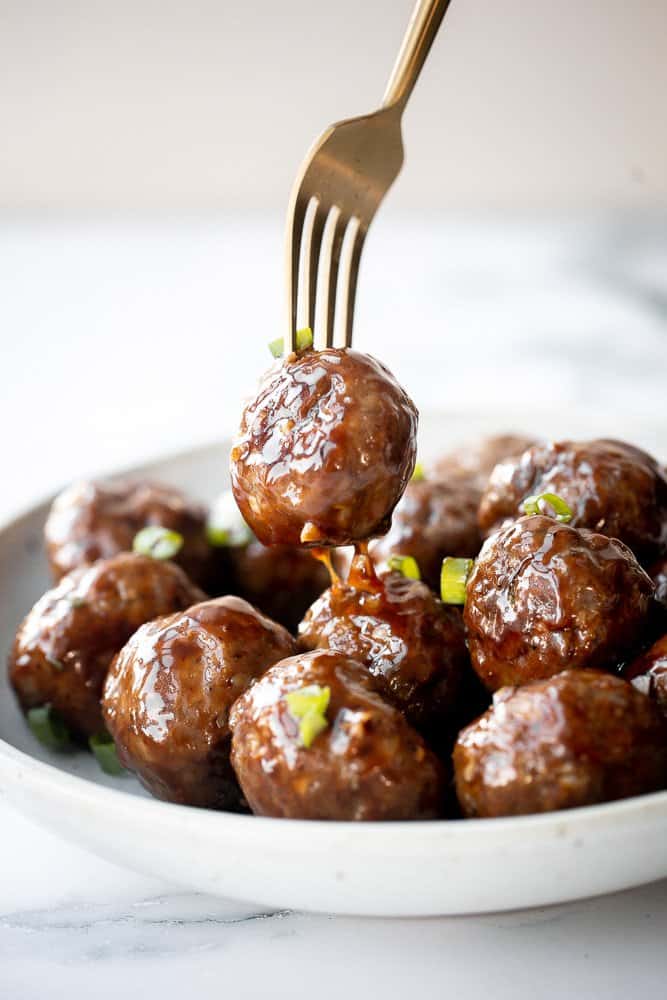
Jalapeño poppers are the perfect appetizer - spicy, crispy, cheesy, and creamy, toasted to golden brown perfection. Plus easy to make ahead and freeze well.
Light and airy, whipped ricotta dip is so easy to make in just 5 minutes with a few fresh ingredients including fresh herbs, olive oil, garlic, and honey.
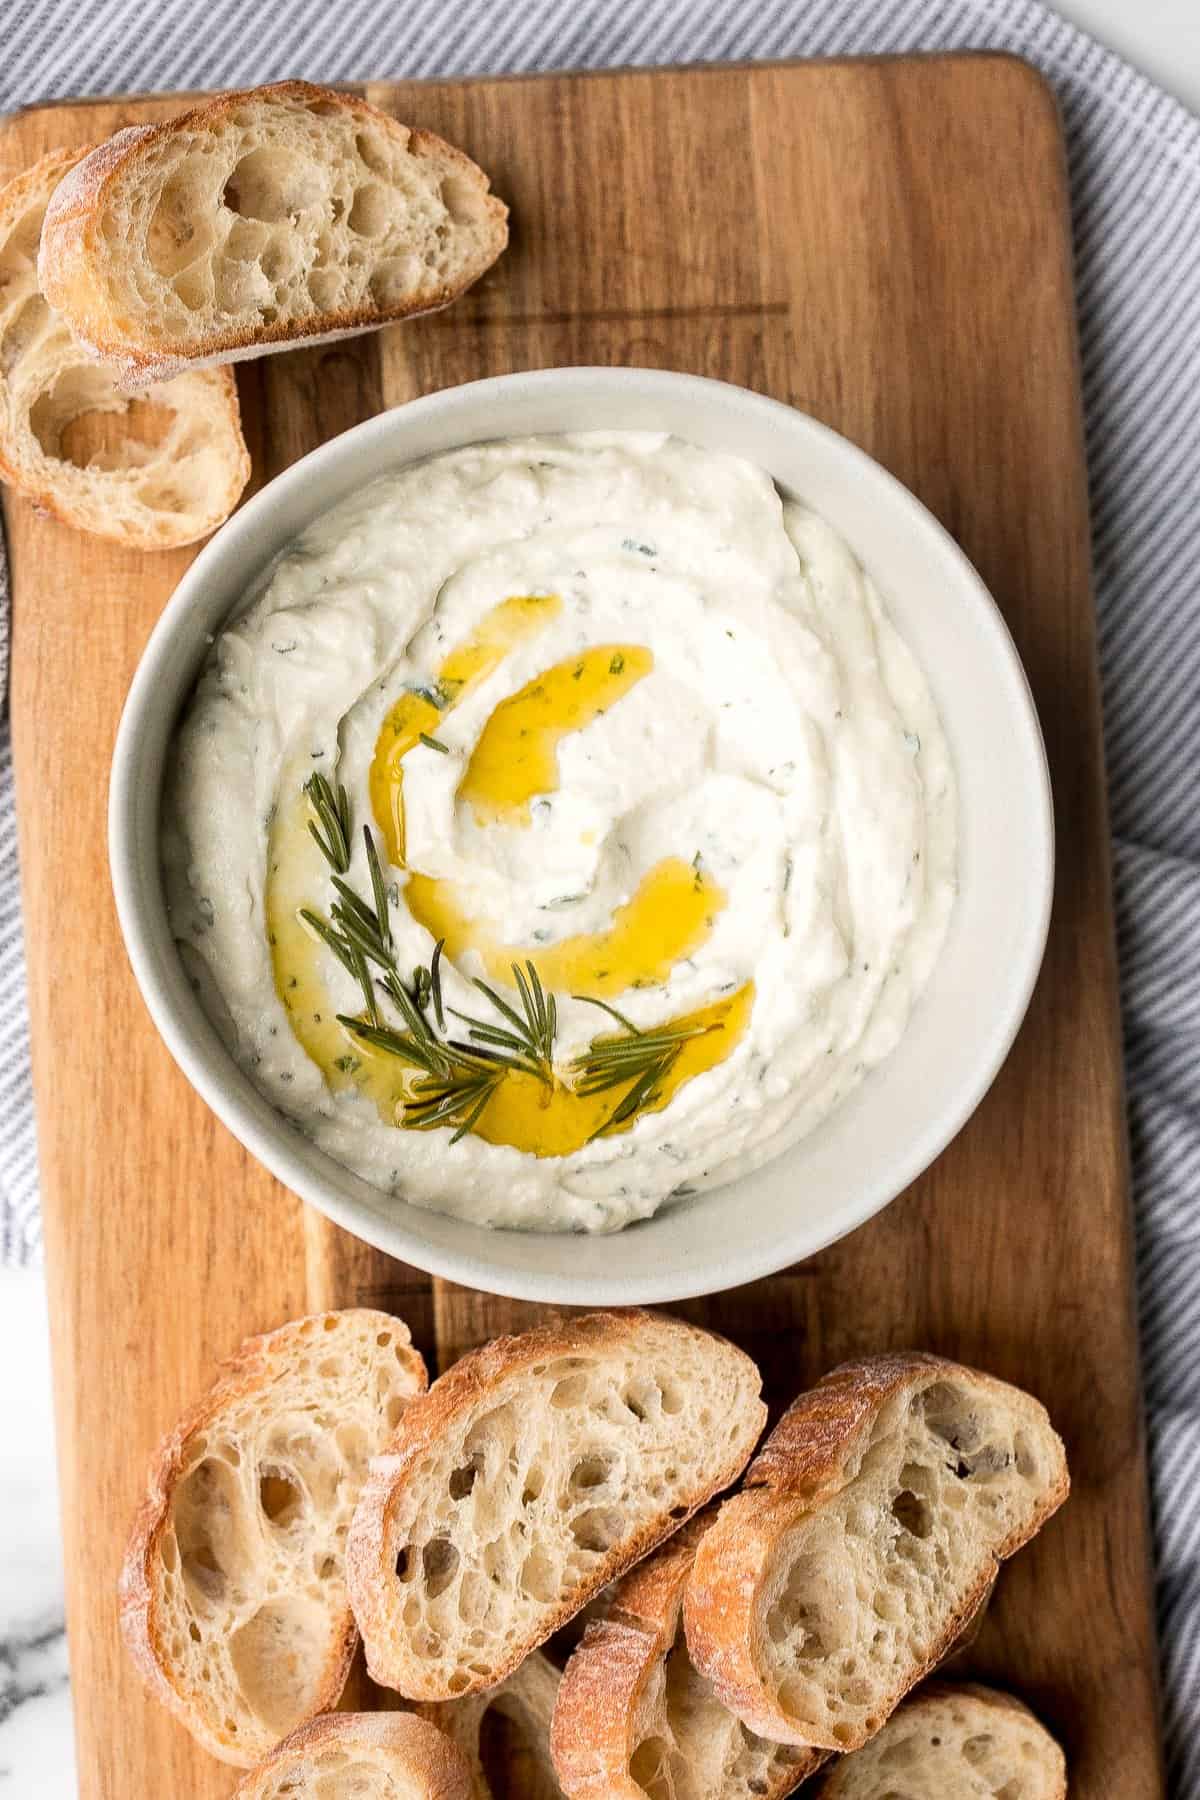
Homemade Taquitos are crispy, delicious and flavorful. These rolled tacos are filled with seasoned ground beef and melty cheese - and can be fried or baked!
Sticky crispy baked sweet chili chicken bites is better than takeout and so easy to make healthier at home. An easy dinner or game day appy.
Bacon cheddar cheese ball is an easy to make appetizer and delicious showstopper at holiday parties or game day. It's creamy, cheesy, and nutty.
This easy charcuterie board is the perfect appetizer to impress with minimal effort- made with cheese, cured meats, crackers, dips, olives, fruit, and nuts.
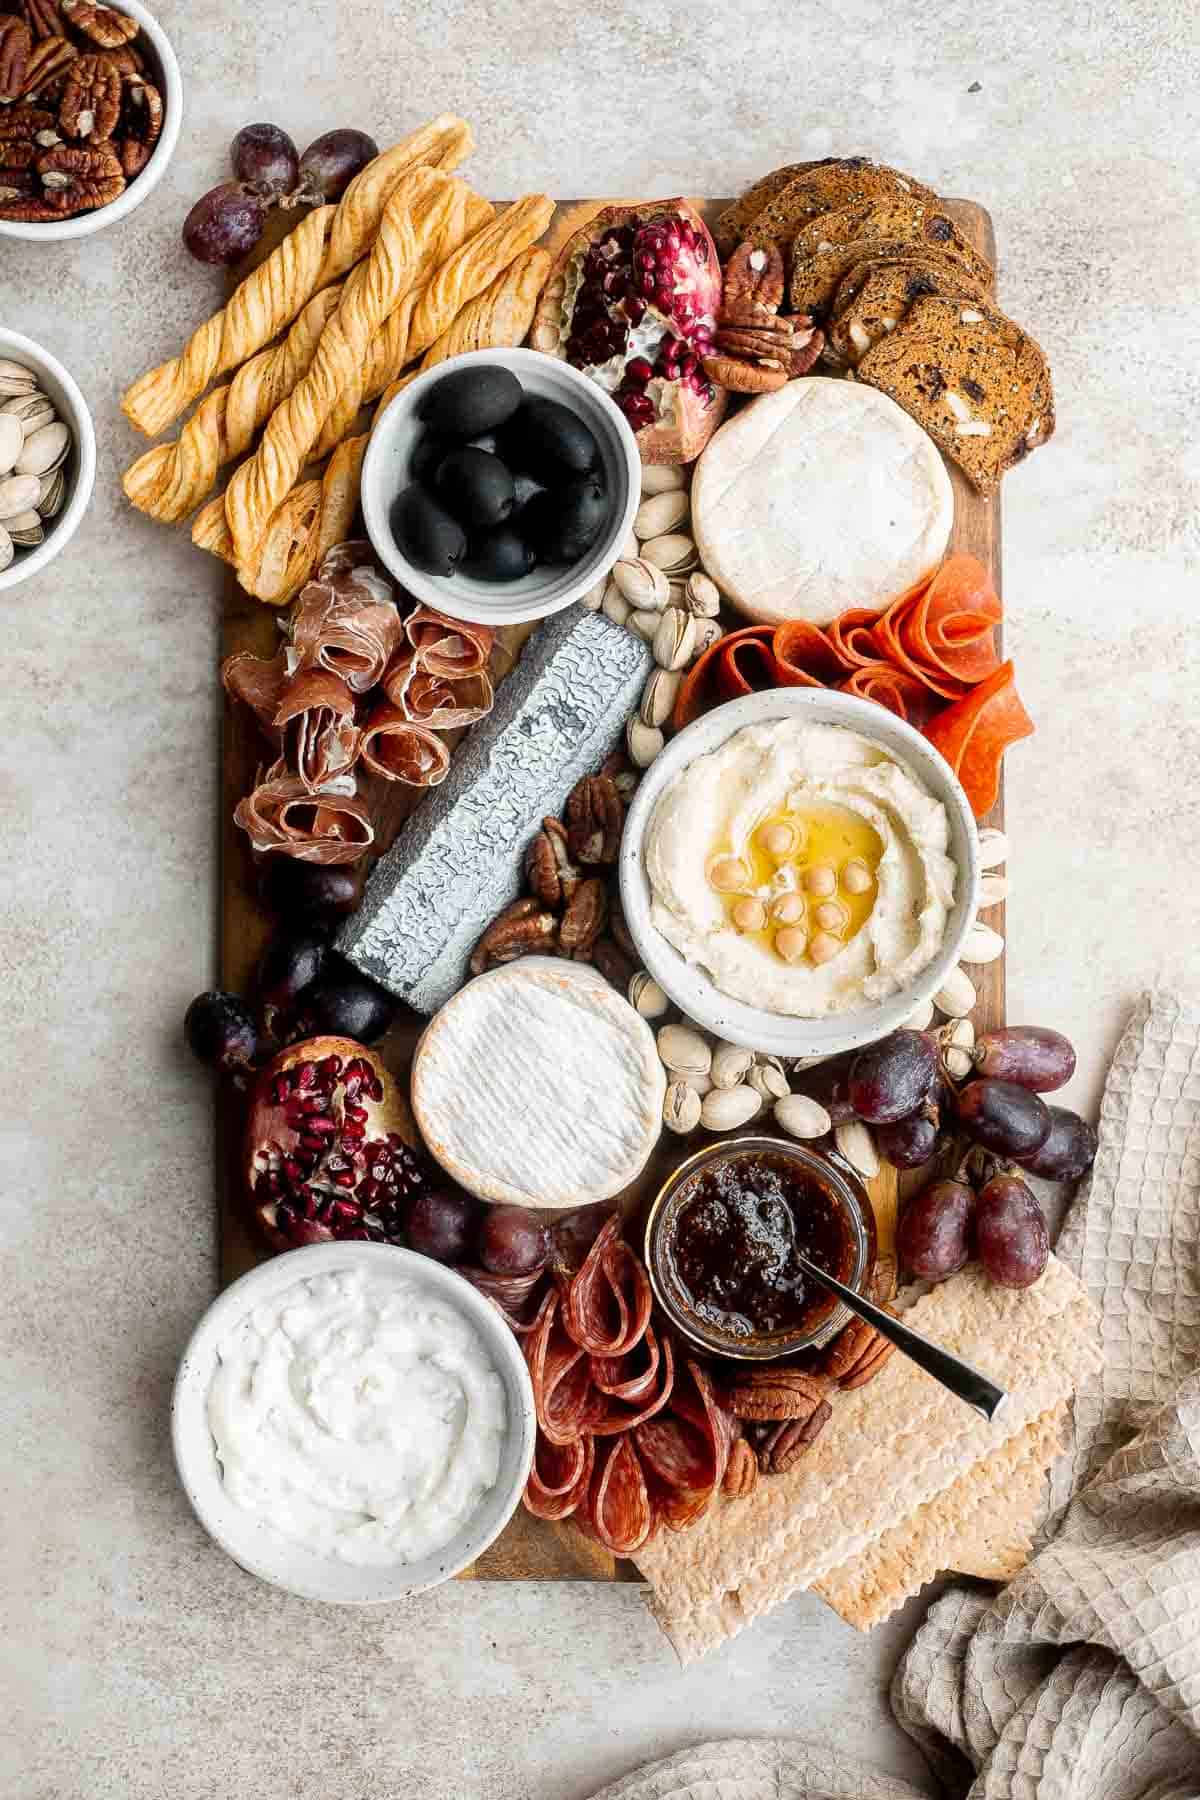
Easy pepperoni pizza rolls are crispy on the bottom, tender and chewy inside, packed with pepperoni and cheese, and baked until bubbly. One of my favorite finger foods!

Homemade queso Mexican cheese dip is smooth, creamy, delicious, flavorful, and so easy to make. It's so much better than store-bought in every way.
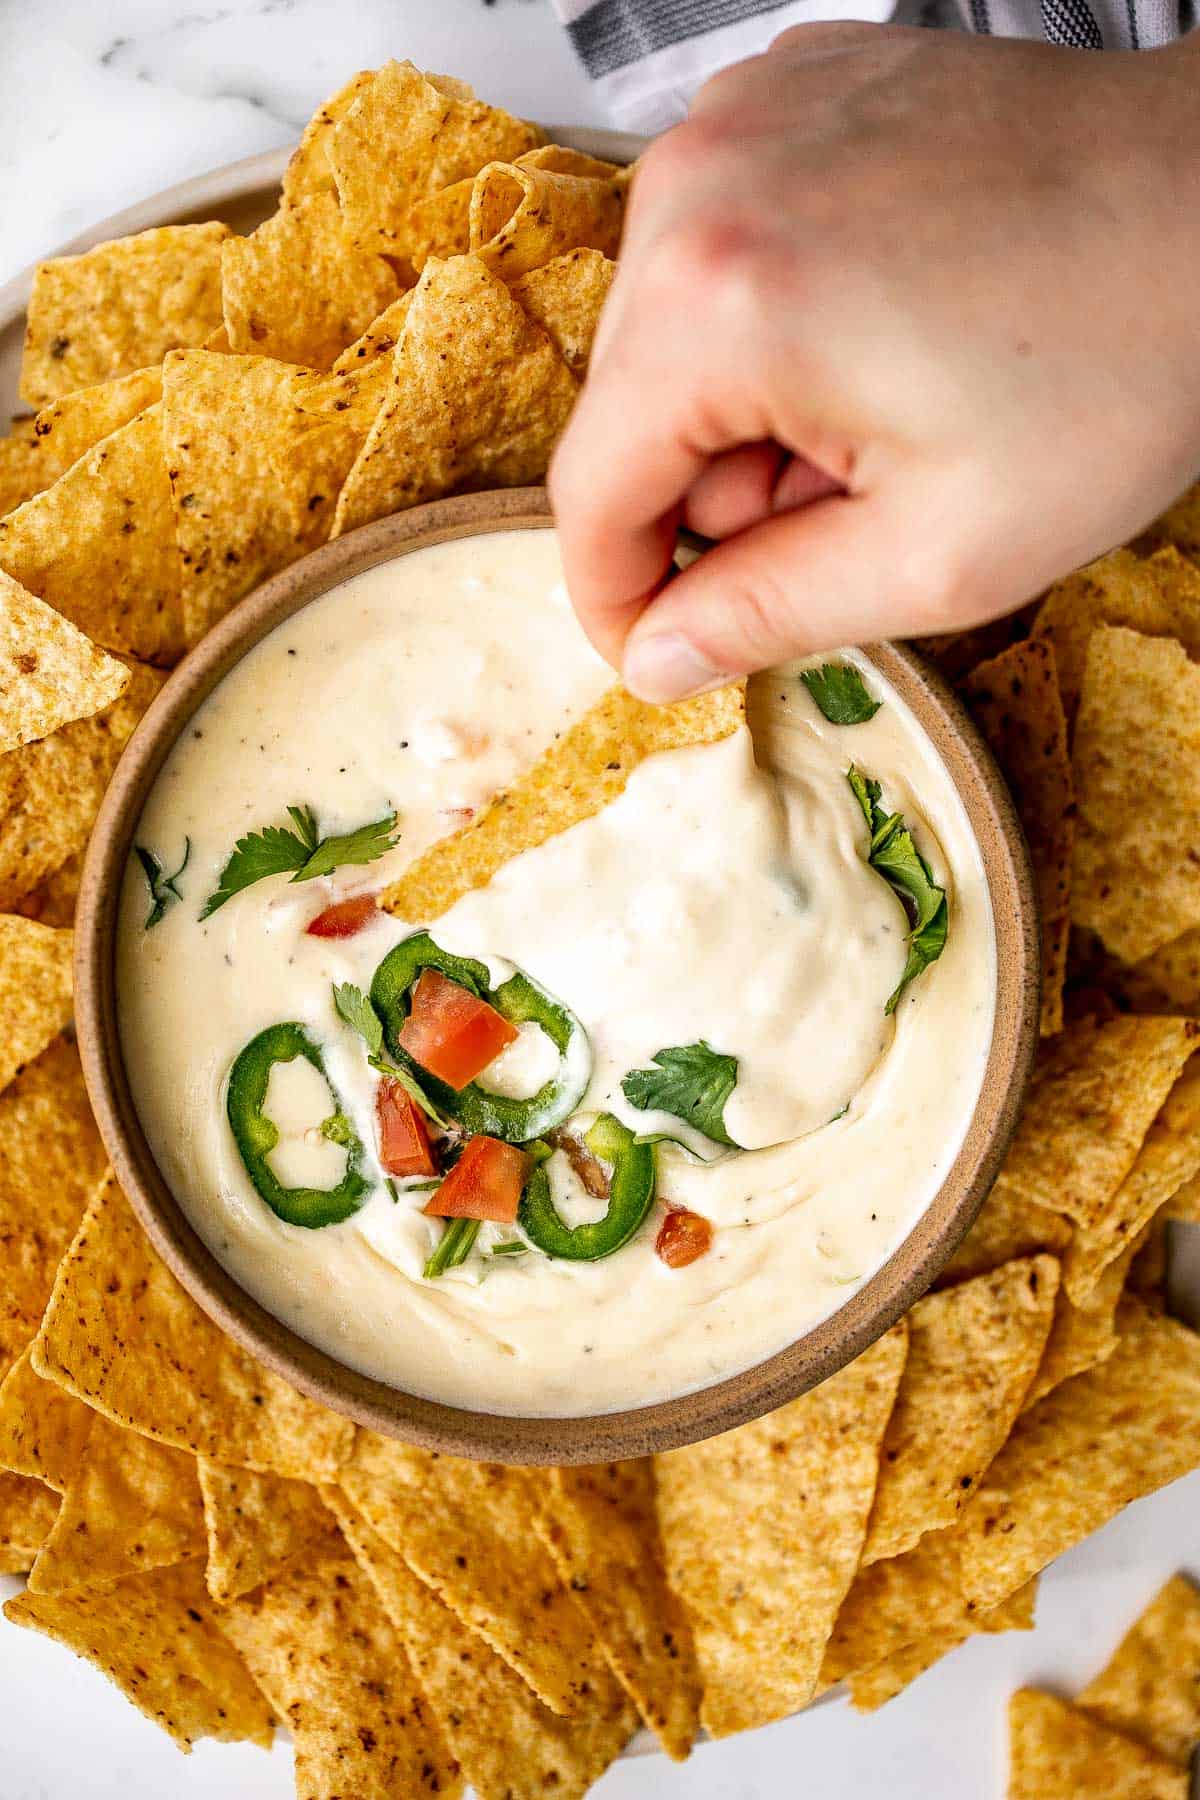
Homemade Chinese beef potstickers (dumplings) are crispy on the outside and tender and juicy inside packed with a delicious beef filling.
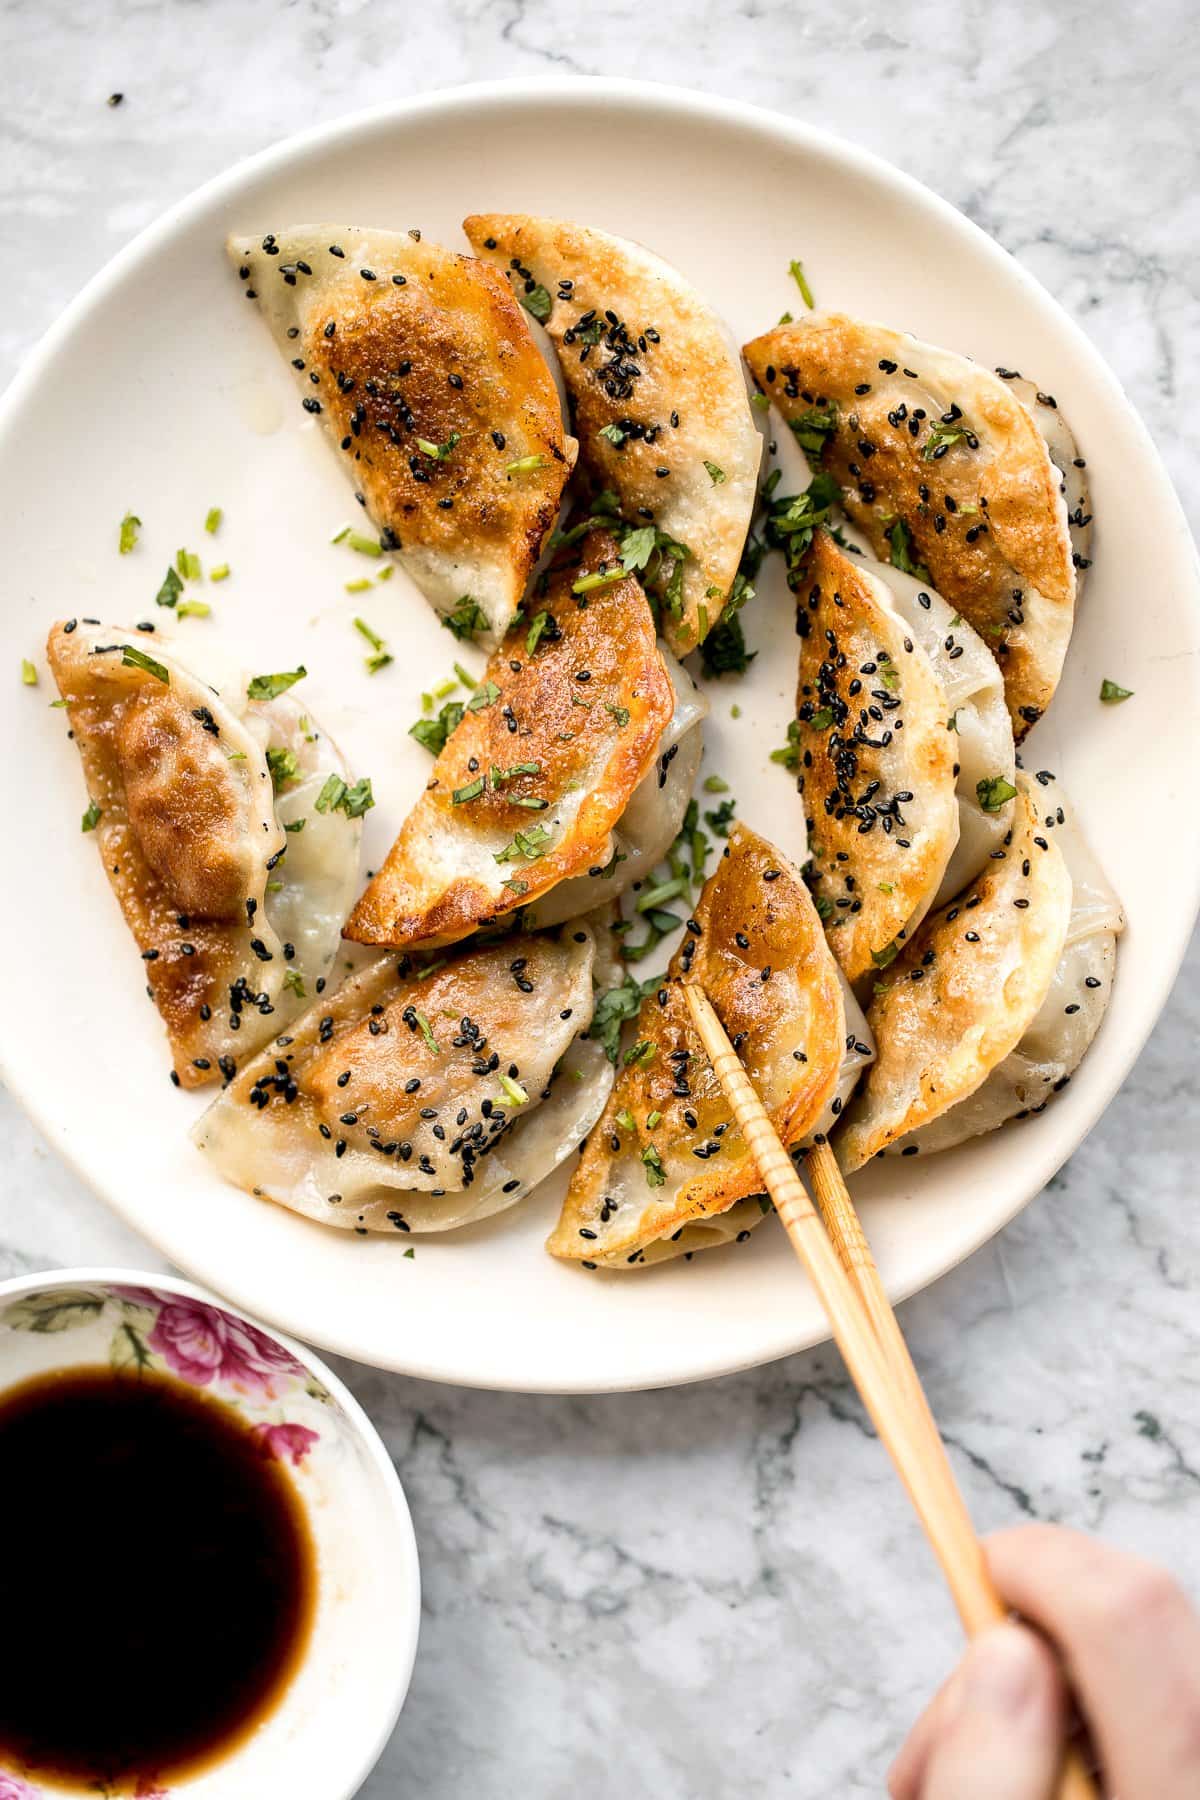
Whipped ricotta crostini is a fancy easy appetizer to make in just minutes or prepare in advance and assemble before serving. A total crowd pleaser.
Cranberry Brie Bites are quick and easy to make with flaky puff pastry, gooey melty brie, and sweet cranberry sauce. The perfect holiday appetizer.
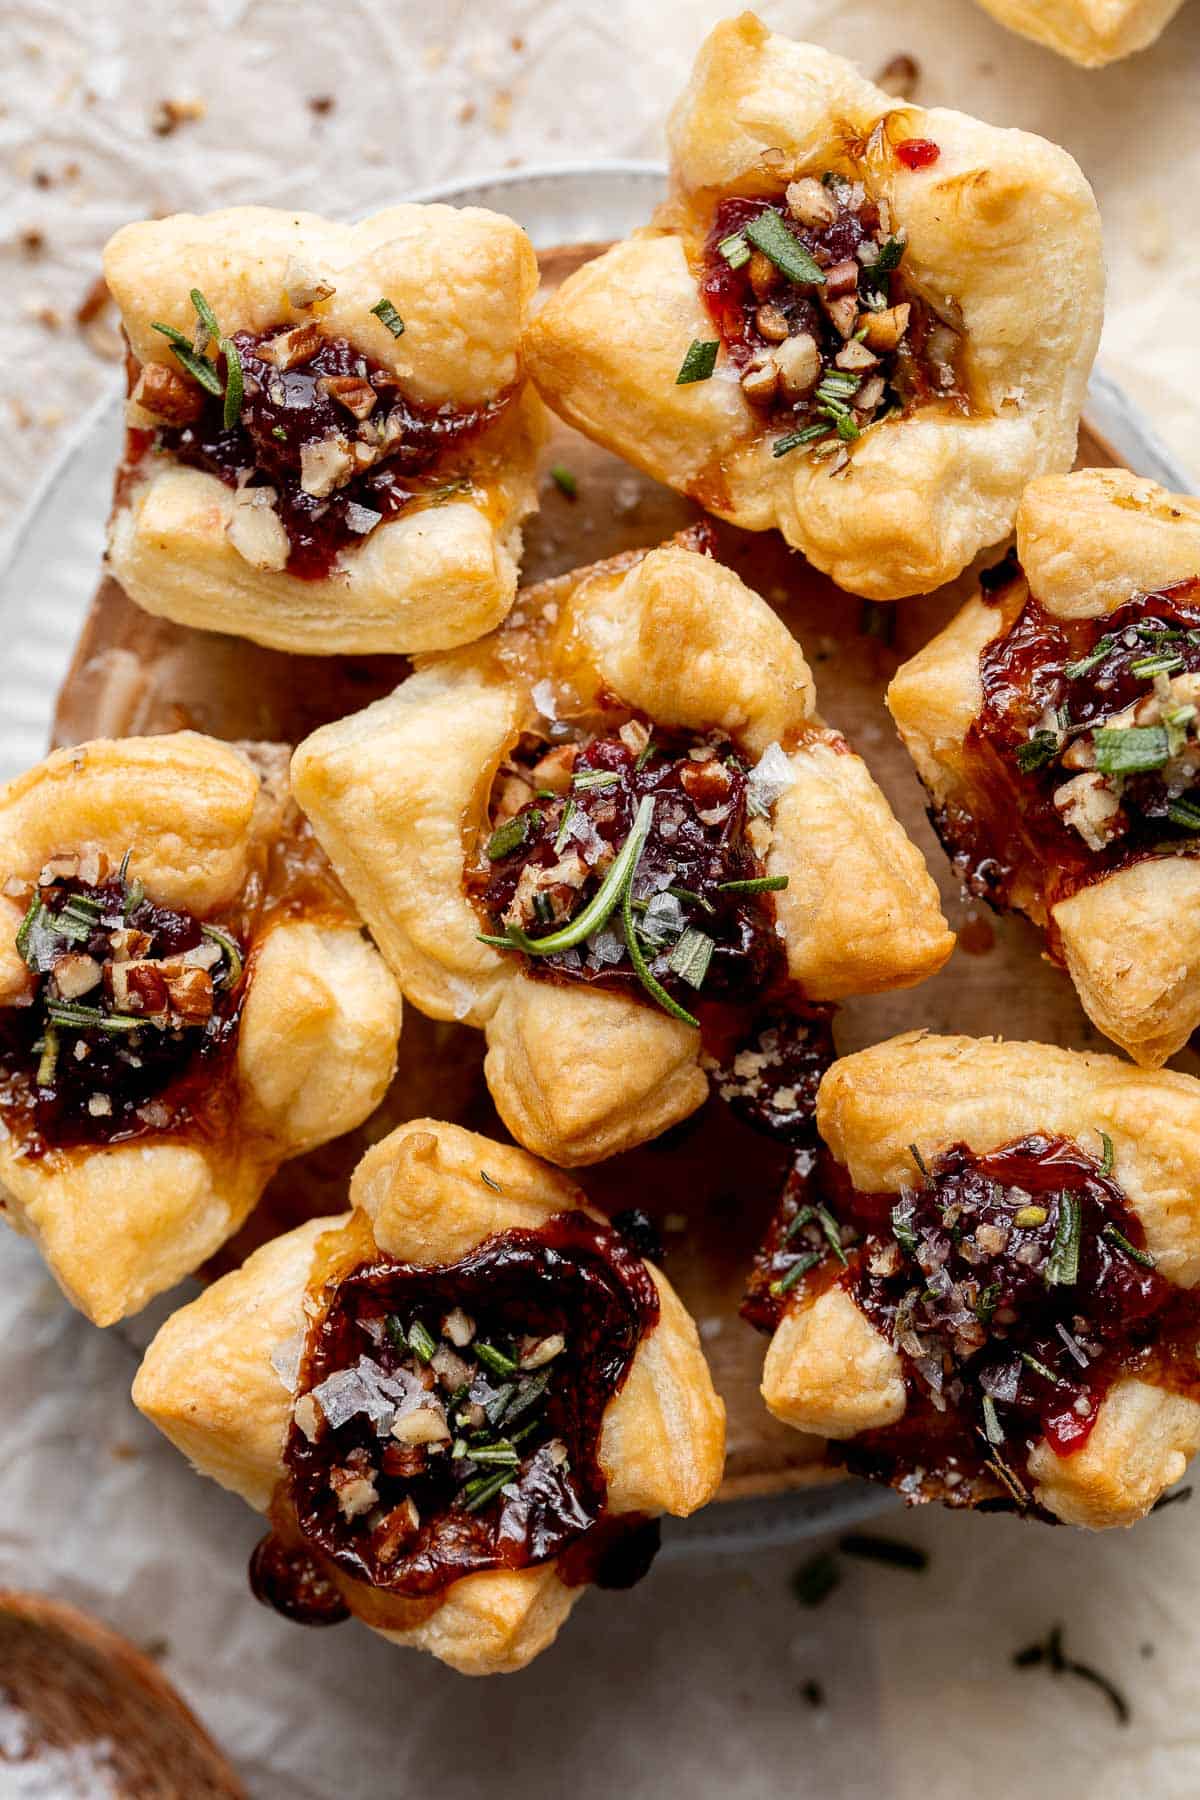
Toasted Ravioli is a classic Italian appetizer that is crispy and golden on the outside, and tender and gooey on the inside. Ready in less than 30 minutes!

Whipped feta is light, airy, and fluffy. It's an easy yet impressive recipe that takes only 5 minutes to make in a blender with 3 simple ingredients.
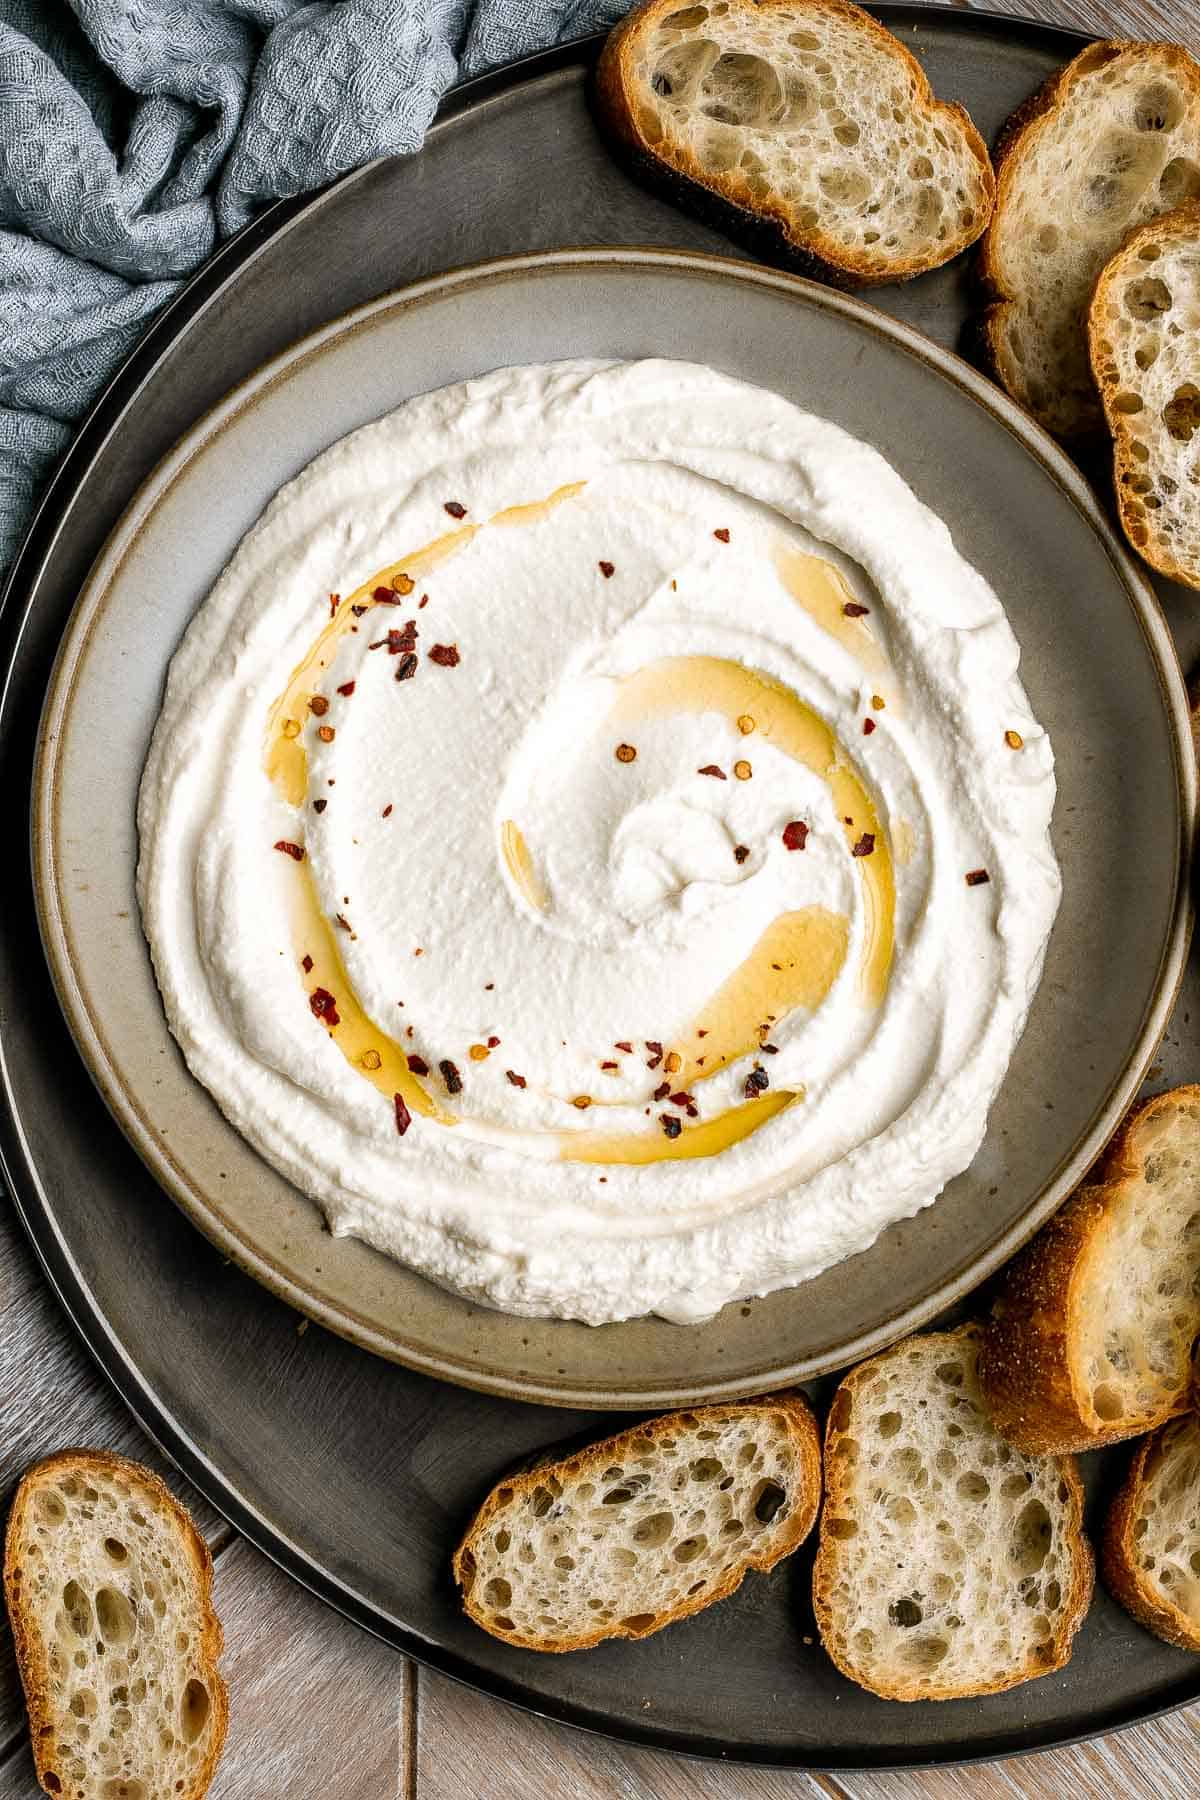
Baked miso garlic chicken wings are crispy, delicious, and easy to make. They're marinated in a savoury Asian marinade, and cooked in the oven or air fryer.

Vegetarian stuffed mushrooms are a delicious, flavorful, healthy, and nutritious appetizer. Plus, quick and easy to make in under 30 minutes including prep!
Caprese Skewers are a quick and fresh appetizer made with bite-sized mozzarella, juicy tomatoes, and basil leaves with a drizzle of balsamic glaze.
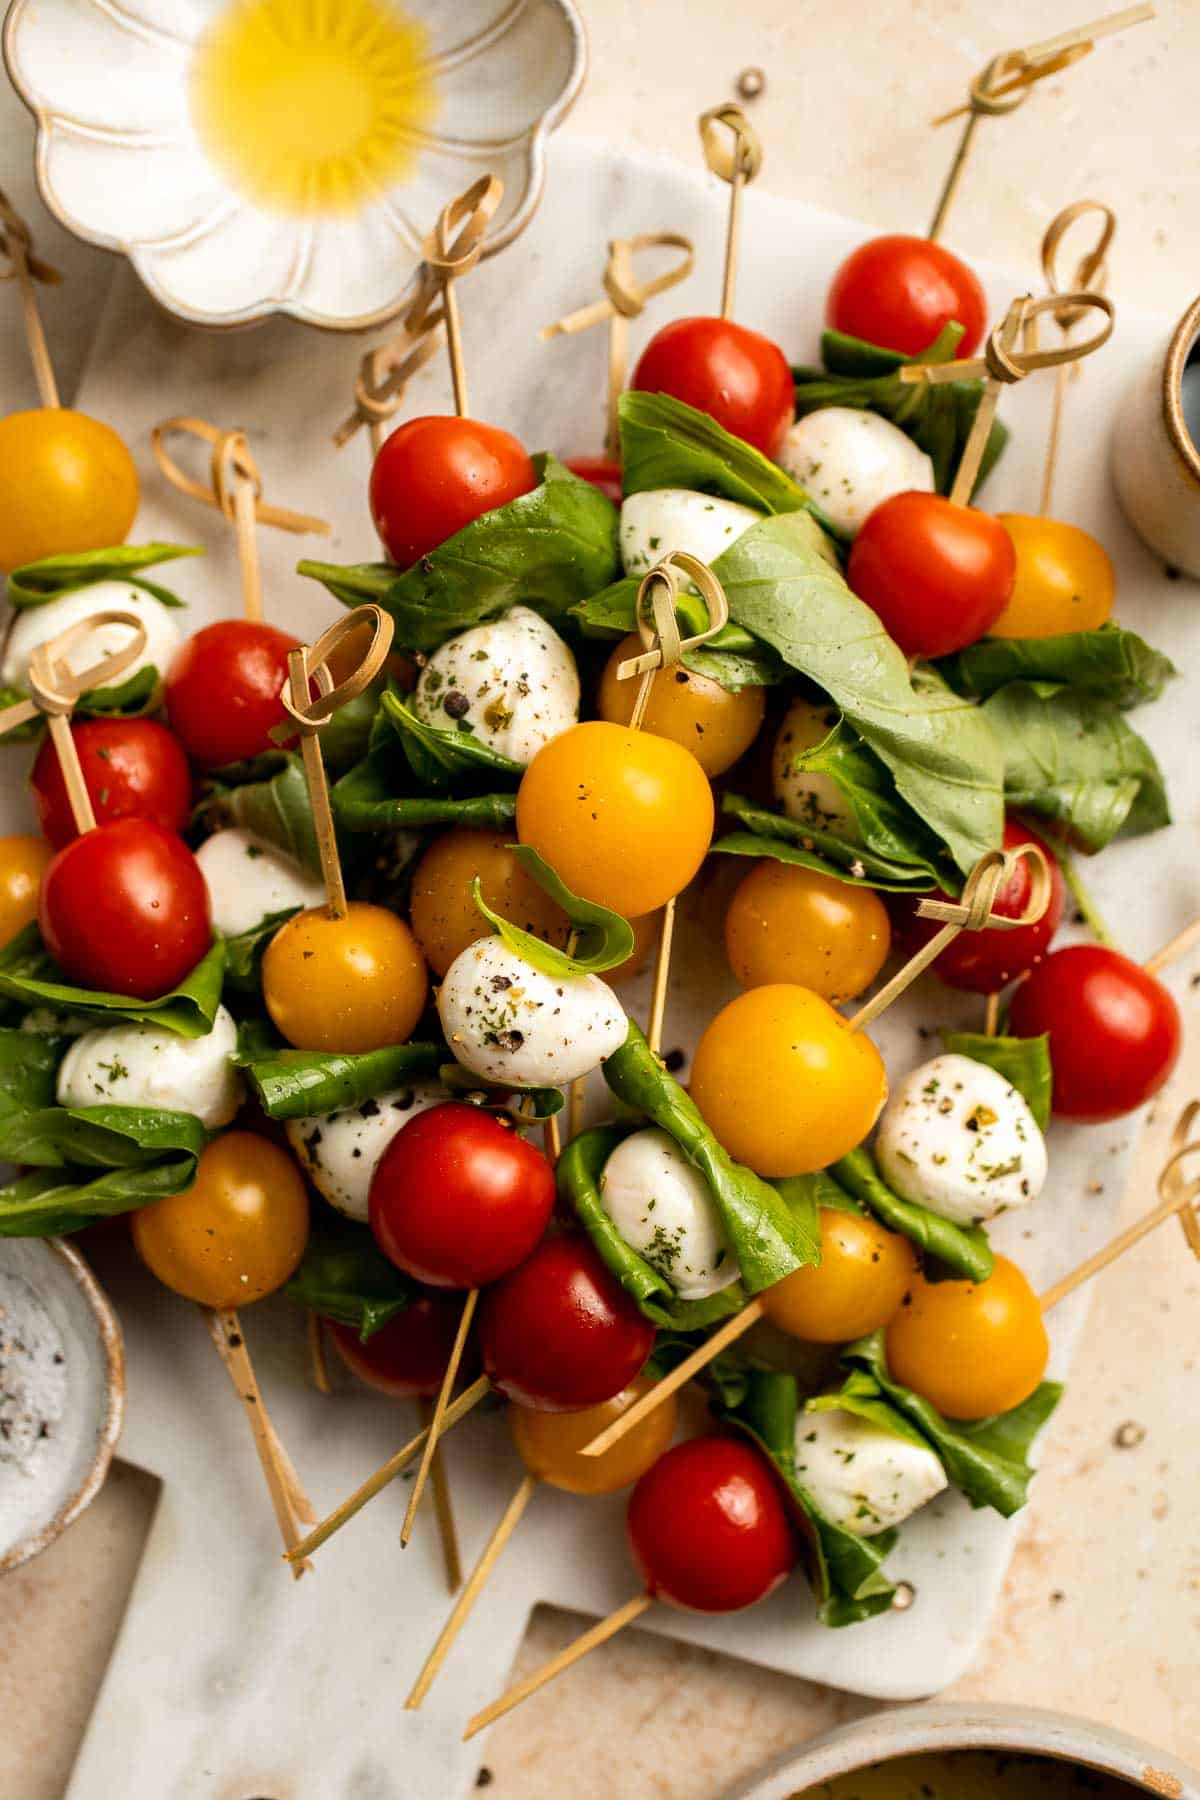
Fried mac and cheese balls are crispy on the outside, creamy and cheesy on the inside, and have the perfect crunch. Best way to use leftover mac and cheese. One of our most popular party foods!
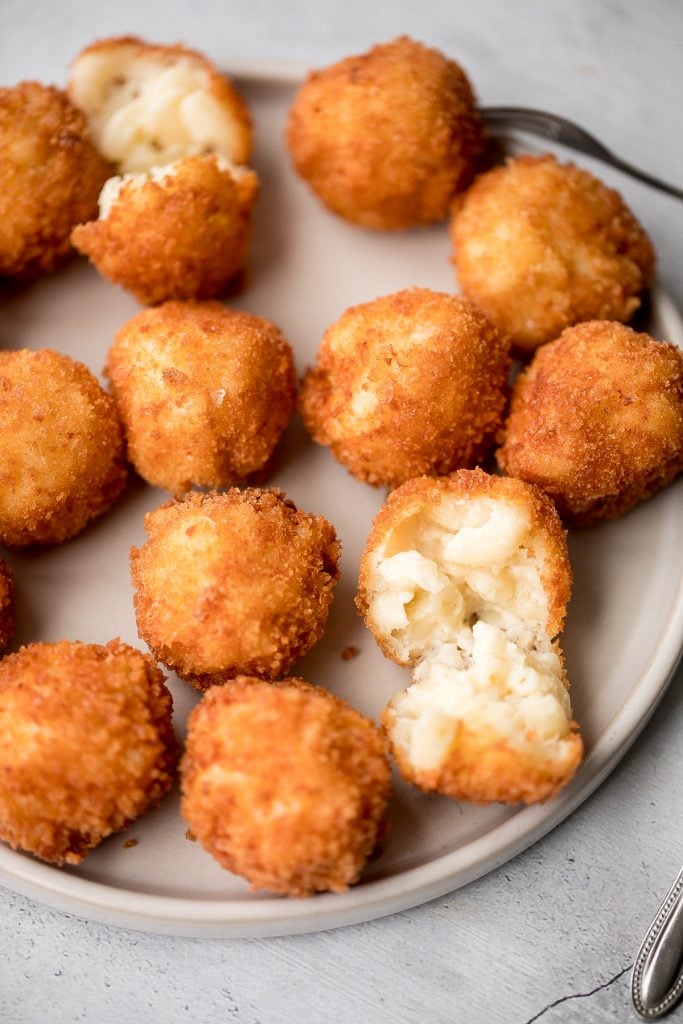
Baked Chicken Quesadillas are cheesy, crispy, flavorful, and delicious. This family-friendly recipe is quick and easy to make in just 30 minutes!
Light and fresh, easy tzatziki sauce is a creamy yogurt cucumber dip packed with fresh cucumbers, garlic, dill, lemon juice and olive oil. So easy to make.
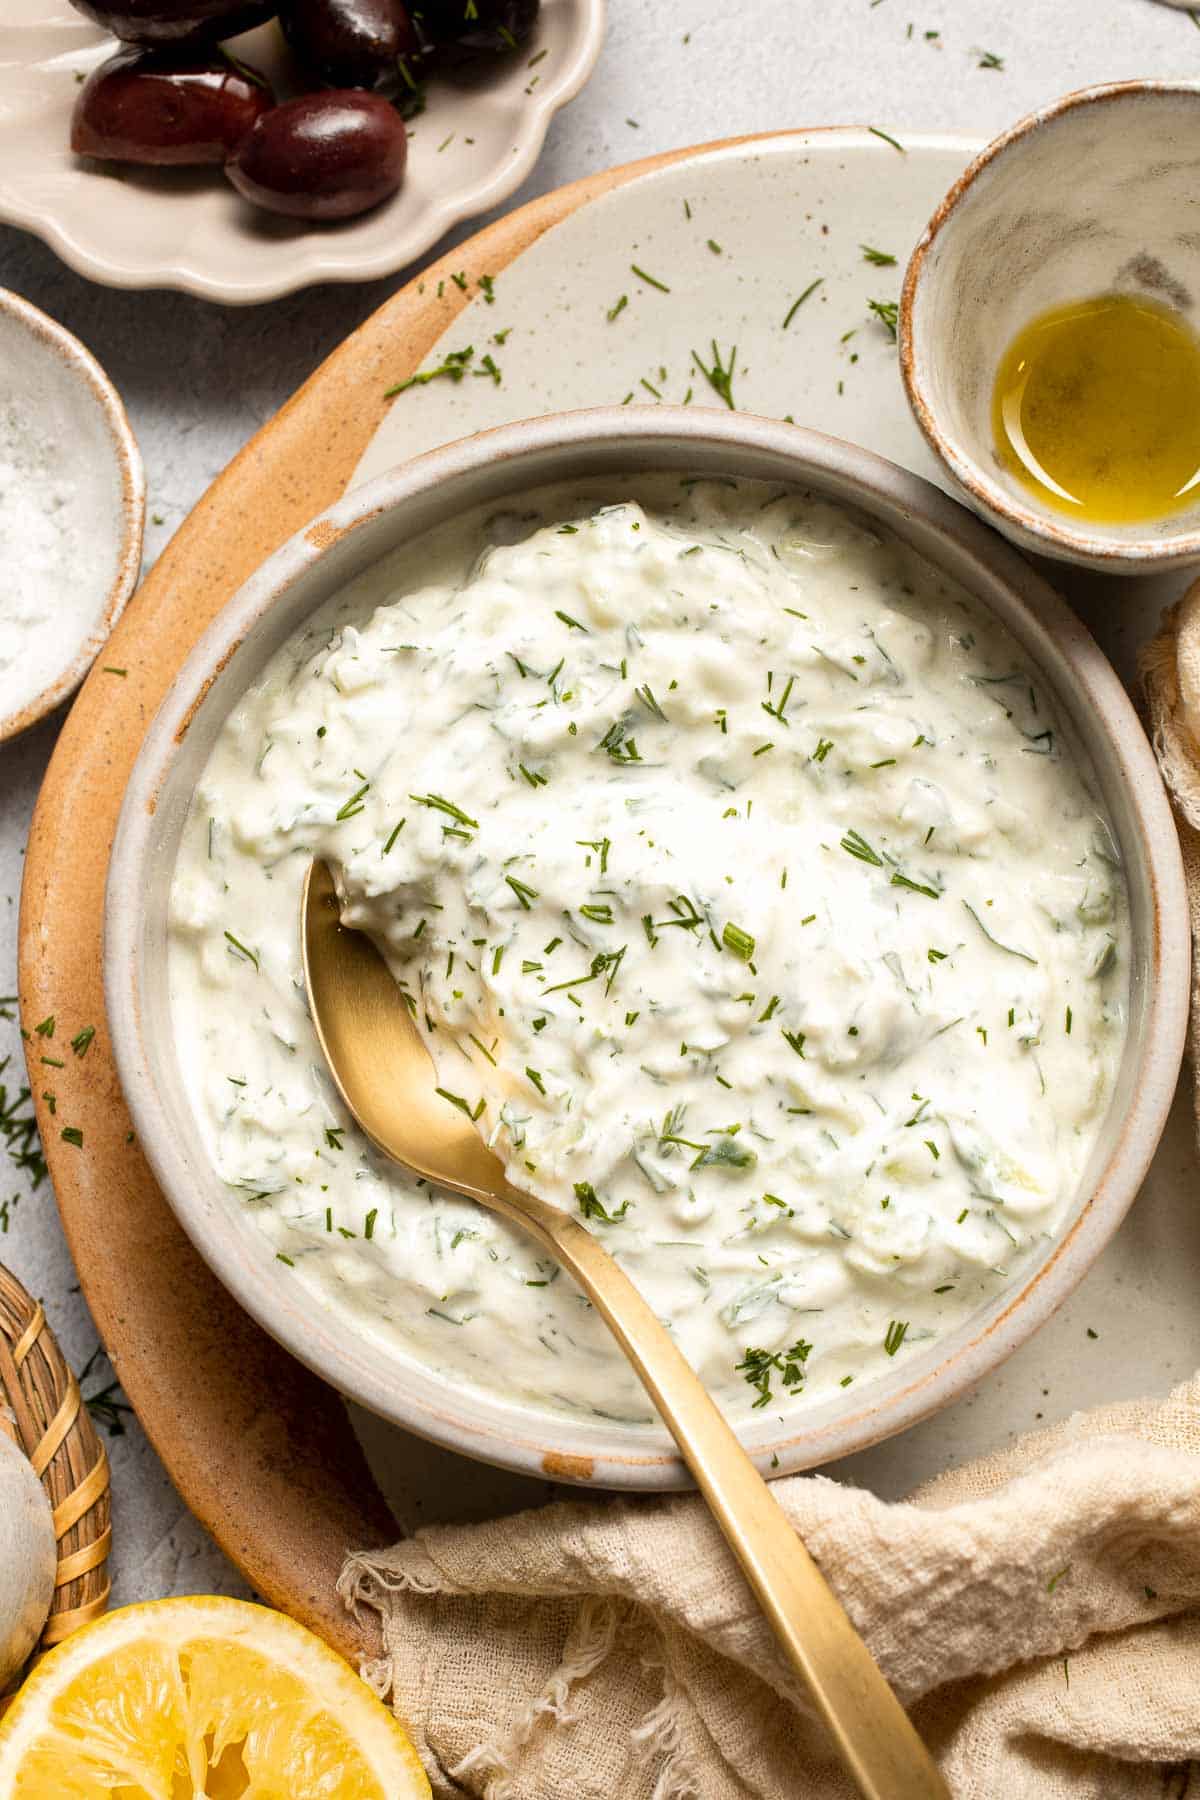
Pigs in a blanket from scratch are a delicious and easy appetizer or snack to make for your next party or gathering - juicy, cheesy, flaky, and buttery.

These Cauliflower Tots are everything you want in a tater tot - but better! They are crunchy on the outside, tender inside, higher in fiber, and cheesy.

This easy Cheese Board is a popular and classic appetizer arranged with an assortment of cheese, bread and crackers, fresh fruit, and nuts.

Cranberry baked brie is a sweet and savory appetizer you need to try this holiday season. It's quick and easy, melty and gooey, and so delicious.
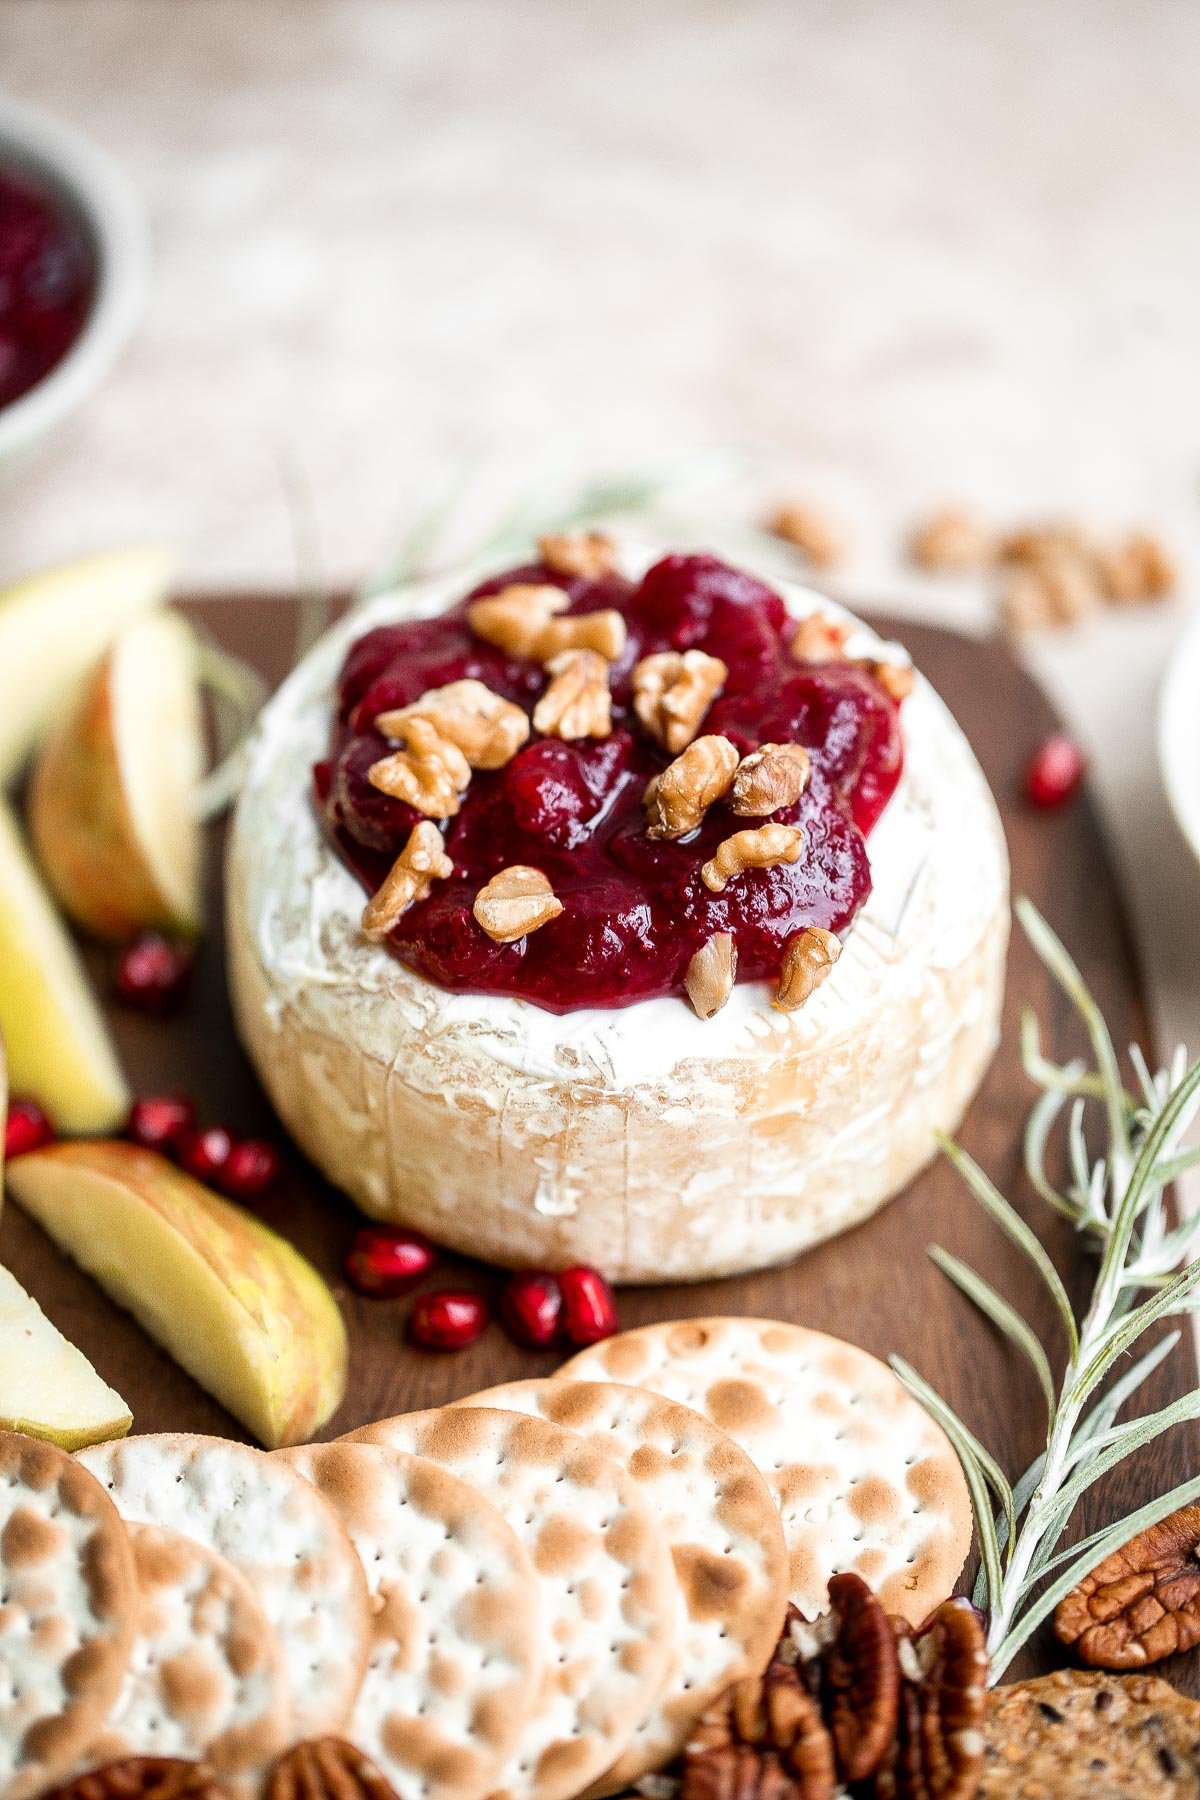
Bacon Wrapped Brussels Sprouts
Bacon wrapped brussels sprouts are the sweet, savory, and salty appetizer that you need at your next holiday gathering this fall. Simple and easy to make.
Easy homemade chicken nuggets with chicken breast are golden and crisp on the outside and juicy and tender inside. They're freezer-friendly so make extra.
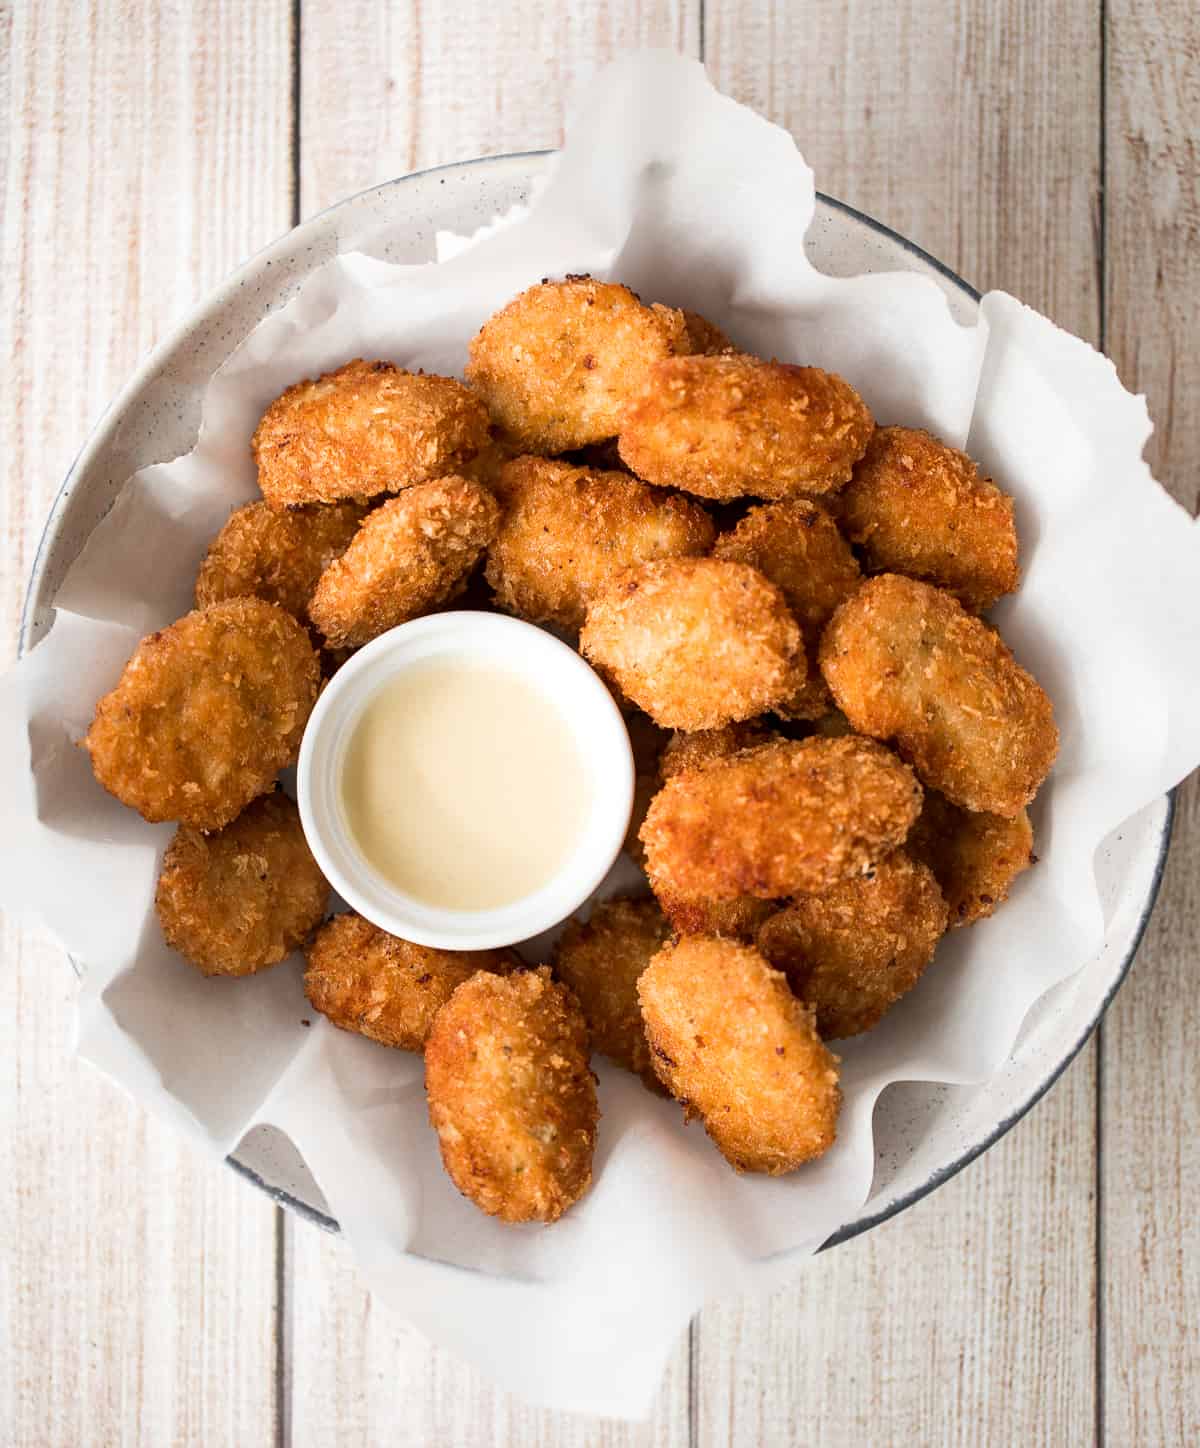
Super crispy air fryer french fries are tender and fluffy on the inside and crunchy on the outside. Make this healthier french fry in just 12 minutes!
Whip up smooth and creamy classic hummus dip at home in just 5 minutes, by combining chickpeas, tahini, olive oil, lemon juice and garlic in the blender.
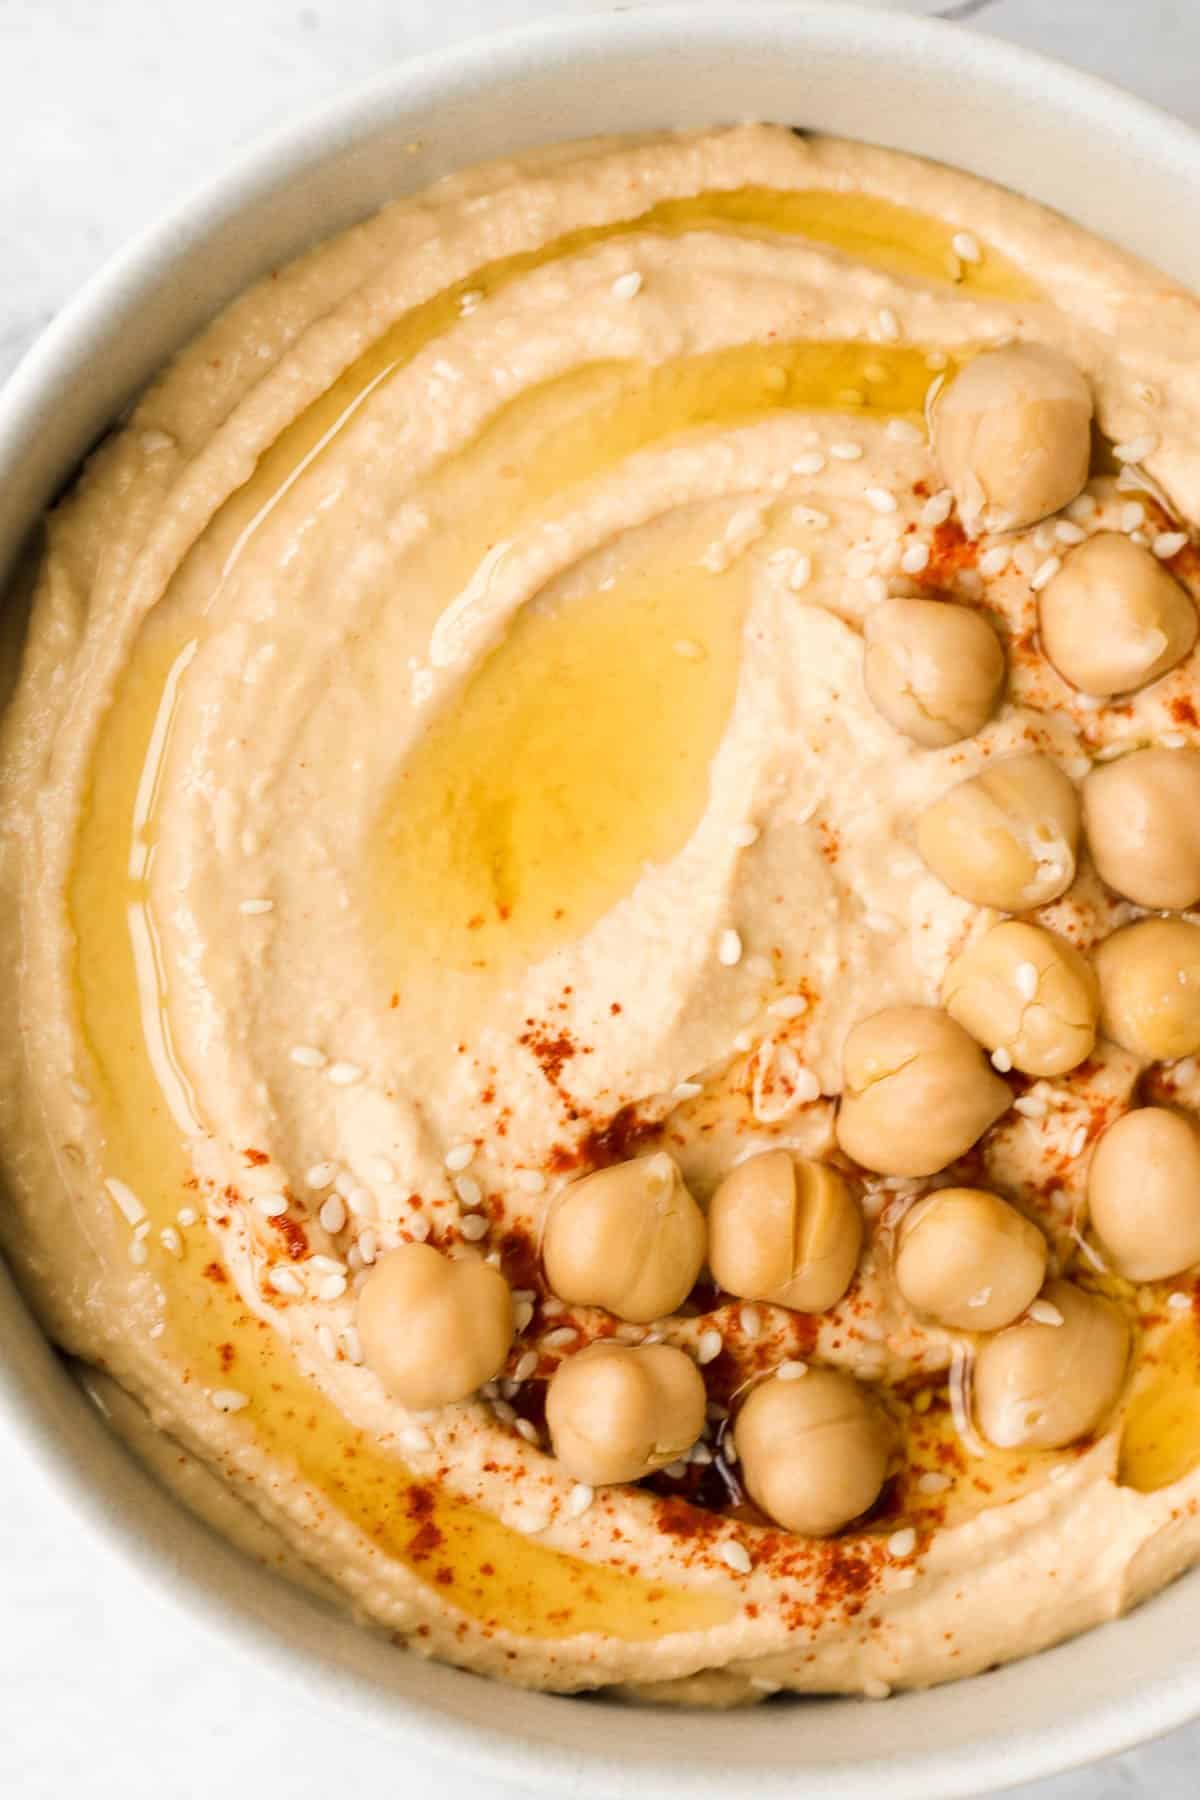
Cheesy Baked Zucchini with Marinara
Cheesy Baked Zucchini with Marinara will save your weeknight dinner routine (and the kids love it too!). It's low carb, vegetarian, gluten-free, and keto.
Classic deviled eggs are a simple, easy, and healthy appetizer to make when you need something quick for brunch, picnics, barbecues, potlucks, or Easter.

Vietnamese Summer Rolls with Chicken
Vietnamese summer rolls with chicken are fresh, light, and healthy. This Asian summer snack takes less than 20 minutes to make and easier than you think.
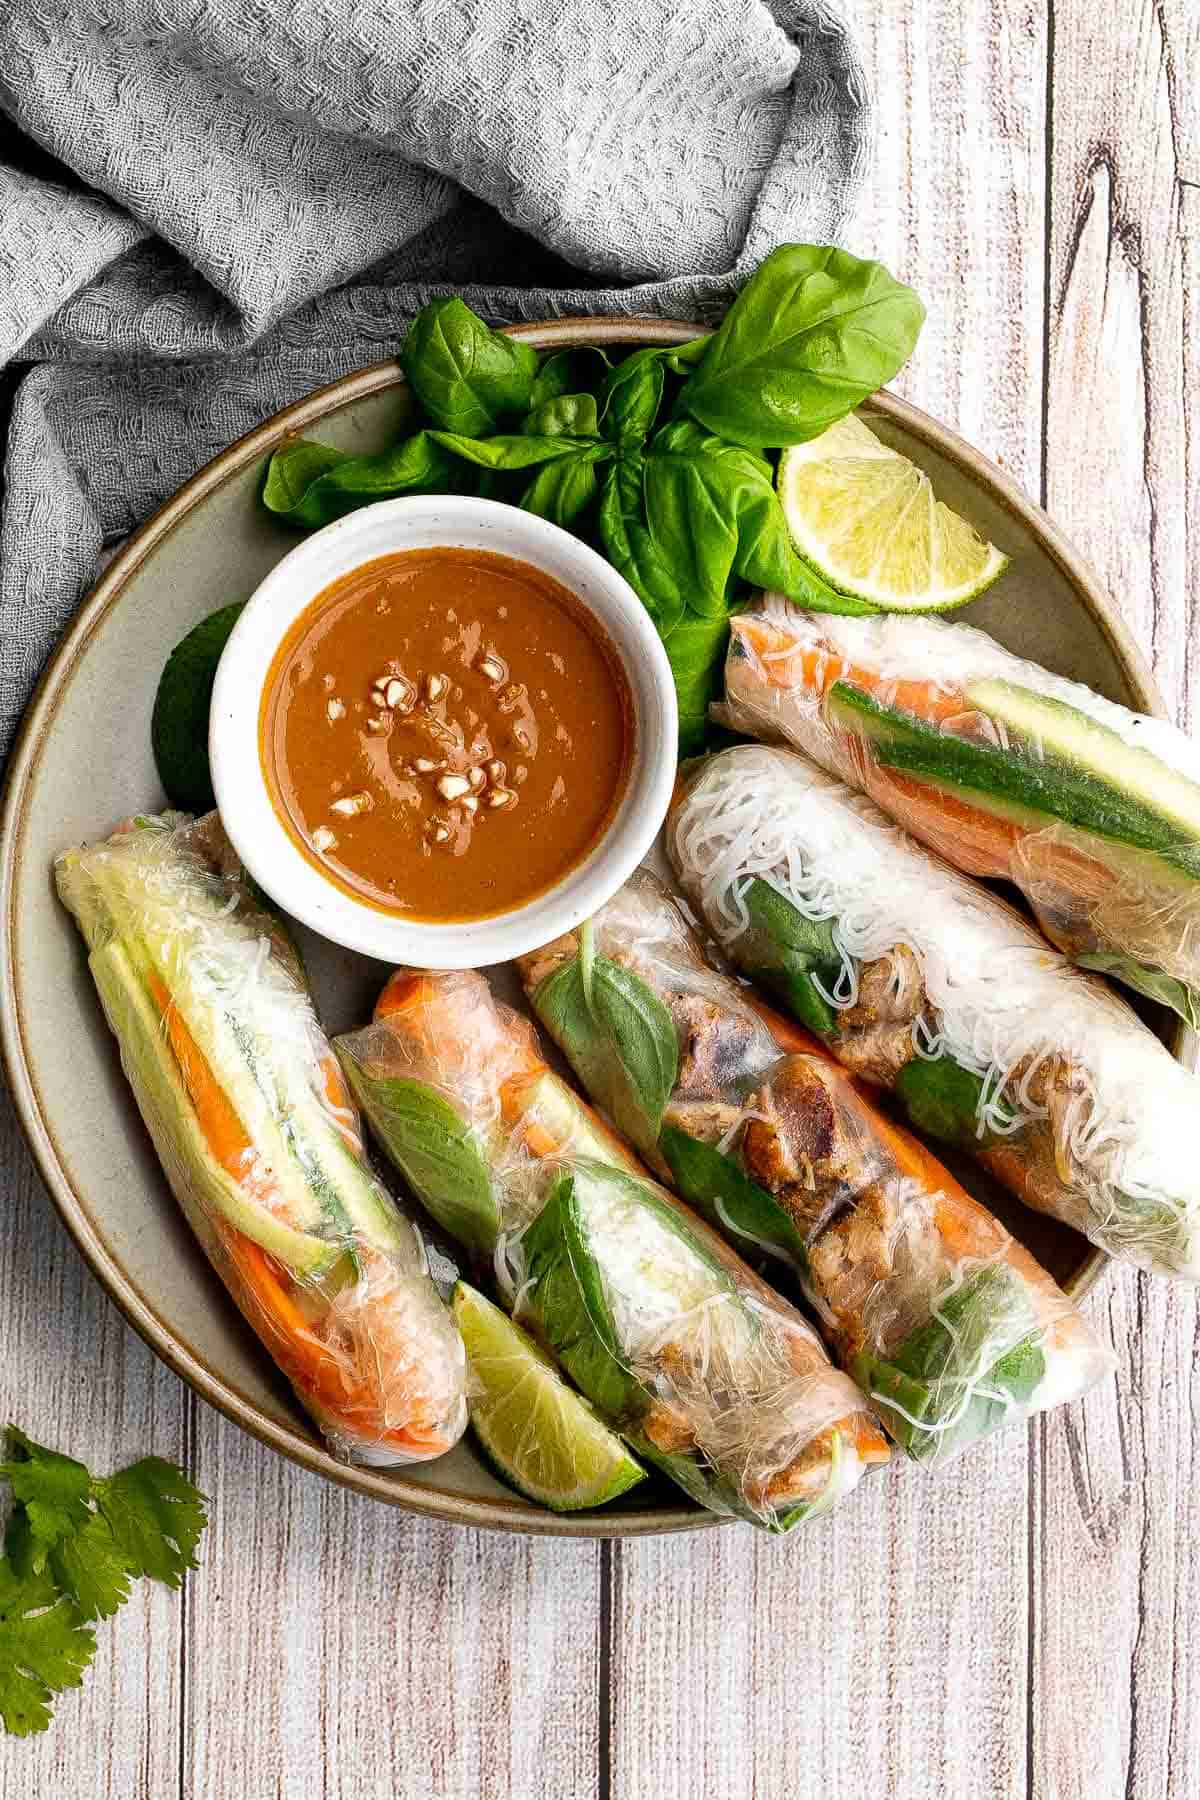
Homemade Air Fryer Pizza Rolls are a grown-up version of Totino's pizza rolls and are perfect to serve as an appetizer, snack, or even a quick main dish!

Mashed potato balls are a delicious appetizer that is crisp on the outside and soft, tender, and cheesy inside. Best way to use leftover mashed potatoes!
Healthy baked cauliflower nuggets are a vegetarian alternative to chicken nuggets. With parmesan panko breading, these bites are baked until crispy.
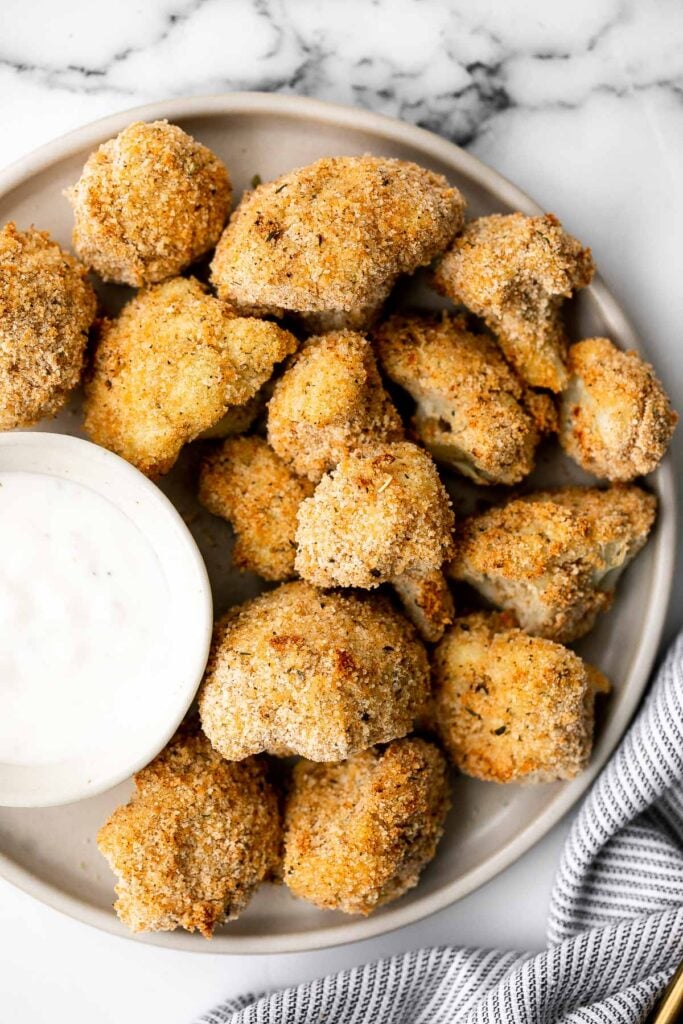
This easy and delicious 7 layer dip is the perfect dip to serve at your next party, made with layers of beans, guacamole, salsa, cheese, and more.
Homemade falafel are delicious, golden brown and crispy on the outside, fluffy tender and soft inside. Plus, they're vegan, loaded with plant-based protein. One of my favorite vegan finger foods!
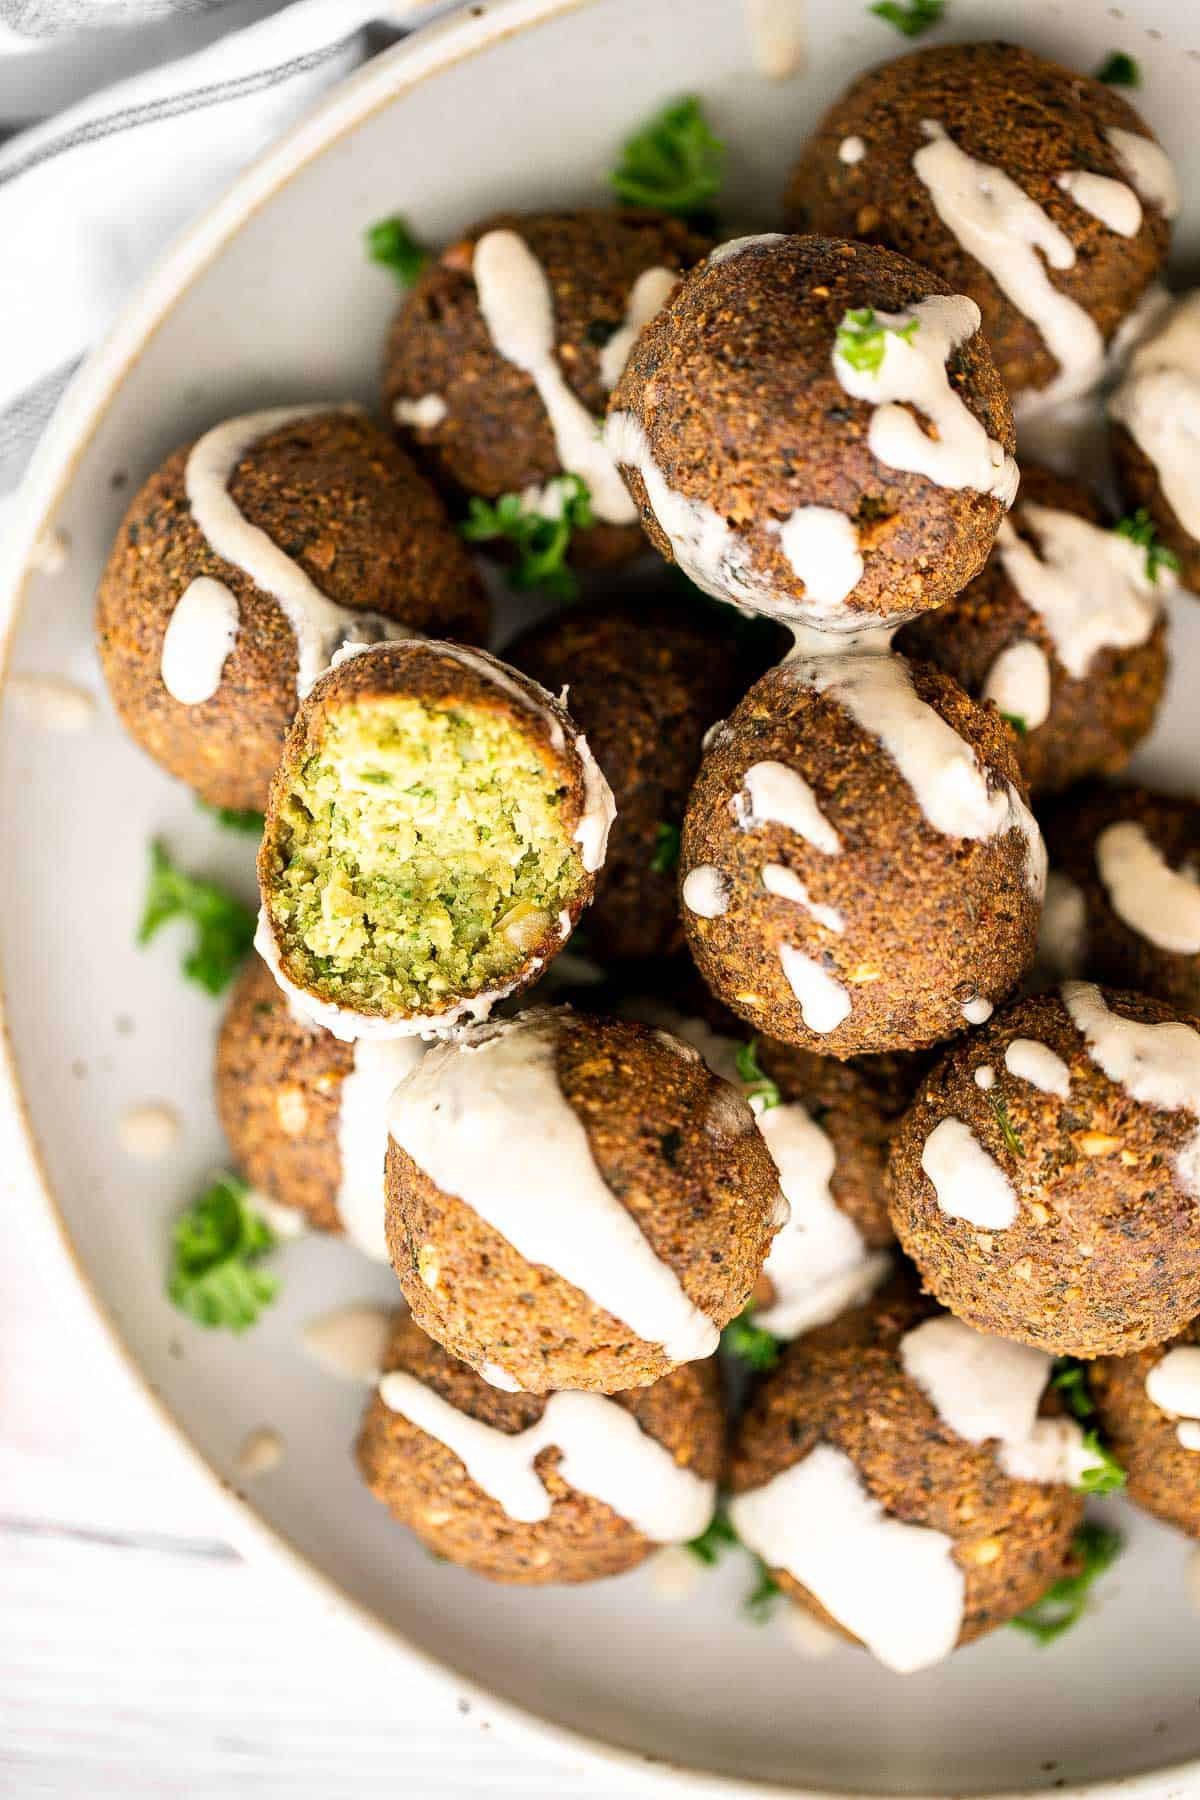
Bacon Wrapped Jalapeño Poppers
Bacon wrapped jalapeño poppers are crispy on the outside, creamy and cheesy inside, spicy, and wrapped in bacon. Easy to make in the air fryer or oven.

Crispy Vegetarian Spring Rolls
Better than takeout, light and crispy fried vegetarian spring rolls are packed with a tender mushroom and cabbage vegetarian filling in a crunchy skin.
Air fryer short ribs are crispy, flavorful, and delicious. The easy marinade ensures they're tender and juicy inside, while the air fryer makes them crispy.
Whipped feta crostini with a herby olive topping is quick and easy snack or appetizer that is ready in less than 20 minutes - or 10 minutes if you're fast.
This authentic Guacamole recipe is quick and easy to make at home with just a few simple ingredients and 5 minutes of time. It's fresh and flavorful.
Pan-Fried Pork and Shrimp Wontons
Better than takeout pan-fried pork and shrimp wontons are so crispy outside and tender and juicy inside with a savoury pork, shrimp and vegetable filling.

Vegetarian quesadillas are quick and easy, completely customizable, loaded with veggies and beans. Serve this kid-friendly Mexican meal for a snack, lunch, or dinner.
Marinated mozzarella balls is a delicious and simple yet stunning appetizer, made with fresh bocconcini soaked in olive oil, garlic, and fresh herbs.
Oven-baked loaded sheet pan nachos are a crowd pleaser for an easy weeknight dinner or a crave-worthy appetizer to serve on game day.

Grilled cheese roll ups are a fun twist on a classic grilled cheese that gives you a hot handheld lunch to enjoy. They're kid-friendly and easy to make.
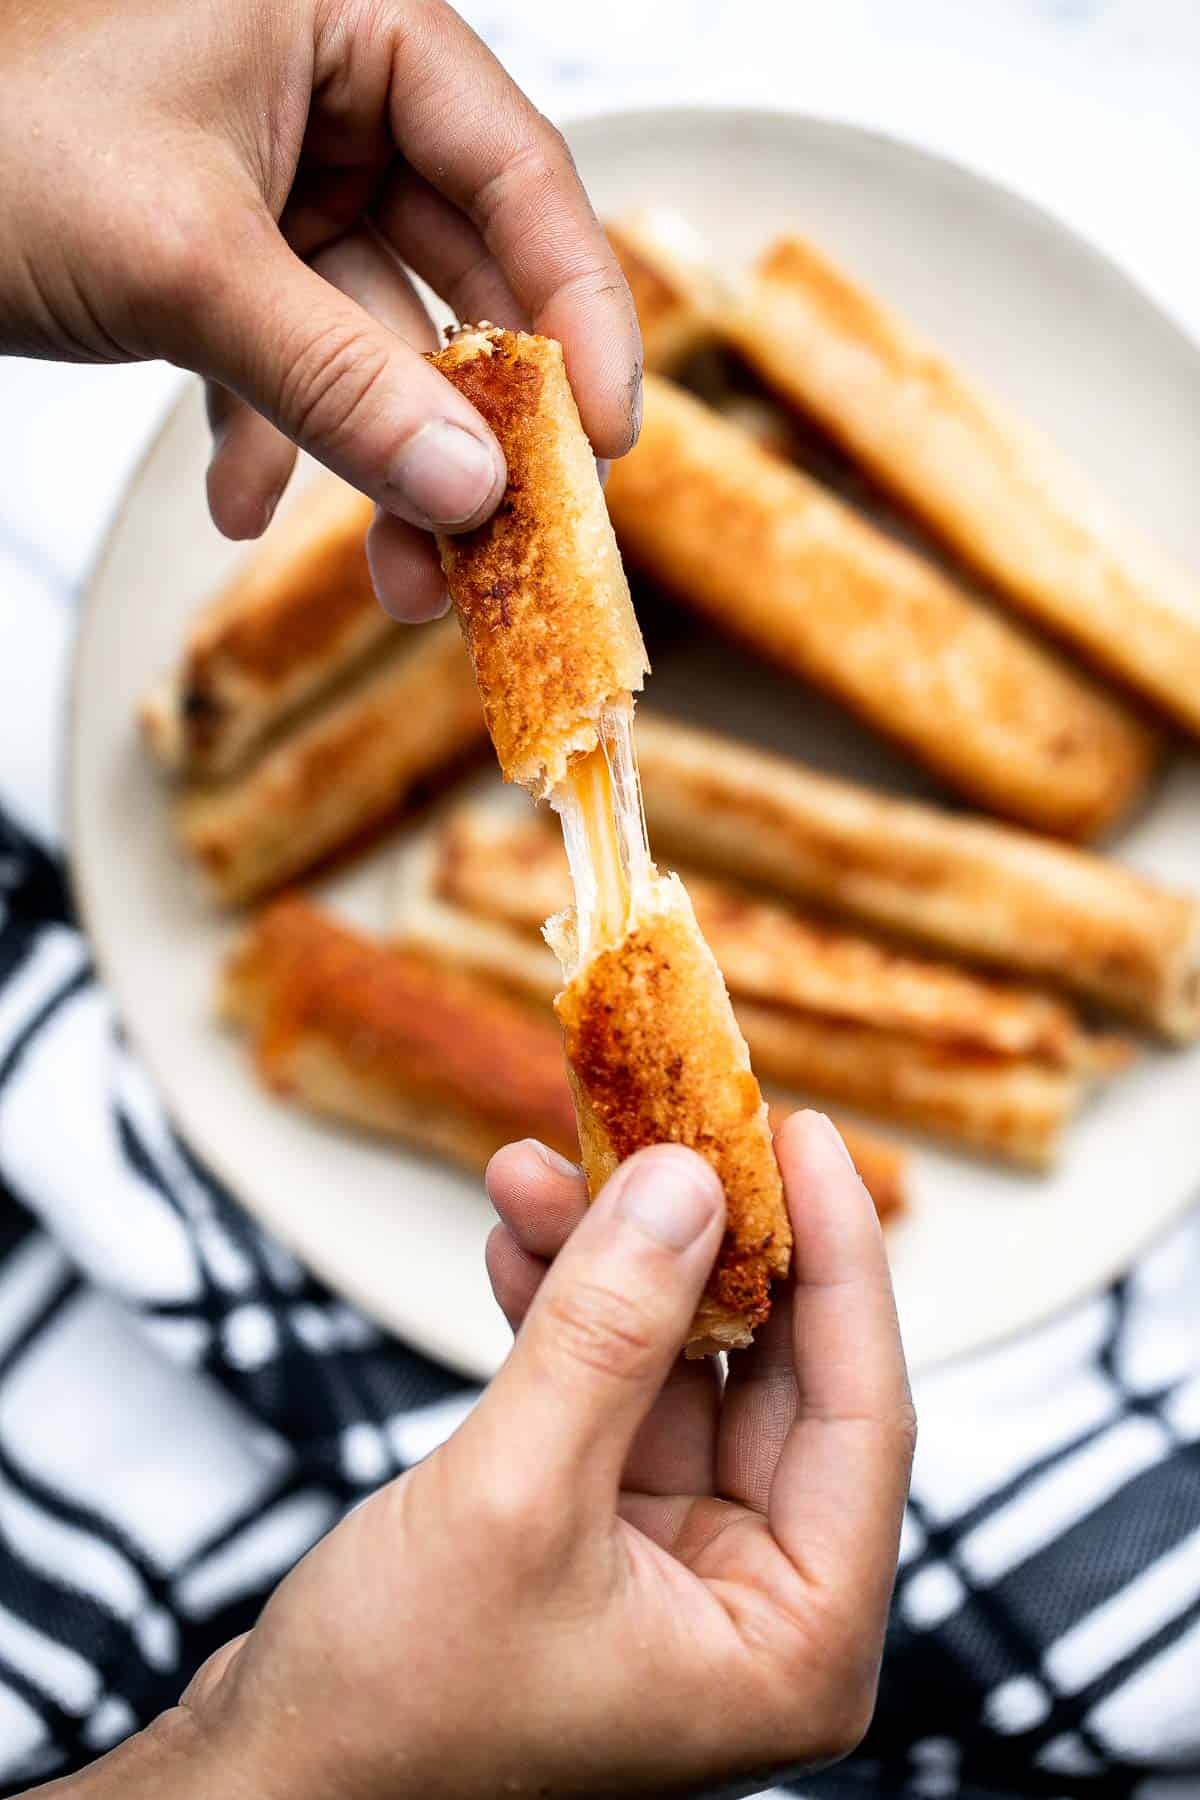
Smooth creamy roasted red pepper hummus is a delicious, flavourful, vegan + gluten-free dip. This healthy appetizer is easy to make with a few ingredients.
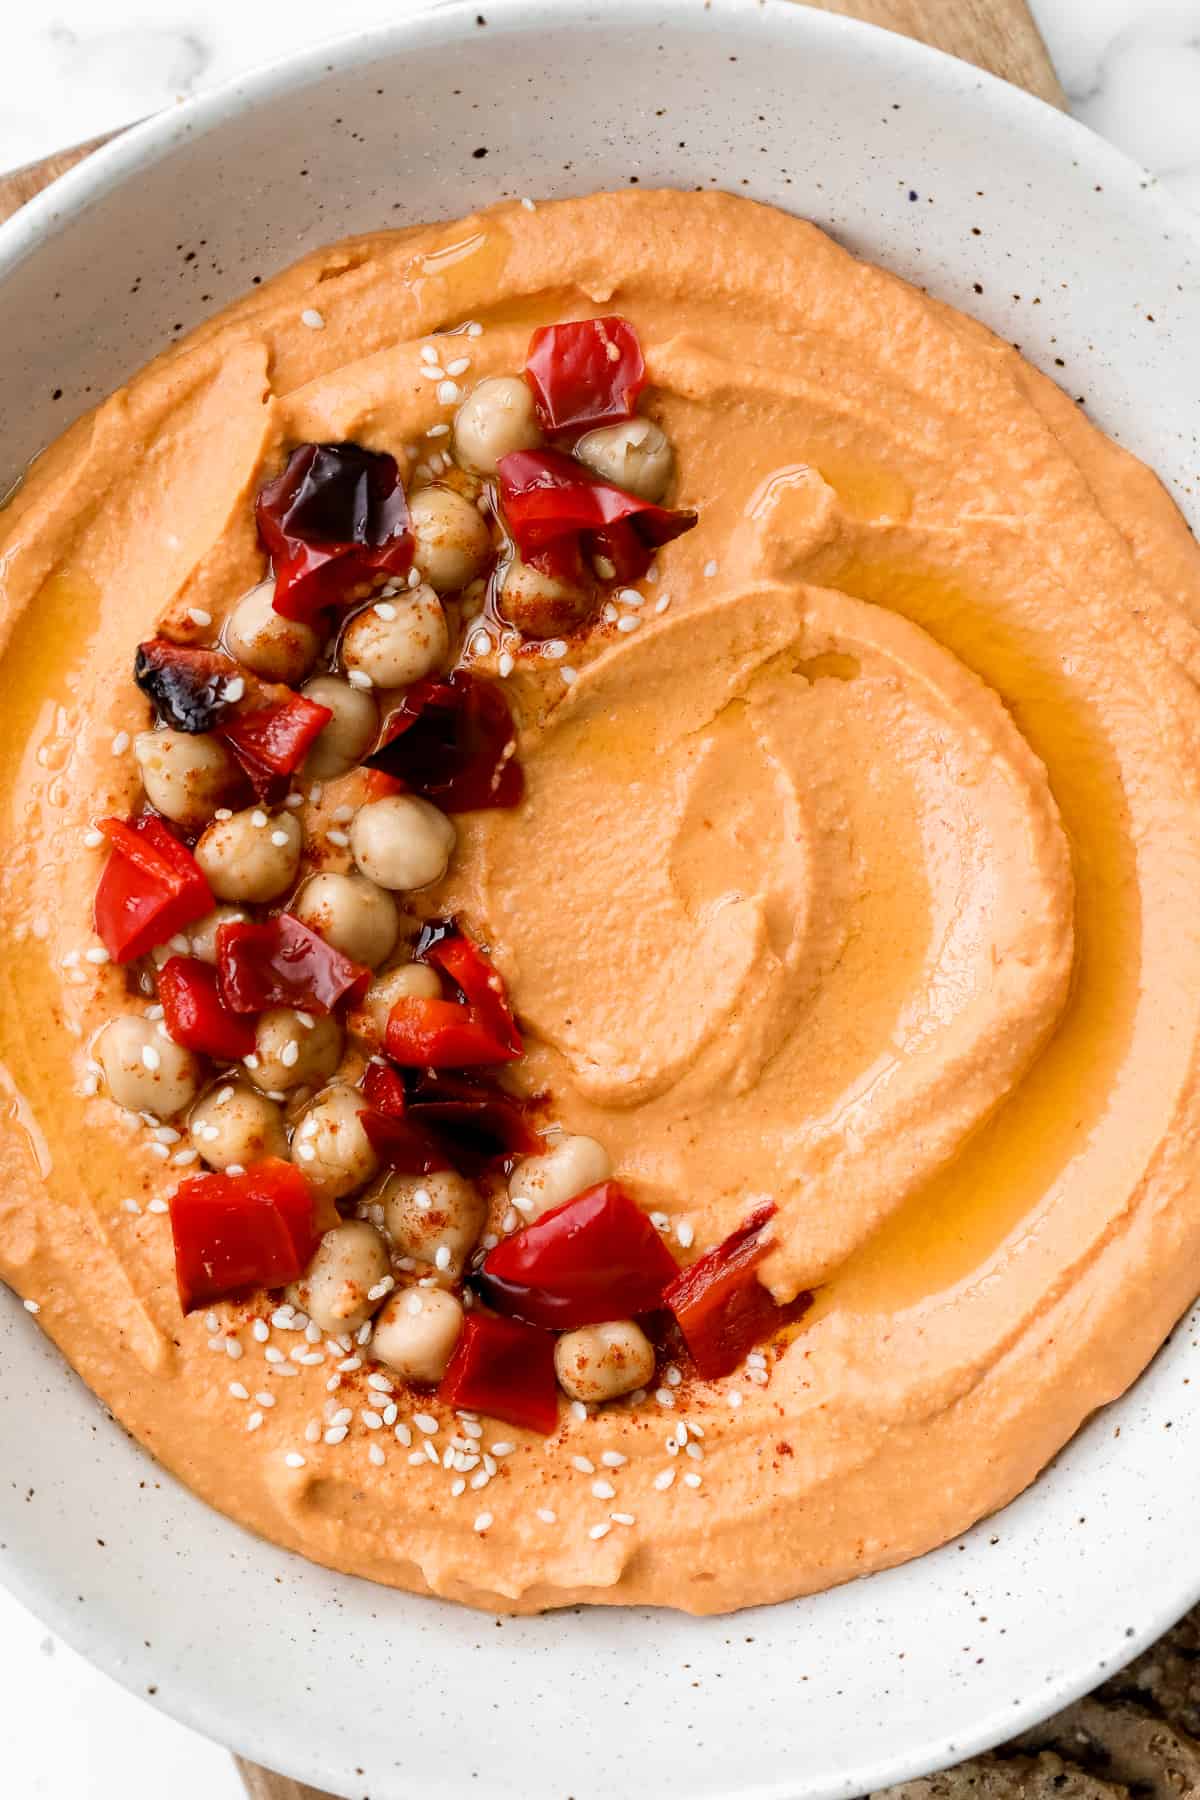
Asparagus tart with Gruyère cheese, a balsamic glaze, and flaky puff pastry, is a flavourful and delicious addition to brunch this spring season.
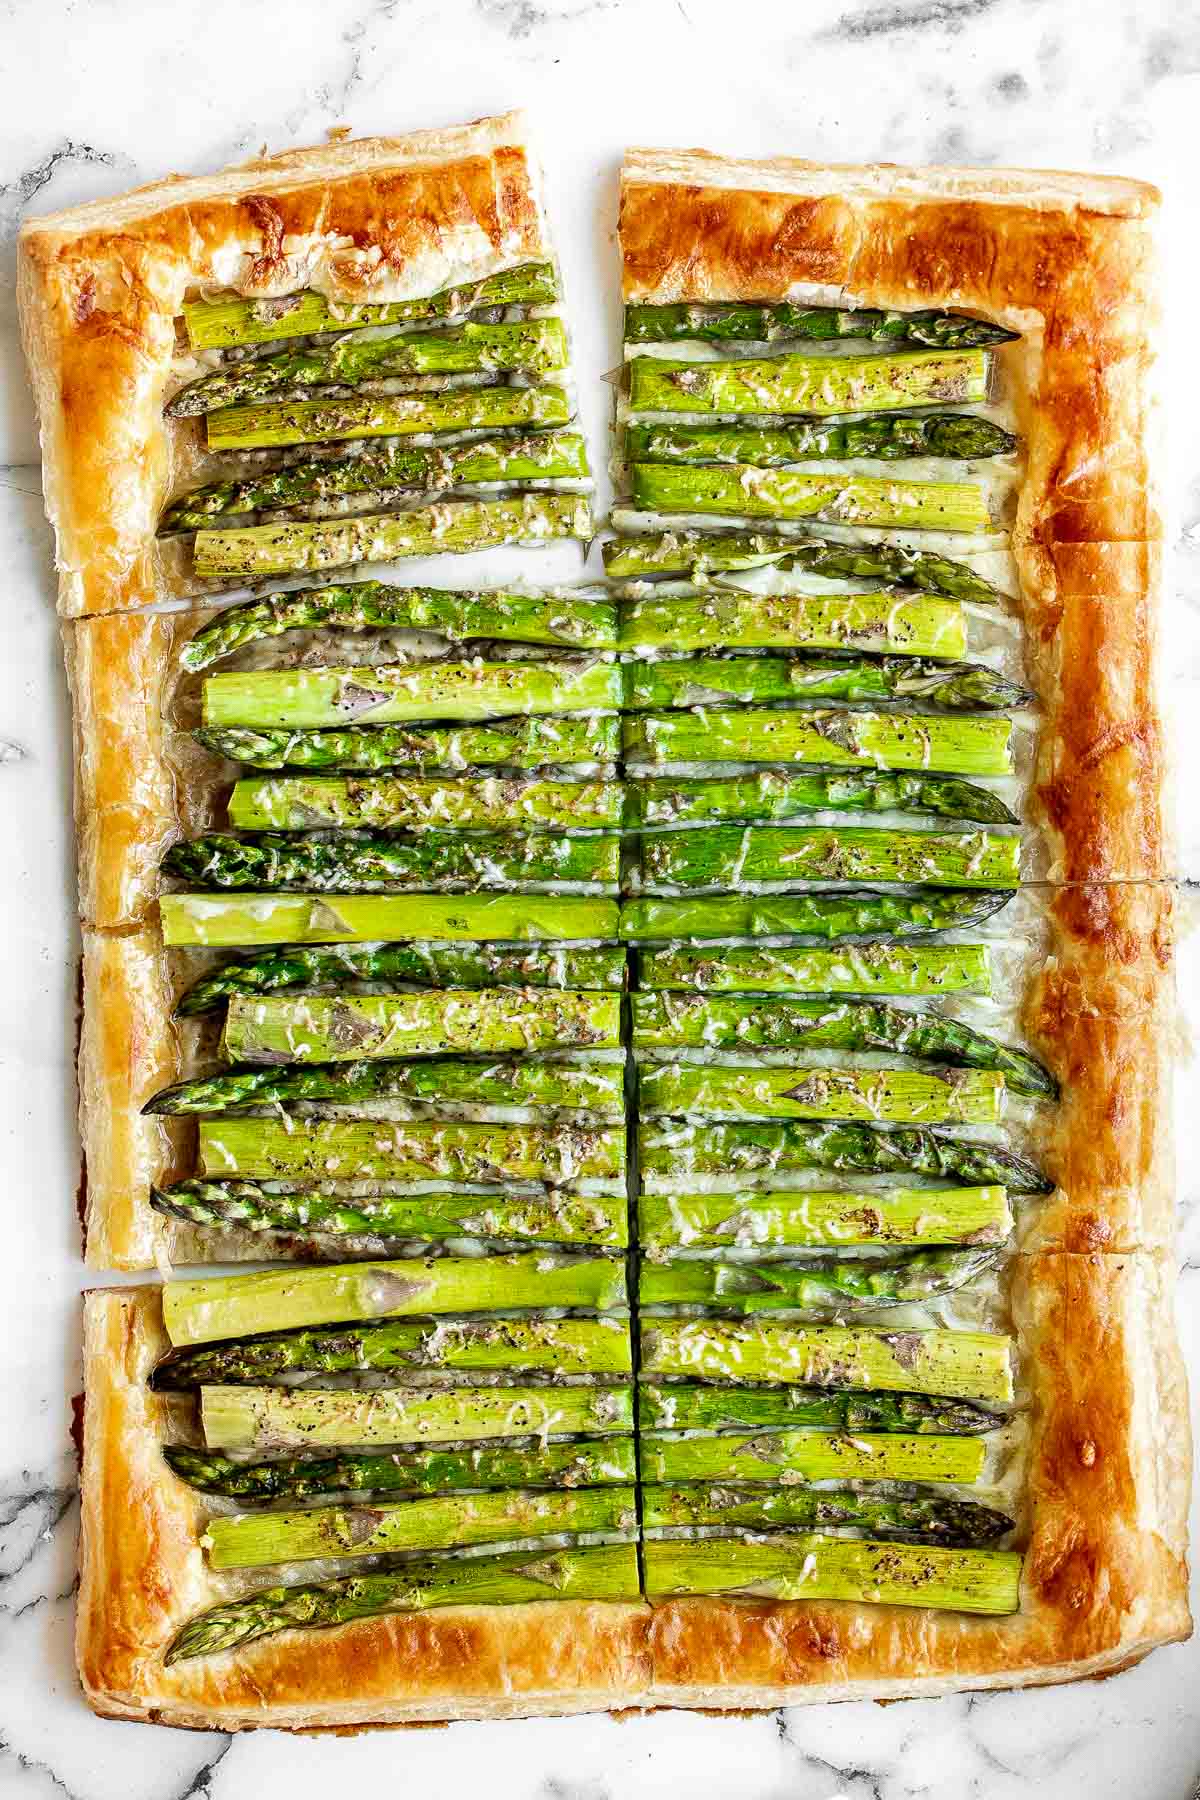
Air fryer cauliflower bites have a crispy breaded coating outside, yet tender and light inside. They are a bite-sized, flavorful, easy to make, and healthy finger food.
Bacon wrapped chicken bites are one of the best appys ever - well seasoned tender juicy chicken is wrapped in bacon and oven-baked to crisp perfection.

Better than takeout, shrimp egg rolls are a delicious, flavourful and easy appetizer to make. They can be deep fried, baked or air fried.

This baked spinach artichoke dip is quick, easy, creamy, flavorful, and delicious. This warm dip is baked in the oven and served with bread or crackers.
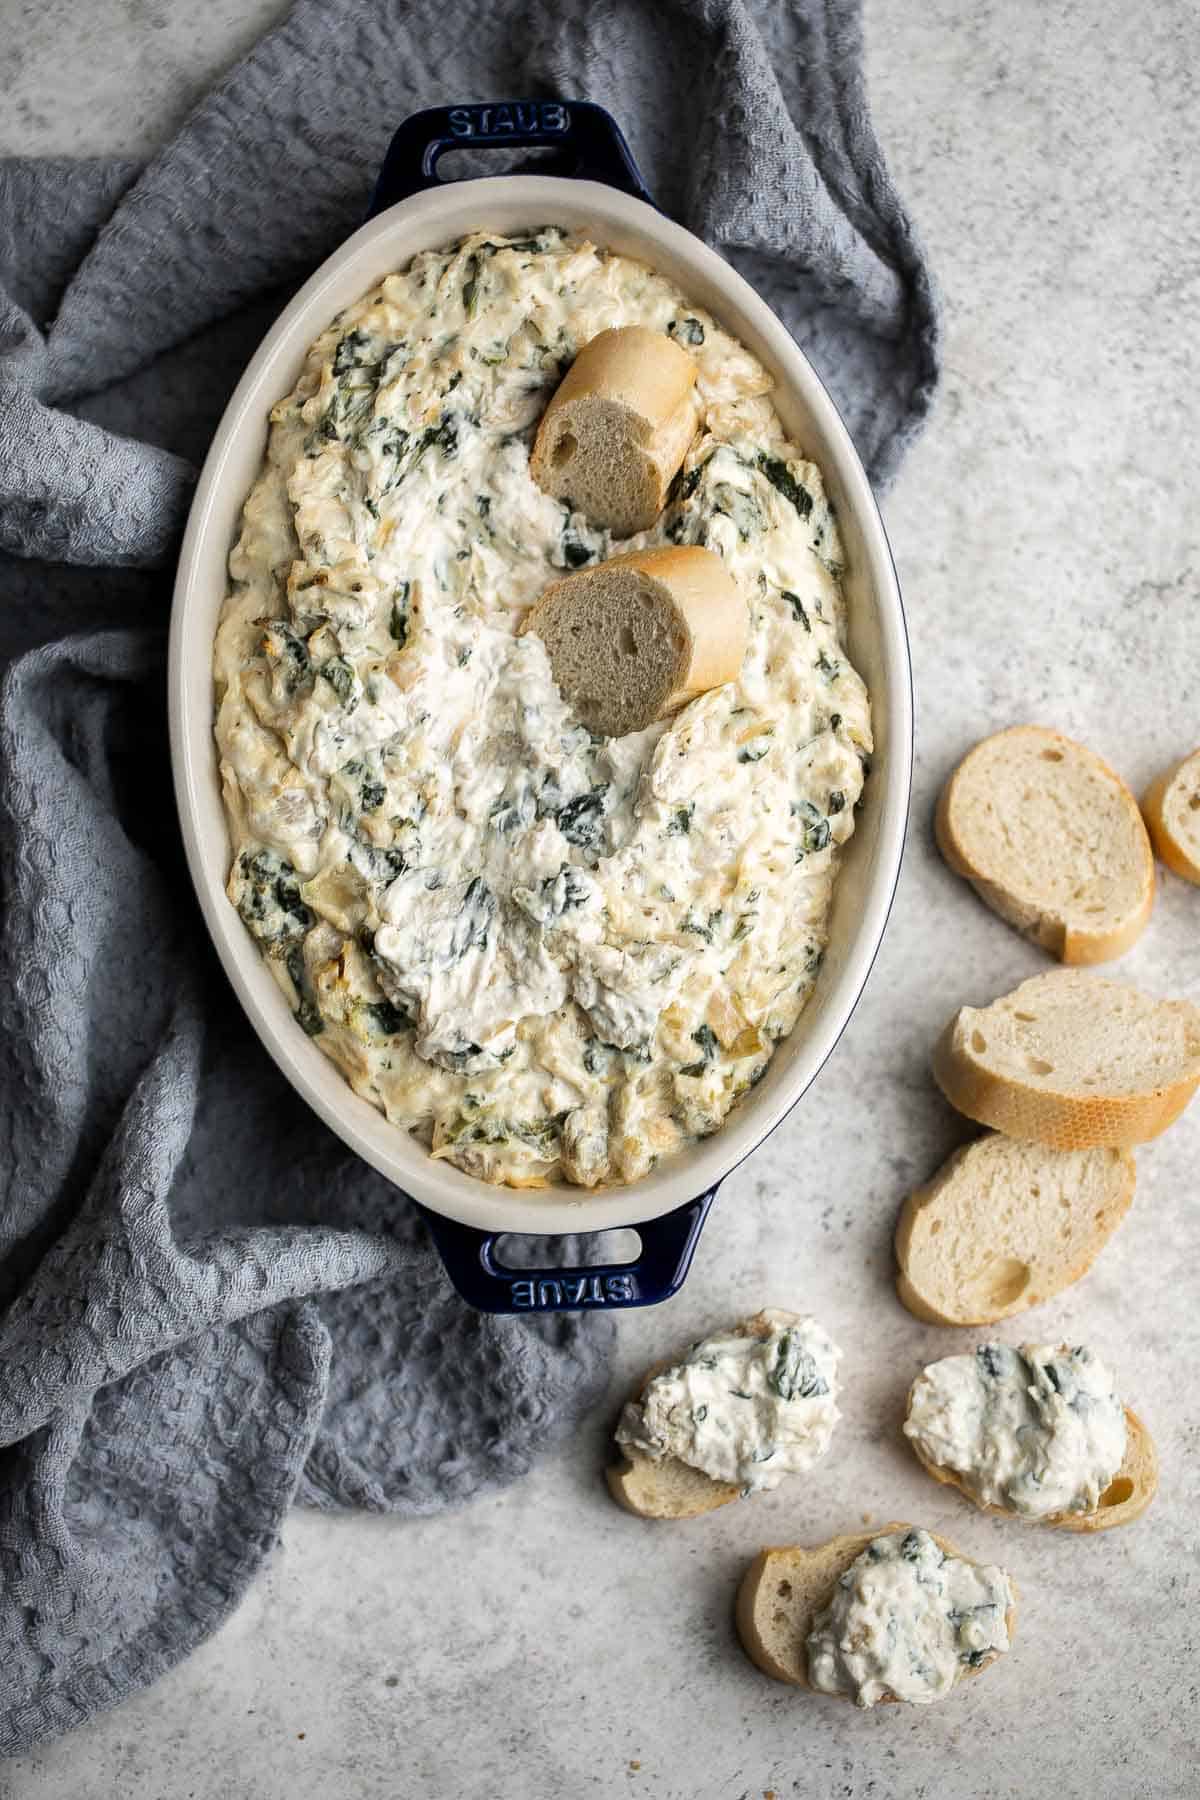
Soft garlic breadsticks are fluffy, airy, buttery, and delicious. They're an easy recipe that is perfect for beginners at baking bread.

Pizza crescent rolls are a delicious, cheesy, easy appetizer ready in under 30 minutes - the perfect last minute bite, lunch or dinner, or party food.

This homemade veggie tray is a quick easy healthy snack or appetizer to make for your next party, with a variety of colorful vegetables and delicious dips.
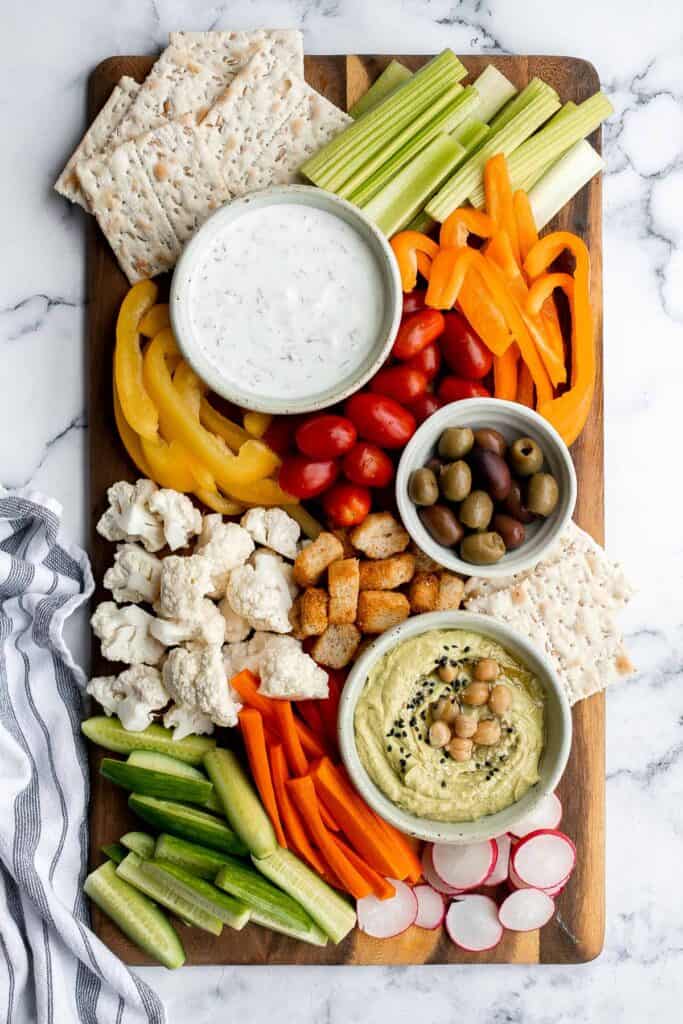
Olive tapenade is a delicious, flavorful, easy dip that comes together in minutes, made with the perfect combination of sharp, tangy, salty, and savory.
Crispy baked coconut shrimp is a delicious appetizer that is easy to make in 30 minutes. They are more flavourful, tastier and healthier than takeout. One of my favorite finger foods!
Spinach cheese rolls are an easy appetizer that's creamy, cheesy, comforting, and delicious. Serve as an appy at parties, for a school lunch, or snack.
Garlic Butter Steak Bites are tender, juicy, and flavorful. This quick and easy appetizer or weeknight dinner takes just 15 minutes to make in one skillet. Serve with toothpicks for an easy finger food idea.
Smooth and creamy pesto hummus is a healthy, delicious and flavourful dip that is easy to make in just 5 minutes. It's vegan and gluten-free.
Sweet chili turkey meatballs are delicious, tender and juicy, loaded with classic Thai flavors, and quick and easy to make. Savory, sweet, and tangy.
Homemade Tater Tots with Bacon
Homemade tater tots with bacon are golden and crispy on the outside, yet soft and tender inside. They're packed with flavour and a total family favourite.
Zucchini Bites are savory balls that are loaded with fresh zucchini. They're quick and easy to make in under 30 minutes in the air fryer or oven.
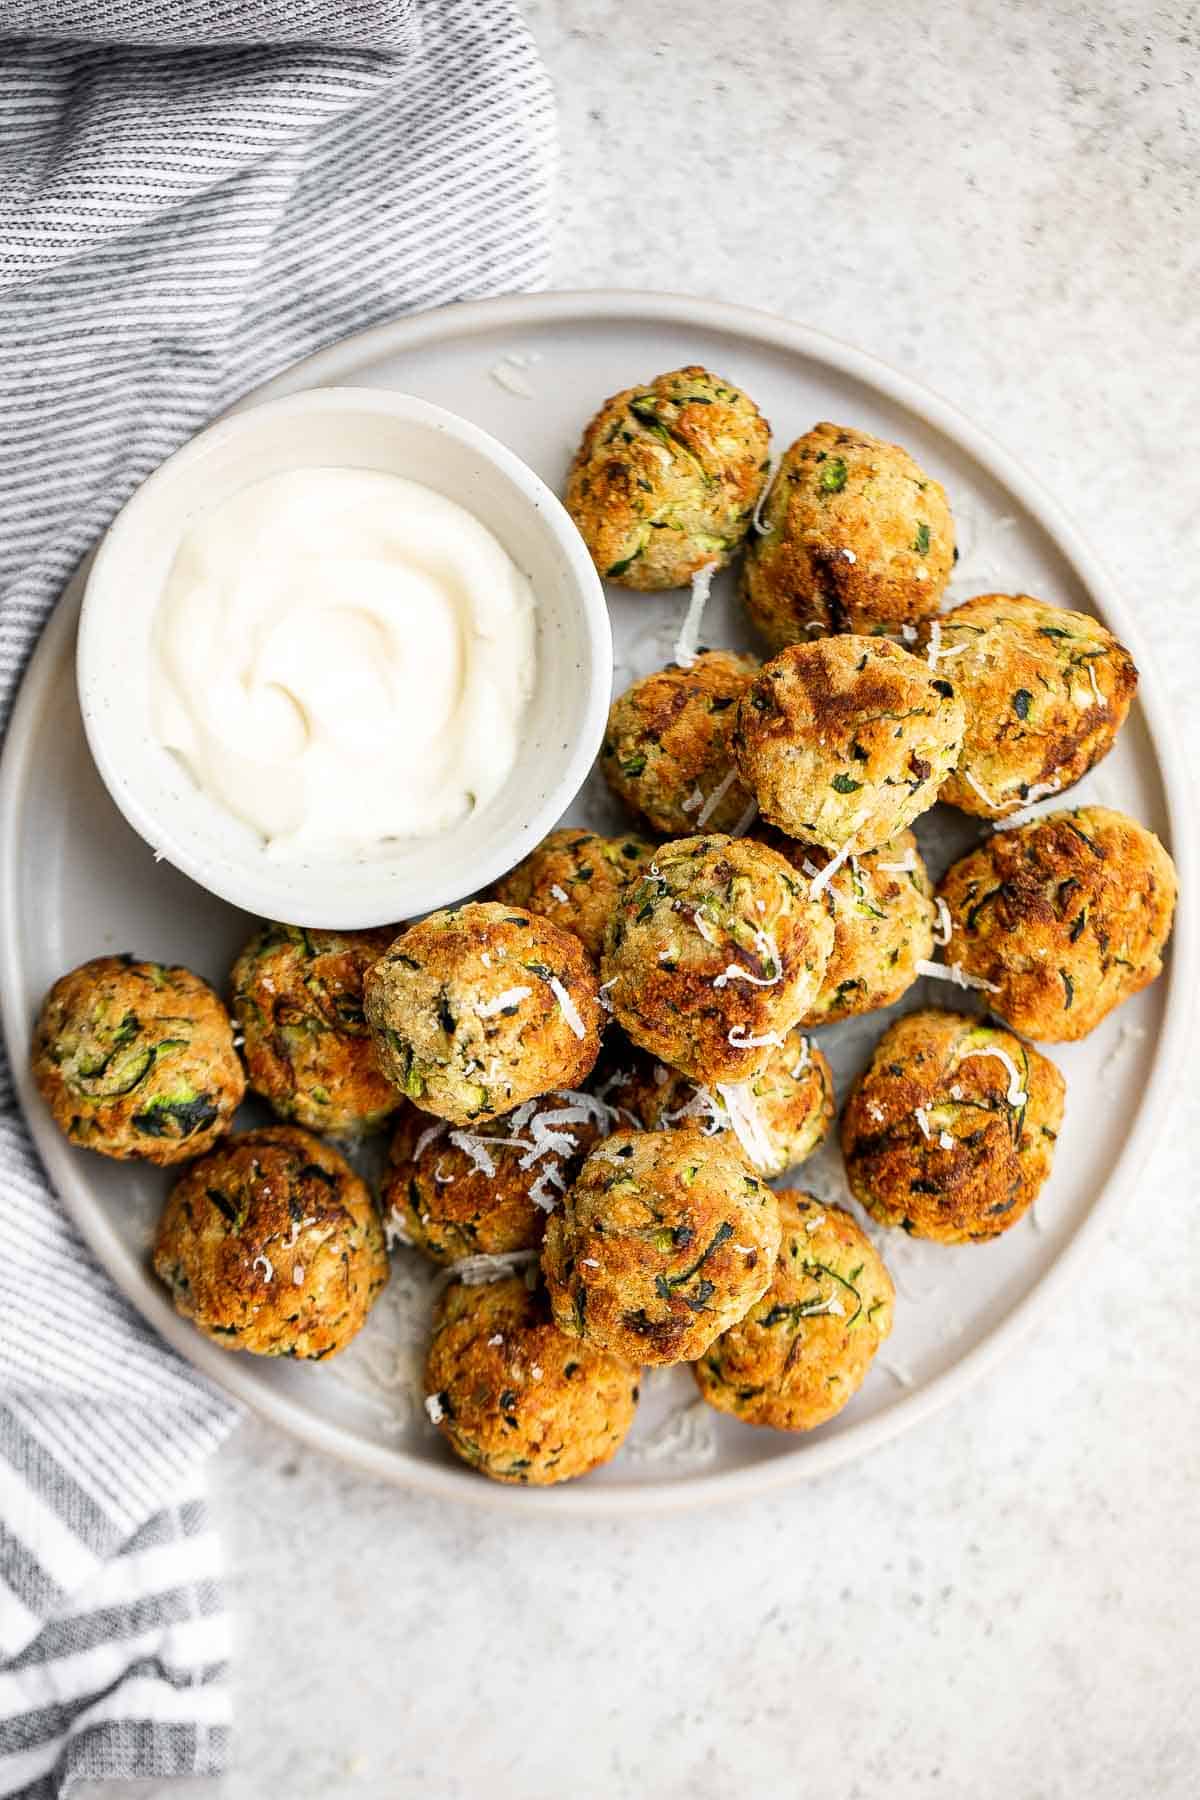
Crunchy, cheesy, and paired with an awesome dipping sauce, these baked mozzarella sticks are just as amazing as what you would find in a restaurant.
Pepperoni pizza dip is creamy, rich, comforting, and delicious. This appetizer is easy to make, easy to prepare ahead of time, and easy to eat.
Air Fryer Breaded Fried Chicken Wings
The BEST breaded fried chicken wings -- extra crispy and crunchy outside, tender and juicy inside. You can't even tell they're air fried, not deep-fried!
Crispy Bottom Pan-Fried Vegetable Buns
Crispy bottom pan-fried fried vegetable buns (no yeast) are crunchy outside yet tender inside with a mushroom, carrot and vermicelli vegetarian filling.

Quick and easy shrimp cakes are juicy, tender, delicious, and flavorful. They're made simple with a food processor and your choice of three cooking methods.
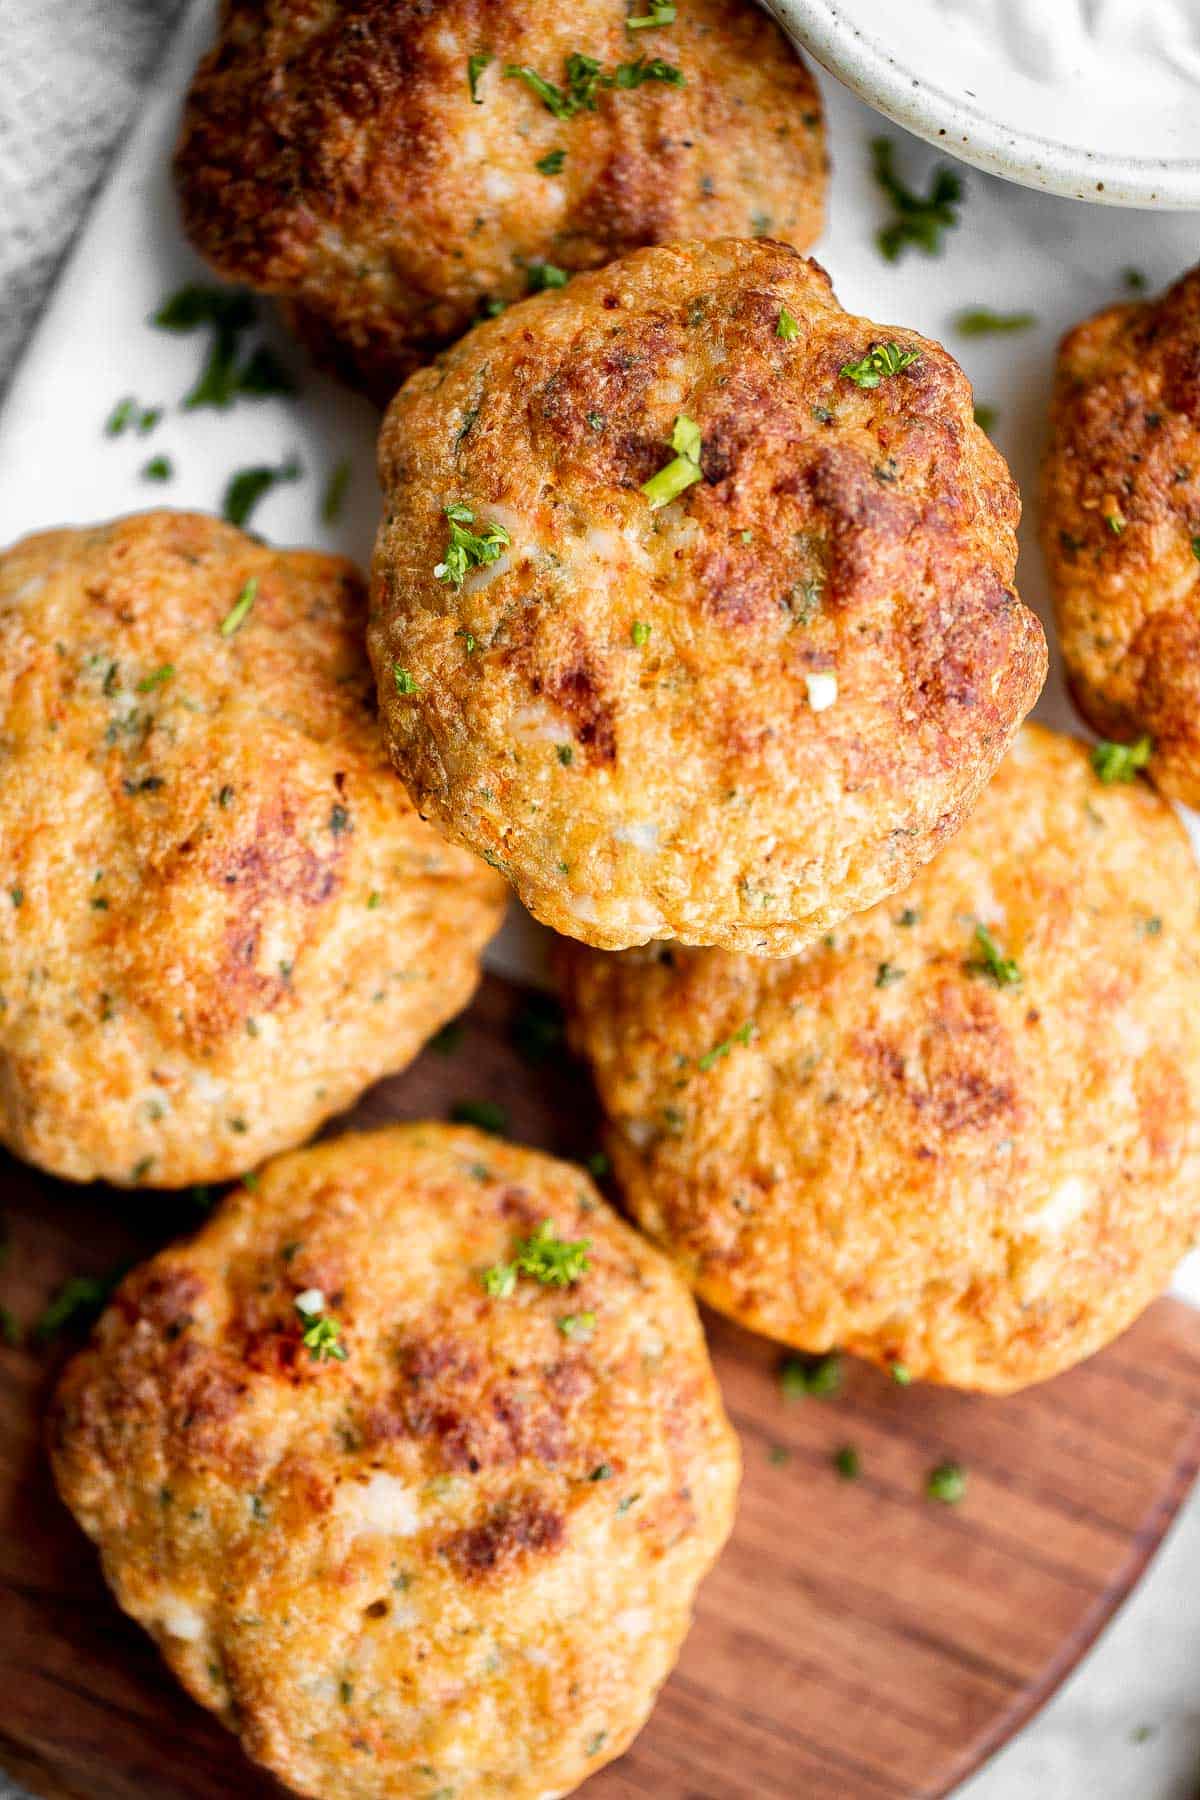
Garlic knots are fluffy on the inside, crispy on the outside, and topped with delicious savory garlic herbed butter that will have you begging for more.
Marinara sauce is rich, vibrant, and loaded with flavor. It's easy to make with a few simple fresh ingredients. Serve as a dip or in pasta and pizza.
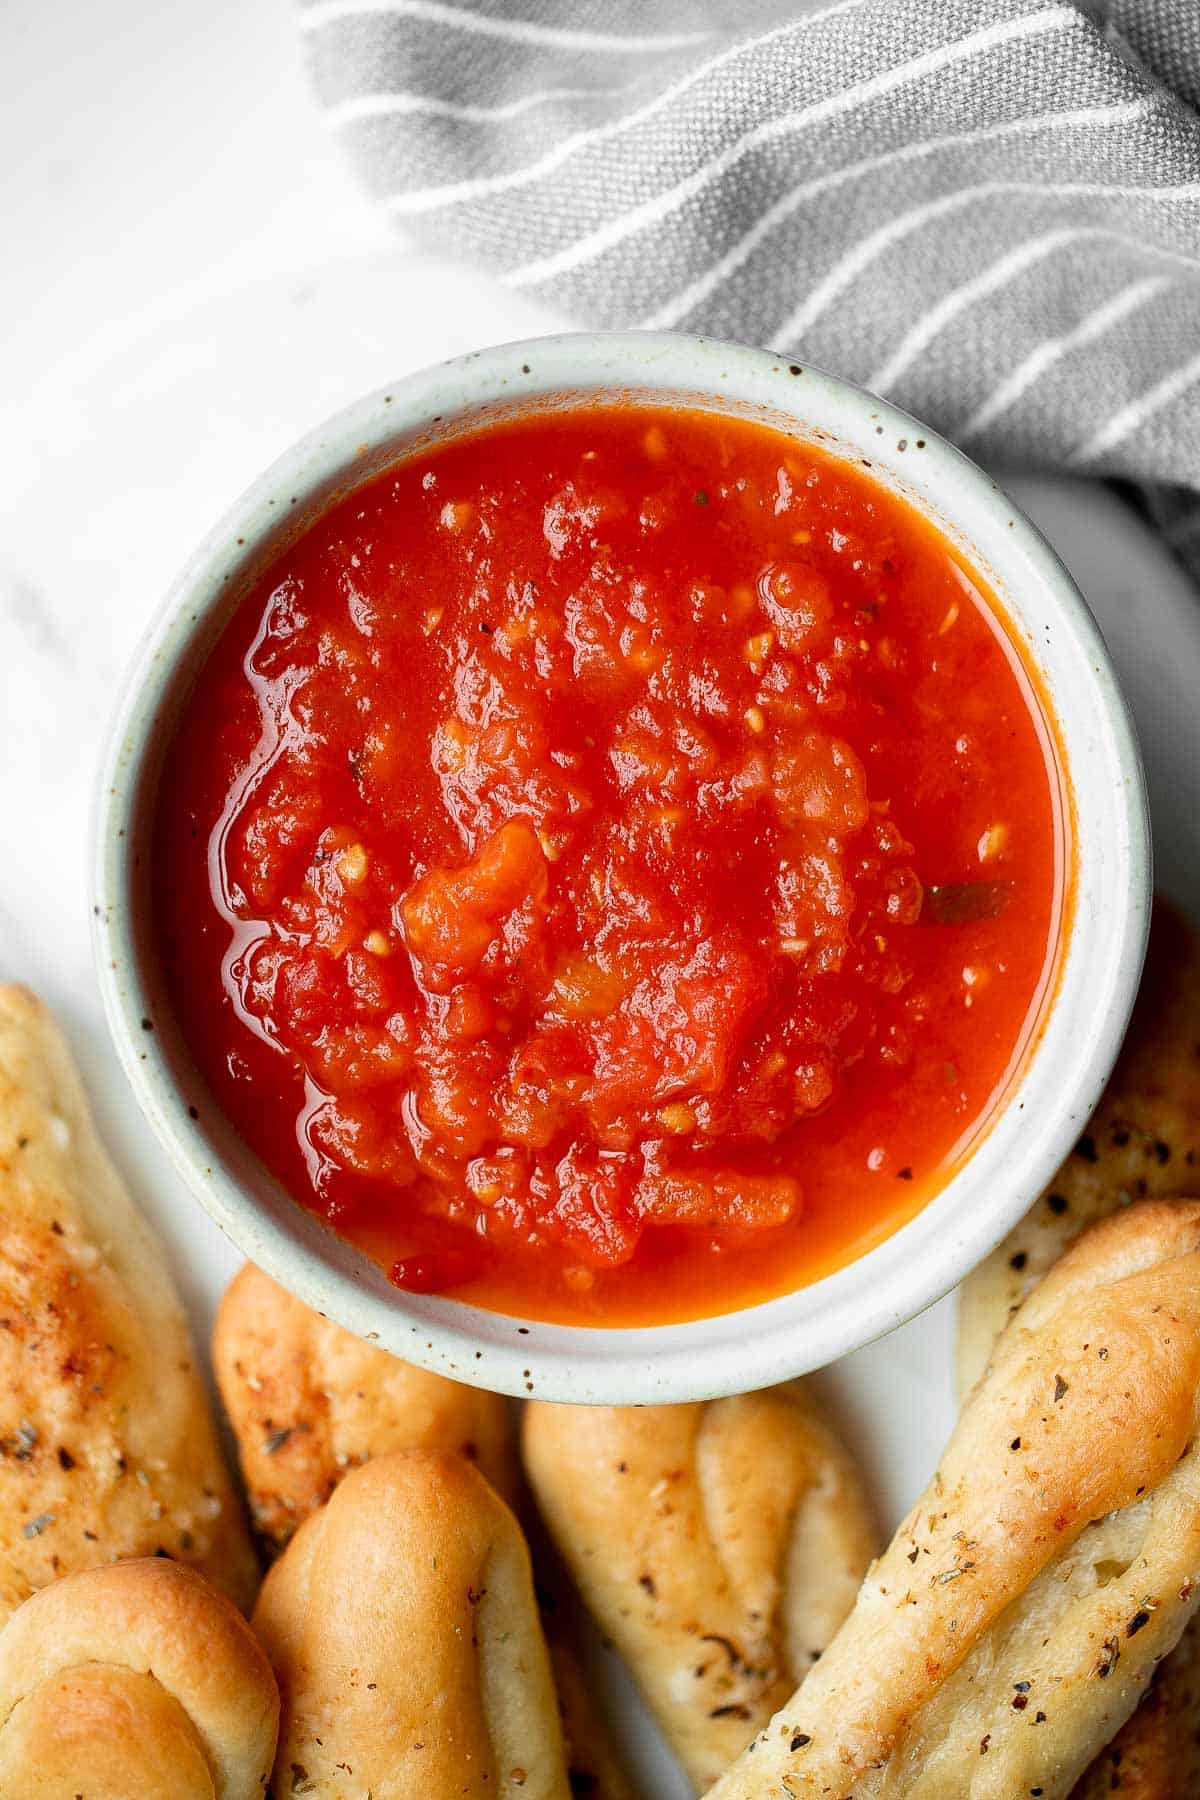
Chicken nachos are an easy to make when you're craving something filling, crunchy, cheesy, and satisfying. Perfect game day appetizer or late-night snack.
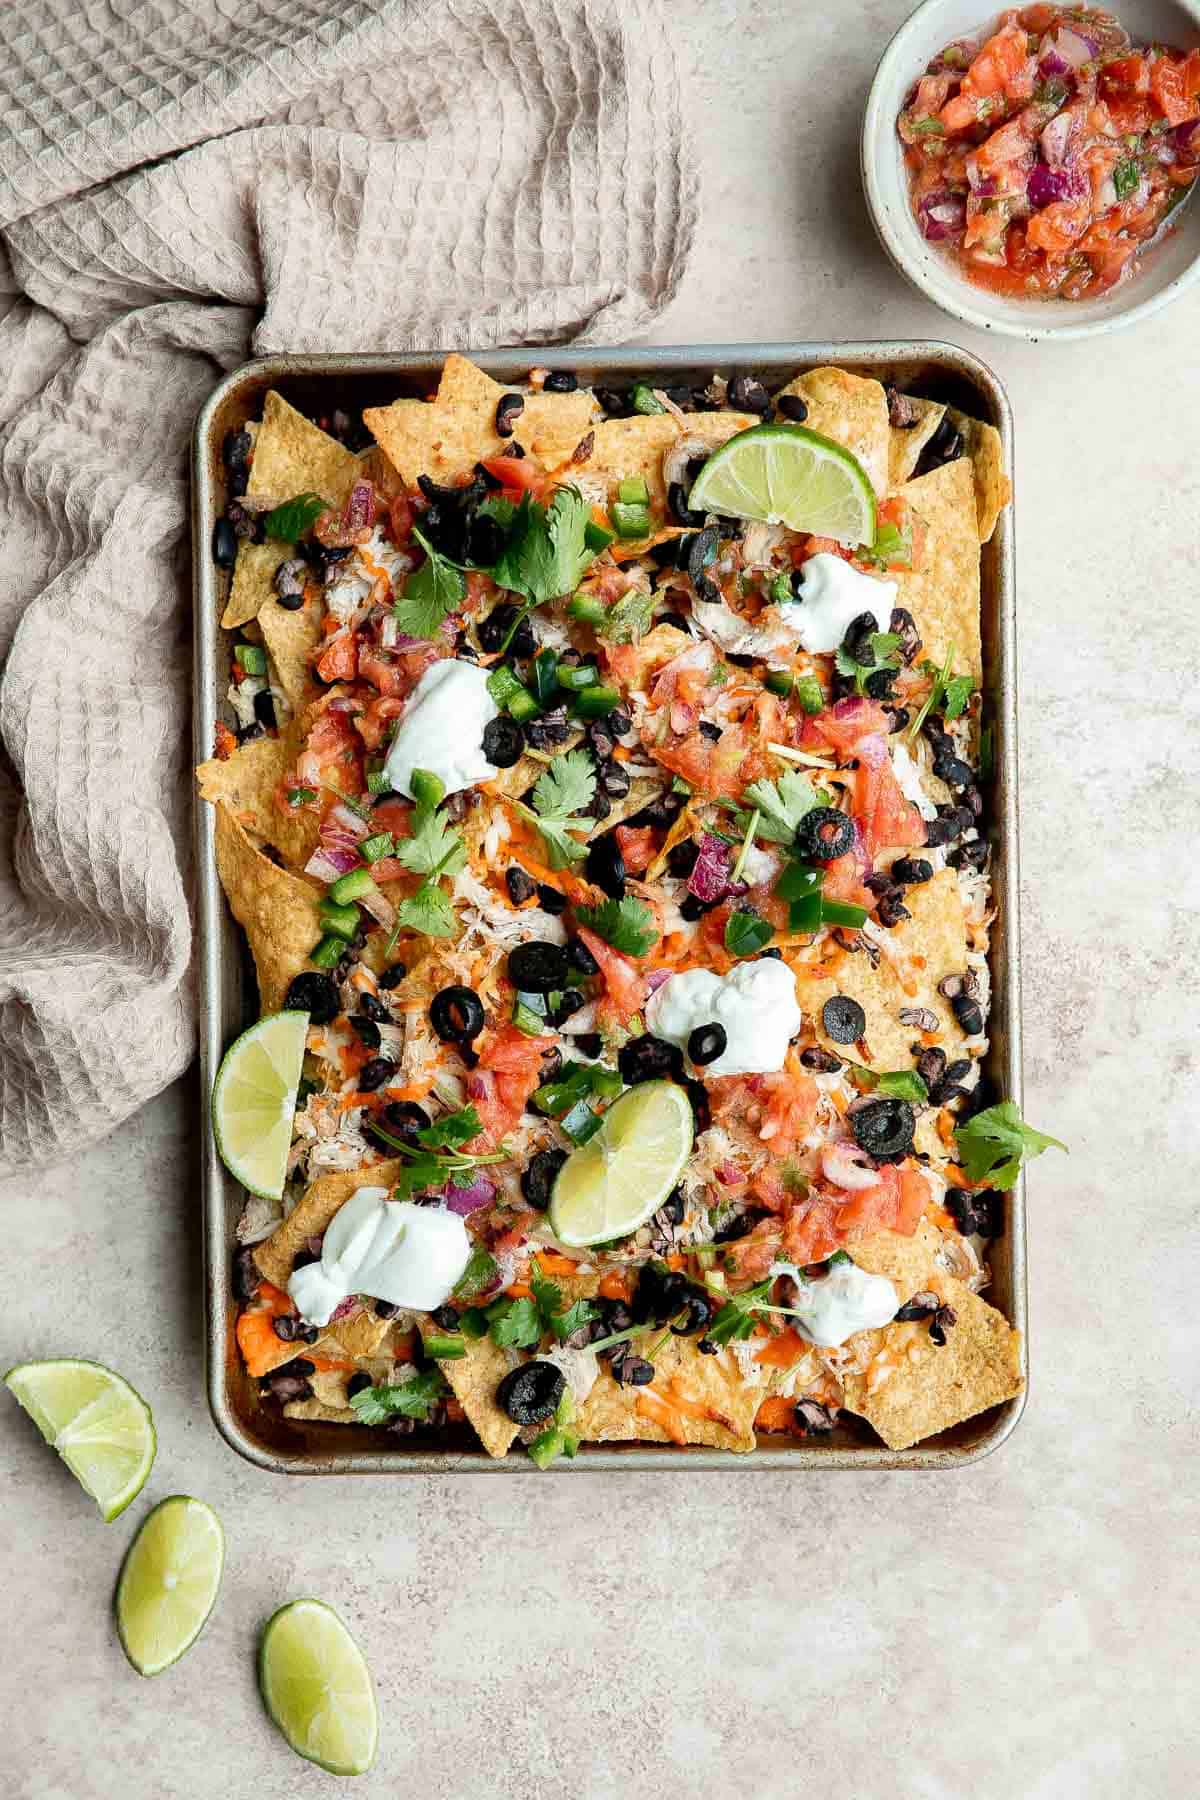
Fried Goat Cheese Balls are flavorful, delicious, and easy to make. With creamy, melty cheese oozing out of a crunchy, golden crust in every bite.

Homemade pork dumplings are quick and easy to make, with perfect crispy bottoms and a tender, juicy pork filling inside. Easy to meal prep and freeze well.

Fig crostini topped sweet, juicy figs, tangy goat cheese and crunchy pistachios is flavourful, delicious, and perfect for snacking on or entertaining.
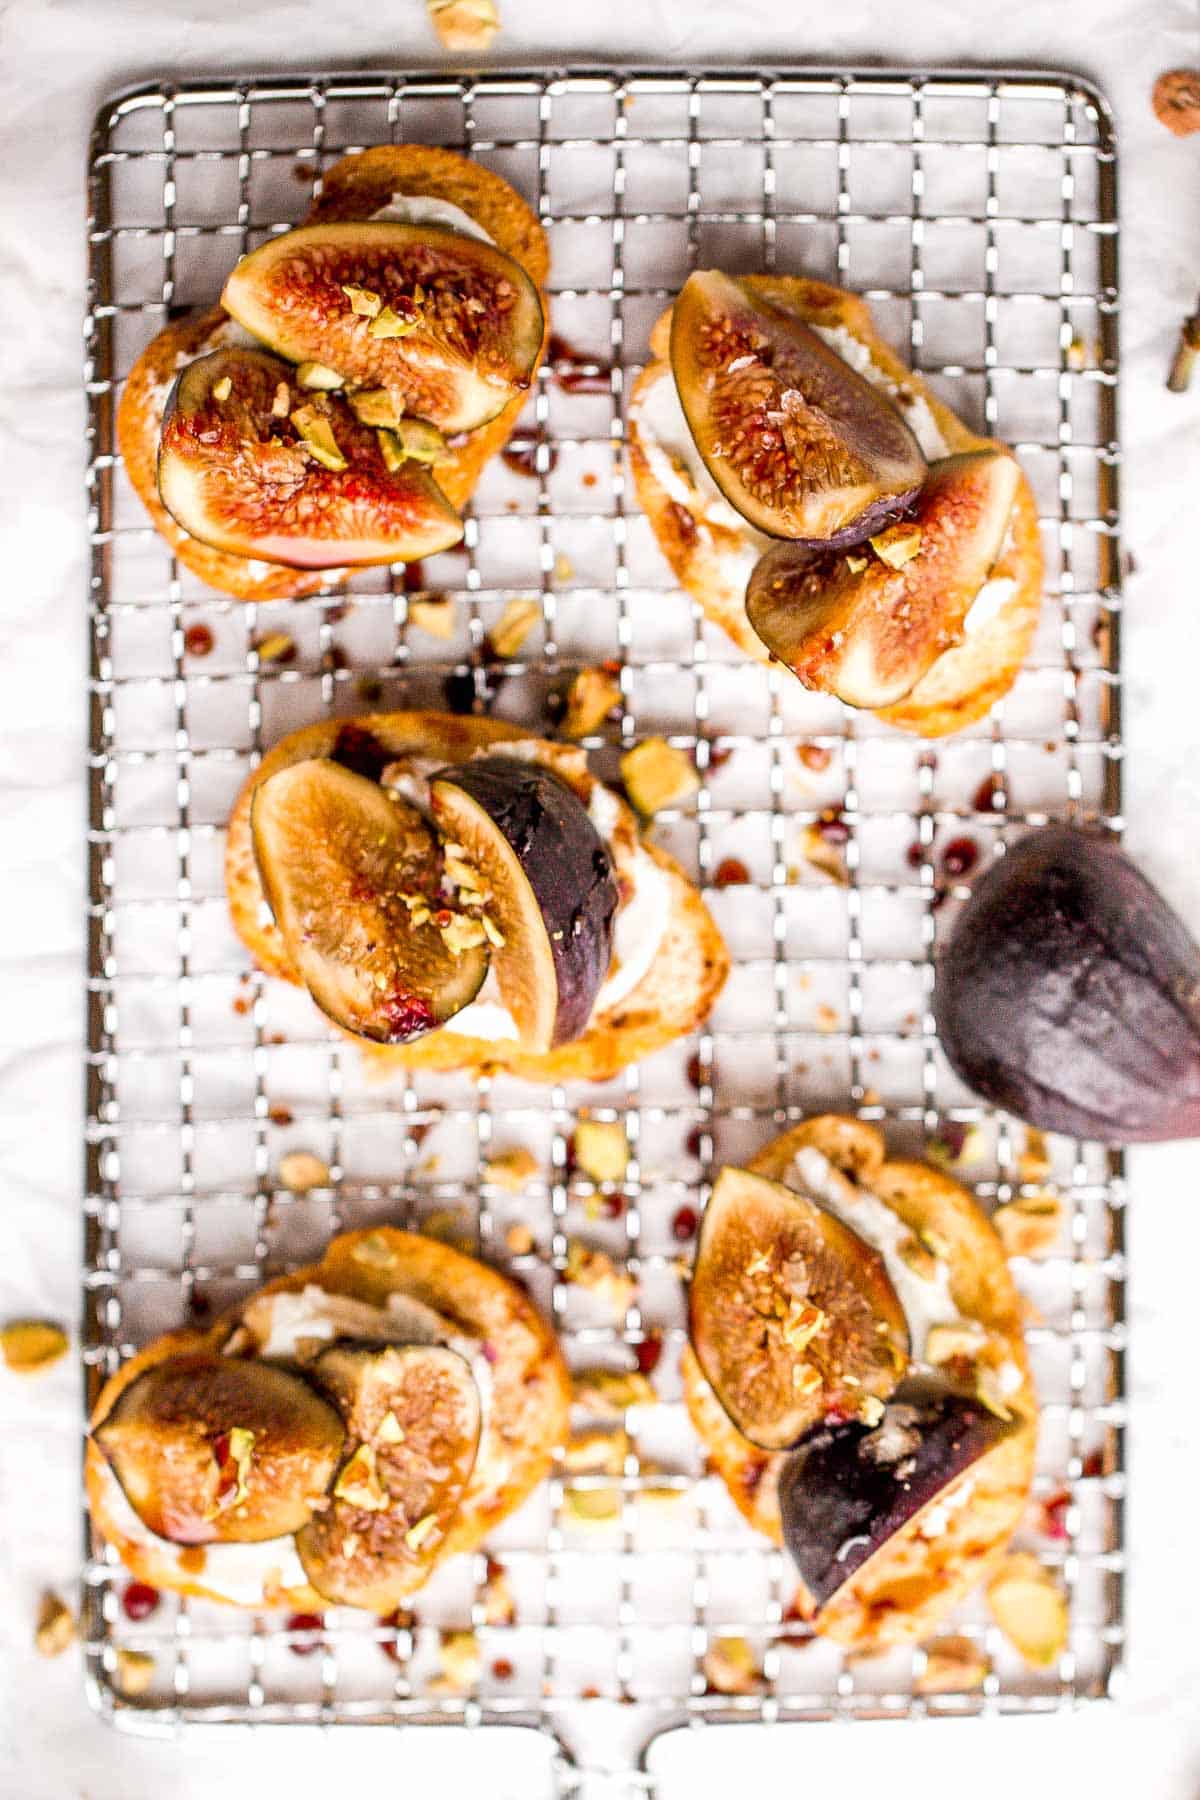
Homemade Greek fries bring a Mediterranean twist on a classic side dish, crispy fries are topped with crumbled feta cheese, fresh parsley, and lime juice.
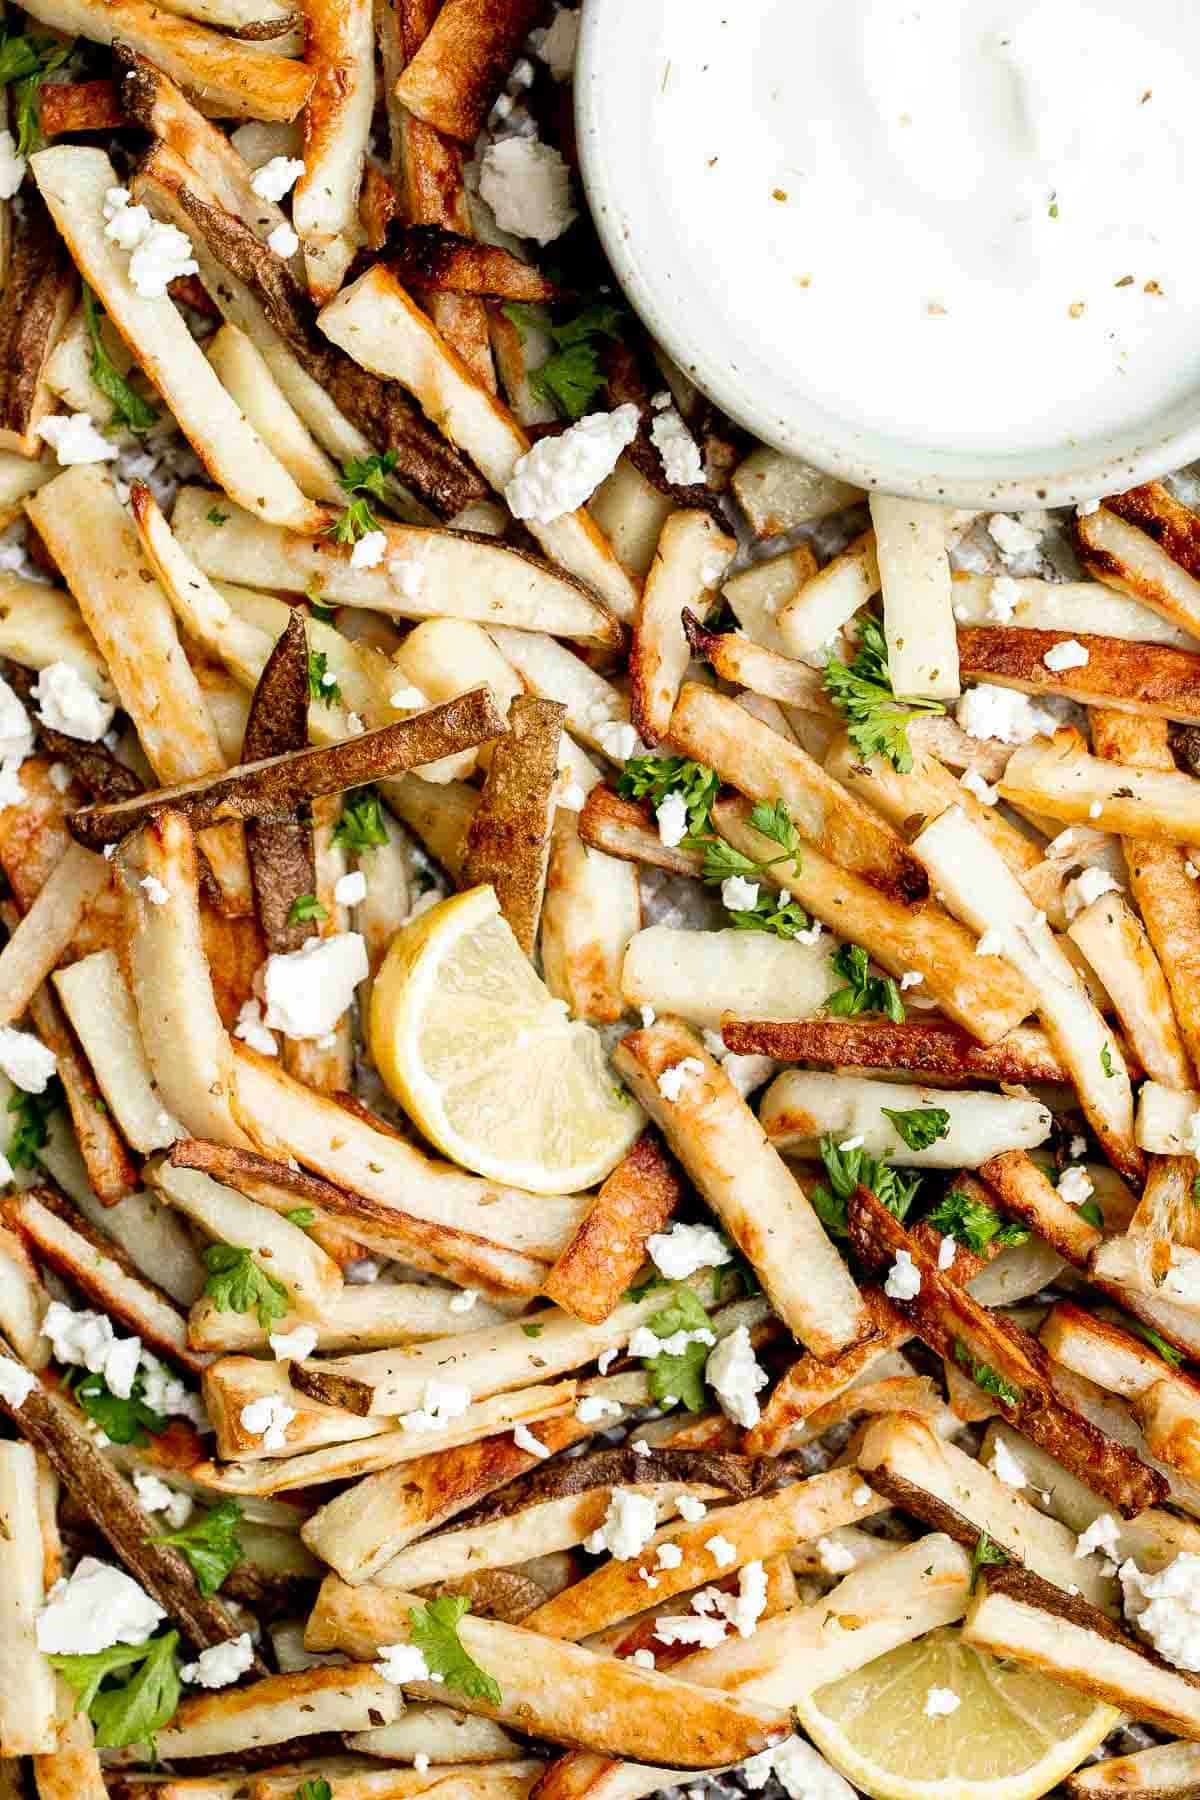
Is it even game day without game day buffalo hot wings? This classic appetizer is a total crowd pleaser and one of my most popular Super Bowl recipes.

Caramelized onion dip is creamy, flavorful, and melt-in-your-mouth delicious. This easy appetizer is perfect for entertaining, on game day, or for a snack.
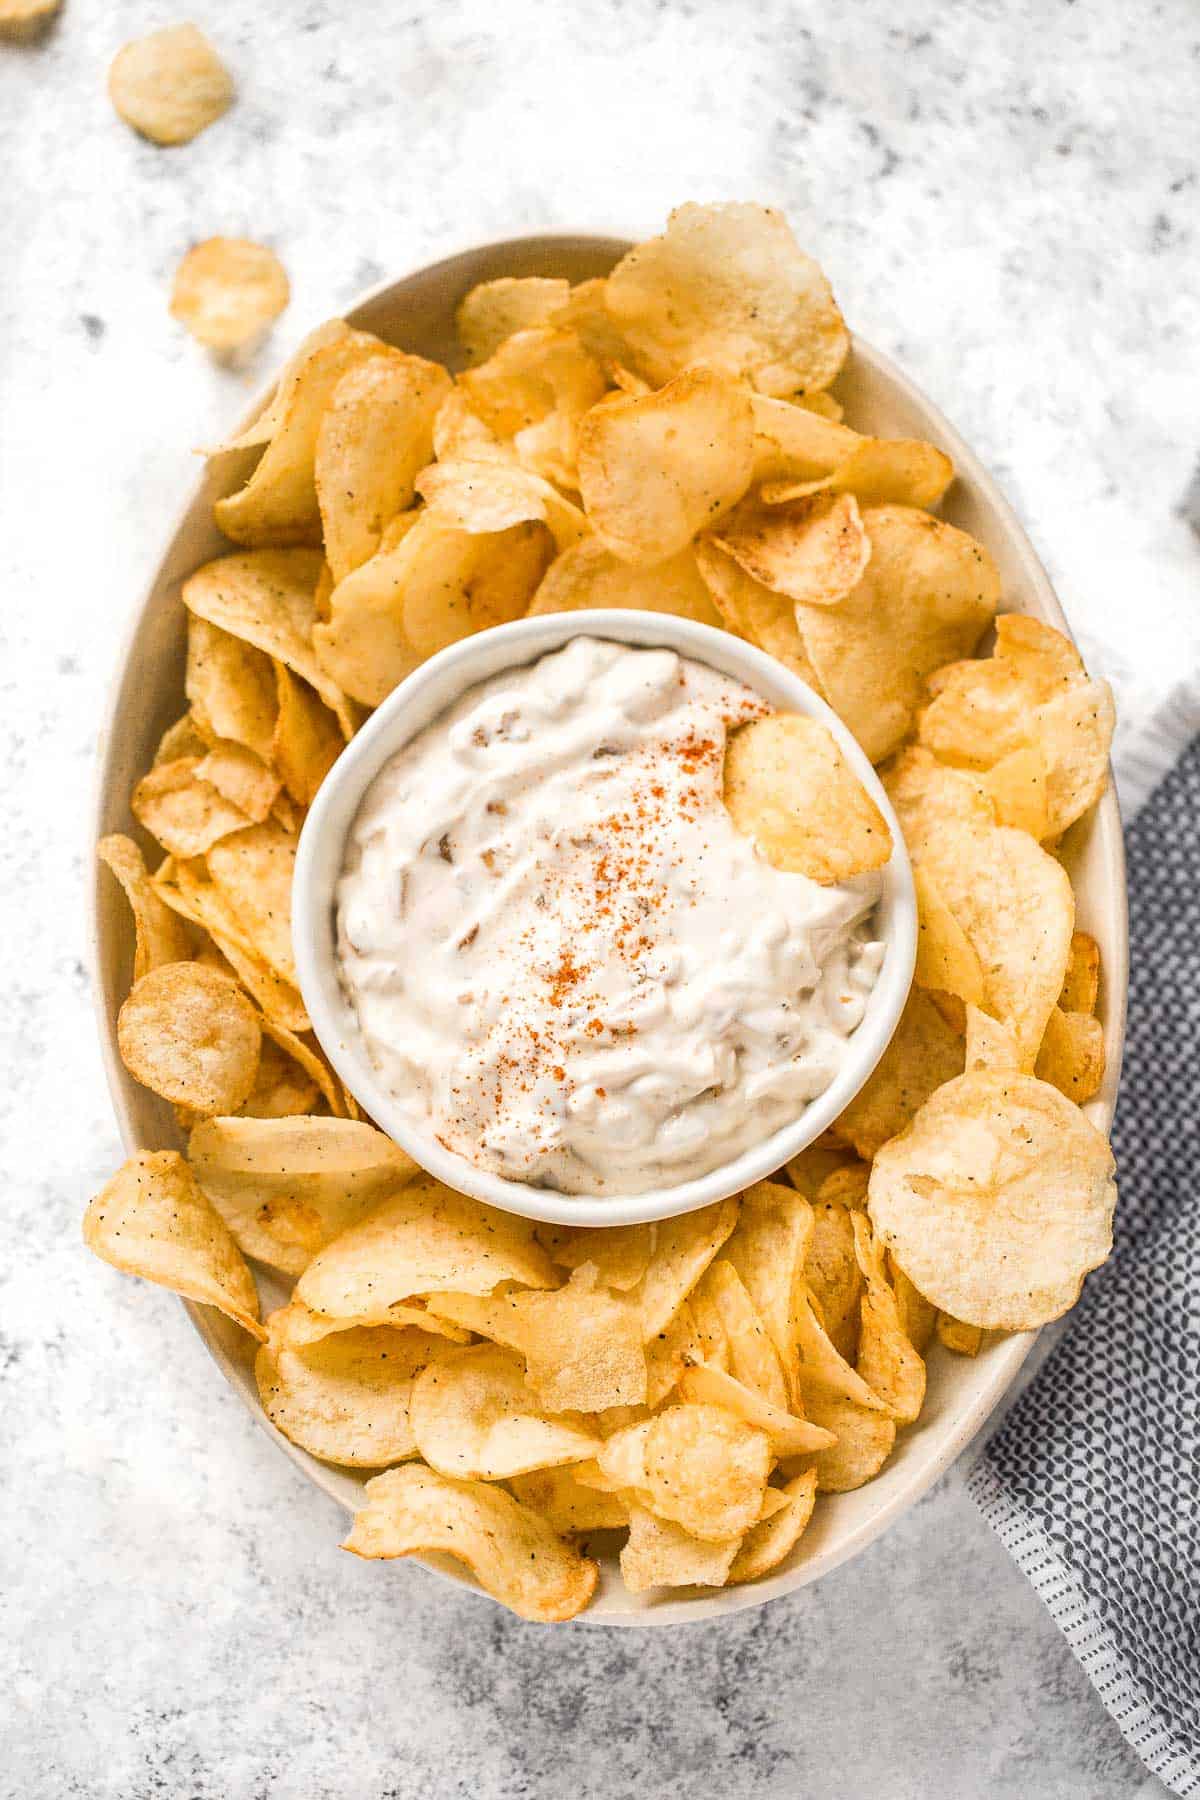
Prosciutto Wrapped Asparagus and Melon
Prosciutto wrapped asparagus and melon are salty, sweet, and juicy. They are easy to make with a handful of simple ingredients, then cooked on the grill.
Air fryer chicken tenders are juicy and moist inside while crispy and golden brown outside. A healthy, delicious, and quick kid-friendly recipe.

Jamaican jerk chicken wings with delicious crispy skin and tender and juicy meat are loaded with flavor. They're easy to make on the oven, grill, air fryer.
Cranberry Meatballs are sticky, sweet and tangy. These delicious bites are the perfect holiday appetizer, or a great way to use up leftover cranberry sauce.
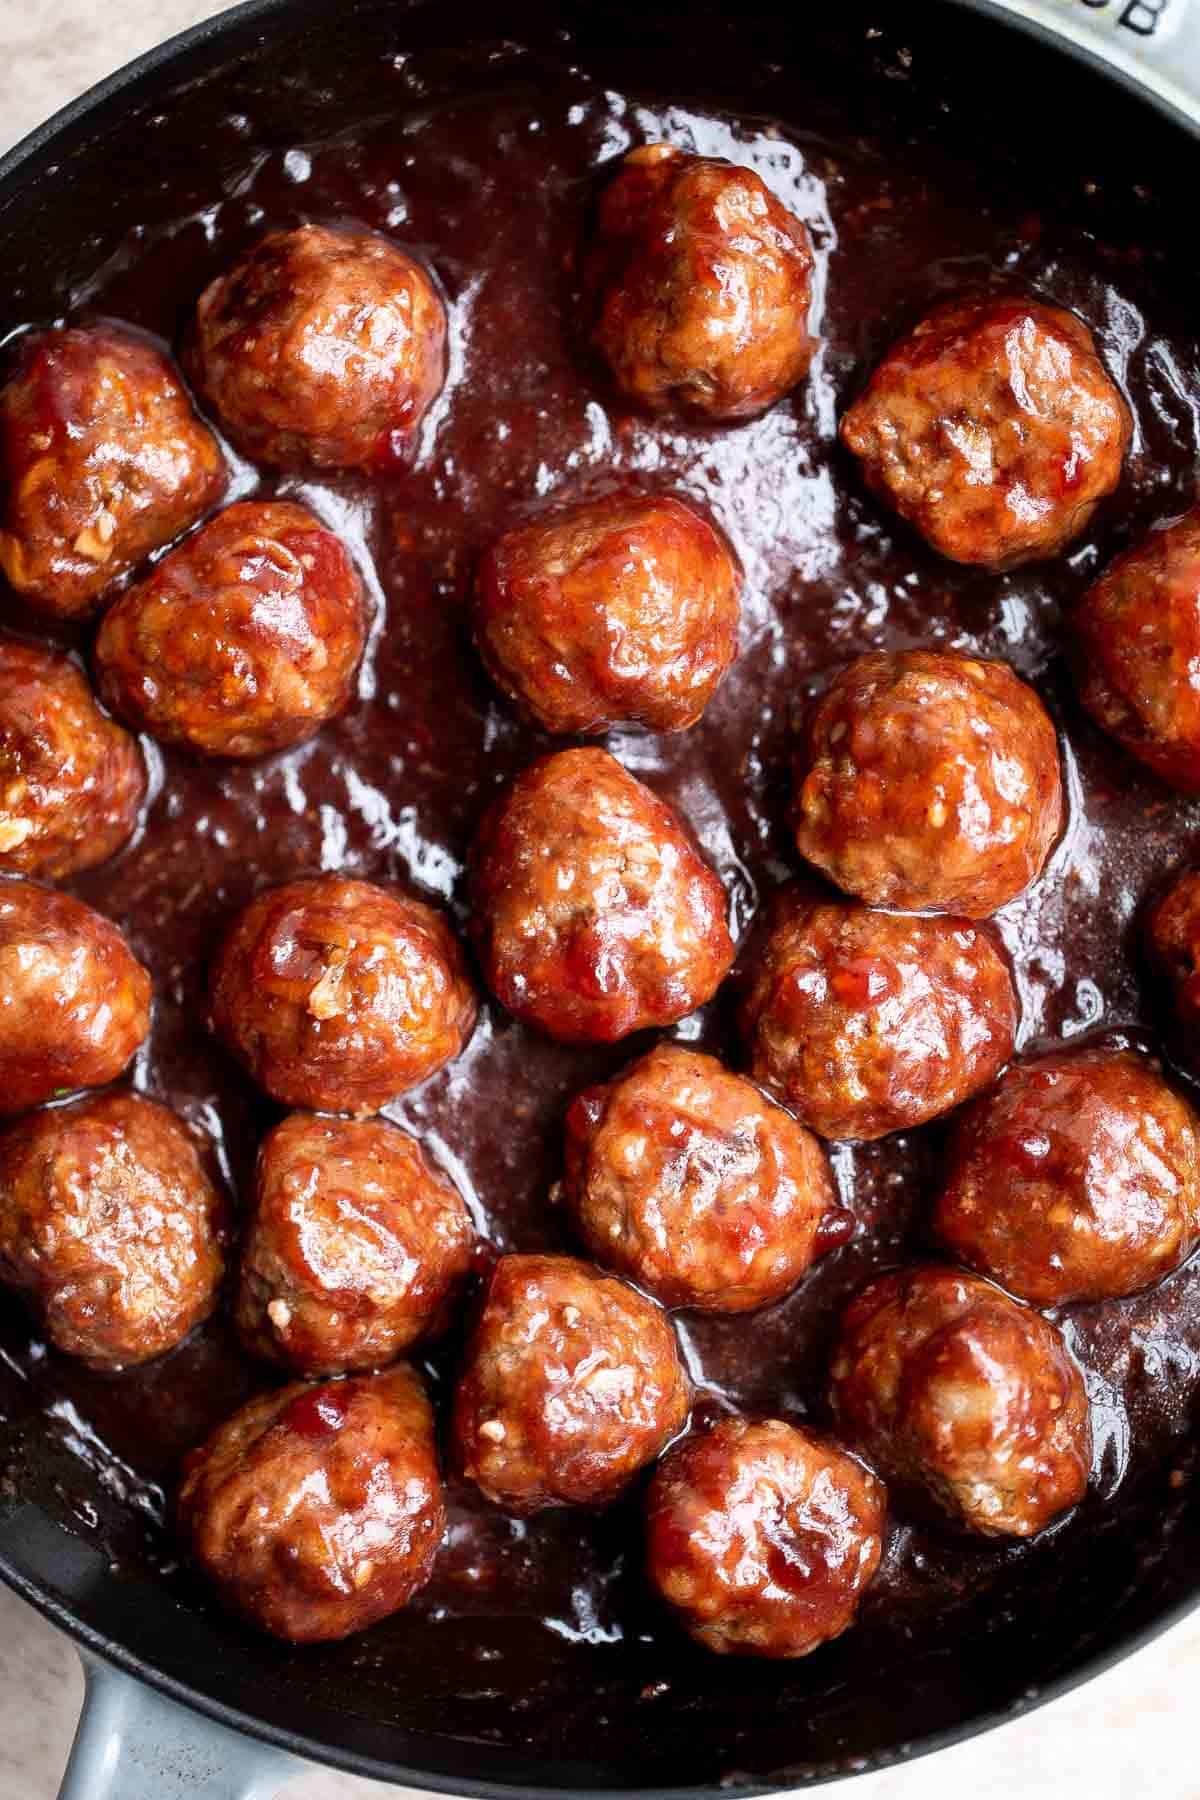
Zucchini fritters are crispy outside, tender inside, and loaded with zucchini. These healthy bites are one of my favorite ways to use up summer zucchini.
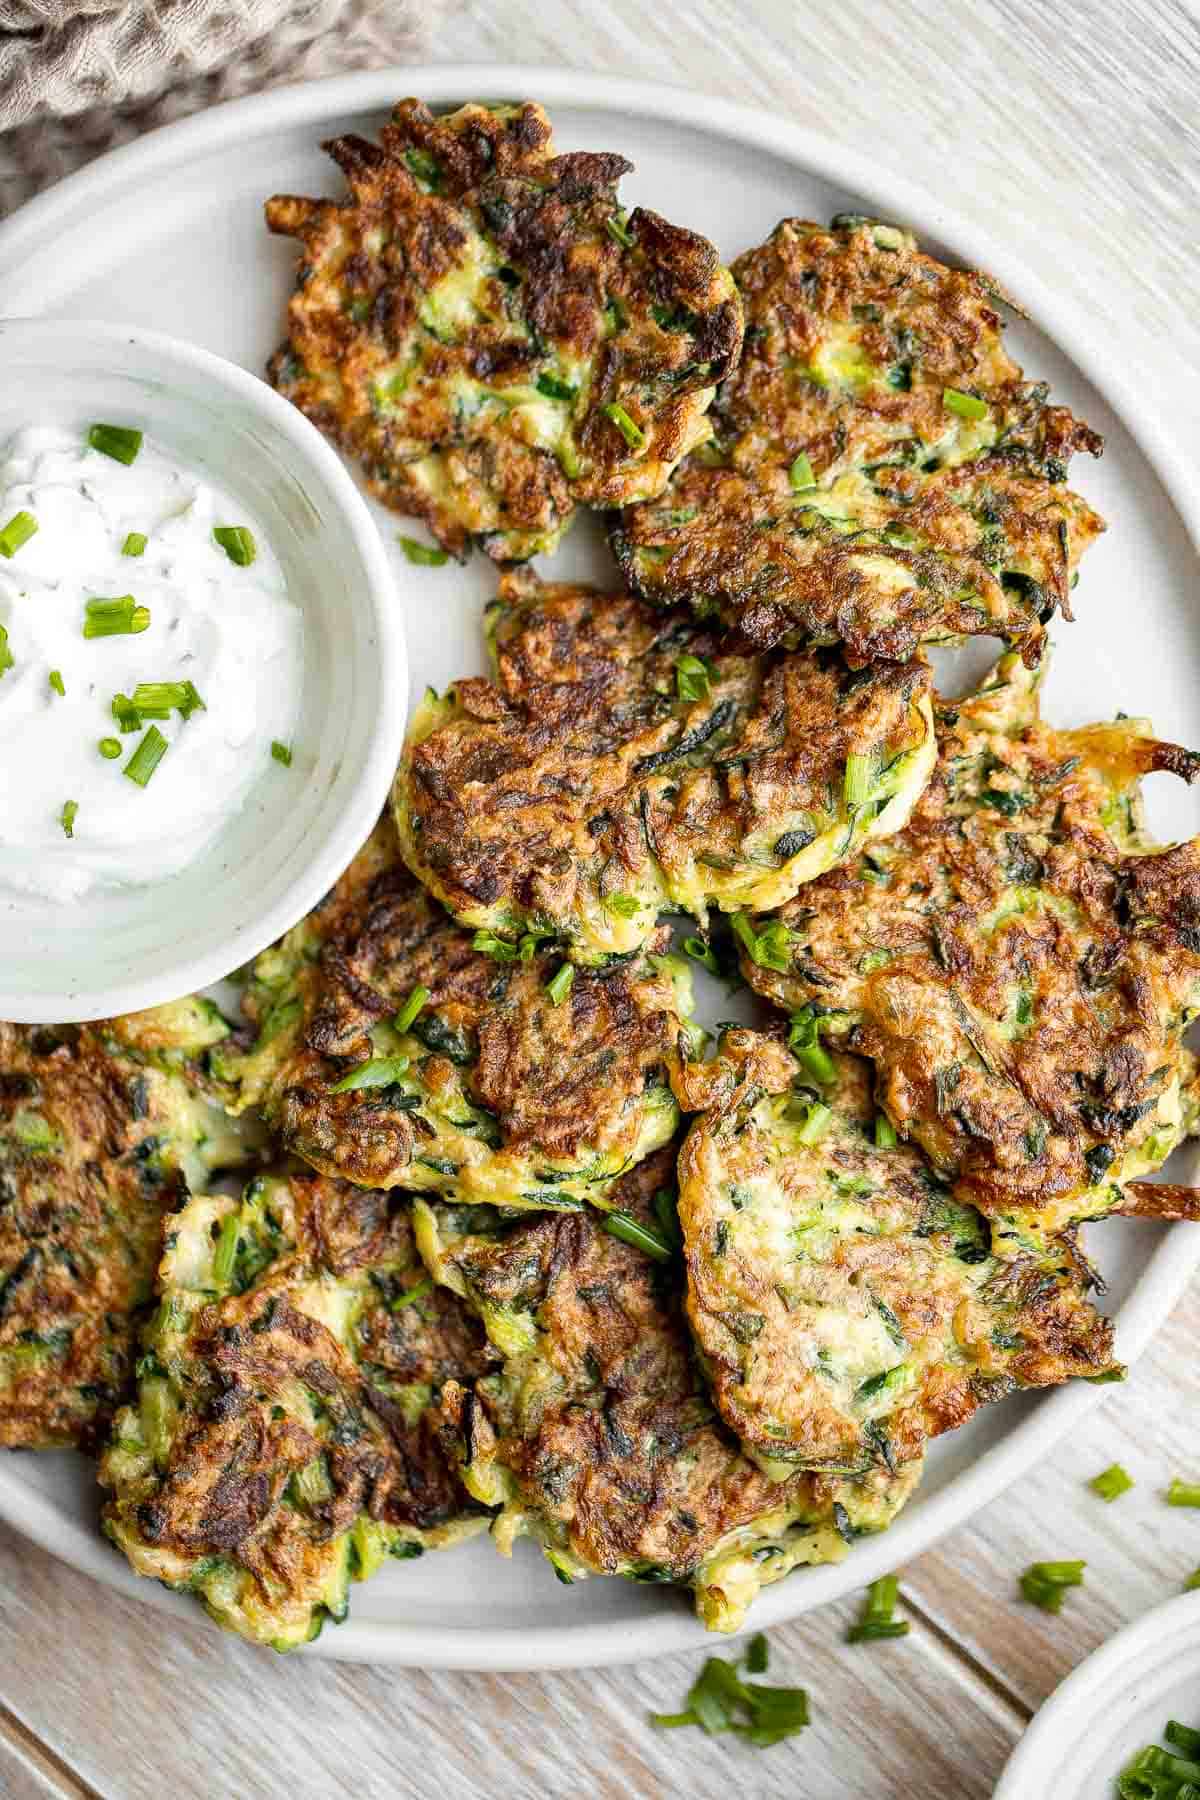
Sweet and sticky, baked BBQ chicken wings are perfectly crispy, so delicious, and smothered in barbecue sauce. They are the perfect party appetizer.
More Recipes
- 20 Best Dip Recipes
- 50 Best Healthy Snacks
- 50 Best Finger Foods
- 60+ Easy Dinner Ideas
- 50 Best Fall Desserts
Did You Make Any of These Easy Appetizer Recipes?
Please leave a comment and rating below, and let me know what you thought of this round up of easy appetizers. Be sure to snap a picture and tag me on Instagram @aheadofthyme or share it on the Pinterest pin so that I can follow along.
HUNGRY FOR MORE? Don't forget to sign up for my email newsletter so that you don't miss any recipes. You can also follow along on Instagram and Pinterest for more recipe updates.
Chocolate Thumbprint Cookies
Chocolate Thumbprint Cookies are rich and chewy chocolate cookies with a smooth and velvety chocolate ganache filling topped with crunchy pistachios. This twist on classic Jam Thumbprint Cookies is easy to make, absolutely delicious, and perfect for chocolate lovers!
These chocolate thumbprints are perfect to make during the holidays as part of a cookie exchange or holiday cookie box, but are the kind of cookie that you can bake any time of the year. Although they require some chilling time, you can serve these bakery-style two-bite cookies in just an hour and a half.
Why You'll Love these Chocolate Thumbprint Cookies
- Double chocolate flavor. A chocolate cookie dough base and chocolate ganache filling makes these chocolate thumbprints a doubly-decadent experience.
- Easy to make. These delicious chocolate thumbprints generally follow standard cookie-making procedure until it comes time to shape the dough when you'll create a shallow indentation in each cookie to fill with simple homemade chocolate ganache once they cool. The whole process takes an hour and a half (1 hour of which is chill time).
- Made with simple baking staples. If you are an avid baker, then you will likely have the ingredients called for in this recipe. These cookies are made with typical chocolate cookie ingredients like flour, sugar, cocoa powder, and butter.
- Classic Christmastime treat. Thumbprint cookies are a time-tested traditional holiday dessert all over the world - along with classic like Peanut Butter Blossoms, Chocolate Crinkle Cookies, Italian Christmas Cookies, and Ginger Cookies.
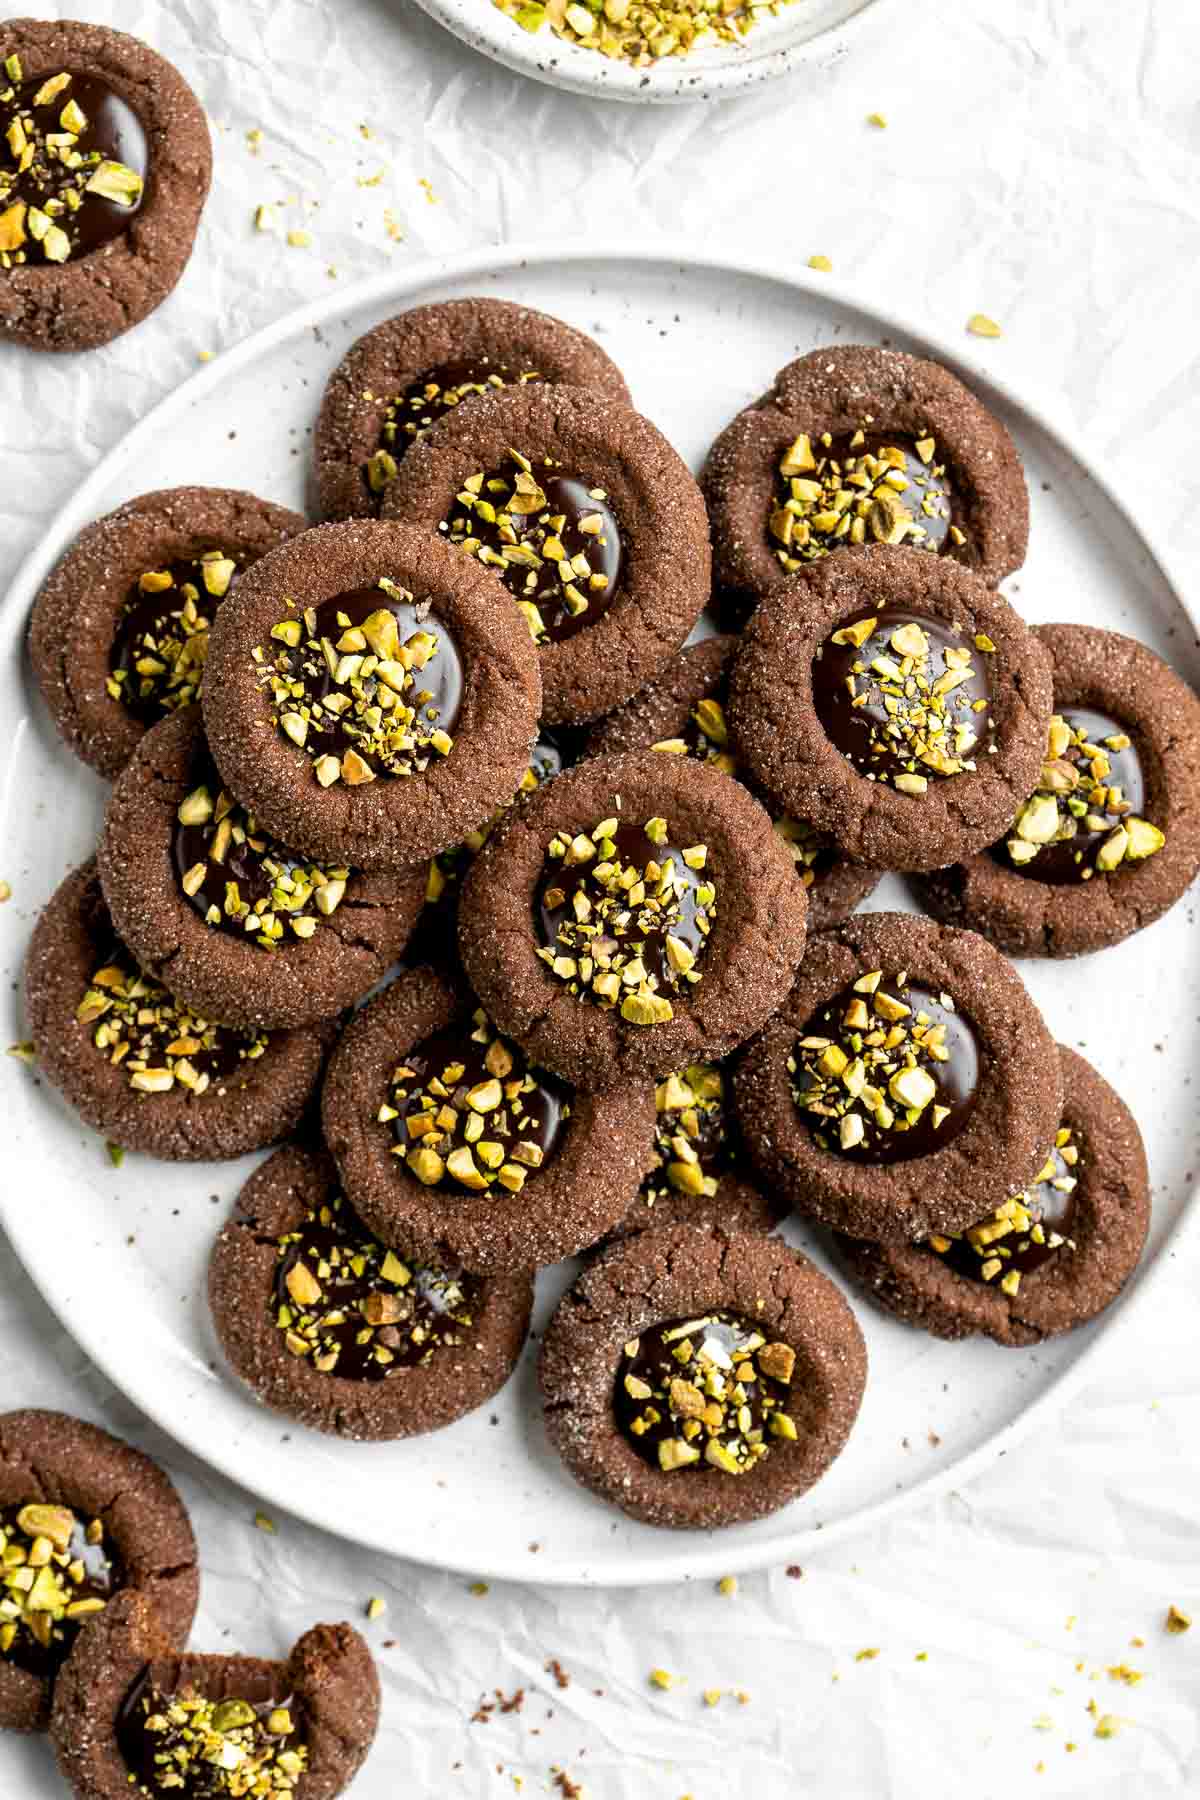
Ingredient Notes
To make these delicious Chocolate Thumbprint Cookies, you will need the following ingredients (full measurements in recipe card below):
- flour - you can also try a measure-for-measure gluten free flour to make these more friendly to people with gluten sensitivity.
- cocoa powder - use unsweetened cocoa powder to control the sweetness of the cookies.
- baking powder
- salt
- butter - use unsalted butter to control the flavor of the cookies. If you need to use salted butter, omit the salt called for in this recipe.
- light brown sugar - you can use an equal amount of dark brown sugar instead for more molasses flavor.
- white sugar - use your preferred granulated sugar (like cane sugar, date sugar, or coconut sugar), or use a sugar-free substitute like stevia or monk fruit.
- egg - set the eggs out ahead of time or place them in a bowl of warm water for a few minutes to bring them up to room temperature.
- vanilla extract - you can use an equal amount of vanilla bean paste for a richer vanilla flavor, or try a different extract flavor such as almond extract or peppermint extract.
- semi-sweet chocolate - you can substitute with other chocolates such as milk, white, or dark chocolate. Note that milk and white chocolate add a lot of sweetness, so it will make the cookies sweeter.
- heavy whipping cream - you could subsitute this with whole milk, but it will change the texture of the ganache slightly and make it more soft (wont set as easily).
- chopped pistachios - you can substitute pistachios with your favorite nuts such as chopped walnuts, almonds, or pecans.

Baking Tools and Equipment
You will also need the following baking tools and equipment:
- measuring cups and spoons
- mixing bowls
- hand mixer
- cookie scoop
- half sheet baking pan and silicone baking mat (or parchment paper)
- wire cooling rack
How to Make the Best Chocolate Thumbprint Cookies
- Combine dry ingredients. In a medium mixing bowl, whisk together flour, cocoa powder, baking powder, and salt. Set aside.

- Combine wet ingredients. Use a stand mixer (or hand mixer) and cream the butter and sugars together in a mixing bowl on medium speed until light and fluffy, about 2-3 minutes. Add egg and vanilla and continue to beat on medium until fully incorporated.
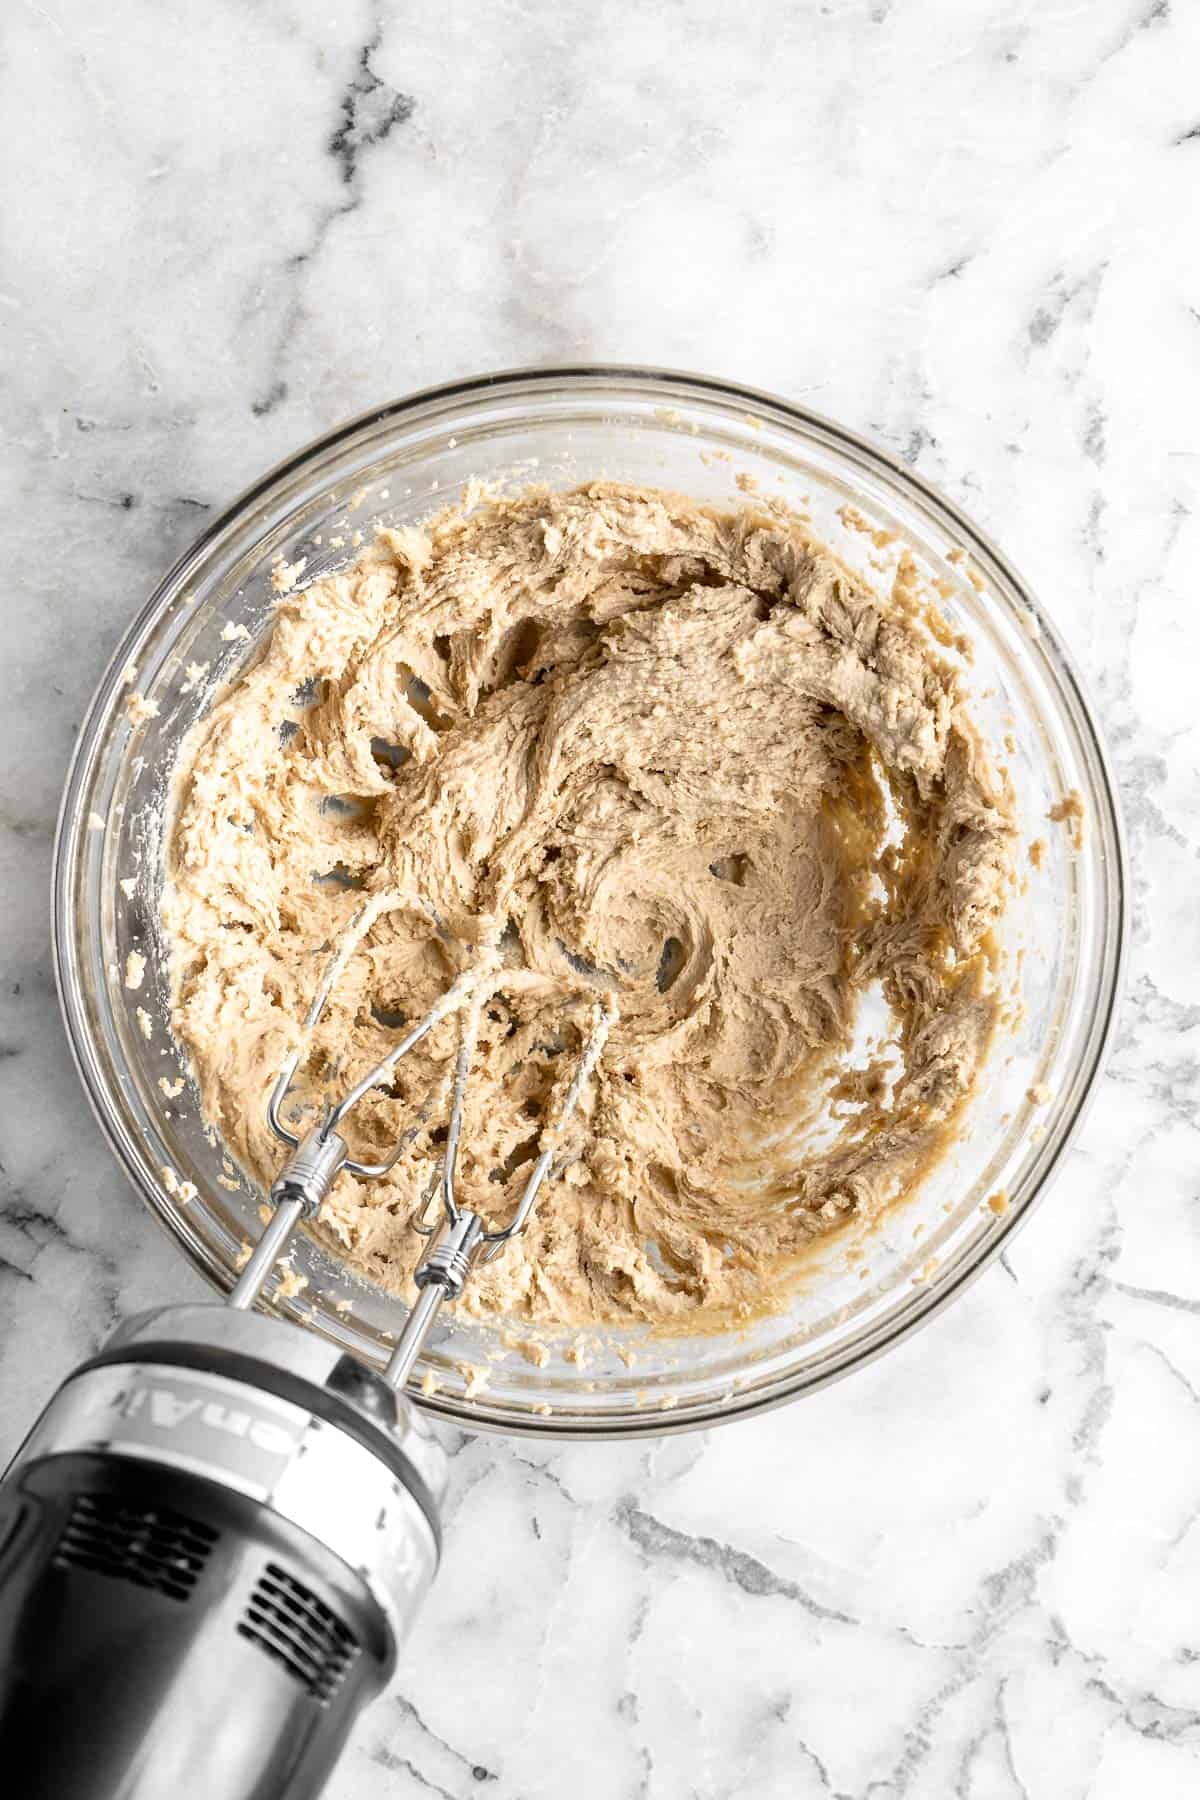

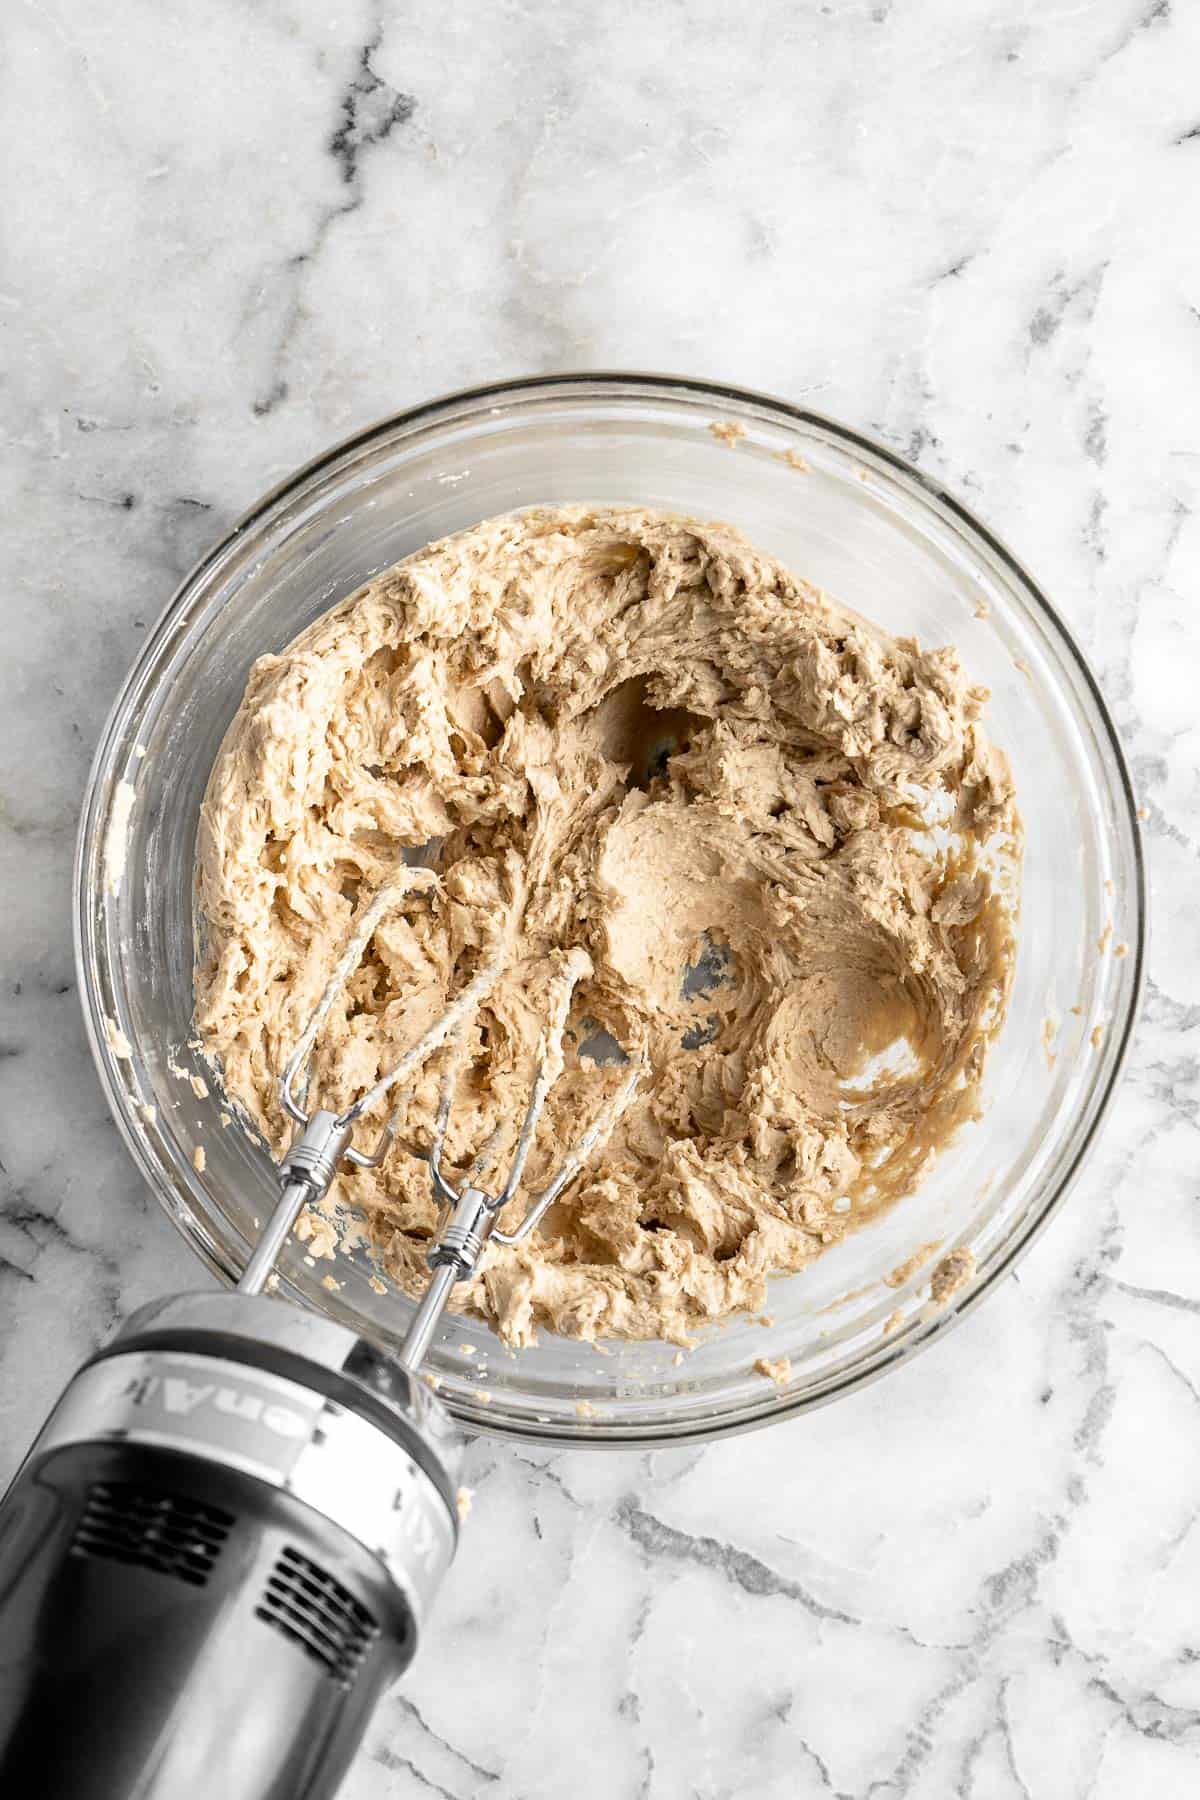
- Add dry ingredients to wet ingredients. Gradually add the dry ingredients until just combined.
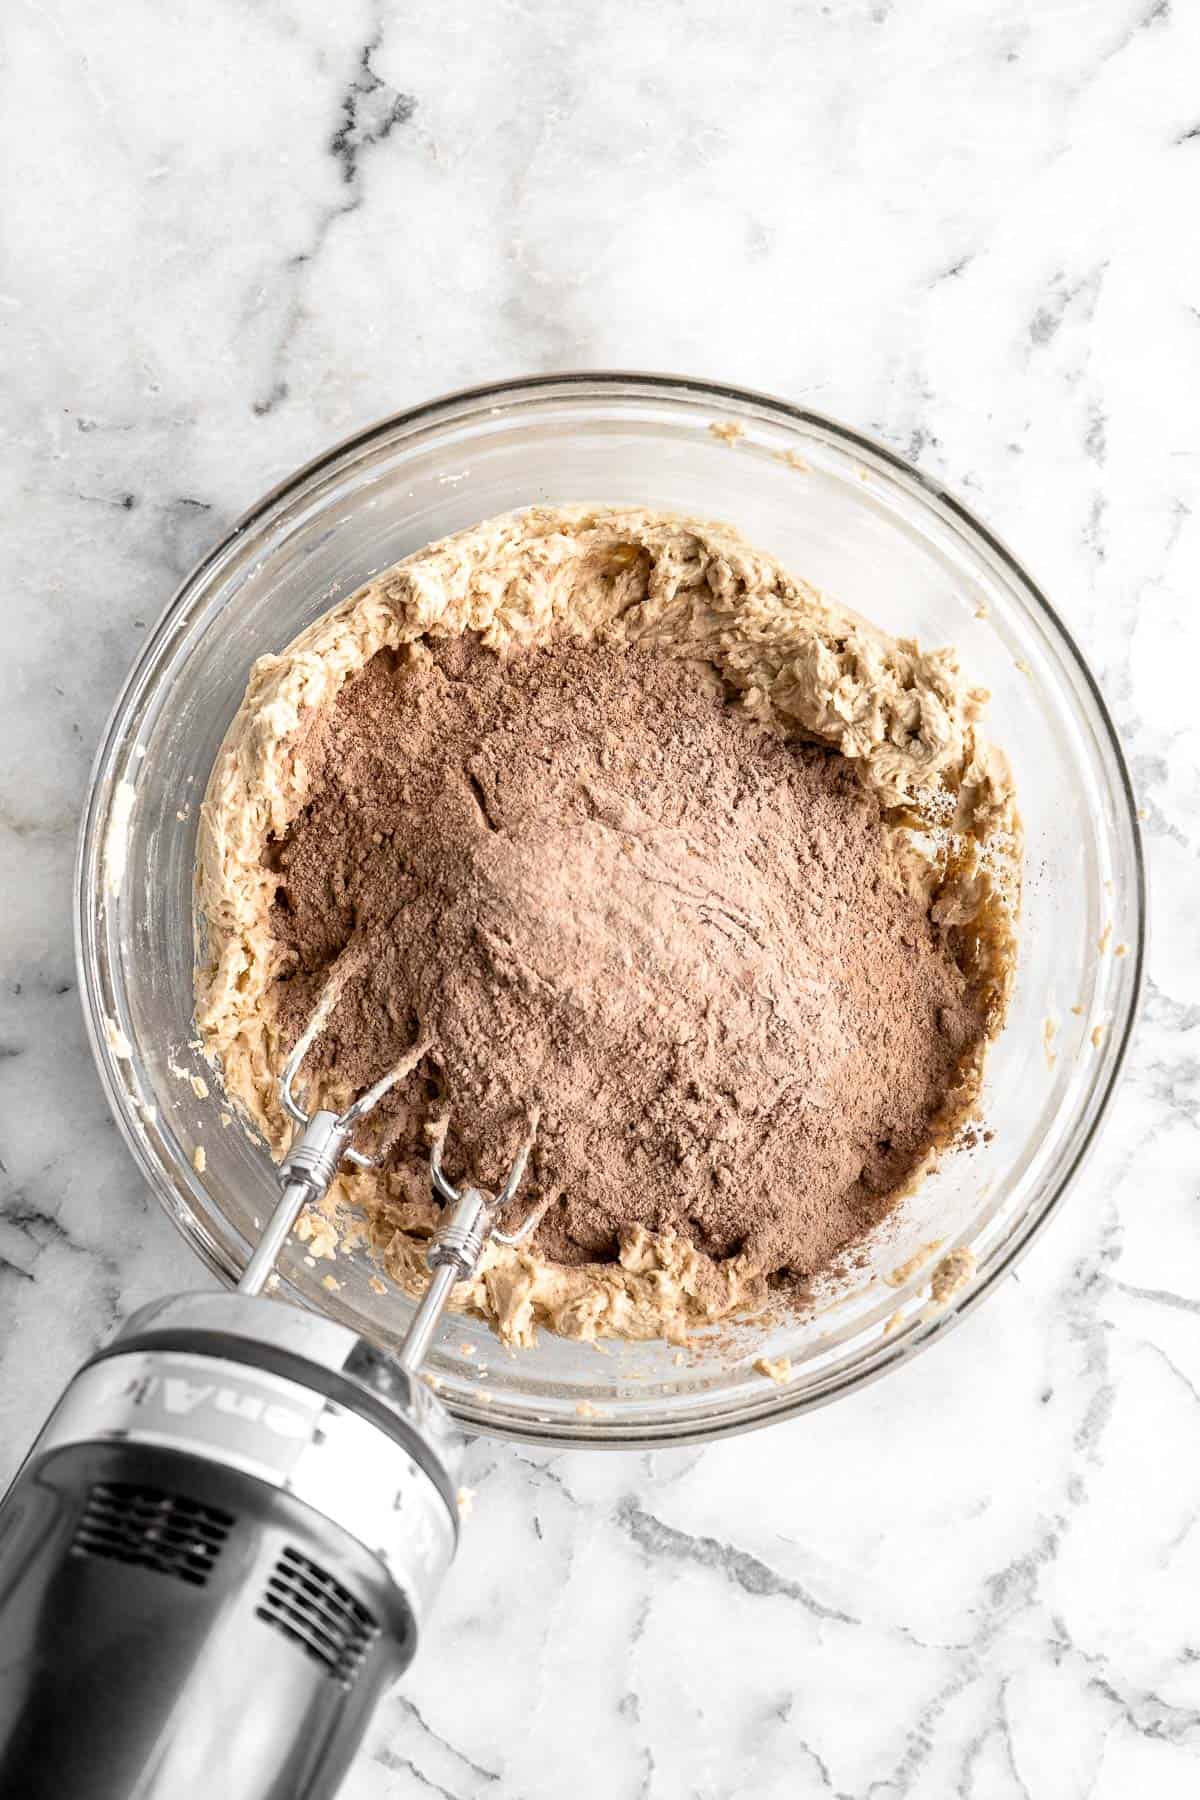
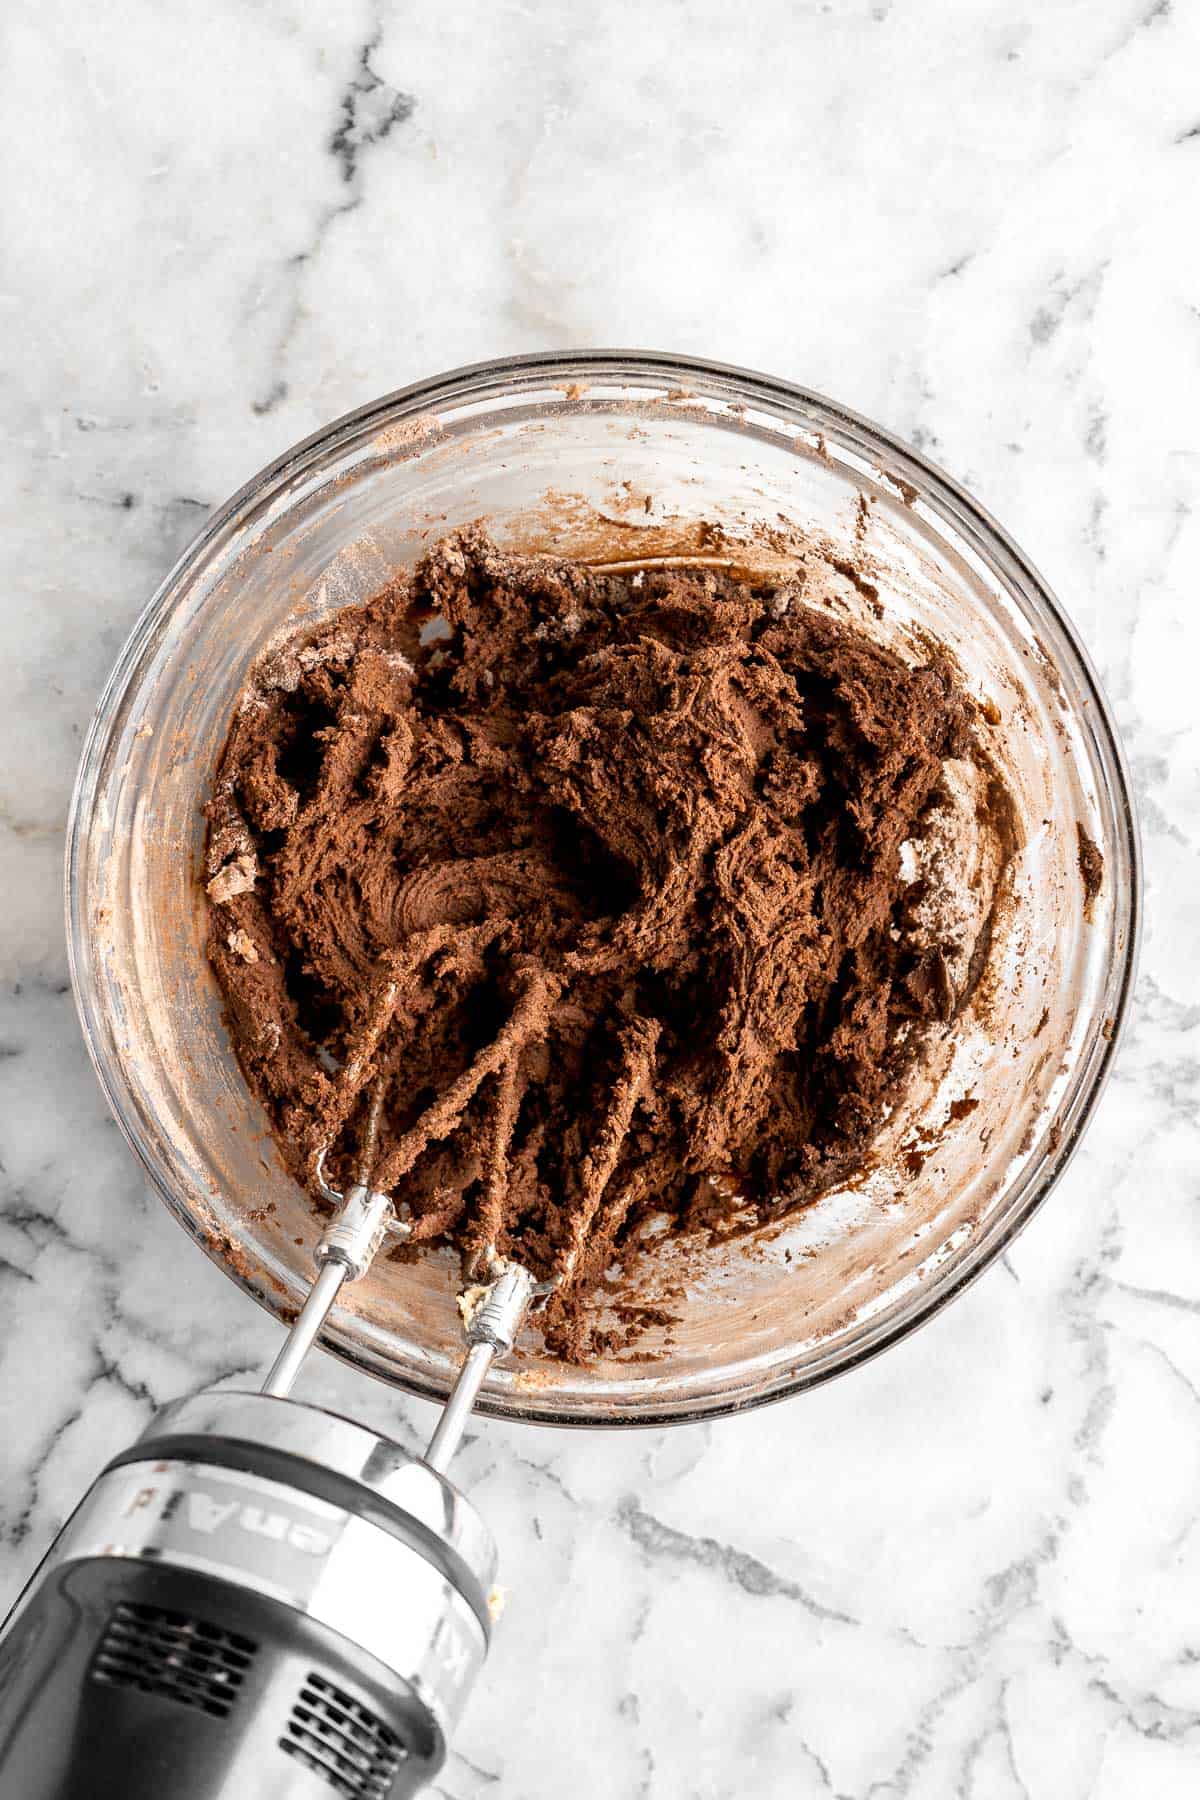
- Roll cookies and coat. Place granulated sugar for rolling into a shallow bowl. Take 1 tablespoon of dough at a time and roll into 1-inch balls. Roll into the sugar to coat.
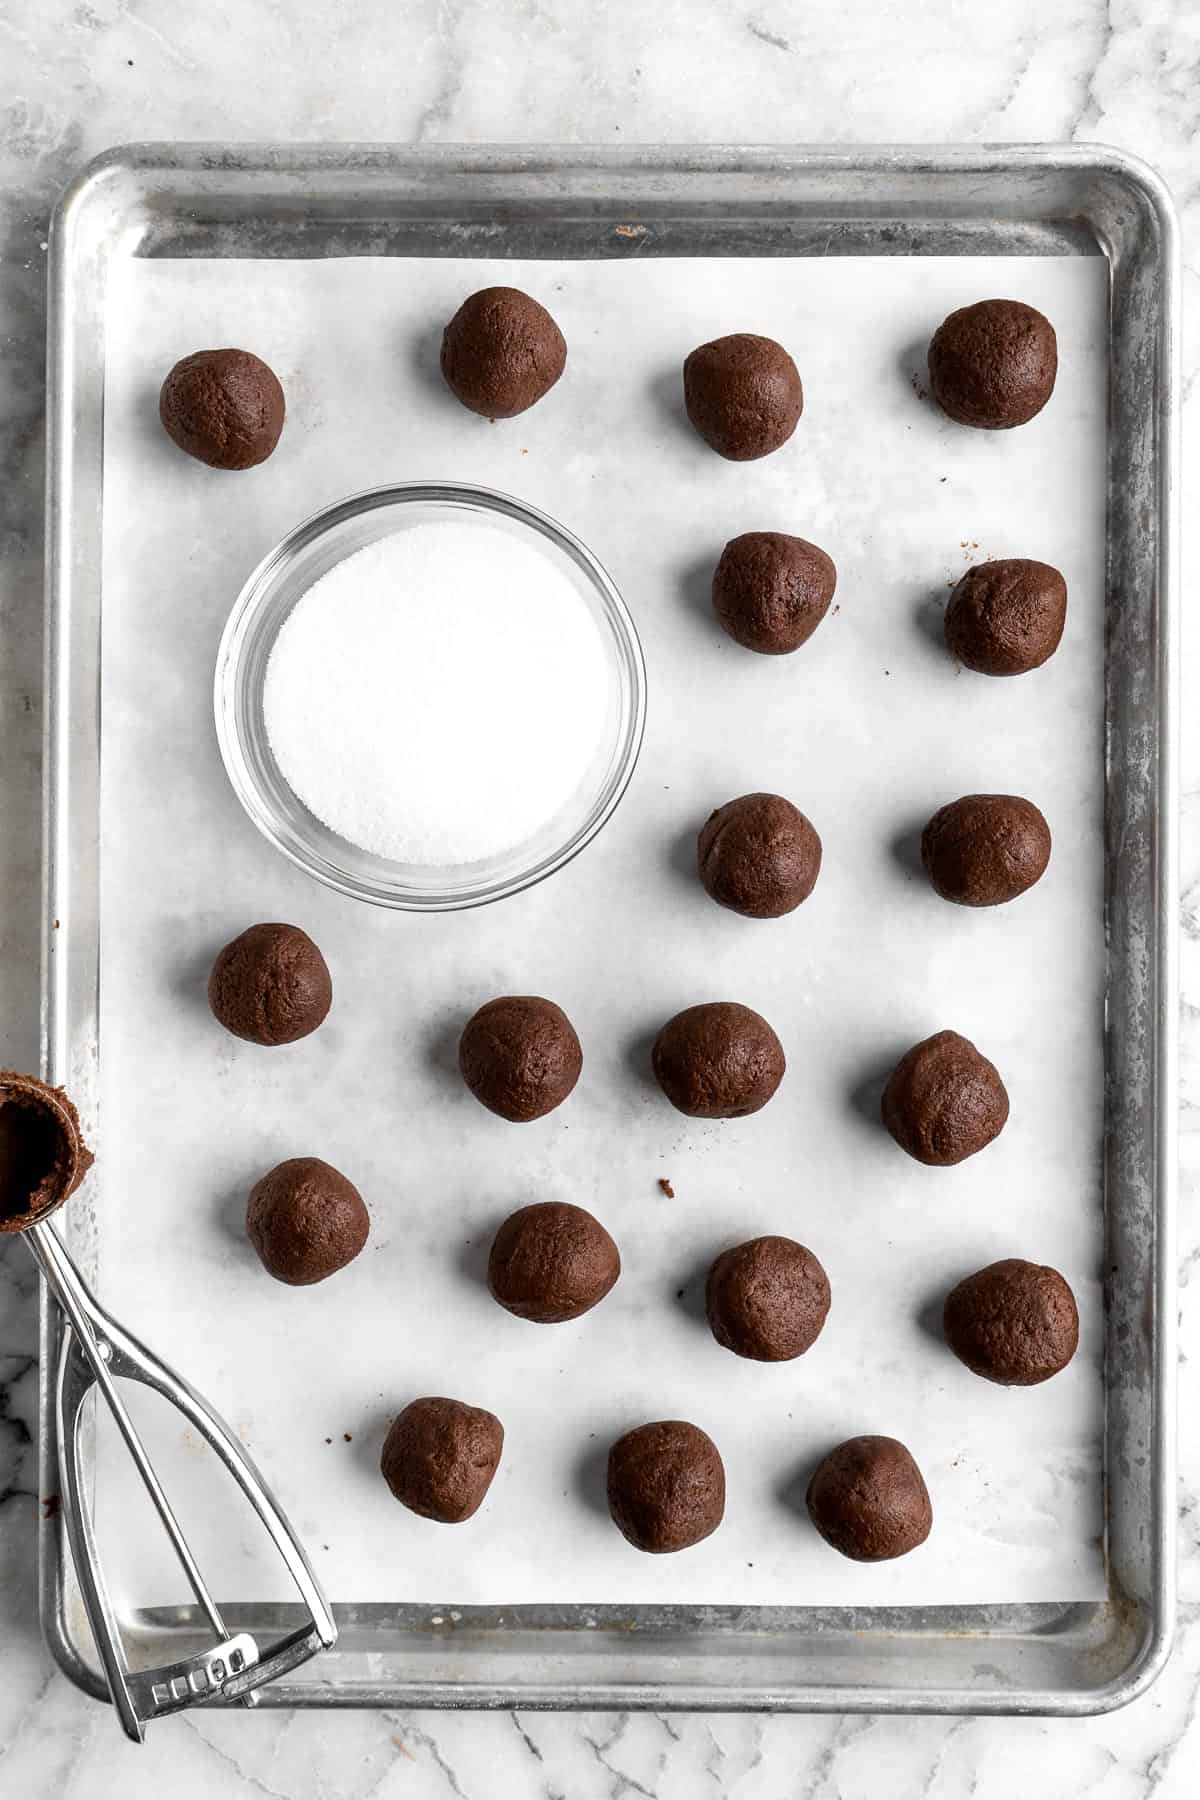
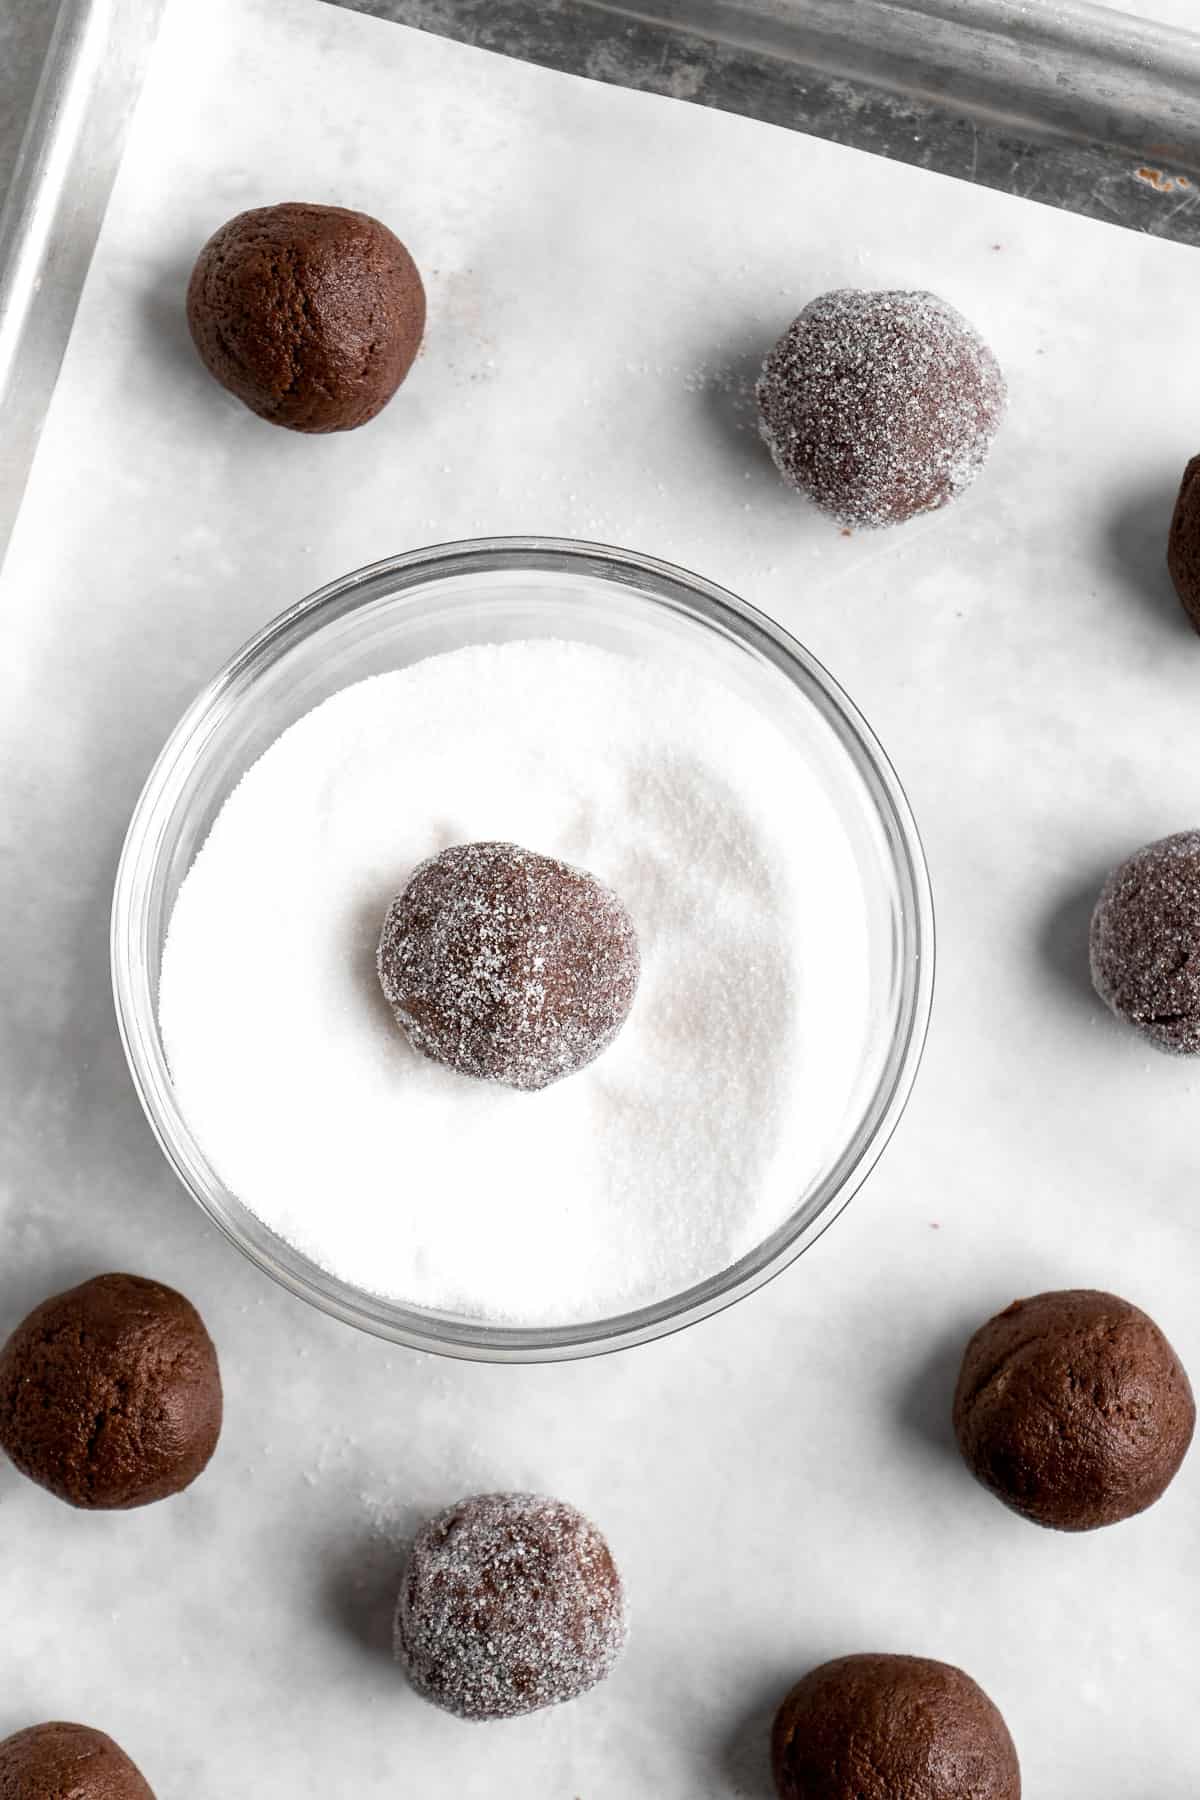
- Make indentations. Make an indentation with your thumb (or the back of a small spoon or melon baller) into the centre of each ball.
- Chill. Place cookies on a silpat or parchment-lined half sheet baking pan, spaced 2 inches apart. Transfer the baking sheet to the refrigerator and chill the cookies for 1 hour (or place in the freezer for 30 minutes).
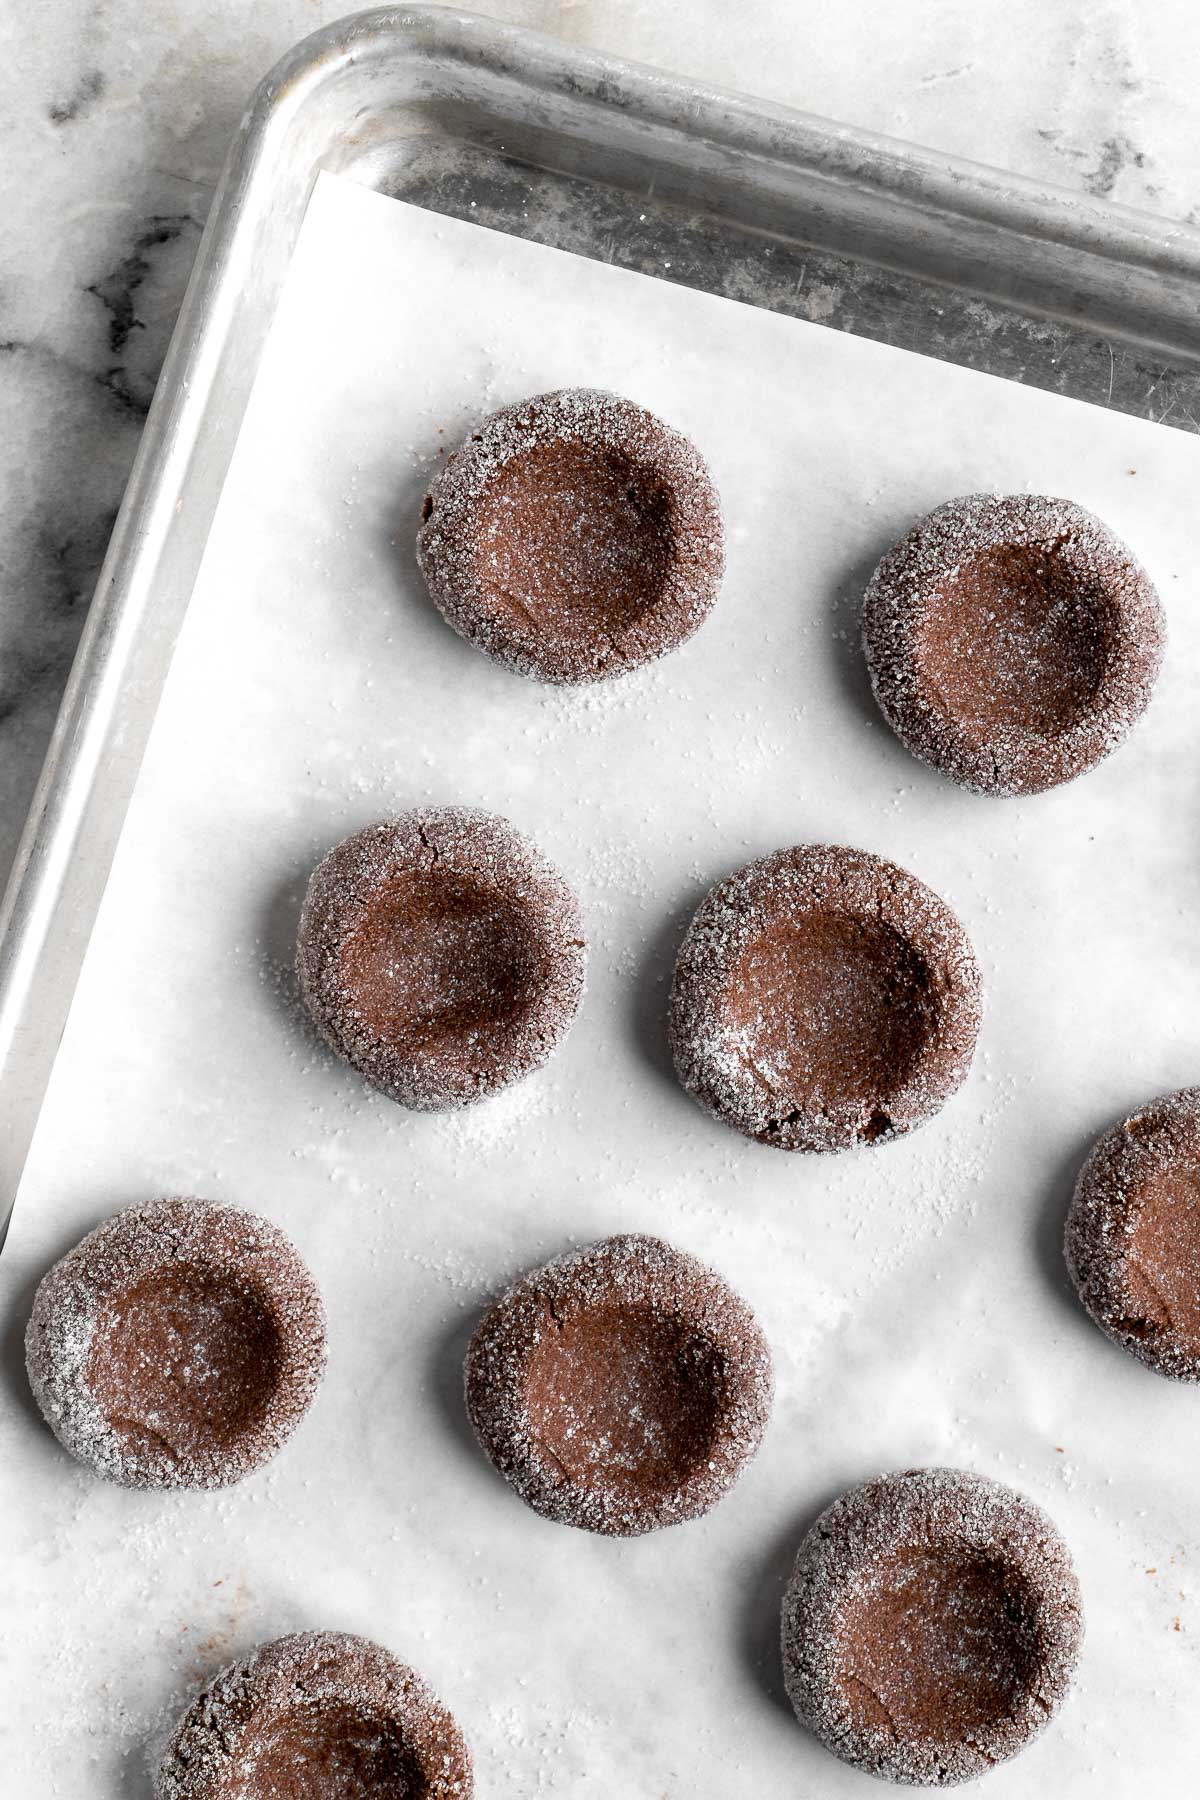
- Bake. Bake the cookies in a 350F preheated oven for 10-13 minutes until the edges are set. If the indentations have started to close, use the back of a spoon or melon baller to carefully make the indentation bigger again, while the cookies are still hot.
- Cool. Allow the cookies to cool on the baking sheet for 5 minutes, then carefully transfer to a wire cooling rack to cool completely.
How to Make Chocolate Ganache
- Prep chocolate. Place chopped chocolate into a medium mixing bowl.
- Heat cream. Heat the heavy cream in a small saucepan until it begins to simmer. Immediately remove from heat before it begins to boil.
- Add cream to chocolate. Pour hot cream over top of the chopped chocolate and let it sit for 5 minutes to allow it to soften the chocolate. Then, use a spoon to slowly stir until completely combined.
- Cool. Allow the ganache to cool down and thicken uncovered for 10-20 minutes.
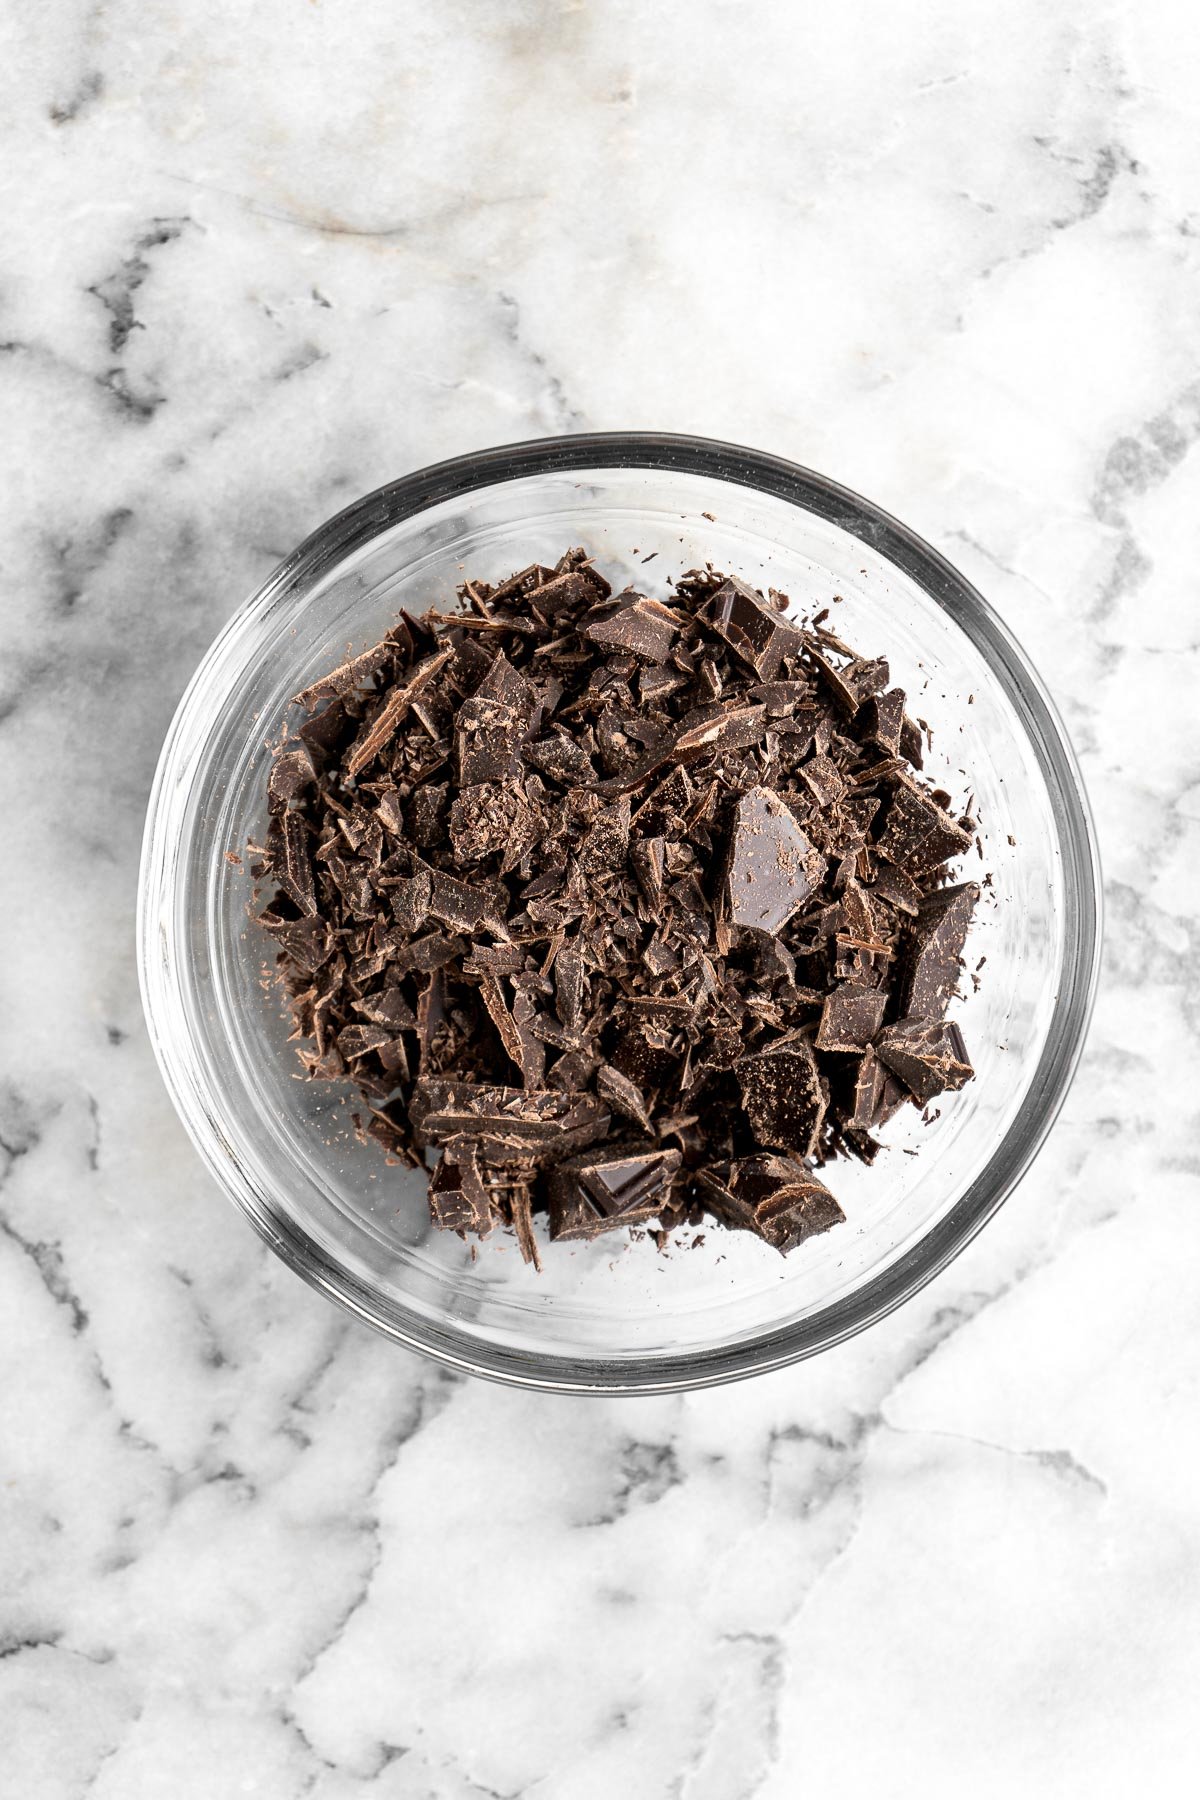


How to Assemble Thumbprint Cookies
- Use a small spoon to scoop just under a teaspoon of the ganache into each indentation.
- Sprinkle crushed pistachios on top of the ganache.
- Allow the ganache to set completely (about 1 hour or faster in the refrigerator) before storing the cookie to avoid smudging.
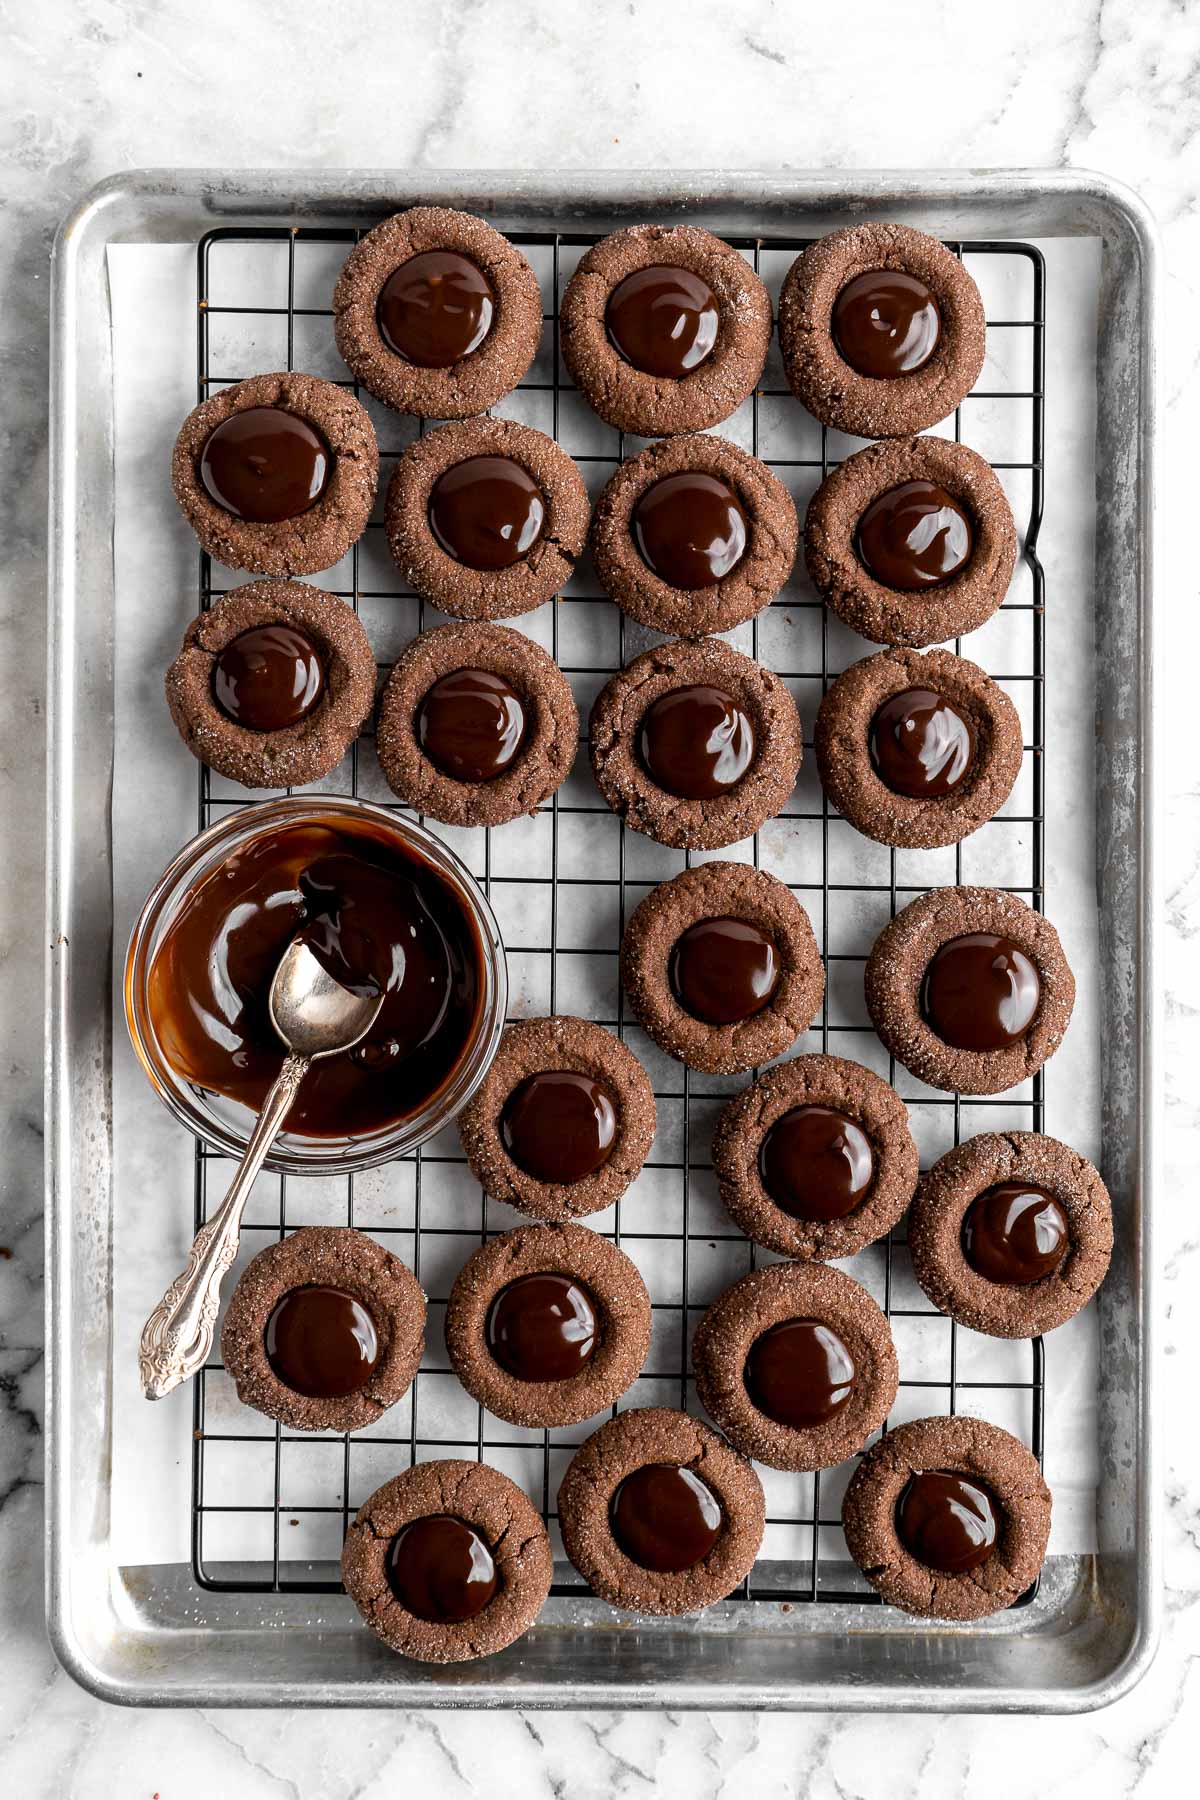
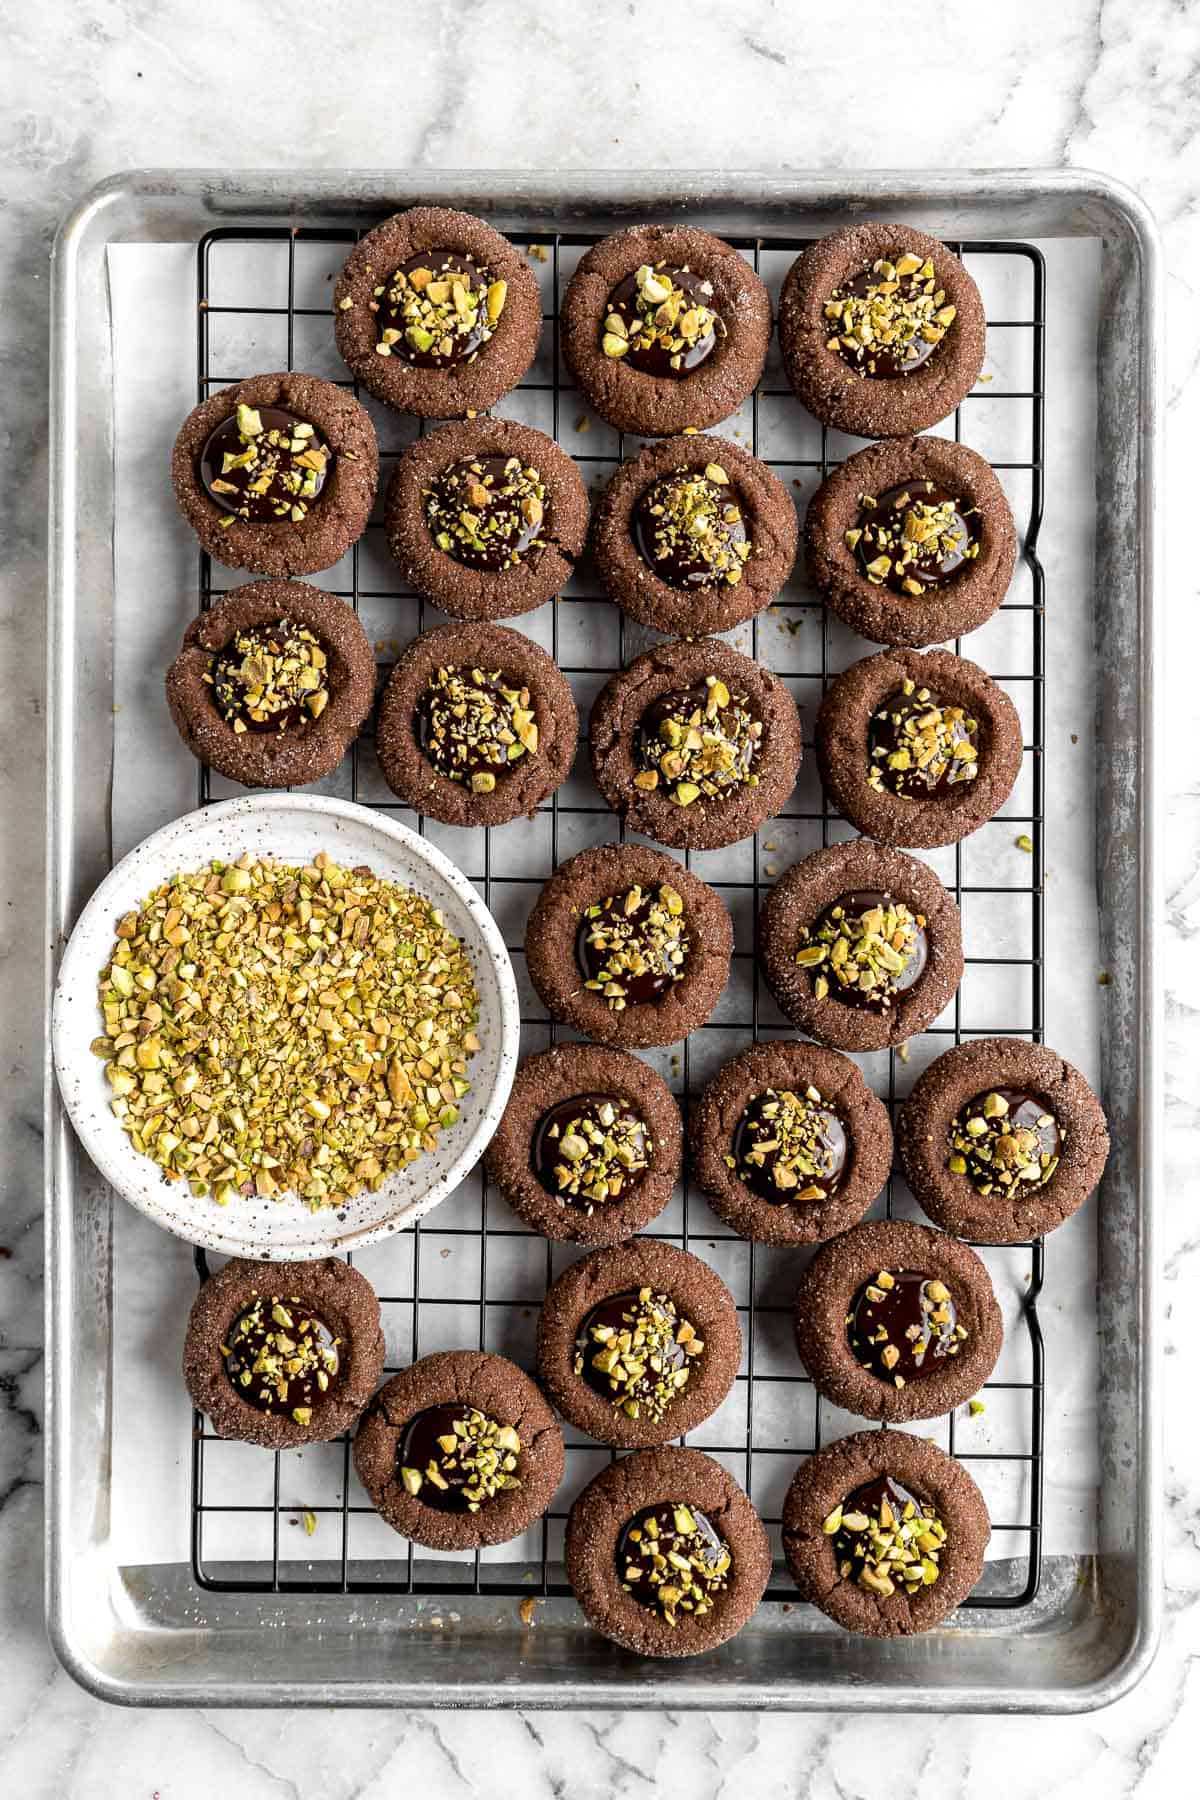
Thumbprint Cookie Variations
- Drizzle chocolate. Want to up the chocolate factor? Drizzle a little melted chocolate over the top of the thumbprint cookies.
- Use different nuts. Substitute the pistachios with chopped pecans, almonds, or walnuts.
- Fill with caramel. Instead of a chocolate ganache filling, fill these thumbprint cookies with Salted Caramel Sauce.
- Add sprinkles. Instead of adding pistachios on top, add sprinkles instead. Then you can customize these cookies based on the holiday that you are making them for. Use red and green sprinkles for Christmas, red and pink for Valentine's Day, and so on.

Recipe Tips and Tricks
- Make sure the dough is completely smooth before pressing it. Many people find that the cookie dough cracks when it's pressed down. To prevent this, take the time to really work and smooth each dough ball before applying pressure.
- Freeze before mailing them out. These are a popular type of cookie to send to family during the holidays, but there's a trick to making sure they arrive intact and unmelted: freeze them right up until you're ready to ship them. They will slowly thaw in transit and be ready to eat (depending on the distance) when they arrive!
- Get the kids involved! This recipe is very kid-friendly. Children can help with making and shaping the dough (many of us have childhood memories of pressing our thumbs in cookie dough to make the indentations), as well as adding the chocolate ganache filling.
Storing and Freezing Instructions
How to Store
Store chocolate thumbprint cookies in a single layer in an airtight container. Store in a cool, dry place for up to 4 days (the kitchen counter is usually fine). You can store them longer in the refrigerator, about 10 days.
How to Freeze
Freeze thumbprint cookies uncovered on a parchment lined baking sheet for 1-2 hours until the cookies are completely solid. Then, transfer to an airtight container between layers of parchment paper. Store in the freezer for up to 3 months.
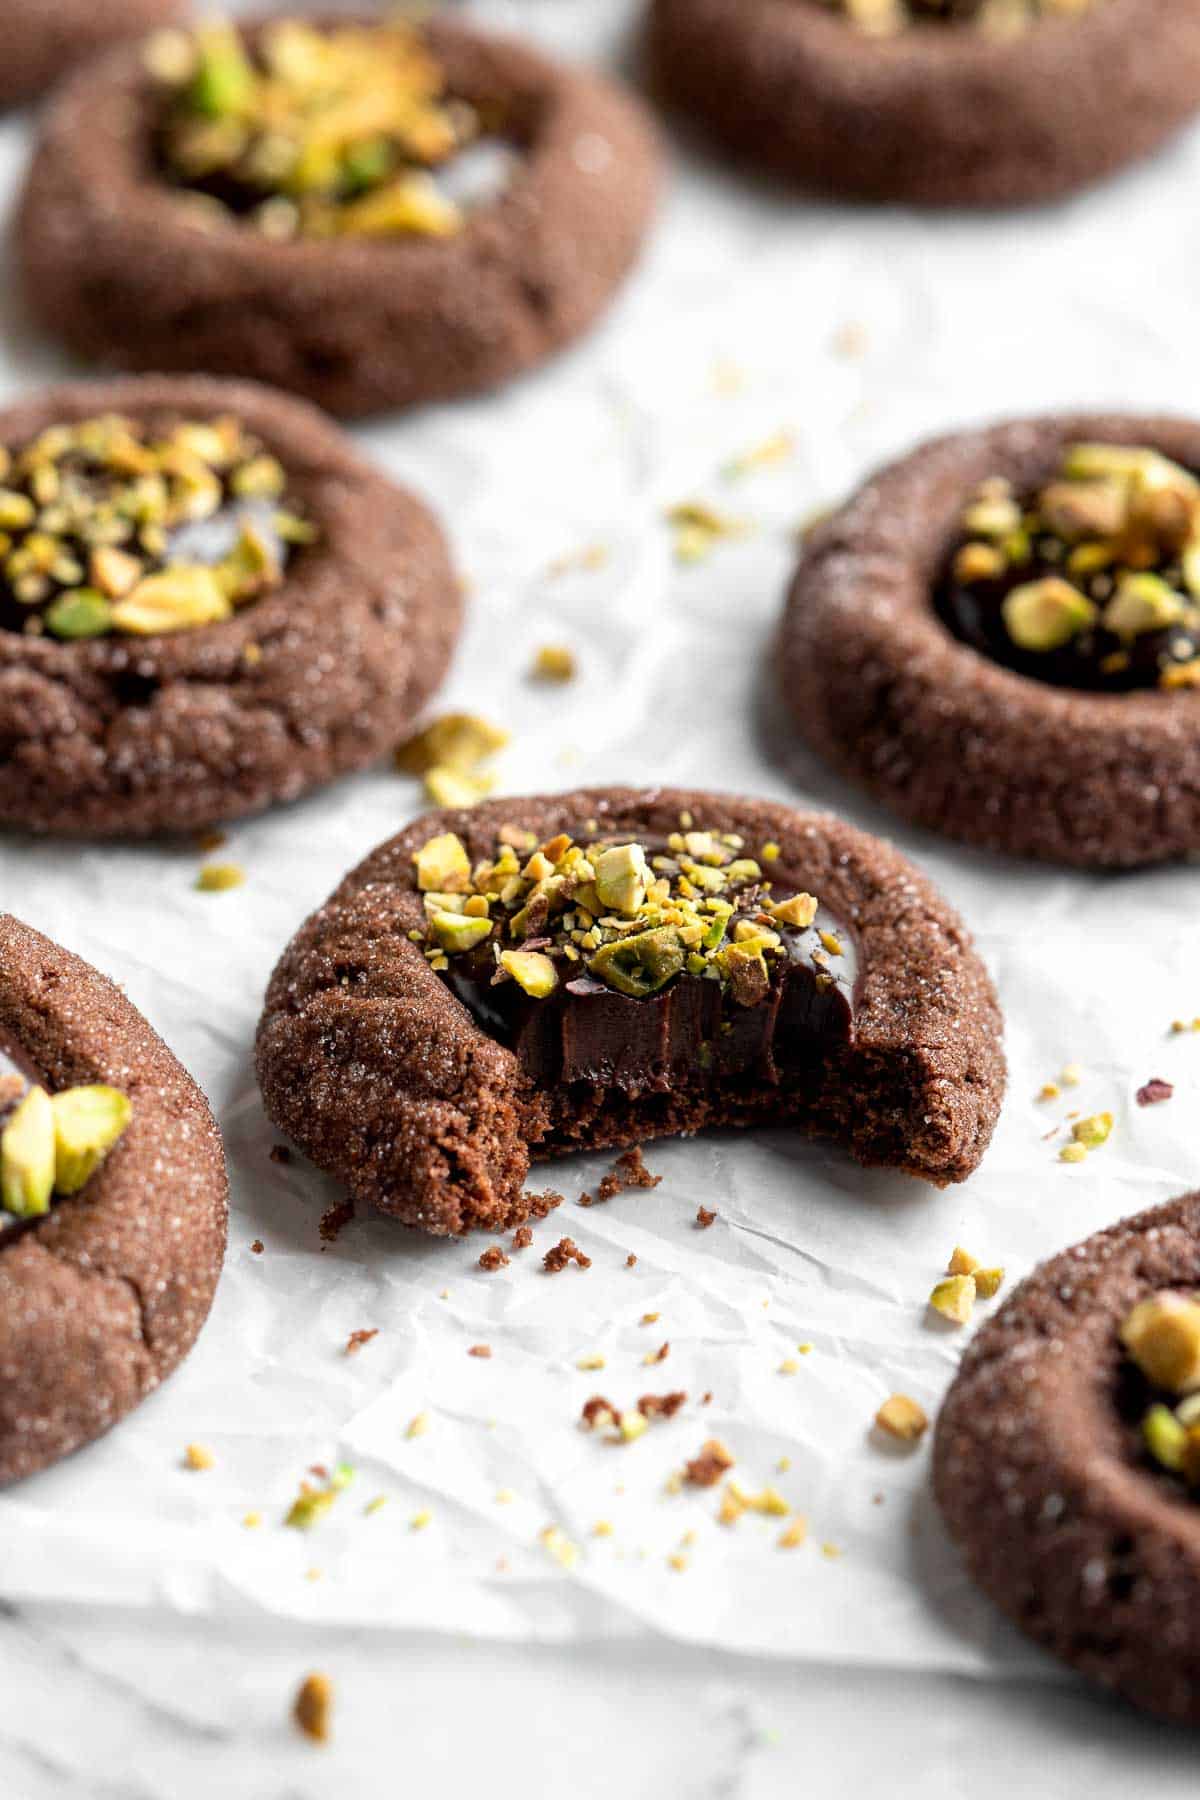
More Cookie Recipes
- 50 Best Cookie Recipes
- Jam Thumbprint Cookies
- Chocolate Shortbread Cookies
- Oreo Truffles
- Hot Chocolate Cookies
- Double Chocolate Chip Cookies
Tried this recipe?
I'd love to hear what you think! Leave a comment and rating below to share your feedback. Your reviews help others discover this recipe and help me keep creating more free recipes for you. Snap a photo and tag me on social media @aheadofthyme too.

Prime Rib Roast
This Prime Rib Roast is a tender and juicy cut of beef marbled with fat. It is incredibly flavorful, delicious, and so good. It is smothered with a few simple ingredients including garlic and herbs that pack on the flavor and served with a homemade chimichurri sauce. This feast is perfect for Chrismas dinner, special occasions, or date night.
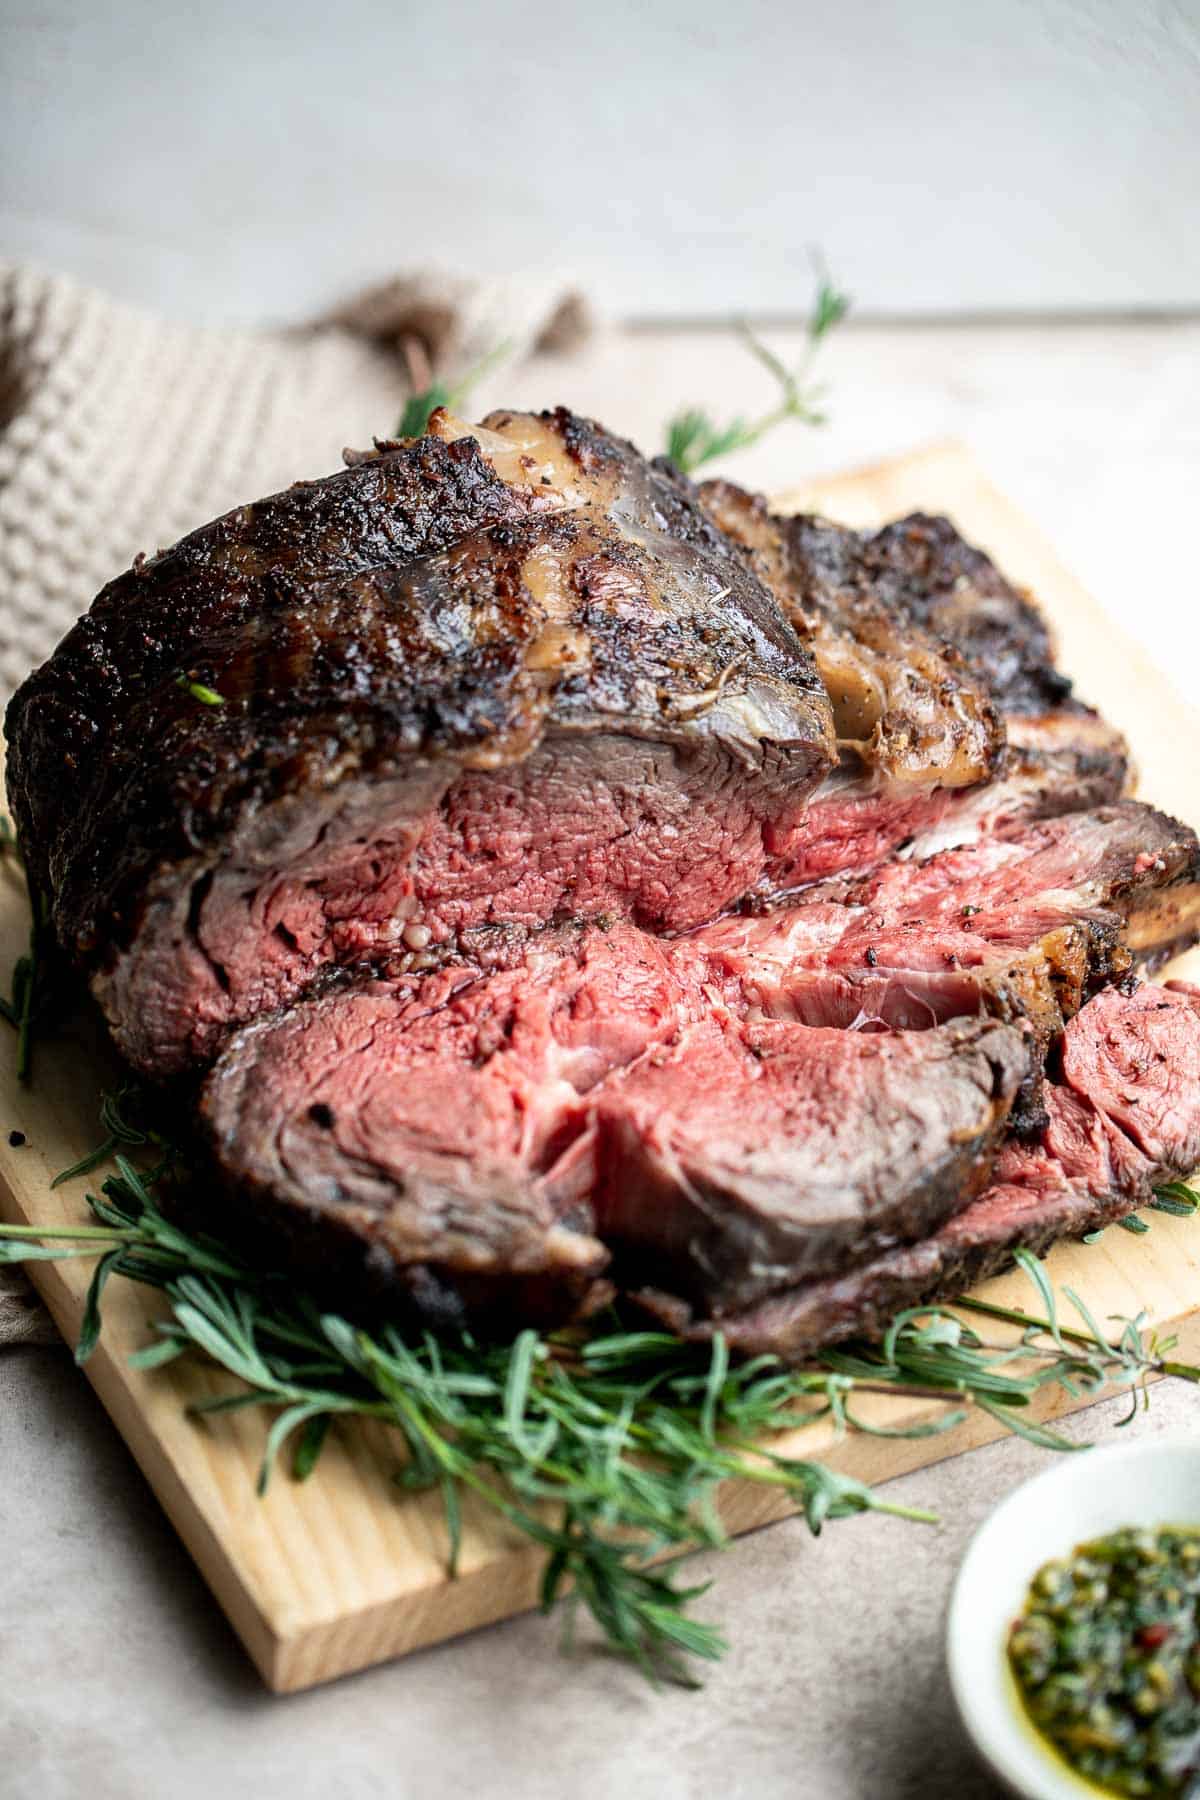
If the flavor isn't enough to impress you, the short prep time will! It only takes a few minutes to get the standing rib roast ready to roast so you can go about your day and check on it periodically, though the scent of garlic and herbs will make your mouth water long before the roast is ready to eat.
Why You'll Love this Prime Rib Roast
- Perfect holiday main for Christmas dinner. This standing rib roast recipe delivers a lot of flavor without a lot of work. You can get the rib roast ready for the oven in as little as 5 minutes before roasting it and moving on to preparing the sides. It's perfect for Christmas but also great for fancy family dinners.
- Delicious flavor with simple ingredients. The simple ingredients used to flavor this prime rib roast perfectly compliment this cut. All you need is some oil, garlic, and dried herbs to bring out the natural flavors of this tender cut of beef.
- Homemade chimichurri sauce. The finishing touch on this dish is the homemade chimichurri sauce which only consists of olive oil, parsley, garlic, lemon juice, salt, and pepper.
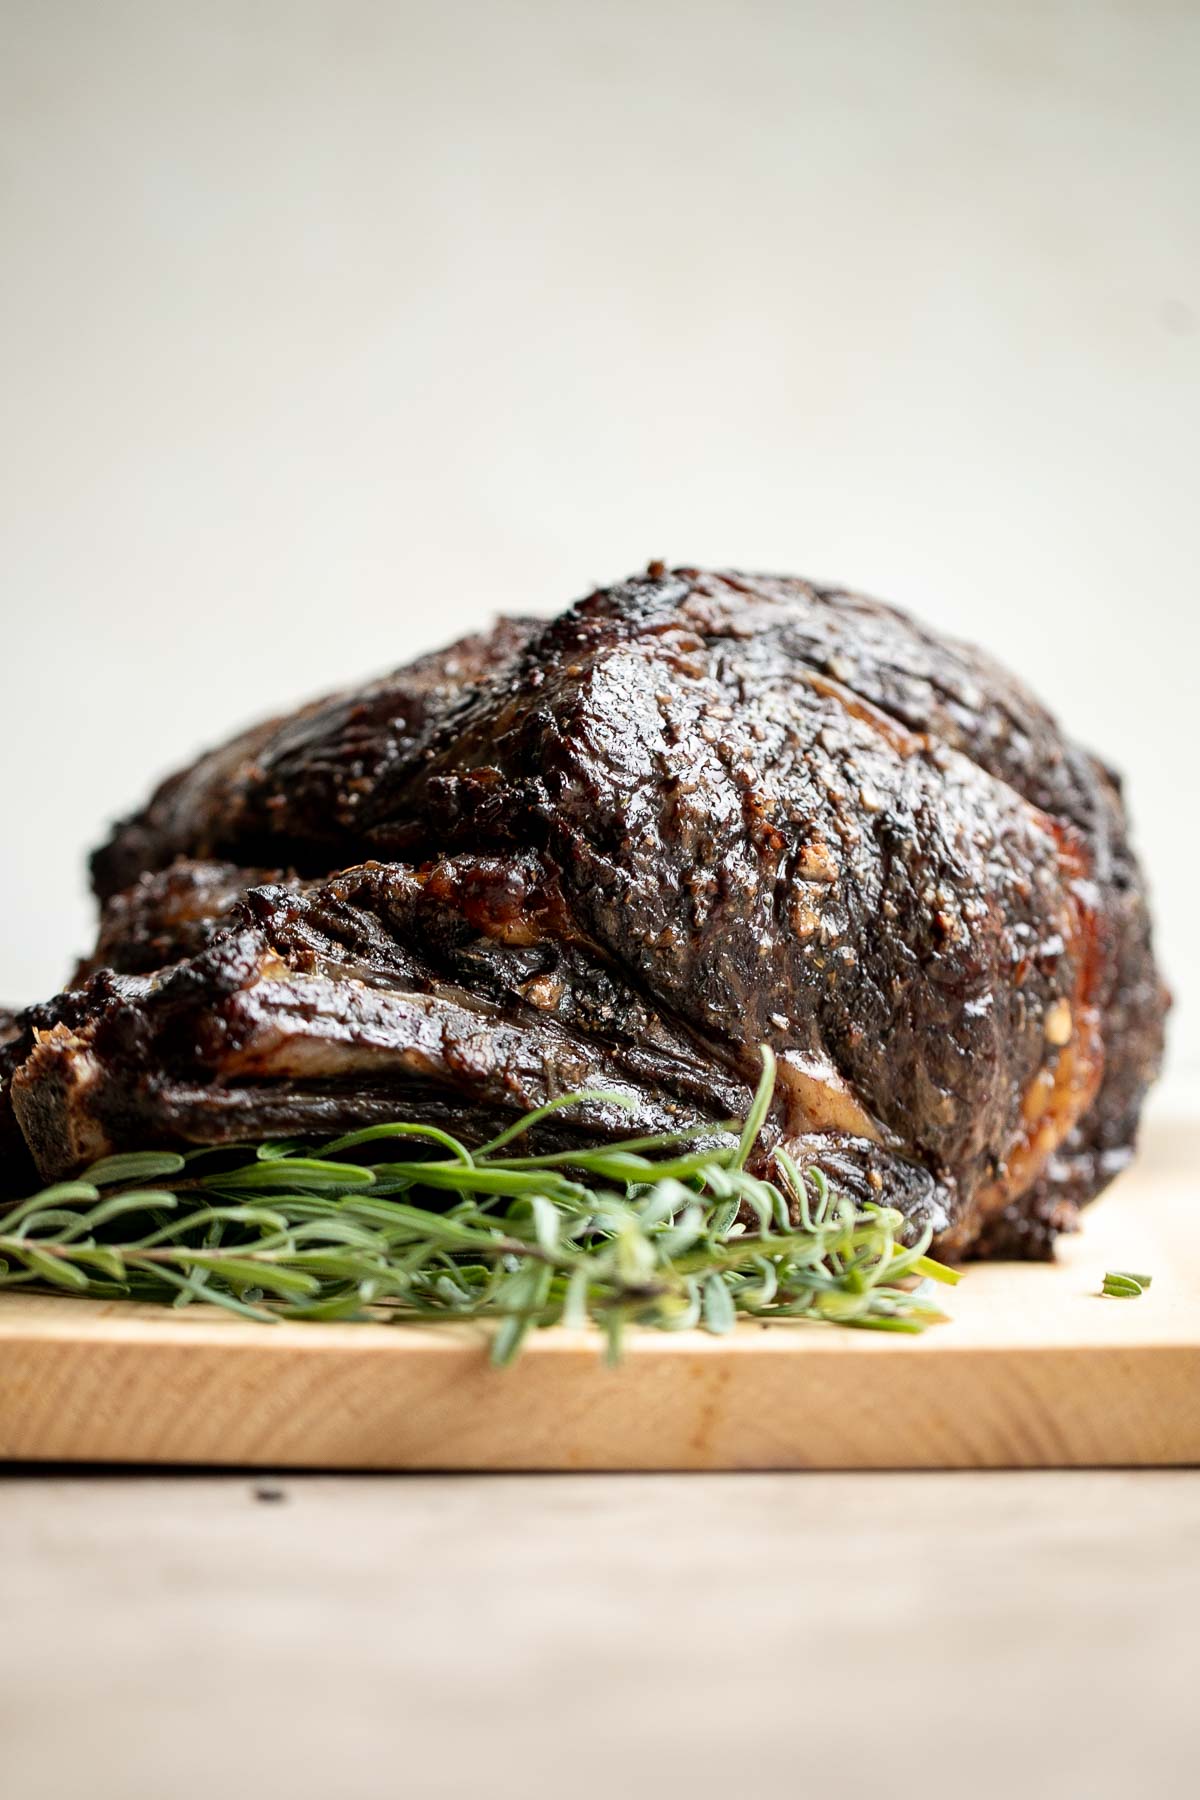
Ingredient Notes
To make this delicious Prime Rib Roast, you will need the following ingredients (full measurements in recipe card below):
- standing rib roast - a bone-in prime rib roast with a layer of fat is the star of this delectable dish and is the main source of flavor. You can pick one up from your local butcher or in the deli section of your grocery store.
- avocado oil - we used avocado oil, but you can also use other vegetable oils including olive oil, or use softened butter.
- garlic - fresh garlic is the best for flavor, but you can also use store-bought minced garlic or garlic paste.
- Italian seasoning -
- Worcestershire sauce - this is optional but adds a rich depth of flavor.
- salt and pepper
- chimichurri sauce - we like pairing our rib roast with a homemade chimichurri sauce, but it is optional. To make it, you will need olive oil, parsley, garlic, lemon juice, salt, and pepper.
You will also need measuring cups and spoons and a roasting pan.

How to Make the Best Prime Rib Roast
- Prepare the rib roast. Use a paper towel to pat the standing rib roast completely dry. Rub salt, pepper, oil, garlic, Italian seasoning, and Worcestershire sauce evenly over the roast. Optionally, use kitchen twine to tie between each rib to help cook more evenly.
- Marinate. Set aside for at least 30 minutes or refrigerate overnight. When ready to cook, it's ideal to bring the marinated roast to room temperature to achieve even cooking and juicier meat.
- Roast. Preheat the oven to 250 F. Place the prime rib on a roasting rack in a roasting pan.Transfer the pan into the oven and bake until a meat thermometer inserted into the thickest part of the meat (away from the bone) reads 118 F, about 30 minutes per pound of meat. This will result in medium rare meat (most popular for feeding a crowd). For medium, take it out once the reading is 125F.
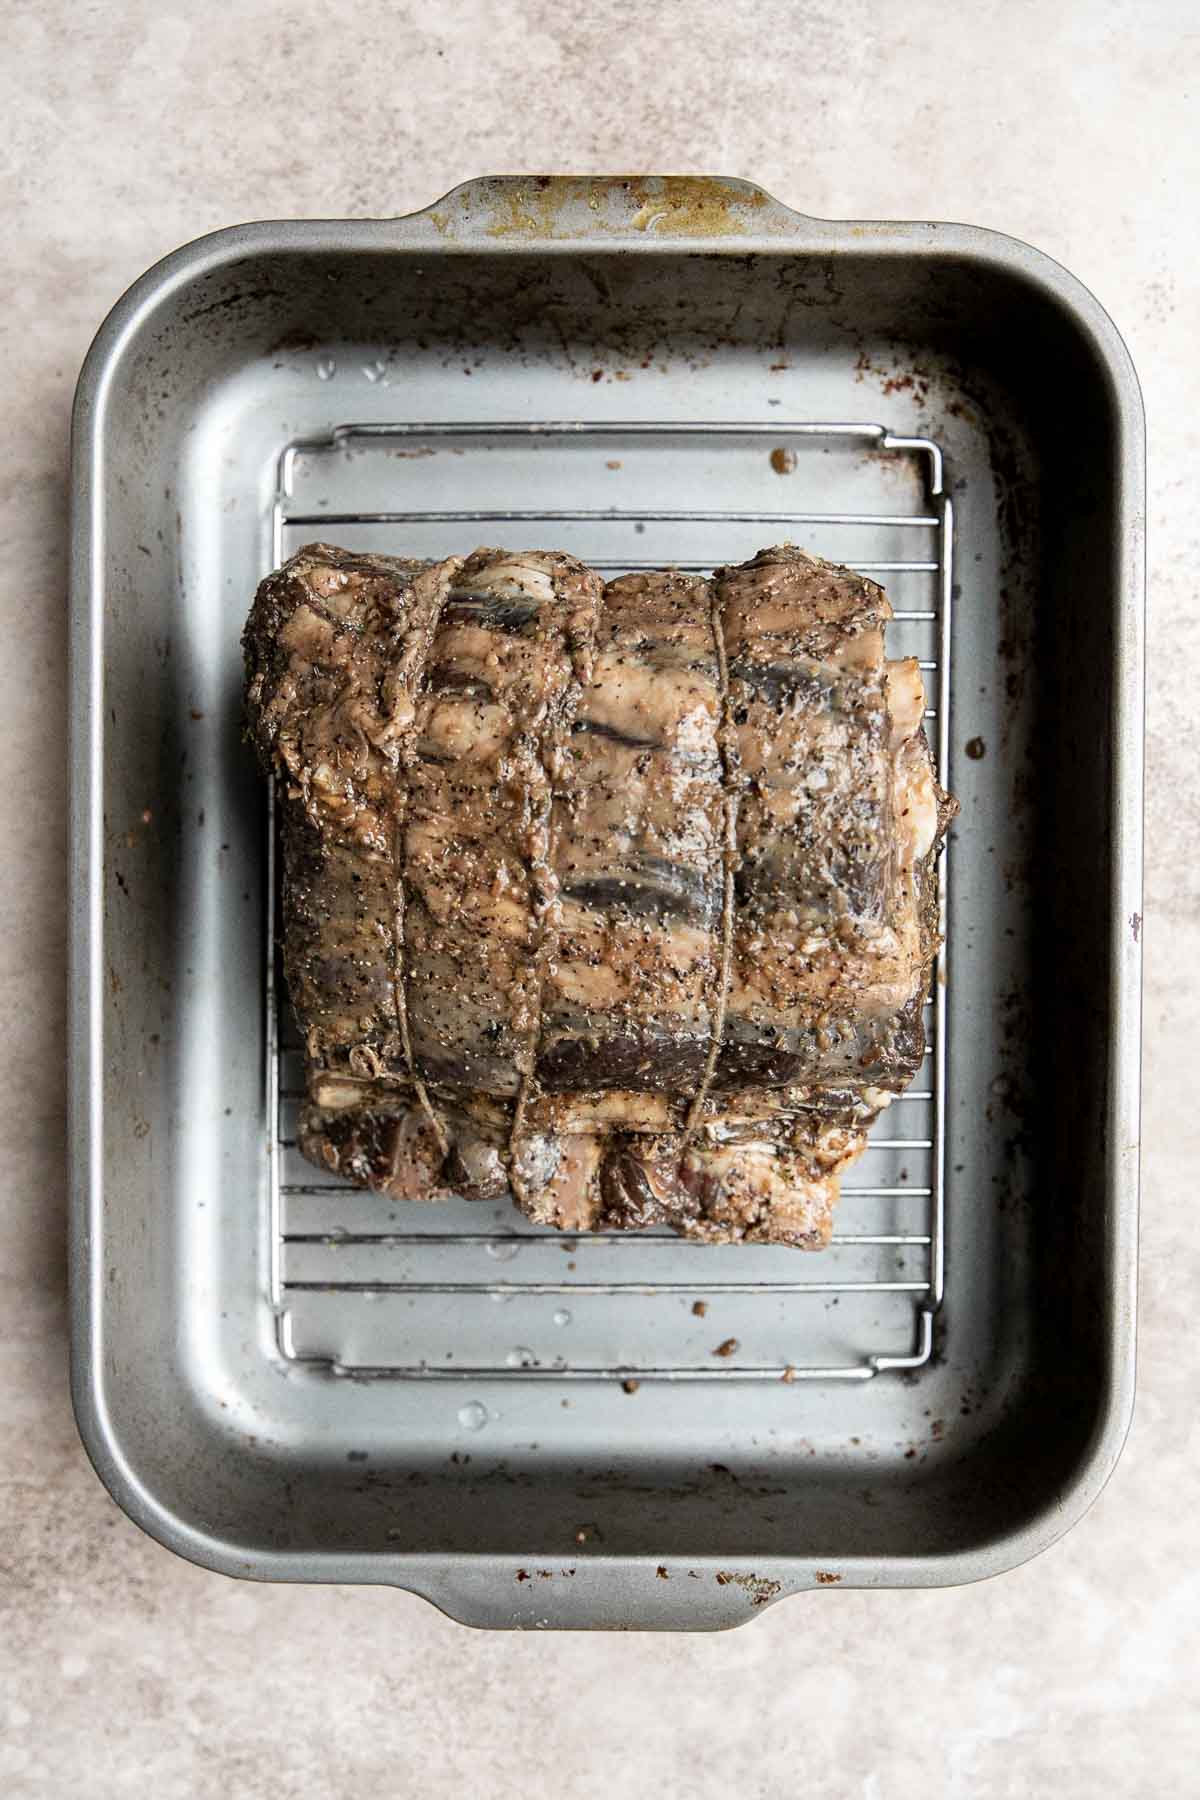
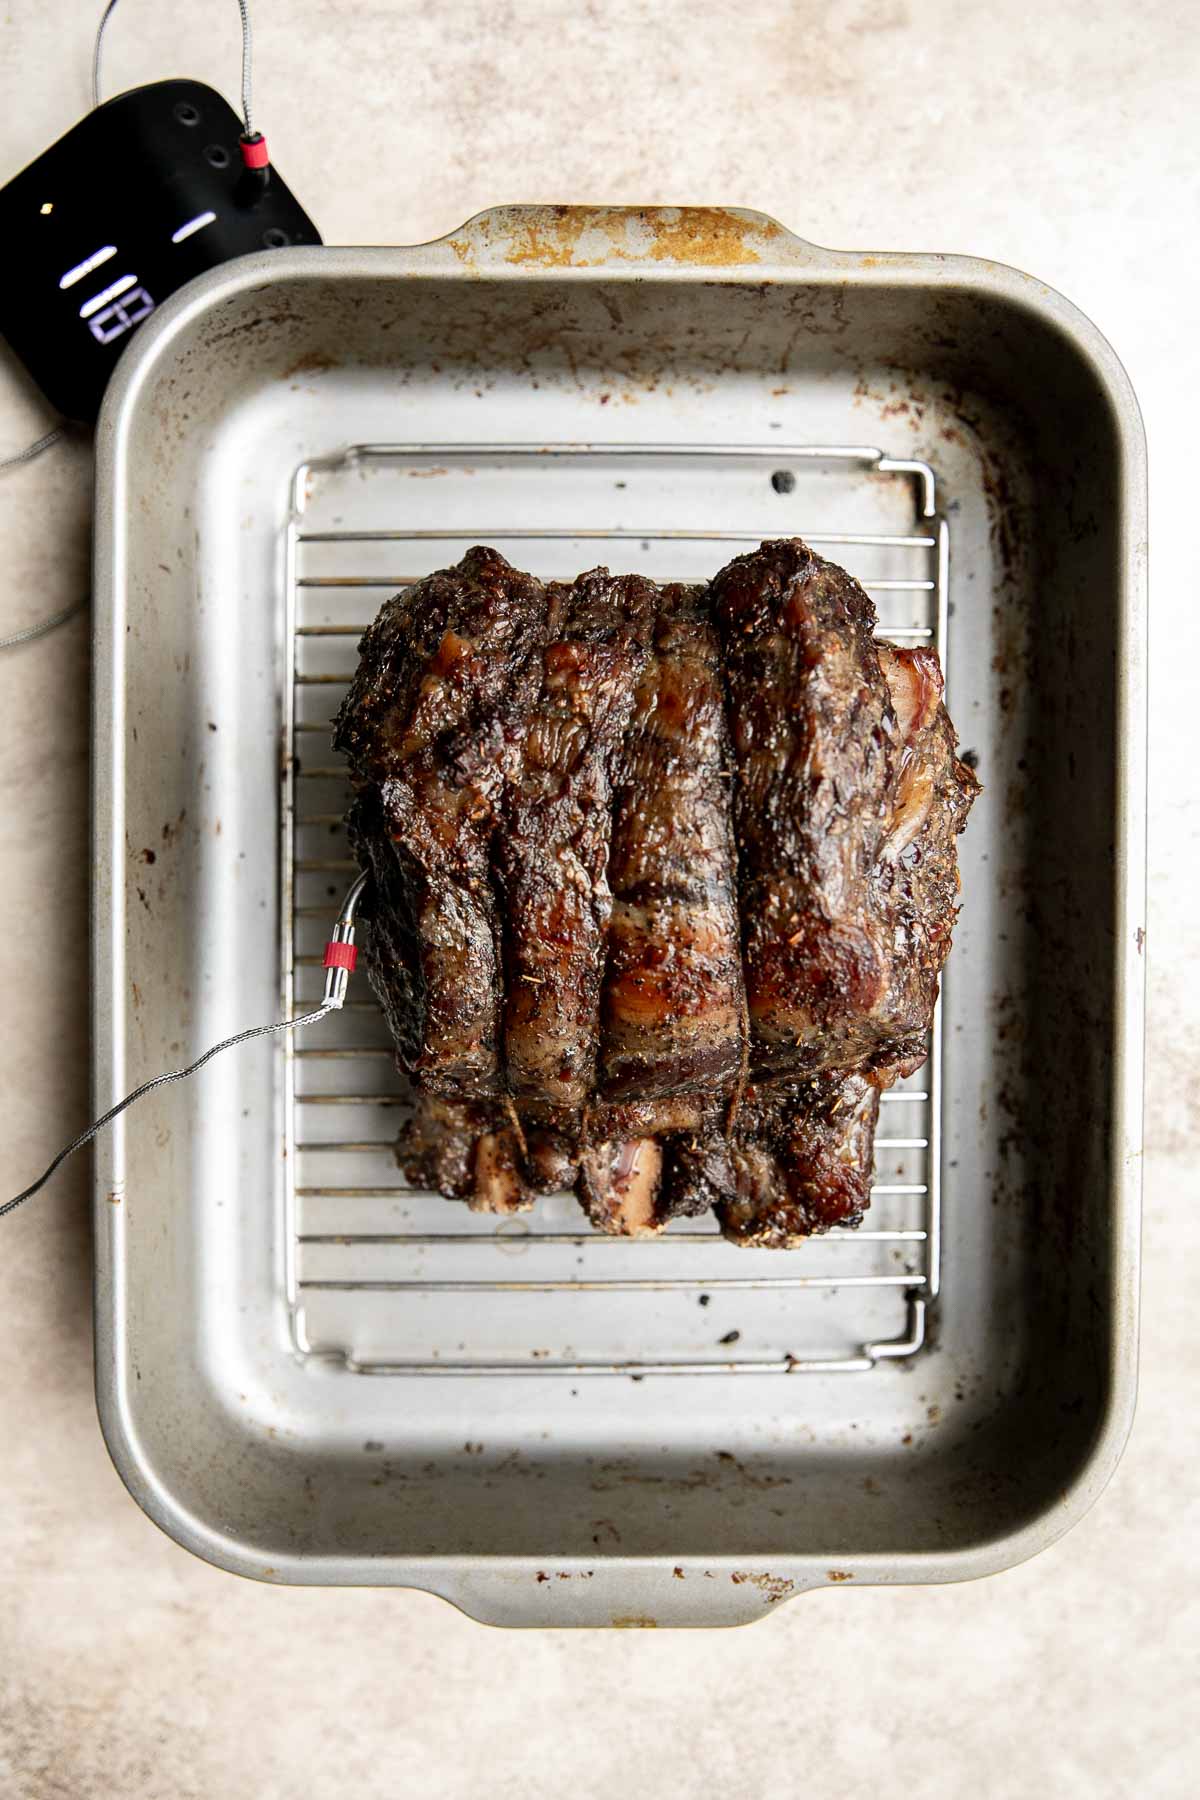
- Rest. Remove the roast from the oven and cover with aluminum foil to keep it moist. Let the roast rest at room temperature for 15-20 minutes. Resting after cooking helps the juices to redistribute into the meat as the internal temperature for the roast continues to rise about 10 degrees. The target temperature after rest should be 127F for medium rare, or 135F for medium.
- Sear. While resting the roast, preheat the oven to 500F. Remove the aluminum foil and sear the roast in the oven for 10 minutes until dark brown on the outside.
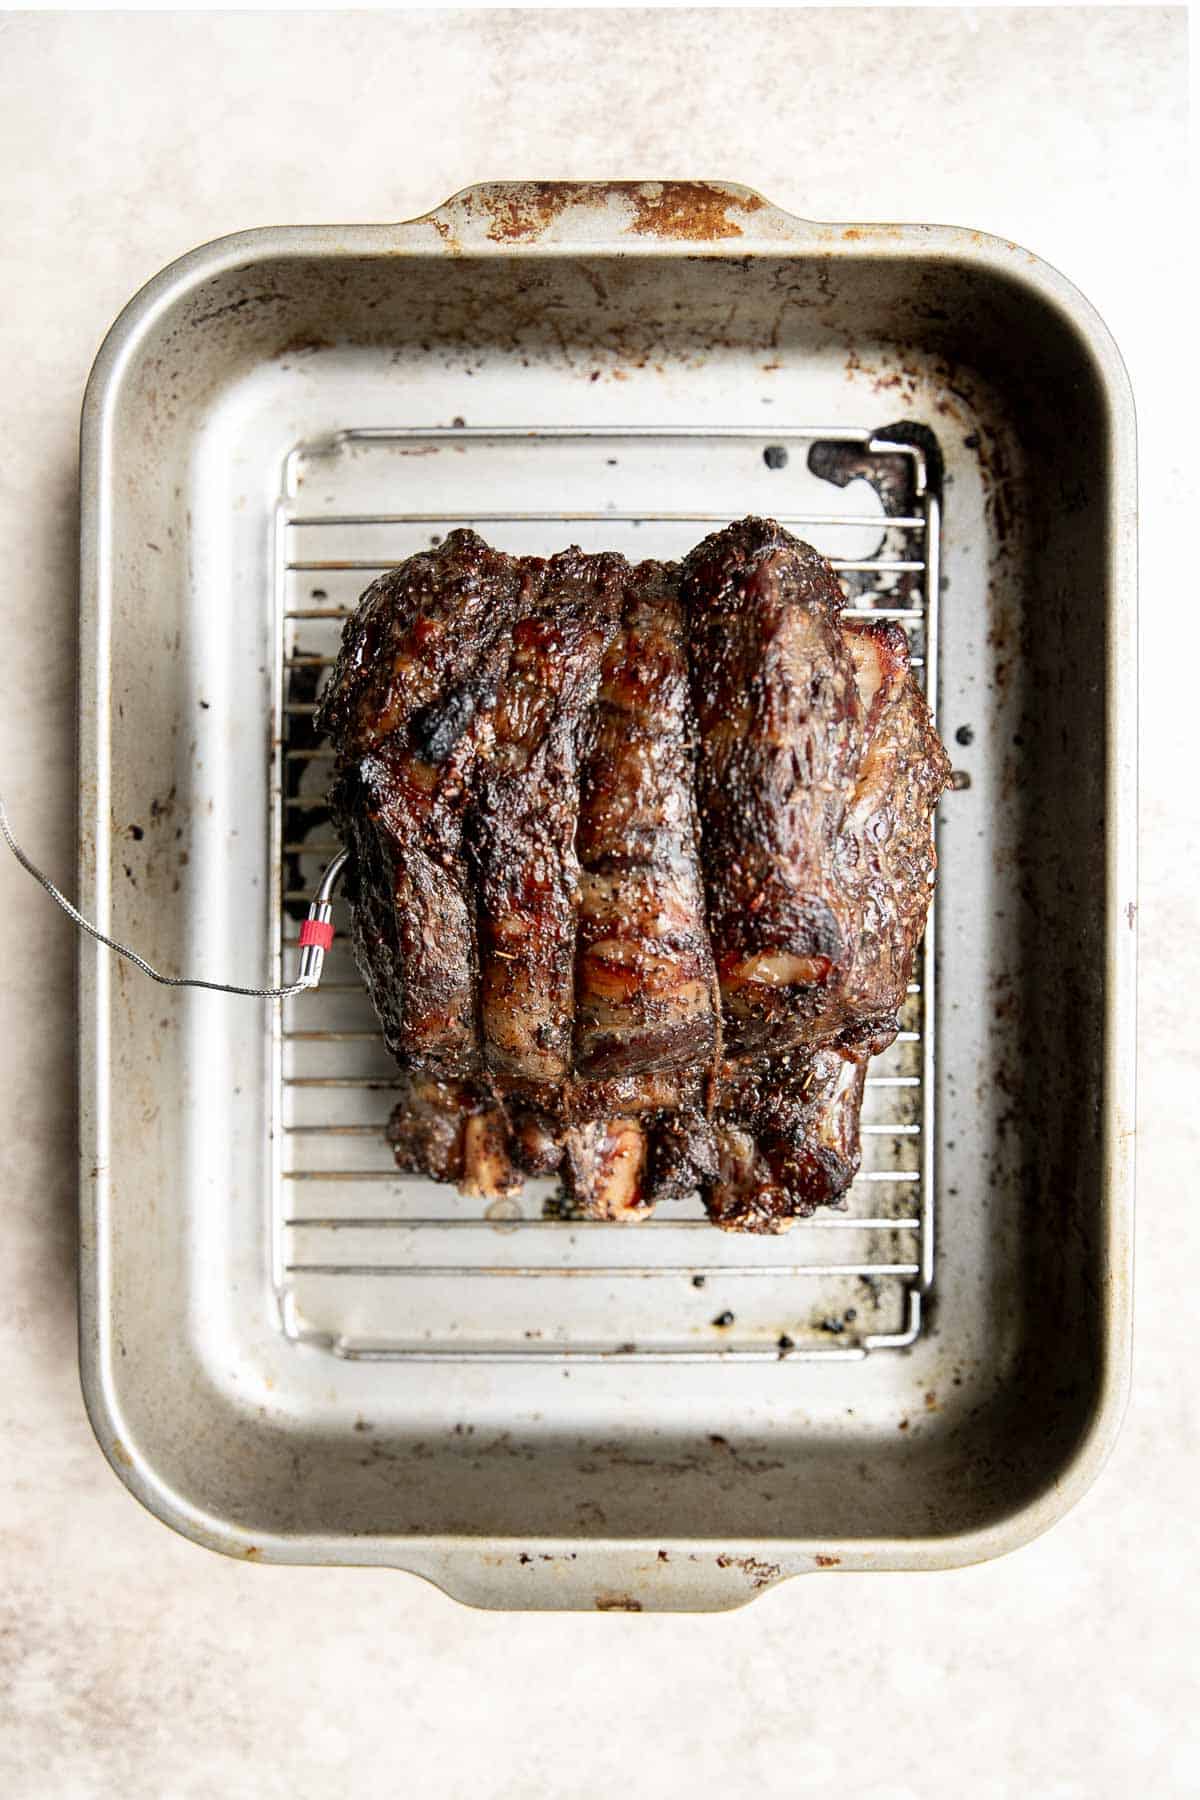
How to Make Chimichurri Sauce
Combine all the sauce ingredients including parsley, garlic, olive oil, lemon juice, salt, and pepper. Mix well until evenly combined.
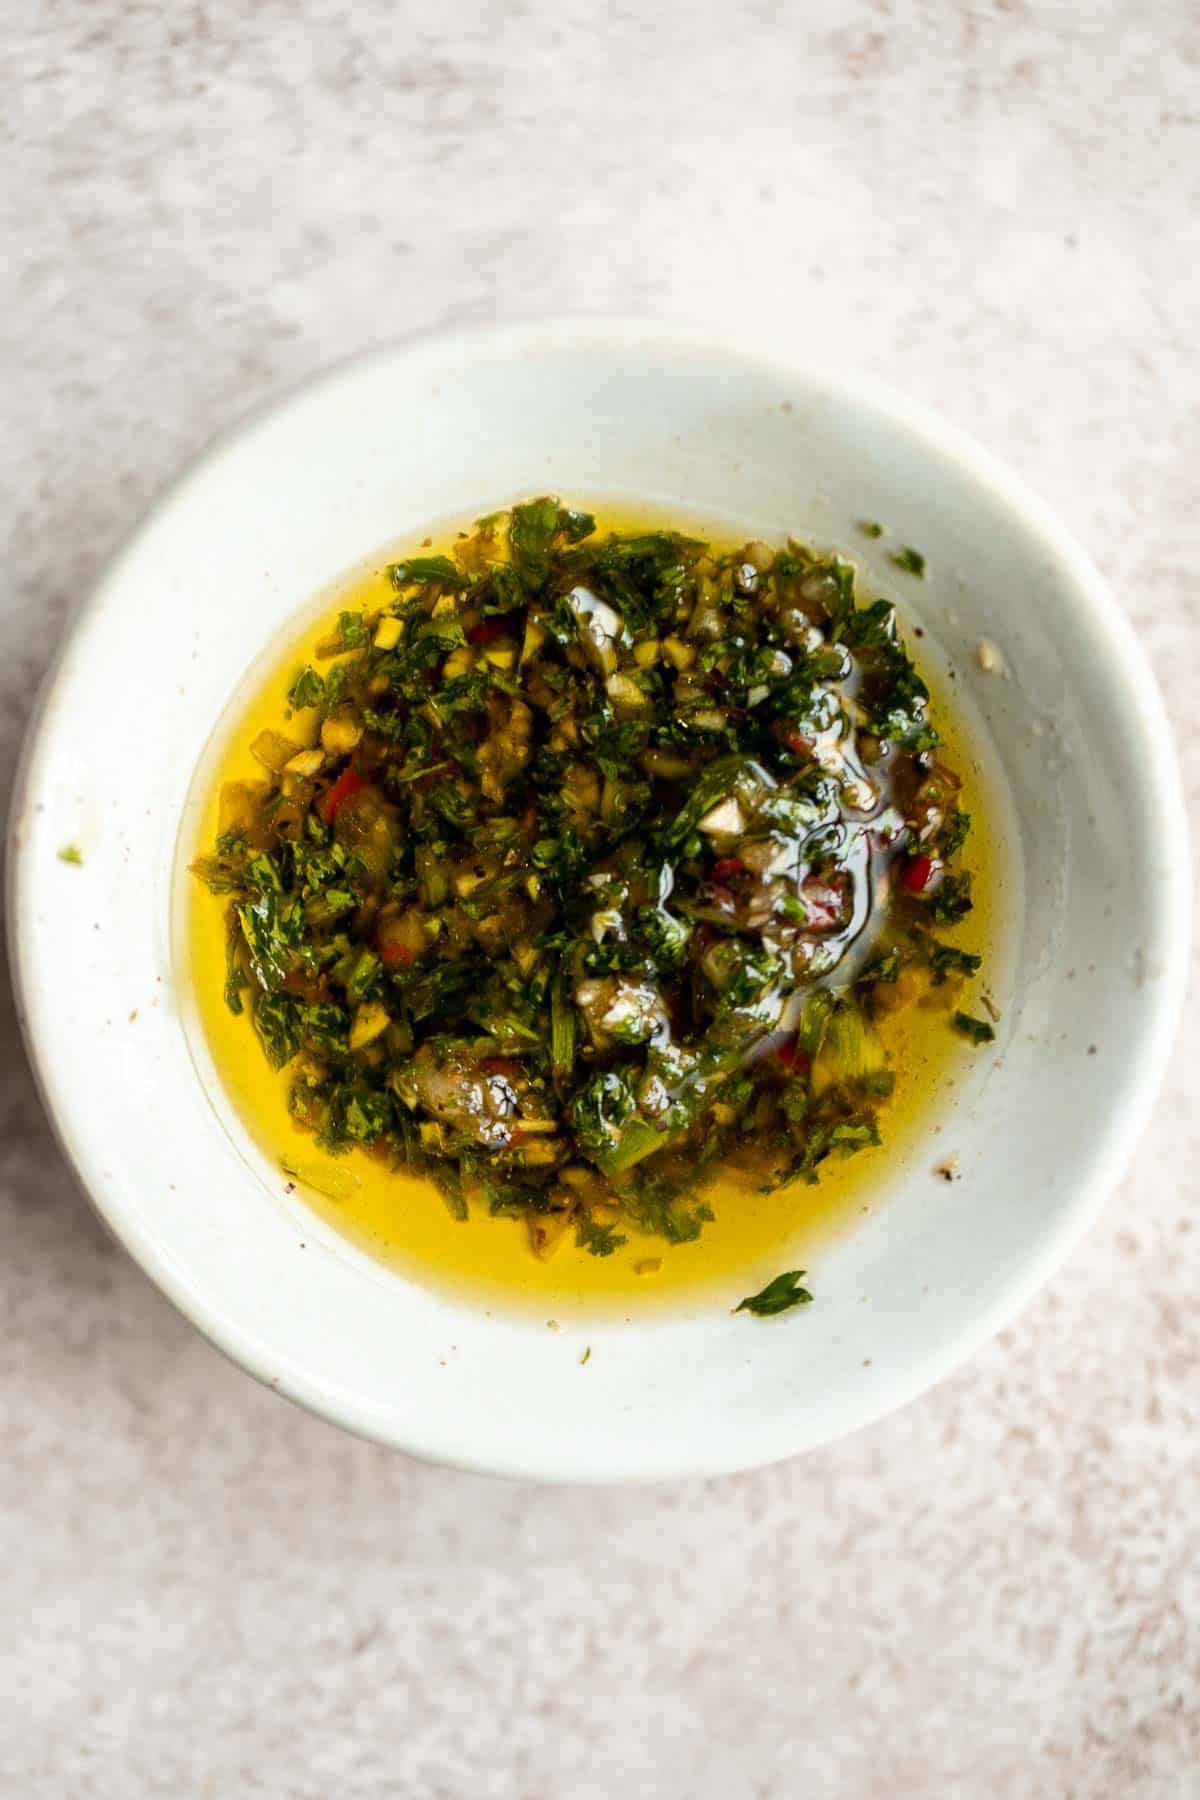
How to Serve
Slice this Prime Rib Roast and serve with chimichurri sauce on top. It also pairs well with a side of vegetables, potatoes, and a dinner roll. Some of our most popular sides include:
- Crispy Smashed Potatoes
- Oven Roasted Vegetables
- Potato Dinner Rolls
- Garlic Mashed Potatoes
- Green Beans with Bacon
- Cheesy Garlic Dinner Rolls
- Sautéed Garlic Mushrooms
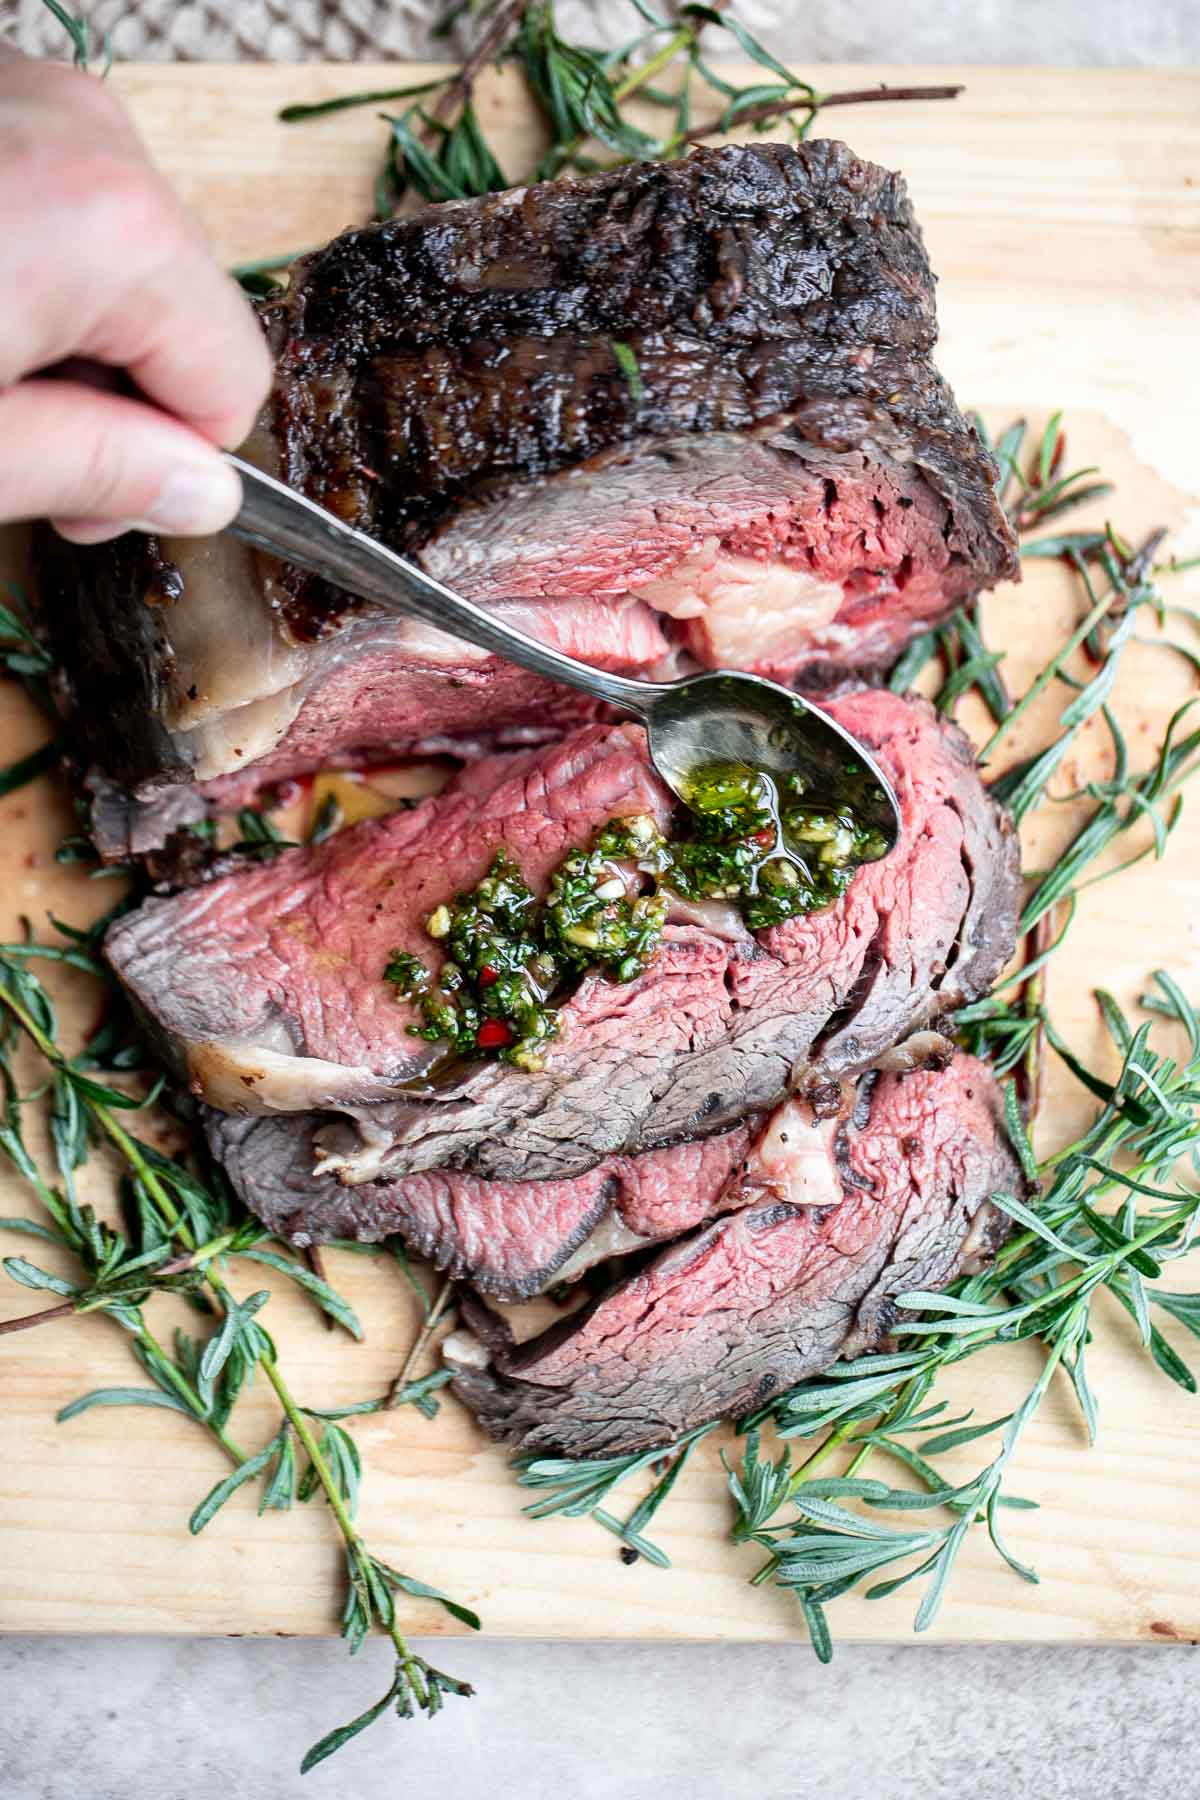
Recipe Tips and Tricks
- Bring the prime rib to room temperature. Once you have added the seasoning rub, set the roast aside for at least 30 minutes at room temperature. By bringing the marinated meat to room temperature, it will help with even cooking and result in juicier meat.
- Keep an eye on the temperature. The best way to do this is use a meat thermometer, especially one that you can leave inserted in the oven and take the reading while it's still inside the oven. The temperature will start increasing faster the closer it gets to the desired temperature of 118F (for medium rare).
- Final prime rib temperature. Plan to take out your roast from the oven when it is about 10 degrees under the final desired temperature. The final temperature for medium rare is 125-130°F (after resting) and for medium is 135-140°F (after resting).
Standing Rib Roast Leftovers
Use leftover prime rib roast in almost any recipe that calls for leftover beef. Some of our favorite recipes are:
- Beef Stroganoff
- Beef Noodle Stir Fry
- Shredded Beef Enchiladas
- Beef Wild Rice Soup
You can also make leftover rub roast sandwiches with chimichurri sauce which are just as good as the original dish! Looks like tomorrow's lunch is already taken care of.
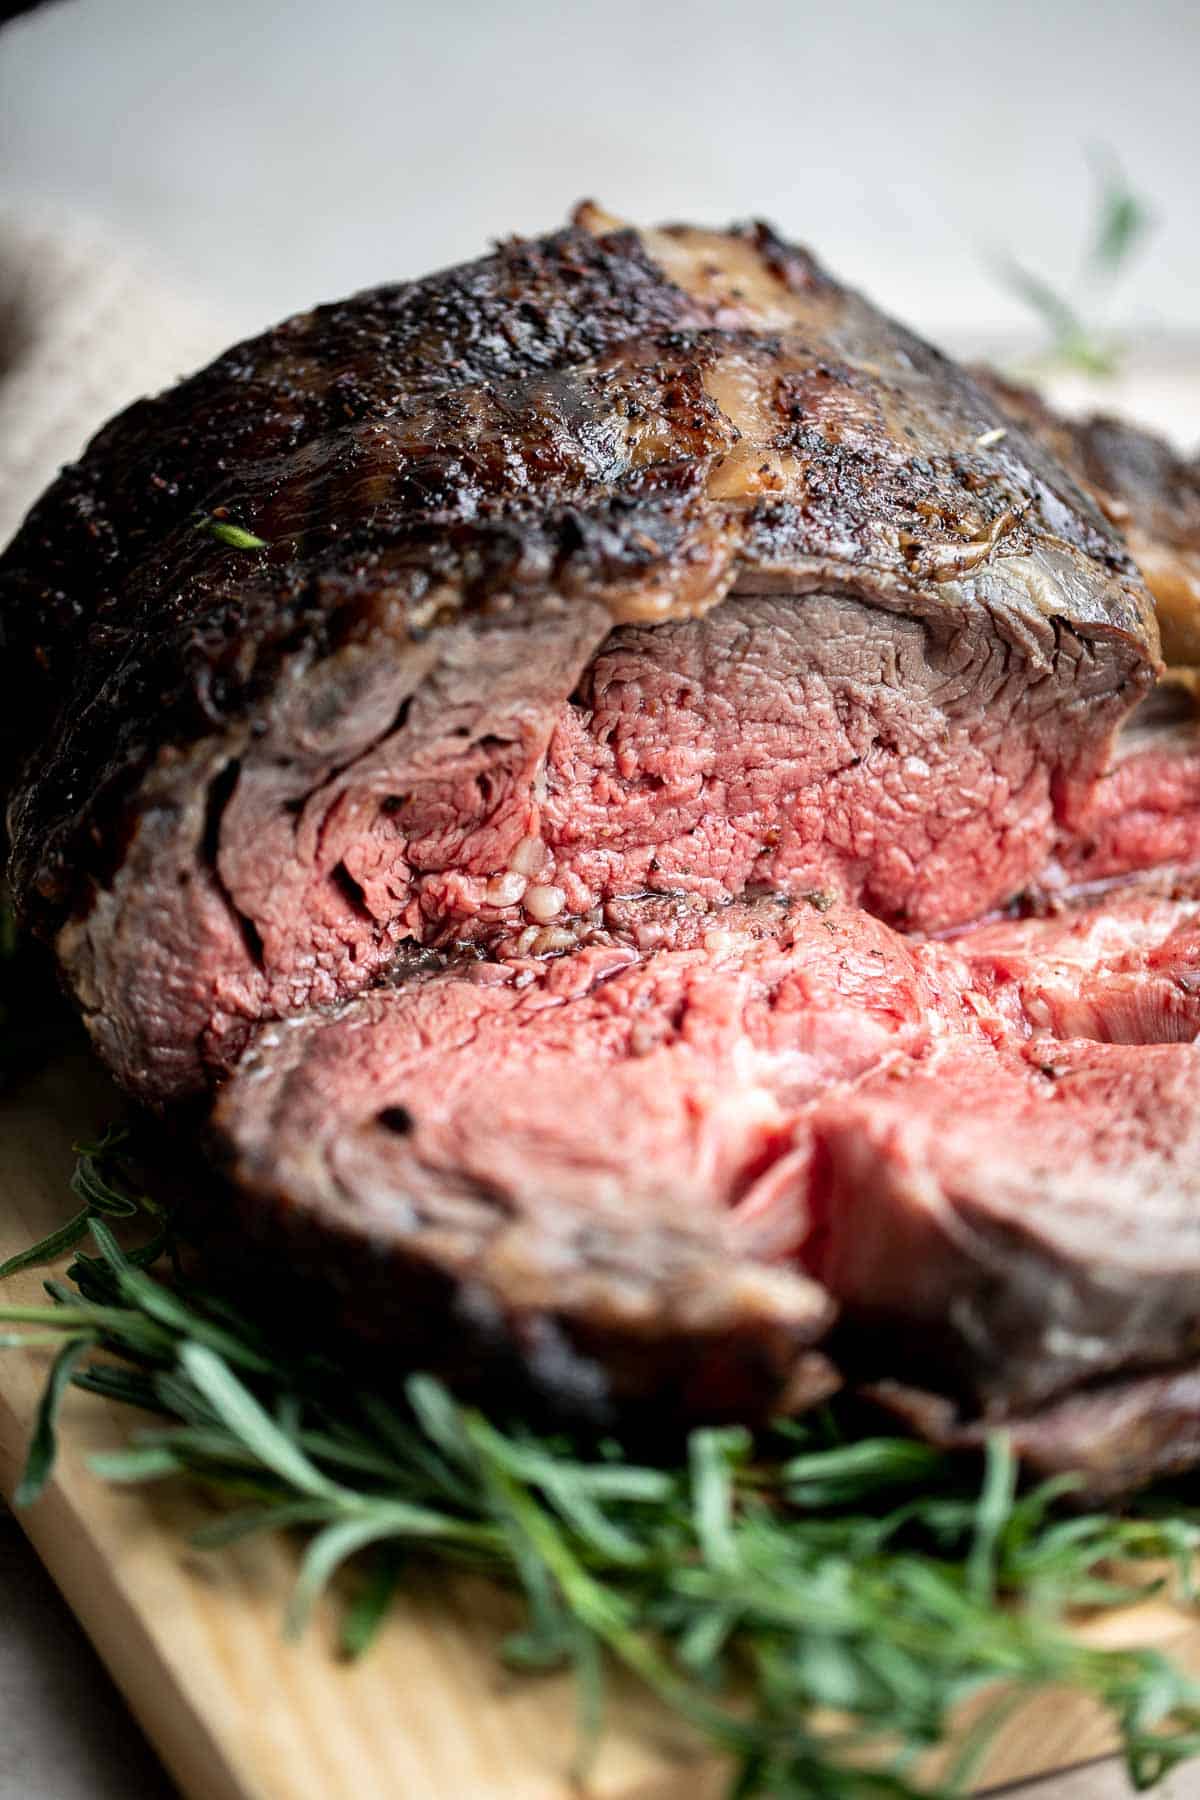
Storing and Freezing Instructions
How to Store
Once the rib roast has completely cooled, transfer it to an airtight container and refrigerate for up to four days.
How to Reheat
Place the prime rib roast in a roasting pan along with any leftover juiced or ¼ cup of beef broth or stock. Reheat in a 300F preheated oven for 20 to 30 minutes, depending on the size of the roast.
How to Freeze
Place leftover prime rib in a freezer bag and freeze for up to three months. I recommend cutting it up first and portioning it out for easy thawing and reheating. When ready to serve, allow it to defrost in the refrigerator overnight before reheating and serving.
More Roast Recipes
- Roast Beef
- Sunday Pot Roast
- Roasted Pork Tenderloin
- Holiday Glazed Baked Ham
- Dutch Oven Whole Roast Chicken
- Juicy Roast Turkey
- Honey Glazed Roast Pork
Tried this recipe?
I'd love to hear what you think! Leave a comment and rating below to share your feedback. Your reviews help others discover this recipe and help me keep creating more free recipes for you. Snap a photo and tag me on social media @aheadofthyme too.
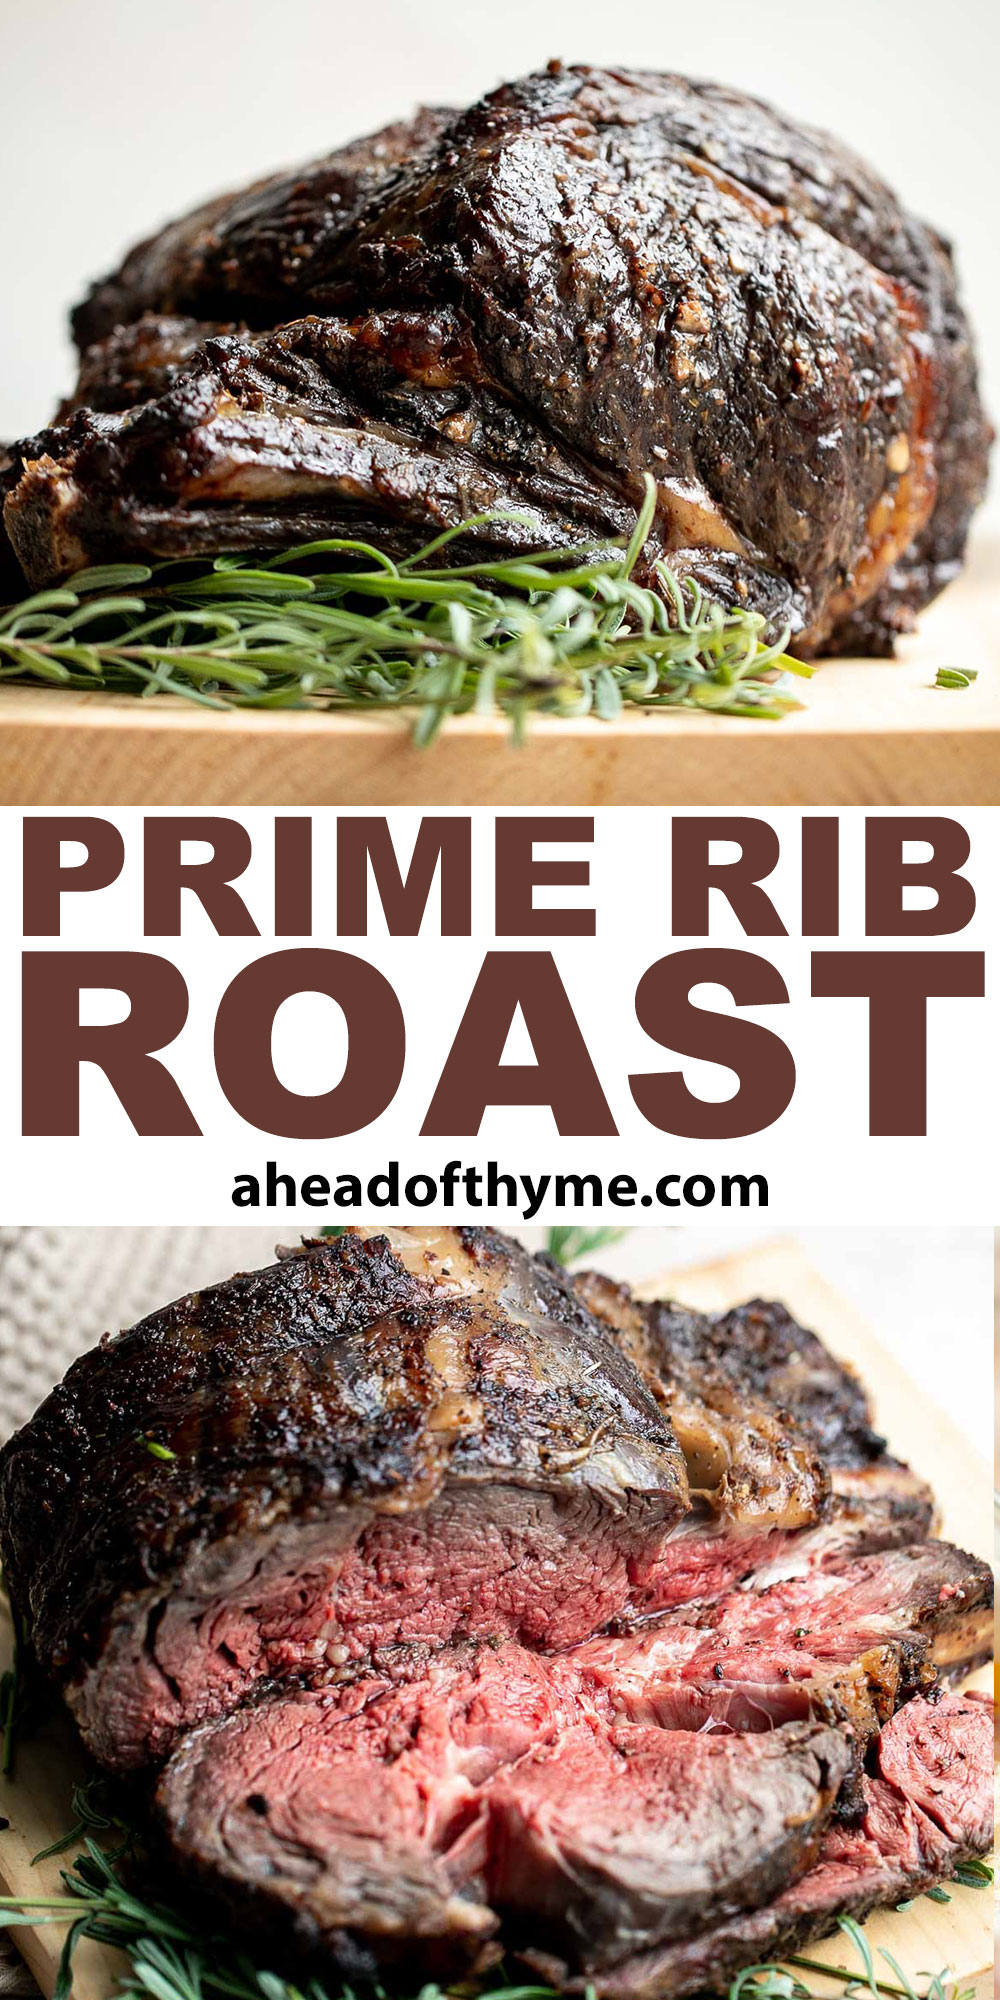
White Hot Chocolate
Homemade White Hot Chocolate is a rich, sweet, and decadent drink that is so quick and easy to make at home from scratch. You may seriously rethink every hot chocolate experience you've ever had after just one cup of this homemade version made with just 3 ingredients including real chocolate. Just in time for the holidays!
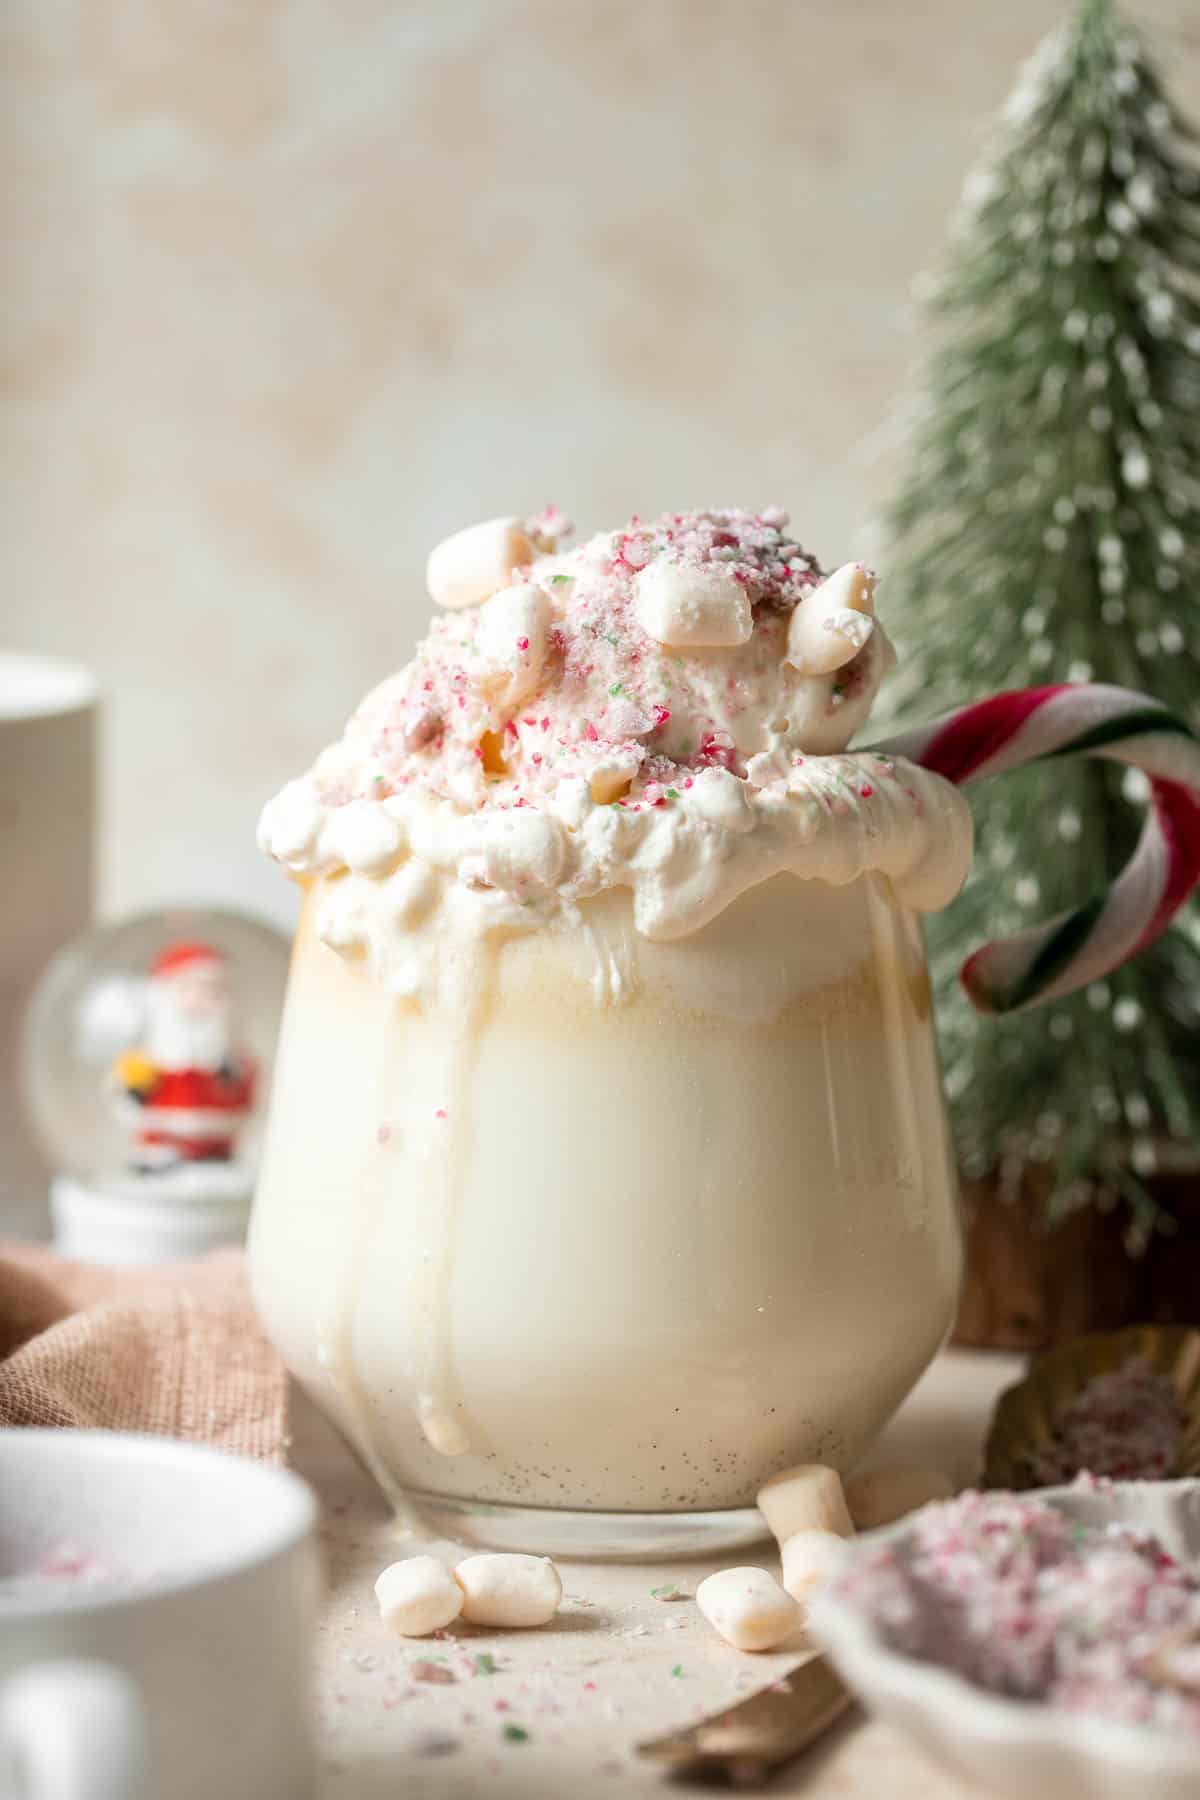
In as little as 15 minutes you can serve up tall glasses of warm, creamy, velvety white chocolate as a winter treat or holiday beverage - and only five minutes of active preparation. Pull out this recipe for your next holiday movie marathon and create unforgettable Christmas memories with your loved ones.
Why You'll Love this White Hot Chocolate
- Perfect for white chocolate lovers. If you fall on the white chocolate side of the dark-versus-light debate, you'll love a mug of this modern hot chocolate with white chocolate!
- Only 5 ingredients! Ditch the mix without making things complicated. This hot chocolate recipe makes luscious white chocolate refreshments by adding milk, vanilla, whipped cream and marshmallows to the white chocolate(plus optional garnishes).
- Made with real white chocolate. This hot chocolate with white chocolate gets its namesake flavor by using real, high-quality melted white chocolate. No powders, imitations or artificial flavors here!
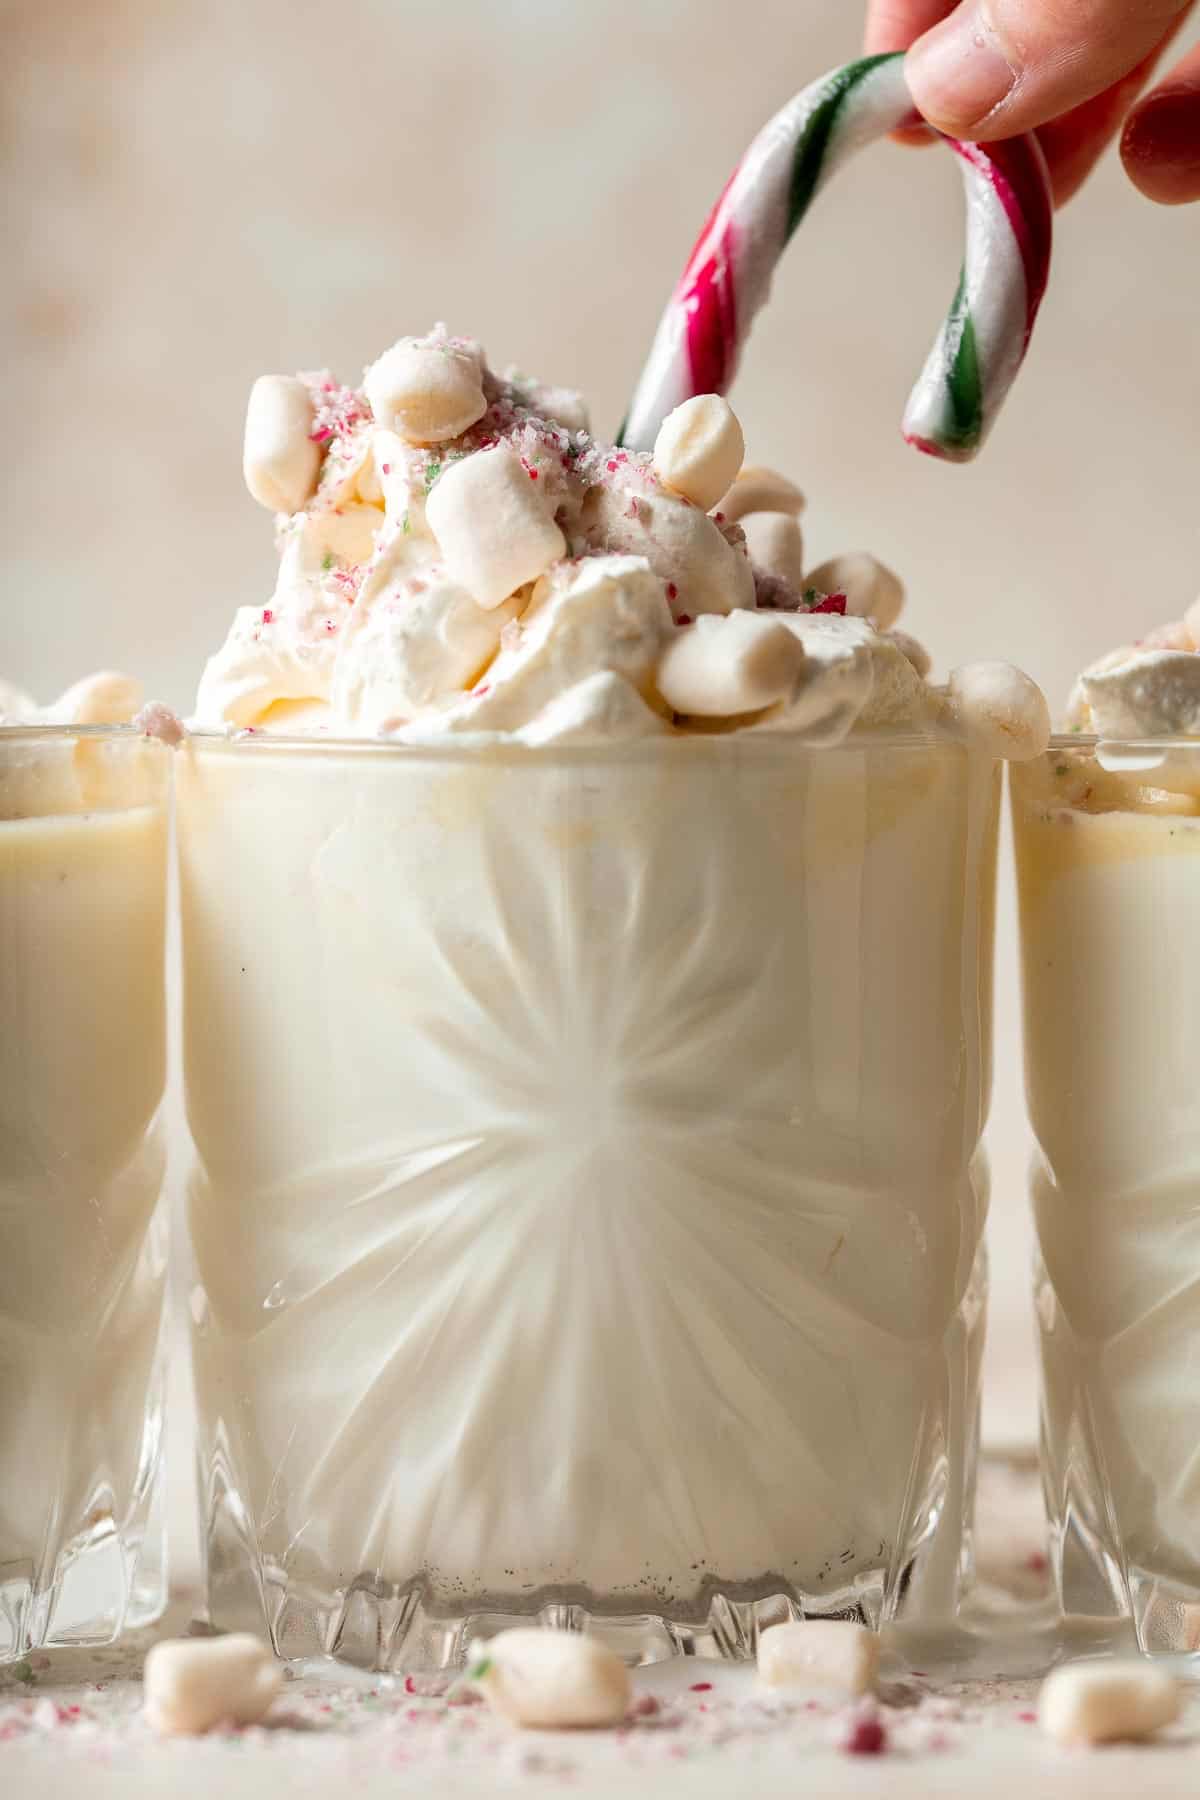
Ingredient Notes
To make easy homemade White Hot Chocolate, you will need the following ingredients (full measurements in recipe card below):
- milk - you can use traditional dairy or replace it with your preferred plant-based milk instead!
- white chocolate - use high-quality white chocolate for the best flavor and texture.
- vanilla extract - you can also use an equal measure of vanilla bean paste.
Optional Toppings and Mix-ins
- whipped cream - use canned whipped cream to make things easier or whip your own if you have time!
- mini marshmallows - you can use vegan marshmallows if necessary.
- crushed candy canes - crush candy canes in a ziplock bag
- sprinkles - use your favorite holiday sprinkles to add a pop of color!
- caramel
- maple syrup
You will also need measuring cups and spoons and a saucepan.
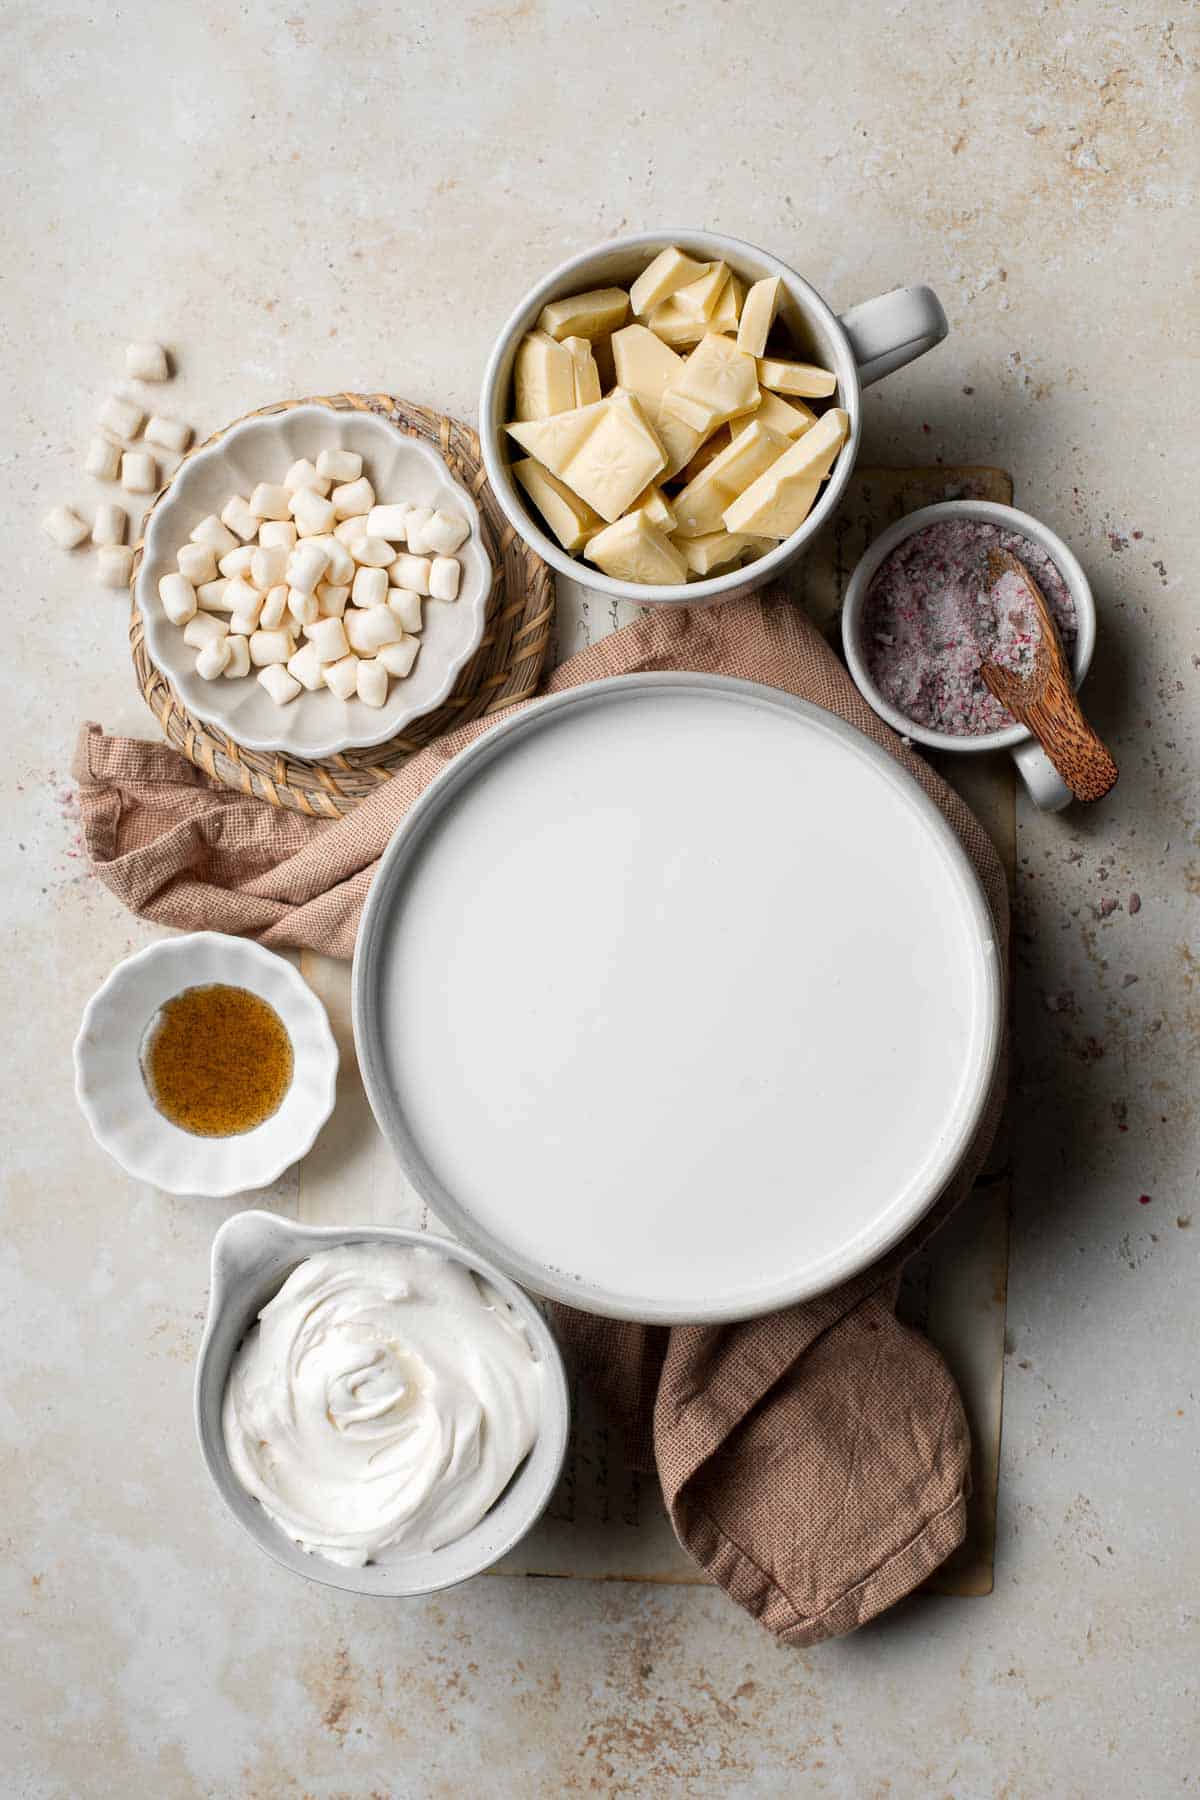
How to Make the Best White Hot Chocolate
In a medium saucepan, add milk, white chocolate, and vanilla extract. Heat over medium-low heat, whisking continuously until smooth (do not boil).
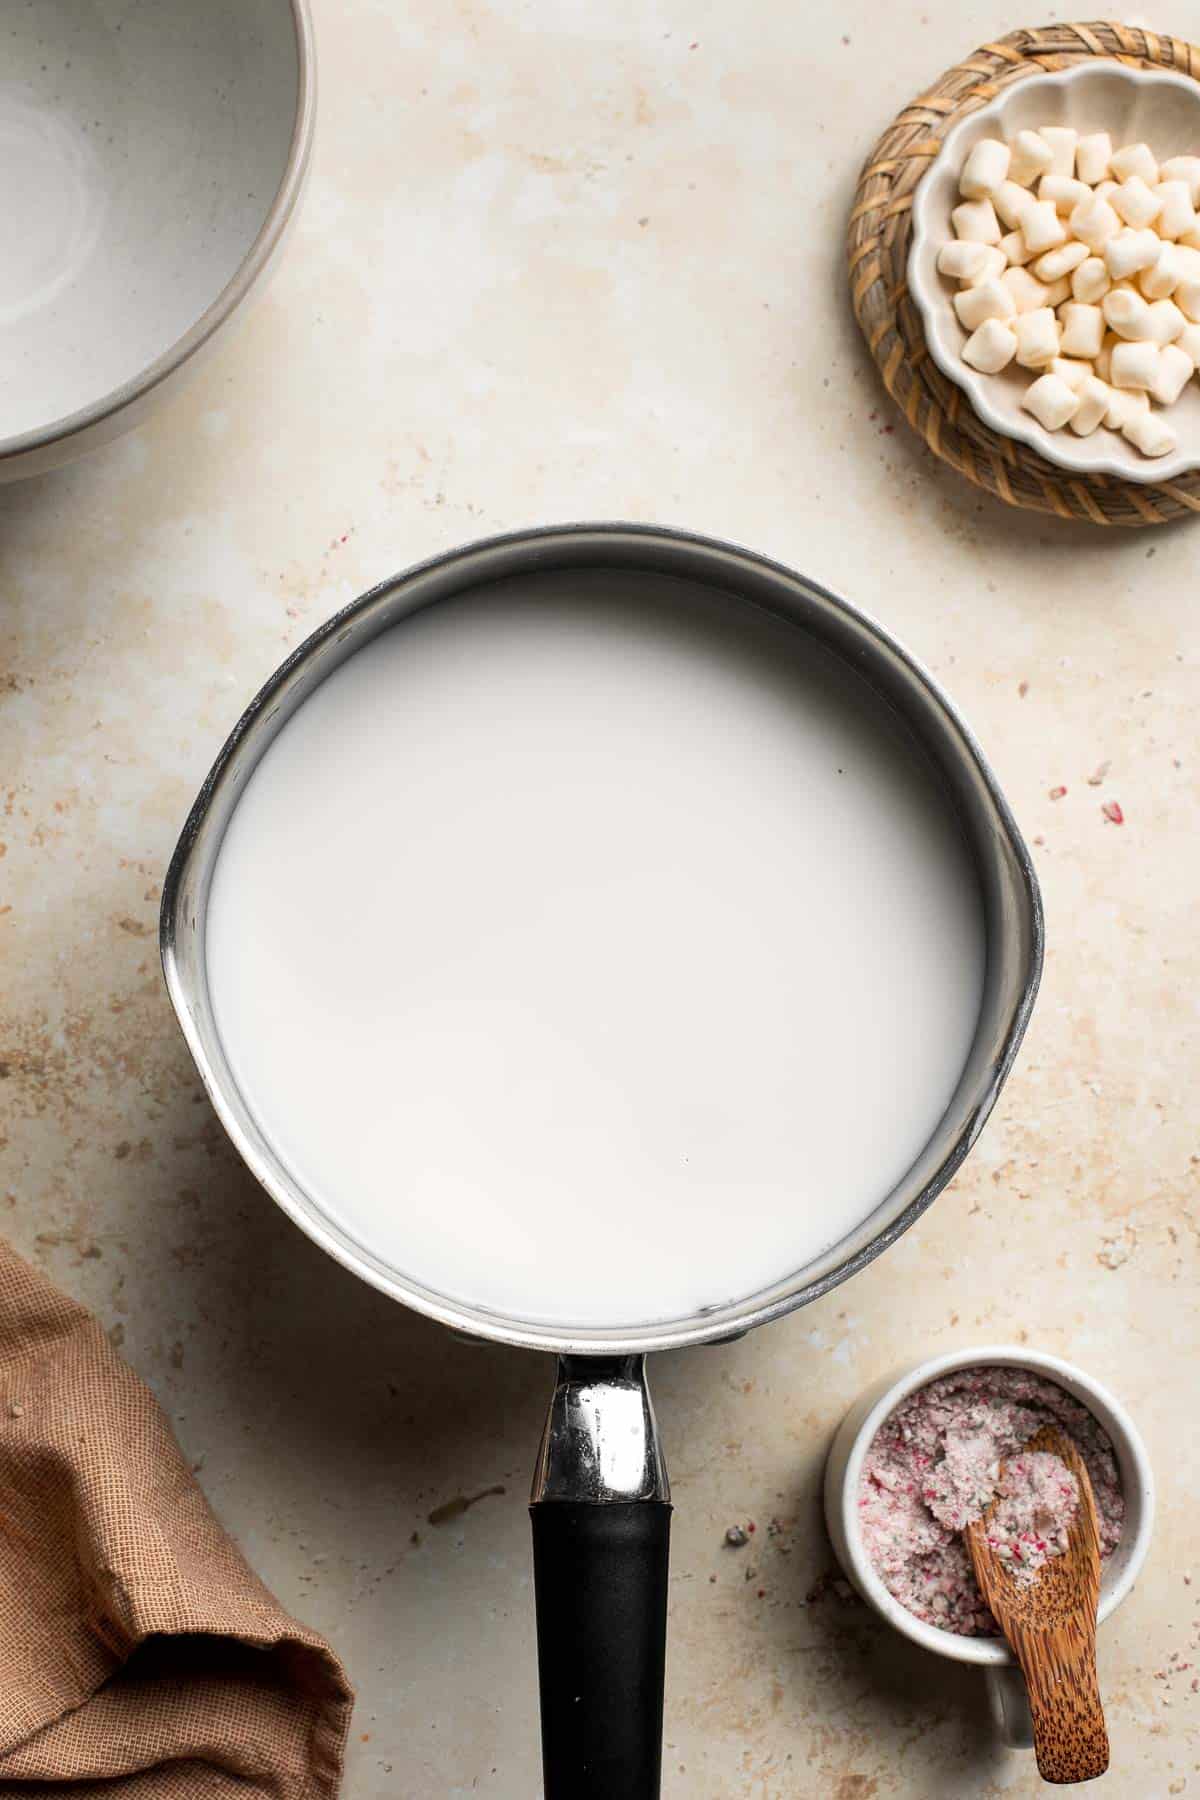
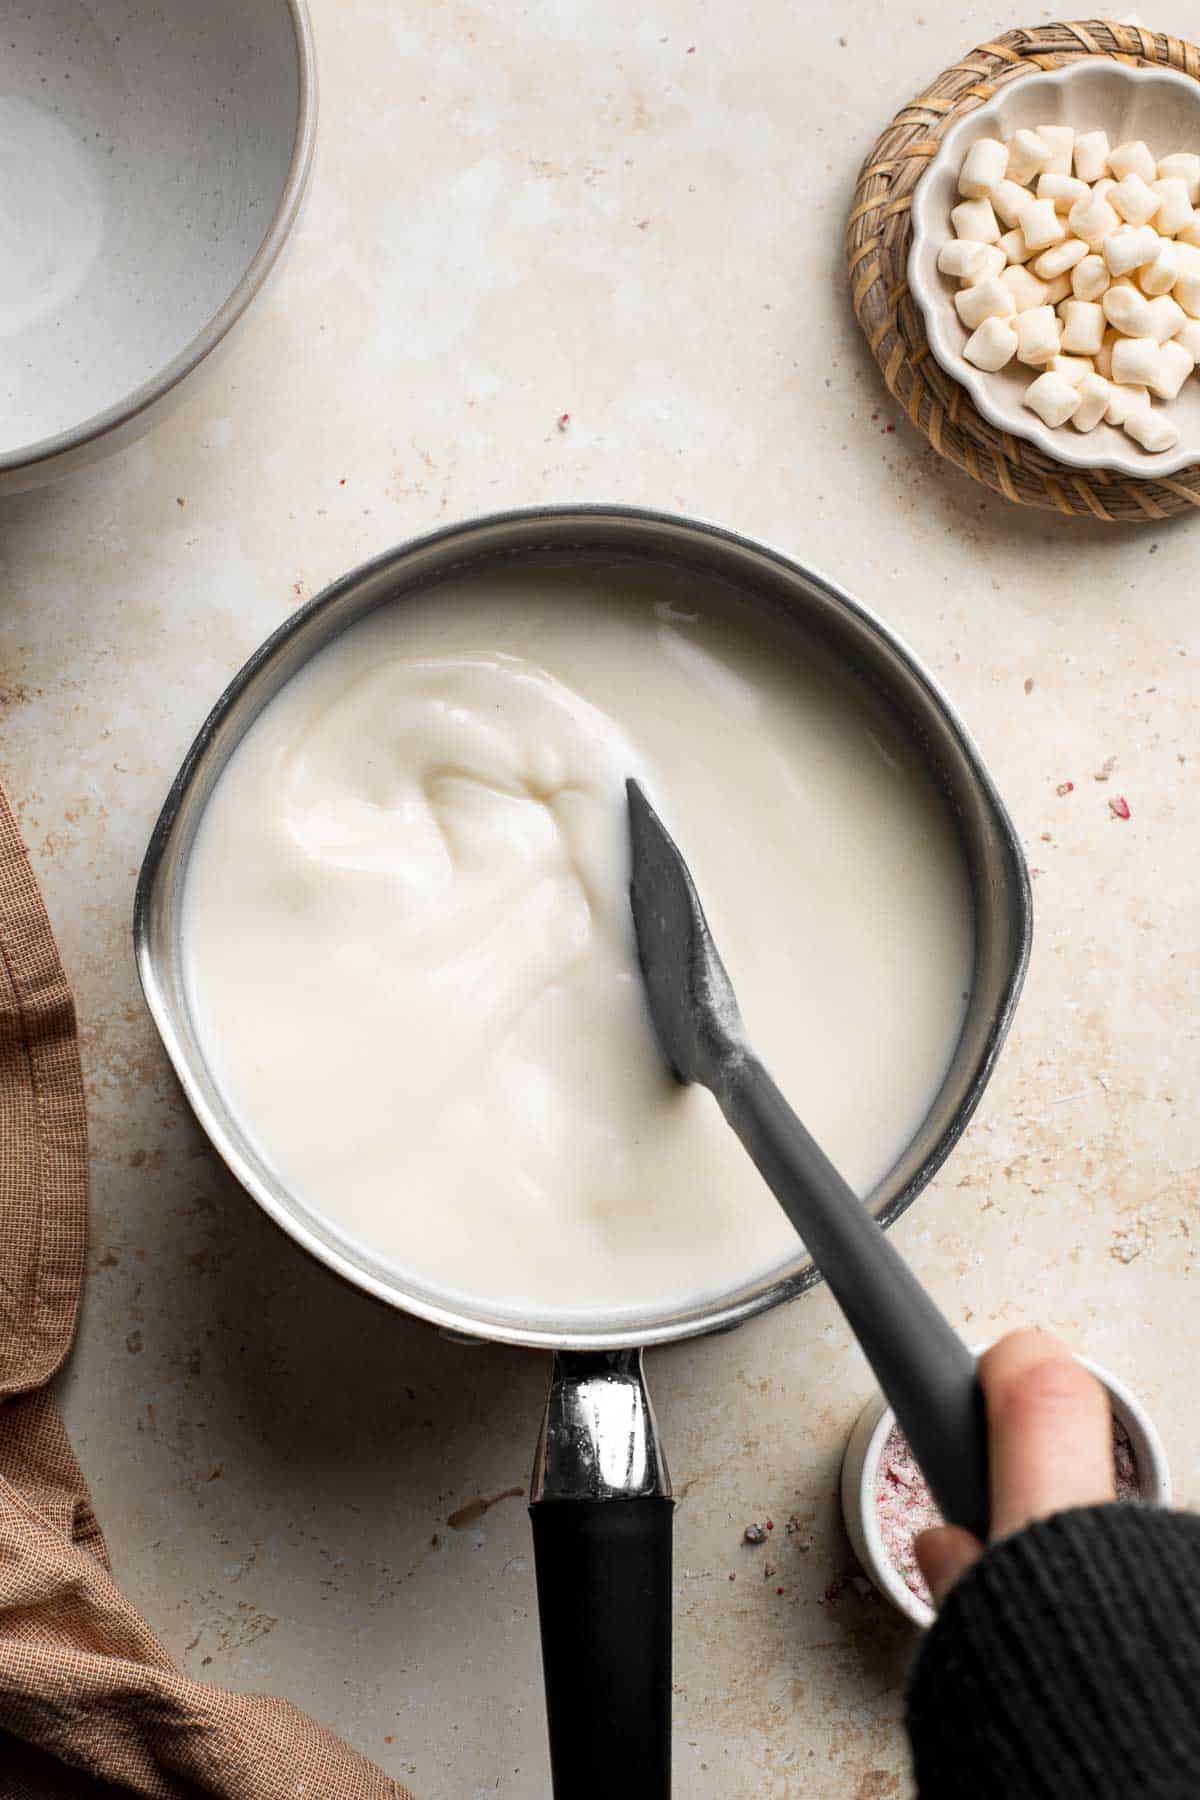
Serve immediately with toppings.
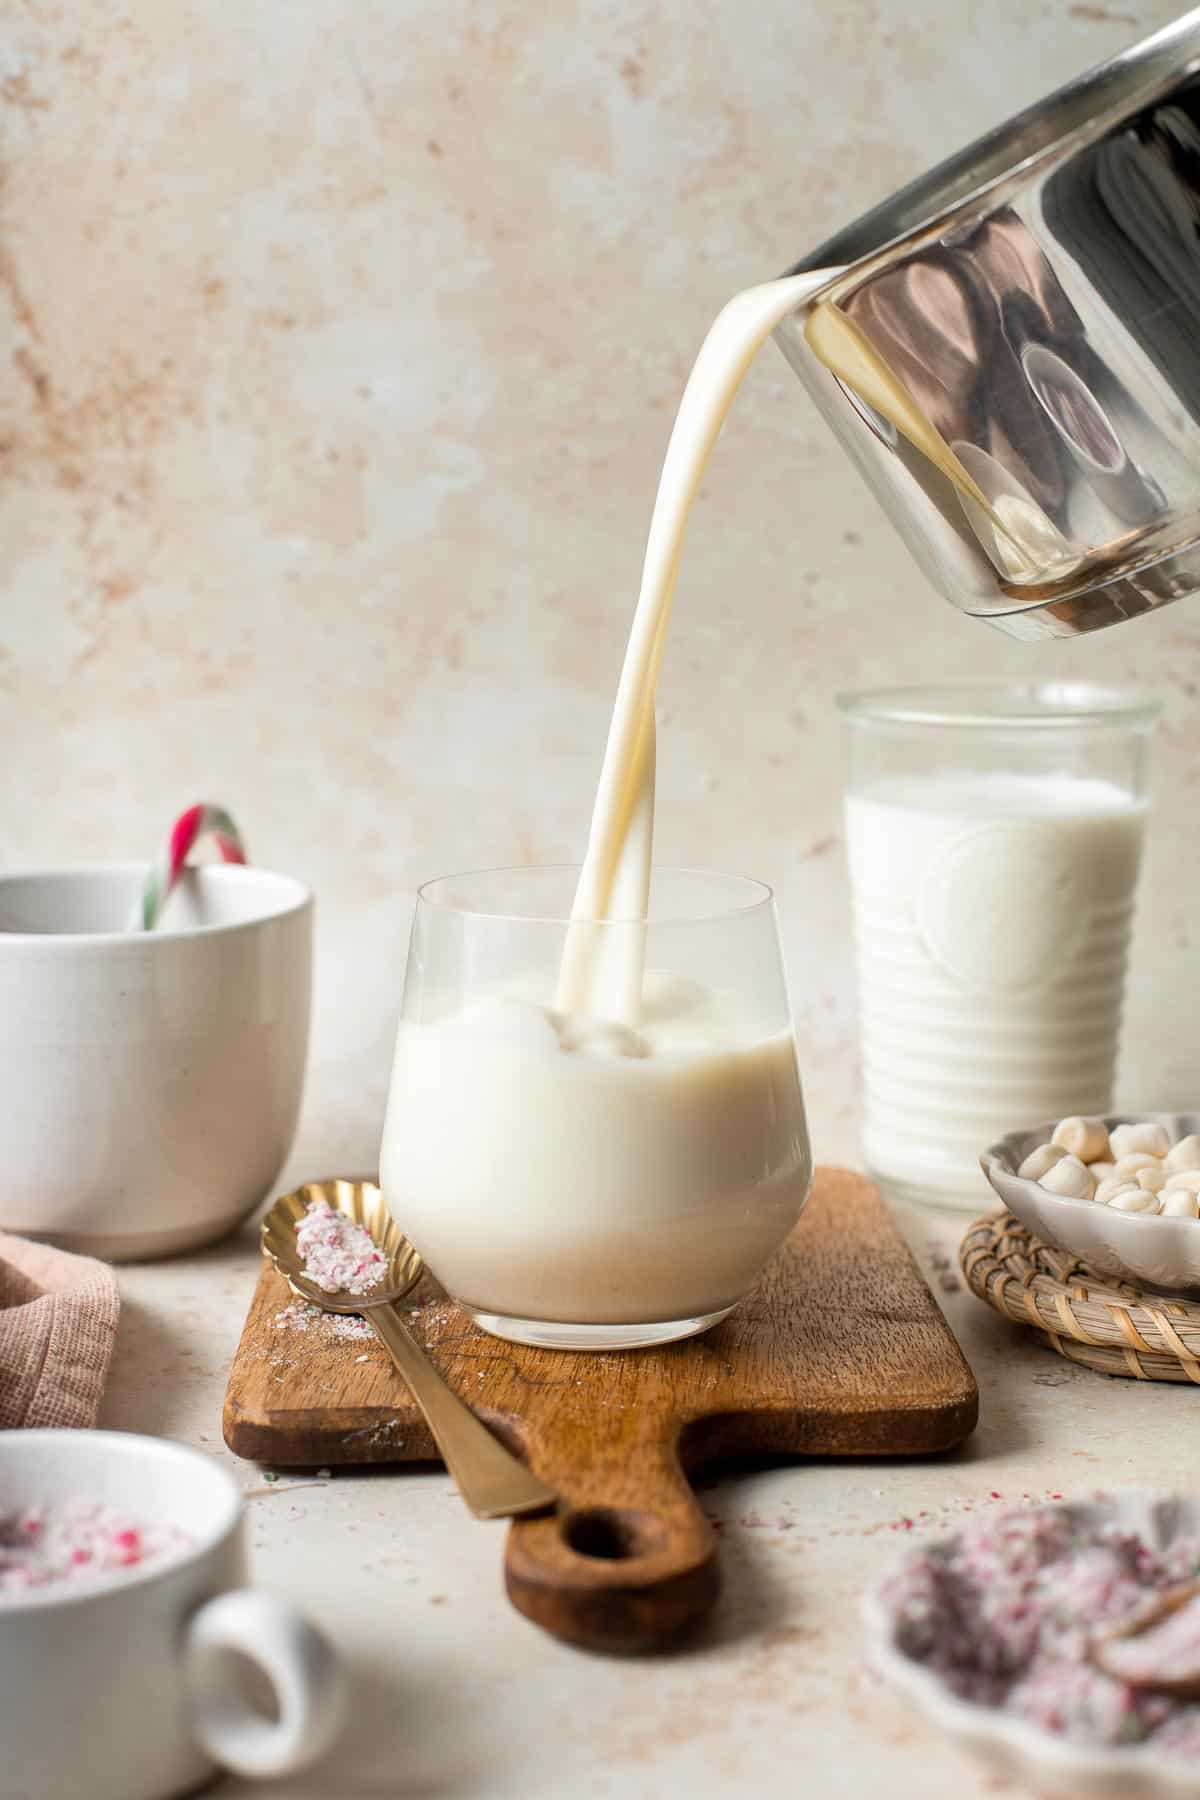
How to Serve
White Hot Chocolate is one of my favorite cozy drinks to enjoy in the cooler fall and winter months. We love serving it with a batch of our favorite homemade holiday cookies, including:
- Chocolate Chip Cookies
- Butter Pecan Cookies
- Almond Crescent Cookies
- Italian Ricotta Cookies
- Hot Chocolate Cookies
- Lemon Drop Cookies
See all of our favorite cookie recipes: 50 Best Cookie Recipes.
Recipe Tips and Tricks
- Choose your white chocolate carefully. Because there are so few ingredients, the quality of the white chocolate is especially important. Look for high quality white chocolate with cocoa butter listed in the first few ingredients and an off-white or yellowish tint to it.
- Make it foamy. Use a handheld frothing whisk to create a layer of foam on the top of each white hot chocolate before adding the whipped cream to create more fluffy, pillowy texture.
- Thicken it up. Everyone has an ideal hot chocolate consistency - some like it watery-thin and some like it as thick as melted chocolate itself. You can give this white hot chocolate a little more body by adding more melted chocolate, using a higher-fat milk (or adding a little heavy cream), or adding a tablespoon or two of cornstarch to the mix.
Storing and Freezing Instructions
How to Store
Allow any leftover white hot chocolate to cool to room temperature, then carefully pour the white hot chocolate into a liquid container with an airtight lid (like a large mason jar or sealed pitcher). Store in the refrigerator for up to 3 days.
How to Freeze
Once cooled to room temperature, pour leftover white hot chocolate into an ice cube tray and freeze until solid (usually 2-6 hours), then transfer the frozen cubes to a freezer bag. Freeze for up to 3 months. To use, reheat from frozen on the stovetop over medium-low heat.
More Drink Recipes
- Peppermint Hot Chocolate
- Non-Alcoholic Homemade Eggnog
- Slow Cooker Apple Cider
- Golden Milk Turmeric Latte
- Turmeric Ginger Tea
- Matcha Milk Tea
Tried this recipe?
I'd love to hear what you think! Leave a comment and rating below to share your feedback. Your reviews help others discover this recipe and help me keep creating more free recipes for you. Snap a photo and tag me on social media @aheadofthyme too.

Fried Goat Cheese Balls
Fried Goat Cheese Balls are flavorful, savory, and delicious. With creamy, melty cheese oozing out of a crispy, golden crust in every flavor-packed bite! They are so easy to make using 8 simple ingredients and are done in just 30 minutes. These cheese balls make the best holiday appetizers, game day snacks, or movie night munchies.
Quick and easy appetizers like fried goat cheese are absolute lifesavers when making for a crowd. They do not take a lot of time to prep and cook, and you can even get your whole family involved in coating the goat cheese while you get busy at the stove deep-frying them in batches. I'm sure the kids will love shaping and dunking the cheese balls in flour, egg and breadcrumbs. They are as much fun to make as they are to eat!
Why You'll Love these Fried Goat Cheese Balls
- Quick and easy appetizers. This goat cheese ball recipe yields 2 dozens of cheese balls done in just 30 minutes - and even less if you have some help! All you have to do is shape the cheese, coat them in flour, eggs, and seasoned breadcrumbs, then deep-frying them to golden perfection. It's a perfect last minute appy to whip up.
- Crunchy outside creamy inside. If you are a certified cheese-lover, then you are in for a treat with this goat cheese recipe. These crispy and cheesy poppers will have you coming back for more with their flavors and textures - from the savory, crispy panko crust to soft, creamy, tangy cheese to sweet, silky honey.
- A crowd-favorite. Fried goat cheese balls are one of those dishes that instantaneously draws in the crowd and are gone in an instant! They are delicious and packed with flavor. Plus, you can serve them warm with a drizzle of honey for even more flavor. It is a good thing you can easily double or triple the recipe to make plenty for a big party!
- Easy to making ahead and freezer-friendly. You can shape and coat the balls the day before and store them in the fridge tightly wrapped ready for frying the next day - or make them months ahead and store in the freezer!). Plus, you can freeze the prepared cheese balls and cook directly from frozen. This will give you more time to prepare other dishes that you are planning to serve to your guests.

Ingredient Notes
To make these Fried Goat Cheese Balls, you will need the following ingredients (full measurements in recipe card below):
- goat cheese - I love how creamy and soft goat cheese is without becoming too gooey when cooked, so they do not leak as much either. I recommend using goat cheese sticks. Do not buy the pre-crumbled goat cheese because that will be much more difficult to form into balls.
- all-purpose flour - this will coat the cheese balls and make them firmer so they do not loose their shape during cooking. Flour also absorbs excess moisture from the cheese to allow the egg to cling better.
- egg - gives the cheese balls a nice sticky surface for the breadcrumbs to adhere to. It also adds a richer taste and color to the crust.
- panko breadcrumbs - we like panko breadcrumbs for a light and crisp crust. If you cannot find panko, you can use regular breadcrumbs or crushed toast instead. Take note though that the texture may not be the same, but similar.
- garlic powder - to season the breadcrumbs and give it a savory flavor. You can play around with other seasonings like onion powder, white pepper, and herbs and spices.
- vegetable oil - or other neutral-tasting, high-smoke point oils like canola, sunflower, or avocado oil will work well for deep frying.
- parsley - for garnishing. You can use other fresh herbs like chives, cilantro, or scallions.
- honey - we drizzled honey over the fried goat cheese balls before serving to give it a sweet twist! You can also use maple syrup or agave as an alternative.
You will also need measuring cups and spoons, shallow dishes, and a cooking pot.
How to Make the Best Fried Goat Cheese Balls
- Shape goat cheese. Cut the goat cheese into 24 equal pieces, roughly 1 teaspoon in size. Use your hands to form each piece into a round ball.
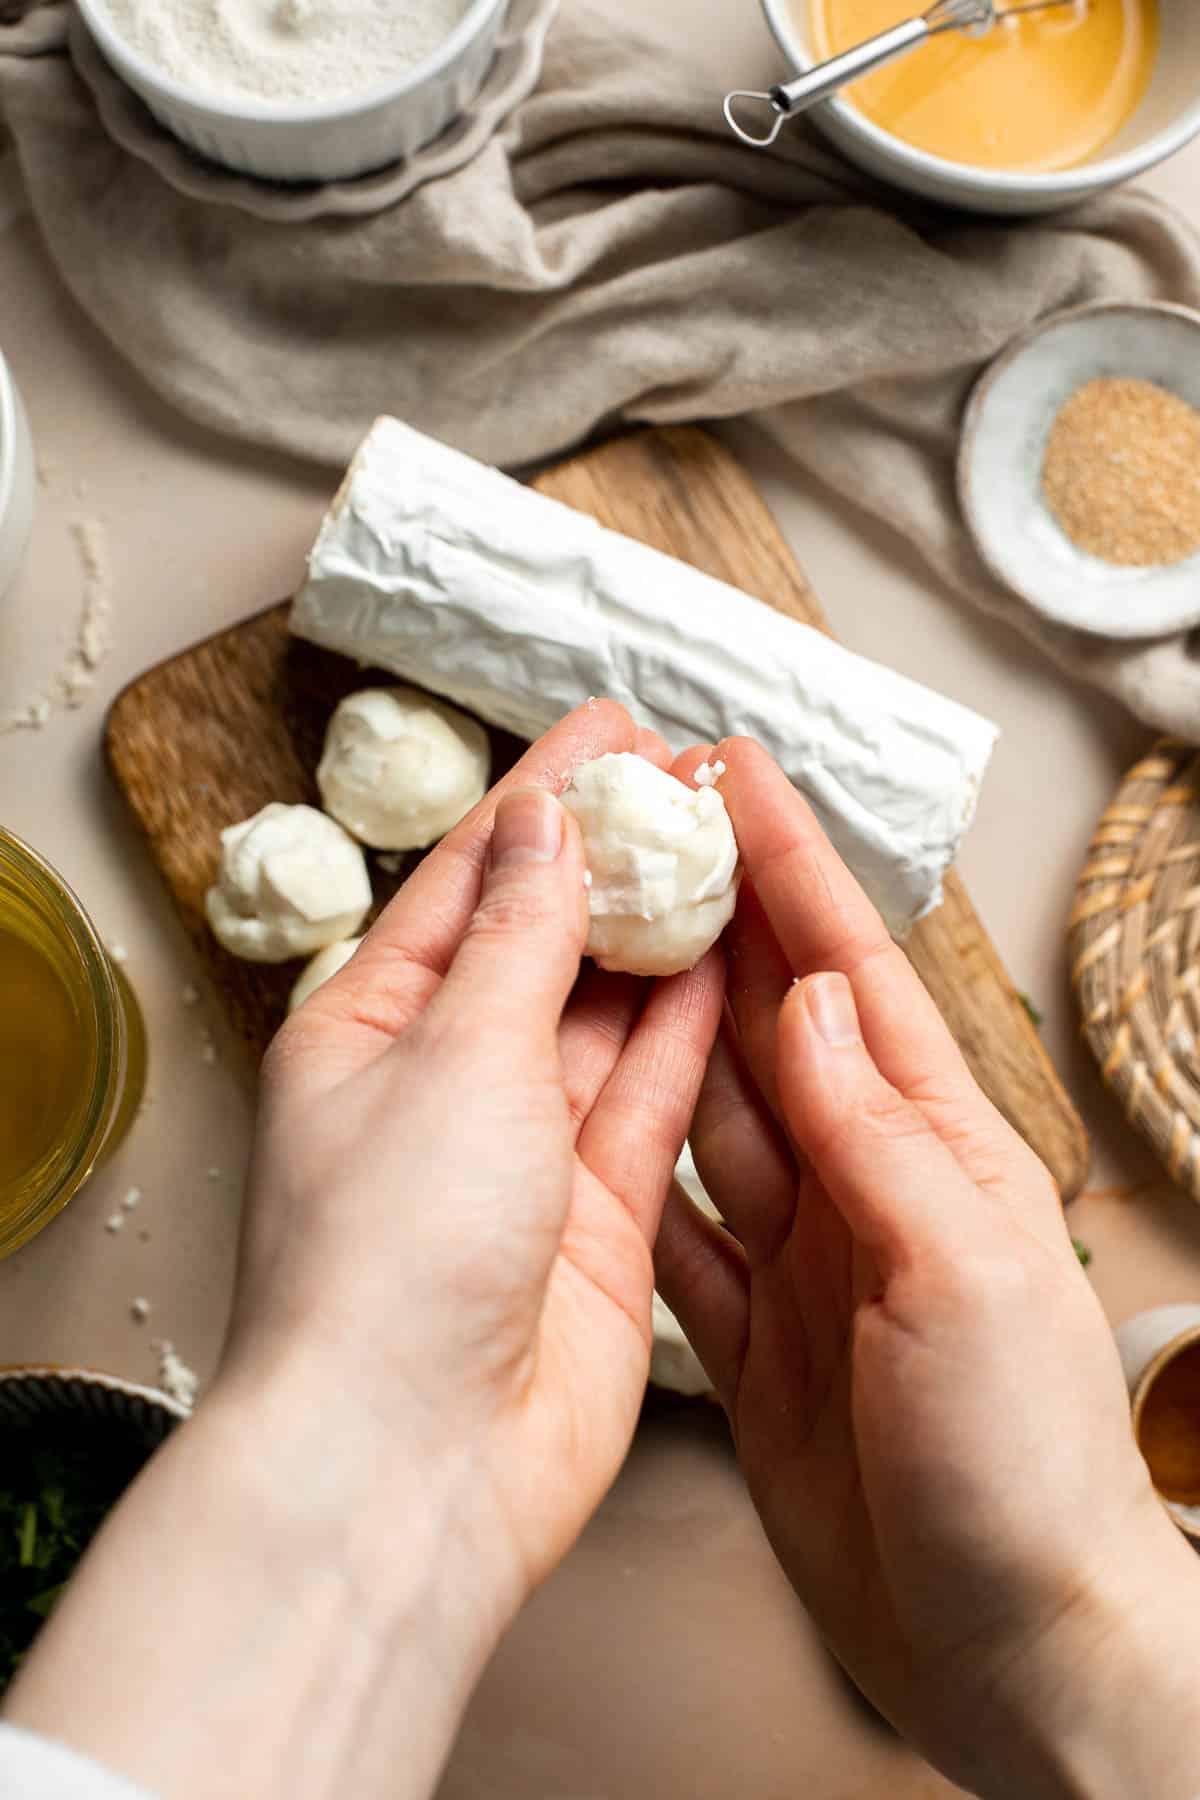
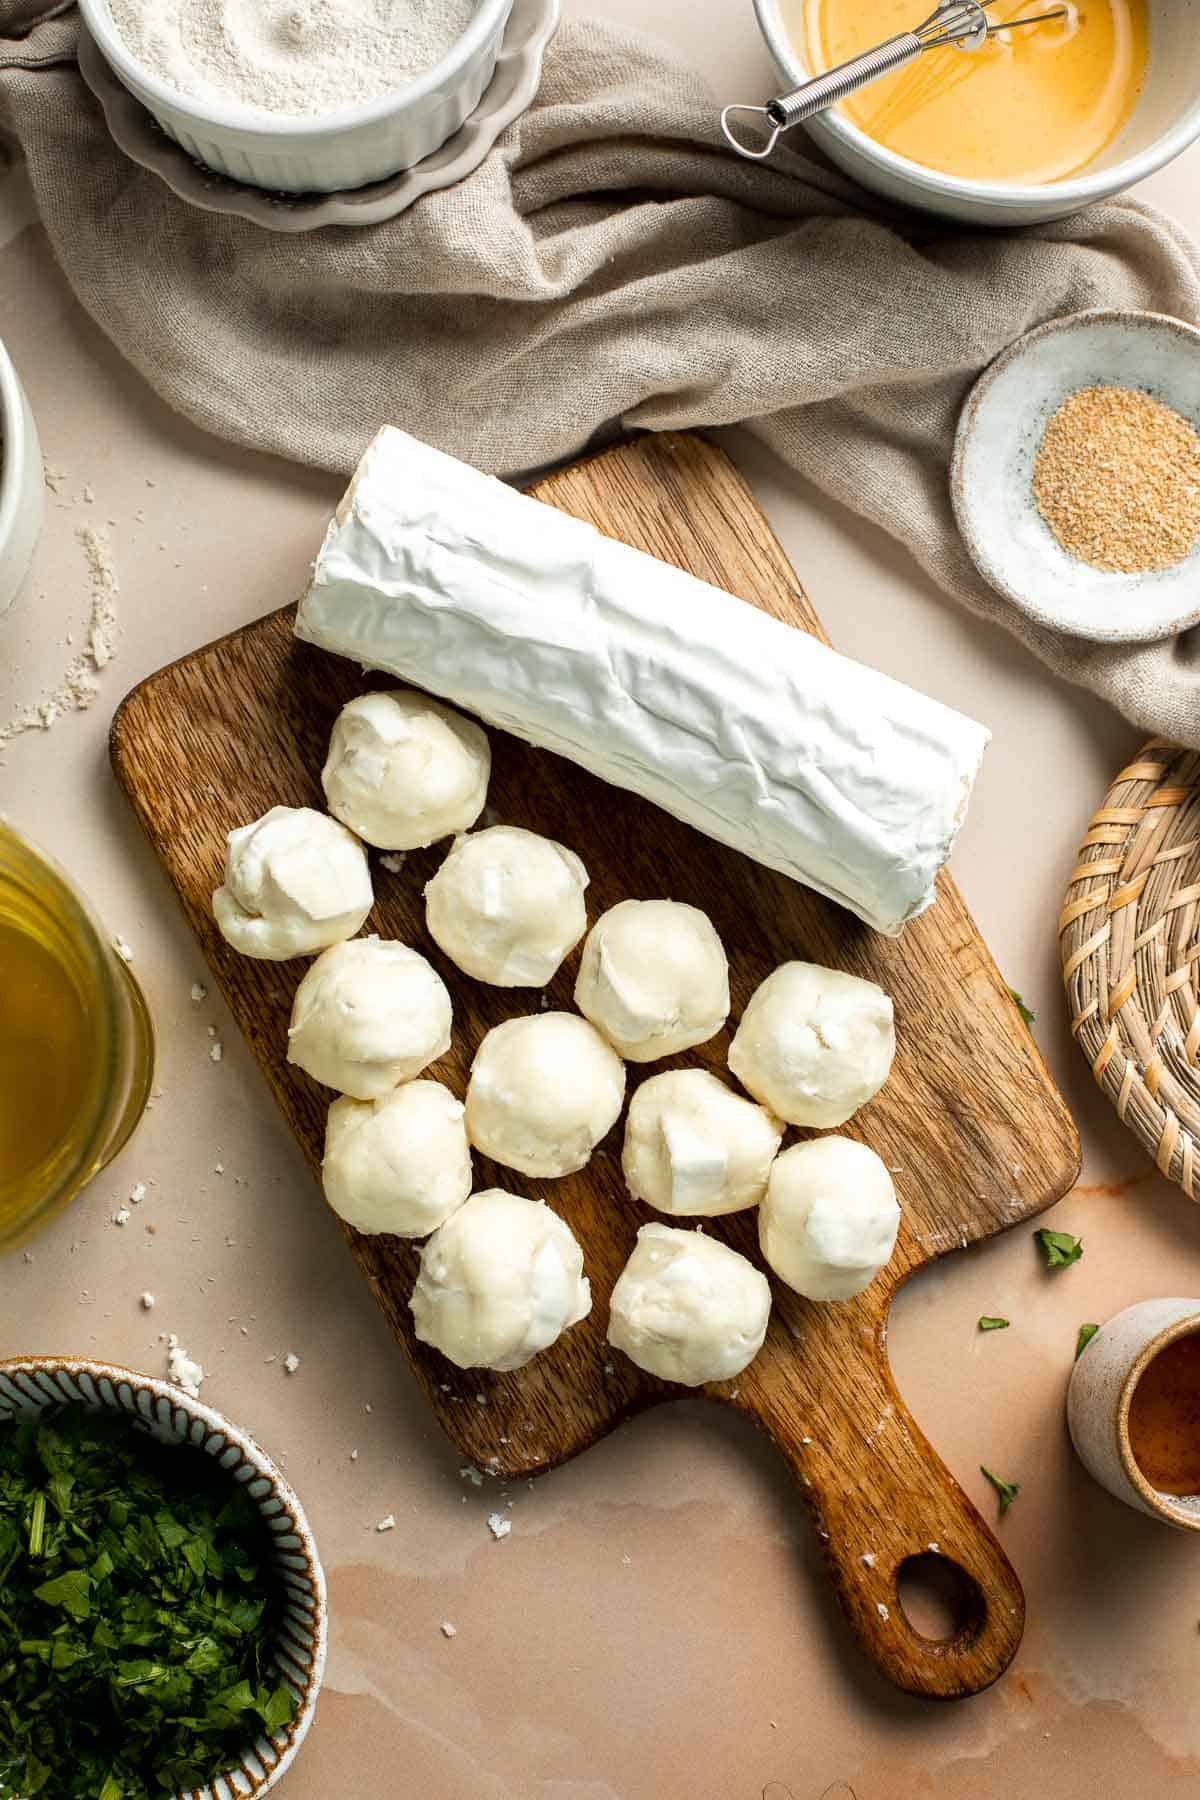
- Prep for coating. Add flour a shallow dish and beaten egg to another shallow dish, In a third shallow dish, add panko breadcrumbs and garlic powder. Whisk to combine.
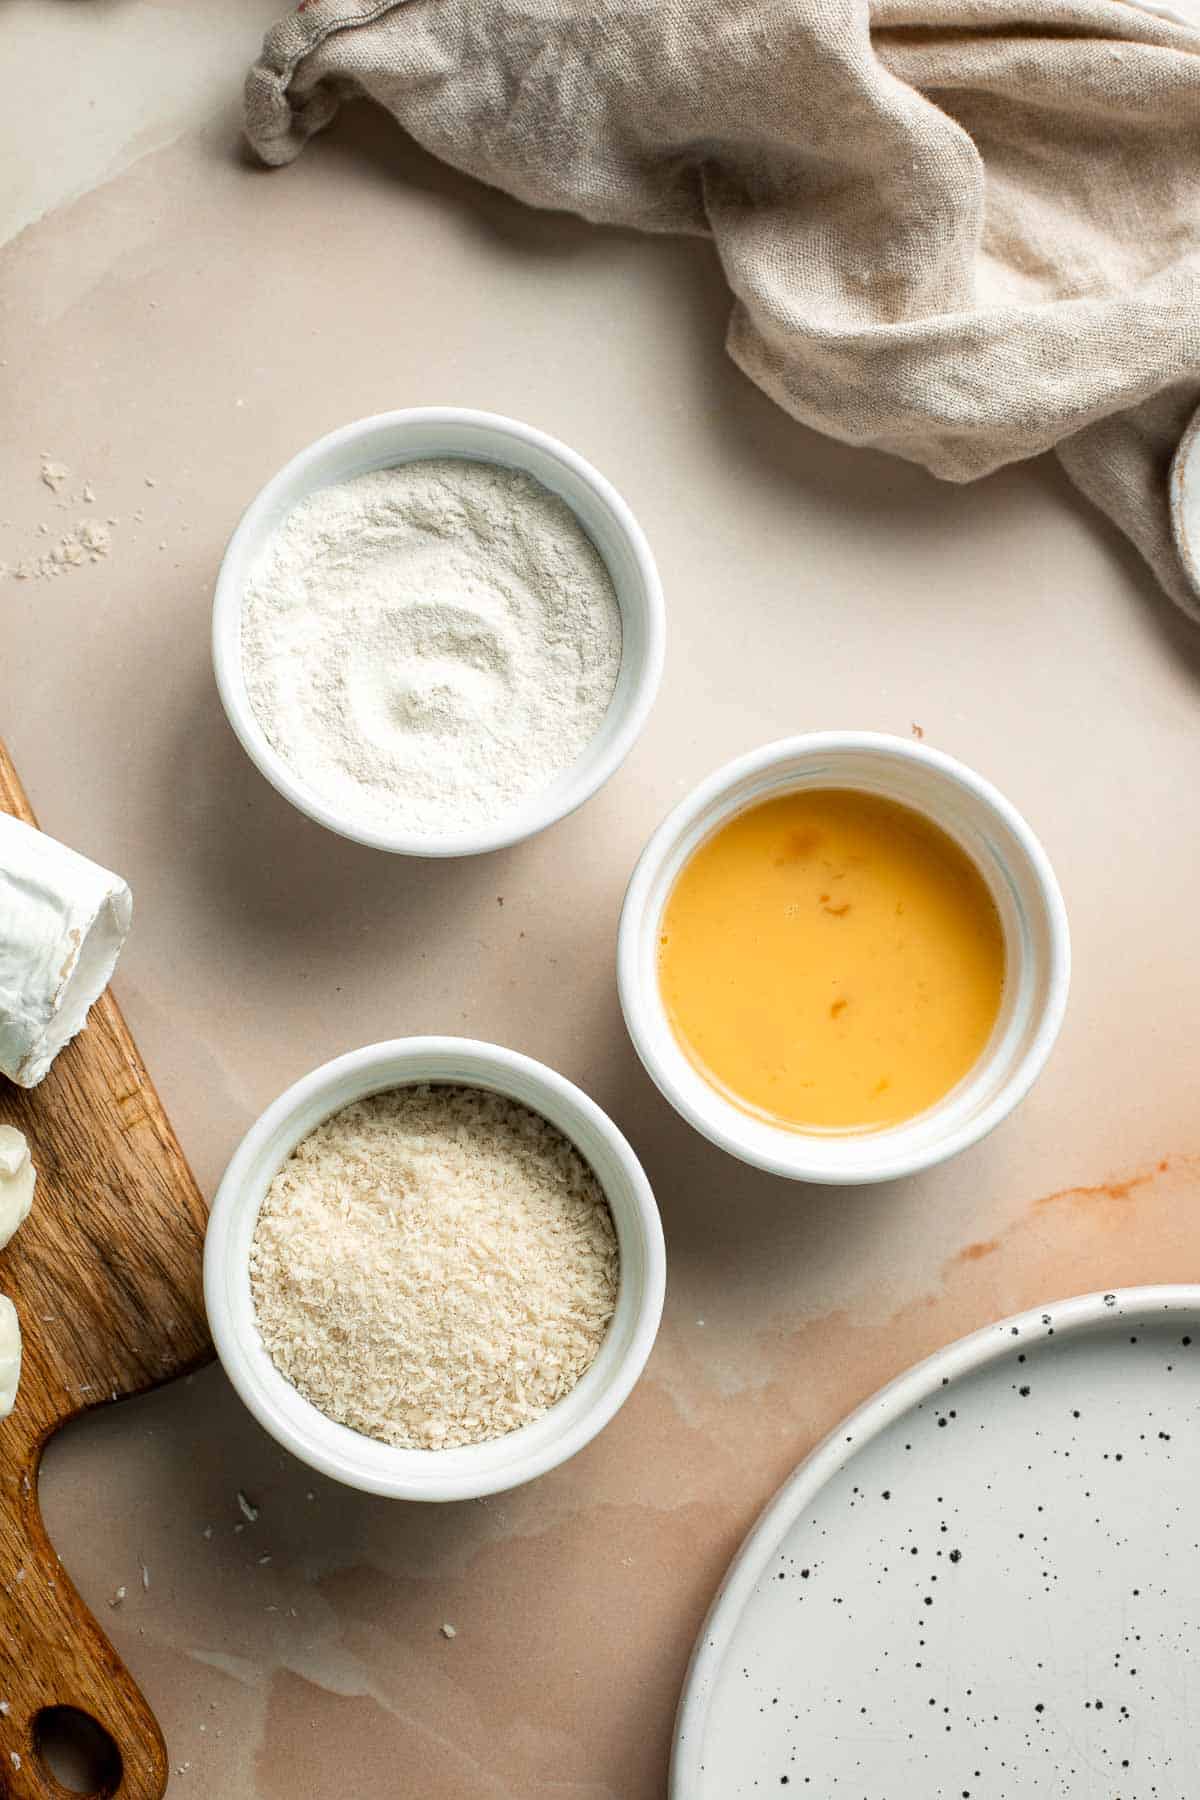
- Coat goat cheese. Coat each goat cheese ball in flour, then coat it into the egg, and finally dredge in panko and fully coat. Gently press the breadcrumbs around each ball to coat if needed to help it stick.
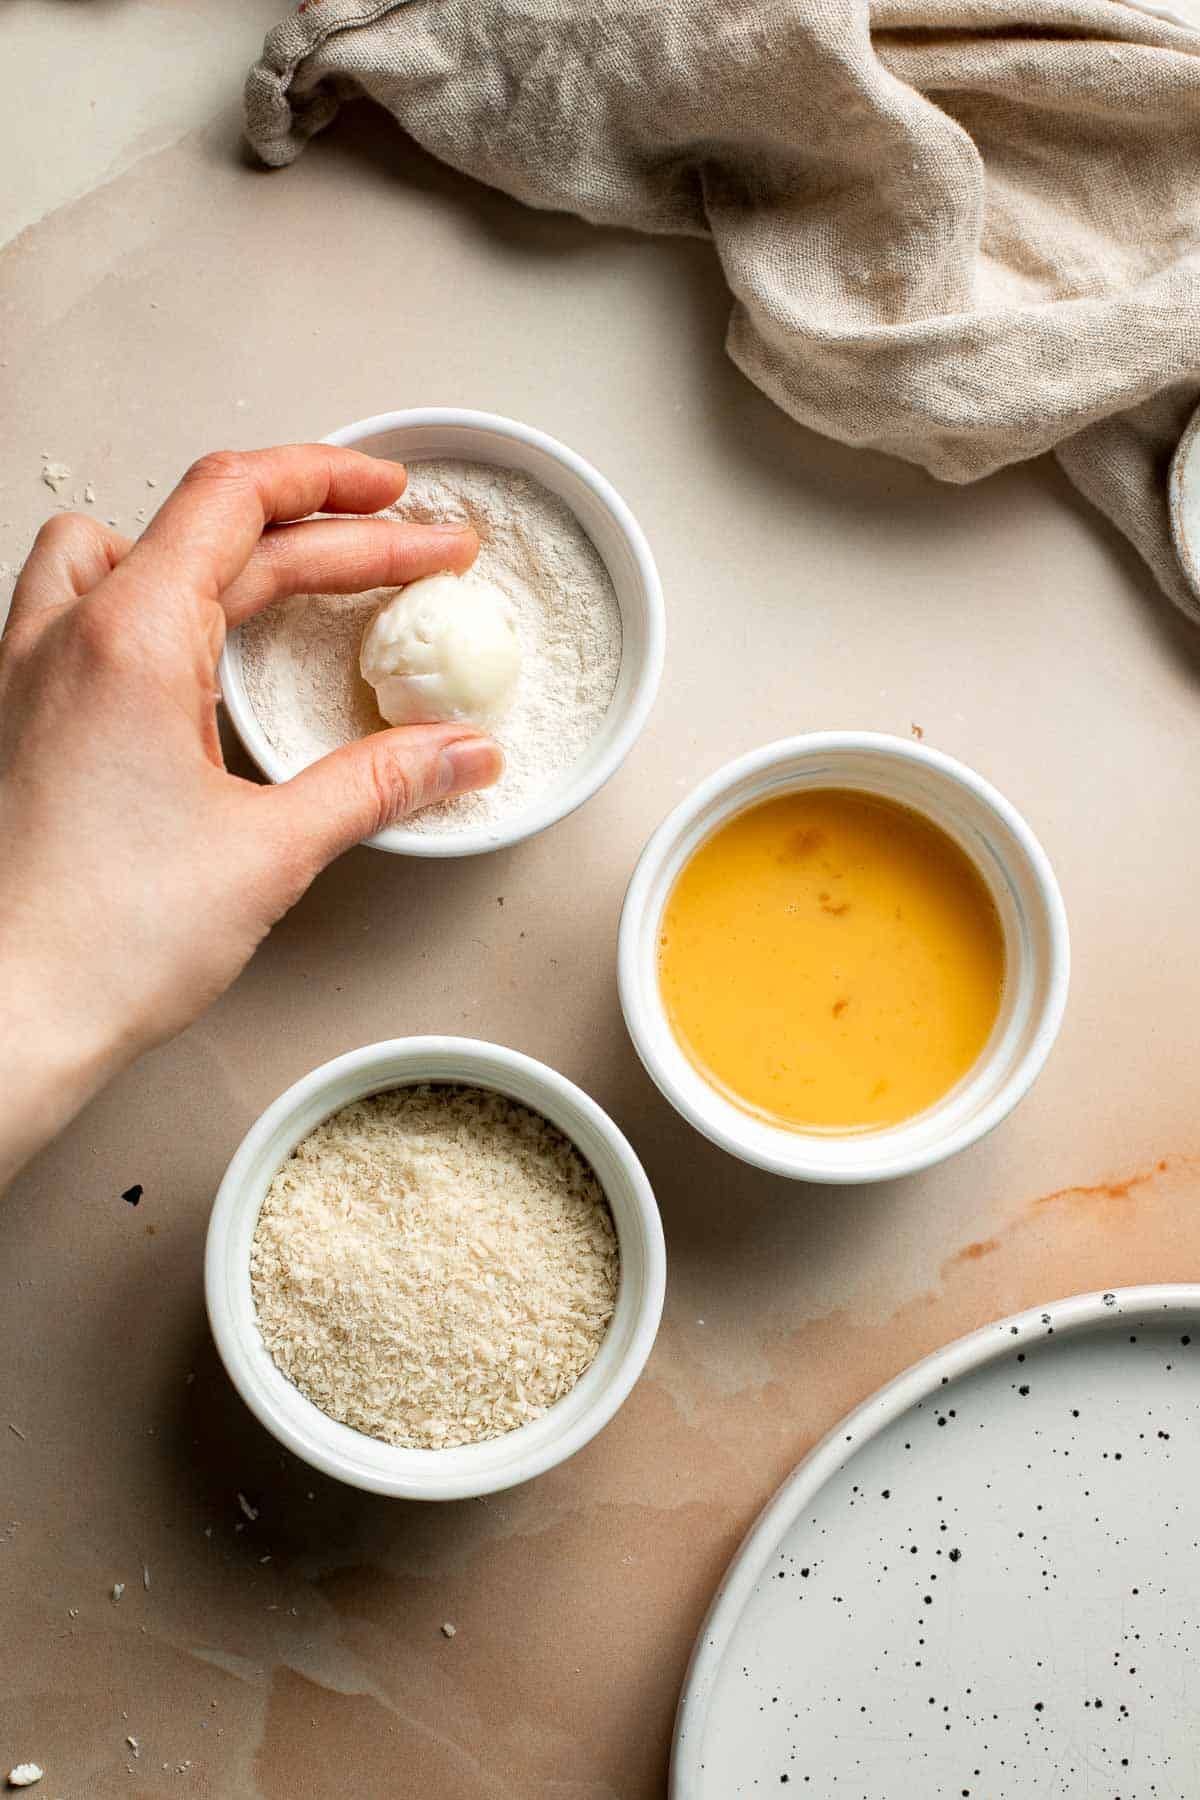
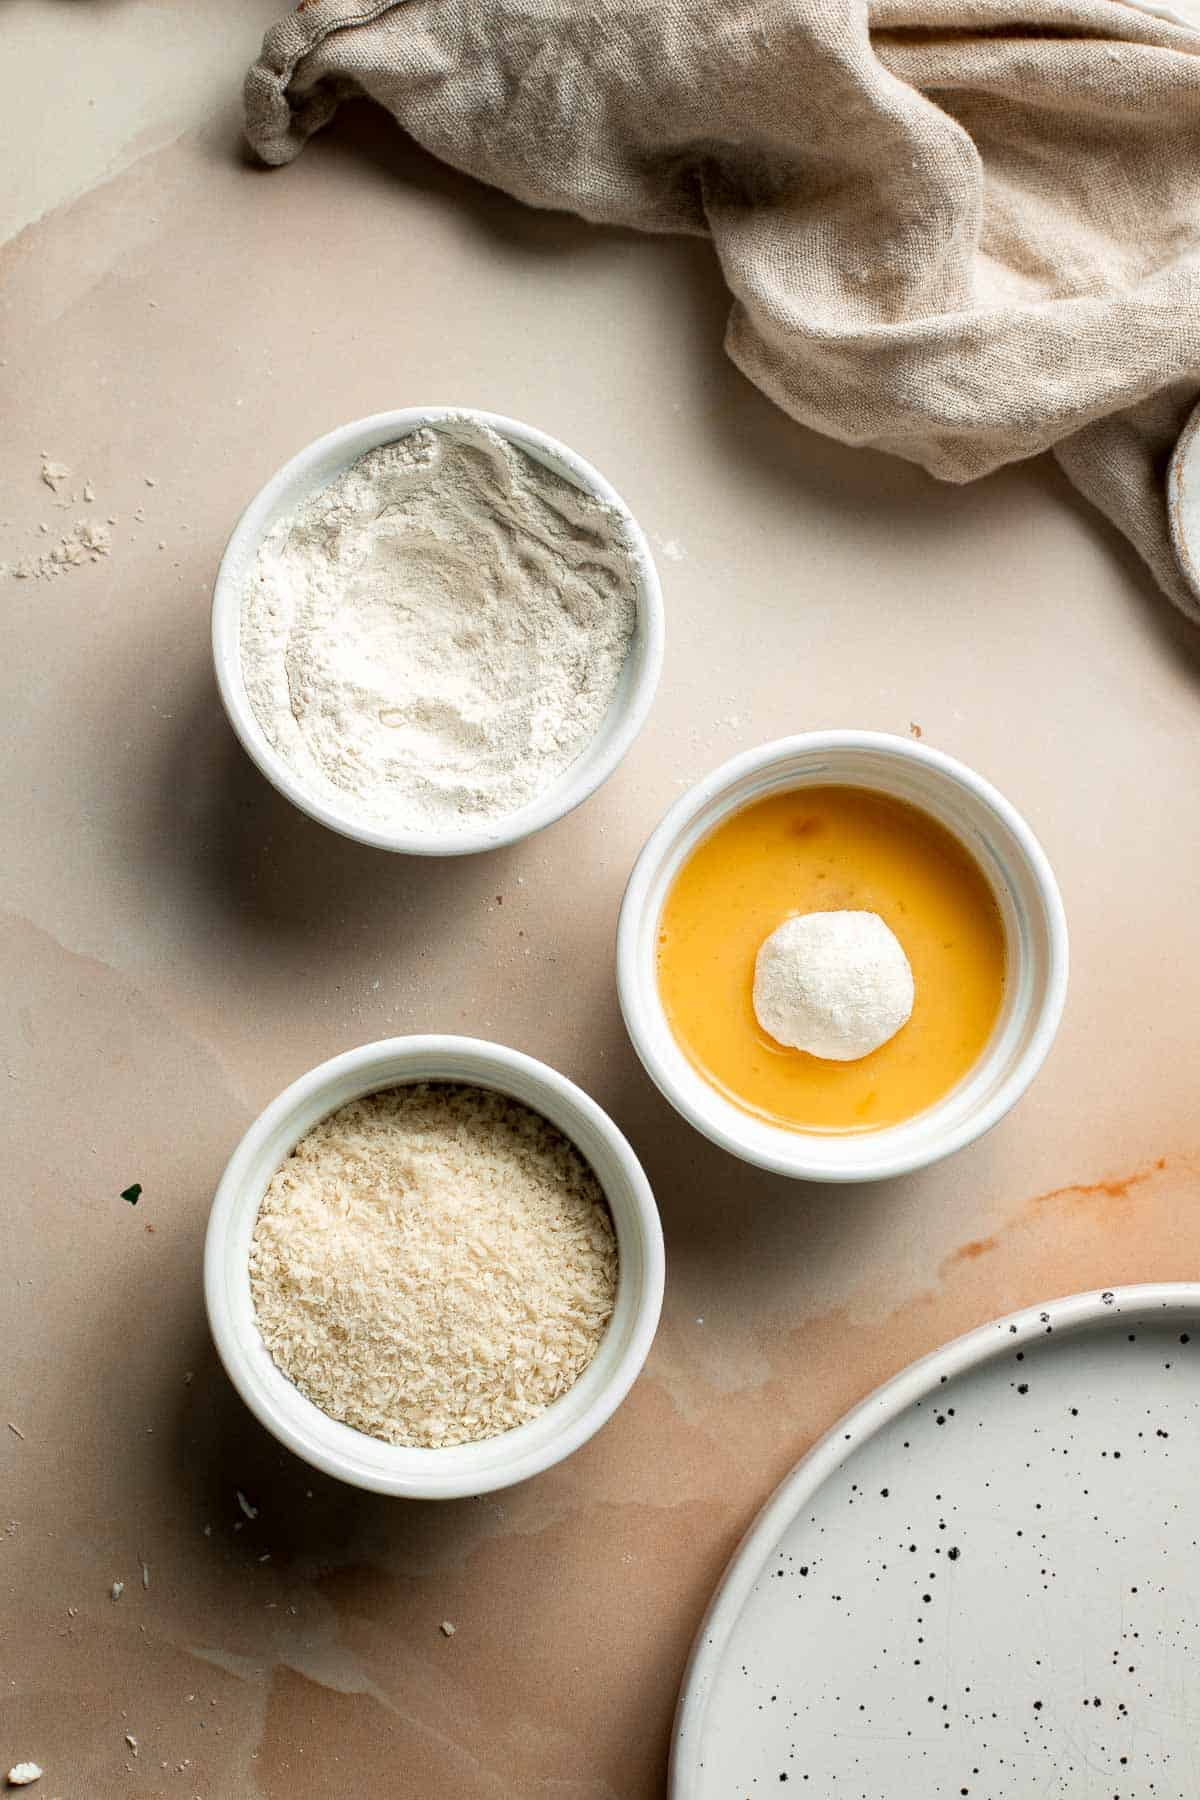
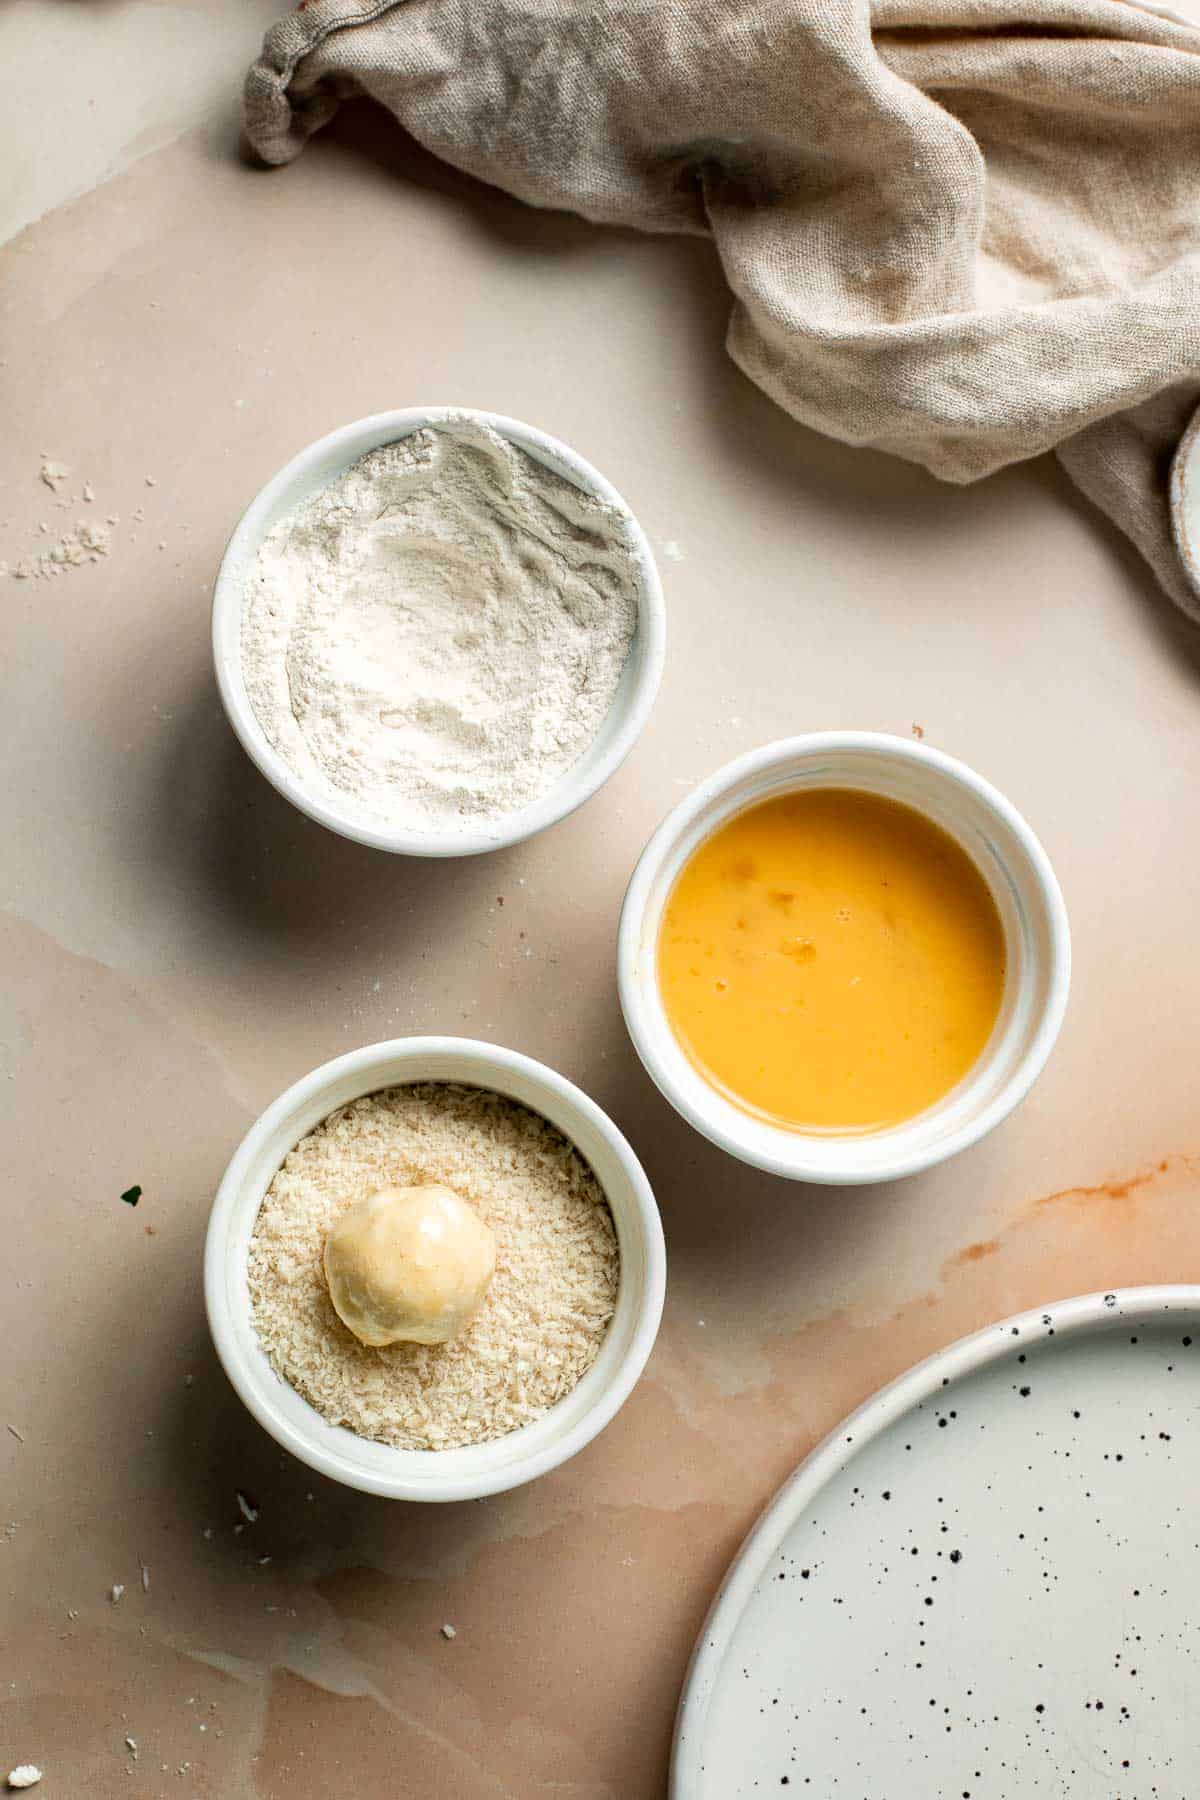
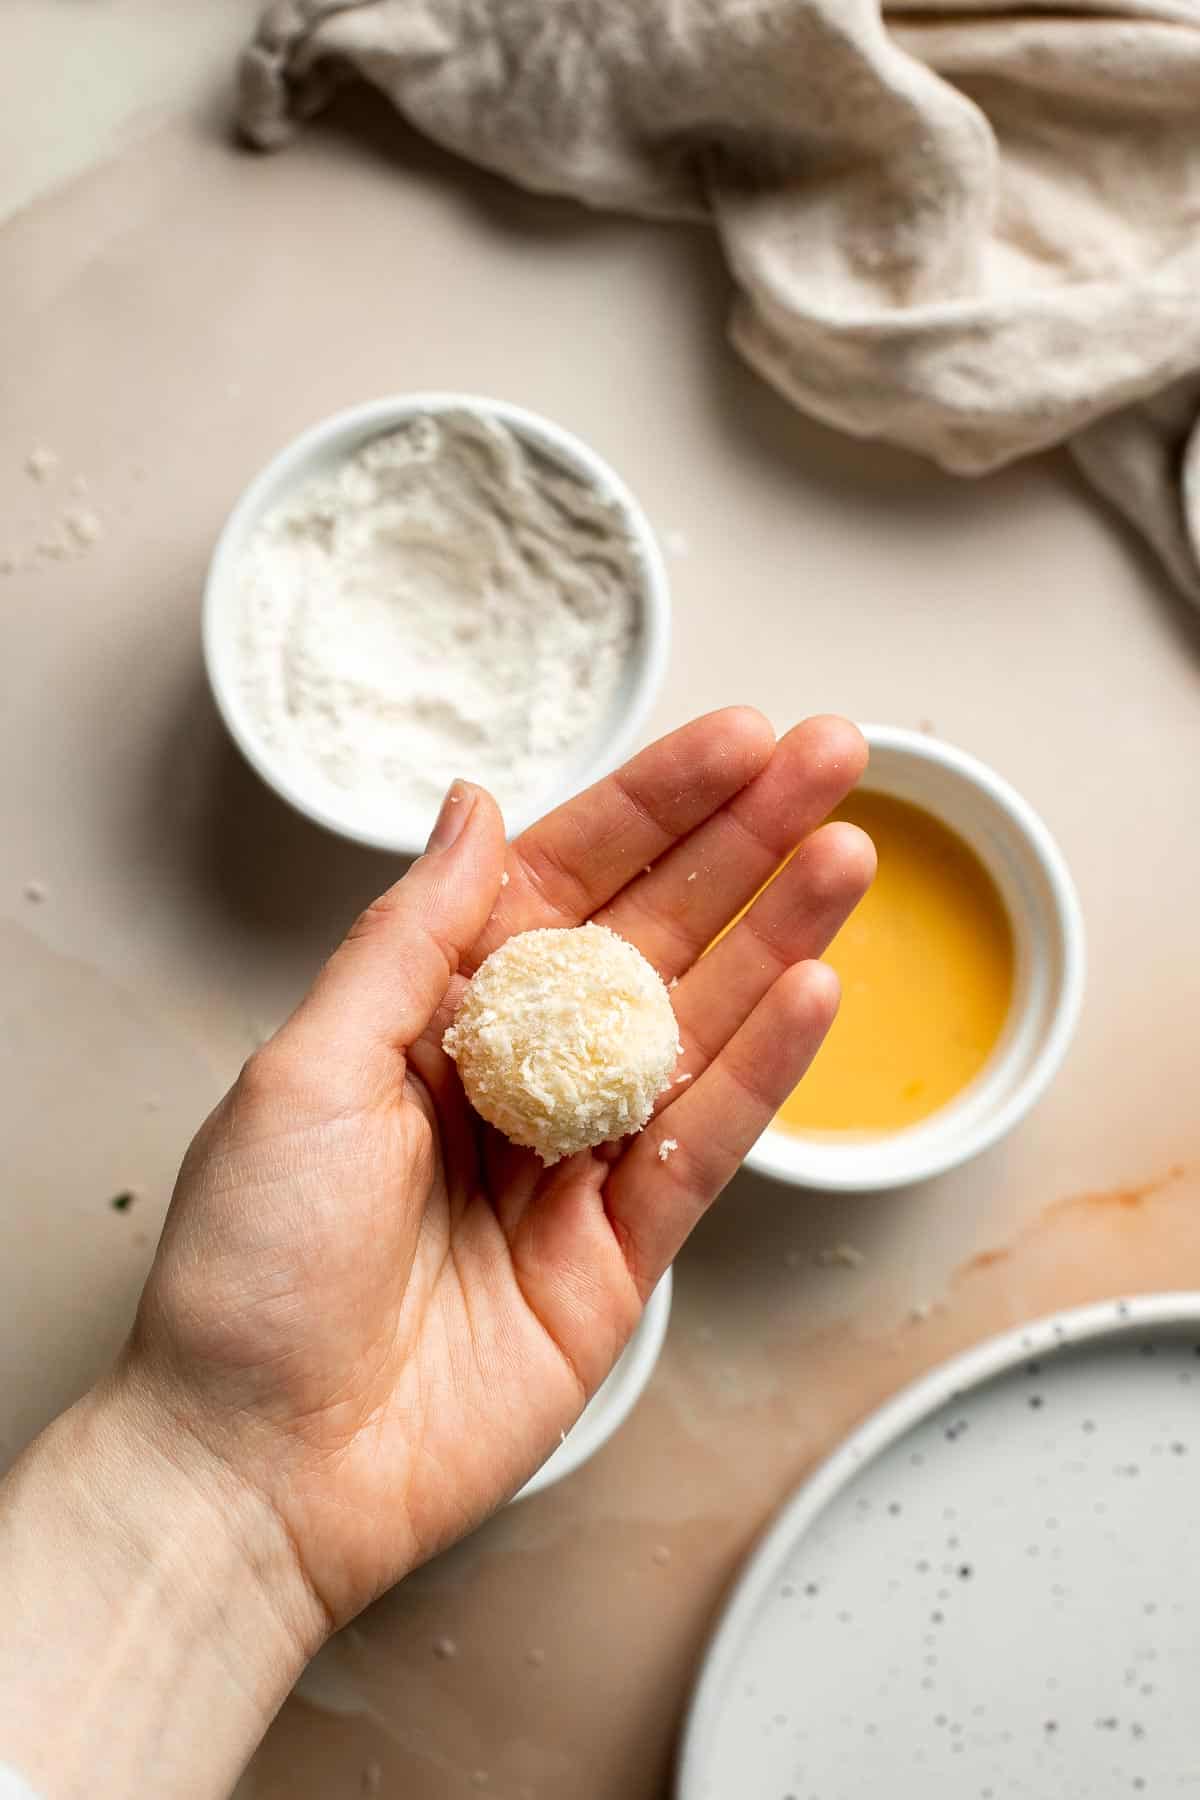
- Deep fry. Add 2-inches of oil into a cooking pot and heat over medium-high heat until shimmering hot, about 3-4 minutes. Add the goat cheese balls in batches (about 4-5 pieces each time) until crisp and golden brown, about 1-2 minutes. Turn the balls occasionally to get an even golden crust on all sides.
- Cool and serve. Transfer the goat cheese balls to a paper towel lined plate to drain excess oil, and let them cool for 5 minutes before serving. Transfer to a serving platter and drizzle with honey and a sprinkle of fresh parsley.
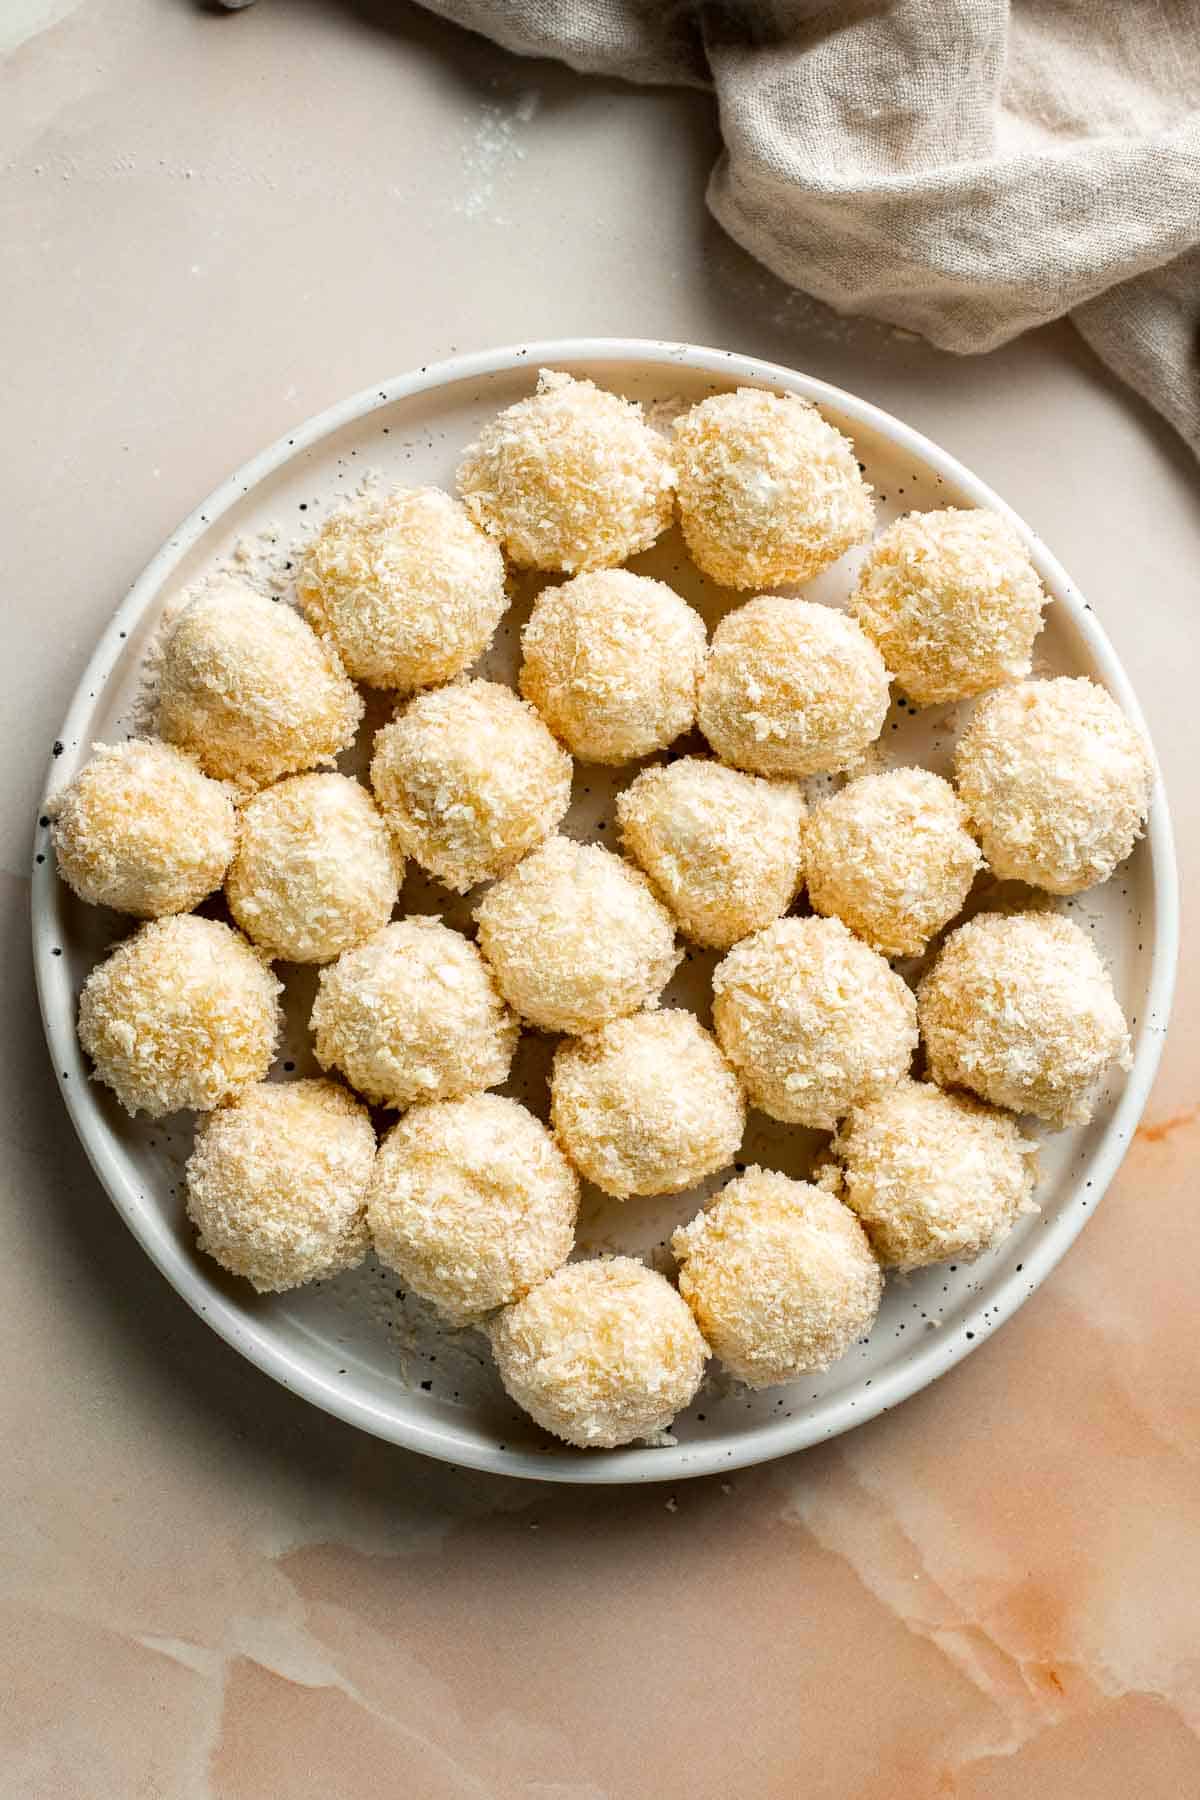
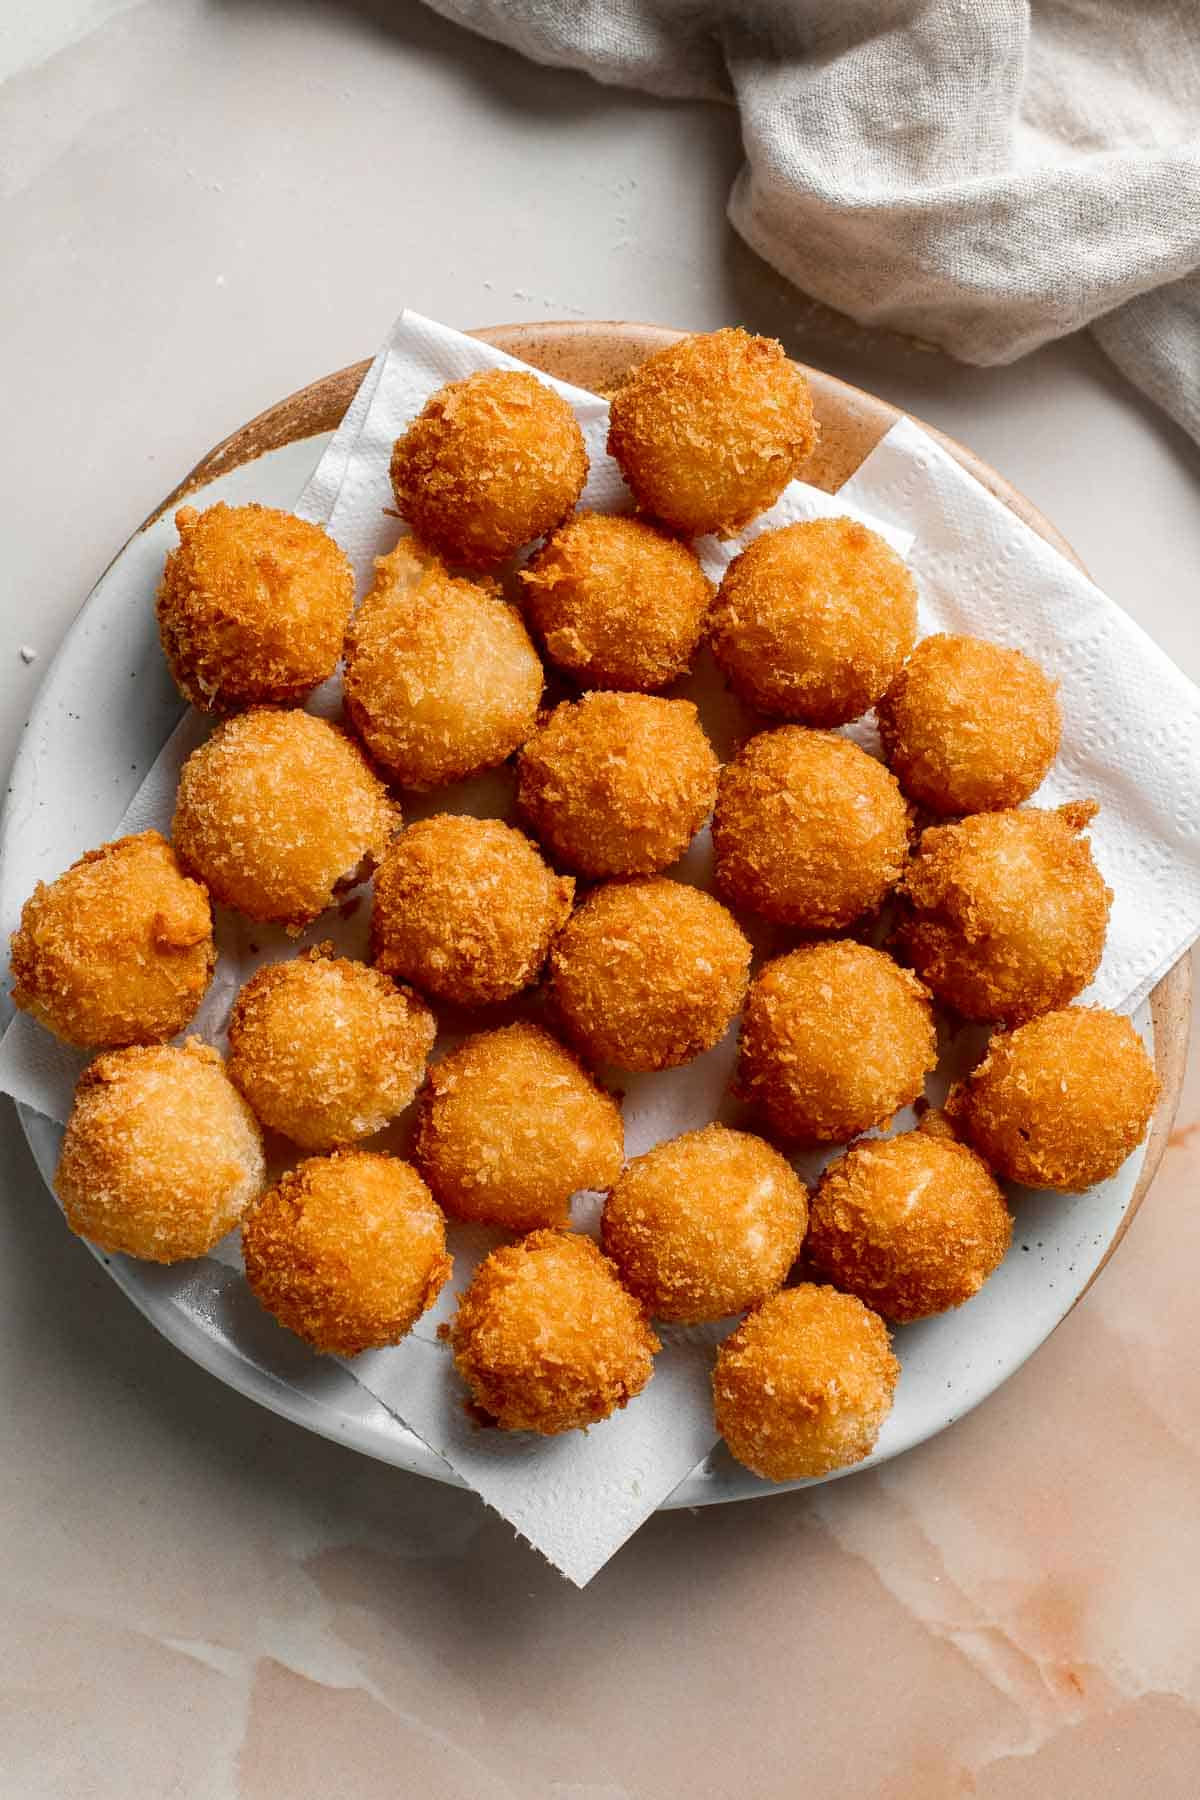
Recipe Variations
- Make it nutty. Add another element of crunch to the golden crust by adding crush nuts to the mix! This will also give them more flavor. Try using pecans, pistachios or almonds.
- Use herbed goat cheese. Herbed goat cheese will instantly give your appetizers a flavor boost without having to take any extra steps!
- Skip the honey and go for dips. While we love serving these with honey, you can also try enjoying them with dips and sauces. See below for our favorite dips to serve with this.
- Make them spicy. Add chili or cayenne powder to the panko breadcrumb mixture to make spicy goat cheese balls instead.
How to Serve
Goat cheese balls are best served warm - just a few minutes off the pan! This is when they are at their crunchiest and the cheese inside is melty and super creamy. While we love serving these with honey, you can also enjoy them with your favorite dips such as:
They are also ideal as salad and pasta toppers!
Recipe Tips and Tricks
- Keep the cheese chilled. Keep the goat cheese chilled as much as you can when you are forming them into balls. If you are making a lot and your kitchen is warm, you can place the shaped balls in the fridge while making the rest.
- Remove excess flour. Bounce the balls gently in your hands to remove excess flour after coating. If the flour coating is too thick, the panko crust might fall off later on.
- Use hot oil. The oil must be shimmering hot before you submerge the cheese balls. If they are not hot enough, the breading will simply absorb the oil and you will end up with soggy, greasy cheese balls.
- Cook in batches. Do not overcrowd the cooking pot. Adding too many balls at the same time will affect the oil temperature. It will also be difficult to move them around.
- Turn the balls regularly. Use a spatula or a chopstick to turn the balls from time to time. This will give you perfectly round, evenly cooked goat cheese balls!
- Do not overcook. Remove them from heat once the crust is golden brown in color. Do not let them become too hot or they will explode
- Drain excess oil. Drain excess oil in a paper-towel-lined plate or wire rack to ensure that they turn out super crispy!

Frequently Asked Questions
Yes, you can! Try using mozzarella, gouda, or cheddar.
You can dip a wooden stick into the pan. If the surface immediately bubbles, it should be ready. You can also use a thermometer. The ideal temp for deep frying should be between 350 to 375°F.
Sure! Just use vegan goat cheese, and swap the eggs with aquafaba and the honey with maple syrup.
Yes you can in the oven or air fryer too! See box below for full instructions.
How to Cook Goat Cheese Balls in the Air Fryer or Oven
To bake in the oven: Preheat oven to 375F. Place the coated goat cheese balls evenly on a parchment paper lined half sheet baking pan. Spray with cooking oil spray to coat. Bake for 20 minutes until the crust becomes golden brown.
To cook in the air fryer: Place the goat cheese balls in a single layer in the air fryer basket and spray evenly with cooking oil spray. Depending on the size of your air fryer, you may have to do this in batches. Air fry at 350F for 13-15 minutes until the crust becomes golden brown.
Storing and Freezing Instructions
Make Ahead Instructions
You can prepare and coat the uncooked goat cheese balls and store before deep frying. When making them ahead, store them in an airtight container in the fridge for 2 days or in the freezer for up to 3 months.
How to Store
If you have leftovers, place them in an airtight container after they have been cooked and cooled to room temperature. Store in the fridge for up to 3 days. You can re-fry them to bring back the crispiness.
How to Freeze
Freeze goat cheese balls before you cook them. Place the coated cheese balls on a parchment paper lined sheet pan. Freeze for 1-2 hours until hard, then transfer to a freezer bag or airtight container. You can deep fry the balls directly from frozen (it may take a minute or 2 longer to cook), or allow them to thaw overnight in the refrigerator and follow the recipe as written.
More Appetizer Recipes
- 30 Best Christmas Appetizers
- Fried Mac and Cheese Balls
- Cranberry Meatballs
- Antipasto Skewers
- Easy Baked Meatballs
- Mashed Potato Balls
Tried this recipe?
I'd love to hear what you think! Leave a comment and rating below to share your feedback. Your reviews help others discover this recipe and help me keep creating more free recipes for you. Snap a photo and tag me on social media @aheadofthyme too.

Christmas Cupcakes
These festive Christmas Cupcakes are made of moist and fluffy vanilla funfetti cake topped with red and green Christmas-themed buttercream frosting. You will have so much fun making them and even more fun if you get the whole family involved. Not only do they look impressive on a dessert table, but they are delicious.

Unleash your jolly holiday spirit by decking these Christmas confetti cupcakes with holiday colored icing and sprinkles. With a step-by-step tutorial for Christmas tree cupcakes, Santa hat cupcakes, or Christmas wreath cupcakes, you can make one or make them all. Christmas cupcakes are the perfect holiday dessert to enjoy at gatherings or to give away to your family and friends.
We love making cupcakes for holidays because it's so much fun to get creative (remember our Bunny Ears Easter Cupcakes or Mother's Day Cupcake with Rose Petal Buttercream Icing?). So of course we have to share a Christmas themed cupcake this year, and we cannot be happier with how they turned out! So, if you are still stumped on what dessert to make this Christmas, these funfetti cupcakes may be exactly what you are looking for.
Why You'll Love these Christmas Cupcakes
- Fun and festive cupcakes! Soft and moist funfetti cupcakes topped with melt-in-your-mouth buttercream icing taste absolutely heavenly and are so endearingly cute! We love how the sprinkles give the cakes a pop of color in every bite. We also had so much fun decorating them with icing and even more sprinkles. You can always get creative with other edible embellishments if you like.
- An easy to follow, from-scratch recipe. This homemade confetti cupcake recipe does not use boxed cake mixes or ready-made buttercream icing. Everything is made from scratch because it is so easy to do so. It takes some time to decorate but you can be as simple or intricate as you like. You'll be impressed with you as-good-as-bakery cupcakes made right in your kitchen!
- Simple ingredients. This recipe requires a few basic pantry and refrigerator staples like flour, baking powder, butter, and eggs. So if you like to bake, you will likely already have most (if not all) of these ingredients already at home.
- It is customizable. You can enjoy these Christmas cupcakes treats all season long and beyond by changing the color of the icing and sprinkles. Use pink or white sprinkles for Valentine's Day or Mother's Day, purple pink and yellow for Easter, orange and black for Halloween and so on. These confetti cupcakes can also be enjoyed on birthdays, baby showers, anniversaries too.
- Perfect for gift-giving. If you are not into Christmas shopping, place these cute treats in a box and you have a thoughtful, made-with-love present for everyone without stepping into a mall!

Ingredient Notes
To make these fun and festive Christmas Cupcakes, you will need the following ingredients (full measurements in the recipe card below):
- all-purpose flour - ideal for making perfectly soft and fluffy cupcakes.
- baking powder - is the leavening agent used to make the batter rise as it bakes, making them tender and crumbly.
- salt - omit the salt in the recipe if using salted butter.
- butter - always use this at room temperature for a smoother batter. If you have salted butter, make sure to omit the salt in this recipe to balance the flavors.
- granulated sugar
- eggs - binds the ingredients together and give the cupcakes a richer flavor, structure, and nice golden color.
- vanilla extract - use the same amount of vanilla bean paste for a slight flavor boost.
- whole milk
- sprinkles - we use red and green Christmas sprinkles to keep it festive, but you can use regular sprinkles if you want, or leave them out completely. We also use rainbow confetti sprinkles for decorating the cupcakes.
- confectioners' sugar - this powder-like sugar will give you a smooth and silky buttercream icing.
- gel food coloring - you will need festive red and green food coloring for these cupcakes.
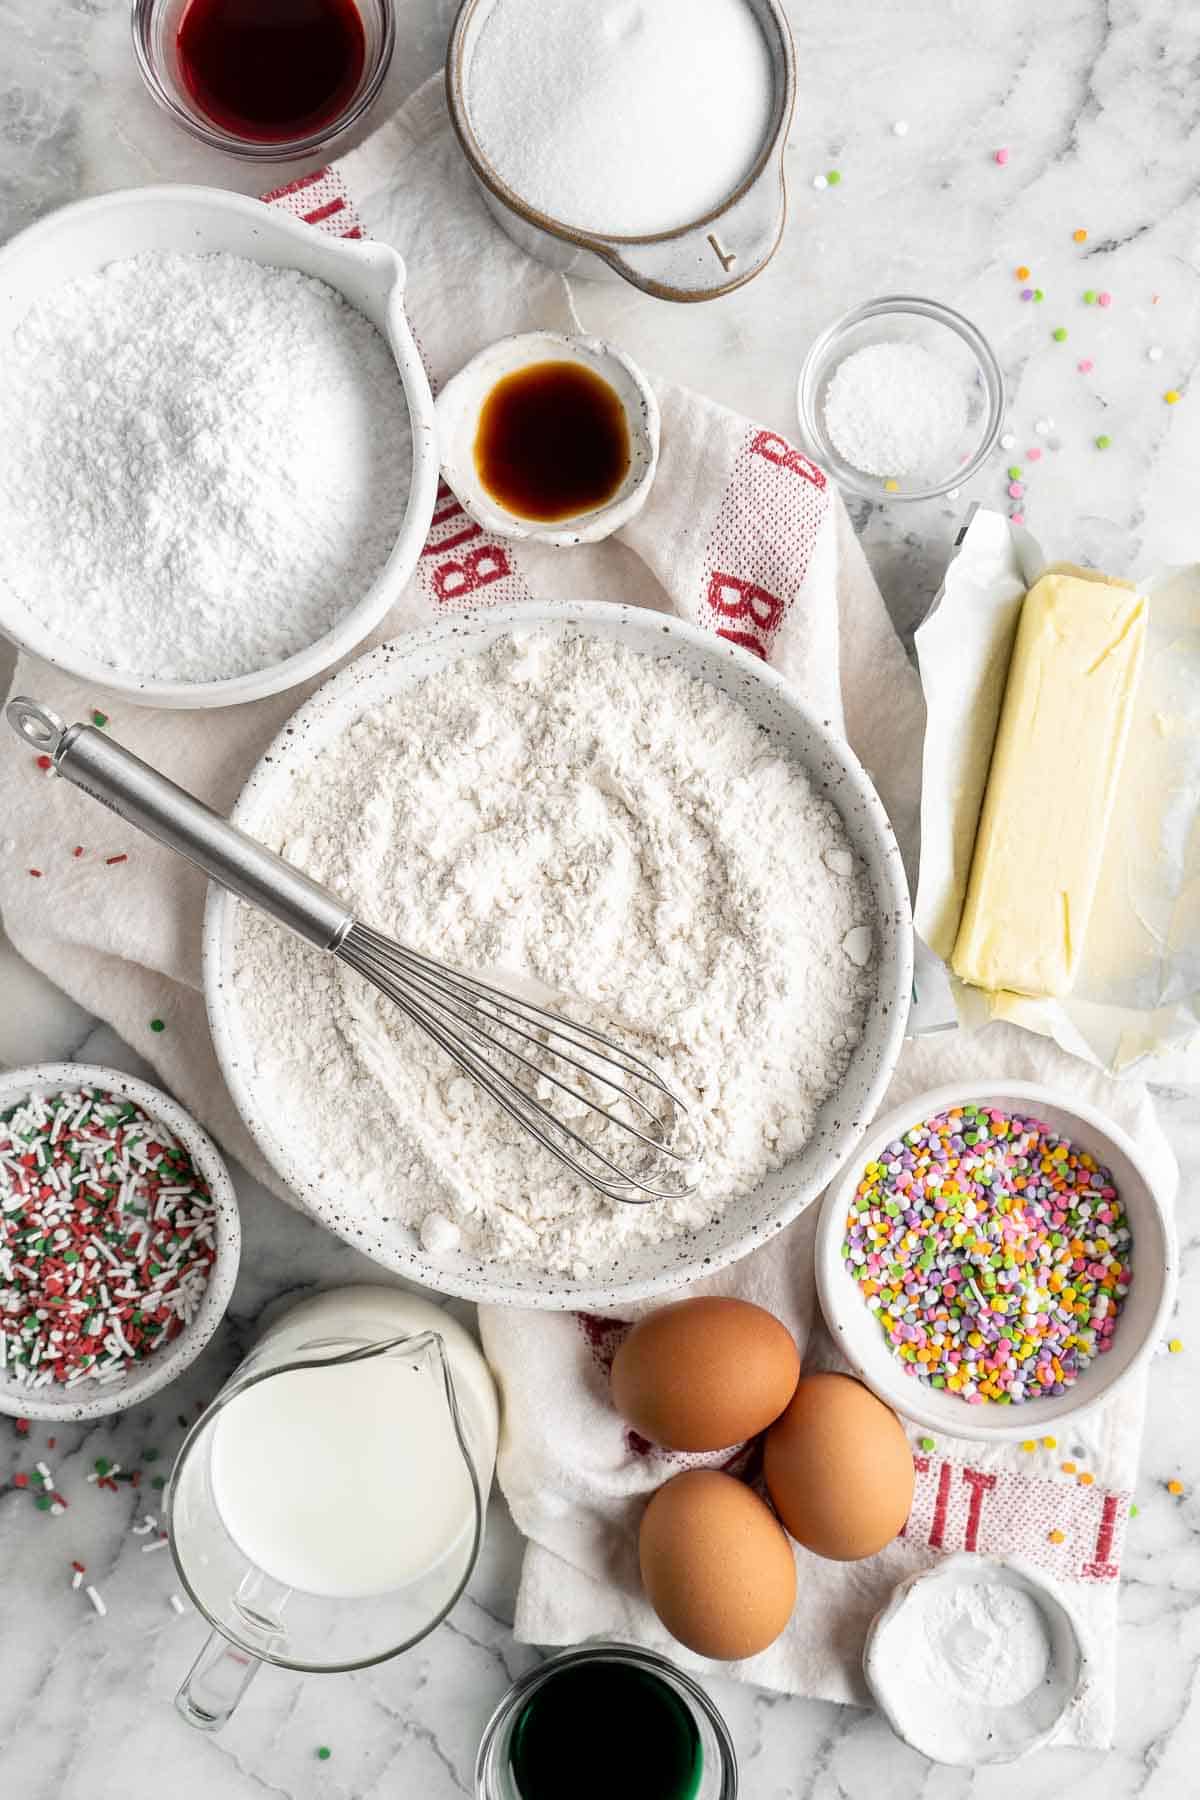
Baking Equipment
You will also need the following baking tools and equipment:
- 12-cup muffin pan
- cupcake liners
- measuring cups and spoons
- mixing bowls
- hand mixer and/or stand mixer
- wire cooling rack
- large and small piping bags
- piping tips
- Atecco 808 (large round tip)
- Wilton 68 tip (leaf decorating tip)
- Wilton 1M tip (open star tip)
- Wilton 32 tip (star tip)
- Wilton 18 tip (open star tip)
- couplers (for securing the tips to the piping bags)
How to Make the Best Christmas Cupcakes
First, make funfetti cupcakes.
- Cream butter and sugar. In a large mixing bowl, use a hand mixer to cream butter and sugar together on medium-high speed until light and fluffy, about 3-4 minutes. Add in eggs and vanilla, and beat until well incorporated and smooth.
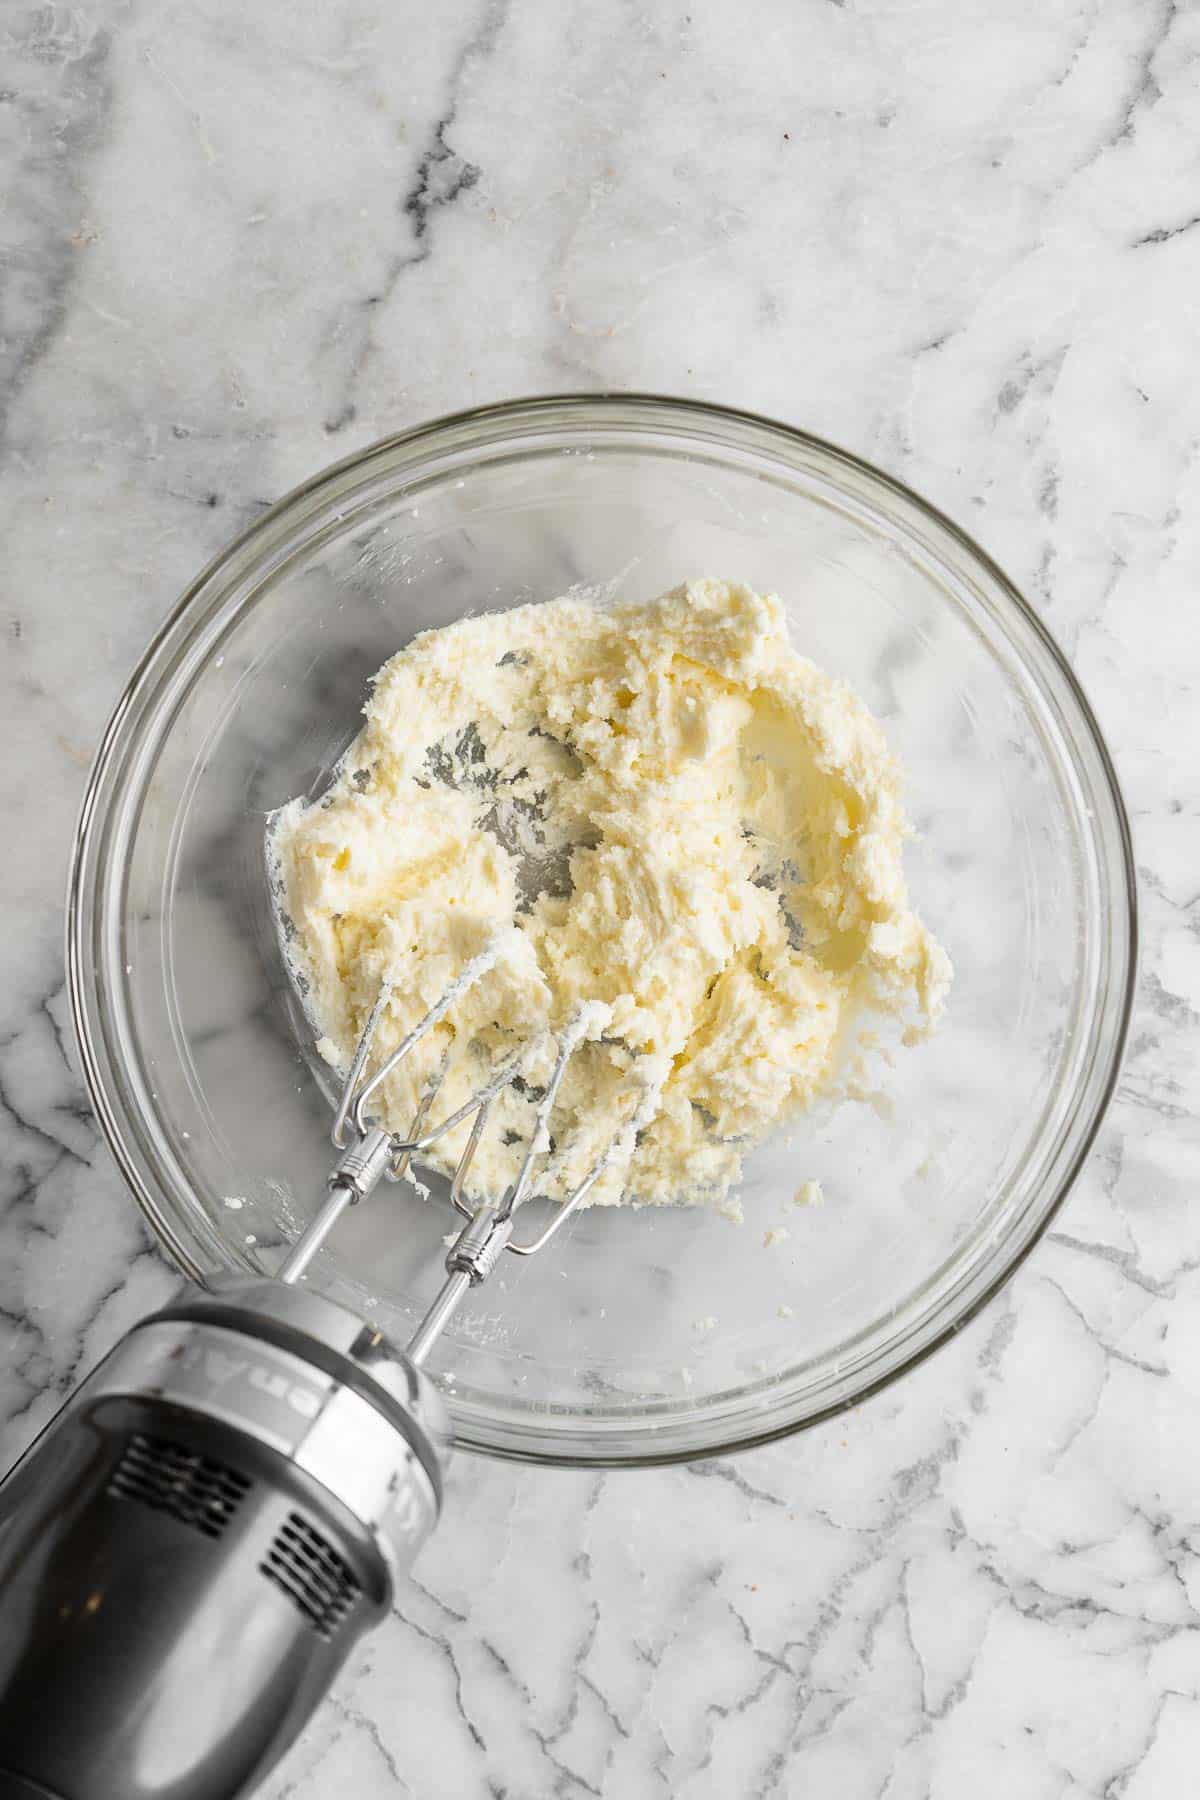
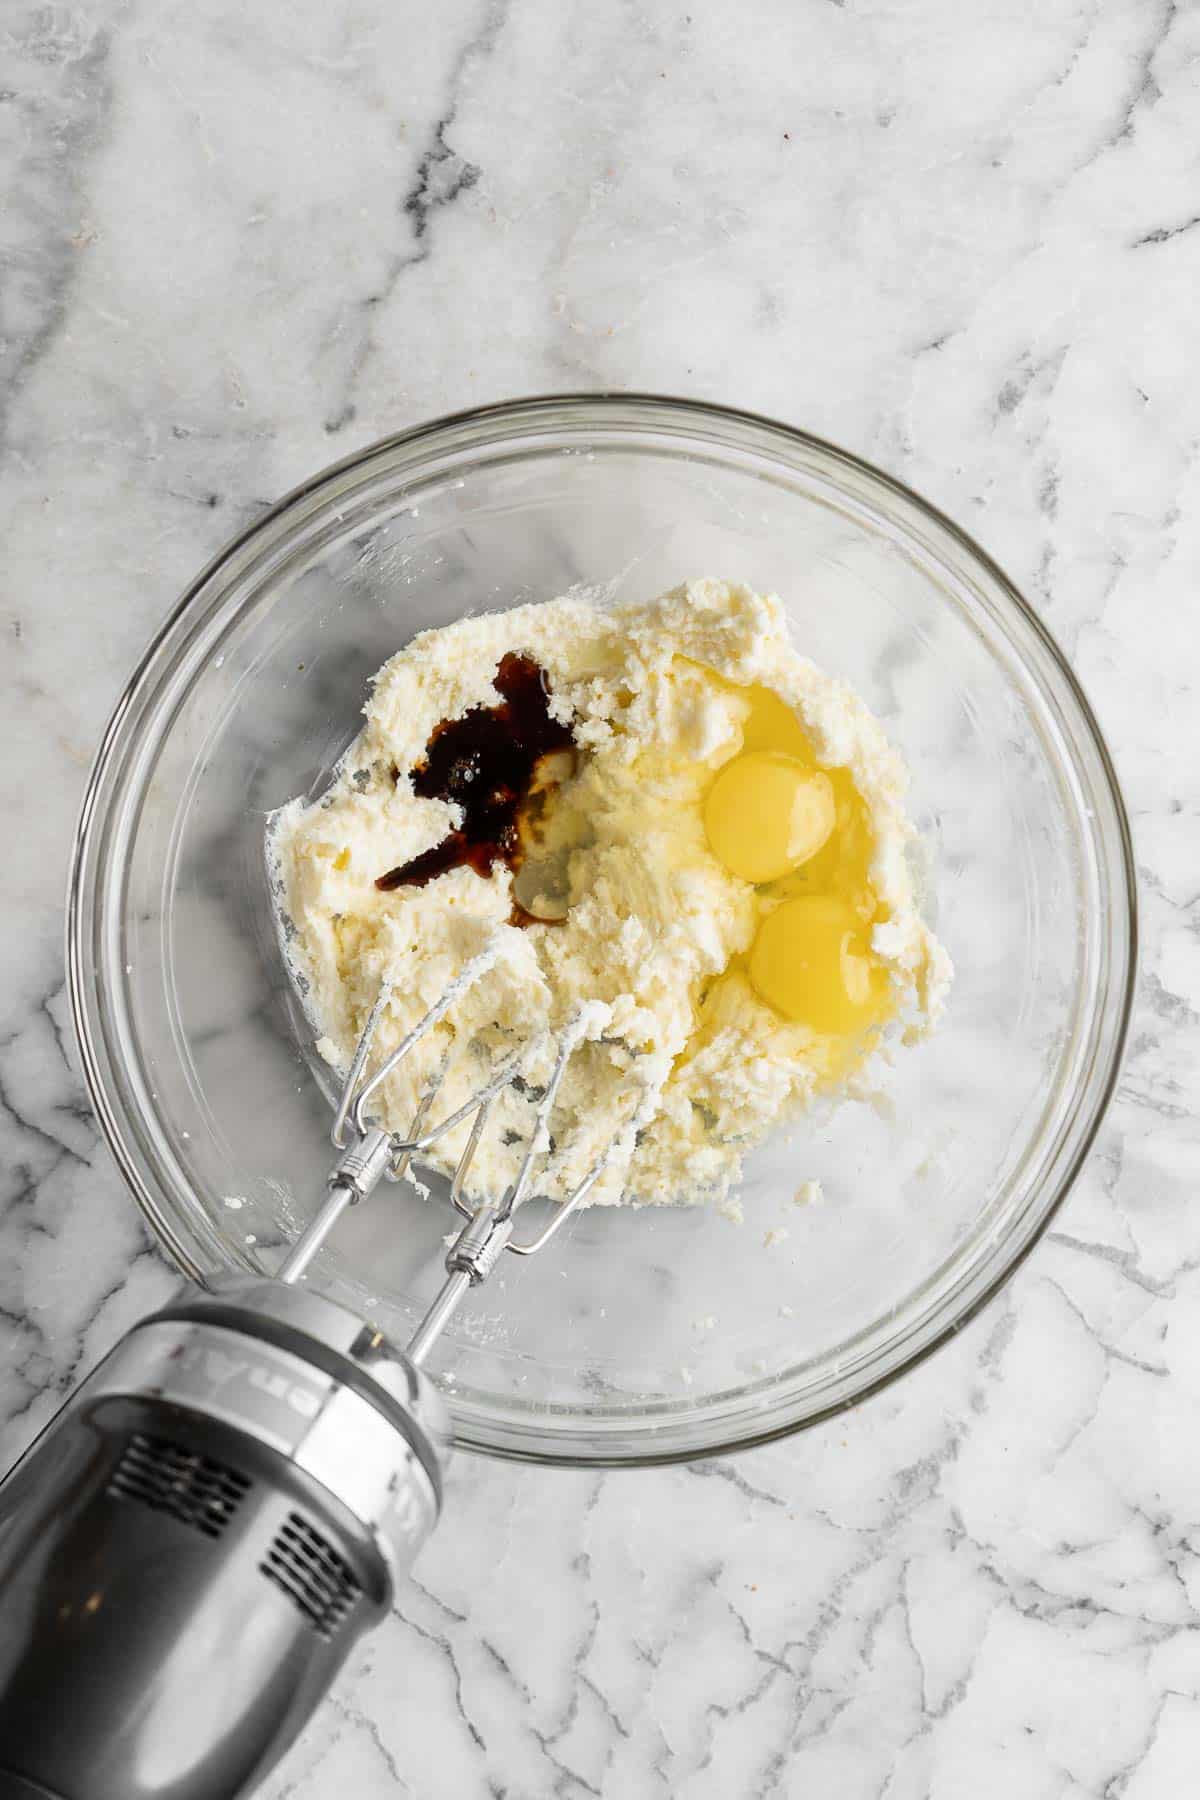
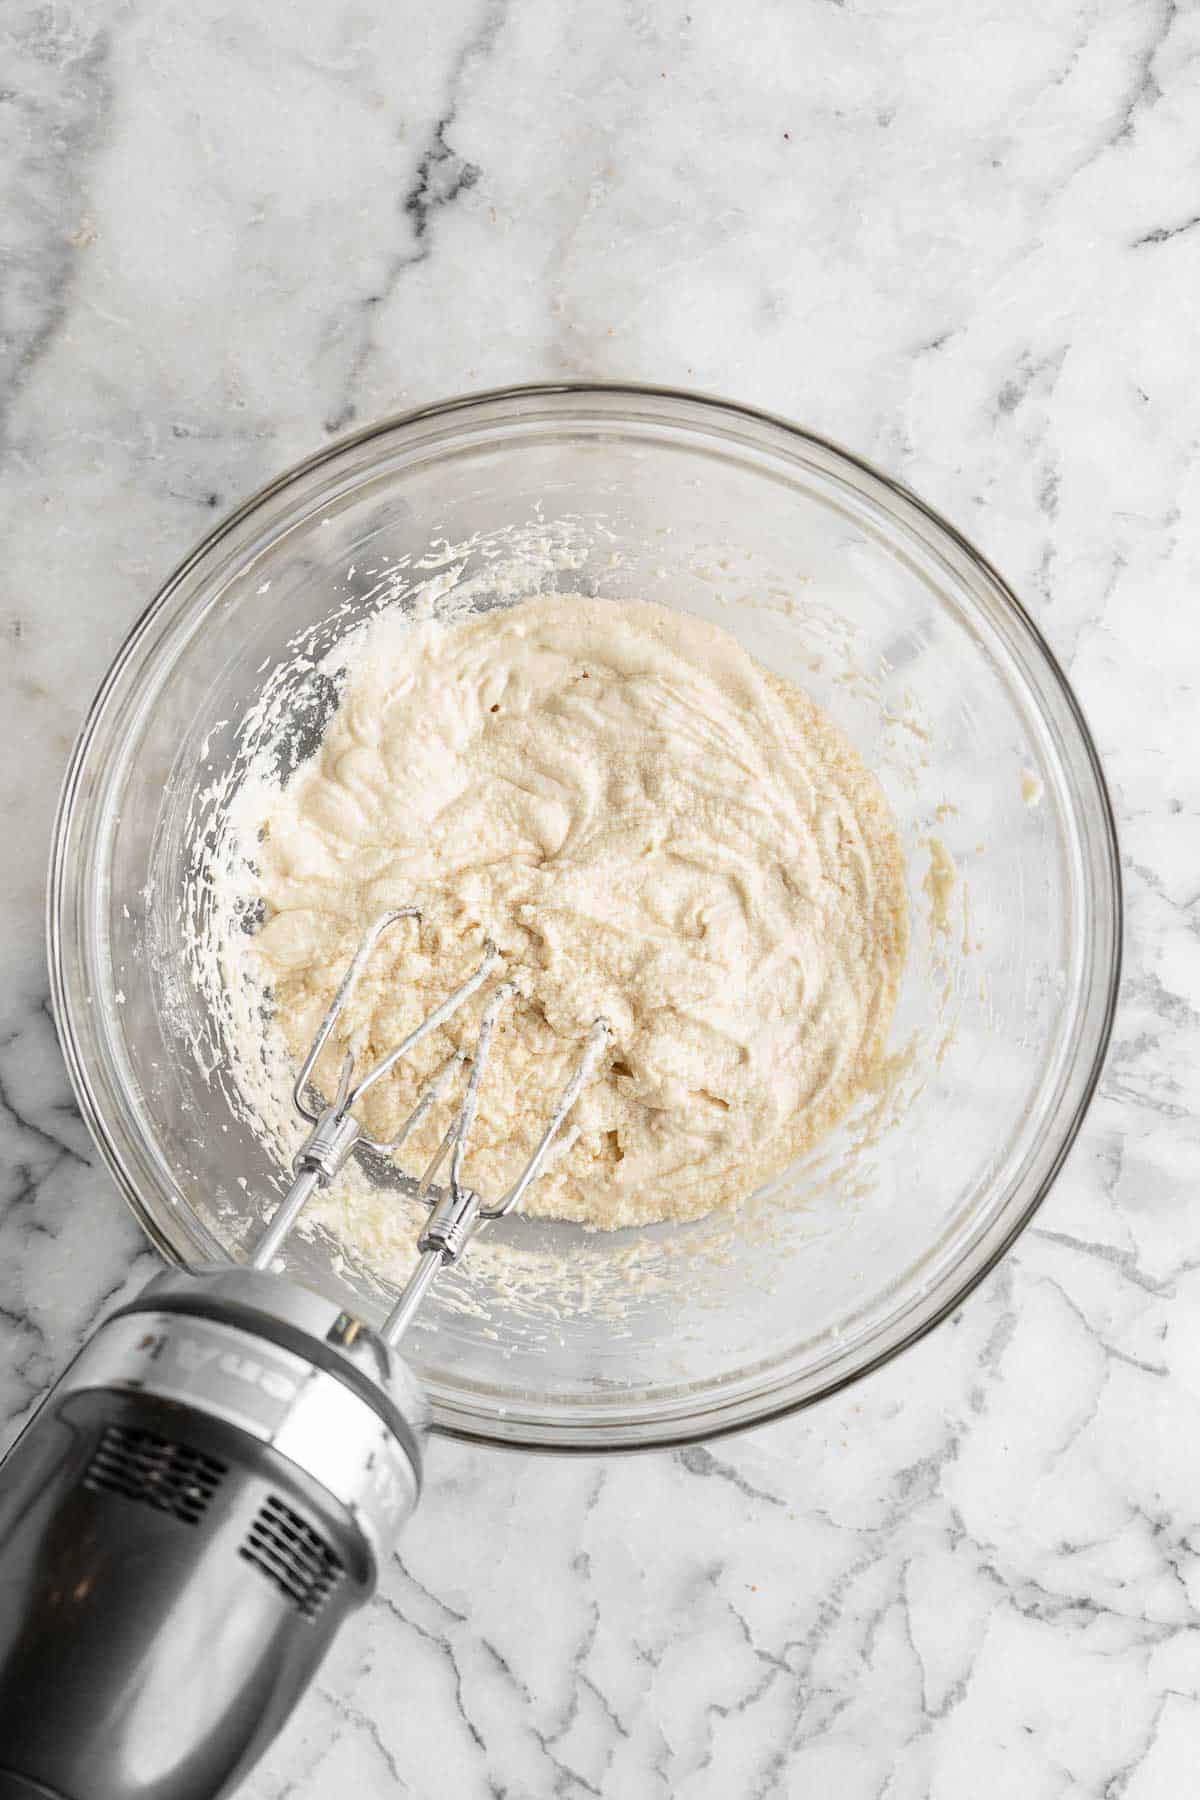
- Combine dry ingredients. In a separate medium-sized mixing bowl, add flour, baking powder, and salt. Whisk together to combine.
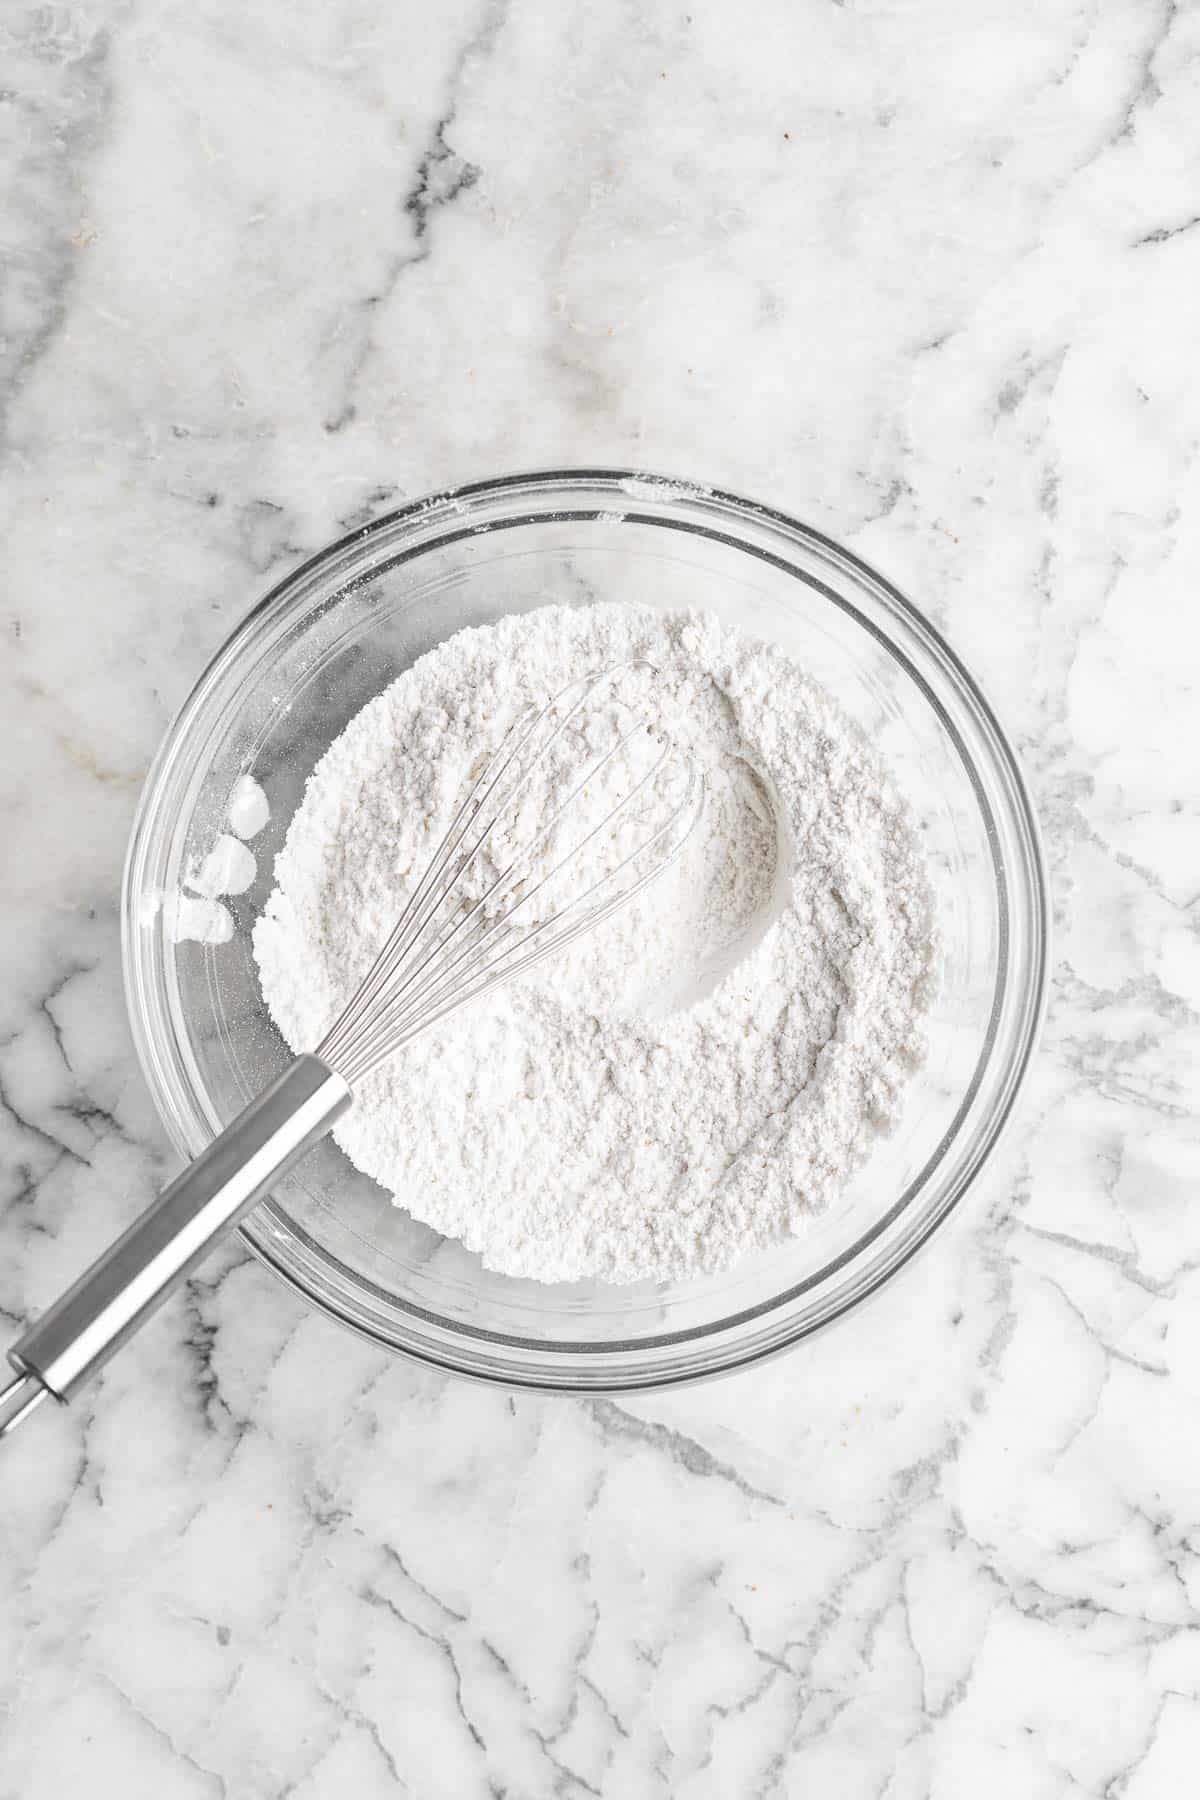
- Combine ingredients together. Add ⅓ of the flour mixture to the large bowl and mix on low speed until combined. Add ½ of the milk and mix on low until combined. Continue alternating the flour and the milk, until both have been completely added (finishing with the flour mixture).
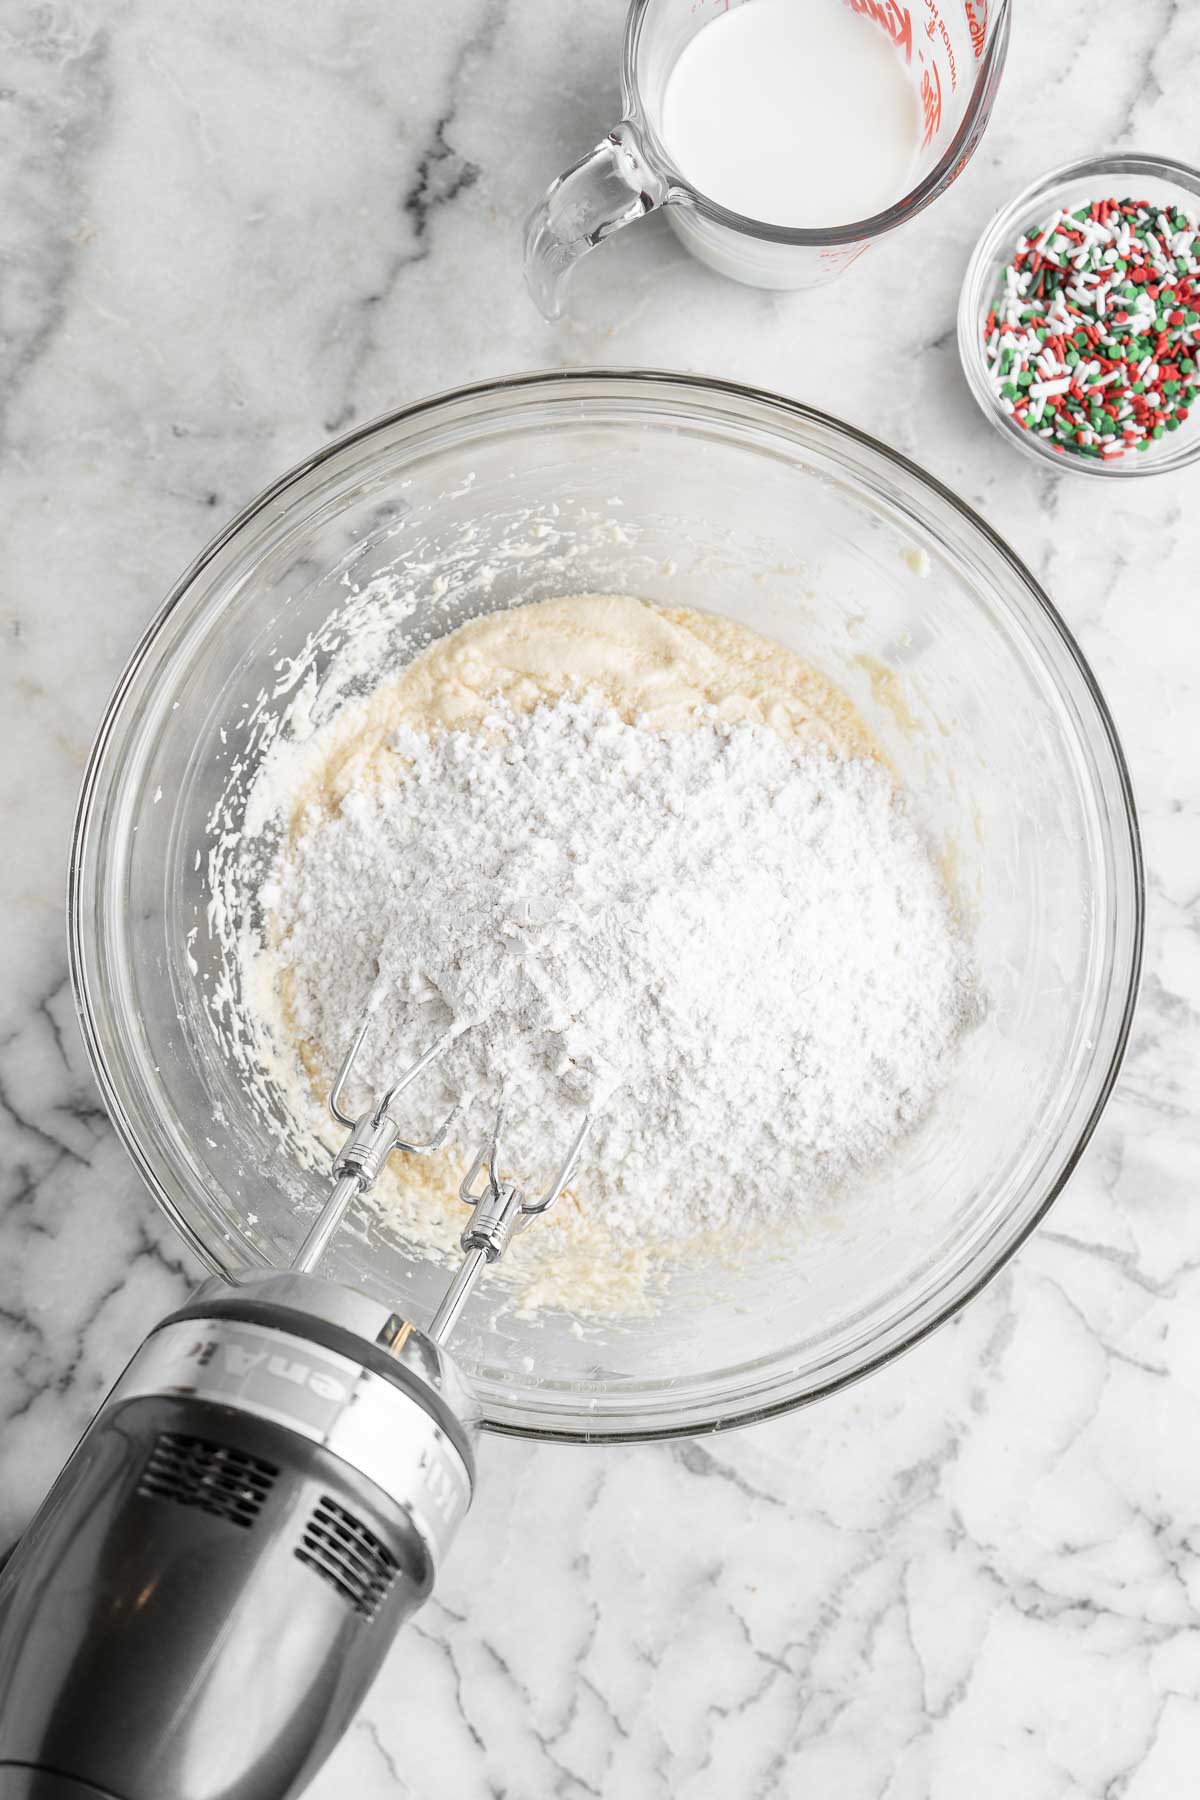
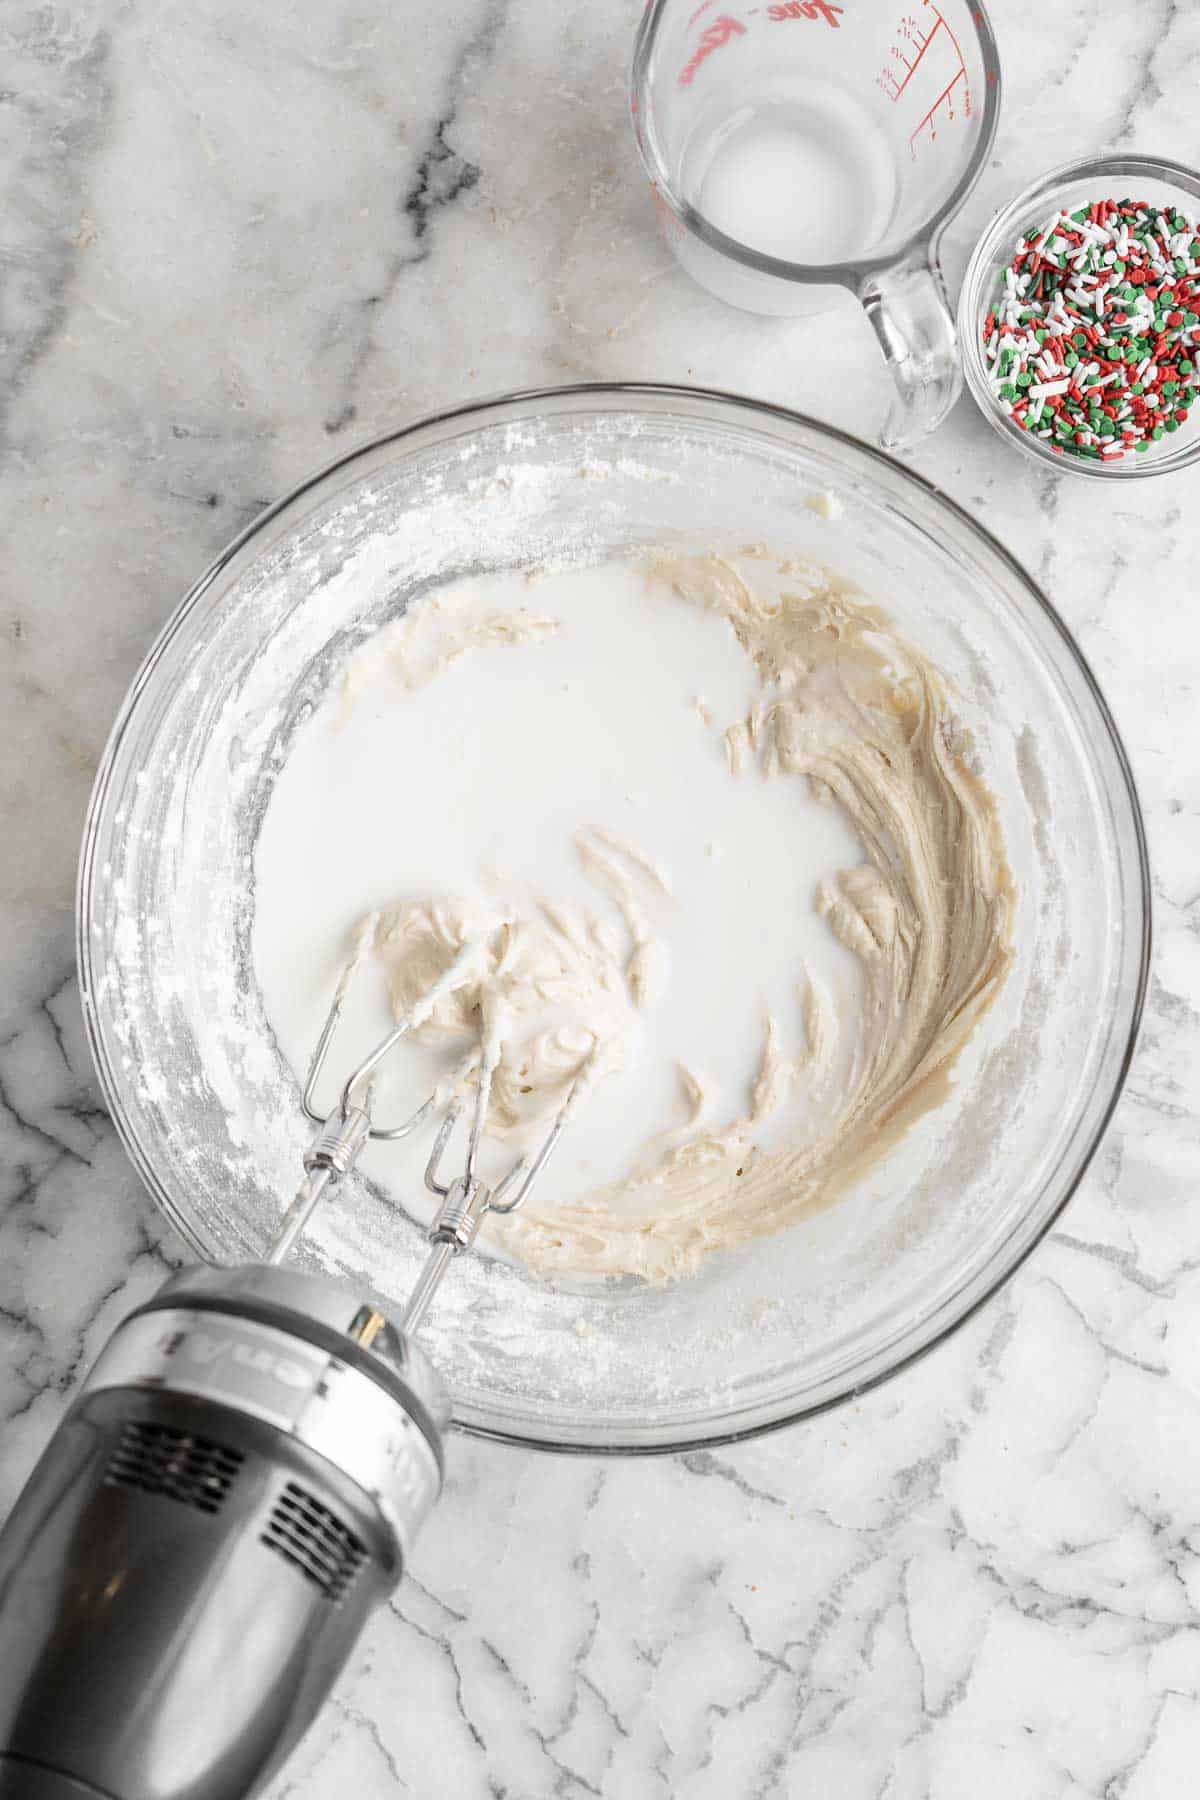
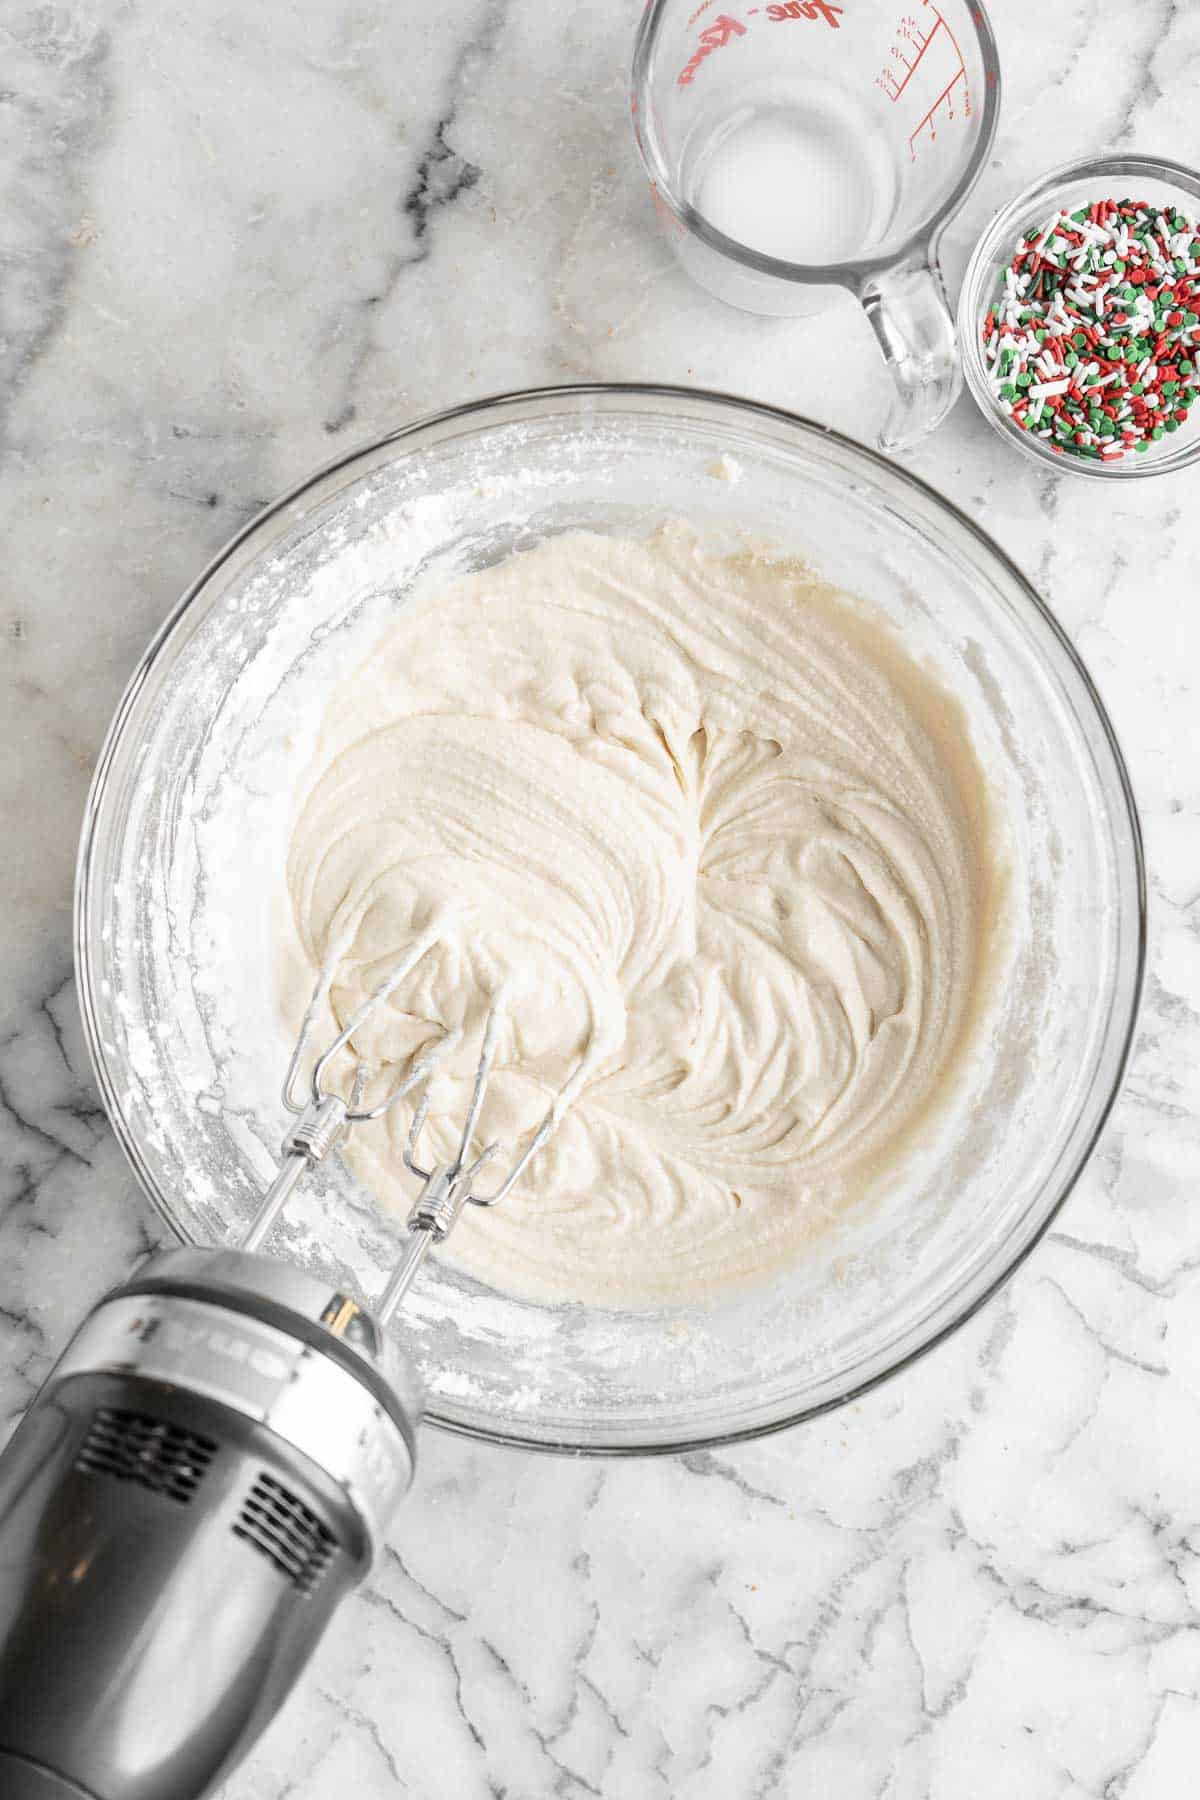
- Add sprinkles. Use a silicone spatula to fold in the sprinkles.
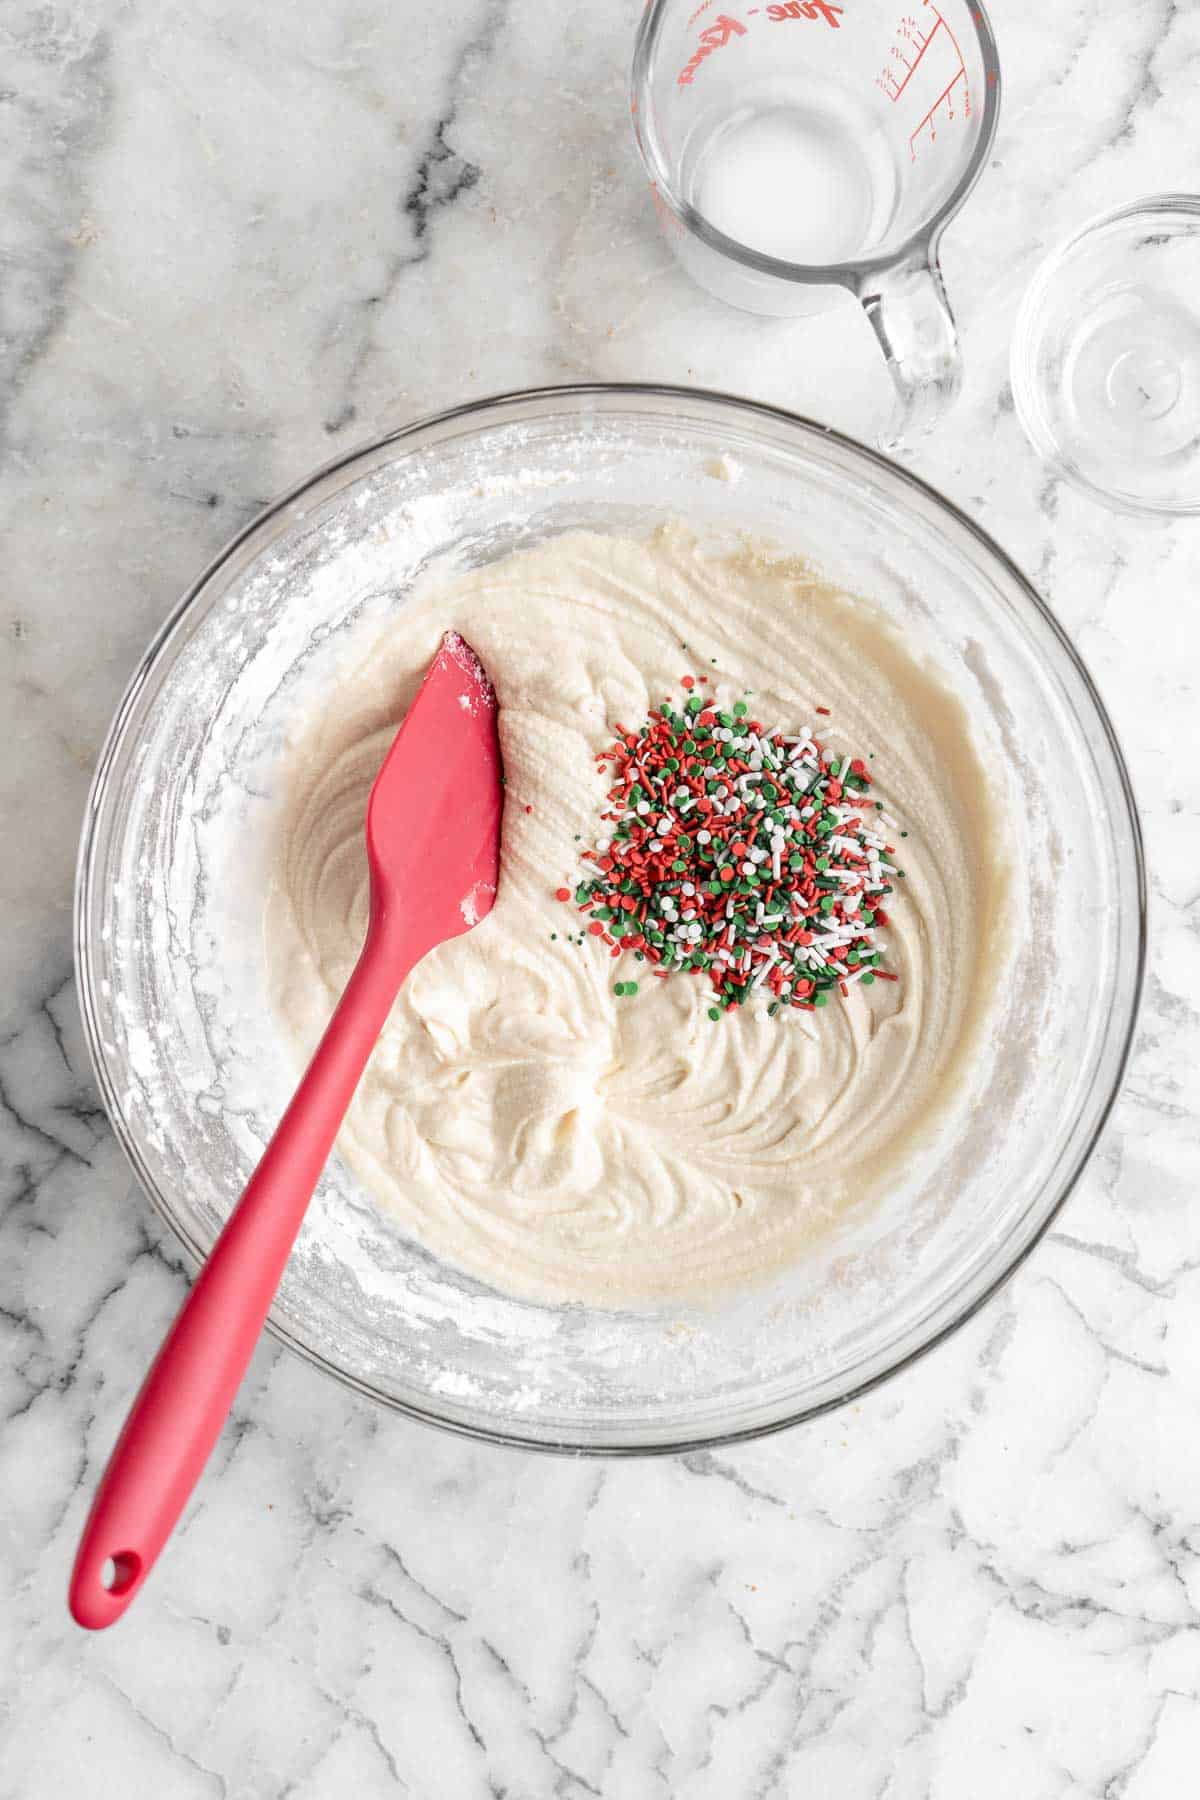
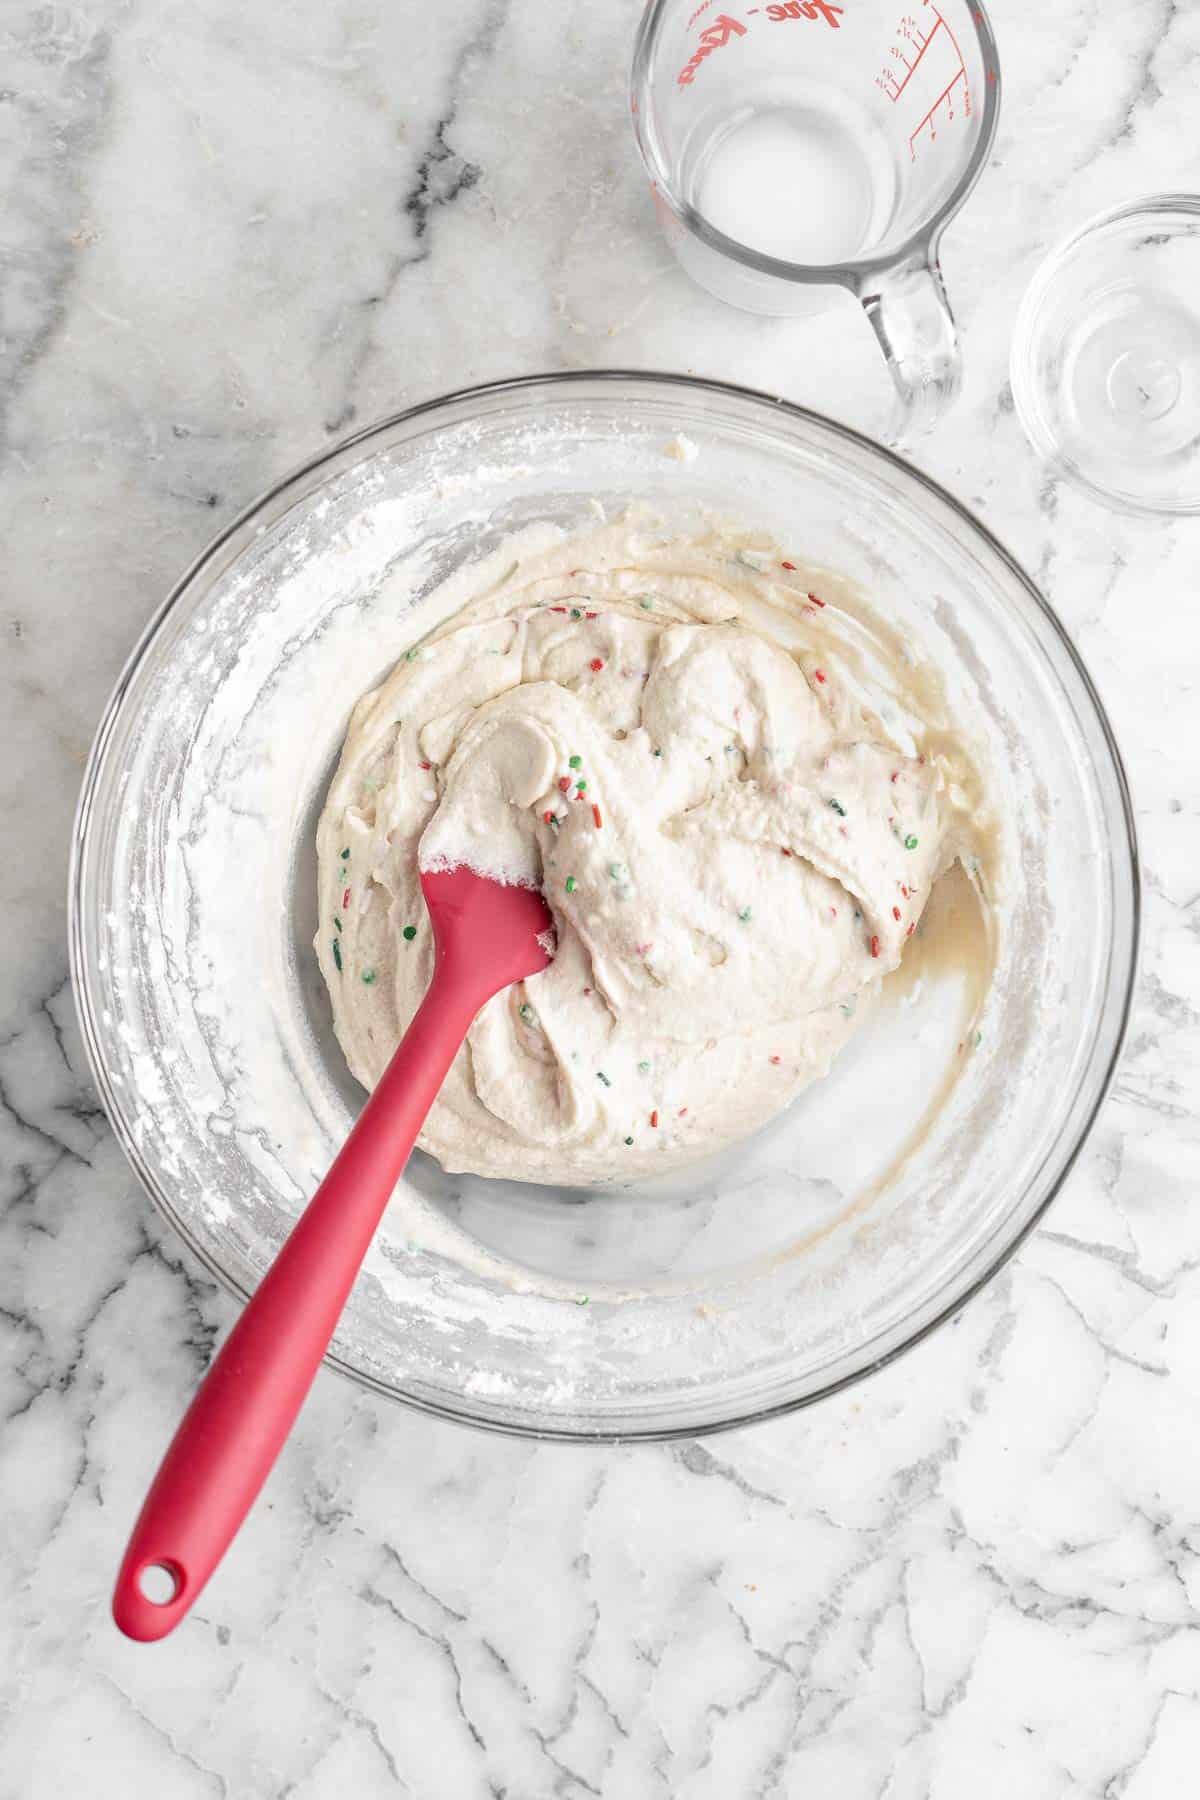
- Bake. Line a 12-cup muffin pan by with cupcake liners. Use a cookie scoop or spoons to evenly disperse the batter into the cupcake liners, filling them about ¾ full. Place the pan in a 350F preheated oven and bake for 20-22 minutes, or until a toothpick inserted into the middle of one of the cupcakes comes out clean.
- Cool. Allow the cupcakes to cool for 5 minutes in the pan, then transfer them onto a wire cooling rack to cool completely. Allow to cool completely before frosting.
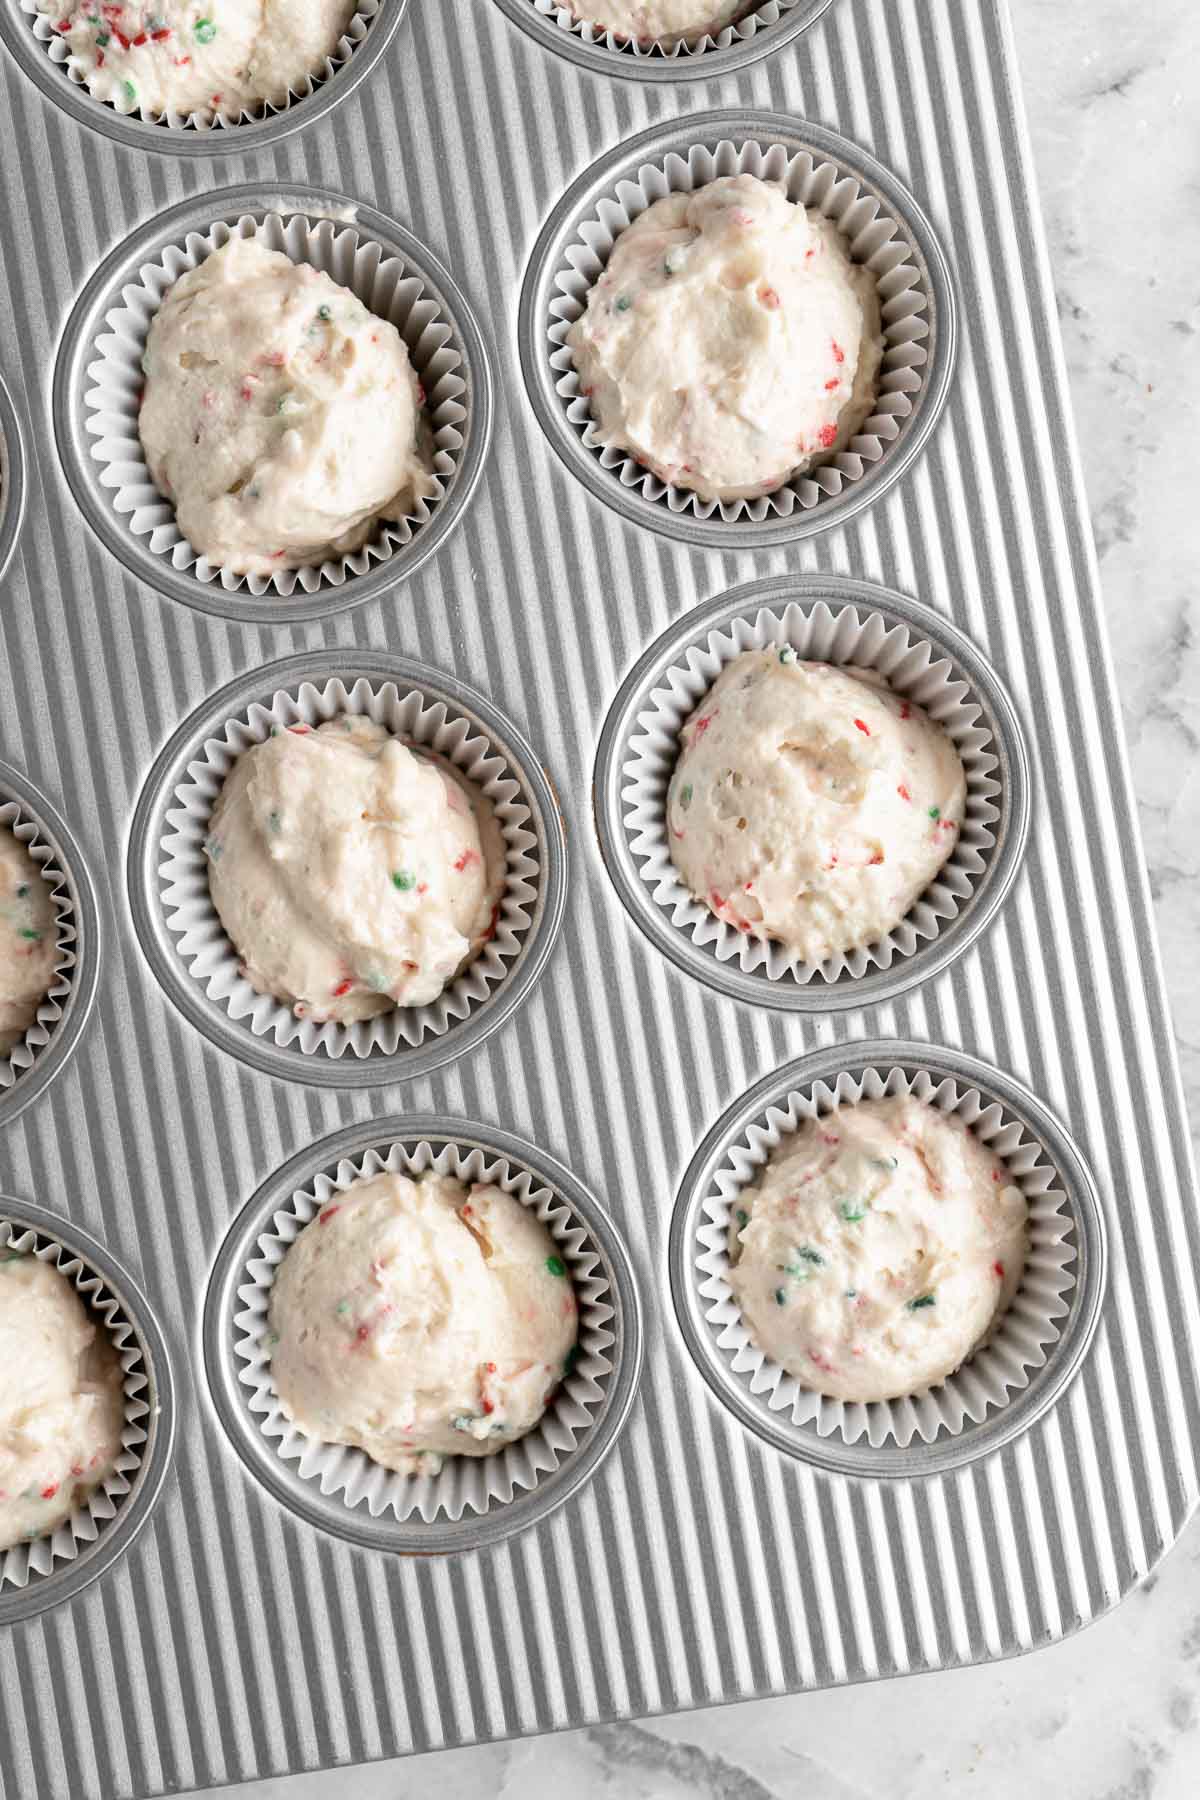
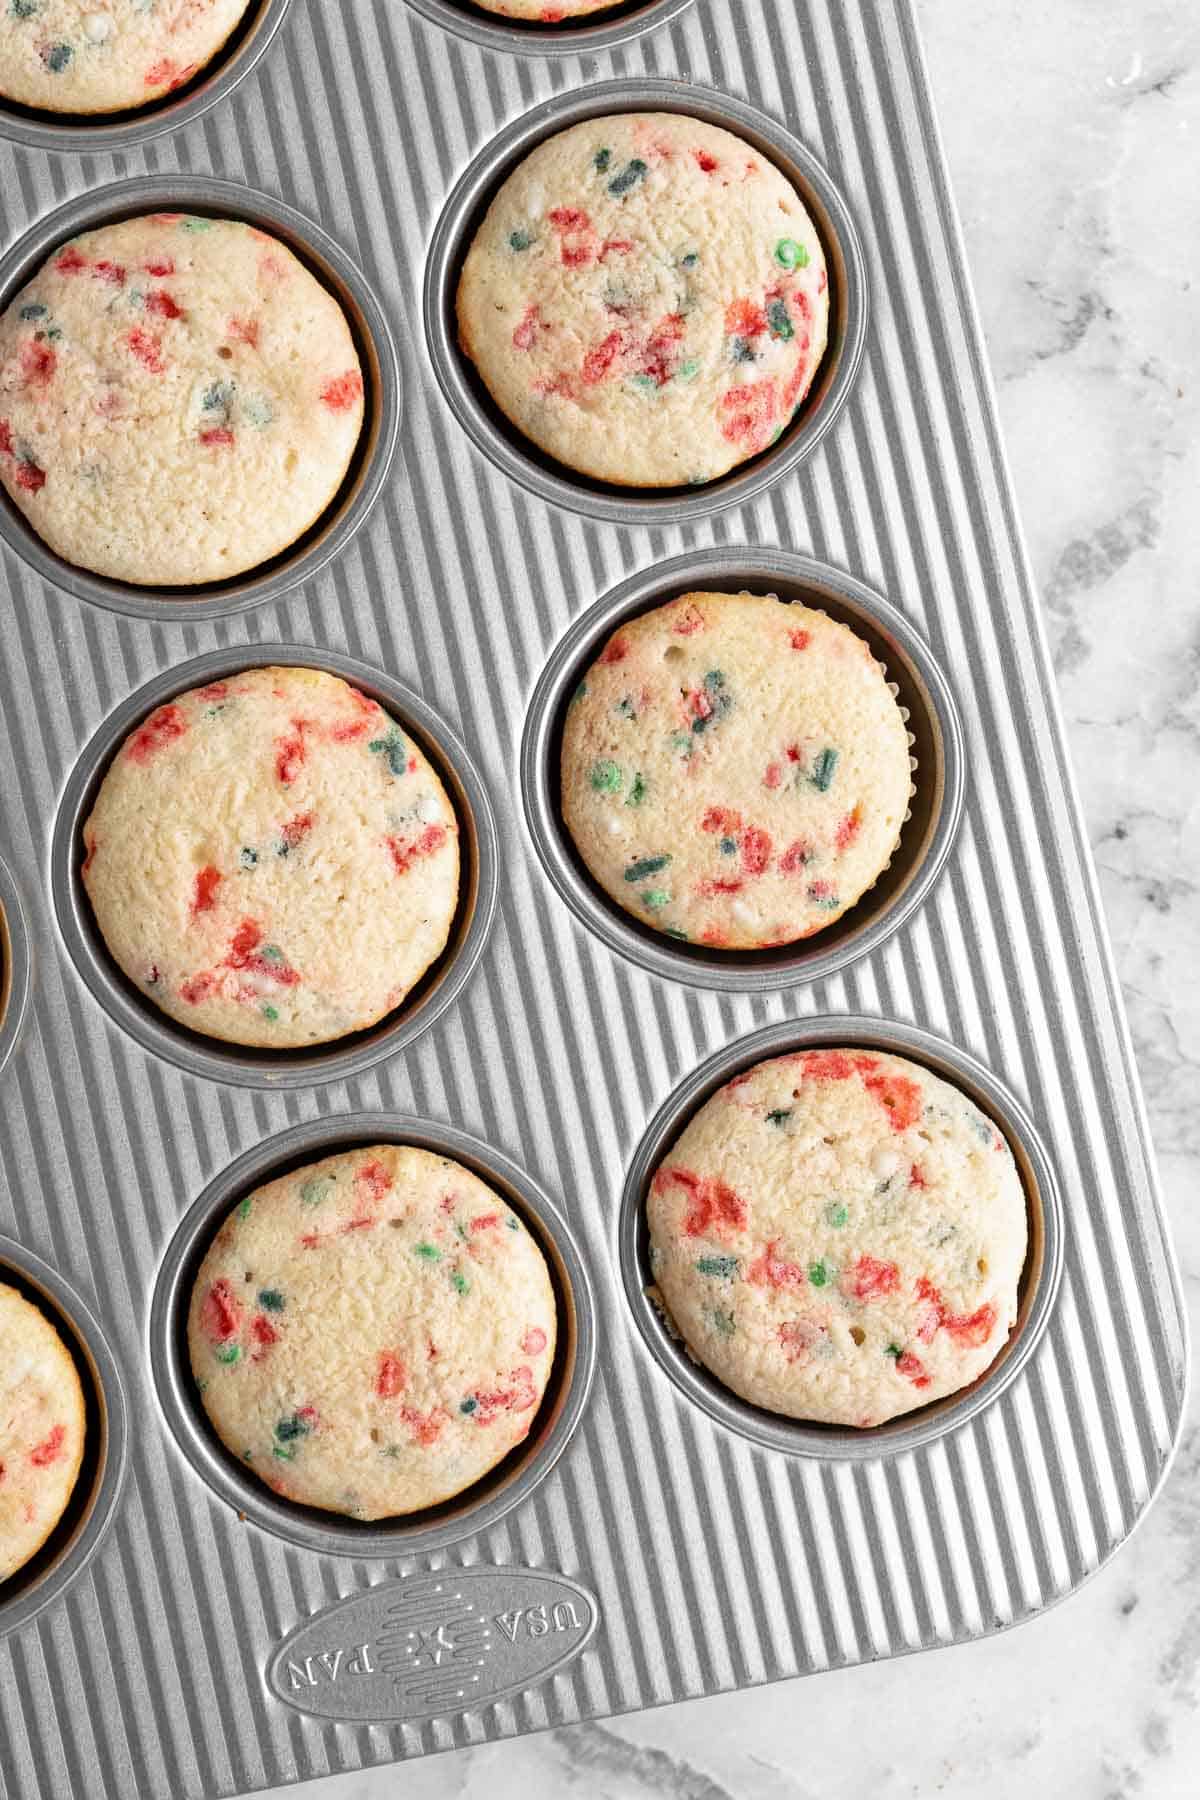
Next, make buttercream frosting.
- Make buttercream. In a stand mixer fitted with the whip attachment, add the butter and beat on high speed until fluffy and pale, about 5 minutes (you can also use a hand mixer and large mixing bowl). Turn down to low speed, and begin adding the confectioners' sugar. Once all of the sugar has been added, add the vanilla and salt, then beat on high until very smooth and fluffy, about 2 minutes.
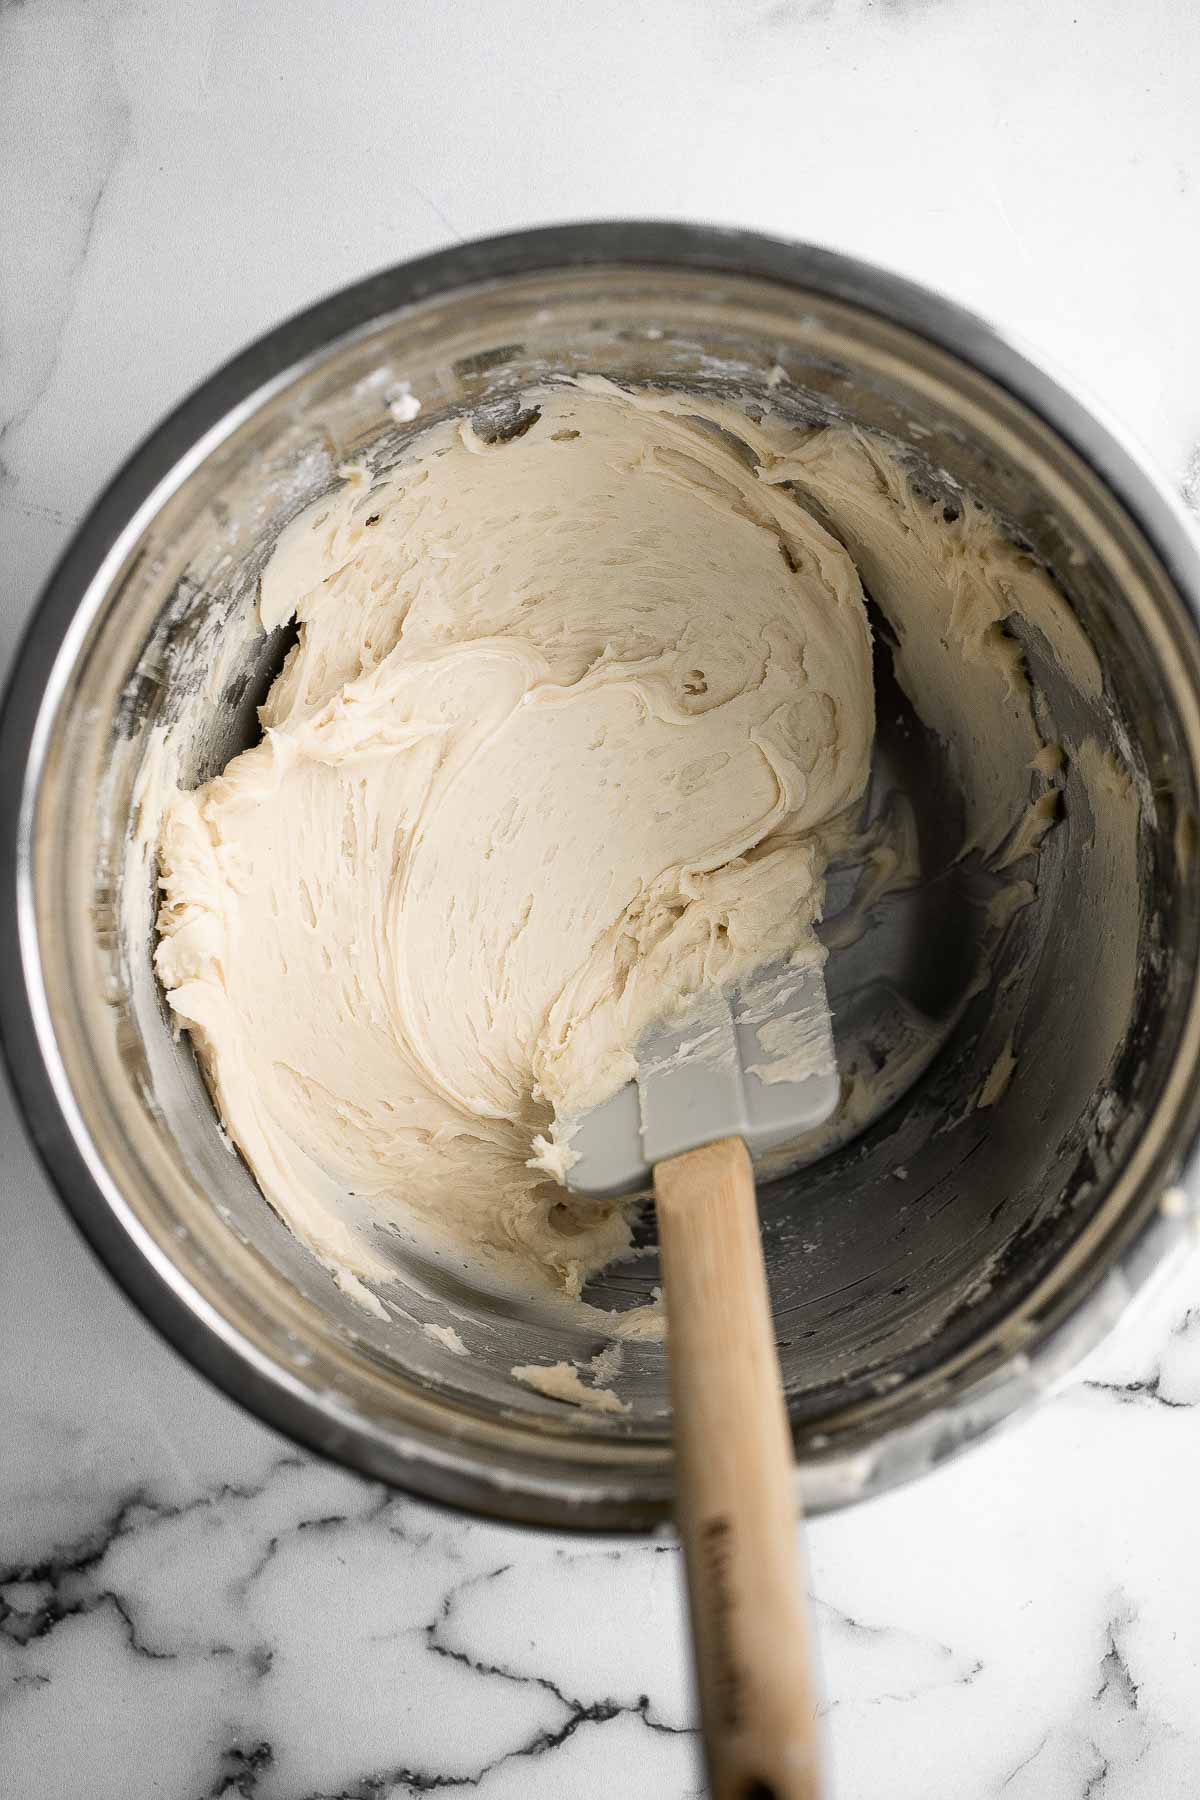
- Divide frosting. Divide the frosting up into 3 mixing bowls. Add a quarter of the frosting to a small mixing bowl (for the white buttercream). Evenly divide the remaining frosting into 2 large mixing bowls (for the red and green buttercream).
- Color the icing. Add red food colouring to one large bowl and beat to combine. Add green food colouring to the other large bowl, and beat to combine.
Transfer buttercream into piping bags.
- For the red frosting: Add three-quarters of the red frosting to a large piping bag fitted with a large round tip (Atecco 808). Add the remaining quarter to a small piping bag fitted with a Wilton 68 tip.
- For the green frosting: Add three-quarters of the green frosting to a large piping bag fitted with a large Wilton 1M tip. Add the remaining quarter to a small piping bag fitted with a Wilton 32 tip.
- For the white frosting: Add three-quarters of the green frosting to a large piping bag fitted with a large round tip (Atecco 808). Add the remaining quarter to a small piping fitted with a Wilton 18 tip.
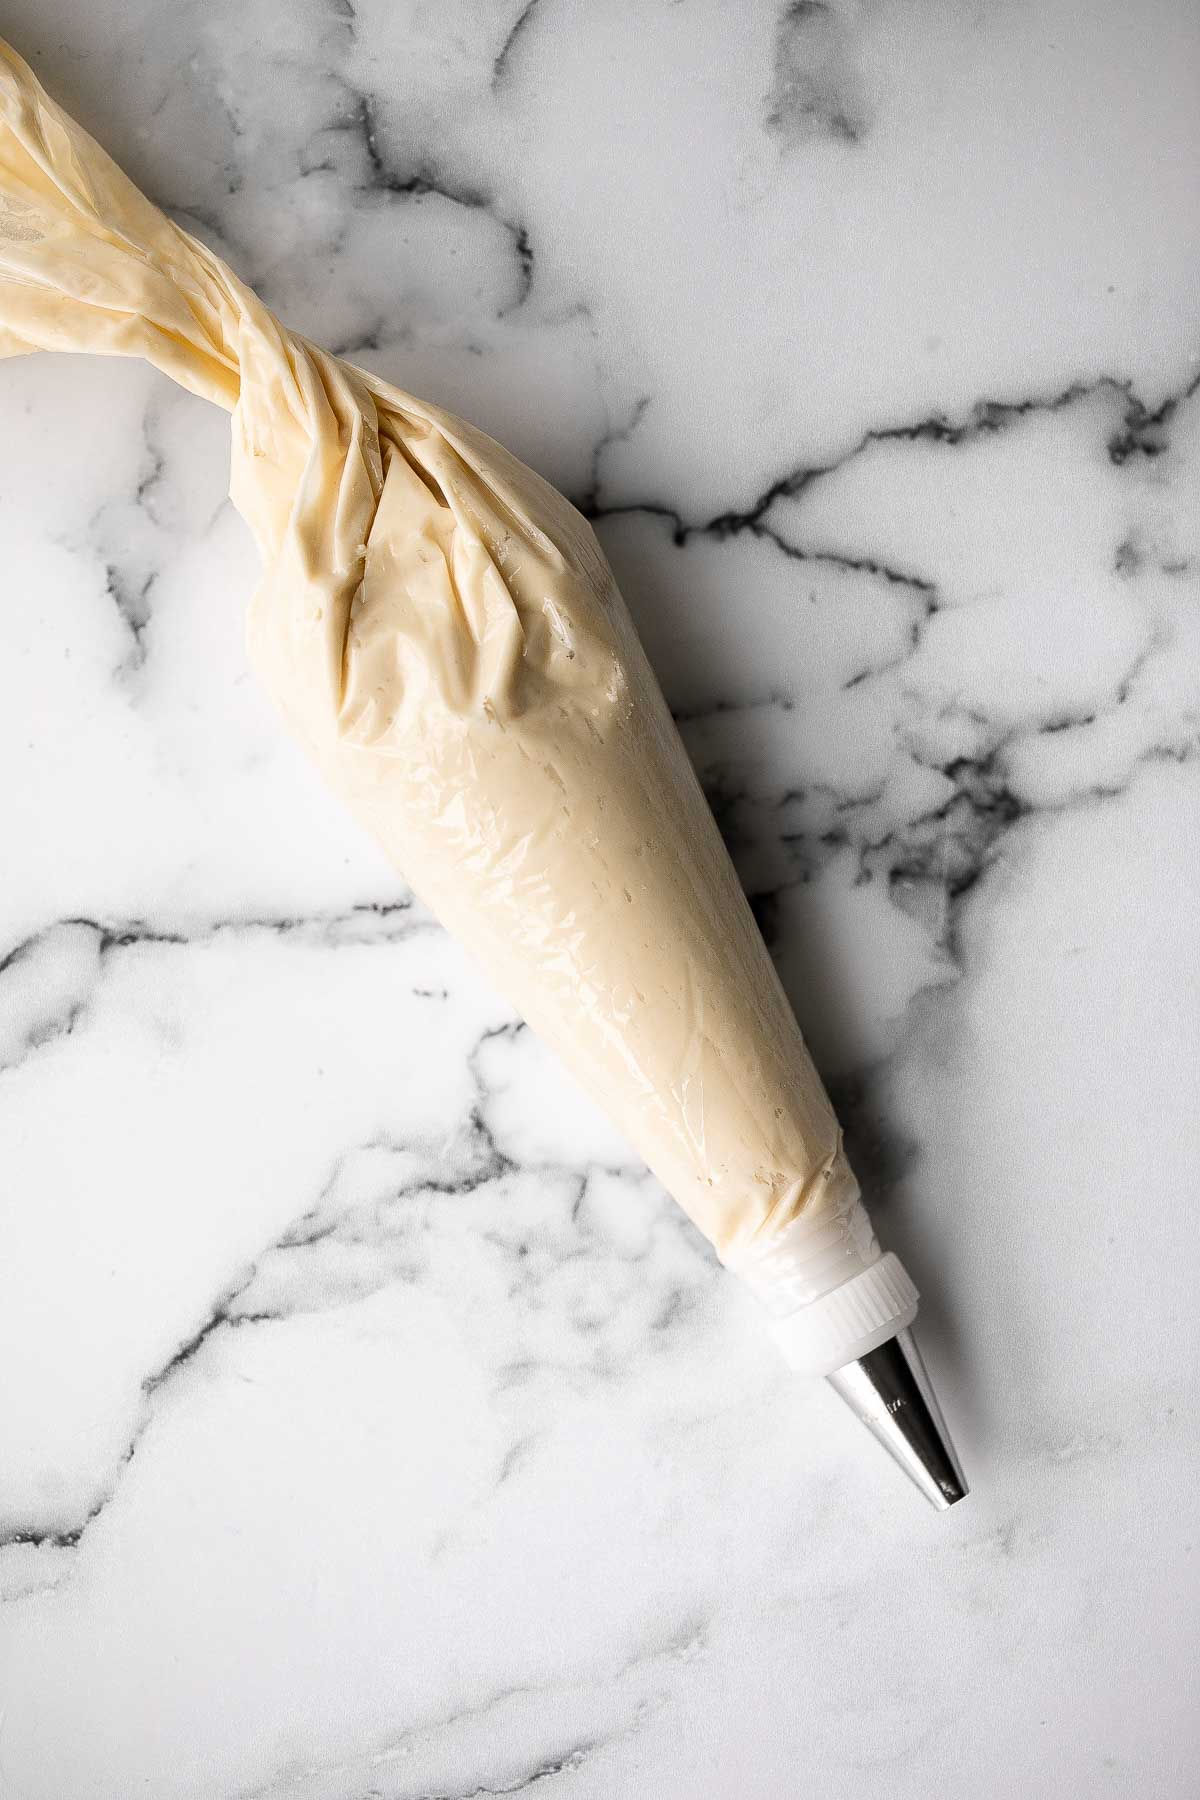
How to Decorate Christmas Cupcakes
Christmas Tree Cupcakes
- Using the large piping bag with green frosting, pipe a tall tree shape on top of one-third of the cupcakes.
- Carefully insert a gold star cupcake topper on top of the tree all the way so that you can no longer see the toothpick. Sprinkle with rainbow confetti sprinkles on top. You can also dust some confectioners' sugar on top to look like snow.

Santa Hat Cupcakes
- Using the large piping bag with red frosting, and pipe a swirl of frosting onto another one-third of the cupcakes.
- Using the small piping bag with white frosting, pipe small stars around the bottom perimeter of the red swirl. Finally, use the same bag to pipe a small dollop onto the top tip if the frosting, then lightly use your finger to press down any edges to make it look more ball/round like.

Wreath Cupcakes
- Using the large piping bag with white frosting, pipe a small round circle of frosting onto ⅓ of the cupcakes.
- Using the small piping bag with green frosting, pipe a wreath shape on top of the white frosting.
- Using the small piping bag with red frosting, pipe a bowl shape at the top of each wreath.
- Lastly, sprinkle with rainbow confetti sprinkles.

Recipe Variations
- Change the cupcake base. Aside from making these cupcakes with a vanilla funfetti base, you can use any kind of cupcake base that you like and keep the buttercream decoration the same. Try making them with Vanilla Cupcakes, Chocolate Cupcakes, Gingerbread Cupcakes, red velvet, or lemon.
- Experiment with flavors. You can even change up the flavor of your homemade buttercream too. Give it a citrusy twist by adding a dash of lemon or orange zest or add a nutty flavor with almond extract.
- Get creative with decorating. Add any kind of edible decorations that you like such as nonpareils, crushed peppermint candy, pearl sprinkles, Christmas M&Ms, edible glitters, coconut flakes, marshmallows and chocolate chips.
How to Display Your Christmas Cupcakes
Just because these cute Christmas funfetti cupcakes are already very eye-catching, should not stop you from staging your cupcakes beautifully on your holiday table! Here are a few ideas on how to display them:
- Use cake or cupcake stands. A cupcake stand not only give the cupcakes the elevation they need to stand out and allows each cupcake to shine, rather than getting lost in the shuffle. Cupcake or cake stands are also a great way to save some space.
- Make a dessert board. This is another ingenious way to display your Christmas cupcakes creatively. Think of a Charcuterie board - but with desserts. Use any board shape you like and place the cupcakes on top. Then arrange other yummy holiday treats around the board. Try cookies, pecan pralines, candies, chocolate, and sprinkles.
- Place them in single-serve boxes. If you are planning to use them as a thoughtful party favor to takeaway, place the funfetti cupcakes in festive boxes or wrap individually.

Recipe Tips and Tricks
- Do not overmix your batter. Mix until everything is just combined, a few small dry spots are fine. Overmixing will result in dry, chewy cupcakes.
- Use room temperature ingredients. Make sure to take the butter, milk, and eggs out of the fridge at least 30 minutes before you start baking. This is important to achieve the right texture for the cupcakes. If your batter is too cold, the cupcakes may not bake evenly.
- Do not overfill. Pour the batter only ¾ of the way. The cupcakes will rise as they bake, so doing this ensures they have plenty of room to expand without spilling over and creating a mess.
- Cool before icing. The cupcakes should be cool before adding the buttercream icing, or else it will just melt into it and create a soggy mess.
Storing and Freezing Instructions
Make Ahead Buttercream Frosting
You can also make the buttercream frosting in advance and keep it in an airtight container in the fridge for up two weeks or up to 3 months in the freezer. If frozen, allow it to thaw in the fridge overnight before using.
How to Store
Once the confetti cupcakes have cooled, you can place them in an airtight container and store them at room temperature in a dry, cool area of your kitchen for up to three days. If you want to store them longer, place them in the fridge for up to 5 days. Note that they may loose some moisture and dry out when stored in the fridge.
How to Freeze
You can also freeze Christmas funfetti cupcakes. If you are planning to do this, I recommend freezing them before frosting.
- Freeze before frosting: Wrap the unfrosted cupcakes in plastic cling wrap and place them in a freezer-friendly airtight container or freezer bag and freeze for up to three months.
- Freeze after frosting: If you've already frosted the cupcakes, you can still freeze them. Place frosted cupcakes on a baking tray and freeze until hard, about 1 hour. Then, wrap them tightly in plastic cling wrap, and then place in an airtight container and freeze for up to 3 months.
Allow the cupcakes to thaw overnight in the refrigerator before icing and serving.
More Christmas Dessert Recipes
- 30 Best Christmas Desserts
- Christmas Sugar Cookies with Royal Icing
- Holiday Yule Log Cake (Buche de Noel)
- Gingerbread Muffins with Vanilla Bean Glaze
- Chocolate Peppermint Christmas Bark
- Gingerbread House
- Gingerbread Bundt Cake with Maple Cinnamon Glaze
Tried this recipe?
I'd love to hear what you think! Leave a comment and rating below to share your feedback. Your reviews help others discover this recipe and help me keep creating more free recipes for you. Snap a photo and tag me on social media @aheadofthyme too.

Chocolate Peppermint Christmas Bark
Chocolate Peppermint Christmas Bark is a quick and easy no bake recipe that you can make with just 4 simple ingredients and 15 minutes of prep. This holiday treat is delicious, sweet, minty, and fun to make. It stores well so it is great for gifting to family and friends this holiday season.
This chocolate bark has a layer of dark chocolate, a layer of white chocolate, and is topped with festive candies and peppermints. Make this with the whole family and get the kids involved! Everyone will have fun making this peppermint bark, and even more fun eating it!
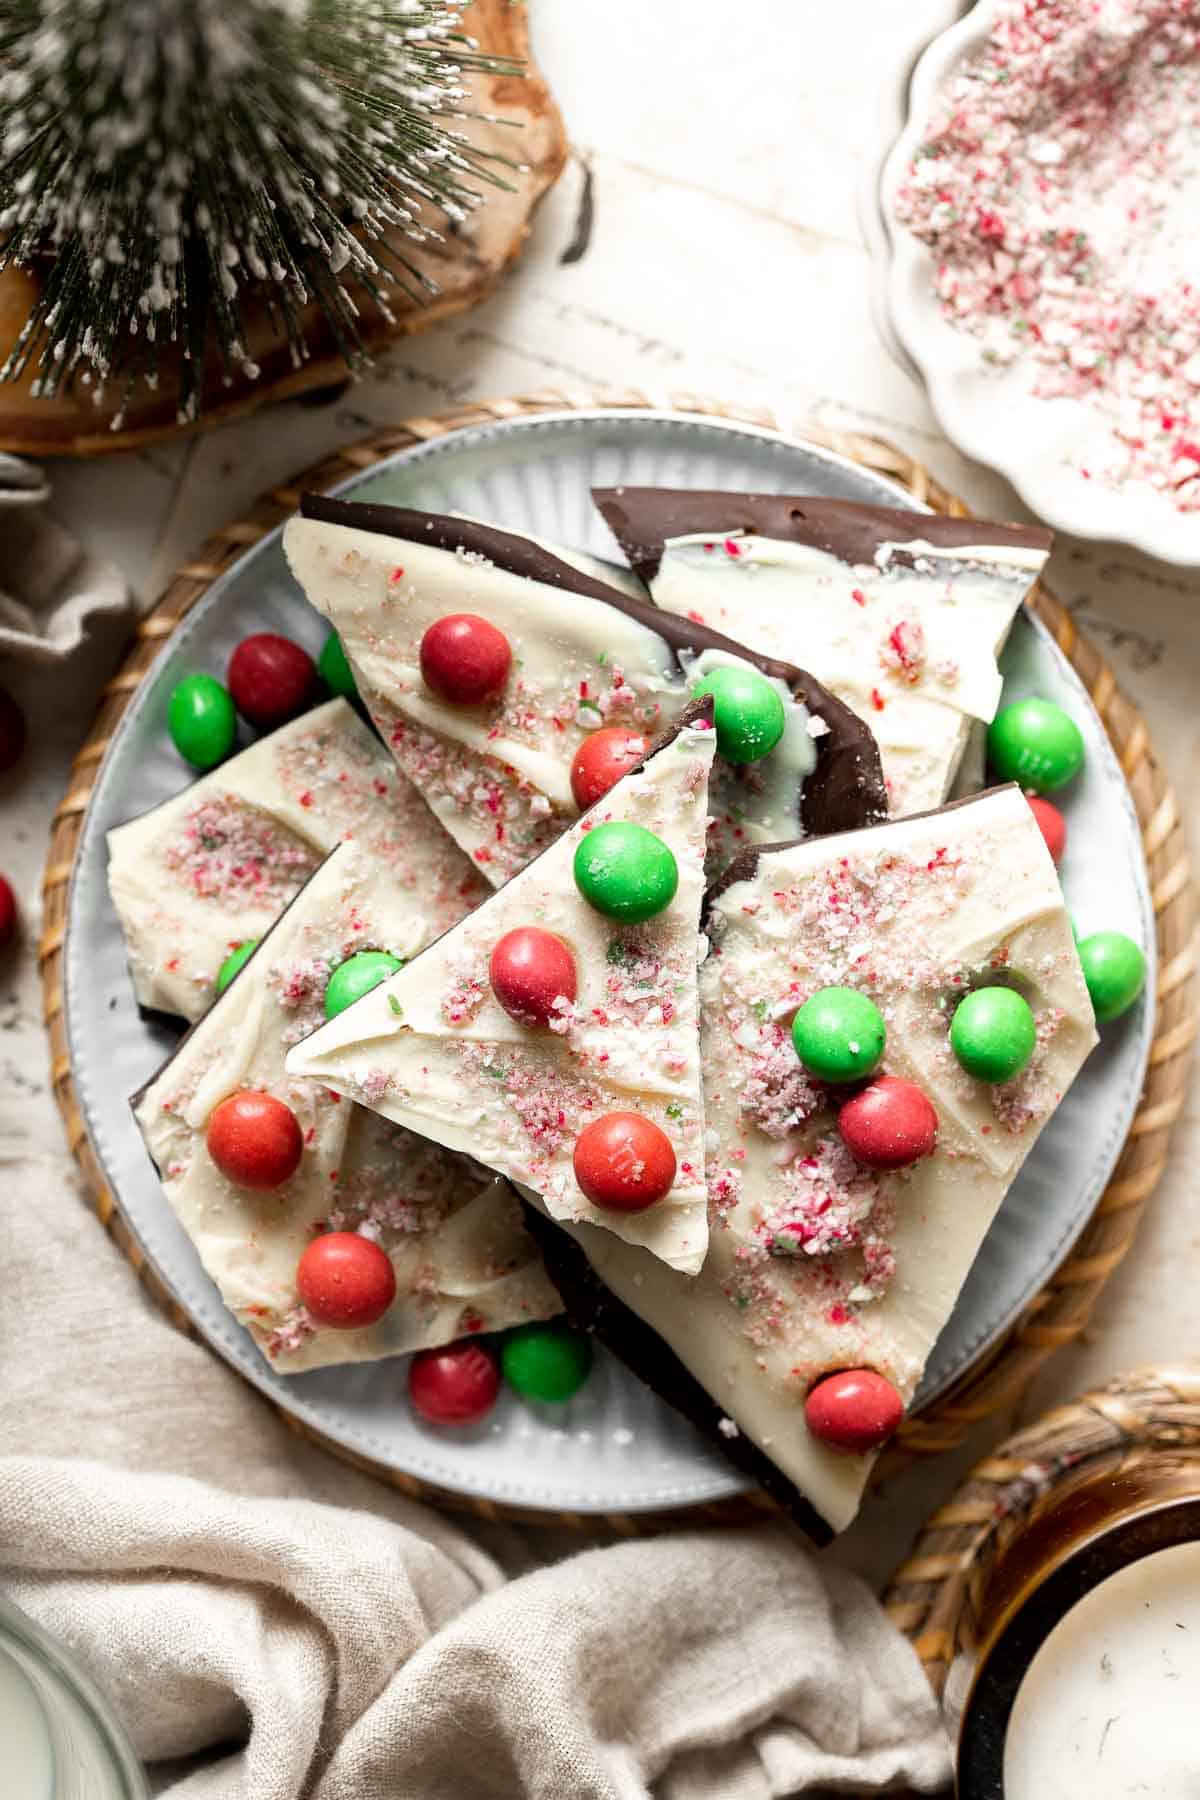
Why You'll Love this Chocolate Peppermint Christmas Bark
- A festive Christmas treat. With festive holiday colors of red and green and flavors of peppermint, this bark is the perfect treat to make this Christmas. It's a great dessert to snack on after dinner or to package up and gift to family and friends.
- Quick and easy to make. Although peppermint bark takes some time to make because you have to let the chocolate to set and harden, it really just requires about 15 minutes of actual prep work from you. This is a quick and easy no-bake dessert made with just 4 simple ingredients.
- Turn it into fun kid's activity. Making Christmas bark is even better when you get the kids involved. Turn the decorating process into a fun activity and let the kids add the toppings. It's safe and easy to supervise since there is no baking required. Be sure to leave out some extra m&m's and peppermint candies because the kids will likely be snacking on them!
- Makes a great Christmas gift. This chocolate peppermint bark can last for weeks at room temperature or in the fridge, and months in the freezer, which makes this a great make ahead recipe. This bark is also a great last minute gift idea! You can break it up and package in clear plastic bags tied with string and gift to friends and family.
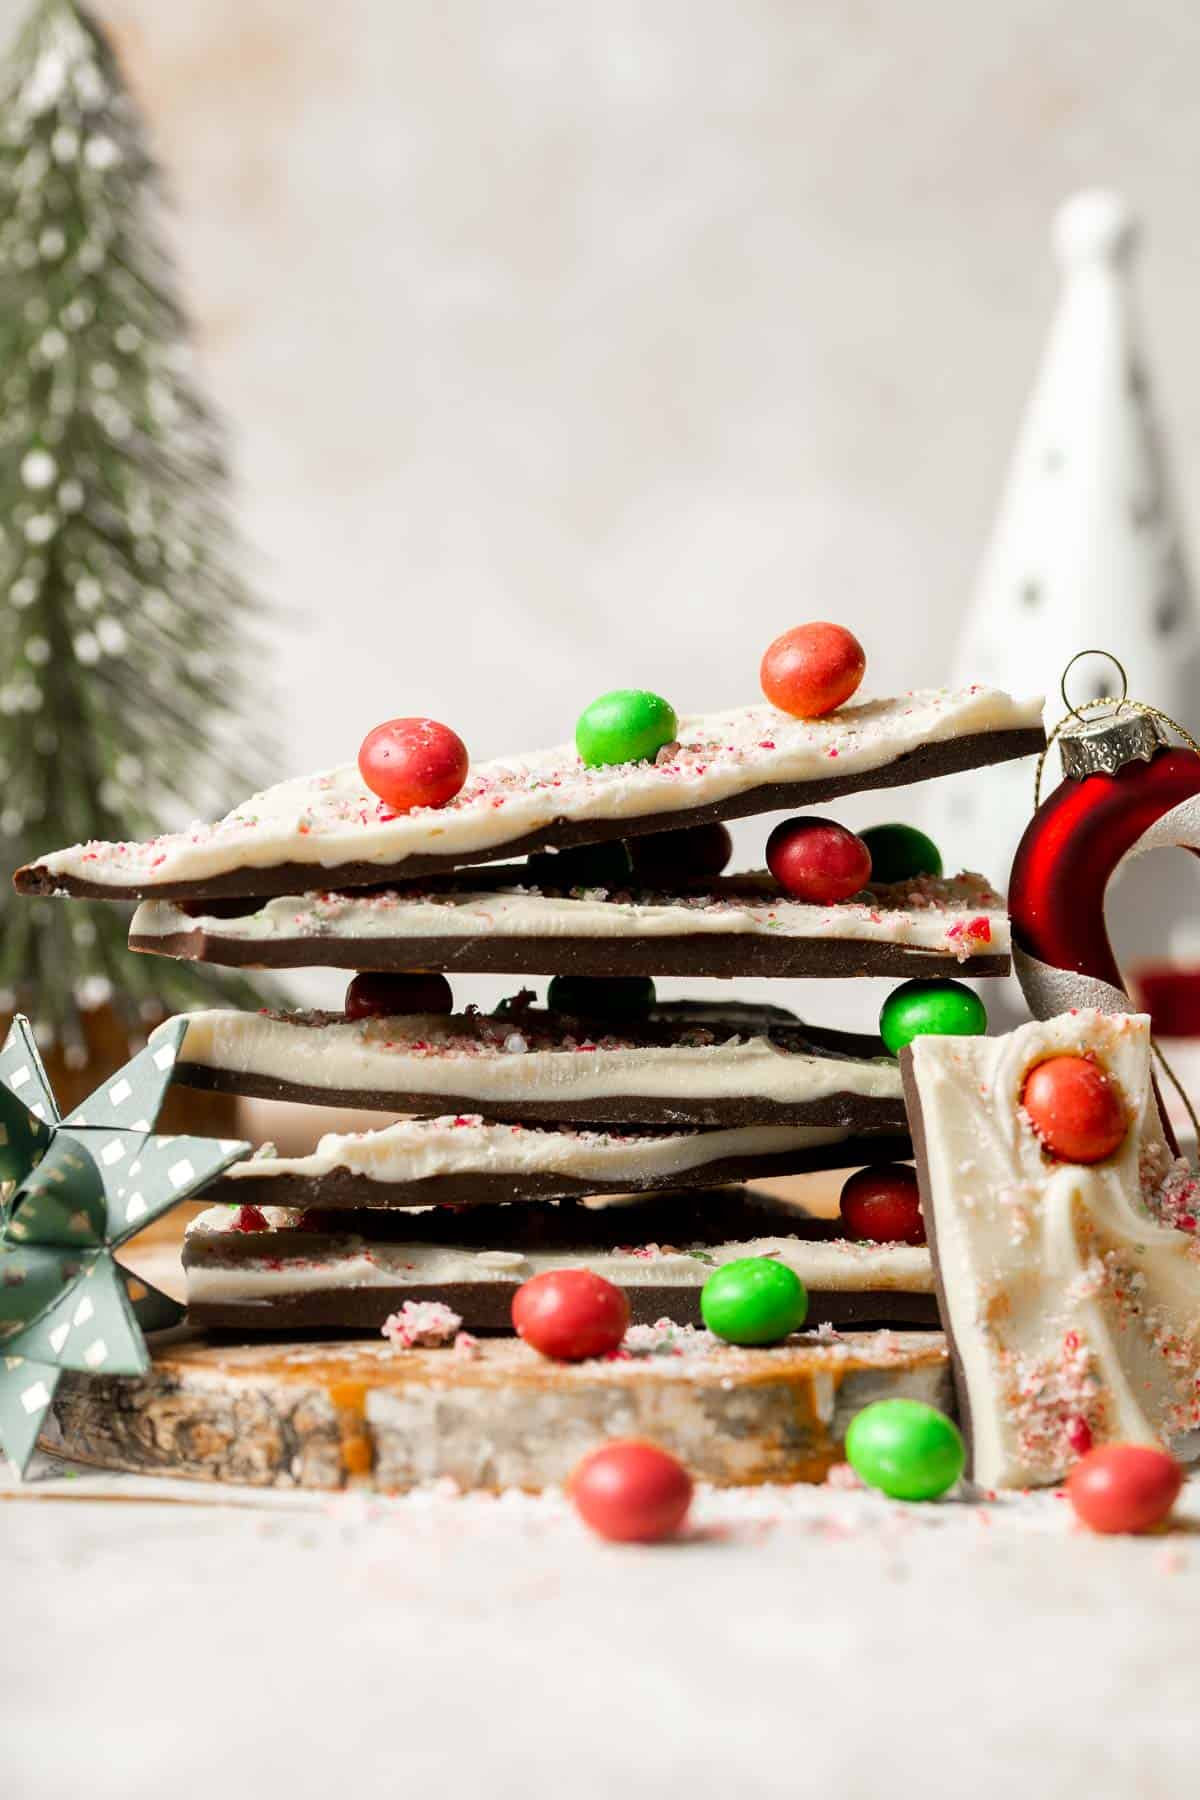
Ingredient Notes
To make these delicious and festive Peppermint Chocolate Christmas Bark, you will need the following ingredients (full measurements in recipe card below):
- dark chocolate - make sure to pick high quality chocolate as it forms the bulk of this recipe.
- white chocolate - same goes for the white chocolate - pick high quality chocolate.
- crushed peppermint candy - or crushed candy canes.
- Christmas m&m's - you need those red and green m&m's. Smarties in the same color work too. You can also leave out the m&m's for a simple classic peppermint bark.
You will also need measuring cups, a large sheet pan (half sheet baking pan), and parchment paper.
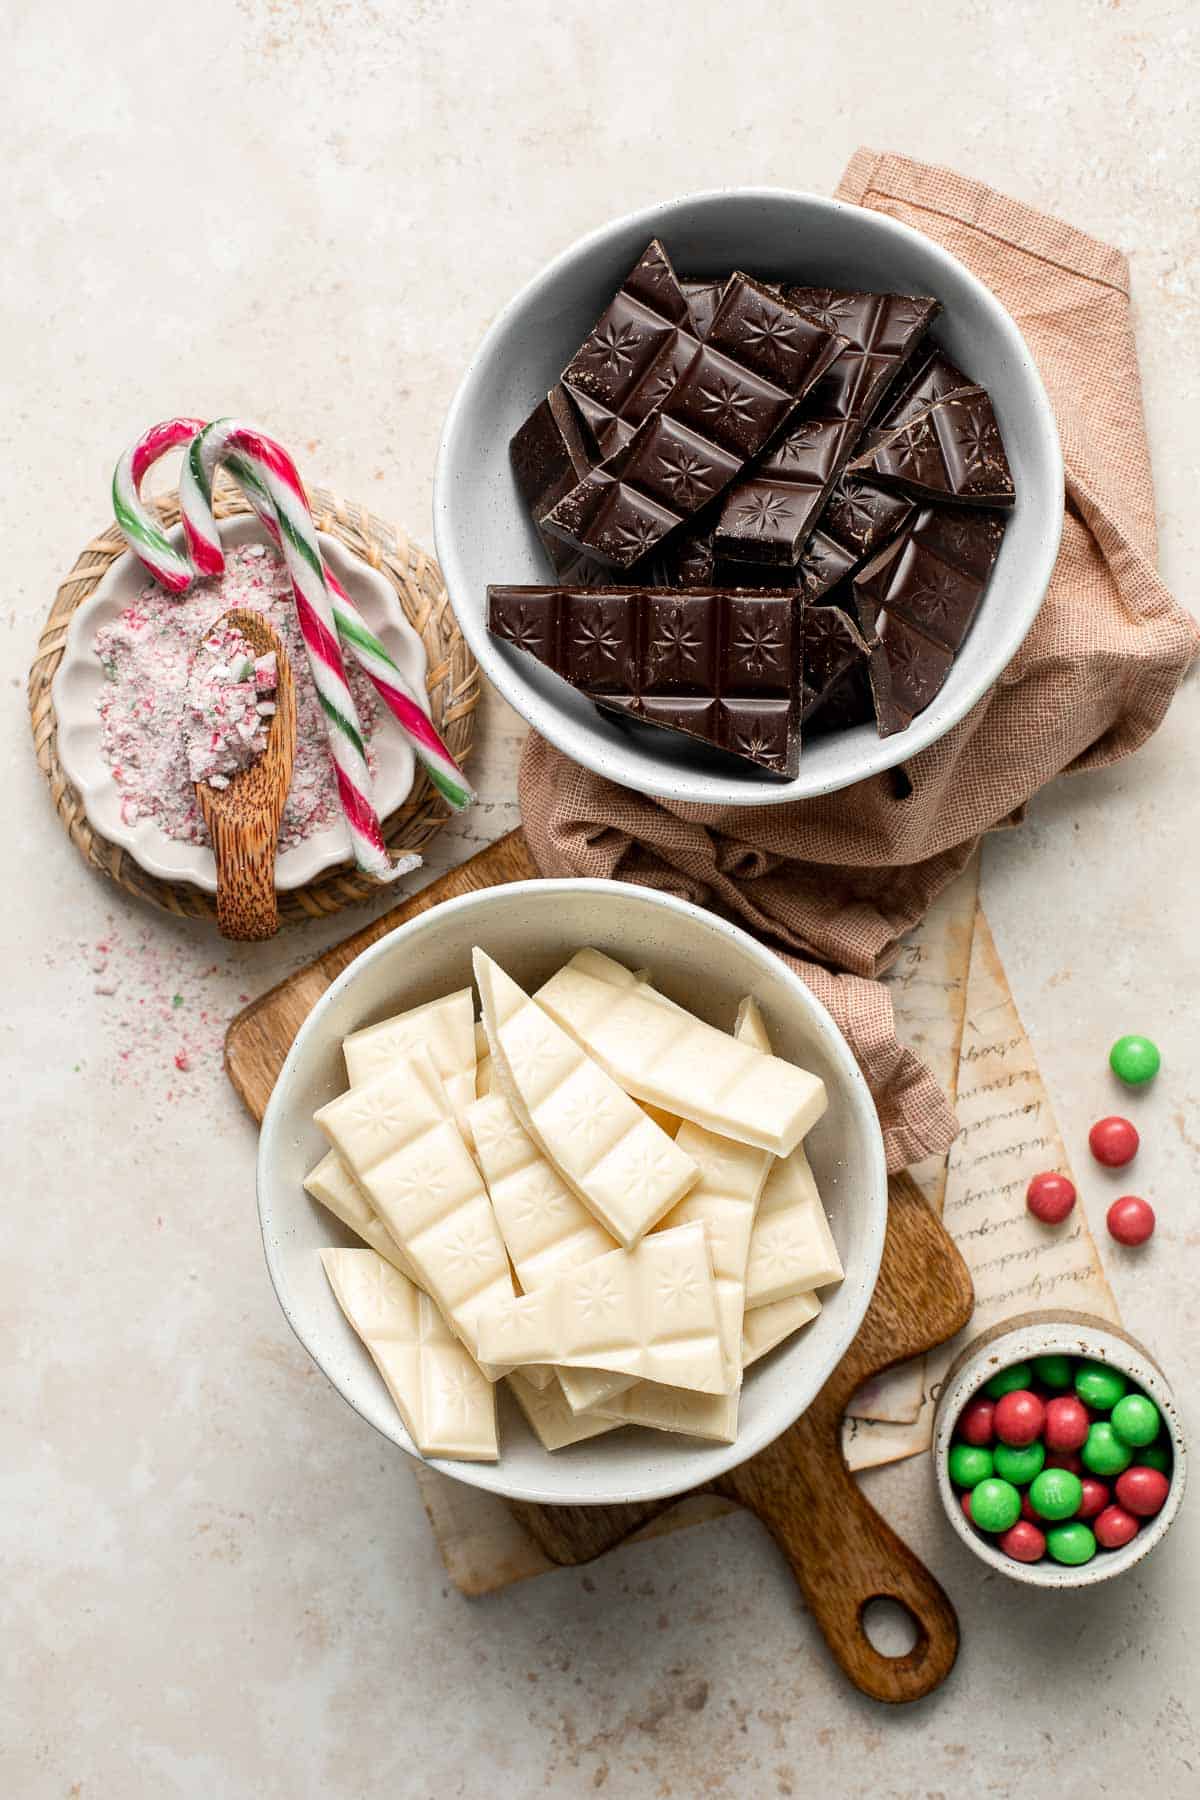
How to Make the Best Christmas Bark
- Prep. Line a large half sheet baking pan with parchment paper.
- Melt dark chocolate. Melt the dark chocolate in a double broiler on the stove or in the microwave until smooth.
- On the stove: Bring 2 inches of water to a low simmer in a saucepan over medium-low heat. Then, turn the heat to low and place a medium heatproof bowl on the mouth of the pot. Make sure that there is a gap of a few inches in between the bottom of the bowl and the water (You can also place a bowl on a steamer attachment on top of your pot). Add the chocolate and stir constantly as it melts. Stir until the chocolate is completely smooth and melted. This should take a few minutes.
- In the microwave: Place a medium heatproof bowl of chocolate into the microwave and microwave in 30 second intervals. Remove the bowl at each interval and stir well. Repeat until the chocolate has completely melted. Stir until completely smooth.
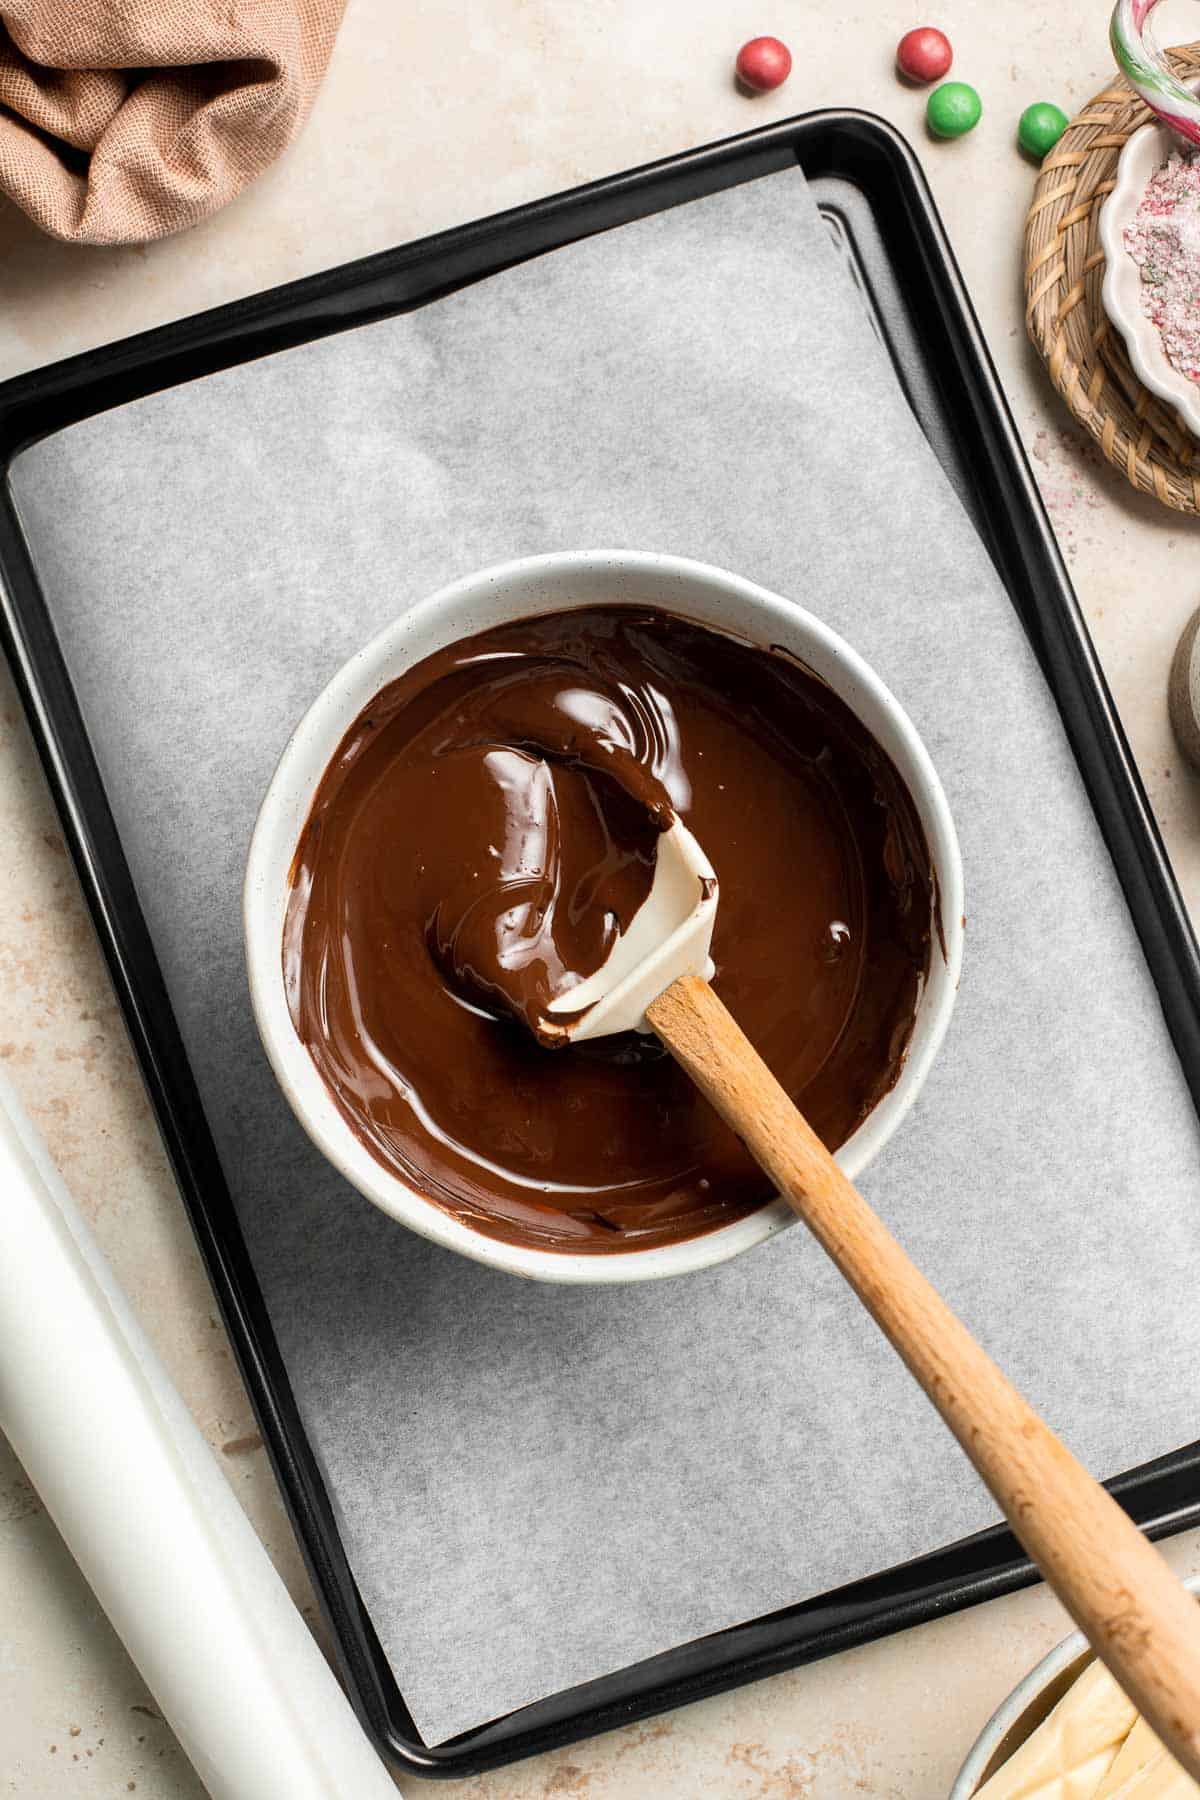
- Spread dark chocolate. Pour the melted chocolate onto the parchment paper and use a rubber spatula to spread it out until it is about ⅓-inch thick. Place in the fridge for 10 minutes to slightly harden.
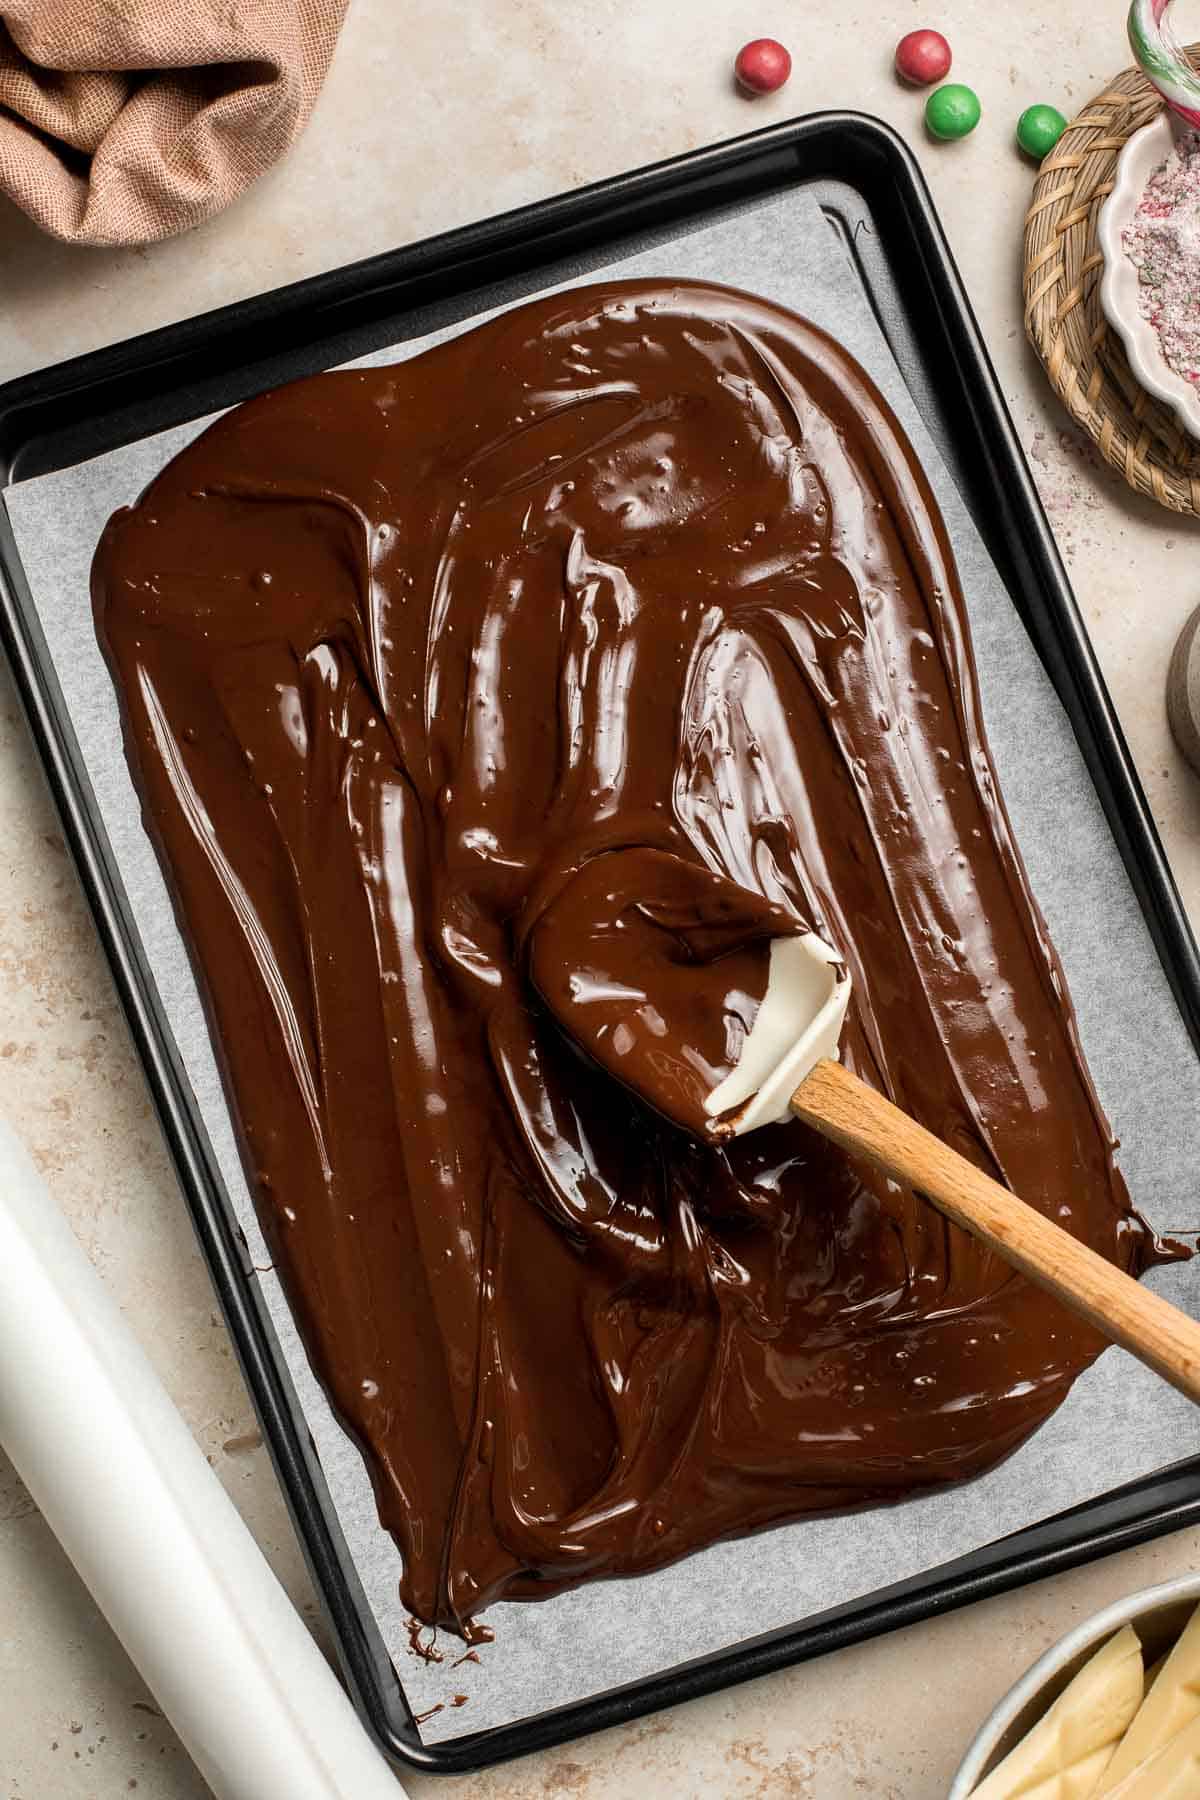
- Melt white chocolate. Melt the white chocolate in a clean bowl and pour on top of the dark chocolate.
- Spread white chocolate. Use a spatula to carefully spread out the white chocolate, covering the dark chocolate.

- Add peppermint. Sprinkle crushed peppermints and m&m's on top of the white chocolate while it is still melted.
- Chill. Place the sheet pan in the refrigerator for 2 hours (or 45 minutes in the freezer) until the chocolate hardens.
- Serve. Break the chocolate apart into pieces and enjoy.
Christmas Bark Variations
- Use festive sprinkles. You can also top this holiday bark with anything festive. I often like adding Christmas sprinkles. It's easy to find red and green sprinkles, tree and star shaped sprinkles, red pearl sprinkles, and so on. Get creative!
- Adapt to different holidays. This bark recipe can be adapted to fit almost any holiday - Halloween, Easter, Valentine's Day, etc. Just change the crushed peppermint with a themed candy (ie. cinnamon hearts for Valentine's Day, mini eggs for Easter), and change the colors of m&m's to reflect the theme colors.
Recipe Tips and Tricks
- Kid-friendly activity: To make this activity even easier for young kids, portion out the crushed peppermints and m&m's into small bowls so that they can easily dump a small quantity on the chocolate, instead of setting out a large amount of toppings.
- Get every drop of melted chocolate: When pouring the chocolate onto the prepared pan, you can get every last drop by using a rubber spatula to wipe the sides of the bowls clean.
Storage and Freezing Instructions
How to Store
Once the peppermint bark has completely cooled and set, you can break it up and transfer it to an airtight container or a sealed plastic bag and store at room temperature for 3-4 weeks. Keep it in a cool area to prevent it from melting. You can also store in the fridge.
How to Freeze
Because this bark is specific to Christmas, you may not want to keep it around until Easter, but if you're making it ahead of the holidays, store it in a freezer-safe airtight container or freezer bag for up to 3 months. When ready to eat, allow it to thaw overnight in the refrigerator.
More Christmas Dessert Recipes
- 30 Best Christmas Dessert Recipes
- Gingerbread Bundt Cake
- Holiday Yule Log Cake
- Christmas Cupcakes
- Gingerbread House
- Yogurt Fruitcake
Tried this recipe?
I'd love to hear what you think! Leave a comment and rating below to share your feedback. Your reviews help others discover this recipe and help me keep creating more free recipes for you. Snap a photo and tag me on social media @aheadofthyme too.

- « Previous Page
- 1
- …
- 13
- 14
- 15
- 16
- 17
- …
- 40
- Next Page »