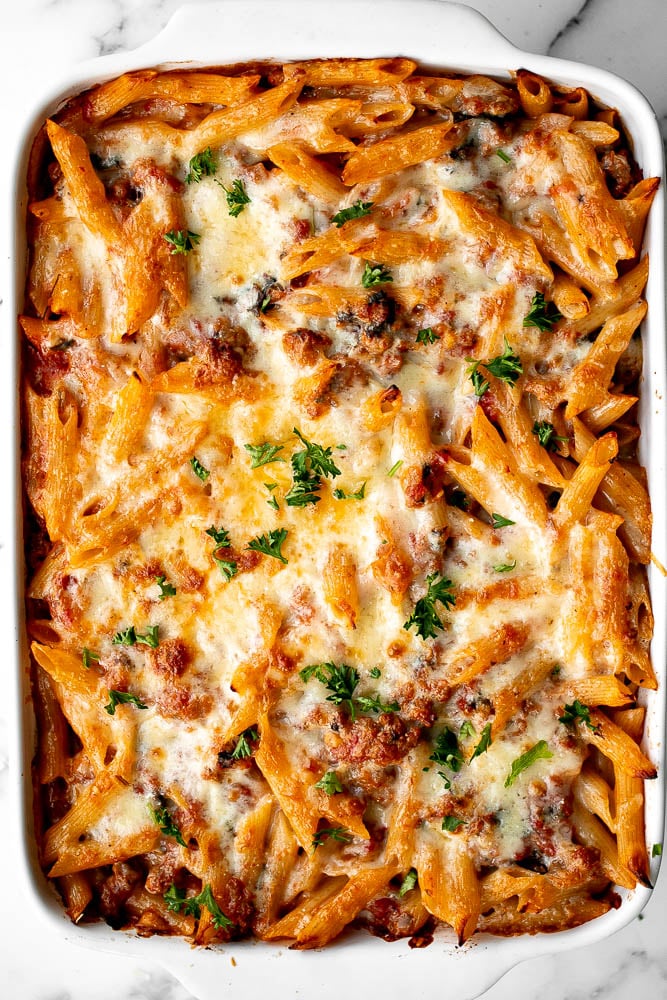
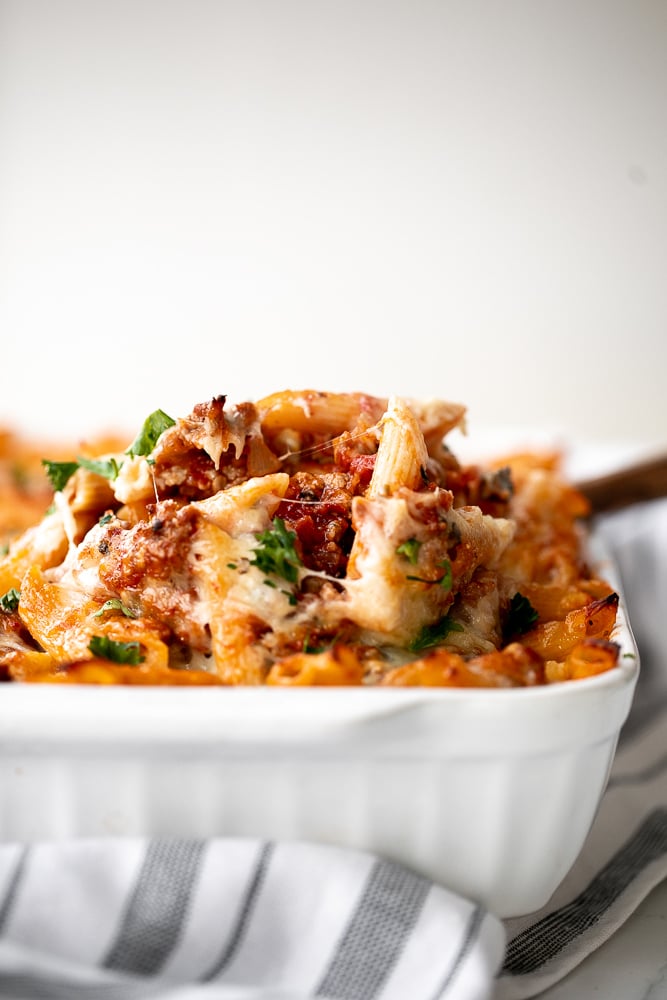
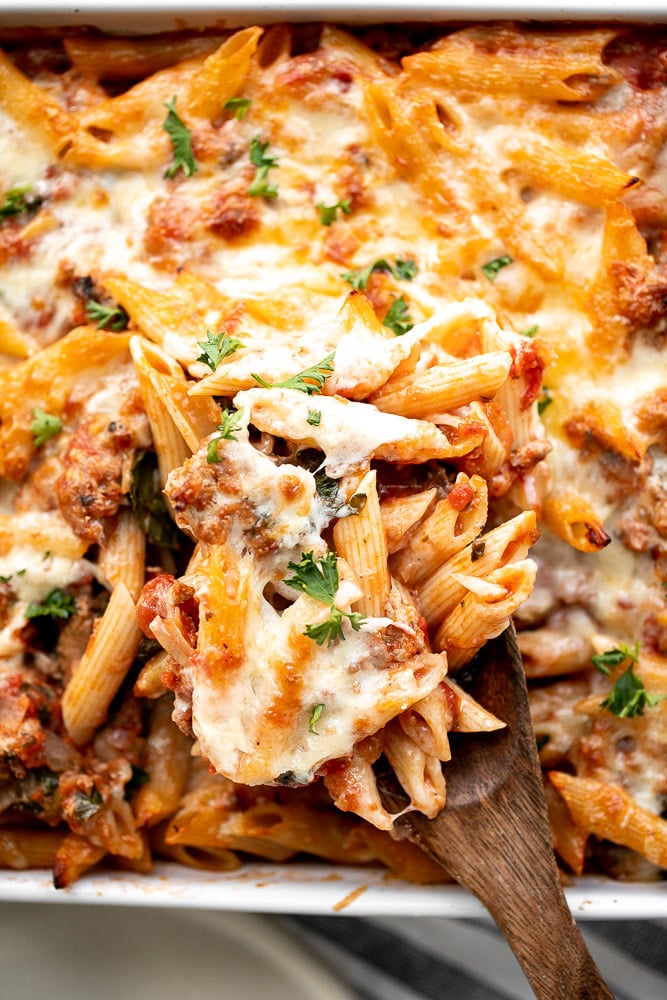
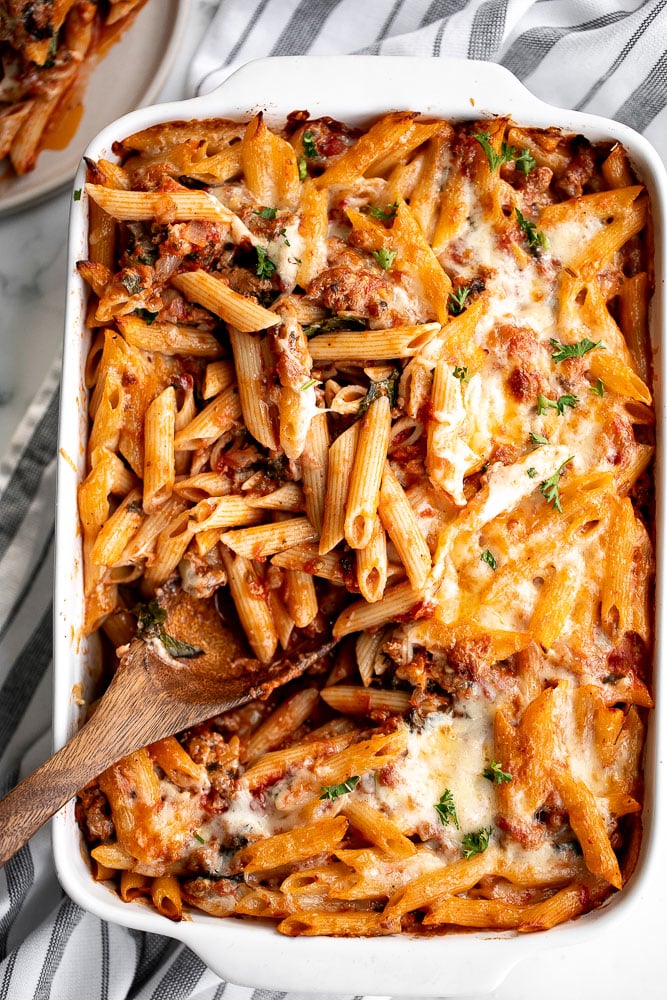
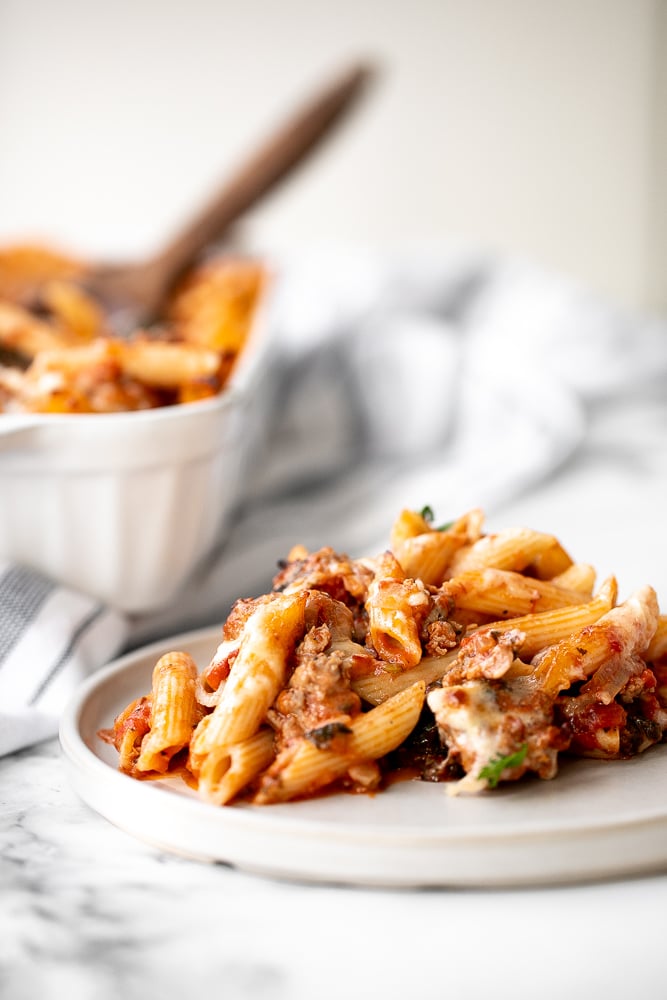
Pasta bake with sausage (baked ziti) is basically a lazy day lasagna with layers of pasta tossed in a rich tomato meat sauce packed with Italian sausage, layered with lots of gooey golden mozzarella cheese, and baked to perfection. It's an easy and delicious casserole dinner to make any day of the week. Plus, you can even make it ahead and freeze for another day.
Pasta bakes are always a go-to in our family, because they are easy to make and can feed a crowd. And the leftovers? They taste even better the next day. Seriously. Plus, it's a favourite for the kids (and obviously adults too!). Some of our other favourites to make are Cheesy Tortellini and Sausage Pasta Bake and Shrimp Fettuccine Alfredo Pasta Bake.
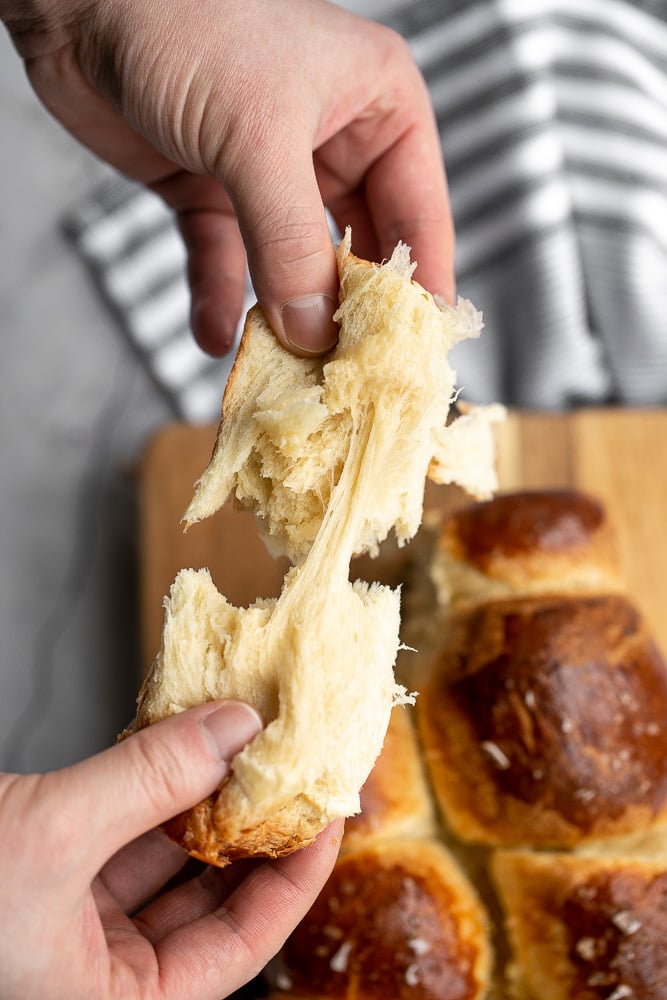
And a crusty loaf of bread is always welcome alongside this pasta bake with Italian sausage. Some great options are: Pull Apart Garlic Bread, Cheesy Garlic Dinner Rolls, Ciabatta Rolls, or slices of French Baguettes.
Ingredient Notes
To make this delicious Pasta Bake with Italian Sausage, you will need the following ingredients (full measurements in recipe card below):
- pasta - I used penne, but you can use the more traditional ziti pasta. But really any kind of smaller pasta will work here such as elbow pasta, rotini, or farfalle.
- olive oil
- Italian sausage - you could use any kind of ground meat as well, such as ground beef, pork, turkey, or chicken. You may have to increase the amount of Italian seasoning used to compensate for the flavours in Italian sausage.
- onion
- garlic
- tomato sauce
- herbs - I used Italian seasoning, fresh parsley and fresh basil.
- cheese - Parmesan and mozzarella cheese.
- salt and pepper
You will also need measuring cups and spoons, large pot (or 4 qt. Dutch oven), and 9x13 casserole pan.
How to Make the Best Pasta Bake with Italian Sausage (Baked Ziti)
- Boil the pasta. Bring a large pot of salted water to a boil over medium-high heat. Add pasta and cook until al dente (fully cooked but still firm), about 8-10 minutes, or according to package directions. Drain well and set aside.
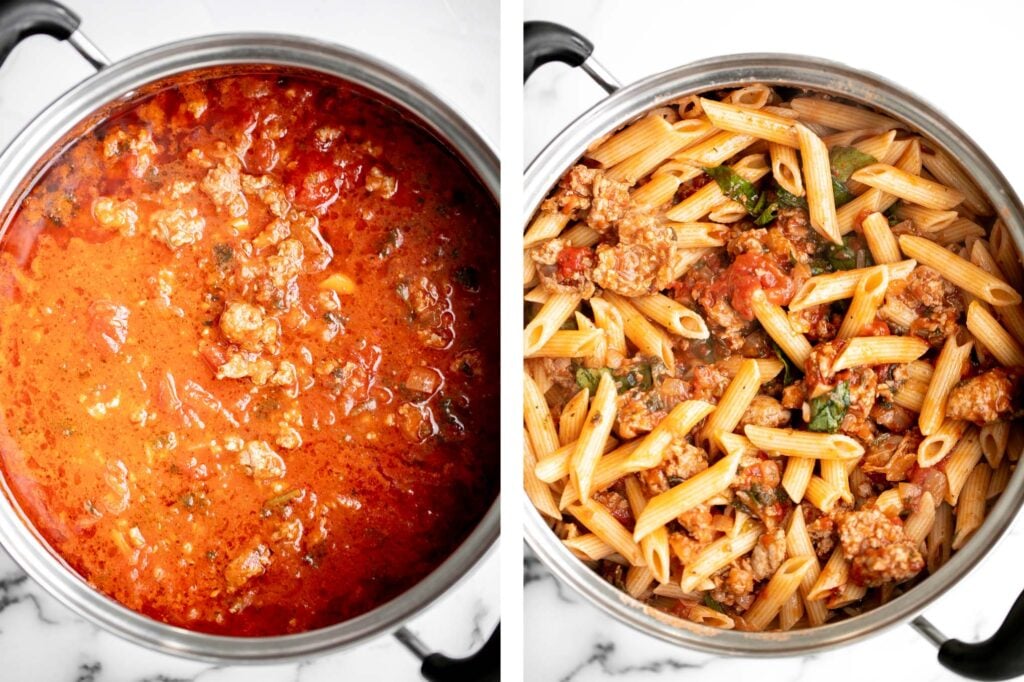
- Cook the sausage. Meanwhile, heat olive oil in a large pot (or 4 qt. Dutch oven) for 2 minutes over medium-high heat until the hot oil sizzles. Add sausage and stir to cook until browned, about 5-7 minutes. Use a spatula to break the sausages into small pieces. Add onions and garlic and sauté until soft and tender, about 2-3 minutes. Stir to combine.
- Make the sauce. Pour in tomato sauce, turn the heat down to medium, and bring the meat sauce to a simmer, stirring occasionally. Stir in Italian seasoning, ½ cup Parmesan cheese, parsley and basil. Season with salt and pepper. Turn the heat down to low and simmer for 5-7 minutes, stirring occasionally. Simmering helps develop richer flavour in the sauce.
- Add the pasta. Transfer the cooked and drained pasta into the sauce and toss well to mix evenly.
- Assemble. Spread half of the pasta into a 9x13 casserole pan and top with half of mozzarella cheese (1.5 cups). Add the remaining pasta and sprinkle the remaining mozzarella and Parmesan cheese evenly on top.
- Bake. Bake the pasta in a 375F preheated oven for 25 minutes until the melted cheese is golden brown. Let cool for 15 minutes, then serve.
Recipe Variations
- Use different sausage. We used a traditional Italian sausage, but you can experiment with any kind of sausage that you like! Try spicy sausage, chicken sausage, or even vegetarian sausage.
- Substitute for ground meat. You can switch out the sausage and substitute with any kind of ground meat in this pasta bake, such as ground beef, pork, turkey, or chicken. You may have to increase the amount of Italian seasoning used to compensate for the flavours in Italian sausage.
- Add veggies. Sneak in some extra nutrients by add in some vegetables such as sautéed spinach, bell peppers, zucchini, mushrooms, or diced tomatoes.
- Make it spicy. Like to turn things up a notch? Add some heat with red pepper flakes or diced jalapeños.
- Try different pasta shapes. While the classic choice in a baked ziti is penne, rigatoni, or ziti, you can consider using other pasta shapes like fusilli, farfalle, or cavatappi for a different look and feel.
How to Serve
This Pasta Bake with Sausage is delicious served on its own as a complete dinner, or paired with some of my favorite pasta sides including:
- Arugula Salad
- Garlic Breadsticks
- Roasted Butternut Squash Soup
- Sautéed Spinach
- Caesar Salad
- Cheesy Garlic Bread
For more recipe inspiration, see our 30 Side Dishes for Pasta.
Recipe Tips and Tricks
- Prepare the sausage. If using sausage with links, remove the casings and crumble the sausage. Then cook it a directed before adding it to the pasta bake.
- Prepare it ahead of time. You can prepare this sausage pasta bake ahead of time. Just assemble everything as directed in the recipe but don't bake it. Cover the casserole pan with plastic wrap or aluminum foil and store in the fridge. When ready, bake it as directed. You may need to add a little extra time if needed.
Storing and Freezing Instructions
Make Ahead
Cook the pasta and the sauce and allow them to cool down. Then, assemble as directed in the recipe and store covered with plastic wrap or foil in the refrigerator or freezer until you are ready to bake. If baking from frozen, allow it to thaw first overnight in the refrigerator or for a few hours on the kitchen counter.
How to Store
Store this sausage pasta bake covered with plastic cling wrap or in an airtight container in the refrigerator for up to 4 days. To reheat, simply heat in the microwave, skillet or oven.
How to Reheat
Reheat leftovers in a 375 F preheated oven for about 10 minutes until warmed through. You can also reheat a smaller portion on the stovetop over medium-low heat or in the microwave in 30 second increments until warm.
How to Freeze
Once cooled to room temperature, transfer the sausage baked pasta to an airtight container and freeze for up to 3 months. To reheat, allow it to thaw in the refrigerator first, then reheat according to the instructions above.
More Pasta Recipes
- 40 Best Pasta Recipes
- Cheesy Tortellini and Sausage Pasta Bake
- Shrimp Fettuccine Alfredo Pasta Bake
- Spaghetti Carbonara
- White Chicken and Spinach Lasagna
- Pesto Penne Pasta
Tried this recipe?
I'd love to hear what you think! Leave a comment and rating below to share your feedback. Your reviews help others discover this recipe and help me keep creating more free recipes for you. Snap a photo and tag me on social media @aheadofthyme too.

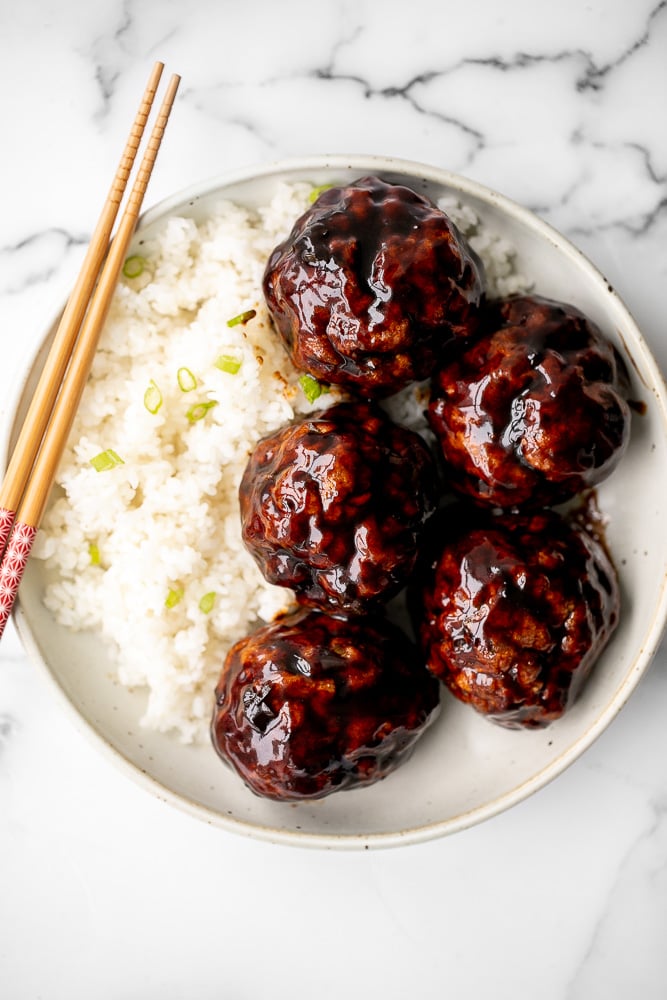
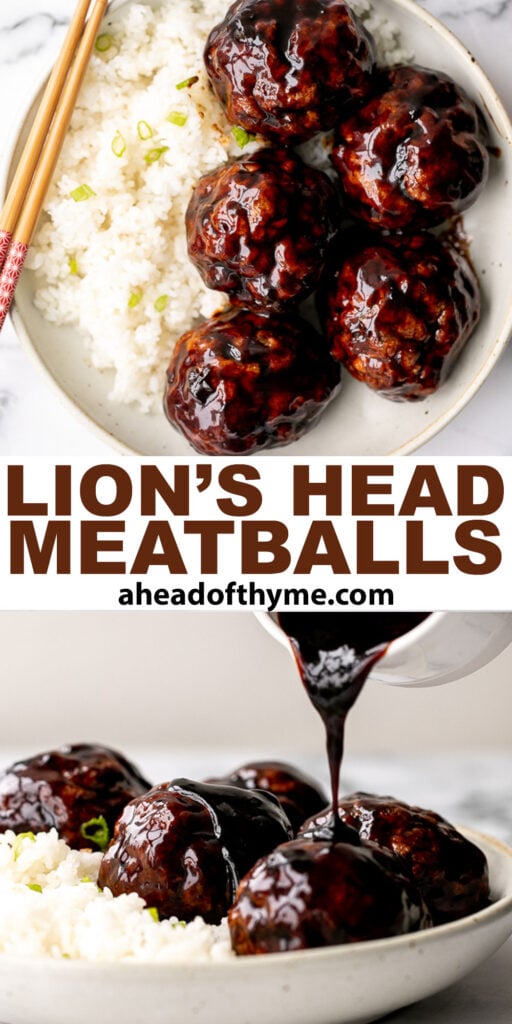
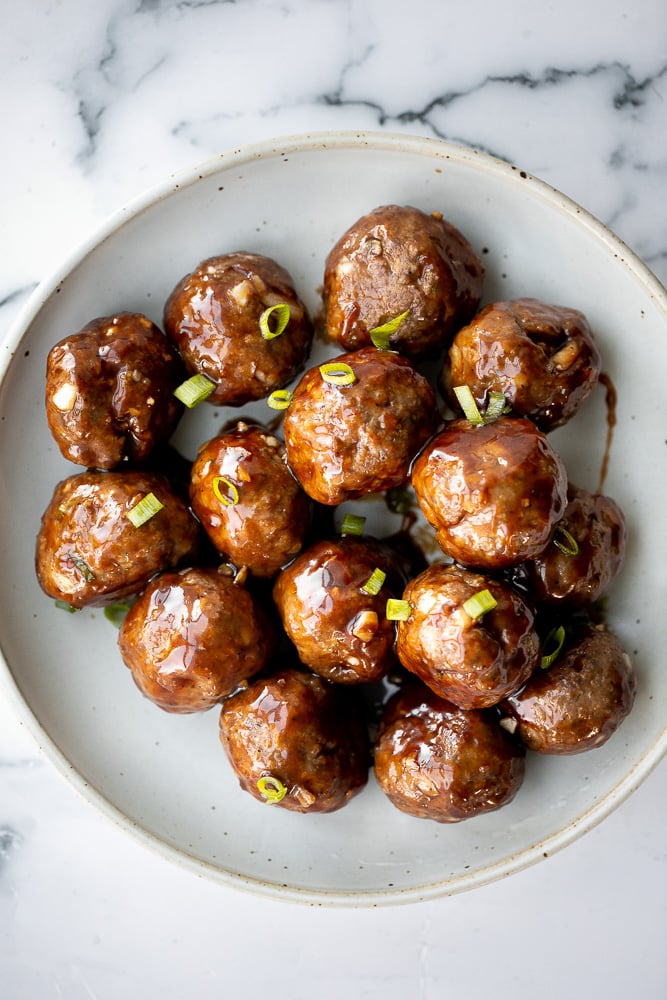
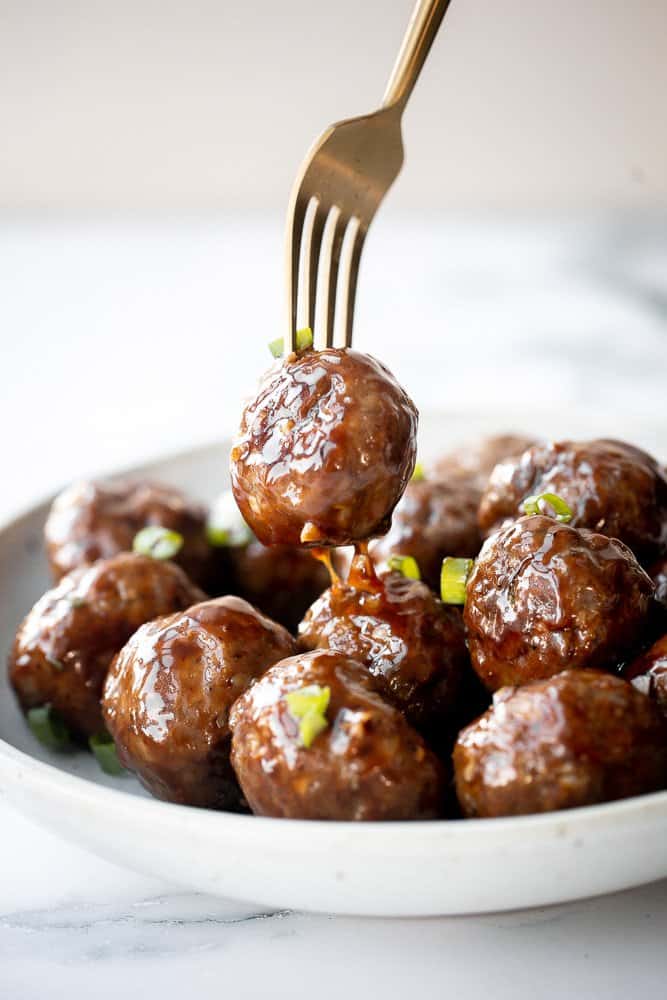
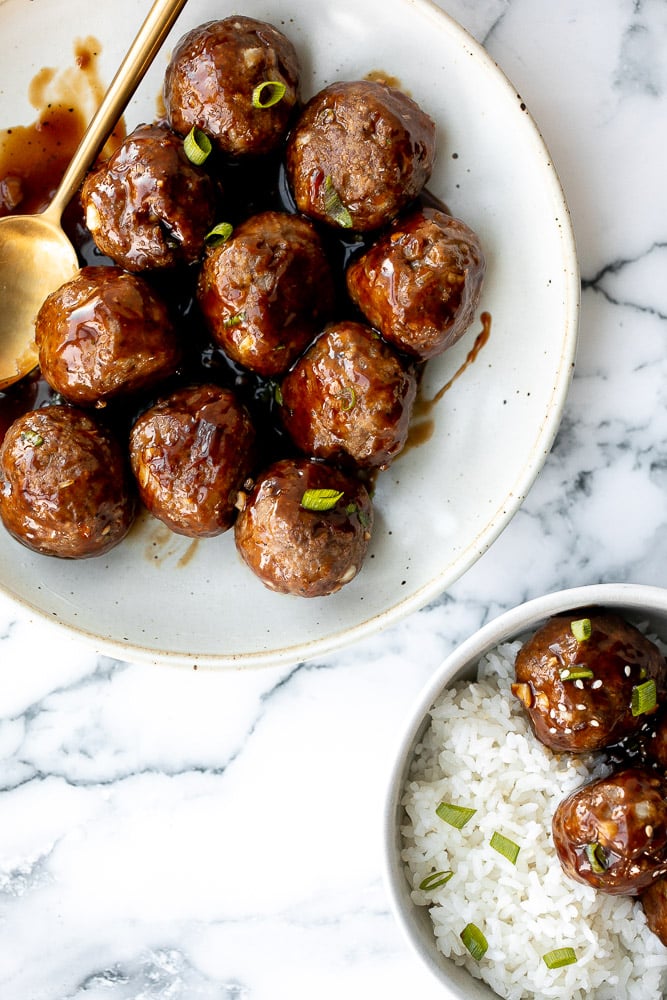
Lion's Head Chinese Meatballs
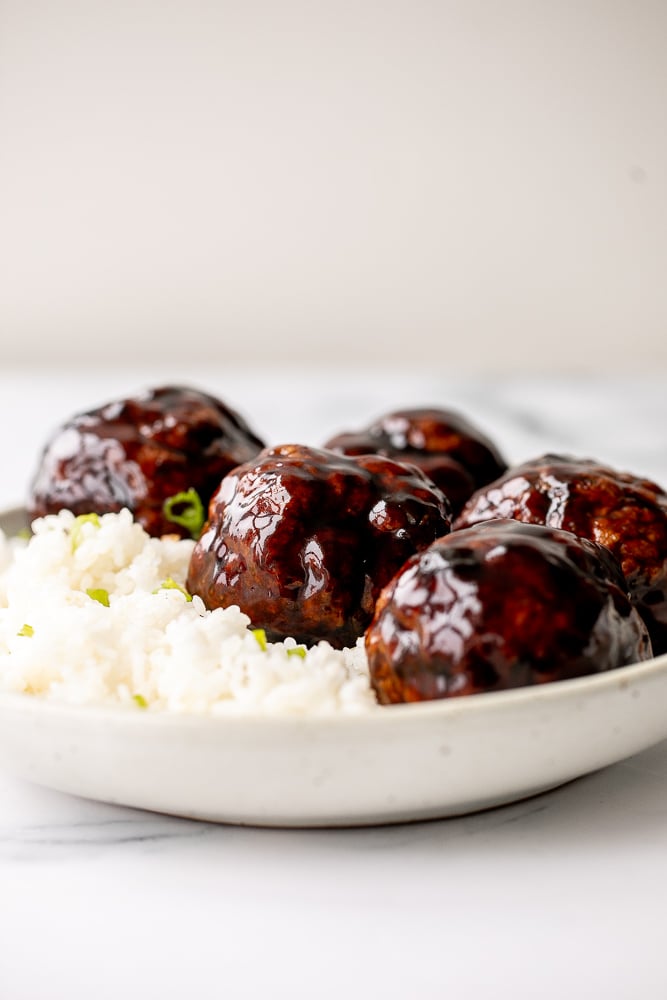
Lion's Head Chinese Meatballs are a popular Chinese New Year dish that we enjoy almost every year. Tender and juicy homemade pork meatballs are packed with Asian seasonings and tossed in a sweet and sticky sauce. They are a delicious, flavourful, and comforting meal that you can make in just 30 minutes. Serve these meatballs over a plate of steamed rice, fried rice, or noodles.
What are Lion's Head Meatballs?
Lion's Head Chinese Meatballs (狮子头) are the ultimate Asian comfort food. You can enjoy these pork meatballs any day of the year, particularly during Lunar New Year or for any big celebration. The meatballs get their name because of their shape, which resembles a lion's head. Lions are a very auspicious symbol in Chinese culture and represents prosperity, strength, and vigor. You may have seen a traditional lion dance during big celebrations like Chinese New Year (we even had one at our wedding!), or a lion's statute outside of temples and palaces. It is undoubtably an important symbol in Chinese culture.
There are different ways to prepare lion's head meatballs. Most traditionally, they are steamed with cabbage. You can also fry them or bake them. You can serve them as is or toss them in a sauce. Plus, the sauce is completely customizable. We prefer a sweet soy sauce, but you can use sweet chili sauce, honey garlic, or even a creamy sauce.
For more Chinese New Year recipes, browse our top 50 Chinese New Year recipes.
Ingredients
To make lion's head Chinese meatballs, you will need the following ingredients
- ground pork
- breadcrumbs
- eggs
- green onions
- seasonings - Shaoxing cooking wine (or mirin), soy sauce, sesame oil, brown sugar, fresh ginger, garlic, salt, and ground black pepper (or white pepper).
For the sweet soy sauce, you will need:
- soy sauce
- chicken broth
- brown sugar
- sesame oil
- flour - or cornstarch
You will also need measuring cups and spoons, mixing bowl, an air fryer (if using) or quarter sheet baking pan.

How to Make the Best Lion's Head Chinese Meatballs
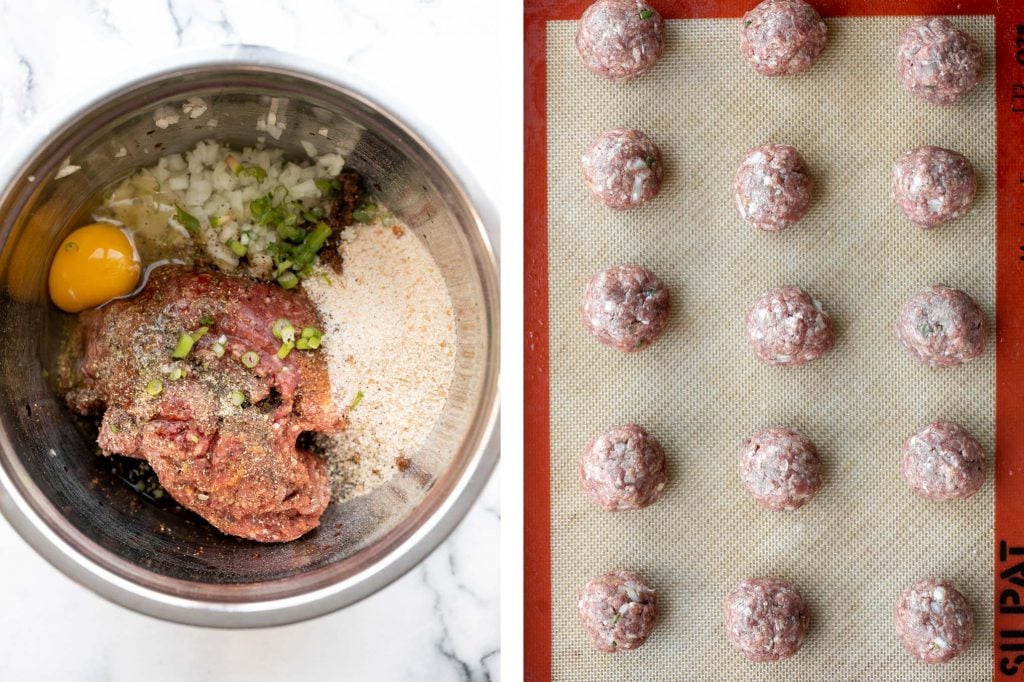
- Prepare the meatballs. In a large mixing bowl, combine pork with breadcrumbs, eggs, Shaoxing cooking wine, green onions, soy sauce, sesame oil, brown sugar, ginger, garlic, salt and pepper. Mix well until uniform in consistency.
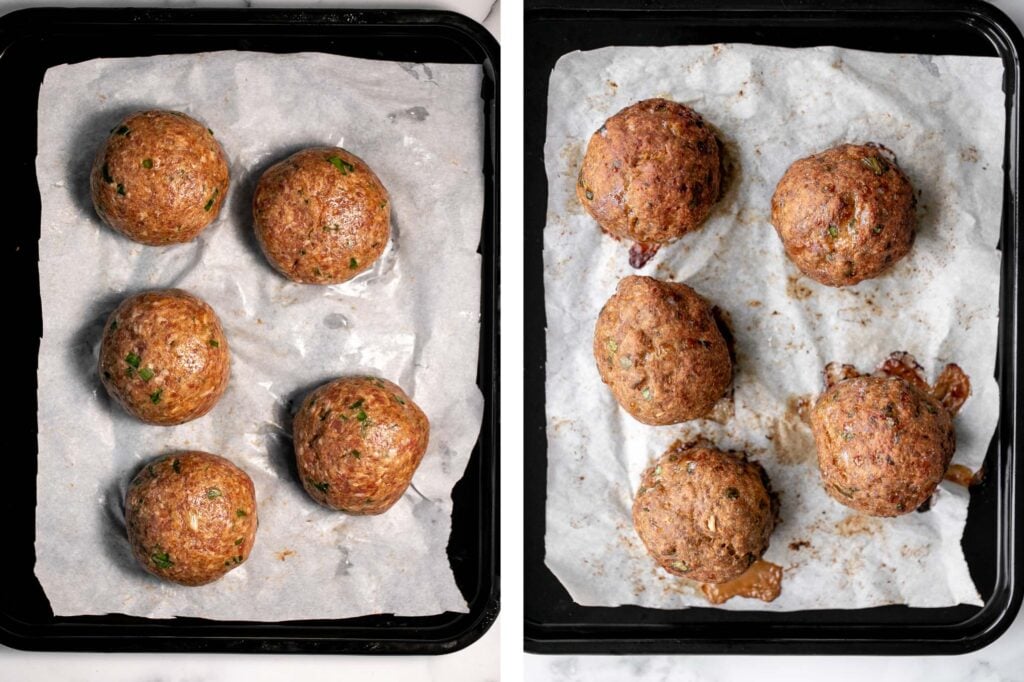
- Shape the meatballs. Divide pork mixture into 5 equal pieces and roll into meatballs with your hands. Wear disposable gloves when handing meat to avoid contamination.
- Cook the meatballs. You can cook the meatballs in the air fryer or in the oven:
- In the air fryer: Place meatballs in a single layer in the air fryer and cook at 375F for 20 minutes, until the internal temperature reaches 160F when measured on a meat thermometer. Set aside.
- In the oven: Place meatballs in a parchment-lined quarter sheet baking pan and cook in a 375 preheated oven for 40 minutes, until the internal temperature reaches 160F when measured on a meat thermometer. Set aside.
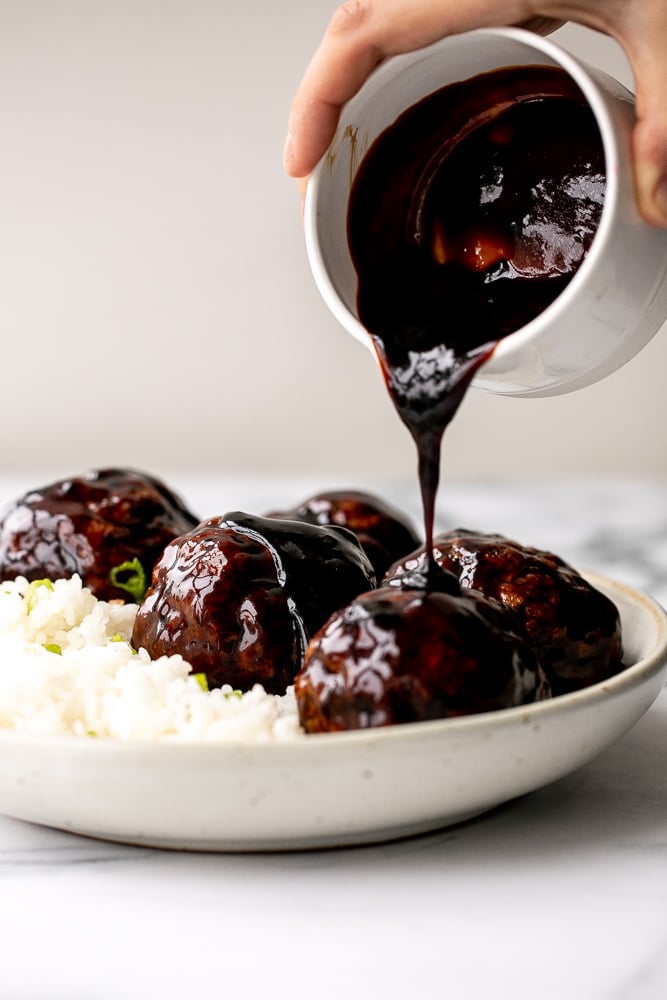
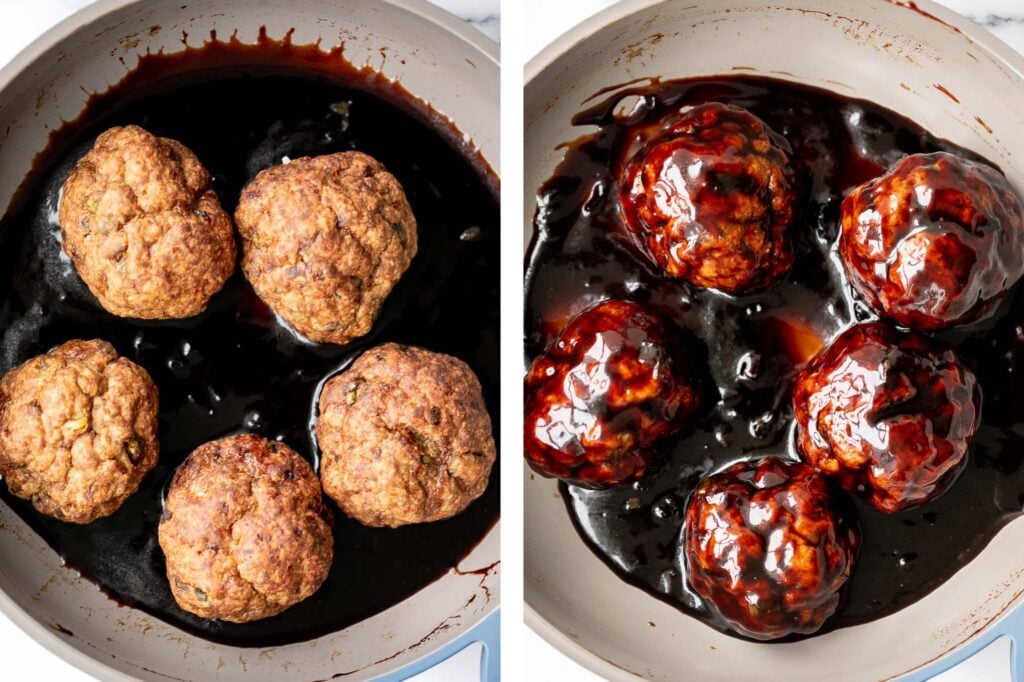
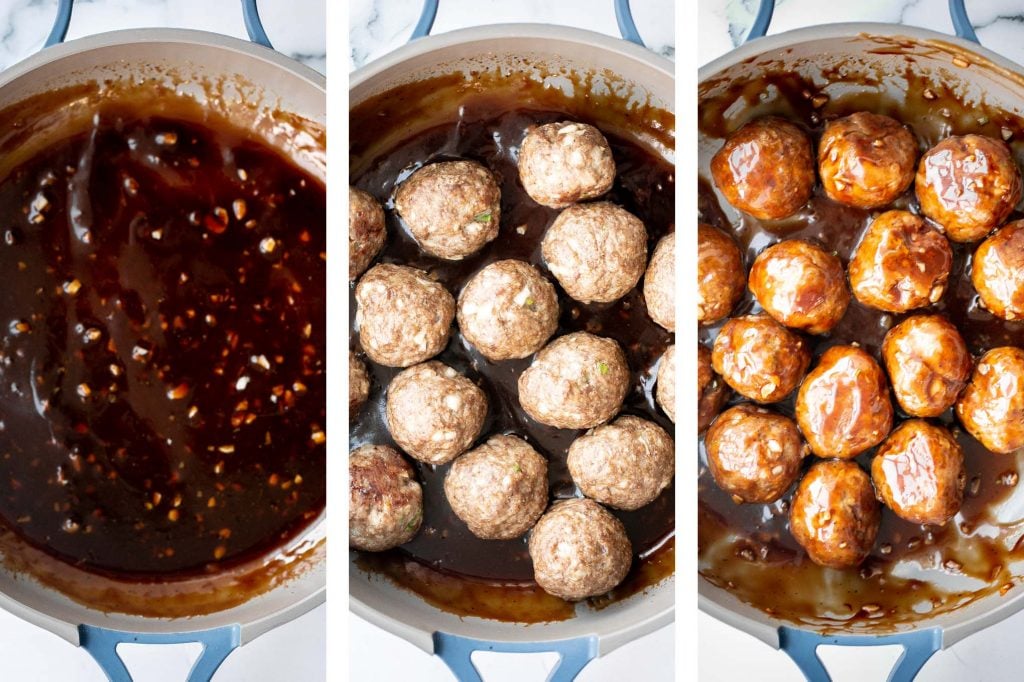
- Make the sweet soy sauce. In a small mixing bowl, add soy sauce, chicken broth, brown sugar, sesame oil and flour. Whisk well to combine until flour and sugar dissolves. Transfer the sauce into a shallow saucepan and heat over medium for 3-4 minutes. Continuously stir until desired consistency is reached.
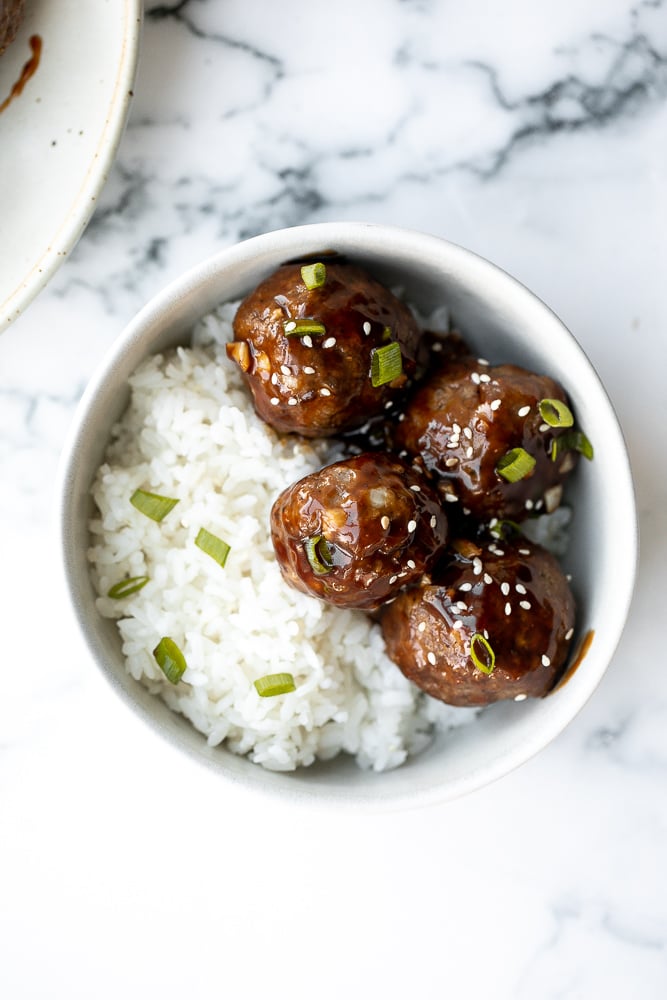
- Serve. Add meatballs to the saucepan and toss well to coat evenly. Garnish with green onions and serve warm with a bowl of steamed rice, fried rice, or noodles, and drizzle any extra sauce from the pan on top.
Freezing and Storing Instructions
- How to store: Store lion's head meatballs in an airtight container and place in the refrigerator for up to 3 days. To reheat, simply reheat in a steamer or in a shallow saucepan on the stove over medium-low heat until warmed through. You may need to add a splash of water if the sauce thickened up too much in the refrigerator.
- How to freeze uncooked meatballs: You can freeze uncooked lion's head meatballs by placing them on a quarter sheet baking pan lined with parchment paper. Then transfer to the freezer and freeze until hard, about 1 hour. Then, transfer the meatballs to a freezer bag or freezer-safe airtight container and store in the freezer for up to 3 months.
- How to cook from frozen: Allow the meatballs to thaw overnight in the refrigerator first, then cook as per recipe instructions on the stove.
- How to freeze cooked meatballs: Freeze cooled cooked meatballs by transferring into an airtight container or freezer bag. I would recommend freezing before mixing with the sauce, and making a fresh batch of sauce when ready to use.
More Ground Meat Recipes
- Crispy Bottom Shanghai Pan-Fried Pork Buns
- Beef Potstickers (Dumplings)
- Sticky Honey Garlic Meatballs
- Mini Meat Pies with Soy Sauce
- Spicy Dan Dan Noodles
- Swedish Meatballs
Tried this recipe?
I'd love to hear what you think! Leave a comment and rating below to share your feedback. Your reviews help others discover this recipe and help me keep creating more free recipes for you. Snap a photo and tag me on social media @aheadofthyme too.
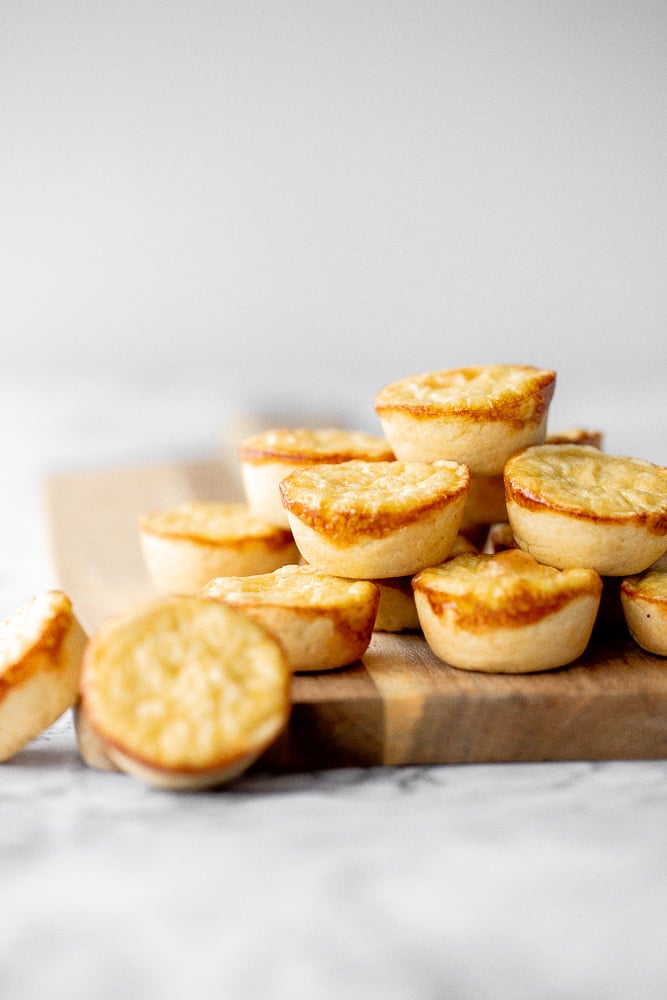
Mini Egg Tarts
Mini egg tarts with a flaky, buttery crust and a silky smooth, rich egg custard filling are a delicious Hong Kong pastry that might look hard to make but are actually so easy. Enjoy this Asian-style treat for breakfast alongside a hot cup of tea in the morning, as a snack throughout the day, or most typically, as dessert to end an epic Chinese dim sum feast with.
What are Egg Tarts?
The Chinese egg tart (also called a dan tat) was first introduced in China by the British in the early 1900s. They are similar to Portuguese egg tarts, in that both have a delicious flaky pastry shell and a smooth egg custard filling. However, there are some differences. Portuguese egg tarts have a flakier shell, a sweeter filling, use only egg yolks, and are caramelized longer to get their signature blackened tops. Hong Kong egg tarts are typically smaller, have a sturdier shell, are less sweet, and use the whole egg yielding paler-coloured filing. You can find them at Chinese bakeries or at dim sum restaurants.
Ingredients
To make these mini egg tarts, you will need the following ingredients:
- pastry dough - made with all-purpose flour, unsalted butter, confectioners' sugar, salt, and ice cold water.
- eggs
- hot water
- heavy cream
- sugar
- vanilla extract
You will also need measuring cups and spoons (or kitchen scale), a food processor, mixing bowl, round cookie cutter, and mini muffin pan.
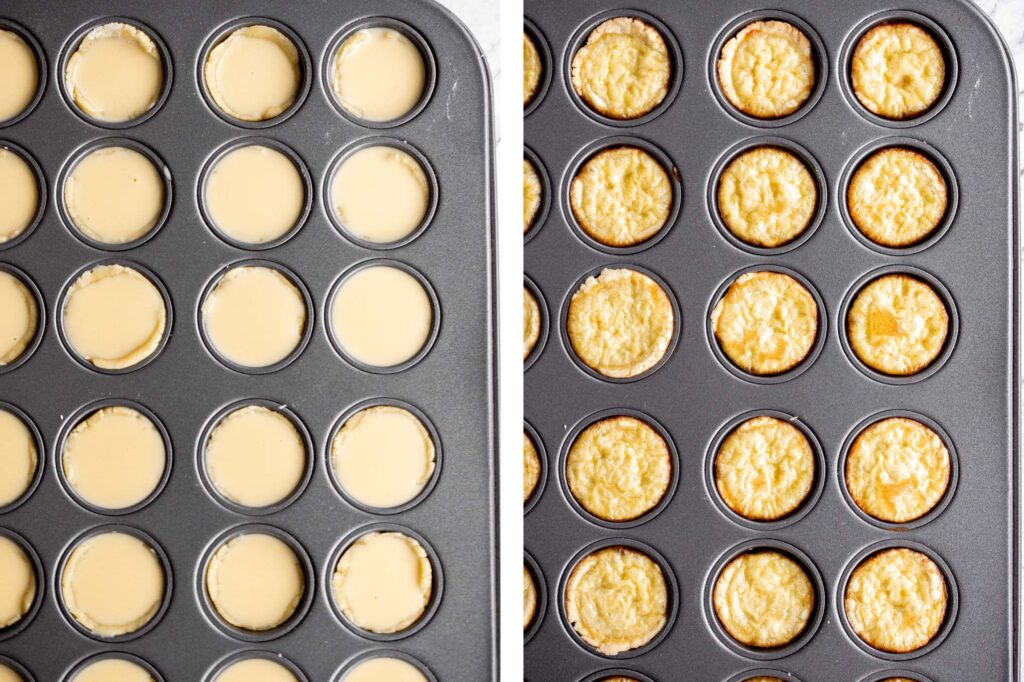
How to Make Mini Egg Tarts
- Make the dough. In a food processor, add flour, cubed butter, confectioners' sugar and salt. Pulse mix on and off for one minute, until the consistency of the flour mixture turns into small breadcrumbs. Drizzle ice water into the mixture (ice water is the key here). Close the lid and continue to pulse mix on and off for another one minute. Squeeze the crumbs together with your hands. If they stick together, the dough is ready.
- Shape the dough. Transfer the crumb-like dough into a large ziploc bag. Squeeze the dough using your hands and bring all the loose crumbs together until it turns into a nice and smooth dough ball. You can use disposable gloves to make it easier. Flatten the dough ball into a ¼-inch thick rectangle on a lightly floured surface using a rolling pin.
- Prepare the pastry cups. Use a 2-inch round cookie cutter (or rim of a glass) and cut out equal pieces of dough. Re-roll any scraps and repeat. You should be able to get about 24 pieces. Carefully press each dough into the tins of a non-stick 24-cup mini muffin pan. Transfer the pan into the refrigerator and store until the custard filling ready.
- Make the egg custard. In a small mixing bowl, whisk to combine beaten eggs, hot water, heavy cream, sugar and vanilla extract until smooth and creamy and the sugar is fully dissolved. To achieve smooth and creamy custard, you can strain the filling through a fine mesh strainer to ensure that there are no lumps.
- Assemble the egg tarts. Remove the mini muffin pan from the refrigerator and slowly pour in the custard filling into the pastry dough shells, up to ¾ full.
- Bake. Bake in a 450 F preheated oven for 12 to 15 minutes until golden brown and the custard is set. You can test by inserting a toothpick into the the egg tart. If it can stand without falling over, then it is done. Allow the egg tarts to cool for 5-10 minutes in the pan, then remove and serve warm.
Tips for Making Mini Egg Tarts
- Use COLD butter. Similar to any pastry pie dough, this is the key to getting a perfectly flaky crust. If the butter is too cold, it will melt too quickly when working with the dough and will not give you the flakiness that you want.
- Use disposable gloves: Using disposable gloves when handling pie dough (rather than handling pie dough directly with bare hands) will also help prevent the butter in the dough from melting too quickly.
- Refrigerate the dough. When not working with the dough (ie. when you have lined your mini muffin pan), always store it in the refrigerator to keep the butter from melting.
- How to store. Place completely cooled egg tarts into an airtight container and store for up to 3 days in the refrigerator.
- How to reheat. Reheat egg tarts in a 300F preheated oven for 5 minutes or the air fryer for 2-3 minutes until just warm. Do not overheat.
More Pastry Recipes
- Apple Hand Pies
- Mini Pumpkin Pies
- Quick and Easy Butter Croissants
- Baked Jelly Donuts
- Braided Lattice Apple Pie
- Easy Peach Cobbler
Tried this recipe?
I'd love to hear what you think! Leave a comment and rating below to share your feedback. Your reviews help others discover this recipe and help me keep creating more free recipes for you. Snap a photo and tag me on social media @aheadofthyme too.

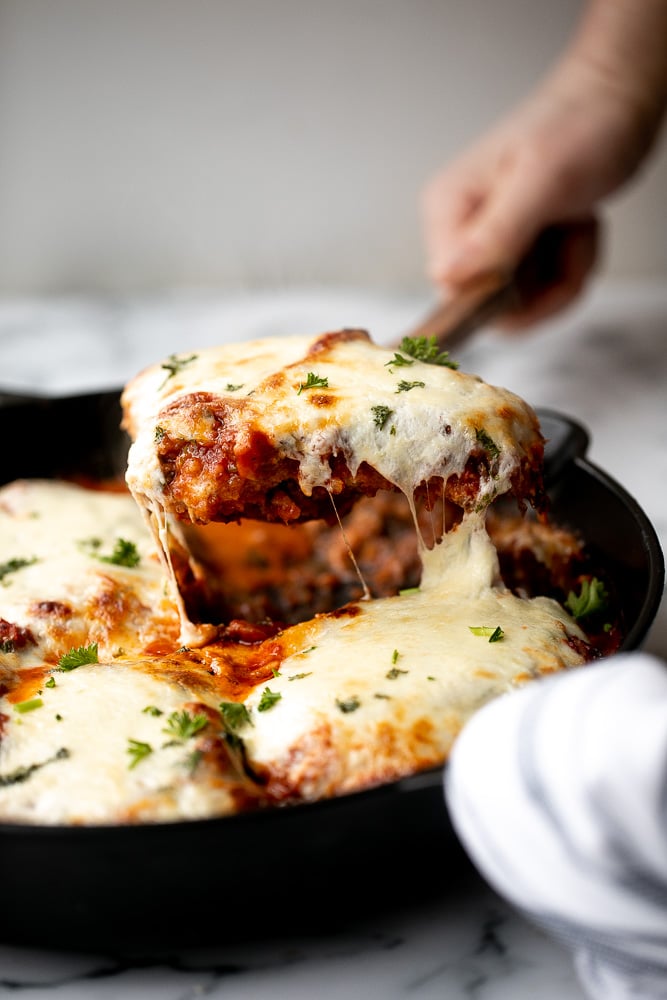
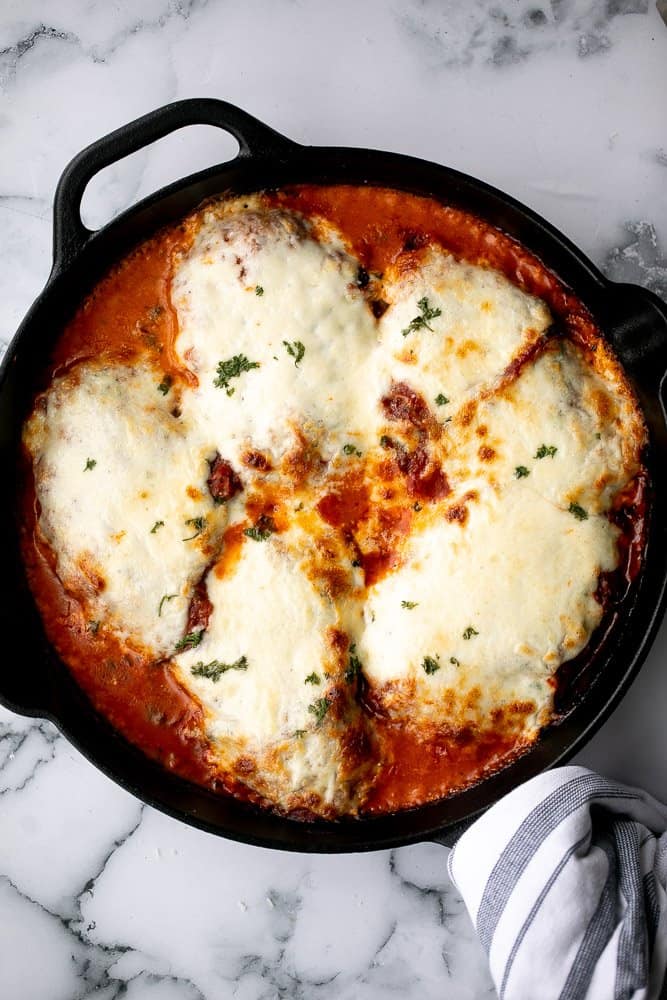
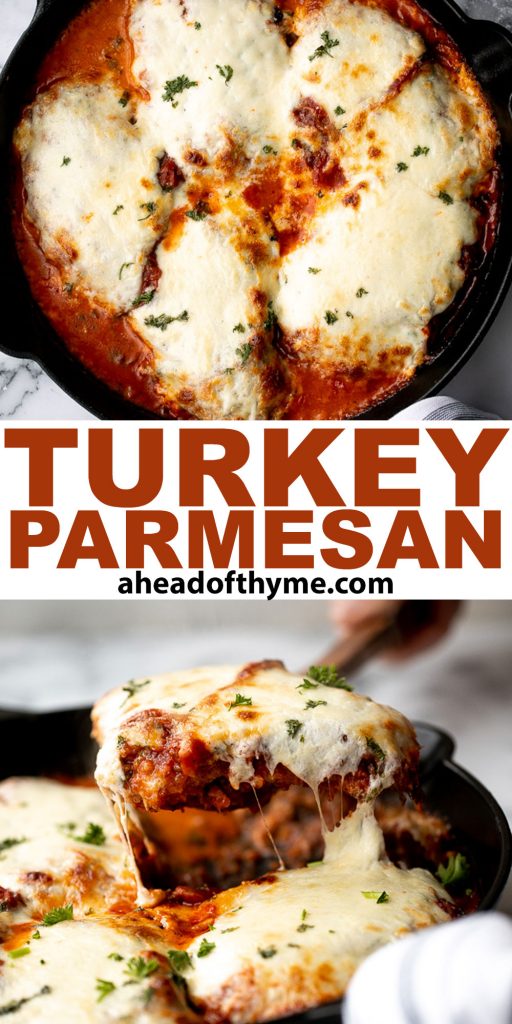
Turkey Parmesan
Oven baked turkey parmesan with a delicious, crispy, breaded coating, covered in a rich homemade tomato sauce, and topped with golden melted mozzarella and parmesan is a comforting dinner that the whole family will love. Lean and delicious turkey cutlets fit into this classic Italian dish so easily and well. Serve it on its own or over spaghetti for a complete meal.
I have partnered with the Turkey Farmers of Canada to bring you this delicious turkey parmesan recipe. All images and opinions expressed are my own.
With Valentine's Day right around the corner, turkey is a lean option that's great for planning a romantic date night in or candle-lit dinner. It's a fancy, restaurant-quality meal that despite having a number of different steps, is actually quite simple and easy to make. It's a special dinner that will be hard to forget.
Ingredients
To make delicious turkey parmesan, you will need the following ingredients:
- turkey cutlets - you will need 1.5 pounds of turkey breast cut into 5 cutlets, about 1-inch thick, seasoned in salt and pepper.
- breaded coating - made of breadcrumbs, Parmesan cheese, and garlic powder.
- eggs - to help the breaded coating stick onto the turkey.
- olive oil - for pan-frying the turkey before baking.
- tomato sauce - made with onion, garlic, tomato sauce, tomato paste, Italian seasoning, fresh parsley, and salt.
- mozzarella cheese - for that cheesy topping.
- Parmesan cheese - for the topping.
- fresh parsley - to garnish on top.
You will also need a cast-iron skillet (or an oven safe skillet). You could also fry the turkey cutlets in a large skillet and then transfer them into a casserole dish to bake with the sauce and cheese.
How to Make the Best Turkey Parmesan
First, prepare the turkey. With a paper towel, pat dry each turkey cutlet completely and season with salt and pepper. Set aside for at least 30 minutes to allow the cutlets to come to room temperature for even cooking.
How to Coat Turkey Parmesan
- In a shallow plate, whisk together breadcrumbs, Parmesan cheese, and garlic powder. Set aside.
- Add beaten eggs into another shallow plate.
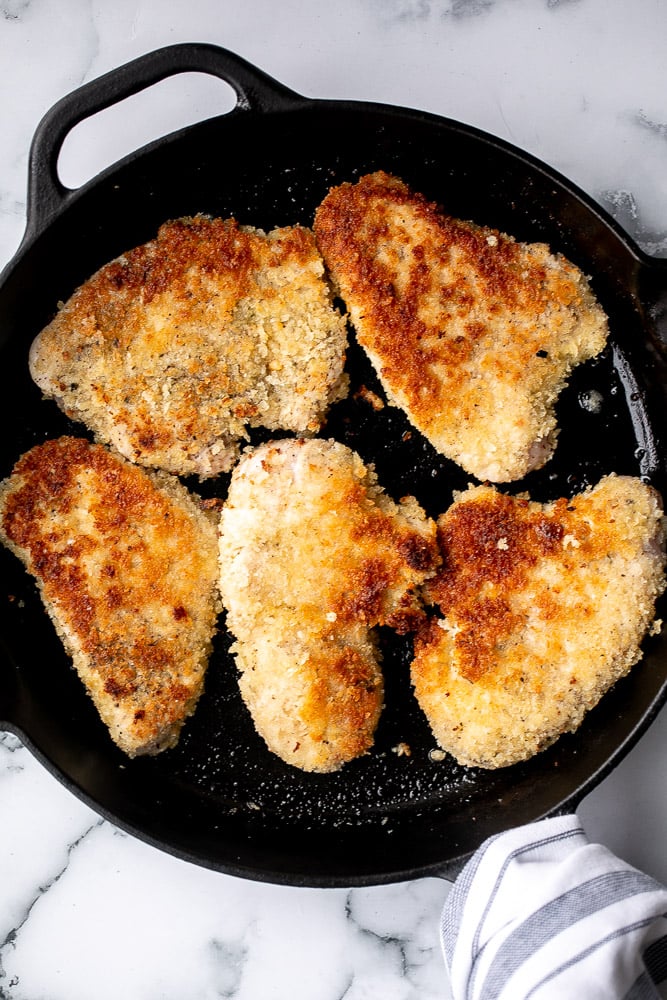
- Dip both sides of each turkey cutlet into the eggs to evenly coat them, and then dip into the breadcrumb mixture. The breadcrumbs will stick to the egg wash.
Then, heat oil in a non-stick cast-iron skillet over medium-high heat for 2 minutes until the hot oil is sizzling and shimmering. Pan fry the turkey cutlets for 4-5 minutes on each side until golden and crispy. Set aside on a plate. The turkey should be almost fully cooked and the internal temperature should reach above 155 F, as measured on a meat thermometer.
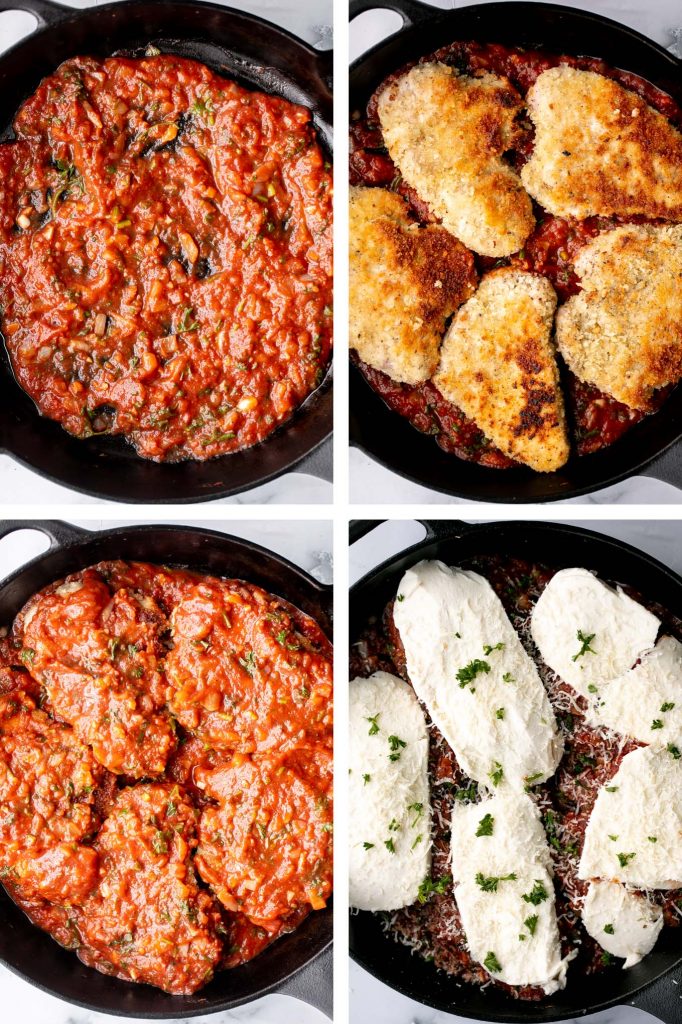
Then, prepare the tomato sauce. Remove all but 2 tablespoons of the hot oil in the skillet. Add onions and sauté for 2 minutes until soft and tender. Then, add garlic and sauté for another 2 minutes until fragrant. Add tomato sauce, tomato paste, Italian seasoning, parsley, and salt. Stir well to combine and bring the sauce to a simmer. Turn to low heat and let it simmer for 5 minutes. Remove from heat and transfer sauce into a bowl.
Now, let's assemble the turkey parmesan and bake. In the same skillet (or in another cast-iron skillet or casserole dish), evenly spread ½ cup of the sauce on the bottom. Place the turkey cutlets spaced evenly apart over the sauce. Cover each cutlet with a quarter-cup sauce, and top each cutlet with a slice of mozzarella cheese and Parmesan cheese. Sprinkle chopped parsley on top.
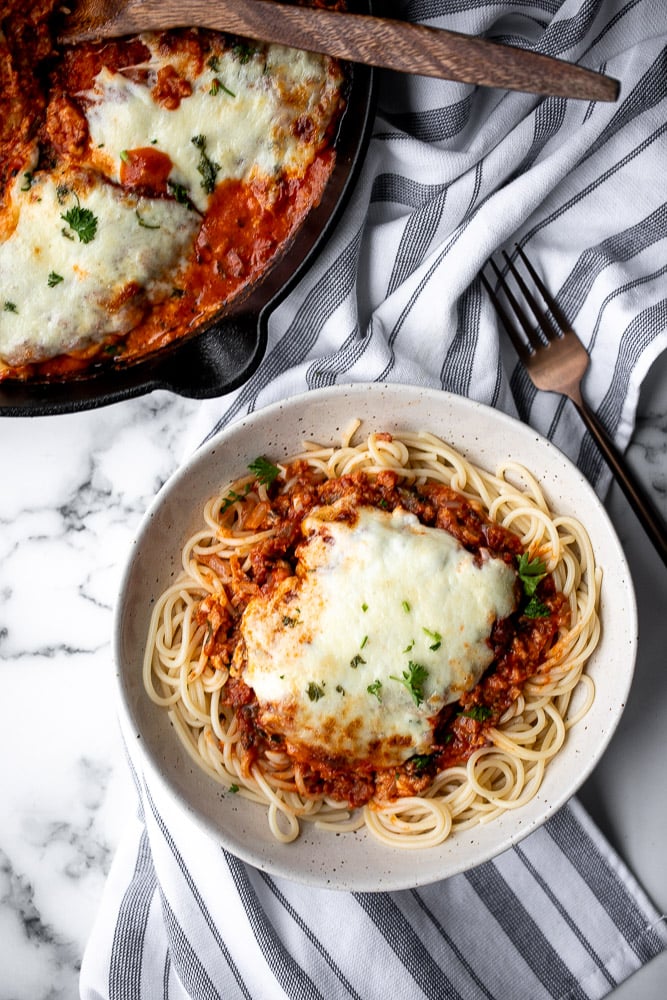
Bake in a 425F preheated oven for 25 minutes until the melted cheese turns golden brown and the internal temperature of the turkey reaches 165 F. Serve over spaghetti and garnish with more parsley on top.
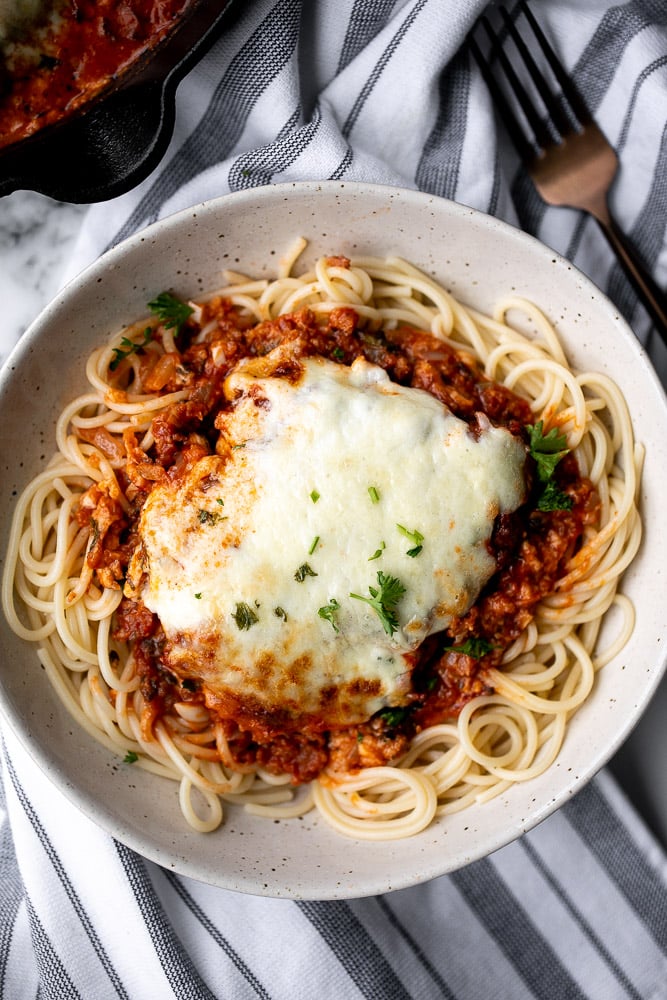
How to Serve Turkey Parmesan
With all the cheesy and tomato flavours in this turkey parmesan, I like to serve it over a plate of spaghetti noodles to soak up that delicious rich sauce. Some crusty bread is also always welcome for major dipping. Some of my other favourite side dishes to serve with turkey parmesan include: mashed potatoes, garlic mushrooms, roasted vegetables, or a side salad.
Make Ahead Instructions
Turkey parmesan is best served fresh as the coating can get soggy over time from the sauce. To make ahead, you can coat the turkey cutlets in advance and refrigerate for up to 24 hours. Then, allow the coated turkey to come to room temperature (about 20-30 minutes) before assembling and baking as per recipe instructions.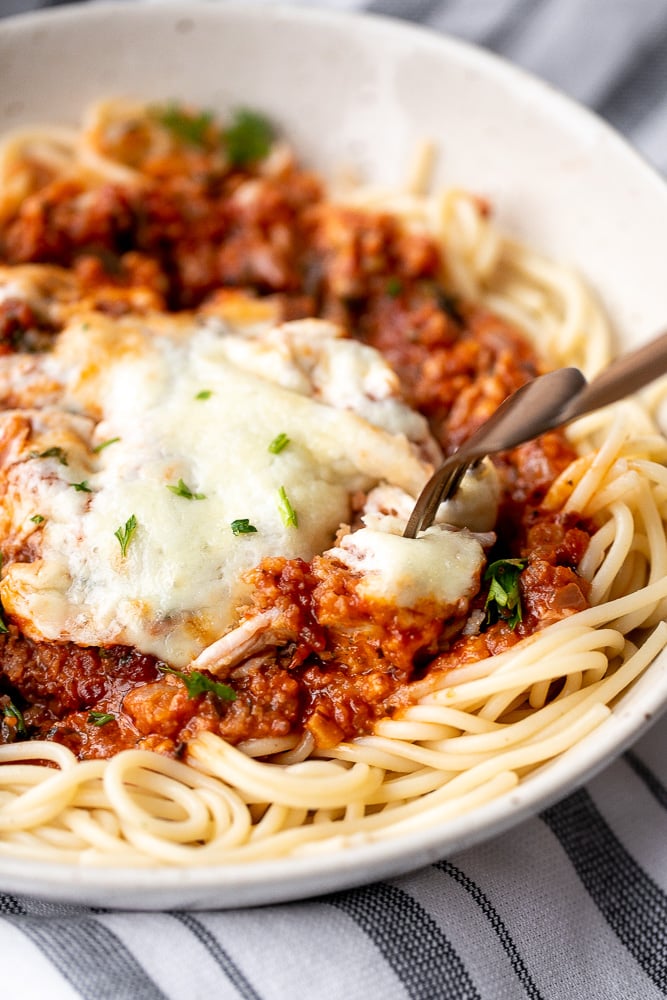
More Turkey Recipes
- Juicy Roasted Turkey Breast
- Turkey Stuffed Peppers
- Baked Turkey Meatballs
- Creamy Turkey Orzo Soup
- Turkey Tetrazzini with Spinach
- Leftover Turkey Fried Rice
Tried this recipe?
I'd love to hear what you think! Leave a comment and rating below to share your feedback. Your reviews help others discover this recipe and help me keep creating more free recipes for you. Snap a photo and tag me on social media @aheadofthyme too.
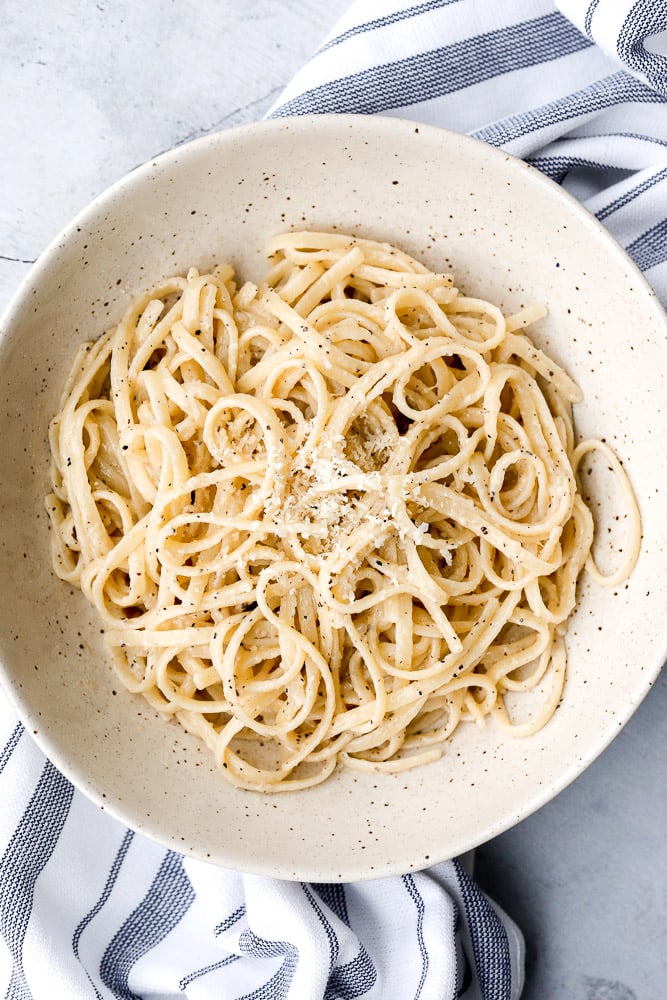
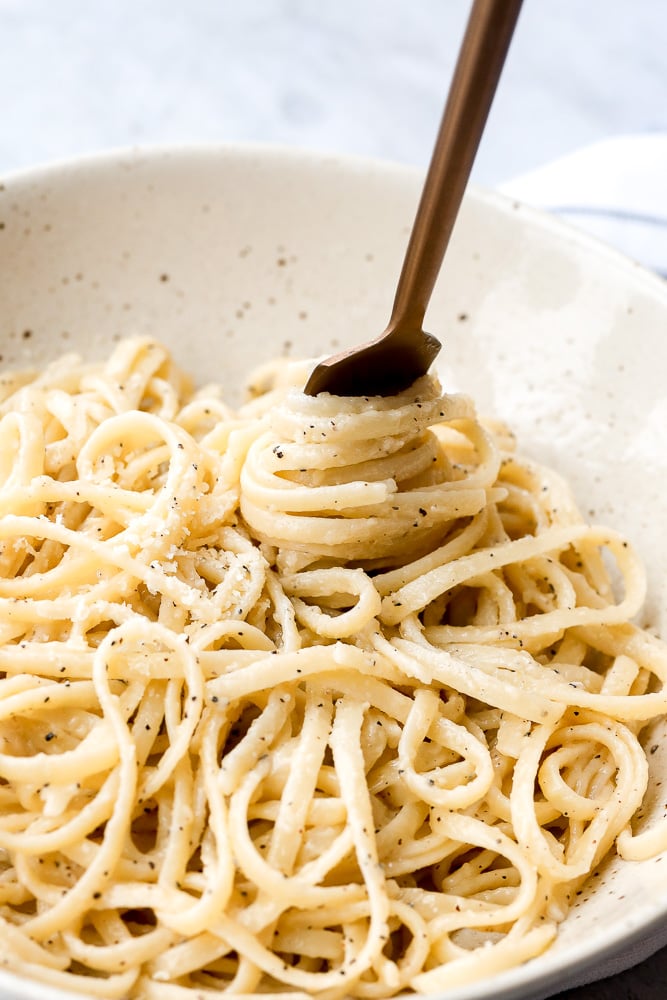
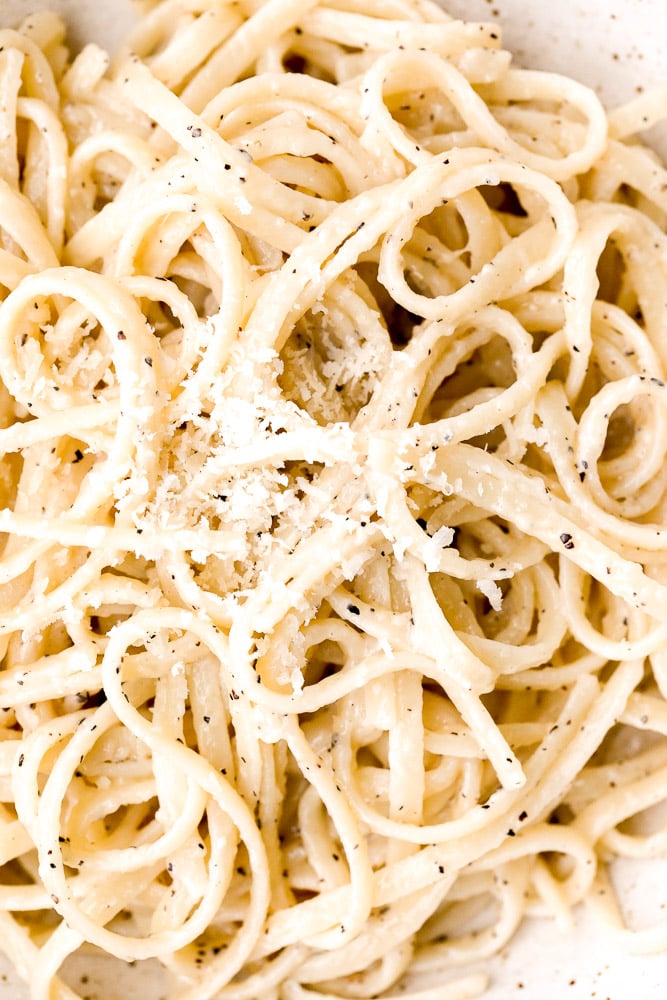
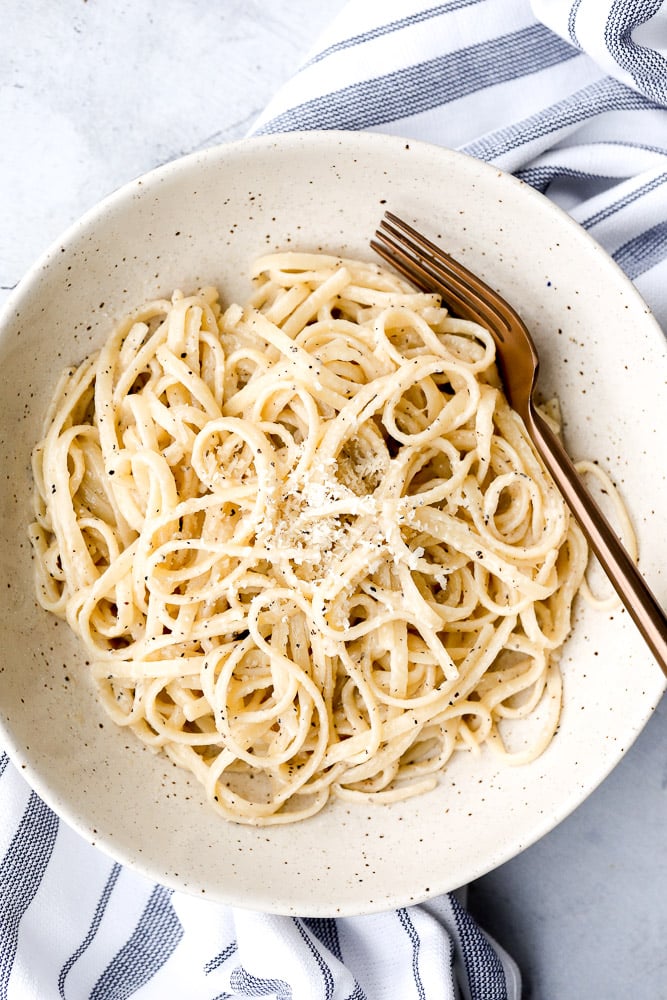
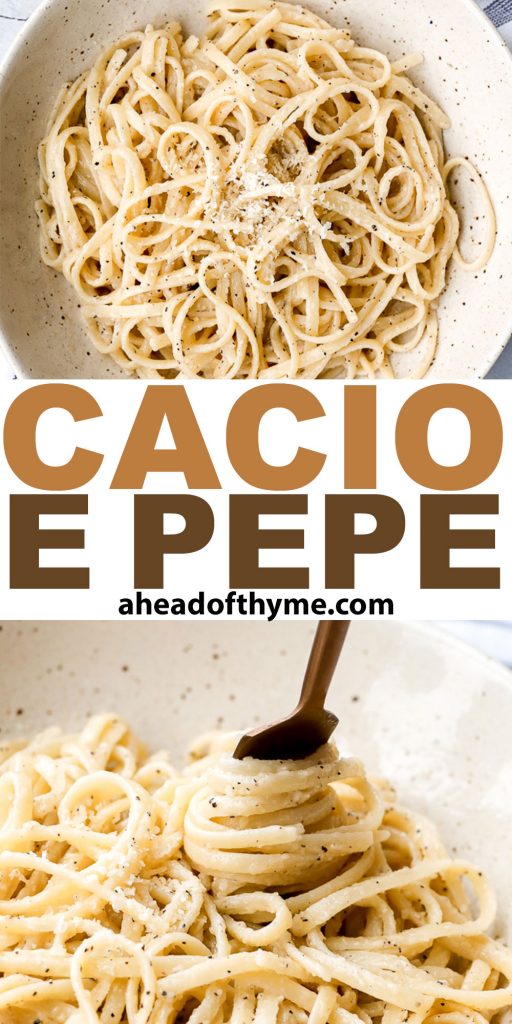
Cacio e Pepe
Cacio e pepe is a simple, authentic Italian pasta dish made with just four ingredients in 20 minutes. It's so easy to make by tossing freshly cooked pasta in a buttery, cheesy, and peppery sauce. Serve it fresh for a delicious and flavourful weeknight dinner or on any night of the week. Comfort food has never been easier!
If you love how fast this all comes together, then you will also love these other pasta dishes that take less than 20 minutes to prep and cook: Spaghetti Carbonara, Pesto Penne Pasta, Stovetop Mac and Cheese with White Cheddar, and Shrimp Fettuccine Alfredo Pasta Bake.
What is Cacio e Pepe?
Cacio e pepe is a classic Italian dish originating in Rome. It literally translates to "cheese and pepper" which describes the main ingredients in this dish. It's basically a simple version of mac and cheese and not as heavy on the cheese.

Ingredients in Cacio e Pepe
To make easy cacio e pepe, you need just 5 simple ingredients:
- pasta - I used spaghetti noodles but any long noodle will work such as bucatini (this is what is traditionally used), linguine, or fettuccine.
- butter - traditionally cacio e pepe doesn't have butter, but I just love the flavour that it adds.
- ground black pepper
- cheese - Pecorino cheese is traditionally used, or you can use Parmesan as a substitute (which is what we do). Either way, use freshly grated cheese, not pre-grated cheese.
You will also need a medium cooking pot and a shallow saucepan or skillet.
How to Make the Best Cacio e Pepe
- Cook the pasta. Bring a large pot of salted water to a boil over medium high heat. Add pasta and cook until just al dente (fully cooked but still firm), about 8 minutes, or according to package directions. Turn off the heat and set the pot aside. Do not overcook the pasta.
- Prepare the sauce. While the pasta is cooking, melt the butter in a shallow saucepan over medium-high heat. Add black pepper and sauté until fragrant, about one minute. Add about ⅓ cup hot pasta water and stir vigorously to combine. A vigorous whisking emulsifies fat from the butter and pasta water, creating a creamy sauce.
- Toss in spaghetti and cheese. Turn the heat down to low and transfer the hot pasta into the saucepan. Stir in cheese and stir well to combine, about one minute. The melted cheese makes the sauce thicker and more creamy. Add 2-3 tablespoons pasta water and mix well until desired consistency is reached.
- Serve. Serve immediately on a plate and garnish with extra pepper and cheese if desired.
Tips
- How to customize. You can customize cacio e pepe by adding in cooked meat such as chicken, shrimp, or bacon. You can also add in cooked vegetables such as mushrooms, zucchini, red peppers, or spinach.
- How to serve. Serve cacio e pepe pasta with a side of crusty garlicky bread such as pull apart garlic bread, rosemary garlic focaccia bread, ciabatta bread, or tomato focaccia bread. You can also pair it with a fresh salad on the side such as an easy Greek salad, Mediterranean chickpea wedge salad, or tomato cucumber avocado salad.
- How to store. Cacio e pepe is best served fresh. Store any leftovers an airtight container for up to 3 days in the refrigerator. Reheat on the stove over medium-low heat until warmed through. You may need to add a splash of water if the sauce has thickened up too much in the refrigerator.
More Pasta Recipes
- Avocado Basil Pesto Spaghetti
- Spaghetti Bolognese
- Cheesy Tortellini and Sausage Bake
- Spaghetti and Meatballs
- Shrimp Fettuccine Alfredo Pasta Bake
- White Chicken and Spinach Lasagna
Tried this recipe?
I'd love to hear what you think! Leave a comment and rating below to share your feedback. Your reviews help others discover this recipe and help me keep creating more free recipes for you. Snap a photo and tag me on social media @aheadofthyme too.
Vegetarian Lumpia (Spring Rolls)
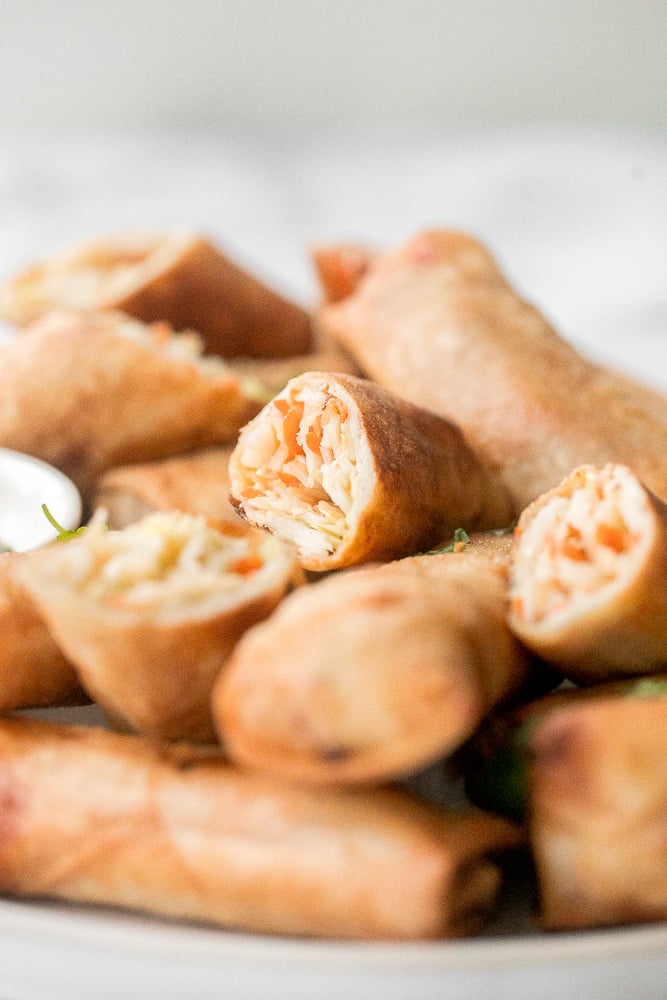
This vegetarian lumpia (spring rolls) recipe is all you need to make delicious, flavourful and crispy lumpia at home. These crunchy spring rolls are packed with a tasty, savoury filling, rolled in up in a spring roll wrapper, and deep fried, baked or air fried to crisp perfection. Plus, you can make a big batch and freeze them for an easy snack, appetizer or dinner on a busy day.

What is Lumpia?
Lumpia is the Filipino version of spring rolls that developed from Chinese spring rolls when migrants from China moved to Philippines in the 17th century. Similarly, they are savoury springs rolls that are stuffed with delicious savoury fillings that are completely customizable including meat, seafood and vegetables. They are rolled and fried until crispy.

Ingredients in Vegetarian Lumpia
To make vegetarian lumpia, you need the following ingredients:
- spring roll wrappers - You need one (25 piece) package of spring roll wrappers or lumpia wrappers.
- dry vermicelli rice noodles
- firm tofu
- cabbage
- carrots
- shiitake mushrooms
- fresh ginger
- all-purpose flour - or you can use cornstarch.
- seasoning - vegetable bouillon powder (or substitute with chicken bouillon powder), brown sugar, ground black pepper, soy sauce, and sesame oil.
- cornstarch water - mix water with cornstarch and use for sealing the egg roll wrappers.
- vegetable oil - for deep frying.
- dipping sauce - you can dip these into a thai sweet chili sauce, peanut dipping sauce, or a vinegar sauce made with rice vinegar, fish sauce, brown sugar, Thai chili pepper, ground black pepper, and cilantro.
TIP: You can easily use different vegetables in the lumpia such as beans sprouts or add in your favourite protein such as shredded chicken or beef. The key is to keep the filling thick like a paste, and not too soupy or runny. If you find it too runny, drain the extra liquid or add cornstarch to thicken it up.

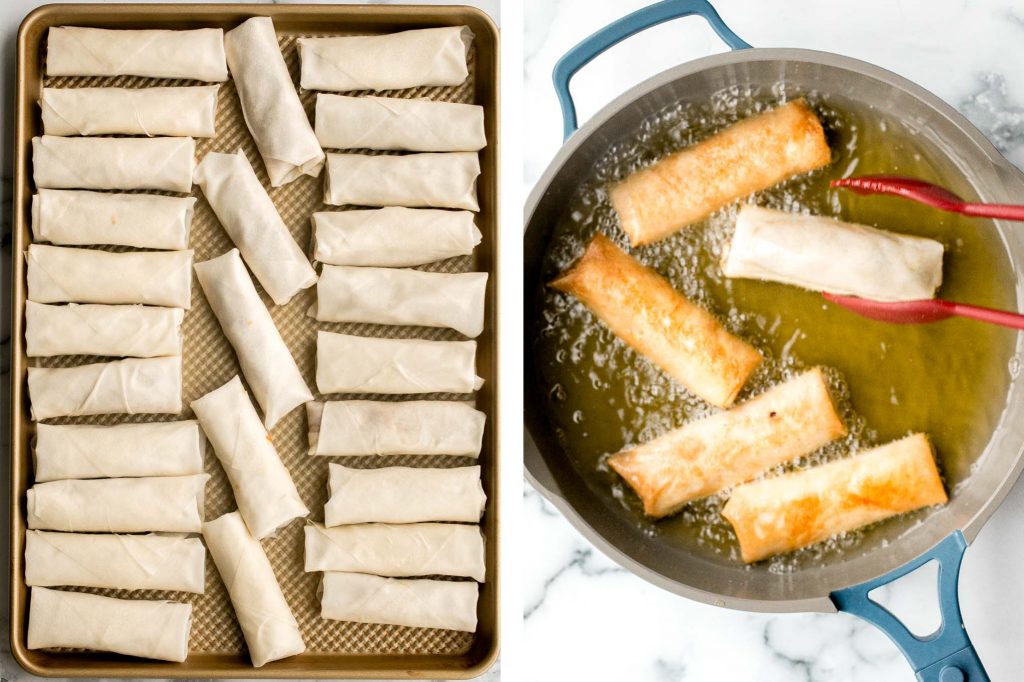
How to Make the Best Vegetarian Lumpia (Spring Rolls)
- Soften the noodles. Place vermicelli noodles into a large mixing bowl with hot water to soften the noodles until tender, about 5-10 minutes. Rinse with cold water to cool and drain well in a colander. Coarsely chop the noodles into 1-inch pieces on a cutting board.
- Make the filling. In a large mixing bowl, combine noodles, tofu, cabbage, carrots, mushrooms, ginger, flour, chicken bouillon powder, brown sugar, pepper, soy sauce, and sesame oil. Stir well to mix evenly, and drain off any excess liquid from the bowl. The filling should not be too wet as this can make the spring rolls soggy.
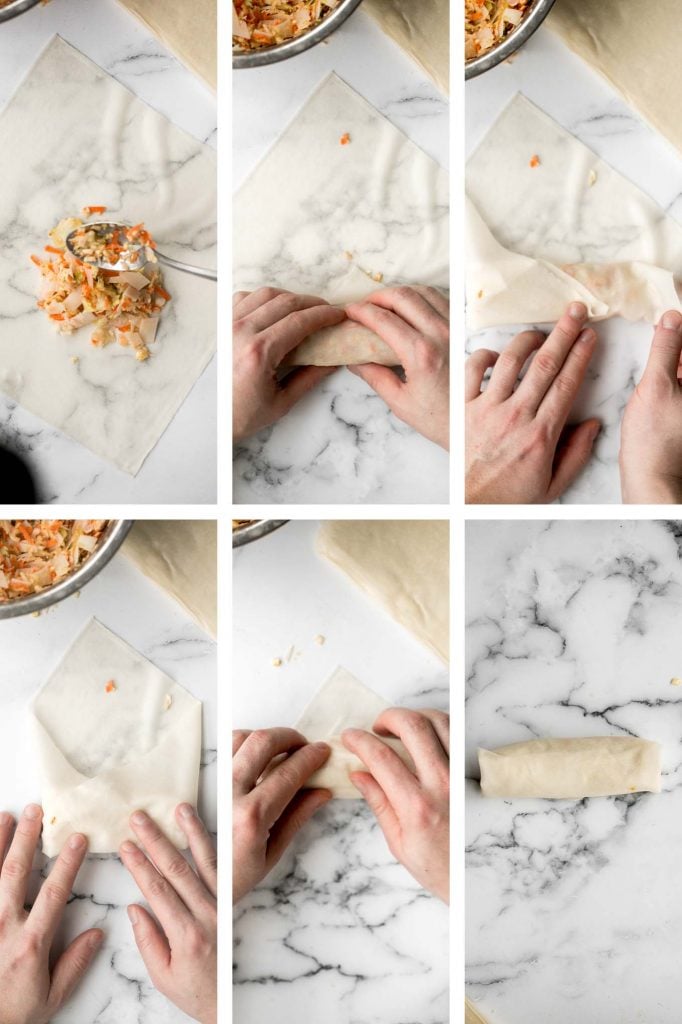
How to Wrap Lumpia
- Place one spring roll wrapper diagonally (diamond shape) on a dry, clean flat surface. Keep the rest of the wrappers inside the package to prevent them from drying out.
- Place up to 1.5 tablespoons of filling in a horizontal line near the centre of the wrapper placed approximately a quarter of the way up from the bottom, leaving about 2-inches uncovered on the side corners.
- Fold up the bottom so that it covers the filling. The bottom corner should approximately touch the centre of the wrapper. Fold in the two side corners into the centre, folding over top.
- Tightly roll the wrapper with your fingers until 1-2 inches remains on top. Lightly brush the remaining corner on top with cornstarch water (mix water with cornstarch in a small bowl) or dip your finger into the bowl and apply it to the top corner.
- Roll up the spring roll tightly to seal like a burrito. Make sure all corners are tightly sealed. Place the top edge side down, and cover with a tea towel to prevent the lumpia from drying out.
- Repeat steps with remaining wrappers.
How to Cook Vegetarian Lumpia
Deep Fry
- Add cooking oil into a shallow saucepan and heat over high heat for 4-5 minutes, or until the oil starts shimmering and sizzling. The oil should be about ½-inch deep or enough to almost submerge the lumpia.
- Add in a batch of 5-6 lumpia and cook for 2 minutes on each side. Turn them over a few times so that both sides turn golden brown and cook evenly. Make sure to leave some space in between the lumpia when deep frying.
- Transfer the lumpia onto a paper towel lined plate (to help soak in the extra oil) and let cool for at least 5 minutes before serving.
- Repeat steps with remaining lumpia.
Air Fry
Brush or spray some oil over the lumpia and cook in the air fryer at 350 F for 7-8 minutes. Brush more oil on them halfway through. This is to help get that golden colour. It might not turn out as golden as it does when you deep fry, but it will be healthier, as you will be using a lot less oil.
Bake
Brush or spray cooking oil over the lumpia and bake in a preheated 425 F oven for 15 minutes. Flip them over and continue to bake for another 10 minutes until crisp and golden.
Storing and Freezing Instructions
- How to store store lumpia: Transfer cooled lumpia into an airtight container and store in the refrigerator for up to 3 days. To reheat, heat in a 350 F preheated oven or air fryer for 5-10 minutes until warmed through.
- How to freeze lumpia: These freeze beautifully. I prefer to freeze the lumpia after they have been cooked. Although you can freeze before cooking as well. To store, place the spring rolls on a baking tray lined with parchment paper and freeze for one hour. Then, transfer them into a freezer bag or an airtight container, and use as desired.
- How to cook frozen lumpia. You can reheat or cook them directly from the freezer, without thawing. To reheat cooked frozen lumpia, heat in a 350 F preheated oven or air fryer for 10-15 minutes until warmed through. To reheat uncooked frozen egg rolls, follow recipe instructions but add 5 minutes extra time.
More Asian Appetizers
- Fried Vegetarian Spring Rolls
- Shanghai Style Vegan Steamed Buns
- Spicy Chili Oil Wontons
- Savoury Chive Pancakes with Sourdough Starter
- Egg and Chive Vegetarian Dumplings
- Chicken and Cilantro Wontons
Tried this recipe?
I'd love to hear what you think! Leave a comment and rating below to share your feedback. Your reviews help others discover this recipe and help me keep creating more free recipes for you. Snap a photo and tag me on social media @aheadofthyme too.

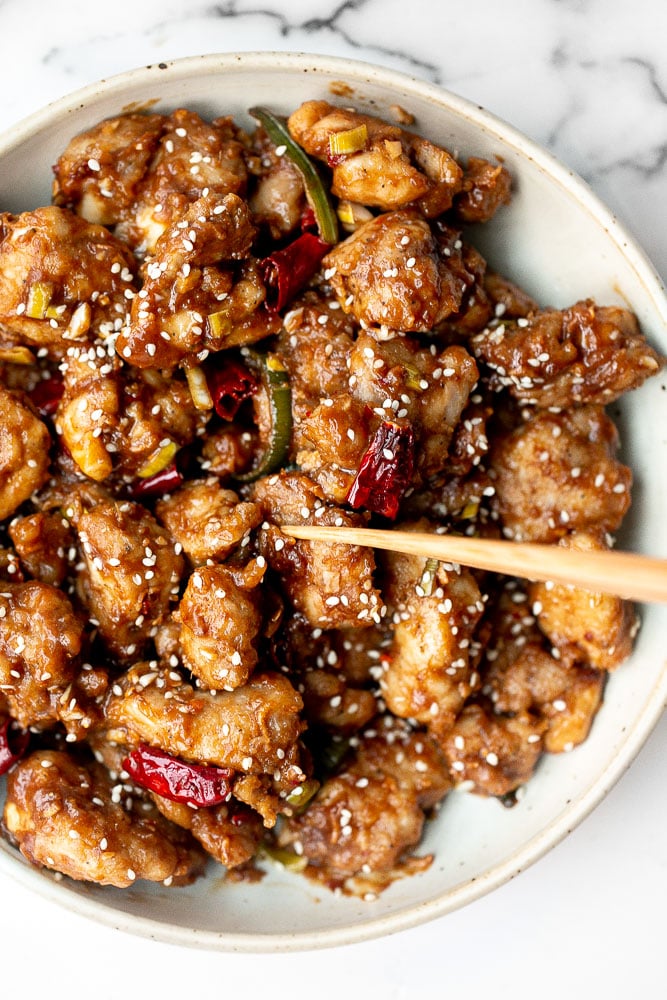
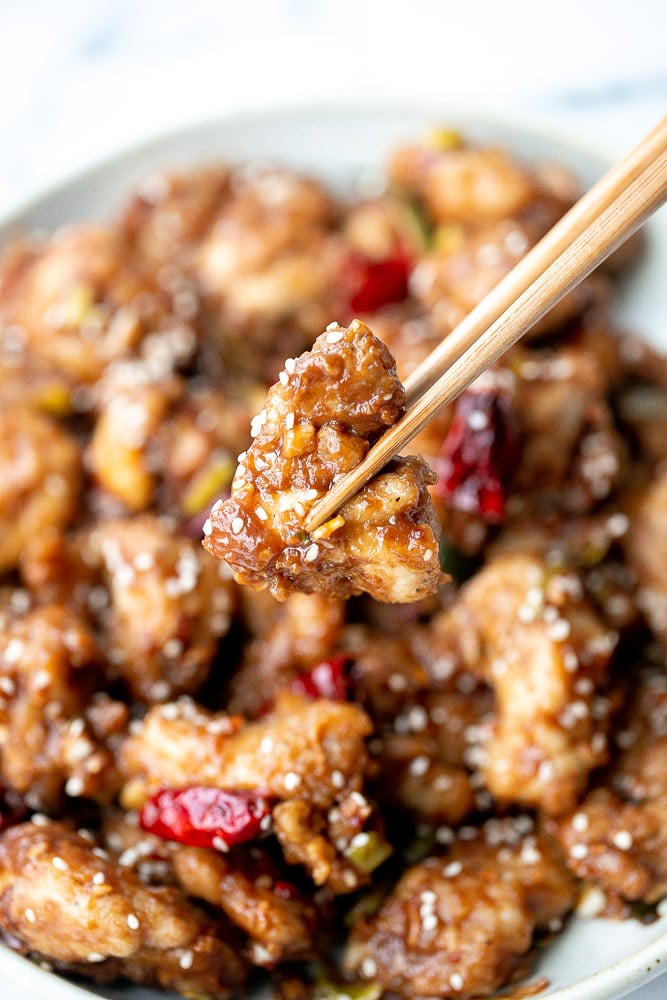
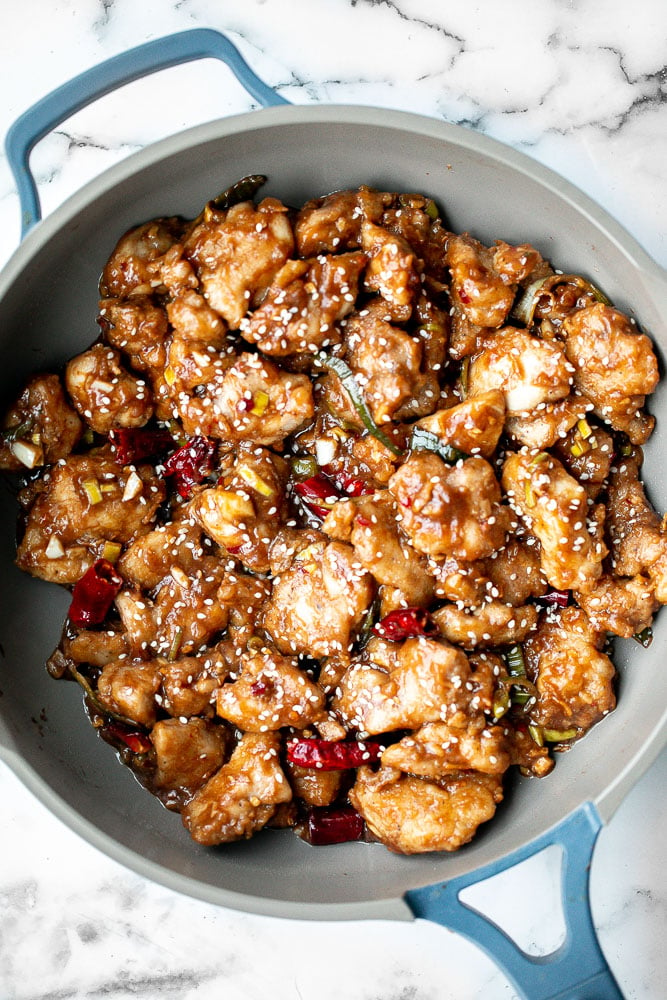
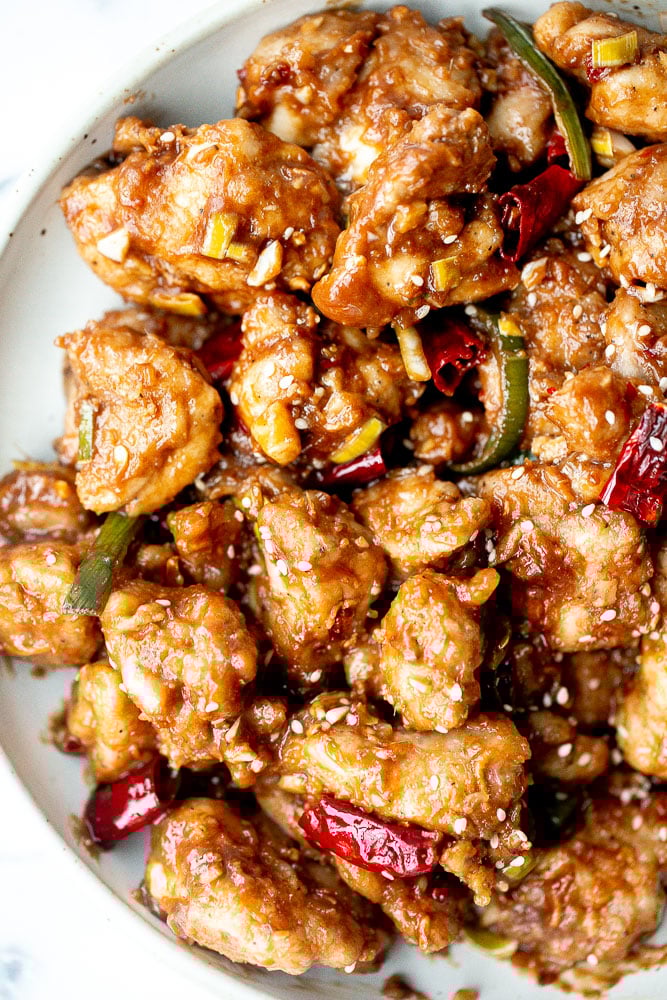
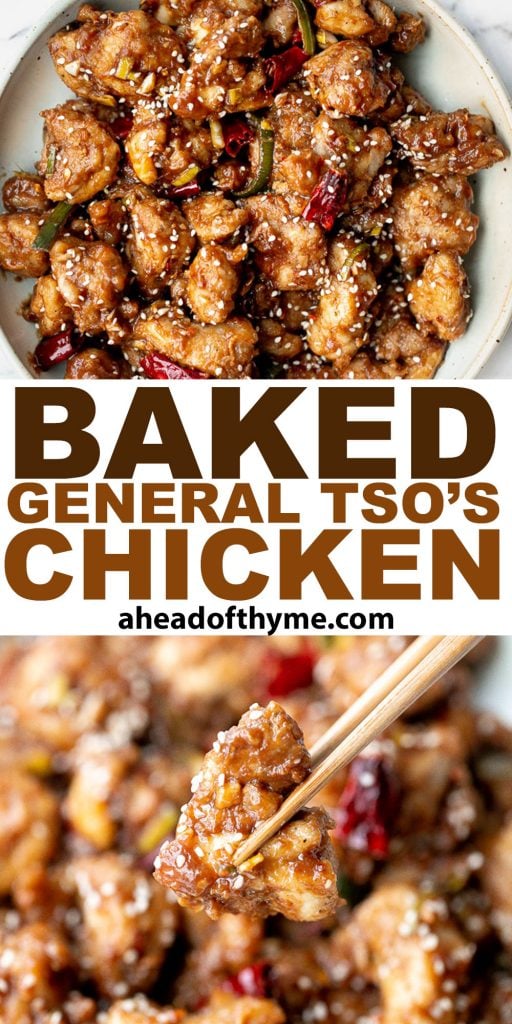
General Tso's Chicken
Baked General Tso's Chicken is saucy, savoury, sweet and spicy. It's a Chinese-American takeout favourite made healthier with baked chicken bites (not deep-fried) smothered in a thick and flavourful signature sauce. Make it at home in under 30 minutes and you will wonder why you ever ordered takeout. It's faster, tastes better, healthier, and cheaper than takeout. Serve it for a quick weeknight dinner over a bowl of steamed rice or fried rice.
General Tso's chicken is very similar to Baked Sesame Chicken, but tossed in a different delicious Asian sauce. Both are super easy and quick better than takeout dishes. Some other quick and easy takeaway fakeaway dishes that we love to make on busy weeknights are: Kung Pao Chicken, Seafood Fried Rice, Scallion Oil Noodles, and Healthy Lemon Chicken.
Ingredients in General Tso's Chicken
To make healthier baked general tso's chicken, you will need the following ingredients:
- chicken thighs or breasts - boneless and skinless chicken seasoned with salt, pepper, and olive oil.
- all-purpose flour (or cornstarch) - for coating the chicken to create a floured layer.
- cooking oil spray - to create a crispy crust on the outside of the chicken when baked.
- soy sauce
- black vinegar
- Chinese Shaoxing cooking wine (or mirin)
- granulated sugar
- chicken broth
- dried red chili peppers
- garlic and ginger
- green onion
- sesame oil
- cornstarch - or all-purpose flour.
- sesame seeds - for garnish.
You will also need measuring cups and spoons, mixing bowls, large half sheet baking pan, and a shallow saucepan or wok.
How to Make the Best Baked General Tso's Chicken
- Prepare the chicken. Pat dry the chicken completely with paper towel and cut into 1-inch cubes. Place into a medium mixing bowl and season with salt, pepper and oil. Toss well to combine and set aside for at least 5 minutes. In a large ziploc bag, add flour and cubed chicken. Seal the bag and shake well to coat evenly.
- Bake the chicken. Place coated chicken on a large half sheet baking pan lined with parchment paper. Lightly spray the chicken with cooking spray oil to help create a crispy crust on the outside. Bake in a 400F preheated oven for 20 minutes until golden brown. Set aside on a plate after baking.
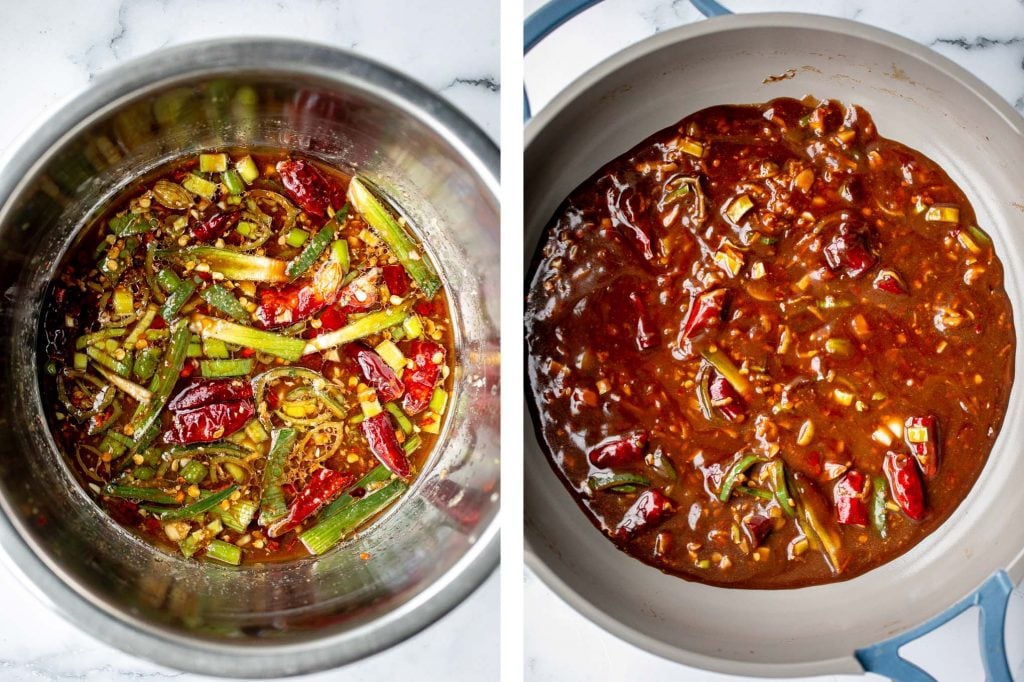
- Make the sauce. In another medium mixing bowl, whisk together all the sauce ingredients until sugar and cornstarch is fully combined. In a shallow saucepan or wok, heat the sauce over medium heat for 3-4 minutes. Keep stirring until thickened to a desired consistency.
- Toss in baked chicken and serve. Add the baked chicken and toss well to coat. Garnish with sesame seeds on top and serve immediately with a bowl of steamed rice or fried rice.

Tips
- How to serve: Serve General Tso's chicken over a bowl of steamed rice, fried rice, or noodles. For a complete Chinese meal, pair it with Beef Potstickers, Chinese Garlic Cucumber Salad, Air Fryer Vegetable Stir Fry, and Steamed Buns.
- How to store: Store leftovers in an airtight container in the refrigerator for up to 3 days. To reheat, heat on the stove over medium heat for 5-10 minutes until warmed through. If the sauce has thickened up too much in the refrigerator, add some water when reheating.
More Asian Chicken Recipes
- Baked Sesame Chicken
- Sweet Chili Chicken Bites
- Chicken Pad Thai
- Char Siu (Chinese BBQ) Chicken
- Shanghai Style Fried Noodles
Tried this recipe?
I'd love to hear what you think! Leave a comment and rating below to share your feedback. Your reviews help others discover this recipe and help me keep creating more free recipes for you. Snap a photo and tag me on social media @aheadofthyme too.
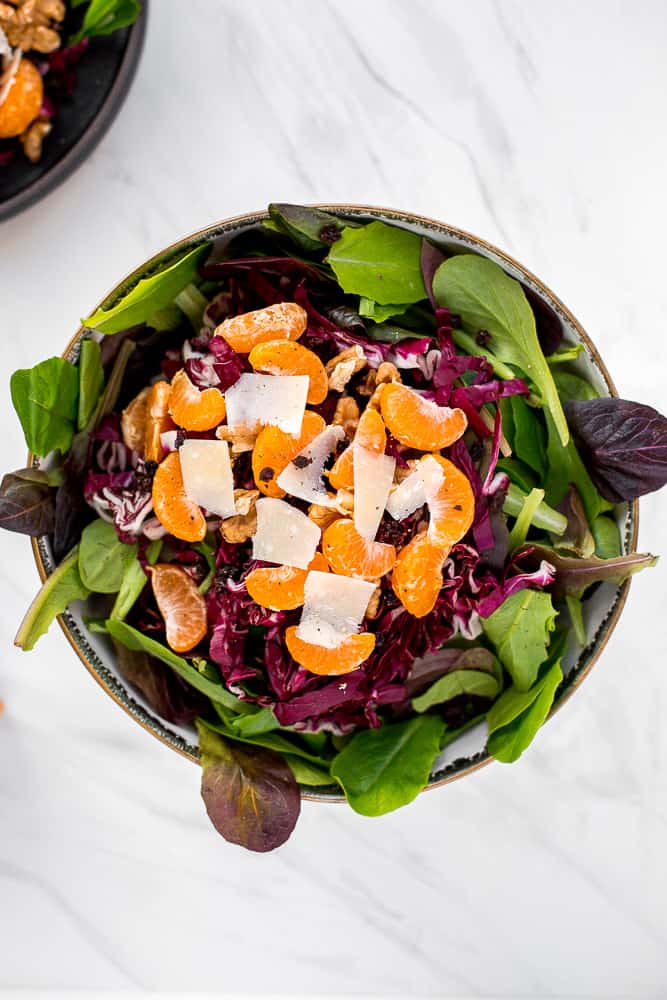
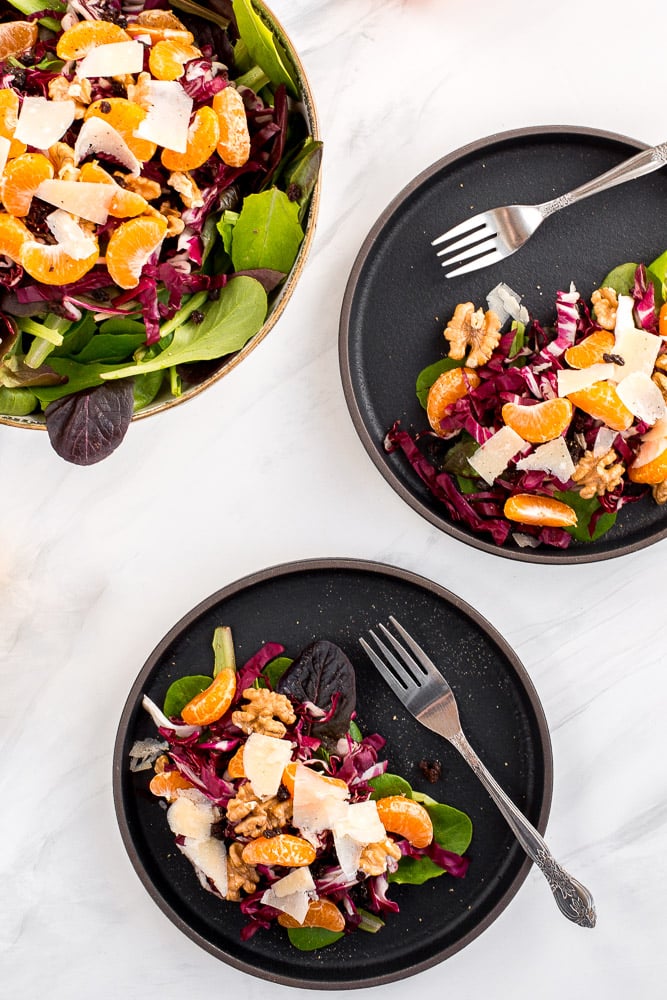
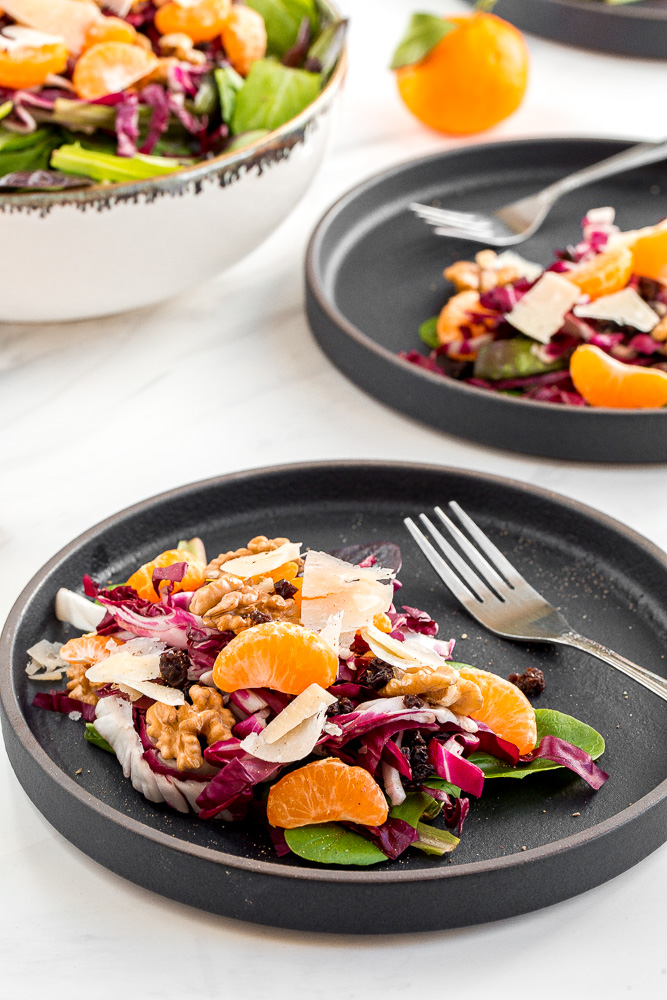
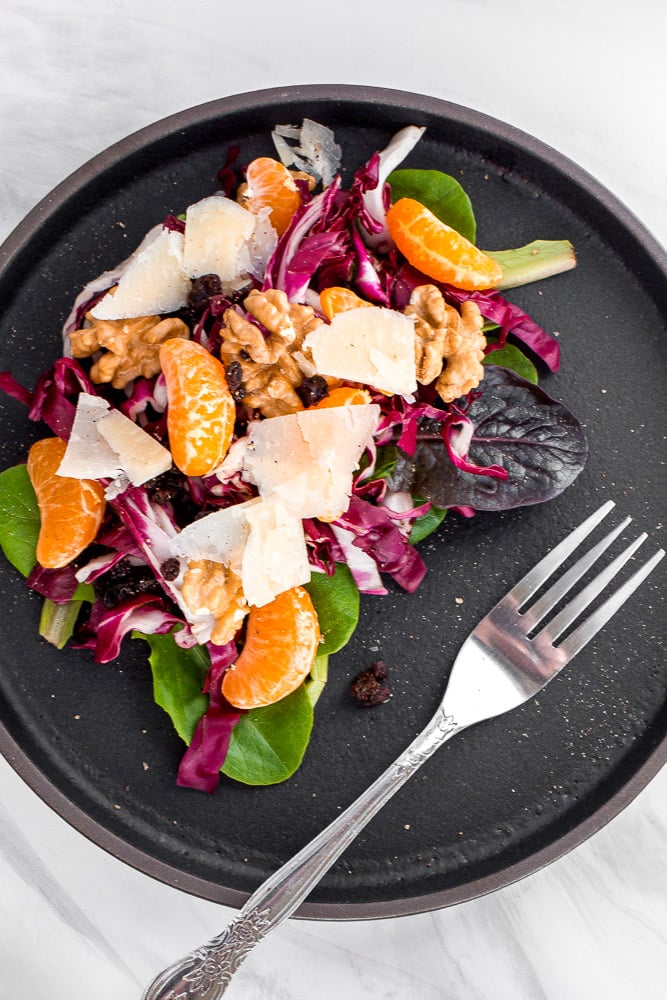
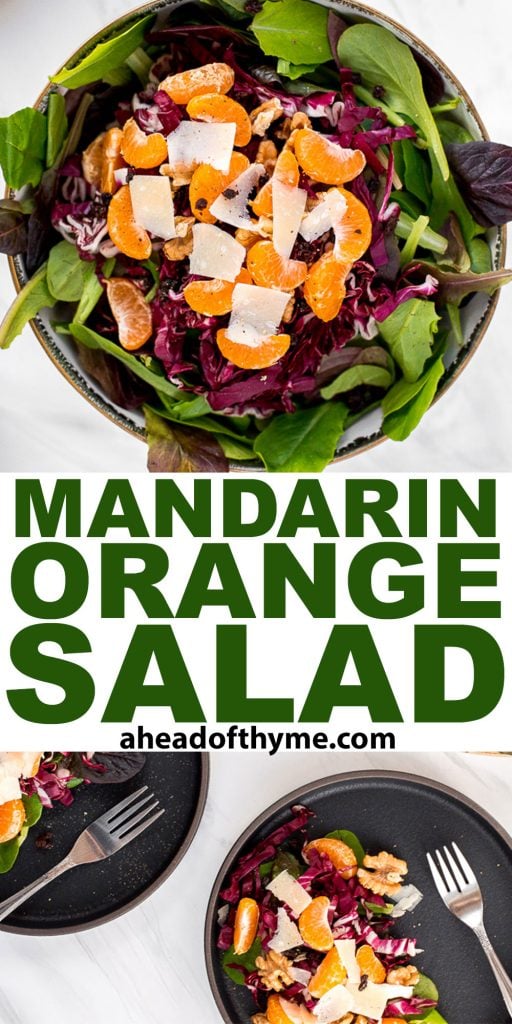
Mandarin Orange Salad
Mandarin orange salad is fresh, vibrant, tangy, and sweet, bursting with flavour in every bite. It is colourfully packed with mandarin oranges, crunchy radicchio, toasted walnuts, and sweet currants, and topped with a delicious orange-flavoured homemade salad dressing. The contrasting textures and tastes of these ingredients compliment each other in the most satisfying way. It's seriously one of the most impressive dinner salads, but most simple to make.
What I love about a salad like this is that it is completely customizable. You can really add anything in here that you want, so long as you keep the mandarin oranges. You can switch up the greens, the nuts and the currants and you have something similar but different. Some of my other favourites to make in the winter months are Winter Kale Salad with Apple Cider Vinaigrette, Goat Cheese and Tangelo Winter Salad, and Apple Walnut Salad with Balsamic Vinaigrette.
Ingredients in Mandarin Orange Salad
To make this refreshing mandarin orange salad, you will need the following ingredients:
- mandarin oranges - mandarin oranges are in season early winter to early spring, so if you can get your hands on some at your local market, grab as many as can fit into your cart! Mandarins are smaller and sweeter than regular naval oranges and take only seconds to peel. They alone take this salad from ordinary to extraordinary.
- baby mixed greens - grab whichever baby greens look freshest. You can use any greens such as romaine, spinach, arugula, kale or mixed greens.
- radicchio
- walnuts - you can substitute with other nuts such as pecans or almonds.
- currants - you can substitute this with raisins or dried cranberries.
- Parmesan cheese
- dressing - made with olive oil, balsamic vinegar, dijon mustard, orange zest, and salt and pepper.
You can also add some protein to this mandarin orange salad, such as sliced roast chicken or grilled shrimp.
How to Make the Best Mandarin Orange Salad
- Assemble the salad. Combine mixed greens and radicchio in a large bowl or on individual plates. Layer with segmented mandarin oranges, toasted walnuts, and currants. Top with sliced or grated Parmesan.
- Make the dressing. Combine olive oil, balsamic vinegar, dijon, salt and pepper in a small mixing bowl. Whisk vigorously to combine, then add orange zest and stir once more. The zest from one of the mandarins gives just the perfect hit of flavour.
How to Serve
Serve this salad with the dressing on top of on the side. This salad will also be just as tasty with straight up balsamic vinaigrette, so if that's what's in your fridge GO FOR IT. But for real, healthy eating never tasted so good.
You can keep it light and serve this mandarin orange salad alongside a soup such as a creamless cream of asparagus soup or light cream of broccoli soup, or serve it as a side salad for dinner alongside a cheesy tortellini and sausage pasta bake or skillet margherita pizza.
More Salad Recipes
- Goat Cheese and Tangelo Winter Salad
- Winter Kale Salad with Apple Cider Vinaigrette
- Fall Harvest Salad with Roasted Butternut Squash
- The Best Greek Salad
- Mediterranean Orzo Pasta Salad
- Apple Walnut Salad with Balsamic Vinaigrette
Tried this recipe?
I'd love to hear what you think! Leave a comment and rating below to share your feedback. Your reviews help others discover this recipe and help me keep creating more free recipes for you. Snap a photo and tag me on social media @aheadofthyme too.
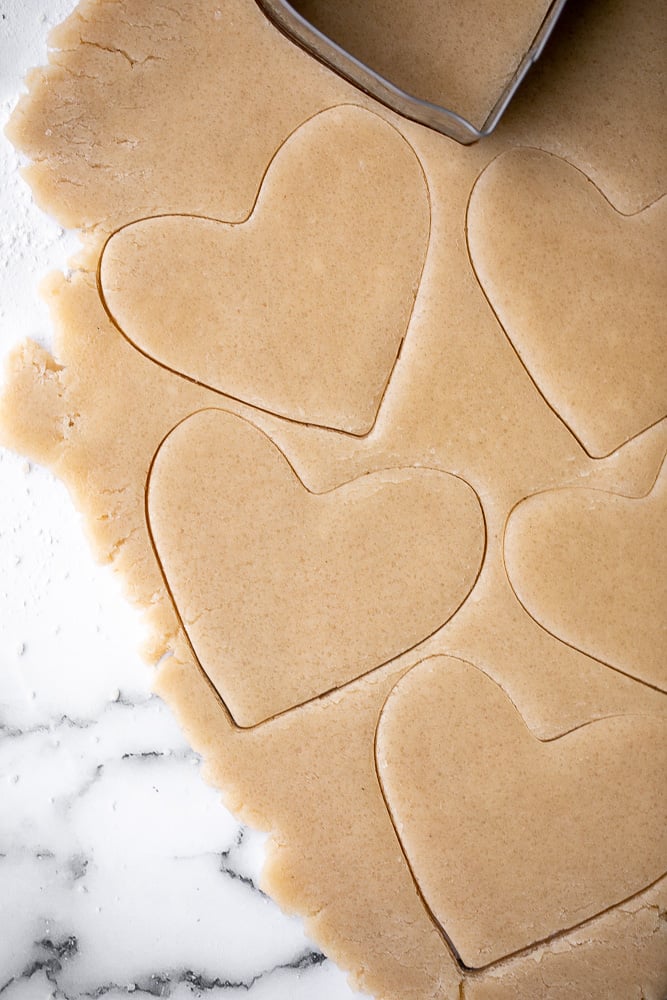
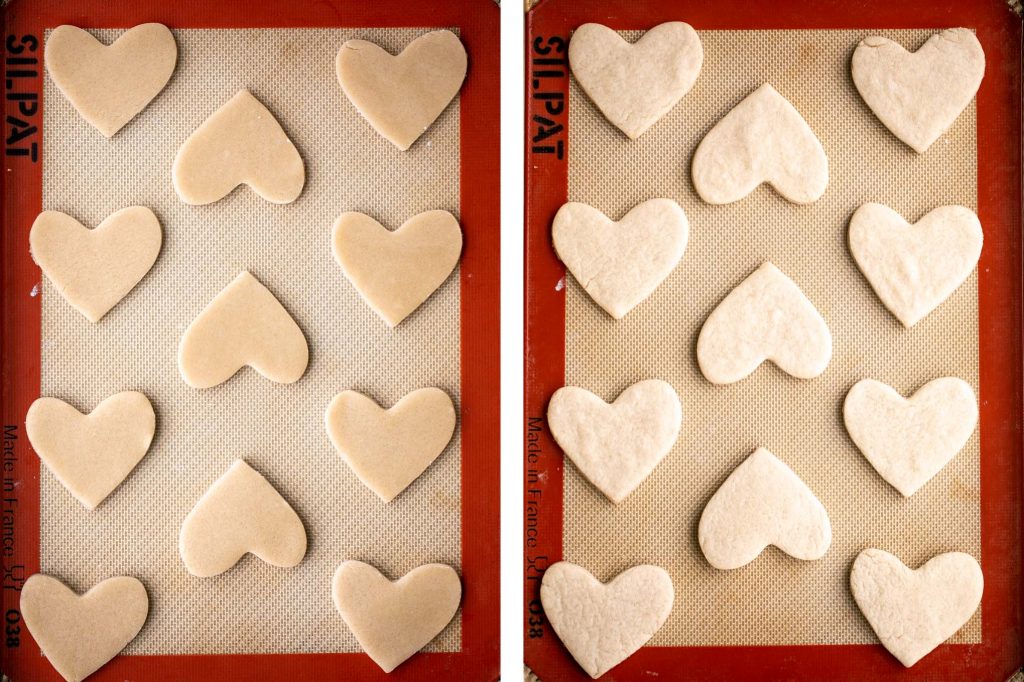
Valentine's Day Heart Sugar Cookies
Valentine's Day heart sugar cookies with royal icing are the perfect festive treat to make this year. They are golden brown and crisp on the outside, but soft and tender on the inside, and decorated with cute love messages using a meringue-based royal icing. They are seriously the best gourmet holiday cookies to gift to your loved ones.

Whenever a holiday rolls around, my go to cookie is always sugar cookies. They are just so easy to make and fun to decorate for whatever occasion that it is. Some other popular Valentine's Day treats to make are Raspberry and White Chocolate Shortbread Cookies, Chocolate Covered Strawberries, Molten Chocolate Lava Cakes, Dark Chocolate Raspberry Truffles, and French Macarons.

Ingredients
You will need the following ingredients to make these cute Valentine's day heart sugar cookies:
- unsalted butter - If you only have salted butter on hand, you can use it, but leave out the extra salt in the recipe.
- granulated sugar
- egg
- vanilla extract
- baking powder
- salt
- all-purpose flour
- royal icing - Easy to make with confectioners' sugar, meringue powder, water, vanilla extract.
- gel food colouring - for decorating the cookies with different colours.
Kitchen Tools and Equipment
You will also need the following kitchen tools and equipment:
- measuring cups and spoons
- mixing bowls
- hand mixer or stand mixer
- rolling pin
- 3-inch heart-shaped cookie cutter
- half sheet baking pan and silicone baking mat (or parchment paper)
- wire cooling rack
- piping bags
- couplers - for securing the tips to the piping bag.
- no. 5 round tip for the base colour and no. 1 round tip or no. 2 round tip for piping the letters.

How to Make the Best Valentine's Day Heart Sugar Cookies
- Make the dough: In a large mixing bowl, cream butter and sugar together using a hand mixer (or stand mixer) on medium speed until light and fluffy, about 2 minutes. Add egg and vanilla and beat until combined. Turn the mixer to low speed and add baking powder and salt. Gradually add flour and mix until combined. Form the dough into a ball and wrap it tightly in plastic cling wrap. Freeze for 30 minutes or refrigerate until firm (at least 1 hour, up to overnight).
- Cut out the cookies: Remove the dough from refrigerator and let it sit at room temperature for 5-10 minutes. On a lightly floured surface, use a rolling pin to roll the dough out until it is ¼-inch thick. Use 3-inch heart-shaped cookie cutters to cut out heart cookie shapes. Transfer the cookies onto a half sheet baking pan lined with parchment paper or a silicone baking mat, placing them an inch apart. Re-roll any scraps and repeat to cut out more cookies.
- Bake: Bake the cookies at 350 F preheated oven for 8-10 minutes, until the edges start to turn golden brown. Let the cookies cool for a couple minutes on the baking sheet, then transfer them to a wire cooling rack to cool completely.
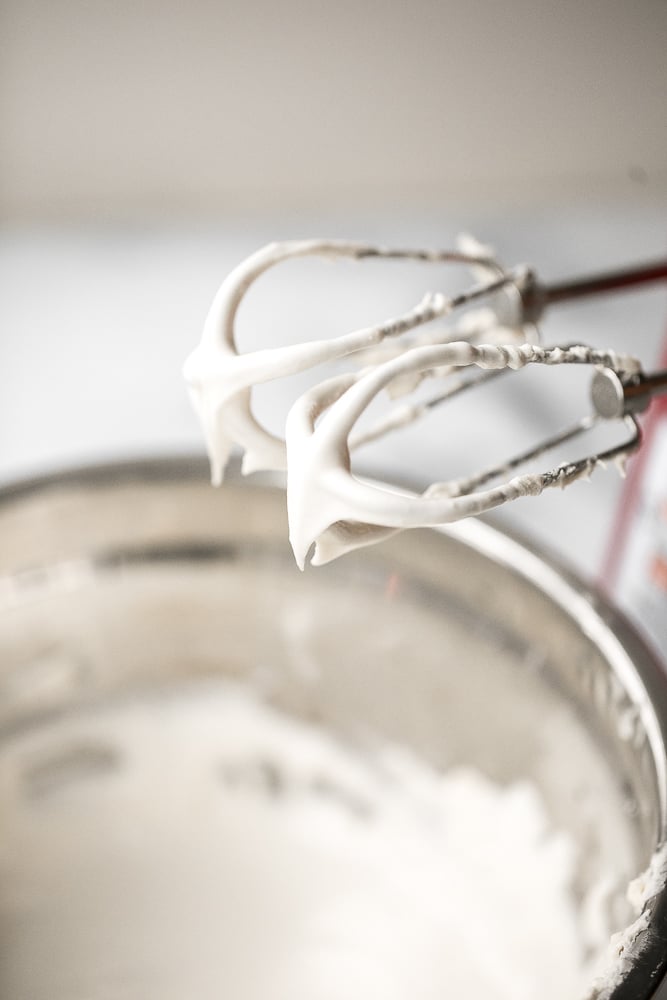
How to Make Easy Royal Icing for Heart Sugar Cookies
Once you have made the Valentine's Day heart sugar cookies and allowed them to cool completely, you are ready to start making the royal icing. Traditionally, royal icing is made with raw egg whites, but you can actually use meringue powder in place of the egg whites (as we did) and still get icing that hardens beautifully with the same taste, texture and consistency as royal icing.
To make royal icing:
- Combine ingredients: In a medium mixing bowl, combine confectioners' sugar with meringue powder. Add water and vanilla extract and beat with a hand mixer on medium-high speed, until smooth. If you find that the icing is too thick, add a little water (a teaspoon at a time). If you find the icing too thin, add a little more sugar.
- Add colour: To colour the icing, add gel food colouring. You can also use liquid food colouring, but this will have a slight effect on the consistency of the icing. You may need to add a little more sugar to get the consistency right.
How to Decorate Sugar Cookies with Royal Icing
- Use a no. 5 piping tip to outline the base colour on the sugar cookie, leaving about ⅛-inch from the edge, and fill in the inside. To get the icing completely to the edges, use the back of a spoon to spread the icing to the edge.
- Allow the base to dry enough so that when you add icing on top, it won't smudge or blend into it. It doesn't have to be fully set, but set enough, about 20-30 minutes.
- Use a thin no. 1 round tip to write cute Valentine's Day messages on the cookies.

Storing and Freezing Sugar Cookies
- How to store: Store sugar cookies in a single layer in an airtight container at room temperature for up to 3 days, or in the refrigerator for up to one week.
- How to freeze: Sugar cookies freeze beautifully. Store them in an airtight container, layered in between pieces of parchment paper and store in the freezer for up to 3 months.
Tips
- Plan ahead. You will need to plan ahead and give yourself enough time when making these cookies. The entire process spans over the course of a several hours, up to a day:
- the cookies need to completely cool before icing for at least a few hours. Otherwise the icing will get too runny from the warm cookies and won't set properly.
- the icing needs a few hours, up to a day, to completely set and harden, otherwise it can easily get smudged when storing, handling, or transporting. If adding multiple layers of icing, you need to allow the bottom layer to dry first, at least 30 minutes.
- If not using royal icing. If you decide not to decorate the cookies with icing, then you don't need to plan too far ahead or wait for the cookies to cool down or set. These cookies taste great both plain or iced.

More Cookie Recipes
- Raspberry and White Chocolate Shortbread Cookies
- Chocolate-Dipped Shortbread Heart Cookies
- Chewy Chocolate Chip Oatmeal Cookies
- M&M Cookies
- Slice and Bake Pecan Shortbread Cookies
- Jam-filled Thumbprint Cookies with Almond Glaze
- The Best Soft and Chewy Peanut Butter Cookies
- Chocolate Chip Banana Bread Cookies
Tried this recipe?
I'd love to hear what you think! Leave a comment and rating below to share your feedback. Your reviews help others discover this recipe and help me keep creating more free recipes for you. Snap a photo and tag me on social media @aheadofthyme too.

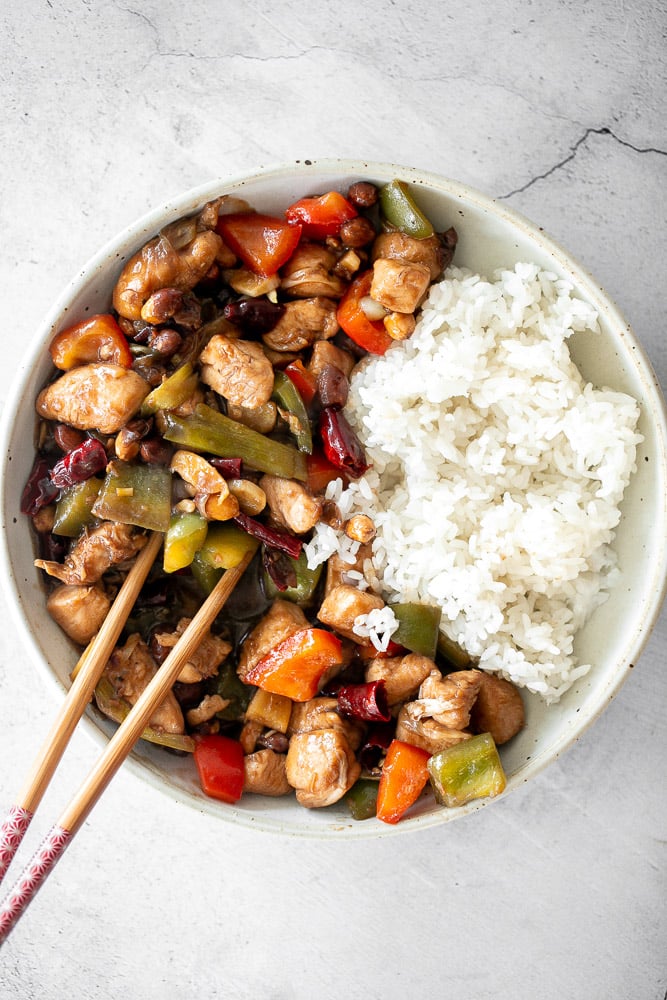
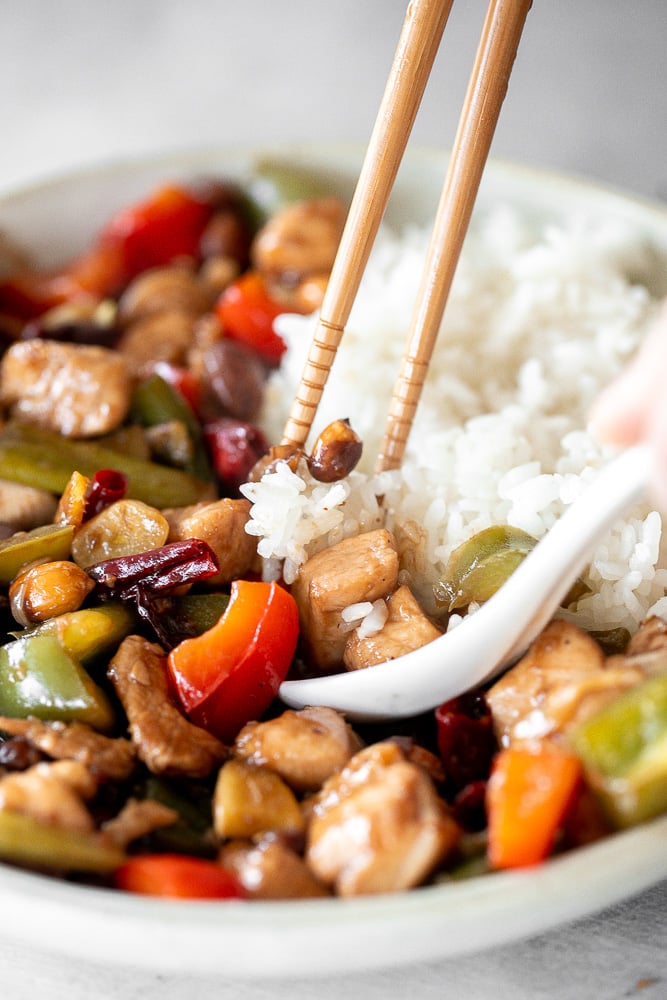
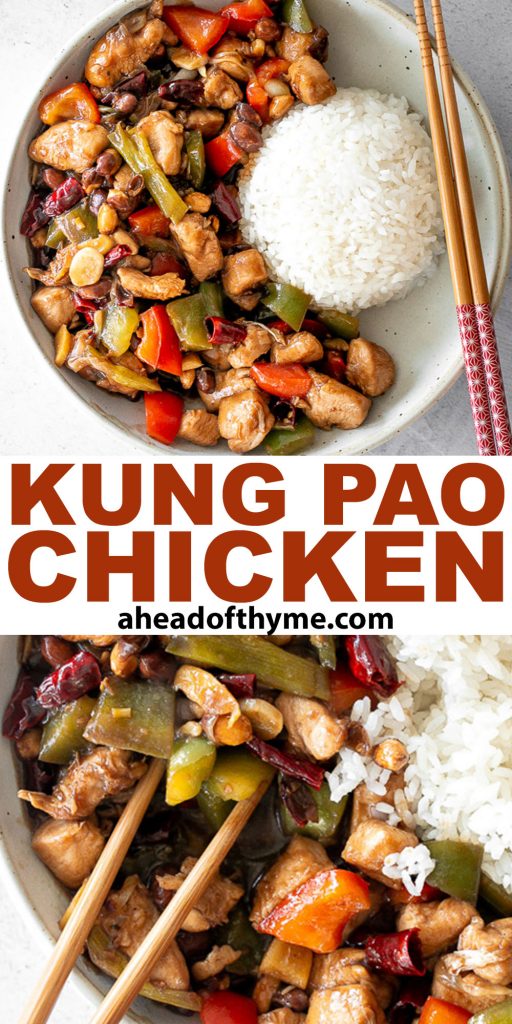
Kung Pao Chicken
Kung Pao chicken is a Chinese chicken dish that is stir-fried with crisp vegetables and tossed in a delicious and smooth sauce that is packed with flavour. Make it at home in under 30 minutes and you will wonder why you ever ordered takeout. It's the easiest weeknight dinner ever and seriously one of the most delicious. Kung Pao chicken is salty, spicy and sweet all at the same time. So so good.
Quick and easy weeknight dinners that taste so much better than takeout is kind of my jam. It usually takes less time to prepare these dishes at home than it does to wait for your takeout order to arrive. Some other easy Asian dishes that we like to whip up in under 30 minutes are: Curry Chicken Fried Rice, One Pot Thai Red Curry Noodle Soup, Scallion Oil Noodles, and Seafood Fried Rice.
Ingredients
To make easy Kung Pao chicken at home, you will need the following ingredients:
- chicken breast - marinated in soy sauce, Chinese Shaoxing cooking wine (or mirin or rice wine vinegar), cornstarch (or all purpose flour), and olive oil.
- soy sauce
- black vinegar - black vinegar is preferred but you can substitute with any kind of vinegar.
- Chinese Shaoxing cooking wine - you can also use mirin or rice wine vinegar.
- granulated sugar
- chicken bouillon powder - of you can use 2 tablespoons of chicken stock or broth.
- white pepper - if it's hard for you to find white pepper, you can leave it out.
- cornstarch - you can also substitute the cornstarch with all purpose flour.
- water
- olive oil - for stir-frying.
- dried red chili peppers - adds some heat into this dish.
- garlic + ginger - for flavour.
- vegetables - I used red bell pepper, green bell pepper, and green onions. Feel free to add in any vegetables that you like.
- roasted peanuts
You will also need measuring spoons, mixing bowls, and a large skillet or wok.
How to Make the Best Kung Pao Chicken
- Marinate the chicken. In a medium mixing bowl, stir to combine chicken, soy sauce, cooking wine, cornstarch, and olive oil. Set the chicken aside, allowing it to marinate for at least 10 minutes.
- Prepare the Kung Pao sauce. In another mixing bowl, whisk together all the Kung Pao sauce ingredients (soy sauce, vinegar, cooking wine, sugar, chicken bouillon powder, white pepper, cornstarch, and water). Whisk until the sugar and cornstarch is fully combined.
- Stir fry chicken. Heat oil in a large skillet or wok over medium-high heat for 2 minutes until the hot oil is sizzling hot. Add in the marinated chicken and stir fry for 3 minutes until browned on all sides.
- Add vegetables. Add dried chili peppers, garlic and ginger. Stir well to mix until fragrant, about 1 minute. Add red and green bell peppers and green onions. Stir fry for another minute until soft.
- Add Kung Pao sauce. Stir in the sauce and toss well to coat until the sauce thickens to desired consistency, and the chicken and vegetables evenly coated with Kung Pao sauce.
- Serve. Stir in peanuts and serve immediately with steamed rice or fried rice.
Tips
- How to serve: Serve Kung Pao chicken over a bowl of steamed rice or fried rice. You can also pair with other Chinese side dishes such as Chinese Garlic Cucumber Salad, Air Fryer Vegetable Stir Fry, and Steamed Buns.
- How to store: Store any leftover Kung Pao chicken in an airtight container in the refrigerator for up to 3 days. To reheat, heat on the stove over medium heat for 5-10 minutes until warmed through. If the sauce has thickened up too much in the refrigerator, add a splash of water when reheating.
More Asian Chicken Recipes
- Healthy Lemon Chicken
- Baked Sesame Chicken
- Char Siu (Chinese BBQ) Chicken
- Shanghai Style Fried Noodles
- Chicken Pad Thai
- Sweet Chili Chicken Bites
Tried this recipe?
I'd love to hear what you think! Leave a comment and rating below to share your feedback. Your reviews help others discover this recipe and help me keep creating more free recipes for you. Snap a photo and tag me on social media @aheadofthyme too.
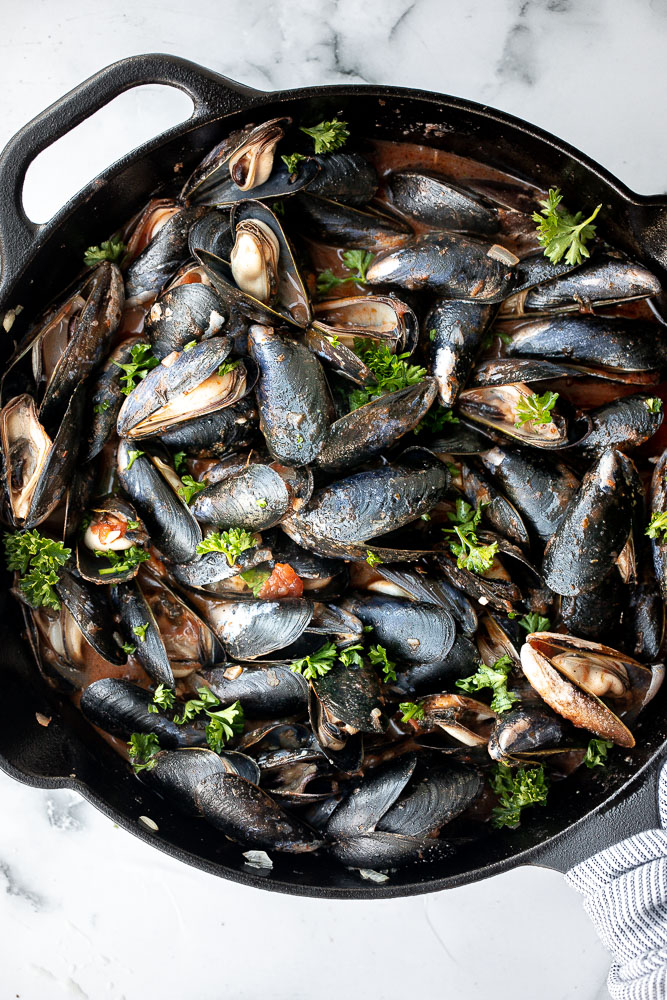
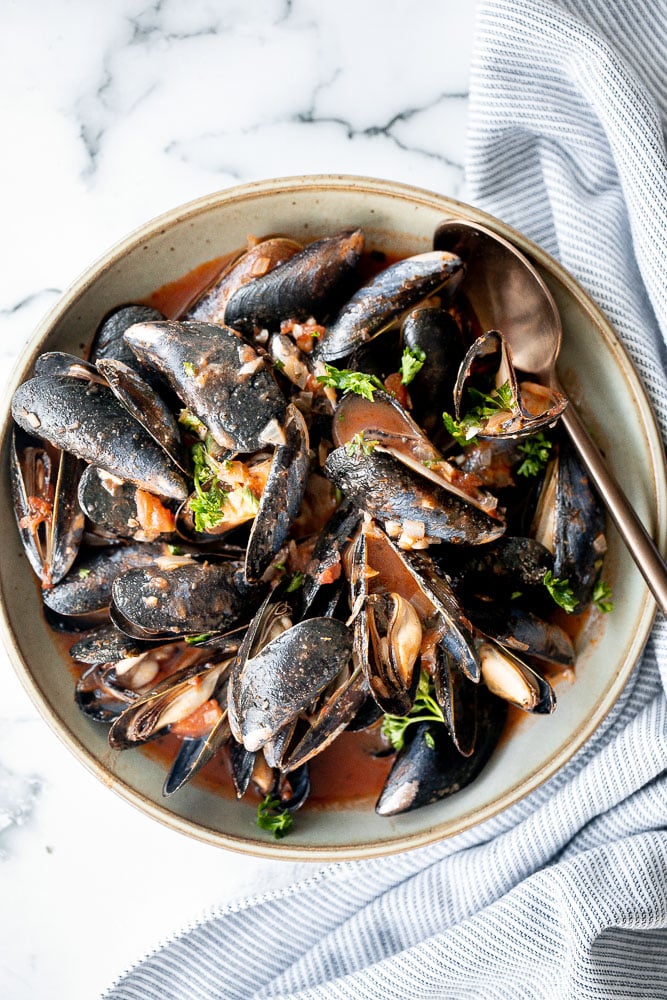
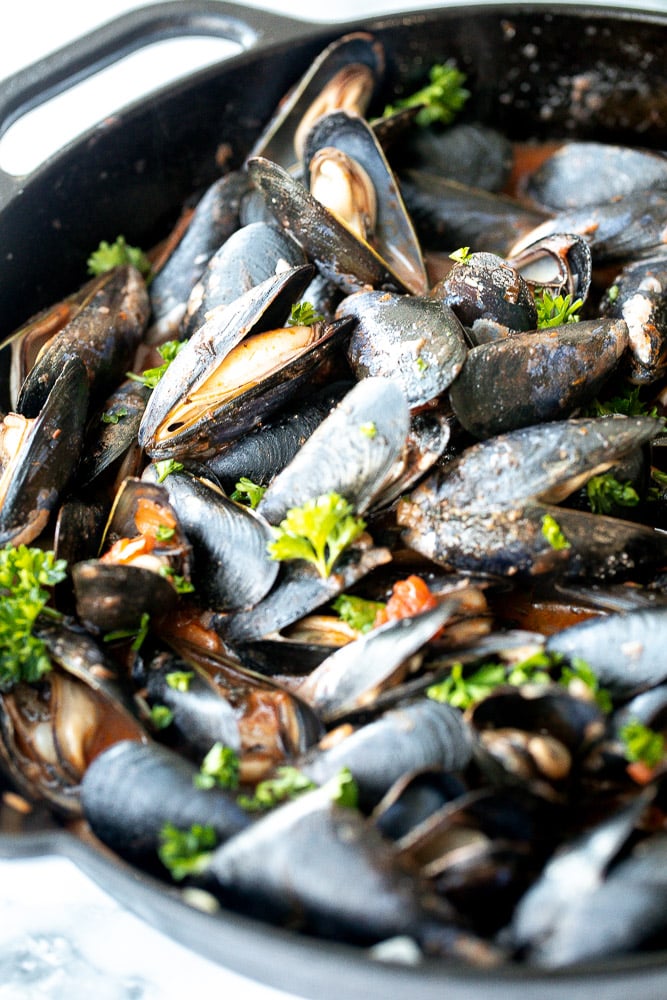
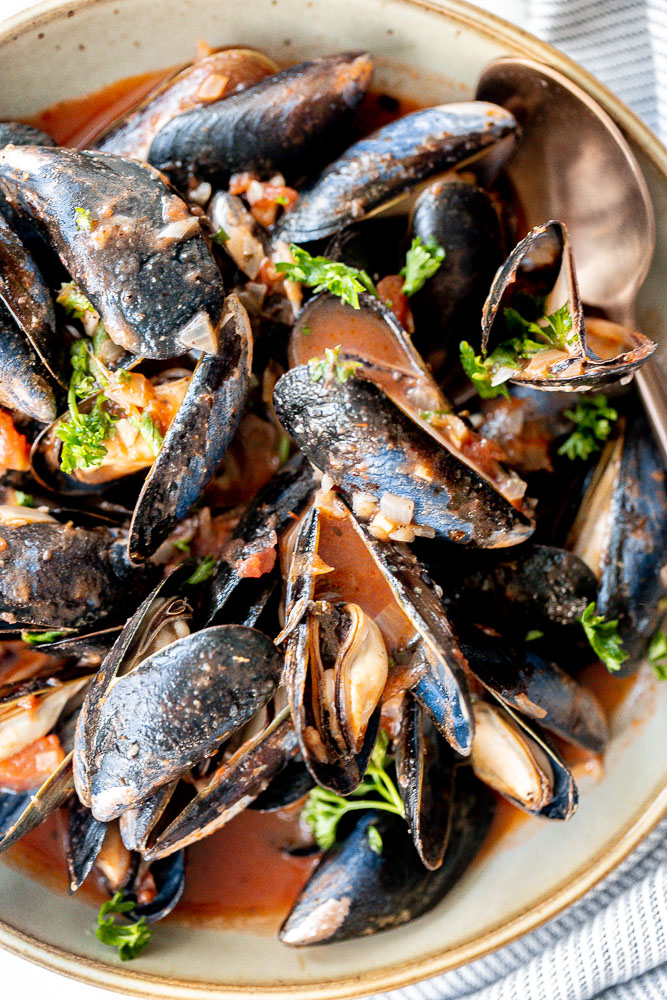
Steamed Mussels in Tomato Sauce
Steamed mussels in tomato sauce is a restaurant-quality, one pot dish that is so quick and easy to make at home in less than 25 minutes. Fresh mussels are steamed in sautéed onions and garlic, cooking wine, and tossed in a delicious tomato sauce. This fancy meal is the perfect appetizer to serve on their own or with a side of crusty bread or as a complete dinner over a plate of spaghetti noodles. However you serve them, they are sure to impress.
If you like these mussels, then you will also love Thai Red Curry Mussels. They are cooked in a Thai-based coconut sauce that's creamy with a little kick and also very very delicious.
Ingredients
To make steamed mussels in tomato sauce, you will need the following ingredients:
- fresh live mussels - To prepare mussels, you will need to clean and debeard them. To clean, scrub the mussels with a scrubbing brush to remove any particles and debris. Next, remove the beard. This is a small stringy mass that sticks out of the side of each mussel. Hold the mussel in one hand, and gently pull the beard off using your other hand, pulling towards the bottom of the mussel where the clasp is. Once you've removed all of them, give the mussels one last rise under cold water.
- olive oil
- onion
- garlic
- cooking wine - You can use white or red cooking wine.
- diced tomatoes
- salt and pepper
- fresh parsley - optional, for garnish on top.
You will also need a large cooking pot or skillet (I used a cast-iron skillet).

How to Make the Best Steamed Mussels in Tomato Sauce
- Sauté onions and garlic. In a large pot or skillet, heat olive oil over medium-high heat for 2 minutes until the hot oil is sizzling and shimmering. Stir in onion and garlic and sauté until soft and fragrant, about 2-3 minutes.
- Cook mussels. Add mussels and wine. Cover the lid and steam for 6-8 minutes until all the shells are wide open. If you don't have a lid to cover, you can stir occasionally to help evenly cook the mussels. Discard any mussels that don't open.
- Add tomatoes. Add diced tomatoes and stir well. Bring the sauce to a simmer, and let it simmer for 3-5 minutes until the tomato sauce is evenly dispersed into the mussels. Season with salt and pepper.
- Serve. Garnish with parsley and serve immediately.
How to Serve Steamed Mussels
You can serve steamed mussels as a delicious appetizer with a side of crusty bread to soak up all that juicy tomato sauce. You can also serve steamed mussels with tomato sauce over a plate of boiled spaghetti.
Tips for Preparing and Storing Mussels
- How to store fresh mussels: It's best to cook mussels the day that you buy them. To store for up to 2 days, transfer the mussels to a bowl or unsealed container and covered with a clean damp cloth or paper towel. Drain any water that collects in the bottom of the bowl every day. Do not store the mussels in water as they will die from it.
- How to tell if mussels are fresh: Fresh mussels should be alive with their shells closed. They should have a fresh salty ocean smell, and not a fishy smell. If they smell fishy, I would not suggest eating them. If your mussels are store in the refrigerator, give it a smell just before cooking to ensure freshness.
- How to store cooked mussels: You can store cooked mussels for up to 2 days in an airtight container in the refrigerator. To reheat, heat in a skillet over low heat until warmed through. You may have to add a little water if the sauce has thickened up too much in the refrigerator. I would not recommend freezing mussels.
More Seafood Recipes
- Baked Maple Salmon
- Seared Scallops
- Surf and Turf Steak and Lobster Tails
- Almond-Crusted Halibut with Lemon Garlic Butter
- Teriyaki Grilled Salmon Rice Bowl
- Air Fryer Black Cod with Black Bean Sauce
- Baked Coconut Shrimp
Tried this recipe?
I'd love to hear what you think! Leave a comment and rating below to share your feedback. Your reviews help others discover this recipe and help me keep creating more free recipes for you. Snap a photo and tag me on social media @aheadofthyme too.

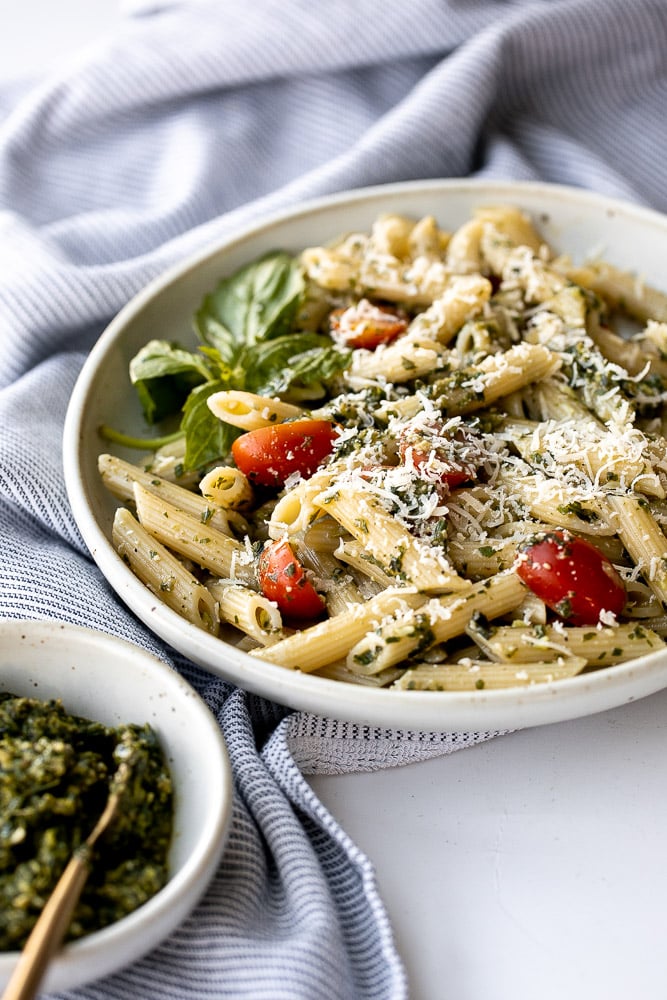
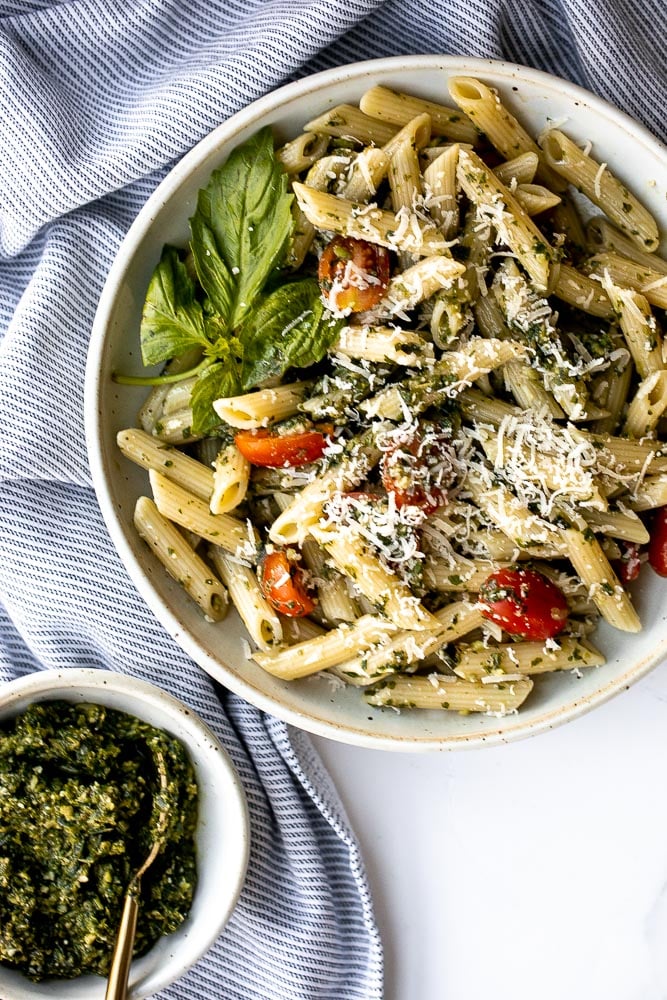
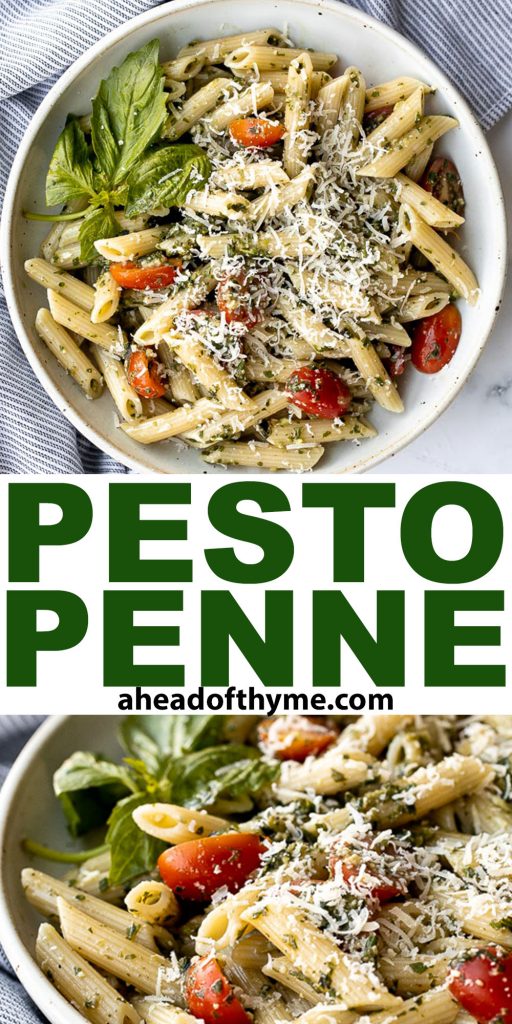
Pesto Penne Pasta
Quick and easy pesto penne pasta is a simple and light Italian pasta dish made with just five ingredients in under 15 minutes. Freshly cooked pasta is packed with flavour when tossed in pesto, fresh cherry tomatoes and Parmesan cheese. It is best served fresh for an easy weeknight dinner, and serve any leftovers cold as a pasta salad the next day for lunch.

Pesto penne pasta is one of the easiest and quickest pasta recipes you will make... like ever. If you are all about those quick and easy meals, then you will also love these other pasta dishes that take less than 20 minutes to prep and cook: Spaghetti Carbonara, Avocado Basil Pesto Spaghetti, Stovetop Mac and Cheese with White Cheddar, and Shrimp Fettuccine Alfredo Pasta Bake.
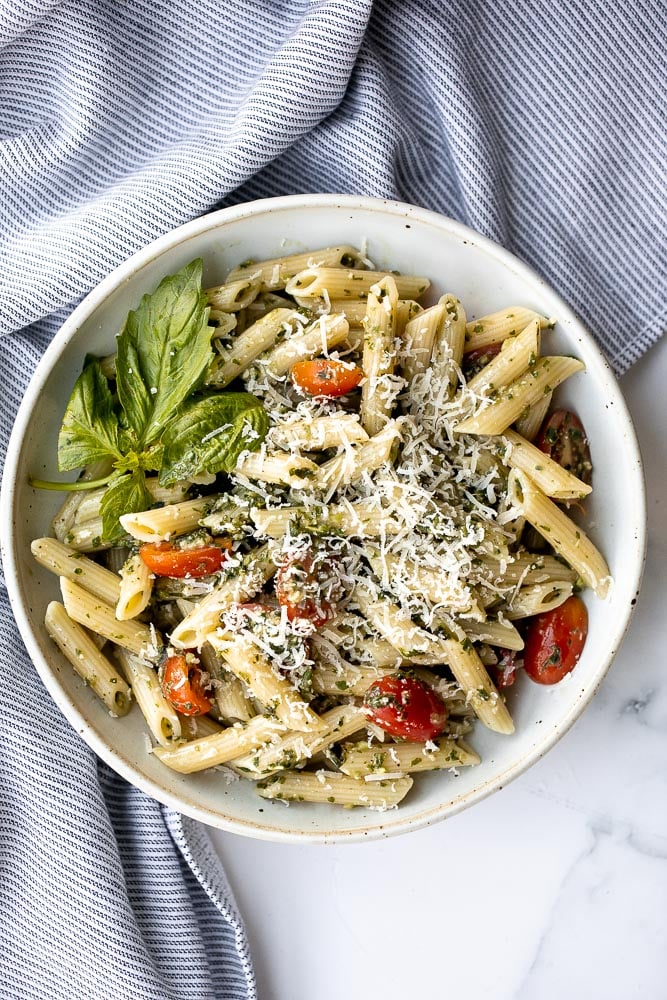
Pesto Penne Ingredients
To make easy pesto pasta, you need the following simple ingredients:
- penne pasta - or substitute with your favourite kind of pasta. I like the penne shape because it traps so much delicious sauce inside.
- basil pesto - it's really easy to make fresh basil pesto homemade in just 5 minutes, or you can easily use store-bought pesto as well.
- cherry tomatoes
- Parmesan cheese
- salt and pepper
You will also need a large cooking pot and a mixing bowl.
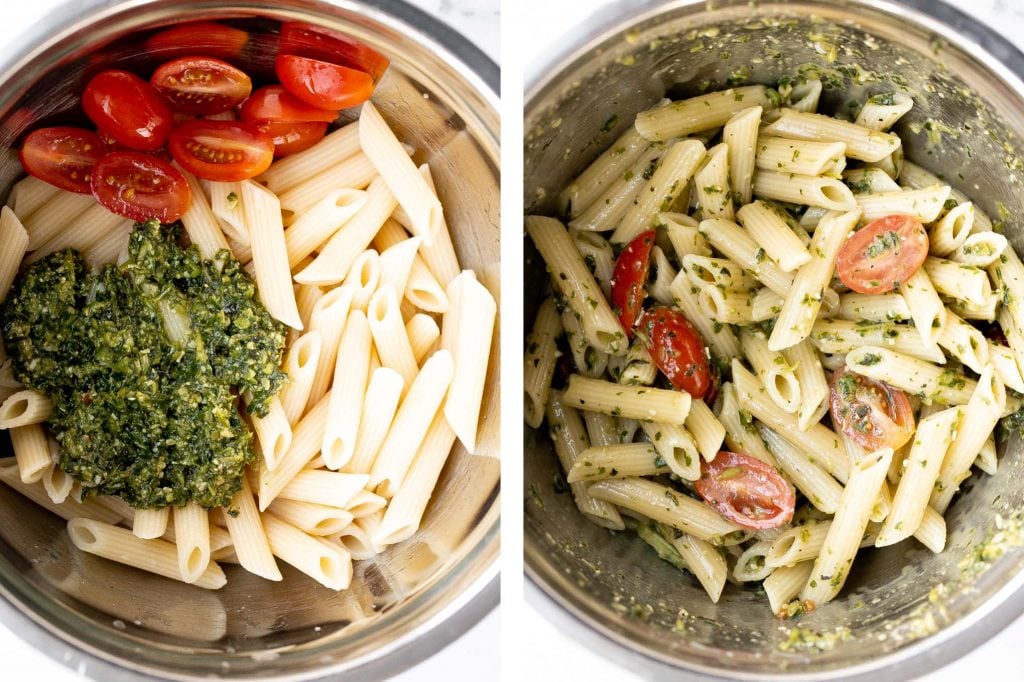
How to Make the Best Pesto Penne Pasta
- Make the penne pasta. Bring a large pot of water to a boil over medium-high heat. Add penne pasta and a little bit salt, and cook till al dente (fully cooked but still firm) about 8-10 minutes, or according to package directions. Do not overcook the pasta. Turn off the heat and reserve at least ¼ cup of pasta water, then drain the pasta in a colander and let it cool for 1 minute.
- Toss in pesto. Transfer pasta into a large mixing bowl and add pesto and reserved pasta water (¼ cup or more, if desired). Season with salt and pepper and toss well to coat. Stir in cherry tomatoes and parmesan cheese.
- Serve. Serve immediately. Sprinkle extra parmesan on top, if desired.
Tips
- Toss in a mixing bowl. When mixing the pasta and pesto together, make sure to use a mixing bowl rather than just mixing in the post. The pot is too hot and will cause the basil in the pesto to turn black.
- How to customize. You can customize this penne pasta by adding in cooked meat or vegetables such as chicken, shrimp, zucchini, or broccoli.
- How to serve. Serve pesto penne pasta with a side of crusty garlicky bread such as pull apart garlic bread, rosemary garlic focaccia bread, ciabatta bread, or tomato focaccia bread. You can also pair it with a fresh salad on the side such as an easy Greek salad, Mediterranean chickpea wedge salad, or tomato cucumber avocado salad.
- How to store. Pesto pasta is best served fresh or cold as a pasta salad. Store any leftovers an airtight container for up to 3 days in the refrigerator. I would not recommend reheating, as this will also cause the basil to turn black when heated. You can serve leftovers as a delicious pasta salad.
More Pasta Recipes
- Avocado Basil Pesto Spaghetti
- Spaghetti Bolognese
- Cheesy Tortellini and Sausage Bake
- Spaghetti and Meatballs
- Shrimp Fettuccine Alfredo Pasta Bake
- Creamy White Chicken and Spinach Lasagna
Tried this recipe?
I'd love to hear what you think! Leave a comment and rating below to share your feedback. Your reviews help others discover this recipe and help me keep creating more free recipes for you. Snap a photo and tag me on social media @aheadofthyme too.
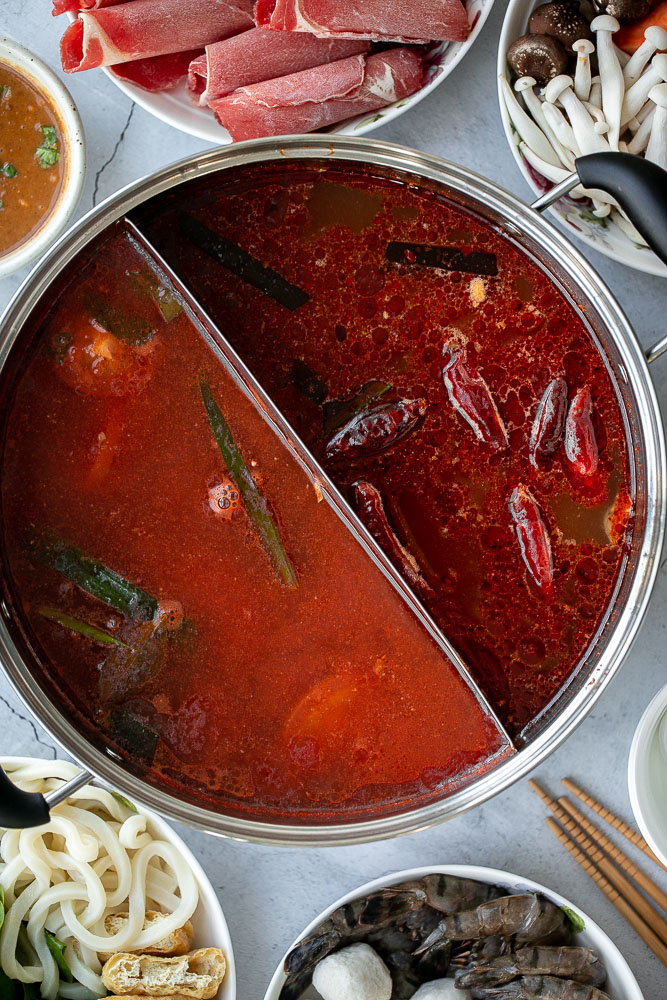
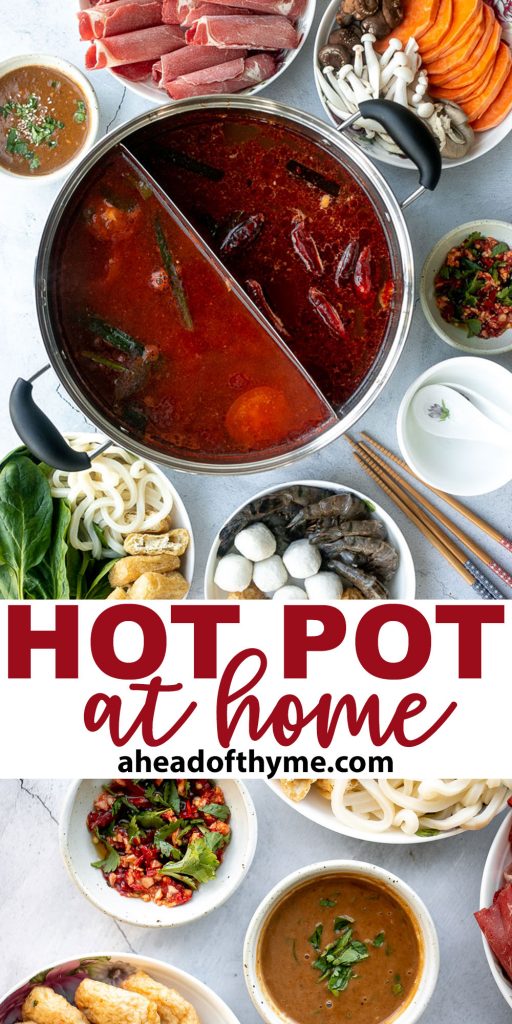
Chinese Hot Pot at Home
Chinese hot pot at home is a warm and comforting meal to enjoy with family or a small group of friends. It's one of the most popular social gatherings in China because it's delicious, easy to prepare, and completely customizable to fit all dietary preferences. So whether you are vegan, a meat lover or seafood lover, you can enjoy hot pot easily at home. Plus, making hot pot at home is so much cheaper than ordering at a restaurant, and it always tastes better. And with all of staying home this year, Chinese hot pot at home is a great way to celebrate Chinese New Year this year.
What is Chinese Hot Pot?
Chinese hot pot is a social meal with a simmering pot of soup base at the middle of table over a portable burner and an assortment of raw ingredients on the table that are cut into bite-sized pieces including vegetables, meat, seafood and noodles. All the food gets cooked at the table as you eat, and since the ingredients are cut into small pieces, they cook quite quickly in about one minute. Once cooked, you remove your item and dip it into a delicious personalized dipping sauce and eat.
Hot pot has traditionally been enjoyed during the winter months, but it has started to become more common for people to eat it all year round. When we were travelling across China back in 2018, we had hot pot almost every day. Different regions in China use different flavours in their hot pot soup base. From spicy, to mild bone broth, to seafood-based, there are so many variations to enjoy.
And contrary to popular belief, hot pot is relatively healthy as it's less processed. Everything is boiled (rather than deep fried), so you can get lots of nutrients from your food. But do watch out for portion control because hot pot is so crave-worthy and it's hard to track how much you have eaten, so you will almost certainly eat more than you should.
Required Hot Pot Equipment
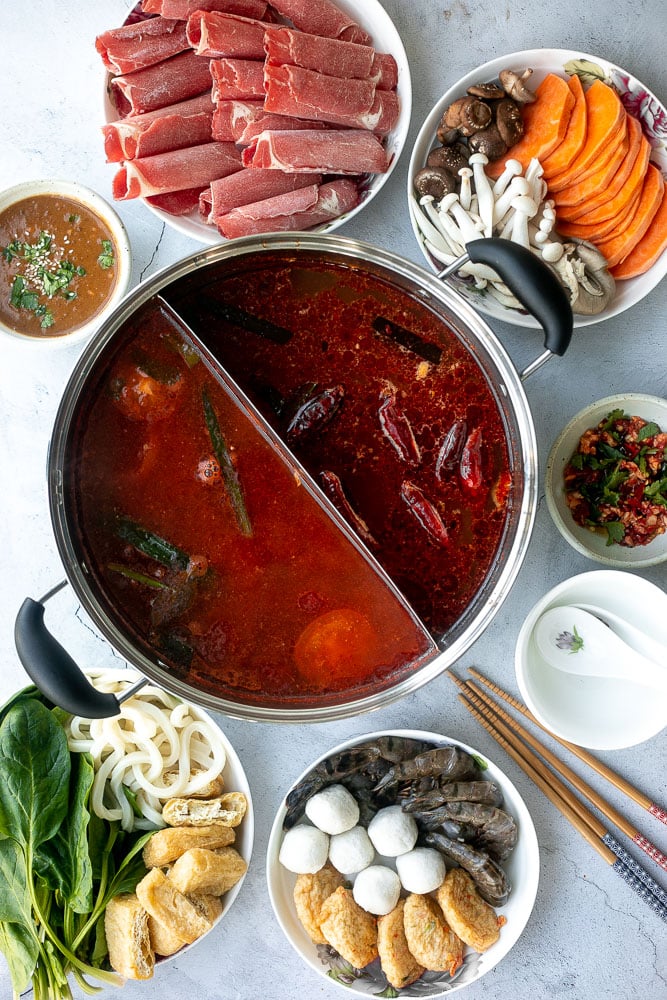
To make Chinese hot pot at home, you will need the following equipment:
- portable burner - since hot pot is cooked at the table, you will need a portable burner to enjoy the simmering soup at the table. You can use either a portable induction burner or a portable gas burner. You can also use a special hot pot set that includes pot with a built-in burner.
- hot pot cookware - a round stainless steel pot that is about 11 or 12-inches in diameter and relatively shallow, about 3.5 to 4 inches deep. You can also use a dual hot pot that has a separator to allow you to make two soup flavours at the same time (as we did here). One pot is enough to feed up to 6 people. To feed more people, you will need a second pot and a second burner.
- chopsticks - you will need a set of extra long chopsticks for dipping and retrieving food from the communal hot pot, and a set of regular wooden chopsticks per person for eating.
- hot pot strainer scoops - hot pot strainer scoops are also helpful for retrieving food from the communal hot pot, especially for items which are harder to pick up using the extra long chopsticks.
- eating accessories - you will need small bowls for eating and dip bowls for the individual dipping sauces.
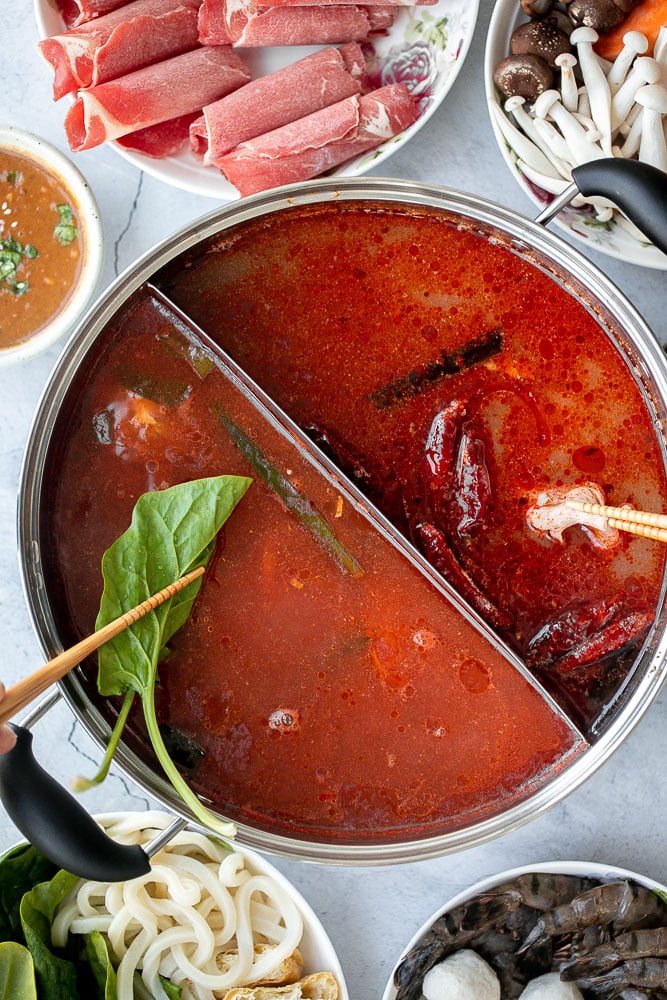
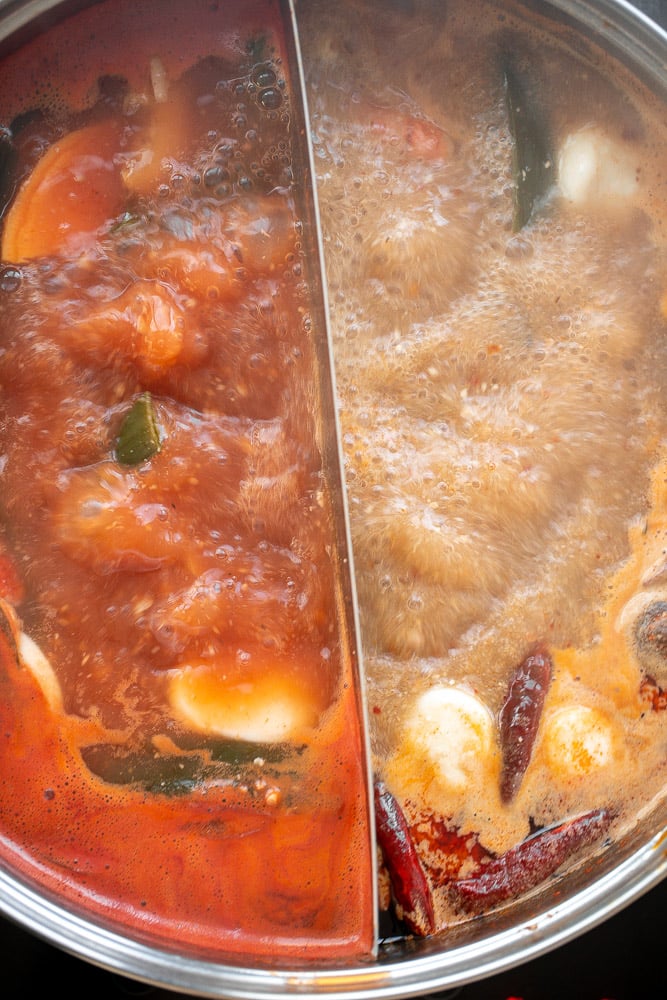
How to Make Hot Pot Soup Base
It is super easy to prepare a hot pot soup base from scratch. We prepared two different hot pot soup bases using our dual hot pot -- a mild hot pot and a spicy hot pot. To prepare, simply add all the ingredients for each of the bases into each compartment of a dual hot pot and mix well to combine. Then, place the dual hot pot on a portable induction burner or portable gas burner and bring to a simmer over medium heat. You can also just make one soup base and use a round stainless steel hot pot instead.
If you have a hard time finding the ingredients for the soup base, you can easily use store-bought soup base that you can find at your local Asian grocery store or online. To prepare a store-bought hot pot soup base, simply add one pouch into hot water or broth.
Ingredients in Tomato-Based Hot Pot Soup Base
To make a tomato-based hot pot soup base, you will need the following ingredients:
- olive oil
- chicken broth - you can substitute this with vegetable broth or bone broth.
- water
- tomato + tomato paste
- green onions
- garlic
- ginger
- bay leaves
Ingredients in Spicy Chili Hot Pot Soup Base
To make a spicy chili hot pot soup base, you will need the following ingredients:
- spicy red chili oil
- chicken broth - you can substitute this with vegetable broth or bone broth.
- peanut butter
- water
- dried red chili peppers
- green onions
- garlic
- ginger
- bay leaves
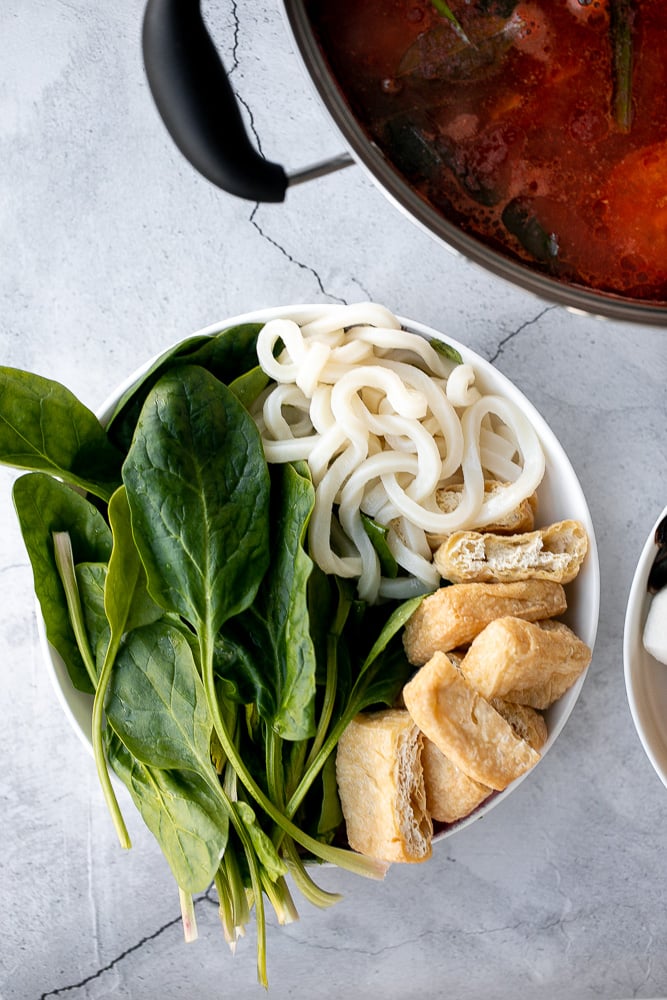
Ingredients in Hot Pot
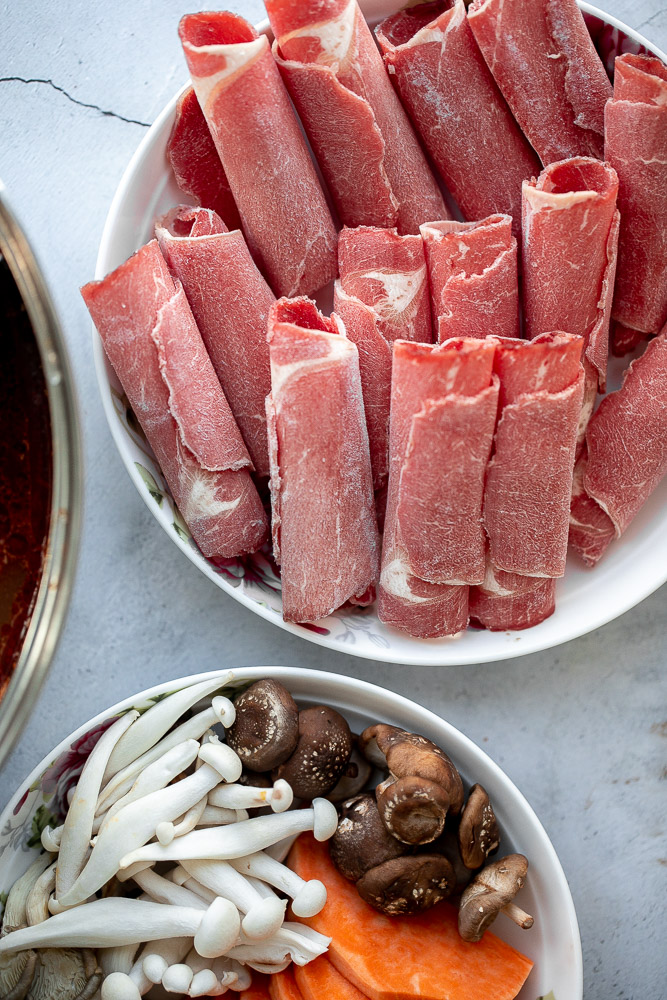
Making Chinese hot pot at home is extremely customizable and you can use almost any ingredients that you have on hand. Hot pot typically consists of a variety of vegetables (including leafy greens, root vegetables, and mushrooms), meat and seafood, noodles and tofu. There are no rules when it comes to the ingredients to use in hot pot, although it's a good idea to pick a few items from each category to keep it interesting. When preparing the ingredients, be sure to cut everything into small, bite-size pieces for quick cooking.
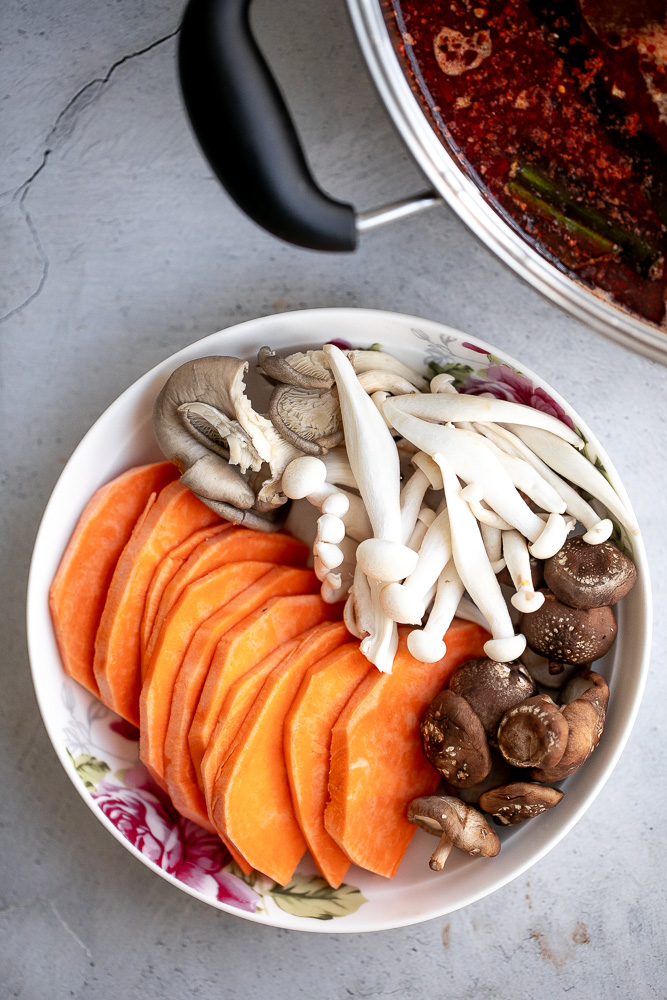
Vegetables
Choose from a variety of vegetables, preparing about 2 cups total per person. We like to include at least one leafy green and mushroom when picking our vegetables.
- leafy greens - such as spinach, baby bok choy, napa cabbage, and watercress.
- root vegetables - such as potato, sweet potato, yam, daikon and lotus root.
- mushrooms - such as shiitake mushrooms, oyster mushrooms, enoki mushrooms.
- other vegetables - such as broccoli, cauliflower and tomatoes.
Meat and Seafood
Choose from a variety of meat and seafood, preparing about 1 cup total per person. Make sure to use only thinly sliced meats for quick cooking.
- beef
- lamb shoulder or leg
- pork
- chicken
- shrimp
- mussels
- oysters
- meatballs and cakes - such as fish balls, shrimp balls, fish cakes and beef balls.
Noodles and Tofu
Choose one or two of noodle and tofu dishes, and prepare about ½ cup per person.
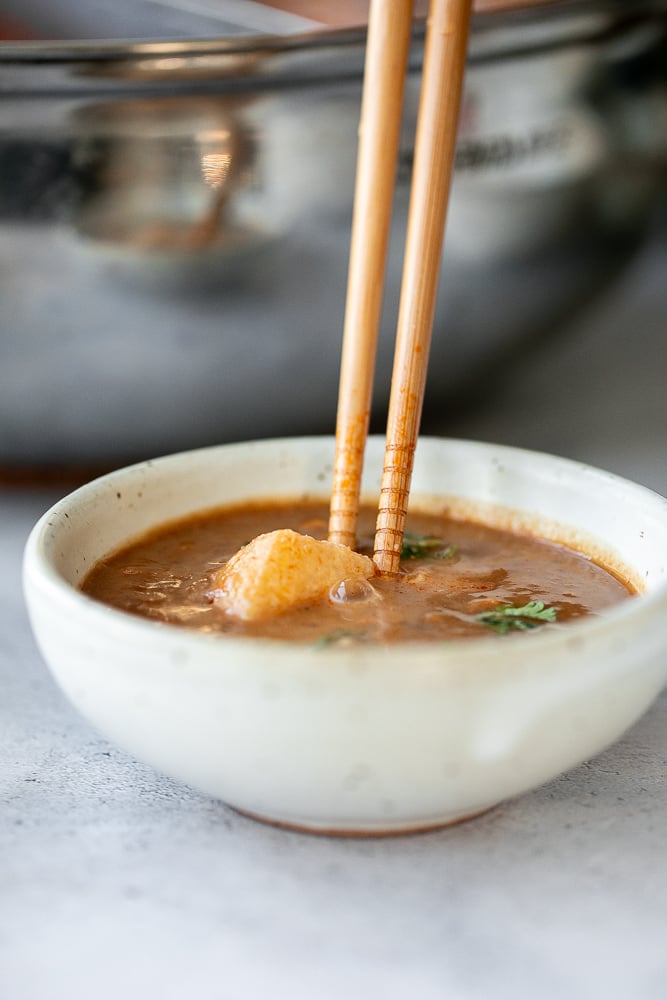
How to Make Hot Pot Dipping Sauce
The hot pot dipping sauce might be the most important pot of the whole hot pot experience. In addition to the hot pot soup base, it really determines the flavour of your meal. You can completely customize it to your liking and make it spicy, savoury, sour, or slightly sweet.
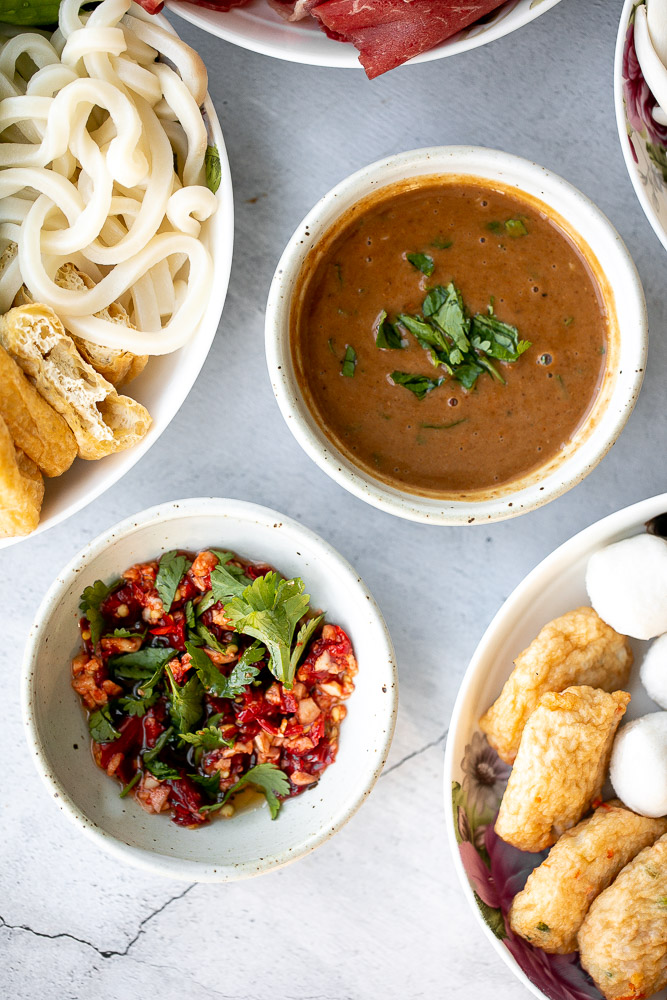
To make an easy peanut-based dipping sauce, you will to heat the following ingredients in a shallow saucepan over medium heat for about 1-2 minutes until well blended and smooth:
- soy sauce
- peanut butter
- satay paste
- sesame oil
- sugar
- water
Once you divide the peanut dipping sauce into the dip bowls, you can stir in some optional toppings. Some popular ingredients to add are: vinegar, minced garlic, red chili oil, sambal oelek or chili garlic sauce, finely chopped cilantro, and white sesame seeds.
Whenever we have leftover dipping sauce, we save it and use it in a batch of noodles the next day. It's so delicious.
Tips for Making Chinese Hot Pot at Home
- How to set up the hot pot table. Set up your table with the burner and hot pot in the center, and the ingredients on plates around the pot. You can group ingredients together in a single plate or platter to save space. For instance, group meat together, group seafood together, and group vegetables or vegetarian items together.
- Order of cooking hot pot ingredients. There is no order of cooking the hot pot ingredients, and you do not need to add in all the ingredients at once. Some families like to cook seafood first as it takes longer to cook, but it's a personal preference.
- Reload with hot water. While making and eating hot pot, keep a kettle with a few cups of hot water ready to reload the soup base to replenish it when the liquid starts to evaporate too much.
More Chinese Recipes
- 10-Minute Wonton Soup
- Vegetarian Fried Rice
- Stir Fried Rice Noodle Rolls with Peanut Butter Sauce
- Spicy Chili Oil Wontons
- Shanghai Style Fried Noodles
- Crispy Fried Vegetarian Spring Rolls
- Shanghai Style Wonton Soup
- Vegetarian Steamed Buns
Tried this recipe?
I'd love to hear what you think! Leave a comment and rating below to share your feedback. Your reviews help others discover this recipe and help me keep creating more free recipes for you. Snap a photo and tag me on social media @aheadofthyme too.
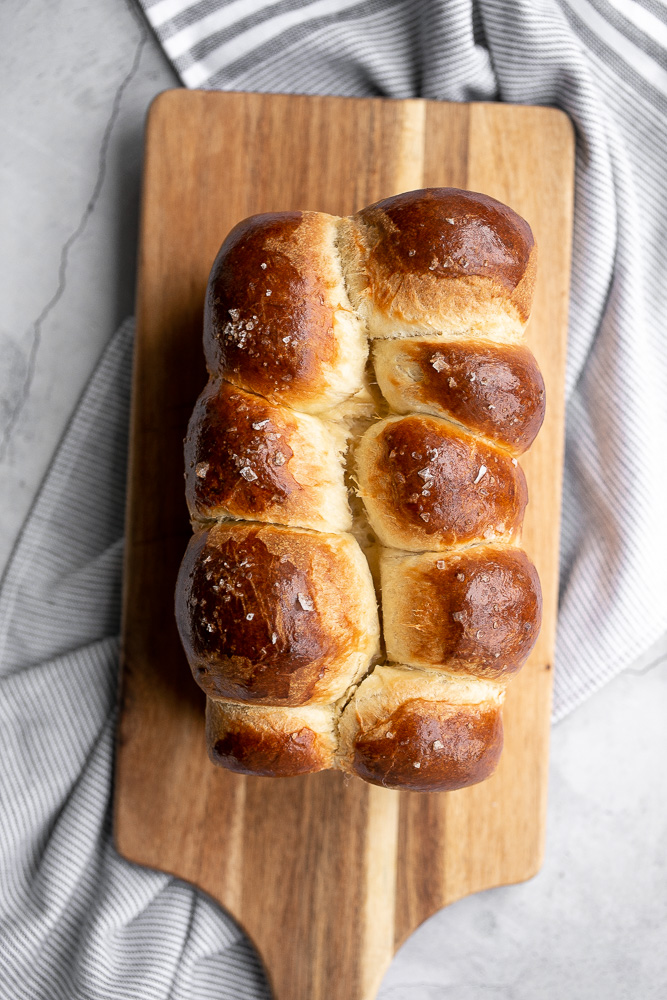
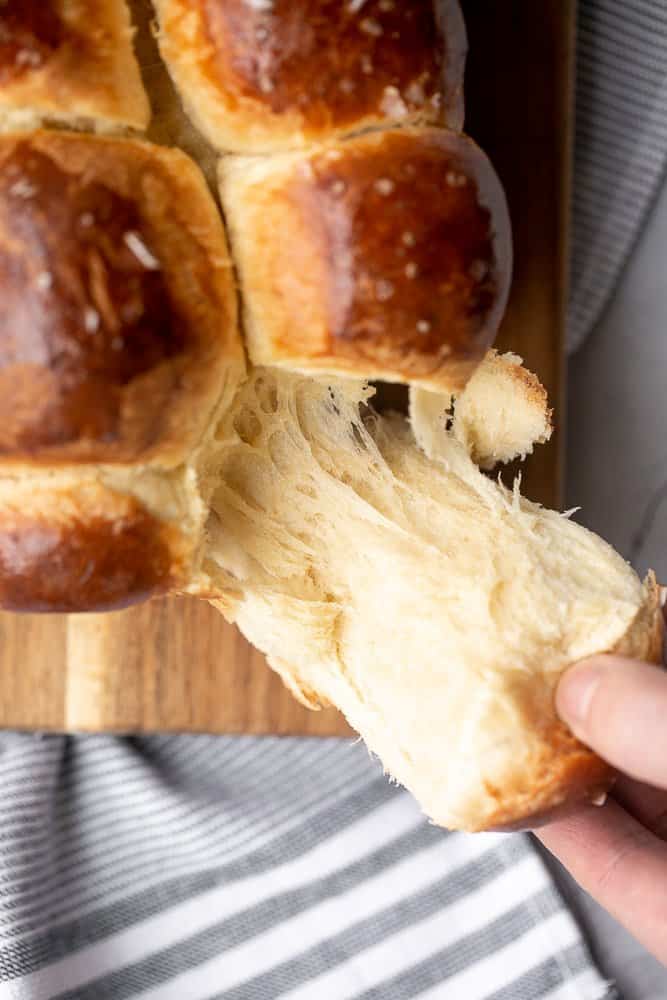
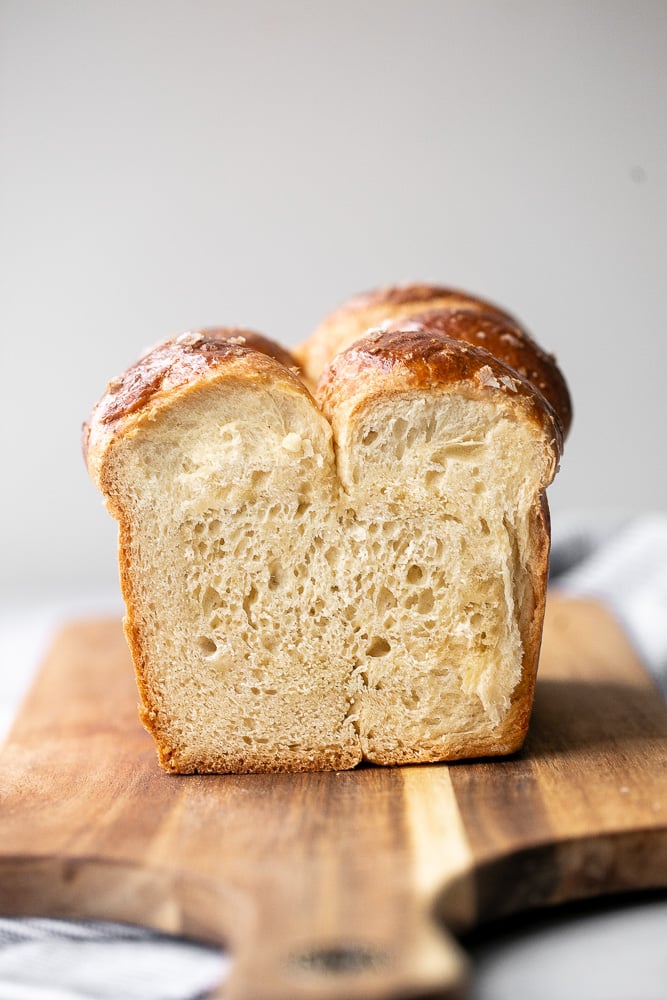
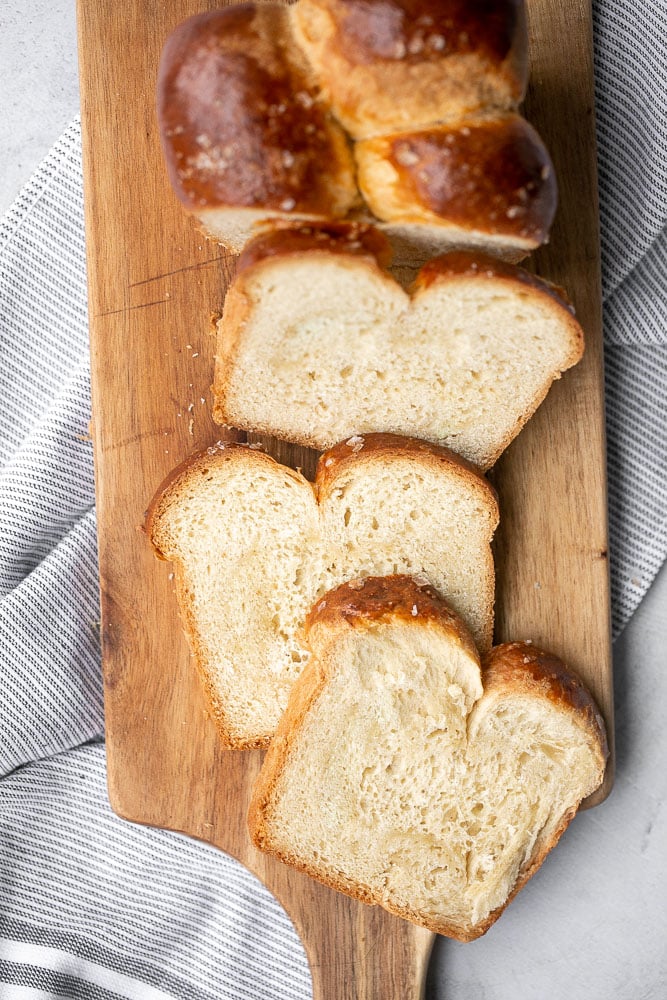
Brioche Bread
Brioche bread is buttery, soft and pillowy with a beautiful golden brown crust. It is a delicious pastry-like bread that is so rich in flavour. The best part? You can make brioche with just 20 minutes of actual prep work. It's the perfect bread to enjoy on it's own with butter and jam, in a sandwich or for French toast.
What is Brioche Bread?
Brioche bread is French bread that is made rich with butter, eggs, and milk. It's high fat and protein content gives it the softest and fluffiest texture, which classifies it somewhere in between a pastry like croissants and regular bread. It can be used in so many ways, as burger buns, sandwich bread, and french toast.
Brioche is often compared to challah as they are similar in texture, but they have their differences. Brioche bread is made primarily of butter and milk whilst challah is made with canola oil and eggs for enrichment.
Ingredients
To make brioche bread, you will need the following ingredients:
- all-purpose flour
- yeast - active dry yeast.
- butter - softened butter, cut into cubes.
- milk
- eggs
- sugar
- salt
- egg white - for egg wash.
- salt flakes - optional, for garnish on top. You could also use sesame seeds, or leave it as is.
You will also need a kitchen scale (or measuring cups and spoons), mixing bowls, and a 1.5 lb. loaf pan (10x5-inch loaf pan).
How to Make the Best Brioche Bread
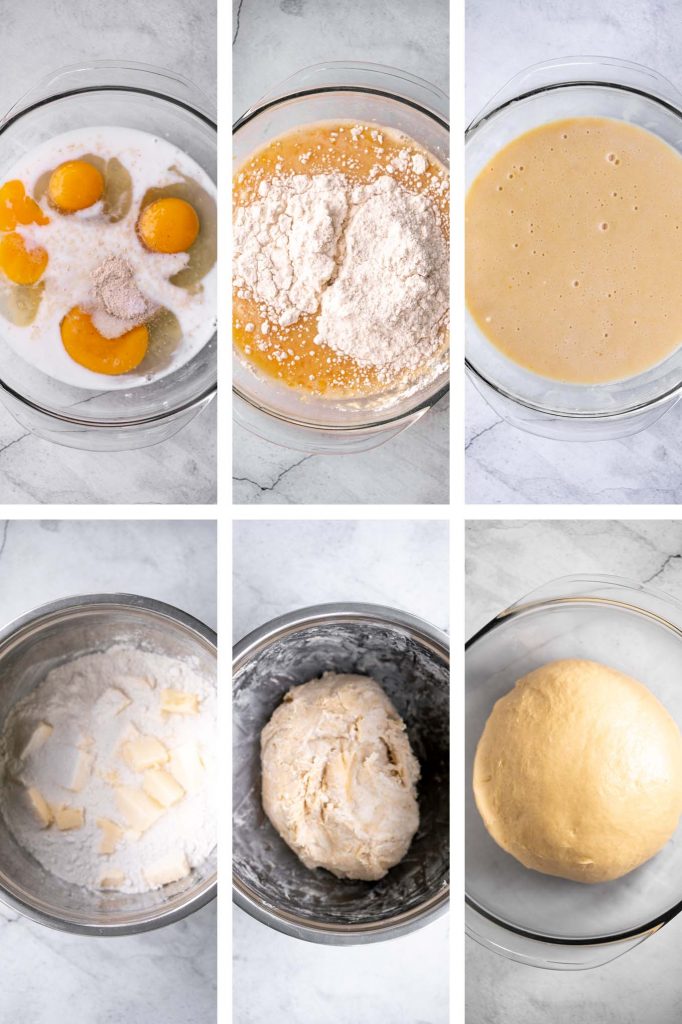
- Prepare the dough. In a medium mixing bowl, whisk well to combine milk, eggs (remove 1 egg white from the eggs, about 2 tablespoons and set aside), yeast and sugar until fully dissolved, about 2 minutes. Whisk in 1 cup flour and mix well until smooth. In a large mixing bowl, add remaining 3 cups flour, diced butter and salt. Mix evenly with a spatula. Pour in the egg flour mixture and stir well to combine until it forms a shaggy dough, scraping down the sides of the bowl (there should be no dry flour particles visible).
- First rise. Cover the bowl with cling wrap and let dough rise at room temperature (preferably in a warmer area) for 1 hour until doubled.
- Knead the dough. You can use a stand mixer or knead by hand. To knead by hand, knead the dough on a clean lightly floured surface for 8-10 minutes until it changes from a sticky shaggy dough into a smooth and soft dough ball. Apply a little bit of flour on your hands if needed and slap and fold the dough to further build gluten and distribute butter evenly in dough.
Tips for Kneading Dough
- How to knead dough: Knead the dough by pushing it down and outward using the palms of your hands. Fold the dough in half toward you and press down. Repeat this motion by pushing the dough down and outward, and then folding over towards you. This helps build up gluten strength in dough that is responsible for making the bread fluffy.
- How to test if dough is well-kneaded: A well-kneaded dough is smooth and can hold its shape. You can test the dough by giving it a firm poke with your finger. The indentation should bounce right back. If it doesn't bounce back and stays like a dimple, keep kneading for a few more minutes.
How to Shape Brioche
Flatten the dough, divide it into 9 equal pieces with a bench scraper, and shape them into smooth balls by cupping the dough in your palm and making circular motions. It should take less than 30 seconds to roll each piece into a smooth ball.
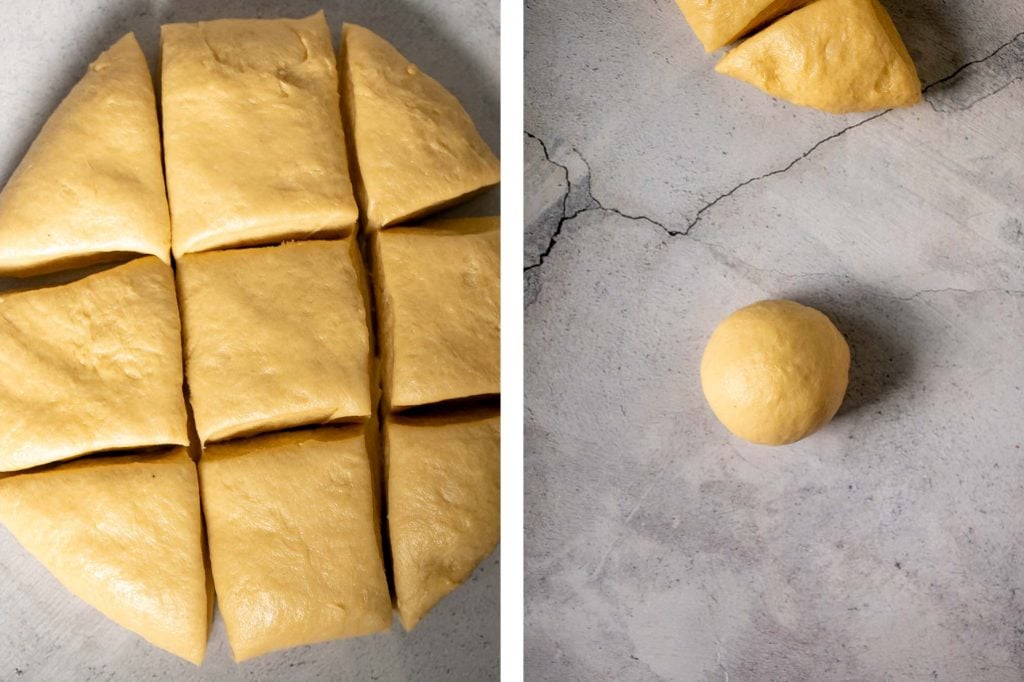
Arrange dough balls in a zigzag pattern in a lightly oiled 1.5 lb. loaf pan (10x5-inch loaf pan). When baked, the dough balls can be pulled apart from the loaf. This is a classic way of shaping brioche. You can also braid the brioche as in challah bread and bake it in the loaf pan or in a sheet pan.
Cover with cling wrap and let it rise until almost doubled in size, about 45 minutes depending on the room temperature. The dough will rise up to the rim of the loaf pan. Brush the reserved egg white evenly over the top and sprinkle with salt flakes. The egg white creates shine and makes the salt stick to the top.

Bake the brioche in a 375 F preheated oven for 30-35 minutes until the crust turns golden brown. Then, transfer the loaf onto a wire cooling rack to cool completely before slicing, about 30 minutes.
Storing and Freezing Instructions
- How to store: Store brioche in a bread box or an airtight container at room temperature for up to 3 days or in the refrigerator for up to one week.
- How to freeze: You can also freeze brioche in an airtight container or freezer bag for up to 3 months. To thaw, place in the refrigerator or kitchen counter.
- How to reheat: To reheat refrigerated or frozen brioche that has been thawed, place in the air fryer or oven at 300 F for 5-10 minutes. You can also cut into slices prior to freezing and toast single slices in the toaster or toaster oven directly from frozen using the freezer setting.
More Bread Recipes
- Easy Challah Bread
- Small Batch No-Knead Bread
- Garlic Naan Bread
- Easy Small Batch Ciabatta Rolls
- Quick and Easy Pita Bread
- Easy Homemade Everything Bagels
- Cinnamon Raisin Challah Bread
Tried this recipe?
I'd love to hear what you think! Leave a comment and rating below to share your feedback. Your reviews help others discover this recipe and help me keep creating more free recipes for you. Snap a photo and tag me on social media @aheadofthyme too.

Sticky Honey Garlic Meatballs
Sticky honey garlic meatballs are a delicious and flavourful 30-minute meal to add to your weekly dinner rotation. These tender and juicy Asian meatballs are baked, tossed in a sweet and sticky honey garlic sauce, and topped with green onions and sesame seeds. They are a quick and easy weeknight dinner to prepare over a bowl of steamed rice, or on their own as a bite-sized appetizer on game day. They are seriously so good and loved by everyone who tries them. A total crowd pleaser.
Meatballs are always a go-to weeknight dinner because they are so quick and easy to make and are ready in under 30 minutes. Some of our other favourites for busy weeknights are classic Spaghetti and Meatballs and Baked Turkey Meatballs.
Ingredients
To make sticky honey garlic meatballs, you will need the following ingredients (full measurements in recipe card below):
- ground beef - you can also switch things up and easily substitute the ground beef for ground turkey, ground chicken, or ground pork.
- breadcrumbs
- onion
- green onions
- egg
- soy sauce
- brown sugar
- garlic powder
- salt and pepper
- honey garlic sauce - the honey garlic sauce takes less than 5 minutes to make with a combination of rice vinegar, brown sugar, soy sauce, honey, garlic, cornstarch (or flour), and water.
You will also need measuring cups and spoons, mixing bowl, large half sheet baking pan, meat thermometer, and a shallow saucepan.
How to Make the Best Sticky Honey Garlic Meatballs
- Prepare the meatballs. In a large mixing bowl, combine beef with bread crumbs, onion, green onions, egg, soy sauce, brown sugar, garlic powder, salt and pepper. Mix well to form into a uniform consistency. Take 2 spoonfuls of beef mixture at a time and roll into 1.5-inch thick meatballs. Transfer the meatballs into a large half sheet baking pan lined with parchment paper and lightly coat with some oil to keep them from sticking, if needed.
- Bake the meatballs. Bake in a 400F preheated oven for 15 minutes until fully cooked, and set aside. The internal temperature should reach 160F, as read on a meat thermometer.
- Prepare the honey garlic sauce. In a medium mixing bowl, add vinegar, brown sugar, soy sauce, honey, garlic, cornstarch and water. Whisk well to combine until cornstarch and sugar dissolves. In a shallow saucepan, stir in sauce mixture and heat over medium heat for 3-4 minutes. Keep stirring until thickened to a desired consistency.
- Serve. Add the meatballs to the saucepan and toss well to coat evenly. Sprinkle with green onions and sesame seeds and serve warm on its own or over a bowl of steamed rice or fried rice.
How to Cook Honey Garlic Meatballs in the Air Fryer
Preheat the air fryer to 375 F, about 3 minutes. Place meatballs in a single layer in the air fryer basket and lightly spray with cooking oil to coat evenly. Air fry the meatballs for 12-14 minutes until browned and the center of the meatball reaches 160 F as read on a meat thermometer. Shake the basket halfway during cooking to brown evenly.
Storing and Freezing Instructions
- How to store: Store sticky honey garlic meatballs in an airtight container and place in the refrigerator for up to 3 days. To reheat, simply reheat in a shallow saucepan on the stove over medium-low heat until warmed through (or in the microwave). You may need to add a little water if the sauce thickened up too much in the refrigerator.
- How to freeze: You can freeze the meatballs before tossing them into the sauce. Bake and let them cool down, then transfer into a freezer-safe airtight container or freezer bag and store in the freezer for up to 3 months.
- How to reheat from frozen: Allow the meatballs to thaw overnight in the refrigerator first, then reheat on the stove over medium-low heat until warmed through. Prepare the honey garlic sauce and toss the meatballs in.
More Ground Beef Recipes
- Ground Beef Meat Pie
- Beef Potstickers (Dumplings)
- Easy Meat Lasagna
- Sheet Pan Nachos
- Beef Cabbage Barley Soup
- Spaghetti Bolognese
- Classic Juicy Hamburgers
Tried this recipe?
I'd love to hear what you think! Leave a comment and rating below to share your feedback. Your reviews help others discover this recipe and help me keep creating more free recipes for you. Snap a photo and tag me on social media @aheadofthyme too.

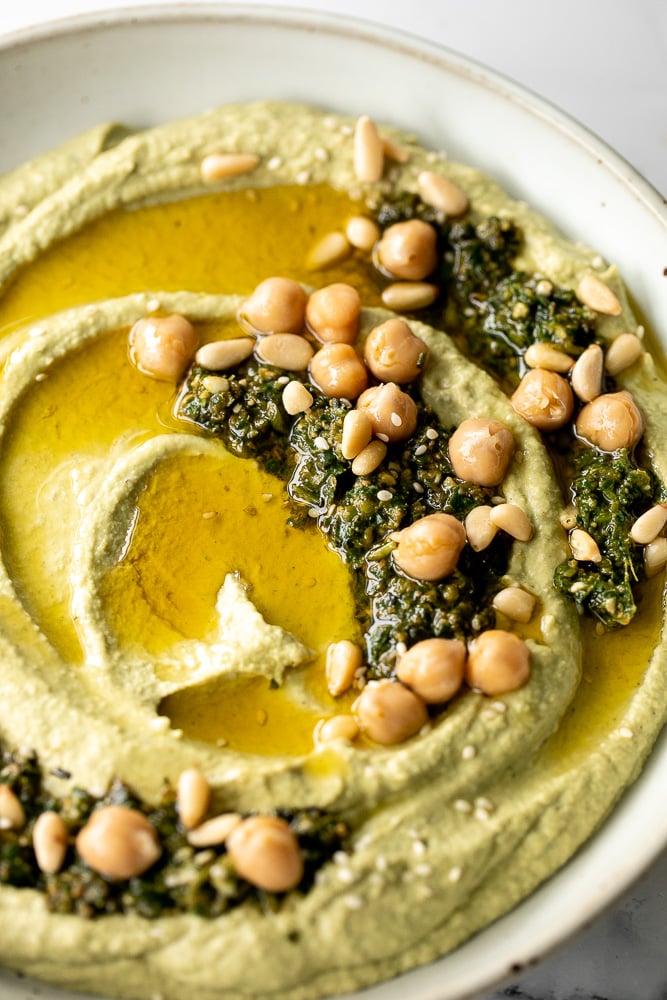
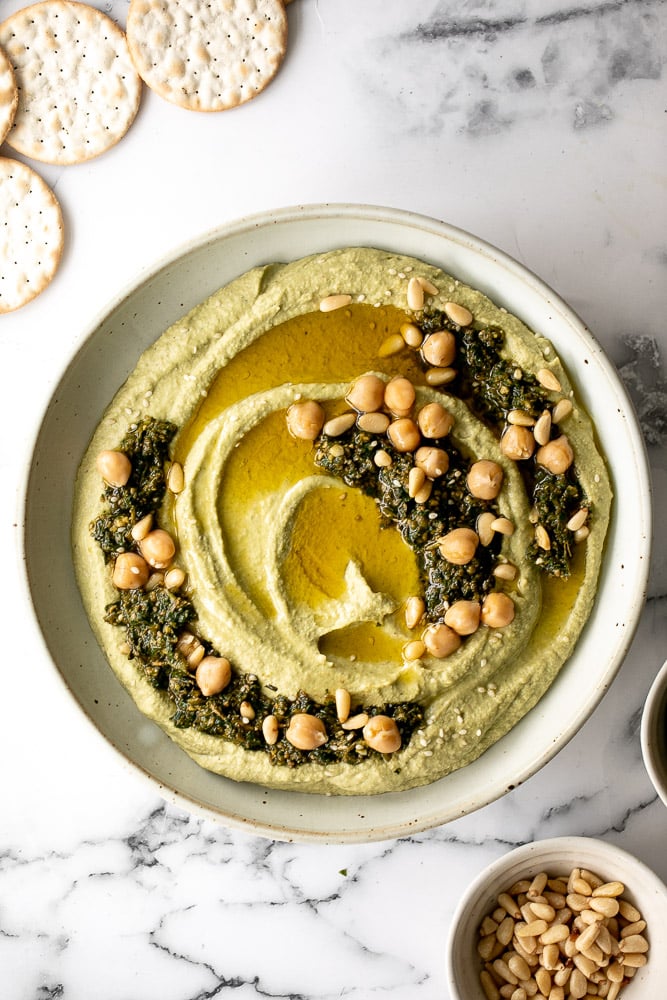
Pesto Hummus
Calling all pesto lovers! Smooth and creamy pesto hummus is a healthy, delicious and flavourful dip that is easy to make in just 5 minutes. This keto and gluten-free appetizer is made with a handful of traditional ingredients including chickpeas, tahini, garlic, olive oil, and lemon juice, with the addition of basil pesto. Make extra because this stuff is crave-worthy.
Pesto hummus is my new favourite way to use up any leftover pesto I have in the fridge. It's a quick and easy way to to incorporate more healthy snacks and appetizers into your diet, and it's also pretty amazing spread on sandwiches and wraps.
If you like this dip, then you will love creamy hummus, roasted red pepper hummus, or avocado hummus.
Ingredients in Pesto Hummus
To make easy pesto hummus, you will need the following ingredients:
- chickpeas - one 400 ml (or 15 oz.) can of chickpeas or 1.5 cups cooked chickpeas.
- reserved canned water - this is the secret to getting really creamy hummus.
- tahini sesame paste
- basil pesto - you can substitute this with your favourite kind of pesto such as sun-dried tomato pesto or avocado basil pesto.
- garlic
- olive oil
- lemon juice
- salt
- toppings - chickpeas, sesame seeds, olive oil, and pesto.
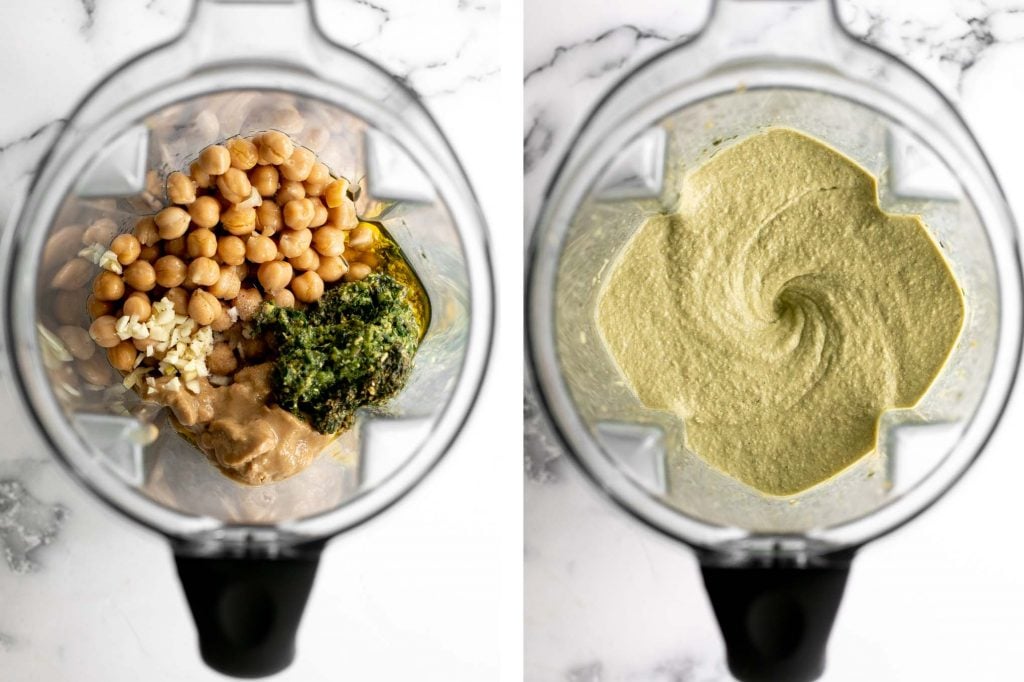
You will also need a blender or food processor.
How to Make the Best Pesto Hummus
Hummus is one of the easiest dips to make. It is a simple, throw everything into a blender recipe that requires almost no prep, other than measuring ingredients. To make this pesto hummus, place all the ingredients (chickpeas, reserved liquid, basil pesto, tahini, olive oil, lemon juice, garlic, and salt) into a blender or food processor. Puree until well blended and creamy.
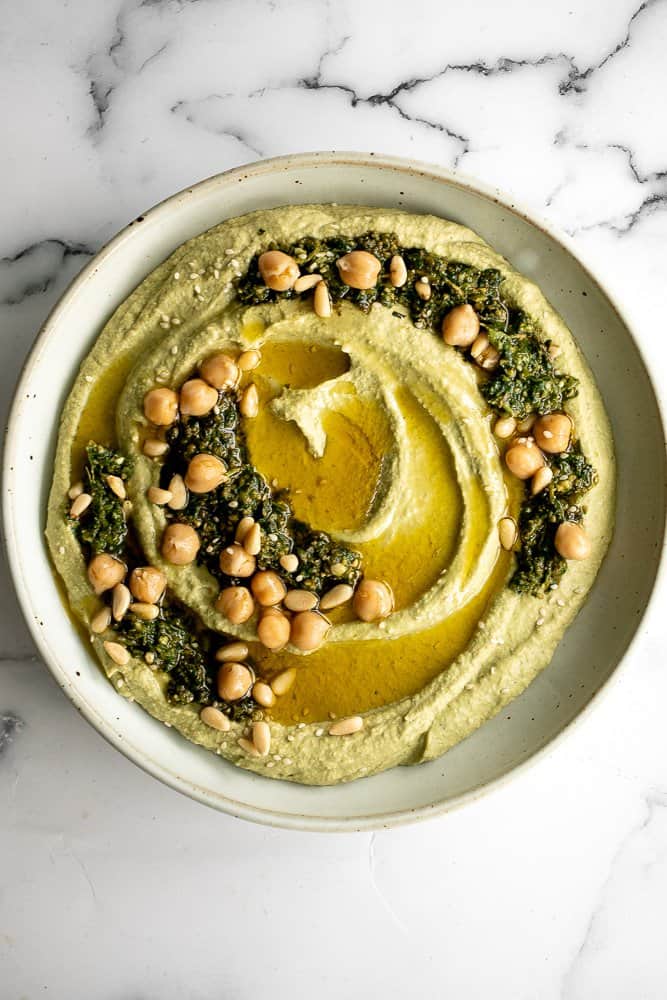
Pour into a serving bowl, drizzle some olive oil on top and garnish with reserved chickpeas, roasted sesame seeds, and a few spoonfuls of pesto.
Tips
- How to serve: You can serve pesto hummus as a dip or spread in almost any kind of bread. Some of my favourites are sourdough crackers, pita bread, naan flatbread, or sourdough. Or keep this snack completely gluten-free by serving it with fruit and veggies.
- How to store: Store pesto hummus in an airtight container in the refrigerator for 7-10 days.
- How to freeze: You can freeze hummus in an airtight container for up to 3 months in the freezer. To serve, let it thaw in the refrigerator until ready to serve.
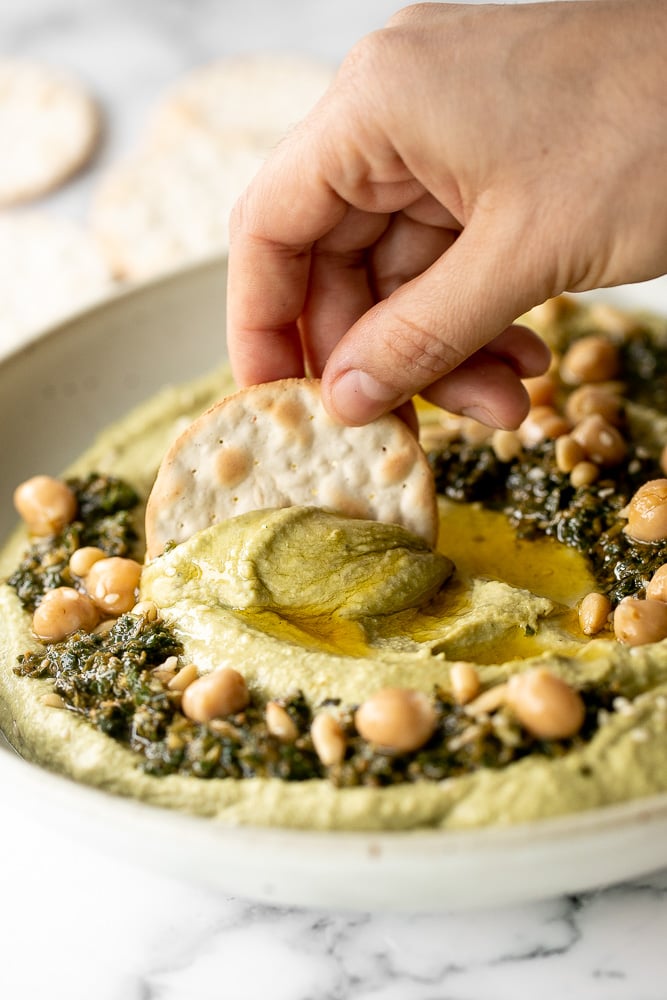
More Dips
- Whipped Ricotta Dip
- Baked Spinach Dip
- Easy Guacamole
- Smooth and Creamy Hummus
- Easy Tzatziki Sauce (Yogurt Cucumber Dip)
- Caramelized Onion Dip
- Baba Ganoush Eggplant Dip
Tried this recipe?
I'd love to hear what you think! Leave a comment and rating below to share your feedback. Your reviews help others discover this recipe and help me keep creating more free recipes for you. Snap a photo and tag me on social media @aheadofthyme too.

Biang Biang Spicy Noodles
Biang biang spicy noodles is a flavourful, spicy noodle dish that is simple, quick and easy to make with just a few ingredients and in less than 10 minutes. Toss thick and chewy, wide hand-pulled noodles with a few classic Asian seasoning with a drizzle of sizzling hot oil on top, and toss to combine. These homemade vegan noodles are so much better than takeout.
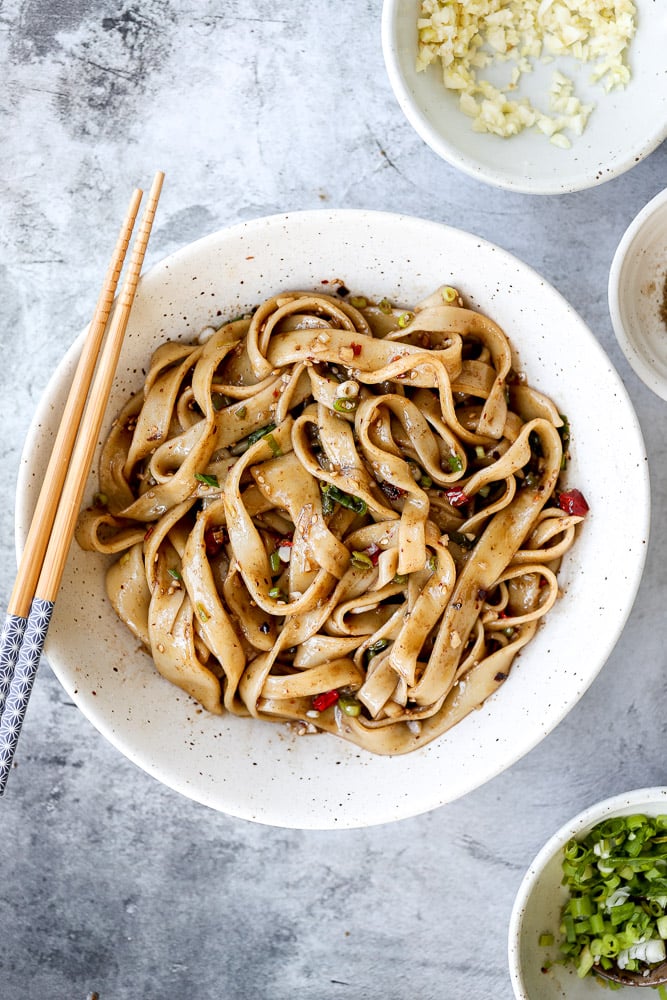
What are Biang Biang Spicy Noodles?
Biang biang noodles are a popular Chinese dish from the city of Xi'an in the Shaanxi province of China. They are made with wheat flour hand-pulled noodles that are pulled to a long and wide shape, and served with a spicy, oily sauce. The word "biang" is actually an onomatopoeia that describes the sound of noodles smashing against a counter when being pulled. Another interesting fact about this dish is that the Chinese character for "biang" is one of the most complex characters written with 58 strokes! For comparison, most Chinese characters are written with about 10 strokes on average.
We had the pleasure of trying delicious authentic Xi'an noodles on our travels across China a couple of years ago.
Ingredients
To make flavourful biang biang spicy noodles, you will need the following ingredients:
- dry hand-pulled wide noodles - you can use homemade hand-pulled noodles or store-bought noodles.
- soy sauce
- black vinegar
- fresh scallions (spring onions)
- garlic
- dry red chili flakes (or chili powder)
- white sesame seeds
- ground Sichuan pepper - optional.
- ground cumin - optional.
- vegetable oil
You will also need measuring spoons, medium cooking pot, and spider strainer or colander.
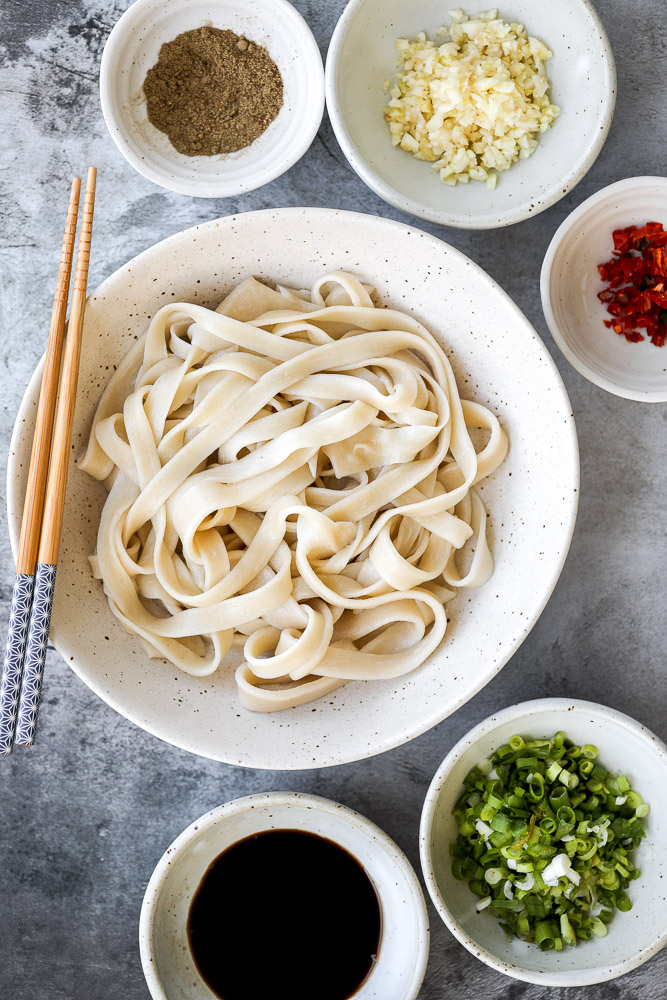
How to Make the Best Biang Biang Spicy Noodles
- Make the noodles. In a medium cooking pot, bring 4 cups of water to a boil over medium-high heat. Add hand-pulled noodles into the boiling water and cook for 2 minutes. Stir the noodles with chopsticks to prevent them from sticking together. If you use store-bought noodles, refer to the package for cooking instructions (may take longer to cook). Drain the noodles well with a spider strainer or colander and place it in a bowl. (You do not need to rinse the noodles under running water).
- Add seasonings. Add all seasonings over the noodles including soy sauce, vinegar, scallions, garlic, chilli flakes, Sichuan pepper, and cumin. Set aside.

- Add oil. In a small pot, heat vegetable oil over medium high heat for 2 minutes until the hot oil starts to sizzle and smoke. Then, pour the hot oil over the scallions and chilli flakes on top of the noodles. You should notice the spices sizzle immediately and become fragrant.
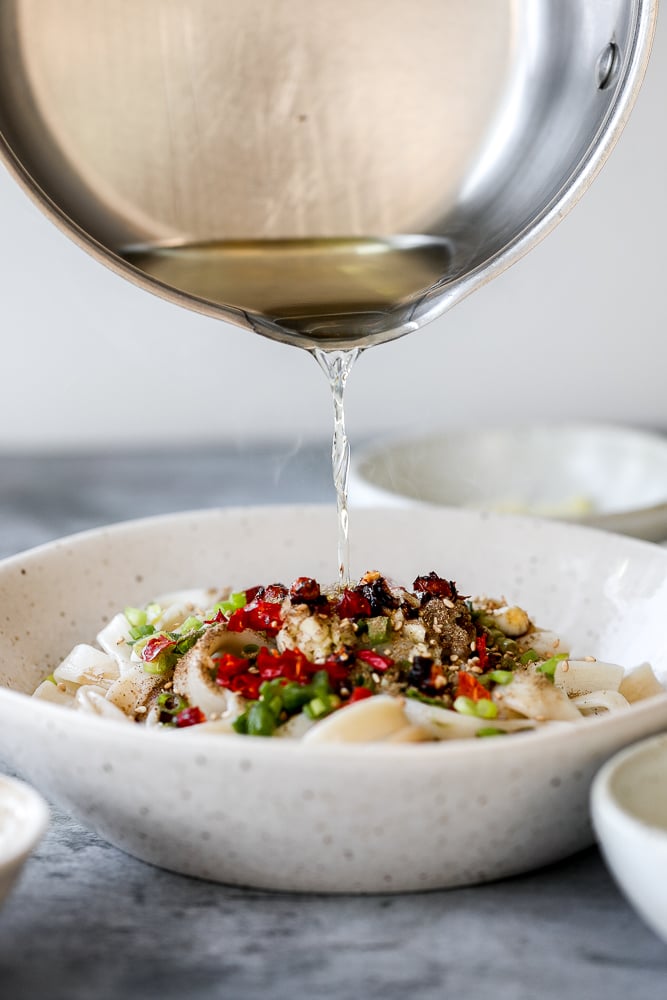
- Stir well with chopsticks to coat the noodles evenly with the oil and seasonings and toss together.
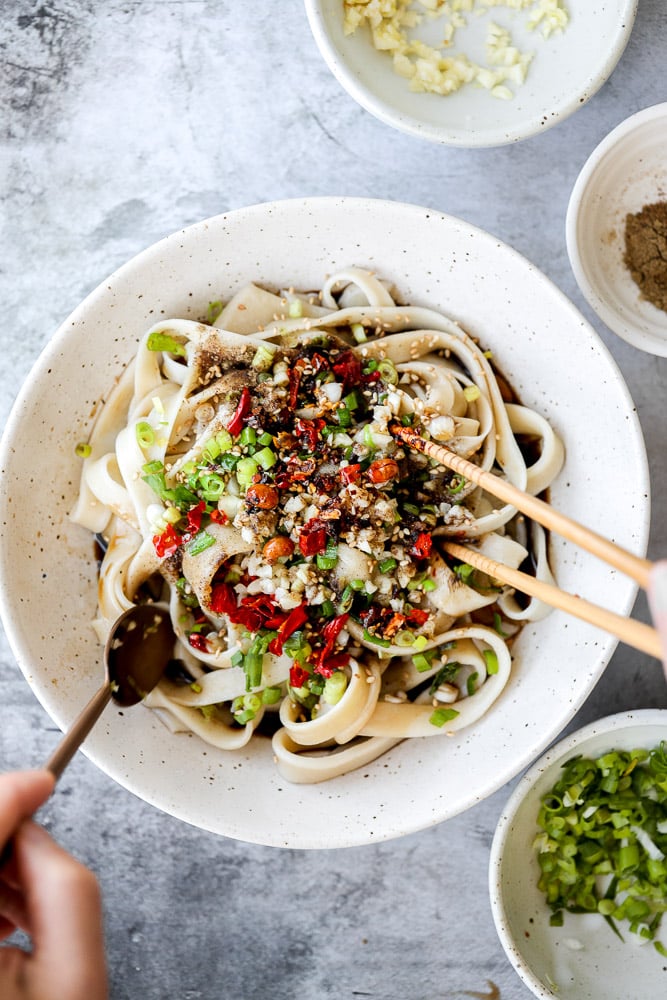
Tips
- How to serve: Serve with vegetarian steamed buns, wonton soup, egg and chive dumplings, or a Chinese garlic cucumber salad.
- How to store: Biang biang spicy noodles are best served fresh. Once the noodles start going cold, they will stick together and get stiff. If you happen to have leftovers, you can store in an airtight container in the refrigerator for up to 3 days, but the noodles may clump together. To reheat, steam the noodles or heat in the microwave.
More Noodle Recipes
- Spicy Cumin Lamb Noodles
- Spicy Dan Dan Noodles
- Scallion Oil Noodles
- Shanghai Style Fried Noodles
- Chicken Pad Thai
- Thai Red Curry Noodle Soup
- Vegetarian Peanut Miso Ramen
Tried this recipe?
I'd love to hear what you think! Leave a comment and rating below to share your feedback. Your reviews help others discover this recipe and help me keep creating more free recipes for you. Snap a photo and tag me on social media @aheadofthyme too.
40 Best Valentine's Day Dessert Recipes

Valentine's Day is all about the rich and decadent desserts, am I right? We have rounded up our 40 best and most popular Valentine's Day dessert recipes from romantic chocolatey and fudgy treats, to heart-shaped cookies perfect for a Valentine's themed holiday cookie box, to festive cakes made for indulging, to indulgent date night dessert ideas. So if you are wondering what to make for yourself and your loved ones this Valentine's, then you have come to the right place.

Best Valentine's Day Desserts
Valentine's Day Heart Sugar Cookies
Valentine's Day heart sugar cookies are crisp on the outside, soft inside, and made festive with red and pink royal icing decorated on top.
These Red Velvet Cupcakes with cream cheese frosting are delicious, moist, rich, and perfectly sweet. Top these Valentine's cupcakes with festive sprinkles.

Raspberry and White Chocolate Shortbread Cookies
Cute raspberry and white chocolate heart-shaped shortbread cookies literally melt in your mouth. They are the perfect Valentine's Day treat or for Date Night.

Chocolate Covered Strawberries
Chocolate covered strawberries are fancy, decadent, bite-sized treats that are loved by all. They are so simple and easy to make at home. One of my favorite date night dessert ideas.

These homemade Red Velvet Macarons with cream cheese frosting are like the beloved cake but in bite-sized form - bold red color and a hint of cocoa flavor.

Molten chocolate lava cakes are rich and fudgy with a classic gooey chocolate center that flows out like lava. So simple and easy to make. Perfect for Valentine's Day or a date night dessert.
Chocolate-Dipped Shortbread Heart Cookies
Shortbread and chocolate are a match made in heaven. Cut our these cookies into any shape that you like and dip in chocolate.
White Chocolate Raspberry Cheesecake
This White Chocolate Raspberry Cheesecake is so decadent, made with a creamy white chocolate cheesecake batter swirled with homemade raspberry sauce.
Strawberry Cupcakes are made with real strawberries in both the tender cake batter and the creamy strawberry buttercream frosting. A picture-perfect treat!

Red Velvet Cookies with white chocolate are moist and chewy, deliciously chocolatey with a cake-like texture, and are striking red. Ready in 20 minutes!
Classic Strawberry Shortcake is a small, layered cake featuring fluffy crumbly biscuits, a fresh strawberry filling, and homemade whipped cream.

Dark Chocolate Raspberry Truffles
Dark chocolate raspberry truffles are so much easier to make than you think. It's as simple as combining quality chocolate, cream, raspberry jam, and cocoa.
Nutella crepes with berries are sweet and indulgent. These French pancakes are an easy to make blender recipe that will have you craving breakfast all day.
Persian Love Cake is a rich, moist, and nutty almond cake loaded with floral and citrus flavors, topped with a lemon glaze, pistachios, and rose petals.
Lofthouse Cookies are super soft, moist, and thick, classic grocery store cookies made of a cakey sugar cookie, sweet buttercream frosting, and sprinkles.

Nutella mousse cups are rich, creamy, airy, and delicious. No bake and whipped together in just minutes with a few ingredients before it's ready to chill.
Oreo Brownies are a fudgy, rich and decadent dessert that is quick and easy to make from scratch in about 30 minutes using simple ingredients.
Vanilla Cupcakes with Rose Petal Buttercream
Light, airy and fluffy vanilla cupcakes with rose petal buttercream icing is the cutest treat for Valentine's Day. They are super quick and easy to make.

French Macarons with Vanilla Buttercream Filling
Easy French macarons with vanilla buttercream filling are sweet, light, airy, and delicate cookies that melt in your mouth. Beginners can make them too!

Red Velvet Crinkle Cookies are a soft, tender, and chewy Christmas cookie that is easy to make with no chilling required. The perfect holiday cookie!
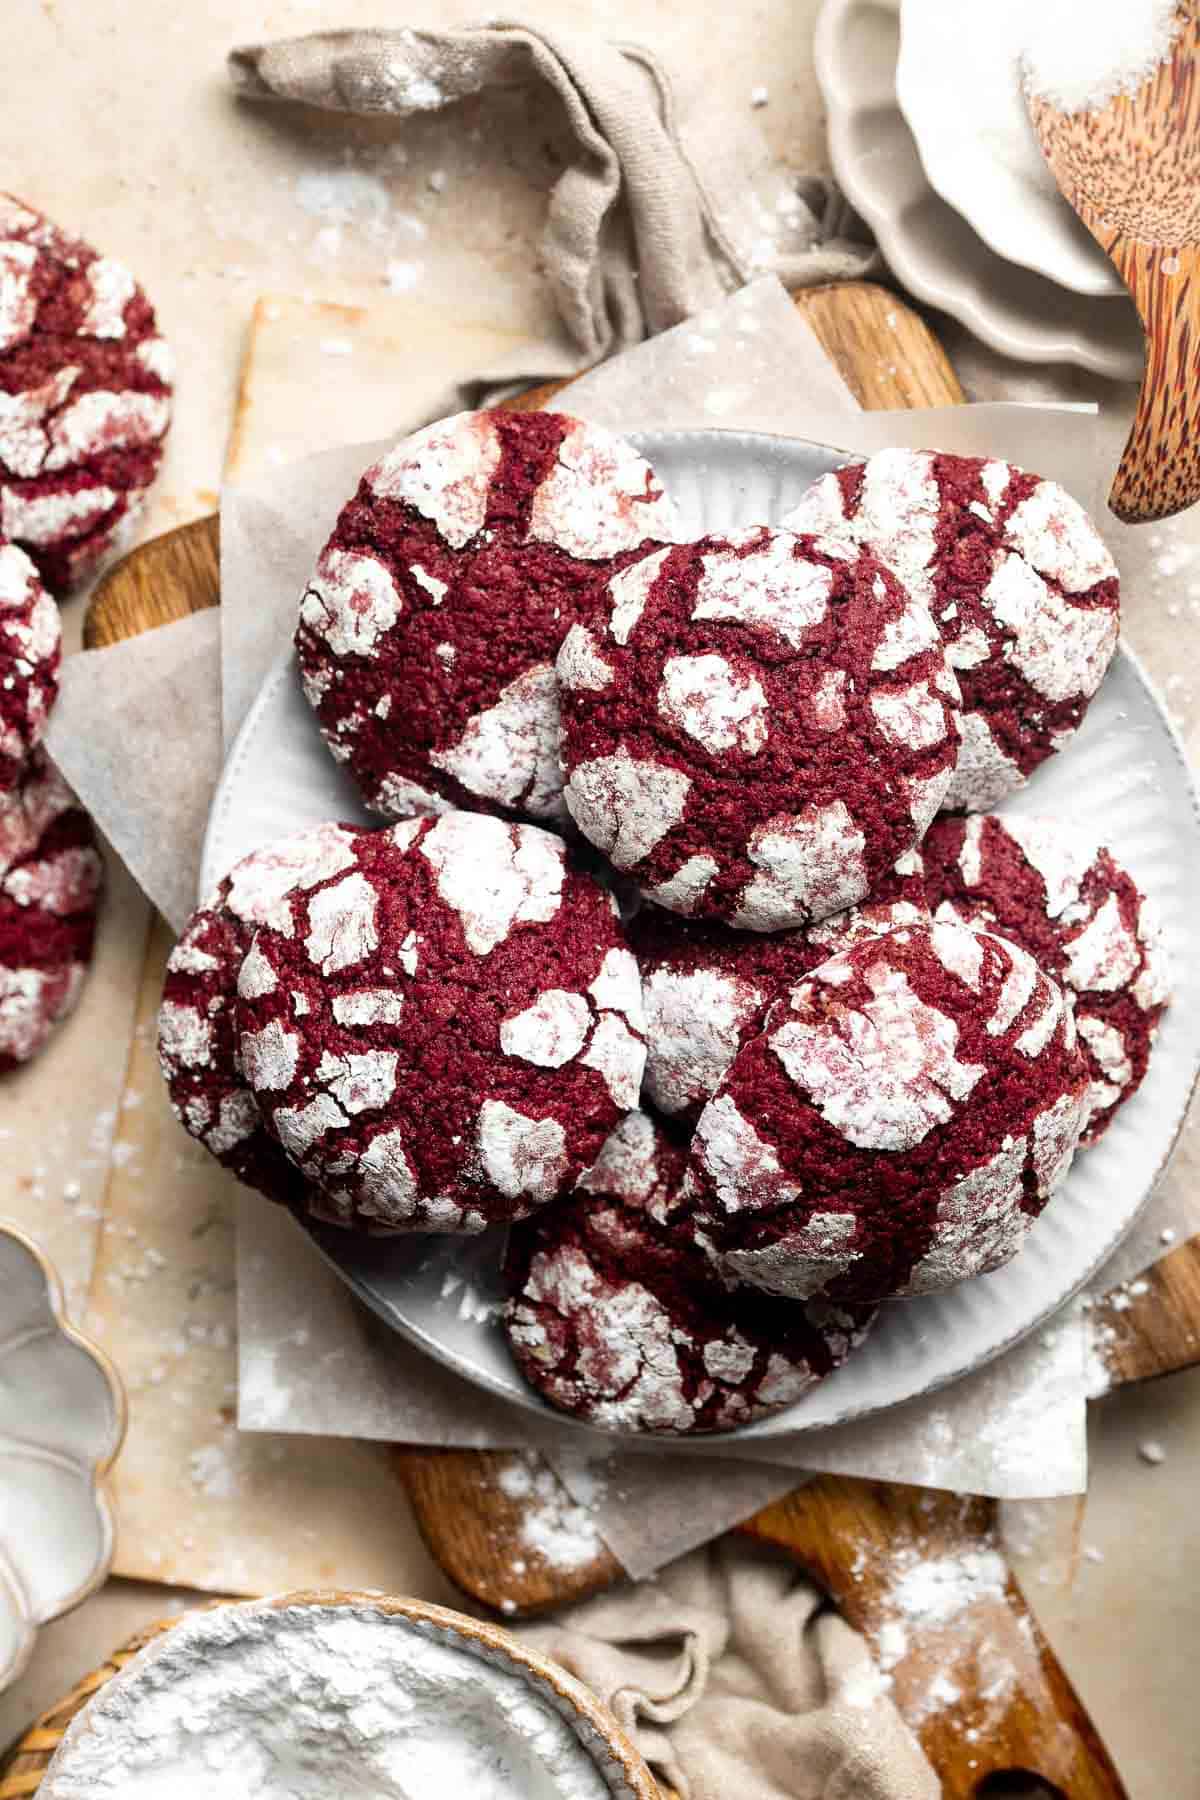
Classic New York Cheesecake is stunning, delicious, rich, and creamy. Plus, it's surprisingly easy to make from scratch - even for beginners!
Fudgy brownies are rich, sweet, moist, and decadent. Plus, they're easy to make in one bowl (meaning less cleanup!) and ready in about 30 minutes.
Classic Madeleines are soft spongy mini cakes with a signature shell shape and dusting of sugar on top. Making French butter cakes is easier than you think!
The cutest bite-sized treat to serve at any event are vanilla cake pops from scratch -- luckily, they are actually simple and easy to make. Add pink or red food colouring to the chocolate coating, or use red and pink sprinkles to make them festive for Valentine's Day.
This fudgy double chocolate loaf cake is delicious, moist, and rich. It's easy to make with a quick one-bowl batter that's ready for the oven in 10 minutes.
Strawberry Muffins are tender, fluffy, and delicious! They are golden-brown and crisp outside while moist and cake-like inside and loaded with strawberries.
Chocolate Thumbprint Cookies are rich and chewy chocolate cookies with a smooth and velvety chocolate ganache filling topped with crunchy pistachios.

Baked Jelly Donuts with Strawberry Jam
These melt-in-your-mouth, homemade baked jelly donuts, coated in sugar and filled with sweet strawberry jam, are so soft, fluffy, spongy and airy.
Chocolate and Vanilla Marble Cake
Chocolate and vanilla marble cake is delicious, moist, fluffy with the perfect golden brown crust. With two classic cake flavors, this loaf cake has it all.
Double Chocolate Chip Cookies are soft and chewy, easy to make, and so satisfying. Enjoy these cookies in under 20 minutes with no chilling required!
Decadent caramel pecan cheesecake bars with a graham cracker crust, cheesecake filling, and caramel pecan topping is perfect for any special occasion.
Festive red and green M&M cookies are super soft and chewy with the crispiest edges. Quick and easy to make in under 20 minutes with no chill time. Switch up the M&M's with red and pink for Valentine's Day.
Homemade salted caramel sauce is sweet, salty, and buttery. It's so simple and easy to make at home in just 10 minutes with 4 basic ingredients.

Flourless banana brownies are rich, fudgy, moist, delicious, and gluten-free. Make this quick and easy dessert is ready in just 30 minutes.
Easy Small Batch Almond Biscotti
Small batch almond biscotti are crunchy, crumbly and packed with almonds, perfect for dunking into tea, coffee, or hot chocolate, and they are super easy to make.

Italian Lemon Drop Cookies (Anginetti) are light, cake-like, classic Italian cookies with citrus flavor throughout. Quick and easy to make in 30 minutes.

Homemade chocolate chip cookies are soft and chewy, have perfectly crisp edges, and are loaded with chocolate chips. This classic cookie is quick and easy.
Caramel cheesecake brownies are totally indulgent and worth the effort, so toss that prepared brownie mix away and bake this with a few easy ingredients.
No one will be able to resist this perfectly sweet and moist, glazed brown sugar bundt cake. Made with Greek yogurt for major decadence and richness.
Chocolate Chunk Peanut Butter Cookies
These perfectly soft, chewy and a little crumby chocolate chunk peanut butter cookies literally melts in your mouth. Make them in under 20 minutes.
Easy no crust burnt Basque cheesecake is the easiest one bowl recipe. It is perfectly caramelized on the top and edges and creamy yet firm on the inside.
Inspired by Starbucks lemon loaf, this moist, homemade lemon loaf with lemon glaze has the perfect balance between sweet and tangy, and so so flavourful.
Soft and Chewy Peanut Butter Cookies
The best classic soft and chewy peanut butter cookies are puffy and thick, stay soft for days, and melt in your mouth. Make them in under 20 minutes.
Fluffy soft and moist, these are the best banana chocolate chip muffins ever. Prep this easy one bowl recipe in less than 10 minutes with a few ingredients.
Whipped Shortbread Cookies are sweet and buttery cookies that melt in your mouth. These light tea time treats have crisp edges and a crumbly center.
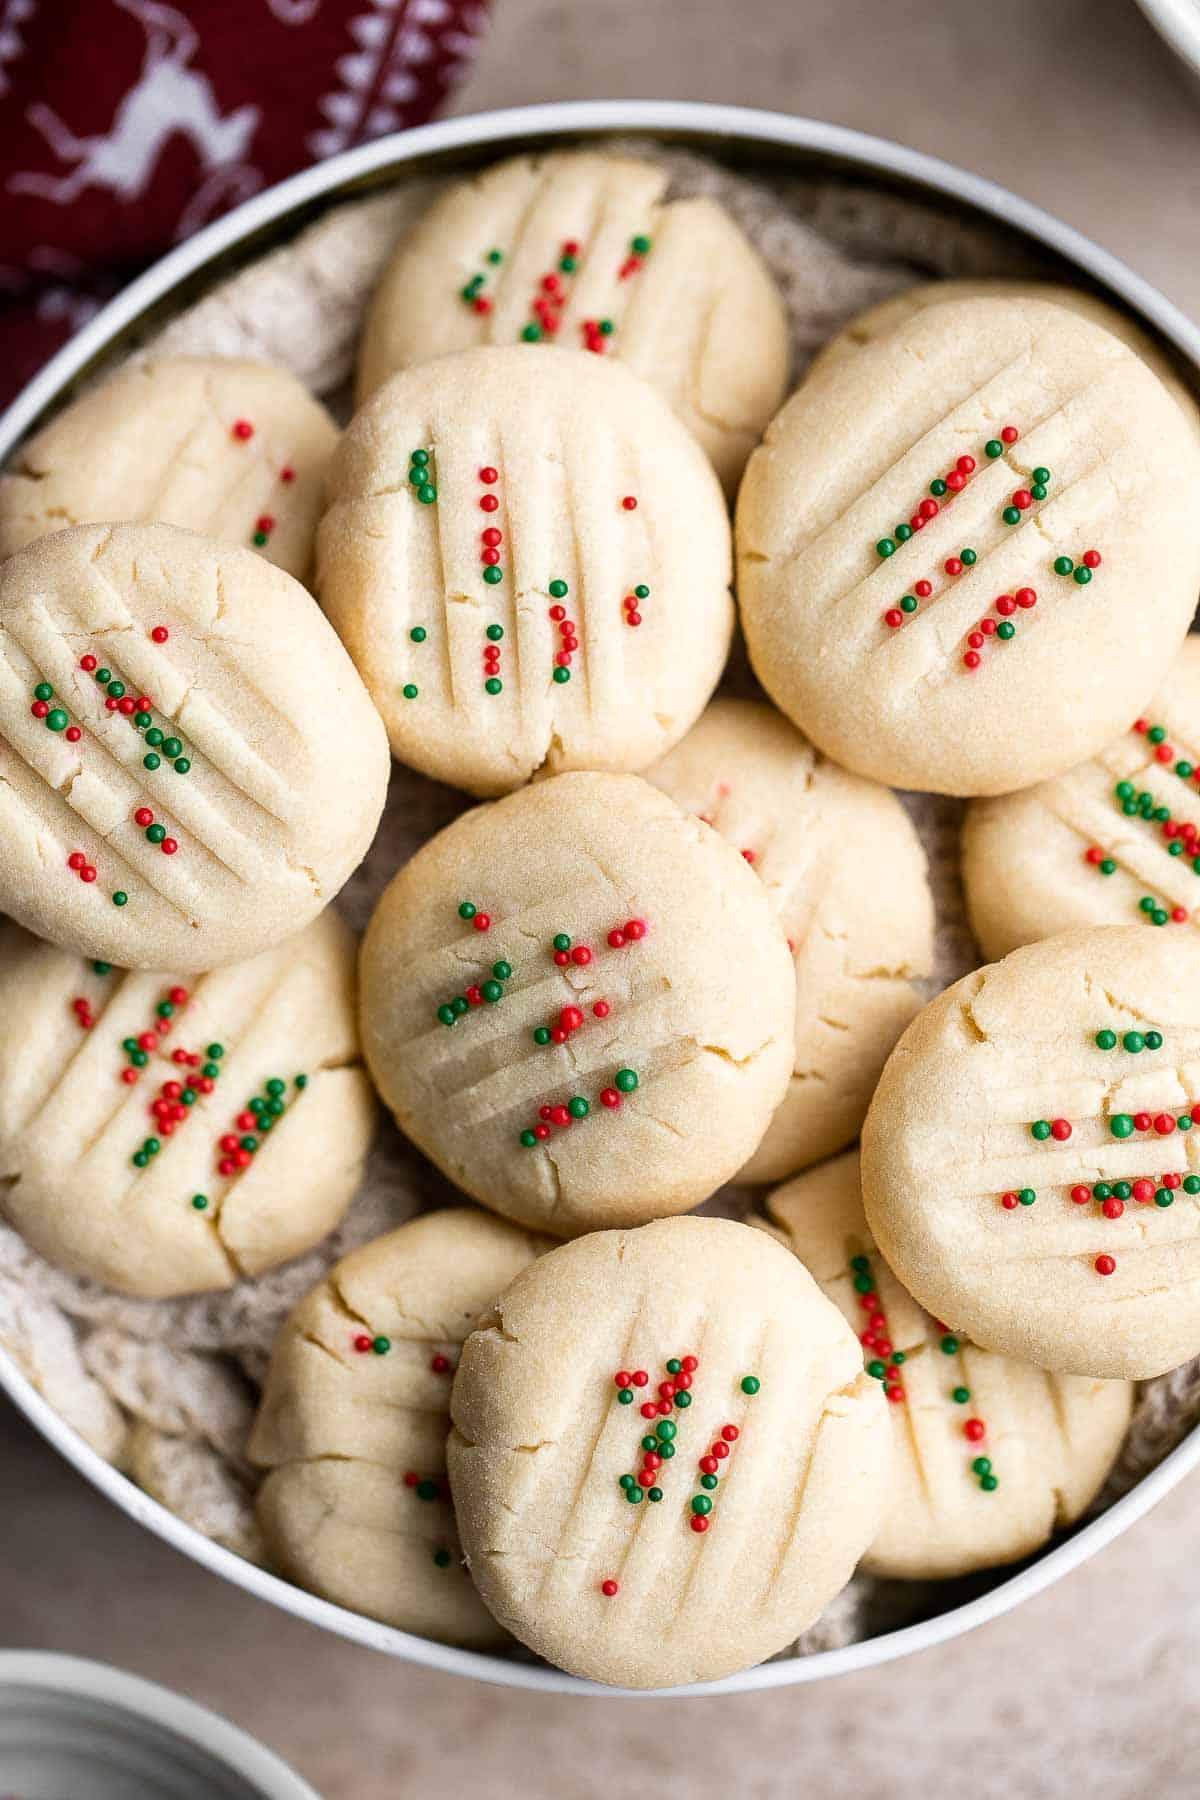
Easy to make and decorate, bite-sized chocolate cake pops are packed with chocolate and sprinkles are the perfect treat. Use red, pink and white sprinkles to make it festive for Valentine's Day.

Butter cookies are a classic cookie with a crisp, slightly crunchy texture that melts in your mouth on the first bite - and every bite after!

M&M cookie bars are soft and chewy, have crisp edges with a gooey center, and are loaded with M&M's and chocolate chips. The easiest way to bake cookies!
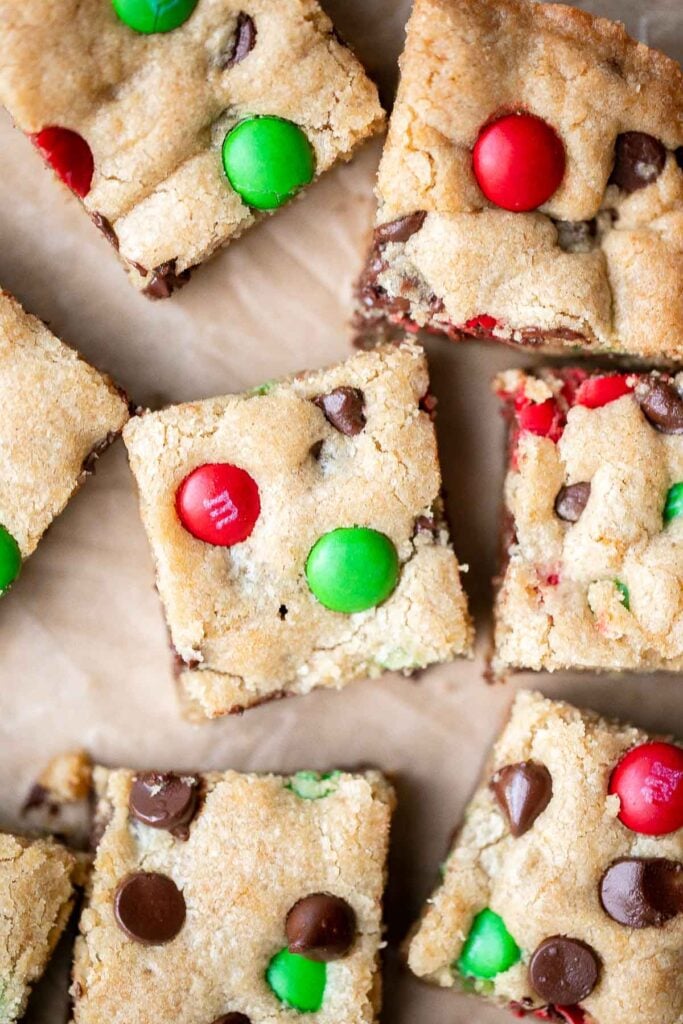
Peanut Butter Thumbprint Cookies with Maple Cinnamon Glaze
Melt-in-your-mouth peanut butter thumbprint cookies with raspberry jam and a drizzle of maple cinnamon glaze are the best holiday cookies and easy to make.
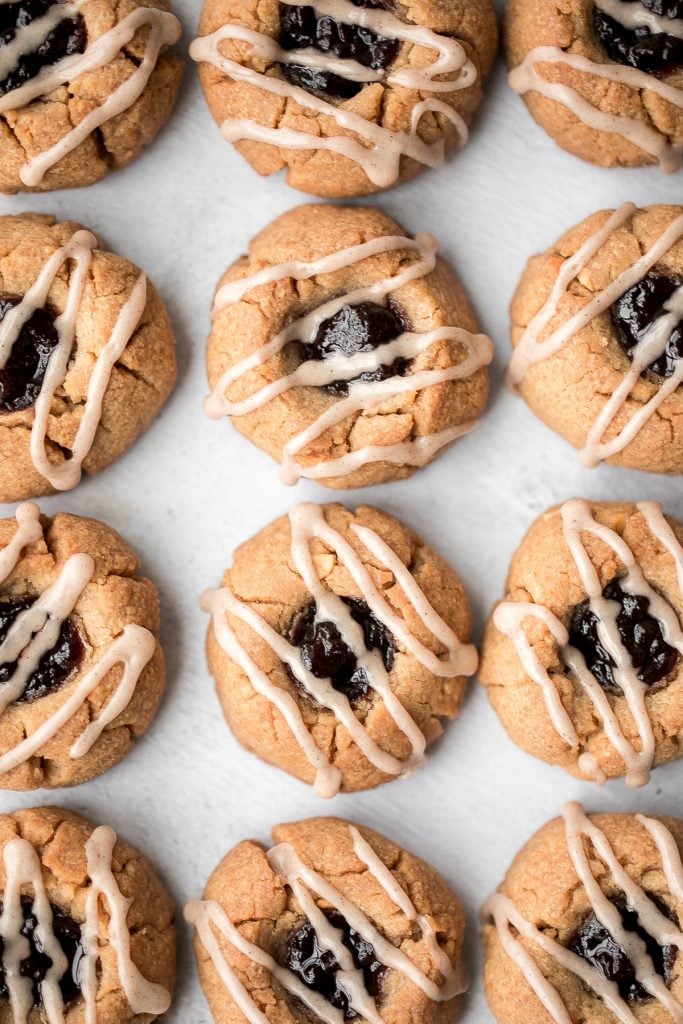
Smooth and creamy no churn vanilla ice cream with strawberry jam and toasted peanuts is easy to make, no ice cream maker required and better than storebought.
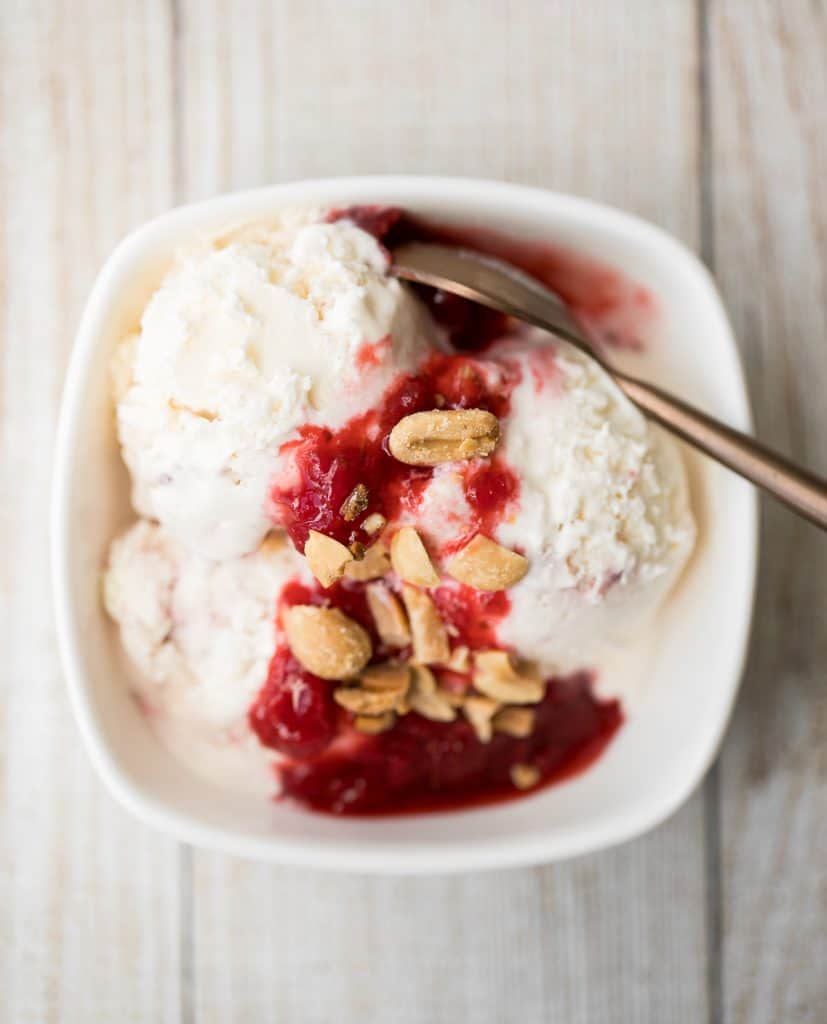
Easy homemade apple hand pies/turnovers are the perfect treat -- stuffed with tender apples and cinnamon and wrapped in crispy, flakey, buttery crust.
The Best Chewy Chocolate Chip Oatmeal Cookies
Grab a tall glass of milk and start dipping the best homemade, soft-centered, chewy chocolate chip oatmeal cookies you will ever try.

Caramel brownies are rich, moist, and decadent. Baked from the thickest and indulgent chocolate batter and topped with a homemade creamy caramel sauce.
Slice and Bake Pecan Shortbread Cookies
Easy slice and bake pecan shortbread cookies are sweet, nutty and buttery shortbread cookies packed with finely chopped pecans that melt in your mouth.
Sourdough Cinnamon Roll Twist Bread
Soft and fluffy sourdough cinnamon roll twist bread is buttery and layered with cinnamon sugar. Prep it the night before and freshly bake it right before serving for that fresh out of the oven experience.
Healthy banana bread is delicious and moist and contains no refined sugar or butter. Quick and easy to make with 10 minutes prep and few pantry staples.
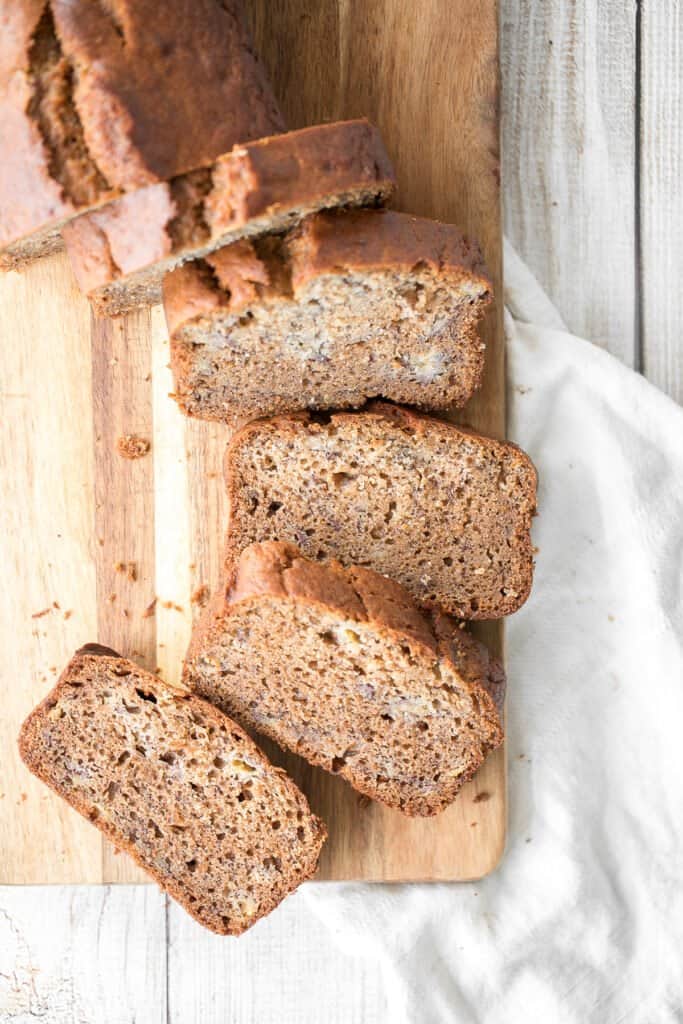
Cut out shortbread cookies are soft, buttery, and melt in your mouth. Made with a simple 5-ingredient cookie dough and decorated with optional royal icing.
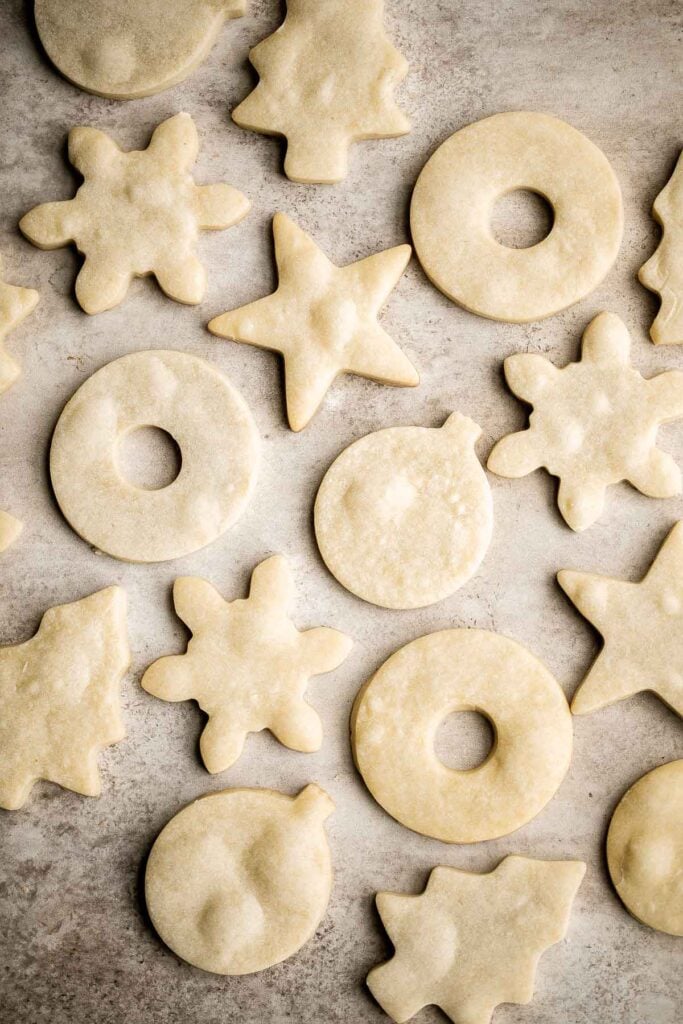
Chocolate Chip Banana Bread Cookies
Brown butter oatmeal chocolate chip banana bread cookie bites are thick, fluffy, pillowy, cake-like little bites of banana bread heaven.

These pecan toffee bars combine the flavours of shortbread topped with crunchy nuts to create magic. Prepped in under 10 minutes with only 6 ingredients.
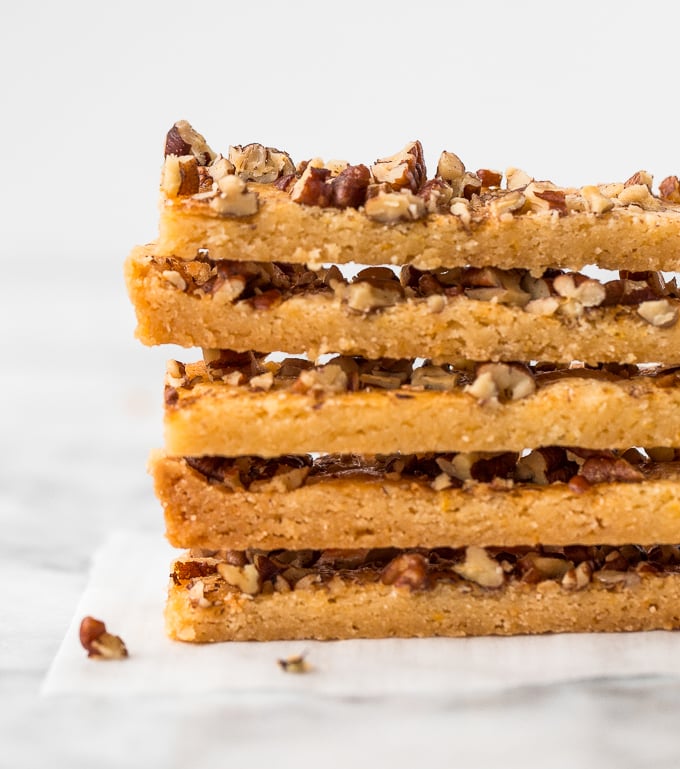
Jam-Filled Thumbprint Cookies with Almond Glaze
Soft, buttery, melt-in-your mouth jam-filled thumbprint cookies with almond glaze are the cutest, festive treat to make.
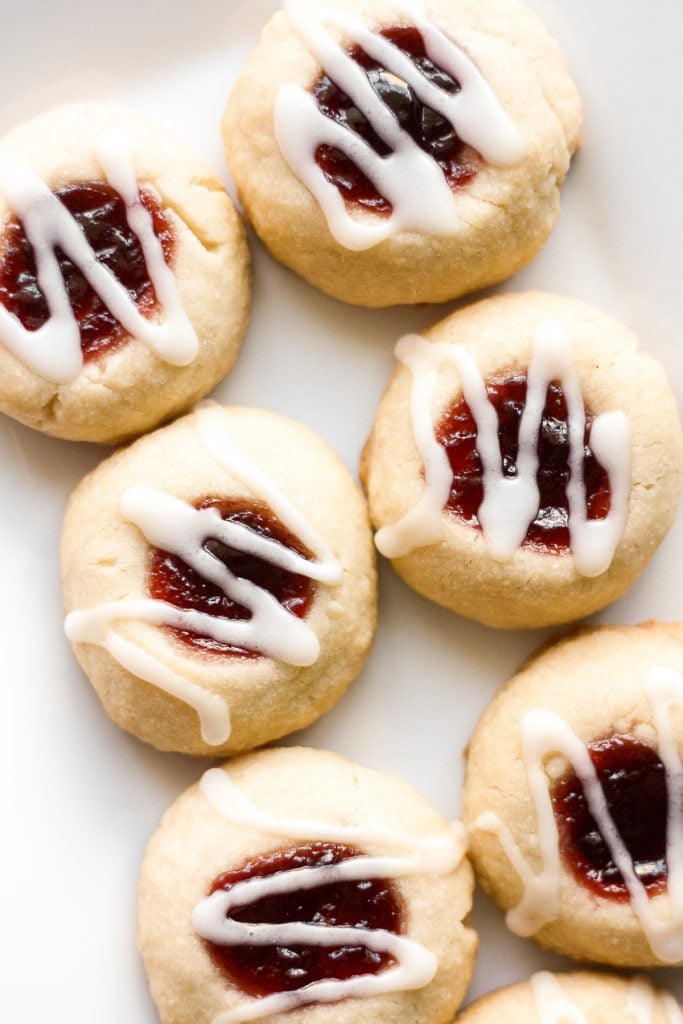
Sweet buttery linzer cookies are a classic cookie with flaky shortbread and fruit jam. The perfect festive holiday treat that melts in your mouth.
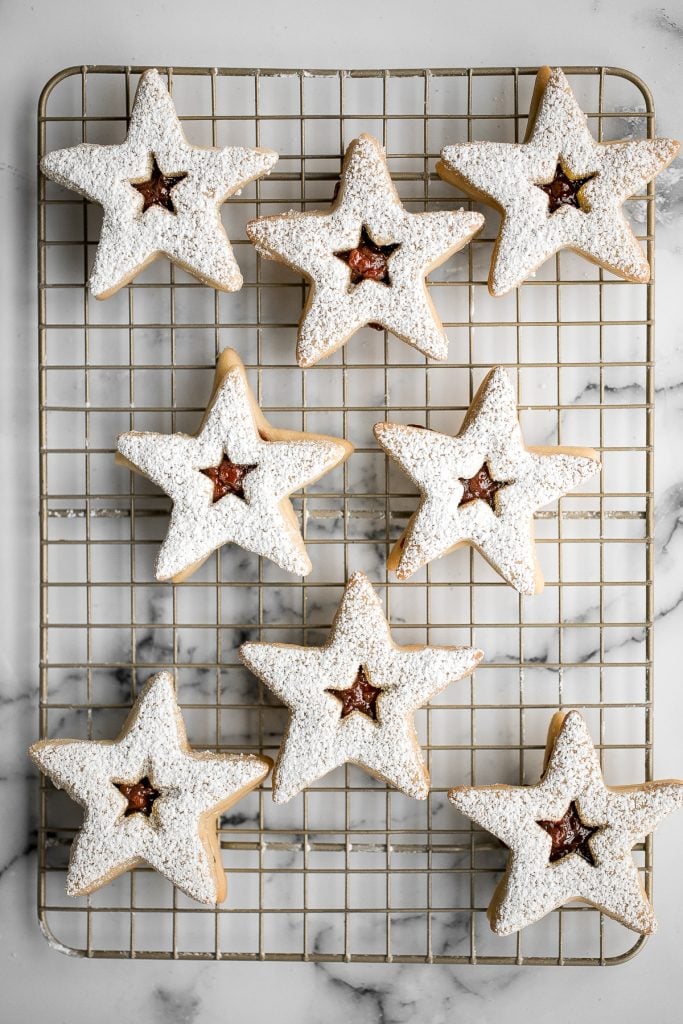
Funfetti shortbread cookie bites are little bites of buttery melt-in-your-mouth shortbread packed with festive sprinkles for a fun holiday treat.
How to Make Ahead and Store Valentine's Day Dessert
You can make or prepare most of these Valentine's Day dessert recipes ahead of time. You can store the cookies at room temperature for a few days and the cakes for about 1-2 days (depending on the recipe). You can also store them in the refrigerator for up to one week or in the freezer for up to 3 months. Confirm storing instructions by checking each recipe.
To reheat any of these desserts and serve them warm as if they just came out of the oven, you can warm them up in a 300F preheated oven for about 5-15 minutes. I would check on it every 5 minutes until warmed through. If heating from frozen, let it thaw first and then reheat.
Did You Make Any of These Valentine's Day Dessert Recipes?
Please leave a comment and rating below, and let me know what you thought of this round up of Valentine's Day dessert recipes. Be sure to snap a picture and tag me on Instagram @aheadofthyme or share it on the Pinterest pin so that I can follow along.
HUNGRY FOR MORE? Don't forget to sign up for my email newsletter so that you don't miss any recipes. You can also follow along on Instagram and Pinterest for more recipe updates.
Raspberry and White Chocolate Shortbread Cookies

Raspberry and white chocolate shortbread cookies are sweet, buttery, and literally melt in your mouth. They have two layers of buttery and flaky shortbread, a layer of white chocolate with raspberry jam in between, and a generous dusting of confectioners' sugar on top. These heart-shaped cookies are the perfect festive Valentine's Day treat.
I love holidays. I literally use each and every holiday as an excuse to bake up a storm and indulge in delicious desserts and treats. So for Valentine's Day this year, why not give your loved ones something that you took time and poured your heart into and baked with love? I prefer cookies over a stuffed animal any day.
Some other popular Valentine's Day treats to make are Chocolate Covered Strawberries, Molten Chocolate Lava Cakes, Dark Chocolate Raspberry Truffles, and French Macarons. For more Valentine's Day dessert recipes, browse our top 40 Valentine's Day Desserts.

Ingredients
To make these raspberry and white chocolate shortbread cookies, you only need a handful of ingredients that you likely already have in your pantry. Like all other shortbread, you need just 5 basic ingredients:
- butter
- Confectioner's sugar (icing sugar)
- pure vanilla extract
- salt
- all-purpose flour
For the filling:
- white chocolate - if you don't have any white chocolate, you can just omit it from the recipe. The cookies will still be amazing.
- raspberry jam - or any type of jam that you like. Try homemade strawberry jam.
- more confectioners' sugar for dusting on top.
Equipment Used
- measuring cups and spoons
- mixing bowl
- hand mixer (or stand mixer)
- rolling pin
- heart-shaped cookie cutters - I used a 3-inch heart-shaped cookie cutter and a 1-inch heart-shaped cookie cutter in the middle. You could also use the mini heart cutout from this linzer cookie cutter set.
- half sheet baking pan lined with silicone baking mat or parchment paper
- wire cooling rack
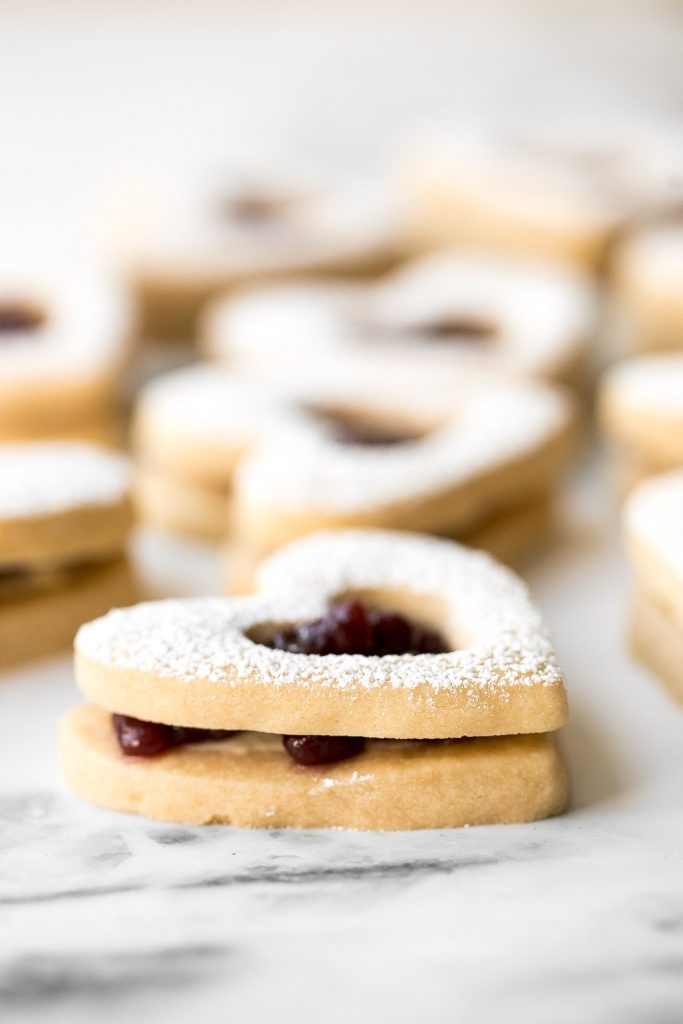
How to Make the Best Raspberry and White Chocolate Shortbread Cookies
This recipe is super easy to make. At first glance, it may look hard but it's really not. Shortbread is easy to make, chocolate is easy to melt, and jam is easy to spread. So let's get started.
- Make the dough. Cream together the butter and icing sugar until it is light and fluffy. I used a hand mixer to do this, but you can use a stand mixer if you have one. Next, add the vanilla extract and salt and continue to mix until fully combined. Lastly, slowly add in your flour, continuously mixing. Once all the flour has been added, use your hands to form a ball of dough.
- Chill the dough. Shape the dough into a disc and cover it tightly in plastic cling wrap. Chill the dough in the refrigerator for 30 minutes.
- Cut out the cookies. Lightly dust your surface and rolling pin with flour. This will prevent any dough from sticking to either the surface or the rolling pin. Roll out your dough about ¼ inch thick. Use a 3-inch heart-shaped cookie cutter to cut out your heart shapes and use a 1-inch heart-shaped cookie cutter to cut out a smaller heart shape in the middle of half of the cookies. If you don't have a mini heart cookie cutter, you can use a knife to carve out a heart shape in the center. This will be a little challenging and will take more time.
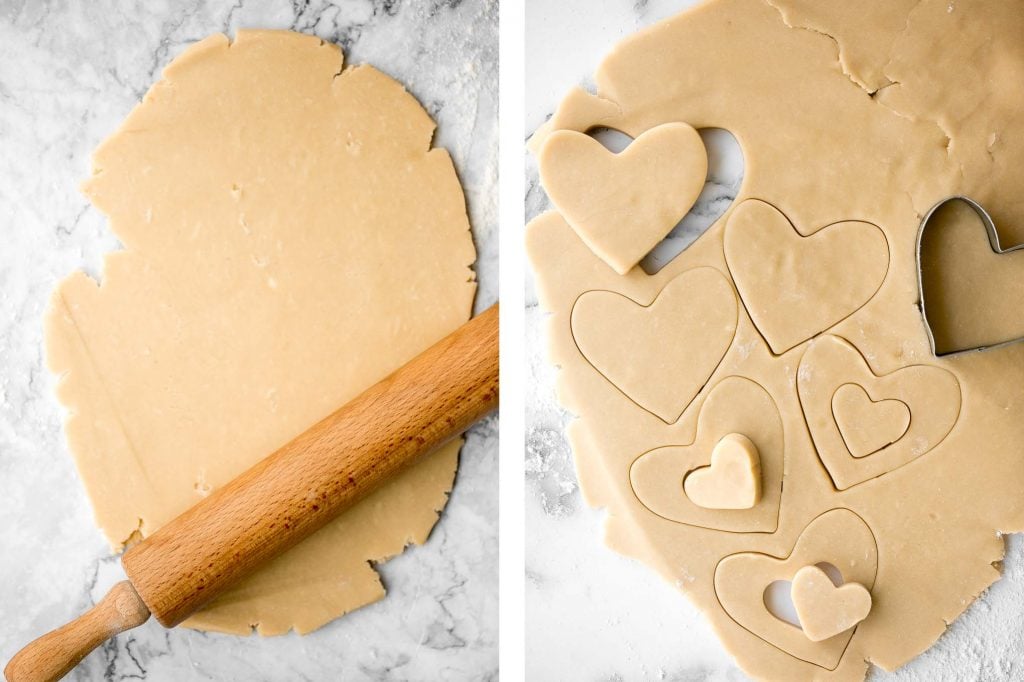
- Second chill. Line your baking tray with parchment paper and place your cookies half an inch apart. If your oven is still preheating, place the tray with your cookies in the refrigerator and chill for another 10 minutes.
- Bake. When the oven is ready and preheated to 350 F, bake the cookies for 8-10 minutes, until the edges just start to brown. Allow the cookies to cool on the baking sheet for 5 minutes, then transfer onto a wire cooling rack to cool completely to room temperature.
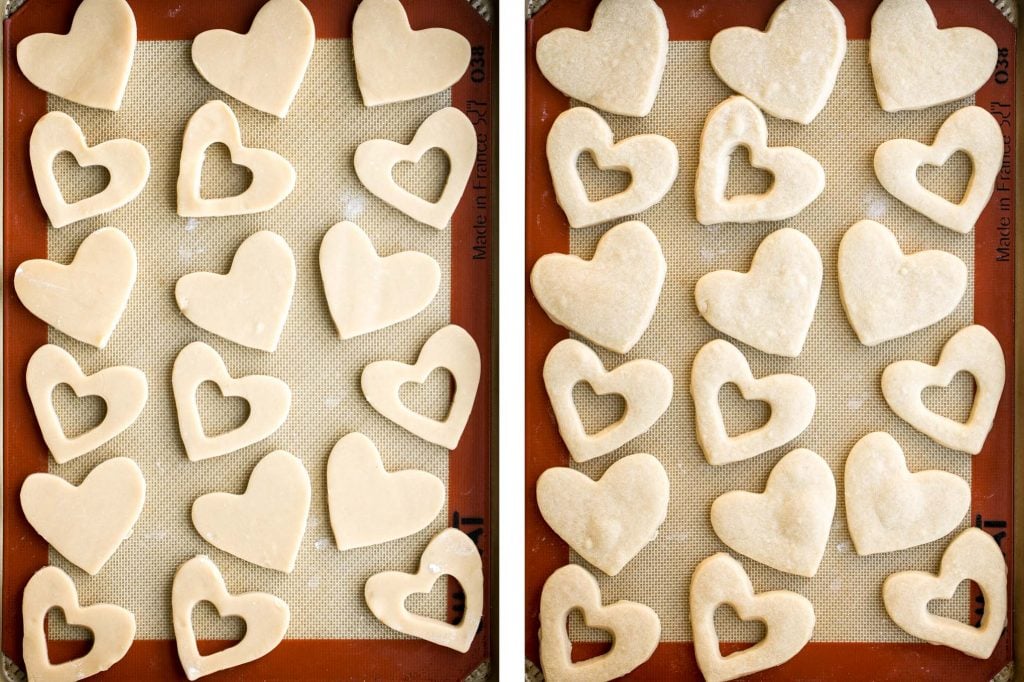
How to Assemble Shortbread Sandwich Cookies
- Melt the white chocolate. You can melt the chocolate either on the stove or in the microwave.
- On the stove: Bring 2 inches of water to a low simmer in a saucepan over medium-low heat. Then, turn the heat to low and place a medium heatproof bowl on the mouth of the pot. Make sure that there is a gap of a few inches in between the bottom of the bowl and the water (You can also place a bowl on a steamer attachment on top of your pot). Add the chocolate and stir constantly as it melts. Stir until the chocolate is completely smooth and melted. This should take a few minutes.
- In the microwave: The second way to melt chocolate (and an easier way) is in the microwave. Place the medium heatproof bowl of chocolate into the microwave and microwave in 30 second intervals. Remove the bowl at each interval and stir well. Repeat until the chocolate has completely melted. Stir until completely smooth.
- Dust tops of cookies. Meanwhile, use a mesh strainer to dust confectioners' sugar on the cookies that have the center cut out.
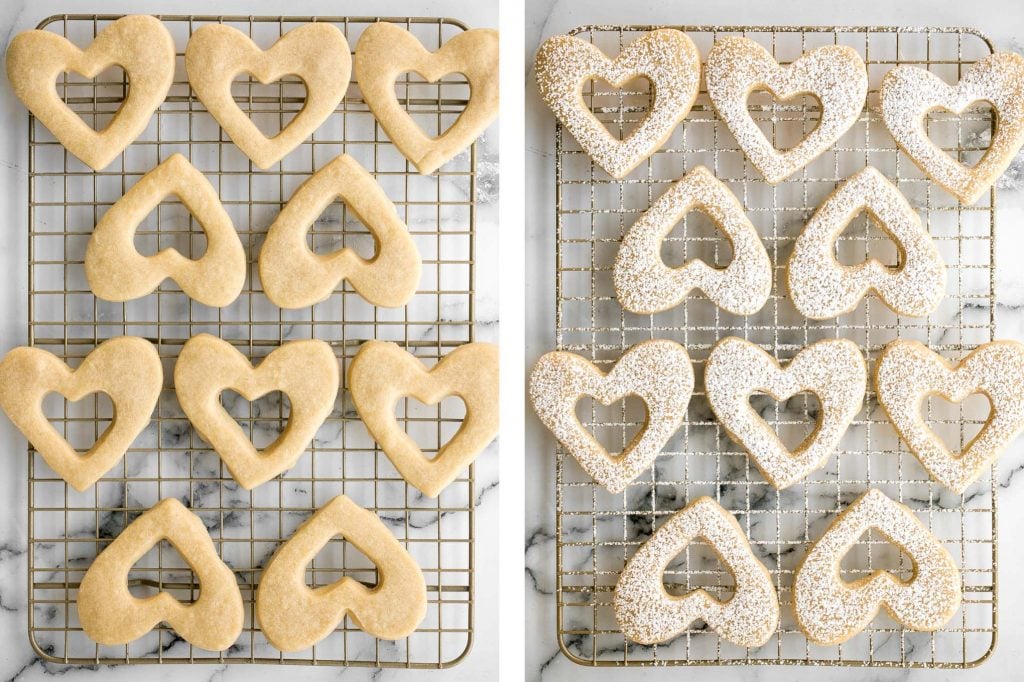
- Add layer of white chocolate on cookies. Spread a layer of melted white chocolate on the bottom halves of each cookie cookies (ones that are not cut out), leaving a small ⅛-inch border around each of the cookies. You can use a knife or use a piping bag with a round piping tip to pipe the chocolate onto the cookies. Let the chocolate set slightly for 5-10 minutes.
- Add layer of raspberry jam. Add a teaspoon of raspberry jam on top of the chocolate once it has set slightly. You can use a spoon or use a piping bag with a round piping tip to pipe the jam onto the cookies.

- Sandwich the cookies. Carefully place the tops of the cookies on the jammy bottoms. Be careful not to smudge the sugar on top. You can fill the open centers with more jam using a piping bag and round tip, if desired.
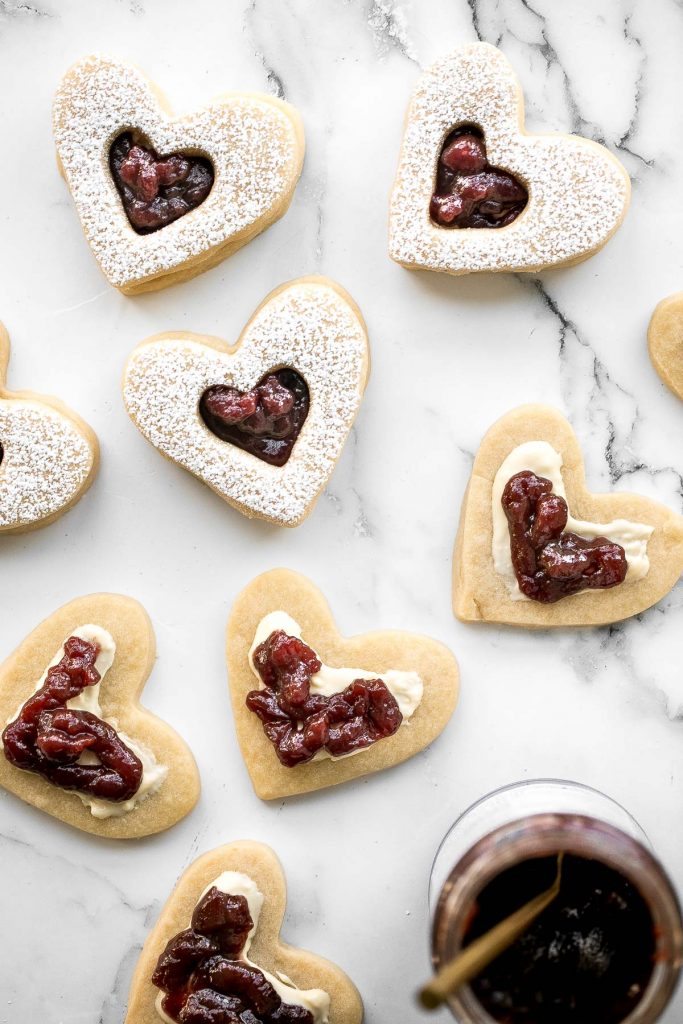
Storing and Freezing Instructions
- How to store: Store in a single layer in an airtight container at room temperature for up to 3 days, or in the refrigerator for up to one week.
- How to freeze: To freeze unassembled shortbread cookies, arrange them in a single layer in an airtight container. Then add a layer of parchment paper and place another layer of shortbread cookies on top. You can also freeze assembled cookies, but note that the confectioners' sugar will melt when the cookie thaws, so it will not be as pretty. I would recommend freezing the cookies unassembled, and then adding confectioners' sugar once thawed.

More Shortbread Cookies Recipes
- Linzer Cookies
- Chocolate-Dipped Shortbread Heart Cookies
- Cranberry Orange Shortbread Cookies
- Carrot Cake Shortbread Cookies
- Slice and Bake Pecan Shortbread Cookies
- Jam-filled Thumbprint Cookies with Almond Glaze
- Pecan Snowball Cookies
Tried this recipe?
I'd love to hear what you think! Leave a comment and rating below to share your feedback. Your reviews help others discover this recipe and help me keep creating more free recipes for you. Snap a photo and tag me on social media @aheadofthyme too.
This post was original published in 2016. It was completely updated in 2021 with new photographs and tips.

Molten Chocolate Lava Cakes

Molten chocolate lava cakes are rich and fudgy with a classic gooey chocolate center that flows out like lava when pierced with a fork. They are a decadent individual portioned treat that is surprisingly so simple, quick and easy to make at home with just a few ingredients and in about 20 minutes. If you thought molten lava cakes taste good at the restaurant, wait until you try homemade. So. Much. Better.
Why You'll Love This Chocolate Lava Cake Recipe
- Perfect dessert for all occasions. These fancy little cakes are the perfect treat to make for Valentine's Day, Mother's Day, birthdays, or really for any occasion. They're rich, decadent, and a crowd favorite.
- Quick and easy to make. When you bite into a gooey lava cake that is oozing with chocolate, you make think it was really hard to make. But you will be surprised that these delectable treats come together with just 10 minutes of prep and just over 10 minutes in the oven. It's one of the quickest, easiest, and most simple desserts you can make. Perfect to satisfy a last minute late-night craving.
- Individual dessert for easy serving. Whatever occasion you are celebrating, it's all about individual desserts these days so these molten chocolate lava cakes fit right in. Some other individual-sized desserts that you can enjoy all to yourself and not have to share are Chocolate Covered Strawberries, Individual Apple Crisp, Baked Jelly Donuts, and Apple Hand Pies.
Ingredients in Molten Chocolate Lava Cakes
To make these easy molten chocolate lava cakes, you will need to the following pantry and refrigerator staples:
- semi-sweet chocolate (or 1 cup chocolate chips), coarsely chopped
- butter - unsalted butter, cut into small cubes for easy melting.
- eggs + additional egg yolks - you will need 4 large eggs in total. 2 full eggs, and 2 egg yolks from the extra 2 eggs.
- vanilla extract
- confectioners' sugar - I like the melt-in-your-mouth texture of confectioners' sugar, but you can also use granulated sugar.
- all-purpose flour
- pinch of salt
- toppings - try a scoop of vanilla ice cream, whipped cream, a dusting of more confectioners' sugar, fresh fruit, chocolate chips, or salted caramel sauce. I love these cakes with ice cream. There is something about the combination of hot, oozing chocolate and vanilla ice cream that just hits the spot every time.
You will also need measuring cups and spoons, mixing bowls, hand mixer or whisk, and ramekins. If you don't have ramekins, you can use a 12-tin muffin pan instead and make 6 smaller lava cakes. Follow the same steps except bake for 8-10 minutes.
How to Make the Best Molten Chocolate Lava Cakes
- Prepare ramekins. Preheat oven to 425 F. Grease four 6-oz. ramekins or three 8-oz. ramekins with non-stick cooking spray and dust with cocoa powder, tapping out the excess cocoa powder. This will help the lava cakes come out easily when inverted.
- Melt chocolate with butter. Melt the chocolate and butter in a medium heat-proof bowl and set aside to allow it to slightly cool. You can melt the chocolate either on the stove or in the microwave.
- On the stove: Bring 2 inches of water to a low simmer in a saucepan over medium-low heat. Then turn the heat to low and place medium heatproof bowl of chocolate with butter on the mouth of the pot. Make sure that there is a gap of a few inches in between the bottom of the bowl and the water (You can also place a bowl on a steamer attachment on top of your pot). Stir the chocolate constantly as it melts. Stir until the chocolate is completely smooth and melted. This should take a few minutes.
- In the microwave: The second way to melt chocolate (and an easier way) is in the microwave. Place the medium heatproof bowl of chocolate and butter into the microwave and microwave in 20 second intervals. Remove the bowl at each interval and stir well. Repeat until the chocolate has completely melted. Stir until completely smooth.
- Combine ingredients. In a medium mixing bowl, use an electric hand mixer or a whisk to beat together the eggs, egg yolks, vanilla extract, sugar, and salt, on low speed, until combined, about 1 minute. Pour in the melted chocolate into the egg mixture, along with the flour. Use a rubber spatula and fold it in until fully combined. Note that the batter will be thick but should not be lumpy.
- Bake. Place the prepared ramekins on a quarter sheet baking pan and divide the batter between them. Bake for 12-14 minutes until the edges look solid and firm. The tops will still be soft with a slight jiggle in the center.
- Serve. Allow the molten chocolate lava cakes to cool in the ramekins for 1 minute, then cover each with an inverted plate and use an oven mitt to flip them over (invert) and release the cakes onto the plate. Add toppings (such as a scoop of vanilla ice cream, dusting with powdered sugar, garnishing with fresh fruit like fresh berries, or a drizzle of salted caramel sauce or chocolate sauce) and serve immediately.
PRO TIP: Do not overcook as overcooking will cause the center of the chocolate lava cake to completely solidify and not be gooey. If you are not sure how hot your oven runs, I suggest making one first to test. If it has solidified too much, then adjust the bake time lower. Mine turns out perfect at exactly 12 minutes.
Storing and Freezing Instructions
- How to store: Store baked and completely cooled chocolate lava cakes in an airtight container in the refrigerator for up to 3 days. Reheat in the microwave, oven or air fryer at 300F for about 5 minutes until warmed through.
- How to freeze: Freeze baked and completely cooled chocolate lava cakes in an airtight container in the freezer for up to 3 months. To reheat, place in the microwave, oven or air fryer at 300F for 5-10 minutes until warmed through.
- How to make ahead: Make the batter in advance and store in the refrigerator for up to 2 days. To bake the cakes, place the bowl of batter on the kitchen counter and allow it to come to room temperature, about 20 minutes. Then, divide into greased ramekins and bake.
More Chocolate Recipes
- Chocolate Covered Strawberries
- Chocolate-Dipped Shortbread Cookies
- Dark Chocolate Raspberry Truffles
- Double Chocolate Loaf Cake
- Vanilla Cake Pops
- Peppermint Hot Chocolate
Tried this recipe?
I'd love to hear what you think! Leave a comment and rating below to share your feedback. Your reviews help others discover this recipe and help me keep creating more free recipes for you. Snap a photo and tag me on social media @aheadofthyme too.
This post was first published in 2016. It has been completely updated in 2021 with new photographs and tips.

Chocolate Covered Strawberries

Chocolate covered strawberries are one of the fanciest little bite-sized treats that are literally loved by all. And they are actually so simple and easy to make with just 2 ingredients -- strawberries and chocolate. These beautiful desserts are perfect for Valentine's Day, Mother's Day or any special occasion you can think of, or just whenever you are craving something sweet and decadent.
I mean, who doesn't like fruit dipped in chocolate? In fact, I like to dip everything in chocolate like Chocolate-Dipped Shortbread Cookies, Vanilla Cake Pops, and Chocolate Cake Pops because chocolate just makes everything taste better.

How to Make the Best Chocolate Covered Strawberries
- Prepare the strawberries. Wash and dry the strawberries very well. The strawberries have to be really dry or else the chocolate will not stick on. They have to be SUPER dry.
- Melt the chocolate. You can melt the chocolate either on the stove or in the microwave.
- On the stove: Bring 2 inches of water to a low simmer in a saucepan over medium-low heat. Then turn the heat to low and place a large heatproof bowl of chocolate chips on the mouth of the pot. Make sure that there is a gap of a few inches in between the bottom of the bowl and the water (You can also place a bowl on a steamer attachment on top of your pot). Stir the chocolate constantly as it melts. Stir until the chocolate is completely smooth and melted. This should take a few minutes.
- In the microwave: The second way to melt chocolate (and an easier way) is in the microwave. Place the chocolate into a microwave safe bowl and microwave in 30 second intervals. Remove the bowl at each interval and stir well. Repeat until the chocolate has completely melted. Stir until completely smooth.
- Coat the strawberries. Dip half the strawberries into melted semi-sweet chocolate and place on a quarter sheet baking pan lined with parchment paper. Dip the remaining half into melted white chocolate. (Tip: You can make the chocolate pink for Valentine's Day by adding a drop of red gel food colouring to the white chocolate first).
- Add toppings. Use a piping bag and round tip to drizzle the remaining chocolate on top. You can also add sprinkles or coat the chocolate with crushed nuts.
- Chill. Place the baking sheet in the refrigerator and chill for 30 minutes until the chocolate is set.

Frequently Asked Questions and Tips
- What kind of strawberries should I use? Use firm and ripe strawberries that are completely red. When preparing them, allow them to come to room temperature (take them out of the refrigerator and place on the counter for about 20 minutes). Wash and dry them before dipping into melted chocolate. The strawberries have to be really dry or else the chocolate will not stick on. They have to be SUPER dry.
- What kind of chocolate should I use? Use high-quality chocolate. Since this recipe only contains strawberries and chocolate, you will be able to tell immediately if the chocolate used is not of good quality.
- How do I store chocolate covered strawberries? Store chocolate covered strawberries on a plate uncovered at room temperature (away from sunlight) for a few hours, or for up to one day in the refrigerator.
- Can I freeze chocolate covered strawberries? No, unfortunately you cannot freeze these strawberries. The chocolate will become too hard to bite, and as it thaws, the strawberries will get mushy and the chocolate will get watery.

More Chocolate Recipes
- Molten Chocolate Lava Cakes
- Chocolate-Dipped Shortbread Cookies
- Dark Chocolate Raspberry Truffles
- Double Chocolate Loaf Cake
- Vanilla Cake Pops
- Peppermint Hot Chocolate
- Chocolate Crinkle Cookies
Tried this recipe?
I'd love to hear what you think! Leave a comment and rating below to share your feedback. Your reviews help others discover this recipe and help me keep creating more free recipes for you. Snap a photo and tag me on social media @aheadofthyme too.
This post was originally published in 2017. It has been completely updated with new photographs and tips.

Sweet Chili Chicken Bites
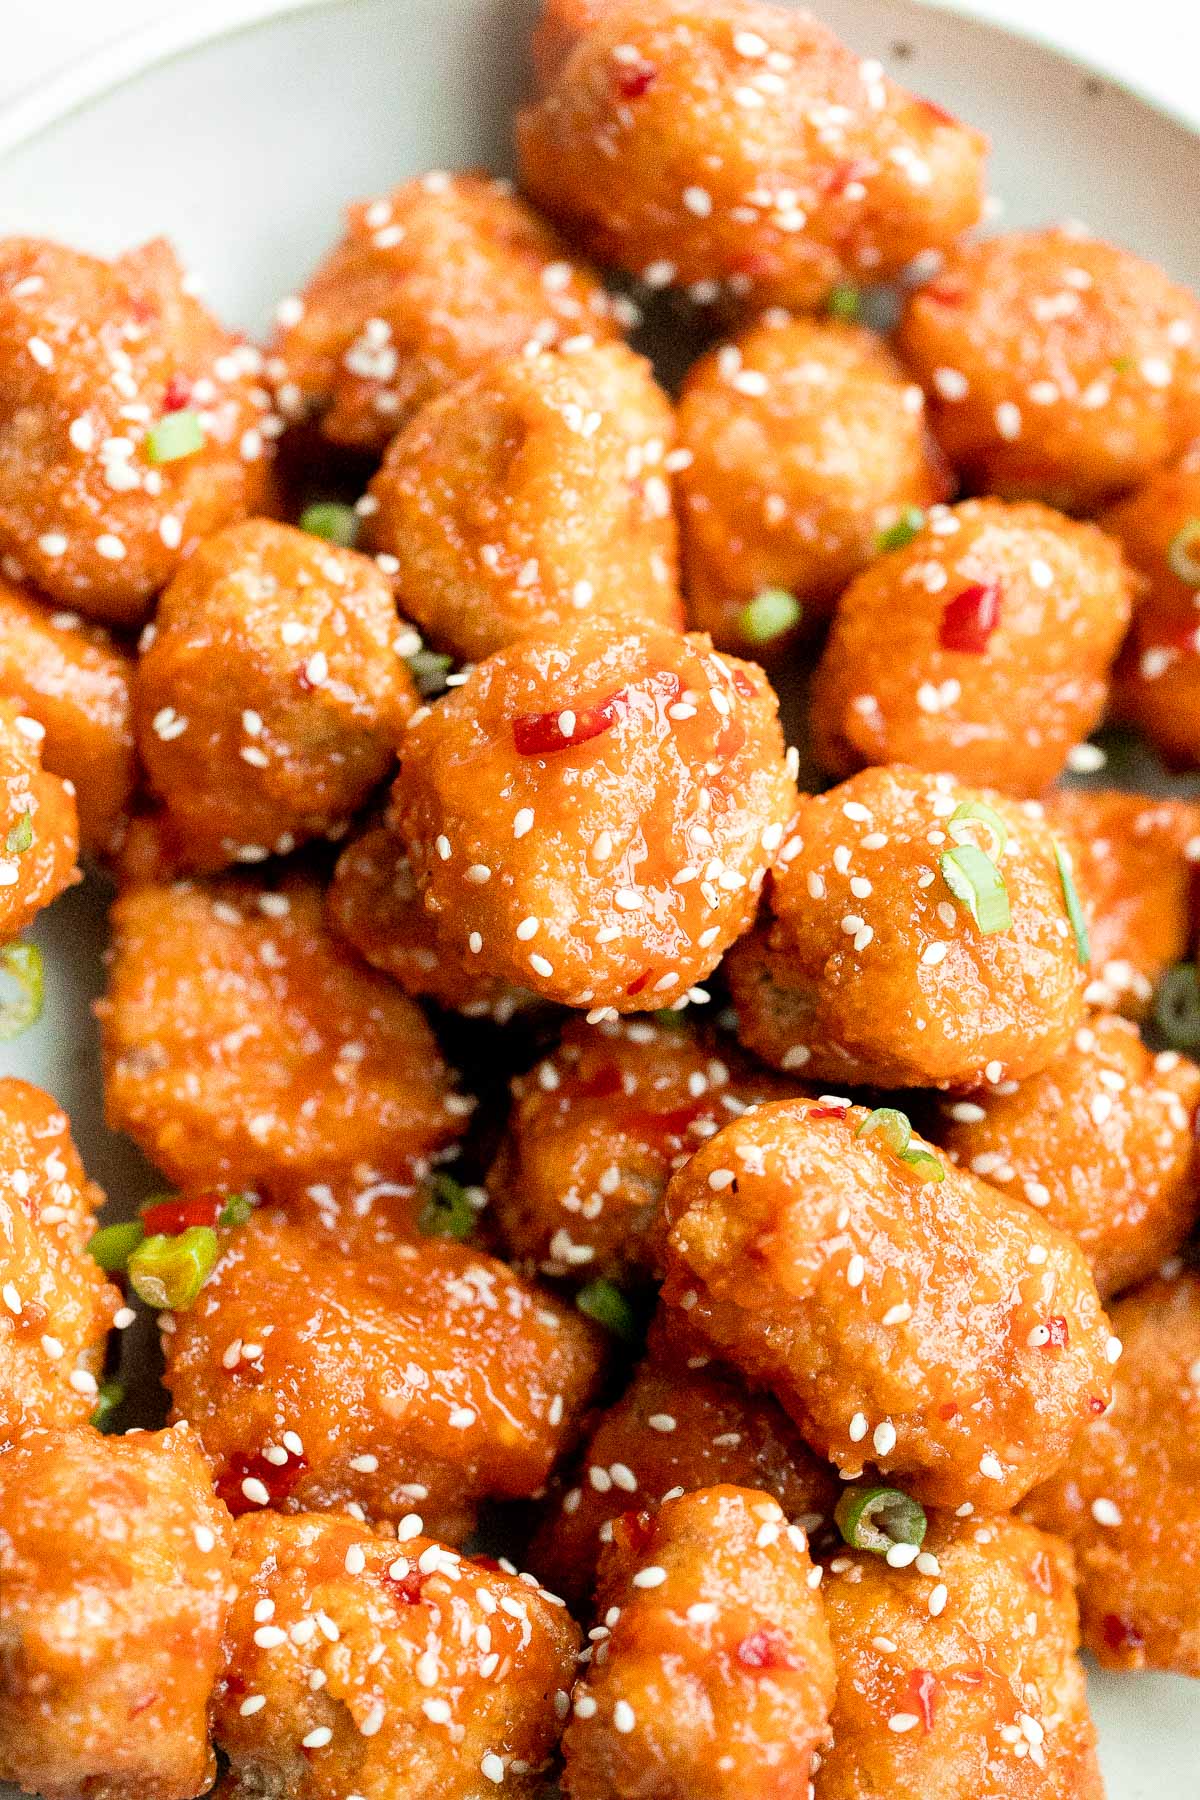
Sticky and crispy, baked sweet chili chicken bites is so much better than takeout and so easy to make healthier at home. Bite-sized pieces of breaded chicken are baked until crispy on the outside and tender inside, tossed in a delicious sweet red chili sauce, and topped with sesame seeds and green onions. These chicken nuggets are an easy dish to prepare for a weeknight dinner over a bowl of steamed rice, or as a crave-worthy appetizer on game day.

Just like Baked Sesame Chicken, I am obsessed with crispy chicken coated in a sticky and sweet sauce, especially when it's healthier than takeout. Since these Asian chicken nuggets are baked rather than deep-fried like what you would get at the restaurant, these are so much better for you. Plus, homemade just tastes way better.
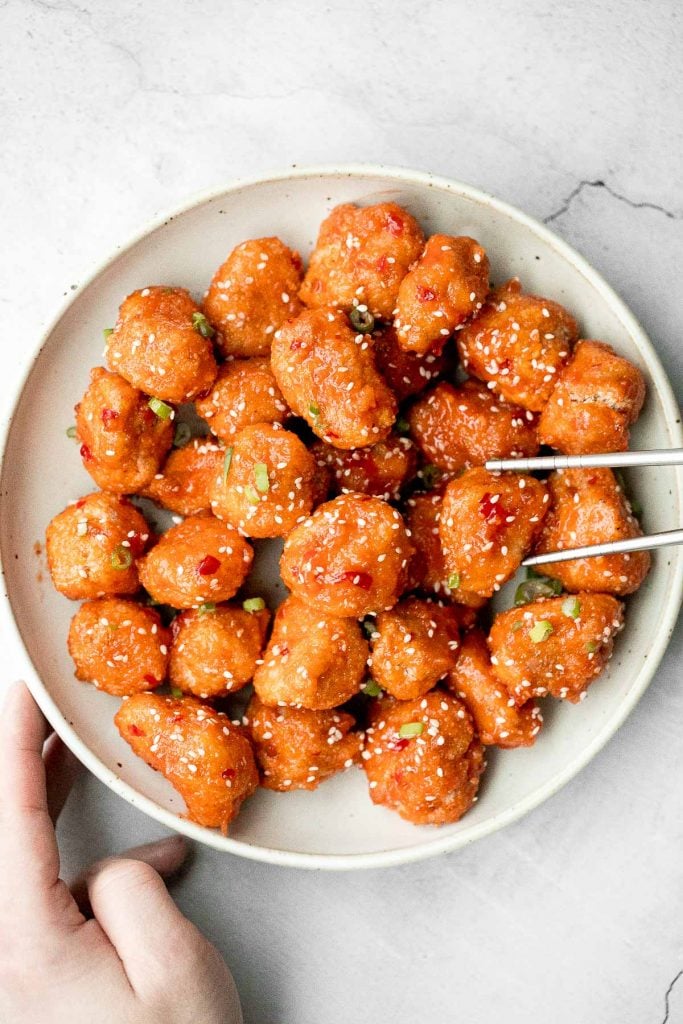
Ingredients
To make these baked sweet chili chicken bites, you will need the following ingredients:
- chicken breasts - seasoned with salt and pepper.
- 1 teaspoon paprika
- all purpose flour - to coat the chicken.
- eggs - to coat the chicken and help the breadcrumbs stick to it.
- breadcrumbs - to coat the chicken.
- cooking oil spray - helps the coating get super crispy when baked.
- sweet chili sauce - you can use store-bought or homemade if you have access to Asian ingredients. To make homemade sweet chili sauce, you will need rice vinegar, fish sauce (or soy sauce), brown suger, sambal oelek (or chili garlic sauce), cornstarch or flour, and water.
- green onions - for garnish.
- white sesame seeds - for garnish.
You will also need a mixing bowl and a half sheet baking pan. If you are making homemade sweet chili sauce, then you will also need a shallow saucepan or non-stick skillet.
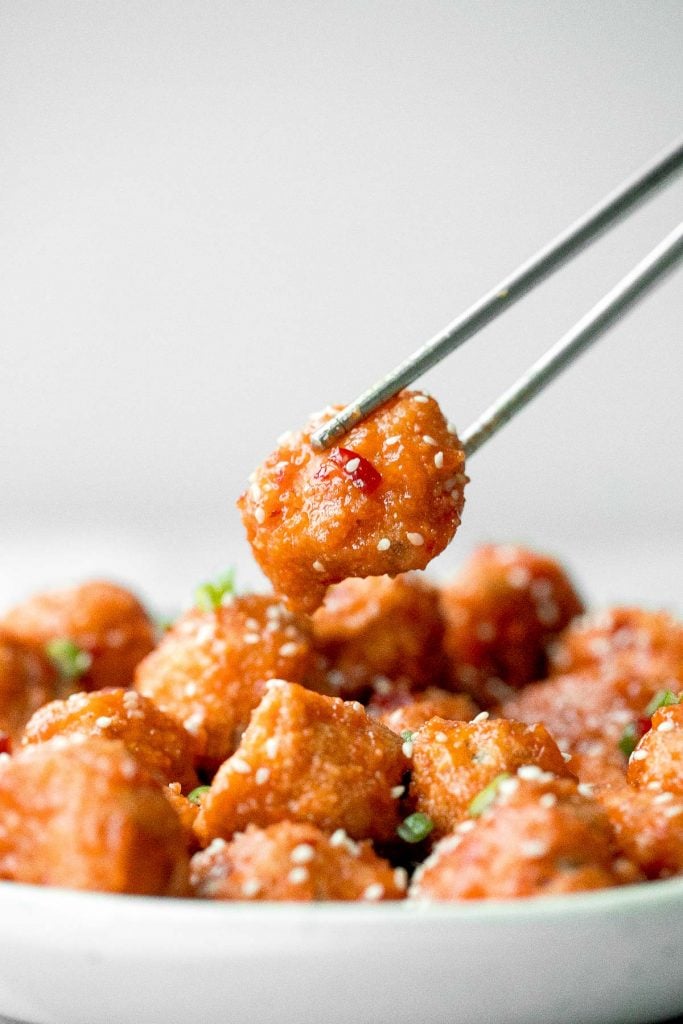
How to Make the Best Sweet Chili Chicken Bites
- Prepare the chicken. Pat dry chicken breasts completely with a paper towel and cut into 1-inch cubes. Place into a medium mixing bowl and season with salt, pepper, and paprika. Set aside for at least 5 minutes. In a large ziploc bag, add flour and cubed chicken. Seal the bag and shake well to coat.
- Coat the chicken. Prepare a shallow plate with the beaten eggs and another with the breadcrumbs. Dip the chicken, one at a time, into the egg wash and evenly coat it. Then dip into breadcrumbs and fully coat. You can gently squeeze crumbs into each piece to adhere and fully coat. The flour will stick to the chicken, the egg wash sticks to the flour, and the breadcrumbs will stick to the egg wash. Arrange the breaded chicken on a large half sheet baking pan lined with parchment paper or a silicone mat. Spray the chicken with cooking oil spray. This helps create a crispy crust on the outside during baking.
- Bake. Bake the chicken in a 375 F preheated oven for 25 to 30 minutes until chicken is fully cooked. The internal temperature for the chicken should be 165F.
Air Fryer Instructions
Place chicken bites in a single layer in the air fryer basket and lightly spray with oil to coat evenly. Cook at 375 F for 12-14 minutes until golden brown and the internal temperature for the chicken reaches 165F. Shake the basket halfway during cooking to brown the chicken bites evenly.
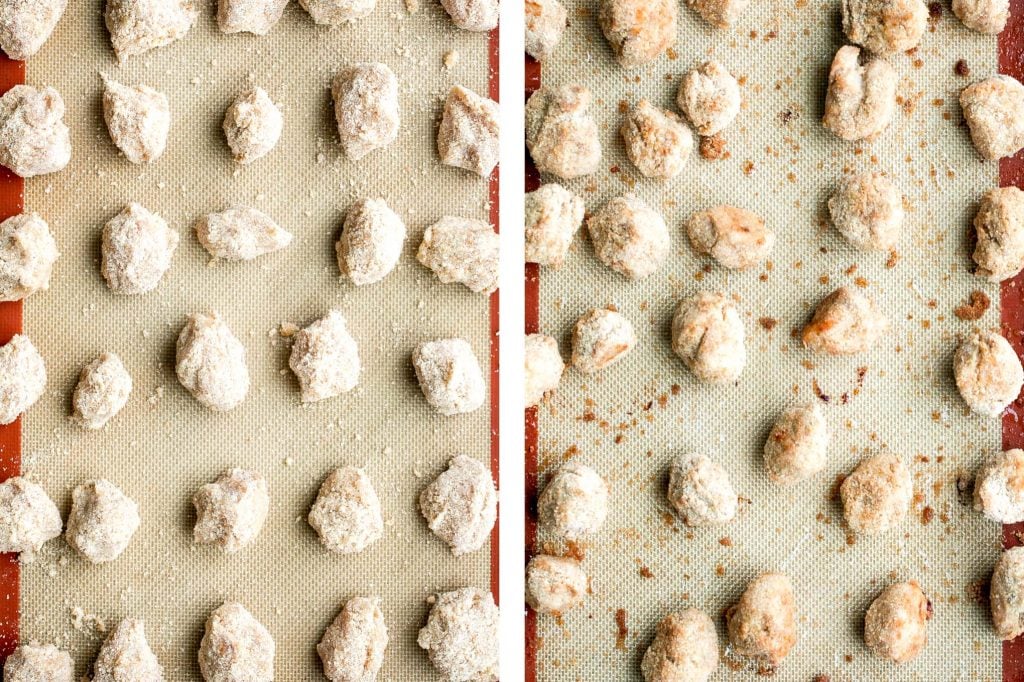
- Toss in sweet chili sauce and serve. Transfer the cooked chicken to a large mixing bowl and add in sweet chili sauce (or if making homemade sweet chili sauce, add the chicken into the saucepan after the sauce has been cooked and thickened). Toss gently and well to coat evenly. Sprinkle with sesame seeds and green onions.

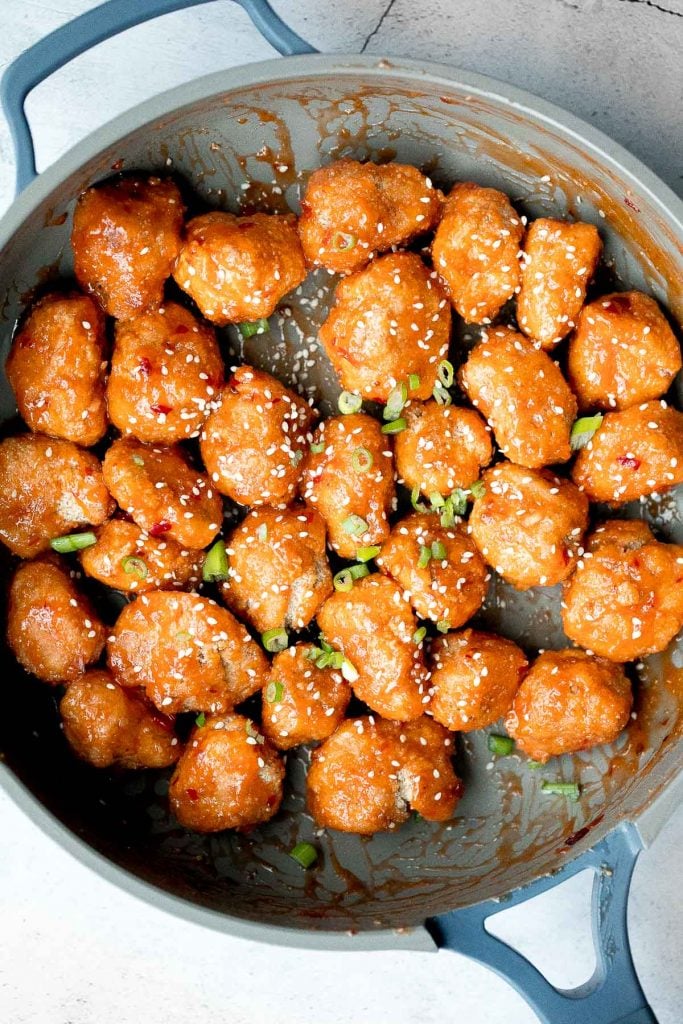
How to Make Homemade Sweet Chili Sauce
To make homemade sweet chili sauce (instead of using store-bought sweet chili sauce), add vinegar, fish sauce, brown sugar, sambal oelek, cornstarch and water into a medium mixing bowl. Whisk well to combine until cornstarch and sugar dissolves. Then, transfer the sauce to a shallow saucepan and heat over medium heat for 3-4 minutes. Stir until thickened to desired consistency.
This sweet chili sauce is sticky, sweet, and slightly spicy and pairs with so many things. You can throw it on meat, noodles, or vegetables, or use it as a dipping sauce for so many appetizers. My favourites to dip into sweet chili sauce are chicken lettuce wraps, fried vegetarian spring rolls, shrimp egg rolls, and fried wontons.
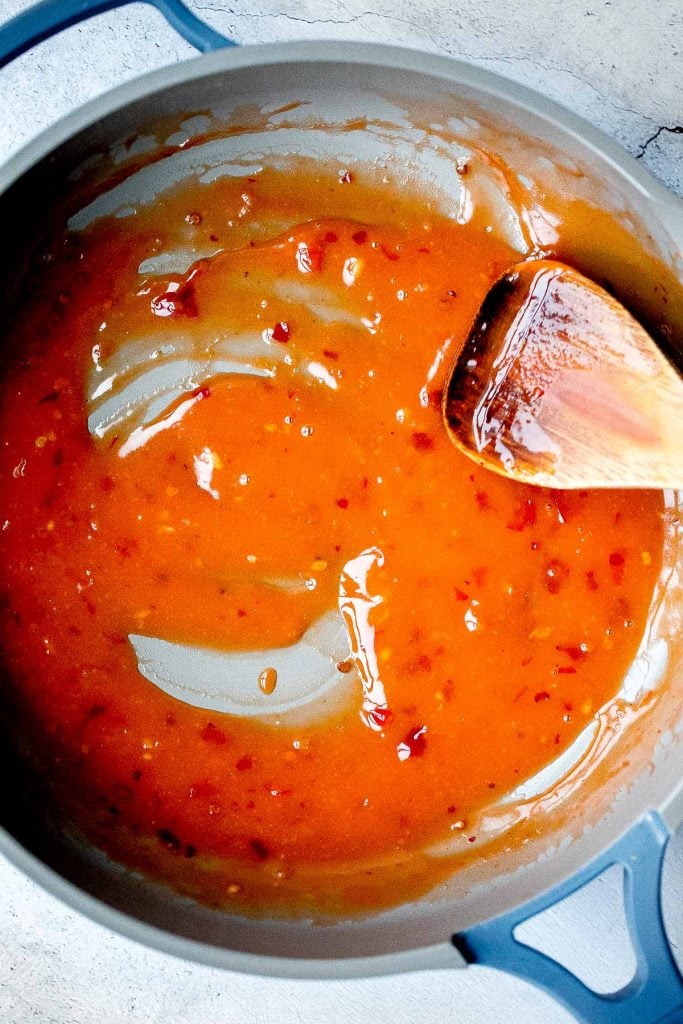
Tips
- How to serve: Serve baked sweet chili chicken over a bowl of steamed rice or vegetarian fried rice. For a complete Thai meal with other dishes, pair it with 10-minute chicken Pad Thai, Thai coconut red curry with prawns, Thai red curry mussels or Thai red curry noodle soup.
- How to store: Store any leftover sweet chili chicken bites in an airtight container in the refrigerator for up to 3 days. To reheat, heat on the stove over medium heat for 5-10 minutes until warmed through. If the sauce has thickened up too much, add a little water to thin it out.
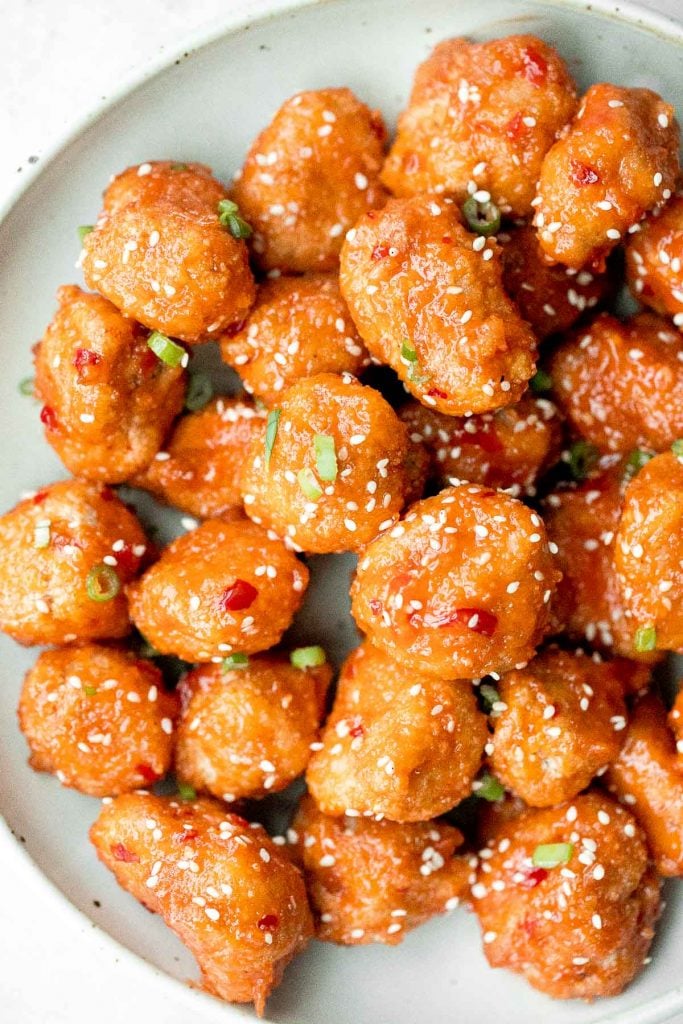
More Asian-Inspired Chicken Recipes
- Baked Sesame Chicken
- Healthy Lemon Chicken
- Miso Garlic Chicken Wings
- Shanghai Style Fried Noodles
- Honey Garlic Chicken Wings
- Char Siu (Chinese BBQ) Chicken
Tried this recipe?
I'd love to hear what you think! Leave a comment and rating below to share your feedback. Your reviews help others discover this recipe and help me keep creating more free recipes for you. Snap a photo and tag me on social media @aheadofthyme too.

Sheet Pan Nachos
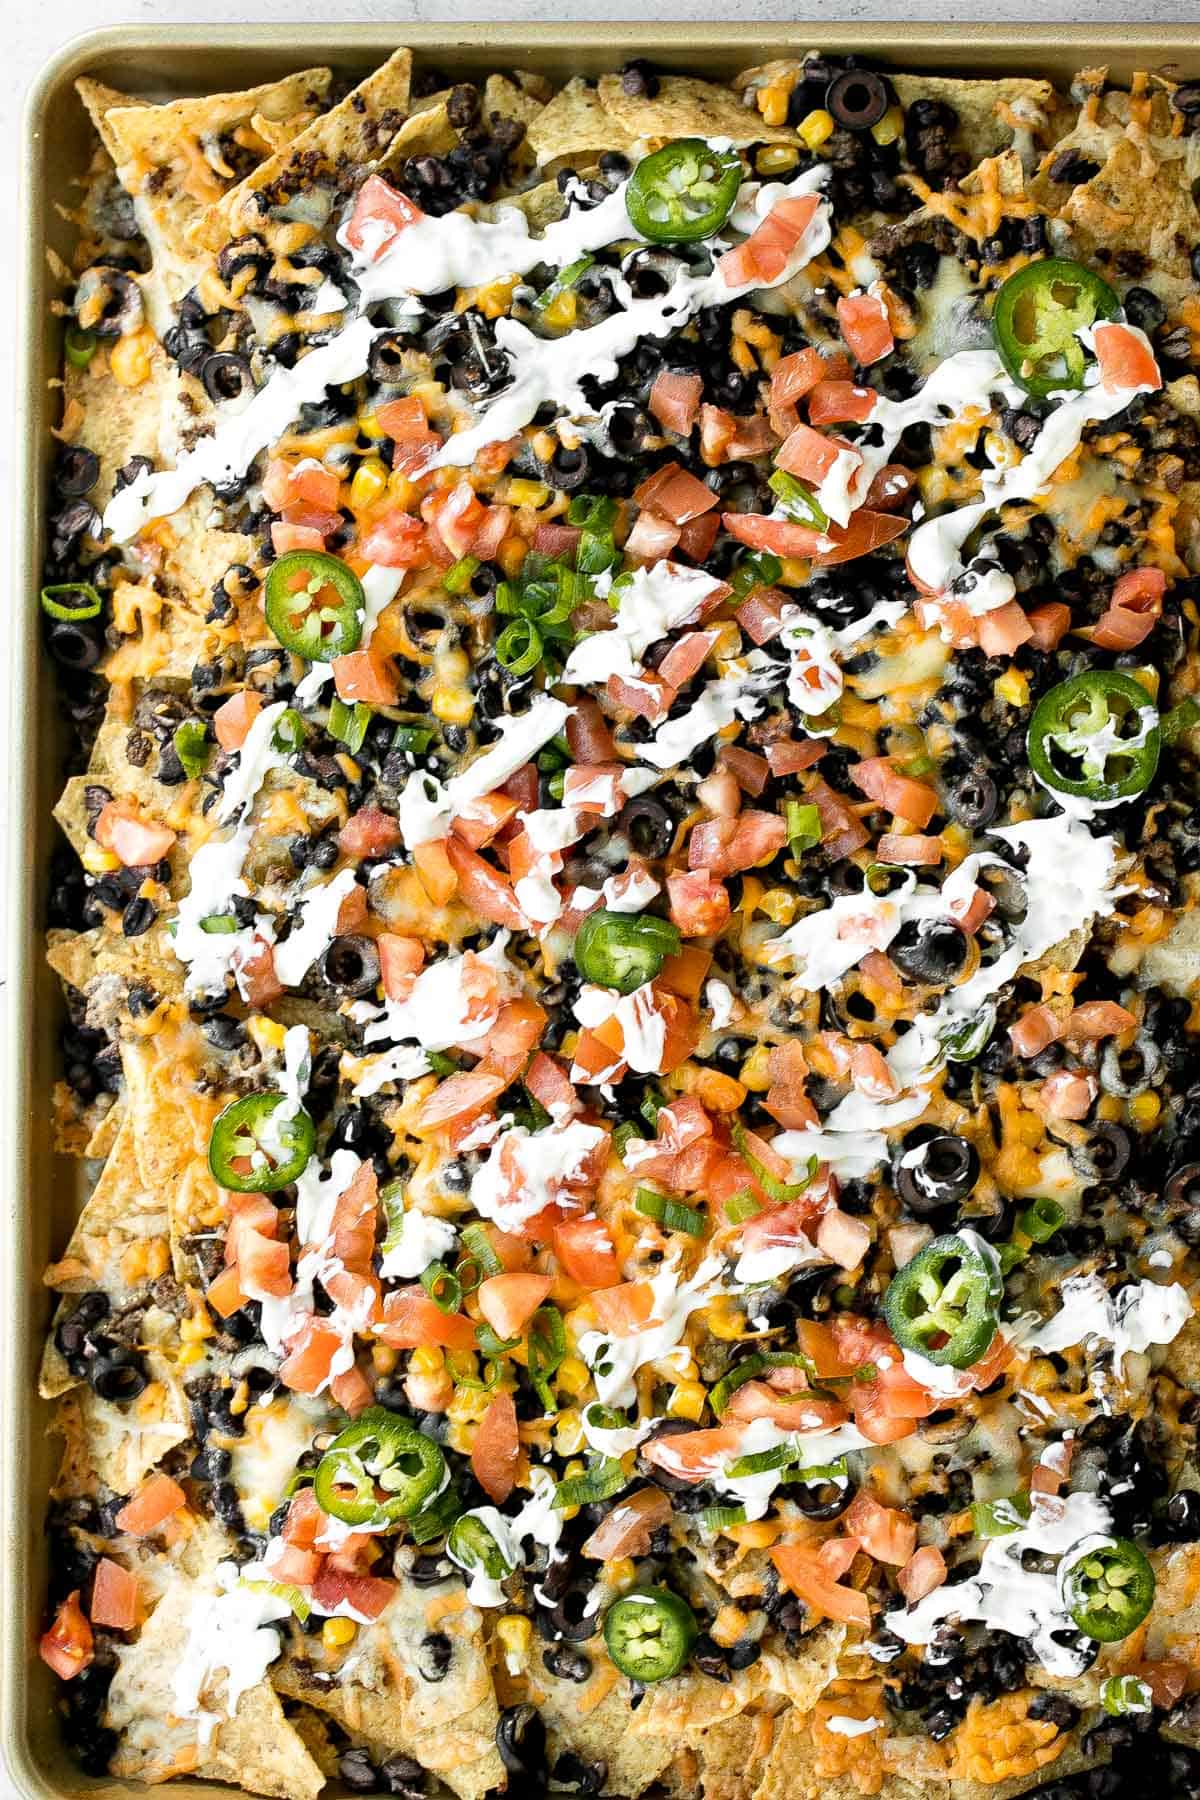
Oven-baked loaded sheet pan nachos are a crowd pleaser for an easy weeknight dinner or an crave-worthy appetizer to serve on game day. Arrange layers of tortilla chips, ground beef, beans, corn, black olives, and cheese in a sheet pan, bake, and load up with the best nacho toppings like tomatoes, jalapeños, and sour cream. Every bite of these sheet pan nachos are savoury, a little spicy, and packed with so much flavour. The best part? You can make it in under 30 minutes.

It really just takes a few simple steps to throw this meal together. Plus, it's completely customizable with your favourite ingredients. You can switch up the protein, the cheese, and the toppings. I love serving adding Easy Guacamole and Pico de Gallo Chunky Salsa to my toppings or on the side for extra dipping. Or make it a complete Mexican-inspired fiesta with Fish Tacos with Lime Crema, Shrimp Tacos with Lime Crema Slaw, or Baked Chicken Quesadillas.
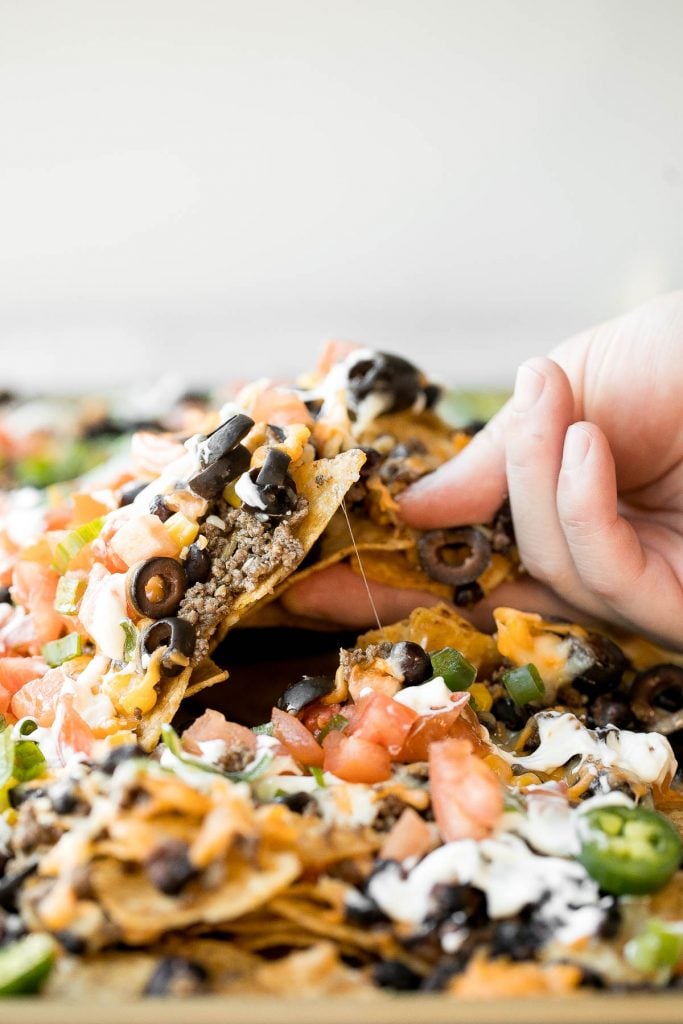
Ingredients
To make easy sheet pan nachos, you will need the following ingredients:
- ground beef - cooked with olive oil and garlic, and seasoned with salt, pepper, paprika, and cayenne (optional). You can try this with other protein such as shredded chicken, steak or pulled pork, or leave the beef completely out for a vegetarian version.
- tortilla chips
- black beans - one 15 ounce can of black beans, or cook ¾ cup of dry black beans.
- corn kernels
- black olives
- cheese - any melty cheese will work. I used both white cheddar cheese and yellow cheddar cheese. Cheddar cheese and Monterrey Jack, or a Tex Mex cheese blend are great alternatives.
- toppings - Add whatever toppings that you like. I used tomatoes, jalapeños, green onions and sour cream. Some other toppings to add are avocados, guacamole, red onions, cilantro, ranch or spicy ranchera sauce.
You will also need a non-stick skillet and a half sheet baking pan.
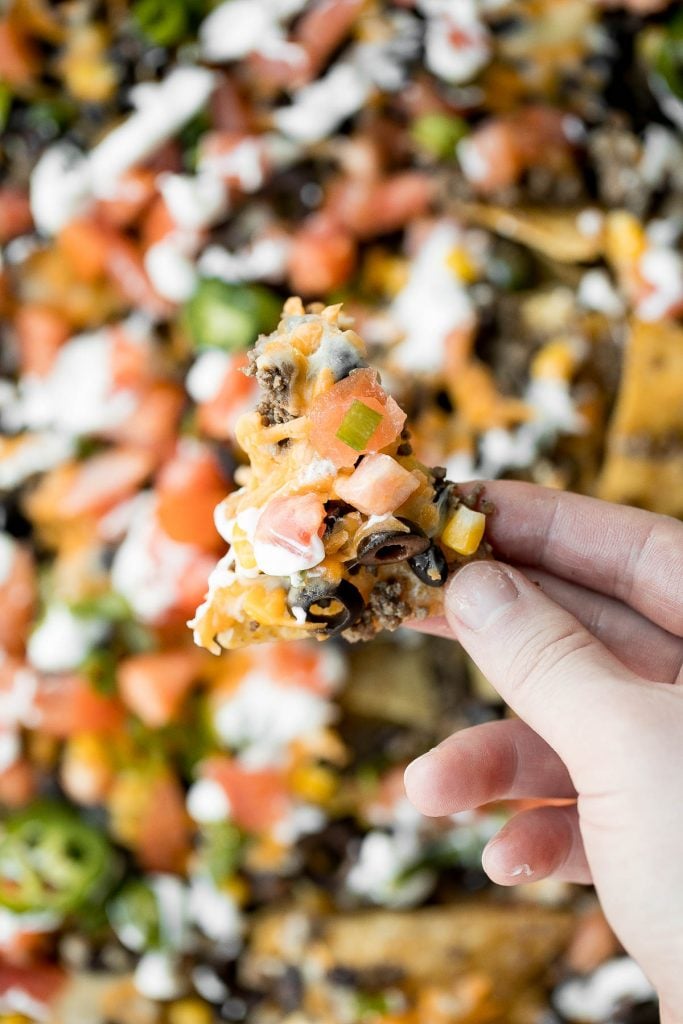
How to Make the Best Sheet Pan Nachos
- Cook the ground beef. Heat oil in a skillet for 2 minutes over medium high heat until the hot oil sizzles and shimmers. Add ground beef and garlic. Stir well to cook for 5-7 minutes until browned. Make sure to break up beef into small pieces to help even browning. Stir in seasoning including salt, pepper, paprika and cayenne pepper (optional) until well combined. Set aside.
- Bake the nachos with toppings. Arrange tortilla chips evenly on a half sheet pan. Sprinkle cooked beef, black beans, corn, black olives and cheese evenly on top. Bake in a 400 F preheated oven for 12-15 minutes until the melted cheese turns golden brown and bubbly.
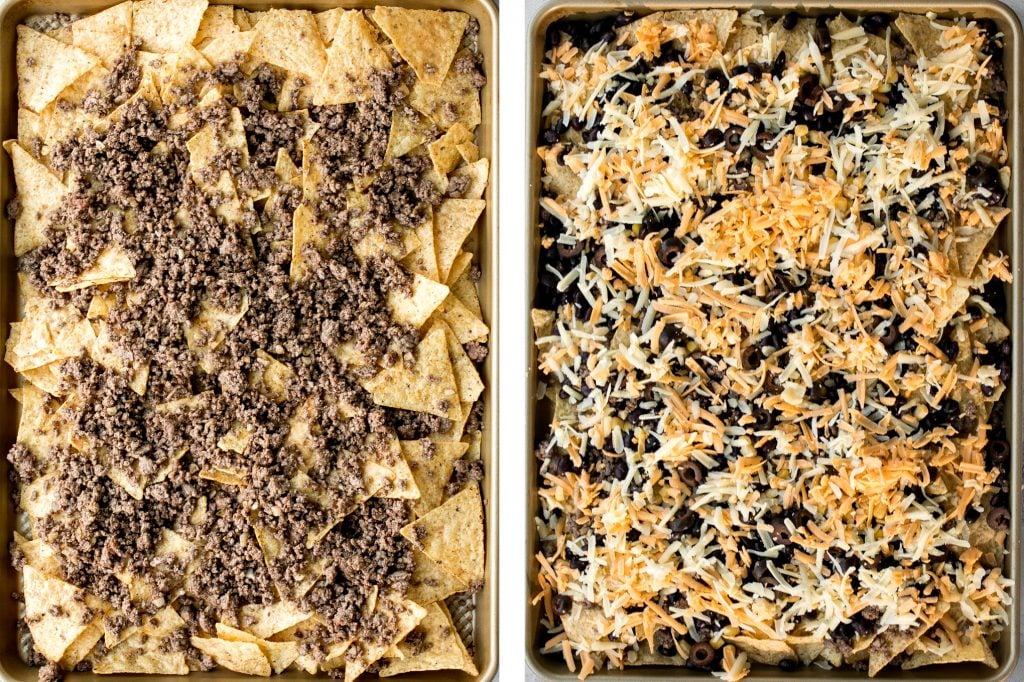
- Serve with additional toppings. Serve immediately and top with tomatoes, jalapeno, and green onions. Drizzle sour cream on top.
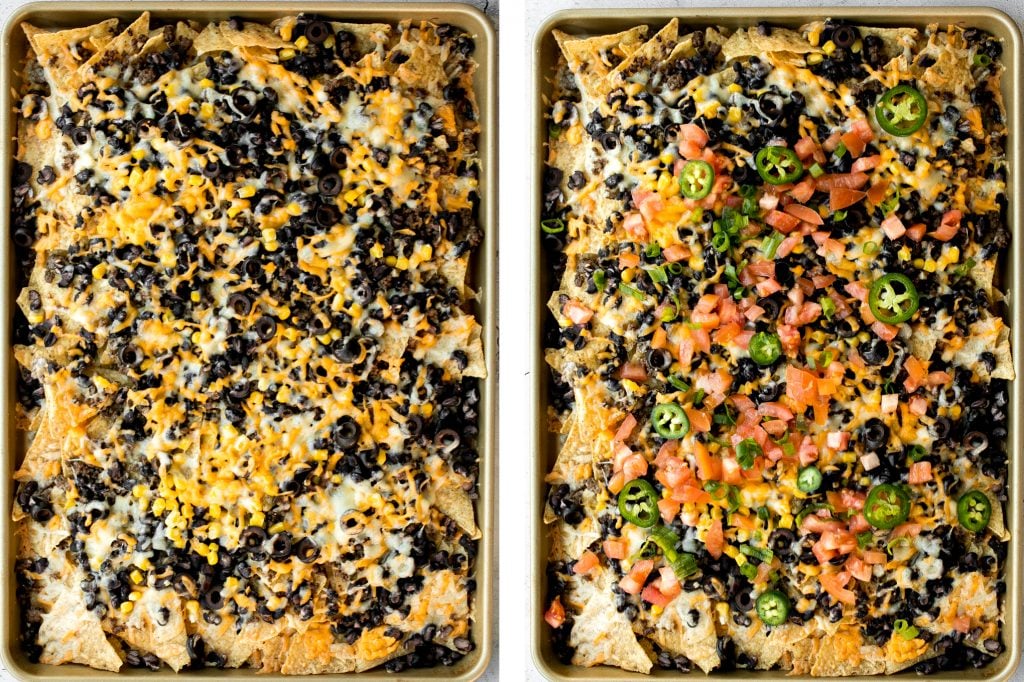
Storing Instructions
- How to store: Transfer nachos to an airtight container and store for up to 3 days in the refrigerator.
- How to reheat: Transfer nachos to a sheet pan and heat at 350 F for 5-10 minutes until crispy. I like to add extra cheese when I reheat because we usually finish the really cheesy pieces in the first round.
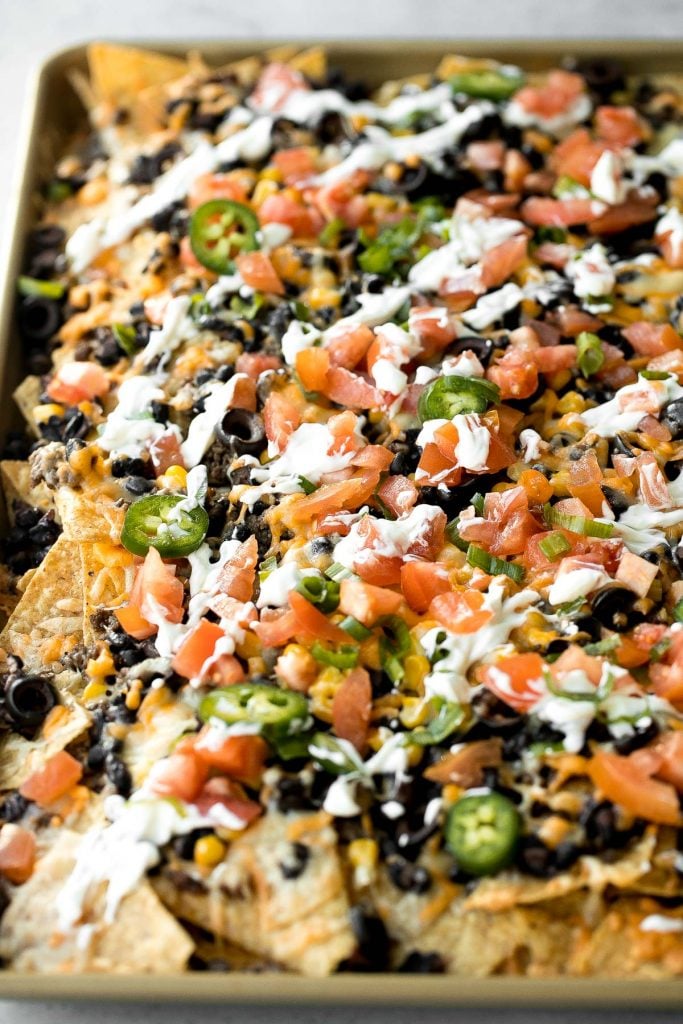
More Sheet Pan Recipes
- One Pan Garlic Roasted Chicken and Potatoes
- Sheet Pan Curry Chicken and Vegetables
- Sheet Pan Chicken Fajitas
- Tandoori Chicken Sheet Pan Dinner
- Sheet Pan Balsamic Chicken and Vegetables
- Sheet Pan Soy Glazed Chicken Thighs
- Roasted Balsamic Chicken with Cranberries
Tried this recipe?
I'd love to hear what you think! Leave a comment and rating below to share your feedback. Your reviews help others discover this recipe and help me keep creating more free recipes for you. Snap a photo and tag me on social media @aheadofthyme too.
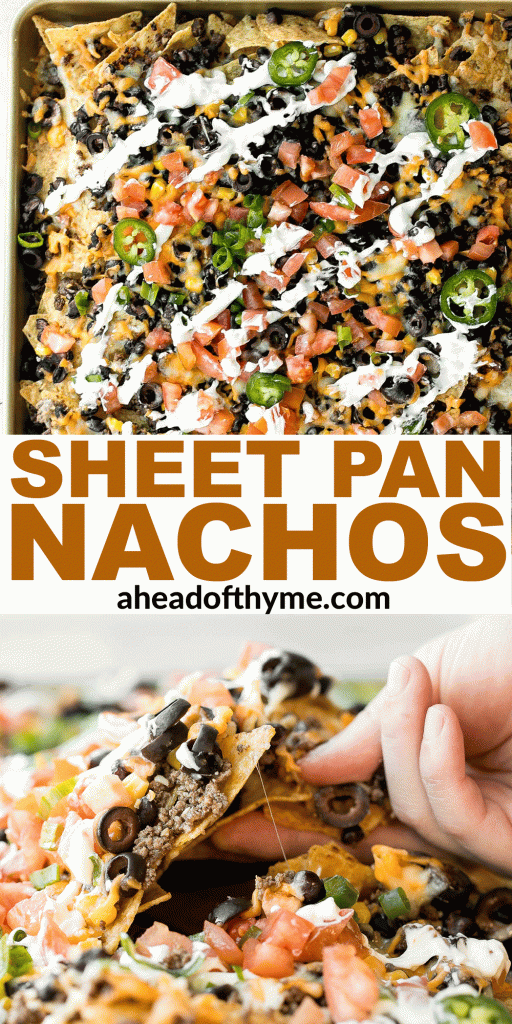
Basil Pesto

Fresh homemade basil pesto is vibrant, colourful, flavourful and extremely easy to make at home with just a handful of ingredients and in just 5 minutes. Once you try homemade, you might never go back to store-bought pesto again. Stir it into a big bowl of pasta or serve it on just about anything from meat to bread.
Adding pesto to pasta makes for a super quick and easy dinner, like Pesto Penne Pasta or Avocado Basil Pesto Spaghetti. You can also add it to many other dishes including pizza, sandwiches, salad, or meat and vegetables to give your meal and instant fresh flavour that just can't be replicated with store-bought pesto. It's fresh, herby, garlicky and just so delicious. So make lots because pesto also freezes well.
Ingredients
To make basil pesto, you need to gather the following ingredients:
- fresh basil leaves
- garlic
- pine nuts - you can also substitute with most other nuts such as sunflower seeds, almonds, pepitas, cashews, walnuts, or peanuts. The flavour will be different but still delicious.
- Parmesan cheese
- salt and pepper
- lemon juice
- extra virgin olive oil - use high quality olive oil for the best flavour and results.
You will also need measuring cups and spoons and a food processor. You could use a blender instead but the consistency will not be the same. Traditionally, pesto is made in a mortar and pestle, but you can replicate the texture and consistency well with a food processor.
How to Make the Best Basil Pesto
Homemade basil pesto is so easy to make in just a couple of steps:
- Combine ingredients. In a food processor, add basil, garlic, pine nuts and Parmesan. Pulse mix until well combined, about 1 minute. Then, add salt, pepper and lemon juice.
- Add in olive oil. Slowly pour in olive oil while mixing on low speed until fully combined. You can stop to scrape down the sides of the food processor occasionally to help mix evenly.
- Serve. Transfer the pesto sauce into a bowl and serve immediately. You can serve with extra olive oil on top.
How to Use Homemade Basil Pesto
You can use homemade basil pesto in so many ways:
- Pasta - homemade pesto is most commonly used as a pasta sauce that can be mixed into any kind of pasta or zucchini noodles.
- Pizza - use it as a topping on your favourite pizza.
- Sandwiches - spread it onto a sandwich or grilled cheese to instantly elevate the flavour.
- Meat - use it as a marinade or a sauce and drizzle over your favourite piece of steak, roasted chicken, or fish.
- Vegetables - drizzle it over roasted vegetables.
- Salad - use it a dressing and add it to your favourite salad.
- Dip - serve it as is, as a dip or spread it over some toasted crostini or other crusty bread.
Storing and Freezing Instructions
- How to store: Store basil pesto sauce in an airtight container in the refrigerator for up to one week.
- How to freeze: Store basil pesto in an airtight container or freezer bag and store in the freezer for up to 6 months. You can also portion out the pesto into an ice cube mold and freeze. Once frozen, transfer the cubes to a freezer bag.
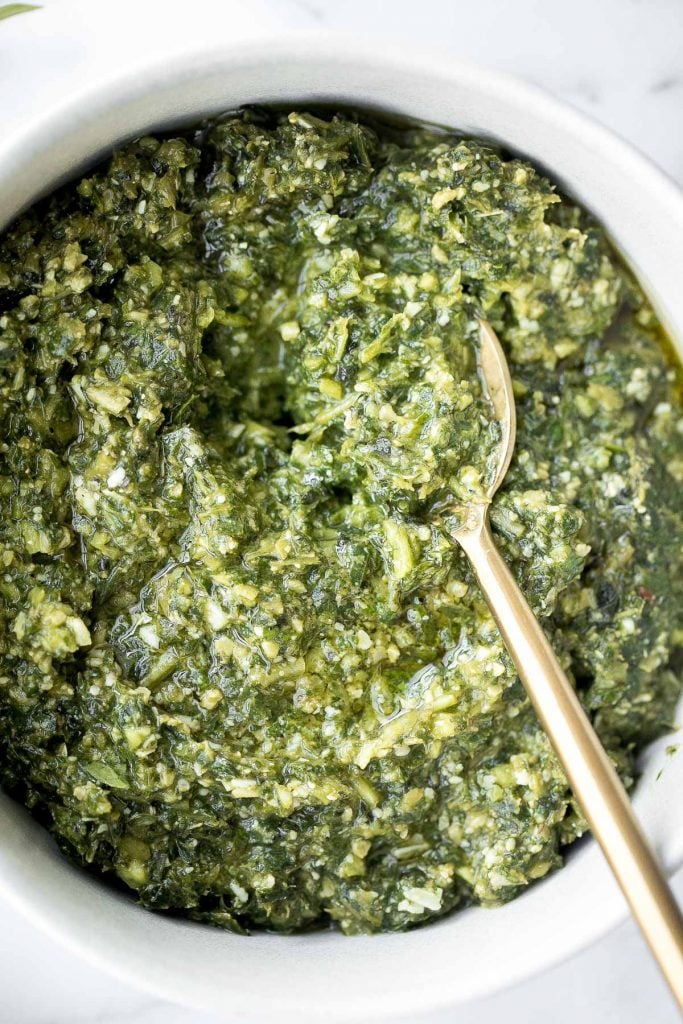
More Italian Recipes
- Creamy White Chicken and Spinach Lasagna
- Tomato Bruschetta with Balsamic Glaze
- Avocado Basil Pesto Spaghetti
- Whipped Ricotta Dip
- Spaghetti and Meatballs
- Creamy Tortellini Soup with Sausage
- Spaghetti Carbonara
- Cheesy Tortellini and Sausage Bake
Tried this recipe?
I'd love to hear what you think! Leave a comment and rating below to share your feedback. Your reviews help others discover this recipe and help me keep creating more free recipes for you. Snap a photo and tag me on social media @aheadofthyme too.
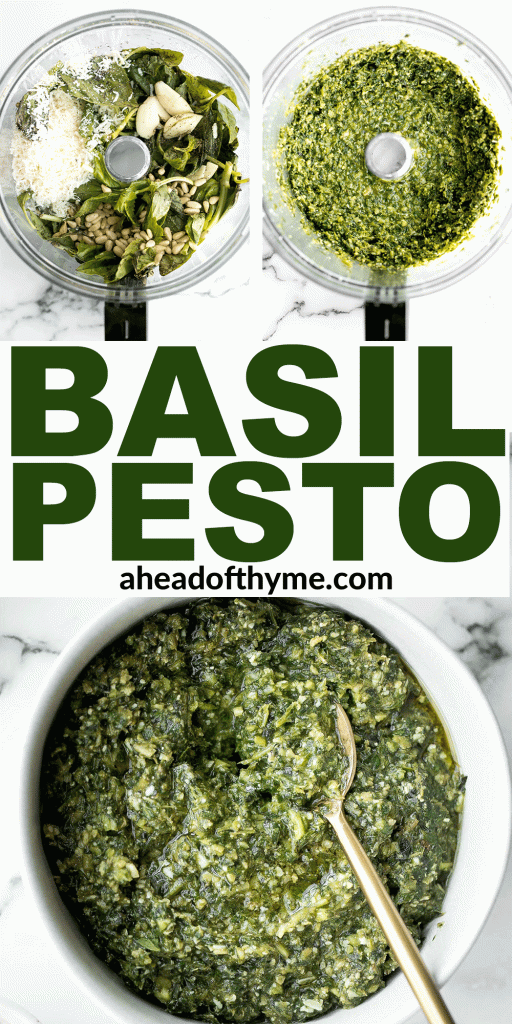
50 Chinese New Year Recipes
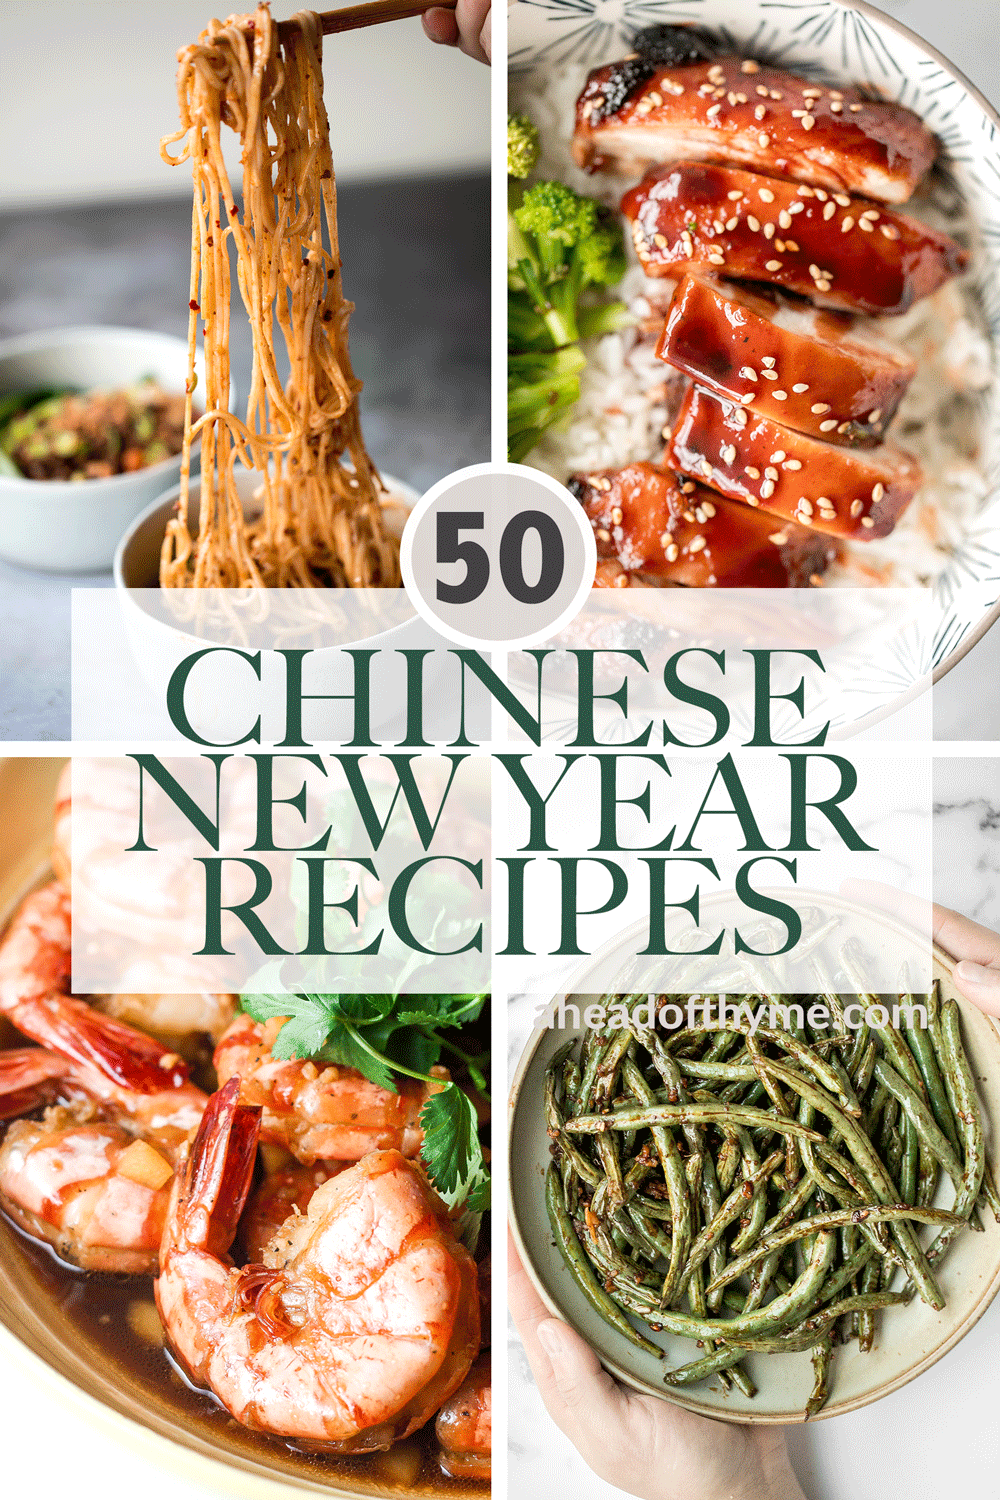
Let's be real, Chinese New Year (or lunar new year) is all about the food. We have rounded up our 50 best and most popular Chinese New Year recipes from main course dishes, noodles and rice, side dishes and dim sum, and everything in between. So if you're wondering what to make for Chinese New Year, then you have come to the right place! You will find some classics as well as some new favourites to try this year.
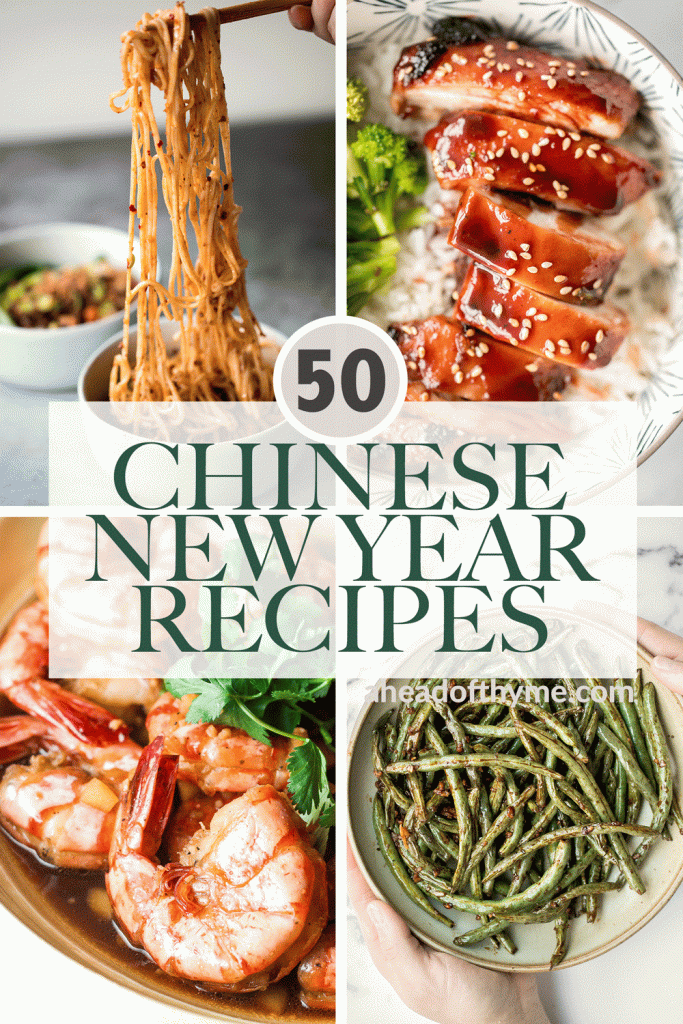
What is Chinese New Year?
Chinese New Year falls on the Lunar New Year and is the celebration of the new year in accordance with the traditional lunar calendar. It is the biggest holiday in China with celebrations lasting for weeks. Some of the traditions that fall during the new year are enjoying delicious food with family and friends, gifting red pockets (money in red paper envelopes), and lighting firecrackers. The Lunar New Year is celebrated in many other Asian countries as well.
Chinese New Year Main Course Recipes
Chinese hot pot at home is a warm, comforting social meal to enjoy with family or a small group of friends for Chinese New Year. It's delicious, easy to prepare, and customizable.
Lion's Head Chinese Meatballs are tender and juicy homemade pork meatballs packed with Asian seasonings and tossed in a sweet and sticky sauce.
Black Cod with Black Bean Sauce
Flaky, oily, and tender air fryer cod with black bean sauce is bursting with flavour and takes less than 20 minutes to make. The perfect Chinese New Year dinner.
Char siu (Chinese BBQ pork) is a delicious, flavorful, traditional roasted pork dinner slathered in a distinct sticky, sweet, savory barbecue sauce glaze. A classic Lunar New Year dish.
Tigers Prawns in Garlic Ginger Soy Sauce
10-minute tiger prawns in garlic ginger soy sauce is juicy, tender and immersed in incredible Asian flavours. It's the perfect weeknight meal.
Kung Pao chicken is a Chinese chicken dish that is stir-fried with crisp vegetables and tossed in a delicious Asian sauce packed with flavour.
Mapo tofu is quick, easy, delicious, flavorful, spicy, and numbing that is ready in just 20 minutes. Serve it with steamed rice on busy weeknights.
Instant Pot Chinese Braised Pork
Instant Pot Chinese Braised Pork (Hong Shao Rou) is tender, juicy, flavorful, and easy to make in a pressure cooker. Try this Shanghai dinner at home today!
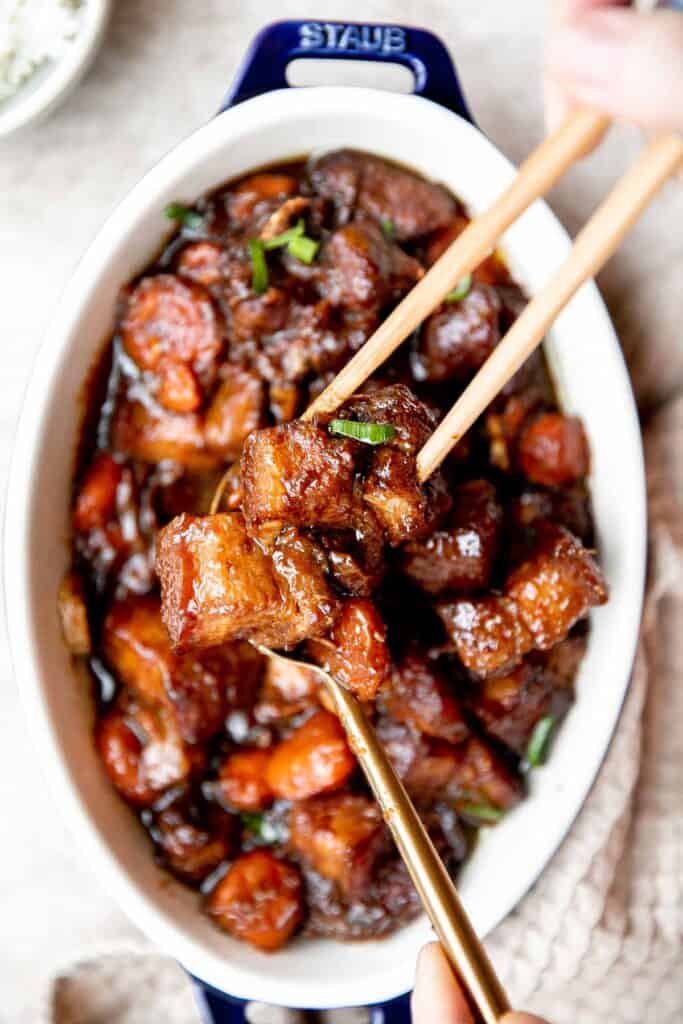
Beef and broccoli stir fry is a classic Chinese-American dish that is delicious, savory, hearty, and saucy. Better than takeout and ready in 25 minutes.
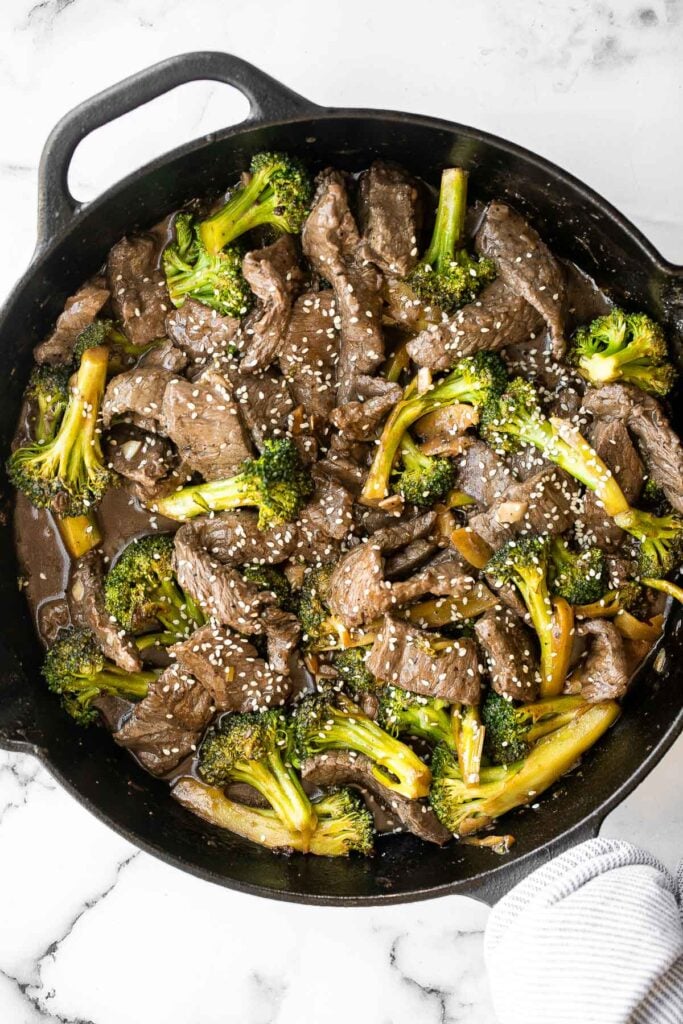
Easy one pan honey glazed roast pork is moist, tender, and juicy, coated with an irresistible honey glaze and packed with potatoes, green beans and apples.
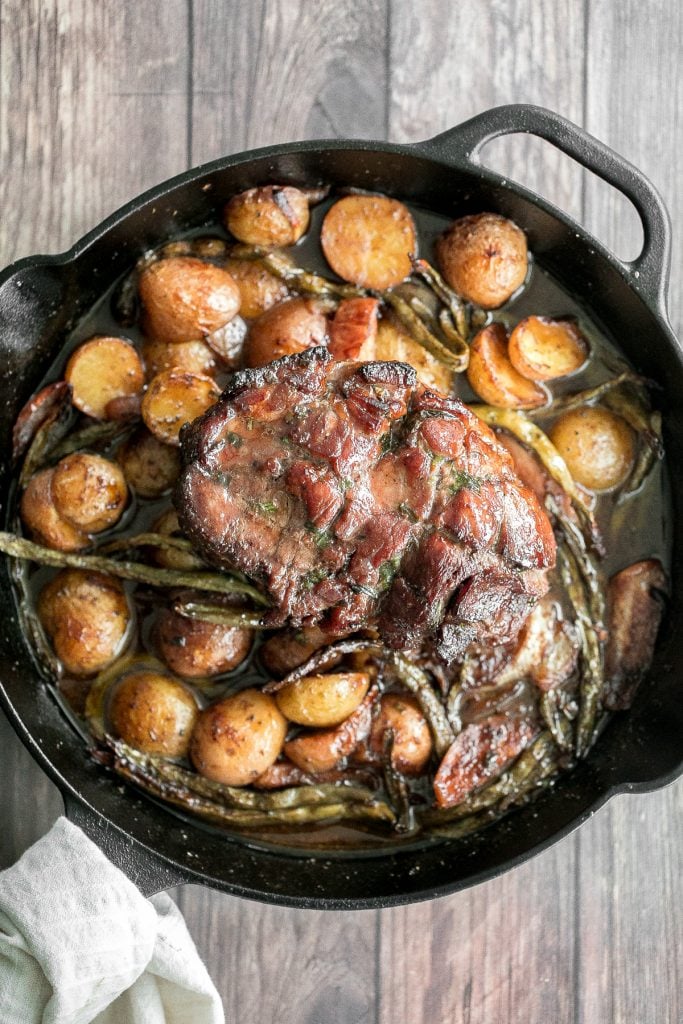
Char Siu (Chinese BBQ) Chicken
Sweet sticky and savoury Char Siu (Chinese BBQ) chicken is a delicious dinner packed with classic Asian flavours with incredible flavour. One of my favourite Chinese New Year recipes.
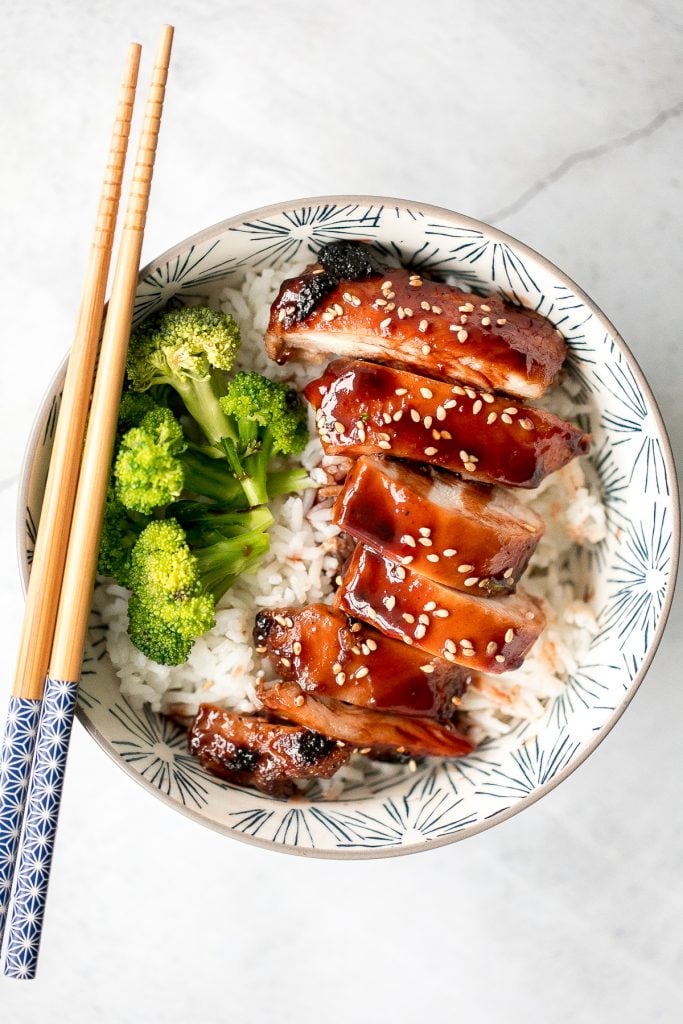
Asian five-spice roast turkey is tender and juicy, marinated with a delicious flavourful Asian rub and has a crispy brown skin. The perfect holiday dinner to include in your list of Chinese New Year recipes.
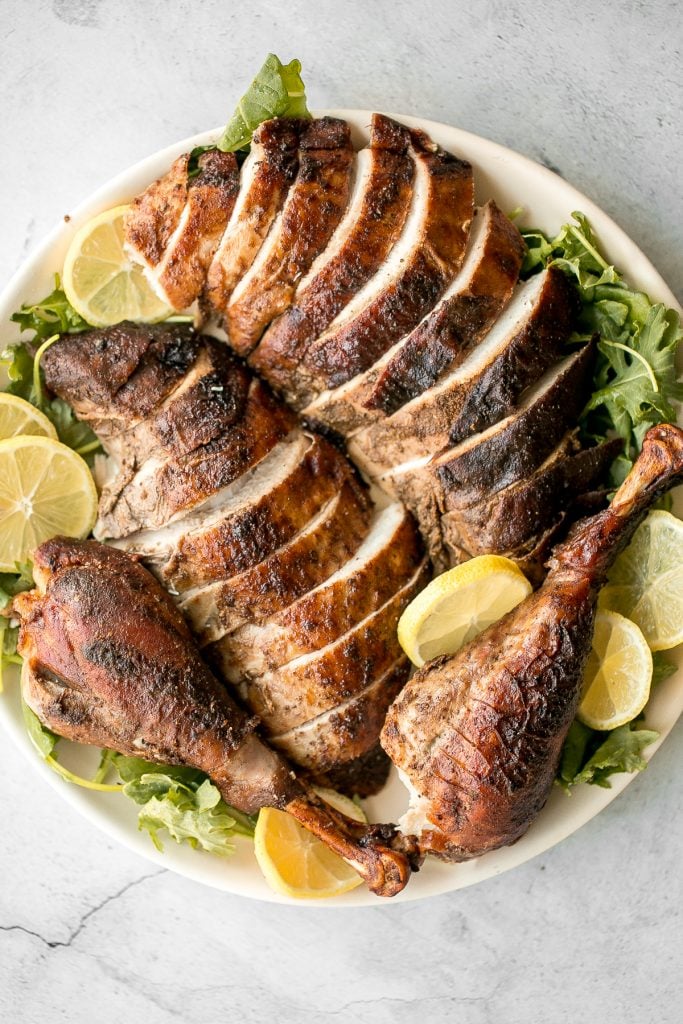
Ginger and Scallion Dungeness Crab
Ginger and scallion Dungeness crab is the ultimate Asian seafood experience stir-fried to perfection and coated with intense flavours.
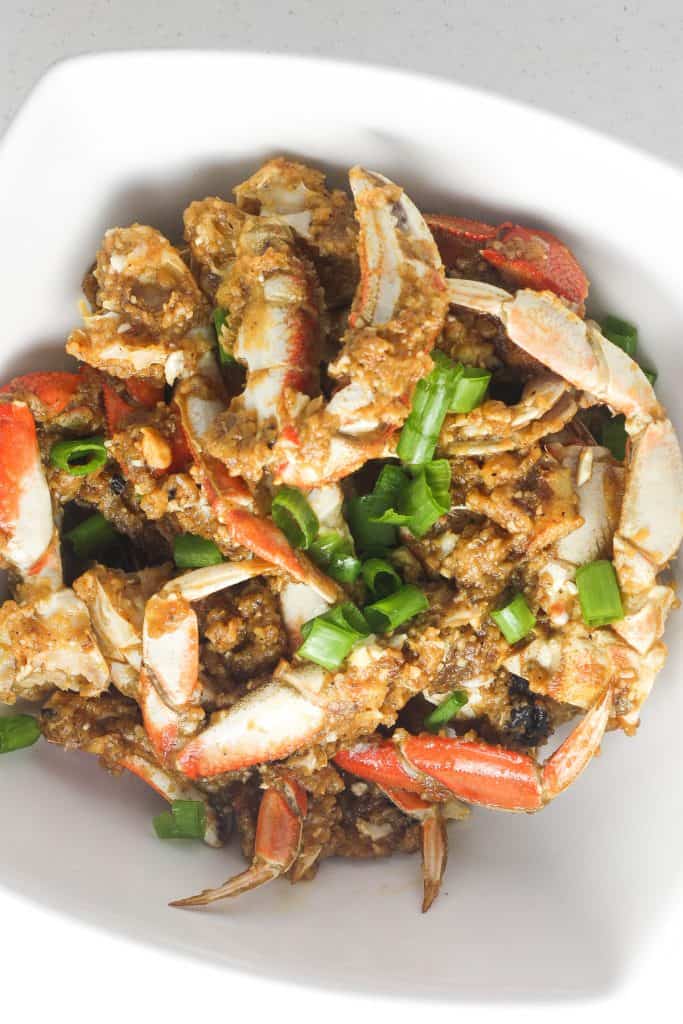
Better than takeout, healthy lemon chicken is a delicious, sticky chicken stir fry coated in a flavourful, sweet and tangy sauce. The best weeknight dinner.
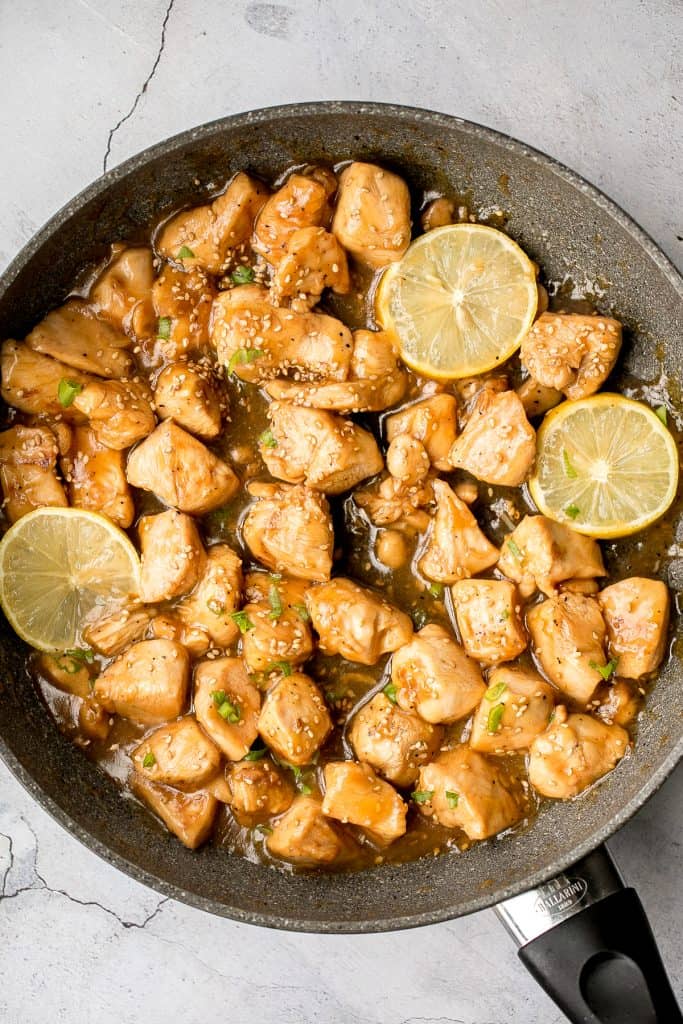
Sweet and sour pork is a delicious, quick and easy Chinese stir fry that takes just 30 minutes to make. Serve this homemade takeout over steamed rice.
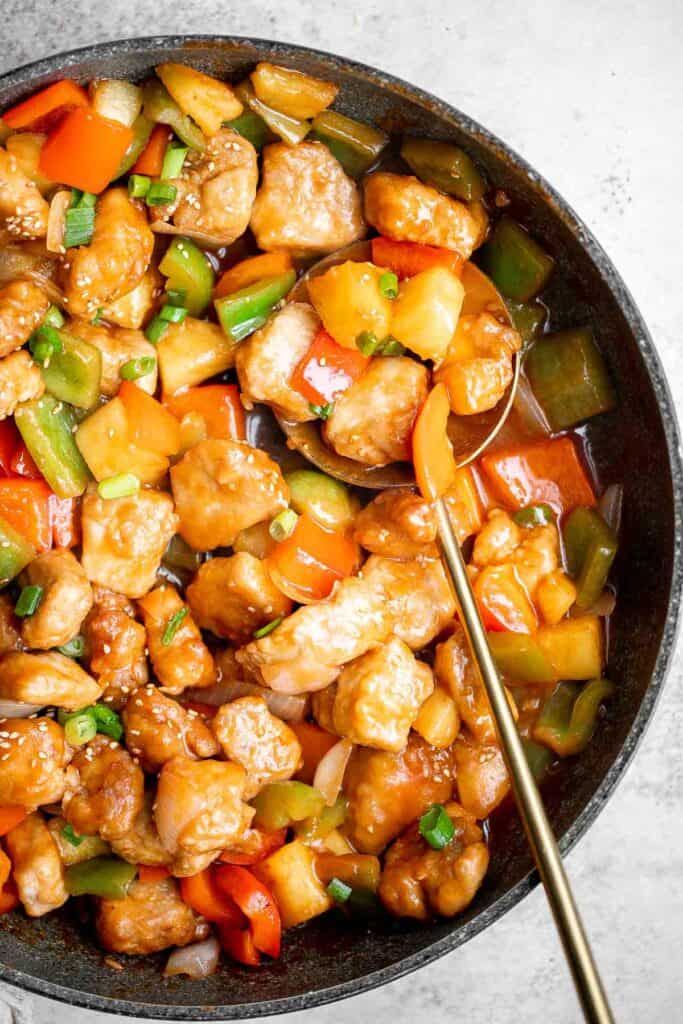
10-minute air fryer jumbo shrimp is juicy and tender on the inside, and crispy on the outside. It's so flavourful and garlicky with Asian seasonings.
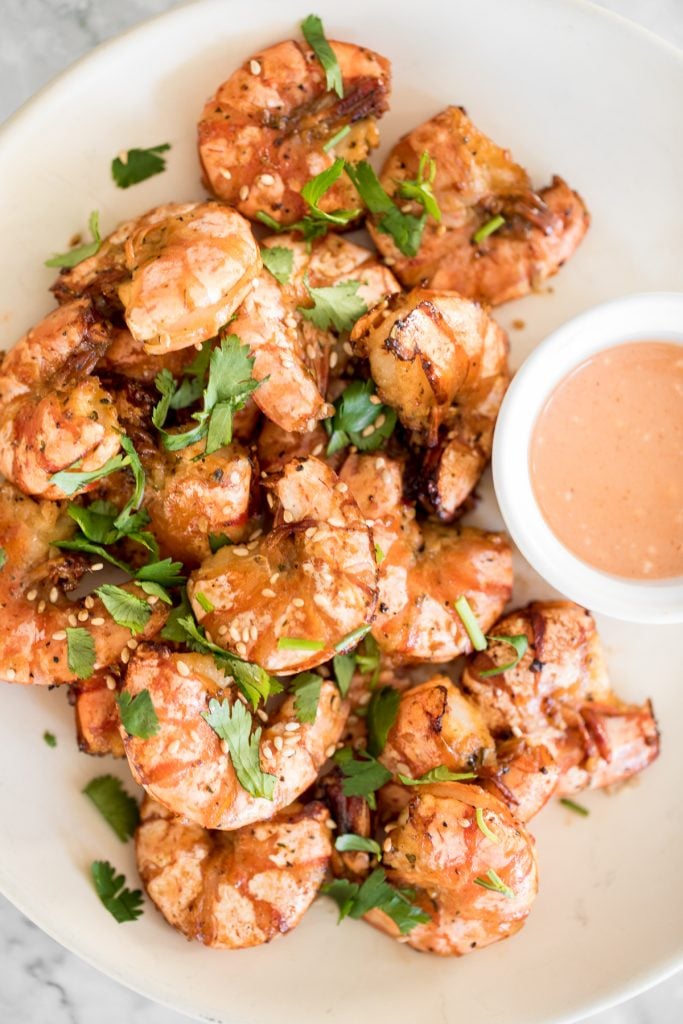
Baked General Tso's Chicken is a saucy, savoury, sweet, spicy Chinese-American takeout favourite made healthier with baked chicken, not fried.
Better than takeout garlic shrimp stir fry is saucy, sticky, flavorful, and delicious. It's quick and easy to make in 15 minutes and great for meal prep.
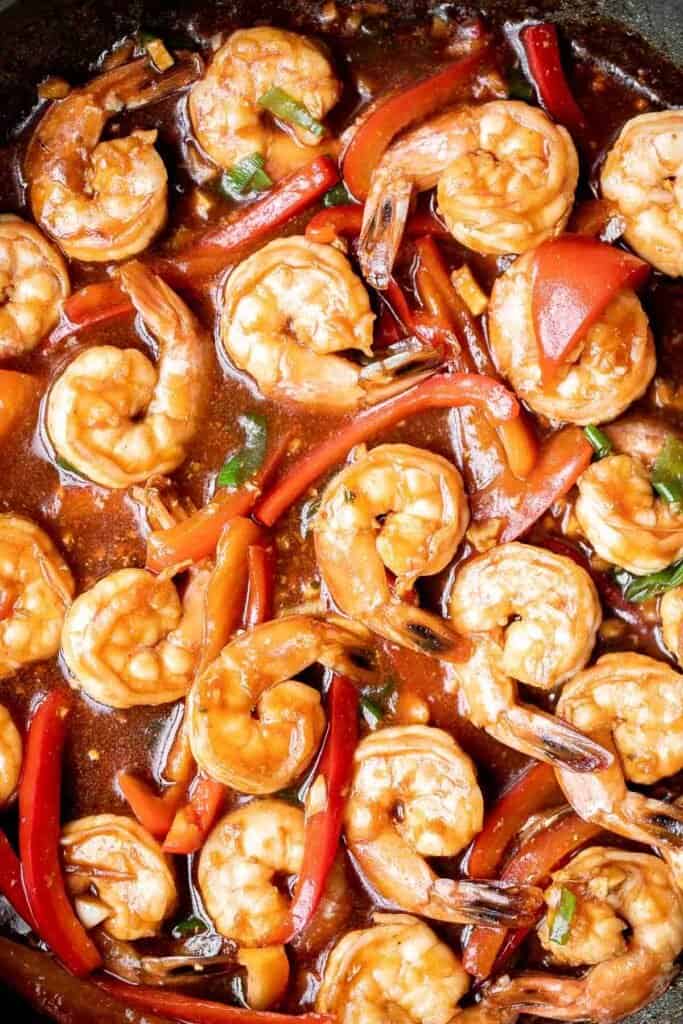
Juicy and tender, Xinjiang spicy cumin lamb skewers with a bold cumin and cayenne marinade, are so flavourful and easy to make on the grill or air fryer.
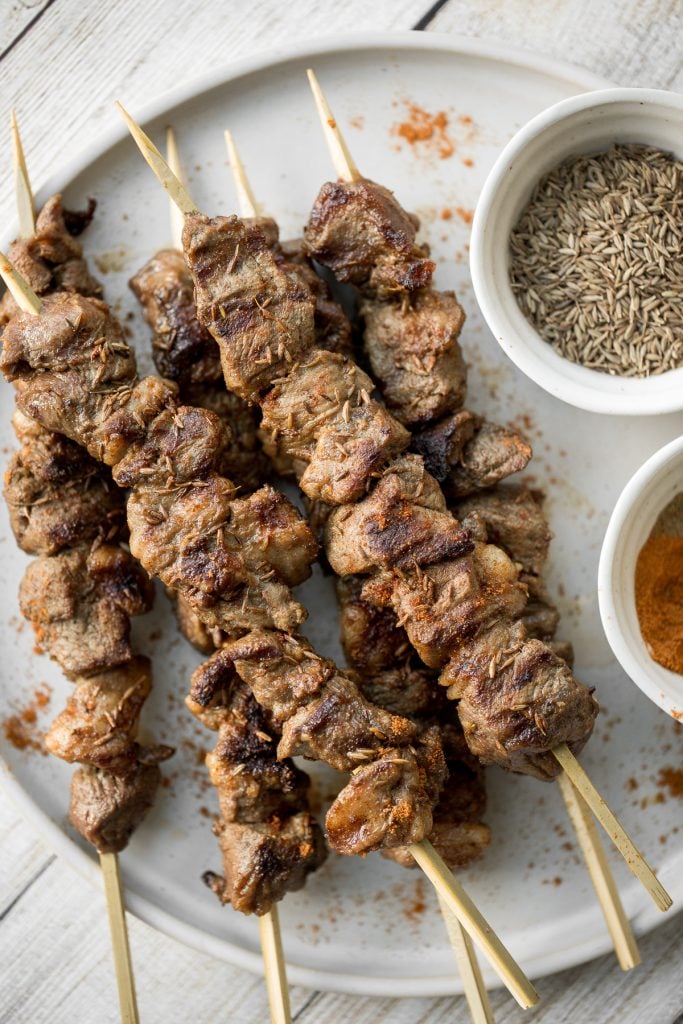
Cashew chicken is a quick and easy chicken stir fry ready in under 30 minutes. It's flavorful, delicious, and so much better and faster than takeout.
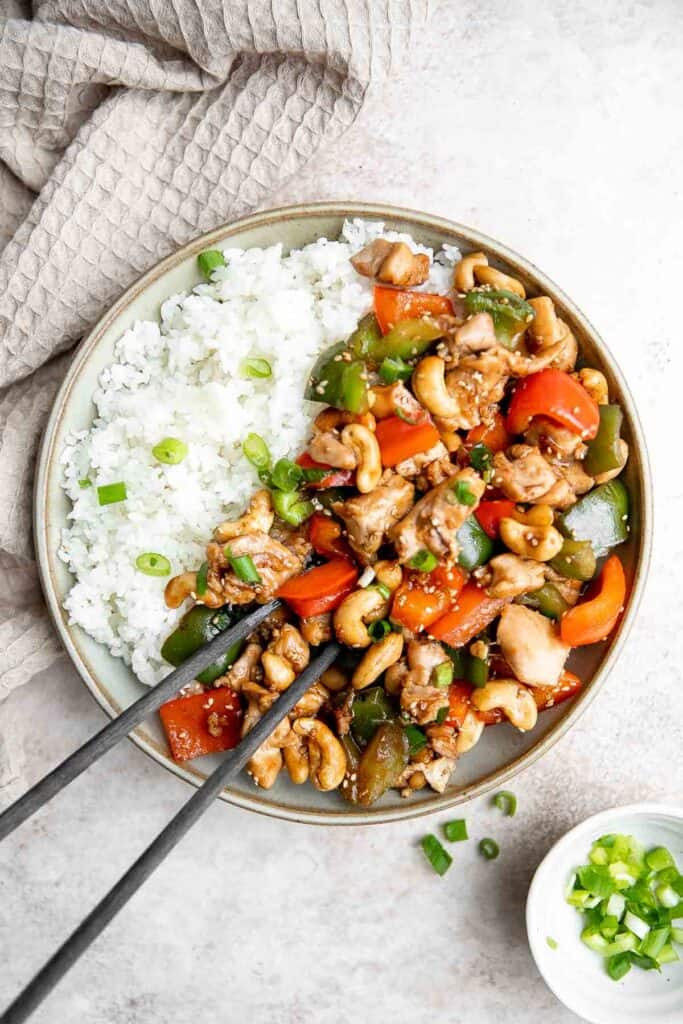
Garlicky, buttery, and perfectly seared scallops take less than 10 minutes to prep and cook. It's the easiest fancy, restaurant-grade meal to make at home.
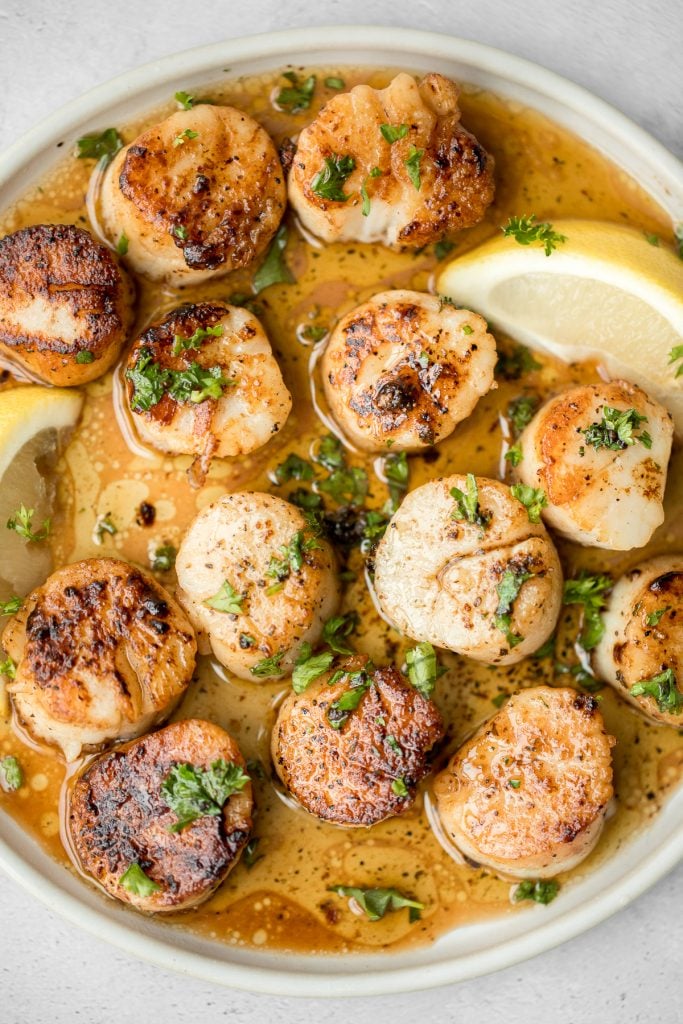
Chinese Takeout Orange Chicken is a quick, easy, delicious meal ready in 30 minutes. It's healthier than takeout - can be pan-fried, air fried, or baked.
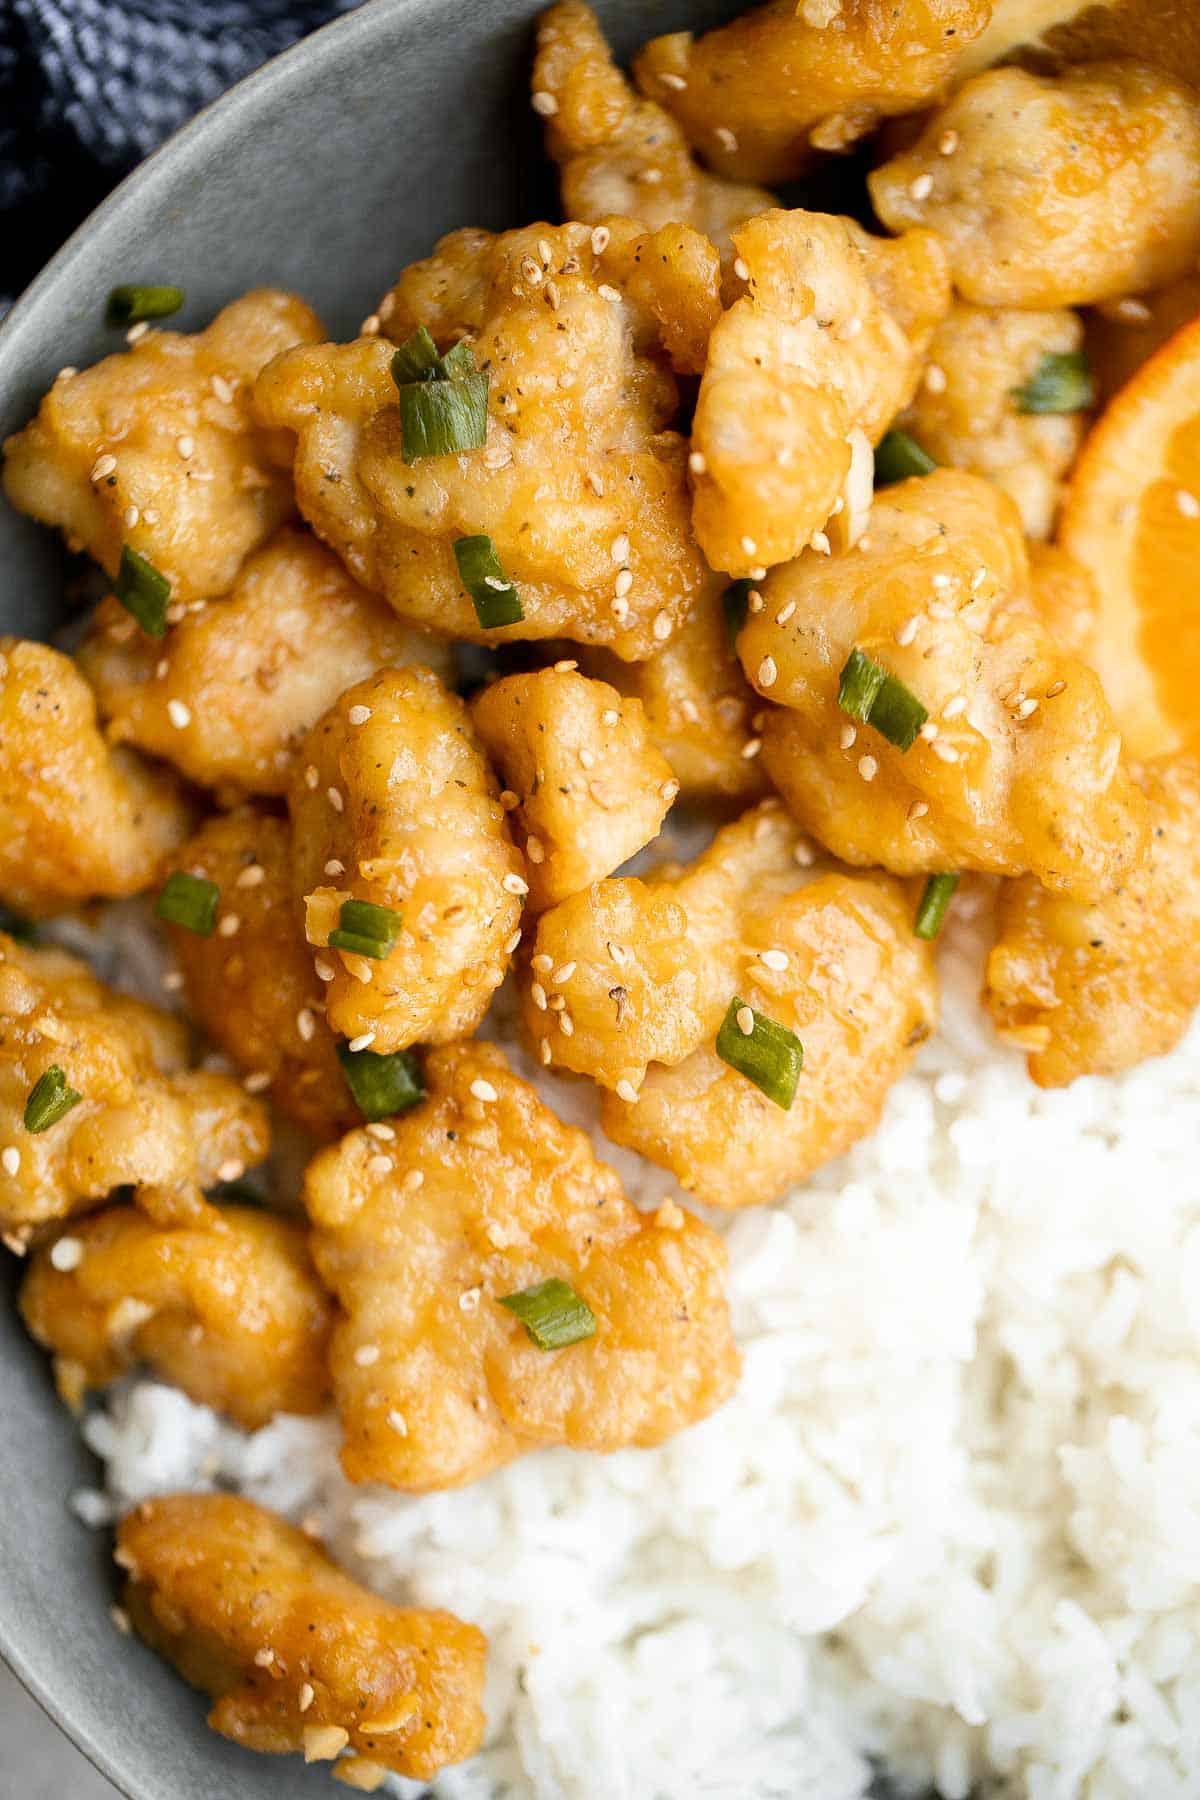
Glazed Honey Balsamic Pork Chops
Quick and easy, glazed honey balsamic pork chops are tender and juicy, seared in thyme and coated with a honey balsamic sauce. Make it in under 30 minutes.
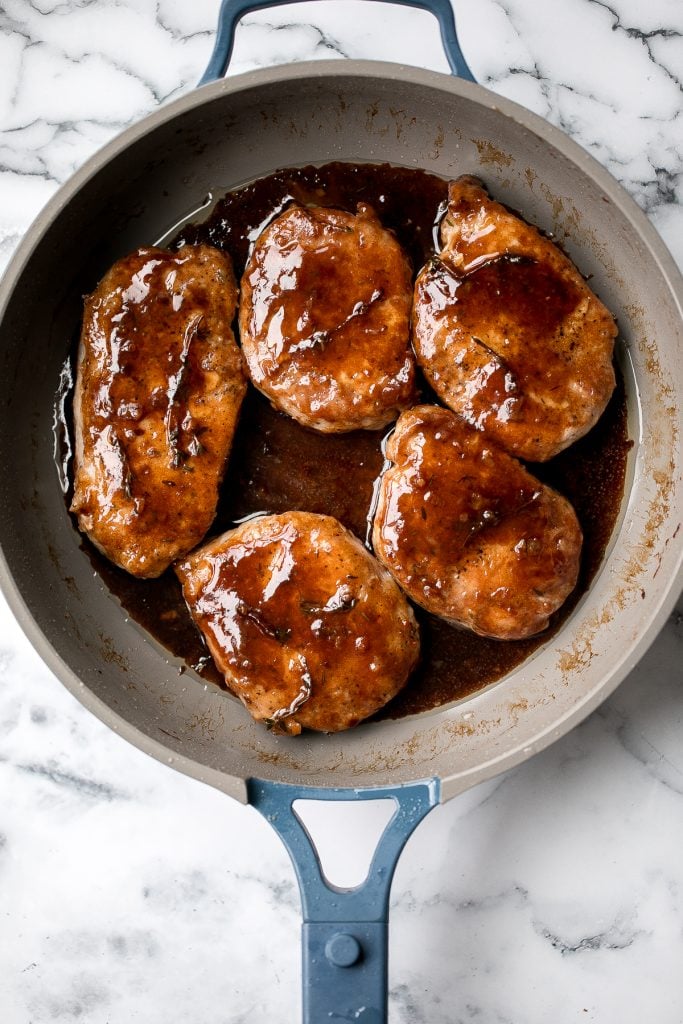
Hearty coconut lamb curry is an easy one pot meal that is packed with flavour. Make it on the stovetop or in the slow cooker and freeze leftovers for later.
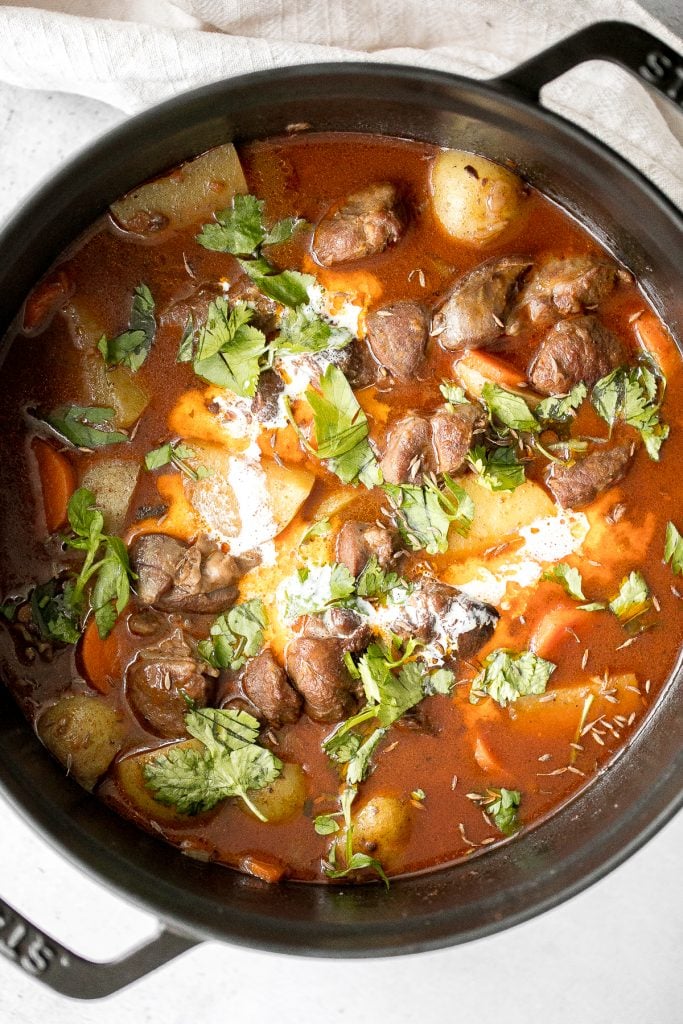
Better than takeout, baked sesame chicken with vegetables is delicious, flavourful, sticky and saucy. This healthier Chinese dish is quick and easy to make.
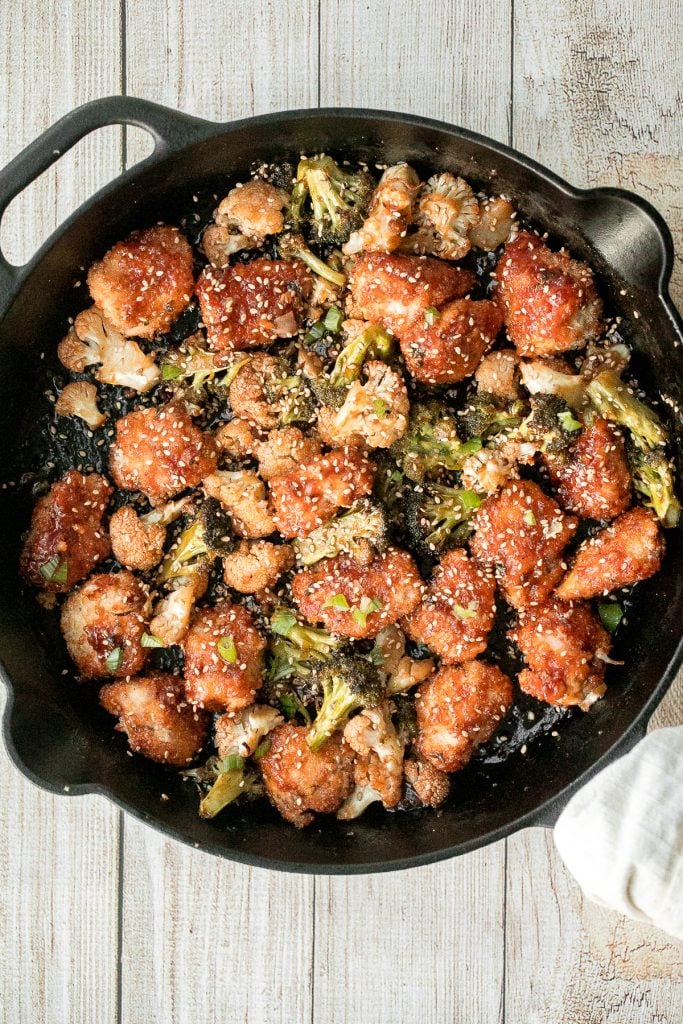
Juicy, tender, and delicious 18-minute air fryer lamb chops is marinated in a dijon sauce and will change the way you cook lamb forever.
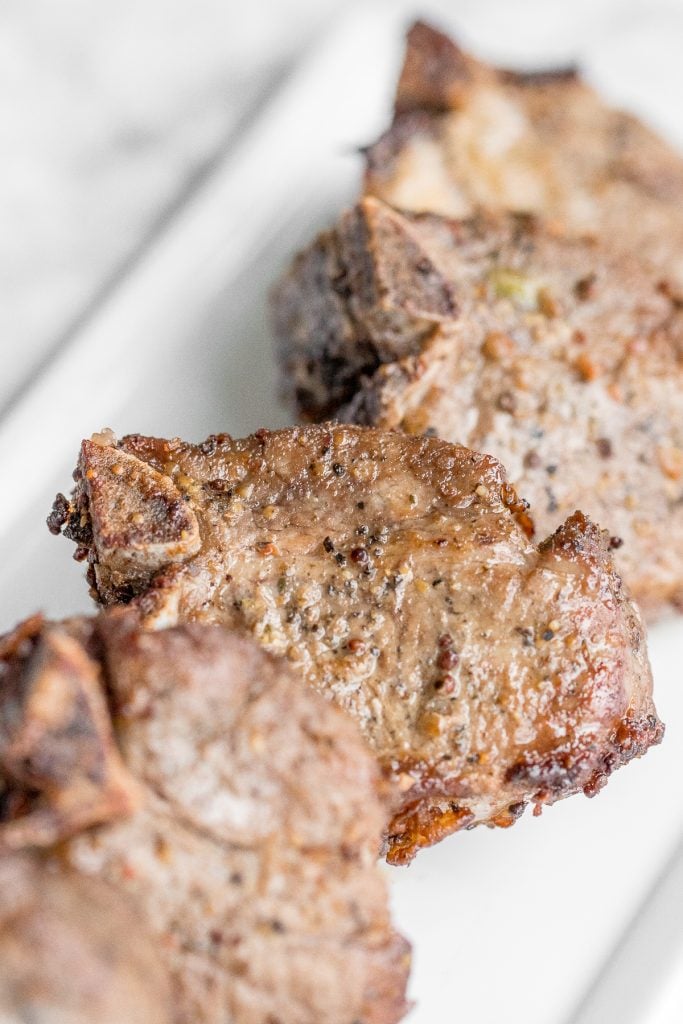
Flame-kissed, sticky and saucy, grilled orange chicken skewers with a rich, citrus-based marinade are delicious, juicy and so tender. Best weeknight dinner.

This delicious garlic and herb-crusted rack of lamb is tender, juicy, and flavourful. It is surprisingly quick and easy to make at home in about 30 minutes.
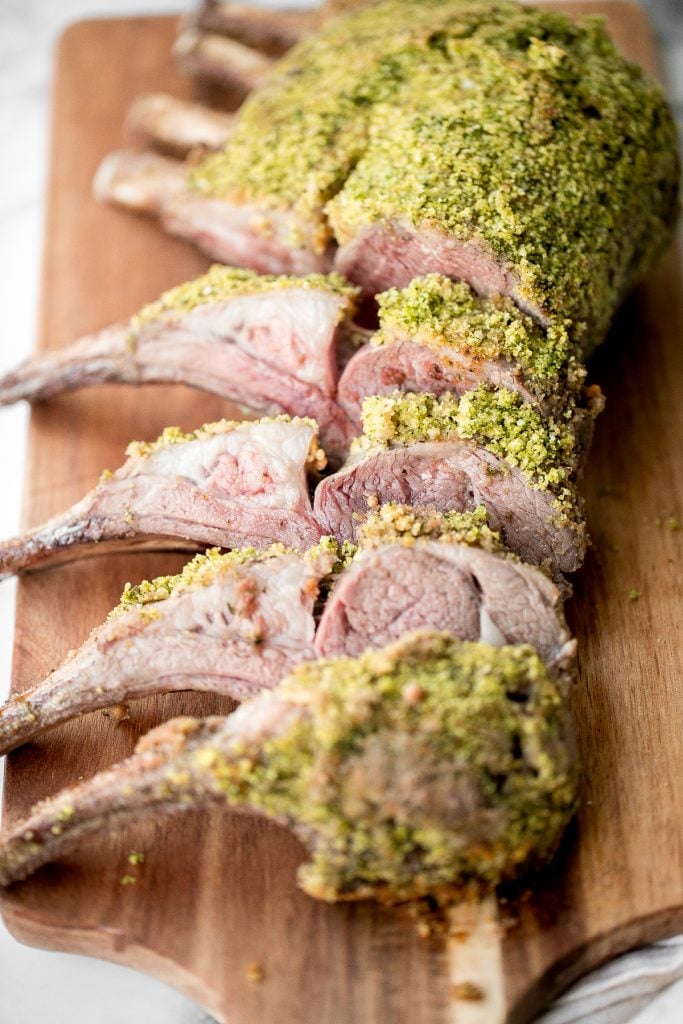
Warm and cozy, easy one pot coconut curry beef stew is hearty yet creamy, packed with tender beef chunks, potatoes and carrots, and creamy coconut milk.
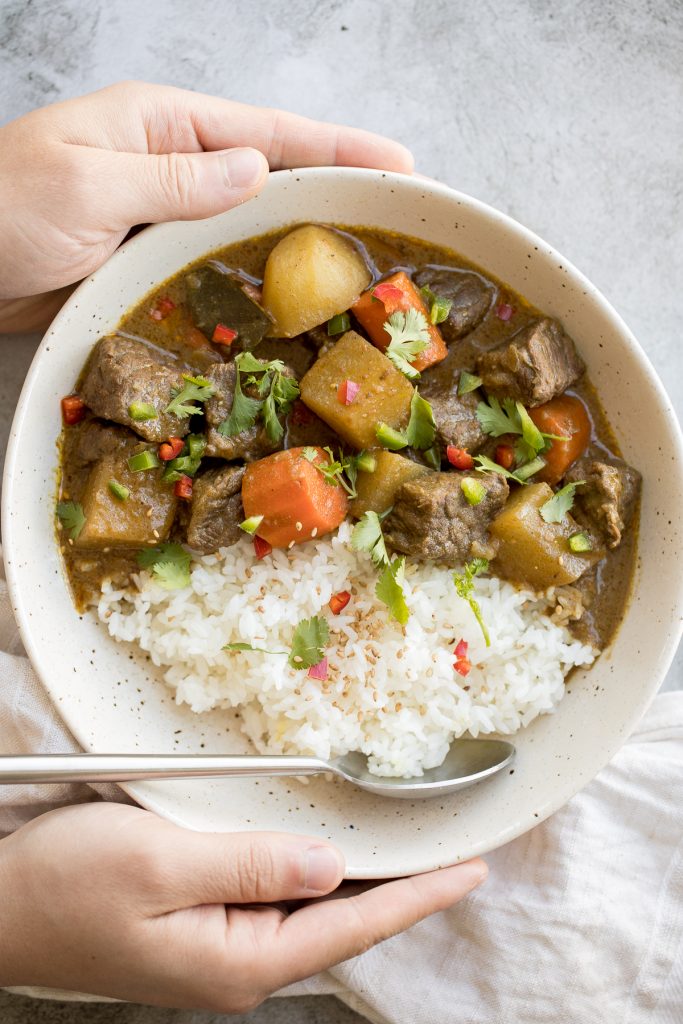
Pan-fried Garlic Prawns with Soy Sauce
Quick and easy, pan-fried garlic prawns with soy sauce, garlic, and green onions is a simple but flavourful Chinese stir-fry made in under 15 minutes.
Instant Pot Oxtail Stew is filling, nourishing, flavorful, and satisfying. This Asian stew is easy to make in the pressure cooker and is freezer-friendly.
Noodles and Rice Recipes
Learn how to make steamed rice that's perfectly cooked, fluffy and delicious in 30 minutes. Cook white rice on the stove, rice cooker, or instant pot.
Say goodbye to takeout and make flavourful, Chinese restaurant-style vegetarian fried rice at home in 10 minutes, with fully customizable ingredients.
Better than take-out, flavourful and authentic Shanghai fried noodles with chicken, mushrooms, and bok choy is made in just 10 minutes - the easiest dinner!
Toss thin wheat noodles in a spicy chili oil sauce and top with seasoned ground beef to make numbing, spicy Sichuan Dan Dan noodles in under 15 minutes.
Quick and easy, one-pan, 10-minute seafood fried rice with tiger prawns is so much healthier, tastier and better than takeout. It's the easiest weeknight meal.
This beef noodle stir fry is the 20-minute dinner that you have been looking for - quick and easy, delicious and flavorful, and so much better than takeout.
Hand-pulled noodles (la mian 拉面) are springy, chewy and delicious traditional homemade noodles that are rolled and stretched into long strips.
Better than takeout, flavourful stir-fried spicy cumin lamb noodles is packed with marinated lamb, noodles, and crisp bean sprouts. Make it in 15 minutes.
Chicken Chow Mein is a classic Chinese noodle dish that is quick and easy to make at home in 20 minutes - faster, healthier, and better than takeout.
Stir-Fried Rice Cakes with Shrimp
Better than takeout, stir-fried rice cakes with shrimp, bok choy, and bean sprouts in a delicious peanut butter sauce is a quick 10-minute one pan meal.
Leftover turkey fried rice with turkey, fluffy rice, scrambled eggs, vegetables, and classic Asian seasonings is a one skillet meal made in just 10 minutes.
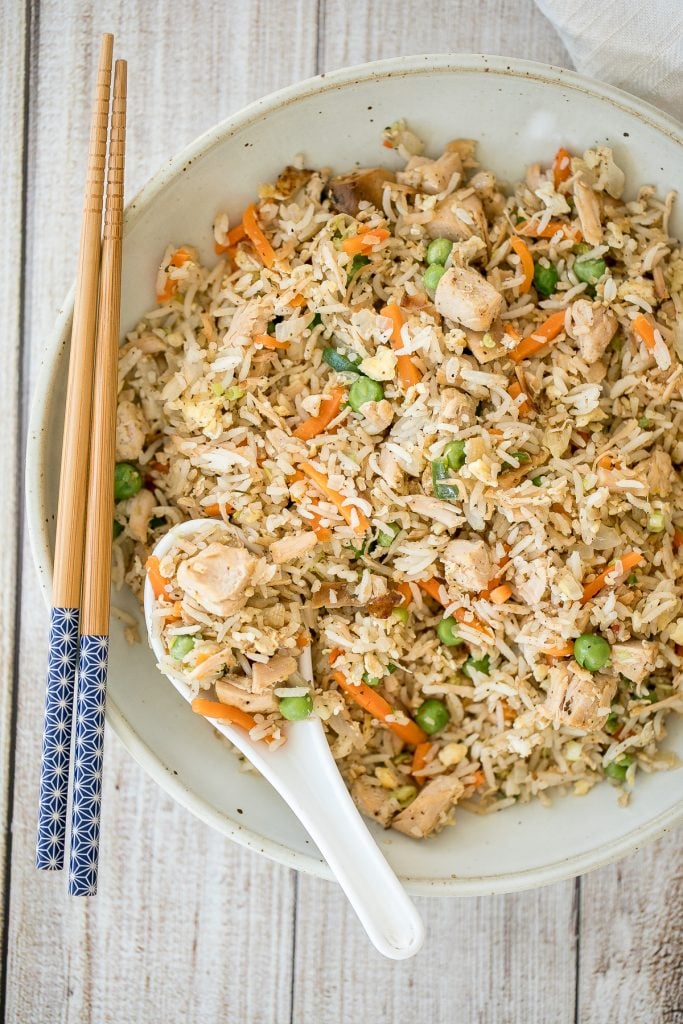
Stir-fried Rice Noodle Rolls with Peanut Butter Sauce
Better than takeout, quick and easy one pan stir-fried rice noodle rolls with peanut butter sauce is the best weeknight stir fry, ready in under 10 minutes.
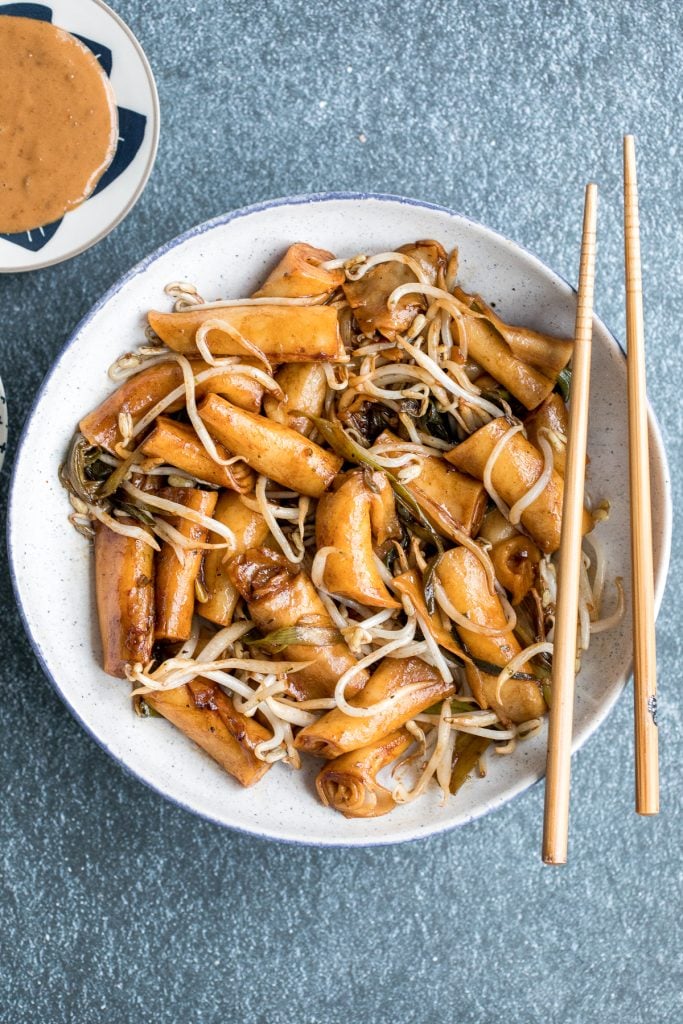
Cold Noodles with Peanut Butter Sauce
Easy vegan Shanghai style cold noodles tossed in peanut butter sauce with fresh vegetables and Asian seasonings, are flavourful and ready in 10 minutes.
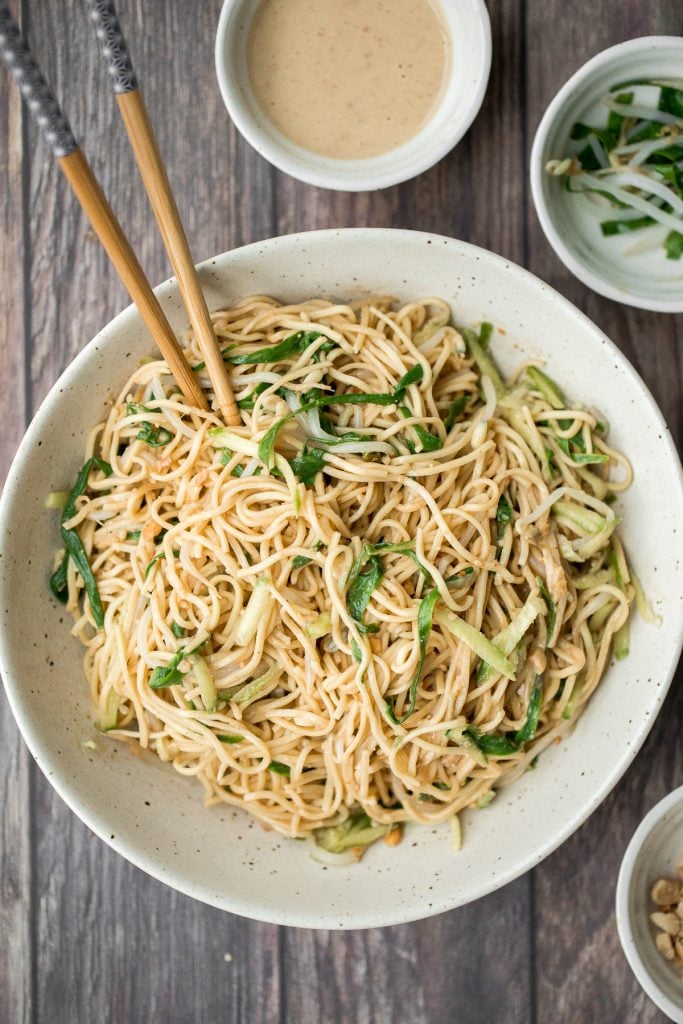
Zongzi Chinese tamales (粽子) or sticky rice dumplings are stuffed with sticky rice, pork belly, and shiitake mushrooms, wrapped inside reed or bamboo leaves.
Pork Noodles is a quick and easy stir fry ready in just 20 minutes (including prep!). It's filling, delicious, flavorful, and better than takeout.
Shanghai scallion oil noodles (葱油拌面) is a flavourful, simple noodle dish that is easy to make homemade with 6 ingredients in under 10 minutes.
Say goodbye to takeout and make easy Lo Mein Noodles at home, packed with fresh veggies and healthy ingredients, in less than 15 minutes!
Flavourful curry chicken fried rice with chicken, mushrooms, peas, rice, and curry flavours is so easy to make in less than 10 minutes on busy weeknights.
Chinese Side Dishes and Appetizers
Roasted Garlic Green Beans (Air Fryer or Oven)
Quick easy roasted garlic green beans are tangy, sour, savoury, and sweet, with a tender and crunchy texture. Make them in the oven or air fryer in minutes.

Homemade pork dumplings are quick and easy to make, with perfect crispy bottoms and a tender, juicy pork filling inside. Easy to meal prep and freeze well.
Air fryer short ribs are crispy, flavorful, and delicious. The easy marinade ensures they're tender and juicy inside, while the air fryer makes them crispy.
Stir-fried Lotus Root with Green Onions
Stir-fried lotus root is a classic Chinese stir fry dish that makes for an excellent vegan side dish at your dinner table.
Crispy Bottom Shanghai Pan-Fried Pork Buns
Crispy bottom Shanghai pan-fried pork buns are crunchy on the bottom and fluffy and airy inside with a juicy and flavourful pork and spring onions filling. They are one of the most popular dim sum recipes in Shanghai.

Quick and easy spring vegetable stir fry is made with delicious seasonal vegetables, packed with savoury and salty flavour, and takes 10 minutes to cook.
Crispy Fried Vegetarian Spring Rolls
Better than takeout, light and crispy fried vegetarian spring rolls are packed with a tender mushroom and cabbage vegetarian filling in a crunchy skin.

Shanghai Style Vegetarian Steamed Buns
Homemade Shanghai style vegetarian steamed buns is spongy with a juicy, flavourful bok choy and mushroom filling inside bursting with Asian flavours.

Quick, easy, and simple, vegan tofu and mushroom stir fry is a delicious meal that is ready in under 15 minutes. Serve it over a bowl of steamed rice.
Light, refreshing and crisp Chinese garlic cucumber salad is a quick and easy, simple salad tossed in an Asian dressing and packed with a ton of flavour.
Homemade Chinese beef potstickers (dumplings) are crispy on the outside and tender and juicy inside packed with a delicious beef filling.

Air Fryer Vegetable "Stir-Fry" with Tofu
Simple air fryer spring vegetable "stir-fry" with tofu is the ultimate easy dinner ready in less than 10 minutes. It's healthy, vegan and gluten-free.
Crispy Bottom Pan-Fried Vegetable Buns (No Yeast)
Crispy bottom pan-fried fried vegetable buns (no yeast) are crunchy outside yet tender inside with a mushroom, carrot and vermicelli vegetarian filling.

Steamed scallion buns (hua juan 花卷) are delicious flower rolls made of a light and fluffy dough layered with green onions that is twisted and steamed.

Better than takeout, shrimp egg rolls are a delicious, flavourful and easy appetizer to make. They can be deep fried, baked or air fried.

Mini egg tarts with a flaky buttery crust and silky smooth rich egg custard filling are a delicious Hong Kong pastry served as dessert with dim sum.
Cranberry Pumpkin Steamed Buns
Cranberry pumpkin steamed buns (baozi) are light, spongy, and fluffy Chinese buns packed with colourful cranberries and pumpkin puree for the best flavour.
For more dim sum recipes, browse our top 25 best dim sum recipes.
Chinese New Year Dinner Tips
- Plan your menu ahead of time. You can prepare some of these Chinese New Year recipes in advance. Some can stored in an airtight container for a few days in the refrigerator, and some can even be frozen, according to recipe directions.
- Prep your ingredients as much as possible. Once you have decided on the dishes to serve, prepare as much as you can in advance, whether that is chopping ingredients or prepping the dish and storing in the refrigerator until ready for the oven. Any little bit that you can prepare in advance will make things much less stressful on the day.
- Set the table the night before. Take out the fancy dinnerware, flatware, glasses, placemats, and napkins and set the table the night before. It's one less thing to worry about on Chinese New Year.
Did You Make Any of These Popular Chinese New Year Recipes?
Please leave a comment and rating below, and let me know what you thought of this round up of Chinese new year recipes. Be sure to snap a picture and tag me on Instagram @aheadofthyme or share it on the Pinterest pin so that I can follow along.
HUNGRY FOR MORE? Don't forget to sign up for my email newsletter so that you don't miss any recipes. You can also follow along on Instagram and Pinterest for more recipe updates.
Goat Cheese and Tangelo Winter Salad
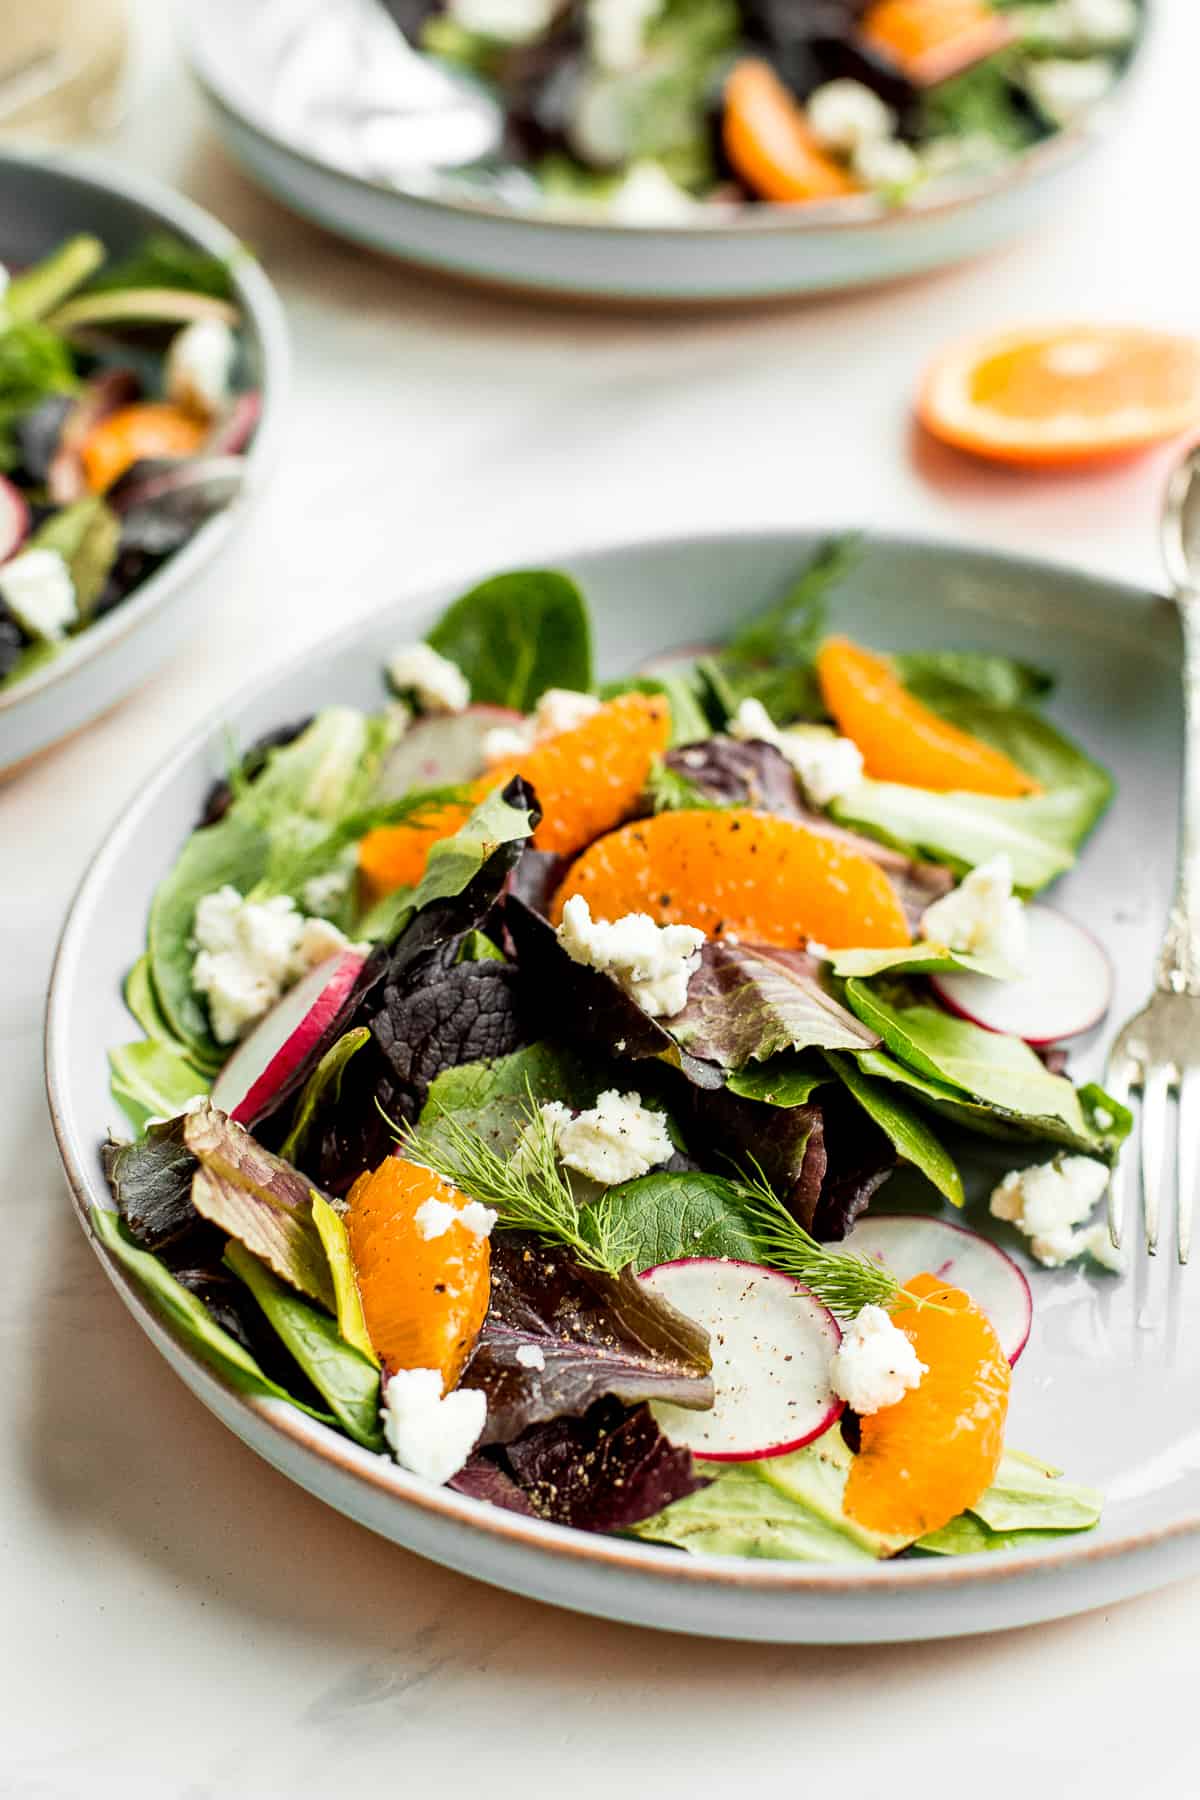
It's finally a new year which means that we are all ready for a fresh start to tackle those new years resolutions. One of the top things on most of our lists is to try to eat a little healthier. So what better way to start the year than with a fresh goat cheese and tangelo winter salad with creamy dressing?
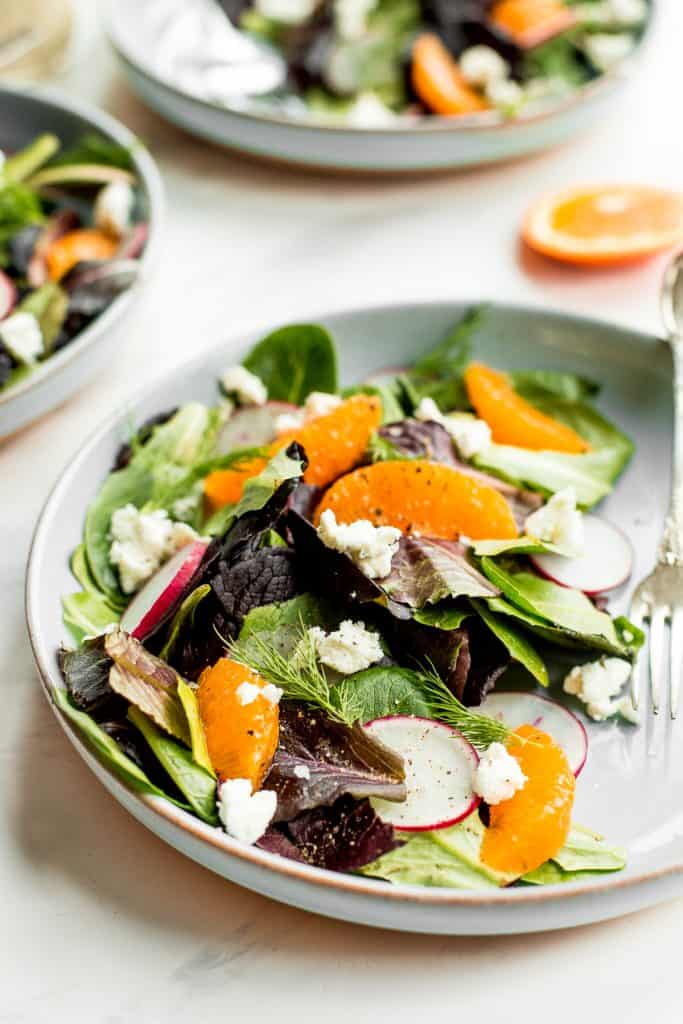
The flavour combinations in this healthy and light winter salad are just impeccable. Sweet, tangy goat cheese offers a creamy contrast that pairs with and plays off the tangelos amazingly well. They're paired together with crunchy, thinly sliced radishes, that add a pop of colour as well as a slightly spicy bite, which is why a creamy dressing works really wonders here.
What I love about a salad is that they are completely customizable. You can switch up the greens, the fruit and the dressing and you have something completely different. Some of my other favourites to make in the winter months are Winter Kale Salad with Apple Cider Vinaigrette, Mandarin Orange Salad, and Apple Walnut Salad with Balsamic Vinaigrette.
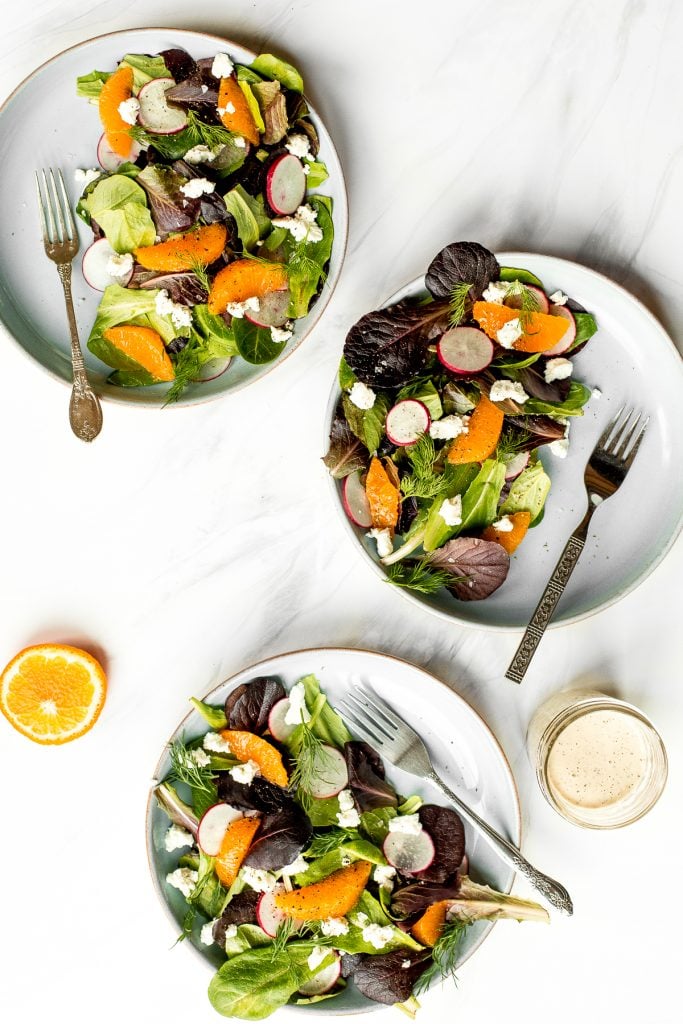
Tangelo Winter Salad Ingredients
To make this goat cheese and tangelo winter salad, you will need the following ingredients:
- baby romaine lettuce - or any spring mixed greens)
- tangelos - tangelos are a winter citrus fruit that, depending on where you live, are in season between December and February, peaking in January. So you should be able to start spotting these at your local grocery store. Tangelos might look like an orange, but they have a much more sour taste, which is not surprising given that they are a hybrid of tangerines and grapefruit.
- radishes
- goat cheese
- salt and pepper
- caesar dressing - I used my favourite homemade caesar, but you can switch this out with any creamy dressing you've got on hand. What makes the salad really pop is adding a bit of the leftover tangelo juice to the dressing. It creates this subtle, fruity flavour that I just love. And I have a feeling you will too.
You can also add some protein to this tangelo winter salad. Try some shredded leftover roast chicken (or store-bought rotisserie chicken), baked maple salmon, or grilled shrimp.
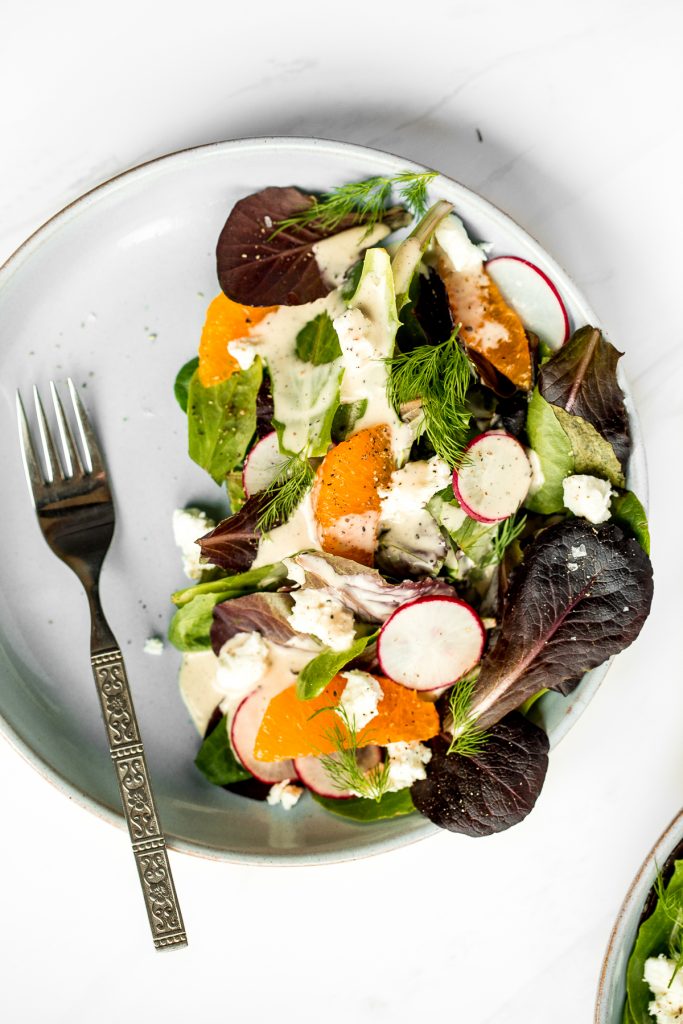
How to Make the Best Goat Cheese and Tangelo Winter Salad with Creamy Dressing
- Arrange the lettuce. Divide romaine lettuce equally between 6 plates, or arrange on one large platter.
- Prepare the tangelos. Supreme the tangelos by trimming off both ends so they will stand up easily on a cutting board. Using a sharp pairing knife, begin cutting from the top of the fruit down to the bottom, following the shape of the fruit, removing only the pith. Carefully slice the segments out, following the natural lines of the membranes which divide each segment. Place tangelo supremes in a small bowl. Squeeze the remaining juice from the membrane into a separate small bowl and set aside.
- Assemble the salad. Layer the tangelos, sliced radishes, and goat cheese on top of the romaine lettuce. Sprinkle with salt and freshly ground black pepper.
- Prepare the dressing. Combine caesar dressing (or other creamy dressing) with remaining juice from the tangelos, one teaspoon at a time. Whisk thoroughly, taste, and add more juice as needed to add a subtle tangelo flavour. Serve salad with dressing drizzled on top or on the side.
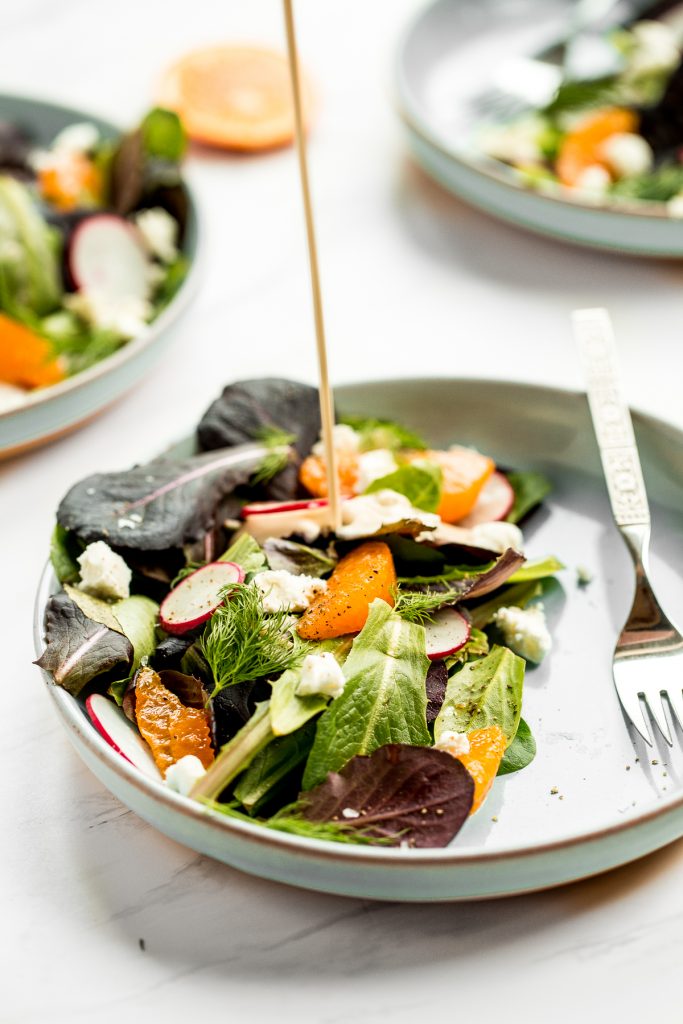
How to Serve Goat Cheese and Tangelo Winter Salad
Enjoy this feel good (and good for you!) tangelo winter salad with a crusty French baguette alongside your favourite light entrée such as a warm and cozy bowl of soup. It pairs really nicely with light cream of broccoli soup or creamy tomato potato soup.

More Salad Recipes
- Mandarin Orange Salad
- Winter Kale Salad with Apple Cider Vinaigrette
- Fall Harvest Salad with Roasted Butternut Squash
- Mediterranean Orzo Pasta Salad
- Apple Walnut Salad with Balsamic Vinaigrette
- Mediterranean Chickpea Wedge Salad with Hummus Dressing
- The Best Greek Salad
Tried this recipe?
I'd love to hear what you think! Leave a comment and rating below to share your feedback. Your reviews help others discover this recipe and help me keep creating more free recipes for you. Snap a photo and tag me on social media @aheadofthyme too.
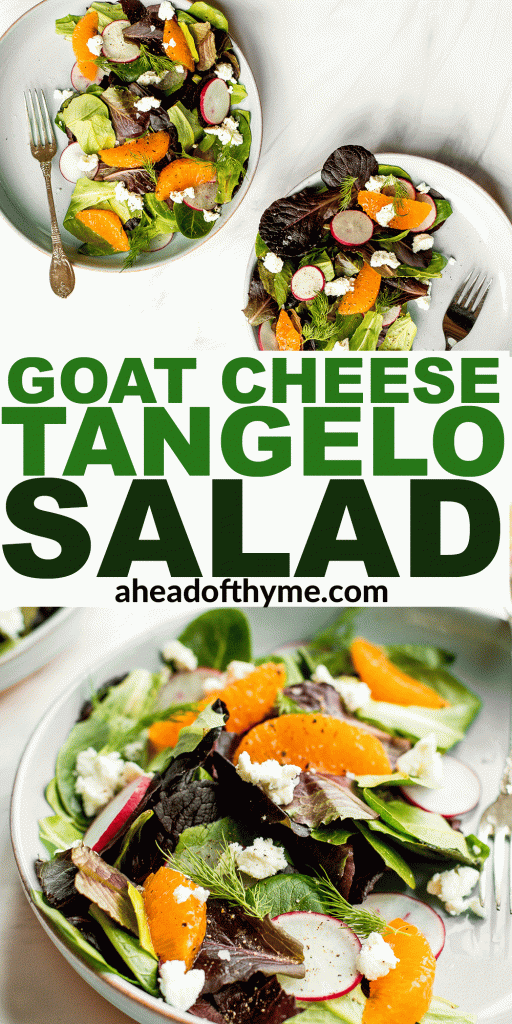
Char Siu (Chinese BBQ) Chicken
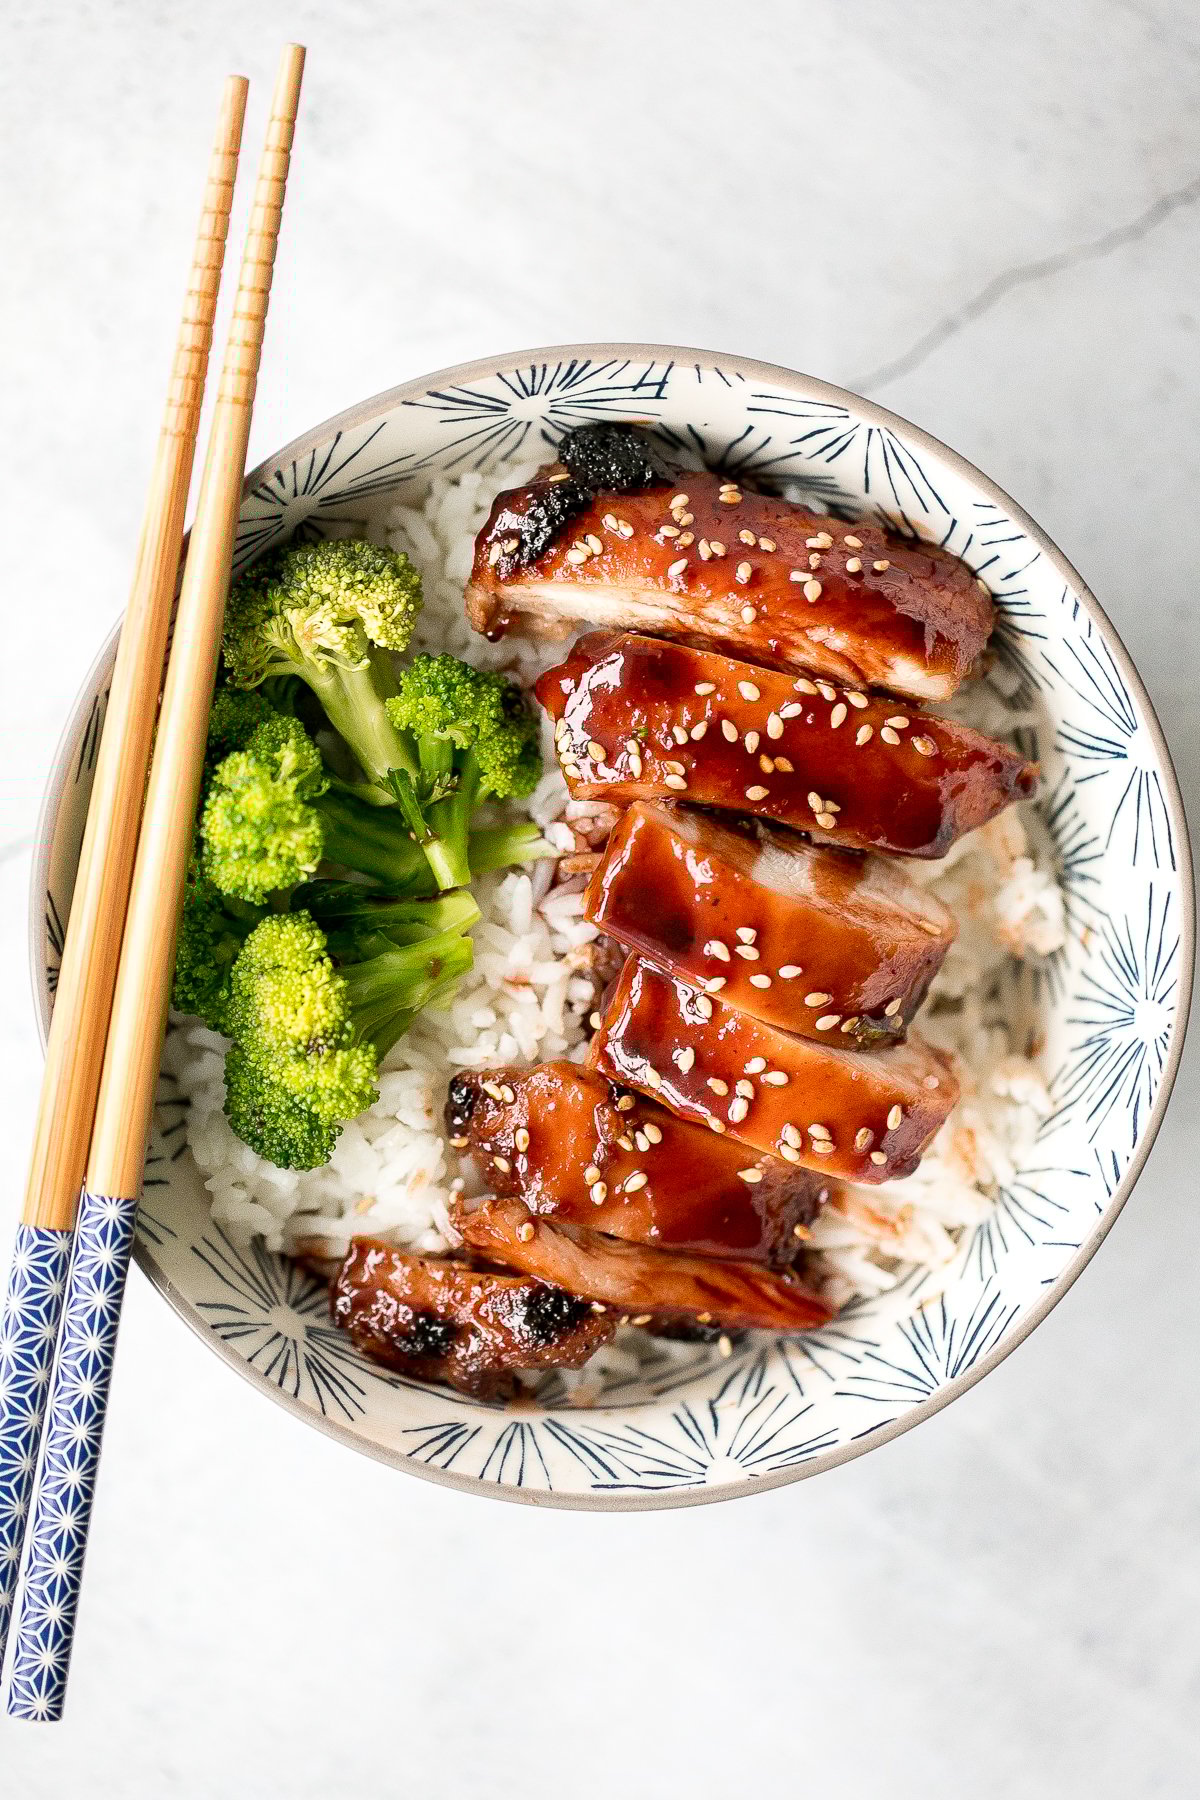
Sweet, sticky, and savoury, Char Siu (Chinese BBQ) chicken is a delicious chicken dinner packed with classic Asian flavours with incredible depth of flavour. The honey in the sticky glaze creates a beautiful caramelization colour that is iconic on a Char Siu and fermented red beans adds that distinct red colour. Plus, making it at home just tastes so much better than takeout. Marinate it ahead of time and bake it in the oven in just 40 minutes. It's the best dinner on busy weeknights or on any night of the week.
If you like barbecue pork belly, then you will love this chicken version with the same classic Cantonese flavours that will fill your kitchen with the best smells. Serve this Char Sui chicken over a bowl of steamed rice or fried rice with the pan drippings on top, and a Chinese cucumber salad or stir-fried vegetables on the side.
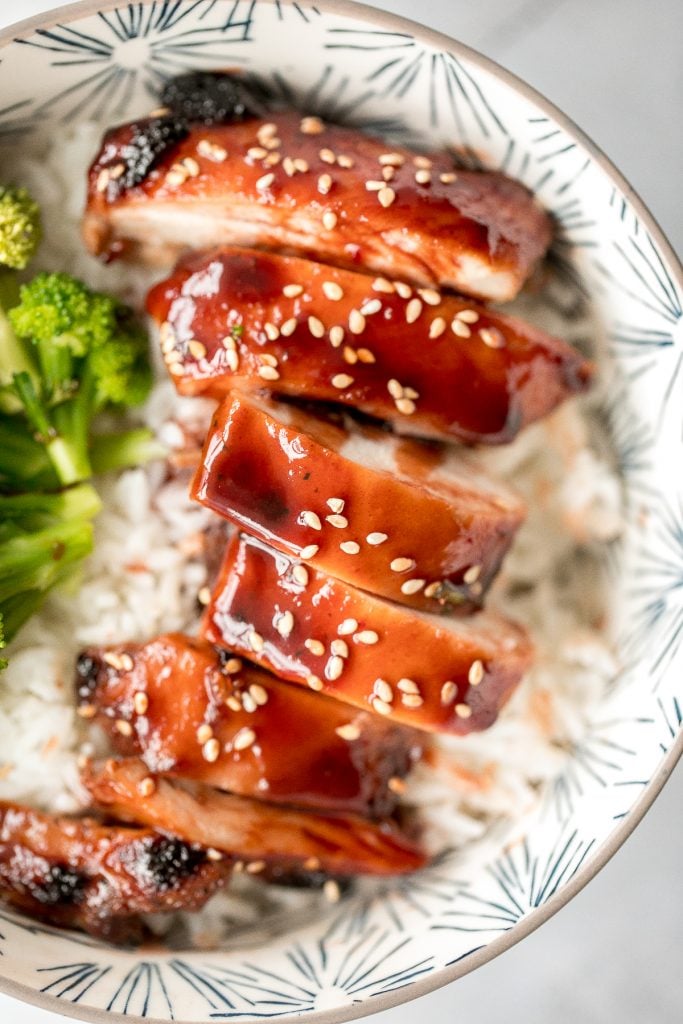
Ingredients in Char Siu Chicken
To make Char Siu chicken, you will need the following ingredients:
- chicken - boneless chicken breast or thighs. I used skinless chicken but you can keep the skin on if you prefer.
- hoisin sauce
- honey
- vegetable oil
- dark soy sauce
- garlic
- ground black pepper
- fermented red bean curd - this is optional but it's what gives the Char Siu it's iconic red colouring.
- sesame seeds - for garnish.
You will also need measuring cups and spoons, large ziploc bag or mixing bowl, and a roasting pan (or a quarter sheet baking pan with a wire rack).
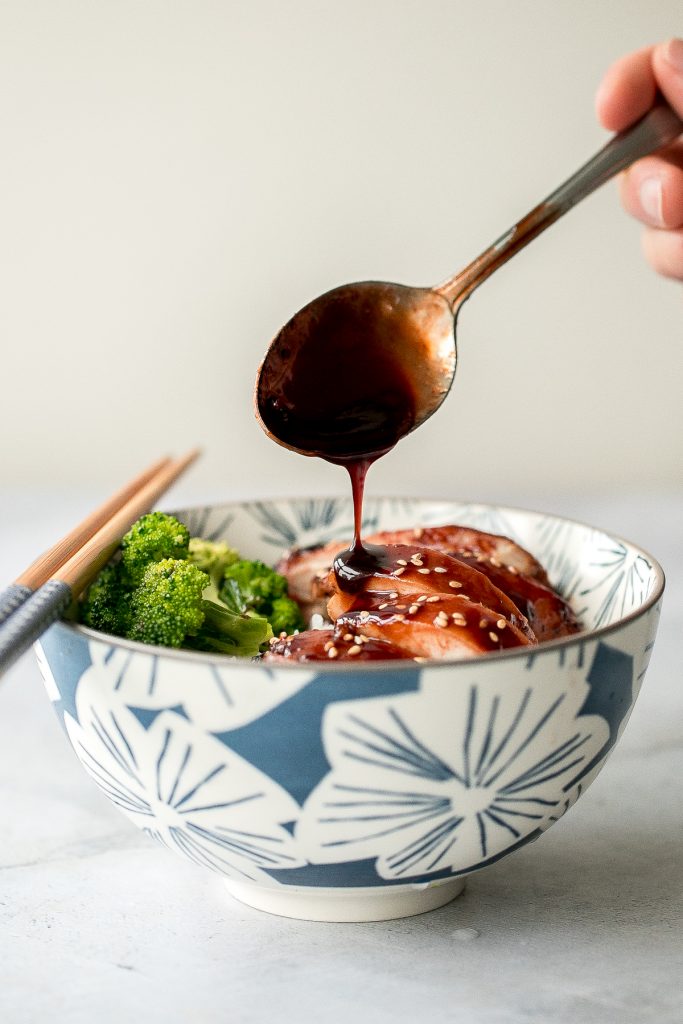
How to Make the Best Char Siu (Chinese BBQ) Chicken
- Marinate the chicken. Pat dry chicken breasts (or thighs) completely with a paper towel before adding seasoning. Transfer the chicken to a ziploc bag and add in hoisin sauce, honey, vegetable oil, dark soy sauce, and garlic. Press the air out of the bag and seal tightly. Press the marinate around the chicken to coat and place in the fridge to marinate at least 1 hour or overnight.
- Roast the chicken. Preheat oven to 400 F. Line a roasting pan (or quarter sheet baking pan) with aluminum foil and place the wire rack on top. Arrange the chicken on top of the wire rack. (You can add a cup of water to the bottom of the baking pan to keep the pan from smoking due to the pan drippings getting burnt). Bake for 30 minutes, flipping the chicken halfway through baking.
- Make the extra glaze. In a small bowl, whisk to combine hoisin sauce, honey, fermented red bean curd and black pepper. The extra Char Siu sauce adds a beautiful caramelizing glaze on the chicken from the browning of the sugar during baking.
- Apply the glaze. Remove the chicken from the oven and generously apply the Char Siu sauce over each piece with a silicone brush and place back in the oven for another 3 minutes. Flip the chicken, apply Char Siu sauce again on the other side and bake for another 3 minutes. The internal temperature for the chicken should reach 165 F when measured on a meat thermometer.
- Broil. Apply additional char siu sauce, if desired. Turn the broiler on high and broil the chicken for an additional 2-3 minutes to achieve a caramel brown colour and until the edges of the chicken become slightly charred.
- Serve. Serve with a bowl of steamed rice and sprinkle sesame seeds for garnish.
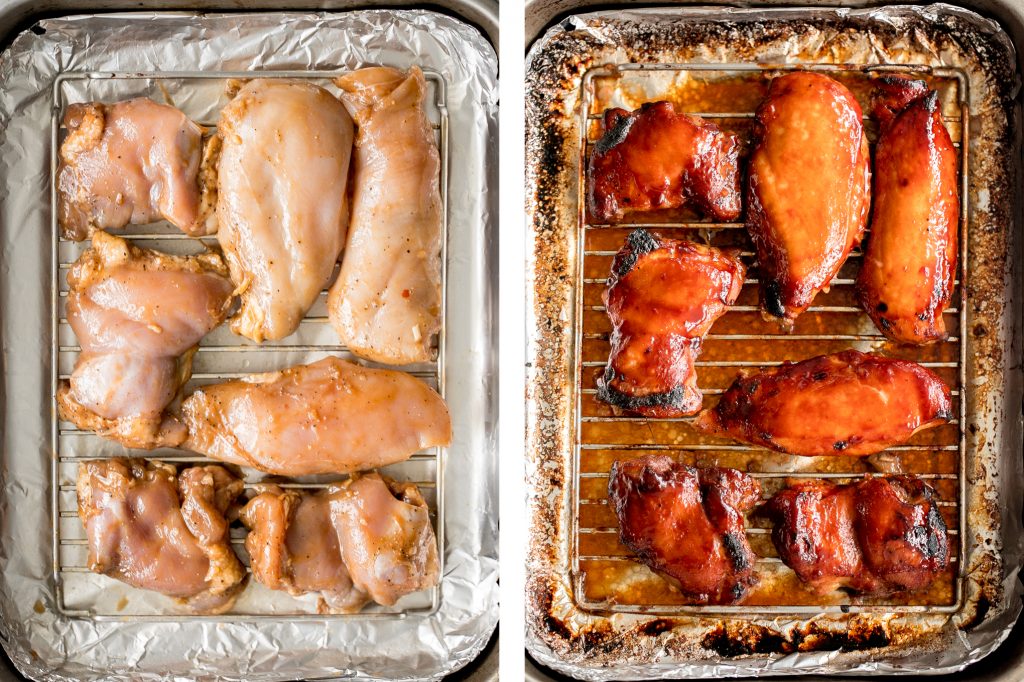
How to Store
Store any leftover Char Siu (Chinese BBQ) chicken in an airtight container in the refrigerator for up to 3 days. To reheat, heat on the stove over medium heat for 5-10 minutes until warmed through. The sauce may have thickened up a bit when stored, so add a little water to thin it out, as needed.
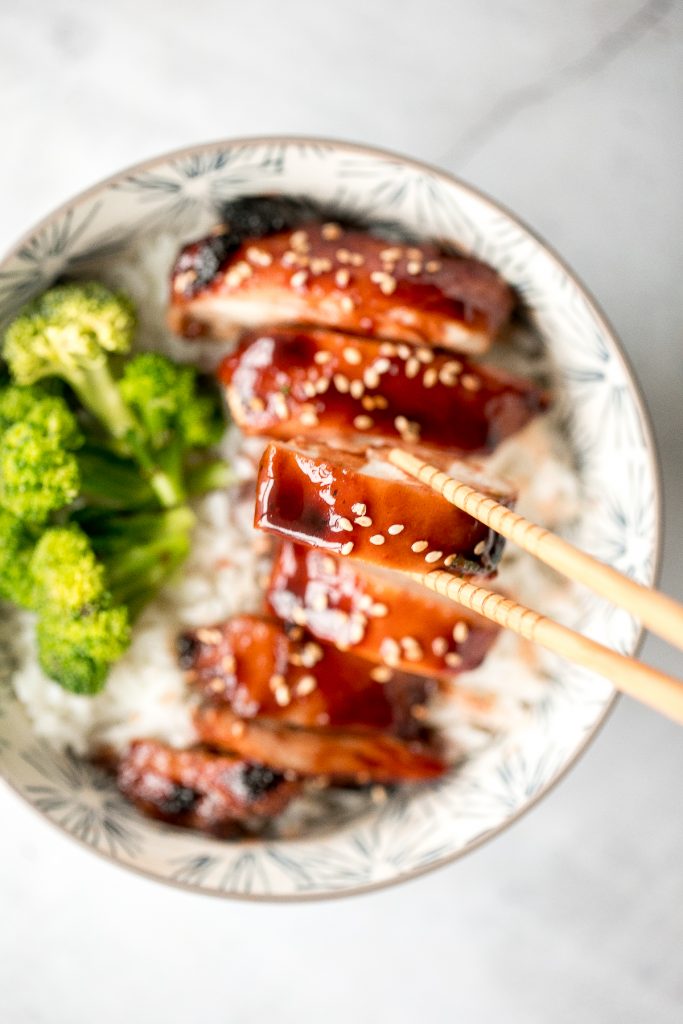
More Chinese Recipes
- Vegetarian Fried Rice
- Shanghai Style Fried Noodles
- Healthy Lemon Chicken
- Beef Potstickers (Dumplings)
- Baked Sesame Chicken
- Chicken and Cilantro Wontons
Tried this recipe?
I'd love to hear what you think! Leave a comment and rating below to share your feedback. Your reviews help others discover this recipe and help me keep creating more free recipes for you. Snap a photo and tag me on social media @aheadofthyme too.
Beef Potstickers (Dumplings)
Better than takeout, homemade Chinese beef potstickers (dumplings) are crispy on the outside and tender and juicy inside packed with a delicious and flavourful savoury beef filling. This popular Chinese dim sum snack is easier to make at home than you think. Plus, these dumplings are freezer-friendly so you can wrap a big batch and freeze the extras for a quick meal on another day.
What are Potstickers?
Potstickers are Chinese dumplings made with round dumpling wrappers that are filled with a juicy filling consisting of different types of meat and vegetables such as beef and celery, chicken and shrimp, or completely vegetarian as in egg and chive dumplings. They can be traditionally pleated to seal in the filling as in these pork potstickers, or simply folded in half with the edges crimped (like we do here).
Potstickers are given their name because of the way that they are cooked. First, they are fried in oil to get their iconic golden crispy bottoms, and then water is added to steam them until filling inside is cooked and soft.
Ingredients in Beef Potstickers
To make these beef potstickers, you will need the following ingredients:
- ground beef
- vegetables - green onions, carrots, corn, and peas. Feel free to substitute with different vegetables such as cabbage, green beans, bok choy or chives.
- seasonings - fresh ginger, rice cooking wine, soy sauce, sesame oil, white pepper, sugar, and salt.
- round dumpling wrappers - we love making our own Homemade Dumpling Wrappers, but feel free to use store-bought for convenience.
- vegetable oil and water - for "steam-frying".
- black sesame seeds - for garnish.
- green onions - for garnish.
- vinegar dipping sauce - black vinegar, soy sauce, sesame oil, and green onions.
You will also need measuring cups and spoons, mixing bowl, and a non-stick skillet.
How to Make the Best Beef Potstickers (Dumplings)
First, you will need to make the filling. In a large mixing bowl, add ground beef, green onions, ginger, cooking wine, soy sauce, sesame oil, white pepper, sugar and salt. Stir with a silicone spatula until evenly combined. Add carrots, corn and peas until evenly mixed. Cover the bowl with plastic cling wrap and marinate for at least one hour in the refrigerator to soak in all the flavours.
How to Wrap Potstickers
- Prepare a small bowl of water for dipping your fingers into.
- Take one dumpling wrapper at a time and place it in your palm. Dip your finger into water and smear it along the edge of the wrapper.
- Transfer a tablespoon of filling into the centre.
- Fold the wrapper over into a half-moon shape, and enclose the filling inside.
- Press the edges together to seal, or pleat the edges together with your finger. Place the dumpling on a parchment-lined baking tray. Cover with a tea towel to prevent the wrappers from drying out.
- Repeat with all dumplings.
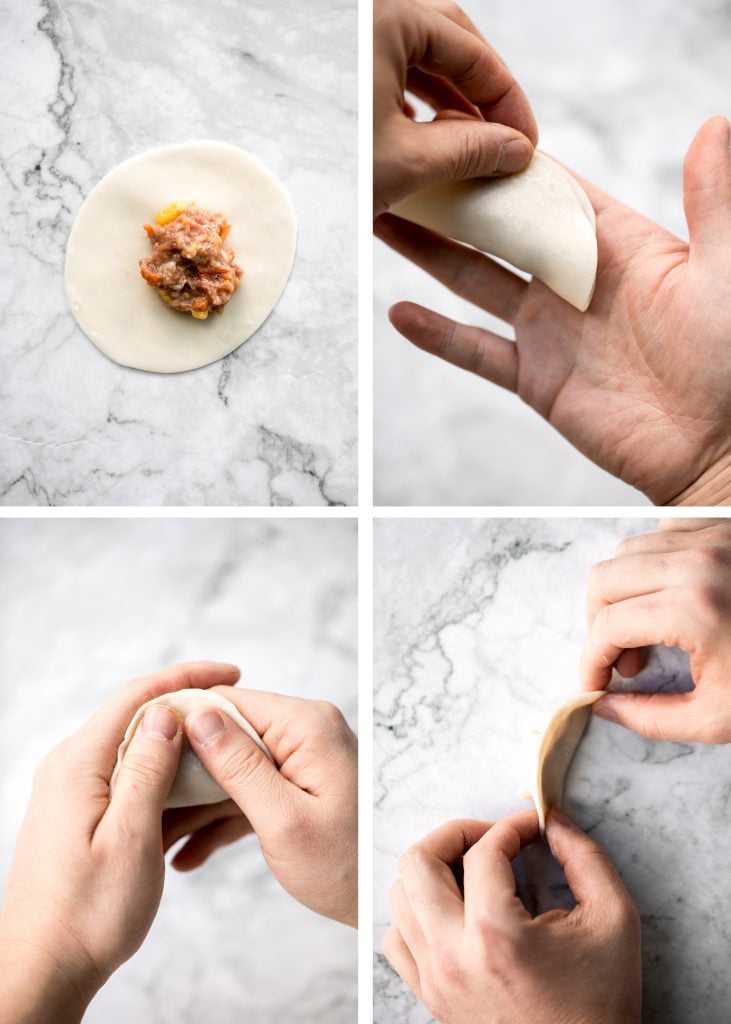
How to Cook Potstickers
- Heat vegetable oil over medium-high heat in a large non-stick skillet until hot, about 3 minutes. Place a batch of 12-15 dumplings on the pan and place them approximately ½-inch apart to make sure that they don't stick together. Cook for 3 minutes until the bottom turns golden brown. (To get all sides crispy rather than just the bottom like we did, then cook on both sides until golden and crispy).
- Add water into the pan to cover half of the dumplings' height (½-inch deep). The water should start sizzling and boiling immediately. Cover with the lid and cook for 7-8 minutes until almost all the water has evaporated.
- Remove the lid and lower the temperature to medium heat. Cook for another 2 minutes until all water has been absorbed. The bottom of the dumplings should be crispy.
- Repeat the same steps for another batch of 12-15 dumplings.
PRO TIP: To make steamed dumplings instead of potstickers, simply place the uncooked dumplings on a steamer basket over a pot of boiling water. Steam for 15-20 minutes until tender.
Video on How to Make Potstickers
How to Serve Beef Potstickers
In a small bowl, make the vinegar dipping sauce by combining black vinegar, soy sauce, sesame oil and green onions. You can also add some Sriracha for a spicy kick.
Transfer the crispy dumplings onto a plate and sprinkle some black sesame seeds and green onions on top. Serve with a side of homemade vinegar dipping sauce or spicy chili oil.
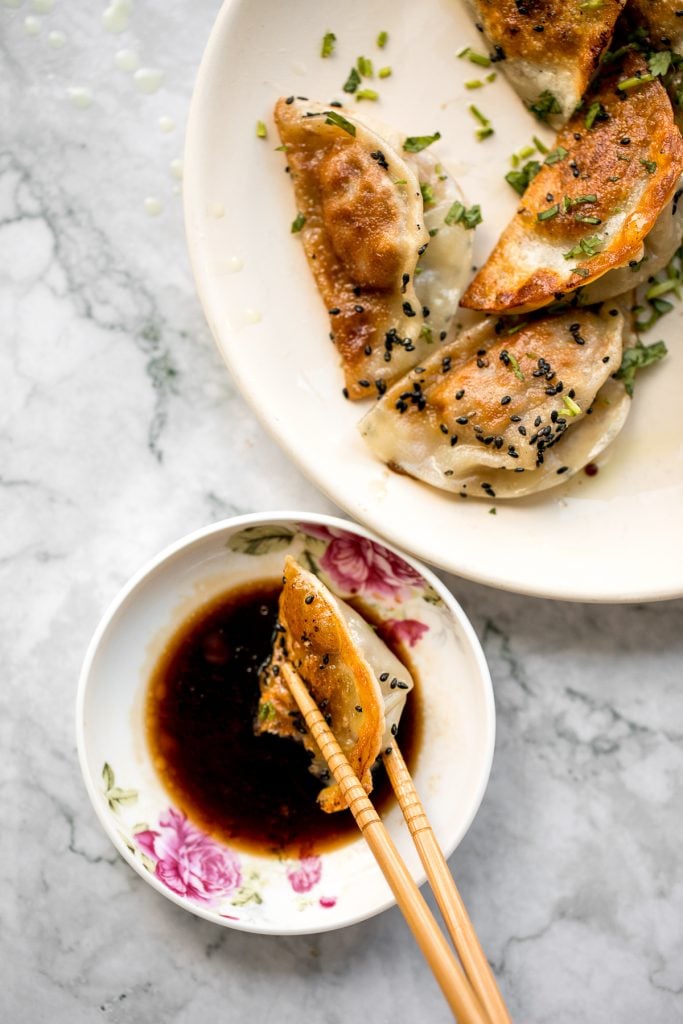
Freezing Instructions
- How to freeze dumplings: Place the dumplings in a single layer on large half sheet baking pan lined with parchment paper. Freeze for one hour and then transfer them to a freezer bag or airtight container and use as desired.
- How to cook from frozen: You can cook these dumplings straight from the freezer. Follow the same steps in this recipe, but when you cover and cook until the water has evaporated, then add another ¼ cup of water and cover. Keep cooking until water almost evaporates, about 5 more minutes.
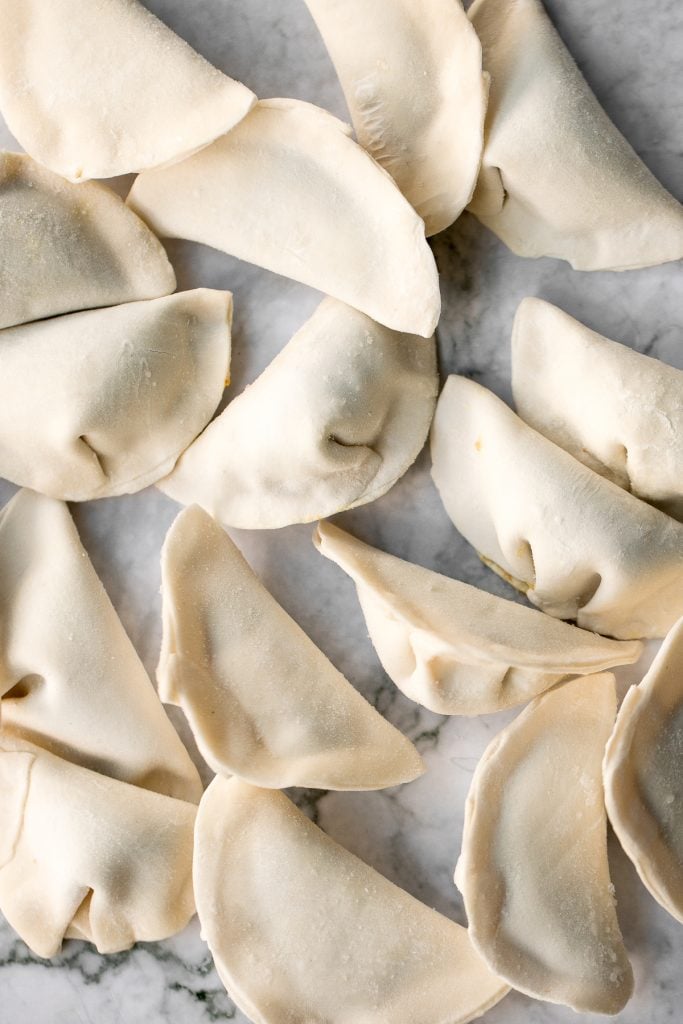
More Chinese Dim Sum Recipes
- Crispy Bottom Pan-Fried Pork Buns
- Shrimp Egg Rolls
- Sardine and Pork Potstickers
- Spicy Chili Oil Wontons
- Egg and Chive Vegetarian Dumplings
- Crispy Bottom Pan-Fried Vegetable Buns
- Chicken and Cilantro Wontons
- Chicken and Shrimp Dumplings
Tried this recipe?
I'd love to hear what you think! Leave a comment and rating below to share your feedback. Your reviews help others discover this recipe and help me keep creating more free recipes for you. Snap a photo and tag me on social media @aheadofthyme too.
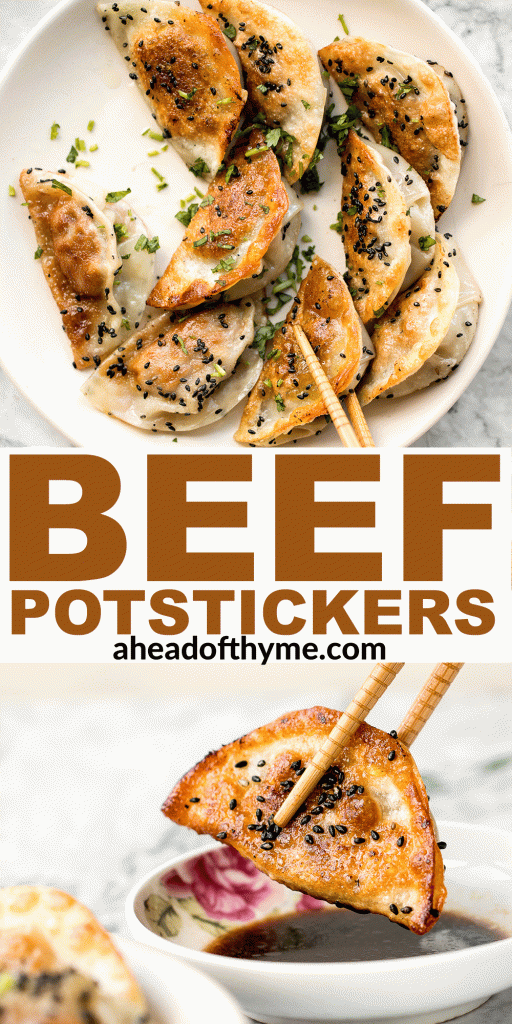
Pepperoni Pizza Rolls

Easy pepperoni pizza rolls are extra crispy on the bottom, tender and chewy on the inside, packed with pepperoni and cheese, and baked until bubbly. Serve with a side of marinara sauce or your favourite pizza sauce for dipping. These pizza rolls are a family favourite and a total crowd-pleaser, so you may want to make a double batch because these will disappear quick!

Once you try pizza rolls, you might never have pizza any other way. I love handheld portions which is also great for meal prep. These pepperoni pizza rolls, like homemade calzones, freeze really well and are perfect for meal prepping lunches or snacks throughout the week.
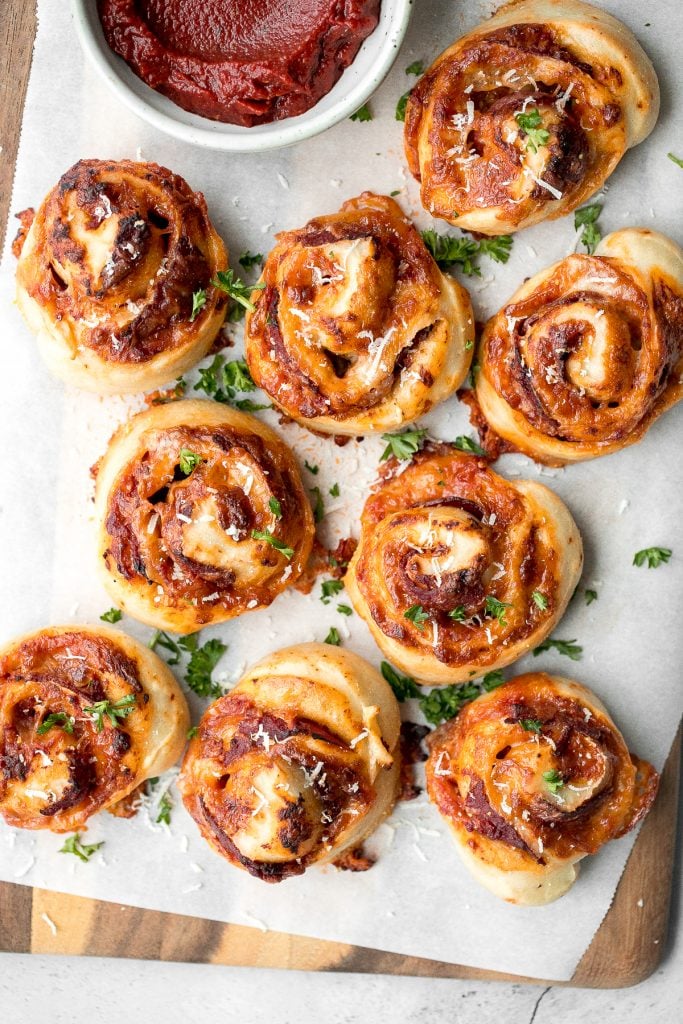
Ingredients
To make pepperoni pizza rolls, you will need the following ingredients:
- pizza dough - made with all-purpose flour, salt, water, instant yeast, sugar and olive oil. I always recommend homemade pizza dough for the best flavour and texture, but you can easily use store-bought pizza dough and cut the time on this recipe down to just 30 minutes, from prep to mouth.
- pizza sauce - you can use homemade pizza sauce or store-bought. You can also use marinara sauce.
- mozzarella cheese
- pepperoni - about 24 pepperoni slices or you can also use salami.
- cornmeal - using cornmeal optional but is recommended. Coating the bottom of the pizza rolls with some cornmeal creates a crispy crunchy crust at the bottom, helps seal in the cheese, and keeps the rolls from sticking to the baking tray.
- olive oil - to brush the top of the pizza rolls for a crispier crust (also optional).
- for garnish - Parmesan cheese and parsley.
You will also need measuring cups and spoons (or a kitchen scale), mixing bowl, and a half sheet baking pan.
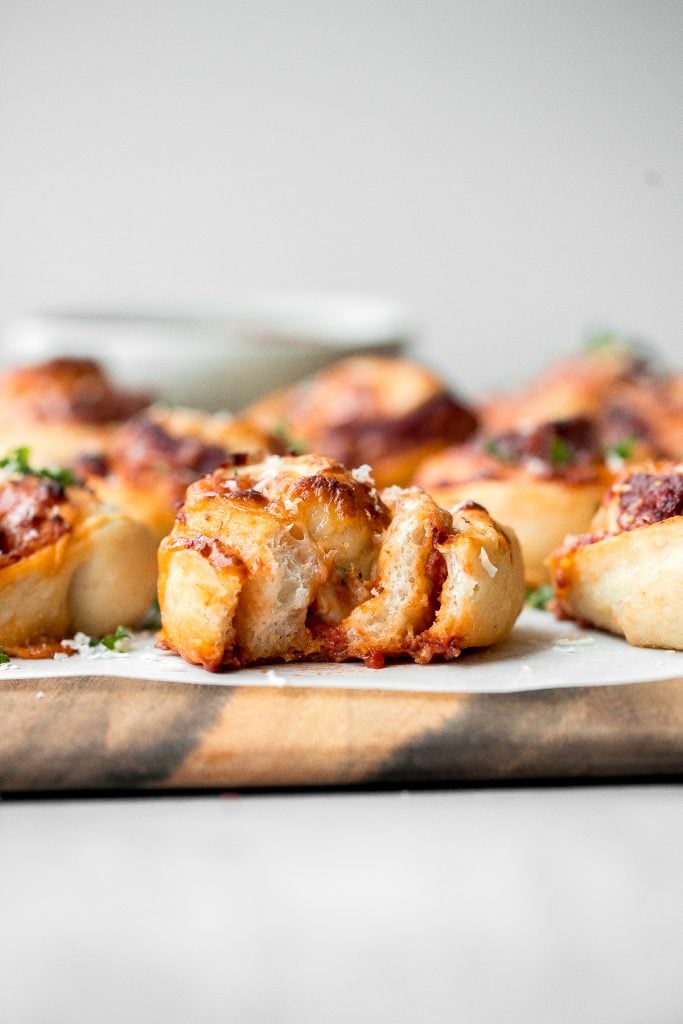
How to Make the Best Pepperoni Pizza Rolls
- Make the dough. Whisk together flour and salt in a large mixing bowl. In a small bowl, combine water, yeast, sugar and olive oil. Whisk to dissolve and pour it into flour mixture. Stir well with a silicone spatula to combine until no dry flour is visible in the bowl. Make sure to scrape down the sides of the bowl with the spatula. Let the dough rest for 10-15 minutes to develop gluten naturally. Knead with your hands until the dough is smooth, about 7-10 minutes. Allow the dough to rest for 1 hour, until doubled in size.
- Shape the dough and add toppings. Transfer pizza dough onto a lightly oiled surface and gently flatten into a 10x14-inch rectangle using a rolling pin. Spread pizza sauce on top. Then, sprinkle mozzarella evenly and add pepperoni slices on top (or any desired toppings).
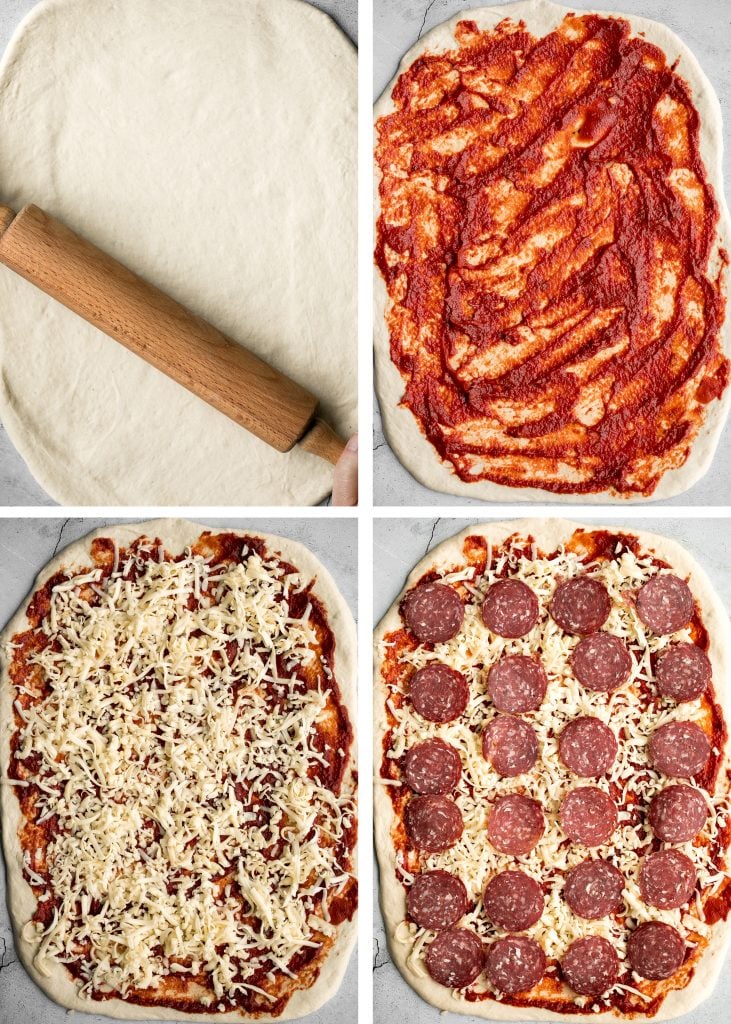
- Shape the pizza rolls. Roll up the dough tightly lengthwise into a log and pinch the end edges to seal. Cut the rolled dough into 12 even pieces using a knife or bench scraper, about 1-inch wide each.
- Coat with cornmeal. Place cornmeal on a shallow plate and dip the bottom of each roll into the cornmeal. Cornmeal is optional but recommended. It keeps the rolls from sticking to the baking tray and helps create an extra crispy bottom. Arrange the rolls flat, with cornmeal side down on a large half sheet baking tray lined with parchment paper. Brush a little bit of oil over the rolls for crispier crusts.
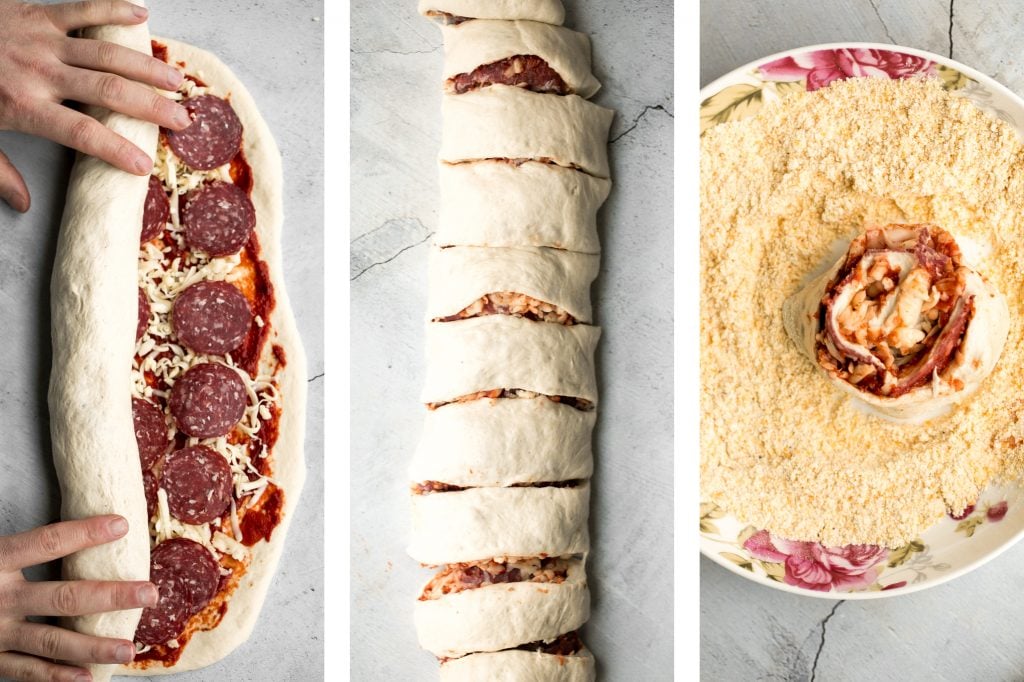
- Bake. Bake in a 400F preheated oven for 20 minutes until golden brown. Let the pizza rolls cool for 5-10 minutes. Sprinkle Parmesan cheese and parsley on top and serve warm with pizza sauce for dipping.
How to Serve Pizza Rolls
Serve these pizza rolls with a side of pizza sauce or marinara sauce for dipping. I also always pair anything pizza-inspired with a big bowl of salad to balance everything out. My favourite salads to serve with pepperoni pizza rolls are Greek salad, Mediterranean orzo pasta salad, cucumber and tomato salad or Mediterranean chickpea wedge salad.
Storing and Freezing Instructions
- How to make ahead: Roll up the pizza dough with the toppings and wrap tightly with plastic cling wrap (before slicing). Store in the refrigerator for up to one day. When ready to bake, slice the roll and bake according to recipe instructions.
- How to store: Once cooled, transfer the pizza rolls to an airtight container and store in the refrigerator for up to 3-4 days.
- How to freeze: Once cooled, transfer the pizza rolls to an airtight container or freezer bag. Store in the freezer for up to 3 months.
- How to reheat: To reheat, heat in a 350 F preheated oven for up to 10 minutes until warmed through, in the air fryer for up to 5 minutes, or for up to 25 minutes if reheating from frozen. You can also reheat thawed pizza rolls in the microwave.

More Pizza Recipes
- Homemade Calzones
- Salami and Mushroom Skillet Pizza
- Skillet Neapolitan Margherita Pizza
- Garlic Mushroom Focaccia Pizza
- 30-Minute BBQ Chicken Pizza
- Butter Chicken Pizza
- Mushroom and Arugula Skillet Pizza
Tried this recipe?
I'd love to hear what you think! Leave a comment and rating below to share your feedback. Your reviews help others discover this recipe and help me keep creating more free recipes for you. Snap a photo and tag me on social media @aheadofthyme too.

Spaghetti Carbonara
Spaghetti carbonara (or Spaghetti a la Carbonara) is a simple and classic Italian pasta that is quick and easy to make in just minutes. Freshly cooked spaghetti is tossed in a delicious creamy Parmesan sauce with pieces of flavourful pancetta (or bacon) throughout. It's a delicious and comforting pasta that is perfect for busy weeknights when you just don't know what to make.

Spaghetti carbonara is seriously one of the easiest and fastest pasta dishes I have ever made. It pretty much ties with these other quick favourites: avocado basil pesto spaghetti, stovetop mac and cheese with white cheddar, and shrimp fettuccine alfredo pasta bake. All take about 20 minutes or less to make.
Ingredients in Spaghetti Carbonara
To make easy spaghetti carbonara, you need the following simple ingredients:
- spaghetti noodles - spaghetti is traditionally used, but any long pasta will work. I often use linguine.
- pancetta - pancetta is traditionally used in carbonara, but you can also use bacon. Both add a delicious salty flavour to the pasta.
- garlic - adds flavour, but it is not typically included in traditional carbonara and can be left out.
- eggs - creates a rich creamy sauce which is cooked when tossed with the hot spaghetti.
- Parmesan cheese - you can also use Pecorino Romano (which is traditionally used).
- ground black pepper
- fresh parsley - for garnish.
You will also need a cooking pot and a shallow saucepan.
How to Make the Best Spaghetti Carbonara
- Cook the spaghetti. Bring a large pot of salted water to a boil over medium high heat. Add spaghetti noodles and cook until al dente (fully cooked but still firm) or according to package directions, about 8-10 minutes. Turn off the heat and set the pot aside.
- Prepare the sauce. While cooking the spaghetti, prepare the sauce mixture by whisking together eggs, Parmesan cheese and pepper in a medium mixing bowl. Set aside.
- Cook the pancetta. Sauté the pancetta or bacon (no cooking oil needed) in a shallow saucepan over medium high heat until crisp, about 3-4 minutes. Add garlic and sauté for another minute until fragrant.
- Toss in the spaghetti. Turn off heat and transfer the hot spaghetti into the garlicky bacon in the saucepan. Add 1 to 2 tablespoons of hot pasta water and stir vigorously to combine. A vigorous whisking emulsifies fat from the bacon and pasta water, creating the classic creamy carbonara.
- Stir in the sauce. Stir in the egg-cheese mixture and toss to coat, about 1 minute. Egg yolk is also an emulsifier which further helps fat disperse throughout the liquid, making the sauce creamy.
- Serve. Serve immediately on a plate and garnish with parsley and extra parmesan on top, if desired.
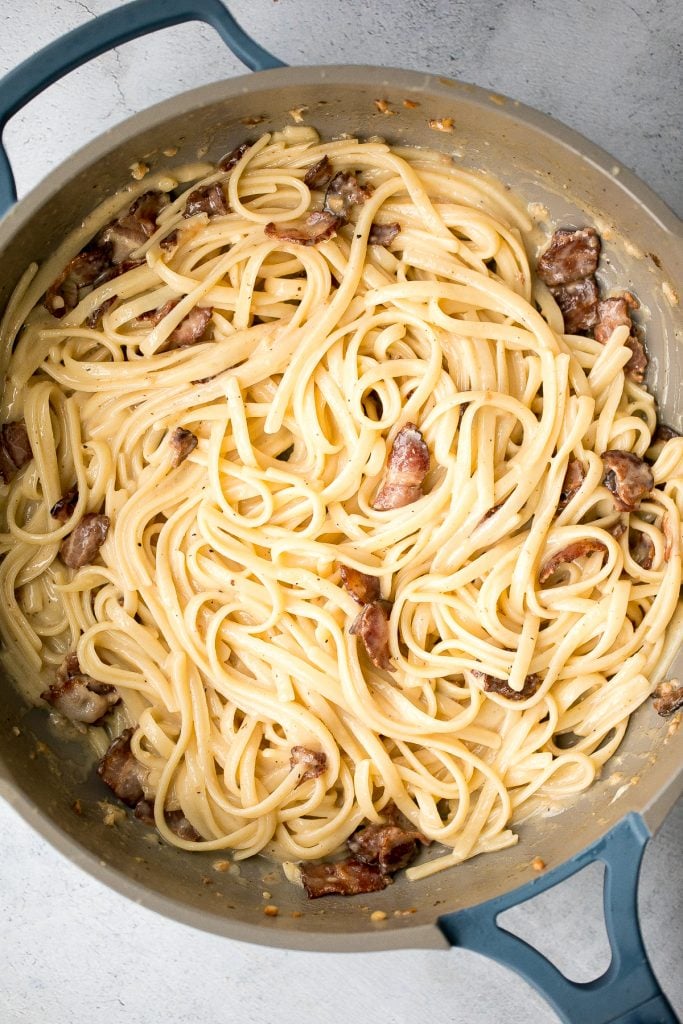
Tips
- Do not drain or rinse the pasta. You want to keep all that starch on the pasta to help thicken the sauce and get the right consistency. Plus, you will need to use some of the pasta water in the sauce.
- Stir vigorously while mixing the hot noodles together with pasta water into the pancetta. This emulsifies liquid and fat, creating a creamy consistency.
- Turn off the heat when stirring in the egg-cheese sauce. The eggs are cooked when tossed in the hot pasta, but if the heat gets too high, the egg mixture will quickly solidify, turning into scrambled eggs.
- How to customize. You could add in other cooked meat or vegetables if you want to mix things up. Some suggestions are chicken, shrimp or mushrooms.
- How to store: Spaghetti carbonara is best served fresh. To store, transfer cooled spaghetti to an airtight container and store for up to 3 days in the refrigerator. Reheat on the stove over medium-low heat for a few minutes until warmed through. You may need to add a little water if the sauce has thickened up too much in the refrigerator.
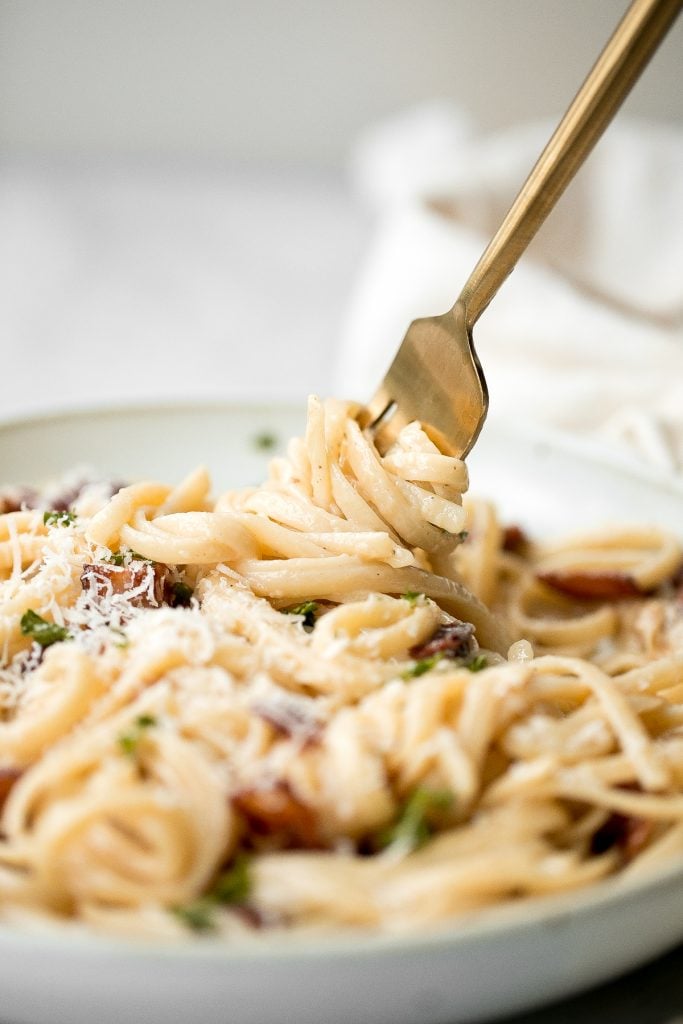
How to Serve Spaghetti Carbonara
Serve spaghetti carbonara with a side of crusty garlicky bread such as pull apart garlic bread, rosemary garlic focaccia bread, or cheesy garlic dinner rolls. You can also pair it with a fresh salad on the side. Try an easy Greek salad, Mediterranean chickpea wedge salad, or tomato cucumber avocado salad.
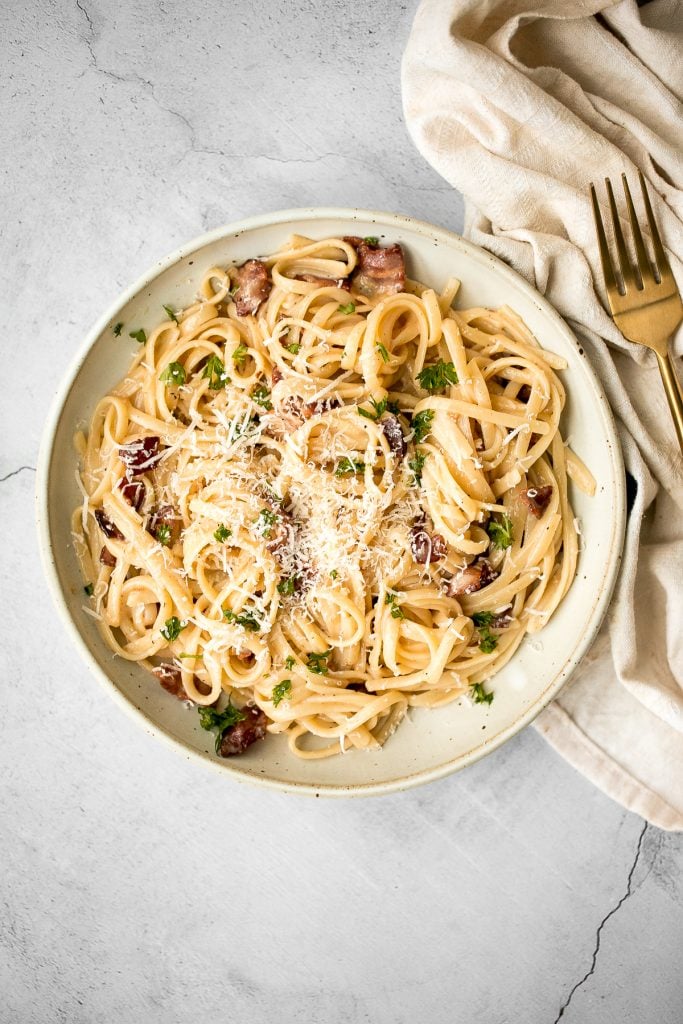
More Pasta Recipes
- Spaghetti Bolognese
- Turkey Tetrazzini with Spinach
- Cheesy Tortellini and Sausage Bake
- Spaghetti and Meatballs
- Shrimp Fettuccine Alfredo Pasta Bake
- Creamy White Chicken and Spinach Lasagna
- Spaghetti Alfredo with Spinach and Mushrooms
- Easy Meat Lasagna
Tried this recipe?
I'd love to hear what you think! Leave a comment and rating below to share your feedback. Your reviews help others discover this recipe and help me keep creating more free recipes for you. Snap a photo and tag me on social media @aheadofthyme too.

Majoon (Banana and Date) Smoothie
This majoon (banana and date) smoothie is a delicious and healthy, all-natural energy drink made with banana, dates, and nuts, and packed with nutrients. It's the perfect breakfast or post-workout snack. It tastes so good that it almost feels like dessert.
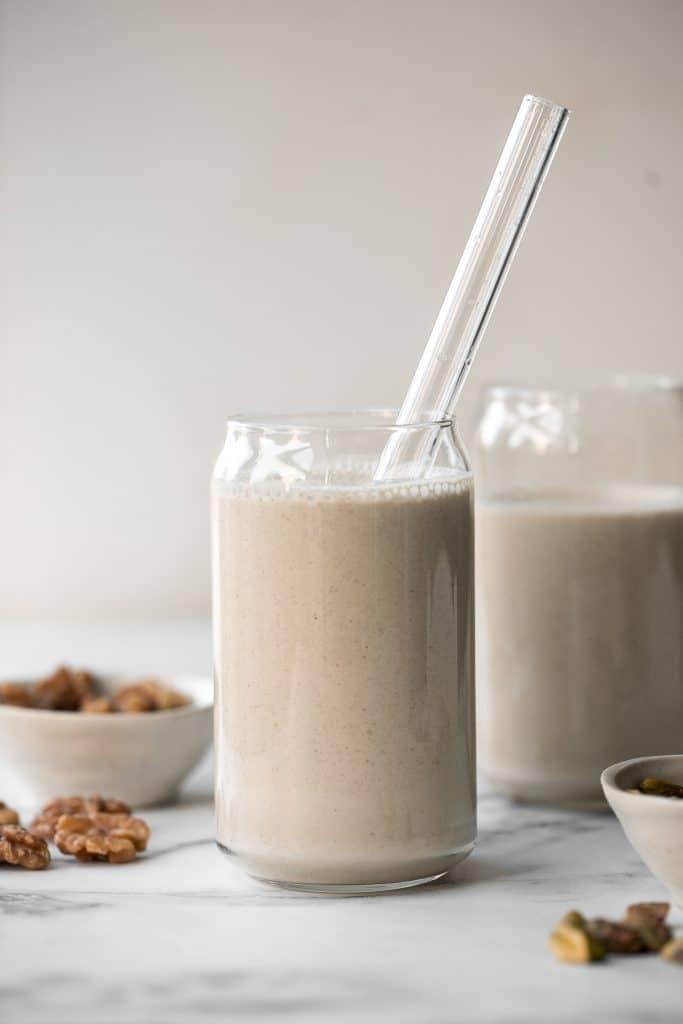
I first tried this Persian-style majoon date shake at a local health store and fell in love. It kept me full for hours, it's packed with energy and nutrients to help you start your day, it's healthy and so good for you, and it's naturally sweetened with no added sugar. So of course I had to go home and recreate it like asap.
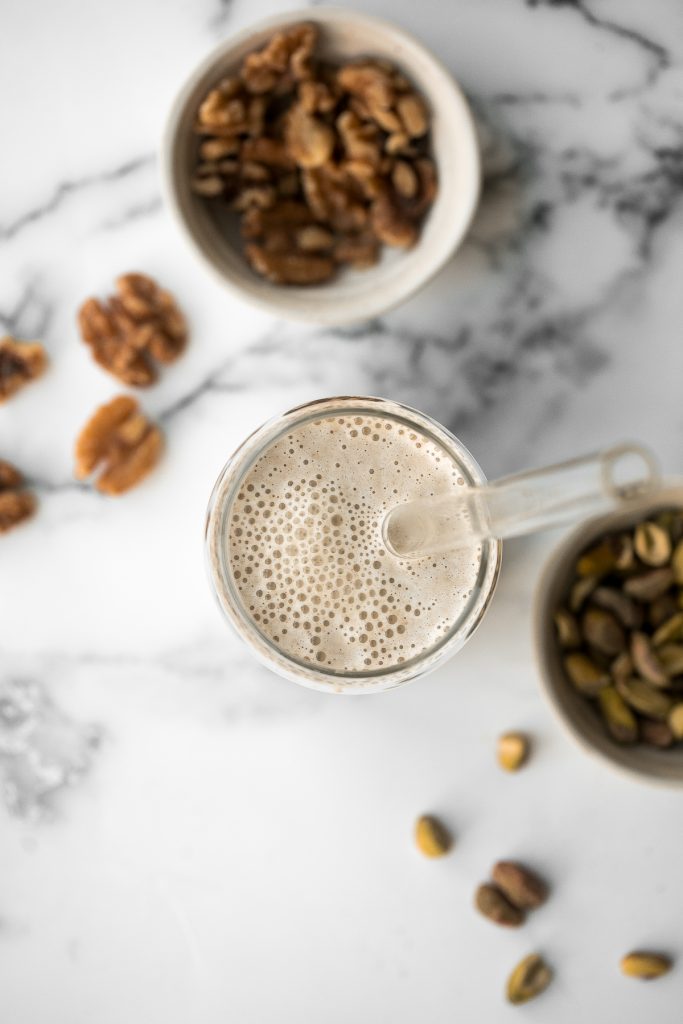
Ingredients in a Majoon Smoothie
- banana - use a ripe banana for the best flavour and sweetness.
- dates - pitted Medjool dates are best in this recipe for their sweetness, but you can also substitute this with any type of date that you have on hand.
- nuts - I used walnuts and pistachios, but you can use a combination of other nuts as well, such as almonds or pecans.
- milk - I used almond milk, but any kind of milk works. Try dairy milk, oat milk, or cashew milk.
- ground cinnamon
- vanilla extract - adds flavour. Use a non-alcoholic vanilla extract if you have it, otherwise you can leave this out.
- ice
You will also need a measuring cups and spoons and a blender.
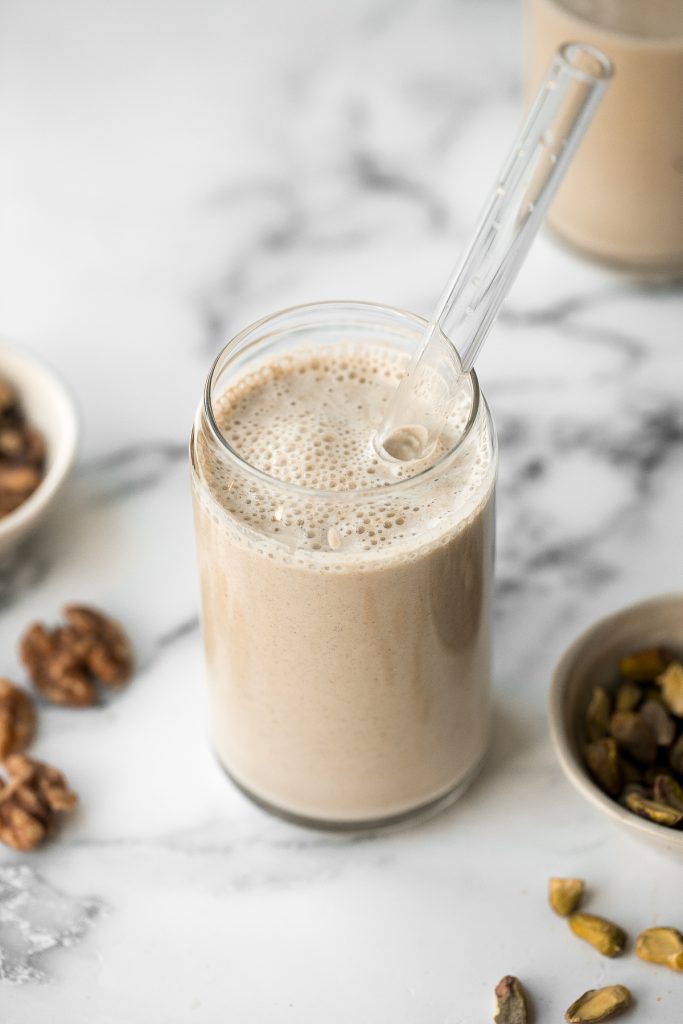
How to Make the Best Majoon (Banana and Date) Smoothie
- Place all the ingredients (banana, dates, walnuts, pistachios, milk, cinnamon, vanilla, and ice) into a heavy duty blender.
- Blend on high until smooth, about 45-60 seconds.
- Divide between two large glasses or 4 cups, and serve immediately.
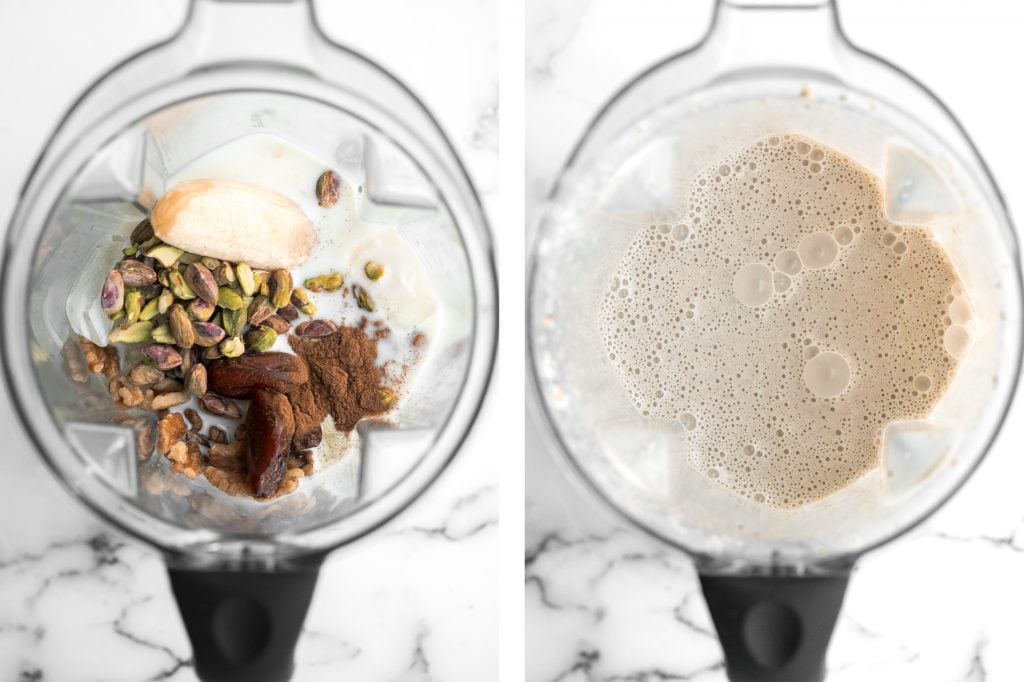
Tips
- How to customize: You can customize this smoothie by using different kinds of nuts or nut butters, adding in some shredded coconut, or sweetening it more with maple syrup or honey, if desired.
- Add toppings: I love adding in some toppings to my smoothies such as granola, seeds, and slices of fruit. Some of my favourite homemade toppings are: gingerbread granola, pumpkin pie granola, and cinnamon apple granola.
More Smoothie Recipes
- 5-Minute Super Berry Smoothie Bowl
- Healthy Mango Yogurt Smoothie
- Healthy Fall Apple Pie Smoothie
- Strawberry and Banana Smoothie
- Green Smoothie Bowl
- Blueberry Milkshake
Tried this recipe?
I'd love to hear what you think! Leave a comment and rating below to share your feedback. Your reviews help others discover this recipe and help me keep creating more free recipes for you. Snap a photo and tag me on social media @aheadofthyme too.
Homemade Pizza Dough
Good pizza starts with good pizza dough. This homemade pizza dough makes the best crisp pizza crust that is soft, airy, chewy, and flavourful. It is a perfect recipe for beginners to make because it is so easy with just 5 simple ingredients and 15 minutes of actual hands-on prep work. Once you try homemade pizza dough, it will be hard to go back to store-bought dough or even pizza delivery.
This recipe seriously makes the best yeast-based pizza dough. If you bake sourdough and have a batch of sourdough starter going, you can also try our sourdough pizza dough and make some pretty amazing pizza too.
Ingredients
To make homemade pizza dough, you will need the following pantry staples:
- all-purpose flour
- yeast - I used instant yeast but active dry yeast works as well. You just have to let it sit in the water for a few minutes to activate it first.
- all purpose flour
- water - use lukewarm or cold water. Hot water will kill the yeast.
- salt - adds flavour.
- olive oil - adds flavour.
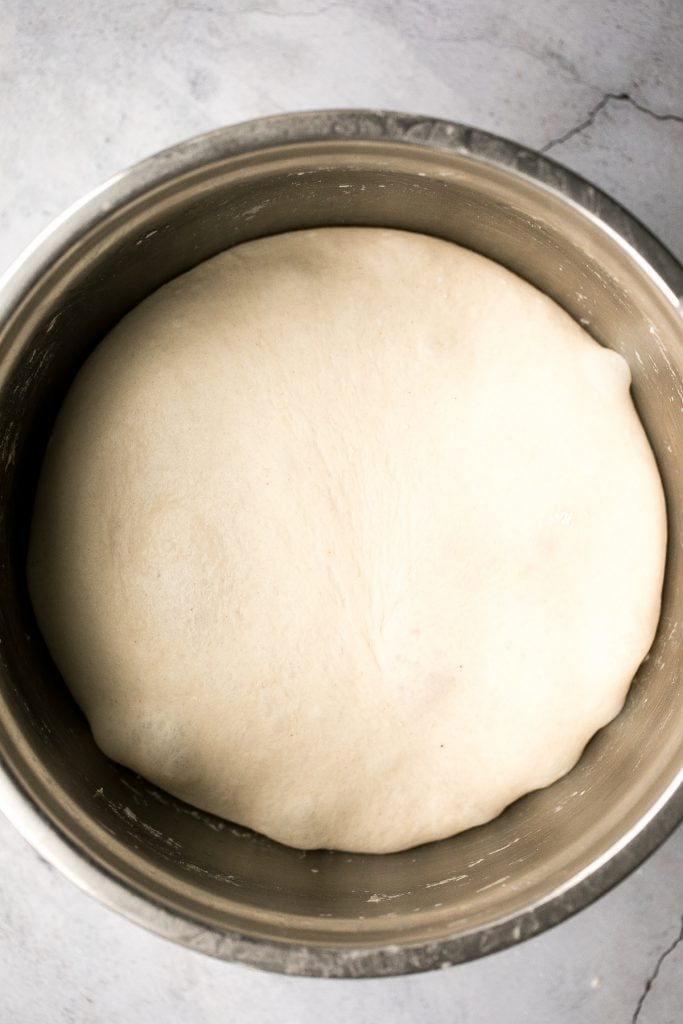
How to Make the Best Homemade Pizza Dough
- Make the dough. Whisk together flour and salt in a large mixing bowl. Combine water, yeast and the olive oil in a small mixing bowl and pour it into flour mixture. Stir well with a silicone spatula to combine until no dry flour is visible in the bowl. Make sure to scrape down the sides of the bowl with the spatula.
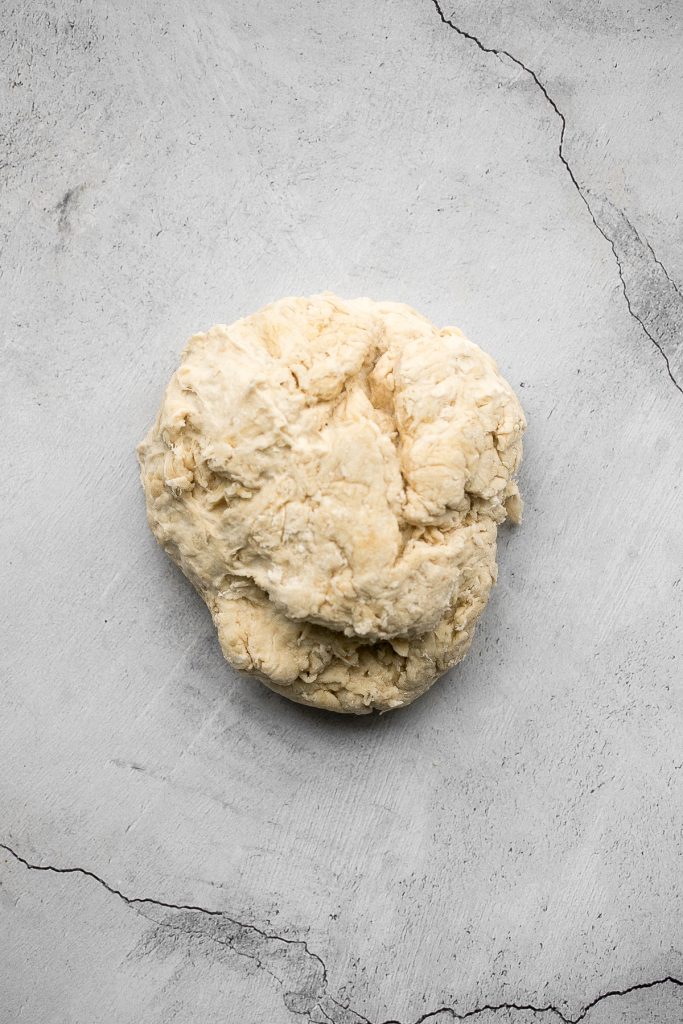
- Knead the dough. Transfer the dough mixture onto a clean and lightly greased surface. The oil will help keep the dough from sticking to your hands initially. You can even lightly oil your hands too. Knead with your hands until the dough is smooth and not sticky at all, about 5-10 minutes.

Tips for Kneading Dough
- How to knead dough: Knead the dough by pushing it down and outward using the palms of your hands. Fold the dough in half toward you and press down. Repeat this motion by pushing the dough down and outward, and then folding over towards you. This helps build up gluten strength in dough that is responsible for making the bread fluffy.
- How to test if dough is well-kneaded: A well-kneaded dough is smooth and can hold its shape. You can test the dough by giving it a firm poke with your finger. The indentation should bounce right back. If it doesn't bounce back and stays like a dimple, keep kneading for a few more minutes.
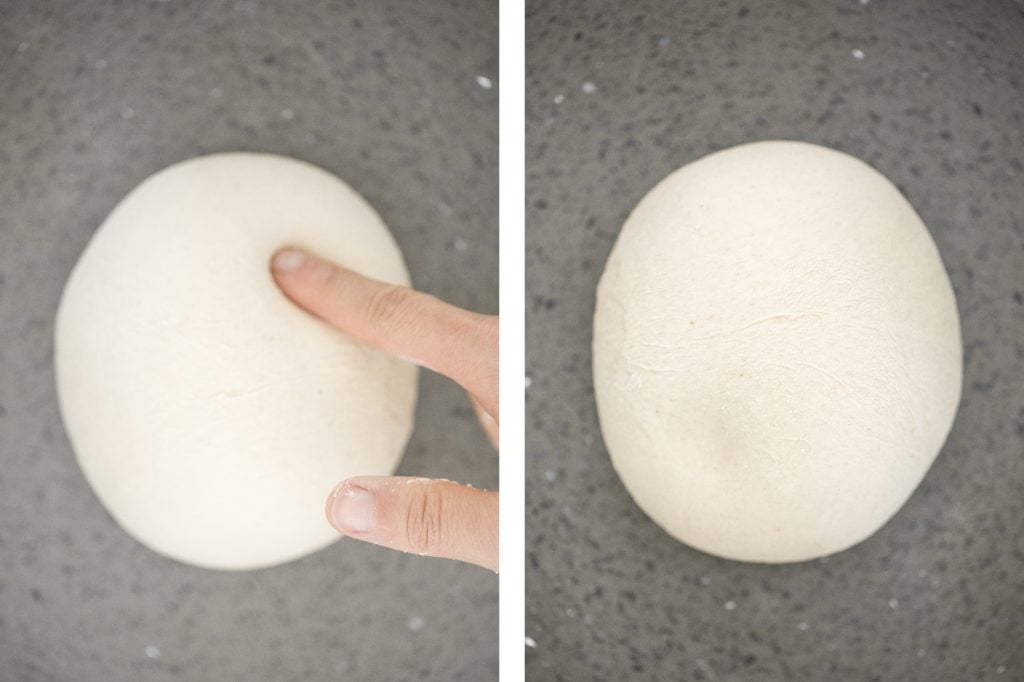
- Shape the dough. Divide the dough into 2 equal pieces and shape each into a ball. Lightly brush some oil over a large glass container and place each dough spaced apart. Lightly brush oil over the dough ball to prevent from being too sticky and losing moisture.
- Let the dough rise. Cover the glass container and let the dough rest and rise for 2-3 hours at room temperature or overnight in the refrigerator. You can leave it in the refrigerator up to 2 days before use. However, you might find the dough starts to smell like alcohol from over fermentation but it's still edible. The dough balls will almost double in size.
- Turn the oven broiler to high, and heat a cast-iron skillet over medium-high heat.
- Transfer pizza dough onto a floured surface. Gently press the pizza dough with your fingers into an 8-inch circle. Sprinkle some flour if needed to prevent stickiness. Once the skillet is hot, carefully place the flattened dough onto the skillet. Stretch out the dough a bit more to let it spread over the entire skillet.
- Immediately add the pizza sauce and spread evenly over the pizza crust. Place sliced fresh mozzarella cheese and basil leaves evenly on top. Leave the pizza to cook on the skillet for 5 minutes or until the bottom of the crust starts to brown. Transfer the cast-iron skillet to the preheated broiler and cook for 3 minutes or until the crust is blistered and slightly charred. Keep your eye closely on the broil, because the intense heat can make pizza crust burn quite quickly.
- 66.6% hydration
- 1% yeast
- 2% salt
- 3% oil
- How to store pizza dough: Store the dough balls in an airtight container in the refrigerator for up to 3 days.
- How to freeze pizza dough: To freeze unbaked pizza dough, store each dough ball into separate freezer bags. Push out any air in the bags and seal. Store in the freezer for up to 3 months. When ready to use, thaw the dough in your refrigerator overnight or for 10-12 hours.
- Skillet Neapolitan Margherita Pizza
- Homemade Calzones
- Salami and Mushroom Skillet Pizza
- 30-Minute BBQ Chicken Pizza
- Butter Chicken Pizza
- Mushroom and Arugula Skillet Pizza
- Classic Roman Herbed Potato Pizza
- egg roll wrappers - You need one (25 piece) package of egg roll wrappers. Spring roll wrappers work as well but are less bubbly on the coating when deep fried.
- shrimp or prawns - 1 lb. of shrimp, peeled, deveined and tails removed. To prepare the shrimp, cut through the shell along the back with kitchen scissors. Remove the shells and tails, and rinse to remove the veins. Pat dry each shrimp completely with a paper towel.
- vegetables - cabbage, carrots, shiitake and mushrooms. You can easily use different vegetables such as beans sprouts or add in your favourite protein such as shredded chicken or beef. The key is to keep the filling thick like a paste, not too soupy or runny. If you find it too runny, drain the extra liquid or add cornstarch to thicken it up.
- fresh ginger
- all-purpose flour - or you can use cornstarch.
- seasoning - chicken bouillon powder, brown sugar, ground black pepper, soy sauce, and sesame oil.
- cornstarch water - mix water with cornstarch and use for sealing the egg roll wrappers.
- vegetable oil - for deep frying.
- egg - optional for egg wash.
- vinegar dipping sauce - rice vinegar, fish sauce, brown sugar, Thai chili pepper, ground black pepper, and cilantro.
- Place one egg roll wrapper diagonally (diamond shape) on a dry, clean flat surface. Keep the rest of the wrappers inside the package to prevent them from drying out.
- Place up to 1.5 tablespoons of filling in a horizontal line near the centre of the wrapper placed approximately a quarter of the way up from the bottom, leaving about 2-inches uncovered on the side corners.
- Fold up the bottom so that it covers the filling. The bottom corner should approximately touch the centre of the wrapper. Fold in the two side corners into the centre, folding over top.
- Tightly roll the wrapper with your fingers until 1-2 inches remains on top. Lightly brush the remaining corner on top with cornstarch water (mix water with cornstarch in a small bowl) or dip your finger into the bowl and apply it to the top corner.
- Roll up the egg roll tightly to seal like a burrito. Make sure all corners are tightly sealed. Place the top edge side down, and cover with a tea towel to prevent the egg rolls from drying out.
- Repeat steps with remaining egg rolls. Brush egg wash over each roll if desired.
- Add cooking oil into a shallow saucepan and heat over high heat for 4-5 minutes, or until the oil starts shimmering and sizzling. The oil should be about ½-inch deep or enough to almost submerge the egg rolls.
- Add in a batch of 5-6 egg rolls and cook for 2 minutes on each side. Turn them over a few times so that both sides turn golden brown and cook evenly. Make sure to leave some space in between the egg rolls when deep frying.
- Transfer the egg rolls onto a paper towel lined plate (to help soak in the extra oil) and let cool for at least 5 minutes before serving.
- Repeat steps with remaining egg rolls.
- How to store store egg rolls: Transfer cooled egg rolls into an airtight container and store in the refrigerator for up to 3 days. To reheat, heat in a 350 F preheated oven or air fryer for 5-10 minutes until warmed through.
- How to freeze egg rolls: These freeze beautifully. I prefer to freeze the egg rolls after they have been cooked. Although you can freeze before cooking as well. To store, place the spring rolls on a baking tray lined with parchment paper and freeze for one hour. Then, transfer them into a freezer bag or an airtight container, and use as desired.
- How to cook frozen egg rolls. You can reheat or cook them directly from the freezer, without thawing. To reheat cooked frozen egg rolls, heat in a 350 F preheated oven or air fryer for 10-15 minutes until warmed through. To reheat uncooked frozen egg rolls, follow recipe instructions but add 5 minutes extra time.
- Fried Vegetarian Spring Rolls
- Shanghai Style Vegan Steamed Buns
- Spicy Chili Oil Wontons
- Savoury Chive Pancakes with Sourdough Starter
- Egg and Chive Vegetarian Dumplings
- Chicken and Cilantro Wontons
- sourdough starter - make your own sourdough starter using flour and water. It takes about 7 days to create a mature starter.
- all-purpose flour
- water
- salt
- In a large mixing bowl, add sourdough starter, all-purpose flour, salt and water. Whisk to combine, scraping down the sides of the bowl (there should be no dry flour particles visible). Cover the bowl and let the dough rest for one hour. Resting helps build gluten strength naturally.
- Apply some water on your hands and stretch and fold the dough in the bowl by folding the edges over to the centre, one edge at a time. Wet hands makes it easier to work with the dough and it should take you less than a minute to fold all 4 sides. Cover with plastic wrap and let the dough rest for 30 minutes. Since this wet dough is over 70% hydration and quite sticky, stretching and folding is a better technique to build gluten strength than kneading. Stretch and fold the dough again, cover, and let dough rest for another 30 minutes.
- Drizzle and spread a little bit of oil over dough with your hands to help prevent it from drying out. Cover the bowl with plastic wrap and continue to let the dough rest until it almost doubles in size. It takes about 4 to 6 hours for the dough to double in size, depending on room temperature.
- Transfer the dough to a lightly oiled surface. Flatten the dough into a 5x9-inch rectangle and roll it into a log. Pinch the edges together to seal. (Note that after the first rise, the dough becomes less sticky and easier to handle).
- Transfer the rolled dough into a 5x9-inch loaf pan (1 lb. loaf pan) and press it down with the palm of your hand to spread it to cover the entire pan. This also helps distribute air bubbles evenly in dough when it rises
- Cover the loaf pan with plastic cling wrap or seal it in a large Ziploc bag. Let the dough rise for the second time for 2 to 3 hours or overnight in the refrigerator until it almost rises to the rim of the pan. I often let the dough slowly rise in the refrigerator overnight because bread from slow fermentation tastes better and it is easy to incorporate into your work schedule.
- How to make sourdough starter: You will need 7 days create a fully mature starter using flour and water. Please refer to my sourdough complete starter guide for help. The guide also includes the top frequently asked questions.
- How to store: Store sourdough sandwich bread covered in a bread basket at room temperature for up to 2 days. You can also store it in an airtight container in the refrigerator for up to 1 week. Slice and toast in the toaster, oven or air fryer.
- How to freeze: Wrap the bread tightly in plastic cling wrap and place into an airtight container or freezer bag, and store in the freezer for up to 3 months. If freezing, I would recommend slicing the bread in half or in slices so that it is easy to reheat a slice or two at a time.
- How to reheat: Toast the frozen sourdough slices in the toaster on the freezer setting, or let the bread thaw to to room temperature first and then reheat in the toaster, oven or air fryer.
- Small Batch Sourdough Bread
- Sourdough Ciabatta Bread
- Sourdough Cinnamon Roll Twist Bread
- Savoury Chive Pancakes with Sourdough Starter
- Small Batch Sourdough Pizza Dough
- Artisan Green Olive Sourdough Bread
- Sourdough Discard Crackers with Sesame Seeds
- How to store: Dim sum is best served fresh. Store any leftover dim sum in an airtight container and place in the refrigerator for up to 3 days. Reheat in a steamer or air fryer (depending on the recipe).
- How to freeze: Most of these recipes are freezer-friendly (either before cooking or after according to recipe instructions) and can also be stored in the freezer for up to 3 months. For instance, you can make a big batch of dumplings and wontons, store in the freezer, and cook directly from frozen when ready to use.
- Healthy Lemon Chicken
- 10-Minute Vegetarian Fried Rice
- Shanghai Style Fried Noodles
- Tigers Prawns in Garlic Ginger Soy Sauce
- Stir-Fried Rice Cakes with Shrimp
- Baked Sesame Chicken
- Hand-Pulled Noodles
- Air Fryer Black Cod with Black Bean Sauce
- Spicy Dan Dan Noodles
- Scallion Oil Noodles
- Spicy Cumin Lamb Noodles
- 10-Minute Seafood Fried Rice
- large shrimp or prawns - about 1 lb. or 16 pieces, peeled and deveined.
- coconut oil
- Panko breadcrumbs
- unsweetened shredded coconut
- seasoning - garlic powder, paprika, salt, and pepper.
- all-purpose flour - helps the eggs stick to the shrimp, and creates a nice crust.
- eggs - helps the bread coating stick to the shrimp.
- spicy mayo dipping sauce - made with mayonnaise and hot sauce.
- Toast the breadcrumb coating. In a shallow saucepan, heat oil, breadcrumbs, and shredded coconut over medium heat. Stir constantly and toast until golden brown, about 3-4 minutes. Stir in seasoning garlic powder, paprika, salt and pepper. Mix until well combined and remove from heat. Transfer bread mixture to a shallow plate and allow it to cool down to room temperature.
- Prepare the shrimp. Cut through the shell along the back with kitchen scissors. Remove the veins and the shells (keep the tails on). Rinse to remove the veins and pat dry each shrimp completely with a paper towel.
- Dredge the shrimp. Prepare another shallow plate with flour, and another with the beaten eggs. Pat dry each shrimp completely with a paper towel. Dip each shrimp into flour to evenly coat, then dip it into the eggs, and then coat it completely with the coconut breadcrumb mixture. You can gently press the crumbs into shrimp to adhere as much as possible. (The flour sticks to the shrimp, the egg sticks to the flour, and the breadcrumbs stick to the egg).
- Bake. Transfer the breaded shrimp onto a large half sheet baking pan lined with parchment paper. Bake in a preheated 400F oven for 15 minutes until fully cooked through and coating is golden brown. Flip the shrimp once halfway through baking if you want both sides to be crispy.
- Serve. Serve immediately with spicy mayo sauce. To make the spicy mayo sauce, combine mayonnaise and hot sauce in a small bowl and stir well to combine.
- Toast the breadcrumbs. Do not skip this step. Toasting the breadcrumb mixture first is what makes the coating super crispy when baked and mimics the texture of deep frying without actually deep frying. It is the same method that I use in my baked crispy chicken strips.
- Double up the recipe. This recipe that makes about 16 coconut popcorn shrimps. You can easily double or triple the recipe to feed a crowd (or if you just want to make sure you have leftovers for lunch the next day). If scaling the recipe, make sure to not overcrowd the baking sheet (you will have to bake in multiple batches). Overcrowding your pan will cause the shrimp to steam instead of get crispy.
- How to store. Store coconut shrimp in an airtight container for up to 4 days in the refrigerator or up to 3 months in the freezer.
- How to reheat. Reheat in a 300F preheated oven or air fryer for 5-10 minutes until warmed through.
- Air Fryer Jumbo Shrimp
- Shrimp Fettuccine Alfredo Pasta Bake
- Easy Grilled Shrimp Boil
- Vietnamese Salad Rolls with Peanut Dipping Sauce
- Shrimp Tacos with Lime Crema Slaw
- Grilled Cajun Shrimp Skewers
- Tiger Prawns in Garlic Ginger Soy Sauce
- all-purpose flour
- salt
- water
- vegetable oil
- Make the dough. Whisk together flour and salt in a large mixing bowl. Slowly add water into the mixture and stir well to combine using a silicone spatula until it forms a shaggy dough (and no dry flour is visible in the bowl). Sure to scrape down the sides of the bowl with the spatula.
- Knead the dough. Transfer the shaggy dough onto a clean and lightly greased surface (The oil will help the dough from sticking to your hands initially). You can also lightly oil your hands. Knead the dough until it is smooth, about 5 minutes. To knead, push the dough down and outward using the palms of your hands. Fold the dough in half toward you and press down. Repeat this motion by pushing the dough down and outward, and then folding over towards you, until the dough ball is smooth.
- Divide the dough. Divide the dough into 2 equal pieces with a knife or bench scraper and flatten each piece into a rectangle with a rolling pin. The rectangle doesn't have to be perfect since it will be cut into strips and the strips will be hand pulled later on. Space each rolled out dough apart on a parchment-lined baking tray and gently brush vegetable oil over the dough to prevent from it from losing moisture. (You can also wrap each dough separately in plastic cling film).
- Let the dough rest. Cover the dough with plastic cling film and leave it to rest for 2 hours, or refrigerate it overnight, and bring it to room temperature the next day but setting it out on the kitchen counter for about 20 minutes. Resting for a long period of time helps relax the gluten in the dough completely, which makes it possible to stretch out the dough.
- Place the dough on a lightly oiled chopping board and cut each piece into strips. To make wide noodles, cut into 1.5 to 2-inch thick strips. To make thin noodles, cut into ½-inch thick strips.
- Hold the ends of each noodle strip using each hand and slowly pull the noodle towards opposite directions. Make sure to pull it slowly to avoid snapping. Gently bounce the noodle against the countertop to help it stretch further.
- Fold the noodle and pull again and gently bounce to stretch the noodle.
- How to store noodle dough: Once you have give the noodle dough enough time to rise, you can wrap it tightly in plastic cling wrap and store in the refrigerator for up 3 days before use. To use, allow the dough to come to room temperature before slicing into strips, about 20 minutes.
- How to store raw noodles: These noodles have to be cooked immediately once you have pulled them. To store uncooked noodles, you will have to use flour to coat them to prevent them from sticking together, and the texture of the noodles will change.
- How to store cooked noodles: Hand-pulled noodles are best served fresh. Once the noodles start going cold, they will stick together and get stiff. If you have leftovers that you want to store, you can store them in an airtight container for up to 3 days in the refrigerator, but the noodles may clump together. To reheat, I prefer to steam the noodles rather than heating directly on a pan as it will release more starch into the pan and change the texture even more.
- Shanghai Style Fried Noodles
- Spicy Dan Dan Noodles
- Chicken Pad Thai
- Spicy Cumin Lamb Noodles
- Thai Red Curry Noodle Soup
- Vegetarian Peanut Miso Ramen
- hand-pulled thin noodles - we used homemade hand-pulled noodles, but you can also use store-bought noodles (use thin, dry wheat noodles also called "yangchun noodles").
- vegetable oil
- fresh scallions - also known as spring onions.
- soy sauce
- white pepper
- sugar
- Make the noodles. In a medium cooking pot, bring 4 cups of water to a boil over medium-high heat. Add hand-pulled noodles into the boiling water and cook for 2 minutes. Stir the noodle with chopsticks to prevent them from sticking together. If you use store-bought noodles, refer to the package for cooking instructions. Drain the noodles well with a spider strainer or colander and place it in a bowl. (You do not need to rinse the noodles under running water).
- Make the scallion oil sauce. Heat vegetable oil in a wok or shallow saucepan over medium heat for 2 minutes until the hot oil starts to sizzle and shimmer. Add in scallions (they should start sizzling immediately) and cook for 2 minutes until browned. Add in soy sauce, white pepper and sugar, and stir to cook for 1 minute until the sauce starts sizzling and bubbling.
- Assemble the noodles. Remove from heat and pour the sauce over the cooked noodles. Stir well with chopsticks to coat the noodles evenly and serve immediately.
- How to store: Scallion oil noodles are best served fresh. Once the noodles start going cold, they will stick together and get stiff. If you happen to have leftovers, you can store in an airtight container in the refrigerator for up to 3 days, but the noodles may clump together. To reheat, steam the noodles or heat in the microwave.
- How to serve: Serve with vegetarian steamed buns, Shanghai-style wonton soup, and/or a Chinese garlic cucumber salad.
- Shanghai Style Fried Noodles
- Spicy Dan Dan Noodles
- Chicken Pad Thai
- Spicy Cumin Lamb Noodles
- Thai Red Curry Noodle Soup
- Vegetarian Peanut Miso Ramen
- Italian bread (or French baguette) - sliced into ½ inch slices and brushed with olive oil and garlic powder.
- tomatoes
- red onion
- garlic
- fresh basil
- olive oil - I recommend using a high quality olive oil.
- salt and pepper
- balsamic vinegar - to make your own balsamic reduction glaze, or you can substitute this with ¼ cup of store-bought balsamic reduction.
- Make the tomato topping: In a medium mixing bowl, add tomatoes, red onion, garlic, basil, olive oil and salt and pepper. Toss to combine and store in the refrigerator for one hour (you don't have to wait this long, but letting the mixture sit in the refrigerator will help bring out the flavours).
- Make the balsamic glaze: In a small cooking pot or shallow saucepan, bring the balsamic vinegar to a boil over medium heat. Continue to cook for another 4-5 minutes until the sauce is reduced by half. Pour the glaze into a small bowl and set aside to cool. The glaze will continue to thicken when removed from heat.
- Toast the bread: Preheat oven to 350 degrees. In a small mixing bowl, combine olive oil and garlic powder. Brush the top side of each of the baguette slices with the olive oil mixture. Place the slices onto a large half sheet baking tray and toast for 10 minutes, until light golden brown.
- Assemble the bruschetta: Top each toasted slice with a spoonful of the tomato mixture. Drizzle the balsamic glaze on top and serve.
- Tomato topping: Make the tomato topping up to one day in advance and store in an airtight container in the refrigerator. When ready to serve, gentle stir and then add it on top of the toasted bread.
- Balsamic glaze: You can make this up to one month ahead. Store it in a clean glass jar or airtight container and store in the refrigerator for up to one month.
- Bread: I recommend toasting the bread fresh so that it has the best crunch. You could toast it a day ahead and store in an airtight container, but it will loose it's crunch and could even be a little hard.
- Baked Spinach Dip
- Pico de Gallo Chunky Salsa
- Homemade Calzones
- Whipped Ricotta Dip
- Fried Mac and Cheese Balls
- Baked Mozzarella Sticks
- whole milk ricotta - use high quality ricotta cheese, since this is the bulk of the dip.
- extra virgin olive oil - I also recommend using a high quality olive oil.
- honey - add a little sweetness, but you can opt to leave this out if you prefer.
- fresh herbs - I used mostly basil and a hint of rosemary. You want to be careful with using rosemary because it is very strong and can easily become overpowering. Some other fresh herbs that I like to use are mint, thyme, oregano and chives.
- garlic - you can also substitute this with ¼ to ½ teaspoon of garlic powder.
- salt and pepper
- Blend ingredients together. In a medium bowl, add ricotta, olive oil, honey, fresh herbs, garlic, salt and pepper. Beat with a hand mixer on medium speed until smooth and creamy, about a minute. You can also blend everything together in a food processor. Give it a taste and add extra olive oil, honey, or salt and pepper, if needed.
- Serve. Transfer to a serving bowl, drizzle some olive oil on top, and garnish with fresh herbs. Serve with slices of toasted french baguette, crackers, or vegetables. You can also use it to make an easy whipped ricotta crostini.
- How to customize: Whipped ricotta dip is versatile and you can customize it by adding in all sorts of ingredients. Some of my favourites to add are lemon zest and lemon juice, grated parmesan cheese, pesto, and finely chopped sun dried tomatoes.
- What kind of bread to use: You can serve whipped ricotta with a side of almost any kind of bread. Some of my favourites are french baguettes, ciabatta bread, pita bread, naan flatbread, or sourdough bread.
- How to store: Store whipped ricotta dip in an airtight container or covered in plastic cling warp for up to 3 days in the refrigerator.
- How to use leftovers: You can use any leftover whipped ricotta dip to make whipped ricotta crostini. You can also use it as a creamy pasta sauce.
- Whipped Ricotta Crostini
- Ricotta Crostini with Peas and Mint
- Homemade Calzones
- White Chicken and Spinach Lasagna
- Easy Meat Lasagna
- french baguette - or other long crust bread, cut into ½-inch slices.
- whipped ricotta - made with ricotta, olive oil, honey, fresh herbs (such as basil, mint, thyme, oregano, or chives), garlic, salt and pepper.
- cherry tomatoes - or grape tomatoes, in assorted colours
- olive oil - use a good quality extra virgin olive oil.
- salt and pepper
- Toast the bread. Preheat oven to 350 F. Arrange sliced bread in a single layer on a large half sheet baking pan. Bake for 8-10 minutes until toasted.
- Combine toppings. In a small bowl, toss to combine tomatoes, olive oil, salt and pepper. Set aside.
- Make whipped ricotta. In a medium bowl, add ricotta, olive oil, honey, fresh herbs, garlic, salt and pepper. Beat with a hand mixer on medium speed until smooth and creamy, about a minute. You can also blend everything together in a food processor.
- Assemble crostini. Add a large spoonful of whipped ricotta onto each toasted sliced bread. Top with a spoonful of the tomato mixture.
- How to customize: You can top this whipped ricotta crostini with whatever toppings that you like. Instead of tomatoes, you can add fruit, grilled vegetables, pitted olives, more fresh herbs, or a drizzle of honey.
- Make ahead instructions: Make the whipped ricotta and tomato topping 1-2 days in advance and store in separate airtight containers in the refrigerator. When ready to serve, set the ricotta and toppings on the kitchen counter for about 20 minutes to let them come to room temperature. Meanwhile, quickly slice up the French baguette, toast and then assemble the crostini.
- How to Make a Charcuterie Board
- Whipped Ricotta Dip
- Creamy Hummus
- Prosciutto-Wrapped Asparagus and Cantaloupe Bundles
- Easy Tzatziki Sauce (Yogurt Cucumber Dip)
- Baked Turkey Meatballs
- Zucchini Boats with Marinara and Cheese
- russet potatoes - 1 lb. of potatoes (or 2 large potatoes).
- They hold up well during baking, so your beautiful Tater Tots won't turn to mush.
- bacon - adds incredible flavour but can be left out if you prefer.
- all purpose flour - helps bind the tater tots so that they don't fall apart.
- mozzarella cheese - you can substitute with any melty cheese like sharp cheddar cheese.
- garlic powder
- Italian seasoning
- salt and pepper
- fresh parsley - for garnish.
- Boil the potatoes. Place potatoes in a large pot of cold water and bring to a boil over medium high heat. Reduce heat to low and let it simmer for 5-6 minutes until softened but not completely cooked. Drain well and let cool.
- Cook the bacon. Meanwhile, sauté bacon (no cooking oil needed) in a large cooking pot or 4 qt. Dutch oven over medium high heat until crisp, about 3-4 minutes. Save bacon fat in a bowl and chop bacon into small bits
- Shred the potatoes. Shred potatoes into thin strips with a box grater. Wash off excess potato starch under cold water and drain well. Squeeze out excess water with a cheesecloth or dish towel and place shredded potato into a large mixing bowl.
- Combine ingredients. Add bacon bits, flour, mozzarella, garlic powder, Italian seasoning, salt and pepper. Mix until well combined.
- Shape the tater tots. Shape the mixture into 1.5-inch tater tots, and place on a large half sheet baking pan lined with parchment paper.
- How to bake in the oven: Spray some cooking oil spray over the tater tots and bake in a 400F preheated oven for 25 minutes until golden brown, turning the tater tots halfway through baking. Turn the broiler on high for an additional 4-5 minutes to achieve extra crispy browned tater tots, if desired. Keep a close eye on the broiler as things can burn quickly.
- How to deep fry: Fill oil about 1-inch high in a shallow saucepan or cooking pot. Heat on medium heat until sizzling hot, about 3-4 minutes. Add tater tots and cook until golden brown and crispy on all sides, about 3-4 minutes.
- How to air fry: Add tots in a single layer in the air fryer basket (you may have to cook in multiple batches). Cook at 400 F for 12-15 minutes until golden brown and crispy.
- How to store: Store cooked tater tots in an air tight container (once cooled to room temperature), and store in the refrigerator for up to 3 days.
- How to reheat: Reheat in a 350 F preheated oven or air fryer for 5-10 minutes until warmed through and crispy.
- Make ahead instructions: Shape the tots and line them on your baking pan. Then cover with plastic cling wrap and store in the refrigerator for up to one day in advance. When ready to make them, set the tray out on the counter for about 20 minutes to bring the tots to room temperature. Then cook as per recipe instructions.
- Fried Mac and Cheese Balls
- Baked BBQ Chicken Wings
- Fried Vegetarian Spring Rolls
- Shrimp Tacos with Lime Crema Slaw
- Baked Mozzarella Sticks
- « Previous Page
- 1
- …
- 30
- 31
- 32
- 33
- 34
- …
- 40
- Next Page »
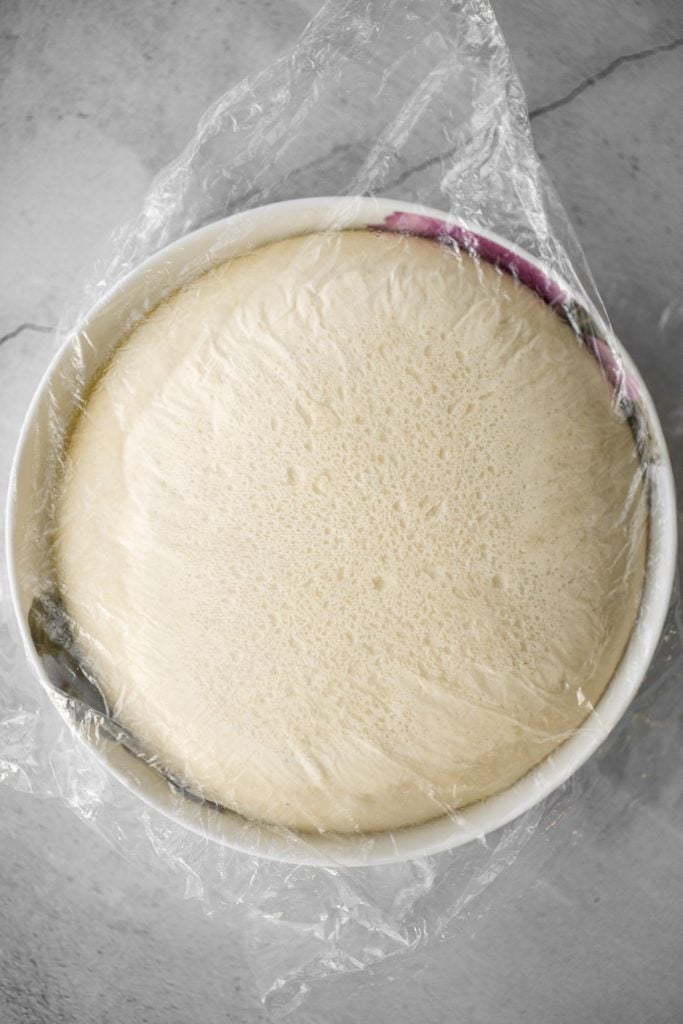
How to Use Pizza Dough
You can use this homemade pizza dough to make any pizza that you can think of. Once you are ready to make your pizza, take the dough out of the refrigerator and transfer it onto a floured surface. It is unnecessary to bring the pizza dough to room temperature before cooking because cold dough is much easier to handle and shaped into pizza.
You can also bake entirely in the oven as in our BBQ Chicken Pizza recipe.
Some of my favourite pizzas to make are Easy Skillet Neapolitan Margherita Pizza, 30-Minute BBQ Chicken Pizza, Mushroom and Arugula Skillet Pizza, Butter Chicken Pizza, Salami and Mushroom Skillet Pizza and Classic Roman Herbed Potato Pizza. Check them out for full instructions on how to cook the pizza dough.

How to Scale Up or Down (Baker's Percentage)
If you are planning to make more (or less) pizza dough, the easiest method to find out how the quantities of each ingredient that we need is what is known as baker's percentage. It's a quick way to helps us to immediately understand the type of dough or bread that we are working with, and to adjust quantities to easily scale the recipe up or down.
Each ingredient in a formula is expressed as a percentage of the flour weight, and the flour weight is always expressed as 100%. Simply multiply the total amount of flour to the percentage of each ingredient to get the amount you need for each ingredient.
The Baker's Percentage for this homemade pizza dough is as follows:
Storing and Freezing Instructions

More Pizza Recipes
Tried this recipe?
I'd love to hear what you think! Leave a comment and rating below to share your feedback. Your reviews help others discover this recipe and help me keep creating more free recipes for you. Snap a photo and tag me on social media @aheadofthyme too.

Shrimp Egg Rolls

Better than takeout, these shrimp egg rolls are delicious, flavourful and so easy to make at home. They are well seasoned and packed with shrimp (or prawns) and vegetables, and have the crispiest golden brown skin. The best part? They can be deep fried, baked or air fried AND they are freezer-friendly. So make a big batch of these appetizers and save the extras for an easy dinner another day.
What are Egg Rolls?
Egg rolls as a classic Chinese-American dish that developed from Chinese spring rolls years ago. They are fried rolls stuffed with delicious savoury filling inside including meat and vegetables. Egg rolls are traditionally served as an appetizer alongside some dipping sauce, but there is no reason why you can't eat a big batch for dinner.
Both egg rolls and spring rolls are made from wrappers made out of wheat flour, but the main difference is that egg roll wrappers are fortified with eggs, which results in a chewy and bubbly skin when deep frying.

Ingredients
To make shrimp egg rolls, you will need the following ingredients:
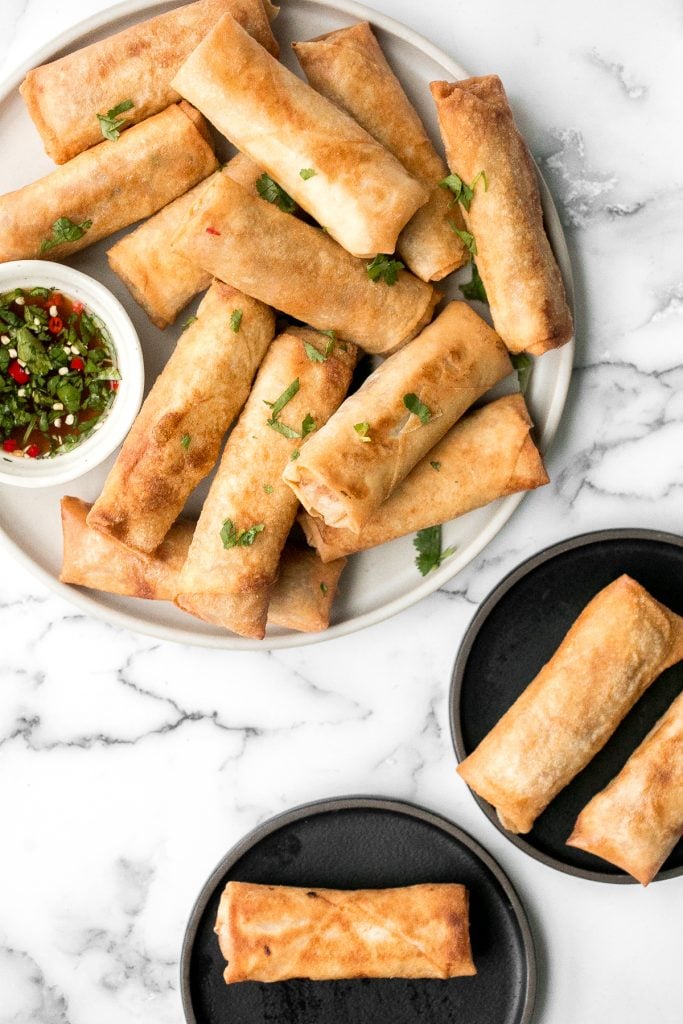
How to Make the Best Shrimp Egg Rolls
First, make the filling. Coarsely cut peeled and deveined shrimp into small pieces on a clean chopping board (about ¼-inch thick).
Then combine the shrimp in a large mixing bowl, along with almost everything else -- cabbage, carrots, mushrooms, ginger, flour, chicken bouillon powder, brown sugar, pepper, soy sauce, and sesame oil. Stir well to mix evenly, and drain off any excess liquid from the bowl. The filling should not be too wet as this can make the spring rolls soggy.
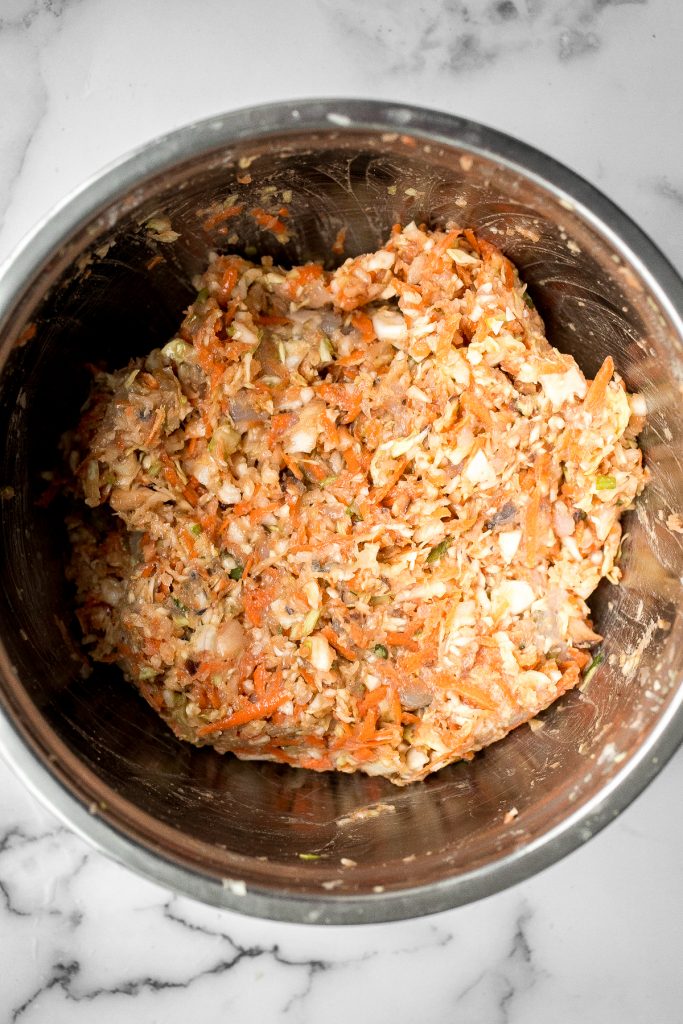
How to Wrap Egg Rolls
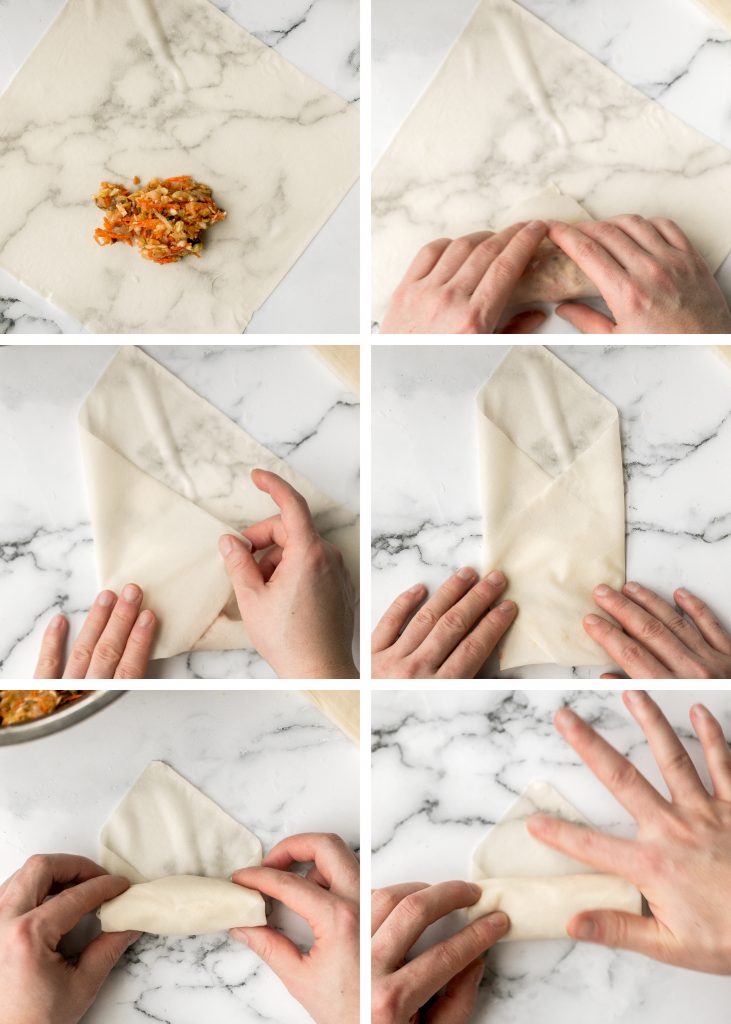
How to Cook Eggs Rolls
Deep Fry
Air Fry
Brush or spray some oil over the shrimp egg rolls and cook in the air fryer at 350 F for 7-8 minutes. Brush more oil on them halfway through. This is to help get that golden colour. It might not turn out as golden as it does when you deep fry, but it will be healthier, as you will be using a lot less oil.
Bake
Brush or spray cooking oil over the shrimp egg rolls and bake in a preheated 425 F oven for 15 minutes. Flip them over and continue to bake for another 10 minutes until crisp and golden.
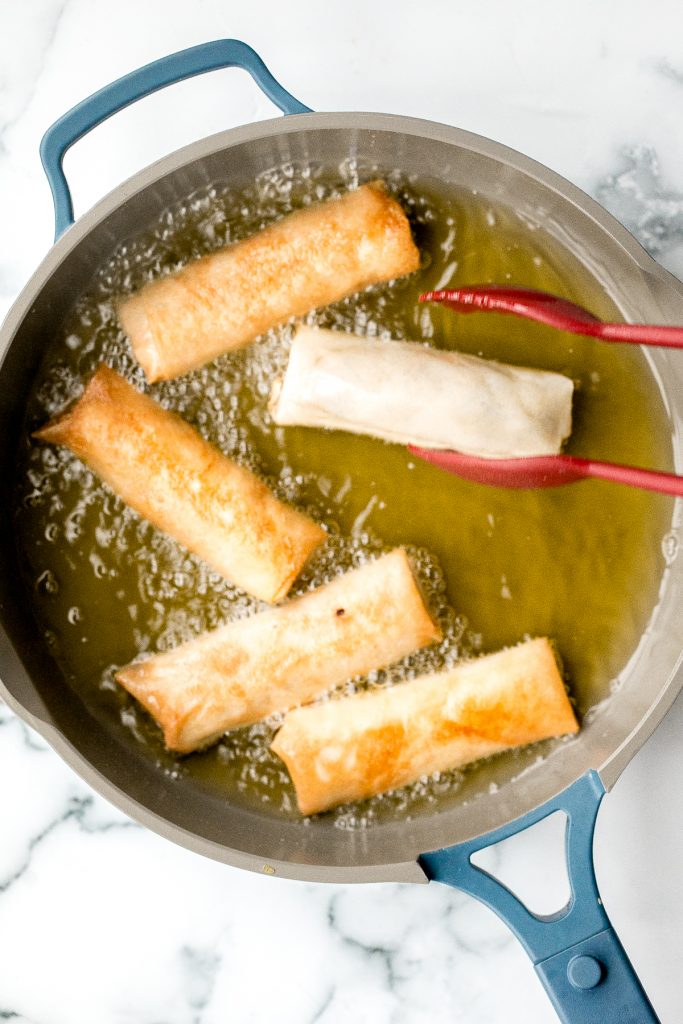
How to Serve Shrimp Egg Rolls with Vinegar Dipping Sauce
To make the vinegar dipping sauce, combine vinegar, fish sauce, sugar, pepper, chili and cilantro in a small bowl. Stir well with a spoon to combine.
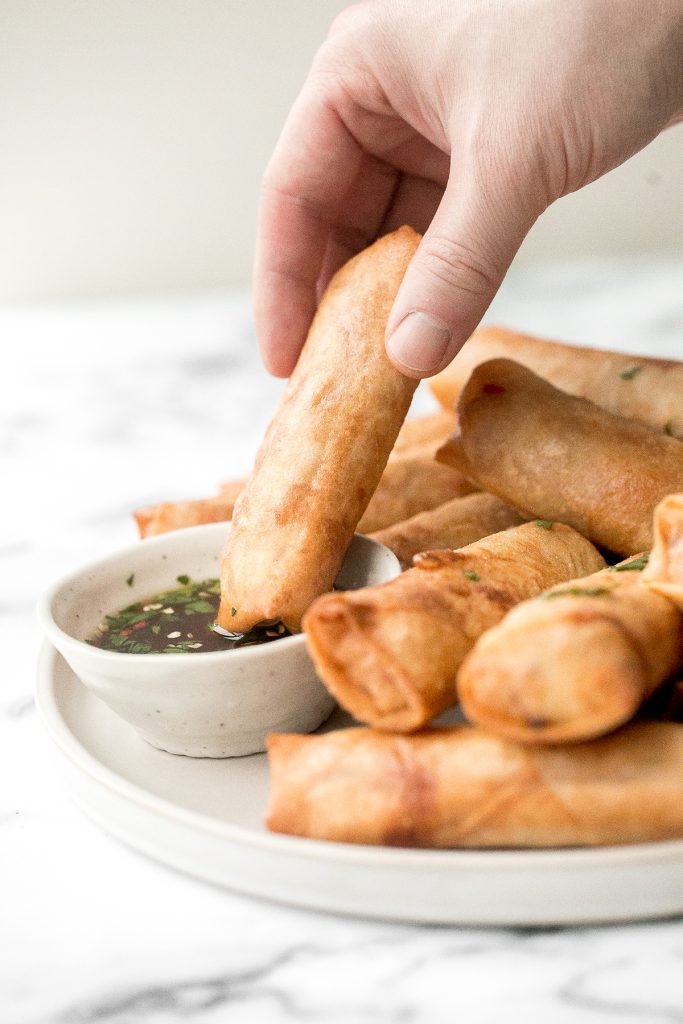
Storing and Freezing Instructions

More Asian Appetizers
Tried this recipe?
I'd love to hear what you think! Leave a comment and rating below to share your feedback. Your reviews help others discover this recipe and help me keep creating more free recipes for you. Snap a photo and tag me on social media @aheadofthyme too.

Sourdough Sandwich Bread

Sourdough sandwich bread is chewy with the perfect air holes inside, and has a crispy crust. It has a delicious signature sourdough taste. Like most sourdough bread, this bread takes just 10 minutes of actual prep work and no kneading. Although it does take longer for sourdough to rise versus traditional yeast, but it is easy to plan ahead and incorporate into your schedule.
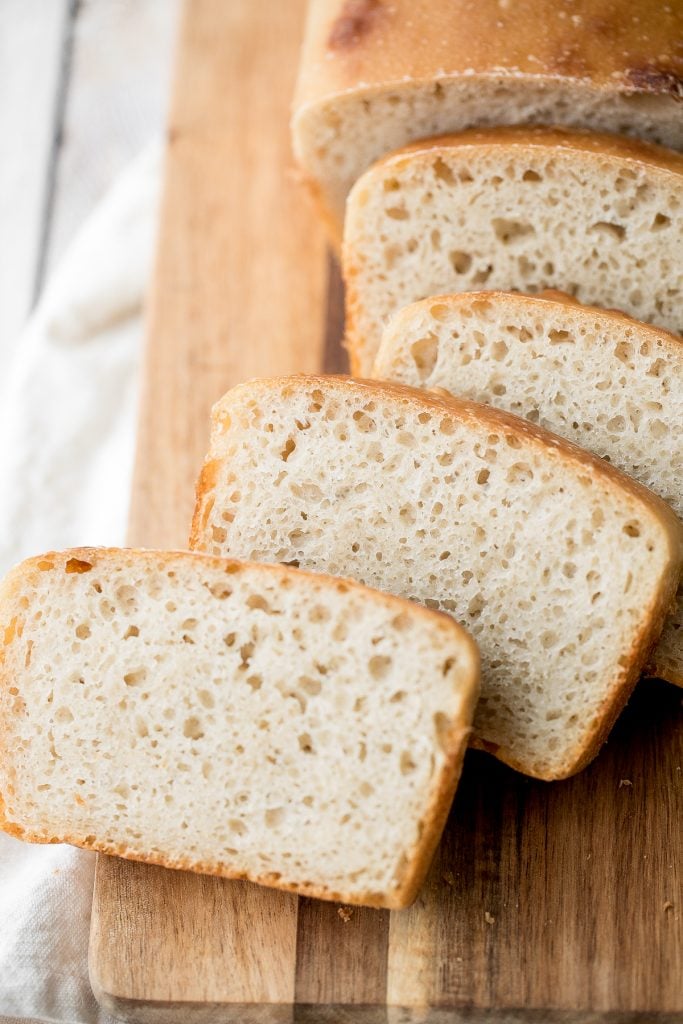
We have had our sourdough starter going since the beginning of March and we love to bake with it almost every week. We usually go for an artisan loaf of bread like small batch sourdough bread, green olive artisan sourdough bread, or fruit and nut sourdough bread, but this week we had plans to head up to the mountains and needed to pack a few egg salad sandwiches. Sourdough sandwich bread was the perfect bread to use.
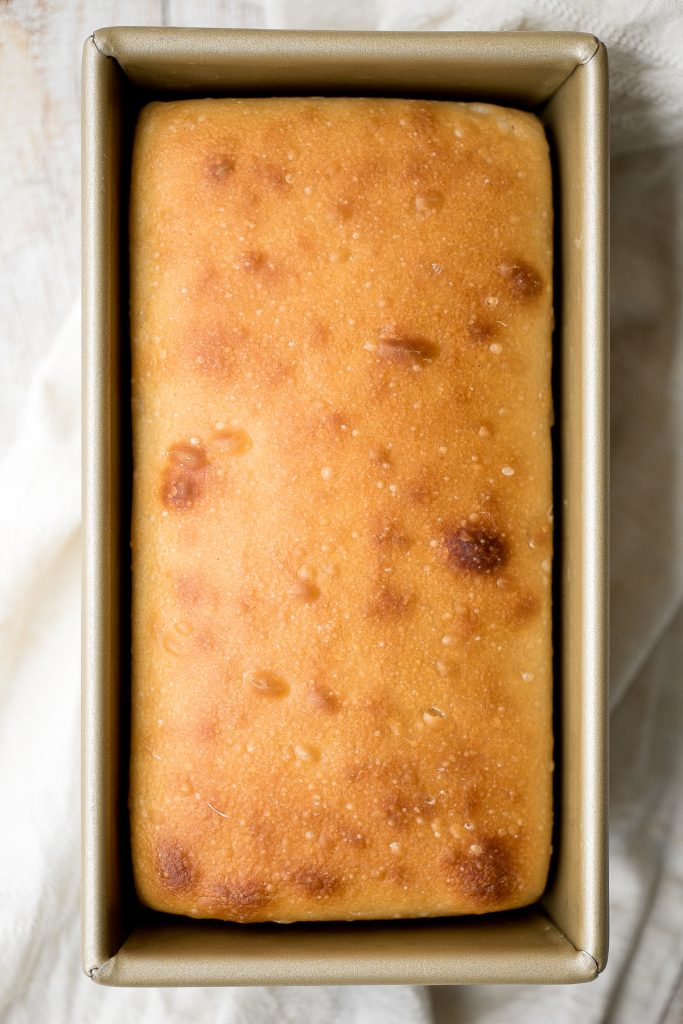
Ingredients
To make almost any sourdough bread, you will need the following ingredients:
You will also need a kitchen scale, mixing bowl, and 5x9 loaf pan (1 lb. loaf pan).

How to Make the Best Sourdough Sandwich Bread
Prepare the Dough + First Rise
Shape the Dough + Second Rise
Bake the Sourdough Sandwich Bread
Once the loaf rises to the rim, it's ready for baking. (Note that sourdough bread normally doesn't rise as much as the yeast bread but it is capable of doubling in size). Transfer the loaf pan into a 400F preheated oven and bake for 40 minutes until golden brown on top.
Remove the loaf out of the pan and allow it to cool completely on a wire cooling rack before slicing, about 1 hour.
How to Serve
Sourdough sandwich bread is perfect for making toast like banana toast with granola and honey, or to make easy deli sandwiches like egg salad sandwich or a turkey sandwich.
Tips for Making and Storing Sourdough Bread
More Sourdough Recipes
Tried this recipe?
I'd love to hear what you think! Leave a comment and rating below to share your feedback. Your reviews help others discover this recipe and help me keep creating more free recipes for you. Snap a photo and tag me on social media @aheadofthyme too.
25 Best Dim Sum Recipes
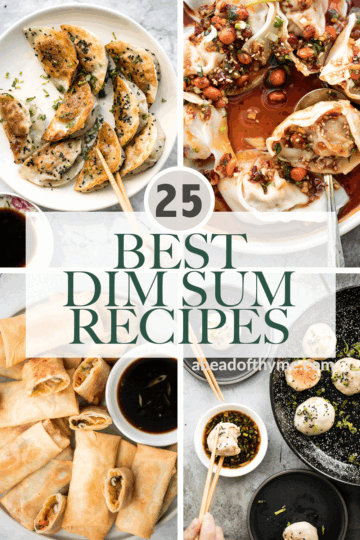
We have rounded up 25 of the best and most popular Chinese dim sum recipes including potstickers and dumplings, steamed buns and spring rolls, and everything in between. So if you are wondering how to make dim sum at home this year, whether for a Chinese New Year dim sum party (even if it's virtual this year) or just because you are craving a delicious appetizer, you are in the right place.

What is Dim Sum?
Dim Sum is a traditional Chinese meal enjoyed over brunch that consists of a variety of small dishes in bite-sized portions served with hot tea. Dim sum is often eaten family-style, which means that the small dishes are passed around and shared at the table so everyone gets to try a little bit of everything. The most popular items on a dim sum menu include dumplings and steamed buns.
Best Dim Sum Dishes
Crispy Bottom Shanghai Pan-Fried Pork Buns
Crispy bottom Shanghai pan-fried pork buns are crunchy on the bottom and fluffy and airy inside with a juicy and flavourful pork and spring onions filling. They are one of the most popular dim sum recipes in Shanghai.

Beef Potstickers (Dumplings)
Homemade Chinese beef potstickers (dumplings) are crispy on the outside and tender and juicy inside packed with a delicious beef filling.
Spicy Chili Oil Wontons
Easy spicy chili oil wontons, a signature Sichuan dish ready in just 10 minutes, hits every sense of your palate — sour, spicy, sweet and nutty.
Vegetarian Spring Rolls
Better than takeout, light and crispy fried vegetarian spring rolls are packed with a tender mushroom and cabbage vegetarian filling in a crunchy skin.
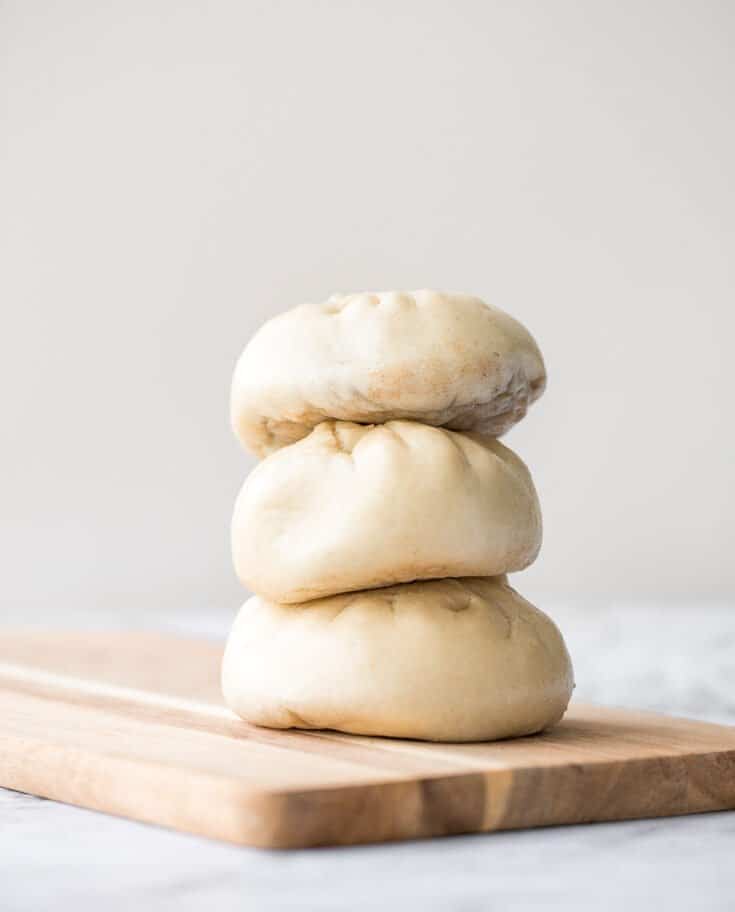
Shanghai Style Vegetarian Steamed Buns
Homemade Shanghai style vegetarian steamed buns is spongy with a juicy, flavourful bok choy and mushroom filling inside bursting with Asian flavours.

Pork Dumplings
Homemade pork dumplings are quick and easy to make, with perfect crispy bottoms and a tender, juicy pork filling inside. Easy to meal prep and freeze well.
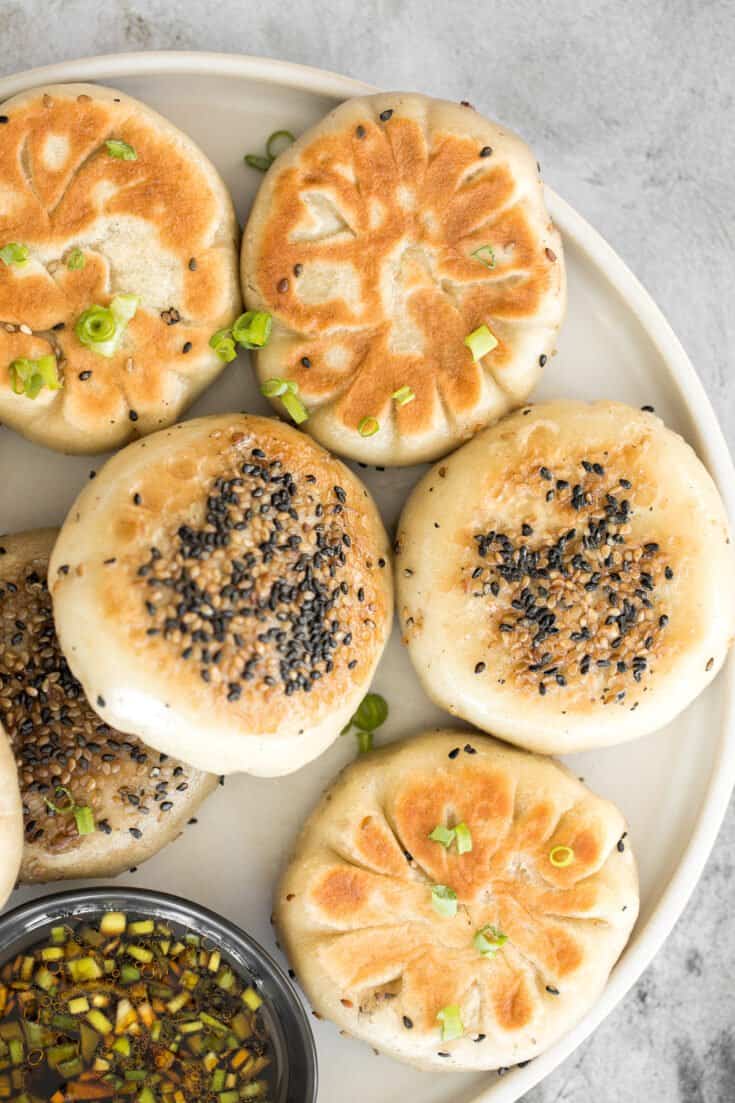
Crispy Bottom Pan-Fried Vegetable Buns (No Yeast)
Crispy bottom pan-fried fried vegetable buns (no yeast) are crunchy outside yet tender inside with a mushroom, carrot and vermicelli vegetarian filling.

Chicken and Cilantro Wontons
Learn how to make homemade chicken and cilantro wontons to celebrate Chinese new year with this easy to follow recipe and instructions on how to fold wontons.
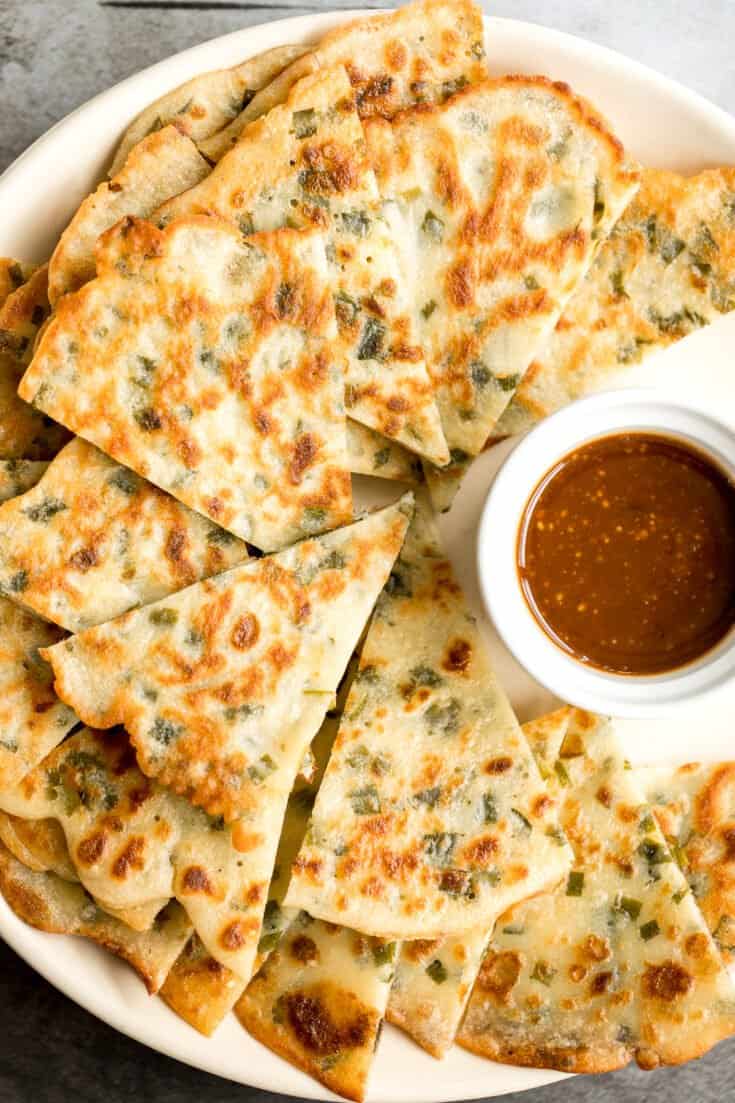
Savoury Chive Pancakes with Sourdough Starter
Don't let your sourdough starter go to waste, use your discard to make this easy one bowl recipe for crispy, light and fluffy, savoury chive pancakes.
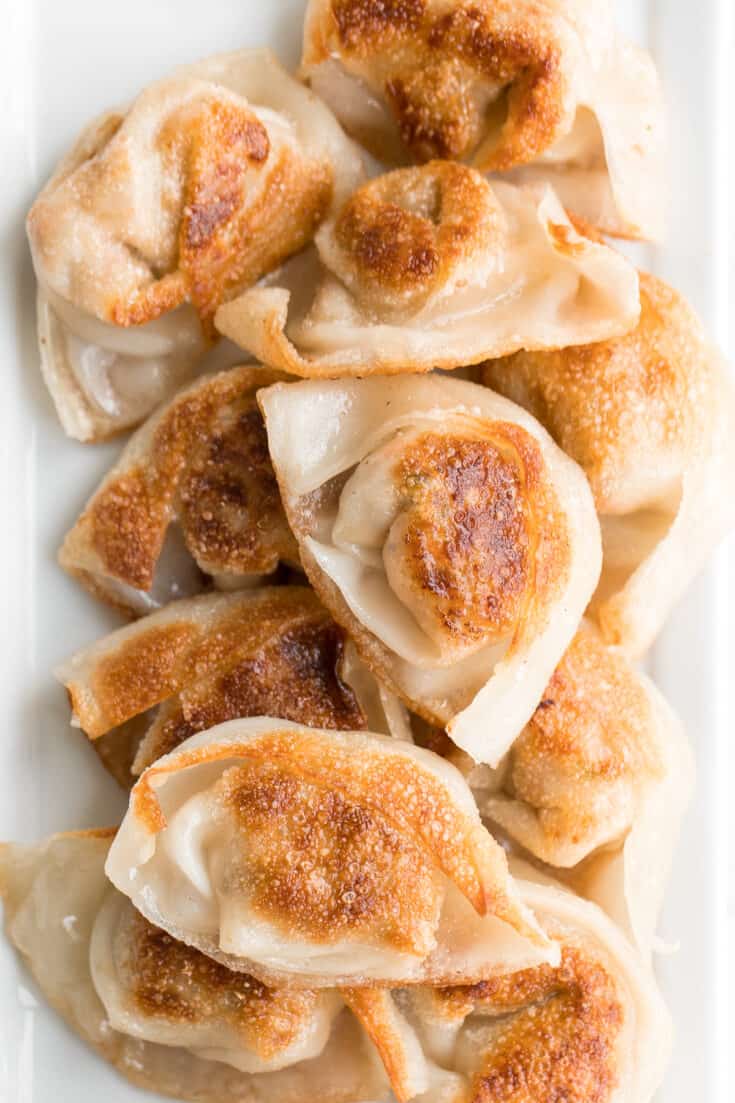
Pan-Fried Pork and Shrimp Wontons
Better than takeout pan-fried pork and shrimp wontons are so crispy outside and tender and juicy inside with a savoury pork, shrimp and vegetable filling.
Miso Garlic Chicken Wings
Baked miso garlic chicken wings are crispy, delicious, and easy to make. They're marinated in a savoury Asian marinade, and cooked in the oven or air fryer.
Pork and Sardine Dumplings (Potstickers)
Wrinkly crispy pork and sardine dumplings (potstickers) with vinegar dipping sauce, are filled with pork, canned sardines, green onions and Asian seasoning.
Shrimp Egg Rolls
Better than takeout, shrimp egg rolls are a delicious, flavourful and easy appetizer to make. They can be deep fried, baked or air fried.
Steamed Scallion Buns
Steamed scallion buns (hua juan 花卷) are delicious flower rolls made of a light and fluffy dough layered with green onions that is twisted and steamed.
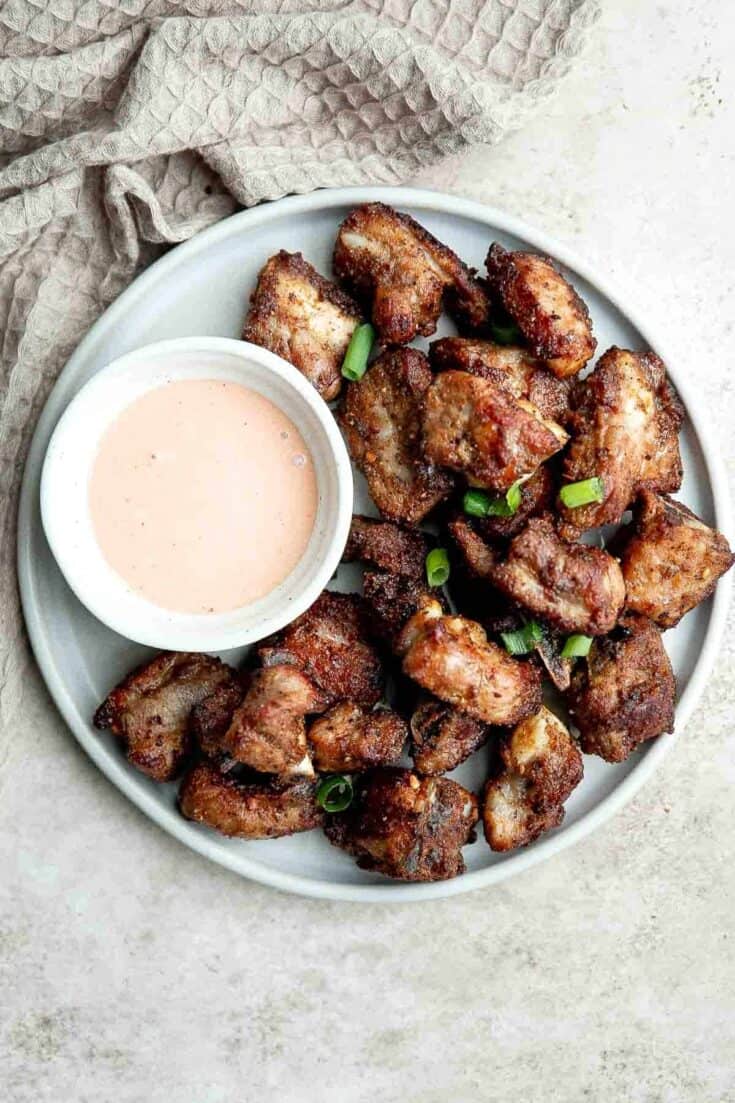
Air Fryer Short Ribs
Air fryer short ribs are crispy, flavorful, and delicious. The easy marinade ensures they're tender and juicy inside, while the air fryer makes them crispy.
Egg and Chive Vegetarian Dumplings
Fragrant chives with fluffy scrambled eggs, and a dash of flavour come together to create the perfect appetizer — egg and chive vegetarian dumplings.

Zongzi Sticky Rice Dumplings
Zongzi Chinese tamales (粽子) or sticky rice dumplings are stuffed with sticky rice, pork belly, and shiitake mushrooms, wrapped inside reed or bamboo leaves.
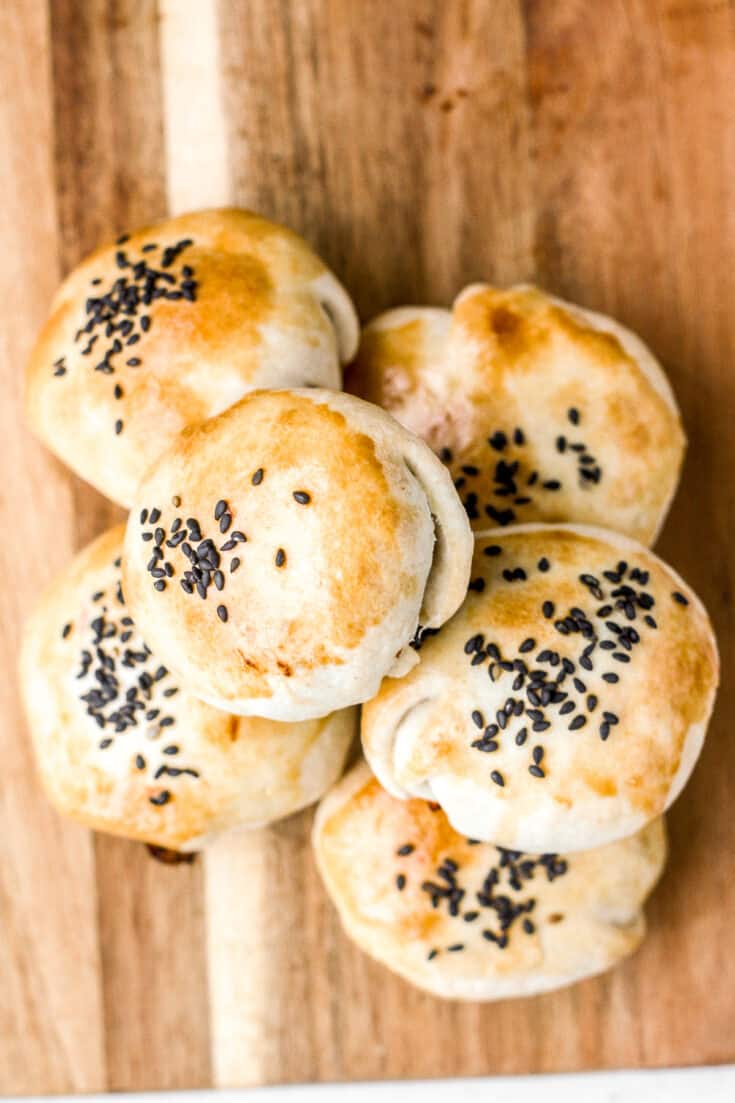
Mini Meat Pies with Soy Sauce
Mini meat pies with soy sauce are flakey puff pastries stuffed with delicious and juicy meat inside marinated with Asian flavours.
Chinese Beef Dumplings with Celery
Easy-to-make Chinese beef dumplings with celery can be made in advance for a stress-free meal. Enjoy these steamed, boiled or pan-fried!
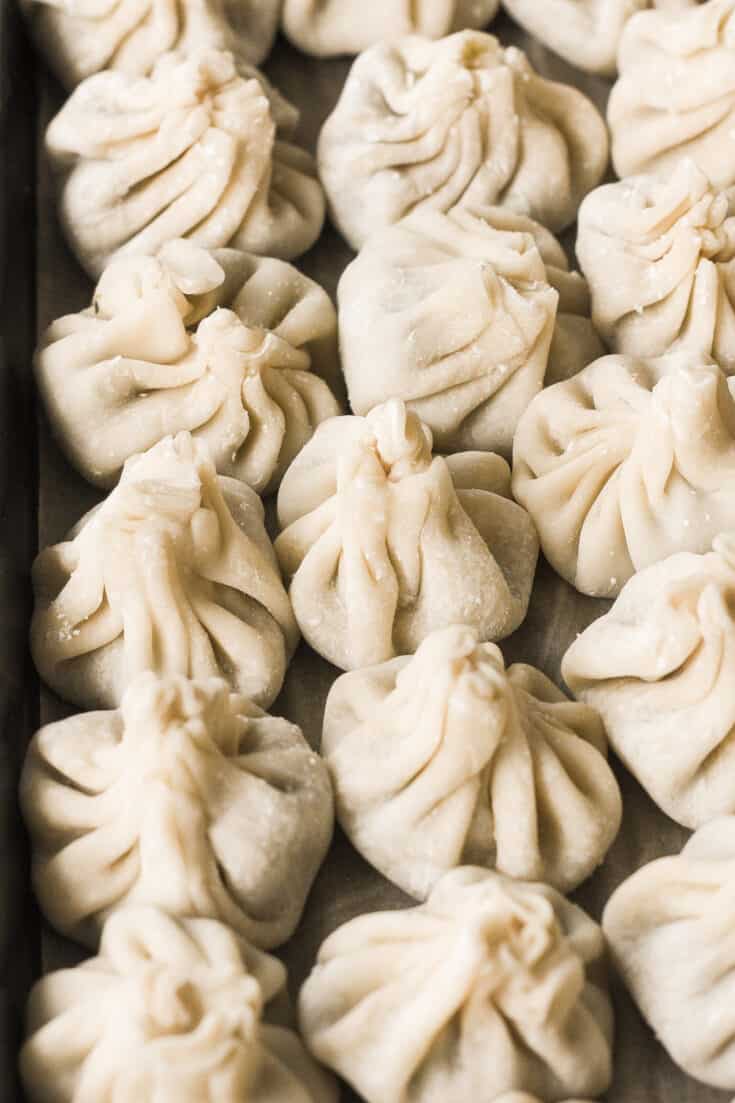
Chicken and Shrimp Dumplings
Easy to make chicken and shrimp dumplings can be steamed, boiled or fried and served with a side of soy sauce for dipping.
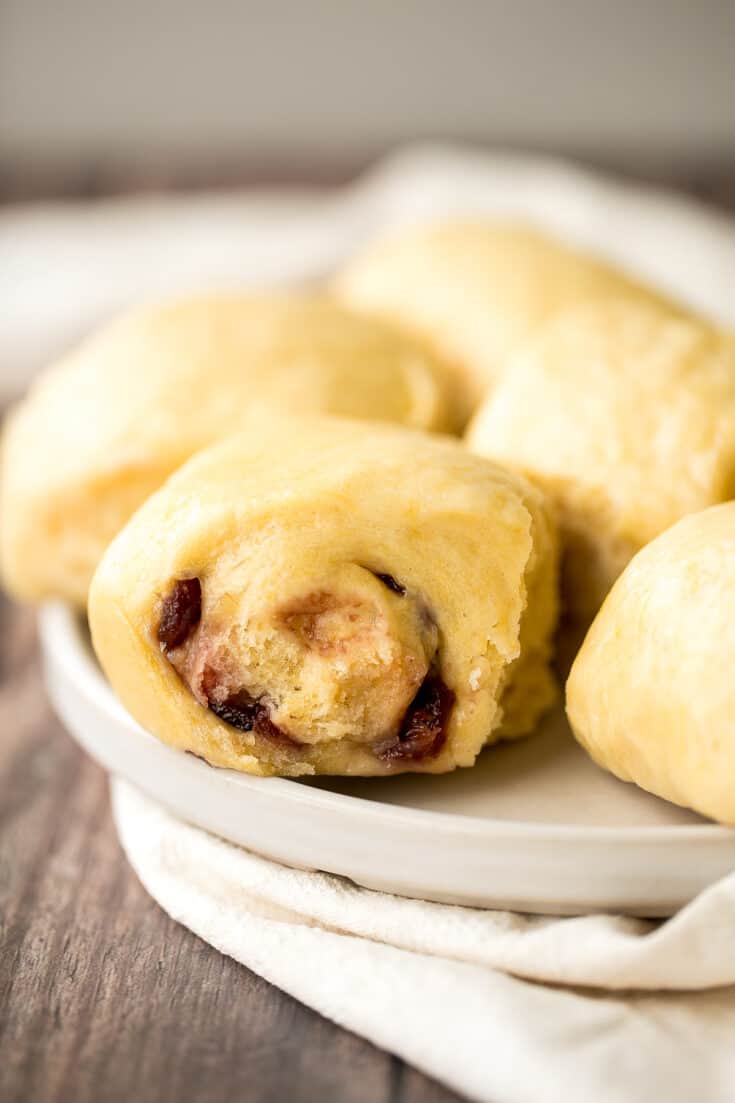
Cranberry Pumpkin Steamed Buns
Cranberry pumpkin steamed buns (baozi) are light, spongy, and fluffy Chinese buns packed with colourful cranberries and pumpkin puree for the best flavour.
Crispy Baked Asian Chicken Wings
You will be amazed by how crispy these baked Asian chicken wings turn out! We add sriracha for heat, honey for sweetness, and ginger to balance the flavours.
Vegetarian Lumpia (Spring Rolls)
Vegetarian lumpia recipe are delicious, crispy spring rolls packed with a flavourful savoury filling. They can be fried, baked or air fried.
Mini Egg Tarts
Mini egg tarts with a flaky buttery crust and silky smooth rich egg custard filling are a delicious Hong Kong pastry served as dessert with dim sum.
Storing Instructions
More Chinese Recipes

Did You Make Any of These Popular Chinese Dim Sum Recipes?
Please leave a comment and rating below, and let me know what you thought of this round up of Chinese dim sum recipes. Be sure to snap a picture and tag me on Instagram @aheadofthyme or share it on the Pinterest pin so that I can follow along.
HUNGRY FOR MORE? Don't forget to sign up for my email newsletter so that you don't miss any recipes. You can also follow along on Instagram and Pinterest for more recipe updates.
Baked Coconut Shrimp

Crispy baked coconut shrimp is a delicious healthy appetizer that is easy to make at home in about 30 minutes. Juicy jumbo shrimp are breaded in coconut flakes, panko breadcrumbs, and lots of seasoning. These popcorn shrimp are so flavourful, way better than takeout and much healthier because they are baked and not fried.
I love cooking with shrimp because they cook so quickly and are so flavourful. Baked coconut shrimp is the easiest finger food to serve with a side of homemade spicy mayo or sweet chili sauce, or turn it into a complete weeknight dinner with a side of steamed rice, air fryer french fries or baked sweet potatoes wedges.
Ingredients in Baked Coconut Shrimp
To make baked coconut shrimp, you will need the following ingredients:
You will also need measuring cups and spoons, mixing bowls, shallow saucepan, and half sheet baking pan.
How to Make the Best Baked Coconut Shrimp
Tips
More Shrimp Recipes
Tried this recipe?
I'd love to hear what you think! Leave a comment and rating below to share your feedback. Your reviews help others discover this recipe and help me keep creating more free recipes for you. Snap a photo and tag me on social media @aheadofthyme too.
Hand-Pulled Noodles

Hand-pulled noodles (also known as la mian 拉面) are homemade noodles that are springy, chewy, comforting and so delicious. These traditional noodles are made with dough that is rolled and stretched into long strips, either thin or wide. They are fun and actually quite easy to make once you get the hang of the stretching technique. Plus, making noodles from scratch just tastes so much better than dried store-bought noodles, and they are cheap to make.
What are Hand-Pulled Noodles?
Hand-pulled noodles, as suggested by its name, are made with wheat dough that is rolled and stretched by hand into long strips. They are made fresh and cooked immediately after pulling. These noodles are surprisingly very easy to make and a great recipe to try especially for beginners.
Hand-pulled noodles are served all over China, and it is a very popular street food. the chef will pull the noodles in front of your eyes and oftentimes performs a noodle pulling dance. We had the pleasure of seeing this in Chengdu (and other cities) when we travelled across China a few years ago.
Ingredients
Making homemade hand-pulled noodles requires just 4 ingredients, all of which you probably have at home, meaning you can literally make these right now. And unlike it's store-bought counterpart, these noodles contain no additives.
You will also need a kitchen scale (or measuring cups and spoons), mixing bowl, cooking pot, and a spider strainer or colander.
How to Make the Best Chinese Hand-Pulled Noodles
Note, because noodles are typically very low hydration dough (flour to water ratio is 2:1), it takes longer to knead the dough into a smooth dough ball. However, this small batch dough should be quite easy to handle and not sticky at all.
TIP: A well-kneaded dough is smooth and can hold its shape. When you give the dough ball a firm poke with your finger, the indentation should bounce right back. If it doesn't bounce back and stays like a dimple, keep kneading for a few minutes.
How to Shape Hand-Pulled Noodles
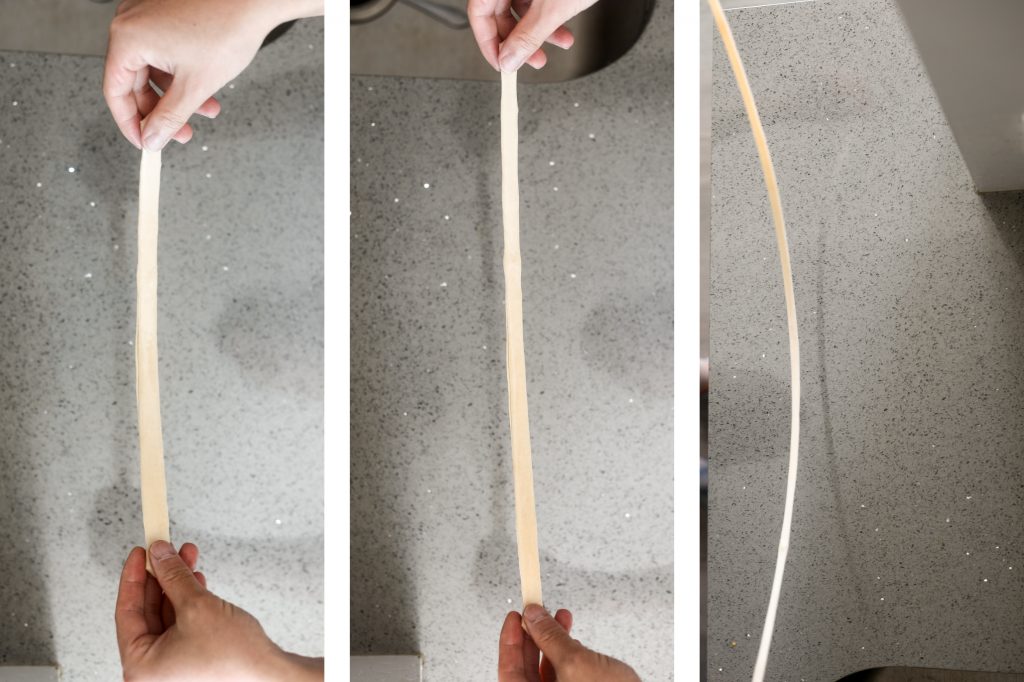
TIP: For wide noodles, you can stretch the noodle out to your total arm length, across your body. For thin noodles, you can stretch them out about one arm's length.
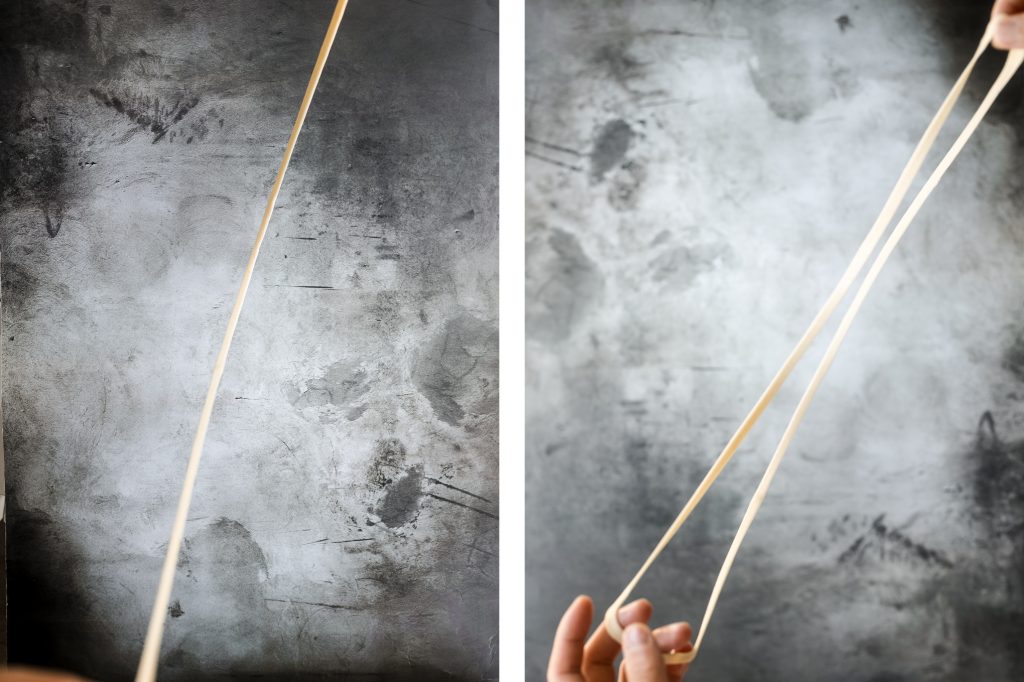
How to Cook Hand-Pulled Noodles
To cook the noodles, bring 4 cups of water to a boil in a large cooking pot over medium high heat. Add the pulled noodles into the boiling water and cook for 2 minutes. Drain the noodles with a spider strainer or a colander and place it into a bowl.
Serve the noodles immediately with seasoning or sauce to avoid the noodles sticking from together. Use the thin noodles to make traditional Shanghai scallion oil noodles or spicy dan dan noodles. Use the flat noodles to make authentic biang biang spicy noodles (also known as Xi'an chili oil noodles) or spicy cumin lamb noodles.
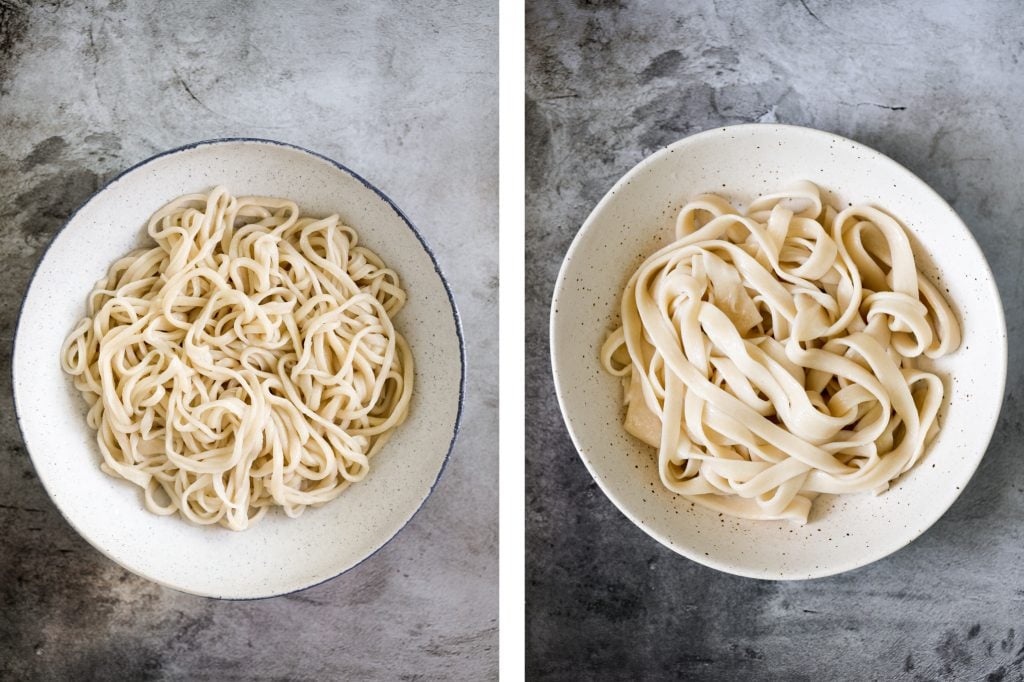
Storing Instructions
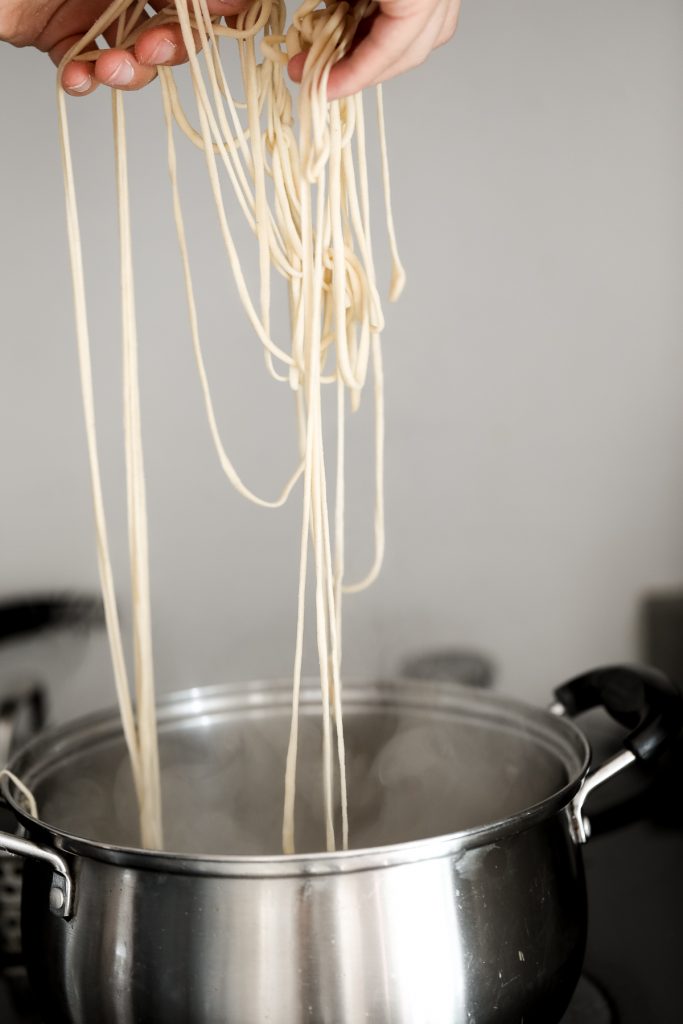
More Noodle Recipes
Tried this recipe?
I'd love to hear what you think! Leave a comment and rating below to share your feedback. Your reviews help others discover this recipe and help me keep creating more free recipes for you. Snap a photo and tag me on social media @aheadofthyme too.
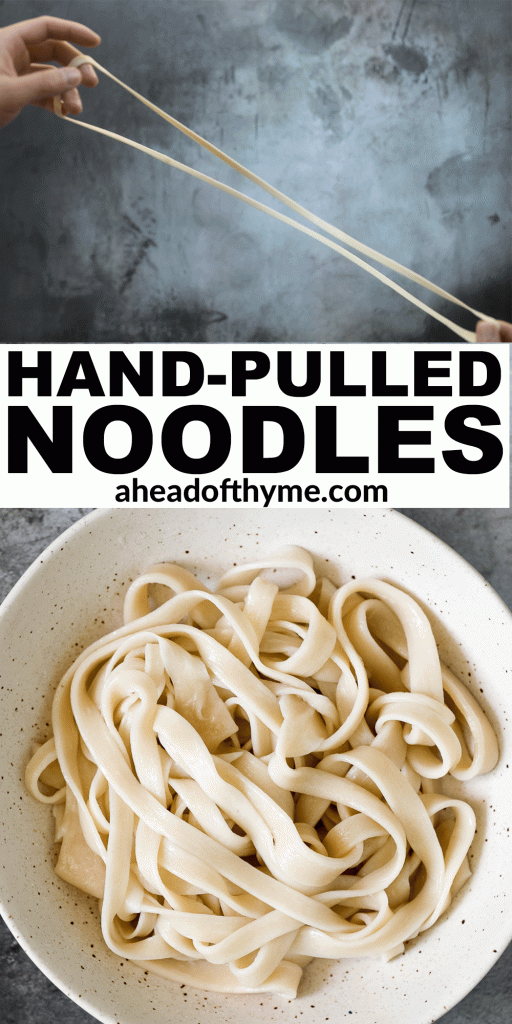
Scallion Oil Noodles

Shanghai scallion oil noodles (葱油拌面) is a simple noodle dish that is easy to make homemade with just 6 ingredients in under 10 minutes. Boiled hand-pulled noodles are tossed in a flavourful oily sauce with fried scallions (or spring onions), making them completely vegan. These delicious authentic noodles taste so much better than restaurant takeout.

What are Shanghai Scallion Oil Noodles?
Similar to Shanghai fried noodles, these scallion oil noodles are another signature noodle dish in Shanghai, and is considered one of the most popular dishes in China. It is served in almost any restaurant you go to in Shanghai, and is typically enjoyed for breakfast or lunch. Danny grew up enjoying a bowl of these noodles alongside some steamed buns and wonton soup. It was also one of my favourite noodle dishes that I tried when I visited China a couple of years ago.
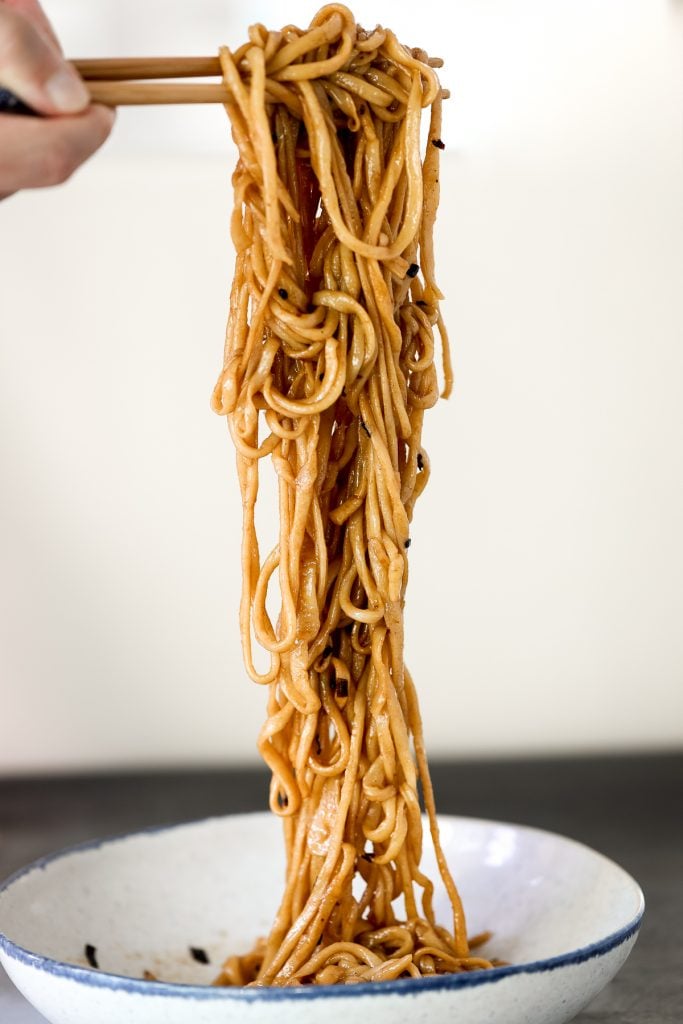
Ingredients
To make Shanghai scallion oil noodles, you will need just a few ingredients:
You will also need measuring spoons, medium cooking pot, spider strainer or colander, and a wok or shallow saucepan.
How to Make the Best Shanghai Scallion Oil Noodles
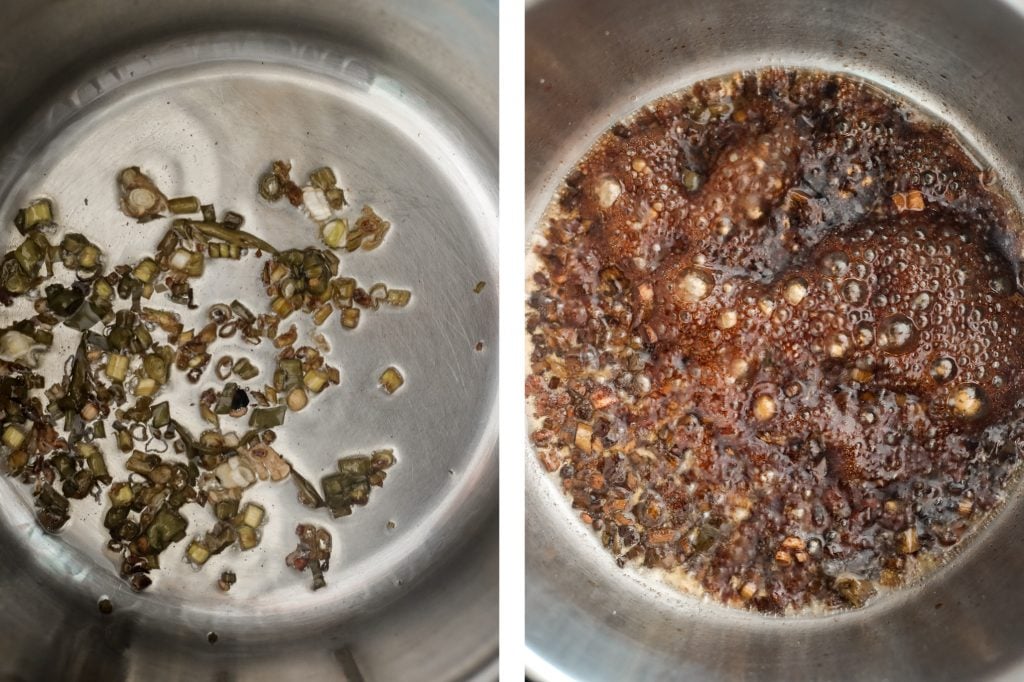
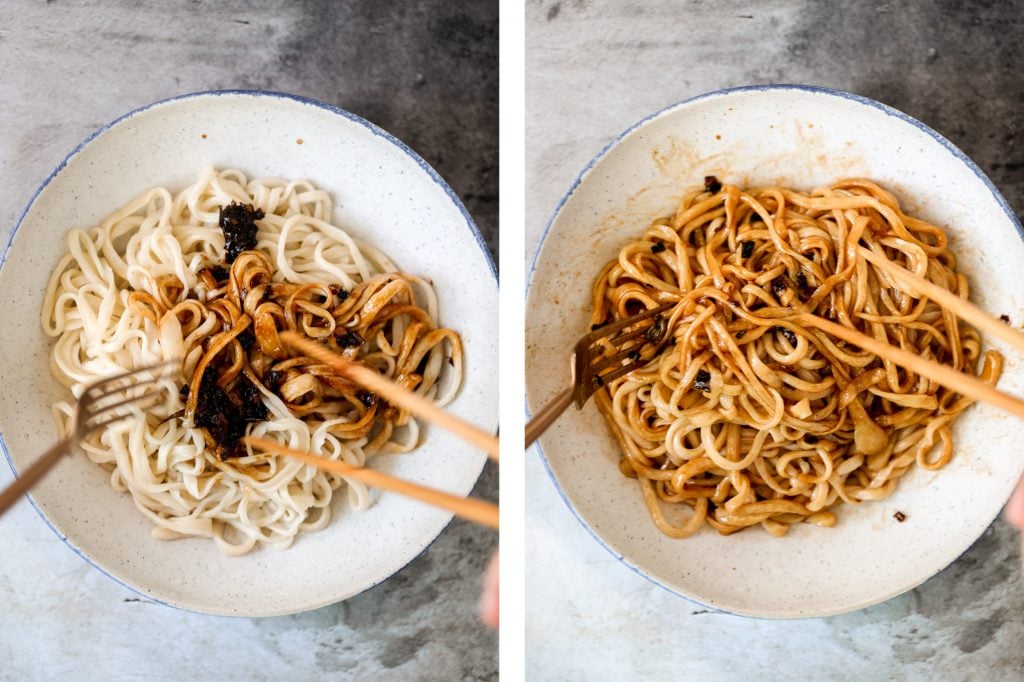
Tips
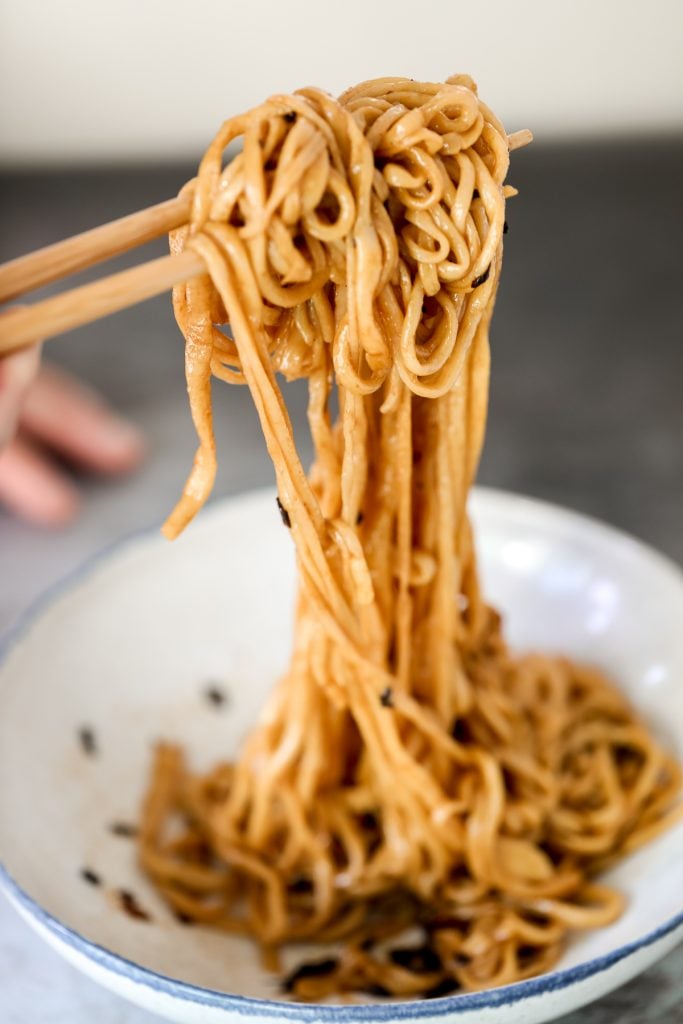
More Noodle Recipes
Tried this recipe?
I'd love to hear what you think! Leave a comment and rating below to share your feedback. Your reviews help others discover this recipe and help me keep creating more free recipes for you. Snap a photo and tag me on social media @aheadofthyme too.
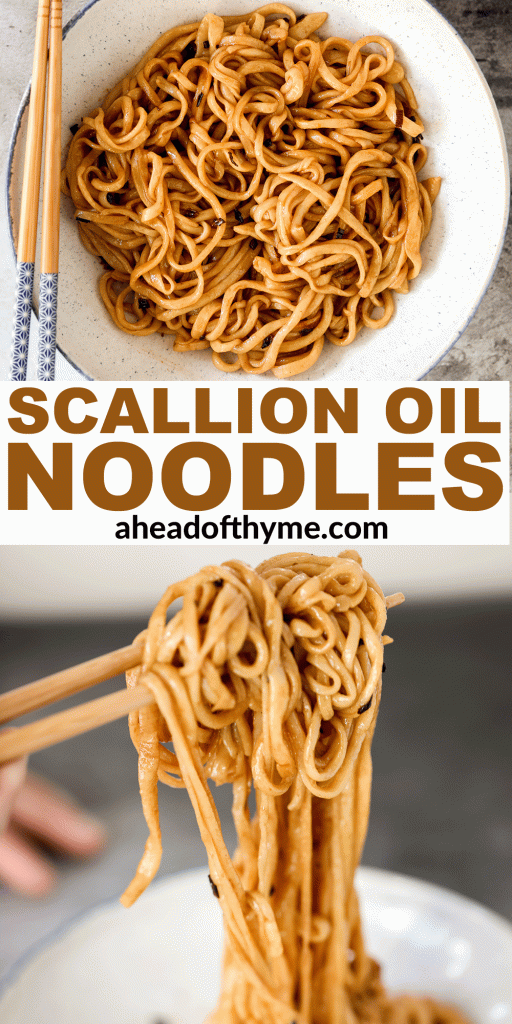
Tomato Bruschetta with Balsamic Glaze

Tomato bruschetta with balsamic glaze is an easy appetizer that you can whip up on short notice. Crunchy, toasted slices of garlicky Italian bread are topped with the perfect blend of tomatoes, onions, garlic, and basil, all immersed in olive oil to bring out their intense flavours, and drizzled with a reduced balsamic glaze.
I am not going to lie, this is one of my go-to "show-off" dishes. Why? Well, it looks and tastes on par with restaurant bruschetta, if not better. You will be shocked at how easy it is to make. It basically comes down to chopping up some vegetables and toasting some bread. Yup, that easy.
You can even prepare the toppings in advance and assemble the bruschetta just before serving. It's a total crowd pleaser so be prepared to make extra.
What is Bruschetta?
Bruschetta are an appetizer made of thick slices of Italian bread or sourdough-type bread that is drizzled with olive oil and rubbed with garlic, then toasted and topped with tomatoes and herbs. They are similar to crostini which is made with small, thin slices of toasted French baguettes.
If you like this bruschetta, then you will love whipped ricotta crostini, pea and ricotta crostini with mint, fig crostini with goat cheese, or curried white bean crostini.
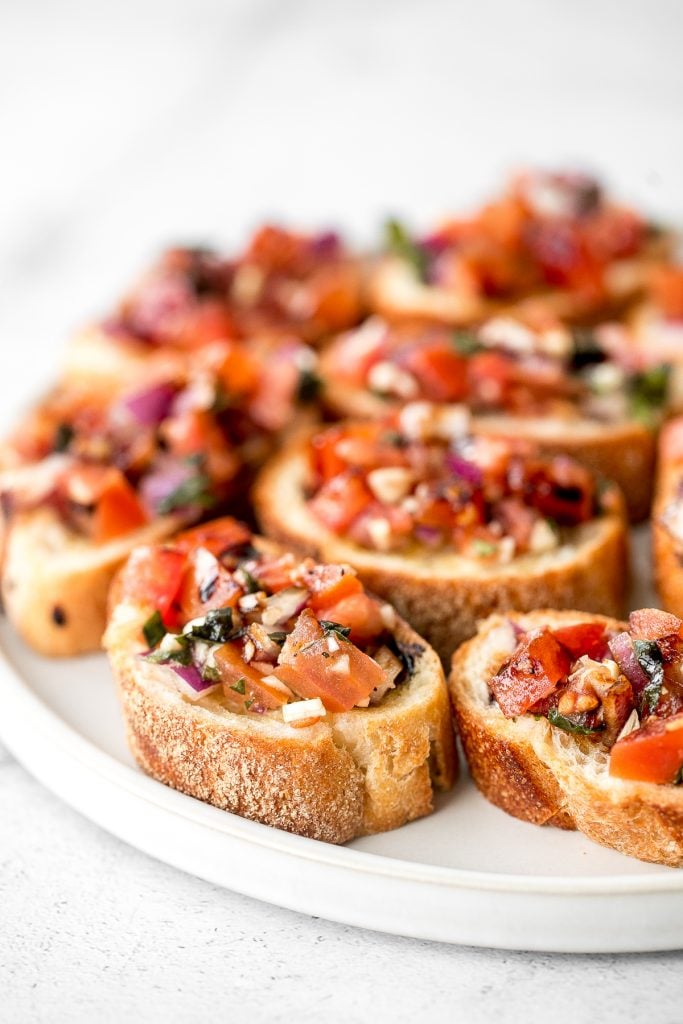
Ingredients in Tomato Bruschetta
To make this easy tomato bruschetta with balsamic glaze, you will need the following ingredients:
You will also need measuring cups and spoons, mixing bowl, small cooking pot or shallow saucepan, and quarter sheet baking pan.
How to Make the Best Tomato Bruschetta with Balsamic Glaze
How to Make Balsamic Glaze
This recipe also calls for balsamic glaze. It is so easy to make at home, or you can use store-bought. To make it at home, all you need is one ingredient: balsamic vinegar. Simply heat it on the stove to reduce the sauce by half (allow the liquid to evaporate). The glaze will be glossy and thick enough to coat the back of the spoon (similar to liquid honey). Note that the glaze will continue to thicken quite a lot as it cools so you need to remove it from the heat and transfer to a bowl immediately once it's reduced by half.
Make Ahead Instructions
You can make parts of this tomato bruschetta with balsamic glaze ahead of time.
More Appetizer Recipes
Tried this recipe?
I'd love to hear what you think! Leave a comment and rating below to share your feedback. Your reviews help others discover this recipe and help me keep creating more free recipes for you. Snap a photo and tag me on social media @aheadofthyme too.

Whipped Ricotta Dip
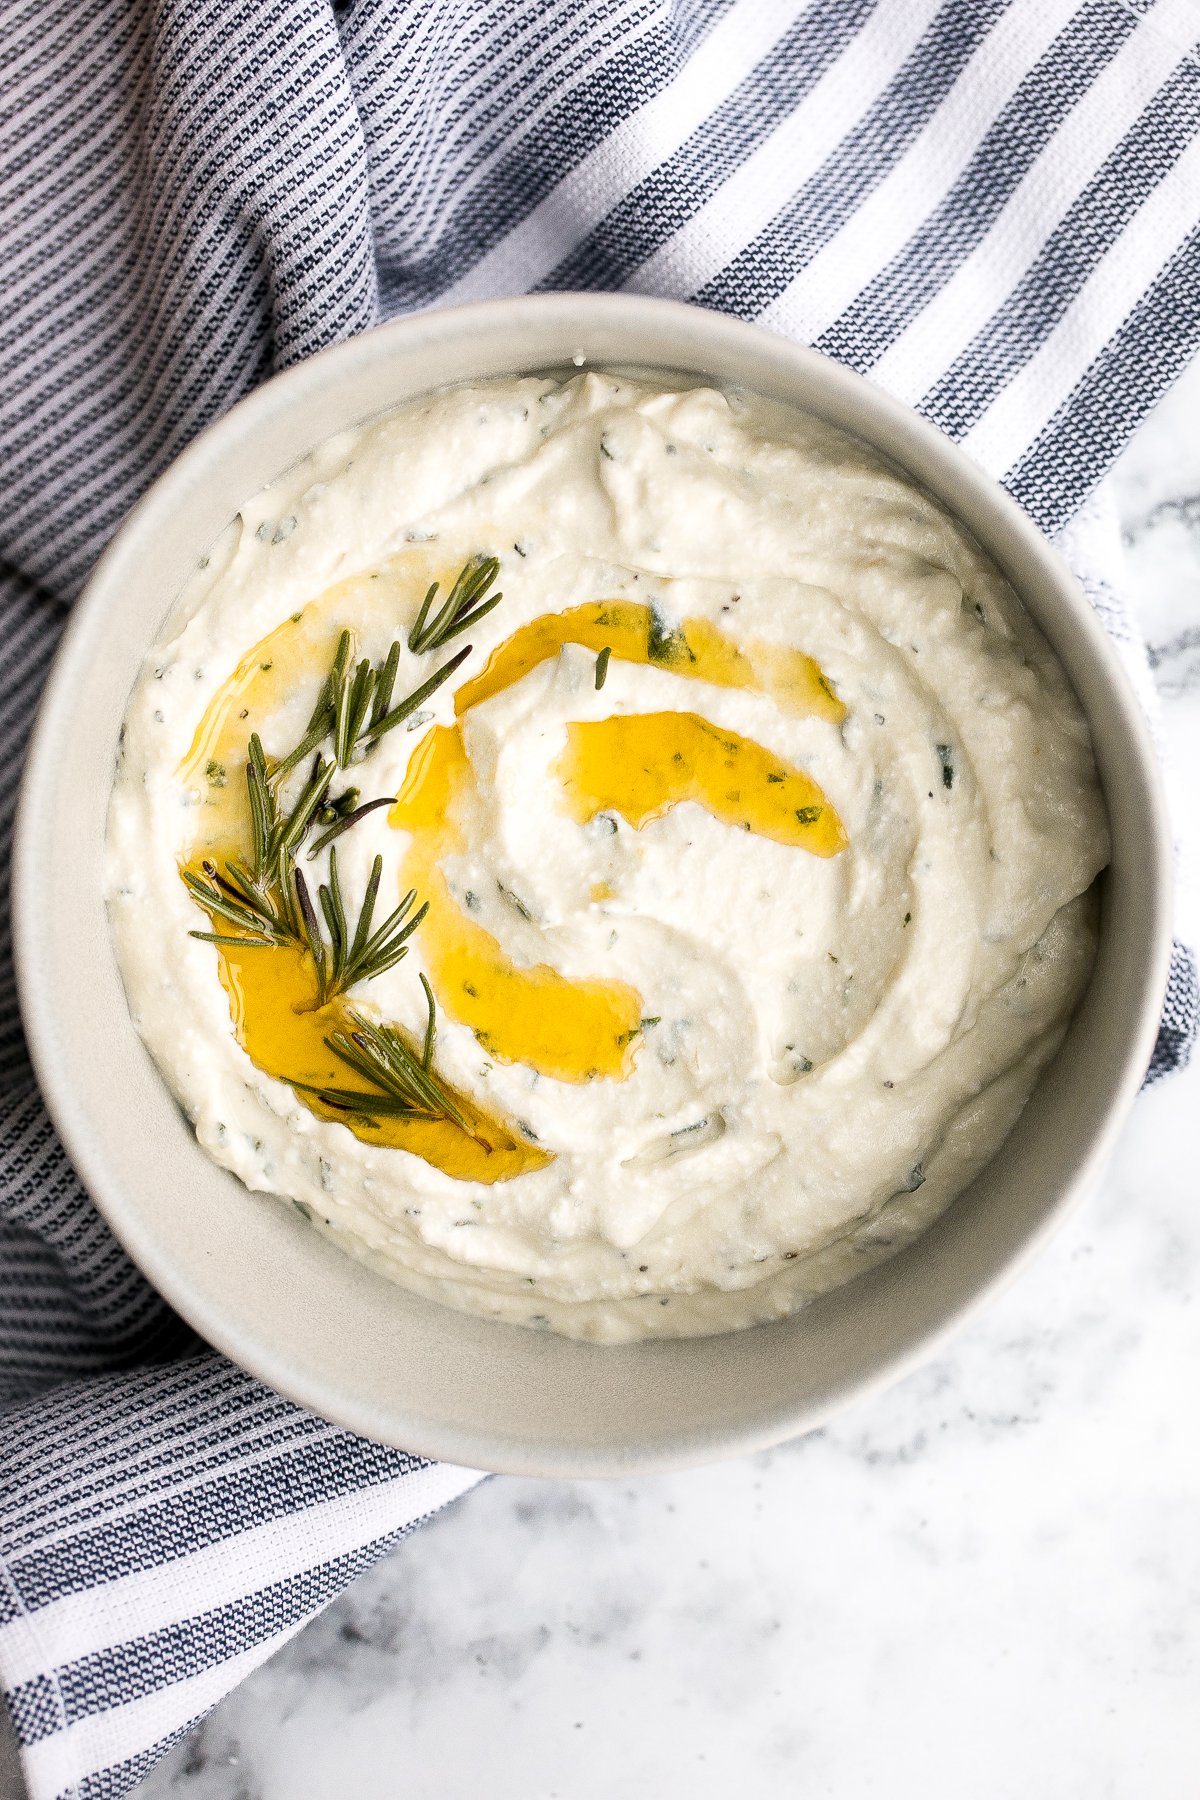
Light and airy, whipped ricotta dip is so easy to make in just 5 minutes with a few fresh ingredients including fresh herbs, olive oil, garlic, and a touch of honey. Serve whipped ricotta as a delicious appetizer with some bread, crackers, or veggies on the side for easy dipping, or as a spread on sandwiches.
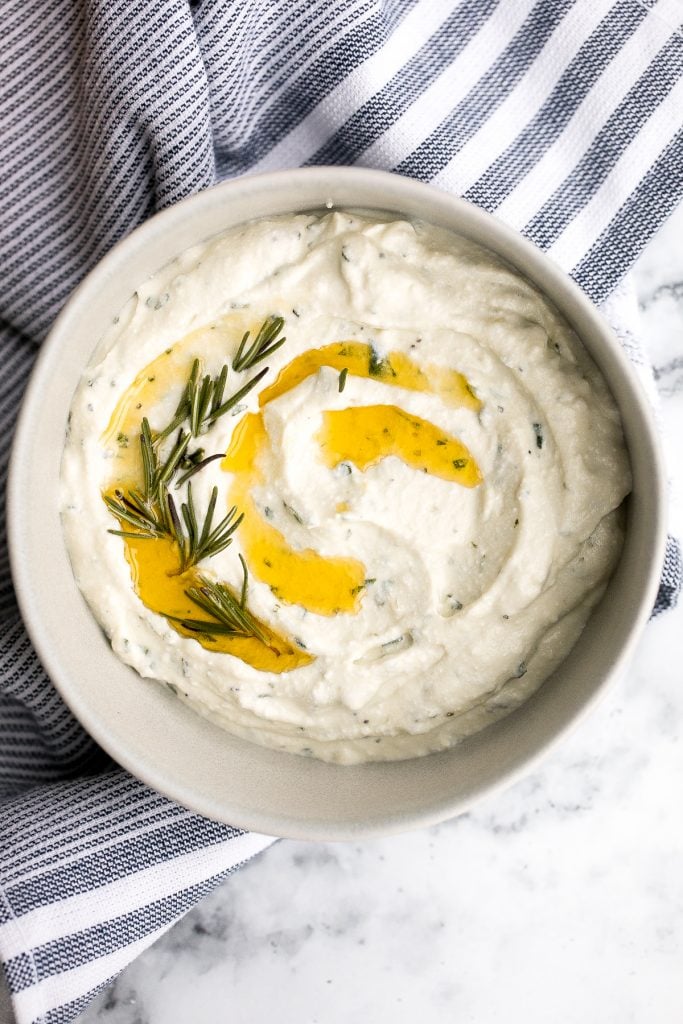
Once you make easy 5-minute homemade whipped ricotta dip, it will be really hard to go back to store-bought. There is so much more flavour in homemade, and you know exactly what is going into your dip meaning no fillers or unnecessary ingredients. If you like this whipped ricotta, then you may like these other quick and easy 5-minute dips: creamy hummus, easy tzatziki sauce (cucumber yogurt dip), or easy guacamole. If you have some more time, try baked spinach dip, caramelized onion dip, or roasted red pepper hummus.
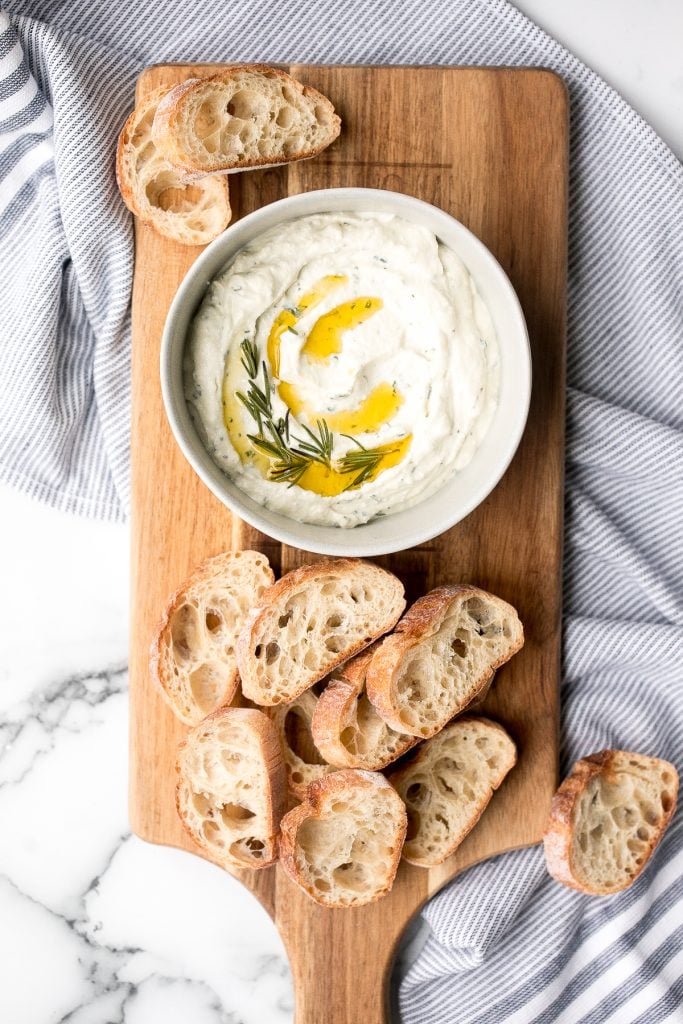
Ingredients
To make whipped ricotta dip, you will need the following ingredients:
You will also need measuring cups and spoons, a medium mixing bowl, and a hand mixer (or food processor).
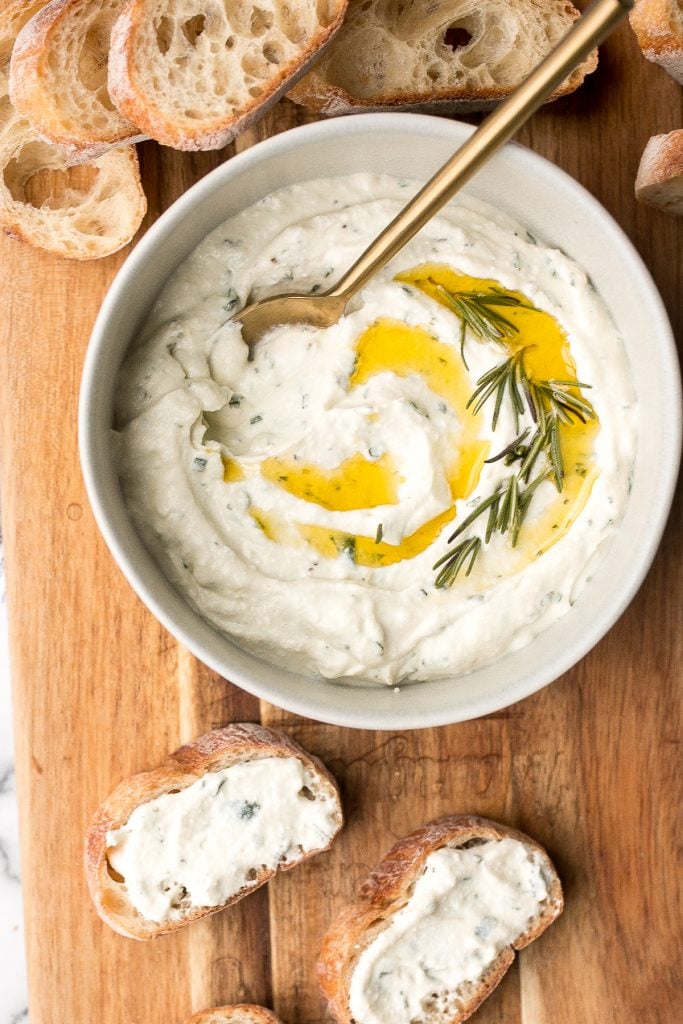
How to Make the Best Whipped Ricotta Dip
Tips
More Ricotta Recipes
Tried this recipe?
I'd love to hear what you think! Leave a comment and rating below to share your feedback. Your reviews help others discover this recipe and help me keep creating more free recipes for you. Snap a photo and tag me on social media @aheadofthyme too.
Whipped Ricotta Crostini
Whipped ricotta crostini is the easiest appetizer to whip up in just minutes. It is a fancy addition to your dinner menu but will likely be the easiest item. Top toasted slices of French baguettes with creamy herbed whipped ricotta and tomatoes. You can even prepare the whipped ricotta and toppings in advance and assemble the crostini just before serving. It's a total crowd pleaser so you may want to make extras.

What is Crostini?
Crostini literally translates to "little toasts" in Italian. They are small, thin slices of toasted bread (like French baguettes), brushed with olive oil. They are topped with savoury toppings like cheese and vegetables. Bruschetta on the other hand, is made with thicker wide slices of Italian bread or sourdough.
If you like this whipped ricotta crostini, then you will love tomato bruschetta with balsamic glaze, pea and ricotta crostini with mint, fig crostini with goat cheese, or curried white bean crostini.
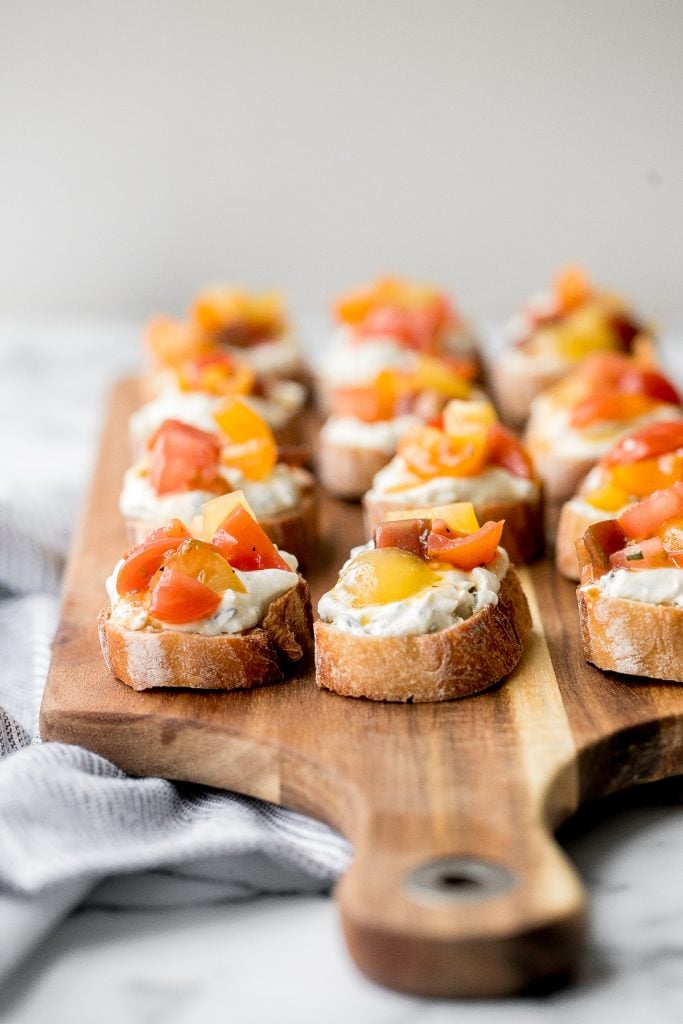
Ingredients in Whipped Ricotta Crostini
To make this easy whipped ricotta crostini, you need the following ingredients:
You will also need a measuring cups and spoons, mixing bowls, and large half sheet baking pan.
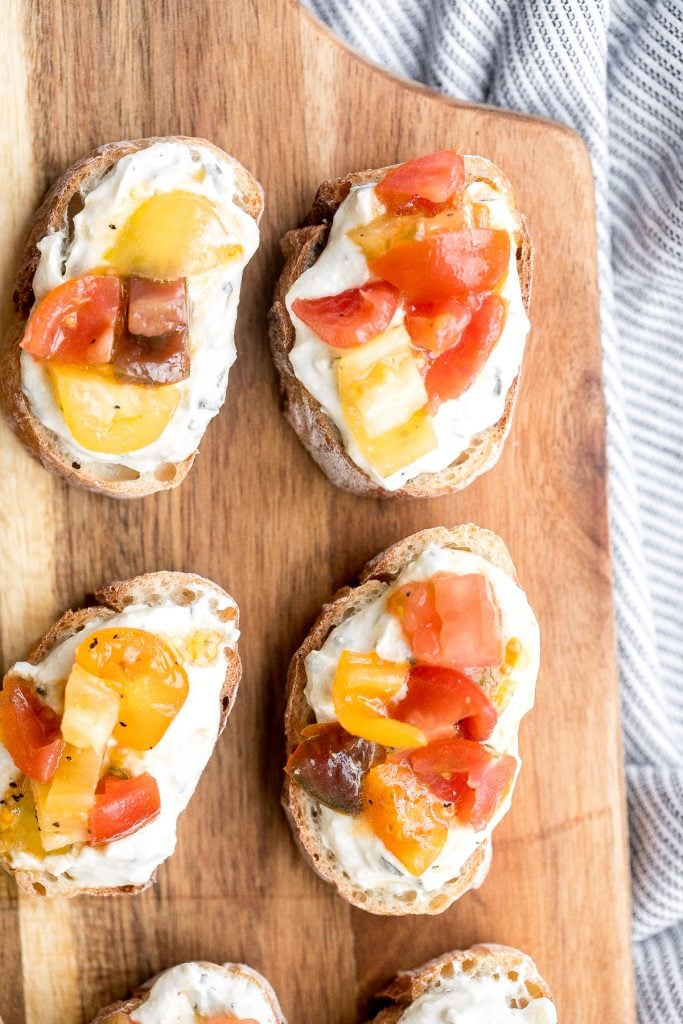
How to Make the Best Whipped Ricotta Crostini
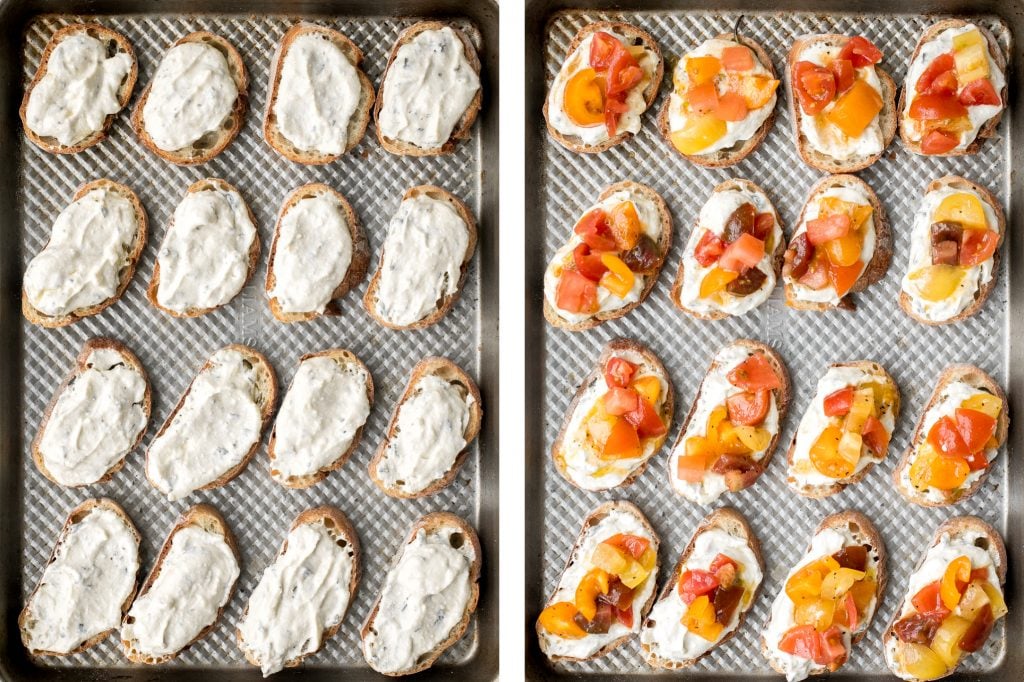
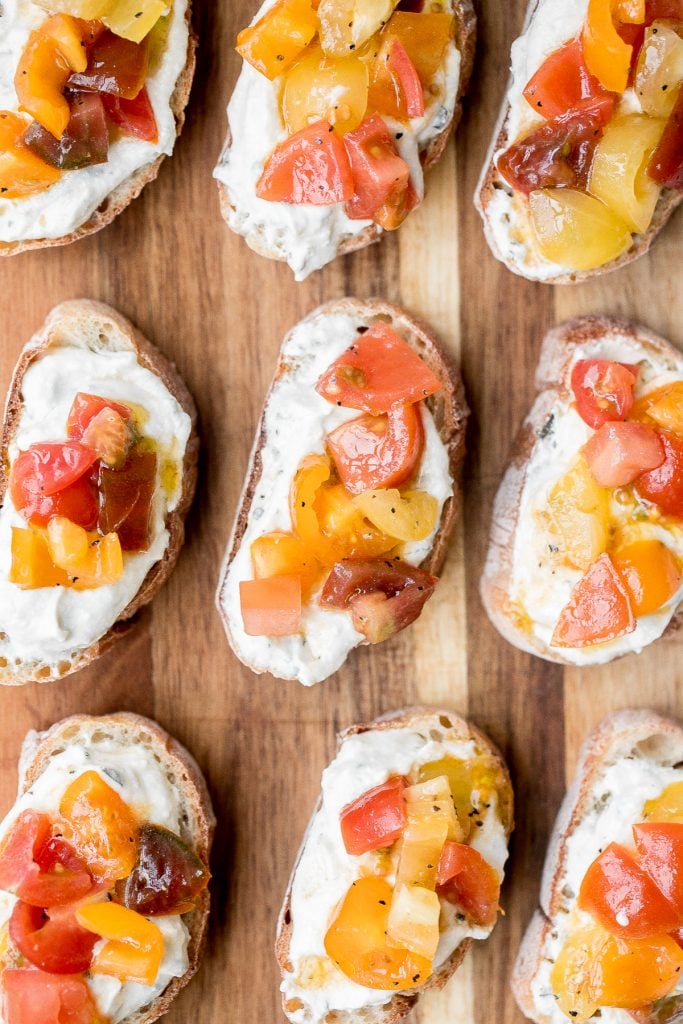
Tips
More Easy Appetizers
Tried this recipe?
I'd love to hear what you think! Leave a comment and rating below to share your feedback. Your reviews help others discover this recipe and help me keep creating more free recipes for you. Snap a photo and tag me on social media @aheadofthyme too.
Homemade Tater Tots with Bacon

Homemade tater tots with bacon are golden and crispy on the outside, yet soft and tender inside. They're loaded with bacon, cheese and seasoning and packed with flavour. These delicious tater tots are a total family favourite and one that the kids love. They are baked to perfection, but you can easily deep fry them or make them in the air fryer.
Plus, these are so much better for you than the frozen tater tots that you buy at the store since we are making everything fresh and know exactly what is going in there. Plus, you have the option to bake these or air fry them. When you use store bought tater tots, note that they are already deep fried before they are frozen.
Ingredients in Homemade Tater Tots
You will also need measuring cups and spoons, mixing bowl, box grater, a large half sheet baking pan (or air fryer or shallow saucepan, depending on the cooking method you are using).
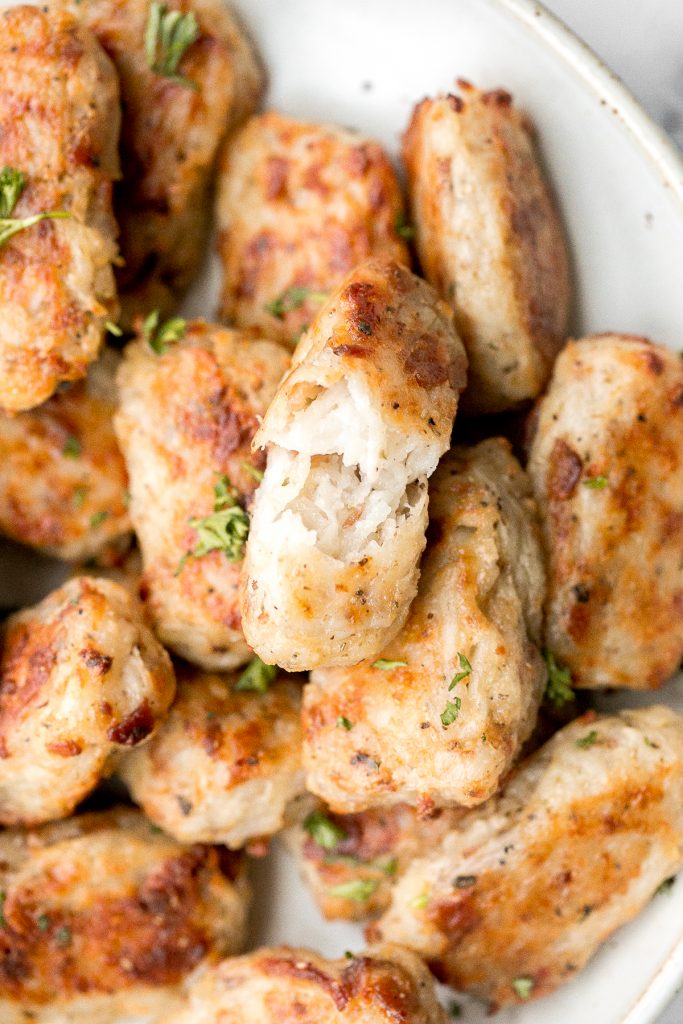
How to Make the Best Homemade Tater Tots with Bacon
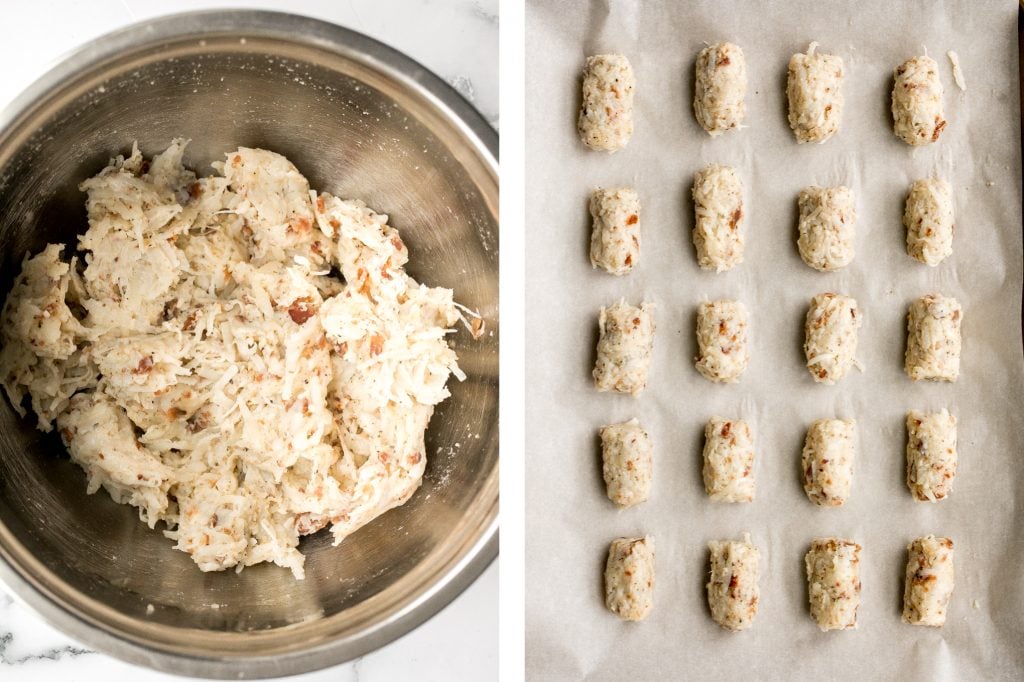
How to Cook Homemade Tater Tots
You can cook homemade tater tots in one of three ways: baked in the oven, deep fried, or in the air fryer.
Serve immediately with ketchup or your favourite dipping sauce.
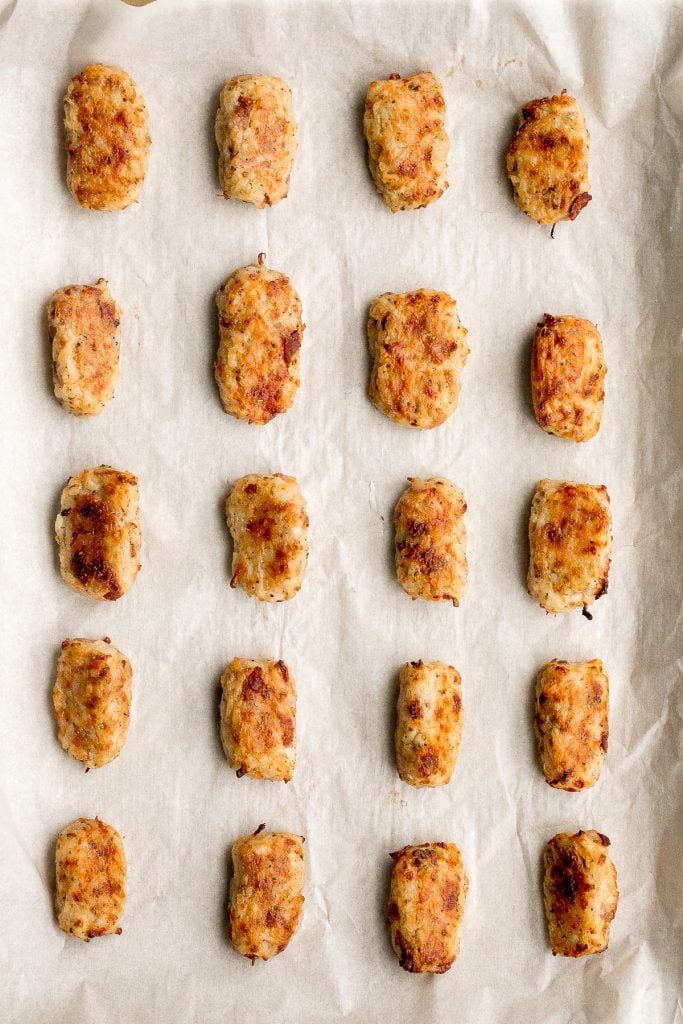
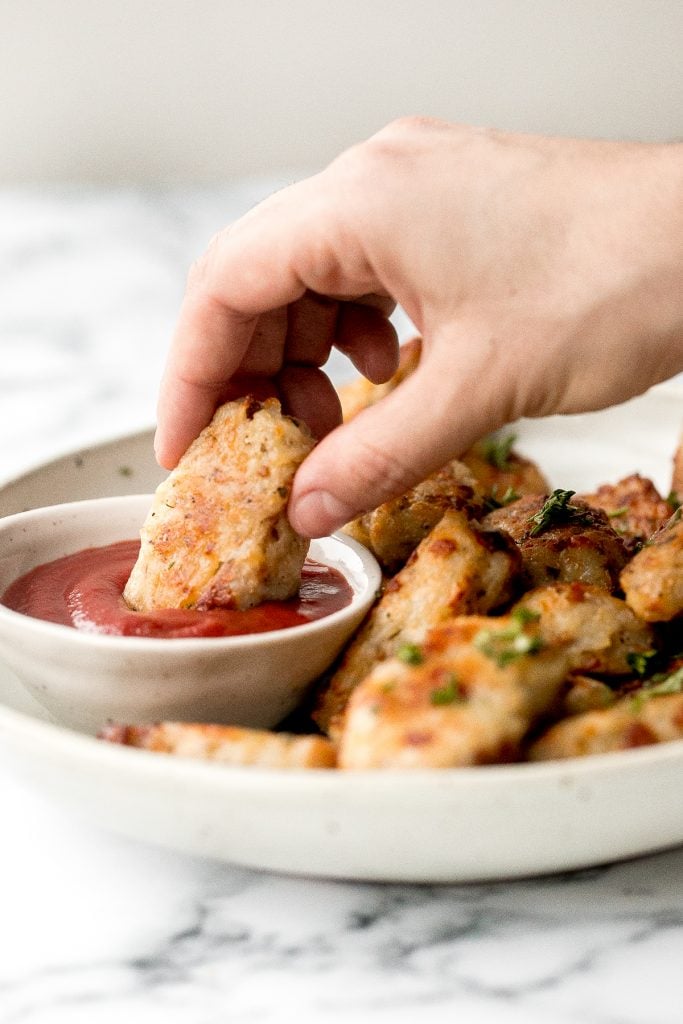
Tips for Storing Tater Tots
More Handheld Appetizer Recipes
Tried this recipe?
I'd love to hear what you think! Leave a comment and rating below to share your feedback. Your reviews help others discover this recipe and help me keep creating more free recipes for you. Snap a photo and tag me on social media @aheadofthyme too.