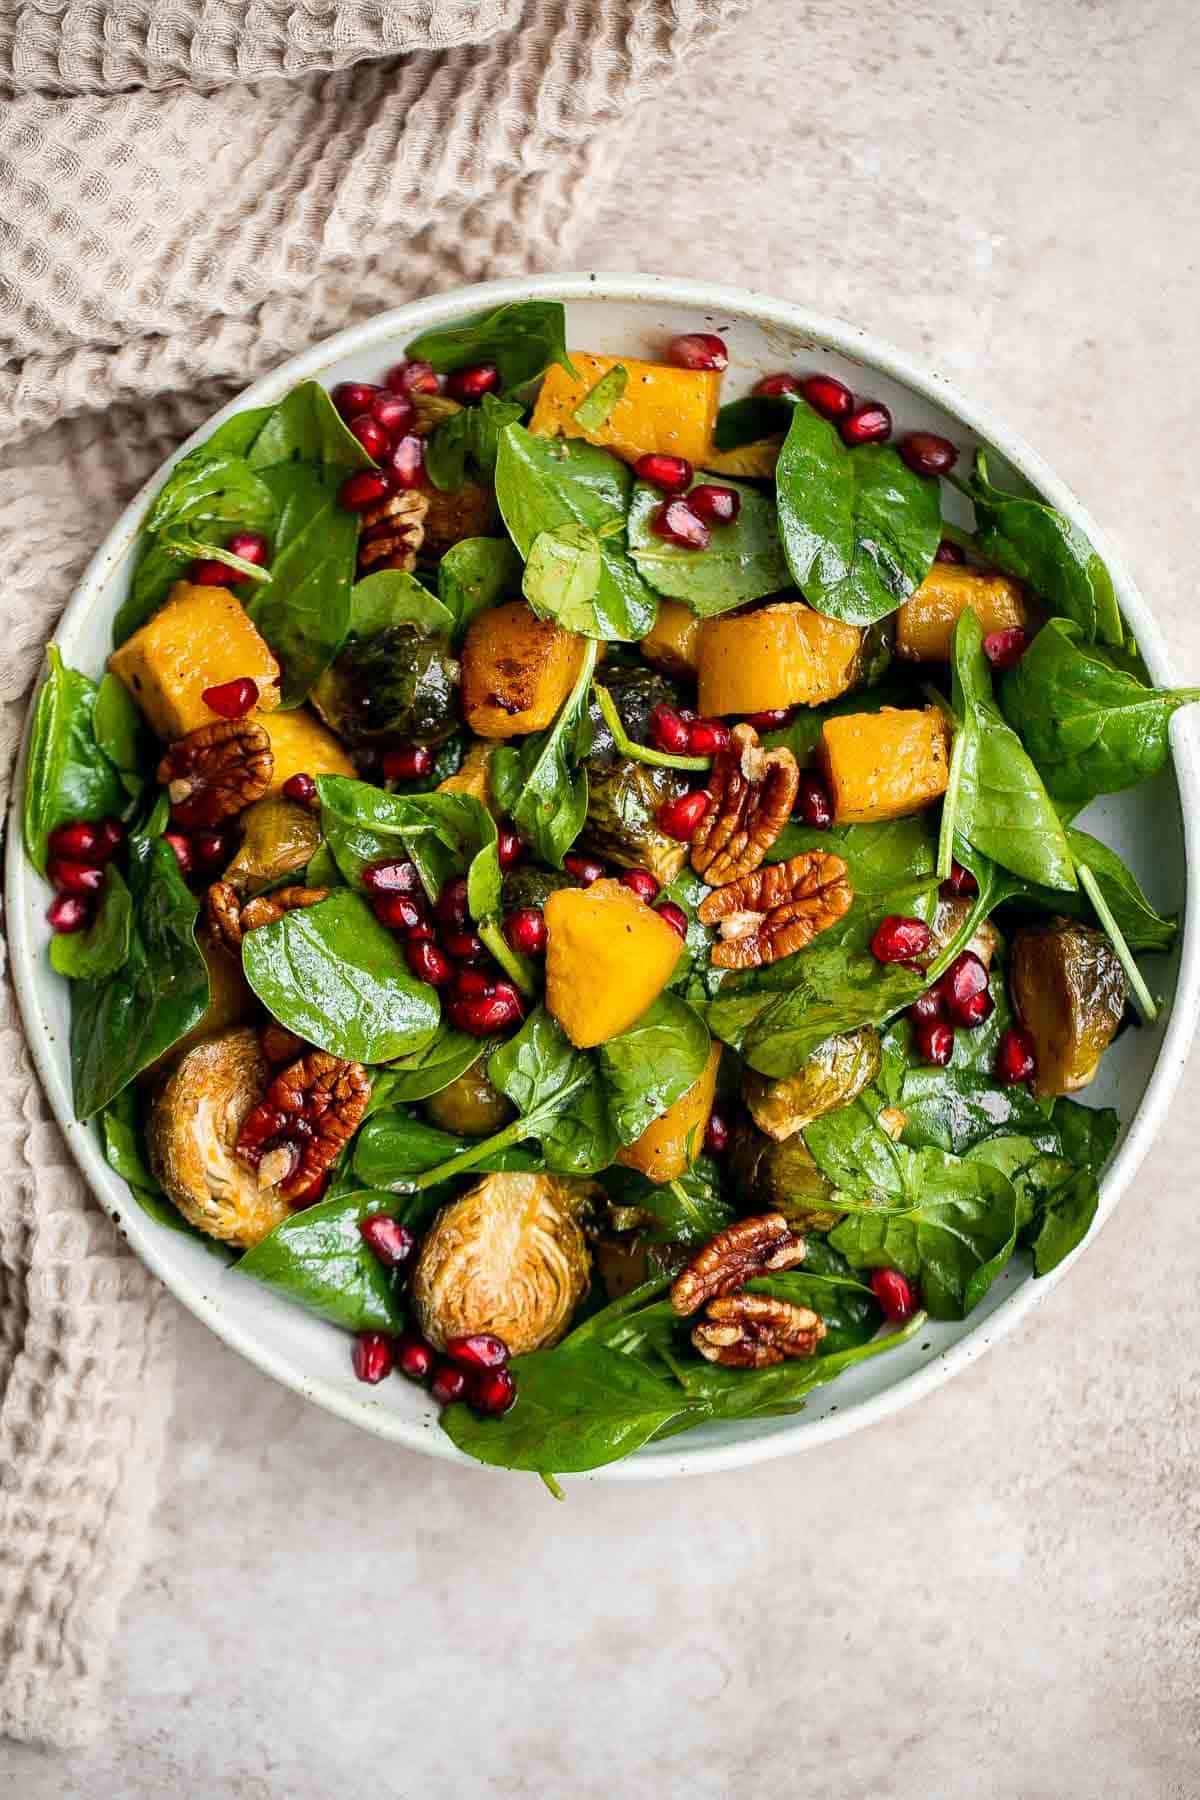
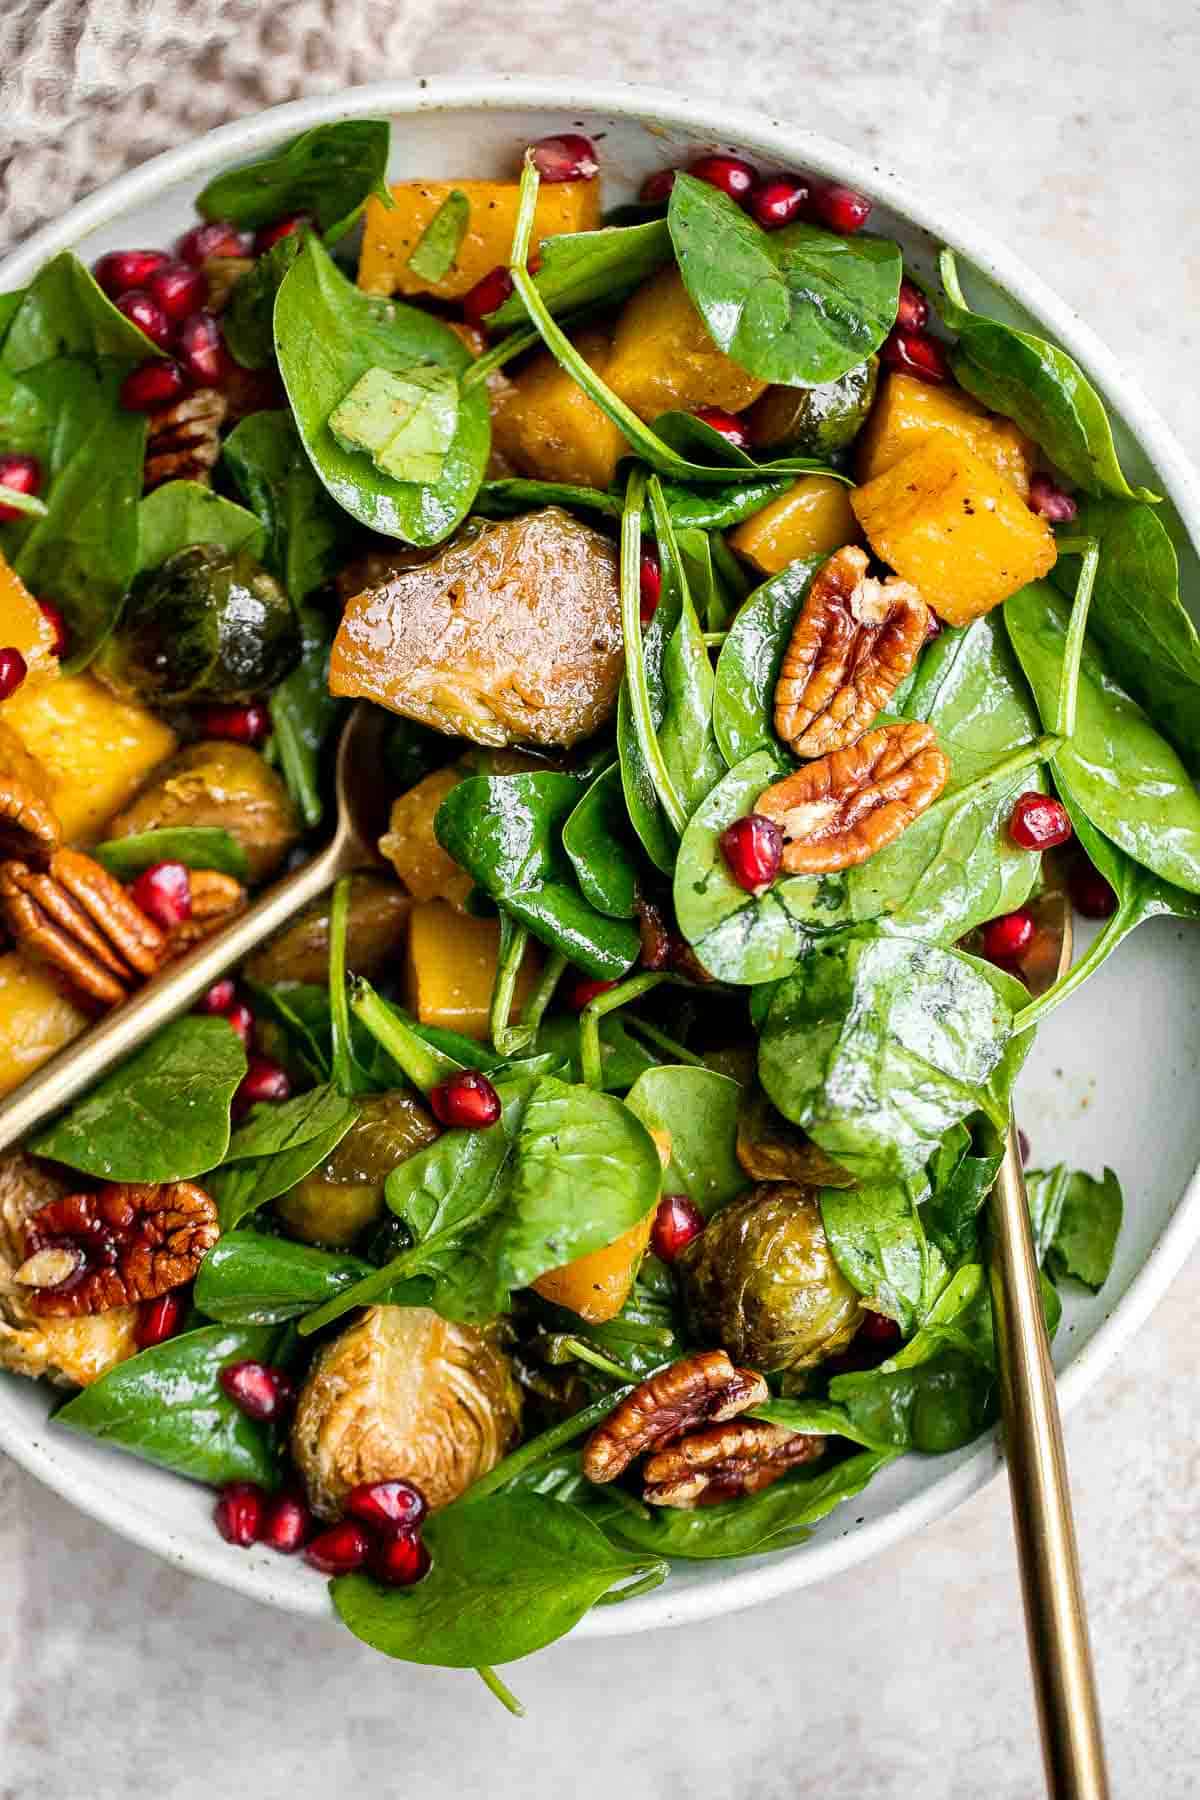
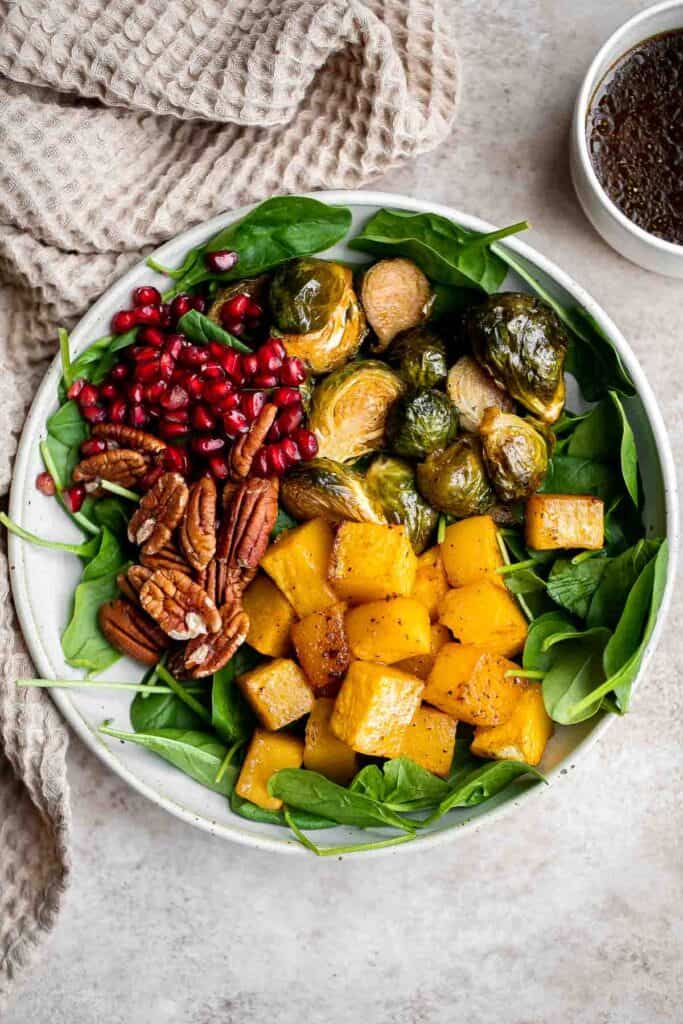
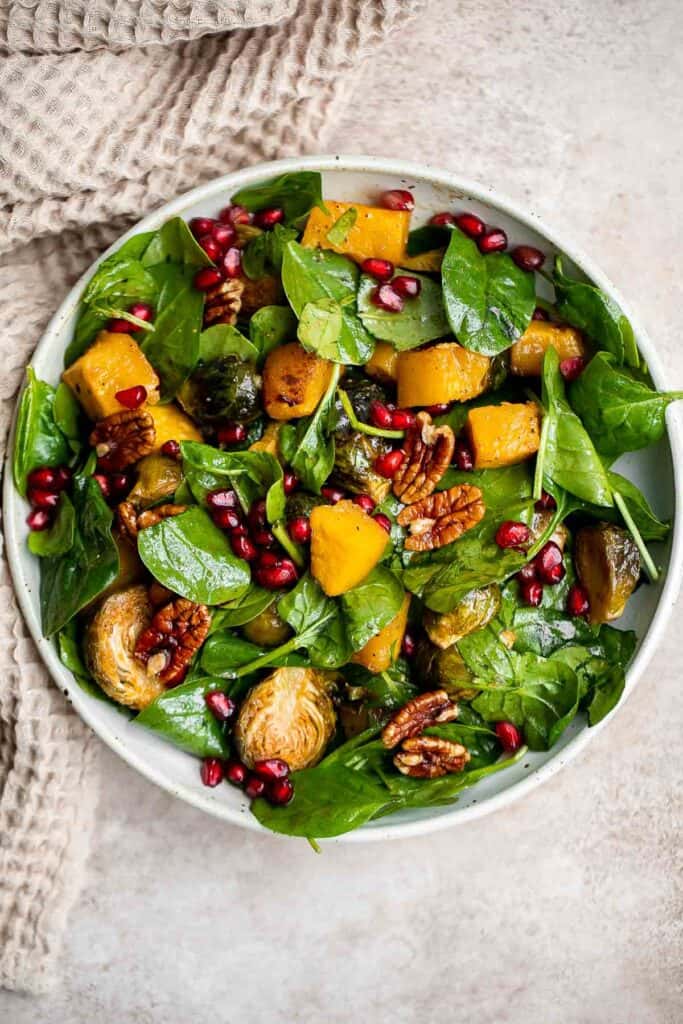
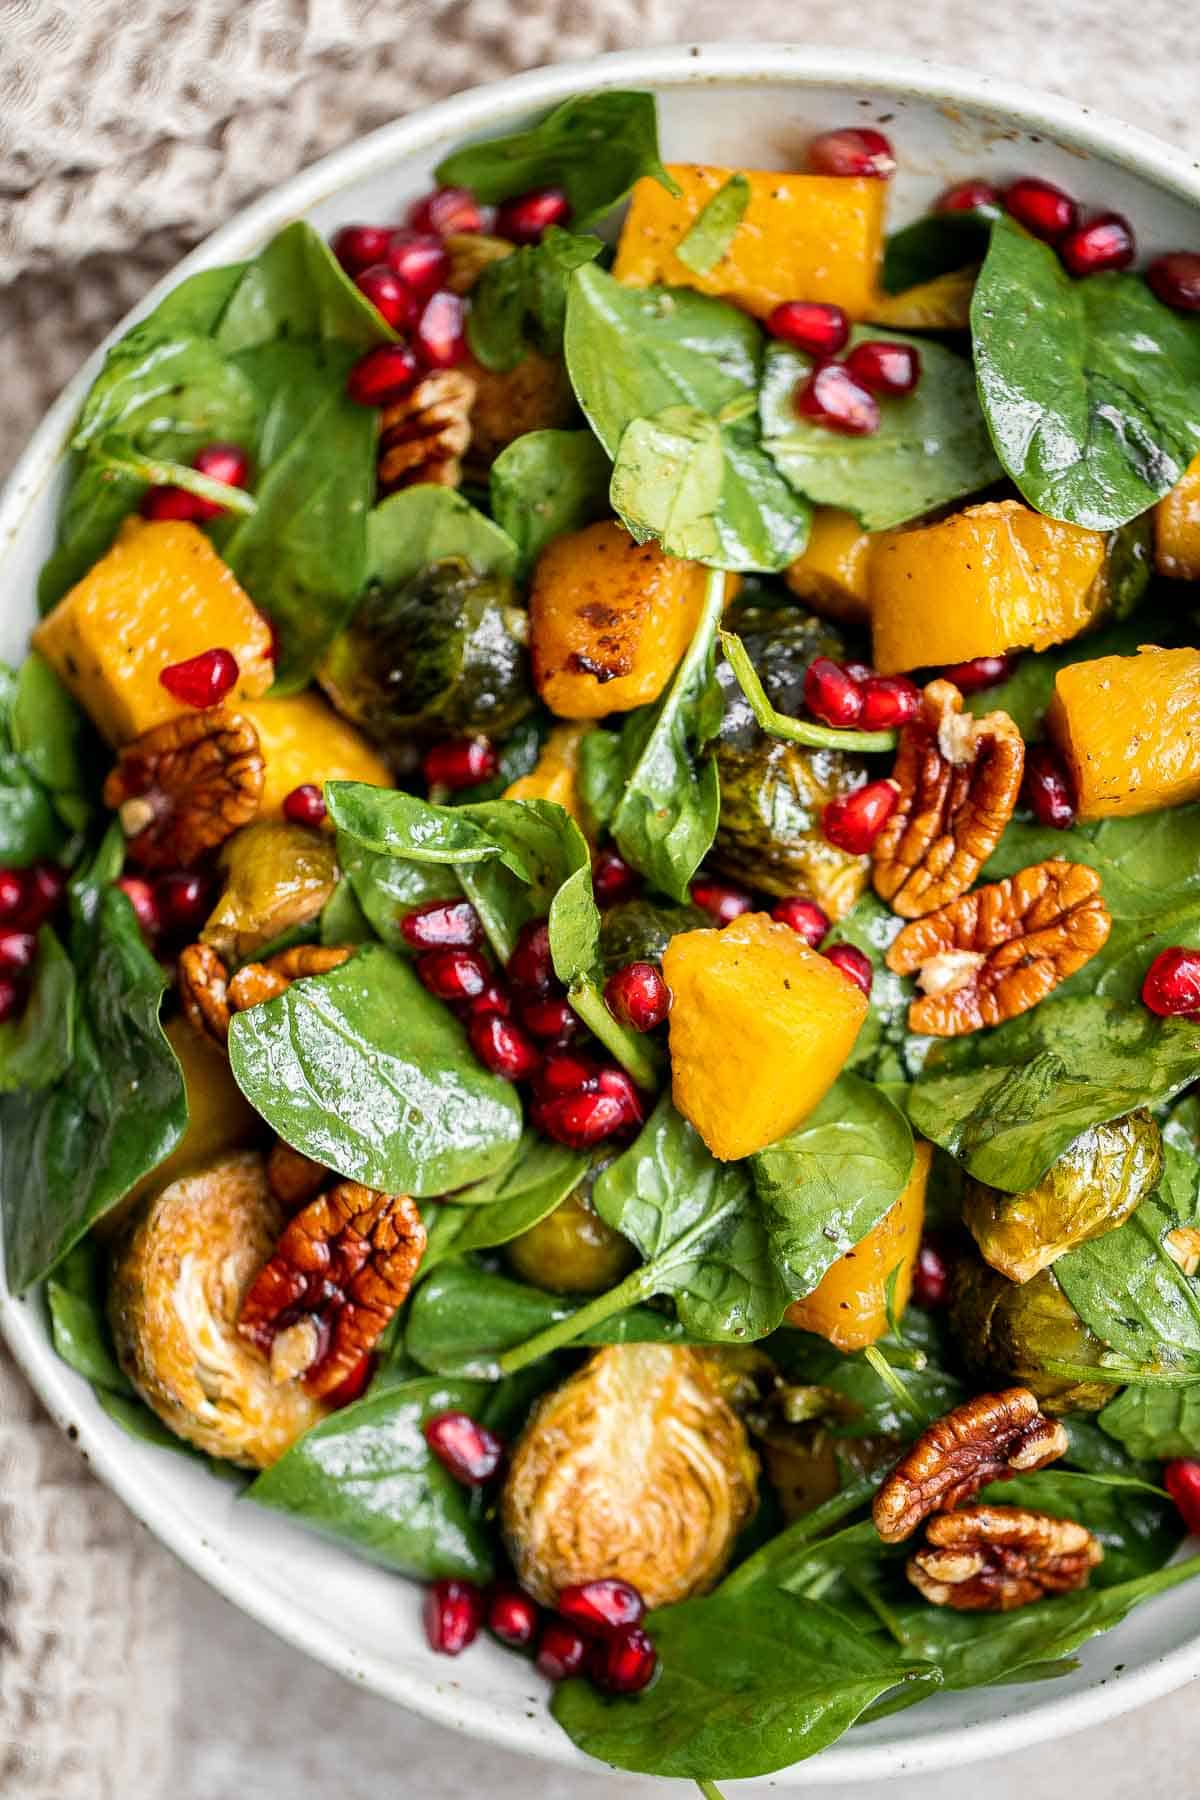
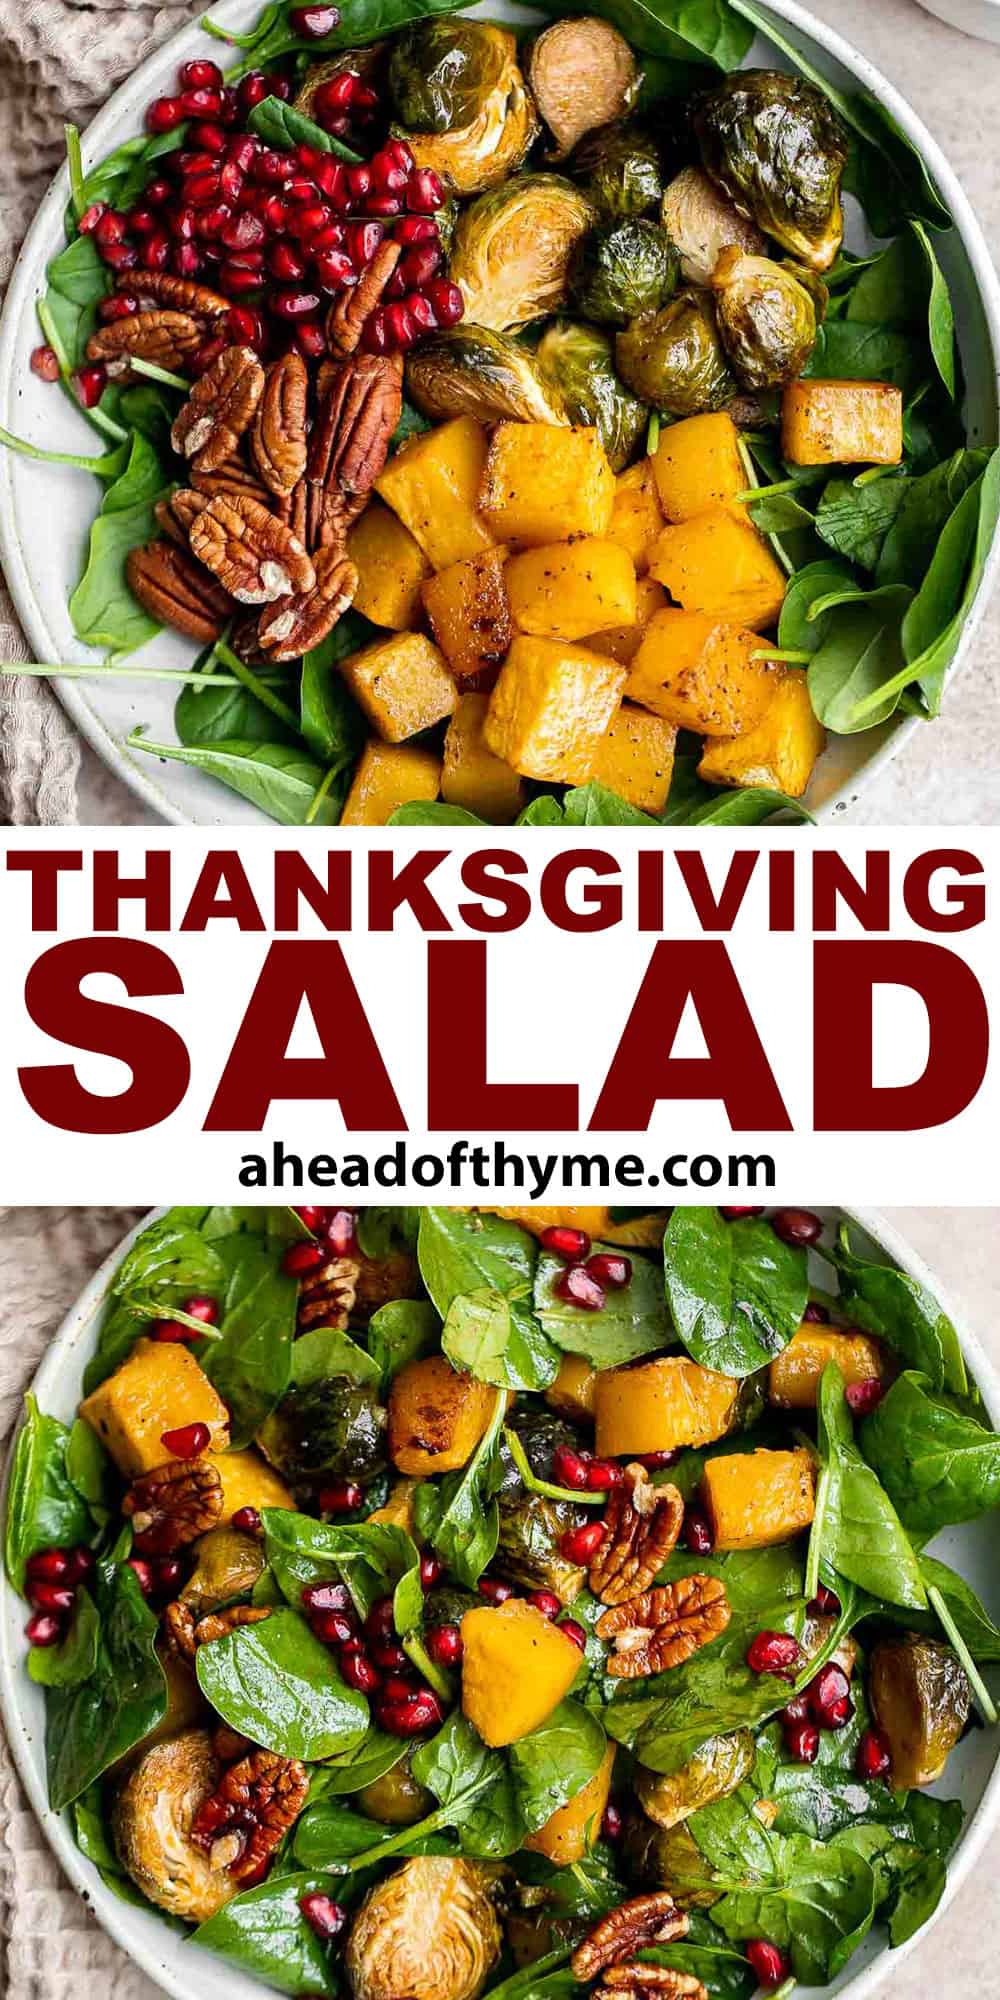
While you may have a lot of dishes to worry about when you're whipping up a massive holiday meal, this Thanksgiving salad won't be one of them. This simple and healthy roasted vegetable salad is loaded with greens, seasonal veggies, pomegranate seeds, and pecans, all tossed in a homemade vinaigrette.
It's the perfect dish to balance out the comforting items on the holiday table. Plus, it's fast and easy to make, so you can check it off your list quickly and move on to more energy-intensive dishes like the turkey.
Why You'll Love this Thanksgiving Salad
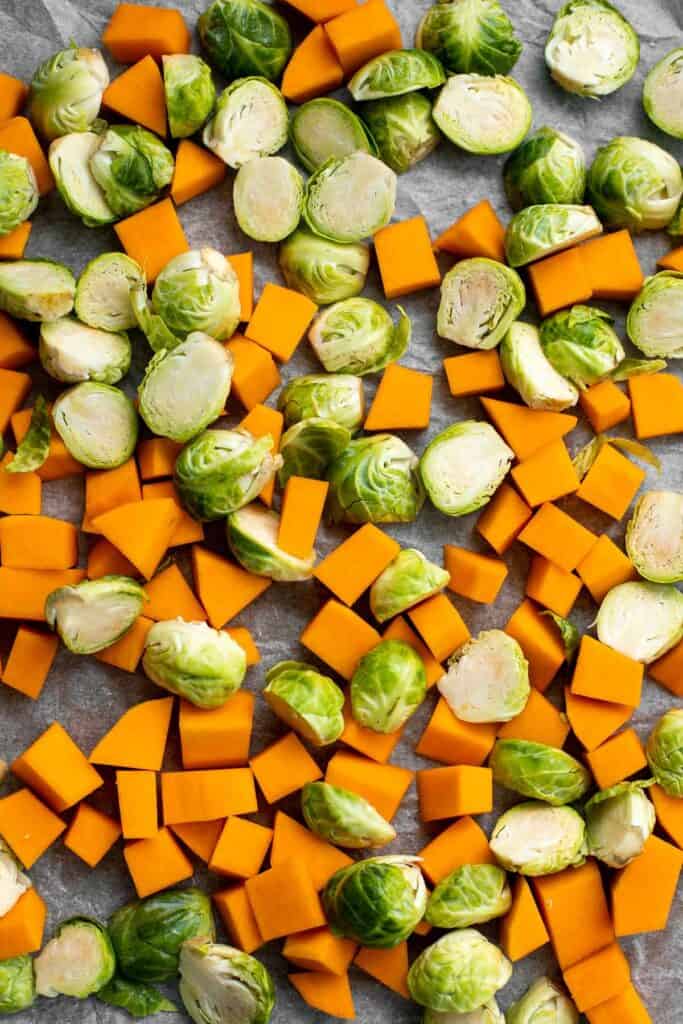
- Quick and easy. This easy salad with roasted butternut squash and brussels sprouts requires minimal prep work before it's ready to be tossed together. The most work you will need to do is chopping up the veggies. Then, just pop into the oven, before you are ready to toss all the ingredients together. It's ready in just 40 minutes including prep!
- Loaded with roasted vegetables. Whether you're hosting a meal yourself or making this to take to someone else's table, you can feel good about how nutritious and healthy this Thanksgiving salad is thanks to an abundance of vegetables. Plus, this fall salad can is gluten-free and can easily be made vegan with a simple substitute in the dressing.
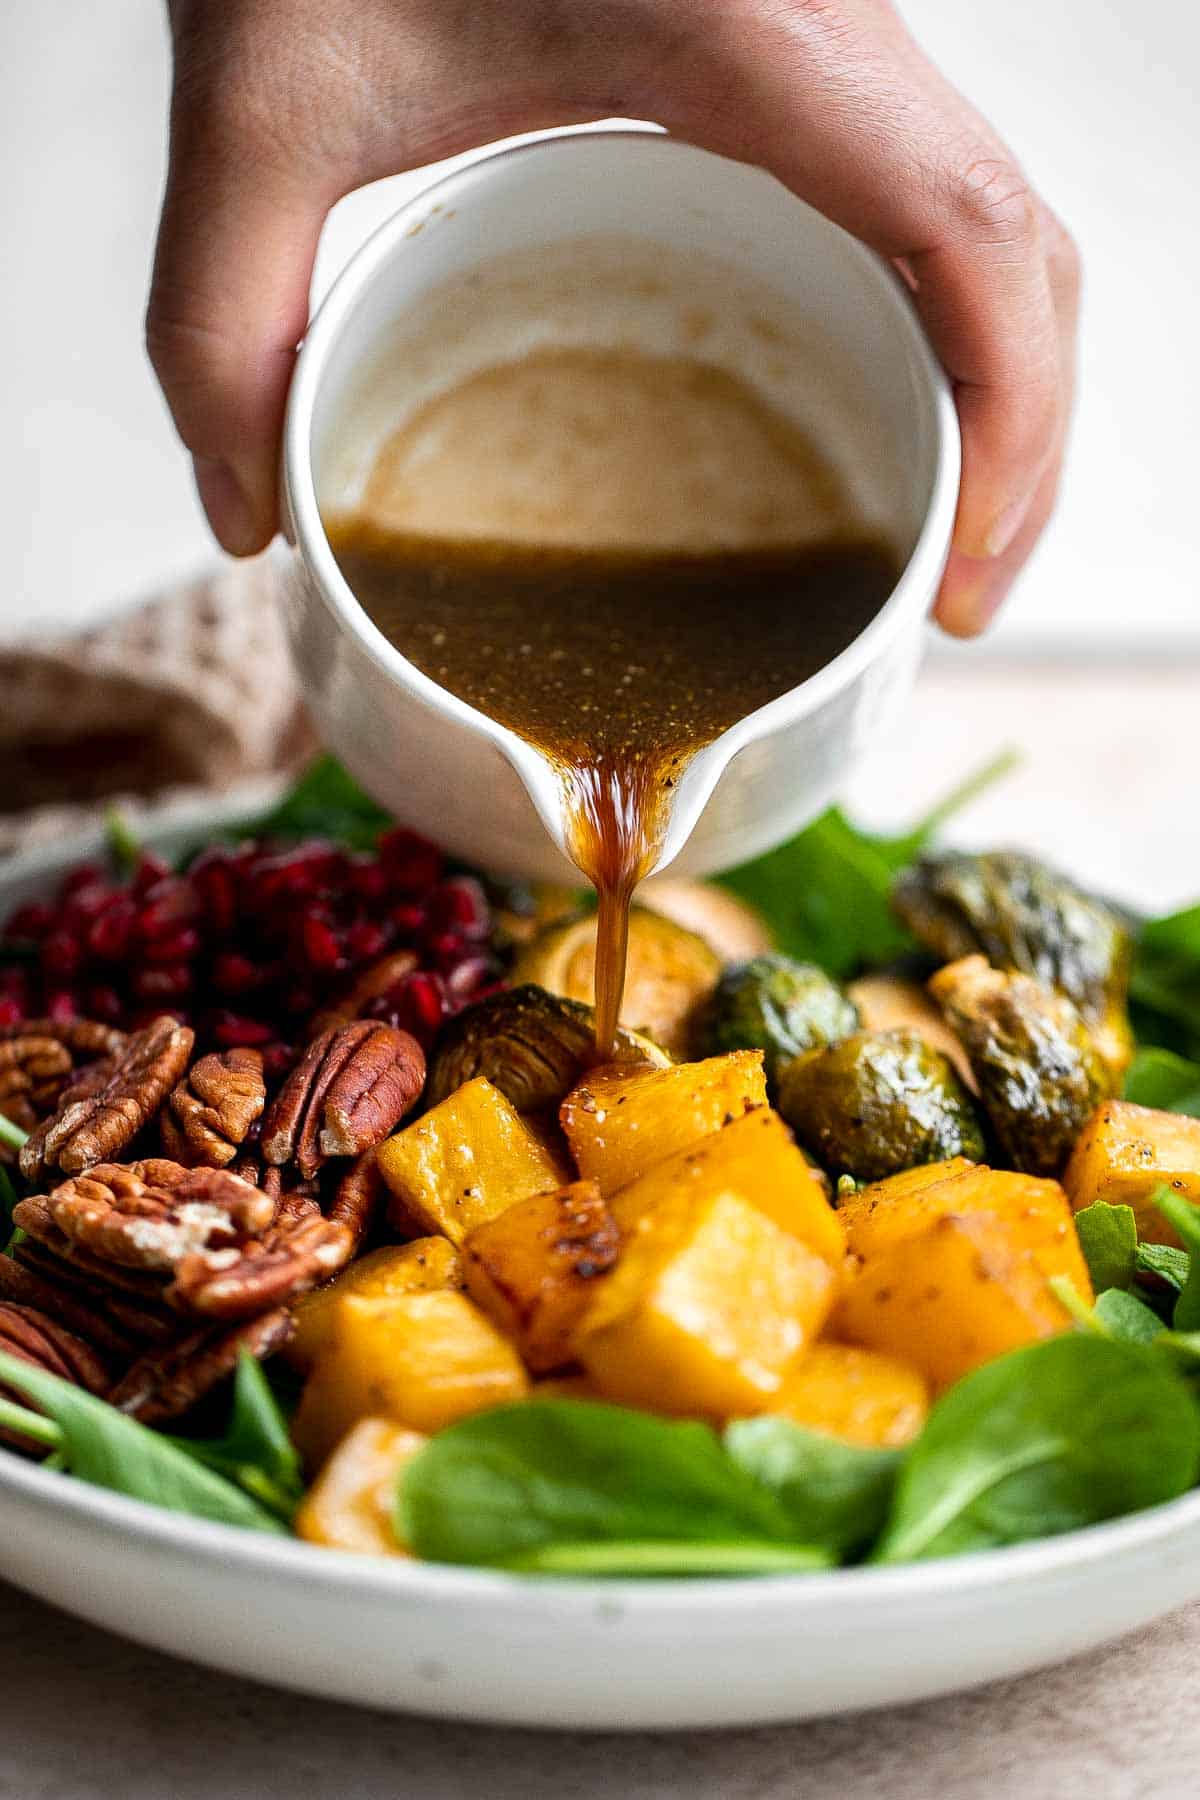
- Bursting with flavor and texture. The tender squash, roasted sprouts, leafy greens, crunchy pecans, and juicy pomegranate seeds are the perfect combination of tastes and textures. Plus, they all get a flavor upgrade thanks to an easy, sweet and savory, homemade vinaigrette dressing.
- Serve it at Thanksgiving and beyond. Serve this roasted vegetable salad on the big day itself alongside the turkey and side dishes, take it to a work potluck holiday party, or serve it with leftovers following Thanksgiving. But since these veggies are in season all fall, you can enjoy this salad for a few months.
Ingredient Notes
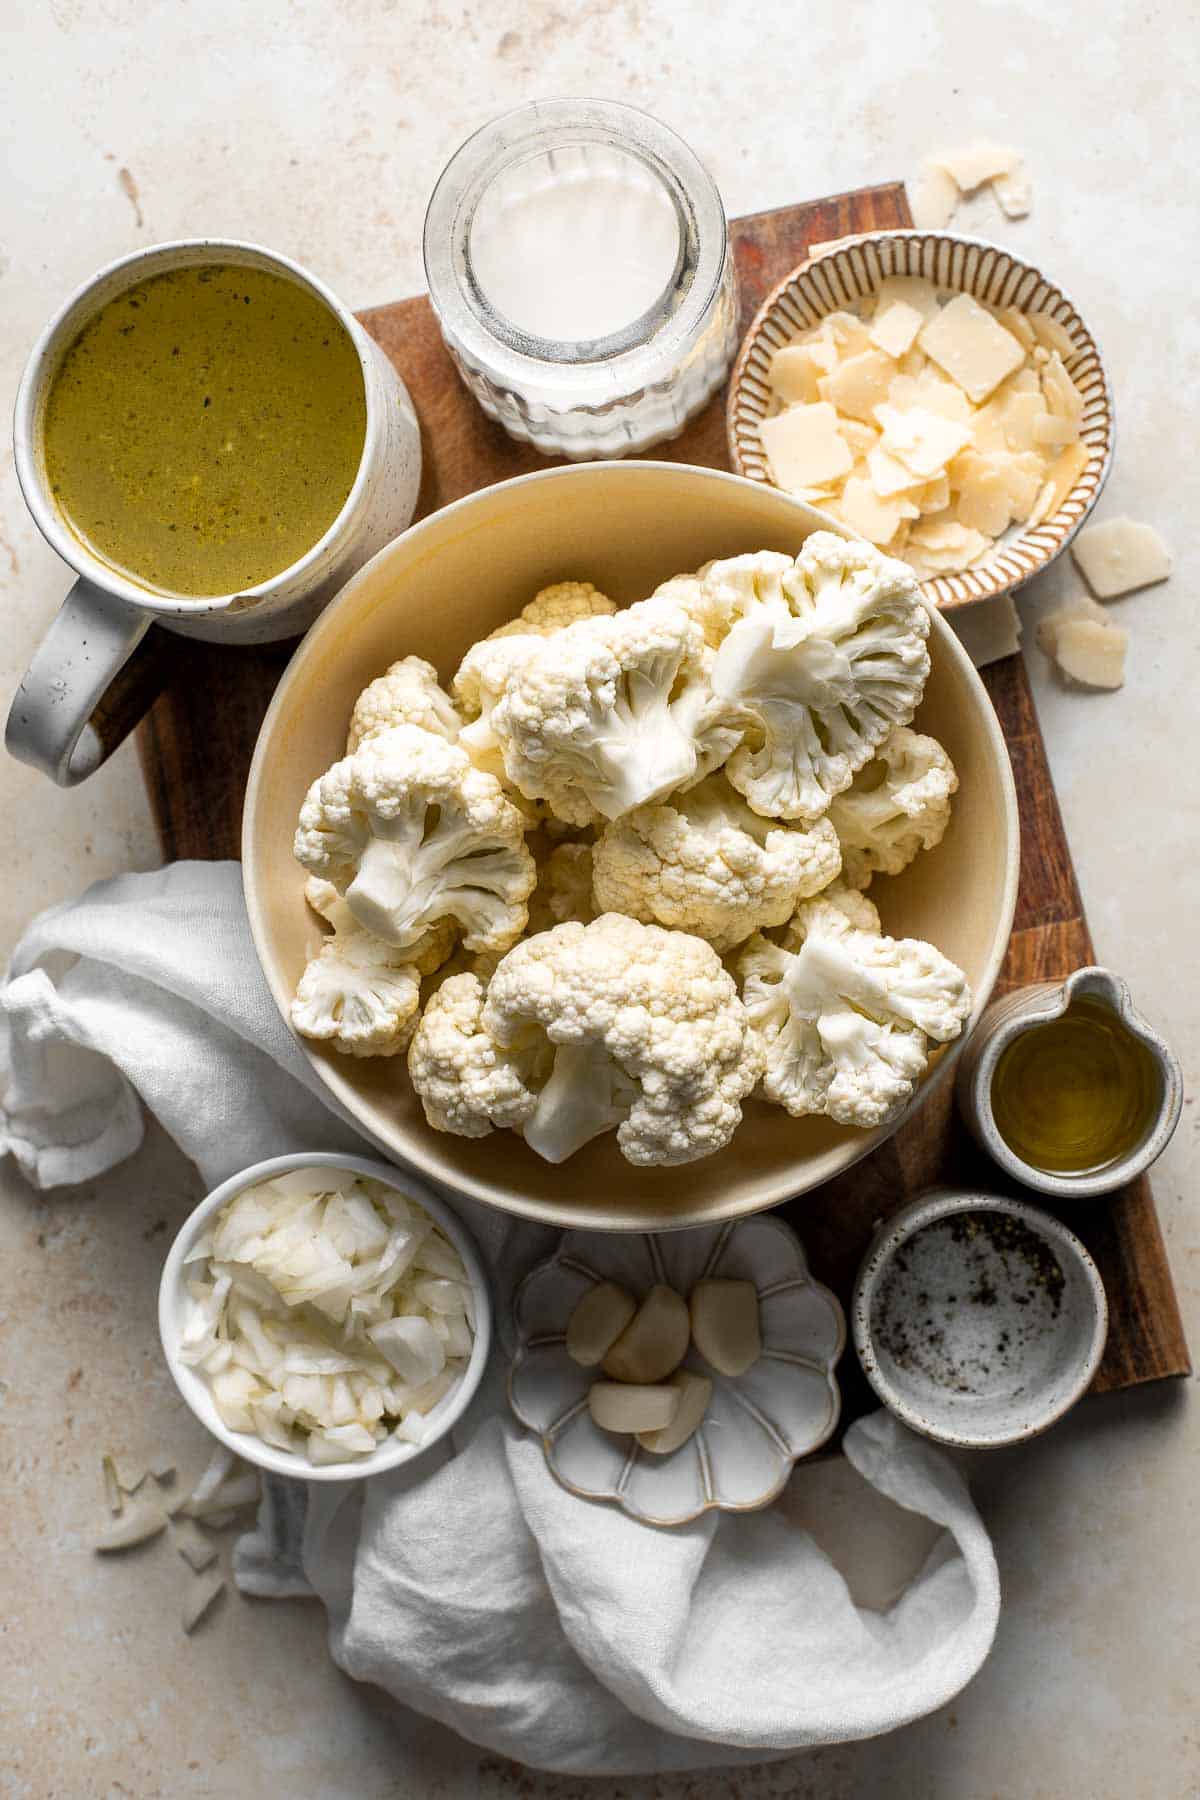
To make this delicious Thanksgiving Salad with roasted veggies, you will need the following ingredients (full measurements in recipe card below):
- butternut squash - acorn squash or honeynut squash are great alternatives to butternut.
- brussels sprouts
- olive oil - avocado oil or coconut oil (any oil with a high smoke point and a neutral flavor) will work in place of the olive oil.
- Italian seasoning - you can easily make your own Italian seasoning by blending a combination of oregano, rosemary, thyme, basil, and marjoram.
- baby spinach - you can substitute this with your favorite salad greens. Baby kale, arugula, or baby chard are great alternatives for baby spinach. Even a spring mix salad will work well.
- pecans - feel free to substitute with your favorite nuts. Walnuts are the best substitute for pecans in this recipe, but some other nuts that will work are almonds and pistachios.
- pomegranate
- balsamic vinegar - you can also use red wine vinegar for a similar flavor.
- dijon mustard - a brown or stone-ground mustard should result in a similar flavor.
- honey - you can use maple syrup or agave nectar in place of the honey, especially if you want to make this salad vegan.
- salt and pepper
You will also need measuring cups and spoons, mixing bowls, and a large serving dish or bowl.

How to Make the Best Thanksgiving Salad
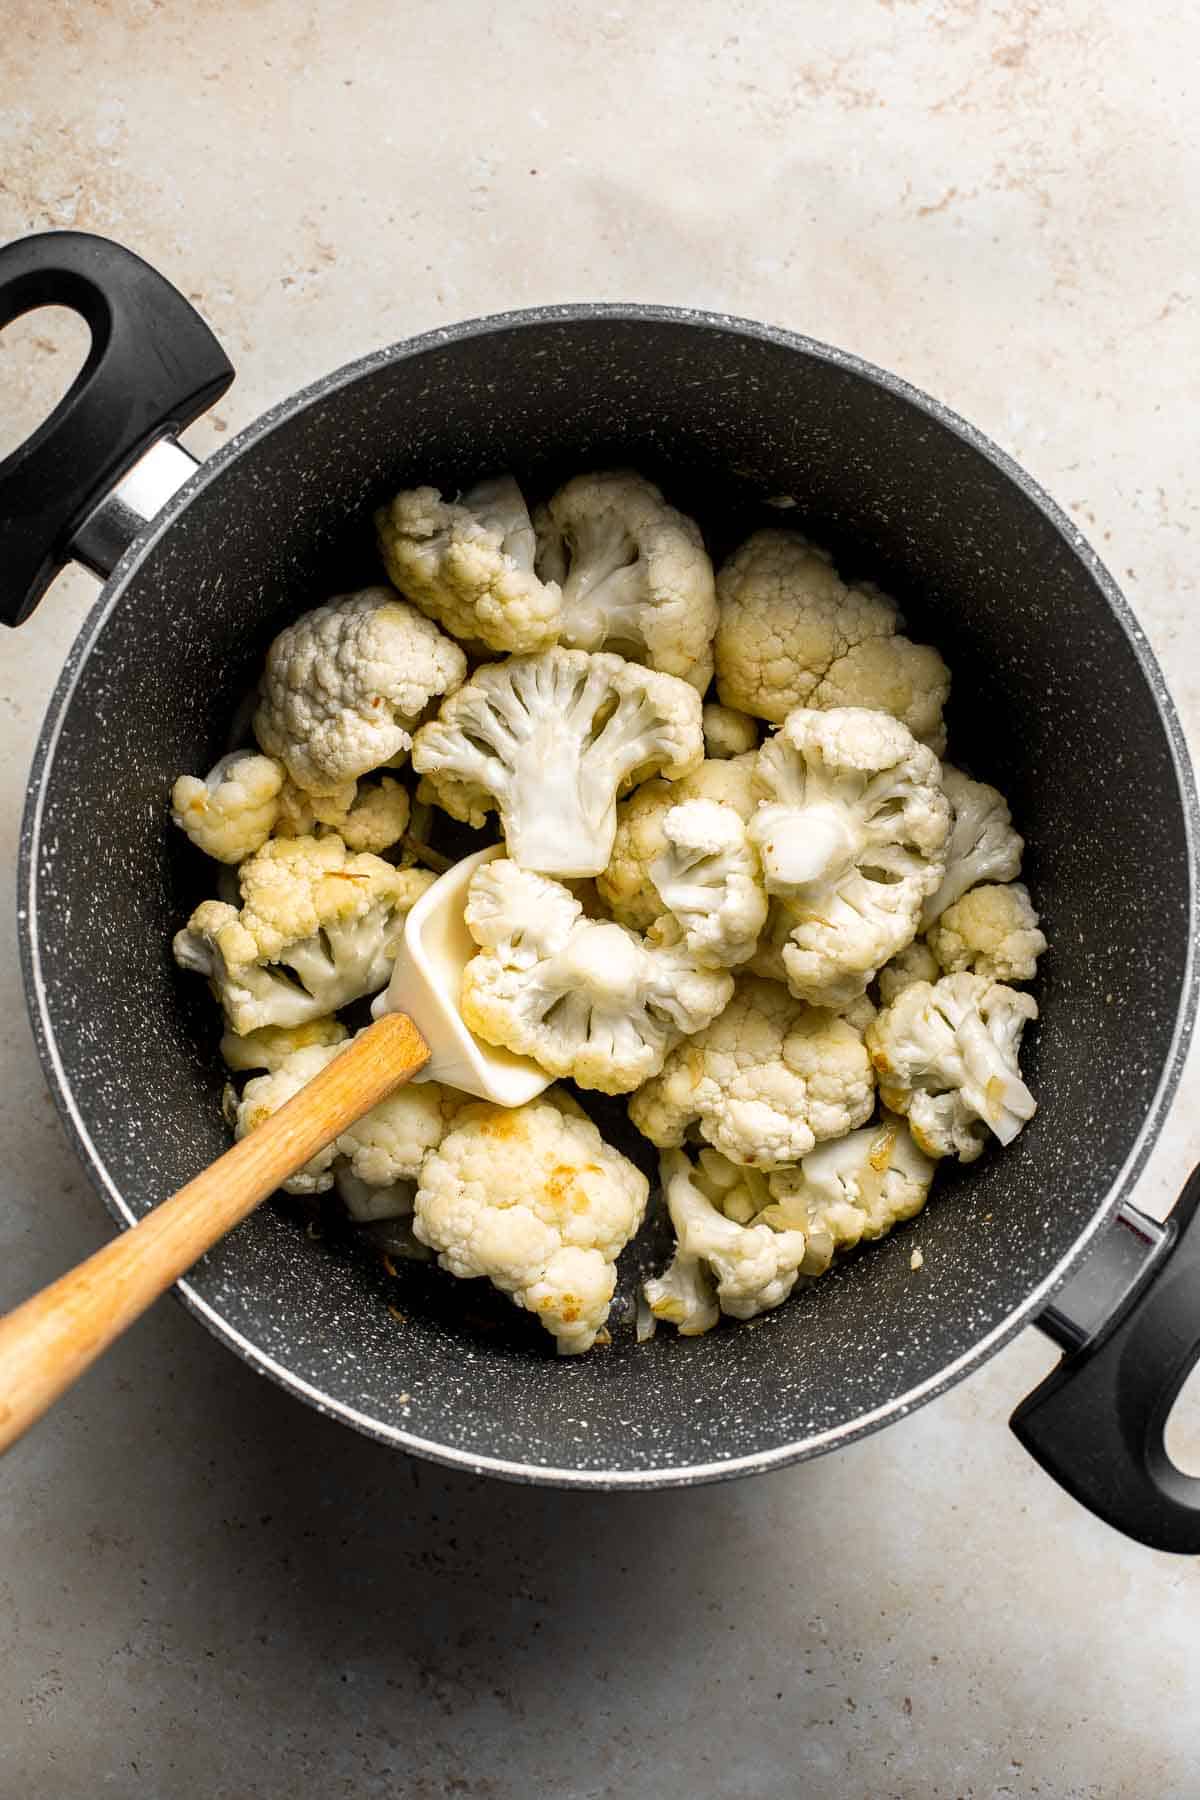
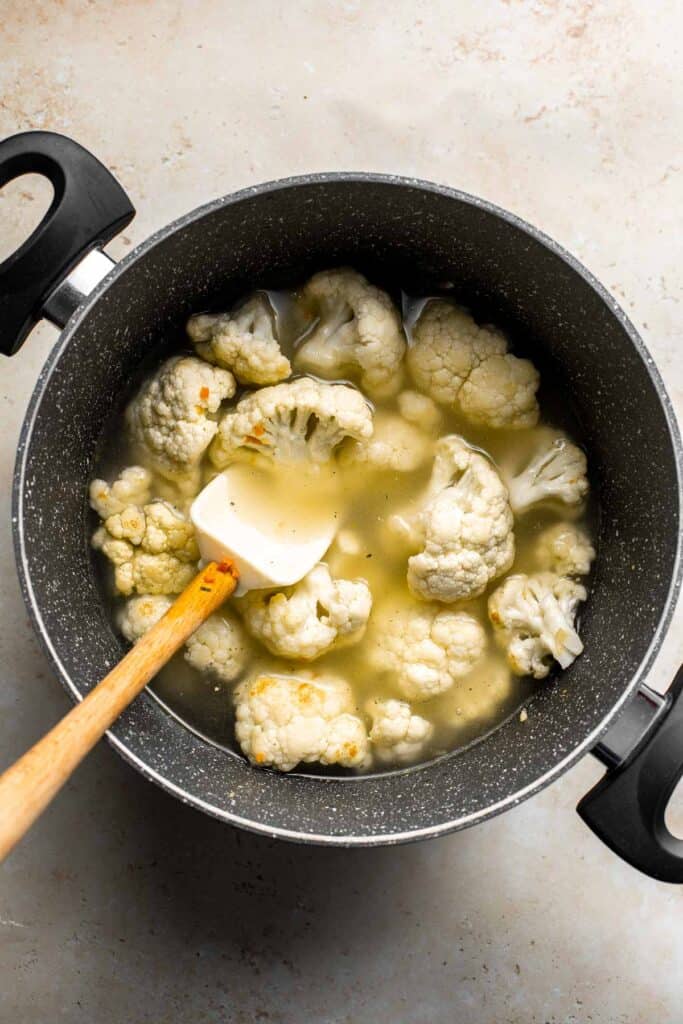
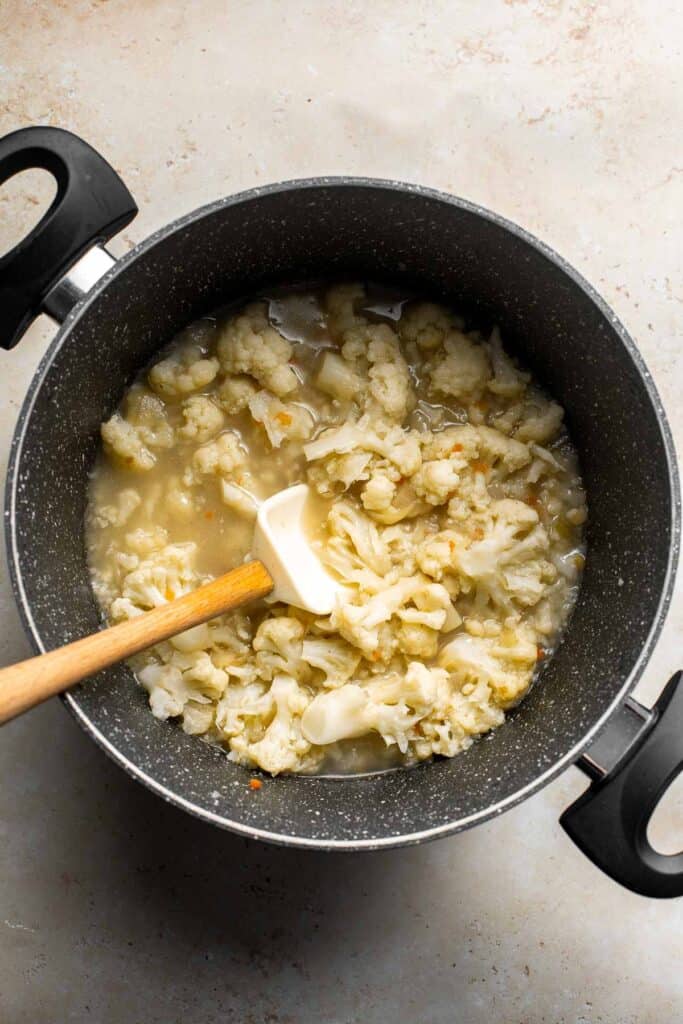
- Roast the veggies. In a mixing bowl, add butternut squash, brussels sprouts, olive oil, Italian seasoning, salt, and pepper. Toss well to coat evenly. Spread the veggies evenly onto a parchment lined baking sheet and bake in a 425F prehehated oven until the butternut squash is fork tender, about 25-30 minutes. Insert a fork to check doneness. If a fork can be easily inserted, then it's fork tender and ready. Otherwise, continue to bake until ready. Remove from the oven and let the vegetables cool to room temperature.
- Combine ingredients. Place the spinach, cooked veggies, pecans, and pomegranate in a large serving dish.
- Make the dressing. In a small mixing bowl, whisk together balsamic vinegar, olive oil, dijon mustard, honey, salt, and pepper until smooth. Drizzle over the salad.
- Toss and serve. Toss well to coat. Serve immediately.
How to Serve
We made this Thanksgiving Salad with roasted butternut squash and brussels sprouts specifically as a companion for your favorite Thanksgiving dishes such as:

Storing Instructions
How to Store
Place leftover salad in an airtight container and refrigerate for up to 4 days, although it's best to eat the salad within 1-2 days because the longer it is stored, the more the spinach will wilt.
To preserve the freshness and keep the leftover salad from getting mushy and soggy, you can serve the dressing on the side so that you only mix as much salad and dressing as you can eat at one time. Then, store the greens and vegetables in a separate container from the dressing. When you're ready to use it again, just toss and eat! The salad will last longer this way.
How to Freeze
If you roast a big batch of butternut squash and brussels sprouts, you can freeze the leftovers. Allow it to cool to room temperature, then transfer to a sealed freezer bag or airtight container and freeze for up to 3 months. Reheat from frozen in a preheated 350F oven for 10-20 minutes until warm and crisp, sauté on the stovetop over medium-low heat, or air fryer at 350F for 5-10 minutes.
Recipe Tips and Tricks
- Prep the vegetables ahead of time. Reduce the amount of prep time by chopping and dicing the vegetables up to two days in advance. Just leave them raw and wrap them tightly in plastic cling wrap or place them in a Ziploc bag or airtight container, then store in the refrigerator until you're ready to cook.
- Use leftovers creatively. Consider breakfast or lunch sorted for the next few days! Add cooked protein for a stand-alone meal, scramble with eggs, or saute and slide onto a piece of toasted sourdough.
More Thanksgiving Salad Recipes
- 15 Thanksgiving Salad Recipes
- Fall Harvest Salad with Butternut Squash
- Butternut Squash Quinoa Salad
- Apple Arugula Salad
- Butternut Squash Salad
- Apple Walnut Salad
Tried this recipe?
I'd love to hear what you think! Leave a comment and rating below to share your feedback. Your reviews help others discover this recipe and help me keep creating more free recipes for you. Snap a photo and tag me on social media @aheadofthyme too.
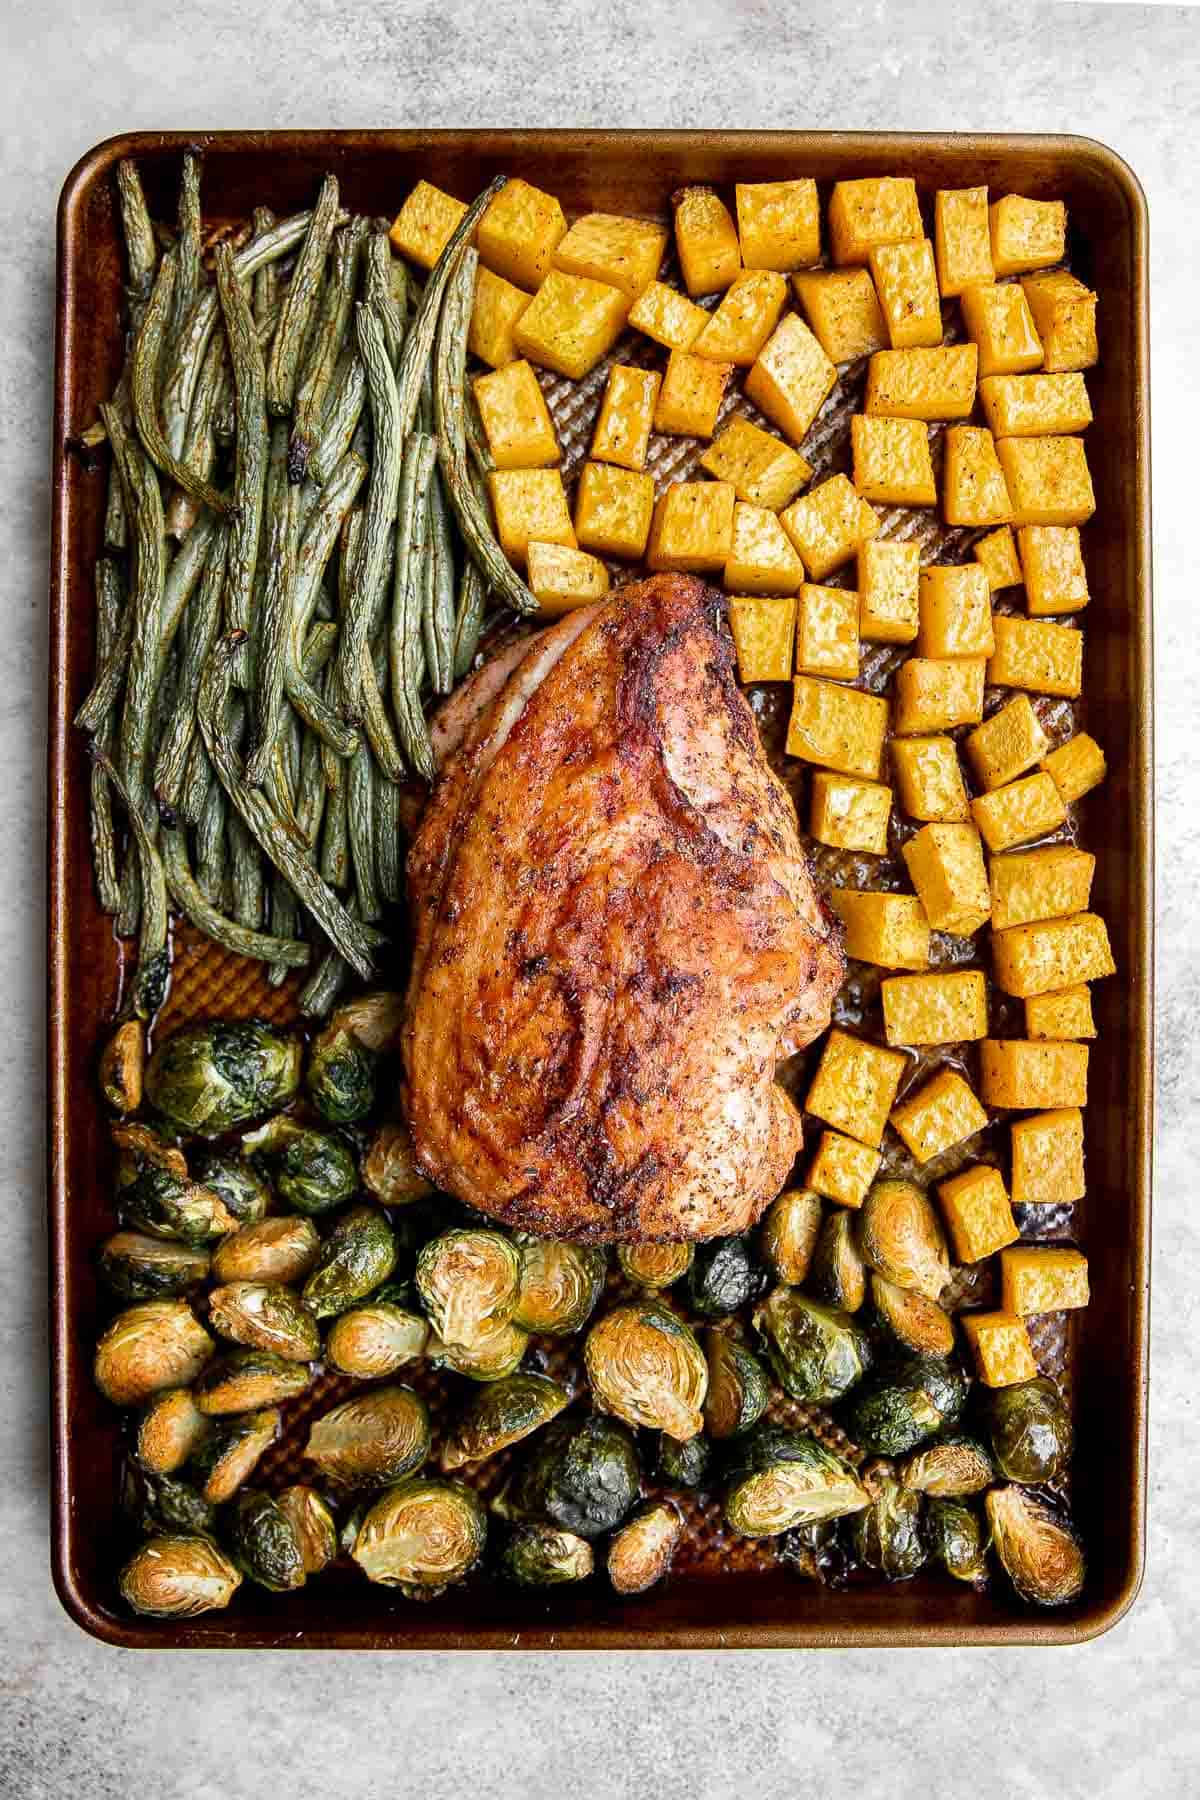
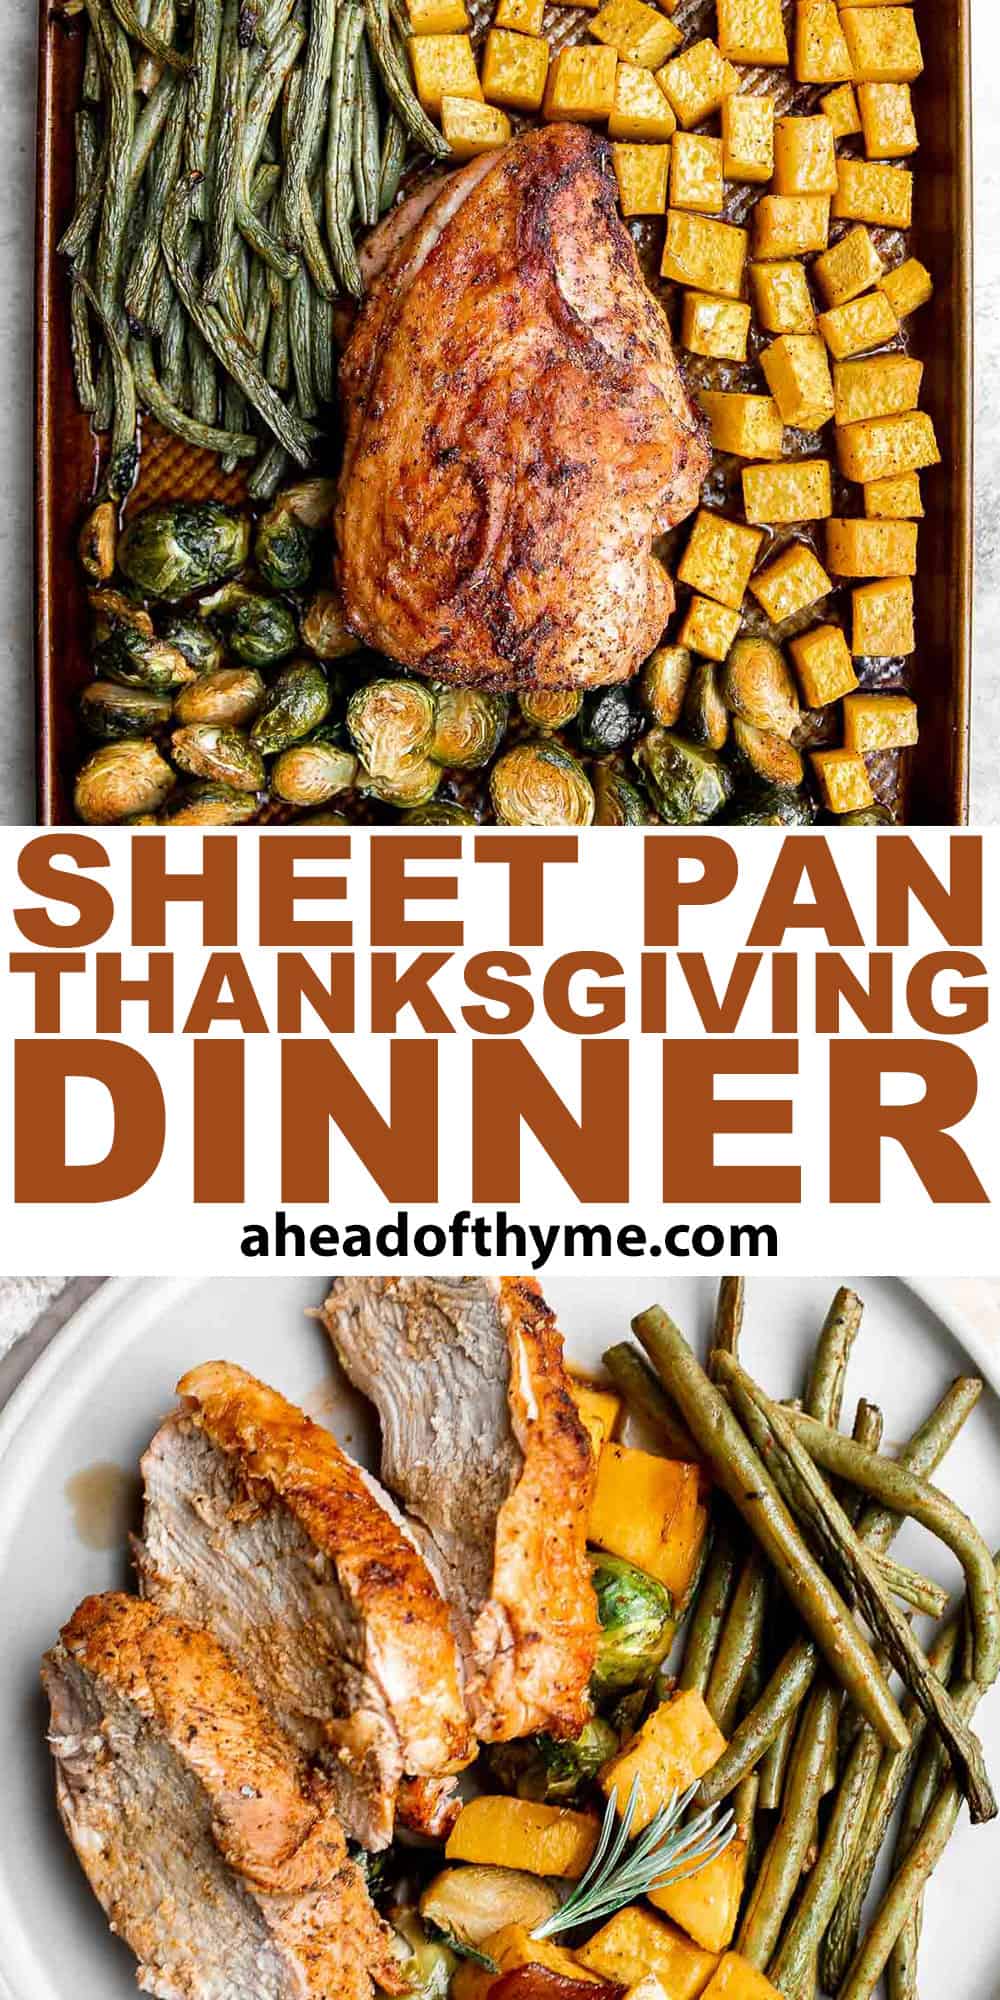
Sheet Pan Thanksgiving Dinner
Say goodbye to the days of spending all your time in the kitchen to get Thanksgiving dinner on the table. This Sheet Pan Thanksgiving Dinner recipe is the easiest way to serve a small turkey dinner with sides including butternut squash, brussels sprouts, and green beans. Ready in just an hour and half, this hack will change your life!
You'll need to spend about 20 minutes of prep time to make this sheet pan turkey dinner, then kick up your feet and join your family for holiday fun while you wait for dinner to roast in the oven in just over an hour. It's the easiest way to do Thanksgiving for 4, perfect for an intimate group of family and friends.
Why You'll Love this Sheet Pan Thanksgiving Dinner
- It combines several dishes into one. Knock out your usual main and sides all at once - a juicy roasted turkey breast and three different vegetable side dishes. Sheet pan turkey and vegetables features the best parts of Thanksgiving dinner.
- Ready in a fraction of the time. You've probably spent hours upon hours in the kitchen tackling various cooking tasks to prepare a full spread for previous Thanksgivings. But if you are planning a more intimate dinner this year with a smaller group, this Thanksgiving dinner in a sheet pan frees up a ton of your time so you can spend more of it with your loved ones. It is ready from start to finish in an hour and 30 minutes (including prep!)
- No complicated cooking steps. Traditionally, roasting a turkey requires hours (if not days) of preparation, special techniques, and constant supervision. Eliminate all the complexities with this turkey breast instead. Plus, the sides are super easy to chop up and toss together too. No complicated steps there either.
- Perfect for a smaller Thanksgiving. Whether you are away from family and friends this year, hosting a small gathering, or just craving a solo turkey dinner solo to leave you turkey leftovers, this is the recipe for you. This is a stress-free way to prepare Thanksgiving dinner for 4 or 5 people (or less = more leftovers for you!).
Ingredient Notes
To make this delicious Sheet Pan Thanksgiving Dinner, you will need the following ingredients (full measurements in recipe card below):
- olive oil - any vegetable oil will work as a great alternative. Try avocado oil, grapeseed oil, or coconut oil.
- turkey breast - though it's certainly not Thanksgiving dinner without the turkey, you can use chicken breast in place of the turkey breast for easy sheet pan weeknight dinners at home.
- butternut squash - sweet potato or hubbard squash can be swapped for the butternut squash.
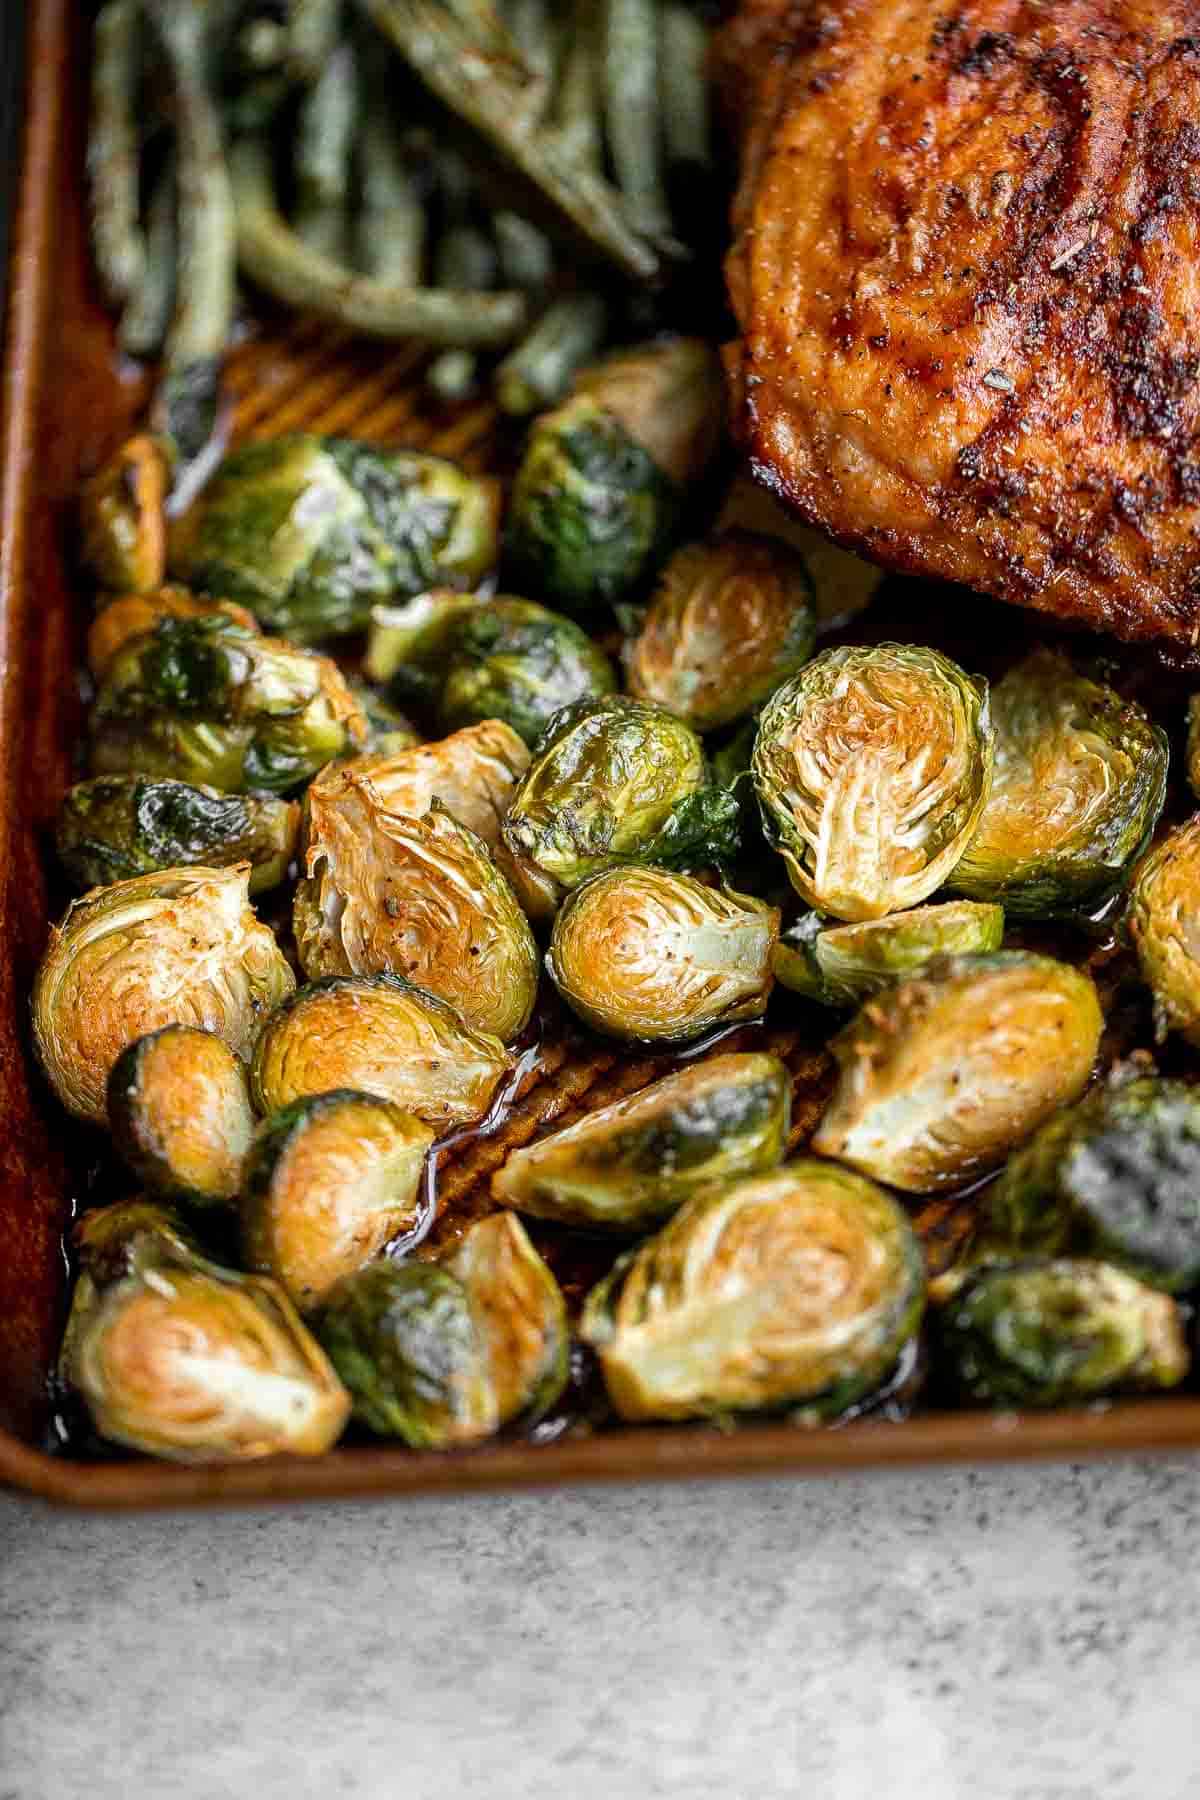
- brussels sprouts
- green beans - this recipe calls for fresh green beans, but you could also use canned or frozen if necessary. The texture of the green beans is best when you use fresh beans, though.
- seasoning - balsamic vinegar, Italian seasoning, paprika, garlic powder, salt and pepper are some of the seasonings that we use to season the turkey and/or veggies. Put your own spin on this recipe by swapping things out to switch up the flavor. We often use a blend of dried thyme and sage instead of Italian seasoning for the turkey.
You will also need measuring spoons, half sheet baking pan, and mixing bowls.
How to Make the Best Sheet Pan Thanksgiving Dinner
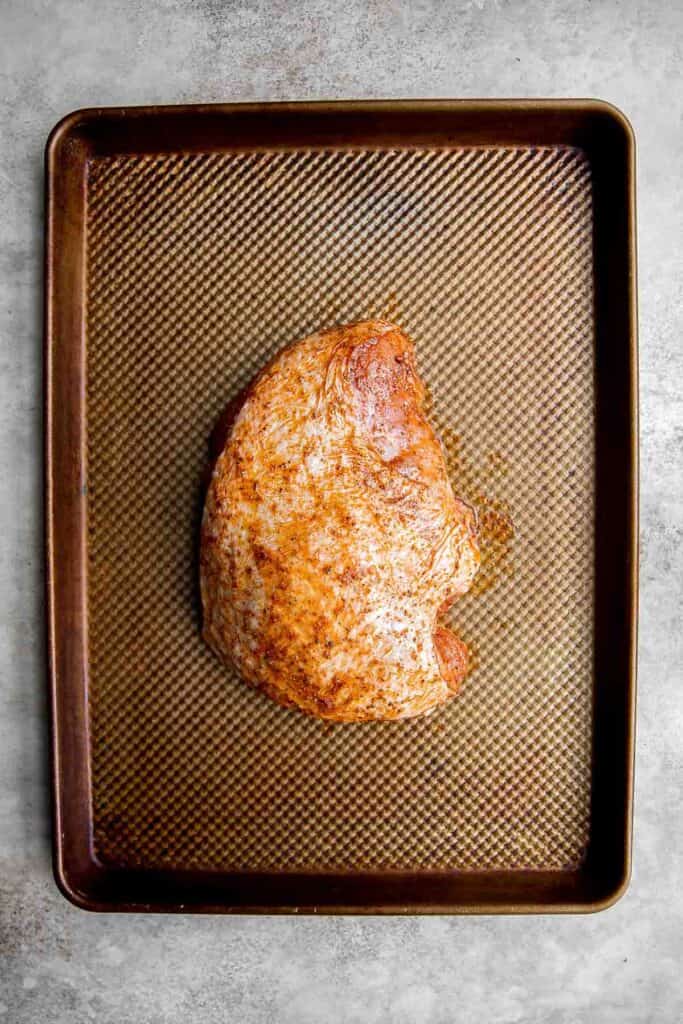
- Prepare the turkey breast. Use a paper towel to pat the turkey breast completely dry. In a small mixing bowl, combine oil, salt, pepper paprika, garlic powder, and Italian seasoning, until combined. Rub the mixture all over the turkey breast and set it aside on a plate for 15 minutes at room temperature. It's ideal to bring the seasoned turkey to room temperature to achieve more tender and juicier meat.
- Roast. Place the turkey breast on the centre of a large half sheet baking pan and bake in a 375F preheated oven for 30 minutes.
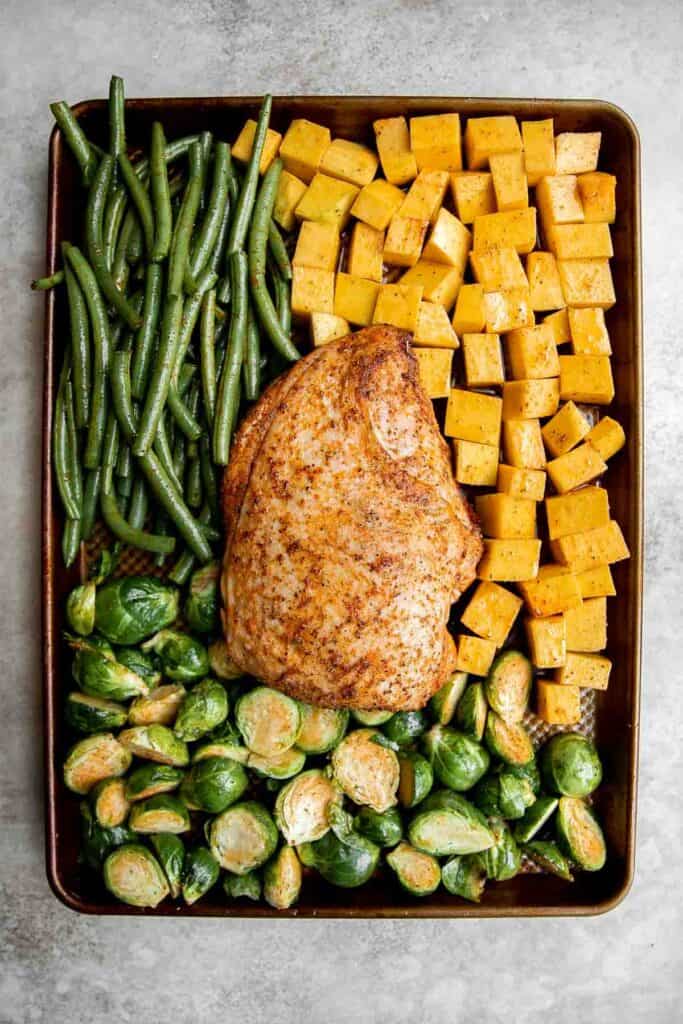
- Prepare the vegetable sides. While the turkey is cooking, prepare the veggies by tossing the ingredients together in separate mixing bowls.
- For the butternut squash: In a large mixing bowl, toss together butternut squash, oil, balsamic vinegar, Italian seasoning, salt and pepper.
- For the Brussels sprouts: In a medium mixing bowl, toss together sprouts, oil, Italian seasoning, salt and pepper.
- For the green beans: In a medium mixing bowl, toss together green beans, oil, salt and pepper.
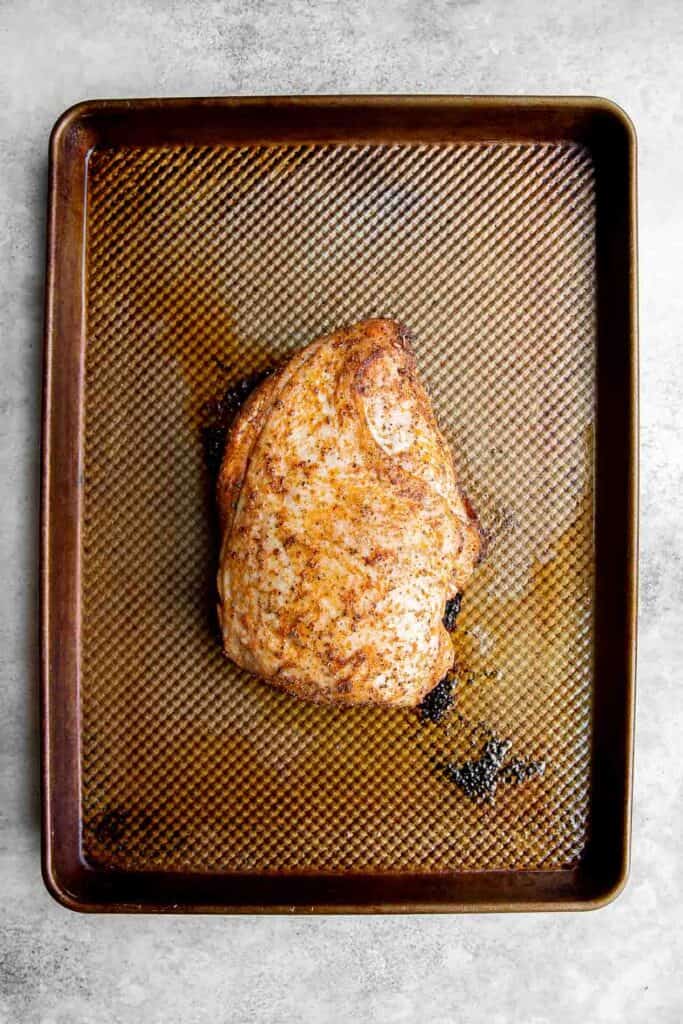
- Add veggies. Once the turkey has been roasted for 30 minutes, remove the baking sheet from the oven and carefully arrange the seasoned vegetables around the turkey breast in a single layer. Be careful as the pan will be very hot.
- Bake. Return the baking sheet to the oven and continue baking for another 30-35 minutes until the butternut squash is fork tender and the turkey breast is fully through. The internal temperature for the turkey should reach at least 160F as read on a meat thermometer.

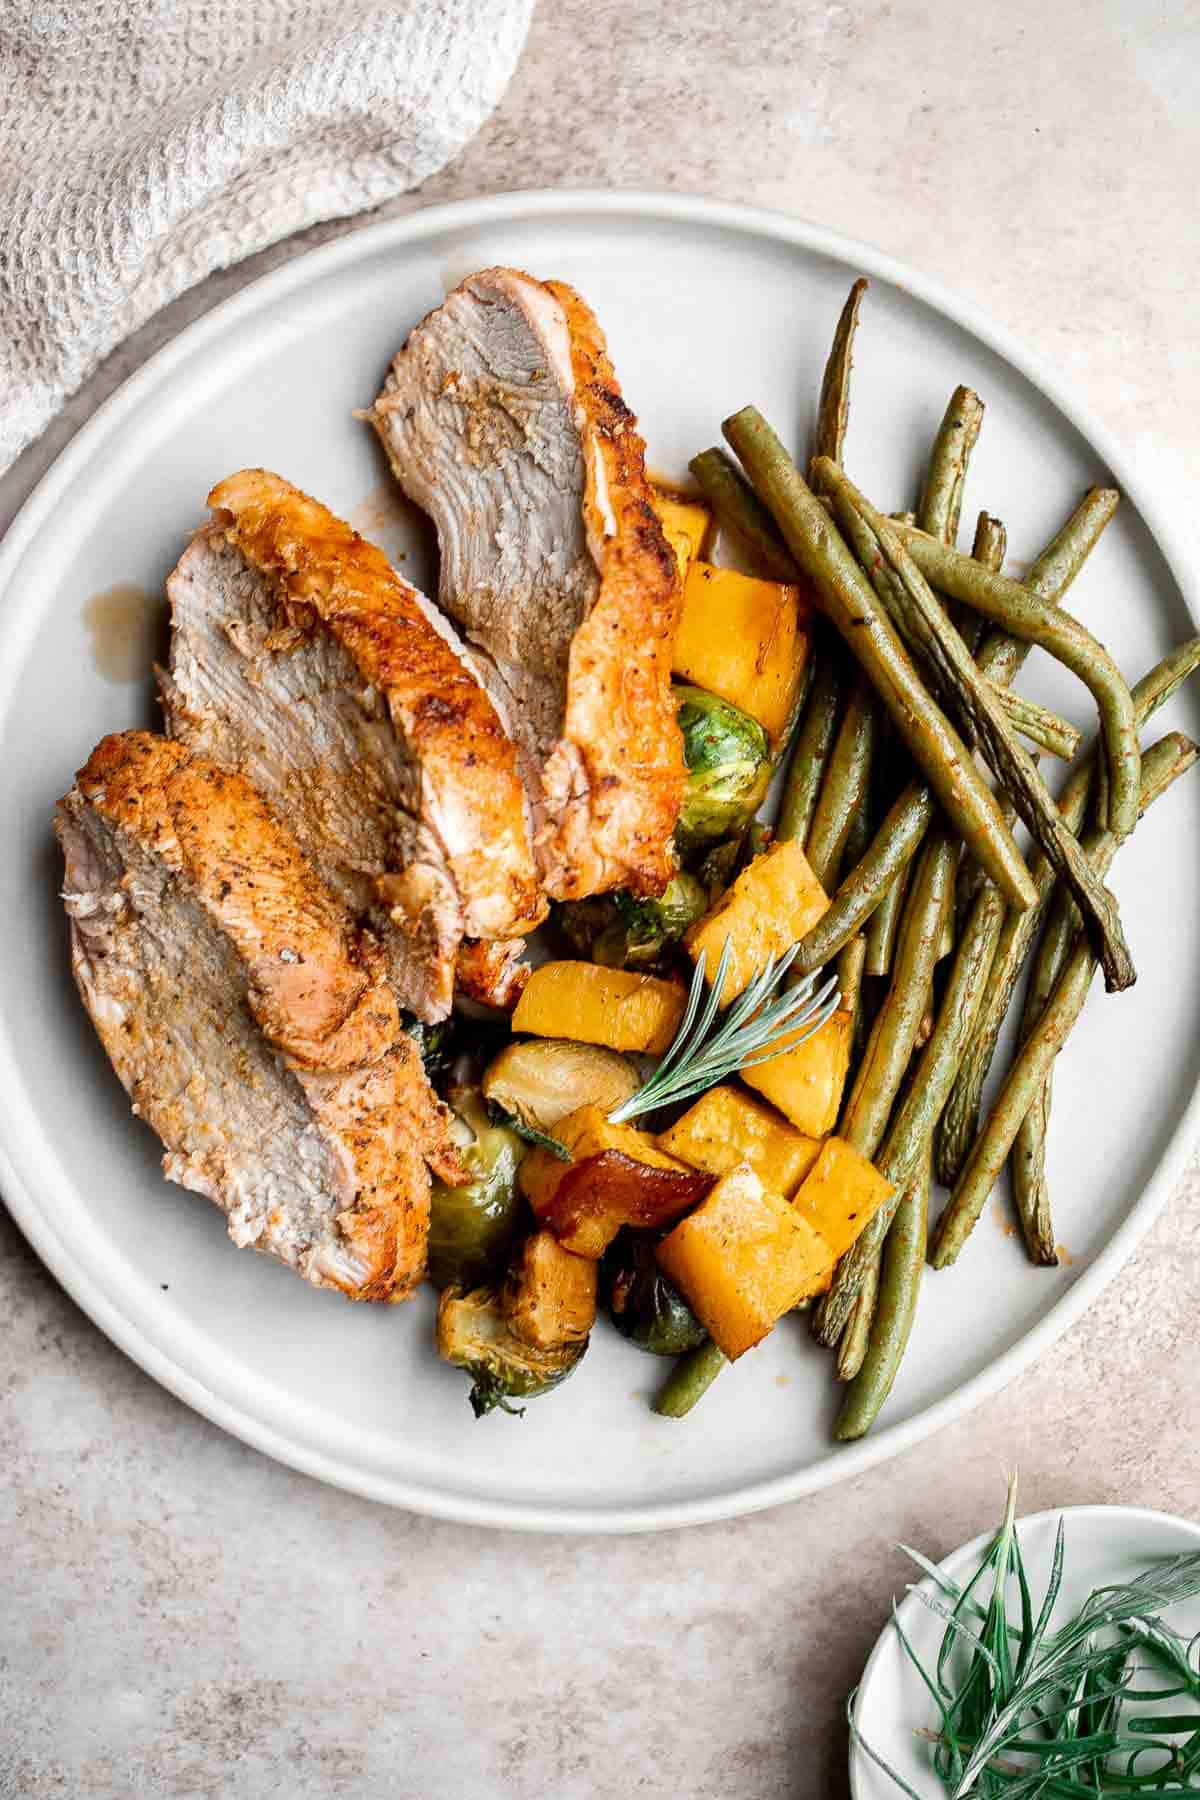
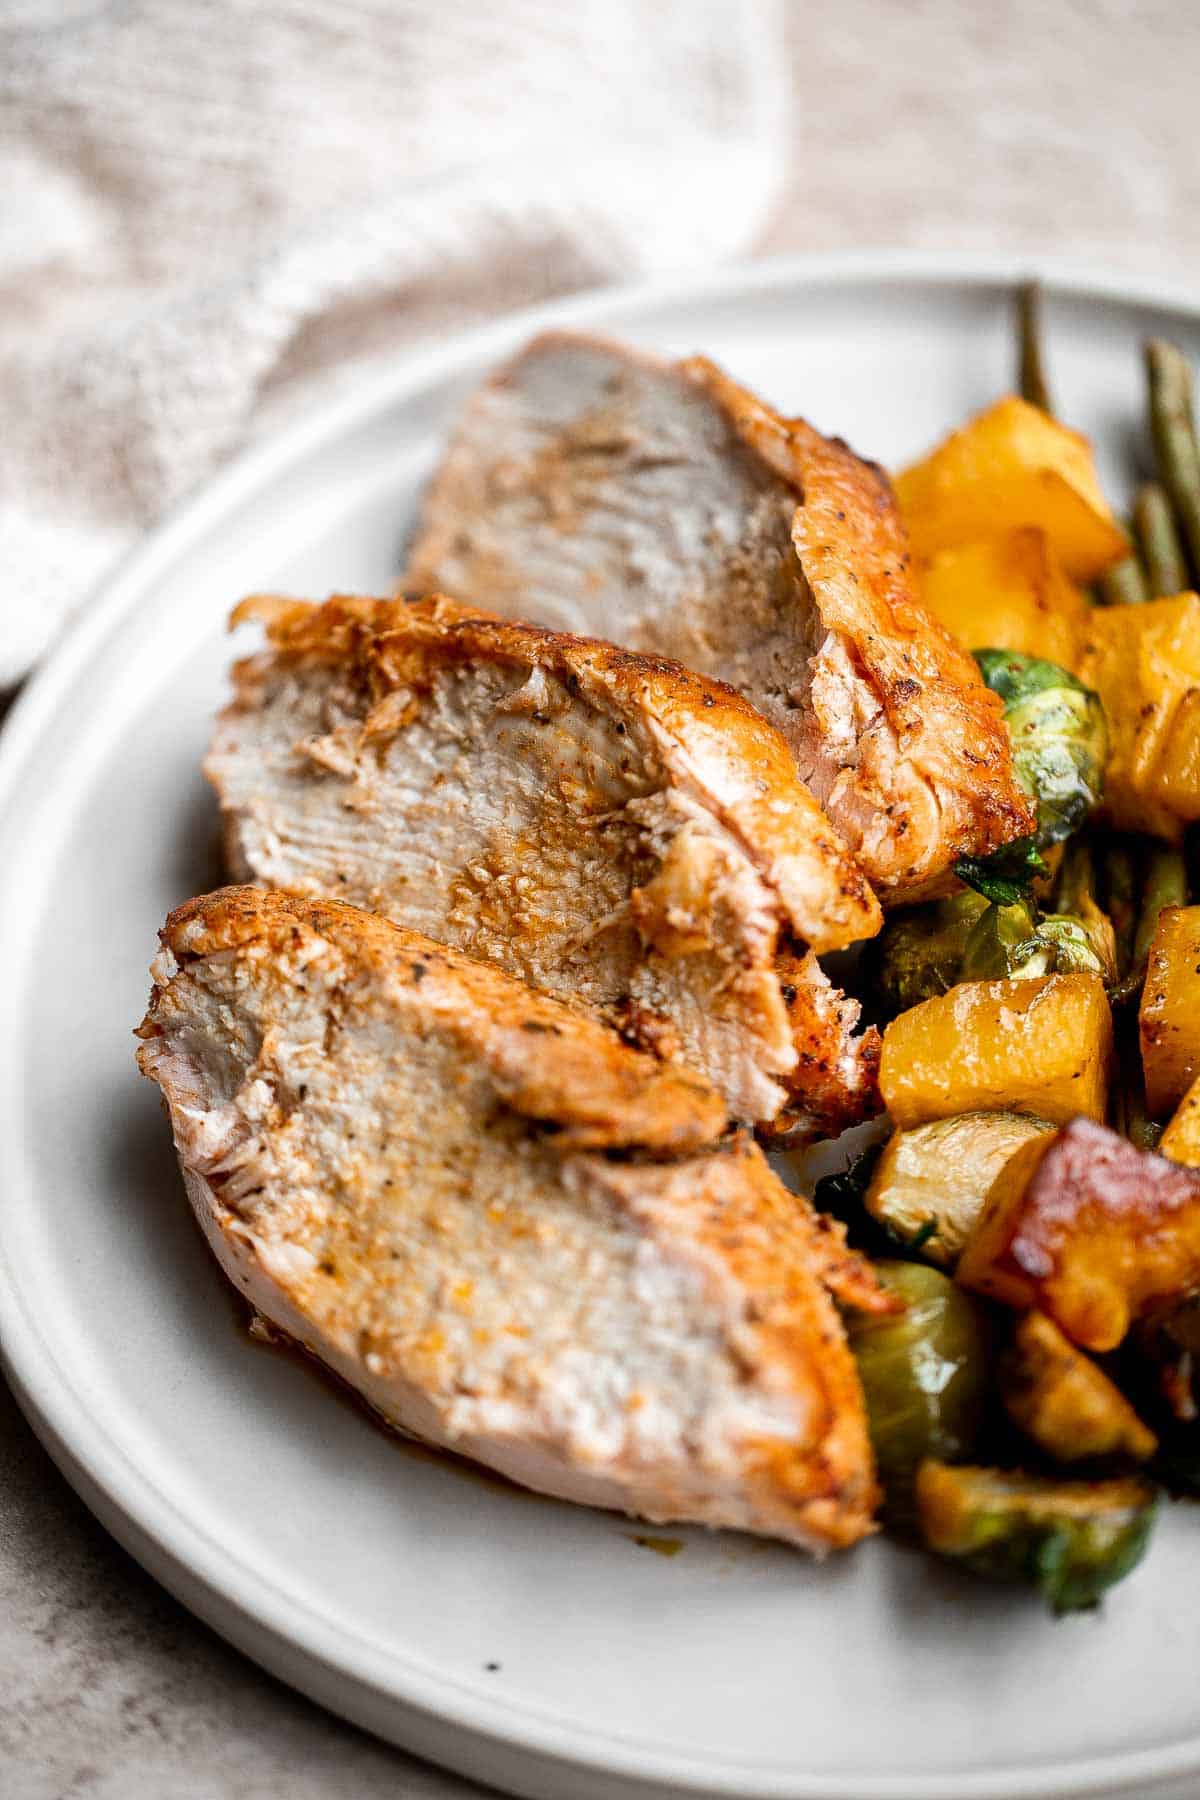
- Rest. Let the turkey breast sit for 10-20 minutes before slicing. Serve with the vegetables.
How to Serve
This Sheet Pan Thanksgiving Dinner covers most of the bases, but it does miss some classics such as Mashed Potatoes, Gravy, and Cranberry Sauce are typically present at this holiday dinner. Remedy that by serving this roasted turkey and veggies on a bed of mashed potatoes with gravy and cranberry sauce.
Here are some more side dishes you can serve this with:
- Creamy Garlic Mashed Cauliflower
- Roasted Butternut Squash Soup
- Sweet Potato Casserole
- Mascarpone Mashed Potatoes
- Potato Dinner Rolls
- Creamed Corn
Storage and Freezing Instructions
How to Store
Store leftovers in an airtight container and refrigerate for up to 4 days.
How to Freeze
Spread leftovers on a lined baking sheet and freeze for 2 hours, then transfer into a freezer bag and freeze for up to 3 months. Reheat straight out of the freezer by sautéing until heated through or in the air fryer at 300F until warmed through.
How to Use Leftovers
You've probably heard of the Thanksgiving leftover sandwich, but what about Thanksgiving leftover stir-fry or Thanksgiving leftover quiche? Use the leftovers to craft an entirely new dish! Some of our favorite leftover dishes to make using any leftover turkey from this recipe are:
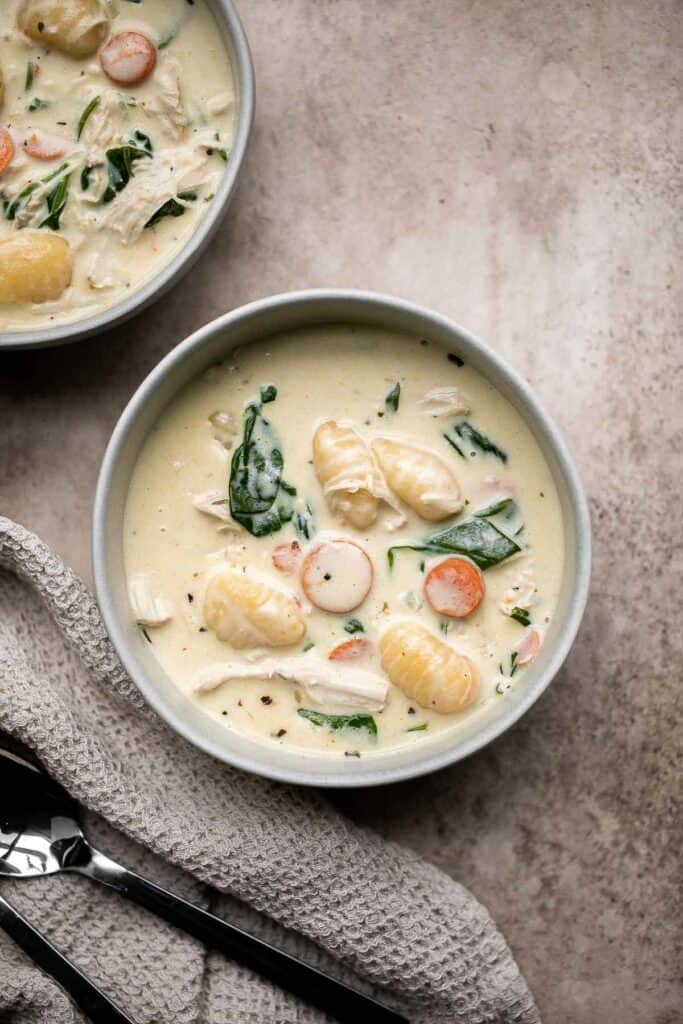
- Creamy Turkey Gnocchi Soup
- Leftover Turkey Stuffed Peppers
- Coconut Curry Turkey
- Buffalo Turkey Wraps
- Turkey Tetrazzini with Spinach
- Turkey Potato Chowder
Browse all our favorite 15 Leftover Turkey Recipes.

More Thanksgiving Recipes
- Small Thanksgiving Menu for 4
- 40 Thanksgiving Main Dishes
- 50 Best Thanksgiving Side Dishes
- 20 Thanksgiving Soup Recipes
- 30 Best Thanksgiving Appetizers
- 25 Thanksgiving Dessert Recipes
Tried this recipe?
I'd love to hear what you think! Leave a comment and rating below to share your feedback. Your reviews help others discover this recipe and help me keep creating more free recipes for you. Snap a photo and tag me on social media @aheadofthyme too.
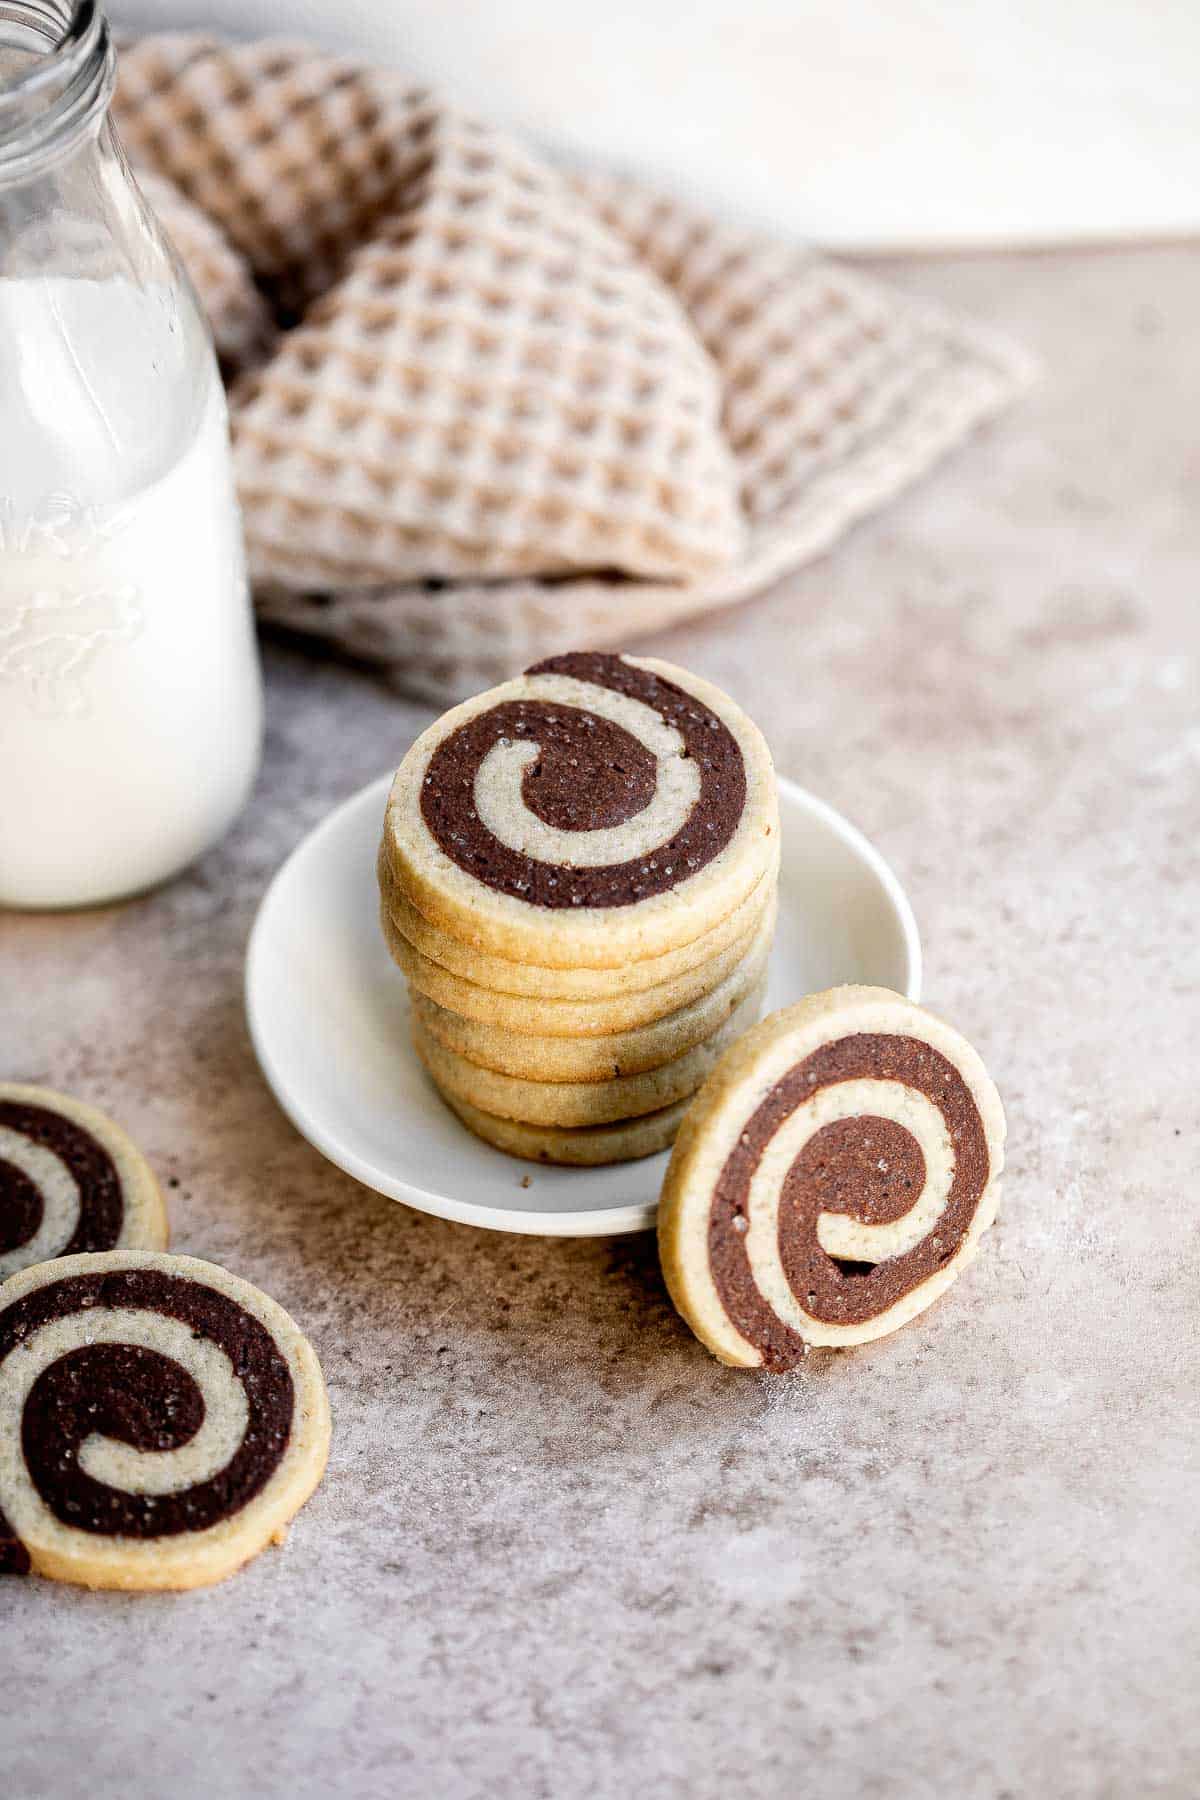
Pinwheel Cookies
Chocolate Pinwheel Cookies are a Christmastime classic. They are sweet, buttery, and melt in your mouth delicious. Making these festive swirl cookies from scratch is a lot easier than you think. They are a simple slice-and-bake cookie - meaning no cookie cutters needed!
Include these chocolate-and-vanilla cookies as part of a cookie exchange on your holiday baking list, in a holiday cookie box to gift to family and friends, or for any time of the year. You will find yourself baking these over and over again!

Why You'll Love these Pinwheel Cookies
- Easy to make. There are no special skills needed to make these chocolate swirl cookies. You'll just need a few ingredients and about 15 minutes of preparation time using standard kitchen tools before rolling and chilling the dough for a few hours. Once the log has firmed up sufficiently, you'll slice and bake the cookies for ten minutes.
- Made with simple baking staples. You won't have to hunt down any specialty ingredients to make these slice and bake cookies - everything you need is likely already in your pantry or can easily be acquired from your local grocery store.
- Festive for Christmas. These pinwheel cookies are one of many cookies that mark the holiday season, which makes this the perfect recipe to bust out for the office Christmas party or a Christmas Eve dinner with your in-laws. It's gorgeous without too much effort (no cookie cutters needed or icing intricate patterns here!)
- Freezer-friendly. These Christmas cookies are easy to make ahead because you can freeze them before or after baking. I love to just freeze a roll of cookie dough and be ready to bake a batch whenever I please. Some other freezer-friendly holiday cookies to bake are M&M Christmas Cookies, Soft and Chewy Ginger Cookies, Chocolate Crinkle Cookies, and Gingersnaps.

Ingredient Notes
To make this holiday Pinwheel Cookies, you will need the following ingredients (full measurements in recipe card below):
- all-purpose flour - a gluten free measure-for-measure flour will make these cookies friendlier to those with gluten sensitivity, but it may change the texture.
- baking powder
- salt - a finely ground salt is best for cookie dough. A coarse or flaked salt will result in inconsistent flavor - some bites will be too salty, some will be bland.
- butter - setting the butter out to come up to room temperature is incredibly important in almost any cookie recipe - cold butter won't cream with the sugar easily and warmed butter will change the texture of the dough.
- sugar - any granulated sugar should work. Use coconut sugar, raw sugar, or an equivalent sugar substitute if you prefer. The taste will change slightly depending on what you use.
- eggs
- vanilla extract - you can use a standard alcohol-based vanilla extract or use a vanilla bean paste at equal measure.
- unsweetened chocolate - also known as baker's chocolate. You could also use dark chocolate or bittersweet, though you may have to adjust the sugar measurement to make sure the cookies aren't overly sweet.
Equipment needed
You will also need the following baking equipment and tools:
- measuring cups and spoons
- mixing bowl
- stand mixer or hand mixer
- parchment paper
- rolling pin
- plastic cling wrap
- knife
- half sheet baking pan
- wire cooling rack

How to Make the Best Pinwheel Cookies
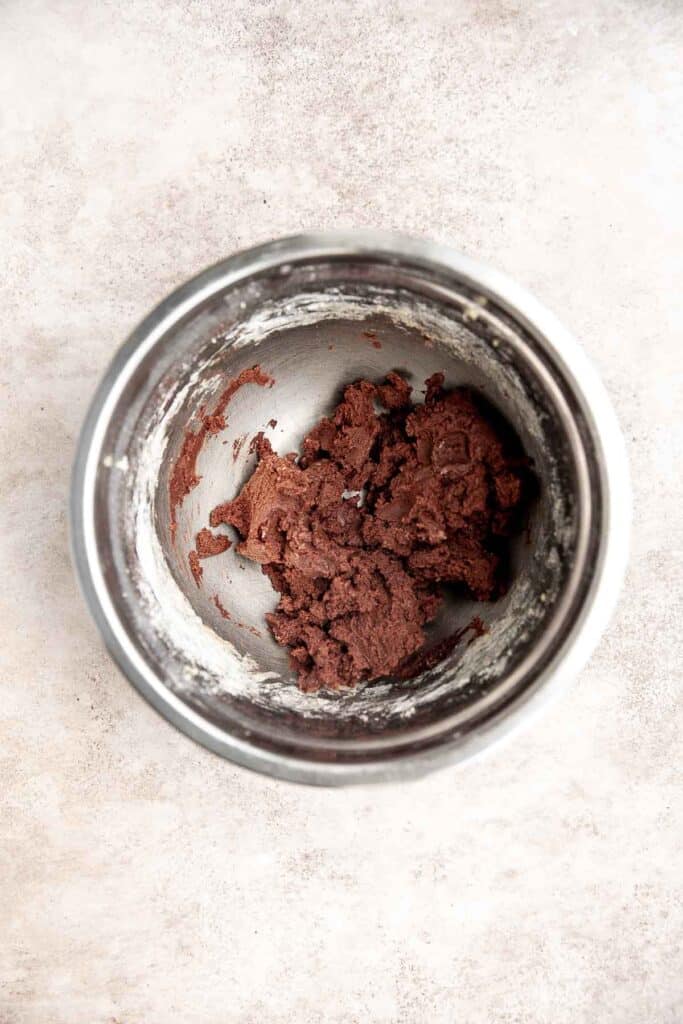
- Melt the chocolate. Melt the chocolate either on the stove or in the microwave. Then, set the chocolate aside and allow it to cool slightly.
How to Melt Chocolate
You can melt chocolate either on the stovetop or in the microwave.
- On the stove: Bring about 2 inches of water to a gentle simmer in a saucepan over medium-low heat. Reduce the heat to low and place a medium heatproof bowl over the saucepan, making sure the bottom of the bowl doesn't touch the water (you can also use a steamer insert). Add the chocolate and stir constantly as it melts. Continue stirring until completely smooth and gloss. This should take just a few minutes.
- In the microwave: For a quicker method, place the chopped chocolate in a heatproof bowl and microwave in 30-second intervals, stirring well after each one. Continue until the chocolate is fully melted and smooth. Be sure to stir between intervals to prevent overheating or scorching.

- Make the cookie dough. In a medium mixing bowl, sift together the flour, baking powder, and salt. In a large mixing bowl, add butter and use a hand mixer or stand mixer to beat until light and fluffy, about 1-2 minutes. Add sugar and continue to beat until fluffy, about 2 minutes. Add vanilla and egg and beat until combined, scraping down the sides of the bowl as needed. Slowly add in the dry ingredients and beat until combined.


- Divide. Divide the dough in half. In one half, pour in the cooled melted chocolate. Use the mixer to beat it until just incorporated. You will have one white dough and one chocolate dough.
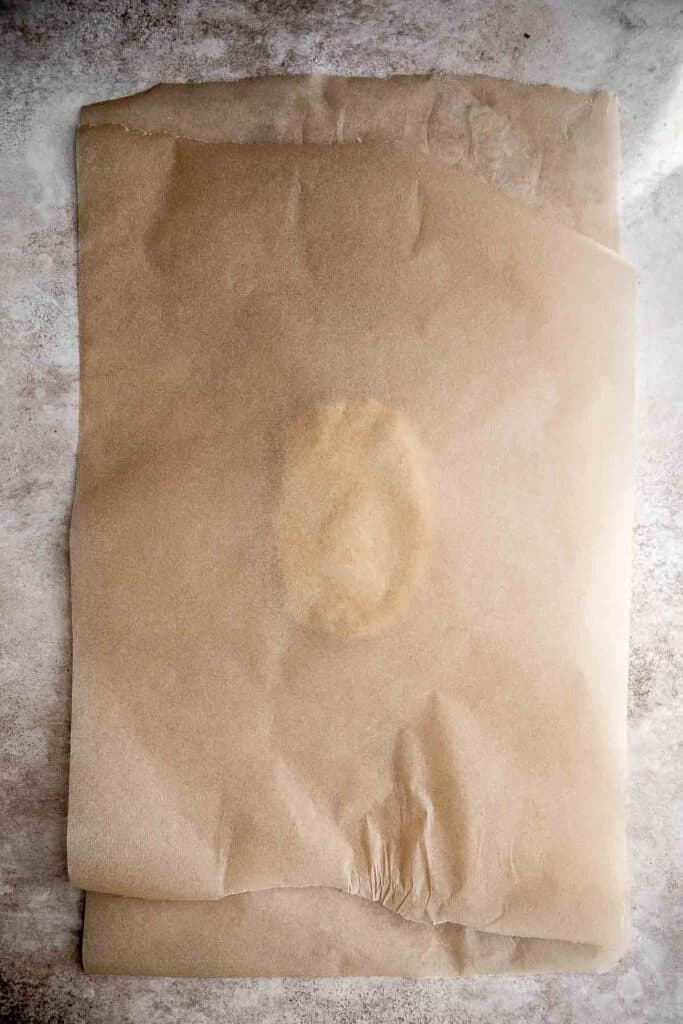
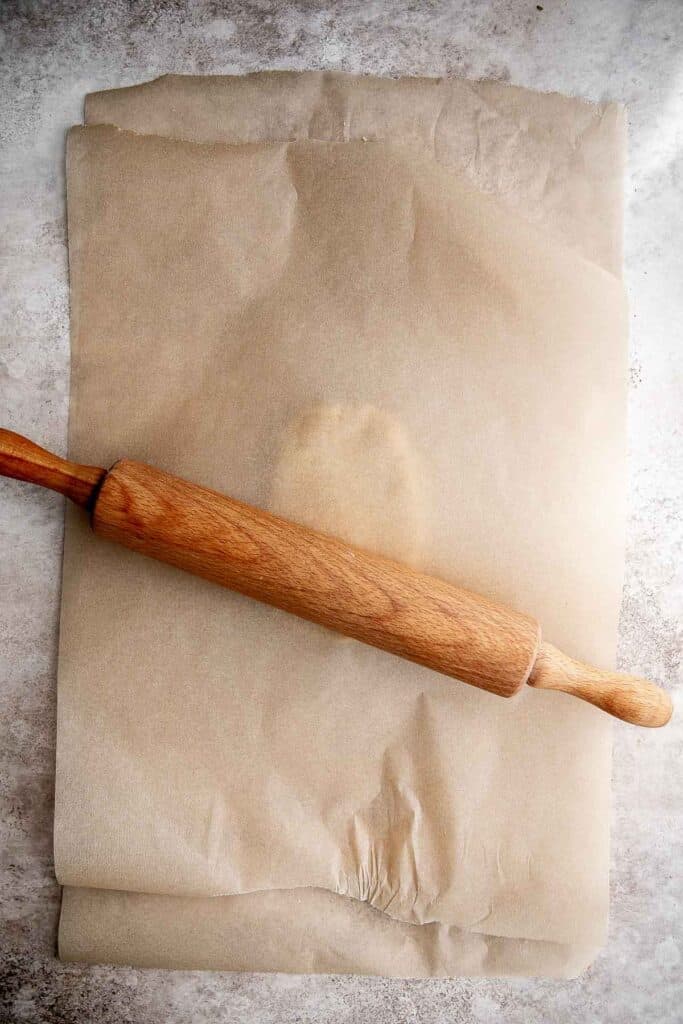
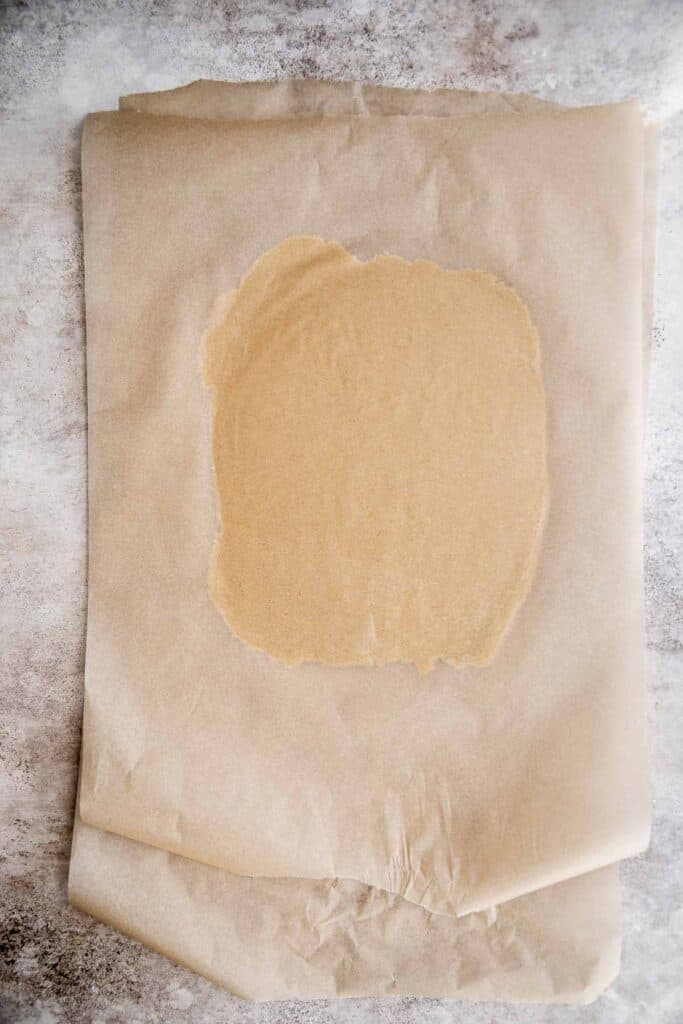
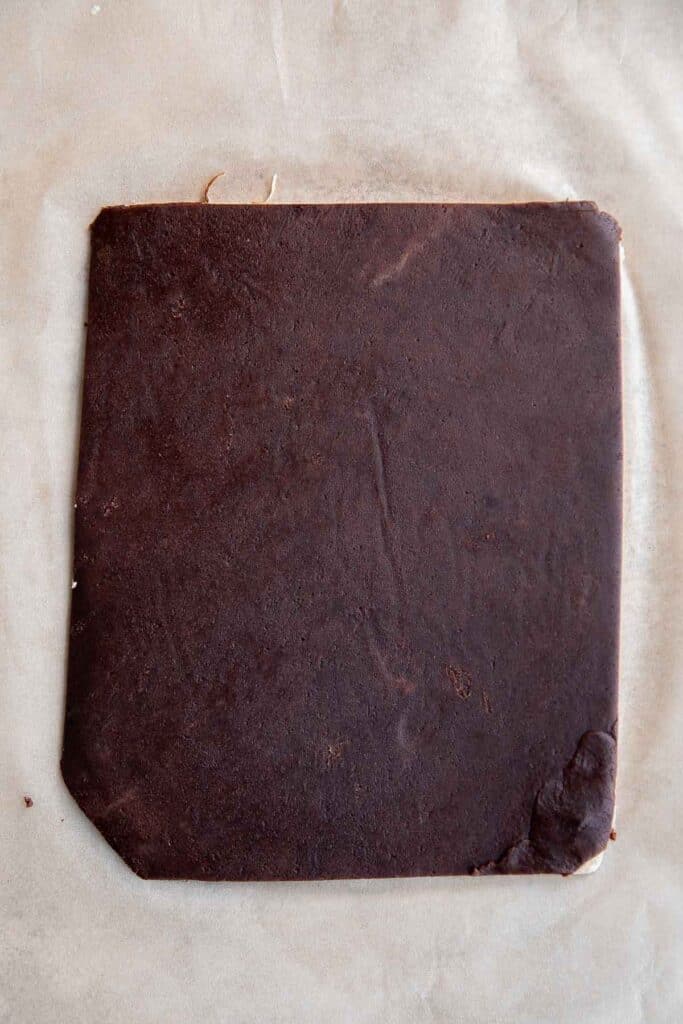
- Roll the dough. Take the white dough and place on a large sheet of parchment paper. Use your hands to shape it into a square rectangle about 4 inches long. Place another large sheet of parchment paper on top, and use a rolling pin to roll it out into a large rectangle that is ½-inch thick. It should measure roughly 9x7-inches.
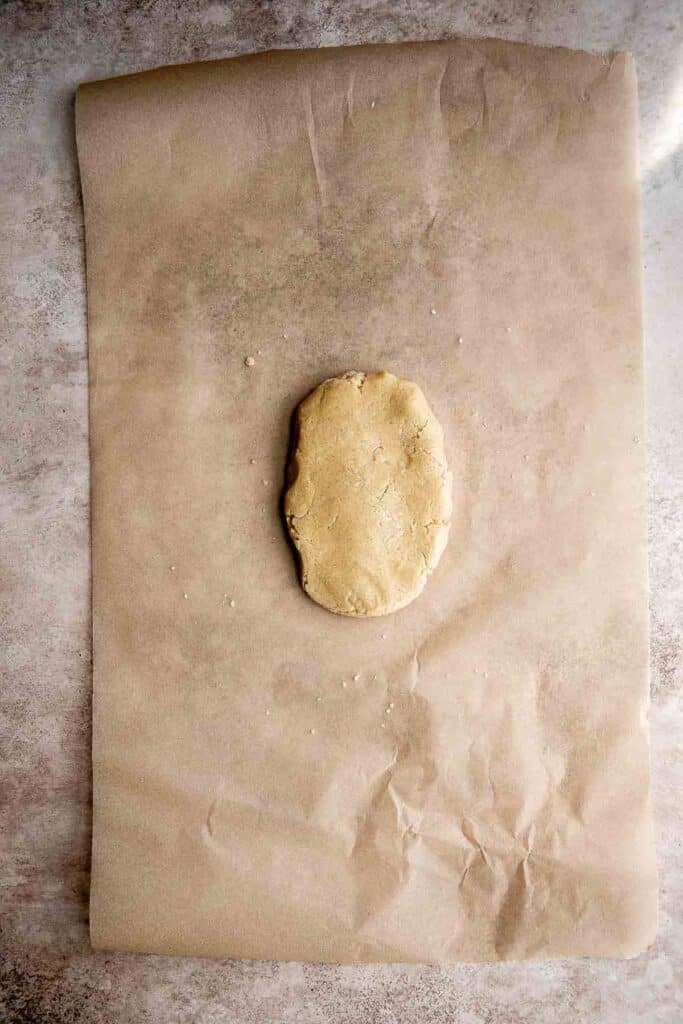
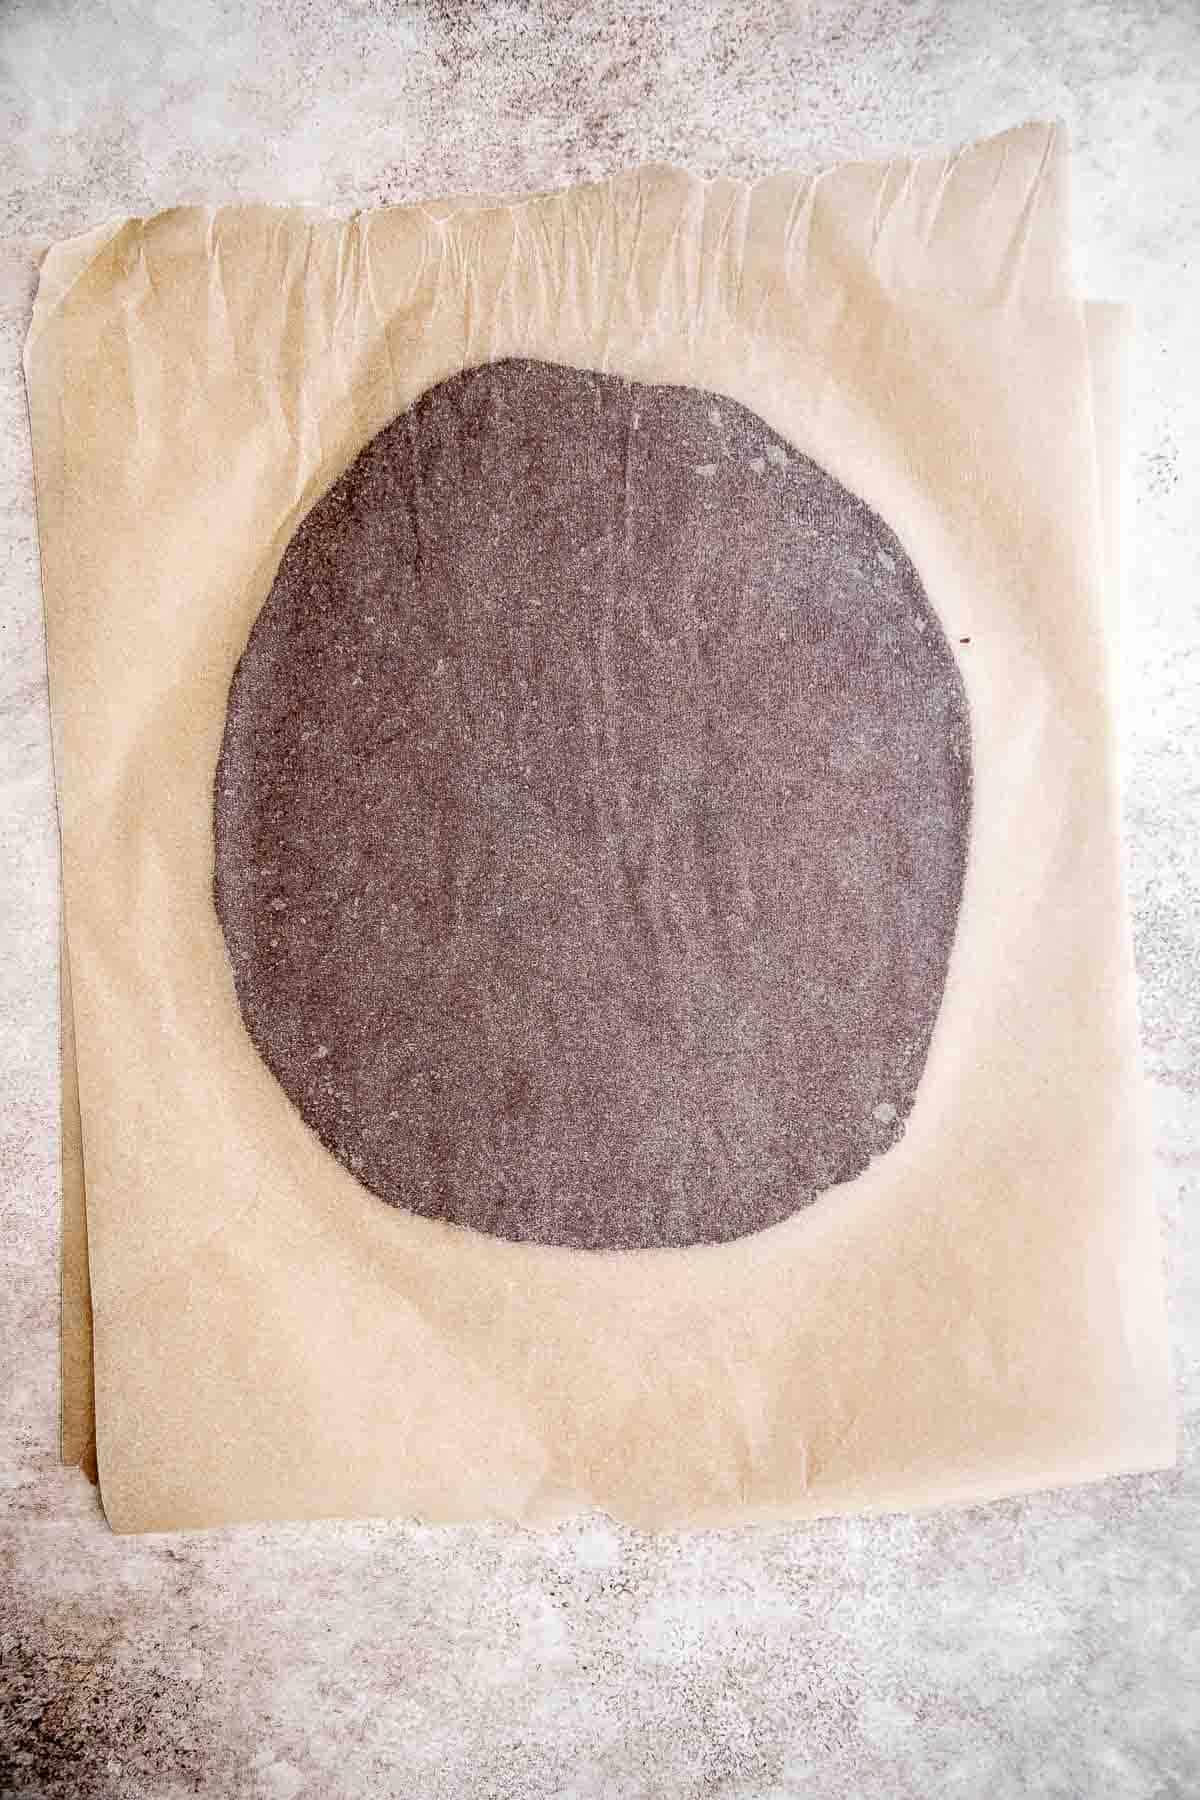
- Repeat. Repeat with the chocolate dough.
- Chill. Transfer parchment paper with the rolled out dough inside into the fridge and refrigerate for 30 minutes.
How to Roll and Slice Pinwheel Cookies
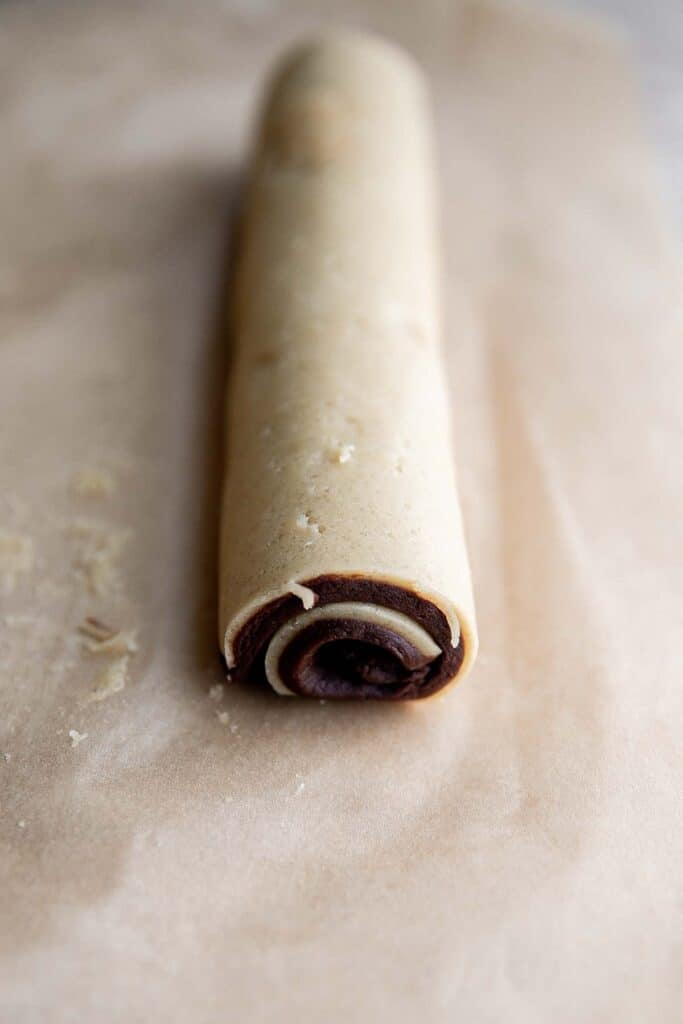
- Combine layers. Once chilled, place the white dough and the chocolate dough on the counter. Carefully peel off the top layer of parchment paper on each. Take the chocolate dough and careful flip it over on top of the white dough.


- Press together. Use a rolling pin and give it a couple gentle rolls to get the 2 pieces of dough to stick together. Remove the parchment paper off of the top of the chocolate layer.
- Smooth it out. Use a knife to cut along the edges to create a smooth rectangle.

- Roll. Carefully pinch one side of the dough (on the longer side) and roll it in to form a log.

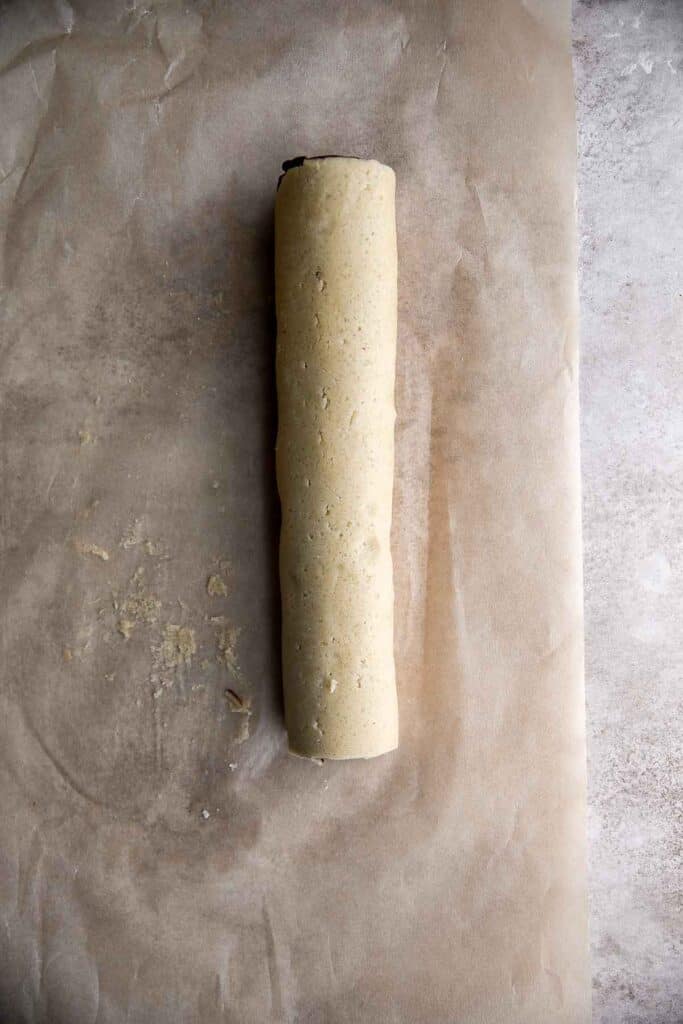
- Wrap. Place the log on a piece of plastic cling wrap and wrap it tightly. Twist the ends to secure it tightly.

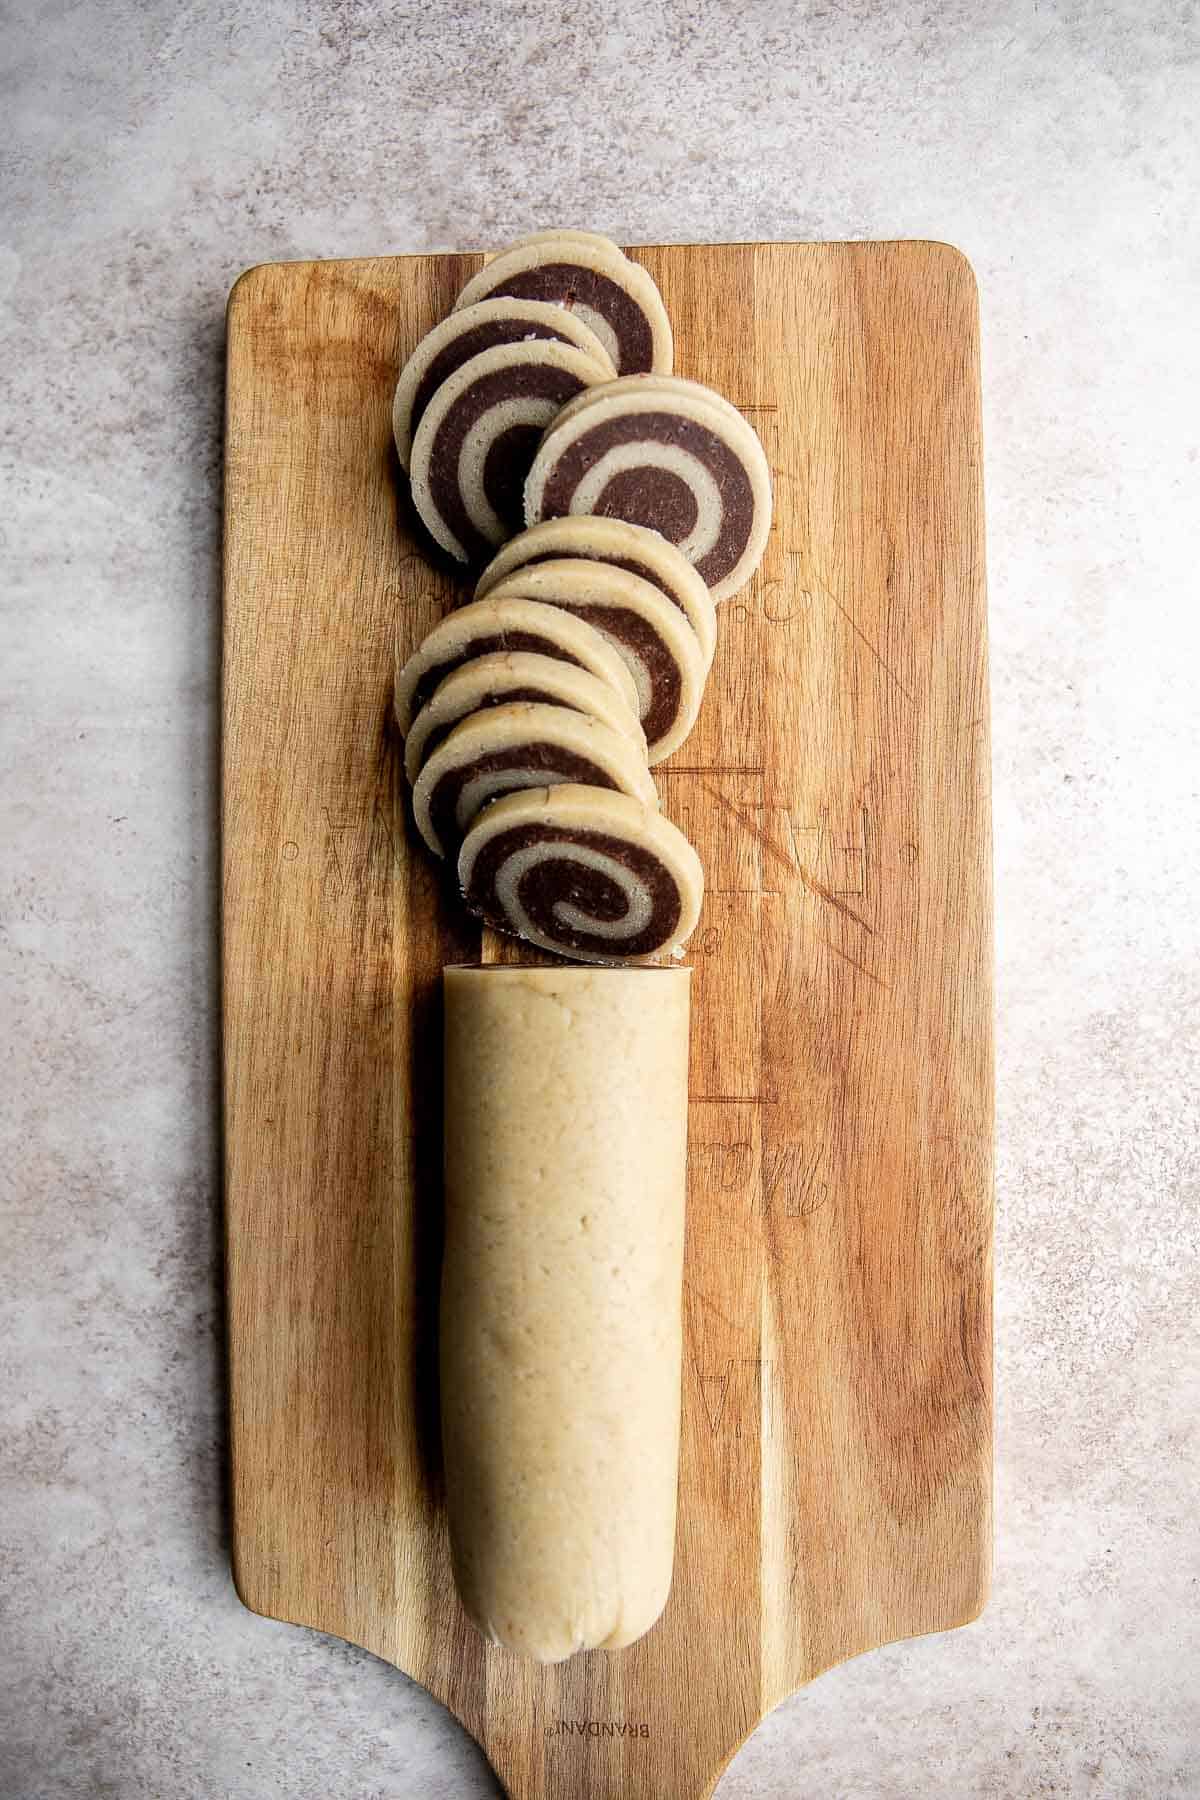
- Chill. Refrigerate for 30 minutes. Take the dough out of the fridge and roll it on the counter (still in the plastic cling wrap) to smooth out the flattened area on the bottom and make it round. Transfer the dough back to the refrigerator for 2 hours until firm. You can also place in the freezer for about an hour to speed up the process.
- Slice. Remove the plastic cling wrap from the dough and use a knife to slice the log into ¼-inch slices.
Baking Cookies
Line a large half sheet baking pan with parchment paper or a silicone baking mat. Transfer the slices to the lined baking sheet, spacing them about 1.5-inches apart.
Bake the cookies in a 350F preheated oven for 9-11 minutes until just starting to brown on the edges. Allow the cookies to cool in the baking pan for 5 minutes, then carefully transfer to a wire cooling rack to cool completely.


How to Serve
Nothing says cookies better than a tall glass of milk or a warm drink. Some of my favorite cozy drinks to serve alongside these cookies are:
Storage and Freezing Instructions
How to Store
Once the cookies have cooled completely, transfer them to a sealed plastic bag or tupperware lined with parchment paper and store at room temperature for up to 7 days.
How to Freeze
Freezing baked cookies. Freeze the baked cookies between layers of parchment paper in an airtight container for up to 4 weeks.
Freezing cookie dough. Freeze the entire uncooked entire log wrapped tightly in plastic cling wrap and then placed in a freezer bag. When ready to slice, let it thaw in the refrigerator overnight to make it easier to slice. You can also freeze sliced cookie dough between layers of parchment for up to 3 months.
Recipe Tips and Tricks
- Make ahead for busy days. If you know the holiday season is going to be a particularly hectic one, you can make these ahead and freeze the dough (as directed above) and still have fresh-baked cookies right when you need them!
- Add food coloring. You can add red food coloring to the chocolate and green food coloring to the vanilla dough to make it more festive.
- Heat your knife before slicing. Make things easier on yourself (and a little less messy) by running the blade of your knife under hot water and drying it before attempting to cut through the frozen log of cookie dough. It should cut like butter!
- Round them out. Here's a little-known secret used by pros to get perfectly round cookies every single time: while the cookies are still warm, right out of the oven, quickly swirl them around in a tight circular motion a few times on the pan using a circular cookie cutter. It makes them all uniform without a ton of extra work!

More Cookie Recipes
- 50 Best Cookie Recipes
- Slice and Bake Pecan Shortbread Cookies
- Chocolate Crinkle Cookies
- Chocolate Chip Cookies
- Butter Cookies
- Cranberry Orange Shortbread Cookies
Tried this recipe?
I'd love to hear what you think! Leave a comment and rating below to share your feedback. Your reviews help others discover this recipe and help me keep creating more free recipes for you. Snap a photo and tag me on social media @aheadofthyme too.

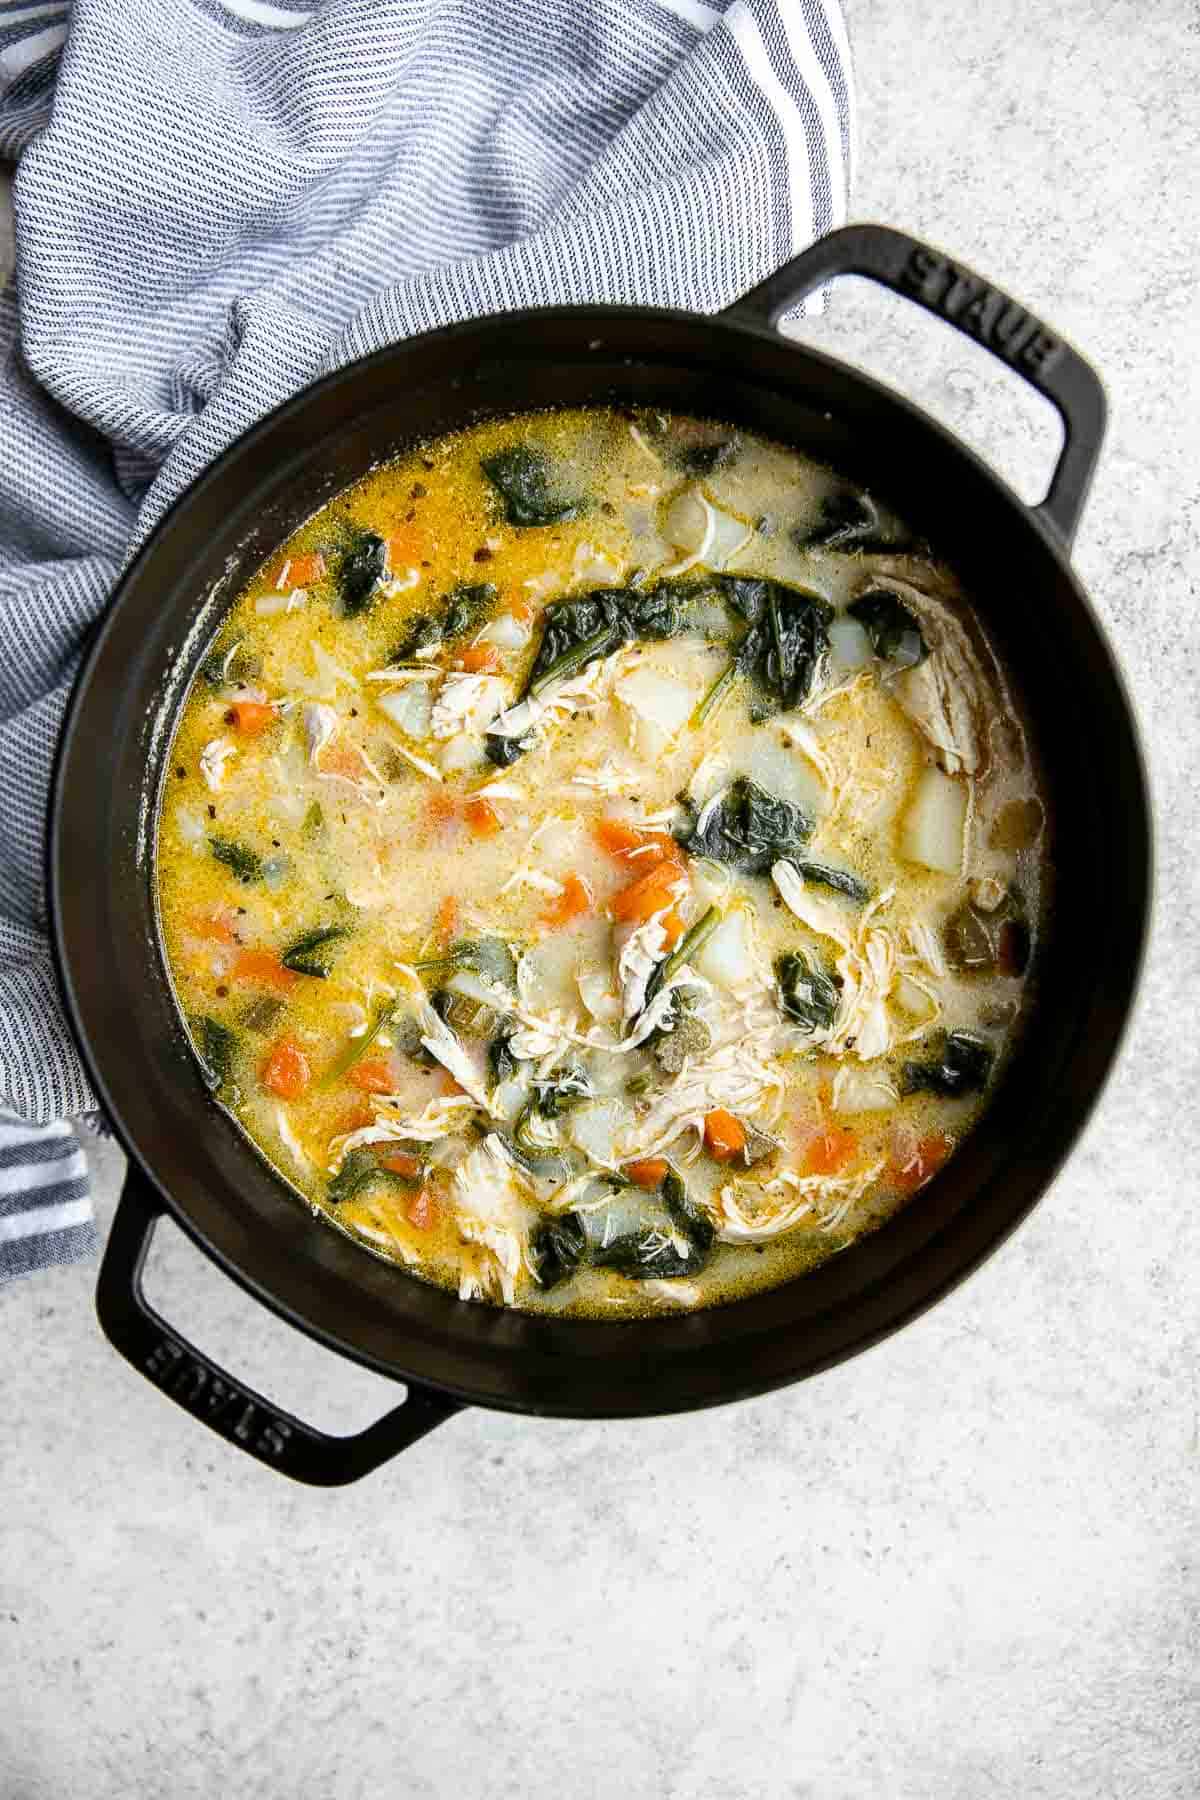
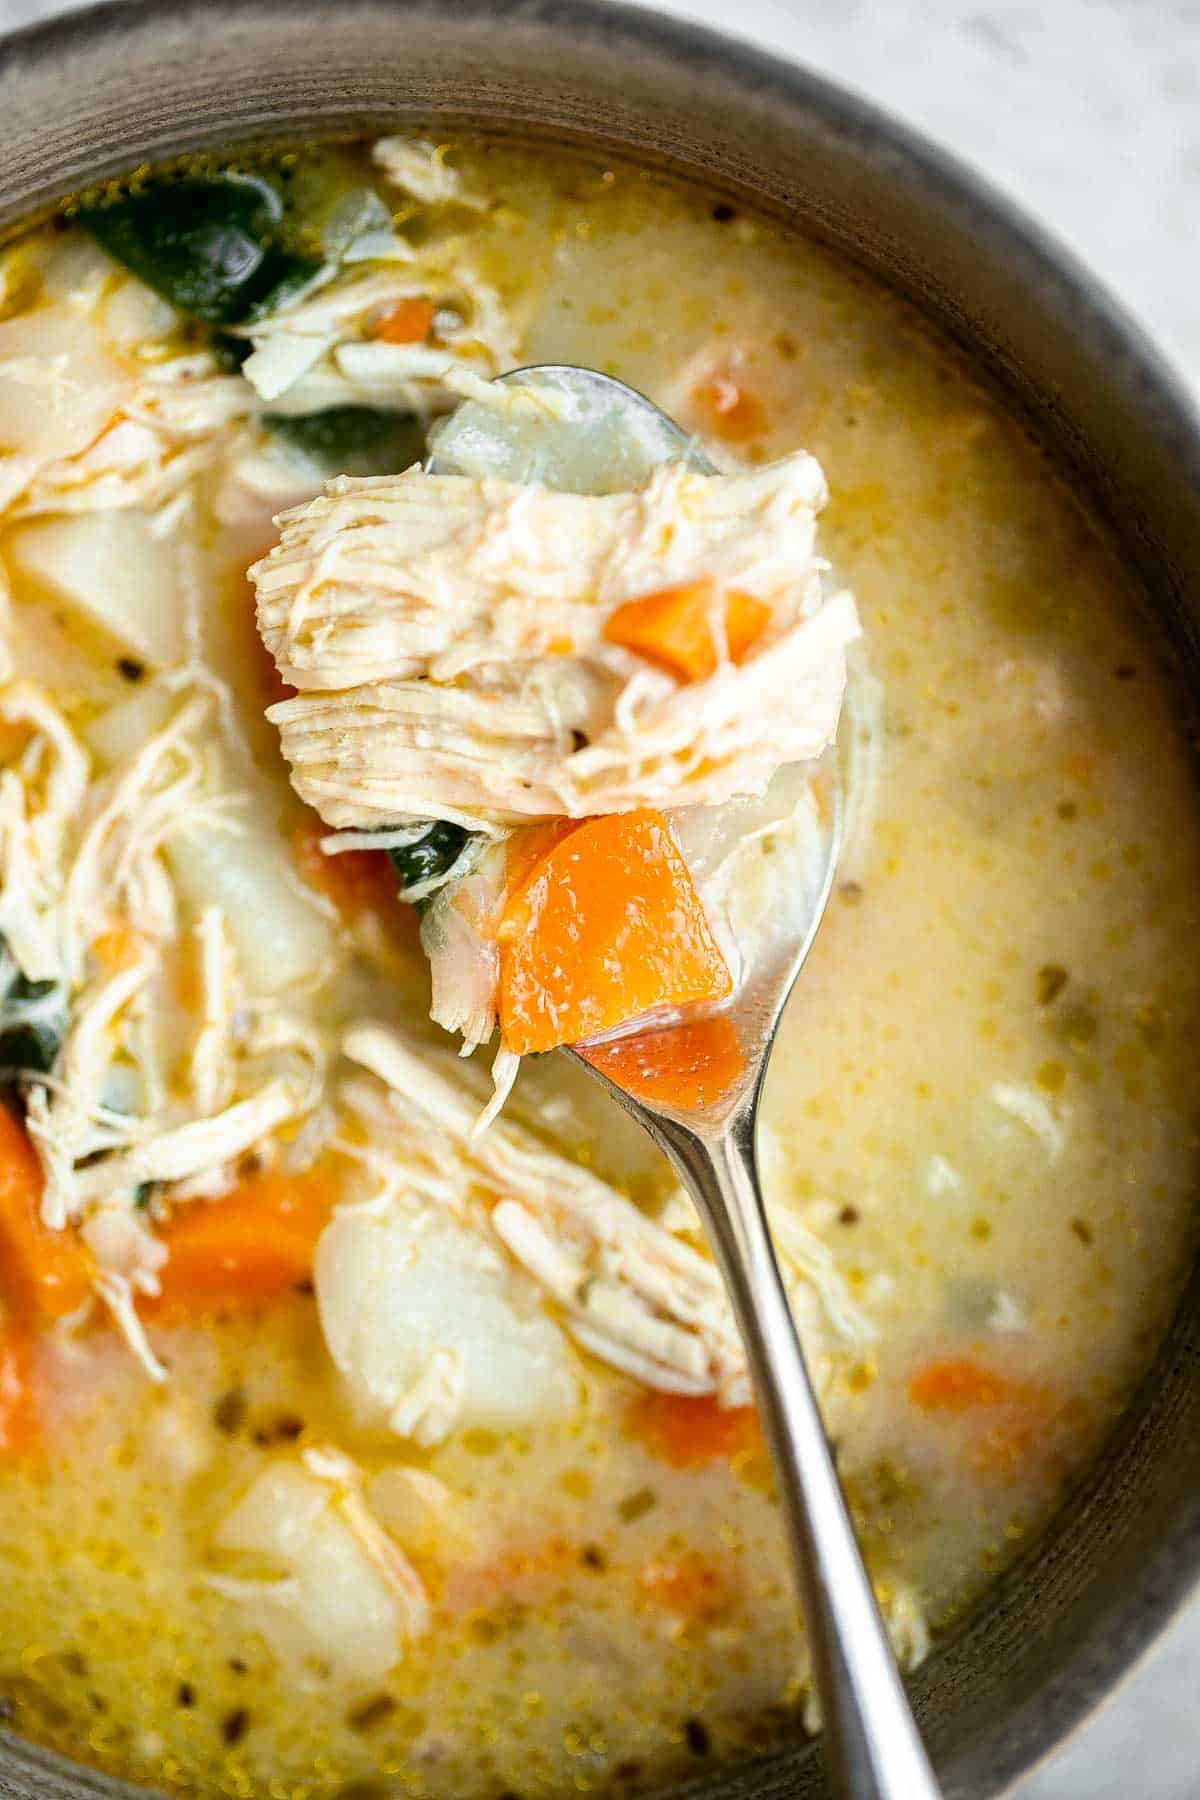
Chicken Potato Soup
Chicken Potato Soup is cozy, hearty, and delicious. Loaded with chicken, potatoes, veggies, and greens simmered in a slightly creamy broth, this chicken soup is nourishing and healthy. It's the perfect comfort food to serve on a chilly night.
Plus, it's quick and easy to make in one pot and freezer-friendly too. Whether you're fighting sickness in your household or just trying to get a hot meal on the table in a hurry, this recipe for creamy chicken potato soup will be your new go-to comfort food on chilly weeknights.
Why You'll Love this Chicken Potato Soup
- It's ready in under an hour. Some soups take a notoriously long time to cook, but this one can be made from scratch and served in only forty minutes - making it perfect for busy days with the family. Plus, you can make it even faster by using leftover cooked chicken or a rotisserie chicken.
- The best flavor and texture. Italian seasoning and simmered veggies give the soup a rich, savory flavor, while the chicken and potato create hefty spoonfuls of dense texture.
- Loaded with nutritious ingredients. Not only is this creamy chicken soup with potato delicious - it's also healthy. The vegetables, chicken, broth, and greens make this soup nourishing, wholesome, and filling. It's gluten-free too.
- Perfect for chilly evenings. Chicken soup is good for the soul. Warm yourself up from the inside out when the weather takes a turn for the worse with a cozy steamy bowl of homemade chicken soup. Nothing is better!
- Chicken and potatoes are the best combination. Chicken soup is a staple recipe in any cook's arsenal of dishes, but this creamy chicken potato soup is guaranteed to replace your usual favorite recipe. It has all the classic goodness of soup with added tender potatoes for a satisfying one-pot meal.

Ingredient Notes
To make this delicious Chicken Potato Soup, you will need the following ingredients (full measurements in recipe card below):
- vegetable oil - I used avocado oil, but olive oil or coconut oil will also work. As long as it's got a high smoke point and a neutral flavor profile, whatever oil you have on hand will work fine.
- vegetables - this soup is packed with veggies including onion, garlic, carrots, celery, and spinach.
- chicken broth - you can also use vegetable broth if you don't have chicken broth in stock. Homemade and store-bought are both great!
- chicken breasts - you could substitute chicken breasts for thighs if you prefer dark meat, though the cooking time will need to be adjusted and the texture will be slightly different.
- potatoes - Yukon gold potatoes typically hold up better compared to other varieties of potatoes - they don't go mushy as quickly.
- half and half - heavy cream is an acceptable swap for half and half here. If someone in your family has a sensitivity to dairy, you can also use full-fat canned coconut milk in its place.
- baby spinach - baby spinach will wilt and become tender when added to the hot broth. You can use either fresh or frozen. If you want to exchange it for another green, try chopped kale, chard, or watercress for a similar experience.
- Italian seasoning - Italian seasoning is a blend of several different spices: rosemary, basil, thyme, oregano, and marjoram. If you have all (or most) of these ingredients, you can make your own blend.
- salt and pepper
You will also need measuring cups and spoons, a large pot (I used a 4 qt. Dutch oven), and a hand mixer, stand mixer, or 2 forks (for shredding the chicken).

How to Make the Best Chicken Potato Soup
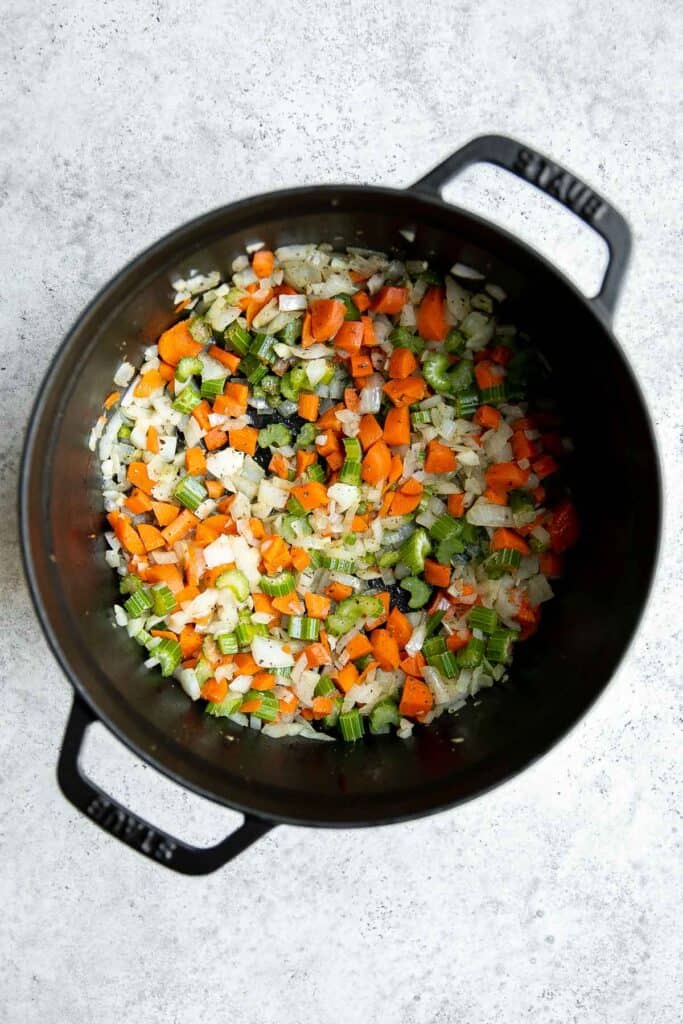
- Sauté veggies. Heat oil in a large pot over medium-high heat until sizzling hot, about 1-2 minutes. Add onion, garlic, carrots, and celery and sauté until tender, about 3-4 minutes. Stir in Italian seasoning until well combined.
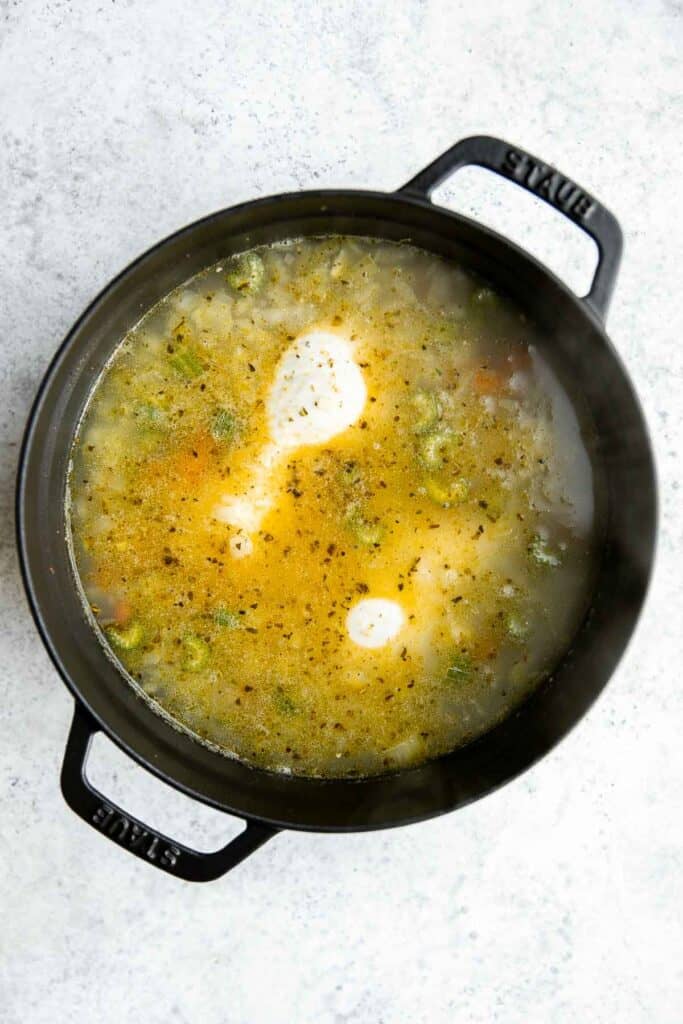
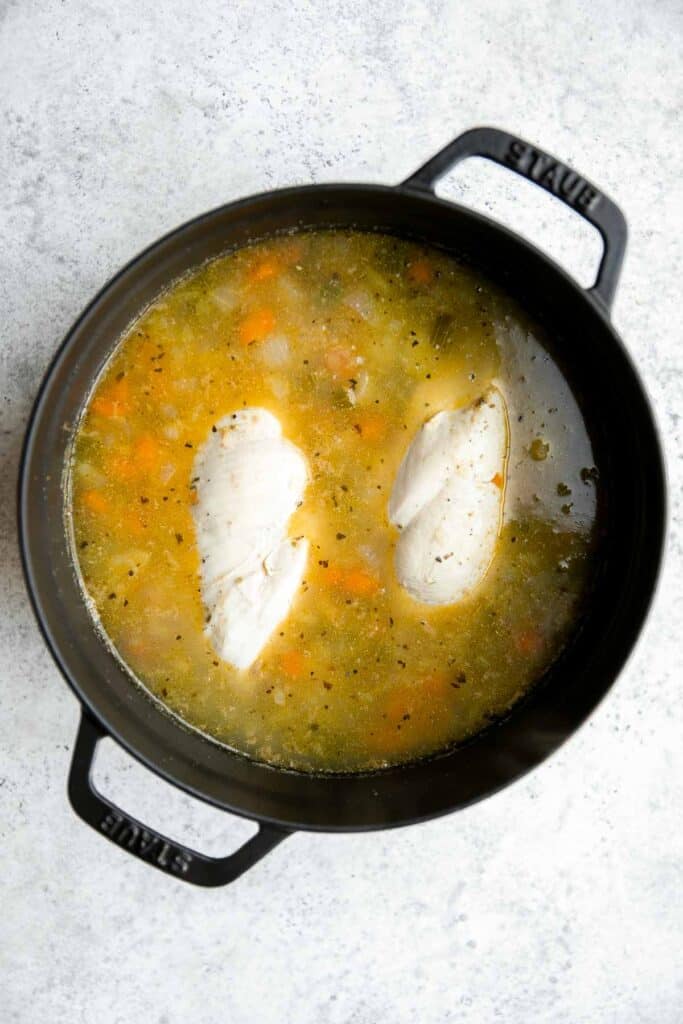
- Add chicken and potatoes. Add chicken broth, chicken breasts, and potatoes. Bring it to a boil and cook until the chicken is fully cooked through, about 12 minutes. (If using leftover cooked chicken, just cook for a few minutes until warmed through).
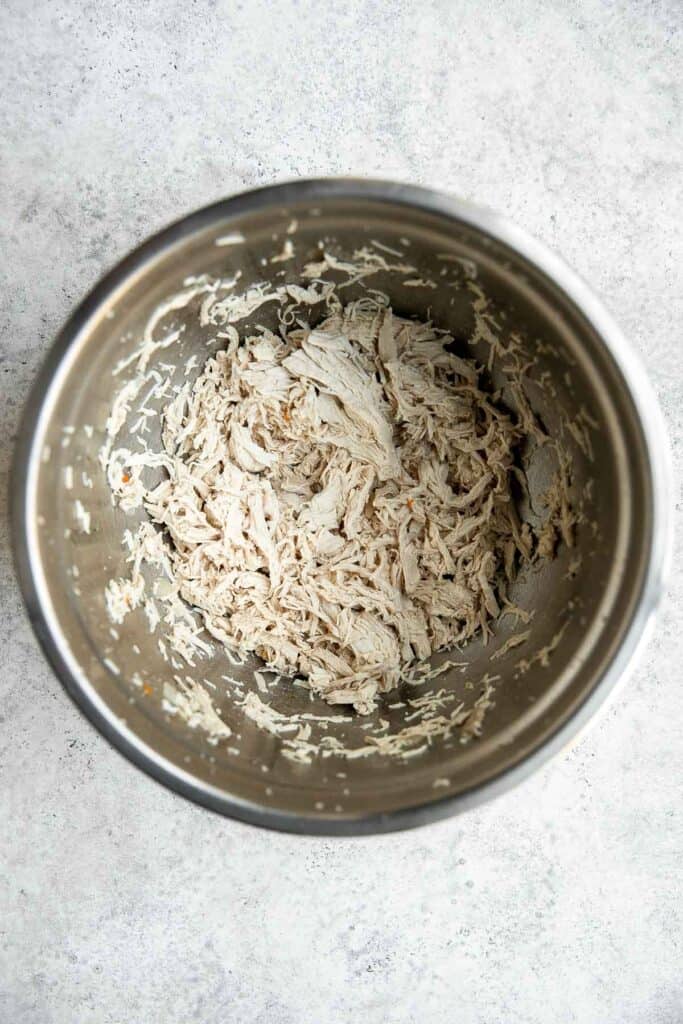
- Shred chicken. Remove the chicken and shred into small pieces in just seconds using an electric hand mixer or stand mixer. You can also shred the chicken using 2 forks.
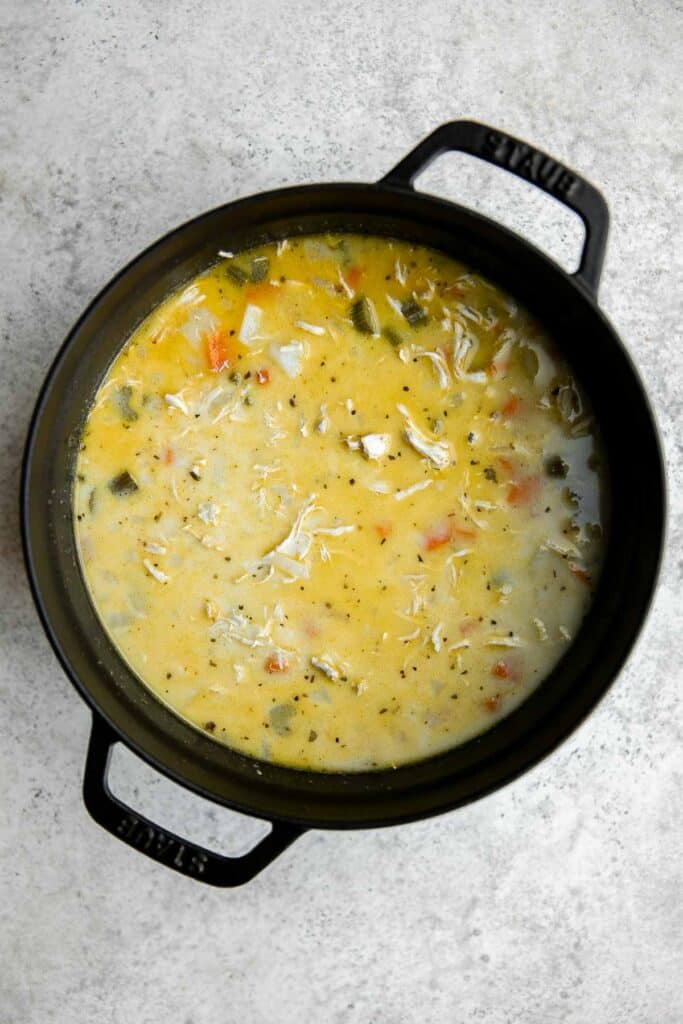
- Add shredded chicken. Return the shredded chicken to the pot and stir in heavy cream. Cook until warmed through, about 3-4 minutes.
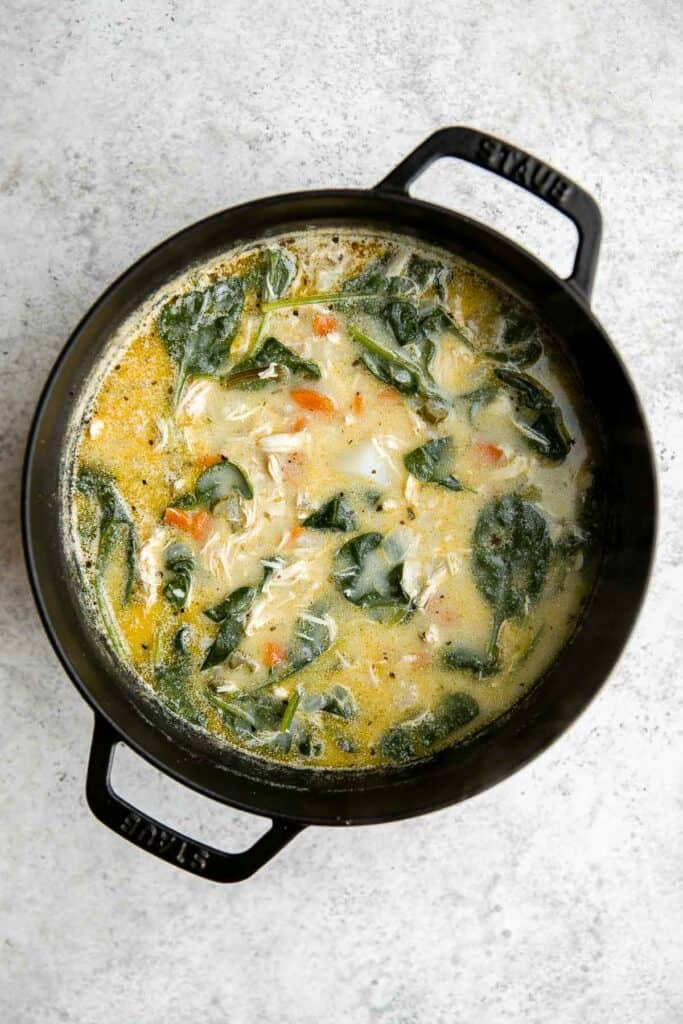
- Add spinach. Stir in spinach and season with salt and pepper to taste. Serve warm.
How to Serve
What's a good soup without something to soak up the broth? Serve this chicken and potato soup with your favorite variety of crackers or croutons for a delightful crunch.
You can serve this soup on its own, or pair with some of my favorite soup sides including:
- Garlic Cheddar Biscuts
- Grilled Cheese Roll Ups
- Shaved Brussels Sprout Salad
- Greek Fries
- Zucchini Bites
- Pepperoni Pizza Rolls

Storage and Freezing Instructions
How to Store
Transfer leftover chicken soup to an airtight container and store in the refrigerator for 3-4 days.
How to Freeze
Once cooled to room temperature, transfer leftover chicken potato soup to a freezer-safe container or freezer bag and freeze for up to 3 months. I recommend portioning them out before freezing to easily reheat the exact amount you want. To thaw, transfer to the fridge overnight before you want to use the leftovers.
How to Reheat
Reheat on the stovetop on medium-low heat until warmed through or in the microwave until warm. You can also reheat straight from frozen in a crockpot after thawing it just enough to release it from the container.
Recipe Tips and Tricks
- Make it spicy! If you like things on the spicier side, add chili flakes or your preferred hot sauce.
- Use leftover chicken to speed things up. Have some leftover chicken breast or rotisserie chicken from a meal a day or two before? Put it to good use in this soup! Adjust the cooking time to account for the already cooked shredded chicken .
More Chicken Soup Recipes
- 60 Best Soup Recipes
- Lemon Chicken Orzo Soup
- Chicken Tortilla Soup
- Chicken Noodle Soup
- White Chicken Lasagna Soup
- Chicken and Rice Soup
Tried this recipe?
I'd love to hear what you think! Leave a comment and rating below to share your feedback. Your reviews help others discover this recipe and help me keep creating more free recipes for you. Snap a photo and tag me on social media @aheadofthyme too.

Cranberry Brie Bites

Cranberry Brie Bites made with flaky puff pastry, gooey melty brie, and sweet cranberry sauce is loaded with sweet and savory flavor. These holiday appetizers are quick and easy to make with 5 ingredients, can be made days ahead, and are freezer-friendly too.
Plus, they look stunning in a spread and taste unbelievably good. Become the hit of the holiday season by whipping up a batch or two of these Cranberry Brie Bites before your next gathering. You might never make another appy for Christmas again!

Why You'll Love These Cranberry Brie Bites
- The perfect blend of sweet and savory. Gooey salty cheese, sweet fruity cranberry sauce, and crunchy pecans. This brie appy has it all - flavor and texture.
- Made with just 5 ingredients. Cranberry brie bites are easy to make with just 5 simple ingredients - puff pasty, cranberry sauce, brie, pecans, and rosemary.
- Picture-worthy without a ton of hassle. Though these baked brie bites will look like you spend hours painstakingly crafting each one, you can finish a batch in only 30 minutes!
- Quick to make. Brie cheese, frozen puff pastry, and pre-made cranberry sauce are the secrets to making this delicious holiday appetizer quick! Once the puff pastry has thawed, it will only take a few minutes to assemble them before baking them to perfection.
- Great for holiday parties. This cranberry brie appetizer is guaranteed to be a hit wherever you serve them! They are festive and loaded with fall flavors. These handheld bites are easy to snack on so you may need to make a double batch!
- Easy to transport. They're easy to transport and can go anywhere you take them. Unlike Cranberry Baked Brie (which is just as delicious but hard to take to go).

Ingredient Notes
To make these delicious Cranberry Brie Bites, you will need the following ingredients (full measurements in recipe card below):
- cooking oil spray - pick one with a subtle flavor like coconut oil spray, avocado oil spray, or a blend of the two.
- frozen puff pastry - if you're in the practice of making your own puff pastry from scratch, you can use it here. Otherwise, frozen puff pastry (thawed) does the trick nicely and saves a ton of time.
- all-purpose flour - the flour is just for dusting the dough and preventing it from sticking to the surface or the rolling pin when it's being worked.
- brie cheese - brie has a naturally sweet, slightly nutty flavor and a soft, creamy texture. Some substitutes that would yield a similar result would be Camembert or goat cheese.
- whole berry cranberry sauce - it's important to make sure you get the cranberry sauce that contains whole berries (or make your own Homemade Cranberry Sauce) and not just the jellied cranberry sauce. The berries give the baked brie appetizer a more substantial bite and offer better texture.
- pecans - walnuts, slivered almonds, pine nuts or pistachios would also work. You can also choose to omit the nuts altogether, though they add a nice crunch and festive flavor.
- rosemary - the fresh rosemary adds a delicious aroma and a seasonal flair to the appetizer, but you can omit it or replace it with a similar herb if you don't have rosemary.
You will also need measuring cups and spoons, mini muffin pan, knife, and fork.

How to Make the Best Cranberry Brie Bites
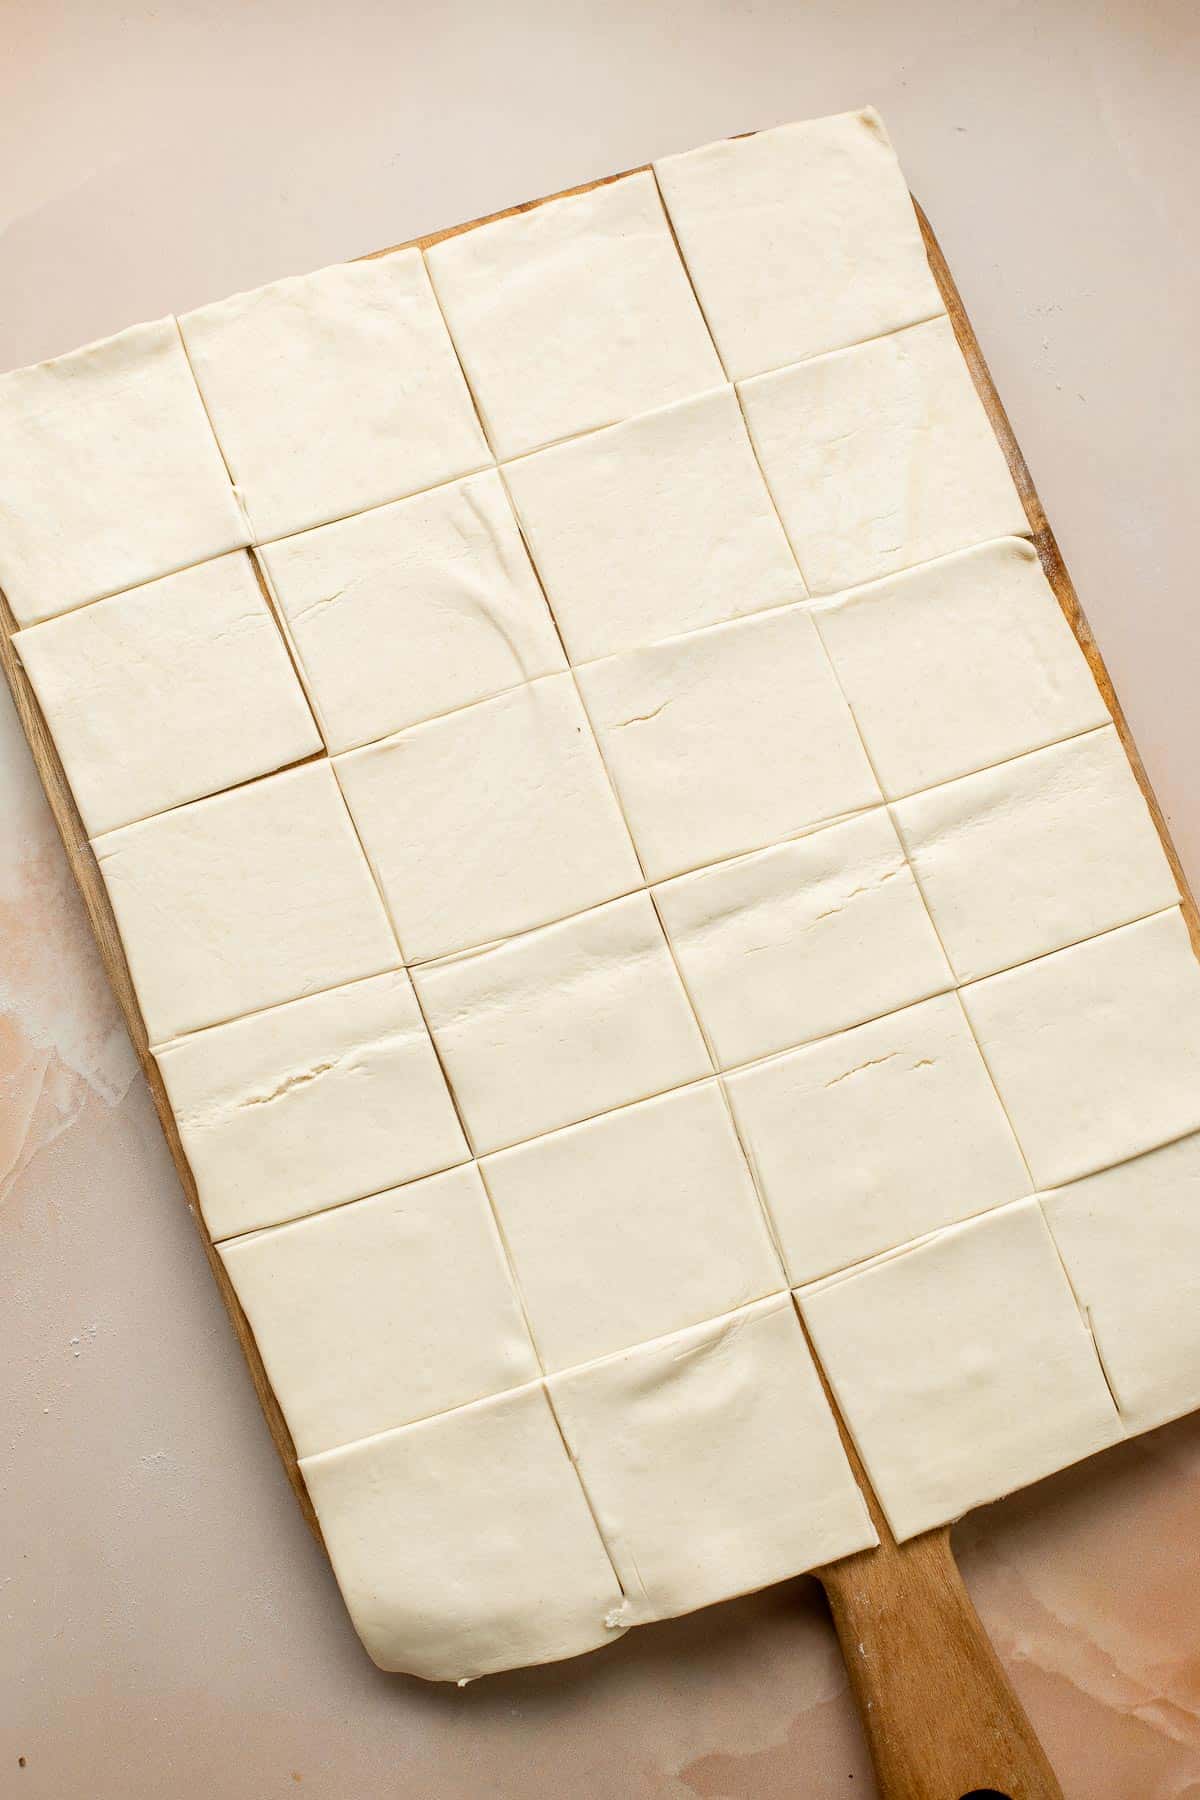
- Cut out puff pastry. On a lightly floured surface, unroll the thawed sheet of puff pastry into a 10x14-inch rectangle. Cut into 24 squares (4 columns and 6 rows).
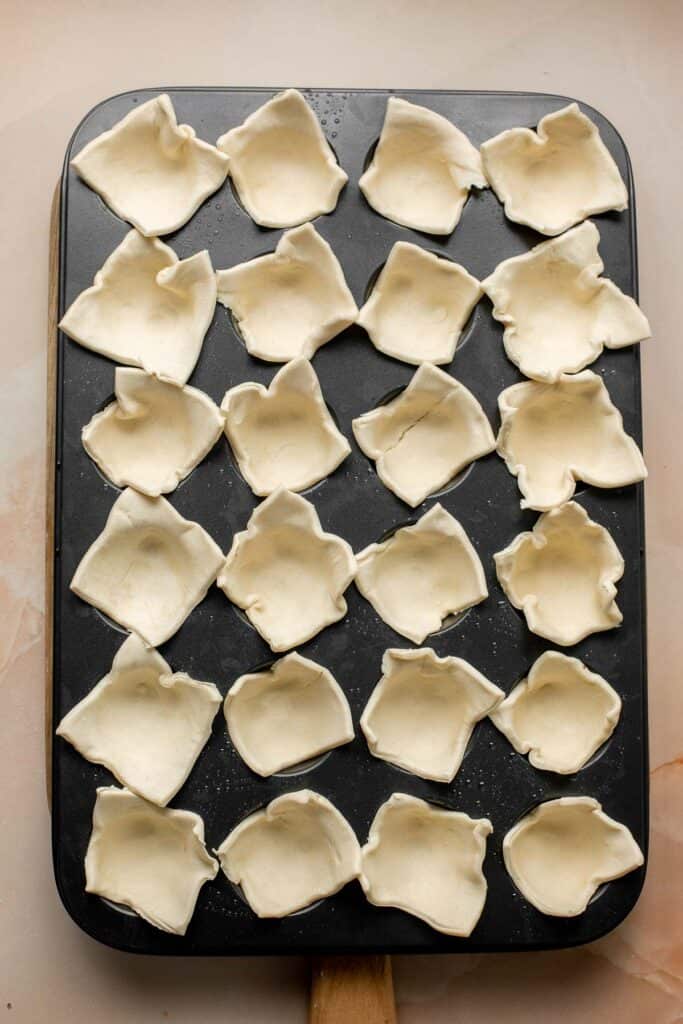
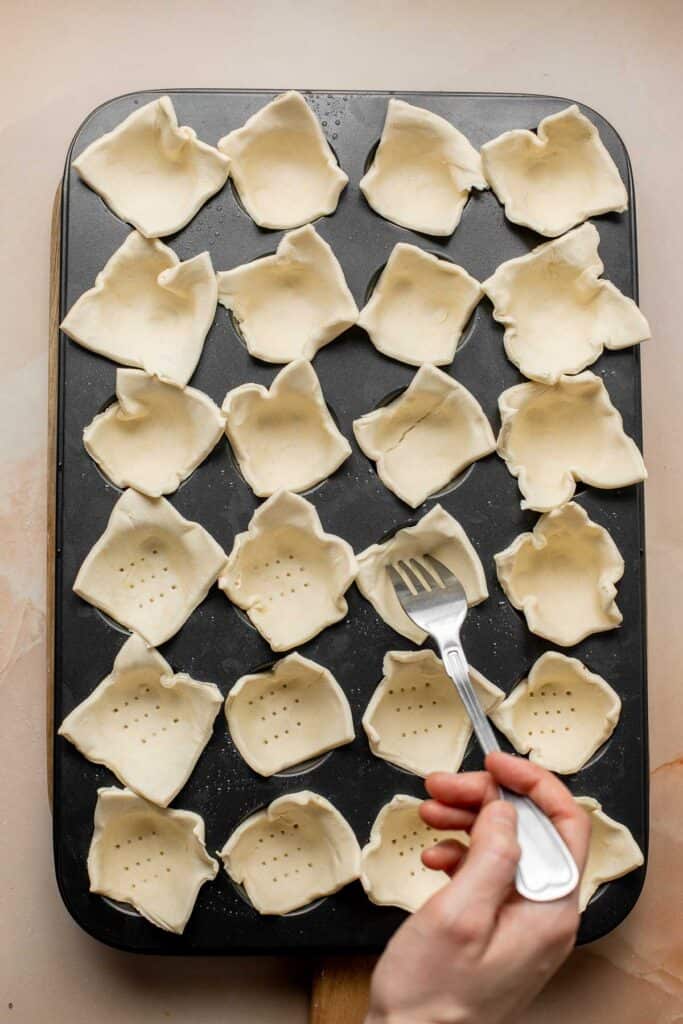
- Place into pan. Grease a 24-cup mini muffin pan with cooking spray oil. Gently take each square and place them into the muffin tin slots to create a little pastry cup. Use a fork to lightly prick the bottom of each pastry cup.
- Fill. Chop the brie into 24 small pieces (½-inch pieces), and place one piece into each of the pastry cups in the mini muffin tray. Top each piece of Brie with 1 teaspoon cranberry sauce. Evenly divide the pecans on top and top with a piece of rosemary.
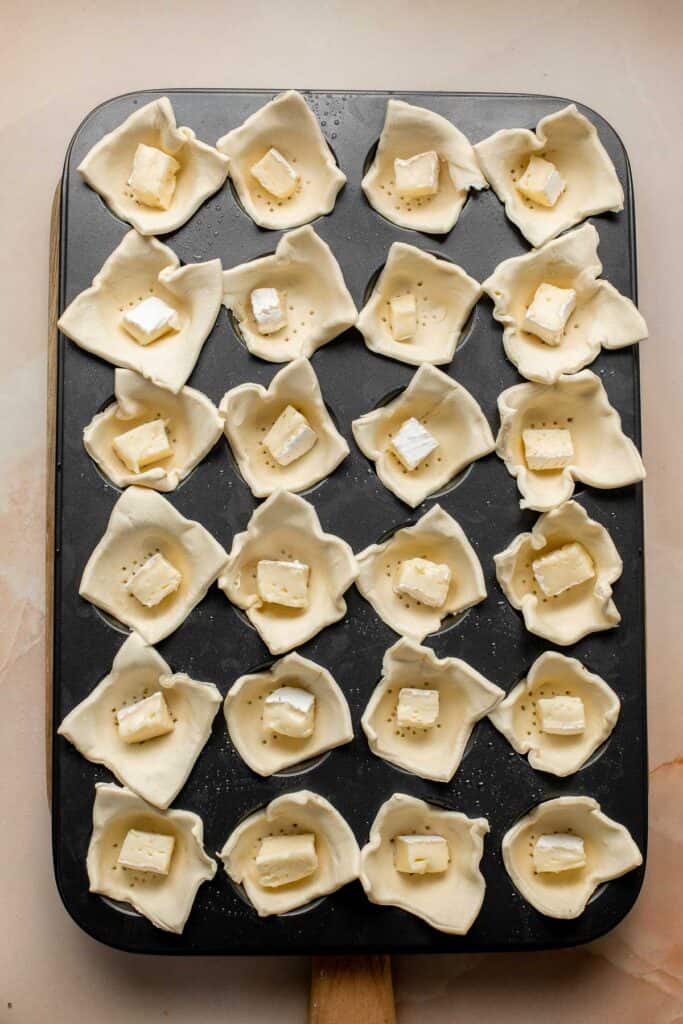

- Bake. Bake in a 375F preheated oven for 15 minutes, until the puff pastry is golden brown on the edges.
- Serve. Let the bites cool in the pan for 5 minutes, then serve warm or at room temperature. Optionally, sprinkle a little flaky salt on top and serve.

Storage and Freezing Instructions
How to Store
Transfer any leftover baked brie bites into an airtight container or place in a large sealed plastic bag and store in the refrigerator for up to a week.
How to Reheat
Reheat in the oven at 350F for about 5 minutes or in the air fryer for a few minutes to crisp up the puff pastry.
How to Freeze
To freeze, let the brie bites cool completely before storing them in an airtight container. Place in the freezer for up to 2-3 months. Thaw at room temperature for several hours and reheat in the oven or air fryer.
Make Ahead Instructions
Assemble these cranberry brie bites up to 2 days ahead of time. Store the mini muffin pan with the assembled bites in the fridge, covered with plastic cling wrap. Then, pop into the oven when ready to bake. You may need to add a couple of minutes to the cook time.
Recipe Tips and Tricks
- Make ahead for easy party prep. You can prepare a whole tray of these and stash it in the refrigerator or freezer hours (or days) ahead of time to be baked while you're getting ready to host, freeing up time in your schedule and eliminating a potential kitchen mess right before guests arrive.
- Experiment with different flavors. You can easily try different jellies, sauces, cheeses and garnishes to create different flavors and tailor these bites to any occasion.
- Serve before, during, or after the main course. Even though these are technically meant to be an appetizer, you can serve them as a side dish in a holiday spread or a late-night snack after the main meal has conclude - there's no bad time to serve these!
- Best way to use leftover cranberry sauce. Got leftover cranberry sauce from your Thanksgiving or Christmas dinner? Use it to make these baked brie appys. For more inspo, check out our 15 Leftover Cranberry Sauce Recipes.

More Appetizer Recipes
- 30 Best Christmas Appetizers
- Cranberry Baked Brie
- Charcuterie Board
- Marinated Mozzarella Balls
- Fried Mac and Cheese Balls
- Vegetarian Stuffed Mushrooms
Tried this recipe?
I'd love to hear what you think! Leave a comment and rating below to share your feedback. Your reviews help others discover this recipe and help me keep creating more free recipes for you. Snap a photo and tag me on social media @aheadofthyme too.

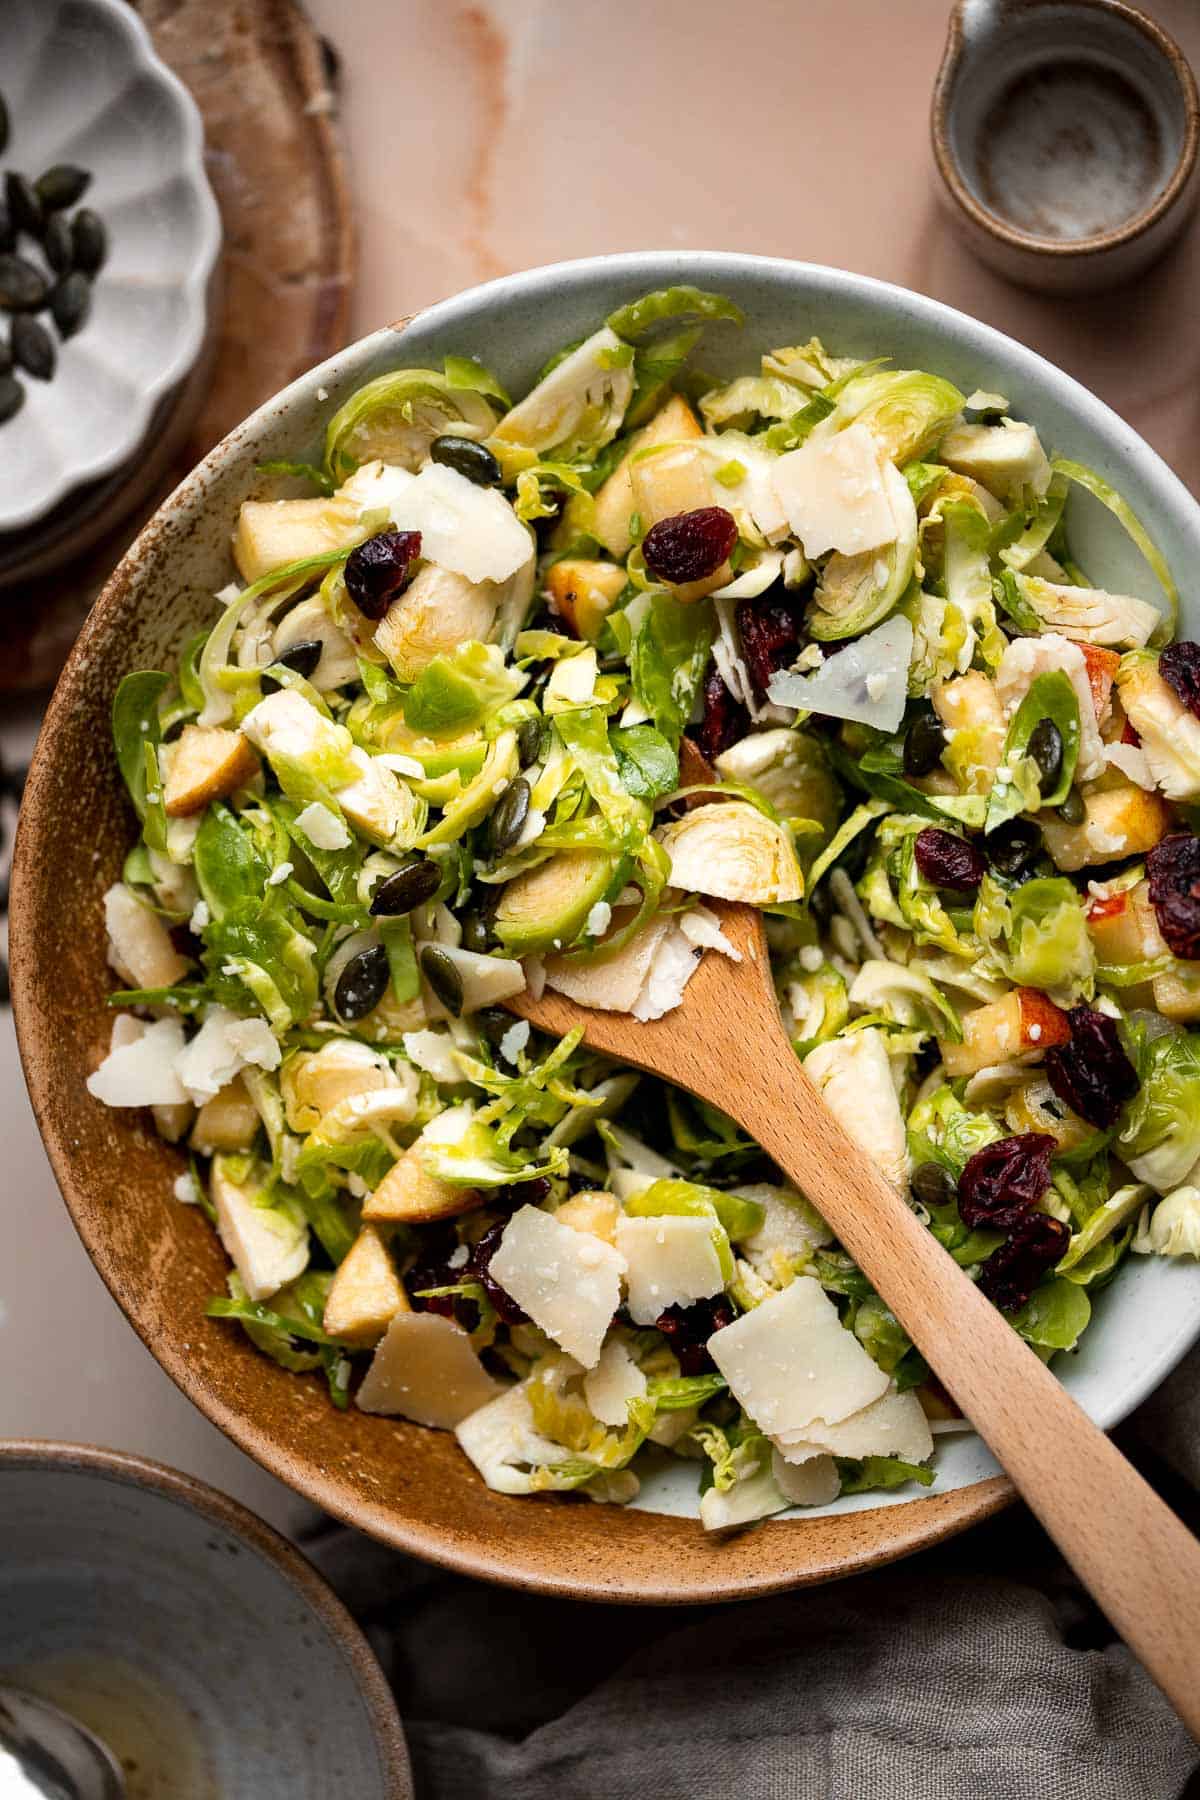
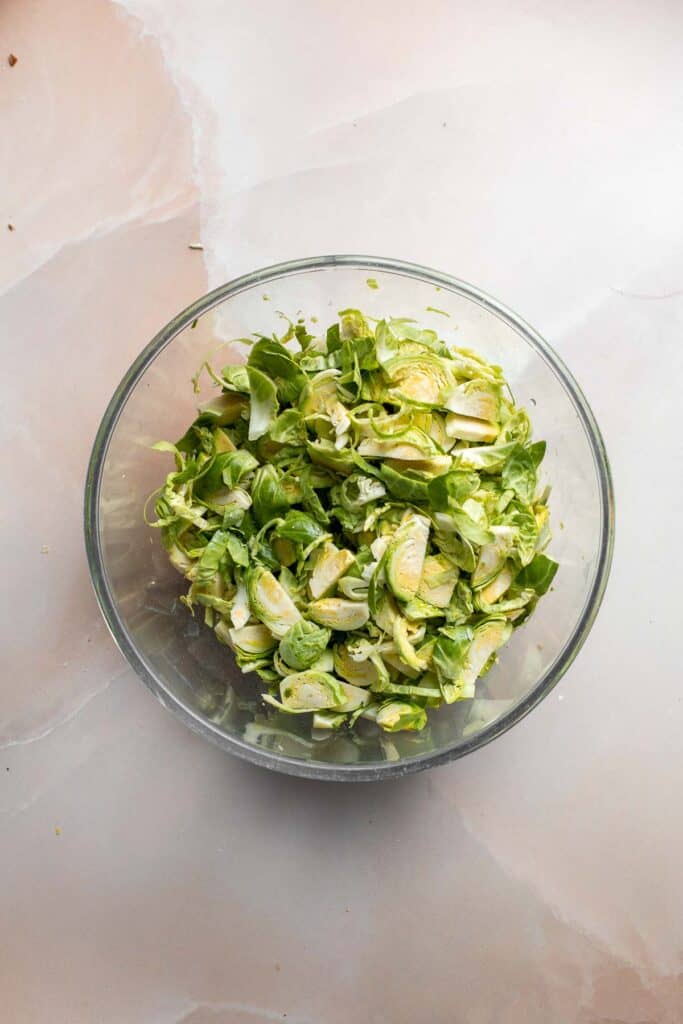
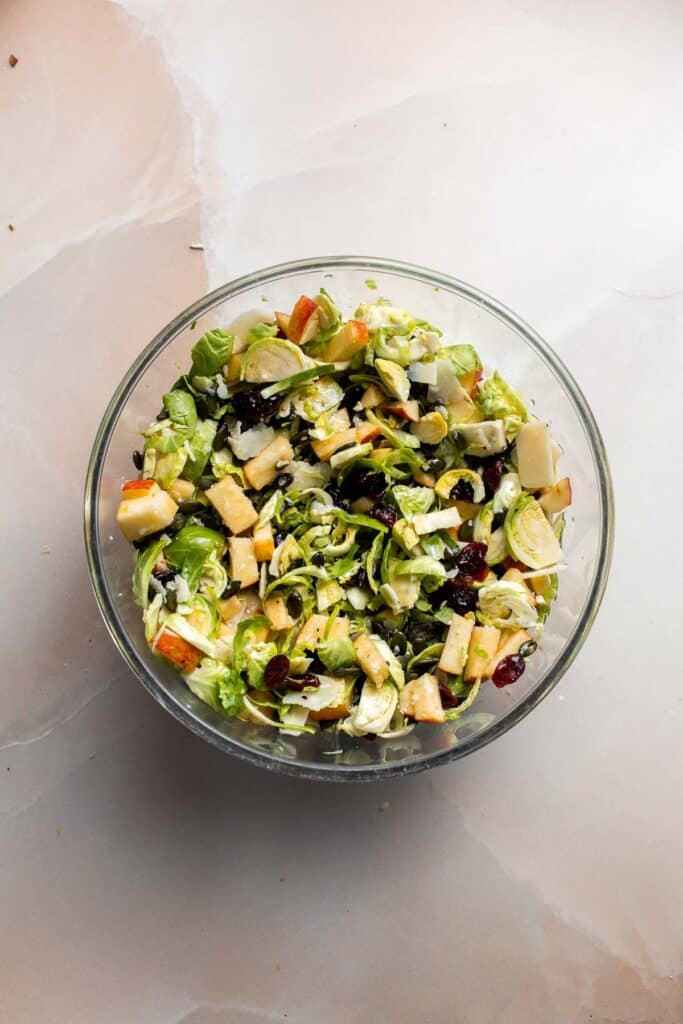
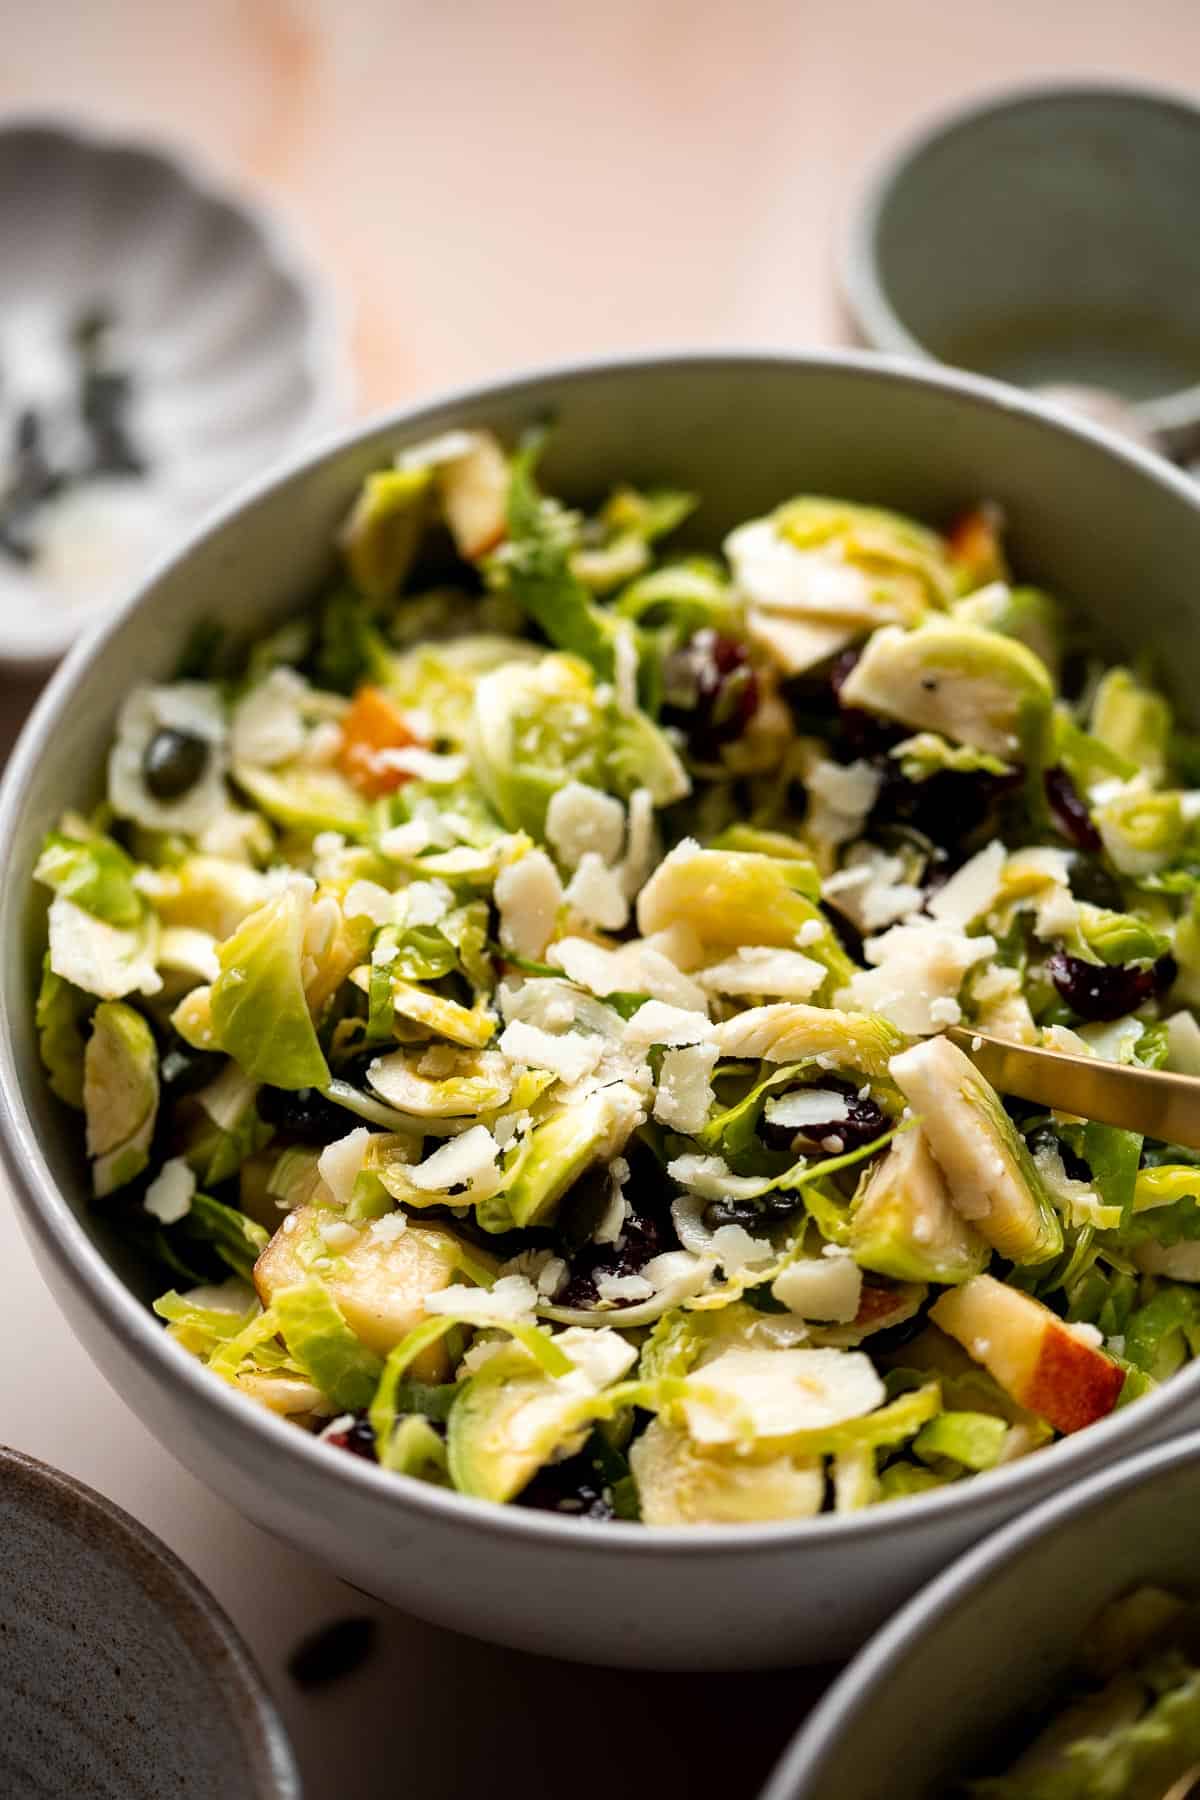
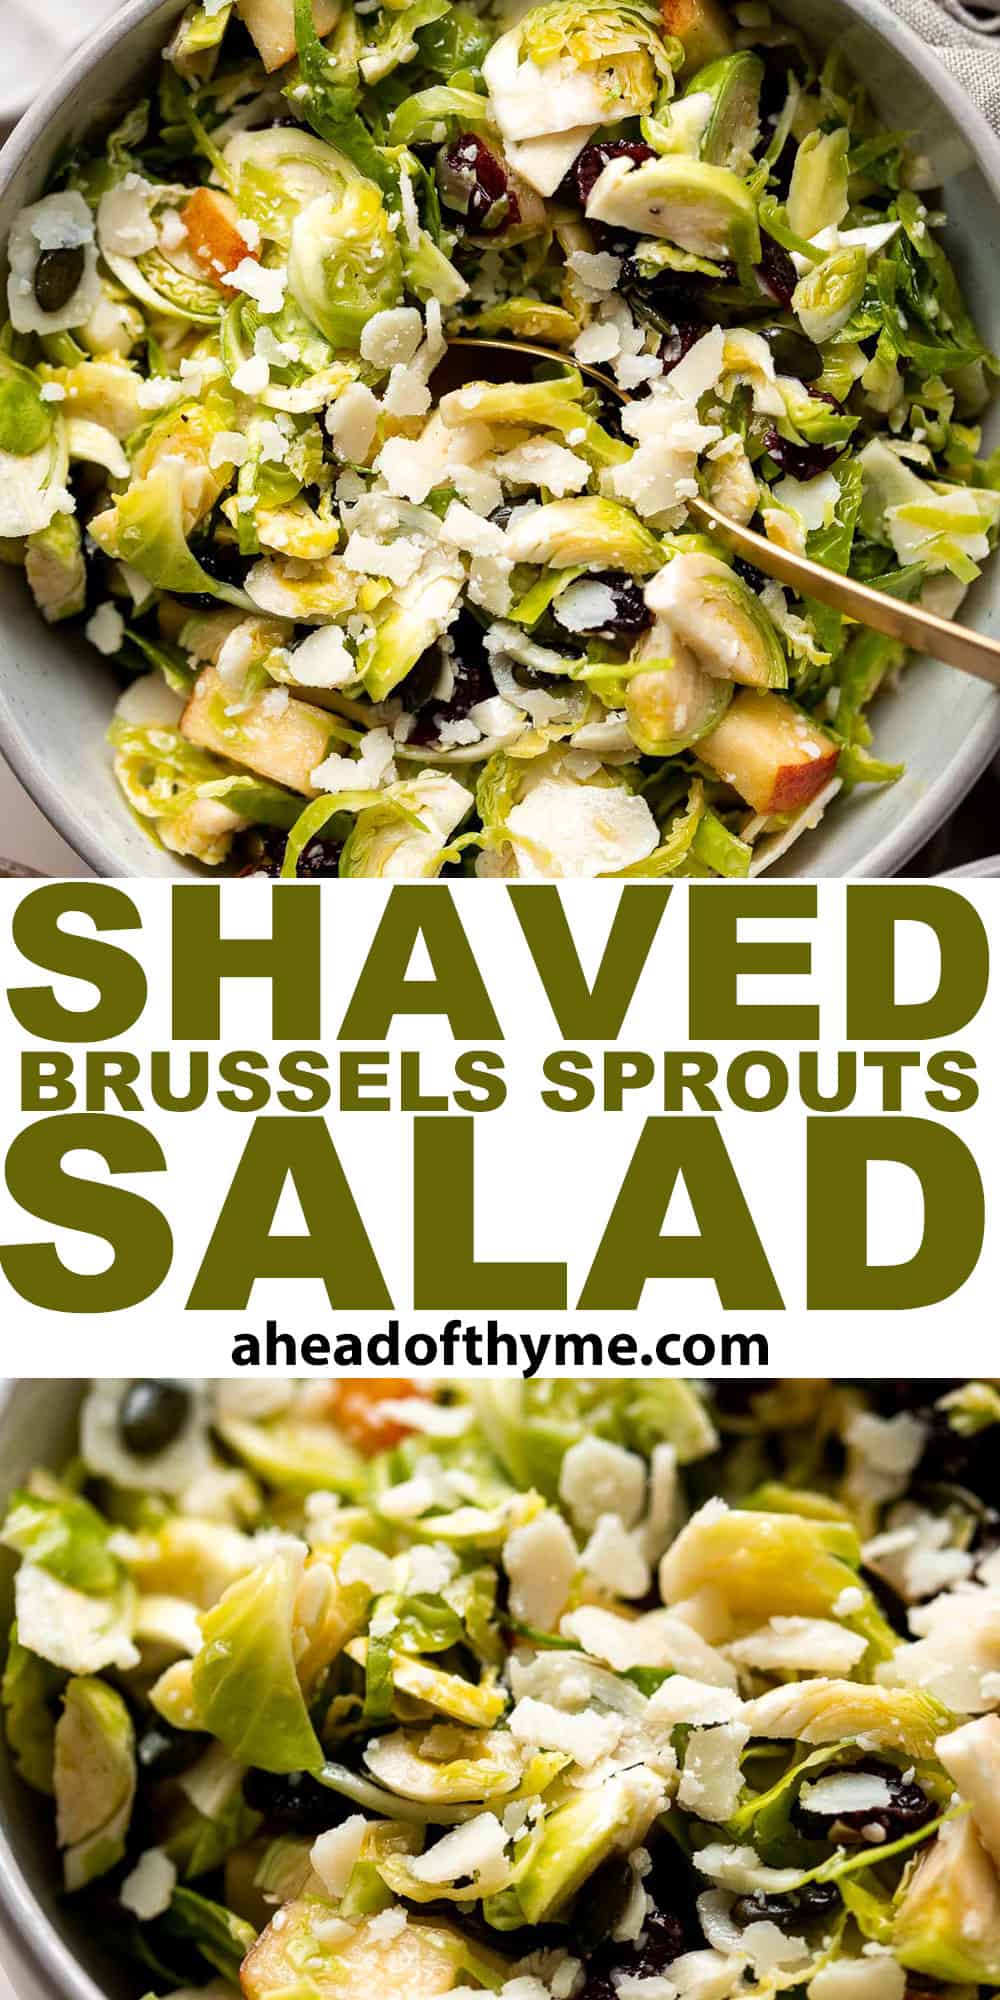
Shaved Brussels Sprout Salad
Shaved Brussels Sprout Salad is a unique and delicious fall salad packed with fresh Brussels sprouts, crisp apples, sweet cranberries, and crunchy pumpkin seeds, all tossed in a homemade vinaigrette. It's quick, easy, and simple.
Brussels sprouts are a highly underrated ingredient, and may even be harder to sell when prepared raw, but this shredded brussels sprouts salad will make you fall in love with them in their truest, simplest form. Serve it for a light lunch or as a side for dinner.
Why You'll Love this Shredded Brussels Sprout Salad
- Complex flavors. Salty shaved parmesan cheese, crisp apples, sweet bursts of dried cranberries, and crunchy pepitas help transform humble brussels sprouts into a complex palette of flavors and textures in this shredded brussels sprouts salad recipe.
- Easy to make. Like most salads, this one is a quick toss together salad that takes jyst minutes to prepare. You will spend most of the prep time shredding the Brussels sprouts before tossing them with the rest of the ingredients.
- It's versatile. Serve this shaved brussels sprout salad up as a side at a family Thanksgiving dinner or eat it as a quick vegetarian lunch - it's appropriate for almost any occasion you can think of in the fall.
- No cooking necessary. Perhaps the best part about this recipe is that it involves zero cooking. No microwave, oven, or stovetop necessary. Just chop, mix, and enjoy!

Ingredient Notes
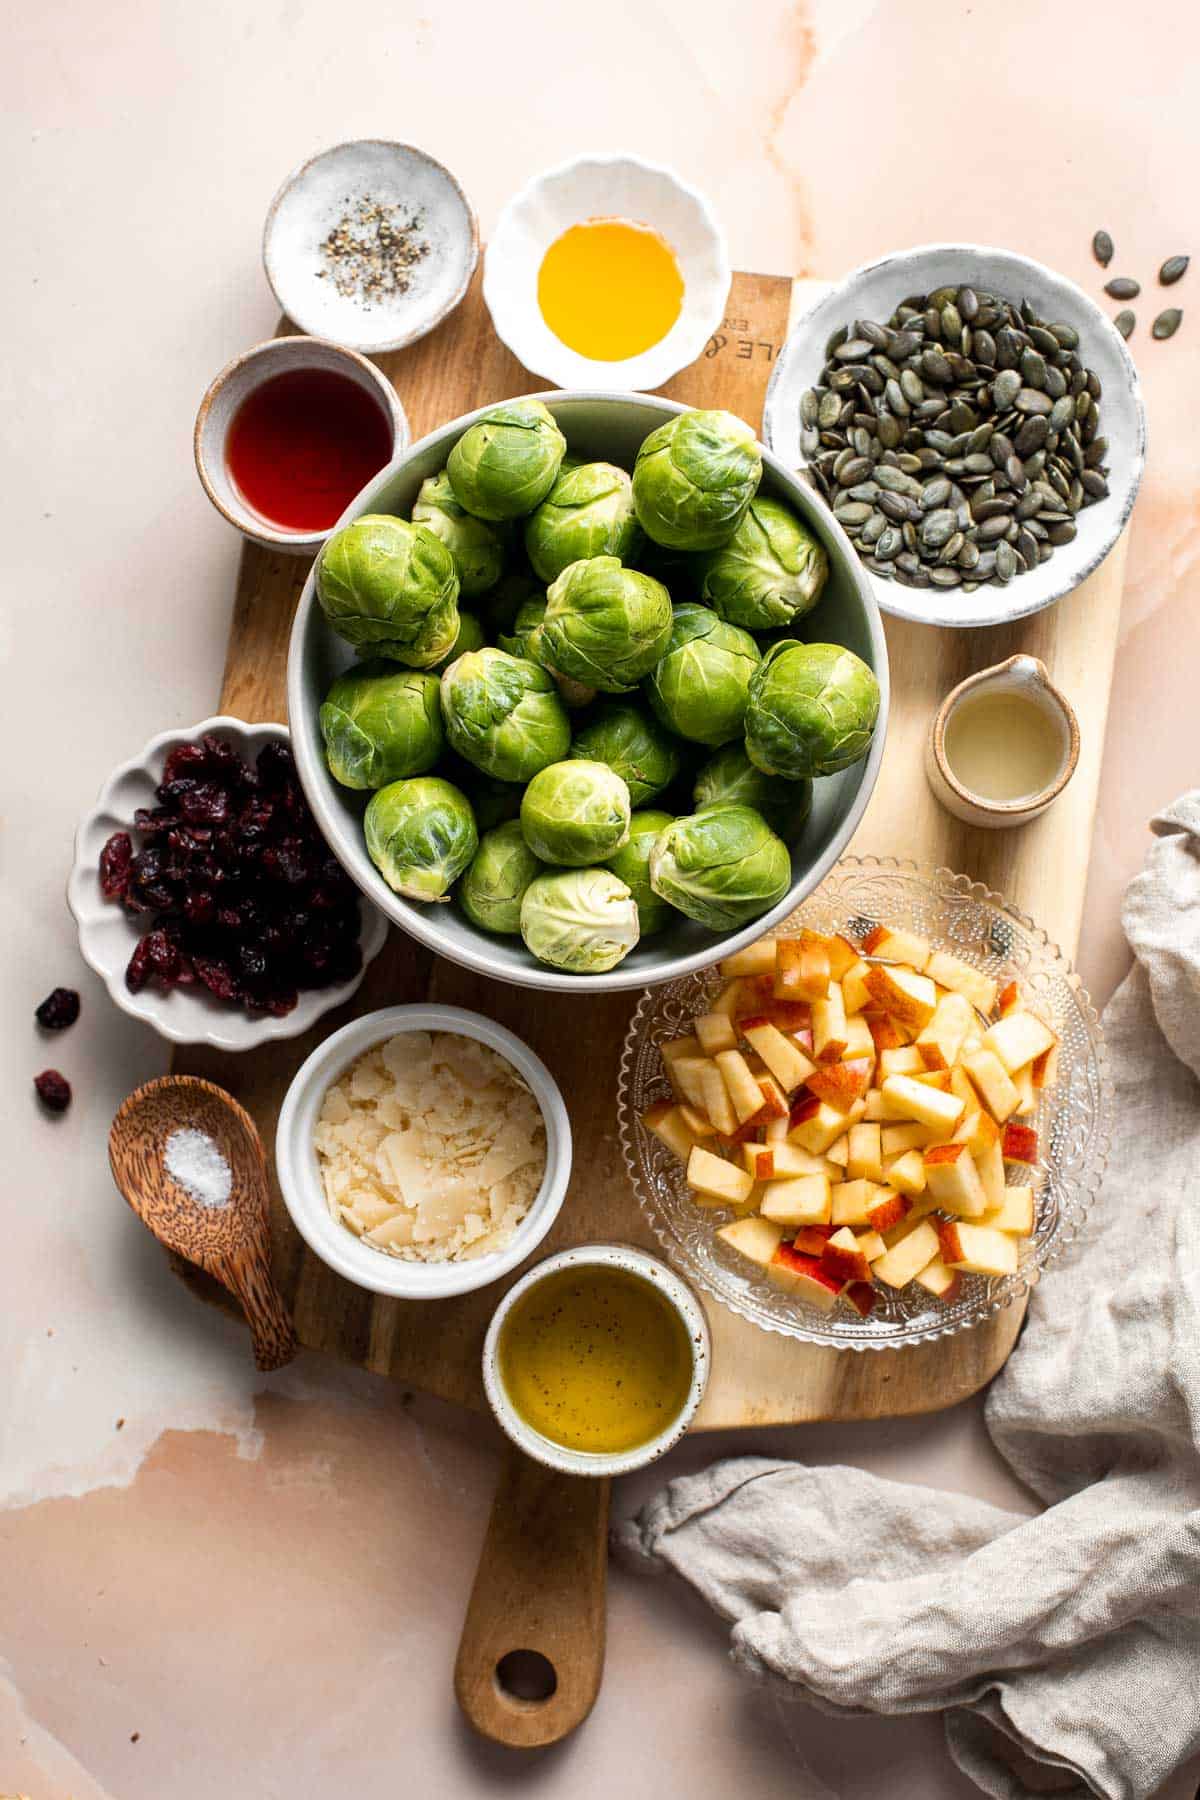
To make this delicious Shaved Brussels Sprout Salad, you will need the following ingredients (full measurements in recipe card below):
- brussels sprouts
- honeycrisp apples - if you don't like or can't find Honeycrisp apples, try Fuji apples, Pink Lady, or Galas in their place.
- parmesan cheese - asiago or pecorino would also work as a good substitute.
- dried cranberries - raisins, dried cherries, or other similar fruits would yield a similar result.
- pepitas - pepitas are just shelled pumpkin seeds. You can also try pine nuts, walnuts, or pecans instead.
- olive oil - olive oil can be swapped with avocado oil or coconut oil.
- lemon juice - fresh squeezed lemon juice will yield the brightest flavor, but you can also use lemon juice concentrate if necessary.
- red wine vinegar - if you don't have any red wine vinegar on hand, try using balsamic vinegar, apple cider vinegar, or rice wine vinegar.
- salt and pepper
- honey or maple syrup - choosing one or the other will make only the slightest difference in taste, so choose whichever you prefer. Honey is typically thicker and may take a little more effort to incorporate. And adding honey or maple syrup is optional if you want to add some sweetness to your salad.
You will also need measuring cups and spoons and mixing bowls.
How to Make the Best Shaved Brussels Sprout Salad
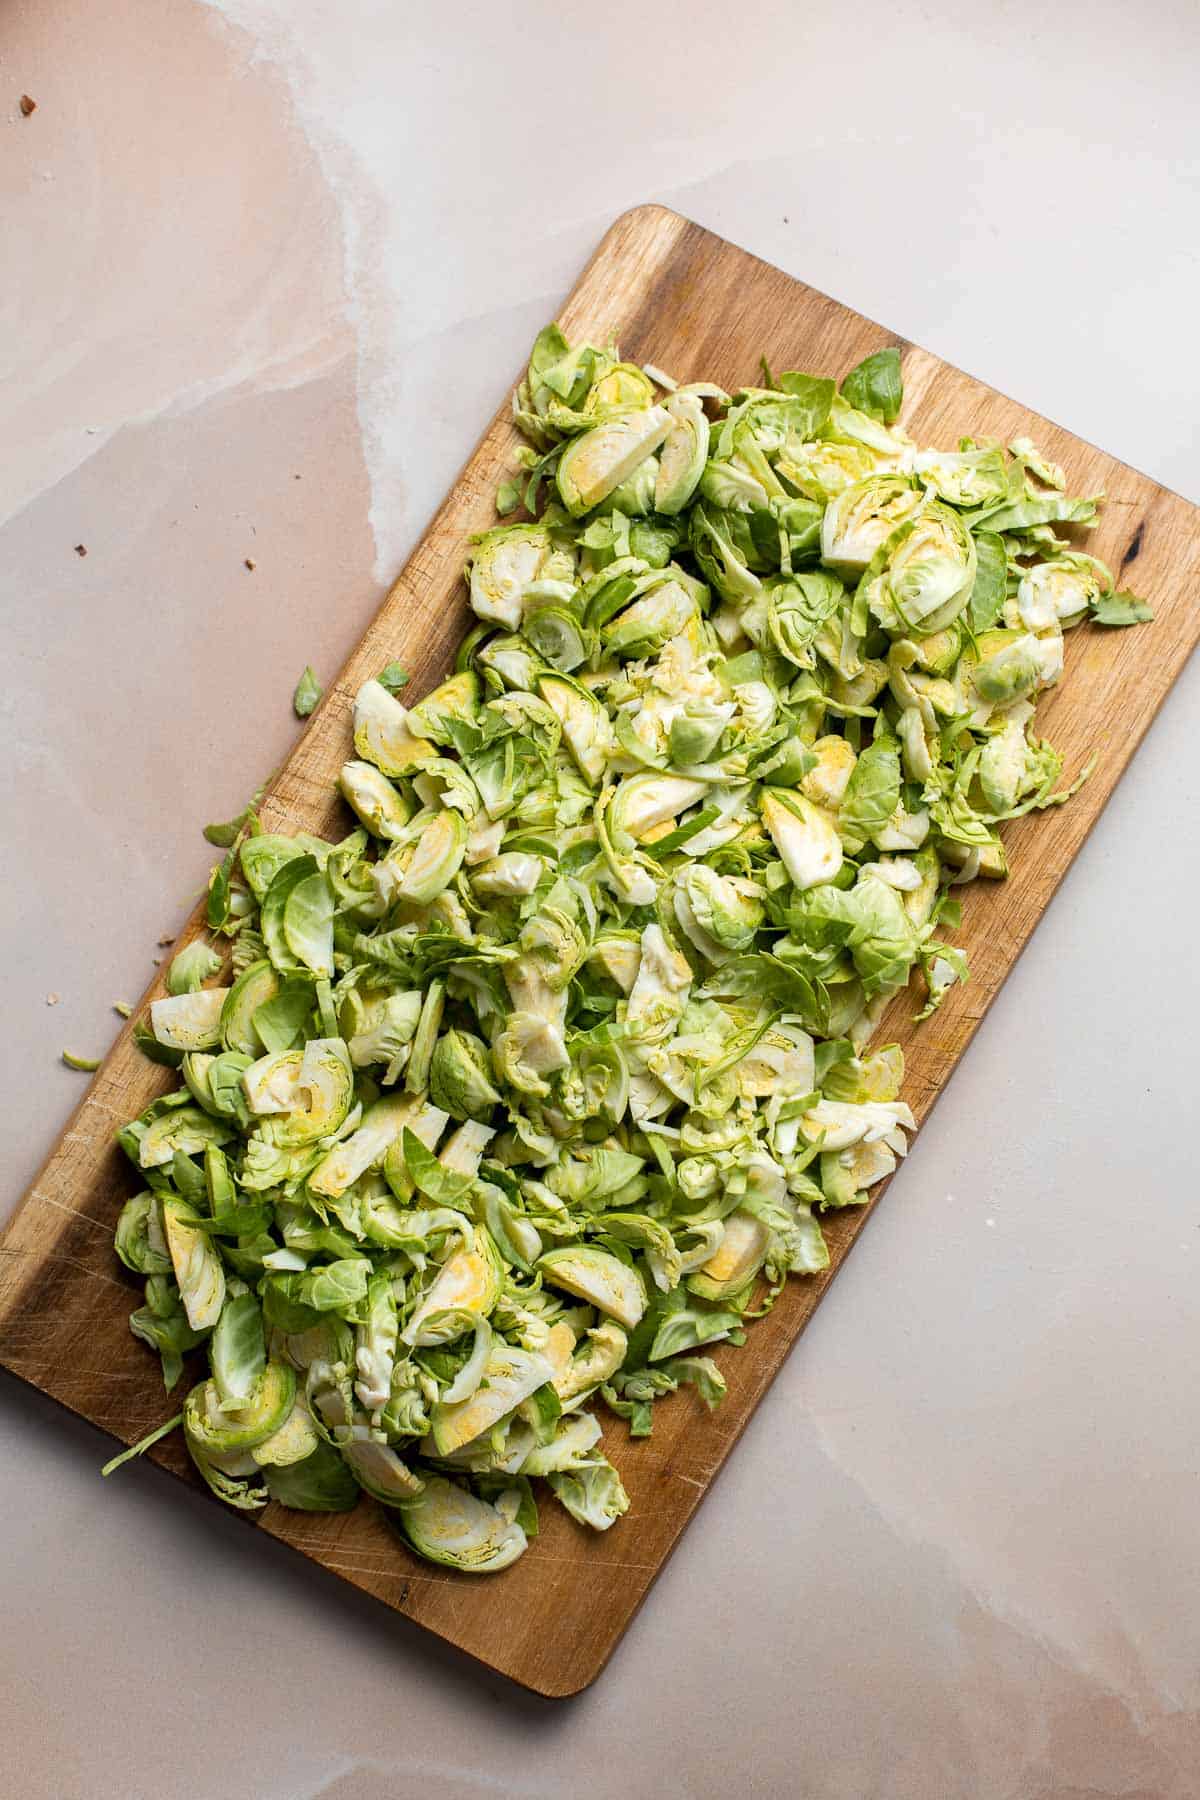
- Shred brussels sprouts. Cut brussels sprouts in half through the core. Place them down on a flat surface and thinly slice until all the sprouts are shredded.
- Combine ingredients. Transfer the shredded brussels sprouts to a large mixing bowl or platter. Add apples and Parmesan cheese. Scatter the dried cranberries and pepitas on top.
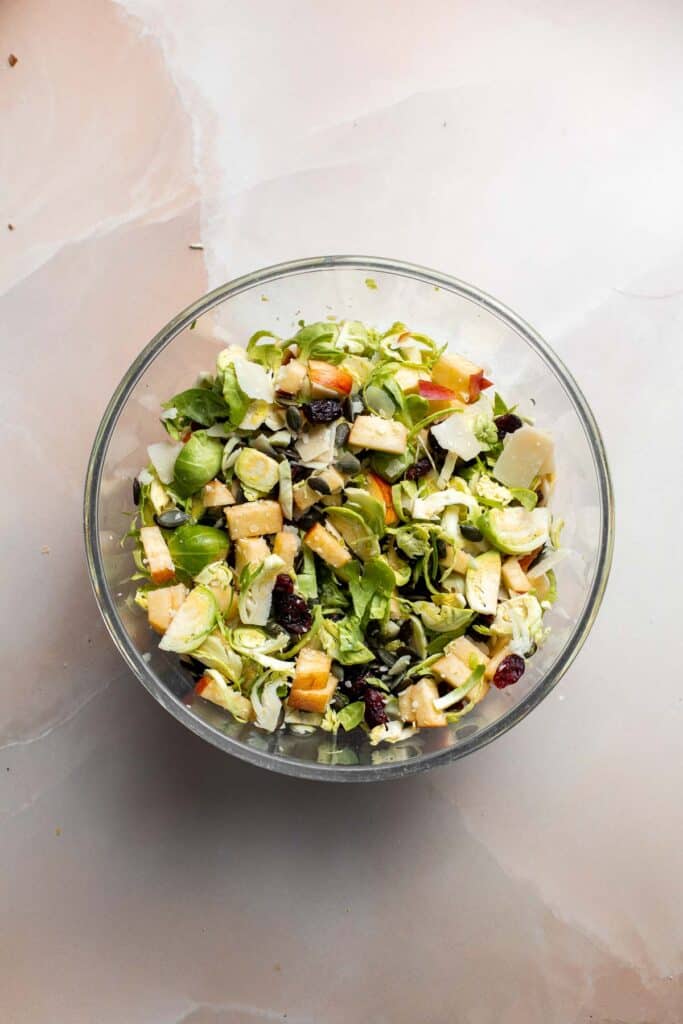
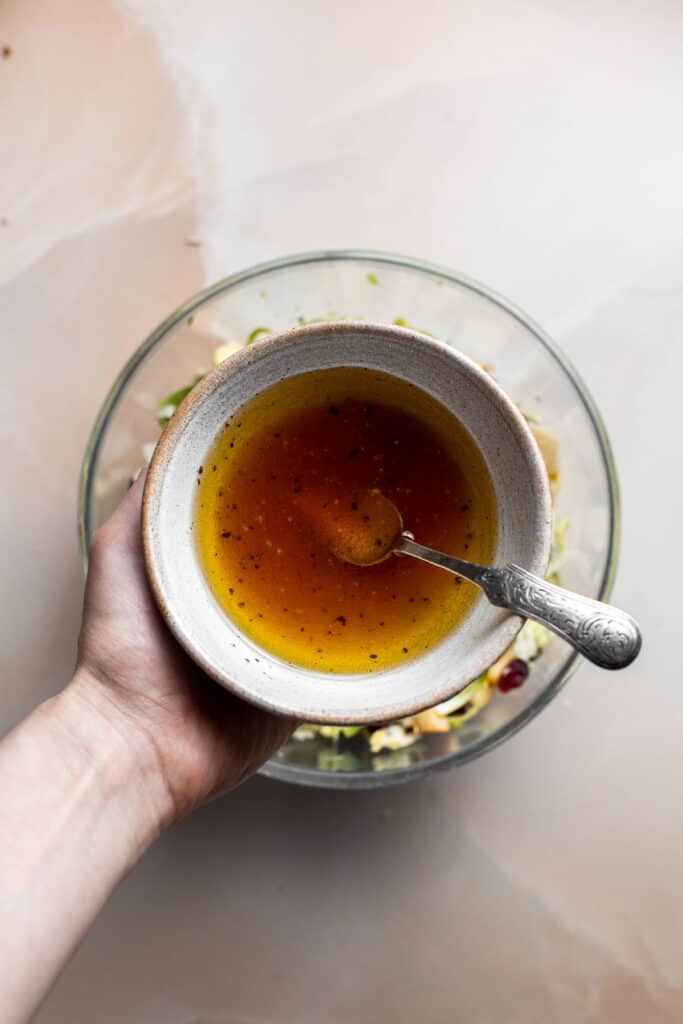
- Make dressing. In a small mixing bowl, whisk together the dressing ingredients until combined, including olive oil, lemon juice, vinegar, salt, and pepper.
- Serve. Pour dressing over salad and serve as is, or toss to combine.
How to Serve
Shaved Brussels Sprout Salad is delicious served on its own for a light lunch, or paired with some of my favorite fall dinners including:
- Acorn Squash Soup
- Oven Roasted Turkey Breast
- Stuffed Butternut Squash with Wild Rice
- Creamy Pesto Chicken
- Creamy Garlic Cauliflower Soup
- White Chicken Lasagna with Spinach
- Sunday Pot Roast
For more dinner ideas, see our 60+ Fall Dinner Ideas.
Storage Instructions
Place leftover shredded Brussels sprout salad in an airtight container and refrigerate for up to 4 days.
Freezing salad of any kind usually results in limp or mushy vegetables once it's thawed, but if you want to use the leftovers as ingredients in other dishes (keep reading for some tips) you can freeze the leftover brussels sprouts in a sealed freezer bag for 3-6 months!
Recipe Tips and Tricks
- Repurpose leftover brussels sprouts salad. If you have a ton of leftover salad or you want to freeze it, you can use the leftovers in other way - especially because brussels sprouts are very versatile. Separate out the brussels sprouts and add the leftovers (frozen or fresh) to a stir fry, bake in a casserole, or sauté and serve alongside roasted chicken.
- Upgrade your salad with protein. If you want to serve as a one-and-done entrée, add a significant source of protein to make the meal go further. Shredded chicken, sautéed tofu, diced steak, or hard-boiled eggs are great choices to add to this already filling salad.
More Fall Salad Recipes
- 15 Best Fall Salad Recipes
- Fall Harvest Salad
- Thanksgiving Salad
- Butternut Squash Quinoa Salad
- Apple Arugula Salad
- Roasted Brussels Sprouts Salad
Tried this recipe?
I'd love to hear what you think! Leave a comment and rating below to share your feedback. Your reviews help others discover this recipe and help me keep creating more free recipes for you. Snap a photo and tag me on social media @aheadofthyme too.
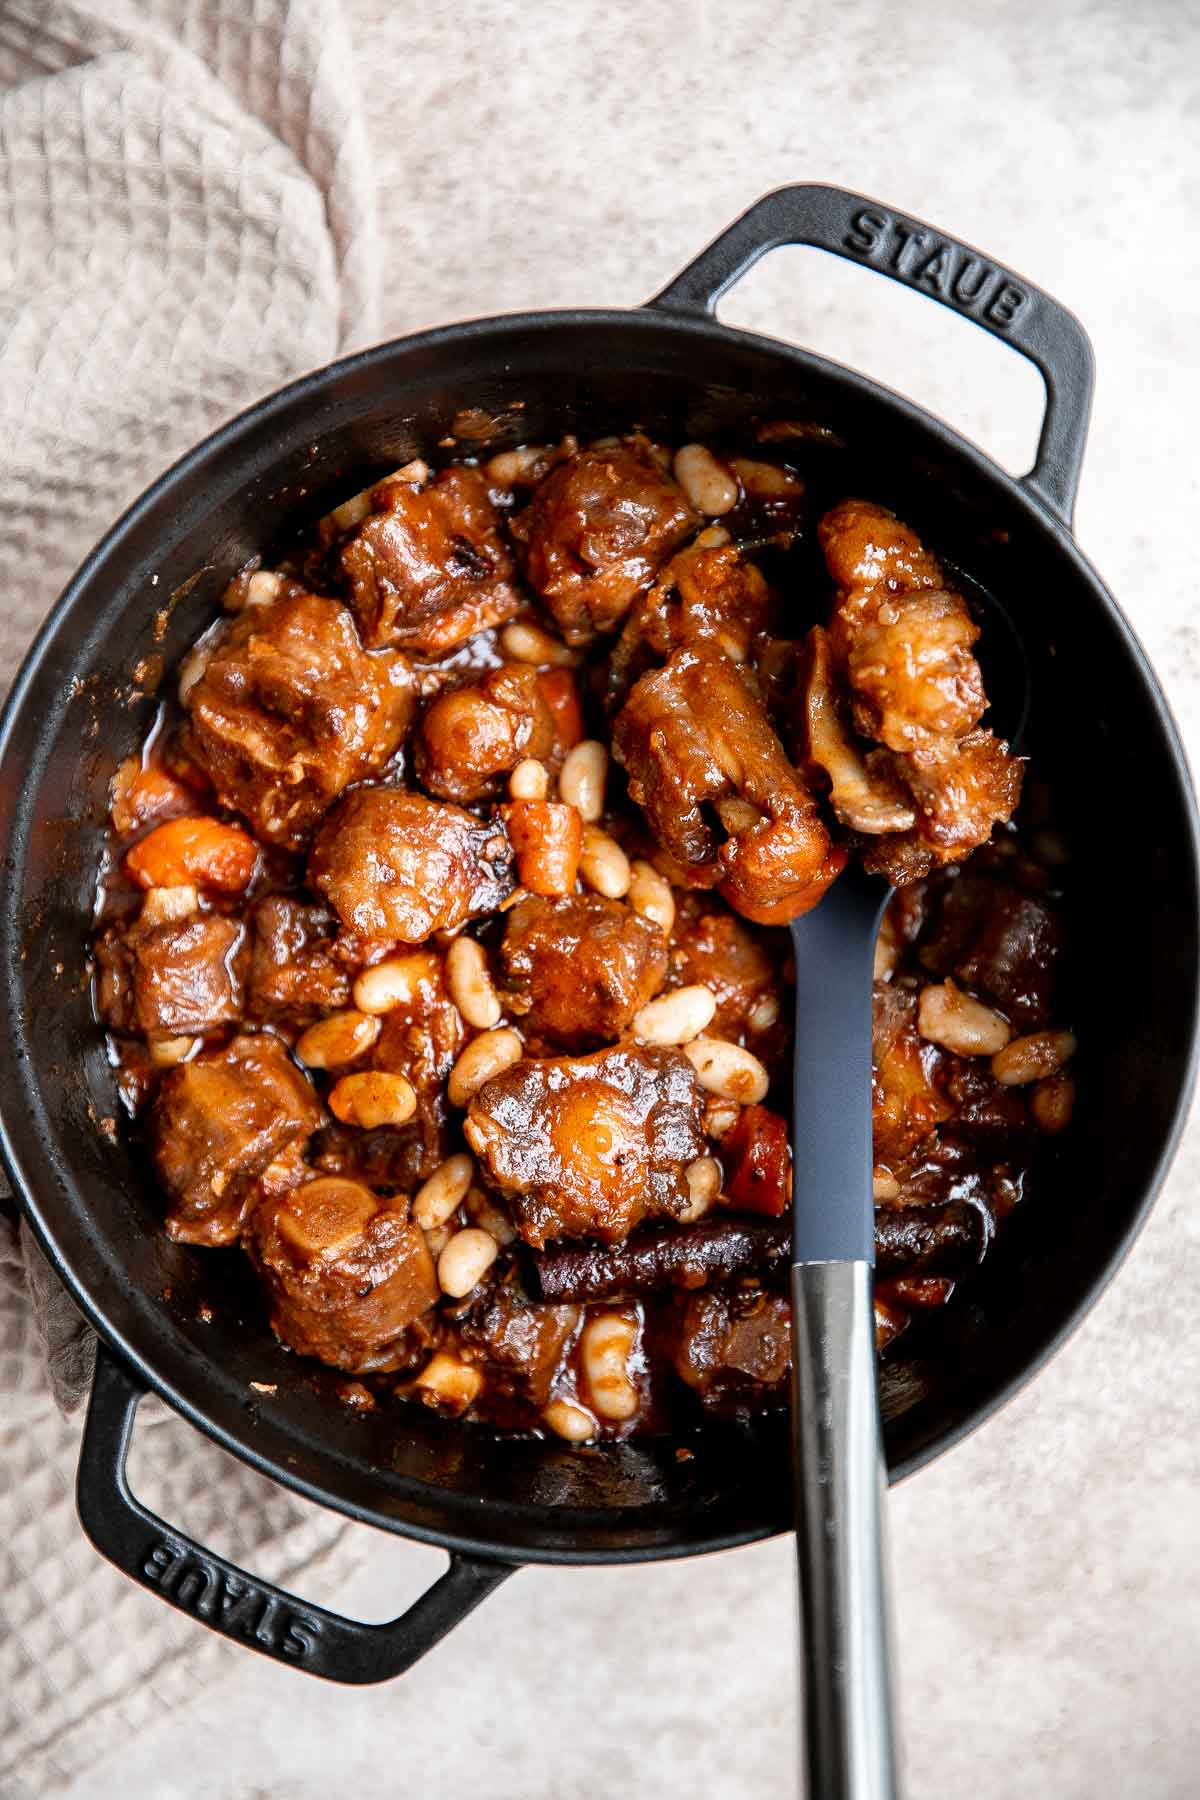
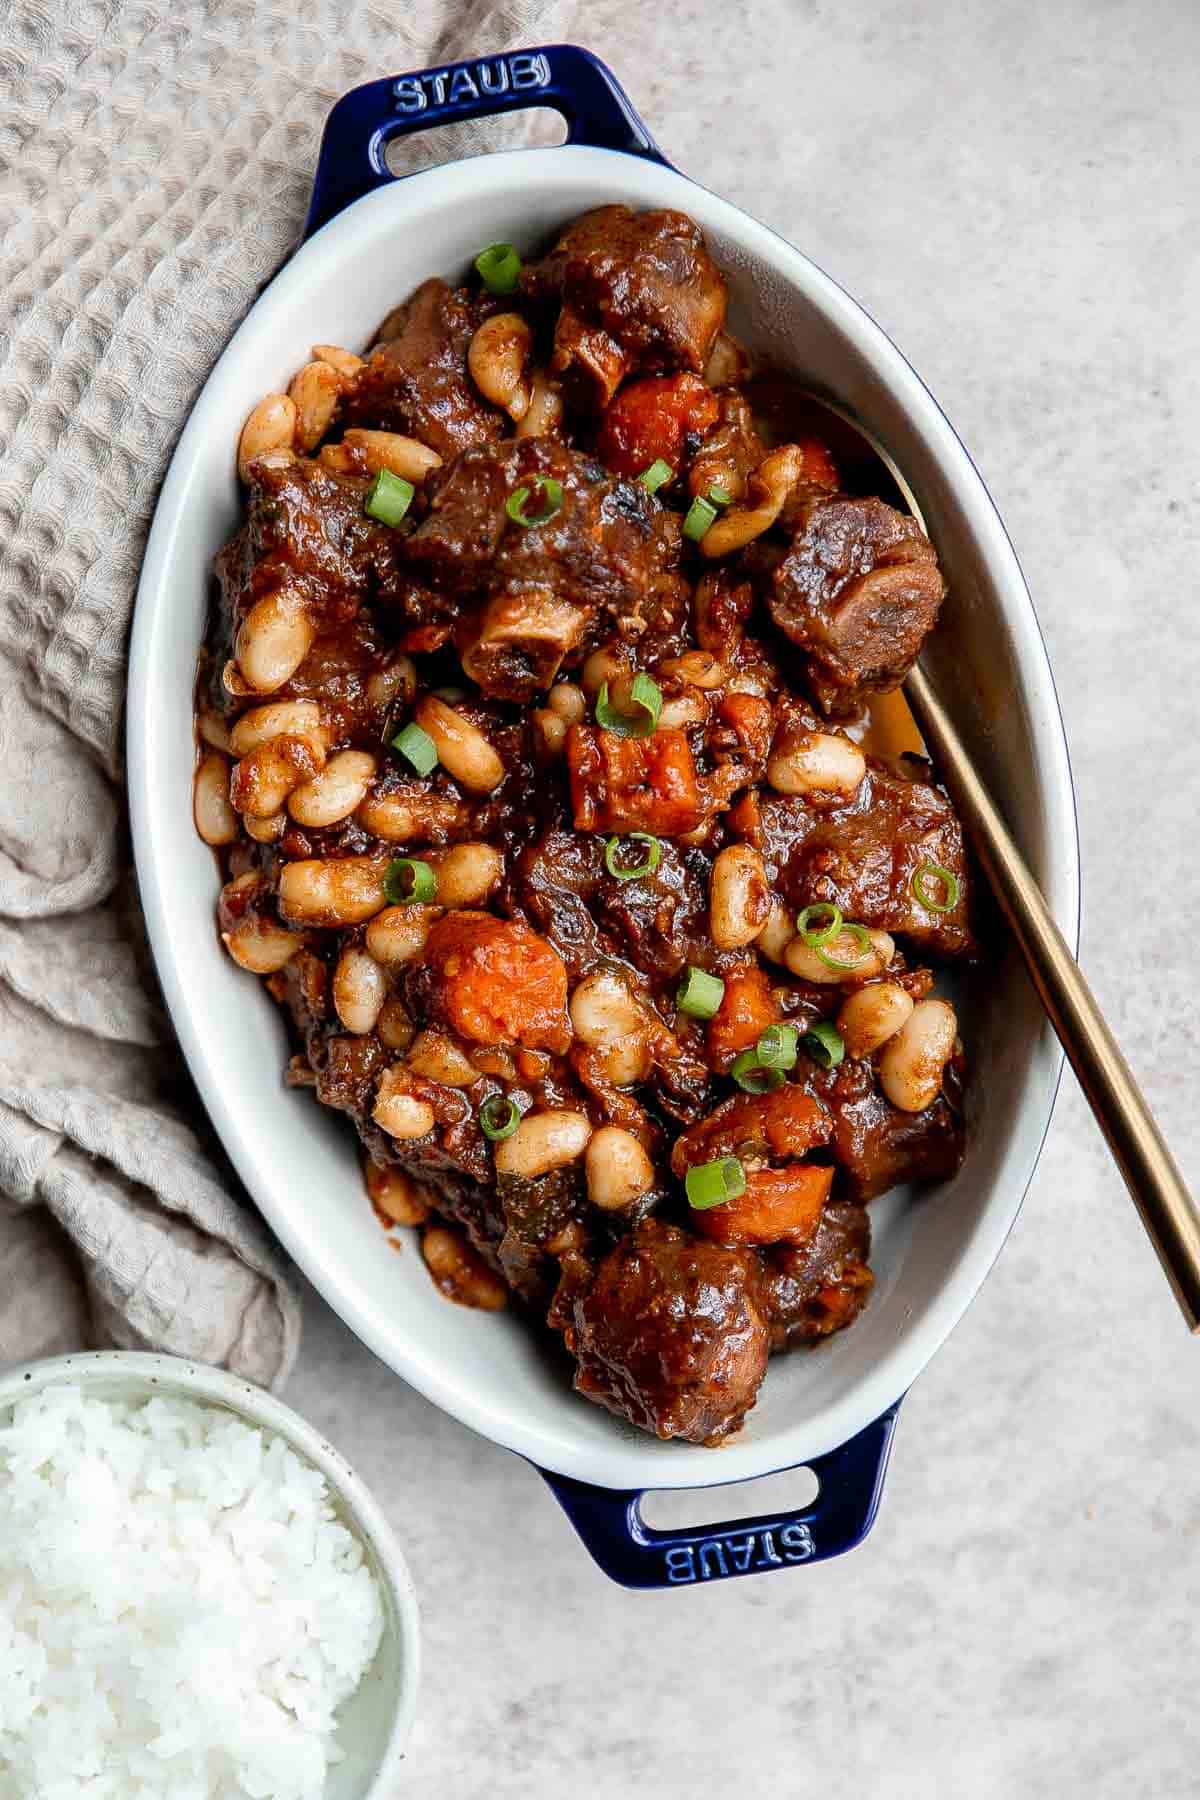
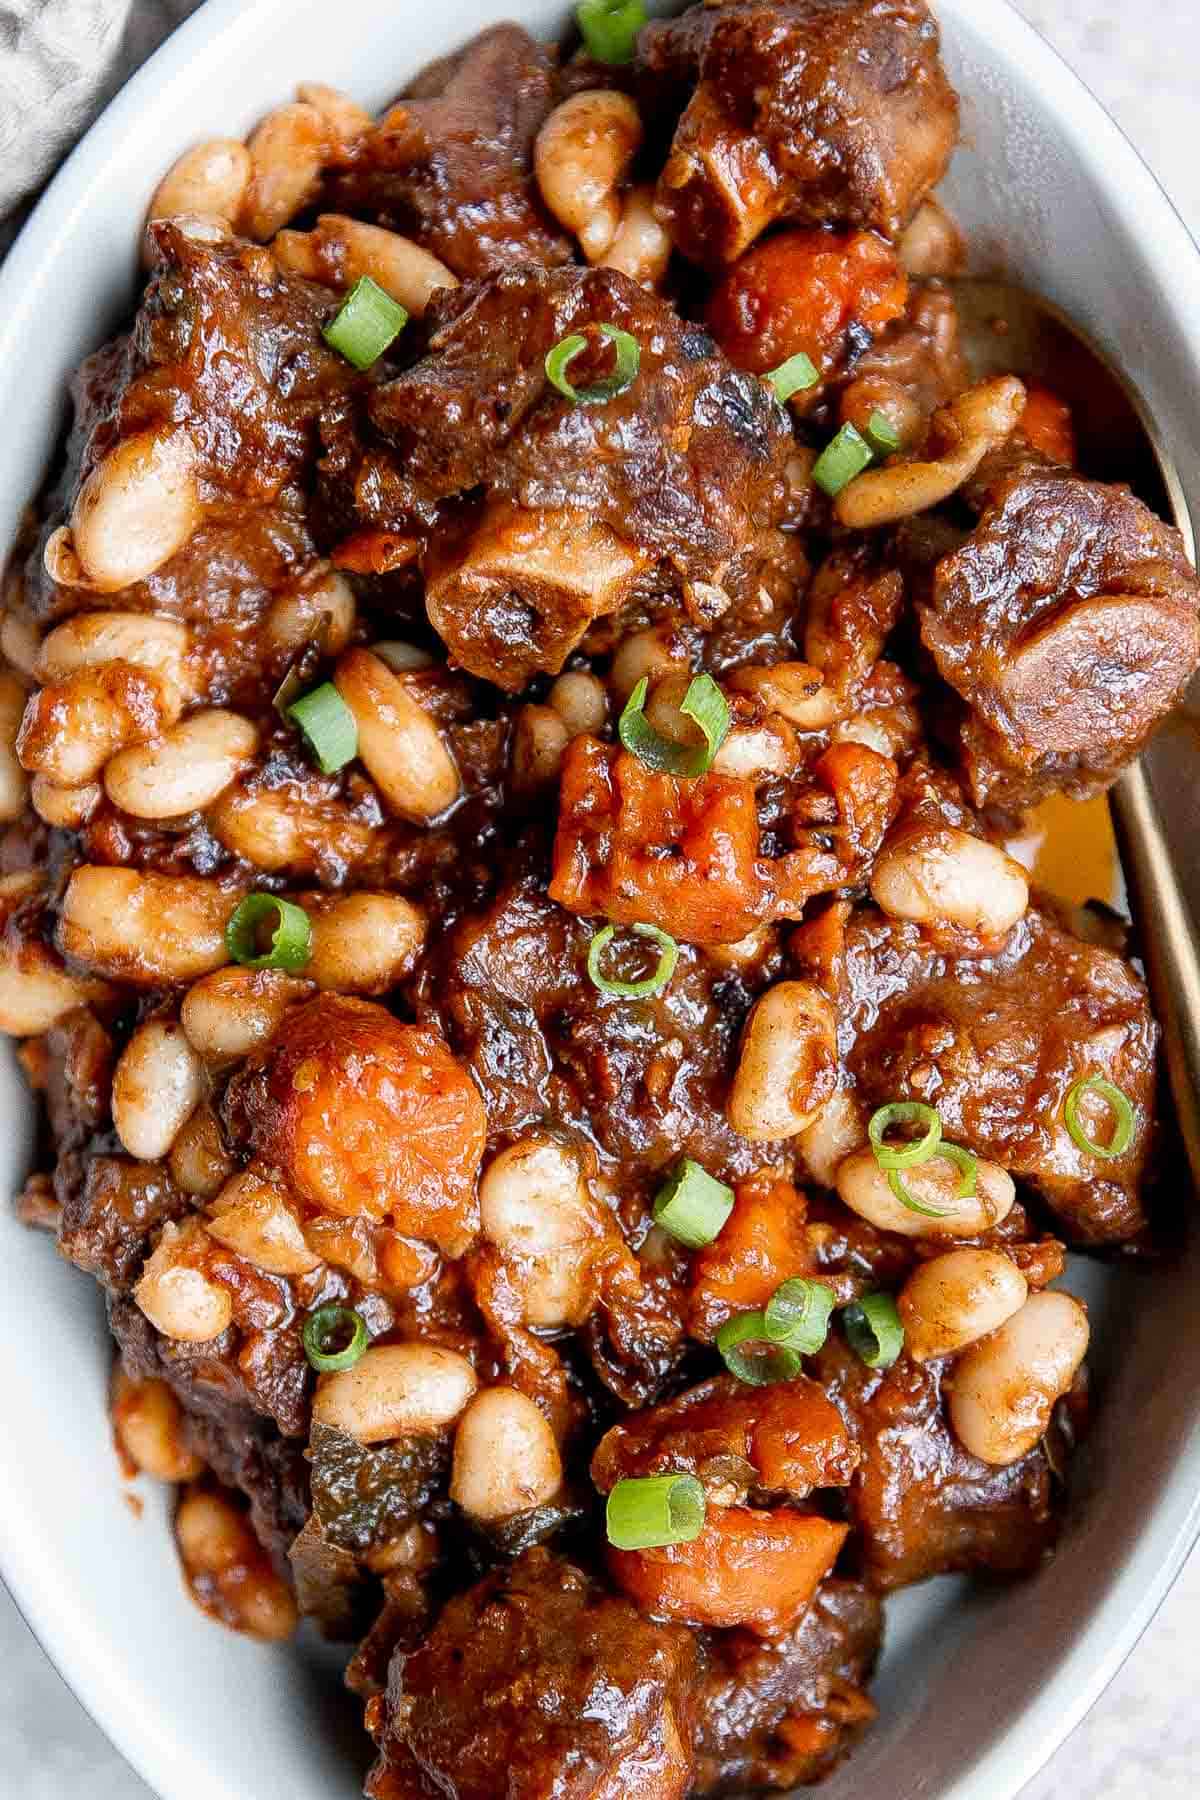
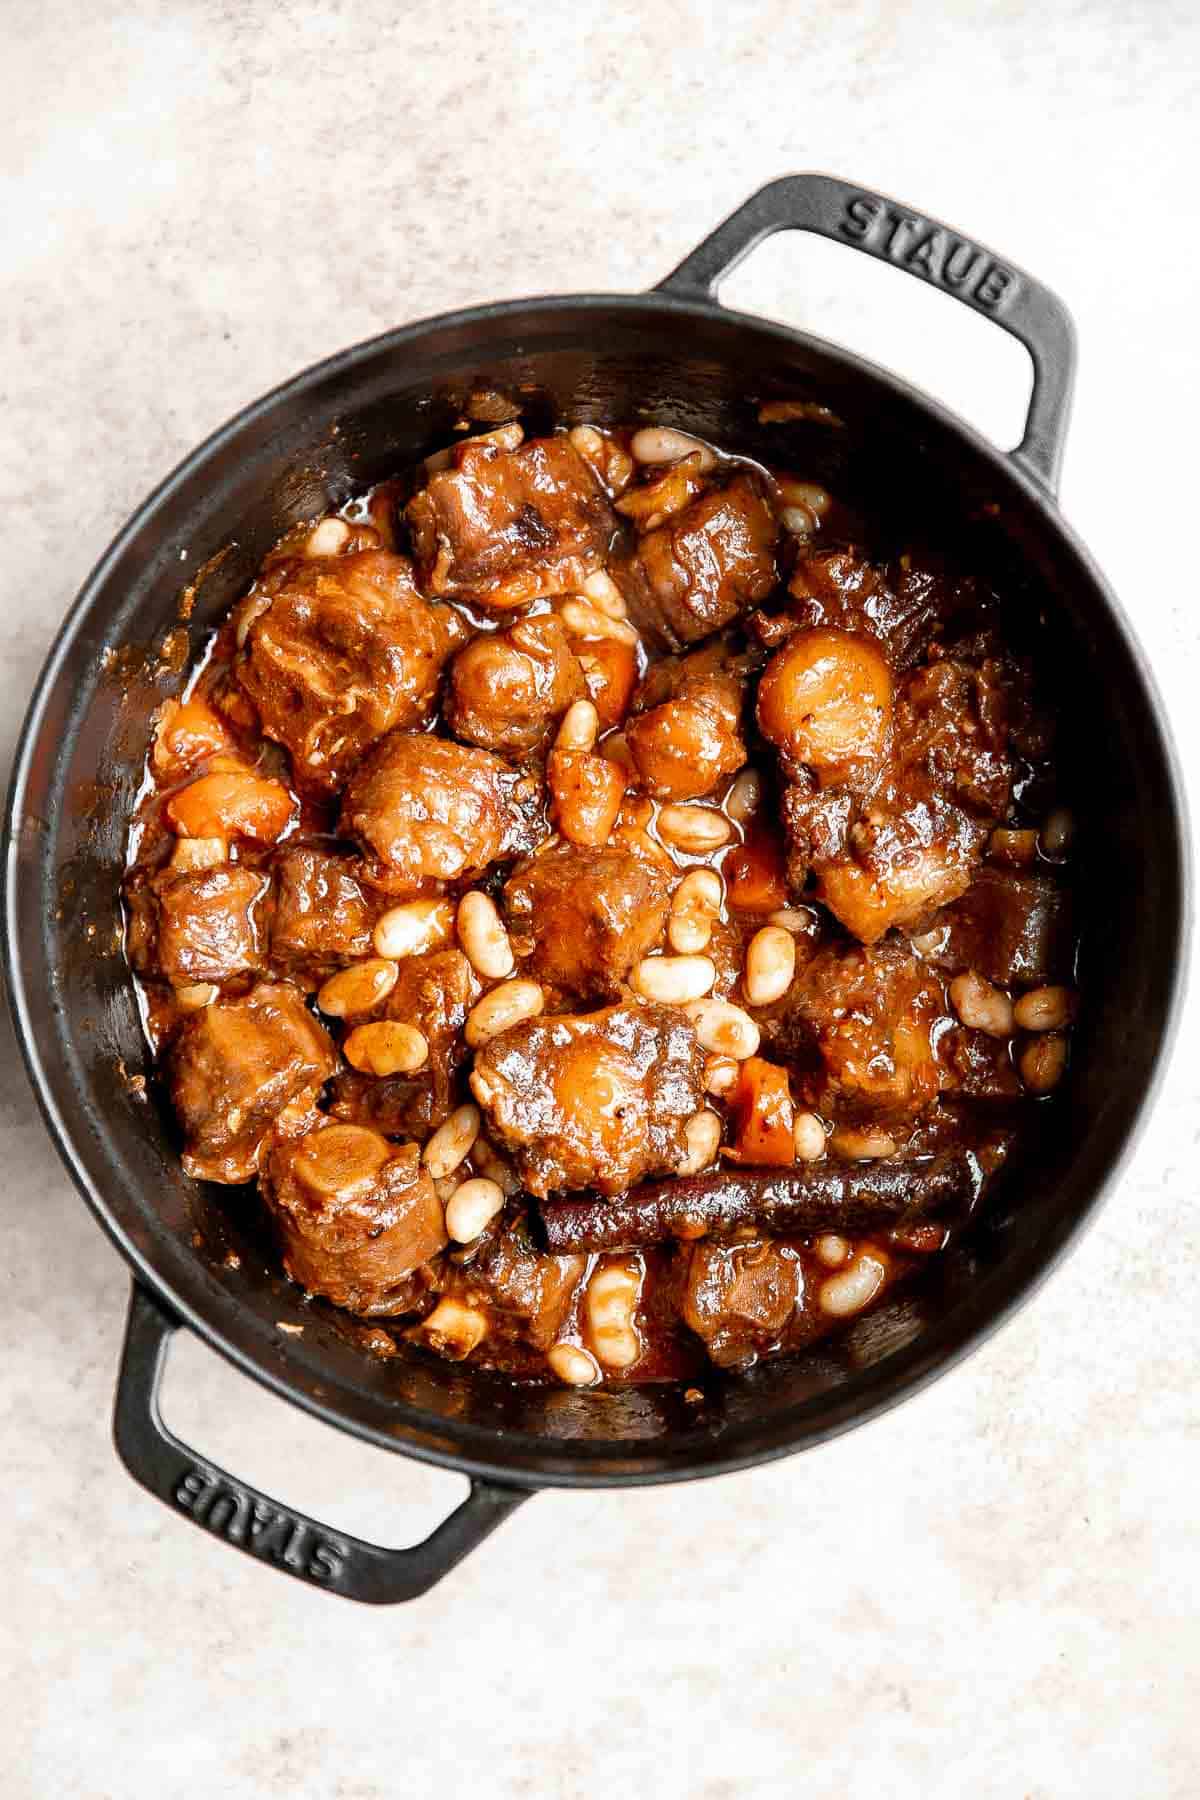
Jamaican Oxtail
Jamaican Oxtail is a juicy, delicious, and flavorful dish, made with tender oxtails that fall off the bone and slow braised in a rich well-seasoned sauce with carrots and butter beans.
It takes minimal prep work before you can let it simmer on the stove for over an hour. This oxtail stew is perfect to serve on a cold and chilly night. Plus, leftovers might even taste better the next day!
Why You'll Love this Jamaican Oxtail Recipe
- There's a reason low and slow is the best way to cook beef. This recipe takes just under 2 hours to cook, but it's well worth the investment in time - especially because it doesn't require much active prep time. Jamaican oxtails become so tender as they cook. They will literally fall off the bone that you'll hardly need to chew. And the flavor that cooking slowly brings is amazing.
- Delicious flavors bring out the best in this cut of beef. Oxtails are a unique cut of beef that many people have ever even tried - and that needs to change. Oxtails have a big bone in the center and beautiful marbling that delivers amazing flavor, especially when cooked with the right blend of ingredients found in this Jamaican oxtail recipe.
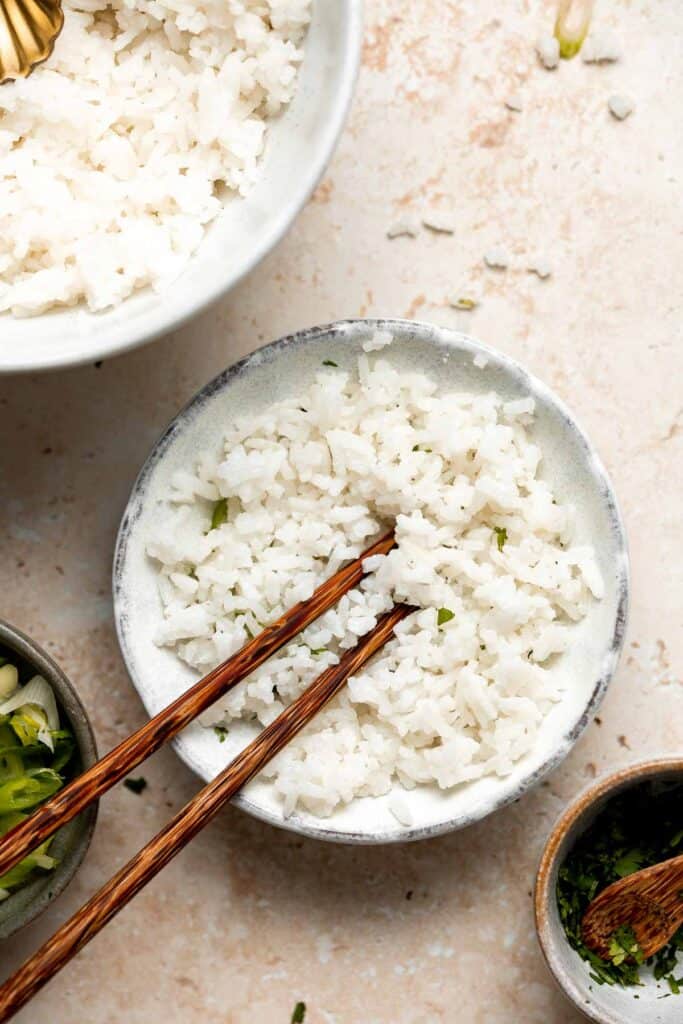
- It's a complete meal when you serve it with rice. This Jamaican oxtail recipe is packed with protein from beef and beans. Carrots and onion add additional nutrients, and when paired with Steamed White Rice, Jamaican oxtails make a satisfying and balanced meal.
Ingredients Notes
To make this delicious Jamaican oxtail, you will need the following ingredients (full quantities in the recipe card below):
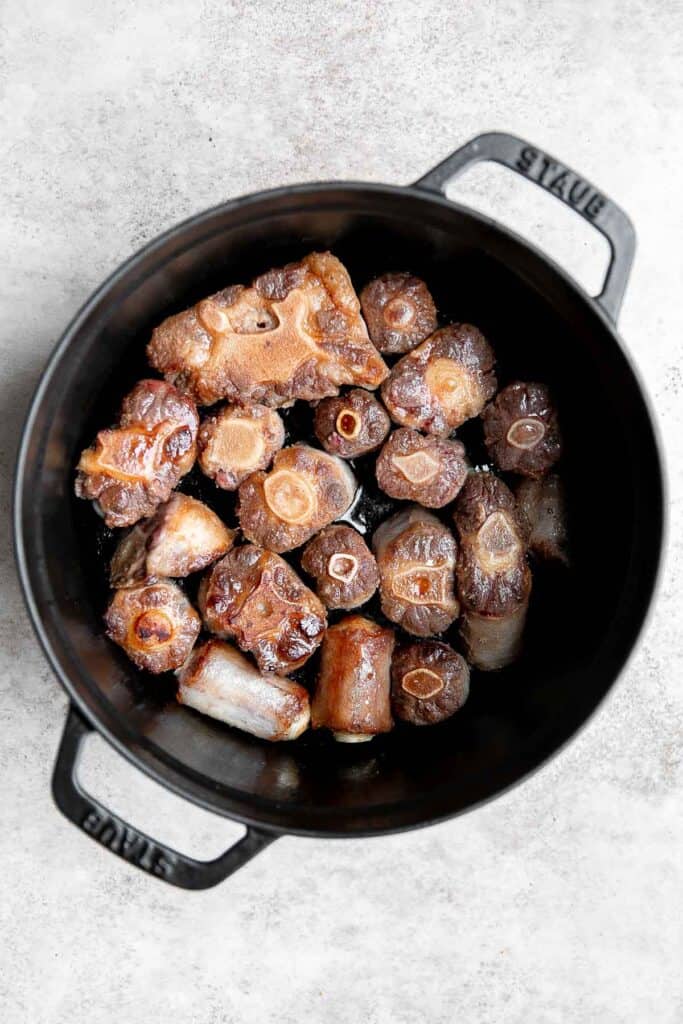
- beef oxtails - when picking oxtails at the store, look for the large thick ones with lots of meat. These oxtails are closer to the body of the cow. If you can't find any, adding in oxtails from closer to the tip of the tail works too.
- vegetable oil
- dark soy sauce - adds flavor but also a rich color to this dish.
- onion
- ginger and garlic
- cinnamon stick - or substitute with 1 teaspoon of Jamaican allspice berries.
- bay leaves
- ketchup - you can also substitute with tomato paste.
- oyster sauce - or substitute with soy sauce for a similar tangy kick.
- water
- brown sugar - adds a hint of sweetness to balance out the flavors.
- all-purpose flour - helps to thicken up the sauce.
- carrots
- butter beans - these creamy beans are also known as lima beans. You can feel free to replace with white kidney beans instead.
- salt and pepper
- green onions - to garnish on top. You can substitute with chives or leave them out if your prefer.
You will also need measuring cups and spoons and a 4 quart Dutch oven or pot.
How to Make the Best Jamaican Oxtail
- Prepare the oxtails. Use a paper towel to pat the beef oxtails completely dry. Set aside.
- Sear oxtails. Heat oil in a 4 quart Dutch oven or large pot until the hot oil sizzles, about 1-2 minutes. Sear oxtails in batches until golden brown, about 5 minutes on each side. The oxtails don't need to be fully cooked at this point. Add soy sauce and brown the oxtails for 2 minutes on each side. Set aside on a clean plate.
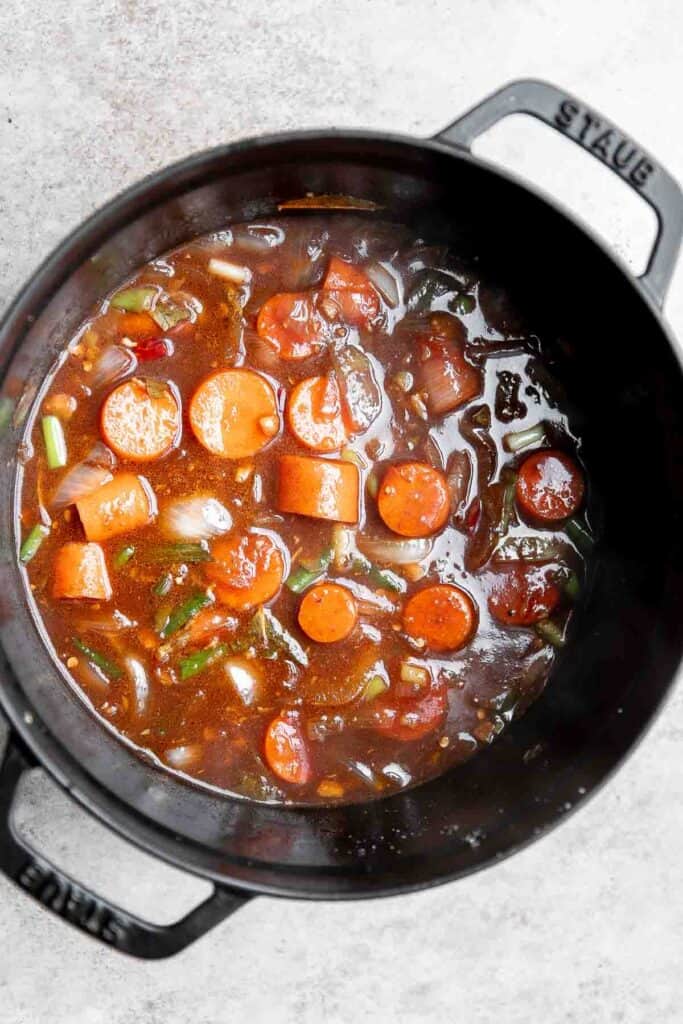
- Sauté aromatics. Add onions, ginger, garlic, cinnamon stick, and bay leaves and sauté until fragrant, about 2 minutes.

Sear oxtails. Sauté aromatics.

- Add sauce. Stir in ketchup, oyster sauce, water, sugar, and flour. Mix well until smooth.
- Add carrots. Add carrots and return the seared oxtails to the pot. The liquid should just cover the oxtails. If not, add a little bit more water.
Add carrots. Add seared oxtails.
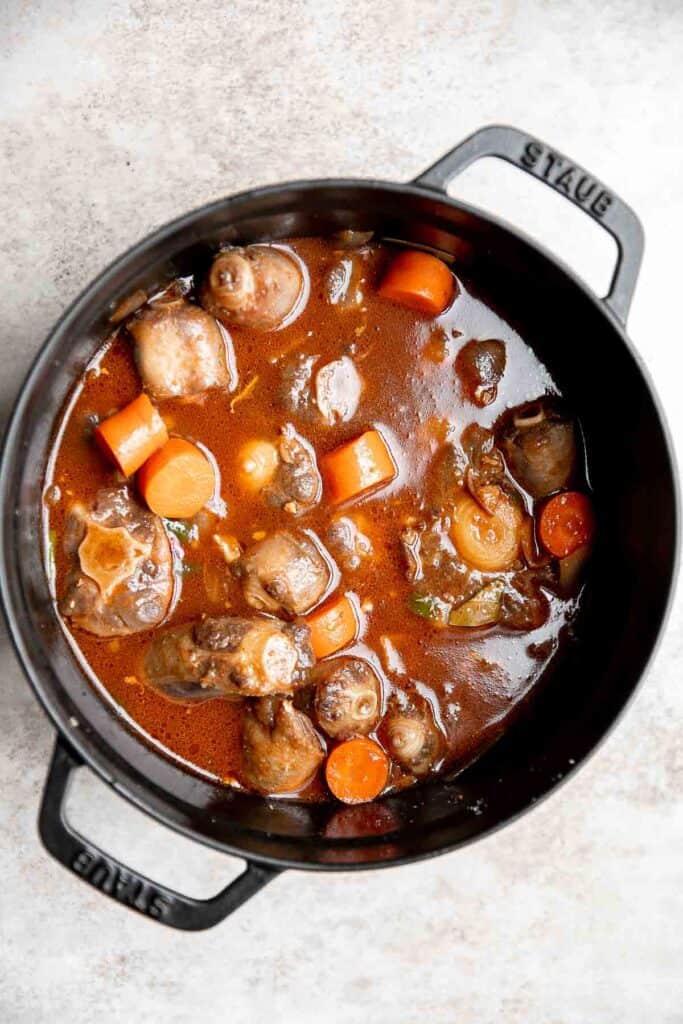
- Simmer. Cover with the lid and bring to a simmer. Turn the heat down to low and simmer for 1 to 1 ½ hours until tender (and the meat falls off the bone). Stir occasionally to prevent the sauce from burning. If the sauce thickens a bit too much, stir in some water (2 tablespoons at a time) to thin it out.
- Add beans. Stir in butter beans and cook until heated through, about 2-3 minutes. Season with salt and pepper to taste.
How to Serve
Serve Jamaican Oxtail on its own with a garnish of greens, or paired with some delicious sides such as:
- Coconut Rice
- Garlic Mashed Potatoes
- Cornbread Muffins
- Sautéed Garlic Green Beans
- Steamed Rice
- Garlic Cheddar Biscuits

Storage Instructions
- How to store: Keep Jamaican oxtails in an airtight container in the fridge for 3-4 days.
- How to freeze: Once cooled to room temperature, freeze leftover oxtails in an airtight container or freezer bag for up to three months.
- Reheating: The best way to reheat leftover Jamaican oxtails is on a pan on the stovetop. Heat oxtails, covered, over medium heat until warmed through, stirring occasionally. Add water if the sauce looks too thick or dry.
More Beef Recipes
- Instant Pot Oxtail Stew
- Slow Cooker Bone Broth
- Roast Beef
- Instant Pot Beef Curry
- Beef and Broccoli Stir Fry
- Beef Wild Rice Soup
Tried this recipe?
I'd love to hear what you think! Leave a comment and rating below to share your feedback. Your reviews help others discover this recipe and help me keep creating more free recipes for you. Snap a photo and tag me on social media @aheadofthyme too.

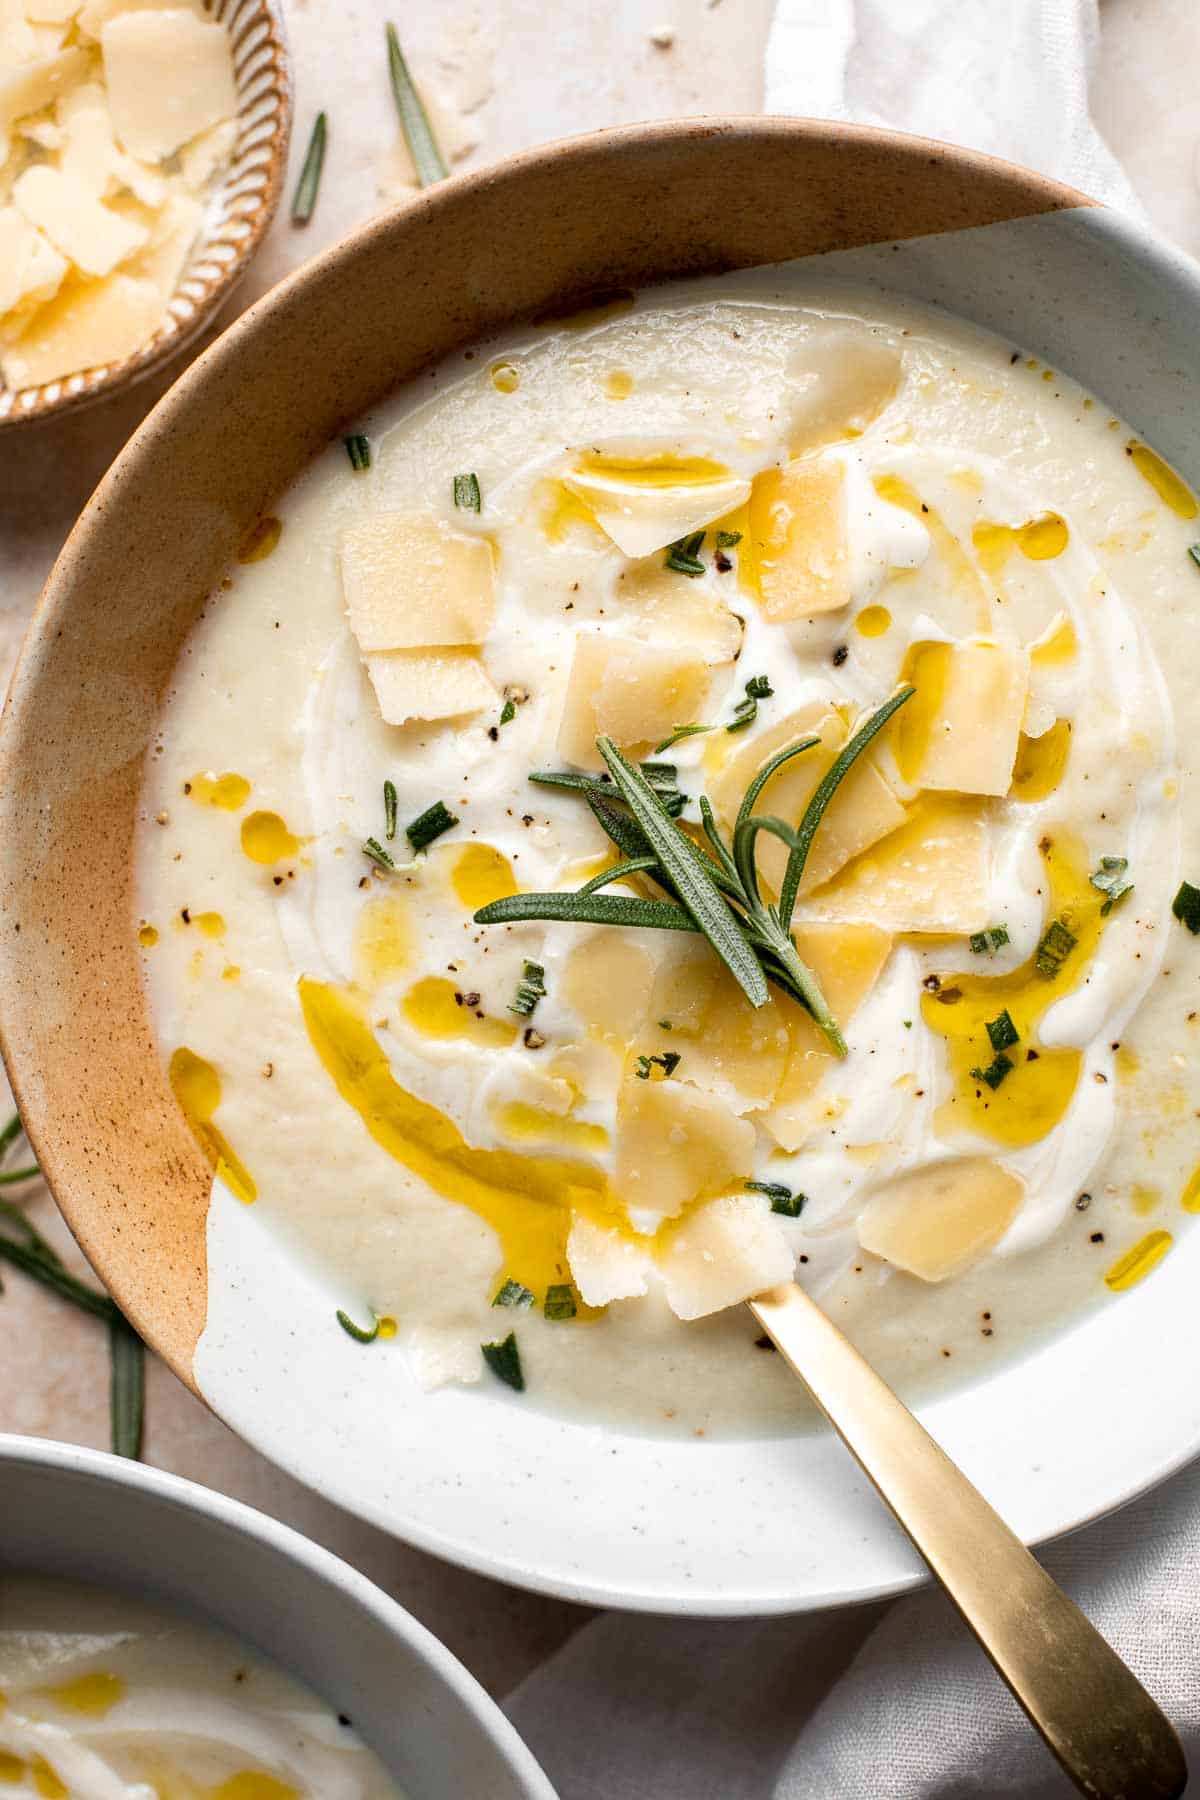
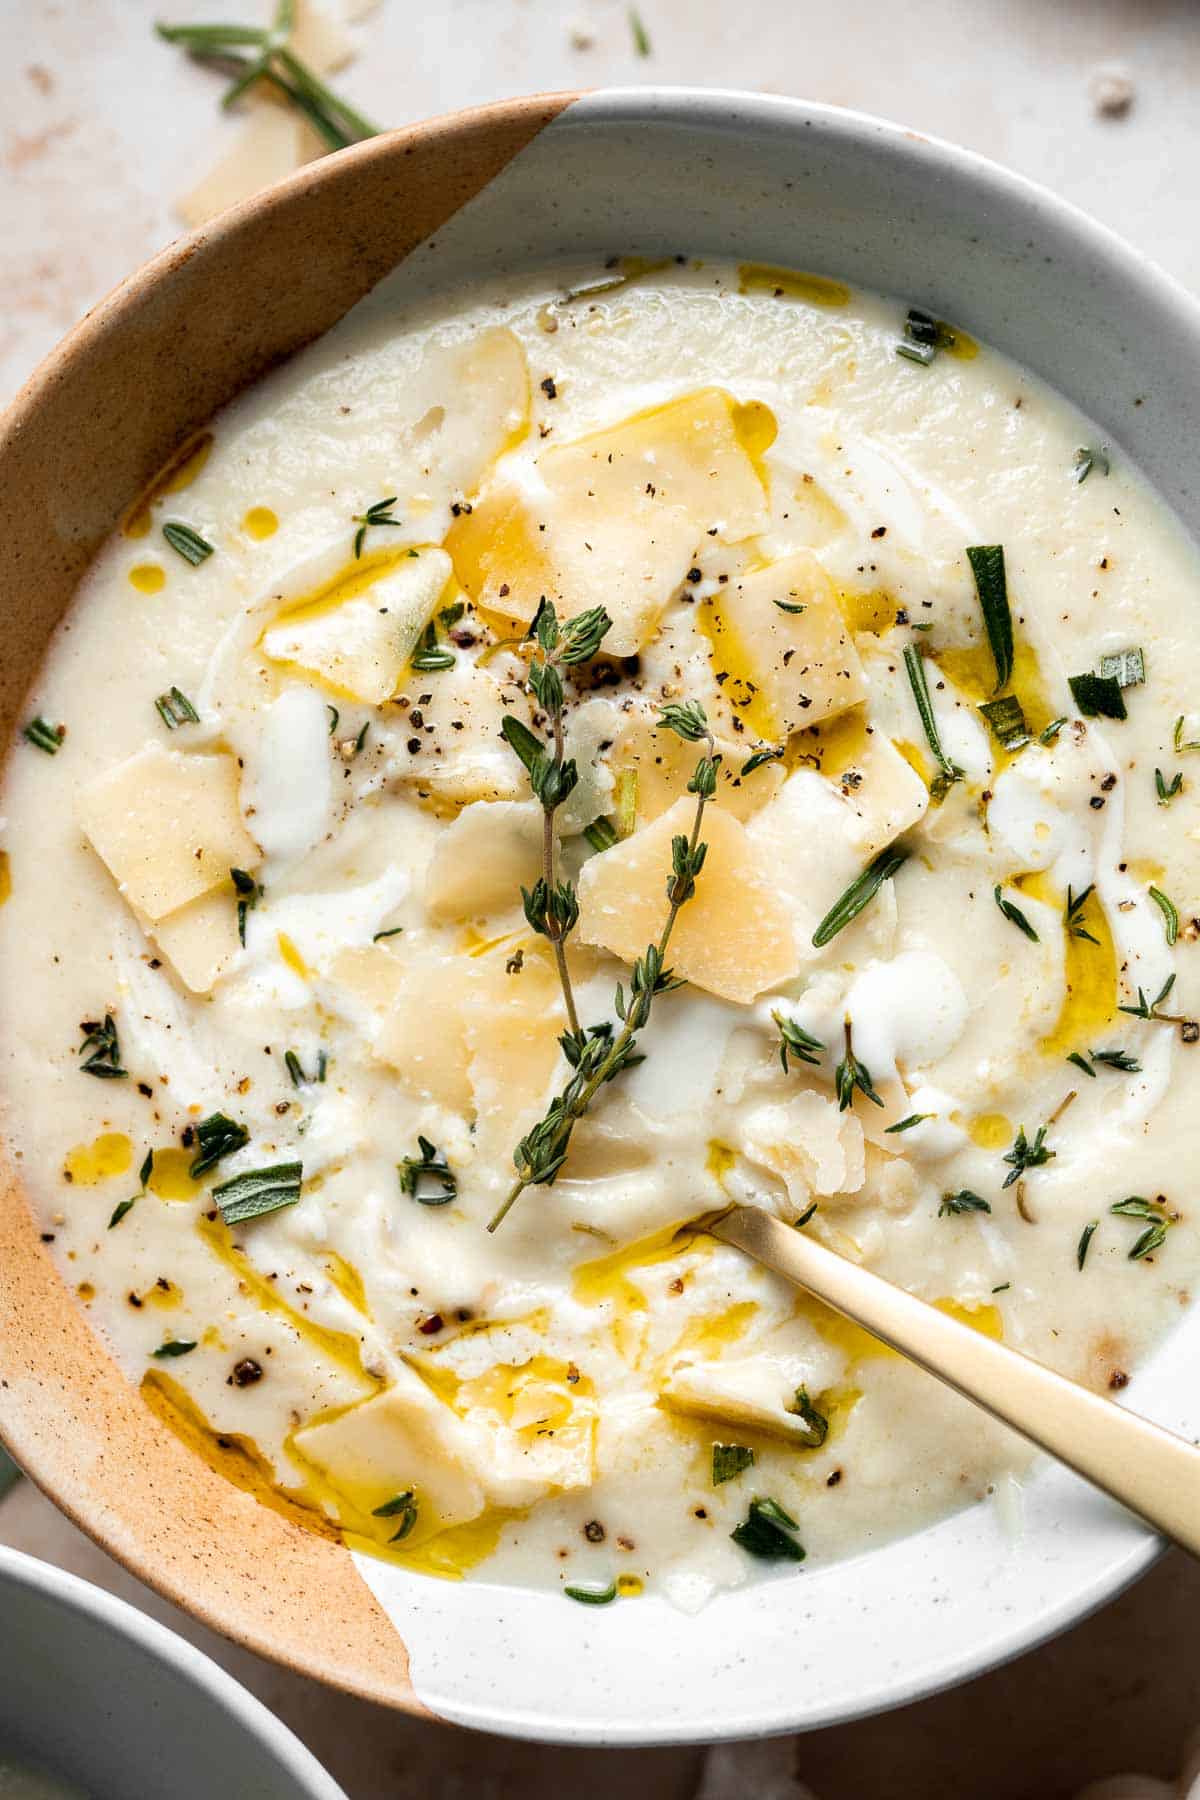
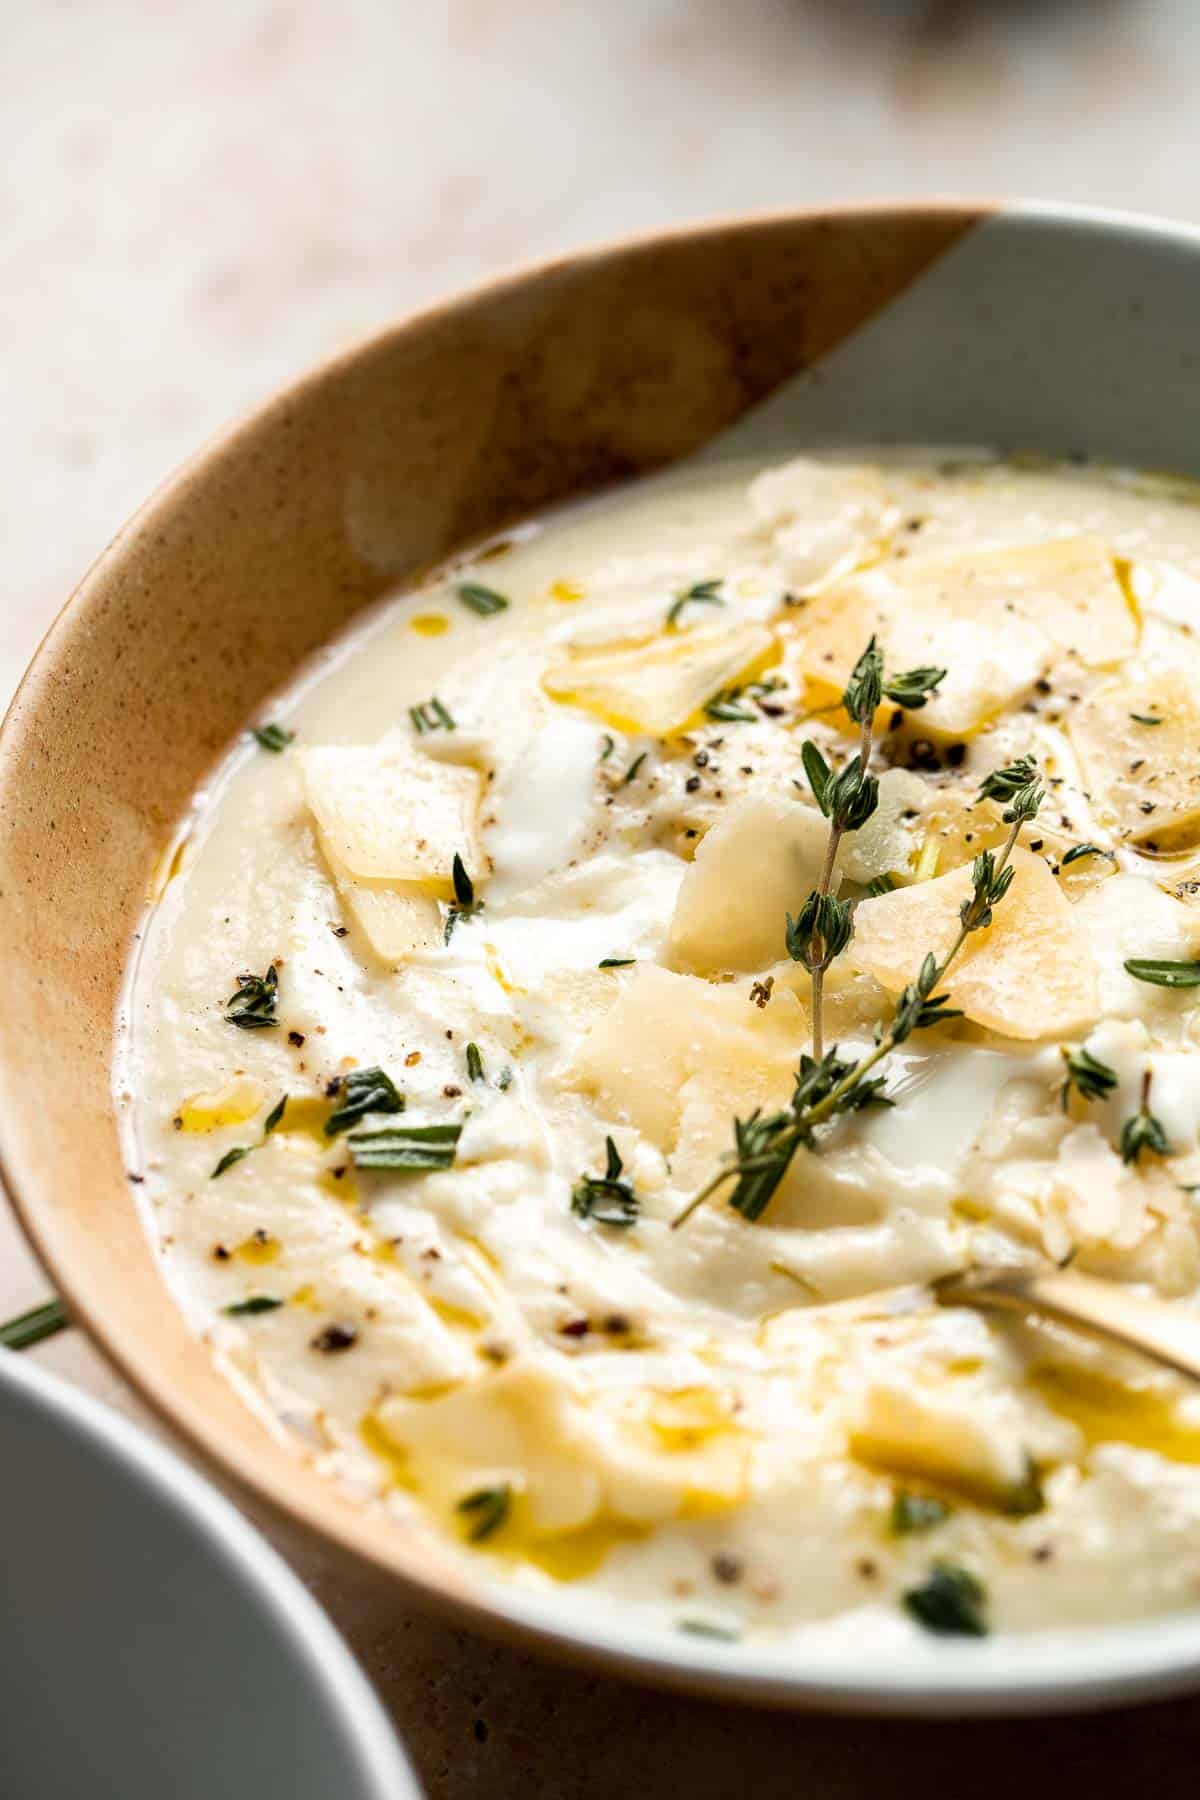
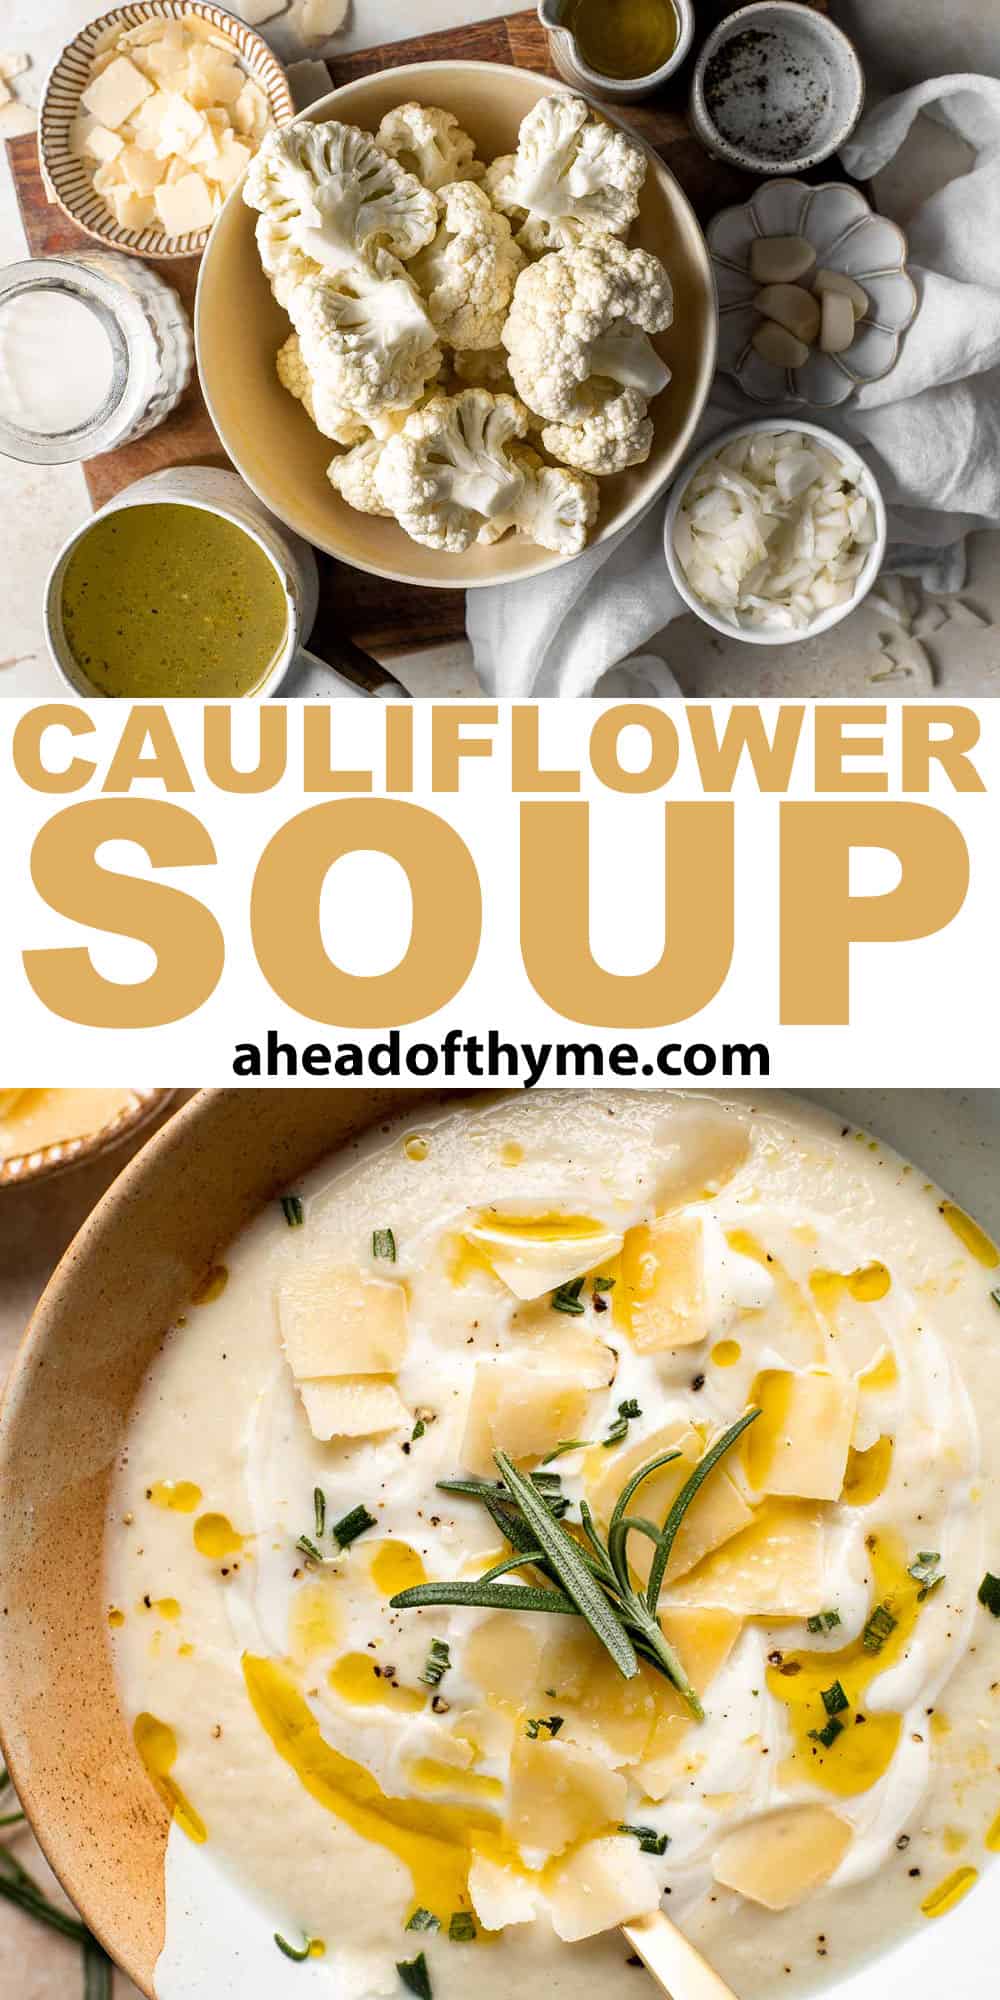
Creamy Garlic Cauliflower Soup
Creamy Garlic Cauliflower Soup is creamy, velvety, and healthy. This vegetarian soup is ready in just 45 minutes with a handful of simple, wholesome ingredients and a few simple steps. With its rich garlic flavor, easy preparation, and compatibility with all kinds of meals, this cauliflower and garlic soup recipe is a keeper. It's one of the easiest and tastiest soups ever.
Serve cauliflower soup on its own with bread for dipping, for a hot lunch with a side salad or sandwich, or for dinner as a side or first course before the big entree. It's perfect for busy weeknights when you are craving a bowl of cozy comfort food but fancy enough for a special occasion.
Why You'll Love this Creamy Garlic Cauliflower Soup
- The caramelized flavor. With just a few ingredients, this creamy cauliflower soup is loaded with flavor. And the key to the most amazing flavor is caramelizing the vegetables. The combination of caramelized cauliflower, garlic, and onion not only enhances the flavour, but it also gives the soup a gorgeous, golden colour.
- It's naturally vegetarian. The recipe for this creamy cauliflower and garlic soup is vegetarian, and can easily become vegan by swapping only two ingredients - keep reading for details!
- Ready in under an hour. It takes only 45 minutes from start to finish to get this rich, savory soup on the table - only ten of which is active preparation. Plus, everything is made in one pot so clean is up quick too.
- One of the best ways to eat cauliflower! If your kids or other family members aren't generally fans of raw, steamed, or sautéed cauliflower, this soup may be just the trick you need to get them to eat this cruciferous vegetable. Take a chance and surprise yourself. They might even ask for seconds!
- It's healthy and low in calories. The main ingredient in this garlic cauliflower soup is cauliflower - and a head of cauliflower only has 150 calories so that pretty much speaks for itself. The remaining calories come from a portion of half and half and Parmesan cheese which distributes into the entire pot of soup. In fact, an entire cup of this soup has about 120 calories.
With minimal prep and simmering time, the flavors combine perfectly to create a seasonal soup that you can serve as a side or main dish at all kinds of occasions.
Ingredient Notes
To make delicious Creamy Garlic Cauliflower Soup, you will need the following ingredients (full measurements in recipe card below):
- cauliflower - if you're short on fresh cauliflower or on a time crunch, frozen pre-cut cauliflower florets will work. Add to the pan straight from frozen - you may have to slightly increase the amount of time it spends in the pan to bring it up to temperature and caramelize.
- olive oil - you can substitute any neutral plant-based oil, butter, or ghee for the olive oil.
- onion - white or yellow varieties will yield the best flavor in soup!
- garlic - whole cloves of garlic will give this recipe an intensely delicious flavor - definitely necessary for flavoring otherwise-bland cauliflower, but you can adjust the number of cloves based on your preferences.
- vegetable stock - any type of stock would be a suitable swap, but using an animal-based one like chicken stock or beef stock will revoke the vegetarian status of the dish.
- half and half - to make this already-vegetarian recipe vegan, you can swap the dairy half and half with coconut, almond, or cashew cream. You can also reduce a plant-based milk to thicken it and add it in place of the dairy version.
- Parmesan cheese - for a vegan option, substitute with a vegan Parmesan-style alternative, ground roasted pine nuts, or flaked nutritional yeast.
- salt and pepper
Optional Toppings
Serve this salad with your favorite soup toppings. We topped ours with:
- fresh herbs (try thyme or rosemary or both!)
- Parmesan cheese
- a drizzle of cream
- a drizzle of olive oil
You will also need measuring cups and spoons, a large stockpot, and an immersion blender (or food processor or stand up blender).
How to Make the Best Creamy Cauliflower Soup
- Caramelize vegetables. Heat olive oil in a large stockpot over medium heat. Add cauliflower, onion, and garlic and sauté until the vegetables have caramelized, roughly 15 minutes.
- Add stock. Pour in stock and reduce the heat to medium-low and simmer for about 20 minutes or until the cauliflower florets are soft and tender.
- Puree. Use an immersion blender to puree the soup until smooth. You can also transfer the soup to a food processor or blender and puree until smooth. You may need to add some water to get it going in the blender. Then, pour the soup back into the pot.

- Add cream. Stir in the cream and Parmesan cheese and simmer for 1-2 minutes.
- Serve. Season with salt and pepper to taste. Add toppings if desired, and serve immediately.
How to Serve
Serve this creamy cauliflower and garlic soup with crunchy bread, croutons, or crackers for major dunking. You can also serve this soup with some classic soup sides for a more filling meal. Some of my favorites are:
- Grilled Cheese Roll Ups
- White Bean Salad
- Baked Sweet Potato Wedges
- Pepperoni Pizza Rolls
- Classic Coleslaw
- Pigs in a Blanket

Storage and Freezing Instructions
How to Store
Once the cauliflower and garlic soup has cooled to room temperature, transfer it to an airtight container and store in the refrigerator for up to 3-4 days.
How to Reheat
Reheat leftover cauliflower soup in a pot on the stove over medium-low heat until warmed through, or in the microwave in 30-second intervals until warm. You can also reheat it in the crockpot according to the appliance's instructions.
How to Freeze
Transfer the cooled soup to a freezer-safe airtight container or freezer bag and freeze for up to 3 months. Release the frozen soup from the container by allowing it to thaw overnight in the refrigerator, or by dunking the container in a warm water bath. Then, reheat it as usual.
Recipe Tips and Tricks
- Use an immersion blender for easy clean-up. Make this uber-easy recipe even easier by using an immersion blender. This helps reduce the chance of spilling when transferring back and forth between the pot and the blender, and many people find them much easier to clean than a full traditional countertop blender.
- Reuse leftovers in creative ways! This soup can multitask and work as a dip, a flavoring for other broths, hummus, casseroles - there are endless ways to use the leftovers to your advantage.
- Control your blend level. In the mood for a chunkier soup? Pulse the blender until it's reached your desired consistency, or let it run at full speed if you want a super-silky, almost drinkable soup.
- Change the consistency. I like my soup thick and creamy. To thin it out, add some water. To thicken it, heat it on the stove until it has thickened up to your desired consistency.
More Soup Recipes
- 60 Best Soup Recipes
- Roasted Butternut Squash and Cauliflower Soup
- Broccoli Cheese Soup
- Coconut Curry Pumpkin Soup
- Pinto Bean Soup (Sopa Tarasca)
- Acorn Squash Soup
Tried this recipe?
I'd love to hear what you think! Leave a comment and rating below to share your feedback. Your reviews help others discover this recipe and help me keep creating more free recipes for you. Snap a photo and tag me on social media @aheadofthyme too.
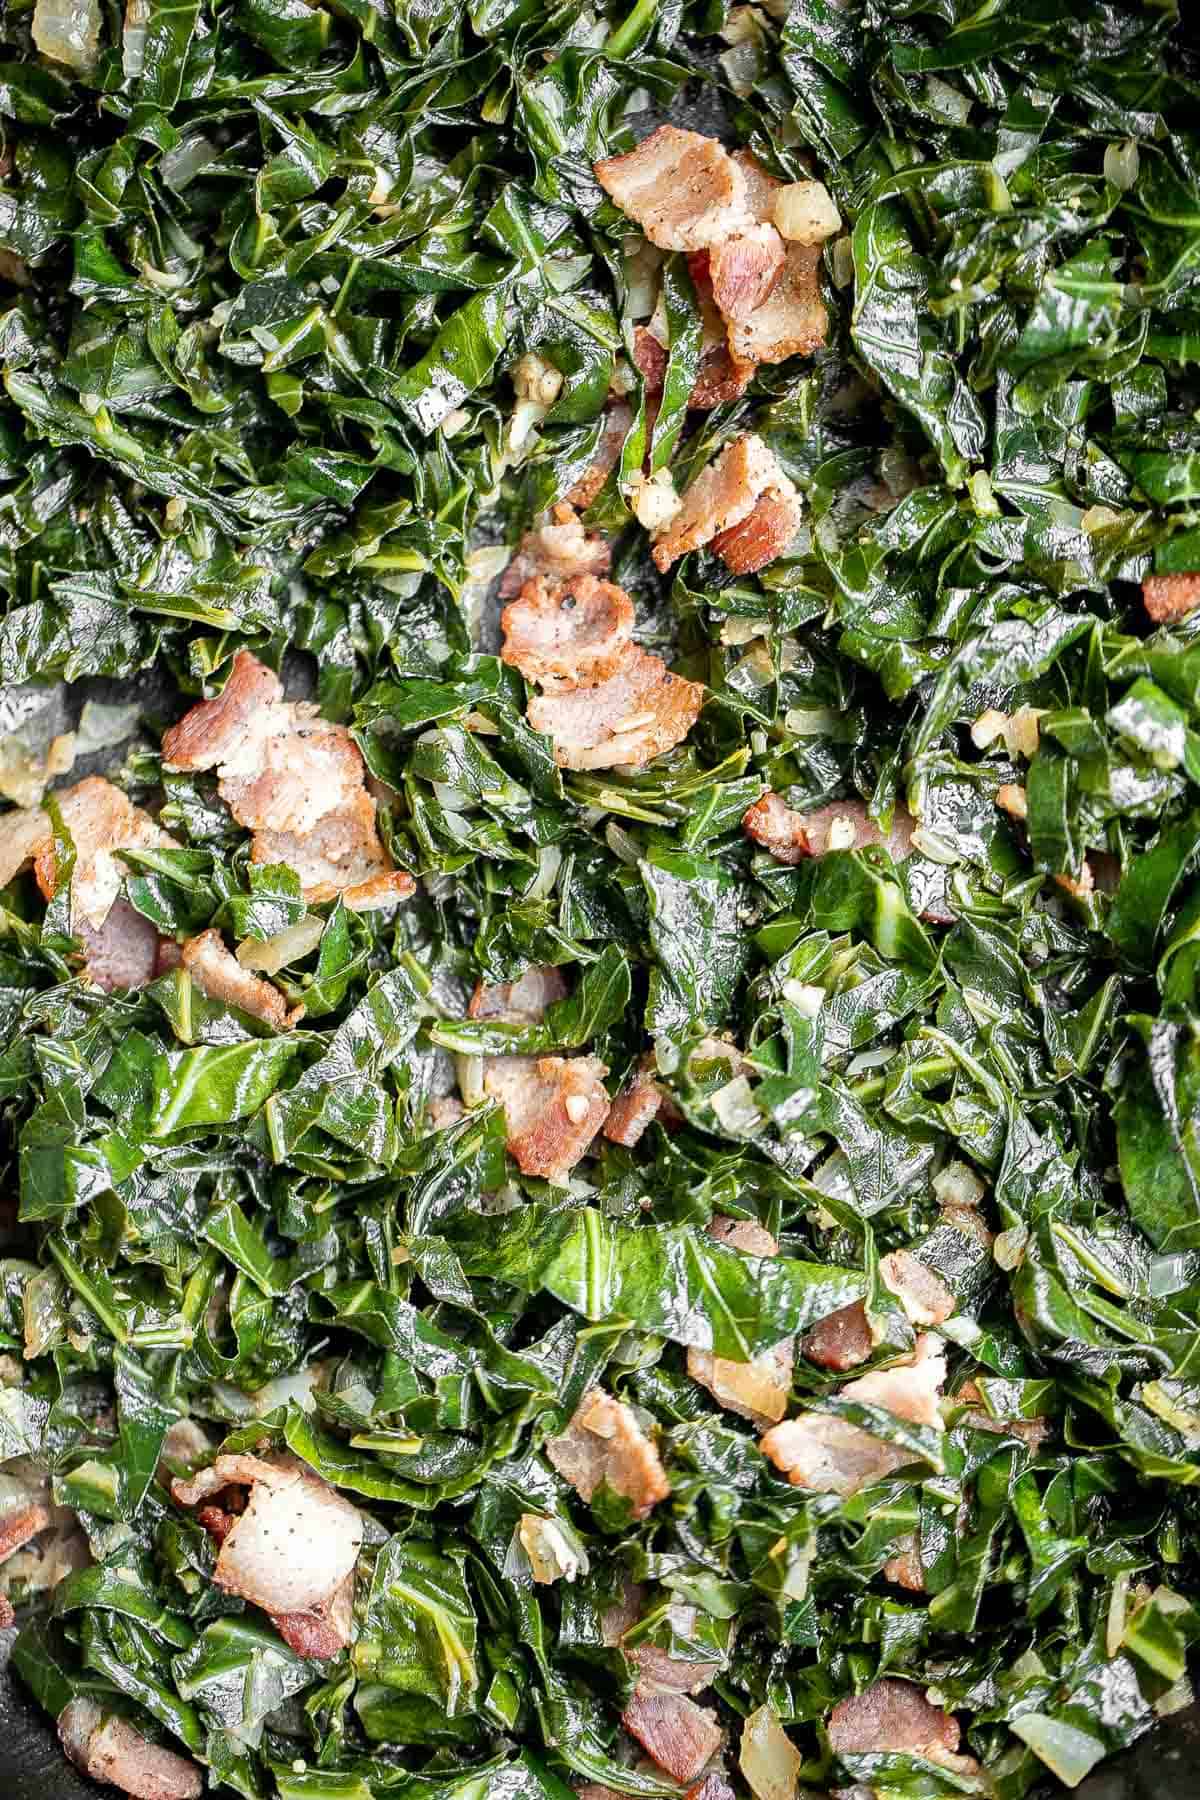
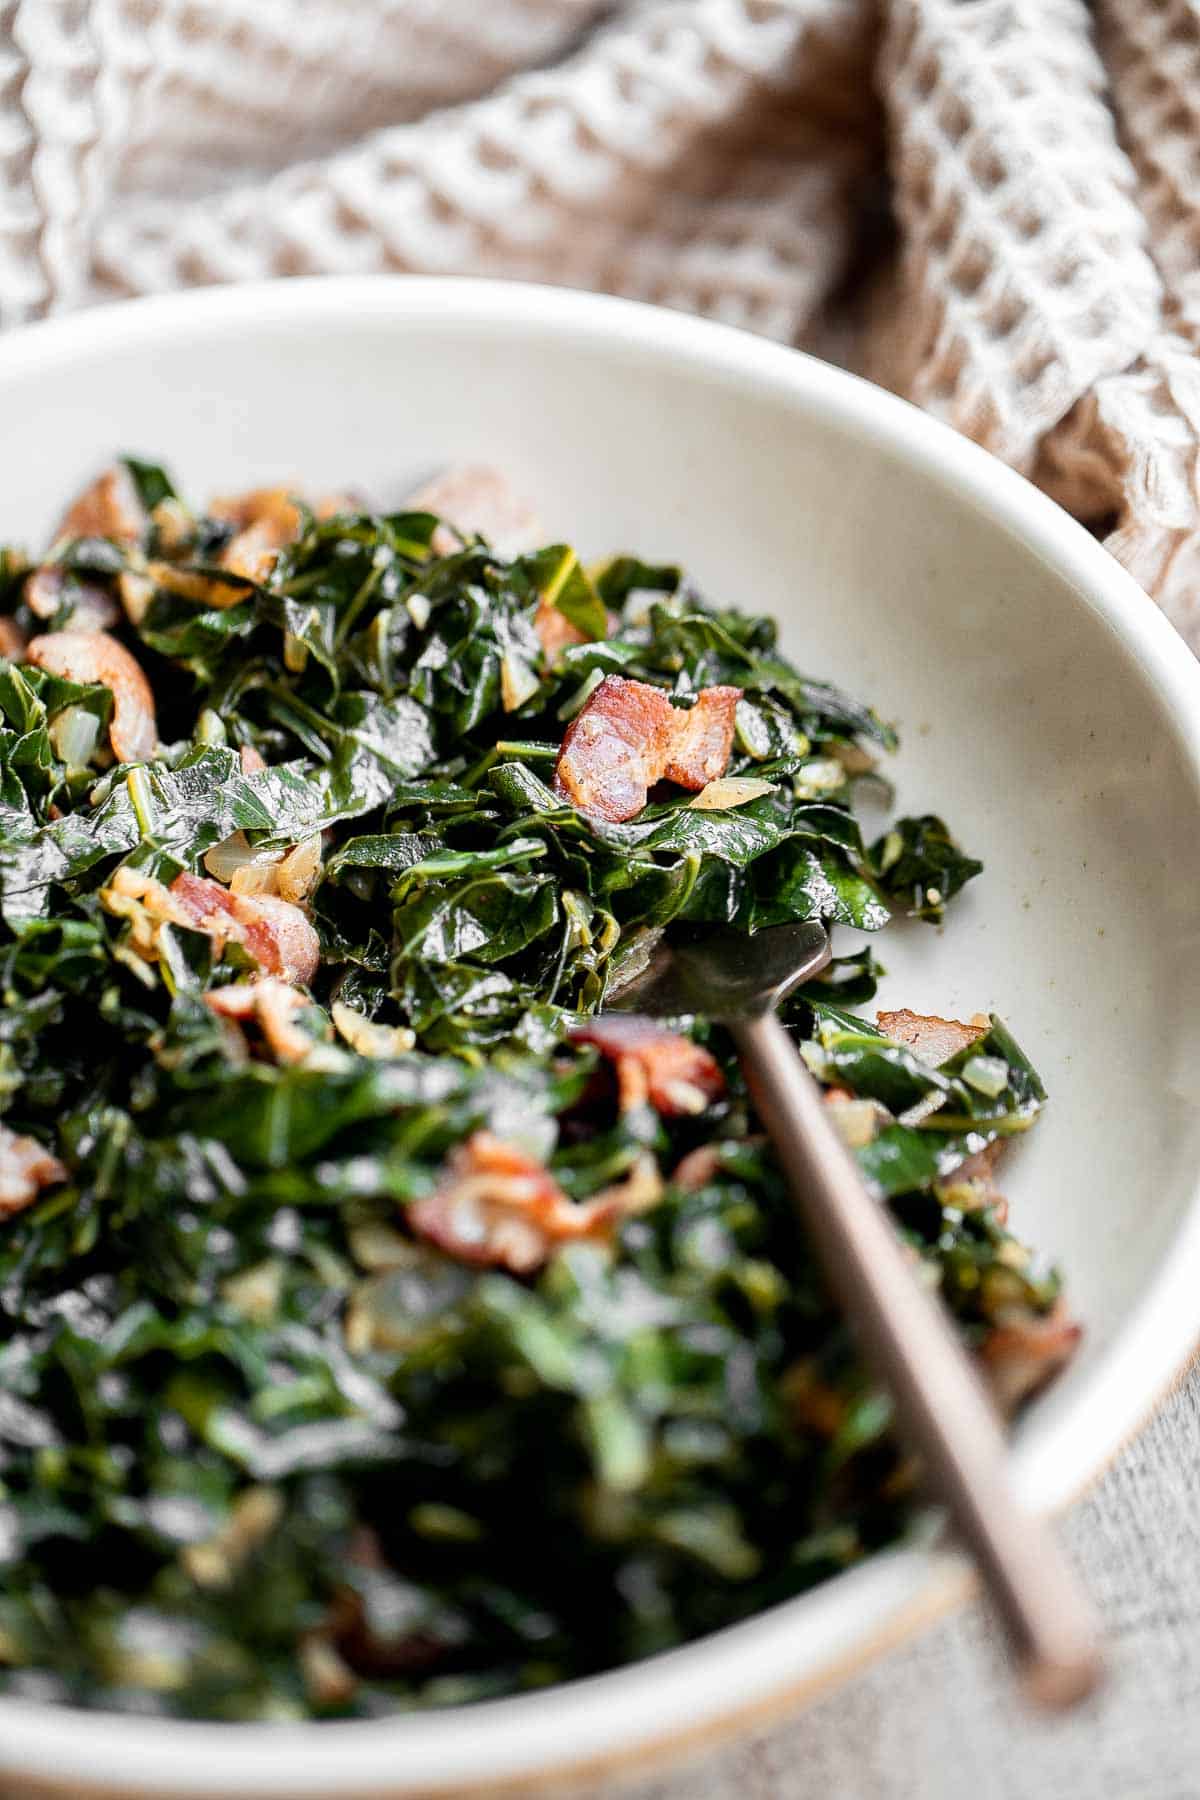
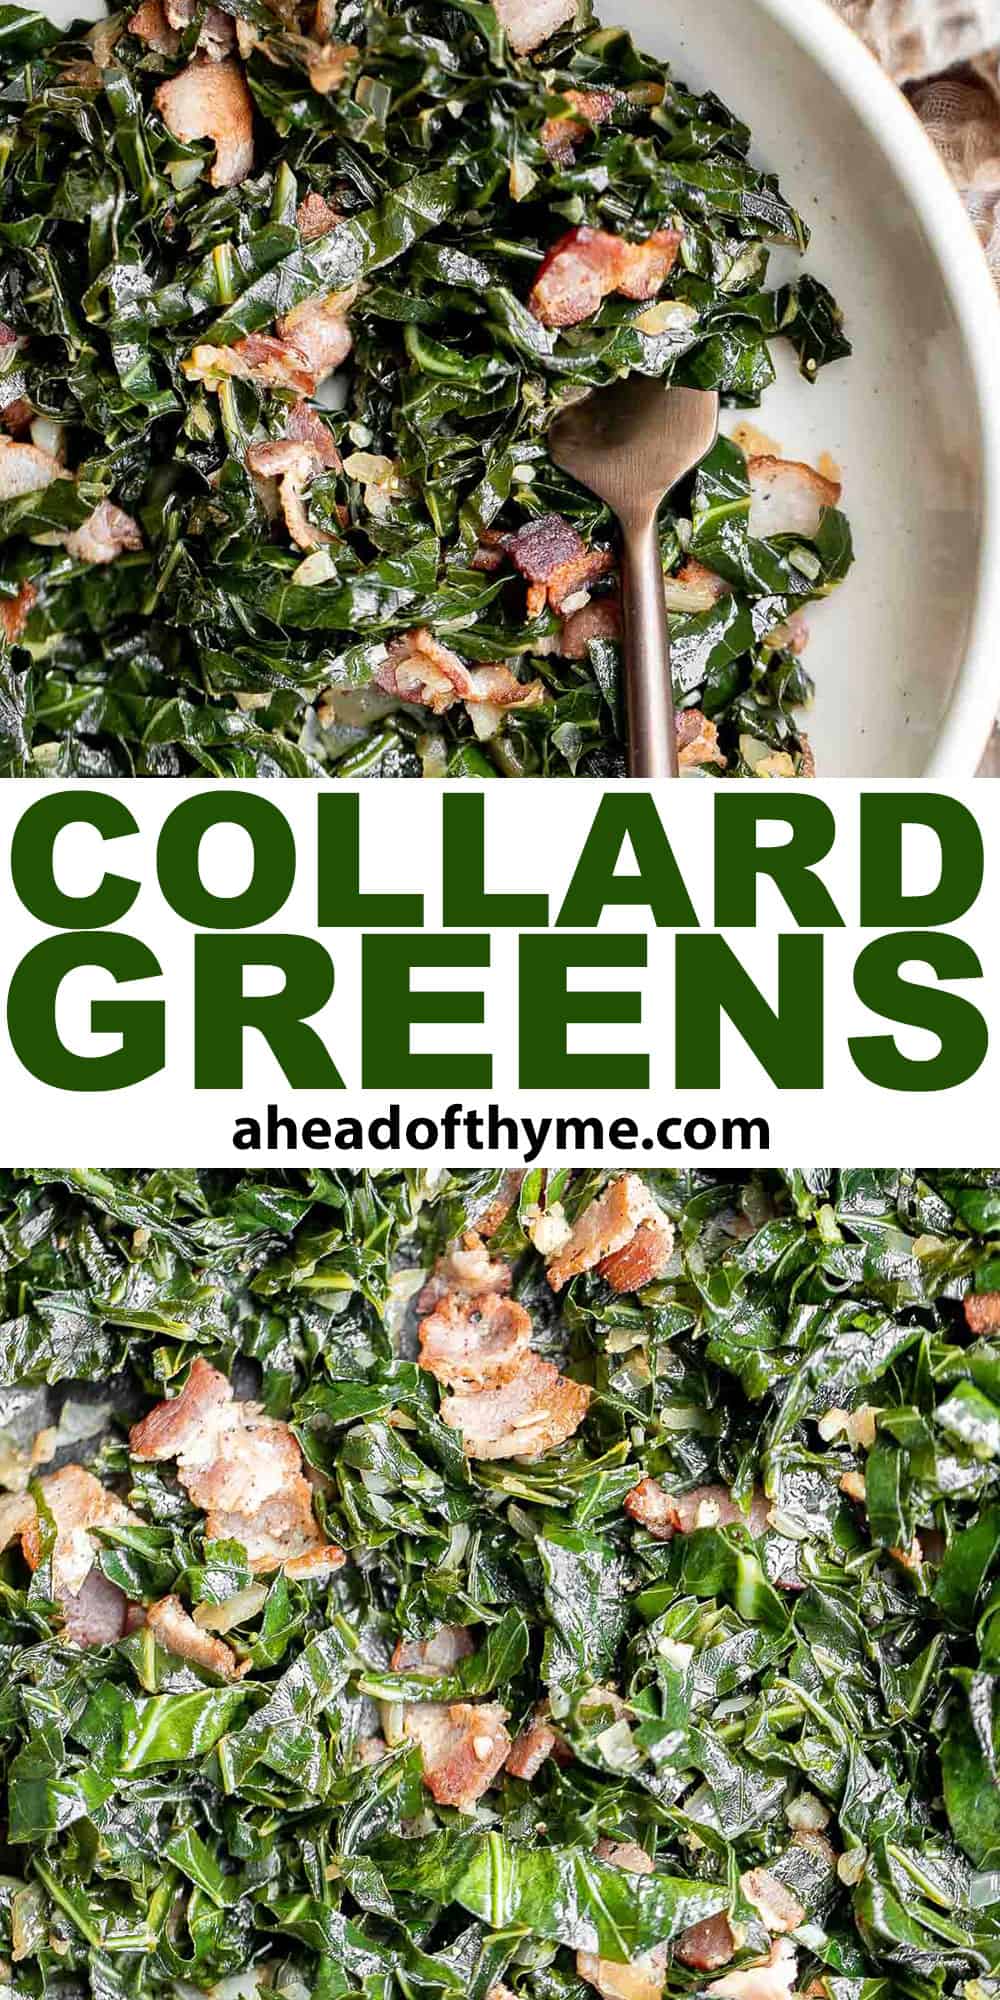
Collard Greens with Bacon
Collard greens with bacon is a flavorful, delicious, and healthy side dish. Tender greens come together with salty bacon and garlic for even more flavor. These quick collard greens take just 15 minutes to cook, making them a perfect stress-free side to prepare for a holiday dinner.
A tender greens dish is a key part of a balanced holiday meal, so you need these sautéed collard greens on your Christmas dinner menu - but they are quick and easy enough to make any night of the week.

Why You'll Love these Collard Greens with Bacon
- Perfect for the holidays. Collard greens are considered an essential part of the holiday meal lineup for Thanksgiving and Christmas. It's nostalgic, delicious, and satisfying. Add this to your holiday menu and feel good about checking something off your to-do list!
- Simple and quick. This side dish is made up of only a handful of simple ingredients - collard greens, bacon, onion, garlic, salt, pepper, water, and lemon juice - and it can be prepared and ready to serve on the table in just 25 minutes.
- A healthy, gluten-free side dish. Most holiday sides are creamy and cheesy, so you need something lighter to balance it all out. This recipe for sautéed collard greens contains no dairy, eggs, or gluten - so you can serve it to friends and family members who have those dietary restrictions.
- Loaded with flavor. Bacon makes everything taste better. Pair it with fresh garlic to give these collard greens a savory boost while still allowing the flavor of the greens to shine through. Every bite is packed with flavor - tasty enough to entice even picky eaters.
Ingredient Notes
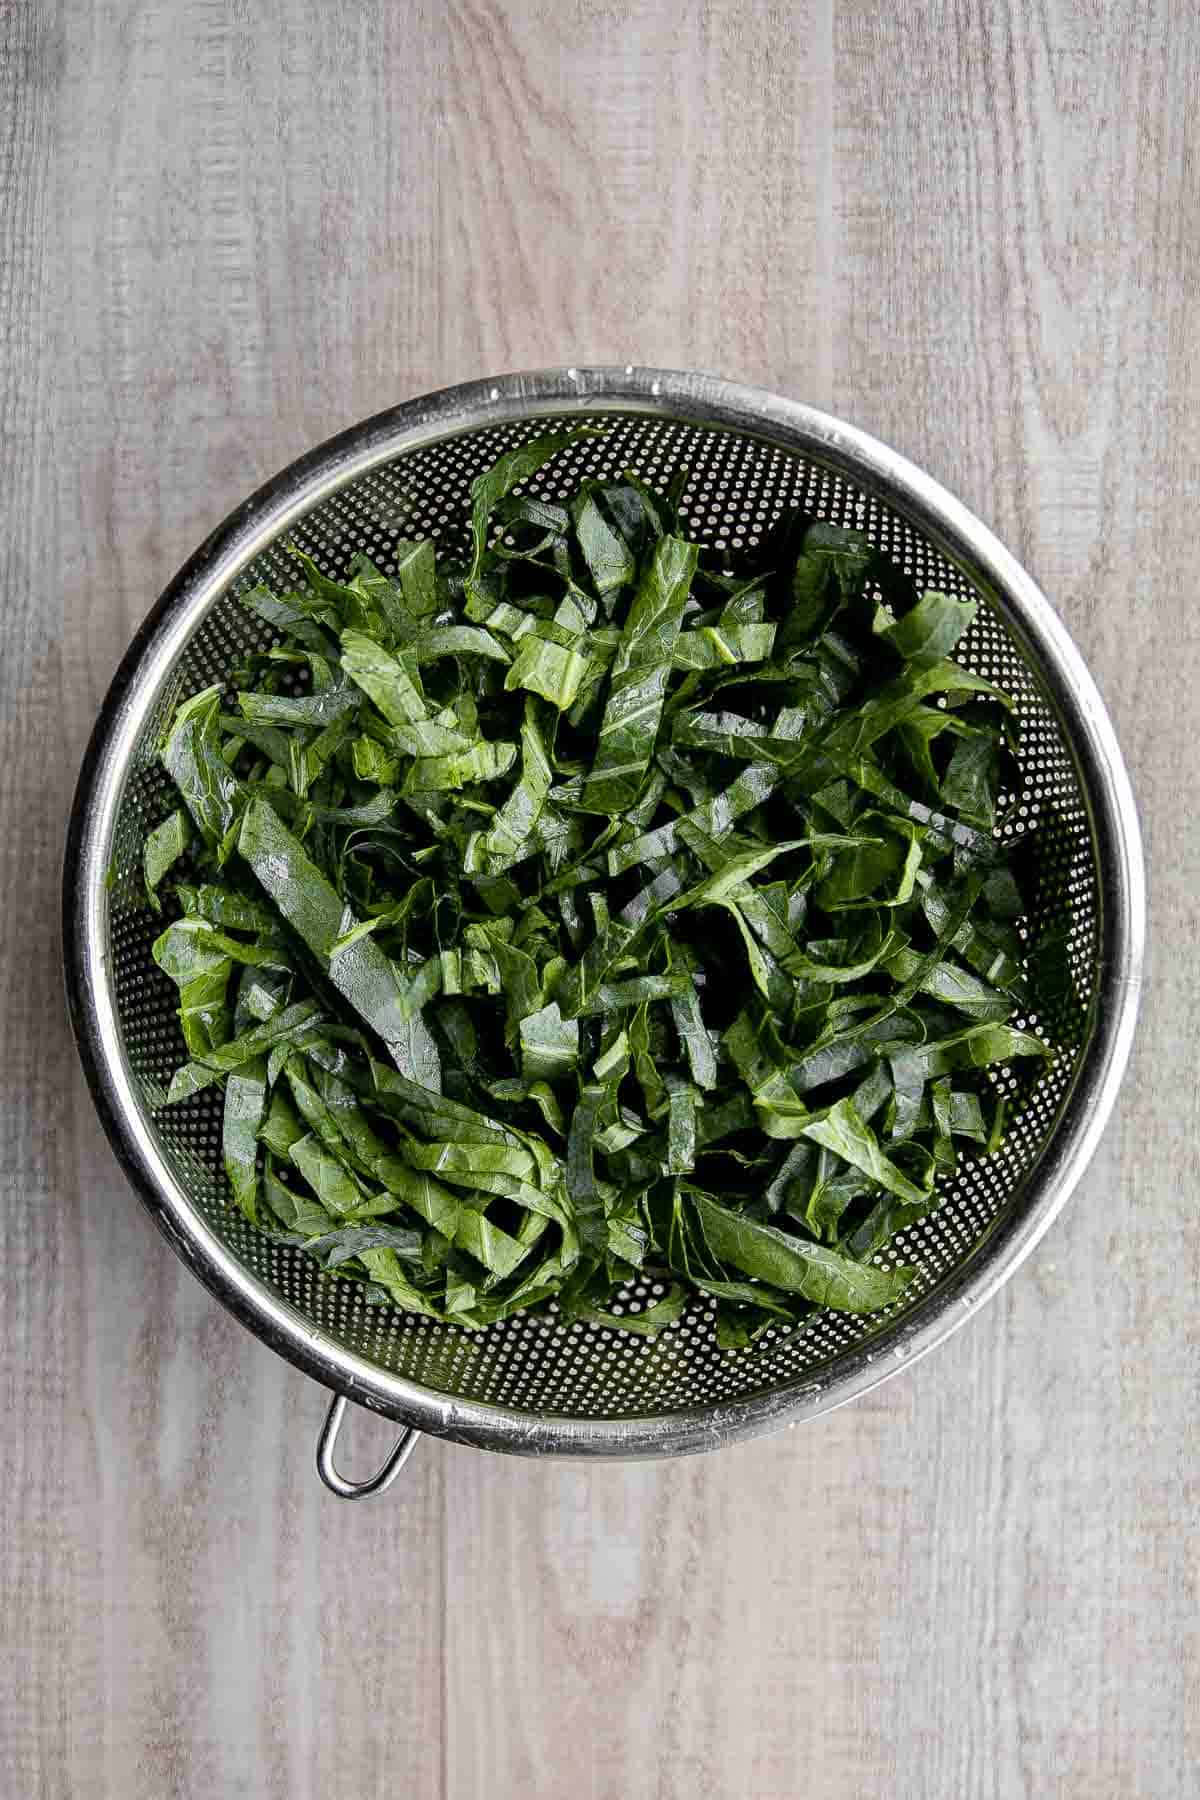
To make delicious Collard Greens with Bacon, you will need the following ingredients (full measurements in recipe card below):
- collard greens - this recipe covers fresh collard greens on the stalk, but you can use pre-chopped or frozen collard greens by adjusting some of the directions here.
- bacon - we cut our bacon into 2-inch strips. You can use whatever thickness of bacon you like, as well as making it as crispy or as tender as you prefer. Pork bacon is what adds a ton of flavor to these collard greens. You could swap it out with chicken, turkey, or veggie bacon if pork isn't your thing, but note the flavor won't be the same.
- onion
- garlic - fresh garlic gives these sauteed collard greens a punchy flavor, but if you don't have the time to mince or press it, you can use pre-minced garlic from a jar at an exchange of one teaspoon per clove.
- water - helps to cook the collard greens in. You can also substitute with chicken broth for more flavor.
- lemon juice
- salt and pepper - fine sea salt is especially important here to make every bite of greens taste the same as the last.
You will also need measuring cups and spoons and a large skillet (we used our 10-inch skillet but a 12-inch works well too).
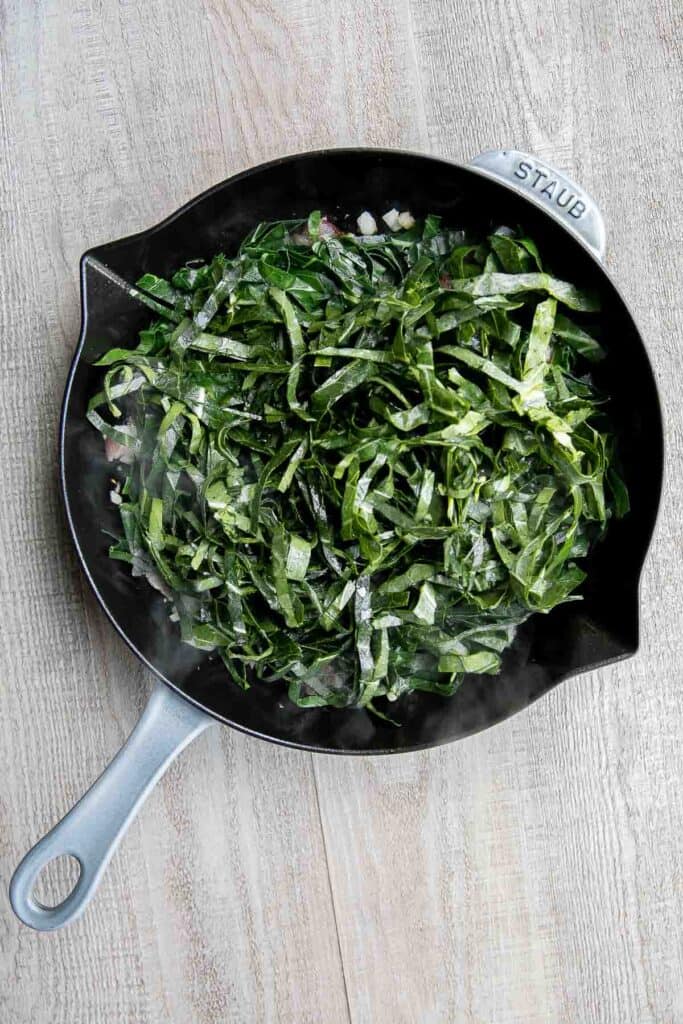
How to Make the Best Collard Greens with Bacon
- Cook bacon. Add bacon in a large skillet and cook over medium heat until browned on both sides, about 3-4 minutes.
- Add aromatics. Next, add onion and garlic and sauté until fragrant, about 1 minute.
- Add collard greens. Toss in the collard greens and season with salt. Stir well to coat and cook until wilted, about 2-3 minutes.
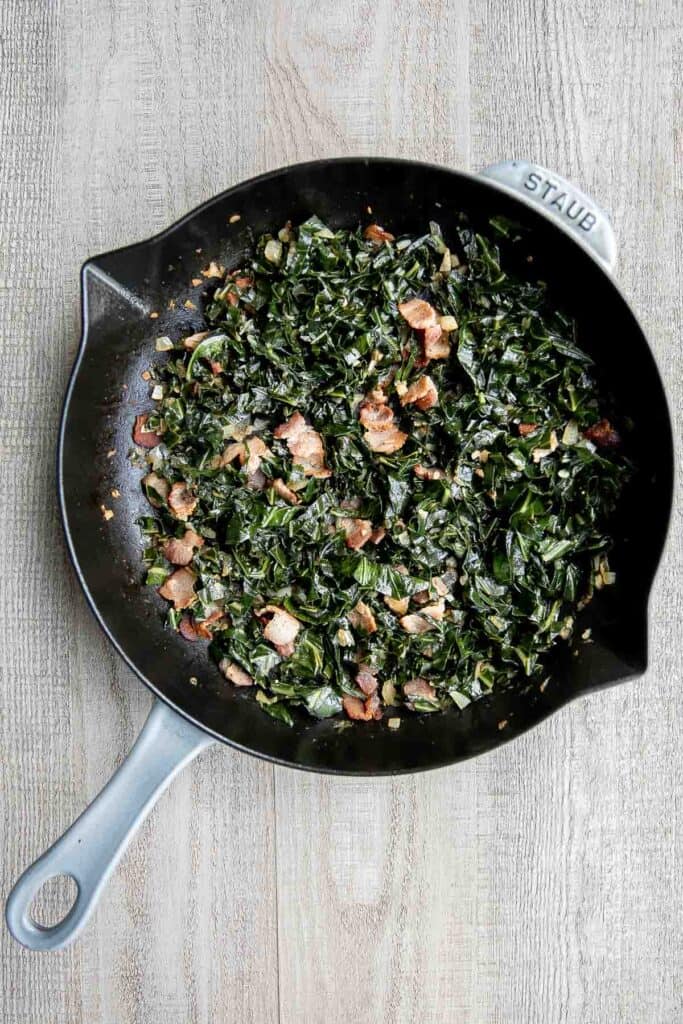
- Add liquids. Add water and lemon juice. Simmer for 8-10 minutes or until the liquid has evaporated and the greens are tender, stirring occasionally.
- Serve. Sprinkle with black pepper and serve immediately.
How to Serve
These simple but delicious greens are the perfect compliment to a holiday roasted protein. Serve collard greens with bacon alongside:
- Thanksgiving Turkey
- Christmas Ham
- Dutch Oven Whole Roast Chicken
- Sunday Pot Roast
- Instant Pot Turkey Breast
- Pineapple Glazed Ham Slices
Storage and Freezing Instructions
How to Store
Once cooled to room temperature, transfer the collard greens with bacon to an airtight container or sealed plastic bag and store in the fridge for up to four days.
How to Freeze
Transfer leftover collard greens to a freezer bag or freezer-safe airtight container and freeze for up to 1 year. You can reheat it straight from frozen or thaw in the fridge overnight first and reheat.
How to Reheat
Reheat on the stovetop over medium-low heat or in the microwave in 30 second increments until warmed through.
Recipe Tips and Tricks
- Multitask. These greens come together quickly and require minimal intervention (other than monitoring and the occasional stir) so you can prepare to cook the next dish while you closely watch the greens to make sure they don't burn.
- Spice it up with your favorite seasonings. Though these garlicky collard greens already have tons of flavor, you can add your favorite spices to customize the greens to your liking.
More Side Dish Recipes
- 40 Vegetable Side Dishes
- Green Beans with Bacon
- Creamed Spinach
- Pesto Green Beans
- Maple Roasted Brussels Sprouts and Butternut Squash
- Spinach Gratin
Tried this recipe?
I'd love to hear what you think! Leave a comment and rating below to share your feedback. Your reviews help others discover this recipe and help me keep creating more free recipes for you. Snap a photo and tag me on social media @aheadofthyme too.
25 Best Halloween Desserts
Halloween is all about the spooky and creepy desserts. I am talking about everything to do with witches, ghosts, and creepy crawly things. But it's also about the classic fall flavors like pumpkin, apples, pecans, and caramel. So if you are looking for a dessert recipe to make this Halloween, then you are in the right place. We are sharing over 25 of our best Halloween desserts including cookies, chocolate, cake, muffins, candy, and more.

Best Halloween Desserts
Halloween Bark is a delicious, sweet, and fun to make chocolate treat. This quick and easy no bake recipe is easy to make with a handful of ingredients.

Witch Finger Cookieshttps://www.aheadofthyme.com/witch-finger-cookies/
Get your cauldron bubbling, these creepy Witch Finger Cookies are here to stir up some Halloween fun. These spooky treats are quick, easy, and delicious.

Dirt Pudding Cups are an easy Halloween dessert that is sweet, delicious, and creepy - totally on brand for spooky fun. Make worms in dirt in 10 minutes.

Nothing says fall better than Homemade Caramel Apples that are sweet, delicious, and fun to make. Chewy caramel made from scratch covers crisp juicy apples, topped with optional toppings.

Trick or Treat! Easy to make and decorate, bite-sized spooky chocolate cake pops packed with chocolate and sprinkles are the perfect Halloween treat.

Small batch mini pumpkin pies with a flaky crust, delicious pumpkin pie filling, and cinnamon whipped cream, are perfect for a small Thanksgiving crowd.

M&M cookie bars are soft and chewy, have crisp edges with a gooey center, and are loaded with M&M's and chocolate chips. The easiest way to bake cookies! Customize it for Halloween by using Halloween M&M's.

Jello Jigglers are fun, colorful gelatin treats that are smooth in texture and fruity flavored. Customize for any holiday with different colors and shapes. Use orange and purple jello for a Halloween themed dessert.

Pumpkin Chocolate Chip Cookies
Thick, fluffy, chewy pumpkin chocolate chip cookies is when pumpkin bread meets chocolate chip cookies. These no chill cookies are ready in under 20 minutes.
Funfetti shortbread cookie bites are little bites of buttery melt-in-your-mouth shortbread packed with festive sprinkles for a fun holiday treat. Customize it for Halloween by using Halloween colored sprinkles.

Baked Apples are soft, warm, and tender, with a crunchy sweet cinnamon oat filling. This cozy and comforting fall dessert is quick easy to make too.
Moist vanilla cupcakes with buttercream frosting are soft, fluffy, simple, sweet, and delicious. Secret ingredient yogurt keeps them moist for days! Add Halloween sprinkles to make them festive.

This rich, creamy pumpkin mousse is a fall dessert favorite. It's beginner-friendly, no bake, and easy to whip up in 15 minutes before ready to chill.
Festive M&M cookies are super soft and chewy with the crispiest edges. Quick and easy to make in 20 minutes with no chill time. Customize it for Halloween by using Halloween M&Ms.

The cutest bite-sized treat to serve at any event are vanilla cake pops from scratch - luckily, they are actually simple and easy to make! Customize it for Halloween by using Halloween colored sprinkles.

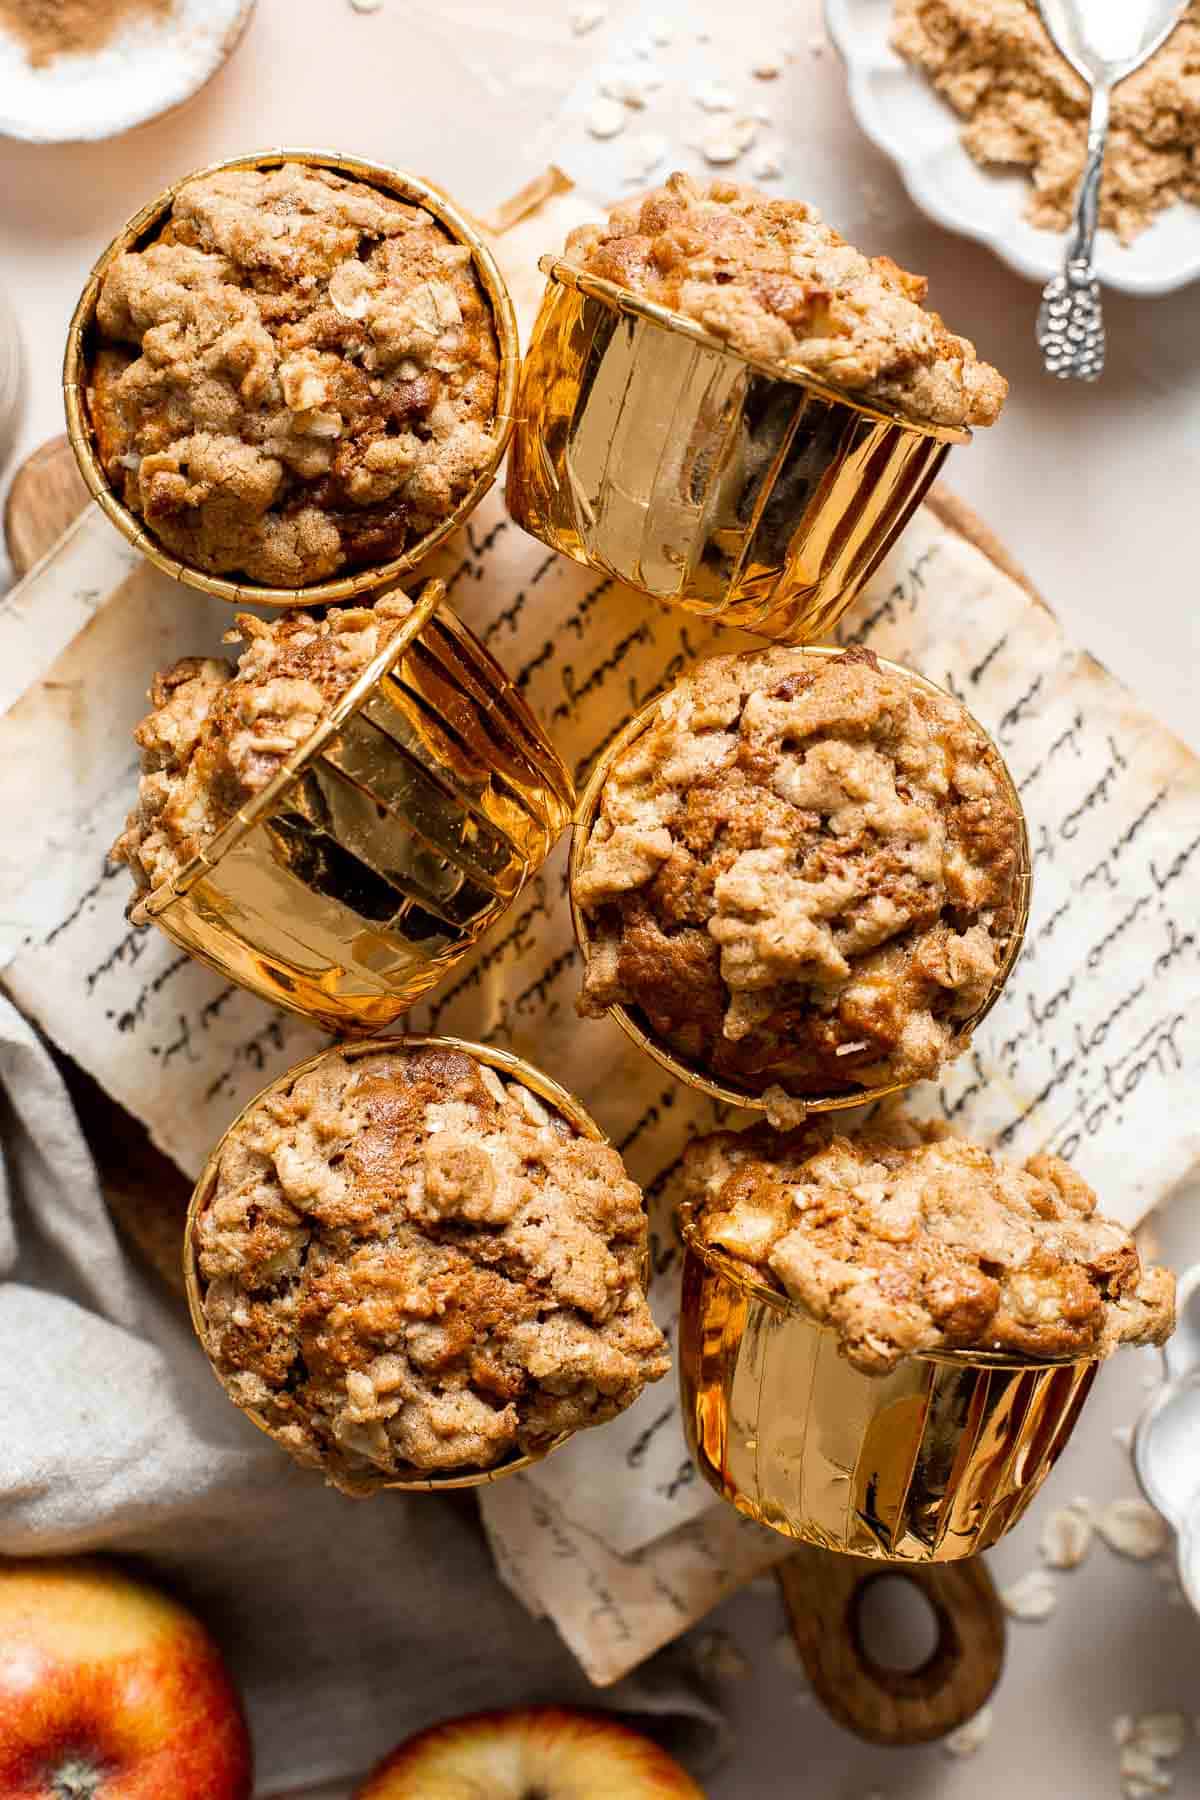
Cinnamon Apple Oatmeal Muffins
Cinnamon Apple Oatmeal Muffins are fast, easy and delicious- loaded with apples, oats, and fall spices. A quick nutritious bite for breakfast or snack time.
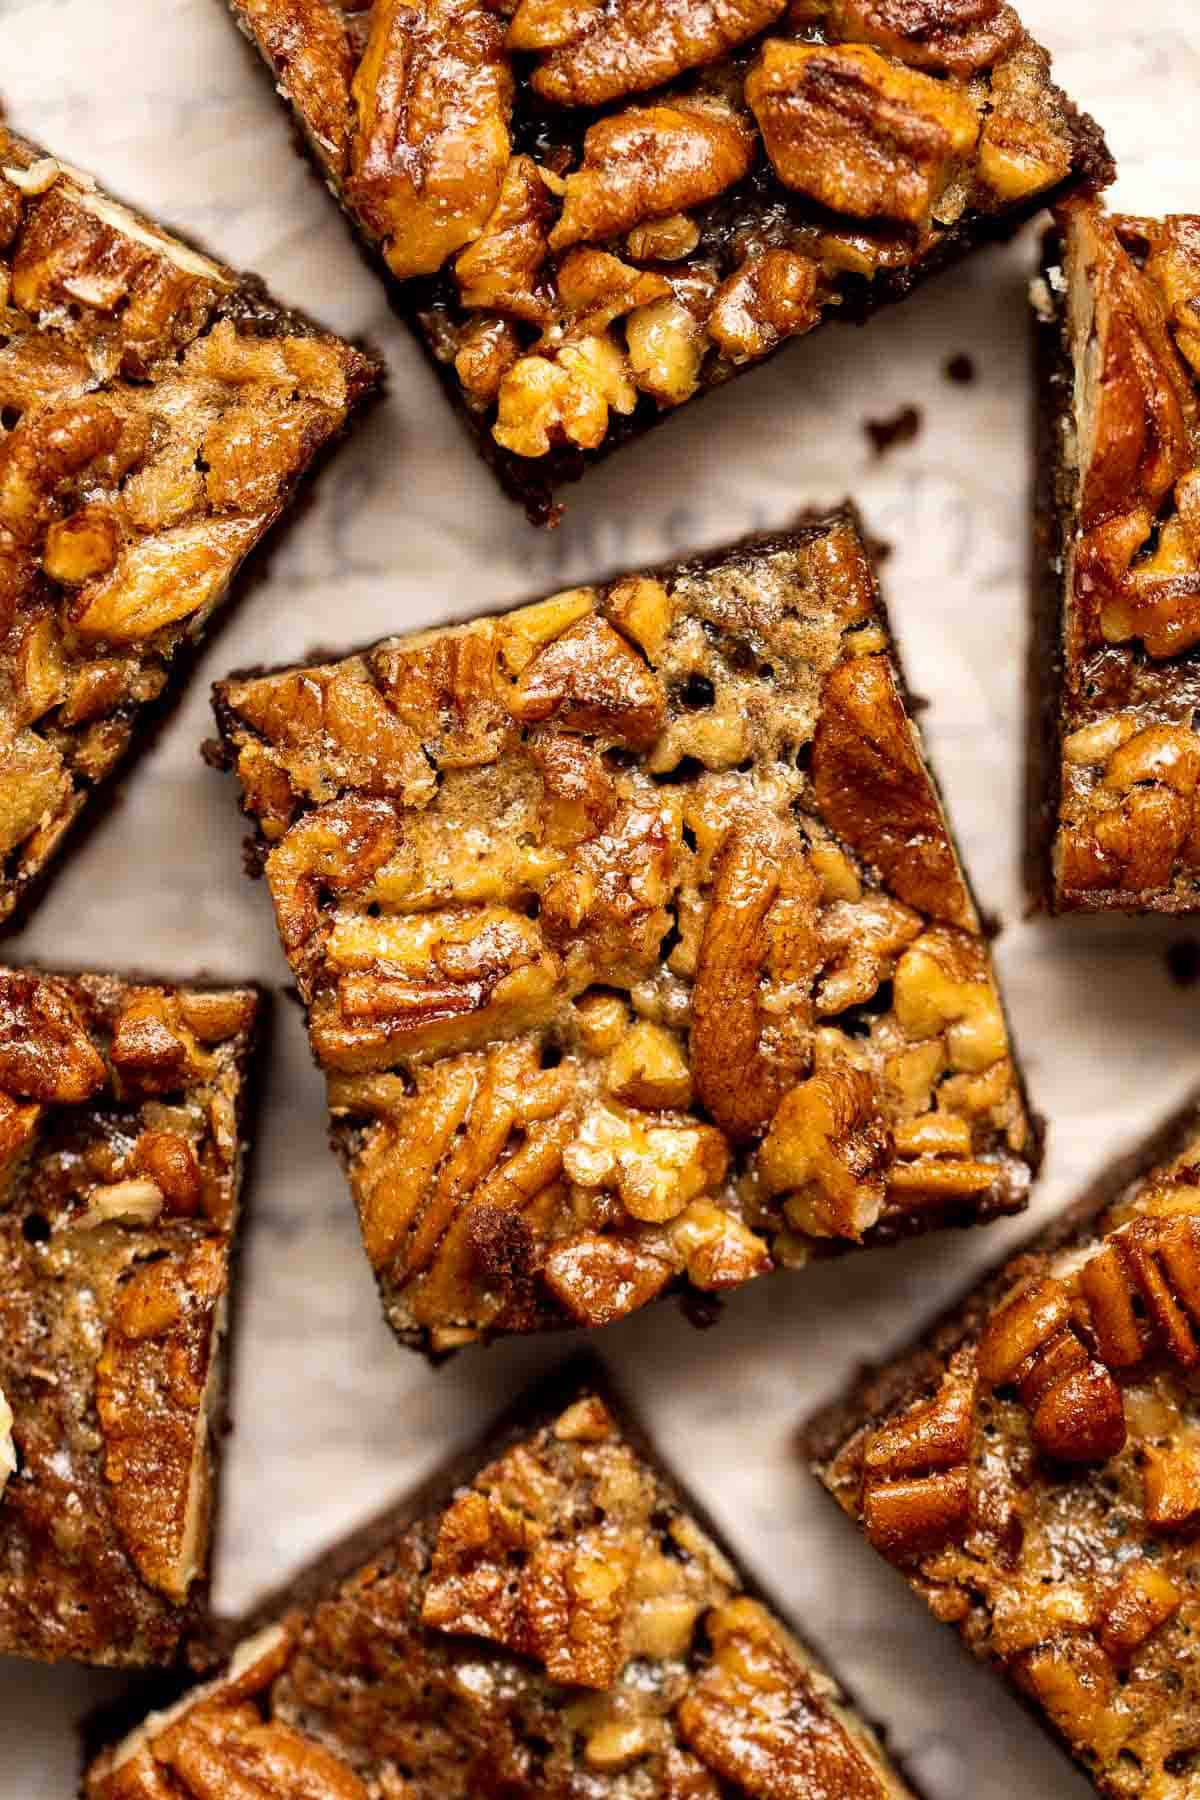
Why make pie or brownies when you can have them both at once? These Pecan Pie Brownies are the perfect fall treat for any occasion - rich, sweet, indulgent.
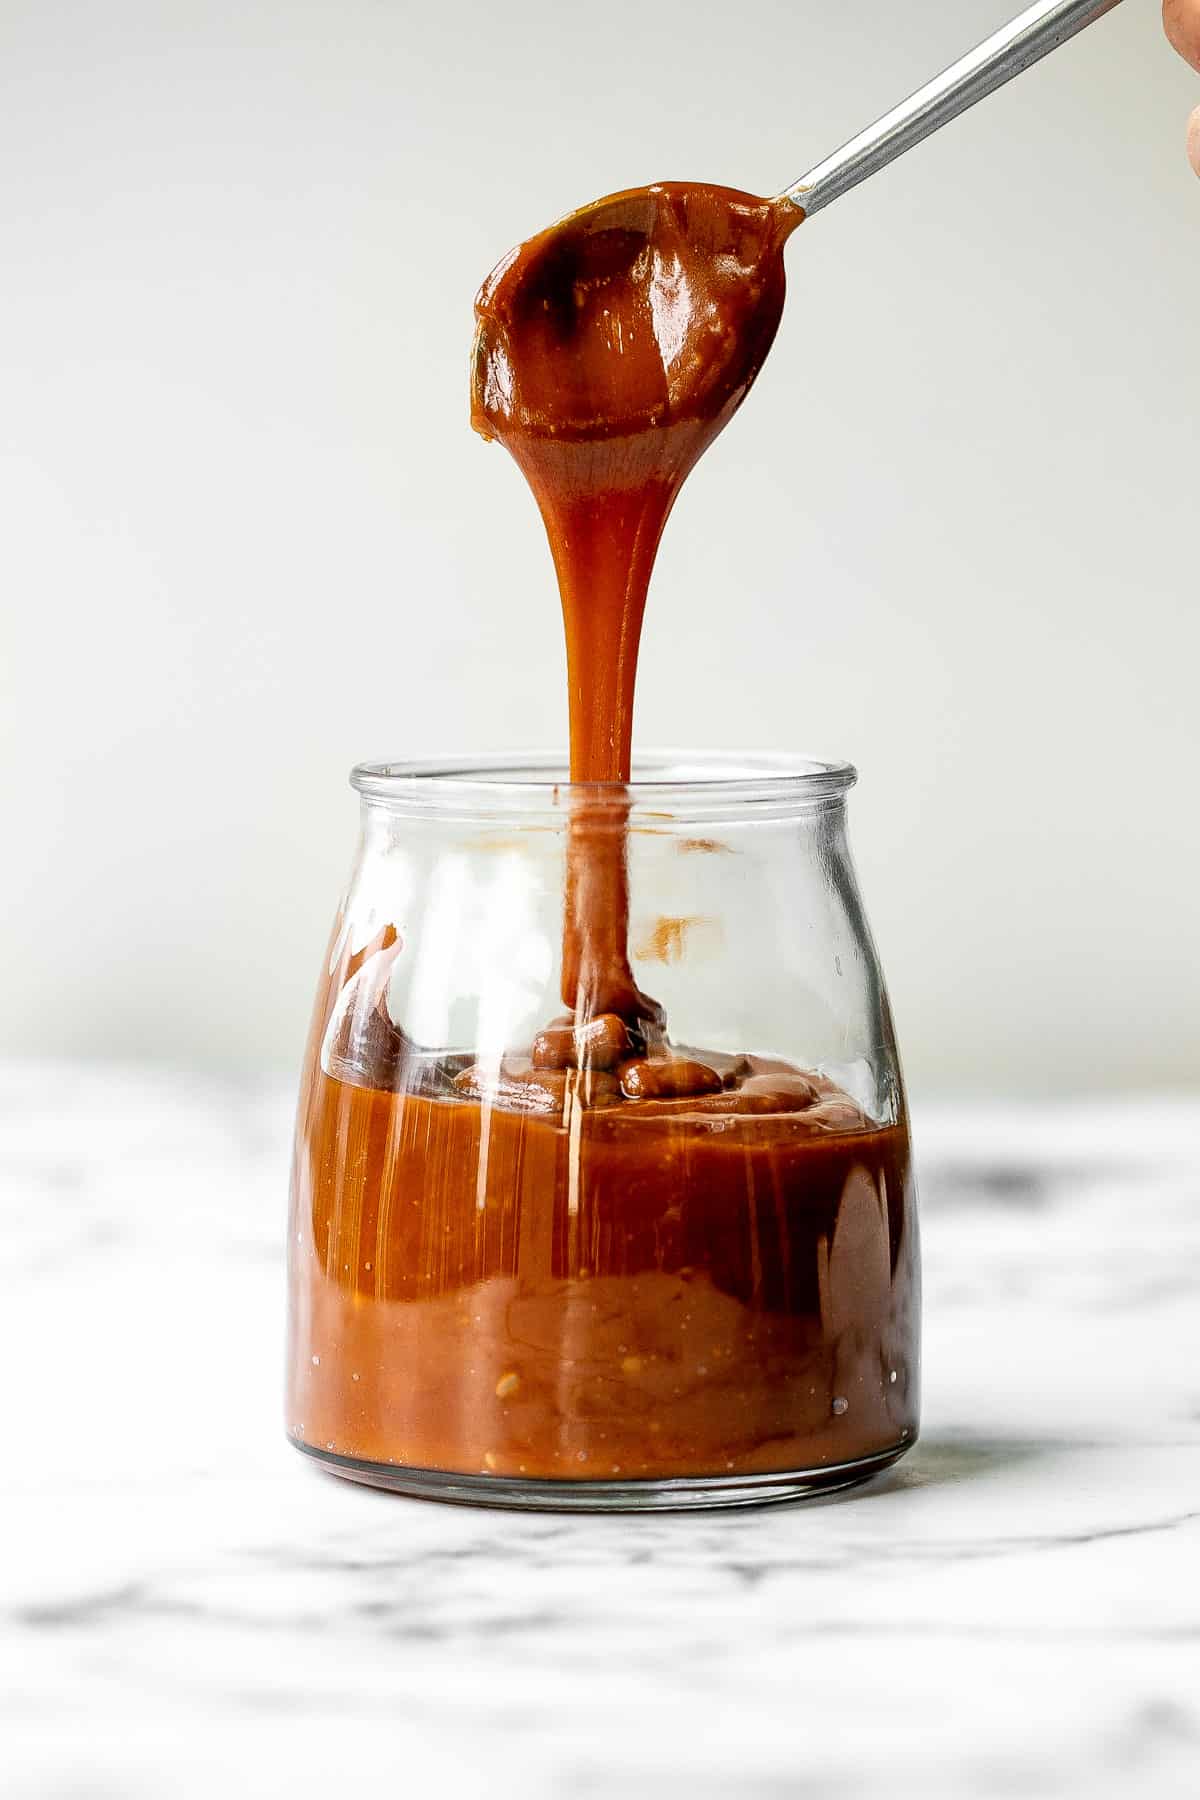
Homemade salted caramel sauce is sweet, salty, and buttery. It's so simple and easy to make at home in just 10 minutes with 4 basic ingredients.
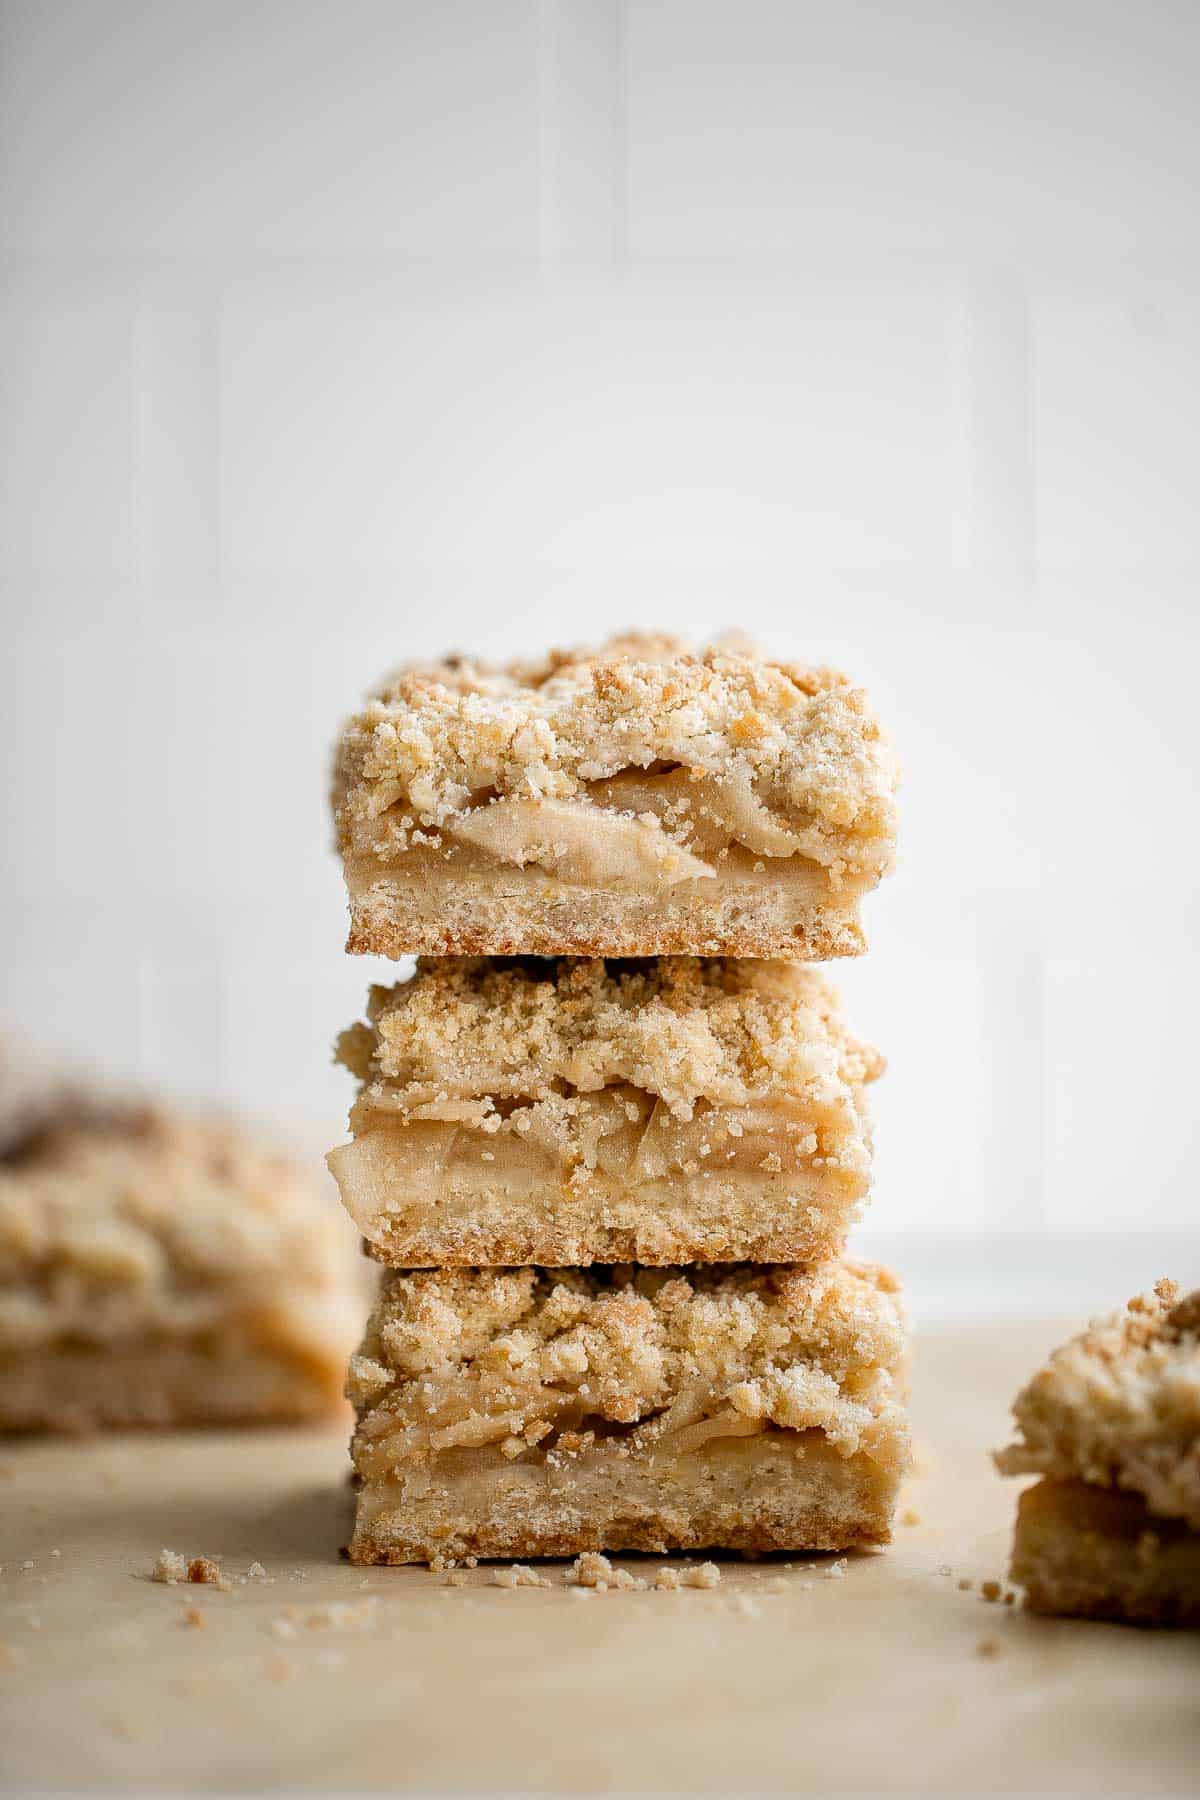
Homemade Apple Pie Bars are sweet, tart, and crumbly. With 3 delicious layers including a flaky pastry crust, cinnamon apple filling, and crumbly topping.
Moist chocolate cupcakes topped with chocolate buttercream frosting and sprinkles, are a chocolate triple threat. They're rich, decadent, sweet, and easy. Top with Halloween sprinkles to make it more festive.

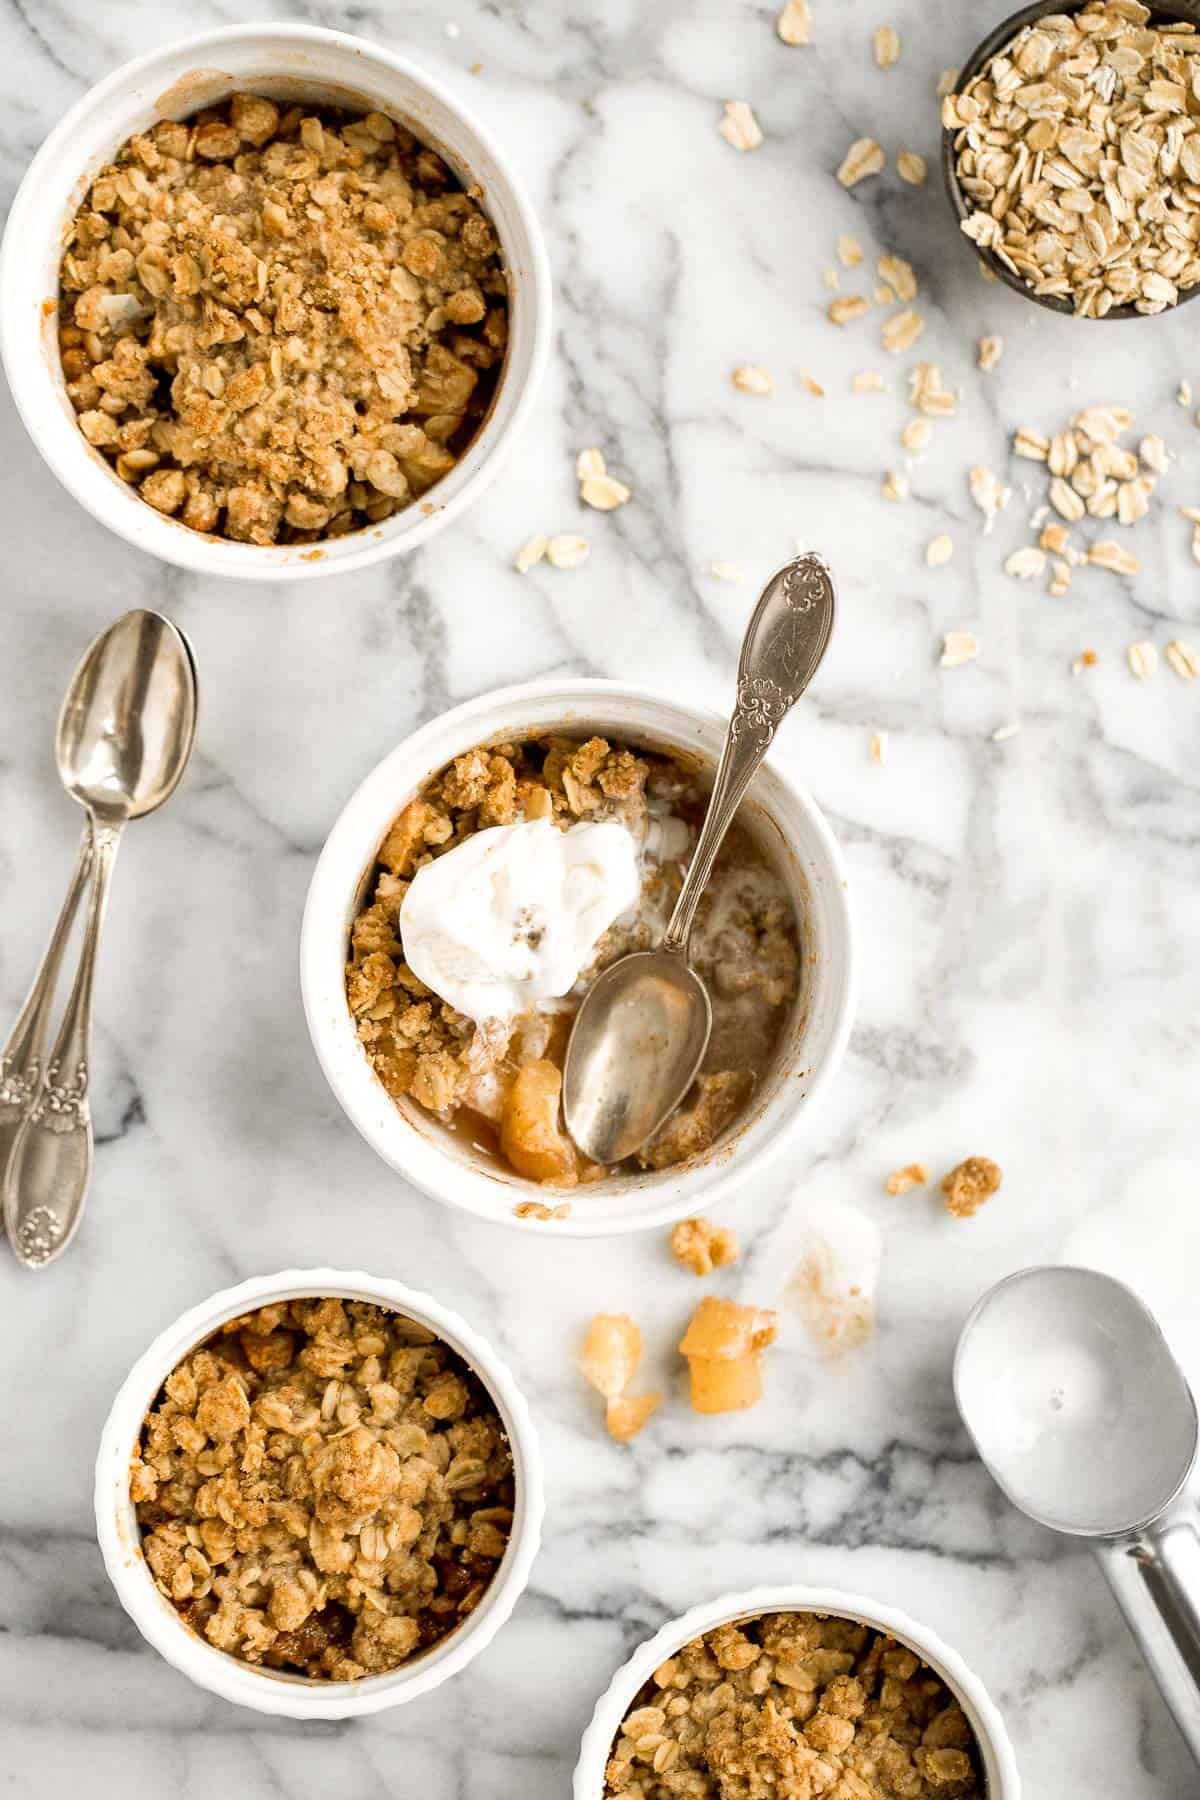
Individual apple crisp is a sweet tart fall dessert served in single-sized portions with all the crunchy corners of crumble. And so quick and easy to prep.
How to Make Ahead and Store
You can make or prepare some of these Halloween dessert recipes ahead of time. Store the desserts and baked goods at room temperature for 1-2 days. You can also store them in the refrigerator for up to one week or in the freezer for up to 3 months. Confirm storing instructions by checking each recipe.
To reheat any of these recipes and serve them warm, reheat in a 300F preheated oven or air fryer for 5-15 minutes until fully warmed through, depending on the recipe. If heating from frozen, let it thaw first and then reheat.
Did You Make Any of These Halloween Dessert Recipes?
Please leave a comment and rating below, and let me know what you thought of this round up of the best Halloween desserts. Be sure to snap a picture and tag me on Instagram @aheadofthyme or share it on the Pinterest pin so that I can follow along.
HUNGRY FOR MORE? Don't forget to sign up for my email newsletter so that you don't miss any recipes. You can also follow along on Instagram and Pinterest for more recipe updates.
Witch Finger Cookies
Get your cauldron bubbling, these creepy Witch Finger Cookies are here to stir up some Halloween fun. Made with a buttery, shortbread-like base and decorated with jam and almonds, these cookies are delicious. Plus, they're easier to make than you think!
Witch Fingers are the perfect treat to serve at a Halloween party, include in your kid's lunchboxes, or to make for a fun family activity this fall. You'll cast a spell on all you encounter with these spooky-yet-scrumptious Halloween cookies.
Why You'll Love the Witch Finger Cookies
- Your kids will love them. This fun treat will delight kids of all ages, from toddlers to too-cool teenagers. They're fun to make, eat, and play with - and it's almost guaranteed that your kids will want to do all three.
- They're edible art. These witch finger Halloween cookies are as much an arts-and-crafts project as they are a baked treat. You can get as detailed (or not) as you wish. You might find yourself experimenting to get your ideal finger shape, knuckle pattern, and strawberry jam "blood" ooze.
- Impressive without being difficult. These witch fingers are one of those treats that look like they take forever to make, but in reality, they're actually very easy and fun to make. In fact, they take just over 1 hour until they are ready to eat with about 25 minutes of actual prep time (depending on how fast or detailed you are).
- Delicious cookies. These festive Halloween cookies are created with a simple dough made of confectioner's sugar, butter, eggs, flour, baking powder, and extracts. When baked, they have a shortbread-like consistency and taste, plus a bite of almond and strawberry jelly.

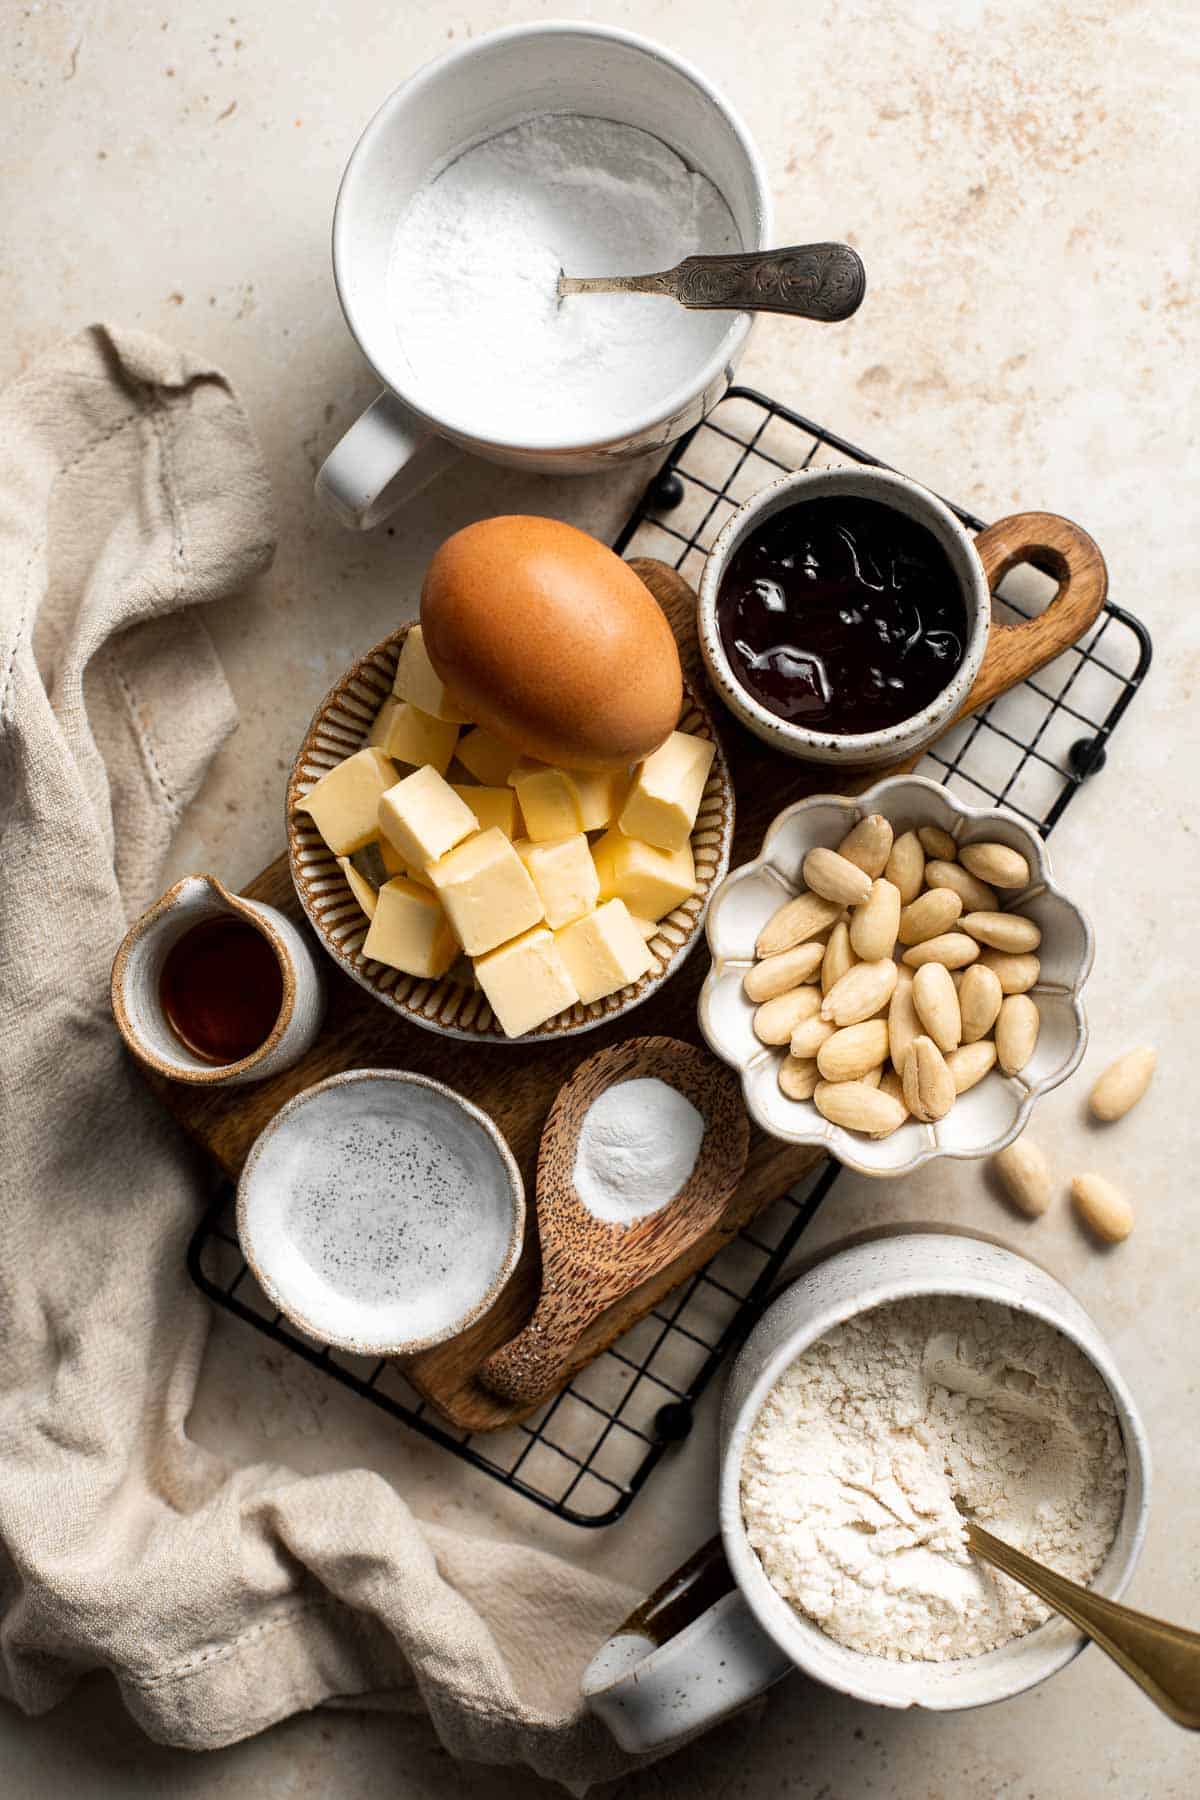
Ingredient Notes
To make these festive Witch Finger Cookies, you will need the following ingredients (full measurements in recipe card below):
- butter - unsalted butter is always the go-to for cooking and baking. Using salted butter may affect the final flavor of these witch finger cookies.
- confectioner's sugar - also known as powdered sugar. We use it instead of granulated sugar because it give the cookies a creamy melt-in-your-mouth texture. You can use granulated sugar instead, but the texture won't be the same.
- egg
- almond extract - almond is one of the classic flavors in this recipe, but you can swap it with a different kind of extract (cinnamon, pumpkin, or omit it).
- vanilla extract
- all-purpose flour - you can try to make this recipe gluten-free by using a measure-for-measure all purpose gluten free flour instead, but the end result may be affected.
- baking powder - baking powder and baking soda are similar but not quite equal - baking powder contains baking soda as well as other components.
- whole blanched almonds - If you can't find blanched almonds, you can blanch them yourself at home!
- strawberry jam - any red jam will do - cherry, red raspberry, or redcurrant will all offer different flavors but will look similar on the "finger".
Equipment
You will also need measuring cups and spoons, mixing bowl, hand mixer or stand mixer, half sheet baking pan, and wire cooling rack.
How to Make the Best Witch Finger Cookies
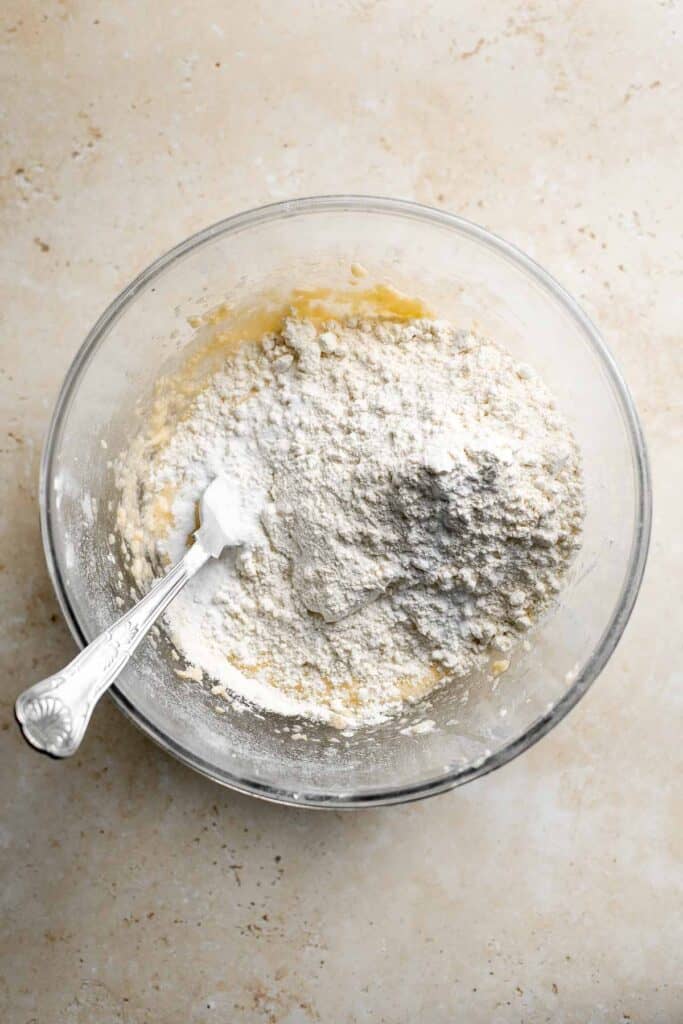
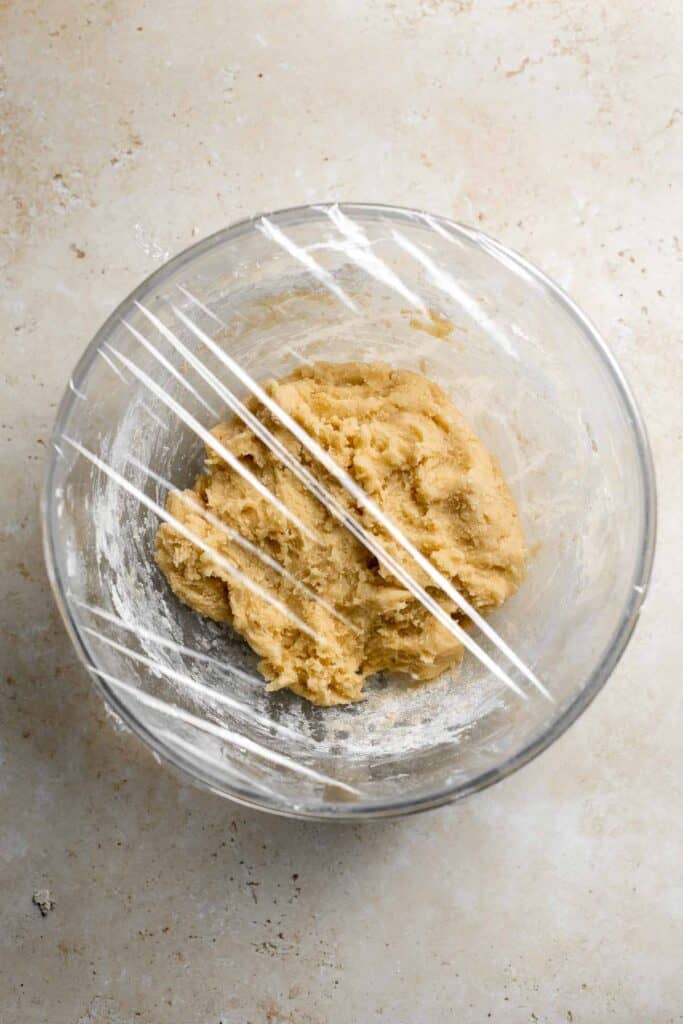
- Make cookie dough. In a large mixing bowl, use a hand mixer (or stand mixer with paddle attachment) to cream together the butter and sugar until light and fluffy, about 1-2 minutes. Add egg, almond extract, and vanilla and beat until incorporated. Stir in the flour and baking powder and mix until just combined. The mixture will be crumbly.
- Chill. Cover the bowl and refrigerate for 10 minutes. Meanwhile, line a large half sheet baking pan with parchment paper or a silicone baking mat.

- Shape cookies. Take half of the dough from the fridge and leave the rest in the fridge. Take a tablespoonful of dough and use your hands to roll it into a finger shape for each cookie (about 3-inches long).
- Add details. Press an almond firmly into 1 end for the nail. Squeeze in the center of the top half and bottom half to create a knuckle shape in the middle. Use a knife to make slashes for under the nail bed and on the knuckles.


- Chill again. Place on a baking sheet. Repeat with remaining dough. Transfer the sheet pan back into the fridge for 15-20 minutes.

- Bake. Bake cookies in a 325F preheated oven for 20-25 minutes or until pale golden.
- Add jam. Let the cookies cool for 3 minutes. Then carefully lift the almonds and place a small amount of strawberry jam in the indented nail bed. I recommend using a piping bag with a fine tip attached. Then, press the almond back in place so that the jam oozes out from underneath.


- Cool. Carefully remove the cookies from the baking sheet and allow them to cool completely on a wire cooling rack.

Storing and Freezing Instructions
How to Store
Transfer the cooled cookies to a sealed plastic bag or airtight container lined with parchment paper and store at room temperature for up to 3-5 days, or in the refrigerator for up to 1 week.
How to Freeze
You can also freeze the cookies between layers of parchment paper in an airtight container for up to 3 months.
How to Store and Freeze Cookie Dough
Form your dough into a ball and wrap it tightly with plastic cling wrap. You can store it in the fridge for up to 3 days before shaping the finger cookies. When ready to use, set the dough on the kitchen counter for 20-30 minutes to soften a little and make it easier to work with.
To freeze the cookie dough, place the plastic wrapped cookie dough ball into a freezer bag or airtight container and store in the freezer for up to 2 months. When ready to use, allow it to thaw overnight in the refrigerator, and then let it sit at room temperature for 20-30 minute before shaping.
Recipe Tips and Tricks
- Make ahead to save time. Not only can you cook these ahead of time, you can also freeze the dough and make them "fresh" whenever you're ready - ensuring you always have enough time to make them for Halloween festivities!
- Add food coloring. This recipe will create flesh-colored witch finger cookies, but you can also add dye to make them creepier. Try classic green or make them purple, red, or blue.
- Paint the "nails". Have a little extra time on your hands? Dip the nails in colored white chocolate or regular melted chocolate to add another layer of flavor and color.

More Halloween Recipes
- 25 Best Halloween Desserts
- Halloween Bark
- Dirt Pudding Cups
- Caramel Apples
- Spooky Chocolate Cake Pops
- Baked Apples
Tried this recipe?
I'd love to hear what you think! Leave a comment and rating below to share your feedback. Your reviews help others discover this recipe and help me keep creating more free recipes for you. Snap a photo and tag me on social media @aheadofthyme too.

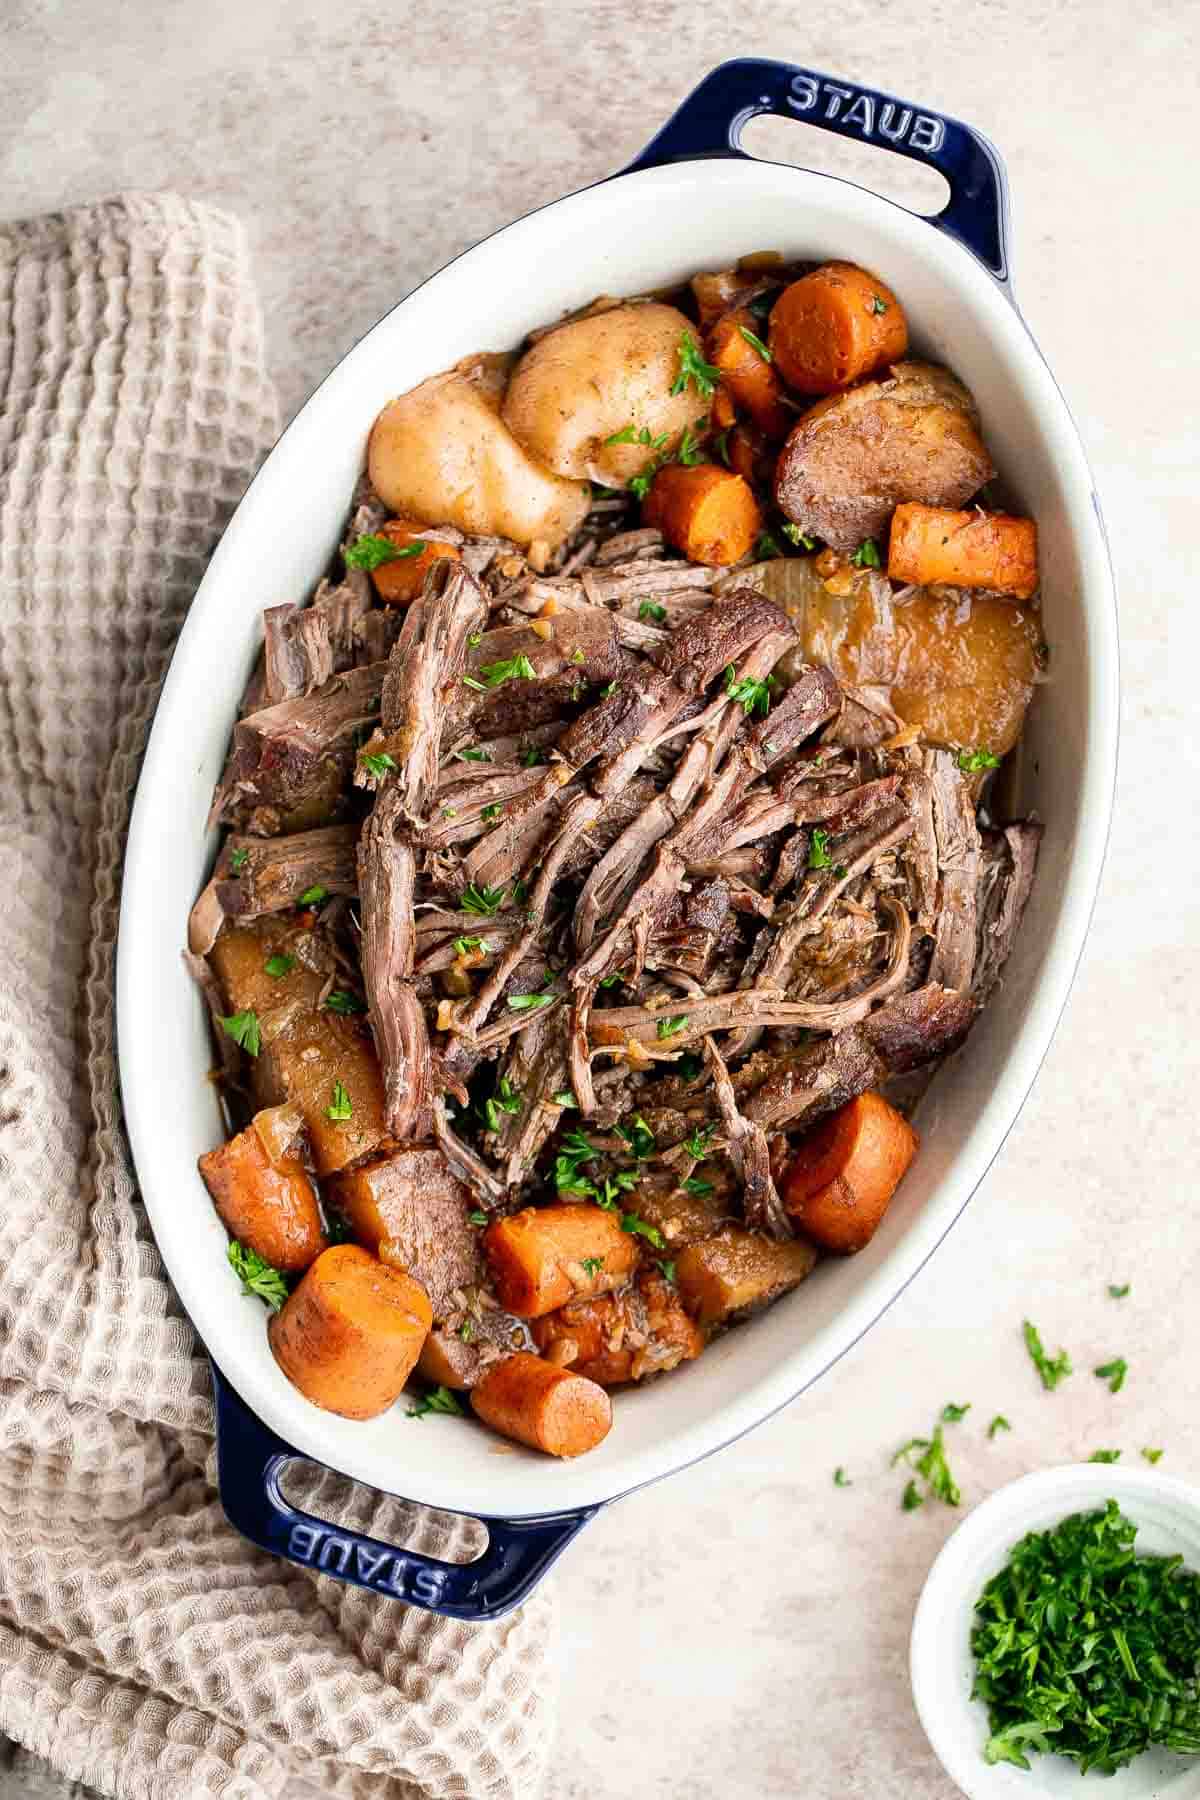
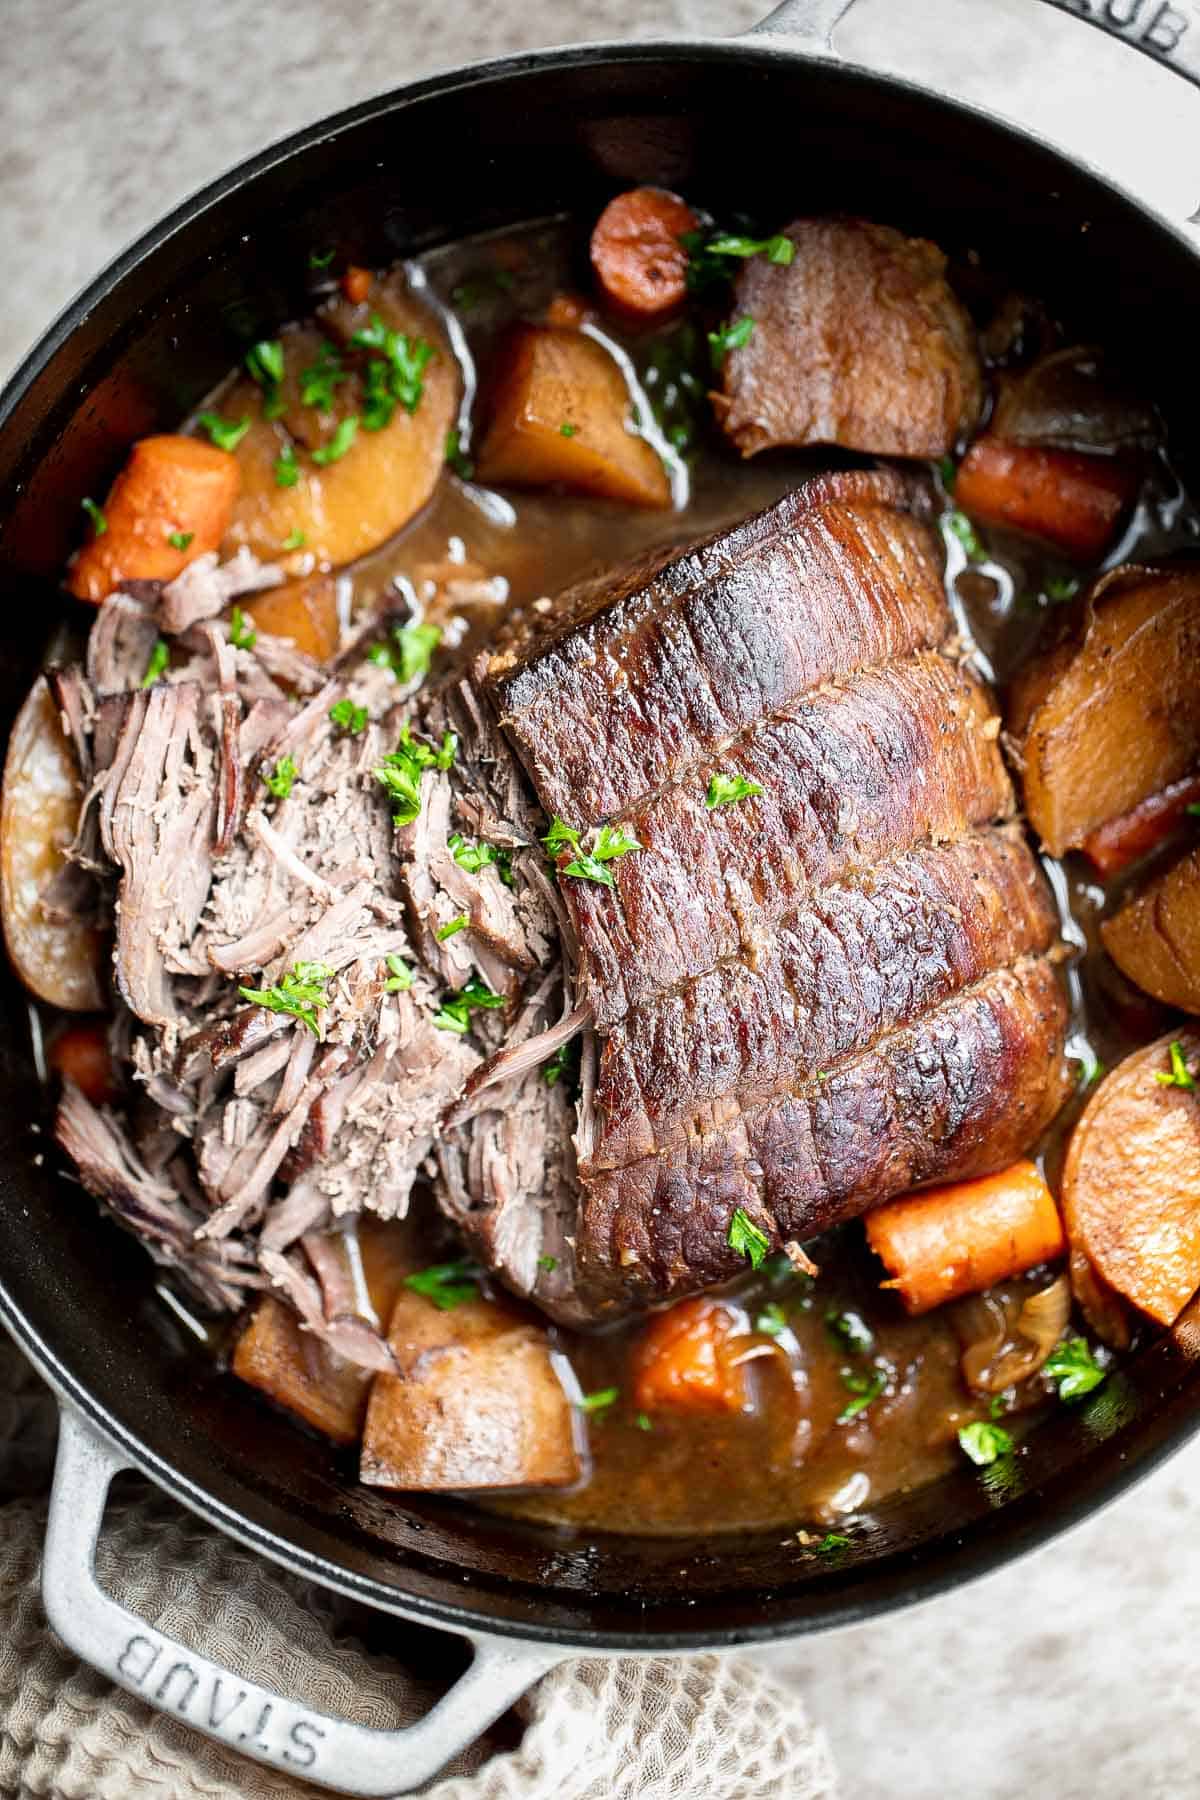
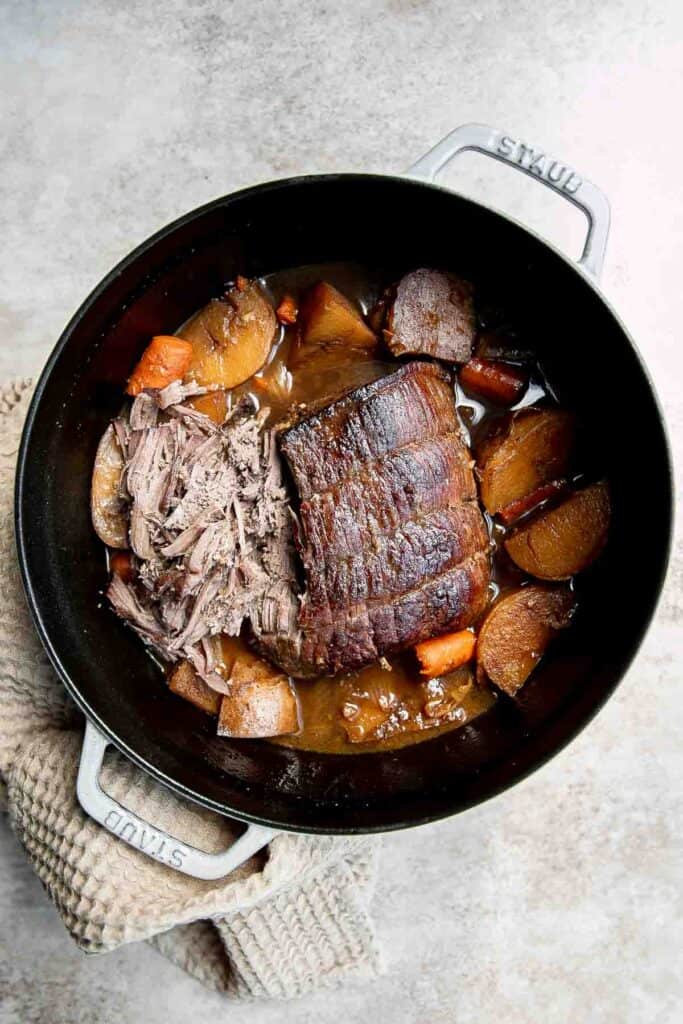
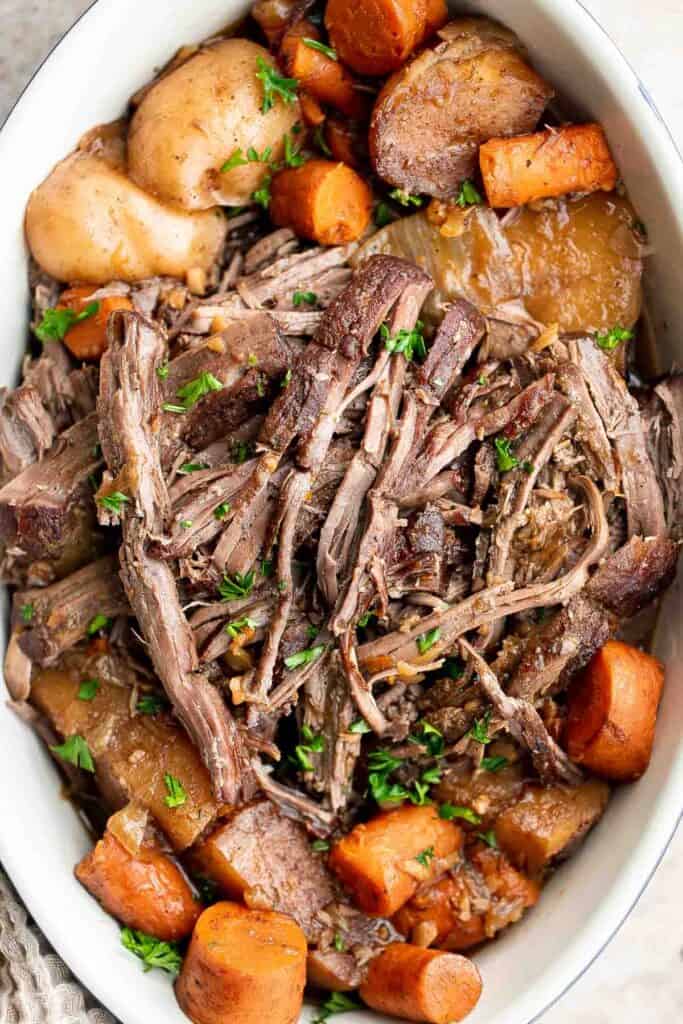
Sunday Pot Roast
There's nothing better than a classic Pot Roast for Sunday Dinner. It's hearty, wholesome, and filling comfort food that can feed the whole family and then some! This easy to make recipe takes just 15 minutes of actual prep work before ready to cook for a few hours in a traditional oven braise.
After searing your roast, you'll bake it in a rich broth alongside carrots, onions, and potatoes for a cozy Sunday dinner idea. Plus, with this traditional pot roast recipe, you don't need any fancy equipment like a crockpot or instant pot - only a pot that is safe on the stovetop and in the oven.
Why You'll Love this Sunday Pot Roast
- It's easy to make. You'll want to get started early because this pot roast takes 3 hours to cook. Despite the long cook time, you really only need to set aside 15 minutes of actual prep time, while you let the oven do the rest. This classic Sunday dinner takes little effort to reap an incredible reward.
- Beef and potatoes. What more can I say? This classic pot roast is complete with potatoes, carrots, and onions, which cook to perfection alongside your preferred cut of beef. It's hearty, comforting, and cozy. The best kind of dinner to enjoy on Sundays, or any night of the week that you have time to cook it.
- Flavorful ingredients. There are plenty of reasons why this is the best pot roast recipe, like the generous addition of Worchestershire sauce, onions, and a heaping pile of fresh garlic. But red wine is the secret ingredient that makes this pot roast so good.

Ingredient Notes
To make this Sunday Dinner Pot Roast, you will need the following ingredients (full measurements in recipe card below):
- beef chuck roast - we recommend using a beef chuck roast because it is tender and falls apart easily, making it really easy to shred too. You could also use a round roast which is leaner and easy to slice.
- salt and pepper
- vegetable oil
- garlic - freshly minced garlic is always best for fresh flavor, but if you're short on time, you can use pre-minced garlic. Use 1 tablespoon minced garlic for each clove called for in the recipe.
- onion - white or sweet onions work well.
- carrots - slice your carrots into 2-inch pieces. If you slice them too thinly, they will get mushy and essentially disintegrate into the broth.
- all-purpose flour
- red wine - this is optional, but recommended. It adds a rich flavor that brings out the natural flavor of the beef really well.
- beef broth - we used our homemade Slow Cooker Bone Broth, but feel free to use any beef broth you have on hand.
- red potatoes - there is no need to peel the potatoes. Yukon gold or baby potatoes also work well in this pot roast (skin on). You can substitute with russet potatoes as well, but peel the skin off in that case.
- Worcestershire sauce
- parsley - optional, for serving. You can also serve this with other fresh herbs you have on hand such as rosemary, thyme, sage, or oregano.
You will also need measuring cups and spoons and a large Dutch oven (I used my 5.5 quart Dutch oven).
How to Make the Best Pot Roast
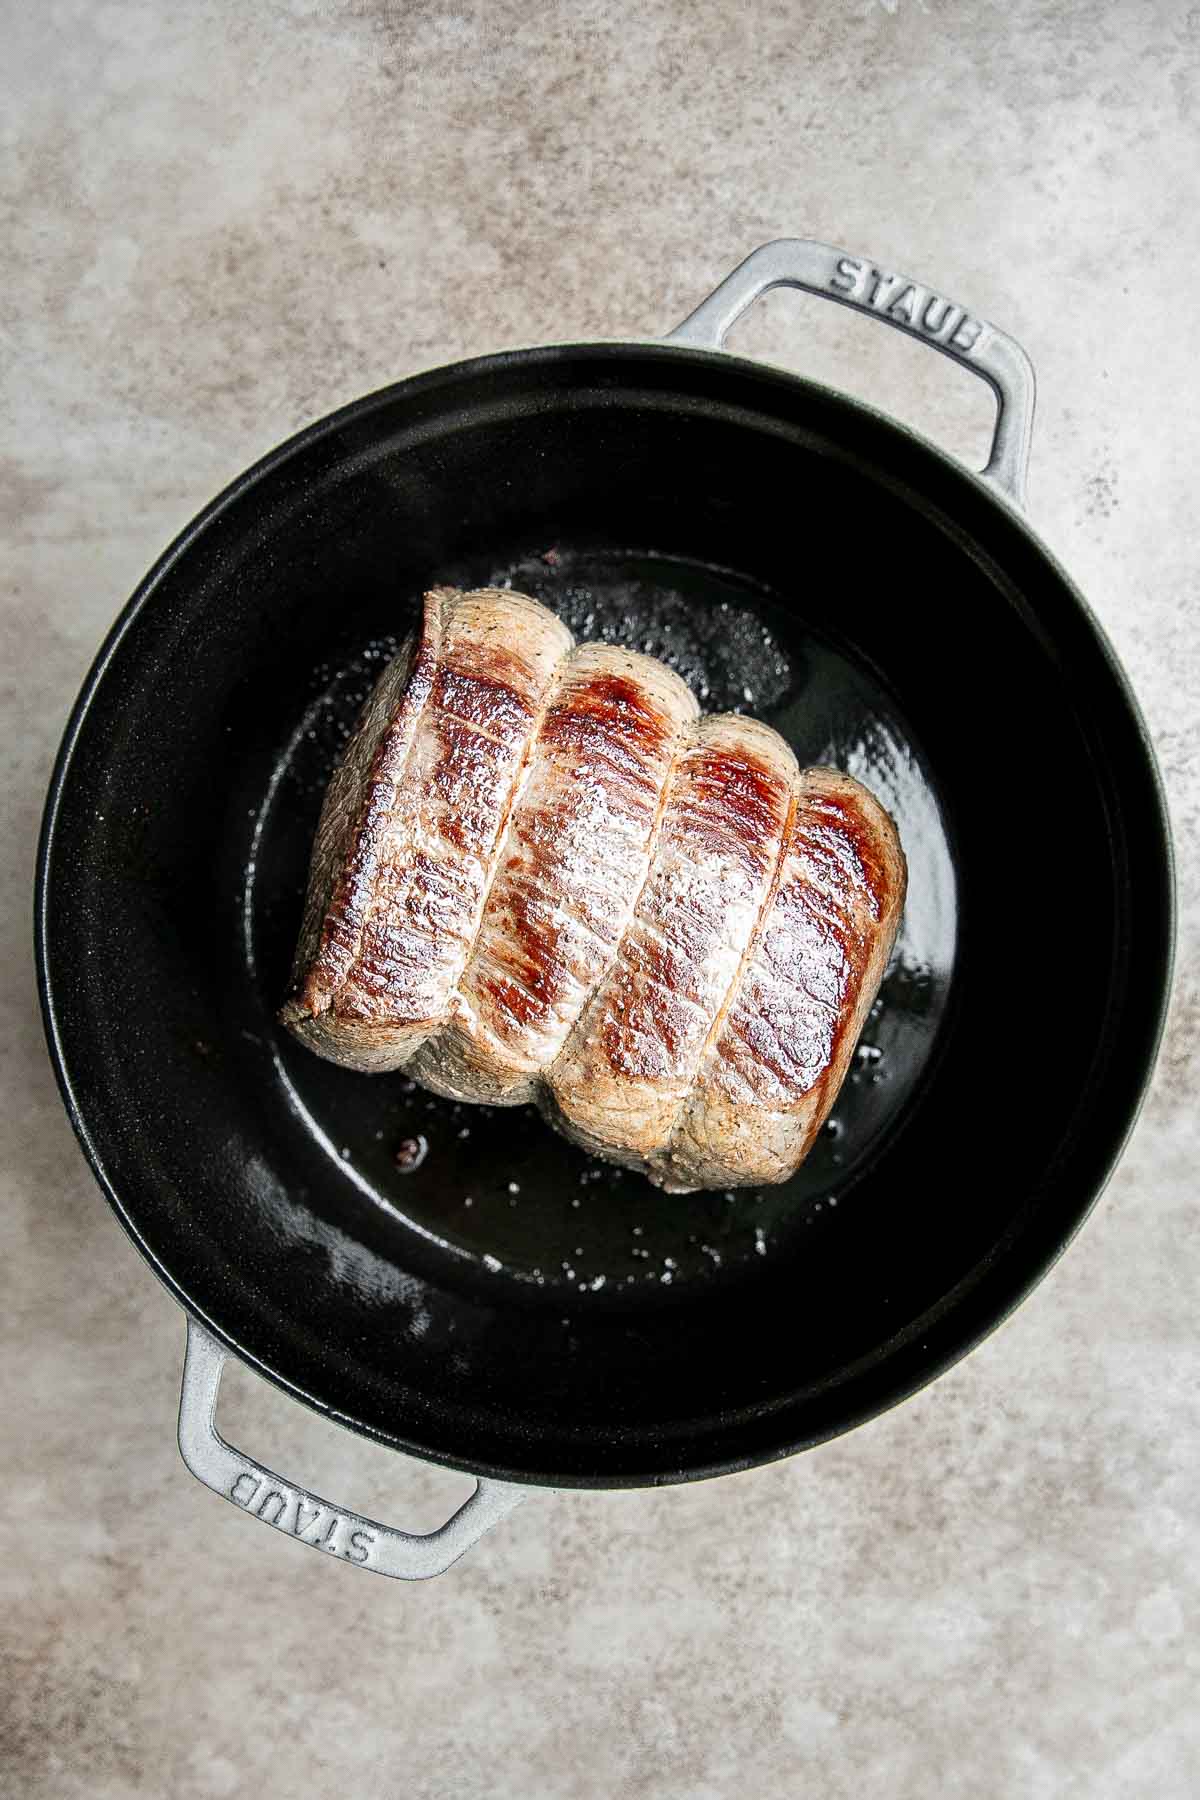
- Season the beef. Use a paper towel to pat the beef roast completely dry. Generously rub salt and pepper evenly over the roast. Set aside for at least 30 minutes or refrigerate overnight. Once ready to cook after refrigerating, it's ideal to bring the marinated beef to room temperature to achieve even cooking and juicier meat, about 20-30 minutes.
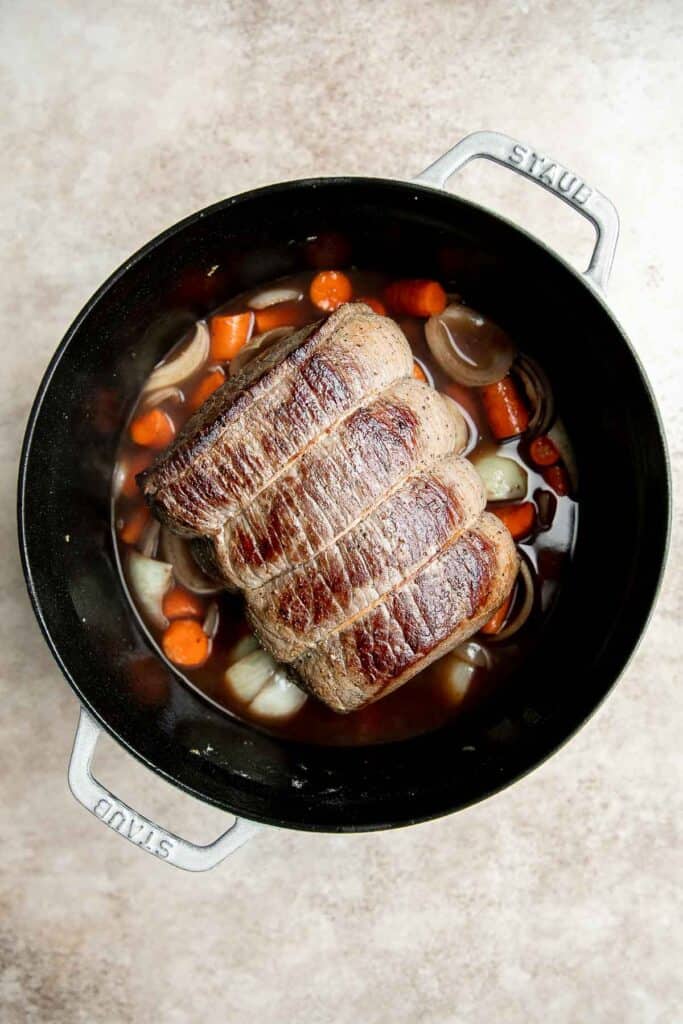
- Sear. Sear the beef roast in a large 5.5 quart Dutch oven over medium-high heat until browned on all sides, about 3-4 minutes per side. Transfer to a plate.
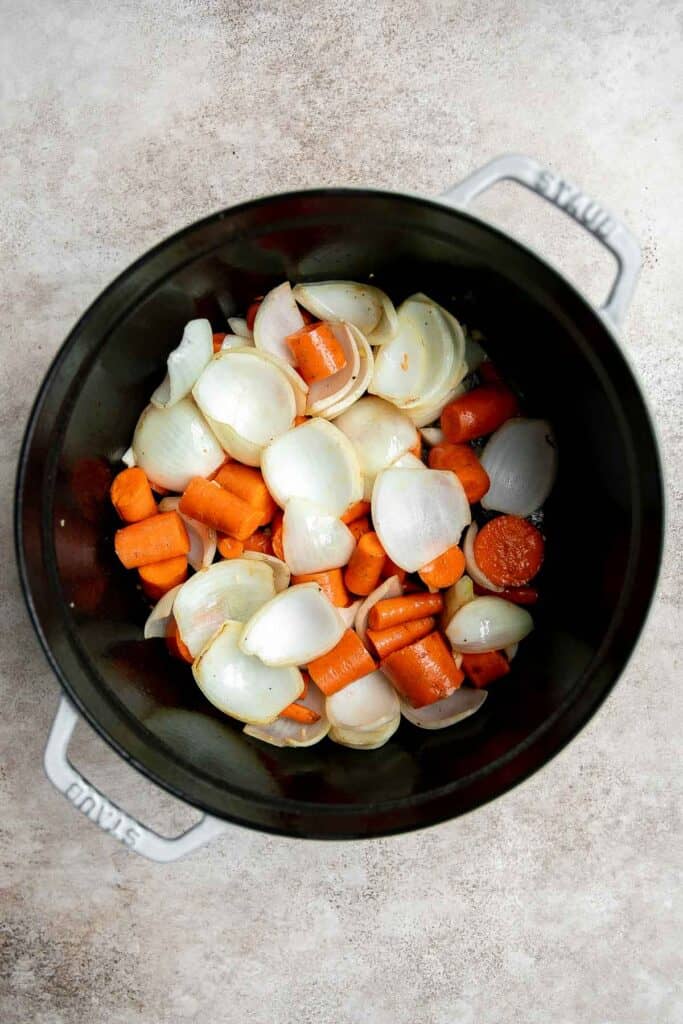
- Combine ingredients. In the same pot, add garlic, onions, and carrots and sauté for 1 minute. Stir in flour and cook for 1 minute. Add wine and broth. Use a spatula to mix well and deglaze the pan.
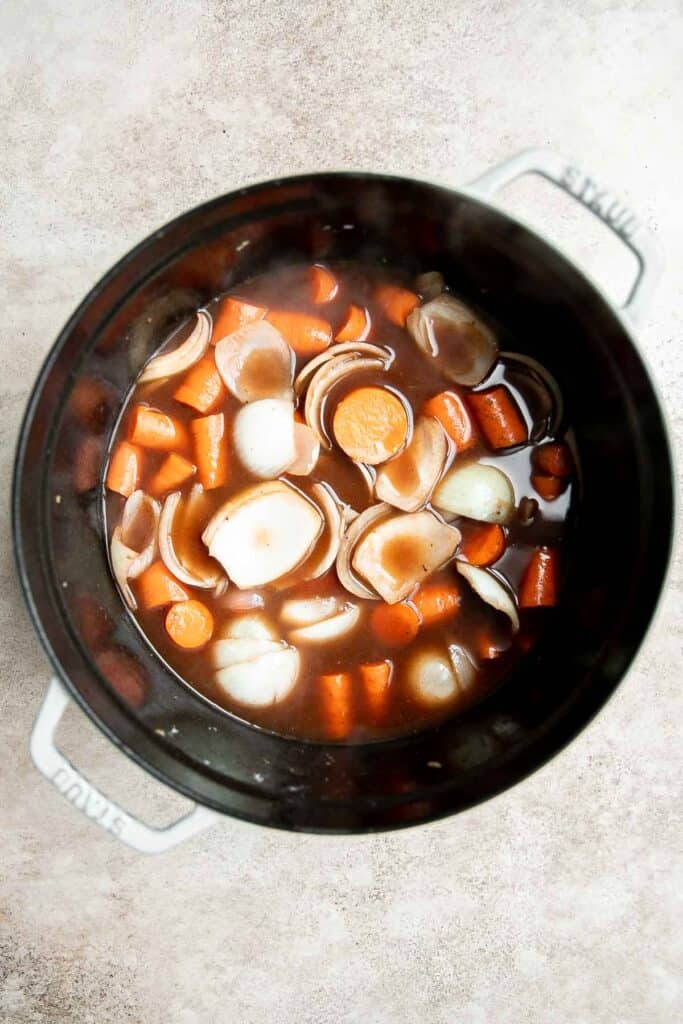
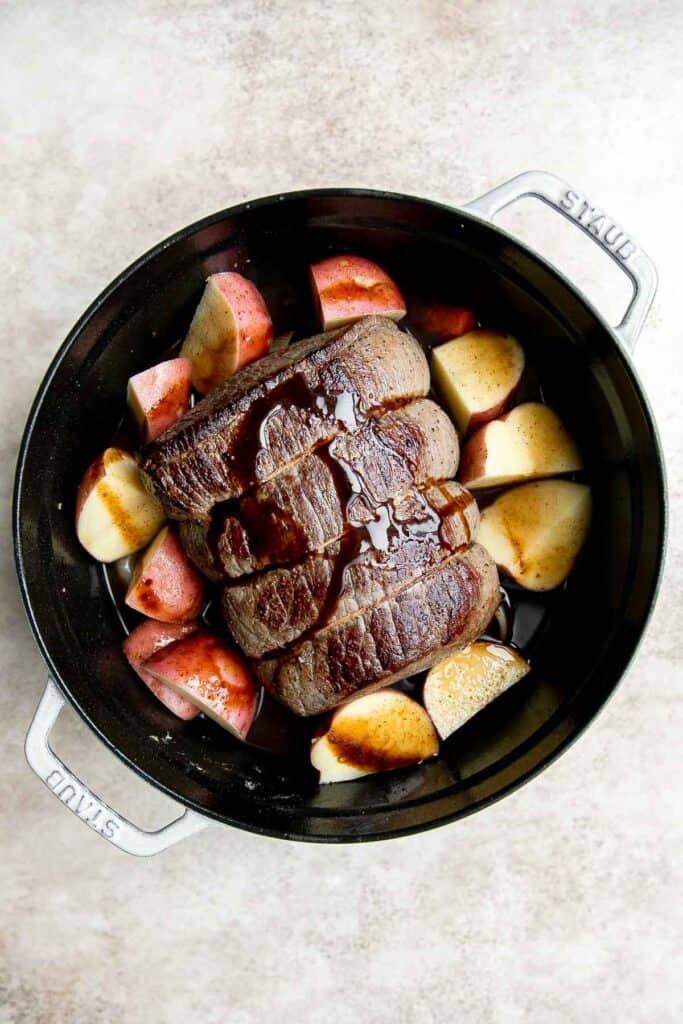
- Add beef and potatoes. Return the beef roast to the middle of the pot. Arrange the potatoes around the roast. Add Worcestershire sauce over the roast and potatoes and cover the lid.
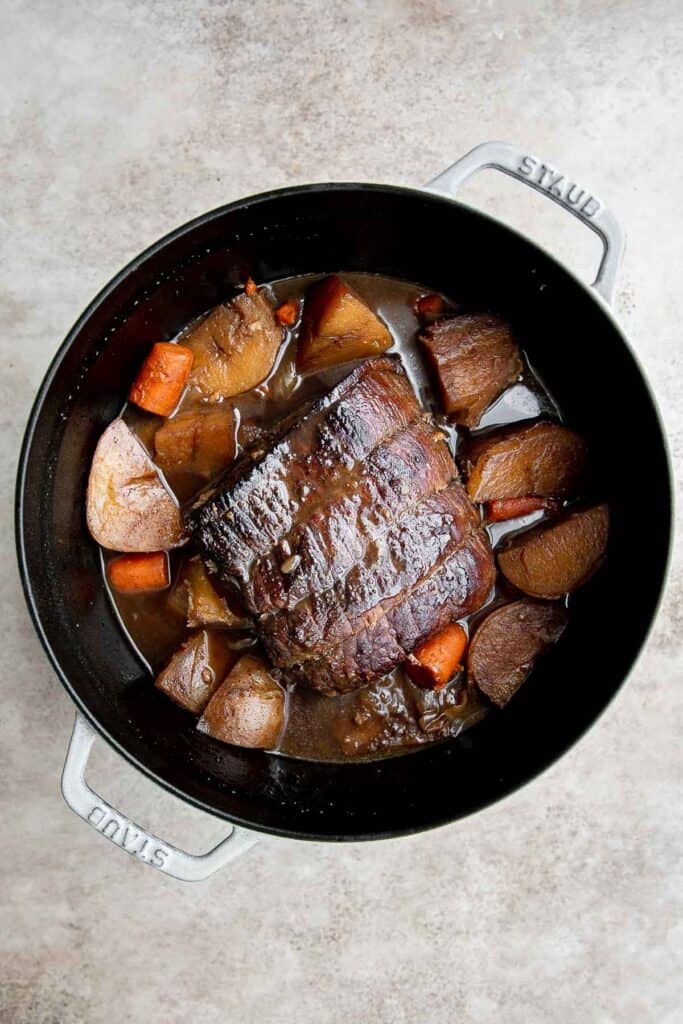
- Bake. Transfer the Dutch oven into a 350F preheated oven and bake for 3 hours until the roast is fork tender and fully cooked through. For a 4 to 5 pound roast, bake for 4 hours. Insert a fork to check doneness. If the fork goes in with no resistance, it's ready.
- Serve. Garnish with fresh parsley and serve warm.
How to Cook in the Instant Pot
- On the Instant Pot, turn the sauté function on high. Add the seasoned beef roast and sear until browned on all sides, about 8-10 minutes.
- Add in the remaining ingredients and mix well. Seal the lid and turn the steam release knob to SEAL position. Pressure cook for 1 ½ hours until completely tender. Once the time is up, quick release the remaining pressure by turning the steam release valve to the venting position.
How to Cook in the Slow Cooker
- In a large skillet or Dutch oven, heat oil over medium-high heat until sizzling hot, about 1 minute. Sear the seasoned beef roast on all sides, about 3-4 minutes per side. Transfer to a plate.
- Transfer the roast into a slow cooker/crockpot and add in the remaining ingredients. Mix well. Close the lid and set to cook for 8-10 hours overnight on LOW or 4-6 hours on HI. When time is up, the slow cooker will automatically switch to WARM setting.
How to Serve
This Sunday Pot Roast is delicious served on its own with the veggies that it is cooked with, or paired with some of my favorite sides including:
- Cheddar Mashed Potatoes
- Potato Dinner Rolls
- Steamed Rice
- Roasted Harvest Vegetables
- Sautéed Garlic Mushrooms
- Creamed Spinach
- Sweet Kale Salad
For more, see our 50 Sunday Dinner Ideas.
Storing Instructions
- How to store: Once cooled to room temperature, store leftover pot roast in an airtight container in the fridge for 4-5 days.
- How to freeze: You can also freeze this pot roast! I recommend portioning it into freezer bags or meal prep containers with the juice surrounding the beef. Then, freeze for up to 3 months. Many people choose to omit the carrots and potatoes since they often become mushy or grainy when frozen. When ready to eat, it's best to thaw frozen pot roast overnight in the fridge, and then reheat.
- How to reheat: Reheat cold pot roast over medium heat in a covered pan on the stovetop until warmed through, about 10-30 minutes (depending on how much pot roast you're reheating). You can also reheat leftover pot roast in the microwave. For best results, heat in 45-second increments on medium heat, stirring frequently.
How to Use Leftover Beef
Use your leftover pot roast in almost any recipe that calls for leftover beef. Some of our most popular recipes are:
- Pot Roast Soup
- Beef Stroganoff
- Beef Noodle Stir Fry
- Shredded Beef Enchiladas
- Beef Wild Rice Soup

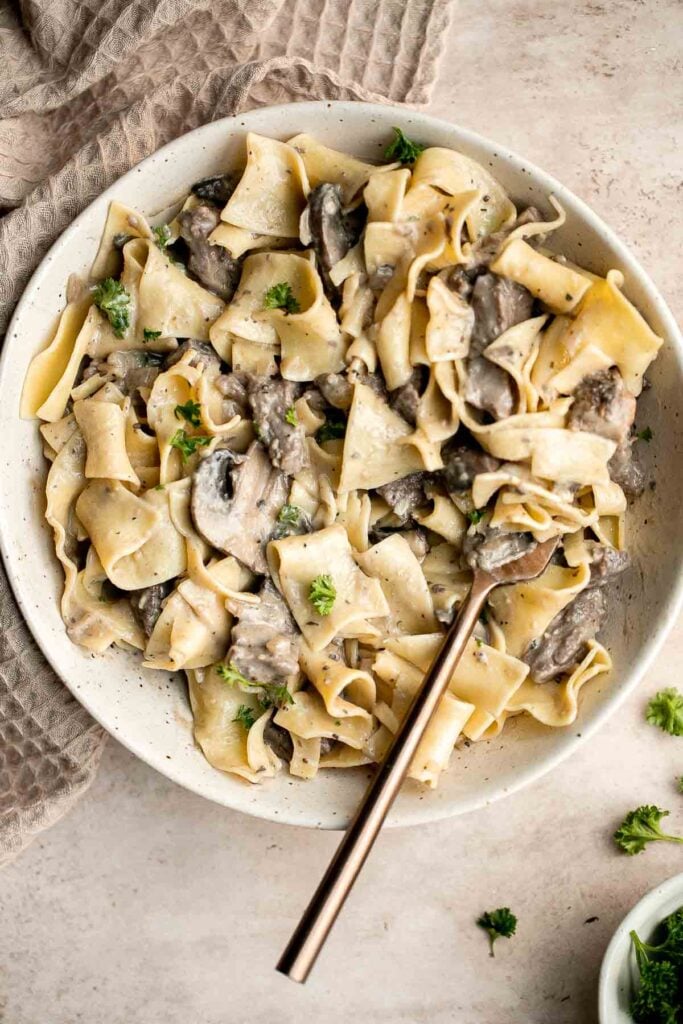
More Beef Recipes
- Roast Beef
- Ribeye Steak
- Beef Wild Rice Soup
- Garlic Butter Steak Bites
- Beef Stroganoff
- Beef and Broccoli Stir Fry
Tried this recipe?
I'd love to hear what you think! Leave a comment and rating below to share your feedback. Your reviews help others discover this recipe and help me keep creating more free recipes for you. Snap a photo and tag me on social media @aheadofthyme too.
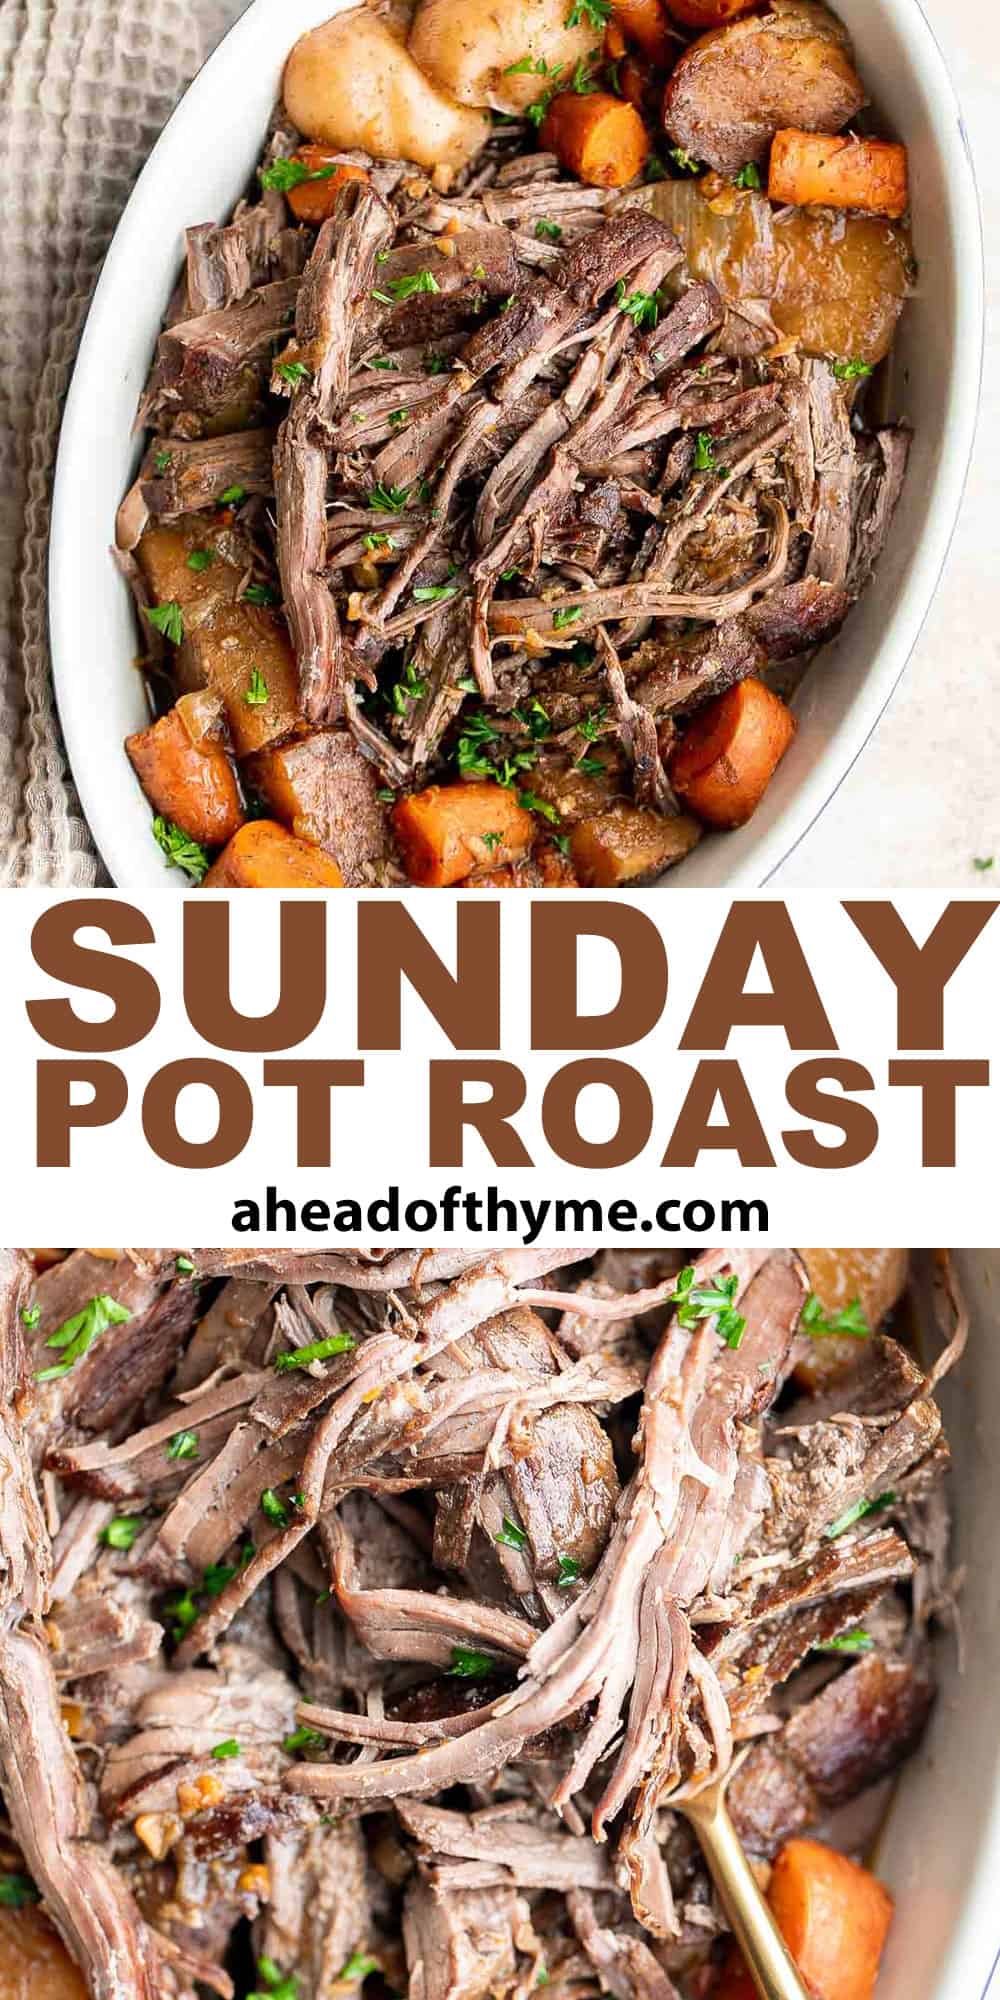
Dirt Pudding Cups
Dirt Pudding Cups are the easy Halloween dessert that you have been looking for. They are sweet, delicious, and creepy - totally on brand for spooky fun. Make worms in dirt in just 10 minutes of active prep time with chocolate pudding from scratch or use store-bought. It's a perfect recipe to make with the kids!
Rich and creamy chocolate pudding is covered with crushed oreos and topped with gummy worms. Dirt pudding is a Halloween treat that the whole family will love. Plus, it stores well and is easy to make ahead. Great for entertaining.
Why You'll Love these Dirt Pudding Cups
- Festive Halloween treat. Dirt and worms are a classic Halloween treat that are a must at any Halloween themed party or event. They are a great dessert for entertaining.
- A fun activity for kids. This recipe is so easy to make, especially if you are using store-bought pudding. It's so easy that you can (and should!) get the whole family involved in. Kids love to assemble these creepy crawly pudding cups - from spooning the pudding into the jar, sprinkling the "dirt" on top, and carefully arranging the gummy worms.
- Make it on your terms. Customize this recipe to suit your schedule. Whether that is making the chocolate pudding completely from scratch (and needing a few hours to let it set), using an instant pudding mix to make it in minutes, or use pre-made chocolate pudding - whatever you have time for!
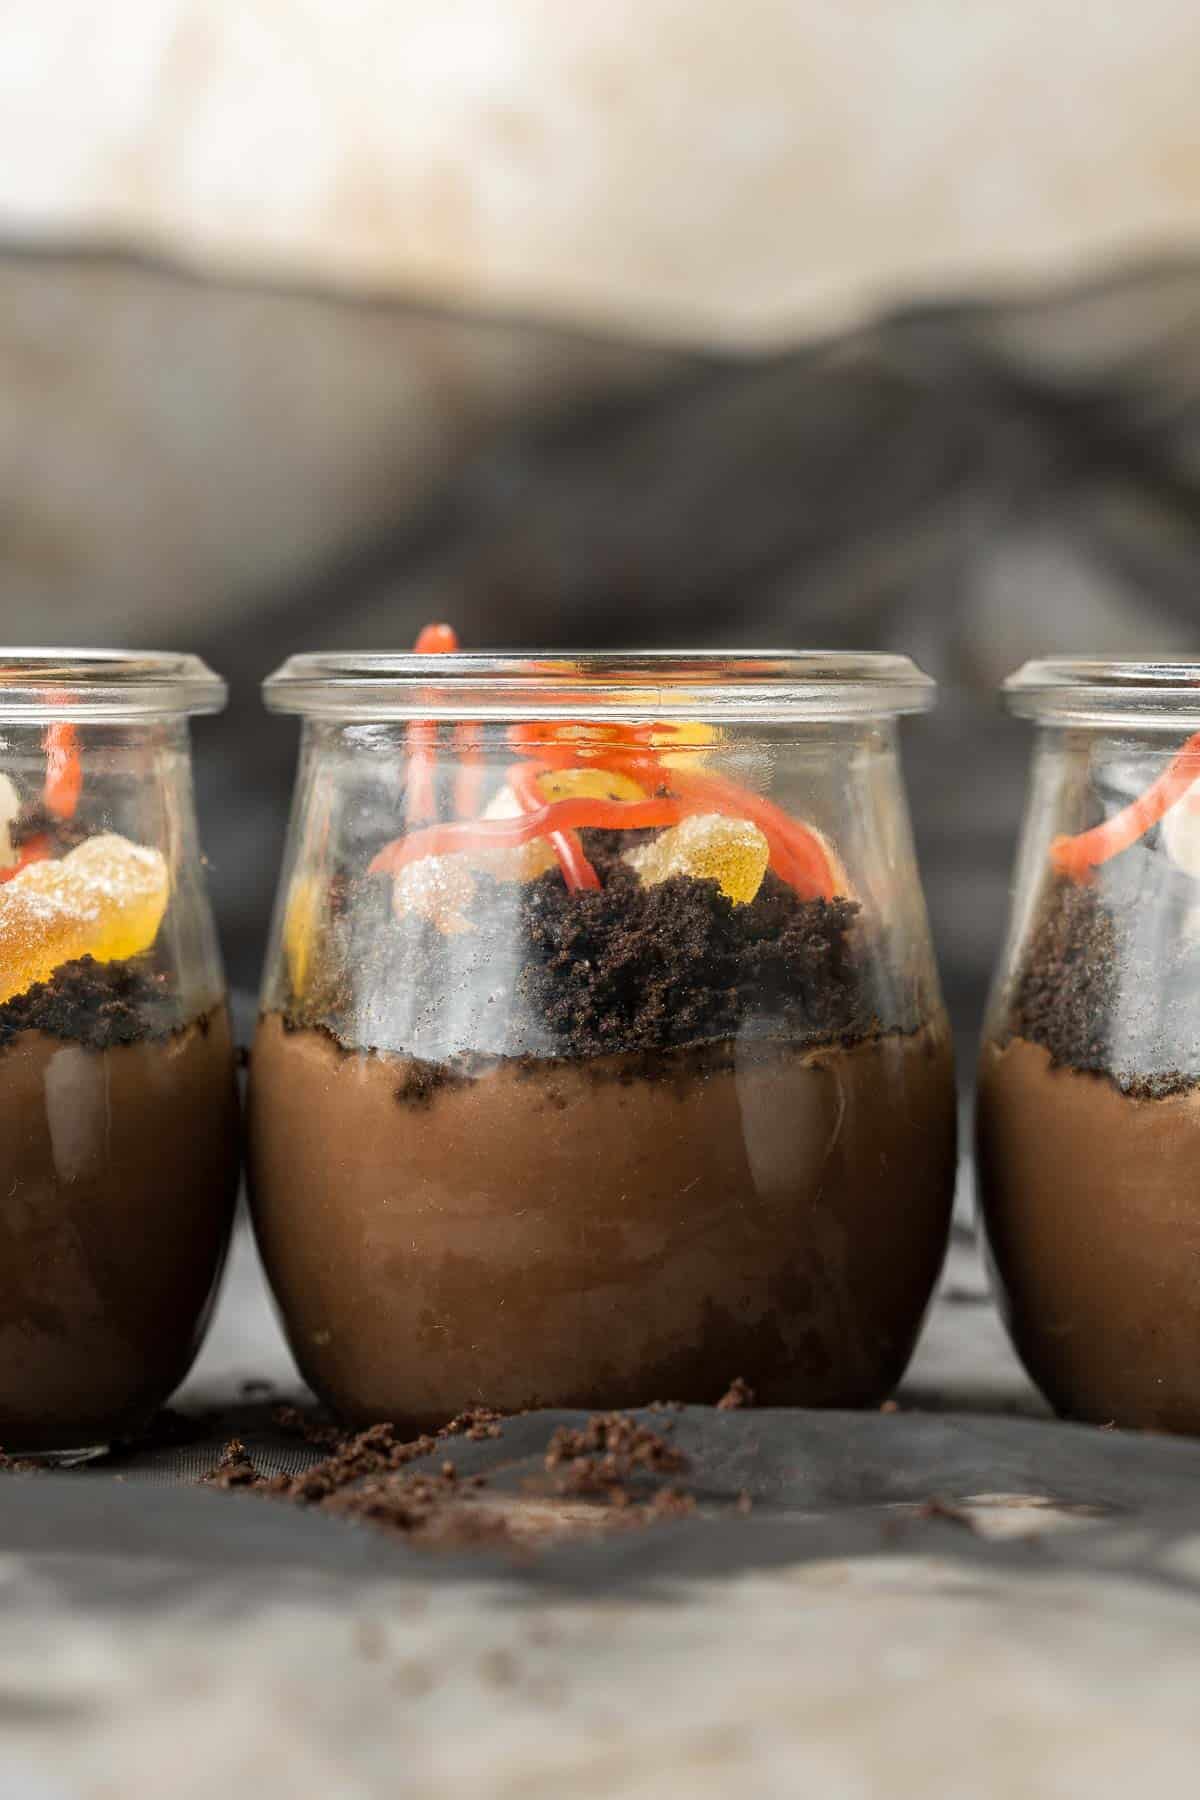
Ingredient Notes
To make this festive Halloween Dirt Pudding Cups, you will need the following ingredients (full measurements in recipe card below):
- chocolate pudding* - if you are making chocolate pudding using a box mix, follow the instructions on the box.
- oreo cookies - Oreos make the most convincing dirt, but you can use whatever brand of chocolate sandwich cookies you like. You can also use vanilla cookies instead to make "sand" pudding cups.
- gummy worms - use a similar size gummy candy if you're not a fan of worms, like gummy bears, gummy fish, or gummy rings.
*If making homemade chocolate pudding, you will need:
- granulated sugar - use a granulated sugar-free alternative (like stevia or Swerve) if you need to.
- unsweetened cocoa powder
- cornstarch - potato starch is the closest cornstarch and can be used at a 1:1 exchange rate.
- salt
- egg yolks - pureed tofu, soaked ground flaxseed, or agar powder can be swapped in place of the egg yolks if you have an allergy or follow a plant-based diet.
- milk - full-fat coconut milk (the kind in a can) would be the best alternative. The fat content helps set the pudding and gives it the right texture.
- butter - use a vegan butter substitute if you're sensitive to dairy.
- semi-sweet chocolate - semi-sweet works best in the recipe as written, but if you're okay with tampering with the measurements of sugar and cocoa powder, you can use milk chocolate. If you want a slightly more earthy flavor, try dark chocolate.
- vanilla extract - swap the extract with real vanilla bean paste if you want to impart an even richer flavor. Use the same measurement called for in the recipe.
- ice - for the ice water bath.
You will also need mini dessert cups. If making the chocolate pudding from scratch, then you will also need measuring cups and spoons, saucepan, mesh sieve, and mixing bowl.
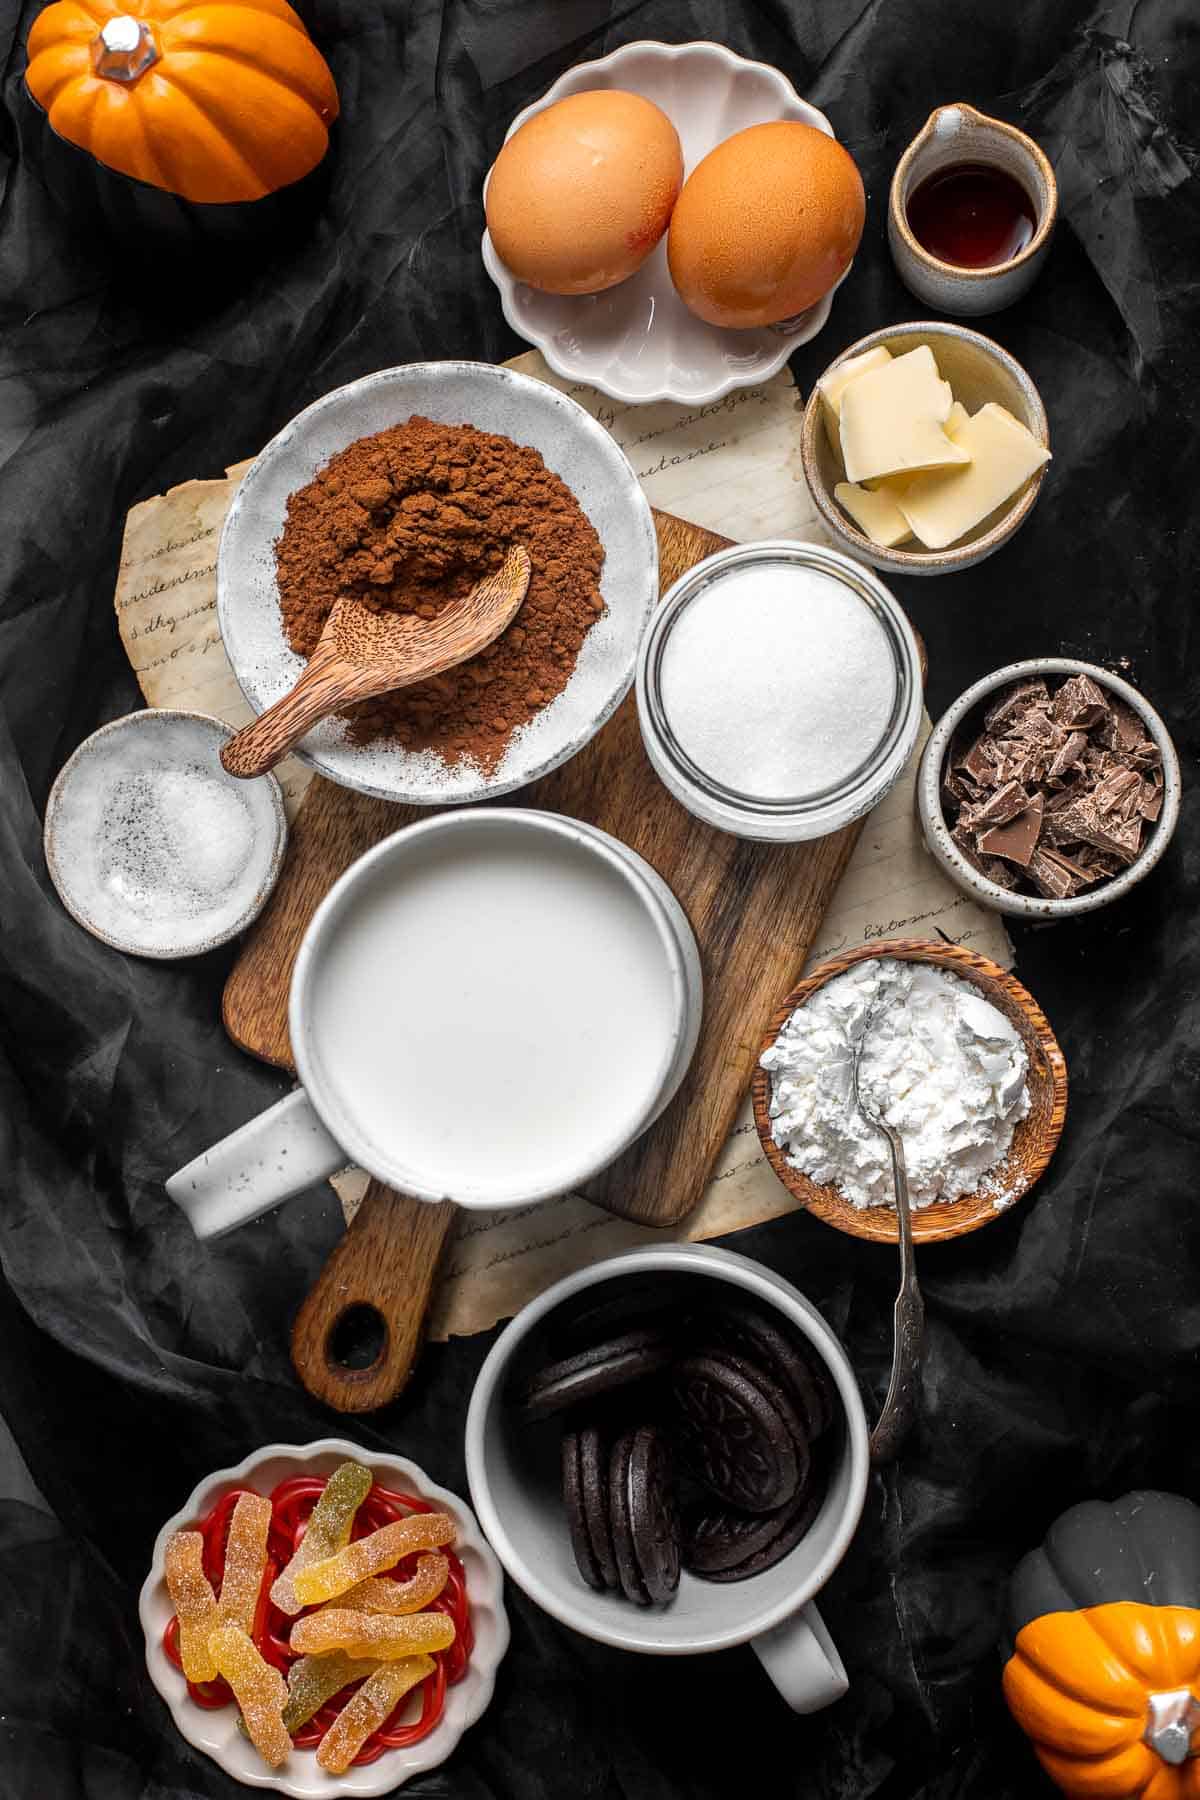
How to Make the Best Dirt Pudding
Prepare the chocolate pudding.
If you are using store-bought pudding then you don't need to prepare the pudding and you can make these dirt pudding cups in minutes. If you are making chocolate pudding using a box mix, follow the instructions on the box.
To make homemade chocolate pudding:
- Combine ingredients and cook. In a medium saucepan, whisk together sugar, cocoa powder, cornstarch, salt, and egg yolks until well blended. Whisk in the milk and heat over medium heat, stirring often, about 5-8 minutes. Once the mixture starts to bubble, turn the heat down to low and continue cooking until thickened, whisking often, about 1-2 minutes more. Note that pudding will be pourable but will continue to thicken more as it cools. Remove from heat and immediately whisk in the butter, melted chocolate, and vanilla, stirring until smooth.
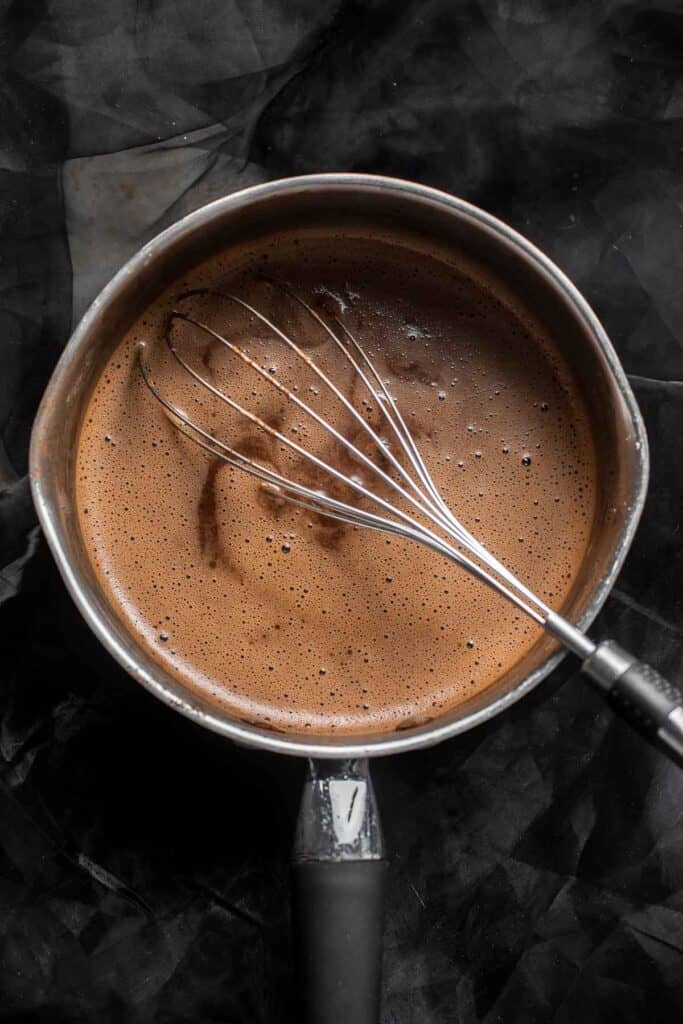
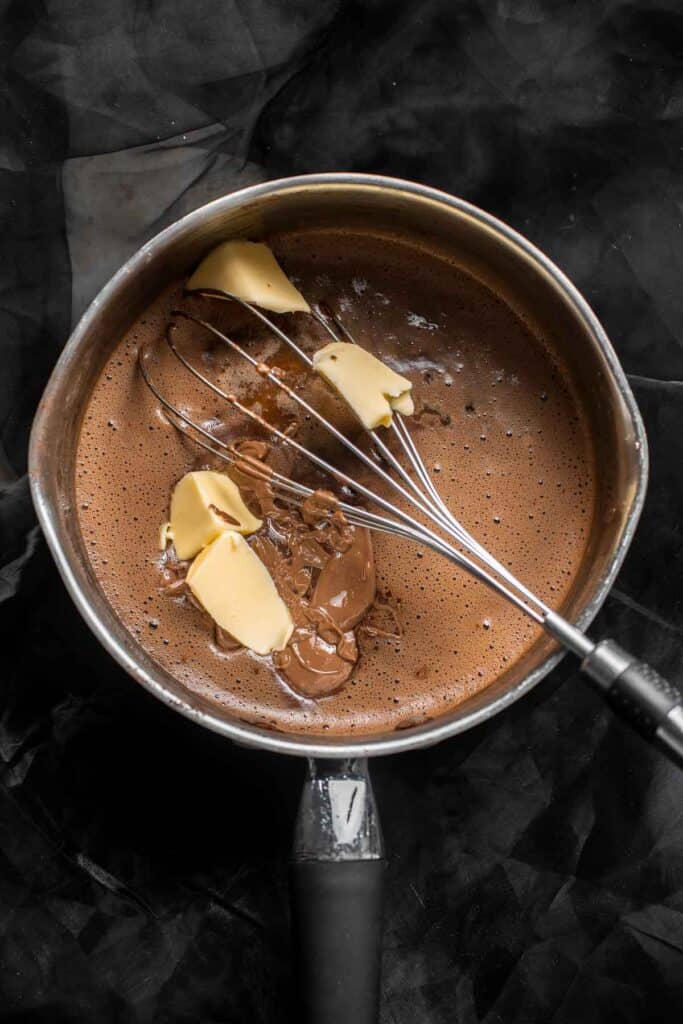
- Remove lumps. If you notice any lumps, pass the pudding through a fine mesh sieve over a large heatproof bowl to remove any lumps. Skip this if you don't notice any lumps.
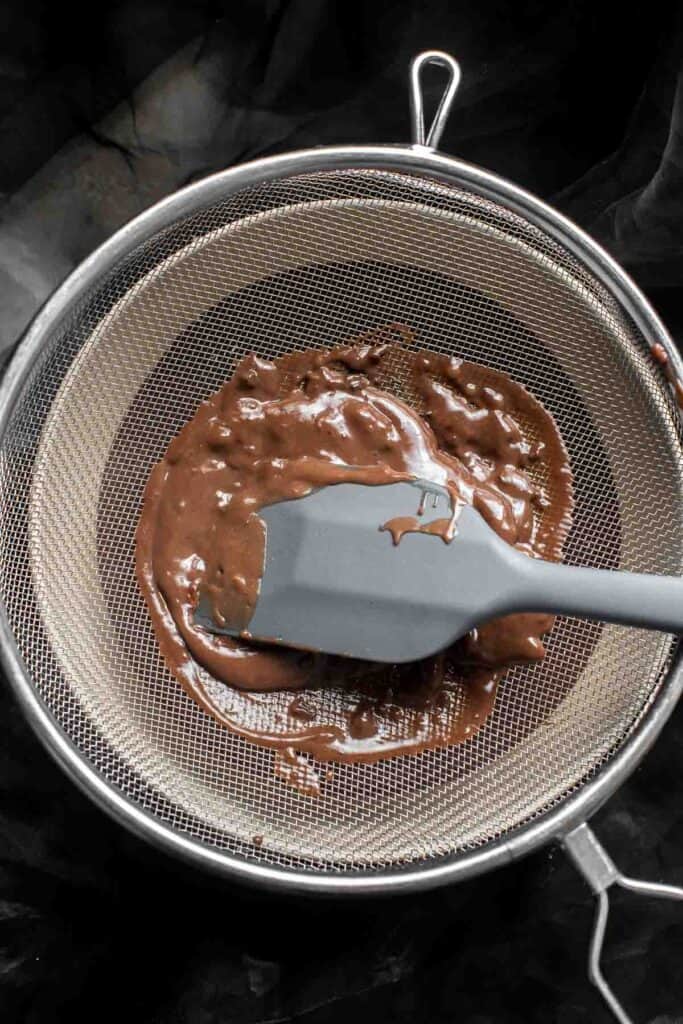

- Chill. Prepare a large bowl with some water and ice to make an ice bath. Place the saucepan directly into the ice bath, stirring occasionally, until the pudding reaches room temperature, about 30 minutes. Cover and refrigerate until the pudding has chilled through completely, at least 4 hours (up to 2 days).
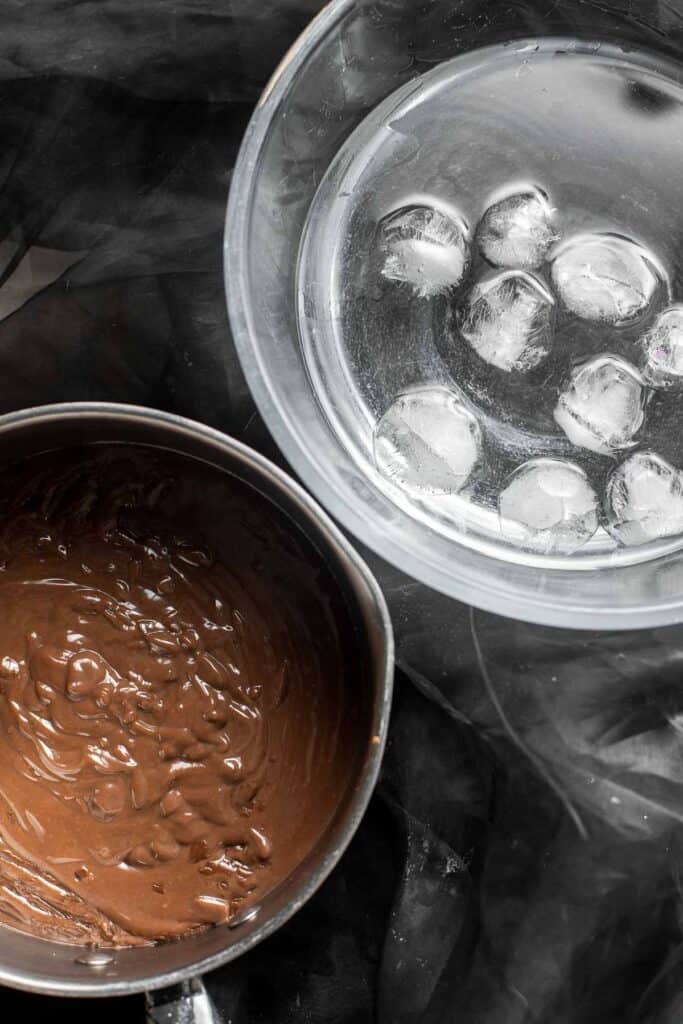
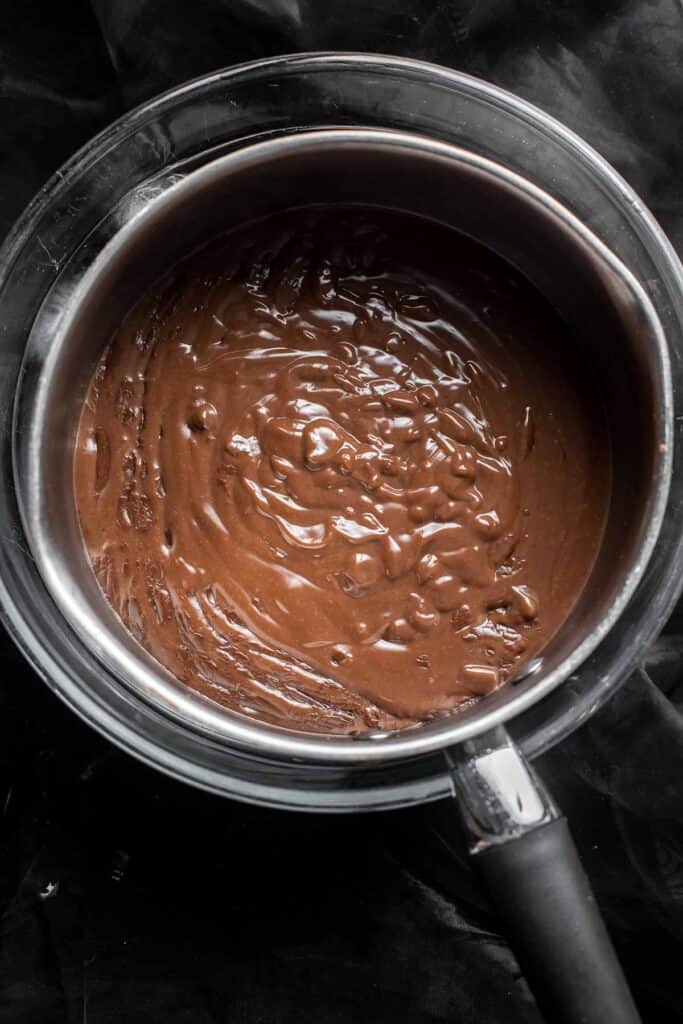
Assemble the dirt pudding cups.
- Crush the cookies. Use a food processor to crush the cookies. You can also place them in a Ziploc bag and roll a rolling pin over top to crush them. Set aside.
- Assemble. Divide the pudding into 4 separate small cups (½ cup pudding into each). Top each with crumbled oreos and place a few gummy worms on top.
- Serve. Serve immediately or chill until ready to serve.

Storing and Freezing Instructions
How to Store
Cover each of the cups tightly with plastic cling wrap and refrigerate for up to five days.
How to Freeze
Make sure the cups are freezer-safe before wrapping in plastic wrap and freezing for up to 3 months. Thaw the pudding cups overnight in the refrigerator before eating.
Recipe Tips and Tricks
- Make ahead. You can make the chocolate pudding ahead of time. Homemade chocolate pudding will keep for up to one week in an airtight container in the fridge. Then, just assemble the dirt pudding when you are ready to serve.
- Add your own edible decorations. You're not limited to crushed oreos and gummy worms - add whatever you like as a topper to these festive and (and yummy!) pudding cups. Try Halloween M&M's, candy eyes, candy corn, or keep in the theme and add in licorice worms or gummy spiders and bugs.
- Serve with edible dippers. Who needs spoons when you can eat the pudding off of a graham cracker or vanilla wafer? So much fun!
- Ditch the cups and try family-style. If you're short on time, you can build your dirt pudding in a small casserole dish or pan instead of making individual servings.
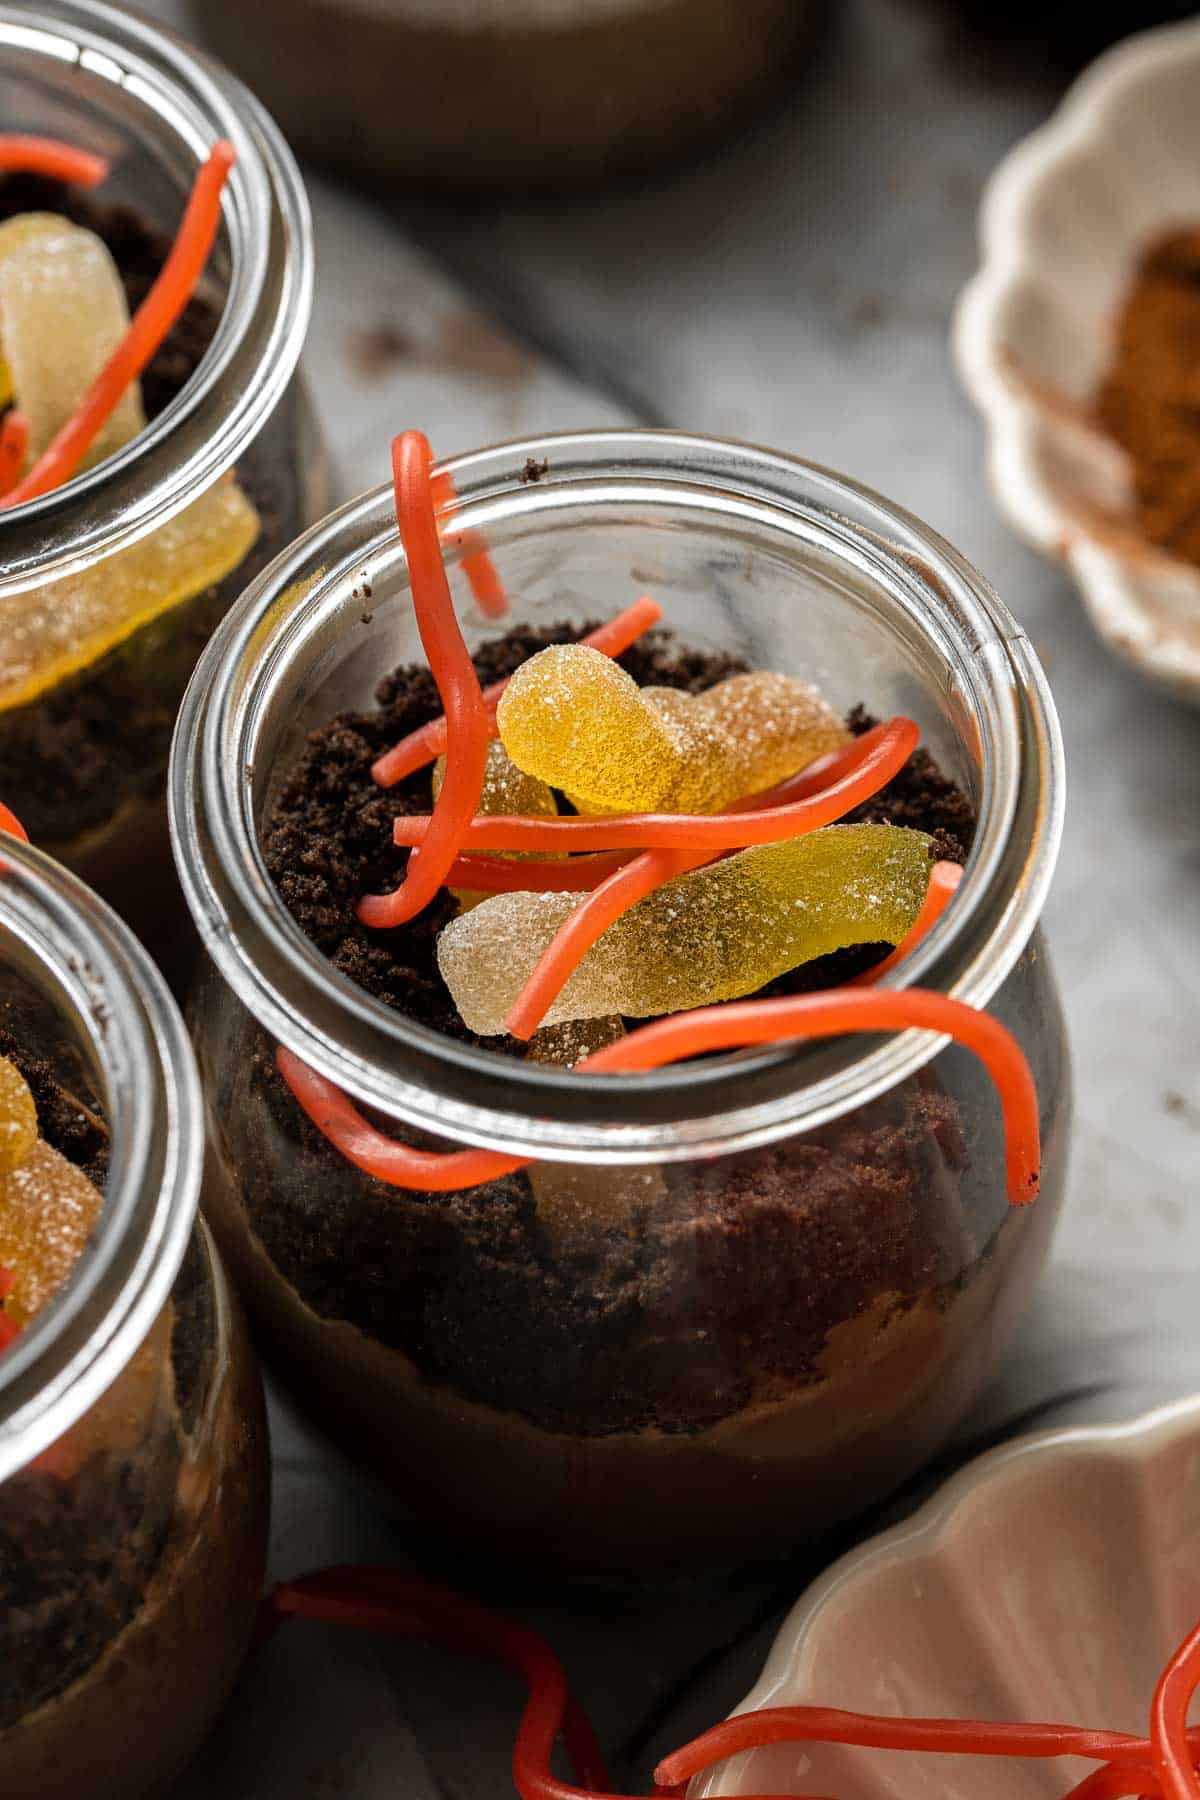
More Halloween Recipes
- Halloween Bark
- Caramel Apples
- Spooky Chocolate Cake Pops
- Witch Finger Cookies
- M&M Cookie Bars
- Baked Apples
Tried this recipe?
I'd love to hear what you think! Leave a comment and rating below to share your feedback. Your reviews help others discover this recipe and help me keep creating more free recipes for you. Snap a photo and tag me on social media @aheadofthyme too.

Green Beans with Bacon
Green Beans with Bacon is a delicious and flavorful side dish you need on your dinner table this season. Crisp yet tender green beans come together with salty, crunchy bacon, and is flavored with garlic. The whole family will love these green beans!
Plus, green beans and bacon come together quickly in just 20 minutes (including prep!) with a handful of simple ingredients. Serve this quick and easy side dish on your holiday dinner table or any night of the week.
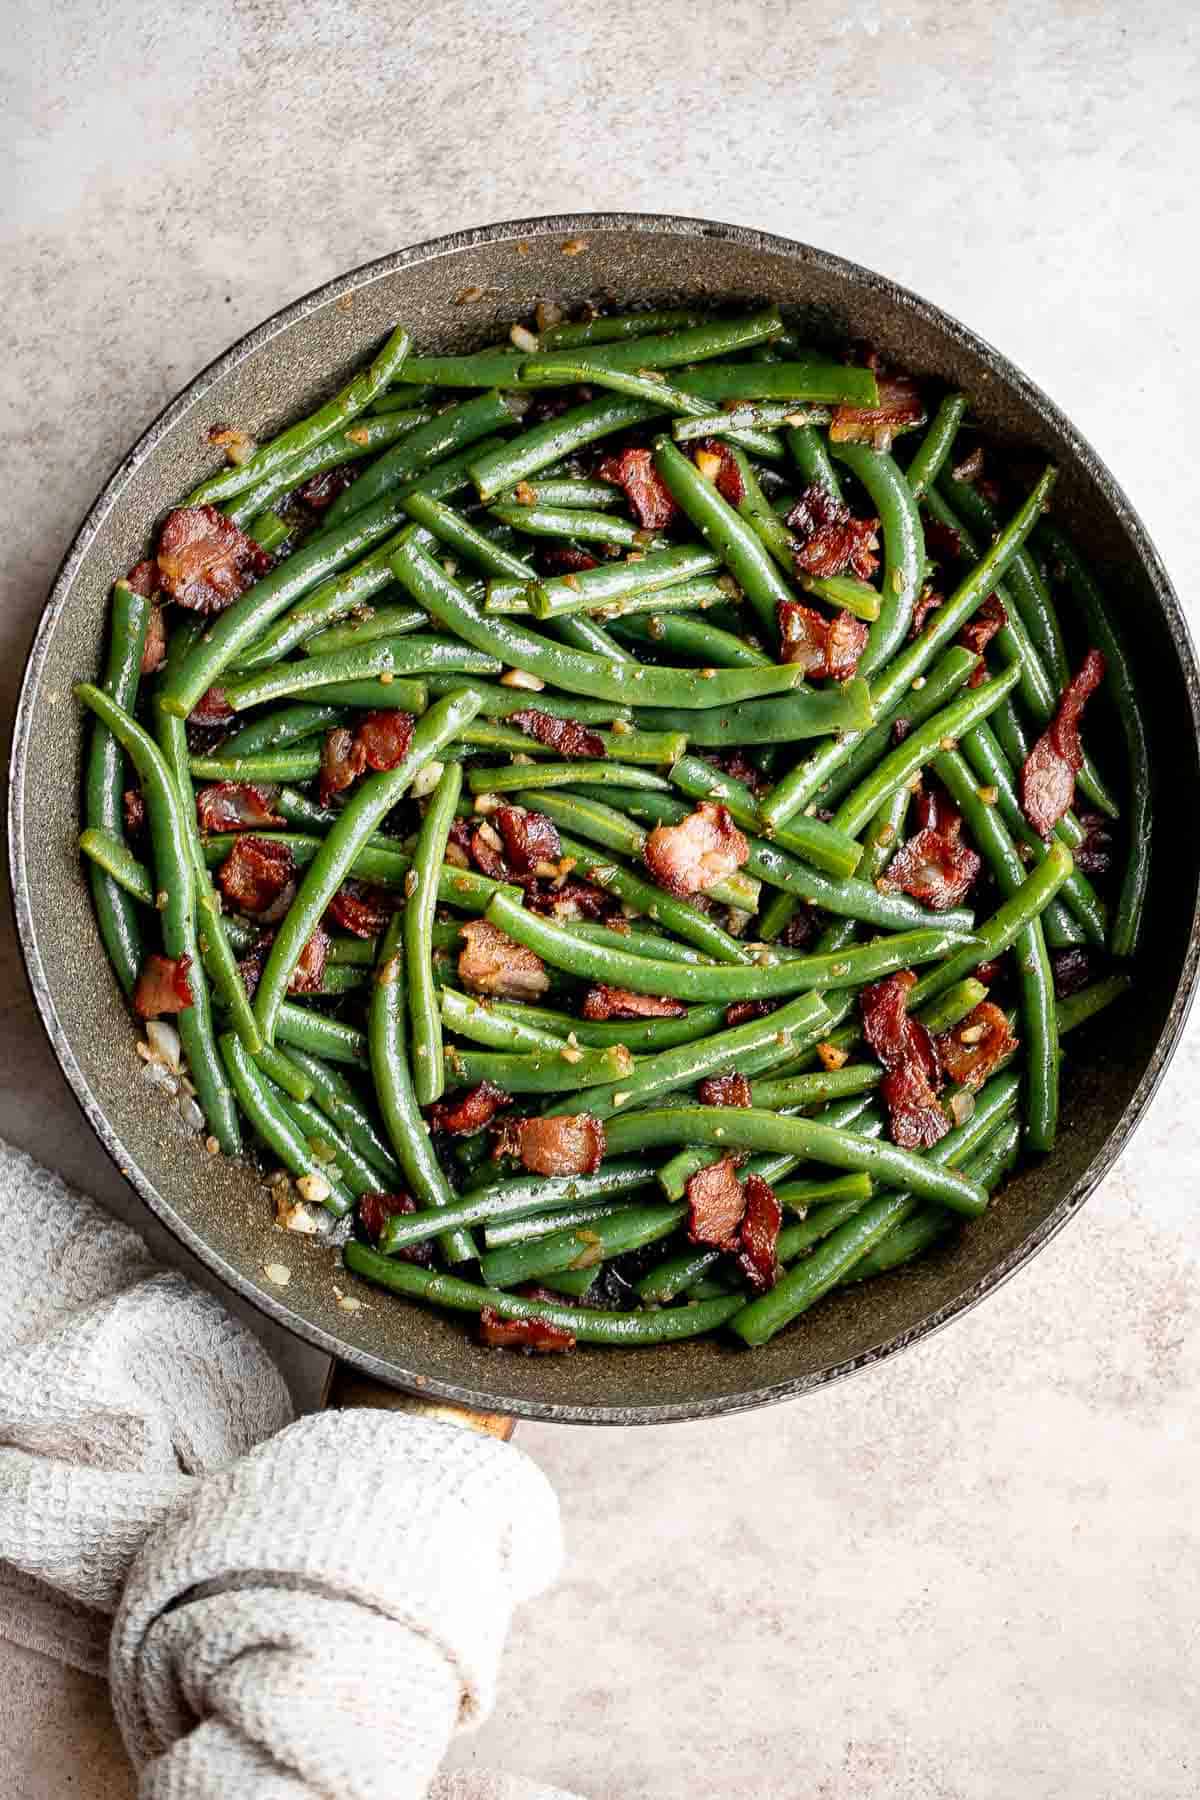
Why You'll Love These Green Beans with Bacon
- Quick and easy. You can make this green beans side dish in just 20 minutes with only 6 ingredients. This leaves you can more time to prepare your other dishes to serve with it. Choose a main dish with a similarly low cook time and you could have a complete dinner ready to serve in under an hour.
- A flavorful side dish. Despite just a handful of ingredients, these green beans with bacon are so flavorful. It's the perfect dish to serve as a side dish on busy weeknights, but fancy enough for large family dinners like Thanksgiving and Christmas. The perfect choice no matter the occasion.
- They're customizable. This delicious green bean recipe is all about the bacon and garlic, which adds so much flavor to it. But you can easily add, remove, or substitute ingredients in different ways to suit your family's tastes. For instance, add some nuts for extra crunch, add in extra protein for a more filling dinner, or switch out the protein for something else.
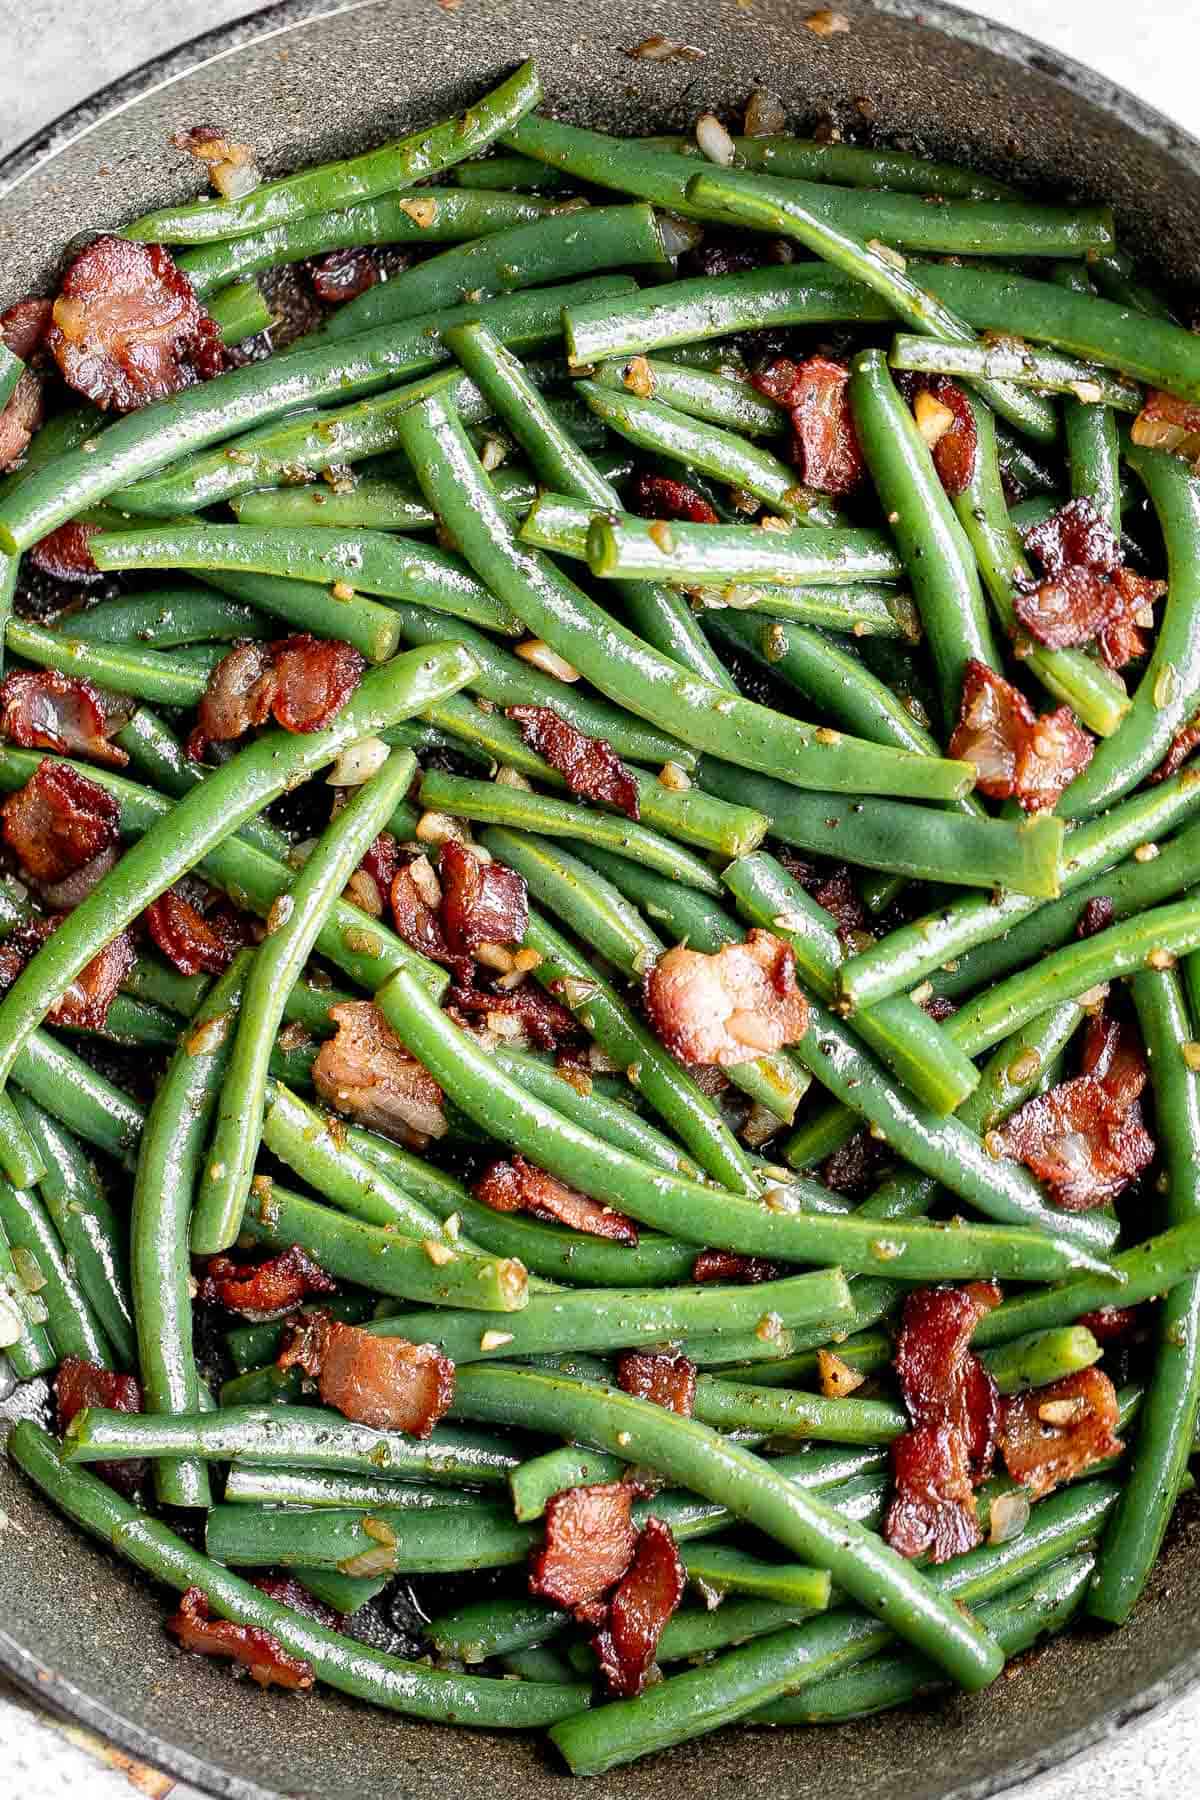
Ingredient Notes
To make these easy Green Beans with Bacon, you will need the following ingredients (full measurements in recipe card below):
- green beans - fresh green beans work best, but you can also use frozen French cut green beans. Just be sure to adjust the cooking time and cook them through to make sure the centers aren't cold.
- bacon - we cut our bacon into 2-inch strips. You can use whatever thickness of bacon you like, as well as making it as crispy or as tender as you prefer. You can also swap it out with chicken, turkey, or veggie bacon if pork isn't your thing.
- garlic - freshly chopped garlic always adds the most flavor, but you can also use pre-minced garlic if you've got some on hand.
- balsamic vinegar - balsamic vinegar lends a very distinct taste and brings balance to the bacon and Brussels sprouts. But if you don't have any on hand, you can substitute it for lemon juice or a similar vinegar or acid like red wine vinegar or apple cider vinegar.
- salt and pepper
You will also need measuring spoons and a 10-inch skillet.
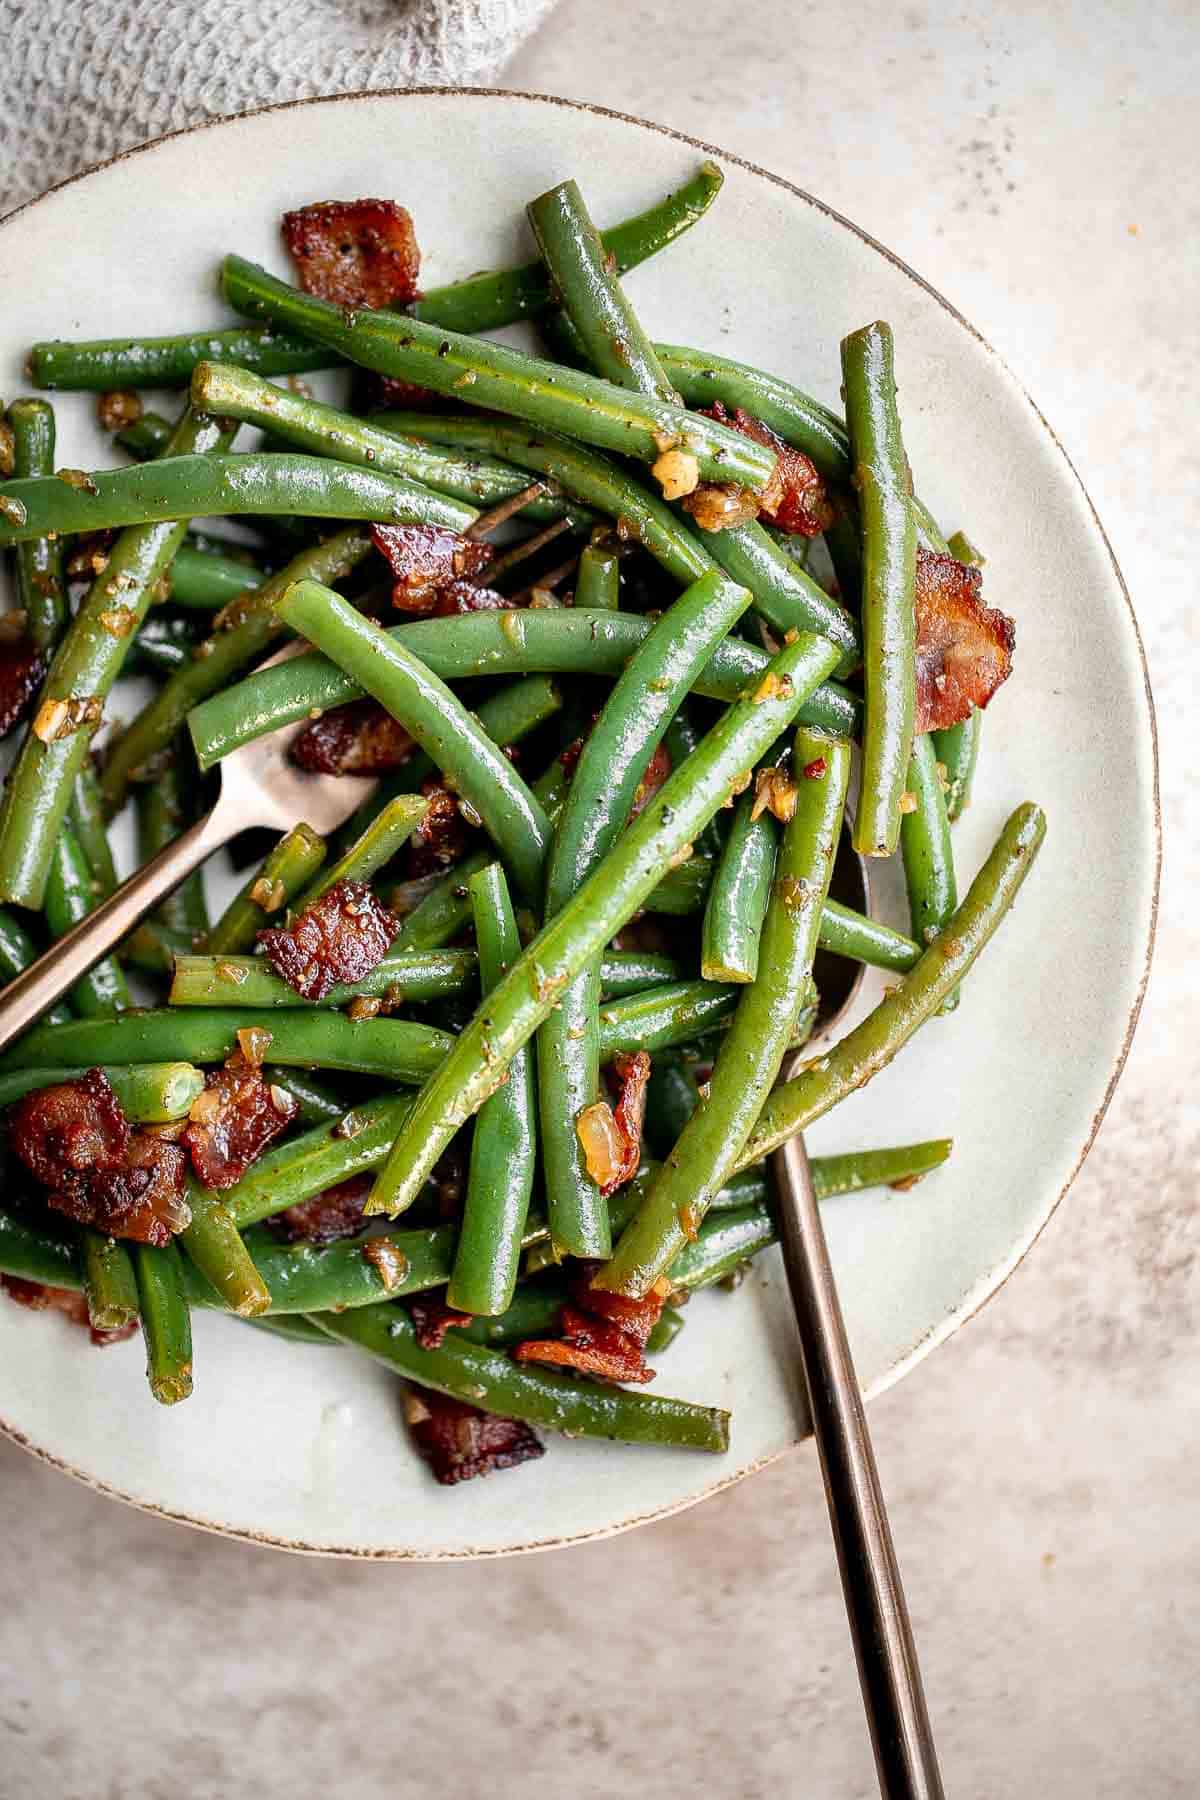
How to Make the Best Green Beans with Bacon
- Blanch green beans. Bring a large pot of salted water to a boil. Add green beans and cook until tender, about 3-4 minutes. Drain under cold running water for a minute and set aside.

- Cook bacon. Add bacon to a large skillet and cook over medium-high heat until browned on both sides and crisp, about 3-4 minutes. Leave the bacon fat in the skillet and transfer the bacon onto a plate.

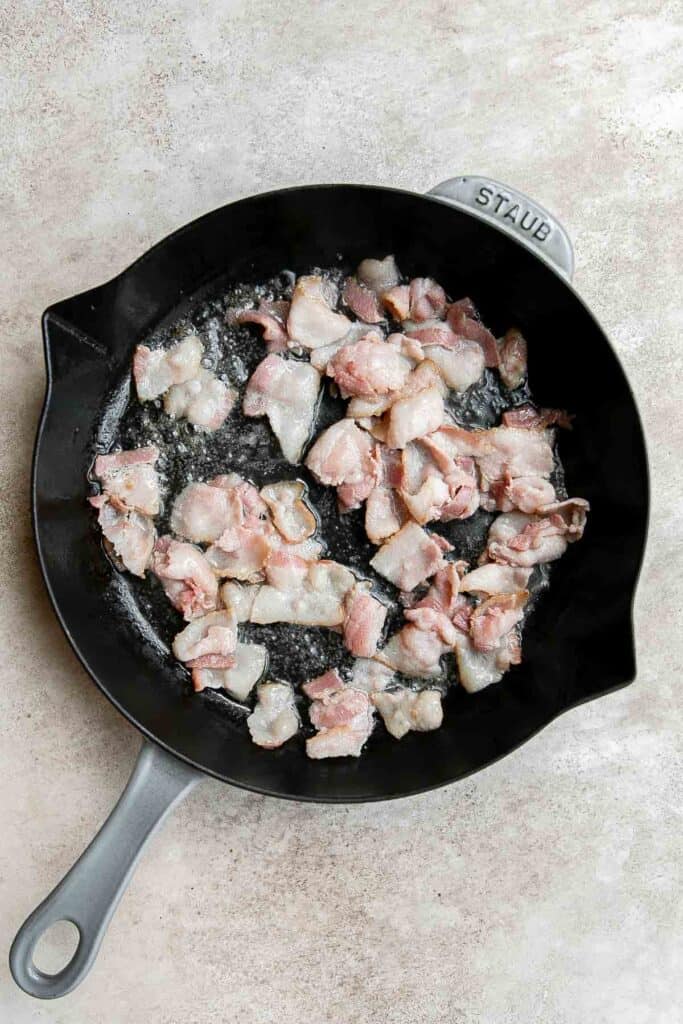
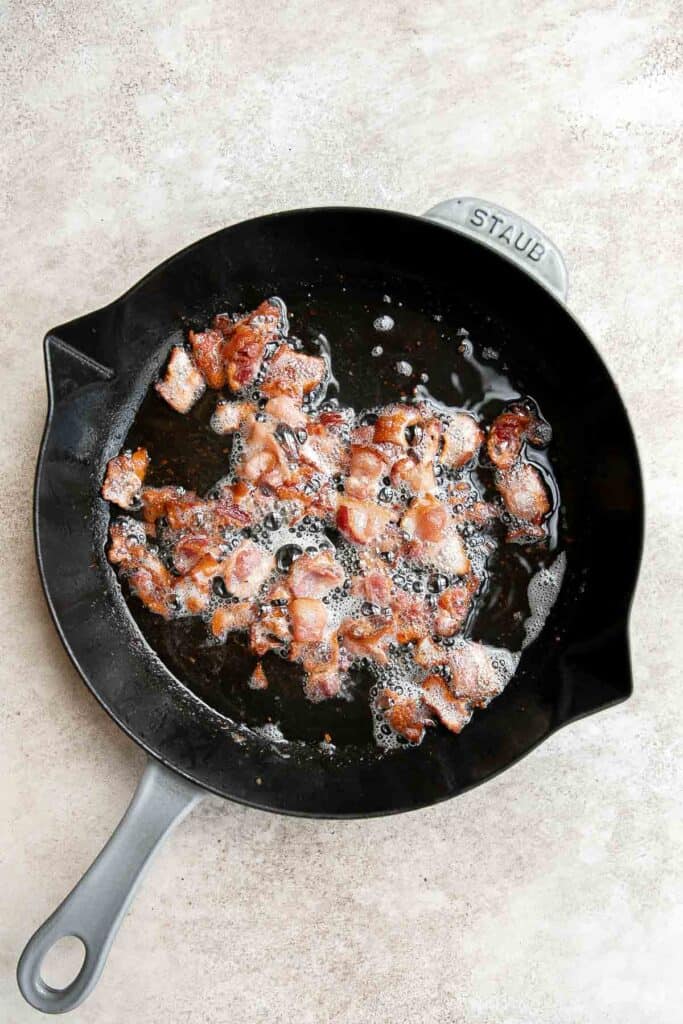
- Sauté aromatics. In the same pan, add onion and garlic and sauté until fragrant, about 1 minute.
- Add in green beans. Stir in the blanched green beans and cook until warmed through, about 1-2 minutes. Stir well to coat.
- Add in bacon. Return the bacon to the skillet and add balsamic vinegar, salt, and pepper. Toss to combine and cook for one more minute. Serve immediately.

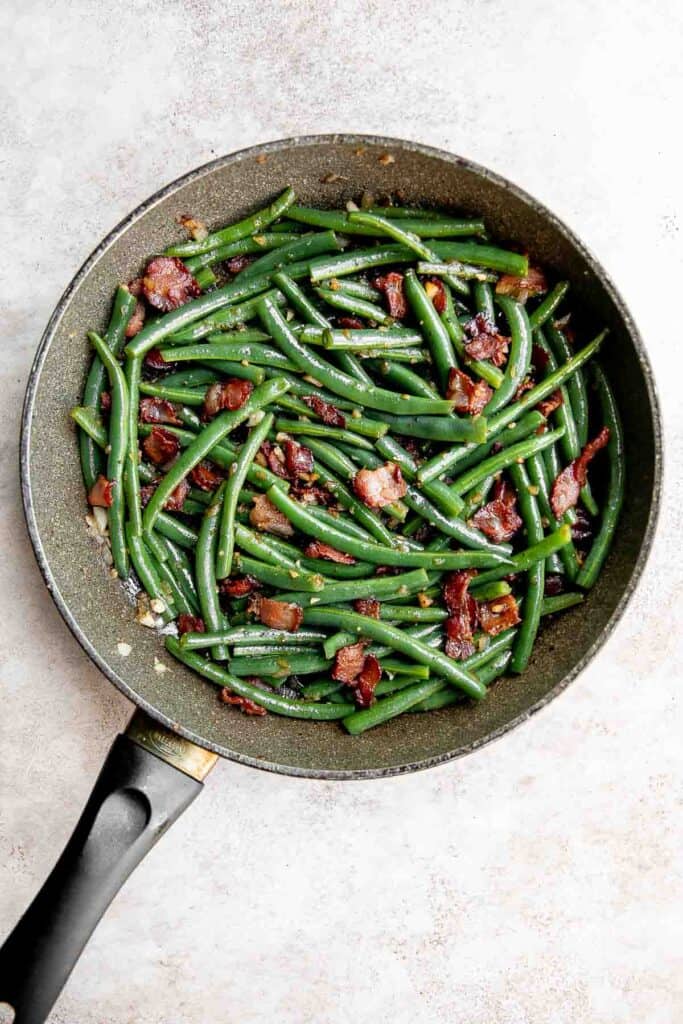
How to Serve
Green Beans with Bacon is delicious served as a light meal for lunch, or as a a side dish along with some dinner entrees (especially holiday mains) such as:
- Instant Pot Whole Chicken
- Slow Cooker Turkey Breast
- Roasted Pork Tenderloin
- Stuffed Chicken Breasts
- Roast Beef
- Juicy Roast Turkey
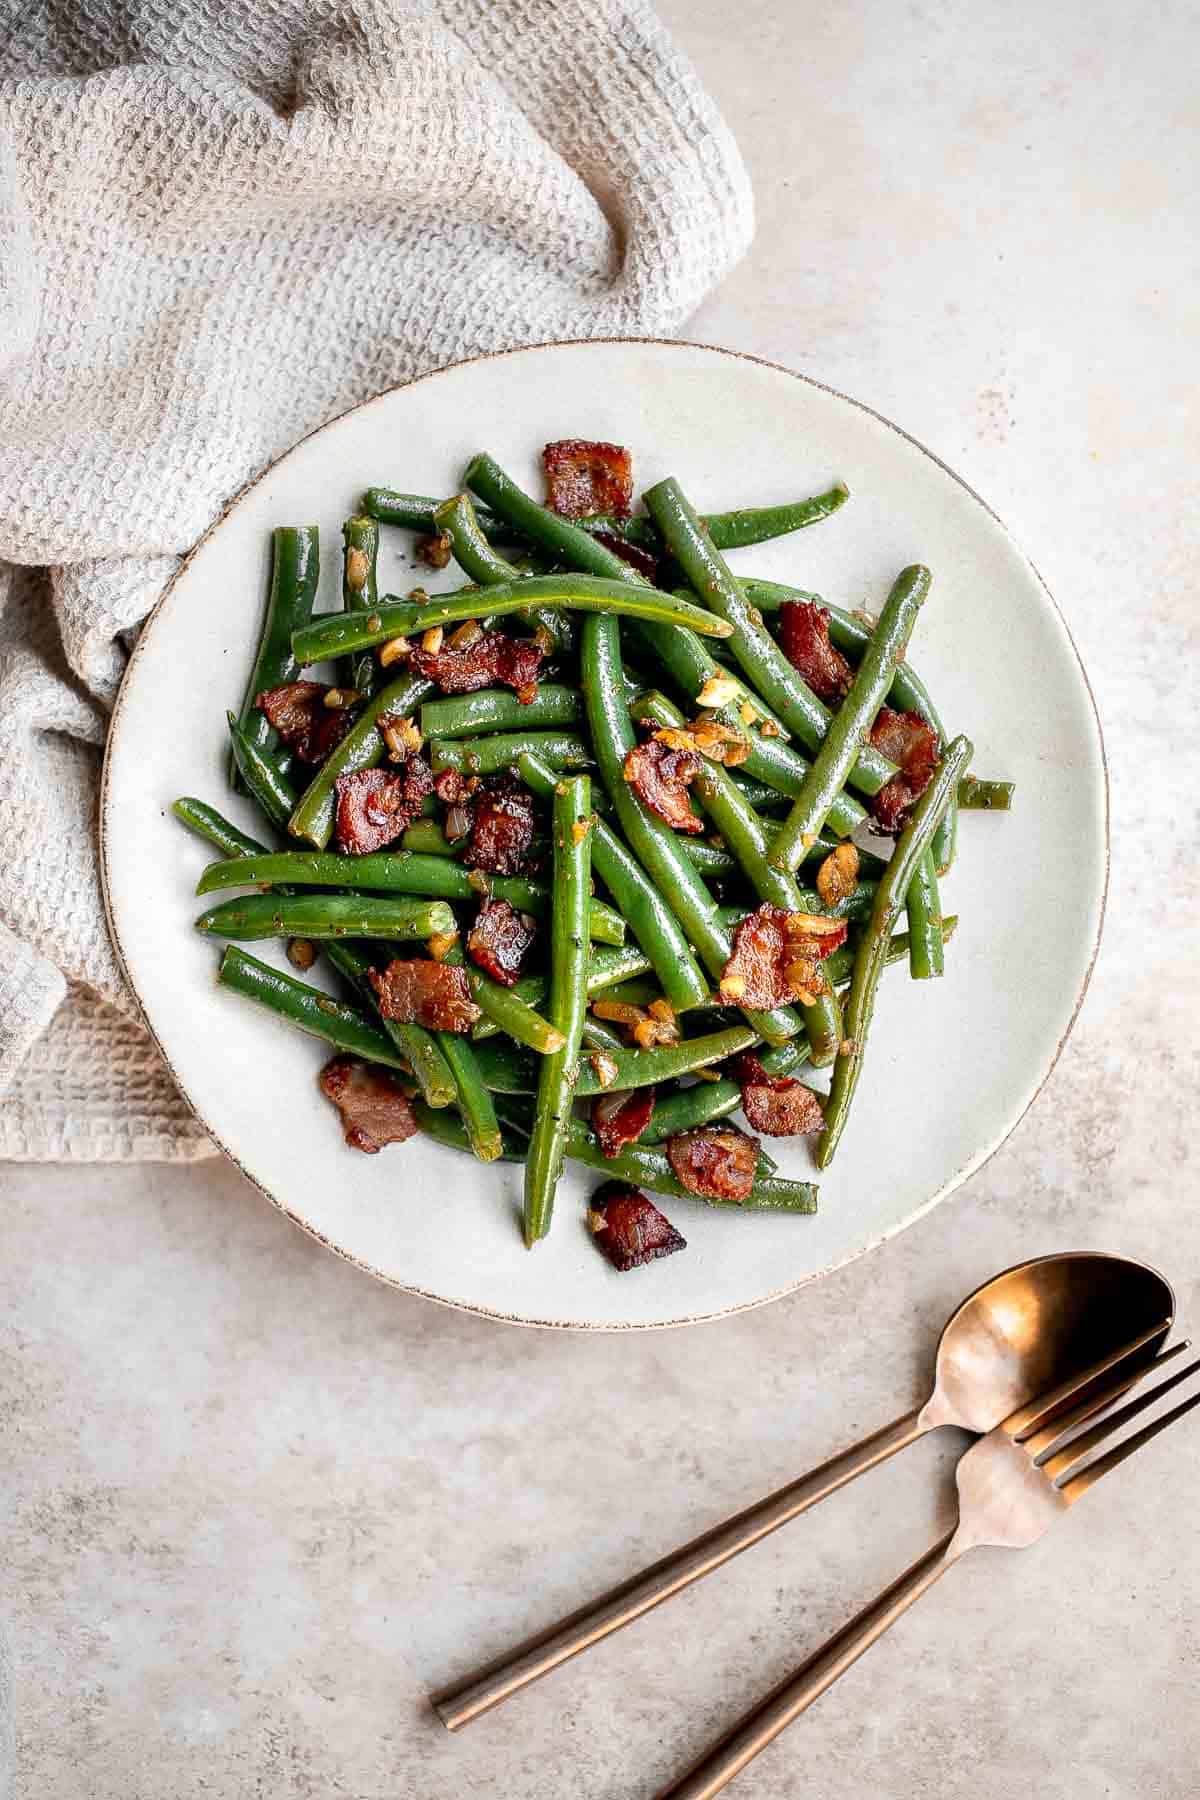
Storage and Freezing Instructions
How to Store
Allow the sautéed green beans with bacon to cool to room temperature first, the place them an airtight container refrigerate for up to 4 days. Reheat on the stove over medium-low heat until warmed through.
How to Freeze
You can also freeze green beans and bacon! Spread the leftover green beans and bacon on a parchment-lined half sheet baking pan and freeze for 2 hours, then transfer it a freezer bag and freeze for up to 3 months. You can reheat straight from the freezer by sautéing until heated and crisp or baking at 450℉ for 10-15 minutes. You can also air fry leftovers at 400℉ for 7-12 minutes until warmed through.
Recipe Tips and Tricks
- Serve balsamic on the side. The balsamic adds a very subtle flavor, but if you don't like balsamic vinegar, you can serve a balsamic reduction or glaze on the side as an optional drizzle or dipping sauce.
- How to serve as an entree. Turn this delicious side dish into a main course dinner by simply adding in some more protein. Our favorites include ham, chicken, or turkey. Use leftover protein from a previous meal to make things even easier!
- Add more crunch. To add some more crunch, feel free to add in some toasted slivered almonds or chopped toasted pecans or walnuts. They add texture and a delicious nutty flavor that compliments the dish really well.
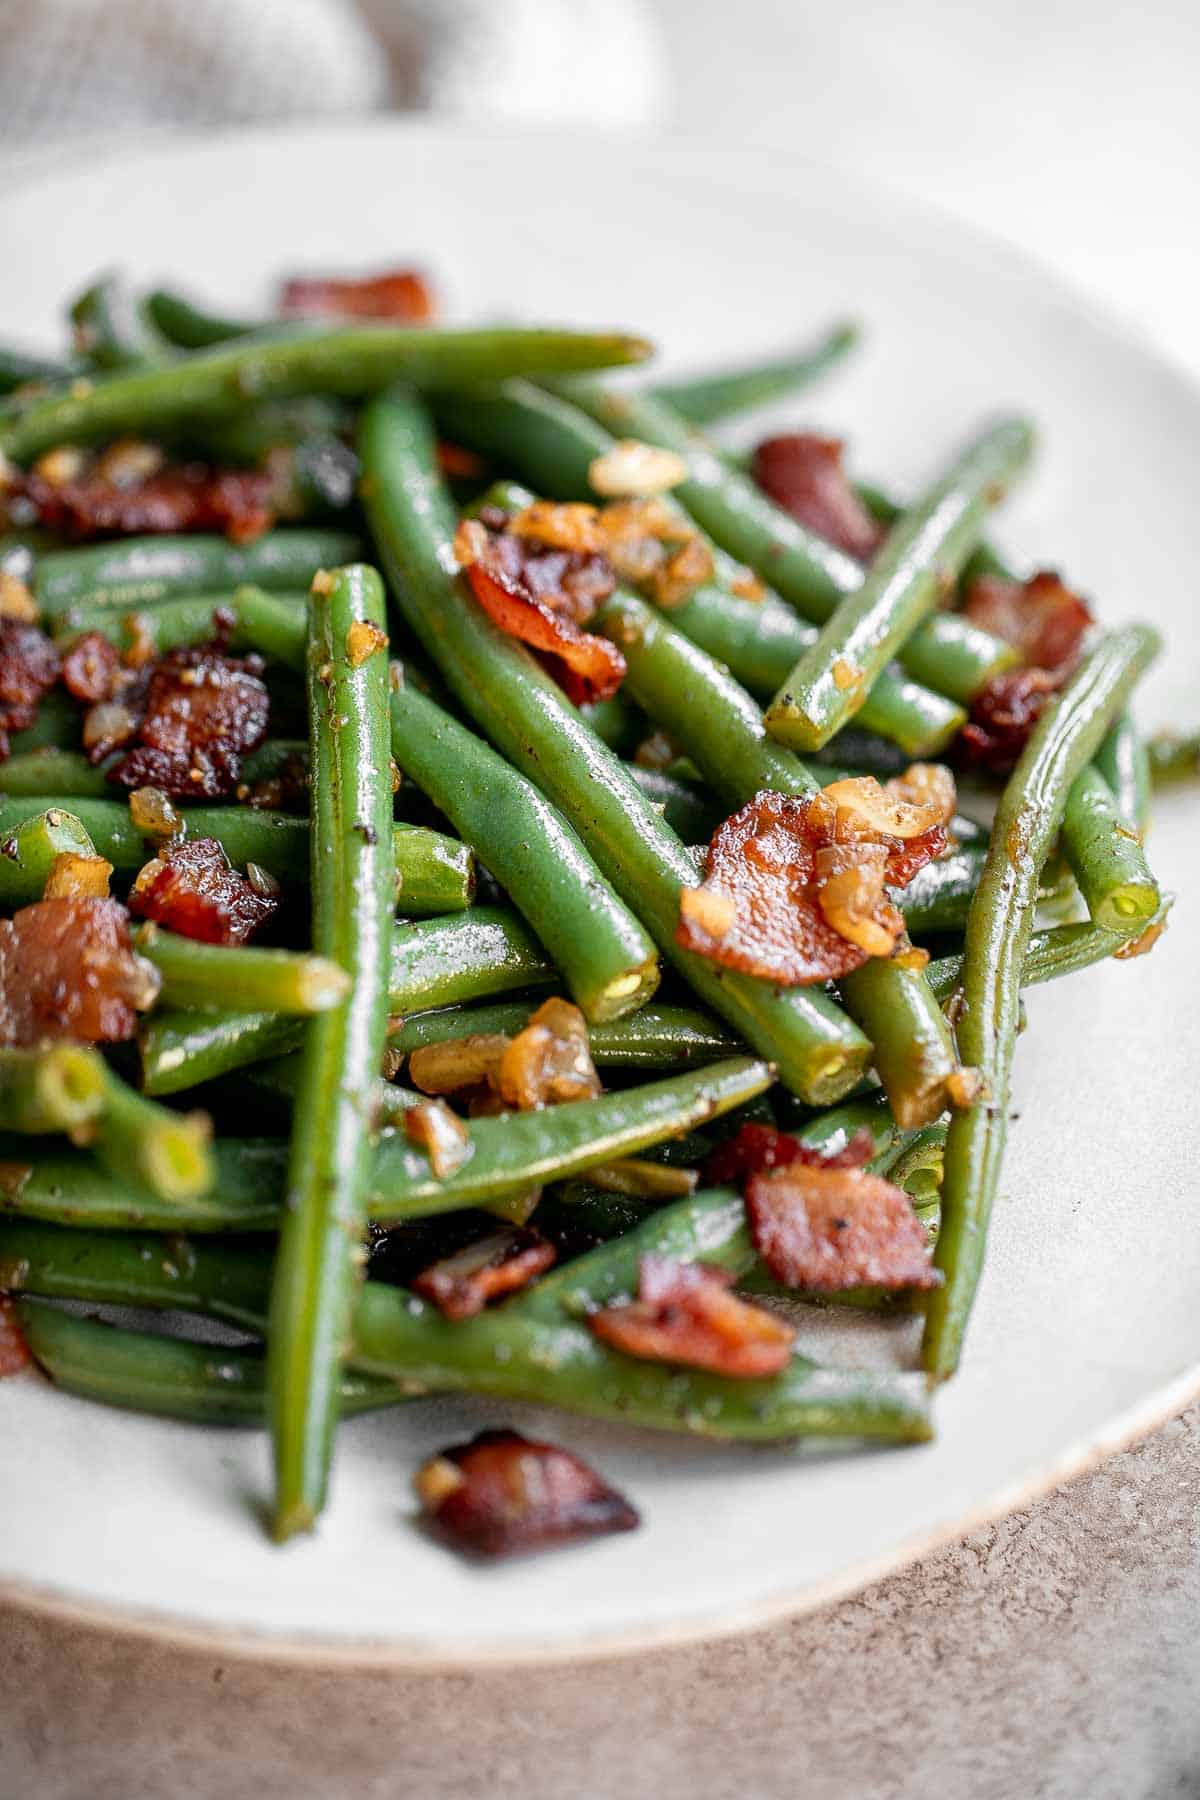
More Green Beans Recipes
- 15 Best Green Bean Recipes
- Green Beans Almondine
- Green Bean Fries
- Pesto Green Beans
- Green Bean Casserole
- Sautéed Garlic Green Beans
Tried this recipe?
I'd love to hear what you think! Leave a comment and rating below to share your feedback. Your reviews help others discover this recipe and help me keep creating more free recipes for you. Snap a photo and tag me on social media @aheadofthyme too.
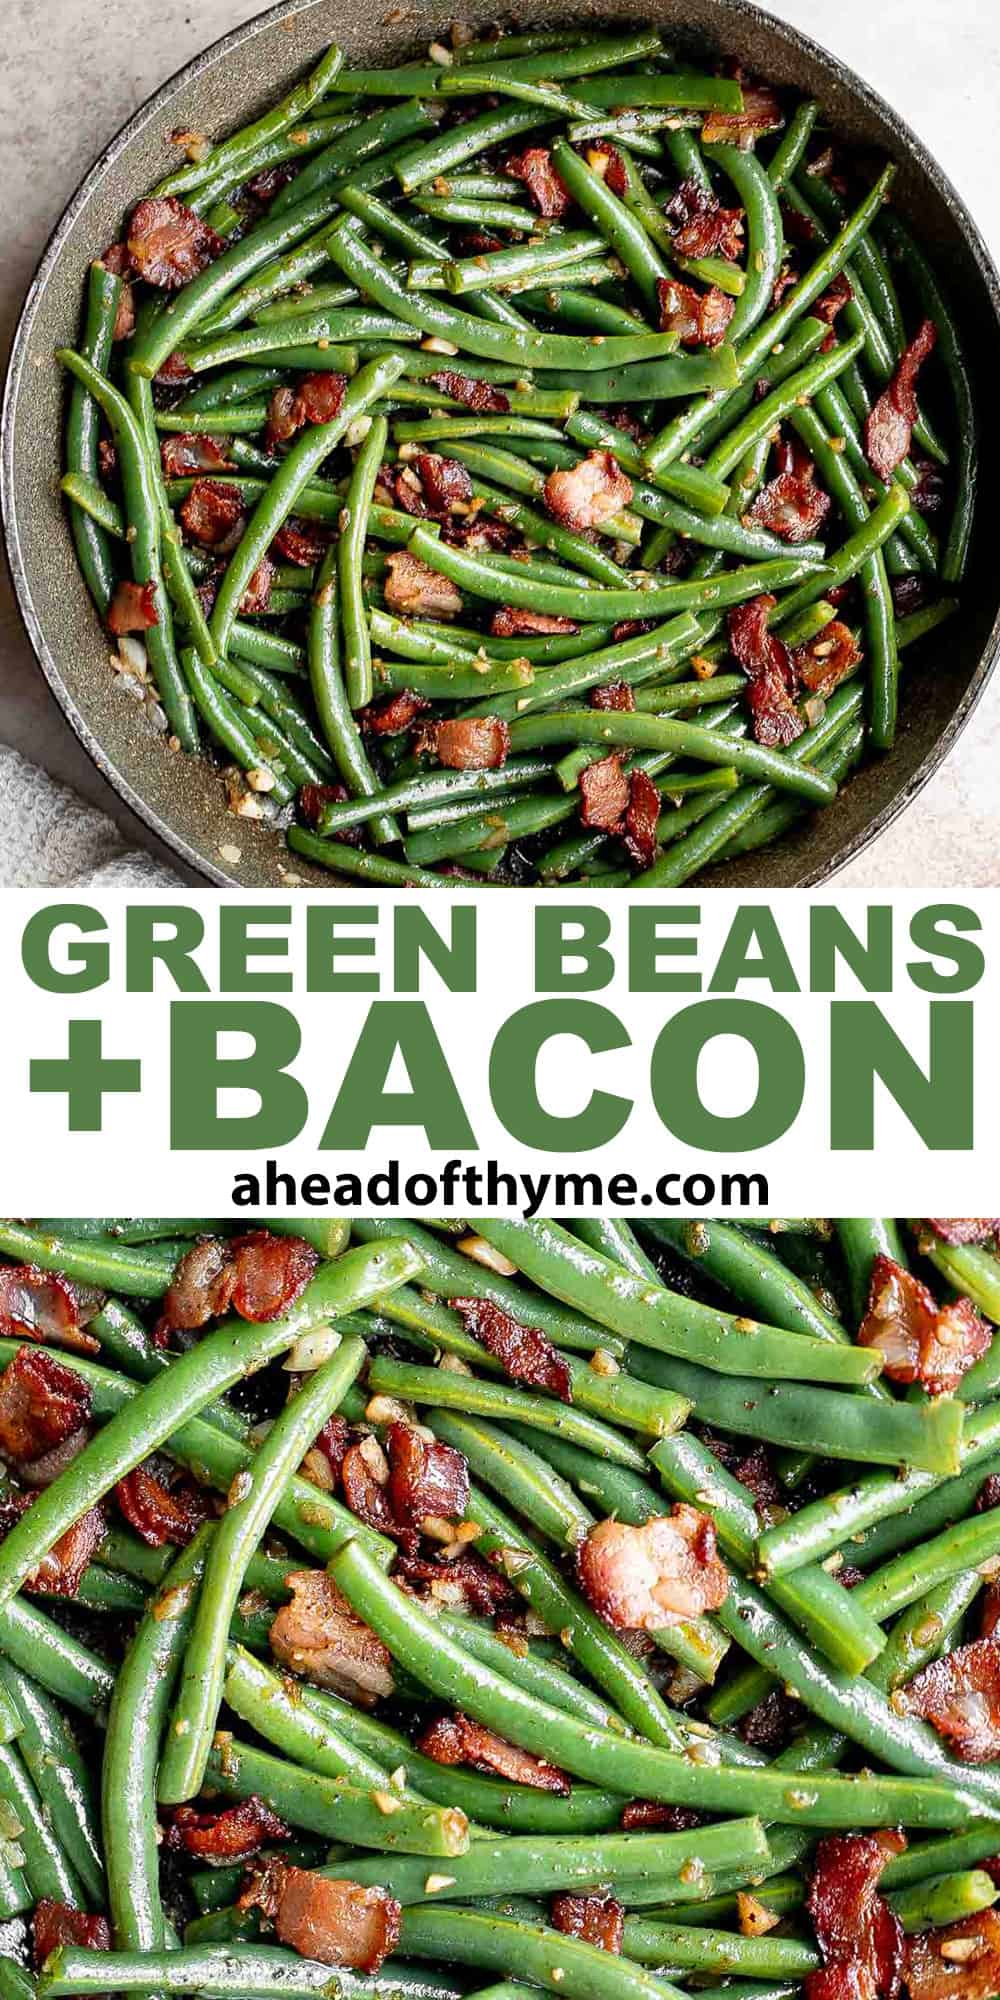
Pecan Crusted Chicken
Pecan Crusted Chicken is a quick and easy dinner that is ready in just 40 minutes. Juicy and tender chicken is coated in a crunchy pecan breadcrumb topping, then baked to crispy perfection in the oven (or air fryer!). It's simple, delicious, and flavorful.
Crusted chicken has long been a classic dish, but this pecan chicken will reignite your love for it. This beginner-friendly chicken recipe requires just 10 to 15 minutes of prep which includes seasoning and coating, before popping in to the oven to bake the chicken breast until tender and cooked through. Perfect for busy weeknights!

Why You'll Love this Pecan Crusted Chicken
- Quick and easy. In just 40 minutes you can prepare this restaurant-worthy chicken from scratch and pair it with pasta, salad, soup, or vegetables in many forms.
- Crunchy pecan crust. Forget shake and bake chicken, pecan crusted is where it's at! The crispy panko and pecan crust in this breaded chicken perfectly contrasts the tender, juicy chicken cutlet inside. It's the perfect combination of textures.
- It's a great main dish for all occasions. Quick dinner with the kids at home? Hosting your closest friends for an elegant dinner party? This pecan chicken has you covered for both - and everything in-between.
- Tangy honey mustard sauce. This chicken with pecan crust can be served alongside a simple, three-ingredient honey mustard sauce that you can memorize and use over and over for all your dipping needs.

Ingredient Notes
To make this delicious Pecan Crusted Chicken, you will need the following ingredients (full measurements in recipe card below):
- chicken cutlets - you can buy cutlets in the poultry aisle or cut them yourself from chicken breast by slicing them in half lengthwise.
- mayonnaise
- pecans - if you swap out the pecans for a similar nut (like walnuts or pistachios) it won't technically be pecan chicken, but the taste and texture will be similar.
- panko breadcrumbs - these can be substituted with regular breadcrumbs or a gluten-free version to make this recipe friendly to families with Celiac.
- garlic powder - garlic and paprika powders are classic to this dish, but feel free to mix things up by adding your favorite spice blend in place (or in addition to) the simple seasonings listed here.
- paprika
- salt and pepper
- honey mustard sauce - this is optional, for serving. You can use store-bought or homemade. For homemade, you'll need:
- mayonnaise - or substitute with yogurt. If you use yogurt, make sure it's plain or unflavored. Greek or regular will work.
- dijon mustard - you can also try stone-ground or brown mustard in place of the dijon called for in the recipe.
- honey - this could be swapped for maple syrup if you have an aversion to honey.
You will also need measuring cups and spoons, blender or food processor, shallow plates, and large half sheet baking pan.

How to Make the Best Pecan Crusted Chicken
- Prepare chicken. Use a paper towel to pat the chicken cutlets completely dry. Season on both sides evenly with salt. In a large ziploc bag or shallow plate, evenly coat the chicken with mayonnaise. Set aside for 5 minutes.
- Make pecan coating. In a blender or food processor, add pecans, breadcrumbs, garlic powder, paprika, salt, and pepper. Mix until evenly combined and pecans resemble fine crumbs.
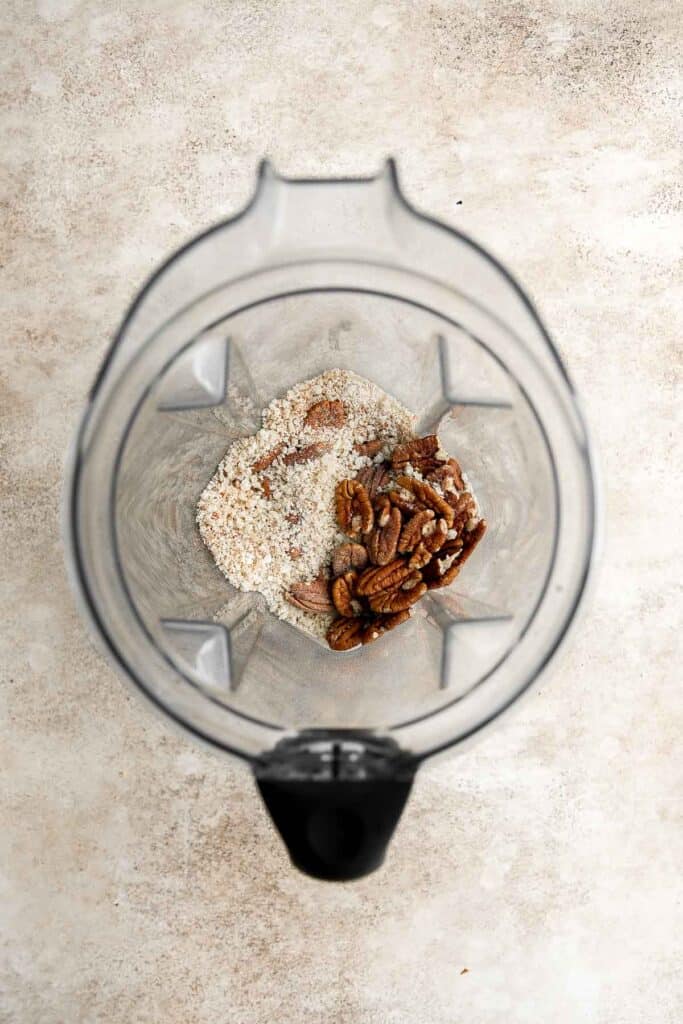
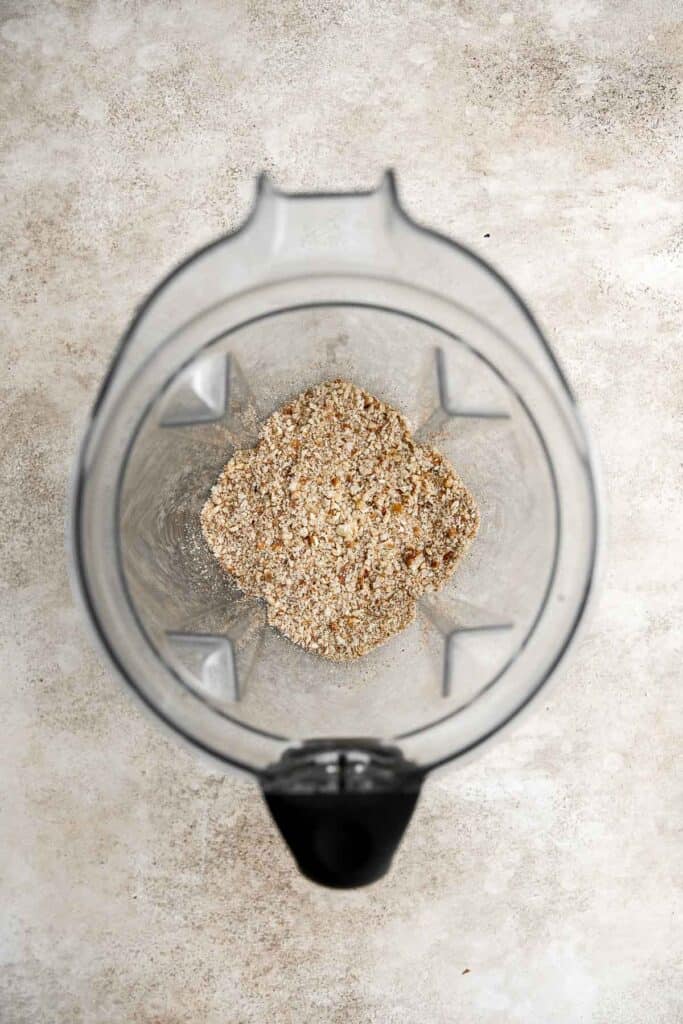
- Coat the chicken. Transfer the crumb mixture onto a shallow plate and press the mayo-coated chicken into the crumbs and coat them evenly.
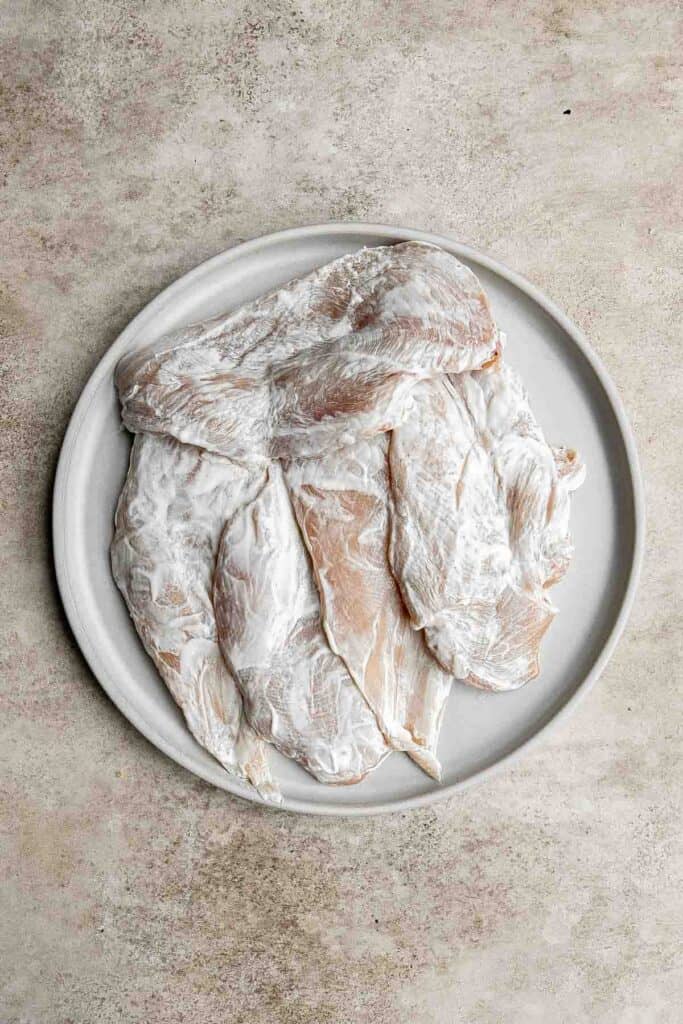
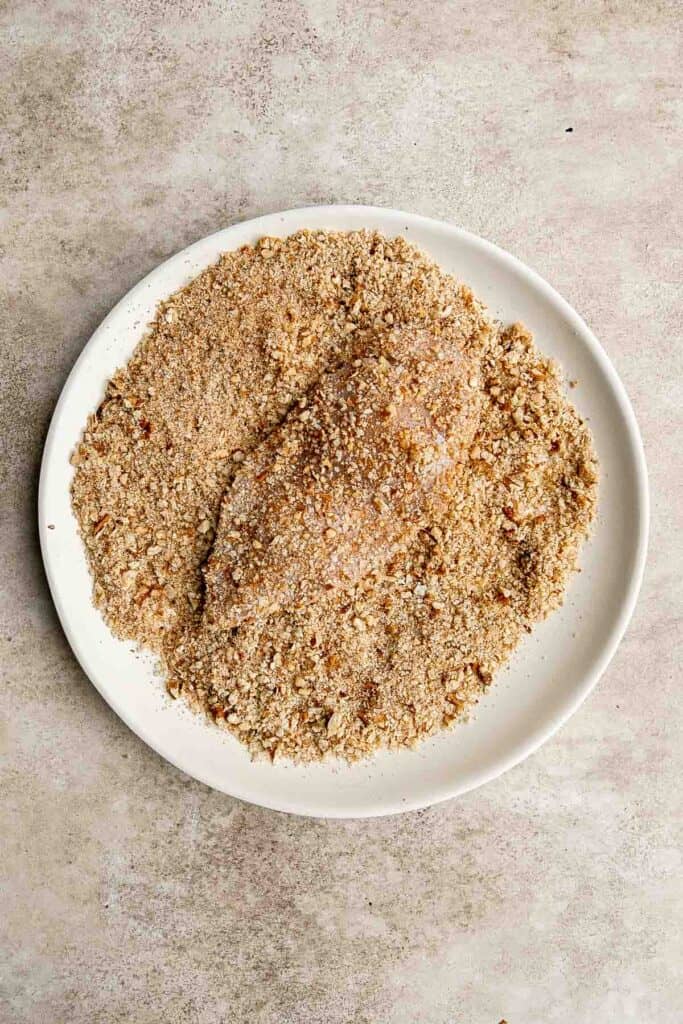
- Bake. Line a large half sheet baking pan with parchment paper. Place the crusted chicken on the prepared pan and bake in a 425F preheated oven until the crust becomes golden brown and chicken is fully cooked through, about 22-25 minutes. Flip once halfway to ensure the chicken is cooked evenly on both sides.
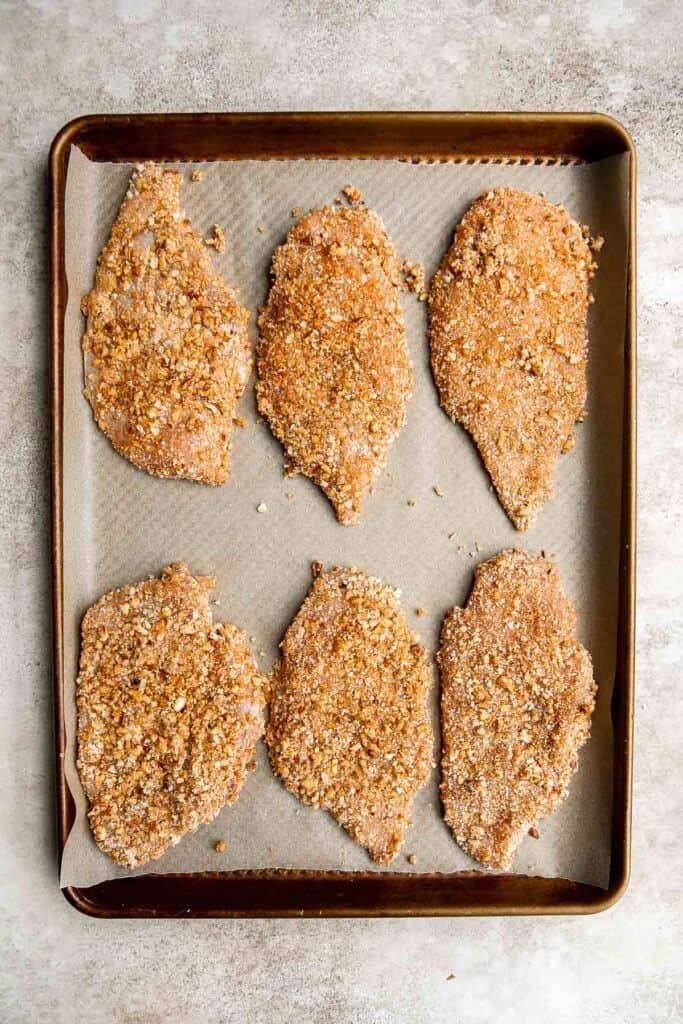
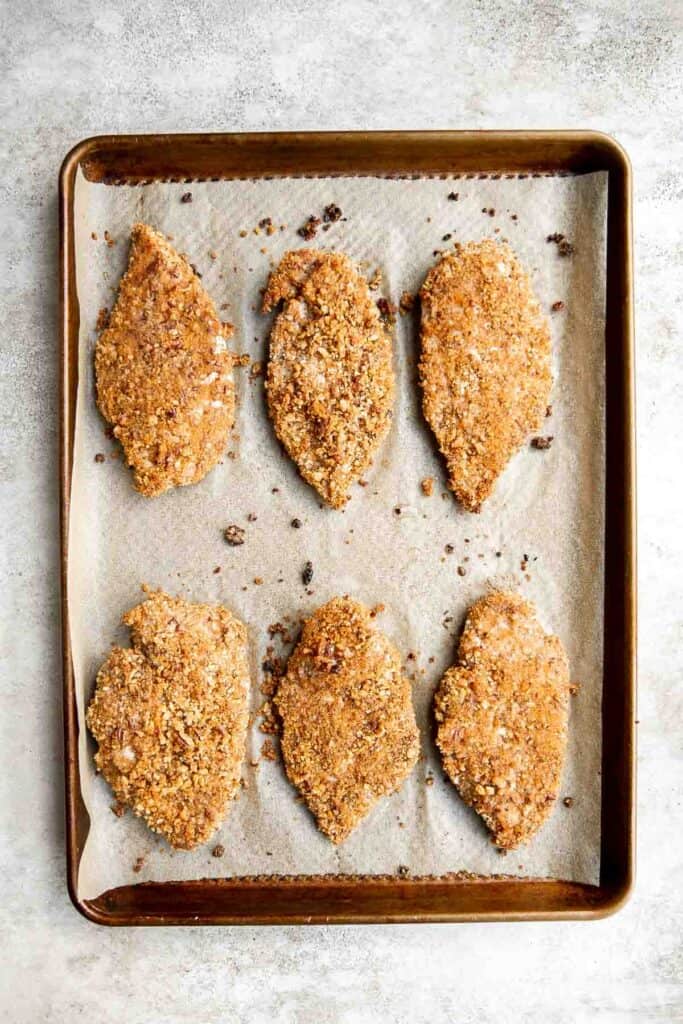
- Serve. Serve warm with honey mustard sauce (optional) or mayo on the side or drizzled over the chicken. To make the honey mustard dipping sauce, whisk together mayonnaise, dijon mustard and honey in a small bowl until smooth.
How to Cook Chicken in the Air Fryer
You can also cook pecan crusted chicken in the air fryer.
Transfer the coated chicken in a single layer in the air fryer basket and spray with cooking oil spray. Cook at 350F for 15 minutes until fully cooked through and the breading turns golden brown. The internal temperature for the chicken should reach 165F as read on a meat thermometer.
How to Serve
Pecan Crusted Chicken is delicious served on its own, with a drizzle of honey mustard sauce or mayo, or paired with some delicious sides. Roasted or steamed seasonal vegetables are always a great companion to chicken.
Some of my favorite sides for chicken include:
- Green Beans Almondine
- Sweet Kale Salad
- Crispy Smashed Potatoes
- Air Fryer Vegetables
- Cheesy Potato Soup
- Microwave Steamed Broccoli
Find more in our collection of 25 Side Dishes for Chicken.
You can also slice up the chicken and add it on top of salads and pastas.

Storage and Freezing Instructions
How to Store
Transfer leftover pecan crusted chicken to an airtight container and store in the refrigerator. Use the leftovers within 4 days.
How to Freeze
Place leftover cooked chicken in a freezer bag or another freezer-safe container and freeze for up to 3 months. Allow it to thaw in the refrigerator overnight before reheating, or defrost in the microwave according to the appliance's instructions.
How to Reheat
Reheat coated chicken in the oven at 375F for 10 minutes until warm and crispy, or in the air fryer for about 5-7 minutes at the same temperature.
Recipe Tips and Tricks
- Mise en place. That's just a fancy term for preparing everything ahead of time - making sure your ingredients are measured out, chopped, peeled, etcetera before beginning the cooking process. This will help reduce the possibility of cross contamination and make the cooking process much smoother and more efficient.
- Use a meat thermometer. When cooking chicken (or any kind of meat, for that matter), using a meat thermometer can take the guesswork out of making sure it's cooked properly, reducing the risk of contracting an illness. The chicken is cooked once it reaches 165F.

More Chicken Breast Recipes
- 50 Best Chicken Breast Recipes
- Parmesan Crusted Chicken
- Oven Baked Chicken Breast
- Stuffed Chicken Breasts
- Air Fryer Chicken Breast
- Mexican Chicken Breast
Tried this recipe?
I'd love to hear what you think! Leave a comment and rating below to share your feedback. Your reviews help others discover this recipe and help me keep creating more free recipes for you. Snap a photo and tag me on social media @aheadofthyme too.

Halloween Bark
Halloween Bark is my favorite chocolate treat to make in the fall. It's delicious, sweet, and fun to make. Plus, it's pretty too and can be customized with your favorite sprinkles and Halloween candy. This quick and easy no bake recipe is easy to make with a handful of ingredients and minimal prep time - perfect to make with the kids!
Sweet, melt-in-your mouth chocolate meets chewy candy corn and crunchy candy and sprinkles. The whole family will love every bite of this chocolate bark. Plus, it stores well, so you can snack on these for weeks to come (if you don't finish them before then!).
Why You'll Love this Halloween Bark
- The perfect Halloween treat. Fall is in full force and we have entered holiday territory - more specifically, Halloween territory, where Pinterest boards become chockfull of spooky treats. You can officially stop looking for the perfect holiday dessert: this Halloween bark is it.
- It takes just 15 minutes of prep. This quick and easy no bake recipe is simple but looks complex. In fact all it takes is 15 minutes of actual prep work. All you really have to do is melt the chocolate and sprinkle on some candies. The rest of the time (about 45 minutes) is allotted to let the chocolate bark chill and set after it's been assembled.
- Fun and easy to make (perfect for the kids!). Making Halloween bark is a great activity to get the kids involved with since there is no baking required. Leave the melting of the chocolate to the adults, but the kids can help with everything else. After melting and spreading the chocolate, the whole family will have fun arranging the layers of different candies and sprinkles to make a unique spooky masterpiece that everyone will enjoy.
- Perfect for Halloween parties. This easy recipe makes a sharable, on-theme treat that you can make for Halloween parties at home or take to festive functions everywhere. Plus, you can make them for any occasion by just substituting the candies and sprinkles with ones that match your theme.
- Great for gifting too. Chocolate bark can last for weeks both at room temperature or in the fridge, and even longer in the freezer (making them great to make ahead). This also makes them a great last minute Halloween gift that you can package up in clear plastic bags tied with string and gift to friends and family.

Ingredient Notes
To make this easy and festive Halloween Chocolate Bark, you will need the following ingredients (full measurements in recipe card below):
- semi-sweet chocolate - feel free to use dark chocolate. You could also use milk chocolate but I find the bark ends up being too sweet as it also has a lot of sweetness from the candy toppings.
- white chocolate - if you're not a fan of white chocolate, just increase the amount of regular chocolate and skip this step.
- Halloween M&M's - you can use regular M&M's if you can't source the Halloween edition, but the colors of the holiday version really give the bark a spooky(ish) look!
- candy corn - there's always a great debate about whether or not candy corn tastes good, but regardless, it looks perfect on Halloween bark. You could also swap it out for candy pumpkins if you prefer.
- candy eyes - candy eyes should be available in the baking section of your local grocery store this time of year (if not year-round). You can also order these candy eyes online.
- Halloween sprinkles - just like the M&M's, the same situation applies here: the Halloween colors (white, purple, black, orange, and sometimes a neon green) make this candy bark festive, but if you can't find them or make your own blend, other colors should taste exactly the same. You can also order these classic Halloween sprinkles online, or these Halloween sprinkles which also include candy eyes.
You will also need measuring cups and spoons, mixing bowl (for melting the chocolate), half sheet baking pan, and parchment paper (or silicone baking mat).
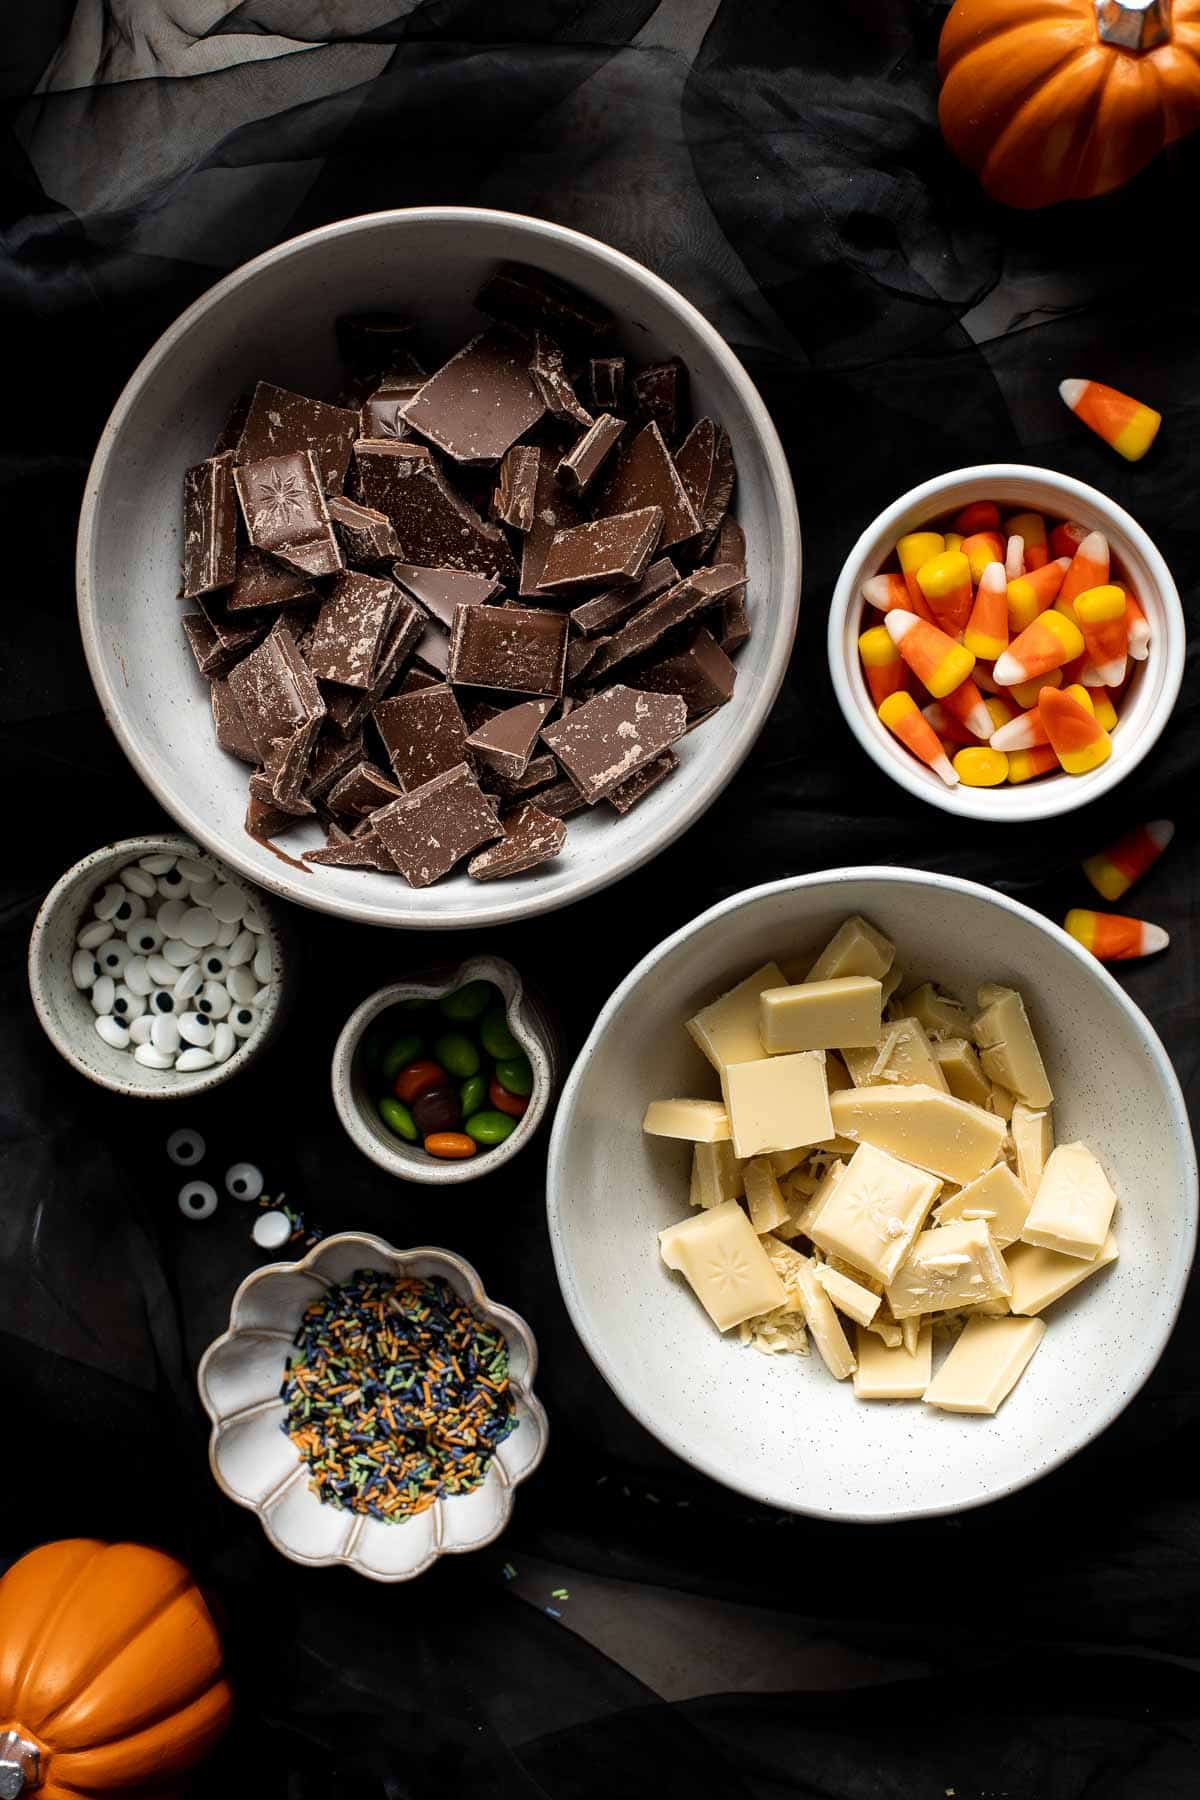
How to Make the Best Halloween Bark
First, melt the chocolate.
Melt the semi-sweet chocolate and white chocolate separately.
How to Melt Chocolate
You can melt chocolate either on the stovetop or in the microwave.
- On the stove: Bring about 2 inches of water to a gentle simmer in a saucepan over medium-low heat. Reduce the heat to low and place a medium heatproof bowl over the saucepan, making sure the bottom of the bowl doesn't touch the water (you can also use a steamer insert). Add the chocolate and stir constantly as it melts. Continue stirring until completely smooth and gloss. This should take just a few minutes.
- In the microwave: For a quicker method, place the chopped chocolate in a heatproof bowl and microwave in 30-second intervals, stirring well after each one. Continue until the chocolate is fully melted and smooth. Be sure to stir between intervals to prevent overheating or scorching.

Next, assemble the Halloween bark.
- Spread semi-sweet chocolate. Line a large half sheet baking pan with parchment paper or a silicone baking mat. Spread the melted semi-sweet chocolate in a thin layer onto the prepared baking sheet, forming an approximate 9x12-inch rectangle, about ⅓-inch thick.
- Swirl in white chocolate. Dollop the melted white chocolate on top. Use a toothpick to swirl the semi-sweet and white chocolates together.


- Add candies. Immediately arrange the m&m's, candy corn, and candy eyes onto the swirled chocolate, pressing them lightly into the chocolate, if necessary. Sprinkle the remaining gaps in the surface with sprinkles.
- Chill. Transfer the pan to the refrigerator to allow the chocolate to set, about 45 minutes. Transfer the parchment paper to a cutting board and cut the bark into pieces. Serve immediately.


Storage and Freezing
How to Store
Once the bark has completely cooled and set, you can break it up and transfer it to an airtight container or a sealed plastic bag and store at room temperature for 3-4 weeks. Keep it in a cool area to prevent it from melting. You can also store in the fridge.
How to Freeze
Because this bark is specific to Halloween, you may not want to keep it around until Christmas, but if you're making it ahead of the holiday, you can store it in a freezer-safe airtight container or freezer bag for up to 3 months. When ready to eat, allow it to thaw overnight in the refrigerator.
Recipe Tips and Tricks
- Adapt to fit different holidays. This bark recipe can be adapted to fit almost any holiday - Christmas, Easter, the Fourth of July are all easy to emulate! Just change the colors and types of the candy you use to reflect whatever is seasonally appropriate.
- Use even more festive sprinkle mixes. When you're sifting through the baking aisle searching for sprinkles and candy eyes, you may find Halloween sprinkle mixes that include colored edible glitter, pumpkin-and-bat-shaped sprinkles, witch hats, etc. Go wild!
- Get the kids involved. This is the perfect treat to make with the kids because the messier it looks, the better! There is no right or wrong way to make chocolate candy bark. Ask them to scatter the sprinkles or meticulously place the candy eyes-they'll ask to make it with you for years to come.

More Chocolate Recipes
- 45 Best Chocolate Desserts
- Dirt Pudding Cups
- Chocolate Covered Strawberries
- Molten Chocolate Lava Cakes
- Pecan Pie Brownies
- Chocolate Cupcakes
Tried this recipe?
I'd love to hear what you think! Leave a comment and rating below to share your feedback. Your reviews help others discover this recipe and help me keep creating more free recipes for you. Snap a photo and tag me on social media @aheadofthyme too.

Potato Corn Chowder
Soup season just got better with this Potato Corn Chowder. It's rich, creamy, hearty, and delicious. Made with a handful of ingredients in just 35 minutes, this vegetarian potato and corn soup is perfect for chilly weeknights or weekend lunches.
Creamy potato corn chowder is wholesome and nourishing, featuring several different kinds of vegetables (not just potatoes and corn), so you can feel good about serving it to your whole family. Soup season is the best season!
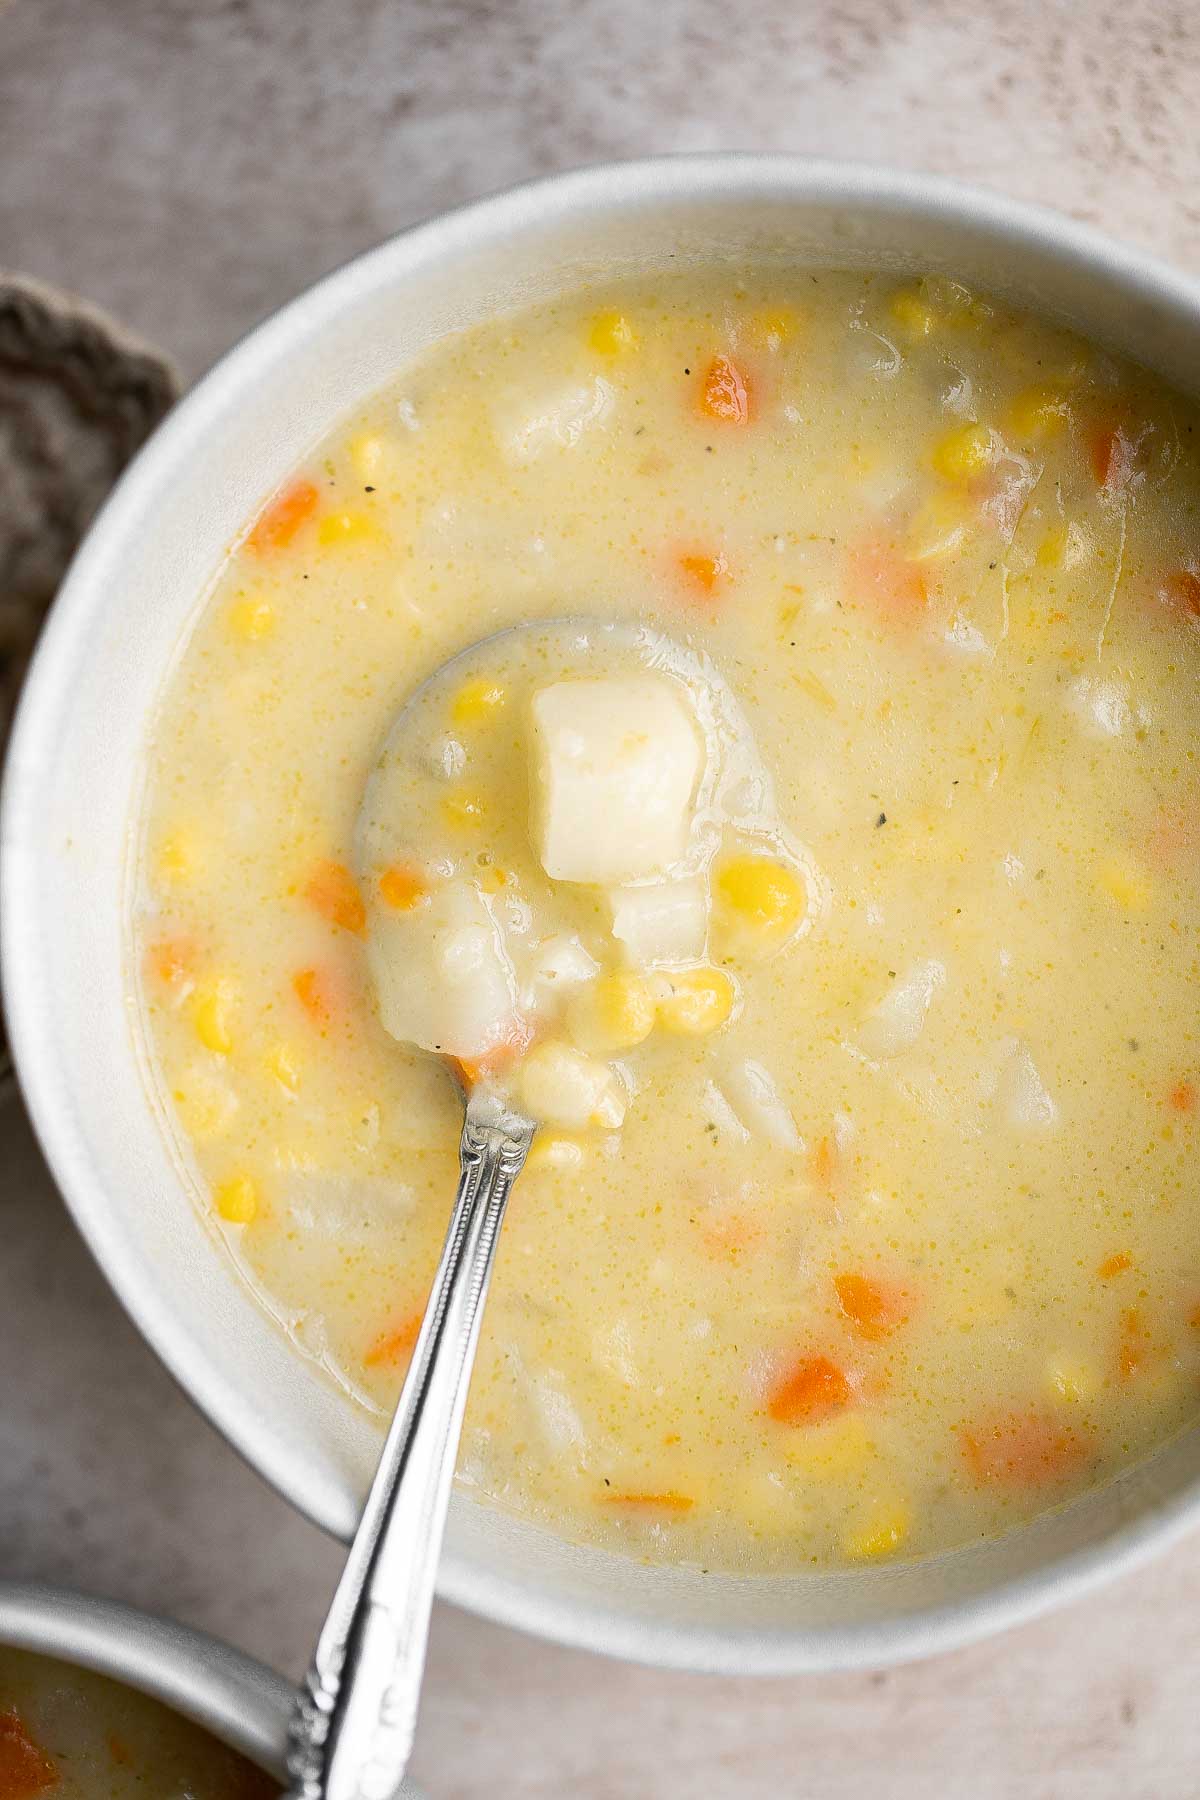
Why You'll Love this Potato Corn Chowder
- It comes together quickly. This potato corn soup takes a little over half an hour to prepare from start to finish, allowing you plenty of time to rustle up a main dish or finish setting the table. Plus, it's made in one pot so clean up is easy!
- The best of both worlds. Fans of potato soups and corn chowders will love this 2-in-1 soup that checks all the boxes. It's creamy, rich, hearty, and loaded with vegetables like onions, garlic, carrots, potatoes, and corn.
- Vegetarian and gluten-free. This corn potato chowder recipe is vegetarian and can be made vegan with a simple substitution (see below for details!). It's gluten-free too it can be enjoyed by everyone including those with dietary restrictions.
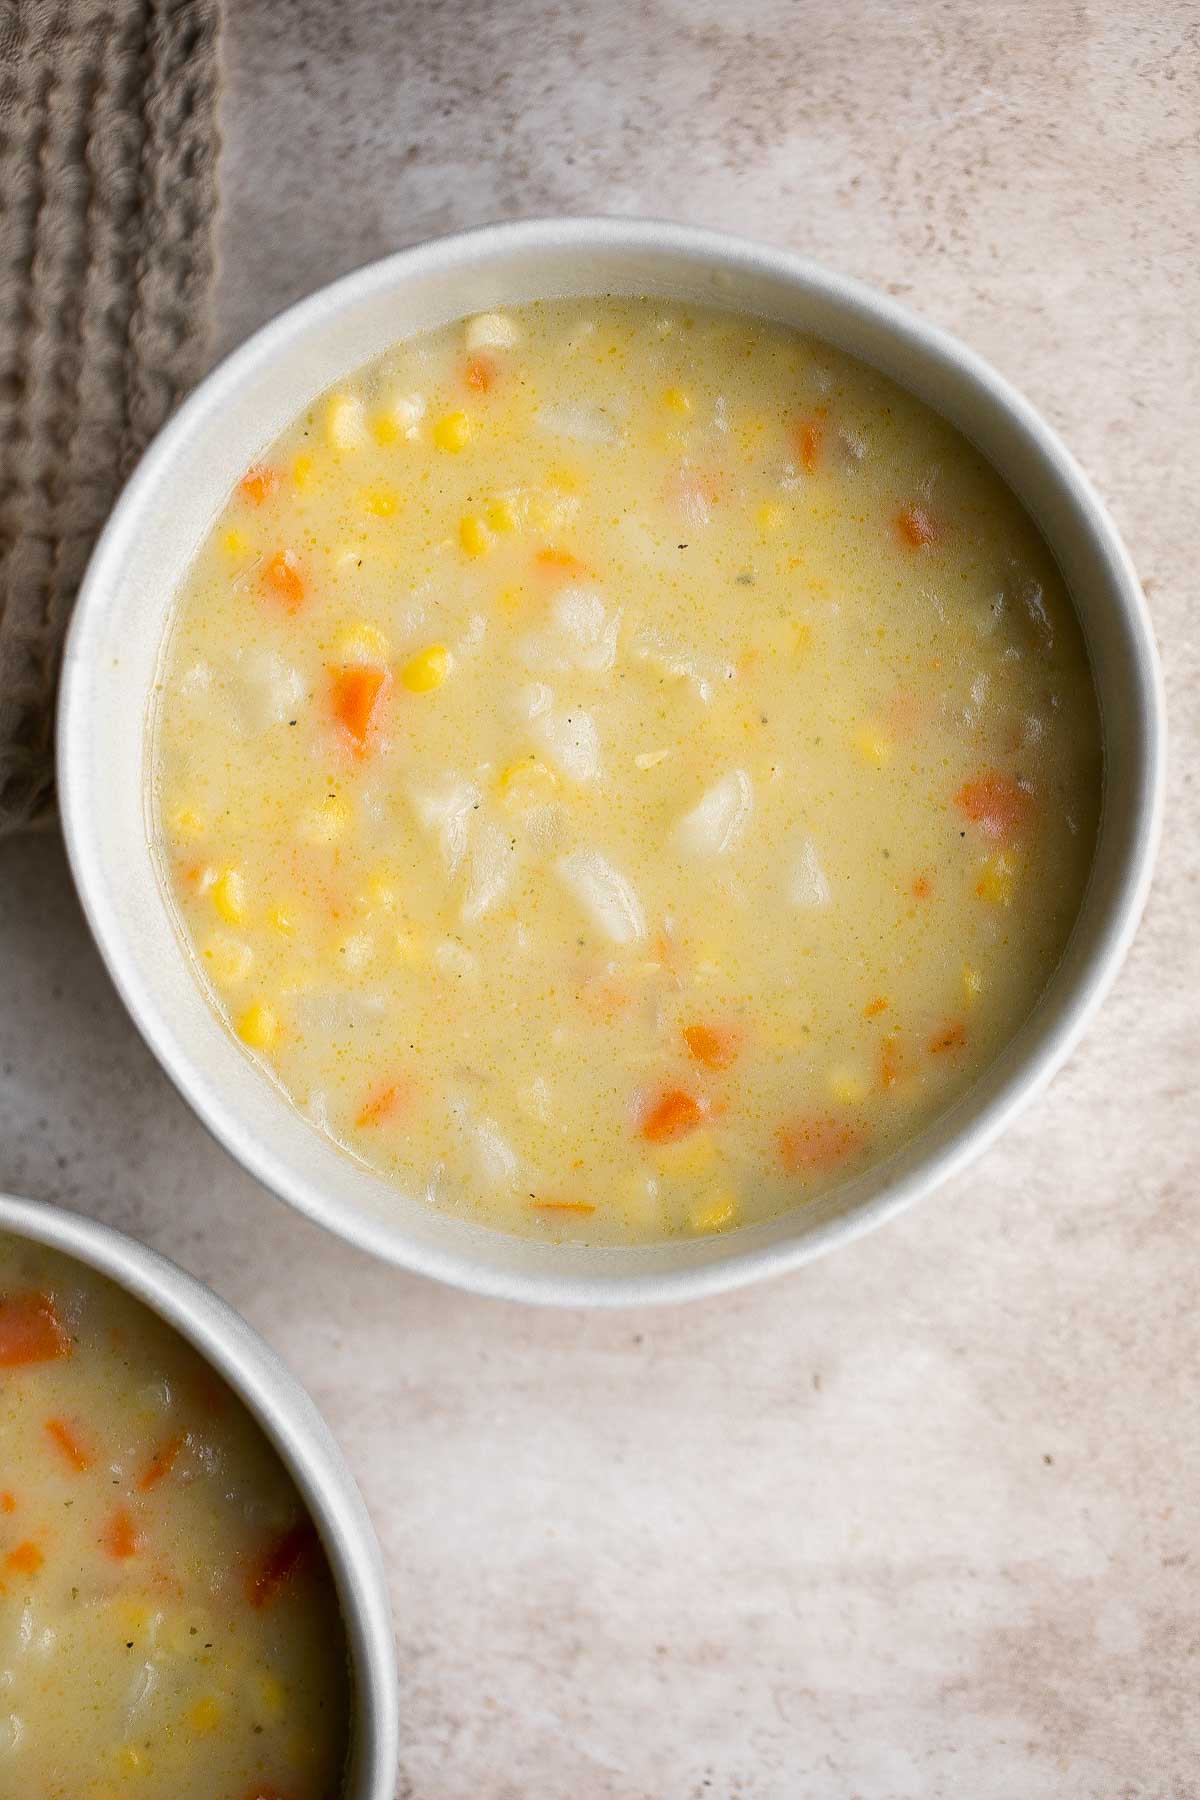
Ingredient Notes
To make this easy and delicious Potato Corn Chowder, you will need the following ingredients (full measurements in recipe card below):
- potatoes - Yukon Golds or russets are best for soup because of their creamy and velvety texture, but you can use whatever variety you have on hand.
- corn - we used frozen corn, but you can also use canned corn or fresh. If using canned, be sure to rinse and drain the corn first. If using fresh corn, cook the corn on the cob first, and then slice off the kernels.
- butter - to make this potato corn chowder vegan-friendly, use a butter alternative or a plant-based oil.
- onion
- garlic - freshly minced garlic gives the best flavor, but pre-minced will help save on time. Use 1 tablespoon minced garlic for each clove called for in the recipe.
- carrots
- broth - you can use virtually any kind of broth. Use vegetable broth to keep the soup vegetarian or vegan. Use chicken broth if you prefer the flavor.
- heavy cream - the heavy cream helps give this soup a rich texture. A great dairy-free option would be canned coconut cream substituted at a 1:1 ratio.
- salt and pepper
You will also need measuring cups and spoons and a large cooking pot (we used our 5.5 quart Dutch oven).

How to Make the Best Potato Corn Chowder
- Sauté aromatics. Melt butter in a large pot (like a 5.5 quart Dutch oven) over medium-high heat until bubbly, about 2 minutes. Add onion, garlic, and carrots and sauté until tender, about 2 minutes.
- Add potatoes. Add potatoes and broth. Bring to a boil and cook covered until potatoes are fork tender, about 10 minutes. It is ready when a fork can be easily inserted into the potatoes.
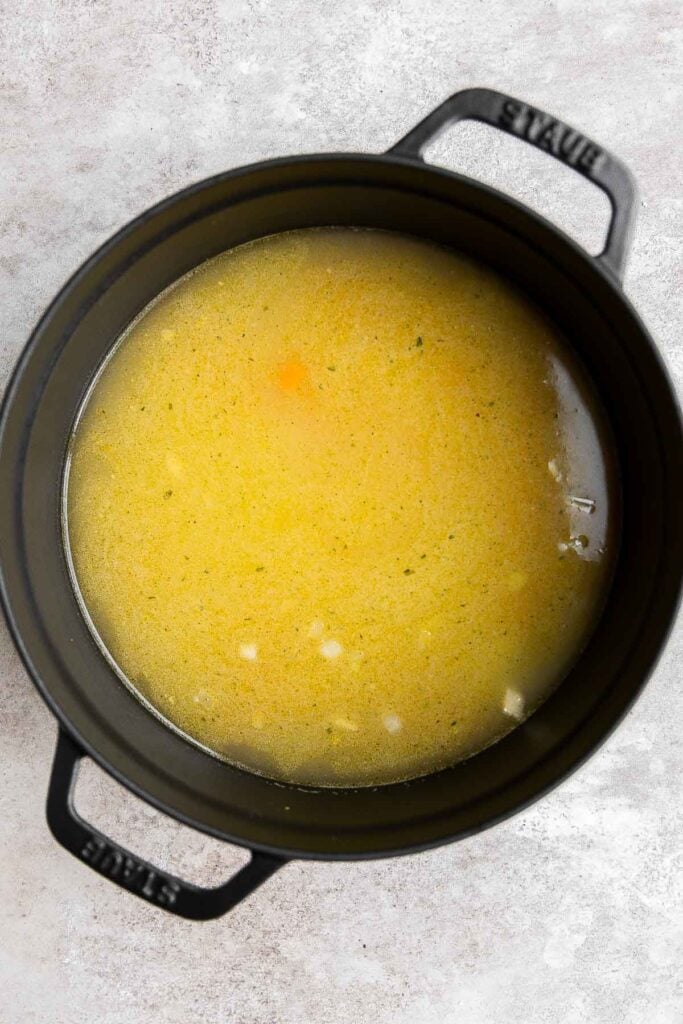
- Add corn. Turn the heat down to medium and stir in heavy cream and corn. Cook until warmed through, about 2 minutes.
- Mash. Using a potato masher, mash half of the potatoes in the pot to thicken the soup. You can also coarsely blend with a handheld immersion blender.
- Thicken. Stir well and let the soup continue cooking until thickened to a desired consistency, about 3-4 minutes.
- Serve. Season with salt and pepper to taste and serve warm.
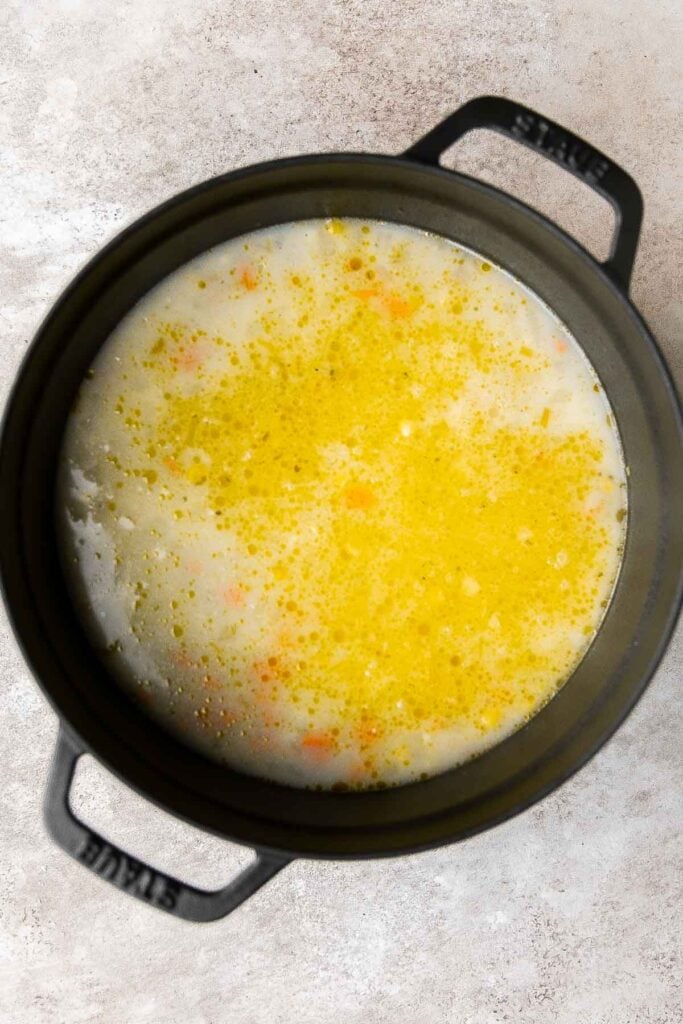
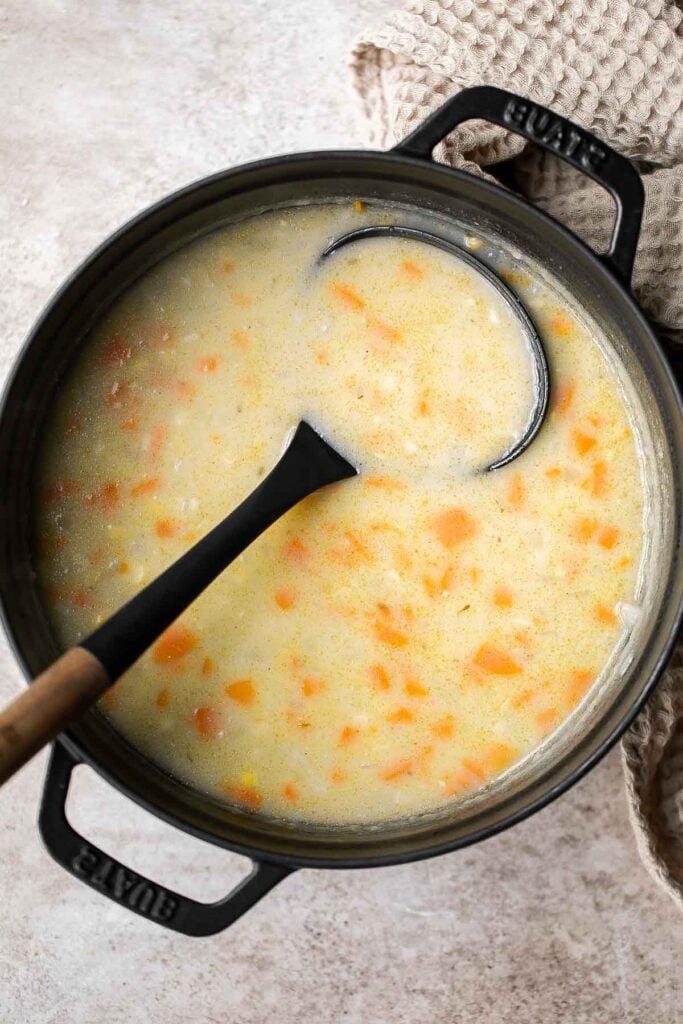
How to Serve
This potato and corn soup is delicious served on its own, or paired with some classic soup side dishes such as:
- Salads - try Caesar Salad, Sweet Kale Salad, Apple and Arugula Salad, or Butternut Squash Quinoa Salad
- Bread - try Garlic Breadsticks, Potato Dinner Rolls, or Garlic Cheddar Biscuits
- Sandwiches - try Pita Grilled Cheese, Tuna Melt, Grilled Cheese Roll Ups, or Roasted Broccoli Grilled Cheese
Storage and Freezing Instructions
How to Store
Allow the soup to cool completely before transferring to an airtight container (this also helps to minimize risk of burning yourself). Refrigerate for up to four days. Reheat on the stovetop, in the microwave, or in the instant pot.
How to Freeze
To freeze the chowder, transfer it to a freezer-safe airtight container (such as a plastic deli container) or freezer bag, allowing room for expansion as the liquids freeze. Freeze for up to 3-6 months. Thaw overnight in the refrigerator and or use a warm water bath to gently release the soup from the bag or container and reheat from frozen.
Recipe Tips and Tricks
- Serve at holiday dinners. This potato corn chowder makes a great alternative to both mashed potatoes and corn chowder. Mix things up and knock out two dishes at once!
- Offer additional toppings. Give your family or dinner guests a chance to customize the soup to their liking by serving it up alongside an array of optional toppings like chopped or dried chives, bacon bits or chopped bacon, dill, sour cream, or shredded cheese - let your tastebuds dictate what you choose.
- Prep the vegetables up to two days before. This tip comes in handy for holiday or dinner party prep when you've got several dishes to execute in a limited amount of time. Chop, dice, and peel everything a day or two before you're ready to cook to streamline your preparation. Store all the prepared veggies in an airtight container in the fridge.
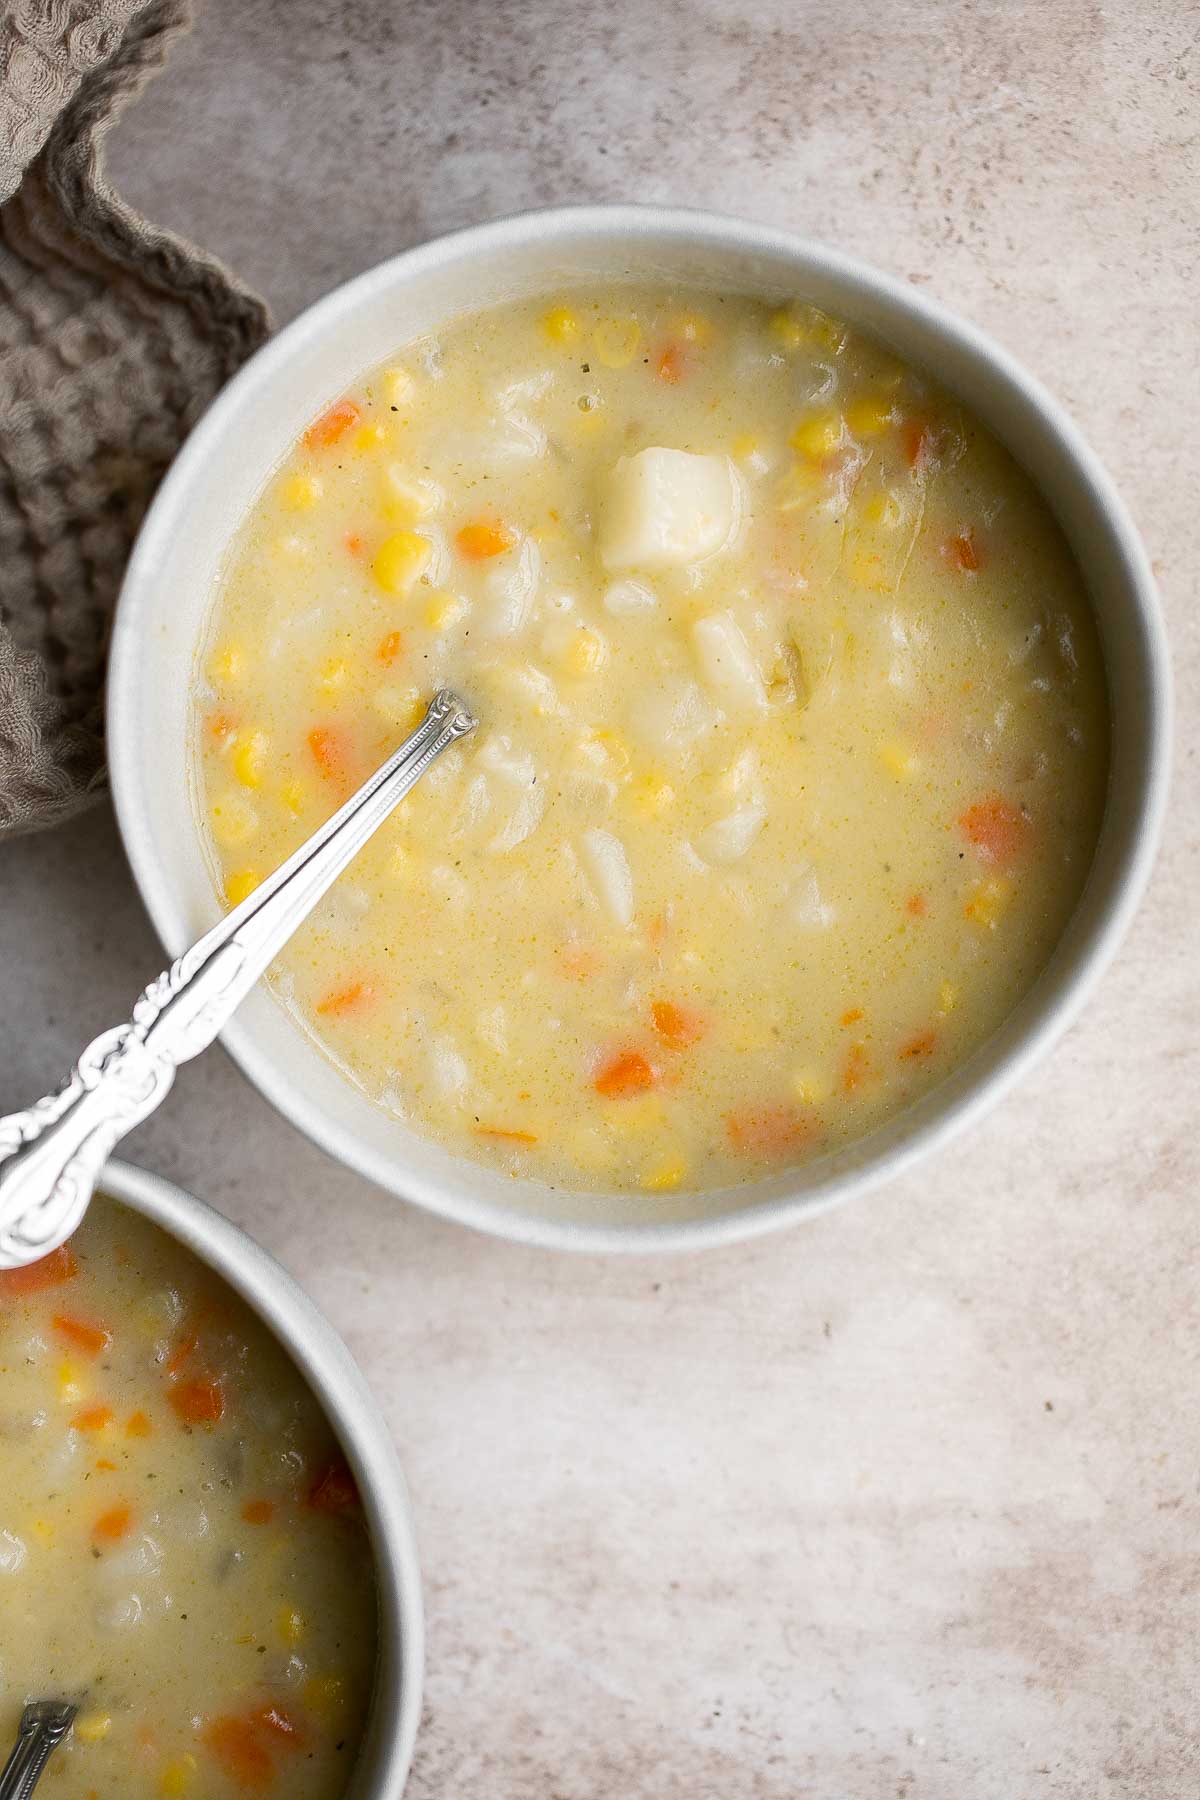
More Soup Recipes
- 60 Best Soup Recipes
- Cheesy Potato Soup
- Creamy Mexican Corn Soup
- Ham and Potato Soup
- Mashed Potato Soup
- Turkey Potato Chowder
Tried this recipe?
I'd love to hear what you think! Leave a comment and rating below to share your feedback. Your reviews help others discover this recipe and help me keep creating more free recipes for you. Snap a photo and tag me on social media @aheadofthyme too.

Coconut Curry Ramen
Tired of the same old soup recipes? This Coconut Curry Ramen will change everything! It's creamy, rich, comforting, and delicious, with a perfect blend of mouthwatering textures and flavors that will have you going back for another serving every time.
Ready in just 25 minutes, it's so much easier to make homemade ramen than you think! This quick and easy vegetarian ramen with coconut curry is perfect for busy weeknight dinners - especially on cold fall or winter days.
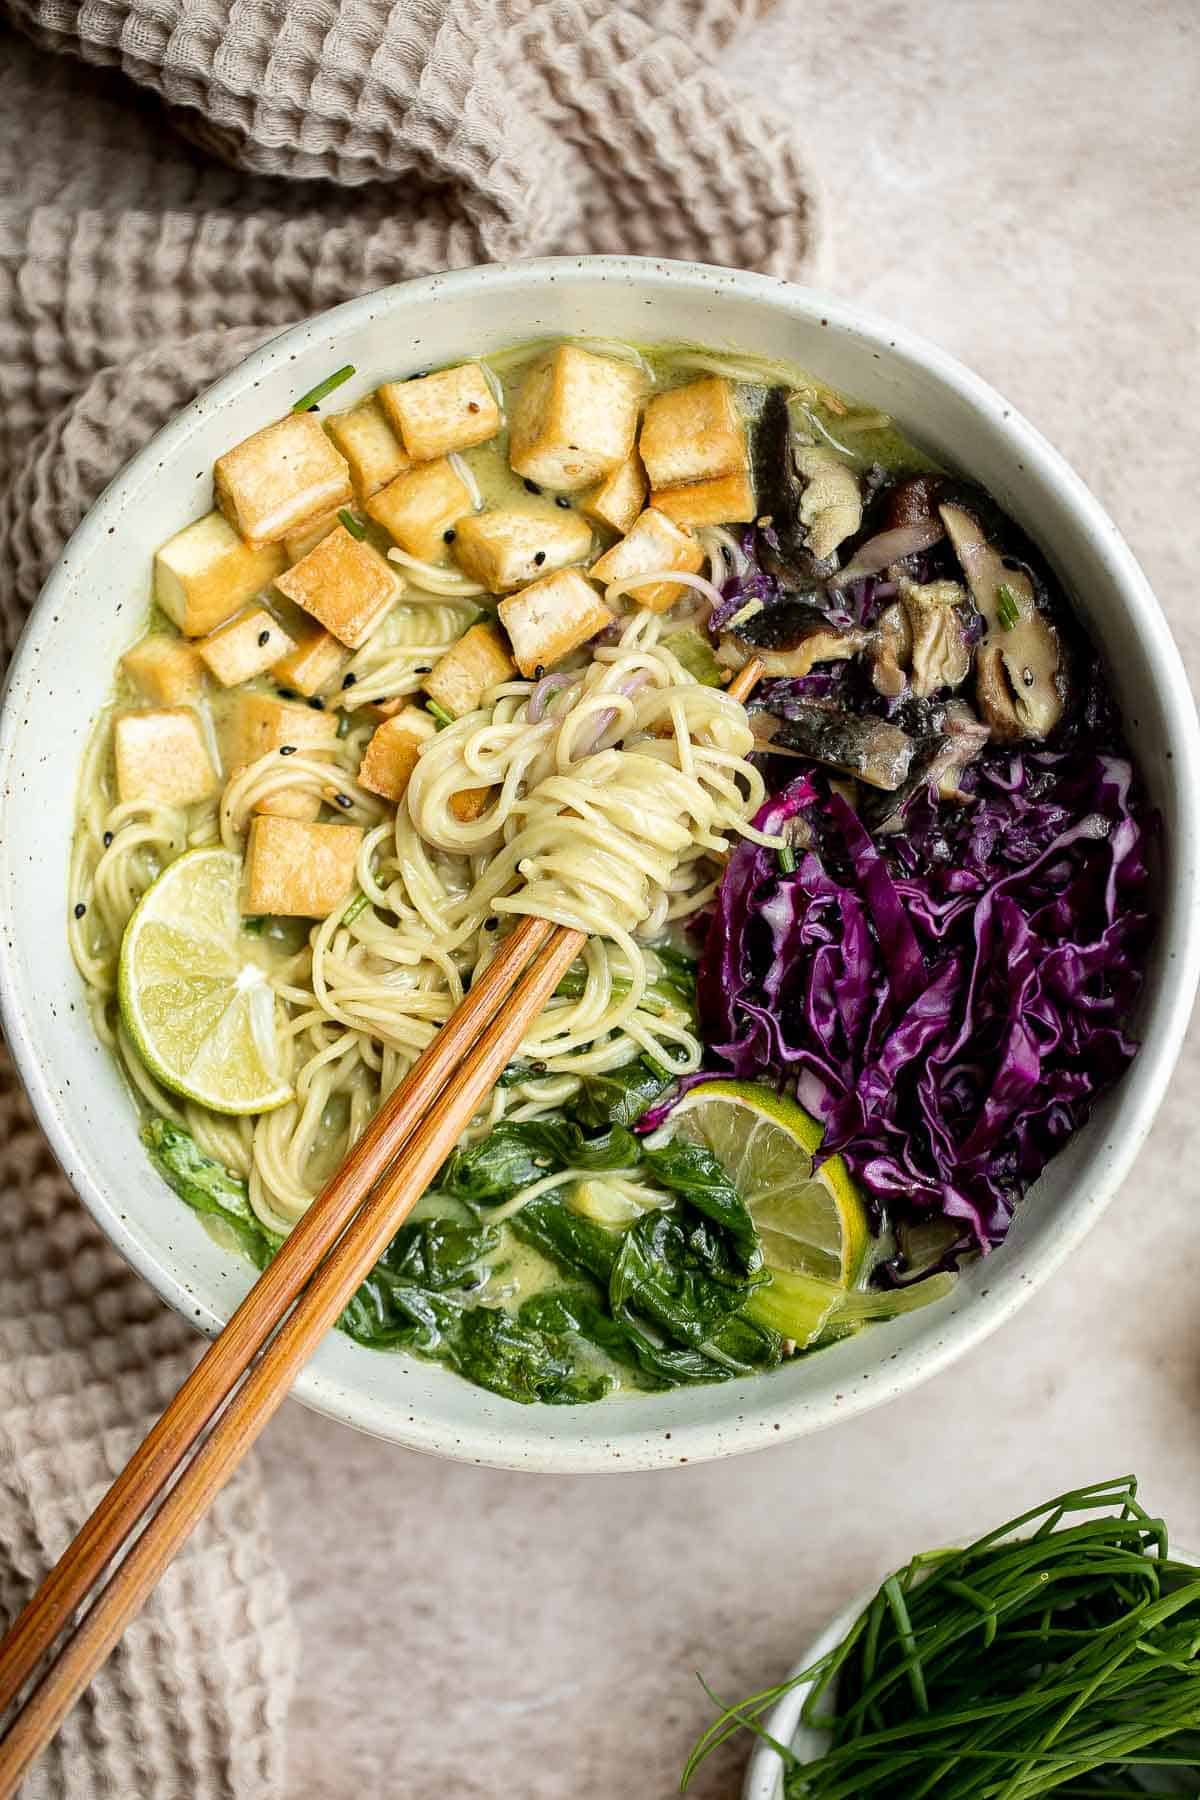
Why You'll Love this Coconut Curry Ramen
- Fast and easy. This recipe takes almost no time to make! The whole process takes only 25 minutes from start to finish and requires only basic cooking skills like chopping, dicing, and mincing, but can be modified to be even easier. Check out the ingredient notes below for suggestions!
- Simple ingredients. All of the ingredients in this coconut curry ramen recipe are fairly common and won't require an extra trip to a specialty market - you can just grab them (or appropriate substitutions) at your usual grocery store! No secret ingredients here, just pantry staples and fresh produce for a delicious, nutritious cold-weather meal.
- Naturally vegetarian. Thanks to a hearty list of mostly plant-based ingredients, this Thai green curry ramen is vegetarian-friendly and can be made completely vegan with minimal ingredient substitutions. Keep reading for the list of ingredients and suggested swaps!
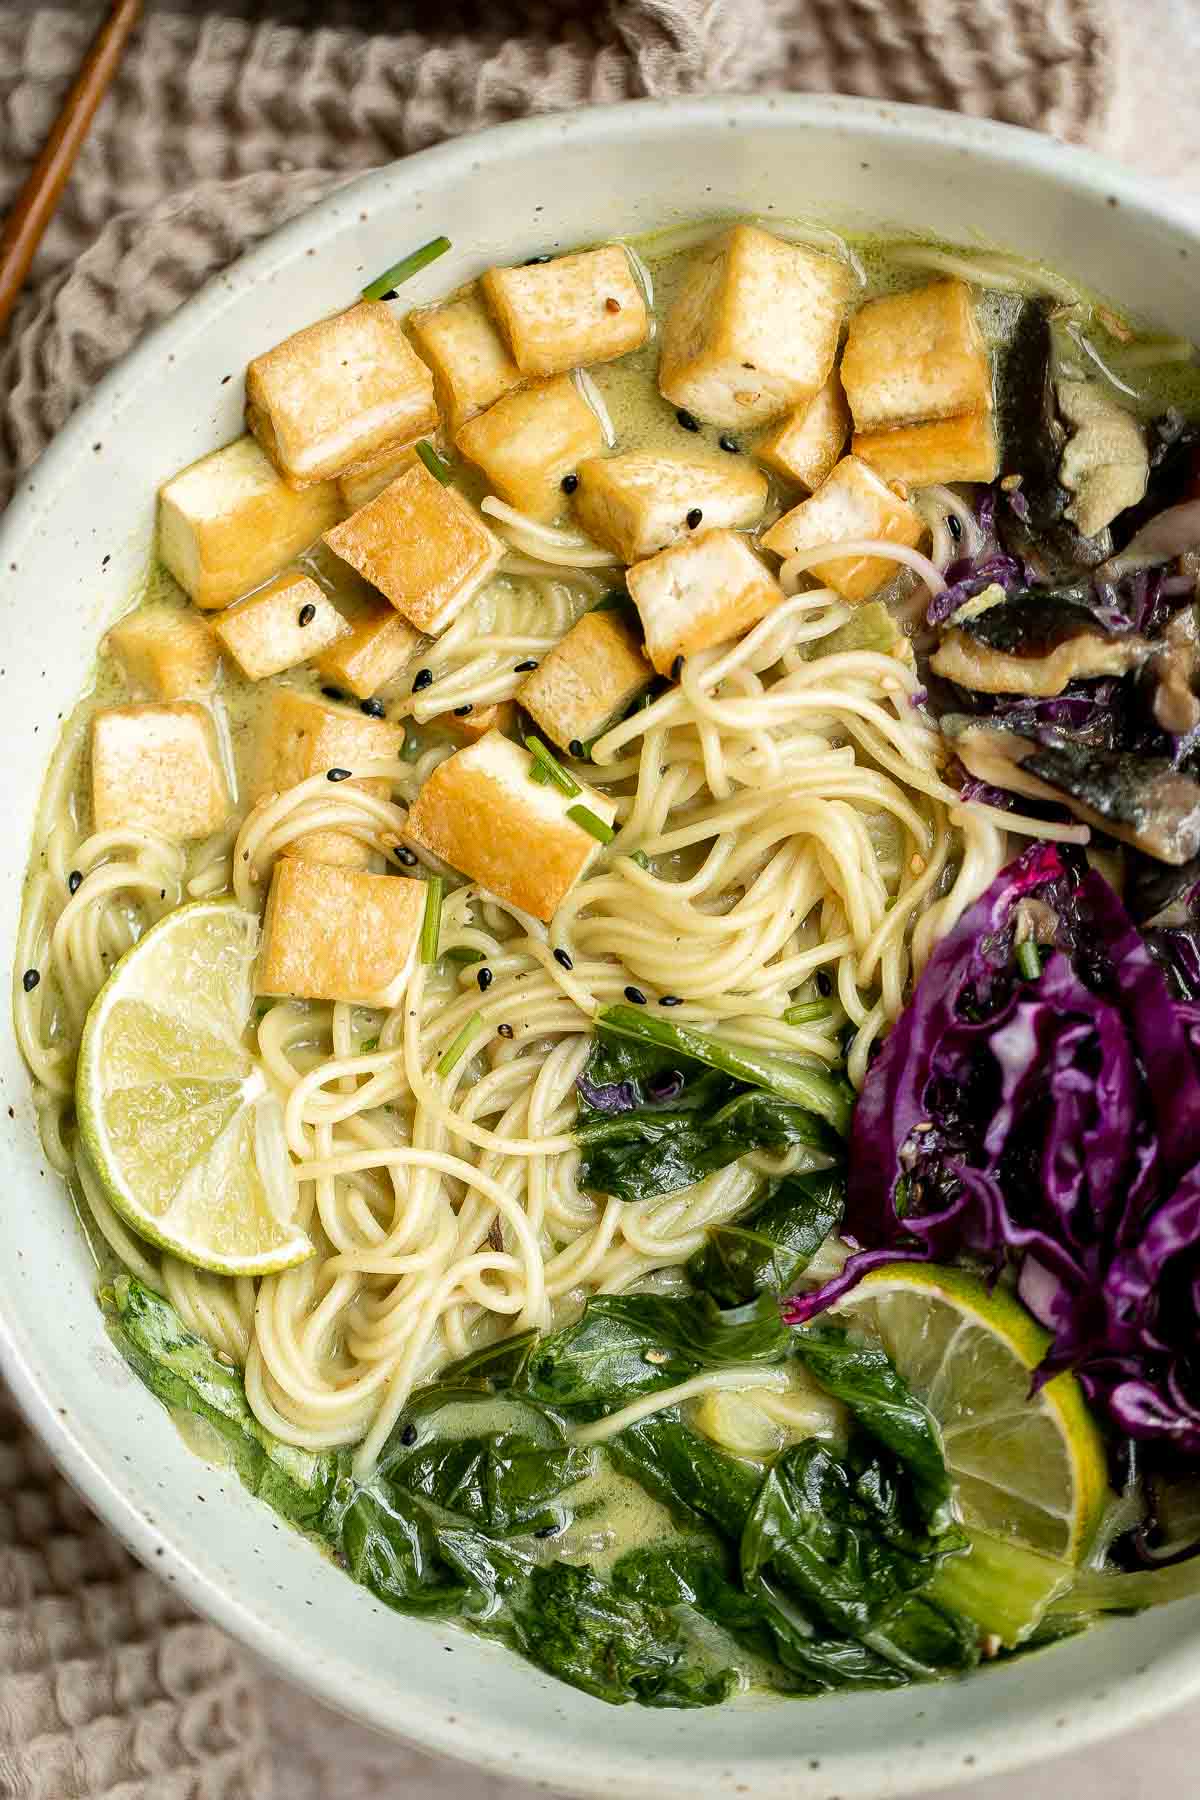
Ingredient Notes
To make this delicious Coconut Curry Ramen, you will need the following ingredients (full measurements in recipe card below):
- vegetable oil - this can be substituted with butter, ghee, avocado oil, olive oil or coconut oil - whatever you prefer.
- extra firm tofu - extra firm tofu is great in soups like this one because it will retain its shape and texture longer than softer varieties, preventing your tofu from going mushy in the broth before you get a chance to eat it.
- shallot - if you don't have shallots on hand, yellow onions (or whatever you've got in stock) are close enough.
- garlic - freshly minced garlic yields the best flavor, but pre-minced garlic from the grocery store will work fine, too.
- ginger - the same goes for the ginger - if you don't have time (or fresh ginger) pre-minced will suffice.
- shiitake mushrooms - shiitakes will provide the most authentic taste, but creminis, oyster mushrooms, portobellos, porcinis, or a number of other varieties of mushroom can be used in their place.
- green curry paste - feel free to substitute with yellow curry paste or red curry paste. The ramen will taste slightly different but delicious.
- coconut milk - it's important to use canned coconut milk, not the kind from a carton. The fat in canned coconut milk helps make the soup broth creamy and delicious!
- vegetable broth - you can also substitute with chicken broth.
- fish sauce - if you wish to make this recipe completely vegan, swap out the fish sauce for soy sauce mixed with rice wine vinegar, or just leave it out completely.
- lime juice - fresh squeezed lime juice has the most vibrant flavor, but if you're short on limes you can use refrigerated lime juice concentrate.
- ramen noodles
- bok choy - napa cabbage or chard will work if you can't find bok choy.
- shredded purple cabbage - this is optional but adds the perfect touch of crunch (and some extra nutrients!) to this soft, dreamy curry soup.
You will also need measuring cups and spoons and a large pot (I used my 4 qt. Dutch oven).

How to Make the Best Coconut Curry Ramen
- Cook tofu. Heat oil in a large pot over medium-high heat until the hot oil sizzles, about 2 minutes. Add cubed tofu and sauté until golden brown on all sides, about 3-4 minutes. Set aside on a plate.
- Sauté aromatics. In the same pot, add onion, garlic and ginger and sauté until fragrant, about 1 minute. Add mushrooms and cook until tender, about 2-3 minutes.
- Make soup base. Stir in curry paste and sauté until fragrant, about 2 minutes. Slowly pour in the coconut milk, broth, fish sauce, and lime juice. Stir constantly and bring the soup to a simmer over medium heat, about 3-4 minutes.
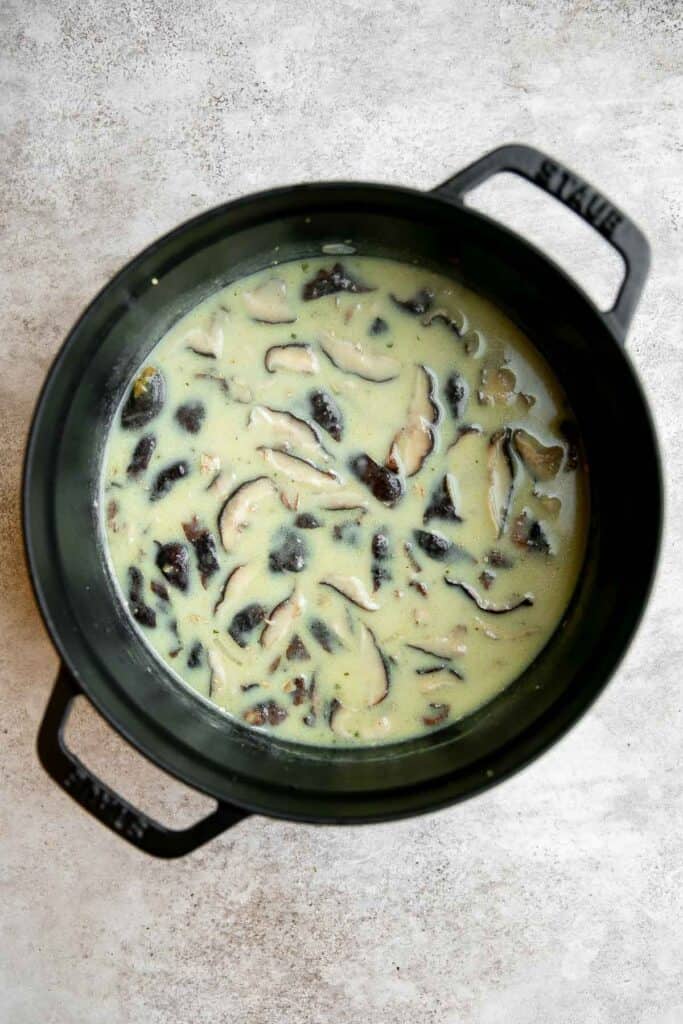
- Add noodles. Next, add ramen noodles and cook according to the package instructions until al dente, about 3-4 minutes.
- Add bok choy and tofu. Add bok choy and cook until softened, about 1 minute. Return the cooked tofu to the pot.
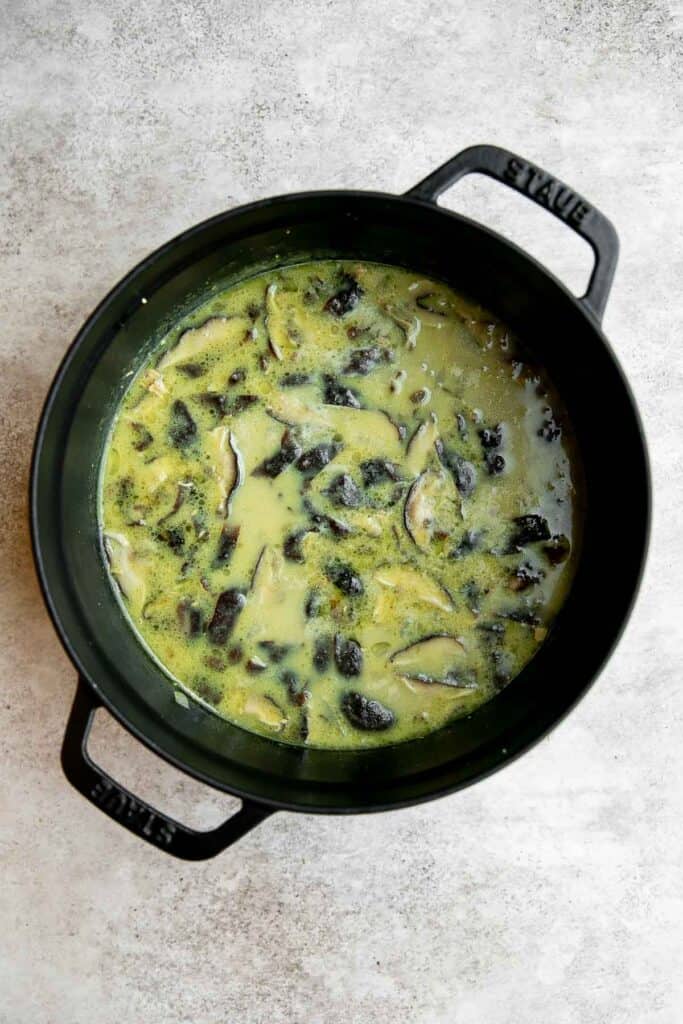
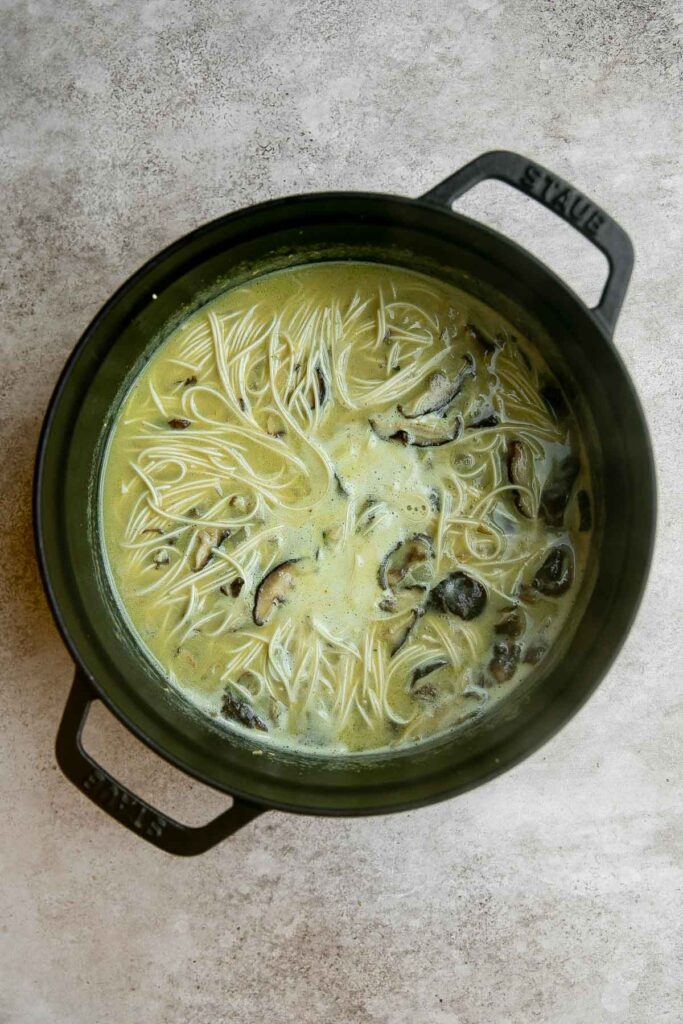
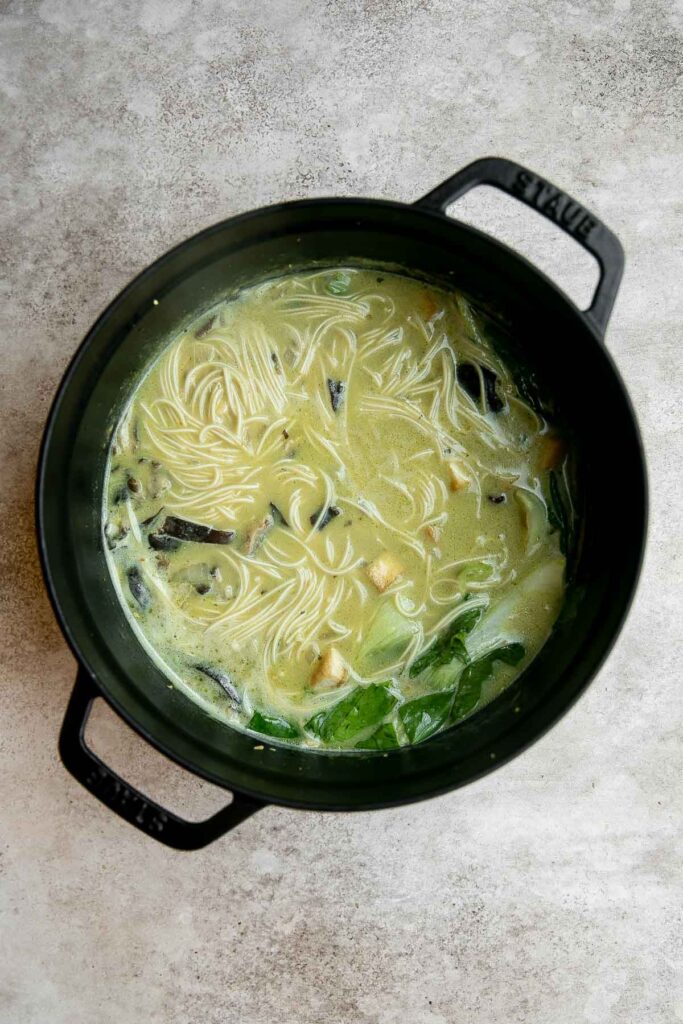
- Serve. Divide noodles and soup base evenly into ramen bowls and top with shredded cabbage.
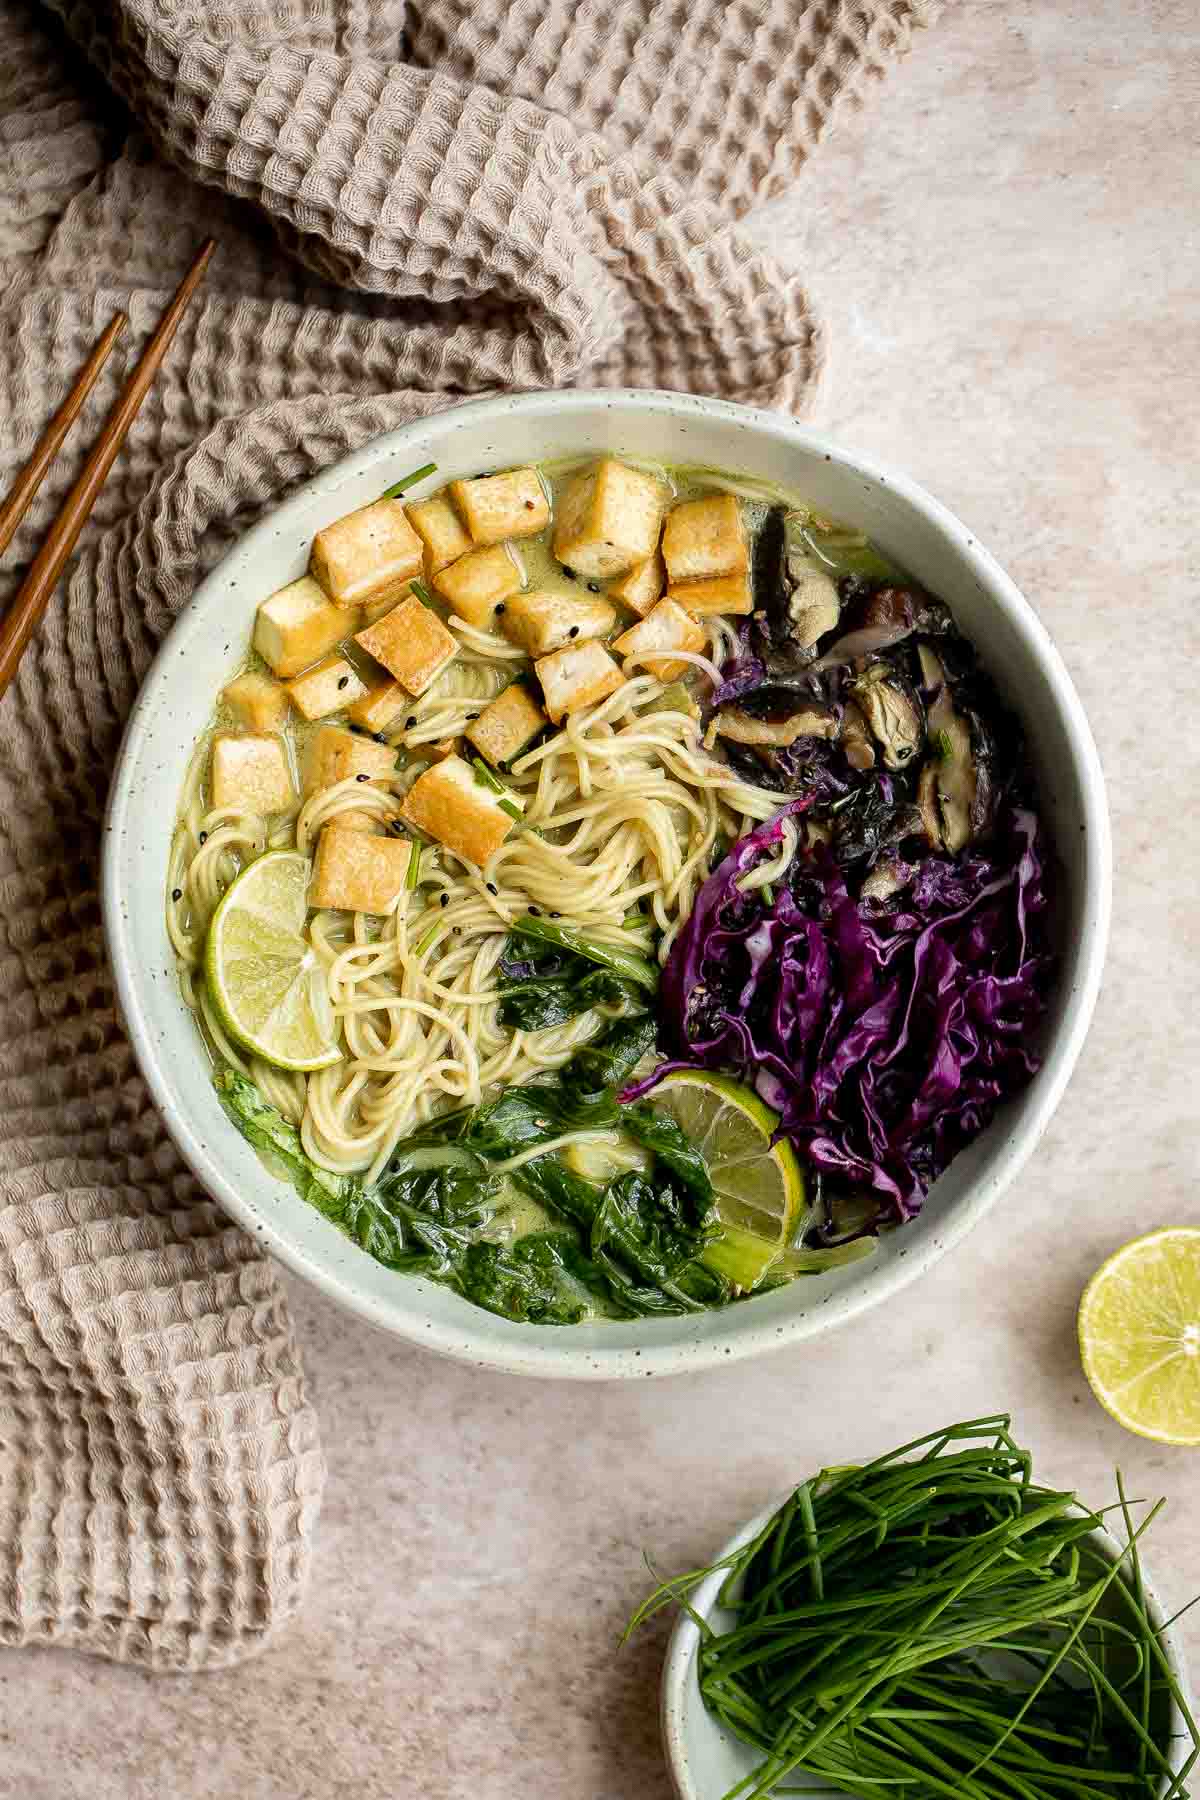
How to Serve
Coconut Curry Ramen is delicious served on its own, or paired with some of my favorite sides including:
- Spring Vegetable Stir Fry
- Chinese Garlic Cucumber Salad
- Steamed Scallion Buns
- Air Fryer Vegetable Stir Fry
- Kani Salad
Storage Instructions
Transfer to an airtight container and refrigerate for 2-4 days. Reheat on the stovetop or in the microwave. Be aware that the noodles may start to get mushy after the first day - you can avoid this by straining the broth from the noodles and storing them separately before combining them again for reheating.
You can freeze leftover coconut curry ramen (without the noodles) in an airtight container or freezer bag for up to 3 months. I do not recommend freezing with the noodles as they will get mushy and lose their texture. Reheat by thawing in the fridge for at least 24 hours or release the soup from the container with a warm water bath (if necessary) and then reheat straight from frozen!
Recipe Tips and Tricks
- Customize your toppings. This ramen with coconut curry is delicious as-is, but you can always experiment with different toppings to create your own perfectly-tailored version. If you don't mind changing the vegetarian nature of the dish, you can add different types of proteins, like grilled pork, fish cakes, boiled eggs, or shredded chicken or beef. You can also top it with green onions, bean sprouts, bamboo shoots, mushrooms, or your preferred combination of toppings!
- Reuse the leftovers in creative ways! If you end up with lots of leftover broth and noodles, you can recycle them into a completely new meal (or several!). Use the broth to season rice or other cooked grains, crisp up the noodles, tofu, and vegetables in a stir fry, or incorporate the cooked ingredients in a casserole or omelet.
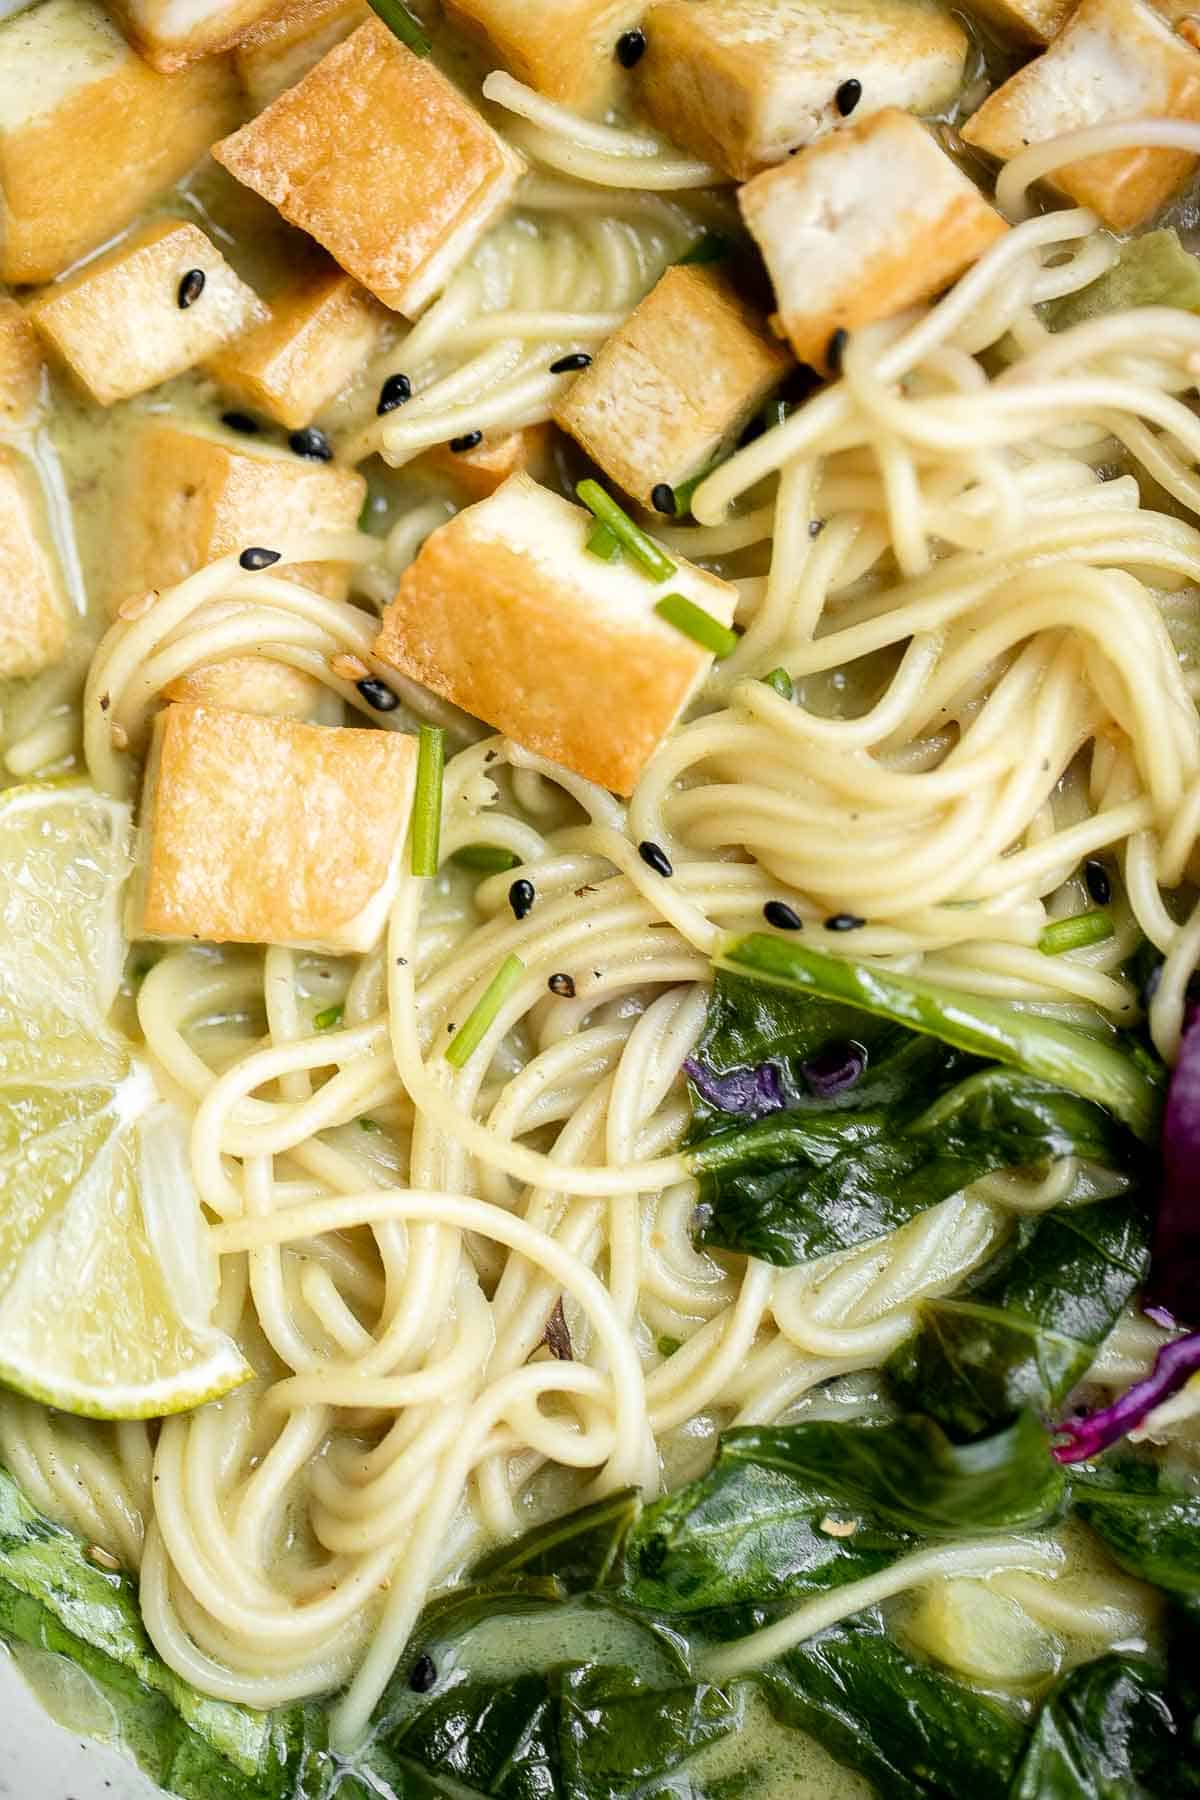
More Noodle Soup Recipes
- Creamy Vegan Ramen
- Thai Red Curry Noodle Soup
- Healthy Miso Ramen with Chicken
- Vegetarian Ramen
- Creamy Vegetarian Peanut Miso Ramen
- Slow Cooker Asian Beef Noodle Soup
Tried this recipe?
I'd love to hear what you think! Leave a comment and rating below to share your feedback. Your reviews help others discover this recipe and help me keep creating more free recipes for you. Snap a photo and tag me on social media @aheadofthyme too.

Apple Cider Vinegar Turmeric Detox Drink

This Apple Cider Vinegar Turmeric Detox Drink is one of the healthiest ways to start your day. Drink one cup in the morning to help clear toxins from your body, aid in digestion and absorption of nutrients, and boost energy.
My new year's resolution is to be healthier and take better care of myself - and this apple cider vinegar tea is going to do just that. It's packed with some incredible health benefits. The best part? It is quick and easy to make with just a handful of ingredients that you likely already have in your pantry.

Why You'll Love this Apple Cider Vinegar Drink
- It's loaded with powerful ingredients. As the name suggests, this drink consists of apple cider vinegar and turmeric, and it also has lemon juice. Each of these ingredients are powerhouses on their own, so when they come together magic happens. Yes, magic.
- A healthy boost in the mornings. I like drinking apple cider vinegar tea every morning to help start my day right. Apple cider vinegar is loaded with health benefits including clearing toxins from your body, inducing digestion, and boosting energy - a great start to the day.
- It has immune-boosting properties. This cleanse drink is also great for helping to prevent getting sick and for fighting off colds if you are already side. It's a great cold remedy that can sooth a sore throat and clear a stuffy nose.
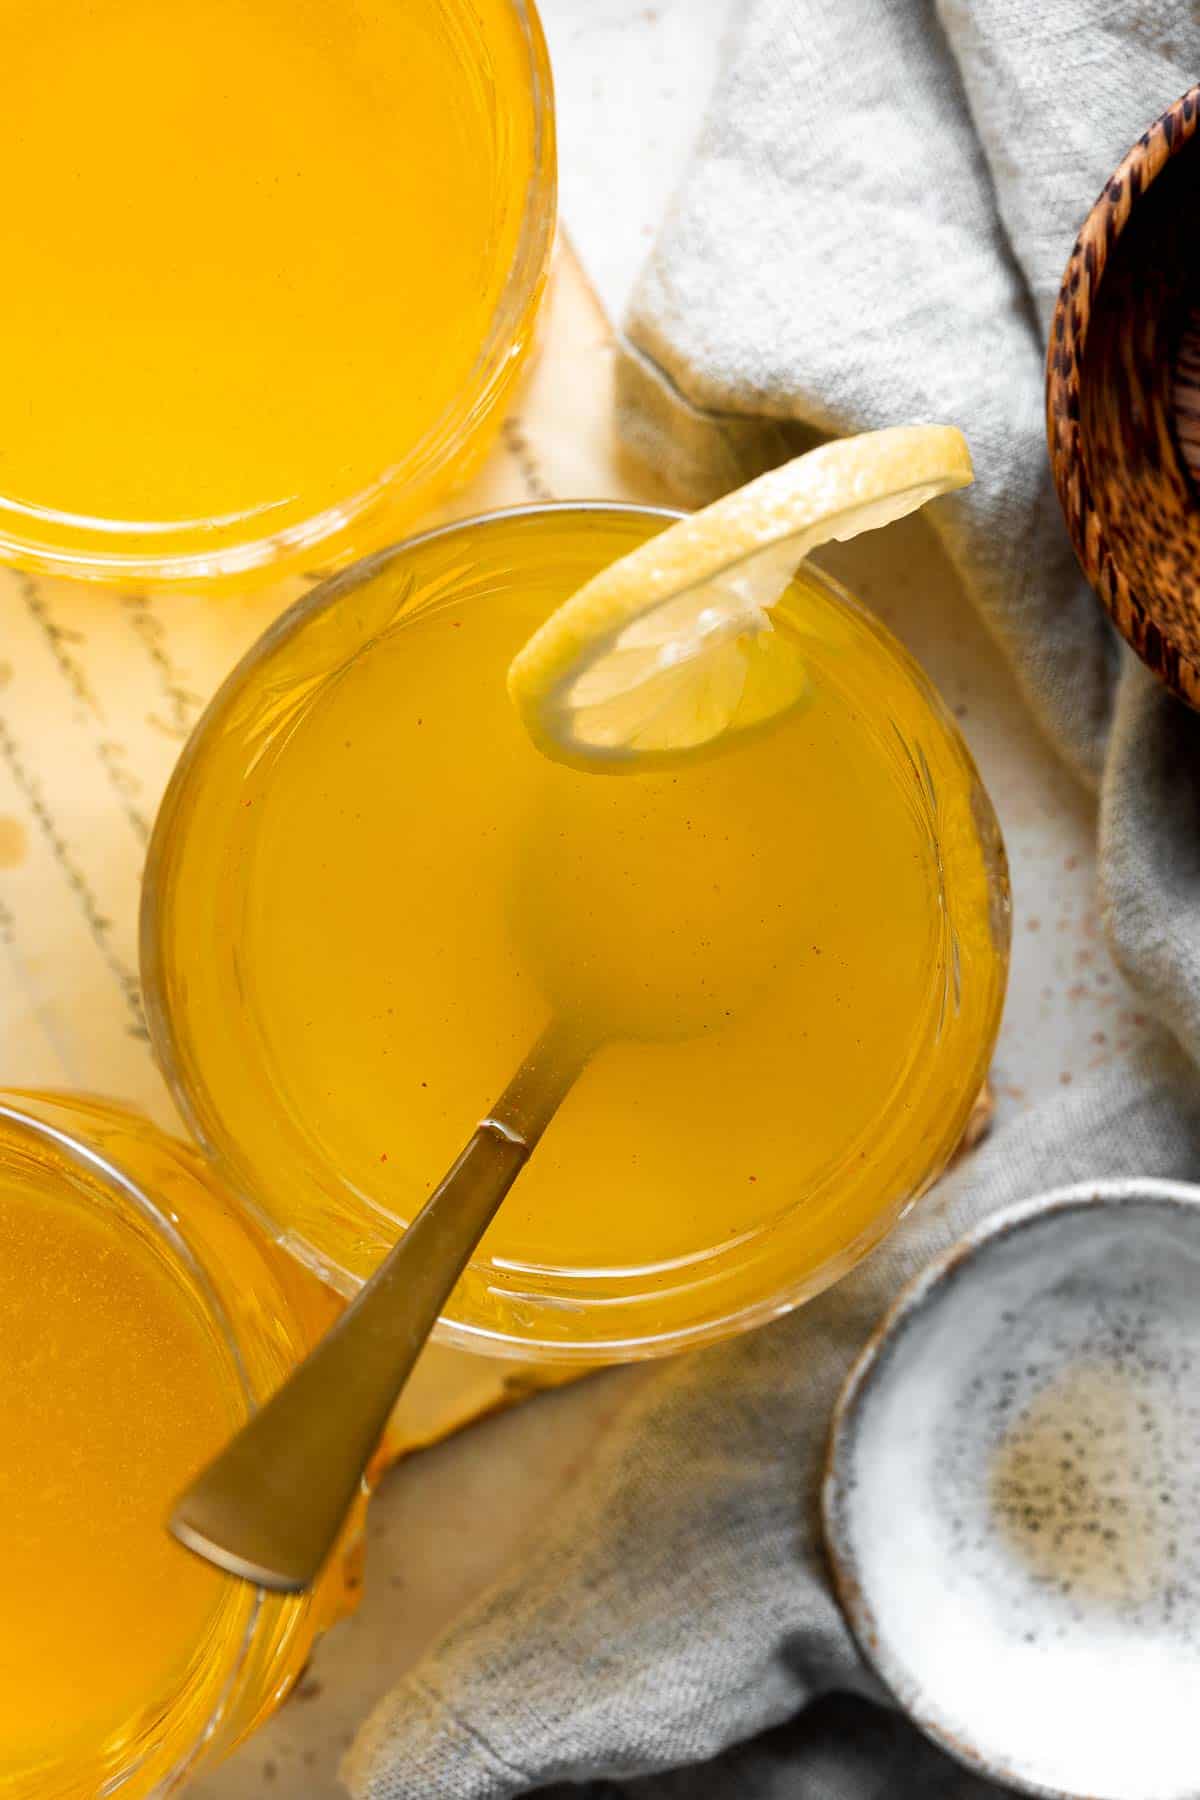
Ingredient Notes
To make this simple Apple Cider Vinegar Turmeric Detox Drink, you will need the following ingredients (full measurements in recipe card below):
- hot water
- apple cider vinegar
- lemon juice - I recommend freshly squeezed lemon juice for the best flavor.
- pure maple syrup - feel free to substitute with honey or another sweetener that you like. You can also adjust the amount that you add and add more or less based on your desired level of sweetness.
- turmeric - we use ground turmeric in this recipe. You can also substitute with ¾ teaspoon of fresh grated turmeric.
- cayenne pepper powder
You will also need measuring cups and spoons and a glass or mug.
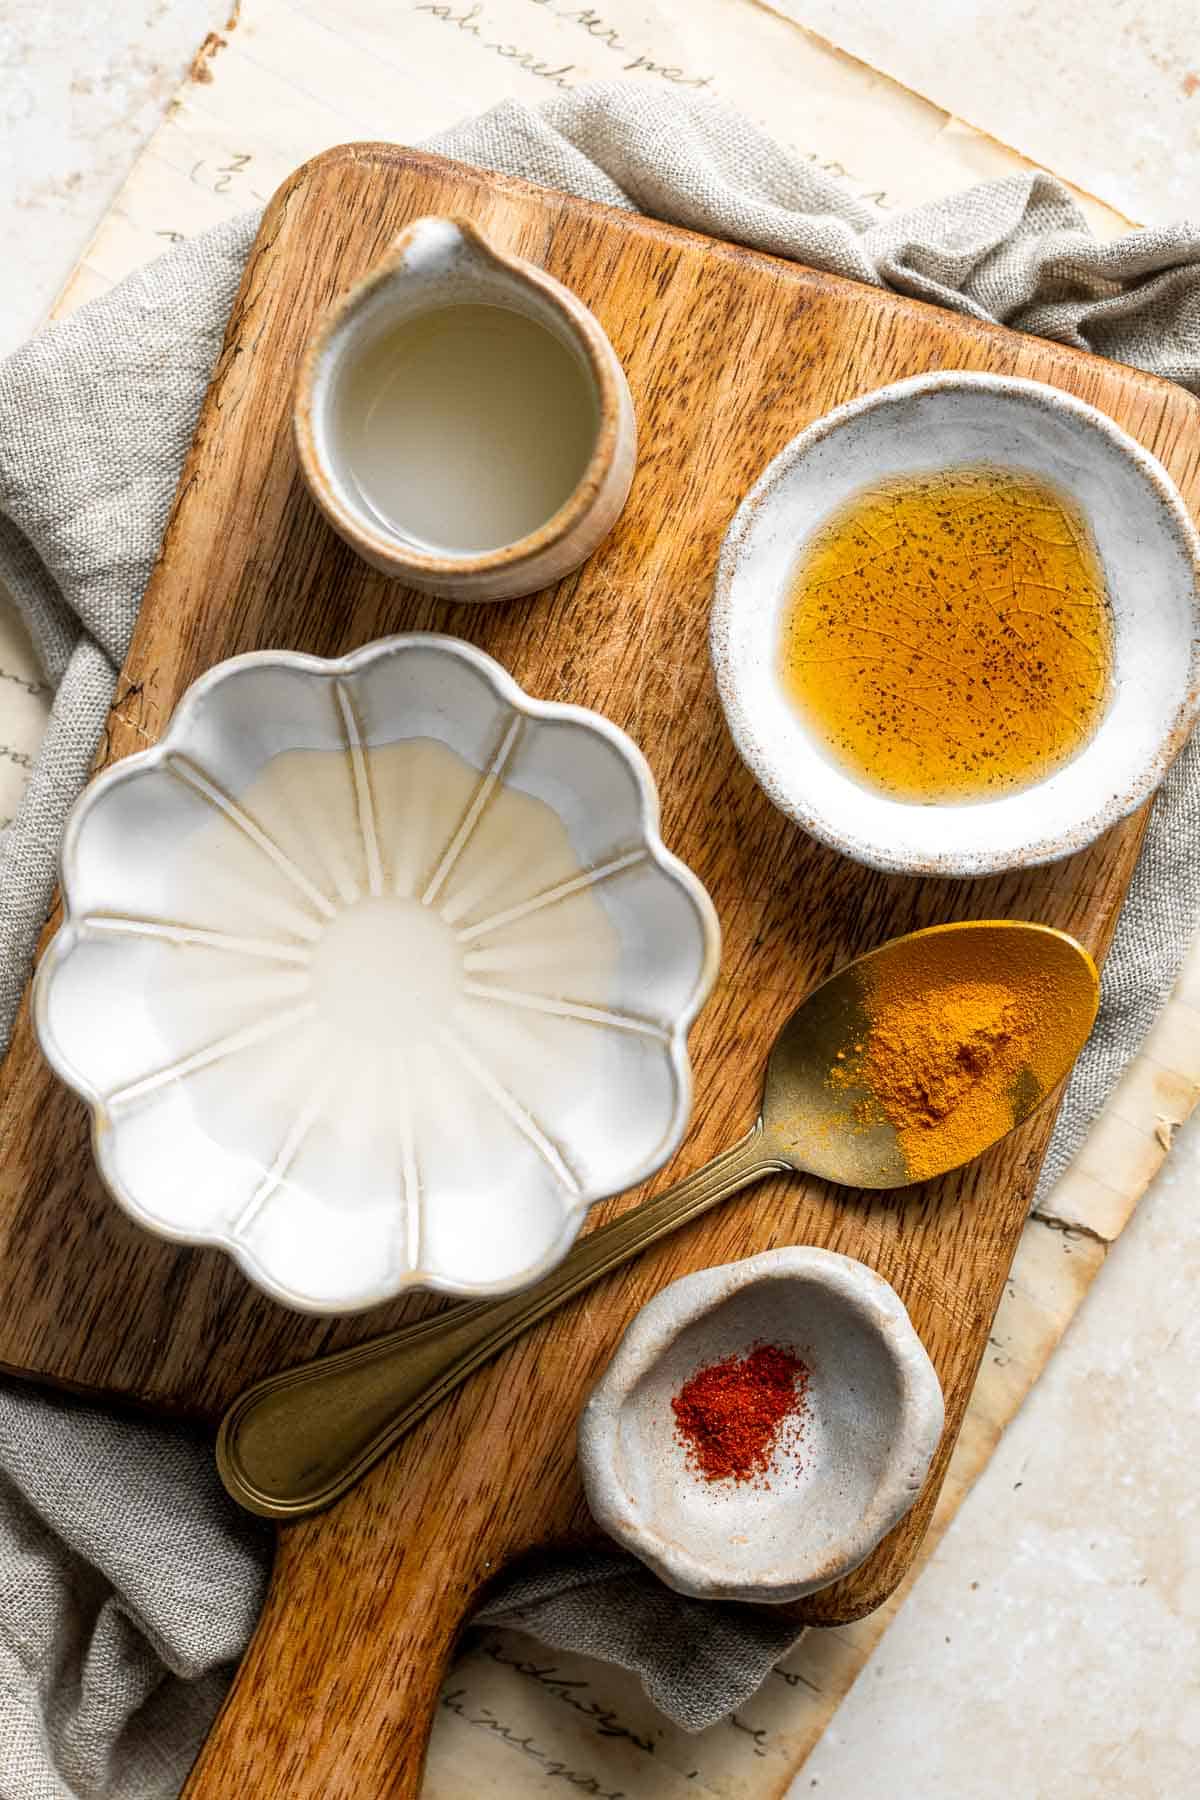
Health Benefits of Apple Cider Vinegar and Turmeric
Apple Cider Vinegar
Apple cider vinegar is kind of amazing. It has a long list of proven benefits including:
- boosts immune system
- acts as a cold remedy (it soothes a sore throat and clears a stuffy nose!)
- boosts energy
- prevents indigestion
- regulates blood sugar level
- lowers cholesterol
- reduces risk of heart disease
- may prevent cancer
- benefits the skin (it acts as a dandruff treatment and a skin toner to clear acne!)
- aids in weight loss!
Turmeric
Turmeric is also incredibly amazing. Here's just some of the reasons why:
- a strong antioxidant (it can improve skin conditions and delay aging!)
- has strong anti-inflammatory effects (including helping with arthritis)
- acts as an anti-depressant
- prevents and treats cancer
- improves brain function
- lowers the risk of brain disease (including Alzheimer's disease!)
- lowers the risk of heart disease
Like I said, it's magic. Just imagine the combination of these two in your body. Fireworks. But I am not going to lie, this stuff does not taste very pleasant. It's the kind of drink that I plug my nose and gulp it down. I guess you just can't have it all!
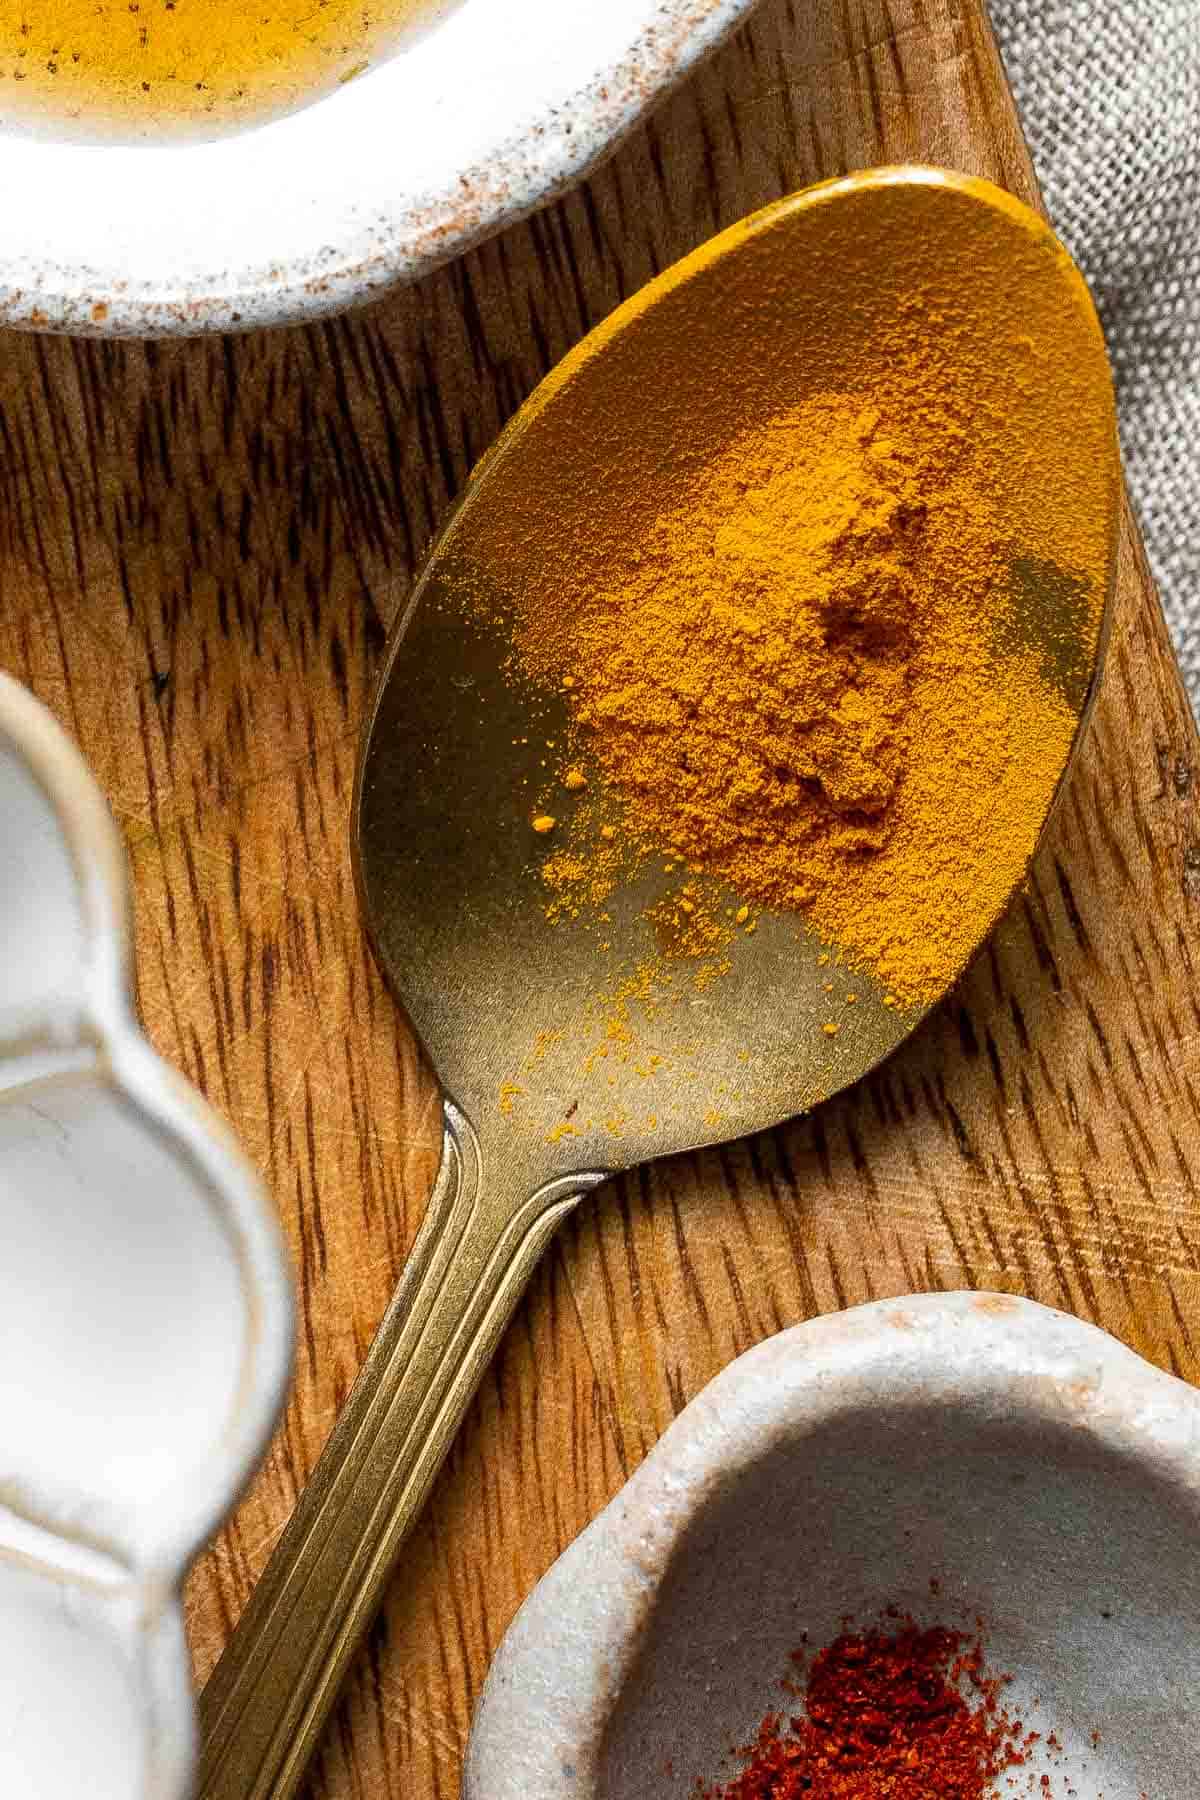
How to Make Apple Cider Vinegar Turmeric Detox Drink
This apple cider vinegar drink is probably the easiest drink you'll ever make. You just combine all ingredients (including hot water, apple cider vinegar, lemon juice, maple syrup, turmeric, and cayenne pepper) into your drinking glass. Stir with a spoon to combine. Then, drink immediately.


FAQ and Recipe Tips
Can I drink this apple cider vinegar tea every day?
Yes, you can! Because apple cider vinegar is so acidic, it is not recommended to take apple cider vinegar shots. We have diluted it with lots of water in this detox drink for a healthy drink.
How do I store apple cider vinegar and turmeric detox drink?
Individually, the ingredients in this recipe can be stored for a long time. However, once they are mixed, I would recommend only storing it for one day in an airtight container in the refrigerator. This apple cider vinegar drink is best served fresh and since this recipe only makes one cup, it's really easy to ensure that there are no leftovers.
More Drink Recipes
- Ginger Turmeric Tea
- Iced Latte
- Matcha Milk Tea
- Peppermint Hot Chocolate
- Peach Iced Tea
- Strawberry Banana Smoothie
Tried this recipe?
I'd love to hear what you think! Leave a comment and rating below to share your feedback. Your reviews help others discover this recipe and help me keep creating more free recipes for you. Snap a photo and tag me on social media @aheadofthyme too.

Pumpkin Muffins
If you can't get enough of pumpkin spice everything, then these Pumpkin Muffins are for you. These fall muffins are fluffy, moist, delicious and flavorful. This quick and easy recipe is loaded with real pumpkin, making these healthier than your average muffin.
Serve pumpkin spice muffins for a quick breakfast on the go, pack for a school snack, or enjoy as a healthy dessert. Either way, you'll be doing this season justice. Pumpkin is a phenomenal winter squash, and this pumpkin muffin recipe will show you why!

Why You'll Love these Pumpkin Muffins
- Quick and easy. Spiced pumpkin muffins are one of the easiest you can make. In just 40 minutes, you'll have over a dozen fresh muffins that will last all week.
- The moist, fluffy texture. If you're a baker and you haven't added fresh fruit or vegetables to your desserts, you're missing out! Adding produce like banana, zucchini, or pumpkin puree is a pro tip because it adds moisture and fiber to your muffins. So, your pumpkin muffins turns out with the best texture possible: light, fluffy, moist, and decadent!
- The spiced pumpkin flavor. I can't say enough on this. You'll season these pumpkin muffins with classic pumpkin spice containing spices like cinnamon, nutmeg, and ginger.
- Great for meal prep. These fall muffins with pumpkin are perfect to make ahead of those fall mornings when you know you'll have a lot on your plate. They store well and are freezer-friendly. They're a perfect grab-and-go item for breakfast on the go or to pack in lunches for snack time.
- The health benefits - yes, health benefits! As far as desserts go, these pumpkin spice muffins are a healthy alternative to most sweets, since they are loaded with this vegetable. For an even healthier version, you can substitute your white flour for whole wheat flour and reduce the amount of added sugar.

Ingredient Notes
To make these easy Pumpkin Muffins, you will need the following ingredients (full measurements in recipe card below):
- all-purpose flour
- baking soda + powder
- sugar - we use granulated sugar, but you can use brown sugar if you'd like instead.
- pumpkin pie spice - or substitute with ground cinnamon.
- 1salt
- pumpkin puree - we used a 13.5 ounce can of pumpkin puree, but feel free to use homemade puree if you want. You will need to use 1 and ⅔ cups of homemade pumpkin puree instead.
- vegetable oil - feel free to use any vegetable oil including olive oil or melted coconut oil.
- yogurt - we used our homemade yogurt because we always have a batch in the fridge.
- eggs
- vanilla extract
- walnuts - chopped walnuts are optional. You can also use other nuts such as pecans or almonds.
Equipment Used
You will also need the following baking equipment:
- measuring cups and spoons
- mixing bowls
- 12-tin muffin pan
- cupcake liners
- cookie scoop
- wire cooling rack

How to Make the Best Pumpkin Muffins
- Combine dry ingredients. In a large mixing bowl, whisk together flour, baking soda, baking powder, sugar, pumpkin pie spice, and salt until evenly combined.
- Combine wet ingredients. In a medium mixing bowl, whisk together pumpkin puree, oil, yogurt, eggs, and vanilla extract until smooth.
- Add wet to dry. Pour the wet mixture into the dry ingredients and mix together using a spatula until just combined and no dry ingredients are visible. Do not overmix. Fold in the walnuts, if using.
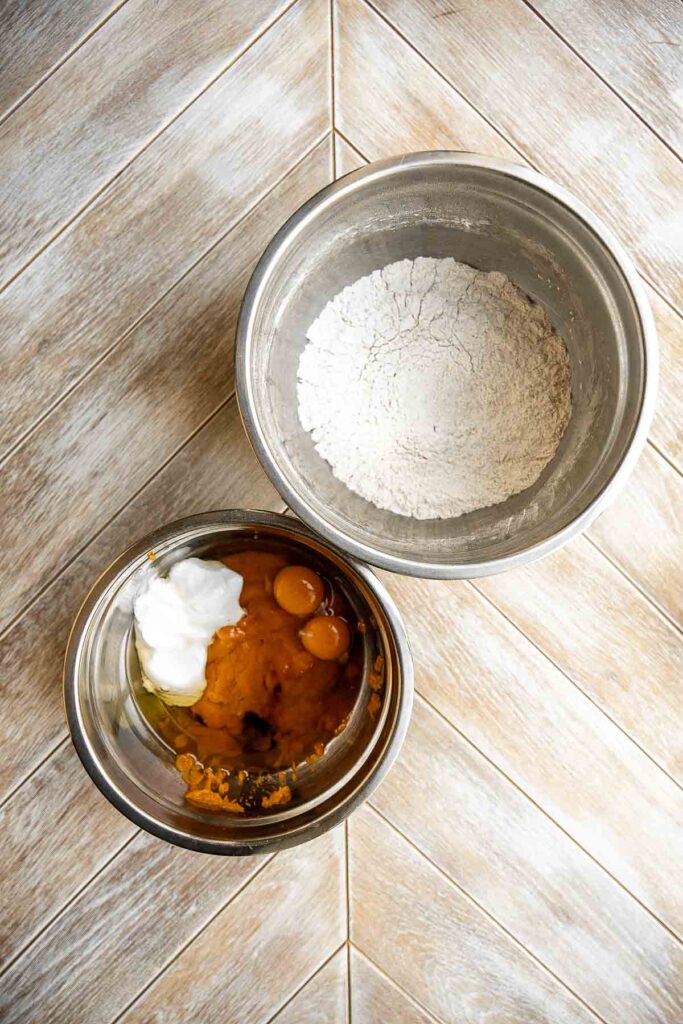
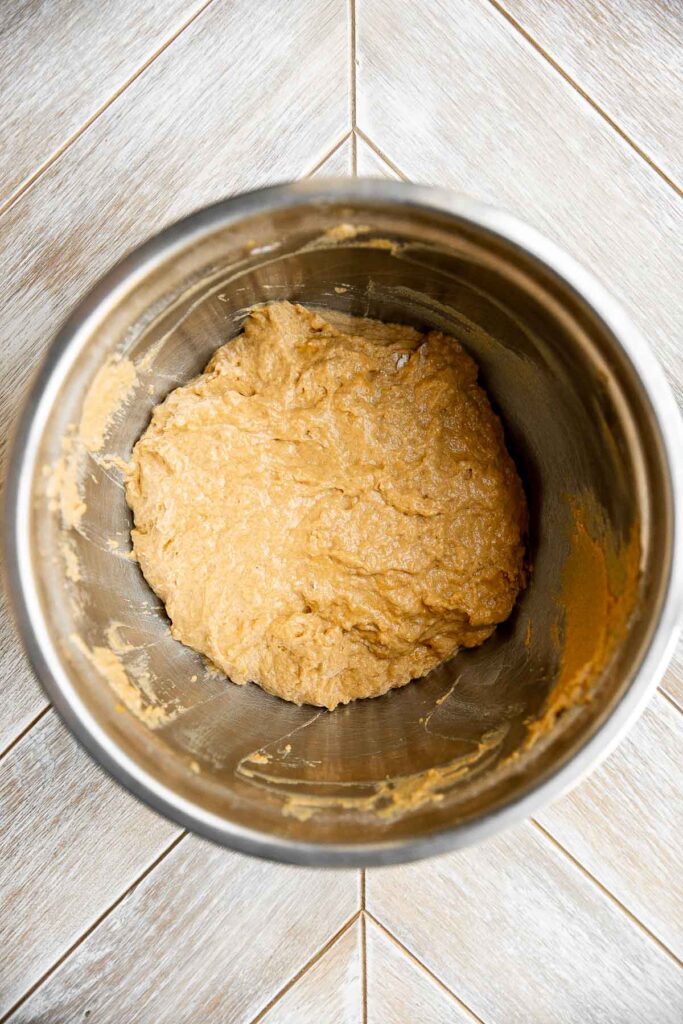
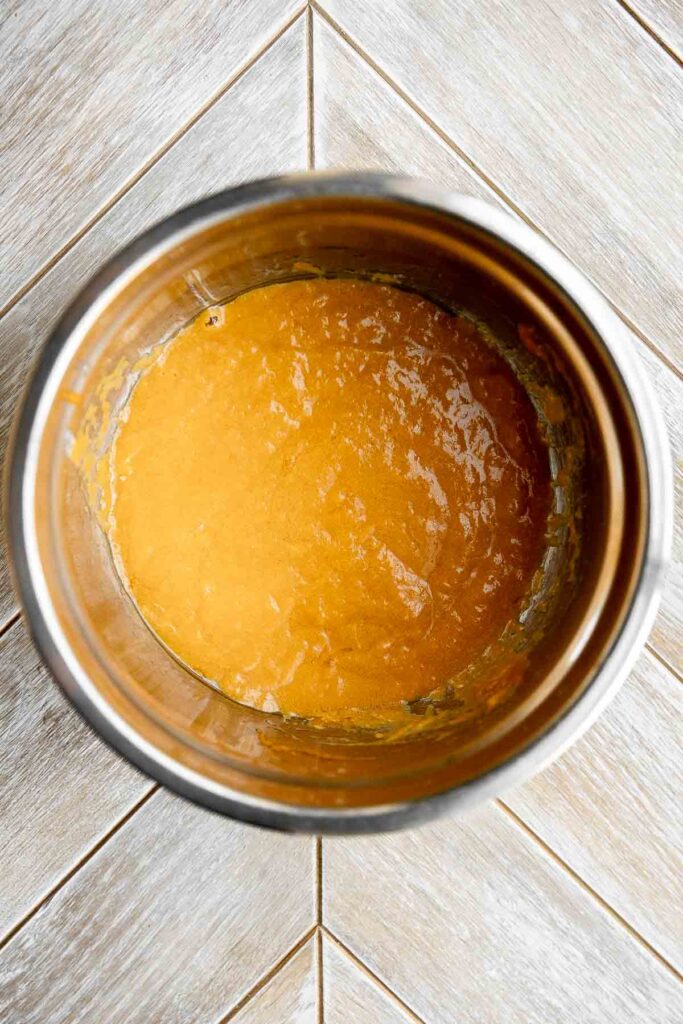
- Scoop muffins. Line a 12-cup muffin pan with cupcake liners or grease lightly with cooking spray oil. Use a cookie scoop to fill each cavity of the prepared muffin pan ¾ full (about ⅓ cup batter in each cavity).
- Bake. Bake in a 375F preheated oven for 20-22 minutes until fully cooked through and a toothpick inserted into the center of the muffin comes out clean.

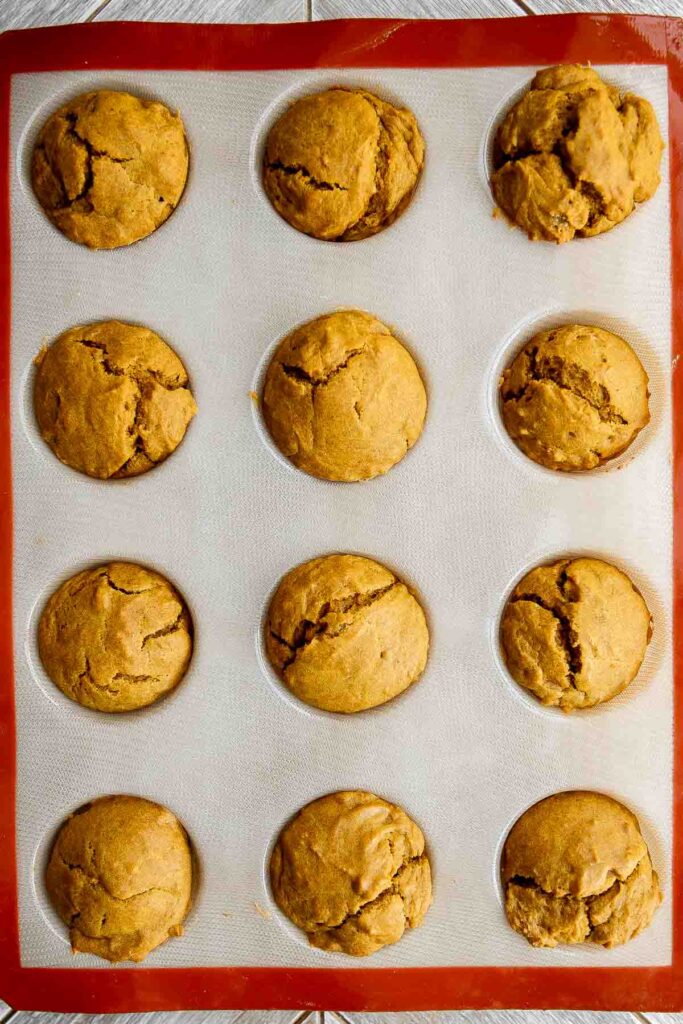
- Cool. Let the muffins cool for 10 minutes in the pan, then remove from the pan and transfer the a wire cooling rack to cool completely.

How to Serve
Pumpkin muffins taste delicious on their own as a quick breakfast or a dessert. Pair your fluffy, moist, and flavorful pumpkin muffins with a pumpkin spice latte for a fall-themed breakfast, or enjoy these pumpkin muffins as a healthy dessert option.
You can also serve them with:
- ice cream
- hot tea, coffee, or golden milk latte
- fresh fruit
- jam or jelly
- vanilla icing
- a drizzle honey
Storing Instructions
How to Store
Keep leftover pumokin muffins at room temperature for 1-2 days in an airtight container or in the fridge for up to one week. Refrigerating pumpkin muffins will dry them out a bit, but you can reheat them to add some moisture back in.
How to Freeze
You can freeze these pumpkin muffins and enjoy them for months! Store in an airtight container or freezer bag and freeze for up to 3 months. To serve, allow the pumpkin muffins to thaw overnight in the fridge or for a few hours on the kitchen counter.
Recipe Tips and Tricks
- Got extra pumpkin puree? If you picked up one too many cans of pumpkin, just double up the recipe because these muffins store well. They are freezer-friendly, so there's no rush to finish them all in a few days - although it's possible! You can also use up any extra pumpkin in soup, pie, or cookies.
- Want to reduce paper waste? Line the muffin tins with unbleached, compostable muffin or cupcake liners, make your own by folding compostable parchment paper (not wax paper), use reusable silicone liners, or grease the pan with cooking spray oil.
- Make mini muffins. To make mini muffins instead (for easy portability, snacking, or portion control), pour the batter into a mini muffin pan instead of a 12-cup muffin pan. Mini muffins are toddler-friendly and easy to pack in lunchboxes. Note that you'll also have to reduce baking time - around 7-10 minutes, but every oven is different. Check the center of the muffins for doneness with a toothpick and add a few minutes as needed until completely cooked through.

More Pumpkin Recipes
- 20 Best Pumpkin Desserts
- Pumpkin Pie
- Pumpkin Mousse
- No Bake Pumpkin Cheesecake
- Pumpkin Bread
- Pumpkin Pie Granola
Tried this recipe?
I'd love to hear what you think! Leave a comment and rating below to share your feedback. Your reviews help others discover this recipe and help me keep creating more free recipes for you. Snap a photo and tag me on social media @aheadofthyme too.

Acorn Squash Soup
Roasted Acorn Squash Soup is smooth and velvety, packed with veggies, and loaded with fall flavor. The star of the show, acorn squash, is roasted, incorporated with other vegetables and seasoning, and blended into a lush, creamy squash soup.
Plus, its easy to make with about 10 minutes of actual prep time. It's the perfect soup for the cooler weather in the fall and winter. Serve on any day of the week for a cozy lunch or dinner, or as a first course on special occasions like Thanksgiving.
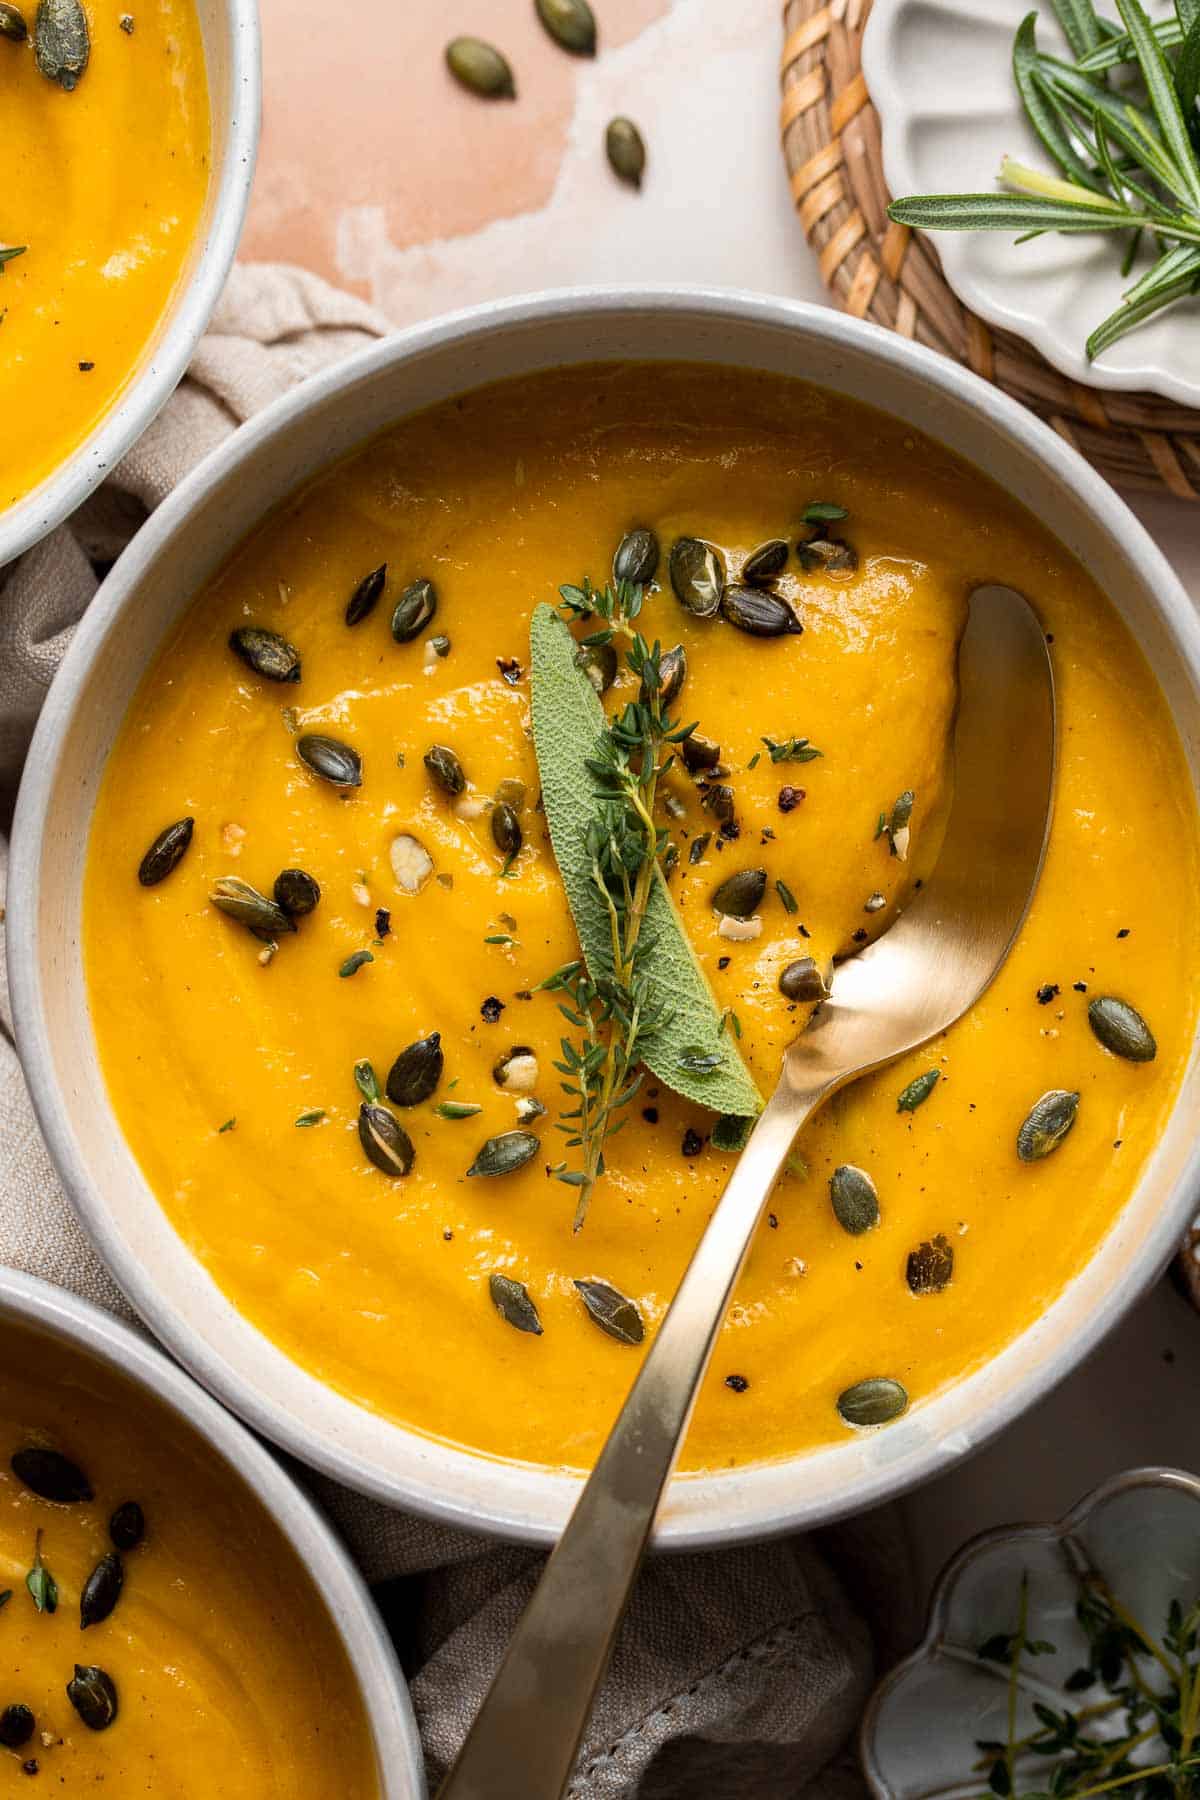
Why You'll Love Acorn Squash Soup
- Easy to make. It takes around an hour and a half to make this rich soup, but most of it is cooking time - the bulk of it is spent waiting for the squash to roast. In fact, it only takes about 10 minutes of active prep time, so you can multitask and move on to preparing other dishes while you're waiting. It's worth the wait!
- Packed with vegetables. It's rich, creamy, and nutritious! This acorn squash soup contains several different kinds of vegetables - squash, carrots, celery, onion, and garlic - and is bursting with roasted flavor.
- Great for all occasions. This fall soup with squash is perfect for all kinds of autumn celebrations (like Thanksgiving, potlucks, fall birthdays, or fall dinner parties) and casual meals at home.
- Naturally gluten free and vegetarian. This fall soup with squash doesn't include any wheat-based ingredients that would contain gluten, and the only animal product called for is half and half. It can easily be swapped (see below) to make the soup vegan-friendly instead!
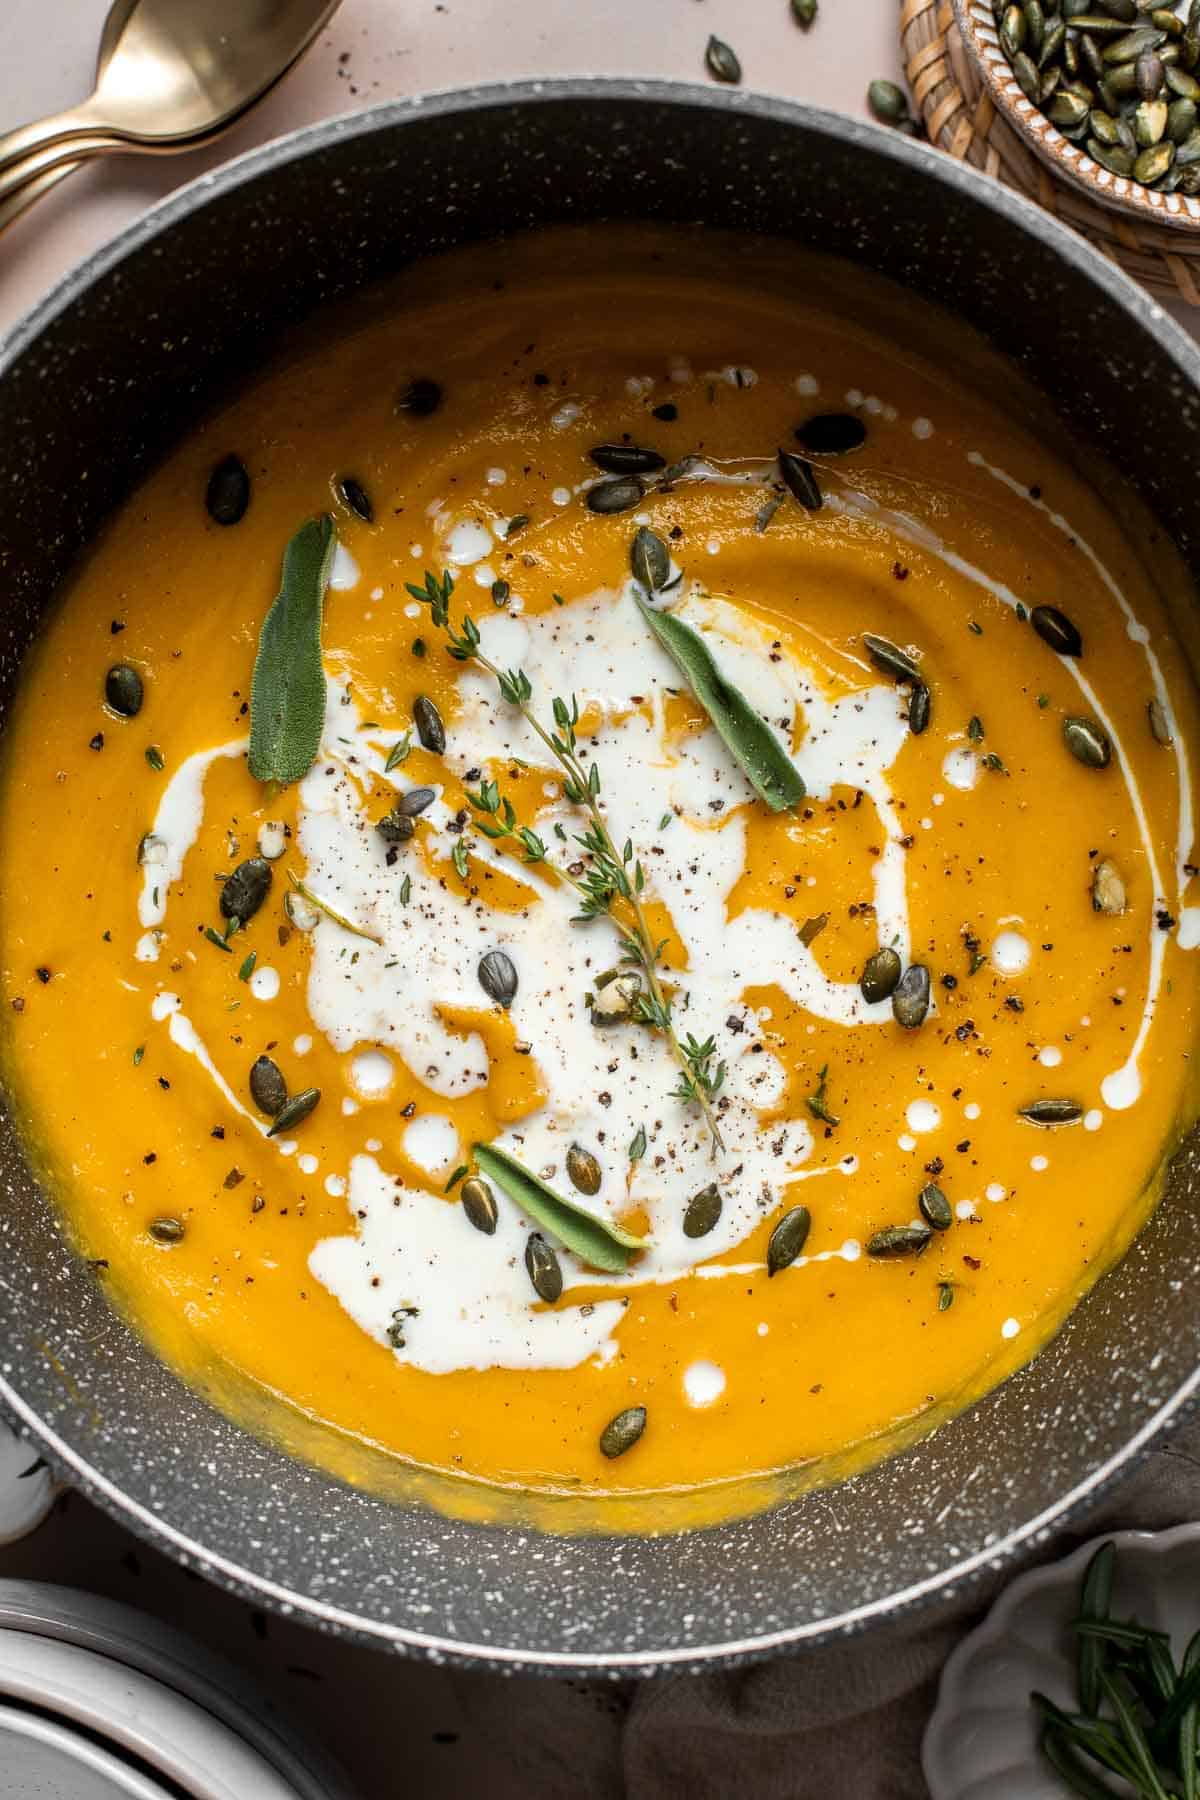
Ingredient Notes
To make this easy Acorn Squash Soup, you will need the following ingredients (full measurements in recipe card below):
- acorn squash - acorn squash are the namesake of this recipe, but if you'd like to experiment, you can also try making variations of this soup using butternut squash, honeynut squash, buttercup squash, or pumpkin. You'll have to adjust the quantities and the cooking times to ensure a similar result.
- olive oil - this can be swapped for avocado oil, coconut oil, butter, or ghee if needed.
- salt and pepper
- onion - shallots would also work in this recipe.
- carrots
- celery
- garlic - freshly minced garlic is always best for fresh flavor, but if you're short on time, you can use pre-minced garlic.
- vegetable stock - using vegetable stock keeps this soup vegetarian-friendly, but you can substitute it for chicken stock, beef stock, or bone broth if you prefer any of those.
- sage - this recipe calls for whole sage leaves but if you can't find them, you can use dried sage.
- thyme - dried thyme can also also acceptable, though you may need to skim out the leaves if they aren't crushed.
- rosemary - fresh rosemary will give the soup the best flavor and is easier to remove before blending. If you choose to use dried rosemary, you can try to skim it out of the soup between simmering and blending, if you want a silky smooth soup.
- half and half - canned coconut milk would be a vegan-friendly replacement for the half and half.
Optional Ingredients
You can adjust the flavor to your liking by adding some extra seasoning such as:
- honey - 2 tablespoons of honey adds a little sweetness that complements the squash
- red pepper powder - ¼ teaspoon red pepper powder instead adds a kick that also compliments the squash well. Don't add both honey and red pepper powder.
- cinnamon - you can also add in ½ teaspoon cinnamon for flavor.
You will also need measuring cups and spoons, a half sheet baking pan, 6 qt. Dutch oven, and an immersion blender, food processor, or stand-up blender.
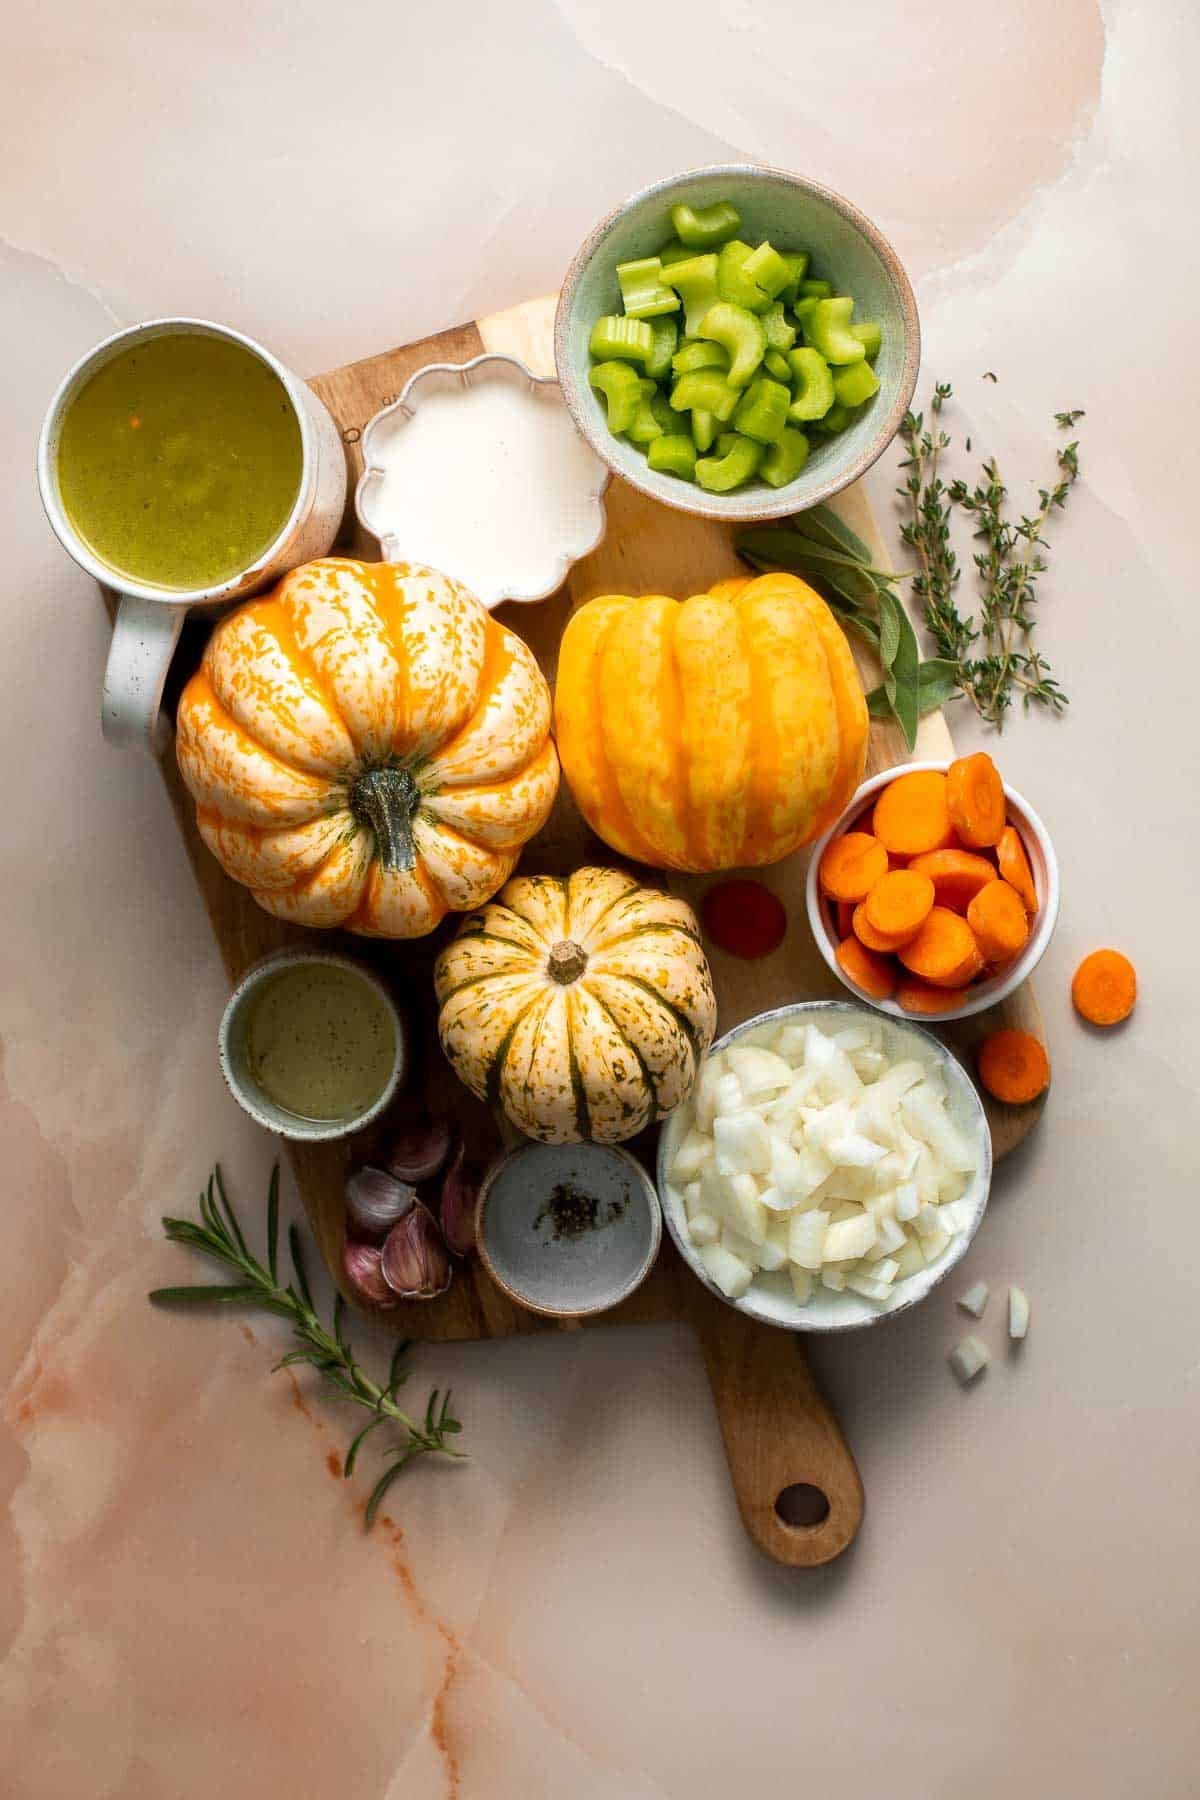
How to Make the Best Acorn Squash Soup
- Roast acorn squash. Preheat oven to 400F. Slice the squash in half lengthwise and scoop out the seeds. Line a rimmed half sheet baking pan with parchment paper and place the squash halves cut side up on the sheet pan. Drizzle with 2 tablespoons olive oil and sprinkle with salt. Bake for 40-50 minutes until edges start to wrinkle and the flesh is fork tender (fork is easily inserted). Set aside to cool until cool enough to handle.
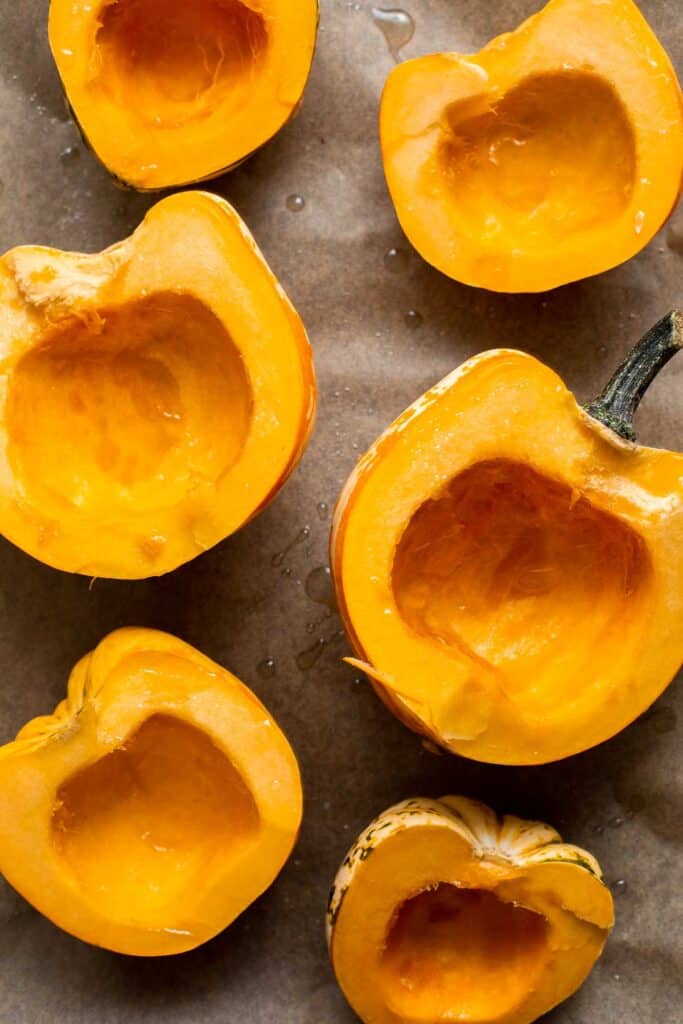
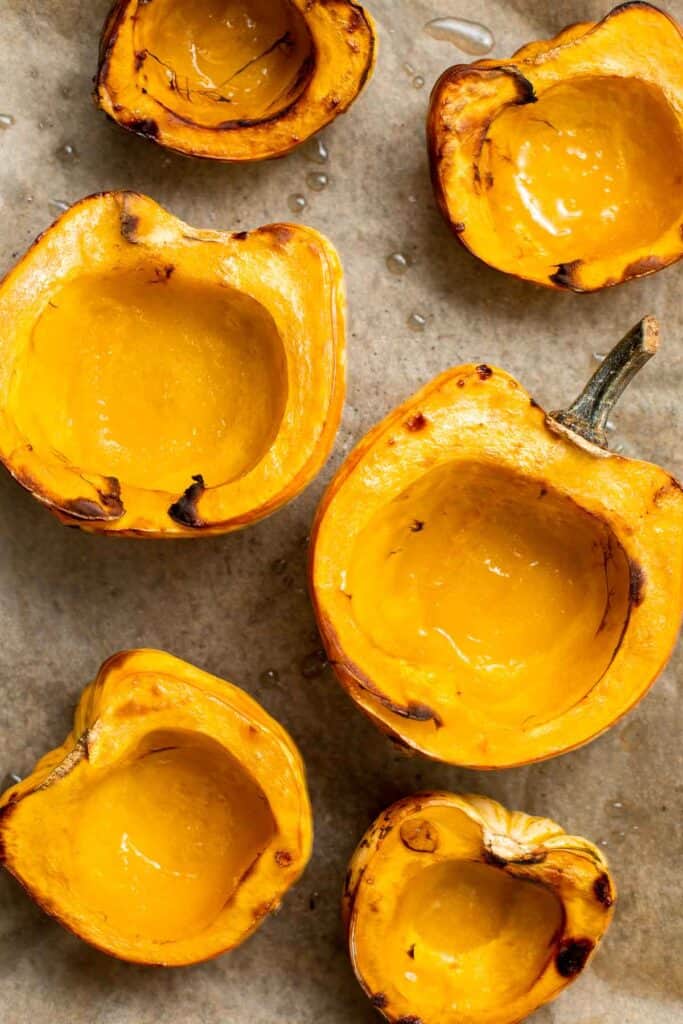
- Scoop out flesh. Then use a spoon to scoop out the flesh and set aside in a bowl.
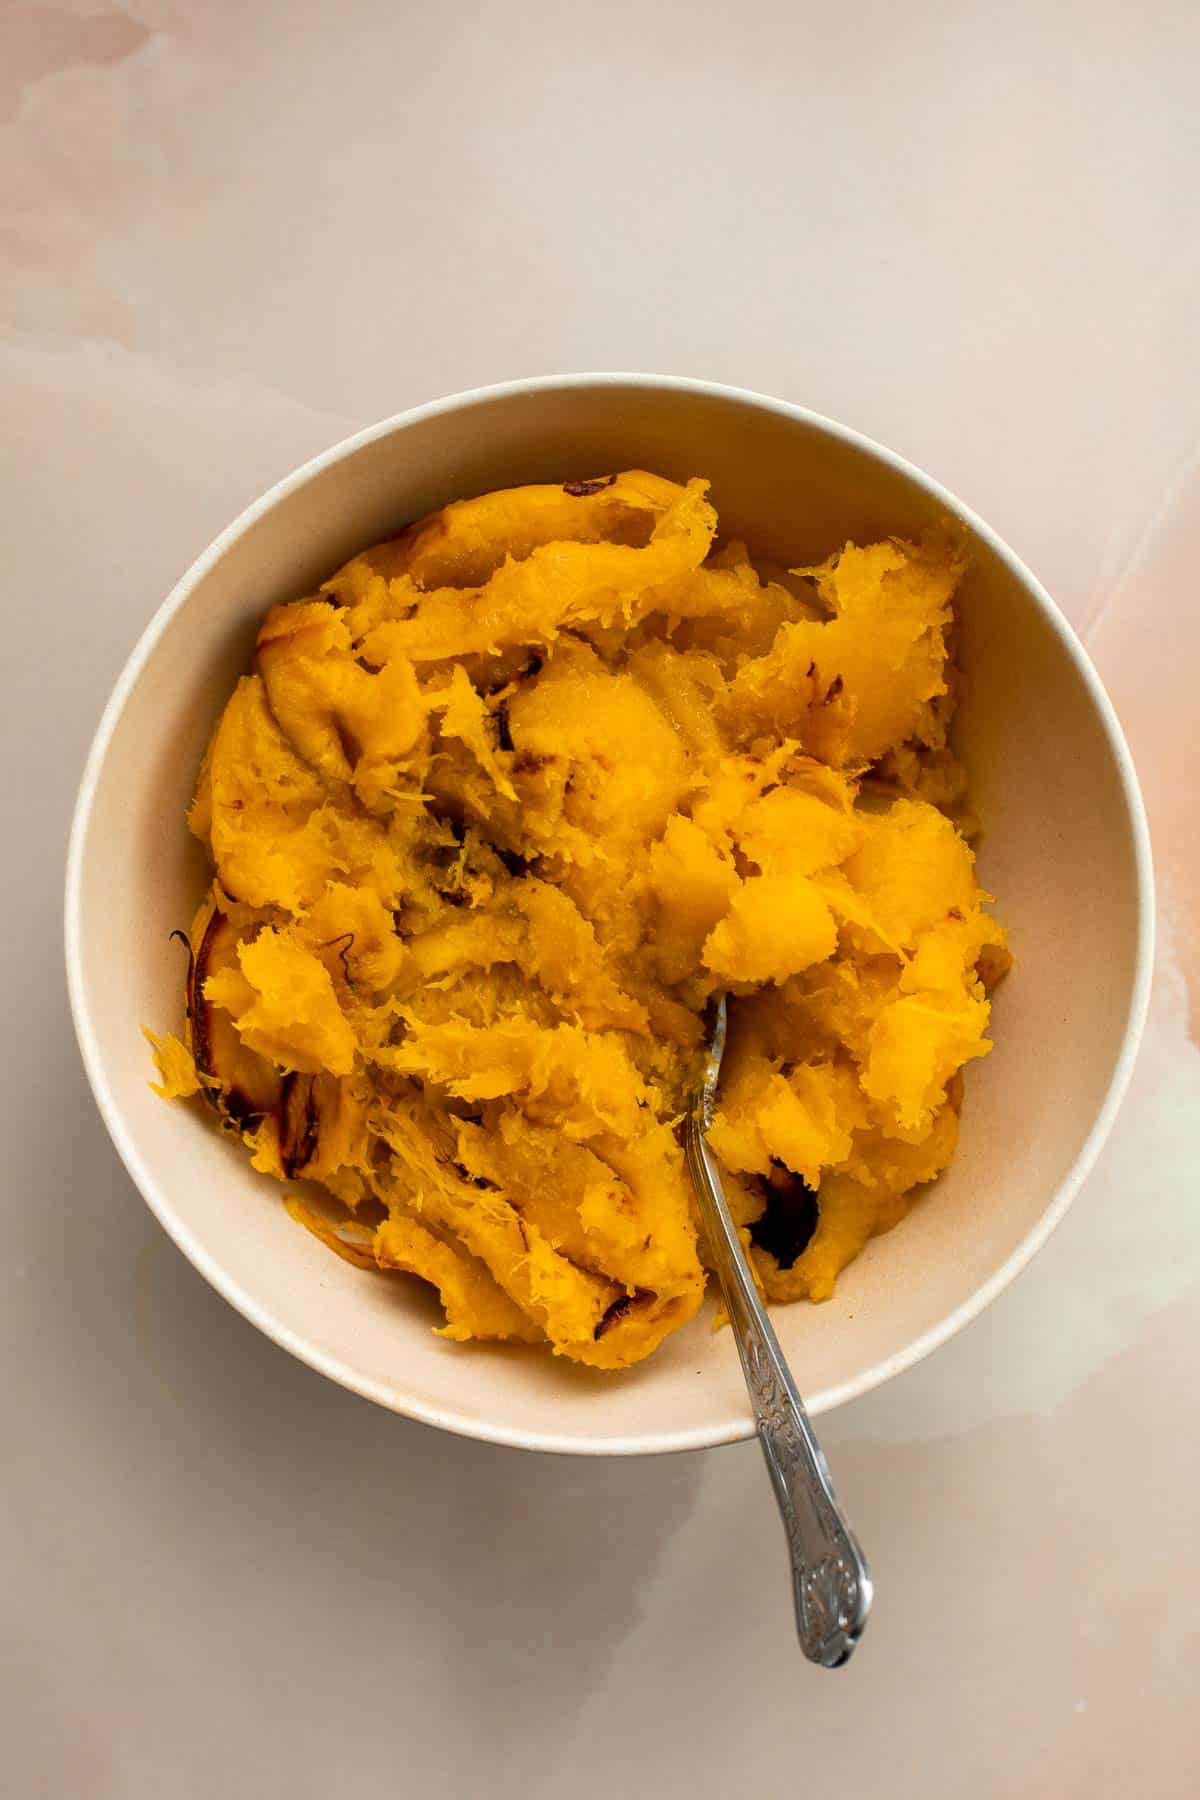
- Sauté veggies. Heat remaining tablespoon olive oil in a large stockpot or 6 quart Dutch oven over medium heat. Add the onion, carrot, and celery, and saute until veggies start to brown, about 6-8 minutes, stirring often. Add the garlic and cook until fragrant, about 1 minute.
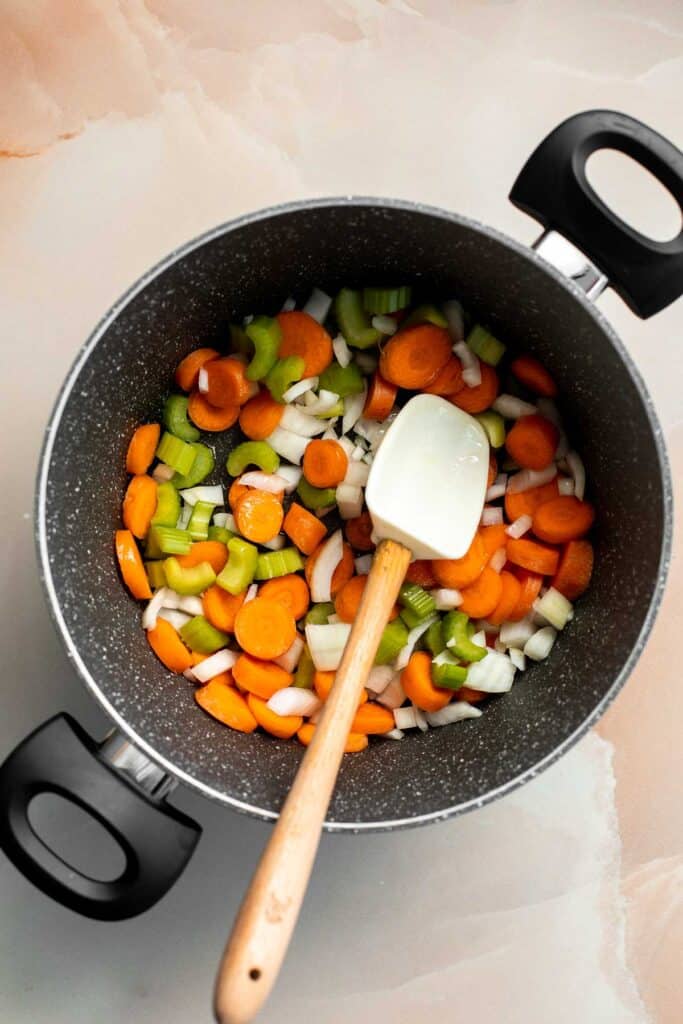
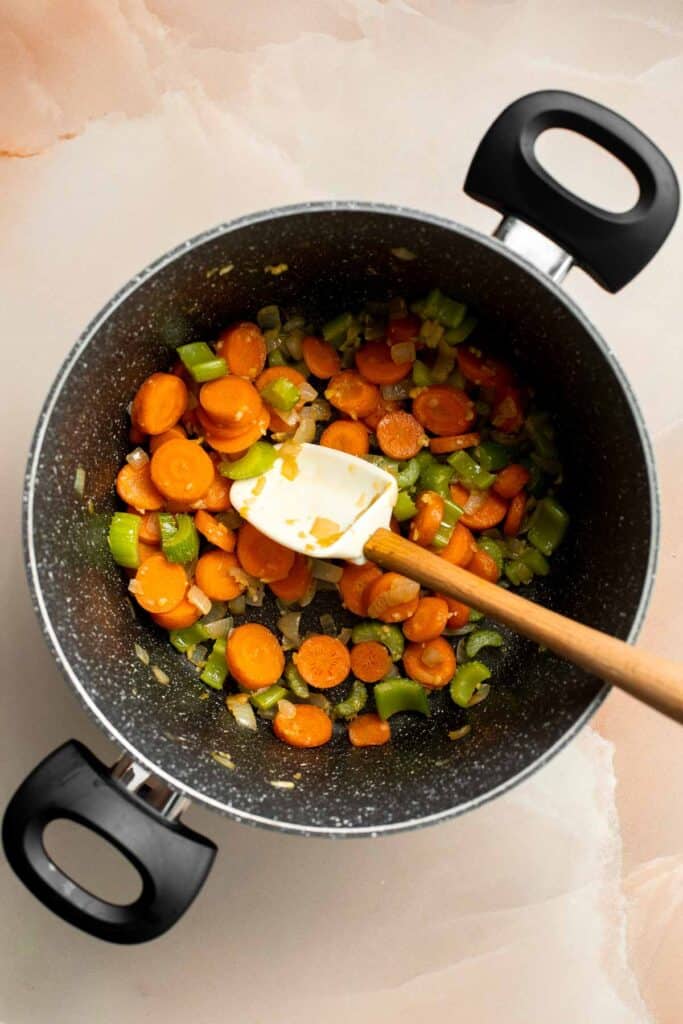
- Add squash. Add one cup of stock and stir to remove any caramelized onions that may have stuck to the bottom or sides of the pot. Then, add in the reserved flesh and stir until dissolved into the stock.
- Add stock and herbs. Add remaining stock, sage leaves, springs or thyme and rosemary. Stir to combine and bring the soup to a simmer. Turn the heat down to medium-low and cover the lid. Allow the soup to simmer for 15 minutes, stirring occasionally.
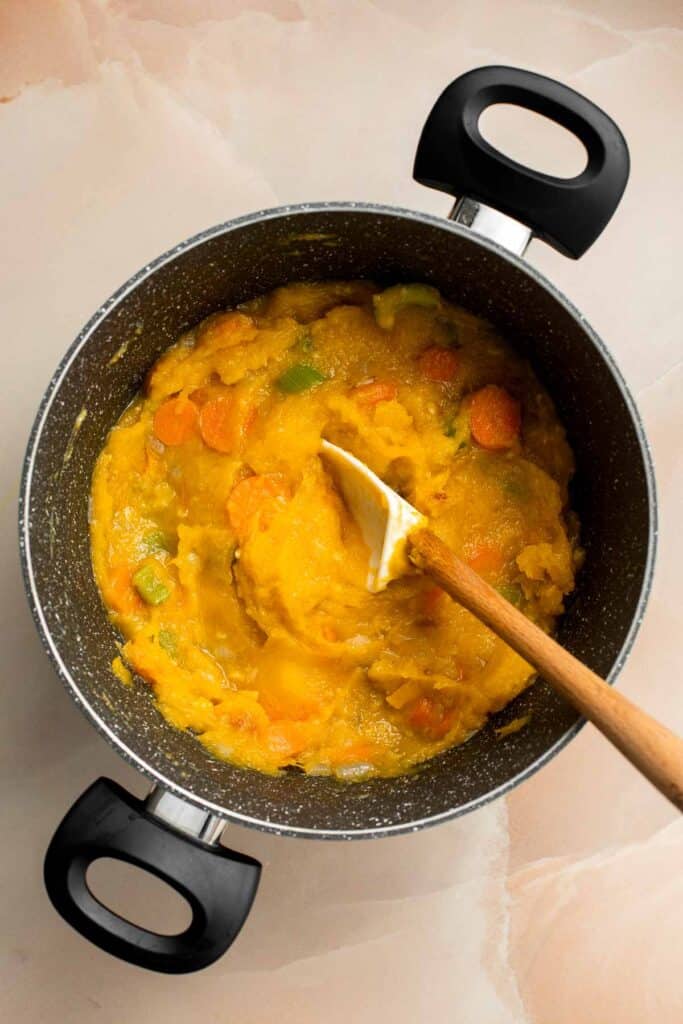
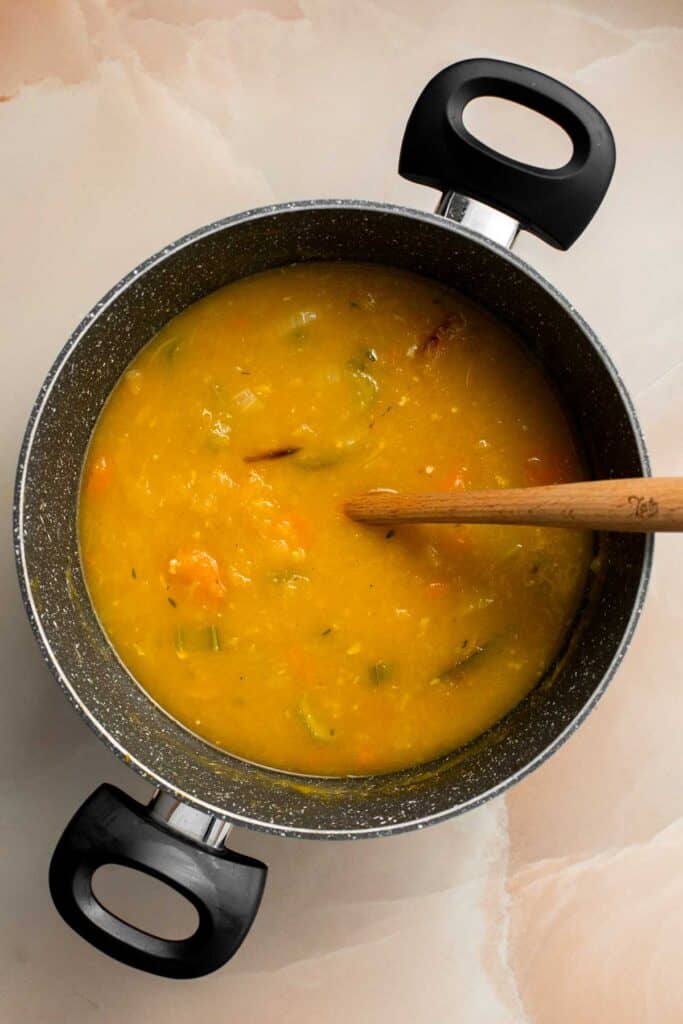
- Puree. Remove the thyme springs and rosemary and discard. Use an immersion blender to puree the soup. You can also transfer the soup (in batches) to a blender to puree.
- Add cream. Turn the heat off and stir in the cream. Add more or less based on how creamy you want your soup. Give the soup a taste and season with salt and pepper, to taste.
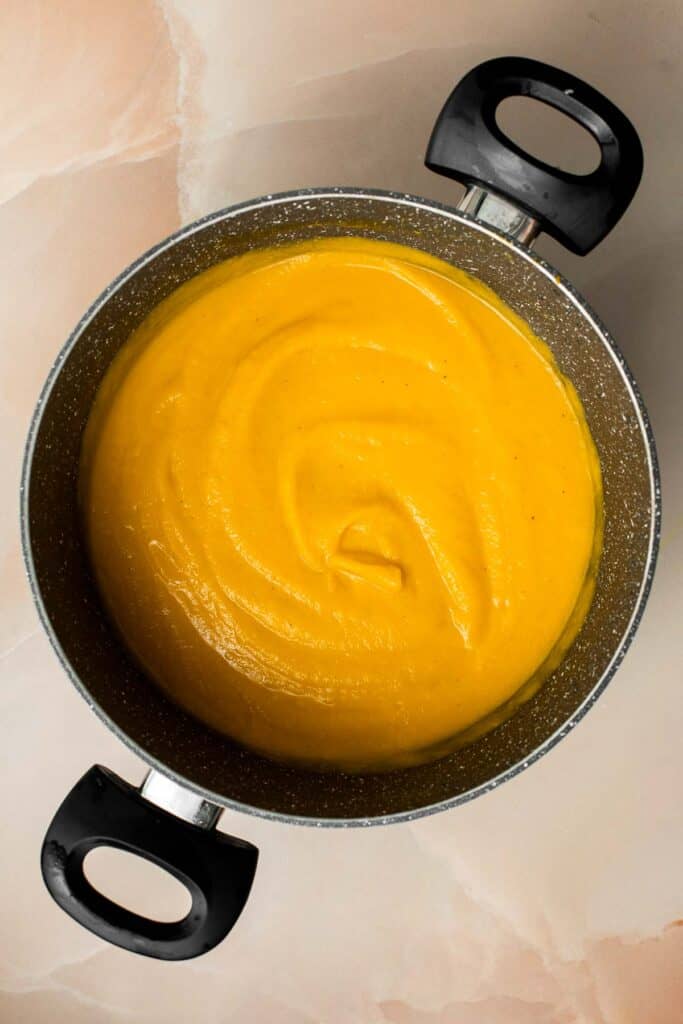
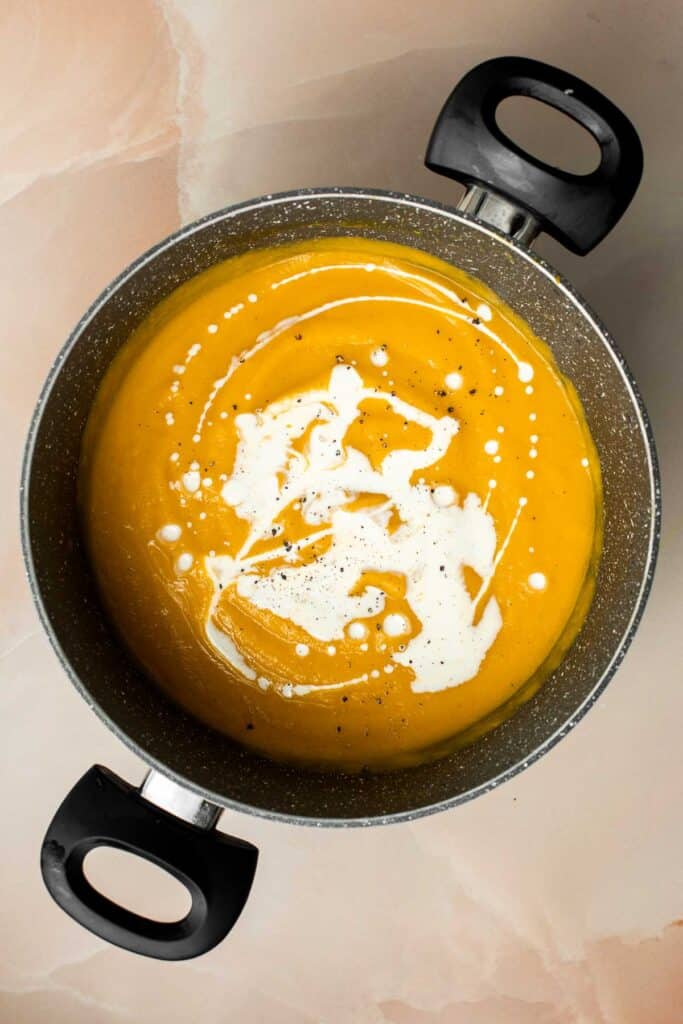
- Serve. Serve with your favorite toppings such as croutons, fresh herbs, a drizzle of cream, pumpkin seeds, or grated Parmesan, if desired.
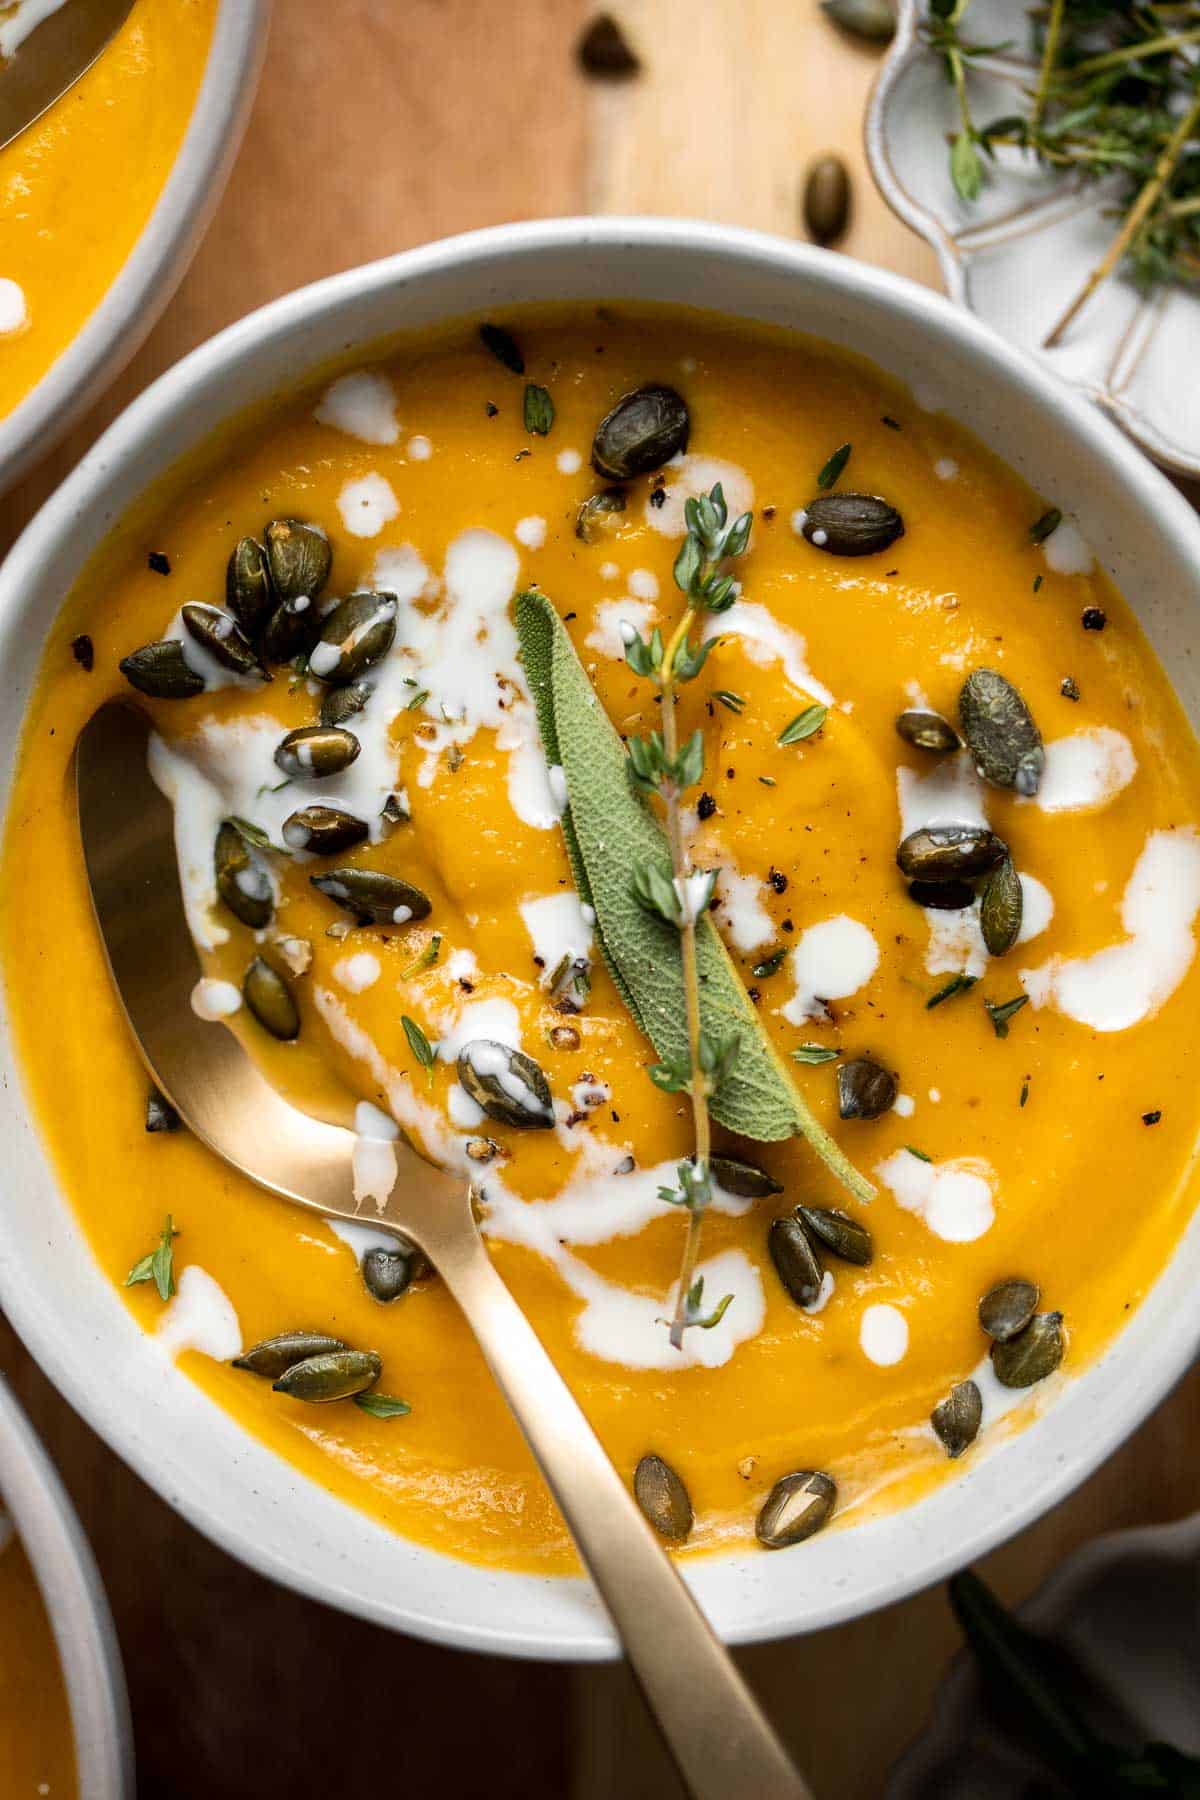
How to Serve
Acorn Squash soup is delicious served on its own, or paired with some of my favorite fall sides including:
- Butternut Squash Quinoa Salad
- Roasted Broccoli Grilled Cheese
- Garlic Breadsticks
- Apple and Arugula Salad
- Potato Dinner Rolls
- Buffalo Turkey Wraps
Storage and Freezing Instructions
How to Store
Once cooled to room temperature, transfer any leftover acorn squash soup to an airtight container and store in the refrigerator for 3-4 days. If finishing within a day or 2, you can also keep it stored in the pot, covered with the lid.
How to Reheat
To reheat, transfer the soup to a cooking pot and heat over medium-heat until warmed through. You can also transfer to a heat-safe dish and bring it up to the desired temperature in the microwave.
How to Freeze
Transfer to a freezer safe container or freezer bag and freeze for up to 3 months. To thaw, transfer to the fridge one to two days before you want to use the leftovers and reheat. You can also reheat straight from frozen in a crockpot or on the stovetop, but you'll have to use a warm water bath to release the frozen soup from the container first.
Recipe Tips and Tricks
- Serve with dippers. This is kind of a no-brainer when it comes to soup, but it's almost always served best with some kind of crunchy dipping vessel, like toasted bread, robust crackers, or crisp veggies. It's also perfect for dipping grilled cheese sandwiches!
- Switch up the serving dishes. Planning on making this soup for a holiday gathering? Go the extra mile to impress guests by serving it in roasted mini pumpkins or roasted acorn squash!
- Prep the ingredients ahead of time. If you know you'll be especially pressed for time, you can chop vegetables or even roast the acorn squash a full day or two in advance before making the soup, and store in airtight containers in the fridge.
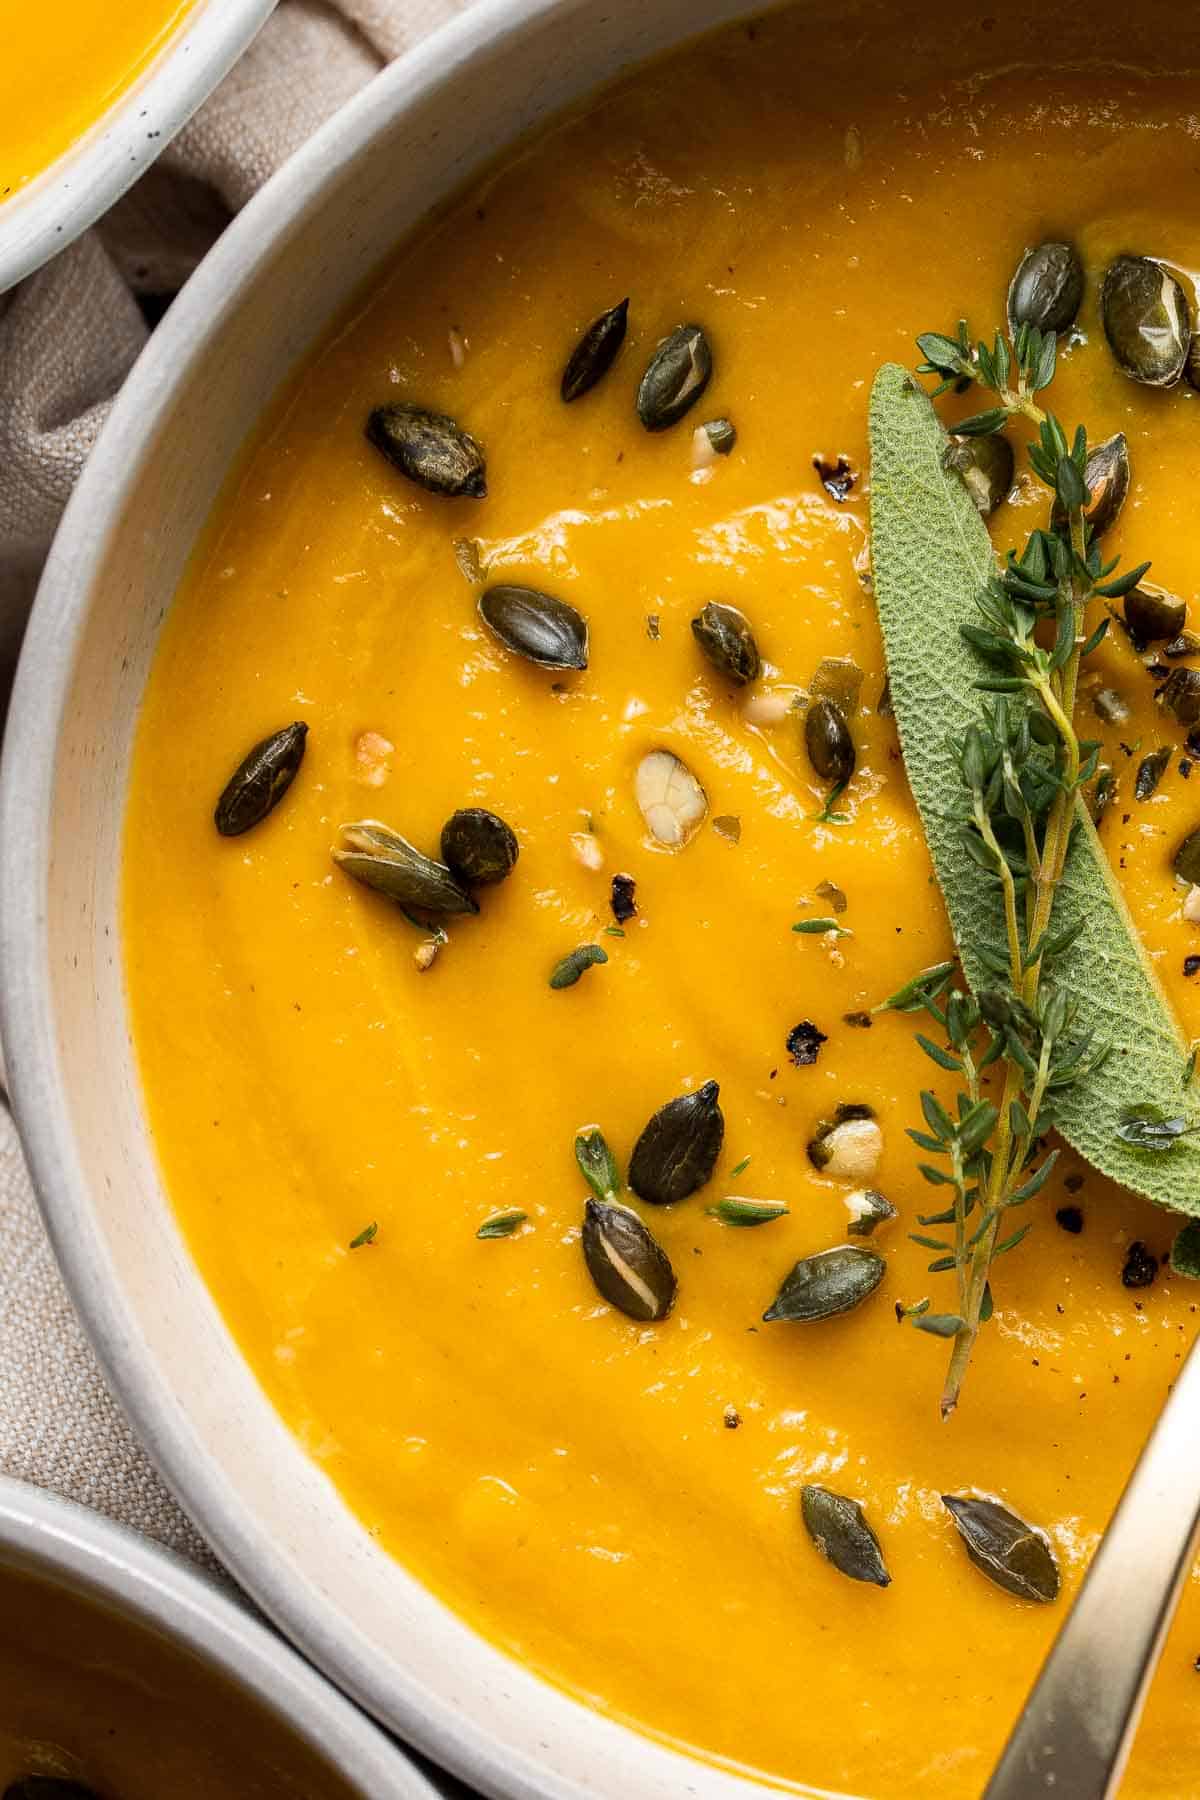
More Soup Recipes
- 60 Best Soup Recipes
- Roasted Butternut Squash Soup
- Cheesy Potato Soup
- Pinto Bean Soup
- Carrot Pumpkin Soup
- Roasted Butternut Squash and Cauliflower Soup
Tried this recipe?
I'd love to hear what you think! Leave a comment and rating below to share your feedback. Your reviews help others discover this recipe and help me keep creating more free recipes for you. Snap a photo and tag me on social media @aheadofthyme too.

Butternut Squash Quinoa Salad
Hello, fall! The season is quickly changing, and this roasted butternut squash quinoa salad is the perfect plate to usher in the cooler weather. It's healthy, wholesome, and filling. Plus, it's bursting with benefits from all the seasonal vegetables.
The soft, tender texture of roasted butternut squash is complimented perfectly by fluffy quinoa, crisp spinach, and crunchy walnuts. This vibrant fall salad gets a boost of tangy flavor from a simple homemade balsamic vinaigrette and the whole thing can be made in less than an hour.
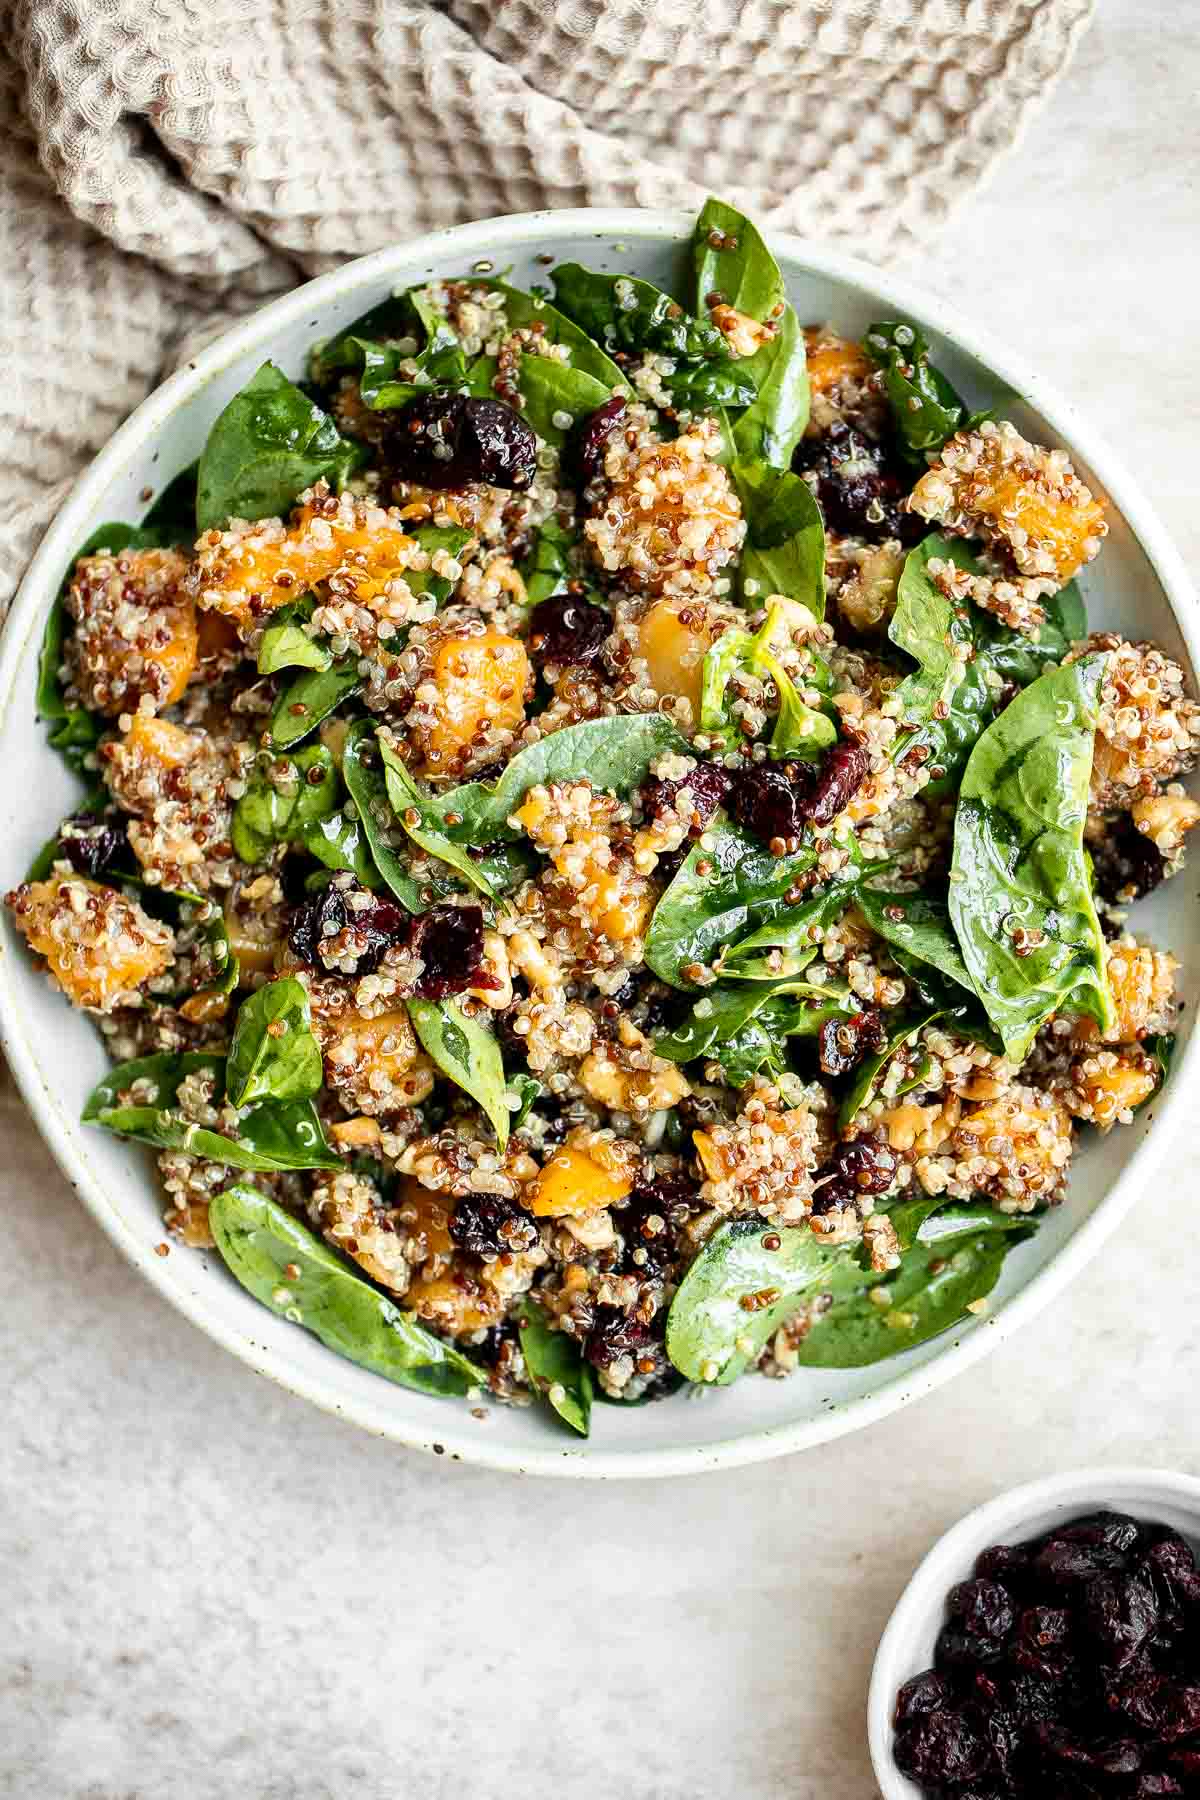
Why You'll Love This Butternut Squash Quinoa Salad
- Versatility. This quinoa salad with butternut squash is suited for any number of occasions, including everyday lunches and dinners or festive occasions - and it makes a wonderful Thanksgiving salad! It's filling enough to be a standalone salad, but it would also make a great side for larger meals and gatherings.
- Perfect way to eat in-season. This salad uses tons of fall produce, making it a perfect recipe to align your diet with the seasons! Eating seasonally is great for the environment, your wallet, and your health.
- Great transitional meal. Cold salads aren't always appetizing in the winter, and roasted vegetables just aren't as appealing in the summer. This is the best of both worlds for that weird in-between time, especially if you live in an area where fall means you get a taste of each season every day.
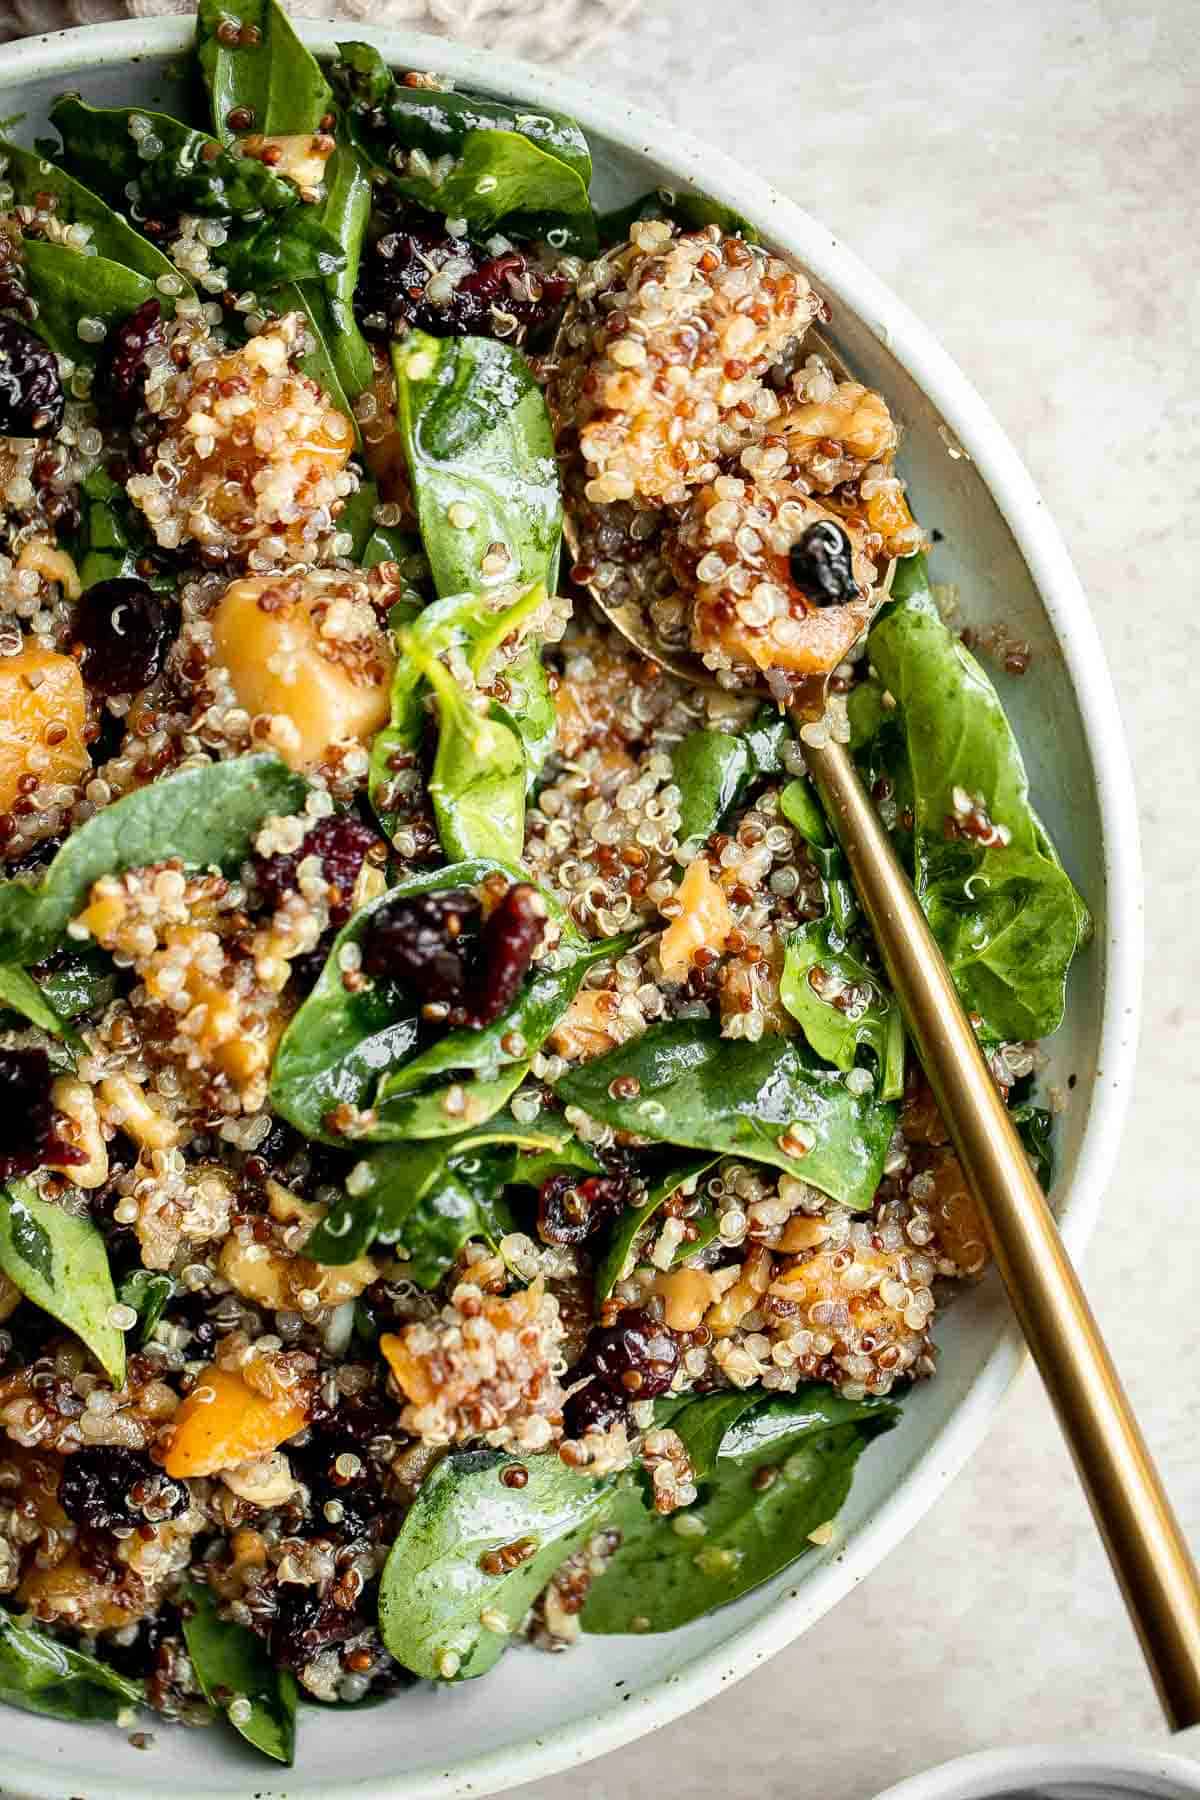
Ingredient Notes
To make this delicious Roasted Butternut Squash Quinoa Salad, you will need the following ingredients (full measurements in recipe card below):
- butternut squash - acorn squash or delicata squash are both suitable swaps for butternut squash.
- vegetable oil - avocado oil works best because it has a very neutral flavor, but you can also use olive oil if you don't mind a bit more of an earthy taste.
- Italian seasoning - Italian seasoning is a dried blend of rosemary, oregano, basil, marjoram and thyme. If you grow a combination of these herbs or have dried versions in your spice cabinet, you can blend your own Italian seasoning.
- salt and pepper
- baby spinach - you can also use massaged baby kale, baby chard, or arugula. Mixed gem lettuce would also work well.
- quinoa - if you're not a fan of quinoa, you can use roast cauliflower, cooked barley, couscous, or bulgur wheat.
- dried cranberries
- walnuts - the walnuts in this recipe can be replaced with toasted pecans, pine nuts, macadamia nuts or similarly flavored nuts.
Dressing ingredients
- balsamic vinegar
- olive oil - avocado oil is a great substitute for olive oil.
- garlic
- dijon mustard - brown mustard or a coarse-ground mustard will also work for this recipe.
- honey - if you don't have any honey on hand, a natural maple syrup is a good substitute and will add even more complex fall flavor!
- salt and pepper
You will also need measuring cups and spoons, mixing bowl, and a quarter sheet baking pan.
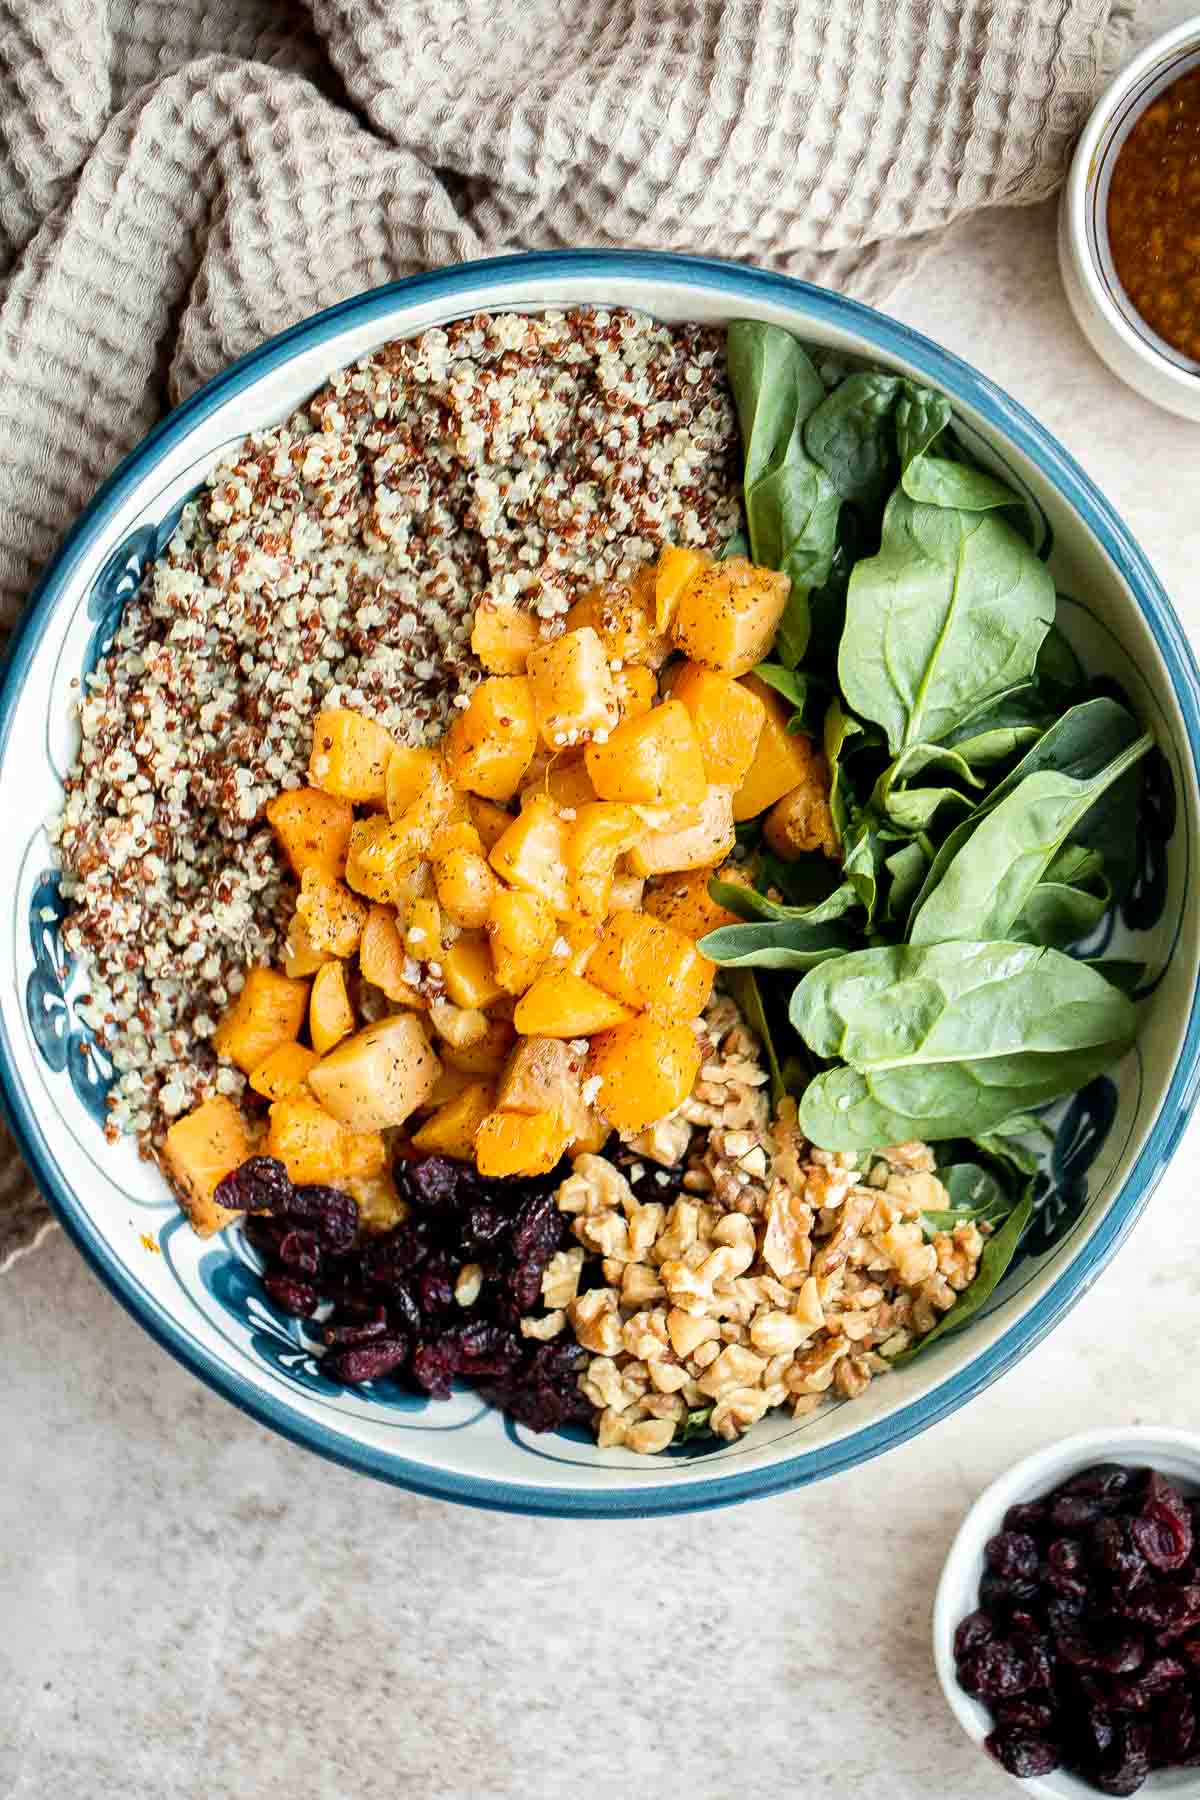
How to Make the Best Butternut Squash Quinoa Salad
- Roasted the butternut squash. In a large mixing bowl, add butternut squash, oil, Italian seasoning, salt, and pepper. Toss well to coat evenly. Spread the butternut squash evenly onto a parchment-lined quarter sheet baking pan and bake ina 425F preheated oven until the butternut squash is fork tender, about 25-30 minutes. Insert a fork to check doneness. If it is easily inserted in, it's fork tender. Let it cool to room temperature.
Season butternut squash. Roast.
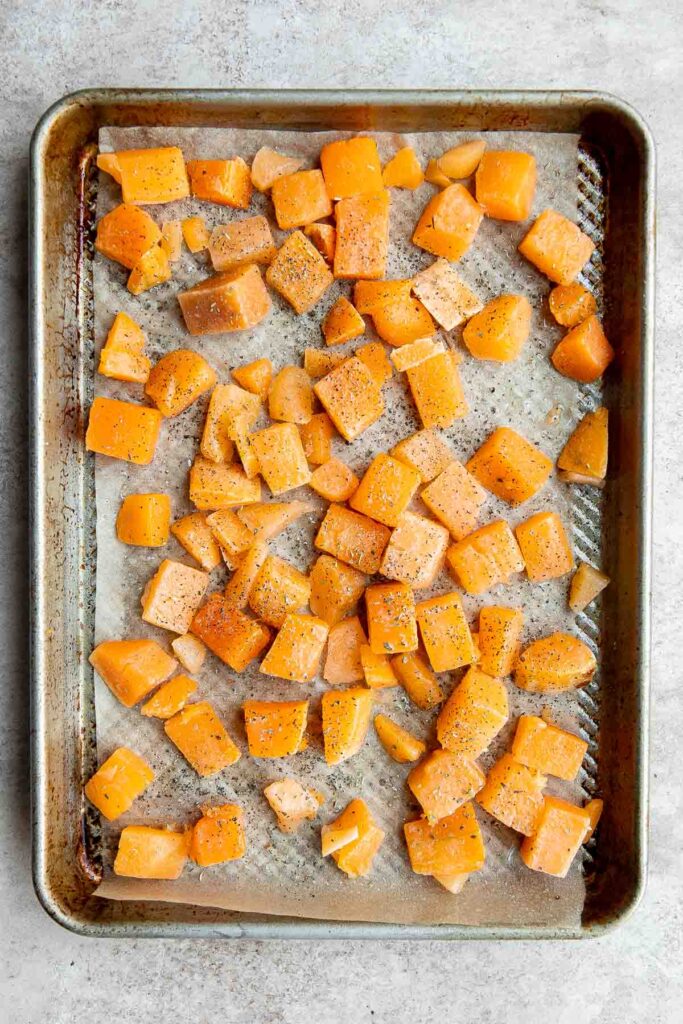
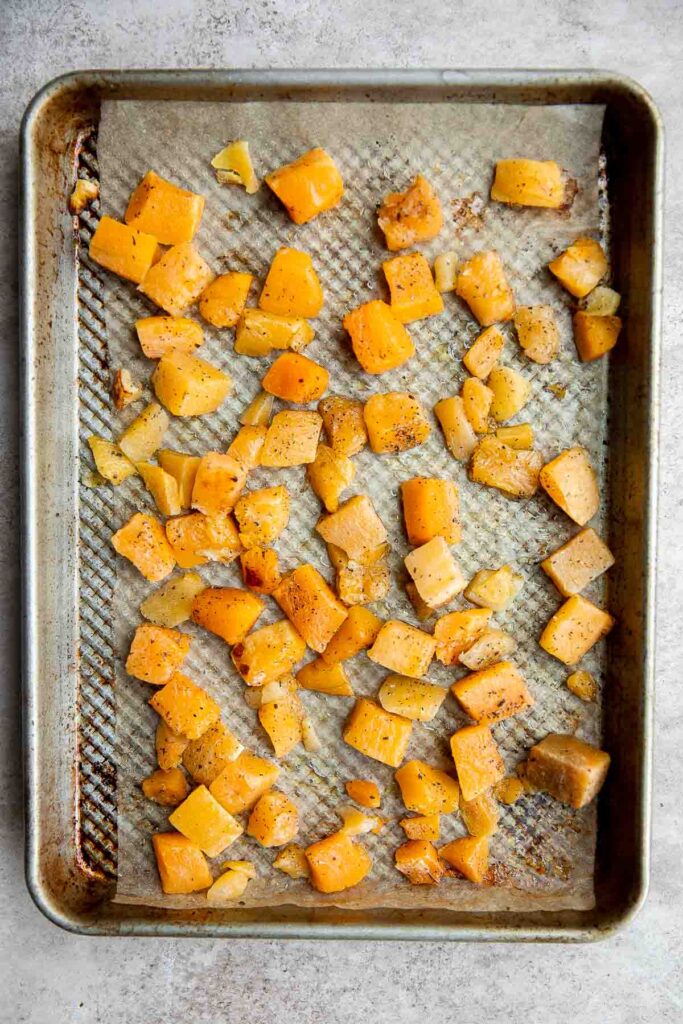
- Assemble salad. Add the roasted butternut squash, spinach, cooked quinoa, cranberries, and walnuts in a large serving bowl.
- Make vinaigrette dressing. In a small mixing bowl, whisk together balsamic vinegar, oil, garlic, dijon mustard, honey, salt, and pepper until smooth.
- Serve. Drizzle vinaigrette dressing over the salad and toss well to coat. Serve immediately.
Combine ingredients. Make dressing. Add dressing to salad.
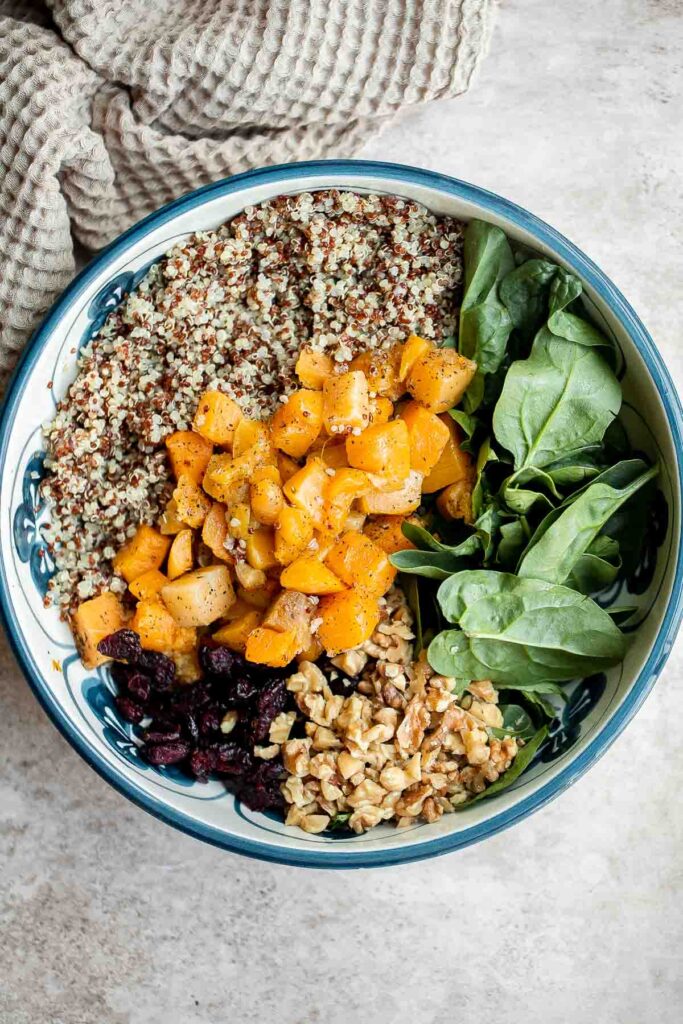
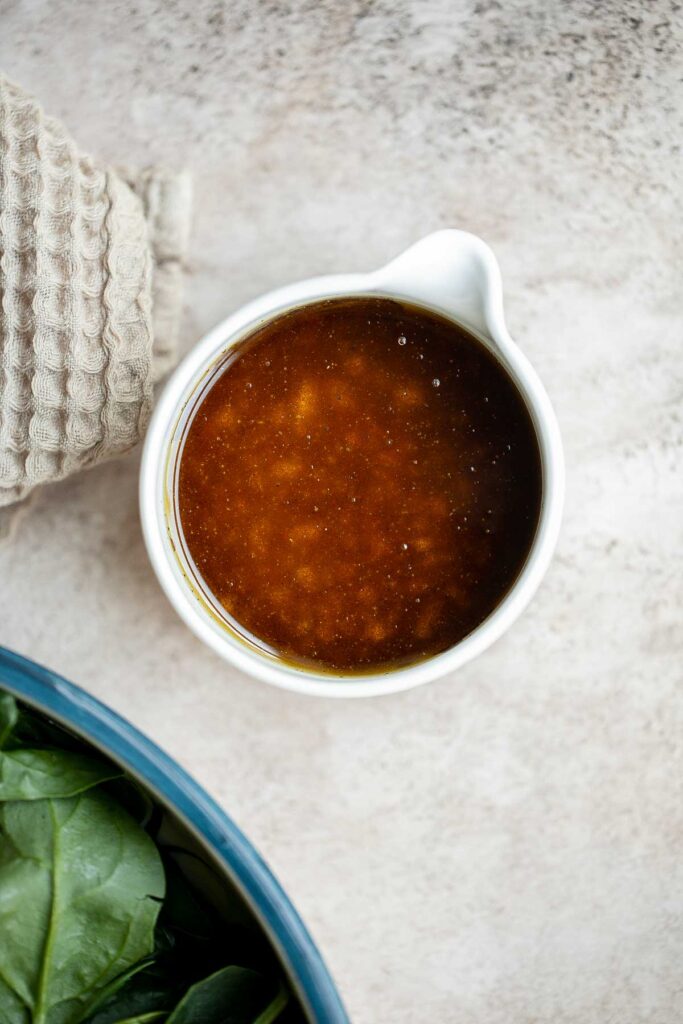
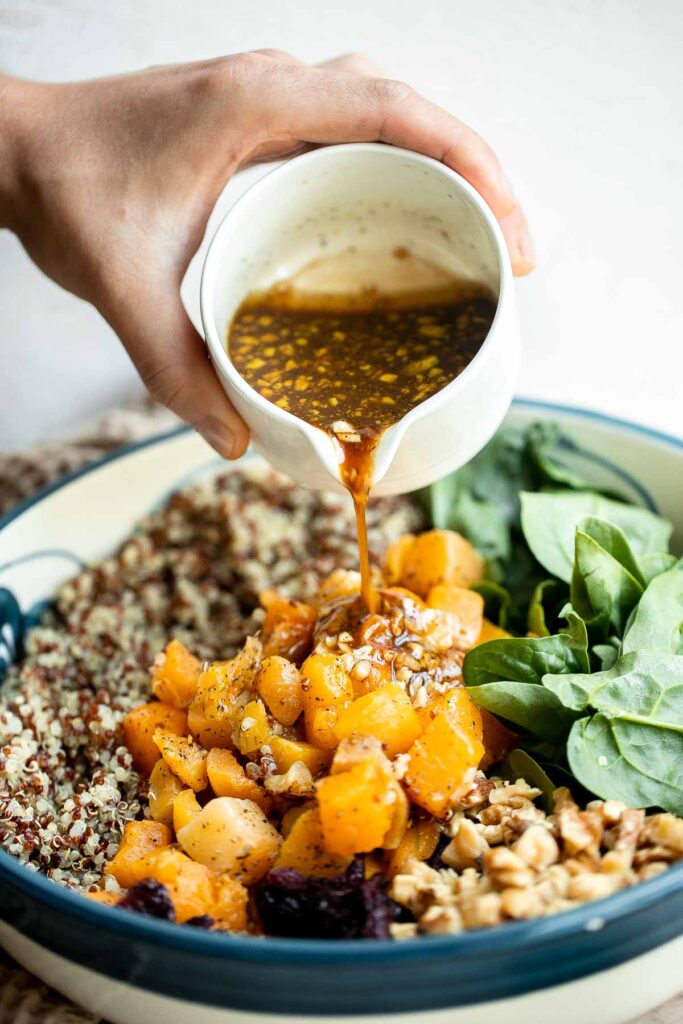
How to Serve
This Butternut Squash Quinoa Salad is delicious served on its own, or paired with some delicious fall dinners including:
- Ground Turkey Soup
- White Chicken and Spinach Lasagna
- Skillet Shepherd's Pie
- Stuffed Eggplant
- Chicken Pot Pie
Storage Instructions
Place in an airtight container and refrigerate for up to 4 days, although it's best to eat the salad within 1-2 days as the longer it is stored, the more the spinach will wilt.
To preserve the freshness and keep the leftover salad from getting mushy and soggy, try to only mix as much salad and dressing as you can eat at one time. Then, store the greens and vegetables in a separate container from the dressing. When you're ready to use it again, just toss and eat!
It's not usually recommended that you freeze salad, as the greens, vegetables and toppings will usually go limp or get soggy when thawed. However, if you want to use the leftovers to make other dishes (keep reading for tips!), you can freeze leftovers in a sealed freezer bag for up to six months.
Recipe Tips and Tricks
- Use leftover salad creatively. If you do end up storing fully dressed salad, don't worry! Freeze it before it can get soggy and then toss the leftovers to add fiber and more nutrients to an egg or tofu scramble, or bake them in a fall flavored casserole.
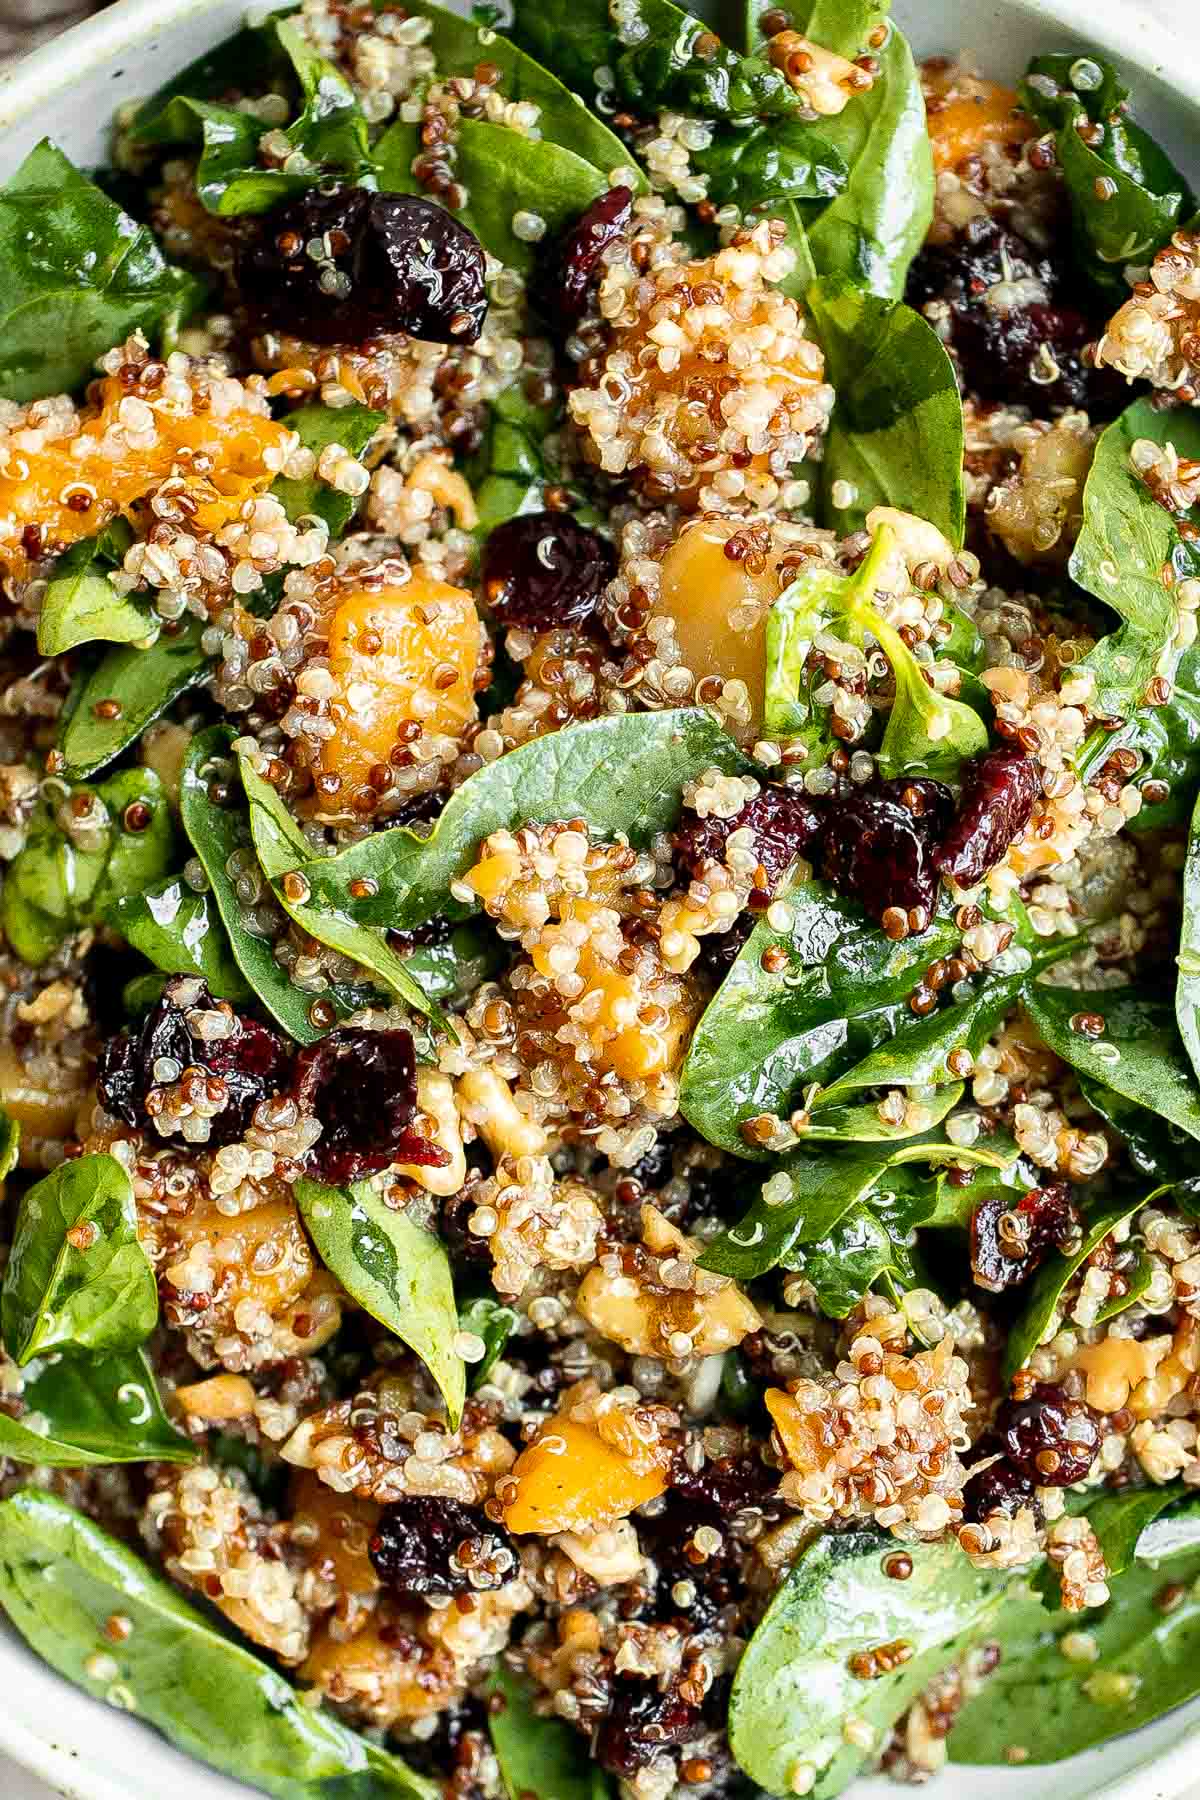
More Butternut Squash Recipes
- 30 Best Butternut Squash Recipes
- Butternut Squash Salad
- Butternut Squash Curry with Chickpeas
- Roasted Butternut Squash Soup
- Butternut Squash Mac and Cheese
- Stuffed Butternut Squash with Wild Rice
Tried this recipe?
I'd love to hear what you think! Leave a comment and rating below to share your feedback. Your reviews help others discover this recipe and help me keep creating more free recipes for you. Snap a photo and tag me on social media @aheadofthyme too.
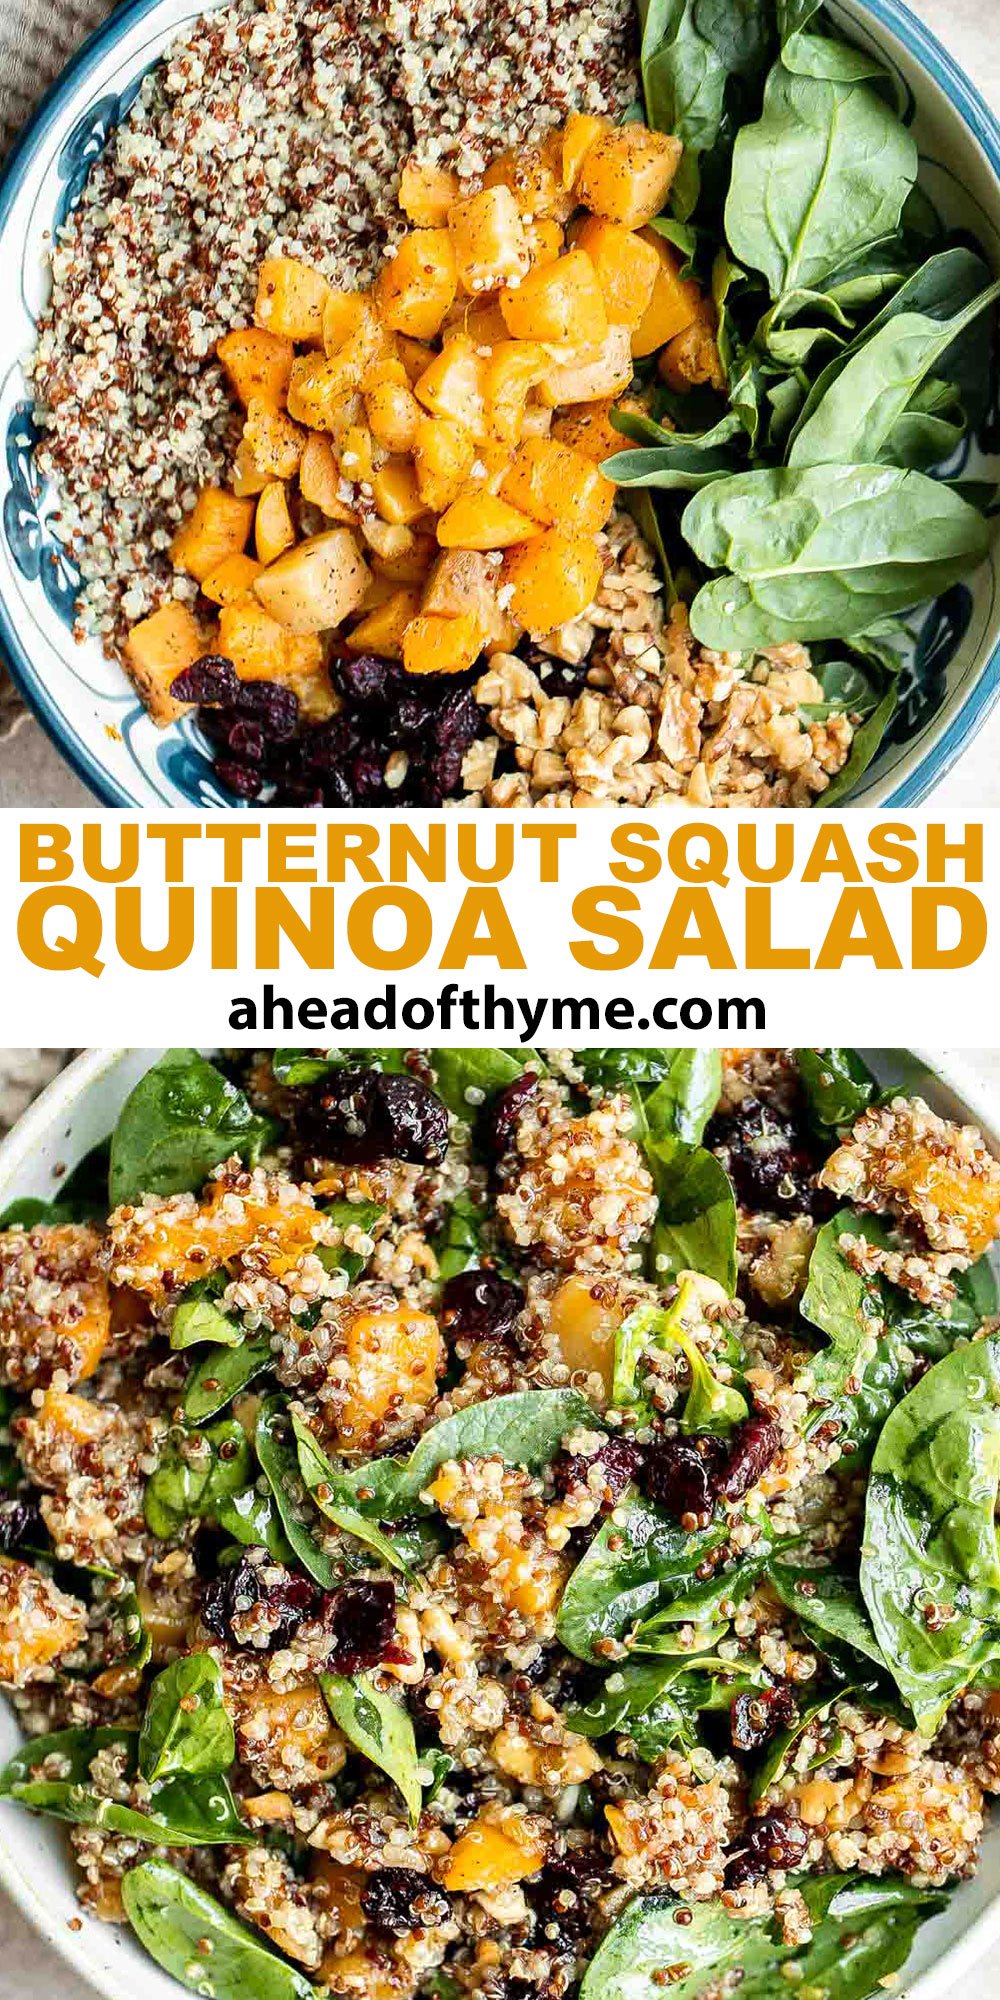
Pecan Pie Brownies
Why make pie or brownies when you can have them both at once? These Pecan Pie Brownies are the perfect fall treat for any occasion (or no occasion at all)! They're fast, easy, and best of all, they're made with real ingredients.
With a rich brownie layer and a sweet pecan pie topping, these delicious pecan brownies are irresistible. Make them for Thanksgiving, take to a holiday work potluck, or satisfy a last minute dessert craving.
Why You'll Love Pecan Pie Brownies
- Best of both desserts. If you've ever spent a little too much time at the dessert table agonizing over the decision between gooey, chocolatey brownies and sweet, crunchy pecan pie, this pecan brownie recipe is for you. No more difficult choices - now you get both flavor profiles in one easy dessert!
- Perfect for fall parties. These pecan pie bars with a brownie base will be a huge hit wherever you take them - to work parties, family gatherings, football tailgates, and beyond! My favorite is serving at Thanksgiving as part of a holiday dessert spread.
- Speedy sweet treat. This hybrid dessert seems like it might take an especially long time to make, right? You might be surprised to learn that they take less than an hour - actually, only 45 minutes! With just ten minutes of active prep and 35 minutes of baking time, this will be your new go-to when you need to make something impressive for dessert on a tight schedule.
- Easy to make from scratch. You'll start with the gooey brownies, and while they're in the oven, you'll move on to the pecan pie topping. Once they're ready to combine, you'll layer the topping over the brownie base and bake one more time before the hardest part: waiting for them to cool down enough to eat!
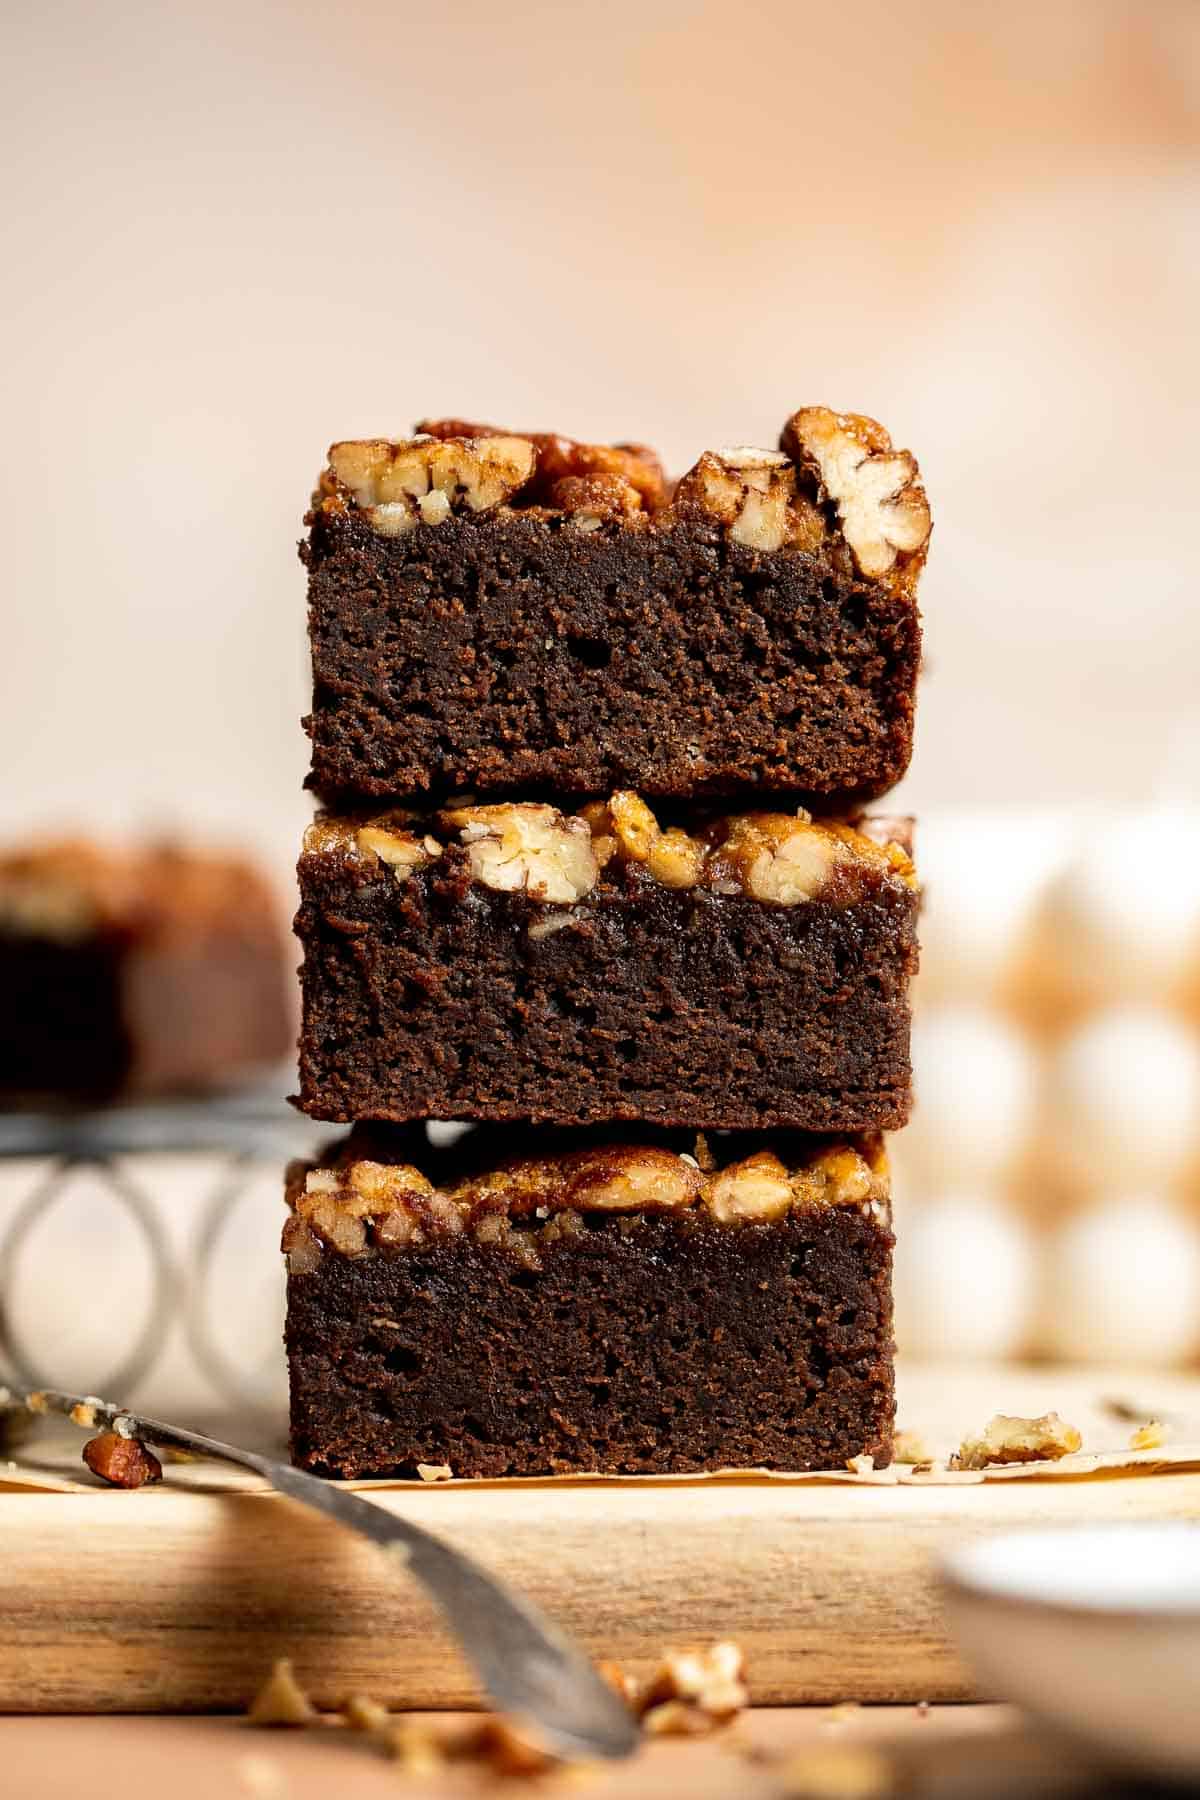
Ingredient Notes
To make these easy Pecan Pie Brownies, you will need the following ingredients (full measurements in recipe card below):
- semi-sweet chocolate - you can also try dark chocolate if you prefer.
- butter
- sugar - sugar is an essential ingredient in most desserts, but you can replace it in this recipe with your favorite sugar alternative, like raw sugar, coconut sugar, stevia, or Swerve.
- brown sugar - the same goes for brown sugar. Try a 1:1 brown sugar alternative if you need to.
- eggs - the eggs in the brownie batter can be replaced with flaxseed eggs, which are made by combining 1 tablespoon of flax meal with 3 tablespoons of water per egg. Let the mixture set for 10 minutes before using in the recipe.
- vanilla extract
- all-purpose flour - you can easily make these pecan pie brownies gluten-free by swapping the wheat flour for a measure-for-measure gluten free flour substitute.
- cocoa powder
- salt
- maple syrup - honey will also work in a pinch.
- pecans - pecans add the perfect crunch to these brownies! If you really need to, you can swap them out with a similar nut like walnuts or cashews, though you won't really be able to call these pecan pie brownies if you do. We use both whole and coarsely chopped pecans, but feel free to use or the other if you prefer.
You will also need measuring cups and spoons, mixing bowls, 9-inch square baking pan, and wire cooling rack.
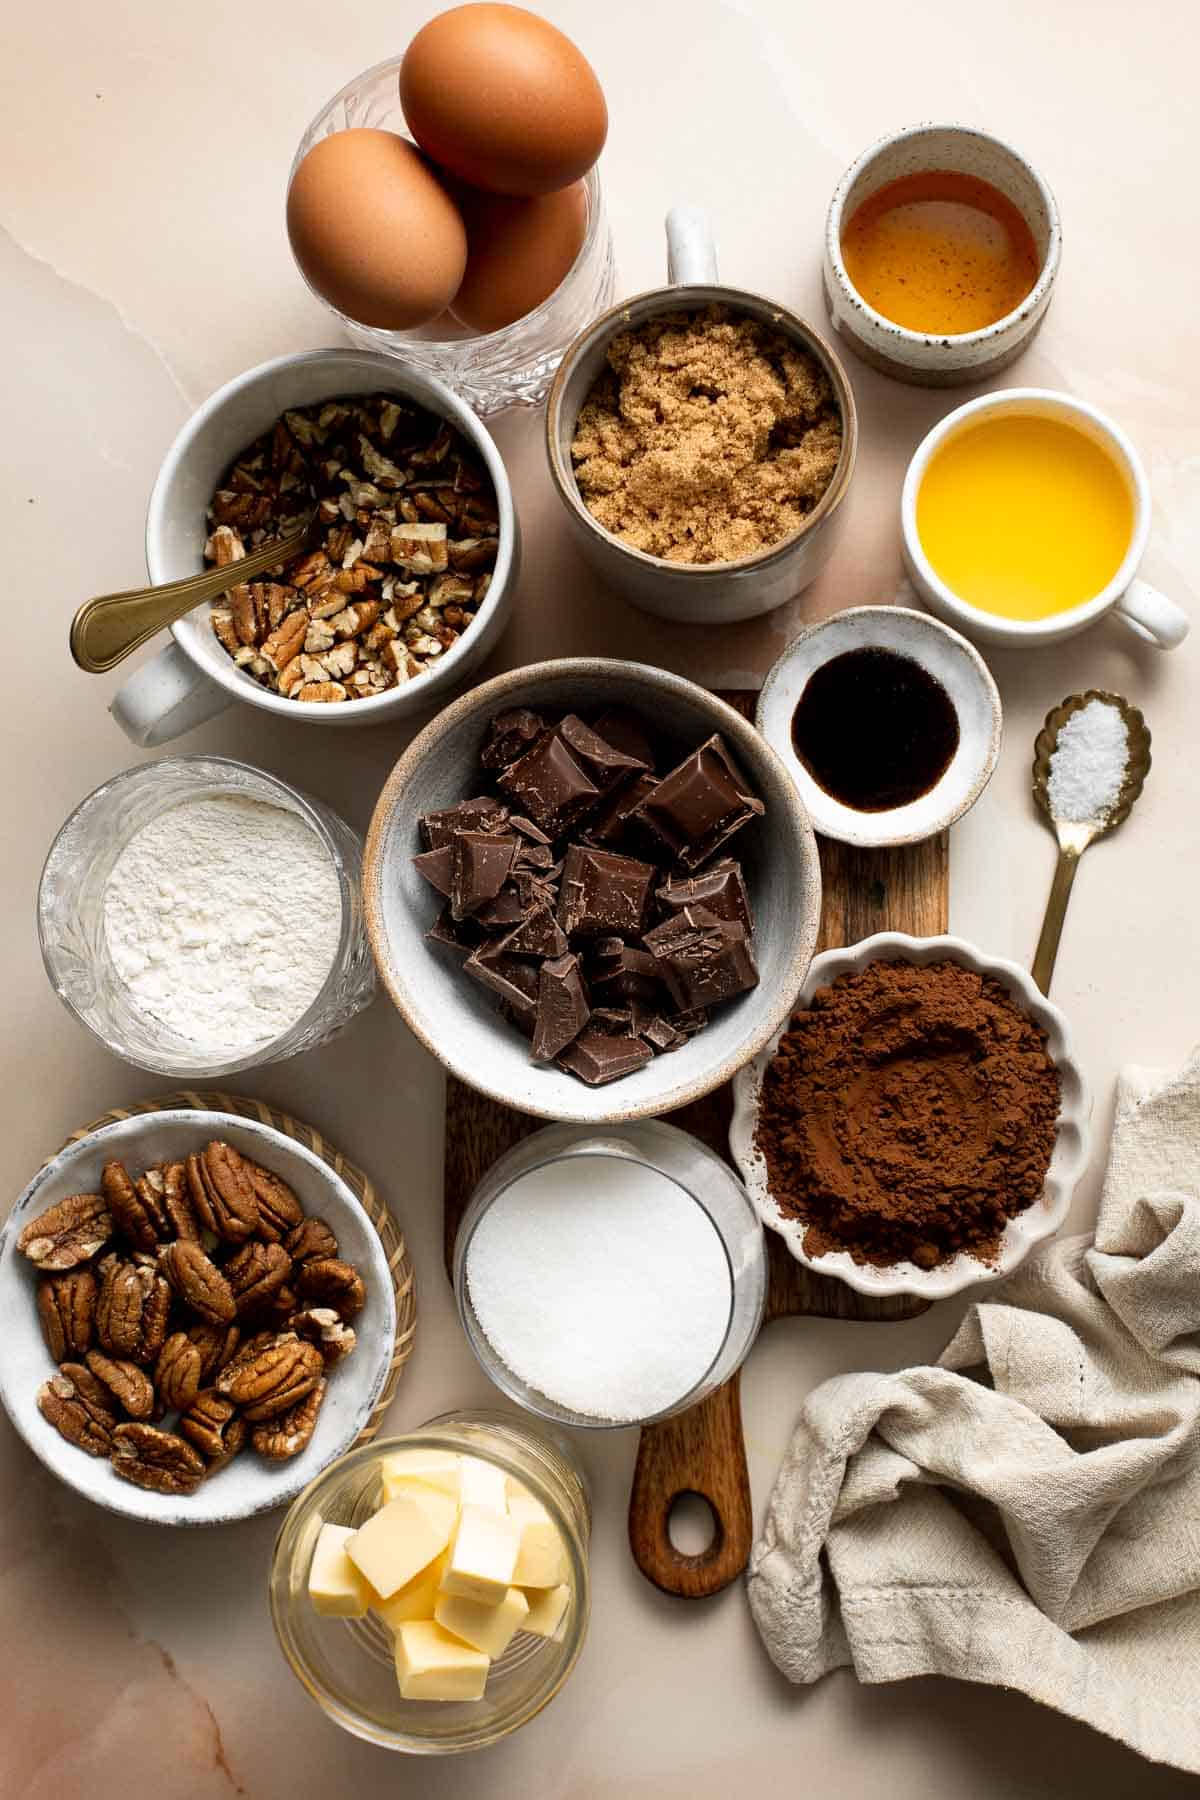
How to Make the Best Pecan Pie Brownies
First, make the brownie layer.
- Melt chocolate. Melt the chocolate with butter in a medium heatproof bowl over a pan of simmering water. Make sure the bottom of the bowl does not touch the water, or you will burn the chocolate. Whisk until melted and smooth.
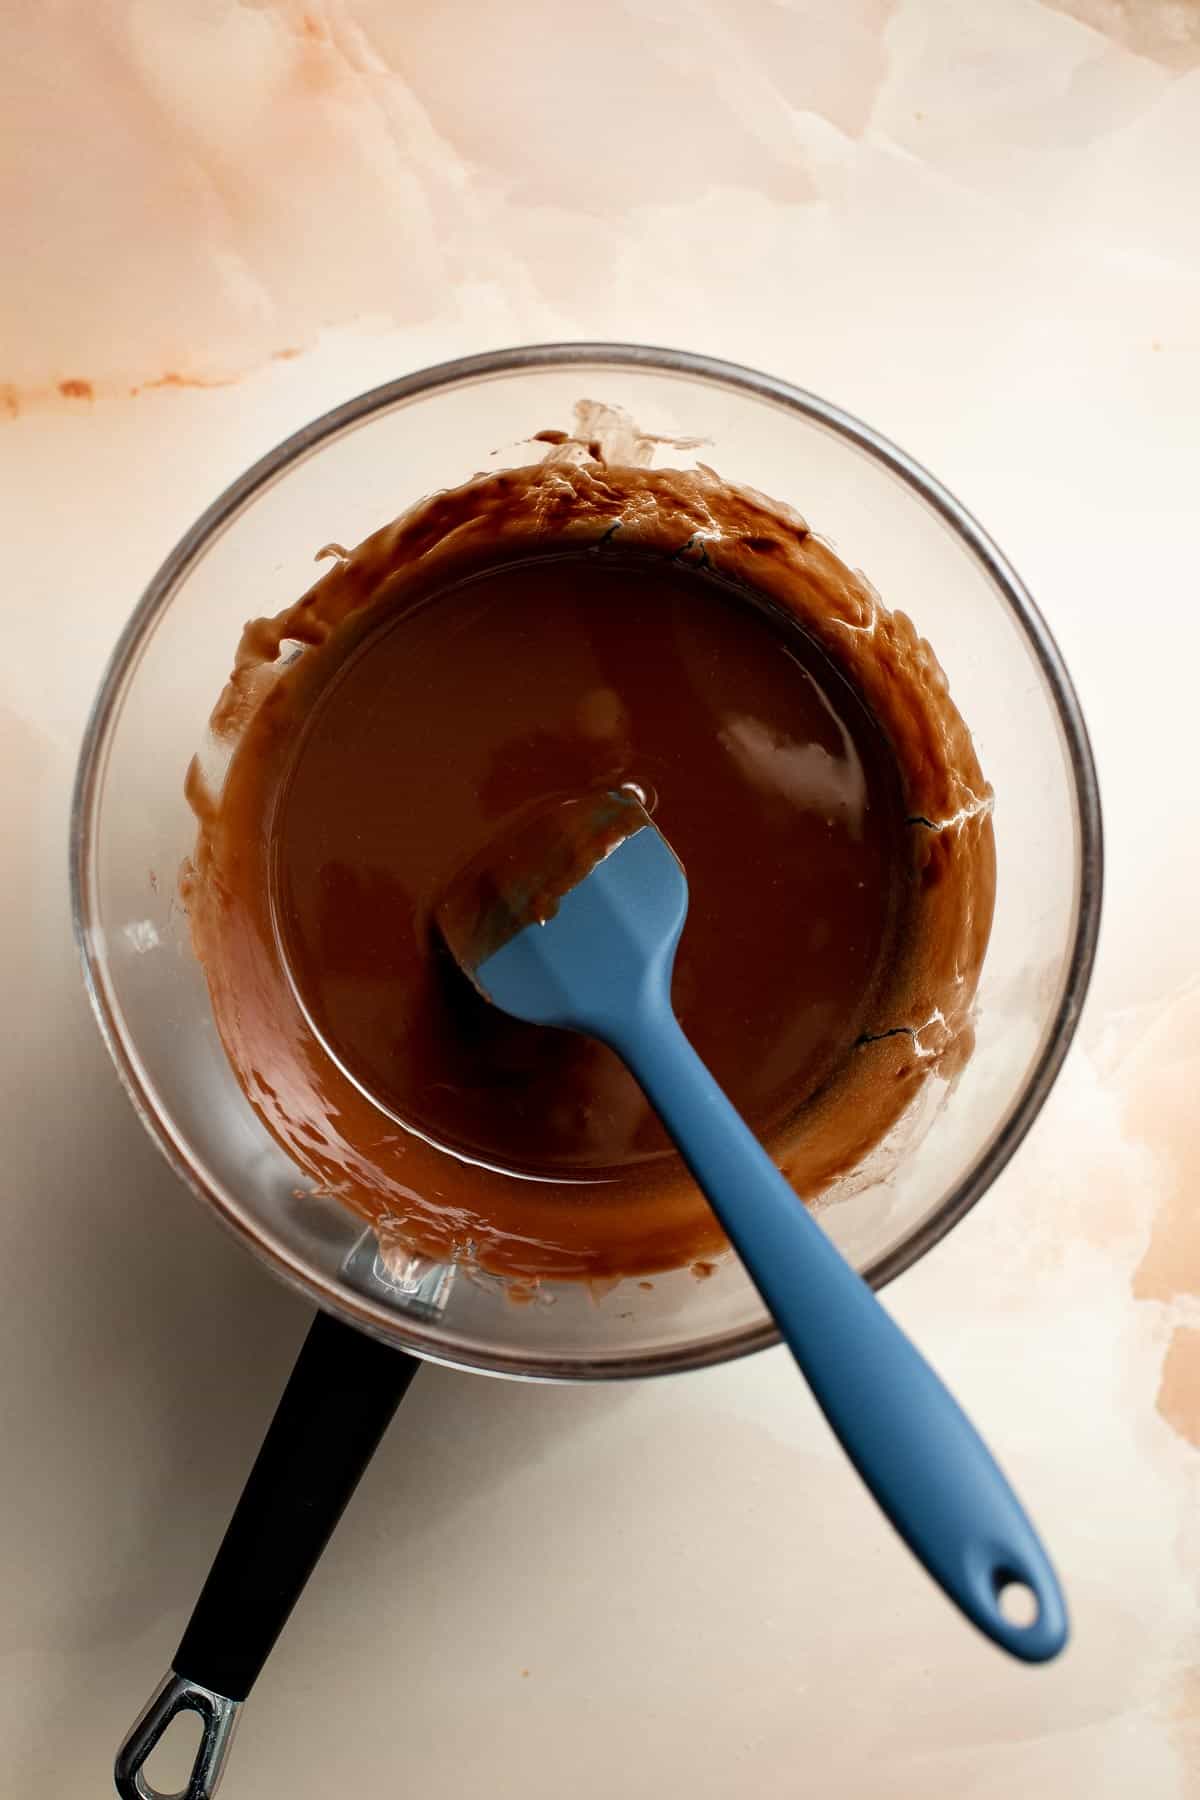
- Add sugar. Remove from heat and add sugars into the chocolate mixture and whisk until completely combined. Let the chocolate mixture cool for a few minutes.
Add sugar to the melted chocolate. Stir to combine.
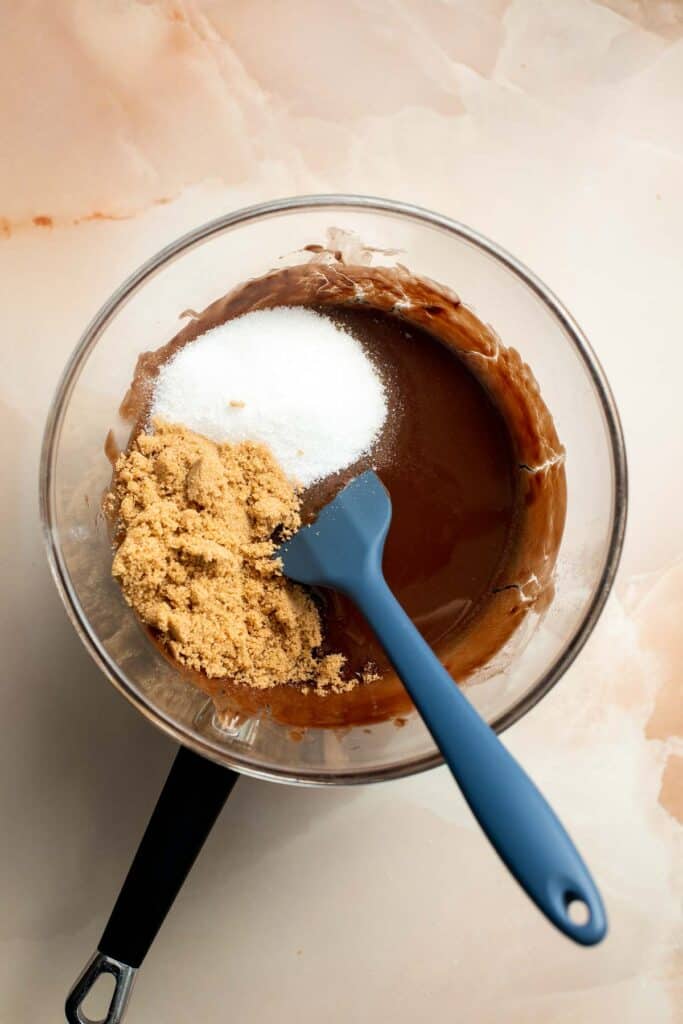
- Add wet ingredients. Add in eggs and vanilla, and beat with a hand mixer on medium speed for 2 minutes.
Add wet ingredients. Beat to combine.
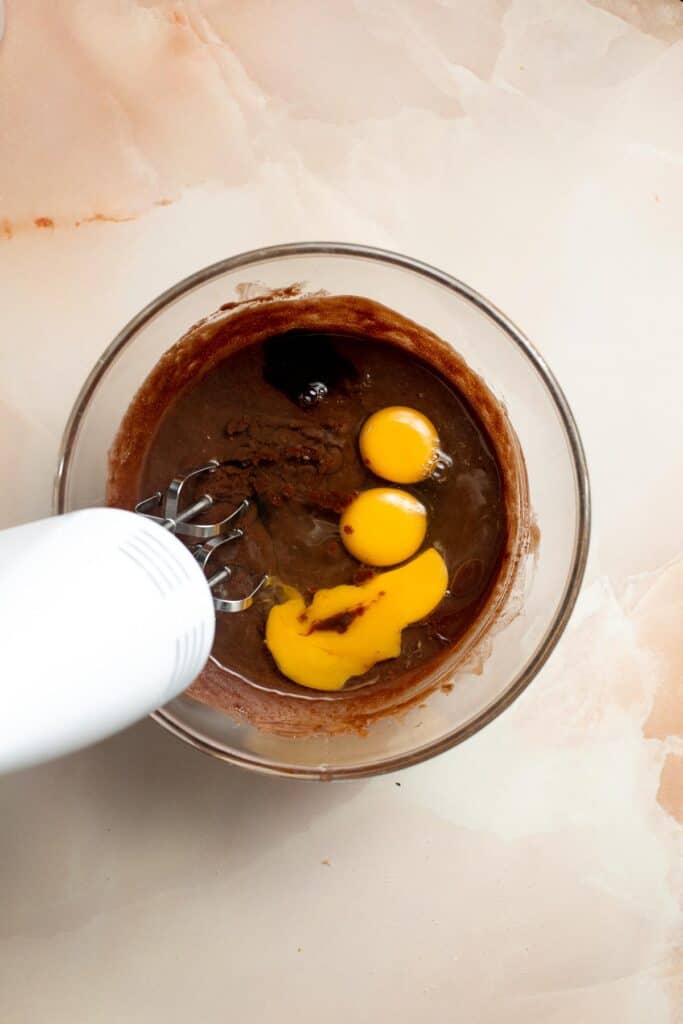
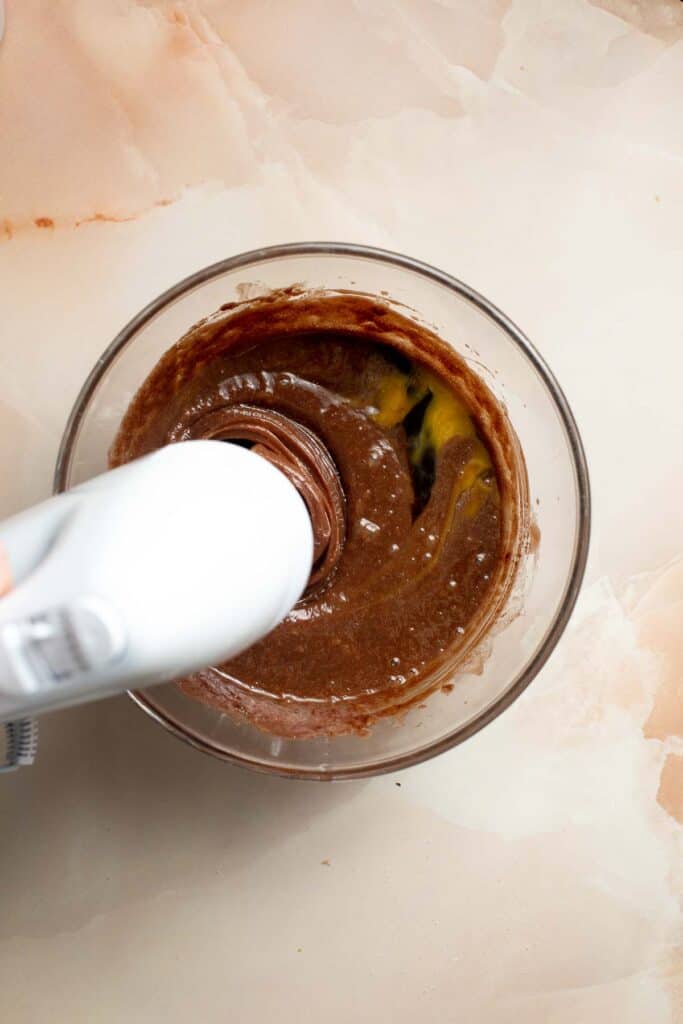
- Add dry ingredients. Add in flour, cocoa powder, and salt and fold together using a large silicone spatula until just combined.
Add dry ingredients. Fold together until combined.
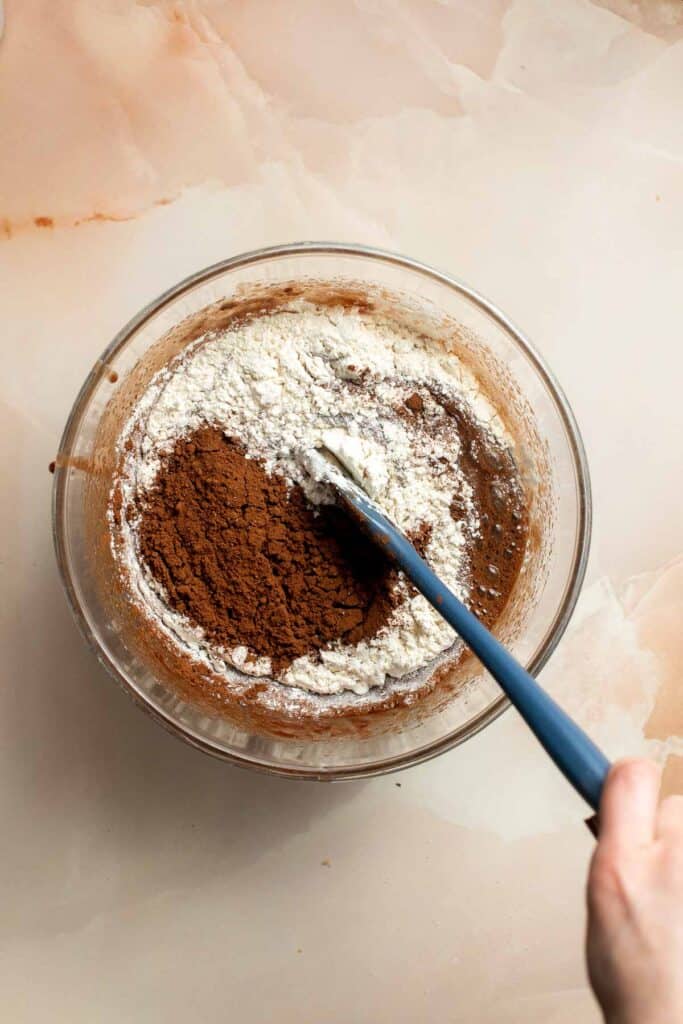
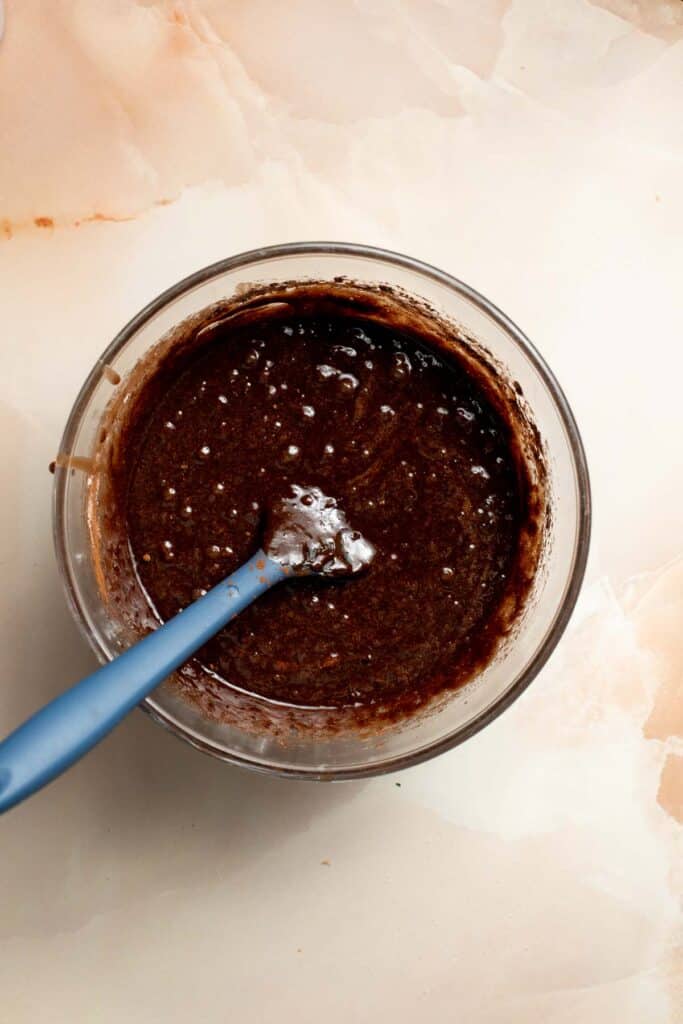
- Fill pan. Grease a 9-inch square baking pan and line it with parchment paper so that it hangs over two sides to make it easy to life the brownies out of the pan when baked. Transfer the thick batter into the prepared baking pan.
Line the baking pan. Add batter.

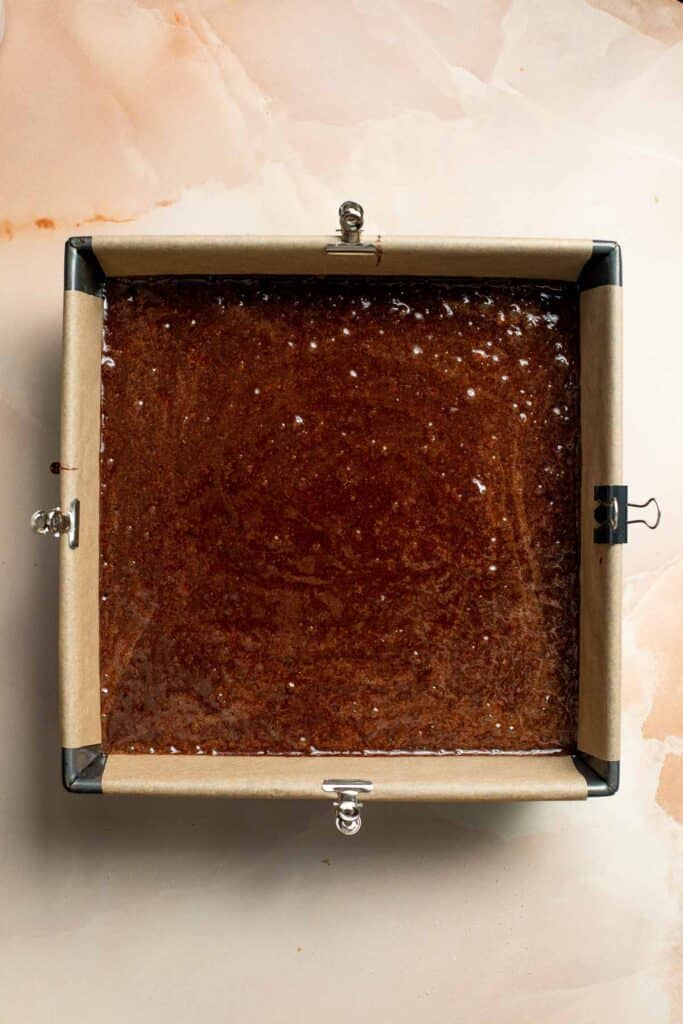
- Bake. Bake in a 350°F preheated oven for 20 minutes. The brownies won't be fully cooked, but the top should start to set. If the brownies look completely wet and raw, bake for another 5 minutes, or until it starts to set.
Second, make the pecan pie topping.
- Combine ingredients. While the brownie base is baking, prepare the pecan pie topping. In a large mixing bowl, whisk together brown sugar, maple syrup, melted butter, egg, vanilla, and salt until smooth and combined. Stir in the whole and chopped pecans until coated.
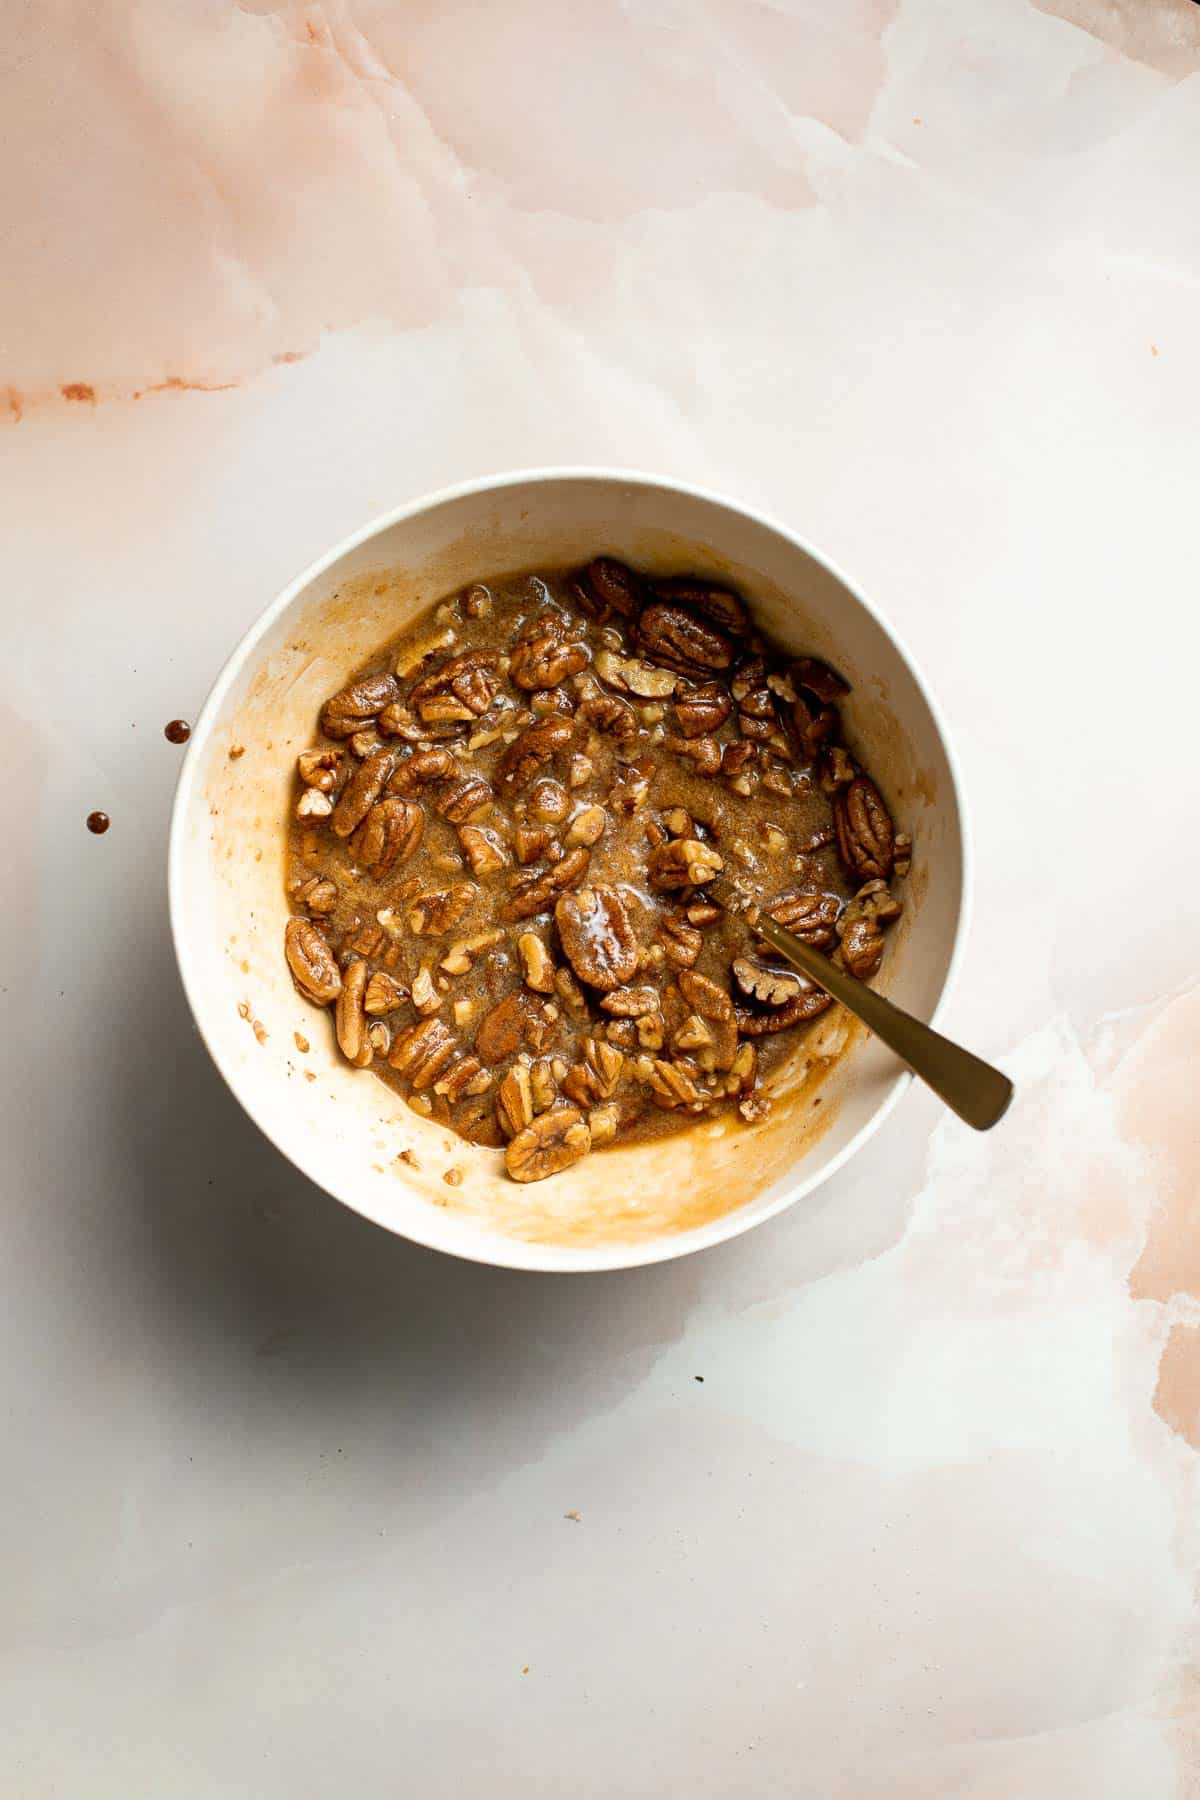
- Add pecan topping. Pour the topping over the baked brownie immediately once the brownie is removed from the oven and is still hot. Return the baking pan back into the oven and bake for another 15-20 minutes until the topping has set (it may jiggle a little with no liquid visible in the topping).
Add pecan topping on the brownie. Bake.
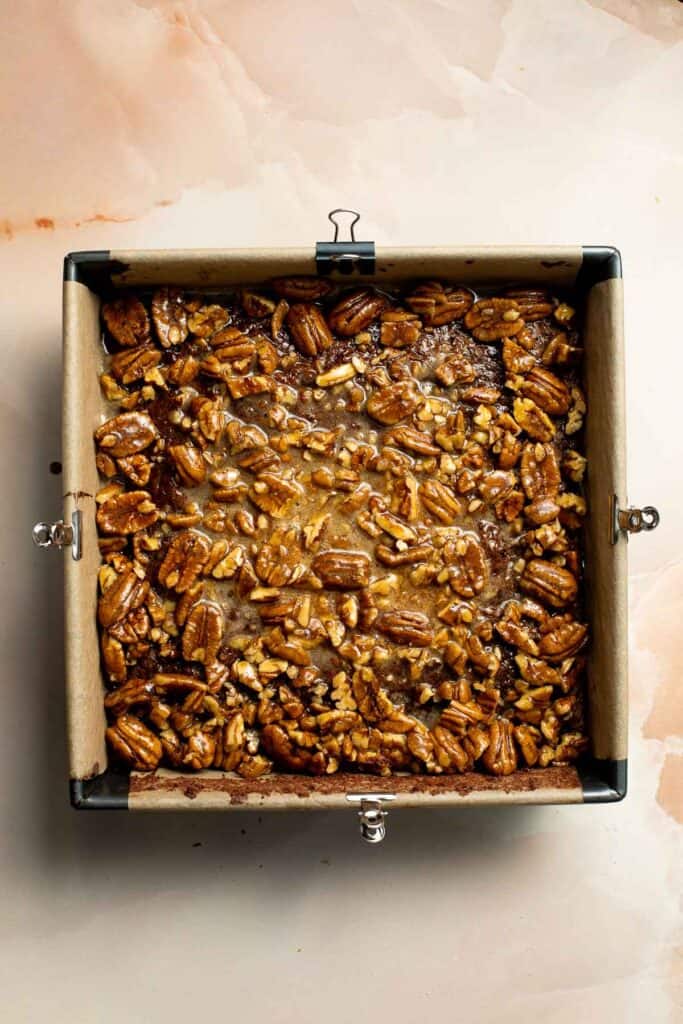
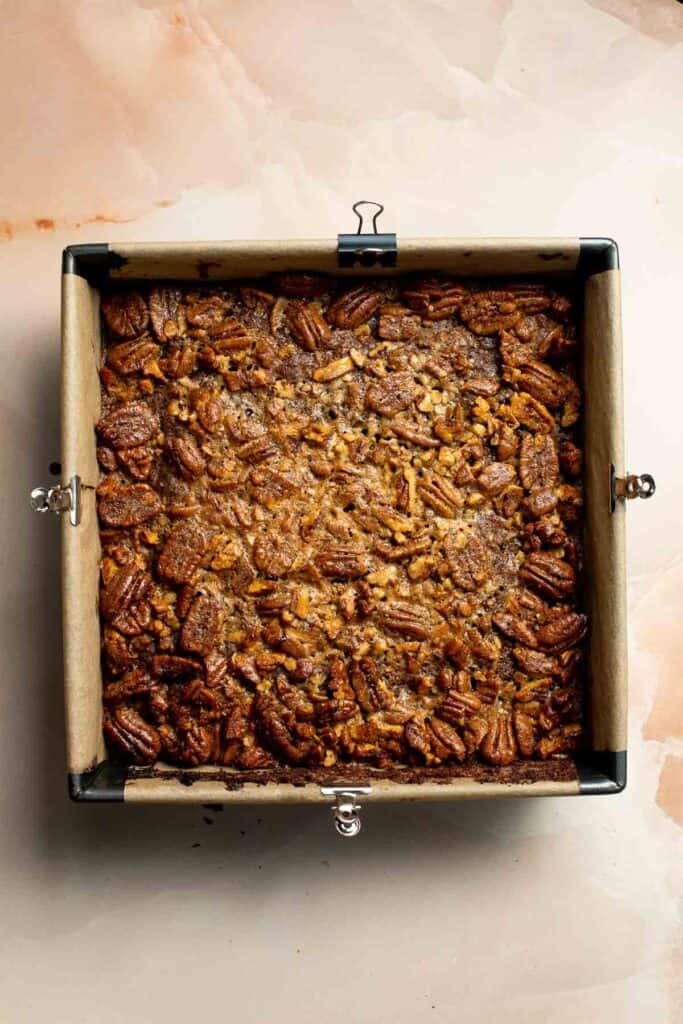
- Cool. Allow the pecan pie brownies to cool completely in the pan on a wire cooling rack. Once cooled, you can place the brownies in the refrigerator for 1-2 hours for easier slicing, if you prefer. Once cooled completely, easily lift it out of the pan using the parchment paper overhang. Then, slice into 16 squares and serve.

How to Serve
Pecan pie brownies taste delicious cool or at room temperature. So, you can leave them out on the table for people to take at their leisure. To bring things up a notch, and eat with cold vanilla ice cream. It's so good!
You can also make this legendary fall dessert even better by serving warm with a scoop of vanilla ice cream or butter pecan ice cream! You can throw the pecan pie bars in the microwave for 10-20 seconds to reheat, or in a 350F preheated oven or air fryer until warmed through.
Storage and Freezing Instructions
How to Store
Once the brownies have completely cooled, you can store them at room temperature in an airtight container for up to 3 days - make sure to keep them cool and out of direct sunlight. You can also tightly wrap them in plastic cling wrap or aluminum foil. You can store them longer for up to a week in the fridge.
How to Freeze
Once cool, Place in a plastic freezer bag and freeze for up to two months. You can also slice them first and wrap tightly in plastic cling wrap before placing in a freezer bag. Then, on take out the portion that you want. Defrost in the microwave on the defrost setting or reheat in the oven. You can also thaw overnight in the fridge and serve cold or reheat.
Recipe Tips and Tricks
- Use caution when adding the pecan pie topping. The brownies will still be a little raw and very delicate when you add the pecan pie topping, so go slowly and be careful not to break the brownies. Instead of pouring the mixture in the center and spreading from there, try pouring the topping evenly over the brownie layer and gently coax it to the edges with a wooden spoon or silicone spatula.

More Pecan Recipes
- 30 Best Pecan Recipes
- Pecan Pie Bars
- Caramel Pecan Pie Cheesecake Bars
- Candied Pecans
- Pecan Pie
- Slice and Bake Pecan Shortbread Cookies
Tried this recipe?
I'd love to hear what you think! Leave a comment and rating below to share your feedback. Your reviews help others discover this recipe and help me keep creating more free recipes for you. Snap a photo and tag me on social media @aheadofthyme too.

Maple Roasted Brussels Sprouts and Butternut Squash
Maple Roasted Brussels Sprouts and Butternut Squash are the Thanksgiving side dish that you have been looking for. These quick and easy veggies are tender, flavorful, and delicious. This vegan recipe will wow the whole family at your next holiday gathering, but it's so easy you'll likely make it for quick, wholesome weeknight dinners, too!
This holiday vegetable side dish tastes like it took a lot of time and talent to create, but here's the secret: the oven does most of the cooking. All you have to do is chop, season, and pop the veggies on a sheet pan and the oven will take care of the rest while you focus on cleaning up or making other sides and entrees.
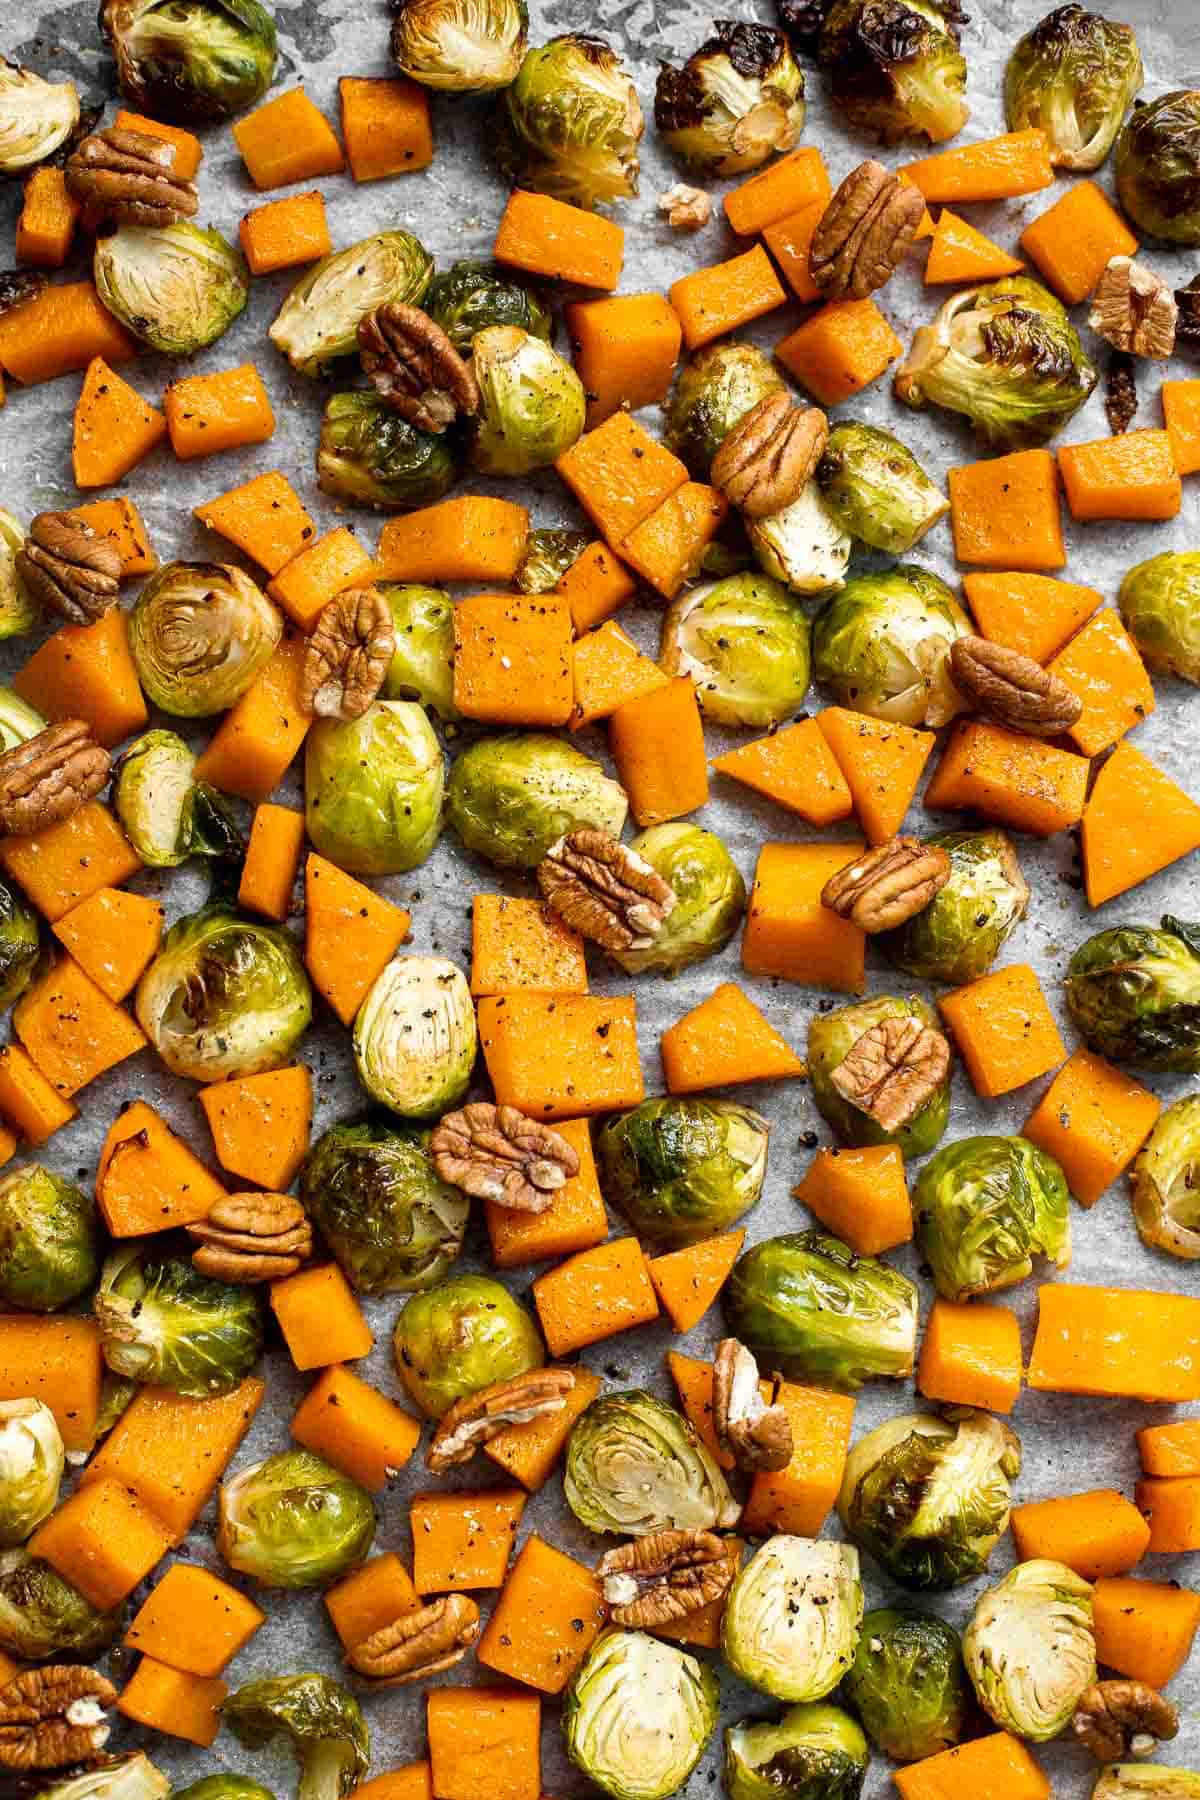
Why You'll Love these Maple Roasted Brussels Sprouts and Butternut Squash
- An ideal Thanksgiving side. Brussels sprouts and butternut squash have long held their own spots at the Thanksgiving table, but once you have them combined like this, you'll never go back. Why make two individual side dishes when they're better together? Half the work for an even better reward!
- Serve it all season long. But, I don't limit myself to the holidays. I make this dish throughout the season. I mean, why wouldn't I? It's makes weeknight meal planning so easy. Plus, if I have leftovers, I use it up the next day for lunch or dinner by throwing it in a salad.
- It's quick and easy. This recipe is so easy to prepare, especially if you use precut veggies. You literally throw everything into your pan, toss, and roast. It only takes ten minutes of active prep time to get these vegetables in the oven!
- Sweet and savory flavor. Just because something takes no time or effort to prepare, doesn't mean that it's quality is compromised. In fact, this side dish is bursting with flavour in every single bite. And maple syrup makes everything better, vegetables included. It adds the perfect touch of sweetness to the squash and brussels sprouts to appease even the pickiest eaters.
- Roasting makes everything better. The secret of roasting is that it makes everything taste better. It enhances the flavours in these vegetables about ten-fold. And don't get me started on the texture. The vegetables are crisp on the edges, yet soft and tender on the inside.
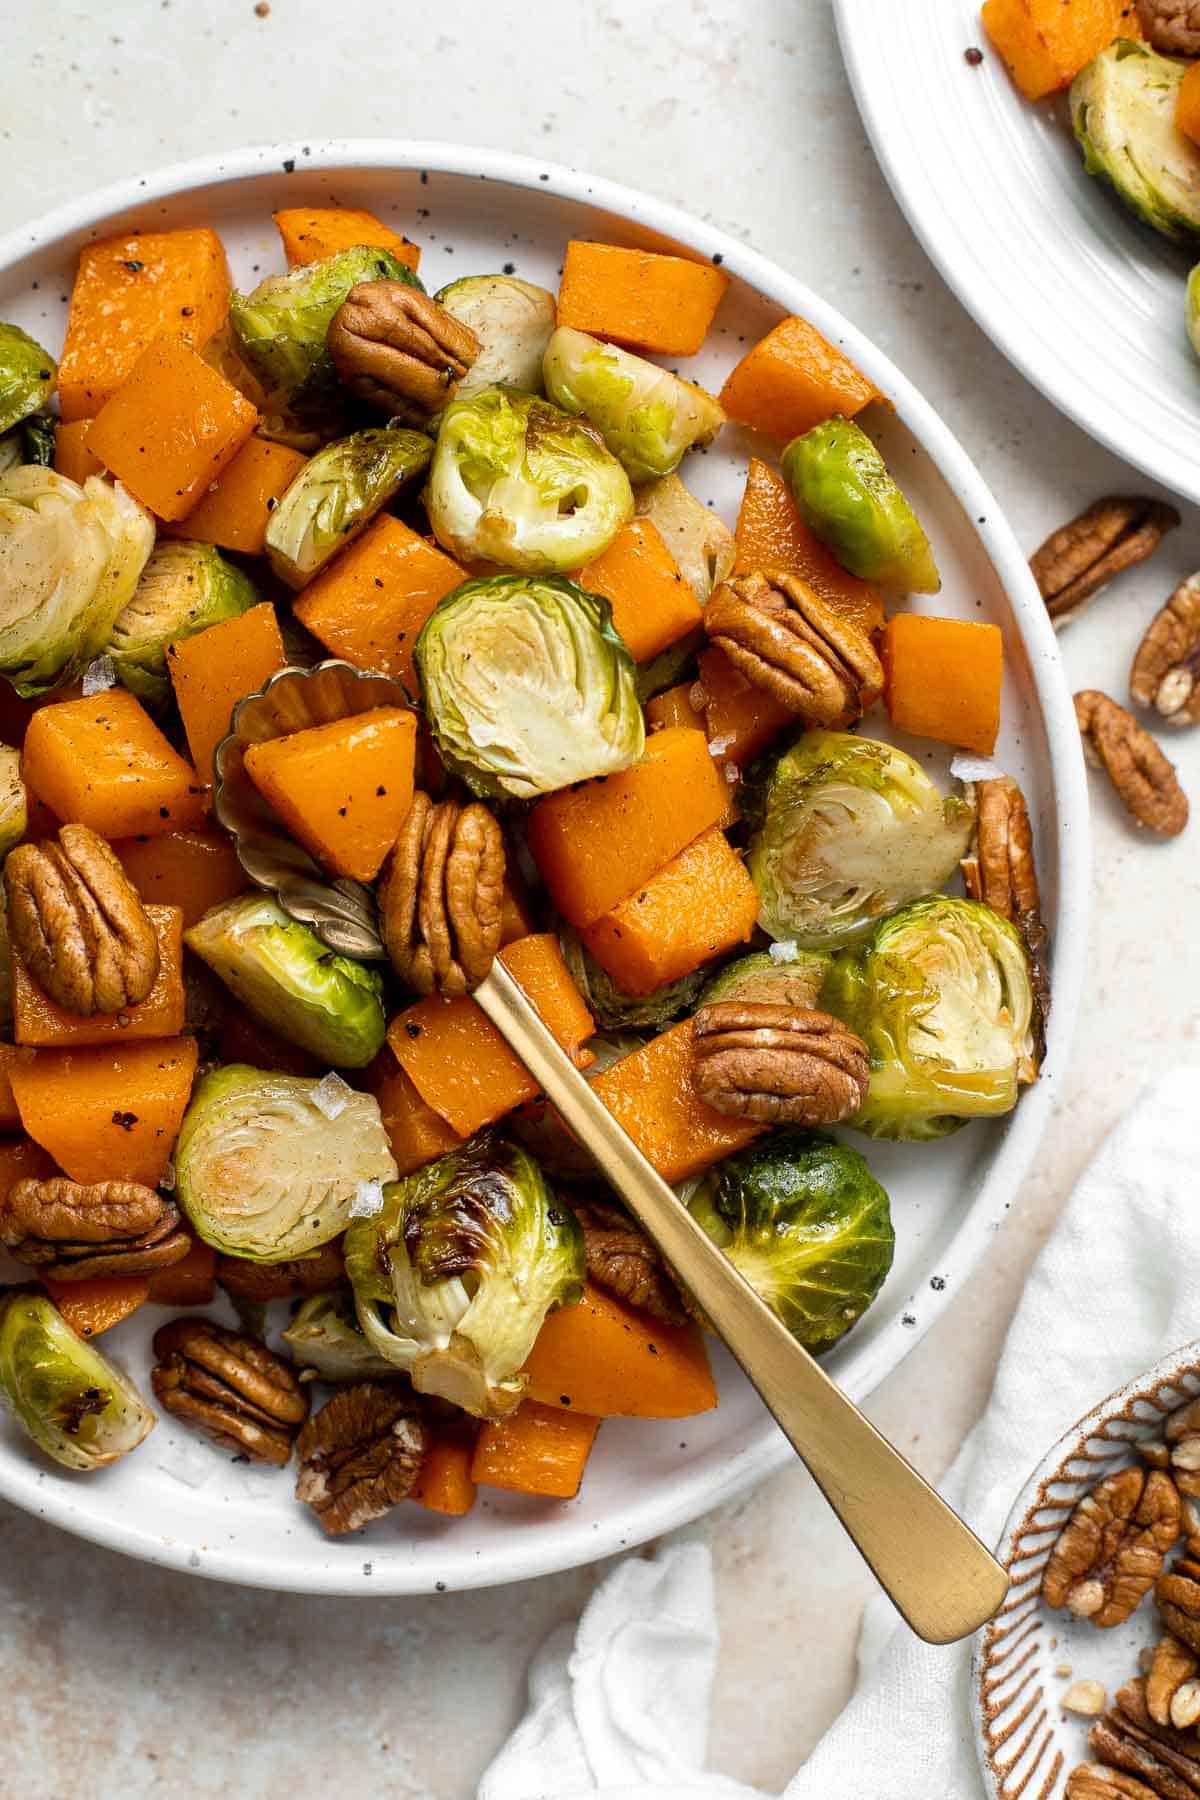
Ingredient Notes
To make this delicious Maple Roasted Brussels Sprouts and Butternut Squash, you will need the following ingredients (full measurements in recipe card below):
- brussels sprouts - if you're really in a pinch and don't have brussels sprouts on hand, you can substitute them for roughly chopped cabbage. It will be similar in flavor but you may have to adjust cooking time to make sure you don't overcook the cabbage.
- butternut squash - if you're not a fan of butternut squash, a similar hearty winter squash will work in its place. Acorn squash, buttercup squash, delicata squash, or even sweet potatoes will produce a similar result.
- olive oil - you can also use coconut oil or avocado oil.
- maple syrup - for the best flavor, try to use a natural maple syrup if you can find it. Many of the name-brand syrups contain large amounts of corn syrup or other artificial sweeteners which will change the taste. You can even substitute with honey.
- cinnamon
- salt and pepper
- pecans - nuts are optional but recommended! Instead of the pecans, you could try hazelnuts, macadamia nuts, walnuts or cashews.
You will also need measuring cups and spoons and a half sheet baking pan.
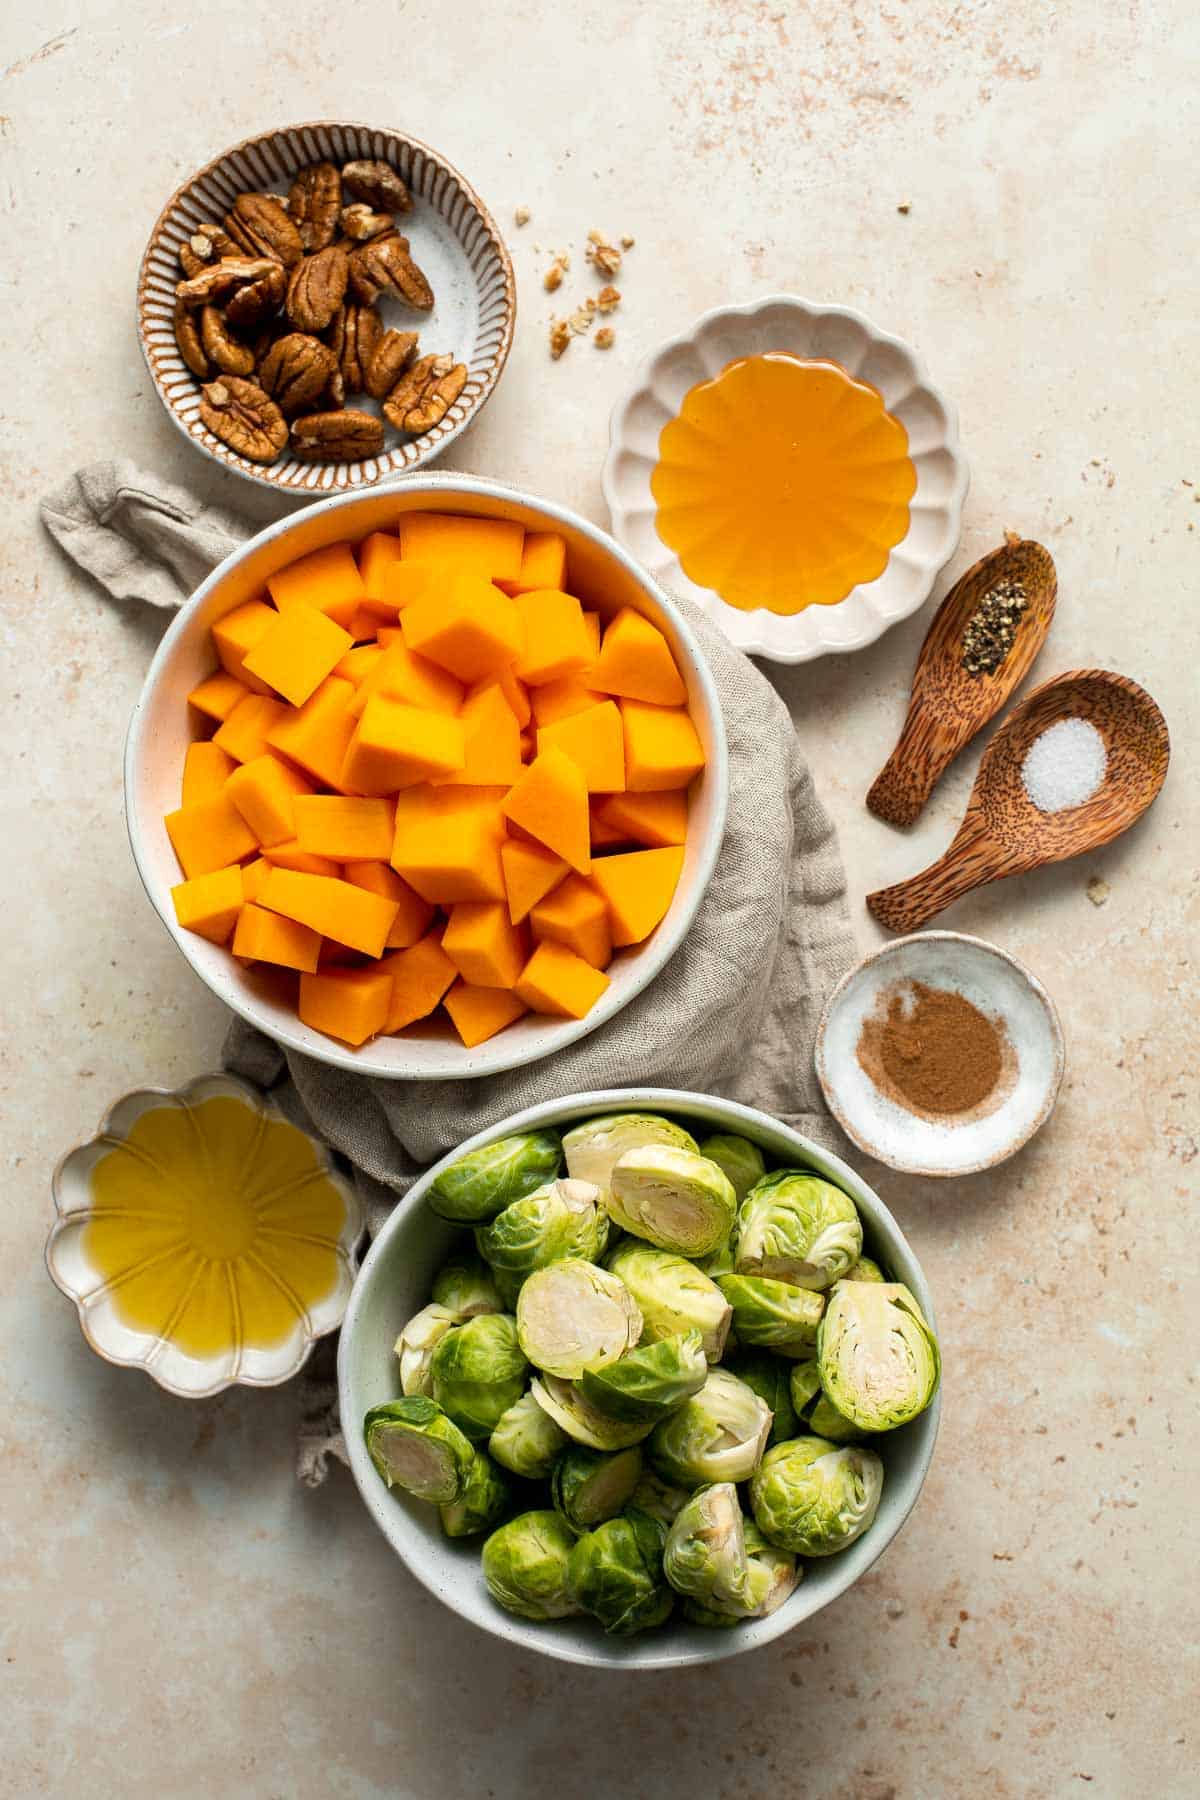
How to Make the Best Maple Roasted Brussels Sprouts and Butternut Squash
- Combine ingredients. Add brussels spouts and butternut squash cubes to a parchment paper-lined half sheet baking pan. Drizzle with olive oil and maple syrup. Sprinkle cinnamon, salt, and pepper on top. Toss until combined. Spread the vegetables evenly in a single layer.

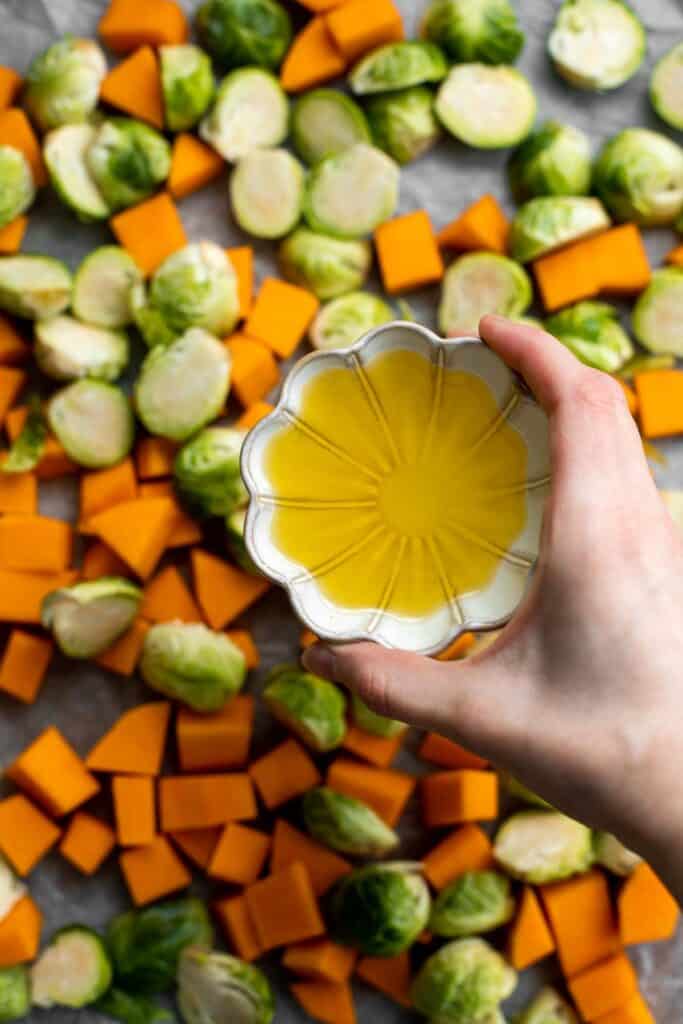
- Roast. Roast in a 425F preheated oven for 25 minutes, until vegetables are tender and edges are browned.
- Serve. Toss in pecans (if desired) and serve.
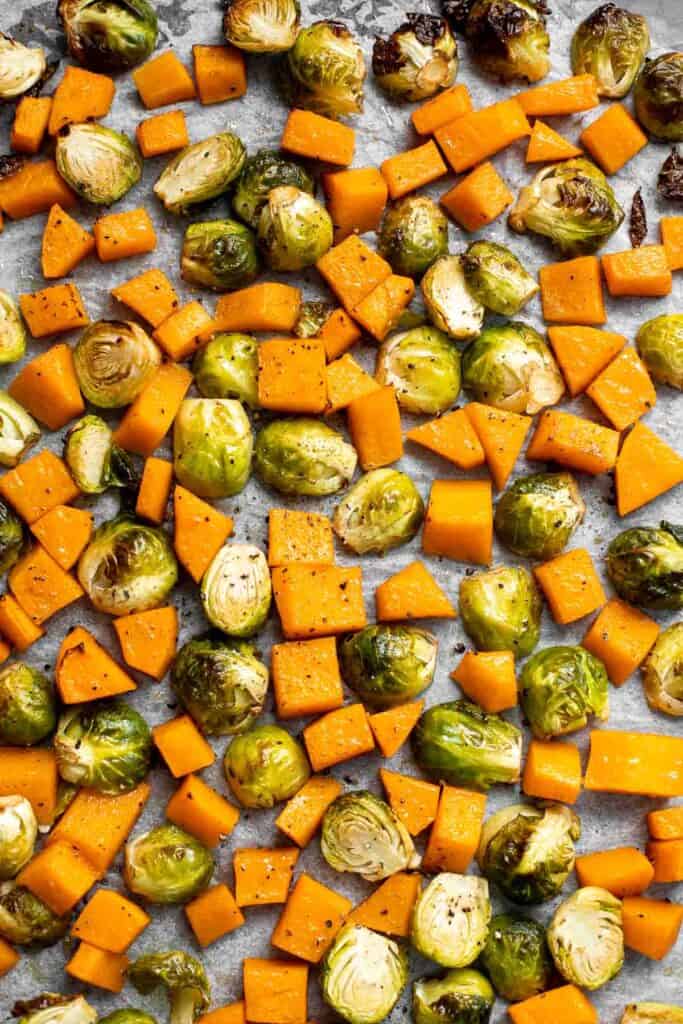
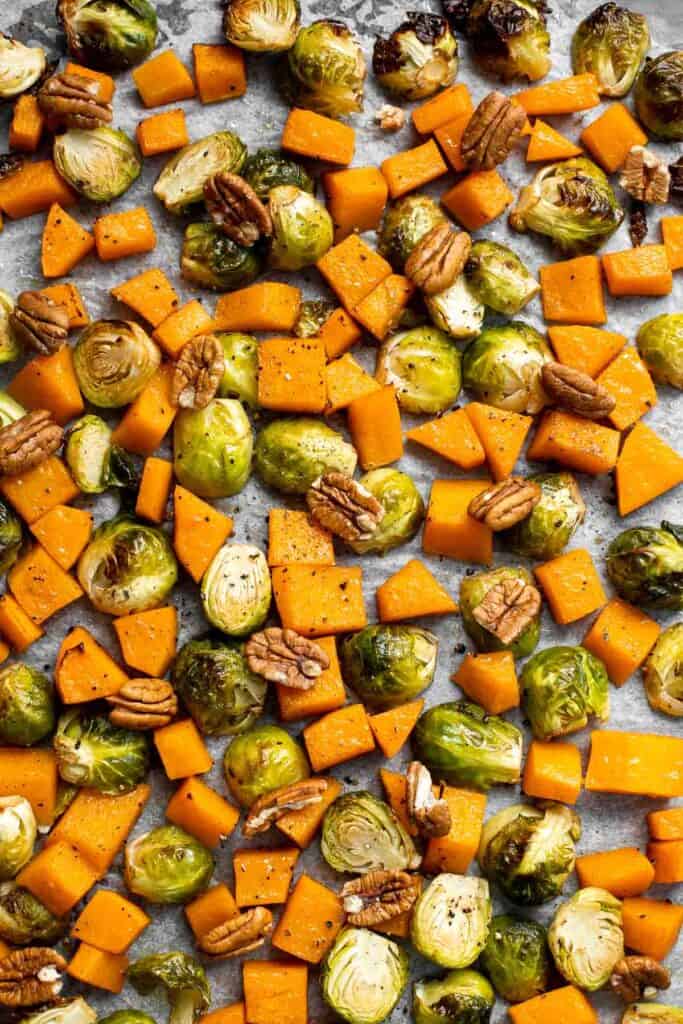
How to Serve
These roasted brussels sprouts and butternut squash are a classic side dish that is great for fall and winter gatherings like Thanksgiving, but also great for everyday meals. Just serve alongside roasted turkey, chicken, steak, tofu, or your protein of choice.
Some of my favorite fall dinners to serve with this are:
- Apple Cider Chicken
- Homemade Hamburger Helper
- Creamy Pesto Chicken
- Homemade Potato and Cheese Perogies
- Ground Beef Stuffed Peppers
- Indian Butter Chicken
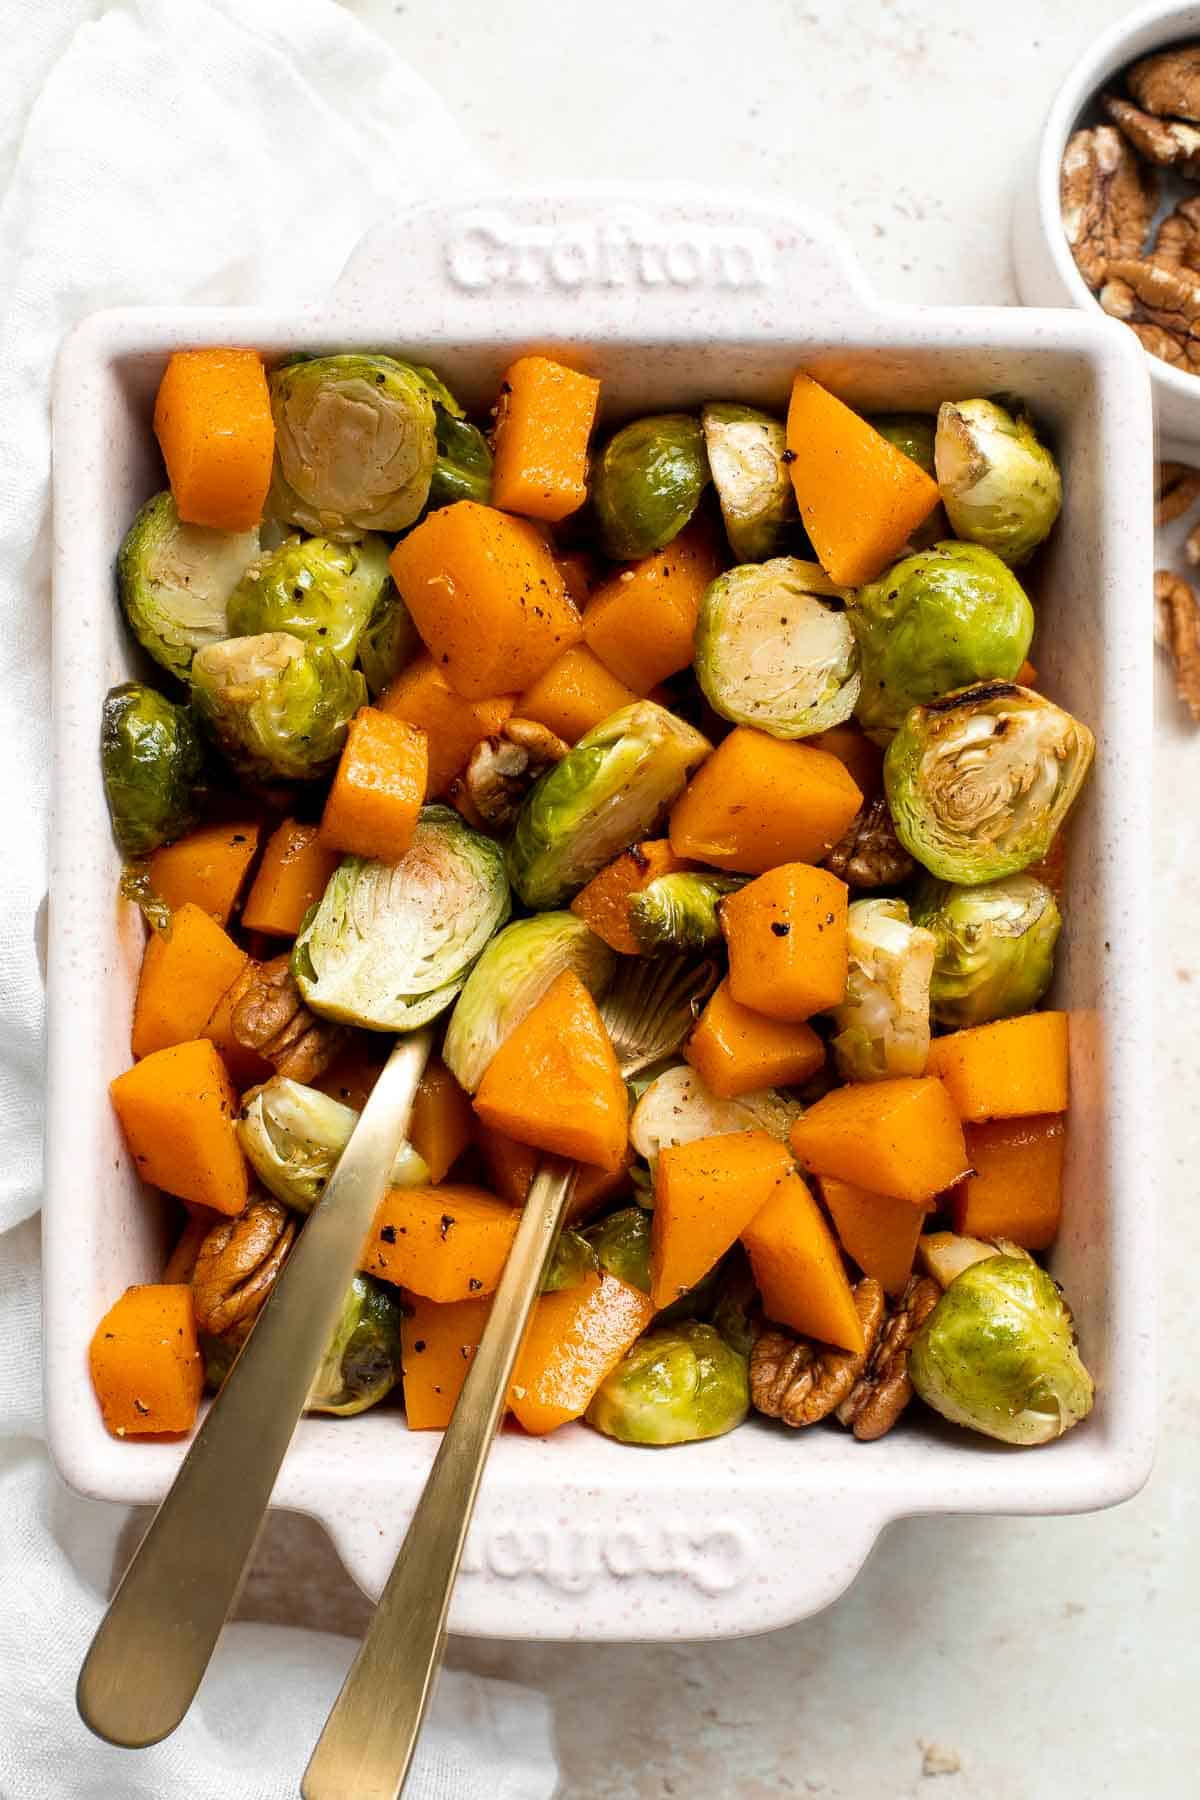
Recipe Tips and Tricks
- Cut vegetables ahead of time. Save yourself a bit of prep work (especially if you're whipping up a big holiday meal) by cutting the vegetables a day or two beforehand. Store them in the refrigerator in an airtight container and then use them as directed in the recipe.
- Make them crispy and more charred. If you would like it the vegetables to be a little more crispier, place under the broiler for a couple minutes. Keep a close eye on the broiler as things can burn fast in there.
- Thanksgiving side dish. If you are hosting the big event this year, this recipe has just made your life a little easier. The key to stress-free holiday entertaining is to prepare some dishes that take no time and no effort to make. I am talking about dishes that take under 30 minutes to make or dishes that can be made in one pan - like these veggies.
- Repurpose the leftovers. Leftover roasted vegetables make a great addition to omelettes, soups and stocks, quiche, or homemade sauce reductions.
Storage and Freezing Instructions
How to Store
Place leftover roasted vegetables in an airtight container and refrigerate for up to 4 days. Reheat in a 425F preheated oven for 10-15 minutes until warm and crisp, or in the air fryer at 400F for 10 minutes until warm.
How to Freeze
Spread leftover vegetables on a lined baking sheet and freeze for 2 hours, then transfer into a freezer bag and freeze for up to 3 months. You can reheat them straight out of the freezer (no need to thaw) by sautéing until heated through and crisped up. You can also try reheated in a 450℉ preheated oven for 10-15 minutes, or in the air fryer at 400F for 10-15 minutes.
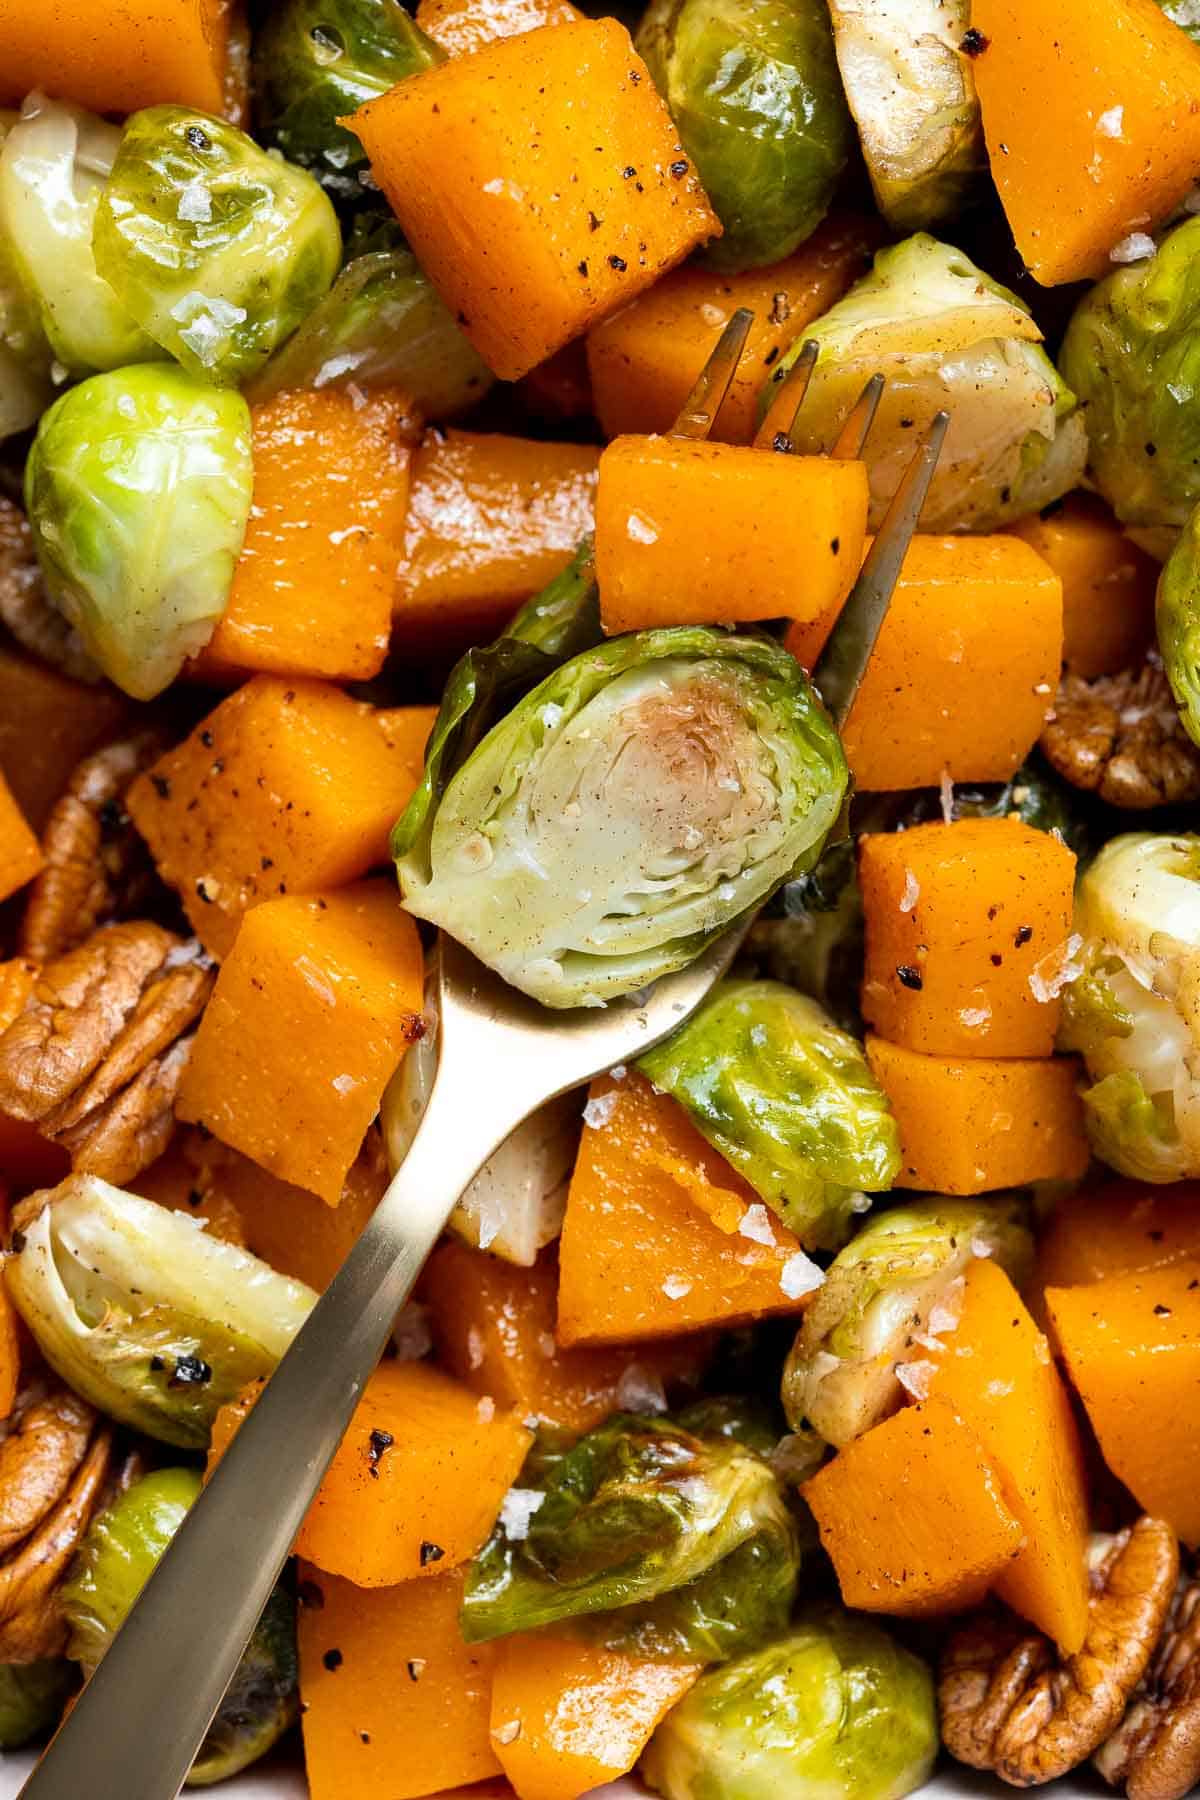
More Fall Side Dishes
- 50 Best Thanksgiving Side Dishes
- Roasted Butternut Squash
- Brussels Sprouts with Bacon
- Creamed Corn
- Green Beans Almondine
- Honey Balsamic Brussels Sprouts
Tried this recipe?
I'd love to hear what you think! Leave a comment and rating below to share your feedback. Your reviews help others discover this recipe and help me keep creating more free recipes for you. Snap a photo and tag me on social media @aheadofthyme too.

Creamed Corn
Homemade Creamed Corn is creamy, delicious, and simple. It's quick and easy to make at home and so much better than store-bought canned creamed corn. Made with mild and naturally sweet corn smothered in a creamy sauce made from scratch, this flavorful side dish is fresh in the summer but comforting in the fall.
Learn how to make creamed corn from scratch with our step-by-step guide below and serve it any time of the year - as a summer side dish at a BBQ or cookout, or in the fall and winter months as a Thanksgiving side dish.
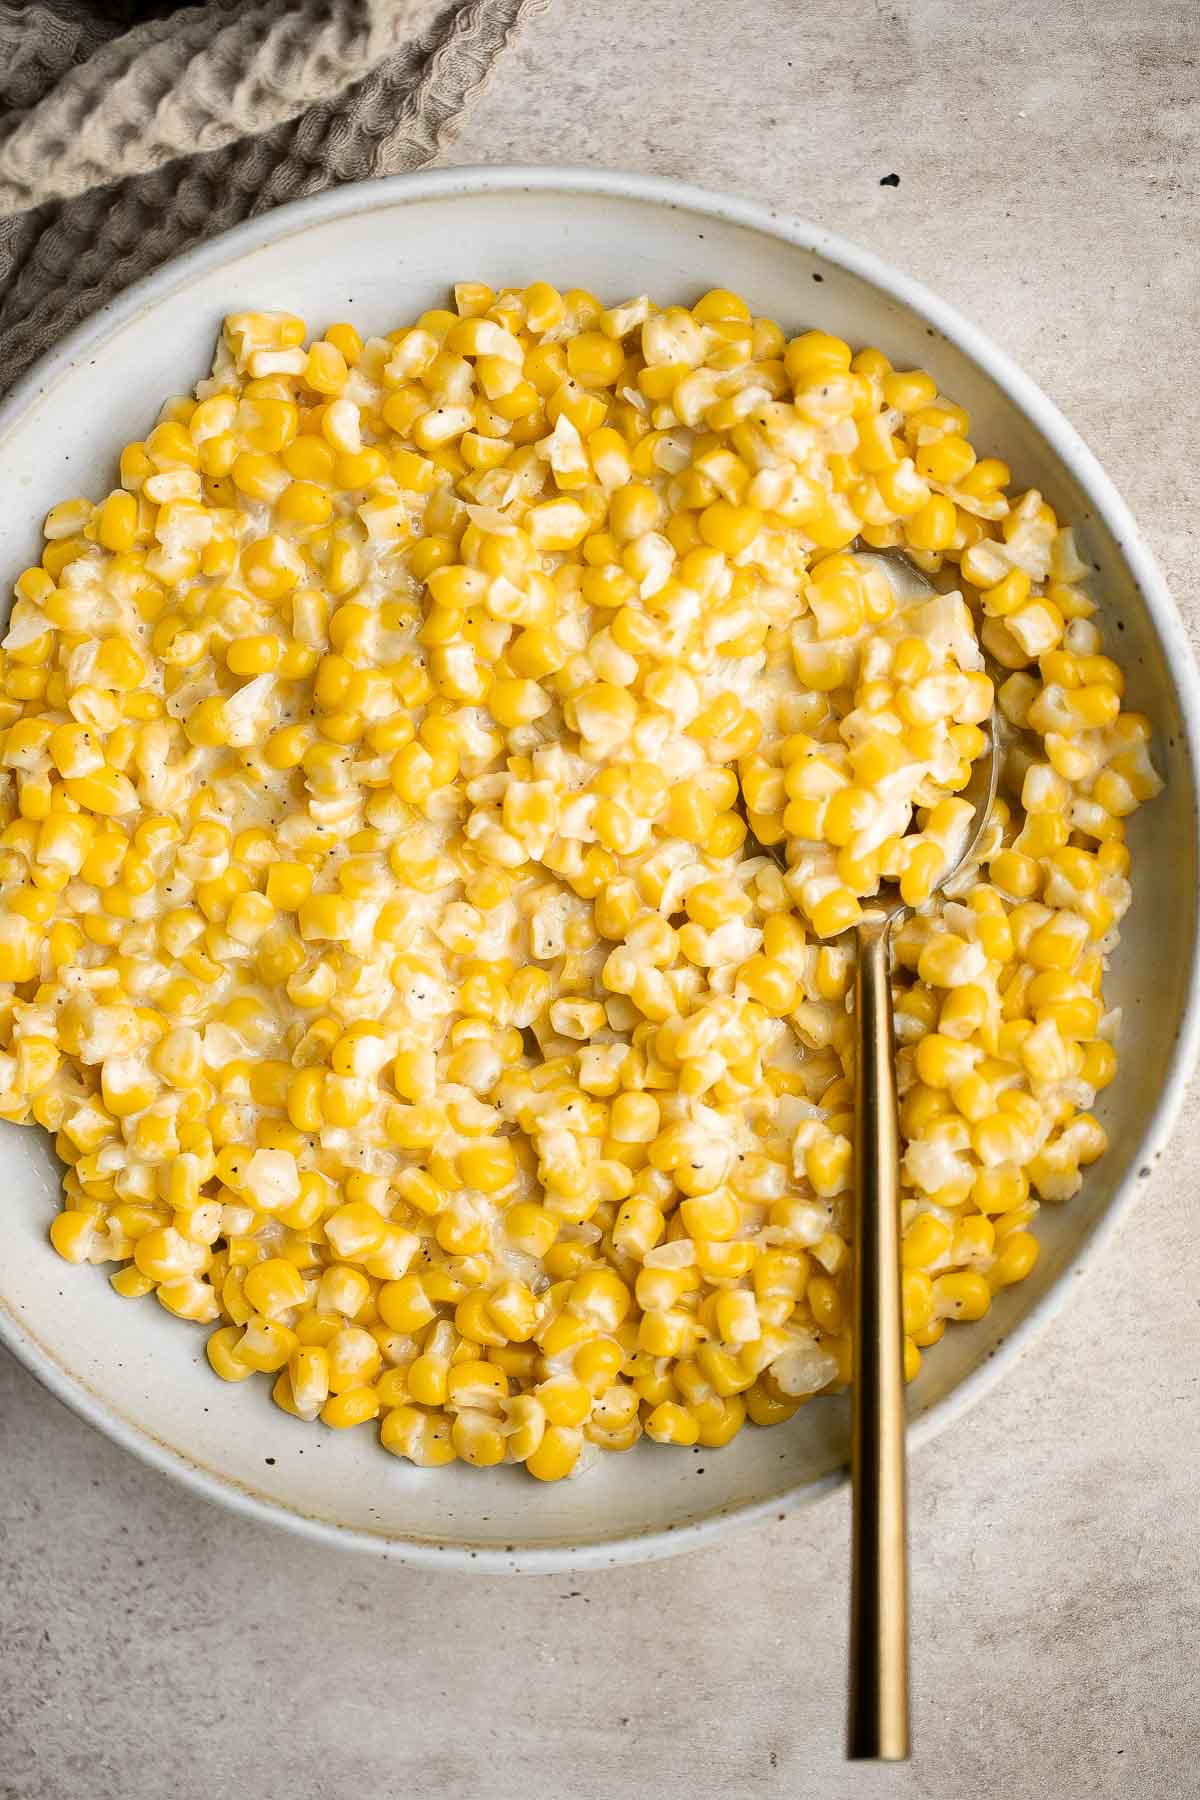
Why You'll Love This Creamed Corn
- A quick and simple veggie side. This is a quick, easy, 20-minute side dish that you can easily toss together with common ingredients while the main course is cooking - or task one of your junior sous chefs with it for even more efficient preparation.
- Make it in the summer or winter. Creamed corn is the perfect recipe to make using corn at the end of the summer season as we venture into the shorter, colder months, or to take advantage of the small hoard of canned corn kernels we all eventually end up with in our pantry in the fall and winter months.
- Great for holidays. Creamed corn is possibly the most under-appreciated side dish ever - especially when compared to other popular sides in the fall lineup. This creamed corn recipe is sure to change that. Serve this classic side dish at holiday gatherings including Thanksgiving and Christmas. It's a stress-free side that you can quickly prepare while the turkey is roasting in the oven.
- Easy to modify for dietary needs. Creamed corn (or at least this version of it) is already naturally gluten-free, but it can also be made dairy free and vegan easily with just two ingredient swaps. Keep reading for details!

Ingredient Notes
To make this easy Creamed Corn, you will need the following ingredients (full measurements in recipe card below):
- butter - if you or a family member are sensitive (or allergic) to dairy, you can use a non-dairy butter alternative in place of the butter. You can also try olive or avocado oil, but it may affect the texture or taste of the final dish.
- onion
- corn kernels - we used frozen corn, but you can also use canned whole kernel corn or fresh. If using canned, be sure to rinse and drain the corn first. You can also use fresh corn kernels sliced off of fresh cooked corn on the cob.
- heavy cream - swap this for a plant-based heavy cream if you need a dairy-free or vegan option.
- salt and pepper
You will also need measuring cups and spoons and a large skillet.

How to Make the Best Creamed Corn
- Sauté aromatics. In a large skillet, melt butter over medium-high heat until bubbly, about 2 minutes. Add onion and sauté until tender, about 2 minutes.
- Add corn. Next, add corn kernels and cook until softened, about 3-4 minutes.
- Add cream. Add cream, salt, and pepper and bring to boil. Stir constantly and simmer over medium heat until creamy and thickened to a desired consistency, about 5-7 minutes. Serve warm.

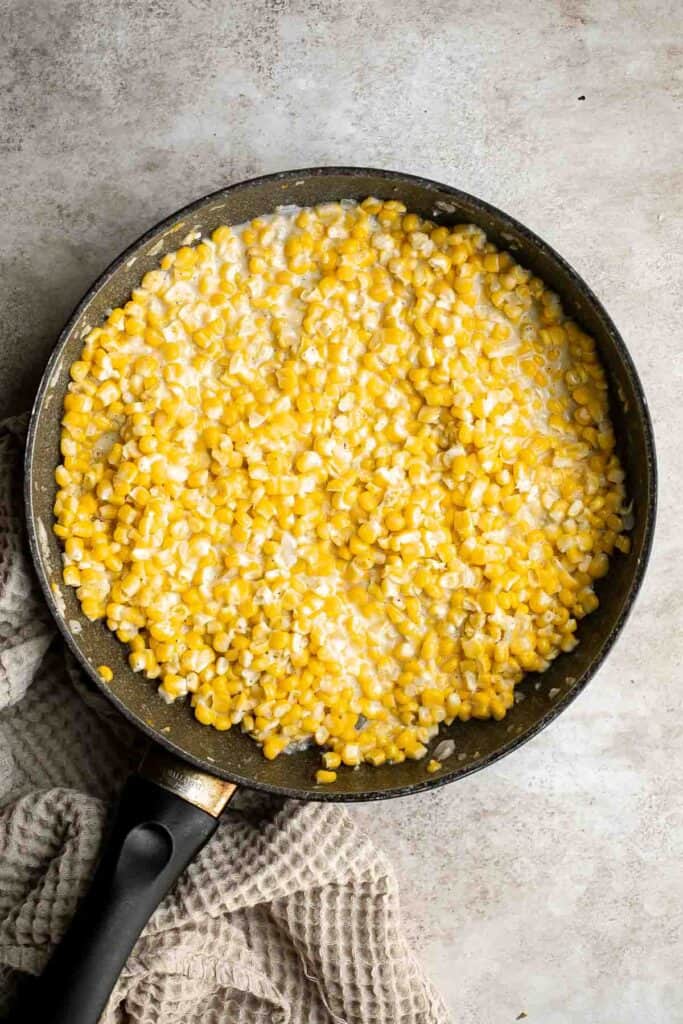
How to Serve
This Creamed Corn is a classic Thanksgiving side dish that you can serve all season long. Some of my other favorite holiday sides that you can serve at a holiday dinner are:
- Green Bean Casserole
- Vegetarian Cornbread Stuffing
- Mashed Potatoes
- Creamed Spinach
- Roasted Butternut Squash
- Sweet Potato Casserole with Pecans
Storage and Freezing Instructions
How to Store
Transfer any leftover creamed corn (once cooled to room temperature) to an airtight container and store in the refrigerator for 3-4 days. Reheat in the microwave or on the stovetop over medium-low heat until warmed through.
How to Freeze
To freeze creamed corn, place it in a freezer-safe container or a sealed heavy duty freezer bag and freeze for up to three months. Make sure to leave some room in the container to account for expansion. When ready to serve, thaw the creamed corn in the refrigerator overnight and then reheat in the microwave or on the stovetop.
Recipe Tips and Tricks
- Make it extra creamy. Nobody likes watery creamed corn - which is why canned pre-made creamed corn often gets such a bad reputation. If the creamed corn starts to look a bit too thin, add a little more cream or a tablespoon of cornstarch to thicken things up and make it creamier.
- Add garnishes. If you want to add more interest and increase the flavor in this creamed corn, try topping it with chopped fresh herbs, a drizzle of balsamic vinegar, or a sprinkle of toasted breadcrumbs.
- Char it! Pop your finished creamed corn under the broiler for a few minutes to add the perfect touch of char to the top and a deep, delicious roasted flavor for the perfect creamy corn dish.
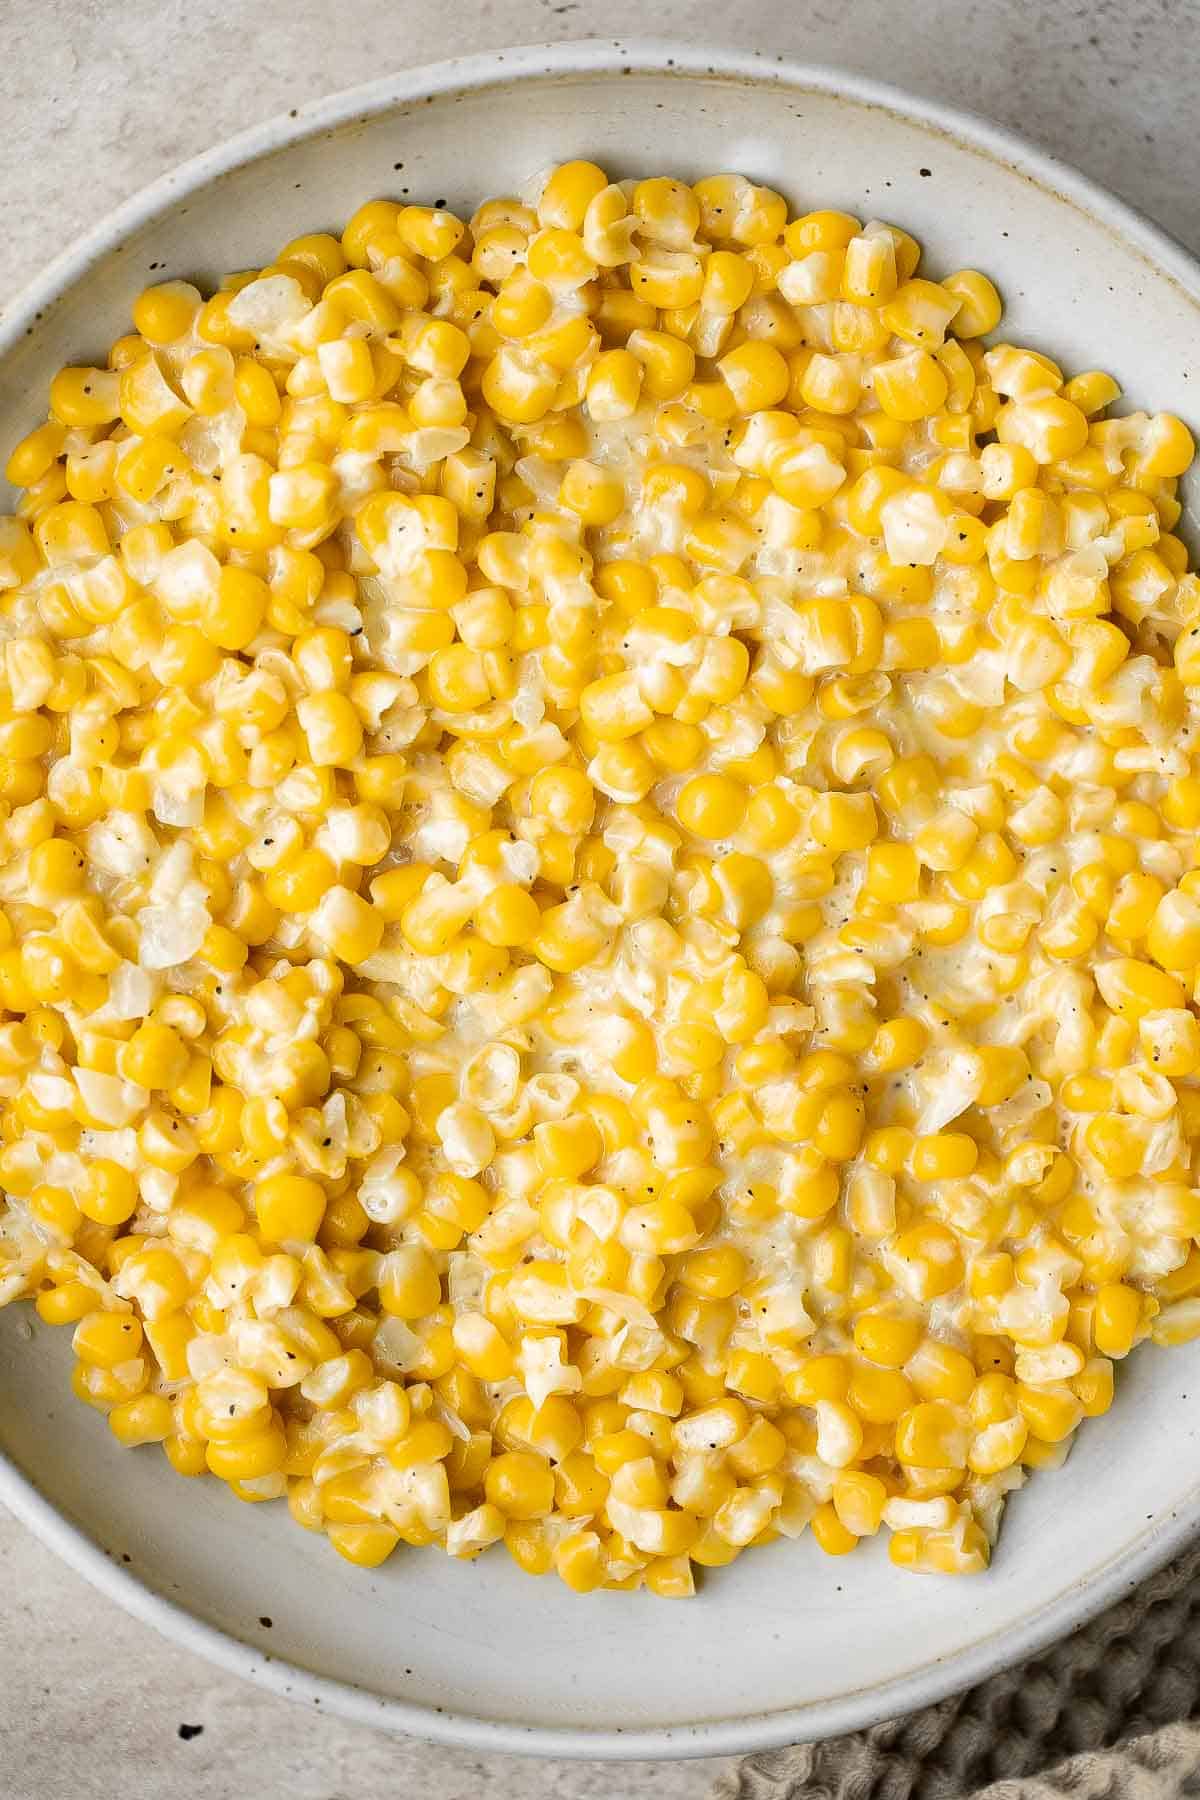
More Corn Recipes
- Corn Casserole
- Creamy Mexican Corn Soup
- Cornbread Muffins
- Oven-Roasted Corn on the Cob
- Mexican Street Corn Salad
- Potato Corn Chowder
Tried this recipe?
I'd love to hear what you think! Leave a comment and rating below to share your feedback. Your reviews help others discover this recipe and help me keep creating more free recipes for you. Snap a photo and tag me on social media @aheadofthyme too.

Carrot Pumpkin Soup
Carrot Pumpkin Soup is wholesome, nutritious, and delicious. There's nothing more comforting in the fall than a creamy bowl of soup. It's quick and easy to make too - perfect to feed the family on lazy weeknights where you just want to put on a cozy sweater and turn on a movie.
It's so easy that once you've gathered up all the ingredients for this one pot soup, there are really only four main steps: chop, saute, simmer, and blend. That's as complicated as it gets. So get this pumpkin soup with carrots on the stove for your best autumn harvest dinner yet. Flavorful, healthy, and so good.

Why You'll Love this Carrot Pumpkin Soup
- Fall comfort food. Fall is the season of pumpkin patch trips and cozy soups - and this recipe combines the best of both worlds! This creamy carrot pumpkin soup is a tried-and-true fall favorite. It's hearty, healthy, and easy to make - a genuine triple threat.
It's naturally vegetarian. This tantalizing fall pumpkin soup happens to be naturally vegetarian! Because of that, it's also easy to make it fully vegan by swapping a single ingredient. - It's potluck friendly. This carrot pumpkin soup is easy to transfer to a crockpot and take to your next work or family potluck! Serve with dinner rolls or fancy crackers and your coworkers will be begging you to bring it to every function thereafter.
- It's easy to make. Even though it's packed with complex, restaurant-quality fall flavors, this soup is incredibly beginner-friendly and it takes less than less than an hour from start to finish. You simply cook everything in a pot, then just pulse it all together to get a nice creamy puree. Perfect for a lazy dinner on busy weeknights.
- Well-seasoned and loaded with flavor. For the spices in this soup, I used a combination of black pepper, Herbes de Provence and a pinch of chilli powder (if you are not afraid of a little heat). Spices brighten up the sweet and delicate flavours of the carrot and pumpkin and actually add a lot of health benefits including big anti-inflammatory benefits.

Ingredient Notes
Bursting with flavour, this comforting, vegetarian soup comes alive with hearty pumpkin, sweet carrots and a little kick of garlic. The pumpkin and carrot combo creates such an incredible flavour that complements the unusual mix of spices, which brings the soup to a whole new level.
To make this quick and easy Carrot Pumpkin Soup, you will need the following ingredients (full measurements in recipe card below):
- olive oil - you can also use butter or avocado oil.
- onion + garlic - classic aromatics in almost every soup that add so much flavor.
- pumpkin
- parsley root - if you can't find parsley root in stores, try parsnips instead! They're pretty similar but you'll have to account for the size difference. The resulting soup will be slightly sweeter as well.
- carrots - you can use store bought carrots or some from your fall harvest. Just make sure to rinse them thoroughly before using.
- vegetable stock - using vegetable stock will keep the soup vegetarian, but you can also use beef stock, chicken stock, or a bone broth if you prefer.
- herbs de Provence - Herbs de Provence is a French herb blend consisting of dried rosemary, lavender, basil, thyme, tarragon, savory, marjoram, oregano and bay leaf. Some blends also include Italian parsley and fennel. If you can't find herbs de Provence but have some (or all) of the herbs mentioned, make your own blend!
- half and half - to make this soup vegan and dairy-free, just swap the half and half for a non-dairy version like coconut cream or an unsweetened dairy-free creamer.
- chili powder - this is optional but adds just the right amount of kick to the soup.
- salt and pepper
- optional toppings - top this soup with your favorite toppings such as a drizzle of cream, fresh herbs, and roasted sunflower seeds.
- most soft herbs like dill, parsley, basil, cilantro, mint, and tarragon make delicious and visually appealing edible garnishes!
- shelled sunflower seeds can be replaced with roasted pine nuts or roasted chopped walnuts.
You will also need measuring cups and spoons, a medium saucepan (or 4 quart Dutch oven), and an immersion blender or food processor.
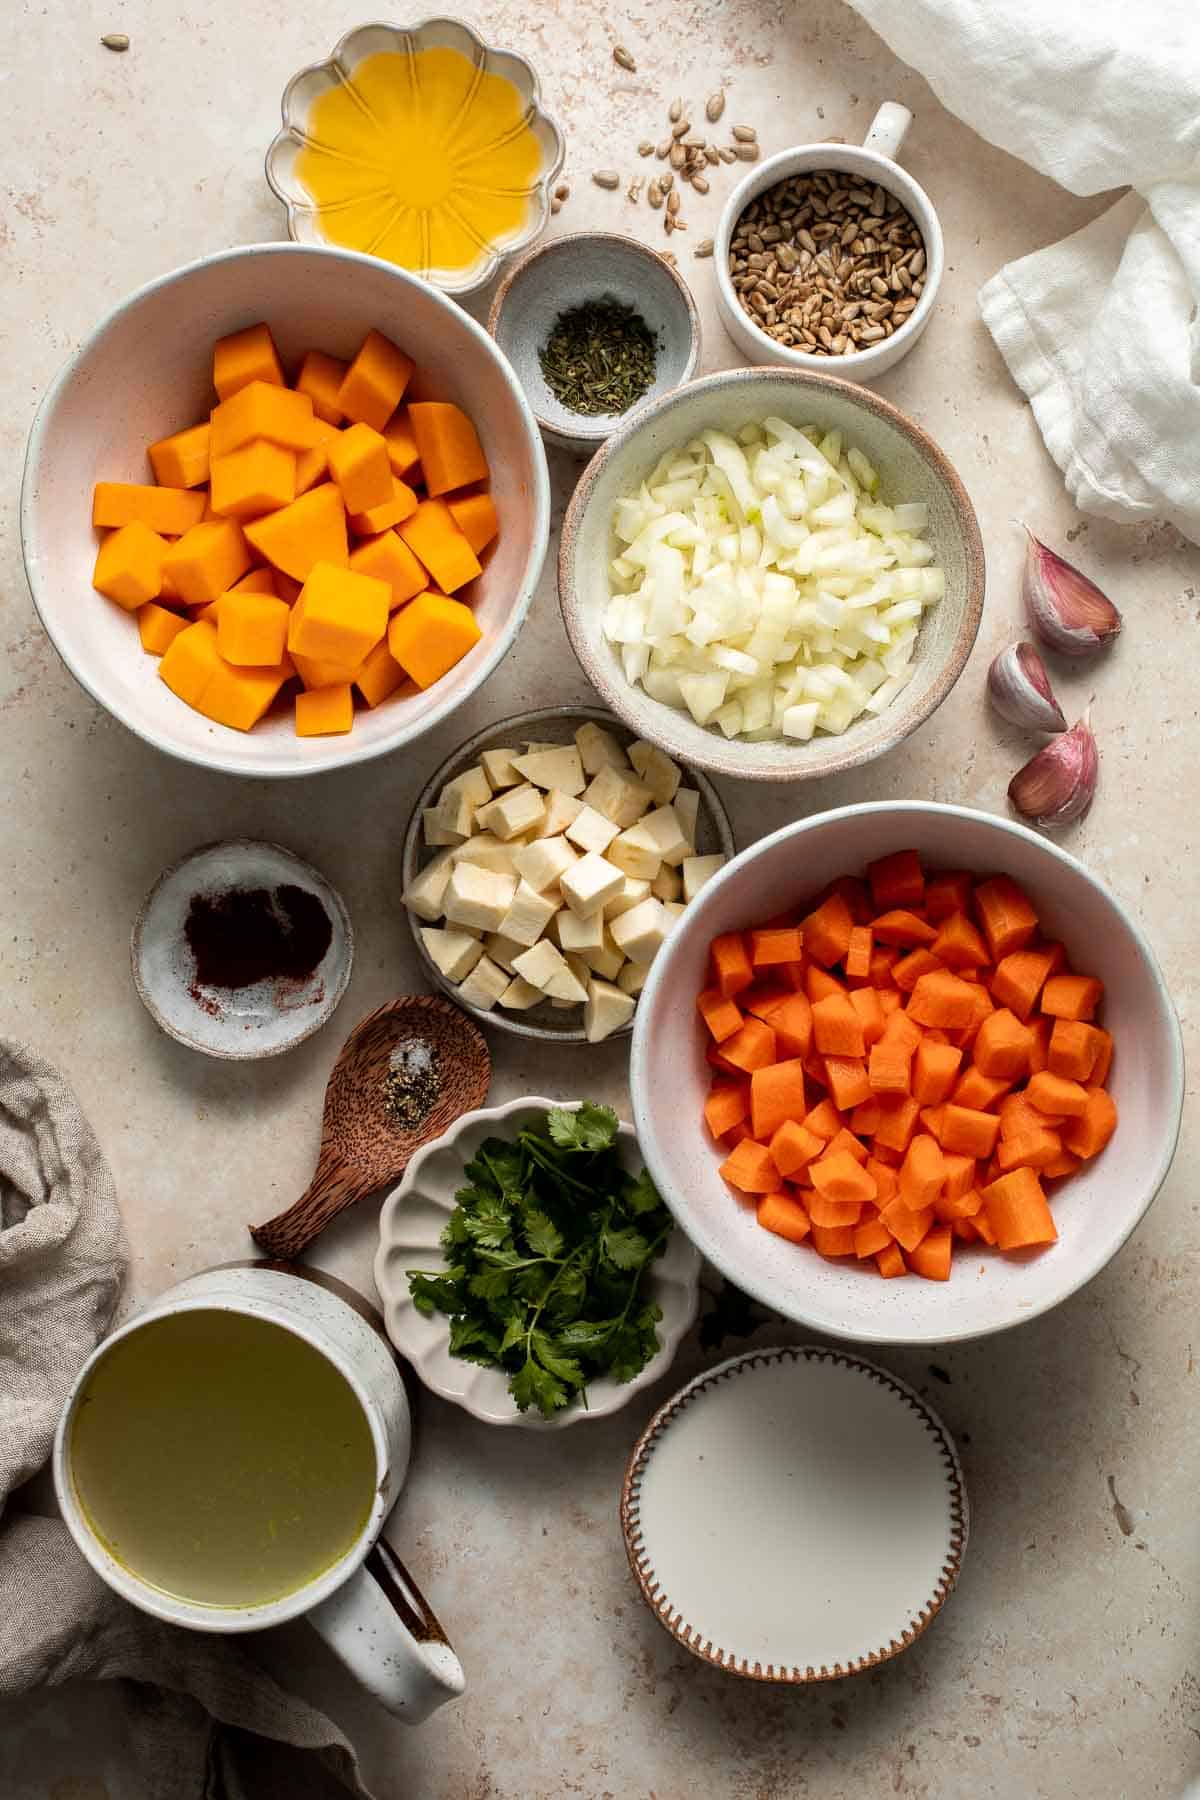
How to Make Carrot Pumpkin Soup
- Sauté vegetables. Heat olive oil in a saucepan (or 4 quart Dutch oven) over medium heat. Add onion and garlic and sauté for 2 to 3 minutes until soft and translucent. Then, add pumpkin, parsley root, and carrot, and cook for another 5 minutes, stirring occasionally.
- Add stock and simmer. Add vegetable stock and Herbes de Provence spice mix and stir together. Reduce heat to low, cover, and simmer for 25 minutes.
Sauté aromatics. Add vegetables. Cook. Add stock and herbs. Simmer.
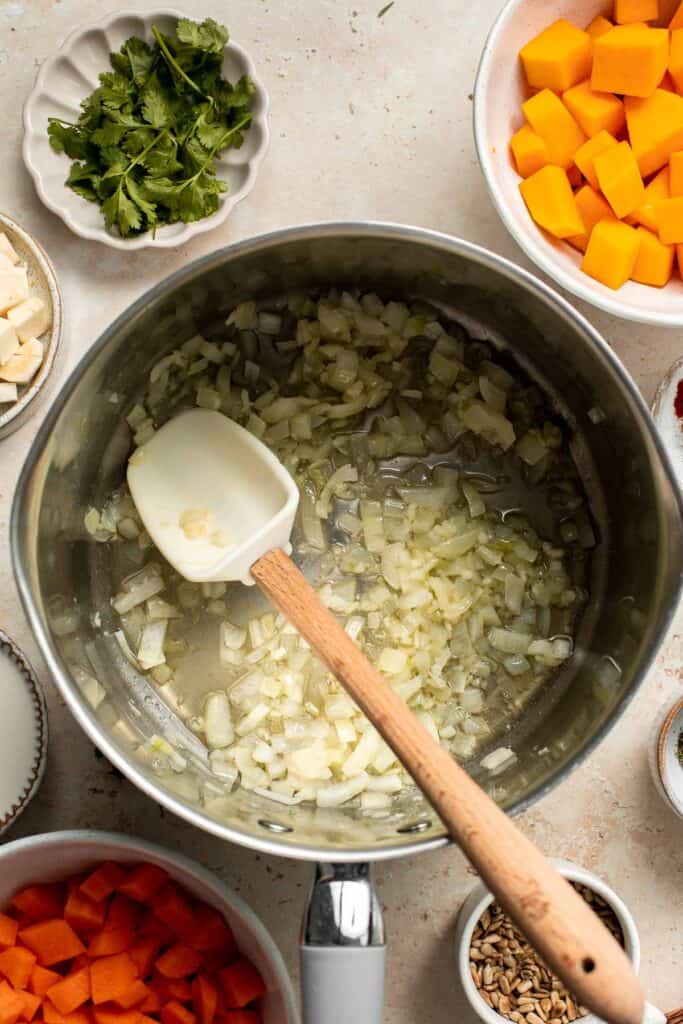
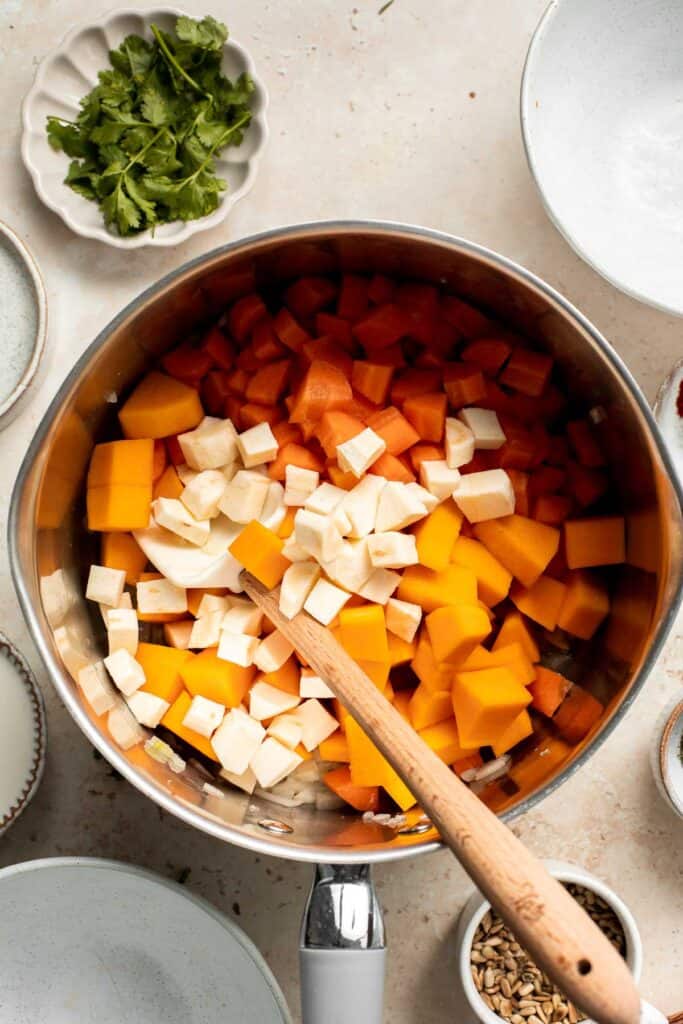
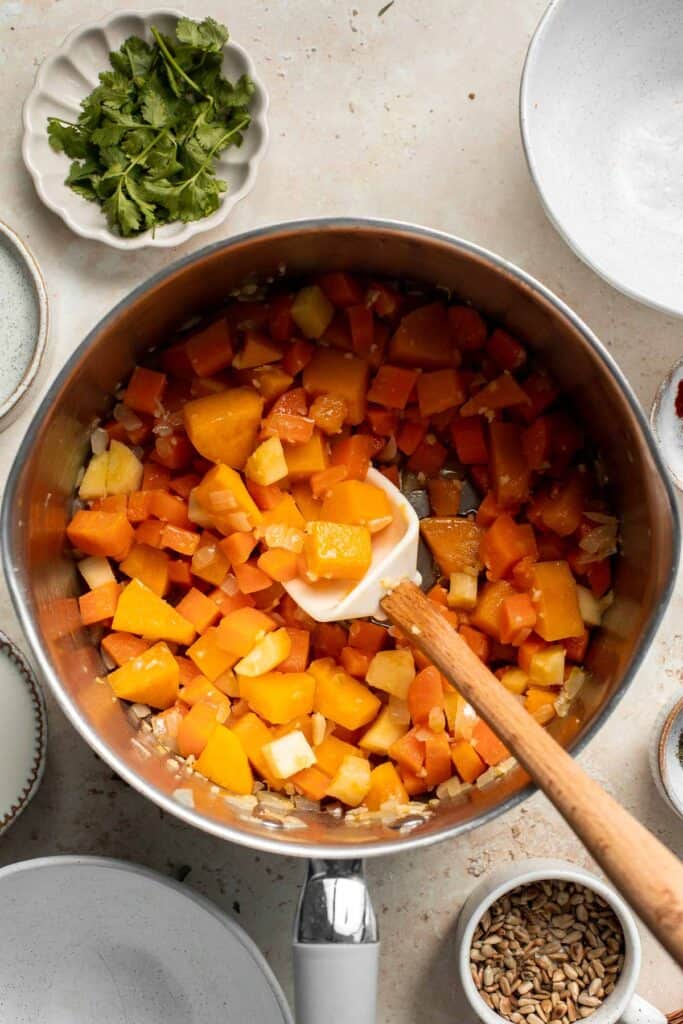
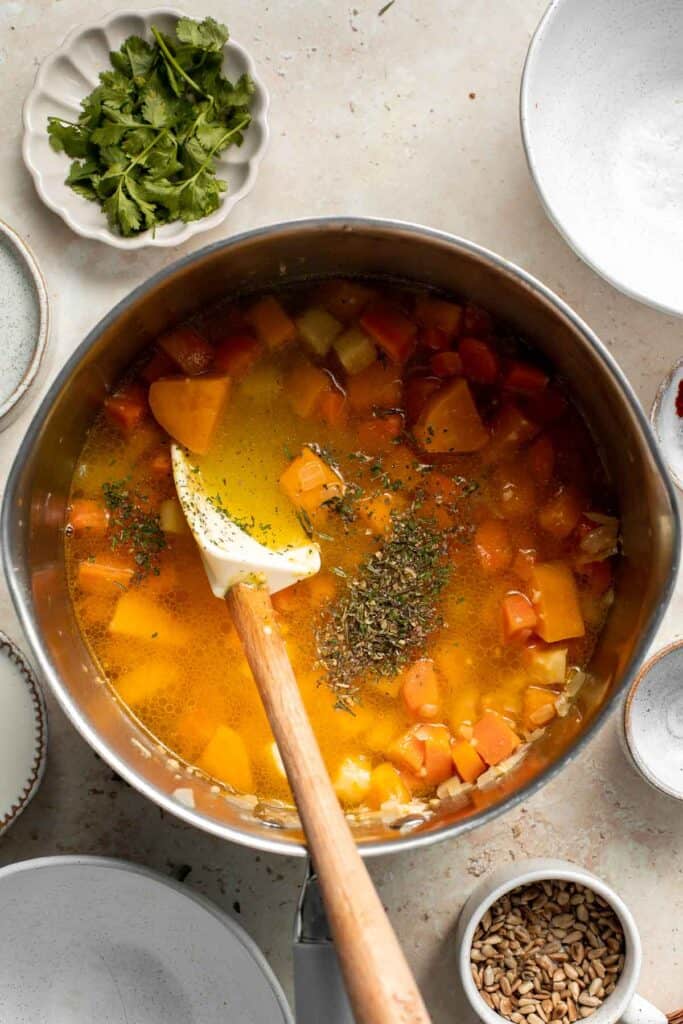
- Puree. Remove the soup from heat. Using an immersion blender or food processor, pulse until smooth.
- Stir in cream. Stir in cream and season to taste with salt and pepper. Add a pinch of powdered chilli (optional, for a little heat. Feel free to skip this step).
- Serve. Transfer to 6 serving bowls, decorate with a swirl of cream, some fresh herbs and sunflower seeds. Serve immediately.
Puree soup. Stir in cream.
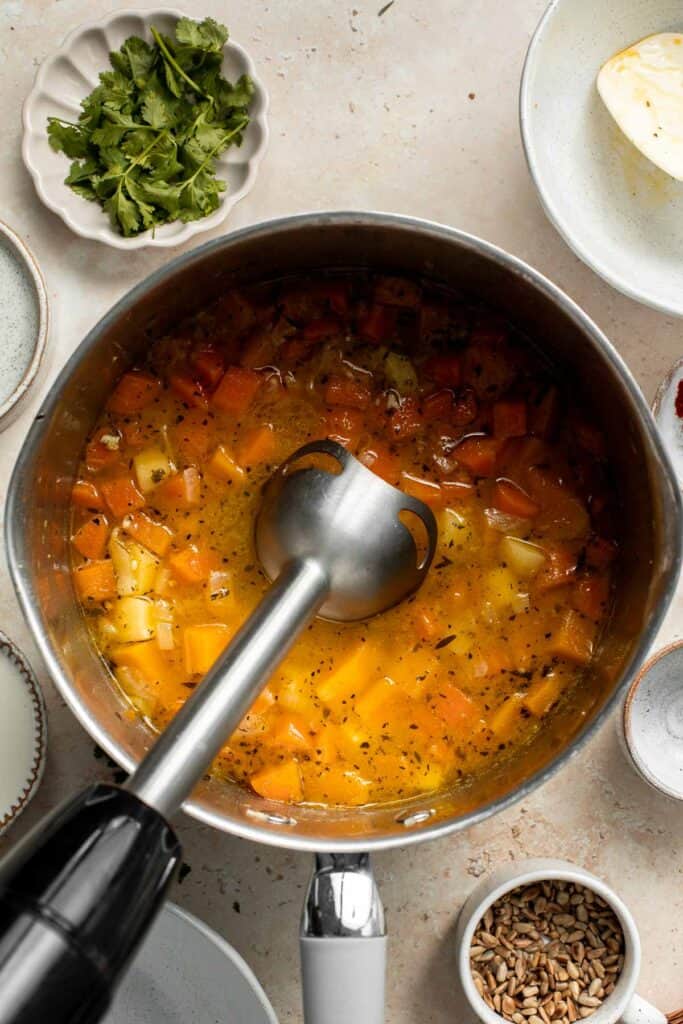
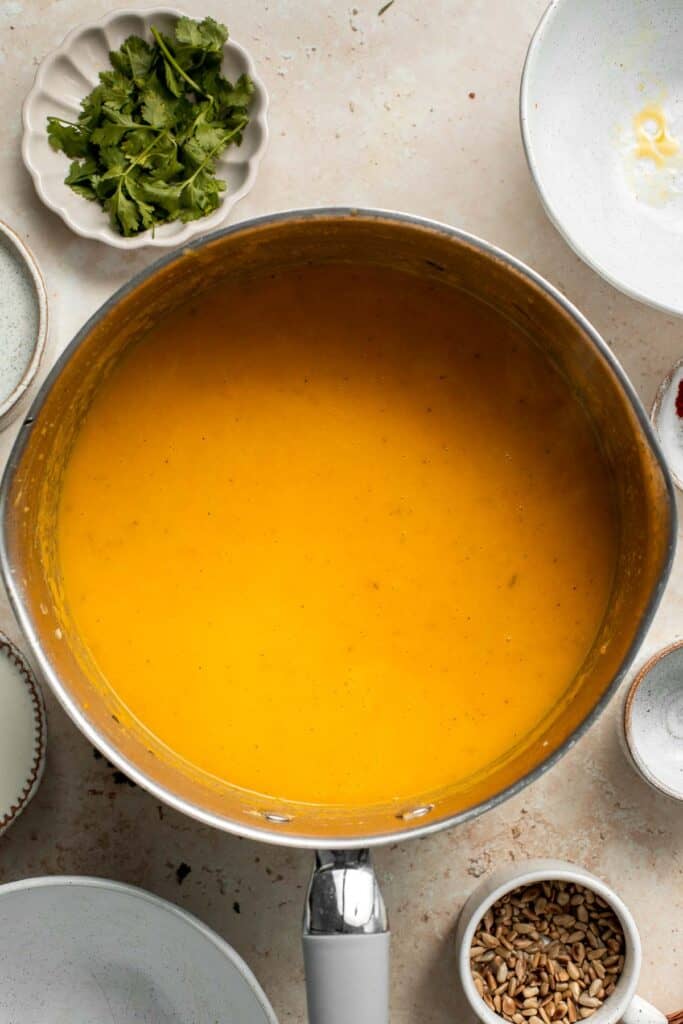
How to Serve
This pumpkin soup with carrots is delicious served on its own with your favorite toppings such as a swirl of cream, sunflower seeds, and fresh herbs.
Some classic fall soup sides that also pair well with it are:
- Butternut Squash Salad
- Pumpkin Cornbread
- Roasted Broccoli Grilled Cheese
- Sweet Kale Salad
- Garlic Knots
- Pigs in a Blanket
Storage and Freezing
How to Store
Transfer leftover pumpkin soup to an airtight container and store in the refrigerator for 3-4 days. Reheat on medium-low heat on the stovetop, stirring frequently, or in the microwave until warmed through.
How to Freeze
Once cooled to room temperature, place carrot pumpkin soup in a freezer-safe container or a freezer bag. Make sure to only fill only ¾ of the way to allow for expansion as the liquid freezes. Freeze for up to three months and thaw in the refrigerator overnight or use a warm water bath to release the frozen soup from the container.
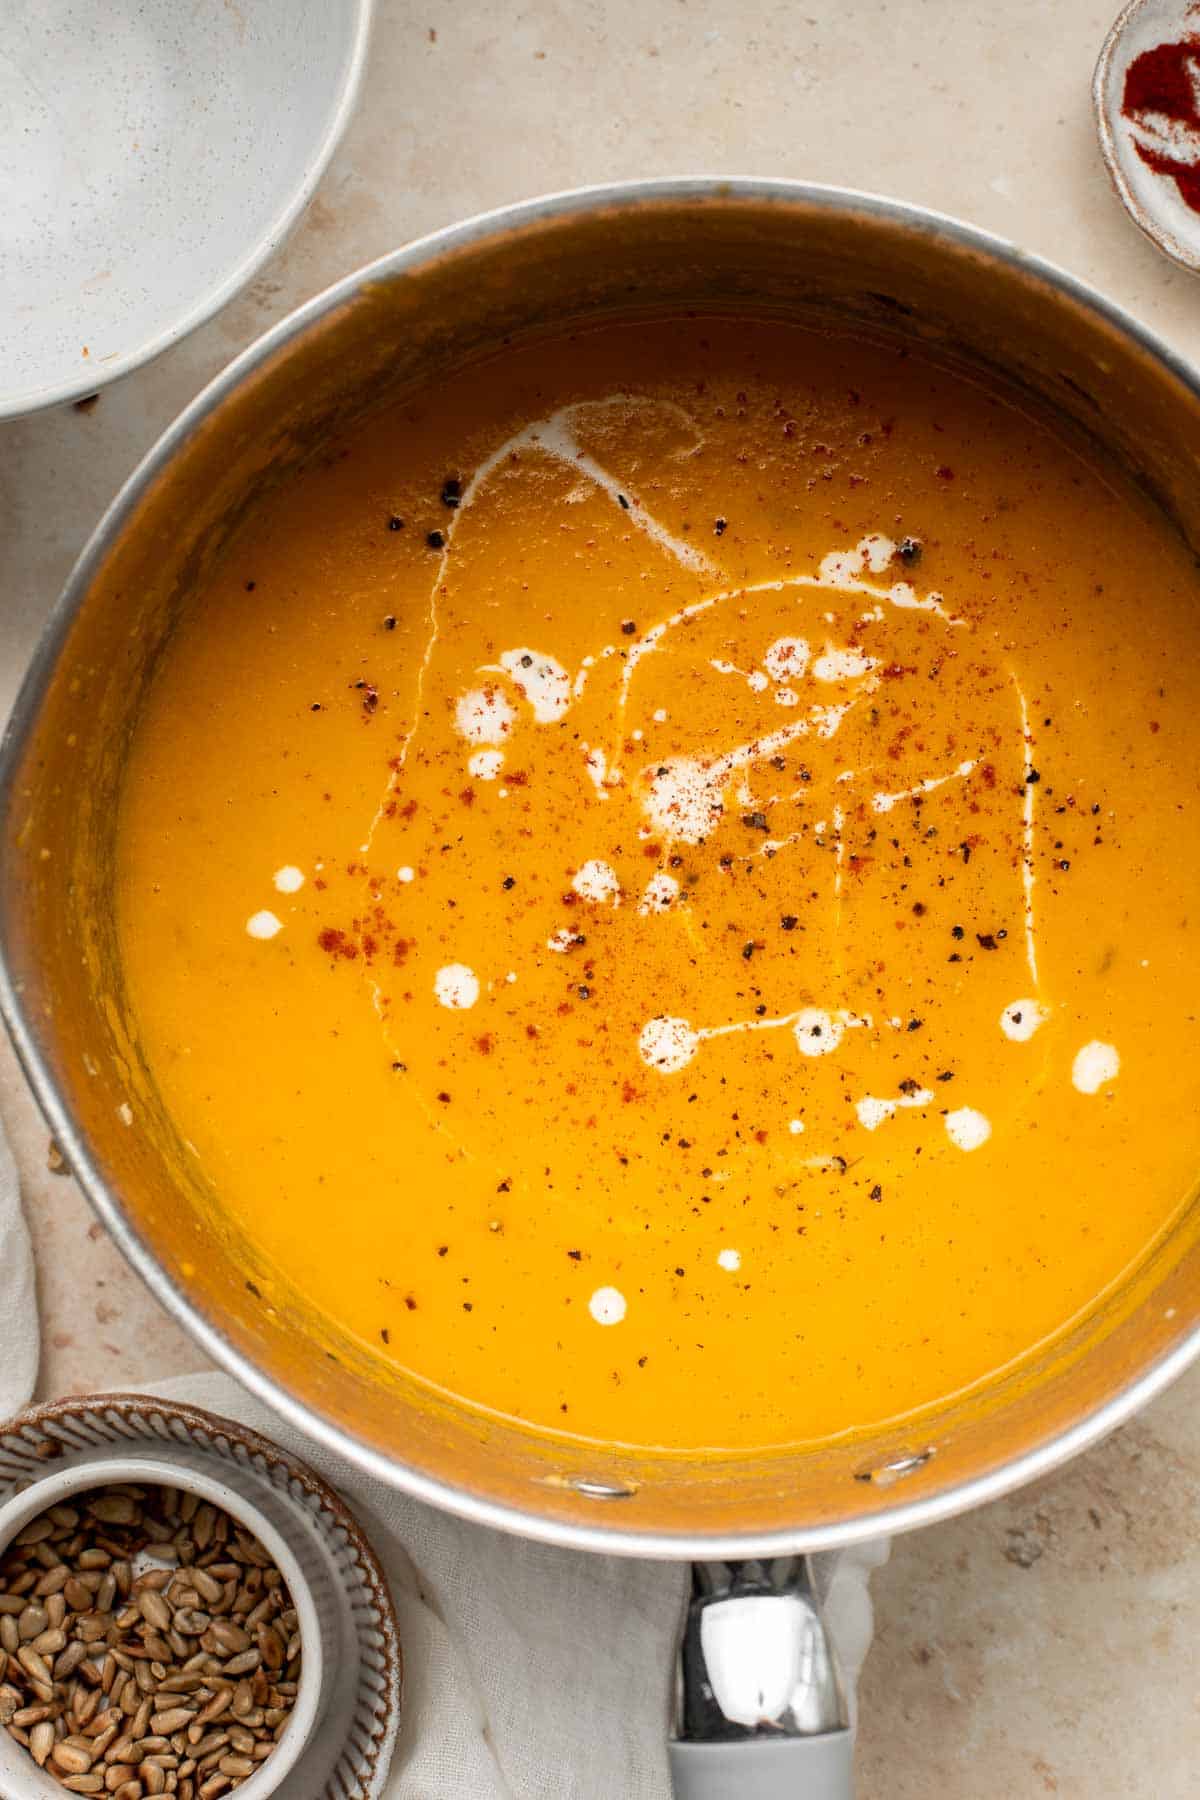
Recipe Tips and Tricks
- Use it for meal prep. Soup is one of the easiest things to meal prep - all you have to do is make a big batch, portion, and store or freeze! Bulk up your rainy day freezer meal stash and pull out this pumpkin soup with carrots whenever you need a break from making a meal from scratch.
- Make your own stock. If you have the time and know-how (it's actually really simple!), making the stock yourself adds an extra dimension of flavor. Plus, you control what goes into it, so you can make it fit your preferences right down to the number of garlic cloves included.
- Reuse leftovers in creative ways. Leftover soup is sometimes hard to use in time without freezing, but if you can think up new ways to use it, the leftovers will quickly dwindle. You can use leftover carrot pumpkin soup to make dressings, marinades, sauces, dips, and more!
More Soup Recipes
- 60 Best Soup Recipes
- Coconut Curry Pumpkin Soup
- Roasted Carrot and Ginger Soup
- Minestrone Soup
- Broccoli Cheese Soup
- Roasted Butternut Squash Soup
Tried this recipe?
I'd love to hear what you think! Leave a comment and rating below to share your feedback. Your reviews help others discover this recipe and help me keep creating more free recipes for you. Snap a photo and tag me on social media @aheadofthyme too.

Pumpkin Mousse
This rich, creamy Pumpkin Mousse is a fall dessert favorite. It's beginner-friendly and requires little experience to whip up. Make this holiday mousse with a little time and a few common ingredients to create pumpkin spiced perfection - and no baking required!
In fact, you can whip up this delicious dessert in only 15 minutes of prep (plus two hours of chill time) and have it ready to go the moment you're ready for it. It's easy to make ahead and freezer-friendly too.
Why You'll Love This Pumpkin Mousse
- A simple and delicious fall dessert. As the seasons change, the demand for pumpkin spice everything goes up. Why? Because it's delicious and classic! Add in the creamy richness of cream cheese and whipped cream and you've got an irresistible concoction of silky spice on your hands.
- It doubles as a dip. You can serve this pumpkin puree mousse on its own with a spoon, or as a dip with things like graham crackers, gingersnaps, or teddy graham - adapt it to whatever works for you.
- It's easy to make. Making mousse with pumpkin is a lot easier to make than you think! If you haven't made homemade mousse before, then you will be pleasantly surprised. This easy no bake treat comes together in literally minutes with a handful of ingredients before it's ready to be set in the refrigerator.
- It has the best texture. The melt-in-your-mouth fluffiness of this mousse is thanks to whipped heavy cream, which helps the softer ingredients (like the cream cheese and pumpkin puree) hold a more structured shape. It's silky smooth yet firm.
- Great for holiday parties. Pumpkin mousse cups are a crowd favorite and are sure to please guests at any event you make them for! You can also leave it as a family-style serving and take it to potlucks, provided your transit time is low and you have a place to refrigerate it before serving. Don't anticipate leftovers - this one usually gets devoured quickly!
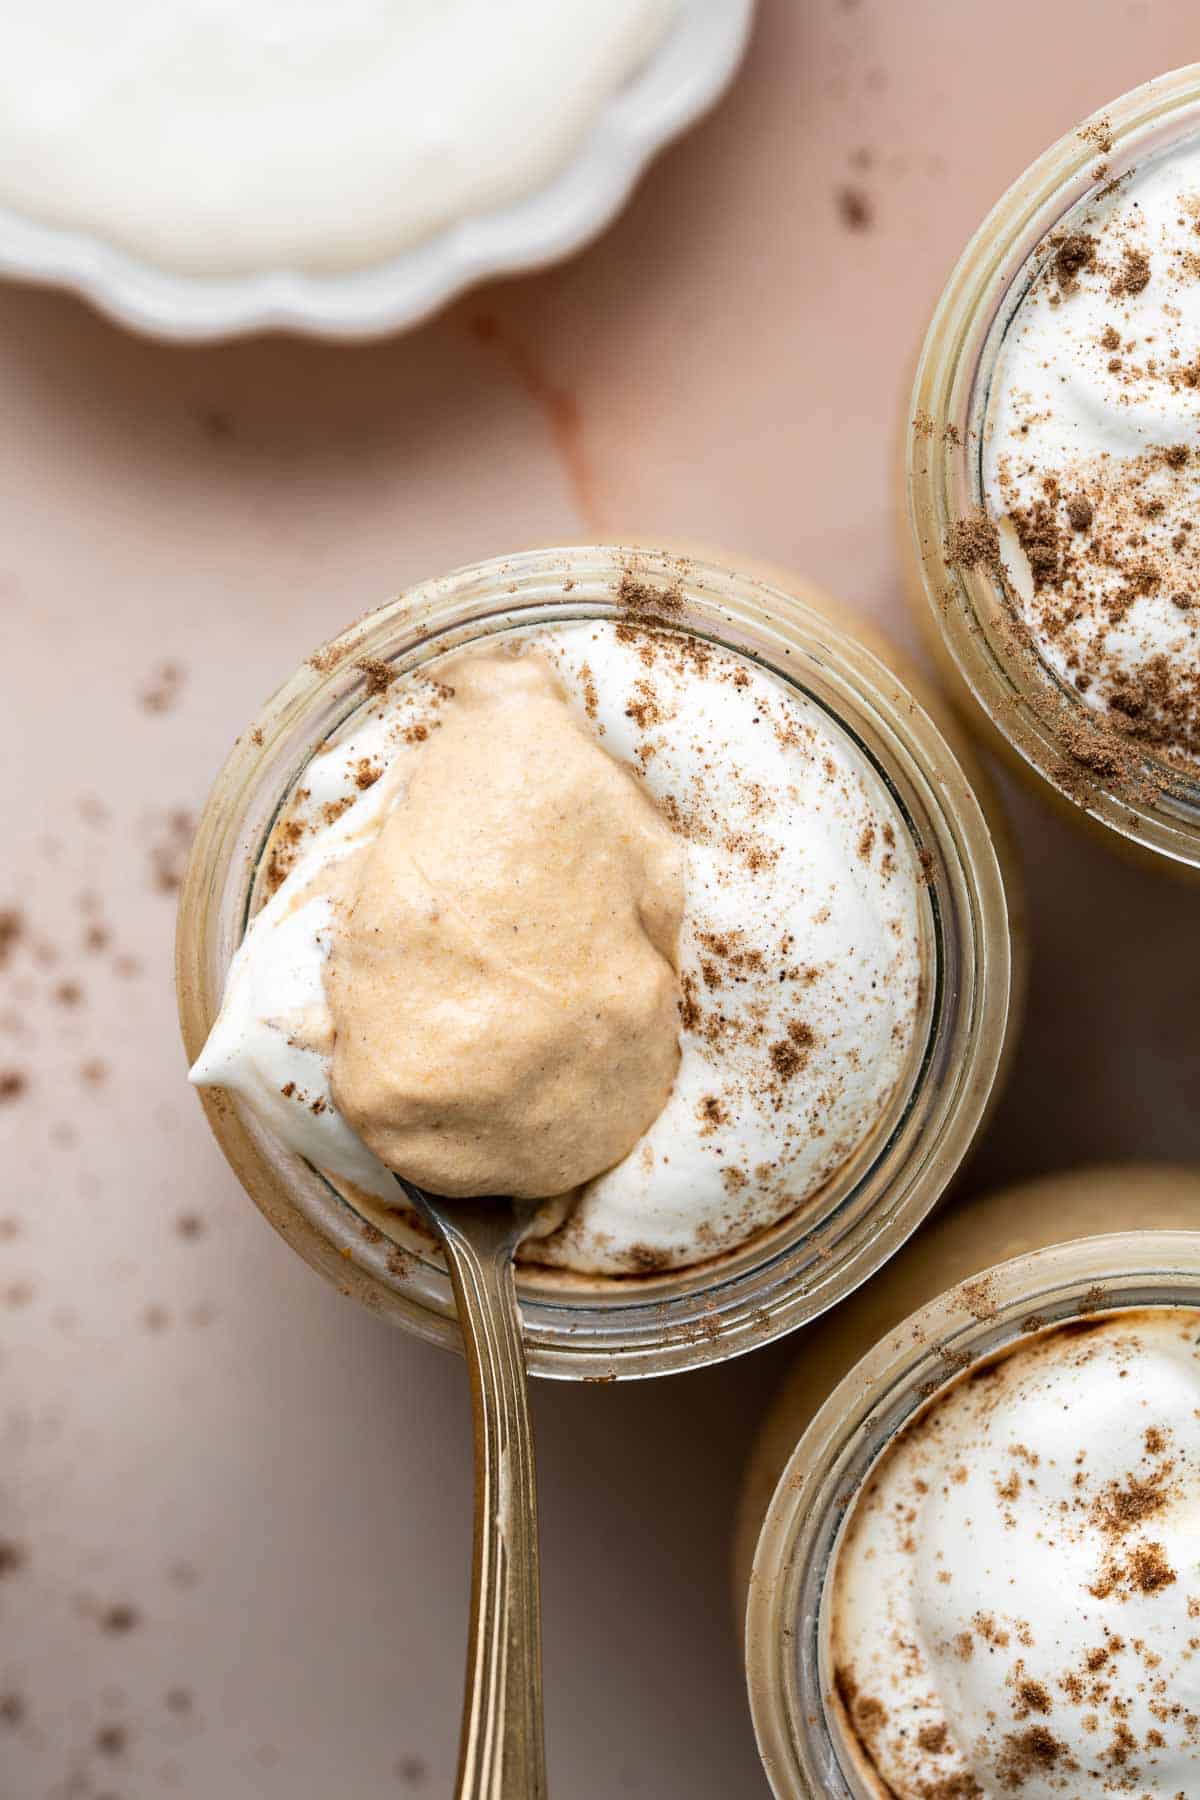
Ingredient Notes
To make this easy Pumpkin Mousse, you will need the following ingredients (full measurements in recipe card below):
- cream cheese - cream cheese helps give the mousse a silky consistency, but if you're out, you can swap it with neufchatel cheese, ricotta, or a vegan cream cheese alternative.
- brown sugar - maple syrup or honey will work best as a 1:1 substitute for brown sugar.
- pumpkin pie spice - pumpkin pie spice is just a blend of spices, so you can make your own or use a store-bought blend. Cinnamon, nutmeg, ground ginger, clove, and allspice are all you'll need.
- pumpkin puree - you can use homemade pumpkin puree or the grocery store version. Either way, it's important to note that pumpkin puree and pumpkin pie mix are not the same thing. Pumpkin puree only contains pumpkin, whereas pumpkin pie mix has a different texture and already includes sugar, spices, and other ingredients for pumpkin pie.
- vanilla extract - vanilla bean paste, though a little harder and more expensive to get your hands on, would amplify the flavors even more in this mousse recipe.
- heavy cream - you can also use a non-dairy version.
- sugar
- whipped cream - optional, for topping. There are several vegan whipped cream alternatives on the market that would work just fine in this recipe like coconut whipped cream or whipped cream made from almond milk.
You will also need measuring cups and spoons, mixing bowls, and hand mixer.
Toppings
Feel free to serve pumpkin mousse in individual cups as is. You can also top them with your favorite toppings. Try:
- whipped cream and a dusting of pumpkin pie spice
- crumbled graham crackers or gingersnap cookies
- whipped cream and sprinkles (customize the colors based on a holiday that you are serving this during)
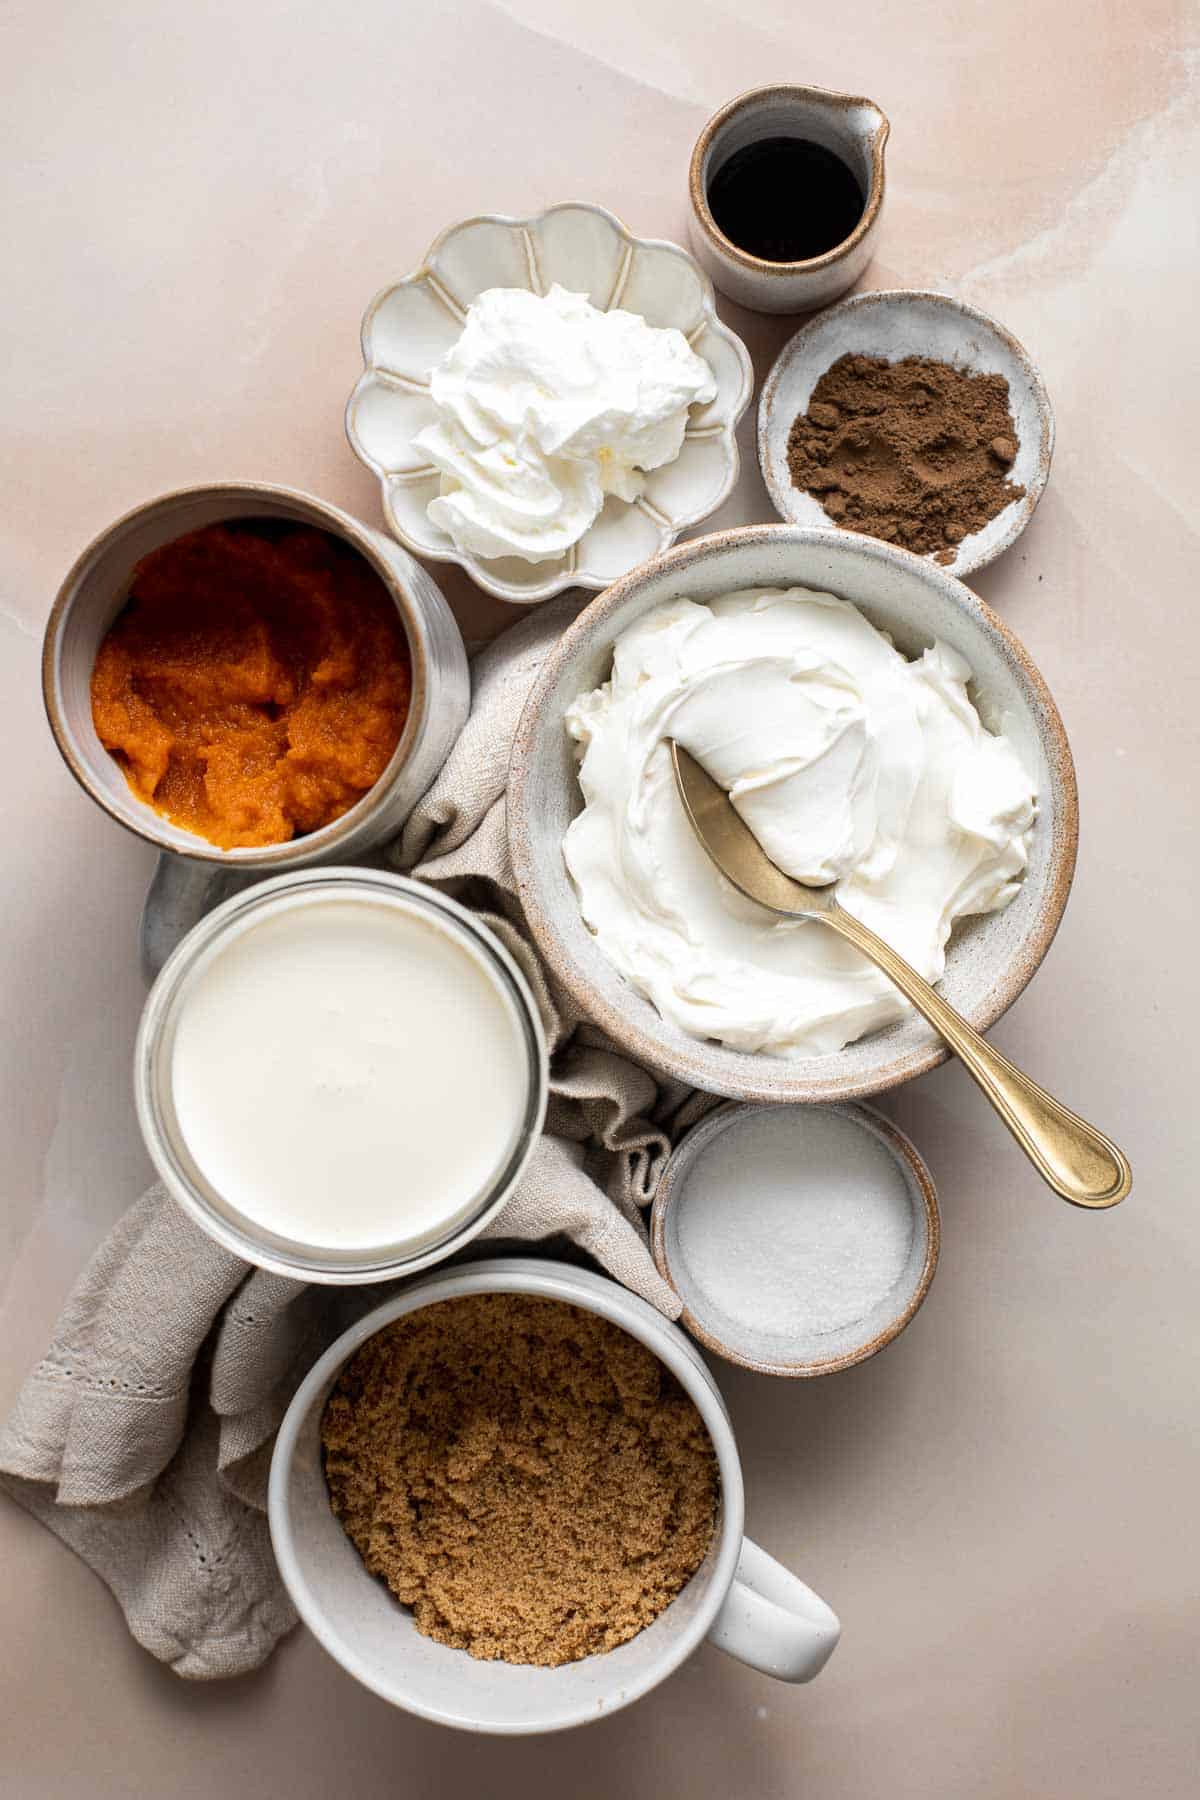
How to Make the Best Pumpkin Mousse
- Beat cheese. In a large mixing bowl, use a hand mixer and beat the cream cheese until light and fluffy, about 1 minute.
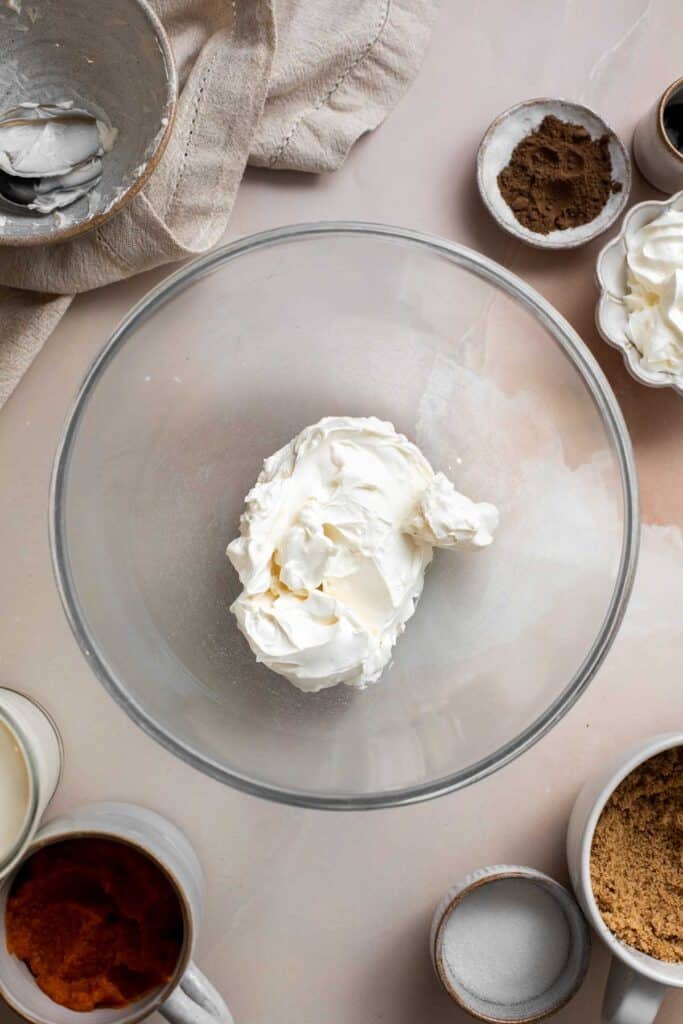
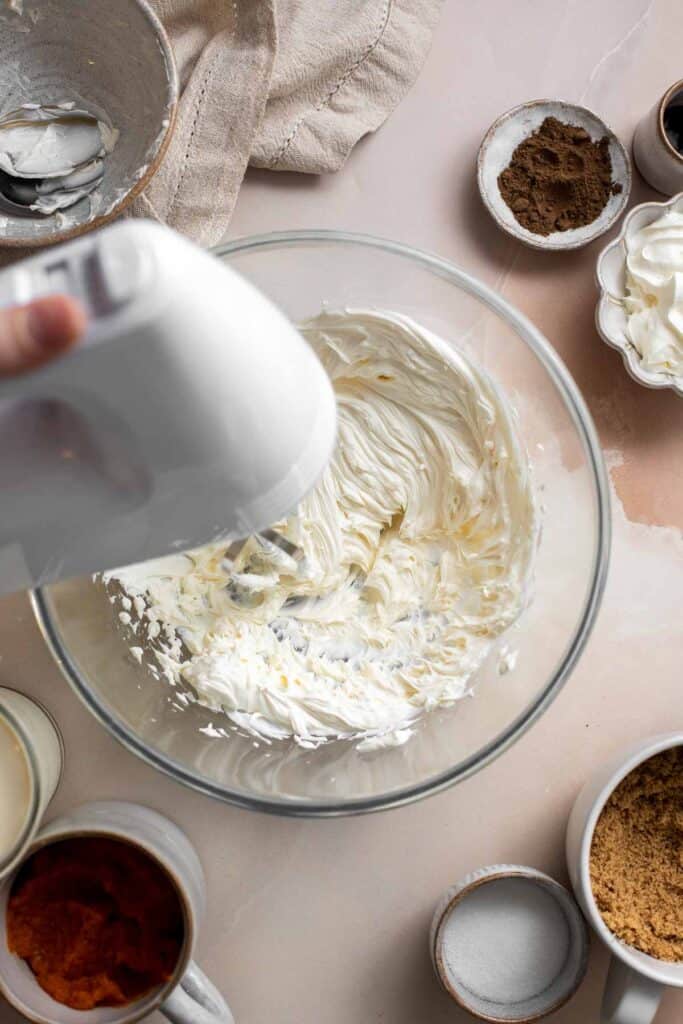
- Add sugar and spice. Add brown sugar and pumpkin pie spice and continue to beat until light and fluffy and fully blended together.
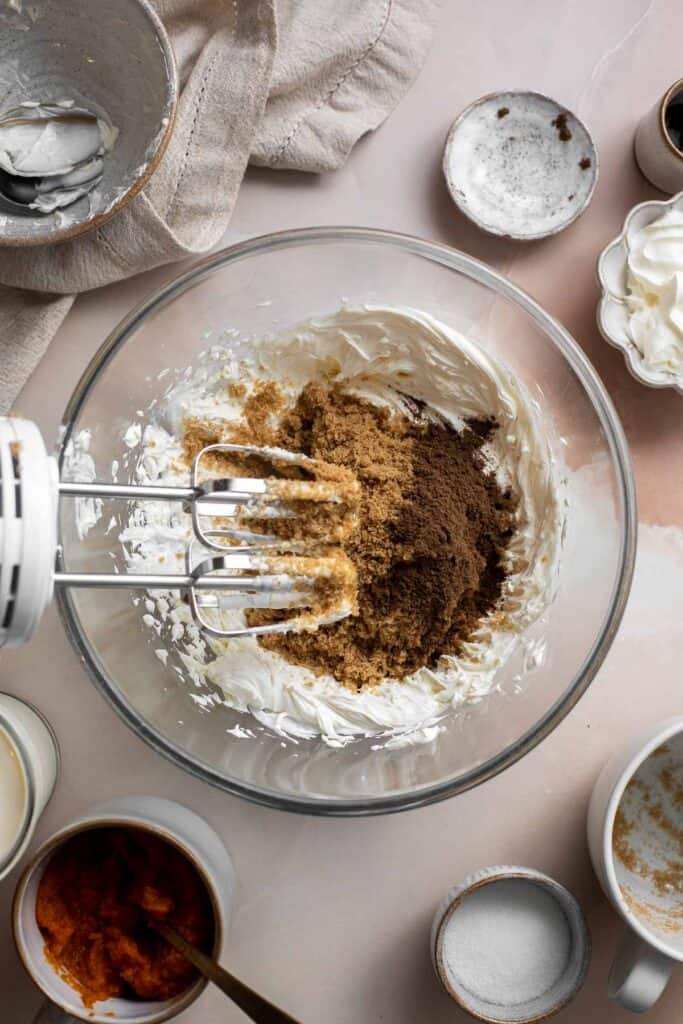
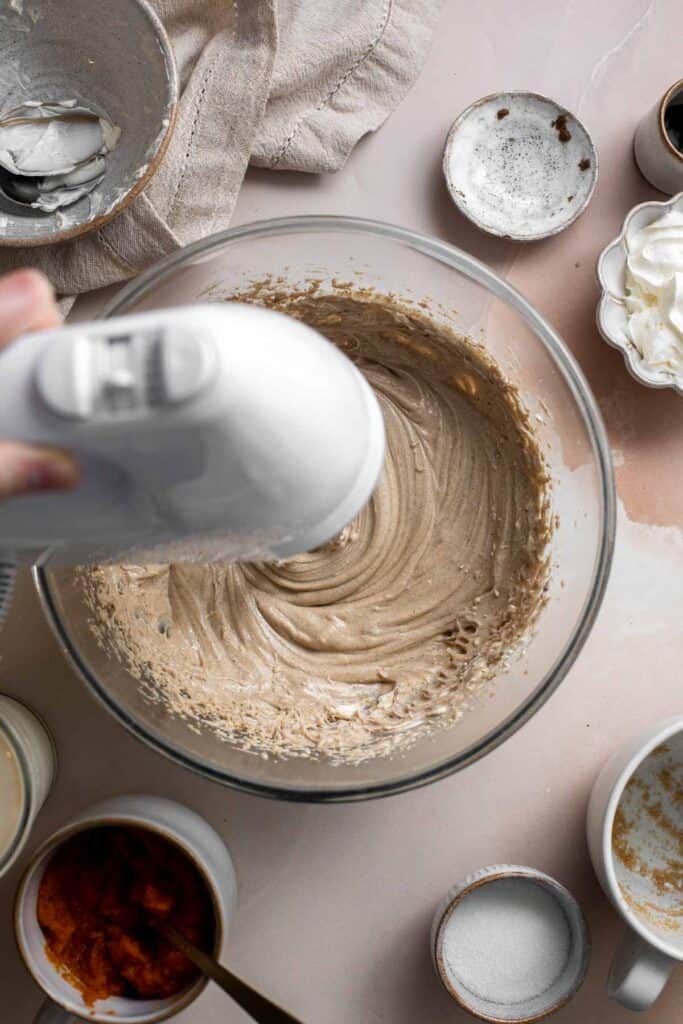
- Add pumpkin. Add the pumpkin puree and vanilla and mix until combined.
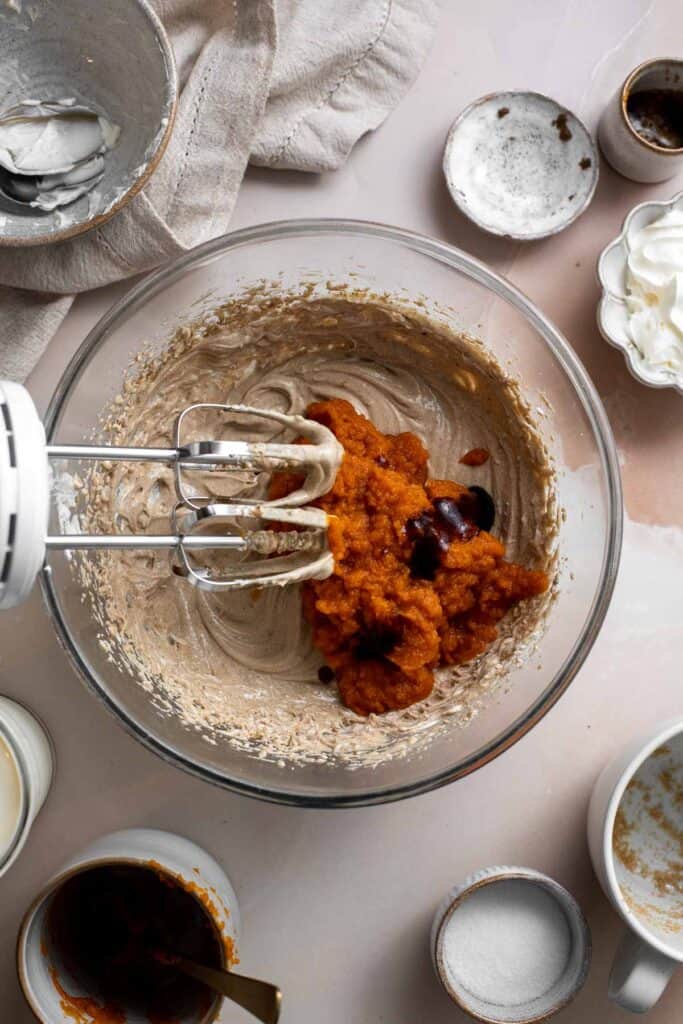
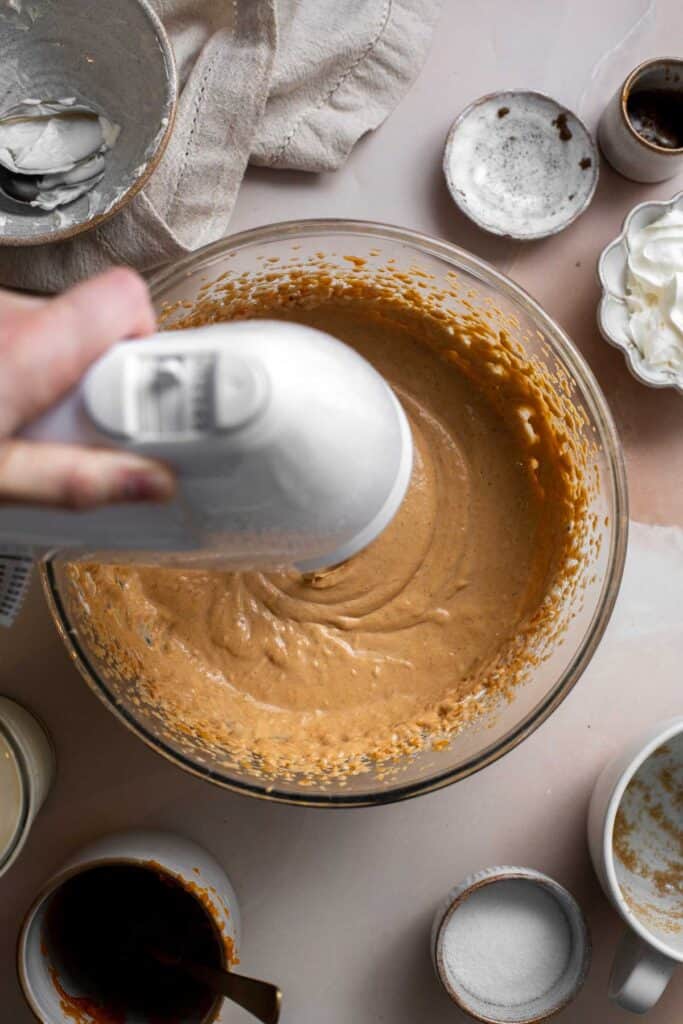
- Whip cream. In a medium mixing bowl, whip the cream using your hand mixer set on low-medium speed until you form soft peaks, about 1 minute. Add the granulated sugar and set the mixer to high and continue to whip until you reach stiff peaks, about 1 more minute.
- Combine. Gently fold the whipping cream mixture into the pumpkin mixture until fully combined with no streaks visible.
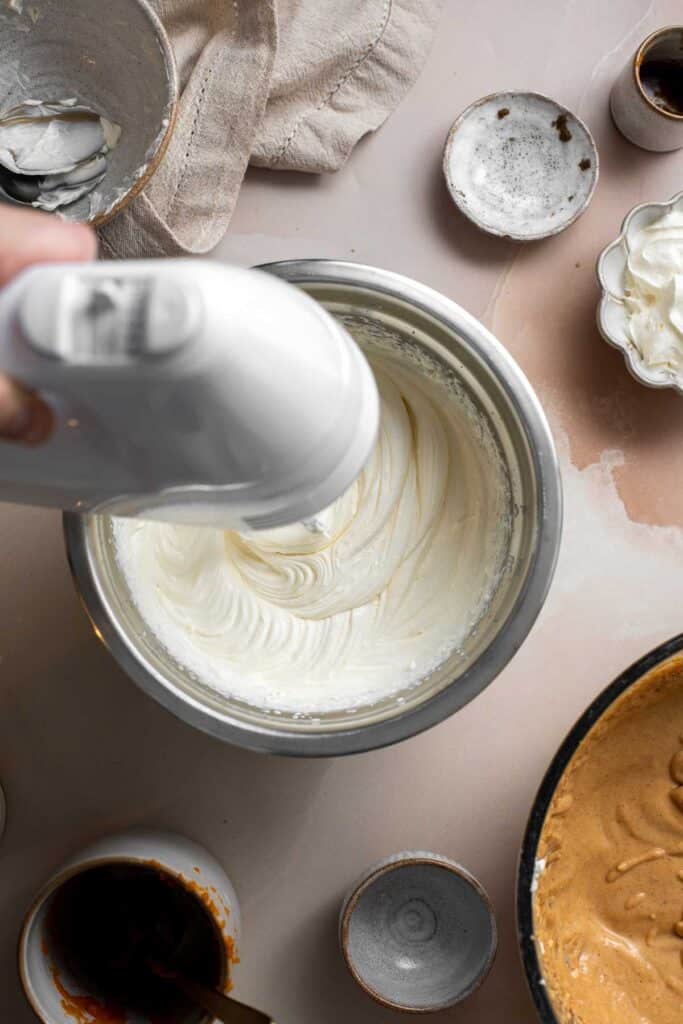

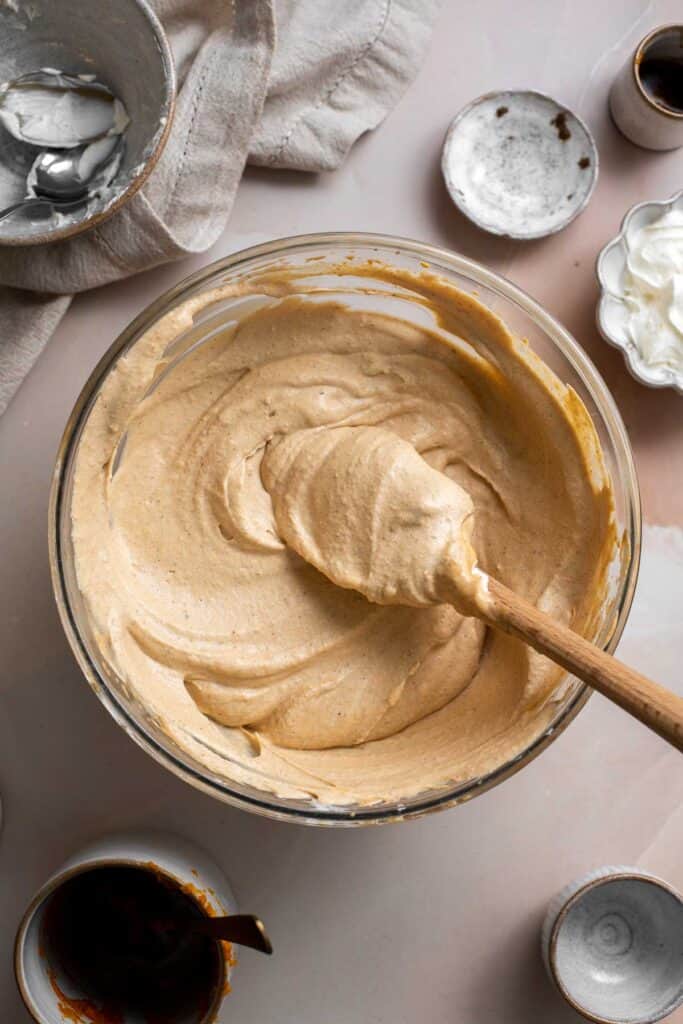
- Chill. Transfer the mousse into individual sized serving cups. You can pipe them to make the transfer easier. At this stage, the mousse will be very soft. Refrigerate for at least 2 hours to let the mousse set. If you have time, leave it overnight.
- Serve. Serve with a dollop of whipped cream and a sprinkle of pumpkin pie spice on top.
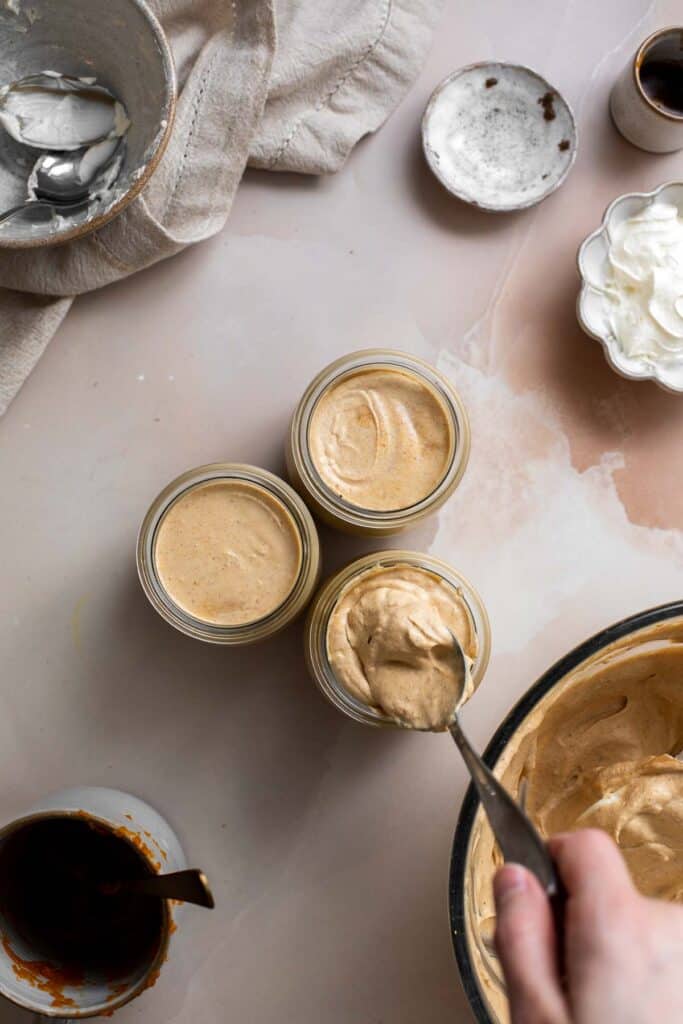
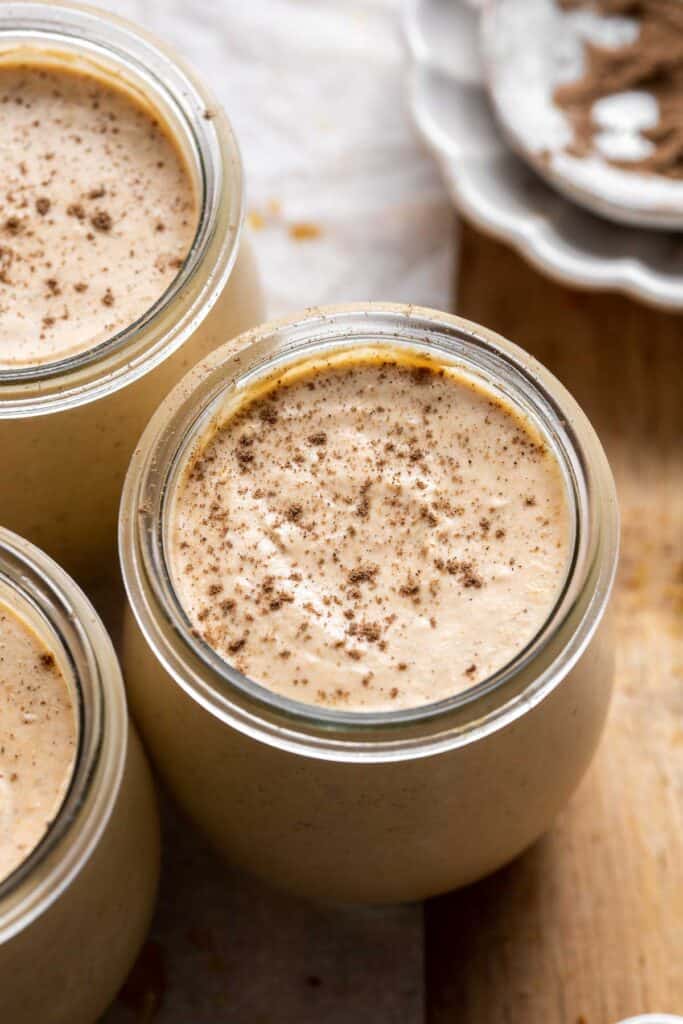
How to Serve
Pumpkin Mousse is delicious served on its own with a dollop of whipped cream and a sprinkle of pumpkin pie spice on top.
If making this for a holiday dessert spread this fall, here are some other favorite fall desserts to include:
Storage and Freezing Instructions
How to Store
Spoon the pumpkin mousse into an airtight container and refrigerate for up to four days. It may lose its shape and "flatten" a little over time, so use it or freeze as soon as possible.
How to Freeze
Transfer the leftover mousse into an airtight, freezer safe container or freezer bag and store for 2-3 months. To thaw the mousse, just transfer the bag into the refrigerator and let it thaw for several hours (or overnight) until it's gone back to its original consistency.
Recipe Tips and Tricks
- Don't over-whip your whipping cream. You'll want to pull your whipped cream the moment it's formed stiff peaks - any longer than that and the milkfat and the solids will start to separate and you'll be left with very sweet homemade butter and buttermilk. Those things sound good, but won't make fluffy mousse.
- Get the timing right. There's not a lot of downtime in this recipe, and things can fall apart if you spend too much time searching for an ingredient or utensil in between steps. Make sure you set yourself up for success by grabbing everything you need prior to starting the recipe.
- Make it ahead of time for special occasions. Because this mousse is freezer friendly, it can be made ahead of holiday parties or gatherings! This would be a perfect dessert for a fall birthday, Halloween party, Thanksgiving, or football night. You can also go the extra mile and offer it with themed toppings for the occasion.
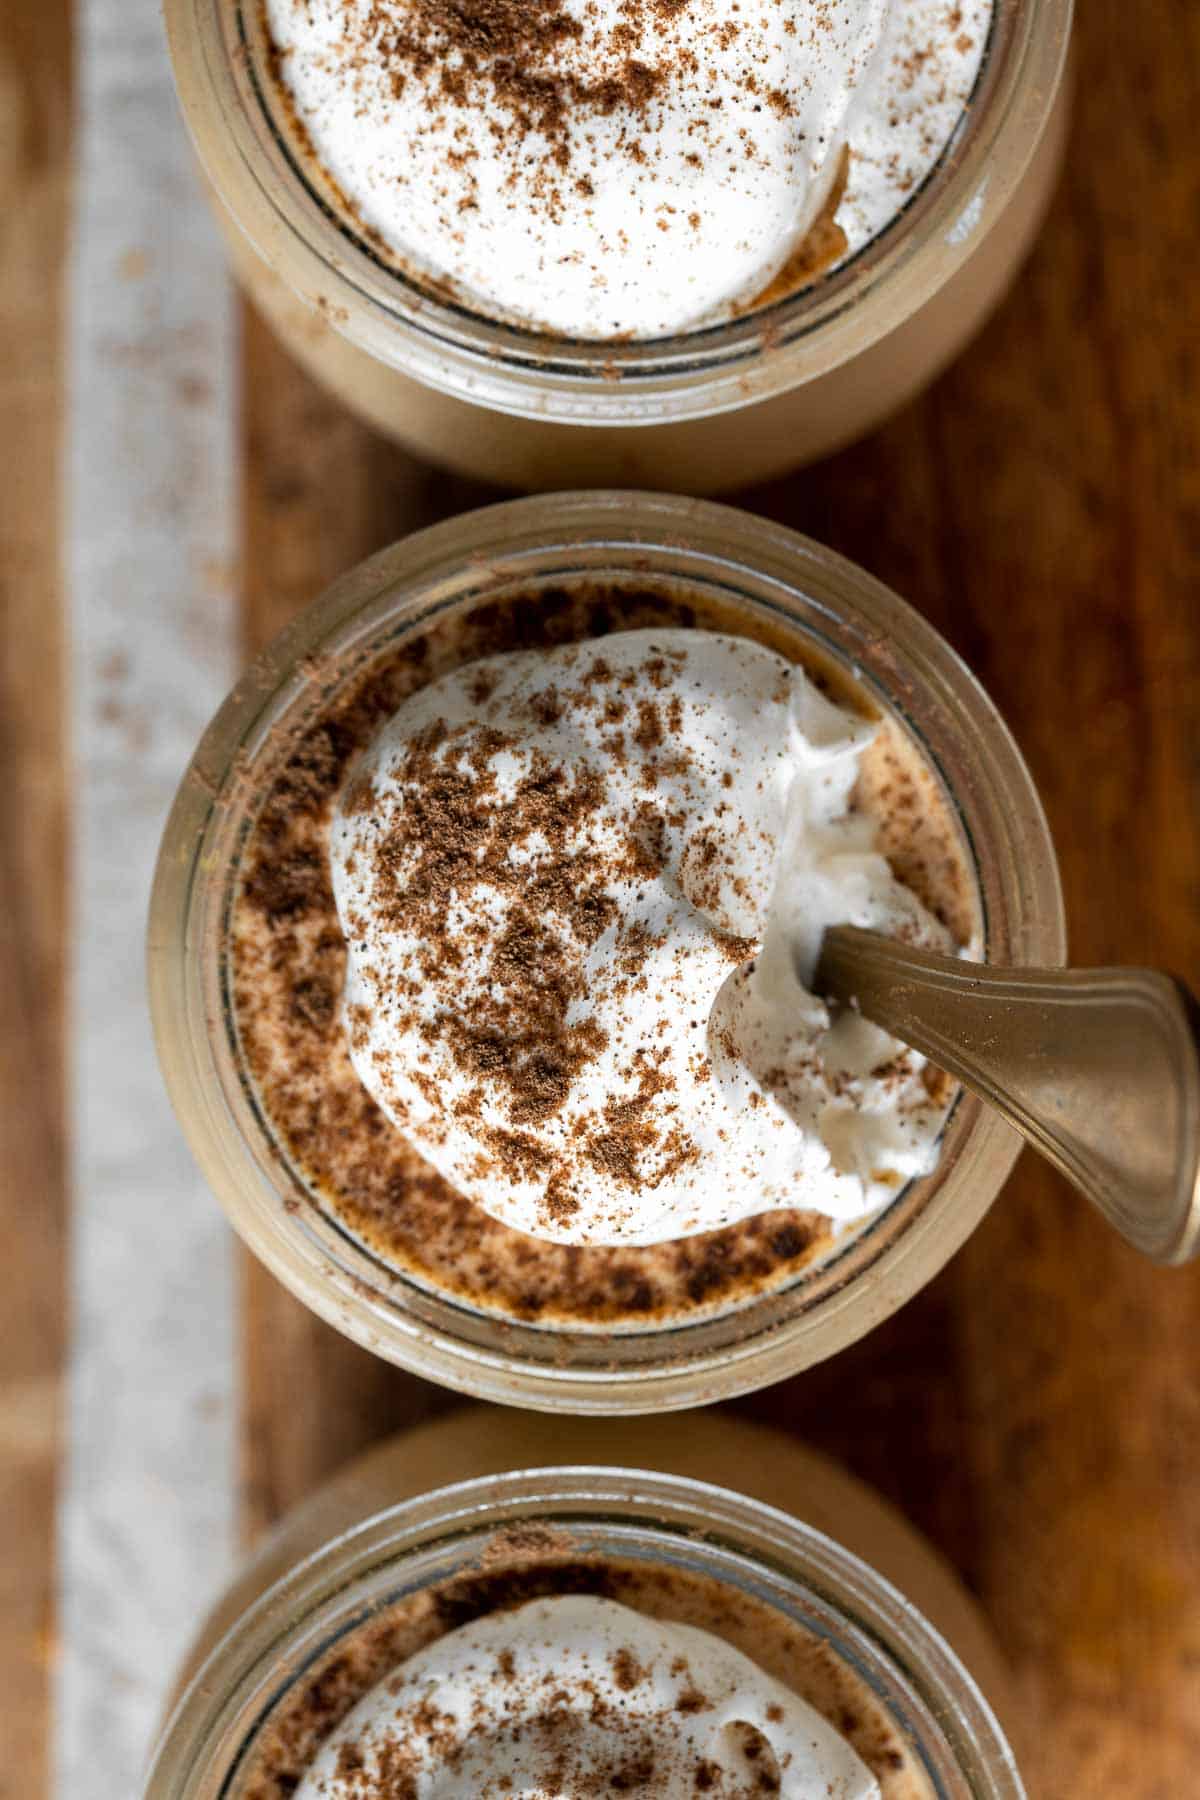
More Pumpkin Recipes
- 20 Best Pumpkin Desserts
- Pumpkin Bread
- Pumpkin Pie
- Mini Pumpkin Pies
- Pumpkin Chocolate Chip Cookies
- Pumpkin Cornbread
Tried this recipe?
I'd love to hear what you think! Leave a comment and rating below to share your feedback. Your reviews help others discover this recipe and help me keep creating more free recipes for you. Snap a photo and tag me on social media @aheadofthyme too.

Potato Dinner Rolls
Potato Dinner Rolls are soft, light, and fluffy. These quick and easy dinner rolls are loaded with leftover mashed potatoes along with a handful of simple pantry staples that you likely already have at home.
These homemade dinner rolls with potato can easily be made in an afternoon or prepared ahead for a special meal (with easy step-by-step instructions). They're delicious and pillowy and pair well with all kinds of soups, salads, and entrees - or can become and entree themselves if you incorporate them into sliders.
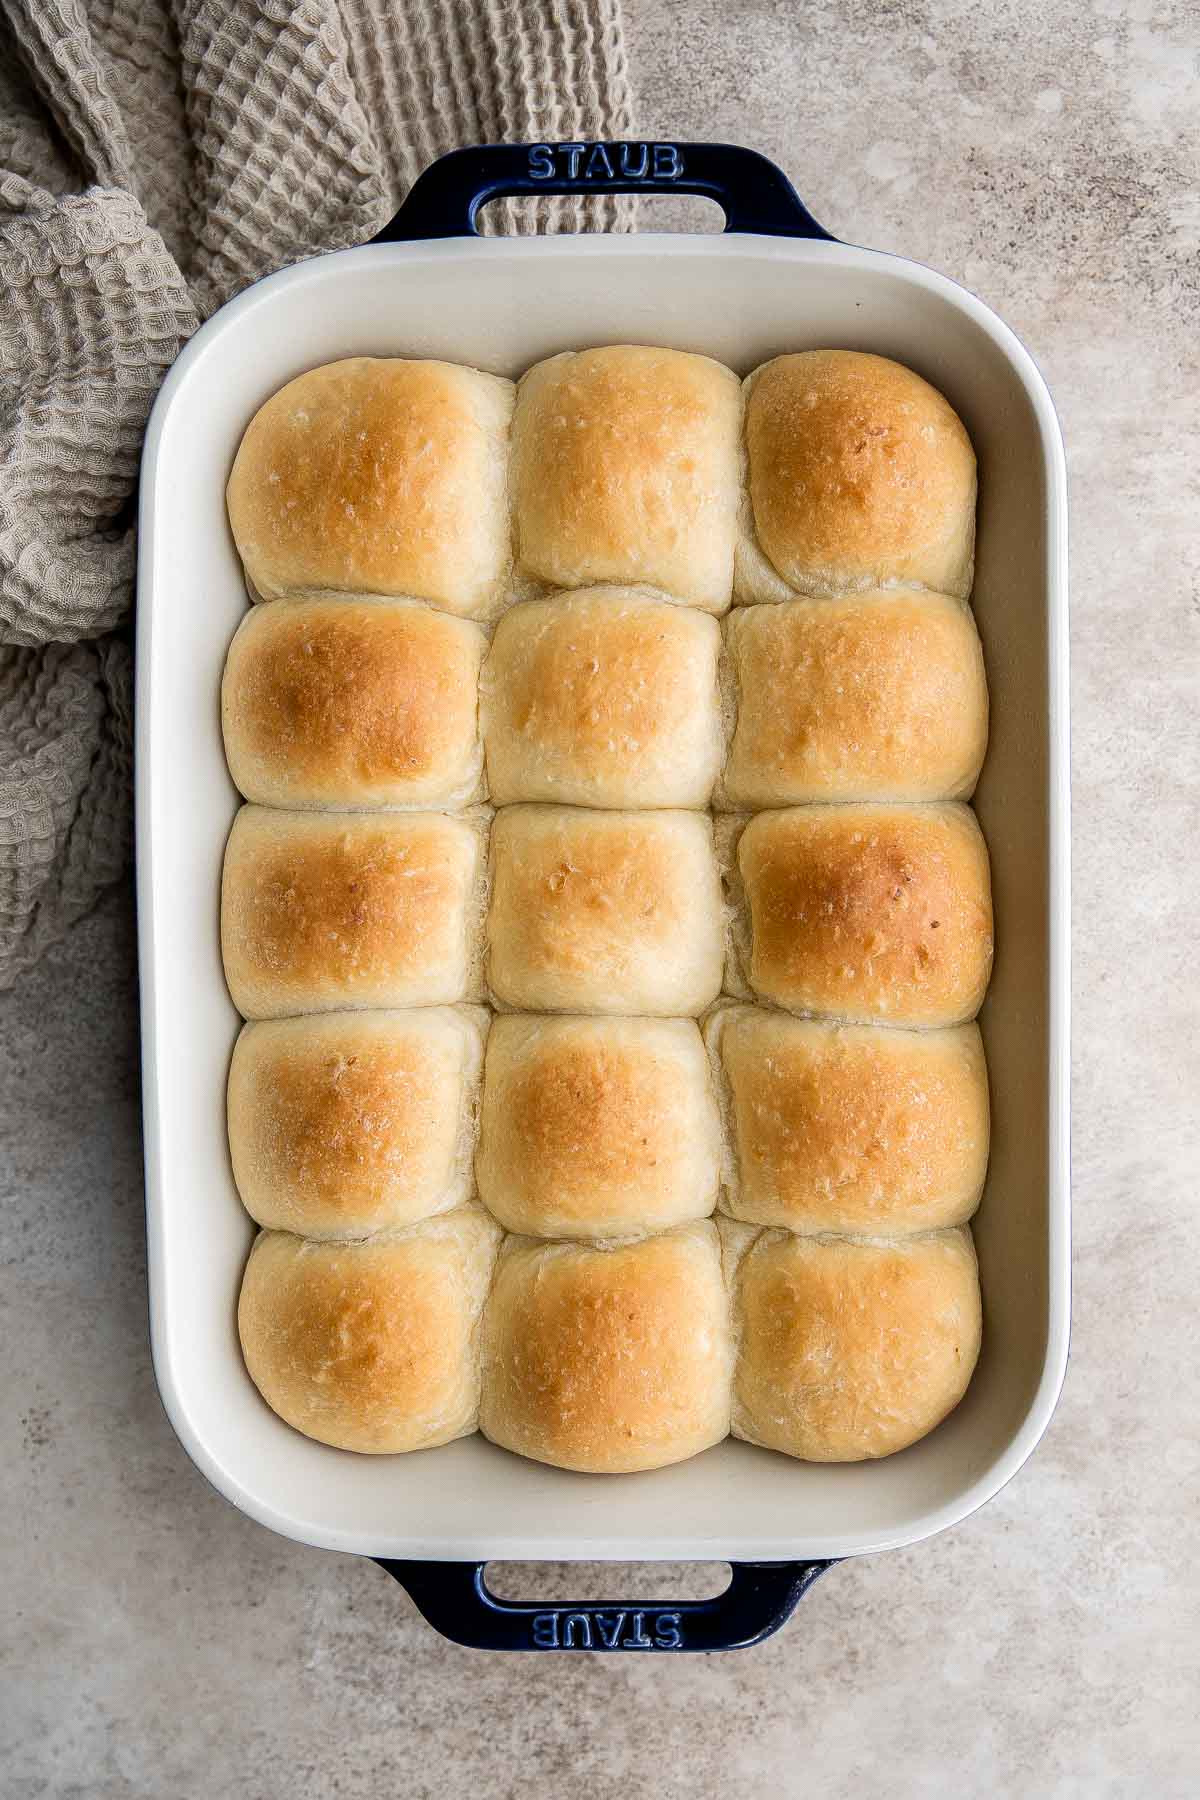
Why You'll Love These Potato Dinner Rolls
- Loaded with real potatoes. Homemade dinner rolls are always a hit, and these dinner rolls with potato are guaranteed to delight diners of all ages. The not-so-secret ingredient, mashed potatoes, adds even better texture and flavor to these versatile rolls.
- They're extra soft. These potato dinner roll have the best texture thanks to mashed potatoes. By adding mashed potatoes to this dinner roll recipe, it gives them an even more supple, fluffier texture.
- Perfect for casual weeknight dinners and big holiday parties. These rolls are fast and easy enough to make for a weeknight dinner, but fluffy and delicious enough to serve at bigger events like holiday potlucks or dinner parties.
- Great for using leftover mashed potatoes. This potato bread will be your new go-to for using up leftover mashed potatoes! Using leftovers cuts back on the amount of prep and clears some space in your fridge - taking care of two birds with one stone. Some of my other favorite leftover mashed potato recipes include: Mashed Potato Soup, Mashed Potato Cakes, Mashed Potato Balls, and Homemade Potato and Cheese Perogies.
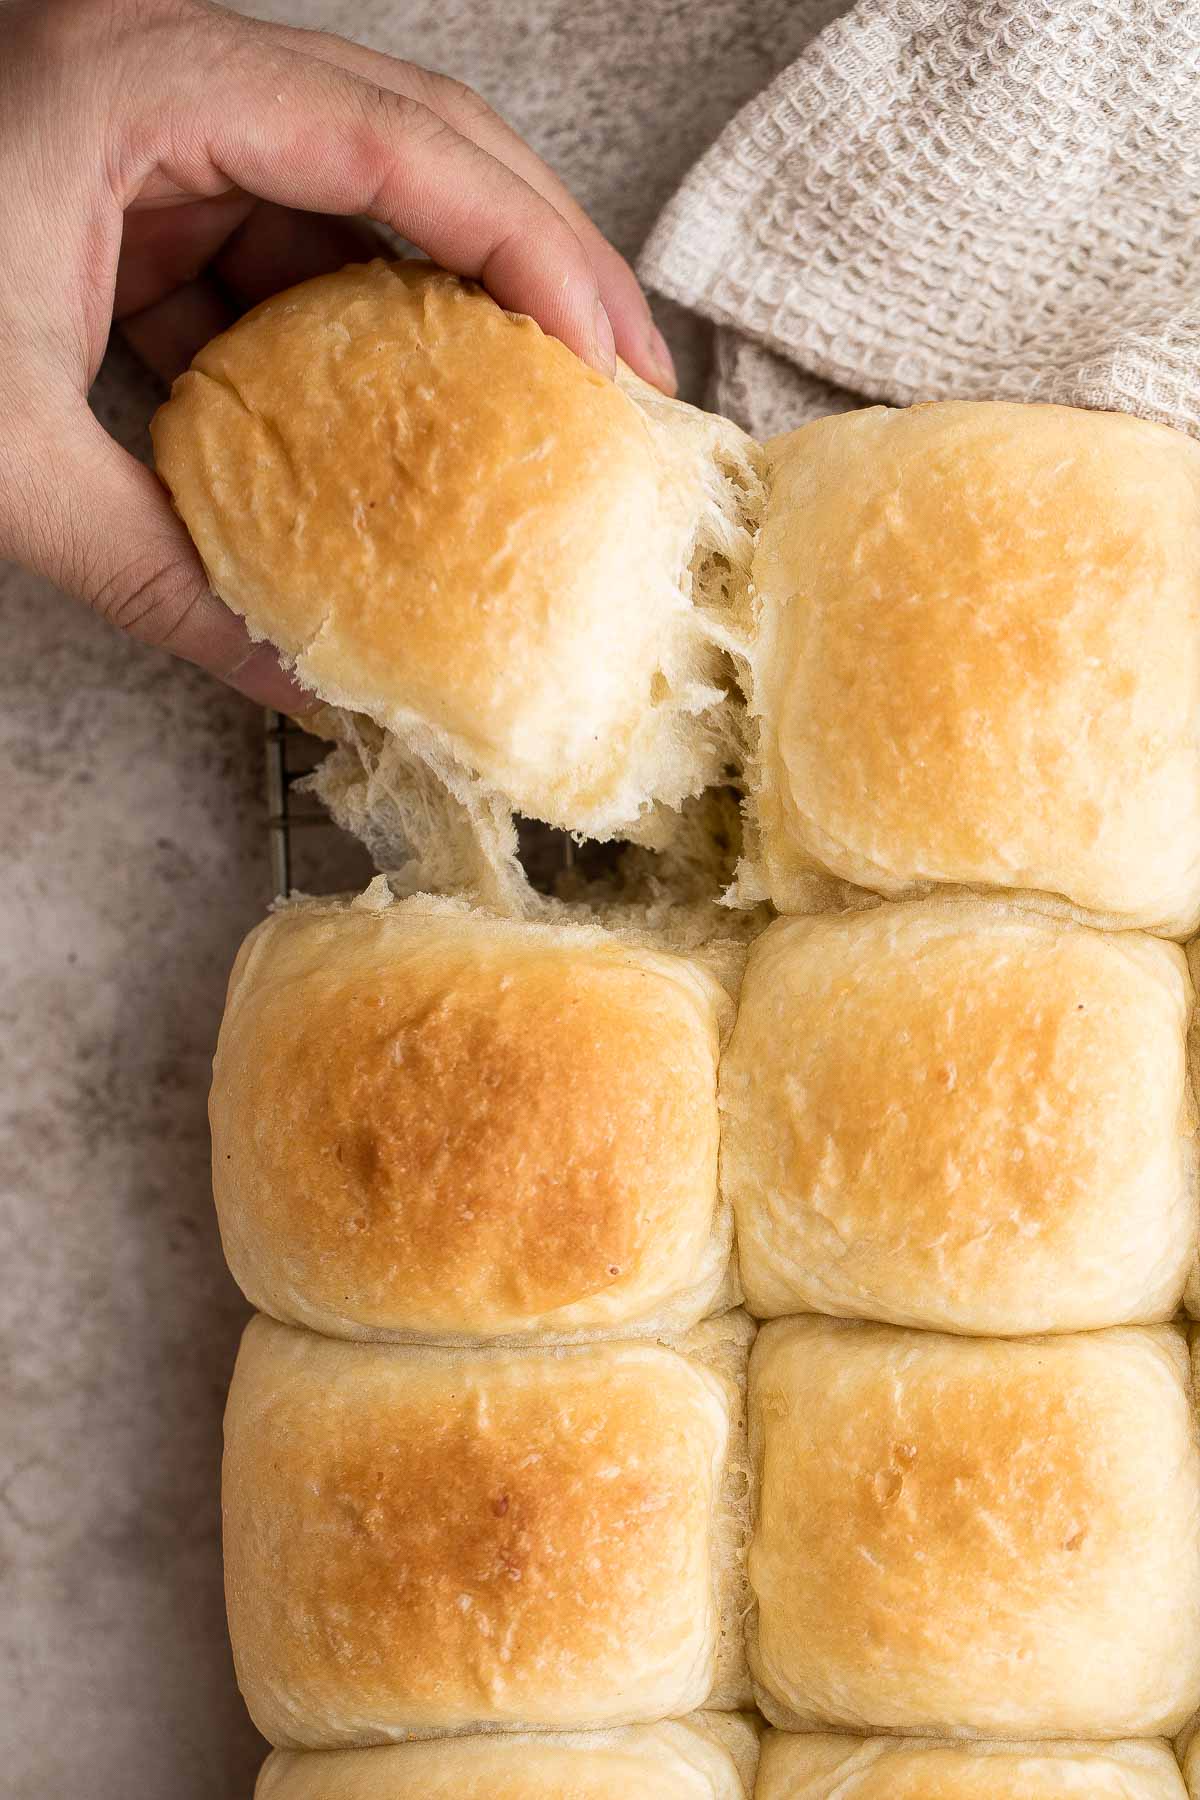
Ingredient Notes
To make these easy Potato Dinner Rolls, you will need the following ingredients (full measurements in recipe card below):
- milk - if you or someone in your family is lactose intolerant or sensitive to dairy, you can use unflavored coconut milk, almond milk, or another dairy-free milk substitute in place of the milk in these rolls. Coconut milk tends to work well with baked goods because of its high fat content.
- sugar - honey would also work well in this dinner roll recipe!
- active dry yeast - active dry yeast will yield the best, most consistent bread result every time-but things happen and we all run out every once in a while. A 1:1 measurement of baking powder should help the rolls rise and give a similar effect. Active sourdough starter would also work, but you'll have to change the quantities a bit. The rule of thumb is one cup of starter per standard 7g package of active yeast, or per two teaspoons of active dry yeast if you're using the jar kind.
- eggs
- melted butter - olive oil would be a fine substitute for butter in these rolls.
- all-purpose flour - you can make gluten free mashed potato rolls by swapping the wheat flour with a measure-for-measure gluten free flour.
- mashed potatoes - Yukon or russet potatoes are the best potatoes for mashing, and therefore, the best kind of mashed potatoes for this recipe, but you can use whatever kind of potato or mashed potato you have on hand, including instant.
- salt
You will also need measuring cups and spoons (or a kitchen scale), mixing bowl, bench sraper, and a 9x13-inch casserole pan.
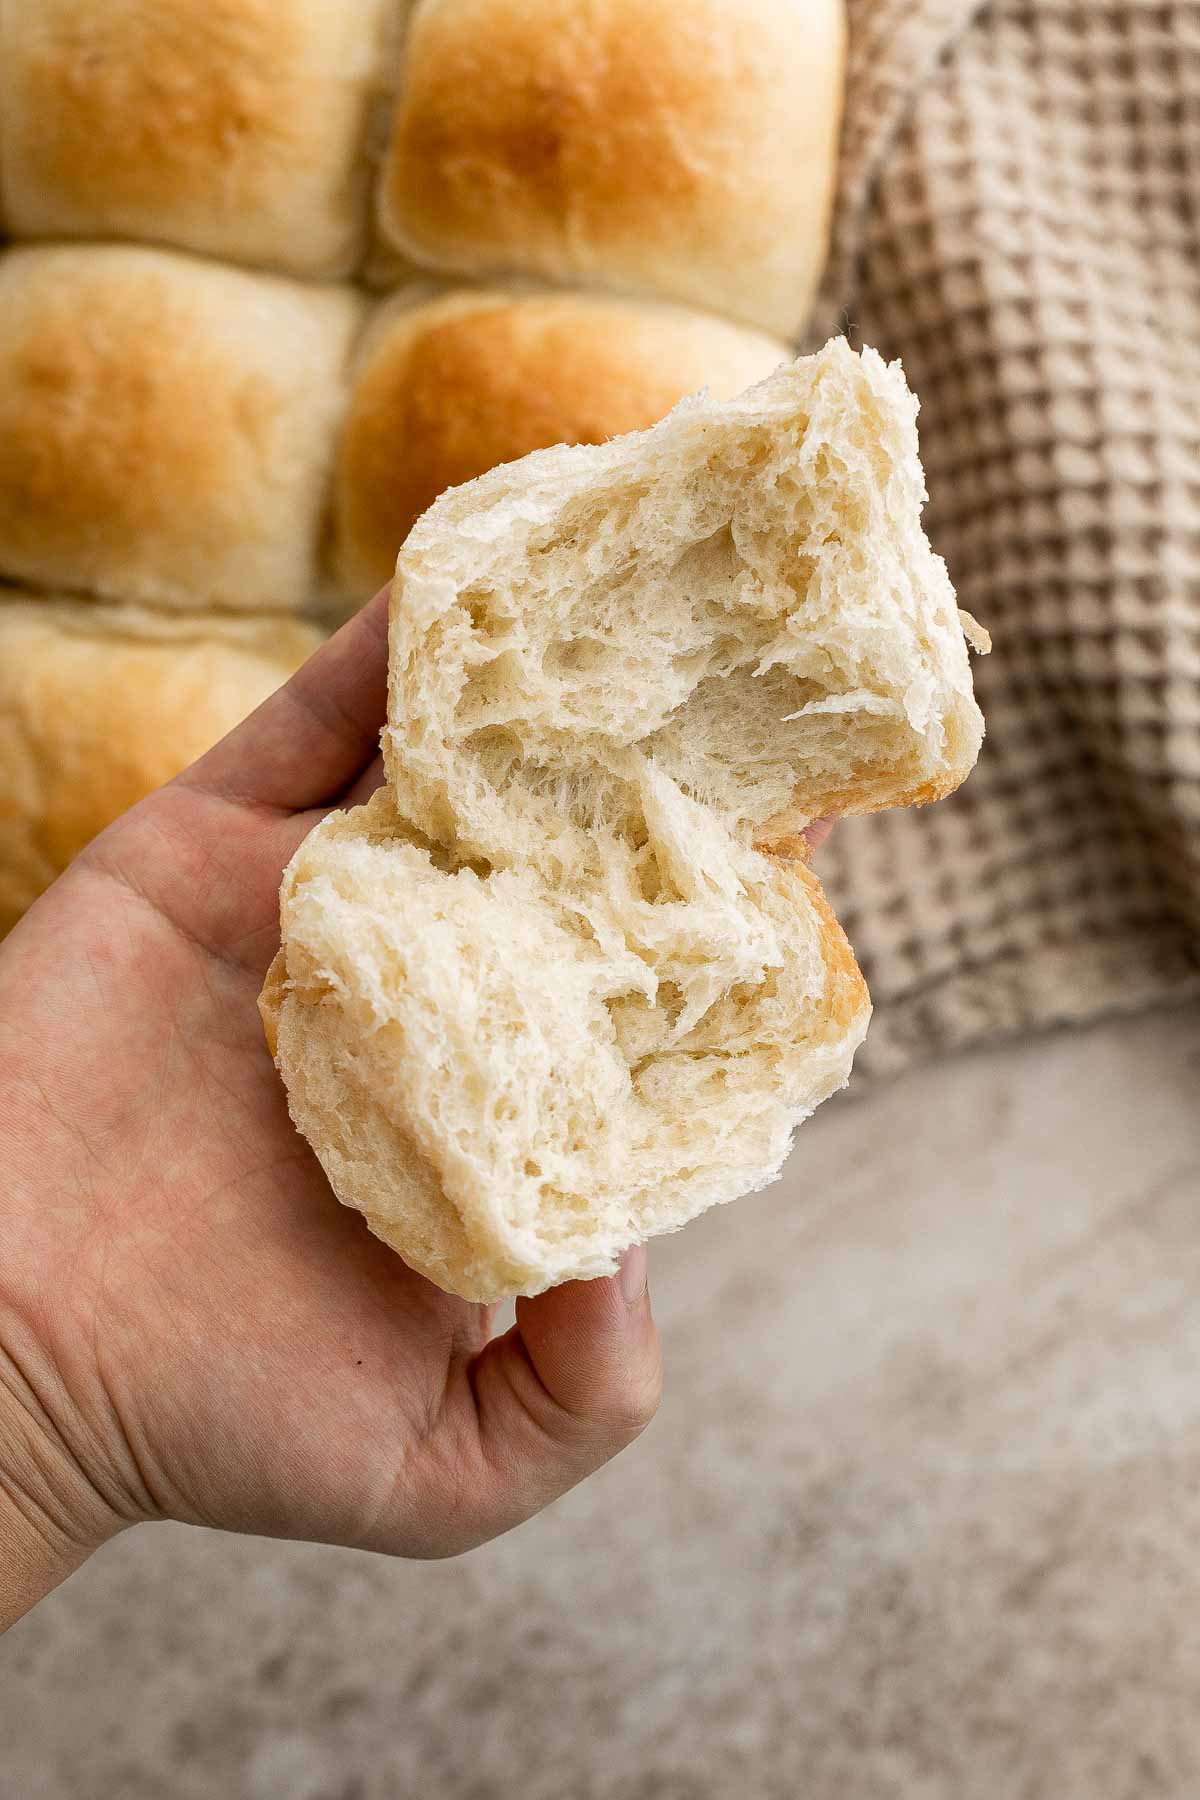
How to Make the Best Potato Dinner Rolls
- Make the dough. In a medium mixing bowl, whisk to combine milk, sugar, yeast, eggs, and butter until smooth. Set aside for 5 minutes until bubbles form on top. In a large mixing bowl, stir together flour, mashed potatoes, and salt until evenly combined. Slowly pour the wet mixture into the flour mixture. Mix well until it forms a shaggy dough, scraping down the sides of the bowl (there should be no dry flour particles visible).
- Knead the dough. Knead the dough for 8-10 minutes until a smooth and soft dough ball is formed. You can also knead the dough on medium speed in a stand mixer for 8-10 minutes until smooth dough ball is formed. Cover the bowl and let the dough rise until doubled in size, about 1 hour. You can lightly oil the dough ball to prevent sticking.
Combine ingredients. Kneaded dough. First rise.
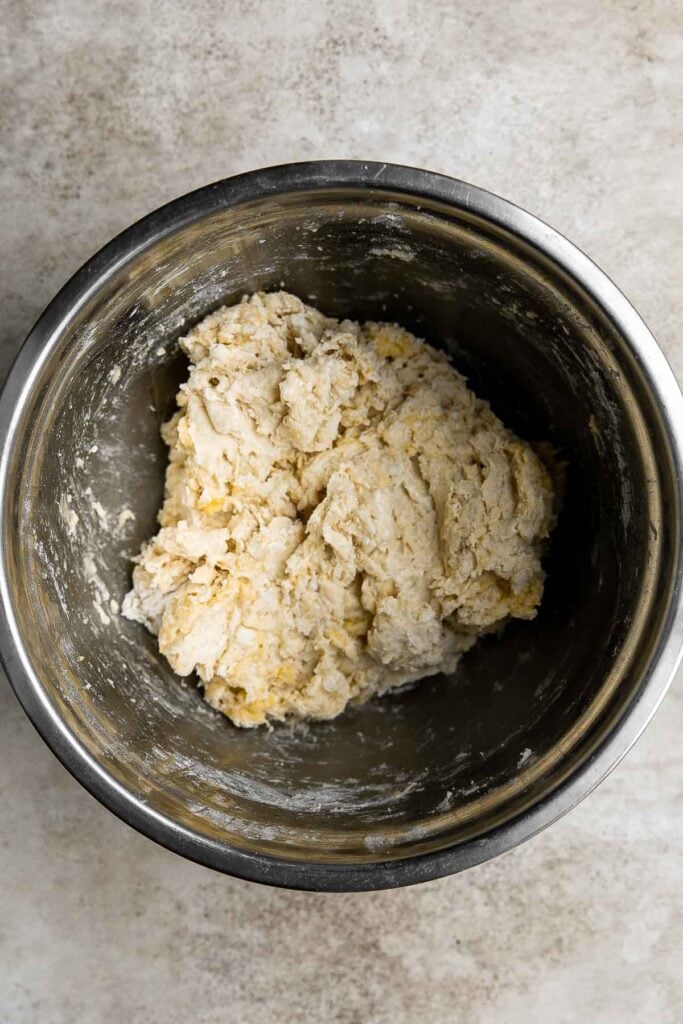
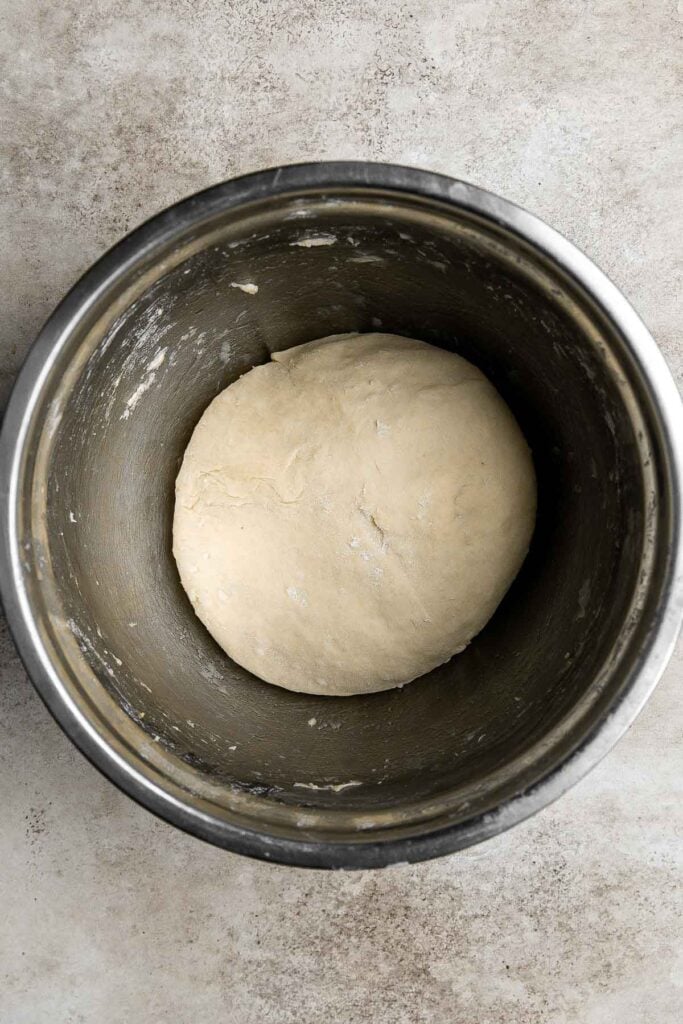
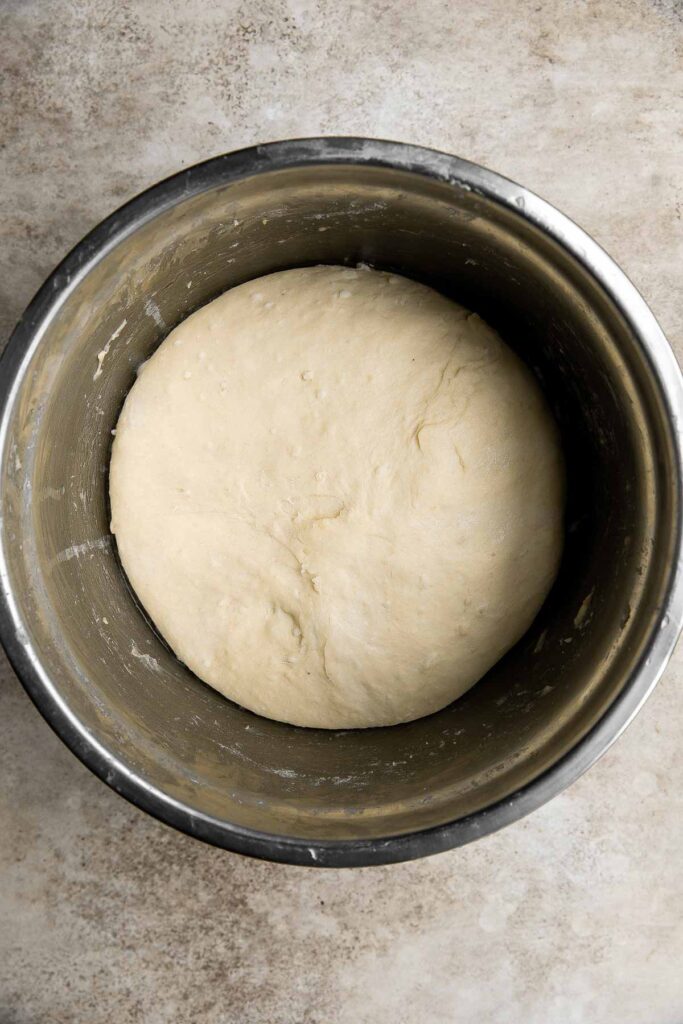
Tips for Kneading Dough
- How to knead dough: Knead the dough by pushing it down and outward using the palms of your hands. Fold the dough in half toward you and press down. Repeat this motion by pushing the dough down and outward, and then folding over towards you. This helps build up gluten strength in dough that is responsible for making the bread fluffy.
- How to test if dough is well-kneaded: A well-kneaded dough is smooth and can hold its shape. You can test the dough by giving it a firm poke with your finger. The indentation should bounce right back. If it doesn't bounce back and stays like a dimple, keep kneading for a few more minutes.
How to Shape Dinner Rolls
- Roll the dough into a log and use a bench scraper to divide it into 15 equal pieces. Cover the dough with a damp cloth or plastic cling wrap to prevent it from drying.
- Take one piece at a time and shape each piece into a smooth ball. Use the palms of your hands to flatten each dough, then fold and press all edges into the centre.
- Turn it over and cup the dough in the palm of your hand, making circular motions until you create a ball. It should take less than 30 seconds to roll each piece into a smooth ball.
Shape into a log. Cut into 15 equal pieces. Roll into balls.

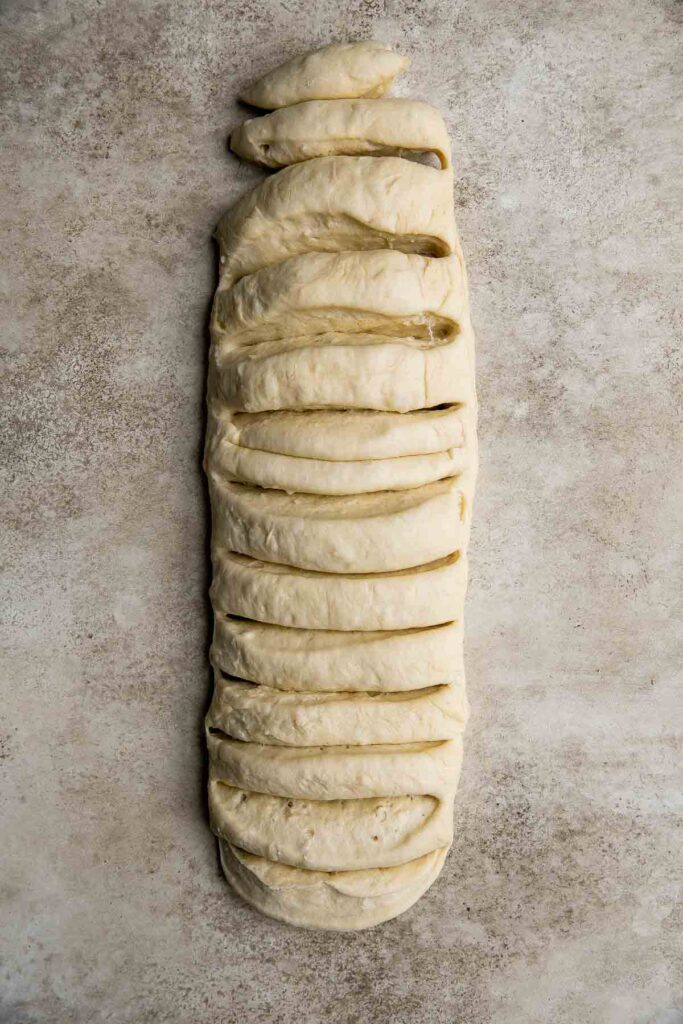

- Arrange the dough balls into a 9x13-inch casserole pan, spacing them evenly into 5 rows and 3 columns.
- Cover the pan loosely with plastic cling wrap and let the rolls rise until almost doubled in size, about 45 minutes.
Arrange in baking pan. Second rise.

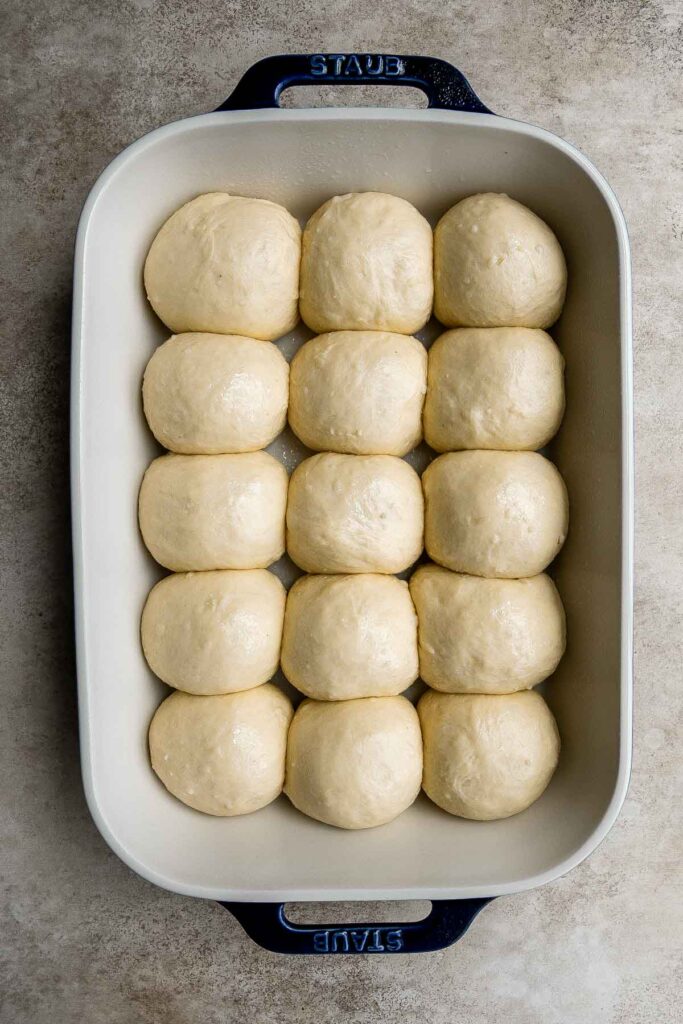
Baking Potato Dinner Rolls
Bake the potato dinner rolls in a 350F preheated oven for 22-25 minutes until golden brown.
Brush the top with some melted butter (if desired) and let the rolls cool on a wire rack for 15 minutes before serving.
Ready to bake. Baked dinner rolls.
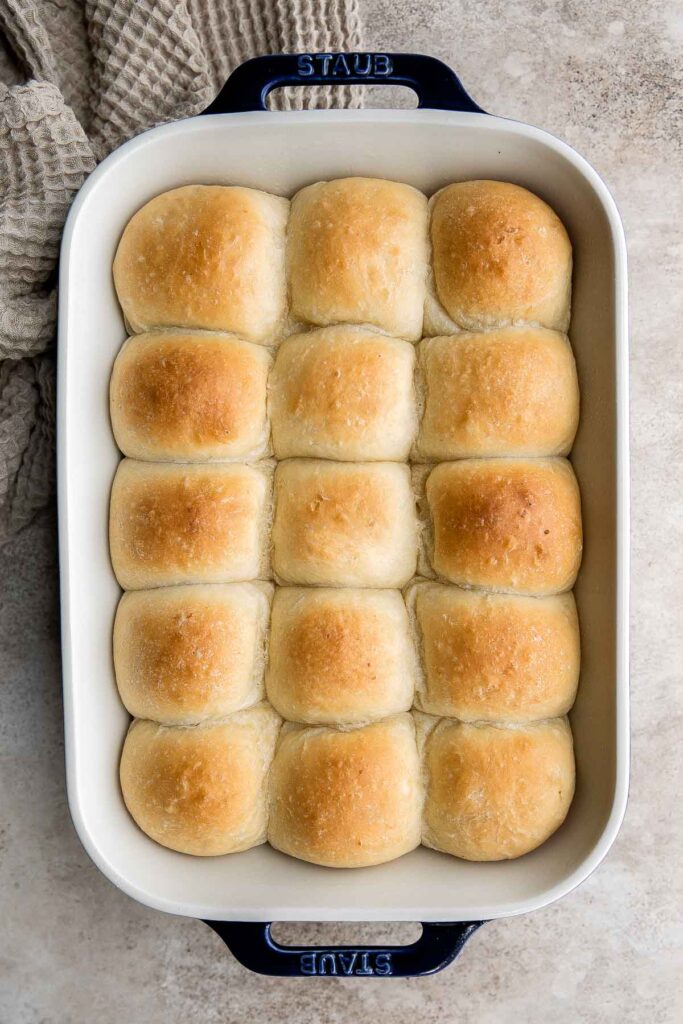
How to Serve
Potato Dinner Rolls are delicious served on its own with butter as a starter to dinner, as a snack, or with meat and cheese inside like in these Turkey and Cheese Sliders. They are also great served on the side of dinner. Some of my favorite dinner entrees to serve the on the side of are:
- Vegetarian Bolognese
- Ground Turkey Soup
- Creamy Pesto Chicken
- Hamburger Soup with Macaroni (Goulash Soup)
- Creamy Tuscan Shrimp
- Stuffed Chicken Breasts
Storage and Freezing Instructions
How to Store
Wrap leftover dinner rolls tightly with plastic cling wrap or place in a large sealed plastic bag and store at room temperature for up to 3 days. You can extend the shelf life to a week if stored in the fridge. But note that the fridge will dry them out a bit.
How to Freeze
To freeze, let the potato rolls cool completely, then store them in an airtight container, freezer bag, or wrap them tightly in plastic cling wrap and place in the freezer for up to 2-3 months. When ready to serve, thaw at room temperature for several hours and reheat in the microwave on high power for 60 seconds.
Recipe Tips and Tricks
- Make ahead instructions. You can have freshly baked potato dinner rolls at your next holiday party without making them on the day of. Just freeze the potato rolls while they're still in dough form - right after forming the rolls, before they get a chance to rise, transfer them to a sealed freezer bag and freeze for up to 3 months (though the sooner you use them, the better). Once you're ready to bake them, transfer to the container you intend to bake them in, then let them thaw on the counter for several hours (or overnight in the fridge) and allow them to rise to normal height. Bake as directed.
- Make your own flavored butter. Potato bread pairs well with savory butters and sweet butters alike, such as dill or herb butter, cinnamon butter, honey butter, or spicy sriracha butter. Make several and see what your family likes best!
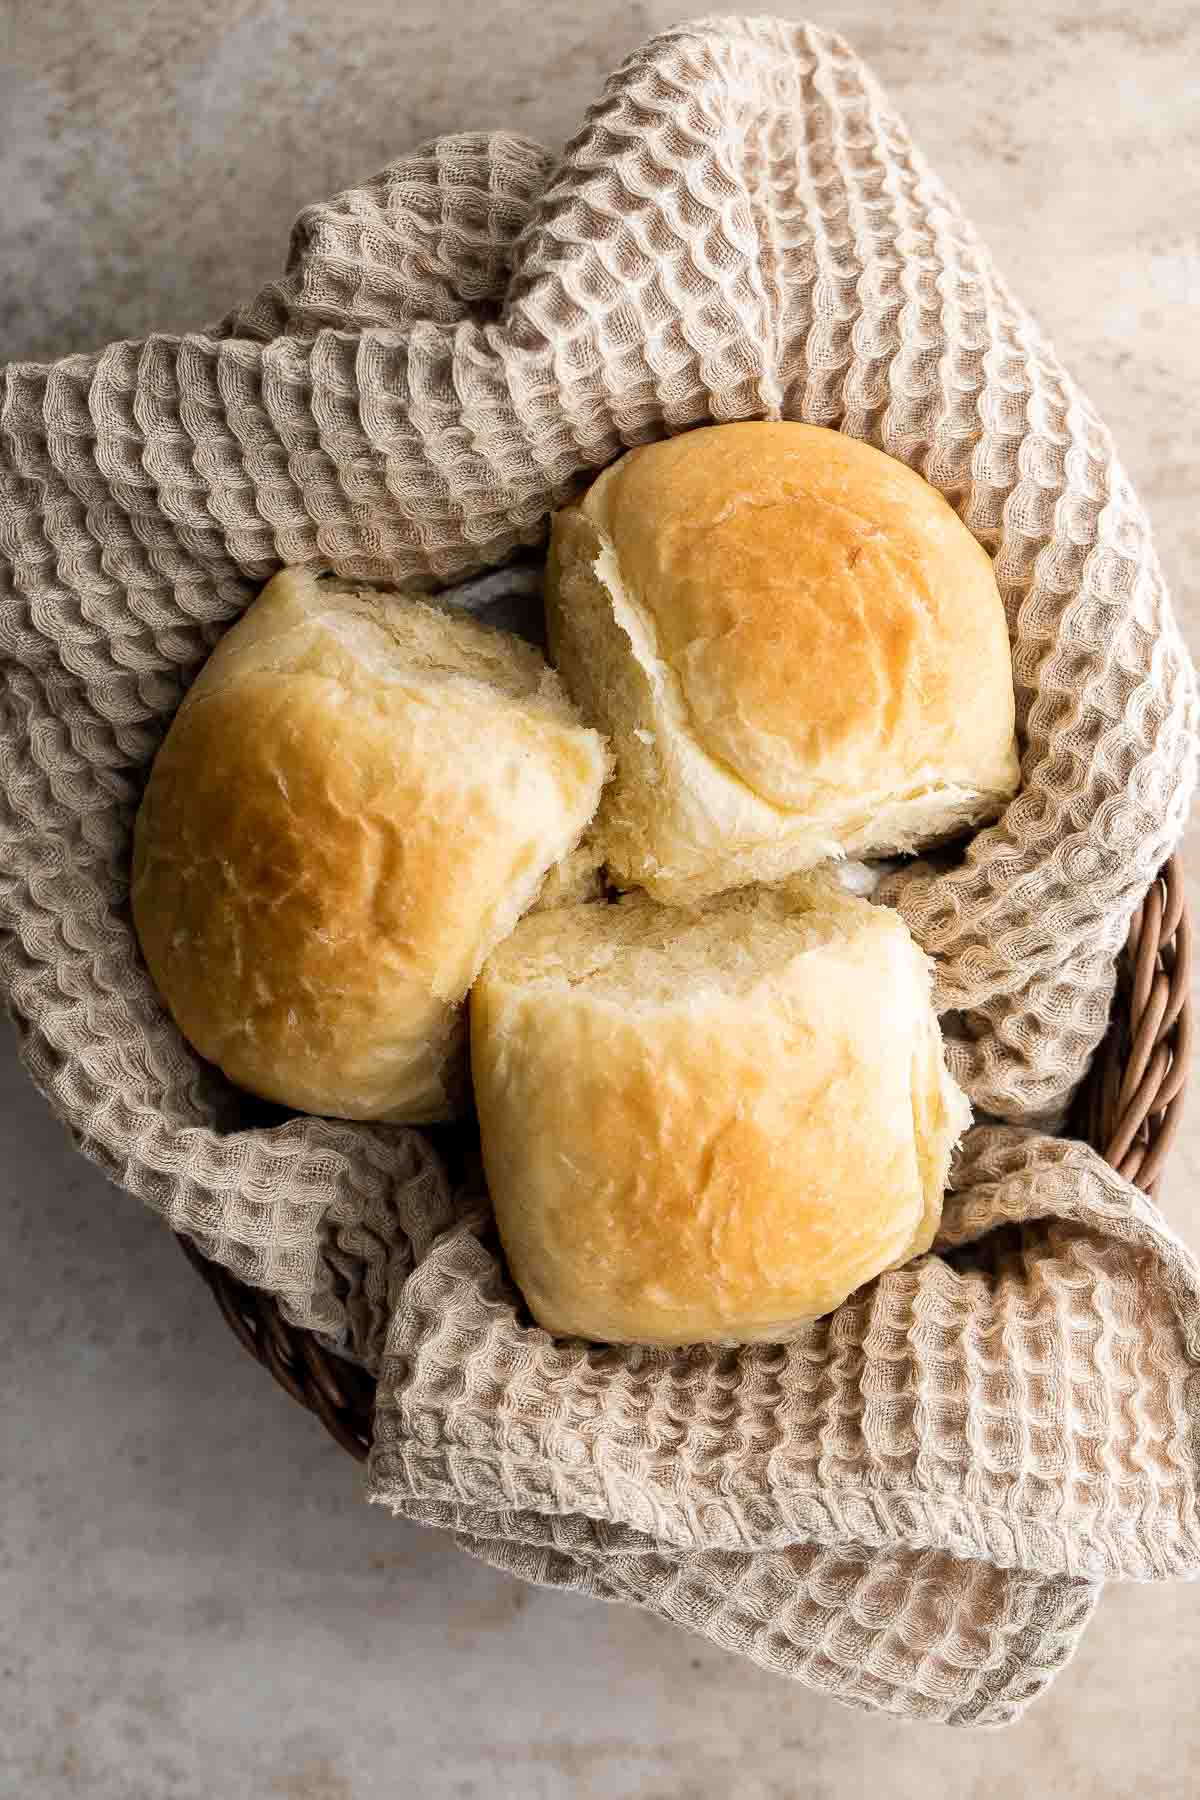
More Dinner Roll Recipes
- 50 Best Bread Recipes
- Green Onion Dinner Rolls
- Cheesy Garlic Dinner Rolls
- Pumpkin Dinner Rolls
- Ciabatta Rolls
- Garlic Knots
- Skillet Dinner Rolls
Tried this recipe?
I'd love to hear what you think! Leave a comment and rating below to share your feedback. Your reviews help others discover this recipe and help me keep creating more free recipes for you. Snap a photo and tag me on social media @aheadofthyme too.

Cheesy Potato Soup
Cheesy Potato Soup is creamy, delicious, and comforting. This recipe takes everyday ingredients and transforms them in about 30 minutes into a rich, luscious soup that pairs well with other dishes or dazzles as an entree all on its own.
Potato cheddar soup is quick and easy to make - which means you can quickly put it together after a long day of work and errands or take your time and make it as part of a multi-course meal. Either way, this potato soup recipe will be one your family never gets tired of.

Why You'll Love This Cheesy Potato Soup
- Creamy, cheesy flavor. The sharp cheddar in this creamy potato soup kicks things up a notch and adds a ton of flavor - living up to its reputation for making absolutely everything taste better. Kids and adults alike will love this cheesy potato soup!
- It's a classic comfort dish. When things get cold and the weather is a bit gloomy, this soup will warm you up from the inside out! Count on this soup for comfort all season long. It tastes like Cheddar Mashed Potatoes, but in soup form.
- It's freezer-friendly. Soups are always an excellent option for stocking the freezer, and this potato soup with cheddar cheese is no exception. You can make a massive batch of this soup and use leftovers to feed your family any time you need something fast!
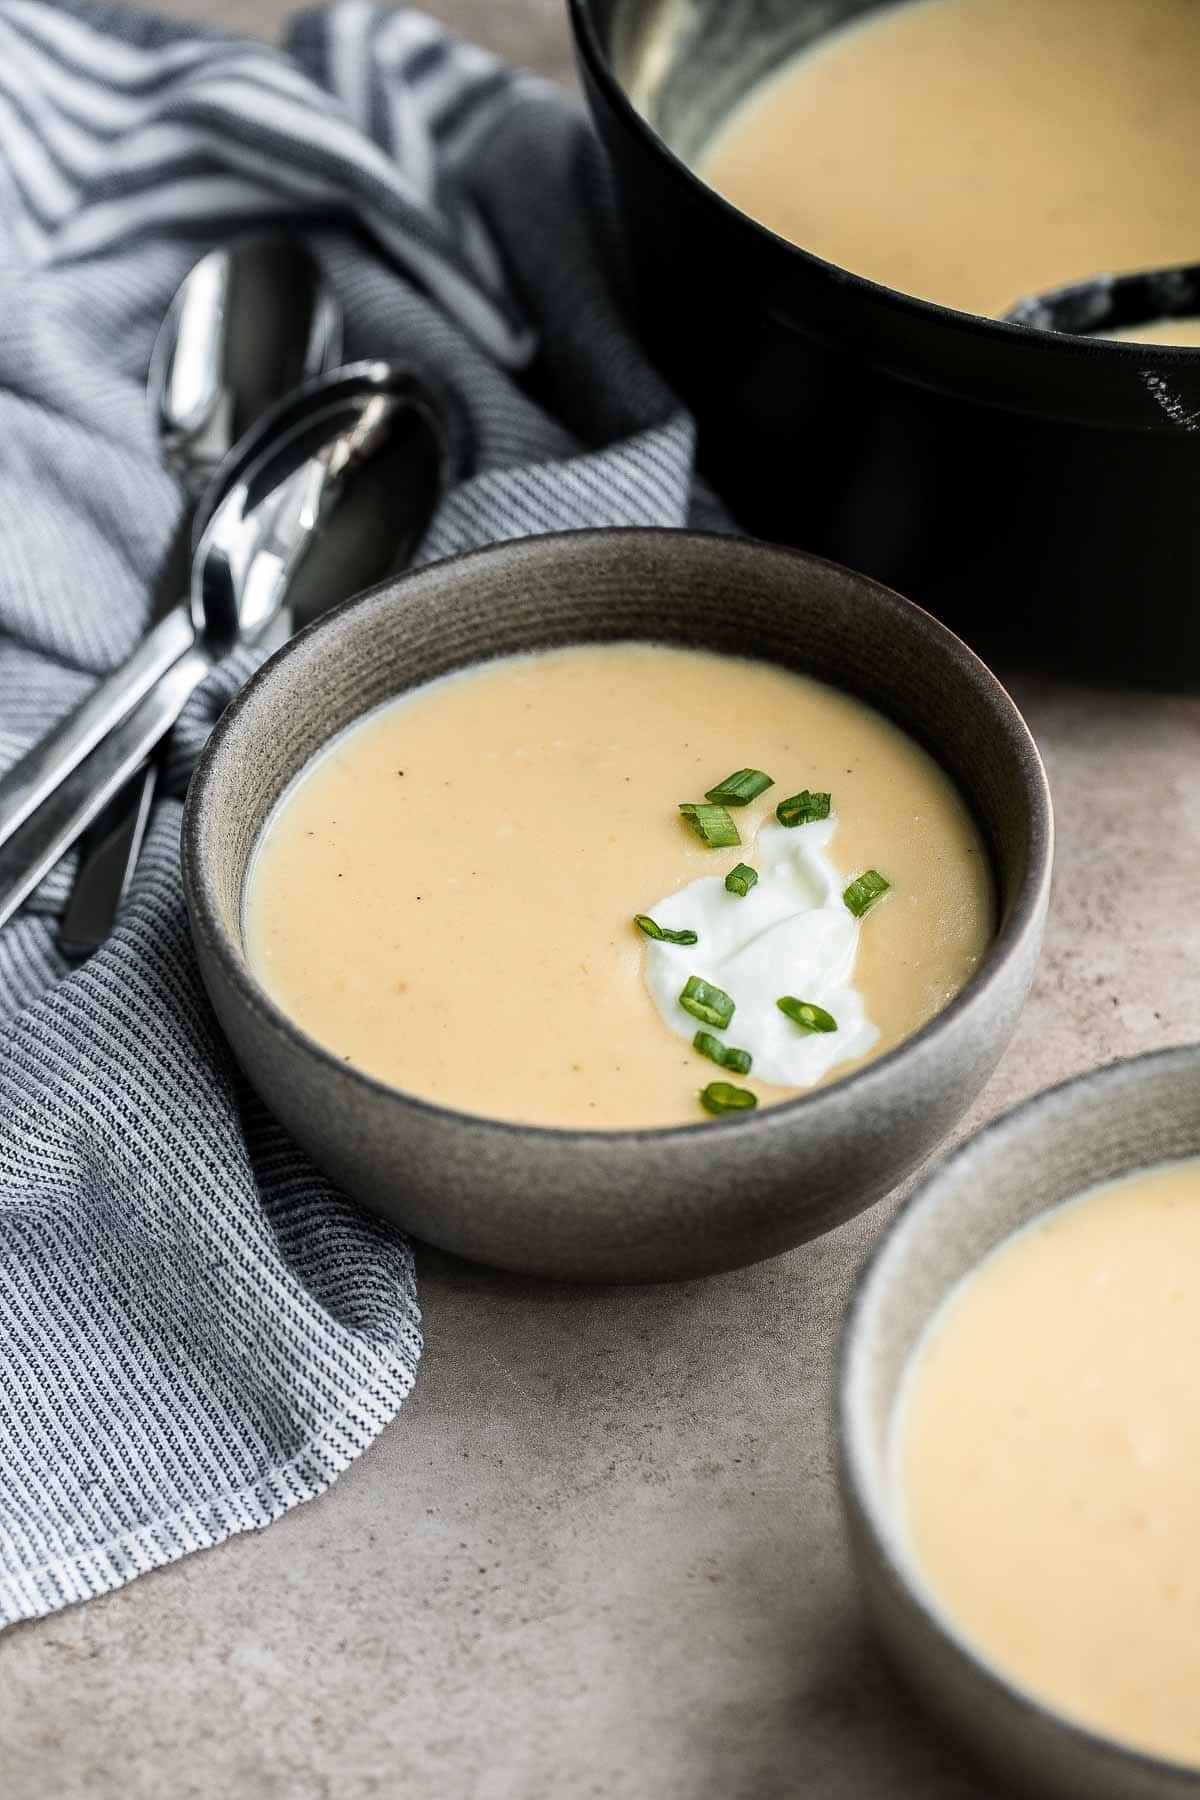
Ingredient Notes
To make this delicious Cheesy Potato Soup, you will need the following ingredients (full measurements in recipe card below):
- butter - olive oil, avocado oil, or a vegan butter substitute would also work.
- onions - If you're in a pinch or just not a fan of chopping onions, dehydrated diced onions or onion powder will add similar flavor to the recipe but will alter the texture of the soup slightly.
- garlic - freshly minced garlic is always best flavor-wise, but canned or jarred minced garlic are fine substitutes.
- potatoes - Yukon gold potatoes or russet potatoes work best for this recipe because of their high starch content that helps give the soup a robust texture, whether you decide to leave it chunky or make it smooth.
- stock - homemade stock will add even deeper flavors to this soup (plus you're in control of the ingredients), but if you don't have time to make your own, store-bought stock is great too!
- milk - if you or someone in your family has a milk allergy or sensitivity, you can use a dairy-free milk with similar fat content, like coconut milk.
- cheddar cheese - cheddar works especially well for adding tons of sharp, tangy, cheesy flavor to potato soup, but you can swap your favorite hard cheese in its place or use a vegan imitation cheese!
- salt and pepper
Toppings
Top this potato soup with your favorite toppings such as:
- sour cream - if you're out of sour cream, greek yogurt is a great alternative that will taste and feel similar.
- green onions or chives - you can top this soup with any soft herb, like dill, parsley, or basil. Additionally, you can use dried herbs if you don't have the fresh versions!
- bacon bits
- cheese - grated cheddar cheese or parmesan cheese are delicious on top.
You will also need measuring cups and spoons, a large cooking pot, and a potato mashed (or fork). You'll also need an immersion blender, food processor, or blender, to puree the soup until smooth if you don't want it to be chunky.
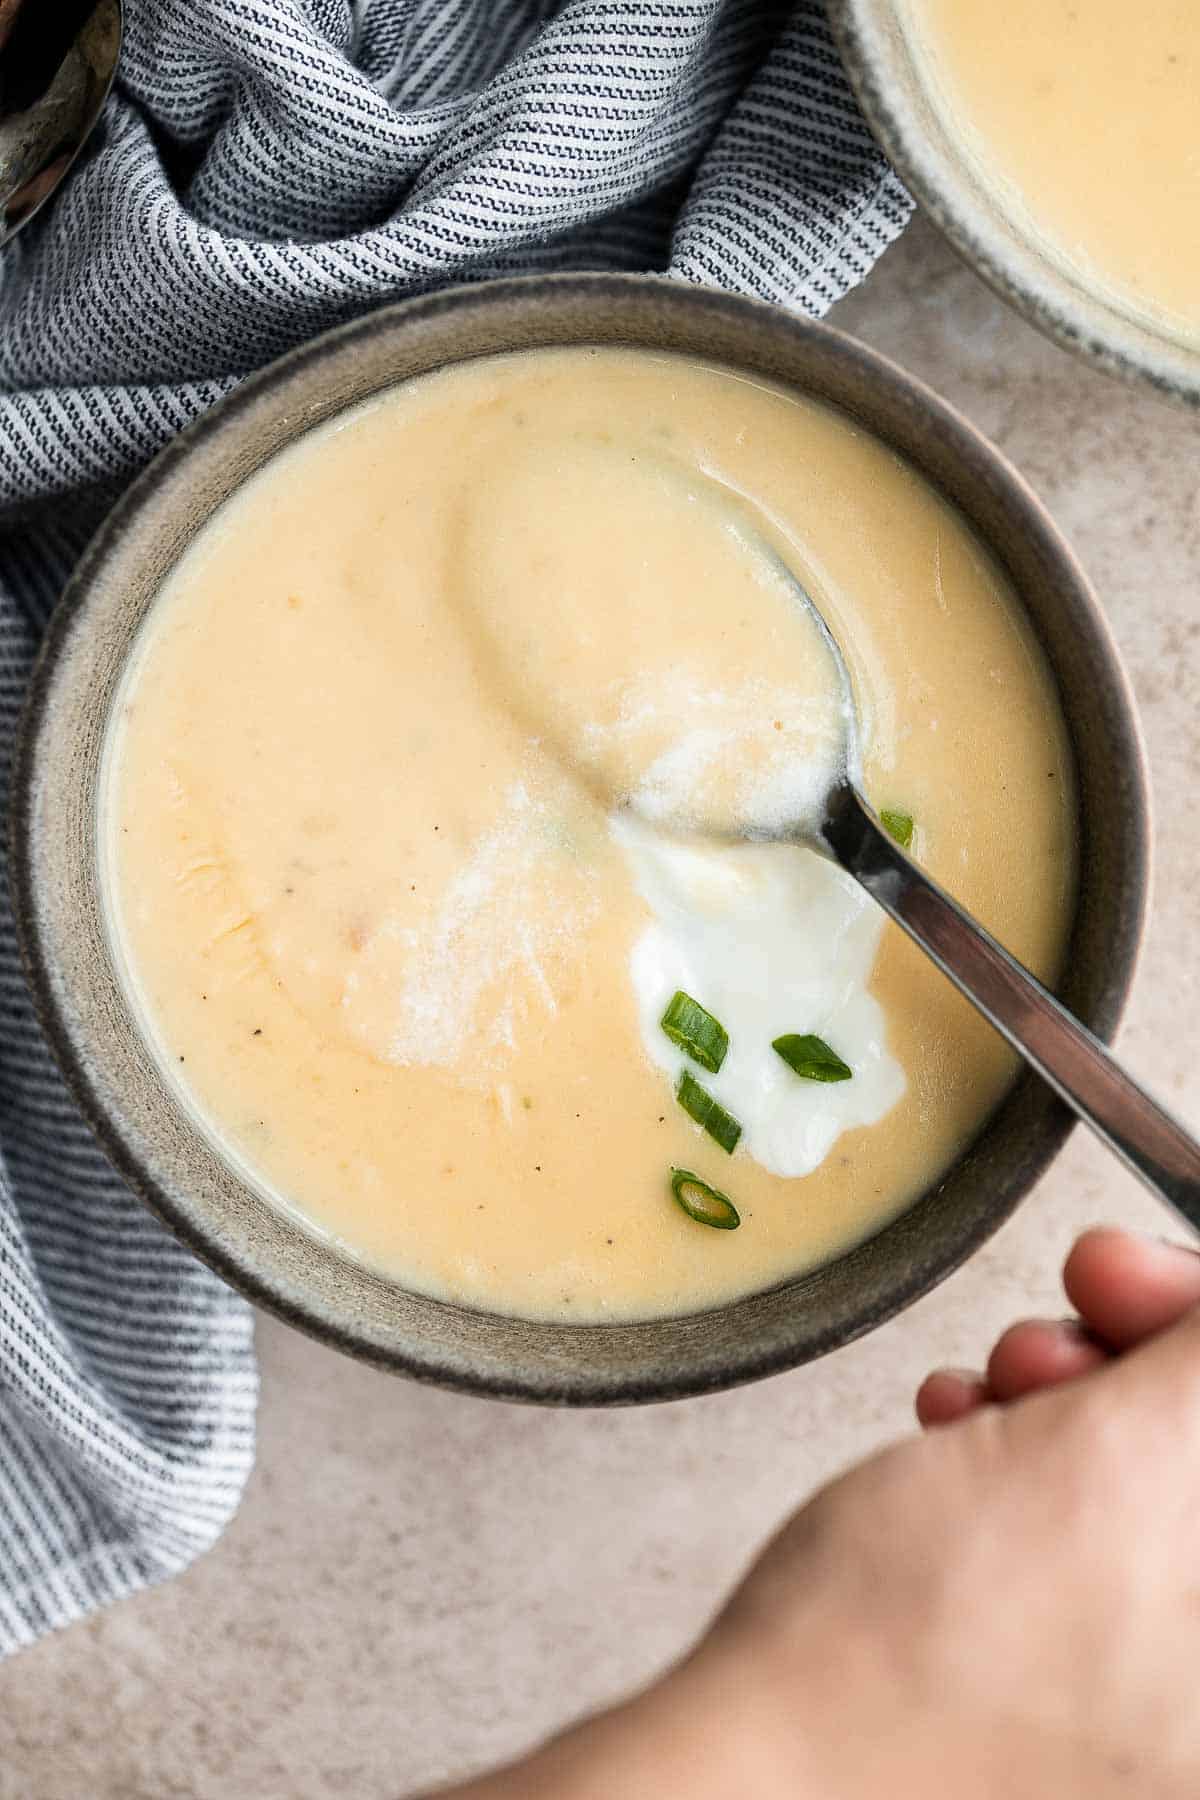
How to Make the Best Cheesy Potato Soup
- Sauté aromatics. Heat butter in a large cooking pot over medium-high heat. Add onion and cook until soft and translucent, about 3-4 minutes. Add garlic and cook until fragrant, about 1 minute.
- Add potatoes. Add potatoes and stock, and give everything a stir.
- Simmer. Turn the heat up to high and bring the soup to a boil. Then, reduce heat to low, cover, and simmer for 15-20 minutes, until potatoes are soft when you insert a fork.
- Mash. Use a potato masher or fork to roughly mash the potatoes.
- Add cheese. Stir in milk until incorporated. Add cheese and stir until melted. Season with salt and pepper, to taste.
- Puree (optional). You can serve the soup chunky, or puree it until smooth. If so, use an immersion blender and puree the soup directly in the pot, or transfer to a food processor or blender to puree.
- Serve. Serve warm and top with a dollop of sour cream and green onions, if desired.
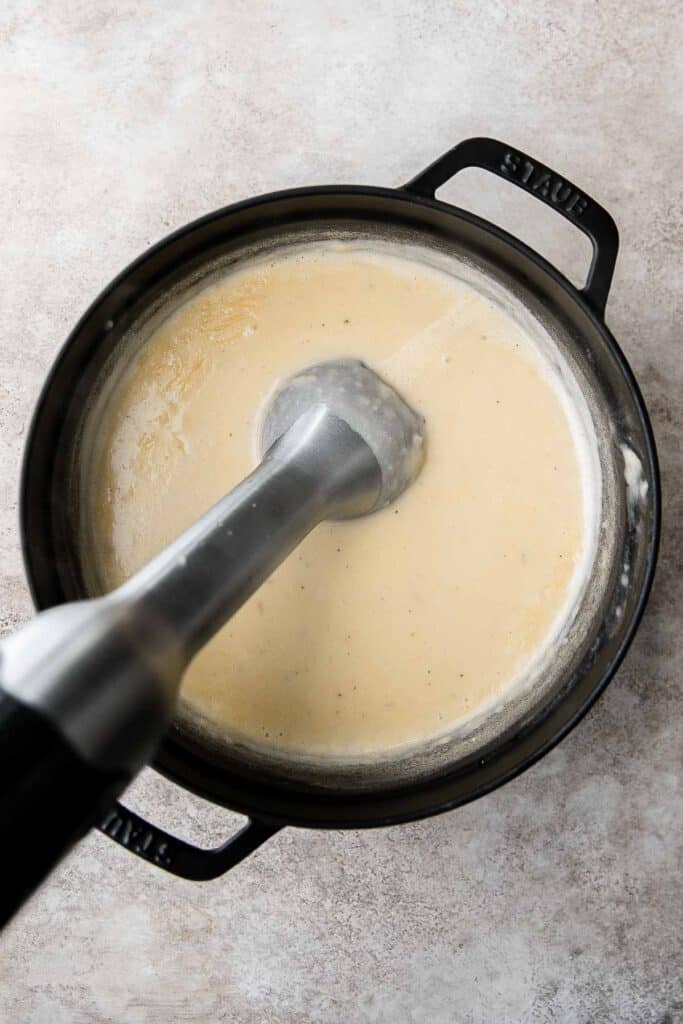
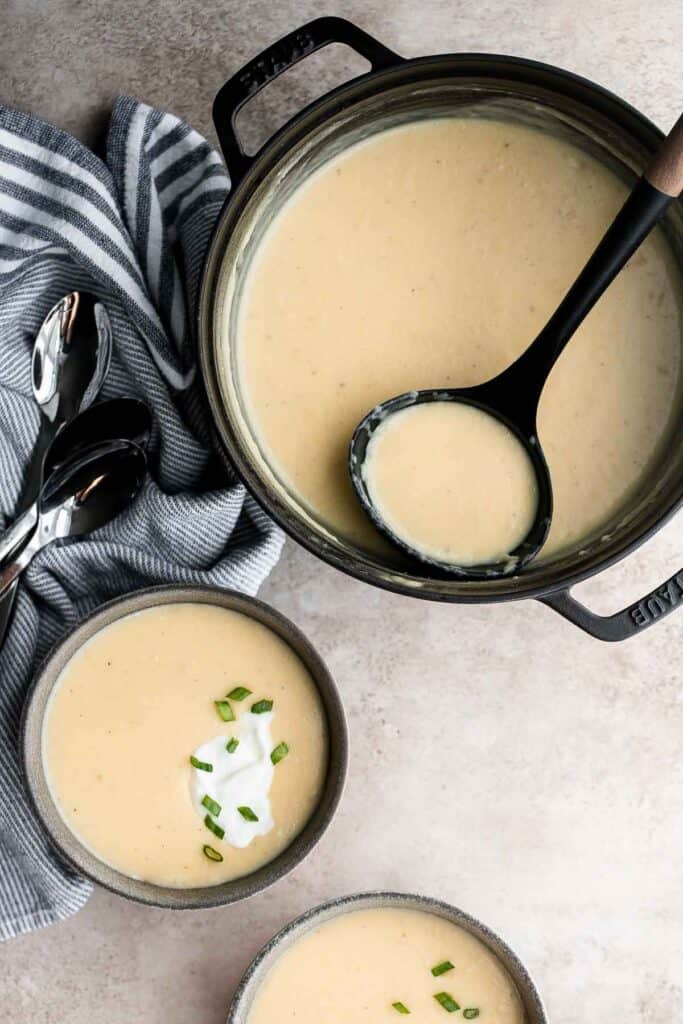
How to Serve
Cheesy Potato Soup is delicious served on its own with your favorite toppings. It also pairs really well with some classic fall soup sides including:
- Fall Harvest Salad
- Pumpkin Cornbread
- Pita Grilled Cheese
- Sweet Kale Salad
- Stuffed Butternut Squash
- Garlic Breadsticks
- Chicken Salad
Storage and Freezing Instructions
How to Store
Allow any leftover potato soup to cool to room temperature, then transfer to an airtight container and store in the refrigerator for 3-4 days. If only storing for a day or 2, you can keep it in the pot covered with the lid.
How to Freeze
Transfer leftover cheesy potato soup to a freezer-safe airtight container or freezer bag and freeze for up to six months. To thaw, transfer to the fridge a day before you want to use the leftovers to allow it to thaw overnight.
How to Reheat
To reheat, bring it up to the desired temperature in the microwave or on the stovetop. You can also reheat straight from frozen in a crockpot or on the stovetop, but you'll have to allow it to thaw a bit first or use a warm water bath to release the frozen soup from the container.

Recipe Tips and Tricks
- Choose your chunks. The texture of this soup is fully up to your preferences. You can mash the potatoes as roughly or as finely as you want. You can even add them to a blender, use an immersion blender, or throw in the food processor to get a smoother, silkier soup.
- Make sure the potatoes are cut uniformly. The ability to cut things uniformly is one of the most essential skills you can have in the kitchen! You don't have to be perfect, but if the potatoes vary too much in size, they'll cook at different rates and can affect the texture of your soup. Plus, no one likes a surprise bite of undercooked potato.
More Potato Soup Recipes
- 60 Best Soup Recipes
- Mashed Potato Soup
- Creamy Ham and Potato Soup
- Creamy Tomato Potato Soup
- Sweet Potato Soup
- Turkey Potato Chowder
Tried this recipe?
I'd love to hear what you think! Leave a comment and rating below to share your feedback. Your reviews help others discover this recipe and help me keep creating more free recipes for you. Snap a photo and tag me on social media @aheadofthyme too.

Green Beans Almondine
Green Beans Almondine is buttery, garlicky, and nutty. This classic French side dish is quick and easy to make, loaded with flavor, and has the perfect combination of textures between green beans and almonds. You will be reaching for this recipe any time you've got green beans on hand.
Made with a handful of simple ingredients including a few other minor pantry staples, these green beans are big on flavor and comes together quickly, making it especially helpful for when you need a tasty side in a hurry.
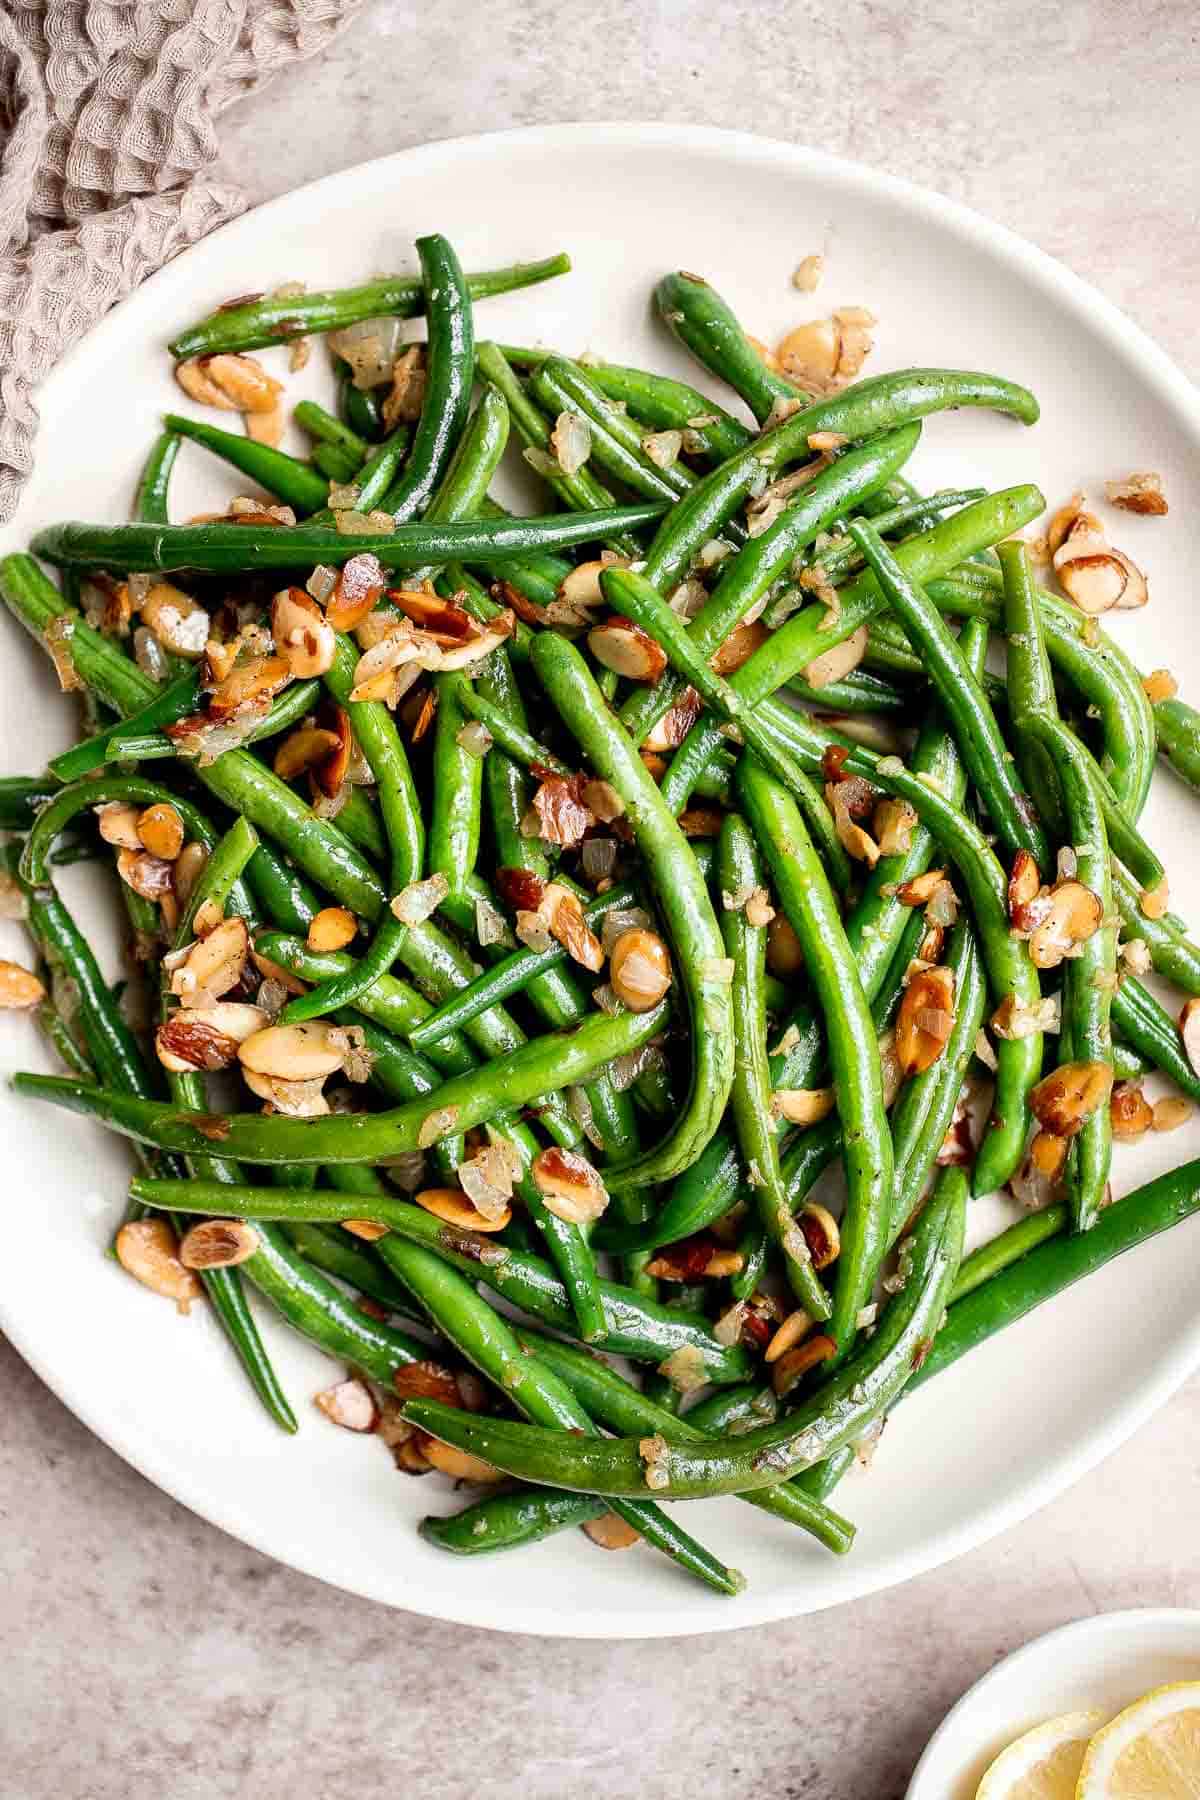
Why You'll Love This Green Beans Almondine
- They're a great side for formal and informal occasions. These green beans with almonds are easy to whip up but look pretty fancy among a dinner spread, making them the perfect choice no matter the occasion.
- They come together quickly. Green beans almondine is a fairly fast side - it's ready to eat in only 20 minutes! If you choose a main dish that's got a similarly low cook time, you could have a full dinner done in under an hour.
- Made with a handful of ingredients. This green beans side dish is made up of simple ingredients like toasted almonds, sautéed garlic, blanched green beans, butter, and a few other minor pantry staples. It's got big flavor.
- They're tasty and healthy. These humble green beans are packed with flavor, plus the toasted almonds add the perfect amount of crunch. They're healthy and delicious. Your whole family will love this preparation of a typically boring vegetable!
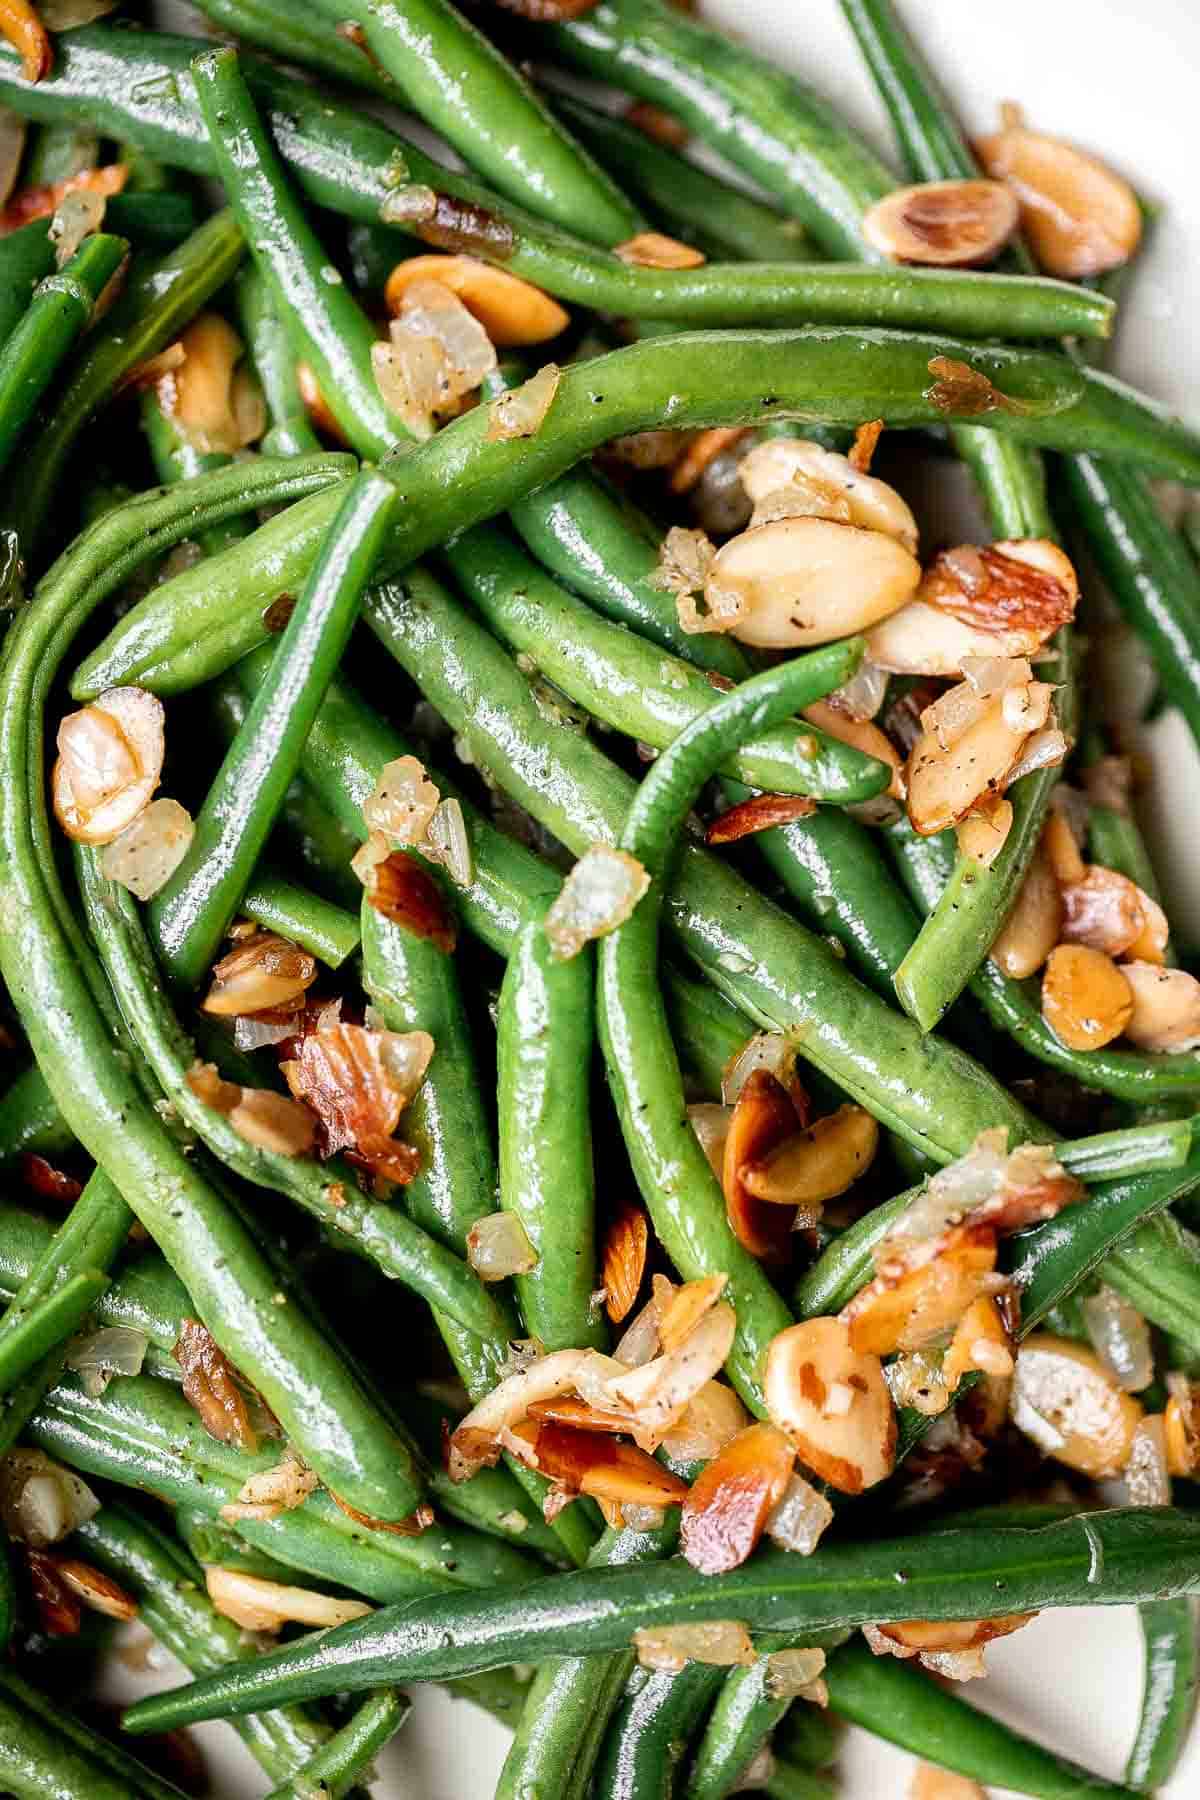
Ingredient Notes
To make this delicious and easy Green Beans Almondine, you will need the following ingredients (full measurements in recipe card below):
- green beans - fresh green beans work best, but you can also use frozen French cut green beans. Just be sure to adjust the cooking time and cook them through to make sure the centers aren't cold.
- butter - olive oil or other neutral oil with a high smoke point would also work.
- sliced almonds - store-bought sliced almonds make this recipe a little faster and less labor intensive, but if you've got whole almonds and no time (or patience) to slice them yourself, a rough chop will do.
- onions
- garlic - freshly chopped garlic always adds the most flavor, but you can also use pre-minced garlic if you've got some on hand.
- lemon juice - If you're out of fresh lemons, concentrated lemon juice is fine to use, too.
- salt - you can use the usual finely ground table salt for these French green beans or try a course or flake salt to add a bit more crunch and delightful bursts of saltiness.
- black pepper
You will also need measuring cups and spoons and a large skillet.
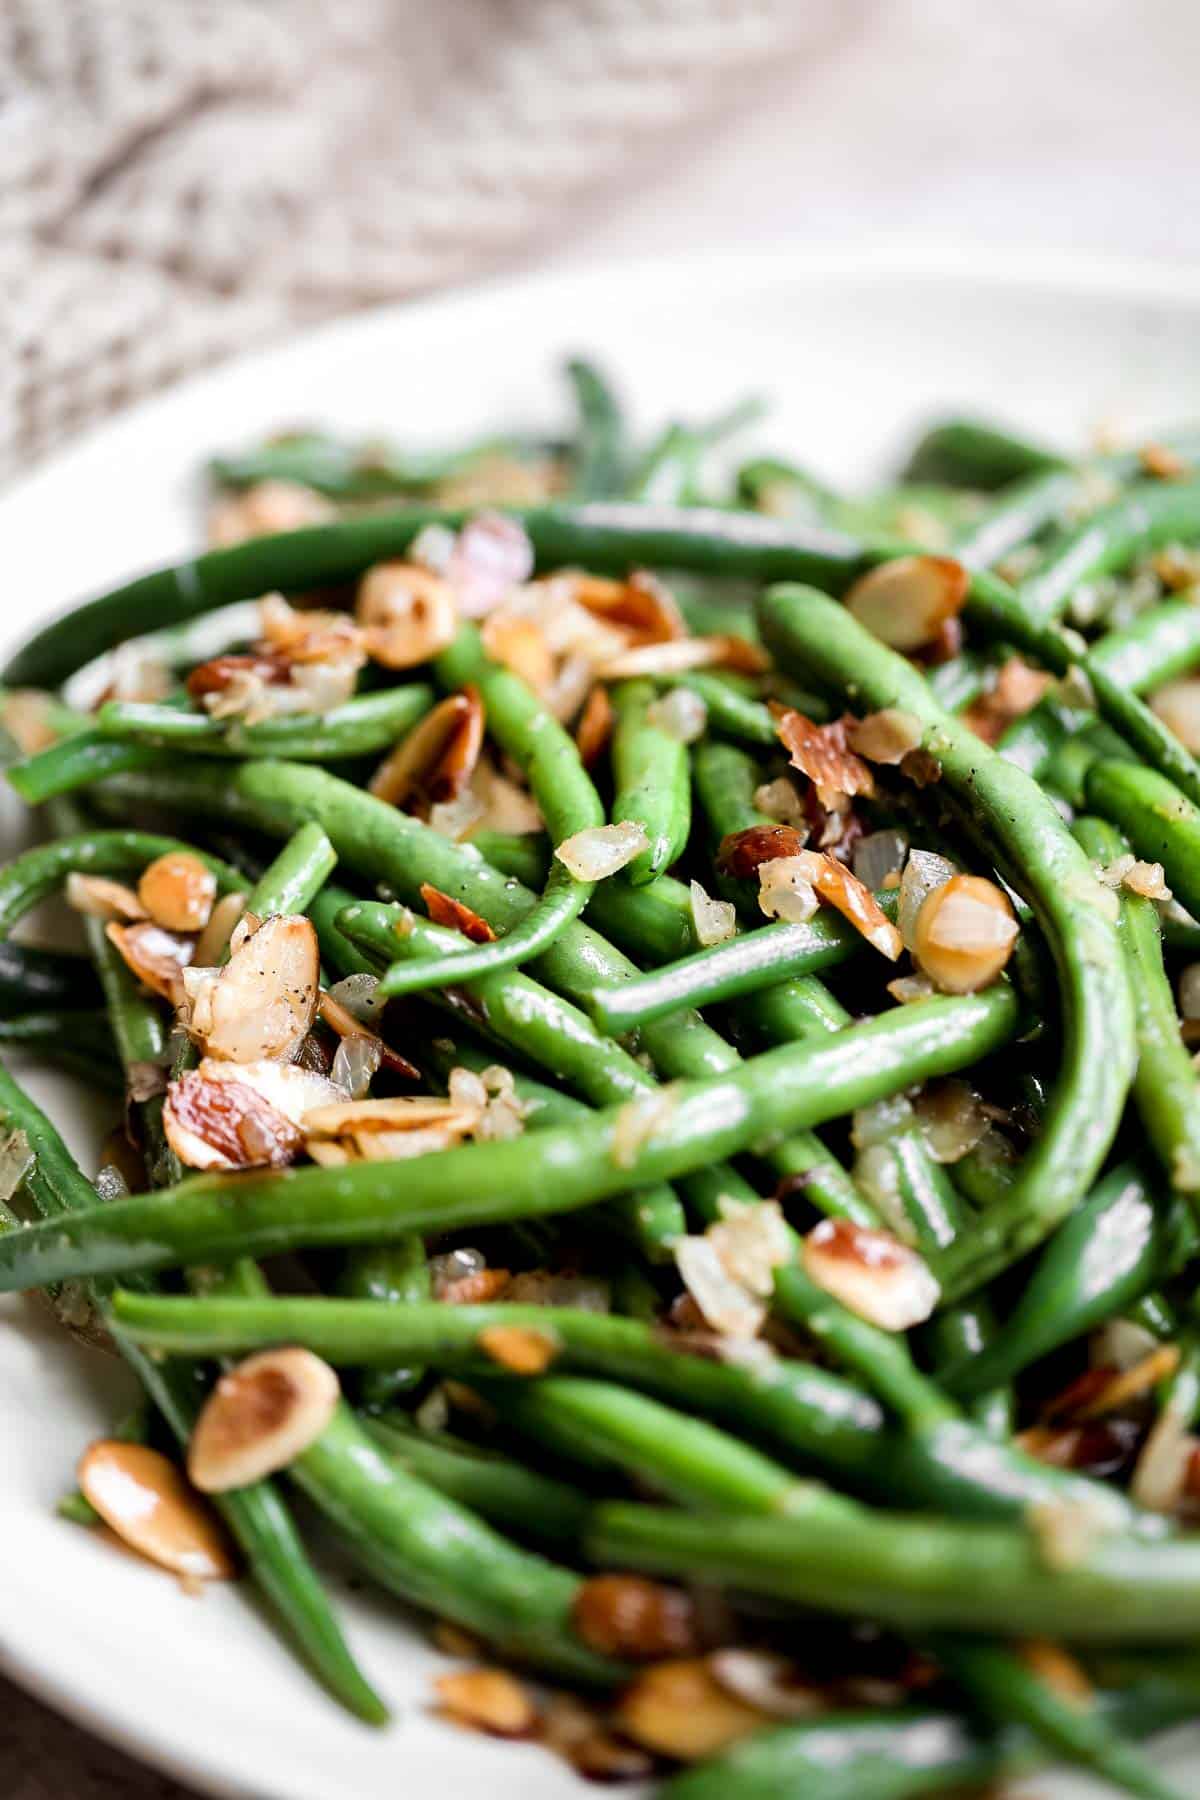
How to Make the Best Green Beans Almondine
- Blanch green beans. Add green beans in a large pot of boiling water and cook until tender, about 3-4 minutes. Drain under cold running water for a minute and set aside.
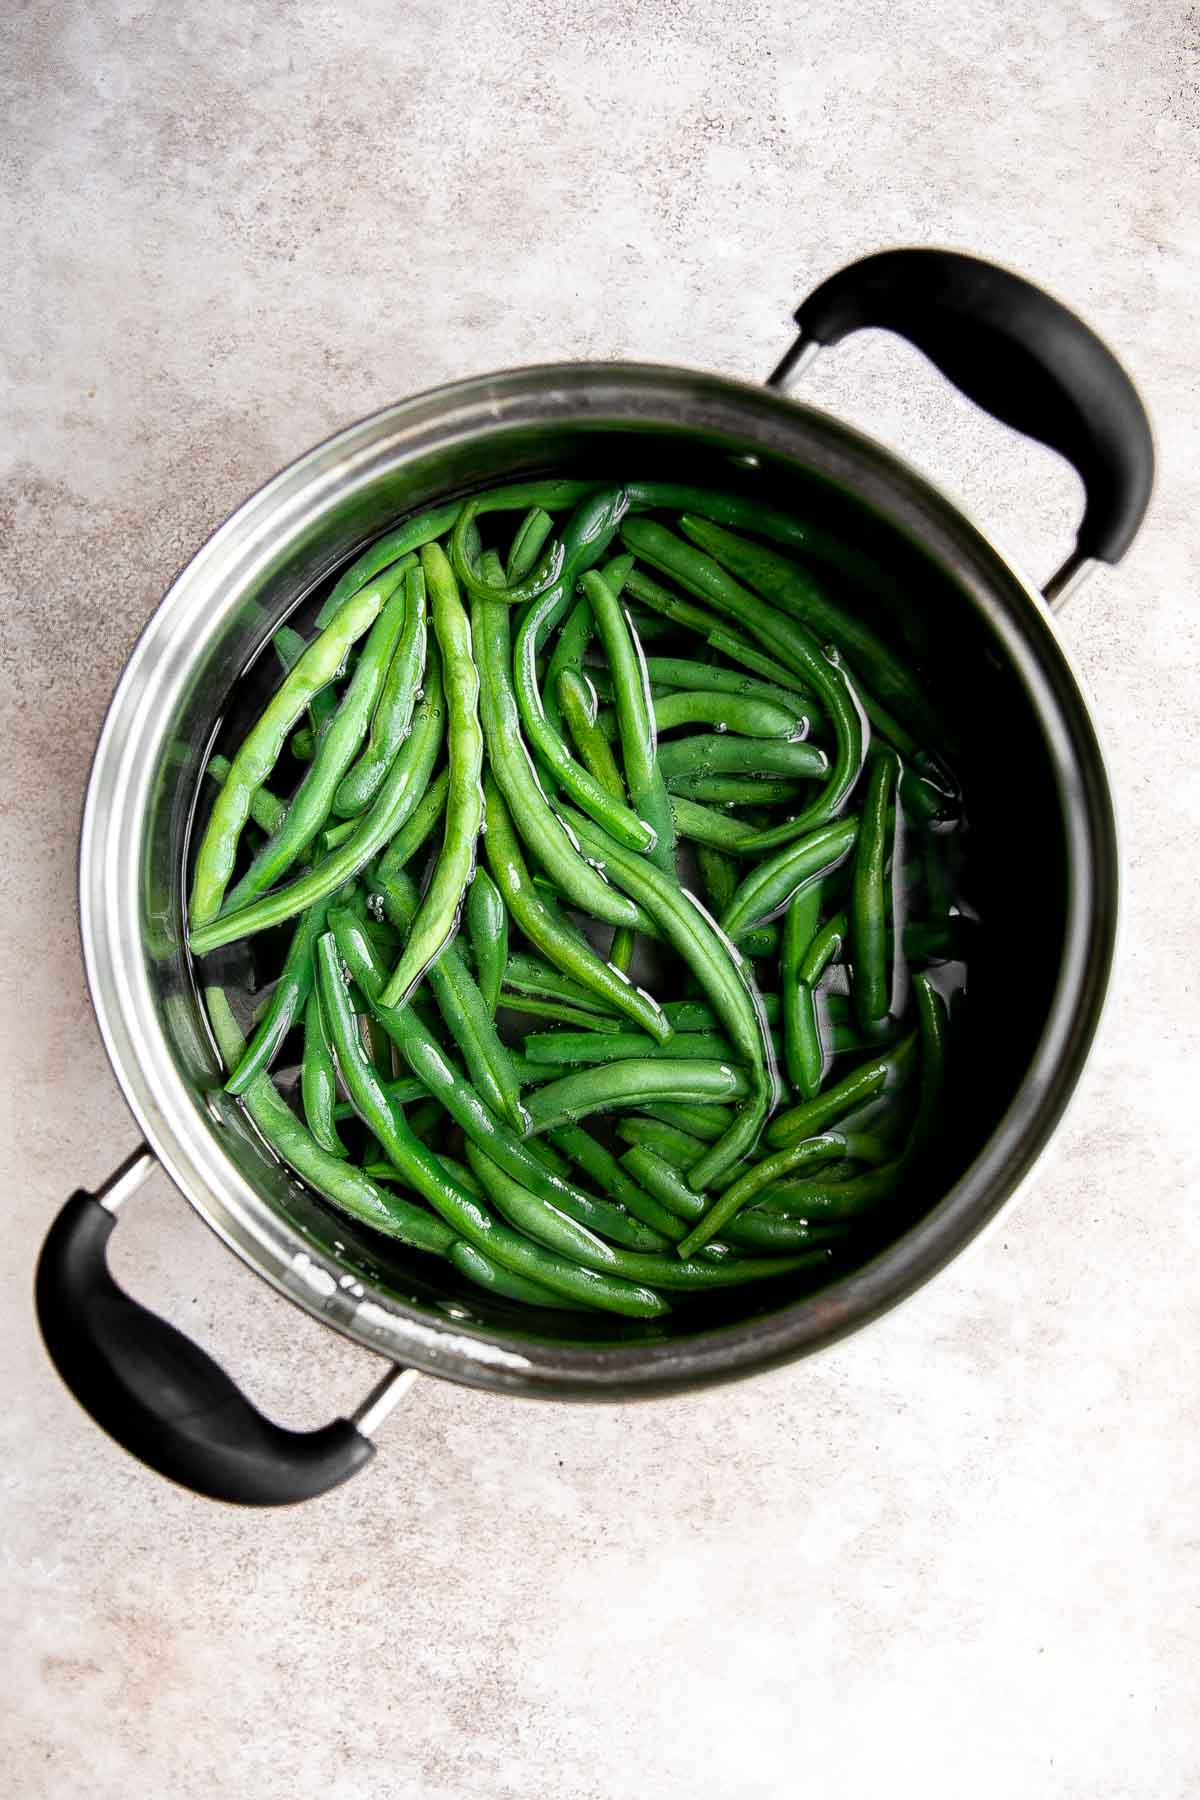
- Sauté almonds. In a large skillet, melt butter over medium-high until bubbling, about 2 minutes. Add almonds and sauté until golden brown, about 2 minutes.
- Add aromatics. Add onion and garlic and cook until fragrant, about 1 minute.
- Add in green beans. Stir in the blanched green beans and cook until warmed through, about 1-2 minutes.
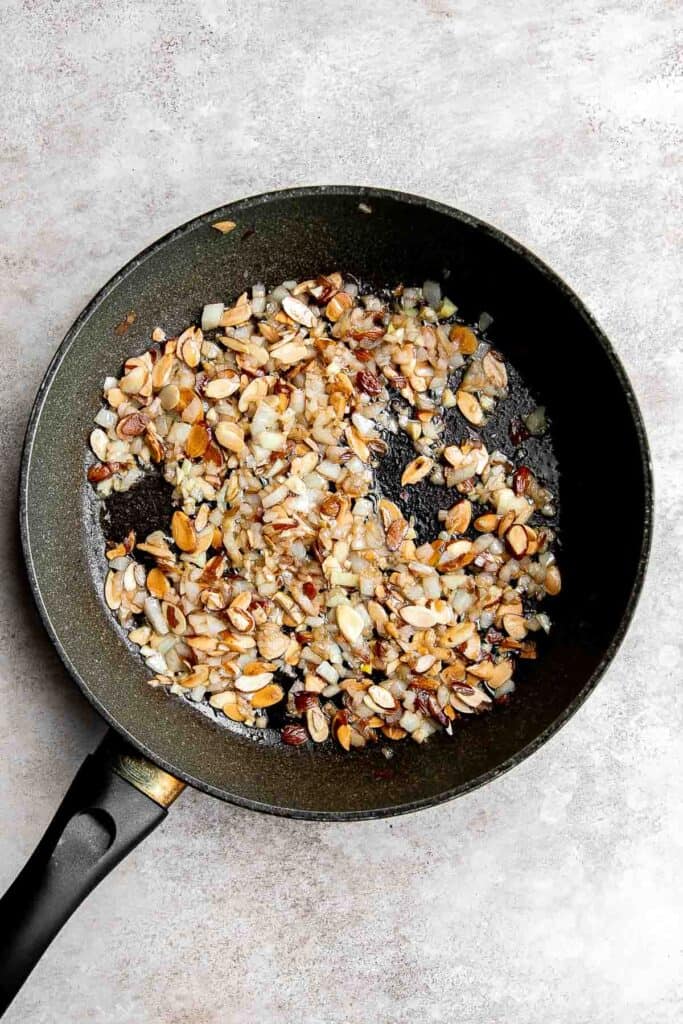
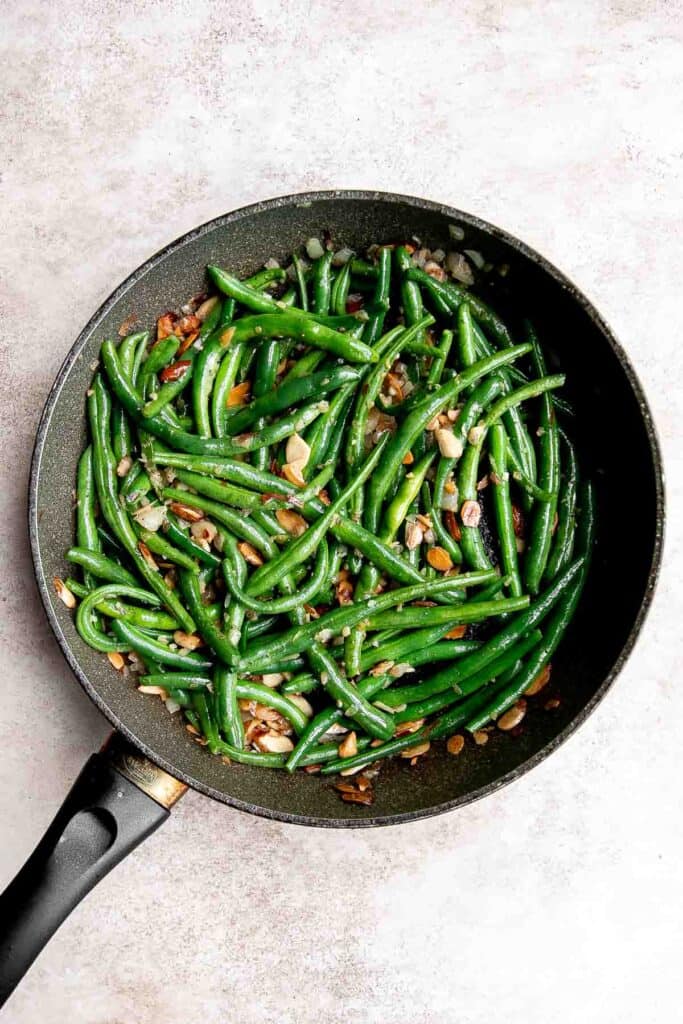
- Add seasoning. Add lemon juice, salt, and pepper and toss well to coat. Serve immediately.
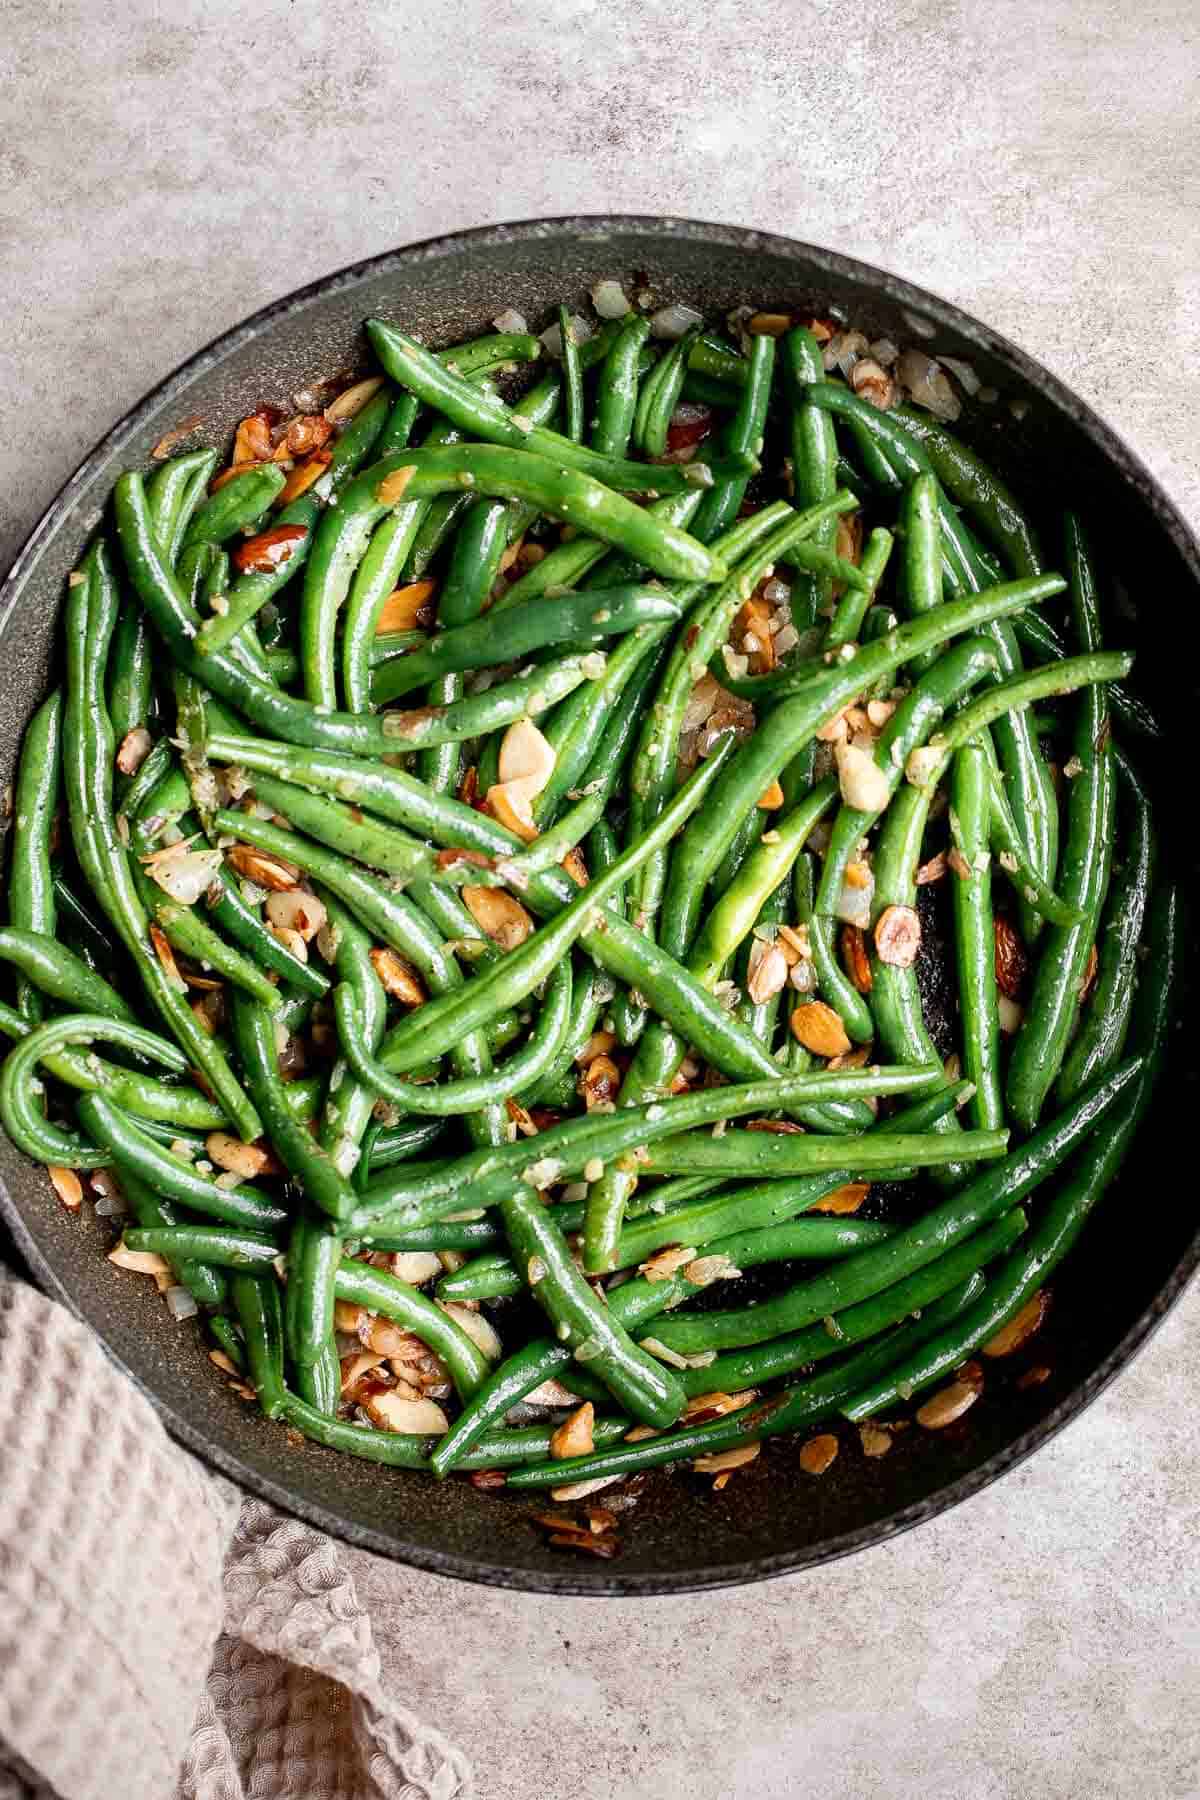
How to Serve
Green Beans Almondine is a delicious side dish that you could eat all on it's own, but it pairs really well with almost any entree. Some of our favorite main course dishes to pair these green beans with are:
- Garlic Butter Steak Bites
- Oven Baked Chicken Breast
- Stuffed Eggplant
- Garlic Butter Salmon
- Seared Scallops
Storage and Freezing Instructions
How to Store
Store leftover cooked green beans in an airtight container and store in the fridge for up to four days.
How to Freeze
Place leftover green beans almondine in a freezer bag and freeze for up to 3 months. To thaw, transfer to the fridge overnight and reheat in the microwave or on the stovetop over medium heat.
Recipe Tips and Tricks
- Prep your own green beans for optimal freshness. Stores will sell French cut green beans several ways, from fresh and entirely whole, to already-trimmed, to fully prepared canned or frozen green beans. Trimming your own is a little time consuming, but if you have extra hands it goes by quickly (and this is a simple task that kids ages 6+ will love helping with!). You can easily snap off the ends of fresh green beans with your hands, so a sharp knife is optional.
- Avoid overcooking. It's important to watch the pot while the beans are blanching in the boiling water. Overboiling them will cause them to go mushy and fall apart. You want them to have the same texture as al dente pasta: tender, but still firm enough to hold shape and bite through.
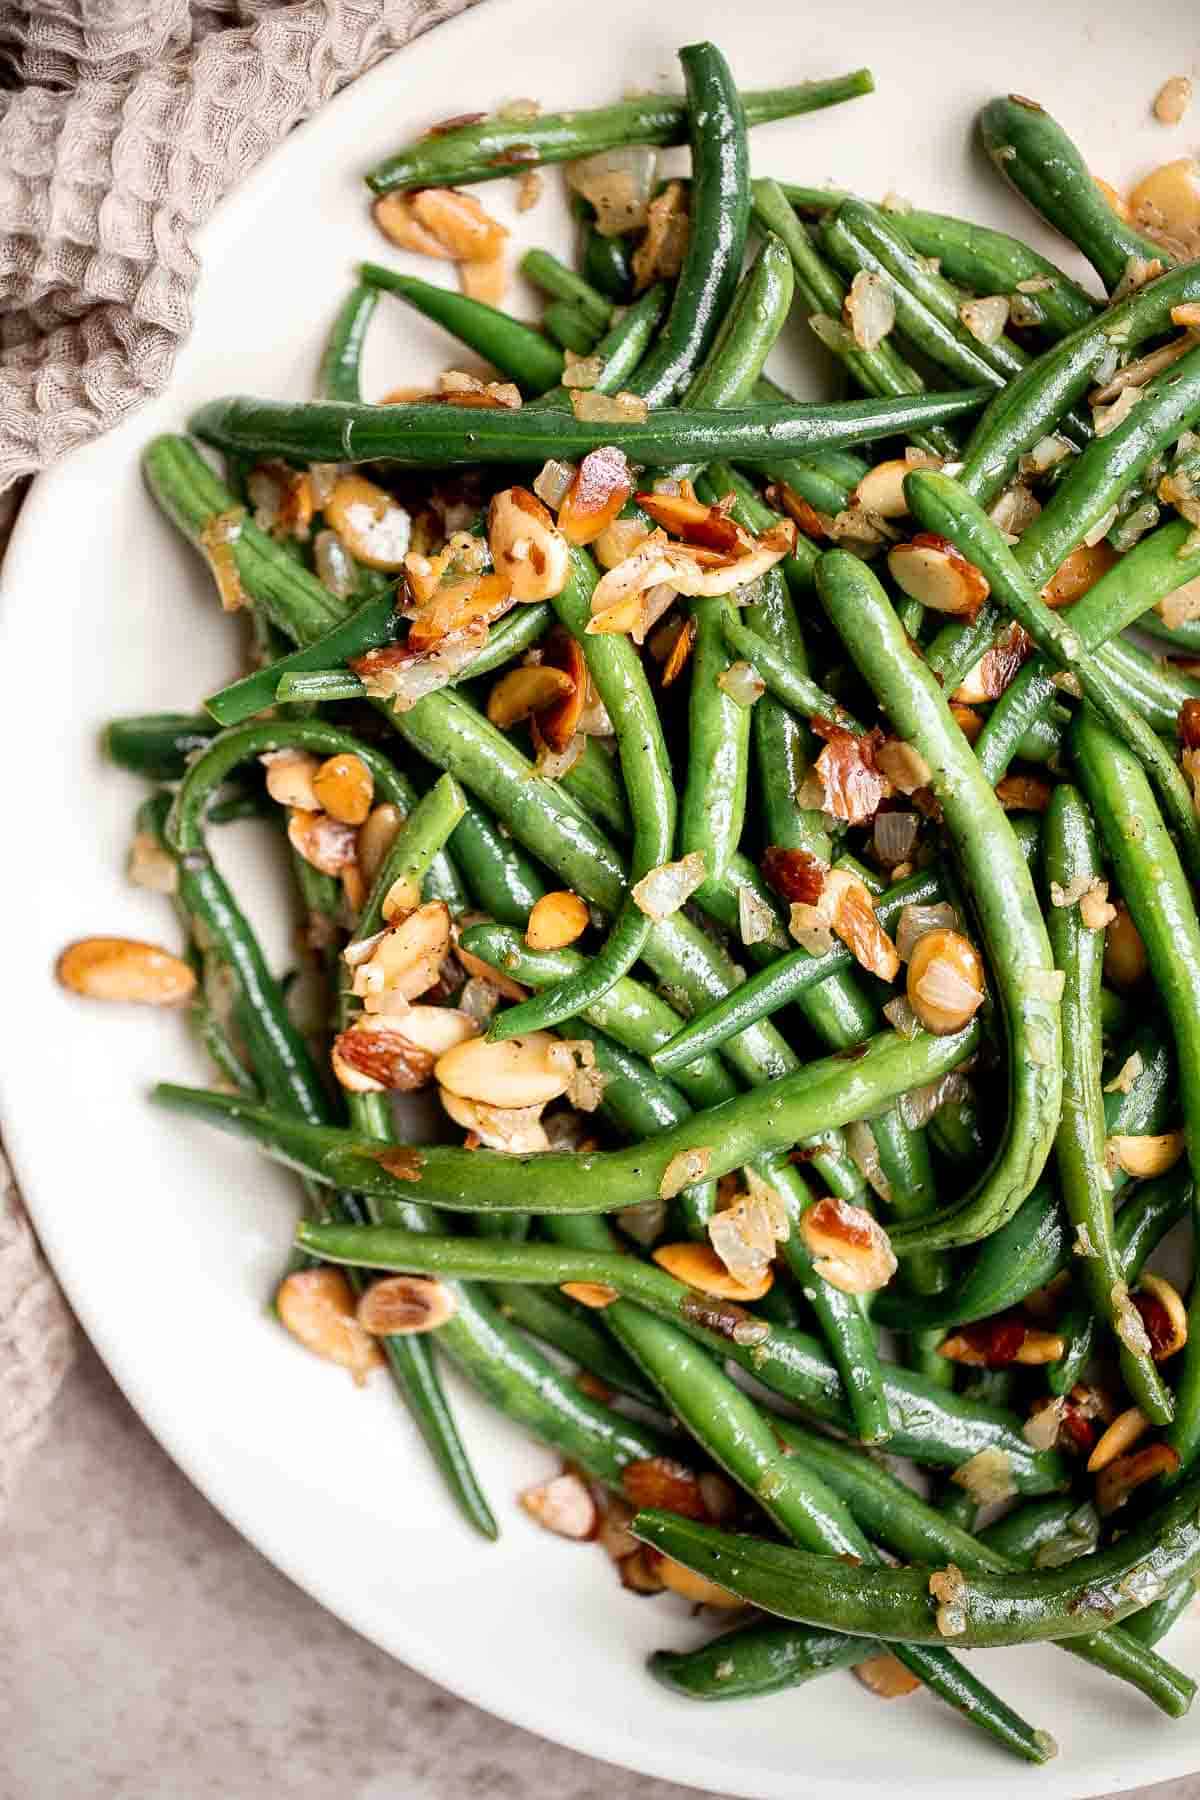
More Green Bean Recipes
- 15 Best Green Bean Recipes
- Pesto Green Beans
- Sautéed Garlic Green Beans
- Green Bean Casserole
- Green Bean Fries
- Roasted Garlic Green Beans
Tried this recipe?
I'd love to hear what you think! Leave a comment and rating below to share your feedback. Your reviews help others discover this recipe and help me keep creating more free recipes for you. Snap a photo and tag me on social media @aheadofthyme too.

Pumpkin Cornbread
Pumpkin Cornbread is a sweet and savory side dish that is moist, fluffy, and crumbly with golden crisp edges. Loaded with real pumpkin, this twist on classic cornbread is delicious and flavorful.
Plus, this quick and easy bread recipe requires only ten minutes of preparation before baking (and no mixer required!) and takes half an hour in total. It's perfect for tossing in the oven before a meal or baking and taking on the road.
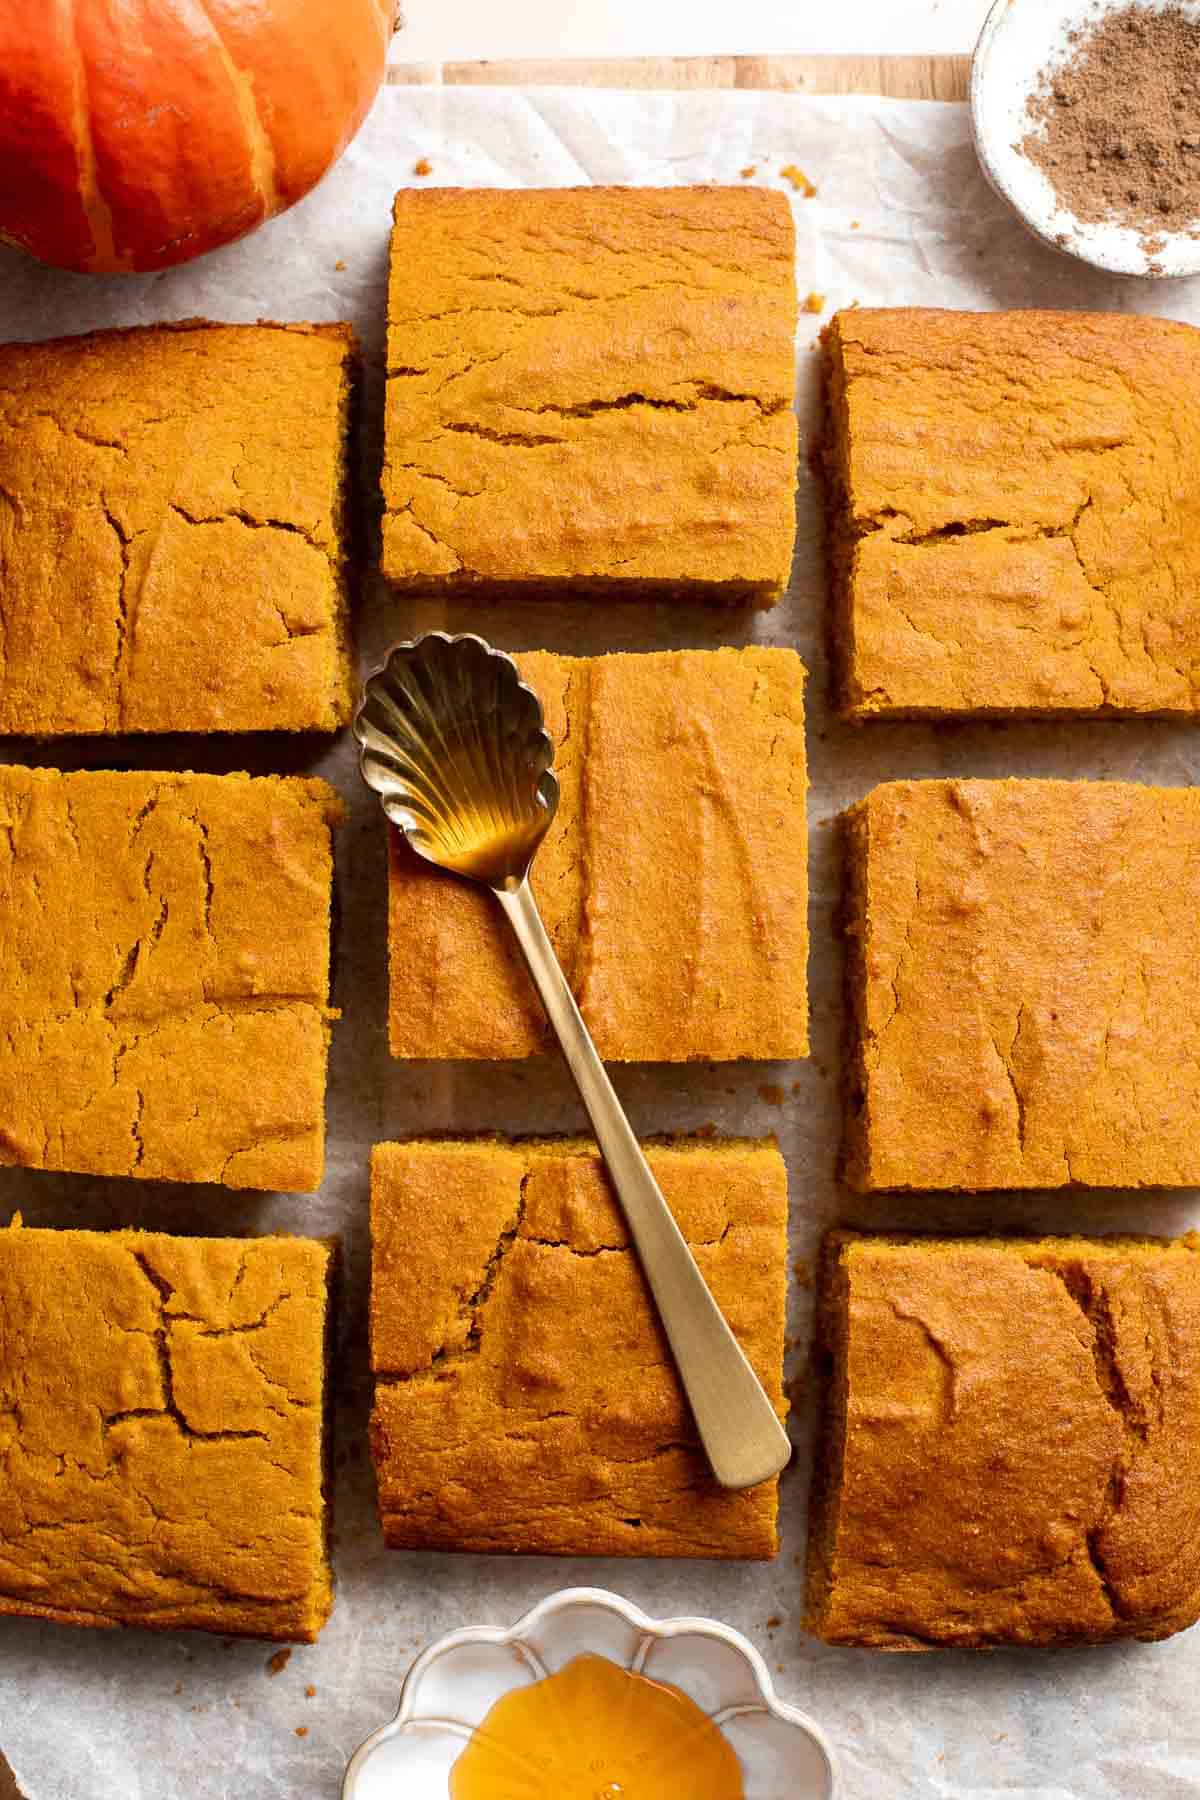
Why You'll Love This Pumpkin Cornbread
- Full of fall flavors. Fall brings with it pumpkin-flavored everything - cornbread included! Between the pumpkin puree, pumpkin pie spice, and the cornmeal, it tastes like a full fall harvest in one bite. This cornbread will instantly get you in the autumn mood, if you're not there already.
- It's great as a side and an appetizer. You can serve this versatile pumpkin cornbread as a starter or alongside the main dish. Whether you're trying to hold over a few hungry mouths before a meal or looking for the perfect bread side to compliment a stew or roast, look no further.
- It's ideal for parties and tailgates. Autumn is the season of crockpot potlucks, tailgating events, and fall gatherings. This pumpkin cornbread travels well and is great for taking to a potluck or contributing to a party spread!
- Great use of leftover pumpkin. This pumpkin cornbread is a great recipe to make when you have some extra pumpkin puree leftover from your other fall baking adventures like Mini Pumpkin Pies, Small Batch Chocolate Chip Pumpkin Bread, or Pumpkin Mascarpone Pie.
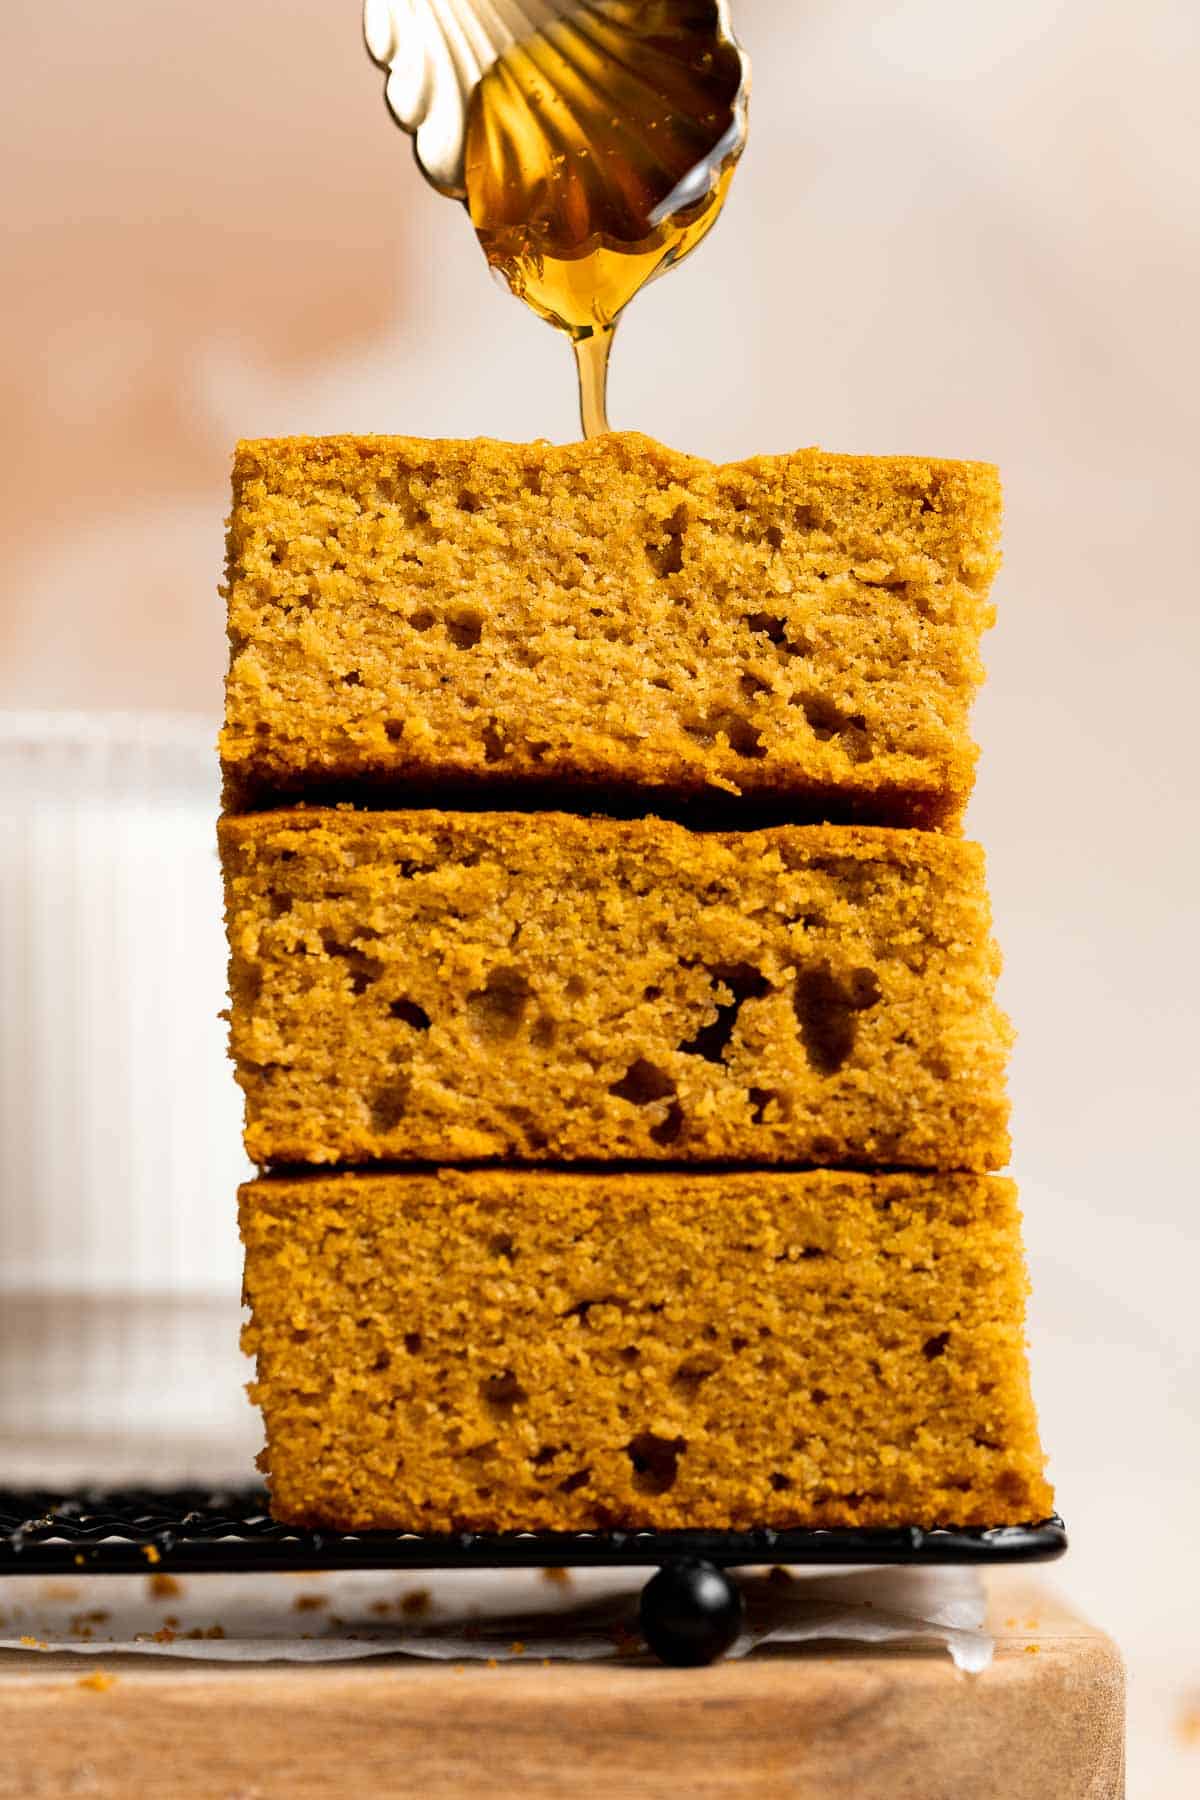
Ingredient Notes
To make this delicious Pumpkin Cornbread, you will need the following ingredients (full measurements in recipe card below):
- flour - for a gluten-free pumpkin cornbread, substitute the wheat flour for all-purpose gluten free flour.
- cornmeal
- baking powder + baking soda
- pumpkin pie spice - pumpkin pie spice is made up of cinnamon, ground ginger, allspice, nutmeg, and clove, so if you don't have pumpkin pie spice on hand but you have the other spices, you can make your own!
- pumpkin puree - pumpkin puree is essential to this pumpkin cornbread recipe. Whether you use store-bought pumpkin puree or a homemade puree is up to you.
- milk - the milk in this recipe can easily be swapped for a dairy-free version like coconut milk, almond milk, or another plant-based milk substitute.
- vegetable oil - feel free to use any vegetable oil such as avocado oil, olive oil, or coconut oil - just be aware that the flavor may change slightly depending on which oil you decide to use.
- eggs - the eggs in this recipe can be substituted for applesauce or mashed banana. It may slightly sweeten the recipe a bit, so you may want to alter the amount of brown sugar you add later.
- brown sugar - light molasses, honey, maple syrup, or zero-calorie brown sugar alternatives can be used instead.
- maple syrup or honey - this is optional, to drizzle on top when serving.
You will also need measuring cups and spoons, mixing bowls, and an 8-inch square baking pan.
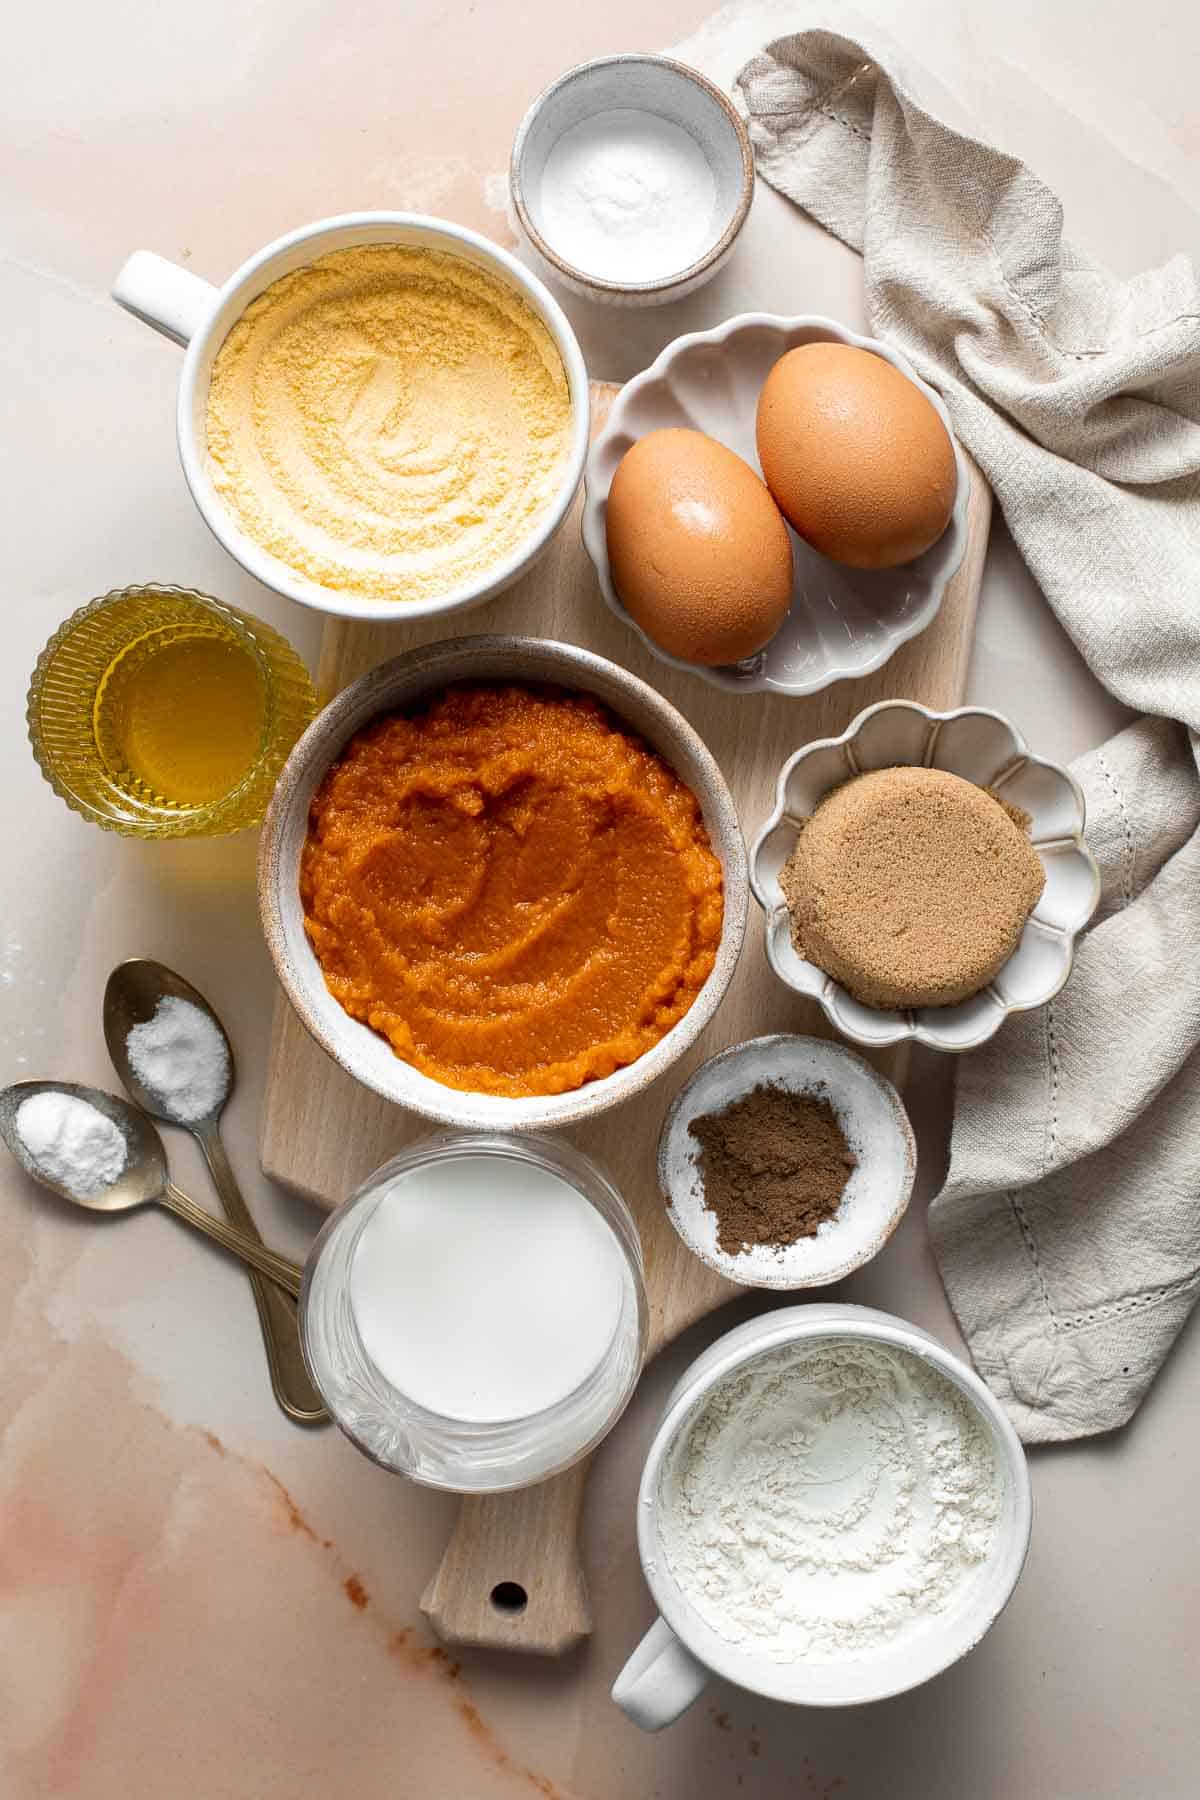
How to Make the Best Pumpkin Cornbread
- Combine dry ingredients. In a large mixing bowl, whisk together flour, cornmeal, baking powder, baking soda, salt and pumpkin spice. Set aside.
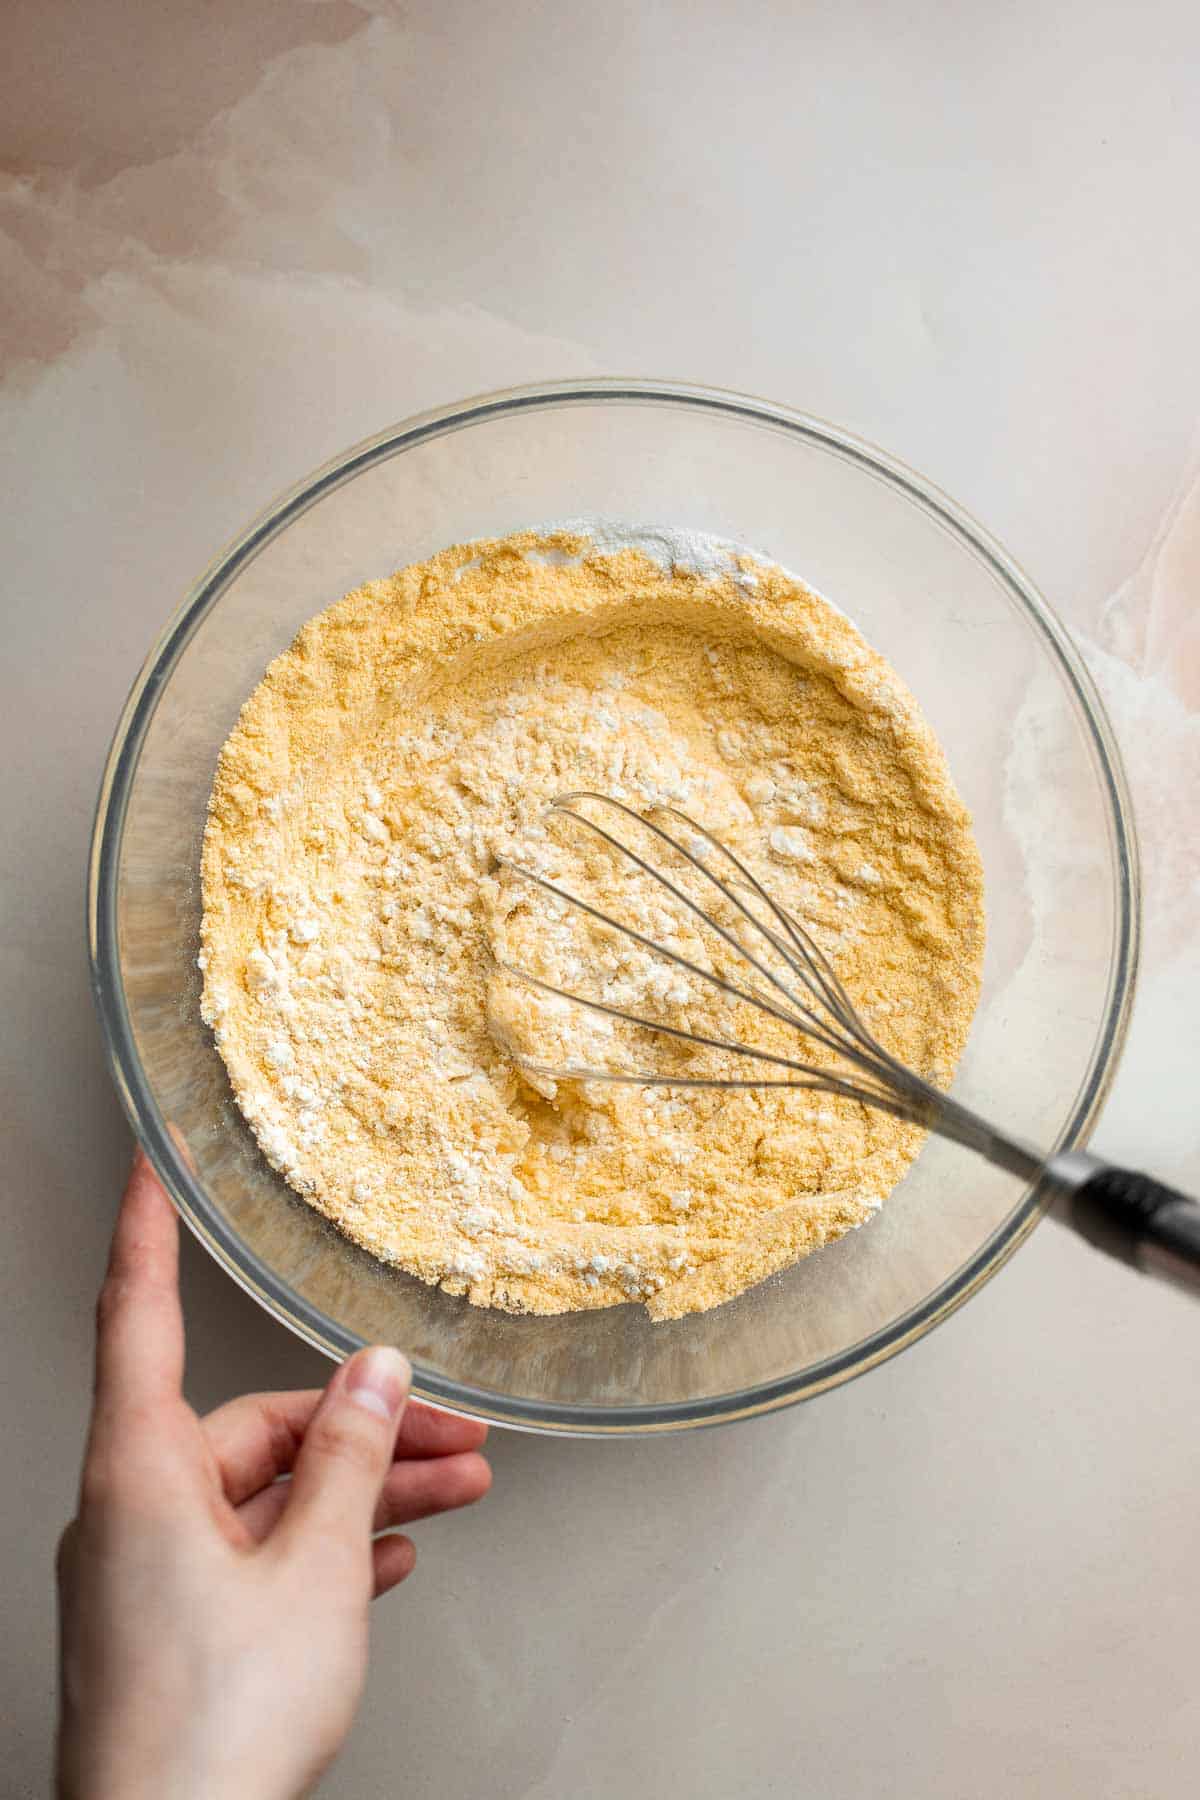
- Combine wet ingredients. In a medium mixing bowl, whisk together pumpkin puree, milk, vegetable oil, eggs, and brown sugar, until smooth and the sugar is dissolved.
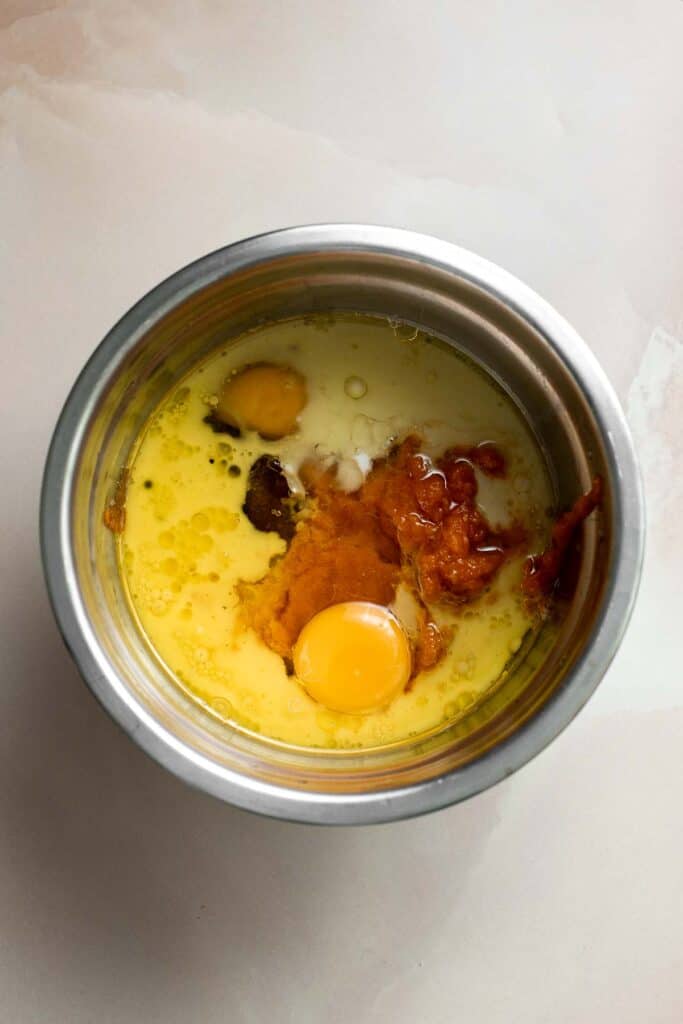
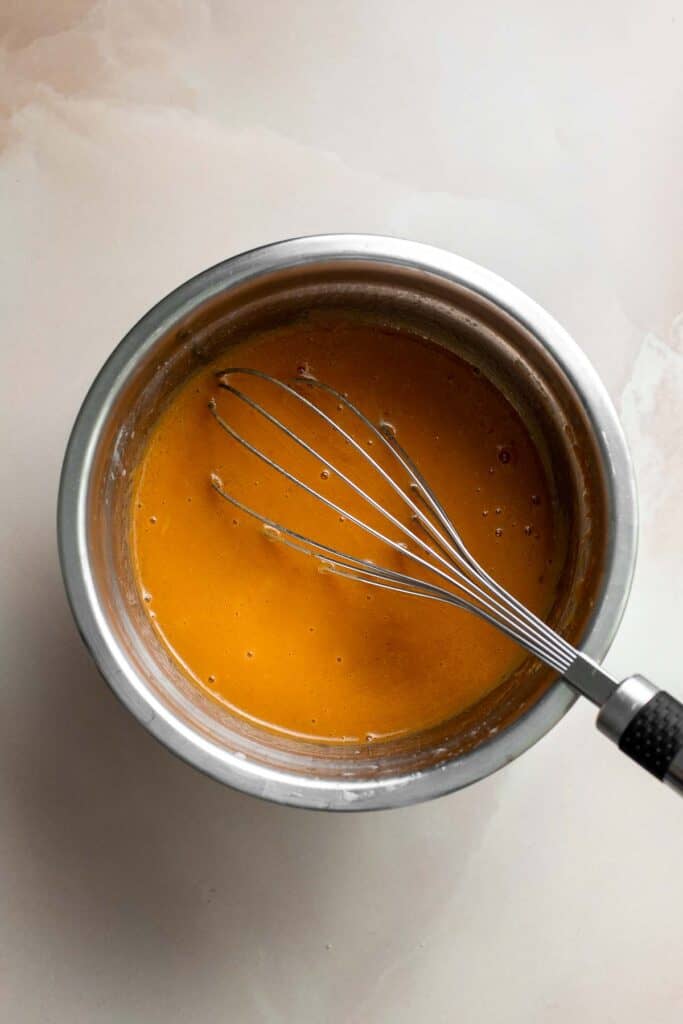
- Add wet to dry ingredients. Pour the liquid mixture into the dry mixture. Stir with a silicone spatula to combine until no dry flour is visible in the bowl. Make sure to scrape down the sides of the bowl with the spatula. Do not overmix. The mixture will be fairly wet.
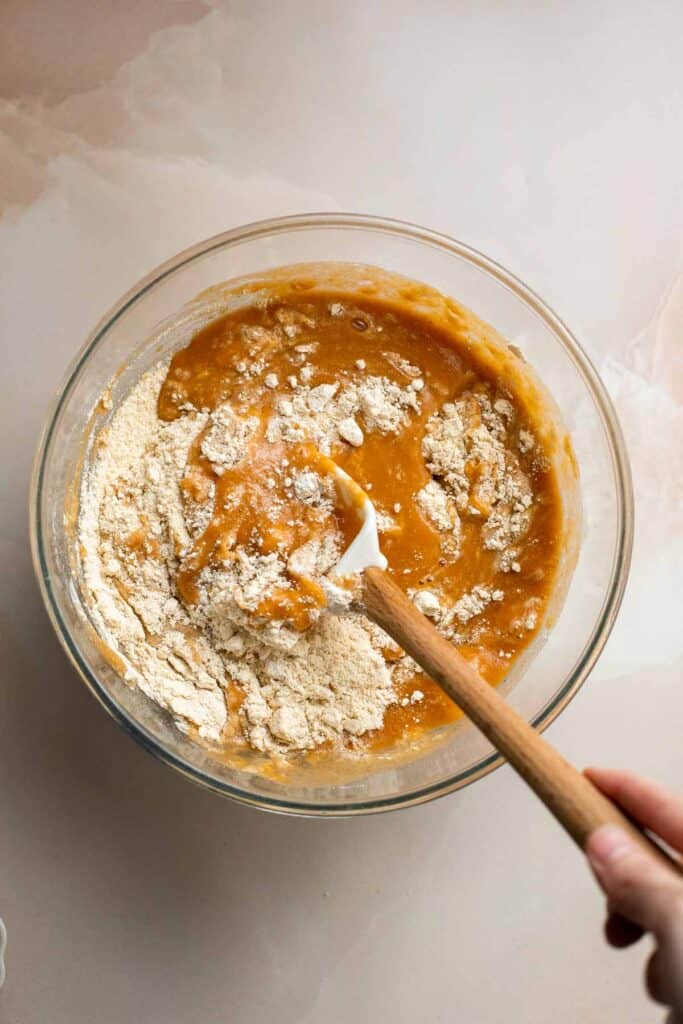
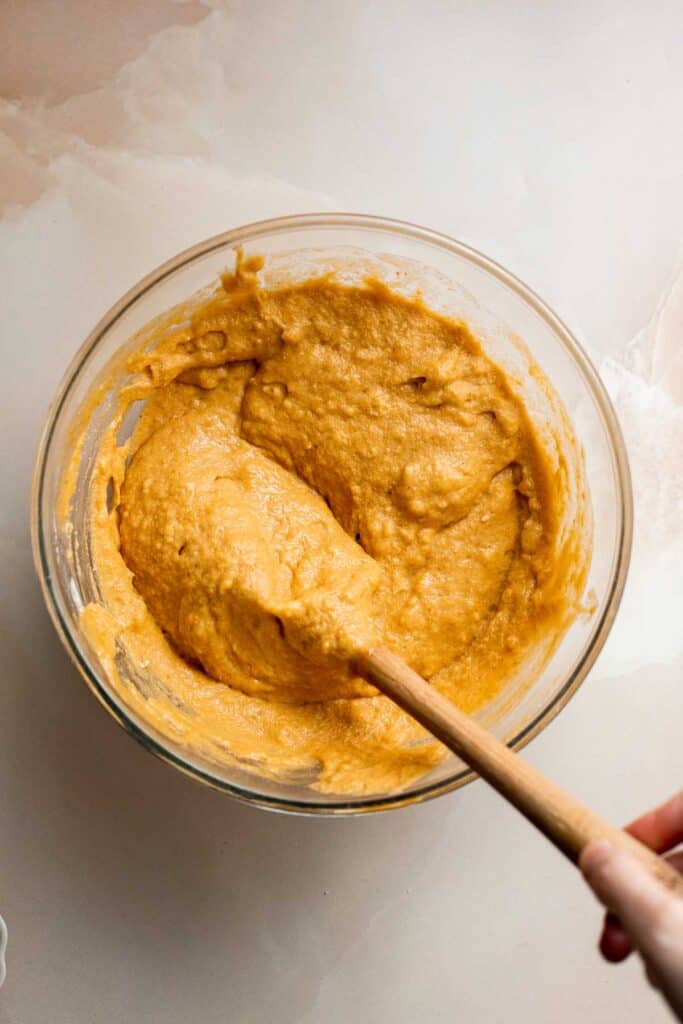
- Transfer batter to pan. Lightly grease an 8-inch square baking pan with some vegetable oil and set it aside. Pour the mixture into the baking pan. Tap the pan to release some trapped air bubbles, if any.
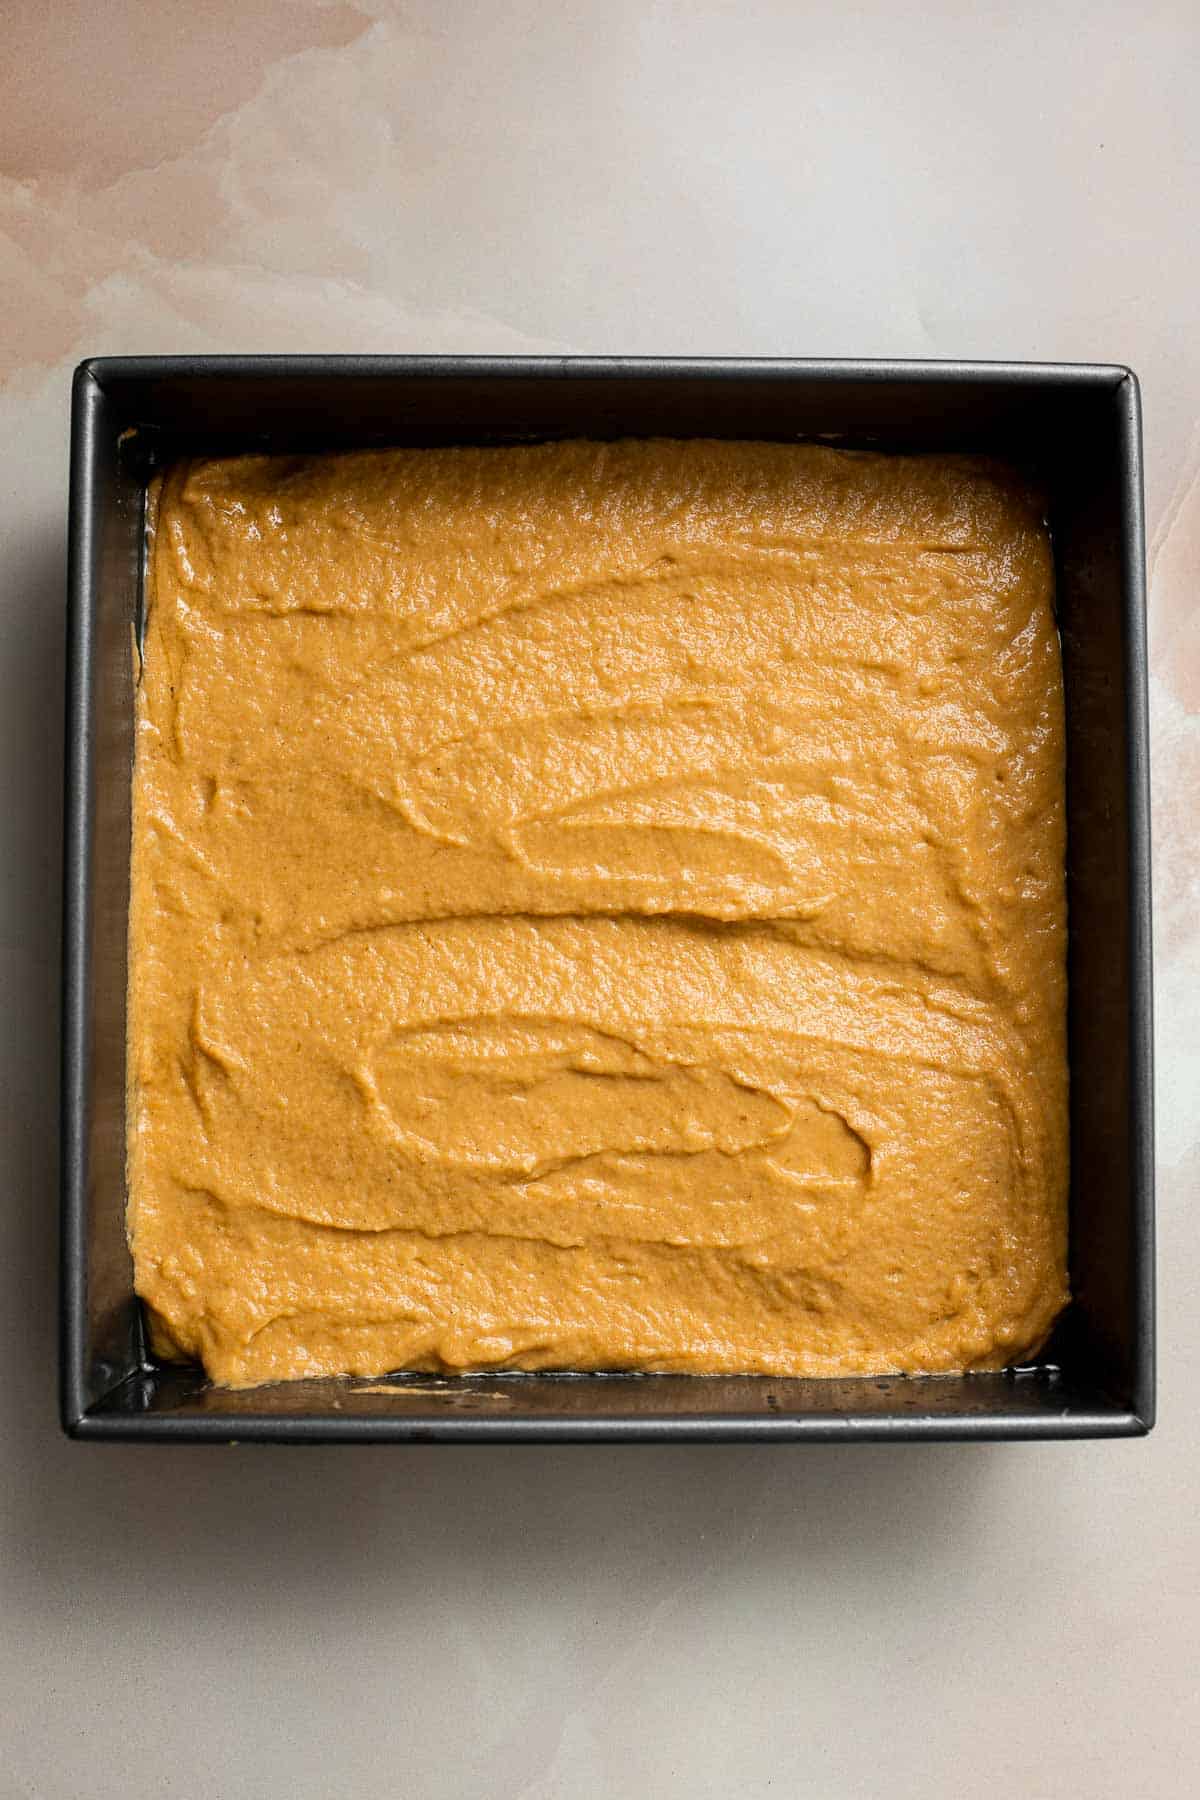
- Bake. Bake in a 400°F preheated oven for 20-30 minutes until golden brown and set. Remove the pan from the oven and let it cool in the pan for 15-20 minutes before serving.
- Serve. Slice into 9 squares and serve warm or transfer to a wire cooling rack to cool completely.
How to Serve
I like to serve this Pumpkin Cornbread warm with a drizzle of maple syrup or honey on its own as a snack, or serve it as a side dish with dinner or as part of a holiday brunch spread.
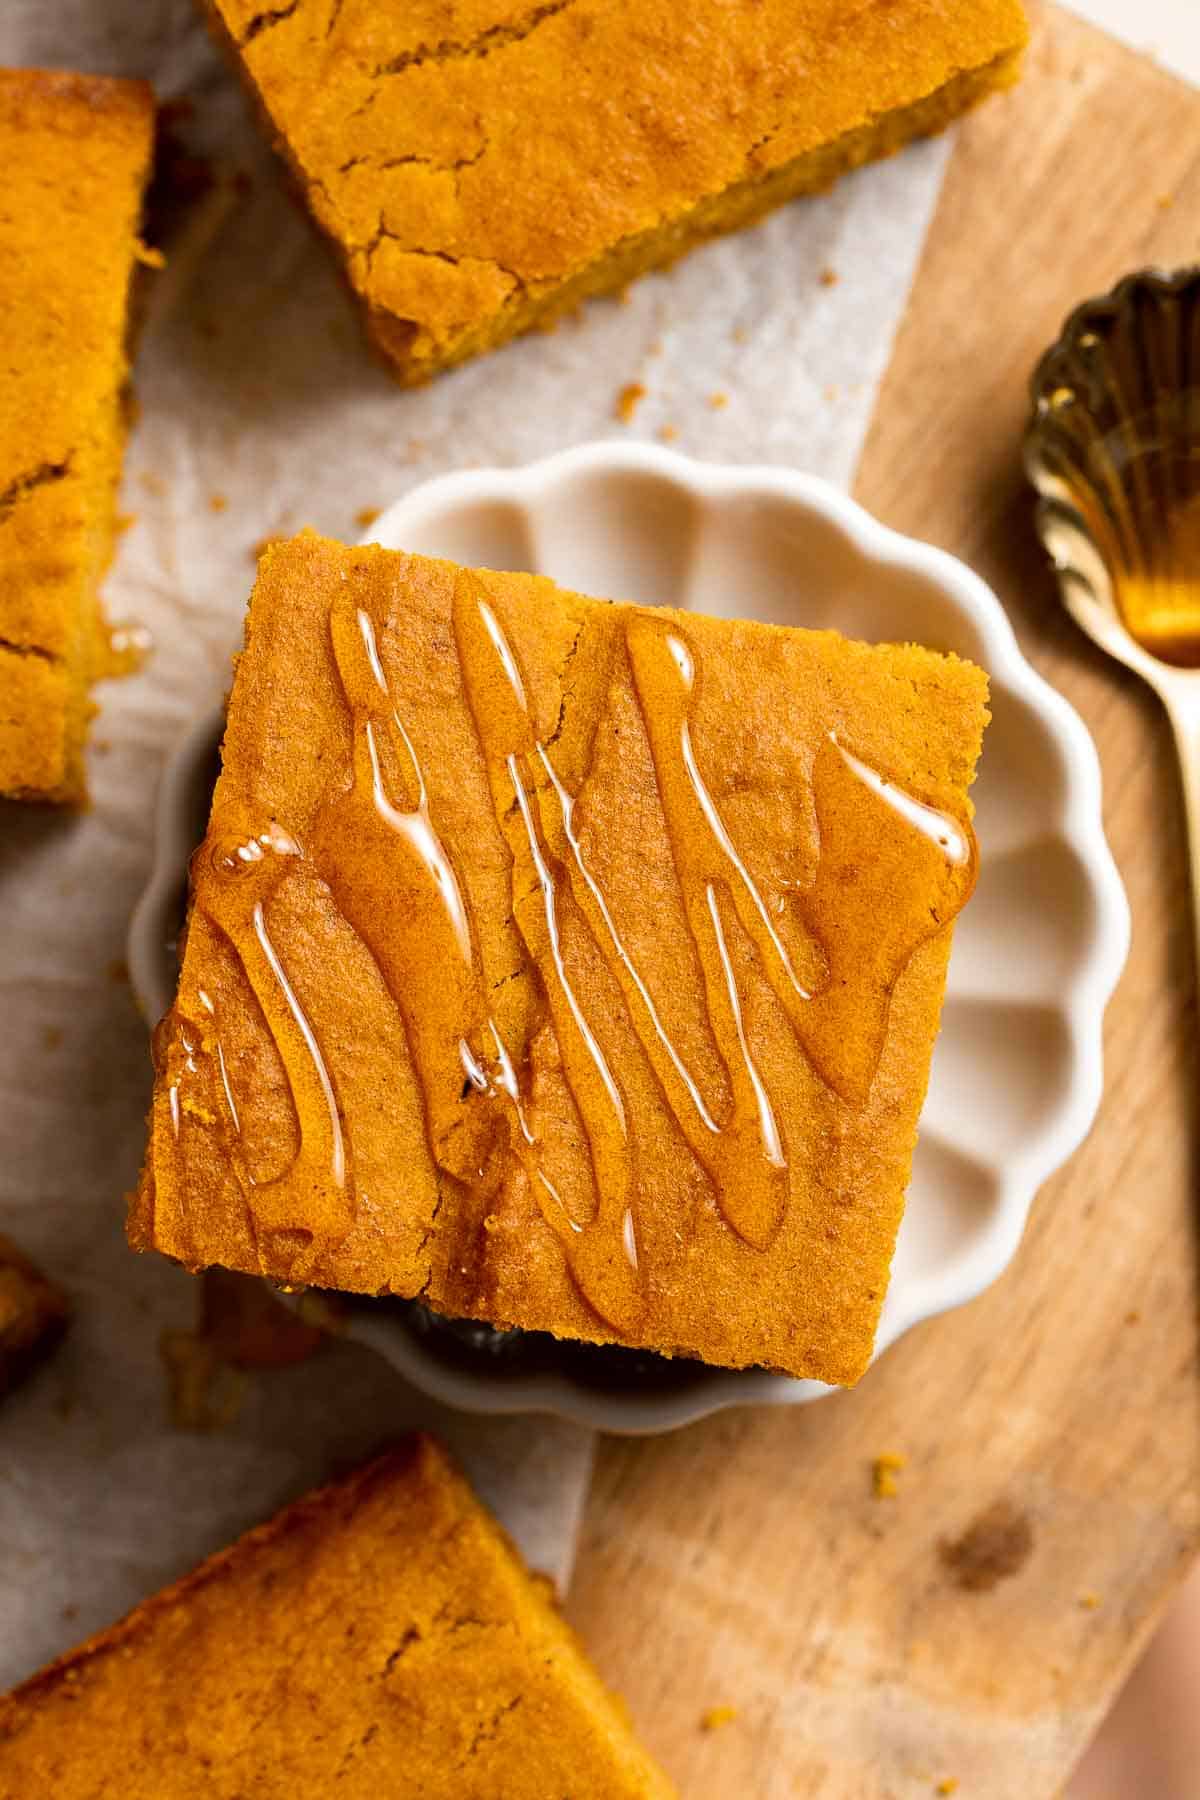
Some popular dishes to serve with cornbread are:
- Turkey Chili
- Classic Meatloaf
- Chicken Noodle Soup
- Glazed Honey Balsamic Pork Chops
- Hamburger Soup with Macaroni
Storage and Freezing Instructions
How to Store
Store leftover pumpkin cornbread, once cooled to room temperature, in an airtight container at room temperature for two to three days, or refrigerate for up to five days.
How to Reheat
Reheat in the microwave by transferring to a microwave safe dish, cover with a microwavable lid or plastic cling wrap, and microwave on high for 15-30 seconds until heated through, being careful not to overheat due to risk of drying out the bread.
How to Freeze
Transfer the pumpkin bread to a sealed freezer bag and refrigerate for up to three months. Let thaw at room temperature for several hours before reheating and serving.
Recipe Tips and Tricks
- Mix by hand. Unlike other batters, you actually want to leave a few lumps in your cornmeal for the signature bready texture, and using a stand or hand mixer can easily overmix your batter.
- Change up the shape. You can use this recipe to make pumpkin cornbread muffins, too! Just swap the baking pan for a muffin tin and adjust the cooking time according to the size of your desired muffins. You can also use a cast iron skillet instead of a baking pan for a crispier crust and more rustic cornbread.

More Pumpkin Recipes
- 20 Best Pumpkin Desserts
- Pumpkin Dinner Rolls
- Pumpkin Bread
- Thanksgiving Pumpkin Pie
- Pumpkin Bundt Cake
- Pumpkin Mousse
Tried this recipe?
I'd love to hear what you think! Leave a comment and rating below to share your feedback. Your reviews help others discover this recipe and help me keep creating more free recipes for you. Snap a photo and tag me on social media @aheadofthyme too.

Microwave Steamed Broccoli
Microwave Steamed Broccoli is tender, buttery, and delicious. This easy side dish takes just minutes to prep and even less time to cook. Broccoli florets go from crunchy to unbelievably tender when steamed in the microwave. You may never cook broccoli any other way again!
Learn how to steam broccoli in the microwave and add in just a few pantry staples to enhance the natural flavor of the broccoli even more. It's so easy you won't mind making it several times a week! Your whole family will fall in love with this microwave broccoli.
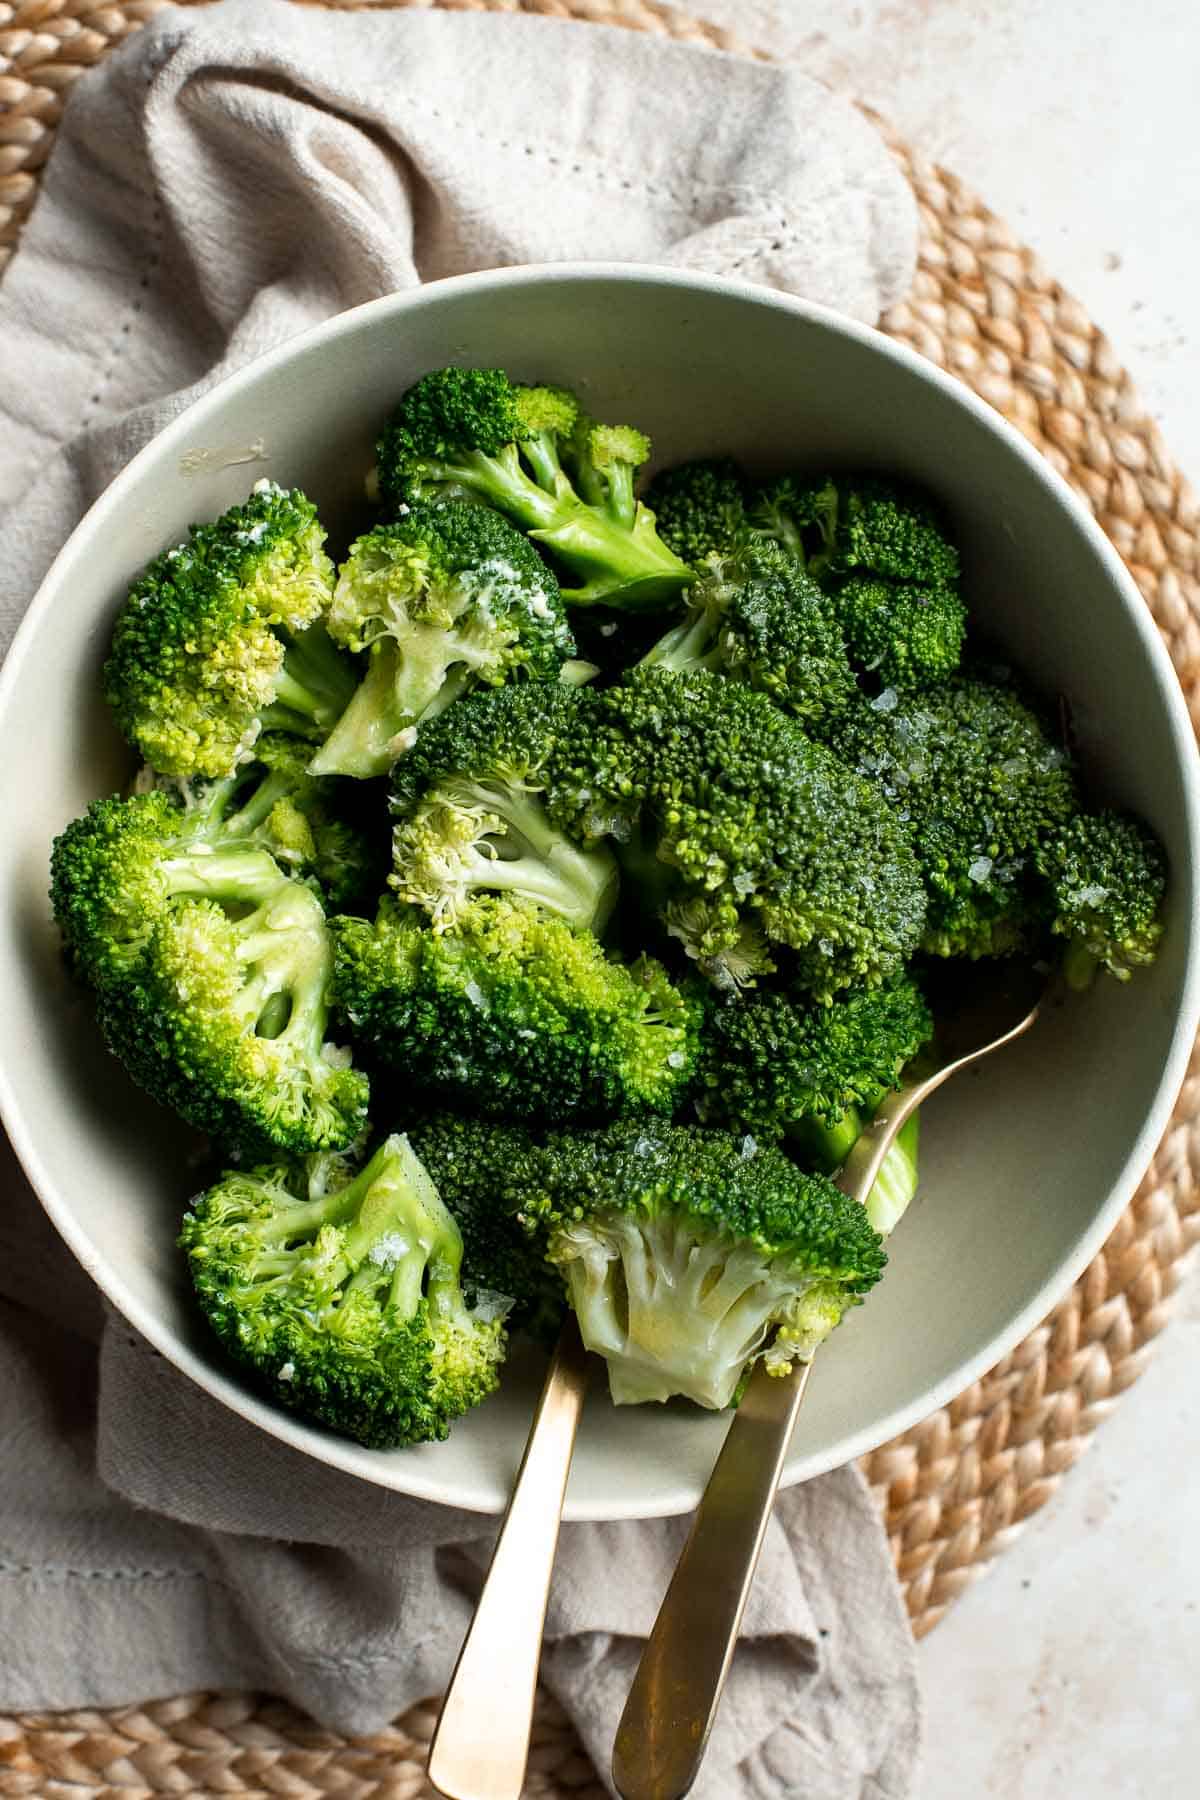
Why You'll Love Microwave Steamed Broccoli
- It makes for a speedy, (mostly) hands-off side dish. Chopping the broccoli is the most labor-intensive part of this recipe. After that, the microwave will take care of the cooking! All you have to do is drain the excess water off and stir in the butter and seasoning at the end.
- No stovetop or oven needed! This incredibly easy recipe doesn't require you to fire up a single burner or preheat anything. Just add the ingredients, pop into the microwave, and stir when it's done.
- Easy way to add a vegetable to any meal. Keep this recipe for how to steam broccoli in the microwave in your back pocket (or simply memorize the few easy steps and ratios!) to use any time you need it, whether you're in a pinch and need to add something green to your child's plate or you're making a recipe that calls for steamed broccoli.
- It cooks fast. When you're quickly whipping up dinner between work and running errands, every minute counts - which is why this recipe for steamed broccoli in the microwave is the perfect dish for busy schedules. It tastes so great, you wouldn't know it only took a few minutes in the microwave!
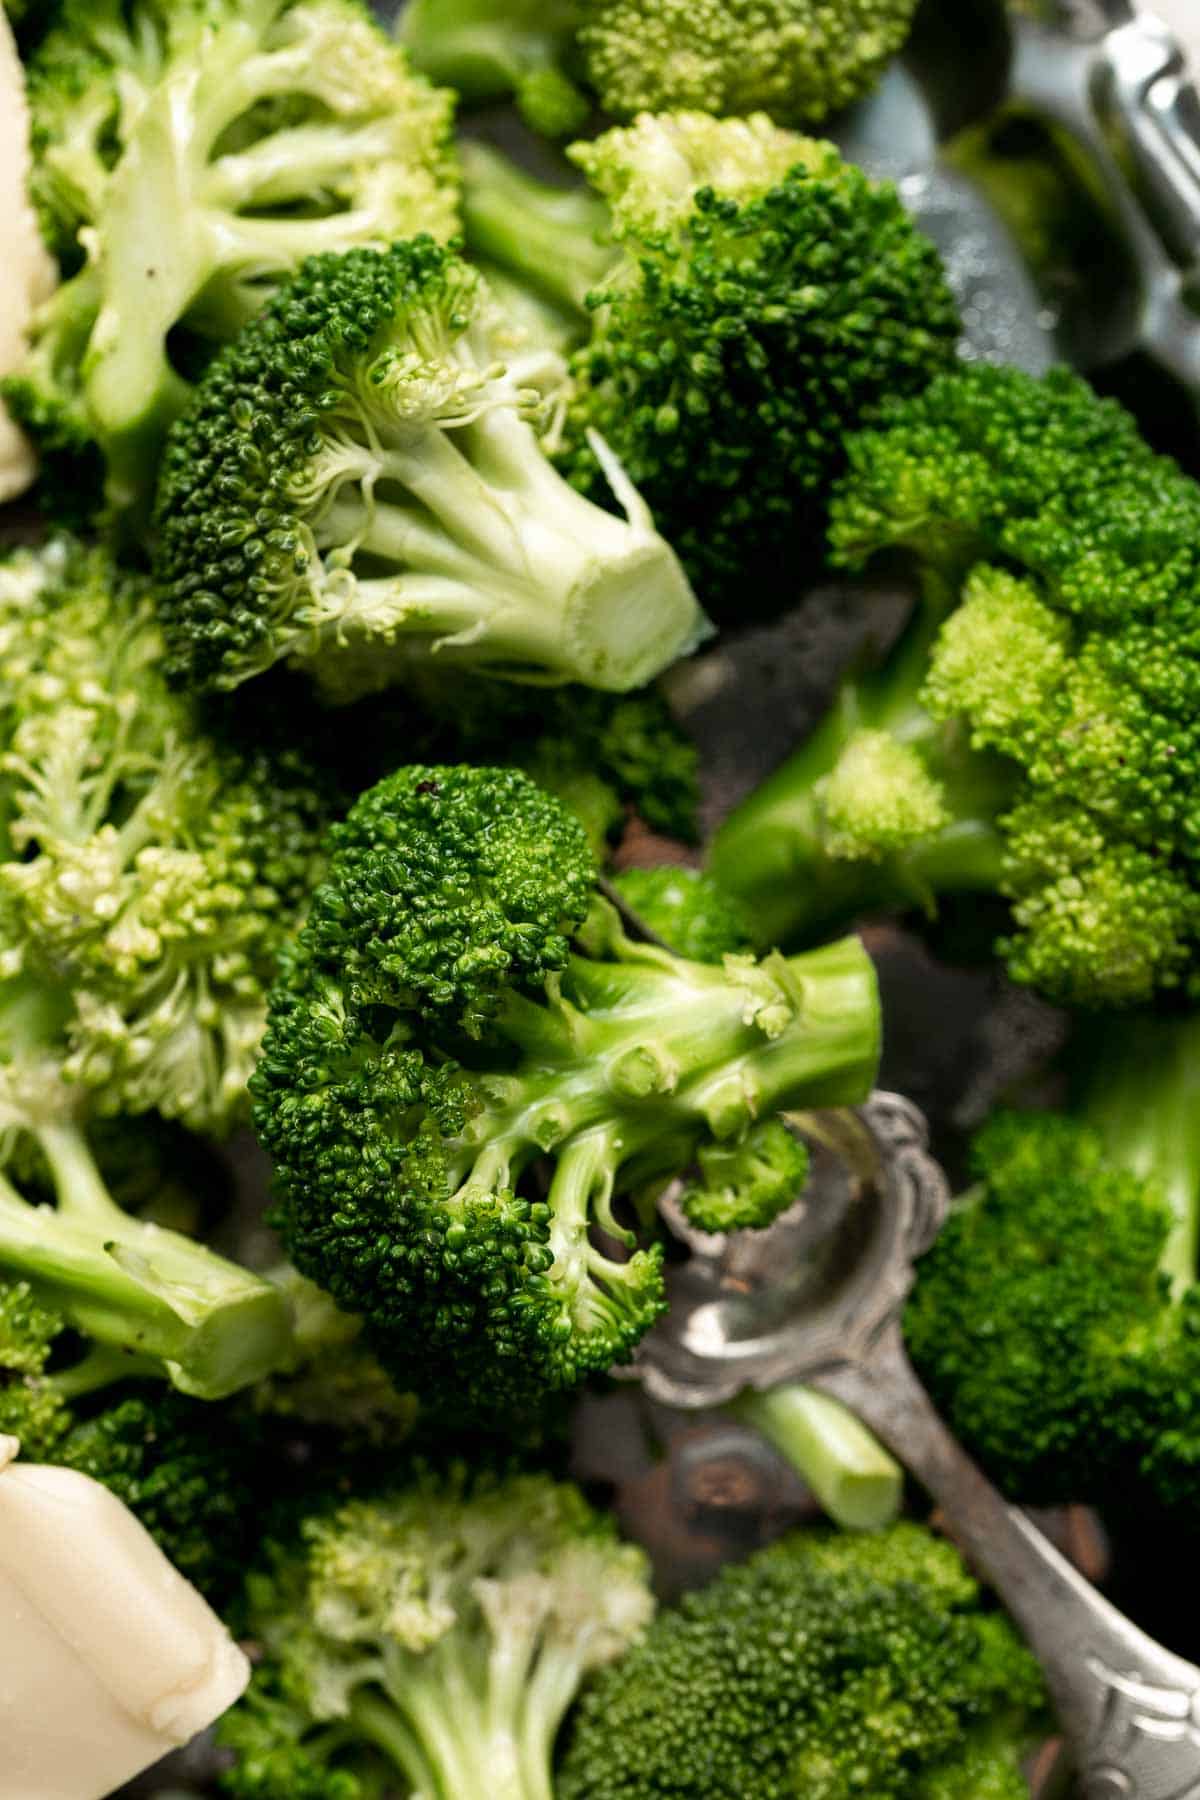
Ingredient Notes
To make easy Steamed Broccoli in the microwave, you will need the following ingredients (full measurements in recipe card below):
- broccoli florets - this recipe calls for freshly chopped florets of broccoli, but you can also use frozen broccoli florets if you're in a pinch! You may have to adjust the amount of water and the cooking time to account for the extra moisture and starting temp.
- water
- butter - using unsalted butter will ensure you don't over salt it in the next step, but if you use salted butter, just make sure you taste it before adding more salt. You can also use a vegan butter alternative if you prefer.
- salt and pepper - fresh ground pepper offers the most favor and you can use whatever size grain of salt you want-larger flakes will add a crunchy texture and smaller flakes will offer a more even distribution. It's up to you!
You will also need measuring spoons and a microwave-safe bowl and cover.
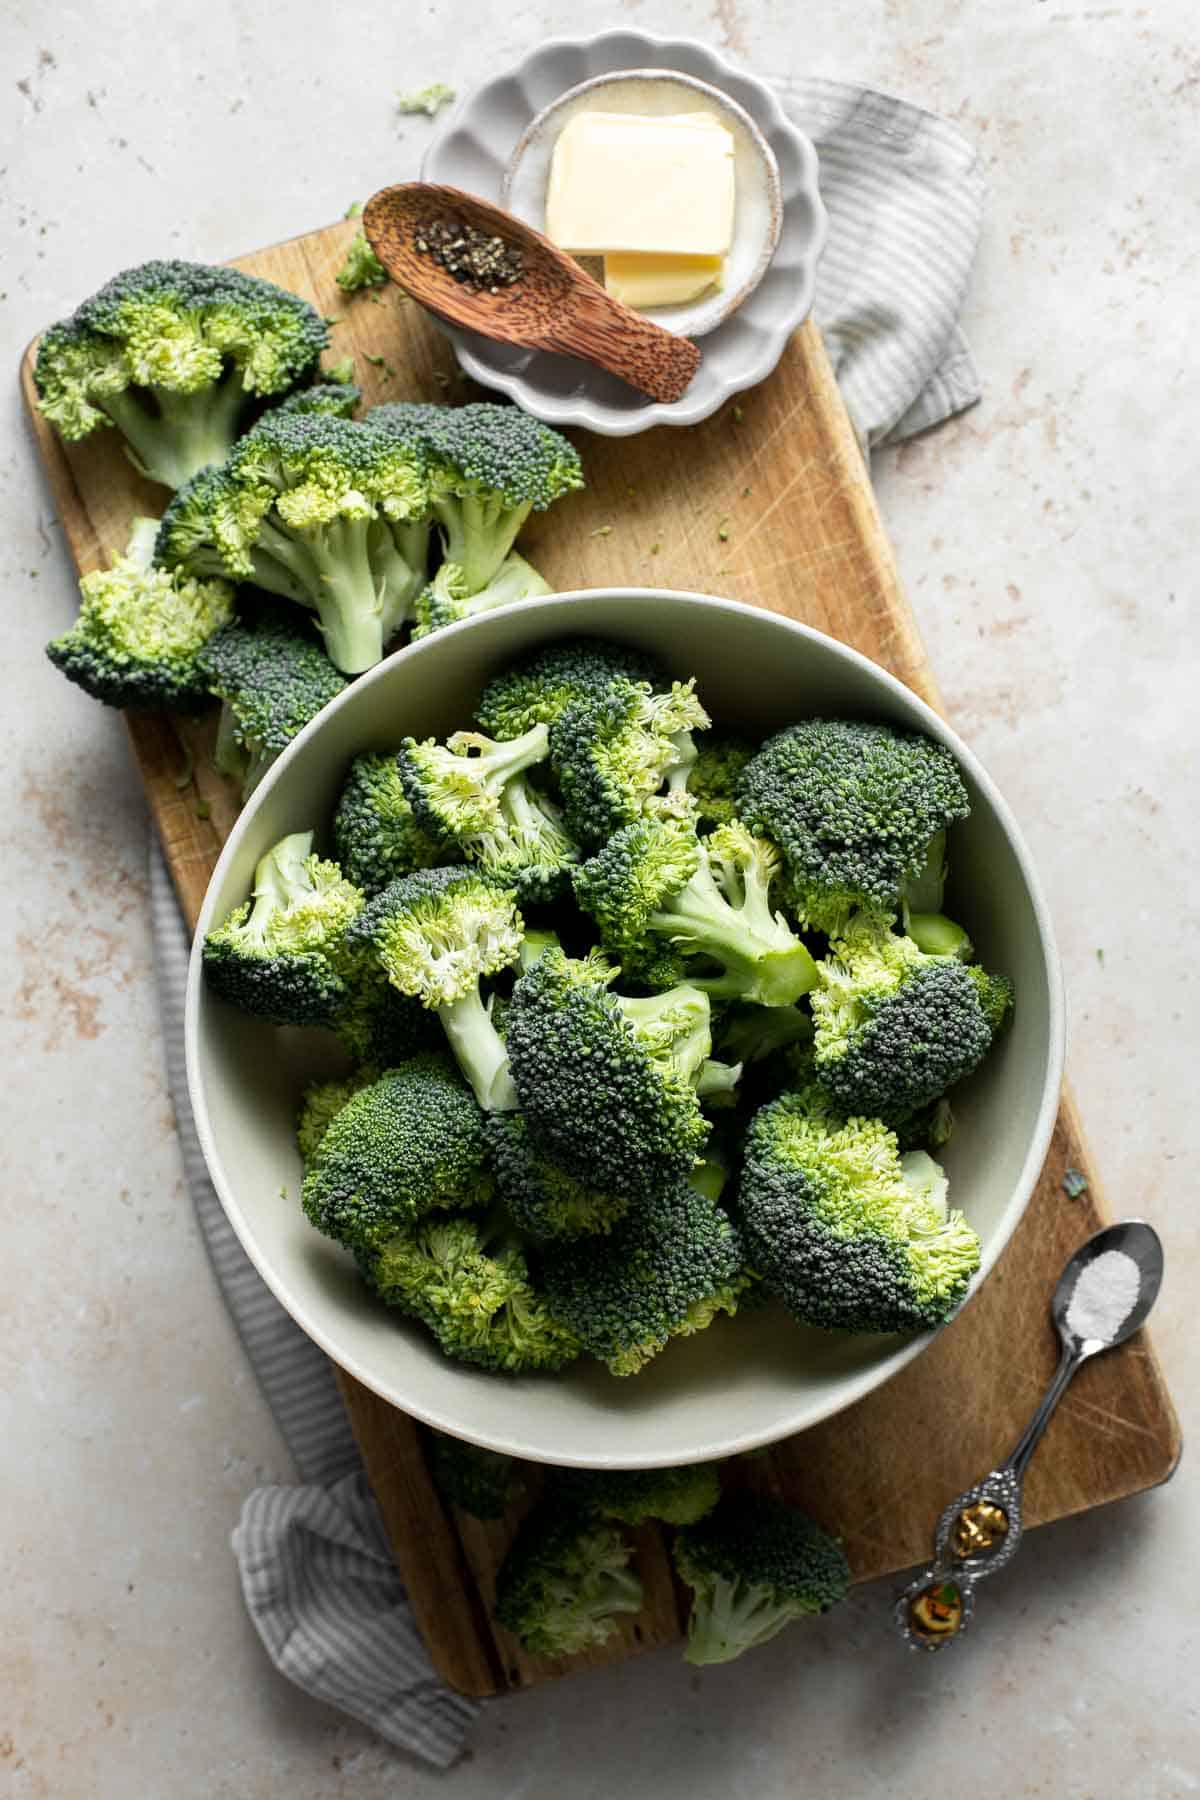
How to Make the Best Steamed Rice in the Microwave
- Microwave. Place broccoli florets in a large microwave-safe bowl. Pour water on top. Cover the bowl with a microwave cover or microwave-safe plate. Microwave on high until broccoli is tender, about 3-4 minutes.
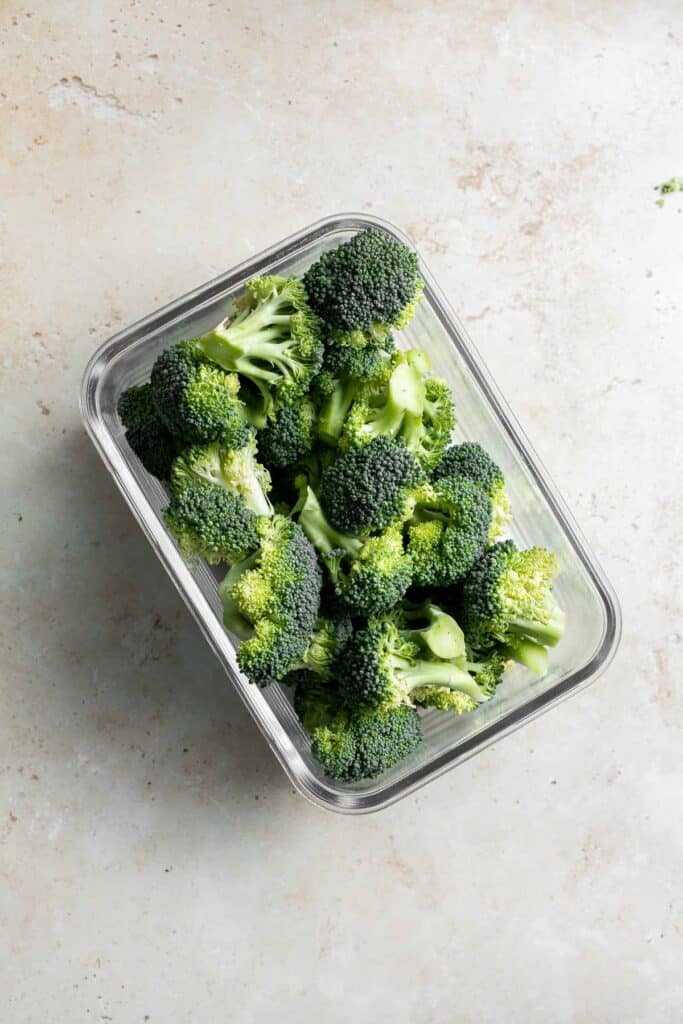

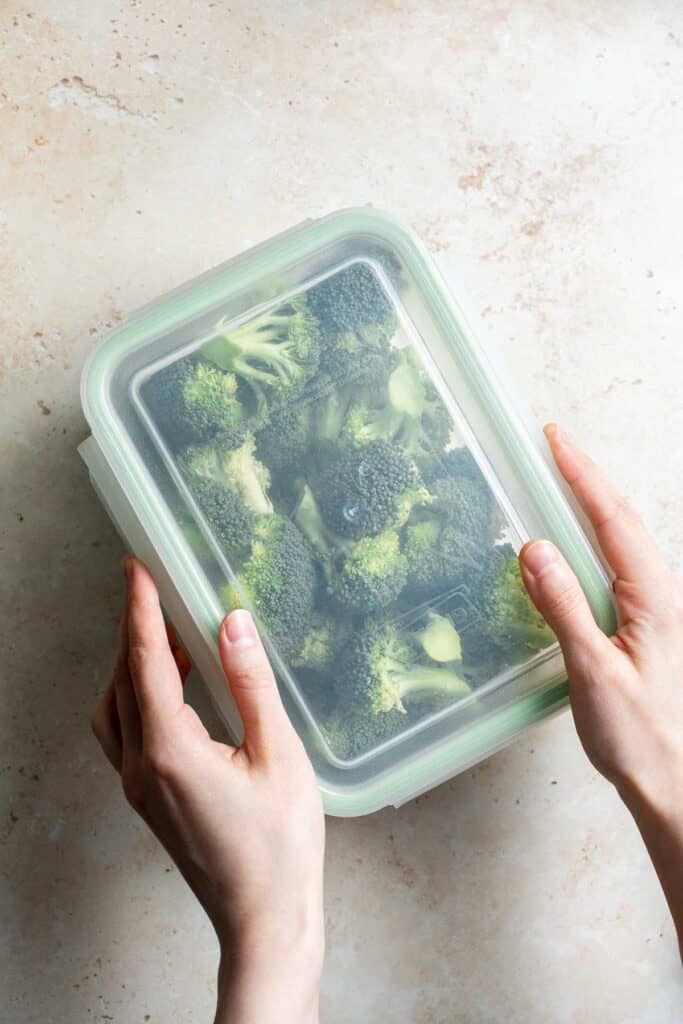
- Drain. Carefully remove the hot bowl (watch for the hot steam) and carefully drain the steamed broccoli in a colander if there is any water is leftover.
- Season. Transfer the steamed broccoli to a serving dish and top with butter, salt, and pepper. Toss to coat and serve immediately.
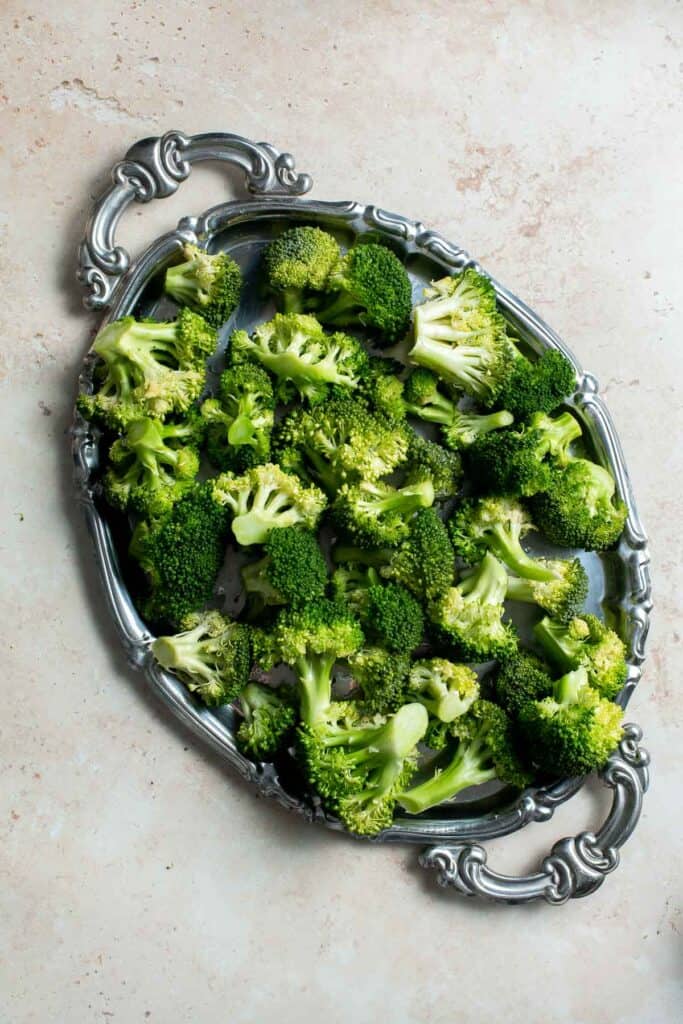
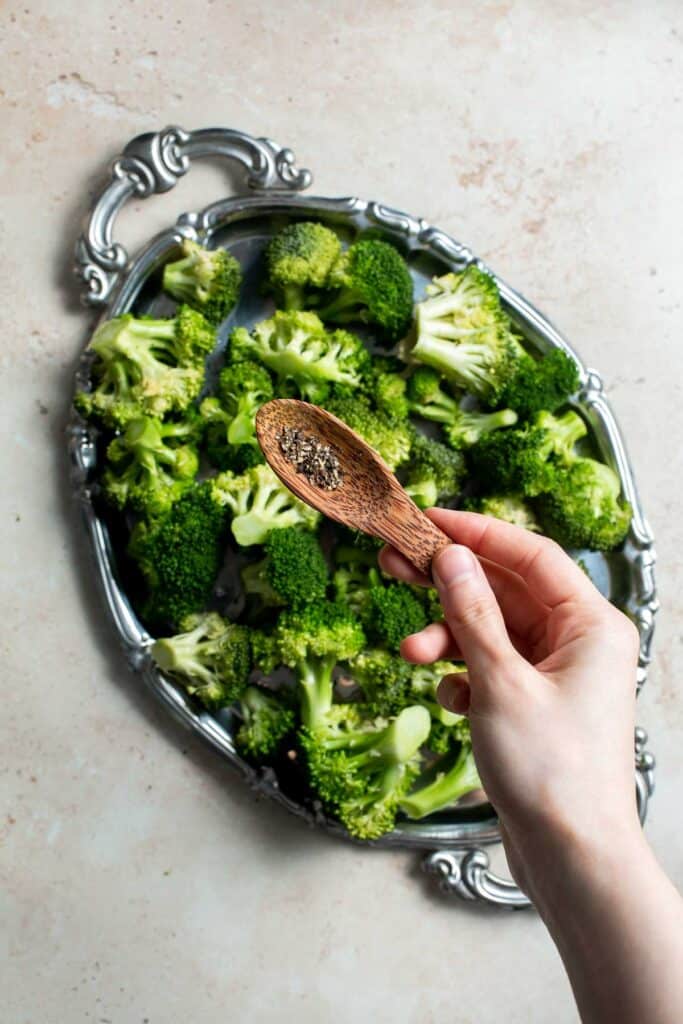
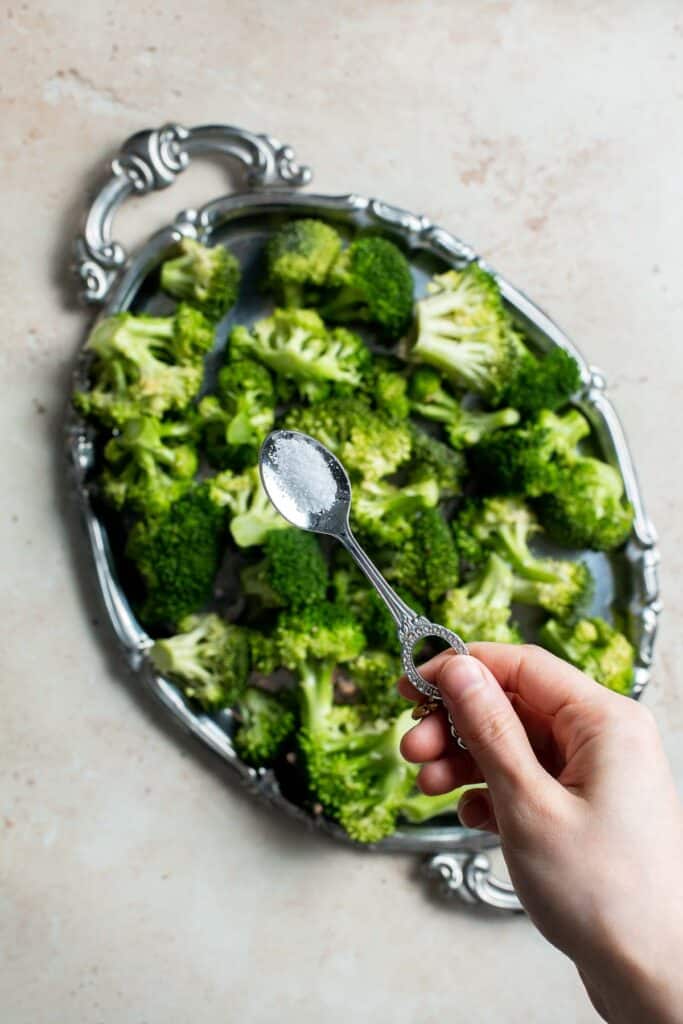
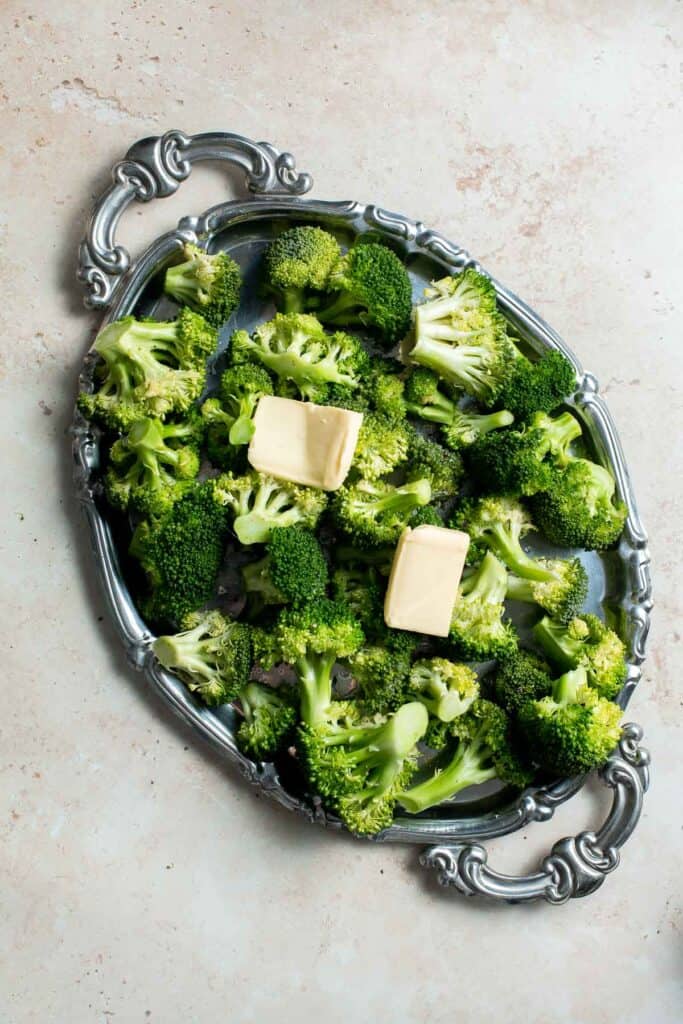
How to Serve
Serve Microwave Steamed Broccoli any time you need to add a veggie to a meal. Grilling chicken, steak, or fish? Serve this broccoli. Making spaghetti? Steamed broccoli makes a great side! Grilled cheese sandwiches and macaroni for lunch? Toss some broccoli in the microwave while you're browning bread and serve. Because this steamed broccoli is so simple and easy, it pairs well with just about anything.
Some of my favorite entrees to serve this with are:
- Creamy Chicken Pesto Pasta
- Homemade Potato and Cheese Perogies
- Garlic Butter Salmon
- Oven Baked Chicken Breast
- Creamy Parmesan Risotto
- Creamy Garlic Shrimp
Storage and Freezing Instructions
How to Store
Once cooled, place any leftover broccoli in an airtight container and store in the refrigerator for up to 3 days. To reheat, transfer to a microwave-safe dish and cover. Microwave on high for 45-75 seconds until warm.
How to Freeze
Steamed broccoli can also be frozen. Transfer to a freezer-safe container or freezer bag and freeze for up to 3 months.
Recipe Tips and Tricks
- Recycle leftover broccoli. Leftover steamed broccoli is one of the most versatile ingredients. Chop up leftover broccoli and toss in pasta, reheat and serve with rice and a protein, or cut into small pieces and add to an omelet. Devise your own method of reusing the leftovers!
- Add your favorite sauces or seasonings. Though this recipe is pretty basic, it's still got great flavor. However, if you want to kick the flavor up a notch, you can add your favorite seasonings and tailor it to the main entree or theme of the meal.
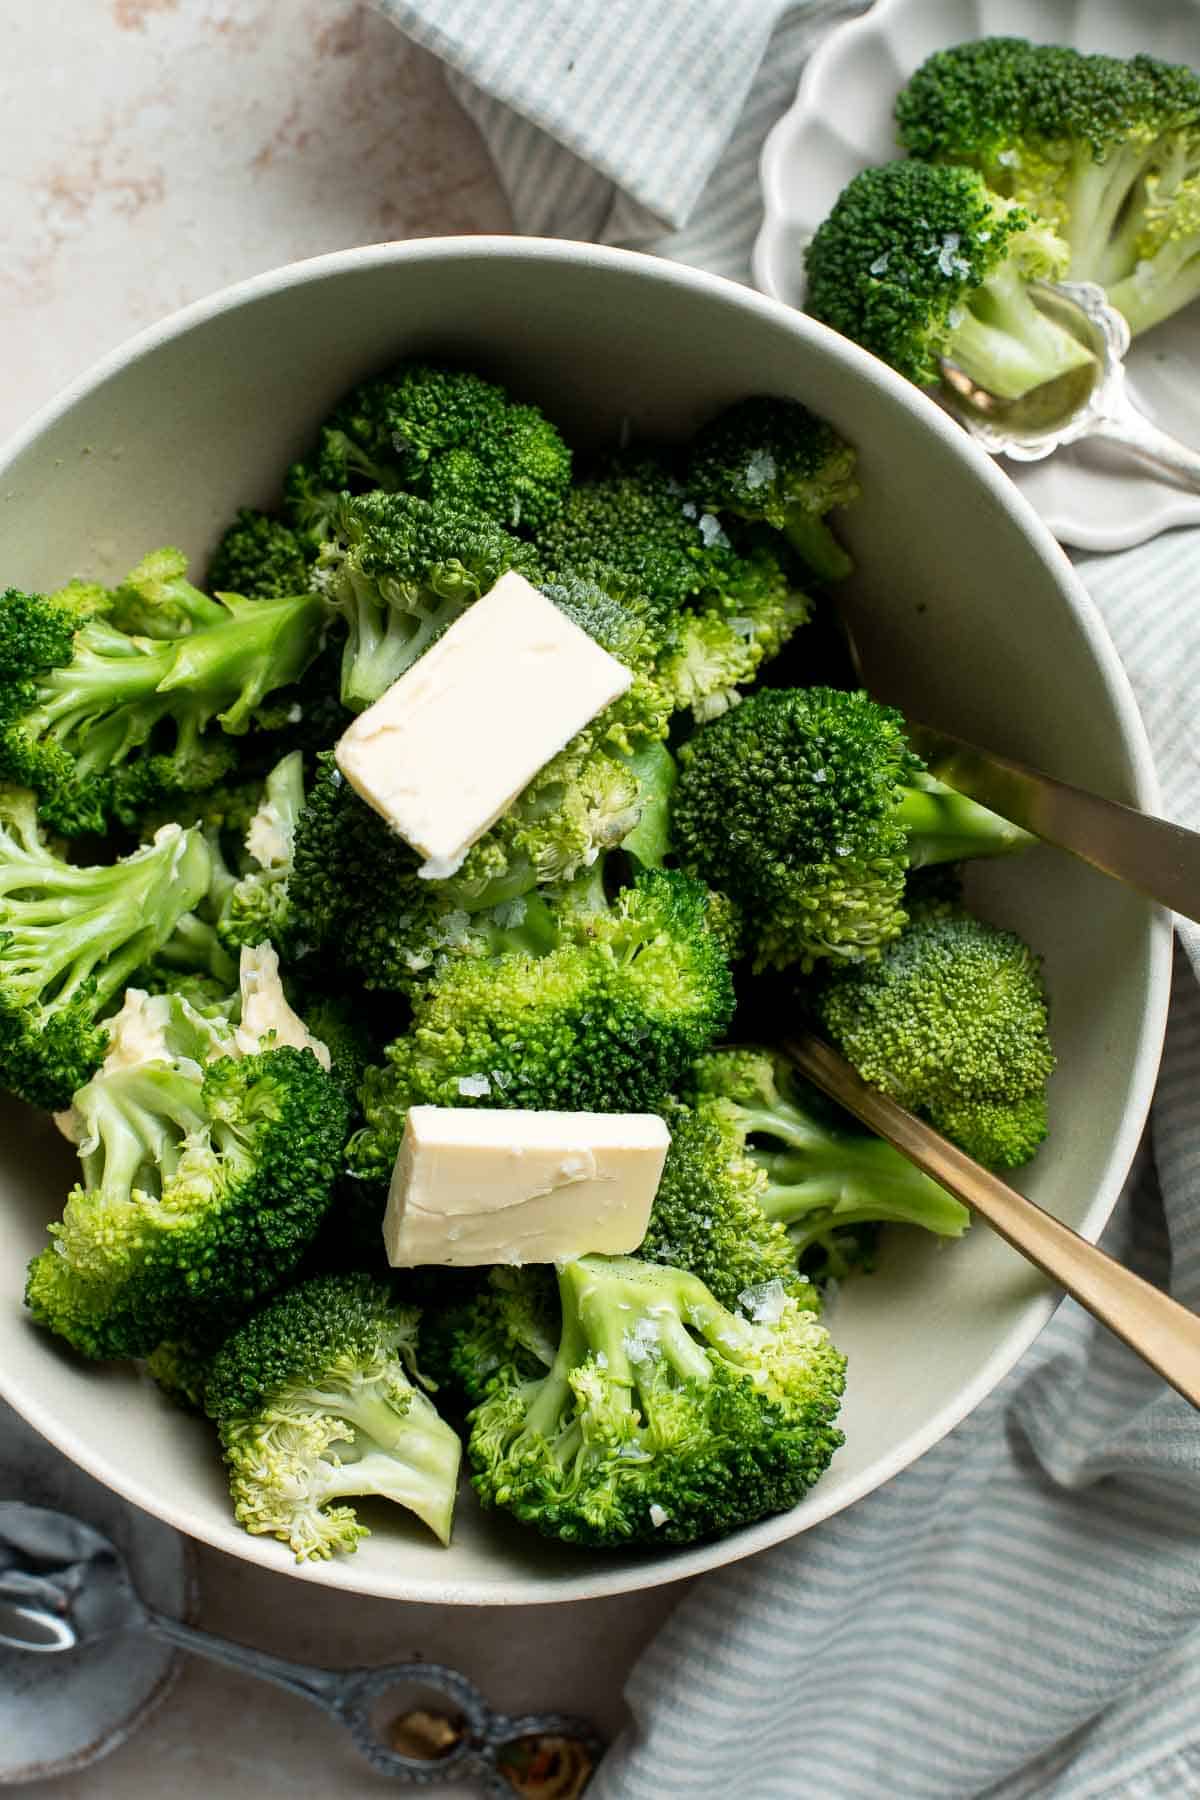
More Broccoli Recipes
- Air Fryer Broccoli
- Broccoli Cheese Casserole
- Creamy Broccoli Slaw Salad
- Roasted Broccoli Grilled Cheese
- Broccoli Cheese Soup
- Beef and Broccoli Stir Fry
Tried this recipe?
I'd love to hear what you think! Leave a comment and rating below to share your feedback. Your reviews help others discover this recipe and help me keep creating more free recipes for you. Snap a photo and tag me on social media @aheadofthyme too.

Caramel Apples
Homemade Caramel Apples are sweet, delicious, and fun to make. Chewy caramel made from scratch covers crisp, juicy apples and can be topped with a nearly limitless selection of optional toppings to make this fall dessert absolutely irresistible.
Making caramel apples at home is easier than you think! You only need a handful of everyday ingredients and one hour of time. This recipe is fun to make alone or with a group and is a perfect party treat for fall holidays (especially Halloween!). Plus, it's very customizable - keep reading for ingredient swap suggestions and topping ideas!
Why You'll Love these Caramel Apples
- Done in under an hour. These festive, healthy-ish snacks or desserts are ready in just under an hour, which makes them easy to whip up for a Halloween party or an afternoon treat. It's so much easier to make hommeade caramel apples at home that you might have thought.
- Kid-friendly. This delicious recipe also doubles as a fun fall activity that your kids will remember for years to come. Whether you make it a seasonal tradition or a one-time activity, kids of all ages will enjoy making (and eating!) these yummy gourmet caramel apples made from scratch.
- Simple ingredients. Unlike some store-bought caramel candy apples, these homemade caramel apples don't contain fillers, preservatives, or artificial ingredients - just a few common ingredients that you are already familiar with.
- Decorate them if you want. What is Halloween without a little bit of dress-up? You can make these caramel apples as is, or decorate them! I played around with milk chocolate, white chocolate, and crushed nuts. You could also add some orange food coloring to the white chocolate to make it orange in line with a Halloween theme. There are so many other ways to decorate. Use m&m's, marshmallows, or sprinkles too.
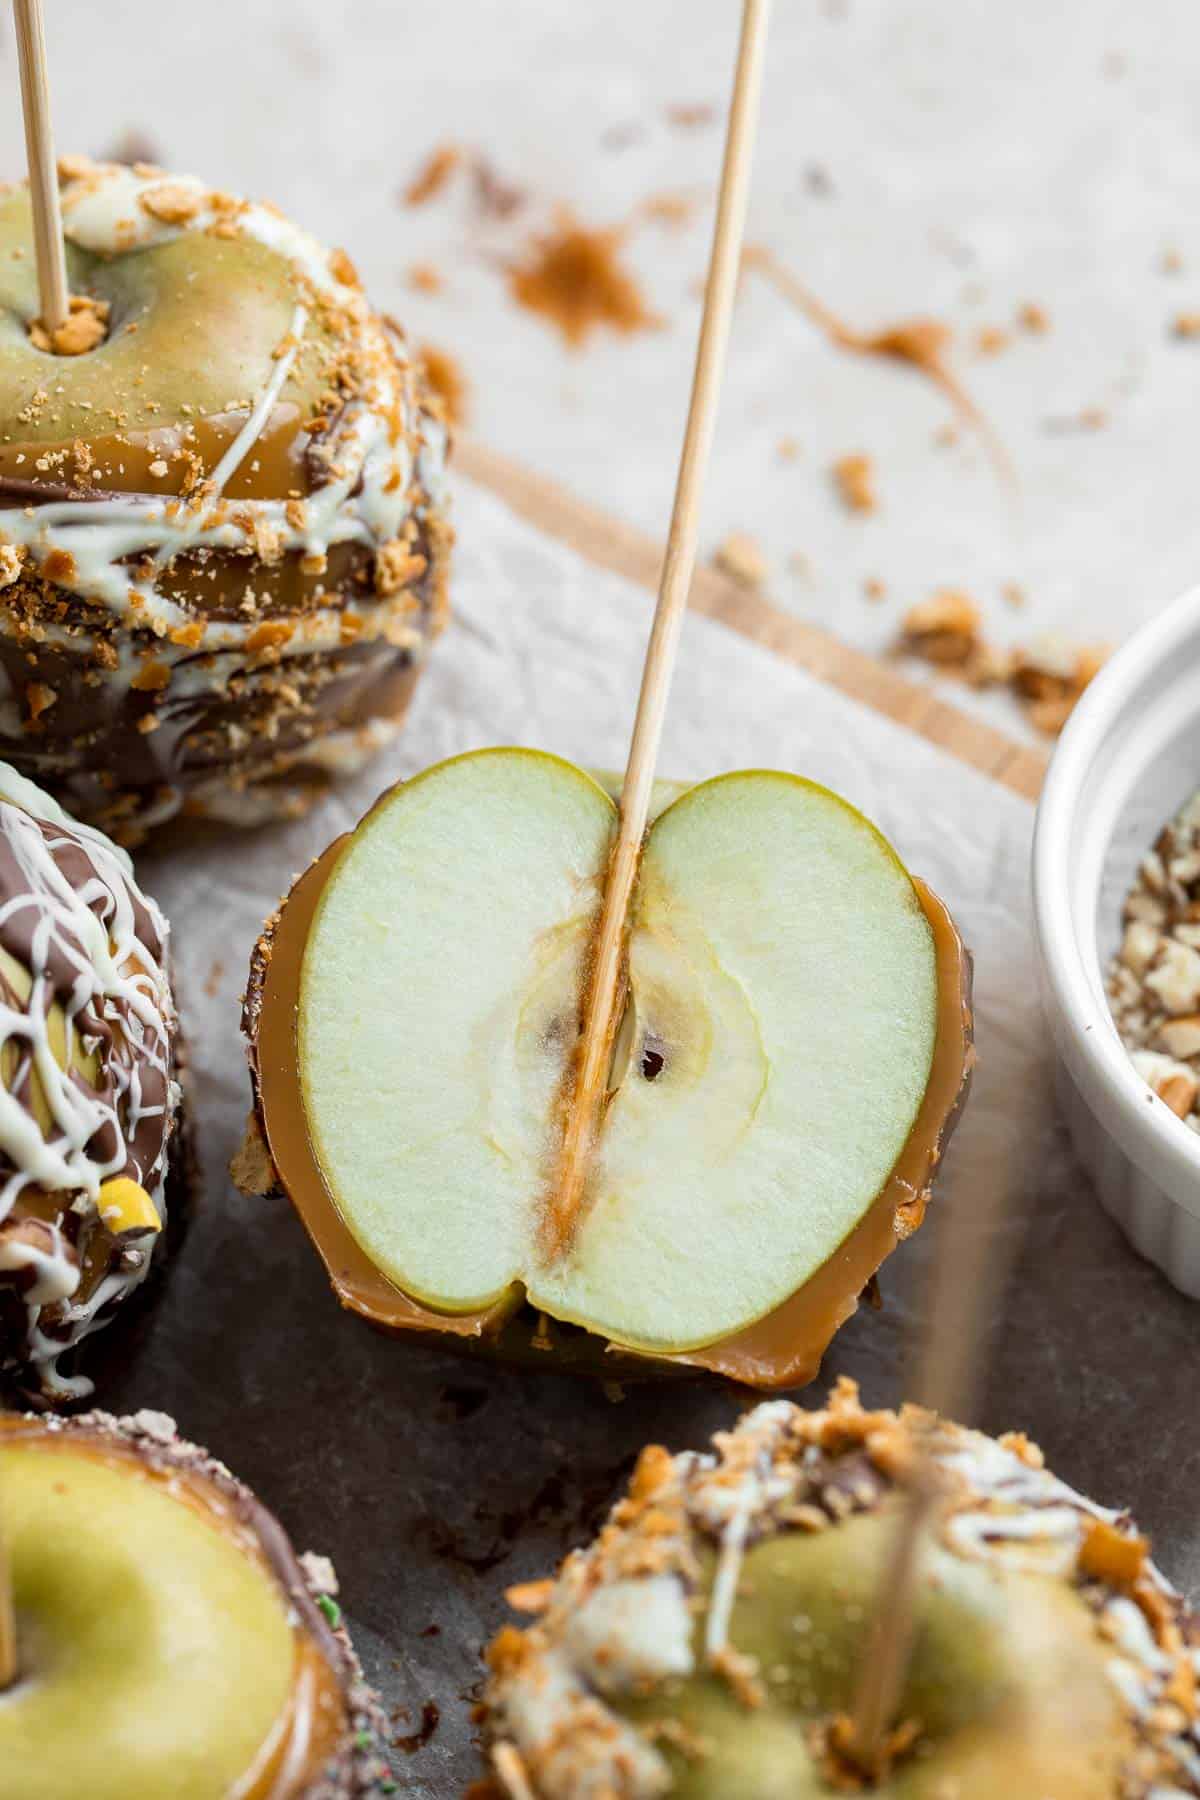
Ingredient Notes
To make these delicious gourmet Caramel Apples, you will need the following ingredients (full measurements in recipe card below):
- apples - you can use virtually any apple you would like. Granny Smith, Honeycrisp, and Fuji apples are especially great candidates for coating (I personally love using Granny Smith apples). Just be sure to use unwaxed apples and keep them cold and dry in the fridge as this will allow the caramel to stick to the apples.
- butter - butter is considered essential for making caramel. You may be able to use a vegan alternative in its place, such as coconut oil. But note that the result will vary in texture and taste.
- brown sugar
- light corn syrup - the corn syrup in this recipe can be substituted for brown rice syrup, thick maple syrup, or light molasses. Be mindful that each of these alternatives will lend a mildly different flavor that may be noticeable in the finished product.
- sweetened condensed milk - there are also vegan alternatives available to replace the traditional dairy version if you want. If you're plant-based or otherwise dairy-free, try sweetened condensed coconut milk instead.
- vanilla extract - vanilla extract can be substituted for vanilla bean paste or another extract (in different amounts depending on the intensity of the flavor). Cinnamon or maple extract would both lend complimentary flavors to the caramel apples.
You can keep the caramel apples plain, or add your favorite toppings such as:
- milk chocolate
- white chocolate
- walnuts or other nuts
- pretzels
- mini m&m's
You will also need measuring cups and spoons, a medium saucepan, candy thermometer, and hard lollipop sticks (or popsicle sticks). I used these bamboo lollipop sticks for my candy apples. They are sturdier than regular lollipop sticks or cake pop sticks.
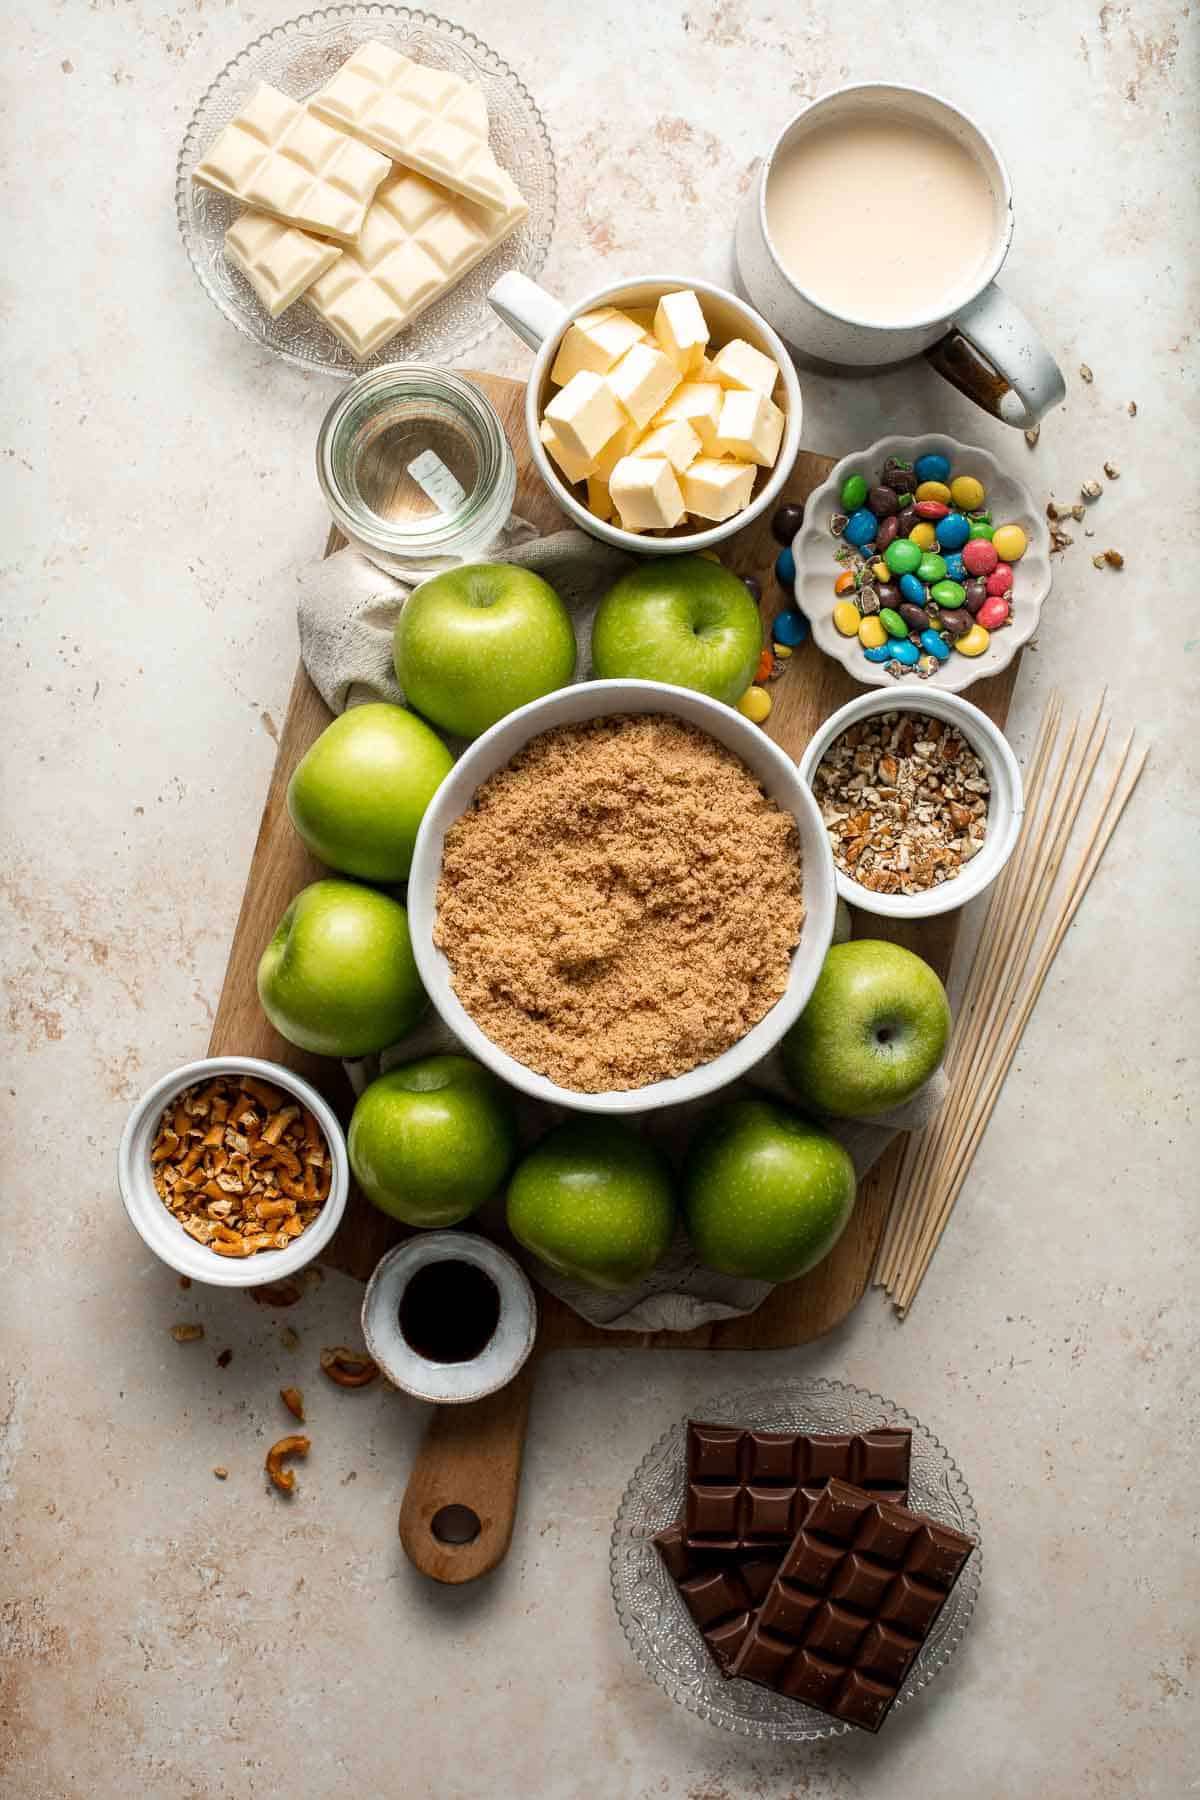
How to Make the Best Caramel Apples from Scratch
- Prepare apples. Use unwaxed apples or wash them well to remove any wax. Use a paper towel to pat them completely dry. Insert hard lollipop sticks into the center of the apples. Place on a parchment lined baking sheet and transfer to the freezer to chill while you prepare the caramel.

- Heat caramel ingredients. In a medium saucepan, melt the butter over medium-low heat. Whisk in the sugar, syrup, condensed milk and vanilla. Stir regularly and cook until the mixture beings to boil.
- Thicken. Increase heat to medium heat and cook caramel for about 15 minutes, stirring constantly but slowly, until the caramel thickens and the caramel is done (check for doneness by checking the temperature or using the soft ball method).
How to Tell when Caramel is done
There are 2 ways to help you figure out if your caramel is done:
- Temperature check: The caramel will be done when your candy thermometer reads 235 °F.
- Soft ball method: You can also test the caramel to see if it forms a "soft ball". This means that if you drop the caramel into cold water and then remove it from the water and roll into a ball, the caramel should keep its shape.
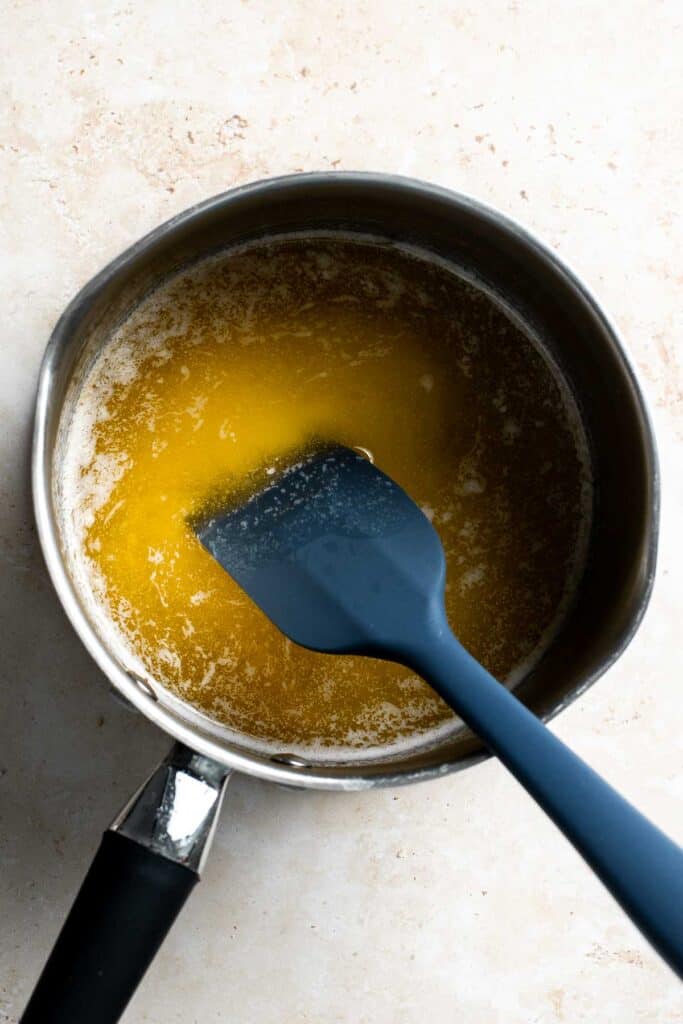
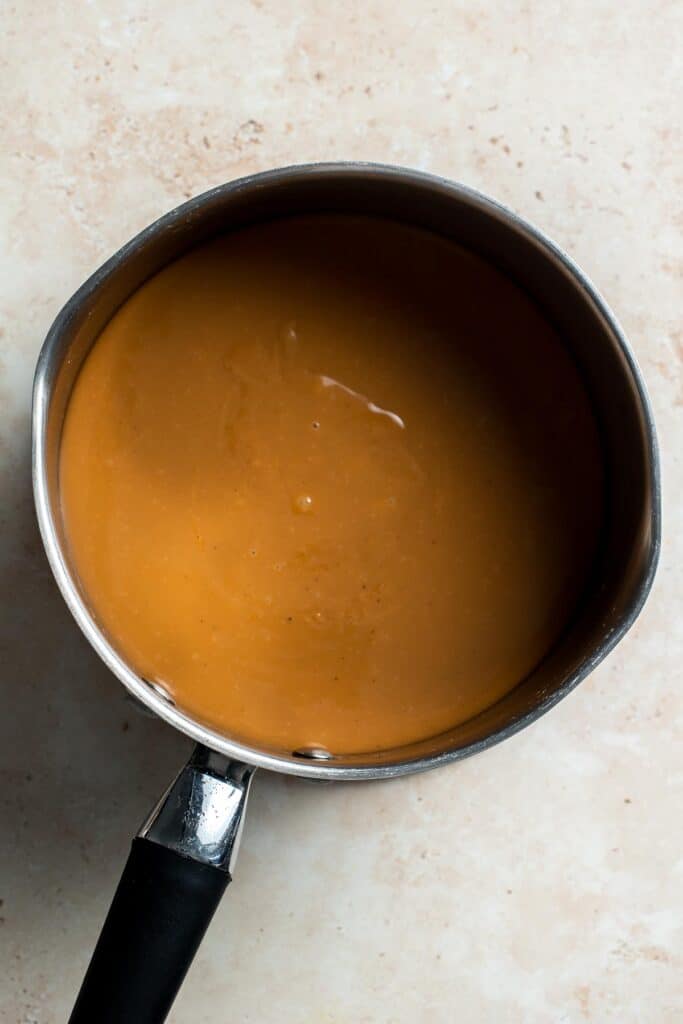
- Cool. Remove saucepan from the heat. Let the caramel cool for a few minutes.
- Dip apples. Dip the apples into the hot caramel and twirl to fully coat and to let any excess drip off. Hold it upright for 30 seconds before placing it top side down back on the lined pan (this is to prevent the caramel from pooling at the bottom).
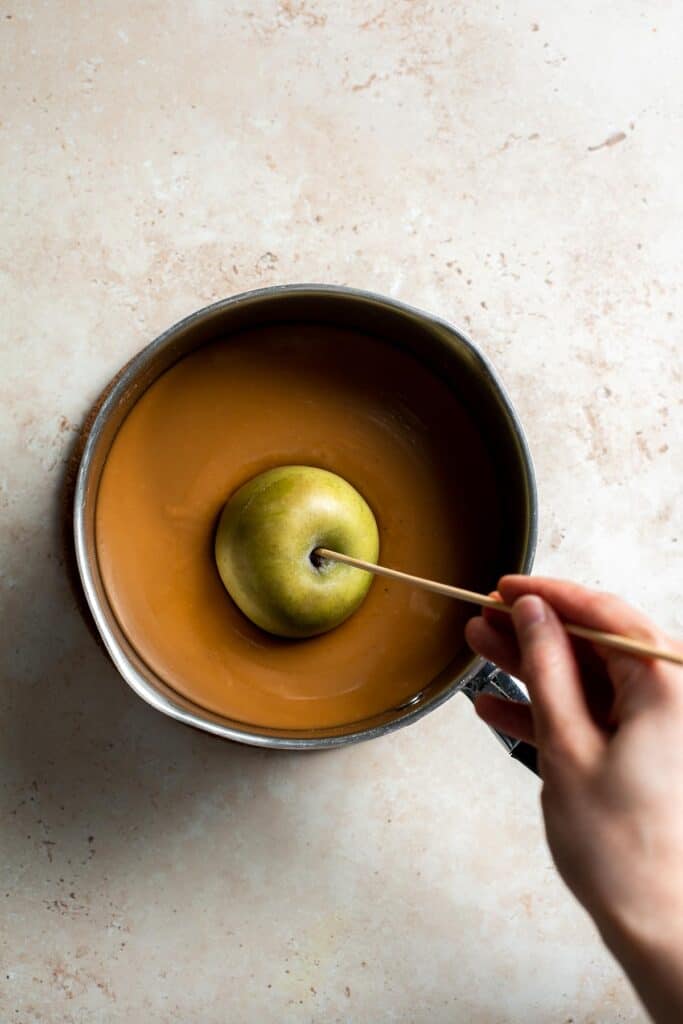
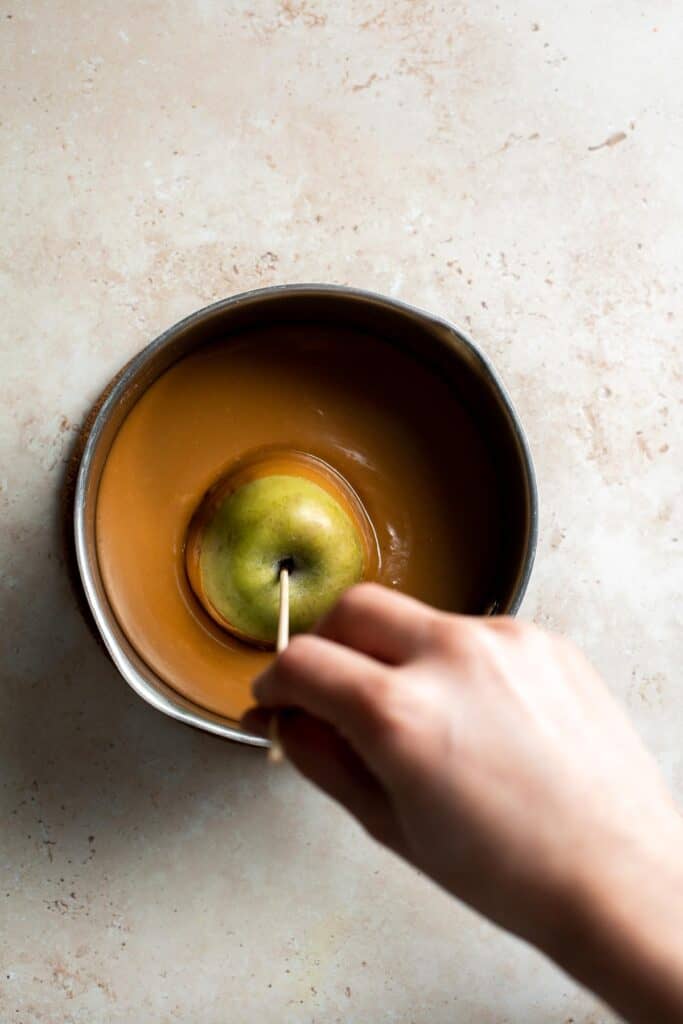
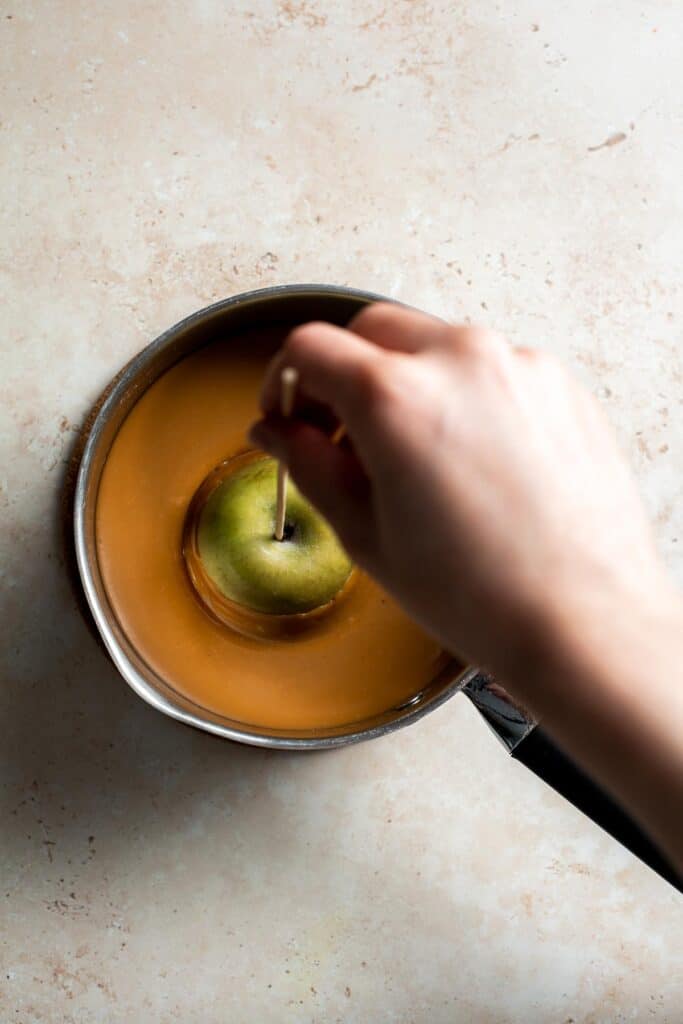
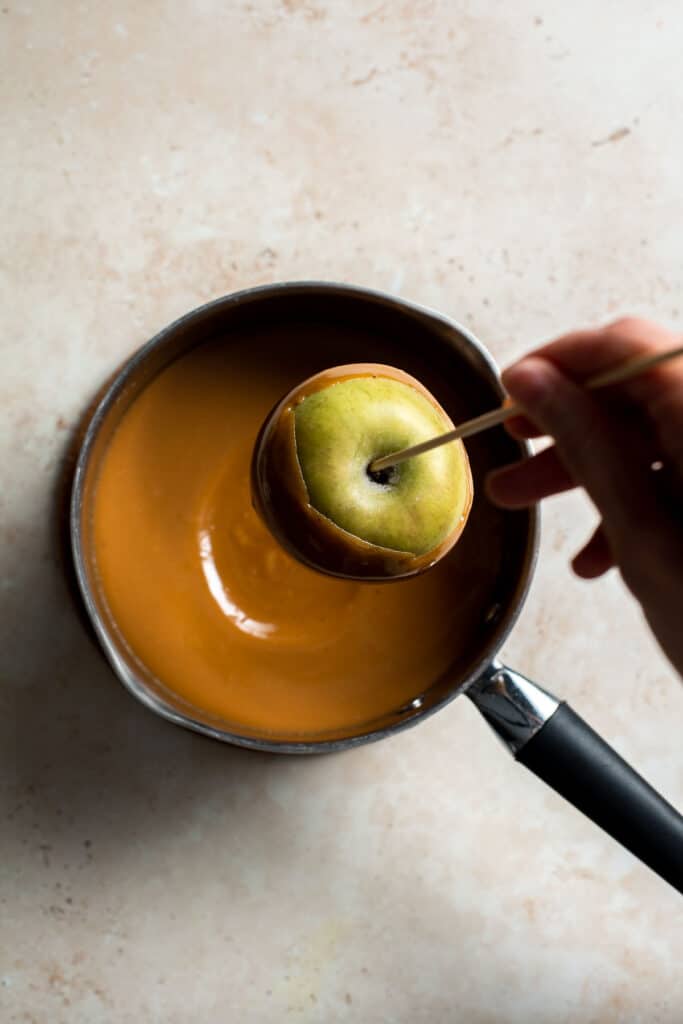
- Decorate (optional). To decorate, start decorating the apples within 5-10 minutes (before the caramel has completely set). For plain caramel apples or apples completely dipped in chocolate, transfer the apples to the refrigerator instead for 15 minutes first to set completely. If the caramel pooled a little on the parchment paper, you can leave it as is, or lift up the apple and use your hand to shape the pooled caramel around the apple.

How to Decorate Caramel Apples
There are so many ways that you can decorate these festive caramel apples. You can:
- Dip the caramel apples (not yet fully set) in crushed nuts, pretzels, and/or mini m&m's.
- Allow the caramel to set, then melt the milk chocolate and/or white chocolate and drizzle some or the caramel apples with melted chocolate.
How to Melt Chocolate
You can melt chocolate either on the stovetop or in the microwave.
- On the stove: Bring about 2 inches of water to a gentle simmer in a saucepan over medium-low heat. Reduce the heat to low and place a medium heatproof bowl over the saucepan, making sure the bottom of the bowl doesn't touch the water (you can also use a steamer insert). Add the chocolate and stir constantly as it melts. Continue stirring until completely smooth and gloss. This should take just a few minutes.
- In the microwave: For a quicker method, place the chopped chocolate in a heatproof bowl and microwave in 30-second intervals, stirring well after each one. Continue until the chocolate is fully melted and smooth. Be sure to stir between intervals to prevent overheating or scorching.
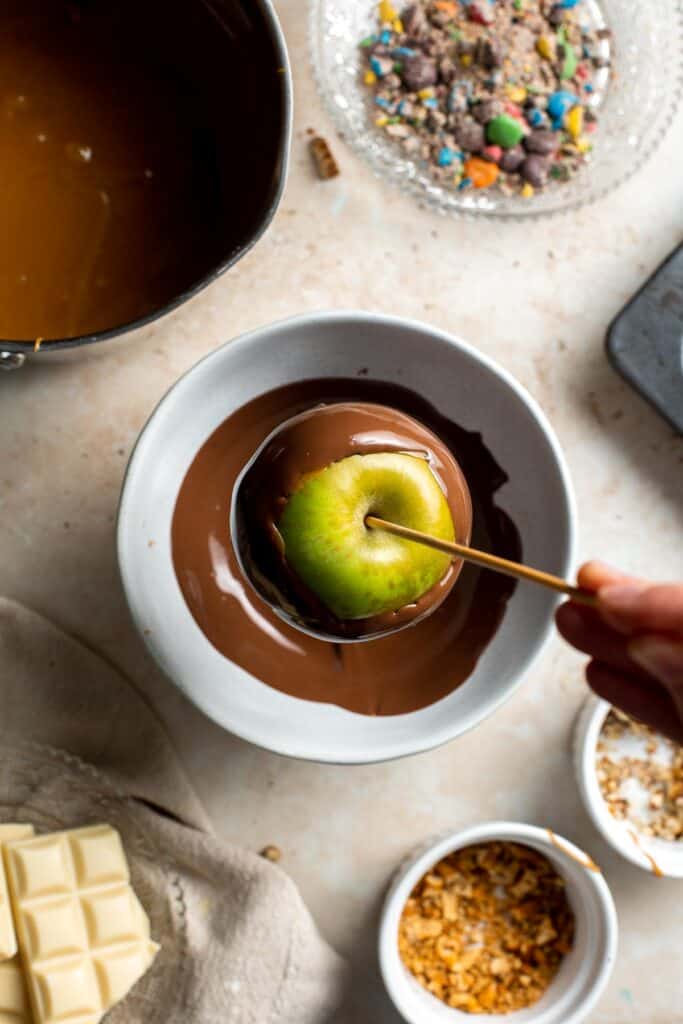
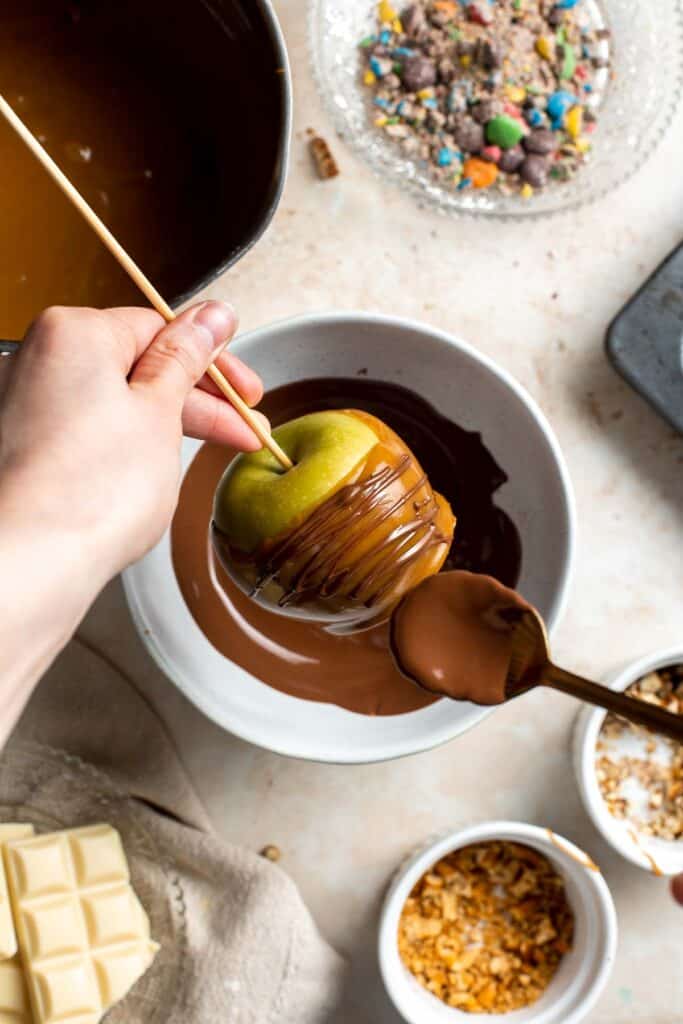
- Allow the caramel to set, then melt the milk chocolate and/or white chocolate and dip it completely in chocolate for 2 solid layers - caramel and chocolate.
- Add extra toppings if desired.
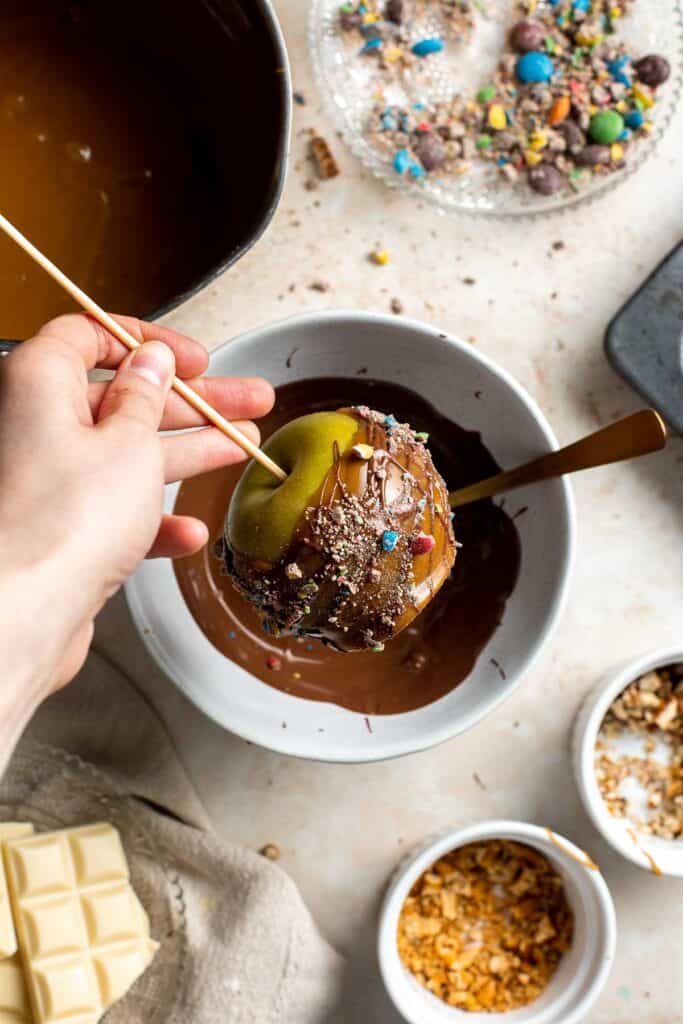
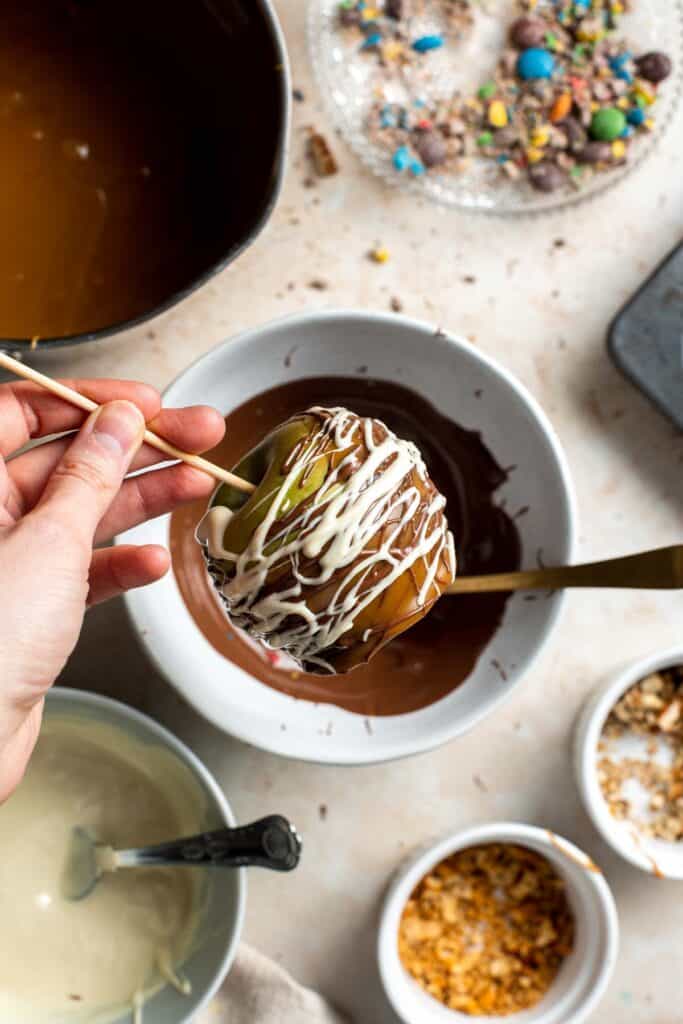

Set aside the decorated apples back on the parchment paper lined pan and let toppings harden fully.
Recipe Tips and Tricks
- Get the whole family involved! Invite the kids to decorate their own caramel candy apples. Everyone from toddlers to teenagers or young adults will love dunking the apples in caramel, drizzling with chocolate, and adding their own personal touches and tastes to these treats. Whether they make faces on their apples or coat the whole thing in nuts and sprinkles, it's always interesting to see what their creative minds come up with.
- Remove wax - seriously. You may be tempted to skip this step if using waxed apples (if you aren't sure if your apples are waxed, just assume they are!). Leaving the wax on will affect the taste and might keep the caramel coating from sticking to the skin. An easy and effective way to remove wax from apples is to use a cloth or paper towel to wipe the surface of the apple with an apple cider vinegar and hot water solution. Dry using a clean cloth or paper towel. Inspect and repeat as needed.
Storing Instructions
Wrap the caramel apple tightly in plastic cling wrap and refrigerate for up to 7 days.
It typically isn't recommended to freeze caramel apples, as the caramel will easily become freezer burned and the apple will change consistency when thawed and may be unpleasant to eat.
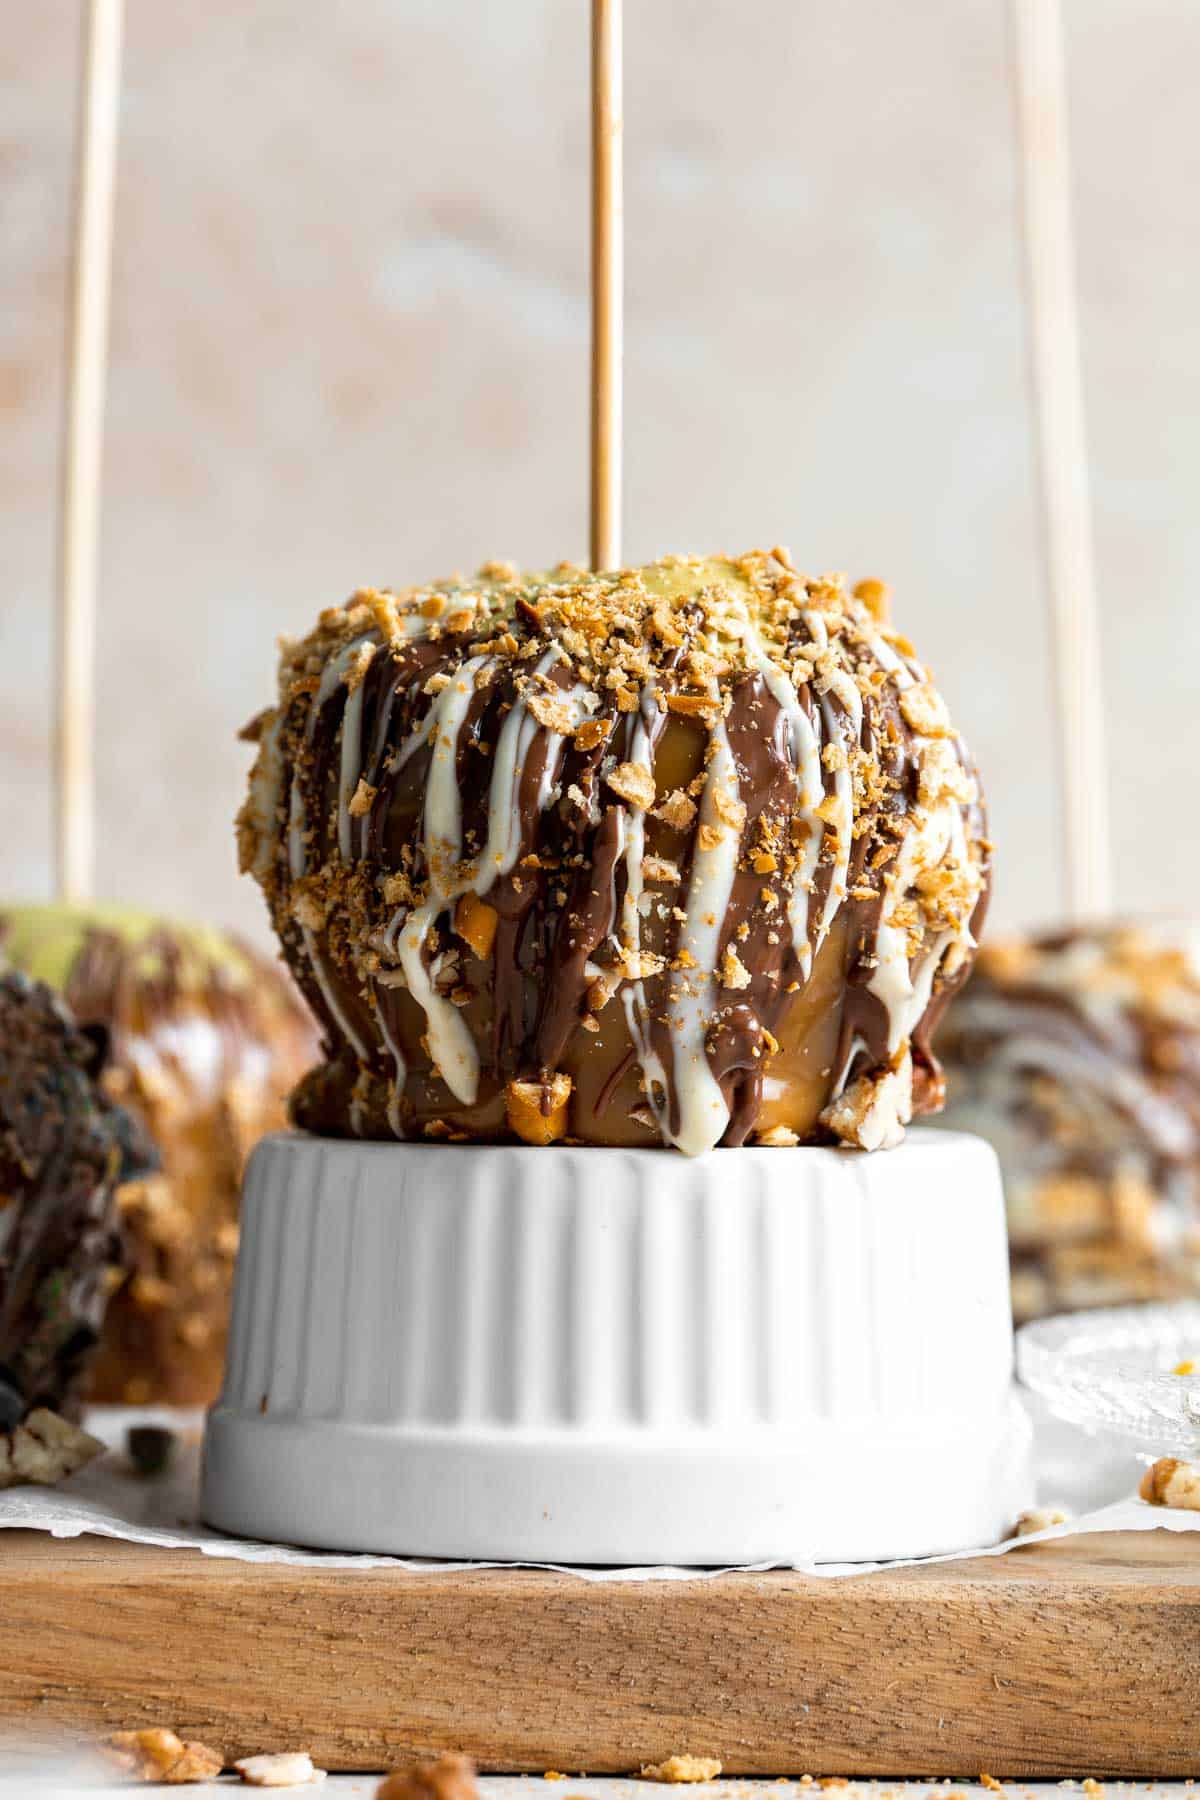
More Apple Dessert Recipes
Tried this recipe?
I'd love to hear what you think! Leave a comment and rating below to share your feedback. Your reviews help others discover this recipe and help me keep creating more free recipes for you. Snap a photo and tag me on social media @aheadofthyme too.

30 Blender Soup Recipes
When it comes to soups, blender soups are the easiest. You just throw you ingredients into the pot, simmer, and then puree with a blender. They're silky, smooth, and luscious. It's what soup season is all about.
If you are wondering what kind of soup to make in the blender, then you are in the right place. Today we are sharing over 30 of our best and most popular blender soup recipes that are vegetarian, with lots of vegan and gluten-free options too.

Best Blender Soup Recipes
Homemade tomato basil soup is comforting, rich, and smooth. This cozy soup is easy, flavourful, and nourishing, making it so much better than canned.
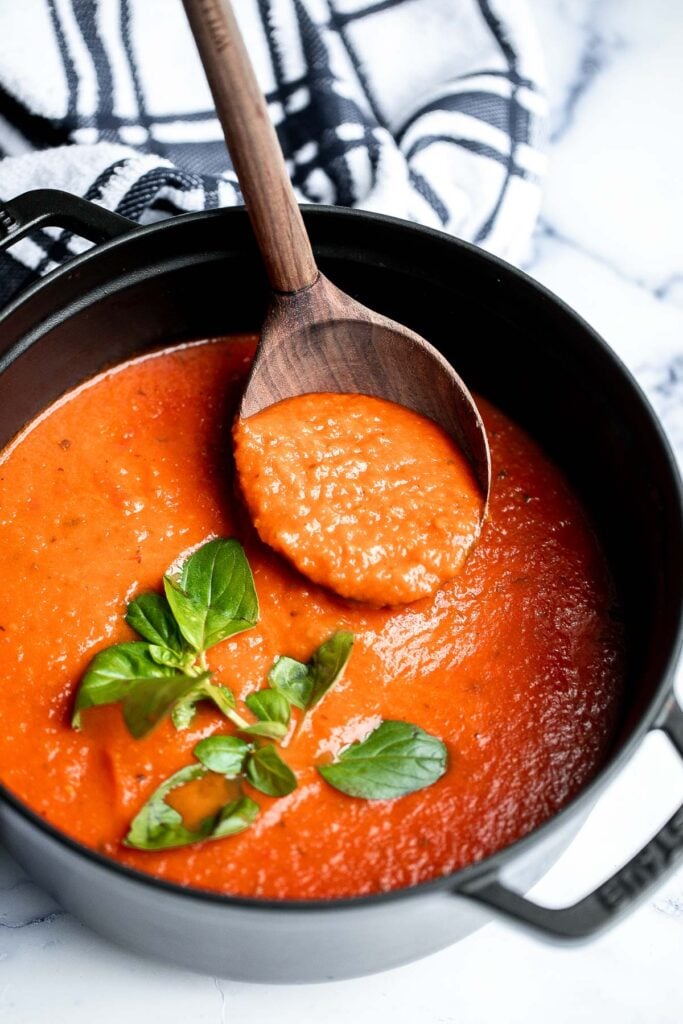
Lemon Asparagus Soup with Parmesan
Lemon asparagus soup with parmesan is the perfect spring soup -- smooth, light, fresh, and flavourful. It's customizable and can be served hot or cold.

Roasted Carrot and Ginger Soup
Roasted carrot and ginger soup is rich, velvety, creamy, flavorful, and delicious. This healthy vegetarian soup is quick and easy to make in 30 minutes. Serve it with some toasted bread.
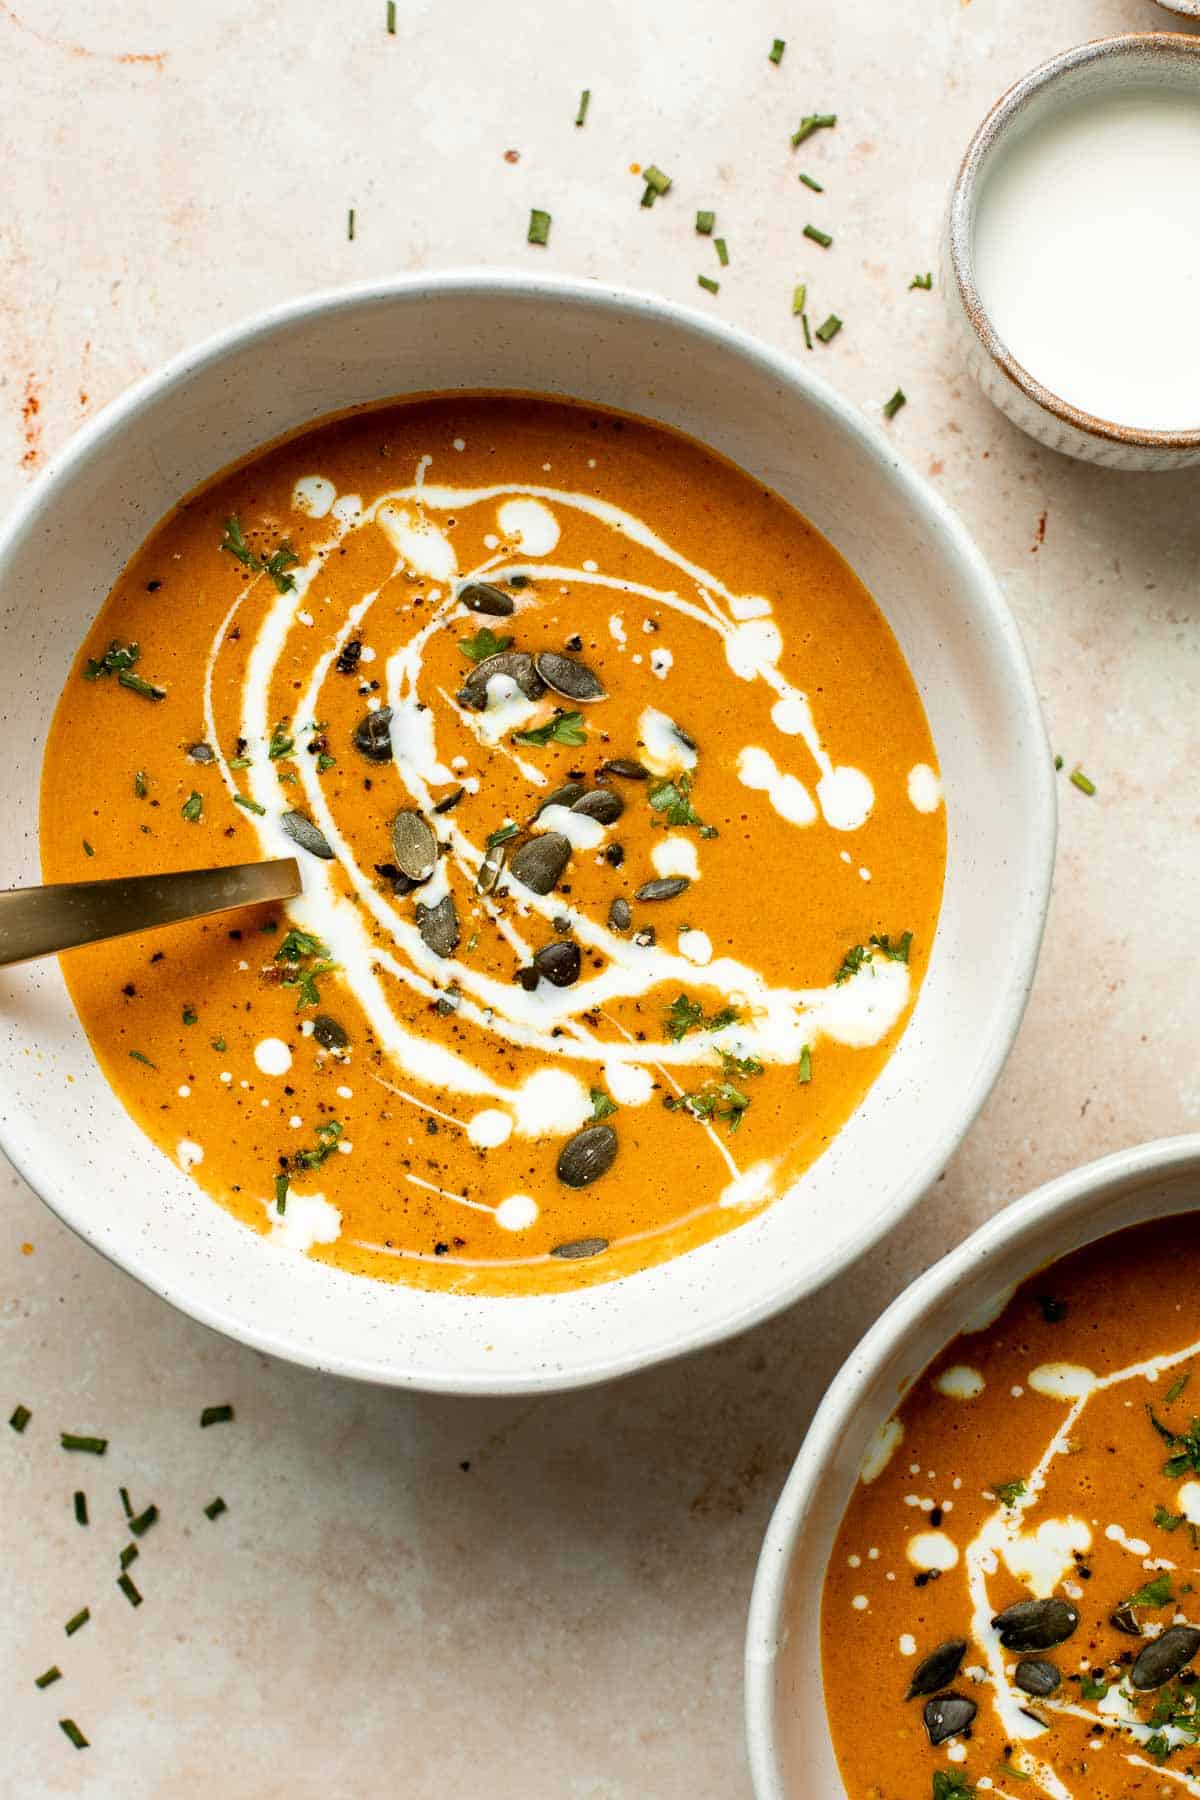
Cheesy Potato Soup
Roasted Butternut and Cauliflower Soup
Creamy roasted butternut squash and cauliflower soup has all the fall soup feels and is vegan and gluten-free. Plus, it's super easy to make in a sheet pan and then puree. Serve it with some quick and easy green onion dinner rolls or skillet dinner rolls.
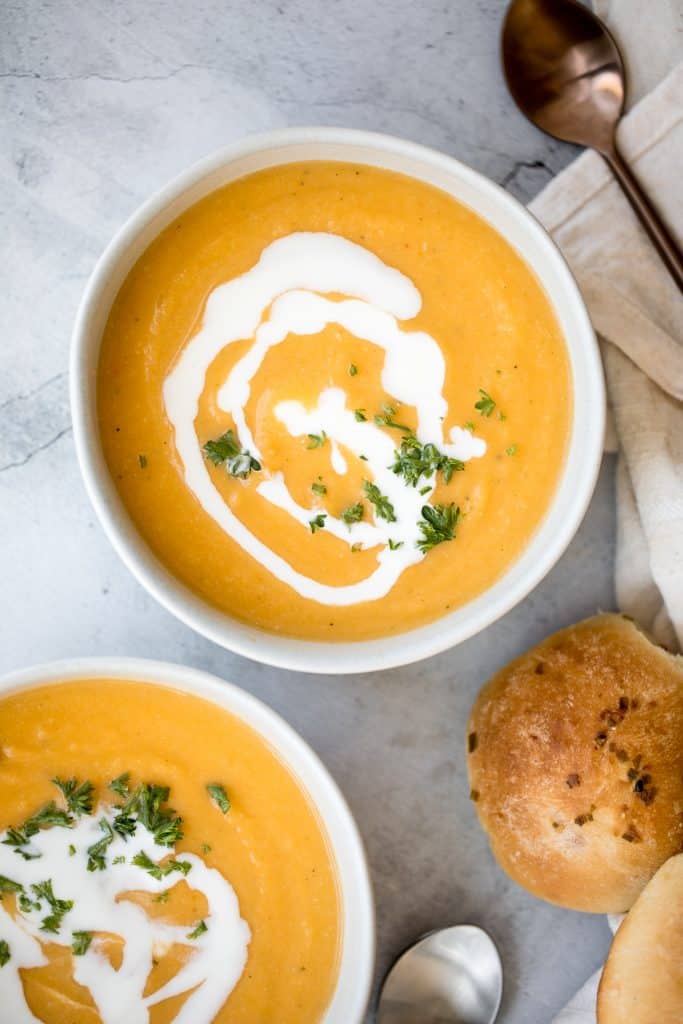
Indian-inspired, vegan, creamy coconut curry lentil soup is an easy and simple 30-minute pantry meal that is packed with spices for maximum flavour. Serve it as a soup or as a curry over some coconut rice.
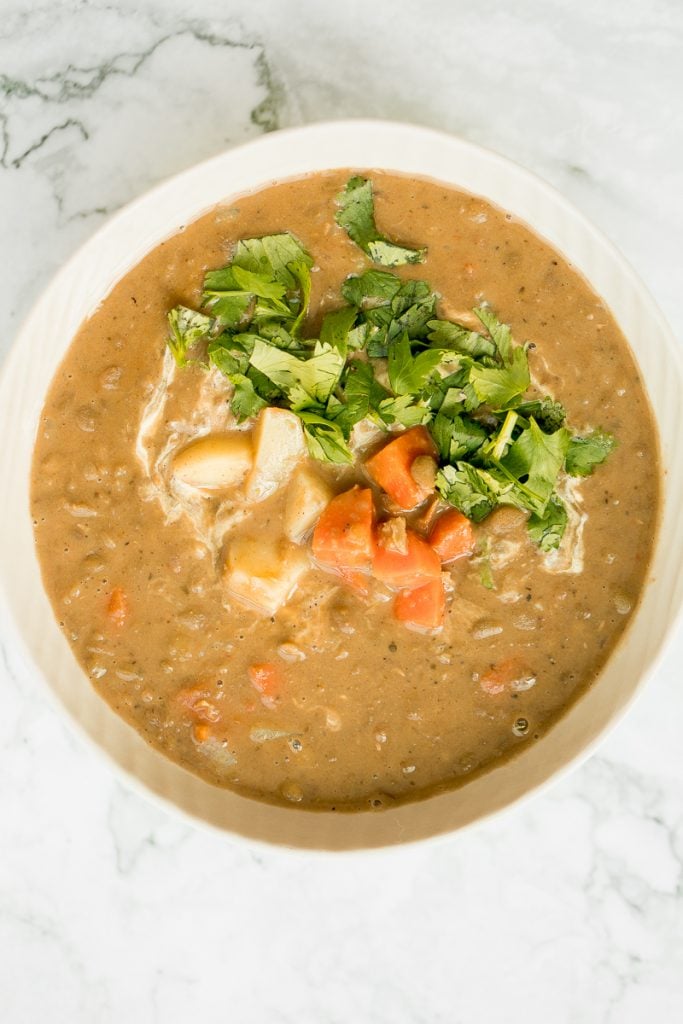
Creamy artichoke soup is rich, healthy, delicious, easy to make, and freezer-friendly. This vegetarian soup is loaded with artichokes, leeks, and potatoes.
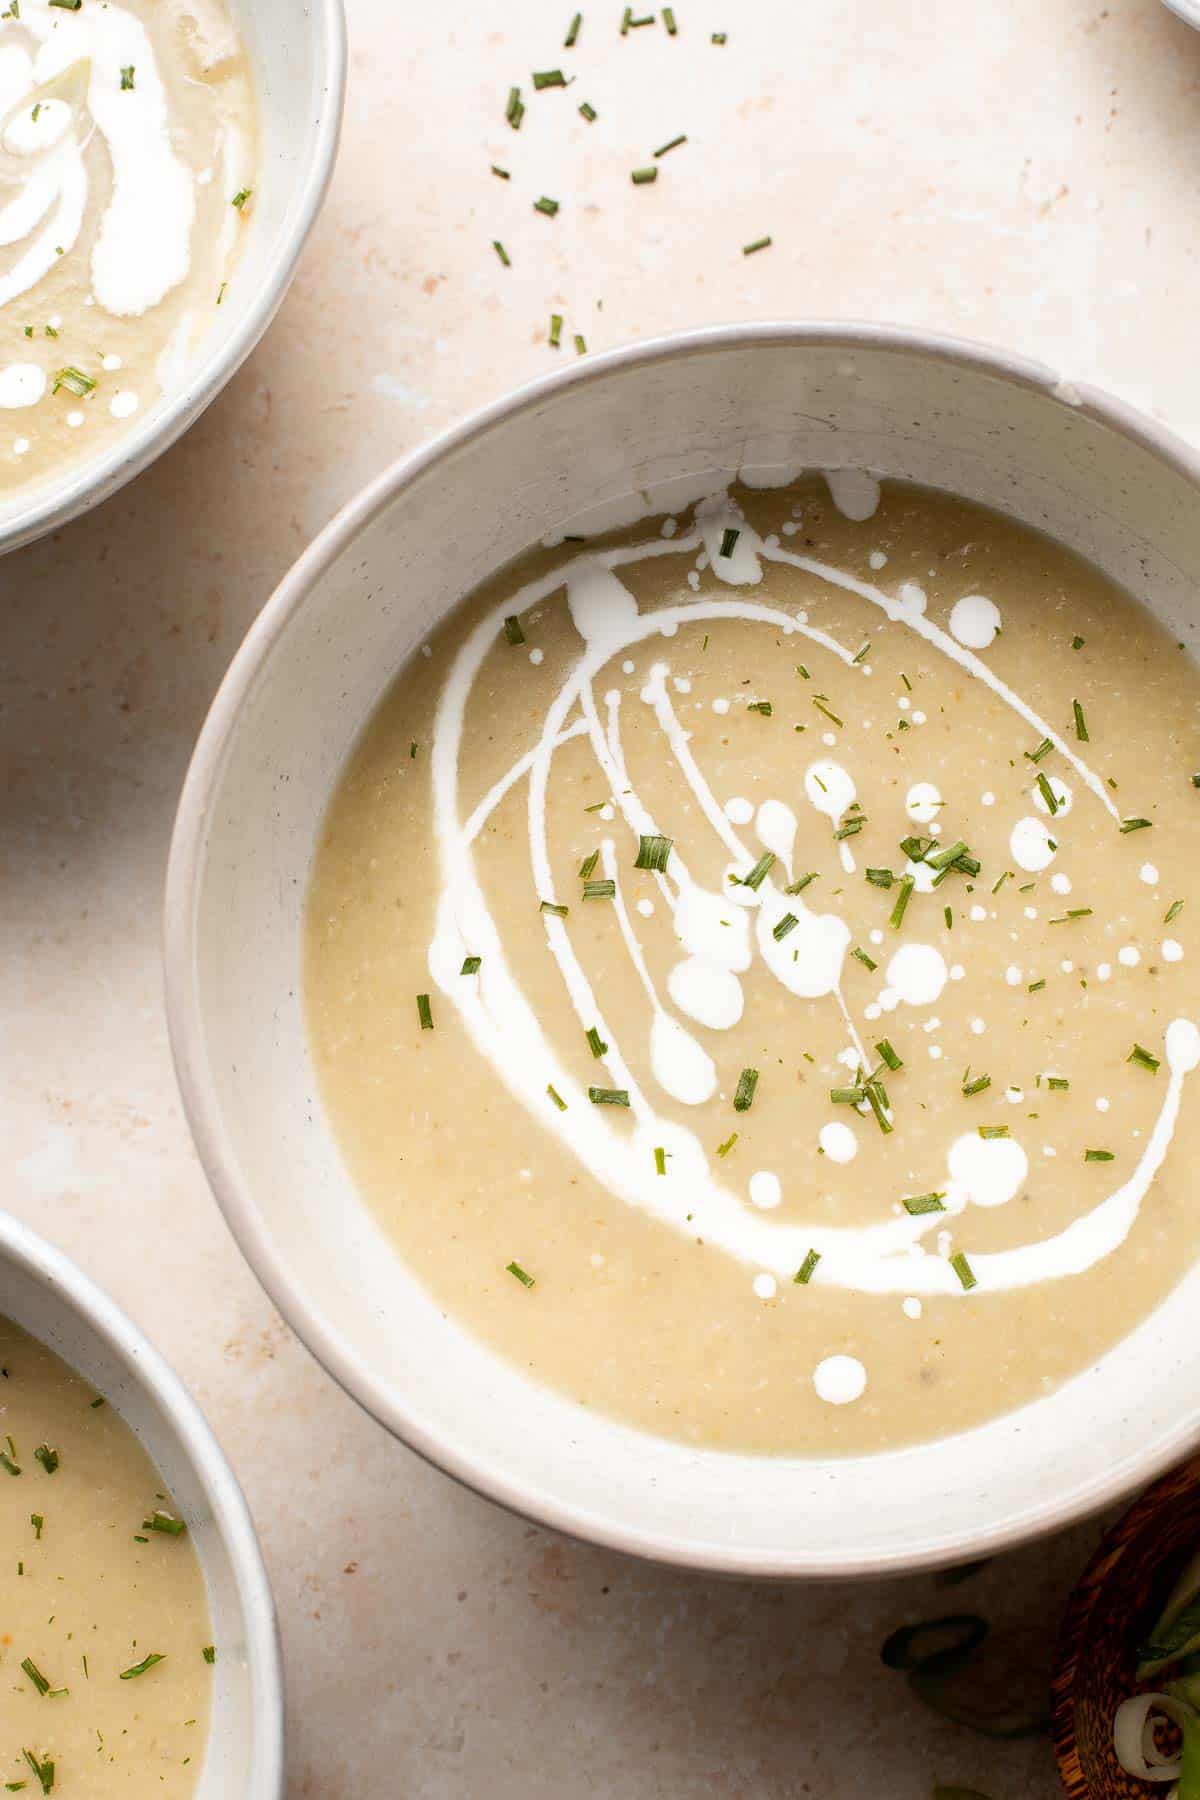
Homemade lobster bisque is rich and creamy, loaded with seafood flavor, and delicious. Serve this quick and easy soup with soft bread for lunch or dinner.

Delicious and flavourful, light cream of broccoli soup is a silky smooth, creamy, and thick soup made healthier with no cream. Make it in under 25 minutes.
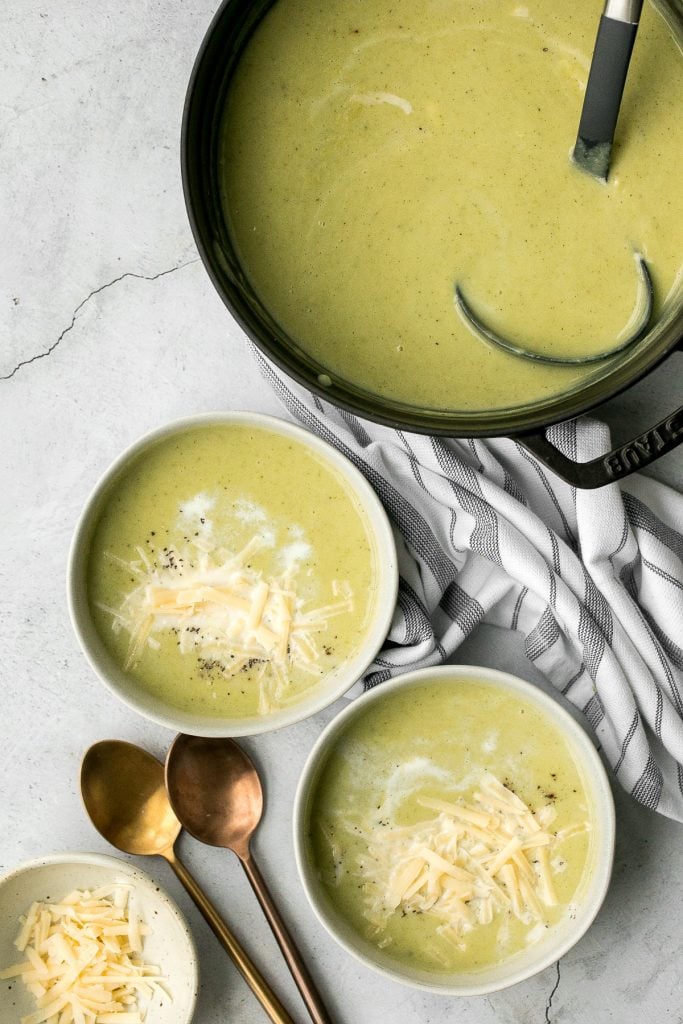
Pinto Bean Soup (Sopa Tarasca)

One pot sweet potato soup is super silky, creamy and vegan, and packed with fall flavours. Make this quick and easy fall and winter soup in 30 minutes. Serve with some rosemary cornbread or pumpkin dinner rolls on the side.
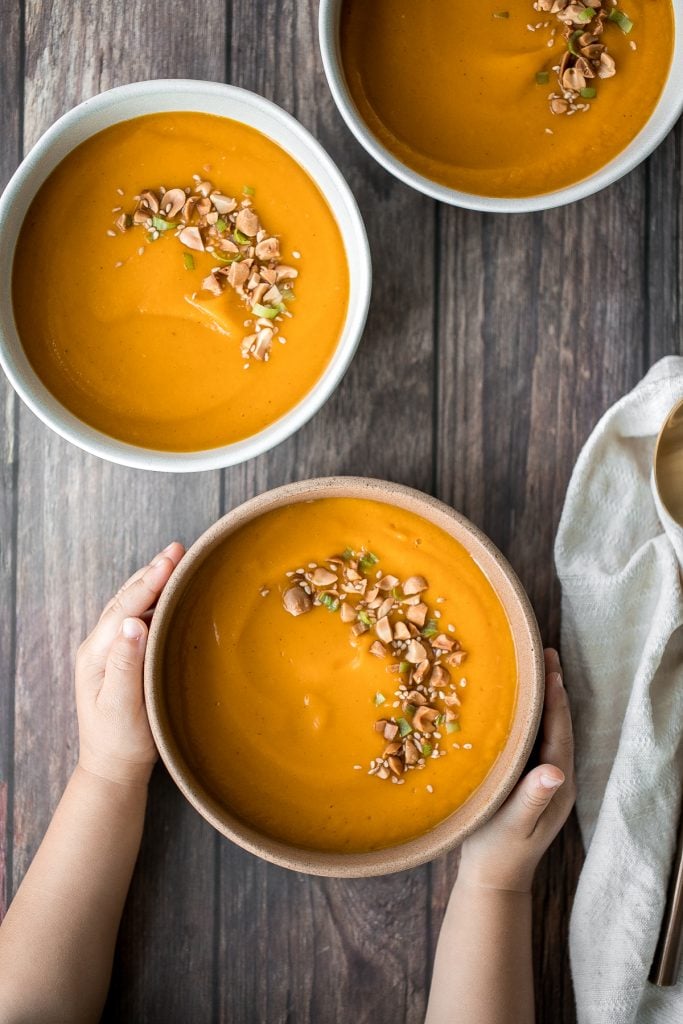
Cream of mushroom soup is thick, creamy, and comforting. This delicious one pot soup is easy to make in 45 minutes, freezer-friendly, and reheats well.
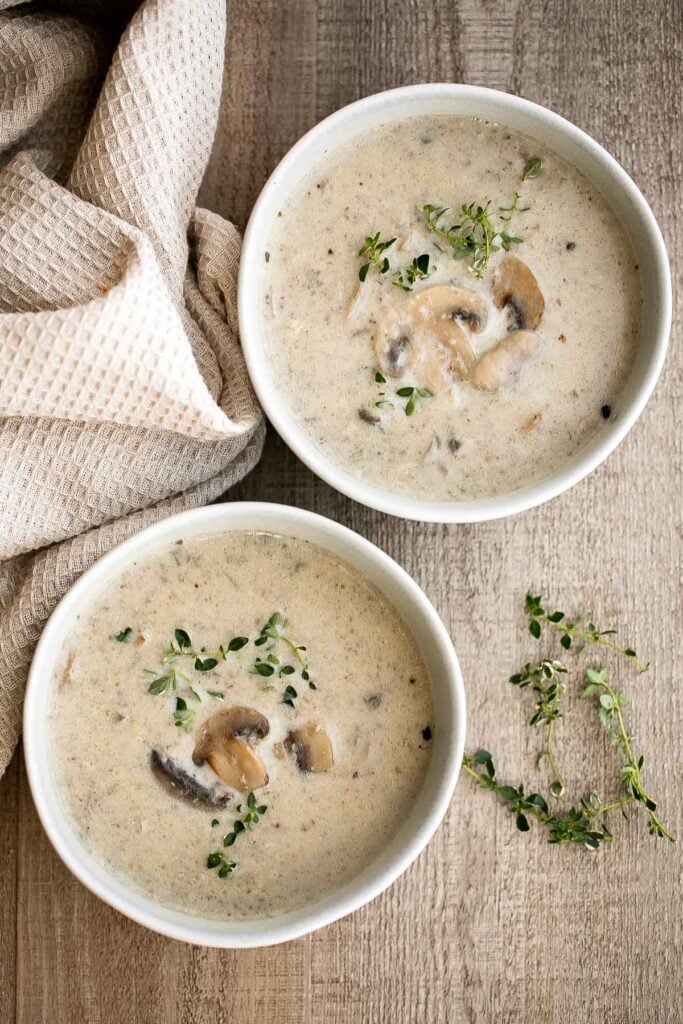
Roasted Red Pepper and Tomato Soup
Roasted red pepper and tomato soup is silky smooth, incredibly flavorful and delicious, and easy to make. This vegan soup is healthy and nutritious too.

This vegetarian, hearty and filling, creamy Mexican corn soup is dense, bright, and full of flavour! It has all the warm and cozy vibes written all over it. Serve it with some butternut squash quesadillas.

It's no surprise that this delicious and easy roasted butternut squash soup is the most pinned soup recipe on Pinterest. This soup captures the taste of the holidays in one spoon. Rosemary, sage and thyme, need I say more? Serve with with a side of homemade ciabatta bread or crusty no knead bread for dipping.
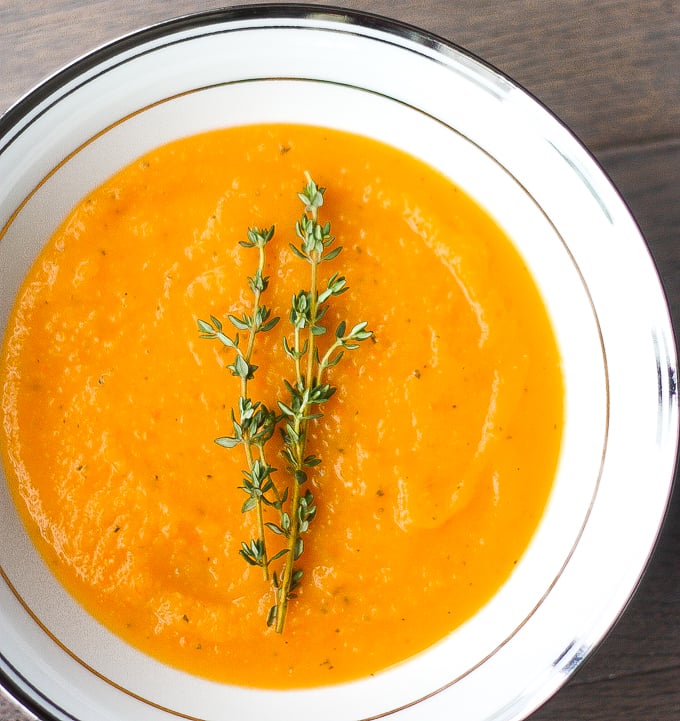
Creamy Garlic Cauliflower Soup
Creamy Garlic Cauliflower Soup is creamy and healthy. This vegetarian soup is ready in 45 minutes with a handful of wholesome ingredients and a few steps. Serve it with an easy tomato bruschetta on the side.
Creamless Cream of Asparagus Soup
Creamless cream of asparagus soup is healthy, delicious, smooth, creamy, quick and easy to make. A perfect spring soup for a last minute lunch or dinner.
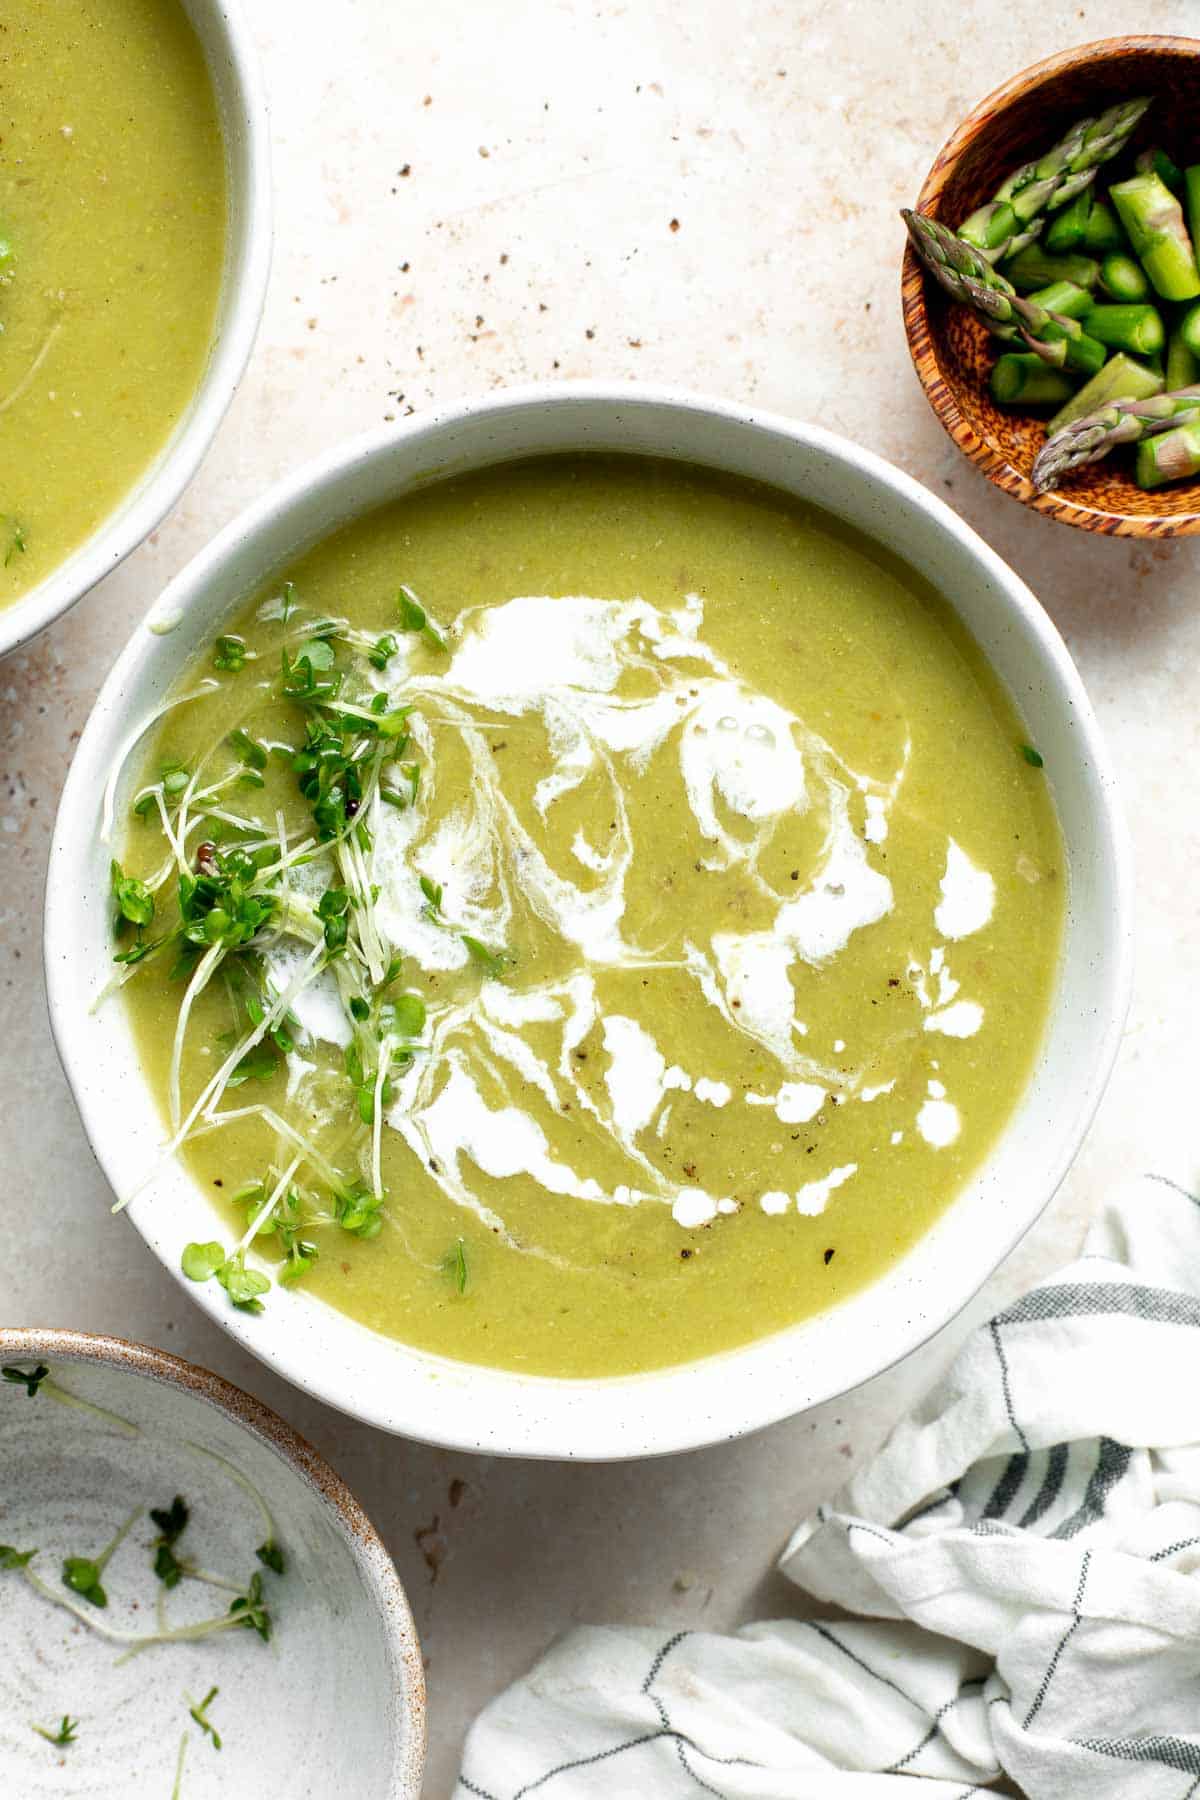
Make this silky smooth and creamy tomato potato soup in under 25 minutes. This gluten-free vegan soup is healthy and filling and the easiest weeknight meal.
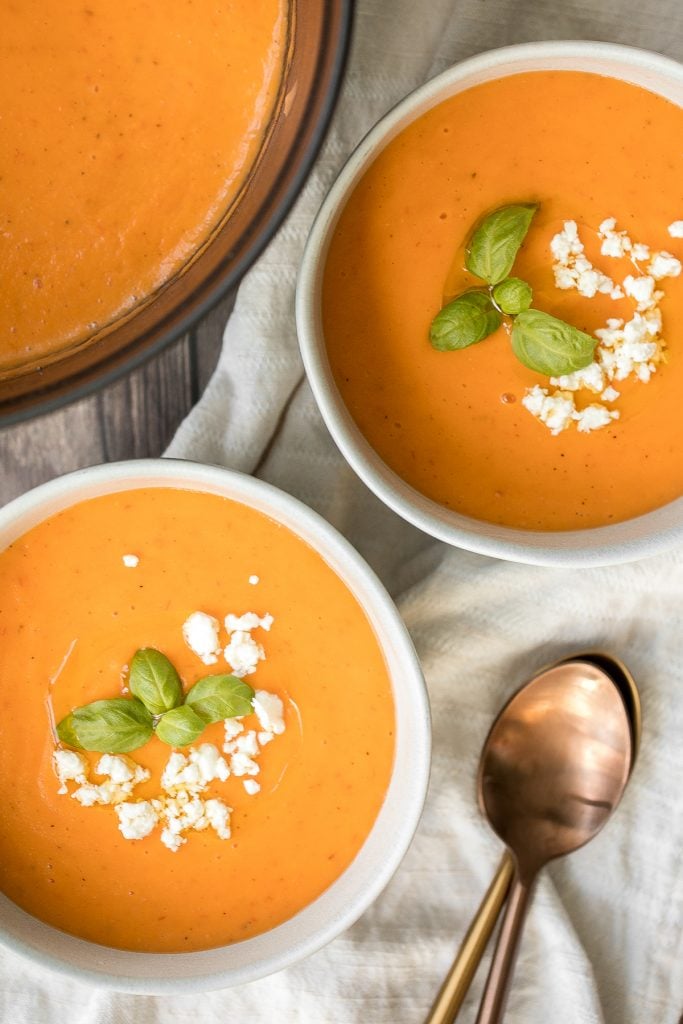
Instant Pot Butternut Squash Soup
Instant pot butternut squash soup is the perfect fall dish to cook in your pressure cooker - warm, cozy, comforting, and creamy. Make in 15 minutes.
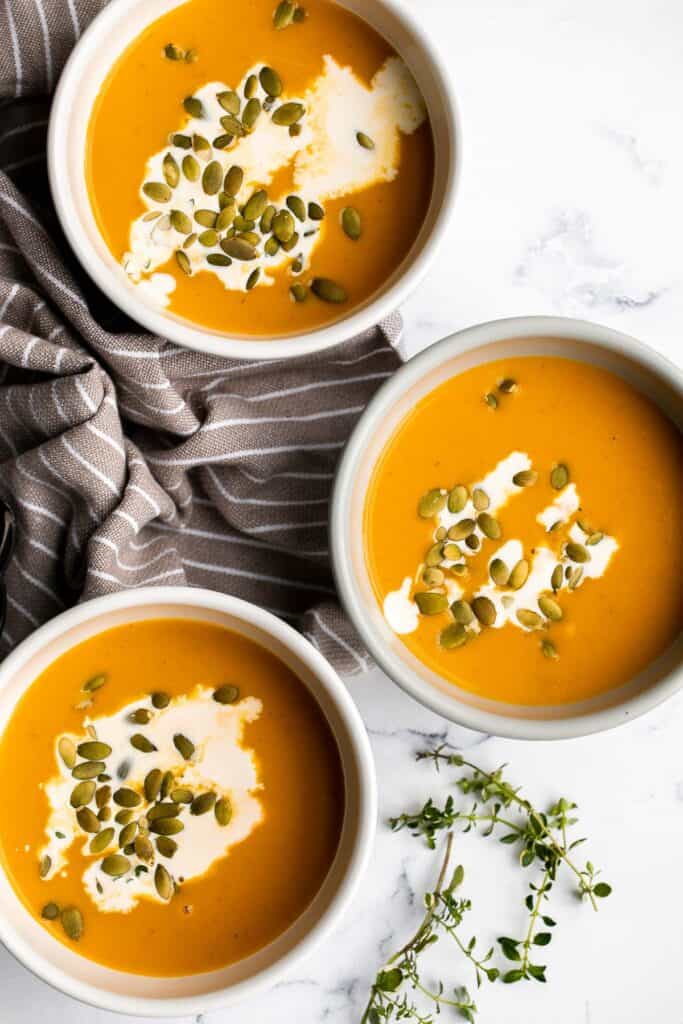
Spinach and Pea Soup is creamy, velvety, healthy and delicious. It's a curried soup with a vegan coconut milk base loaded with fresh spinach and green peas.
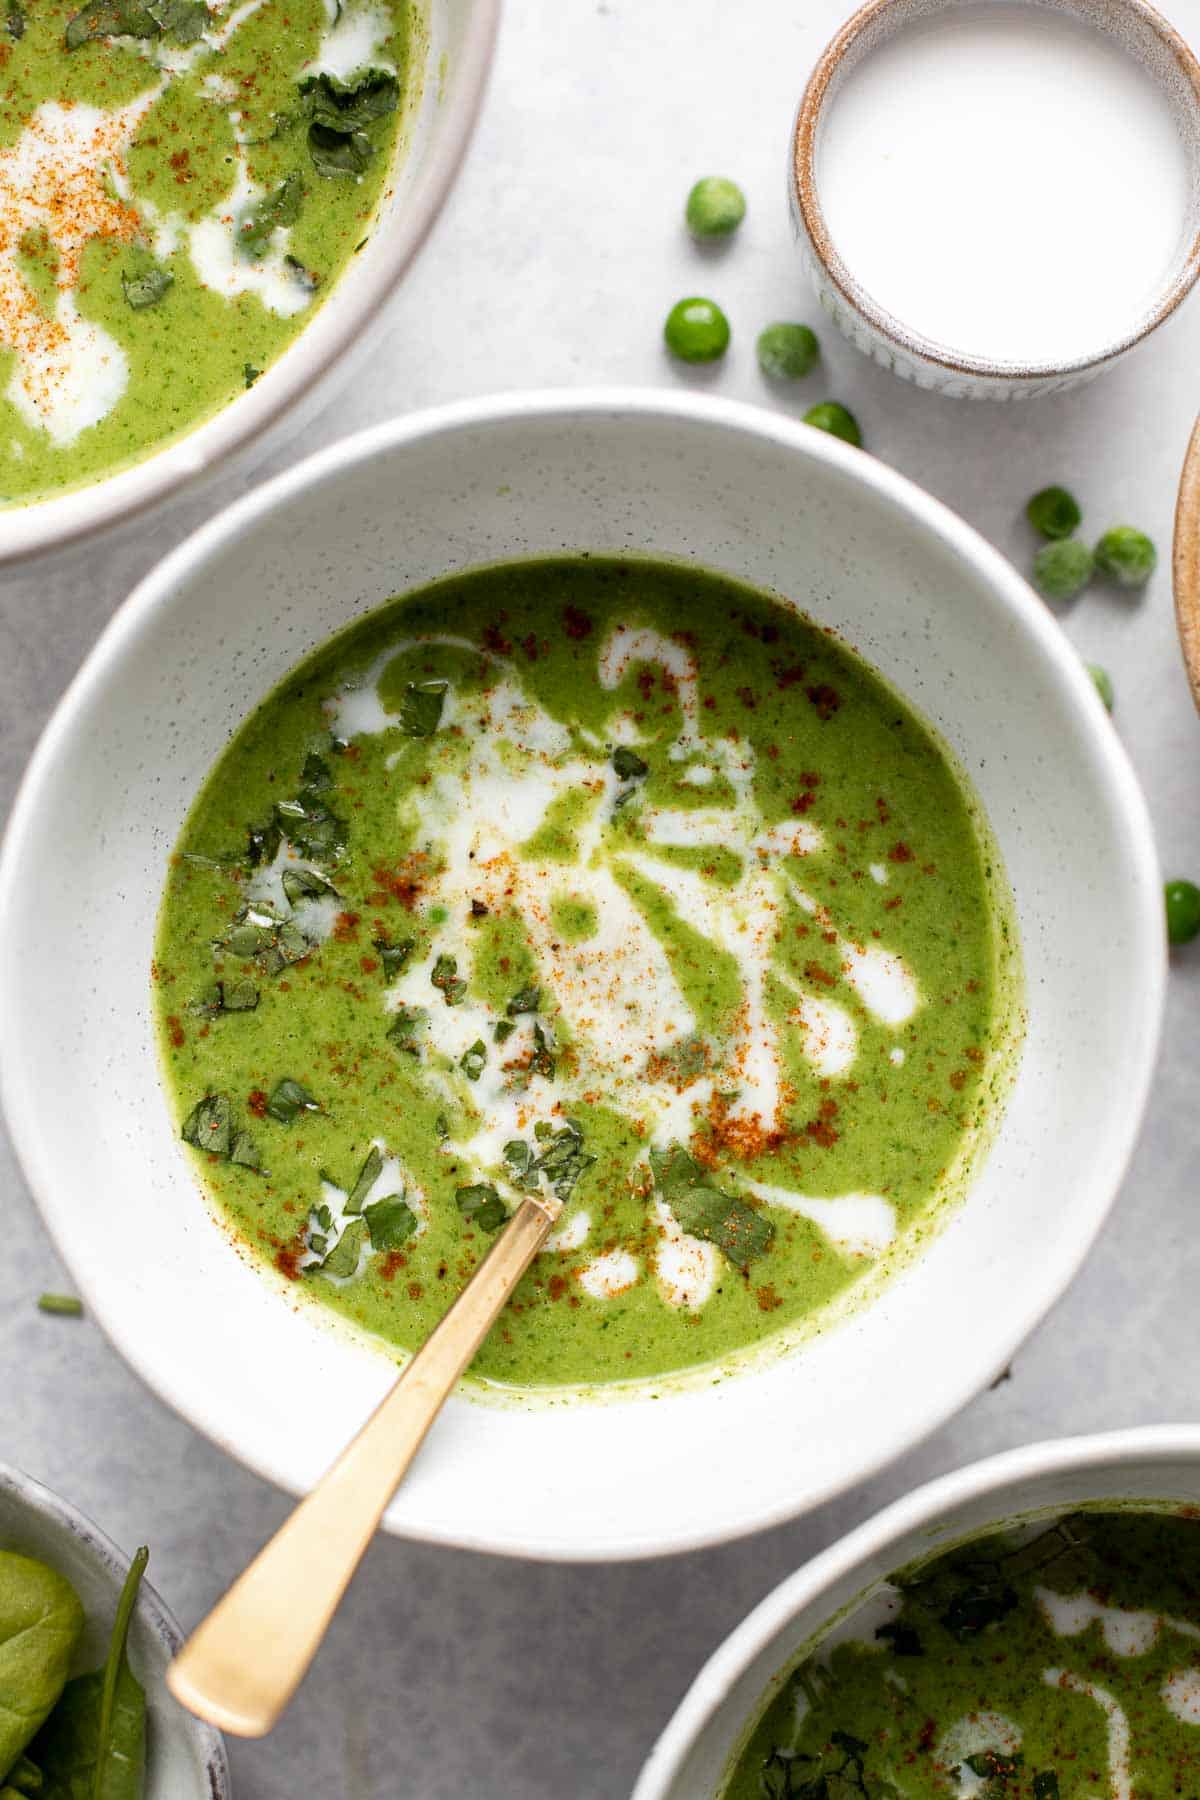
Coconut Curry Pumpkin Soup is rich, creamy, flavorful, and delicious. This vegan soup is ready just over 35 minutes with minimal prep and in one pot.
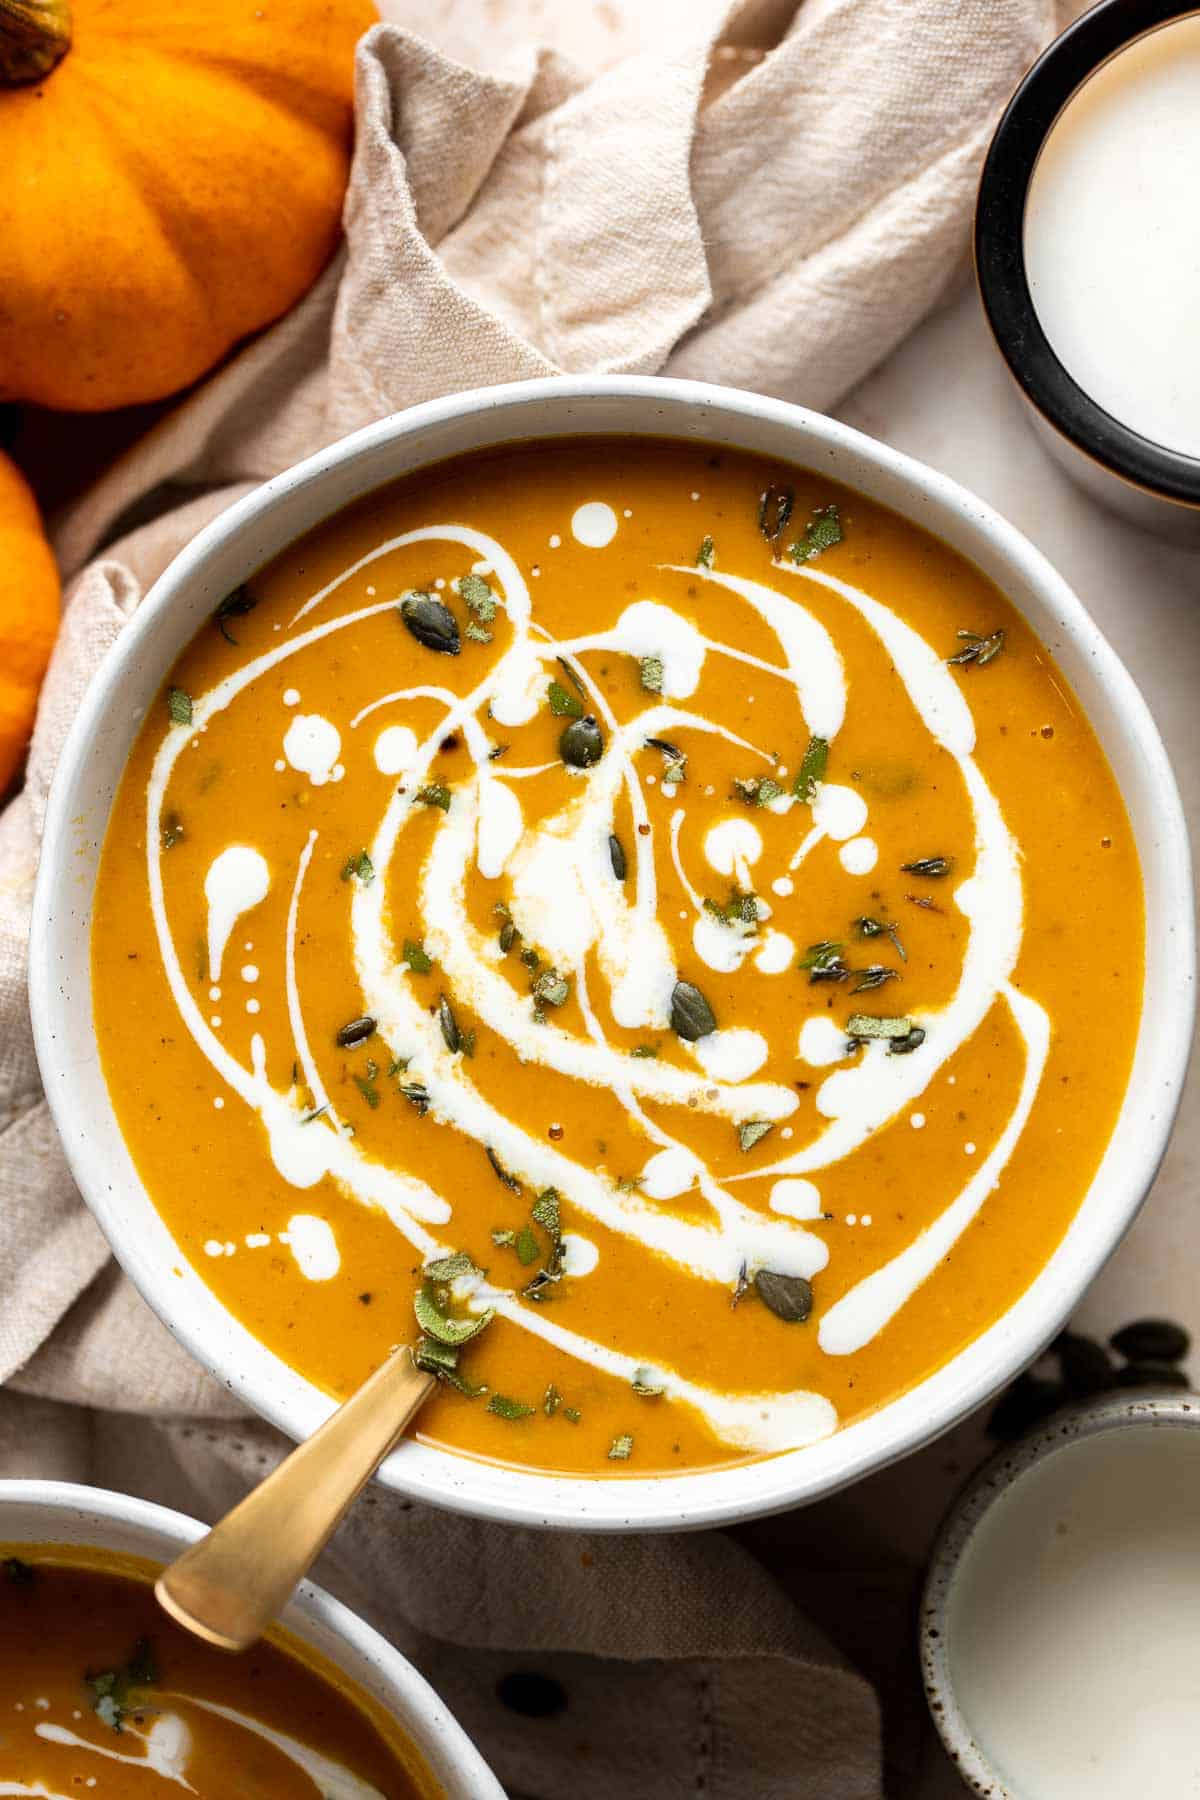
Mashed potato soup is one of the best ways to use up leftover mashed potatoes. It's creamy, cheesy, delicious, and ready in under 30 minutes.

30-Minute Butternut Squash Soup
Quick and easy 30-minute butternut squash soup is simple yet packed with flavour, is naturally vegan and gluten-free, and can be made ahead of time. Serve it alongside some easy rosemary garlic focaccia bread or cornbread muffins for dipping.

Carrot Pumpkin Soup is wholesome, nutritious, and delicious. It's quick and easy comfort food that's perfect to feed the family on lazy weeknights.
Slow Cooker Loaded Baked Potato Soup
Nothing says comfort food like a bowl of slow cooker loaded baked potato soup topped with cheddar cheese, crumbled bacon and green onions. Literally throw your ingredients into the slow cooker and come back to a fully cooked soup a few hours later.

Butternut Squash Apple Soup is healthy and simple yet packed with so much flavour. Top this easy vegan soup with a layer of homemade toasted croutons.

Storing and Freezing Instructions
All of these blender soup recipes can easily be made ahead and stored in an airtight container in the refrigerator for up to 5 days or in the freezer for up to 3 months.
You can also choose to just prep the ingredients in advance, whether that means chopping up vegetables or mixing ingredients together. You can store all your prepared ingredients in airtight containers in the refrigerator. By prepping in advance, it will make the cooking process go a lot more smoothly and quickly.
More Comfort Recipes
- 60 Best Soup Recipes
- 50 Best Comfort Food Recipes
- 60+ Fall Dinner Ideas
- 40 Best Pasta Recipes
- 60+ Winter Dinner Ideas
- 30 Best Casseroles
Did You Make Any of These Blender Soup Recipes?
Please leave a comment and rating below, and let me know what you thought of this round up of blender soup recipes. Be sure to snap a picture and tag me on Instagram @aheadofthyme or share it on the Pinterest pin so that I can follow along.
HUNGRY FOR MORE? Don't forget to sign up for my email newsletter so that you don't miss any recipes. You can also follow along on Instagram and Pinterest for more recipe updates.
Butternut Squash Bread
Move over pumpkin, there is a new loaf in town! Butternut Squash Bread is moist, fluffy, flavorful, and delicious. It's loaded with real butternut squash and warm fall spices that and brings the pumpkin spice season to your home.
Plus, this fall loaf cake is incredibly easy to make with a few baking staples and minimal prep time. Serve it for dessert at Thanksgiving dinner, as a school snack, or during a holiday brunch.
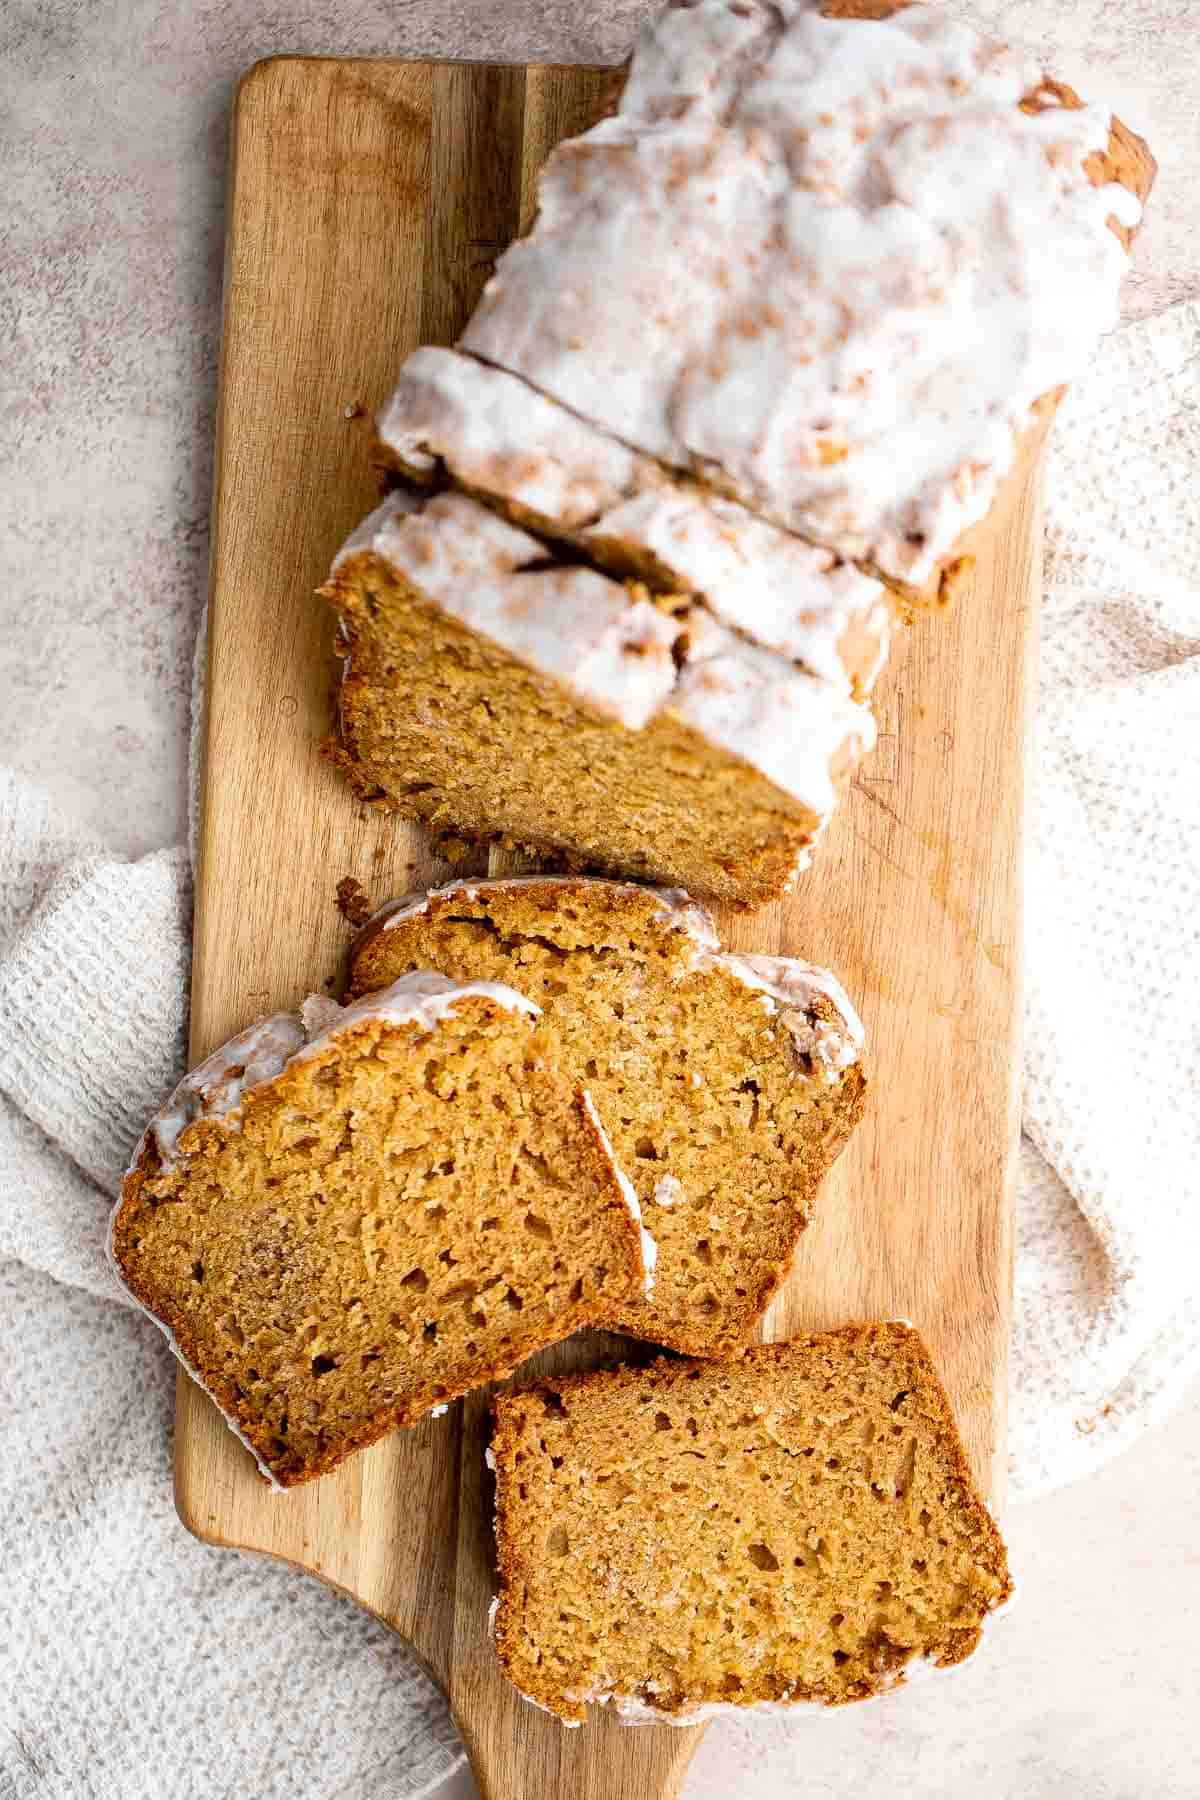
Why You'll Love this Butternut Squash Bread
- Made with real butternut squash. I like to make my own homemade puree and I find butternut squash so much easier to work with than a big, heavy pumpkin. Plus, it is so incredibly flavourful. However, if you are crunched for time or cannot get your hands on butternut squash, you can easily substitute it with pumpkin puree and make classic pumpkin bread.
- Easy to make. This simple loaf cake comes together with a few baking pantry staples along with butternut squash puree and pumpkin spice. You will spend less than 10 minutes of actual prep work before you are ready to pop the butternut squash bread into the oven.
- It's perfectly moist. Butternut squash puree adds more than just flavor. Fresh vegetables like zucchini, eggplant, pumpkin or carrots have the potential to transform the texture and moisture of baked goods (like in Zucchini Muffins and Spiced Carrot Muffins). Butternut squash puree works the same way! It adds a nice density and moisture without sacrificing fluffiness or texture.
- The classic fall flavors. The big bonus of baking this "pumpkin" bread is the incredible aroma that fills my kitchen, which comes from the delicious fall flavours of the pumpkin spice blend. I am talking cinnamon, nutmeg, and ginger.
- It's nutritious. Butternut squash bread because it's a delicious and nutritious way to enjoy one of my favorite winter vegetables. The bread is packed with fiber, vitamin A, and vitamin C, and it's a great source of antioxidants.
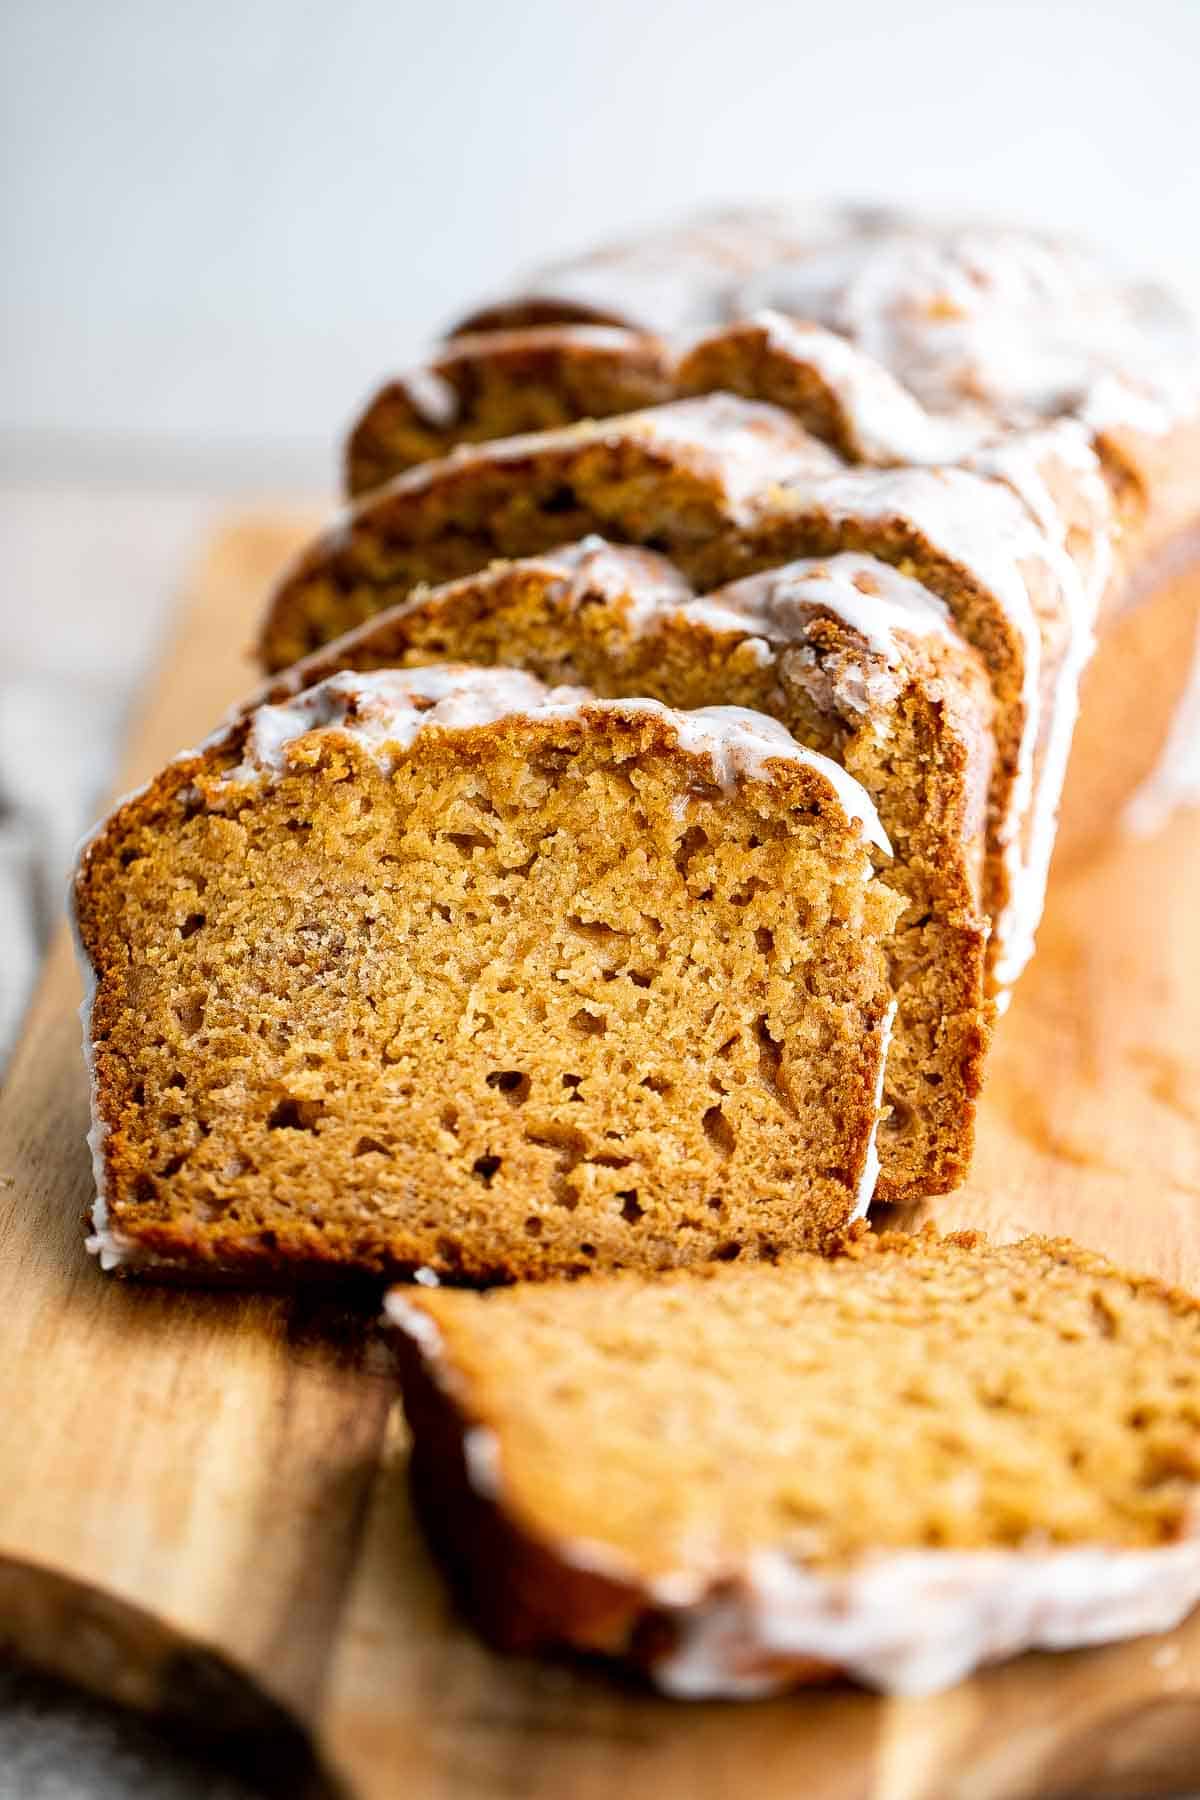
Ingredient Notes
To make this delicious Butternut Squash Bread, you will need the following ingredients (full measurements in recipe card below):
- butternut squash puree - feel free to use store-bought canned puree or homemade. You can even substitute it with pumpkin puree and make pumpkin bread instead.
- baking staples - including all-purpose flour, baking powder + soda, salt, and sugar.
- pumpkin spice blend - you can substitute with ground cinnamon if you'd like.
- eggs
- vanilla extract
- vegetable oil
- buttermilk - feel free to substitute with full-fat milk instead.
- icing - made with confectioners' sugar, pumpkin spice blend (or substitute with cinnamon), and a liquid such as maple syrup, orange or lemon juice, or water.
You will also need measuring cups and spoons, mixing bowls, a 9x5-inch loaf pan, and a wire cooling rack.
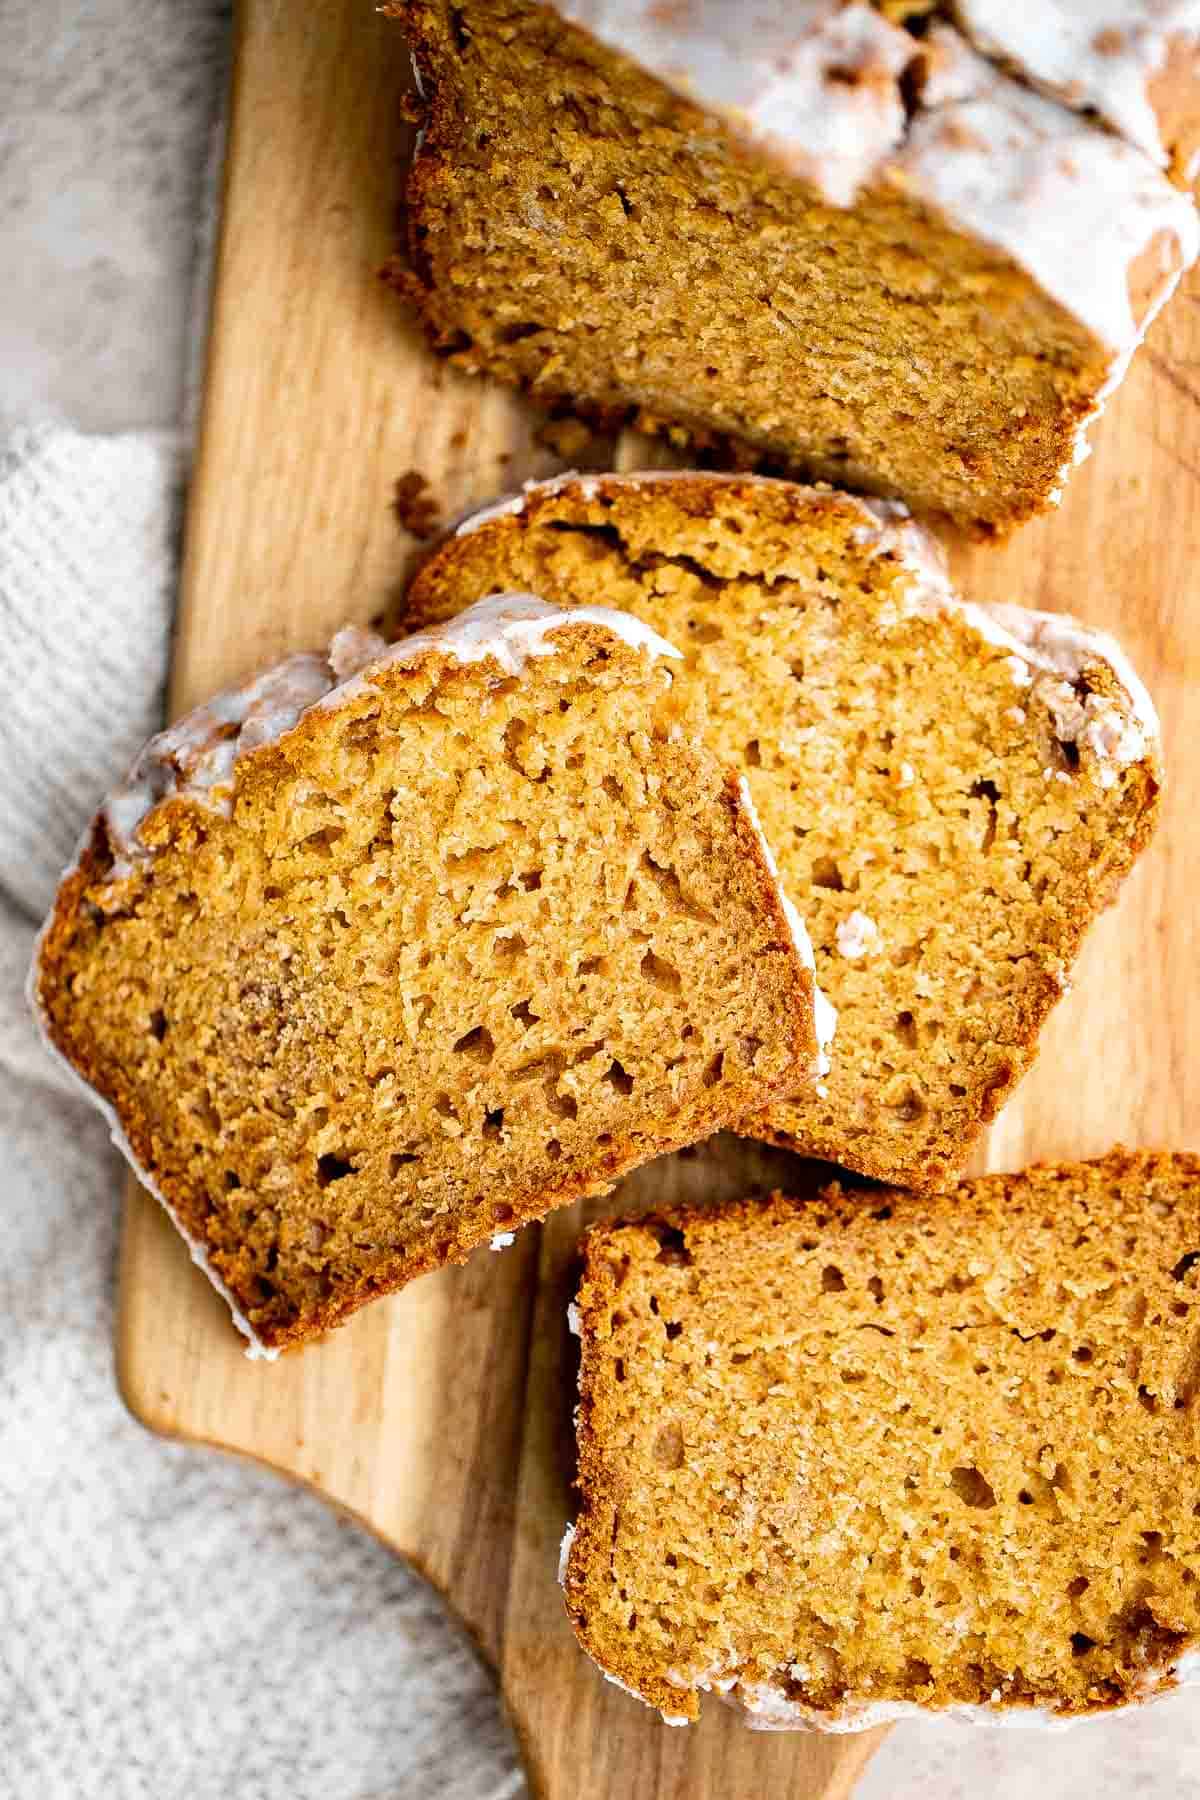
How to Make the Best Butternut Squash Bread
- Combine dry ingredients. In a medium mixing bowl, sift the flour, baking powder, baking soda, salt, and pumpkin spice together.
- Combine wet ingredients. In a large mixing bowl, whisk the eggs and slowly add sugar until the mixture turns a light yellow color. Add vanilla extract, oil, buttermilk, and butternut squash puree and mix thoroughly.
- Add dry to wet. Slowly add in the dry ingredients while continuously mixing the batter, until just combined and no dry ingredients are visible.
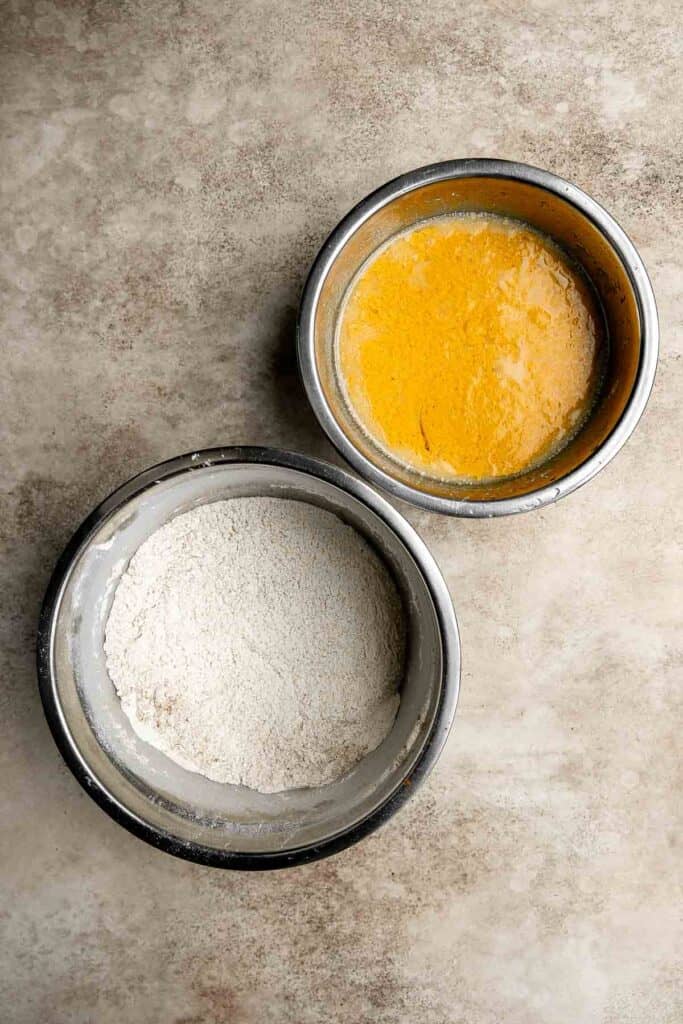
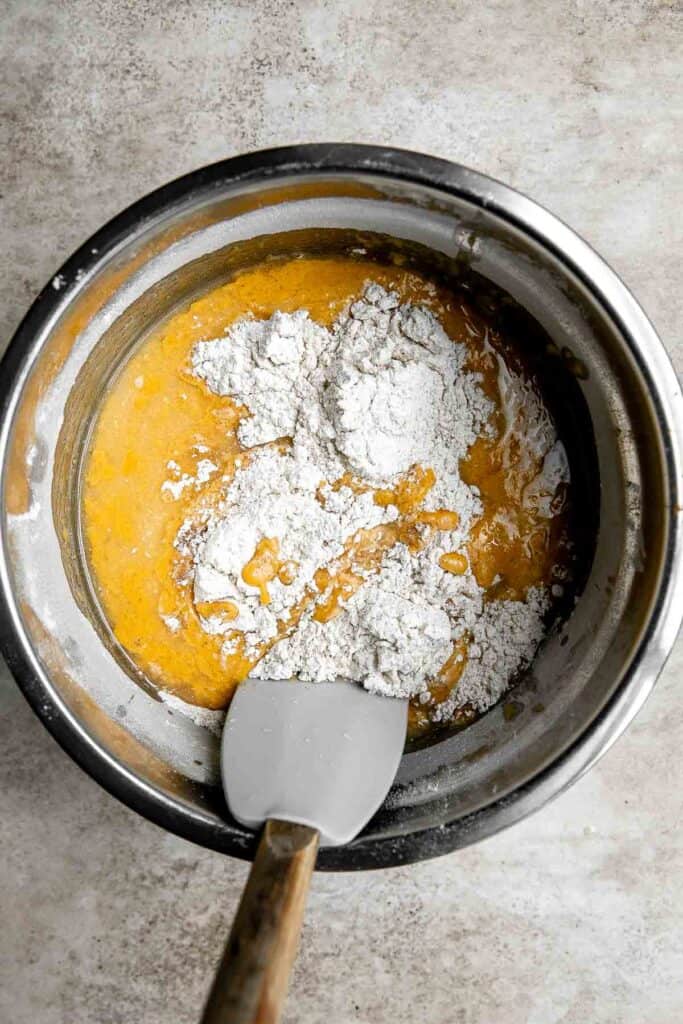
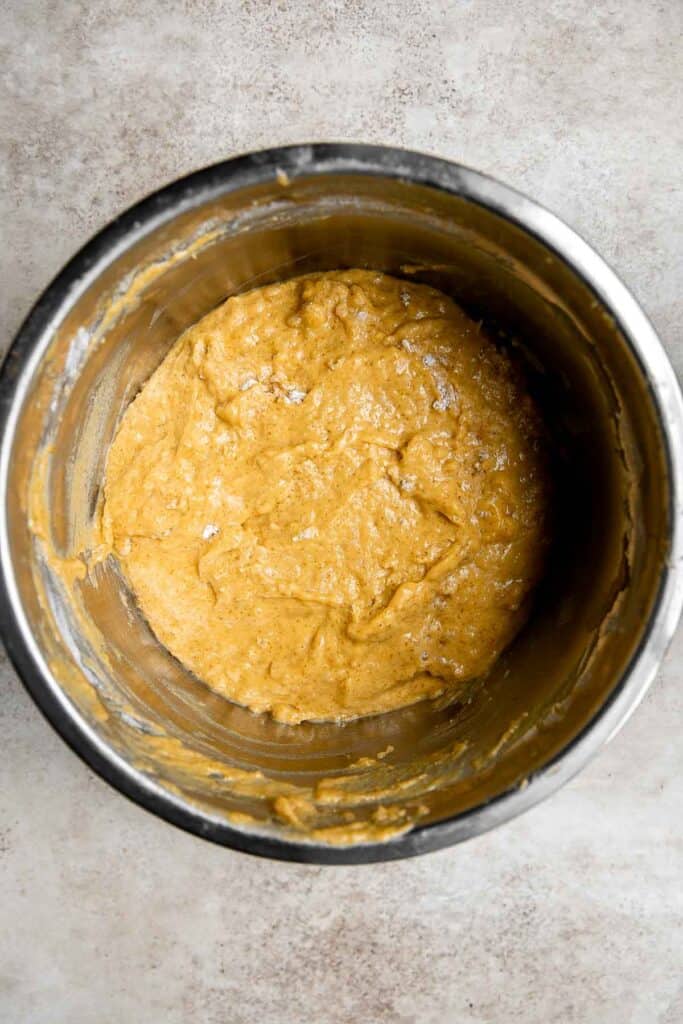
- Bake. Lightly grease and flour a 9x5-inch loaf pan. Pour the batter into the pan and bake in a 350F preheated oven for 60-70 minutes. Check if it is ready by sticking a toothpick in the center of the loaf bread and then withdrawing it. The toothpick will come out clean when it's ready.
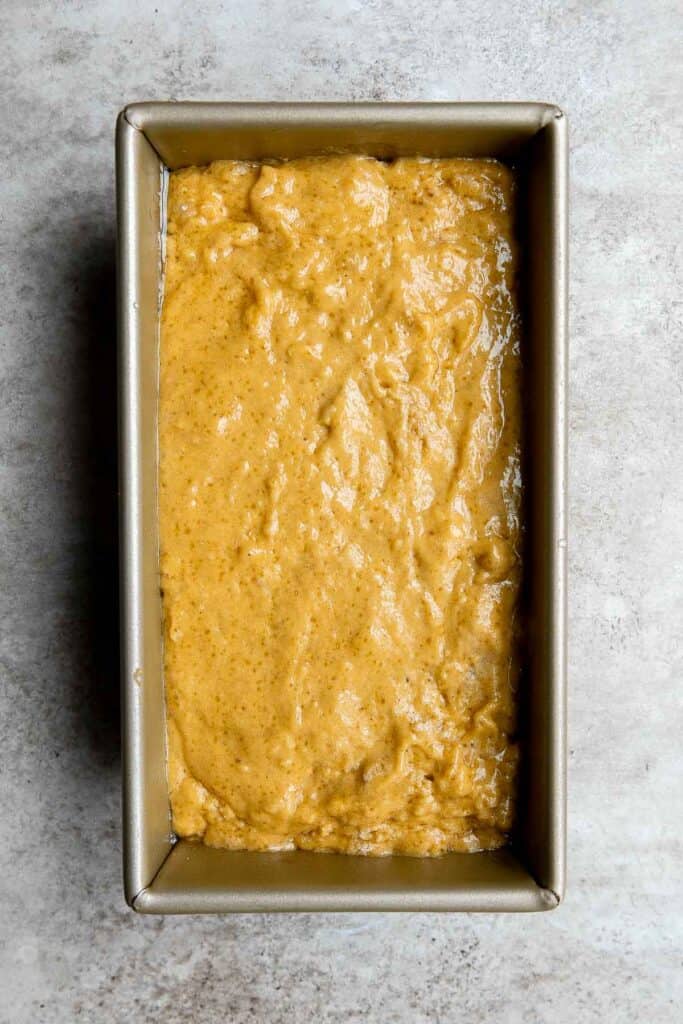
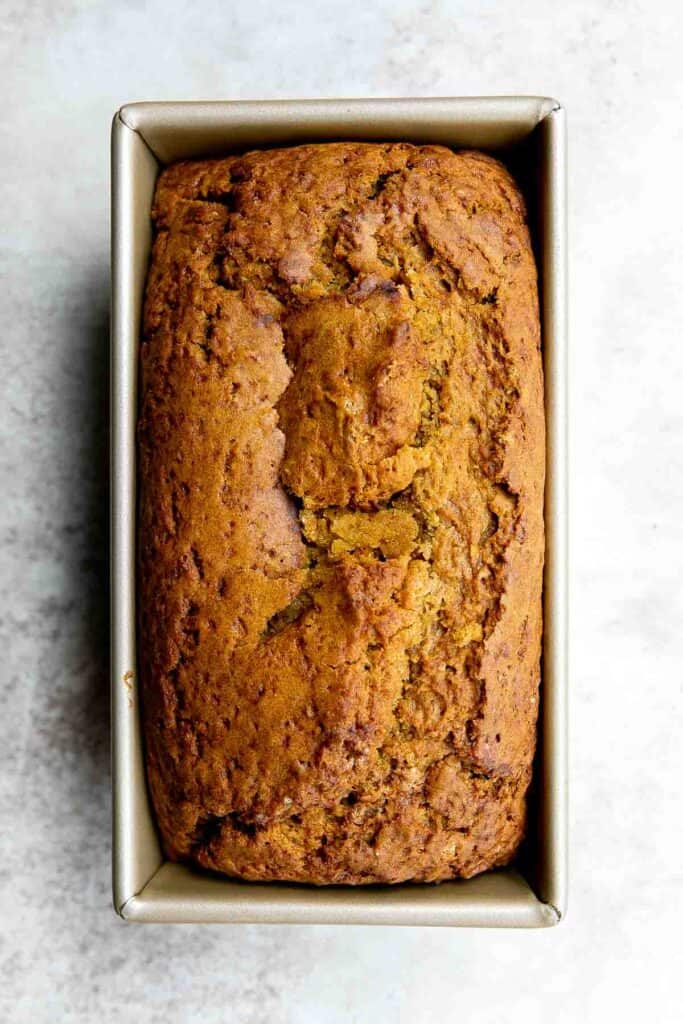
- Cool. Place the pan on a wire cooling rack and allow the loaf to cool down completely before removing it from the pan.
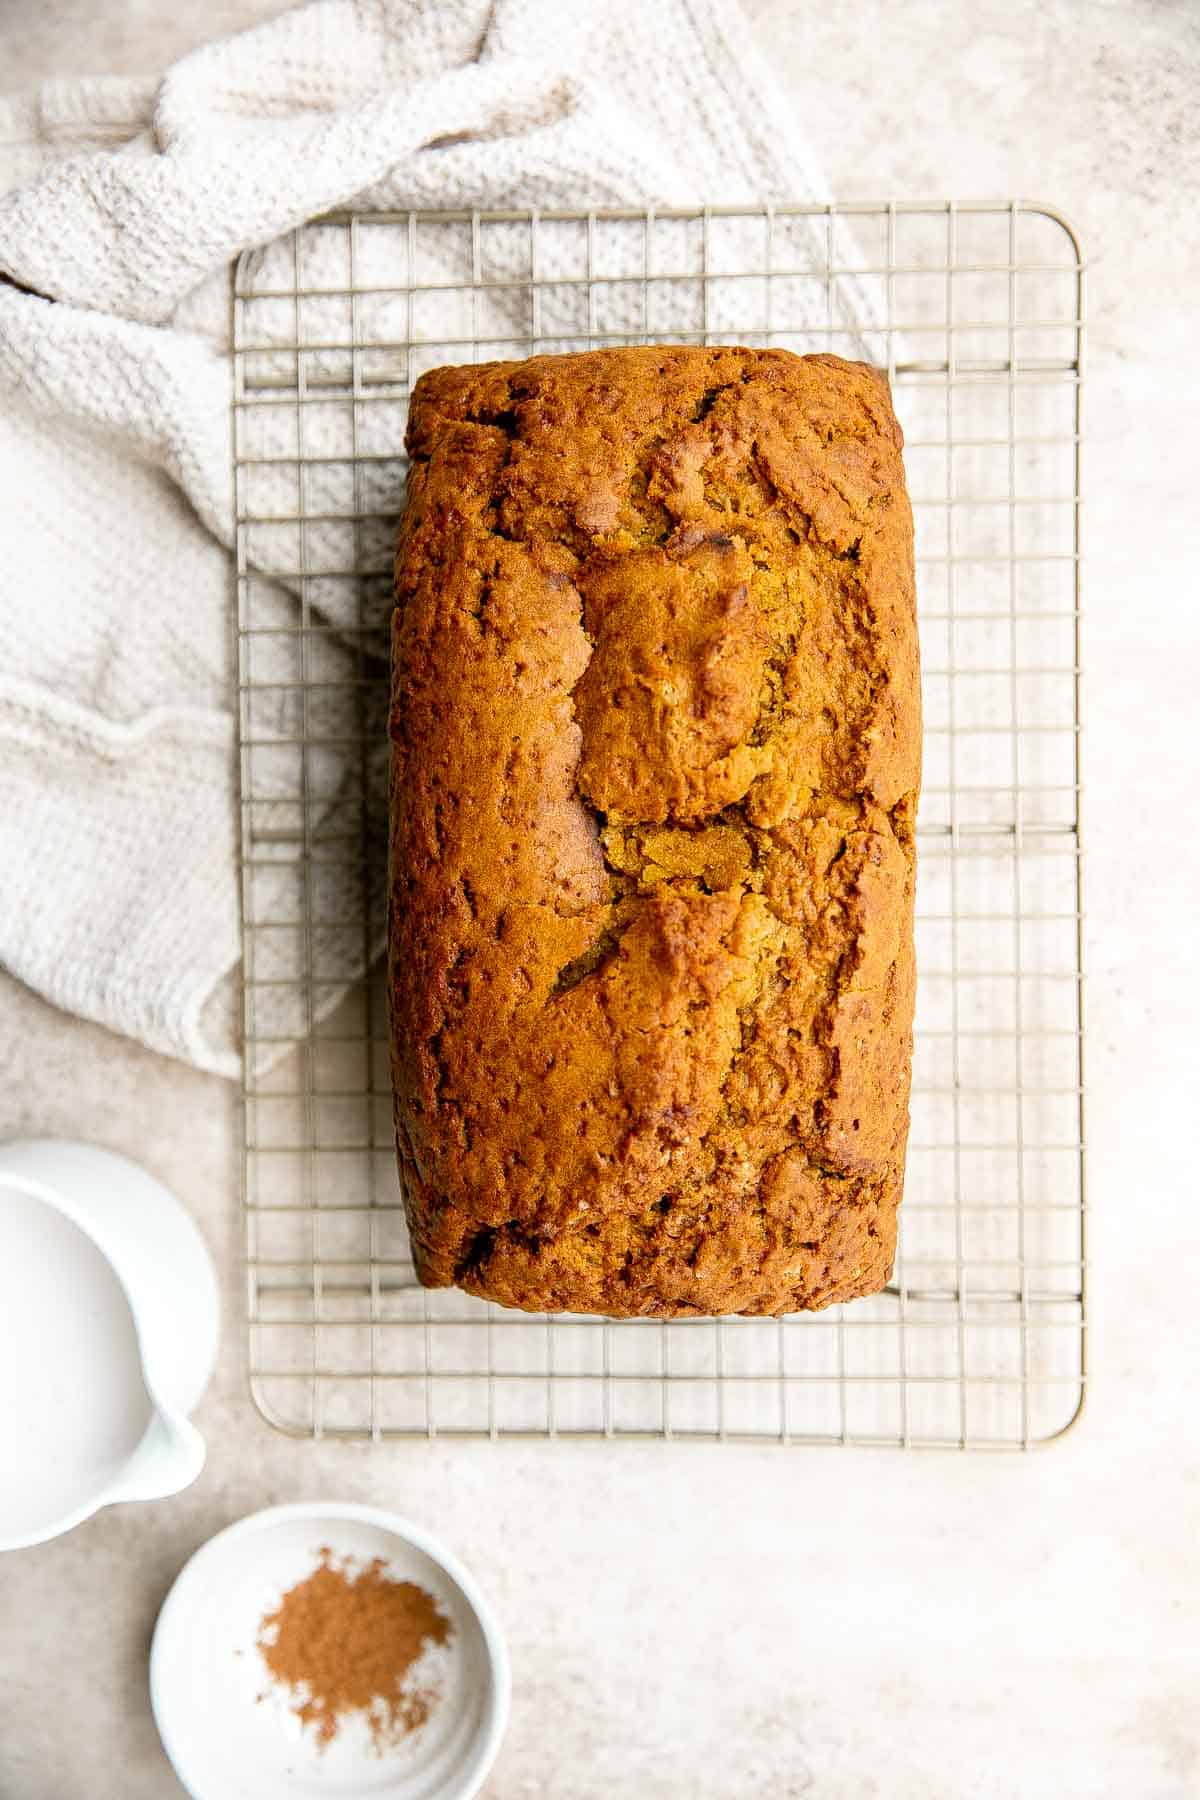
How to Serve
Serve this butternut squash "pumpkin" bread as is, or with a drizzle of icing on top. To make the icing:
- Mix the icing sugar with liquid by adding it in in slowly and mixing well until you get the consistency that you like.
- Drizzle the icing over the loaf bread to cover it completely. Sift some pumpkin spice or cinnamon on top for decoration, if desired.
I also like to serve this butternut squash loaf cake with a warm drink such as tea, coffee, apple cider, or hot chocolate.
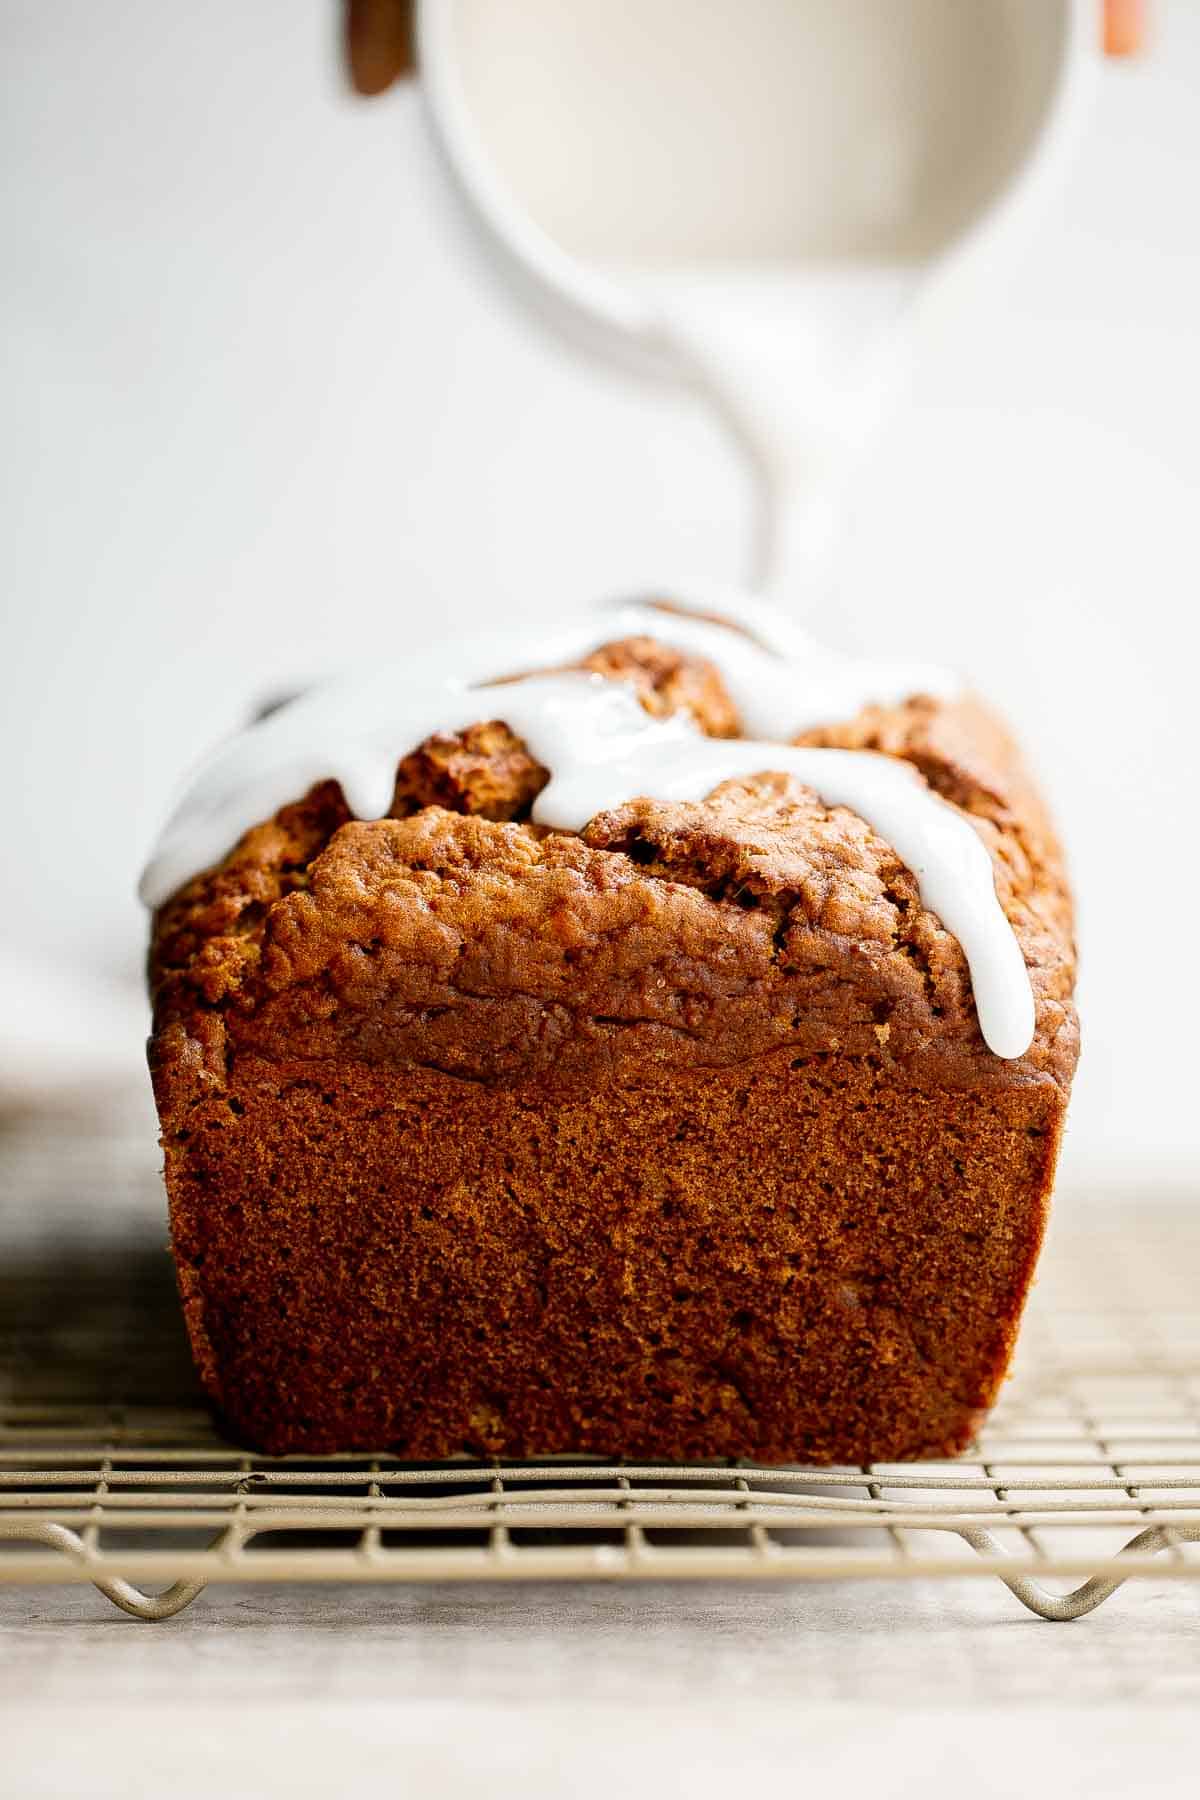
Storing Instructions
- How to store: Butternut squash bread is best kept at room temperature in an airtight container or wrapped tightly in aluminum foil for up to 2-3 days. This will keep the butternut squash bread fresh and moist. You can also extend the life of the squash loaf by storing it in the refrigerator. Allow it to cool to room temperature first, then cover tightly with plastic wrap to retain moisture. Store in the refrigerator for up to one week.
- How to freeze: Once cooled to room temperature, wrap the whole butternut squash bread (or individual slices) in plastic cling wrap and place into a freezer bag. Freeze for up to three months. Thaw frozen pumpkin bread by transferring them into the refrigerator overnight.
More Butternut Squash Recipes
- 30 Best Butternut Squash Recipes
- Butternut Squash Curry with Chickpeas
- Butternut Squash Salad
- Mashed Butternut Squash
- Butternut Squash Mac and Cheese
- Butternut Squash Lasagna
Tried this recipe?
I'd love to hear what you think! Leave a comment and rating below to share your feedback. Your reviews help others discover this recipe and help me keep creating more free recipes for you. Snap a photo and tag me on social media @aheadofthyme too.

Ground Turkey Soup
Ground Turkey Soup is hearty, nourishing, and healthy. Loaded with protein and veggies, this Italian soup is packed with flavor and is super filling. It's a quick and easy recipe that is ready to serve in about half an hour.
Plus, this Italian turkey soup only uses one pot for preparation, so clean-up here is as easy as cooking (and eating!). It's the perfect recipe for fall afternoons, rainy days, or any time you need a warm, comforting meal. This may become your new go-to soup!
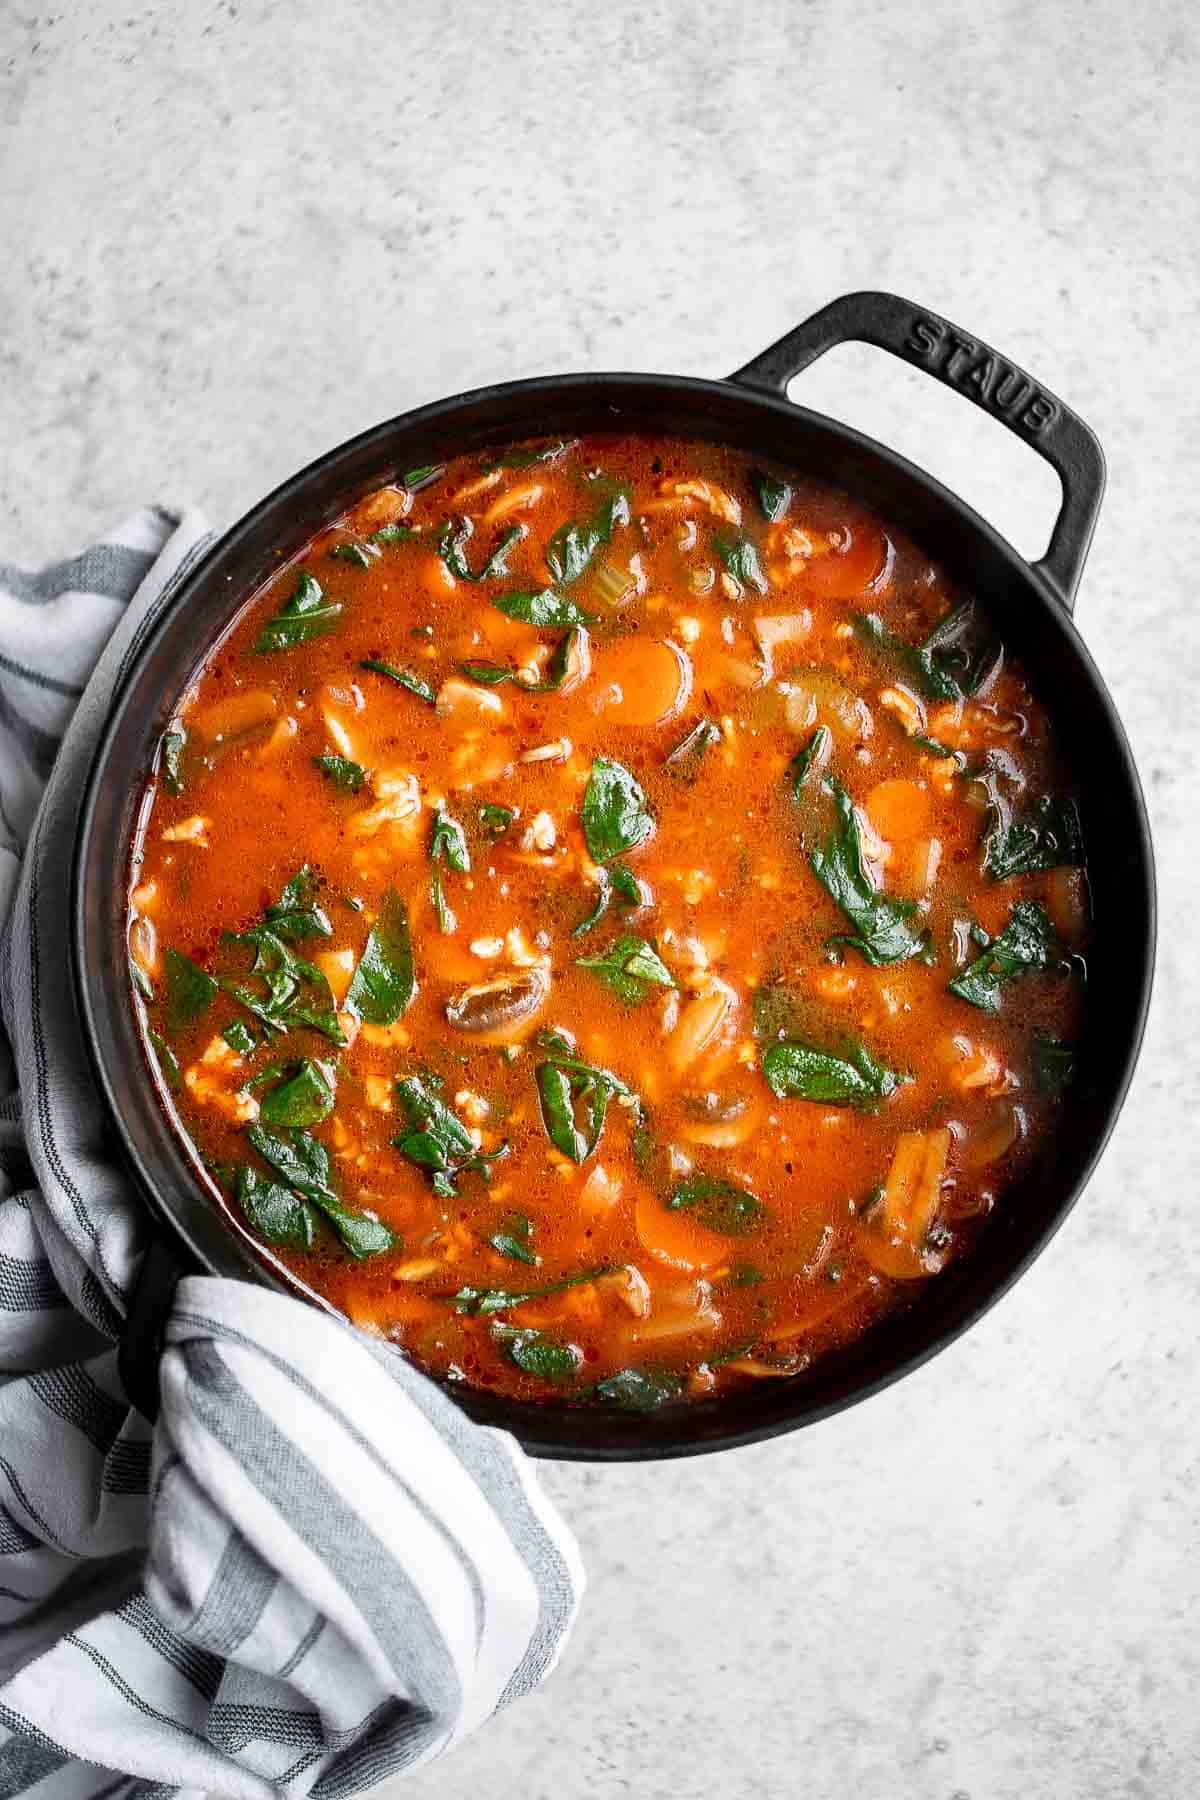
Why You'll Love This Ground Turkey Soup
- It's fast and easy to make. Hearty soups typically involve a laborious, time-consuming process, but this soup takes only 35 minutes from start to finish. Make it after work or on the weekend for a flavorful, hearty soup even when you're pressed for time.
- Authentic Italian flavors. Take your tastebuds on a trip to Italy in under an hour with this Italian soup with ground turkey that rivals your local restaurant. When you're thinking of ordering takeout or going out to eat, you can pull out this recipe and get the same flavors in half the time (and for half the price!).
- Simple gluten-free ingredients. Lean ground turkey plus simple, always-available vegetables and a few common pantry ingredients come together to make this savory, meaty Italian tomato soup that is healthy and gluten-free.
- Packed with veggies. This one-pot tomato soup with ground turkey calls for several types of vegetables including tomatoes, carrots, and celery. You can feel good serving it to your whole family knowing that it's as nutritious as it is tasty!

Ingredient Notes
To make this easy and delicious Ground Turkey Soup, you will need the following ingredients (full measurements in recipe card below):
- olive oil - avocado oil or other neutral oil will also work well.
- ground turkey - this Italian ground turkey soup recipe is obviously tailored to ground turkey, but virtually any kind of ground meat will work like ground beef, ground chicken, or ground pork. You may have to adjust cooking time to make sure your substituted protein is cooked through.
- onion
- garlic - freshly minced garlic always offers the best flavor, but store-bought minced garlic is fine too if you're in a time crunch.
- carrots - using pre-sliced carrots from the grocery store or a mandolin slicer will help cut down on preparation time!
- celery
- white button mushrooms - not a fan of white button mushrooms? Try using other robust types of mushrooms like cremini mushrooms, portobellos, or shiitake mushrooms.
- tomato sauce - you can use canned tomato sauce or make your own if you've got extra tomatoes lying around.
- tomato paste - store-bought or homemade tomato paste are both great options.
- chicken broth
- bay leaves
- potato - Yukon gold potatoes or another low-starch potato typically hold their shape well when used in soups.
- Italian seasoning - a homemade blend of similar herbs and spices will work just as well!
- salt and pepper
- baby spinach
You will also need measuring cups and spoons and a large pot (I used my 4 qt. Dutch oven).
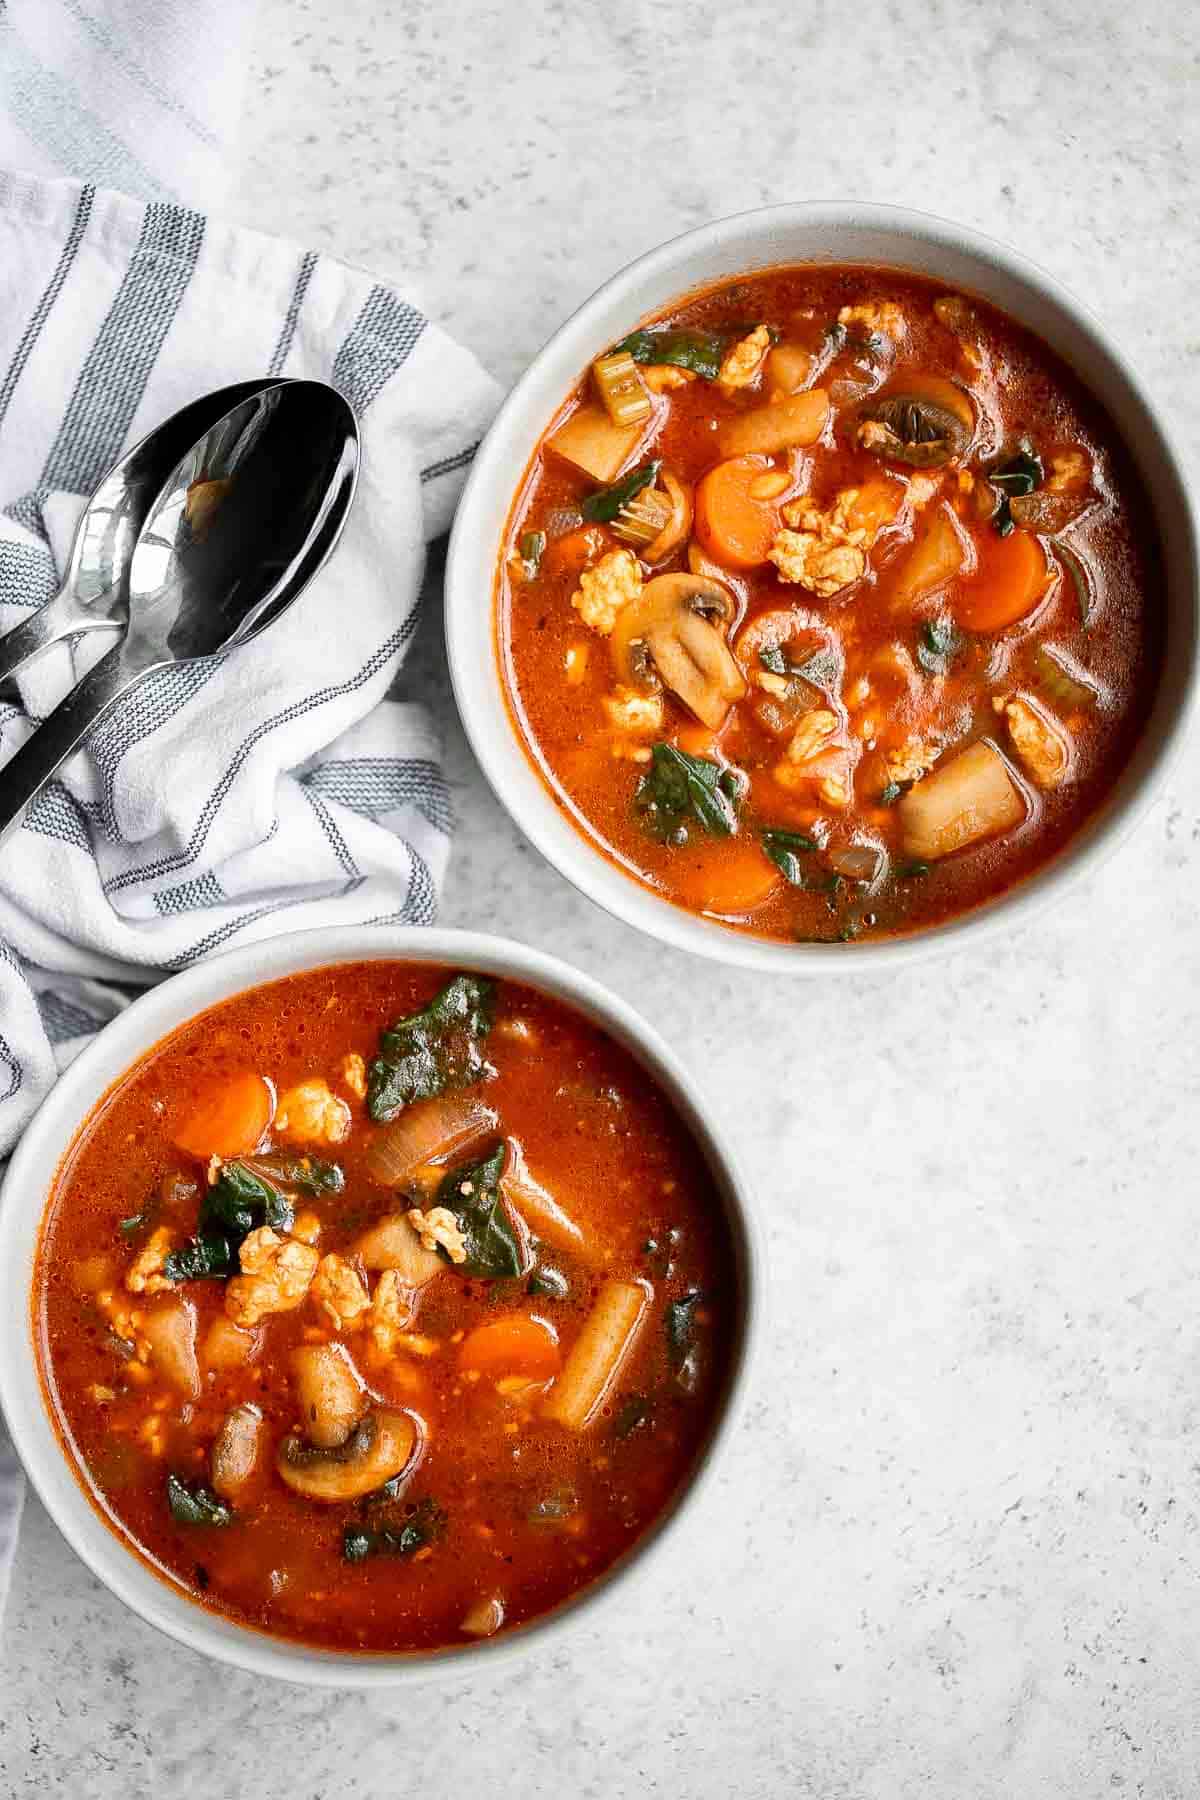
How to Make the Best Ground Turkey Soup
- Cook turkey. Heat oil in a large pot or 4 quart Dutch oven over medium-high heat until the hot oil is sizzling, about 2 minutes. Add ground turkey and cook until no longer pink, about 5 minutes. Stir well and break up the turkey into small pieces.
- Add vegetables. Add onion, garlic, carrots, celery, and mushrooms and cook until tender, about 6-8 minutes.
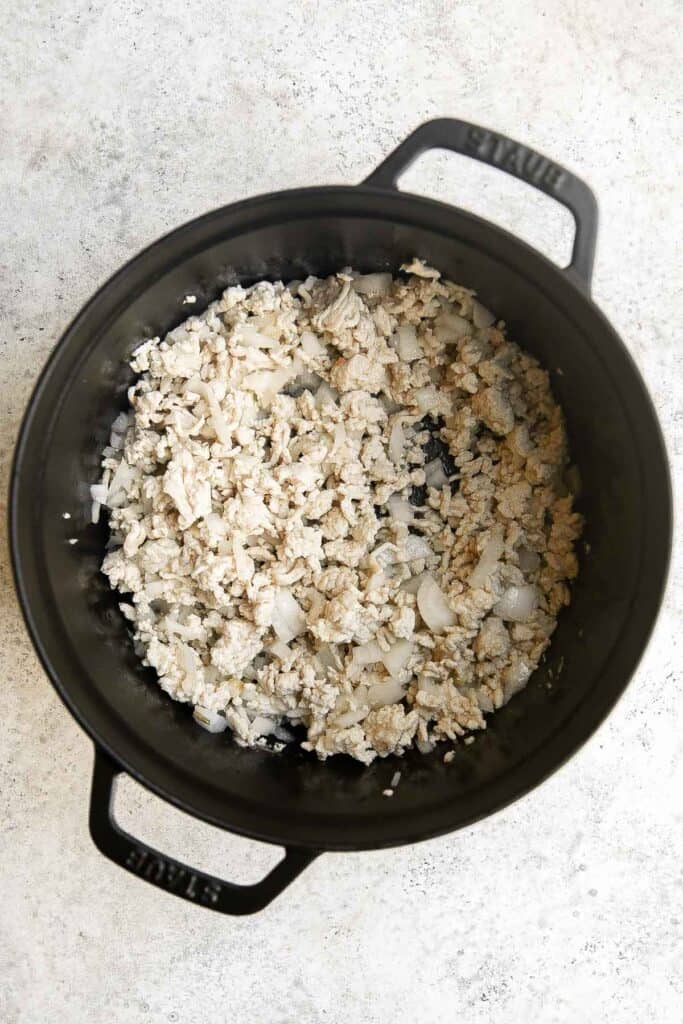
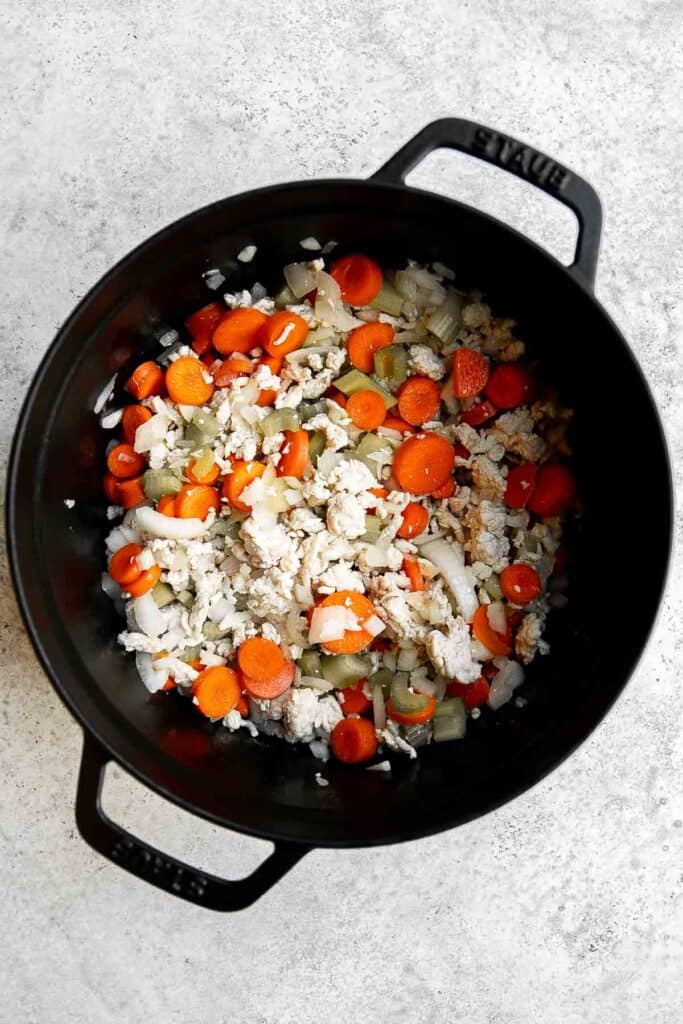
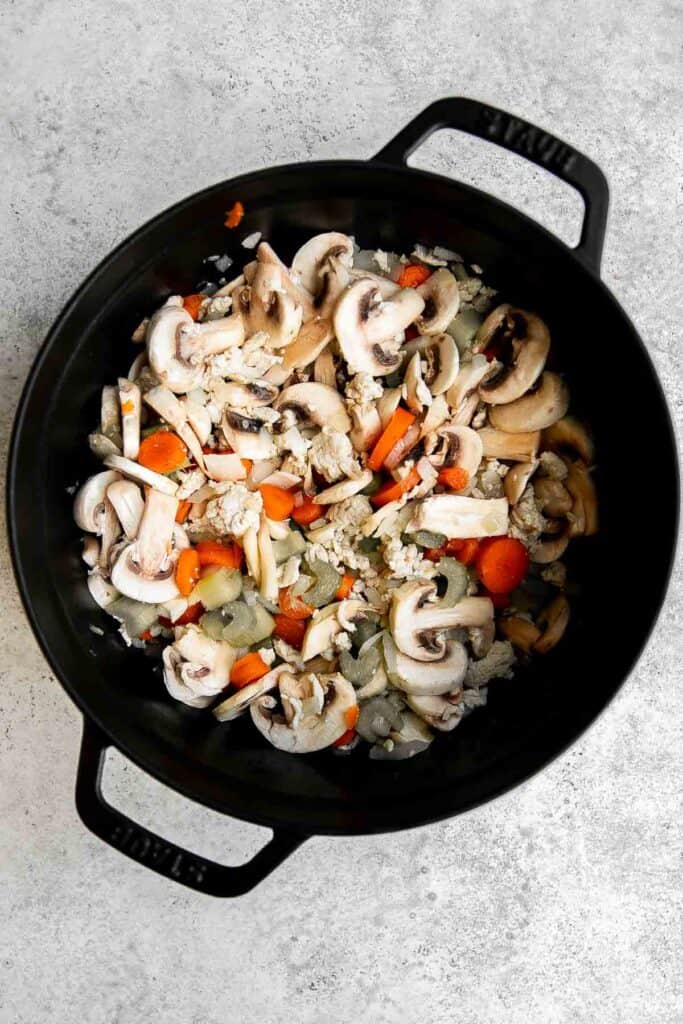
- Add sauce. Add tomato sauce, tomato paste, broth, and bay leaves. Mix well and bring the soup to a boil.
- Add potato and seasoning. Add potato, Italian seasoning, salt, and pepper.
- Simmer. Cover the lid and simmer over low heat until the potato is fork tender, about 10 minutes. Stir occasionally to prevent the potato from sticking to the bottom of the pot. Insert a fork to check doneness (if a fork is easily inserted into the potato, it's fork tender and ready).
- Add spinach. Add spinach and stir until wilted, about 1-2 minutes.
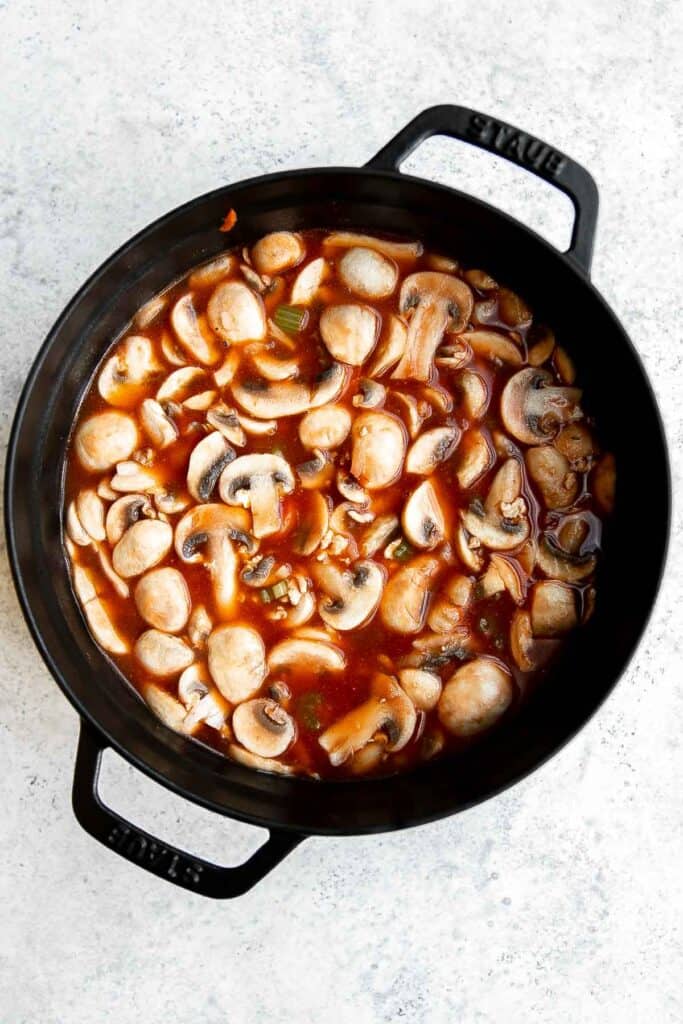
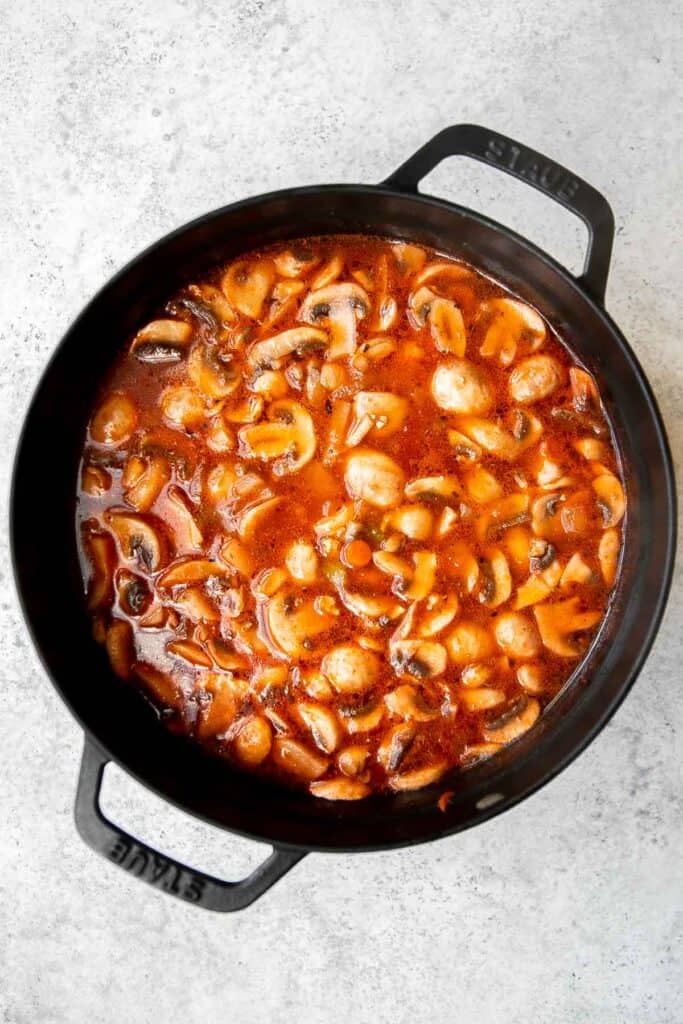

How to Serve
This Italian Ground Turkey Soup is delicious and filling served on its own, or paired with some of my favorite sides including:
- Caesar Salad
- Garlic Knots
- Pita Grilled Cheese
- White Bean Salad
- Rosemary Garlic Focaccia Bread
- Roasted Broccoli Grilled Cheese
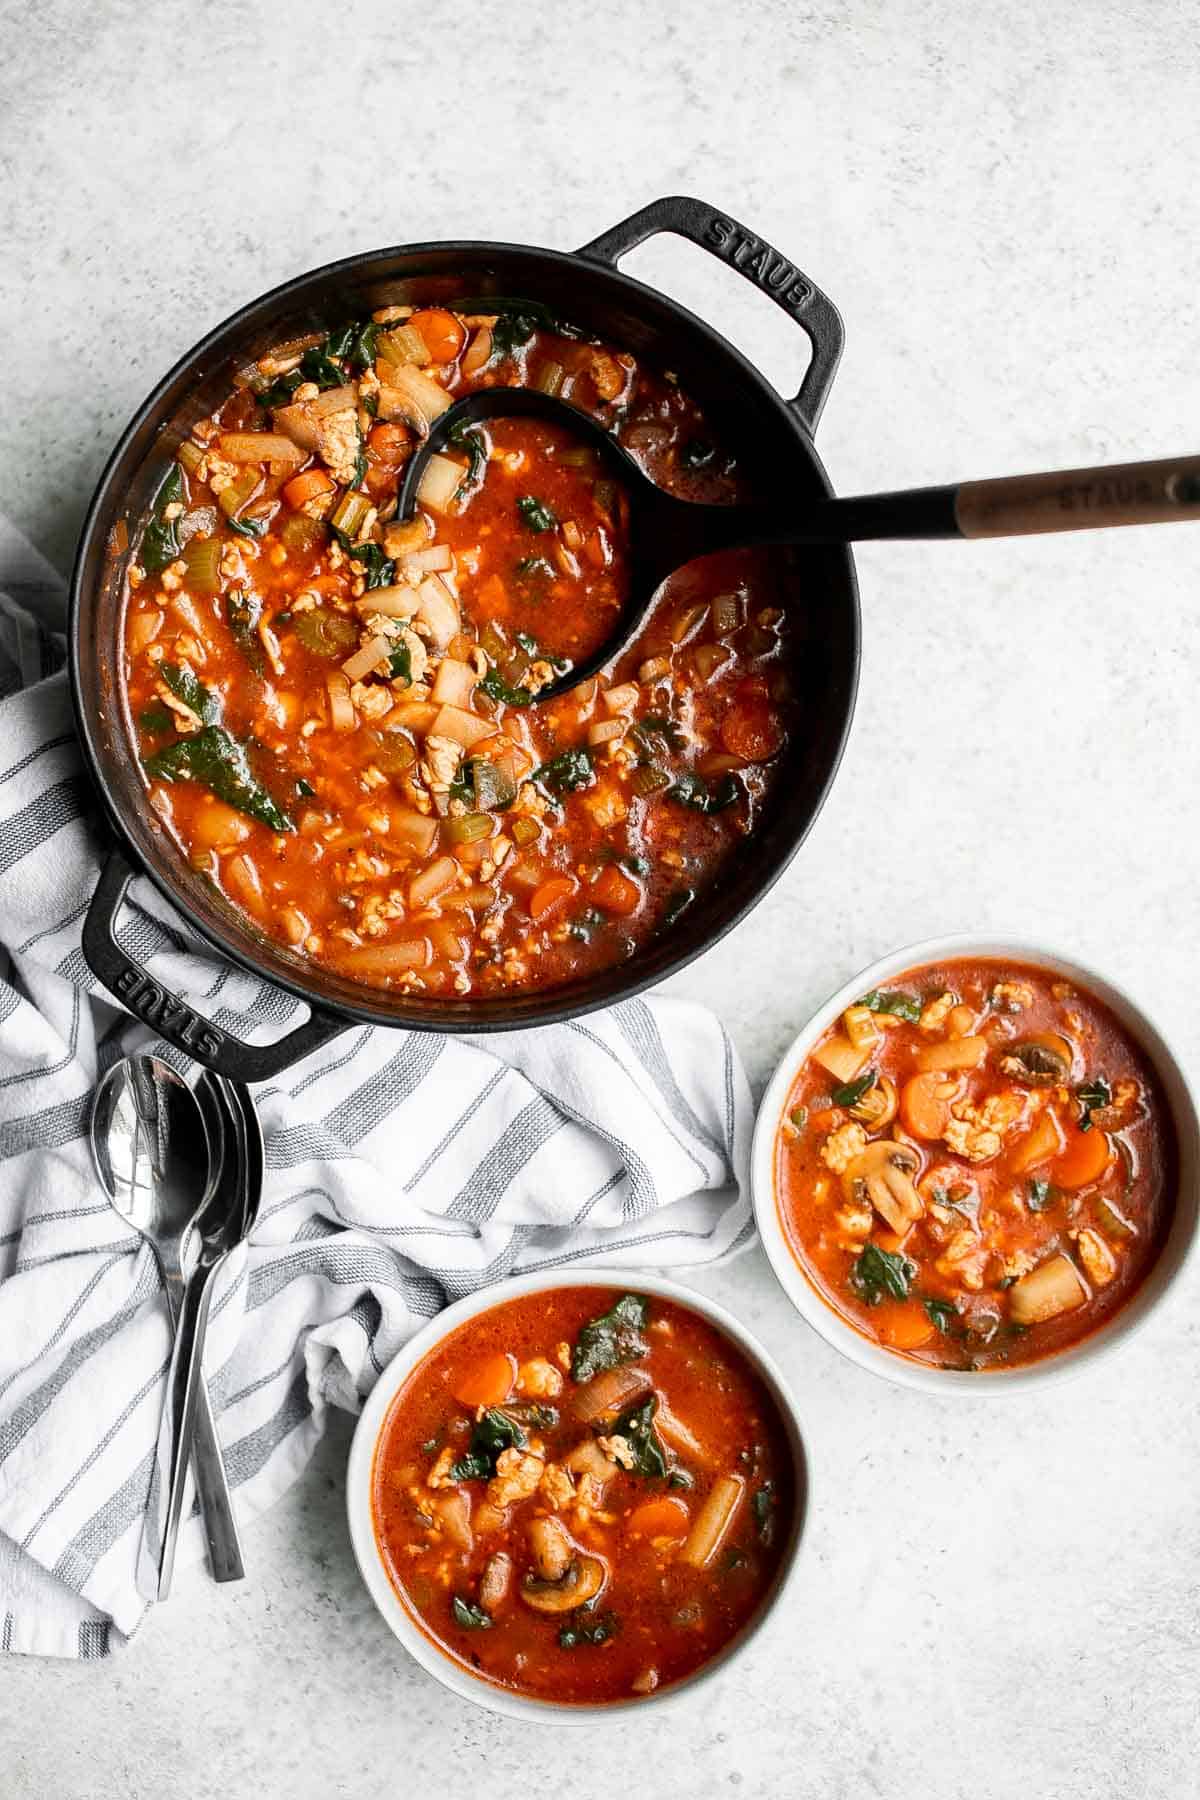
Storage/Freezing Instructions
How to Store
Transfer to an airtight container and store in the refrigerator for 3-4 days. Reheat on the stovetop or in the microwave according to the manufacturer's instructions.
How to Freeze
Place in a freezer-safe container like a plastic deli container or a freezer bag and fill only ¾ of the way to allow for expansion. Freeze for up to three months and thaw in the refrigerator overnight or use a warm water bath to release the frozen soup from the container.
Recipe Tips and Tricks
- Chop vegetables ahead of time. Looking to make this soup even easier? Chop the vegetables a day or two prior to making this recipe to cut back on cooking time! Make sure to separately store chopped veggies so you won't have to sort them before adding them at the appropriate steps.
- Add more carbs! If you want to make this soup go a little further, add cooked rice, pearled couscous, or your favorite shape of pasta at the end to increase the amount of servings you can get from one pot and introduce more texture.
- Add garnishes. Cheese makes absolutely everything even better. Grate a little parmesan, sharp cheddar, or mozzarella cheese on top of individual servings for the perfect finishing touch. Additionally, a dollop of sour cream, a squeeze of lemon, and fresh herbs are great garnishes for this soup.
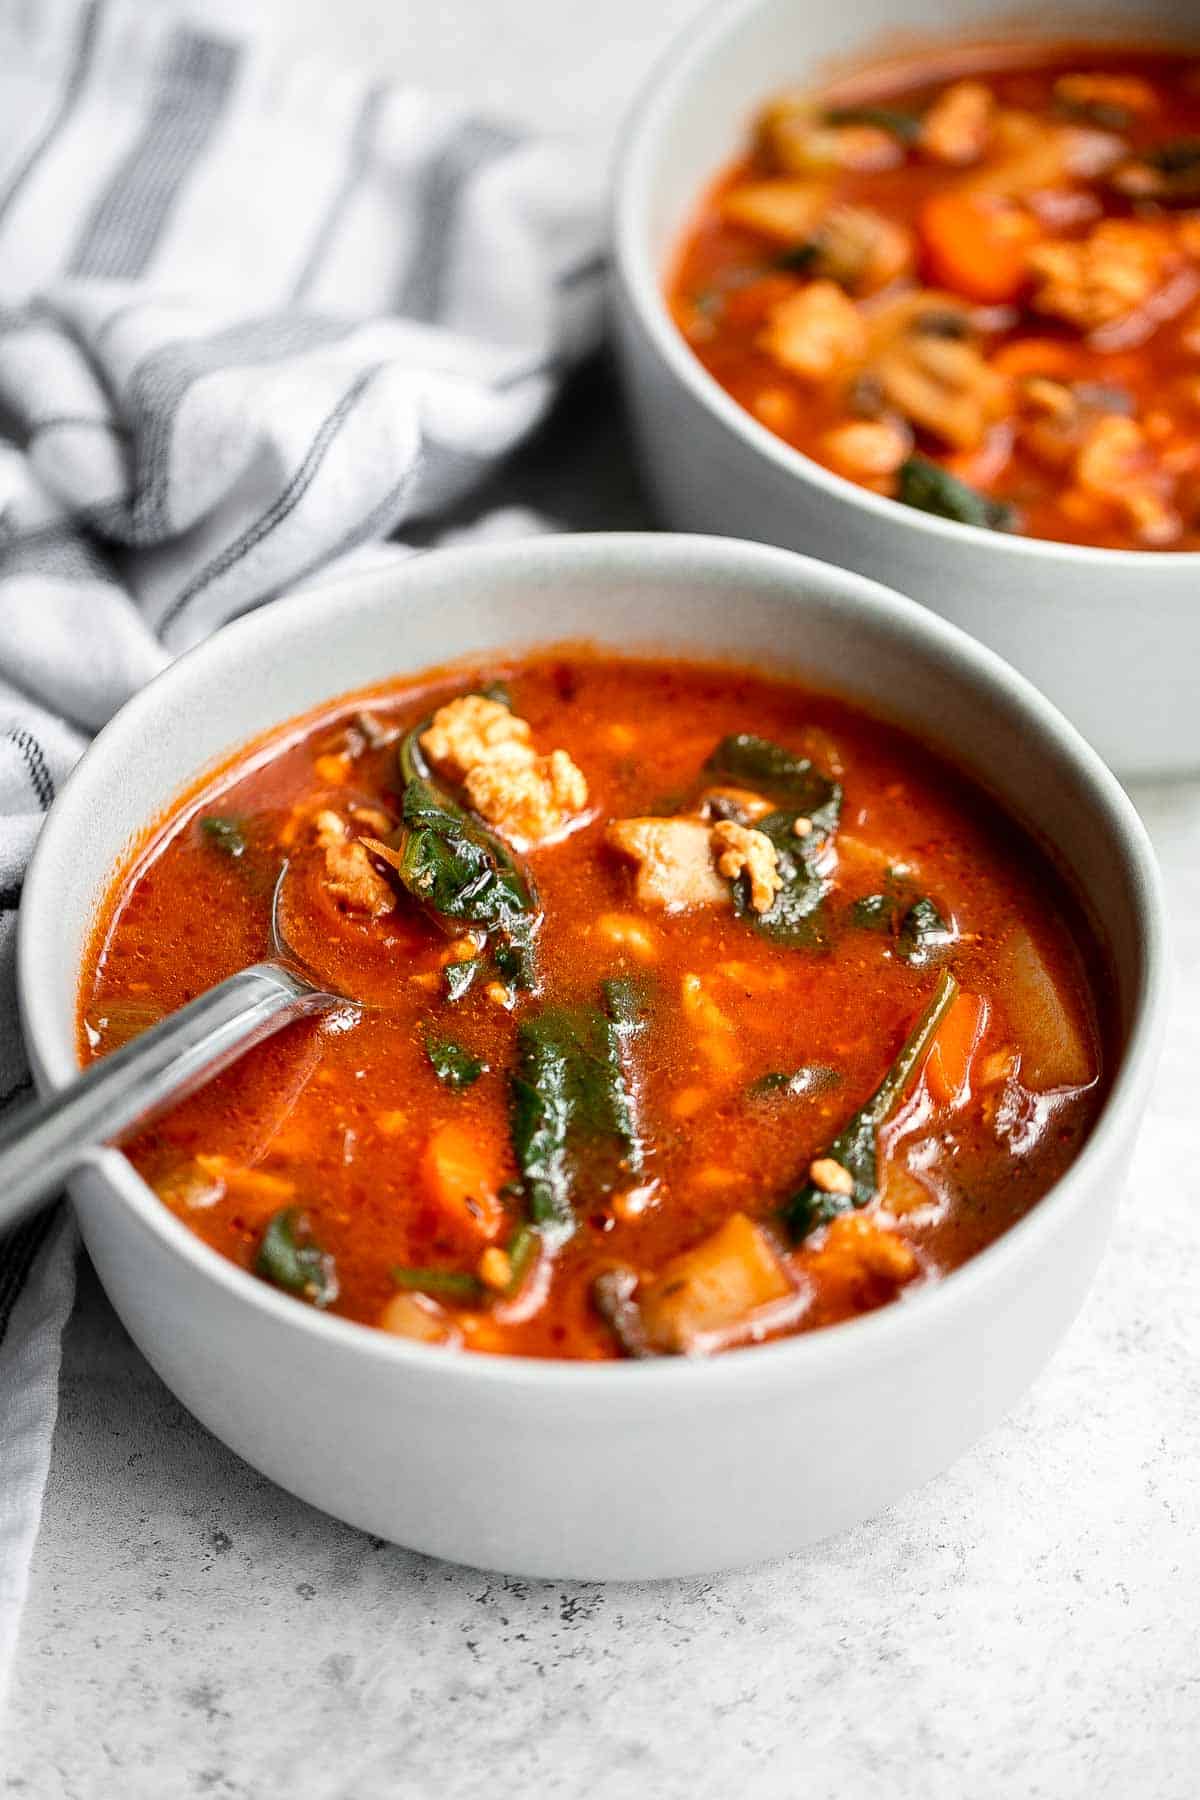
More Soup Recipes
- 60 Best Soup Recipes
- Minestrone Soup
- Creamy Turkey Gnocchi Soup
- Beef Cabbage Barley Soup
- Turkey Wild Rice Soup
- Pinto Bean Soup (Sopa Tarasca)
Tried this recipe?
I'd love to hear what you think! Leave a comment and rating below to share your feedback. Your reviews help others discover this recipe and help me keep creating more free recipes for you. Snap a photo and tag me on social media @aheadofthyme too.

Cheddar Mashed Potatoes
Cheddar Mashed Potatoes are fluffy, creamy, and buttery. Loaded with cheddar cheese and hints of garlic, every bite of this classic side dish is delicious and flavorful. Cheesy mashed potatoes are perfect for all kinds of fancy holiday dinners (think Easter, Thanksgiving, and Christmas) or a family weeknight dinner.
The best part? These mashed potatoes with cheddar cheese are quick and easy to make, and they store and freeze well so you can prep them ahead of time and enjoy for weeks to come with little to no effort at all.

Why You'll Love Cheddar Mashed Potatoes
- Easy elevated mashed potatoes. This recipe turns basic mashed potatoes into an exciting dish with little effort! Garlic, cheddar, and optional chives add flavor and a bit more wow factor to the humble potato.
- They are quick to make. Mashed potatoes have never been more tasty, and this uncomplicated recipe gets them on the table in only half an hour. Just boil, mash, and mix - done! Five-star garlic cheddar mashed potatoes in only a fraction of the time.
- An any-time side dish. Mashed potatoes are a classic crowd favorite that pair well with just about everything, from roasts to salads, soups, and more. Whip up this recipe out for a casual dinner at home or use it as part of your holiday meal planning strategy.
- Only ten minutes of active prep work. This cheddar mashed potato recipe can be completed in 30 minutes - and a majority of it is waiting for the potatoes to boil. You can get them on the stove and move on to preparing other courses for efficiency.
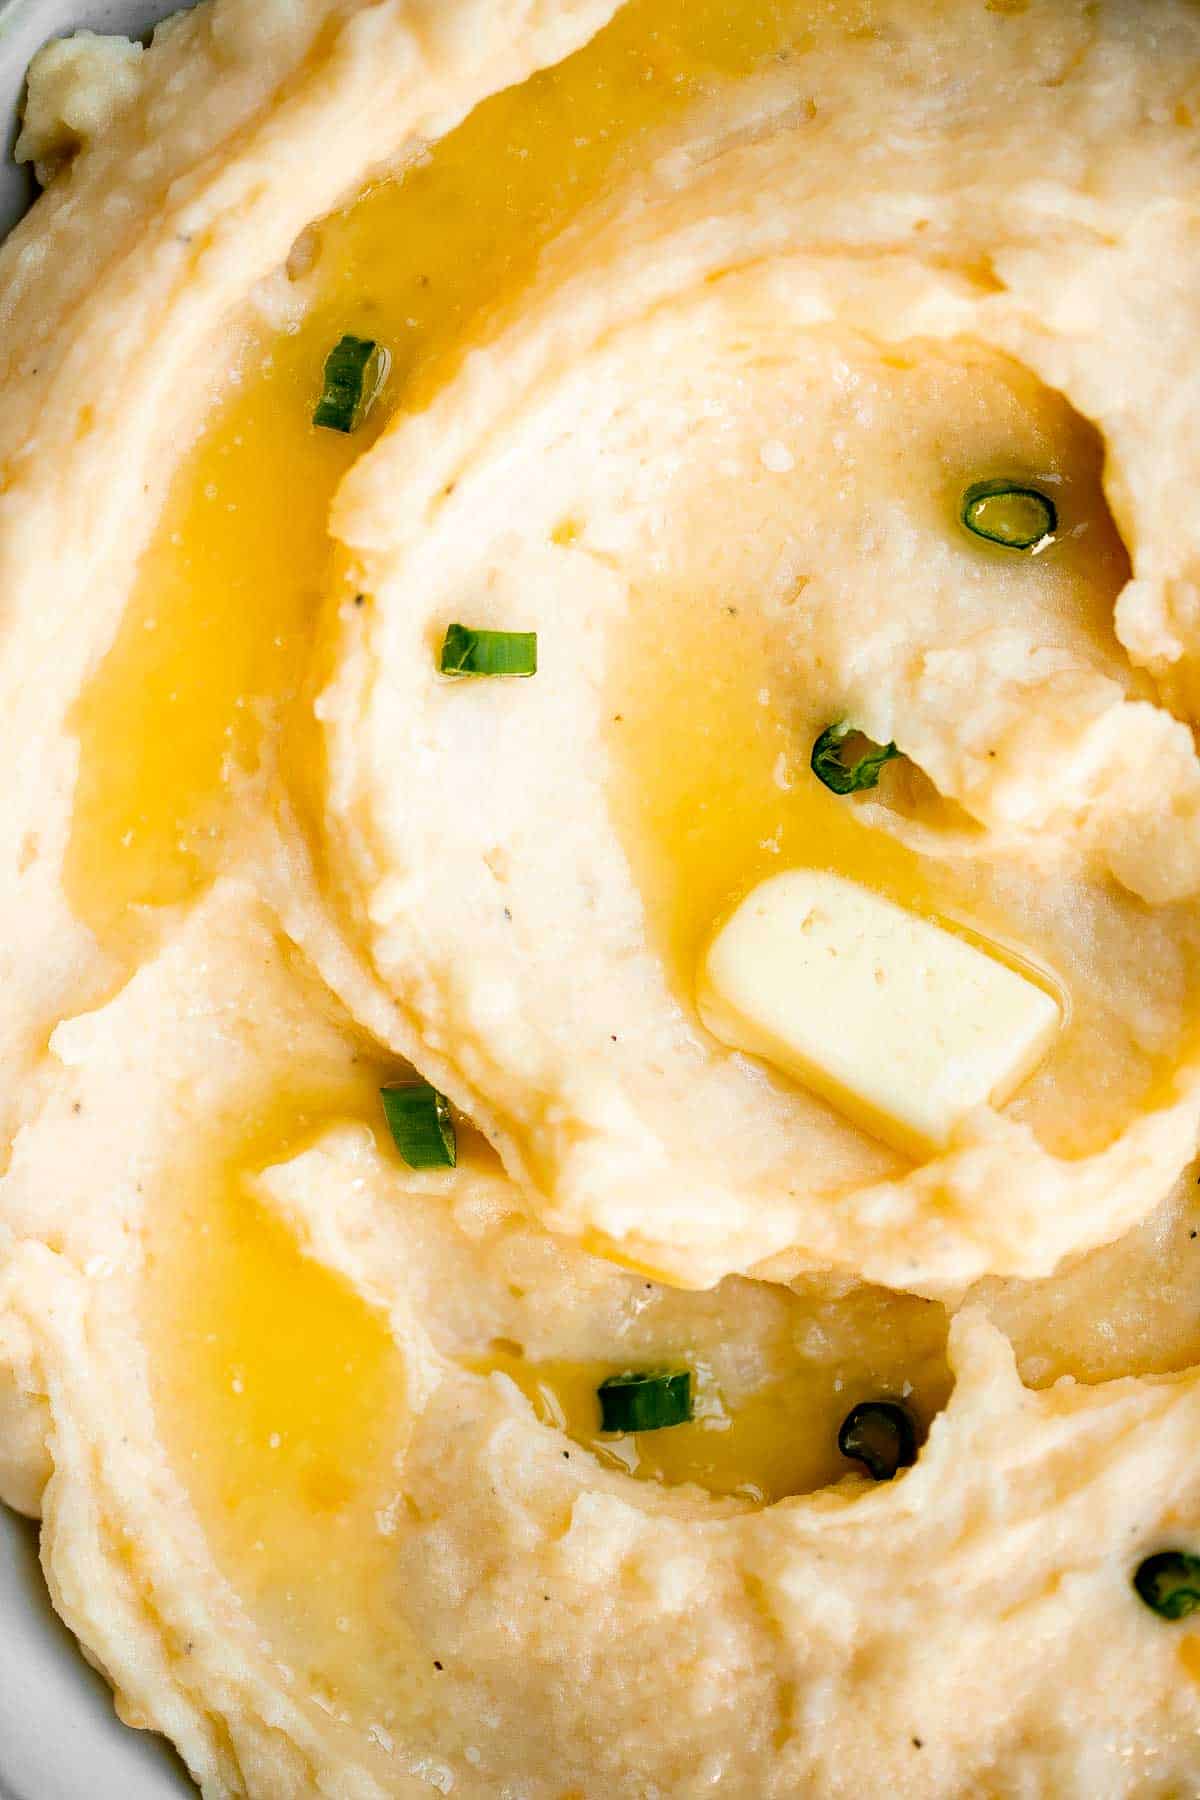
Ingredient Notes
To make this easy Cheddar Mashed Potatoes, you will need the following ingredients (full measurements in recipe card below):
- Yukon gold or russet potatoes - Yukon gold or russet potatoes work best for mashing - their high starch levels make the lightest and fluffiest mounds of mashed potatoes. If you like a denser mashed potato, you can experiment with different kinds of potatoes or use what you have available.
- cheddar cheese - you can freshly grate a block with a cheese grater or use shredded cheese from the grocery store. But note the slight difference: store-bought shredded cheeses usually contain an additive that prevents the cheese from sticking together or melting in the bag, like cornstarch. You can also substitute it for a vegan cheese substitute if you're plant-based or lactose intolerant.
- butter - the butter in this recipe can be swapped for olive oil or a plant-based butter alternative.
- milk - if someone in your family has a dairy allergy or sensitivity, you can try using an unsweetened nut milk instead.
- garlic powder
- salt and pepper
- green onions or chives - garnishing with herbs are optional but recommended. You can use freshly chopped onion and chive or dried versions of either of these soft garden herbs. You can also add other soft herbs like dill or basil.
You will also need measuring cups and spoons, a large cooking pot, and a mixing bowl.
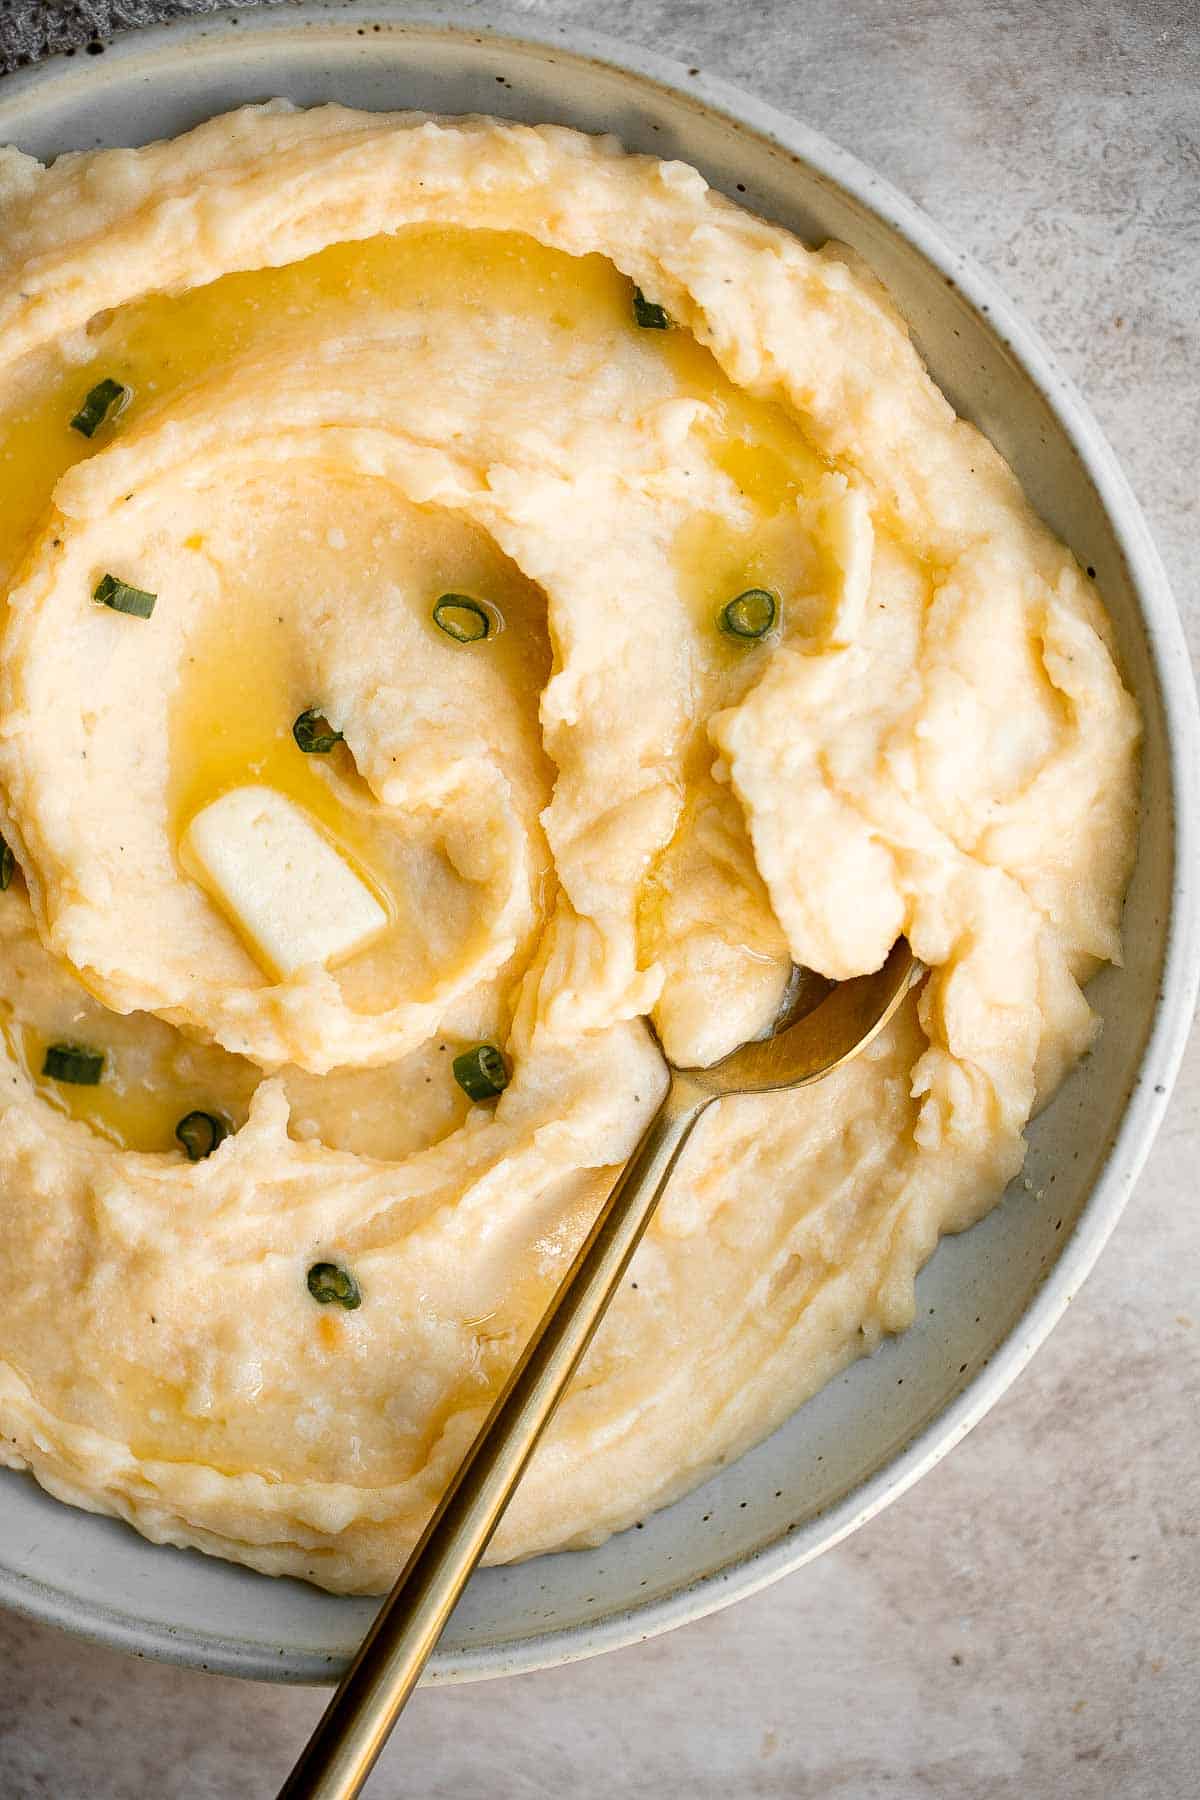
How to Make the Best Cheddar Mashed Potatoes
- Cook potatoes. Place potatoes in a large pot and add enough salted water to cover and immerse the potatoes completely by about an inch. Heat over high heat and bring to a boil. Reduce heat to low, cover, and simmer for 15-20 minutes, until potatoes are soft when you insert a fork.
- Drain. Drain potatoes and place back in the pot. Use a potato masher (or a fork) to mash the potatoes.
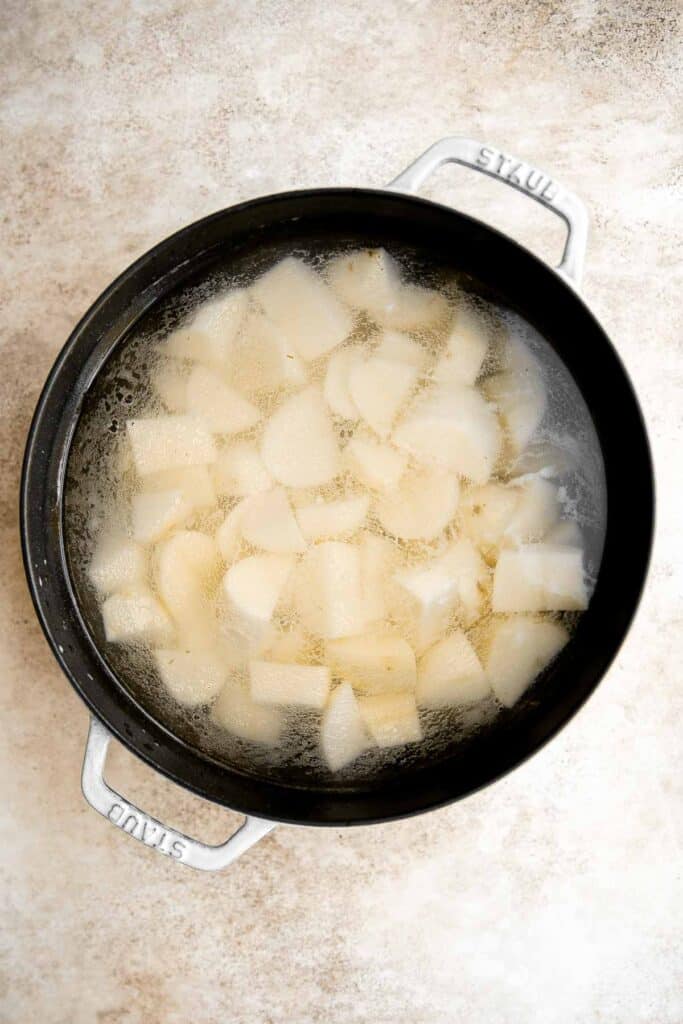
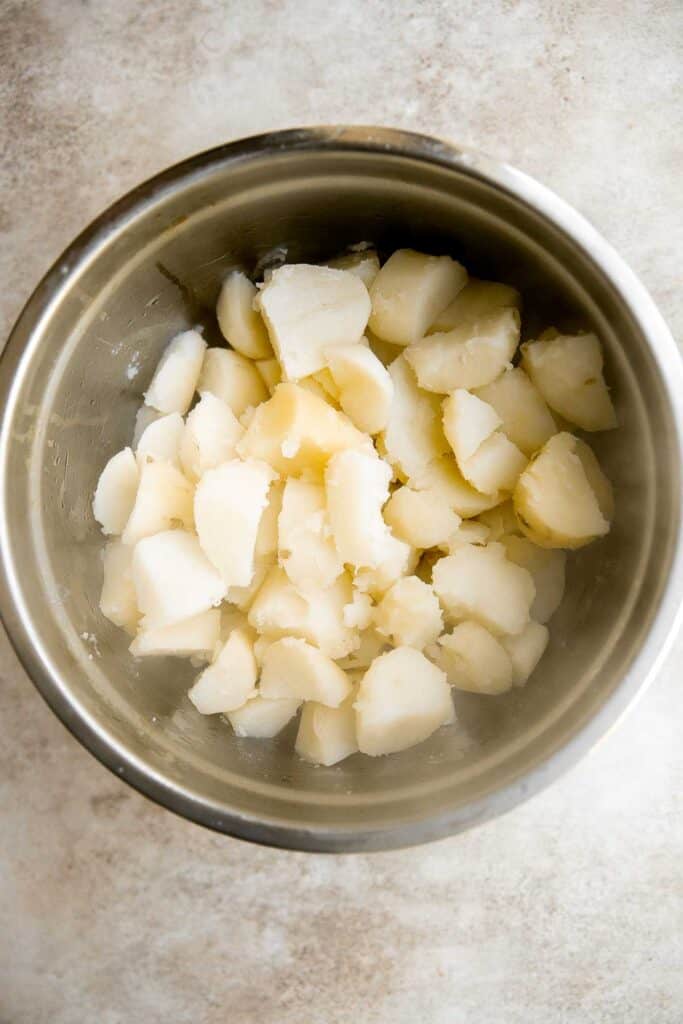
- Add ingredients. Add in the butter and cheddar cheese and stir to mix until melted and incorporated into the potatoes. Slowly add in the milk and stir it into the mashed potatoes. Add garlic powder, salt, and pepper, and stir to incorporate.
- Serve. Remove from heat and transfer to a serving dish, garnish with chives and extra butter, and serve warm.
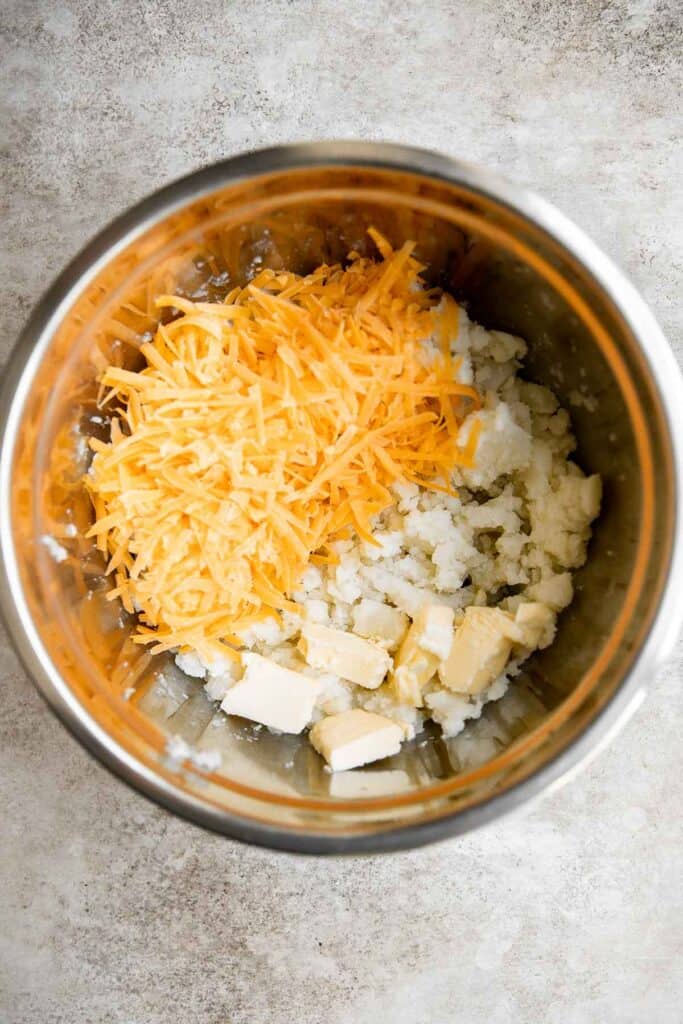

How to Serve
This Cheddar Mashed Potatoes are the perfect side dish to serve with almost all your favorite entrees. They're also the perfect side to serve at holiday dinners this year.
Some of my favorite proteins to serve with these mashed potatoes are:
- Ribeye Steak
- Garlic Butter Shrimp
- Oven Baked Chicken Breast
- Glazed Honey Balsamic Pork Chops
- Creamy Garlic Salmon
- Garlic Butter Steak Bites
- Instant Pot Whole Roast Chicken
- Roast Beef
Storage and Freezing
How to Store
Allow leftover mashed potatoes to cool to room temperature, then store leftovers in an airtight container in the refrigerator for 3-4 days.
How to Freeze
You can also freeze mashed potatoes! Freeze in a freezer bag or a freezer-safe airtight container for up to three months. For individual servings, store servings in separate containers or freeze portions on a parchment-lined sheet pan for 1-3 hours before transferring to a freezer bag or container and thaw servings as you need them!

Ways to Use Leftover Mashed Potatoes
There are so many ways to repurpose leftover mashed potatoes. You can use these cheddar potatoes to make:
- Mashed Potato Soup
- Mashed Potato Balls
- Turkey and Potato Chowder
- Mashed Potato Cakes
- Homemade Cheddar and Potato Perogies
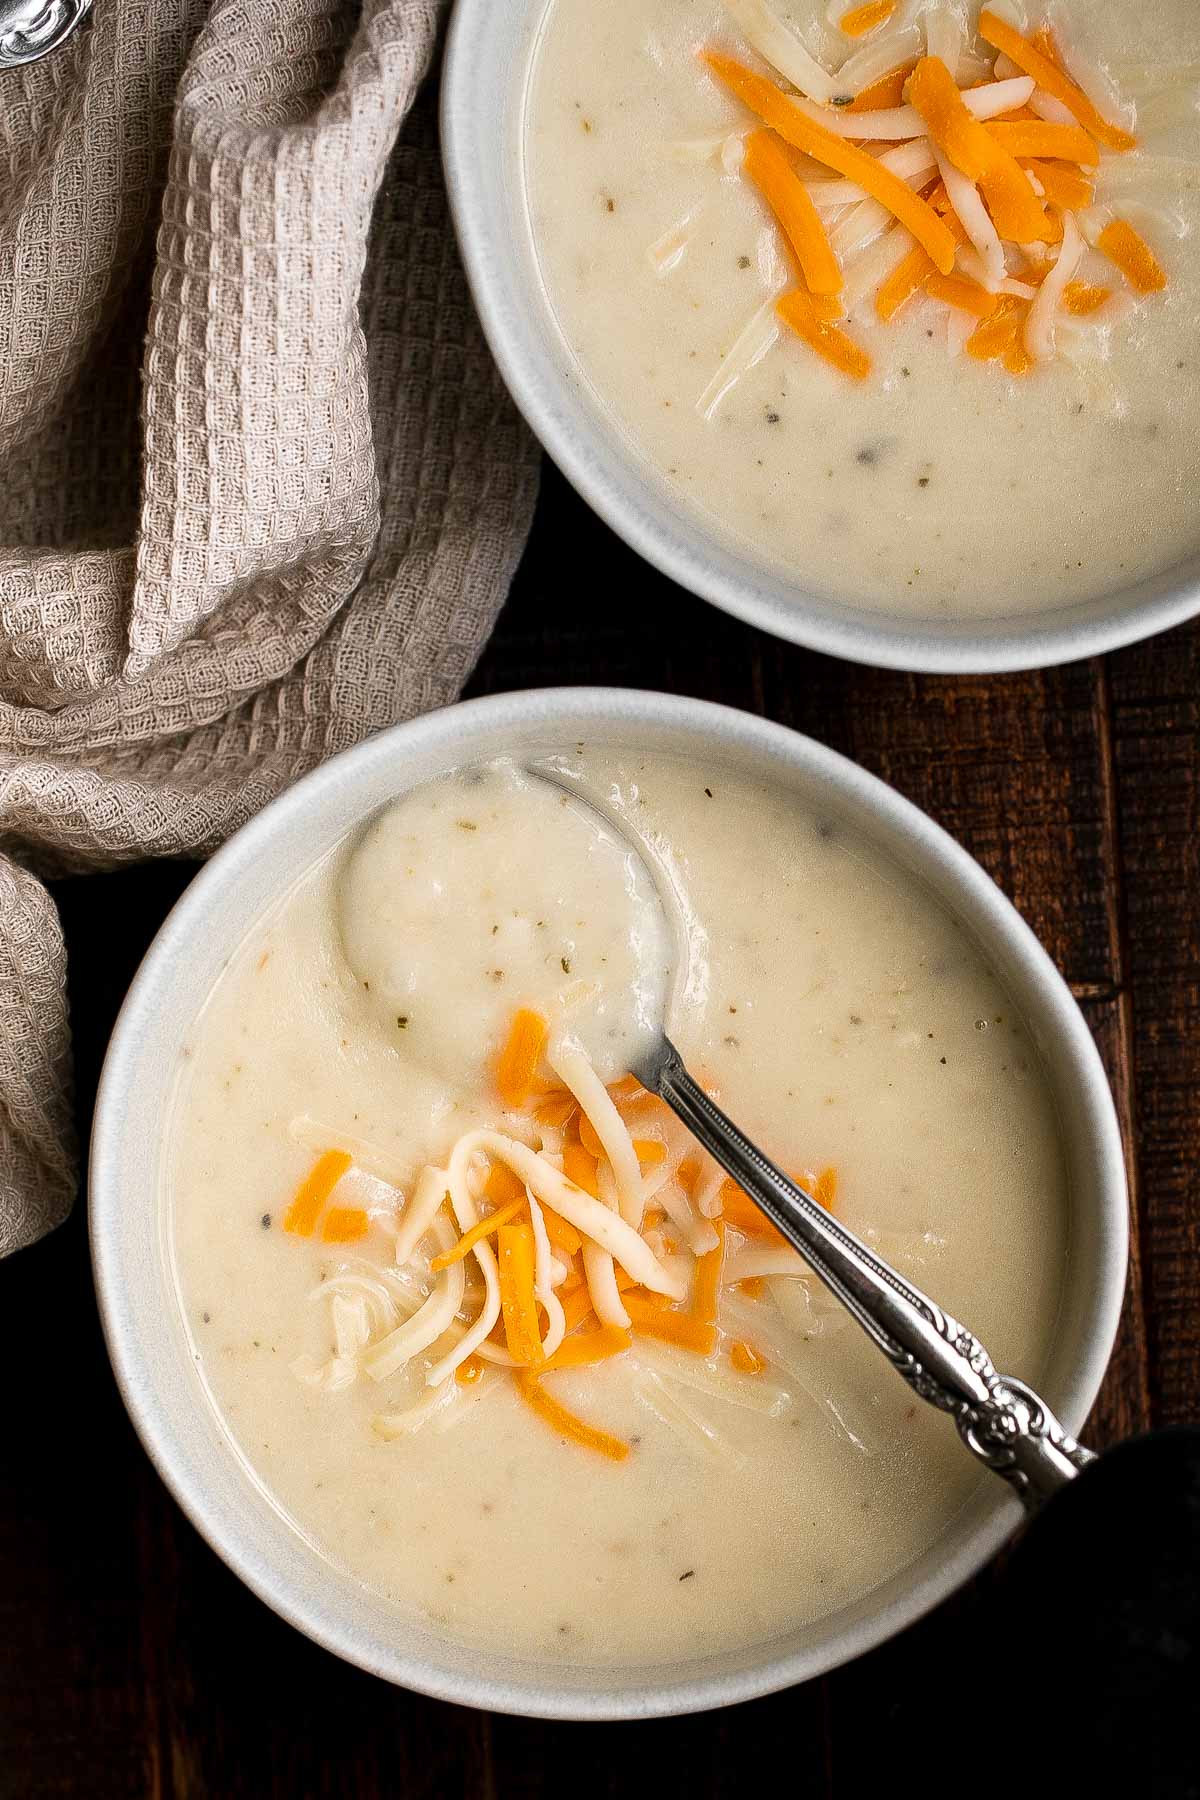

Recipe Tips and Tricks
- Mashing hacks. Use a vegetable ricer, stand mixer with a whisk or paddle attachment, or hand mixer to make mashing even faster and easier. Start at a low and slow speed to make sure you don't over-mix. Leave as many chunks and lumps as you like!
- Keep the butter cold until it's time to add it. Keeping your butter cold up until the moment you mix it with the hot mashed potatoes enables the fats and solids to be distributed more evenly than if you use room-temperature or melted butter.
- Leave the potato skins on for a more rustic-style recipe. Leaving the potato skin on (or partially on, if you decide to reduce the amount of skin in your recipe) adds visual and textural interest to your mashed potatoes, and cuts down on peeling time.
More Potato Recipes
- 30 Potato Side Dishes
- Scalloped Potatoes
- Crispy Smashed Potatoes
- Hasselback Potatoes
- Crispy Leaf Potatoes
- Mashed Red Potatoes
Tried this recipe?
I'd love to hear what you think! Leave a comment and rating below to share your feedback. Your reviews help others discover this recipe and help me keep creating more free recipes for you. Snap a photo and tag me on social media @aheadofthyme too.

Creamy Chicken Pesto Pasta
Creamy Chicken Pesto Pasta is packed with flavor, easy to make, and even easier to eat. Juicy and tender chicken is smothered in a creamy pesto alfredo sauce and tossed together with spaghetti and bursting cherry tomatoes. It's a quick 30 minute recipe that will satisfy the whole family.
This creamy pesto chicken pasta also stores well, leaving delicious leftovers to pack for lunch throughout the week. Plus, it's freezer-friendly, so you can enjoy leftovers for even longer - if there's any left over, that is.

Why You'll Love Creamy Chicken Pesto Pasta
- Vibrant Italian flavor. Transport your taste buds to the Italian countryside with earthy pesto, crunchy pine nuts, and tomatoes in this creamy chicken pasta. It's seriously the best.
- It's ready in 30 minutes. This creamy pesto pasta with chicken needs just a small time investment. It is ready in only thirty minutes - making it great for weeknight dinners after work or on hectic weekends on-the-go.
- Easy to make. This pesto chicken pasta dish serves up complex flavors without the complex prep work. A few basic cooking skills and some multitasking will reward you with a delicious meal that looks and tastes like it took a lot more work to make!
- Perfect end-of-summer dinner. This recipe is great for using up basil pesto and cherry tomatoes while they're still in season at the end of a long, hot summer. But the good news is that these items are readily available at the grocery store all year long, so you can enjoy this creamy pesto alfredo chicken pasta whenever you want!
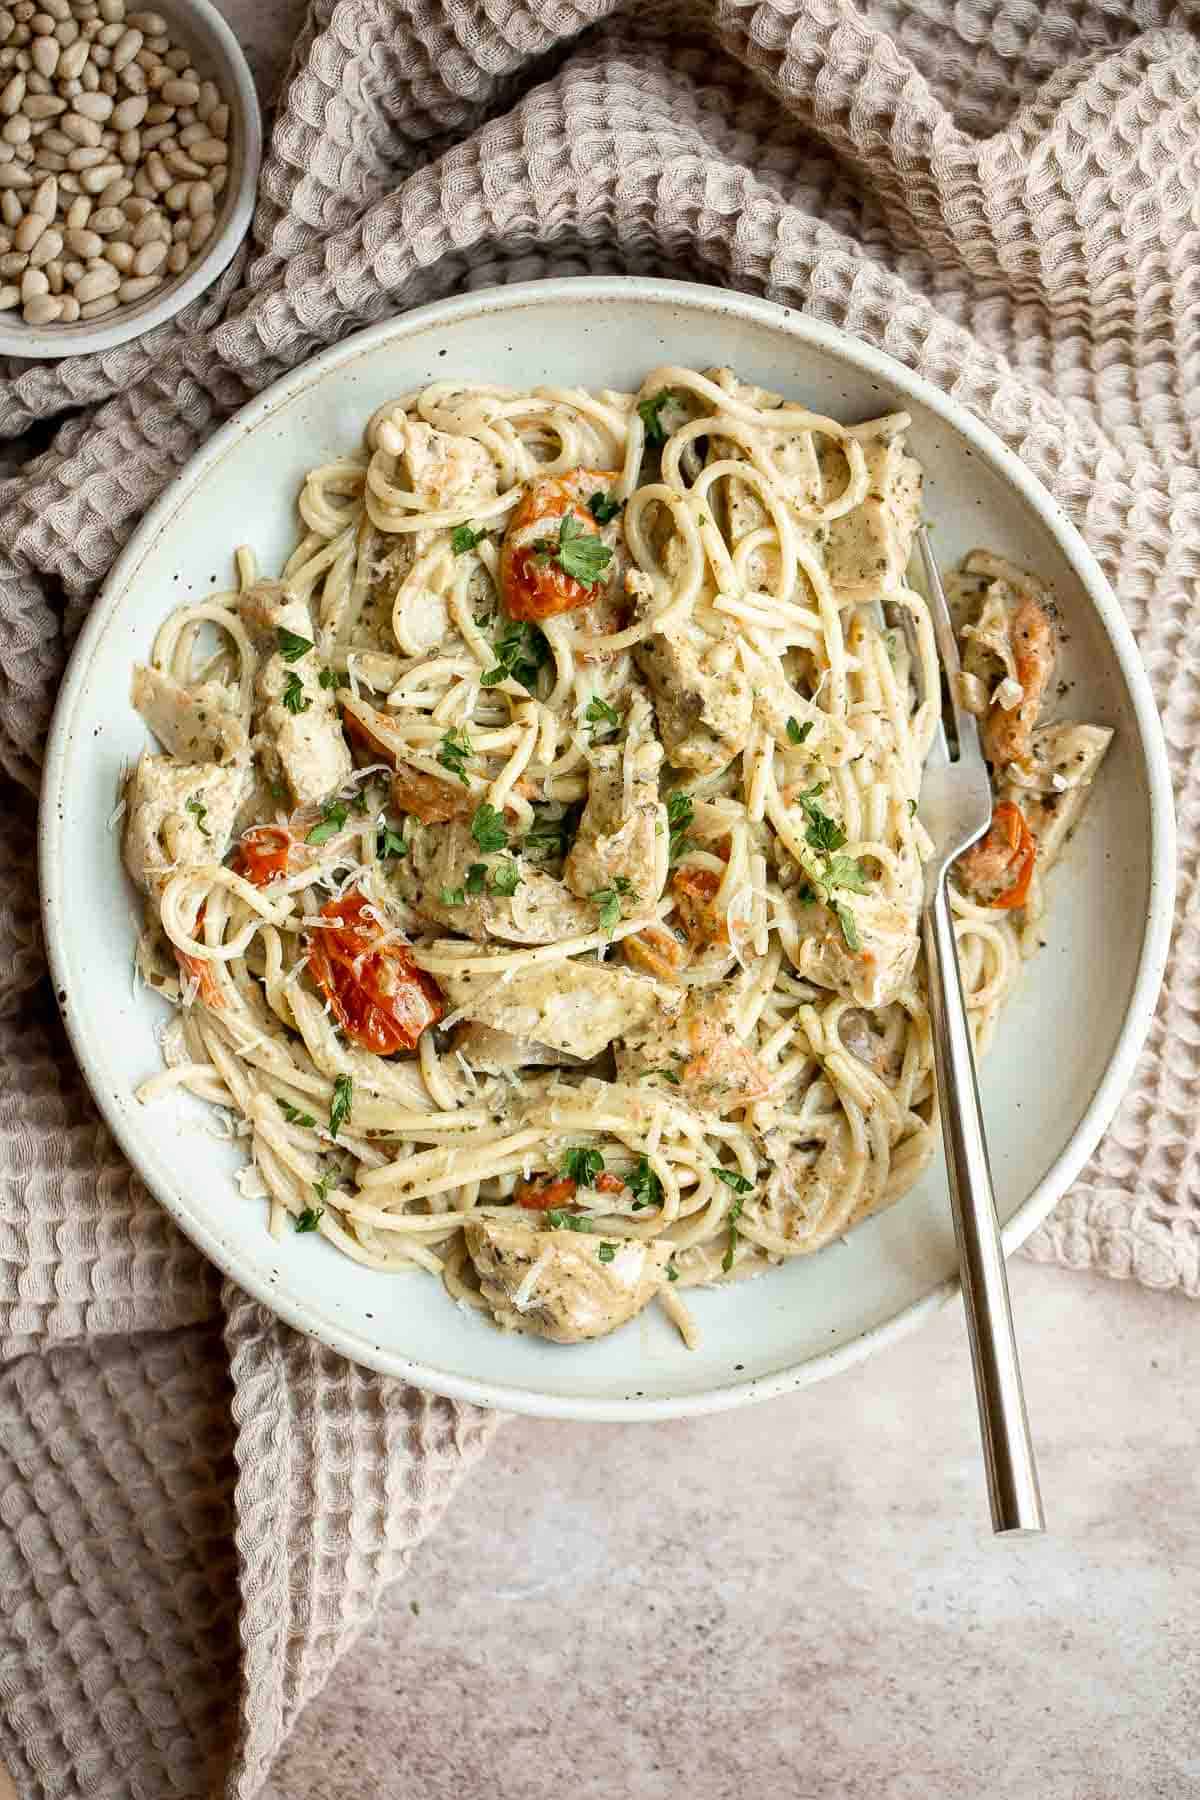
Ingredient Notes
To make this delicious Creamy Chicken Pesto Pasta, you will need the following ingredients (full measurements in recipe card below):
- pasta - I like using a long noodle such as spaghetti, linguine, or fettuccine, but you can swap the spaghetti noodles in this pesto chicken pasta for any preferred shape of pasta-fresh or homemade. Just make sure you adjust the cooking time if needed, according to the directions on the box.
- chicken breast - if you prefer dark meat you can use boneless skinless chicken thighs.
- pesto sauce - store-bought pesto is perfectly fine to use, but if you have the spare time (or an abundance of basil in your kitchen garden), a homemade pesto sauce adds an extra fresh touch to this pasta.
- vegetable oil - we used avocado oil but if you don't have avocado oil, the. olive oil or another neutral-flavored oil with a high smoke point will work.
- butter - if someone in your family is allergic to dairy, you can use a plant-based butter alternative instead.
- red onion - different types of onions have distinctly different flavors, but if you don't have any red onion on hand, white or yellow will yield a similar result.
- garlic - you can substitute fresh garlic for pre-minced garlic at a ratio of ½ to 1 teaspoon per clove in the recipe.
- cherry tomatoes
- heavy cream - a non-dairy heavy cream (like unsweetened coconut cream) will work if you're lactose intolerant or sensitive to dairy, but it may change the flavor slightly depending on the kind you choose.
- chicken broth - vegetable broth or bone broth works just as well in this recipe.
- salt and pepper
- pine nuts - pine nuts can sometimes be difficult to find and are often a tad more expensive than other nuts. Chopped or crushed walnuts are a great substitute.
You will also need measuring cups and spoons, a large cooking pot, and a large skillet.
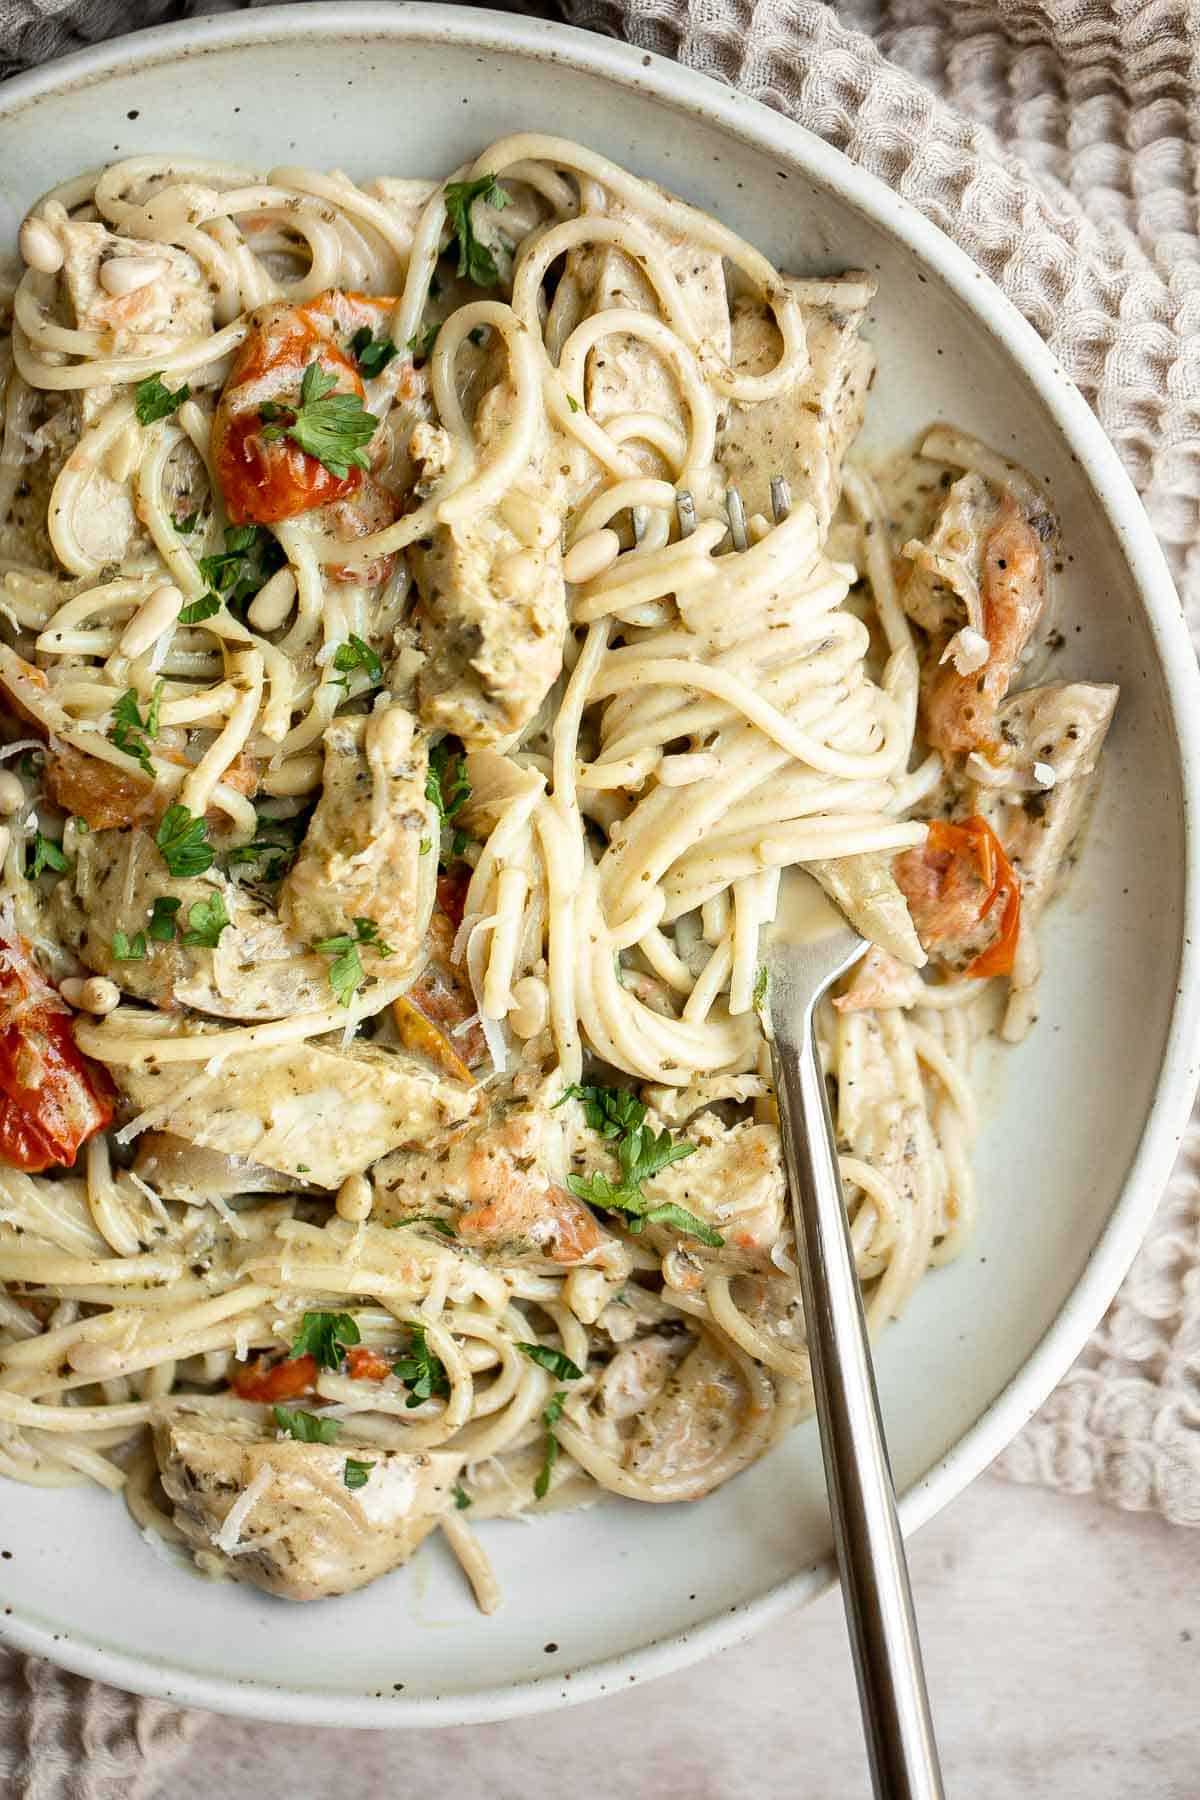
How to Make the Best Creamy Chicken Pesto Pasta
- Cook the pasta. Bring a large pot of salted water to a boil over medium-high heat. Add spaghetti noodles and cook until al dente (fully cooked but still firm) according to package directions, about 10-12 minutes. Rinse the noodles under cold water to cool off completely and set aside in the pot.
- Season the chicken. Use a paper towel to pat the chicken breasts completely dry. Season well with salt, pepper, and pesto. Set aside for 5 minutes.
- Sear the chicken. Heat the oil in a large skillet over medium-high heat for 2 minutes until the hot oil is sizzling hot. Sear the chicken until golden brown and cooked through, about 5 minutes on each side. The internal temperature for the chicken should reach 165F as read on a meat thermometer. Cut the chicken into strips and set aside on a plate.
- Make the sauce: In the same skillet, add butter and allow it to melt until starting to bubble, about 1 minute. Add onion, garlic, and tomatoes. Sauté until the tomatoes burst, about 4-5 minutes. Whisk in heavy cream, chicken broth, and pesto sauce. Bring the sauce to a simmer and stir occasionally until thickened to a desired consistency, about 3-4 minutes. Season with salt and pepper to taste.
- Assemble. Add the cooked chicken to the sauce, and toss well to coat. Add in the pasta and toss again to combine. Garnish with pine nuts and serve warm.
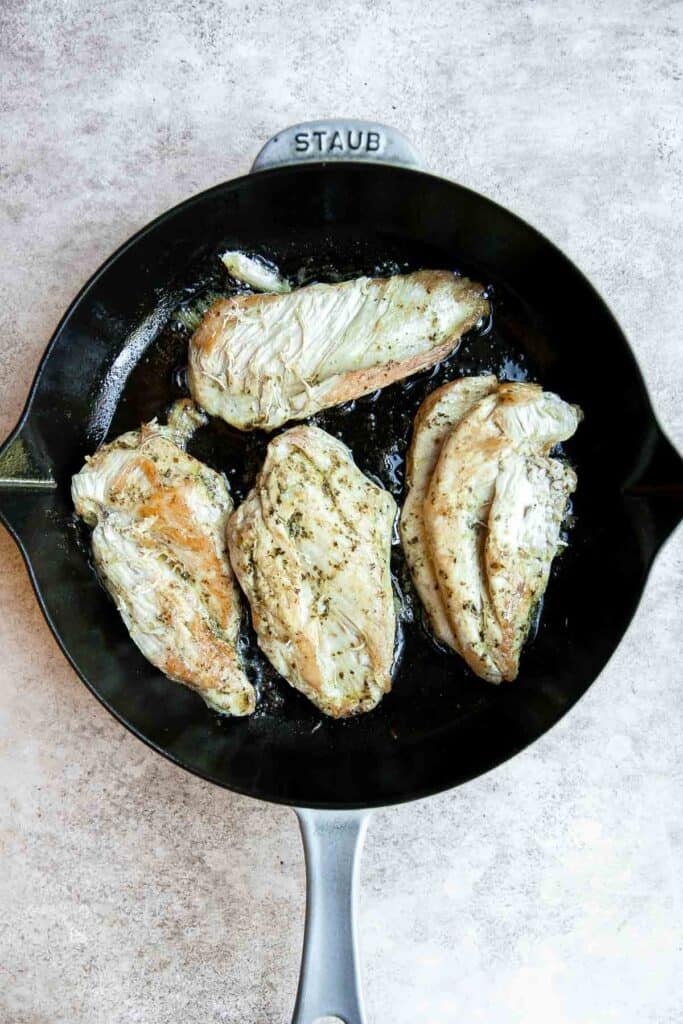
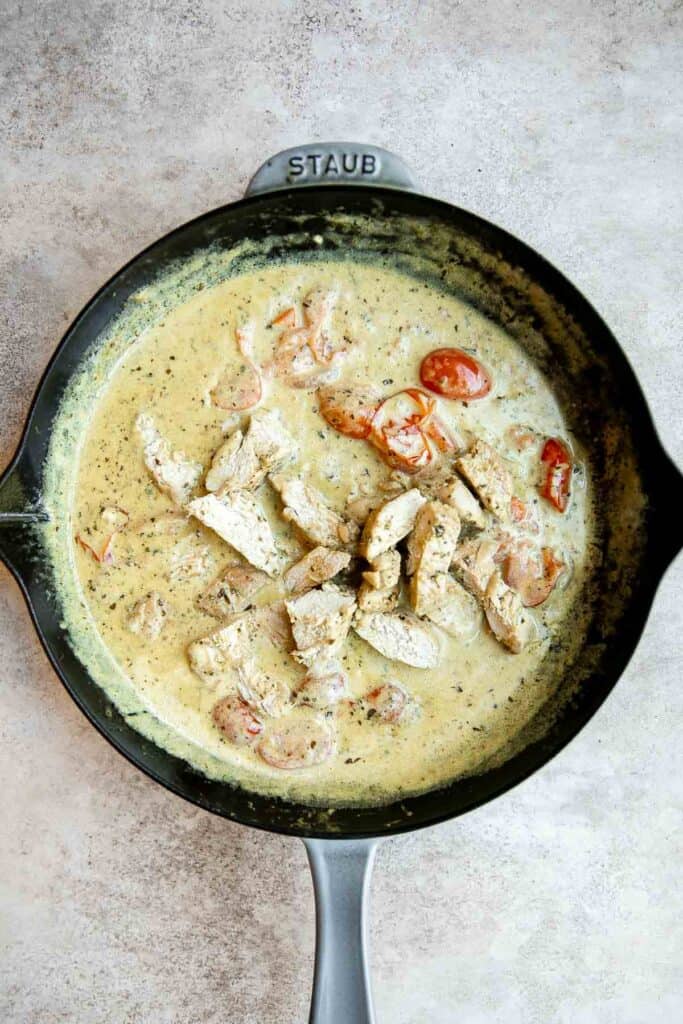
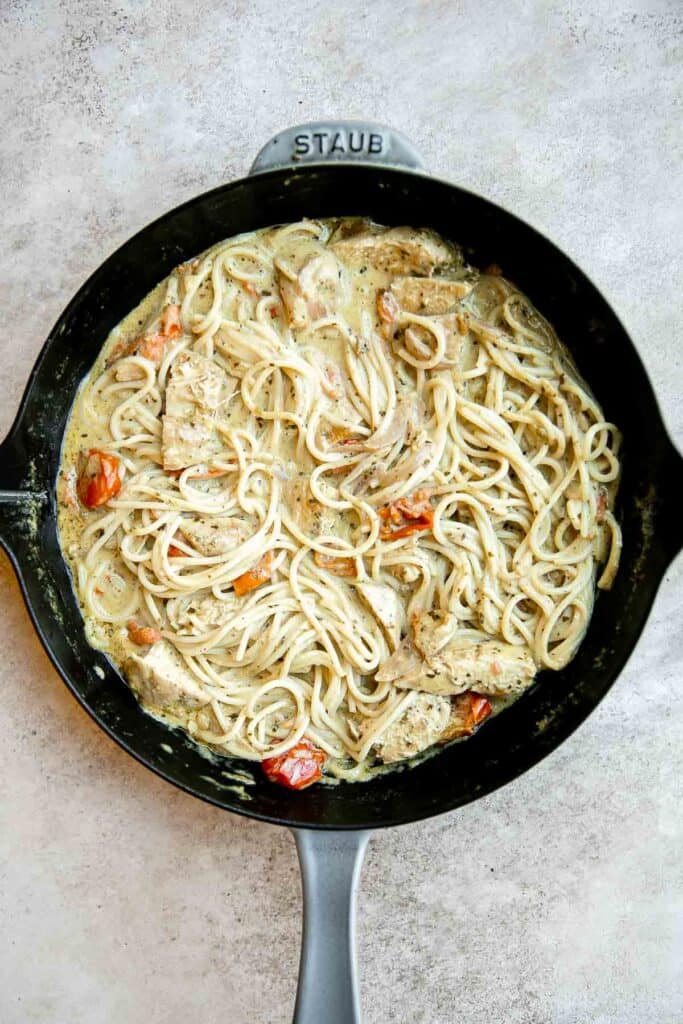
How to Serve
This creamy pesto chicken pasta makes a hearty meal by itself, but it can be stretched farther if you add complimentary sides. A simple chopped salad pairs perfectly with this flavor powerhouse pasta.
Some other delicious sides that this pairs well with are:
- Caesar Salad
- Garlic Breadsticks
- Roasted Red Pepper and Tomato Soup
- Caprese Salad
- Garlic Knots
- Antipasto Skewers
Recipe Tips and Tricks
- Make ahead tip: You can cut down on preparation time by making the sauce ahead of time! Try making it a day or two in advance when you have a few minutes to spare. Your future self will thank you!
- How to store: Allow the pasta to cool to room temperature, then place leftovers in an airtight container and store in the refrigerator for 3-4 days.
- How to freeze: Place in a freezer bag or airtight rubber storage container and freeze for 2-3 months. Allow it to defrost in the refrigerator overnight before reheating.
- How to reheat: Reheat creamy chicken pesto pasta in a skillet on the stove over medium-low heat until warmed through. Add a splash of water if the sauce has thickened up too much in the fridge. You can also reheat it in the microwave (covered) on medium-low heat for 30 seconds to 3 minutes, until warmed through. The time will vary based on how much pasta you are reheating.

More Pasta Recipes
- 40 Best Pasta Recipes
- Chicken Penne Pasta
- Pesto Penne Pasta
- Creamy Salmon Pasta
- Mascarpone Pesto Pasta
- Tuna Pasta
Tried this recipe?
I'd love to hear what you think! Leave a comment and rating below to share your feedback. Your reviews help others discover this recipe and help me keep creating more free recipes for you. Snap a photo and tag me on social media @aheadofthyme too.

Homemade Kettle Corn
Say goodbye to store-bought popcorn and hello to Homemade Kettle Corn instead. It is quick and easy to make with just 4 ingredients, satisfies sweet-and-salty cravings, and will delight family and friends of all ages. Serve it on special occasions or for everyday snacking.
Recreate movie theatre magic at home with this crunchy sweet and salty kettle corn that rivals even the best fairs and festivals. Plus, it takes just a few minutes to prep the kernels before watching them pop on the stovetop. The kids will love to watch too!

Why You'll Love Homemade Kettle Corn
- A quick and easy snack. This sweet and salty kettle corn goes from stovetop to hungry hands in just 20 minutes. Your family will ask for it over and over!
- Made with only four ingredients. This recipe couldn't be any more simple and is made with just four pantry staples. Store-bought popcorns sometimes use questionable oils and preservatives, but you control the quality of all the ingredients in this simple kettle corn recipe made with real ingredients.
- Great for movie nights and parties. Make movie nights at home, sleepovers, birthday parties and more extra special with this fresh, homemade kettle corn to enrich the experience.

Ingredient Notes
To make easy Homemade Kettle Corn, you will need the following ingredients (full measurements in recipe card below):
- vegetable oil - you can use any neutral oil that tolerates heat well, like avocado oil or olive oil, but it may slightly change the flavor of the finished product. We also like using coconut oil for a subtle coconut flavor - it's delicious!
- popcorn kernels - use your favorite kind! There are a ton of different types of popcorn to choose from, like heritage varieties and smaller or larger kernel sizes.
- sugar - classic kettle corn calls for sugar, but you can sweeten the popcorn with alternatives like coconut sugar. You could even omit it and just make regular popcorn.
- salt - a finer grain works best for distributing evenly and sticking to the popcorn.
You will also need measuring cups and spoons and a large skillet or pot.

How to Make the Best Homemade Kettle Corn
- Heat oil. Heat vegetable oil in a large skillet or cooking pot over medium heat. Add 4 popcorn kernels and cover with the lid.
- Add kernels. Once you hear all 4 kernels pop, this will indicate that the skillet is hot enough and ready. Add in the rest of the popcorn kernels, sugar and salt. Toss well to coat and close the lid. The kernels should spread out in a single layer in the skillet. Shake the skillet constantly (or use a wooden spoon to continuously stir) to prevent sugar from burning. The kernels will start popping quickly, in about 30 seconds.
- Cook. Cook the kernels for about 2-3 minutes, until the popping has slowed down to once every 2 seconds. Remove the pot from the heat and shake for a few minutes until popping completely stops.
- Serve. Immediately transfer the popcorn to a large serving bowl and allow it to cool for 5 minutes before eating.

Storing and Freezing
How to Store
Once cool to room temperature, transfer the kettle corn to an airtight container and store at room temperature for 2-3 days. Typically, homemade popcorn without any seasoning added can last for up to 1-2 weeks.
How to Freeze
You can actually freeze popcorn! Once the popcorn has completely cooled, store in an airtight container or sealed freezer bag and store in the freezer for up to 3 months. It doesn't actually freeze, but it will extend its shelf life but note that the texture can become more drier. You can reheat it in 10 second bursts in the microwave on high power if desired.
Recipe Tips and Tricks
- Get creative with toppings. Increase the wow factor by mixing in movie candy, marshmallows, chocolate chips, pretzels, shredded or grated cheese, spices, or other additions for unique flavors and textures.
- Repurpose leftovers. You can use this homemade kettle corn in more ways than one! Try adding leftovers (or fresh popcorn) to make marshmallow popcorn balls, pack as a snack or in the next day's lunch, or toss them in a snack mix.
- Try adding flavored salt. You can elevate this plain kettle corn recipe with little effort by using a flavored salt! Try a lime salt, smoked salt, truffle salt, or other flavored salt to switch things up.

More Snack Recipes
- 50 Best Healthy Snacks
- Homemade Popcorn
- Tortilla Strips
- Almond Cranberry Granola Bars
- Candied Pecans
- Zucchini Bites
Tried this recipe?
I'd love to hear what you think! Leave a comment and rating below to share your feedback. Your reviews help others discover this recipe and help me keep creating more free recipes for you. Snap a photo and tag me on social media @aheadofthyme too.

Pinto Bean Soup (Sopa Tarasca)
Spice up your weeknight dinners with this Mexican Pinto Bean Soup (known as Sopa Tarasca). Creamy pinto beans, spicy chipotle, and a hearty tomato broth are some of the main ingredients that make this vegan soup so delicious.
Plus, this easy one pot spicy bean soup takes only thirty minutes to make from scratch. It's a perfect soup for busy evenings or a quick lunch. It stores well and is freezer-friendly too - making it great for meal prep.

Why You'll Love This Spicy Pinto Bean Soup
- Loaded with flavor. This Mexican bean soup is rich, spicy, and smoky. It's made with a simple combination of ingredients that pack on the flavor. You can also tailor it to your preferences by adding (or omitting) chipotles for a spicy kick when you're craving a little bit of heat.
- Quick and easy. Ready in under 30 minutes, this vegan pinto bean soup is perfect for busy weeknights or lazy weekends when you don't feel like spending a lot of time in the kitchen.
- Serve as a side or as an entree. This versatile sopa tarasca is a filling meal on its own, can be loaded with toppings, or can be served as a side or the soup course with other dishes in a larger meal.
- It's great meal prep for vegetarians. This spicy bean soup is a great vegetarian/vegan dish for lunches or dinners. Plus, it stores well and freezes well, so you can make a big batch to enjoy throughout the week or for months to come.
- It's freezer-friendly. Whether you're trying to build a freezer stockpile for low-maintenance dinners or trying to make leftovers last longer, this soup can easily be frozen for a convenient future meal.
Ingredient Notes
To make this spicy Sopa Tarasca, you will need the following ingredients (full measurements in recipe card below):
- vegetable oil - we used avocado oil because it is nutritious, has a high smoke point, and a neutral flavor that's great for sautéing, but you can use olive oil or coconut oil in its place.
- onion
- garlic - freshly chopped garlic will always yield a more vibrant flavor, but if you're pressed for time, pre-minced garlic will work just fine. Use ½ to 1 teaspoon of minced garlic per clove.
- chipotles in adobo - these are optional but they add a rich and smoky flavor and more dimension to the soup, as well as a spicy kick! You can find chipotle in abodo in the foreign foods section of your local grocery store, in specialty Mexican food shops, or online.
- fire-roasted diced tomatoes
- cumin - cumin is one of the main ingredients in taco seasoning and many curry spice blends, so if you're out of cumin or want to add a touch more spice, you can try replacing it with either of these spice blends for a similar flavor.
- pinto beans - pinto beans have a mild nutty flavor that makes them a perfect compliment to all the other complex flavors in this soup, but you can swap these out for your favorite kind of beans (or whatever you have on hand). Black beans and chickpeas would both work similarly.
- broth - use vegetable broth to keep the recipe vegan, or substitute with chicken broth. You can use store-bought broth in this recipe or homemade broth - whichever works best for you.
- salt and pepper
You will also need measuring cups and spoons, a large pot (I used a 4 quart Dutch oven), and a blender or food processor.

How to Make the Best Pinto Bean Soup (Sopa Tarasca)
- Combine ingredients. Heat oil in a 4 quart Dutch oven or large pot over medium-high heat until the hot oil sizzles, about 1-2 minutes. Add onion and garlic sauté until fragrant, about 1-2 minutes. Stir in chipotles, diced tomatoes, and cumin and cook until the mixture starts to boil, about 5 minutes.
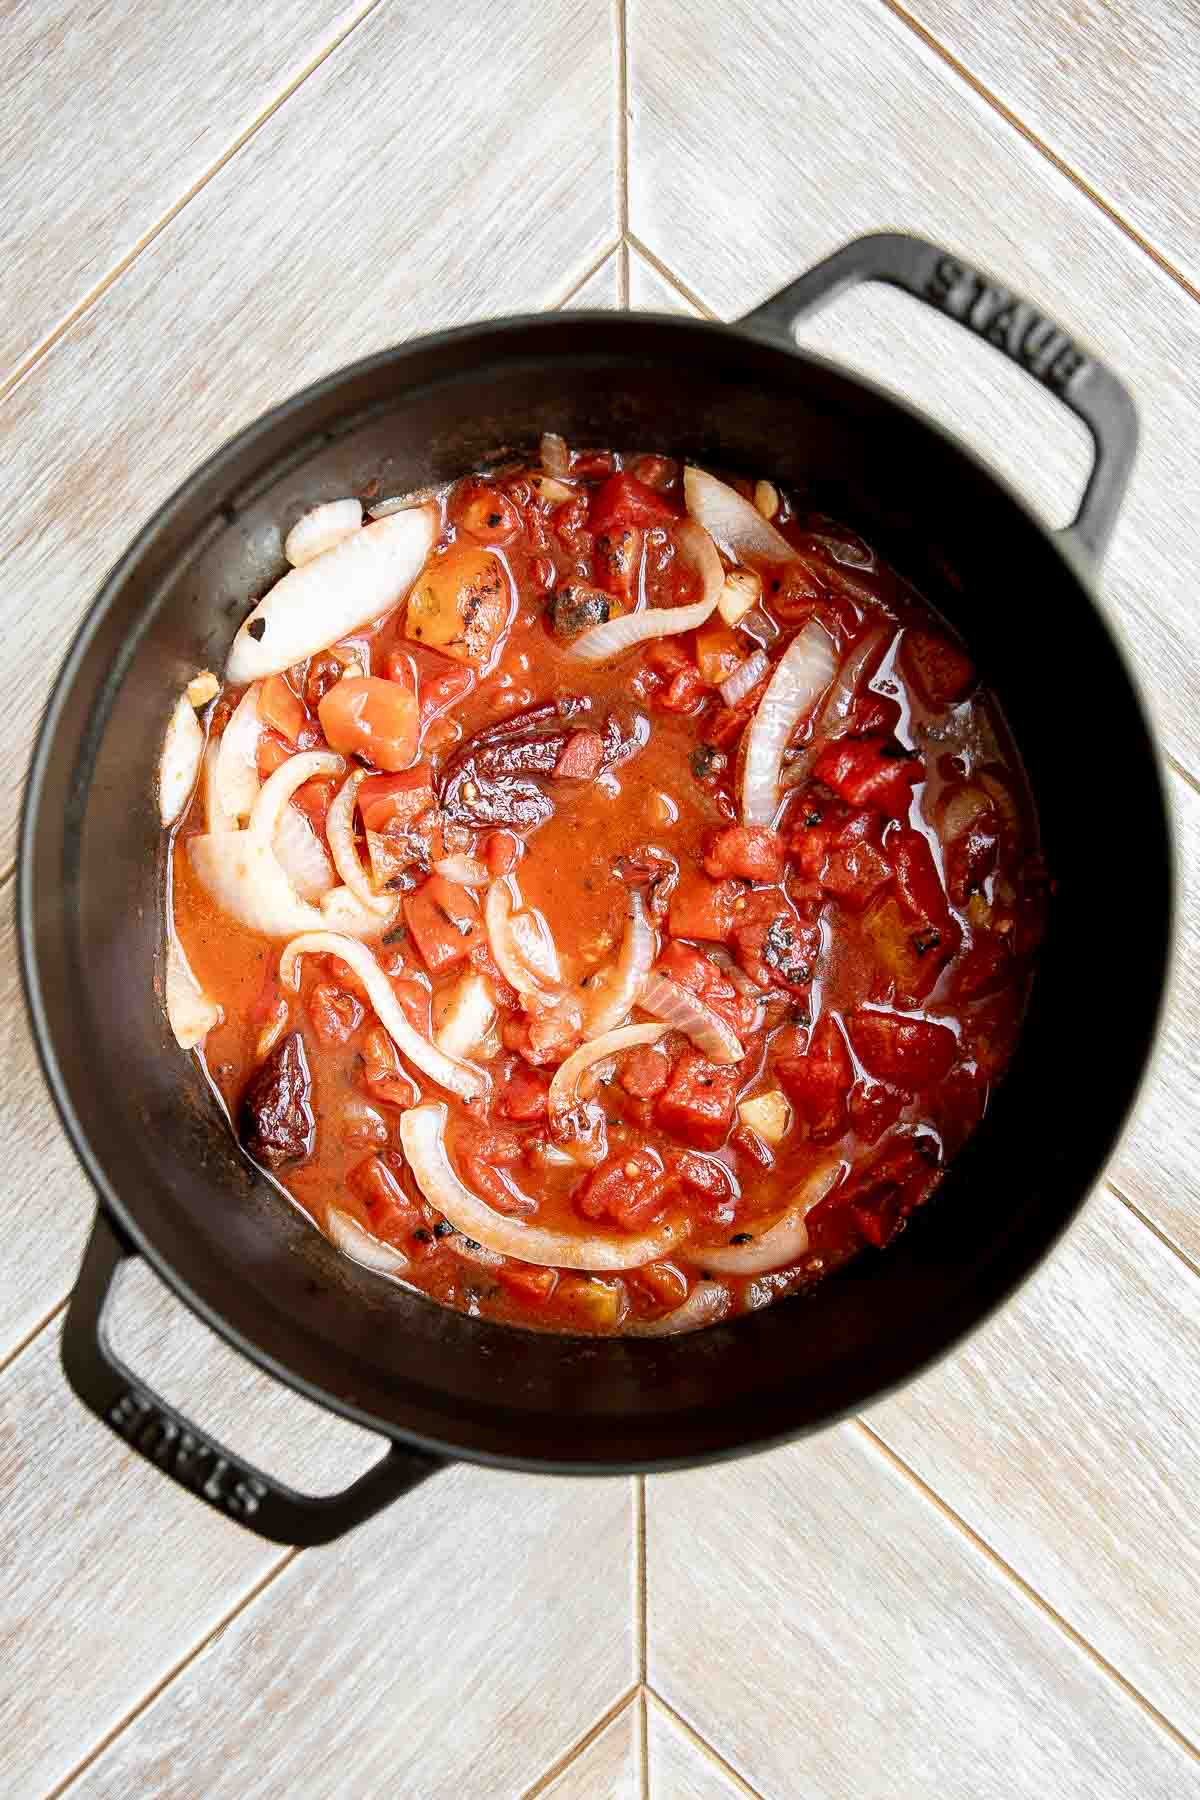
- Puree. Transfer the tomato mixture into a blender (or food processor) and blend until smooth, about 1 minute. Return the mixture to the pot.
- Puree beans. In the same blender, add the drained pinto beans and vegetable broth and blend until smooth, about 1 minute.
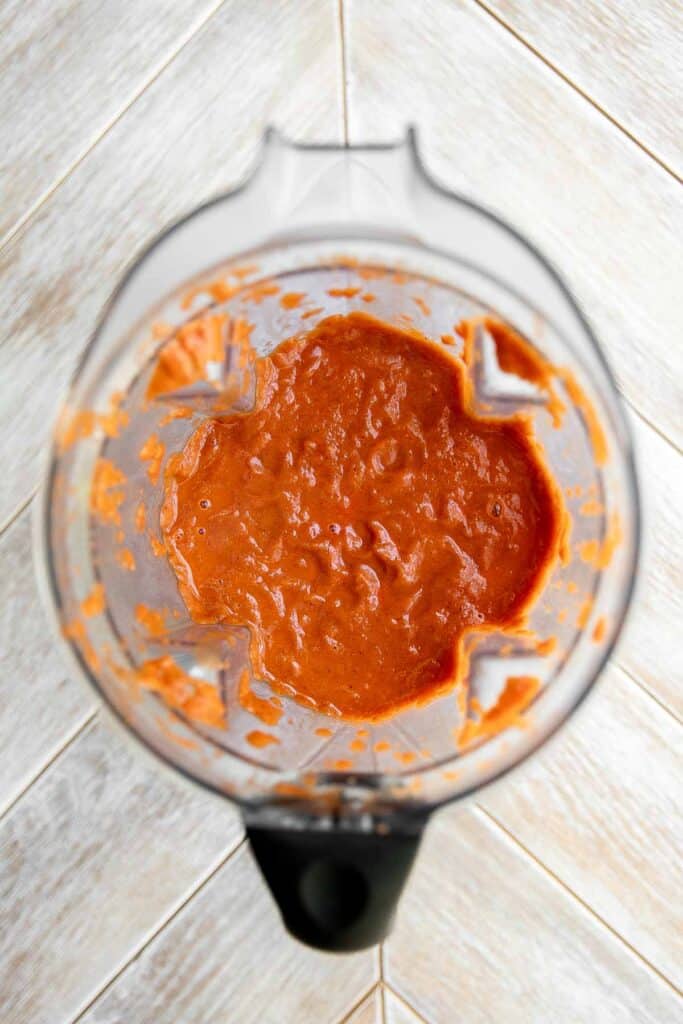
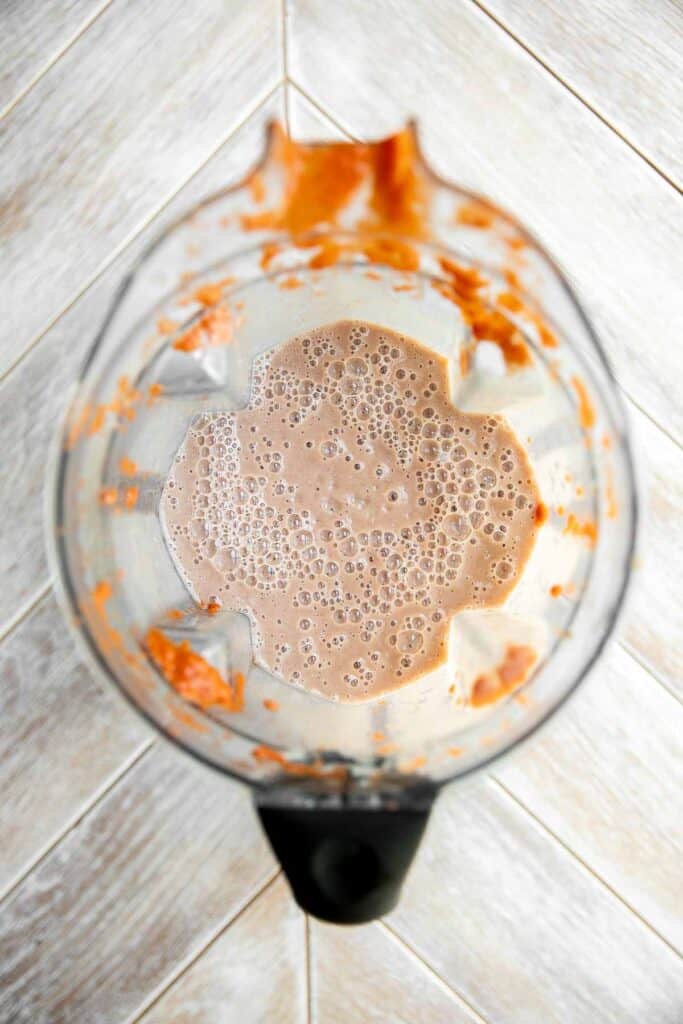
- Combine. Slowly add bean mixture to tomato mixture in the pot and stir well until evenly combined.
- Simmer. Bring it to a simmer under low heat and simmer for 5 minutes. Season with salt and pepper to taste.

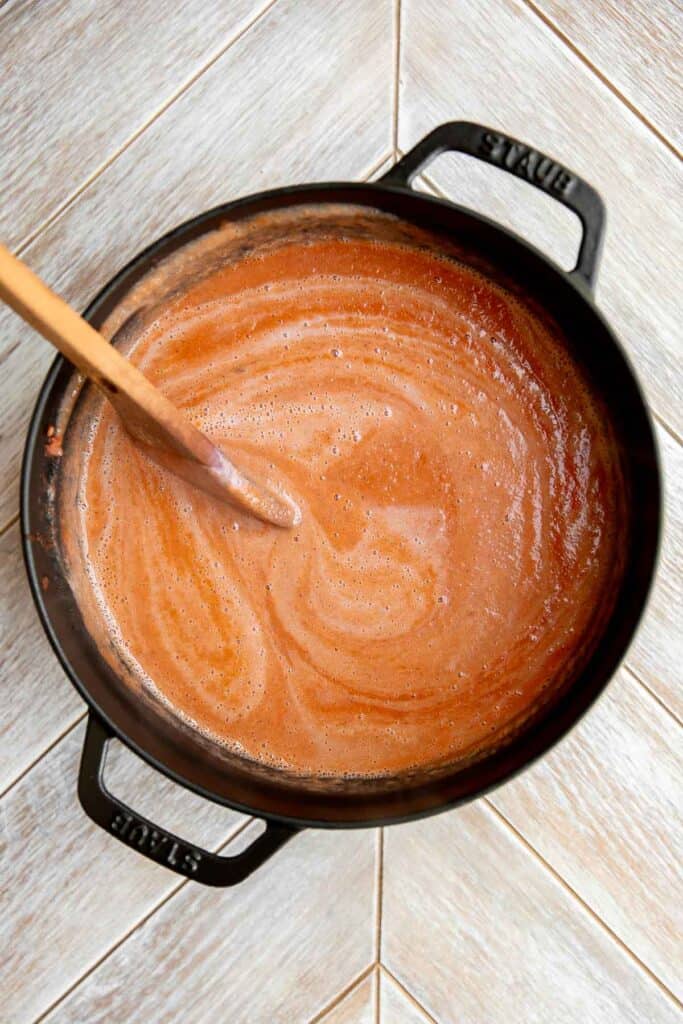
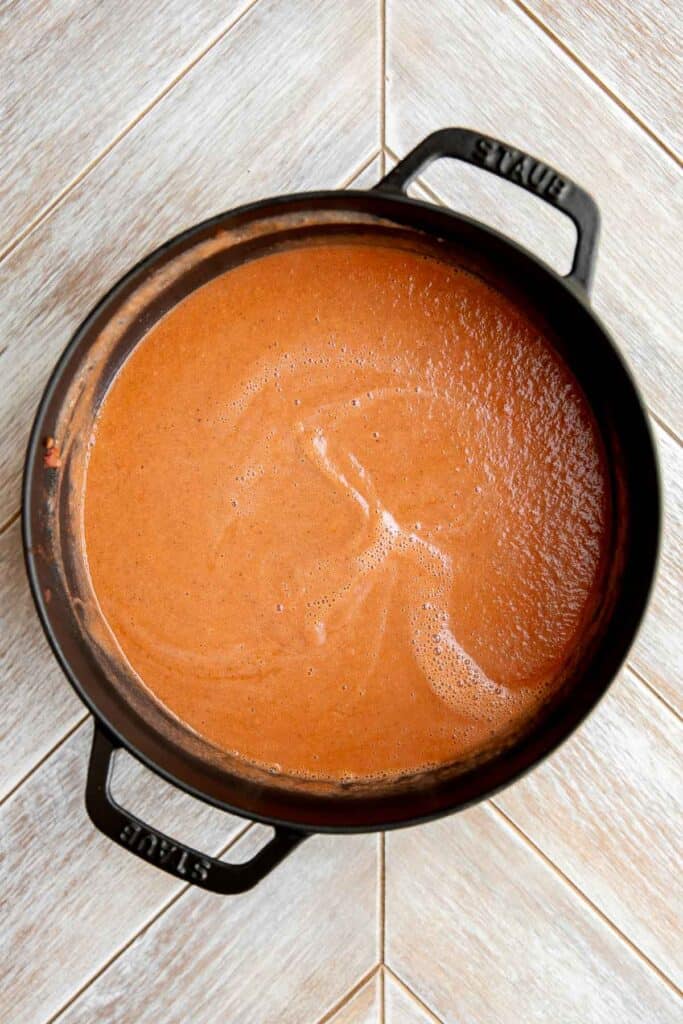
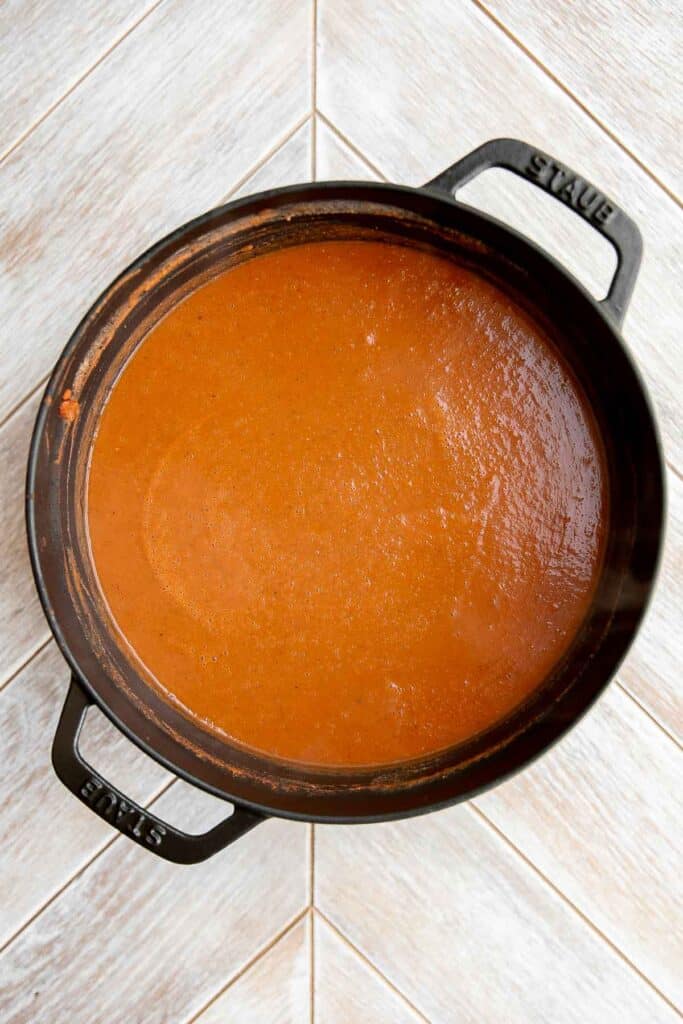
How to Serve
Serve Sopa Tarasca warm with our favorite toppings. We topped ours with tortilla strips and cojita cheese. You can also try topping your soup with a dollop of sour cream, a pinch of chopped cilantro, a squeeze of lime juice, crushed crackers, hot sauce, or sliced jalapenos.
You can serve this spicy bean soup is delicious served on its own, or paired with quesadillas. Quesadillas are to pinto bean soup as grilled cheese is to tomato soup - the perfect companion and a great vehicle for dipping! Make plain cheese quesadillas or Vegetarian Quesadillas to stick with the vegetarian theme or try Chicken Quesadillas or steak quesadillas instead.
You can also pair this spicy pinto bean soup with other classic Mexican dishes including:
- Carne Asada
- Chicken Tacos
- Mexican Street Corn (Elote)
- Sheet Pan Nachos
- Cauliflower Tacos
- Mexican Street Corn Salad
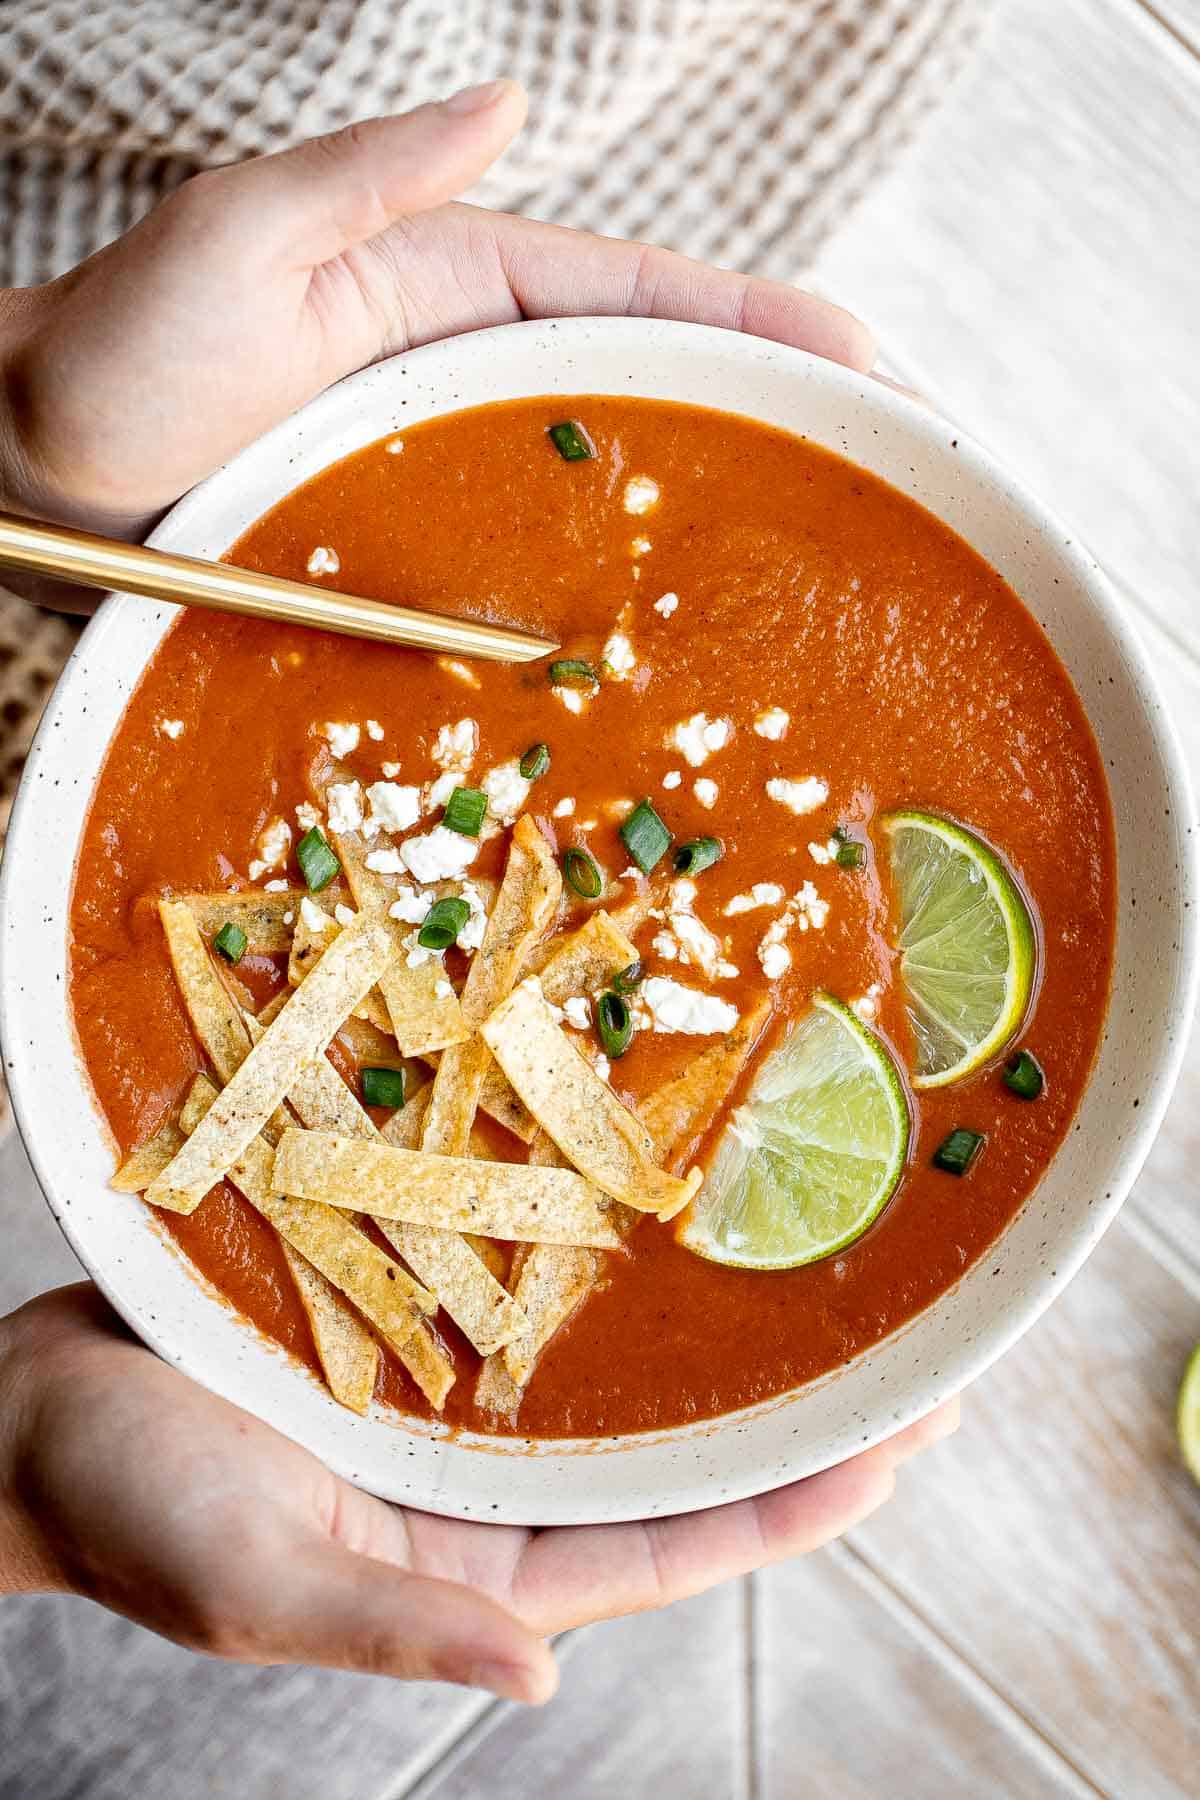
Storing and Freezing Instructions
- How to store: Place leftover sopa tarasca in an airtight container and store in the refrigerator for 3-4 days. Reheat in a saucepan or pot on the stove, or transfer to a microwaveable container and heat on high for 60 second bursts until it's reached the desired temperature (usually about 2-3 minutes), stirring every minute.
- How to freeze: Transfer to a gallon freezer bag or a deli soup container (leaving room at the top for the liquid to expand) and freeze for up to 3 months. Use a warm water bath to release the soup from the container and reheat from frozen on the stovetop or microwave for 3 minutes on low heat in a covered, microwave safe container until thawed and heated through.
More Vegetarian Soup Recipes
- 40 Best Vegetarian Soup Recipes
- Creamy Mexican Corn Soup
- Roasted Red Pepper and Tomato Soup
- Borscht (Beet Soup)
- Minestrone Soup
- Tomato Basil Soup
Tried this recipe?
I'd love to hear what you think! Leave a comment and rating below to share your feedback. Your reviews help others discover this recipe and help me keep creating more free recipes for you. Snap a photo and tag me on social media @aheadofthyme too.

10 Whole Chicken Recipes
Cooking a whole chicken may be intimidating, but it's actually a lot easier to make than you think! They are the perfect main course to serve for holiday dinners, family dinners, or to make for meal prep (shredded chicken anyone?).
So if you've picked up a whole chicken from the grocery store and are wondering "how to cook a whole chicken", then you are in the right place. We are sharing over 10 of our best whole chicken recipes including roasted chicken, whole chicken in the instant pot or crockpot slow cooker, spatchcock chicken, and more!
Best Whole Chicken Recipes
Dutch Oven Whole Roast Chicken
Easy Dutch oven whole roast chicken with the crispiest golden skin is juicy, tender and succulent and packed with flavour. Just takes 15 minutes to prep.
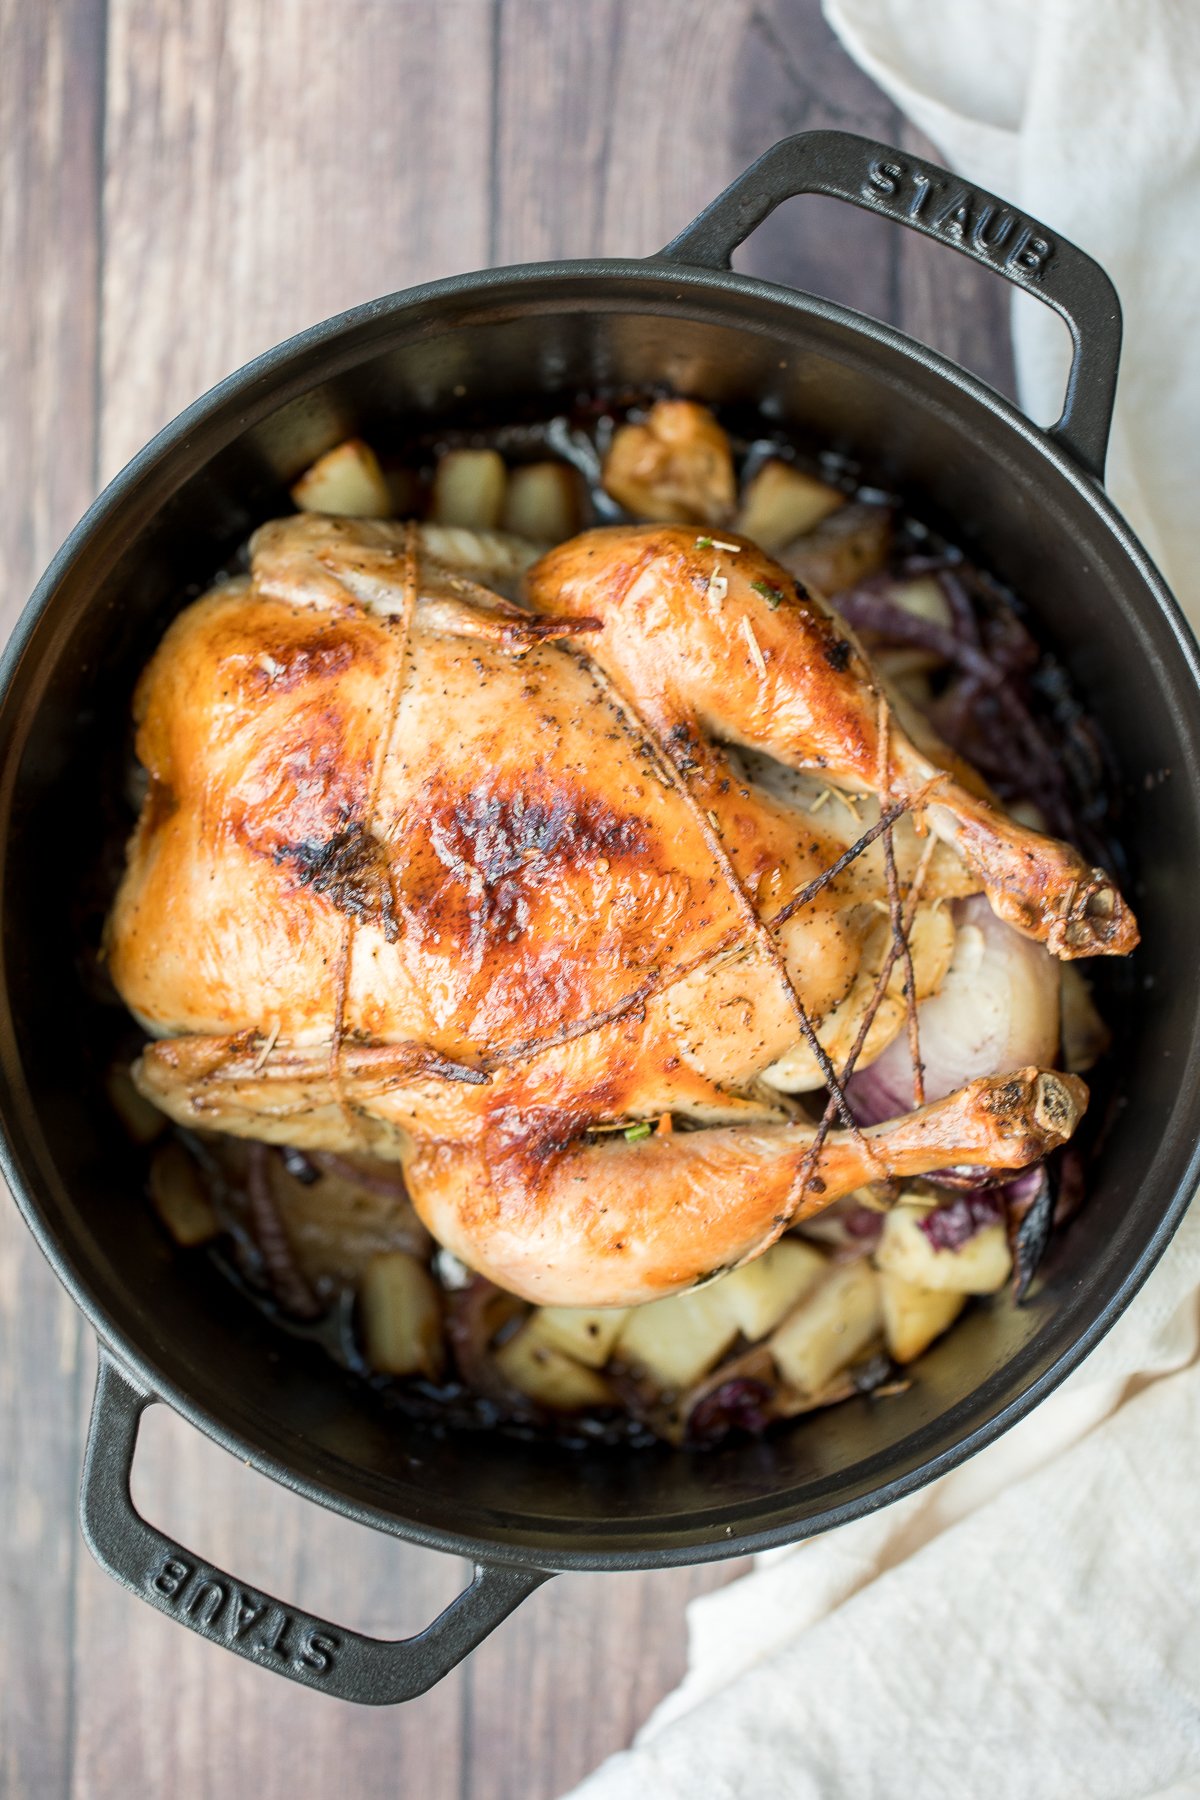
Instant pot whole chicken with gravy is tender, juicy, and flavorful. It's the fastest way to cook a whole rotisserie chicken for dinner in just 40 minutes.
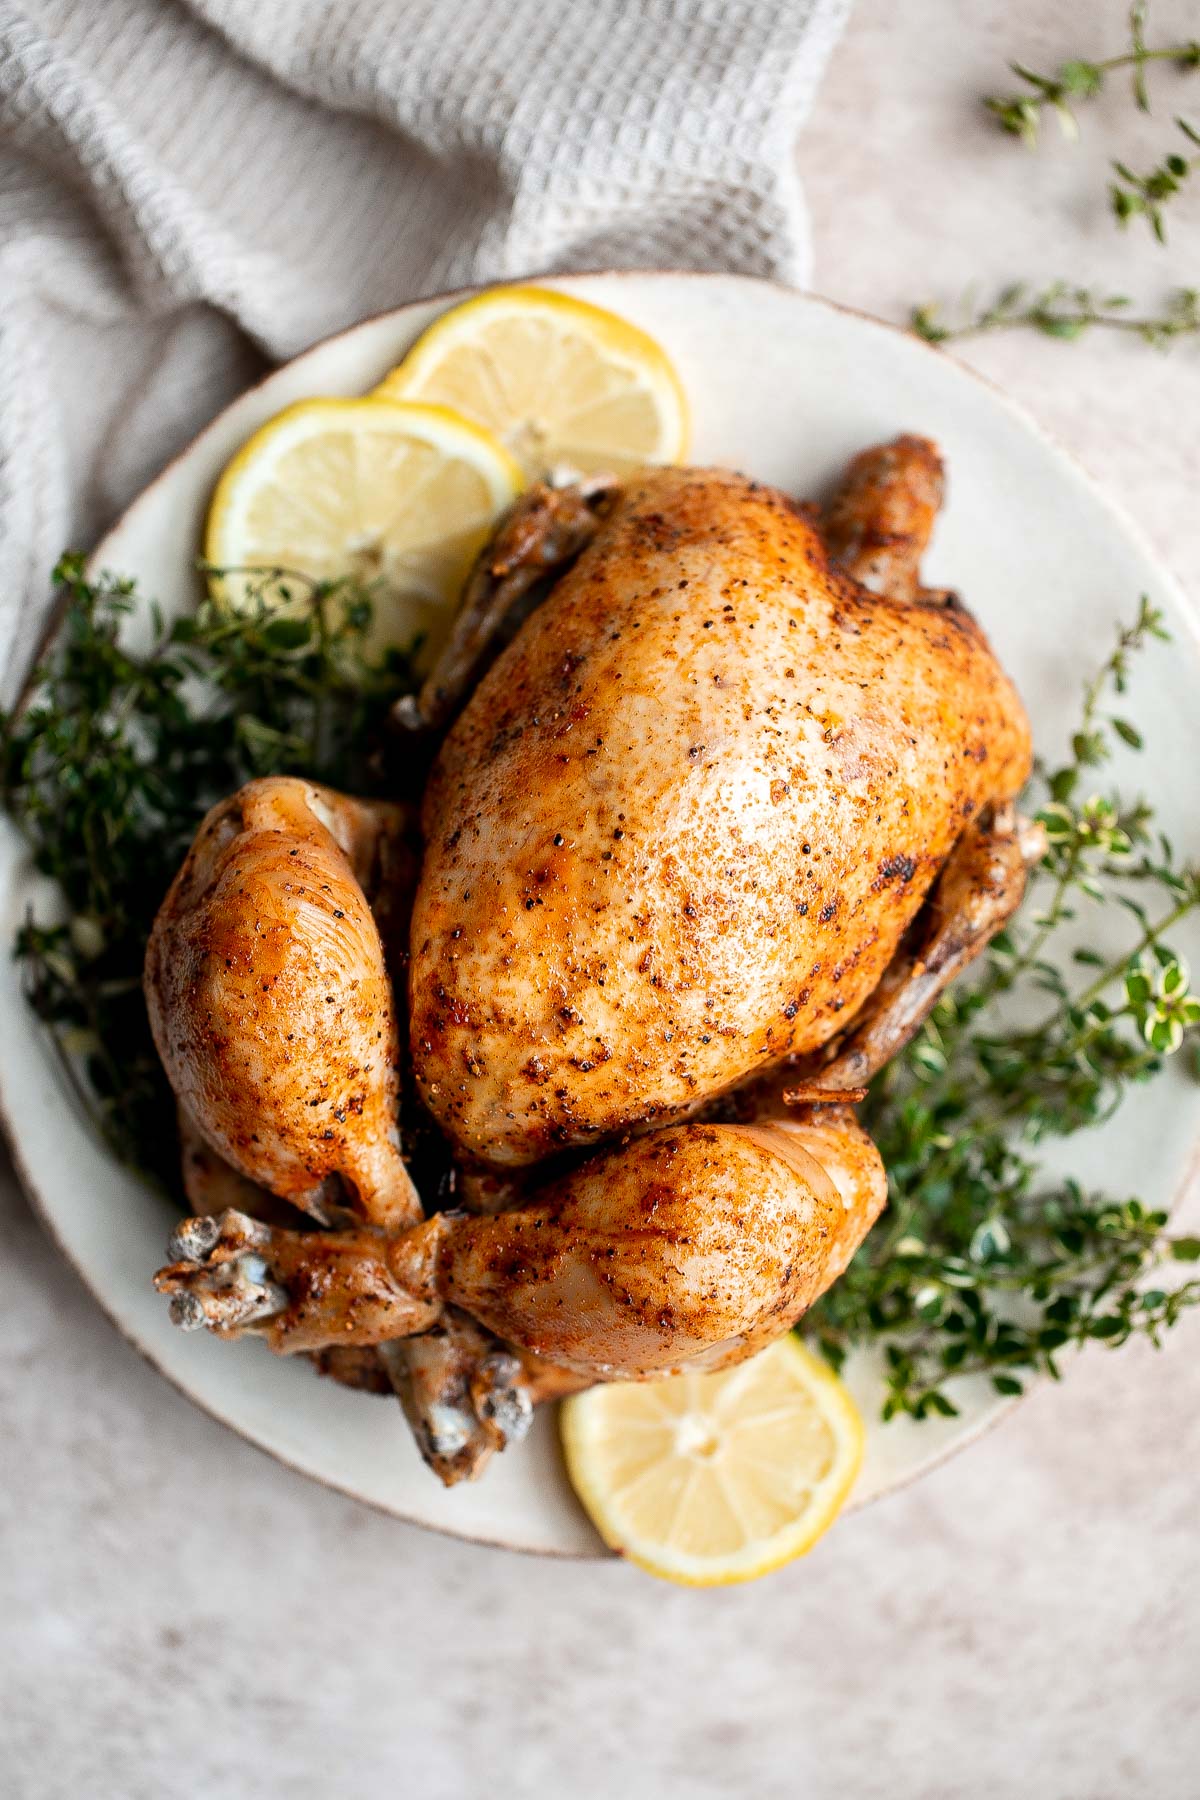
Roasted Spatchcock Chicken (Butterflied Chicken)
Quick and easy roasted spatchcock chicken (butterflied chicken) seasoned with garlic and thyme is juicy, tender, delicious and flavourful with minimal prep.
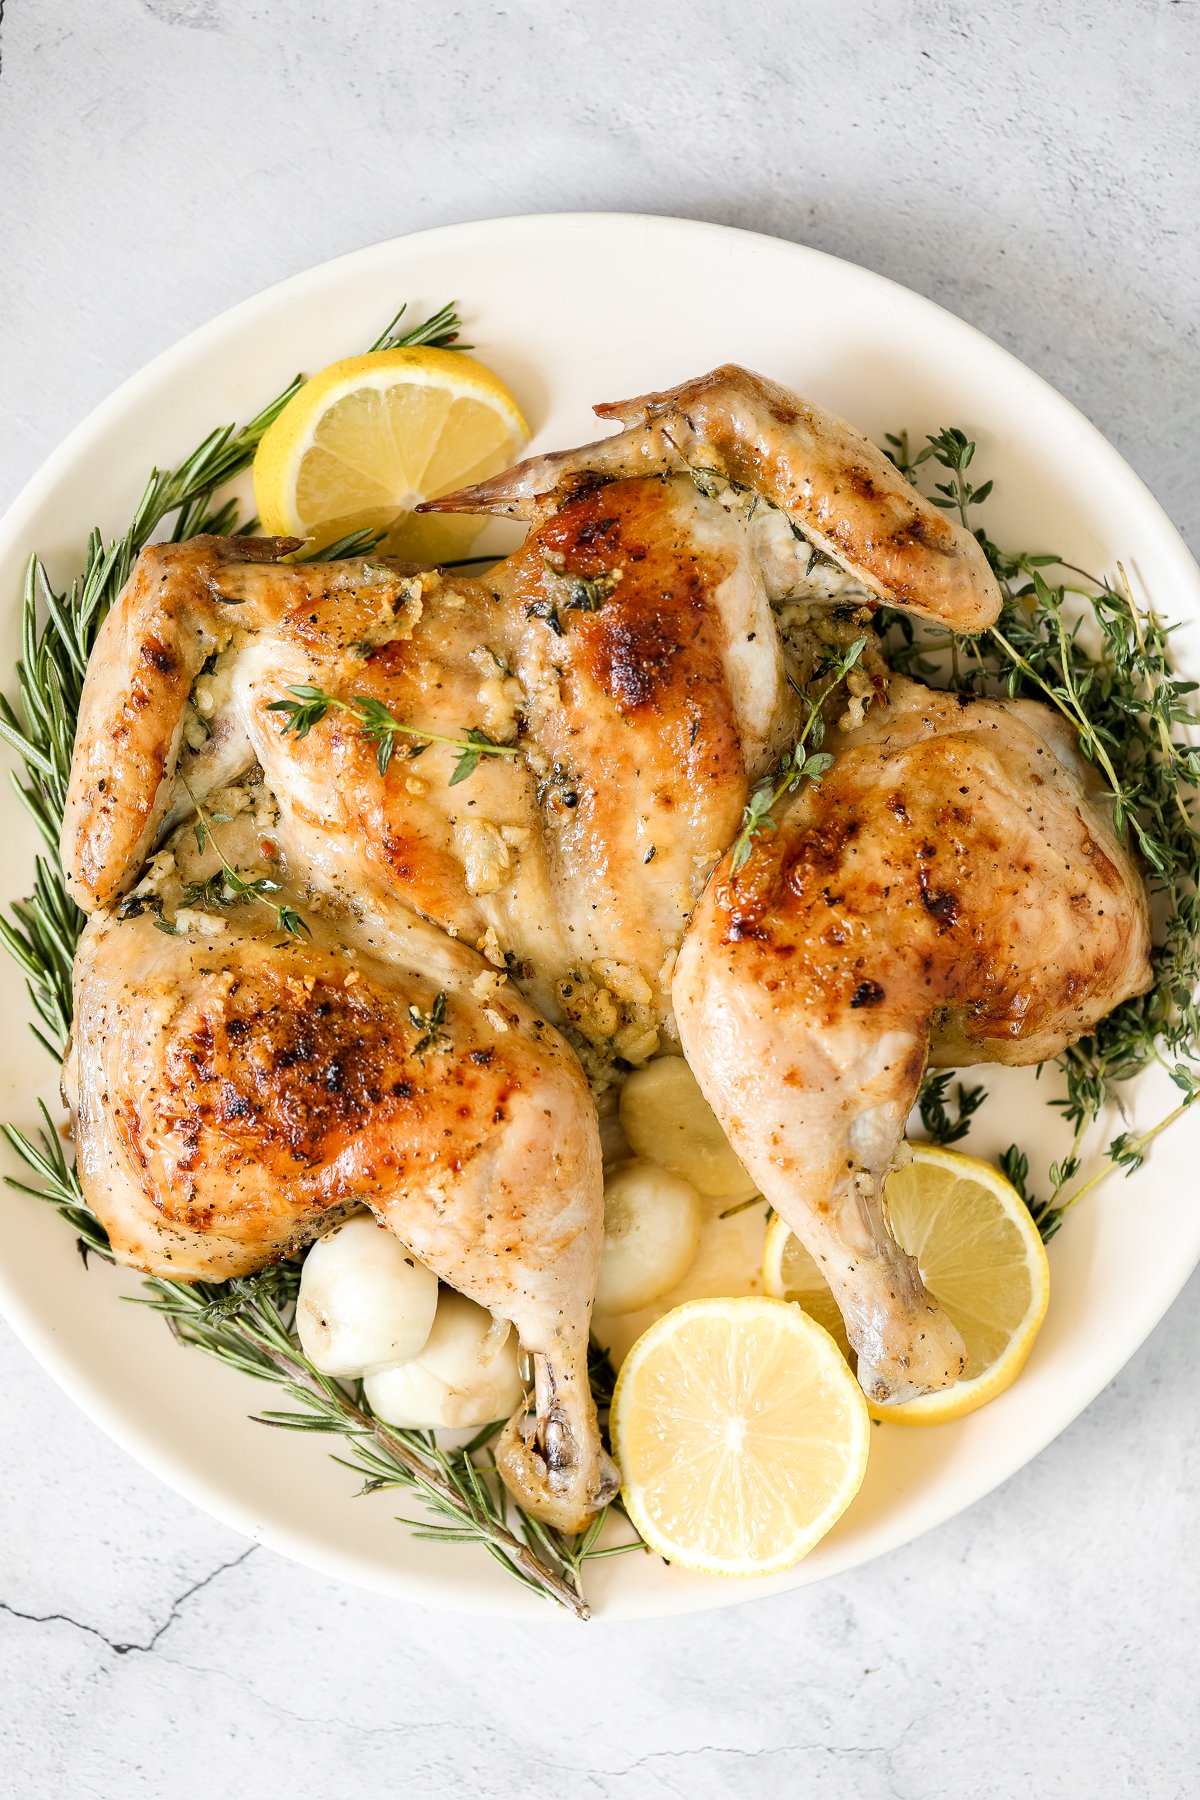
Pe
Pesto whole chicken baked over a bed of vegetables is the juiciest and most flavorful chicken you'll ever taste. Quick and easy to prep and pop in the oven.
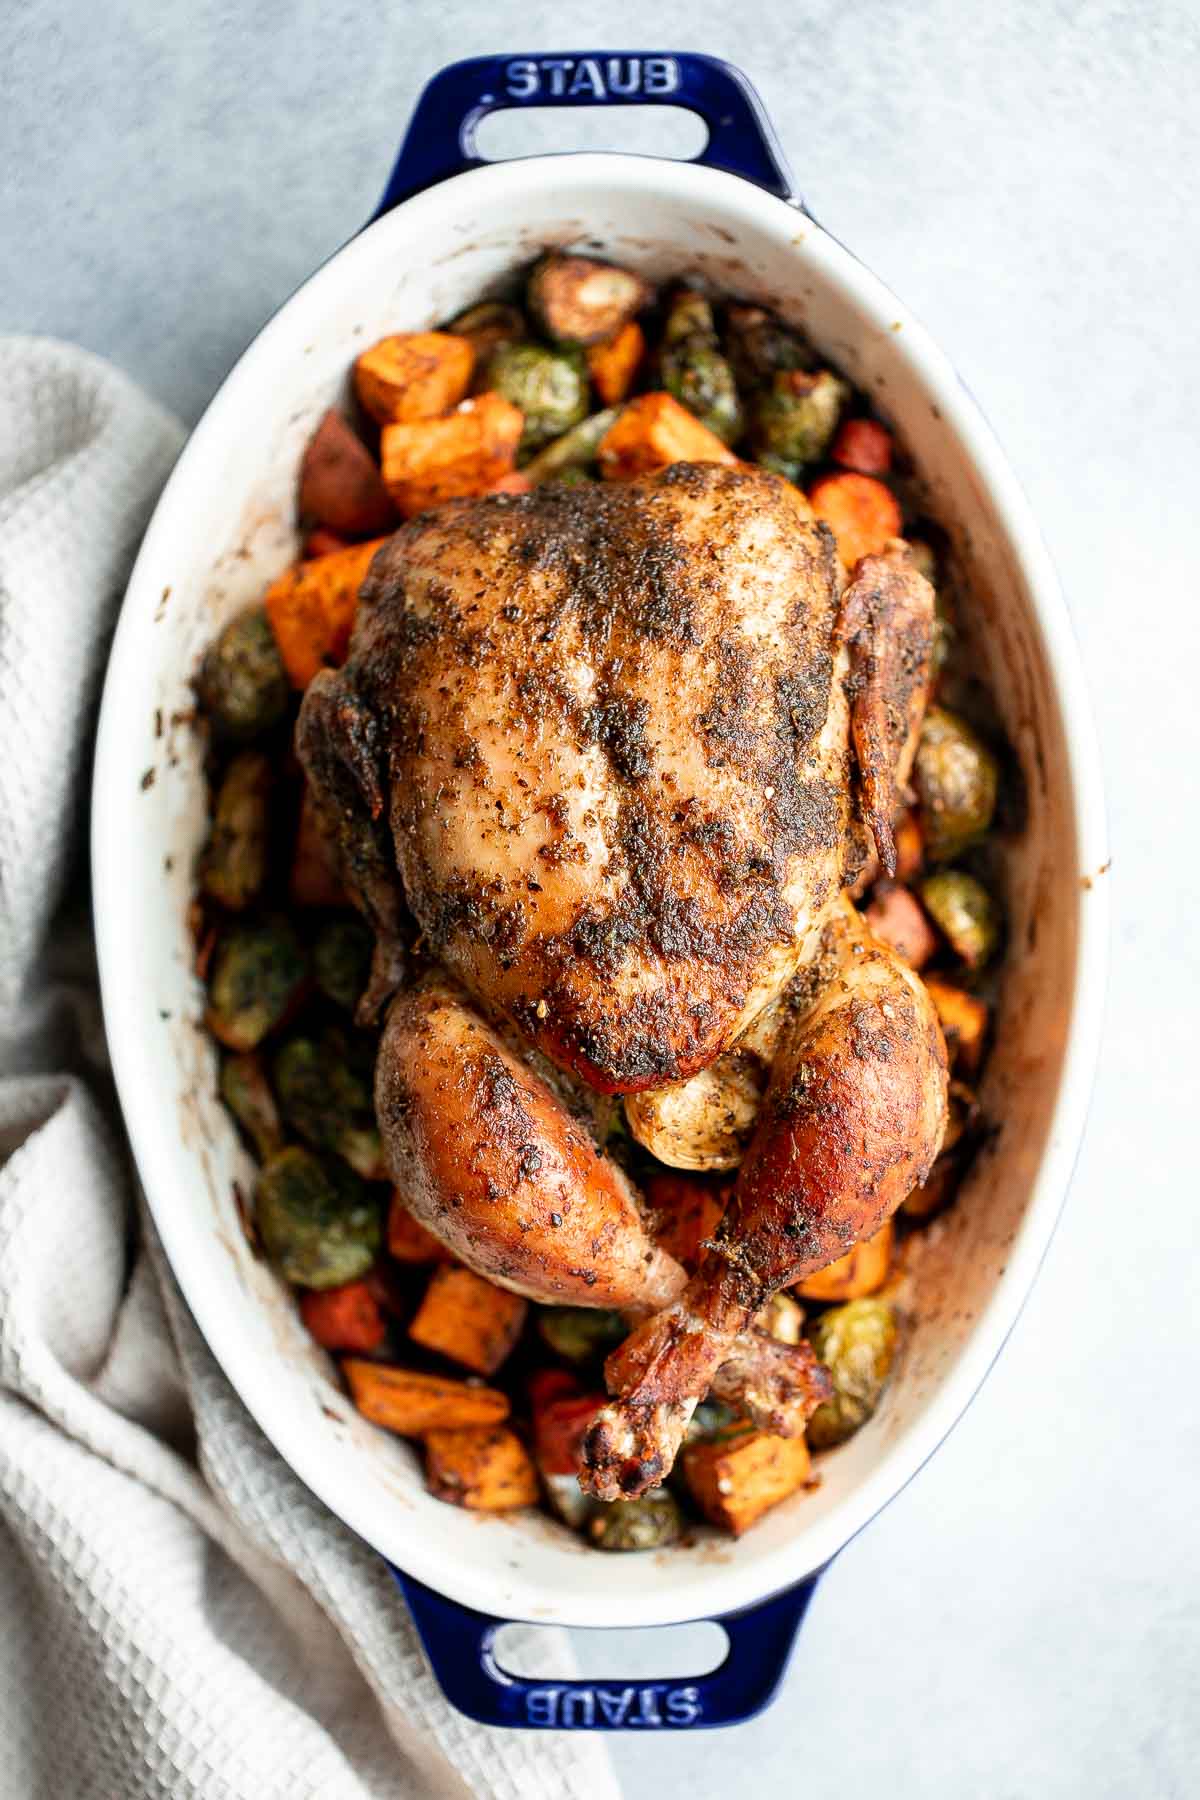
Greek Lemon Garlic Whole Roast Chicken
Easy Greek lemon garlic whole roast chicken is tender, juicy and succulent with the crispiest skin. Prep this flavourful one pan meal in just 15 minutes.
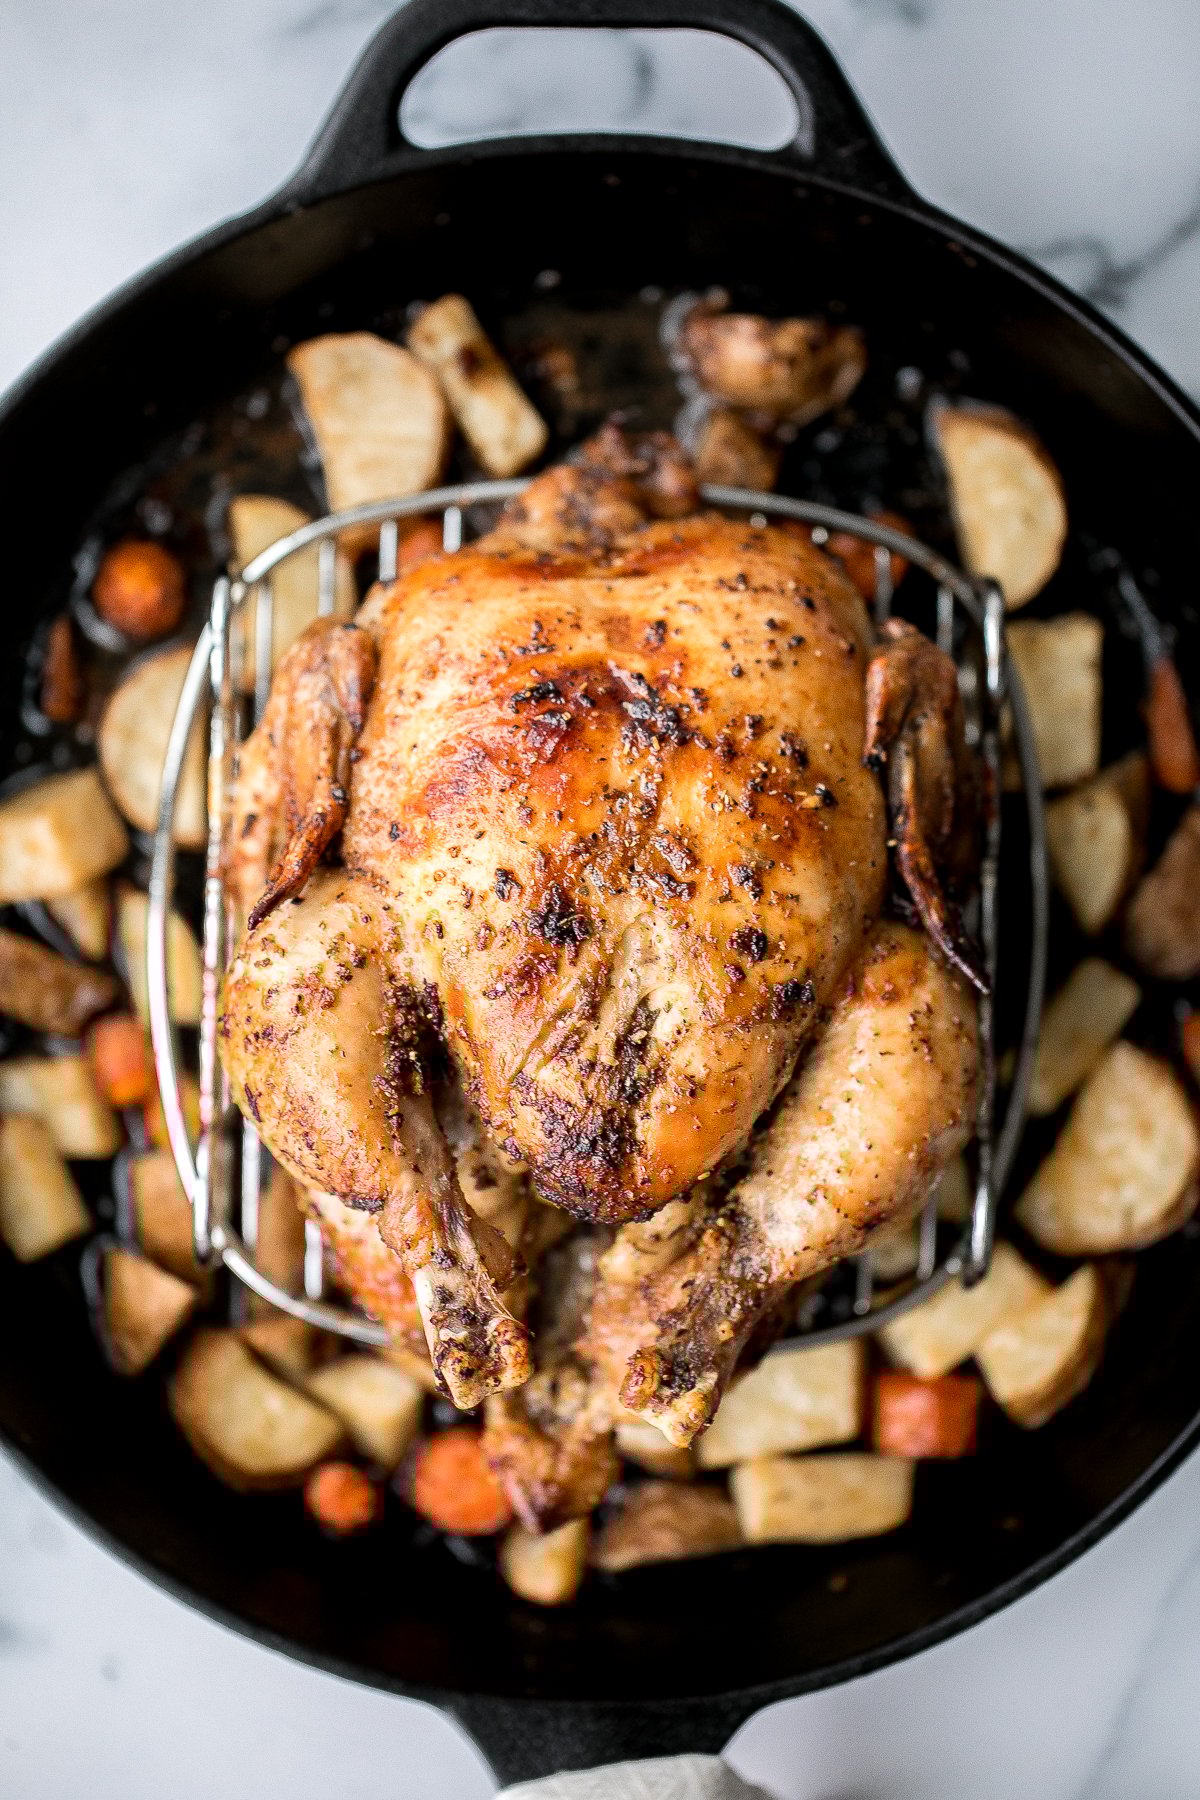
Harissa spatchcock chicken (butterflied chicken) is juicy and tender, has the crispiest skin, and is packed with flavor from red pepper harissa paste.
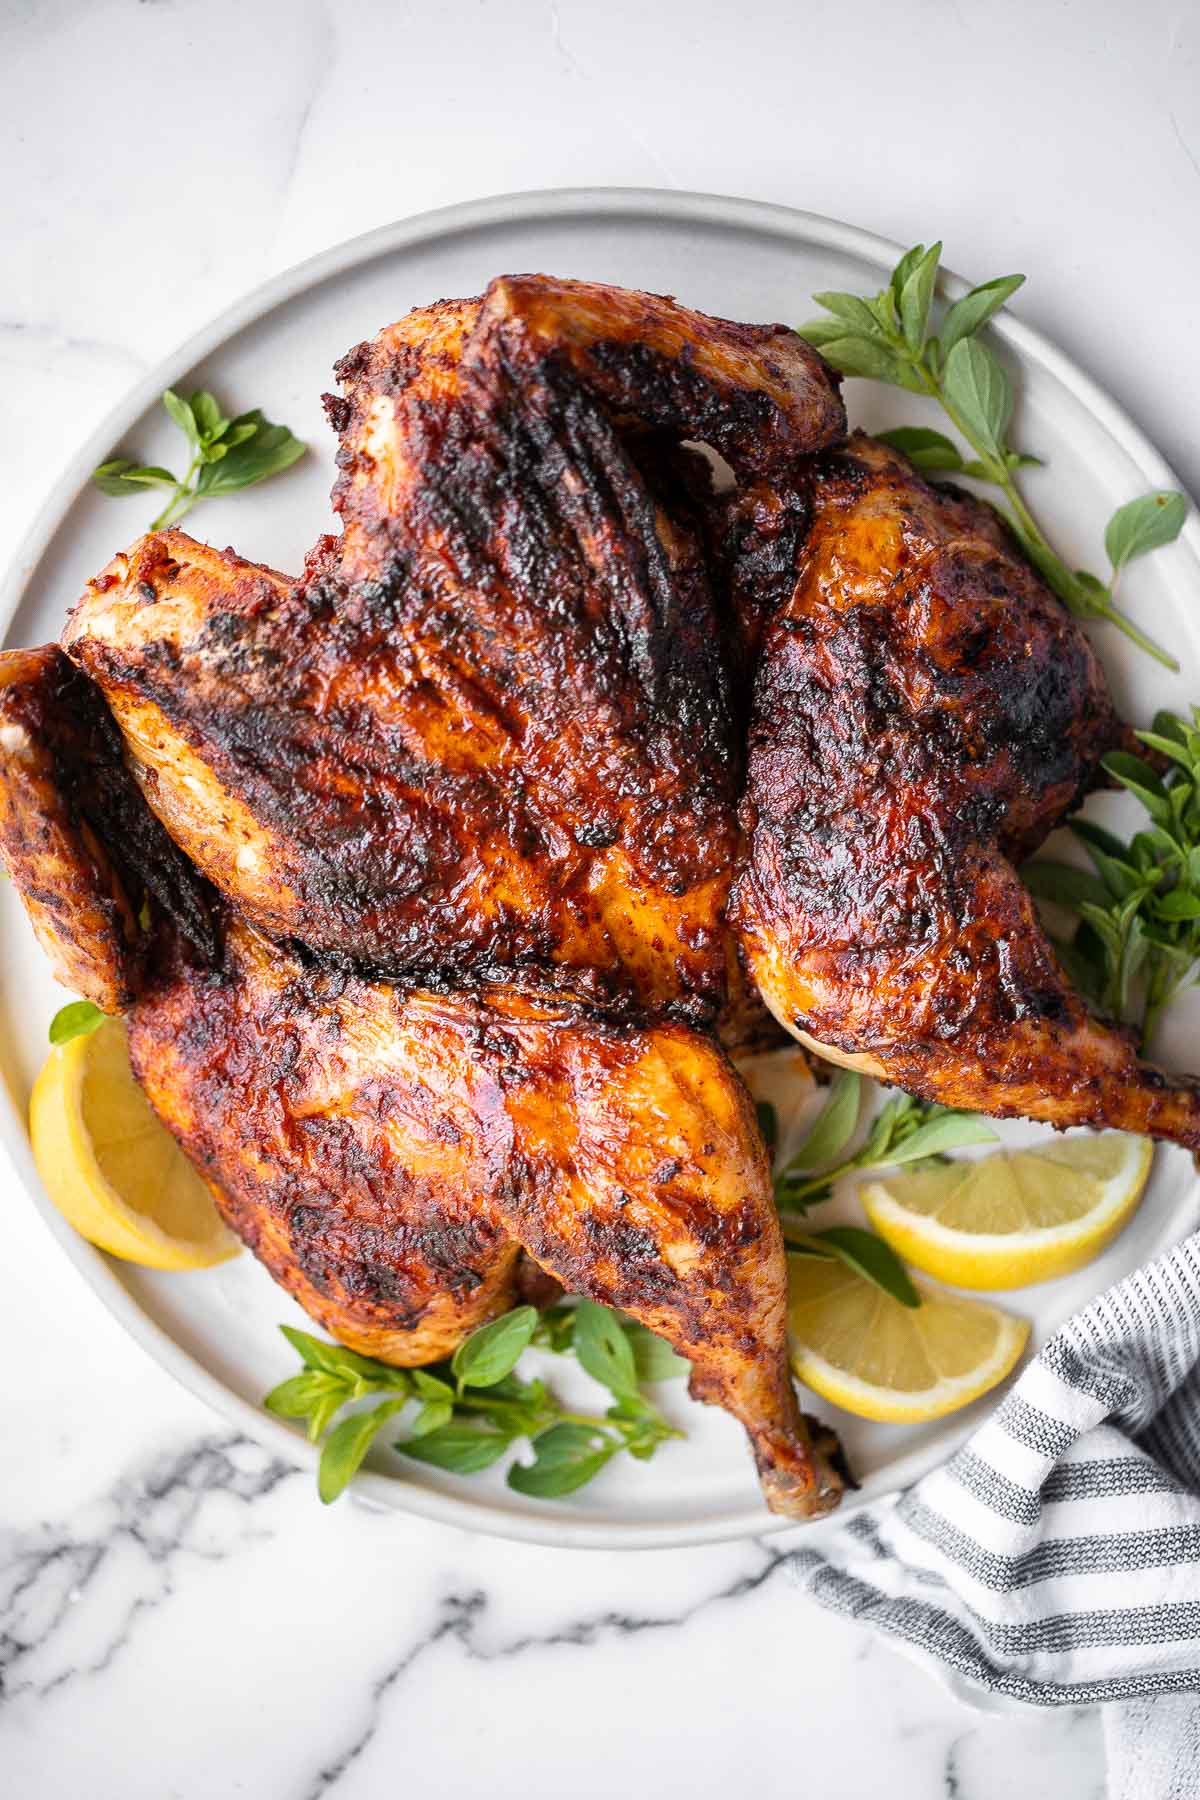
Slow cooker whole chicken is soft and tender and literally falls off the bone. It is the easiest way to cook a rotisserie chicken with a few minutes prep.
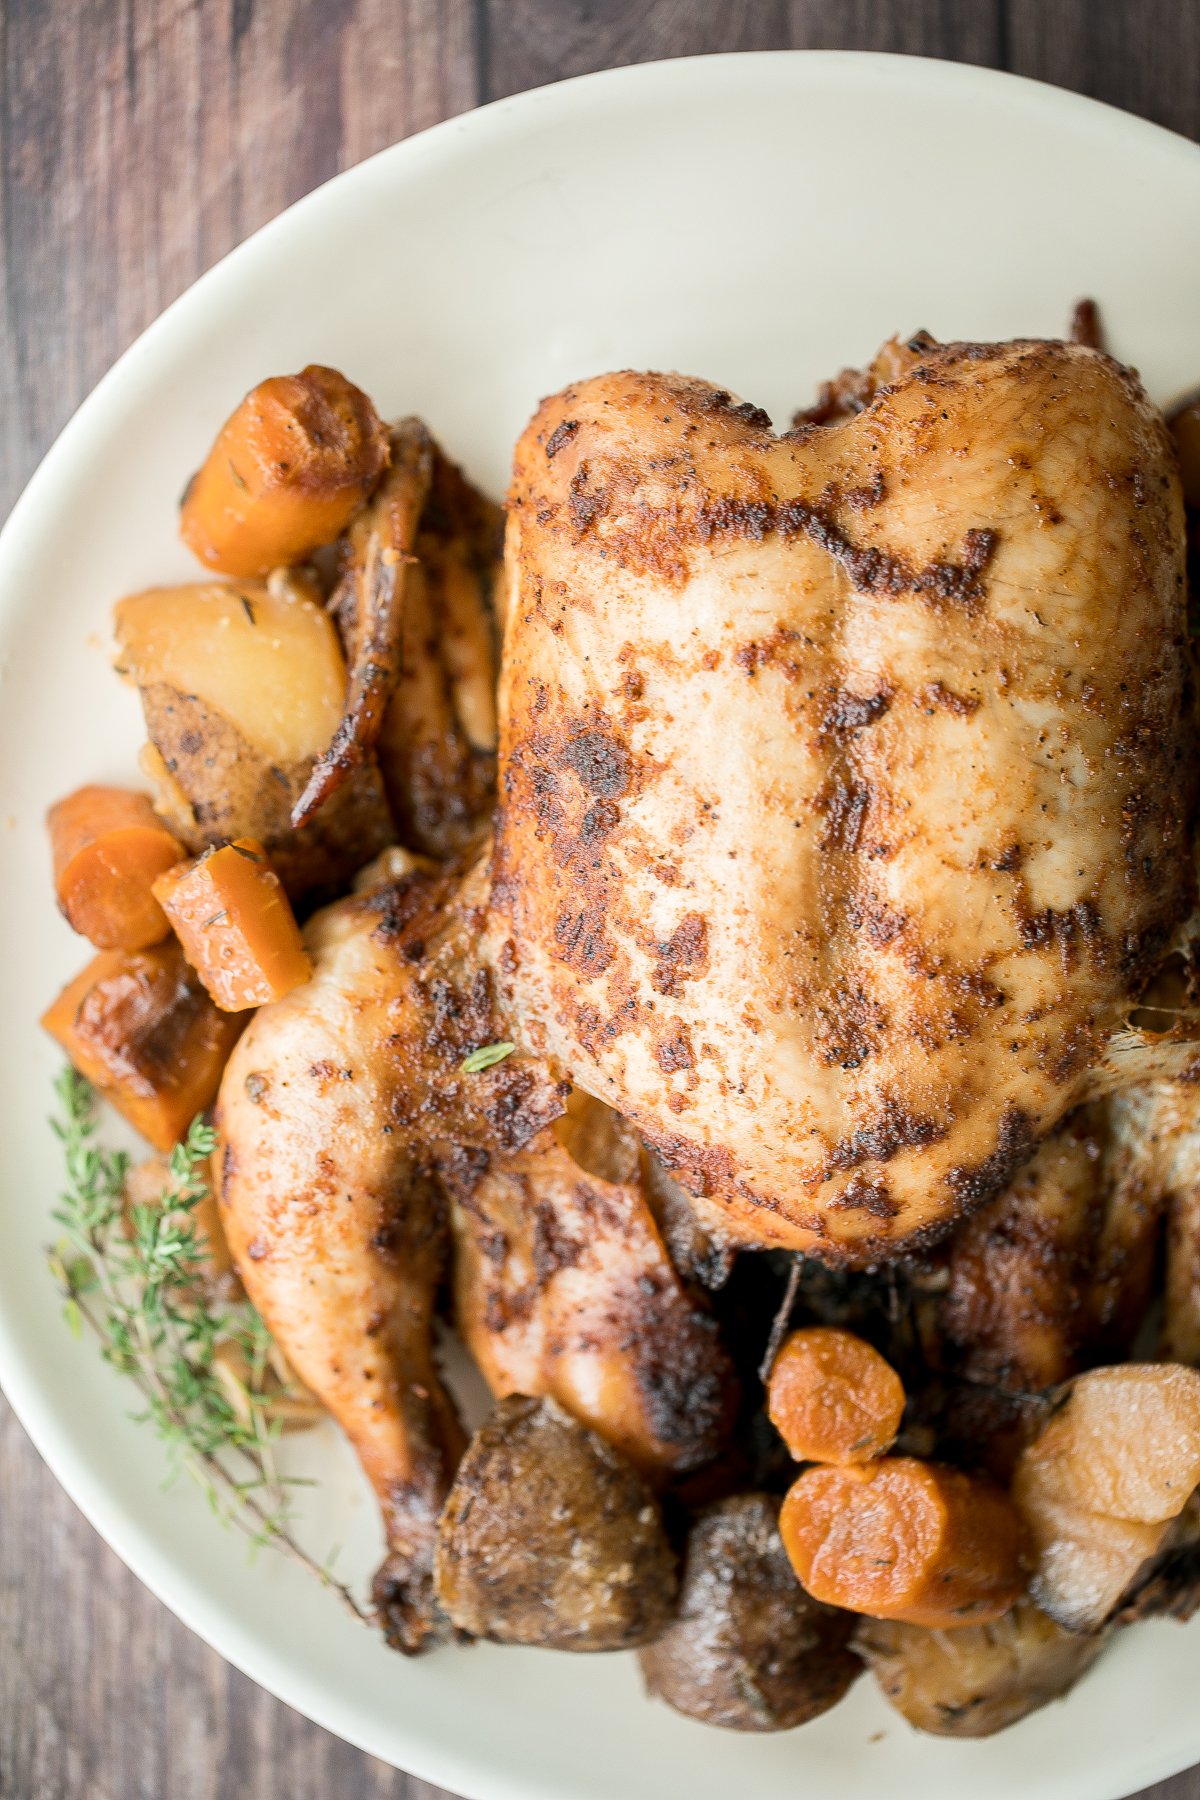
Storing Instructions
Store leftover chicken in an airtight container in the fridge for up to 3-4 days.
To reheat, preheat oven to 325F. Place chicken on a casserole dish or quarter sheet baking pan and cover the bottom with some chicken broth or water (to prevent burning of any drippings). Loosely wrap the chicken in aluminum foil which helps hot, humid air circulate around the chicken, resulting in evenly heated, juicy leftover chicken. Bake for 10-20 minutes, depending on the size of the chicken. You can also break it apart and reheat leftovers in the air fryer at 350F for 5-10 minutes until warmed through.
See individual recipes for full storage details.
What to Do with Leftover Chicken
You can reheat leftovers an enjoy this as is, or shred the meat and use in to make:
- soups such as Lemon Chicken Orzo Soup, Chicken Noodle Soup, or White Chicken Chili
- sandwiches and rolls such as Chicken Salad or Vietnamese Summer Rolls with Chicken
- salads such as Vietnamese Chicken Salad and Greek Chicken Salad
- stuff it in Chicken Enchiladas, White Chicken Lasagna, or Chicken Pot Pie
Browse all of our Shredded Chicken Recipes.
If you are planning to use leftovers in this way, I would recommend separating the meat from the bone before refrigerating. That way, it's easier to use when you want it.
More Chicken Recipes
- 60 Best Chicken Recipes
- 50 Chicken Breast Recipes
- 10 Best Chicken Wings
- 60+ Easy Dinner Ideas
- 40 Best Thanksgiving Main Dishes
Did You Make Any of These Whole Chicken Recipes?
Please leave a comment and rating below, and let me know what you thought of this round up of the best whole chicken recipes. Be sure to snap a picture and tag me on Instagram @aheadofthyme or share it on the Pinterest pin so that I can follow along.
HUNGRY FOR MORE? Don't forget to sign up for my email newsletter so that you don't miss any recipes. You can also follow along on Instagram and Pinterest for more recipe updates.
Baked Apples
Baked Apples are soft, warm, and tender, with a crunchy and sweet cinnamon oat filling. This cozy and comforting fall dessert is quick and easy to make with just 15 minutes of prep before it's ready for the oven.
You can serve these baked cinnamon apples whole or halved, all by themselves or alongside a touch of ice cream and caramel sauce. The possibilities are endless when it comes to these baked apples with oats - and your family will love every single one.
Why You'll Love These Baked Apples
- It's the perfect fall dessert. Warm, cinnamon-spiced apples with a crumbly, brown sugar and oat filling are ideal for cool autumn days. Your family and friends will be delighted by this recipe every time you make it!
- They're fast and easy to make. The prep work for these baked apples with oats takes only 15 minutes! A little bit of mixing and careful apple coring will get cinnamon apples in the oven after a few minutes and you can clean up or focus on the next task while they're baking!
- A single serve dessert. Every bite of this recipe will remind you of a classic Apple Crisp or a crustless Apple Pie. It has all the same flavors but with less effort and is presented in a unique, Pinterest-worthy single serving. Plus, it's easier to serve when the portions are already set out.
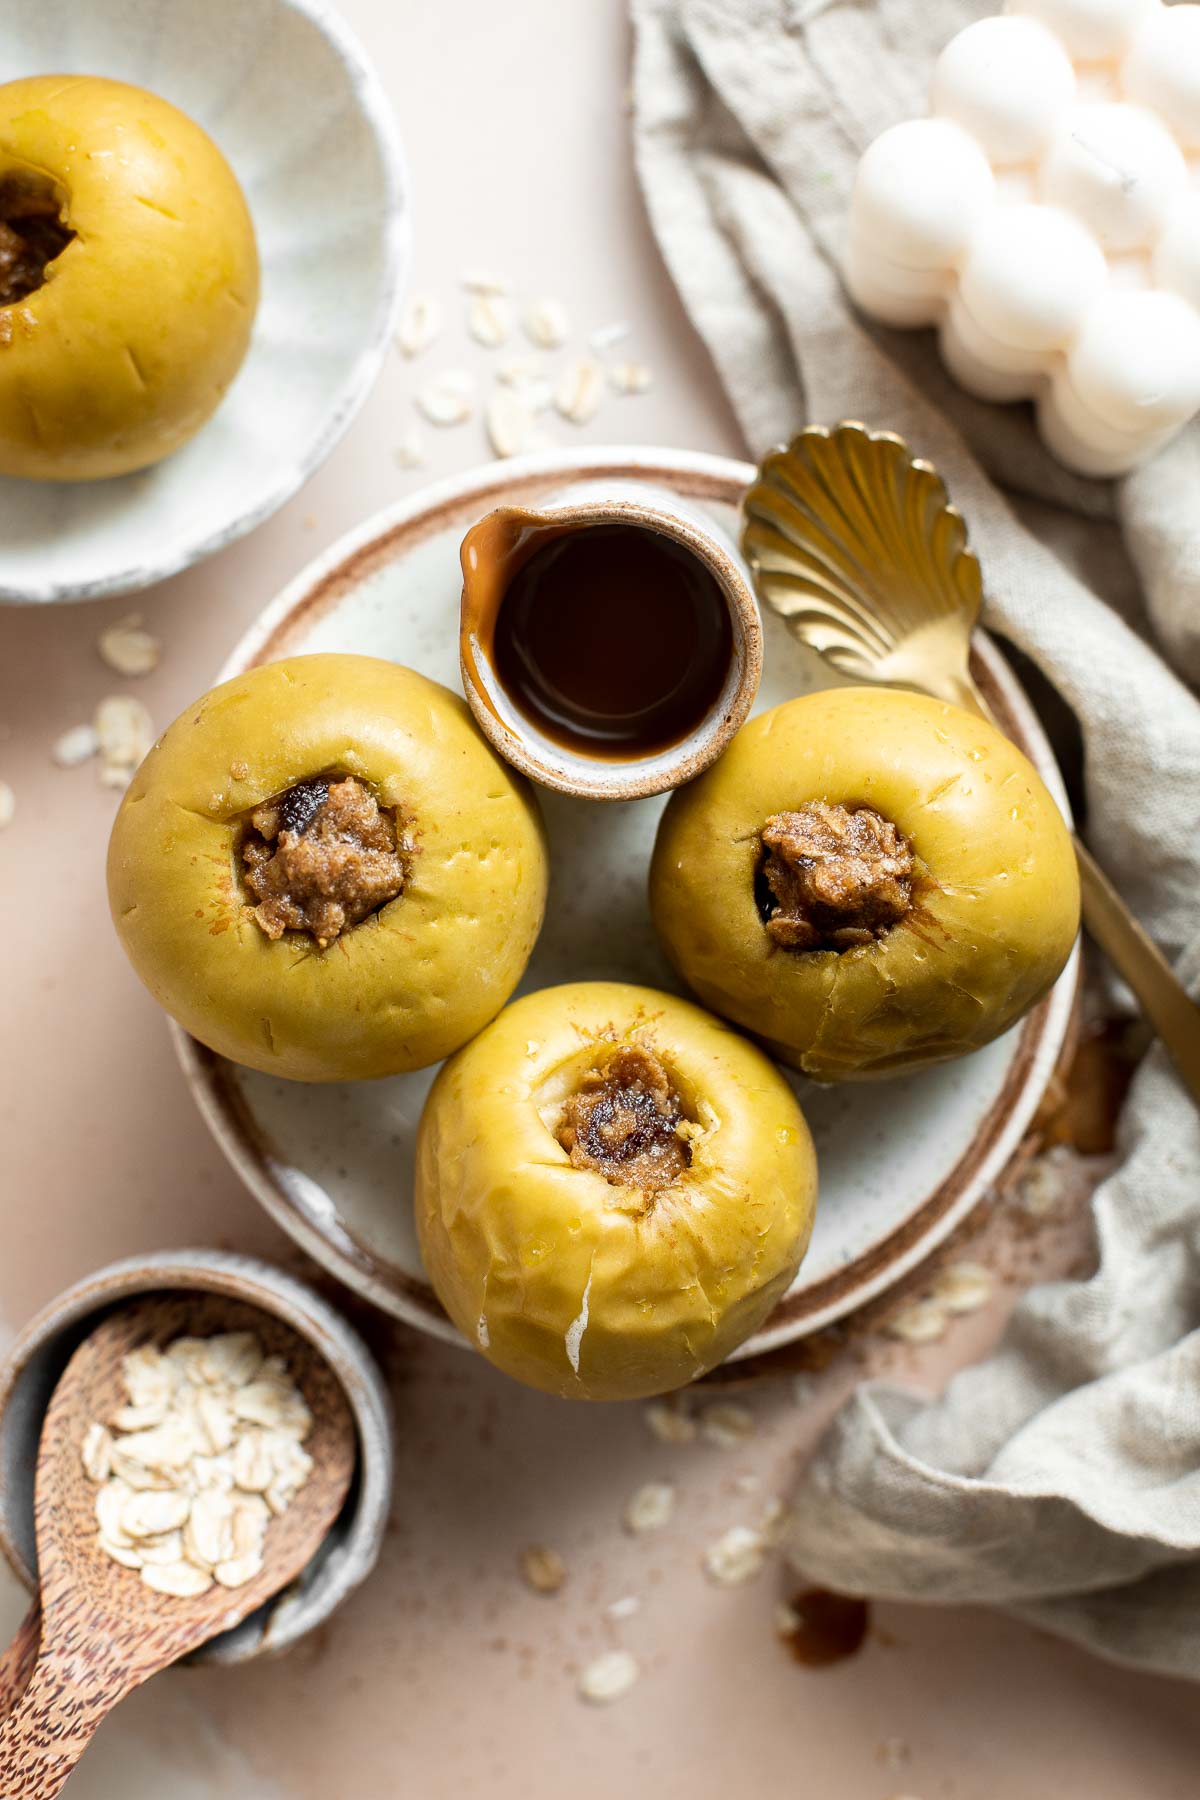
Ingredient Notes
To make these Cinnamon Baked Apples, you will need the following ingredients (full measurements in recipe card below):
- apples - choosing the right kind of apple is crucial to getting these baked apples just right. You want to choose a type that is firm enough that it won't become mush and fall when baked. Several varieties of apple that are great for baking whole, like Honeycrisp, Rome, Pink Lady, or Granny Smith. You want to choose apples that stand upright easily. Look for ones that are perfectly round (not too tall or oblong so they can easily support themselves).
- butter - for a vegan alternative, you can substitute butter for equal amounts of a vegan butter alternative.
- brown sugar - brown sugar is a key ingredient in these baked apples, but you can substitute it for coconut sugar, dark maple syrup, or a sugar-free brown sugar alternative to suit your preferences.
- ground cinnamon
- rolled oats - make sure you are using rolled oats and not quick oats. Rolled oats are whole oats whereas quick oats have been processed into smaller pieces to make them quick faster. You could technically use quick oats but the texture will be off.
- pecans - pecans add the perfect amount of crunch to these baked apples. You can omit them if you prefer or try walnuts in their place.
- raisins or cranberries - this baked apple recipe calls for (optional) raisins or cranberries - but you're not limited to those two choices! You can experiment with different types of dried fruit like golden berries, cherries, dates, figs, and more. Just make sure to cut them into small, raisin-size pieces before adding them.
- warm apple cider (or water) - we love using our homemade Slow Cooker Apple Cider here, but store-bought is great too. Using apple cider on the bottom of the dish adds even more apple flavor to this dessert, but using water instead works well too.
You will also need measuring cups and spoons, apple corer or paring knife, hand mixer, and 8-inch square baking pan.
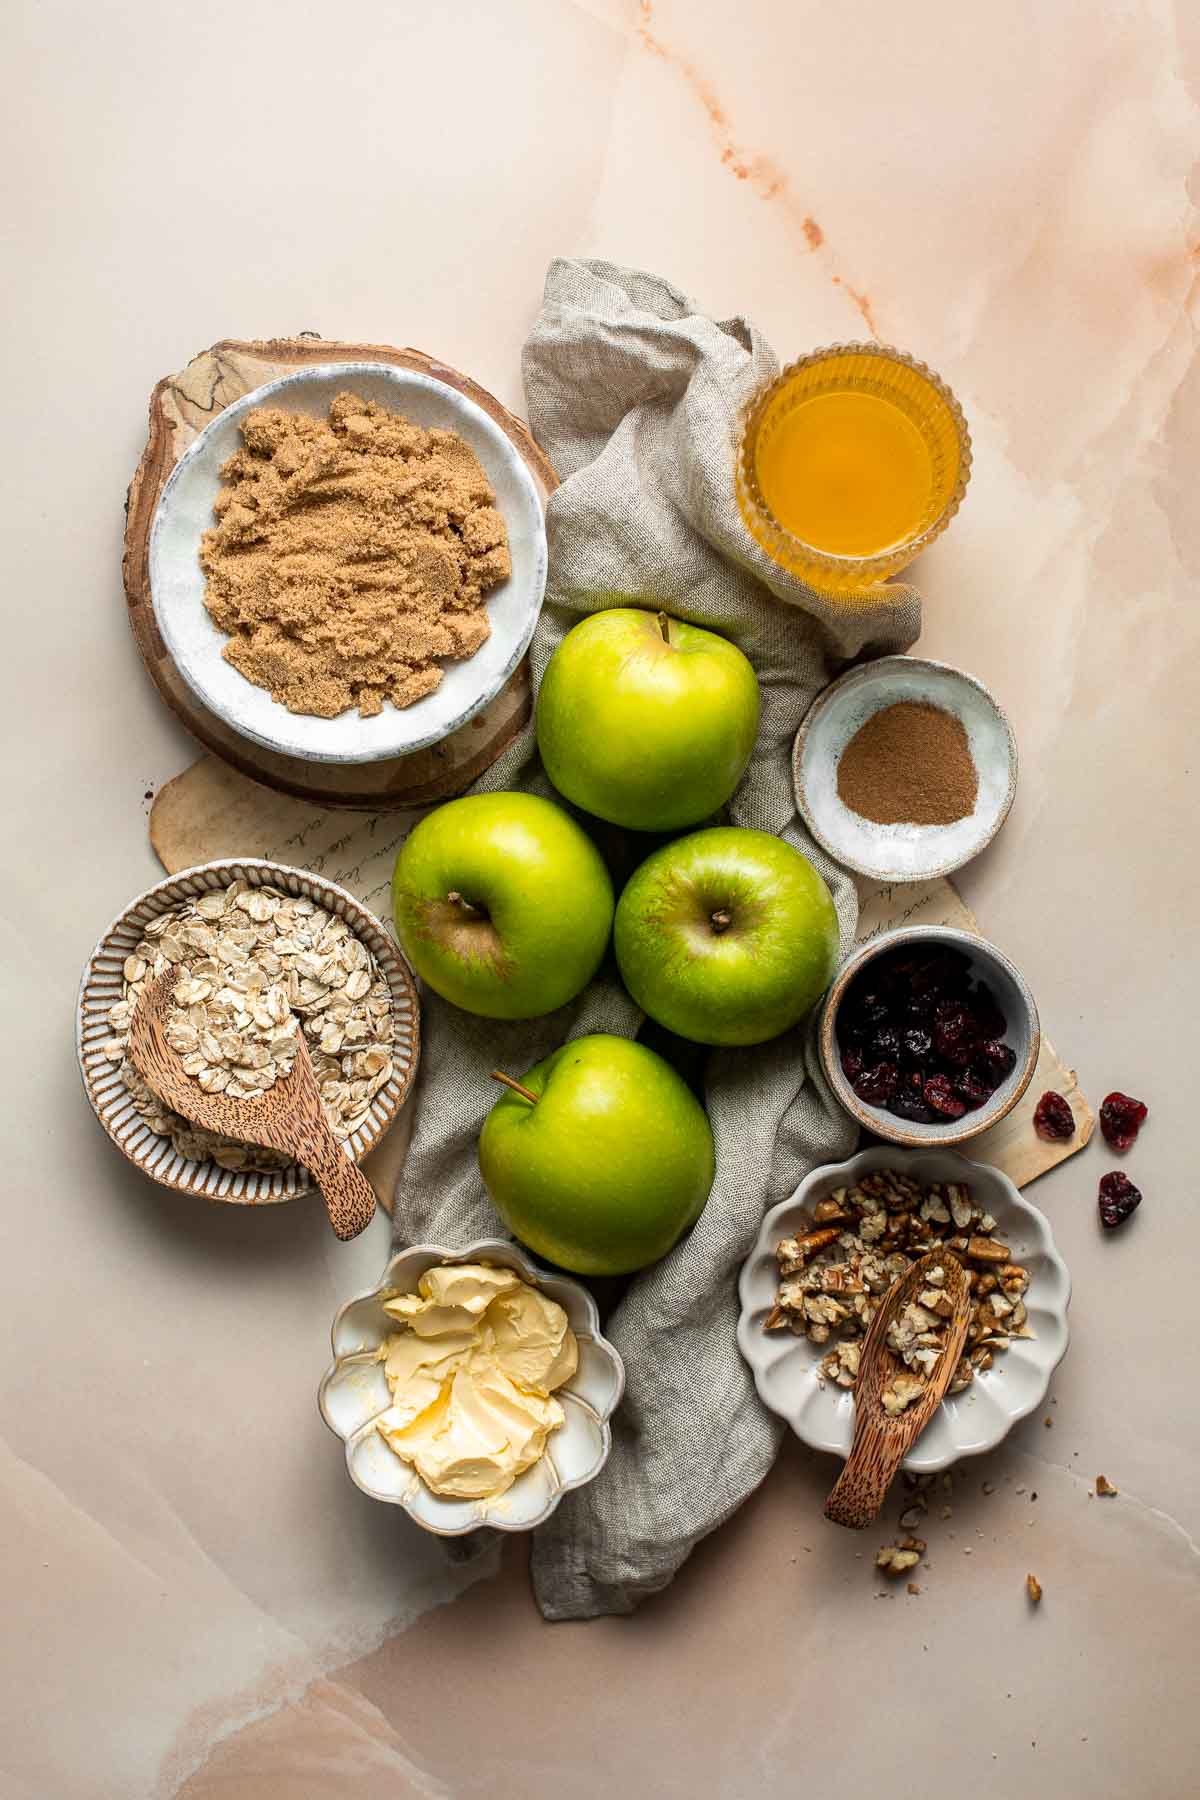
How to Make the Best Baked Apples
- Core the apples. Use a sharp paring knife or an apple corer to cut out the apple cores, about ¾ down into the apple (leaving ½ inch from the bottom intact). Then, use a small metal spoon to dig out the core and remove any seeds. Use a small knife to score them a little across the entire surface with a knife (this will help the apples from splitting in the oven when baked). Transfer the cored apples to an 8-inch square baking pan, standing upright.
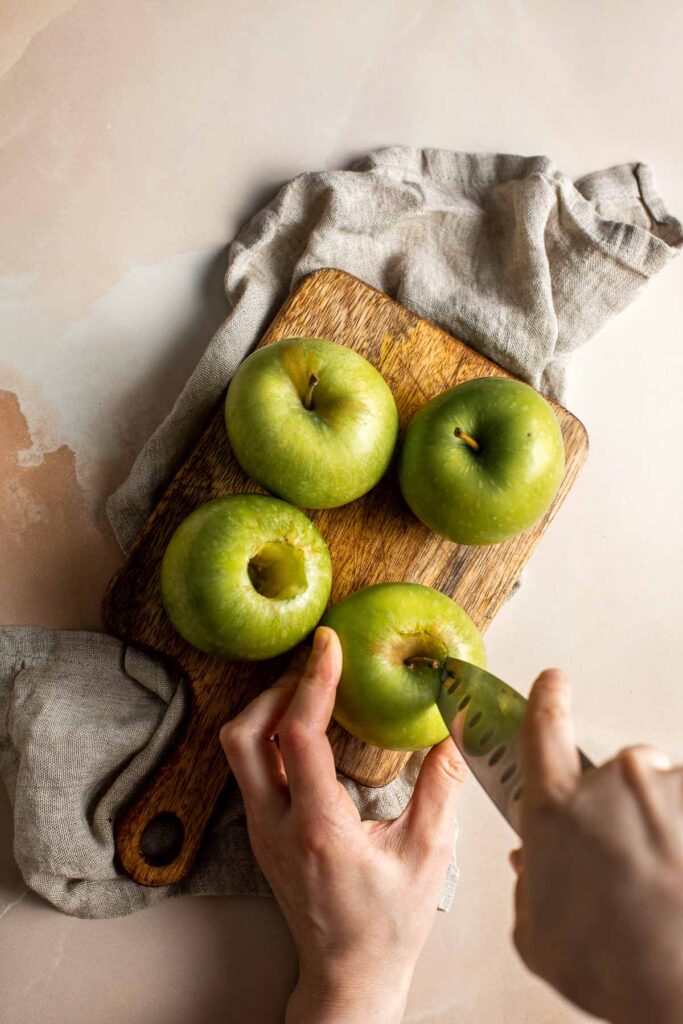
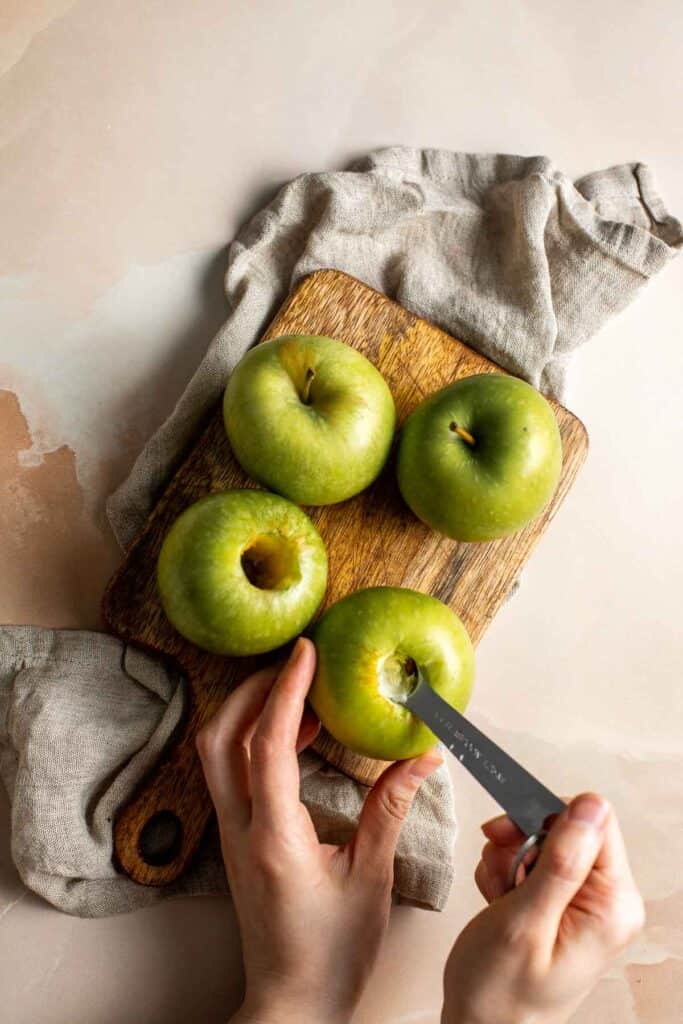
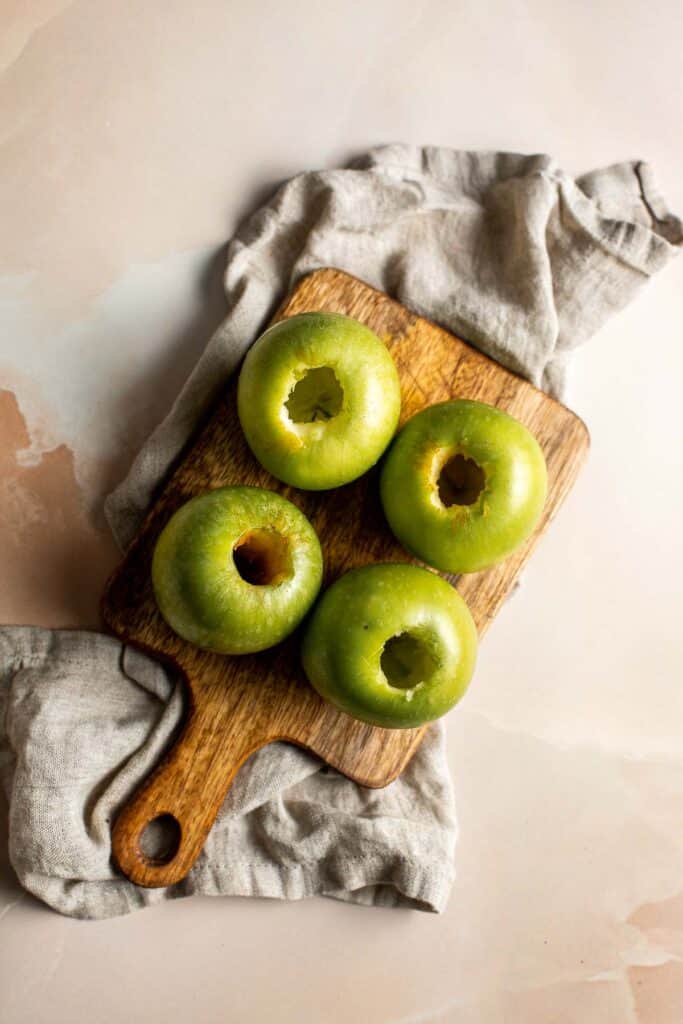
- Make filling. In a medium mixing bowl, combine butter, sugar, and cinnamon together using a hand mixer. Add oats, pecans, and raisins (if using) and stir together until incorporated.
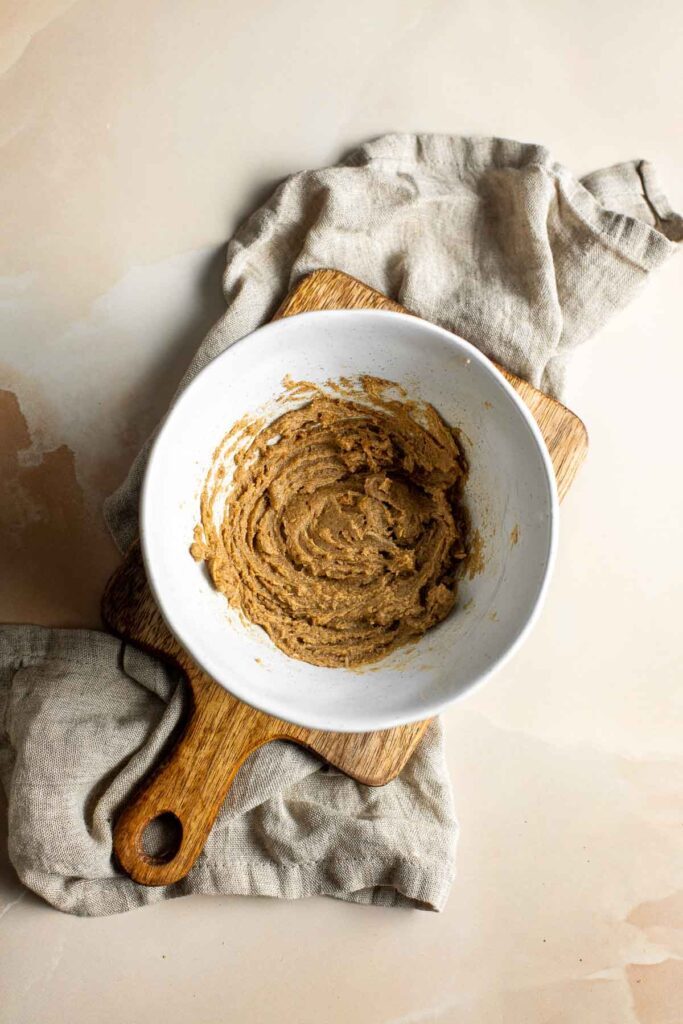
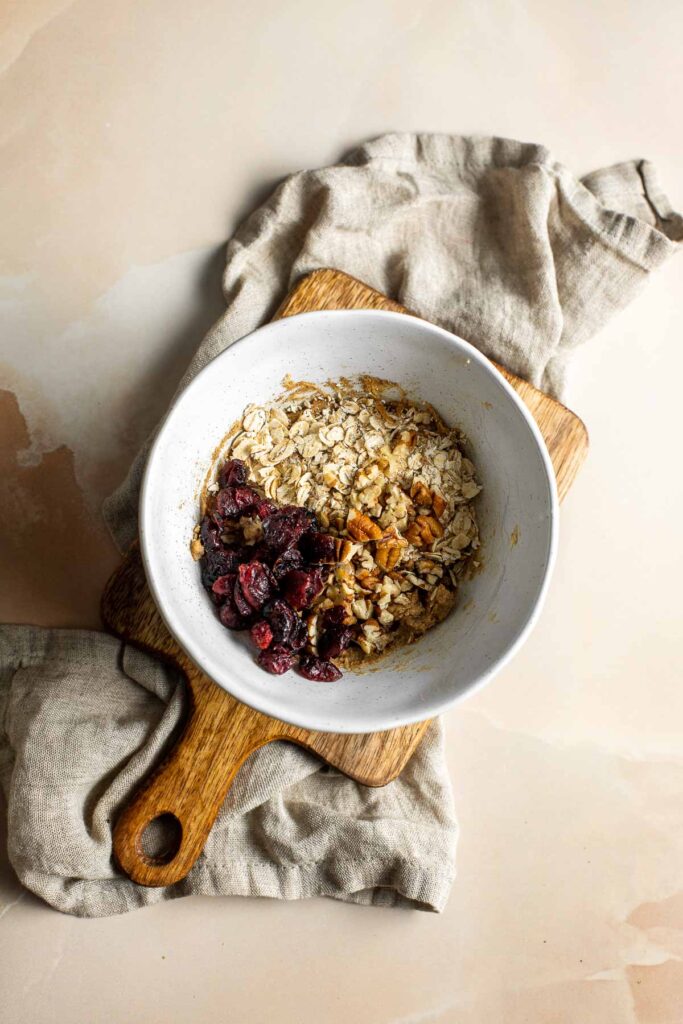
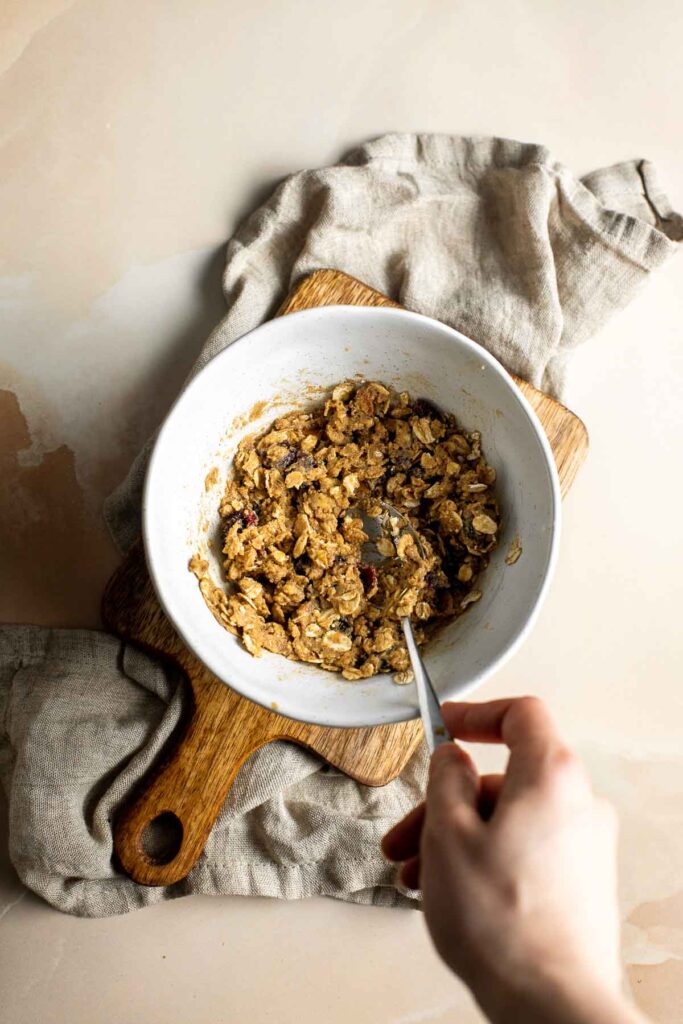
- Stuff the apples. Use a spoon to stuff each apple with the oat mixture, filling it all the way to the top. Pour warm apple cider (or water) into the bottom of the baking pan (to prevent the apples from burning).
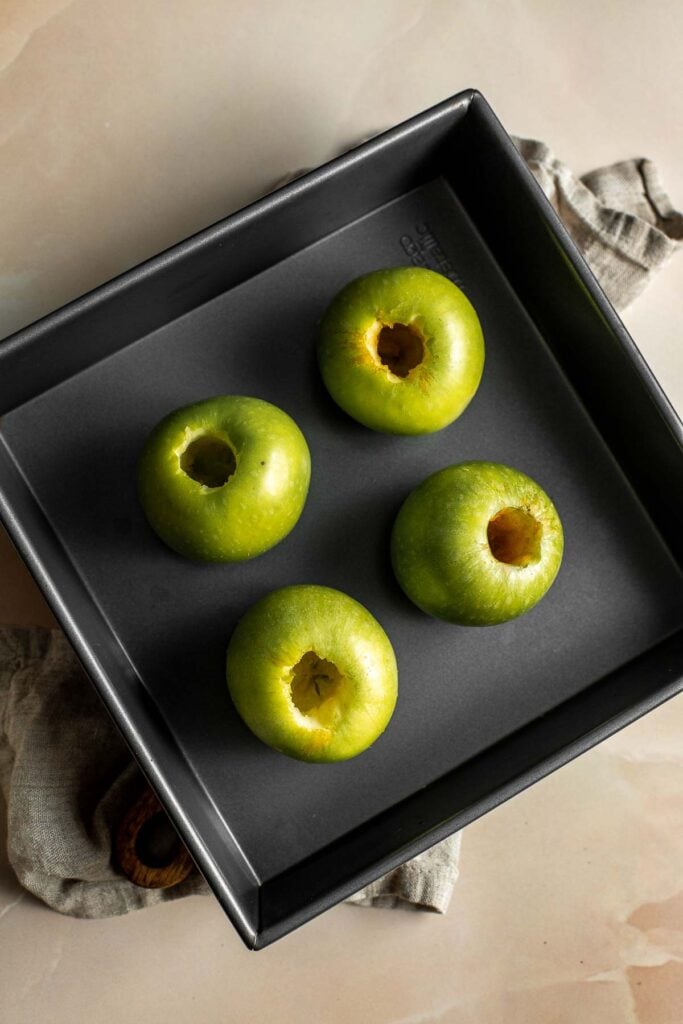
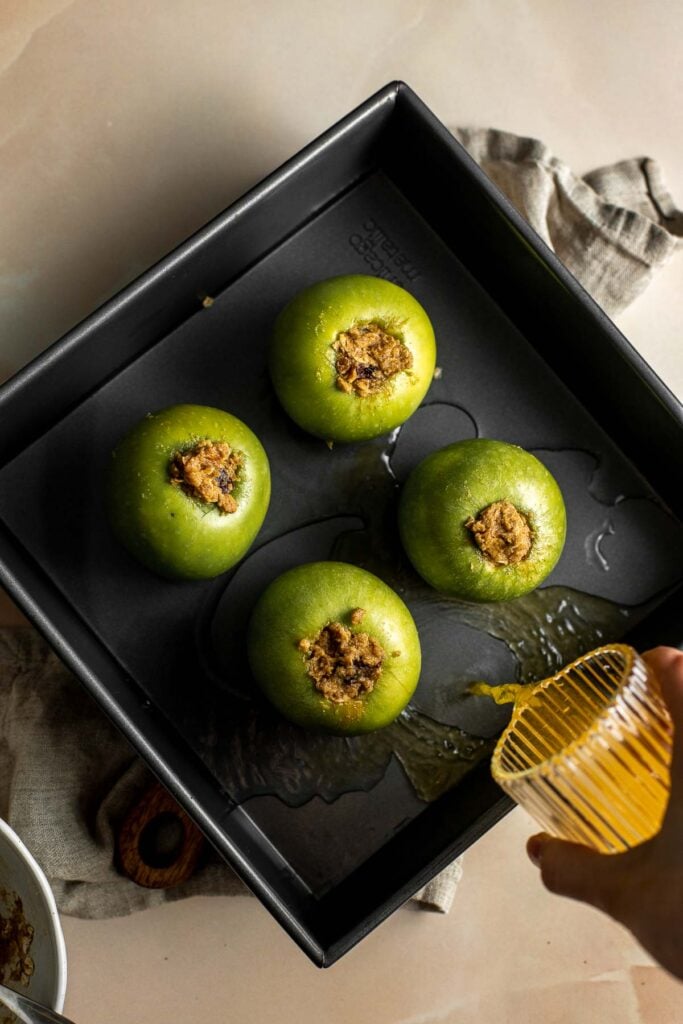
- Bake. Bake in a 375°F preheated oven for 35-45 minutes or until the apples are cooked through and slightly soft, but not mushy. Serve whole or slice in half and serve.
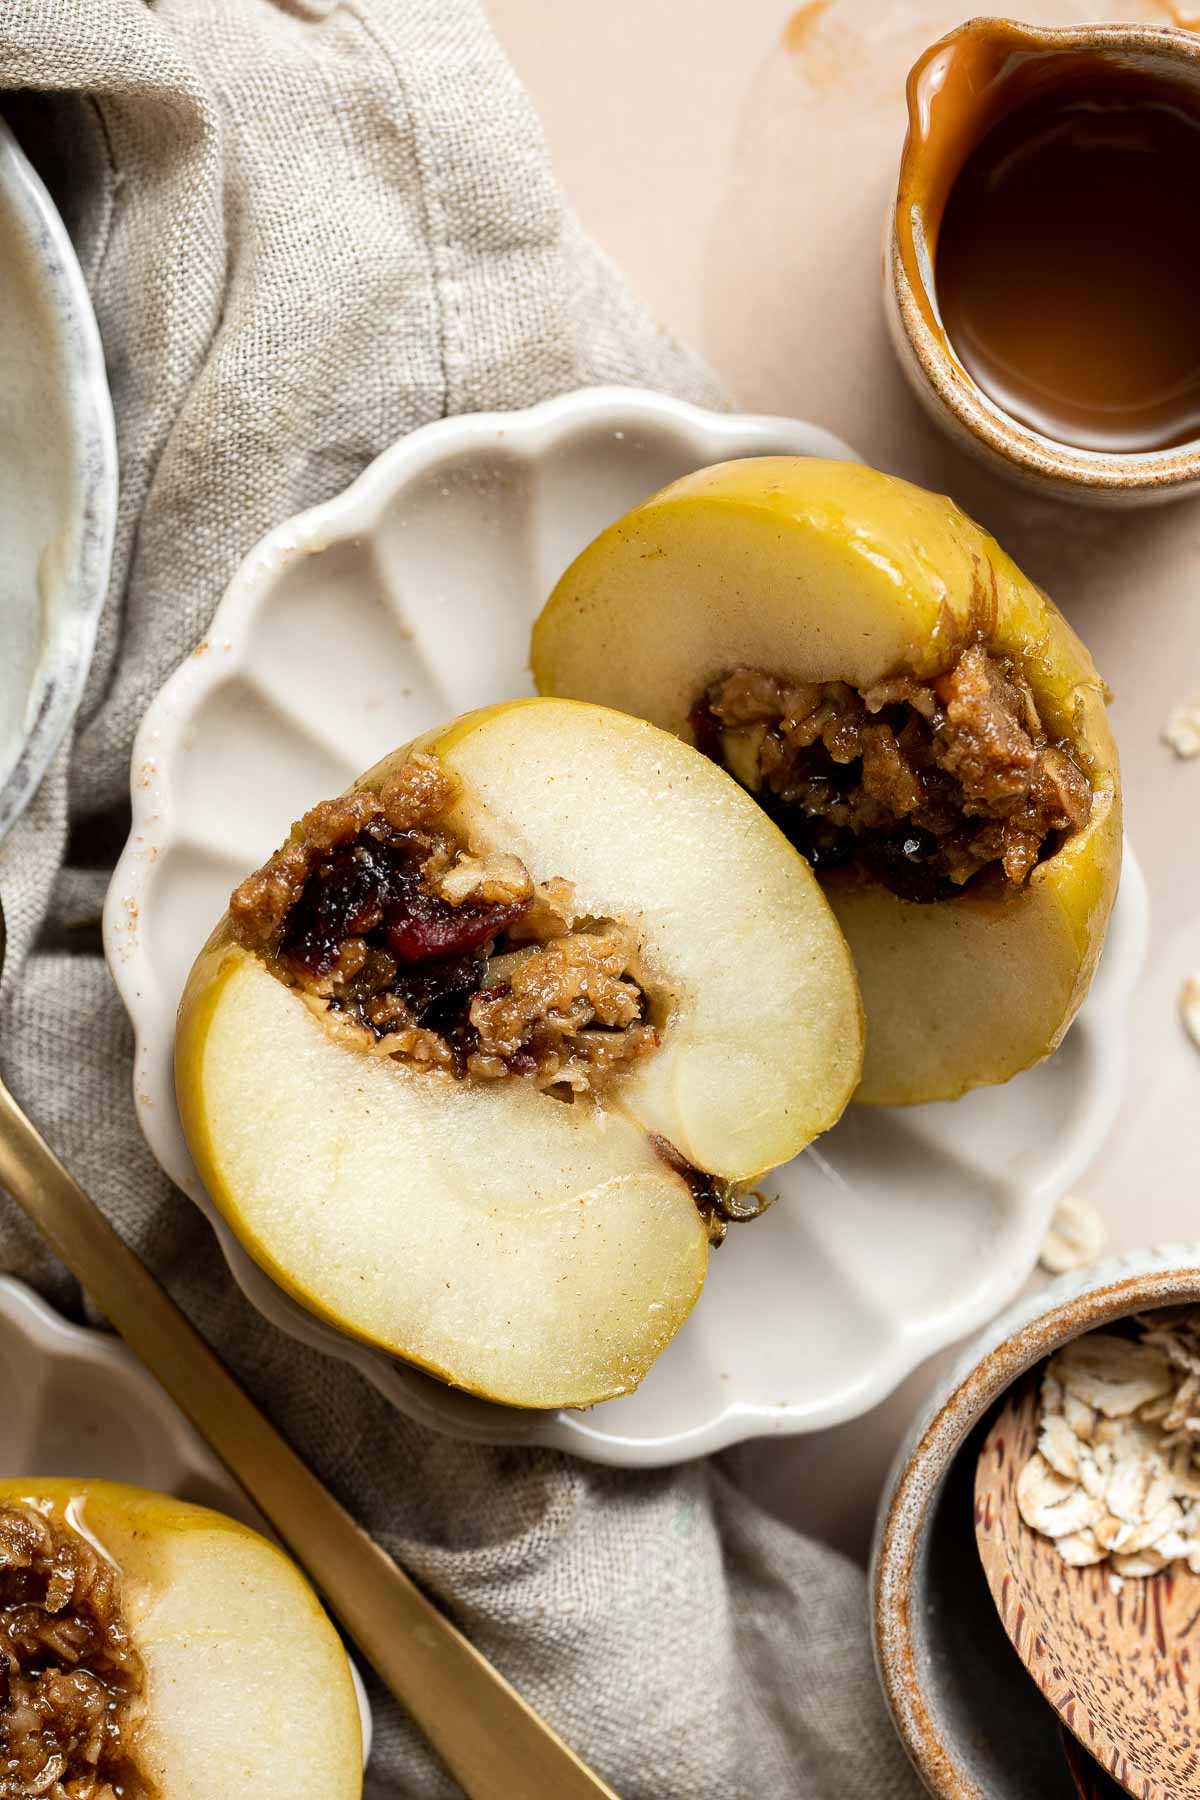
How to Serve
Serve Baked Apples warm out of the oven on their own, or pair with a scoop of Vanilla Ice Cream and a drizzle of Salted Caramel Sauce.
If serving as part of a fall dessert spread, you can also serve these fall favorites:
- Pecan Pie Bars
- Mascarpone Pumpkin Pie
- Butternut Squash Bread
- Caramel Pecan Pie Cheesecake Bars
- Pumpkin Mousse
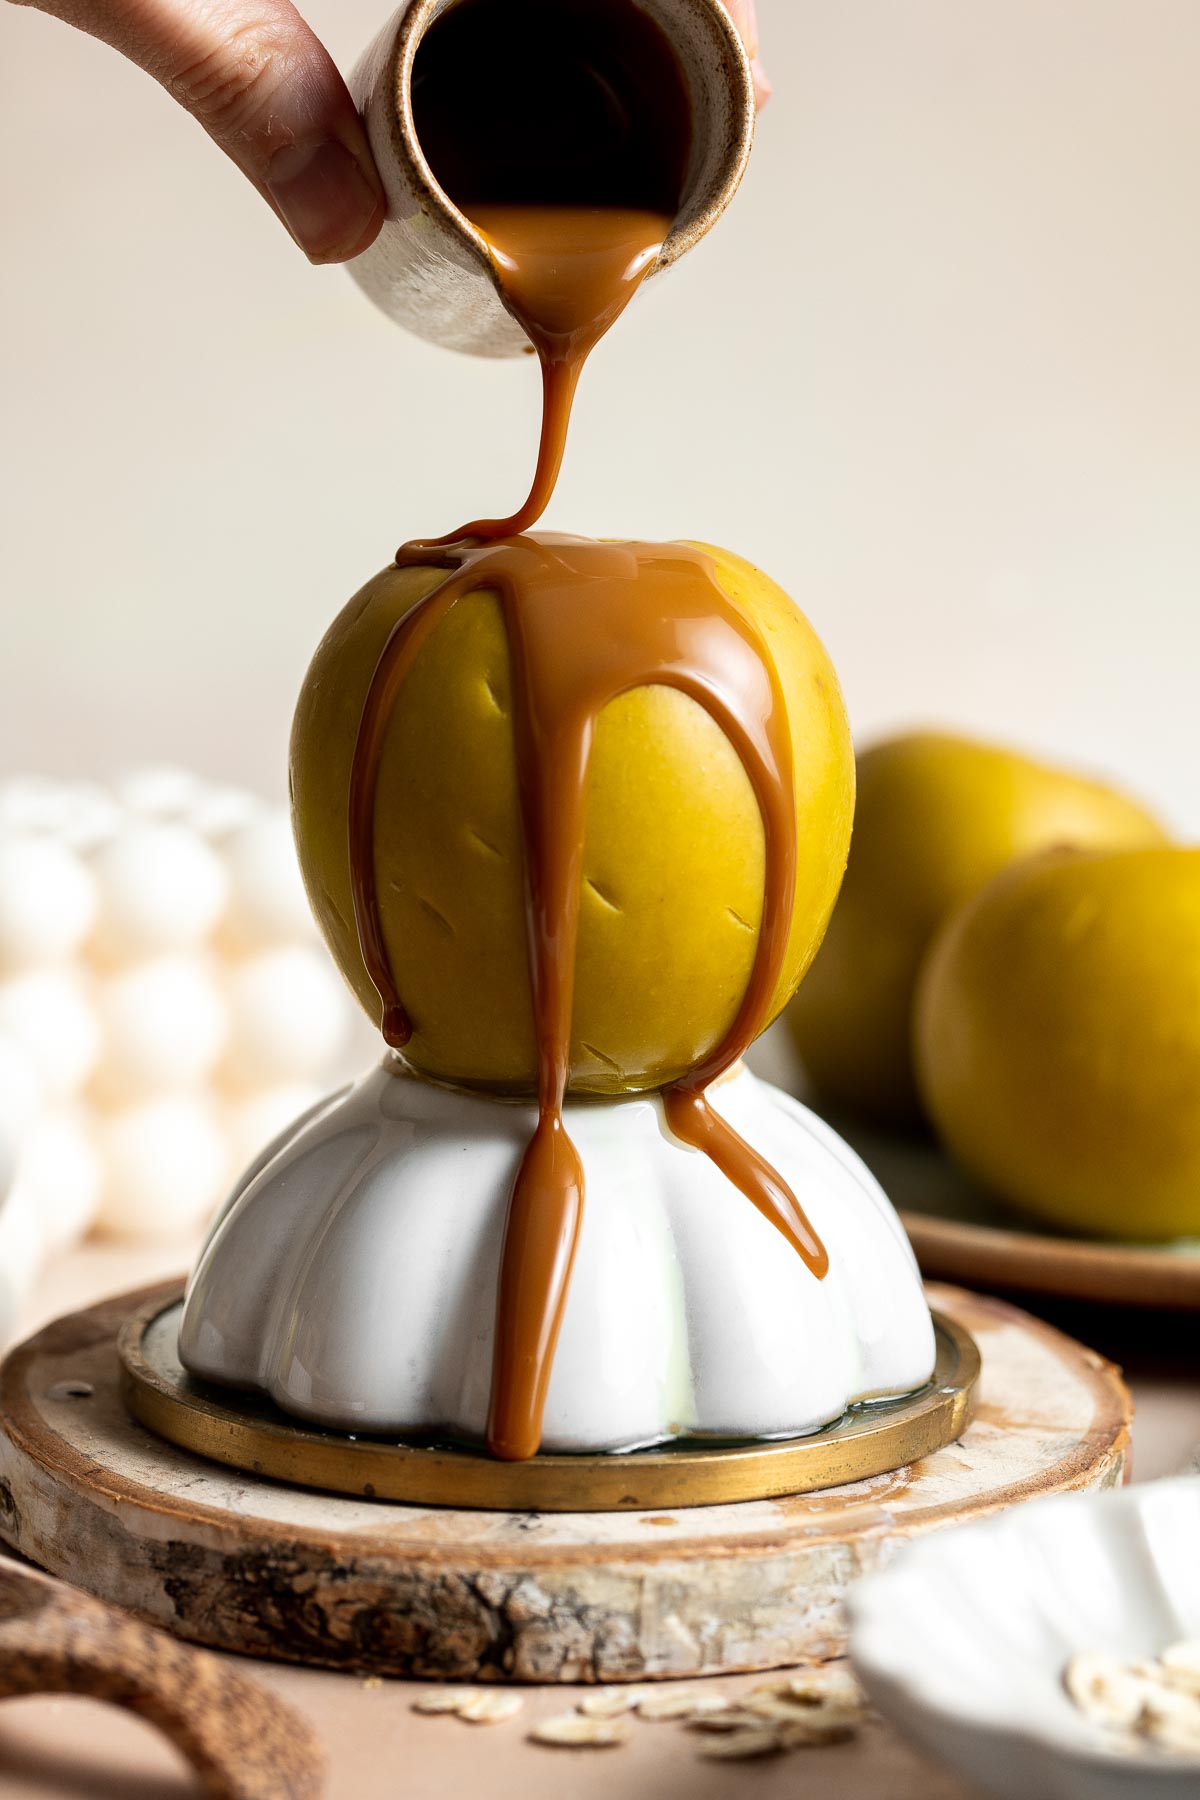
Storage/Freezing Instructions
How to Store
Allow the leftover baked apples to cool to room temperature, then place in an airtight container and store in the refrigerator for up to 4 days.
How to Reheat
Reheat in a 350°F preheated oven for 15-20 minutes until warmed through, or in a 350F oven for 5-10 minutes until warm. You can also reheat in the microwave in 30 second increments until warm.
How to Freeze
Baked apples are ideal for freezing, as they won't change texture like their raw counterparts. Place on a parchment-lined baking sheet and freeze until solid (2-4 hours depending on your freezer settings) and then place the frozen apples in a freezer bag and leave frozen for up to 3 months. Reheat straight out of the freezer by baking in the oven in an aluminum foil-covered pan at 350°F for 30 minutes or until heated through.
Recipe Tips and Tricks
- Use leftovers in unexpected ways. You can easily repurpose leftover baked apples into a topping for things like coffee cake, waffles, pancakes, crepes, or quick and easy pie filling. Simply cook and enjoy as directed, and then pulse leftover apples in a food processor until you have a chunky apple and oat mixture.
- Serve with different flavors of ice cream. This recipe calls for classic vanilla ice cream, but you can serve with caramel swirl, butter pecan, or cinnamon ice cream for even more complimentary flavor.
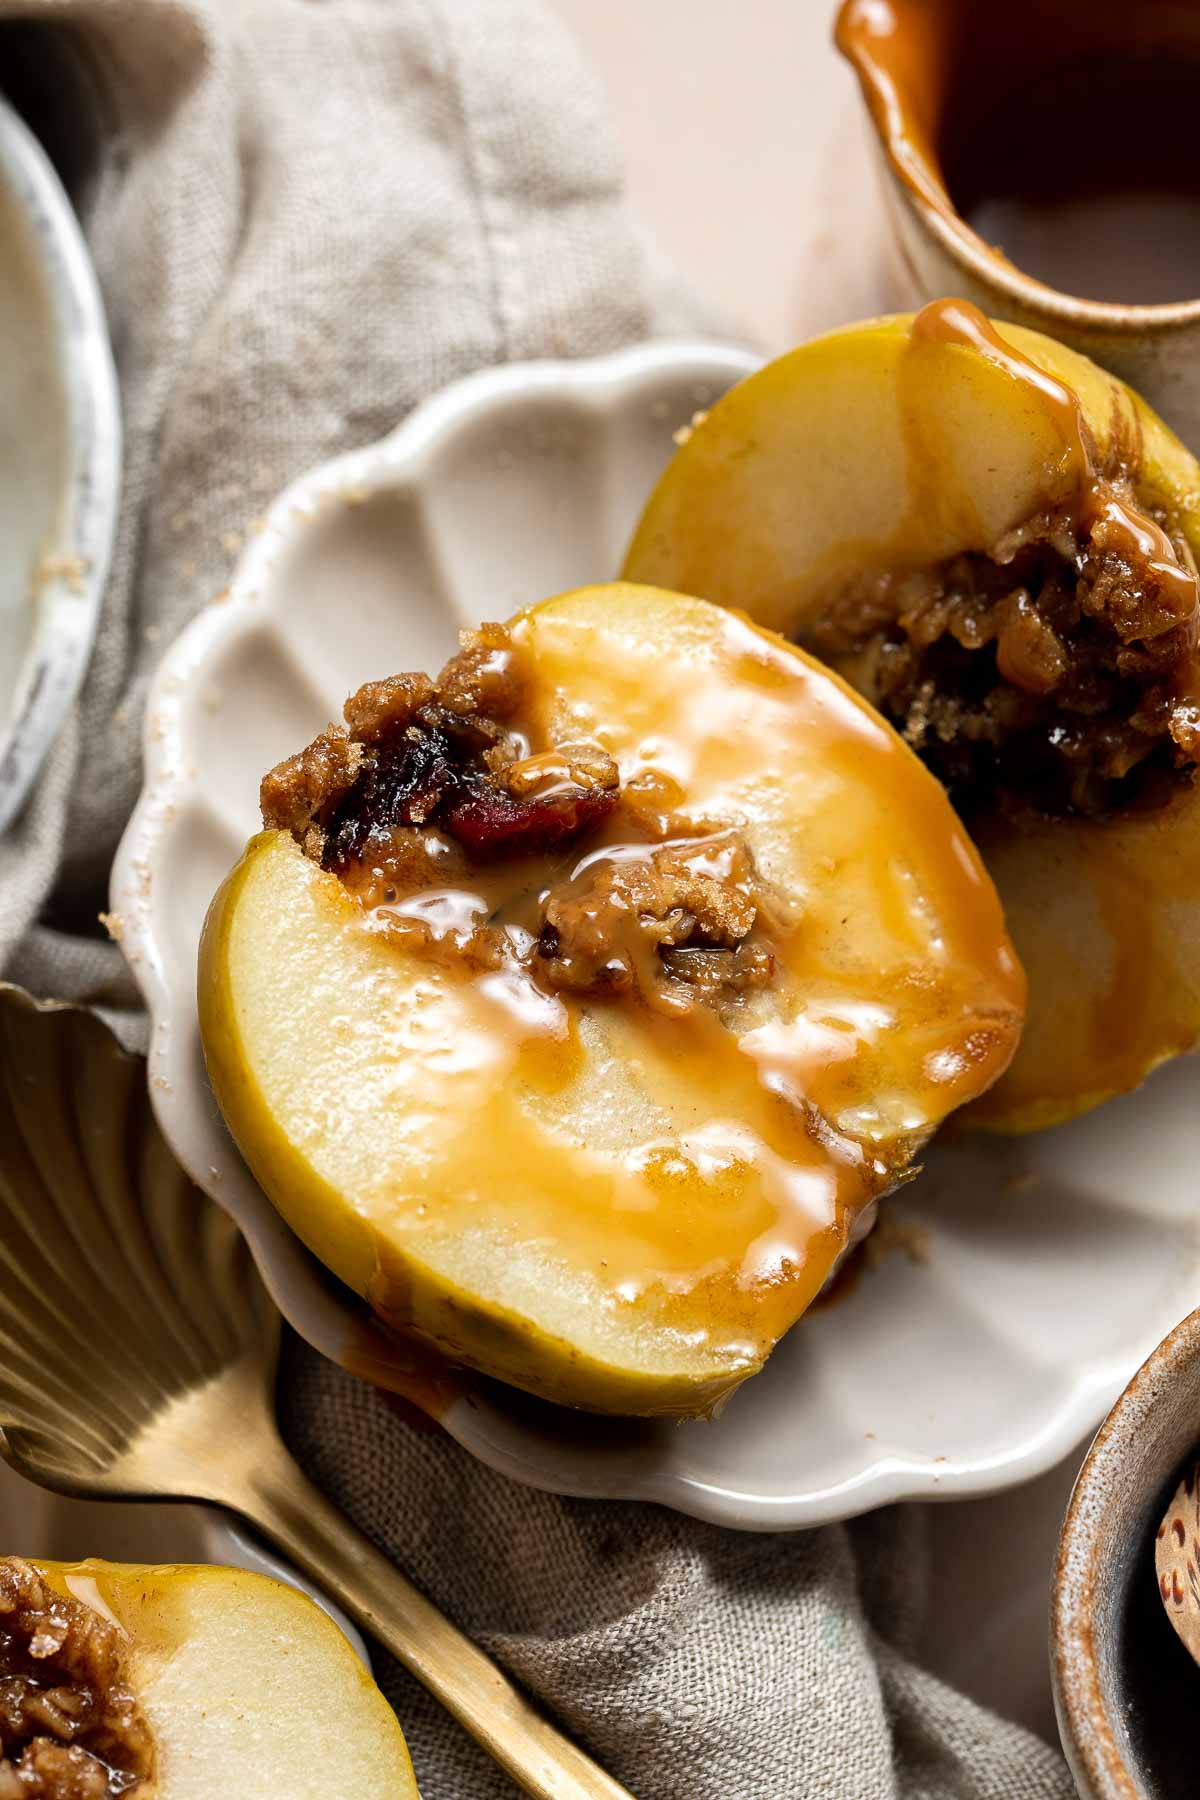
More Apple Dessert Recipes
- 20 Best Apple Desserts
- Braided Lattice Apple Pie
- Cinnamon Apple Oatmeal Muffins
- Apple Crisp
- Baked Apple Chips
- Apple Hand Pies
Tried this recipe?
I'd love to hear what you think! Leave a comment and rating below to share your feedback. Your reviews help others discover this recipe and help me keep creating more free recipes for you. Snap a photo and tag me on social media @aheadofthyme too.

- « Previous Page
- 1
- …
- 15
- 16
- 17
- 18
- 19
- …
- 40
- Next Page »