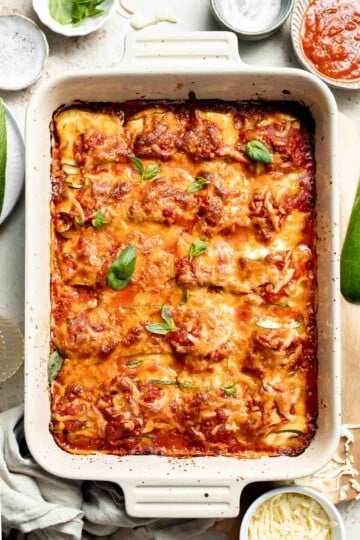
Craving a hearty, cheesy lasagna without the carbs? These Baked Zucchini Roll Ups are the answer. Rolled thin slices of zucchini are filled with a creamy ricotta cheese mixture, smothered in marinara sauce, and topped with bubbly melted cheese. It's a lightened-up, low-carb twist on classic lasagna that's every bit as satisfying.

Also known as zucchini rollatini or zucchini involtini, this vegetarian dish is perfect during late summer when zucchinis are in season and abundant. It's also a hit during the holidays as a vegetarian entrée or a side dish to heavier mains. Whether you're trying to eat healthier or just love zucchini, this one delivers. It's hearty, cheesy, and completely satisfying - all without the lasagna noodles.
This zucchini recipe was inspired by our Lasagna Roll Ups and Zucchini Lasagna and pairs well with these delicious Garlic Breadsticks for a cozy, complete meal.

Why You'll Love This Recipe
- Low carb and gluten-free. Zucchini lasagna roll ups are naturally low in carbs and completely gluten-free, making them a healthy alternative to traditional lasagna. They're packed with veggies and perfect for those avoiding pasta, without compromising on flavor or texture.
- Cheesy comfort food. Loaded with creamy ricotta, melty mozzarella, and salty parmesan, these zucchini ricotta rolls hit all the right notes. The filling is rich and comforting while staying light and fresh thanks to the zucchini.
- Meal prep and freezer-friendly. You can prep these zucchini lasagna rolls ahead of time and bake when ready, or freeze them for later. They're perfect for busy weeknights or feeding a crowd. Plus, leftovers reheat beautifully.
- Versatile and customizable. Easily adapt this recipe with your favorite cheeses or herbs, or add ground meat to the filling for extra protein. This low carb lasagna is flexible and forgiving - a great fridge clean-out dinner!
- Elegant yet not complicated. Though it looks fancy, this zucchini rollatini is simple to assemble and bake. It's a showstopper dish that impresses guests and still fits into your weeknight dinner routine.
Ingredients and Substitutions

To make this delicious Baked Zucchini Roll Ups, you will need the following ingredients (see recipe card below for quantities):
- zucchinis - Choose medium to large zucchinis with an even width. Slice them lengthwise into thin strips with a mandoline or sharp knife for even baking.
- olive oil - For brushing the zucchini before roasting. Helps soften and prevent sticking. Avocado oil is a suitable alternative.
- ricotta cheese - Creamy and mild, this is the base of the filling. Cottage cheese can be used as a substitute but will yield a softer filling.
- mozzarella cheese - Use shredded mozzarella for the topping and mixed into the filling for gooey meltiness. Try provolone or shredded Italian blend if you prefer.
- parmesan cheese - Adds salty, nutty flavor to the filling and top. Pecorino Romano works too.
- egg - Helps bind the filling and give it structure.
- basil - Fresh basil adds bright flavor. Substitute with parsley or oregano if desired.
- salt and pepper - Essential for seasoning both the zucchini and the filling.
- marinara sauce - Use your favorite store-bought or homemade marinara sauce. You can substitute with plain tomato sauce - just stir in ½ teaspoon garlic powder, 1 teaspoon dried oregano or Italian seasoning, 2 teaspoons olive oil (optional, for richness), and salt and pepper to taste. If you have time, let it simmer for a few minutes to allow the flavors to meld together.
Equipment
You'll also need measuring cups and spoons, a mandoline slicer or sharp knife, large baking sheet, mixing bowl, 9x13-inch casserole dish or baking dish, spoon or spatula for spreading, and foil for baking.
Instructions
First, prep the zucchini.
- Slice. Remove the stems from the zucchinis and use a mandoline slicer or a knife to slice lengthwise into ⅛ inch thick slices (lengthwise, not rounds).
- Salt. Salt both sides of the zucchini slices and place on a plate for 10-20 minutes to allow it to "sweat" or draw out excess moisture. Then, use a paper towel to pat it completely dry.


- Bake. Arrange the zucchini slices in a single layer on a large baking sheet. Drizzle with olive oil. Bake in a 375F preheated oven for 20-25 minutes until soft, flipping the zucchinis halfway to achieve even cooking. Set aside.


Then, make the cheese filling.
- In a medium mixing bowl, combine ricotta cheese, ½ cup mozzarella, ¼ cup Parmesan, beaten egg, basil, salt, and pepper. Stir well until evenly combined


Next, roll up the zucchini.
- Add filling. Arrange the zucchini strips on a clean surface or large baking sheet. Carefully spread 1-2 tablespoons of cheese filling on each zucchini slice.


- Roll. Take each filled zucchini slice and roll it up. Repeat with all zucchini slices.


Let's assemble.
- Add layer 1 (marinara sauce). In a 9x13-inch casserole dish, evenly spread out ½ cup of marinara sauce.
- Add layer 2 (zucchini rolls). Place the rolled zucchini, seam side down, into the casserole dish in a single layer. If there is any extra cheese filling, simply spread on top of the zucchini slices.
- Add layer 3 (marinara sauce). Spread the remaining 1 ½ cups marinara sauce over the zucchini roll ups.
- Add layer 4 (cheese). Top with the remaining 1 cup mozzarella cheese and ¼ cup of Parmesan cheese.


Finally, let's bake the roll ups.
- Cover. Cover the casserole dish with aluminum foil and bake for 25 minutes. Then, remove the foil and bake uncovered for another 10-15 minutes or until the melted cheese turns golden brown and bubbly.
- Broil (optional). Optionally, turn on broiler on high and broil for 2-3 minutes to get a crisper and browner cheesy crust. But keep a close eye on the broiler as things can burn quickly.
- Rest. Let the roll ups cool for 10 minutes. Then, slice and serve with fresh chopped basil on top.


Expert tip: Don't overfill
Spread a thin layer of filling on each zucchini slice (about 1 tablespoon) so they roll neatly and stay closed. Too much can make the zucchini rolls burst open during baking.
More Tips and Tricks
- Use a mandoline. Use a mandoline slicer for uniform, thin slices (about ⅛-inch thick). This helps them roll easily and cook evenly without breaking.
- Salt and rest zucchini. Salt the slices and let them sit for 10 minutes. Pat dry to remove excess moisture and avoid soggy zucchini rolls.
- Pre-cook the zucchini. Roast or grill the slices briefly to soften them and remove excess moisture. This prevents watery roll ups and helps them hold their shape.
- Use a thick filling. If the ricotta mixture is too runny, add extra parmesan or breadcrumbs to thicken. This keeps the filling in place.
- Let it rest before serving. After baking, let the zucchini rollatini sit for 5-10 minutes. It helps everything set and makes serving easier.
Recipe Variations
- Add ground meat. For a heartier meal, mix in cooked ground beef, turkey, chicken, or Italian sausage to the marinara sauce. It transforms this dish into a protein-packed, low carb dinner that's extra satisfying.
- Use different cheeses. Swap or add cheeses like goat cheese, provolone, or fontina for a different flavor profile. Smoked mozzarella adds a savory twist too.
- Add greens. Mix in some cooked, drained spinach to the ricotta filling for an extra boost of nutrients and a beautiful green swirl in each roll. Kale works too!
- Try grilled zucchini. Instead of baking the zucchini slices, grill them for extra flavor and smoky char. Perfect for summer!
- Make it spicy. Add a pinch of red pepper flakes to the filling or sauce for a subtle kick that complements the creamy filling.
- Use eggplant. Swap zucchini for thinly sliced eggplant for a different take on low-carb lasagna that has a meatier texture and rich flavor. See our Eggplant Rollatini for the recipe.
See the classic layered version of this recipe on our site!

Storage
How to Store
Store leftovers in an airtight container in the refrigerator for up to 4 days. Reheat in the oven or microwave before serving.
How to Reheat
Reheat covered in a 350°F oven for 10-15 minutes or microwave individual portions for 1-2 minutes until heated through.
How to Freeze
Assemble but do not bake. Cover tightly and freeze for up to 2 months. Thaw overnight in the fridge and bake as directed.
How to Serve
Baked zucchini roll ups are delicious on their own or paired with some of my favorite sides, like crusty bread for sopping up the sauce, a simple side salad, or roasted vegetables.
These are my favorite dishes to serve with zucchini rolls:


FAQ
Yes, zucchini roll ups are great for making in advance. Assemble them fully, cover, and refrigerate for up to a day before baking. You can also prepare the filling and zucchini separately and assemble closer to mealtime. Let them sit at room temperature for about 10 minutes before baking to help them cook more evenly.
You don't have to, but pre-cooking or salting the zucchini can help reduce moisture and prevents soggy results when baked. Roasting, grilling, or even a quick pan-fry softens the zucchini and enhances the flavor. If you skip pre-cooking, be sure to salt and pat them dry to prevent watery lasagna.
Salt and rest the slices for 10-15 minutes, then blot with paper towels. You can also grill or roast them briefly. Avoid overstuffing and use a thicker ricotta filling. Excess moisture can ruin the texture, so drying the zucchini is key for perfect rolls.
Yes, especially if the slices are too thick. Undercooked zucchini will be too firm and hard to cut through. Aim for tender but not mushy. Slice thinly and bake thoroughly until fork-tender for the best texture in your zucchini lasagna rolls.
More Zucchini Recipes


Tried this recipe?
I'd love to hear what you think! Leave a comment and rating below to share your feedback. Your reviews help others discover this recipe and help me keep creating more free recipes for you. Snap a photo and tag me on social media @aheadofthyme too.

Easy Sheet Pan Pizza with Crispy Crust
If you're looking for a no-fuss way to enjoy pizzeria-quality pizza at home, this Easy Sheet Pan Pizza with Crispy Crust is your answer. Made with simple ingredients and baked in a standard baking sheet, it yields a crisp, golden crust and a cheesy, bubbly top. It's the perfect way to feed a crowd or satisfy a serious pizza craving.
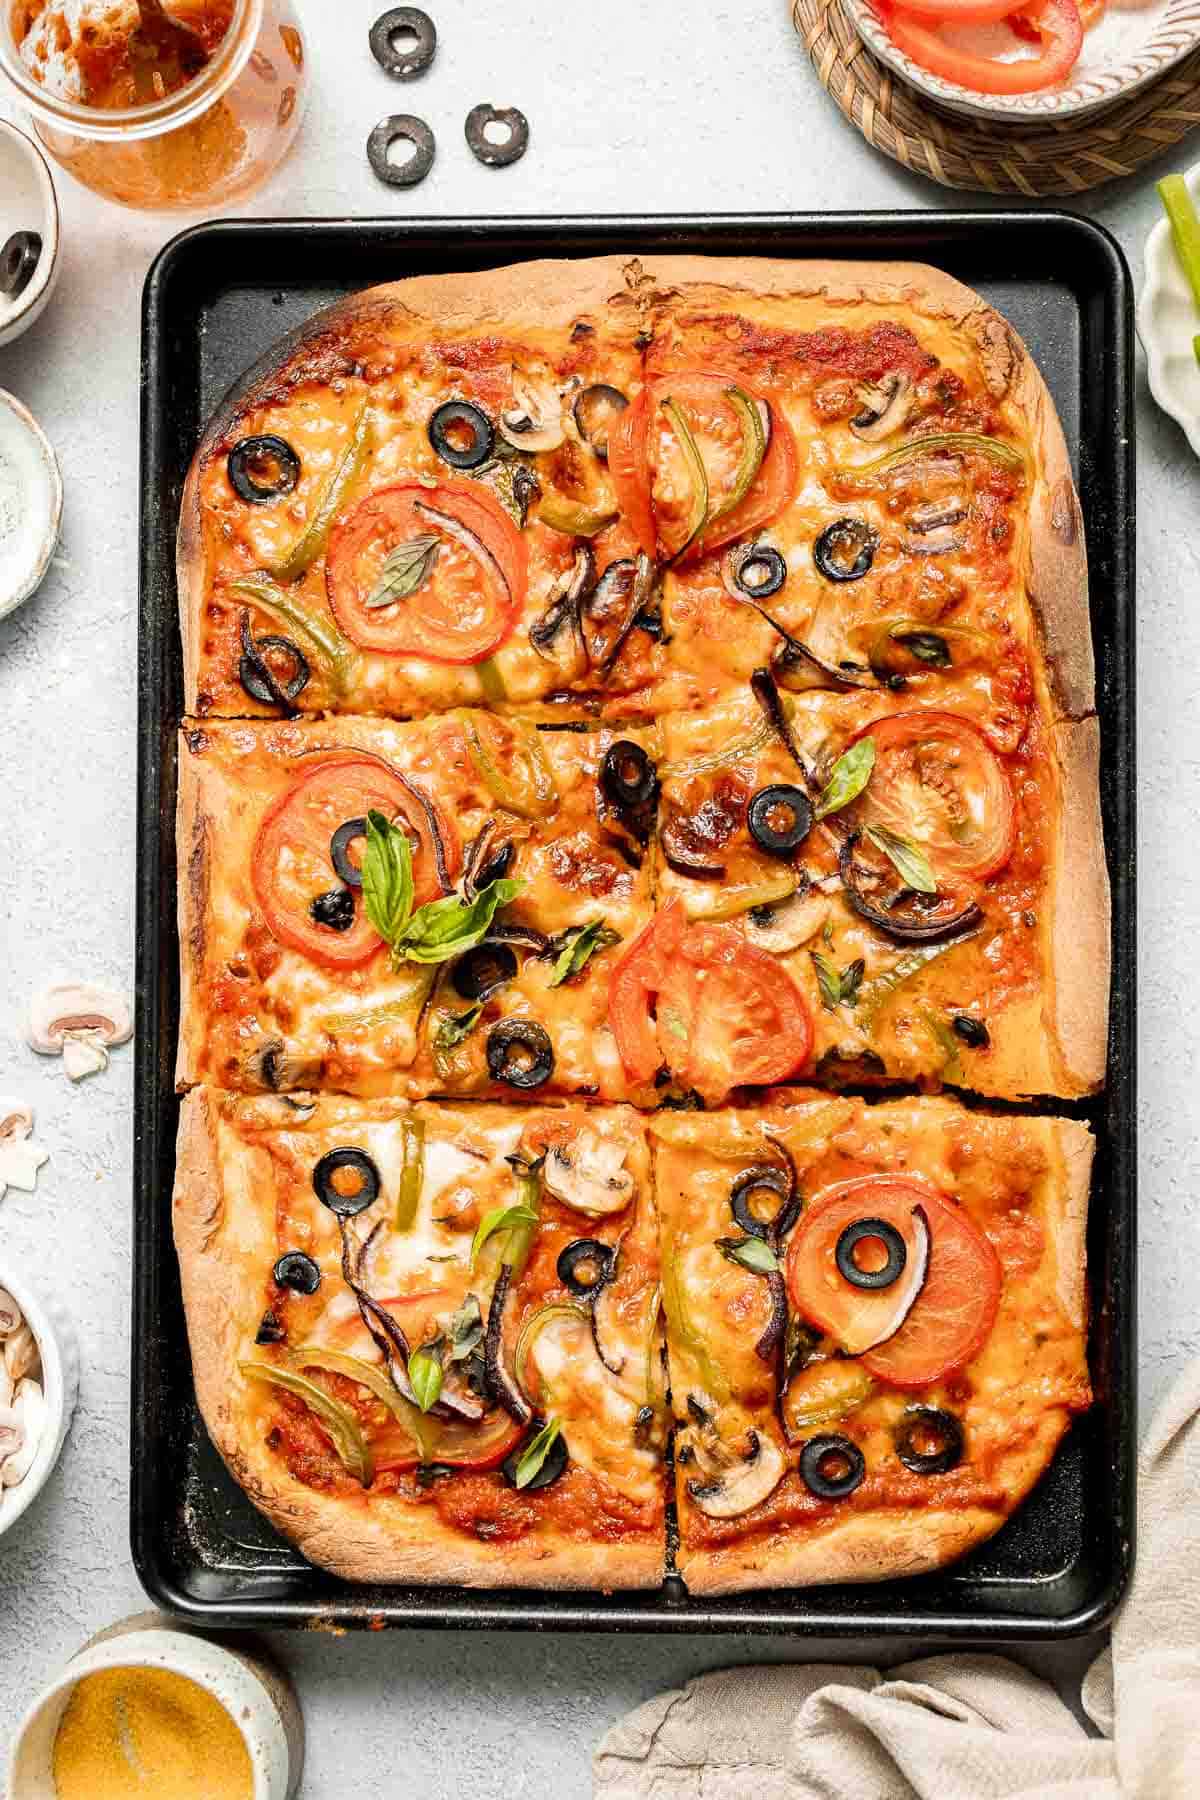
Sheet pan pizza is a true weeknight hero: effortless, satisfying, and guaranteed to please a crowd. Whether you're rolling out store-bought dough or making your own from scratch, this pizza sheet pan method delivers crispy, golden results every time. The beauty of baking sheet pizza is in its simplicity and flexibility. You can load it up with whatever toppings you have on hand, from classic pepperoni to garden-fresh veggies, and still end up with something mouthwatering. It's quick to prep, easy to slice and serve, and perfect for feeding a family or a casual gathering. Plus, no pizza stone required - just a trusty sheet pan and a hot oven.
Why You'll Love Easy Sheet Pan Pizza with Crispy Crust
- Crispy crust without a pizza stone. The baking sheet pizza technique delivers a beautifully crisp crust that rivals your favorite pizzeria. The high heat of the oven and direct contact with the pan give the dough an irresistible golden crunch.
- Perfect for feeding a crowd. This sheet pan pizza recipe makes enough to serve 4-6 people generously. It's ideal for parties, game nights, Friday nights, or any time you need an easy and satisfying meal that feeds a group without extra effort.
- Fully customizable. Whether you love pepperoni, mushrooms, or veggie-loaded pies, this sheetpan pizza adapts to your cravings. Mix and match toppings based on what you have in the fridge for a fun, versatile dinner.
- Great for meal prep. Leftovers store beautifully and reheat well in the oven or air fryer. It's an excellent make-ahead option for lunches or busy weeknights.
- Kid-friendly and fun to make. Kids love helping with topping assembly and choosing their own ingredients. It's a great way to get the whole family involved and excited for pizza night.

Ingredient Notes
To make this Easy Sheet Pan Pizza, you will need the following ingredients (full measurements in recipe card below):
- pizza dough - use store-bought dough or homemade pizza dough. Let it come to room temperature before stretching to make it easier to work with. Gluten-free dough also works well. For homemade dough, all you need is all purpose flour, salt, water, yeast, and olive oil. See our Homemade Pizza Dough for the full recipe or try our Sourdough Pizza Dough for another option.
- cornmeal - this is optional but recommended as it helps prevent sticking and adds texture to the crust. Substitute with parchment paper if preferred.
- pizza sauce - use homemade pizza sauce or your favorite jarred variety. Marinara or tomato sauce are great substitutes.
- mozzarella cheese - use shredded low-moisture mozzarella for the best melt. Fresh mozzarella works too, just slice it thin.
- fresh basil - it adds fresh, aromatic flavor but is completely optional. Substitute with oregano or parsley, or skip entirely.
- favorite toppings - such as pepperoni, ham, bacon, mushrooms, green peppers, red peppers, black olives, tomatoes, and red onion. Any of your go-to pizza toppings work.
You will also need measuring cups and spoons, a rimmed baking sheet, and rolling pin (or your hands).

How to Make the Best Sheet Pan Pizza with Crispy Crust
- Roll dough. Transfer the pizza dough onto a floured surface. Use a rolling pin (or your hands) to gently roll out the pizza dough into an approximately 9x13-inch rectangle. Sprinkle some flour onto the rolling pin if needed to prevent stickiness. Let the dough rest for 10 minutes.
- Place dough into sheet pan. Sprinkle the cornmeal into a 9X13-inch rimmed sheet pan and carefully place the dough on top. Gently press and spread it to cover the sheet pan.


- Add sauce and cheese. Add the pizza sauce and spread evenly over the dough. Place the mozzarella cheese slices and basil leaves evenly on top.


- Add toppings. Add your favorite toppings in an even layer (such as pepperoni, ham, mushrooms, green peppers, black olives, tomatoes, and/or red onions).


- Bake. Transfer the sheet pan to the top rack of a 450F preheated oven and bake until the crust is golden brown and the melted cheese is bubbling, about 12-15 minutes.
- Broil (optional). Optionally, turn on broiler on HI and cook for another 1-2 minutes to make the crust blistered and slightly charred. Keep your eye closely on the broiler, because the intense heat can make pizza crust burn quite quickly.

Pizza Toppings
- Meat lovers' sheet pizza. Load your pizza sheet pan with pepperoni, bacon, ham, and sausage for a hearty, meaty version that satisfies big appetites.
- Veggie deluxe. Top your baking sheet pizza with mushrooms, peppers, onions, olives, and tomatoes for a colorful vegetarian version full of flavor and texture.
- White pizza. Skip the red sauce and use olive oil, garlic, and ricotta cheese instead. Add spinach or arugula for freshness and brightness.
- BBQ chicken. Replace pizza sauce with BBQ sauce, then top with shredded chicken, red onions, and mozzarella. Garnish with fresh cilantro after baking.
- Spicy arrabbiata style. Add red chili flakes to your sauce or drizzle with hot honey or chili oil after baking for a spicy, bold kick.
How to Serve
This Easy Sheet Pan Pizza is delicious served on its own with a sprinkle of parmesan cheese or pecorino romano and a dusting of red pepper flakes, if desired. Or, pair it with some of my favorite sides including:
- Caesar Salad or Simple Italian Salad
- Garlic Knots
- Marinara Sauce or Ranch for dipping
- Tomato Basil Soup
- BBQ Chicken Wings

Recipe Tips and Tricks
- Make it gluten free. Use your favorite gluten-free pizza dough, and double-check all toppings and sauces are gluten-free. Many stores carry great GF dough options, and this baking method works just as well.
- Let the dough rest. Room temperature dough stretches more easily. If it springs back, let it rest another 5-10 minutes and try again.
- Preheat your oven fully. A hot oven is essential for getting that golden, crispy crust. Preheat to 450°F and let it sit for a few extra minutes.
- Don't overload toppings. Too many toppings can make your pizza soggy. Keep it balanced so the crust stays crisp and everything bakes evenly.
- Make sharp slices. Let the pizza rest for a few minutes out of the oven before slicing with a pizza cutter or sharp knife for the cleanest cuts and best texture.
Storing and Freezing Instructions
How to Store
Store leftovers in an airtight container in the fridge for up to 4 days. Keep slices separated with parchment paper.
How to Reheat
Reheat in a 375°F oven or air fryer for 5-10 minutes until crisp and hot. Avoid microwaving, which softens the crust.
How to Freeze
Freeze baked and cooled slices wrapped in foil or stored in a freezer-safe container. Reheat directly from frozen in the oven.
FAQ
Use a hot oven (at least 450°F) and don't overload with toppings. Using oil on the pan helps fry the bottom slightly, making it crispy. Let the dough pre-bake for a couple minutes before adding sauce if you want extra crunch.
Use a standard quarter sheet pan (roughly 9x13 inches). For a larger family-size pizza, double the recipe and use a half sheet pan (roughly 13x18 inches). It's the perfect size for a family-size pizza and ensures even baking across the surface.
You can assemble the pizza a few hours ahead and refrigerate it. Let it sit at room temperature for 15 minutes before baking so the dough bakes evenly. For the crispiest crust, bake just before serving.
How to keep pizza dough from sticking to a sheet pan?
Yes, it can if the surface isn't greased. To prevent sticking, brush the sheet pan generously with olive oil and sprinkle it with cornmeal or flour. This combination prevents sticking and gives a slightly crunchy bottom. You can also use parchment paper for easy cleanup.
A rimmed baking sheet is a fantastic substitute for a pizza stone. You can even preheat the sheet pan in the oven to mimic the hot surface of a pizza stone, which helps the crust crisp up nicely.
More Pizza Recipes
- Easy Skillet Neapolitan Margherita Pizza
- French Bread Pizza
- Salami and Mushroom Skillet Pizza
- Homemade Calzones
- Pepperoni Pizza Rolls
- Mediterranean Flatbread
Tried this recipe?
I'd love to hear what you think! Leave a comment and rating below to share your feedback. Your reviews help others discover this recipe and help me keep creating more free recipes for you. Snap a photo and tag me on social media @aheadofthyme too.

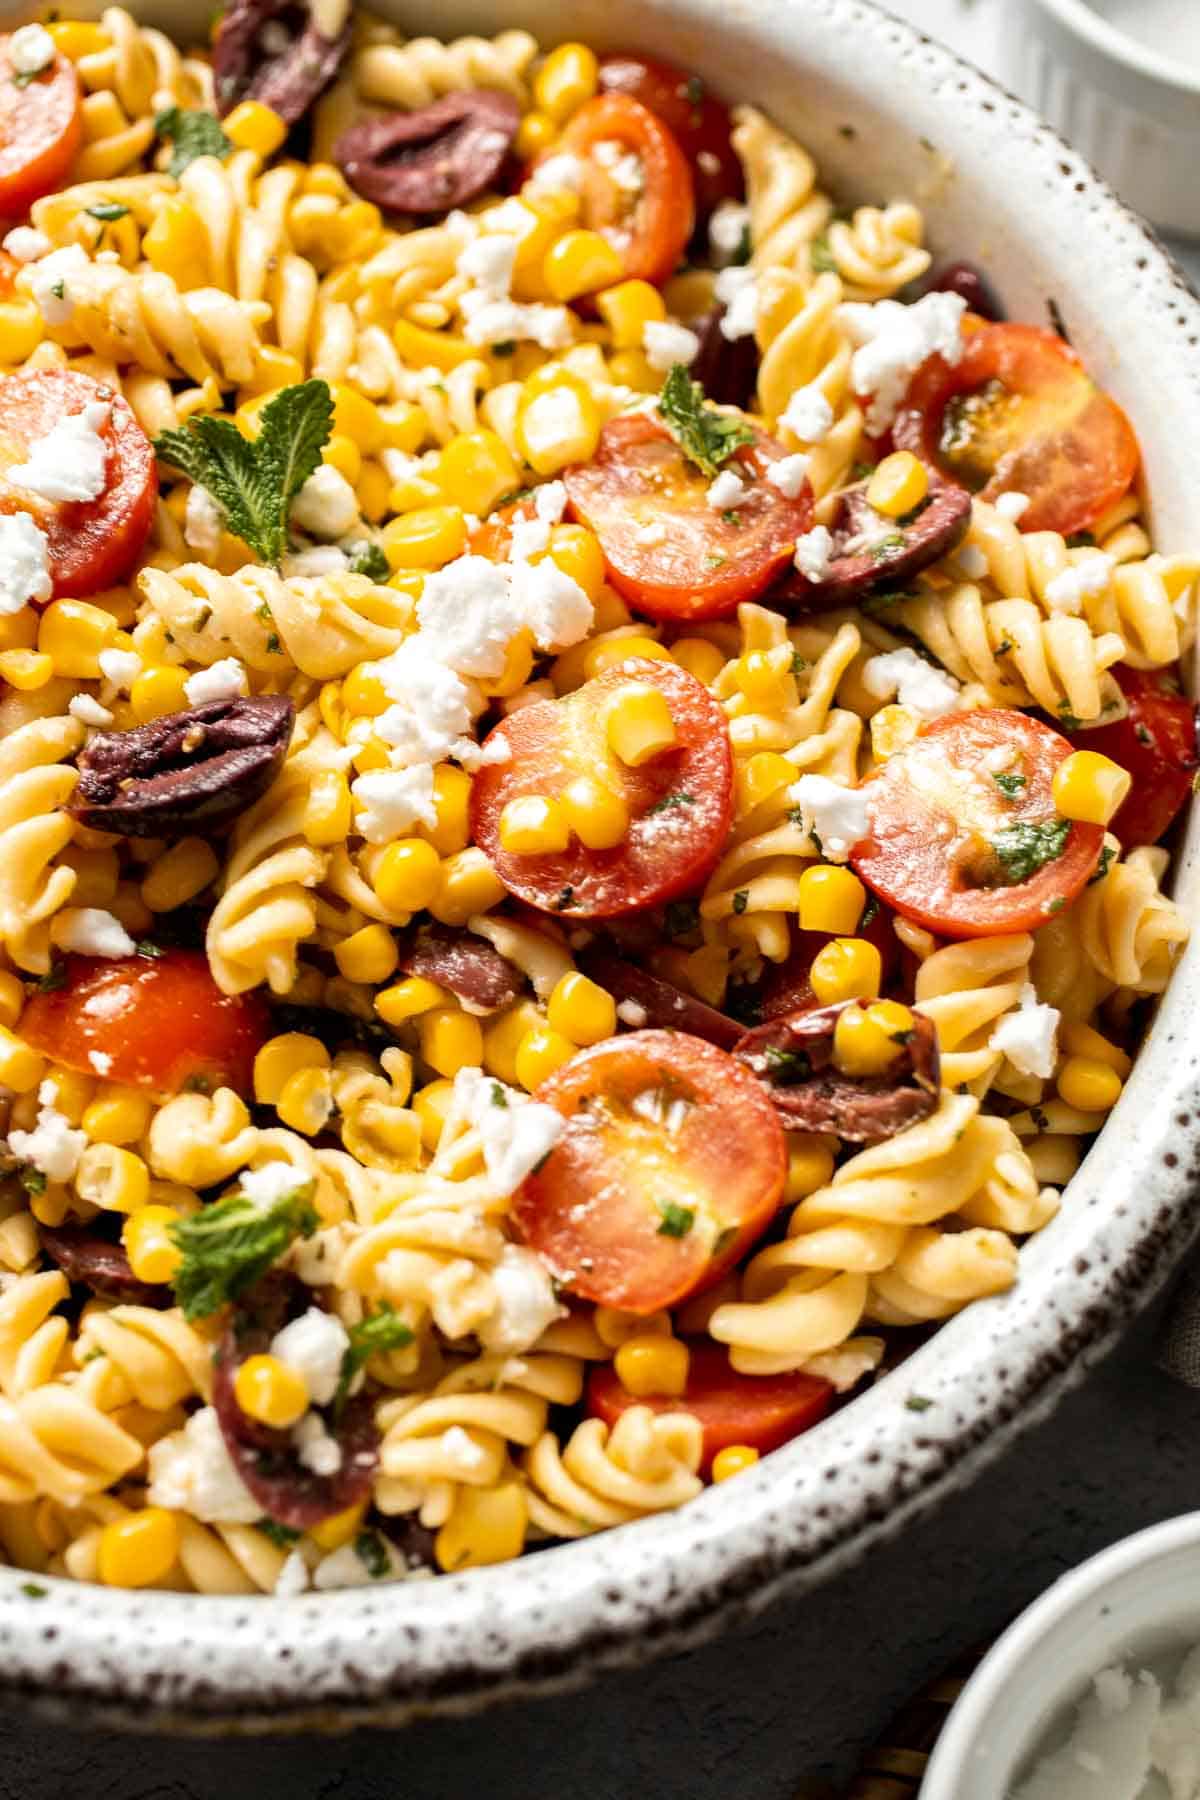
Corn and Tomato Pasta Salad
Corn and Tomato Pasta Salad is the vibrant, summer-ready dish your next gathering needs. Packed with juicy cherry tomatoes, sweet corn kernels, briny olives, and creamy feta, it's tossed in a simple herb vinaigrette that brings it all together. This fresh and zesty corn pasta salad is as beautiful as it is delicious.

This pasta salad with corn is a warm-weather staple. It comes together quickly, travels well, and can be served chilled or at room temperature. It's also endlessly customizable! Swap in your favorite herbs or cheese and make it your own. Serve it as a light lunch or the perfect side for your next barbecue. With its bold flavors and colorful presentation, this corn and tomato salad adds brightness and balance to any summer table spread.
Why You'll Love this Corn and Tomato Pasta Salad Recipe
- Perfect summer salad. Bright, fresh, and seasonal, this pasta salad makes the most of ripe summer produce like sweet corn and juicy tomatoes. It's the perfect way to use up market or garden veggies and brings refreshing flavor to any warm-weather meal.
- Quick and easy to make. This tomato and corn salad comes together in under 30 minutes with just a handful of ingredients. It's great for last-minute gatherings or easy meal prep and doesn't require any fancy equipment or hard-to-find items.
- Customizable and versatile. Swap in your favorite herbs, veggies, or cheese to make it your own. It pairs well with grilled mains or can stand alone as a vegetarian dish. It's a perfect "clean out the fridge" recipe.
- Make-ahead friendly. This corn pasta salad actually gets better as it sits. Prepare it a few hours ahead for the flavors to develop fully. Perfect for potlucks, picnics, and entertaining.
Ingredient Notes
To make this easy Corn and Tomato Pasta Salad, you will need the following ingredients (full measurements in recipe card below):
- pasta - we used rotini pasta because holds dressing well and adds texture. Feel free to substitute with penne, fusilli, or any short pasta you like.
- cherry tomatoes - grape tomatoes or chopped heirloom tomatoes also work beautifully.
- corn kernels - fresh, grilled, or frozen corn all work. Canned corn is fine too - just drain well.
- kalamata olives - use green olives or omit if preferred.
- fresh herbs - use your favorite such as basil, parsley, or mint, or a mix for added depth.
- feta cheese - goat cheese or mozzarella balls can be substituted.
- extra virgin olive oil - this forms the base of the dressing. Use good-quality oil for the best flavor.
- red wine vinegar - substitute with white wine vinegar or apple cider vinegar for a similar tanginess.
- lemon juice - brightens up the dressing. Fresh is best, but bottle works too.
- garlic - use fresh minced garlic or garlic powder.
- parsley - can substitute with other herbs if desired.
- Italian seasoning - a simple dried herb mix. Oregano or dried basil work as a substitute.
- salt and pepper - adjust to taste.
You will also need measuring cups and spoons, a large pot for boiling pasta, mixing bowls, a whisk or fork for mixing dressing, and a serving spoon.

How to Make the Best Corn and Tomato Pasta Salad
- Make the pasta. Bring a large pot of salted water to a boil. Add pasta and cook until al dente, about 8-10 minutes or according to package instructions. Drain and rinse pasta under cold water to stop the cooking process and to cool the pasta down.


- Combine ingredients. Transfer the pasta to a large mixing bowl or serving bowl. Add cherry tomatoes, corn, olives, herbs, and feta cheese.


- Make dressing. In small mixing bowl, whisk together olive oil, vinegar, lemon juice, garlic, parsley, Italian seasoning, salt, and pepper until evenly combined.


- Toss. Drizzle the dressing over the salad and toss well. Serve immediately or cover and store in the refrigerator.


Recipe Variations
- Add protein. Turn this salad into a main course by adding grilled chicken, shrimp, salmon, or canned tuna. It adds heartiness and makes it a complete meal without sacrificing any freshness or flavor.
- Make it vegan. Omit the feta or use a plant-based version to make the salad fully vegan. The bright dressing and vegetables still shine through.
- Use different cheese. Try goat cheese, shredded parmesan, or mozzarella pearls for different textures and flavors. Each option adds a new twist.
- Try grilled corn. Grilling the corn adds smoky flavor and a little char that makes this salad even more summery and crave-worthy.
- Mix in more veggies. Add diced cucumbers, red onion, bell peppers, or avocado for added crunch, creaminess, or color. It's a great way to bulk it up.
How to Serve
This easy pasta salad with corn is delicious served on its own as a light lunch, or served as a side dish paired with some of my favorite summer entrees including:
- Greek Chicken Souvlaki Skewers
- Ribeye Steak
- Garlic Butter Salmon
- Garlic Shrimp Skewers
- Tomato Focaccia
- Homemade Lemonade
For more summer recipes, see our 60+ Summer Dinner Ideas.

Recipe Tips and Tricks
- Cook pasta just right. Cook to al dente and rinse under cold water to stop the cooking process. This keeps the texture firm and prevents sogginess.
- Use fresh ingredients. The better your tomatoes, corn, and herbs, the better your salad. Shop local or hit up the farmer's market.
- Toss with dressing while warm. If time allows, toss warm pasta with dressing so it absorbs more flavor before chilling.
- Let it chill. This salad tastes even better after sitting for an hour. Let the flavors meld in the fridge before serving.
- Garnish before serving. Save a bit of herbs, cheese, and tomatoes to sprinkle on top just before serving for a vibrant, fresh finish.
Storing and Freezing Instructions
How to Store
Store in an airtight container in the refrigerator for up to 4 days. Stir before serving to redistribute dressing.
How to Freeze
Freezing is not recommended, as the texture of the pasta and fresh vegetables will be affected.
FAQ
Yes! This salad is perfect for making ahead. In fact, it tastes better after a few hours in the fridge. Just store it in an airtight container and give it a quick toss before serving. Making it ahead allows the flavors to deepen and develop for a more cohesive taste.
Definitely. Canned corn works well-just drain and rinse it. Frozen corn is also a great option-simply thaw and pat dry. Fresh corn adds more crunch and sweetness, but all options will work in a pinch and still deliver great flavor.
To make this recipe vegan, just omit the feta or use your favorite dairy-free alternative. The olive oil-based dressing and veggies make this salad naturally plant-based. It's still full of flavor, color, and freshness without the cheese.
Absolutely. While rotini works well for holding onto the dressing, you can use penne, fusilli, farfalle, or even small shells. Just make sure the pasta has some texture or ridges to grab onto the vinaigrette and not slide off.
More Pasta Salad Recipes
- 40 Best Salad Recipes
- Italian Pasta Salad
- Greek Pasta Salad
- Tortellini Salad
- Mediterranean Orzo Pasta Salad
- Caprese Pasta Salad
Tried this recipe?
I'd love to hear what you think! Leave a comment and rating below to share your feedback. Your reviews help others discover this recipe and help me keep creating more free recipes for you. Snap a photo and tag me on social media @aheadofthyme too.

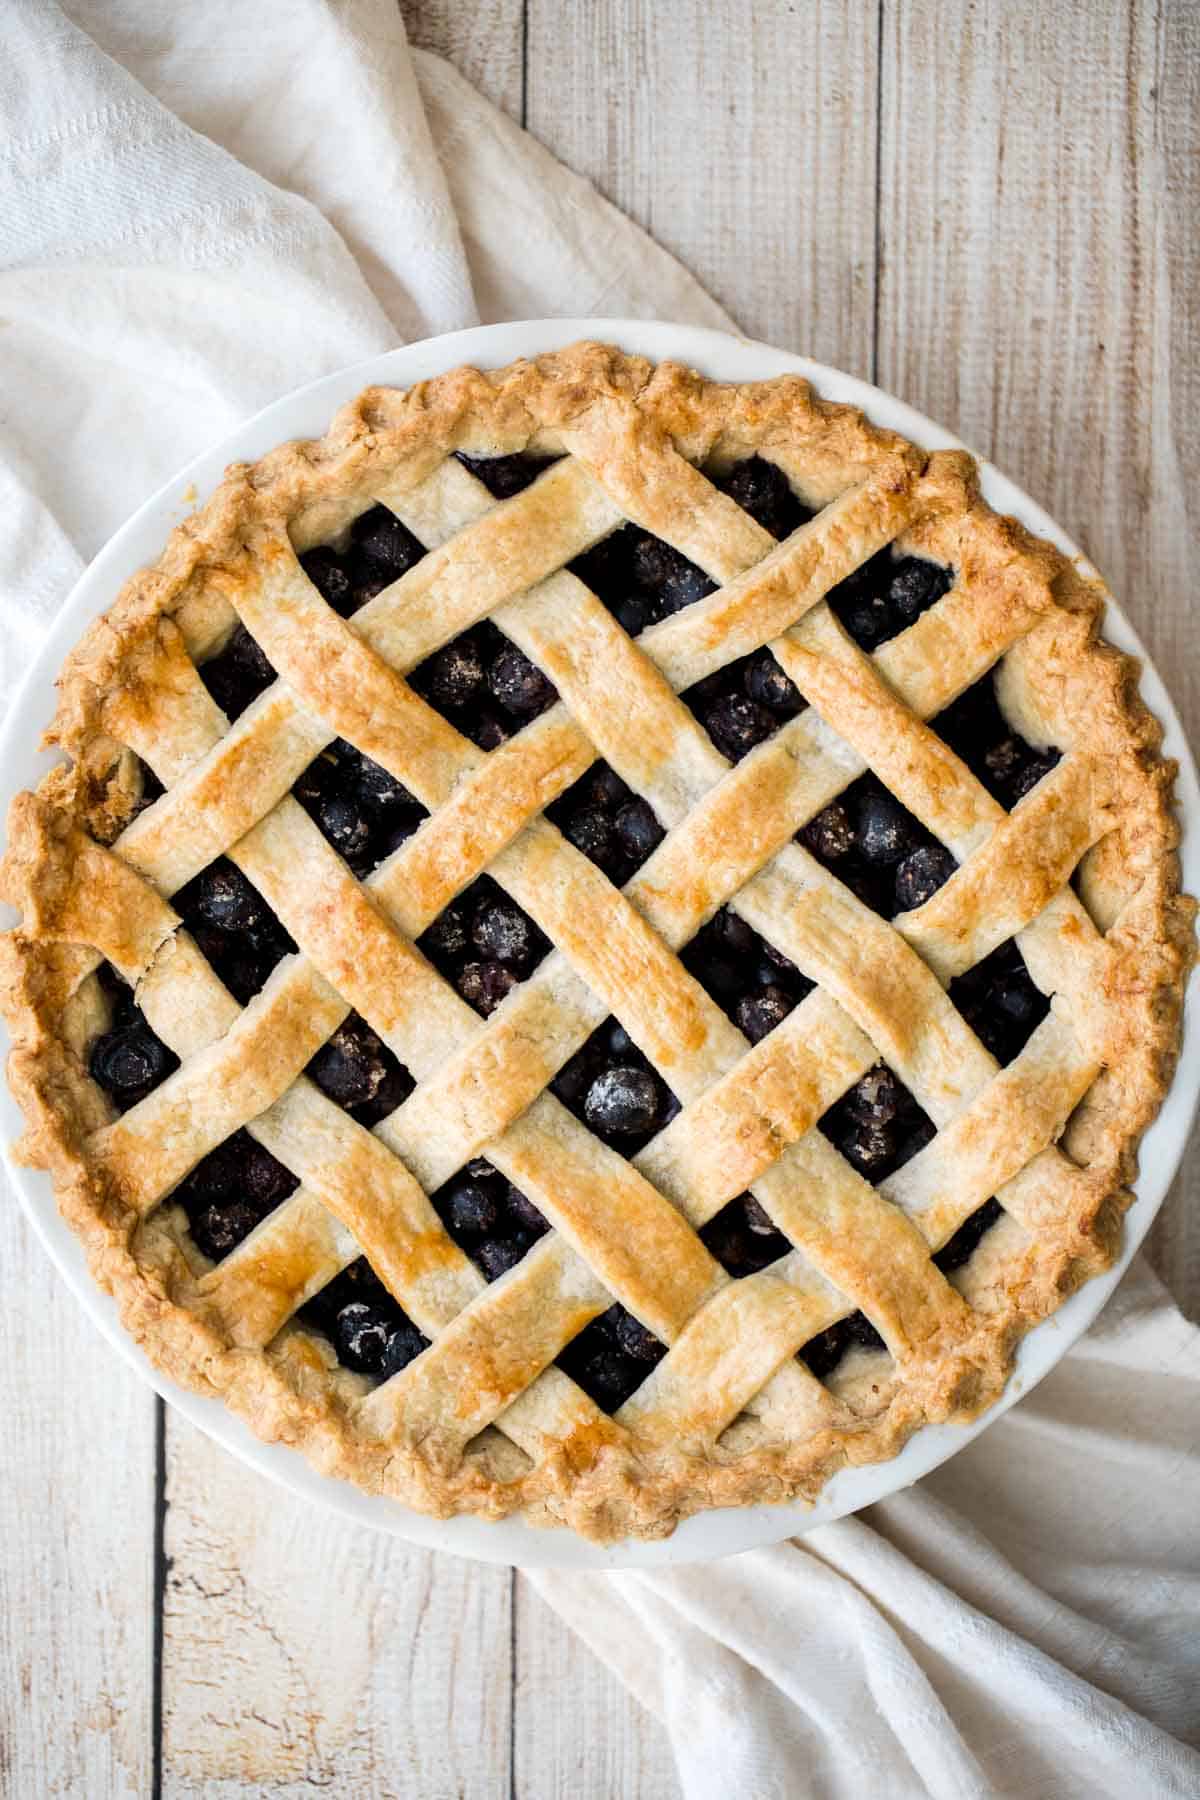
Homemade Blueberry Pie with Lattice Top
This Homemade Blueberry Pie with Lattice Top is the ultimate warm-weather dessert. It features a flaky, golden-brown crust, a jammy and vibrant blueberry filling kissed with lemon zest and cinnamon, and a show-stopping lattice top. It's comforting, classic, and downright irresistible. Serve warm with a scoop of vanilla ice cream or chilled with a dollop of whipped cream, it's the summer dessert of dreams.
My favorite part of summer is baking with all the fresh, seasonal fruit overflowing at the farmer's market. And when blueberry season arrives, there's only one thing on my mind: pie. This lattice crust blueberry pie is the perfect balance of sweet and tart, rich and buttery, rustic and elegant. Whether you're a pie pro or first-time baker, this recipe is easy to follow and sure to impress.
Why You'll Love this Homemade Blueberry Pie Recipe
- Flaky, buttery homemade crust. This easy homemade crust bakes up golden, buttery, and perfectly crisp around the edges. It holds up beautifully to the juicy blueberry filling and tastes so much better than store-bought. Once you make it from scratch, there's no going back.
- Lattice top for a beautiful finish. A woven lattice crust gives this pie a charming, classic look that's impressive but surprisingly simple to do. It also allows steam to escape, ensuring the filling thickens just right without becoming soggy.
- Sweet-tart filling with fresh blueberries. Fresh, juicy blueberries shine in this pie thanks to a simple filling that highlights their natural sweetness and bursts of flavor. A little lemon zest and cinnamon brings just enough depth and balance.
- Perfect for summer gatherings. This pie is always a crowd-pleaser and makes a stunning dessert centerpiece at any picnic, potluck, or backyard barbecue. It travels well and can be made ahead, making entertaining easy and stress-free.

Ingredient Notes
To make this delicious homemade Blueberry Pie with Lattice Top, you will need the following ingredients (full measurements in recipe card below):
- all purpose flour - used in both the pie crust and filling to create structure and thicken the juices. You can substitute with pastry flour for a more delicate crust.
- granulated sugar - sweetens both the crust slightly and the blueberry filling. Feel free to reduce slightly if your berries are extra sweet.
- salt - enhances the flavor of the crust and balances the sweetness of the filling.
- unsalted butter - cold, cubed butter creates those flaky layers in the crust. If using salted butter, reduce the added salt.
- ice cold water - helps bind the dough without melting the butter.
- blueberries - fresh blueberries are ideal, but you can use frozen ones straight from the freezer.
- lemon juice + zest - adds brightness and enhances the blueberry flavor. You can also use orange zest for a different citrus note.
- ground cinnamon - adds a subtle warmth to the filling.
- egg - used for egg wash to give the crust a glossy golden finish. You can substitute with milk or cream for a similar effect.
You will also need measuring cups and spoons, mixing bowls, a food processor, plastic cling wrap, and a rolling pin for preparing the pie dough, and a 9-inch pie dish for baking.

How to Make the Best Homemade Blueberry Pie with Lattice Top
First, make the pastry dough.
In a food processor, add flour, sugar, salt and cubed butter. Pulse mix on and off for 1 minute, until the flour mixture turns into a small breadcrumb-like consistency. Drizzle ice water into the mixture (ice water is the key here). Close the lid and continue to pulse mix on and off for another 1 minute. If you squeeze the crumbs together and they stick together, that means the crumbs are good to go.
Transfer the dough (crumb-like) into a large ziploc bag and squeeze with your hands to bring all the loose crumbs together until it turns into a nice and smooth dough ball. Divide the dough ball in half and flatten to form 2 equal discs. Wrap the discs separately in plastic wrap and refrigerate for at least 1 hour.
Next, make the blueberry filling.
In a large mixing bowl, combine blueberries, flour, sugar, lemon juice, lemon zest, and cinnamon and mix together. Set aside for assembling.


Now, let's assemble the pie.
Unwrap each dough disc and place in between 2 pieces of parchment paper or plastic wrap. Roll each dough disc into 12-inch circle using a rolling pin.
Transfer the first dough disc onto a 9-inch pie pan and gently press down to form into the bottom pie crust. Slowly pour the blueberry mixture into the dough-lined pie pan and use a spatula to spread them evenly across.


How to Create the Lattice Top
First, slice the second dough circle into 10 strips, measuring 1-inch wide. Place the dough scraps to the side. Place 5 strips of dough on top of the blueberry filling, evenly placed 1-inch apart (make sure to use the longer strips in the centre and shorter strips for the edges).
Fold back the 2nd and 4th strip halfway and place the longest strip in the centre, perpendicular to the first 5 strips. Place the 2nd and 4th strip back over that long strip.
Fold back the 1st and 3rd and 5th strip halfway and place a slightly shorter strip 1-inch away. Place the 1st and 3rd and 5th strip back over the shorter strip. Continue adding and alternating strips to complete the lattice top crust.


Then, press edges together and crimp with your fingers to seal. You can place the scraps along the edge and pinch them into the edges to seal.
Gently brush the egg wash over the lattice crust and edges. If your oven is not ready at this point, store the assembled pie in the fridge to prevent the pie crust from disintegrating (the butter in the dough melts quickly at room temperature).


Finally, let's bake the pie.
Preheat the oven to 375 F. Transfer the blueberry pie pan into the oven and bake for 50 minutes until the top crust is golden brown. Leave the blueberry pie in the pan at room temperature for 1 hour before serving. Then, slice it up and serve with a scoop of vanilla ice cream.


Recipe Variations
- Mixed berry pie. Replace part of the blueberries with blackberries, raspberries, or chopped strawberries for a colorful and flavorful twist.
- Add a crumble topping. Skip the lattice and use a brown sugar oat crumble for a rustic texture and sweet crunch.
- Make it gluten-free. Use a gluten-free pie crust and substitute the flour with cornstarch or a gluten-free blend.
- Make mini blueberry pies. Divide the dough and filling into smaller ramekins or muffin tins for personal-sized pies. They are perfect for entertaining or portion control.
- Almond-flavored crust. Add ¼ teaspoon almond extract to the dough for a subtle, nutty aroma that pairs beautifully with the blueberries and adds a unique twist.
How to Serve
This classic Blueberry Pie with Lattice Top is delicious served on its own with a scoop of Vanilla Ice Cream or a dollop of whipped cream. It also pairs well with other summer treats such as:
- Ice Cream Sandwiches
- French Lemon Tart
- Strawberry Sorbet
- Jam Thumbprint Cookies
- Fresh Fruit Tart
- Homemade Lemonade
For more recipes, see our 40 Best Summer Desserts.

Recipe Tips and Tricks
- Chill your dough thoroughly. Cold dough is key to flaky crust. Rest it in the fridge before and after rolling.
- Use a lower oven rack. This helps ensure the bottom crust bakes fully and avoids sogginess.
- Watch for bubbling filling. Bake until the filling bubbles in the center to guarantee it's fully cooked and thickened.
- Cover the edges if needed. Shield crust edges with foil or a pie shield if browning too quickly.
Storing and Freezing Instructions
How to Store
Cover and store pie at room temperature for up to 2 days or refrigerate for up to 5 days. Loosely cover with aluminum foil or plastic cling wrap
How to Reheat
Warm slices in a 300°F oven for 10-15 minutes or microwave for 15-30 seconds.
How to Freeze
Let pie cool completely, wrap tightly in aluminum foil and then place in a freezer bag or airtight container, and freeze for up to 3 months. Thaw overnight in the fridge before serving.
FAQ
Yes, you can use frozen blueberries if fresh ones aren't in season. Just be sure not to thaw them first, as that can release excess moisture and make the filling too runny. Toss them directly with the flour, sugar, and other filling ingredients before baking. You may need to increase the bake time slightly to accommodate the frozen berries, so watch for bubbling and doneness cues.
Not at all! While a lattice crust is visually stunning, you can opt for a full top crust with slits cut in for steam release, or use a crumble topping instead. If you're short on time, even a simple rustic crust with a few cut-out shapes placed on top can look beautiful and taste delicious.
To prevent soggy crust, make sure the pie is baked long enough so the bottom crust is fully cooked. Placing the pie on the lower rack of your oven helps the bottom brown better. You can also sprinkle a bit of flour or cornstarch on the bottom crust before filling to absorb excess juices, or preheat a baking sheet in the oven and place the pie pan on top to help crisp it up.
Absolutely. This pie can be baked the day before and stored at room temperature (loosely covered) for up to 2 days. You can also refrigerate it if you prefer a chilled slice. If you'd like to make it even further in advance, assemble and freeze the unbaked pie, then bake it straight from frozen, adding a few extra minutes to the bake time.
More Blueberry Recipes
- 15 Best Blueberry Recipes
- Blueberry Cheesecake
- Lemon Blueberry Bread
- Blueberry Cupcakes
- Blueberry Crisp
- Glazed Lemon Blueberry Scones

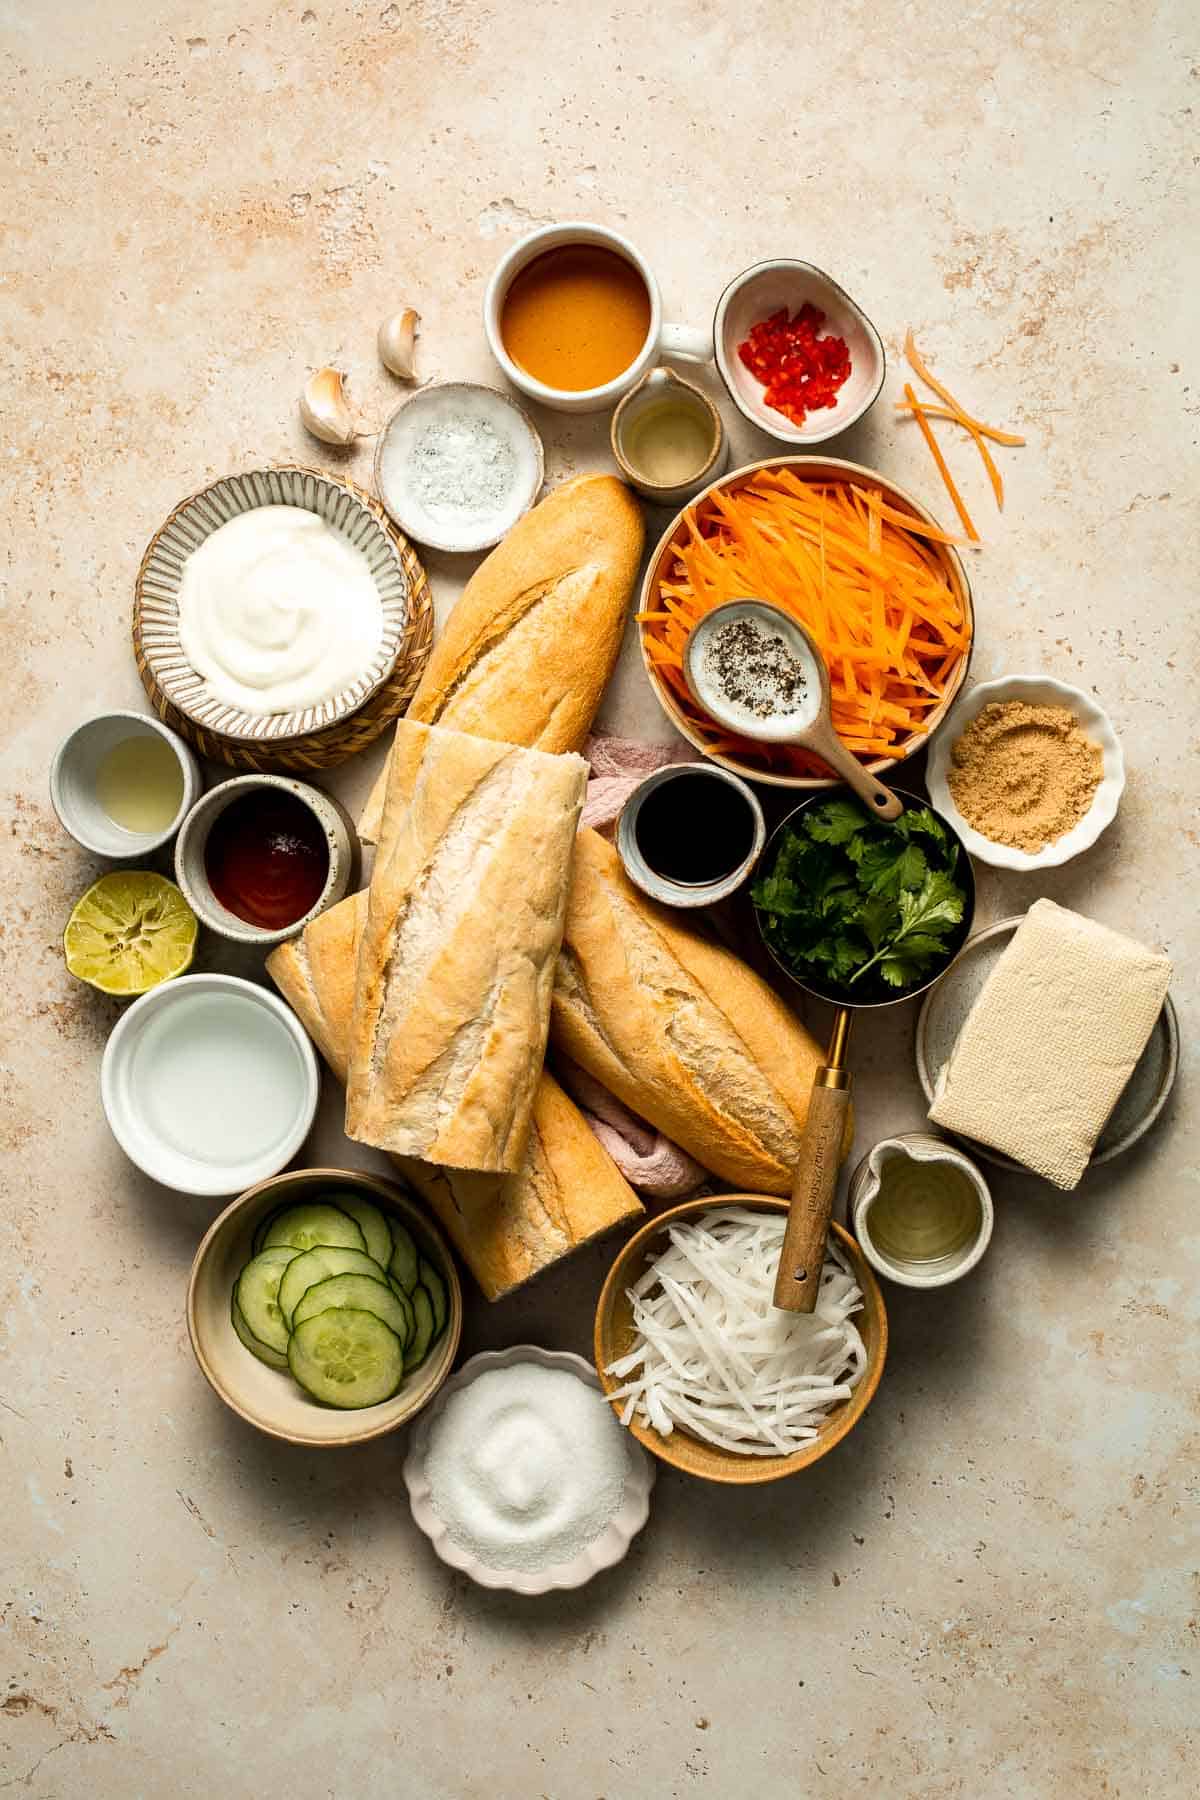
Vegetarian Banh Mi Sandwich
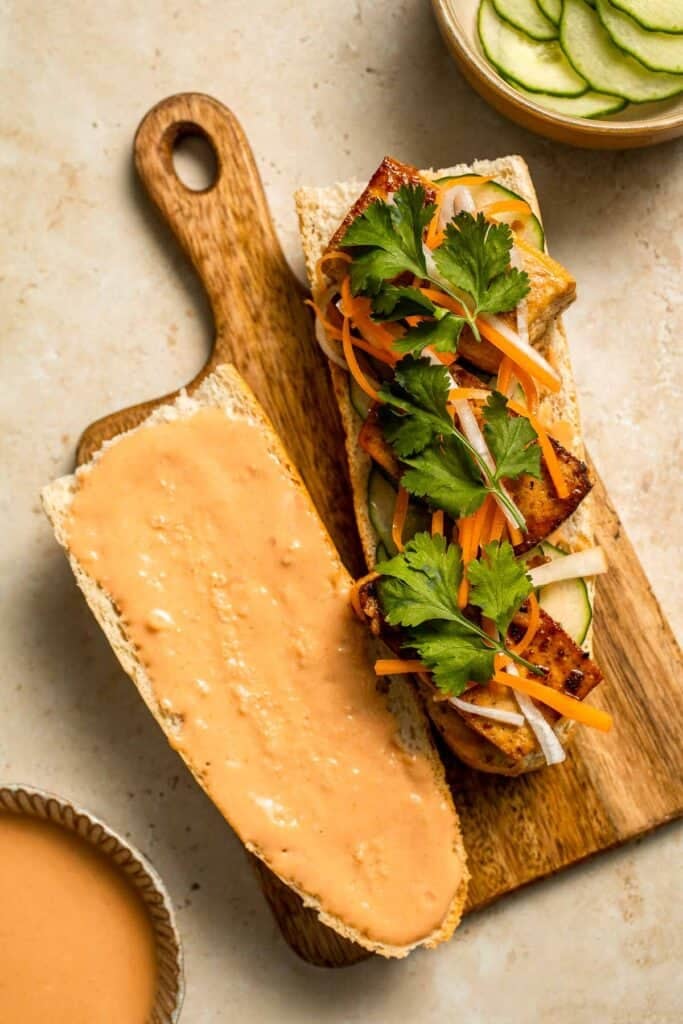
This Vegetarian Banh Mi Sandwich is a fresh, flavorful twist on the classic Vietnamese sandwich, packed with tangy pickled vegetables, crispy pan-fried tofu, and a creamy sweet chili mayo. Layered inside a warm, crusty baguette and topped with cucumber and cilantro, it's the perfect balance of savory, spicy, and refreshing. Best of all, it's completely meatless and easy to prep ahead for busy lunches or casual dinners.

If you've never tried a Banh Mi before, this version is a great place to start. The pickled vegetables add a pop of brightness, the tofu is perfectly seasoned and golden-crisp, and the sweet mayo sauce ties it all together. It's an easy, satisfying, and flavor-packed sandwich that you'll want to keep in your weekly rotation.
Why You'll Love this Vegetarian Banh Mi Recipe
- Incredible texture and flavor. The crispy tofu, crunchy pickled vegetables, and creamy mayo create the perfect bite in every sandwich, offering contrast and depth that's delicious and satisfying.
- Fully customizable. Prefer it fiery or mild? You can tweak the heat with sriracha, jalapeños, or leave it out entirely. The base flavors are bold enough to shine either way, making it super adaptable for all spice levels.
- Great for meal prep. Make the pickled veggies and tofu ahead so you can assemble sandwiches in minutes whenever hunger strikes, saving time while keeping things delicious. Perfect for lunchboxes or weeknight dinners that don't compromise on taste.
- Healthy and meat-free. You won't miss the meat with this satisfying tofu filling. It's protein-rich, packed with veggies, and fits perfectly into a vegetarian lifestyle without sacrificing flavor or satisfaction.

Ingredient Notes
To make this delicious Vegetarian Banh Mi Sandwich, you will need the following ingredients (full measurements in recipe card below):
- carrots - peeled and julienned. You can also buy pre-shredded carrots to save time.
- daikon radish - peeled and julienned. Sub with regular radish or omit if unavailable.
- picking ingredients - you will need water, rice vinegar, sugar, and salt for quick-pickling the vegetables.
- red chili pepper - this is optional, for a spicy kick.
- tofu - we use extra-firm tofu here as it holds its shape the best. Press out excess moisture before pan-frying. Use tempeh or mushrooms as an alternative.
- tofu marinade - you will need a combination of soy sauce, fish sauce (optional), garlic, sesame oil, lime juice, brown sugar, and ground black pepper for marinating the tofu. Omit fish sauce to keep it fully vegetarian.
- vegetable oil - for pan-frying the tofu. Use avocado or peanut oil as substitutes.
- mayonnaise - regular or vegan mayo work well.
- ketchup or Sriracha hot sauce - adjust to your spice preference.
- lime juice - adds tang to the mayo sauce. White vinegar can be used as well.
- baguettes - 6-inch crusty baguettes or a large one cut into sections. Toast for extra crunch.
- cucumber - sliced thinly lengthwise.
- fresh cilantro - essential for authentic flavor. Can sub with parsley if you're not a cilantro fan.
You will also need measuring cups and spoons, mixing bowls, a skillet or frying pan, tongs, a small saucepan, and a sharp knife.
How to Make the Best Vegetarian Banh Mi Sandwiches
First, prepare the pickled vegetables.
- Dry. Use a paper towel to at dry the julienned carrots and daikon completely dry.
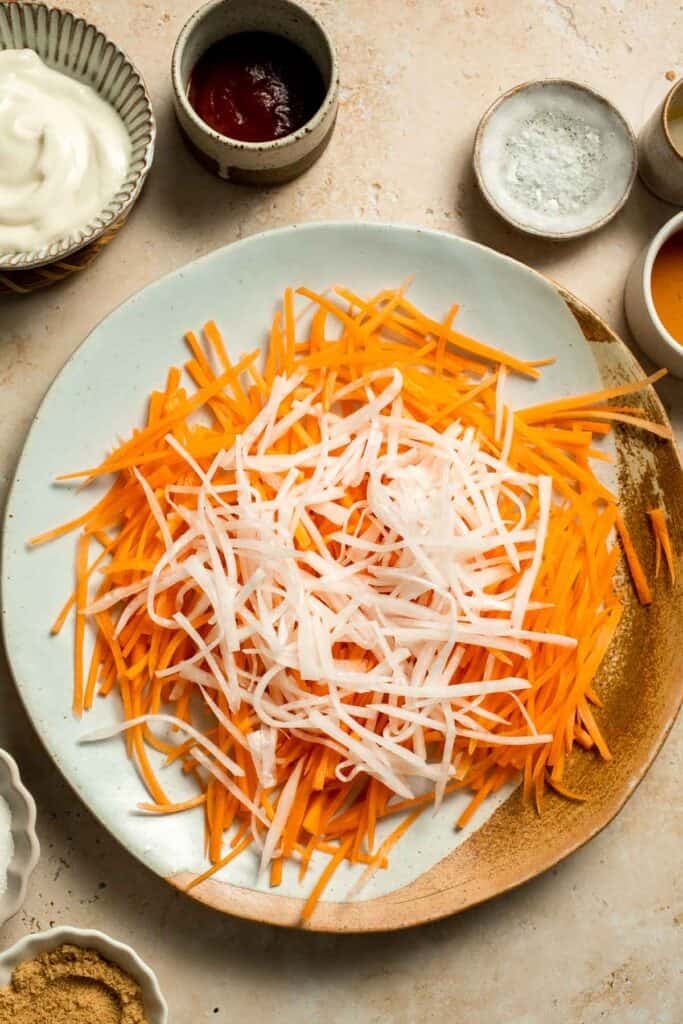

- Add pickling juices. Add them into a large Mason jar, along with water, vinegar, sugar, salt, and red chili pepper (optional). Stir well or shake the jar to dissolve the sugar and salt.
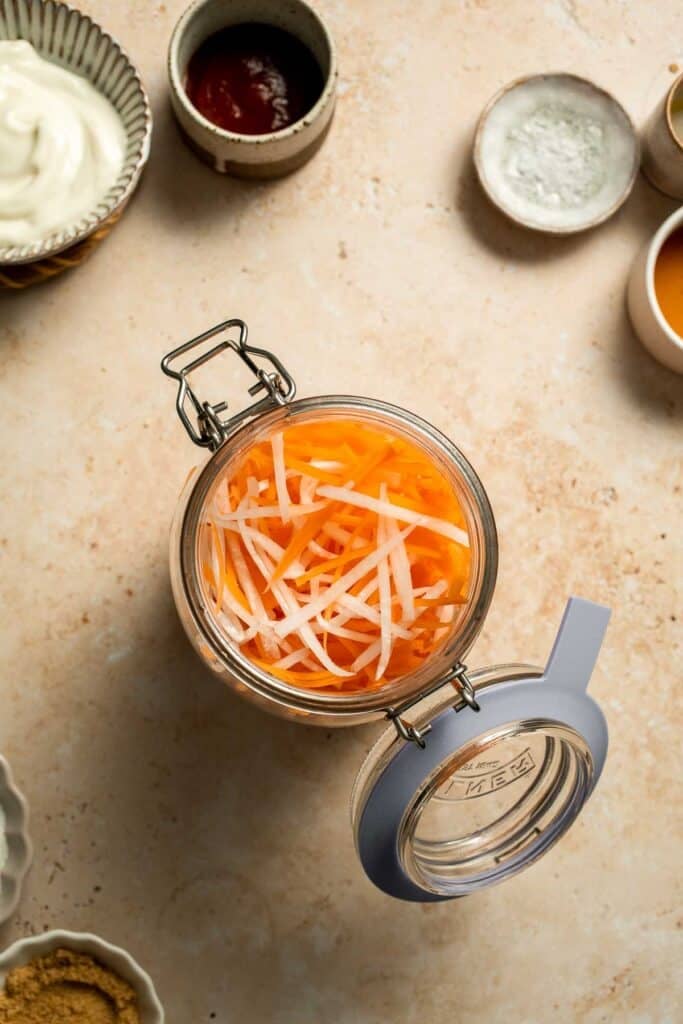
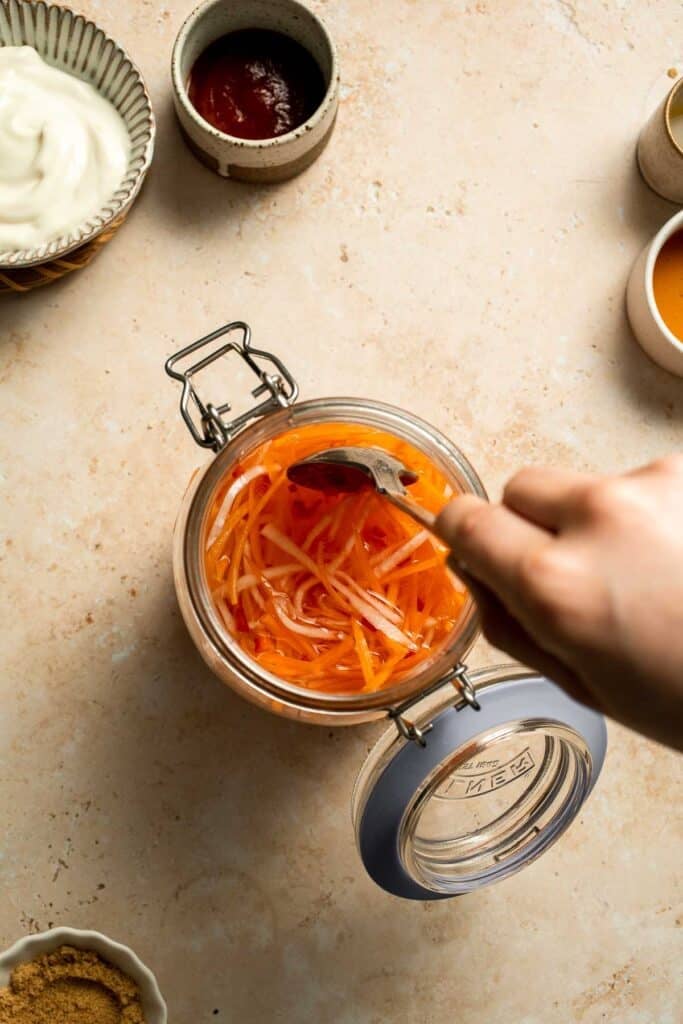
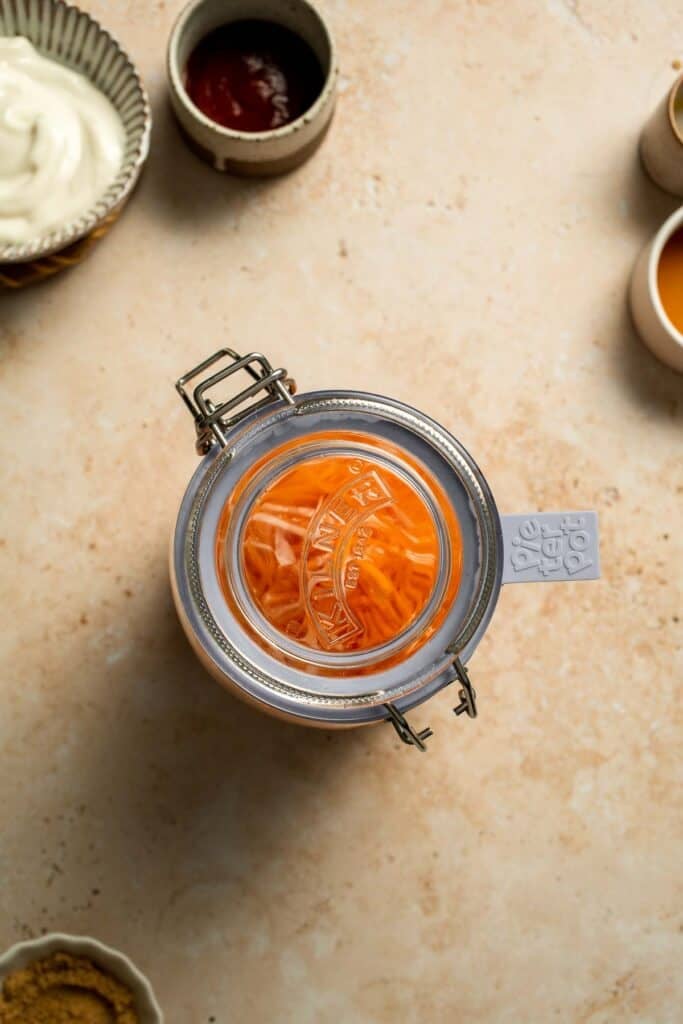
- Refrigerate. Transfer the jar to the refrigerator and leave it for at least 1 hour, or overnight. to infuse all the flavors.
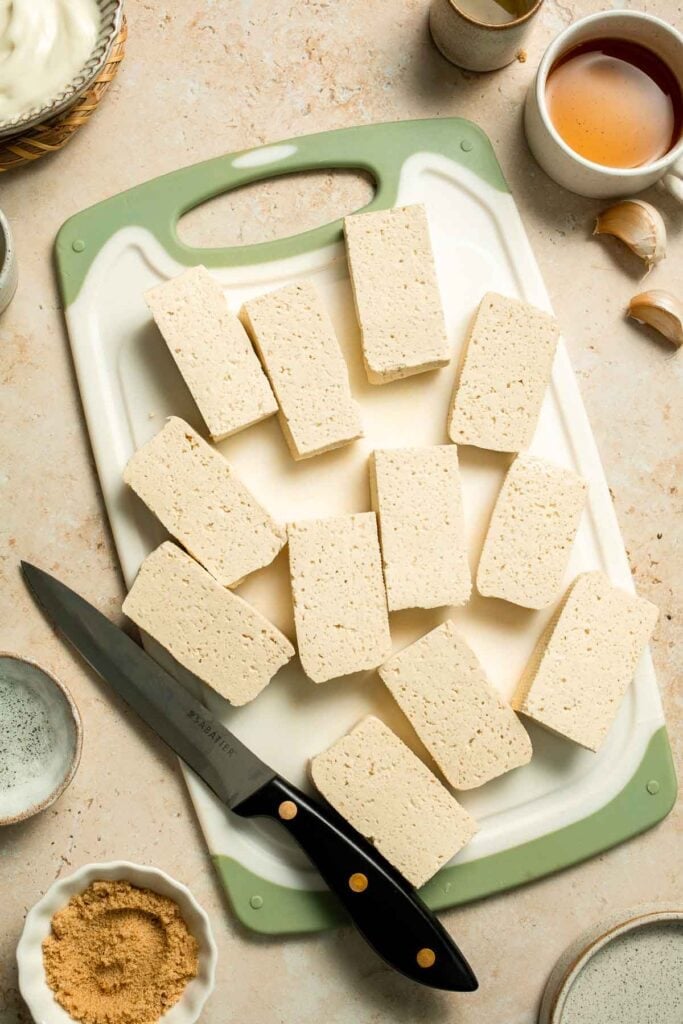
Next, prepare the tofu.
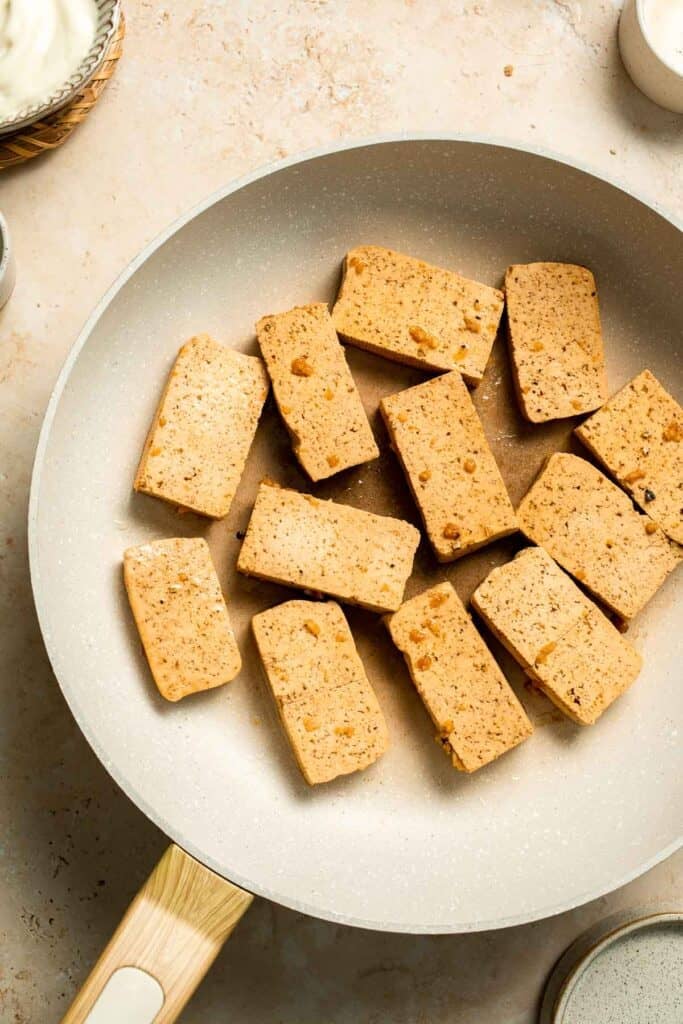
- Slice. Drain, then use a paper towel to pat the tofu completely dry. Cut the tofu into ½-inch thick slices (approximately 1 ½ x 3-inch rectangles).
- Marinate. In a large Ziploc bag or mixing bowl, combine the tofu slices, soy sauce, fish sauce (if using), garlic, sesame oil, lime juice, brown sugar, and black pepper. Shake well and marinate for at least 15 minutes.

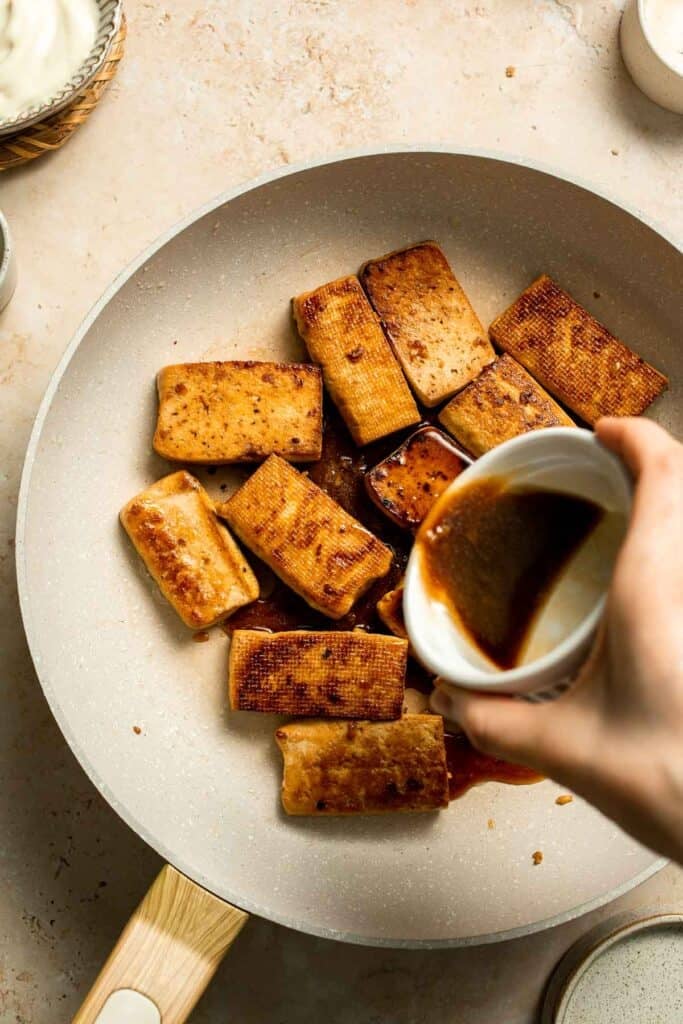
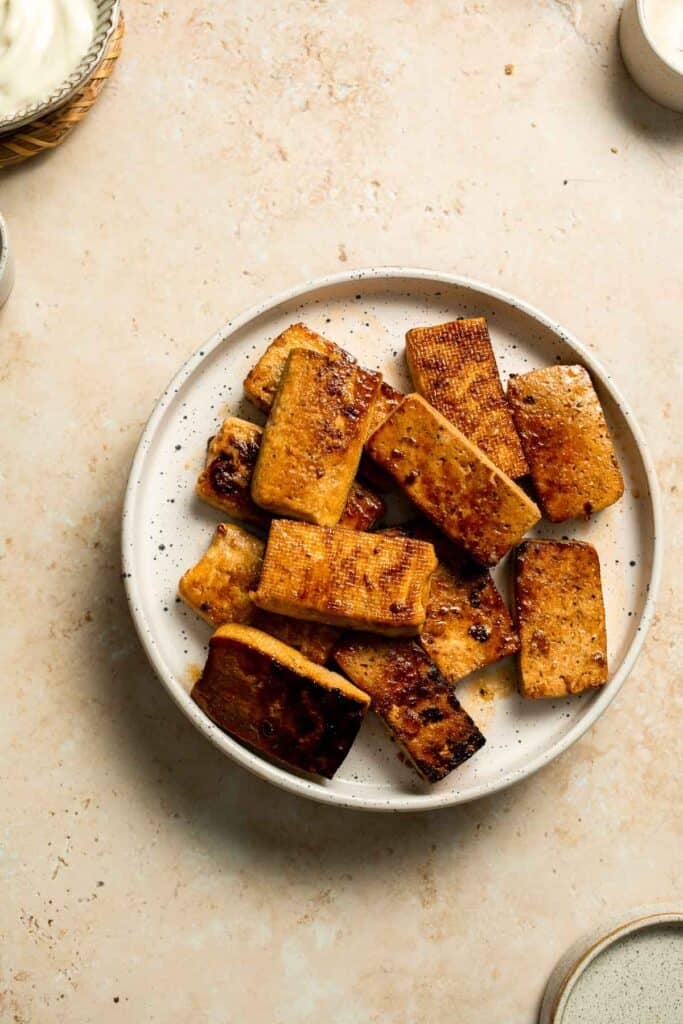
- Cook. Then, heat oil in a large skillet over medium-high heat until the hot oil sizzles, about 1 minute. Place tofu slices in a single layer in the skillet and cook until golden brown and crispy, about 2-3 minutes per side.
- Add sauce. Add the leftover marinade into the pan and cook for another 2-3 minutes to infuse more flavor into the tofu. (You can also bake or cook the tofu in the air fryer for 8-10 minutes until the skin gets crispy.) Set the tofu slices (and sauce) aside on a plate.
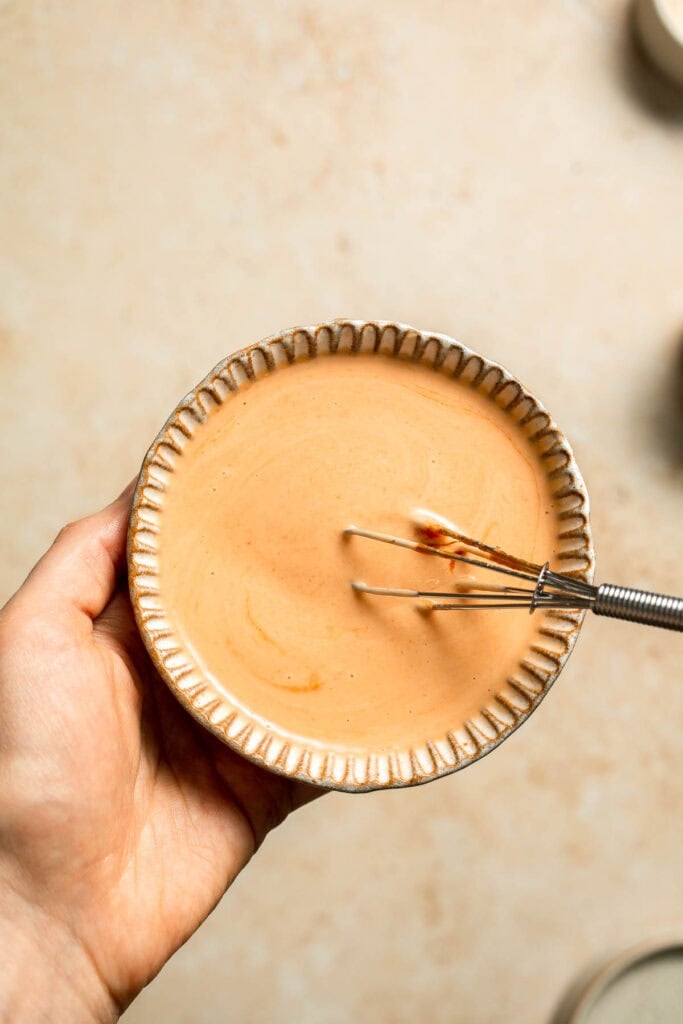
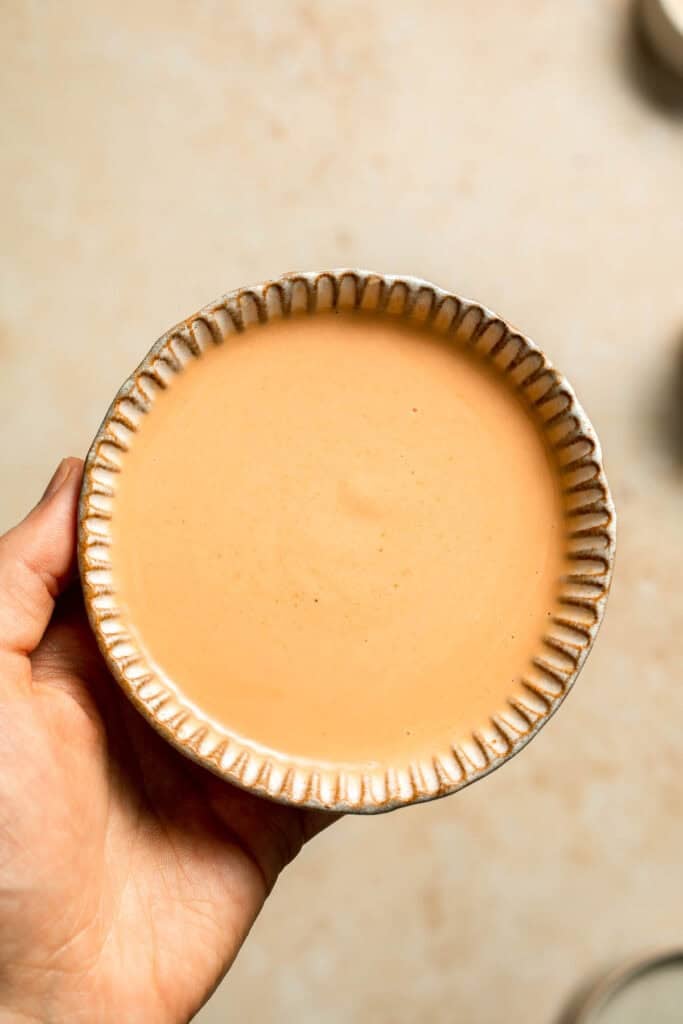
Now, let's make the sweet mayo.
In a small mixing bowl, combine mayonnaise, ketchup (or hot sauce), and lime juice. Stir well until you get a smooth consistency. Set aside.
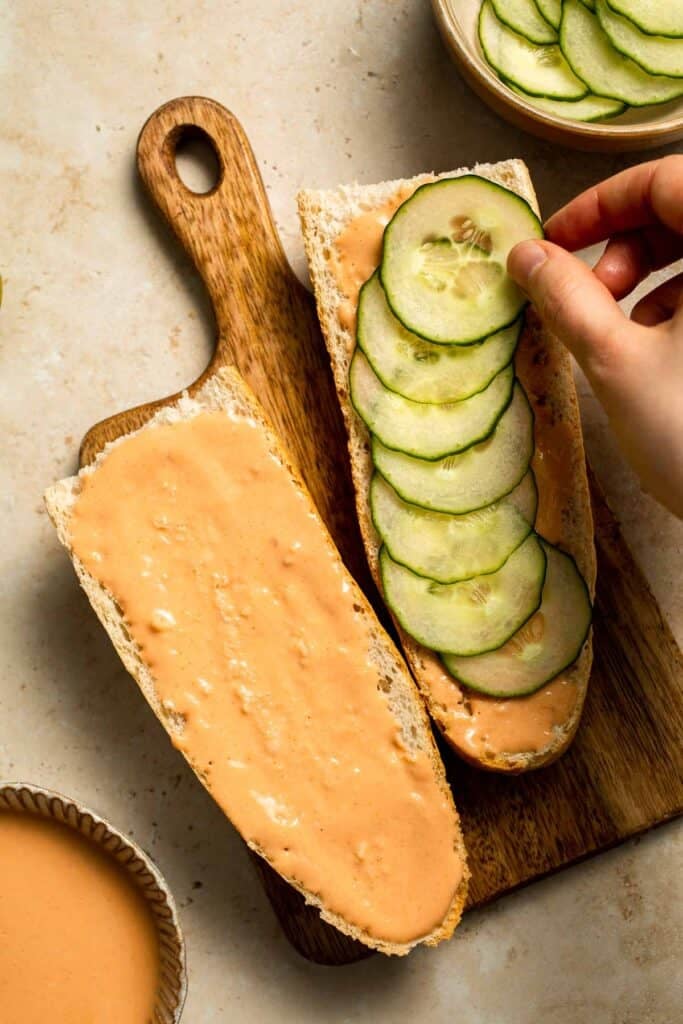
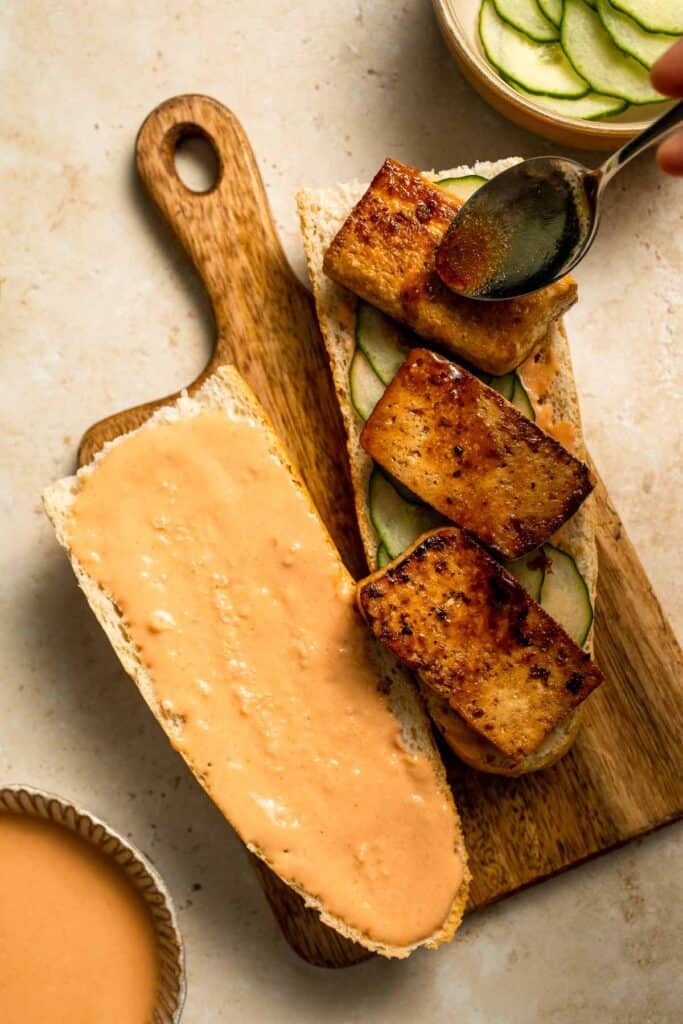
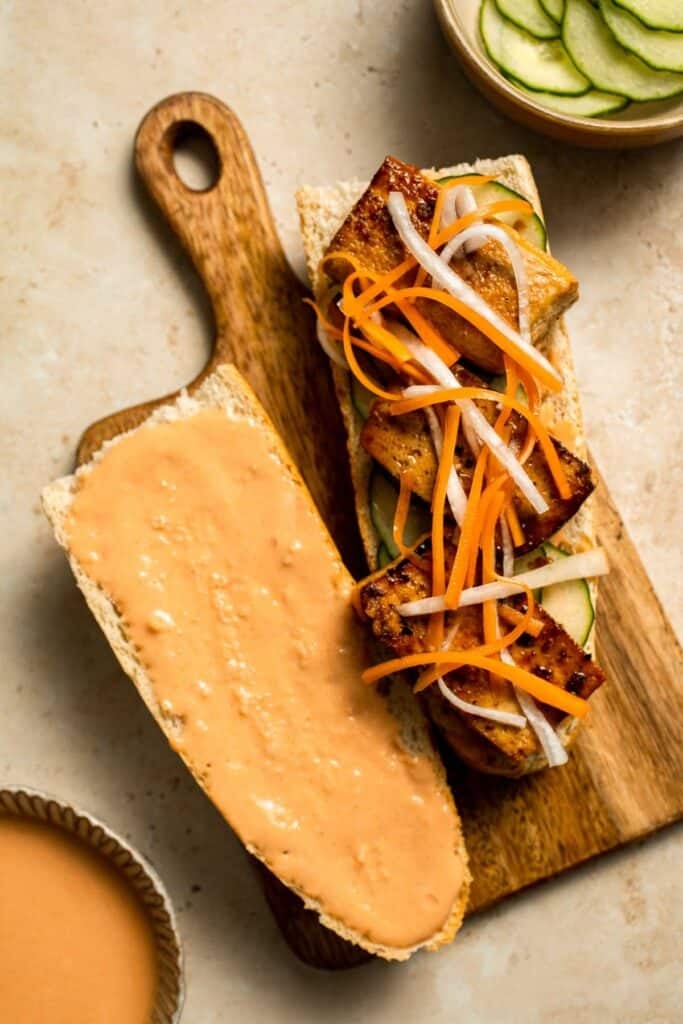
Finally, it's time to assemble the sandwiches.
- Use a sharp bread knife to slice each baguette open horizontally across the centre.
- Evenly spread the sweet mayo sauce on each half.
- Add cucumber slices, 3 or 4 tofu slices and a drizzle of the cooked marinade.
- Add some pickled carrots and daikon on top along with 2-3 pieces of fresh cilantro.
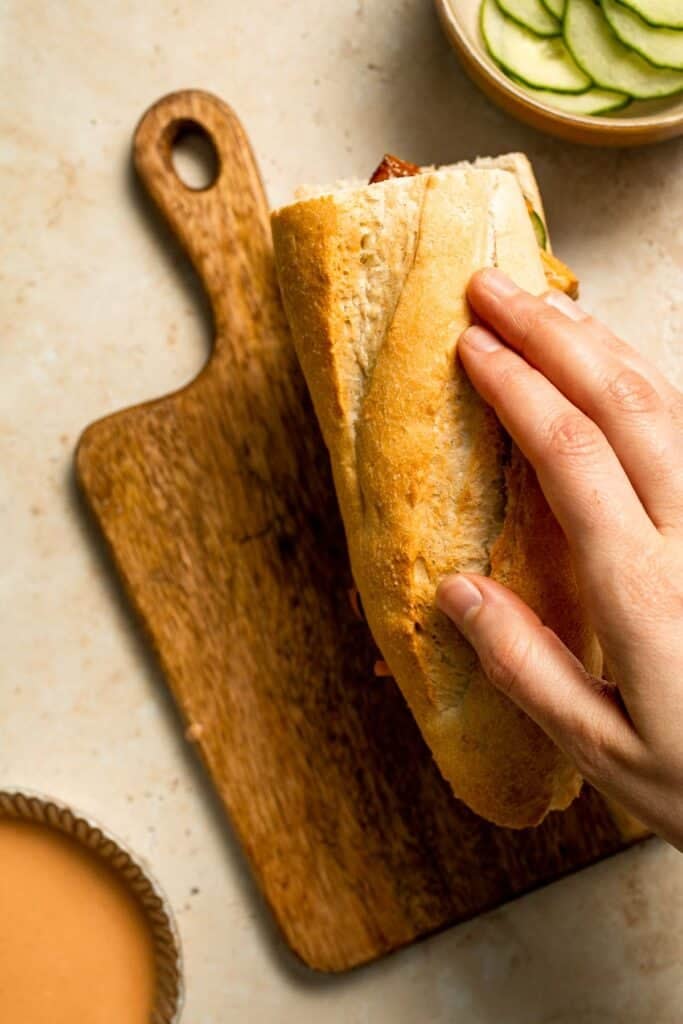
- Put the top half back on and wrap the banh mi sandwich with a piece of parchment paper (if desired) to prevent ingredients from falling out. Serve immediately.

Recipe Variations
- Make it vegan. Use vegan mayo and skip the fish sauce in the tofu marinade. It's still incredibly flavorful and completely plant-based, perfect for anyone avoiding animal products.
- Try a mushroom version. Swap tofu with thick slices of portobello or shiitake mushrooms for a savory, umami-rich filling that soaks up the marinade beautifully.
- Add jalapeño slices. For extra heat and a classic banh mi touch, add fresh jalapeños to your sandwich. They bring just the right amount of spicy crunch.
- Use pickled red onions. Add pickled onions for a punch of acidity and a pop of color, complementing the other ingredients beautifully.
- Switch up the bread. Use ciabatta, hoagie rolls, or even lettuce wraps if baguettes aren't available. Each option offers a unique texture.
How to Serve
This Vegetarian Banh Mi Sandwich is delicious served on its own, or paired with some delicious sides including:
- Chinese Garlic Cucumber Salad
- Baked Sweet Potato Wedges
- Vegetarian Spring Rolls
- Vietnamese Chicken Salad
- Summer Fruit Salad
- Cold Brew Coffee

Recipe Tips and Tricks
- Press the tofu. Removing moisture ensures it crisps up nicely when cooked and allows it to better absorb the flavorful marinade.
- Marinate the tofu. Even 15-30 minutes will enhance the flavor of your tofu filling, but overnight yields the deepest infusion of taste.
- Toast the bread. Lightly toasting your baguette adds texture and helps hold up to the fillings, keeping everything together and avoiding sogginess.
- Use a mandoline. To quickly and evenly slice your vegetables for pickling, ensuring consistent texture and presentation every time.
- Adjust sauce to taste. Mix the sweet mayo sauce to your liking - more heat, more lime, more creamy, whatever fits your flavor preference best.
Storing and Freezing Instructions
How to Store
Store leftover pickled veggies and tofu in separate airtight containers in the refrigerator. The veggies can last for 1-2 weeks, while the tofu can last for up to 4 days.
How to Reheat
Reheat tofu in a skillet over medium heat until warmed through and crispy again, or briefly in the oven, if desired.
How to Freeze
While tofu can be frozen, the texture will change slightly. The pickled veggies are best enjoyed fresh.
FAQ
Yes! Prep the tofu and pickled veggies in advance, then store them separately. Assemble the sandwiches fresh for best texture and flavor. The pickled veggies actually develop more depth after sitting for a day or two, and tofu can be quickly reheated, making this a great prep-ahead option for weekday lunches.
Absolutely. If you're short on time, store-bought pickled carrots or daikon are a convenient shortcut. Just make sure they aren't overly sweet or seasoned to preserve the balance of the sandwich. Homemade pickling gives you more control, but store-bought can still produce a delicious result.
No, it's optional. It adds depth, but you can easily skip it to keep the recipe fully vegetarian. The soy sauce, lime juice, garlic, sesame oil, and sugar create a rich marinade on their own. If you want that umami note, try adding a splash of mushroom soy sauce instead.
Yes. Bake at 400°F for 25-30 minutes, flipping halfway through until crispy and browned. It's a great hands-off option that's less oily and still results in a firm, flavorful texture. This is especially helpful when making a big batch or if you prefer a healthier method.
More Sandwich Recipes
- Caprese Sandwich
- Green Goddess Sandwich
- Roasted Broccoli Grilled Cheese
- Greek Chicken Gyros (with Homemade Tzatziki)
- Egg Salad Sandwich
- Lemongrass Chicken Banh Mi Sandwich
Tried this recipe?
I'd love to hear what you think! Leave a comment and rating below to share your feedback. Your reviews help others discover this recipe and help me keep creating more free recipes for you. Snap a photo and tag me on social media @aheadofthyme too.

Easy Grilled Shrimp Boil
This Easy Grilled Shrimp Boil is the ultimate summer weeknight meal. Made with plump tiger prawns, sweet corn, baby potatoes, smoky sausage, garlic, and fresh herbs, all tossed in Old Bay seasoning and buttery lemon sauce, then grilled to perfection. It's smoky, savory, buttery, and zesty with charred edges and big flavor in every bite. Best of all, it comes together in about 30 minutes with minimal cleanup, thanks to the grill.

If you love a classic shrimp boil, you're going to love this grilled version even more. Grilling brings out deeper flavors with a hint of smokiness, adds texture with those golden charred marks, and makes this meal perfect for warm-weather gatherings or casual backyard dinners. Toss everything in foil packets or a grill basket (or a grill pan) and let the heat work its magic.
Why You'll Love this Easy Grilled Shrimp Boil Recipe
- Packed with bold flavor. Between the Old Bay seasoning, garlic, lemon, and melted butter, every bite is loaded with smoky, savory, and tangy flavors.
- No boiling water required. Skip the big pot and make your shrimp boil entirely on the grill. It's fast, easy, and cleanup is a breeze.
- A summer crowd-pleaser. This recipe is perfect for cookouts, family dinners, or backyard gatherings. It feels special but is incredibly easy to throw together.
- Hearty and satisfying. With shrimp, sausage, corn, and potatoes, this is a full meal that's filling, flavorful, and balanced.

Ingredient Notes
To make this delicious Easy Grilled Shrimp Boil, you will need the following ingredients (full measurements in recipe card below):
- tiger prawns - large tiger prawns work best here, but yoou can also use jumbo shrimp. Just make sure they're big! I prefer peeling and deveining them, but feel free to leave the shells and tails on if you enjoy peeling them while eating.
- old bay seasoning - this classic seafood seasoning adds that signature shrimp boil flavor. It's my go-to blend, but feel free to use your favorite seafood spice mix or even a Cajun-style blend for a spicier twist.
- fresh corn - use sweet corn, husked and cut crosswise into 2-inch slices. It grills up beautifully, becoming sweet, smoky, and slightly charred. Frozen cobs can also be used if fresh isn't available.
- potatoes - I like using a mix of baby red, yellow, and purple potatoes for color and texture. Slice them in half to help them cook faster. Larger potatoes can be used instead - just cut them into smaller chunks for quicker cooking.
- sausages - go for smoky sausage like kielbasa or andouille, sliced into generous bite-sized pieces. Chicken or turkey sausage also works well if you want something lighter.
- lemon - fresh lemon, quartered, adds zesty brightness and balances the richness of the butter. Grill a few slices or wedges for extra flavor.
- garlic - use 5 heaping cloves, crushed to release their flavor into the butter. It's a key part of that buttery garlic drizzle!
- butter - melted butter brings everything together in rich, savory, lemony goodness. Use unsalted to control the seasoning level, or swap in ghee if preferred.
- parsley - fresh chopped parsley brightens the whole dish. Green onions can be substituted for a slightly different but still fresh flavor.
- olive oil - use a bit to brush your grill grates and ingredients to prevent sticking and enhance the charred edges. Avocado oil is a great high-heat option.
You will also need measuring cups and spoons, a large mixing bowl, grilling tongs, and a grill with medium-high heat (and aluminum foil or a grill basket) or an indoor grill pan.

How to Make the Best Grilled Shrimp Boil
First, prep the ingredients.
- Season the prawns. In a medium mixing bowl, toss the prawns with 1 tablespoon of Old Bay seasoning. Set aside to marinate for 5 minutes.
- Combine ingredients. In a large mixing bowl, combine the corn, baby potatoes, sausage, lemon, and garlic. Add the seasoned prawns to the bowl. Add 2 tablespoons melted butter, 1 teaspoon parsley, and the remaining tablespoon of Old Bay seasoning. Toss everything together until evenly coated, then let it sit for 10 minutes to absorb the flavors.


Now, let's cook on the grill or a grill pan.
You can cook this shrimp boil on either a grill pan or an outdoor barbecue grill.
Option 1: How to Make Shrimp Boil on a Barbecue Grill
- Prep the grill. Brush the grill grates with olive oil or spray with nonstick cooking spray to prevent sticking.
- Grill the ingredients. Place the corn, potatoes, shrimp, sausage, and lemon directly on the grill. Grill for a few minutes per side, just until lightly charred and distinct grill marks appear.


- Assemble in foil or a pan. Transfer the grilled items to a large disposable aluminum pan. Add the remaining melted butter and toss to coat. Cover tightly with foil, sealing the edges. Alternatively, divide the grilled ingredients onto four 12-inch sheets of aluminum foil. Spoon the remaining butter over each portion. Fold the foil over to form packets, sealing the edges by rolling them tightly.
- Finish cooking. Place the aluminum pan or foil packets back on the grill. Cover and cook for 15-20 minutes, until everything is cooked through and heated.
Option 2: How to Make Shrimp Boil on a Grill Pan
- Add items. Brush a grill pan with olive oil and heat over medium-high heat. Arrange the items (corn, potatoes, shrimp, sausage, and lemon) in a single layer and lightly brush the tops with some of the remaining melted butter.
- Cook. Cook for about 5 minutes, or until charred grill marks appear. Lower the heat to medium. Then, carefully flip everything, add 1 cup of water to the pan, and cover tightly with aluminum foil.
- Simmer. Simmer for another 15 minutes, or until the potatoes are tender and the shrimp are cooked through.
Finally, let's serve.
Remove from grill and sprinkle with fresh chopped parsley and a generous dusting of Old Bay seasoning before serving.

Recipe Variations
- Add more seafood. Toss in mussels, clams, or scallops for a more seafood-heavy version of this grill boil.
- Make it spicy. Add red pepper flakes or your favorite hot sauce to the garlic butter for an extra kick.
- Use different herbs. Swap parsley for dill, thyme, or cilantro for a slightly different flavor profile.
- Try different sausage. Andouille sausage adds Cajun heat while chorizo brings a smoky, spicy flavor. Go with what you love.
- Add veggies. Bell peppers, red onions, or zucchini grill up beautifully and add color and nutrition.
How to Serve Shrimp Boil
Shrimp Boil is a delicious and filling meal served as is, on its own. It also goes great paired with some summer side dishes, especially if feeding a crowd, including:
- Crusty French Baguettes or Sourdough Bread
- Buttermilk Cornbread
- Classic Coleslaw
- Arugula Salad
- Grilled Vegetable Skewers
- Homemade Lemonade
For more recipe ideas, see our 25+ Best BBQ Side Dishes.

Recipe Tips and Tricks
- Parboil the potatoes. Boil potatoes until just fork-tender before grilling to ensure they cook through without burning.
- Use foil packets for easy cleanup. Wrap ingredients in heavy-duty foil to keep everything moist and avoid sticking.
- Layer the ingredients. Put potatoes and corn on the bottom with shrimp and sausage on top to prevent overcooking.
- Grill over medium-high heat. This helps get that nice char without drying out the shrimp.
- Finish with extra butter and lemon. A final drizzle of garlic butter and a squeeze of lemon juice brings everything together.
Storing and Freezing Instructions
How to Store
Transfer leftovers to an airtight container and refrigerate for up to 3 days.
How to Reheat
Reheat gently in a skillet over low heat or wrap in foil and warm on the grill or in a 350°F oven until heated through.
How to Freeze
You can freeze leftovers, but note the texture of shrimp and potatoes may change slightly. Freeze in a sealed container for up to 2 months.
FAQ
Yes! You can prep all the ingredients and marinate the shrimp and sausage a few hours in advance. Keep everything in the fridge until you're ready to assemble and grill. Just don't marinate too long or the shrimp can become mushy.
Absolutely. Just make sure to thaw and pat them dry first. Excess moisture can cause the shrimp to steam rather than grill, which affects texture. Try to use large, shell-on shrimp or prawns for the best results.
Yes, if you don't have access to a grill, you can use a grill pan or cast-iron skillet on the stovetop. Alternatively, bake the foil packets in the oven at 400°F for 15-20 minutes.
Smoked sausage, kielbasa, or andouille are great options for their bold flavor and firm texture. Chicken or turkey sausage also works well if you want a lighter version. Cut them into 1-inch slices for even cooking.
More Shrimp Recipes
- 30 Best Shrimp Recipes
- Shrimp Fajitas
- Tiger Prawns in Garlic Ginger Soy Sauce
- Shrimp Alfredo
- Shrimp Cakes
- Seafood Fried Rice
Tried this recipe?
I'd love to hear what you think! Leave a comment and rating below to share your feedback. Your reviews help others discover this recipe and help me keep creating more free recipes for you. Snap a photo and tag me on social media @aheadofthyme too.

Fresh Strawberry Sauce (3 Ingredient Topping)
This Fresh Strawberry Sauce is thick, smooth, and bursting with real strawberry flavor in every bite. It's the ultimate quick and easy topping for pancakes, waffles, cheesecake, ice cream, and more! It is made with just three simple ingredients and no cornstarch or lemon juice required. Whether you're elevating a weekend brunch or finishing off a special dessert, this sauce is a must-have.
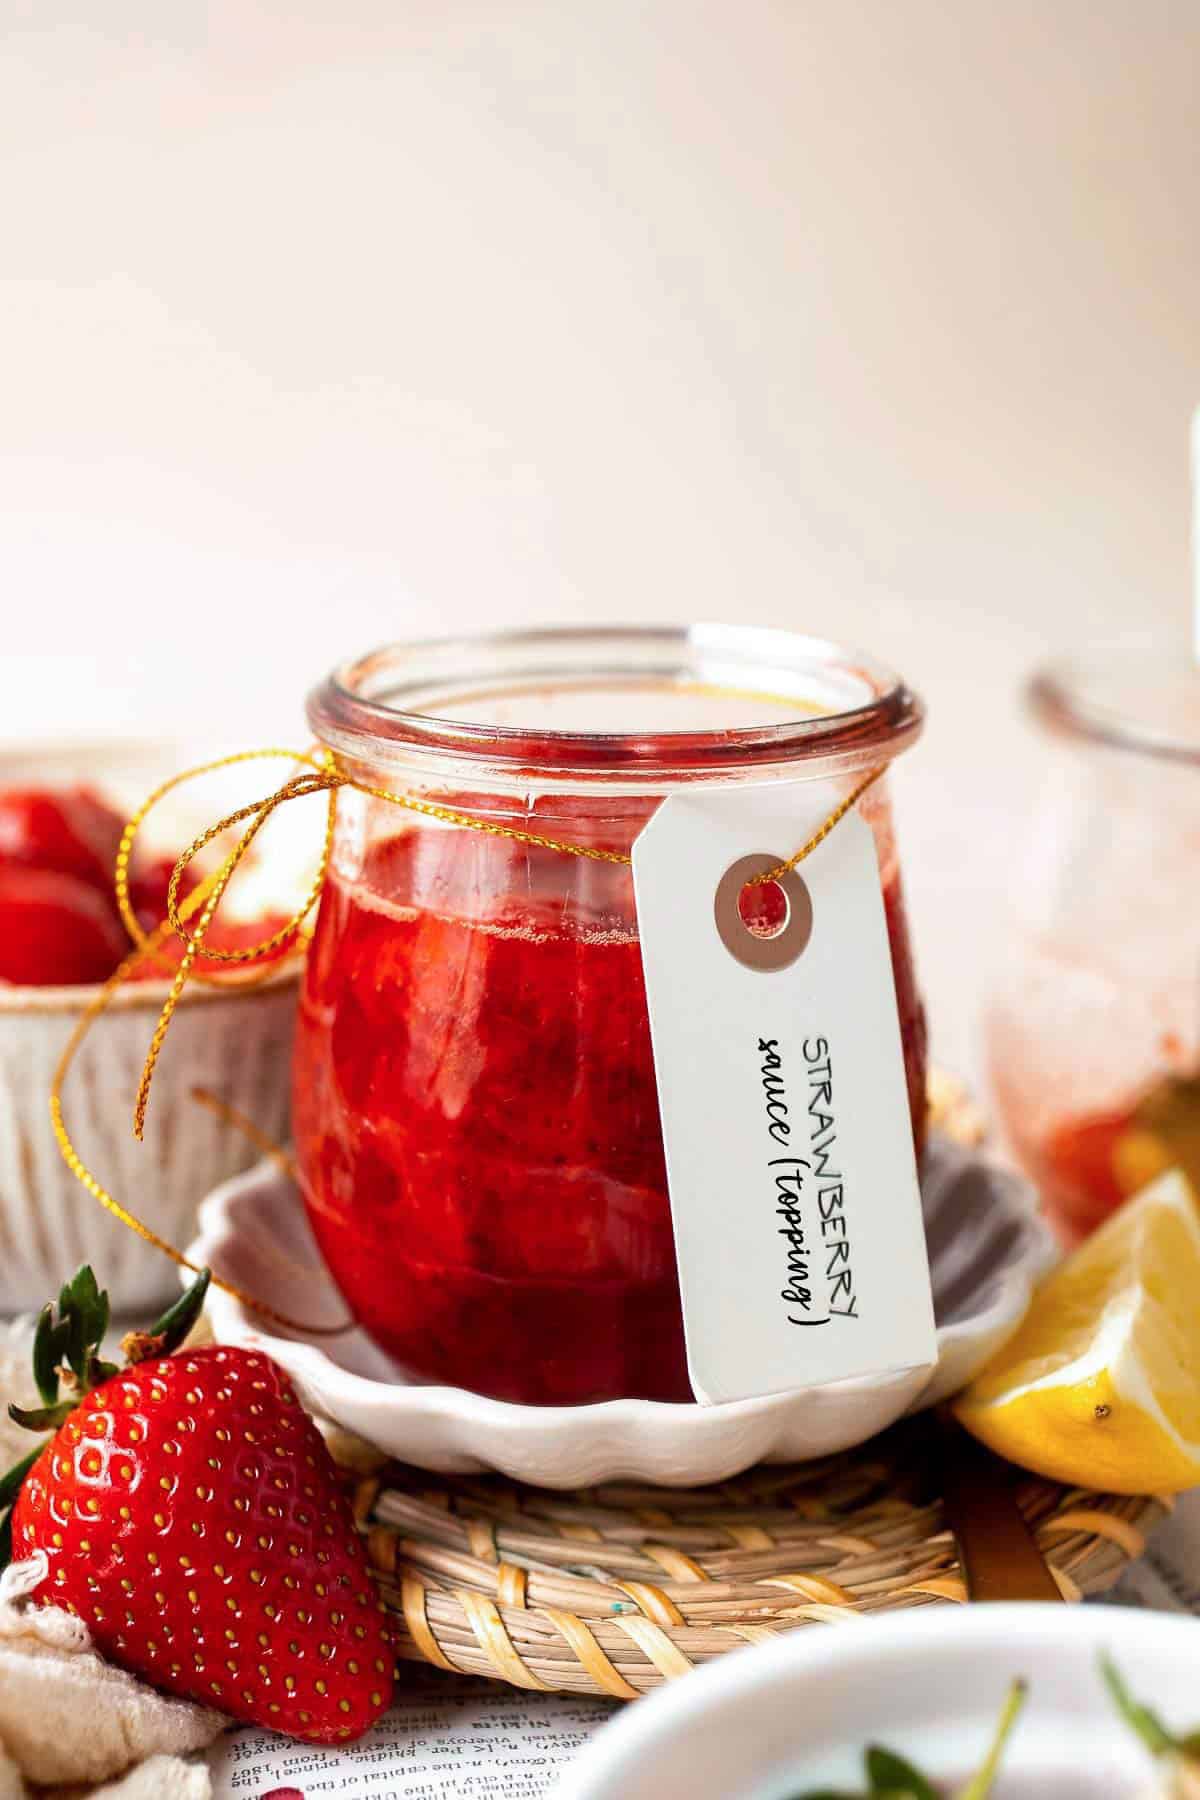
When I think of the ultimate topping, no other contender cuts it quite like this one. It's sweet, perfectly syrupy, and full of soft, jammy fruit. The best part? You can whip it up in about 25 minutes using fresh strawberries, orange juice, and a touch of sugar. It's a fridge staple in our home, and once you try it, you'll want to drizzle it on everything.
Why You'll Love this Fresh Strawberry Sauce Recipe
- Big strawberry flavor. Made with fresh strawberries and orange juice, this sauce is rich, fruity, and tastes like real strawberries. It's not artificial or overly sweet, and so much better than store-bought sauce.
- Just 3 ingredients. No cornstarch, no lemon juice, and no extra thickeners needed. This is a simple, clean recipe anyone can make using using just 3 ingredients and one pot.
- Quick to make. Ready in about 25 minutes, this strawberry sauce is the perfect last-minute upgrade to breakfast or dessert.
- Versatile topping. Use it warm or cold over pancakes, cheesecake, French toast, crepes, ice cream, oatmeal, and more.

Ingredient Notes
To make this quick and easy Fresh Strawberry Sauce recipe, you will need the following ingredients (full measurements in recipe card below):
- strawberries - fresh strawberries are ideal for flavor and texture, but you can also use frozen (thaw first and adjust cook time slightly).
- orange juice - adds natural sweetness, acidity, and brightness. Fresh squeezed is best, but bottled works too.
- sugar - regular granulated sugar sweetens and thickens the sauce slightly. You can adjust the amount to taste or substitute with honey or maple syrup as well.
You will also need measuring cups and spoons, a saucepan, spoon or spatula, and an airtight container or glass jar for storing.

How to Make the Best Fresh Strawberry Sauce
- Combine ingredients and cook. In a small saucepan over medium-high heat, add ¾ of the sliced strawberries, sugar, and orange juice and stir to combine. Bring to a gentle boil and cook, stirring occasionally, until the strawberries are syrupy and the juices begin to release, approximately 5 minutes.
- Simmer. Turn heat down to medium and continue to cook until the sauce thickens, about 15 minutes. Stir occasionally.
- Puree. Transfer the strawberry sauce to a blender and puree until smooth.


- Add more strawberries. Transfer the pureed sauce back to the saucepan. Add the remaining ¼ fresh strawberry slices and stir to combine. Continue to cook on medium for 5 minutes.


- Cool. Remove from heat and allow the sauce to cool to room temperature (or refrigerate until cool) before using as a topping.
Recipe Variations
- Make it chunkier. Leave more whole strawberry pieces or only mash half of the mixture if you want a more textured sauce.
- Add vanilla. Stir in ½ teaspoon vanilla extract at the end for a richer, deeper flavor.
- Use lemon instead of orange. Swap the orange juice for lemon juice for a sharper, more citrus-forward taste. You can also add zest for extra zing.
- Make it refined sugar-free. Use honey, maple syrup, or coconut sugar instead of white sugar to suit your dietary preferences.
- Add herbs. Add a small sprig of fresh mint or basil while simmering for a subtle, elevated twist.
How to Serve
This Fresh Strawberry Sauce is delicious poured over any dessert and so many breakfast dishes including:
- Pancakes, Waffles, or French Toast
- Crepes
- Cheesecake or Cake
- Ice Cream or Frozen Yogurt
- Parfaits
- Oatmeal
- Scones or Biscuits

Recipe Tips and Tricks
- Simmer gently. Cook the sauce over medium-low heat so the fruit breaks down slowly and doesn't burn.
- Mash or blend to your liking. For a smooth sauce, use an immersion blender. For a chunkier version, mash lightly with a spoon.
- Cool before storing. Let the sauce cool completely before transferring it to a container for the fridge to avoid condensation.
- Taste and adjust. Depending on the sweetness of your strawberries, you may want to use a little more or less sugar.
- Double the batch. This sauce stores well, so go ahead and make extra to use throughout the week.
Storing and Freezing Instructions
How to Store
Transfer cooled sauce to an airtight container or jar and refrigerate for up to 1 week.
How to Reheat
Reheat gently in a saucepan over low heat or microwave in short 30 second intervals until warm.
How to Freeze
Freeze in a freezer-safe container or silicone tray for up to 3 months. Thaw in the refrigerator before using.
FAQ
Yes, frozen strawberries work well. Just thaw them first and be sure to simmer off any extra liquid that releases to prevent the sauce from becoming too thin or watery. This helps preserve the sauce's consistency.
This strawberry sauce is delicious both ways! Serve it warm over pancakes or French toast, or chilled over cheesecake and ice cream - it's totally up to you. If serving warm, reheat gently so the flavor and consistency are preserved.
Absolutely! You can substitute sugar with natural sweeteners like honey, maple syrup, or monk fruit sweetener. Keep in mind the flavor may vary slightly depending on what you use, and the consistency could be thinner, so cook slightly longer if needed.
More Strawberry Recipes
- 25 Best Strawberry Recipes
- Strawberry Compote
- Strawberry Sorbet
- Strawberry Shortcake
- Strawberry Cobbler
- Strawberry Cupcakes
Tried this recipe?
I'd love to hear what you think! Leave a comment and rating below to share your feedback. Your reviews help others discover this recipe and help me keep creating more free recipes for you. Snap a photo and tag me on social media @aheadofthyme too.

Mexican Street Corn Dip (Elote Dip)
Mexican Street Corn Dip (Elote Dip) is a creamy, rich, and cheesy appetizer that captures the bold, zesty flavors of elote - the iconic grilled corn on the cob sold by street vendors across Mexico. This dip takes all the goodness of traditional elote and transforms it into a shareable dish that's perfect for parties, game days, or any time you're craving a bold snack.

Made with sweet corn, creamy cheese, sour cream, and a kick of lime and jalapeño, it's a flavor-packed appetizer that comes together quickly with minimal effort. Serve it warm or cold with crunchy tortilla chips, crackers, or fresh veggies, and watch it disappear in minutes. There's no wrong way to enjoy this irresistible dip!
Why You'll Love this Mexican Street Corn Dip Recipe
- Big, bold flavor. The sweetness of corn, tangy lime, creamy cheese, and a hint of heat come together to create an unforgettable flavor combo in this Mexican Street Corn Dip that keeps you going back for more.
- Easy to make. With just a handful of ingredients and minimal prep, this recipe is straightforward and fuss-free. You can have it ready in 25 minutes. Plus, you can prepare this elote dip ahead of time and either bake it just before serving or enjoy it cold straight from the fridge.
- Perfect for parties. Whether you're hosting a casual get-together, holiday celebration, or potluck, this dip is always a hit. It's easy to prep ahead and travels well, making it a go-to dish for any occasion.
- Versatile and customizable. Serve it warm or chilled, spicy or mild, and top it however you like. It's incredibly flexible to suit your taste preferences.

Ingredient Notes
To make this delicious Mexican Street Corn Dip (Elote Dip), you will need the following ingredients (full measurements in recipe card below):
- cream cheese - provides the creamy, rich base. Use full-fat for the best flavor and texture. Neufchâtel can be used as a lighter option.
- sour cream - adds tanginess and smooth texture. Greek yogurt can be substituted for a protein boost.
- mayonnaise - a classic component of elote that enhances creaminess. You can use more sour cream or Greek yogurt if preferred.
- garlic - freshly minced garlic gives this dip a flavorful punch. Garlic powder can work too.
- lime juice - adds brightness and acidity. Lemon juice can be used as a substitute, but lime is more traditional.
- cheese - feel free to use Monterey Jack cheese or Cotija cheese. Monterey Jack melts beautifully, while Cotija offers a crumbly, salty finish. You can also try a blend or swap in cheddar or feta.
- ground black pepper - Balances the richness.
- corn - we used canned corn, but fresh, frozen, or canned all work. If using frozen, thaw first. Grilled corn can also be used and adds extra smoky flavor.
- cilantro - offers freshness and color. If you don't like cilantro, parsley is a milder alternative.
- jalapeño pepper - optional, to add heat. Adjust the amount or remove the seeds for a milder dip. Substitute with green chiles if desired.
You will also need measuring cups and spoons, mixing bowls, spatula or spoon, knife and cutting board, and a 1 quart baking dish or oven-safe skillet.

How to Make the Best Mexican Street Corn Dip
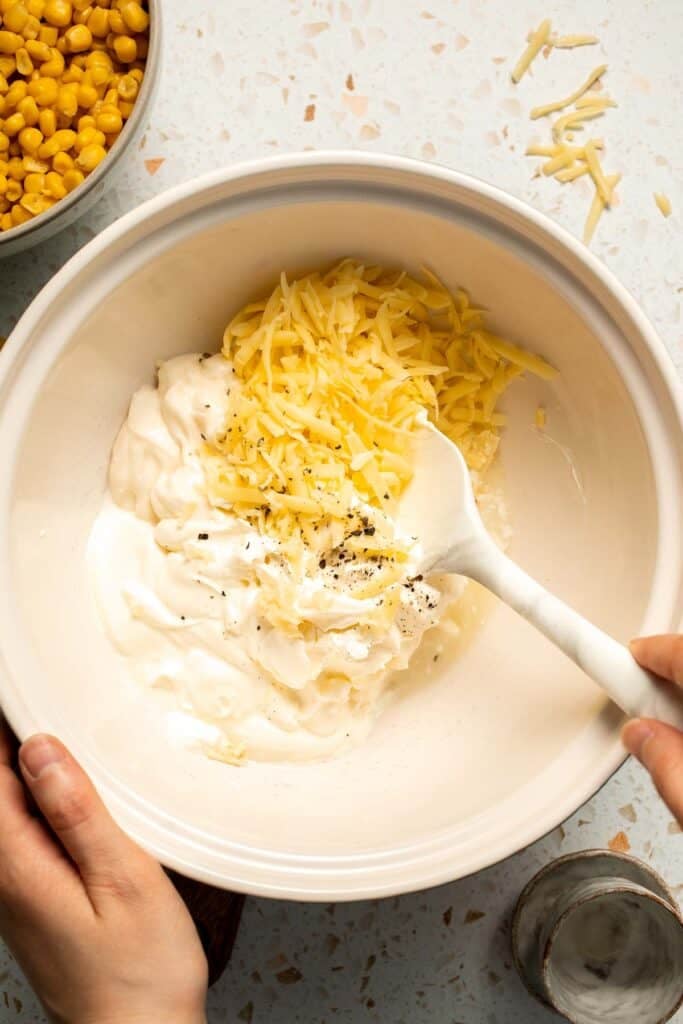
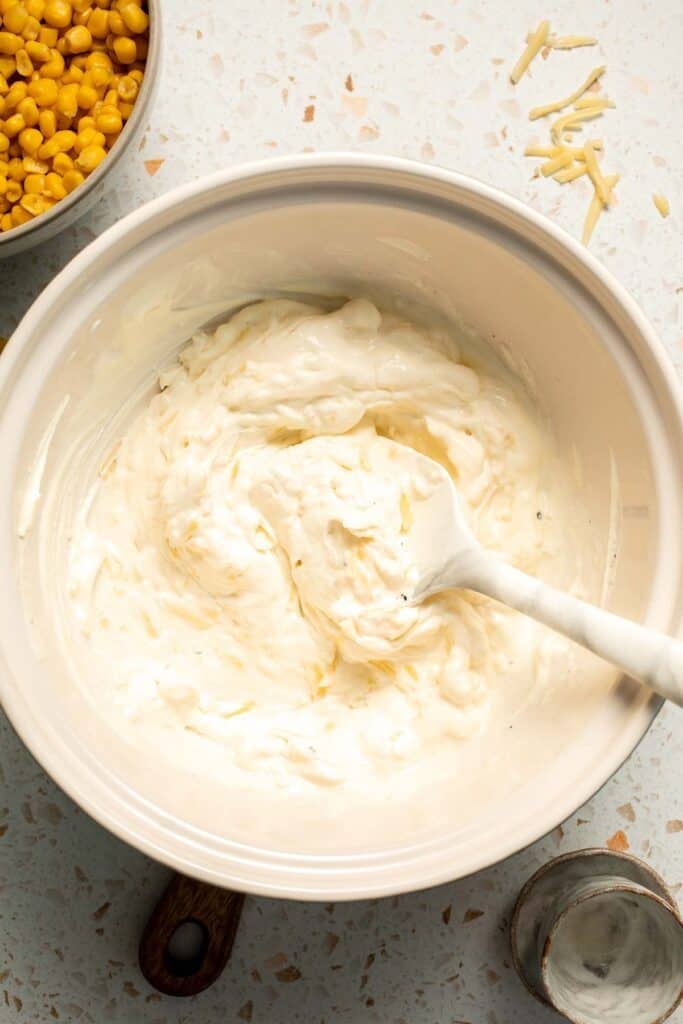
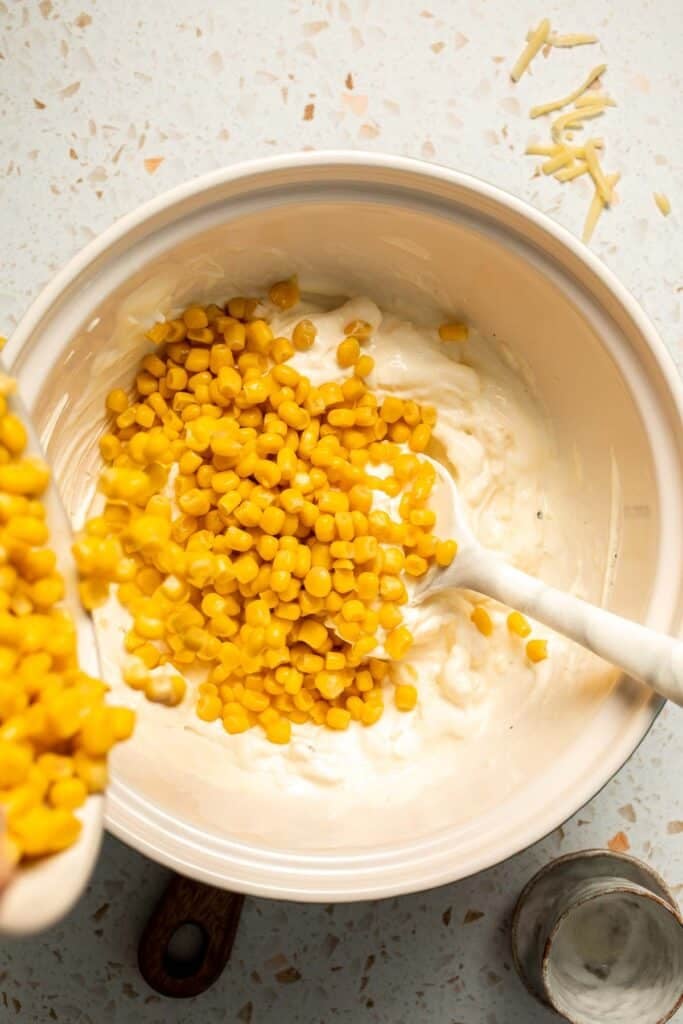
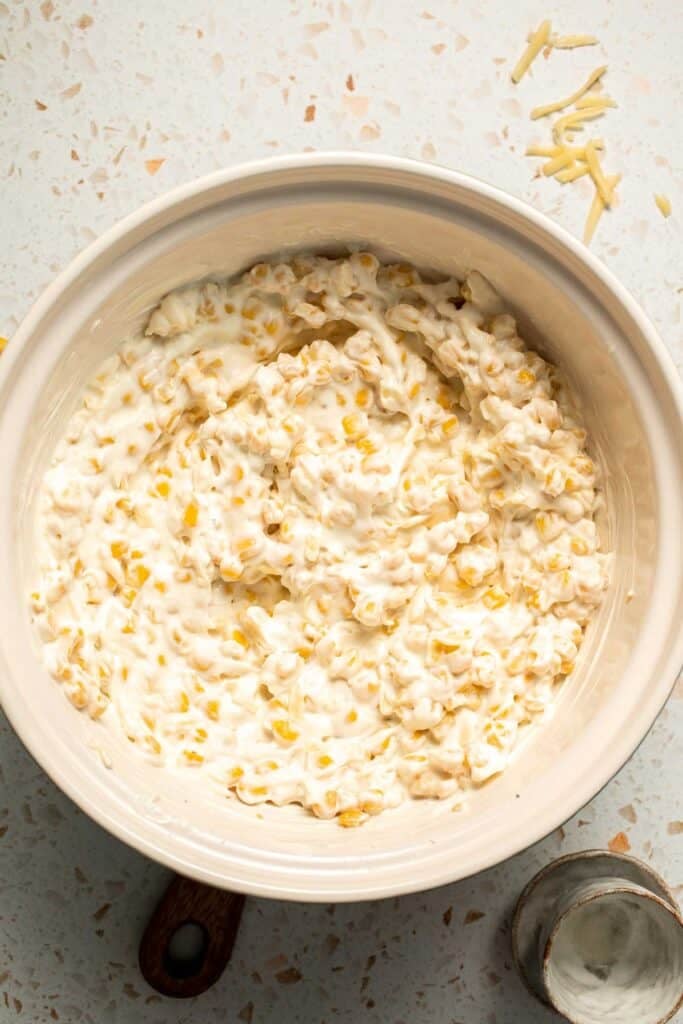
- Combine ingredients. In a large mixing bowl, combine cream cheese, sour cream, mayonnaise, garlic, lime juice, cheese, and black pepper. Stir until evenly combined. Fold in corn until evenly distributed.
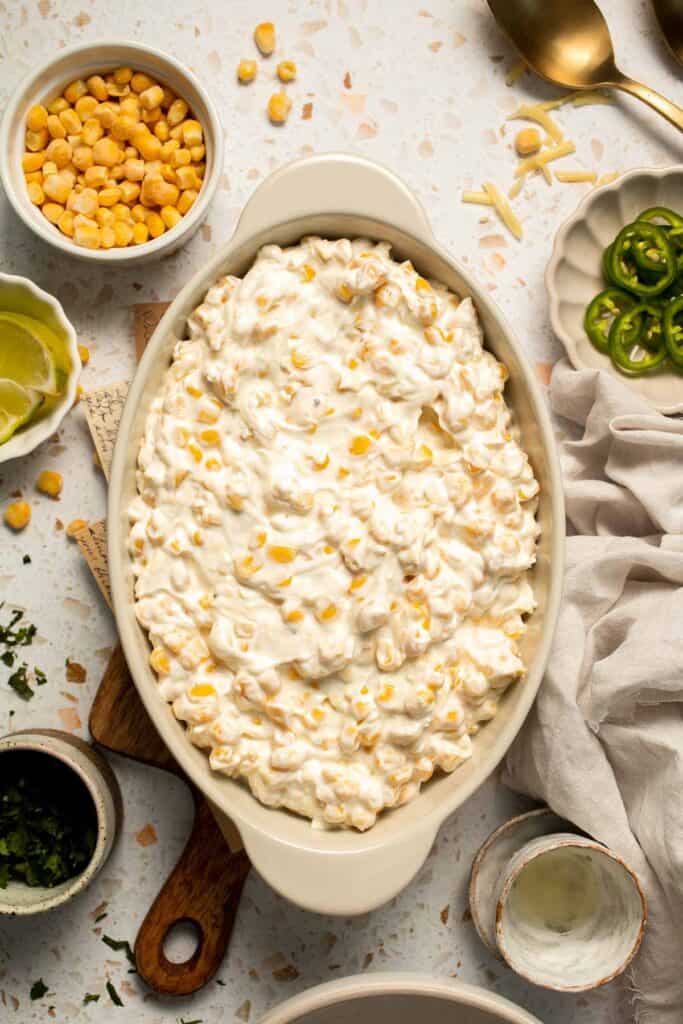
- Bake. Transfer the corn dip mixture into a 1-quart baking dish and spread evenly. Bake in a 350F preheated oven for 20 minutes until bubbly and heated through.
- Serve. Sprinkle with cilantro and jalapeño on top. Serve immediately with tortilla chips, veggies, baguette slices or crackers, if desired.


Recipe Variations
- Make it spicy. Amp up the heat with extra jalapeños, chili powder, or hot sauce stirred in. You can also add cayenne pepper or diced serrano chiles for serious heat lovers.
- Add protein. Stir in shredded rotisserie chicken, crumbled bacon, or black beans to make it heartier and turn it into a complete appetizer or light meal.
- Make it smoky. Use smoked paprika or chipotle powder and grill your corn first to give the dip extra charred depth.
- Lighten it up. Use Greek yogurt in place of mayo and sour cream and opt for light cream cheese to reduce calories without sacrificing taste.
- Serve as a topping. Spoon over grilled chicken, burgers, or baked potatoes for a fun twist on elote flavor.
- Try it with different cheeses. Swap Cotija or Monterey Jack with queso fresco, feta, or even pepper jack for added kick and flavor complexity.
- Make it a skillet dip. Prepare and bake everything in a cast iron skillet for a rustic, crispy-edged presentation and easy cleanup.
How to Serve
This Mexican Street Corn Dip is delicious served on its own with chips, crackers, or veggie sticks, or paired with some of my favorite Mexican sides including:
- Shrimp Tacos with Lime Crema Slaw
- Baked Chicken Quesadillas
- Sheet Pan Nachos
- Vegetarian Burrito Bowl
- Homemade Taquitos
- Cilantro Lime Rice
For more recipe ideas, see our 30 Mexican Recipes.

Recipe Tips and Tricks
- Char your corn. If using fresh or thawed corn, charring it in a dry skillet adds smoky depth and enhances that classic street corn flavor.
- Soften your cream cheese. Bring cream cheese to room temperature before mixing to ensure a smoother, creamier dip without lumps.
- Mix by hand or with a mixer. For a super smooth dip, use a hand mixer to blend everything together, especially if your cream cheese is still a bit firm.
- Balance the flavors. Taste as you go and adjust the lime juice, salt, or spice level to match your preferences perfectly.
- Garnish just before serving. Add toppings like extra cheese, cilantro, lime wedges, and jalapeño slices right before serving for the freshest look and best texture.
- Make it in advance. You can prepare the dip up to a day ahead, refrigerate it, and bake it right before serving for ultimate convenience.
- Double the batch. This dip disappears fast! Consider doubling the recipe if you're feeding a larger group or want leftovers.
Storing and Freezing Instructions
How to Store
Let the dip cool completely, then transfer it to an airtight container. Store in the fridge for up to 4 days.
How to Reheat
Reheat in a 350°F oven until warmed through, about 10-15 minutes. Or microwave in short intervals, stirring in between, until hot.
How to Freeze
This dip isn't ideal for freezing due to the dairy content, which can separate when thawed. Best to enjoy fresh or refrigerated.
FAQ
Absolutely! This dip is perfect for making ahead. Assemble everything, cover tightly, and refrigerate for up to 24 hours before baking. If you want to serve it cold, it tastes great that way too - just make sure the flavors have had time to meld together.
Yes, both frozen and canned corn work well. Just make sure to thaw and drain thoroughly before using to avoid excess moisture, which can thin the dip and affect the texture. Roasting or sautéing the corn briefly before adding it can enhance the overall flavor and give it more depth.
Yes, this dip can be served hot or cold depending on your preference. When served warm, it's rich and melty, making it perfect for dipping chips or spreading on warm bread. When chilled, it's creamy, refreshing, and just as satisfying, especially during warmer months or as part of a party platter.
More Corn Recipes
- Mexican Street Corn (Elote)
- Mexican Street Corn Salad
- Creamy Mexican Corn Soup
- Crispy Corn Fritters
- Creamed Corn
- Cornbread Muffins
Tried this recipe?
I'd love to hear what you think! Leave a comment and rating below to share your feedback. Your reviews help others discover this recipe and help me keep creating more free recipes for you. Snap a photo and tag me on social media @aheadofthyme too.

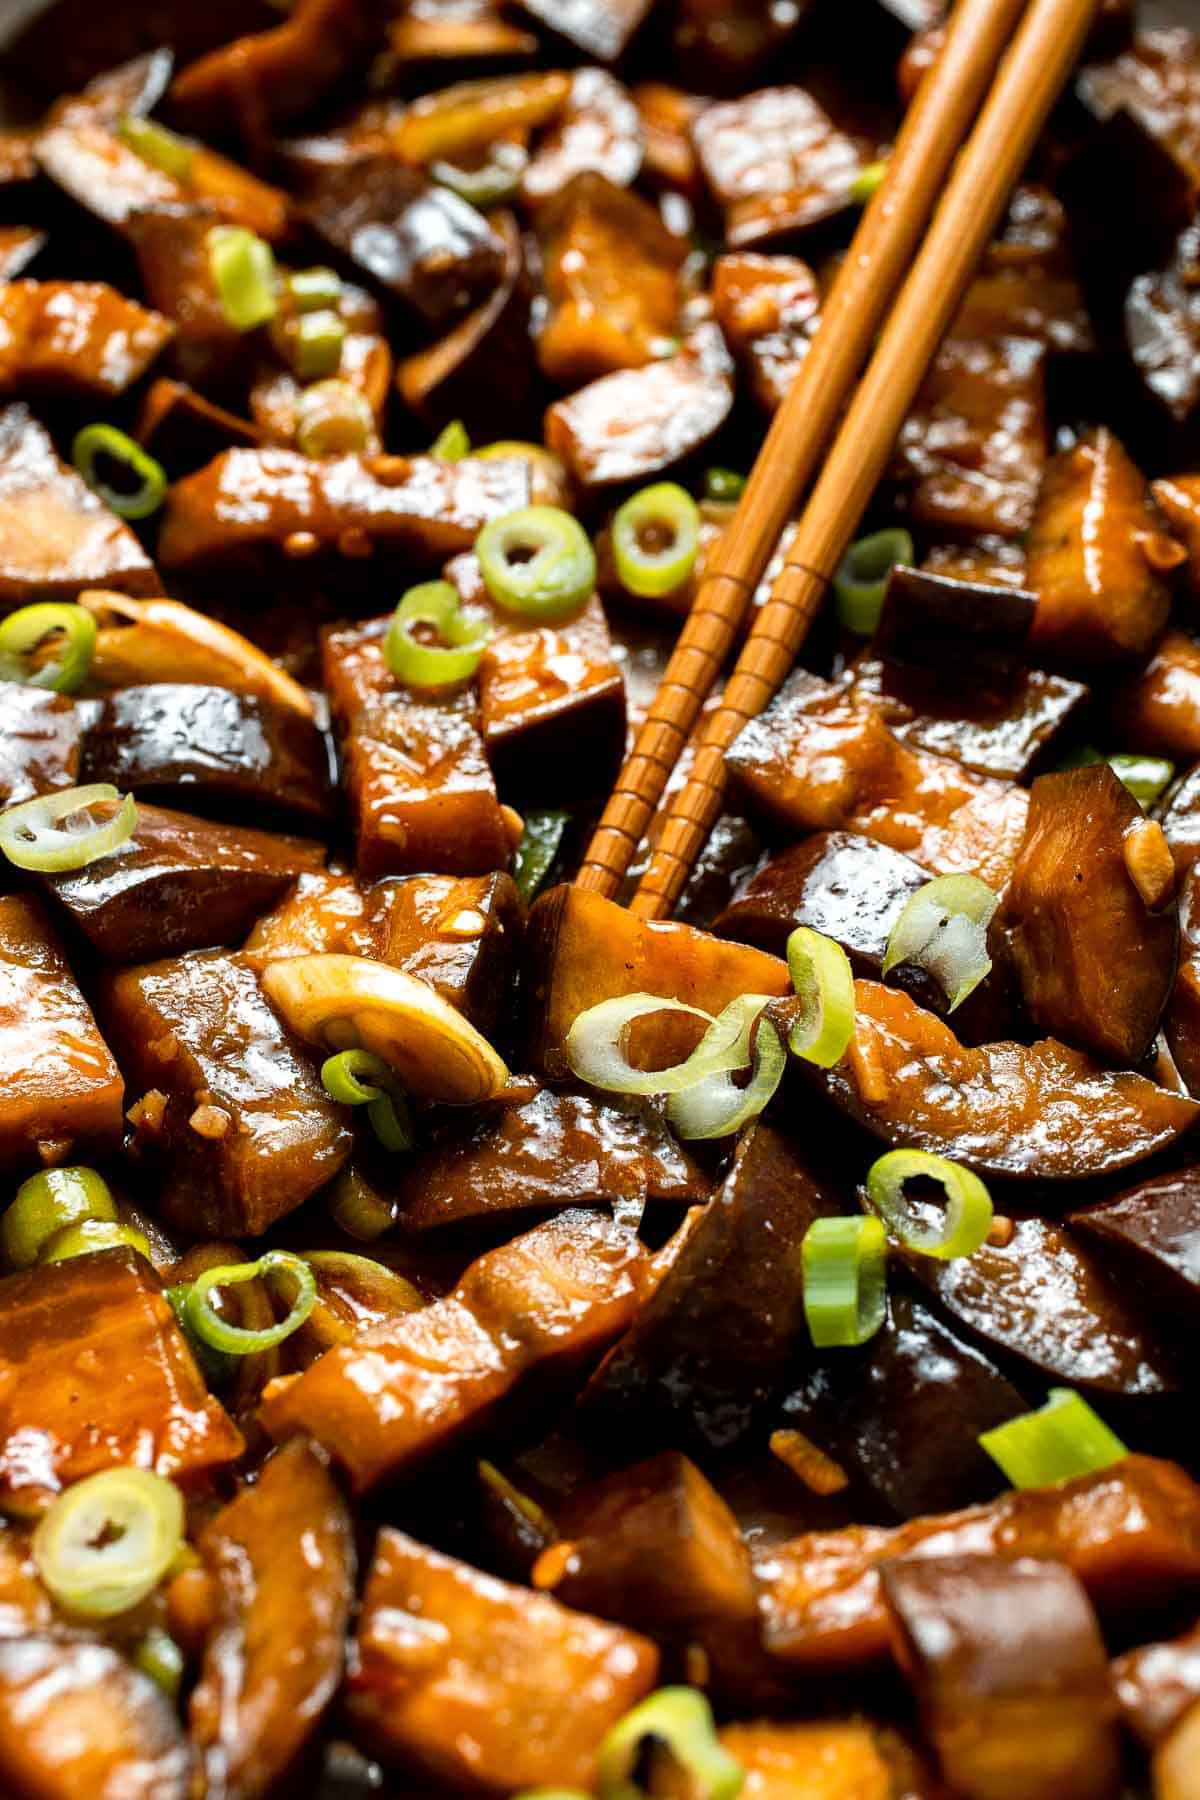
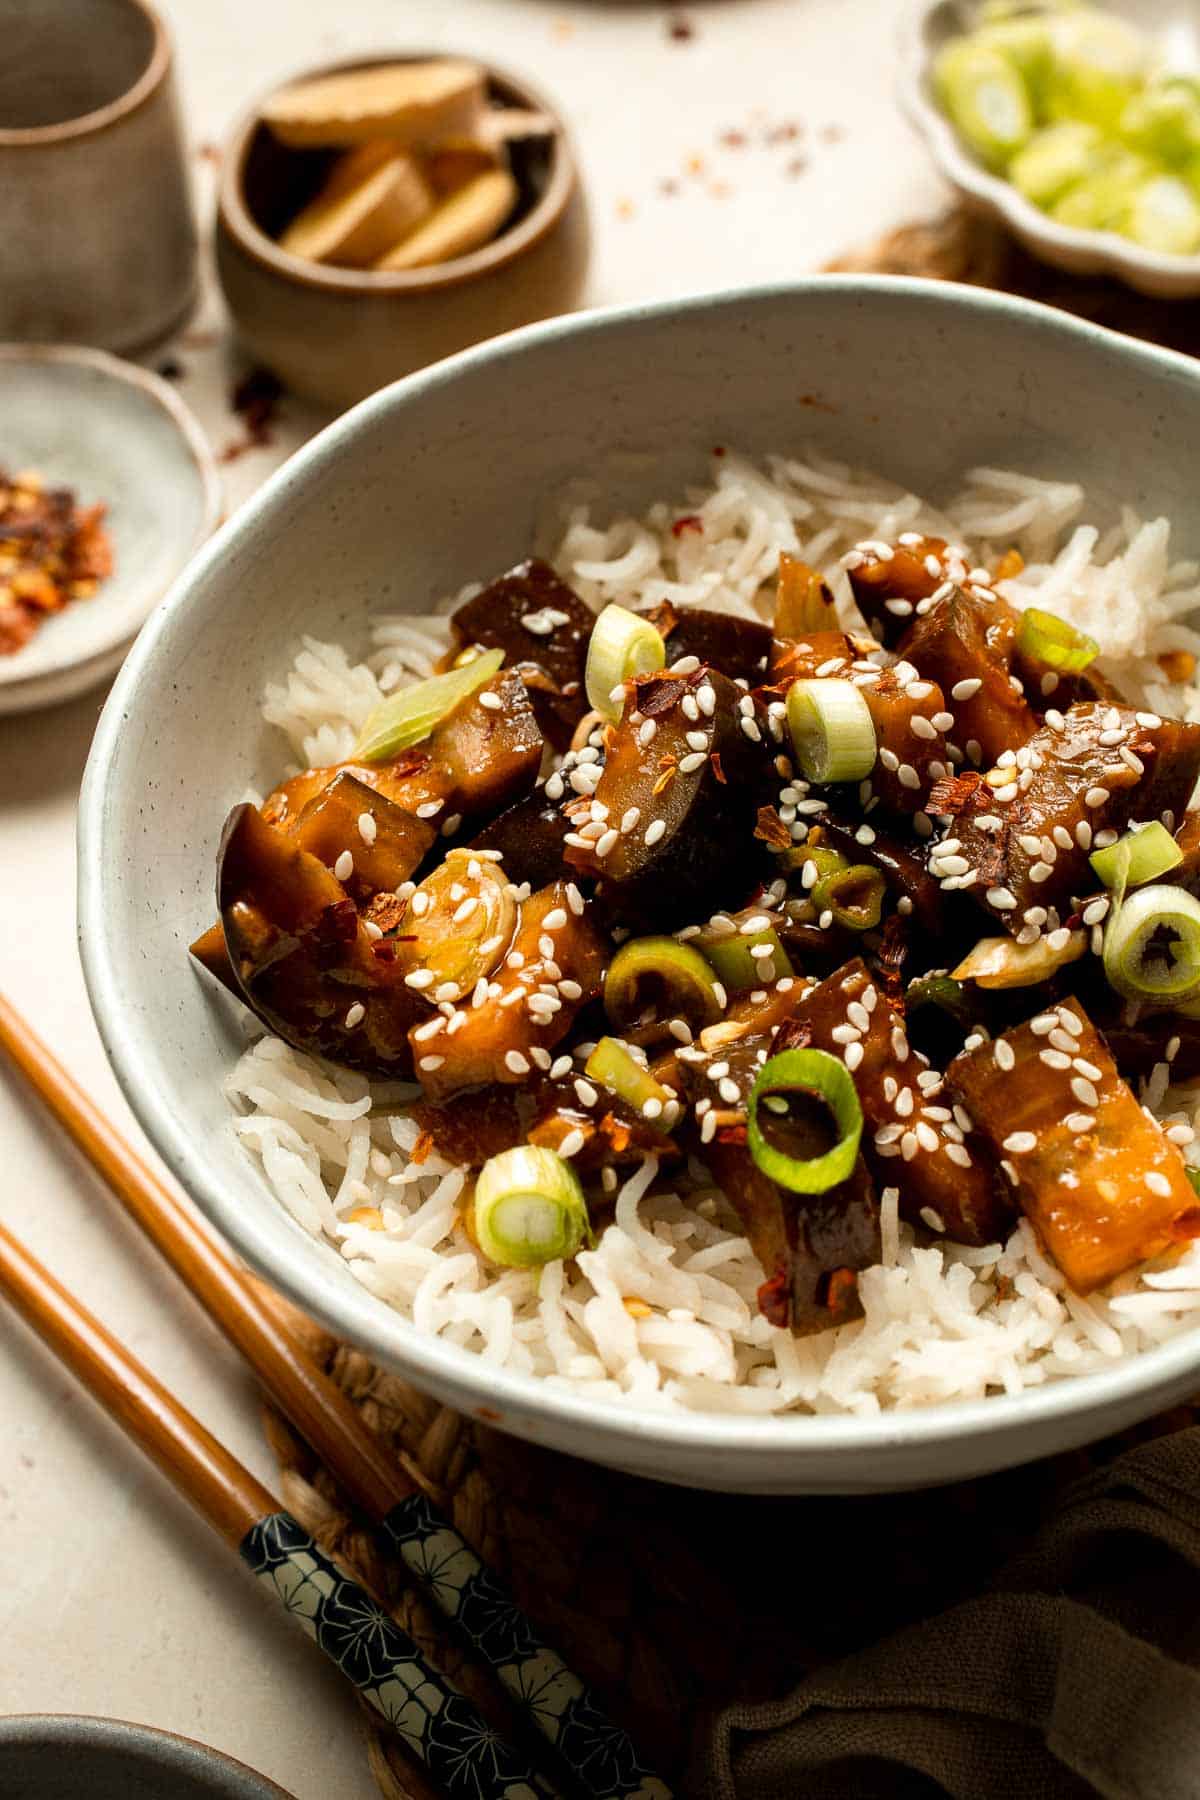
Chinese Eggplant Stir Fry
This Chinese Eggplant Stir Fry is a quick, flavorful dish that brings together tender eggplant and aromatic garlic, ginger, and scallions in a rich, savory sauce. It's saucy, satisfying, and incredibly simple to make in one pan. Perfect as a vegetarian main or a hearty side, this 15-minute dish will quickly become a weeknight favorite.
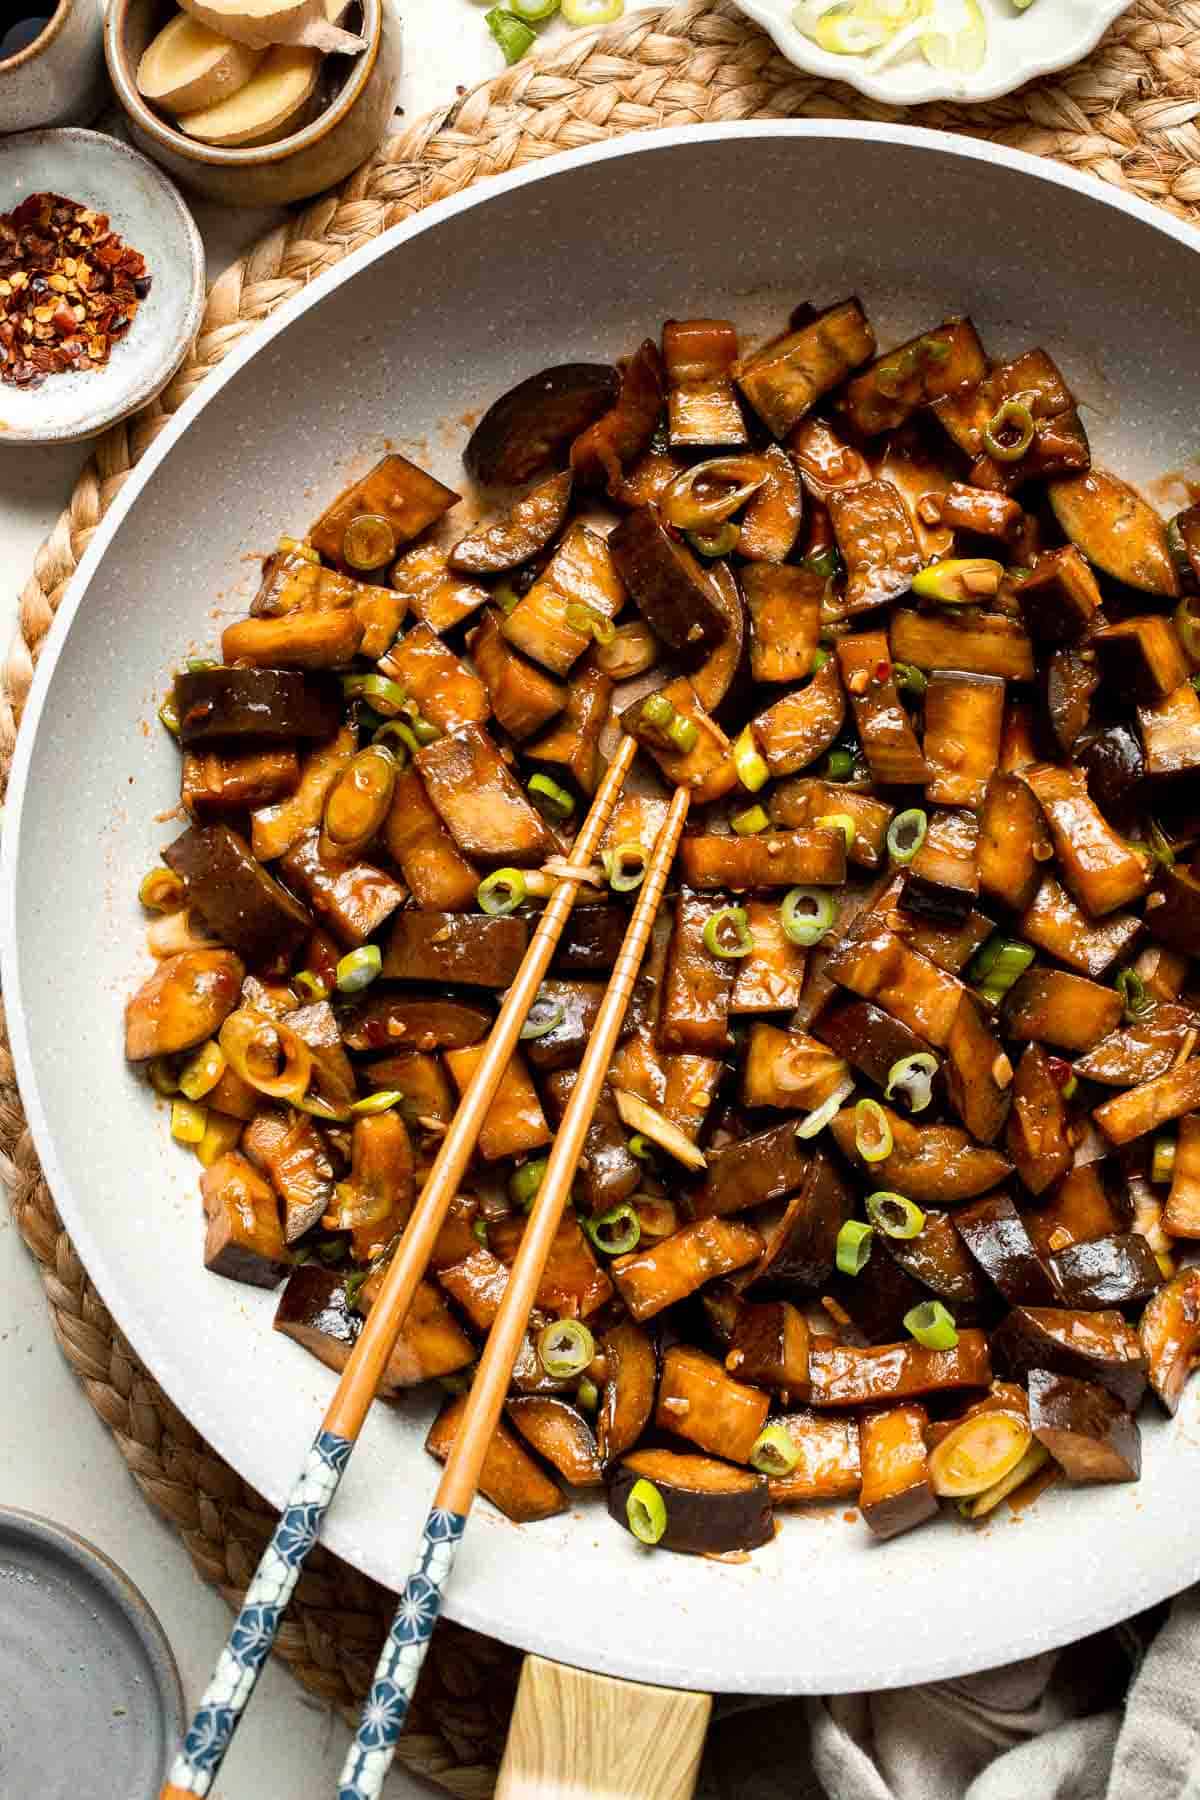
With just a handful of pantry staples and fresh ingredients, this stir fry delivers bold flavors without much effort. The eggplant absorbs all the goodness from the soy-based sauce, while a hint of spice adds just the right kick. Serve it over steamed rice or noodles for a complete, delicious meal.
Why You'll Love this Chinese Eggplant Stir Fry Recipe
- Big on flavor. This dish is packed with layers of savory umami notes, aromatic ginger and garlic, subtle heat, and a satisfying depth that makes each bite incredibly delicious and memorable.
- Quick and easy. Ready in under 30 minutes, this stir fry is perfect for busy nights when you want something fast, healthy, and flavorful without spending too much time in the kitchen.
- Naturally vegetarian. Made without any meat or fish sauce, this dish is entirely vegetarian and vegan. It's a wholesome, plant-based option that's still hearty and rich in flavor.
- Perfect with rice or noodles. The thick, glossy sauce clings beautifully to grains or noodles, making it an ideal pairing with Steamed Rice, brown rice, Lo Mein Noodles, or even soba noodles.
Ingredient Notes
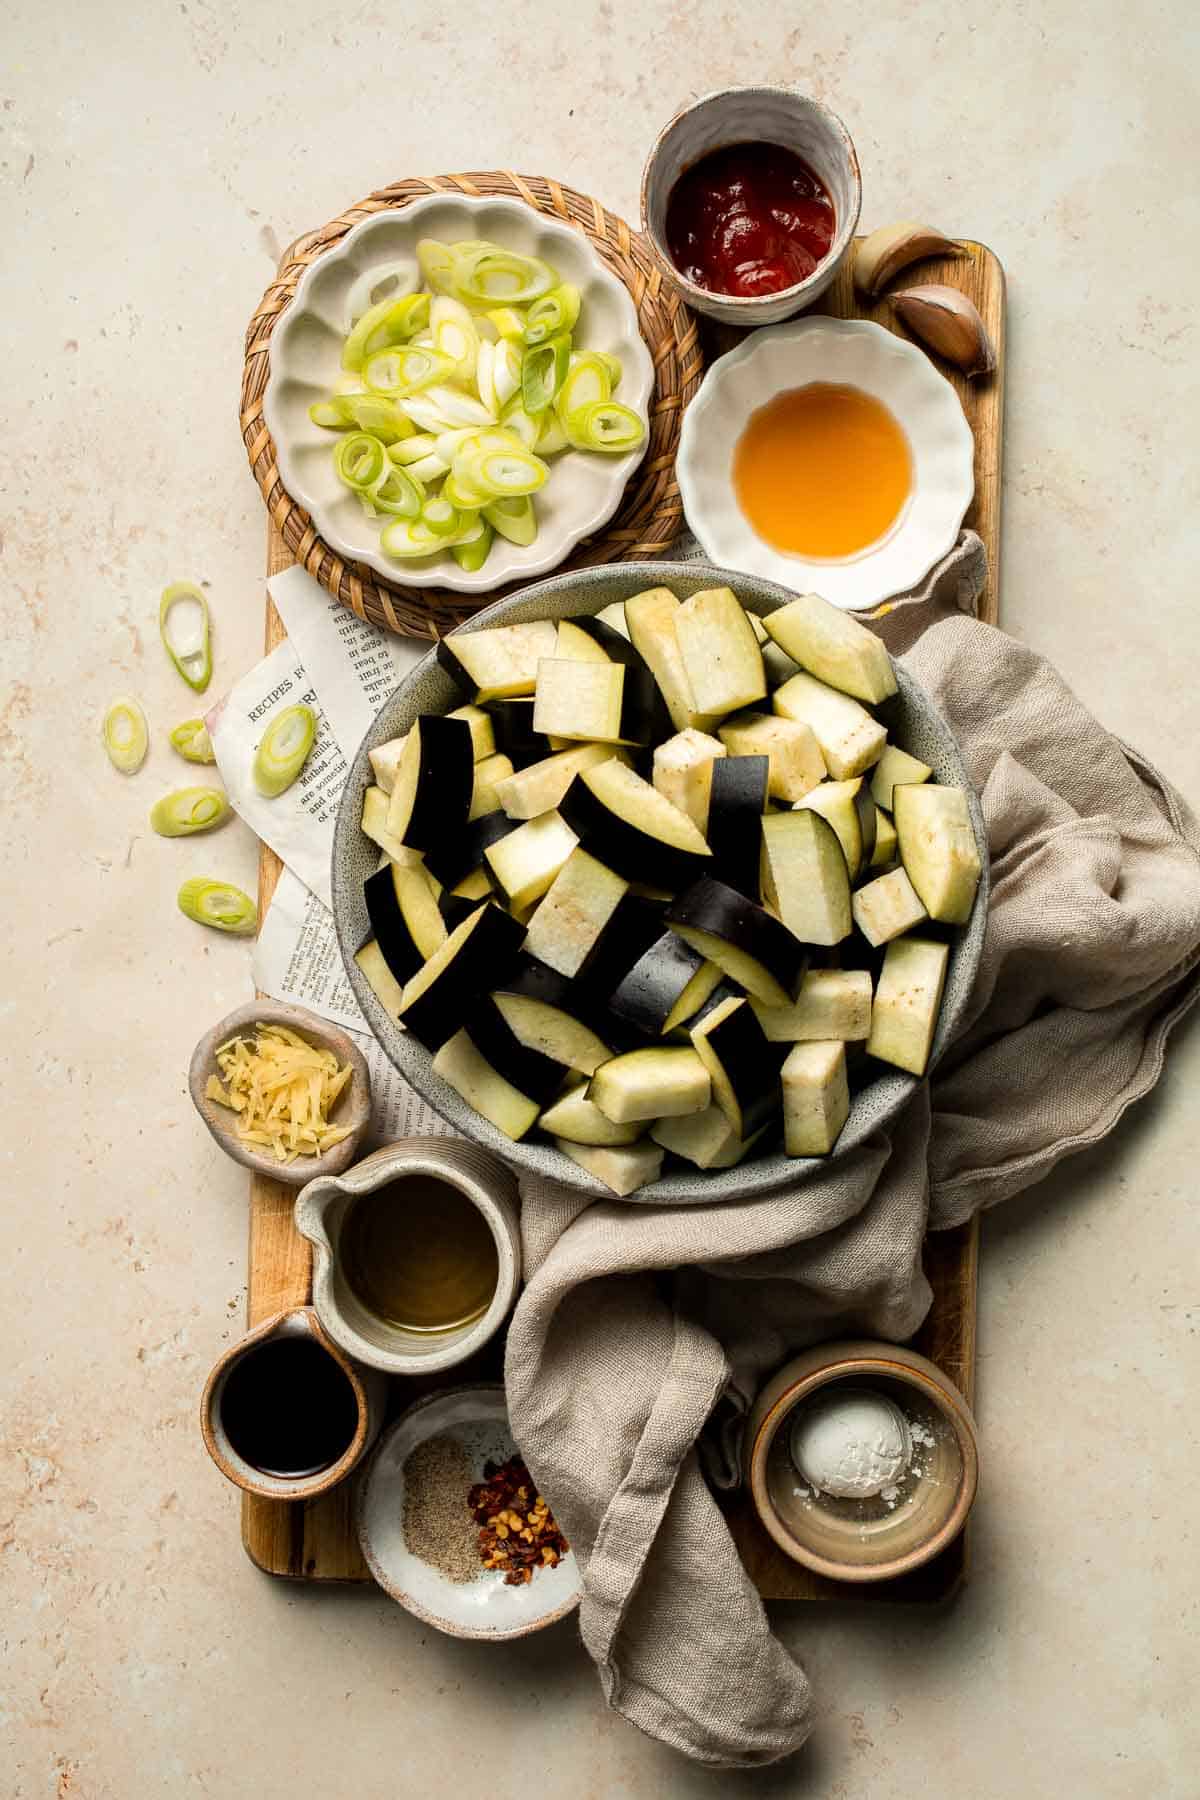
To make this quick and easy Chinese Eggplant Stir Fry, you will need the following ingredients (full measurements in recipe card below):
- eggplant - Chinese or Japanese eggplants are best for this recipe due to their thin skin and tender flesh. If using globe eggplants, salt them beforehand to reduce bitterness. Check the FAQ below for tips on using globe eggplants.
- avocado oil - a neutral oil with a high smoke point. You can substitute with canola oil, grapeseed oil, or vegetable oil.
- ginger - adds warmth and depth to the dish. Use freshly grated ginger for the most vibrant flavor.
- garlic - essential for that rich, savory flavor. Freshly minced garlic works best.
- scallions - add a pop of color and a mild onion flavor. You can also use chopped chives as a substitute.
- soy sauce - forms the base of the sauce. Use low-sodium if desired, or swap for tamari for a gluten-free option.
- water - helps thin the sauce to coat the eggplant evenly.
- ketchup - adds a tangy sweetness and umami depth. Substitute with hoisin sauce for a twist.
- sesame oil - for a nutty, toasty finish. Use toasted sesame oil for the best flavor.
- ground white pepper - You can also use ground black pepper (either works depending on your preference). White pepper adds a sharper bite.
- red chili flakes - this is optional and adds heat. Add more or less depending on your spice preference.
- cornstarch - thickens the sauce to coat the eggplant perfectly. Arrowroot powder can be used as an alternative.
You will also need measuring cups and spoons, mixing bowl, large skillet or wok, spatula, sharp knife, and cutting board.
How to Make the Best Chinese Eggplant Stir Fry
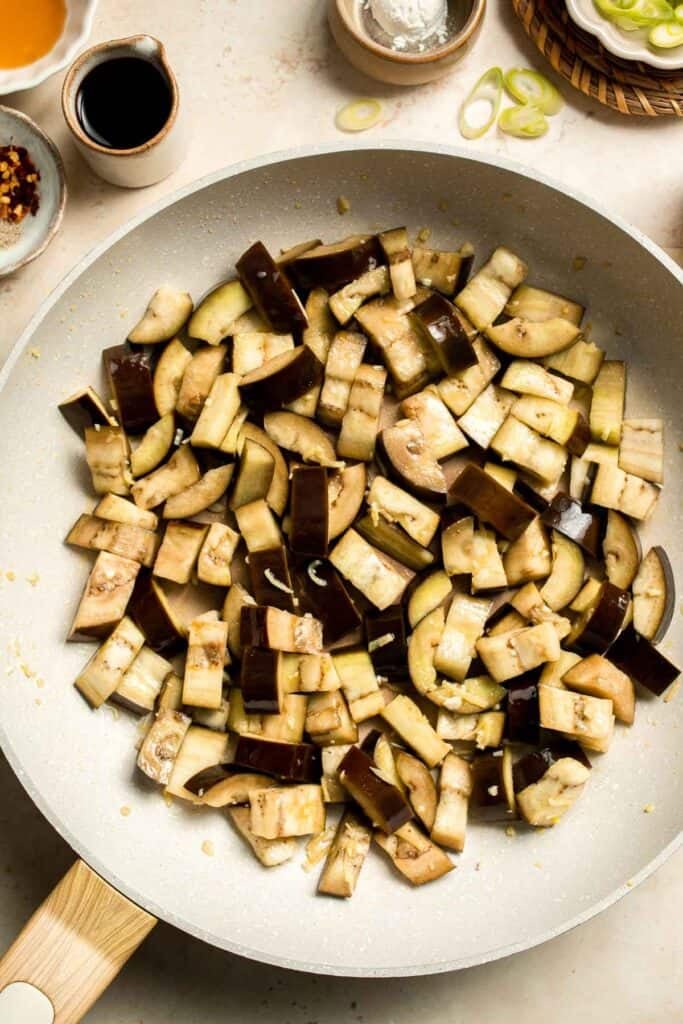
- Boil. Add eggplant in a large pot of salted boiling water and cook over medium high until slightly tender (not mushy or falling apart), about 3-5 minutes. Drain and set aside, You can also cook in a covered steamer basket on high until slightly tender, about 3-5 minutes.
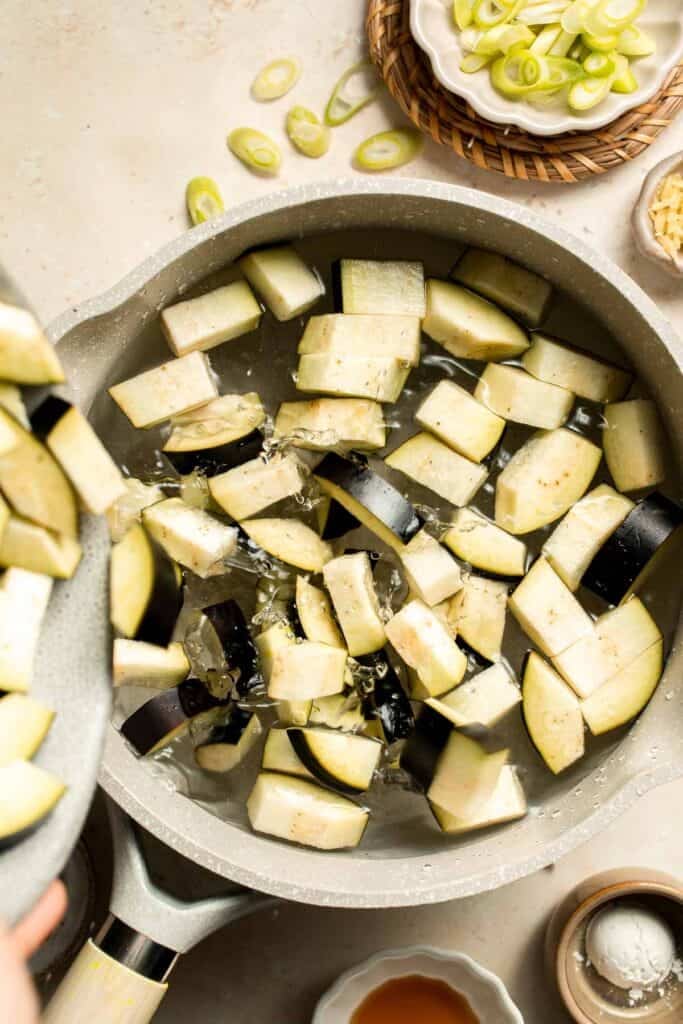
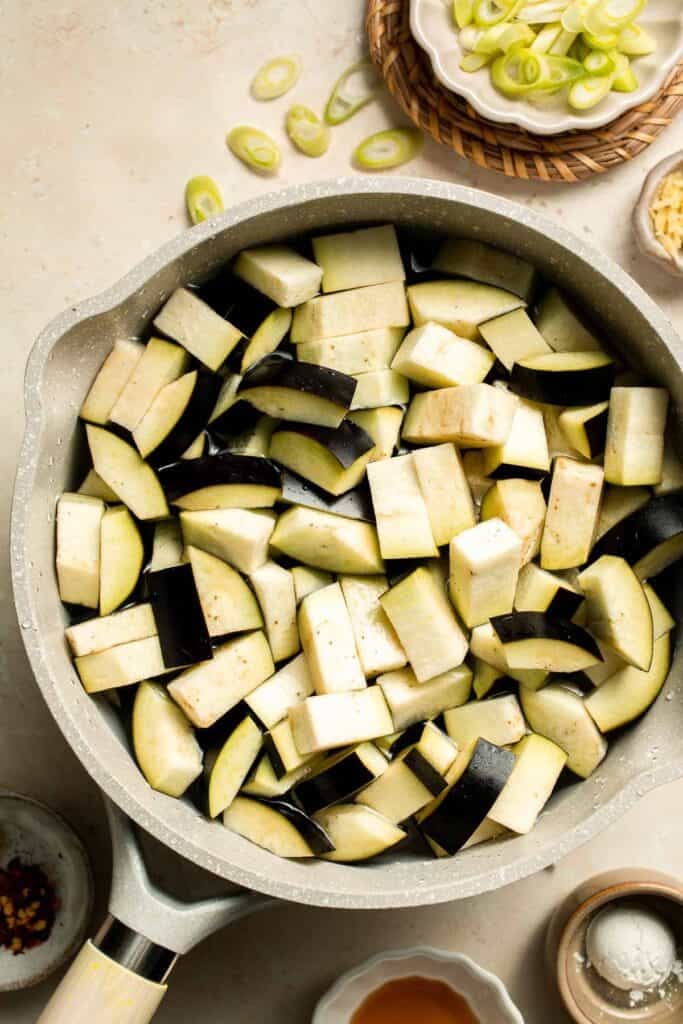
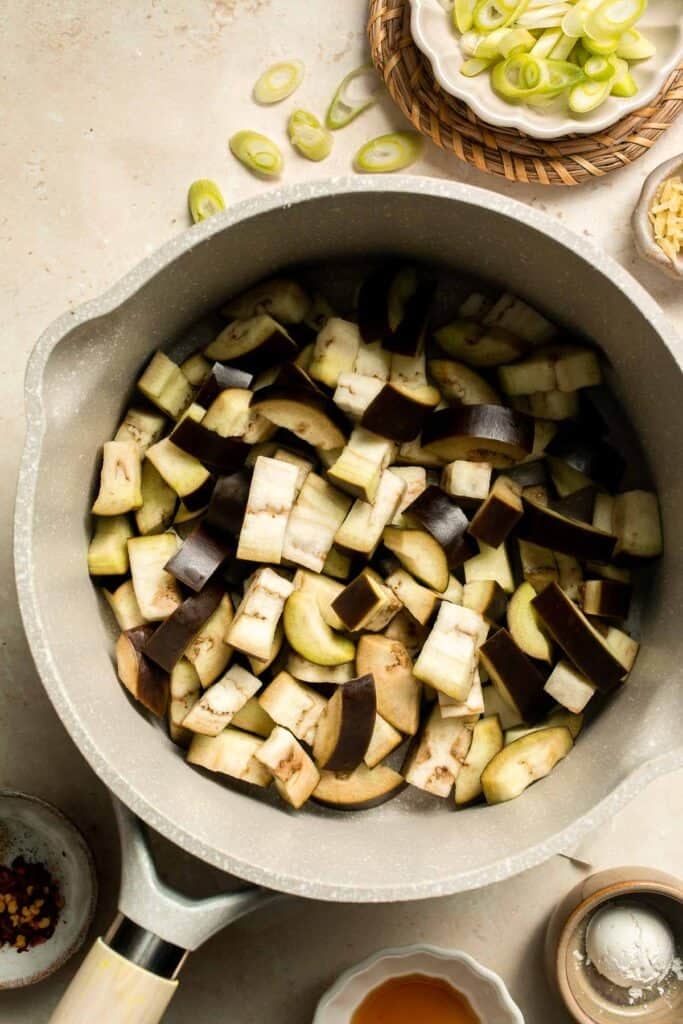
- Sauté aromatics. In a large skillet, heat oil over medium high until hot, about 1-2 minutes. Add ginger and garlic. Sauté until fragrant, about 1 minute.
- Add eggplant. Add eggplant and cook until softened to your desired texture, about 5 minutes, stirring occasionally.
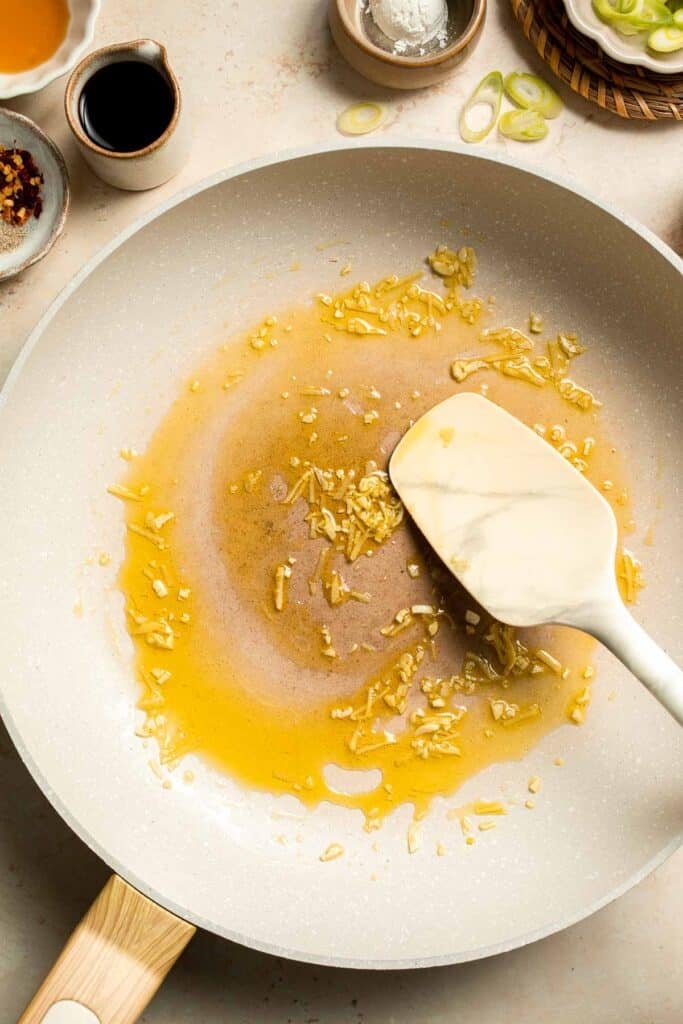
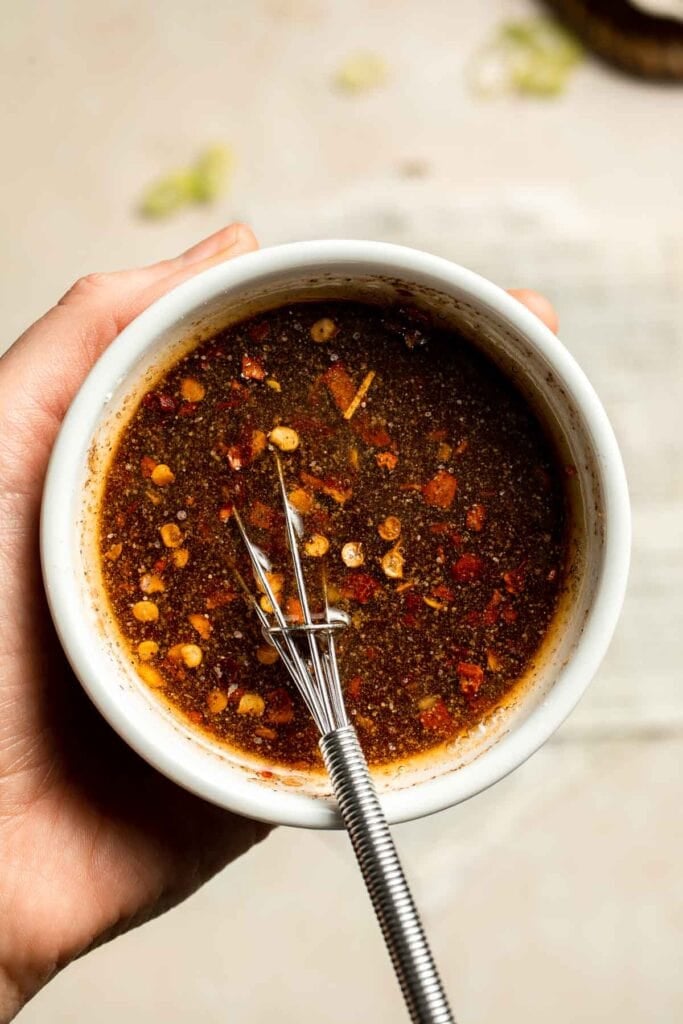
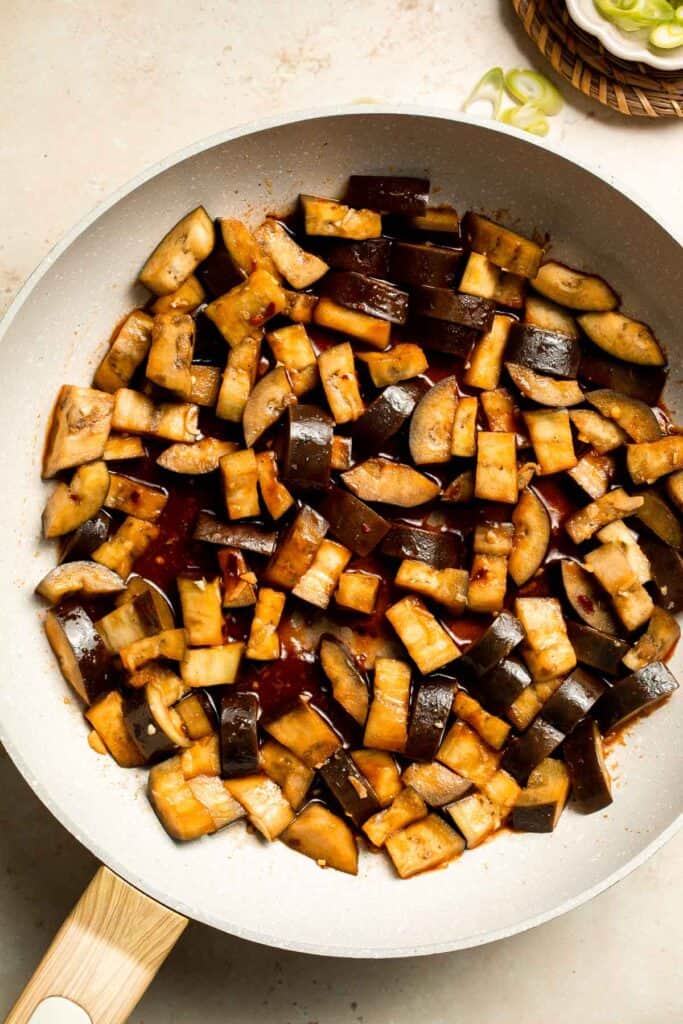
- Add sauce. In a mixing bowl, whisk together all the ingredients for the sauce mixture until smooth. Add the sauce into the eggplants and toss constantly until thickened.
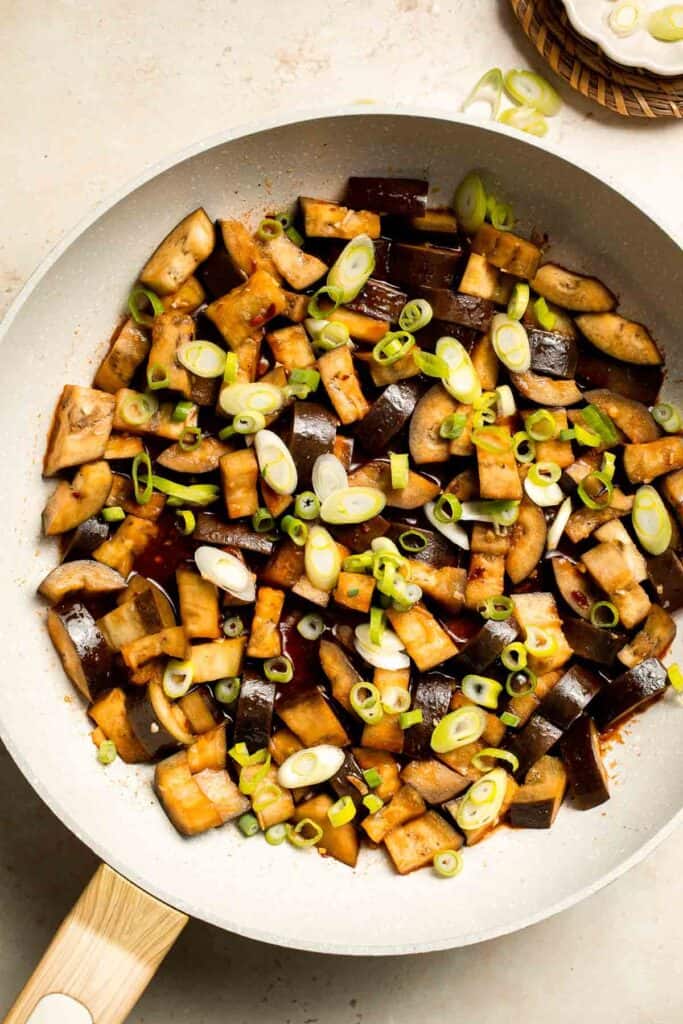
- Serve. Sprinkle with scallions and serve warm with steamed rice or noodles.
Recipe Variations
- Make it spicy. Add more red chili flakes or stir in a spoonful of chili garlic sauce for an extra kick.
- Add protein. Stir in cubed tofu, tempeh, or cooked shrimp for a more substantial meal with added protein.
- Include other veggies. Bell peppers, zucchini, or mushrooms pair beautifully and bring extra texture, color, and nutrients. This also helps stretch the dish to feed more people.
- Use hoisin or black bean sauce. Swap out the ketchup for hoisin sauce or add a spoonful of fermented black bean paste to deepen the umami flavor and add a savory complexity.
- Serve cold. Leftovers taste amazing chilled and can double as a cold noodle salad topper or rice bowl addition, making meal prep more versatile and convenient.
How to Serve
This Chinese Eggplant Stir Fry is delicious served on its own, or paired with some of my favorite Asian-inspired sides including:
- Steamed Rice or Vegetarian Fried Rice
- Sesame Noodles
- Steamed Scallion Buns
- Vegetarian Spring Rolls
- Pork Dumplings
- Kung Pao Tofu
For more Chinese recipes, see our 60 Chinese Takeout Recipes at Home.
Recipe Tips and Tricks
- Don't overcrowd the pan. Cook the eggplant in batches if needed to avoid steaming and ensure each piece browns evenly with a nice caramelized sear for maximum flavor.
- Soak eggplant in salted water. If using globe eggplant, soaking in salted water for 15-20 minutes reduces bitterness and helps the eggplant absorb less oil during cooking.
- Use high heat. Stir fries are best cooked hot and fast. Preheat the pan before adding oil to get the best sear on your vegetables.
- Cut eggplant evenly. Uniform pieces ensure consistent cooking and better texture throughout. Irregular pieces may overcook or undercook, affecting the overall dish.
- Whisk the sauce well. Make sure cornstarch is fully dissolved before adding to the pan to avoid lumps and ensure a smooth, glossy finish on your sauce.
Storing and Freezing Instructions
How to Store
Let leftovers cool completely. Store in an airtight container in the fridge for up to 3 days. Avoid stacking pieces to keep them intact.
How to Reheat
Reheat in a skillet over medium heat until warmed through, or microwave in 30-second intervals, stirring between each. Add a splash of water if needed to loosen the sauce.
How to Freeze
This stir fry is best enjoyed fresh, but you can freeze it in a sealed container for up to 1 month. Note the texture of eggplant may soften significantly after thawing.
FAQ
Yes, globe eggplant can be used, but it has thicker skin and a slightly more bitter flavor. For best results, slice it thinly and soak it in salted water for 15-20 minutes before cooking to improve both taste and texture. The extra step is worth it.
To prevent soggy eggplant, cook over high heat and avoid overcrowding the pan. Let the eggplant sear and brown before stirring too much, and don't cover the pan while cooking. A good initial sear keeps the outside crisp while maintaining a tender interior.
Yes, you can prep the sauce and chop the vegetables in advance to save time. While the dish is best enjoyed freshly made, leftovers store well in the fridge for up to 3 days and can be reheated for a quick and flavorful meal.
It can easily be made gluten-free by swapping regular soy sauce with tamari or a certified gluten-free soy sauce. Double-check that your ketchup and cornstarch are also gluten-free if you're cooking for someone with dietary restrictions.
More Eggplant Recipes
- Roasted Eggplant
- Stuffed Eggplant
- Eggplant Lasagna
- Eggplant Parmesan
- Baba Ganoush Eggplant Dip
- Eggplant Rollatini
Tried this recipe?
I'd love to hear what you think! Leave a comment and rating below to share your feedback. Your reviews help others discover this recipe and help me keep creating more free recipes for you. Snap a photo and tag me on social media @aheadofthyme too.

French Lemon Tart
This French Lemon Tart is sunshine in dessert form. Made from scratch with real lemons, a crisp and buttery shortbread-style crust, and a luxuriously smooth lemon filling with no artificial flavorings, this lemon pie strikes the perfect balance between tart and sweet. Plus, it's surprisingly simple to make and perfect for both beginner and experienced bakers alike!

Ideal for spring and summer gatherings or anytime you want to impress with minimal fuss, this lemon tart comes together with simple pantry ingredients and fresh lemons. Whether you're hosting a spring or summer party, celebrating a special occasion, or simply craving something bright, this tart is just what you need! It's delicious, beautiful and the vibrant citrus flavor shines through in every bite. Serve chilled or at room temperature for a refreshing, crowd-pleasing treat.
Why You'll Love this French Lemon Tart Recipe
- Bright, tangy flavor. Fresh lemon juice and zest create a vibrant citrus filling that's both refreshing and just the right amount of tart. Each bite wakes up your palate and offers a burst of sunshine in dessert form.
- Velvety smooth filling. The custard is creamy, rich, and silky, with a melt-in-your-mouth texture that pairs perfectly with the crisp crust. It's indulgent without being too heavy.
- Bakery style dessert. With its glossy top and neat edges, this tart looks like it came straight from a French patisserie! It a great recipe to impress guests with minimal effort.
- Perfect make-ahead dessert. This tart holds up well in the fridge, making it a great option for entertaining or prepping in advance. It's just as good the next day.

Ingredient Notes
To make this easy French Lemon Tart, you will need the following ingredients (full measurements in recipe card below):
- all-purpose flour - used for the tart crust. Make sure to spoon and level for accurate measuring. You can use a 1:1 gluten-free flour blend as a substitute.
- confectioners' sugar - sweetens the crust and adds tenderness. Substitute with powdered monk fruit sweetener for a low-sugar version.
- salt - enhances the overall flavor and balances the sweetness. Sea salt or kosher salt both work.
- unsalted butter - adds richness to both the crust and the filling. Make sure it's cold for the crust and softened for the filling. Salted butter can be used, just reduce added salt.
- egg - helps bind the crust together. Room temperature is best. Use flax egg for an egg-free crust option.
- lemon zest + juice - use fresh lemons for the best flavor. Bottled juice doesn't compare, but you can use a high-quality bottled lemon juice if needed.
- white sugar - sweetens the filling and balances the tartness of the lemons. Substitute with coconut sugar or maple sugar for a different flavor.
- eggs and egg yolks - create a rich and silky custard filling with structure and depth. There's no great substitute here for the same texture.
- heavy cream - adds richness and helps the filling set to the perfect consistency. You can substitute with full-fat coconut cream.
- vanilla - rounds out the flavors and enhances the overall profile of the tart. Use vanilla bean paste or pure vanilla extract.
You will also need measuring cups and spoons (or a kitchen scale), mixing bowls, whisk, tart pan, fine grater or zester, saucepan, and mesh strainer.
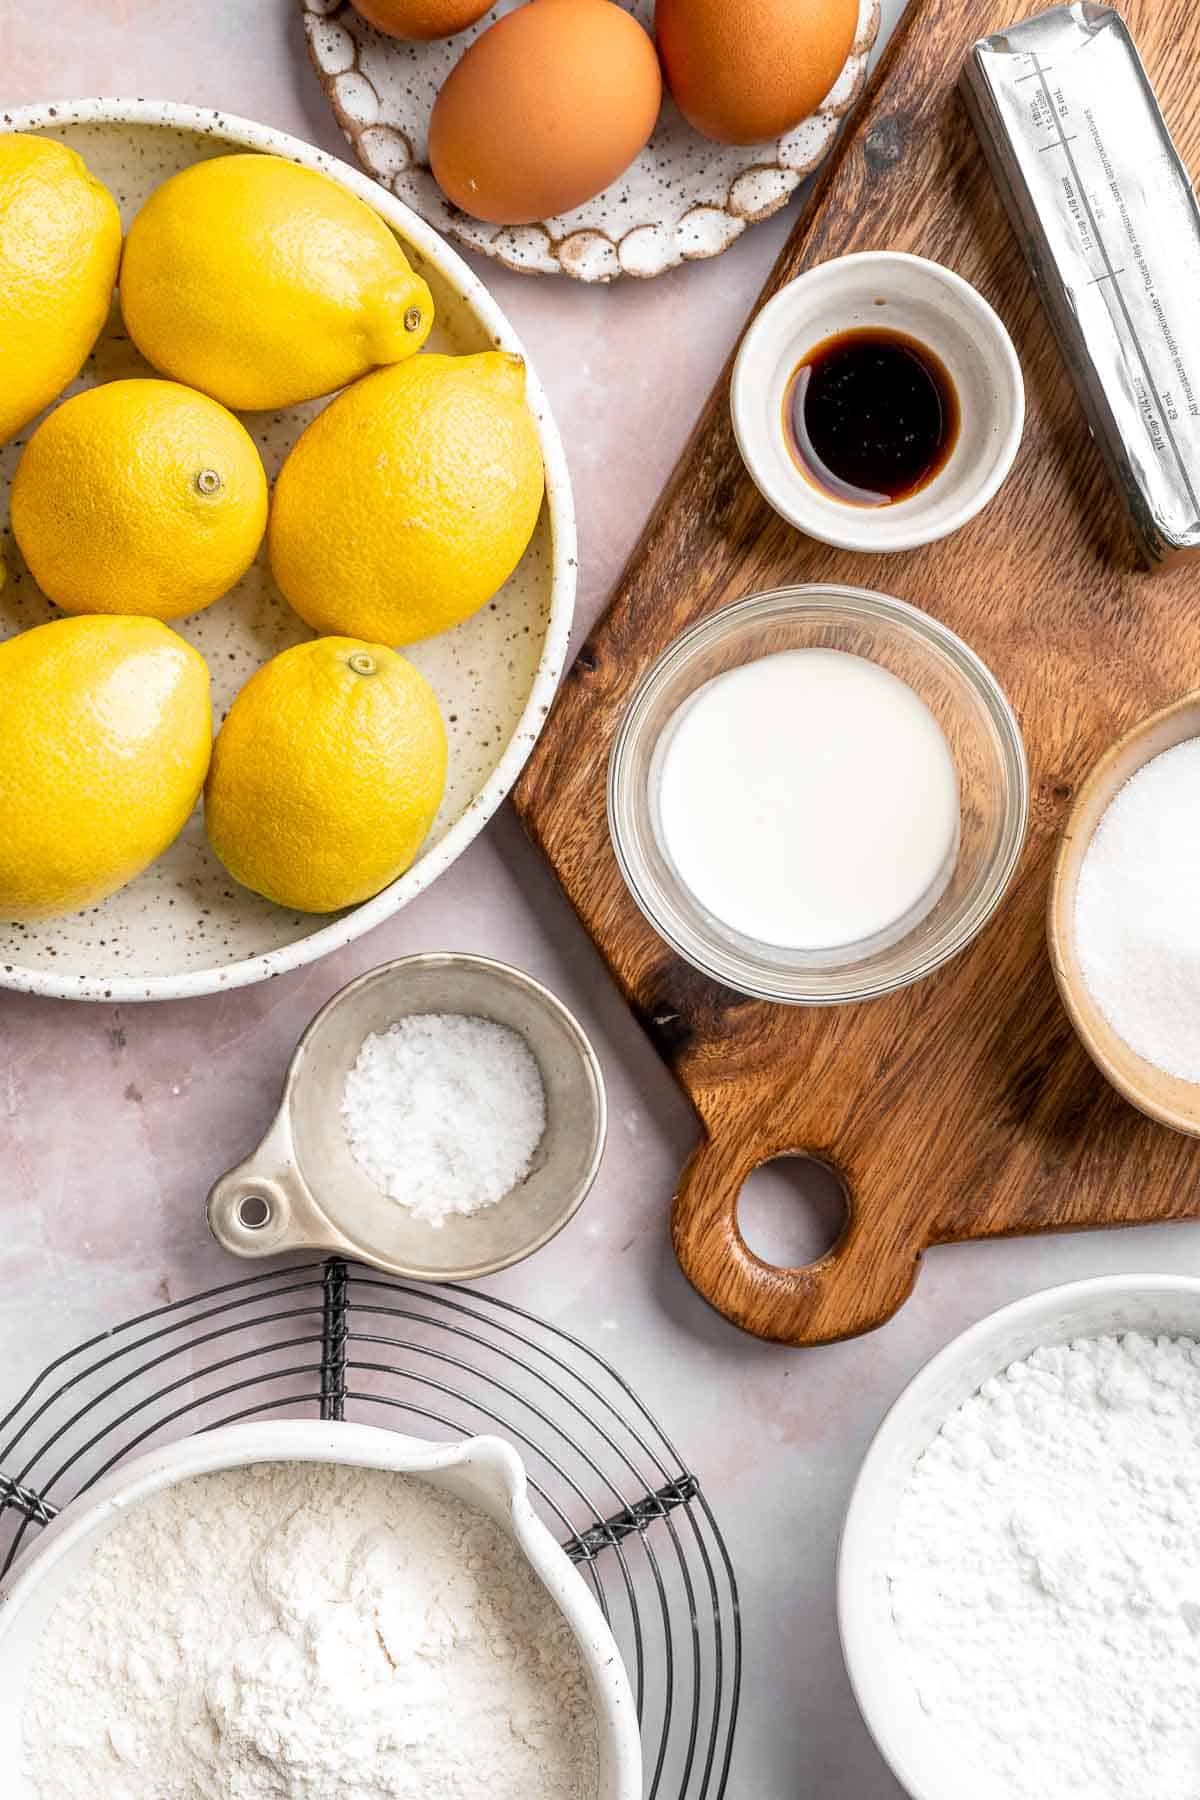
How to Make the Best French Lemon Tart
First, make the sable crust.
- Combine dry ingredients. In a food processor, pulse together the flour, confectioners' sugar, and salt, until combined.
- Add butter. Add in the cold cubed butter, then pulse until butter is mostly broken down into pebble sized pieces.
- Add egg. Add in the beaten egg, then pulse again until egg is fully distributed and the mixture looks like crumbly sand.
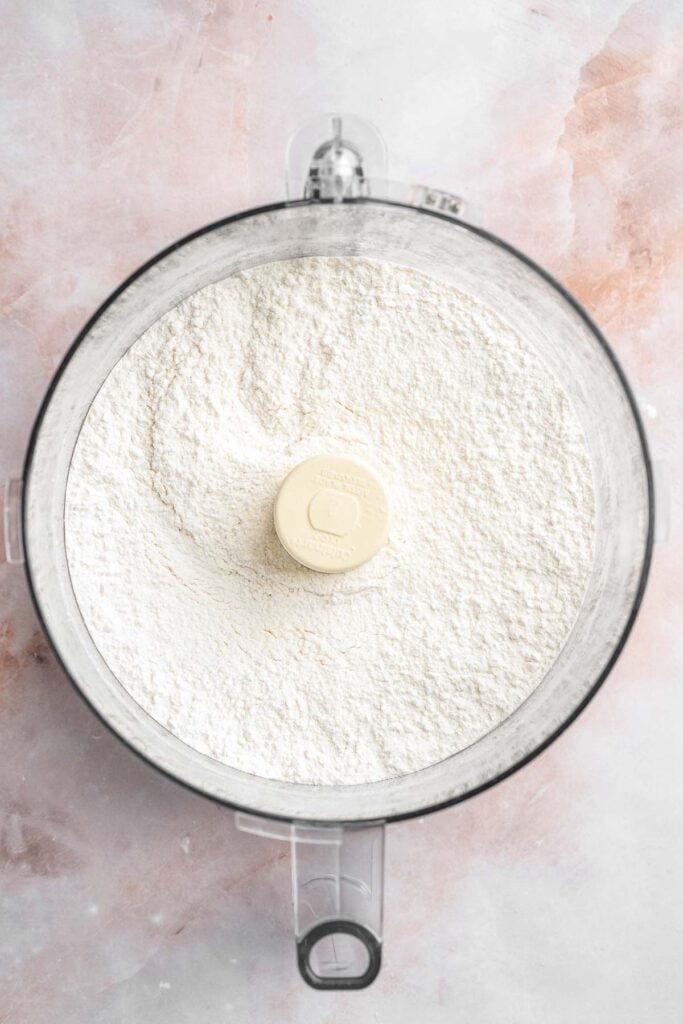
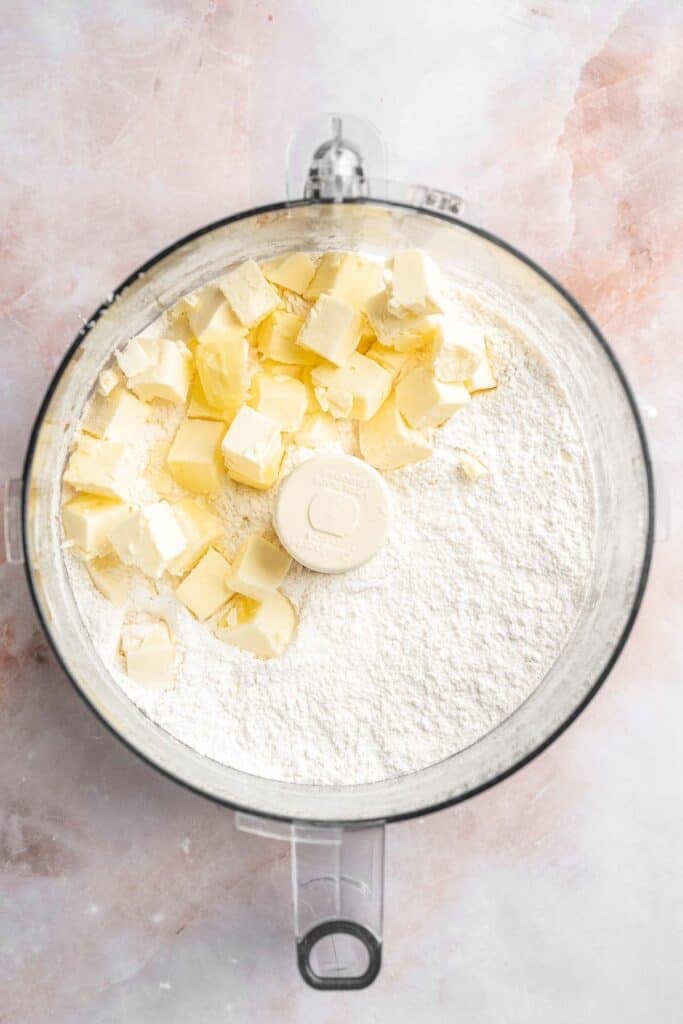
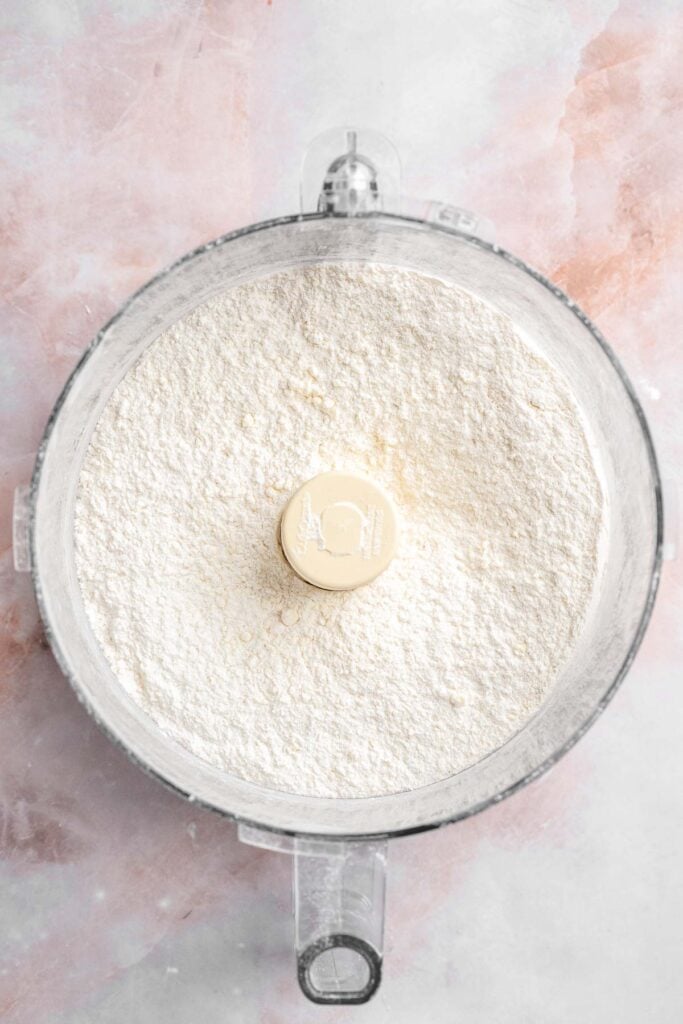
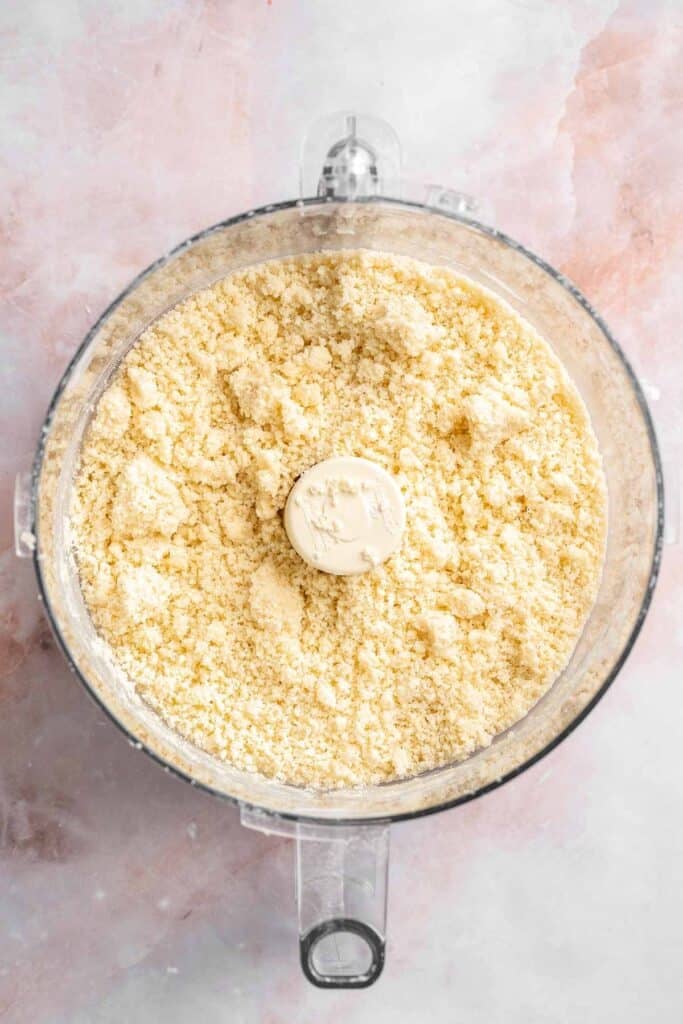
- Form dough. Use your hands to gather the dough together and form into a disc. Wrap in plastic cling wrap, then place into the fridge to rest for 30 minutes.
- Roll. After the 30 minute rest, unwrap and remove the dough from the fridge and place it onto a lightly floured work surface or overtop of a lightly floured parchment paper. Roll out into a 12-inch circle, and about ⅛-1/4-inch thick.
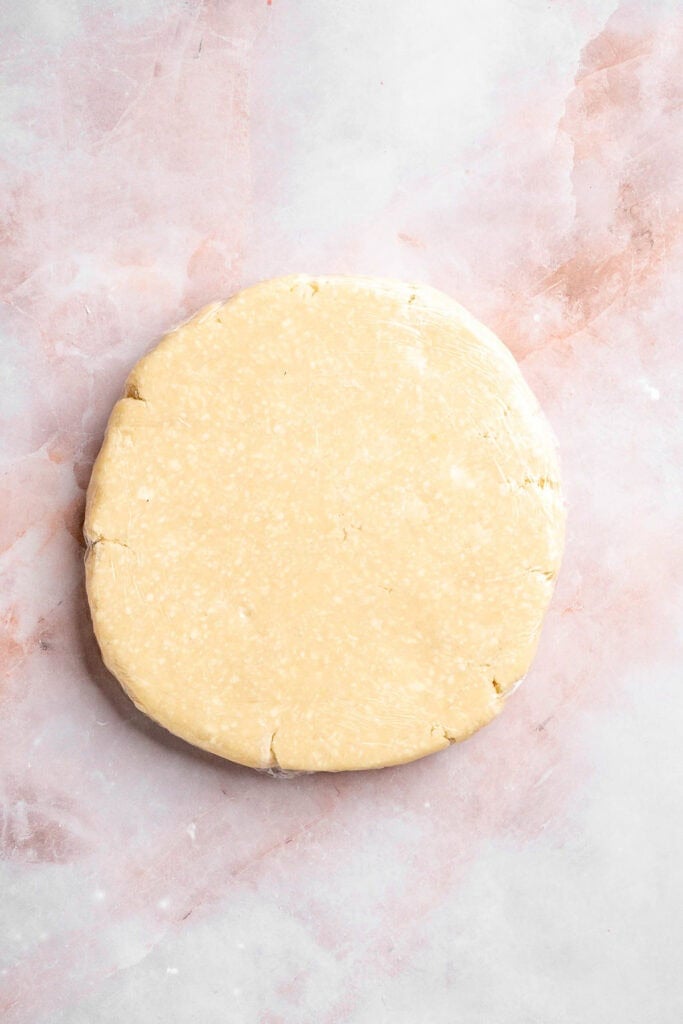

- Shape. Transfer the dough into a 9-inch tart pan, press into the bottom and along the sides, then use a paring knife to cut off the excess dough.
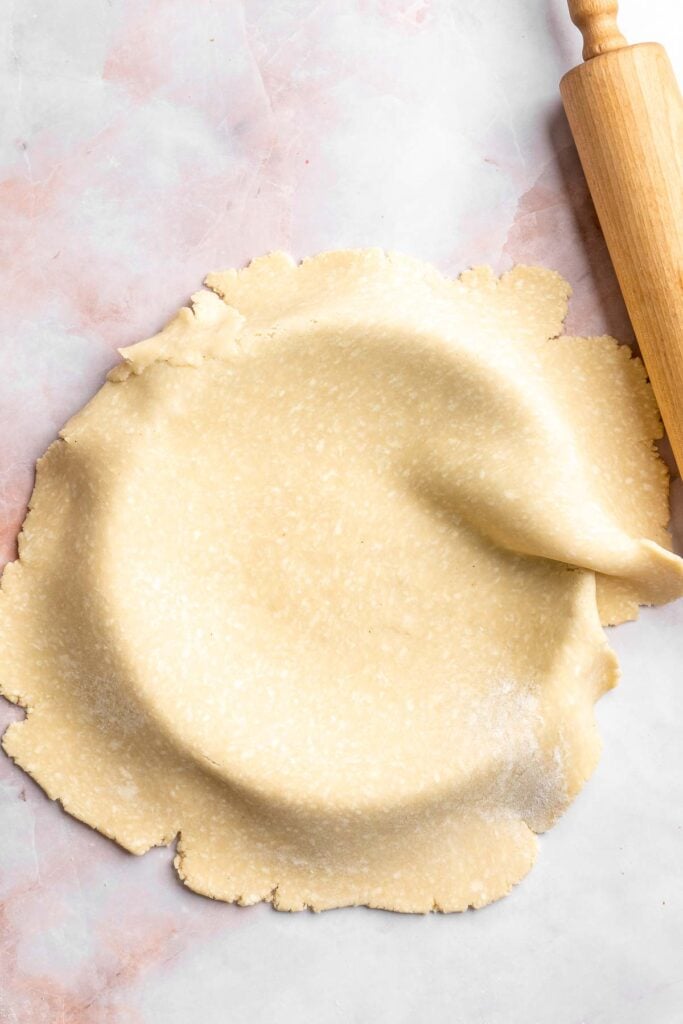

- Chill. Place into the freezer to firm up for 20-30 minutes.
- Prick. Remove from the freezer and use a fork to prick all around. Place parchment and pie weighs over top of the crust.
- Bake. Bake in a 350F preheated oven for about 20 minutes. Remove from oven and remove the pie weights and parchment paper. Return to the oven and bake for an additional 10 minutes, or until lightly golden. When done, allow to fully cool before filling.
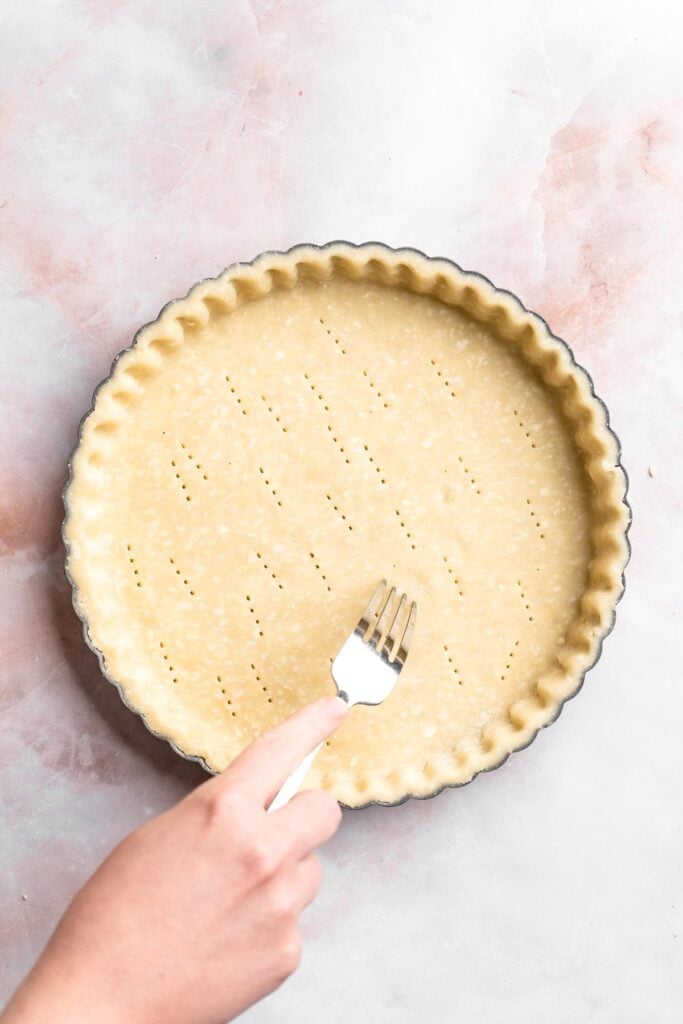
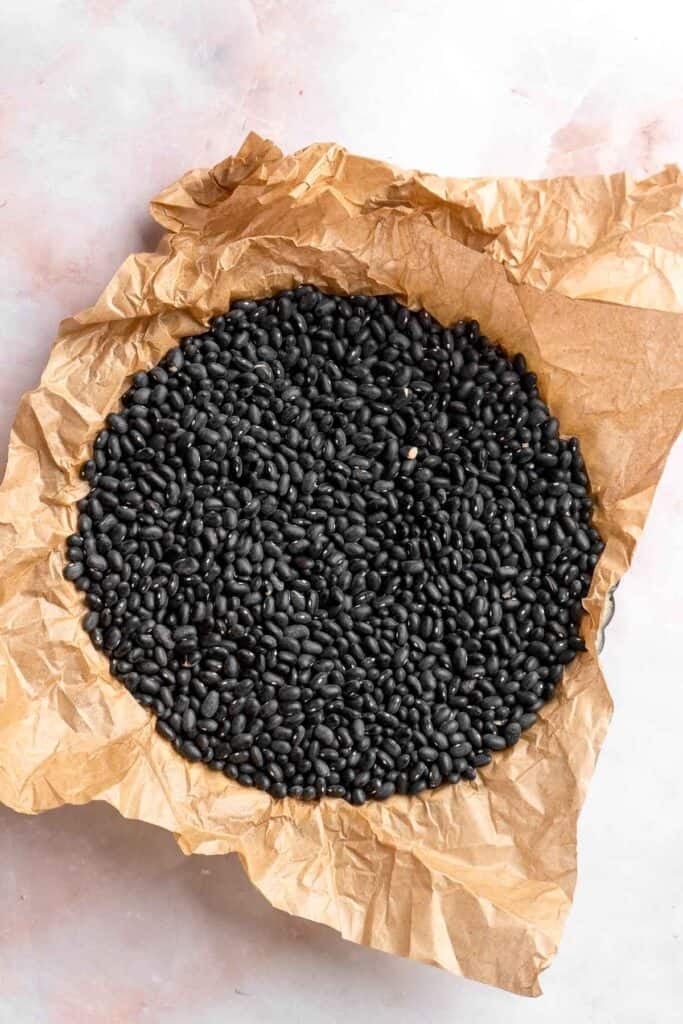
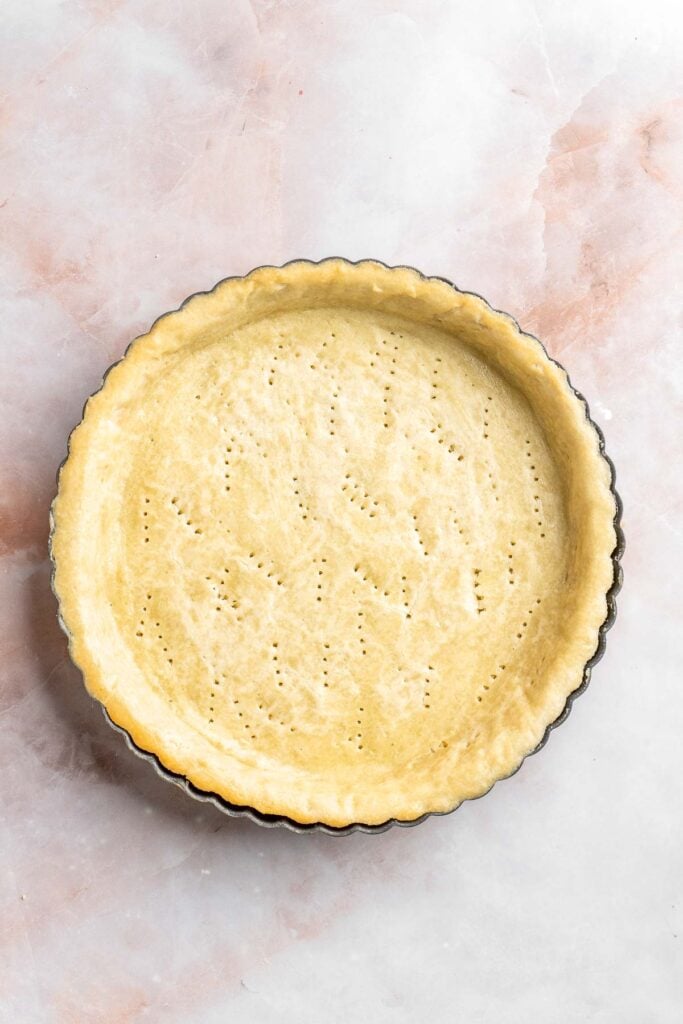
Next, make the lemon filling.
- Turn the oven down to 325F.
- Heat ingredients. Whisk together lemon zest, lemon juice, sugar, eggs, and egg yolks in a medium saucepan. Place over medium-low heat and heat while constantly whisking, until the filling has thickened to a hot pudding consistency (165F are read on a kitchen thermometer), about 8-10 minutes.
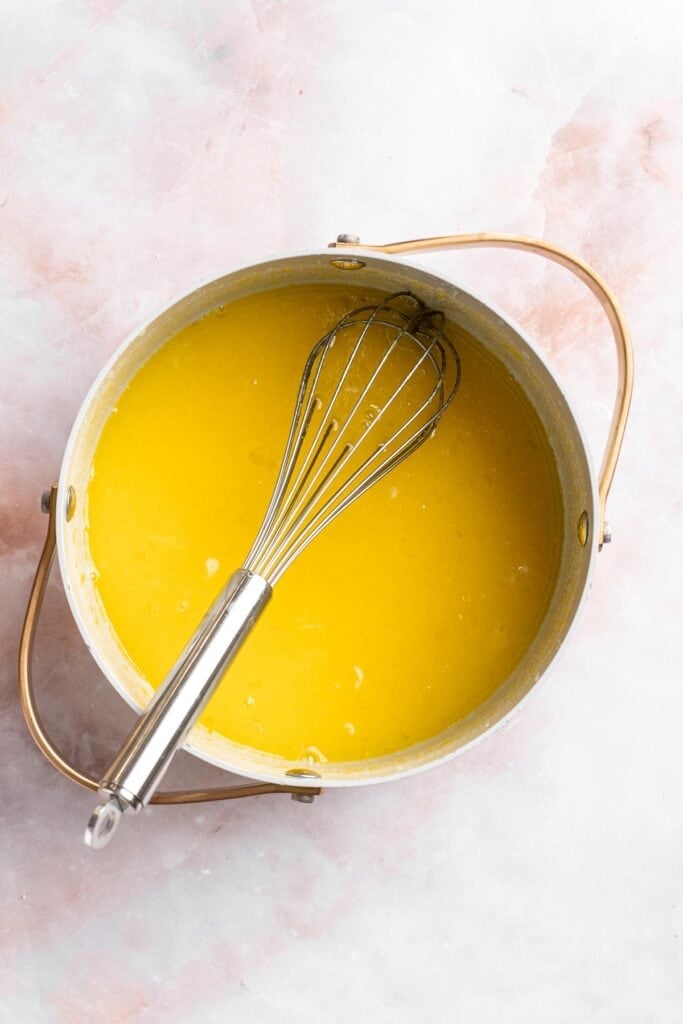
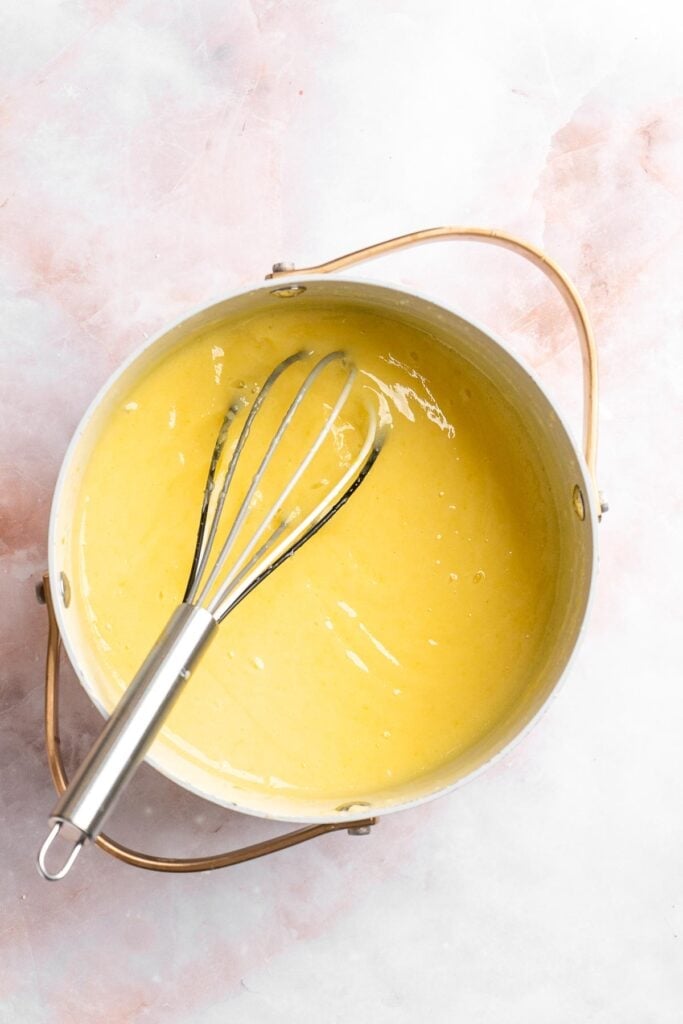
- Add cold ingredients. Immediately remove from heat and add in the cold cubed butter, heavy cream, and vanilla. Whisk until smooth and incorporated.
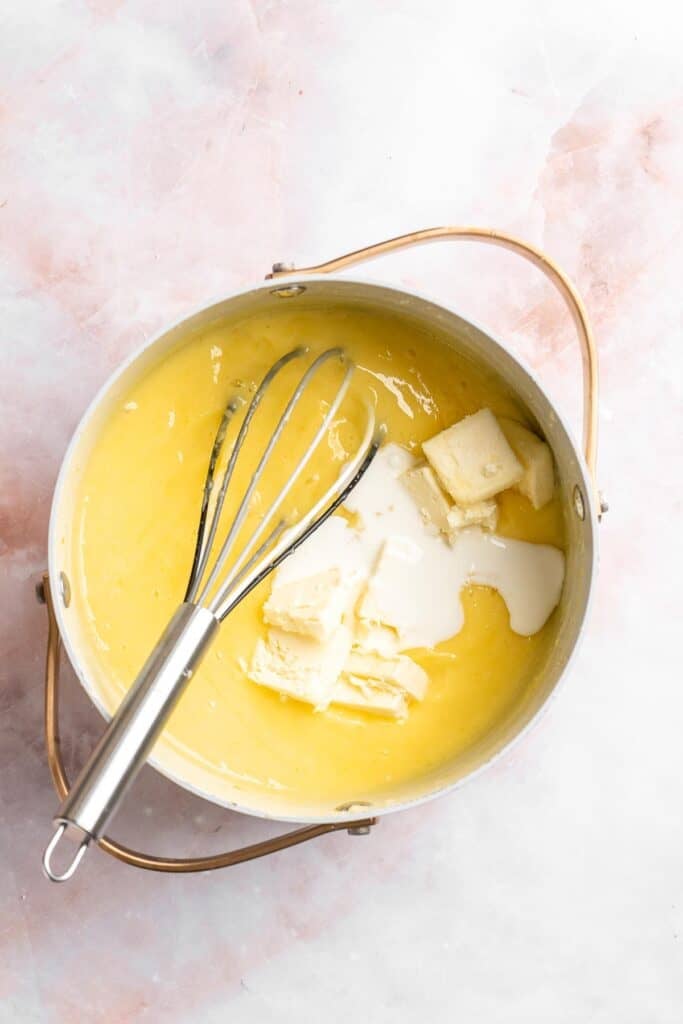

- Strain. Place a fine mesh sieve over the cooled crust, then pour the hot filling over the sieve. Press with a spatula to get most of the filling through.
- Bake. Place the tart back into the oven to bake for 10-15 minutes, or until only the centre is a little jiggly.
- Cool. Remove the tart from the oven and allow it to cool at room temperature for 30 minutes. Then, transfer to the fridge to fully cool for at least 8 hours, or preferably overnight.


- Serve. Slice and serve as is, or feel free to decorate the top with whipped cream, lemon slices, and fresh berries.


Recipe Variations
- Add berries. Top the chilled tart with fresh raspberries, blueberries, or strawberries for a beautiful and flavorful garnish. The burst of fruitiness balances the citrus.
- Make it brûléed. Sprinkle sugar on top and torch until caramelized for a crackly, sweet finish like a crème brûlée. It adds extra texture and a caramel flavor.
- Infuse herbs. Add a sprig of thyme or rosemary to the lemon mixture while it heats for a subtle herbal twist. Strain before pouring into the crust.
- Make it mini. Use mini tart pans to create individual lemon tarts. These are great for parties, easier serving, and also make a lovely plated dessert.
- Add whipped cream. A dollop of sweetened whipped cream adds creaminess and contrast to the tart citrus. You can also add some lemon slices or lemon zest on top.
How to Serve
This French Lemon Tart is delicious served on its own, or paired with some of my favorite dessert sides including:
For more recipes, see our 40 Best Summer Desserts.

Recipe Tips and Tricks
- Chill the dough. Letting the crust dough chill helps prevent shrinking and ensures a flaky texture. It also makes it easier to roll and transfer.
- Use fresh lemons. Fresh lemon juice and zest give the filling its signature brightness. Bottled juice lacks the same intensity, and don't skip the zest!
- Strain the filling. Pour the lemon filling through a mesh strainer to remove any cooked egg bits for a perfectly smooth custard. This step is worth the extra minute.
- Don't overbake. The filling should be set but still have a slight jiggle in the center when done. It will continue to set as it cools.
- Cool before slicing. Let the tart cool completely and chill before slicing to get clean, sharp cuts.
Storing and Freezing Instructions
How to Store
Store the leftover tart in an airtight container in the refrigerator for up to 4 days. Place parchment paper in between slices to prevent sticking.
How to Reheat
No reheating necessary. This tart is best served chilled or at room temperature. Let sit out for 20 minutes before serving.
How to Freeze
You can freeze the fully baked tart. Wrap it tightly in plastic cling wrap and foil and freeze for up to 1 month. Thaw in the fridge overnight before serving for best results.
FAQ
Fresh lemon juice is highly recommended for the best flavor. Bottled juice tends to be more bitter, less vibrant, and lacks the bright citrus aroma that makes this tart shine. While it can technically work, it won't give the same result as fresh juice, and the overall taste of the tart may fall flat.
This can happen if the heat is too high or the eggs cook too quickly. Stir constantly and cook gently over low heat, ideally using a double boiler setup to avoid direct heat. Using a whisk continuously while gently heating the mixture ensures the eggs incorporate smoothly without scrambling. Be patient and keep the heat low.
Yes! You can prepare and bake the crust a day ahead. Store covered at room temperature until ready to fill. You can also freeze it for up to a month. This makes it perfect for entertaining or planning ahead. Just ensure the crust is fully cooled before adding the filling to maintain the texture.
More Lemon Dessert Recipes
- Lemon Meringue Pie
- Lemon Bundt Cake
- Lemon Curd
- Lemon Sweet Rolls
- Lemon Drop Cookies (Anginetti)
- Best Lemon Loaf with Lemon Glaze (Starbucks Copycat)
Tried this recipe?
I'd love to hear what you think! Leave a comment and rating below to share your feedback. Your reviews help others discover this recipe and help me keep creating more free recipes for you. Snap a photo and tag me on social media @aheadofthyme too.

Halloumi Burgers
Halloumi Burgers are a quick and flavorful meatless burger option that even carnivores will love. Perfectly golden, pan-fried halloumi is layered on soft, toasted buns and topped with crisp microgreens, juicy tomato, red onion, and a generous dollop of creamy tzatziki. These burgers are a delicious, satisfying twist on your usual BBQ lineup and come together in under 15 minutes.
This easy vegetarian burger is all about balance: salty, squeaky cheese meets cool, tangy sauce and fresh toppings, making each bite vibrant and well-rounded. Whether you're grilling outdoors or whipping up a weeknight dinner, this burger delivers on flavor and convenience. It also makes a great base for custom toppings, so you can switch things up based on what's in your fridge.
Why You'll Love these Halloumi Burgers
- Quick and easy. These burgers come together in just 15 minutes with minimal prep. Ideal for busy weeknights or low-effort meals, and they always hit the spot. You won't believe how delicious a meatless option can be until you try this.
- Crispy, salty goodness. Pan-fried halloumi has a golden, crispy crust and a squeaky, tender center. Its rich, salty flavor pairs perfectly with fresh and creamy toppings. The satisfying crunch and unique texture make each bite a crave-worthy experience.
- Great for vegetarians. A hearty alternative to beef burgers, halloumi adds bold flavor and satisfying texture. Even meat-lovers won't miss the meat! It's a fantastic option for Meatless Mondays or when you're feeding a crowd with mixed preferences.
- Customizable and fresh. Add avocado, swap buns for lettuce wraps, or try different sauces. These burgers are easy to make your own with whatever toppings you like. It's a great recipe to adapt for dietary preferences or what's already in your fridge.
Ingredient Notes
To make these delicious Halloumi Burgers, you will need the following ingredients (full measurements in recipe card below):
- extra virgin olive oil - for pan-frying the halloumi. You can also use avocado oil.
- halloumi cheese - this firm, salty cheese fries beautifully. You can find it in most grocery stores near the specialty cheese section.
- hamburger buns - use your favorite kind - brioche, whole wheat, or gluten-free all work well. We love using our Easy Homemade Hamburger Buns too. Toast the buns for extra flavor.
- microgreens - these delicate greens add a fresh bite. Arugula or baby spinach make great substitutes.
- red onion - adds a bit of crunch and sharpness. You can use pickled onions for a tangier flavor.
- tomato - use ripe, juicy slices. Heirloom tomatoes or vine-ripened work best.
- tzatziki sauce - creamy and garlicky, this cools and complements the salty cheese. You can use store-bought or homemade. Make our Easy Tzatziki Sauce (Yogurt Cucumber Dip) in minutes.
You will also need measuring cups and spoons, a skillet or grill pan, cutting board, knife, spatula, and paper towels.

How to Make the Best Halloumi Burgers
- Fry halloumi. In a large non-stick skillet, heat oil over medium heat until the hot oil sizzles, about 1-2 minutes. Add halloumi and fry until browned and crispy, about 3-4 minutes on each side. Set aside on a plate.
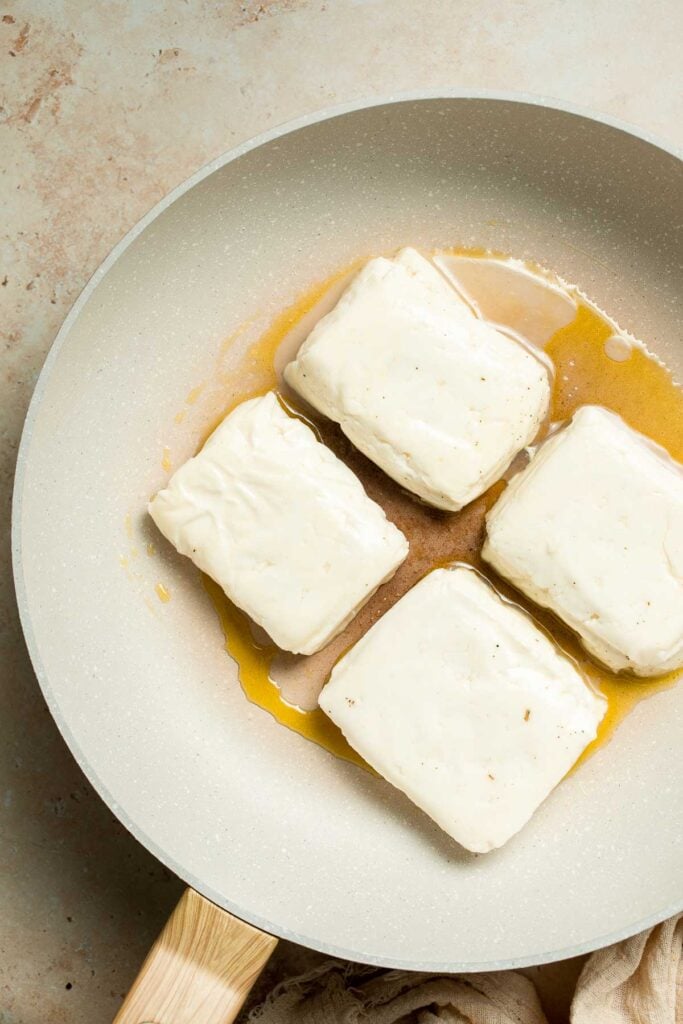
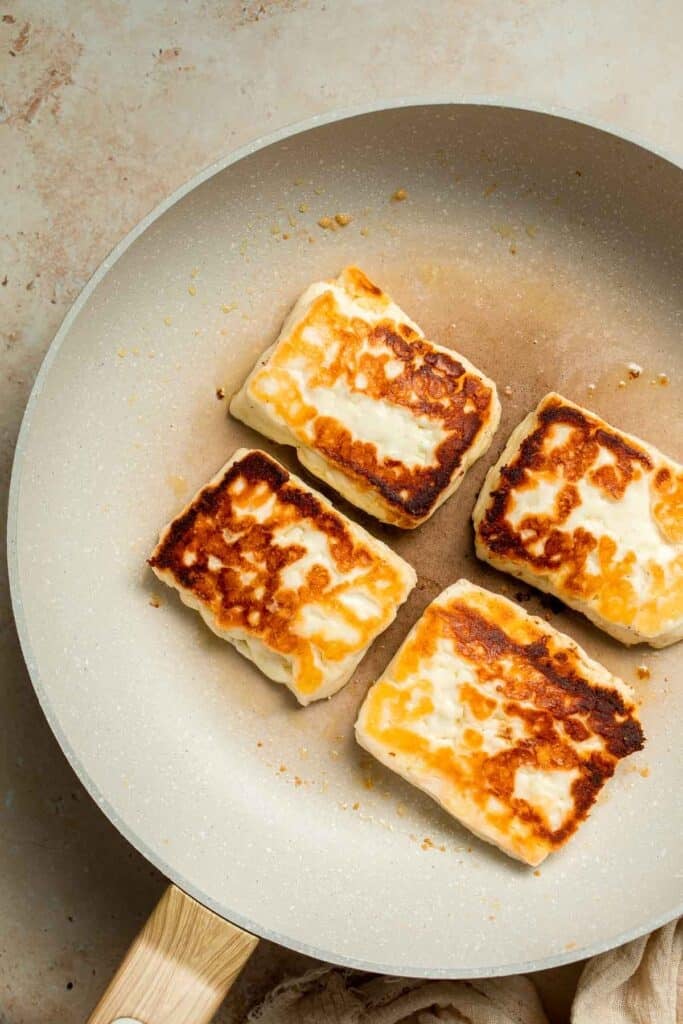
- Assemble burgers. On the bottom half of each hamburger bun, add ½ cup microgreens (or a piece of lettuce) and a block of halloumi. Drizzle 1 to 2 tablespoons of tzatziki sauce on top, and top with red onion slices and a slice of tomato. Place the top half of the bun on top to assemble the burger.
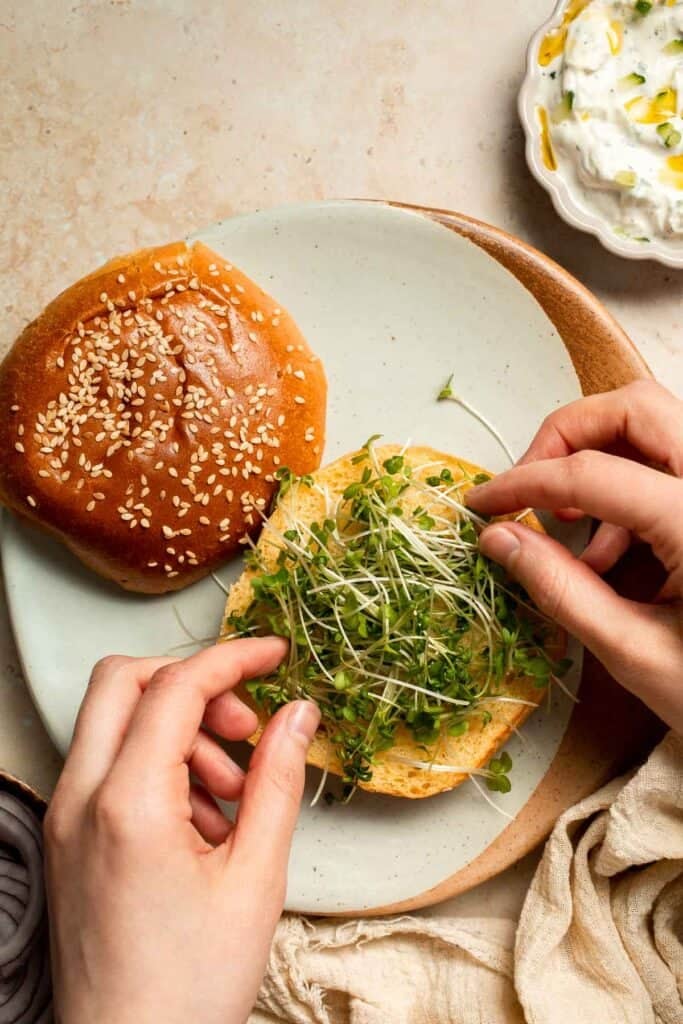
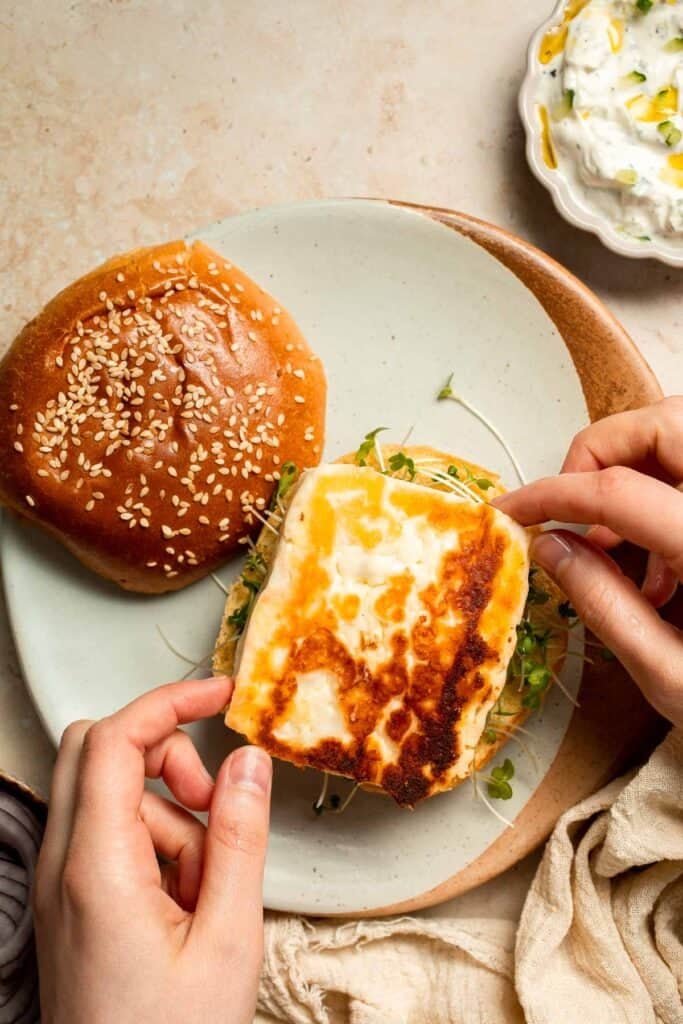

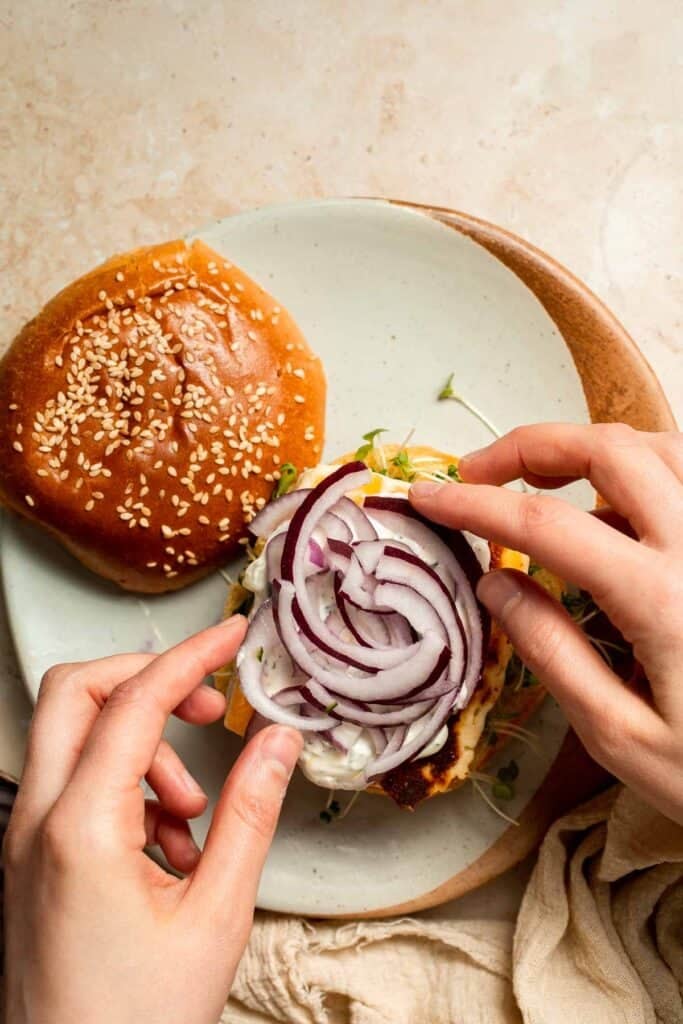
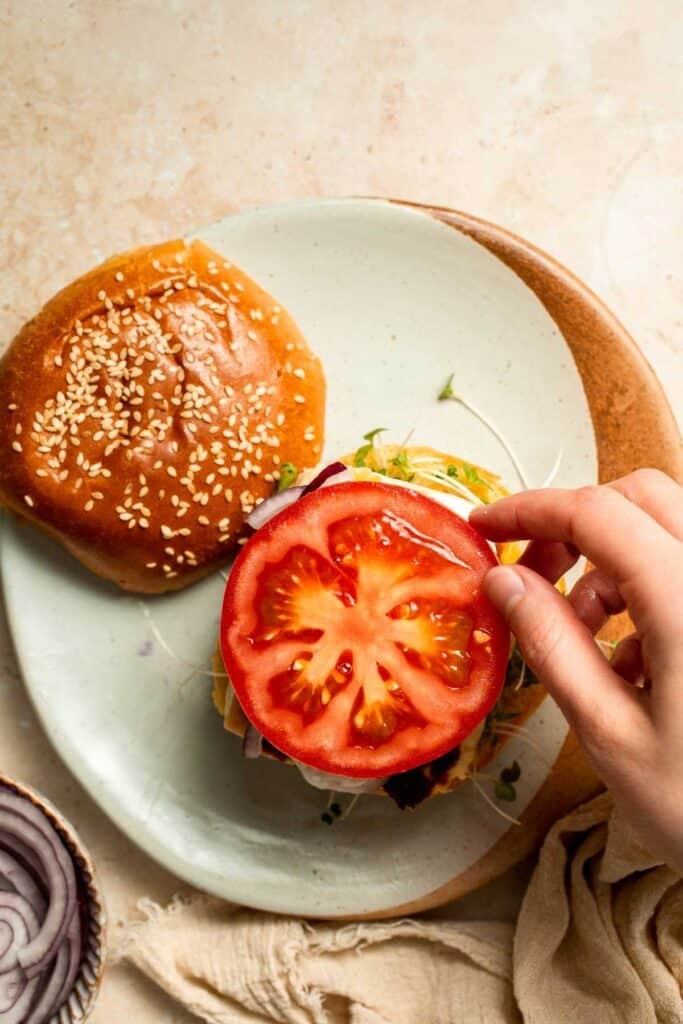
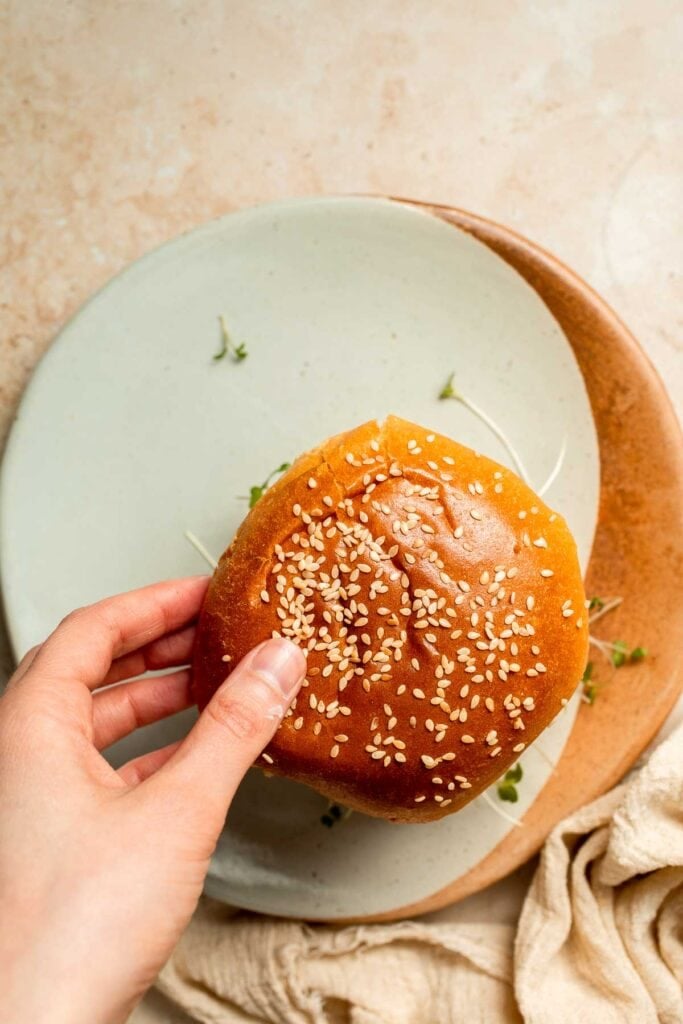
- Serve. Serve with a side of crispy french fries or a side salad such as coleslaw or macaroni salad.
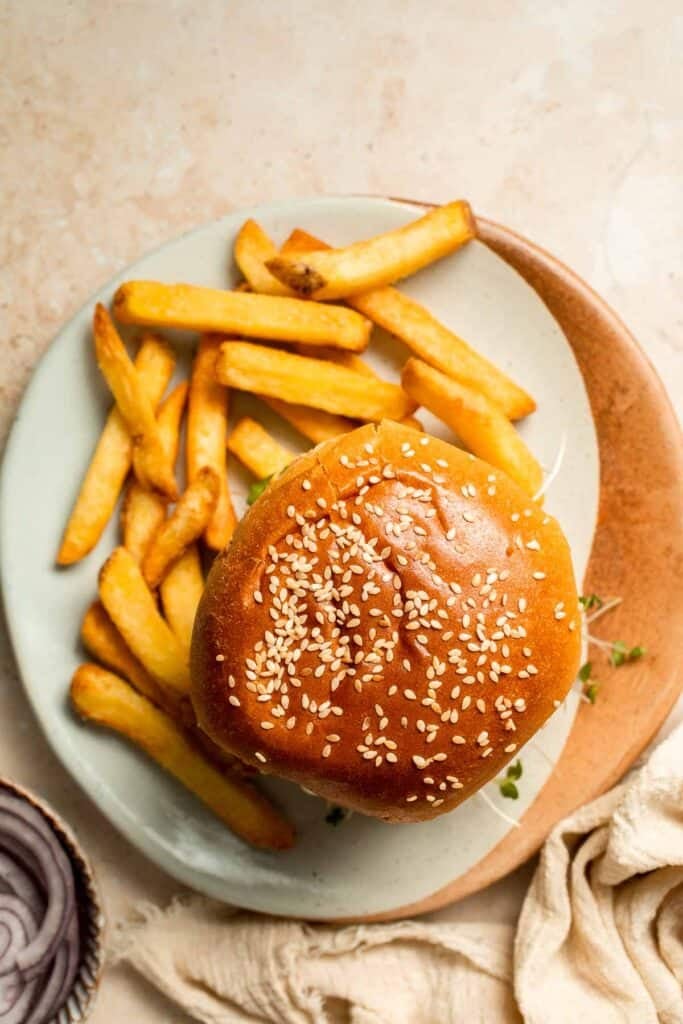
Recipe Variations
- Add avocado. For creaminess and richness, layer in slices of ripe avocado. It balances the saltiness of the halloumi and adds healthy fats.
- Try a different sauce. Swap tzatziki with garlic aioli, hummus, or spicy yogurt sauce. Each variation offers a new spin on flavor.
- Use a lettuce wrap. Skip the bun for a low-carb version. Wrap the ingredients in sturdy lettuce leaves like romaine or butter lettuce.
- Grill instead of pan-fry. Toss the halloumi slices on the grill for added smokiness. Make sure the grates are clean and well-oiled to prevent sticking.
- Add grilled veggies. Roasted red peppers, eggplant, or zucchini slices add smoky depth and work well with the salty cheese.
How to Serve
These Halloumi Burgers are delicious served on its own, or paired with some of my favorite summer sides including:
- Baked Sweet Potato Wedges
- Grilled Corn on the Cob
- Tomato Cucumber Avocado Salad
- Baked Potato Wedges
- Classic Coleslaw
- Lemonade or Iced Tea
For more summer sides, see our 25+ Best BBQ Side Dishes.
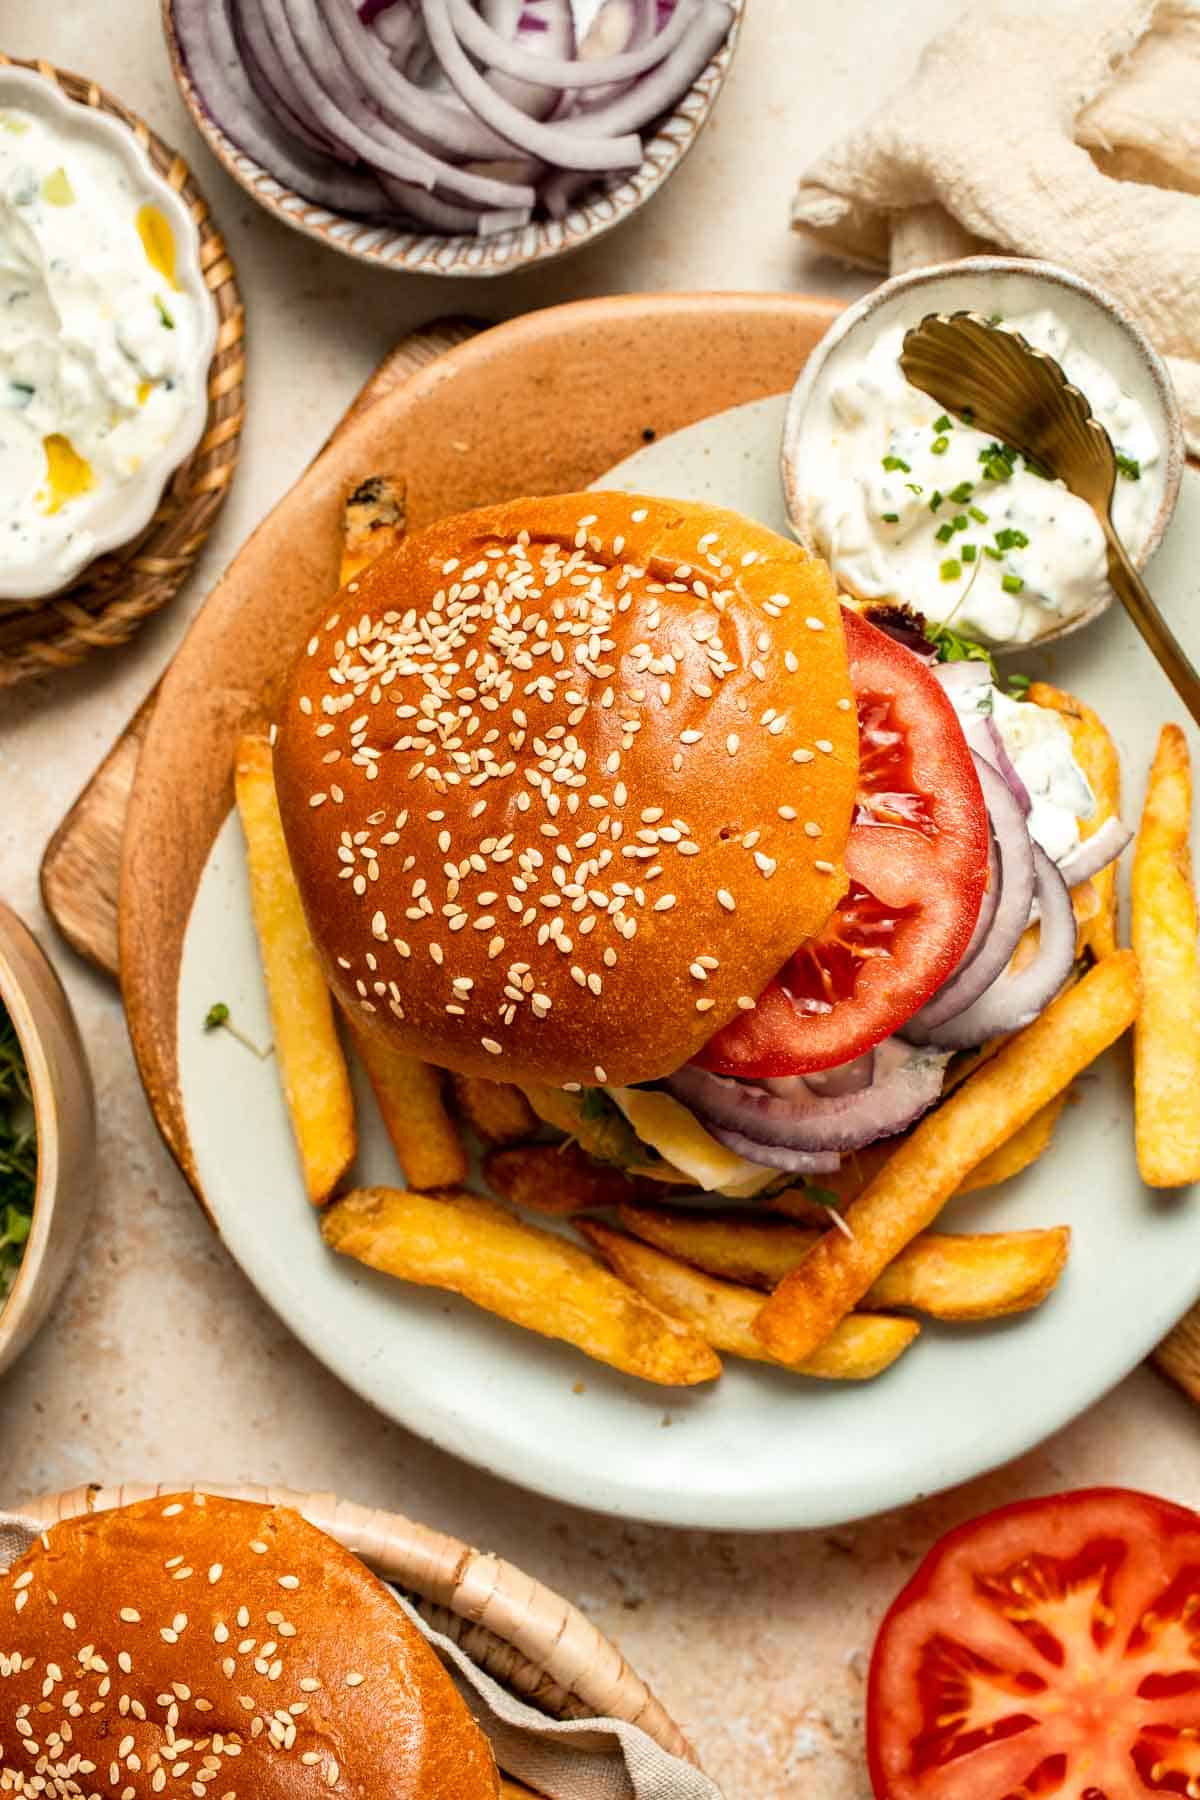
Recipe Tips and Tricks
- Pat the halloumi dry. Removing excess moisture ensures better browning and prevents sticking. Press lightly with paper towels before cooking. This step is key for achieving crisp edges.
- Use a hot pan. A properly preheated skillet helps create a crispy crust. Medium-high heat is best for a quick sear. Don't overcrowd the pan for best results.
- Slice evenly. Uniform halloumi slices cook more evenly. Aim for about ½ inch thick to hold shape and melt slightly. Thinner slices may break apart or overcook.
- Toast the buns. Toasted buns resist sogginess and add texture. Butter lightly before toasting for extra flavor.
- Assemble just before serving. This keeps the burger components fresh and prevents the buns from getting soggy. Serve immediately for best texture.
Storing and Freezing Instructions
How to Store
Store any leftover cooked halloumi in an airtight container in the fridge for up to 3 days. Store toppings separately for best texture.
How to Reheat
Reheat halloumi in a skillet over medium heat until warmed and crispy again. Avoid microwaving as it can make the texture rubbery.
How to Freeze
Freezing is not recommended for cooked halloumi, as the texture may become crumbly. However, uncooked halloumi can be frozen for up to 3 months.
FAQ
You can prep the toppings and slice the cheese in advance, but cook the halloumi just before serving for best texture and flavor. It's best enjoyed fresh, as reheating doesn't always restore that ideal crispy crust.
Halloumi is usually found in the cheese section of most grocery stores, near feta or specialty cheeses. You can also find it at Mediterranean or Middle Eastern markets. Some stores even carry flavored versions for variety.
No, halloumi doesn't melt like mozzarella. It softens and browns when cooked, developing a crispy exterior and chewy, squeaky center. This makes it ideal for grilling or frying without losing its shape.
More Burger Recipes
- 15 Best Burger Recipes
- Black Bean Burgers
- Classic Juicy Hamburgers
- Mediterranean Turkey Burgers
- Salmon Burgers
- Homemade Veggie Burger with Lima Beans
Tried this recipe?
I'd love to hear what you think! Leave a comment and rating below to share your feedback. Your reviews help others discover this recipe and help me keep creating more free recipes for you. Snap a photo and tag me on social media @aheadofthyme too.

Crispy Corn Fritters
Crispy Corn Fritters are the perfect summer appetizer, snack, or side dish: golden brown on the outside, fluffy and tender on the inside, and packed with juicy corn, melty cheese, and the perfect hint of herbs and seasoning. This easy recipe comes together in minutes with simple ingredients and is pan-fried to perfection for the ultimate crowd-pleaser. They're the kind of snack or side dish that disappear fast.

These fritters are made with fresh, canned, or frozen corn (whatever you have on hand!), and held together with a lightly seasoned batter. Paired with a creamy dip, alongside grilled meats and fresh salads, or eaten straight off the plate, these versatile fritters are a must for everything from casual weeknights to sunny summer get-togethers.
Why You'll Love these Crispy Corn Fritters
- Quick and easy to make. These corn fritters come together in about 30 minutes with pantry staples. Great for busy weeknights or last-minute entertaining, and cleanup is a breeze. Even beginner cooks will find this recipe simple and straightforward.
- Perfectly crispy texture. A crispy golden crust with a soft and tender center makes each bite satisfying. The corn adds natural sweetness and juicy pops of flavor, and the cheese enhances the crispiness even more.
- Kid-friendly and crowd-pleasing. These fritters are mild, crunchy, and fun to eat. They're great for little hands and equally loved by adults. Serve with ketchup or a yogurt dip for extra fun. They're also great for school lunches or afternoon snacks.
- Customizable and versatile. You can swap in different cheeses, add chopped herbs, or mix in diced jalapeños or red peppers for a kick. These fritters adapt to whatever you have on hand, and are a great way to use up leftover veggies in the fridge.
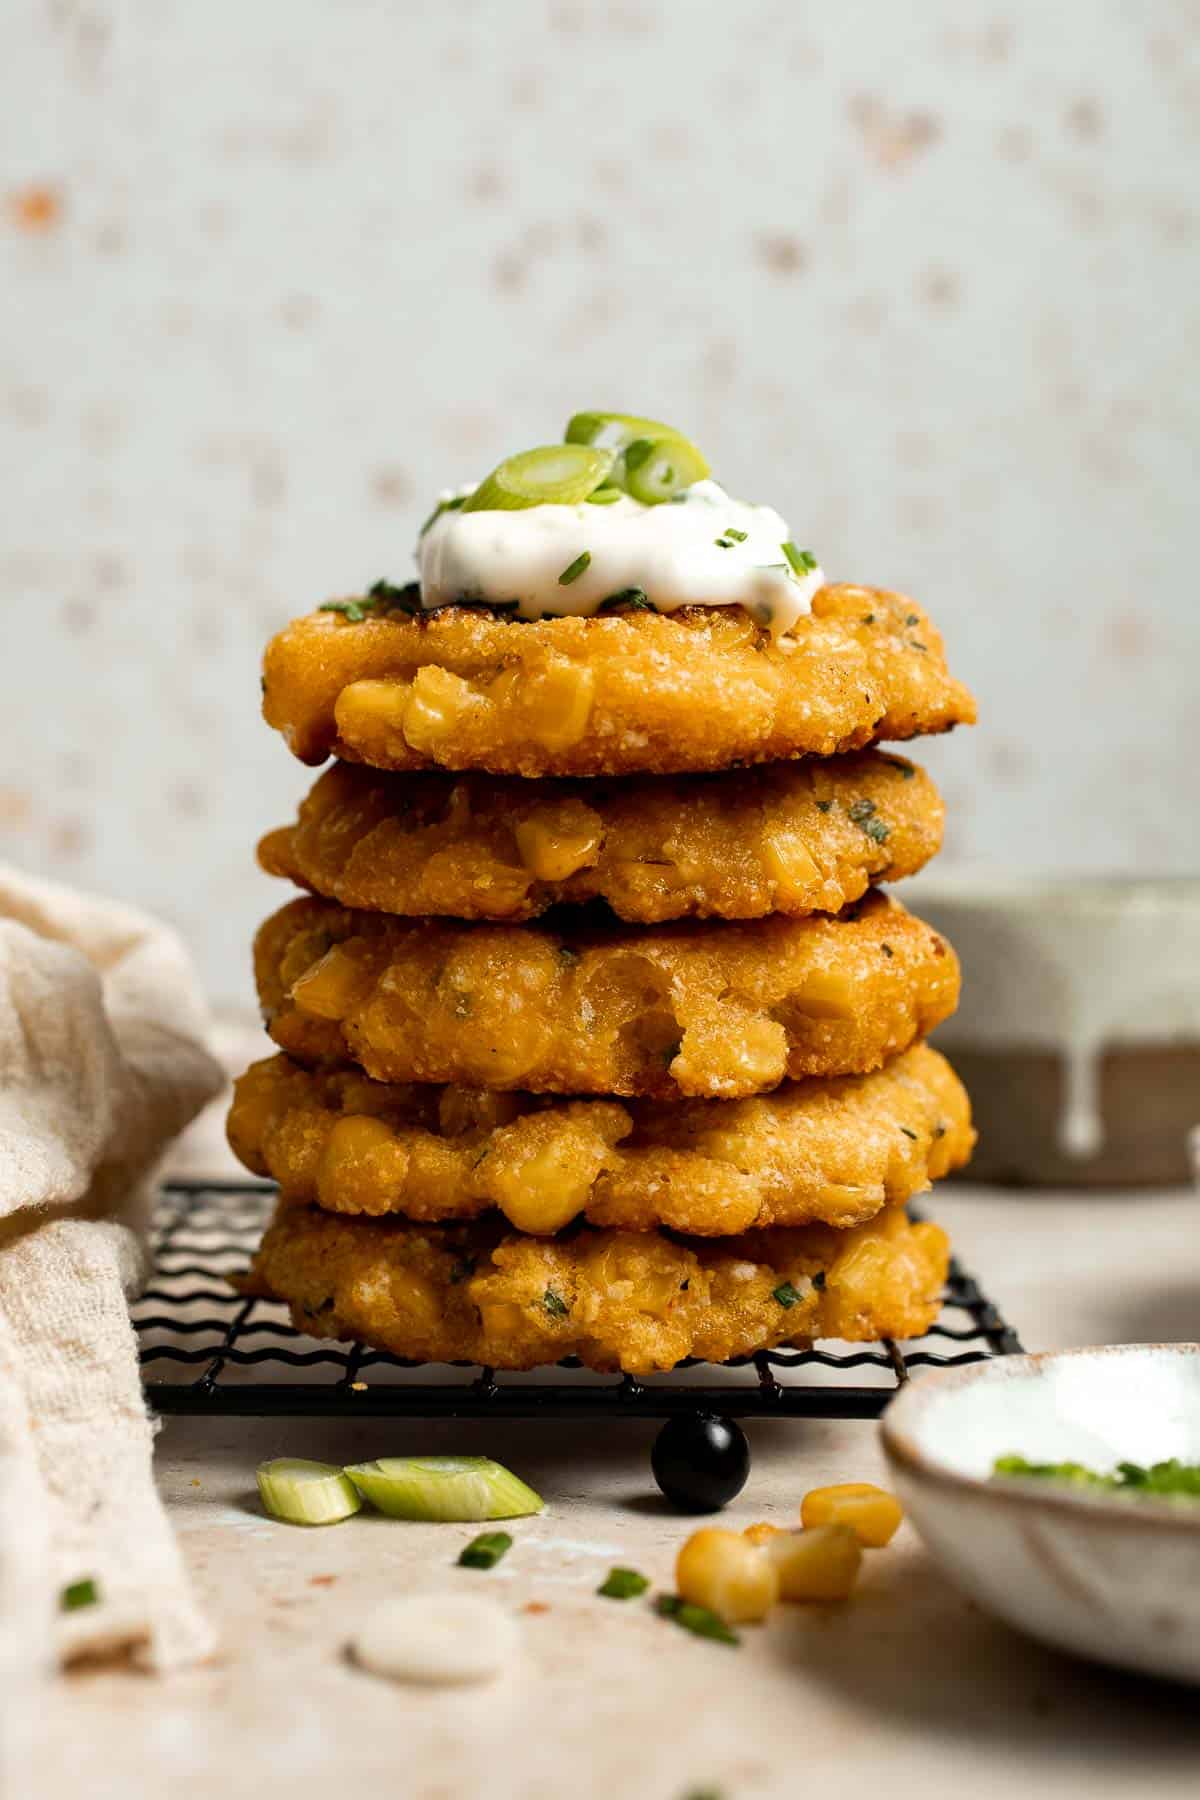
Ingredient Notes
To make this delicious Crispy Corn Fritters, you will need the following ingredients (full measurements in recipe card below):
- corn - fresh, canned (drained), or frozen (thawed) all work. Use sweet corn for best flavor.
- Parmesan cheese - adds savory richness and enhances the crispy texture. You can substitute with cheddar or crumbled feta.
- cornmeal - provides extra crunch. You can substitute with more flour, but the texture will be softer.
- all-purpose flour - helps bind the fritters together. A 1:1 gluten-free blend works if needed.
- chives or green onions - adds fresh flavor. You can use finely chopped shallots or red onion instead if you want.
- seasoning - seasoned with garlic powder, paprika, salt, and pepper. You can use fresh garlic instead of garlic powder, if preferred.
- egg - helps bind the batter. Use a flax egg for a vegan option, though the texture may be slightly softer.
- milk or heavy cream - Helps form the batter. Non-dairy milk works well too (like almond or oat milk).
- vegetable oil - canola or avocado oil are good substitutes for frying.
You will also need measuring cups and spoons, a large mixing bowl, a skillet or frying pan, a spatula, and a paper towel-lined plate.
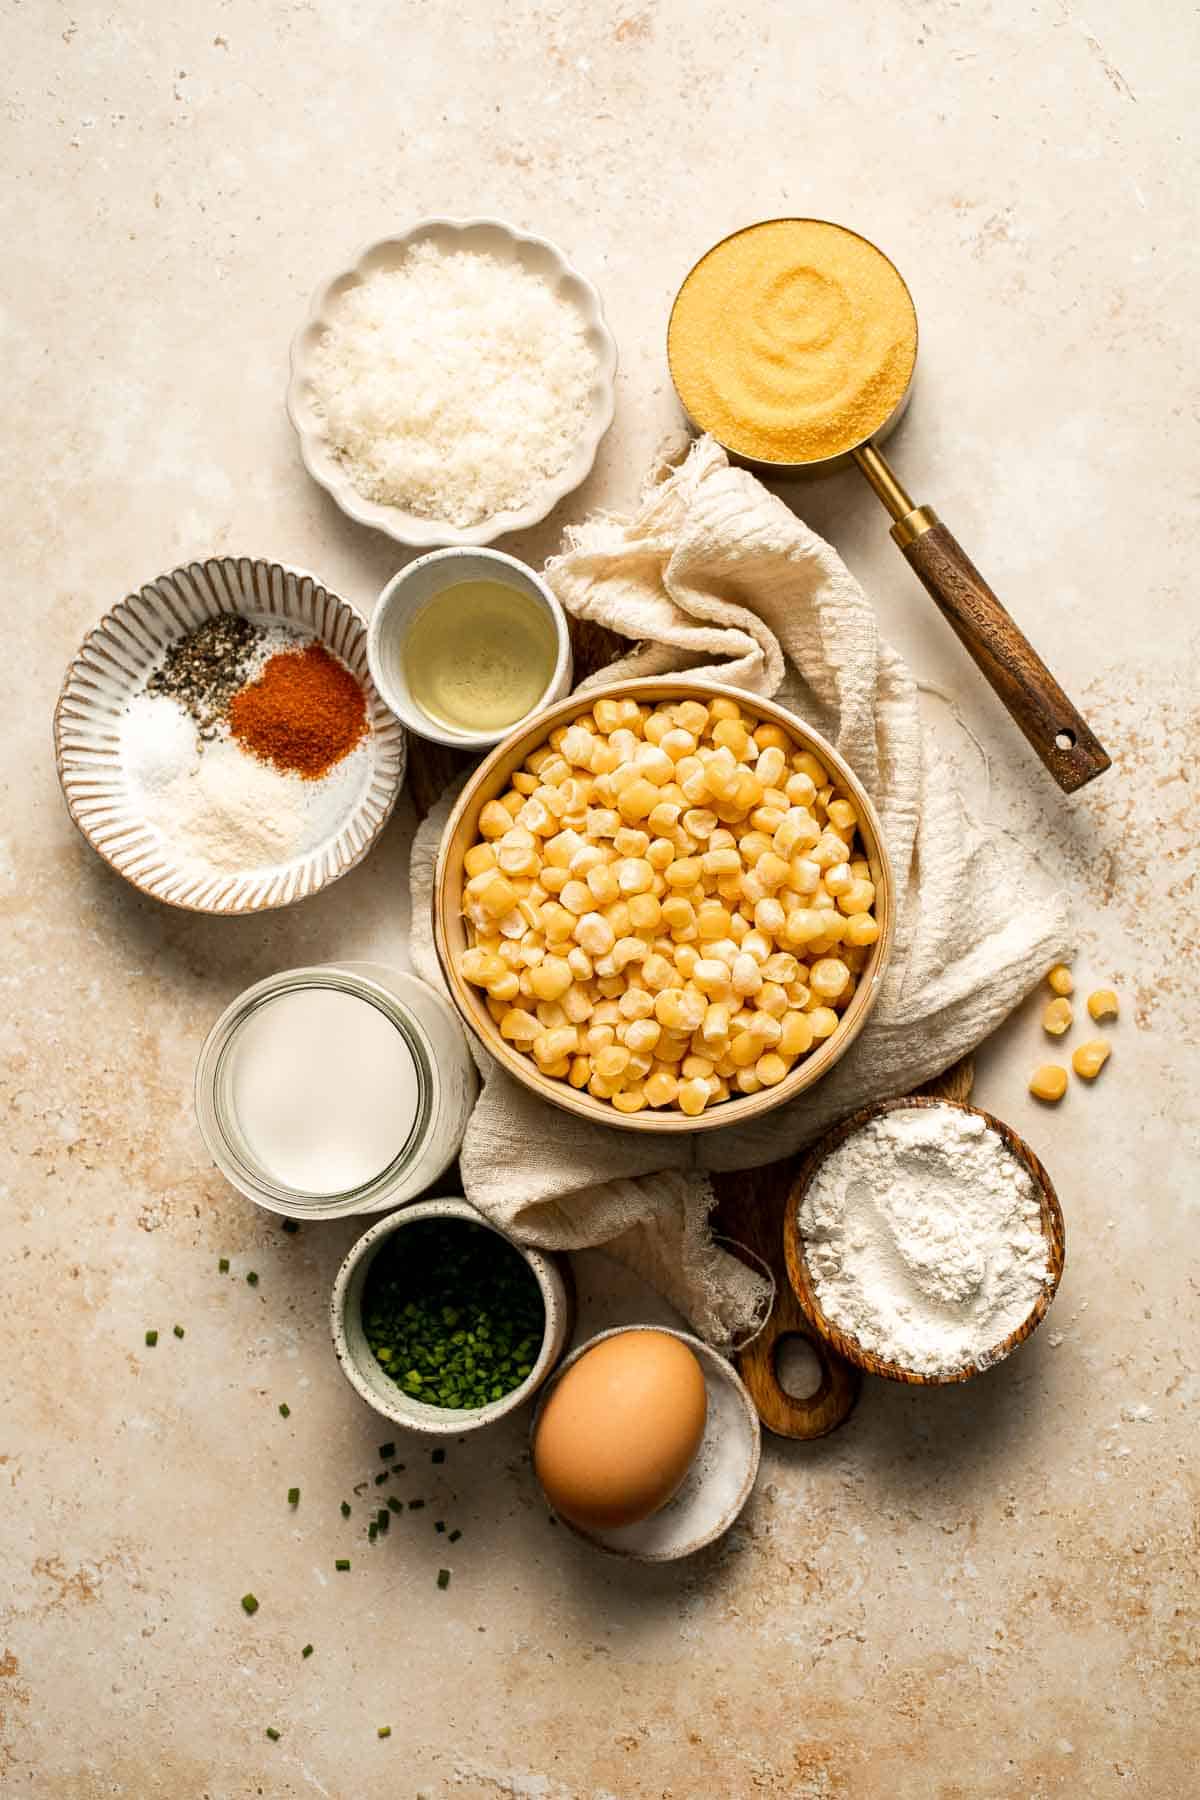
How to Make the Best Crispy Corn Fritters
- Combine dry ingredients. In a large mixing bowl, combine all the dry ingredients including corn kernels, cheese, cornmeal, flour, chives, garlic powder, paprika, salt and pepper. Mix until evenly distributed.
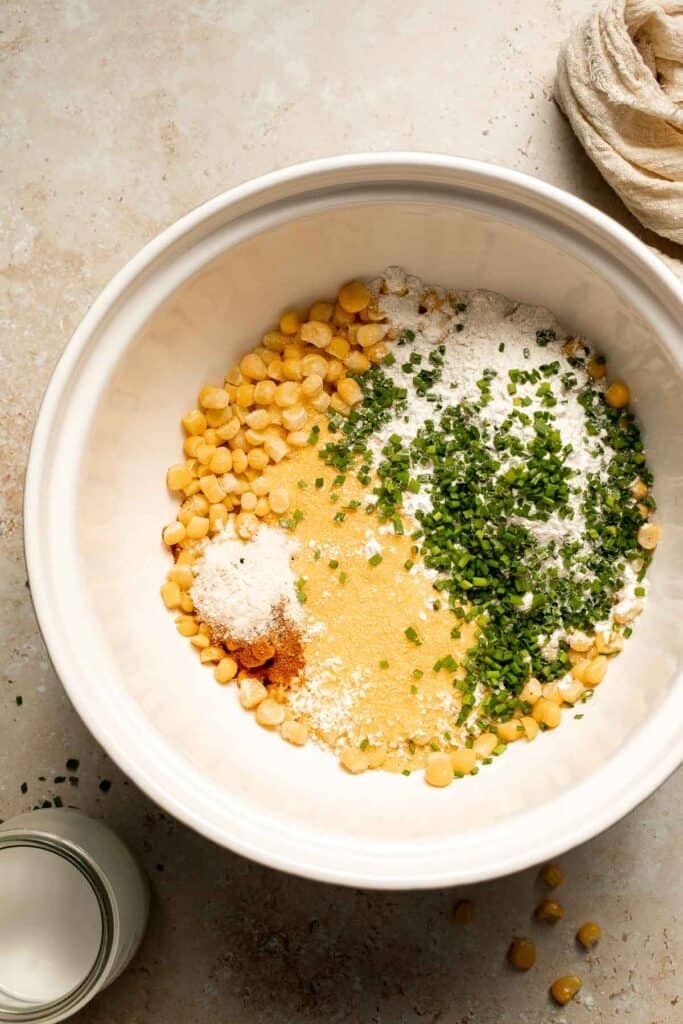
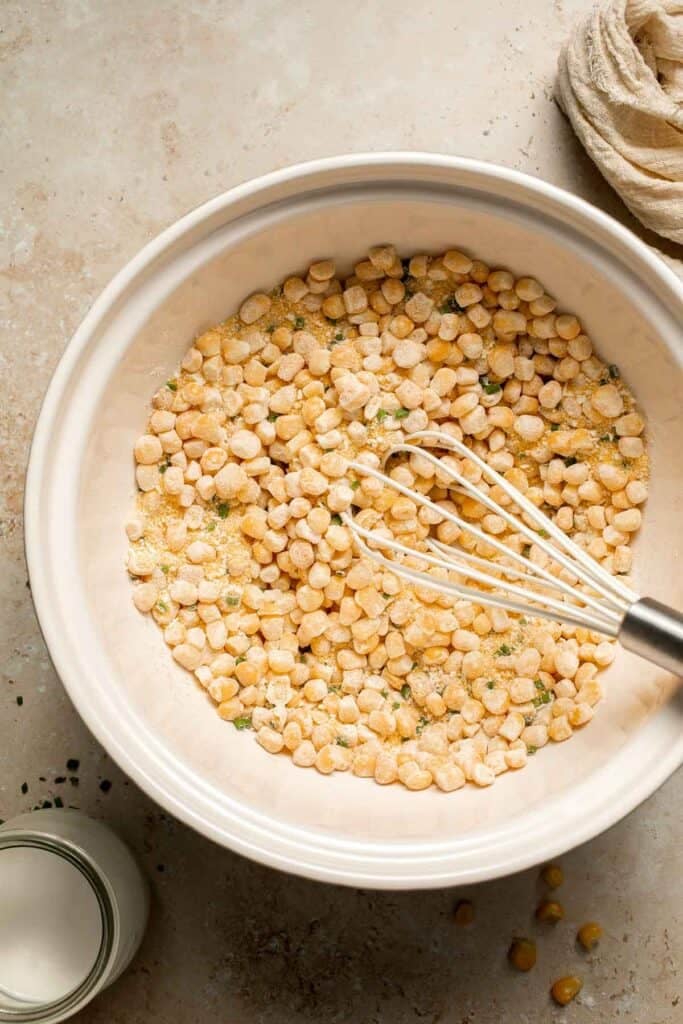
- Combine wet ingredients. In another bowl, whisk together egg and milk until smooth.


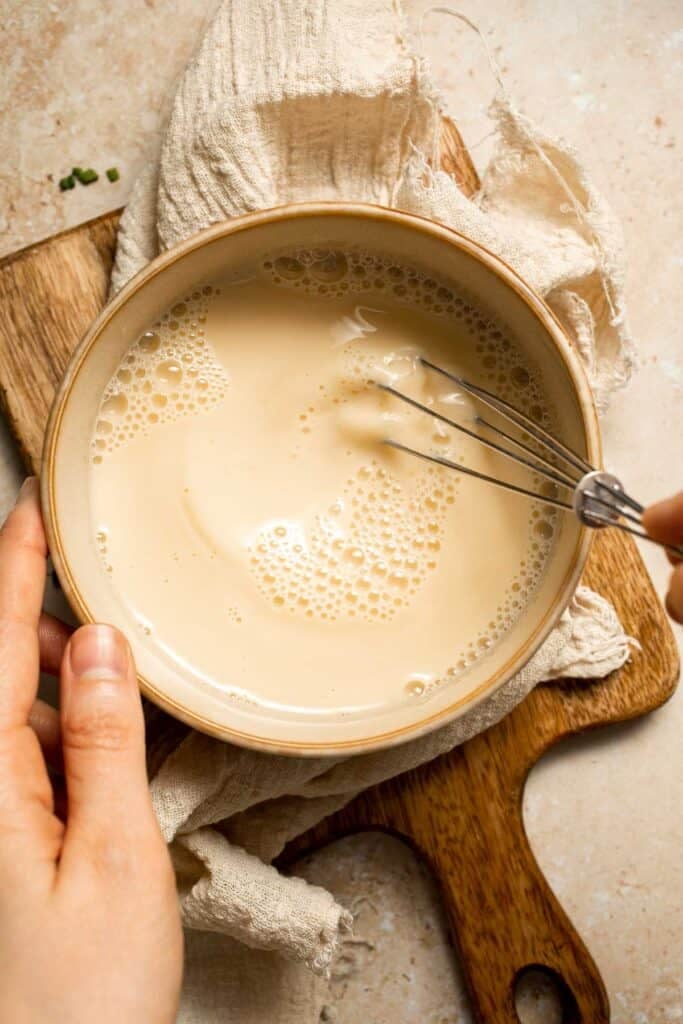
- Complete batter. Add the egg milk mixture into the corn mixture. Mix well until the batter is smooth.


- Scoop. Heat oil in a large skillet over medium heat until sizzling hot, about 2 minutes. Use a medium cookie scoop to scoop out 2-3 tablespoonfuls of the batter into the skillet and flatten slightly with the back of a spoon or spatula. You can probably fit 3-4 fritters in one skillet, depending on the size of your skillet.
- Cook. Cook until golden brown on the bottom, about 2-3 minutes, and flip over. Cook the other side until golden brown, another 2-3 minutes. Repeat in batches until the corn mixture is used up.


- Rest. Let the corn fritters cool on a paper towel-lined plate.
- Serve. Serve warm with a side of your favorite dipping sauce such as mayonnaise or aoili.

Recipe Variations
- Add cheese. Swap or add cheddar, Monterey Jack, or feta for different flavor profiles. You can even try pepper jack for extra spice.
- Make them spicy. Add minced jalapeños, red pepper flakes, or a pinch of cayenne to the batter. This gives a nice heat to balance the sweetness of the corn.
- Try other herbs. Use parsley, basil, or cilantro instead of chives. You can also add a pinch of thyme or dill for extra depth.
- Add other veggies. Mix in grated zucchini (squeezed dry), shredded carrot, or diced bell pepper. These add color, flavor, and nutritional variety.
- Make mini fritters. Use a small cookie scoop to make bite-sized fritters for appetizers or parties. They're fun, easy to eat, and cook quickly. Kids especially love the smaller size.
How to Serve
These Crispy Corn Fritters are delicious served with a dipping sauce as an appetizer, or as a side dish paired with some other popular summer dishes including:
- Classic Coleslaw
- Italian Chicken Skewers
- Air Fryer Short Ribs
- Tomato Cucumber Avocado Salad
- Salmon Burgers
- 7 Layer Dip
For more summer recipes, see our 60+ Summer Dinner Ideas.

Recipe Tips and Tricks
- Drain excess moisture. If using canned or thawed frozen corn, be sure to drain well. Too much moisture will prevent proper crisping and make the batter soggy, affecting both texture and cooking time.
- Preheat the pan. Let your oil heat before adding the batter to ensure a crisp exterior. The batter should sizzle when it hits the pan as this is key for a crunchy crust.
- Don't overcrowd the pan. Cook fritters in batches with space between them to ensure even cooking and crispiness. Overcrowding can lead to soggy fritters and uneven browning.
- Flip gently. Use a spatula to carefully flip each fritter once golden. Don't rush the process. Let them set before turning for a perfect flip and crust.
- Keep warm in the oven. If making a large batch, keep finished fritters on a baking sheet in a 200°F oven until ready to serve. This maintains crispiness without drying them out.
Storing and Freezing Instructions
How to Store
Store leftover fritters in an airtight container in the fridge for up to 3 days. Let them cool before storing to avoid sogginess.
How to Reheat
Reheat in a skillet over medium heat or in the oven at 350°F until warmed through. You can also use an air fryer for extra crispiness.
How to Freeze
Let fritters cool completely, then freeze in a single layer. Transfer to a freezer bag for up to 2 months. Reheat from frozen in the oven or air fryer.
FAQ
Yes! Bake them on a parchment-lined sheet at 400°F for 15-20 minutes, flipping halfway. They won't be quite as crispy but still delicious and a bit lighter. You can also broil briefly at the end for added browning.
Absolutely. Substitute the all-purpose flour with a 1:1 gluten-free baking blend and make sure your cornmeal is certified gluten-free. The texture may vary slightly but they'll still turn out great.
Yes, the batter can be mixed and stored in the fridge for up to 4 hours. Stir before cooking and proceed as directed for easy prep. Note that the batter may thicken slightly, so add a splash of milk if needed.
More Corn Recipes
- Mexican Street Corn (Elote)
- Summer Corn Salad
- Creamy Mexican Corn Soup
- Grilled Corn on the Cob
- Cornbread Muffins
- Mexican Street Corn Salad
Tried this recipe?
I'd love to hear what you think! Leave a comment and rating below to share your feedback. Your reviews help others discover this recipe and help me keep creating more free recipes for you. Snap a photo and tag me on social media @aheadofthyme too.

Peanut Butter Ramen Noodles
Peanut Butter Ramen Noodles is a quick, flavorful stir-fried noodle dish that transforms a humble packet of instant noodles into a crave-worthy meal. Tossed in a creamy, savory, and slightly tangy peanut sauce, this easy recipe comes together in just 10 minutes with pantry staples and fresh garnishes. It's satisfying, full of umami, and perfect for weeknight dinners or anytime you want a no-fuss comfort meal.
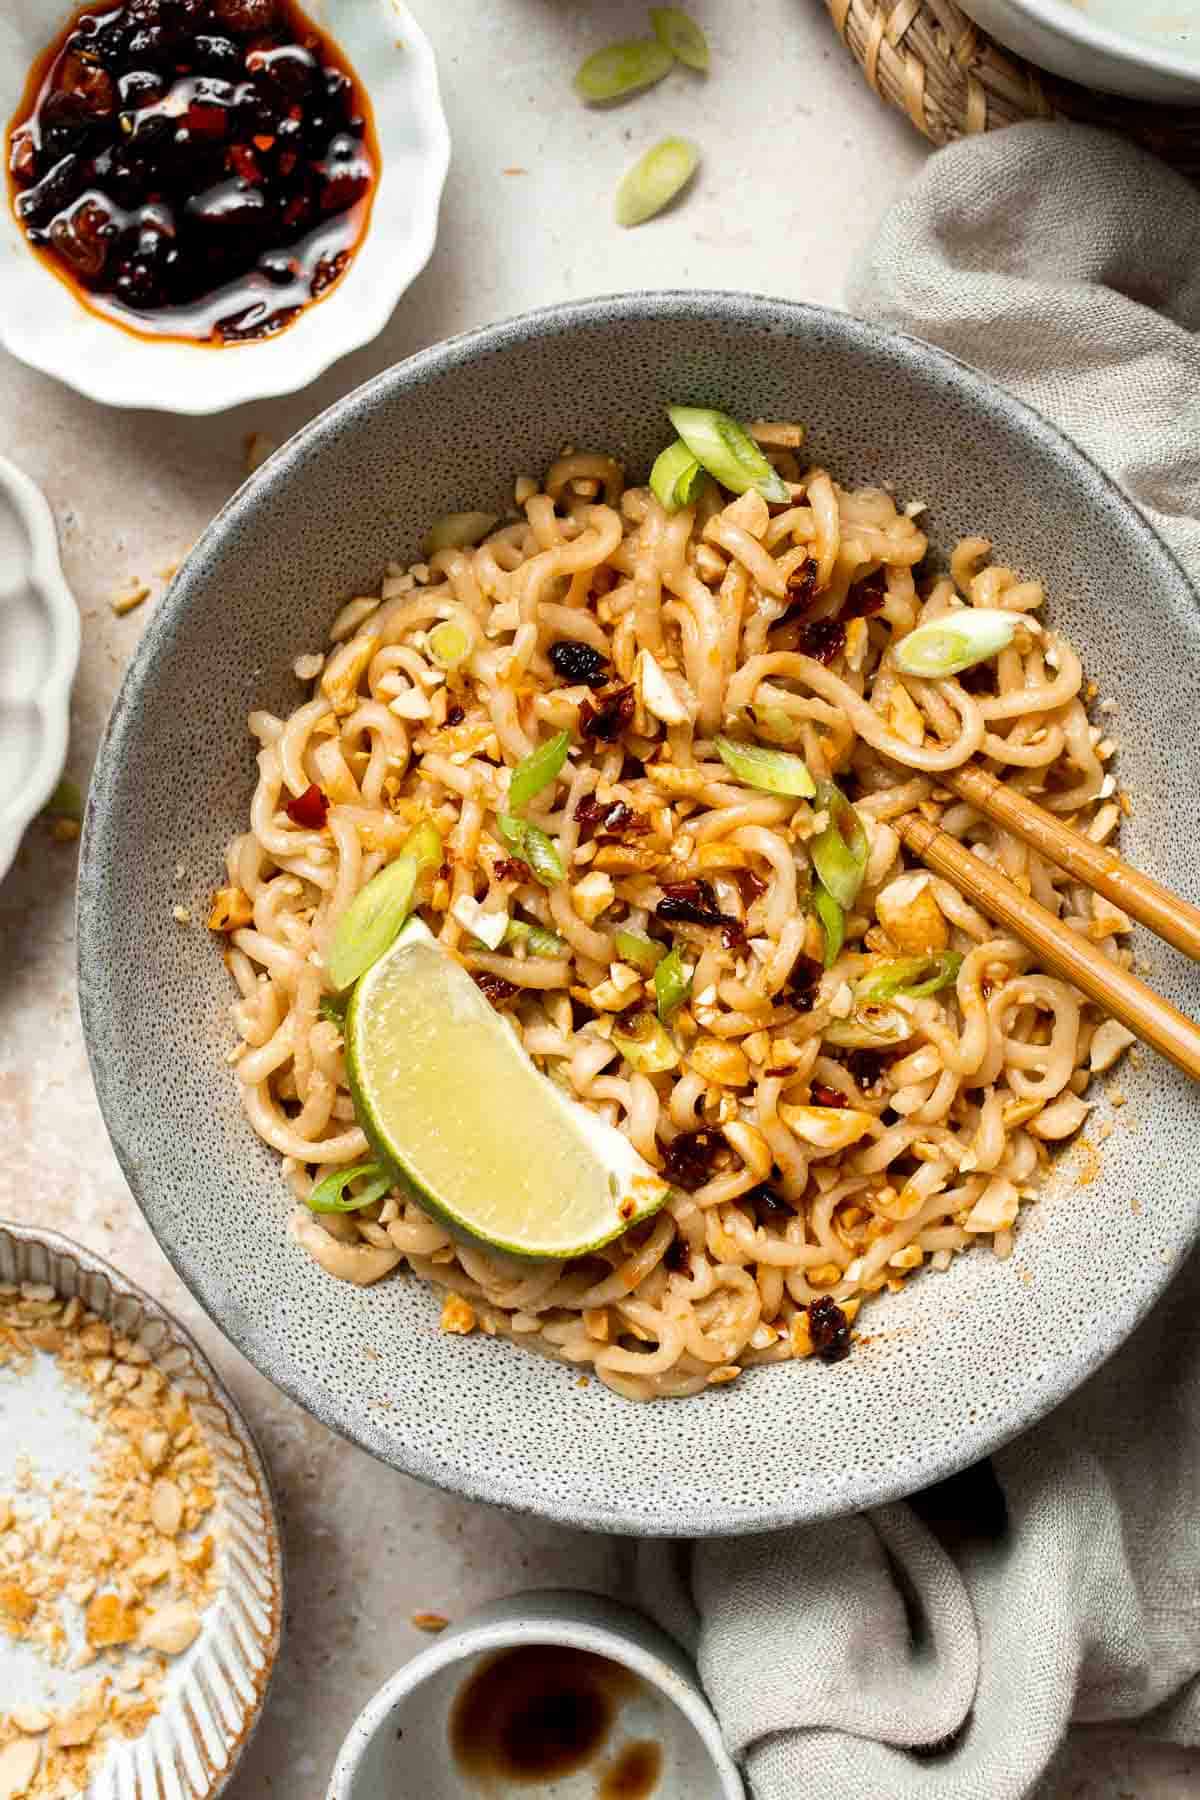
This version isn't a ramen soup, but rather it's a stir-fry style noodle dish that balances the richness of peanut butter with the sharpness of vinegar, the depth of soy sauce, and a pop of garlic and sesame oil. It's endlessly customizable and a budget-friendly favorite that tastes far more indulgent than it actually is. Add it to your weeknight dinner rotation tonight!
Why You'll Love these Peanut Butter Ramen Noodles
- Quick and easy. This recipe comes together in under 15 minutes from start to finish. Perfect for busy days when you need something fast and filling. Minimal prep and just one pan means less cleanup, too.
- Bold, delicious flavor. Creamy peanut butter combines with salty soy sauce, tangy vinegar, and savory aromatics to create a rich and deeply satisfying sauce. It's the kind of dish you'll find yourself thinking about later.
- Customizable. You can add your favorite veggies, add in some protein, or make it spicy. This recipe is flexible and works with whatever you have on hand. Just adjust the flavor balance to suit your taste.
- Budget-friendly. Made with affordable pantry ingredients and instant ramen noodles, this meal is easy on the wallet but big on taste. It's a great way to use what you already have in the kitchen.

Ingredient Notes
To make these quick and easy Peanut Butter Ramen Noodles, you will need the following ingredients (full measurements in recipe card below):
- ramen noodles - use your favorite brand of instant ramen noodles and discard the seasoning packet (you can save it to use another time). You can also substitute with rice noodles or soba noodles.
- soy sauce - adds umami and saltiness. Feel free to substitute with oyster sauce which gives a slightly sweeter, richer depth if preferred.
- peanut butter - use smooth, unsweetened peanut butter for best results. Natural or shelf-stable both work. Almond butter or tahini can be used for a twist if you wish.
- balsamic vinegar - adds brightness and tang. White or rice vinegar works well as a substitute if you prefer a milder flavor.
- sesame oil - for a nutty, aromatic finish. Toasted sesame oil brings the best flavor. A little goes a long way!
- avocado oil - used for stir-frying the noodles. You can also use canola or vegetable oil.
- garlic - freshly minced garlic adds depth and aroma. Garlic powder can also be used as a substitute.
- green onions - sliced thin for garnish and added freshness. Chives are a good substitute as well.
- roasted peanuts - adds crunch and texture. This can be swapped with cashews or left out if desired.
You will also need measuring cups and spoons, a medium saucepan to cook the noodles, a skillet or wok for stir-frying, and a wooden spoon or tongs for tossing.

How to Make the Best Peanut Butter Ramen Noodles
- Cook noodles. Bring a large pot of water to a boil. Add ramen noodles and discard the seasoning pack. Cook ramen according to the package instructions, about 3-4 minutes. Drain well and set aside.


- Make sauce. In a small mixing bowl, add soy sauce, peanut butter, vinegar, and sesame oil. Mix well until smooth.


- Sauté garlic. In a large skillet, heat oil over medium-high heat until it sizzles, about 1 minute. Add garlic and sauté until fragrant, about 1 minute.
- Add ramen. Add cooked ramen. Stir well and cook for 1 minute.


- Add sauce. Add peanut butter sauce mixture and toss well. Cook until the sauce starts to thicken, about 2 minutes.


- Serve. Sprinkle with green onion and crushed peanuts on top and serve immediately. If you like it spicy, add a drizzle of your favorite hot sauce or spicy chilli oil to taste.


Recipe Variations
- Make it spicy. Want some heat? Add chili crisp, sriracha, or red pepper flakes to the sauce or as a topping.
- Add vegetables. Stir in bell peppers, shredded cabbage, carrots, or spinach for a nutrition boost. This is a great recipe for clearing out the fridge!
- Include protein. Add scrambled eggs, tofu, shrimp, or shredded chicken to make it more filling.
- Use different noodles. Try rice noodles, udon, or soba if you want to switch things up. Note that the cooking time may vary slightly.
- Switch up the garnish. Play around with the garnishes until it's just right! Finish with lime juice, sesame seeds, or fresh herbs like cilantro or Thai basil for brightness and texture.
How to Serve
This Peanut Butter Ramen Noodles is delicious on its own, or paired with some of my favorite sides including:
- Tofu Soup
- Easy Vegetable Stir Fry
- Chinese Garlic Cucumber Salad
- Pork Dumplings
- Vegetarian Spring Rolls
- Steamed Scallion Buns
For more Asian-inspired recipes, see our 60 Chinese Takeout Recipes at Home.

Recipe Tips and Tricks
- Don't overcook the noodles. Cook until just tender, as they'll continue to cook slightly when stir-fried. Overcooked noodles can get mushy quickly.
- Mix the sauce first. Combine the sauce ingredients before adding to the pan to ensure a smooth, even coating over the noodles.
- Prep ingredients ahead. Have all your ingredients chopped and ready before you begin. The cooking process is fast!
- Taste and adjust. Taste the sauce before serving and adjust soy sauce, vinegar, or sweetness to your preference.
- Add crunch last. Garnish with peanuts or sesame seeds at the end to preserve their crunch and contrast in texture.
Storing and Freezing Instructions
How to Store
Store leftovers in an airtight container in the fridge for up to 3 days. Reheat gently on the stovetop or microwave.
How to Reheat
Warm in a skillet over medium heat with a splash of water to loosen the sauce. Alternatively, microwave in 30-second intervals, stirring in between.
How to Freeze
Freezing is not recommended as the noodles can become mushy and the sauce may separate when thawed.
FAQ
Yes! Use gluten-free tamari instead of soy sauce and choose gluten-free noodles like rice noodles. Always check ingredient labels to be sure. You may also want to confirm that your vinegar and other sauces are certified gluten-free.
Yes, crunchy peanut butter adds extra texture. Just make sure it melts down into the sauce evenly when heated. You may want to stir more thoroughly or adjust the oil to ensure a silky texture.
It's mild as written, but easy to spice up with hot sauce or chili oil to match your heat preference. You can also add fresh chilies or chili garlic paste for extra kick.
More Noodle Recipes
- 25 Best Noodle Recipes
- Vegetarian Chow Mein
- Sesame Noodles
- Spicy Dan Dan Noodles
- Peanut Noodles
- Lo Mein Noodles
Tried this recipe?
I'd love to hear what you think! Leave a comment and rating below to share your feedback. Your reviews help others discover this recipe and help me keep creating more free recipes for you. Snap a photo and tag me on social media @aheadofthyme too.

Strawberry Overnight Oats
Strawberry Overnight Oats are the perfect make-ahead breakfast for busy mornings. Made with just a few wholesome ingredients like rolled oats, creamy Greek yogurt, and fresh strawberries, they're prepped in minutes and ready to grab-and-go by morning. Naturally sweetened and packed with fiber and protein, this simple breakfast is a delicious and nutritious way to start the day!
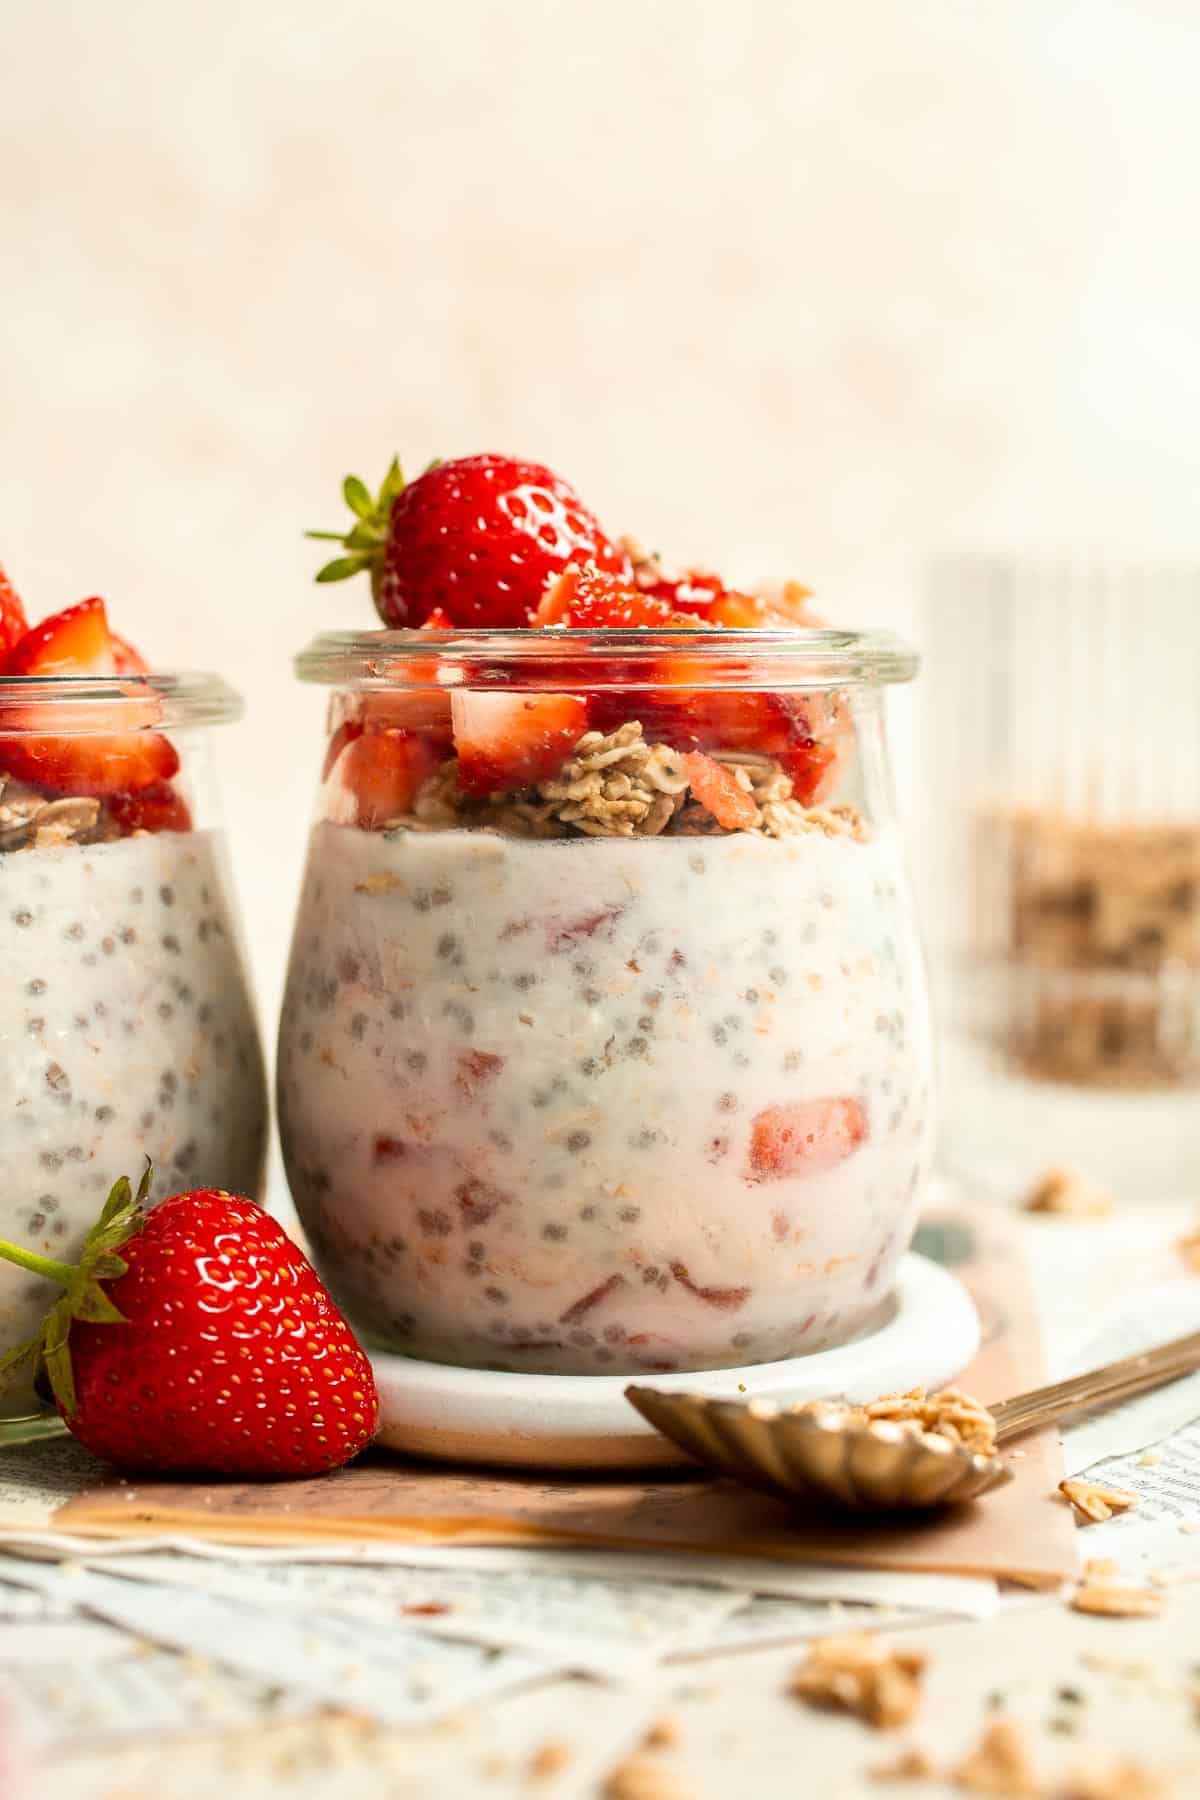
These overnight oats are as practical as they are delicious. You can customize them with your favorite toppings, adjust the sweetness to your taste, and easily scale the recipe to serve more. Whether you're meal prepping for the week or just need something quick and nourishing to grab-and-go, this recipe delivers a healthy breakfast with minimal effort.
Why You'll Love this Strawberry Overnight Oats Recipe
- Make-ahead convenience. Prepare these strawberry oats the night before and they'll be ready to eat by morning. They're perfect for meal prepping or busy schedules! You can even prepare several jars at once for effortless mornings.
- Nutritious and filling. Packed with fiber from oats and chia seeds, protein from Greek yogurt, and antioxidants from strawberries, these overnight oats are a wholesome way to start your day. It'll keep you full and energized for hours.
- Naturally sweetened. The strawberries and honey (or maple syrup) adds just the right amount of sweetness without using any refined sugars. You can also experiment with mashed bananas or pureed dates for variety.
- Kid-friendly. Creamy, fruity, and naturally sweet, these oats are a favorite with kids, and a smart way to sneak in fruit, fiber, and protein. It's a fun breakfast option that little ones can help assemble with their favorite toppings, making mornings more engaging and stress-free.
- Customizable. Swap out the fruit, sweetener, or milk to suit your preferences. You can even add protein powder or nut butter. The options are endless! You can change the flavor profile each week so it never gets boring.
Ingredient Notes
To make these easy and delicious Strawberry Overnight Oats, you will need the following ingredients (full measurements in recipe card below):
- rolled oats - old-fashioned oats work best for a creamy texture. Avoid instant oats, which can become too mushy. You can also use quick oats if you prefer a softer consistency.
- milk - use any dairy or non-dairy milk you like (such as almond, oat, or soy). Coconut milk gives a richer flavor.
- Greek yogurt (or kefir) - adds protein and creaminess. Use plain or vanilla flavored. Non-dairy yogurt like coconut or almond yogurt works for a vegan option.
- chia seeds - helps thicken the oats and provide fiber, protein, and omega-3s. Ground flaxseed can be used as a substitute.
- honey - adjust to your desired sweetness level. Use maple syrup for a vegan version or mashed banana for a fruit-sweetened alternative.
- vanilla extract - adds depth and enhances the flavor of the strawberries. Almond extract can be used for a different twist.
- strawberries - fresh or frozen strawberries work well. Chop or slice before adding. Raspberries or blueberries are great substitutes.
- toppings - feel free to add your favorite toppings when serving such as hemp seeds, granola or chopped nuts, or sliced strawberries.
You will also need measuring cups and spoons, a mason jar or container with a lid, and a spoon for mixing.
How to Make the Best Strawberry Overnight Oats
- Combine ingredients. In a large mixing bowl, combine oats, milk, yogurt, chia seeds, honey, vanilla extract, and strawberries. Mix well until evenly distributed.
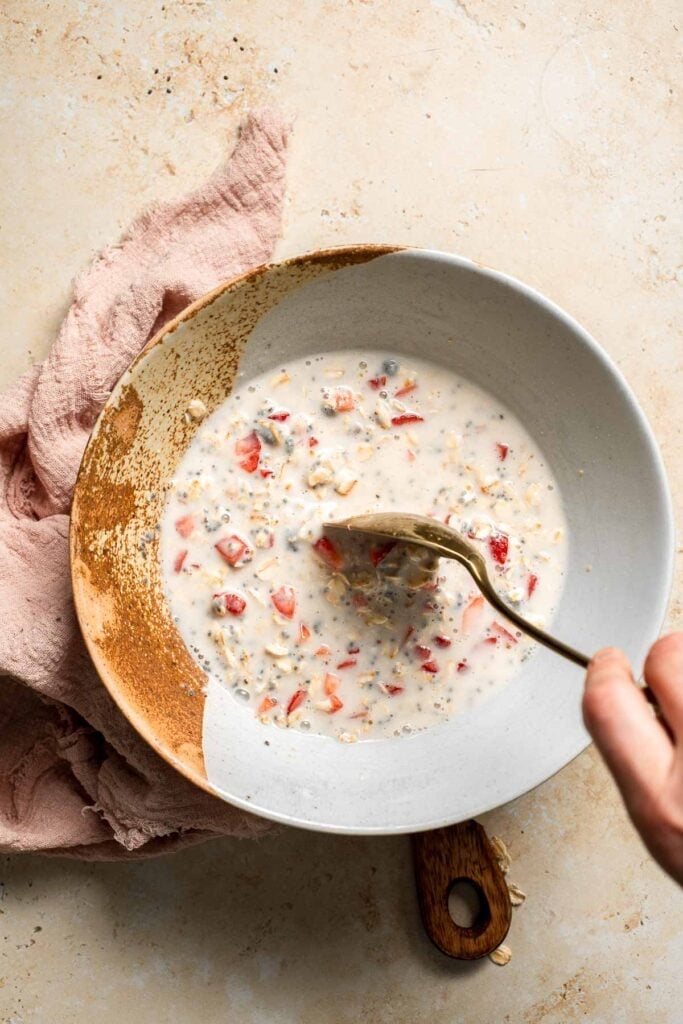
- Chill. Divide the oatmeal mixture into jars (such as a mason jar) and store in the fridge for at least 4 hours or overnight to infuse all the flavor.


- Serve. Enjoy with your favorite toppings such as hemp seeds, granola or chopped nuts, and fresh strawberries.
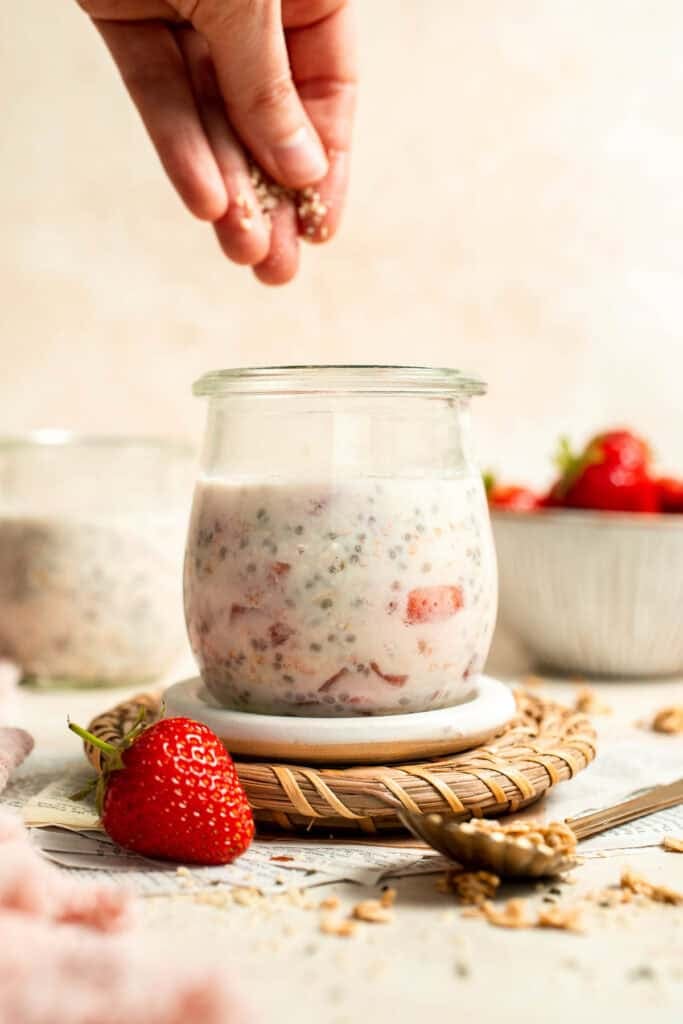
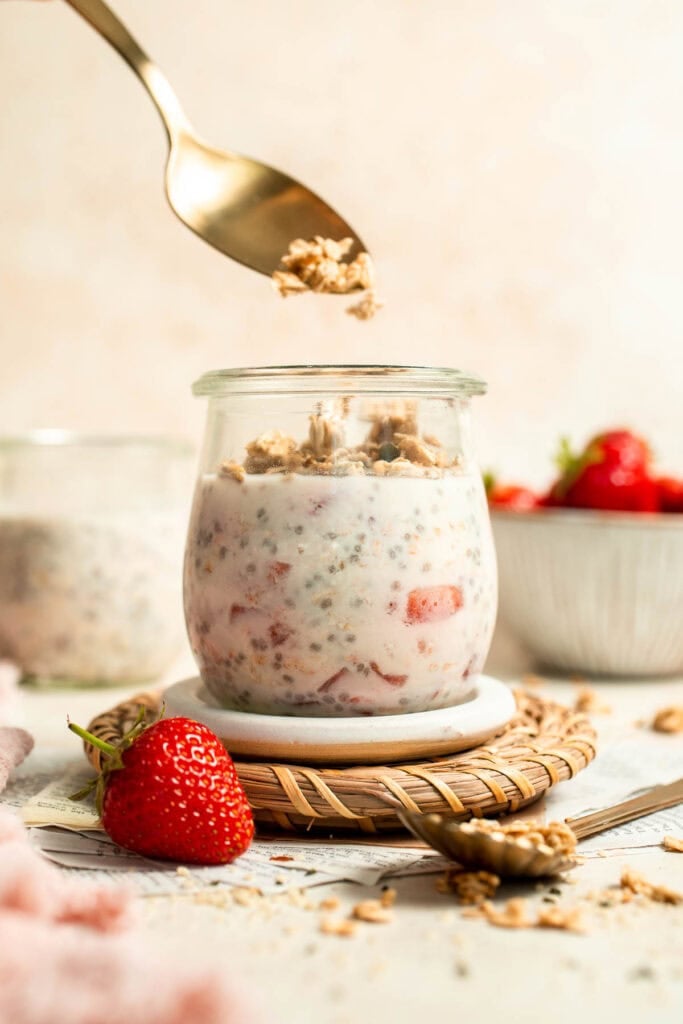
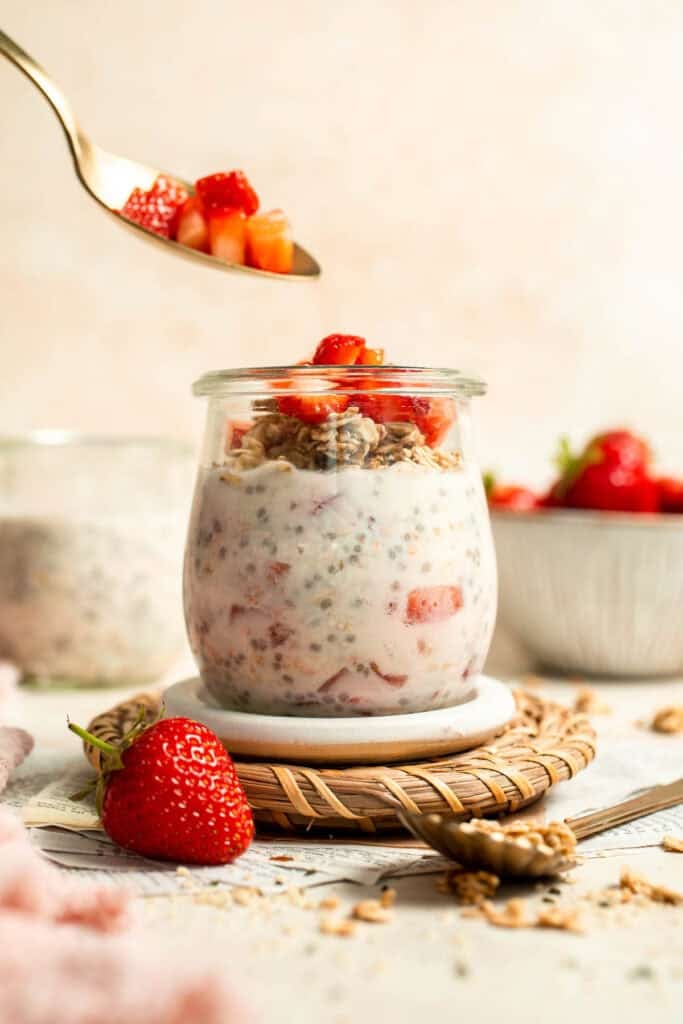
Recipe Variations
- Add nut butter. Swirl in peanut butter, almond butter, or cashew butter for extra richness and flavor. It also adds healthy fats and protein.
- Try other fruits. Blueberries, raspberries, or bananas are great substitutes or additions to strawberries. Use what's in season or on hand.
- Boost the protein. Add a scoop of protein powder or collagen peptides for a more filling option. Great for post-workout fuel too.
- Make it dairy-free. Use plant-based yogurt and milk to keep it completely dairy-free. Almond, soy, or oat yogurt work well.
- Add a crunch. Top with nuts, granola, or cacao nibs for texture contrast and added nutrients. Adds satisfying variety to each bite.
How to Serve
These Strawberry Overnight Oats are delicious served on their own as an easy make-ahead breakfast, or paired with some of my favorite morning side dishes including:
For more breakfast recipes, see our 40+ Best Brunch Ideas.
Recipe Tips and Tricks
- Use the right oats. Stick to rolled oats for the best texture. Steel-cut oats won't soften enough, and instant oats get too soggy. Rolled oats strike the perfect balance, absorb the liquid evenly, and hold up well overnight.
- Sweeten to taste. Adjust honey or maple syrup depending on your sweetness preference. You can also use mashed banana or date syrup. Taste the mixture before refrigerating. It's easier to tweak the flavor at that stage than after it has set.
- Mix thoroughly. Make sure everything is well-combined before chilling so the oats and chia seeds hydrate evenly. Give it another stir before serving for smooth consistency. Proper mixing helps avoid any dry clumps.
- Let it chill. Give the oats enough time to soak. A minimum of 4 hours is best for optimal creaminess. Letting it sit overnight ensures everything melds together beautifully and yields the best flavor and texture.
- Add toppings last. To keep toppings crunchy or fresh, add them right before serving. Especially important for granola or fresh berries to preserve texture and flavor. Adding them early may cause sogginess.
Storing and Freezing Instructions
How to Store
Store overnight oats in an airtight container or mason jar in the refrigerator for up to 5 days. Stir before serving.
How to Reheat
If you prefer them warm, microwave in a microwave-safe jar or bowl for 30-60 seconds. Add a splash of milk if too thick.
How to Freeze
Freezing is not recommended for assembled overnight oats, as texture may be affected. Freeze the fruit separately and combine when ready to prep.
FAQ
Yes! Frozen strawberries work well in this recipe. Just chop them before adding, and they'll thaw overnight in the fridge, infusing the oats with flavor. They're convenient and budget-friendly, especially when fresh berries aren't in season.
Absolutely! Use dairy-free milk and plant-based yogurt (like almond or coconut yogurt) and choose maple syrup instead of honey to make it completely vegan. It's still creamy, delicious, and satisfying.
Yes! If you prefer warm oats, microwave them in a microwave-safe jar or bowl for 30-60 seconds before eating. Add a bit more milk to loosen the consistency if needed.
More Recipes with Oats
- 50 Best Breakfast Ideas
- Oat Porridge
- Cinnamon Apple Baked Oatmeal
- Oatmeal Breakfast Bars
- Homemade Granola
- Almond Butter Granola Bars
Tried this recipe?
I'd love to hear what you think! Leave a comment and rating below to share your feedback. Your reviews help others discover this recipe and help me keep creating more free recipes for you. Snap a photo and tag me on social media @aheadofthyme too.

Greek Lamb Souvlaki Skewers
Tender, juicy, and infused with Mediterranean flavor, Greek Lamb Souvlaki Skewers are a summer grilling essential. These savory skewers are made from chunks of lamb marinated in a zesty mixture of olive oil, lemon juice, garlic, and fragrant dried herbs. They're quick to prepare and even quicker to disappear once they hit the table. Perfect for backyard BBQs or a simple family dinner, this dish is as versatile as it is delicious.

This recipe is proof that you don't need complicated ingredients to create a bold, flavor-packed meal. The lamb is marinated for as little as 30 minutes (though longer is even better!) then grilled until charred on the outside and tender inside. Top them with tzatziki and serve with warm pita, pilaf, or a crisp Greek salad. It's an effortless, crowd-pleasing dinner that tastes like a trip to the Mediterranean. Try it once and you will be adding this to your regular summer dinner schedule.
Why You'll Love this Greek Lamb Souvlaki Skewers Recipe
- Big Mediterranean flavor. The marinade combines olive oil, citrus, garlic, and herbs to deliver a fresh, bright, and savory flavor that pairs perfectly with grilled lamb. Each bite is bold and delicious.
- Fast and simple. The marinade comes together in minutes with just a few pantry staples. No special equipment needed, just skewers and a grill or grill pan, which means clean up is minimal.
- Perfect for entertaining. These skewers look impressive but are incredibly easy to make, making them ideal for cookouts, parties, or a casual weeknight meal. A quick and easy go to!
- Versatile and customizable. Serve with your favorite sides like rice, salads, or dips. You can even swap in other proteins like chicken or pork. It works with whatever's on hand.
- Naturally low-carb. This recipe is naturally low in carbs and gluten-free, making it a great option for many diets.

Ingredient Notes
To make this delicious Greek Lamb Souvlaki Skewers, you will need the following ingredients (full measurements in recipe card below):
- lamb - boneless cuts or leg or shoulder work best. Trim off excess fat and cut into even 1.5-inch cubes. You can also use lamb sirloin.
- olive oil - helps tenderize the lamb and carries the flavors of the marinade. Avocado oil works as a substitute.
- lemon juice - adds bright acidity to balance the richness of the lamb. Use fresh lemon juice for best results.
- garlic - use freshly minced garlic for the most flavor. Garlic powder works but isn't as bold.
- Italian seasoning - convenient blend of herbs like oregano and thyme. You can also use dried oregano and a pinch of rosemary instead. To make your own homemade blend, combine ½ tablespoon each of dried oregano, dried parsley, dried basil, and dried thyme.
- cumin powder - adds subtle warmth and earthiness. Coriander or smoked paprika can be used for a different twist.
- salt and pepper - essential for seasoning the lamb thoroughly and bringing out all the flavors.
You will also need metal or wooden skewers like bamboo skewers (soak wooden ones for 30 minutes), a large mixing bowl, grilling tongs, and either an outdoor grill or stovetop indoor grill pan.
How to Make the Best Greek Lamb Souvlaki Skewers
- Marinate the lamb. Add cubed lamb into a zip-loc bag Add ¼ cup olive oil, lemon juice, minced garlic, Italian seasoning, cumin, salt and pepper. Press the air out of the bag and seal tightly. Press the marinade around the lamb to coat. Place in the fridge to marinate at least 30 minutes or overnight, to infuse all the seasoning and spices into the meat.
- Skewer the lamb. Thread the lamb onto skewers, and lightly brush some olive oil.
- Grill the skewers. Preheat a grill pan over medium high heat for 4-5 minutes and lightly brush the grill with remaining olive oil. You should notice the oil shimmer and sizzle when it's hot and ready. Grill the lamb skewers for 8-10 minutes on each side or until the internal temperature for the lamb reaches 155 F. For well done, cook 1-2 more minutes on each side or until the internal temperature reaches above 160 F.

Air Fryer Lamb Skewers
Cook (unskewered) at 375 F for 15 minutes, shaking the basket halfway. Once done, leave the basket in the air fryer for another 2 minutes as it will continue to cook with the residual heat.
Oven Baked Lamb Skewers
To cook these skewers in the oven instead, simply place the skewers on a baking tray and bake at 440 F for 15 minutes, rotating the skewers halfway.
Recipe Variations
- Add veggies. Skewer chunks of red onion, bell peppers, or zucchini along with the lamb for a full meal on a stick.
- Try different herbs. Swap Italian seasoning for dried Greek oregano, thyme, or rosemary to lean more into traditional flavors.
- Use chicken or pork. This marinade works wonderfully with chicken thighs or pork tenderloin too.
- Spice it up. Add red pepper flakes or a dash of cayenne for extra heat.
- Serve it bowl-style. Pair grilled lamb with rice or couscous, salad, and a drizzle of tzatziki for a Mediterranean grain bowl.
How to Serve
These Greek Souvlaki Lamb Skewers are delicious paired with some of my favorite Greek sides including:
- Rice Pilaf with Carrots or Greek Rice
- Greek Salad or Tabbouleh Salad
- Greek Lemon Roasted Baby Potatoes or Greek Fries
- Easy Tzatziki Sauce (Yogurt Cucumber Dip)
- Homemade Pita Bread
We also love to use these lamb skewers to make a Greek gyro wrap.
For more recipe ideas, see our 30 Best Greek Recipes.

Recipe Tips and Tricks
- Cut meat evenly. Evenly sized cubes ensure everything cooks at the same rate and results in juicy, consistent texture.
- Marinate the lamb. It is crucial to let the lamb marinate for at least 30 minutes to allow the flavours to infuse and for it to get juicier. The lemon juice in the marinade also helps to tenderize the lamb. I prefer letting it marinate overnight for best results, if you have the time.
- Use metal skewers. They're reusable and don't need soaking like wooden ones. If using wood, soak for 30 minutes to prevent burning.
- How to make the lamb even more tender. Turn off the heat and remove the the grill from heat a couple minutes earlier, when the internal temperature reaches 150 F (5 degrees lower than the desired level). Let it rest for a few minutes in the pan as the residual heat will continue to cook the skewers. Resting after cooking helps the juices redistribute into the meat. Once the internal temperature reaches 155 F, remove from the pan and serve.
- Don't overcook. Lamb can become tough if overcooked. Aim for medium doneness and let rest before serving.
- Use a digital thermometer. A digital meat thermometer is very useful when grilling meat skewers for checking doneness. Simply insert halfway inside the meat to get a quick measurement.
- Double up the recipe. This is a smaller batch recipe that makes 6 skewers. You can easily double or triple the recipe to feed a crowd. You can also just double up the marinade for extra flavor and brush it on while grilling.
Storing and Freezing Instructions
How to Store
Unthread the lamb souvlaki and store it in an airtight container for up to 3 days in the refrigerator.
How to Reheat
Reheat gently in a skillet over medium heat or in the oven at 325°F until warmed through. Avoid microwaving, which can dry out the lamb.
How to Freeze
Freeze uncooked marinated lamb in a freezer bag for up to 2 months. Thaw overnight in the fridge and grill as directed.
FAQ
Can I use wooden skewers?
Yes! Just soak them in water for 30 minutes before grilling to prevent burning. Metal skewers are more durable and reusable, making them more eco-friendly and ideal for regular use.
Boneless lamb leg or shoulder works best. They have the right balance of tenderness and fat for flavorful grilling. Sirloin is another great option, especially if you prefer a leaner cut with a quicker cooking time.
While grilling brings out the best flavor, you can also cook the skewers in a grill pan on the stovetop or broil them in the oven. These methods also help achieve that delicious charred exterior when grilling outdoors isn't an option.
More Grilled Skewer Recipes
- Easy Summer Grilling Recipes
- Greek Chicken Souvlaki Skewers
- Spicy Cumin Lamb Skewers
- Balsamic Chicken Kabobs
- Teriyaki Chicken Skewers with Pineapple
- Chicken Satay Skewers with Peanut Sauce
Tried this recipe?
I'd love to hear what you think! Leave a comment and rating below to share your feedback. Your reviews help others discover this recipe and help me keep creating more free recipes for you. Snap a photo and tag me on social media @aheadofthyme too.

Strawberry Pretzel Salad (Creamy Jello Dessert)
This Strawberry Pretzel Salad is the ultimate retro dessert that combines sweet, salty, creamy, and fruity layers into one irresistible treat. With a buttery pretzel crust, smooth cream cheese filling, and a strawberry Jello topping packed with real strawberries, it's the perfect make-ahead dish for parties, BBQs, or holidays.
While it may be called a "salad," this nostalgic dish is really more of a dessert - and a beloved one at that. It's a staple at potlucks and gatherings for good reason: every bite delivers crunch, tang, and sweetness in perfect harmony. It's vibrant, easy to slice, and always a hit with kids and adults alike.
Why You'll Love this Strawberry Pretzel Salad Recipe
- Sweet and salty layers. The combination of salty crushed pretzels, sweetened cream cheese, and fruity Jello is the perfect balance of delicious flavors and textures.
- Easy to make ahead. This layered dessert needs time to chill, making it an ideal make-ahead option for parties, celebrations, or busy holiday prep. You can make it the night before and simply slice and serve.
- Always a crowd-pleaser. This strawberry pretzel salad is colorful, delicious, and nostalgic. It's one of those desserts that disappears quickly and has everyone asking for the recipe. Guests of all ages love its familiar flavors and fun layers.
- Perfect for warm weather. Cool, creamy, and fruity, this creamy jello dessert is refreshing and light enough for spring and summer gatherings. It's especially great when strawberries are in season.

Ingredient Notes
To make this delicious Strawberry Pretzel Salad, you will need the following ingredients (full measurements in recipe card below):
- crushed pretzels - these form the crunchy base. Use salted mini pretzels and crush them finely. Gluten-free pretzels work too.
- unsalted butter - binds the crust and adds richness. Salted butter works too, just reduce the added sugar slightly.
- white sugar - sweetens the crust and the creamy filling. You can reduce slightly in the crust if using sweetened pretzels. Powdered sugar can be used if preferred.
- cream cheese - forms the base of the creamy middle layer. Use full-fat brick cream cheese for best texture. Bringing it to room temperature is also ideal for smooth mixing.
- vanilla extract - enhances the flavor. Almond extract can be a fun alternative.
- cool whip - makes the filling light and airy. Substitute with homemade whipped cream if desired.
- boiling water - make sure it's piping hot so that it dissolves the Jello completely.
- strawberry jello - adds fruity flavor and helps the dessert set. Feel free to use other flavors if you want such as raspberry jello or cherry jello.
- strawberries - fresh berries are sliced and stirred into the Jello. Frozen (thawed) berries can be used, but fresh gives the best texture.
You will also need: a 9x13-inch baking dish, mixing bowls, hand mixer or stand mixer, spatula, measuring cups and spoons, and a saucepan or kettle to boil water.

How to Make the Best Strawberry Pretzel Salad
- Make the pretzel crust. Place crushed pretzels, sugar, and butter into a medium mixing bowl. Toss until fully combined. Evenly press the pretzel crust into the bottom of a 9x13-inch nonstick baking pan. Place into a 350F preheated oven and bake for 11 minutes. Remove from the oven, then allow to cool fully to room temperature, about 1 hour.

- Make the creamy filling. In a large mixing bowl, combine the cream cheese, sugar, and vanilla. Beat with an electric hand mixer until smooth and creamy. Add in the cool whip, then use a rubber spatula to fold in until fully combined.

- Spread. Evenly spread the filling over top of the cooled crust, then place into the fridge to set for at least 1 hour.

- Make the strawberry topping. Whisk together the jello packet and boiling water until all of the jello has dissolved, about 1-2 minutes. Allow the liquid to come down to just warmer than room temperature (about 30 minutes), then mix in the sliced strawberries. Pour the topping over the cooled filling layer, then place back into the fridge to set for at least 8 hours, or preferably overnight.
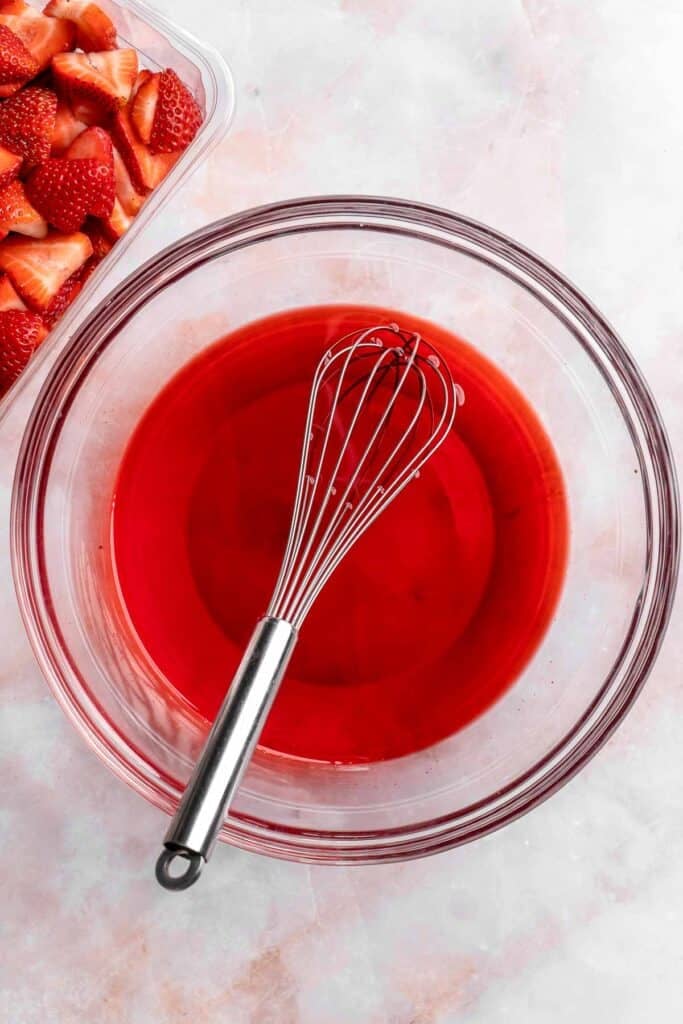
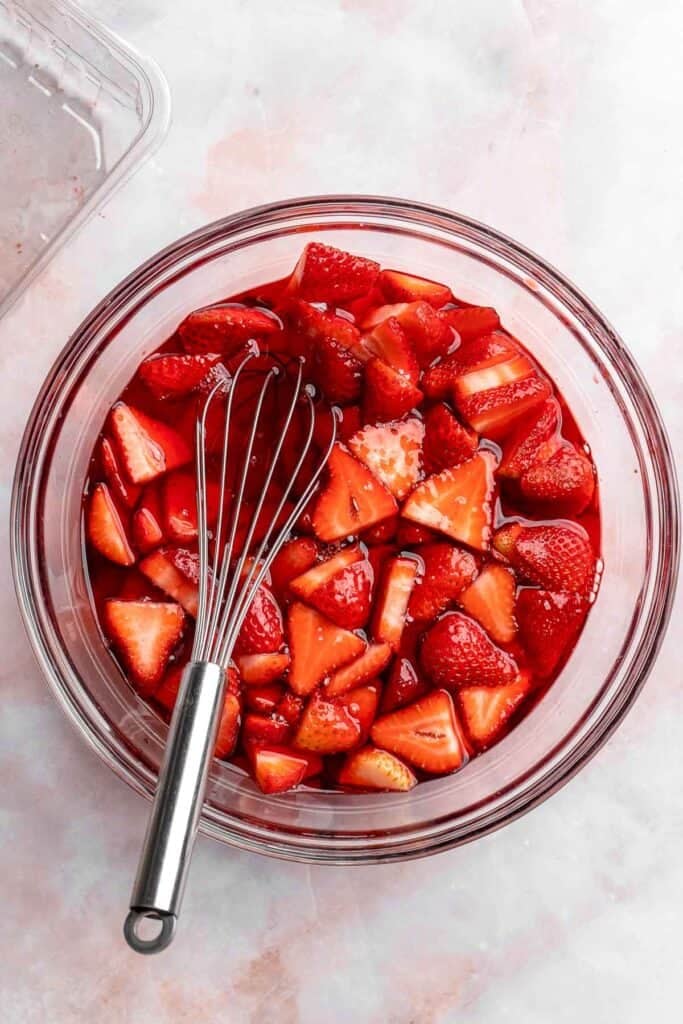
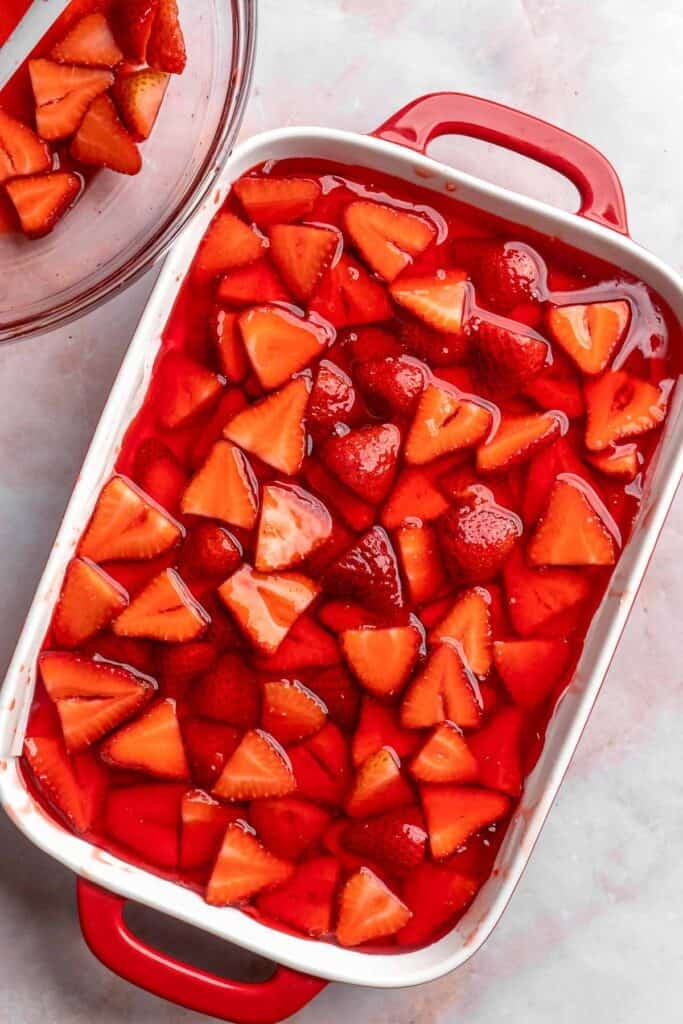
- Serve. Slice into squares and serve chilled. Add a dollop of whipped cream or extra berries if desired.
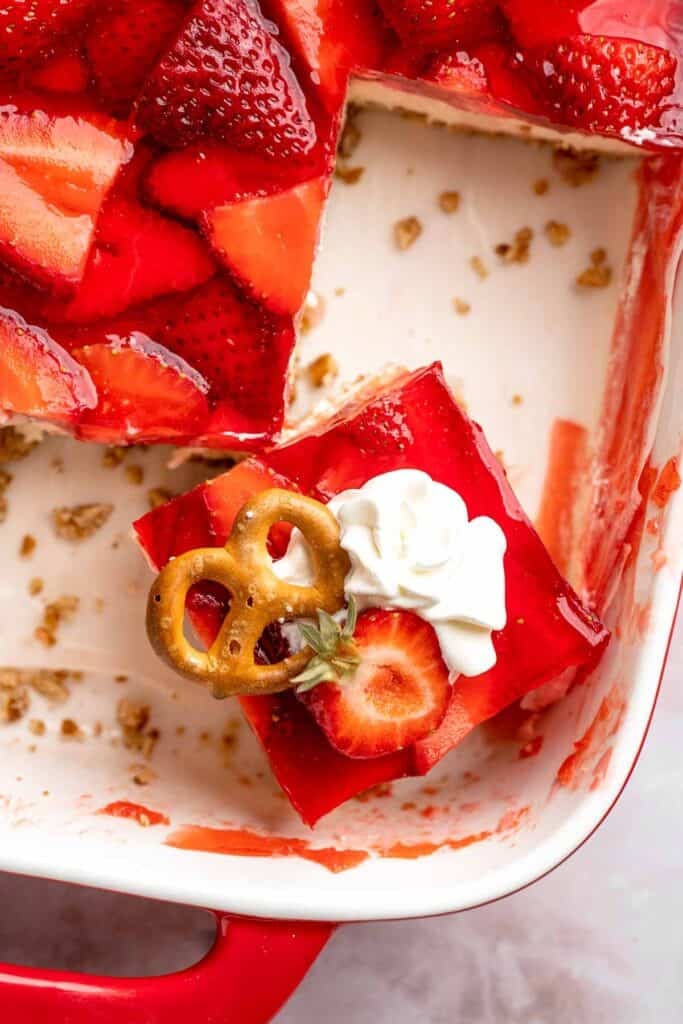

Recipe Variations
- Use different fruit. Try raspberries, peaches, or mixed berries with matching Jello flavors for a new twist. It's an easy way to use seasonal produce.
- Make it mini. Use individual serving cups or mason jars for cute, portable desserts perfect for picnics. These are ideal for parties or potlucks where guests can grab and go.
- Swap the crust. Use crushed graham crackers or vanilla wafers for a sweeter, less salty base. It changes the flavor balance slightly but is just as tasty.
- Lighten it up. Use light cream cheese and whipped topping for a lower-calorie version that's still delicious. You can also use a sugar-free Jello to reduce overall sugar.
- Add crunch on top. Sprinkle extra crushed pretzels on top right before serving for added texture and flair.
How to Serve
This Strawberry Pretzel Salad is delicious served on its own as a sweet treat after a light summer meal such as:
- Balsamic Chicken Kabobs
- Italian Pasta Salad
- Cheeseburger Sliders
- Greek Chicken Gyros (with Homemade Tzatziki)
- Homemade Lemonade
For more recipe ideas, see our 60+ Summer Dinner Ideas.
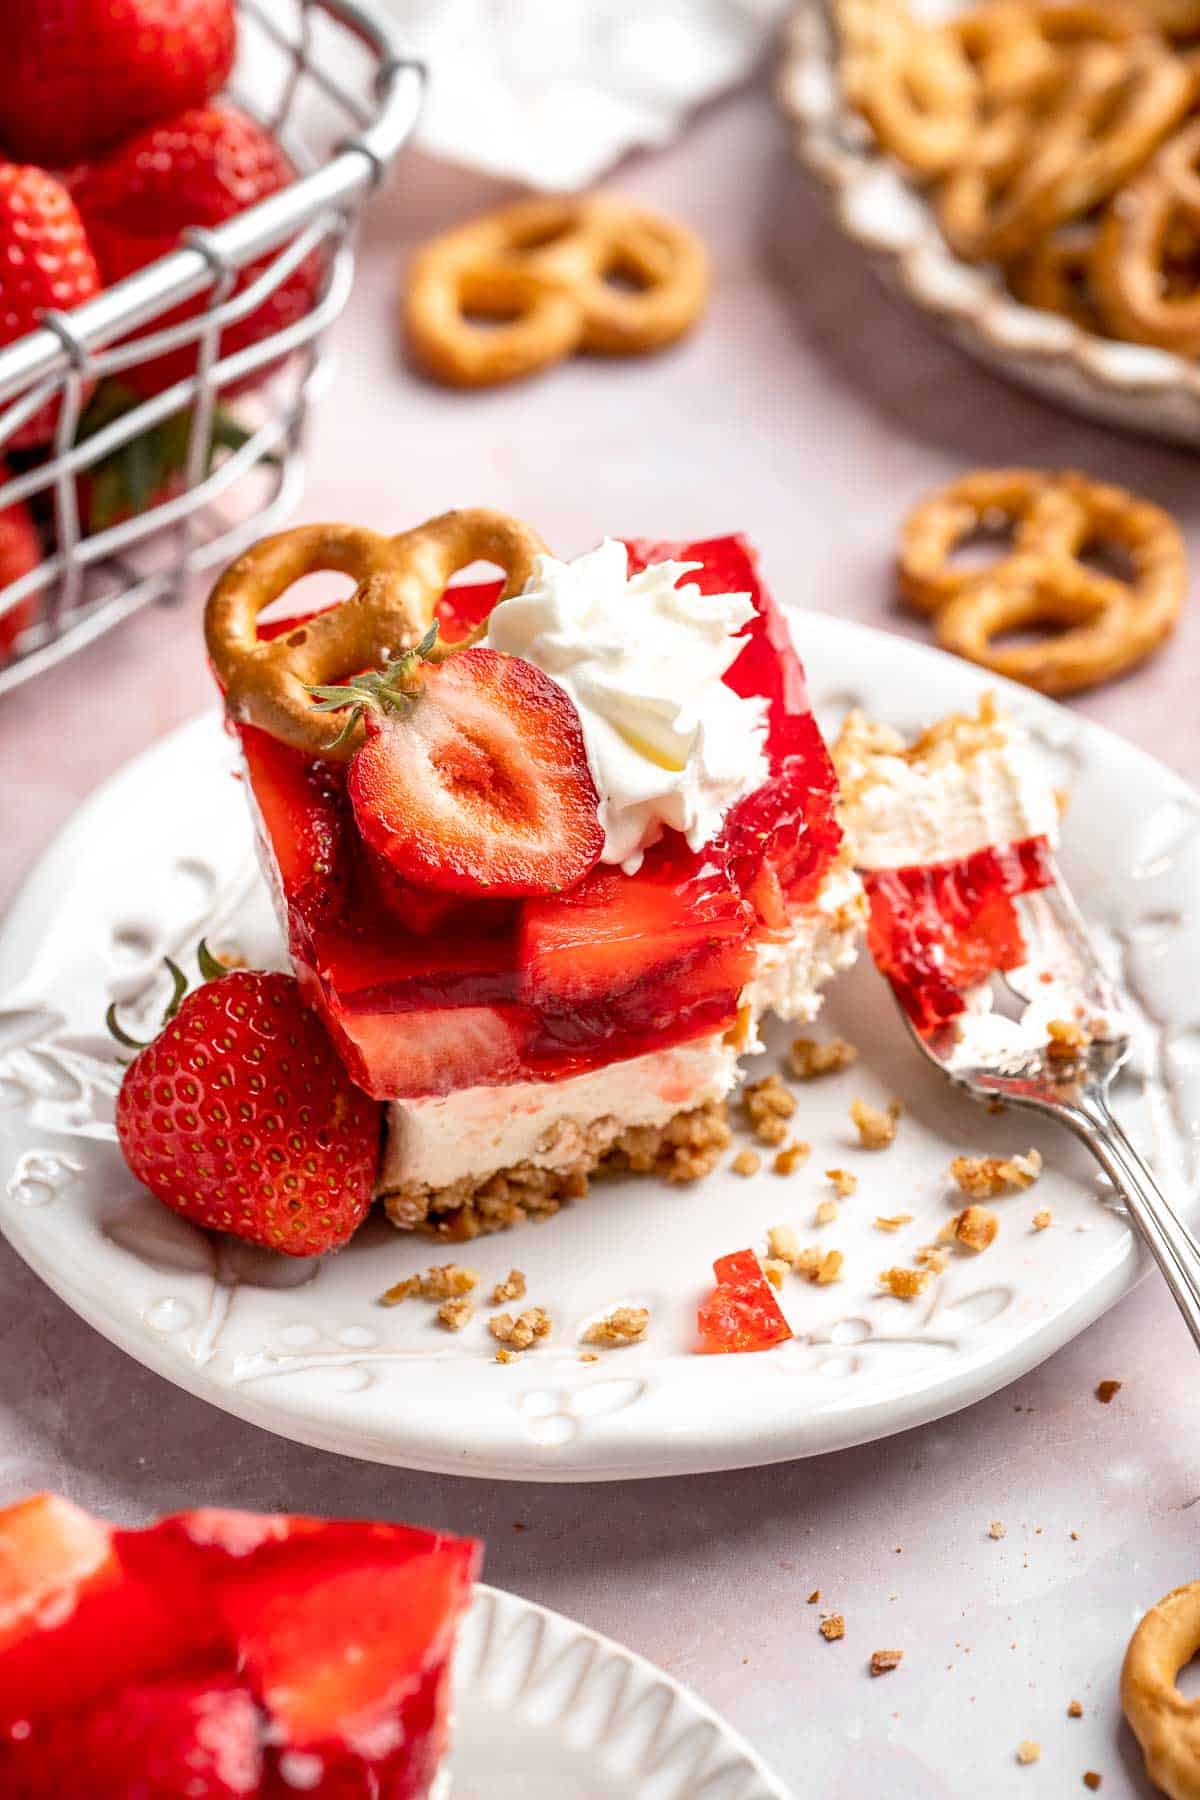
Recipe Tips and Tricks
- Seal the edges well. Be sure the cream cheese layer covers the crust completely to avoid soggy pretzels from the Jello.
- Let layers cool. Make sure the crust and Jello are both cool before adding the next layers to maintain clean separation.
- Use a sharp knife to cut. For the cleanest slices, wipe your knife between cuts. Chilled dessert cuts better.
- Add garnishes. A dollop of whipped cream or a mint leaf makes each piece look extra special.
- Chill thoroughly. Don't rush the chill time-this dessert needs to be fully set for best results.
Storing and Freezing Instructions
How to Store
Store covered in the refrigerator for up to 3 days. Keep it chilled until ready to serve.
How to Freeze
Freezing is not recommended, as the Jello and cream cheese layers can separate and lose texture after thawing.
FAQ
Yes, this is the perfect make-ahead dessert! Prepare the full dish the night before and refrigerate until ready to serve. The layers set beautifully overnight, and the flavor gets even better. Just wait to add any optional toppings until right before serving to keep them fresh.
Use small salted pretzels and crush them finely for best results. The salt helps balance the sweet layers. Pretzel sticks or mini twists both work well. Avoid flavored varieties like honey mustard or garlic. A rolling pin or food processor makes crushing easier.
Yes, you can substitute homemade whipped cream - just whip 1 cup of heavy cream with a little powdered sugar until stiff peaks form. Fold gently into the cream cheese mixture. The texture may be a bit softer but still delicious. Use stabilized whipped cream if you want cleaner slices.
Not quite! The name is more nostalgic than literal. It's a classic Southern-style dessert that's assembled in a baking dish and sliced like a salad. The salty-sweet combination and colorful layers are what make it iconic. It's just one of those charmingly quirky recipe names that stuck.
More Strawberry Recipes
- 25 Best Strawberry Recipes
- Strawberry Shortcake
- Strawberries and Cream Popsicles
- Fresh Strawberry Pie
- Strawberry Sorbet
- Strawberry Galette
Tried this recipe?
I'd love to hear what you think! Leave a comment and rating below to share your feedback. Your reviews help others discover this recipe and help me keep creating more free recipes for you. Snap a photo and tag me on social media @aheadofthyme too.

Crispy Korean Vegetable Pancakes (Yachaejeon)
These Crispy Korean Vegetable Pancakes (Yachaejeon) are golden and crunchy on the outside, loaded with colorful veggies on the inside, and come with a savory dipping sauce that ties it all together. They're made with a simple flour and water batter, pan-fried until crisp, and filled with a mix of carrots, zucchini, cabbage, and green onions. It's a satisfying snack, side, or light meal that's quick to whip up in under 30 minutes!

These pancakes are inspired by the Korean comfort food yachaejeon ("yachae" meaning vegetables and "jeon" referring to a savory pancake). They've quickly become a staple in our kitchen thanks to their ease, versatility, and incredible flavor. It's the perfect way to use up leftover veggies from the fridge, and the results are always satisfying. We now keep this recipe in regular rotation because it's just that simple and delicious every time.
Why You'll Love these Crispy Korean Vegetable Pancakes
- Crispy texture with tender vegetables. Each bite is crisp and golden on the outside, while the inside is packed with soft, flavorful veggies. This contrast makes them incredibly satisfying and hard to resist.
- Quick and easy to make. This recipe uses basic pantry ingredients and fresh vegetables, coming together in under 30 minutes from start to finish. It's a perfect go-to for busy nights or a quick lunch option. No fancy equipment or prep needed - just mix, fry, and enjoy.
- Versatile. You can toss in whatever vegetables you have in the fridge, making it a delicious, flexible way to reduce waste and keep things interesting every time. It's a budget-friendly recipe that's great for end-of-week fridge cleanouts.
- Tangy dipping sauce. The dipping sauce is zesty, savory, and bright which elevates the pancakes that much more. It's the perfect flavor boost for every crispy bite. Customize it with a splash of chili oil or extra sesame seeds.
- Kid and adult approved. These pancakes are great finger food for little ones and flavorful enough for adults. A great family-friendly meal or snack and a fun, tasty way to get in your vegetables. They also make a fun addition to lunchboxes.

Ingredient Notes
To make these delicious Crispy Korean Vegetable Pancakes, you will need the following ingredients (full measurements in recipe card below):
- all-purpose flour - this forms the base of the batter. You can substitute with a gluten-free 1:1 flour blend if needed.
- cold water - keeps the batter light and helps make the pancakes crispy. We also need some water for the dipping sauce.
- salt - enhances flavor throughout the batter. You can reduce slightly if your dipping sauce is salty.
- avocado oil - used for frying as it has a high smoke point which makes it perfect for crispy pancakes. You can also use canola or vegetable oil.
- veggies - we use zucchini, carrot, leeks (or green onions), and green cabbage. Some good substitutes are yellow squash or grated cucumber, parnsips, sweet potato, red onions, purple cabbage, or shredded brussels sprouts.
- soy sauce - adds salt and umami to the dipping sauce. You can also use coconut aminos for a gluten-free, soy-free option.
- rice wine vinegar - for acidity and brightness in the dipping sauce. Apple cider vinegar or white wine vinegar also work well.
- sesame oil - adds flavor and depth to the sauce.
- green onions - this is and optional garnish added to the sauce.
You will also need measuring cups and spoons, a large mixing bowl, a box grater or julienne peeler, a whisk or fork, a large nonstick or cast iron skillet, a spatula for flipping, a small bowl for dipping sauce, and paper towels for draining excess oil after frying.

How to Make the Best Crispy Korean Vegetable Pancakes (Yachaejeon)
- Make the batter. In a large mixing bowl, add flour, water, and salt. Mix well until the batter is smooth.
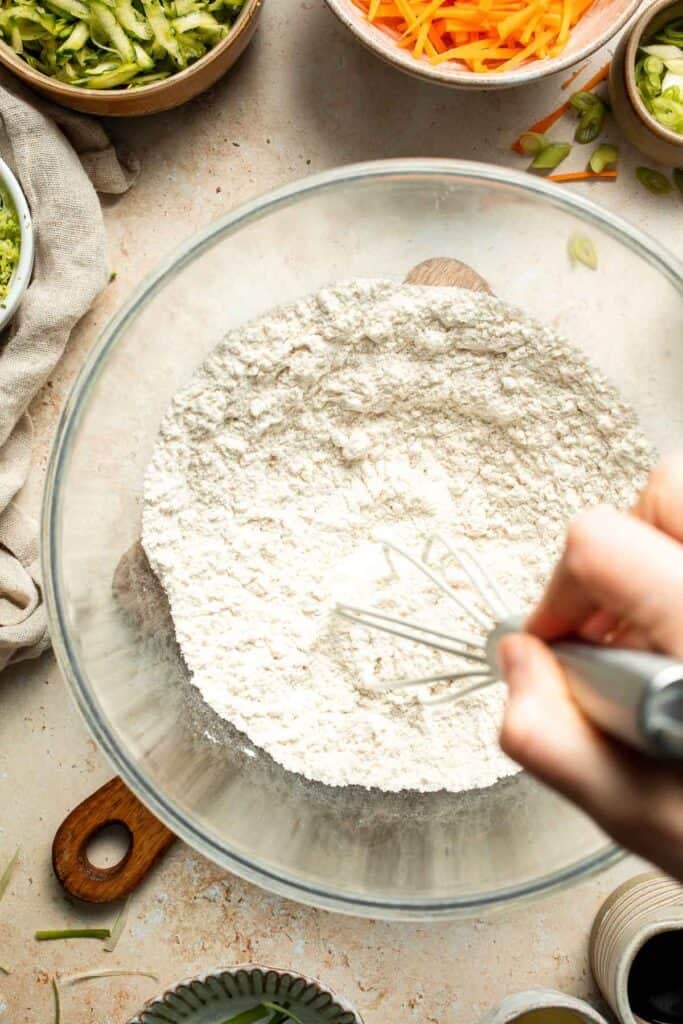
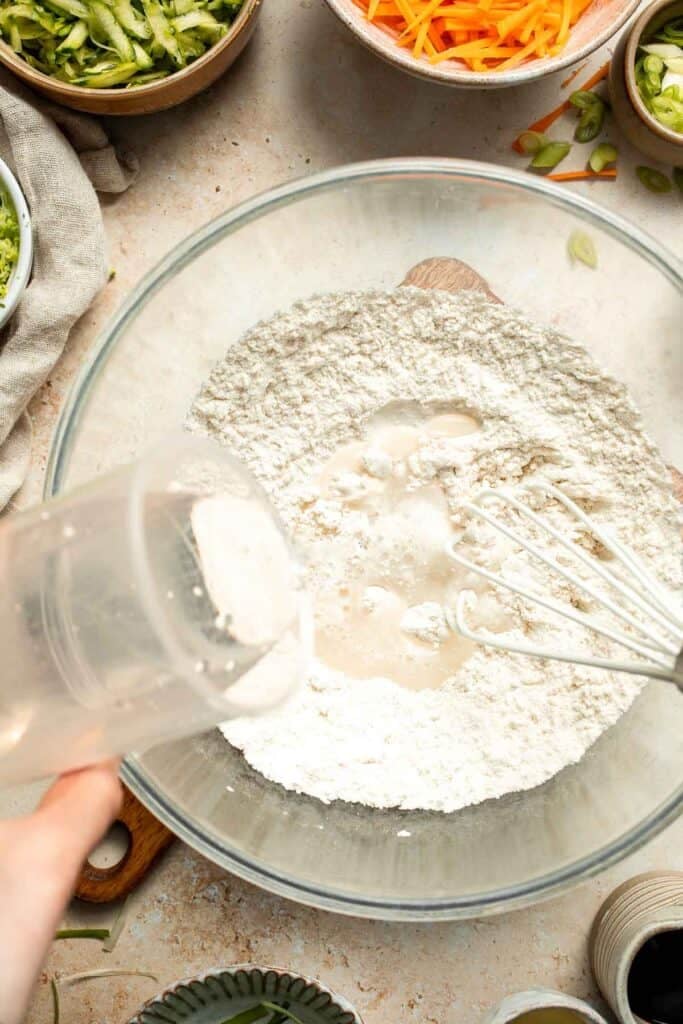
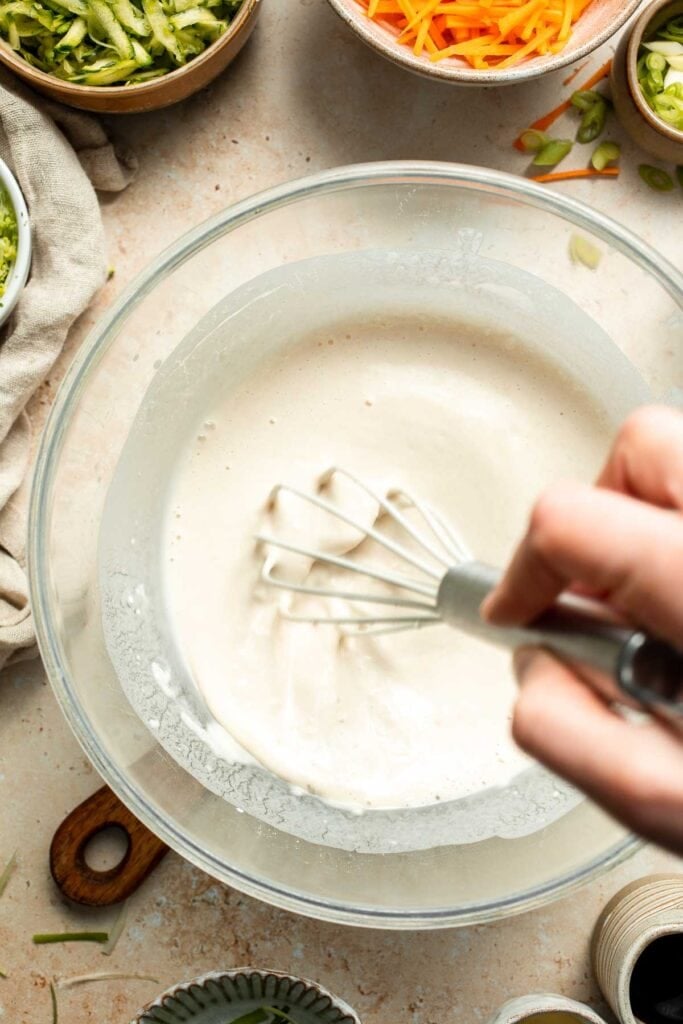
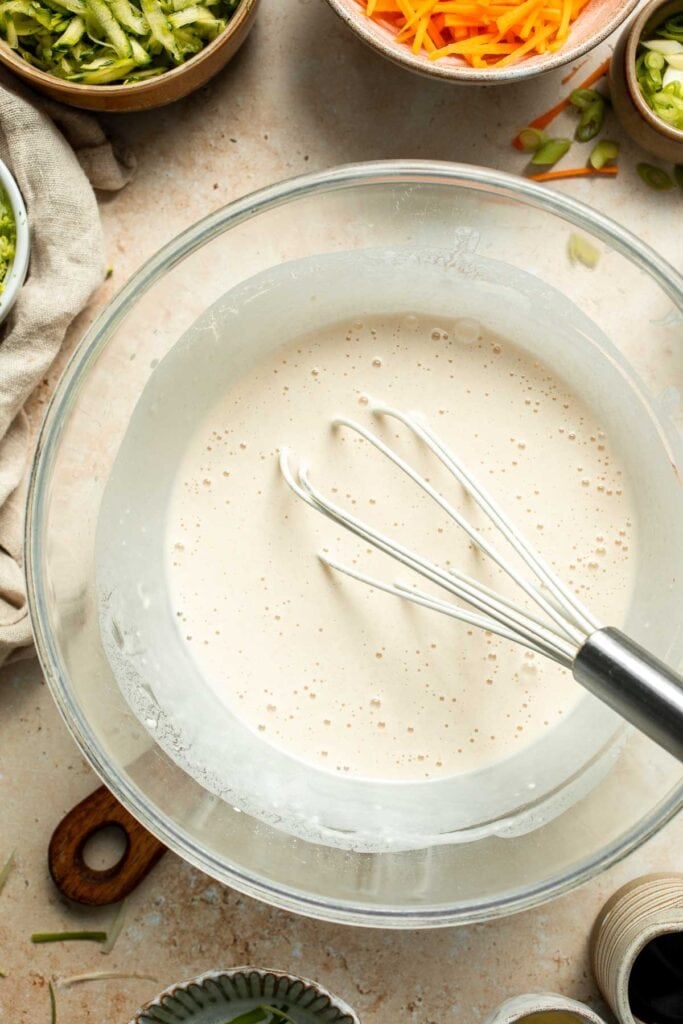
- Add veggies. Add the vegetable mix (zucchini, carrot, leek, and cabbage) and toss well.

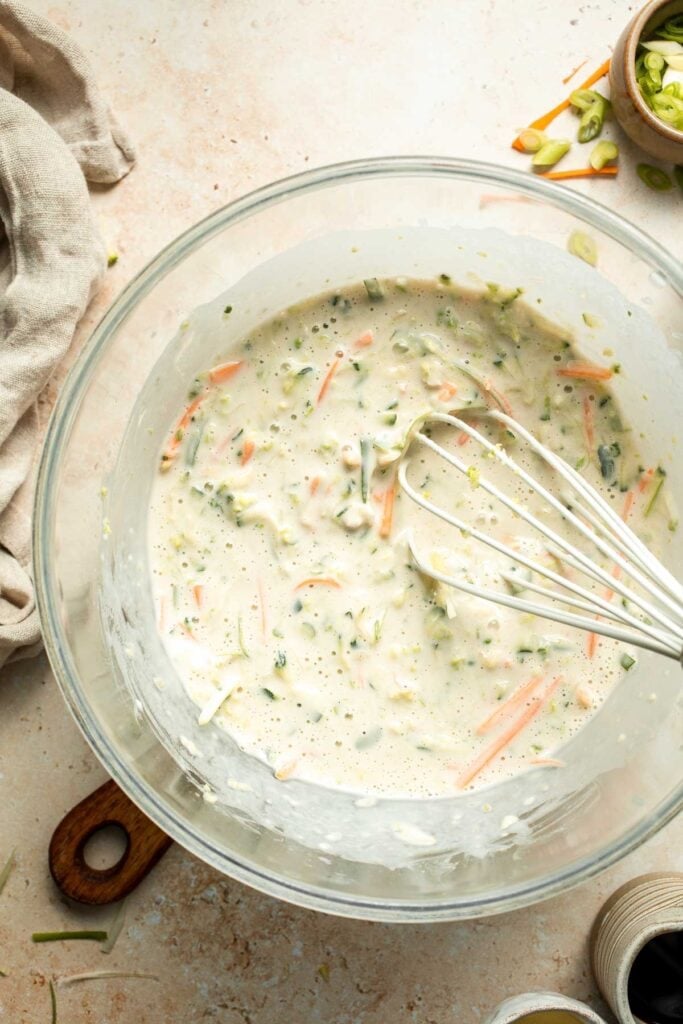
- Cook. Heat oil in a large non-stick skillet over medium-high heat until the hot oil sizzles, about 1 minute. Add and spread the vegetable batter evenly over the pan, about 1 inch thick. Cook until golden brown and crispy, about 5 minutes per side. Depending on the size of your pan, you might cook the pancake in two batches.
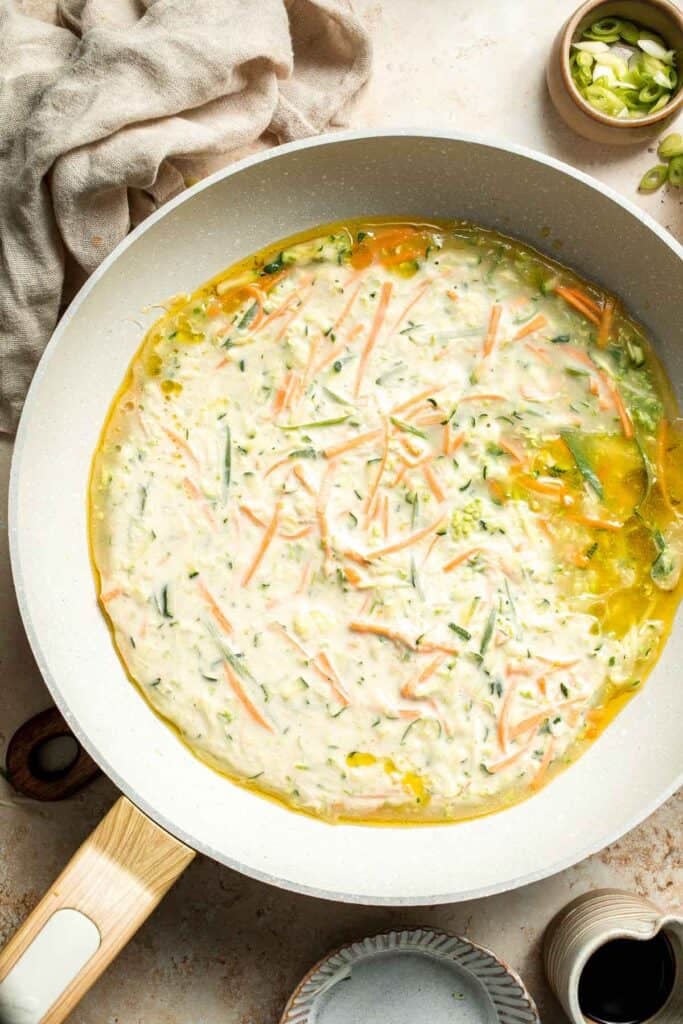

- Make dipping sauce. In a small mixing bowl, combine all the ingredients including soy sauce, vinegar, water, sesame oil, and green onions.
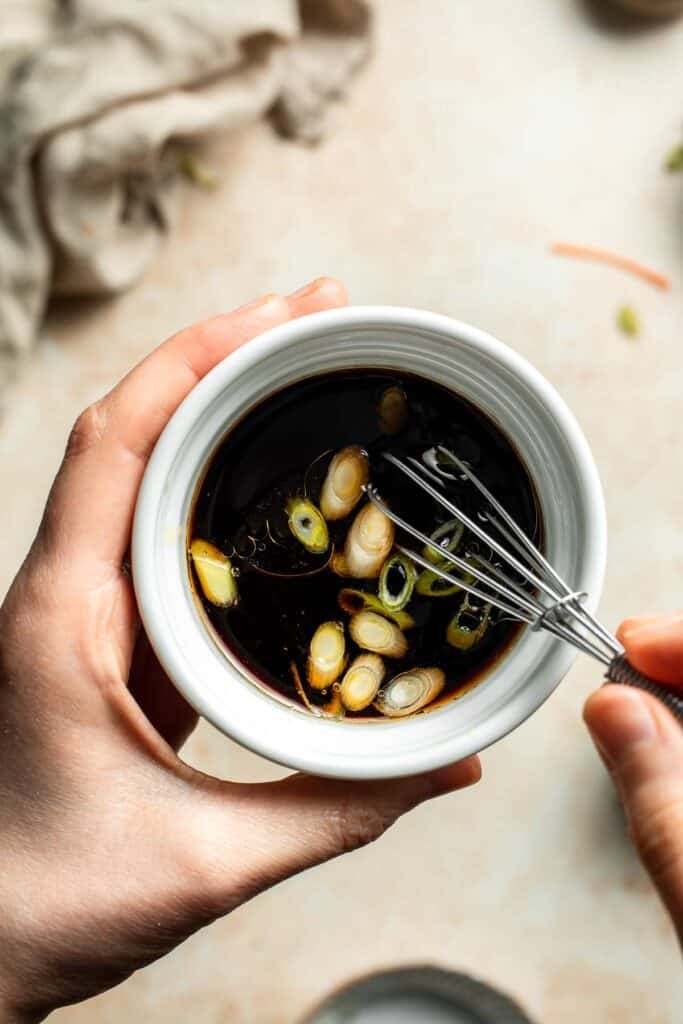
- Serve. Slice and serve warm with the dipping sauce on the side.
Recipe Variations
- Add protein. Stir in small cooked shrimp, shredded chicken, or tofu cubes to the batter for added protein. This makes the pancakes more filling and turns them into a complete meal.
- Spice it up. Add a chopped chili pepper to the batter or a dash of gochugaru (Korean red pepper flakes) for heat. You can also stir chili oil into the dipping sauce for a kick.
- Use other vegetables. Try mushrooms, bell peppers, bean sprouts, or corn for different textures and flavors. This is a great recipe to experiment with different veggie combos you have on hand.
- Make them mini. Use a smaller scoop to create bite-sized pancakes. These are great for kids or for serving as party appetizers with toothpicks and dipping sauce.
- Gluten-free option. Use a 1:1 gluten-free flour blend and make sure your soy sauce is gluten-free (or use tamari). The texture will be slightly different but still delicious.
How to Serve
These Crispy Korean Vegetable Pancakes, or Yachaejeon, are delicious served on its own with the dipping sauce on the side, or paired with some of my favorite sides including:
- Steamed Rice
- Korean Beef Bulgogi
- Kimchi
- Tofu Soup
- Korean Ground Turkey
- Chinese Garlic Cucumber Salad
For more Asian-inspired recipes, see our 60 Chinese Takeout Recipes at Home.

Recipe Tips and Tricks
- Shred vegetables evenly. Use a box grater or julienne peeler for uniform size, which helps everything cook evenly.
- Don't overcrowd the pan. Cook the pancakes in batches (if needed) to ensure they crisp up nicely and don't steam.
- Use enough oil. A generous amount of oil helps create a crispy crust. Wipe the pan with a paper towel between batches if it gets too dark.
- Press down the pancakes. Use a spatula to flatten them slightly in the pan so they cook evenly and get crisp on the bottom.
- Serve immediately. These pancakes are best served hot and crispy right after cooking.
Storing and Freezing Instructions
How to Store
Store leftover Korean pancakes in an airtight container in the refrigerator for up to 3 days.
How to Reheat
To get them crispy again, reheat pancakes in a nonstick skillet over medium heat with a touch of oil or use a toaster oven or air fryer. Microwaving tends to make them soggy, so avoid that if possible. Reheating in a skillet restores that perfect golden crunch.
How to Freeze
To freeze, place cooked and cooled pancakes between sheets of parchment paper and freeze in a sealed freezer bag for up to 2 months. Reheat directly from frozen in a skillet over medium heat or in a 375°F oven until hot and crispy.
FAQ
Yes, you can prepare the batter up to 1 day in advance and keep it refrigerated. Just give it a good stir before using. The vegetables may release some moisture, so you might need to add a spoonful of flour to thicken before cooking. It's best to store the vegetables separately and mix them in just before cooking.
This usually happens when the heat is too low or there isn't enough oil in the pan. Make sure the oil is hot before adding the batter, and use medium-high heat. Also, don't overcrowd the pan, which can cause the pancakes to steam rather than fry. Use fresh cold water in the batter for added crispiness.
Yes! Use a gluten-free 1:1 flour blend and be sure to swap regular soy sauce with tamari or coconut aminos. The texture might be slightly less chewy, but the pancakes will still be crispy and flavorful. Always check labels for hidden gluten if serving someone with celiac disease.
More Asian Vegetarian Recipes
- 60 Easy Vegetarian Dinner Recipes
- Easy Vegetable Stir Fry
- Chinese Scallion Pancakes
- Mapo Tofu
- Vegetable Dumplings
- Sushi Bowl
Tried this recipe?
I'd love to hear what you think! Leave a comment and rating below to share your feedback. Your reviews help others discover this recipe and help me keep creating more free recipes for you. Snap a photo and tag me on social media @aheadofthyme too.

The Best Soft and Chewy Peanut Butter Cookies

There's nothing better than biting into one of these Soft and Chewy Peanut Butter Cookies -thick, puffy, rich, and melt-in-your-mouth delicious. These cookies are made with creamy peanut butter and a simple pantry-friendly dough that comes together in minutes. Best of all, it's a no-chill recipe, so you can go from craving to cookie in under 20 minutes. Get ready to fall in love with a cookie.
Growing up, I only knew peanut butter cookies as dry and crunchy - often found in a cookie tin weeks past their prime. But that changed the moment I tried a soft, chewy version from the bakery. It was thick, tender, and full of peanut butter flavor. I knew I had to recreate it at home. This version is everything those tin-can cookies weren't: buttery, tender, soft for days, and totally hard to resist.
Why You'll Love these Soft and Chewy Peanut Butter Cookies
- Ultra soft and chewy texture. These cookies are thick and pillowy with the perfect balance of softness and chew. Each bite practically melts in your mouth with peanut buttery goodness.
- Quick and easy. No chilling required! Just mix, scoop, and bake. From start to finish, these cookies are ready in under 20 minutes (10 minutes to prepare and 8 minutes to bake), making them perfect for last-minute cravings.
- Stays soft for days. Thanks to brown sugar and peanut butter, these cookies stay fresh and soft for several days - perfect for lunch boxes, gifting, or batch baking.
- One bowl recipe. Minimal cleanup and simple ingredients make this a go-to recipe you'll return to again and again. It's ideal for beginner bakers and busy days.
- Classic nostalgic flavor. With rich peanut butter, sweet vanilla, and buttery notes, these cookies deliver the classic flavor we all know and love-better than any store-bought version.
Ingredients in Peanut Butter Cookies
Peanut butter cookies are made almost entirely with pantry staples, which means I always have everything on hand - no last-minute grocery trips needed! Here is what you will need (full quantities in recipe card below):
- creamy peanut butter - smooth, unsweetened peanut butter is best. Avoid natural peanut butter, which can cause the dough to be oily or separate. You can substitute for chunky peanut butter too but it will give a different texture.
- butter - unsalted and softened. If using salted butter, reduce added salt by ¼ teaspoon.
- granulated sugar - provides sweetness and contributes to the crisp edge.
- brown sugar - helps keep the cookies soft and adds depth with its molasses flavor.
- egg - binds the ingredients and gives structure to the cookie.
- vanilla extract - enhances the peanut butter flavor and adds warmth.
- all-purpose flour - the foundation of the dough. For gluten-free, use a 1:1 gluten-free flour blend.
- baking soda - gives the cookies a light rise and slightly chewy center.
- salt - balances the sweetness and enhances flavor. Reduce if using salted butter.
You will also need measuring cups and spoons, mixing bowls, large half sheet baking pan and a silicone mat.
How to Make the Best Soft and Chewy Peanut Butter Cookies
- Combine the wet ingredients. In a large mixing bowl, cream together the peanut butter, butter and sugars using a hand mixer (or a stand mixer), until soft and creamy. Add the egg and vanilla extract and continue to mix until fully combined.
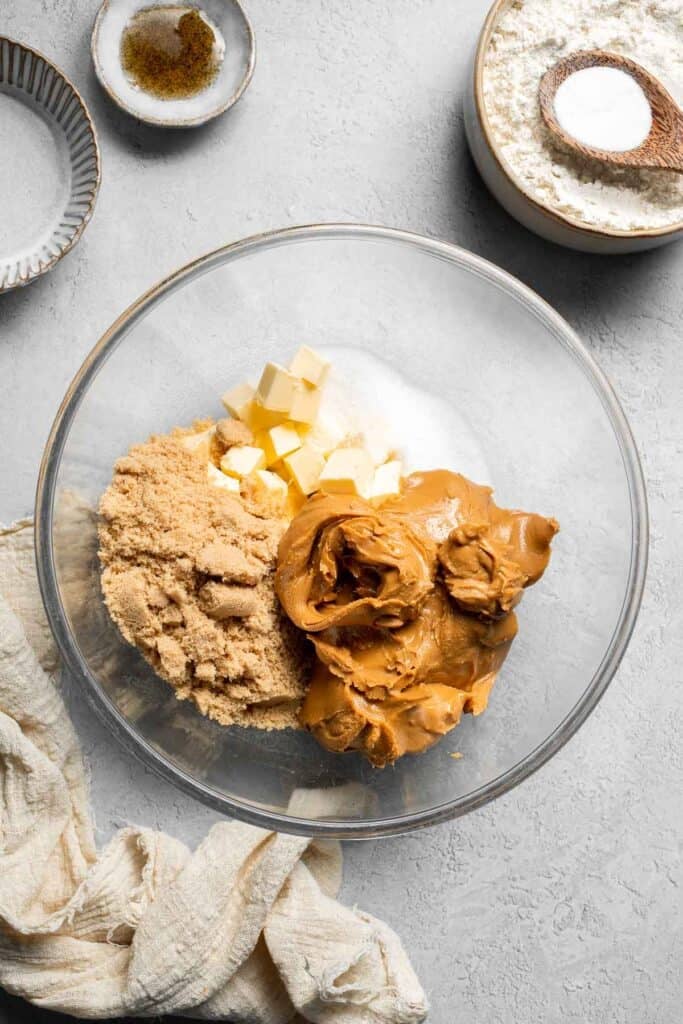
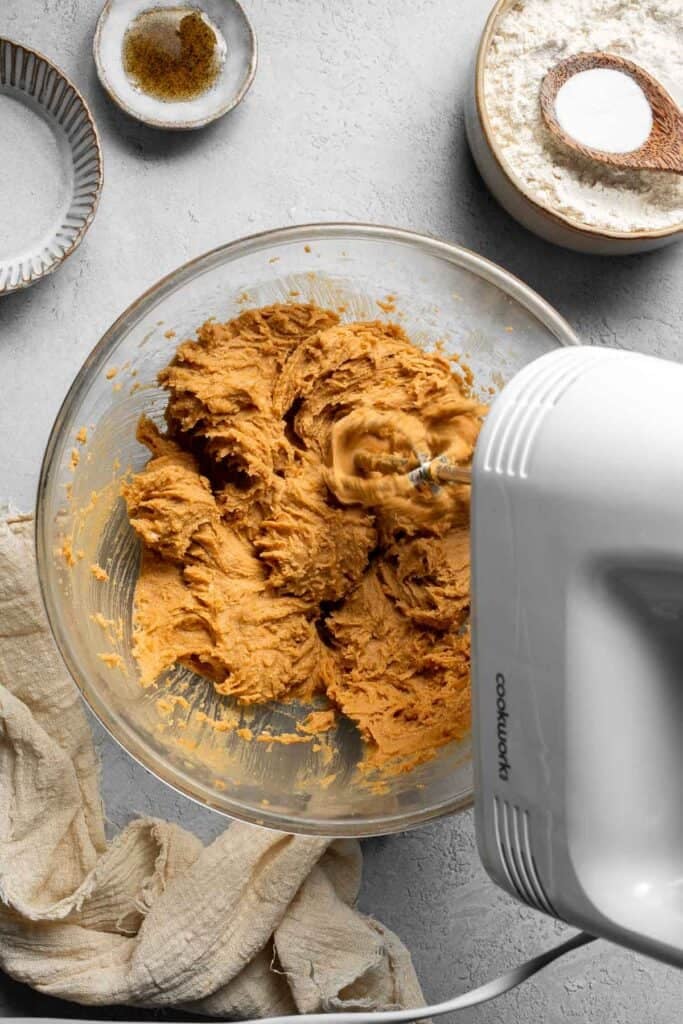
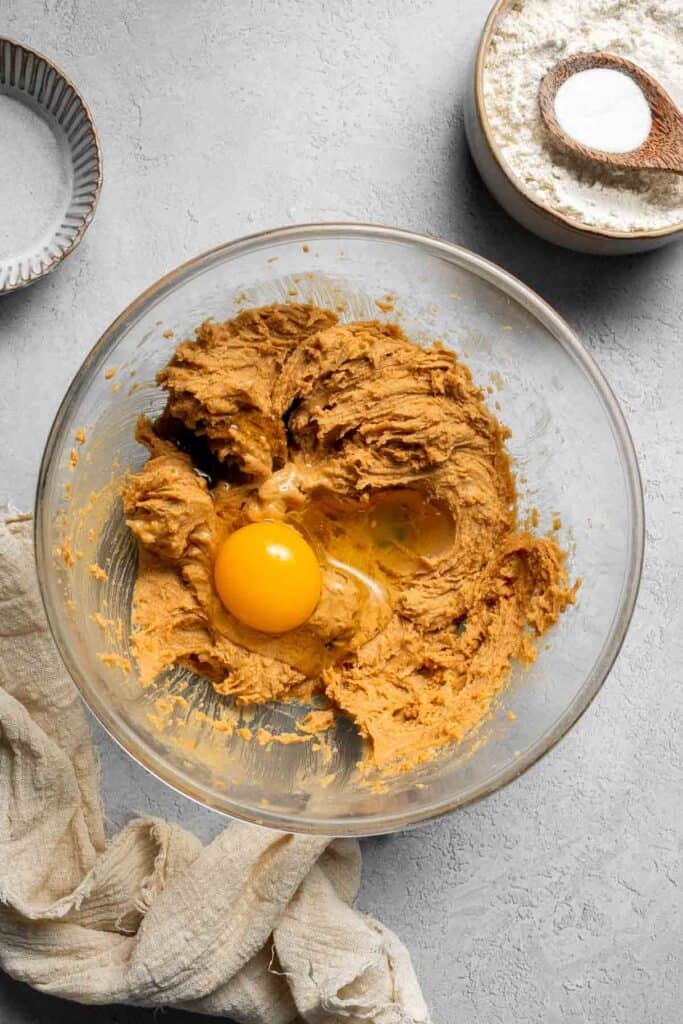
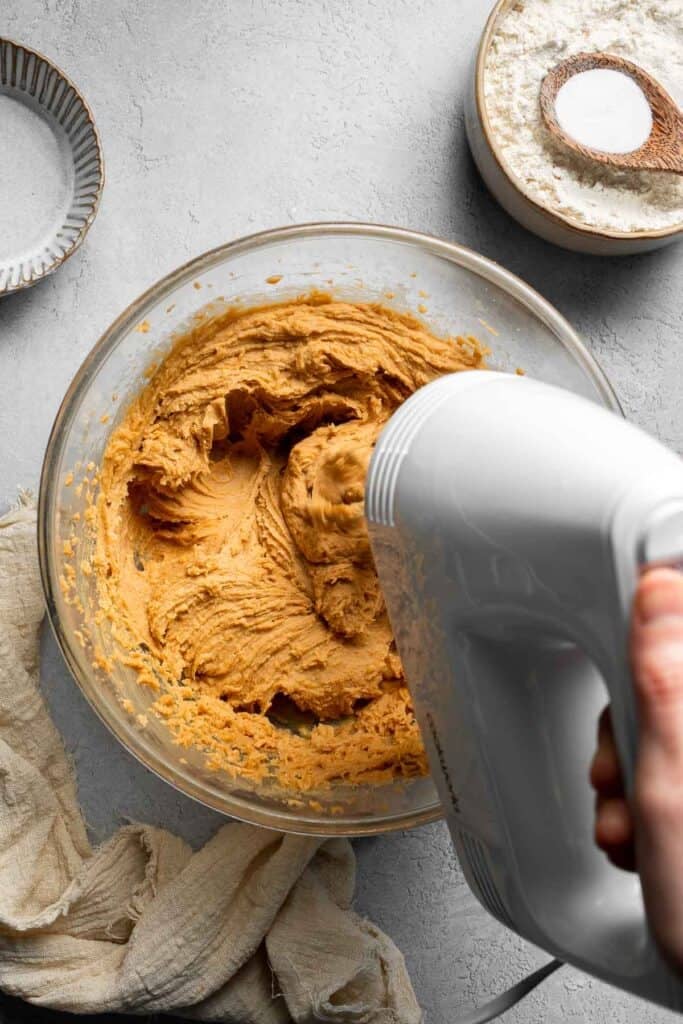
- Combine the dry ingredients. In a separate mixing bowl, whisk together the flour, baking soda and salt.
- Add dry to wet. Add these dry ingredients to your large bowl slowly, continuously mixing using your mixer.
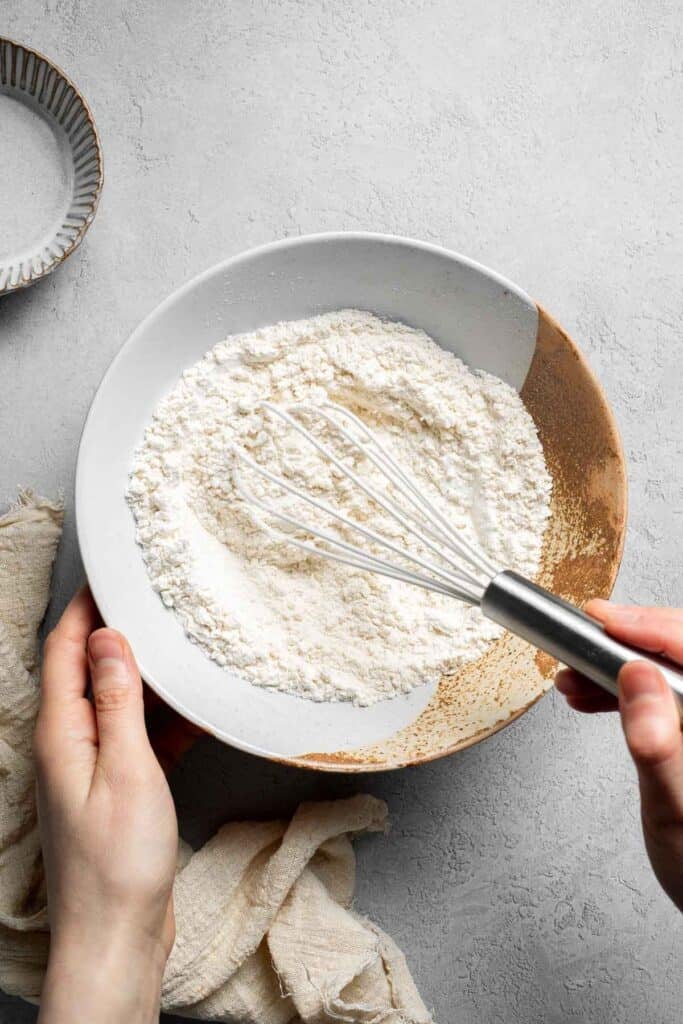
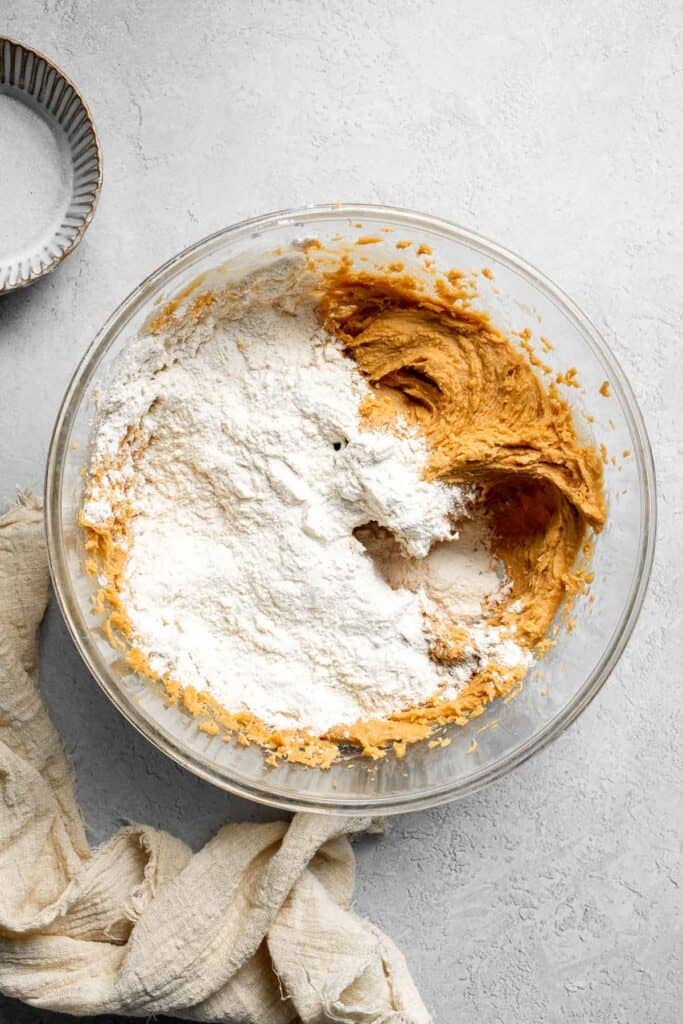
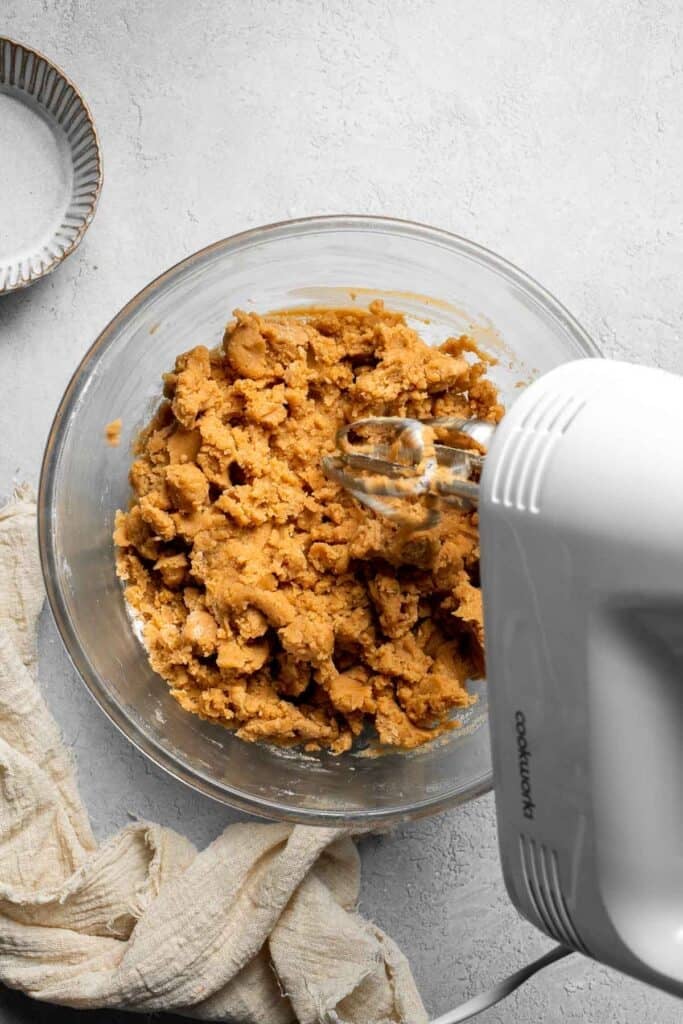
- Scoop the cookies. Scoop out 1-2 tablespoons of dough and roll into 1-inch balls and then flatten into a disc (this helps prevent it from cracking). If it cracks, smooth out the cracks with your hands.


- Shape cookies. Place on a half sheet baking pan lined with a silicone mat or parchment paper. Use a fork to press down on each disc of dough to create a criss-cross pattern.


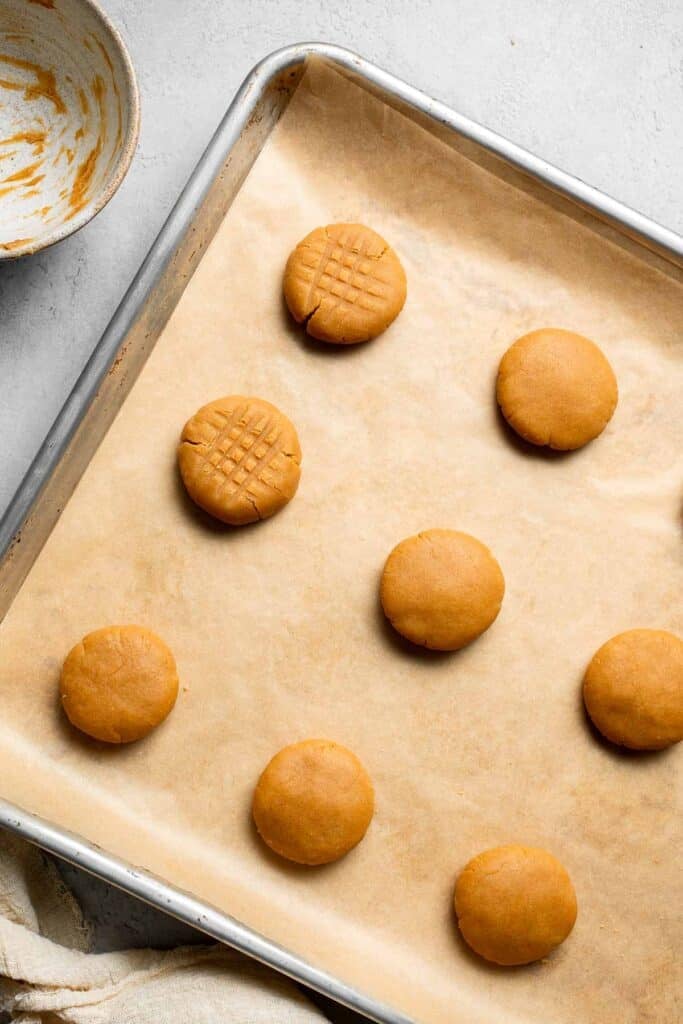
- Bake the cookies. Bake for 8-10 minutes in a preheated 350 F oven, or as soon as tops begin to slightly crack. To keep them soft and chewy, be careful to not overbake.
- Cool. Let cool on the baking sheet for a few minutes and then transfer to a wire cooling rack.
Recipe Variations
- Add chocolate chips. Peanut butter and chocolate are a classic duo. Stir in ½ cup of semisweet or milk chocolate chips (or chunks) for an extra indulgent treat. See our Chocolate Chunk Peanut Butter Cookies.
- Add mix ins. Similarly, other types of mix ins work well too. Try peanut butter chips, nuts, crushed pretzels, or mini M&Ms.
- Make them smaller. Use a teaspoon-sized scoop to make bite-sized peanut butter cookies. Reduce bake time by 1-2 minutes.
- Create peanut butter thumbprints. Gently press a thumb into the center of each dough ball before baking, then fill with jam or melted chocolate after cooling. See our Peanut Butter Thumbprint Cookies for more instructions.
- Make it gluten-free. Substitute the all-purpose flour with a 1:1 gluten-free baking flour. The texture will be nearly identical.
- Add a sugar coating. Roll each dough ball in granulated sugar before baking for a lightly crisp, sweet exterior.
How to Serve
The Best Peanut Butter Cookies are a delicious as is or with a sprinkle of sea salt and/or a drizzle of melted chocolate. They are great served with:
- A glass of cold milk
- A scoop of vanilla ice cream for cookie sandwiches
- Crumbled over yogurt or oatmeal
- Paired with coffee or tea as an afternoon snack

Recipe Tips and Tricks
- Use room temperature ingredients. This helps the dough mix evenly and gives a smoother texture for the cookies.
- Do not overmix. Once the dry ingredients are added, mix just until combined to avoid dense cookies.
- Use a cookie scoop. For even baking and uniform size, scoop the dough using a medium cookie scoop.
- Don't overbake. The cookies should look slightly underbaked when you remove them, as they'll continue to set on the baking sheet.
- Cool on the pan. Let cookies rest for 5 minutes on the baking sheet before transferring to a wire rack.
Storing and Freezing Instructions
How to Store
Store leftover cookies in an airtight container at room temperature for up to 5 days. Add a slice of bread to the container to help retain moisture. This keeps the cookies soft and really works!
How to Freeze
You can freeze baked cookies or unbaked dough. For baked cookies, cool completely and store in a freezer-safe airtight container or freezer bag for up to 2 months. For cookie dough, scoop onto a baking sheet and freeze until solid, then transfer to a freezer bag and bake directly from frozen (adding 1-2 minutes to bake time).
FAQ
It's not recommended. Natural peanut butter tends to separate and can result in oily or crumbly cookies. For best results, use commercial creamy peanut butter, which maintains consistency in the dough and yields more reliable results.
Yes! This recipe scales up easily. Just double all the ingredients and use two baking sheets. You may need to rotate pans halfway through baking to ensure even browning and consistent texture.
Nope! These cookies bake beautifully without any chill time, which makes them perfect for quick baking sessions. However, if your kitchen is particularly warm, a short chill can help control spreading.
You need to be careful not to overcook. Even cooking an extra 5 minutes will cause these cookies to get dry. If they look a little undercooked at the 8-10 minute mark, the residual heat from the pan will continue to bake them.
This can happen if the butter is too soft or melted. Try chilling the dough for 15 minutes or adding a tablespoon more flour to firm it up. Also check your oven temperature to ensure it isn't running hot.
More Cookie Recipes with Peanut Butter
- 50 Best Cookie Recipes
- Peanut Butter Cup Cookies
- Monster Cookies
- Peanut Butter Blossoms
- Buckeyes
- Peanut Butter Thumbprint Cookies
Tried this recipe?
I'd love to hear what you think! Leave a comment and rating below to share your feedback. Your reviews help others discover this recipe and help me keep creating more free recipes for you. Snap a photo and tag me on social media @aheadofthyme too.

Hot Bean Dip with Cream Cheese
This Hot Bean Dip is the ultimate crowd-pleasing appetizer: warm, cheesy, and loaded with bold Tex-Mex flavor. It's rich and creamy thanks to a base of cream cheese and refried beans, spiced with taco seasoning, and finished with a bubbly, golden layer of melted cheese. It's the kind of comfort food you'll want to bring to every party or game day gathering.

This easy dip takes just a few minutes to mix together and bakes to gooey perfection. Best of all, it's endlessly customizable with your favorite toppings like avocado, jalapeños, cilantro, or hot sauce. Serve it with tortilla chips for the perfect scoopable snack that disappears fast.
Why You'll Love this Hot Bean Dip
- Rich and creamy texture. The combination of cream cheese and refried beans creates an ultra-smooth, luscious base that's satisfying and indulgent. It's perfect for dipping and delivers comfort in every bite.
- Packed with flavor. Taco seasoning and a splash of lime juice bring bold, zesty flavor to the dip. Topped with melty mozzarella and parmesan cheese, each layer adds depth and a cheesy kick.
- Quick and easy to make. This recipe takes just minutes to assemble and bakes in under 30 minutes. It's ideal for last-minute get-togethers, casual snacking, or easy weeknight entertaining.
- Perfect for a crowd. Whether it's a party, potluck, or game day, this dip is always a hit. It's rich enough to satisfy, and easy to double for a crowd. Serve it hot and watch it disappear.
- Easily customizable. Add your favorite toppings or mix-ins like chopped green chiles, corn, or black beans. You can also make it spicier with hot sauce or diced jalapeños, or even mellow it with extra cheese or sour cream.

Ingredient Notes
To make this easy Hot Bean Dip with Cream Cheese, you will need the following ingredients (full measurements in recipe card below):
- cream cheese - creates a creamy, rich base. I recommend using full-fat for best results. You could use light cream cheese as a substitute but it might not be as creamy.
- refried beans - You can use either homemade refried beans, or canned beans.
- taco seasoning - use store-bought or homemade. A blend of chili powder, cumin, garlic powder, and paprika also works well.
- lime juice - adds a touch of acidity to brighten the dip. Bottled juice works, but freshly squeeze gives the most potent flavor.
- mozzarella cheese - melts beautifully for that gooey topping. Substitute with Monterey Jack or a Mexican cheese blend.
- parmesan cheese - adds sharp, nutty flavor. Can be swapped for pecorino romano or omitted if desired.
You will also need measuring cups and spoons, mixing bowl, a spatula for stirring, and a small 1-quart baking dish.

How to Make the Best Hot Bean Dip
- Combine ingredients. In a large mixing bowl, combine cream cheese, refried beans, taco seasoning, and lime juice. Stir until evenly combined.


- Assemble. Spoon the mixture evenly into a small round 1-quart baking dish and top with mozzarella cheese and parmesan cheese.


- Bake. Bake for 20-25 minutes until the melted cheese is bubbly and golden brown.


- Serve. Top with avocado, jalapeno, cilantro, and hot sauce, or your favorite taco fix ins. Serve immediately with tortilla chips or crackers.


Recipe Variations
- Make it spicy. Add diced jalapeños, hot sauce, or a pinch of cayenne pepper for a fiery twist that enhances the dip's bold flavor.
- Add more protein. Mix in cooked ground beef, chorizo, or shredded chicken for a heartier, more filling dip perfect for game day.
- Top with extras. Customize with fresh toppings like chopped avocado, cilantro, or sliced olives. These add freshness, color, and extra texture.
- Swap the cheese. Try using cheddar, pepper jack, or a Mexican blend for a different flavor profile that still delivers cheesy goodness.
- Bulk it up. Add black beans or corn to bulk it up and make the dip more filling for a heartier appetizer everyone will love.
How to Serve
This Cheesy Hot Bean Dip is delicious served on its own with tortilla chips, crackers, or veggies, or paired with some of my favorite Tex Mex recipes including:
- Baked Chicken Quesadillas
- Homemade Taquitos
- Crispy Refried Bean Tacos
- Guacamole
- Chicken Enchiladas
- Sheet Pan Quesadillas
For more recipes, see our 30 Mexican Recipes for Cinco de Mayo.

Recipe Tips and Tricks
- Soften the cream cheese. Let it sit at room temperature for easier mixing and a smoother dip consistency.
- Use freshly shredded cheese. It melts better than pre-shredded and gives the dip a more gooey, stringy texture.
- Mix thoroughly. Make sure all the ingredients are evenly combined before baking so you get consistent flavor in every bite.
- Serve hot. This dip is best enjoyed warm from the oven. If needed, keep it warm in a slow cooker for serving.
- Top just before serving. If adding fresh toppings like avocado or cilantro, wait until just before serving to maintain freshness and color.
Storing and Freezing Instructions
How to Store
Transfer leftovers to an airtight container and store in the fridge for up to 3 days. Reheat before serving.
How to Reheat
Reheat in a 300°F oven until warmed through, or microwave in 30-second intervals, stirring in between. Add a splash of water if the dip thickens too much.
How to Freeze
You can freeze the dip before or after baking. Wrap tightly and freeze for up to 1 month. Thaw overnight in the fridge before reheating.
FAQ
Yes, assemble the dip up to a day in advance, cover, and refrigerate. Bake just before serving for best results. This makes it an ideal dish to prep ahead for parties or events.
Absolutely! Use a 9x13-inch dish and double all ingredients. Increase the baking time slightly until hot and bubbly. It's perfect when hosting a larger group or family gathering.
Yes, as long as your taco seasoning and refried beans are gluten-free. Always double-check labels to be sure. Pair it with gluten-free chips for a safe and delicious snack.
Mashed pinto or black beans work well. You can season them with taco spices to mimic refried beans. The texture will be slightly different, but still delicious.
More Cheesy Dip Recipes
Tried this recipe?
I'd love to hear what you think! Leave a comment and rating below to share your feedback. Your reviews help others discover this recipe and help me keep creating more free recipes for you. Snap a photo and tag me on social media @aheadofthyme too.

Greek Chicken Gyros (with Homemade Tzatziki)
This Greek Chicken Gyros (with Homemade Tzatziki) is a bright, bold, and irresistibly fresh dish that brings the flavor of the Mediterranean right to your kitchen. Juicy chicken breast is marinated in a classic Greek souvlaki-style blend of garlic, lemon, herbs, and olive oil, grilled to perfection, and tucked into warm pita bread with crisp lettuce, Greek salad, and a generous dollop of creamy homemade tzatziki sauce.

A Greek gyro is a Greek pita dish made with rotisserie meat, fresh vegetables (tomato, cucumber, and onions) and tzatziki sauce. Perfect for a warm day or anytime you're craving a refreshing and satisfying meal, this dish is lighter than traditional takeout and packs in tons of flavor with minimal effort. It's quick enough for a weeknight dinner but special enough for entertaining - and you can customize the toppings to your taste for a truly personalized plate.
Why You'll Love These Greek Chicken Gyros with Tzatziki
- Fresh and flavorful. The marinade infuses the chicken with bright lemon, bold garlic, and fragrant herbs. Paired with tangy feta, fresh veggies, and creamy tzatziki, every bite is bursting with flavor and freshness that brings a taste of Greece to your kitchen.
- Perfectly tender chicken. Marinating the chicken in advance helps it stay juicy and tender, even after grilling. The bay leaves add depth and a touch of Mediterranean aroma that complements the other spices and ingredients perfectly.
- Easy to make at home. These gyros come together with pantry staples and simple ingredients. With minimal prep, they're surprisingly easy for a dish that tastes like it came from your favorite Greek restaurant, and perfect for beginners.
- Balanced and nutritious. Packed with lean protein, fiber-rich veggies, and healthy fats from olive oil and Greek yogurt, this meal is as wholesome as it is satisfying and fits a wide range of dietary needs.
- Customizable. Choose your favorite toppings or use what you have on hand. It's easy to make this dish your own - vegetarian versions or grilled veggie options work great too, especially with seasonal produce.

Ingredient Notes
To make these easy Greek Chicken Gyros (with Homemade Tzatziki) at home, you will need the following ingredients (full measurements in recipe card below):
- pita bread - I like making my own quick and easy pita bread, but of course storebought pitas work perfectly. Go for a thicker one if you can find it. You can also use any thick flatbread or naan bread.
- chicken breasts - 2 large boneless, skinless chicken breasts cut into 1.5-inch pieces. You can use chicken thighs for juicier results.
- souvlaki marinade - made with a combination of simple ingredients:
- olive oil - substitute with avocado oil if preferred.
- garlic - fresh garlic cloves give the best flavor. Garlic powder can work in a pinch.
- lemon juice - use freshly squeezed for brightness. Bottled lemon juice can be substituted in a 1:1 ratio.
- fresh parsley - adds freshness. You can substitute with cilantro or dill if needed.
- dried oregano - a classic Greek herb. Use Italian seasoning if you're out.
- dried mint - optional, but adds a cool, herbal flavor. Fresh mint can also be used.
- salt and pepper - to season all the components.
- bay leaves - used in the marinade for an aromatic touch.
- tzatziki sauce - made with a combination of Greek yogurt, cucumber, garlic, extra virgin olive oil, lemon juice, fresh dill, salt and pepper. Use full-fat Greek yogurt for the best texture, but low-fat can be used. You can also use dried dill in smaller amounts.
- romaine lettuce - adds crunch. Any leafy greens like spinach or arugula can work.
- cherry tomatoes - sweet and juicy. Substitute with grape tomatoes or diced regular tomatoes.
- cucumber - for the tzatziki and toppings. English or Persian cucumbers work best.
- red onion - for sharp flavor and crunch. Soak in cold water for a milder taste.
- feta cheese - adds tangy creaminess. Crumbled goat cheese is a good alternative.
- salt and pepper
You will also need measuring cups and spoons, mixing bowls, knife and cutting board, bamboo skewers, grilling tongs, and an indoor grill pan (if you are not using an outdoor grill).
How to Make the Best Greek Chicken Gyros with Tzatziki
First, prepare the chicken souvlaki marinade.
- Combine ingredients. Add all of the ingredients for the chicken souvlaki marinade into a ziploc bag. Press the marinade around to combine.
- Add chicken. Add in the chopped chicken, and press the air out of the bag and seal tightly. Press the marinade around the chicken to coat.
- Marinate. Place in the fridge to marinate at least 1 hour or overnight.
Next, prepare the tzatziki sauce.
- Prepare cucumber. Grate the cucumber and drain through a cheesecloth, fine mesh sieve or using your hands. Transfer drained cucumber to a medium bowl.


- Add remaining ingredients. Add the yogurt, garlic, olive oil, lemon juice, dill, salt and pepper. Stir to combine.


- Refrigerate. Refrigerate for at least 1 hour before serving to let the flavours infuse into the yogurt.
Next, let's grill the chicken.
- Prep. You can thread the chicken onto bamboo skewers to grill, or grill the individual pieces. Lightly brush olive oil over grill pan. Heat the grill over medium high heat for about 5 minutes, until sizzling hot.
- Cook. Cook the chicken for 7 minutes on each side, or until its internal temperature reaches 165 F (75 C).


How to Cook Greek Chicken Gyros in the Oven
You can also bake the chicken in the oven instead. Place the chicken on a baking tray and spread it out evenly. Roast in a 480F preheated oven for 12-13 minutes, or until the internal temperature of the chicken reaches 165F, as read on a meat thermometer. You can add some charing by placing under the broiler on high for 1 minute. Keep a close eye on the broiler though, because things can burn quickly in there.
Finally, let's assemble the gyros.
- Prepare the toppings. In a medium mixing bowl, combine the toppings and toss together.
- Warm the pitas. Warm the pitas on the grill, about 1-2 minutes per side.
- Assemble. Then, on the centre each pita bread, add a few spoonfuls of the salad toppings in a line down the middle. Top with grilled souvlaki chicken, and a generous scoop of tzatziki sauce. Fold the pita up and enjoy. You can also wrap it in parchment paper and twist the bottom to keep the ingredients inside.


Recipe Video
Recipe Variations
- Make it spicy. Add crushed red pepper flakes or a drizzle of hot sauce to the marinade or drizzle over the finished gyros for a spicy kick. This enhances the boldness of the dish.
- Use chicken thighs. For extra juicy gyros, try boneless skinless chicken thighs instead of chicken breast - they're more forgiving when cooking and offer rich flavor.
- Add pickled veggies. Add quick pickled red onions or pickled turnips for extra tang and crunch. They complement the creaminess of the tzatziki perfectly.
- Make it vegetarian. Swap the chicken for grilled halloumi or roasted chickpeas to make a meatless version with the same bold flavors and protein.
- Try grilled veggies. Add slices of grilled zucchini, eggplant, or bell peppers to the gyro for a boost of smoky flavor, nutrients, and color.
How to Serve
Greek Chicken Gyros are delicious and filling served on their own. To keep the filling inside, I normally serve these pitas wrapped with parchment paper. You can secure it with an elastic band and twist the bottom together so that the tzatziki sauce doesn't drip out.
These wraps can be made more filling when paired with some of my favorite Mediterranean side dishes including:
- Greek Lemon Roasted Baby Potatoes
- Tabbouleh Salad
- Mezze Platter
- Classic Hummus
- Greek Salad with Lettuce
- Baba Ganoush Eggplant Dip
- Mediterranean Orzo Pasta Salad
For more recipes, see our 30 Best Greek Recipes.

Recipe Tips and Tricks
- Marinate in advance. It is important to let the chicken marinate at least for an hour to allow the maximum flavours to infuse and to ensure the juiciest results. I prefer letting it marinate overnight, if you have the time.
- Use a hot grill or pan. High heat gives the chicken a good sear while locking in moisture and flavor. Don't overcrowd the pan for best texture.
- Use a digital thermometer. A digital meat thermometer is very useful when grilling skewers for checking doneness. Simply insert halfway inside the meat to get a quick measurement.
- Let the chicken rest. Rest for 5 minutes after cooking before slicing to keep it juicy. This helps redistribute the juices inside the meat.
- Drain the cucumber. Squeeze the grated cucumber with a clean towel to remove excess moisture so the tzatziki stays thick, creamy, and not watery.
- Warm the pita. Gently warm pitas before serving to make them more pliable and enhance flavor. This adds a soft, comforting texture to each bite.
- Make your own homemade pitas. You can make your own quick and easy pita bread in under 2 hours with only 15 minutes of actual prep work. These pitas are so soft and puffy with a perfect pocket. Totally worth the extra effort.
Storing and Freezing Instructions
How to Store
Store leftover chicken, tzatziki, and toppings in separate airtight containers in the fridge for up to 3 days.
How to Reheat
Reheat chicken gently in a skillet over medium heat or in a 300°F oven until warmed through. Avoid overcooking to keep it tender and juicy. If using a microwave, cover with a damp paper towel to retain moisture.
How to Freeze
Freeze the marinated raw chicken or cooked chicken for up to 2 months. Thaw overnight in the fridge before reheating or cooking. Tzatziki and toppings are best enjoyed fresh and not frozen.
FAQ
Yes! You can marinate the chicken and prepare the tzatziki sauce a day ahead. Assemble just before serving for best texture and freshness. It's a great option for meal prepping in advance. You can also chop the vegetables and store them in separate containers for even faster assembly.
Reheat gently in a skillet over medium heat or in the oven at 300°F until warmed through. Avoid microwaving to maintain the juicy texture and avoid drying it out. For extra moisture, add a splash of broth or water to the pan while reheating.
Absolutely. While homemade tzatziki offers a fresher taste, store-bought versions save time and still taste great in a pinch. Look for brands with minimal additives for best results. You can even mix in some chopped cucumber or dill to enhance the store-bought variety.
Yes, simply serve the gyro fillings over rice or in gluten-free pita bread or wraps. Double-check sauces and spices to ensure they're gluten-free and safe for your dietary needs. Some gluten-free flatbreads or lettuce wraps also work well and keep things light and fresh.
More Sandwich Recipes
- Chicken Shawarma
- Pita Grilled Cheese
- Lemongrass Chicken Banh Mi Sandwich
- Buffalo Turkey Wraps
- Chicken Salad
- Gourmet Hot Dogs
Tried this recipe?
I'd love to hear what you think! Leave a comment and rating below to share your feedback. Your reviews help others discover this recipe and help me keep creating more free recipes for you. Snap a photo and tag me on social media @aheadofthyme too.

Easy Vegetable Stir Fry
This Easy Vegetable Stir Fry is a quick, colorful, and satisfying way to get dinner on the table fast. Packed with vibrant veggies and tossed in a savory, slightly sweet soy-based sauce, it's a wholesome meal that comes together in just 20 minutes. Whether you're looking for a meatless main or a flavorful side dish, this stir fry delivers on taste and ease.

With crisp-tender vegetables like bell peppers, broccoli, and sugar snap peas, every bite has the perfect mix of texture and flavor. The garlic-forward sauce is enhanced with toasted sesame oil and a touch of sweetness from sugar or honey, making it incredibly versatile and family-friendly. Serve it over steamed rice, noodles, or enjoy it on its own for a light and nutritious meal.
Why You'll Love this Vegetable Stir Fry Recipe
- Packed with flavor. The homemade stir fry sauce is rich with umami from soy sauce, balanced by tangy rice vinegar, aromatic garlic, and the nutty finish of toasted sesame oil. It clings perfectly to every bite and brings all the veggies together into one cohesive, flavorful dish.
- Fast and easy. From start to finish, this dish takes just 20 minutes. Perfect for busy weeknights when you want something nutritious and satisfying with minimal cleanup, and with steps that are easy enough for beginners.
- Customizable. Use whatever vegetables you have on hand. Stir fry is a great way to clean out the fridge while still delivering a delicious meal that can be tailored to any taste or dietary need.
- Naturally vegan and dairy-free. No need for substitutions or special ingredients - this stir fry is plant-based and full of fresh goodness. It's a great option for those following a vegan diet or avoiding dairy.
- Great for meal prep. This dish holds up well in the fridge and can be reheated for quick lunches or dinners throughout the week. The flavors even deepen a bit as it sits, making leftovers extra tasty.
Ingredient Notes
To make this quick and easy Vegetable Stir Fry, you will need the following ingredients (full measurements in recipe card below):
- garlic - minced for bold flavor. Substitute with garlic paste or garlic powder in a pinch.
- soy sauce - the base of the sauce. Use tamari for a gluten-free version.
- dark soy sauce - adds depth and rich color. Substitute with additional regular soy sauce if needed.
- rice vinegar - provides acidity and balance. Substitute with apple cider vinegar or white vinegar.
- toasted sesame oil - adds a nutty, roasted aroma and finish. No close substitute.
- granulated sugar - adds a touch of sweetness. Substitute with honey or use maple syrup for a vegan alternative.
- avocado oil - for stir-frying due to its high smoke point. Substitute with vegetable or canola oil.
- carrot - peeled and sliced. Substitute with parsnip or daikon radish.
- mushrooms - shiitake or button mushrooms adds umami and meaty texture. Use cremini or portobello mushrooms as alternatives.
- bell peppers - add sweetness and crunch. We use yellow and red peppers but feel free to use green bell pepper if preferred.
- broccoli - for texture and nutrition. Substitute with cauliflower florets.
- sugar snap peas - add a crisp, slightly sweet bite. Substitute with snow peas.
- salt - to season to taste.
- toasted white sesame seeds - for garnish and a little crunch.
You will also need measuring cups and spoons, mixing bowl, large skillet or wok, and a spatula or wooden spoon.

How to Make the Best Vegetable Stir Fry
- Make sauce. In a small mixing bowl, combine garlic, soy sauce, dark soy sauce, vinegar, sesame oil, and sugar. Stir well until smooth. Set aside.


- Sauté mushrooms and carrots. In a large skillet, heat oil over medium-high heat until the hot oil sizzles, about 1-2 minutes. Add carrots and mushrooms and sauté until tender and the mushrooms start to brown, about 3-4 minutes.


- Add remaining veggies. Add bell pepper, broccoli, snap peas, and salt. Stir well to combine and cook until tender, about 2-3 minutes.


- Add sauce. Add the sauce and toss well until the vegetables are evenly coated, about 1 minute.


- Add sesame seeds. Add a sprinkle of sesame seeds and serve immediately.


Recipe Variations
- Add tofu. Pan-fry cubes of tofu until golden, then toss with the veggies and sauce for added protein.
- Spice it up. Add red pepper flakes, sriracha, or chili garlic sauce to the stir fry sauce for a spicy kick. You can also use fresh chili for extra heat and flavor.
- Change the veggies. Swap in green beans, zucchini, cabbage, or baby corn depending on what you have. This makes the dish adaptable and great for reducing food waste.
- Add noodles. Stir in cooked noodles like lo mein or rice noodles to make it a more filling main dish. Noodles absorb the sauce beautifully and stretch the dish further.
- Top with nuts. Garnish with toasted peanuts or cashews for extra crunch and a nutty flavor boost. This simple addition adds both texture and a protein-rich finish.
How to Serve
This quick Vegetable Stir Fry is delicious served on its own, or paired with some of my favorite sides including:
- Steamed Rice or Easy Coconut Rice
- Vegetable Dumplings
- Shrimp Egg Rolls
- Tofu Soup
- Pickled Red Onions
- Sesame Noodles
For more Asian inspired recipes, see our 60 Chinese Takeout Recipes at Home.

Recipe Tips and Tricks
- Prep everything first. Stir frying happens quickly, so have all ingredients chopped and sauces mixed before you begin cooking.
- Use high heat. Stir fry at high heat for that signature sizzle and sear on the vegetables. It helps them stay crisp and flavorful.
- Don't overcrowd the pan. If necessary, cook the veggies in batches to maintain that char and avoid steaming.
- Stir constantly. Keep the ingredients moving in the pan to ensure even cooking and prevent burning.
- Taste and adjust. Before serving, taste and add more soy sauce, vinegar, or sesame oil if needed for balance.
Storing and Freezing Instructions
How to Store
Store leftovers in an airtight container in the refrigerator for up to 4 days.
How to Reheat
Reheat in a skillet over medium heat until warmed through.
How to Freeze
Freeze stir fry in a freezer-safe container for up to 2 months. For best texture, slightly undercook the vegetables before freezing. Thaw overnight in the fridge and reheat before serving.
FAQ
Yes! This recipe is great with added protein like tofu, tempeh, or even cooked chicken, shrimp, or beef. Just be sure to cook any meat separately before combining with the veggies and sauce. This ensures everything stays tender and flavorful without overcooking, and lets the veggies remain the star of the dish. You can also use plant-based meat alternatives if you're keeping it vegetarian.
Absolutely. Use tamari or a gluten-free soy sauce alternative and double-check that all other ingredients (like vinegar and sesame oil) are gluten-free. Serve with gluten-free noodles or rice to complete the meal.
Cook over high heat and avoid overcrowding the pan. Stir frequently, and don't overcook - veggies should be just tender but still bright and crisp for the best texture. Flash-cooking helps retain nutrients and that signature stir-fry crunch, so have everything prepped before you start. Also, make sure your pan is hot enough before you begin adding the vegetables.
Use a high smoke point oil like avocado, vegetable, or canola oil. Avoid olive oil, which can burn at high temperatures commonly used in stir fry. Avocado oil also adds a mild, neutral flavor that lets the sauce and veggies shine without interference. Peanut oil is another excellent option that works well in many Asian-style dishes.
Yes, but for best results, thaw and pat them dry before stir frying. This helps prevent excess moisture, which can make the stir fry soggy. Frozen vegetables may not hold the same crunch as fresh, but they are a great convenience option and still taste delicious when cooked quickly. They're perfect when you're short on time or want to avoid extra prep work.
More Stir Fry Recipes
- 60 Chinese Takeout Recipes at Home
- Tofu and Mushroom Stir Fry
- Beef and Broccoli Stir Fry
- Beef Noodle Stir Fry
- Garlic Shrimp Stir Fry
- Stir-Fried Rice Cakes with Shrimp
Tried this recipe?
I'd love to hear what you think! Leave a comment and rating below to share your feedback. Your reviews help others discover this recipe and help me keep creating more free recipes for you. Snap a photo and tag me on social media @aheadofthyme too.

Small Batch Strawberry Jam (No Pectin)
Quick and easy Small Batch Strawberry Jam is so simple to make in one pot with just three ingredients - fresh strawberries, sugar, and lemon juice. No pectin needed, no complicated steps. Just a little time on the stove turns this trio into a glossy, thick jam bursting with real strawberry flavor. It's naturally sweet, slightly tangy, and incredibly addictive.
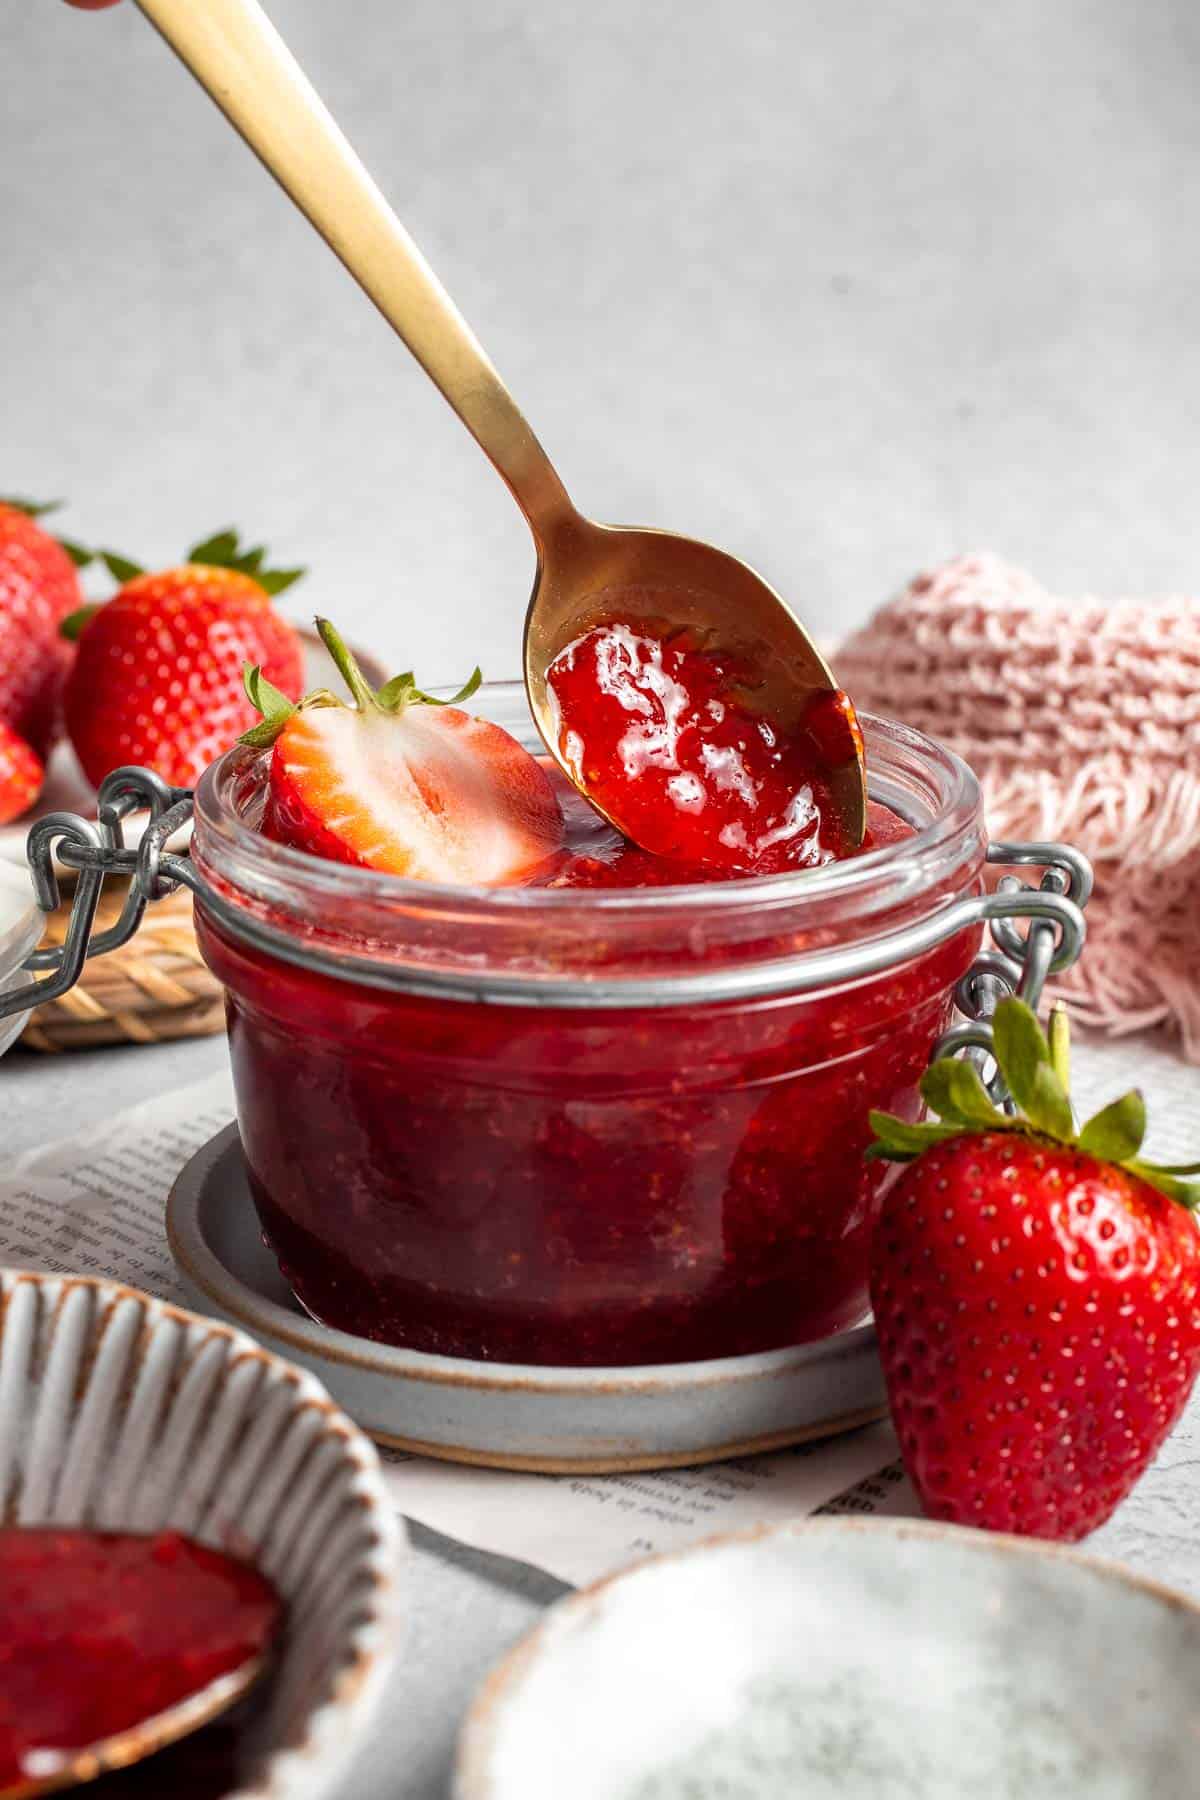
You'll be amazed at how satisfying it is to make your own jam at home. Once you try it, store-bought will never taste the same. This homemade jam is versatile, too and perfect for spreading on toast and pancakes, drizzling over ice cream, spooning onto biscuits, or pairing with cheese on a charcuterie board. Or just eat it straight from the jar. Yes, it's that good.
Why You'll Love This Small Batch Strawberry Jam Recipe
- Just three ingredients. All you need are fresh strawberries, granulated sugar, and lemon juice. No added preservatives or pectin - just simple pantry staples that let the fruit shine.
- Quick and fuss-free. This jam comes together in less than 30 minutes and uses just one pot. It's the perfect introduction to canning or small batch preserving.
- Incredibly flavorful. Cooking the strawberries down intensifies their flavor, while the lemon juice balances the sweetness and adds brightness. It tastes like summer in a jar.
- Small batch = less waste. This recipe makes about 1 cup of jam, so it's perfect when you have a small amount of fruit or just want a quick homemade treat.
- Endlessly versatile. Enjoy it on toast, scones, yogurt, desserts, or even savory dishes like grilled cheese or roasted meats.
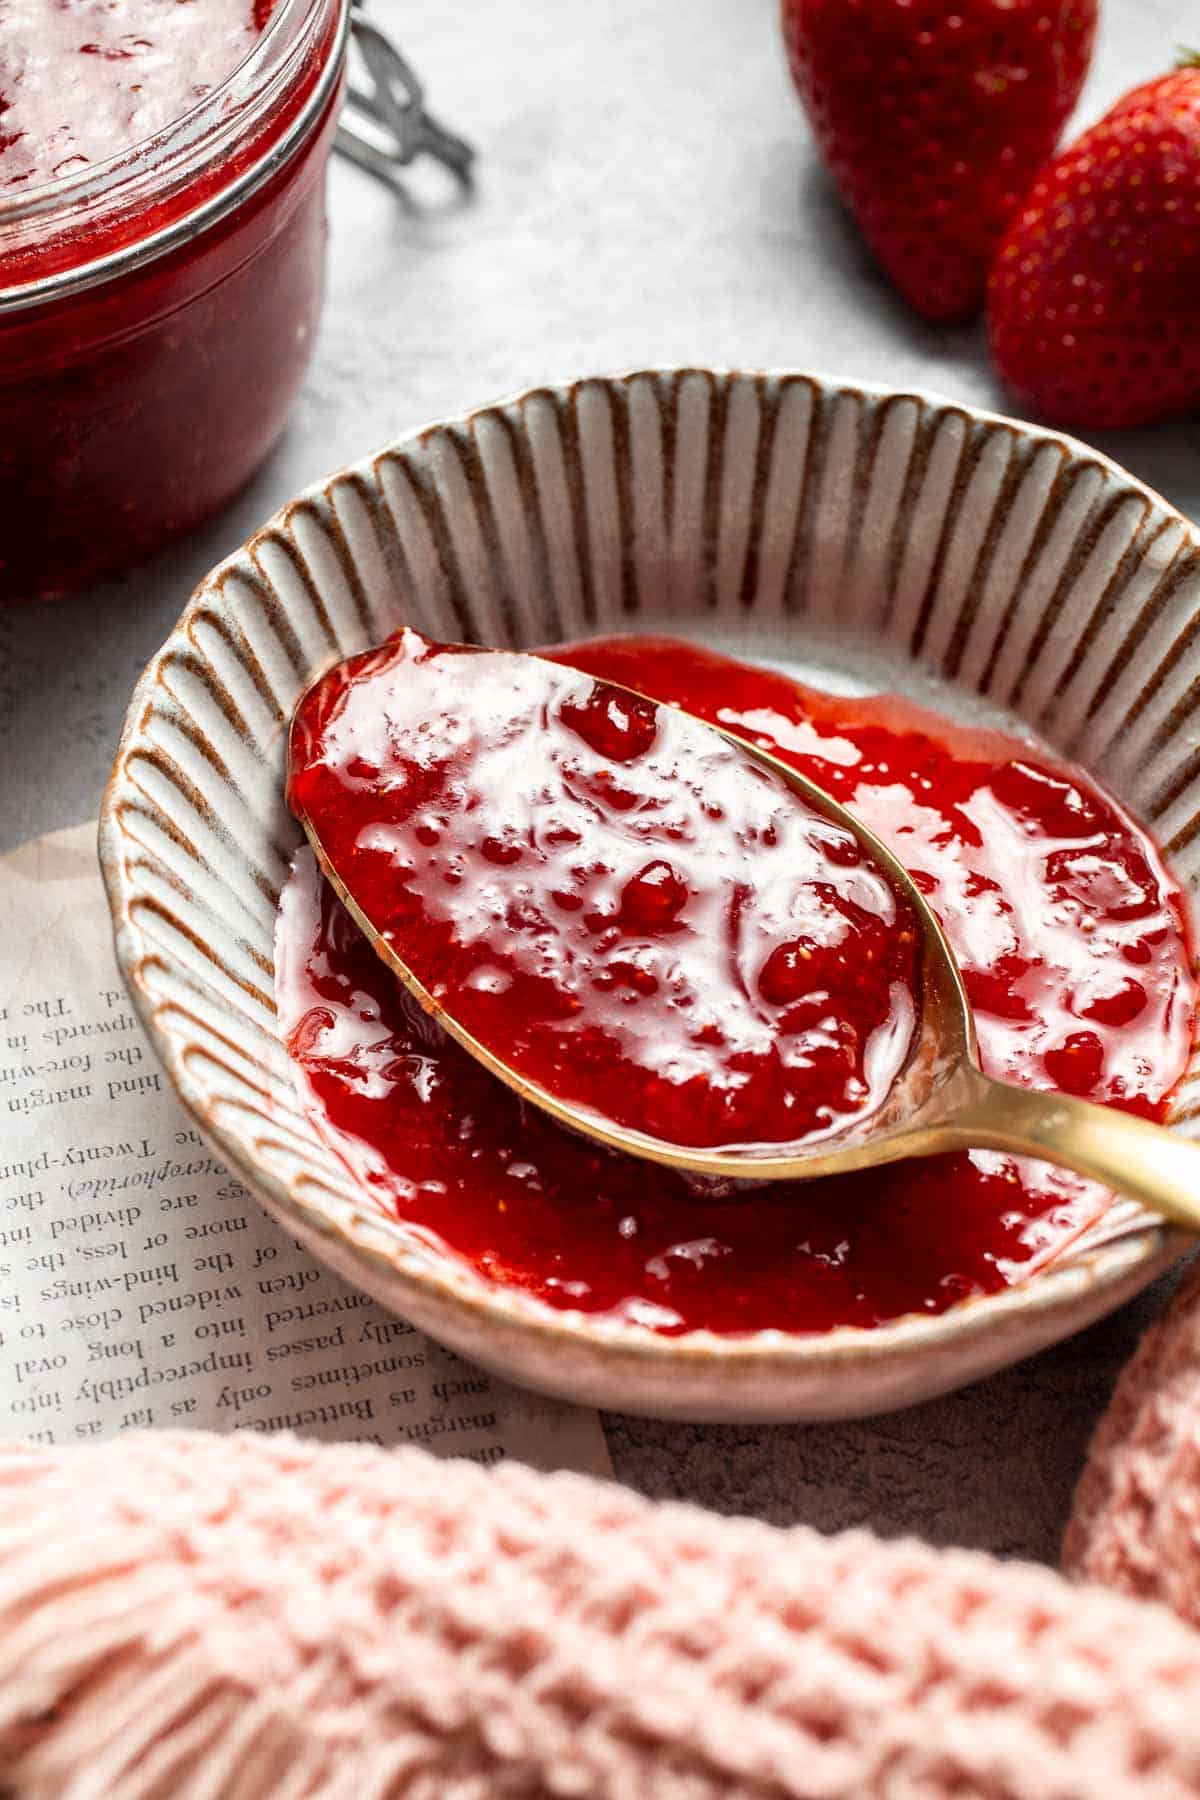
Ingredient Notes
To make this Small Batch Strawberry Jam, you will need the following ingredients (full measurements in recipe card below):
- fresh strawberries - I used small strawberries that we picked at a local farm. They were incredibly ripe and perfect for jam. You can also substitute with frozen strawberries that have been thawed and drained.
- sugar - adds extra sweetness and also helps the jam set. You can also use coconut sugar or cane sugar.
- lemon juice - fresh lemon juice gives the best flavor, but you can use bottled lemon juice as well. It helps balance out the sweetness in the jam.
You will also need measuring cups and spoons, medium saucepan, wooden spoon or spatula, clean jar with lid (like a mason jar).
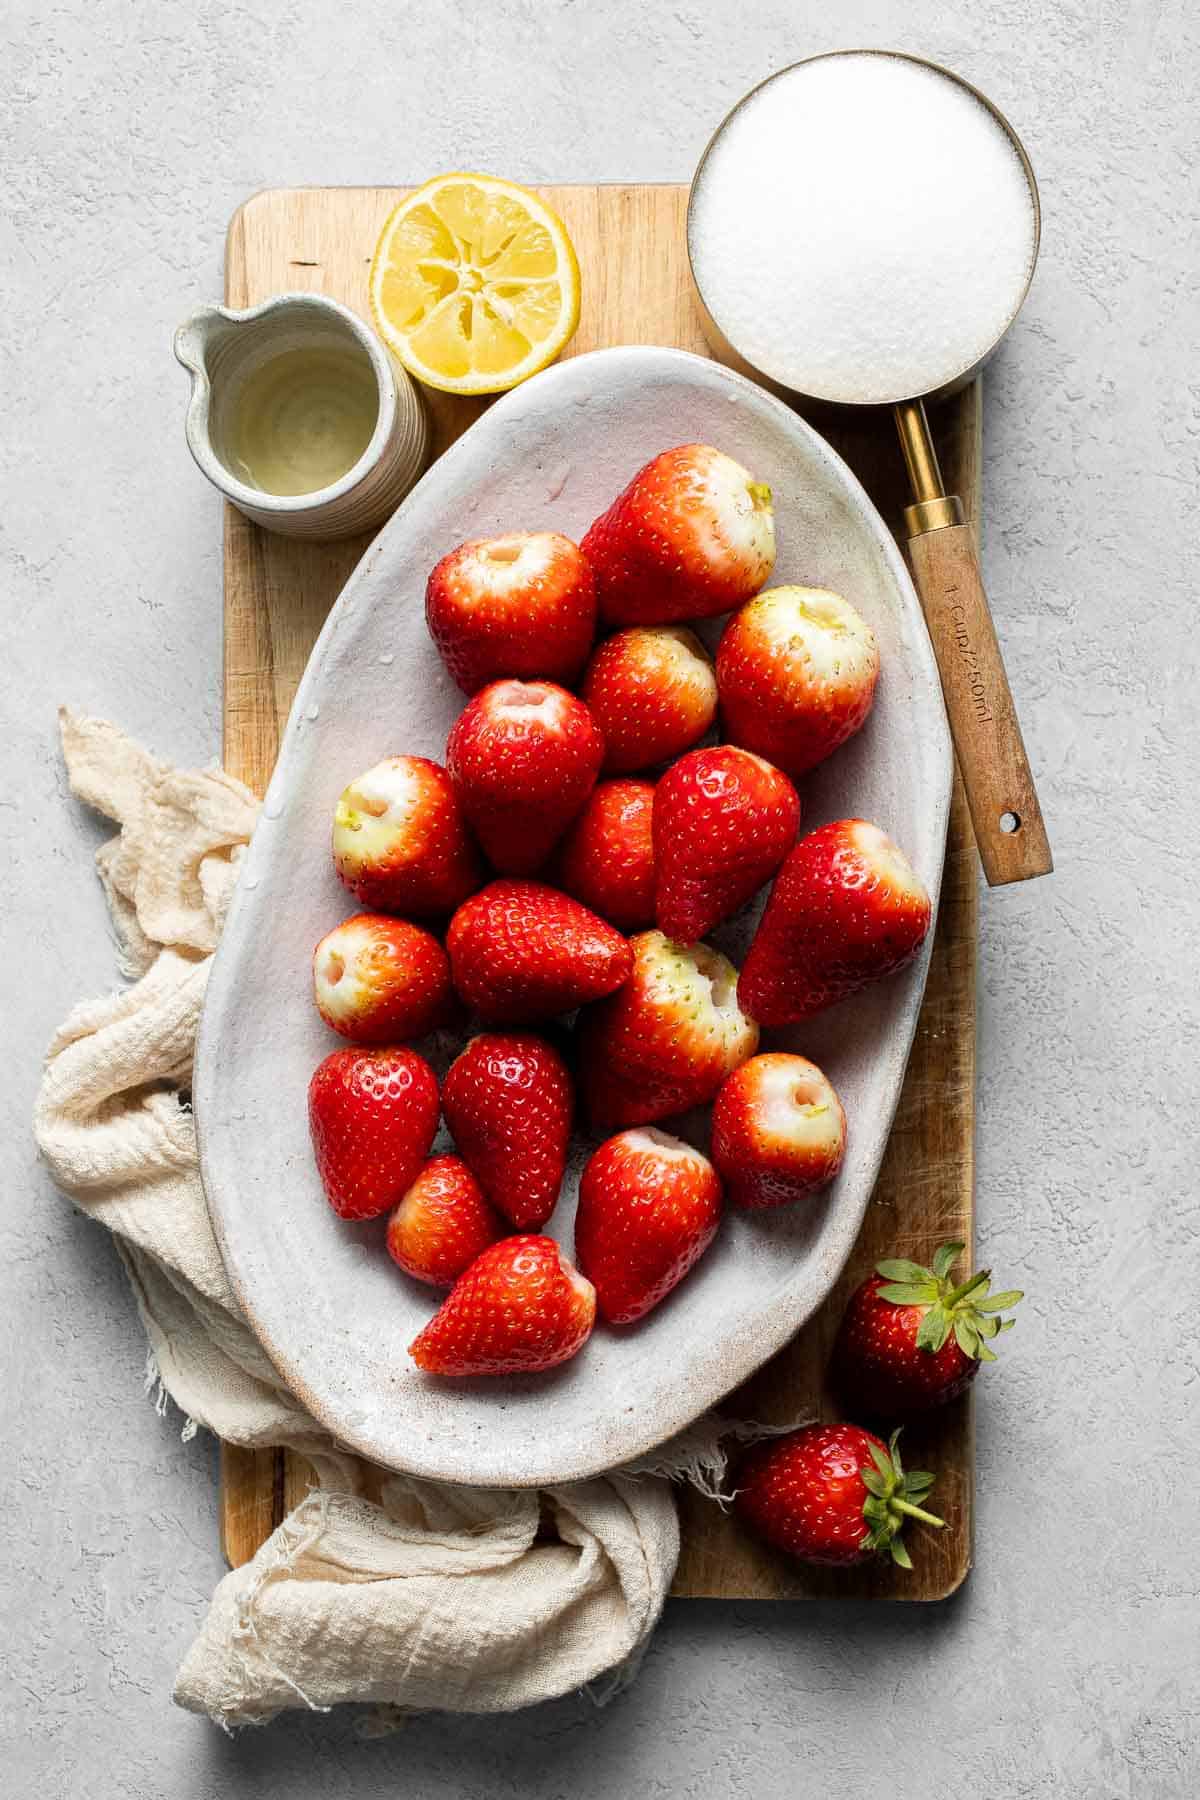
How to Make the Best Small Batch Strawberry Jam without Pectin
- Combine the ingredients. In a medium saucepan, add the strawberries, sugar and lemon juice. Stir well to dissolve the sugar. Let the mixture sit at room temperature for 20-30 minutes. You will notice the strawberries start to feel mushy and the juice coming out.


- Cook. Cook the strawberry mixture over medium low heat. Stir continuously and slowly bring the mixture to a boil. The mixture will get foamy. Continue to boil for about 15 minutes, or until the jam starts to thicken and its internal temperature reaches 220 F. A digital thermometer is very helpful to get the quick measurement. You will also notice the foam disappear at this point.


- Cool down and store. Turn off the heat and keep stirring to cool it down a bit. Pour the jam into a mason jar and allow to cool down to room temperature. Seal the jar and store in the refrigerator.
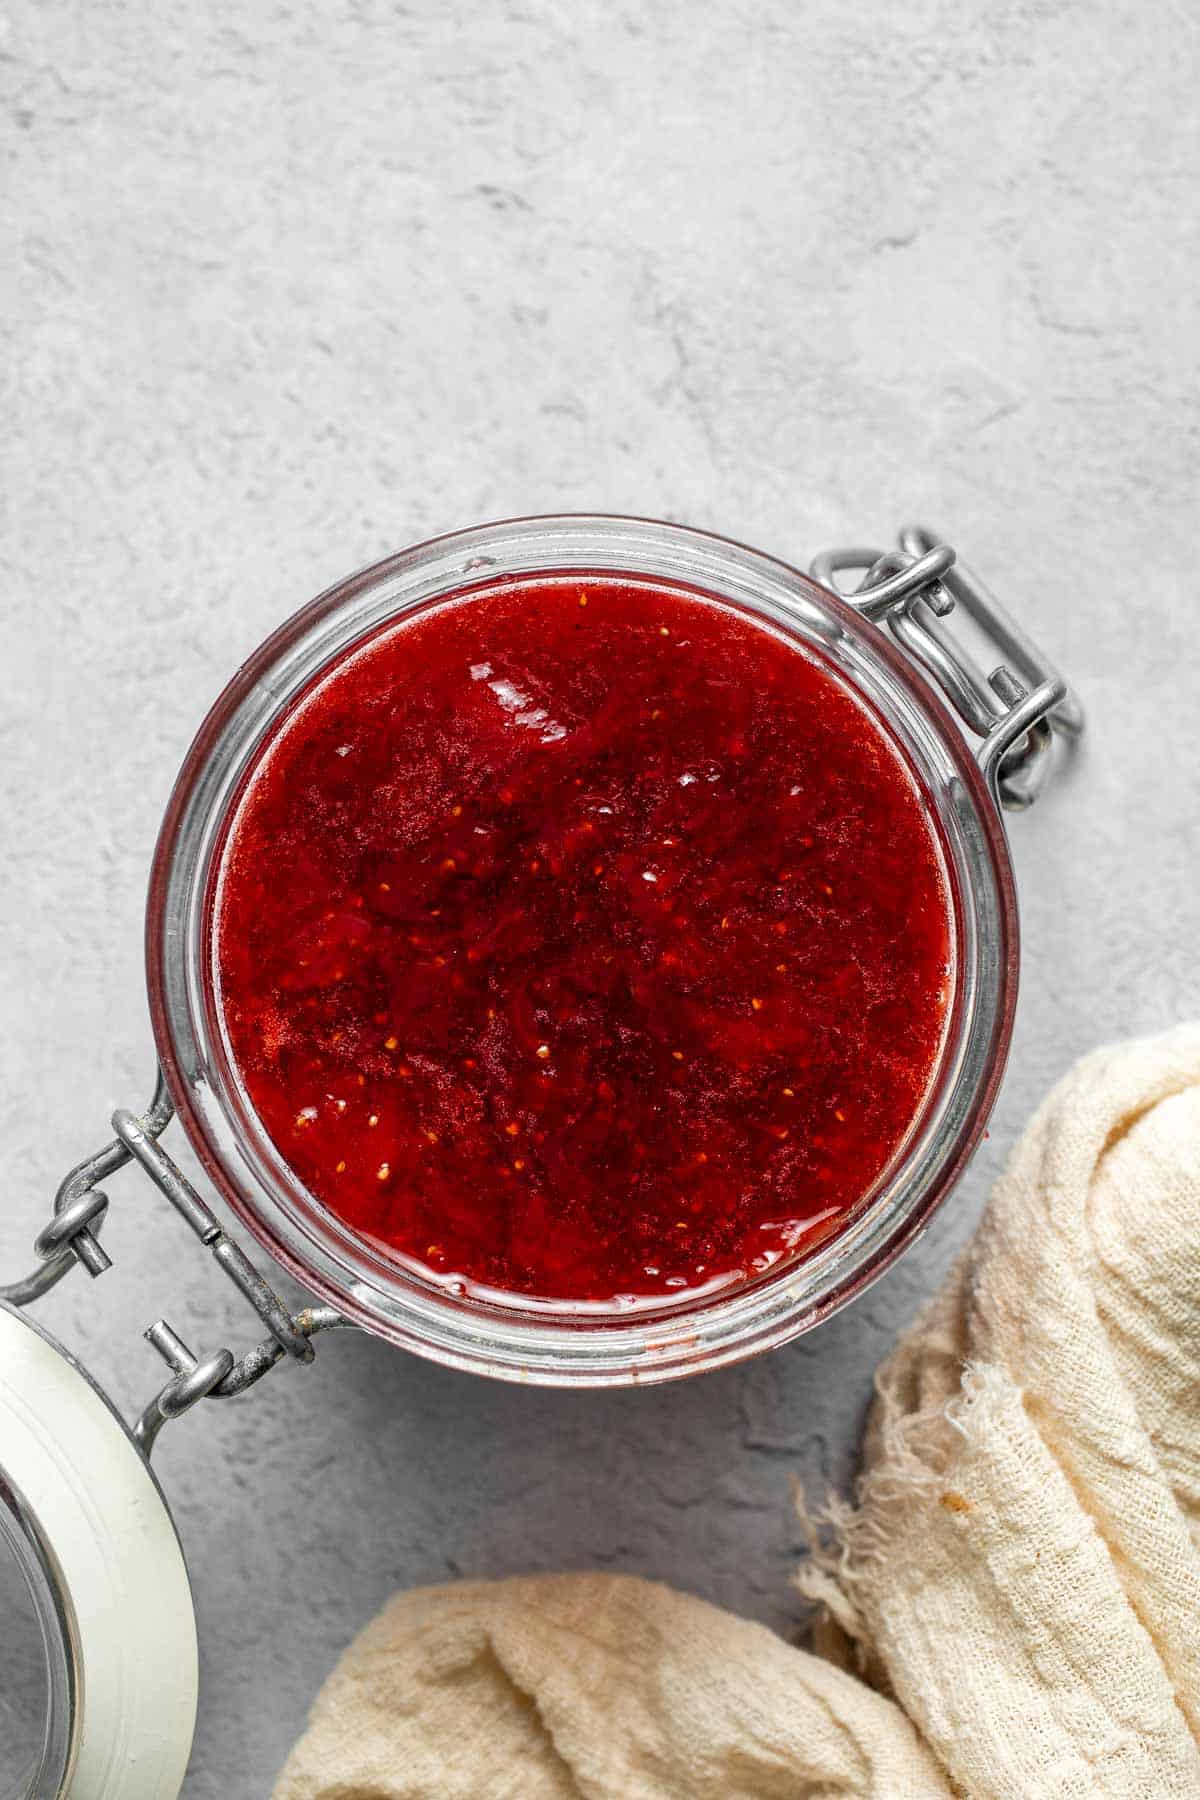
How to Tell When Homemade Jam is Ready
The jam is ready when it thickens to a jam-like consistency. There are a couple ways to test whether your strawberry jam is perfectly set and ready to store.
- Drip test: To test for readiness, scoop out a small spoon of jam and place it on a cold plate. Tilt the plate vertically. If the jam drips down quickly from the plate, you need to continue cooking the jam for a few more minutes. If the jam sets on the plate or slowly moves down off the plate, that means it's ready for storage.
- Spoon test: Another test is to coat the back of a spoon and draw a line through it with your finger. If the line holds, it's done. You can also test using a thermometer (around 220°F). The jam will continue to thicken slightly as it cools, so avoid overcooking to prevent a stiff texture.
Recipe Variations
- Add herbs. Stir in a few sprigs of fresh basil, thyme, or mint while cooking for a unique twist.
- Make it chunkier. Lightly mash the strawberries with a potato masher, or skip mashing altogether for a rustic, chunky jam.
- Boost the citrus. Add lemon zest for extra brightness or substitute half the lemon juice with orange juice for a sweeter finish.
- Add vanilla. A splash of vanilla extract can enhance the richness and round out the flavor.
- Spice it up. Add a pinch of ground cardamom or cinnamon for a warm, unexpected note.
How to Serve
There are so many ways to serve your homemade strawberry jam. Try it with:
- Toast: Sourdough, Brioche Bread, Bagels, or Ciabatta Rolls.
- Biscuits: Buttermilk Biscuits or Glazed Lemon Blueberry Scones
- Oatmeal: Baked Oatmeal, Porridge, or Oatmeal Breakfast Bars.
- Parfaits: Fruit and Yogurt Parfait, Yogurt, and Homemade Granola.
- Sweet breakfast: Pancakes, Waffles, or Crepes
- Desserts: No Churn Vanilla Ice Cream, Classic New York Cheesecake, or Lemon Loaf with Lemon Glaze
- Platters: Cheese Board or Charcuterie Platter
For more recipe ideas, see our 50 Best Breakfast Ideas.
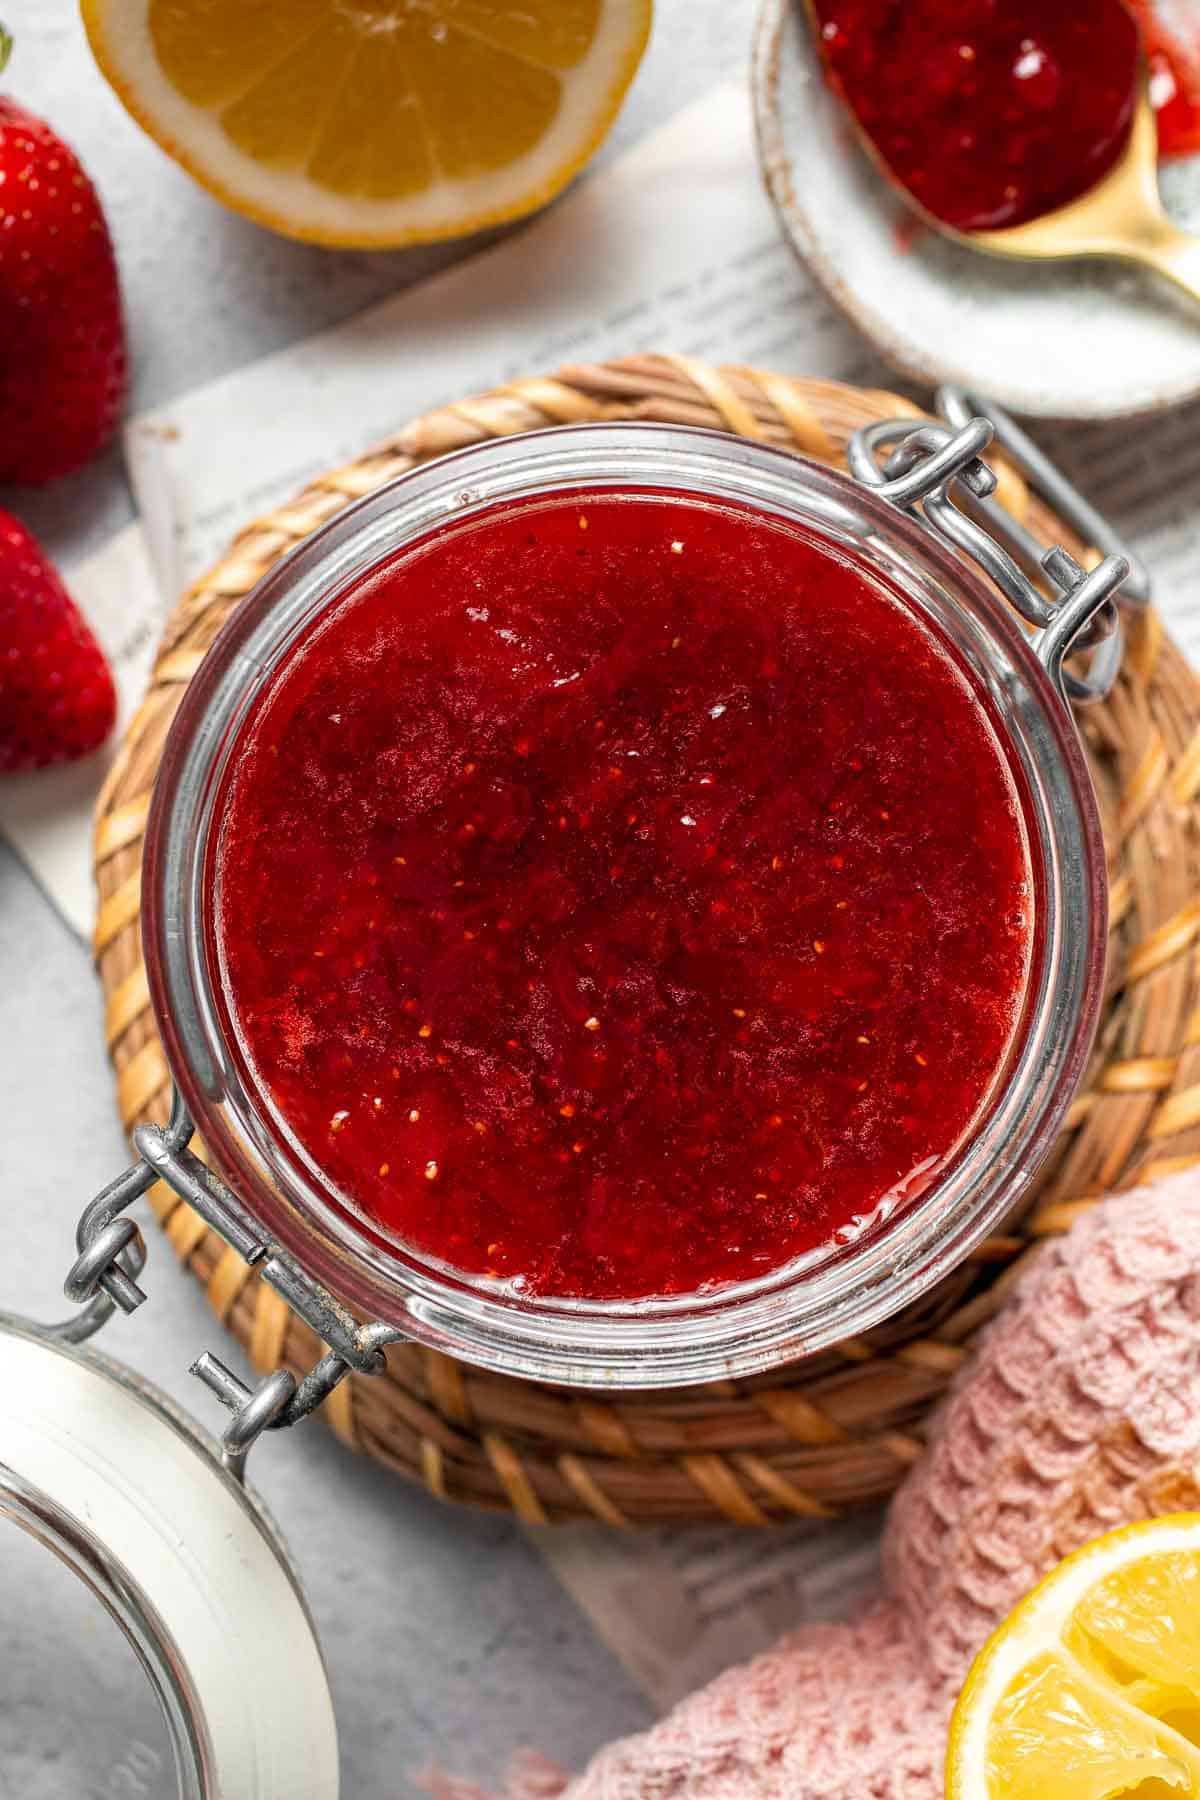
Recipe Tips and Tricks
- Use ripe strawberries. The riper the berries, the sweeter and more flavorful your jam will be. Avoid underripe or overripe fruit.
- Mash as you cook. Use a spoon or masher to help break down the berries as they cook. This gives you control over the texture.
- Simmer until thick. The jam is done when it coats the back of a spoon and runs slowly when dripped. It will thicken more as it cools.
- Don't skip the lemon juice. It's essential for balancing flavor and helping the jam set without pectin.
- Sterilize your jar. To extend shelf life, pour hot jam into a clean, sterilized jar and refrigerate once cooled.
Storing and Freezing Instructions
How to Store
Store strawberry jam in a clean, airtight container in the fridge for up to 2 weeks. Let it cool completely before sealing and storing. For longer storage, use proper canning methods.
How to Freeze
Let jam cool completely, then transfer to a freezer-safe container, leaving a little space at the top for expansion. Freeze for up to 3 months. Thaw in the fridge overnight before using.
FAQ
Continue to cook the jam until it visibly thickens and slowly drips from your spoon in a syrupy ribbon. It should mound slightly when dropped onto a cold plate. If you're unsure, spoon a little onto a chilled dish and run your finger through it - if it leaves a clean path that doesn't fill in, it's ready. The jam will firm up more as it cools, so avoid overcooking to prevent a rubbery texture.
No, pectin is not required in this recipe. Strawberries naturally contain a small amount of pectin, and the lemon juice enhances that effect to help the jam set. Simmering the fruit and sugar long enough allows the mixture to thicken without the need for commercial pectin, resulting in a softer, more natural consistency with a purer strawberry flavor
Yes, thaw and drain them first. Frozen strawberries release more moisture than fresh ones, so you'll need to simmer the jam a bit longer to reach the desired consistency. This may slightly change the texture, but the flavor remains delicious and vibrant. It's a great option when fresh berries aren't in season or if you want to use up a bag of frozen fruit from the freezer.
Yes, you can scale up this recipe to make a larger batch. Just make sure to use a wide, heavy-bottomed pot to help the mixture reduce evenly, and adjust the simmering time as needed. Larger batches may take longer to thicken, and it's important to stir frequently to prevent burning. Be mindful that increasing the recipe may slightly alter the texture, but the jam will still be delicious and spreadable.
More Strawberry Recipes
- 25 Best Strawberry Recipes
- Strawberry Cupcakes
- Strawberry Compote
- Chocolate Covered Strawberries
- Strawberry Sorbet
- Strawberry Lemonade
Tried this recipe?
I'd love to hear what you think! Leave a comment and rating below to share your feedback. Your reviews help others discover this recipe and help me keep creating more free recipes for you. Snap a photo and tag me on social media @aheadofthyme too.

Spicy Cumin Lamb Noodles
Better than takeout, these Spicy Cumin Lamb Noodles are bold, savory, and packed with heat. Tender marinated lamb is stir-fried with chewy noodles, fragrant cumin, and layers of garlic, green onion, and red onion for deep flavor in every bite. Finished with crisp bean sprouts and a splash of sesame oil, this fiery noodle dish is quick, satisfying, and deeply comforting.
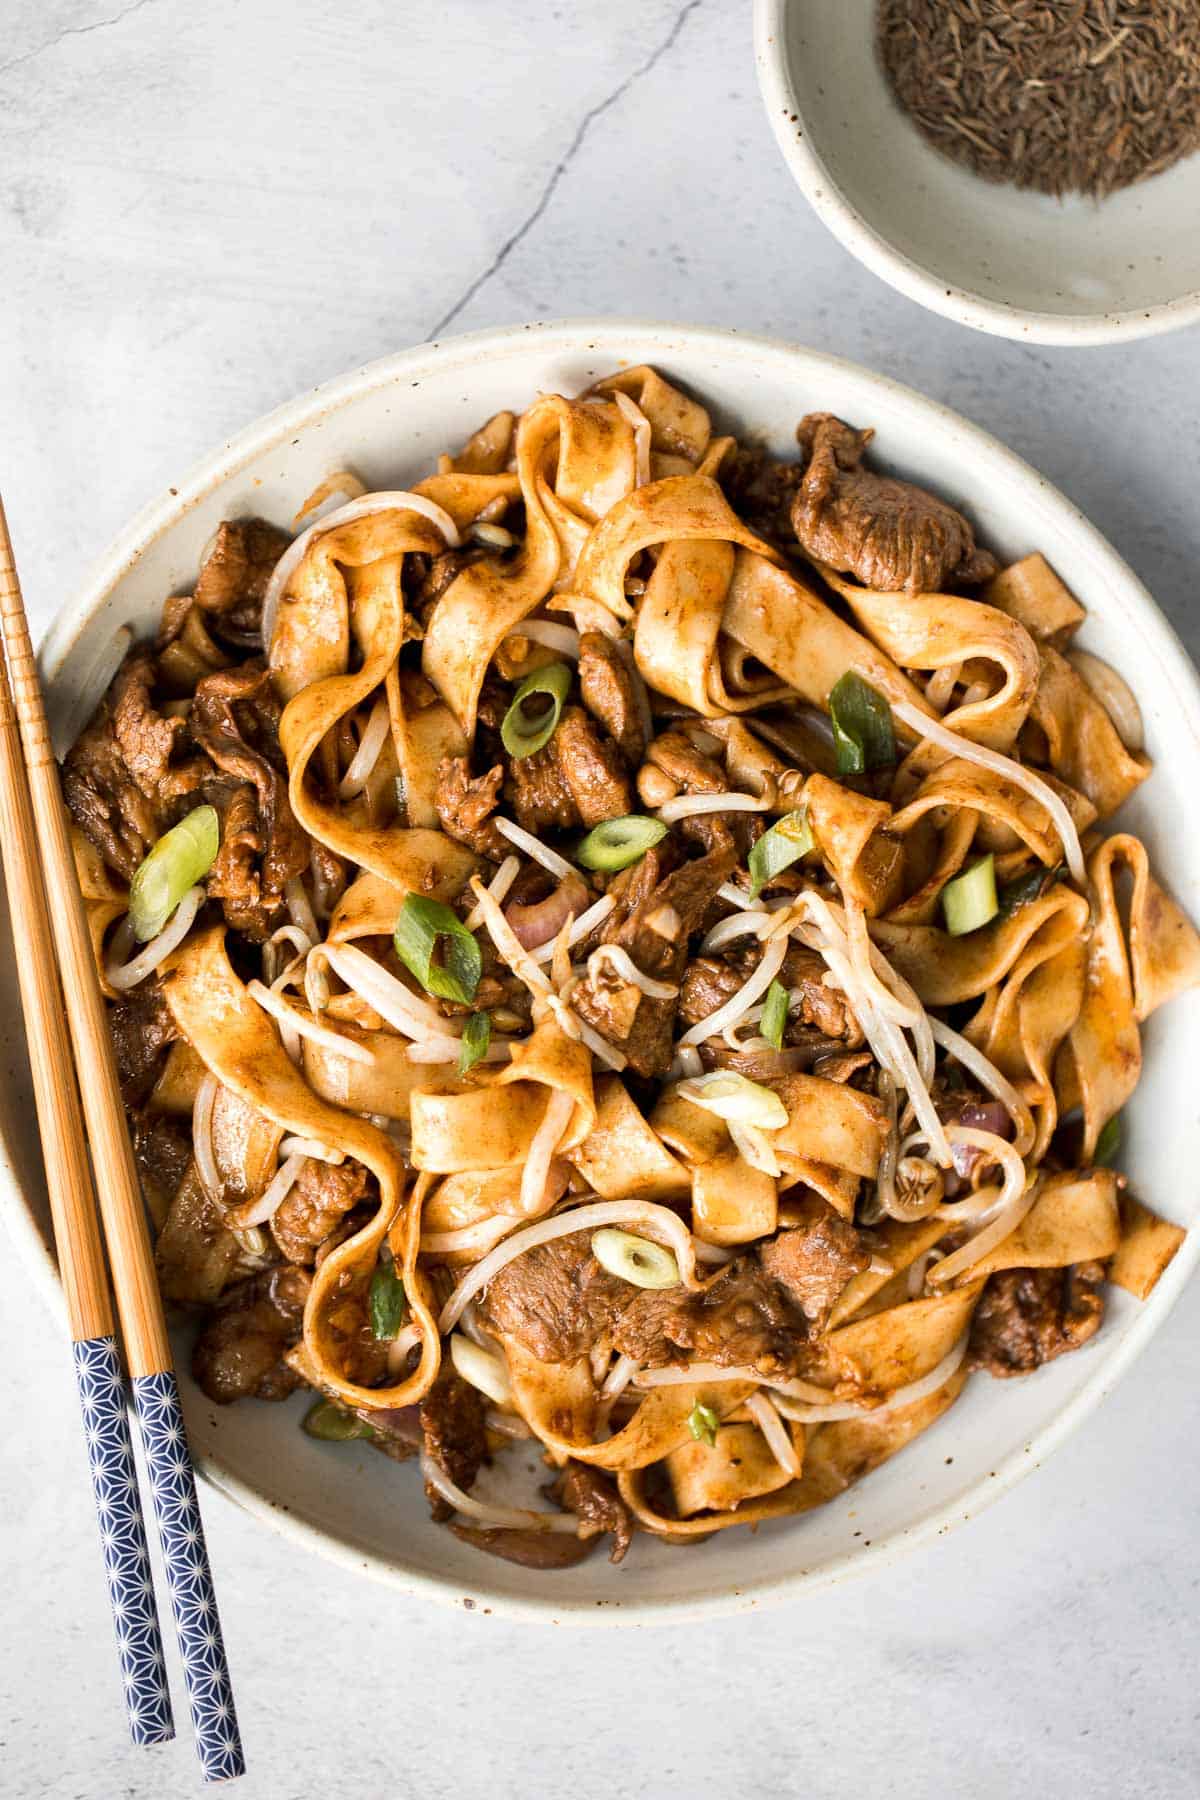
Spicy cumin lamb noodles (or biang biang noodles) is a Chinese stir-fry noodle dish originating in the central northern city of Xi'an, in the Shaanxi province of China. It is traditionally made with homemade hand-pulled noodles and delicious stir-fried spicy cumin lamb.
Our version of this recipe brings restaurant-style stir-fry home with simple pantry ingredients. The best part? It comes together in just 15 minutes, making it an ideal choice for easy weeknight dinners or fast weekend meals that don't compromise on flavor.
Why You'll Love These Spicy Cumin Lamb Noodles
- Full of bold flavor. A mix of cumin, garlic, sesame oil, and soy sauce delivers a mouthwatering combination of savory, spicy, and aromatic notes that infuse every strand of noodle and piece of lamb.
- Quick weeknight meal. This dish is ready in just 15 minutes, including the stir-fry and assembly. It's perfect for nights when you need something satisfying and flavorful without spending hours in the kitchen.
- Better than takeout. Skip the delivery wait and make this at home with fresh ingredients and no mystery oils or additives. The flavor is bold and complex, just like your favorite takeout version - only better.
- A delicious lamb recipe. Lamb shoulder becomes tender, juicy, and delicious with a quick marinade and flash stir-fry. It's a great way to change up your protein rotation and introduce bold flavors to the dinner table.
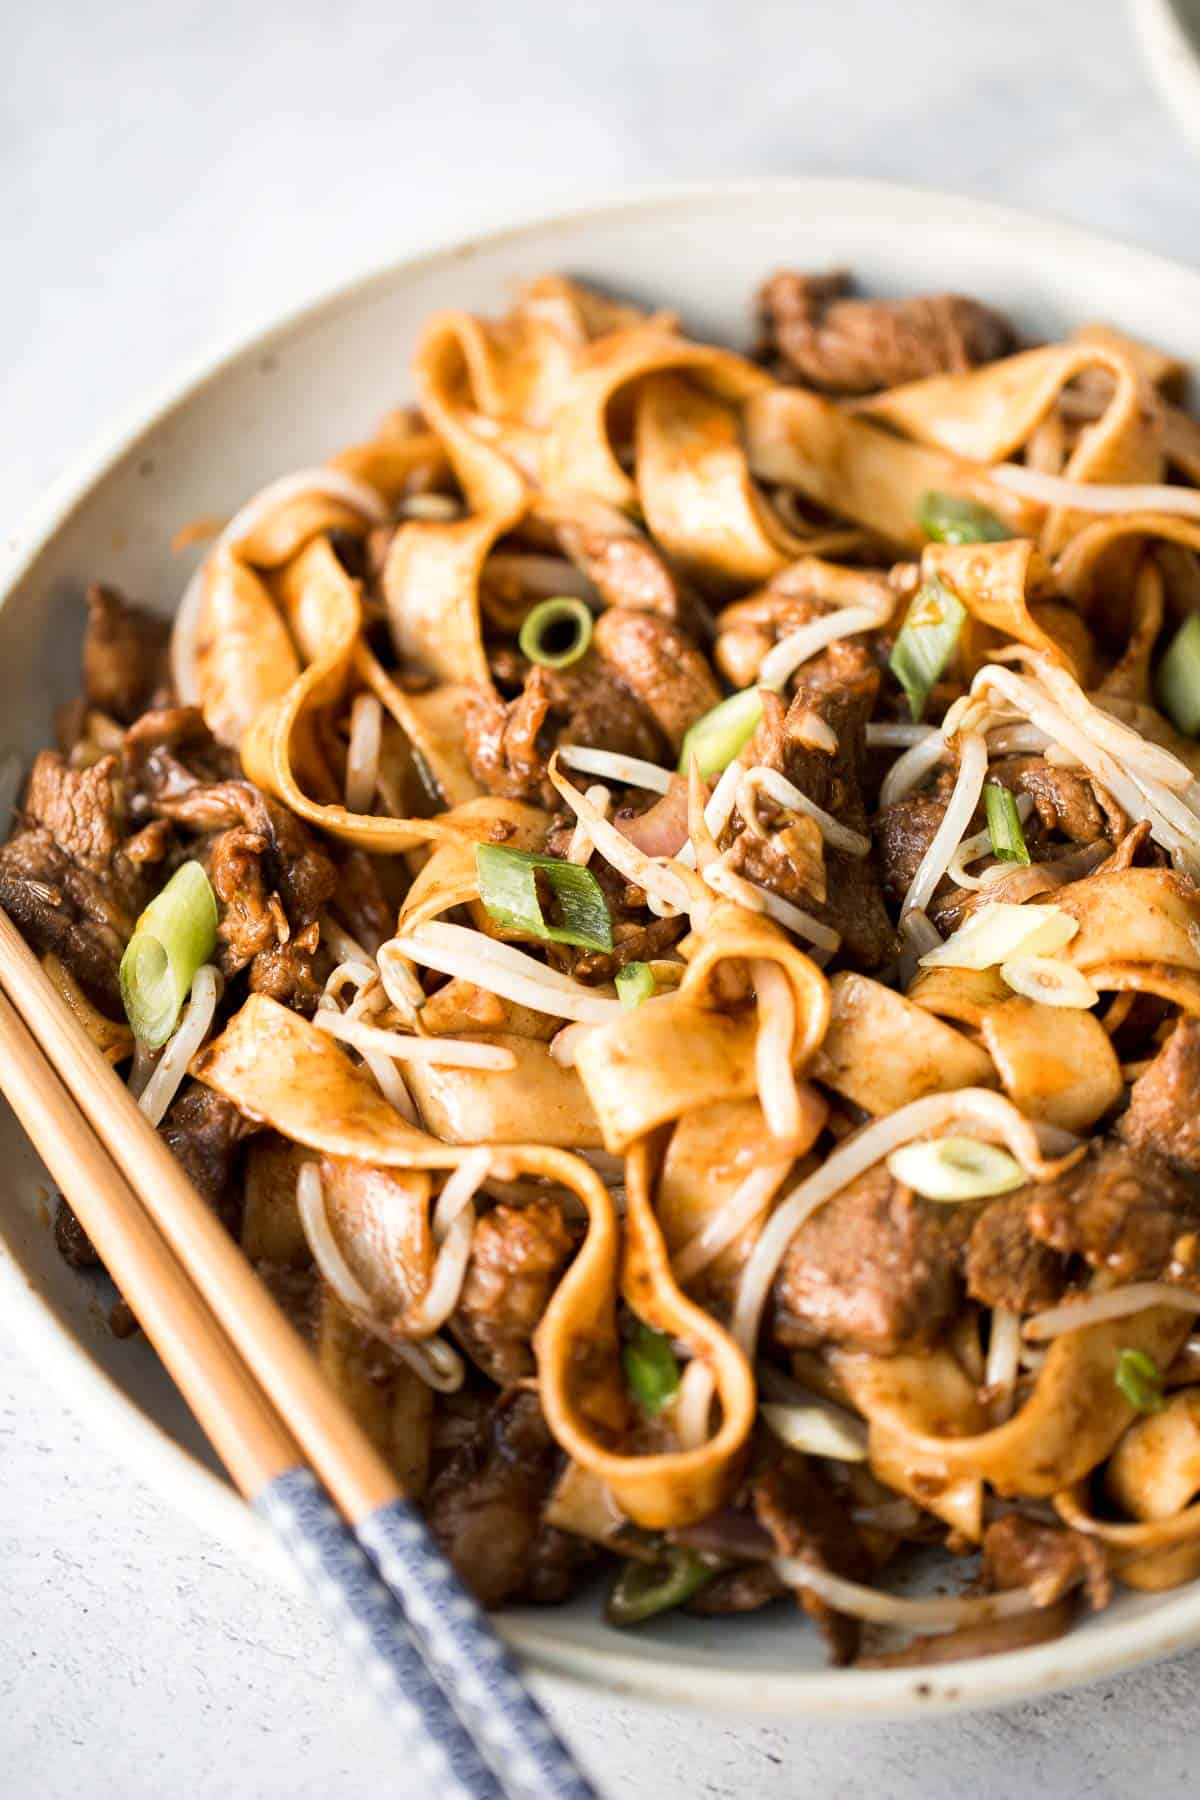
Ingredient Notes
To make these Spicy Cumin Lamb Noodles, you will need the following ingredients (full measurements in recipe card below):
- lamb shoulder - thinly sliced against the grain into ¼ inch stir-fry strips. You can also substitute with other meats such as beef sirloin or chicken thigh.
- marinade - a simple lamb marinade made with Chinese cooking wine (Shaoxing wine), cumin powder, cayenne pepper powder, and cornstarch. Substitute the cooking wine with dry sherry or omit if needed. For the cayenne pepper powder, feel free to use chili flakes instead or omit for less spice.
- dry wheat noodles - I used dry flat noodles, but you can use fresh or dry ones. Try fresh homemade hand-pulled noodles, ramen noodles, lo mein, or udon.
- vegetable oil - for stir-frying.
- garlic - minced for aromatic flavor. Substitute with garlic paste, if desired.
- green onions - for brightness and crunch. Substitute with chives or scallions, if desired.
- cumin seeds - optional for extra flavour and texture.
- red onion - for sweetness and texture. Substitute with yellow onion or shallots, if desired.
- soy sauce - adds saltiness and umami. For a gluren-free option, try tamari instead.
- sesame oil - nutty finish that rounds out the dish. Use toasted for the most flavor.
- sugar - balances the spice and soy. Substitute: with honey or maple syrup if you'd like.
- bean sprouts - adds crispness and freshness to the noodles. You could also use shredded cabbage or julienned carrots for the same effect.
You will also need measuring cups and spoons, mixing bowl, wok or large skillet, tongs or spatula, a pot for boiling noodles, and a colander.

How to Make the Best Spicy Cumin Lamb Noodles
First, marinate the lamb.
Cut the lamb shoulder into ¼-inch thick stir fry strips and place into a medium mixing bowl. Add in cooking wine, garlic, cumin powder, cayenne pepper, and cornstarch. Stir well to combine well. Cover the bowl with cling wrap and refrigerate for at least 30 minutes. (You could skip marinating, but the flavor will not be as intense).
Next, cook the noodles.
- Cook. In a large cooking pot, bring 3 cups of water over medium-high heat. Add the dry noodles and cook until al dente, about 2 minutes (or check package instructions), Stir occasionally with chopsticks or a spatula so that the noodles don't stick together.
- Drain. Drain the noodles in a colander and transfer into a bowl. Let it sit at room temperature until ready to be stir-fried. If you need to leave the noodles out for a while, coat the cooked noodles with an extra spoonful of oil to prevent them from drying out.
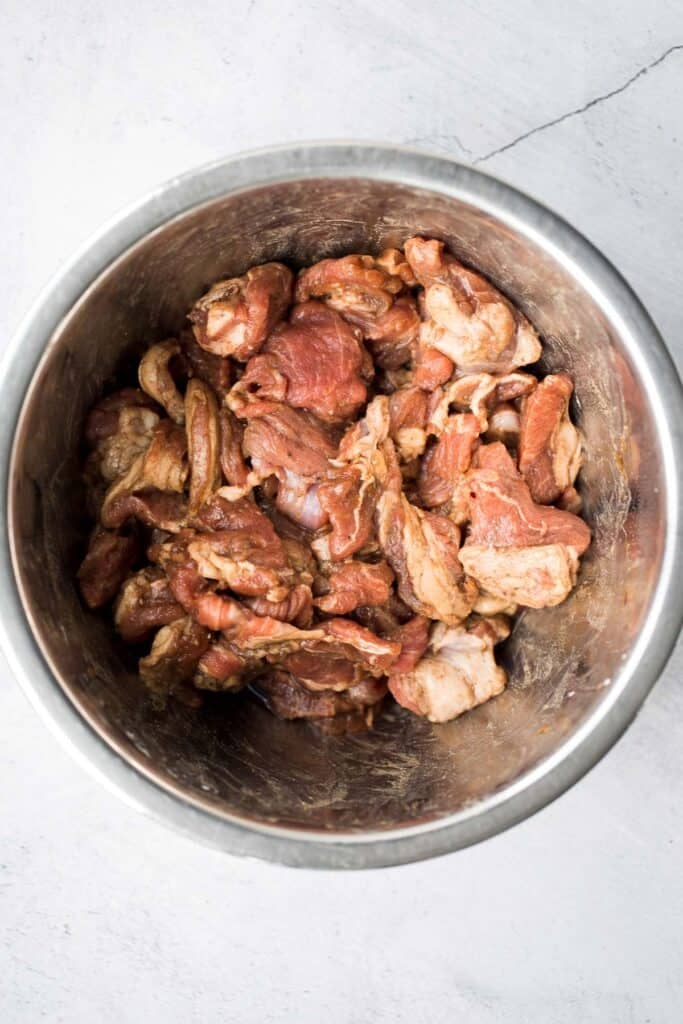

Lastly, stir fry everything together.
- Saute aromatics. Heat vegetable oil in large skillet (or wok) over medium-high heat for 2-3 minutes until the oil starts to sizzle and shimmer. Add garlic, green onions, and cumin seeds (if using) and fry for 1-2 minutes until garlic becomes fragrant.
- Add lamb. Add the marinated lamb and red onion. Use a spatula to stir fry evenly for 3 minutes until the lamb turns brown.


- Add noodles and sauce. Add in the cooked noodles and stir well to combine. Stir in the soy sauce, sesame oil, and sugar. Continue to cook the noodles and lamb for another 2 minutes, continuously stirring. Sprinkle extra cayenne pepper powder on top, if desired.


- Add bean sprouts. Add bean sprouts at the end, and mix well. Remove from heat and serve hot.


Recipe Variations
- Make it vegetarian. Swap lamb for tofu or tempeh and adjust the cooking time to achieve a crisp edge. Keep the seasonings the same for all the flavor.
- Use different noodles. Try hand-pulled noodles, wide rice noodles, or fresh Chinese noodles to change the texture while keeping the seasoning consistent.
- Add vegetables. Toss in sliced bell peppers, mushrooms, or bok choy during the stir-fry for extra nutrition and color.
- Serve with chili oil. Drizzle chili crisp or homemade chili oil on top for added heat and richness that enhances every bite.
- Serve the marinated lamb differently. The spicy cumin lamb is so delicious on it's own and can be served over steamed rice or fried rice instead of noodles.
How to Serve
Serve these Spicy Cumin Lamb Noodles hot and freshly tossed. They pair well with:
- Chinese Garlic Cucumber Salad
- Pork Dumplings
- Spring Vegetable Stir Fry
- Hot and Sour Soup
- Chinese Scallion Pancakes
- Steamed Rice
For more recipe ideas, see our 60 Chinese Takeout Recipes at Home.
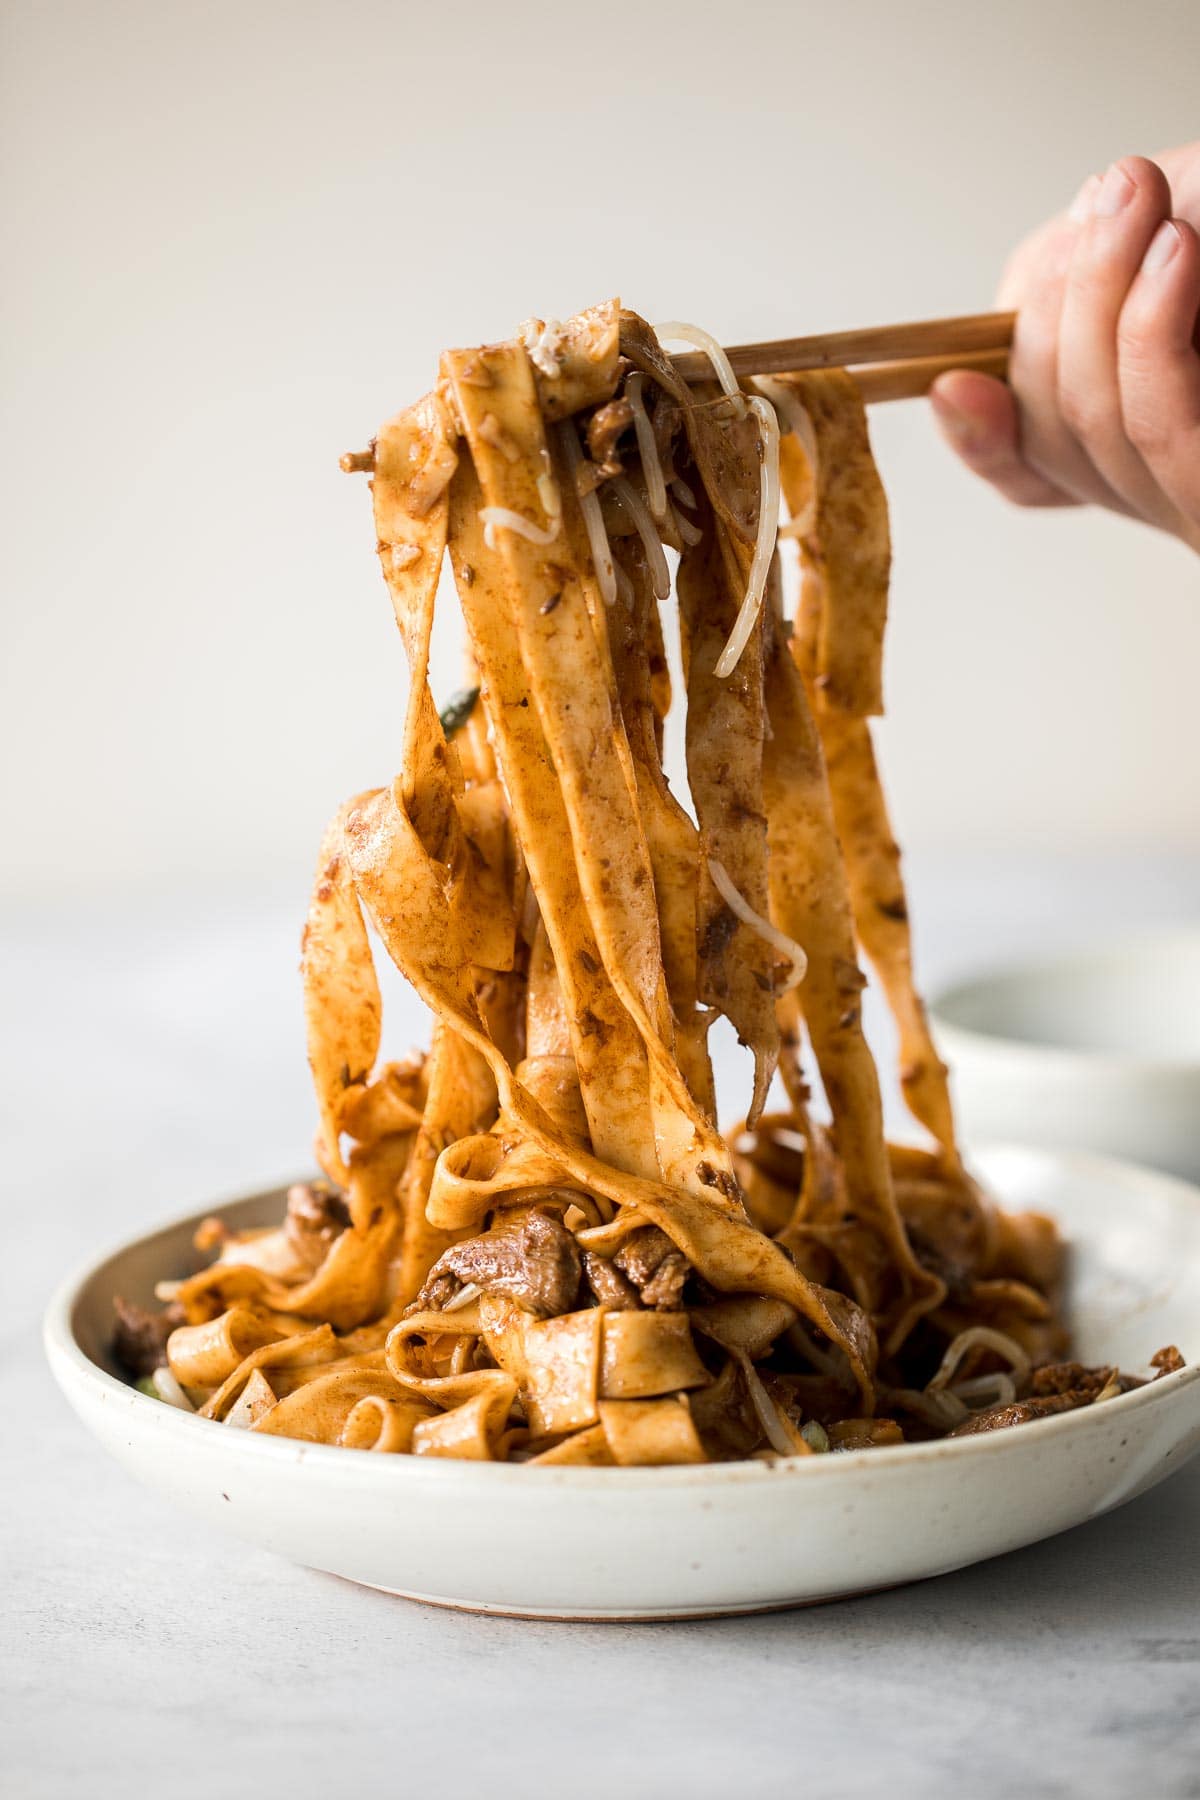
Recipe Tips and Tricks
- Slice lamb thinly. Use a sharp knife and slice against the grain for tender pieces that cook quickly. Partially freezing the meat makes slicing easier.
- Marinate briefly. We recommend marinating the lamb for 30 minutes, but even 10-15 minutes with the wine, cornstarch, and spices helps tenderize the lamb and infuse flavor.
- Use high heat. Stir-fry over high heat to quickly sear the lamb and vegetables without steaming. A hot wok is essential for authentic texture.
- Don't overcook the noodles. Cook just until al dente since they'll continue to cook slightly when tossed with the lamb and sauce.
- Add sprouts last. Stir in bean sprouts at the end to retain their crunch and freshness. Overcooking can cause them to wilt.
Storing and Freezing Instructions
How to Store
Store leftovers in an airtight container in the fridge for up to 3 days.
How to Reheat
Reheat in a wok or nonstick skillet over medium heat for 2-3 minutes with a small splash of water to loosen the sauce. Stir frequently to prevent sticking. You can also microwave in 30-second bursts until heated through.
How to Freeze
Freezing is not recommended for this dish. The noodles tend to become mushy and the stir-fried texture is lost upon thawing. It's best enjoyed fresh or refrigerated.
FAQ
It can be! You control the heat by adjusting the cayenne pepper. For extra heat, drizzle with chili oil or add sliced fresh chilies. For milder flavor, reduce the spice or skip it altogether.
Dry wheat noodles, hand-pulled, or lo mein-style noodles are ideal. They soak up the sauce and hold their texture. Avoid rice noodles for this particular recipe, as they may not hold up well during stir-frying.
Spicy cumin lamb noodles are best served fresh. You should always prepare the noodles fresh because once they start going cold, they will stick together and get stiff. However, you can make the lamb stir fry a day or 2 in advance.
Lamb shoulder is ideal because it's well-marbled and flavorful. You can also use leg of lamb or lamb loin - just make sure to slice thinly against the grain for tenderness.
More Noodle Recipes
- 25 Best Noodle Recipes
- Beef Noodle Stir Fry
- Spicy Dan Dan Noodes
- Shanghai Style Fried Noodles
- Sesame Noodles
- Chicken Pad Thai
Tried this recipe?
I'd love to hear what you think! Leave a comment and rating below to share your feedback. Your reviews help others discover this recipe and help me keep creating more free recipes for you. Snap a photo and tag me on social media @aheadofthyme too.

Easy Tzatziki Sauce (Yogurt Cucumber Dip)
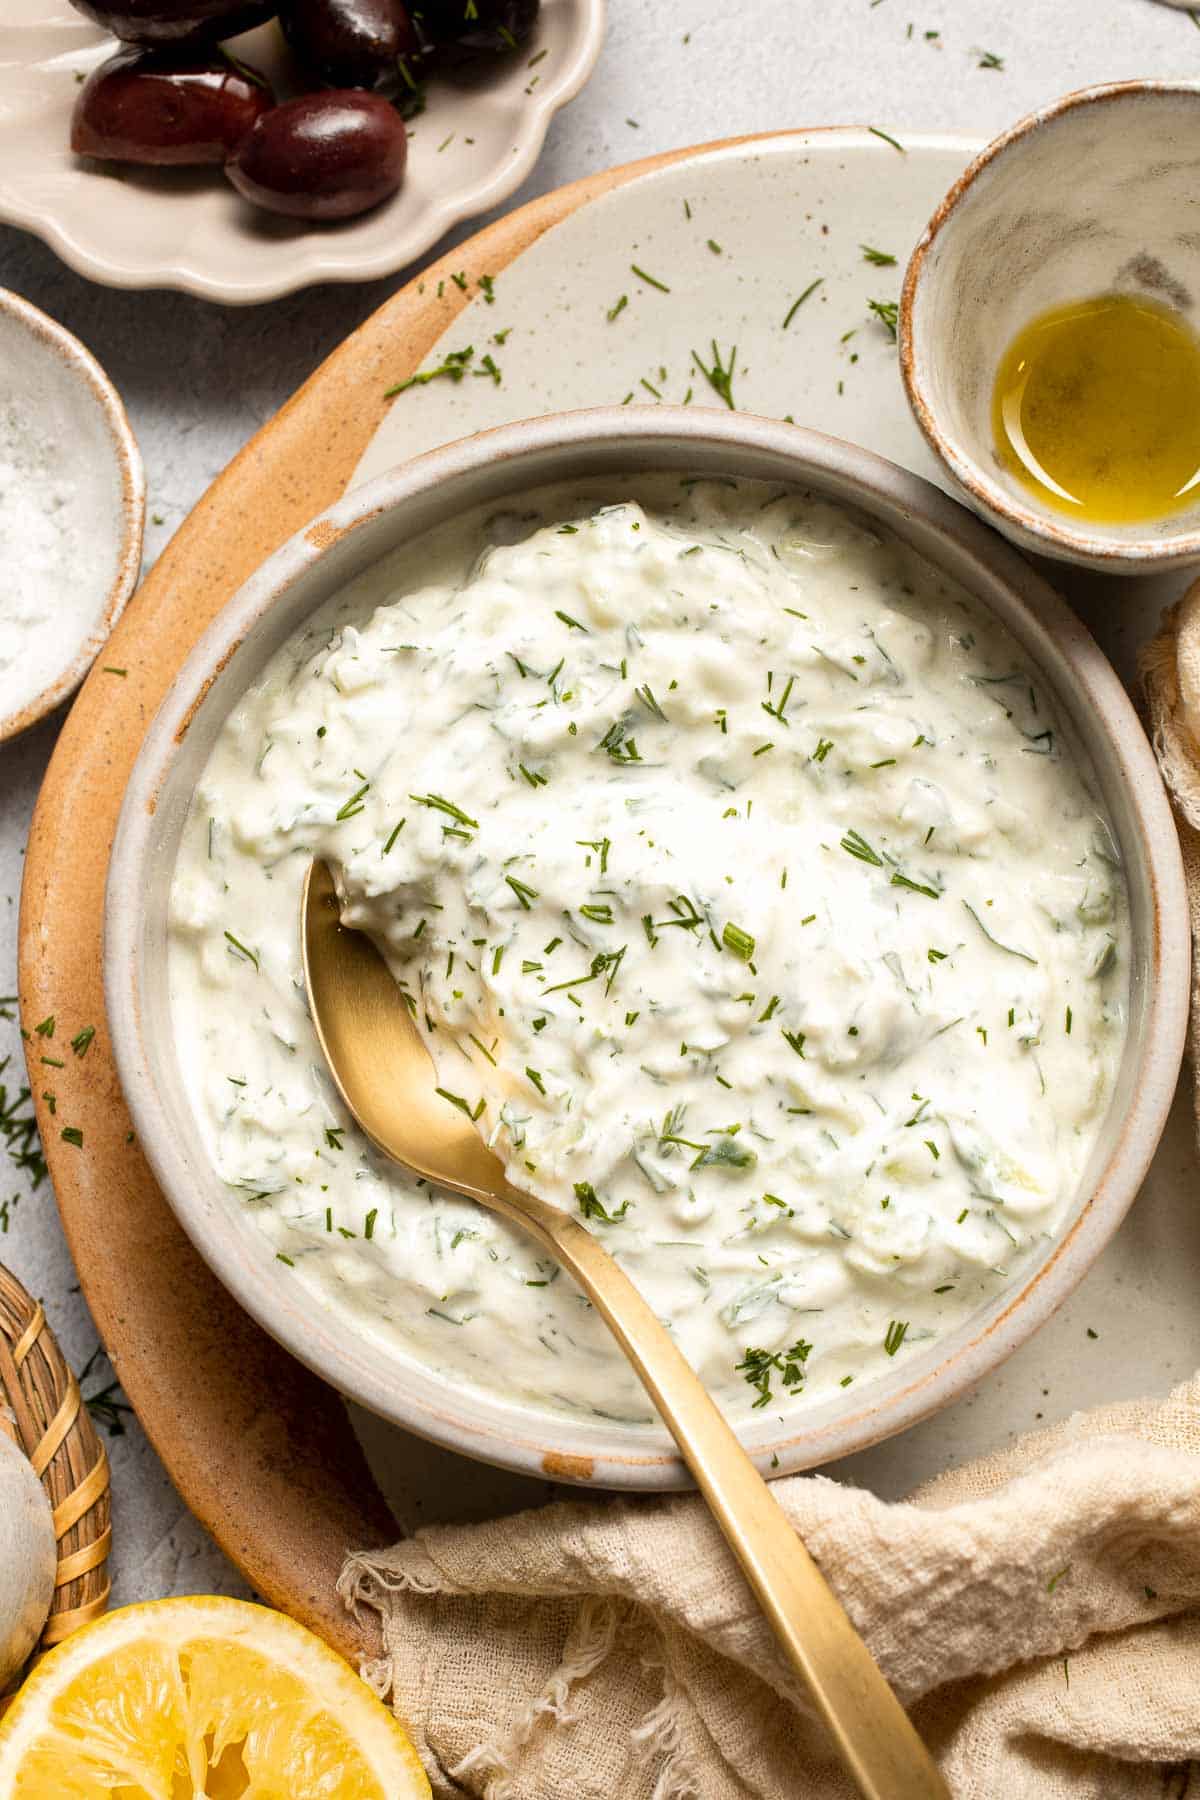
Easy Tzatziki Sauce is a cool, creamy Greek dip made with thick Greek yogurt, crisp cucumber, zesty lemon juice, and fresh dill. It's the perfect refreshing companion to grilled meats, roasted veggies, pita bread, or even as a spread for wraps and sandwiches. Light, fresh, tangy, and herbaceous, tzatziki is quick to prepare and keeps well in the fridge, making it a go-to sauce for Mediterranean meals.

With only a handful of ingredients and no cooking involved, this homemade tzatziki comes together in minutes. Grated cucumber adds crunch and freshness, while Greek yogurt creates a rich, creamy base. Finished with garlic, olive oil, and dill, it's a beautifully balanced dip that's loaded with flavor in every bite
Why You'll Love This Easy Tzatziki Sauce Recipe
- Light and refreshing. The combination of cool cucumber, creamy yogurt, and fresh lemon juice makes this dip crisp, clean, and the perfect match for bold grilled foods or spicy dishes. It brightens every bite and adds contrast to heavier dishes.
- Made in minutes. With just a little grating, mixing, and chilling, you can have this flavorful dip ready in less than 10 minutes - no cooking required! It's a fast, foolproof way to elevate meals and snacks.
- Easy to serve. Tzatziki pairs with everything from pita chips and falafel to grilled chicken, lamb or lemon potatoes and fresh vegetables. It's a universally loved condiment that elevates any meal and fits into countless cuisines.
- Healthy and protein-packed. Greek yogurt is high in protein and probiotics, making this a nutritious addition to your meals, especially when you use full-fat or low-fat varieties. It's both filling and feel-good.
- Make-ahead friendly. Tzatziki actually tastes better after it chills for a bit, allowing the flavors to blend. It stores well and is an ideal prep-ahead option for parties, picnics, weekday snacking, or meal prepping your week.
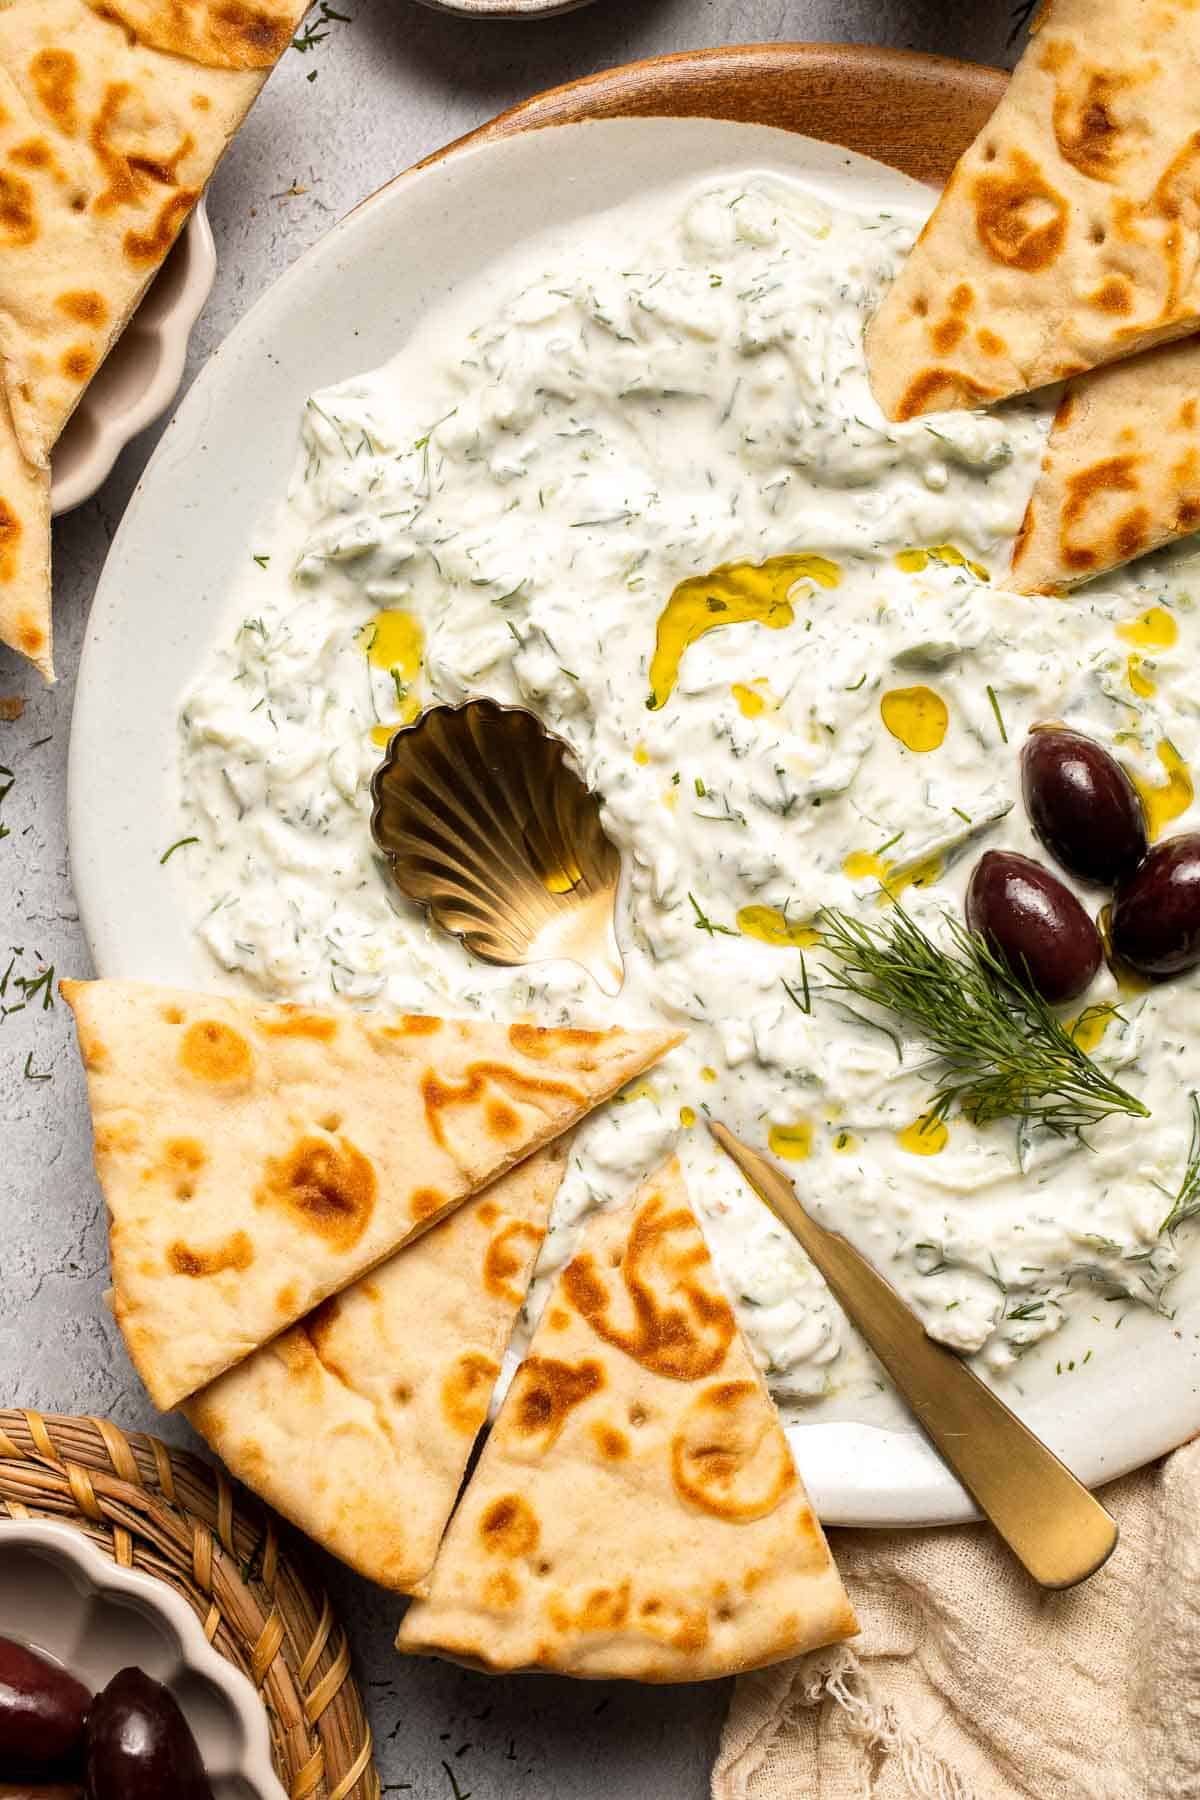
Ingredient Notes
To make this quick and easy Tzatziki Sauce, you will need the following ingredients (full measurements in recipe card below):
- plain Greek yogurt - the thick and creamy base. Greek yogurts provides the best texture, but you can substitute with plain regular yogurt (strain to thicken) or non-dairy yogurt for a vegan version.
- cucumber - I like to keep the skin on for the most authentic texture. You can peel the skin, based on your personal preference. Feel free to substitute with Persian cucumbers for fewer seeds.
- garlic - fresh garlic is best and adds punch and depth. I would not skip this. If you are out, you can substitute with garlic paste or roasted garlic for a milder flavor. I do not recommend substituting with garlic powder, as the flavour will not be as intense.
- extra virgin olive oil - adds richness and enhances the flavor. Substitute with avocado oil or leave out for a lighter dip.
- lemon juice - freshly squeezed lemon juice gives the best flavour. You can substitute with white wine vinegar or apple cider vinegar.
- dill - gives the dip its signature herb flavor. I recommend fresh dill for the best flavor, but you can substitute for dried dill if that is all you have on hand. Use about one-third the amount, or ½ tablespoon. The flavor will be milder and a bit more earthy, but still makes a tasty, balanced dip.
- salt and pepper - added to taste.
You will also need measuring cups and spoons, grater or food processor, mixing bowl, and a fine mesh strainer or cheesecloth (for draining cucumber).
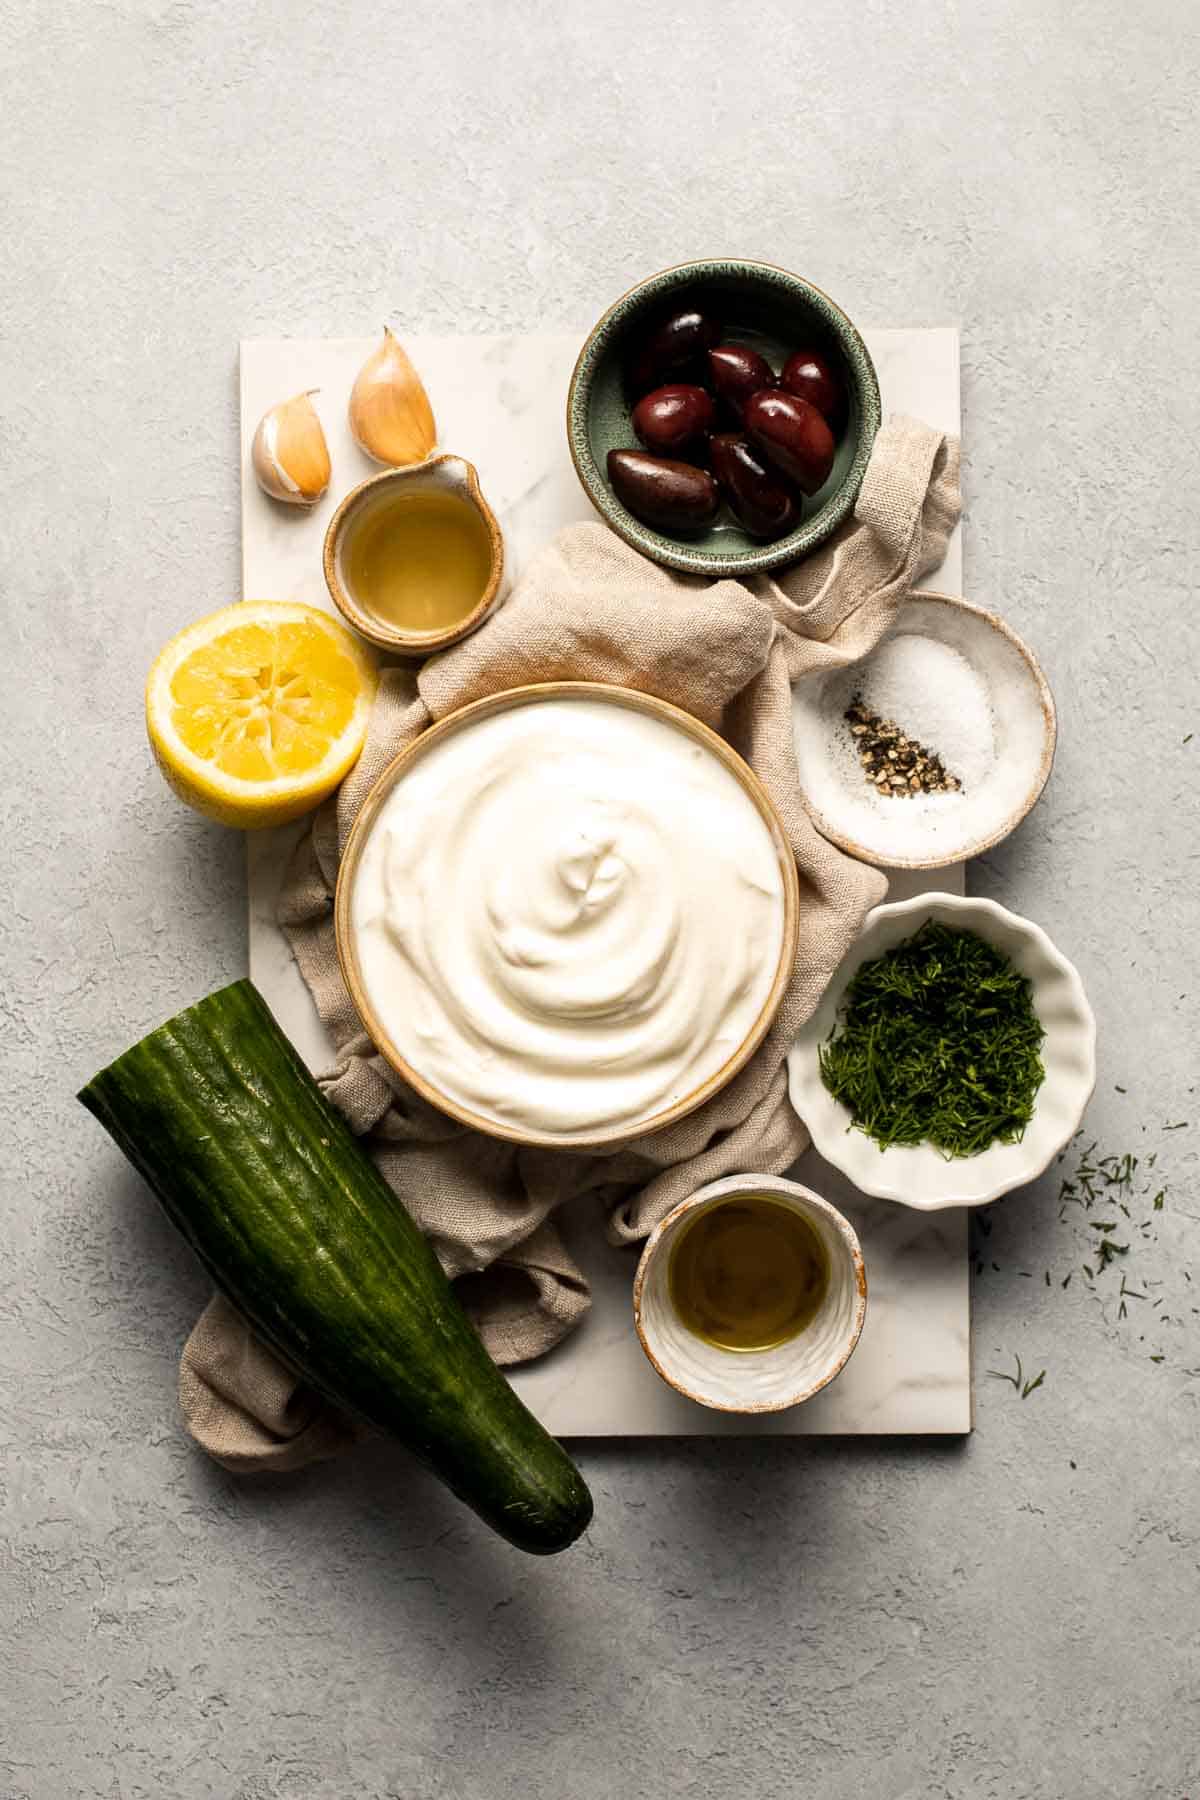
How to Make the Best Authentic Tzatziki Sauce
- Prep your ingredients. Grate the cucumber and drain through a cheesecloth, fine mesh sieve or using your hands.


- Combine ingredients. Transfer drained cucumber to a medium mixing bowl. Add the yogurt, garlic, olive oil, lemon juice, dill, salt and pepper. Stir to combine.


- Refrigerate. Refrigerate for at least 1 hour before serving to let the flavours infuse into the yogurt.
- Serve. Serve as is or garnish with some olives, a sprig of fresh dill, a swirl of olive oil, and pita chips.

Recipe Variations
- Add mint. Swap or combine dill with chopped fresh mint for a slightly sweeter, refreshing variation of classic tzatziki that pairs well with spicy or rich dishes.
- Make it spicy. Stir in a pinch of red pepper flakes or a spoonful of harissa for a spicy twist. This adds complexity and a hint of heat without overpowering the dip.
- Go dairy-free. Use a thick coconut yogurt or almond milk-based yogurt to make a vegan-friendly version that still holds up in flavor and texture. Add lemon for brightness.
- Add more lemon. If you love acidity, increase the lemon juice for a tangier dip that pops. This enhances the freshness and brings out the flavor of the herbs.
How to Serve
Tzatziki sauce is the essential part of any Greek dish. Serve it as a dip, spread, sauce. Pour it over your meat skewers, dip bread in it, or spread it onto a sandwich, pita wrap, or Greek gyro. I also use it for dipping raw veggies or as a salad dressing. It's so delicious!
Tzatziki pairs well with:
- Pita Bread
- Chicken Souvlaki Skewers
- Falafel
- Lamb Souvlaki Skewers
- Greek Chicken Gyros
- Lemon Roasted Baby Potatoes
- Stuffed Eggplant
For more recipe ideas, see our 30 Best Greek Recipes.
Recipe Tips and Tricks
- Drain the cucumber. After grating, squeeze out excess moisture using a fine mesh strainer or cheesecloth. This prevents the dip from becoming watery and helps it stay creamy longer.
- Use thick yogurt. Greek yogurt works best for a rich, creamy consistency. If using regular yogurt, strain it for 1-2 hours to thicken and improve the texture.
- Chill before serving. Tzatziki sauce tastes best when chilled for at least one hour, up to overnight. This lets the flavours of the garlic and dill really infuse to the yogurt. You could skip this step, but you will immediately notice the difference once chilled.
- Grate garlic finely. Use a microplane or small grater for a fine texture that evenly distributes in the dip. This ensures no overpowering bites of raw garlic.
- Adjust seasoning last. After chilling, taste and add more salt, lemon juice, or herbs as needed to balance and brighten the dip before serving.
Storing Instructions
Store tzatziki in an airtight container in the refrigerator for up to 4 days. Stir before serving, as some separation may occur. It keeps best when stored cold and undisturbed.
I would not recommend storing it in the freezer.
FAQ
Yes! In fact, it's best made ahead. The flavor improves after a few hours in the fridge, giving the garlic and herbs time to infuse. Just stir well before serving and adjust seasoning if needed.
Freezing is not recommended. The yogurt base tends to separate when thawed, resulting in a grainy, watery texture. It's best enjoyed fresh or refrigerated for short-term use.
Absolutely. It's high in protein, low in carbs, and full of probiotics and fresh ingredients-especially when made with Greek yogurt and served with veggies or lean proteins. It's a great choice for clean eating.
More Dip Recipes
- 20 Best Dip Recipes
- French Onion Dip
- Classic Hummus
- Homemade Ranch Dip
- Whipped Ricotta Dip
- Olive Tapenade
Tried this recipe?
I'd love to hear what you think! Leave a comment and rating below to share your feedback. Your reviews help others discover this recipe and help me keep creating more free recipes for you. Snap a photo and tag me on social media @aheadofthyme too.
This post was first published in May 2017. It was completely updated in May 2025.

One Pot Pasta with Cherry Tomatoes (Meghan Markle Pasta)
This One Pot Pasta with Cherry Tomatoes (also known as the Meghan Markle Pasta) is a simple, creamy, and flavorful dish made with a delicious combination of cherry tomatoes, garlic, spinach, and pasta, all simmered in one pan for maximum flavor and minimal cleanup. Inspired by the viral Meghan Markle pasta recipe, this copycat version brings all the cozy comfort of the original with just a few pantry staple ingredients.
Perfect for weeknight dinners or lazy weekend meals, this pasta is rich, hearty, and packed with veggies. The cherry tomatoes melt down into a silky sauce, while baby spinach adds a fresh pop of color and nutrients. Parmesan cheese ties everything together into a bowl of pure comfort. Plus, it all comes together in under 30 minutes.
Why You'll Love this One Pot Pasta with Cherry Tomatoes
- One pan, no hassle. Everything cooks in a single skillet, including the spaghetti, which means fewer dishes to wash and a faster cleanup. It's perfect for busy weeknights when you want a homemade meal without the mess.
- Inspired by Meghan Markle. This recipe is a nod to the viral pasta dish shared by Meghan Markle, using slow-simmered tomatoes as the sauce base. It's a minimalist, elegant take that still delivers big flavor.
- Fresh and flavorful. Cherry tomatoes, garlic, and spinach create a light but flavorful sauce that clings to each strand of spaghetti. The parmesan adds a creamy finish without needing heavy cream or butter.
- Quick and satisfying. Ready in under 30 minutes, this pasta is perfect when you're short on time but still want something cozy, warm, and filling. It's a go-to comfort food that doesn't require much effort yet feels restaurant-worthy.
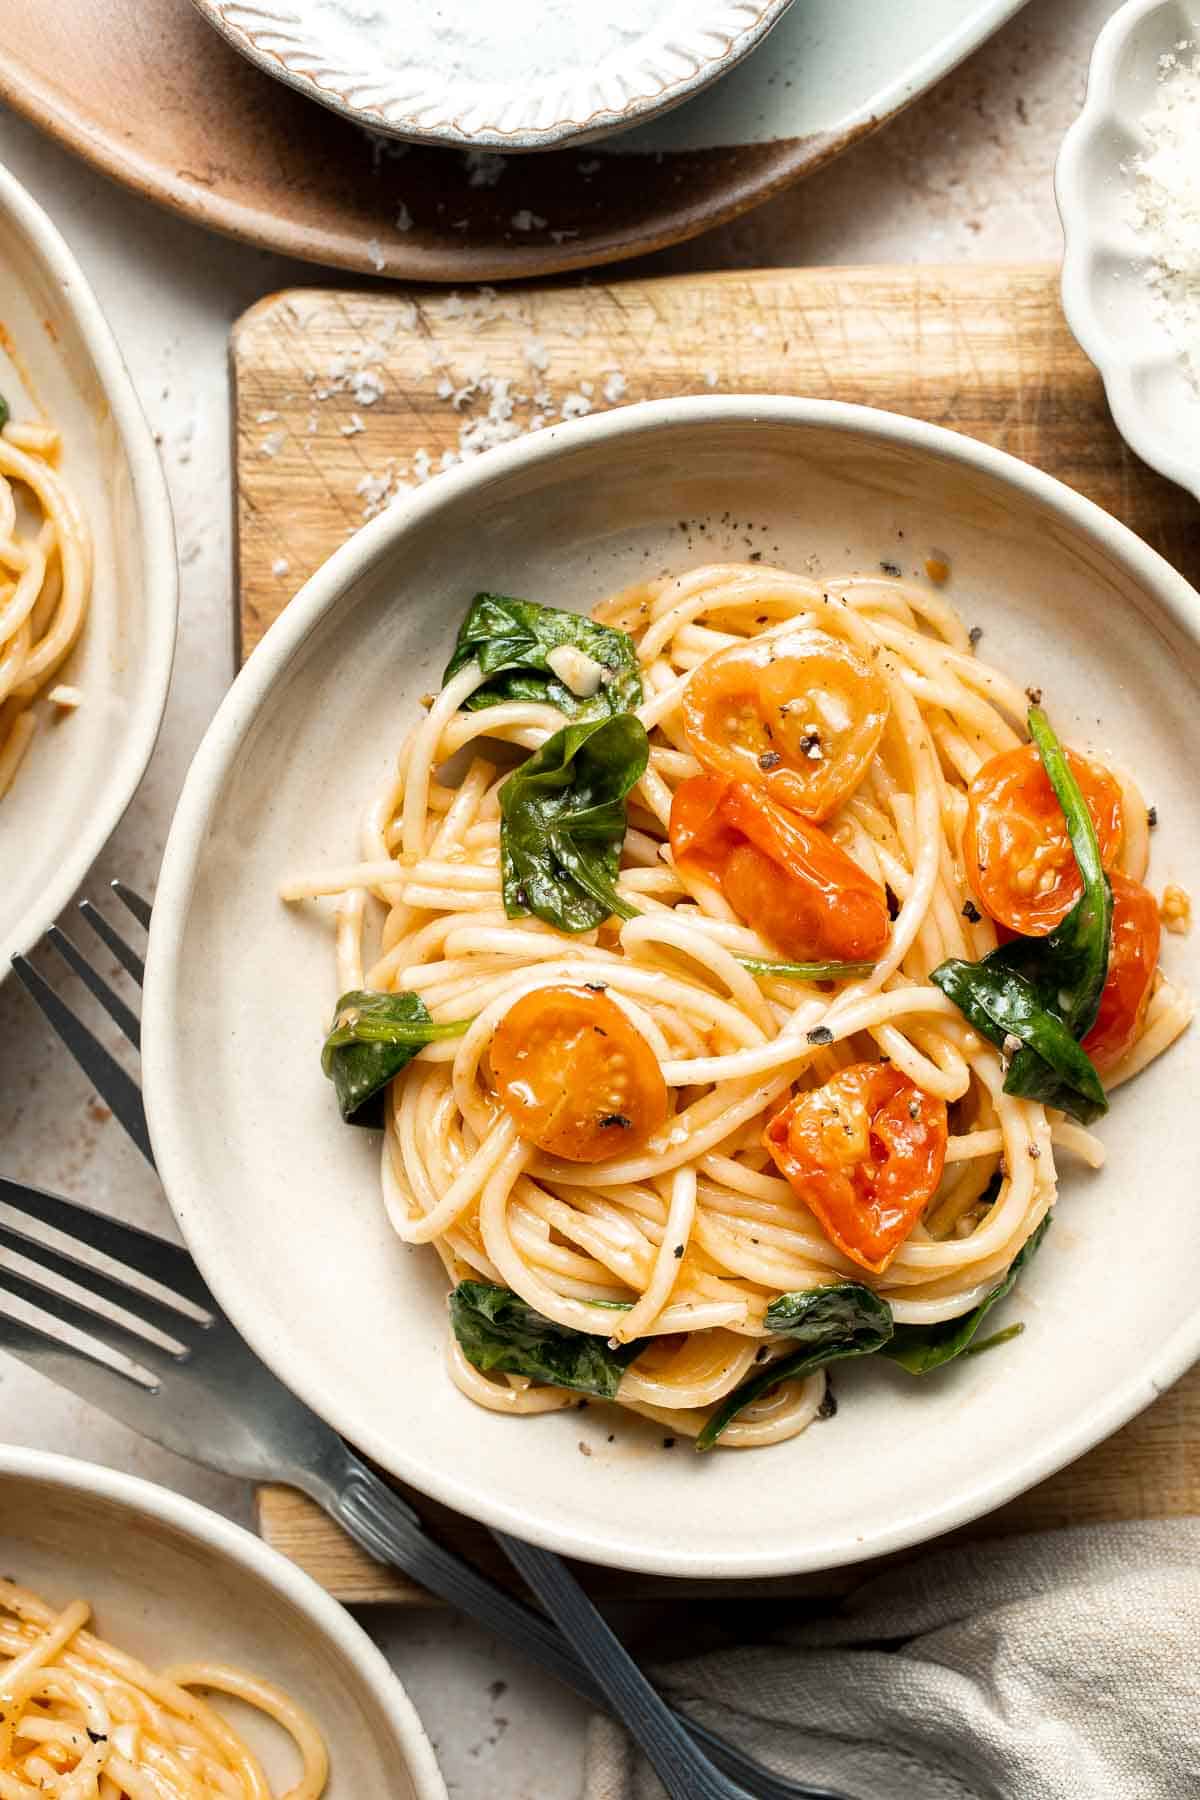
Ingredient Notes
To make this easy One Pot Pasta with Cherry Tomatoes, you will need the following ingredients (full measurements in recipe card below):
- extra virgin olive oil - for sautéing and adding richness to the sauce. Feel free to substitute with avocado oil or light olive oil.
- cherry tomatoes - they break down into a soft, jammy texture and forms the base of the sauce. You can substitute with grape tomatoes or canned San Marzano tomatoes.
- garlic - adds a savory depth to the dish. You can also use garlic paste or roasted garlic for a milder flavor.
- spaghetti - the pasta gets cooked directly in the pan with the other ingredients. Use any other kind of pasta that you like. We like long shaped pasta such as linguine, fettuccine, or a gluten-free pasta.
- boiling water - helps cook the pasta and transform the tomatoes into sauce.
- baby spinach - stirred in at the end for freshness, color, and nutrients. You could also use kale or Swiss chard.
- parmesan cheese - use freshly grated for best and creamiest results. Substitute with pecorino romano or grana padano, if desired. You can also use nutritional yeast for a vegan option.
- salt and pepper - for seasoning.
You will also need measuring cups and spoons and large skillet or sauté pan.
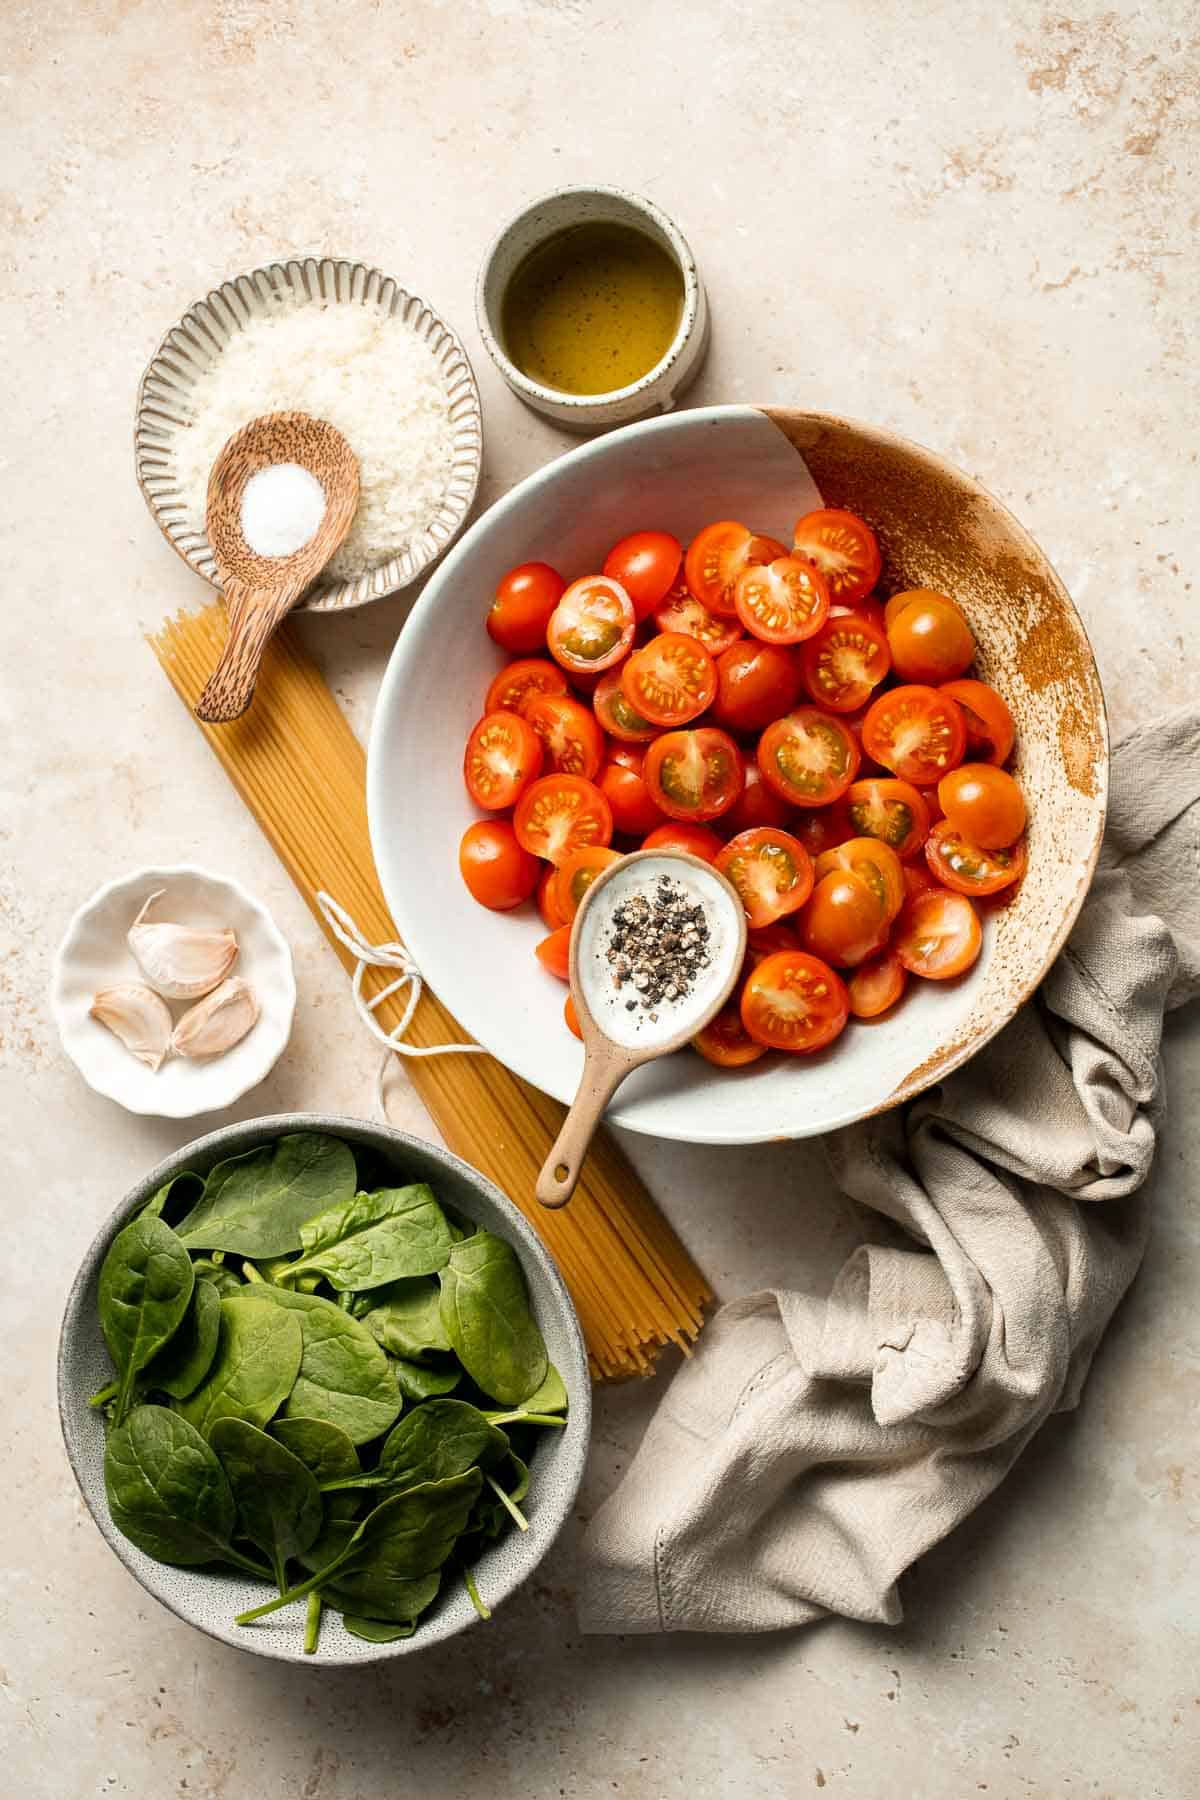
How to Make the Best One Pot Pasta with Cherry Tomatoes
- Sauté. In a large stainless skillet, heat oil over medium-high heat until the hot oil sizzles, about 1 minute Add cherry tomatoes and garlic. Sauté until fragrant, about 1 minute.
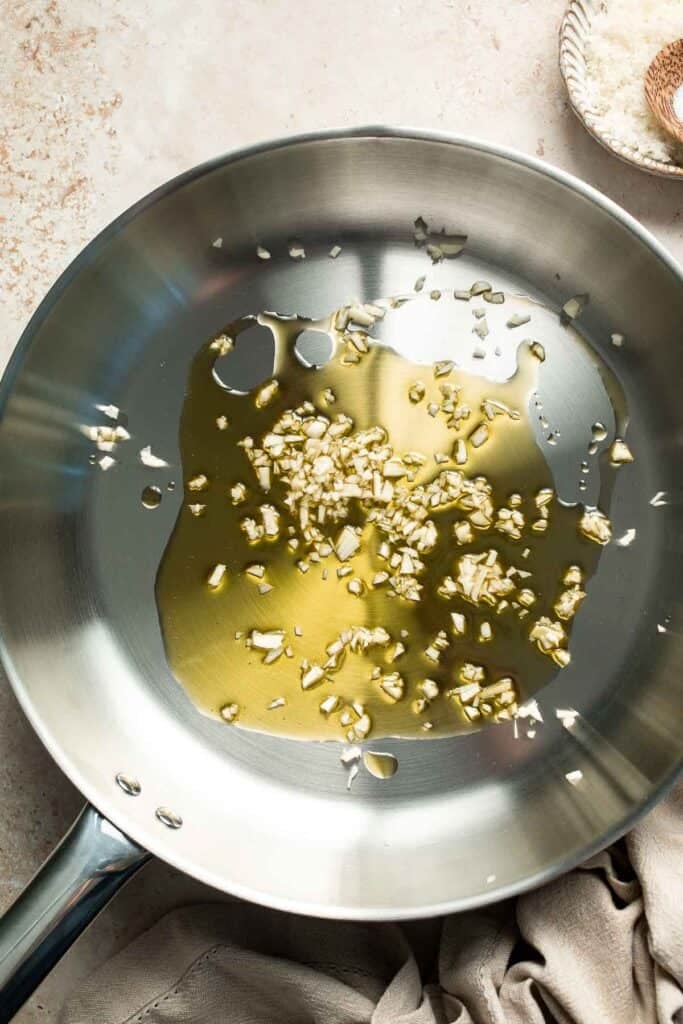
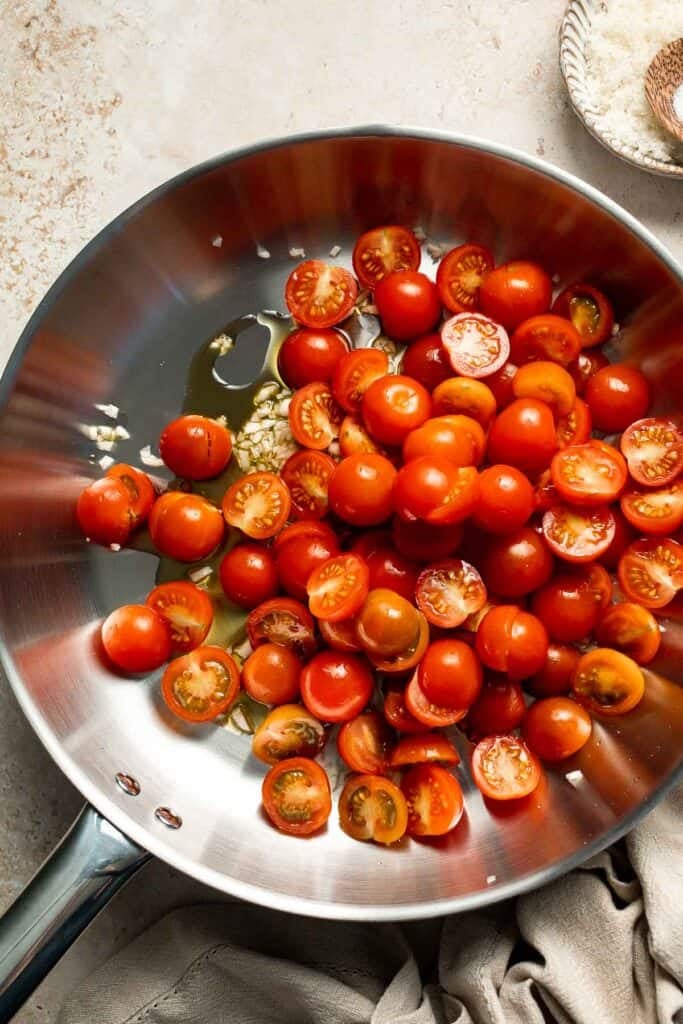
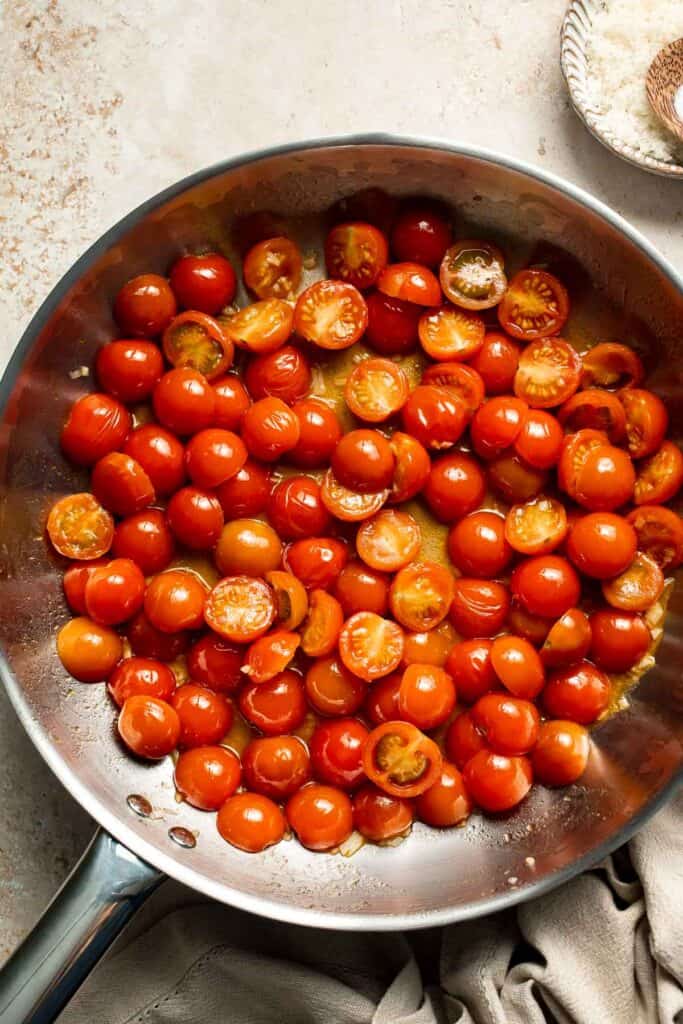
- Add pasta. Spread spaghetti noodles over the tomatoes, then carefully add the boiling water to the skillet. Season with salt.

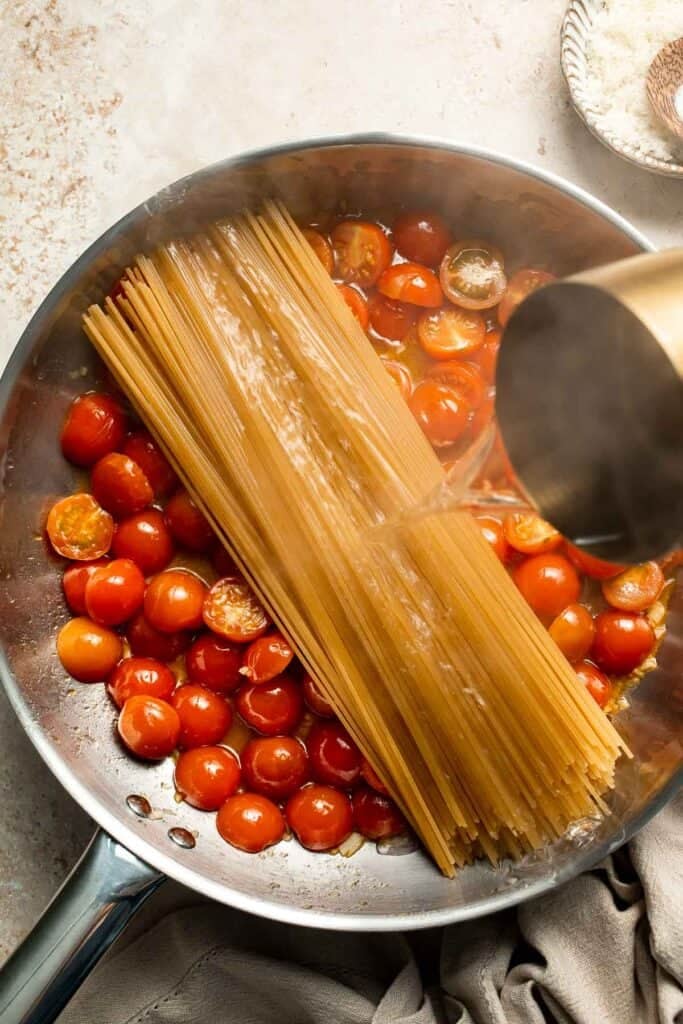
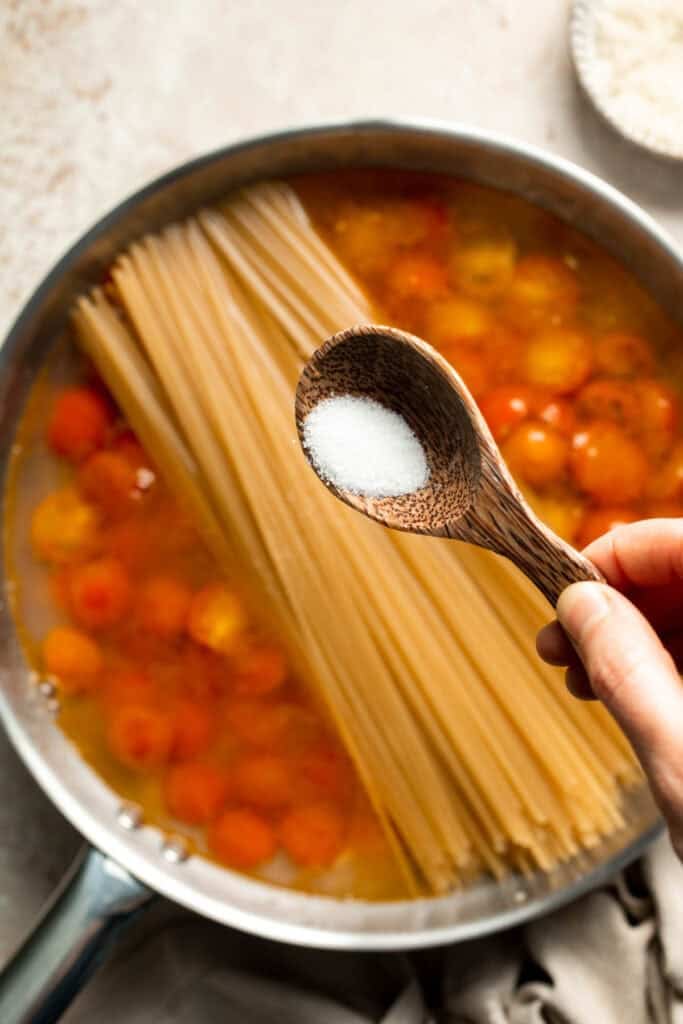
- Cook. Cook uncovered until the spaghetti is al dente, about 8-10 minutes, stirring occasionally. Stir in more boiling water to make it creamy and saucy, if needed.
- Add spinach. Add spinach, parmesan cheese, and black pepper. Toss well until the spinach is wilted. Serve immediately.
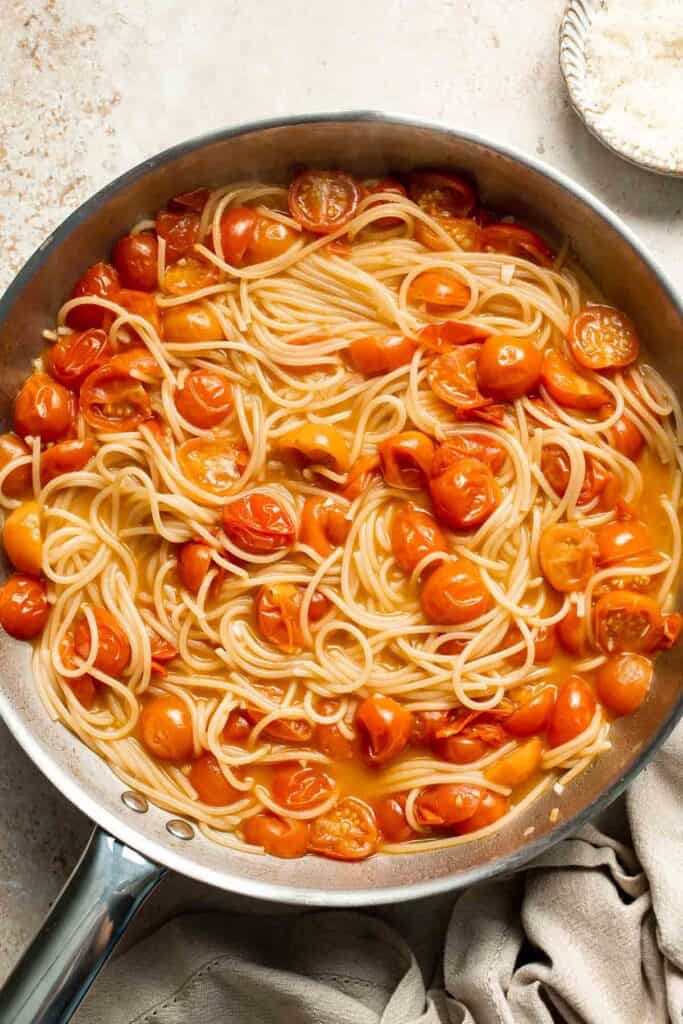
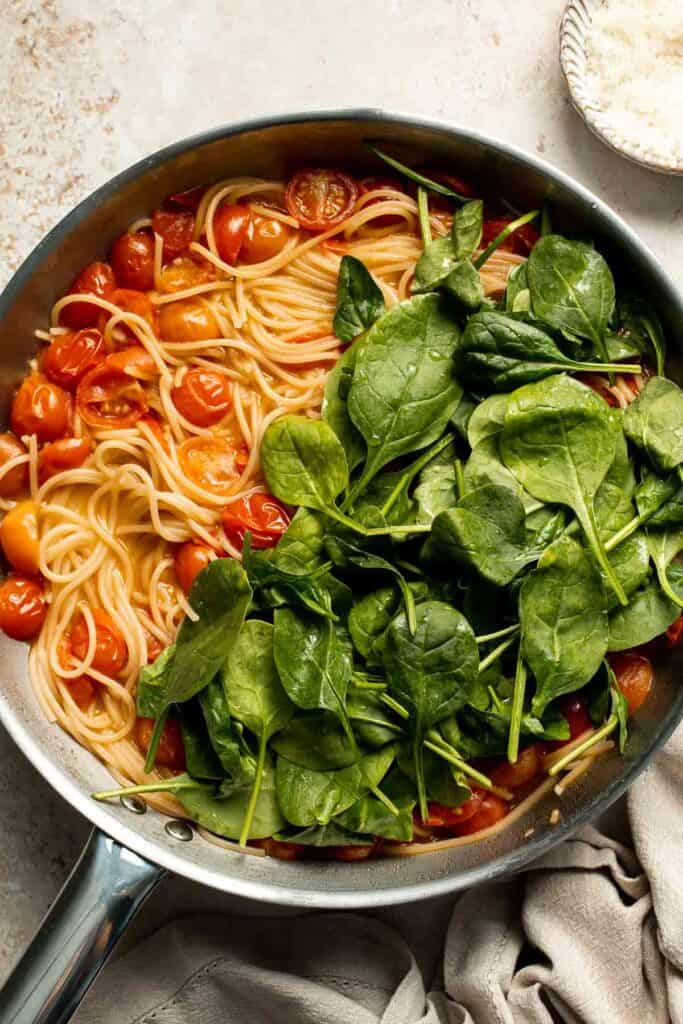
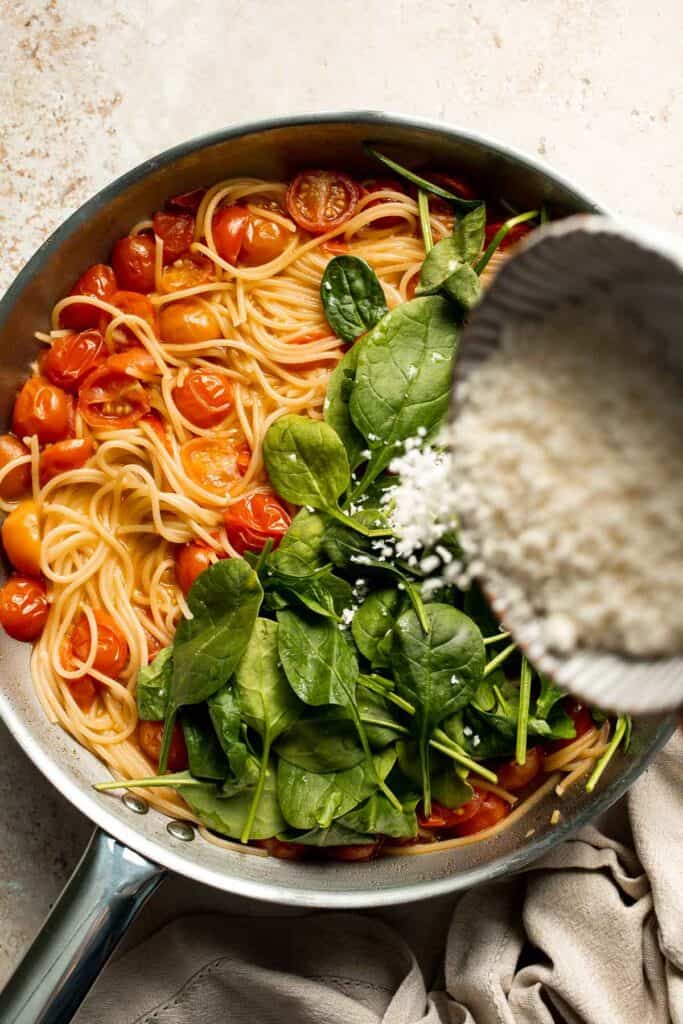
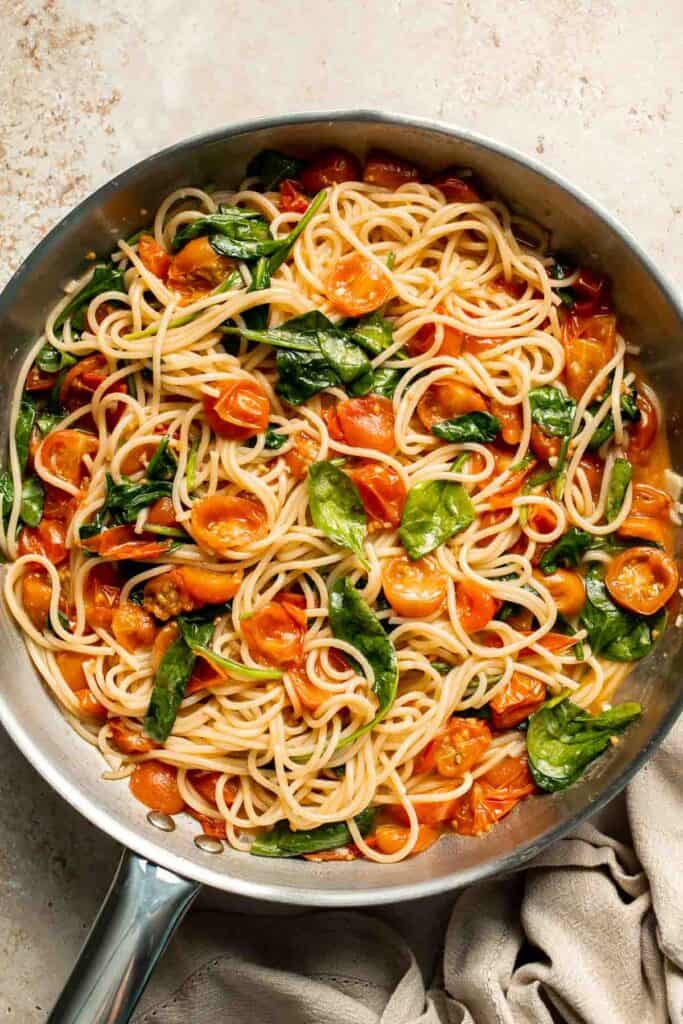
Recipe Variations
- Use different pasta shapes. Swap spaghetti for linguine, fettuccine, or short pasta like penne or fusilli to change up the texture and look of the dish.
- Make it vegan. Skip the parmesan or substitute with a vegan cheese alternative or nutritional yeast to keep the creamy, cheesy flavor.
- Add protein. Stir in cooked chicken, shrimp, or white beans at the end for extra protein without changing the core of the recipe.
- Boost the veggies. Add mushrooms, zucchini, or bell peppers with the tomatoes for more volume and extra nutrition.
How to Serve
This One Pot Cherry Tomato Pasta is delicious served on its own, hot and straight from the skillet with extra parmesan and freshly cracked black pepper. It also pairs well with some pasta sides including:
- Easy No Knead Tomato Focaccia
- Arugula Salad
- Oven Roasted Vegetables
- Cheesy Garlic Bread
- Tomato Basil Soup
- Simple Italian Salad
For more recipes, see our 30 Side Dishes for Pasta.
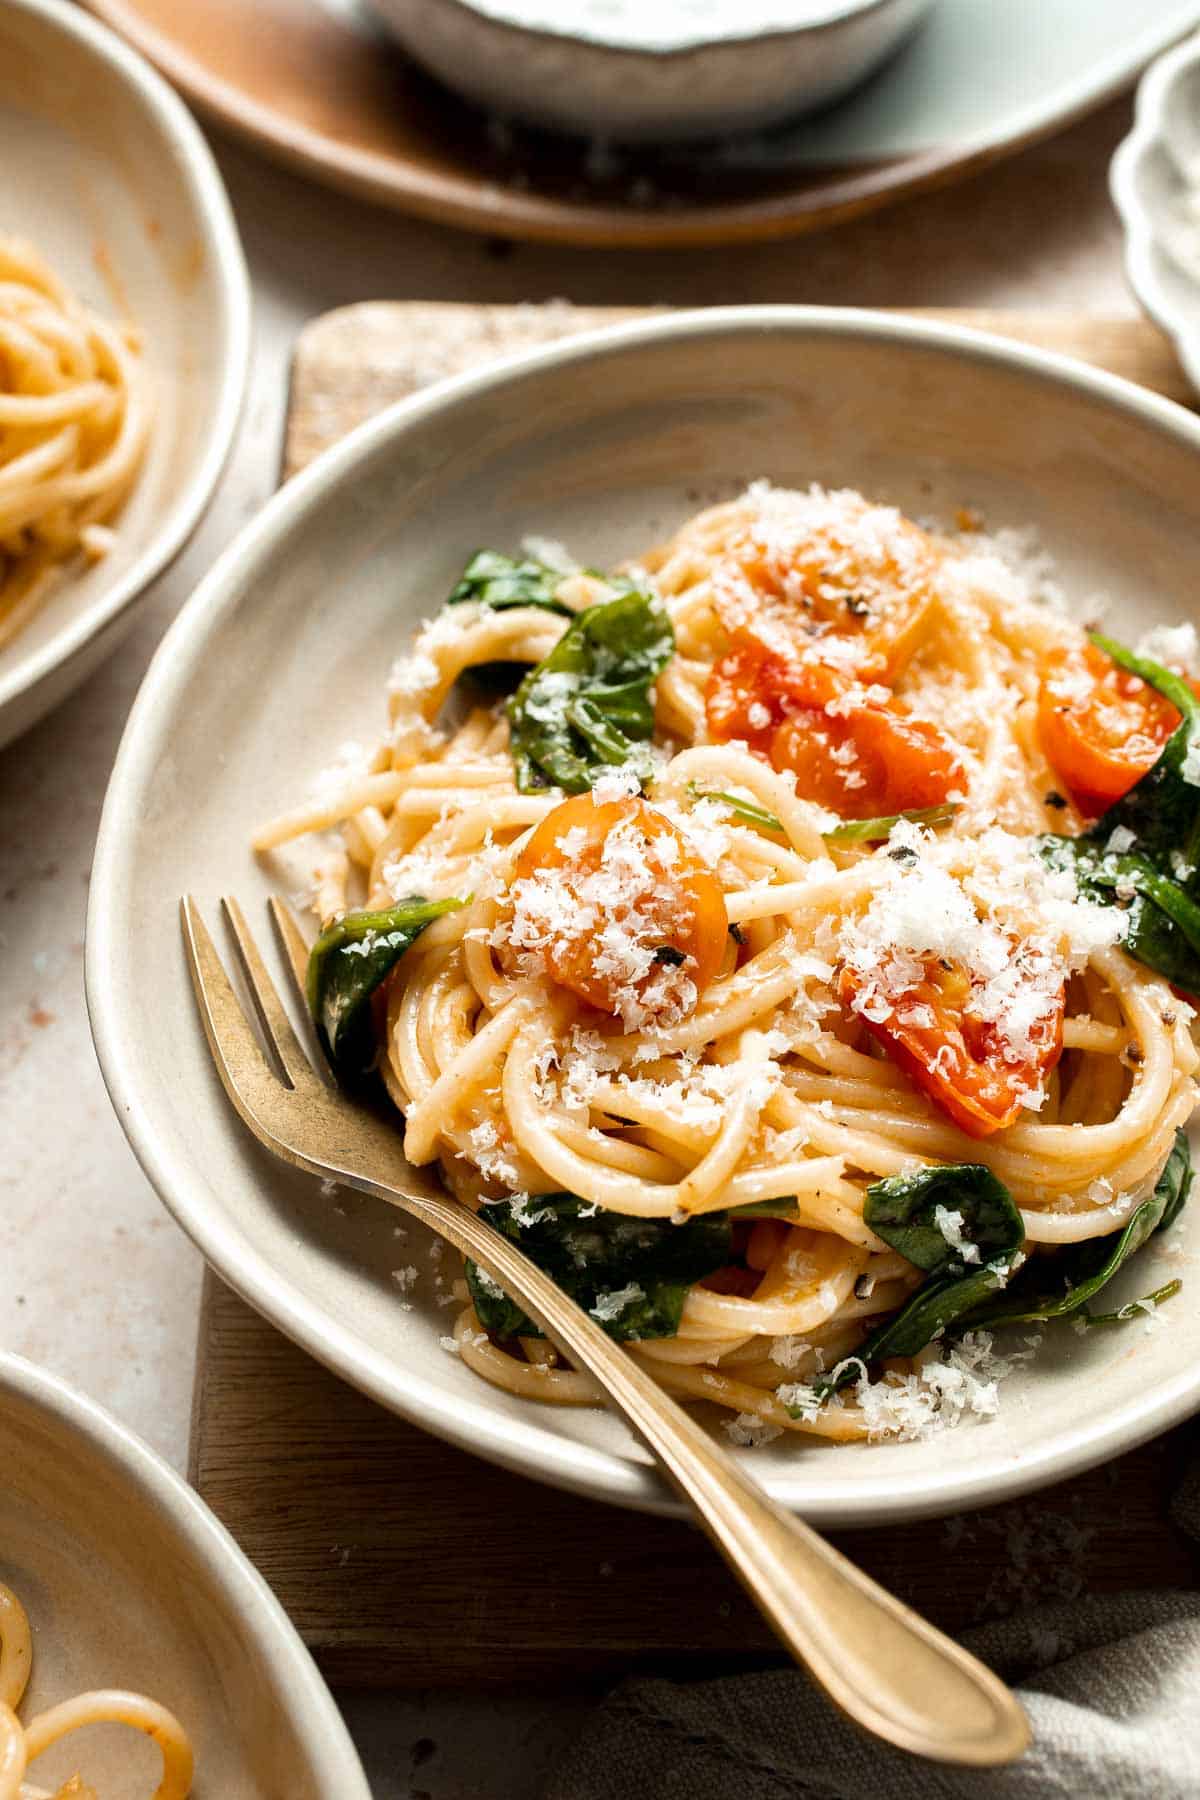
Recipe Tips and Tricks
- Use a wide skillet. A wide-bottomed pan helps the spaghetti cook more evenly and gives the tomatoes space to simmer and reduce properly.
- Smash the tomatoes. As the cherry tomatoes soften, gently smash them with the back of a spoon to release their juices and create the sauce.
- Use enough water. Add just enough boiling water to cook the pasta without drying out the pan, about 3 cups to start, adjusting as needed.
- Stir often. Keep the pasta moving in the skillet so it cooks evenly and absorbs the sauce without sticking.
- Layer in spinach gradually. If your skillet is full, add the spinach in handfuls and stir until it wilts before adding more. This helps it incorporate evenly.
Storing and Freezing Instructions
How to Store
Store leftover pasta in an airtight container in the refrigerator for up to 3 days.
How to Reheat
To reheat, place pasta in a skillet over medium heat with a tablespoon or two of water. Stir until warmed through, adding a little more parmesan or a drizzle of olive oil if needed to bring back the creaminess. You can also reheat in the microwave in 30-second bursts, stirring in between.
How to Freeze
This pasta is best enjoyed fresh, but it can be frozen. Allow the pasta to cool completely, then store in an airtight, freezer-safe container for up to 2 months. To reheat, thaw overnight in the fridge and warm on the stove with a splash of water. Note: the texture of the pasta may be softer after freezing.
FAQ
Yes, though cherry tomatoes are ideal for their natural sweetness and texture. If using canned, opt for whole or crushed San Marzano tomatoes and simmer them down until thickened.
Yes! This recipe is inspired by the pasta dish Meghan Markle reportedly made with slow-simmered zucchini or tomatoes. This version focuses on cherry tomatoes and spinach, combining her original idea with a one-pan twist that's simple, flavorful, and satisfying.
Absolutely. Just substitute regular spaghetti with your favorite gluten-free pasta. Keep in mind that some gluten-free varieties absorb more water, so you may need to adjust the liquid and cooking time slightly.
Yes, this recipe can easily be doubled. Use a larger skillet or sauté pan and be sure to stir often to ensure the pasta cooks evenly and absorbs the sauce without sticking. It's great for serving a crowd or meal prepping for the week.
More Easy Pasta Recipes
- 40 Best Pasta Recipes
- Creamy Tomato Pasta
- Pasta Primavera
- Tagliatelle Pasta
- Cream Cheese Pasta
- Lemon Ricotta Pasta
Tried this recipe?
I'd love to hear what you think! Leave a comment and rating below to share your feedback. Your reviews help others discover this recipe and help me keep creating more free recipes for you. Snap a photo and tag me on social media @aheadofthyme too.
Gomae Spinach Salad
This Gomae Spinach Salad is a classic Japanese side dish featuring tender blanched spinach tossed in a sweet and savory sesame dressing. It's simple, wholesome, and packed with nutty flavor. This salad is perfect as a light appetizer or side to a larger meal and comes together in just minutes with a handful of pantry staples.
My go-to dishes whenever I go to a Japanese restaurant are sushi and gomae (胡麻和え). I only wish that the portions of this salad were bigger. Now that we have developed our own recipe, I can help myself to as many portions as I would like! Plus, once you've made it at home, you'll never want to buy the store version again.
Whether you're serving sushi, noodles, or a bento-style dinner, goma-ae adds balance and freshness to your plate. It's naturally vegan, easy to prep ahead of time, and offers a flavorful way to enjoy greens.
Why You'll Love This Gomae Spinach Salad
- Rich sesame flavor. Toasted sesame seeds are the star of this dish, lending a deep, nutty aroma and taste that makes each bite incredibly satisfying. The homemade sesame sauce is fragrant, smooth, and coats the spinach beautifully without overpowering it. Did you know that this Goma-ae dish is actually named after the dressing? One of my readers pointed out that the word "Goma" essentially means sesame seeds and "Ae" means to dress. So cool!
- Quick and easy. This salad takes only 10 minutes to make, making it perfect for busy weeknights or last-minute dinner additions. The process is simple - just blanch, toast, grind, and mix. The payoff is big in flavor.
- Healthy and nutrient-dense. Packed with vitamins, fiber, and minerals, spinach is a nutritional powerhouse. Combined with calcium-rich sesame seeds, this dish offers a healthful option that doesn't compromise on taste or satisfaction.
- Vegan and gluten-free friendly. Naturally plant-based and easy to make gluten-free by using tamari or coconut aminos instead of soy sauce, this salad suits a wide variety of dietary needs without sacrificing authenticity.
- Pairs with almost anything. Gomae is incredibly versatile and complements everything from sushi and grilled meats to rice bowls and miso soup. It's a reliable go-to for any Japanese-inspired meal.
Ingredient Notes
To make this quick and easy Gomae Spinach Salad, you will need the following ingredients (full measurements in recipe card below):
- sesame seeds - toasted and ground for the rich, nutty base of the homemade sesame dressing.
- cornstarch slurry - made with cornstarch and water to help slightly thicken the sauce and create a smooth texture. You can opt to leave this out if you prefer a thinner consistency.
- soy sauce - for umami flavor. Feel free to substitute with tamari for a gluten-free option.
- sugar - adds balance and sweetness to the savory sesame sauce.
- spinach - fresh, leafy greens that are lightly blanched. Use mature spinach or baby spinach.
- salt - to season.
You will also need measuring cups and spoons, a skillet, a mortar and pestle (or spice grinder, blender, or food processor), mixing bowl, cooking pot, and colander.

How to Make the Best Gomae Spinach Salad
- Roast sesame seeds. In a small skillet, add the sesame seeds and heat over medium-low heat. Roast until they begin to brown, then remove from heat.


- Grind the sesame seeds. Set aside 1 tablespoon of the roasted sesame seeds to use as a garnish, if desired. Transfer the rest into a mortar and pestle and grind. You can also use a spice grinder to grind the seeds or a blender or food processor.
- Make the cornstarch slurry. In a small mixing bowl, make a cornstarch slurry by combining the cornstarch with ¼ cup water and stir together until fully dissolved. If you prefer a thinner sauce, you can skip the cornstarch slurry.


- Make the dressing. Add the ground sesame seeds, soy sauce, and sugar to the same small mixing bowl and mix well.


- Cook the sauce. Transfer the mixture to a small small saucepan and heat over medium until the sauce starts to thicken. Remove from heat and pour into a bowl. Set aside to cool.


- Cook the spinach. Bring a large pot of water to a boil over high heat. Add the spinach and blanch cook for 1 minute. Transfer the spinach into a colander and immediately run cold water through it (this will stop the cooking process completely).
- Squeeze out water. Use your hands or a cheese cloth to to squeeze the water out of the spinach.


- Serve. Split the spinach into 4 small portions and divide into small bowls. Add one tablespoon of your sesame sauce on top and garnish with a pinch of roasted sesame seeds, if using. Serve immediately.


Recipe Variations
- Add tofu. For more protein, toss in small cubes of soft tofu or serve alongside silken tofu for a balanced, satisfying dish.
- Try other greens. Substitute spinach with blanched kale, Swiss chard, or even bok choy for a different texture and slightly more bitter note.
- Make it spicy. Add a pinch of chili flakes or a dash of sesame chili oil to the dressing for a warm, flavorful kick without overwhelming the dish.
- Add citrus. A splash of yuzu juice or lemon juice adds brightness to the dressing and enhances the salad's overall flavor profile.
How to Serve
This Gomae spinach salad is delicious served chilled or at room temperature. This side dish pairs well with a variety of Japanese inspired dishes including:
For more Asian-inspired recipes, see our 60 Chinese Takeout Recipes at Home.

Recipe Tips and Tricks
- Toast sesame seeds thoroughly. Toasting the seeds until fragrant brings out their nutty oils, intensifying the flavor of the dressing significantly. Stir constantly to avoid burning.
- Use a mortar and pestle. Grinding the sesame seeds by hand using a mortar and pestle releases their oils and creates a rustic texture that's key to authentic gomae flavor. A spice grinder also works well. If you don't have either, you can use a blender.
- Blanch spinach briefly. Only blanch the spinach for about 30 seconds to 1 minute (just until wilted) so it retains its bright color and doesn't become soggy.
- Squeeze out excess water. After blanching, gently squeeze the spinach to remove excess water. This helps the dressing stick better and keeps the salad from being watery.
- Chill before serving. Letting the dressed spinach rest in the fridge for 15-30 minutes allows the flavors to meld. It's worth the wait for the most delicious results.
Storing and Freezing Instructions
How to Store
Store leftover gomae in an airtight container in the refrigerator for up to 2 days. For best texture and flavor, keep the dressing and spinach separate until just before serving.
How to Freeze
Freezing gomae spinach salad is not recommended. The spinach tends to become soggy and lose its vibrant color and texture once thawed. Additionally, the sesame dressing may separate or become grainy after freezing and reheating.
FAQ
Yes, gomae is great for meal prep. You can blanch the spinach and make the sesame dressing a day in advance. Store them separately in the fridge and combine right before serving to preserve texture and flavor.
You can, but freshly toasted and ground sesame seeds provide a much deeper, fresher flavor. Pre-ground seeds often lack the intensity and fragrance needed for authentic gomae. If using pre-ground, be sure to toast lightly to revive their aroma.
Gomae is traditionally served cold or at room temperature, which makes it a convenient make-ahead dish. Chilling the salad helps the sesame flavors deepen and settle into the spinach, enhancing the taste over time.
More Spinach Recipes
Tried this recipe?
I'd love to hear what you think! Leave a comment and rating below to share your feedback. Your reviews help others discover this recipe and help me keep creating more free recipes for you. Snap a photo and tag me on social media @aheadofthyme too.

Nanaimo Bars
These classic Nanaimo Bars are a rich, no-bake Canadian dessert featuring three delicious layers: a crunchy chocolate-coconut graham base, a smooth and creamy custard-flavored buttercream center, and a glossy chocolate ganache topping. Sweet, satisfying, and delightfully nostalgic, these bars are perfect for holidays, potlucks, or whenever you're craving a treat that's both indulgent and easy to prepare.

Whether you grew up with Nanaimo Bars or are trying them for the first time, you'll love how quickly they come together and how decadent they taste. They require no oven time and can be made in advance, making them a go-to recipe for busy seasons or whenever you want to wow a crowd. Plus, the layers offer plenty of room for customization, so you can make them as classic or creative as you like.
Why You'll Love These Nanaimo Bars
- Three indulgent layers. Each layer brings something special - the crunchy cocoa-graham base, the smooth custard buttercream, and the silky chocolate top come together in perfect harmony. The combination of textures and flavors creates a balanced and rich dessert.
- No baking required. This dessert is entirely no-bake, which means less time in the kitchen and no need to heat up your oven! This is ideal for summer months or busy holiday baking. It's perfect when you want something impressive without turning on the oven.
- Great make-ahead treat. These bars store well in the fridge or freezer, making them perfect for prepping ahead of time for parties, holidays, or gifts. They hold their shape beautifully, making them easy to transport and serve. No stress!
- Rich, nostalgic flavor. A beloved Canadian favorite, Nanaimo Bars deliver deep chocolate flavor, creamy vanilla custard, and a satisfying texture in every bite. They're both decadent and familiar, often reminding people of special occasions or family traditions.
- Crowd-pleasing dessert. Whether you're serving kids or adults, everyone loves these sweet, layered bars. They're easy to slice and even easier to enjoy. One batch serves many, making them ideal for gatherings and potlucks.
Ingredient Notes
To make these delicious Nanaimo Bars, you will need the following ingredients (full measurements in recipe card below):
- butter - unsalted butter is required in all 3 layers. It can be substituted with a neutral oil in the chocolate topping though.
- sugar - white sugar is needed in the chocolate-coconut graham base, while confectioners' sugar is needed in the custard layer.
- cocoa powder - for a deep chocolate flavor in the base. You can substitute with Dutch-processed cocoa for a richer color and smoother taste.
- vanilla - enhances the overall flavor in both the base and custard layers.
- egg - helps hold the base together and adds richness. Substitute with flax egg for an egg-free option.
- graham cracker crumbs - forms the crunchy base. Feel free to substitute with digestive biscuits or crushed cookies.
- shredded coconut - unsweetened coconut adds texture and a coconut flavor to the base. If you want to use sweetened coconut instead, make sure to reduce the amount of the sugar in the base as it will be too sweet.
- custard powder - custard powder gives the filling its signature yellow hue and flavor. you can also substitute with instant vanilla pudding mix if needed.
- heavy cream - softens the custard filling to the right texture.
- semi-sweet chocolate - melted for the glossy top layer. You can use other kinds of chocolate such dark or milk chocolate depending on your sweetness preference.
You will also need measuring cups and spoon, 9-inch square baking pan, parchment paper, mixing bowls, electric mixer, spatula, and a microwave or stovetop for melting chocolate.
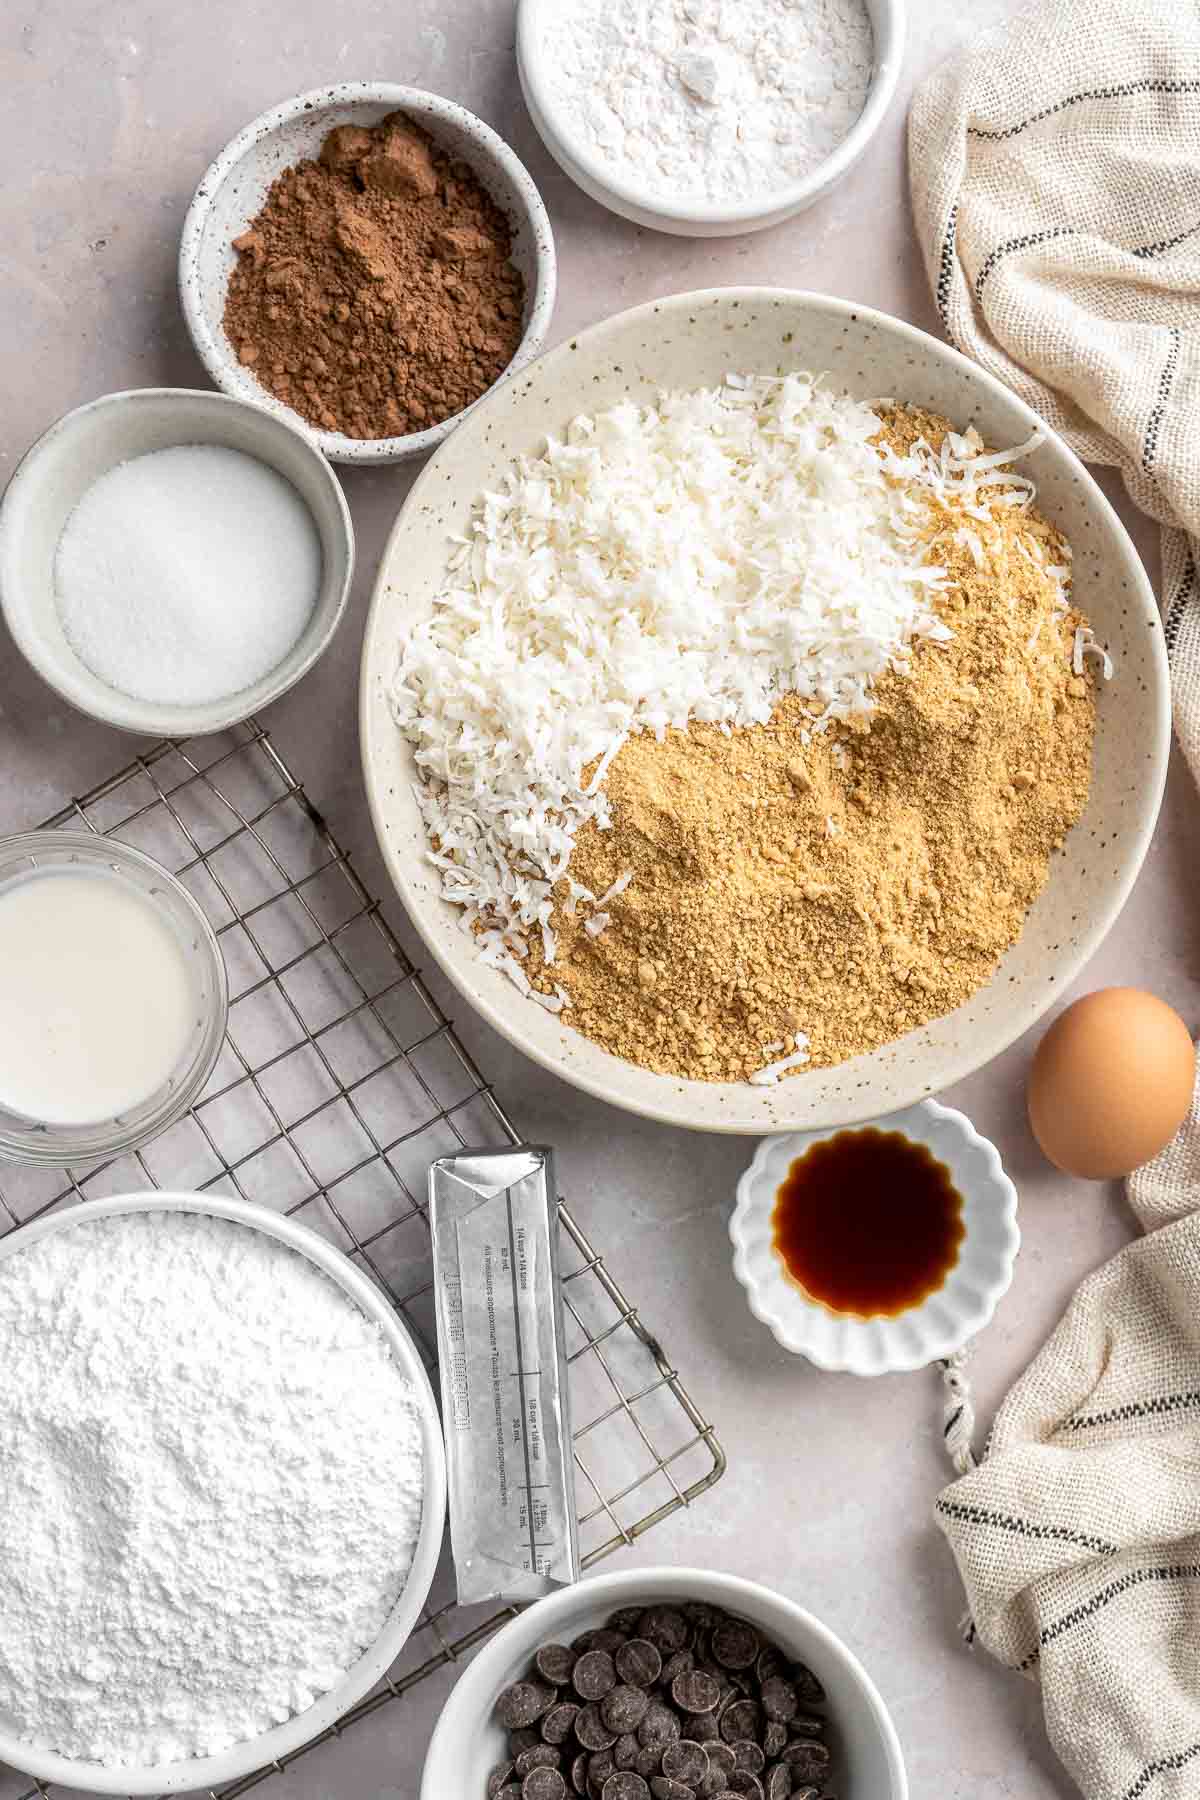
How to Make the Best Nanaimo Bars
First, make the chocolate-coconut graham base.
- Prep. Prepare a 9x9-inch square baking pan with cooking spray and 2 sheets of parchment, leaving an overhang on 2 sides for easy removal.
- Melt butter. In a medium saucepan, add butter and cook over medium-low heat, until melted but not hot.
- Stir in ingredients. Stir in the sugar, cocoa powder, vanilla, and beaten egg, whisking until smooth. Continue to heat over medium-low heat, while stirring constantly, until the mixture is very warm but not bubbling.

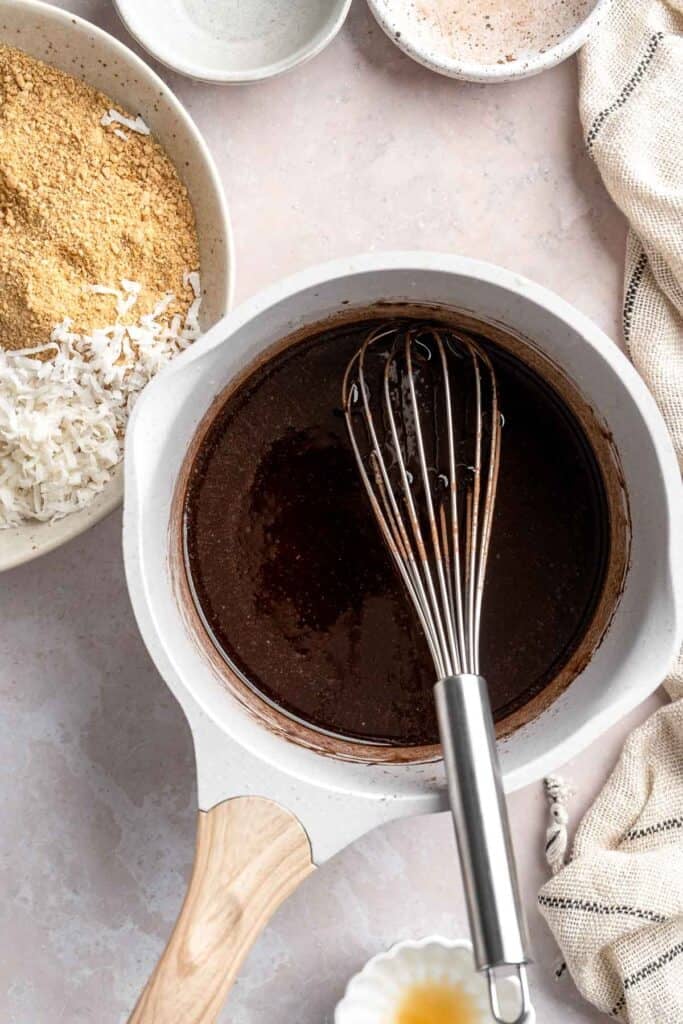
- Add graham crackers and coconut. Remove the saucepan from the heat, then add in the graham cracker crumbs and shredded coconut. Stir until smooth and fully combined.

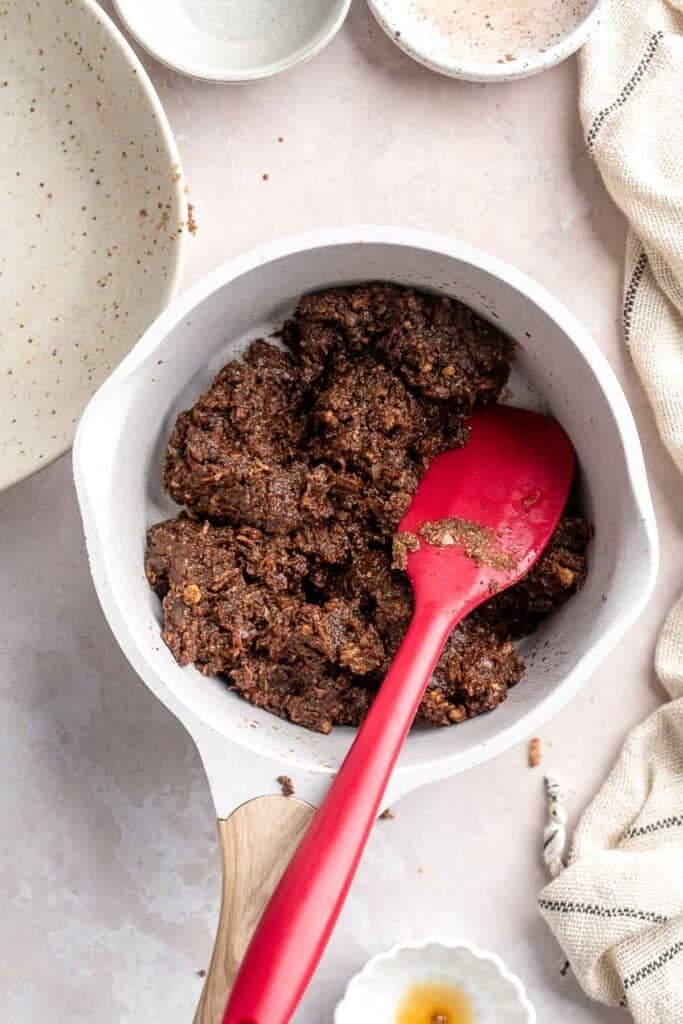
- Shape the base. Transfer into the prepared pan. Use the back of a measuring cup or flat bottomed glass and press down evenly to create a uniformly thick base.
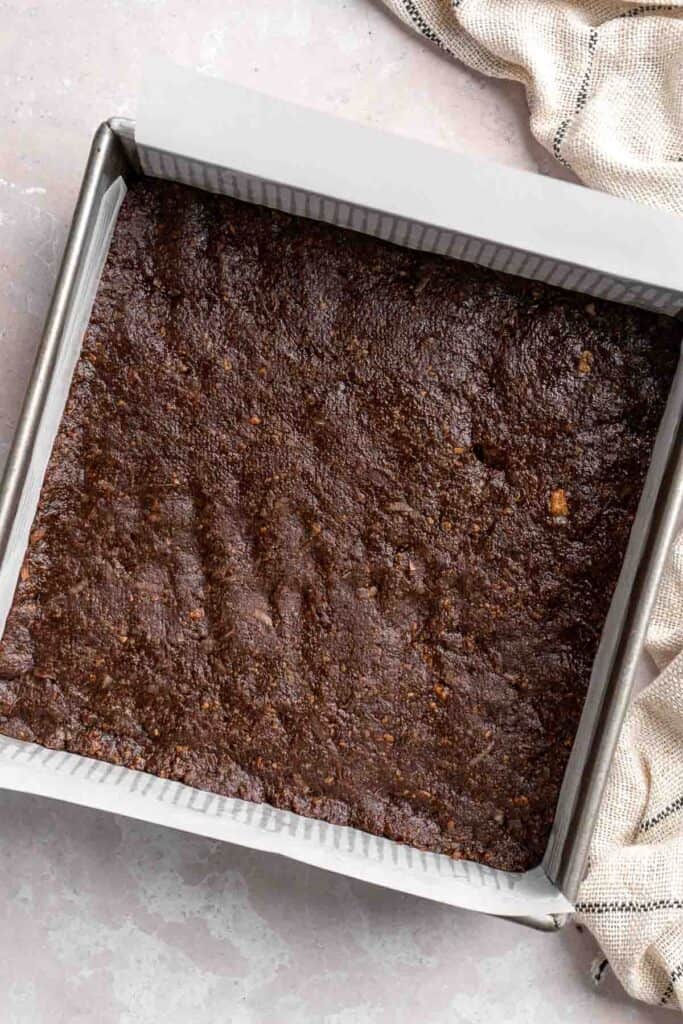
Next, make the custard filling.
- Whip the filling. In the bowl of a stand mixer (in a large mixing bowl with a hand mixer), add the unsalted butter, custard powder, confectioners' sugar, 1 tablespoon heavy cream and vanilla. Beat with the paddle attachment until combined, then decide if you need more cream. The final texture of the custard filling should be like a thick frosting. If more cream is needed, add 1 teaspoon at a time, until the consistency is achieved.
- Spread filling. Spread the custard filling evenly over the chocolate base.
- Chill. Cover lightly and place into the fridge to harden for at least 2 hours.


Lastly, make the chocolate topping and let it set.
- Melt chocolate. Place the chocolate and butter (or oil) into a microwave safe bowl. Microwave in 30 second intervals, stirring in between, until smooth.


- Add layer. Pour the melted chocolate over the hardened custard filling layer. Use a spatula to smooth it out until the layer is fully covered.
- Chill. Place back into the fridge to harden for at least 4 hours, or preferably overnight.
- Serve. Once fully hard, slice into 36 squares and serve.


Recipe Variations
- Add chopped nuts. Fold in a handful of chopped walnuts or pecans to the base layer for extra crunch and nutty flavor that balances the sweetness.
- Make them gluten-free. Use gluten-free graham crackers or cookies in the crust to make this dessert celiac-friendly without sacrificing taste, texture, or the classic Nanaimo bar experience.
- Change the filling flavor. Swap custard powder with flavored pudding mixes like chocolate, butterscotch, or coconut to give your bars a unique twist while keeping the texture smooth and creamy.
- Use white chocolate topping. For a lighter look and sweeter finish, top your bars with melted white chocolate instead of semi-sweet chocolate, or try a swirl of both for visual interest.
- Add a pinch of sea salt. Sprinkle a bit of flaky sea salt on the chocolate layer for a sweet-salty contrast that enhances the overall richness and cuts through the sweetness.
How to Serve
Slice the chilled Nanaimo Bars into small squares or rectangles using a warm knife for clean edges. Serve them slightly chilled or at room temperature for the best texture. They pair perfectly with:
- Coffee or espresso
- Hot tea or chai lattes
- A glass of cold milk
- Fresh berries or a berry compote
- A scoop of vanilla ice cream
- Dessert trays with brownies, lemon bars, or shortbread cookies

Recipe Tips and Tricks
- Use parchment paper. Lining your baking dish with parchment makes it easy to lift out the bars for cleaner cutting and serving. It also helps prevent the layers from sticking to the pan.
- Chill between layers. Let each layer set in the fridge before adding the next to keep the layers defined and the bars neat. This makes slicing and presentation much easier.
- Melt chocolate slowly. Use a double boiler or microwave in short bursts to avoid scorching the chocolate topping. Stir frequently to achieve a smooth, glossy consistency.
- Score the top layer. Lightly score the chocolate layer before it fully sets to prevent cracking when slicing the bars later. This ensures neater, more professional-looking squares.
Storing and Freezing Instructions
How to Store
Store Nanaimo Bars in an airtight container in the fridge for up to 5 days. Place parchment between layers if stacking to prevent them from sticking together.
How to Freeze
Freeze Nanaimo Bars once they chilled in the fridge until fully set. Then slice into bars and place in a single layer on a parchment-lined tray to freeze until firm. Transfer to an airtight container or freezer bag, placing parchment between layers to prevent sticking. Thaw in the fridge overnight before serving
FAQ
Custard powder is a dry mix used to make custard desserts, typically flavored with vanilla and colored yellow. It's a key ingredient in traditional Nanaimo Bars and can be found in the baking or international aisle of many grocery stores, especially brands like Bird's. If unavailable, instant vanilla pudding mix is a common substitute that mimics the flavor and texture well.
Absolutely. In fact, Nanaimo Bars are even better when made ahead. You can prepare them a day or two in advance and keep them chilled until you're ready to serve. This helps the layers set up perfectly, enhances the flavors as they meld together, and makes slicing easier. They're a great dessert to prepare in advance for gatherings.
Yes, you can double the recipe and use a 9x13-inch pan. Just be sure to chill each layer thoroughly and allow extra time for the bars to set before slicing. Doubling the recipe works well for large gatherings, bake sales, or freezing half for later. Be mindful of the chocolate layer's thickness when spreading to keep it easy to cut.
More Dessert Bar Recipes
- Millionaire's Shortbread
- Strawberry Crumb Bars
- Oreo Brownies
- Pumpkin Pie Bars
- Chocolate Chip Cookie Bars
- Blondies
Tried this recipe?
I'd love to hear what you think! Leave a comment and rating below to share your feedback. Your reviews help others discover this recipe and help me keep creating more free recipes for you. Snap a photo and tag me on social media @aheadofthyme too.

Mezze Platter
This easy Mezze Platter brings the best of Mediterranean snacking straight to your table with a colorful mix of creamy dips, crisp vegetables, warm pita, and briny bites. It's a no-cook spread that's bursting with flavor and texture, and is one of the most inviting and versatile appetizers you can serve. Whether you're hosting a dinner party, packing a summer picnic, or building a casual weeknight snack board, this beautiful platter is as fun to assemble as it is to enjoy.

A mezze platter is a celebration of variety, flavor, and ease. You can scale it up for a crowd or keep it small for a cozy evening at home. This platter also serves as a base for creativity: swap in your favorite ingredients, try new dips, or experiment with different textures and colors. With so many elements to enjoy, everyone can find something they love!
Why You'll Love this Mezze Platter Recipe
- Beautiful and colorful. With its vibrant array of veggies, dips, and garnishes, this mezze platter is a true feast for the eyes. The rich colors and variety of ingredients make it perfect for holidays, special occasions, or everyday grazing.
- Effortless to assemble. There's no cooking required - just a bit of slicing, scooping, and arranging. You can have this impressive Mediterranean appetizer board ready in under 20 minutes, making it ideal for last-minute guests or when you need something quick but impressive.
- Loaded with flavor and texture. From creamy hummus and cool tzatziki to crunchy cucumbers and briny olives, every bite is a delicious contrast. The combination of bold Mediterranean flavors ensures each bite is layered, interesting, and satisfying.
- Easily customizable. Whether you're vegetarian, gluten-free, or just picky, you can mix and match ingredients to suit any crowd. Add grilled veggies, nuts, or seasonal fruit to personalize your mezze board.
- Perfect for sharing. Mezze is meant to be enjoyed communally. It's casual, conversational, and makes gatherings feel more relaxed and connected. Everyone can nibble at their own pace while enjoying time together.
Ingredient Notes
To make this delicious Mezze Platter, you will need the following ingredients (full measurements in recipe card below):
- hummus - creamy and protein-rich, it's the classic base dip. Use any kind of hummus you like! Try plain Classic Hummus or flavored varieties like Roasted Red Pepper Hummus, Pesto Hummus, or Beet Hummus.
- tzatziki sauce - cool, tangy yogurt-cucumber dip for contrast. You can substitute with labneh or herbed Greek yogurt.
- muhammara - a smoky-sweet dip made with roasted red peppers and walnuts. Optional but highly recommended for depth and variety. You can also swap in something like roasted red pepper hummus, baba ganoush, or even a spicy red pesto for a similar color and complexity.
- olive oil - drizzle over dips or veggies for richness and shine. Use good-quality extra virgin olive oil.
- marinated olives - briny and savory, they add a punch of salt and fat. Choose a mix of green and black varieties.
- dolmas - grape leaves stuffed with seasoned rice and herbs. They're a staple in Mediterranean cuisine and can usually be found in the international or deli section of most grocery stores. You can also find them in cans or jars at Middle Eastern or specialty food markets. If you can't find any, just leave it out.
- feta cheese - creamy and salty, perfect for crumbling or cubing. You can substitute with goat cheese or halloumi.
- Persian cucumbers - feel free to substitute with English cucumbers or mini bell peppers.
- cherry tomatoes - grape tomatoes or sliced Roma tomatoes also work.
- figs - fresh or dried, they offer a sweet contrast. Substitute with other fresh fruit like grapes or cherries, or try dried fruits like dried apricots or dates.
- pita bread - use store-bought pita or try to make Homemade Pita Bread yourself! I also recommend warming slightly before serving.
- crackers and/or pita chips - for extra crunch and variety.
- fresh herbs - mint or dill adds aroma and color.
You will also need measuring cups and spoons, a large wooden or ceramic platter or board, small bowls for dips, knives and spoons for serving, and napkins or small plates.
How to Make the Best Mezze Platter
- On a large platter, arrange the items that are in a bowl (these are the hummus, tzatziki, muhammara, and olives), spacing them apart from each other in a non-symmetrical pattern. Drizzle the hummus and tzatziki with olive oil on top, if desired.


- Arrange the dolmas, feta, cucumbers, tomato, and figs around the bowls on the platter.


- Arrange the pita bread and crackers in any gaps or around the platter.
- Fill any remaining gaps with fresh mint and dill.


Recipe Variations
- Add protein. Include sliced grilled chicken, lamb meatballs, steak bites, or falafel for a more filling platter that doubles as a meal.
- Add more veggies. Skip meats and pile on more vegetables like roasted eggplant, grilled zucchini, or artichoke hearts to keep it plant-based.
- Add fruit and nuts. Grapes, pomegranate seeds, almonds, or pistachios add contrast and variety while enhancing the Mediterranean flavors.
- Make it spicy. Include a small bowl of harissa or spicy chili oil for dipping or drizzling, or add stuffed spicy peppers for a kick.
How to Serve
Serve your Mezze Platter as an appetizer or as part of a larger Mediterranean-inspired spread. It pairs beautifully with:
- Greek Lamb Souvlaki Skewers
- Tabbouleh Salad
- Baked Greek Chicken Breast with Souvlaki Marinade
- Greek Rice
- Italian Lentil Soup
- Chickpea Greek Salad
- Souvlaki Beef Shish Kebabs
For more recipes, see our 30 Best Greek Recipes.

Recipe Tips and Tricks
- Use small bowls for dips. This keeps things neat and helps contain runny ingredients like tzatziki or hummus while adding height and dimension to the board.
- Group ingredients by type. Place dips in the center, crunchy items around the edges, and soft items like cheese or figs in between to make it easy to grab.
- Warm the pita bread. A quick toast or microwave makes it extra soft and more flavorful. Serve in a napkin-lined basket to keep warm.
- Chop veggies just before serving. This keeps cucumbers and tomatoes crisp and prevents sogginess on the platter.
- Add a drizzle of olive oil and herbs. Right before serving, add a final drizzle and scatter of herbs for a professional, restaurant-style finish.
Storing Instructions
Store leftover components separately in airtight containers in the refrigerator. Dips will keep for 3-4 days, and veggies are best within 1-2 days. Reassemble as needed.
FAQ
Yes, you can prepare most of the components a few hours in advance. Store dips and chopped veggies in separate containers in the fridge, and assemble the platter right before serving for the freshest presentation. Just hold off on slicing the figs and warming the pita until you're ready to serve.
If you're taking your mezze platter to a party or picnic, it's best to pack each component in its own container and assemble everything on-site. Bring along a tray or board, small serving bowls, and serving utensils so you can set it up easily when you arrive. Transporting dips in tightly sealed containers and using plastic wrap to cover pre-sliced veggies helps prevent spills and keeps everything fresh.
Yes! Stick with mild dips like hummus and tzatziki, and include familiar items like pita bread, sliced cucumbers, cherry tomatoes, and cubes of cheese. You can leave out the more adventurous components and focus on finger foods that are easy for little hands to grab. It's a great way to introduce kids to new flavors in a low-pressure, snackable format.
More Platter Recipes
Tried this recipe?
I'd love to hear what you think! Leave a comment and rating below to share your feedback. Your reviews help others discover this recipe and help me keep creating more free recipes for you. Snap a photo and tag me on social media @aheadofthyme too.

Tater Tot Breakfast Casserole
This Tater Tot Breakfast Casserole is everything you want in a cozy morning meal - creamy, flavorful, and loaded with comfort. It features a savory base of fluffy eggs, melty cheese, and diced ham, with golden, crispy tater tots that bake to bubbly perfection. Whether you're serving it for breakfast, weekend brunch, or breakfast-for-dinner, this hearty casserole is a guaranteed crowd-pleaser. The kids love it too!

Whether you're feeding overnight guests, prepping a weekend brunch, or looking for a kid-friendly meal that's satisfying and simple, this tater tot casserole checks all the boxes. It's easy to assemble ahead of time and bakes up beautifully every time. Even better, you can use this recipe as a base and customize it with your favorite proteins, veggies, or cheeses to suit any taste. It's the kind of flexible, dependable dish that makes meal planning easier and keeps everyone at the table happy.
Why You'll Love this Tater Tot Breakfast Casserole Recipe
- Hearty and satisfying. Packed with eggs, ham, and two kinds of cheese, this casserole is a filling, stick-to-your-ribs kind of breakfast. The tater tots on top add that irresistible crispy finish for the perfect bite every time. It's a well-balanced mix of protein, carbs, and comfort that keeps you full and fueled.
- Make-ahead friendly. You can prep everything the night before and pop it in the oven in the morning. That means less morning stress and more time enjoying your meal with loved ones. It's a game-changer for holidays, weekend guests, or early school mornings when time is tight.
- Customizable. Don't have ham? Try cooked sausage or crumbled bacon. Add in some spinach, bell peppers, or mushrooms for extra flavor and nutrition. This recipe is flexible enough to suit different tastes and dietary needs, making it perfect for a variety of occasions.
- Kid-approved. With cheesy goodness and golden tater tots, even picky eaters will dig into this dish. It's fun, familiar, and easy to serve. Plus, the crispy topping and gooey inside make it a meal kids actually look forward to.
- Perfect for a crowd. Whether it's a holiday breakfast or weekend brunch, this casserole feeds a group and can easily be doubled for larger gatherings. It's a no-fuss option that looks impressive and keeps everyone happy.

Ingredient Notes
To make this delicious Tater Tot Breakfast Casserole, you will need the following ingredients (full measurements in recipe card below):
- tater tots - the crispy, golden potato bites in the casserole. No need to thaw them either. For a substitute, use frozen hash browns or shredded potatoes.
- ham - adds savory flavor and protein. You can also use cooked bacon or sausage crumbles instead.
- cheddar cheese - melts into the casserole for that classic cheesy flavor. You can substitute with any melty cheese. Try Colby Jack or pepper jack.
- eggs - the base of the casserole that binds everything together. Use large eggs for best results.
- mayonnaise - adds creaminess and helps create a rich, custardy texture. You can also use sour cream or Greek yogurt instead.
- milk - helps thin the egg mixture. Whole milk works best, but any milk or non-dairy milk will do.
- mozzarella cheese - adds melty stretch and balances the sharpness of cheddar. Substitute with Monterey Jack or provolone if desired.
- chives - for a fresh, mild oniony finish. You can also use green onions or parsley instead.
- salt and pepper
You will also need measuring cups and spoons, 9x13-inch baking dish, large mixing bowl, and whisk.
How to Make the Best Tater Tot Breakfast Casserole
- Prep. Grease a 9x13-inch casserole dish with butter or spray with cooking oil spray.
- Make egg mixture. In a medium mixing bowl, whisk together eggs, mayonnaise, milk, salt, and pepper until smooth.
- Assemble bottom layer. Add tater tots, diced ham and cheddar cheese. Mix until evenly combined.
- Add egg layer. In a medium mixing bowl, whisk together eggs, mayonnaise, milk, salt, and pepper until smooth. Pour egg mixture evenly over tater tot mixture.
- Top with cheese. Top with mozzarella cheese.
- Bake. Bake in a 375F preheated oven until golden brown and the egg mixture is completely set, 40 to 45 minutes.
- Serve. Sprinkle chives on top and serve.


Recipe Variations
- Go meatless. Skip the ham and add sautéed mushrooms, spinach, or bell peppers for a vegetarian option.
- Spice it up. Add diced jalapeños or a pinch of red pepper flakes for some heat.
- Use different cheeses. Try gouda, Swiss, or a Mexican blend for a different flavor profile.
- Add more protein. Toss in cooked sausage or bacon alongside the ham for a meat-lovers' version.
How to Serve
This Tater Tot Breakfast Casserole is delicious served warm, straight from the oven. Serve it on its own or paired with some other brunch favorites including:
- Fruit Salad with Honey Lemon Dressing
- French Toast
- Quick and Easy Butter Croissants
- Arugula Salad
- Chia Seed Pudding
For more recipes, see our 40+ Best Brunch Ideas.

Recipe Tips and Tricks
- Grease your baking dish. This helps prevent sticking and makes cleanup easier, especially with melty cheese involved.
- Whisk eggs thoroughly. This ensures even cooking and a consistent texture throughout the casserole.
- Don't overbake. Bake just until the center is set and the top is golden as overbaking can dry it out.
- Let it rest. Allow the casserole to cool for 5-10 minutes before slicing so it sets up and serves cleanly.
- Double it for a crowd. Feeding a big group? This recipe is easy to scale up. Just use a larger dish and add a bit more baking time.
Storing and Freezing Instructions
How to Store
Store leftovers in an airtight container in the fridge for up to 4 days.
How to Reheat
To reheat, place a slice of casserole on a microwave-safe plate and heat for 1-2 minutes until warmed through. For larger portions or crisper edges, reheat in a 350ºF oven or air fryer for 10-15 minutes. Cover with foil if needed to prevent over-browning. Avoid overheating to preserve the creamy texture.
How to Freeze
Bake the casserole, let it cool completely, and then cover tightly with foil or plastic wrap. Freeze for up to 2 months. Thaw overnight in the fridge and reheat. You can also freeze individual portions for easy grab-and-go breakfasts.
FAQ
Yes! You can assemble the casserole the night before, cover it, and store it in the refrigerator. In the morning, simply uncover and bake as directed. It's a great option for holidays, brunch parties, or busy mornings when you want to have breakfast ready to go with minimal effort.
You can! Shredded or cubed fresh potatoes can be used, but they may need to be par-cooked first so they soften fully while baking. Tater tots give a crispier finish, but fresh potatoes offer a more homemade feel. Make sure to season them well.
Absolutely. Once the casserole is baked and cooled, slice it into portions, wrap them individually, and store them in freezer bags or containers. They reheat well in the microwave or toaster oven, making them perfect for meal prep or busy mornings.
More Breakfast Egg Recipes
- Egg and Potato Breakfast Casserole
- Breakfast Strata
- Turkish Eggs
- Caprese Frittata
- Eggs in Purgatory
- Avocado Toast with Poached Egg
Tried this recipe?
I'd love to hear what you think! Leave a comment and rating below to share your feedback. Your reviews help others discover this recipe and help me keep creating more free recipes for you. Snap a photo and tag me on social media @aheadofthyme too.

Mother's Day Vanilla Cupcakes with Rose Petal Buttercream
This Mother's Day, treat someone special (or yourself!) to these beautifully soft and fluffy Vanilla Cupcakes with Rose Petal Buttercream. They're light and airy, cute and feminine, and topped with a delicate swirl of naturally colored pink frosting - perfect for celebrating the love and sweetness of moms everywhere. The tender crumb and fragrant vanilla base paired with a luscious, creamy buttercream make these cupcakes feel extra special, yet they're simple enough for a beginner baker to tackle with ease.

Whether you're baking for a brunch, gifting a box of homemade treats, or just adding something sweet to your Mother's Day celebration, these cupcakes will be the highlight of the day. The rose-hued frosting brings a stunning floral touch, while the rich vanilla flavor and soft texture make them irresistible. You can also use this recipe as a base to customize with your favorite fillings, toppings, or even different buttercream flavors. The only downside to making these rose petal cupcakes is that your mother may tell you that they are too pretty to eat.
Why You'll Love these Mother's Day Vanilla Cupcakes
- Beautiful Mother's Day cupcakes. These cupcakes are the perfect treat for Mother's Day or for any special occasion such as bridal showers, baby showers, Valentine's Day, birthdays... I could go on. The soft pink hue and delicate swirl of buttercream make these cupcakes look extra special - perfect for celebrating someone you love. Add edible flowers or sprinkles for an even more eye-catching presentation.
- Soft and tender crumb. These cupcakes bake up with a soft, moist texture that melts in your mouth. The crumb is delicate yet holds together beautifully, making each bite a delight. It's the kind of cupcake that feels bakery-quality, but made right at home.
- Easy to make. With basic pantry staples and straightforward steps, these cupcakes are totally manageable for beginner bakers. No advanced decorating skills needed-just a swirl of frosting and a little love go a long way.
- Classic vanilla flavor. These cupcakes and their vanilla buttercream both have a timeless vanilla flavor that's comforting, nostalgic, and universally loved.
- Simple but special. Despite their stunning appearance, these cupcakes are easy to make with just a few steps and no fancy equipment. The vanilla and rose petal-inspired frosting elevates them just enough to make any occasion feel a little more magical.

Ingredients Notes
To make these pretty Vanilla Cupcakes with Rose Petal Buttercream Frosting, you will need the following ingredients (full measurements in recipe card below):
- all-purpose flour - gives the cupcakes structure. Make sure to spoon and level for accurate measuring. Substitute: gluten-free 1:1 flour blend if needed.
- baking powder - helps the cupcakes rise. Ensure it's fresh for the best lift.
- salt - enhances all the flavors.
- unsalted butter - provides rich flavor and tenderness. Make sure it's softened. You can also substitute with salted butter, but then reduce the added salt in the recipe.
- granulated sugar - for sweetness and structure.
- eggs - add structure and moisture. Room temperature eggs incorporate better.
- vanilla extract - gives these cupcakes their signature warm, fragrant flavor. Use pure extract for best results.
- milk - adds moisture and keeps the crumb soft. Use any dairy or non-dairy milk.
- buttercream icing - made with unsalted butter, vanilla extract, confectioner's sugar, milk, and food coloring. The pink food coloring is optional, but adds the rose-like hue for a festive Mother's Day finish.
Baking Tools
You will also need the following baking tools and equipment:
- measuring cups and spoons (or a kitchen scale)
- mixing bowls
- electric mixer
- 12-cup muffin tin
- cupcake liners
- 2D star piping tip

- piping bag
How to Make Vanilla Cupcakes with Buttercream Icing for Mother's Day
First, make the vanilla cupcakes.
- Combine dry ingredients. In a medium mixing bowl, add the flour, baking powder, and salt. Whisk well to combine and set aside.

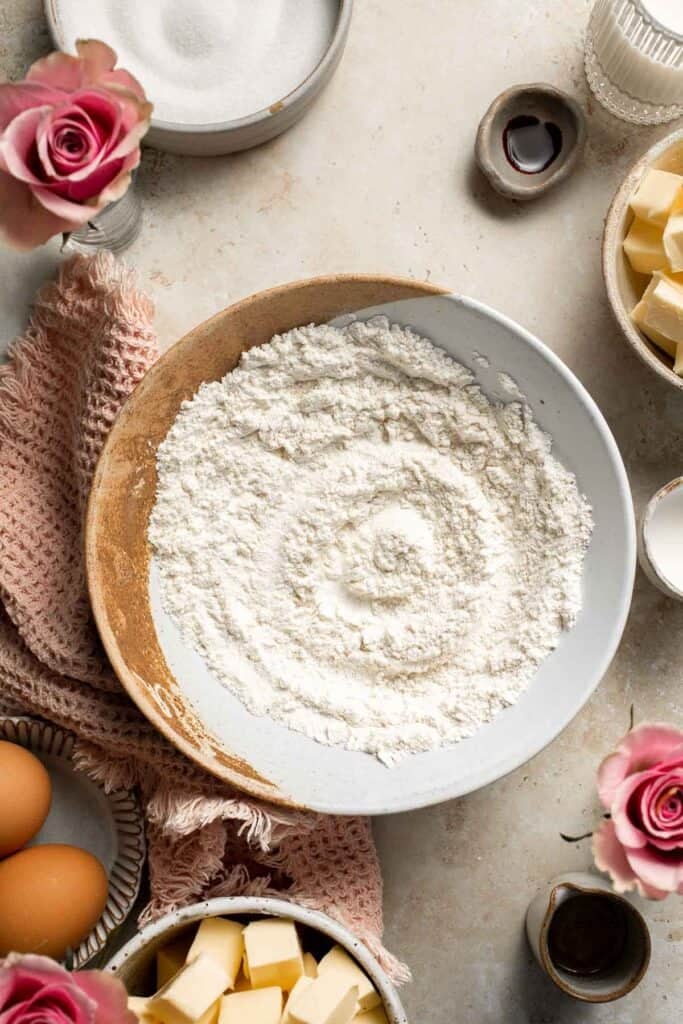
- Combine wet ingredients. In a separate large mixing bowl, use an electric hand mixer (or stand mixer) to cream together butter and sugar until light and fluffy, about 2-3 minutes. Beat in eggs one at a time until fully incorporated. Add in vanilla and continue to beat together.
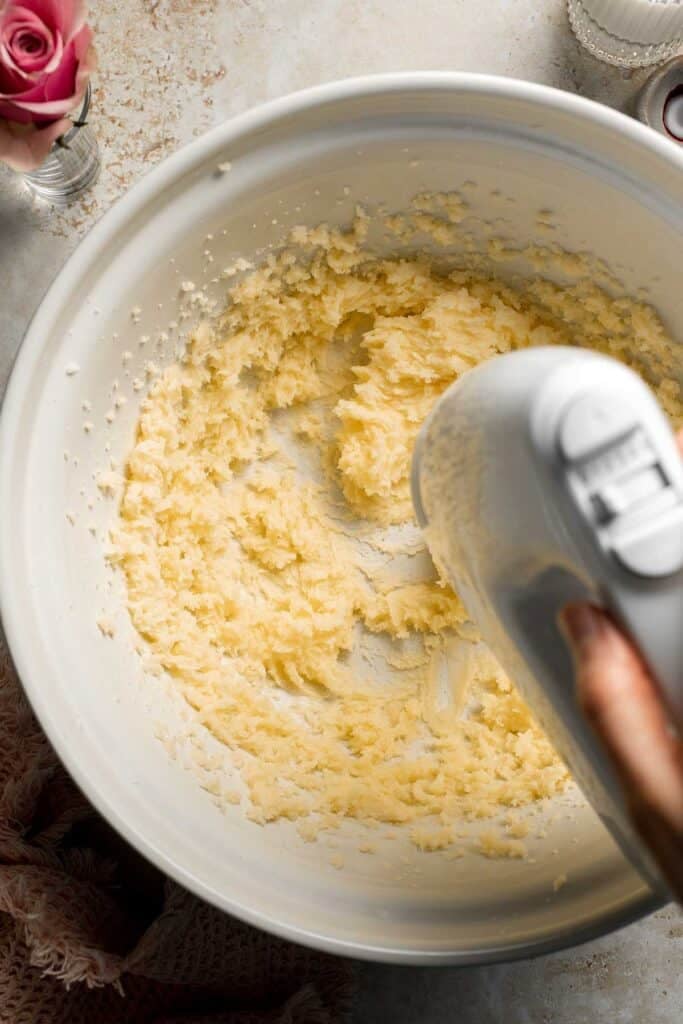
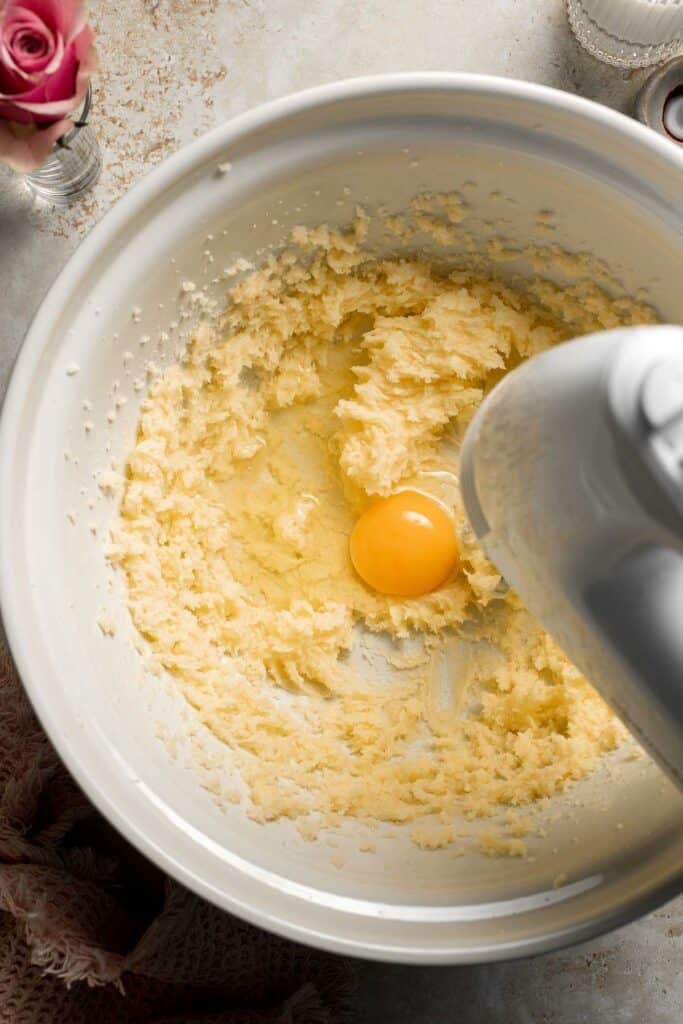
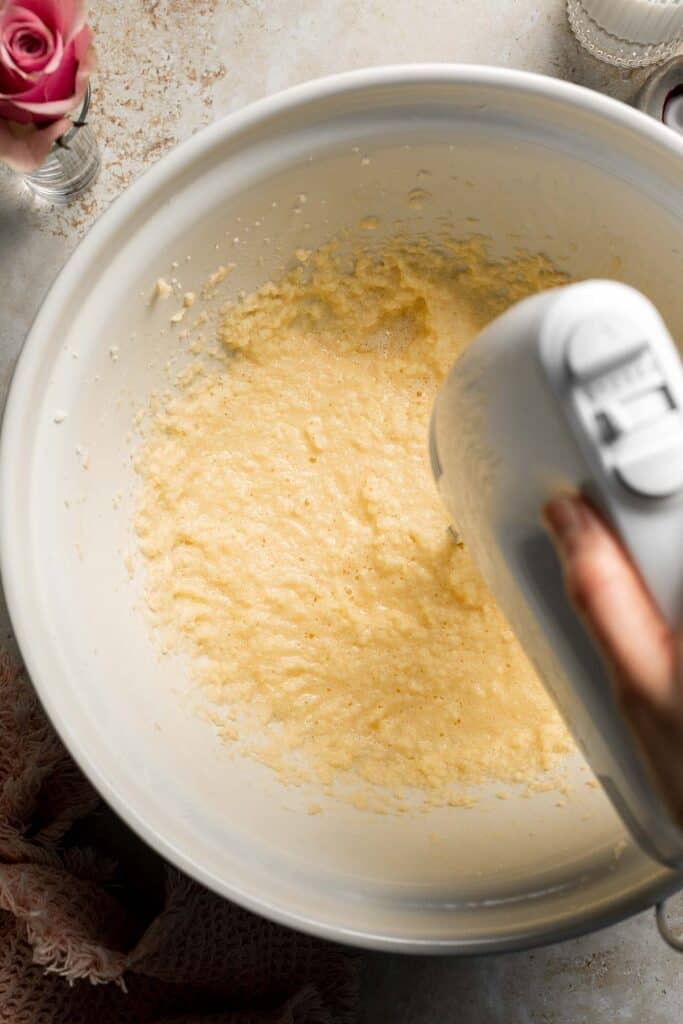
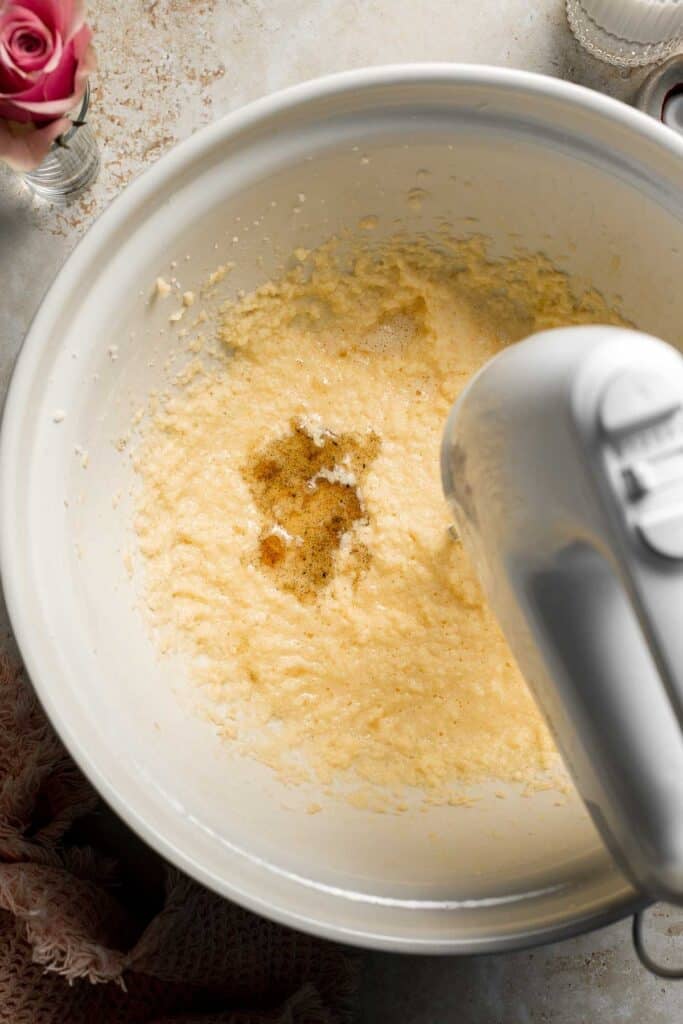
- Add dry to wet. Add ⅓ of the dry mixture into the batter, then beat to combine. Add in half the milk, and beat again to combine. Continue alternating adding and beating the dry mixture and milk, finishing with the dry mixture. Mix until just combined.
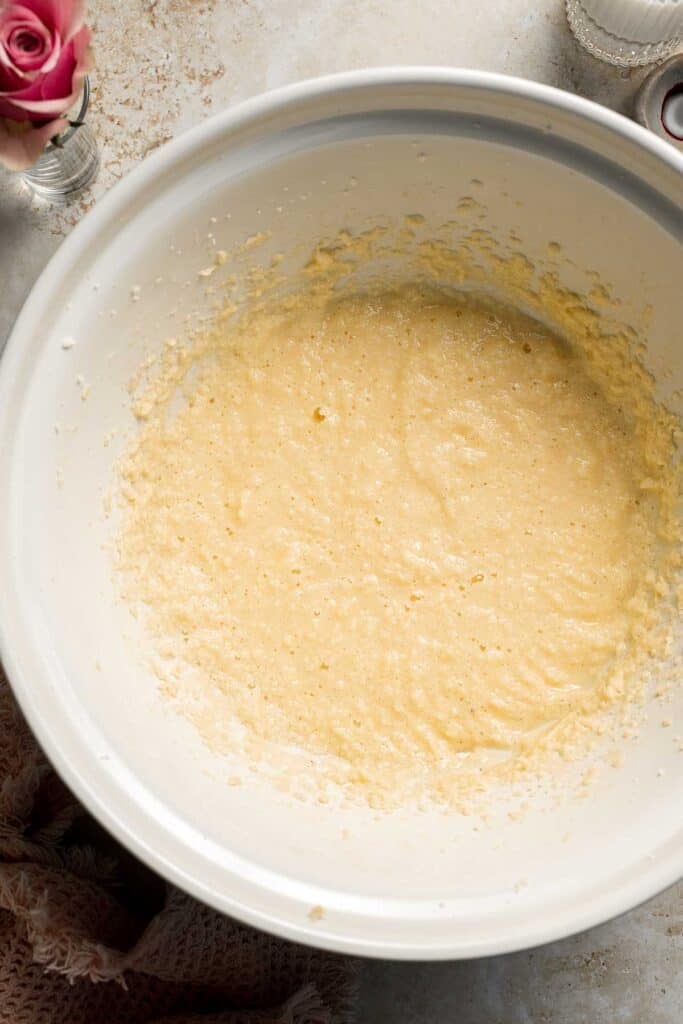

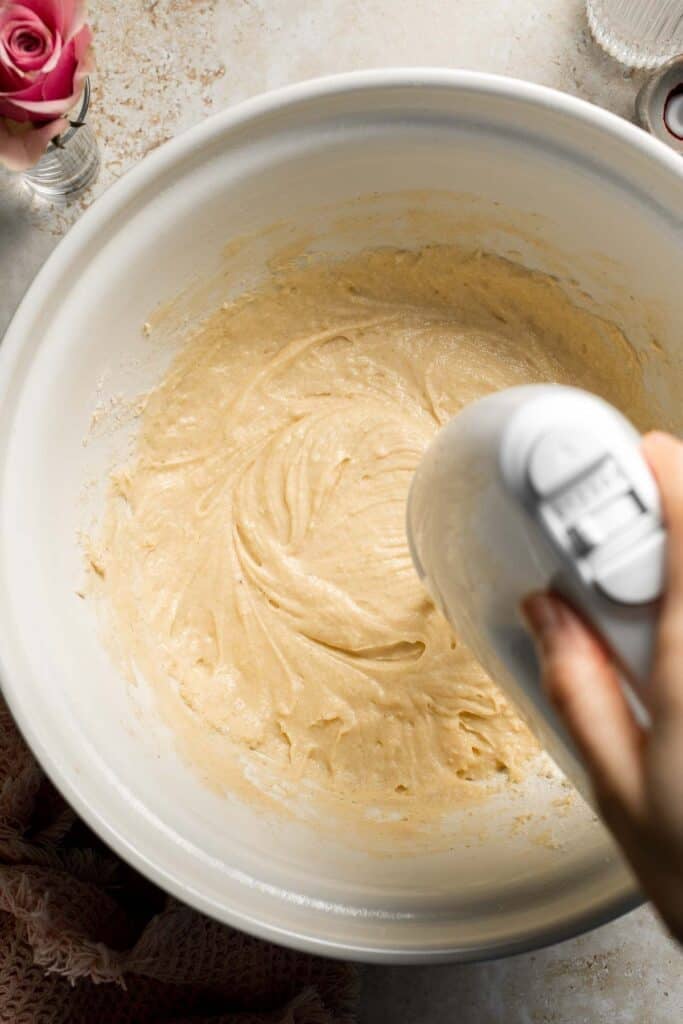

- Bake. Line a 12-cup muffin tin with 12 cupcake liners. Use a medium cookie scoop or spoons to scoop the batter into the prepared cupcake liners, filling each about ⅔ full. Place into a 350F preheated oven and bake for 18-20 minutes, until an inserted toothpick comes out clean.
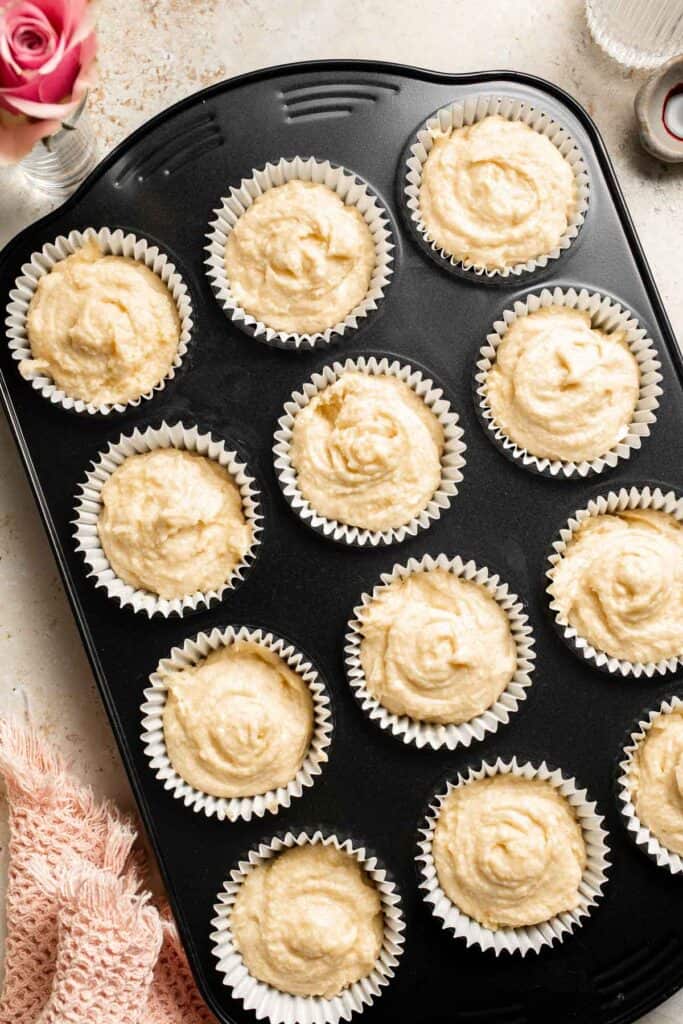
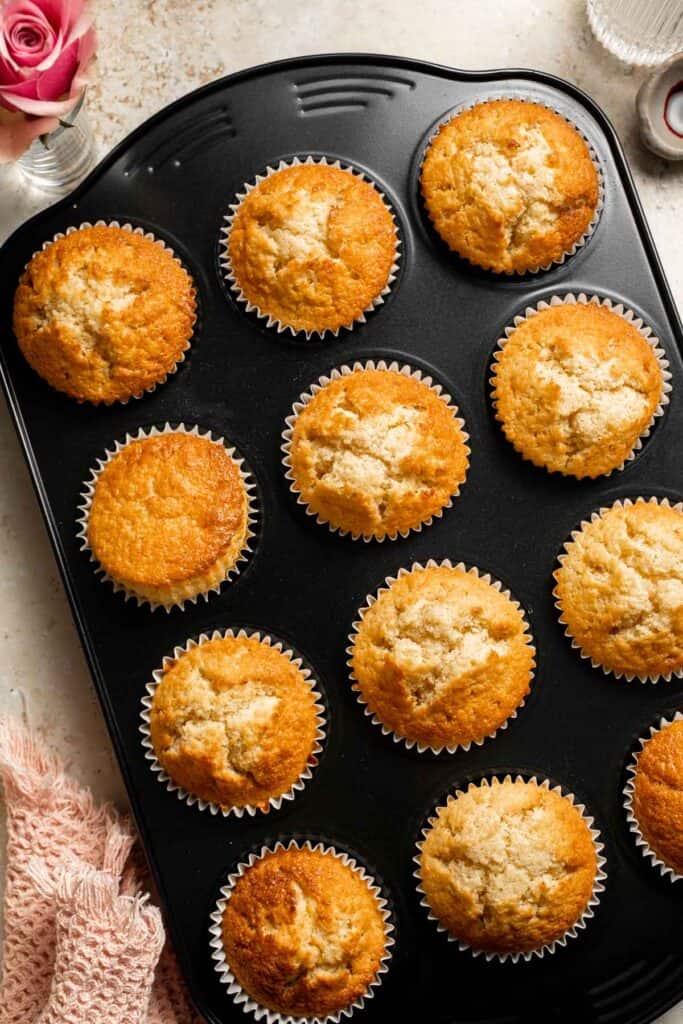
- Cool. Let cool for 5-10 minutes in the muffin tray. Transfer the cupcakes to a wire rack to finish cooling completely before frosting.
Next, make the buttercream frosting.
- Beat butter and sugar. In a large mixing bowl, add the butter and use an electric mixer to beat on high for 3-5 minutes, or until the butter looks fluffy and pale. Add in confectioners' sugar gradually, mixing on medium speed until combined.
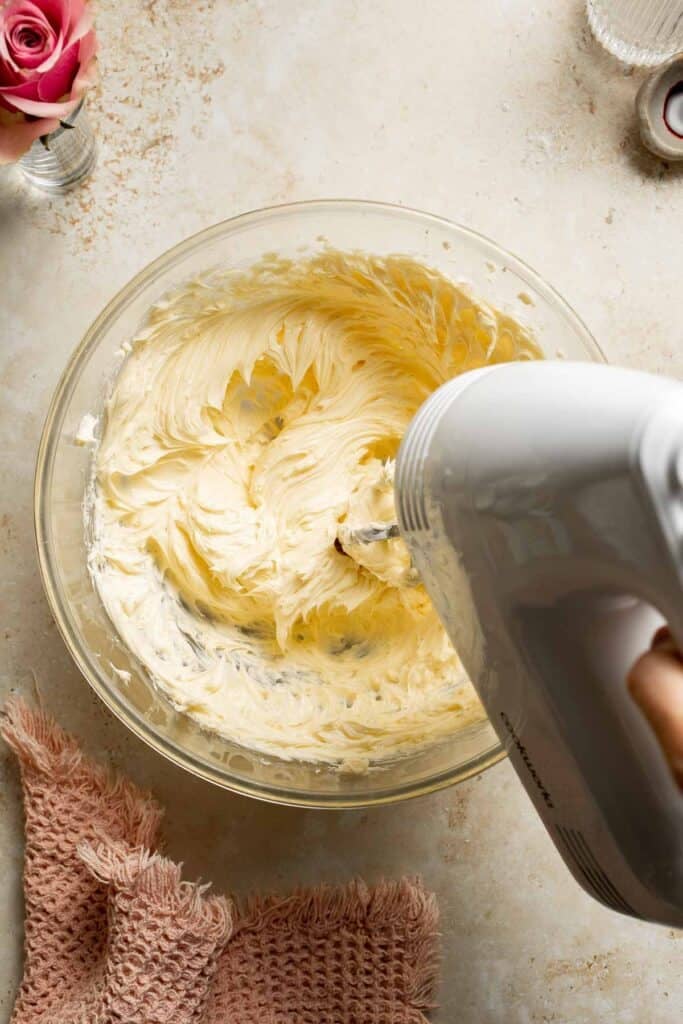
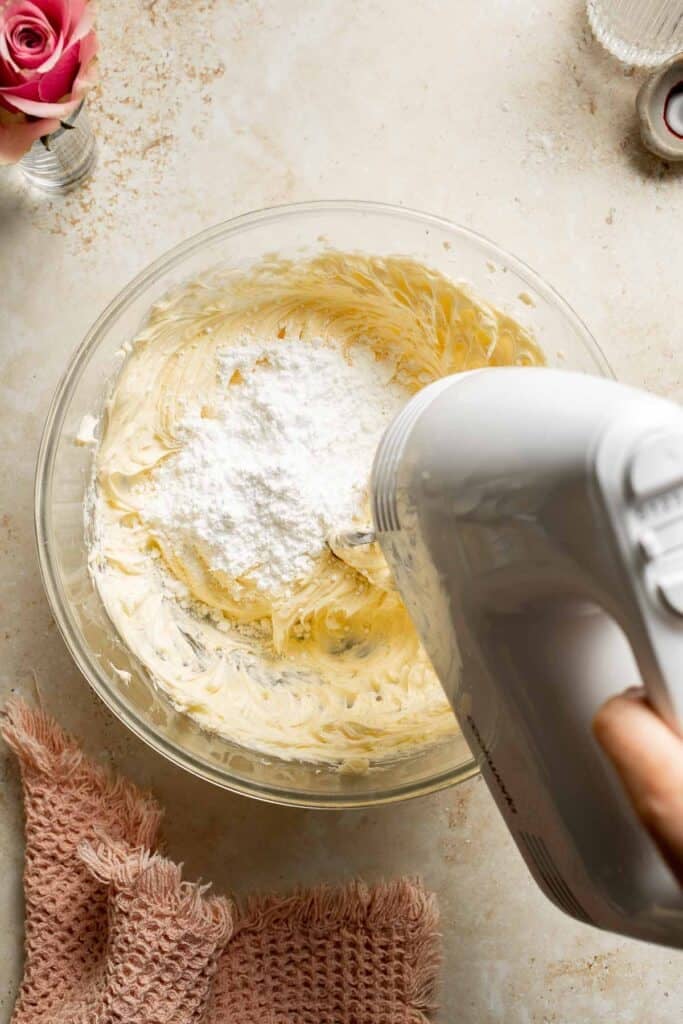

- Add remaining ingredients. Add vanilla, milk, and food colouring and continue to mix together until light and fluffy, another 1-2 minutes. If using liquid food colouring, you may need to add a little more sugar to get the right consistency. Cover the bowl with a damp cloth until you are ready to use the frosting.
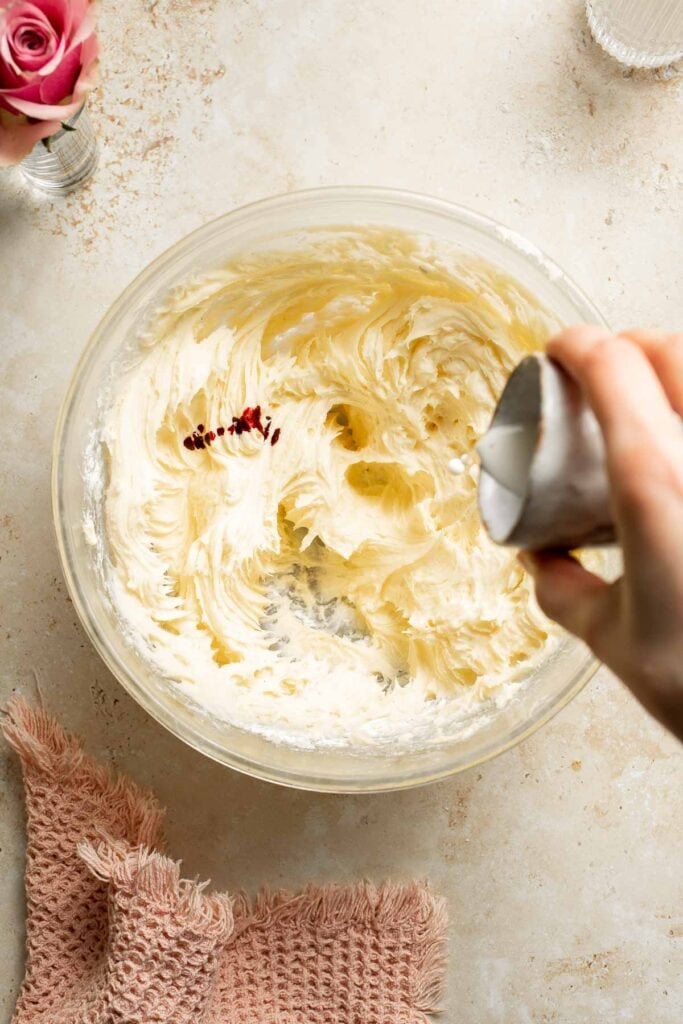
How to Frost a Rose Petal Cupcake
So, the million dollar question is: how do you frost gorgeous rose petals on these cupcakes? Well, luckily you don't have to be a professional pastry chef to create professional-looking cupcakes because it is not as complicated as it looks. Here's how you do it:
- Secure a 2D piping tip onto a piping bag, and fill the bag with the frosting.
- In the middle of the cupcake, pipe a small amount of icing.
- Without lifting your piping bag, slowly work your way around, counter-clockwise, until you reach the outer edge of the cupcake. Make sure you use a lot of pressure to get the icing out consistently.
- Repeat these steps with the all the cupcakes.


Frosting a rose on a cupcake can be done in literally a few seconds! If you are a beginner, take it slow on the first or second cupcake, until you get the hang of the swirl technique. You've got this!

Recipe Variations
- Add a filling. Try a spoonful of raspberry or strawberry jam, lemon curd, or chocolate ganache in the center before frosting.
- Try a new frosting. Swap the vanilla buttercream for cream cheese frosting, Nutella buttercream frosting, or a floral-inspired frosting like lavender or rosewater.
- Make it gluten-free. Use a 1:1 gluten-free flour blend to suit dietary needs.
- Use a different color palette. Customize the frosting color to match your celebration theme with natural or gel food coloring.
How to Serve
This cute Mother's Day cupcakes are delicious served on its own as a sweet treat for mom, or served as part of a larger dessert spread with some other cute desserts including:
For more recipes, see our 40 Mother's Day Dessert Recipes.

Recipe Tips and Tricks
- Don't overmix the batter. Mix until just combined for light and fluffy cupcakes.
- Use room temperature ingredients. This helps create a smoother batter and better rise.
- Cool completely before frosting. If the cupcakes are warm, the buttercream will melt.
- Pipe or swirl the frosting. Use a piping bag and your favorite tip for a bakery-style finish-or simply spread with a knife for a rustic look.
- Decorate right before serving. If using edible flowers or fruit, add them just before serving for the freshest appearance.
Storing and Freezing Instructions
How to Store
Store unfrosted or frosted cupcakes in an airtight container at room temperature for up to 2 days, or refrigerate for up to 4 days. Let refrigerated cupcakes come to room temperature before serving.
How to Freeze
Wrap unfrosted cupcakes individually in plastic wrap and place in a freezer-safe bag or container. Freeze for up to 2 months. Thaw at room temperature, then frost. Frosted cupcakes can also be frozen-freeze uncovered until solid, then wrap and store. Thaw overnight in the fridge and let come to room temperature before serving.
More Mother's Day Recipes
- Easy Mother's Day Brunch Menu
- 60 Best Mother's Day Recipes
- 30 Mother's Day Dinner Ideas
- 40 Mother's Day Dessert Recipes

Tried this recipe?
I'd love to hear what you think! Leave a comment and rating below to share your feedback. Your reviews help others discover this recipe and help me keep creating more free recipes for you. Snap a photo and tag me on social media @aheadofthyme too.

Homemade Crunchwrap
This Homemade Crunchwrap is a crispy, cheesy, flavor-packed meal inspired by the fast-food favorite - only better! It's layered with seasoned ground beef, creamy nacho cheese sauce, fresh tomatoes, sour cream, and a crunchy tostada shell, all wrapped in a warm tortilla and toasted to golden perfection. It's the best combo of textures and bold Tex-Mex flavors, made right in your own kitchen.

Whether you're meal-prepping for the week or making a fun handheld dinner the whole family will love, these crunch wraps are a hit. They're satisfying, easy to customize with your favorite proteins and toppings, and freezer-friendly, making them great for busy nights. Think of it as a delicious base recipe you can build on with whatever you have on hand. Once you try these homemade crunch wraps, you'll want to skip the drive-thru for good!
Why You'll Love this Homemade Crunchwrap Recipe
- Crispy and melty. Each bite combines a crunchy tostada shell with gooey cheese, juicy beef, and warm tortillas toasted to perfection in a skillet or panini press. It's the ultimate comfort food!
- Simple but flavorful filling. A few pantry spices like cumin, paprika, and garlic powder elevate the beef into a rich, savory mixture. Add a touch of tomato paste, and you've got a quick and delicious taco-style filling.
- Quick and easy to prepare. Once your ingredients are prepped, the wraps come together in minutes and toast up perfectly in a skillet - no deep frying required! Great for busy nights when you want something filling, flavorful, and fast.
- Customizable layers. While this recipe sticks to the classic ground beef and cheese combo, you can easily make it your own with different proteins, beans, or extra veggies. It's easy to adjust based on your taste or what you have on hand.
- Perfect for meal prep. Make a batch, freeze extras, and reheat them for quick lunches or dinners. They hold up well and taste just as good after reheating, making them a convenient option for busy weeks.

Ingredient Notes
To make this delicious Homemade Crunchwrap, you will need the following ingredients (full measurements in recipe card below):
- ground beef - lean ground beef works best for less grease, but you can use any variety. Substitute with ground turkey or beans for a lighter version.
- spices - cumin, paprika, garlic powder, salt, and pepper season the beef for bold flavor. You can substitute with a taco seasoning blend if preferred.
- tomato paste + water - helps bind and flavor the beef mixture without making it watery. Crushed tomatoes or tomato sauce can also work in a pinch.
- flour tortillas - we use a large tortilla for wrapping everything together, and a small tortillas as a patch to seal the crunch wrap and preven leaks. You can also trim larger tortillas to size. Use store-bought tortillas or try our Homemade Tortillas.
- tostada shells - for the signature crunch in the center. You can swap with tortilla chips, Tortilla Strips, or crispy flatbread pieces. The goal is to create a crunchy middle layer to mimic the tostada's texture. Get creative with what you have - anything crunchy and flat will help achieve the same result without a special trip to the store.
- nacho cheese sauce - adds creamy, melty goodness. Queso, Velveeta, or shredded cheese with a splash of milk can also be used.
- tomato - diced for freshness and flavor. Cherry tomatoes or salsa can be used instead.
- cilantro - chopped for a bright, herby finish. Substitute with parsley or omit entirely if preferred.
- sour cream - adds creaminess and tang. Greek yogurt works too, or use a dairy-free alternative.
- Mexican cheese blend - shredded cheese that melts beautifully and ties everything together. Monterey Jack, cheddar, or Colby can be used instead.
You will also need measuring cups and spoons, a skillet or griddle, spatula, and parchment or foil for prep.
How to Make the Best Homemade Crunchwrap
First, make the filling.
- Cook beef. In a large skillet, add ground beef and cook over medium-high heat until browned, about 5 minutes. Make sure to break up beef into small pieces to help even browning.
- Season. Add cumin, paprika, garlic powder, salt, pepper, tomato paste, and water. Reduce heat to medium and let the mixture simmer for 3-5 minutes until the beef is fully cooked through and the sauce thickens a bit, stirring occasionally. Turn off heat and set aside.
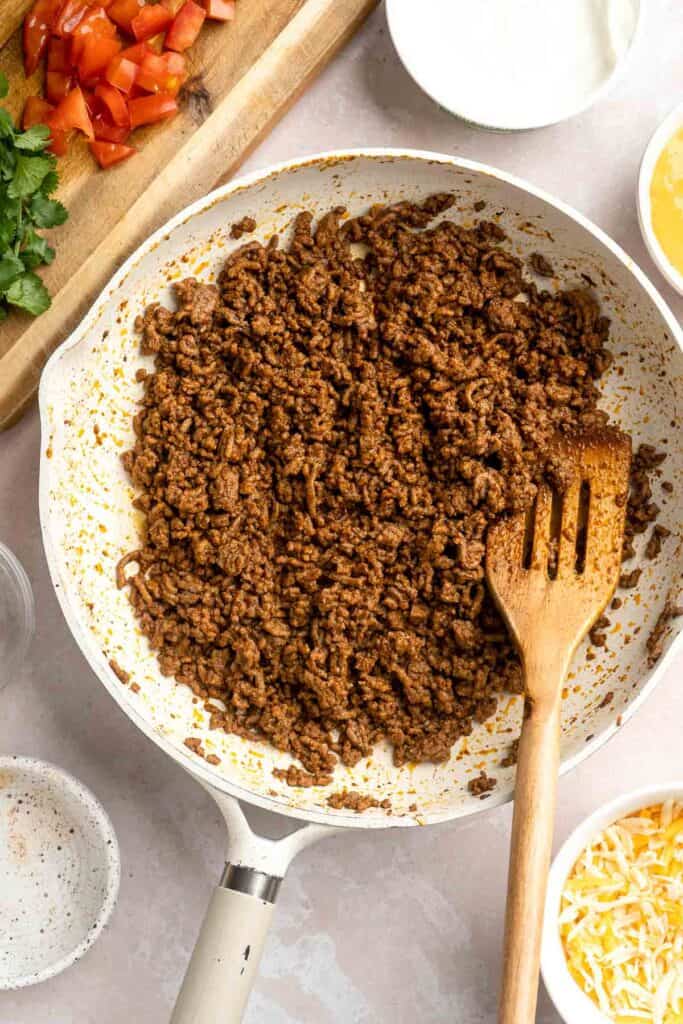
Next, assemble and toast.
- Heat tortillas. Heat both the large and small flour tortillas according to the package instructions (microwave for 30 seconds or heat in an ungreased skillet over medium-high heat for 30 seconds per side). This makes the tortillas easy to wrap.
- Assemble. Add an equal amount of beef filling to each large tortilla. Spread with nacho cheese sauce, tomatoes, cilantro, sour cream, and shredded cheese.
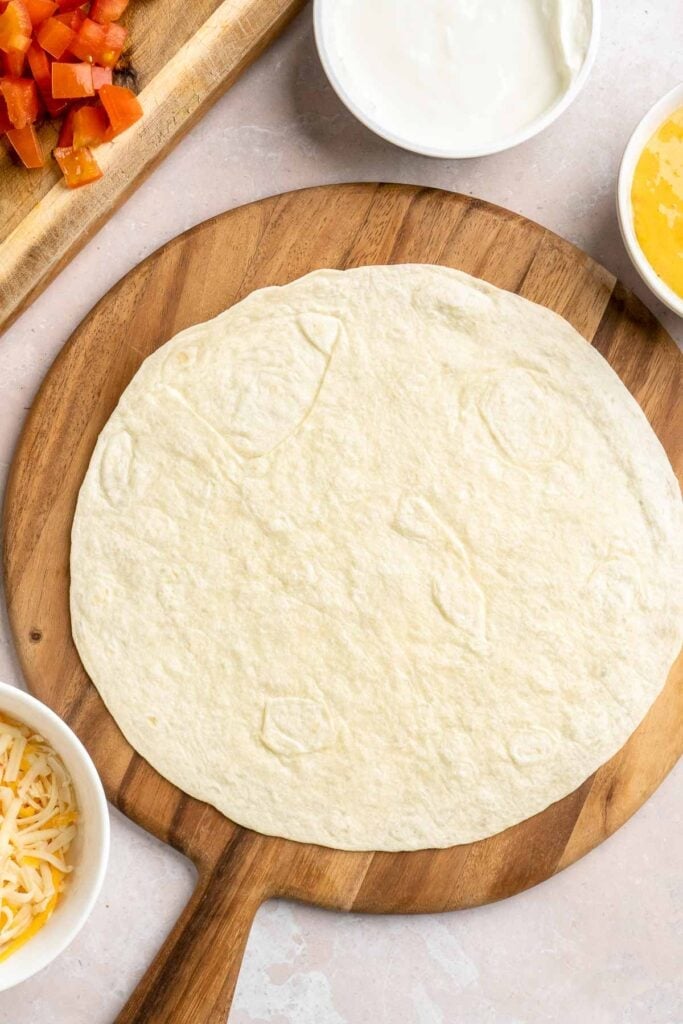
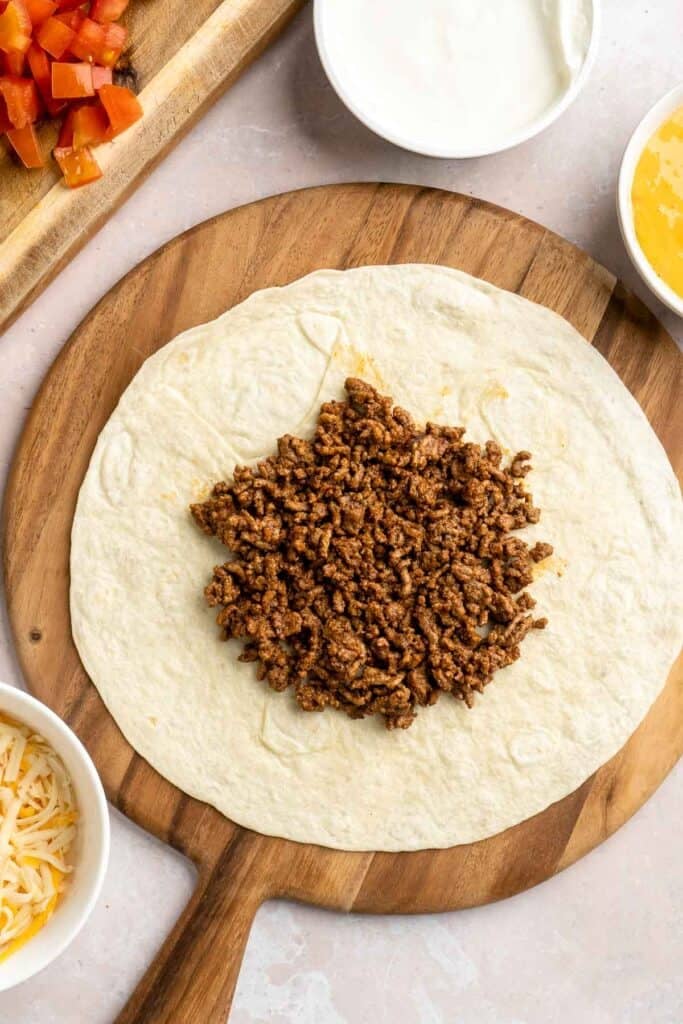
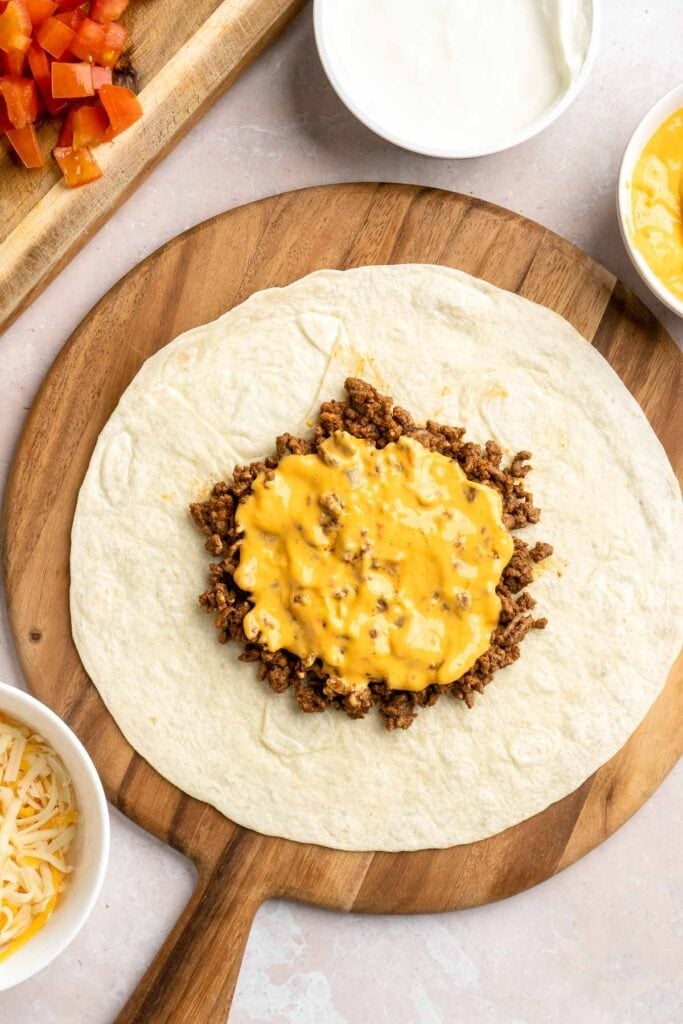

- Seal. Place the tostada shell on top of the fillings and cover with a small flour tortilla. Gently fold the edges of the large tortilla to seal the wrap.
- Toast. In the same clean skillet, heat a little bit of oil over medium heat and place the folded tortilla wrap seam side down. Cook until golden brown, about 3 minutes per side. Repeat with the remaining wraps.
Recipe Variations
- Swap the protein. Use ground turkey, shredded chicken, steak strips, or even scrambled eggs for a breakfast twist.
- Make it vegetarian. Use black beans, lentils, or a plant-based ground in place of beef.
- Spice it up. Add chopped jalapeños, chipotle sauce, or hot salsa inside the wrap.
- Add veggies. Layer in sautéed bell peppers, onions, or corn for extra texture and flavor.
- Add rice or beans. Bulk it up with seasoned rice or refried beans for a more filling wrap.
How to Serve
These homemade crunchwraps are best served hot and crisp from the skillet. They are great served on their own, or paired with some of my favorite sides including:
- Guacamole
- Pico de Gallo, Black Bean Salsa, or Mango Salsa
- Refried Beans
- Cilantro Lime Rice
- Mexican Street Corn Salad
For more Mexican inspired sides, see our 25 Mexican Side Dishes.

Recipe Tips and Tricks
- Warm the tortillas. Microwave large tortillas for 10-15 seconds to make them more pliable and easier to fold without tearing. A soft, warm tortilla is less likely to crack and gives you a tighter seal.
- Don't overfill. It's tempting to stuff them full, but too much filling makes them hard to seal. Use a modest scoop of each layer and flatten it gently for even cooking.
- Toast seam-side down first. When adding to the skillet, place the folded side down first to help seal the wrap. Press gently with a spatula for even browning.
- Use a nonstick skillet. This helps achieve that golden, crispy finish without needing much oil. If using stainless steel, brush lightly with oil to prevent sticking.
Storing and Freezing Instructions
How to Store
Let crunch wraps cool completely, then wrap leftover crunch wraps in foil or place in an airtight container and refrigerate for up to 3 days. They're best enjoyed fresh but can be reheated.
How to Reheat
Reheat in a dry skillet over medium heat until warm and crispy again, about 3-4 minutes per side. You can also use an oven, air fryer, or toaster oven for 10 minutes at 350ºF. Avoid the microwave if possible as it softens the tortilla.
How to Freeze
Wrap each cooled crunch wrap tightly in foil or plastic wrap, then place in a freezer-safe bag or container. Freeze for up to 2 months. You can also reheat from frozen in a 350°F (175°C) oven for 20-25 minutes, flipping halfway through, or thaw in the fridge overnight and reheat according to instructions above.
FAQ
Yes, you can prep all the layers ahead and assemble just before cooking. Cooked crunch wraps also store well and can be refrigerated or frozen for later. This makes them perfect for meal prepping lunches or quick weeknight dinners. For best results, store ingredients separately and assemble right before cooking. Prepping in advance also makes it easier to adjust each wrap to individual tastes.
To keep that signature crunch, make sure the beef mixture isn't too wet. You can also assemble and cook the crunch wraps just before serving. If you're reheating leftovers, use a skillet or toaster oven to bring back the crispiness. Moisture is the main culprit of sogginess, so patting ingredients like tomatoes dry and avoiding overly wet fillings can help. Serve immediately after toasting for the best texture.
Absolutely! Replace the beef with black beans, sautéed peppers and onions, or a meatless crumble. You'll still get all the flavor and crunch without the meat. Add a little extra cheese or beans to keep them hearty and satisfying. This is a great way to accommodate different dietary needs or make use of leftovers from the fridge. Vegetarian crunch wraps are just as filling and delicious!
More Recipes with Tortillas
- 30 Mexican Recipes for Cinco de Mayo
- Mexican Ground Beef Tacos
- Baked Chicken Quesadillas
- Homemade Taquitos
- Chicken Enchiladas
- Shrimp Avocado Tostadas
Tried this recipe?
I'd love to hear what you think! Leave a comment and rating below to share your feedback. Your reviews help others discover this recipe and help me keep creating more free recipes for you. Snap a photo and tag me on social media @aheadofthyme too.

Sushi Bowl
This easy Sushi Bowl recipe is fresh, flavorful, and packed with all your favorite sushi-inspired ingredients - no rolling required! It comes together with tender sushi rice, crispy tofu, crunchy vegetables, and a savory homemade teriyaki-style sauce that brings everything together. These bowls are the perfect way to enjoy sushi at home in a simplified form.
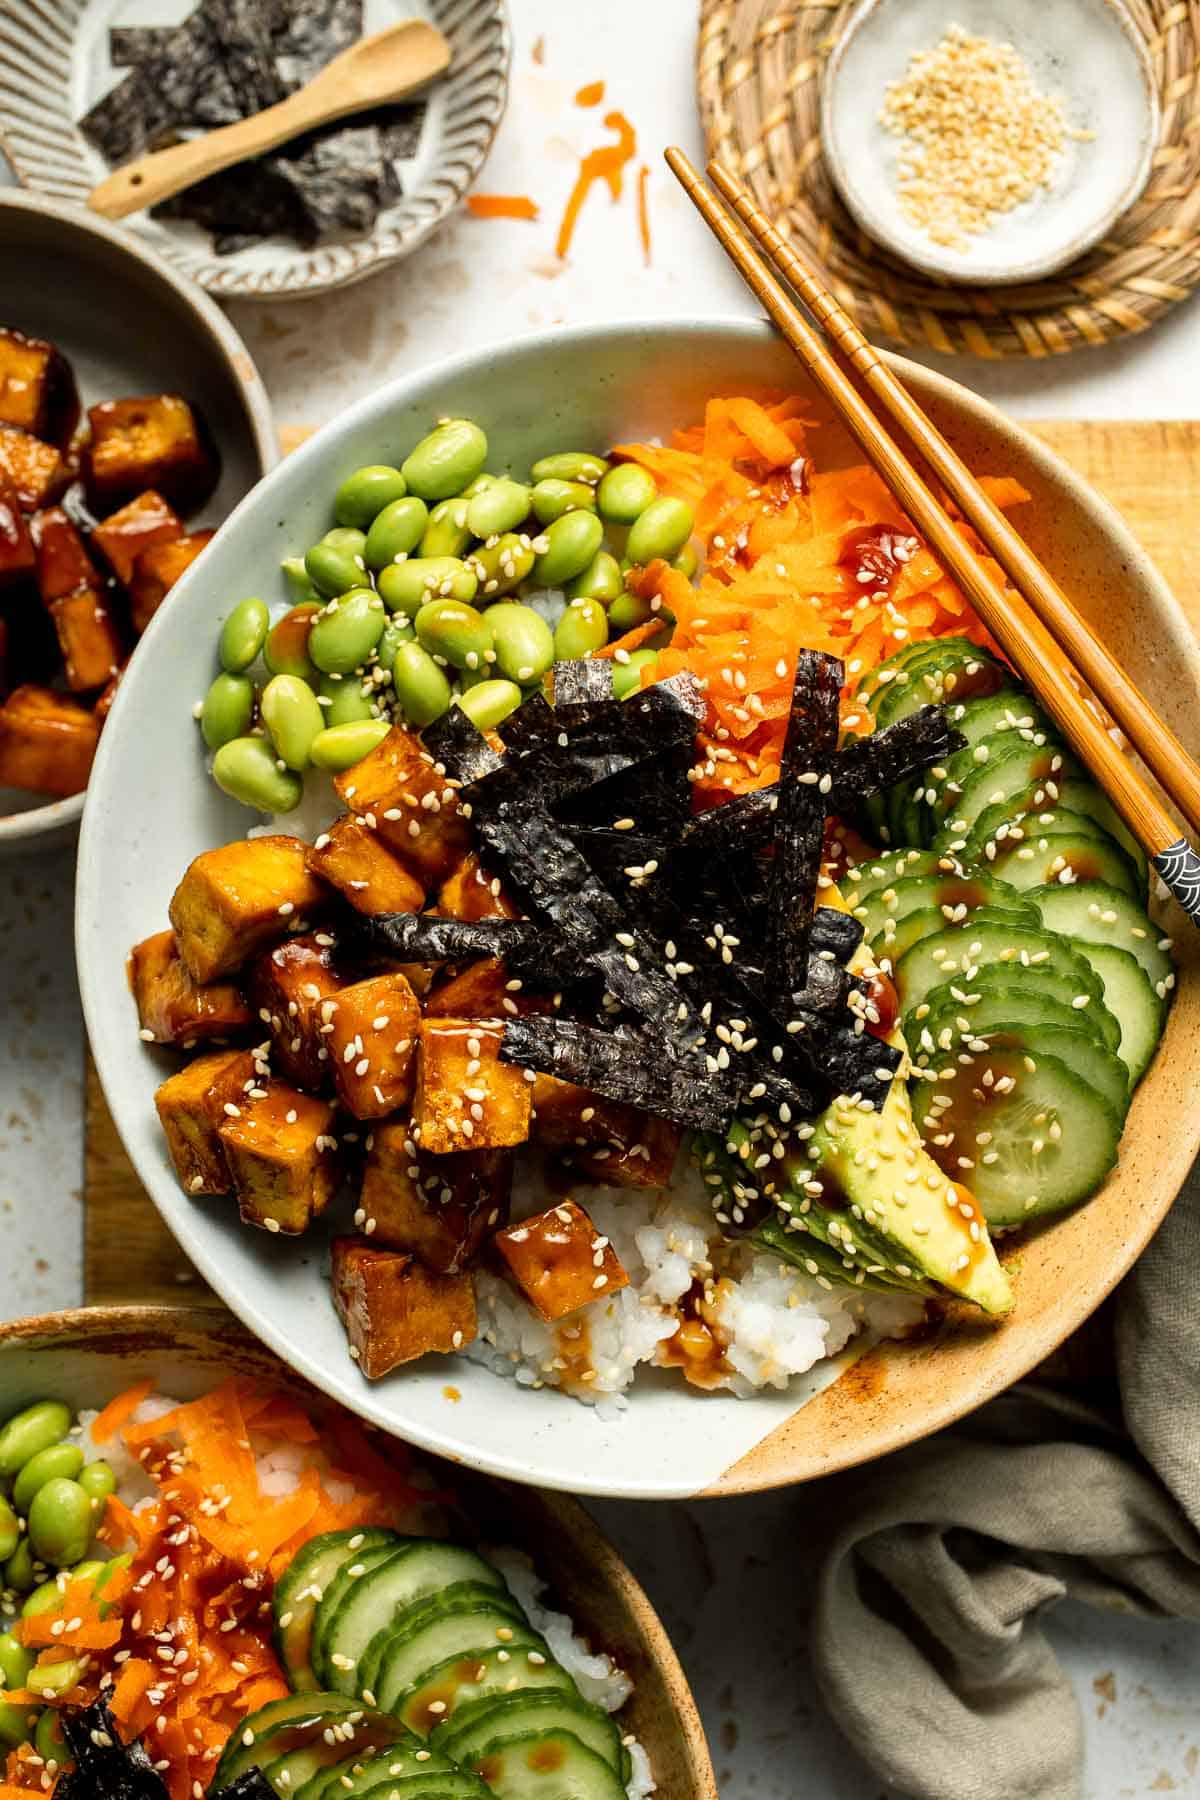
Sushi bowls are a great option for quick weeknight dinners, meal prep lunches, or anytime you're craving something fresh and nourishing. They're totally customizable and easy to build based on what you have in the fridge. You can mix and match your favorite toppings or sauces, making this a great base recipe to adapt to different dietary needs or flavor preferences. Plus, the variety of textures, from the crispy tofu to the creamy avocado and crunchy veggies, makes every bite exciting and delicious.
Why You'll Love this Sushi Bowl Recipe
- A nourishing, well-balanced meal. With protein-rich tofu, fiber-packed veggies, and hearty sushi rice, these bowls are as filling as they are flavorful. It's a well-balanced meal in one dish that doesn't skimp on taste or texture.
- Simple but flavorful sauce. The homemade teriyaki sauce made with soy sauce, brown sugar, sesame oil, and vinegar is sweet, salty, and packed with umami. It coats the rice and tofu well and adds that signature sushi flavor to the entire bowl.
- Customizable and flexible. These bowls are easy to personalize with different proteins (like shrimp or salmon), sauces (such as spicy mayo or ponzu), or toppings like pickled ginger and scallions. It's a fun and approachable way to enjoy sushi your way.
- Great for meal prep. Prepare the rice, sauce, and tofu in advance and store them separately. When you're ready to eat, just assemble the bowl with your favorite fresh toppings for a quick, delicious meal anytime.
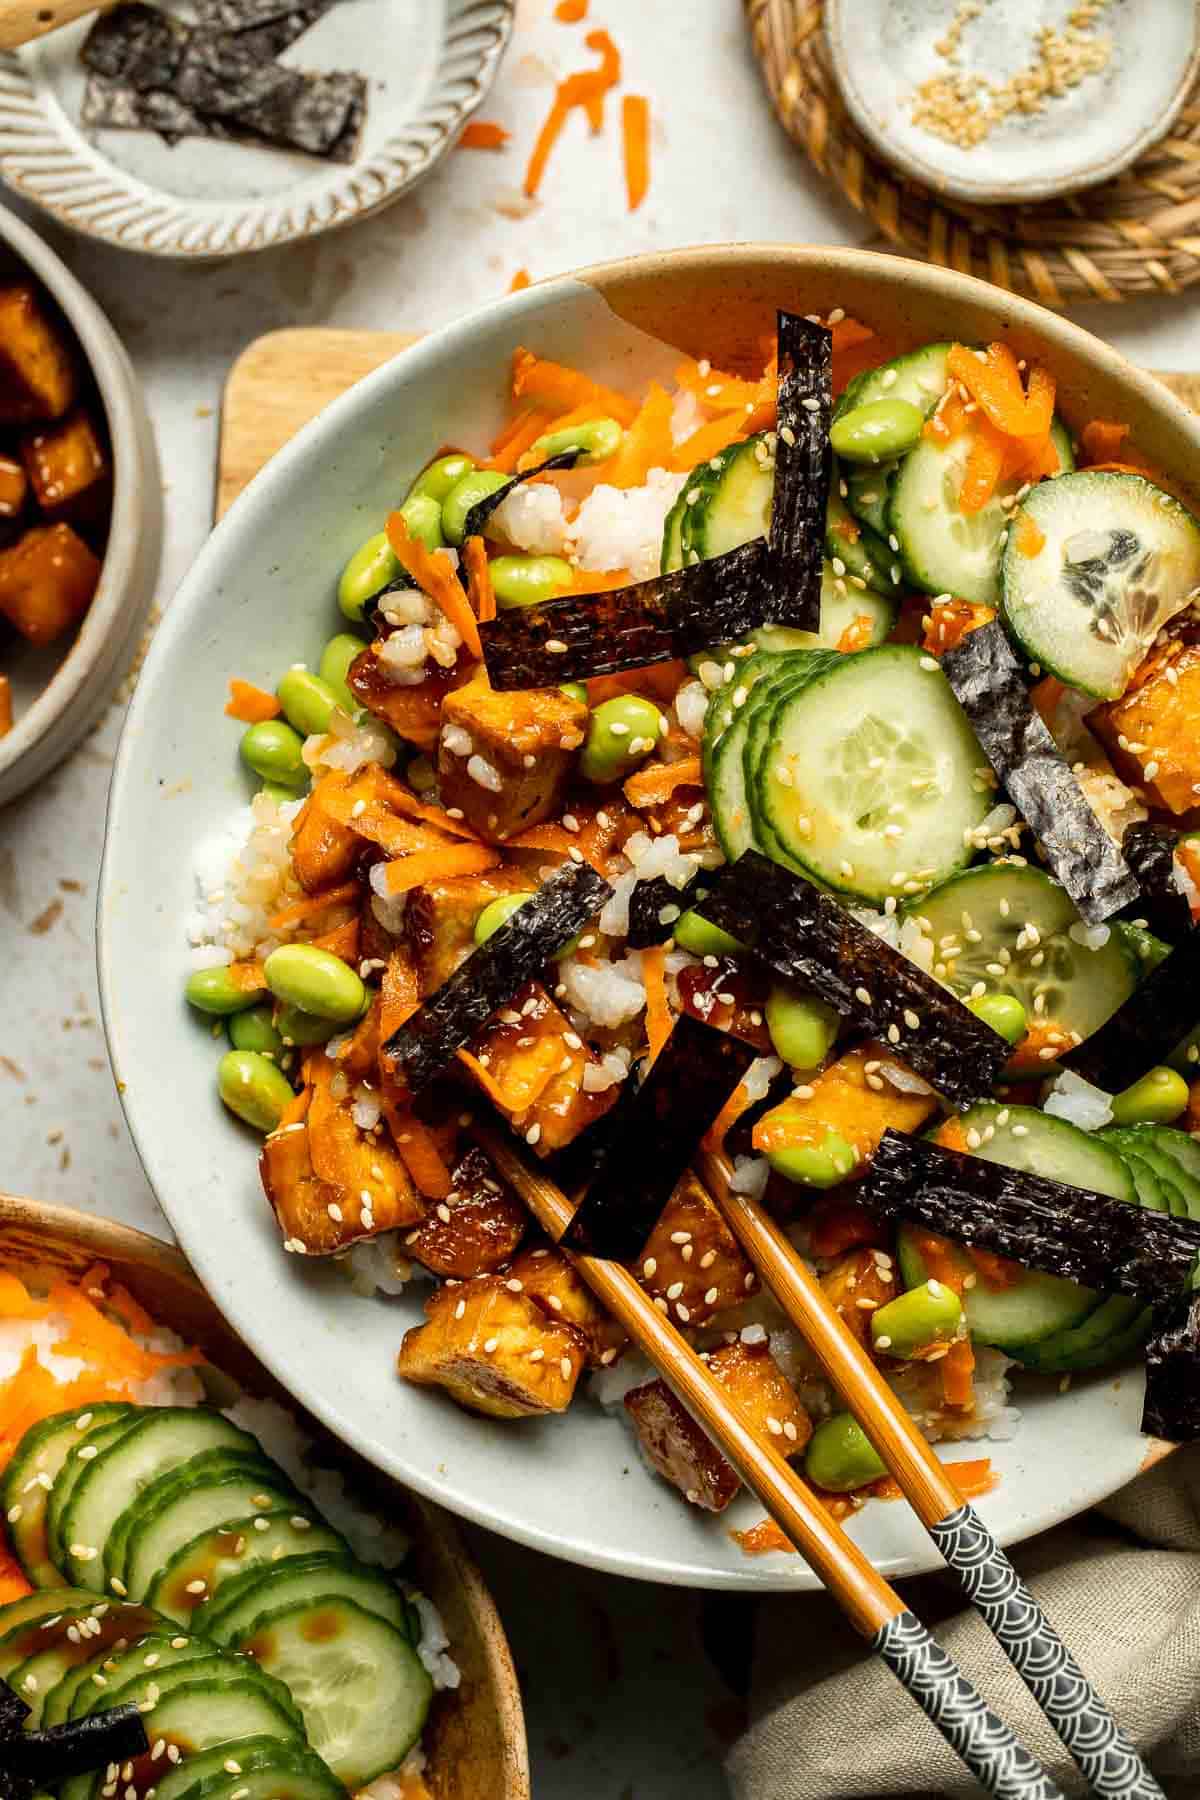
Ingredient Notes
To make this delicious Sushi Bowl, you will need the following ingredients (full measurements in recipe card below):
- extra-firm tofu - pressed and cubed for maximum crispiness. You can substitute with cooked shrimp or cooked salmon if preferred. You can also use tempeh or a plant-based meat alternative if you want to keep it vegan but try something new. The sauce pairs well with most proteins, so feel free to experiment!
- avocado oil - for sautéing the tofu. Olive oil or vegetable oil also work well.
- sushi rice - cooked and seasoned for that classic sticky texture. Short-grain white rice is best, but you can also use jasmine rice or brown rice.
- edamame - for a protein and fiber boost.
- persian cucumber - thinly sliced. English cucumber works as a substitute.
- avocado - diced for creamy texture and healthy fats.
- carrot - shredded for crunch and color. Use a julienne peeler or grater.
- nori seaweed - sliced into strips. You can use roasted seaweed snacks if preferred.
- toasted sesame seeds - for a nutty, toasty finish.
- teriyaki sauce - made from scratch using soy sauce, brown sugar, mirin or rice vinegar, sesame oil, and a cornstarch slurry.
You will also need measuring cups and spoons, a small saucepan for the sauce, a nonstick pan for tofu, and bowls for assembling.
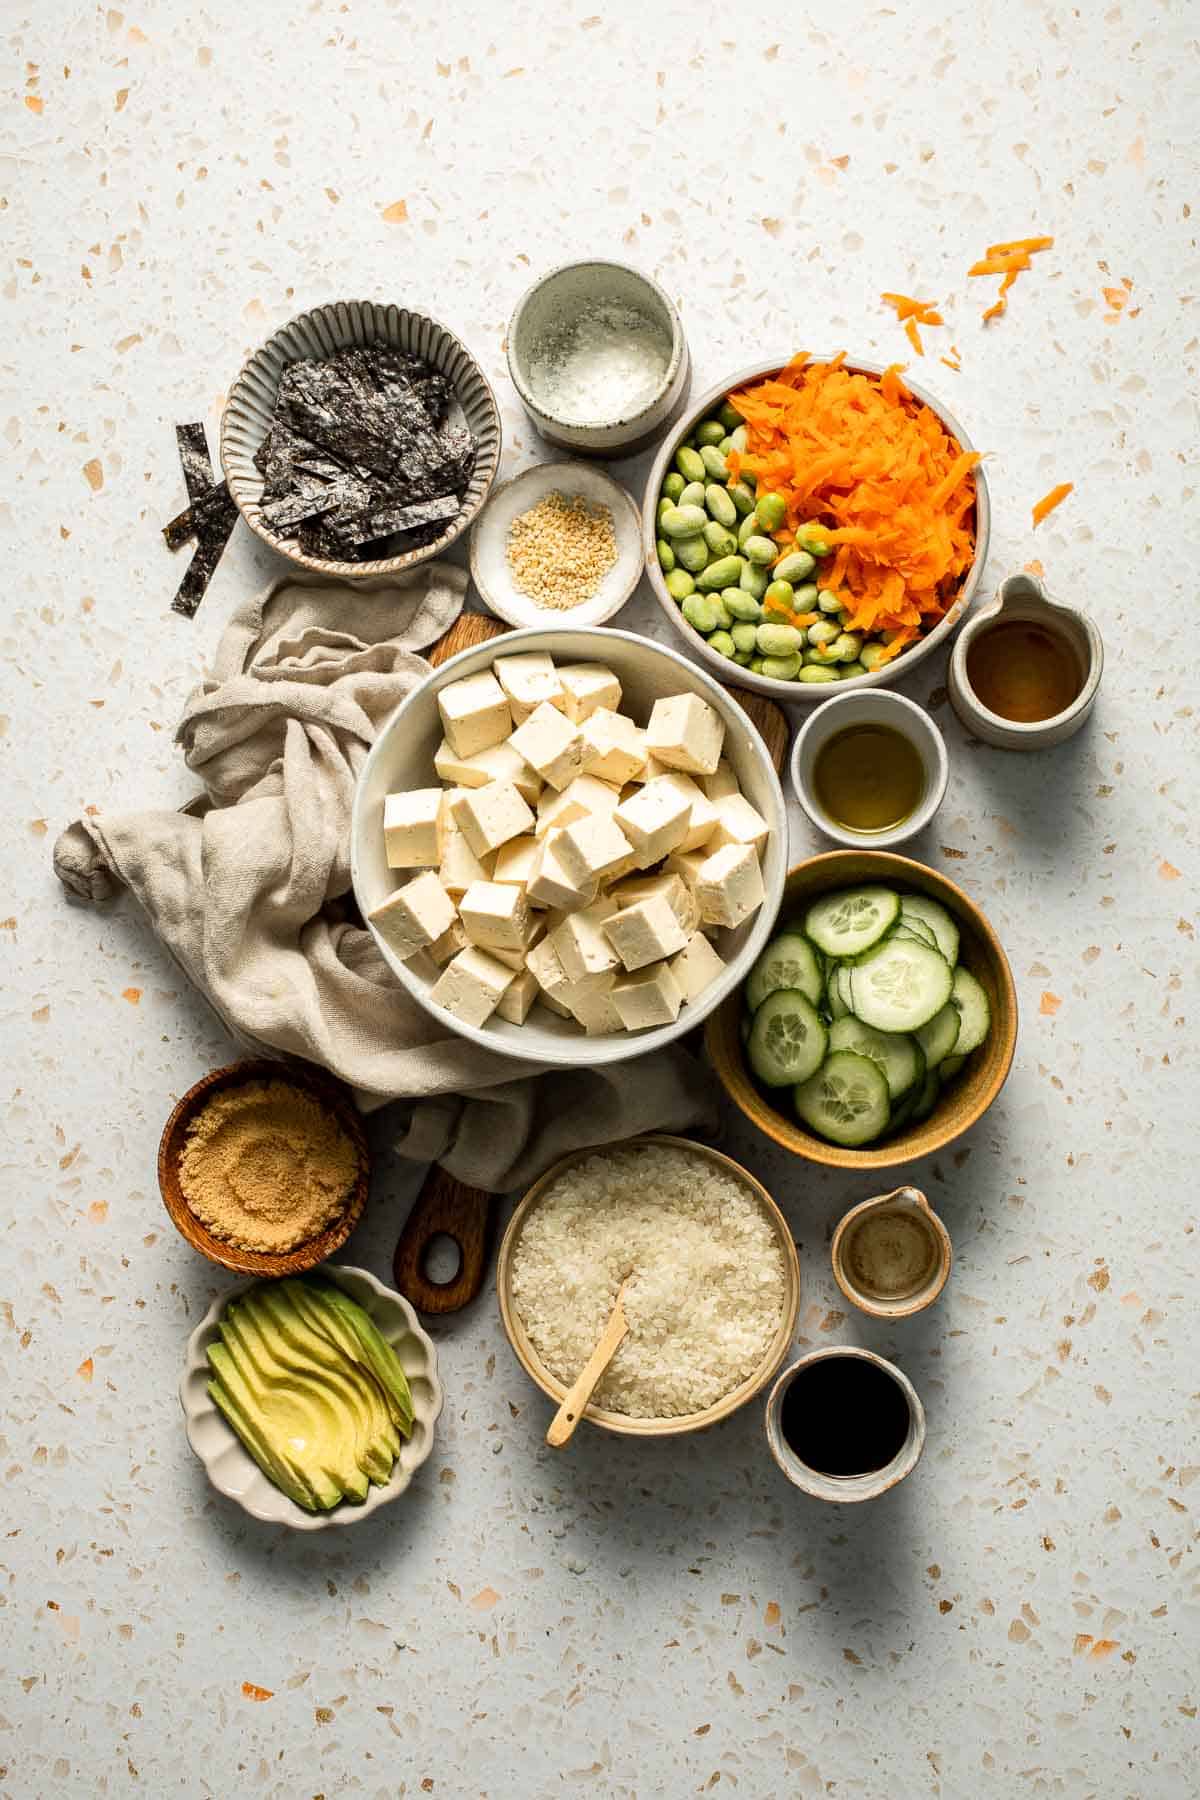
How to Make the Best Sushi Bowl
First, make the rice.
Rinse and wash the rice and place into a medium saucepan. Add 1 cup of water (or according to the package instructions) and bring to a boil on high heat. Once boiling, reduce heat to low and cover. Cook until water is completely absorbed and rice is tender, about 15 minutes. Turn off the heat and let rest for another 10 minutes.
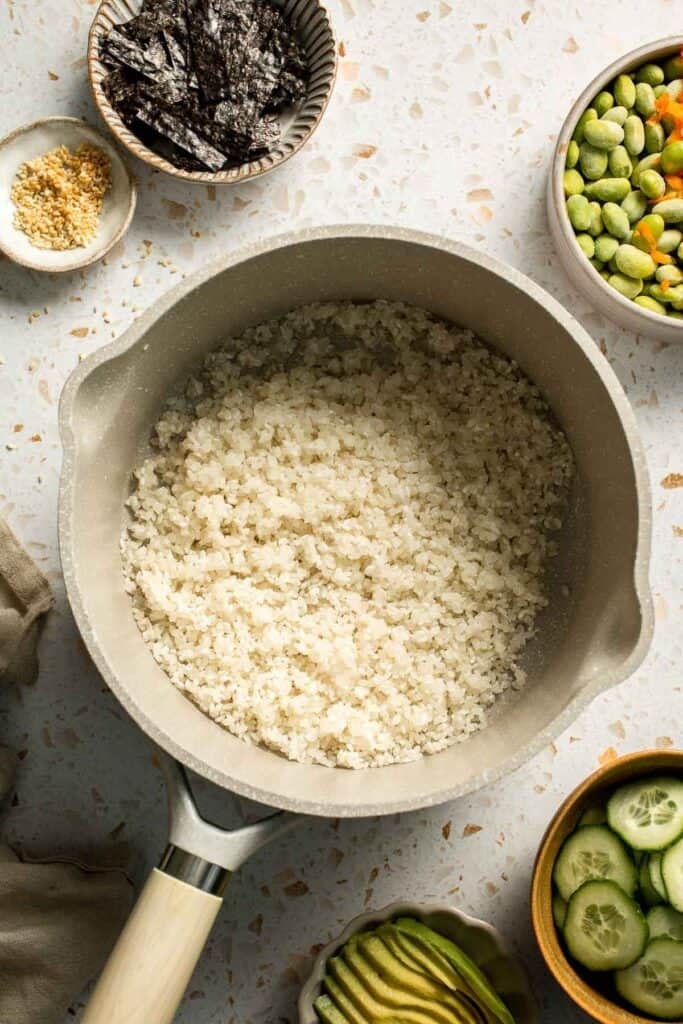
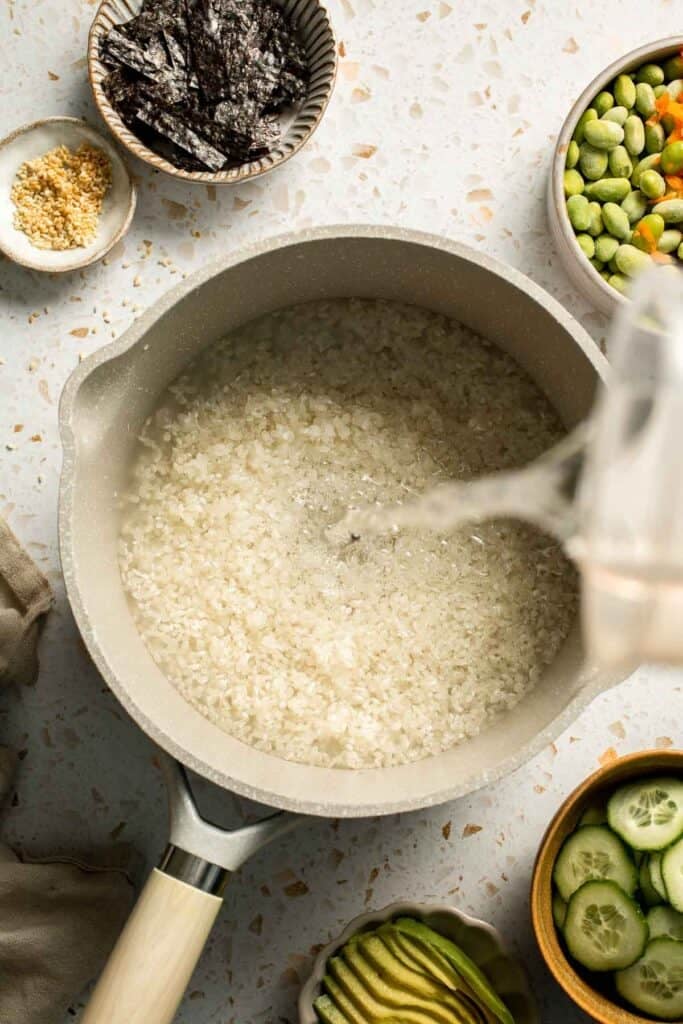
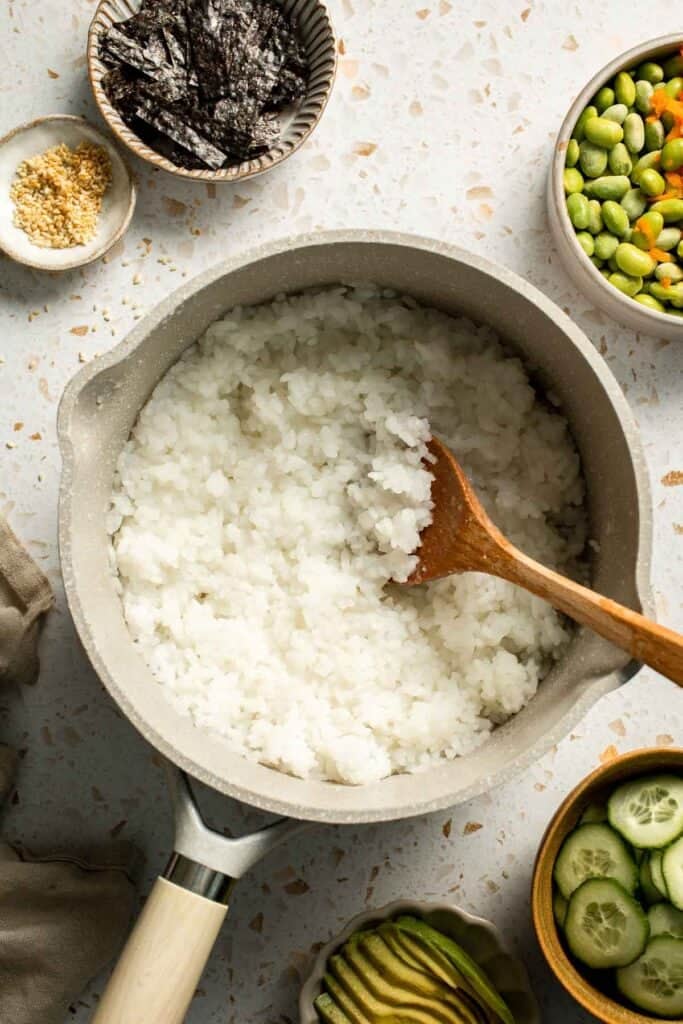
Next, make the sauce.
In a mixing bowl, whisk together water, soy sauce, cornstarch, sugar, sesame oil, and mirin until the cornstarch and sugar has dissolved. Set aside.
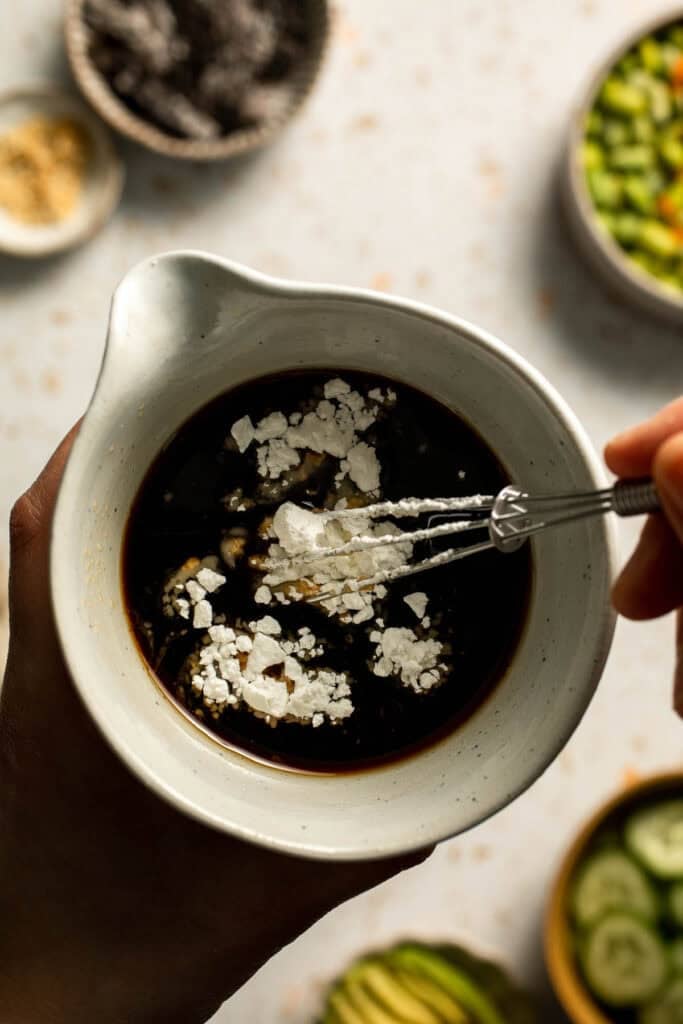
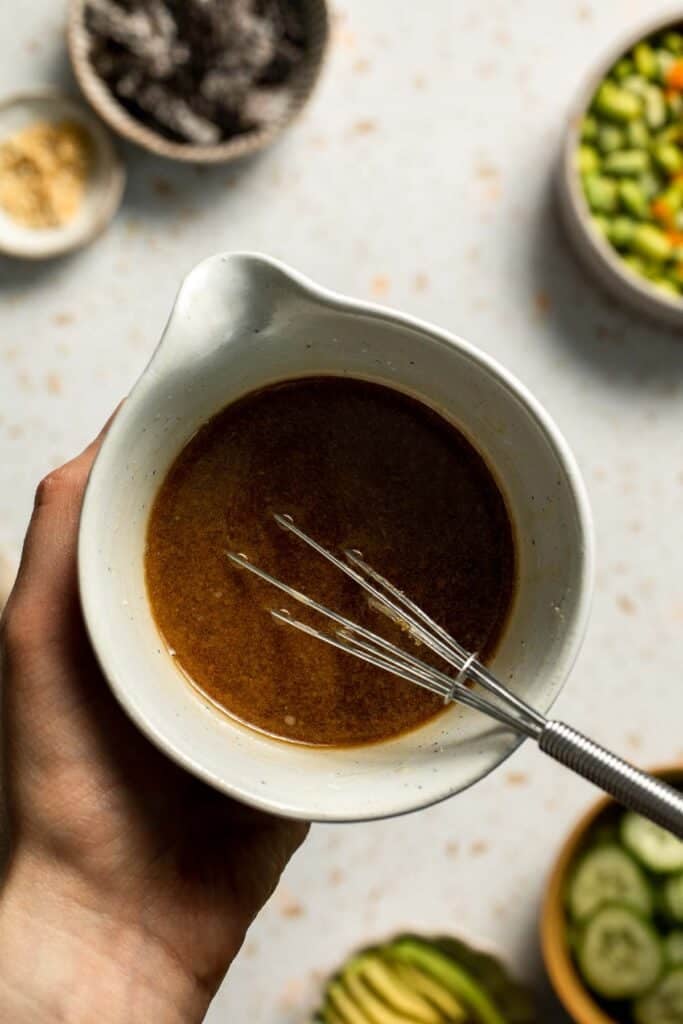
Now, make the tofu.
- Prep tofu. Use a paper towel to pat dry the cubed tofu to remove excess water.
- Pan fry the tofu. In a large skillet, heat oil over medium-high heat for 2 minutes until the hot oil is sizzling hot. Add tofu and sauté until all sides are crispy and golden brown, about 5 minutes.
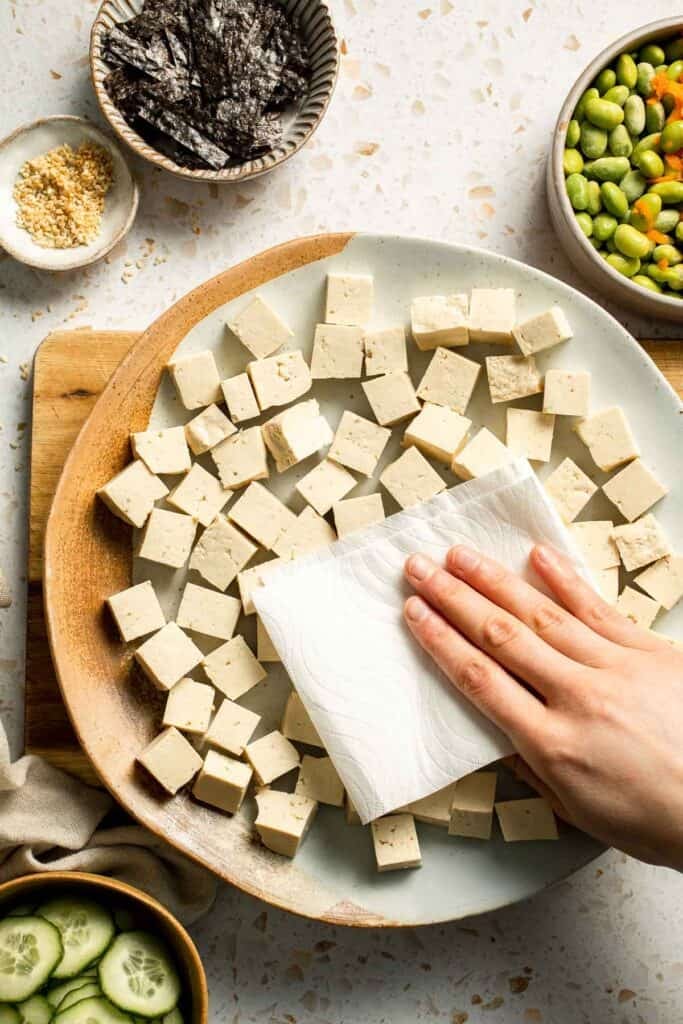
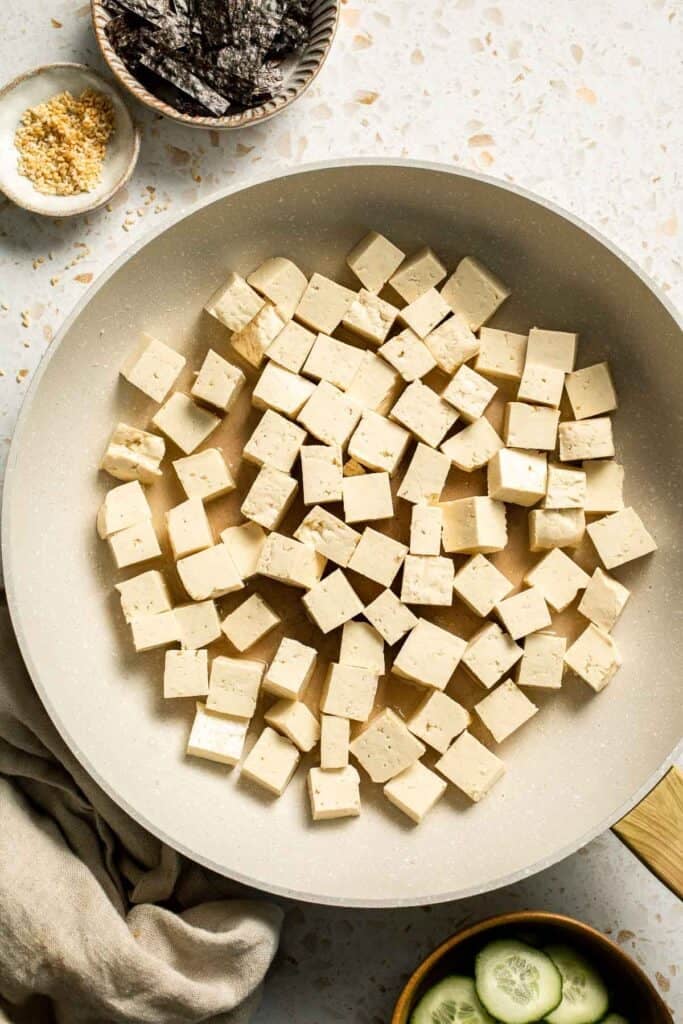
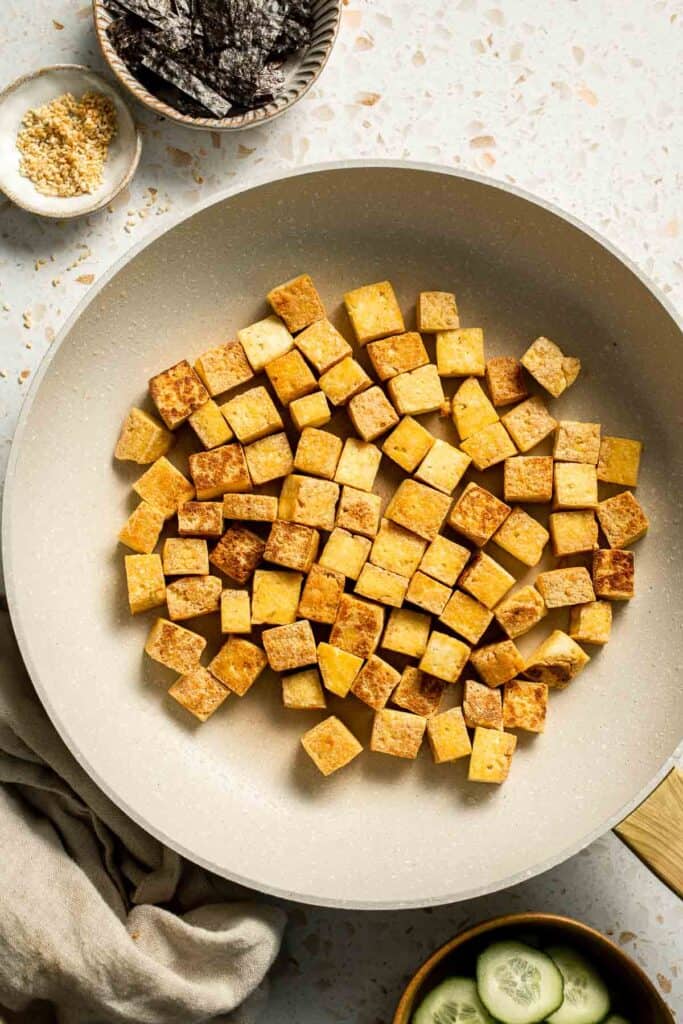
- Add sauce. Add the sauce to the skillet. Stir well until the tofu is well coated in the sauce and until thickened to the desired consistency, about 2-3 minutes.
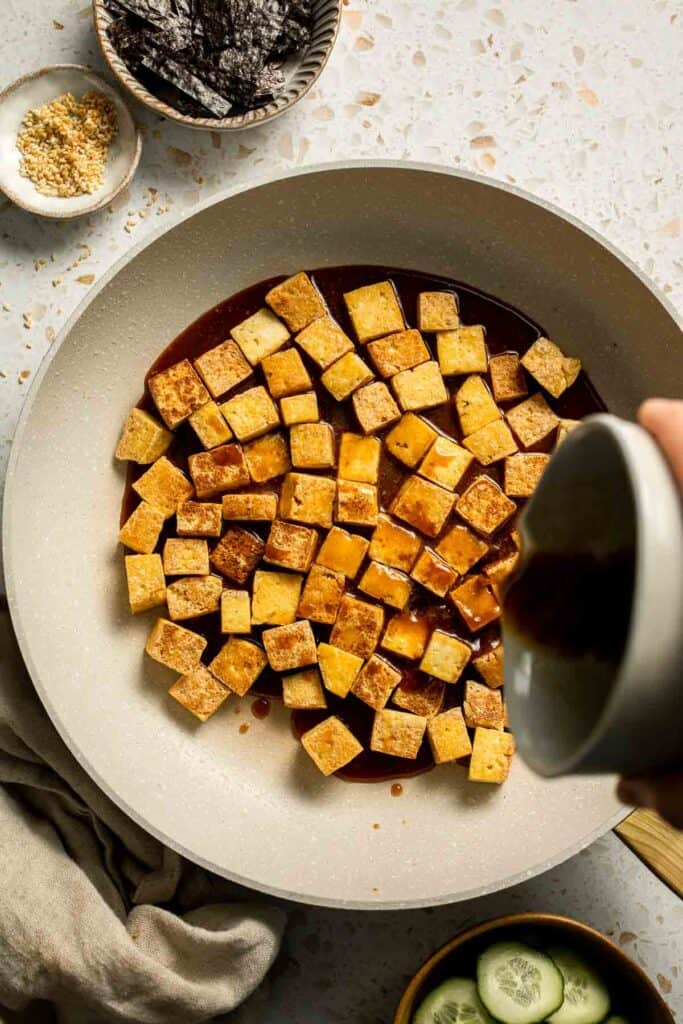
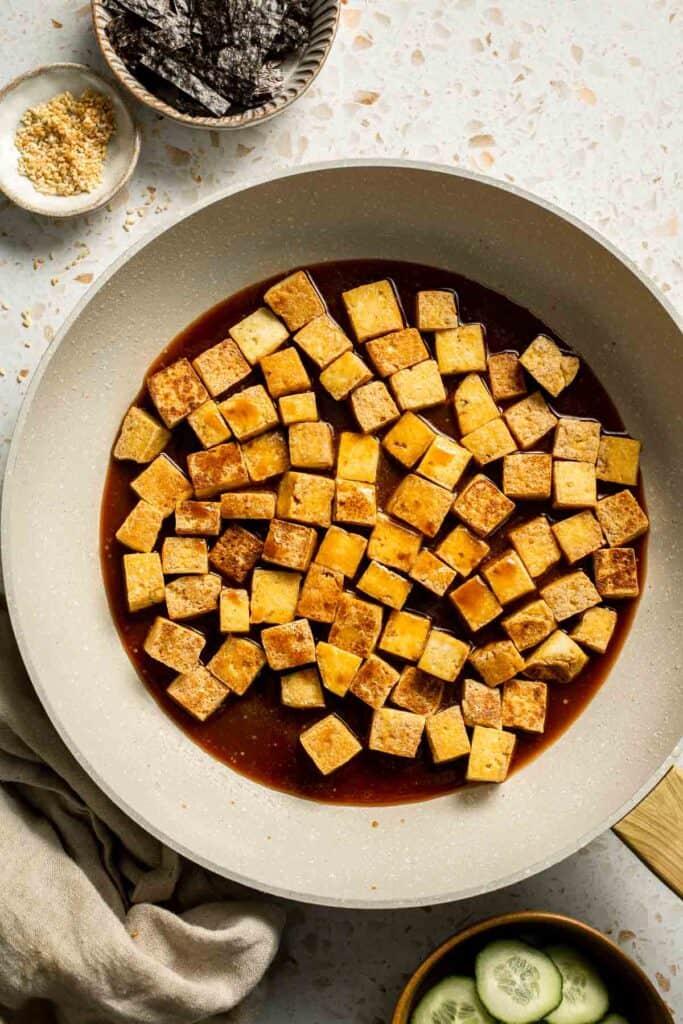
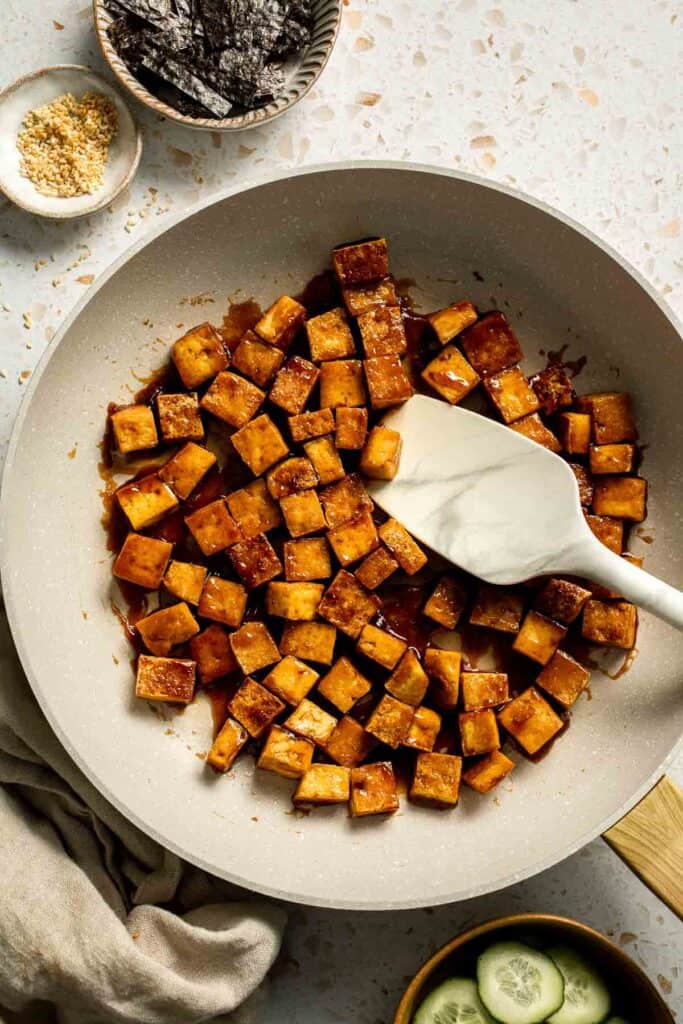
Now, let's assemble the sushi bowls
Divide the rice into 2 wide bowls. Use tongs to add the tofu. Arrange the edamame, cucumber, avocado, and carrot on top of the rice as well.
Drizzle with sauce (from the fried tofu) and garnish with seaweed and sesame seeds. Serve immediately.
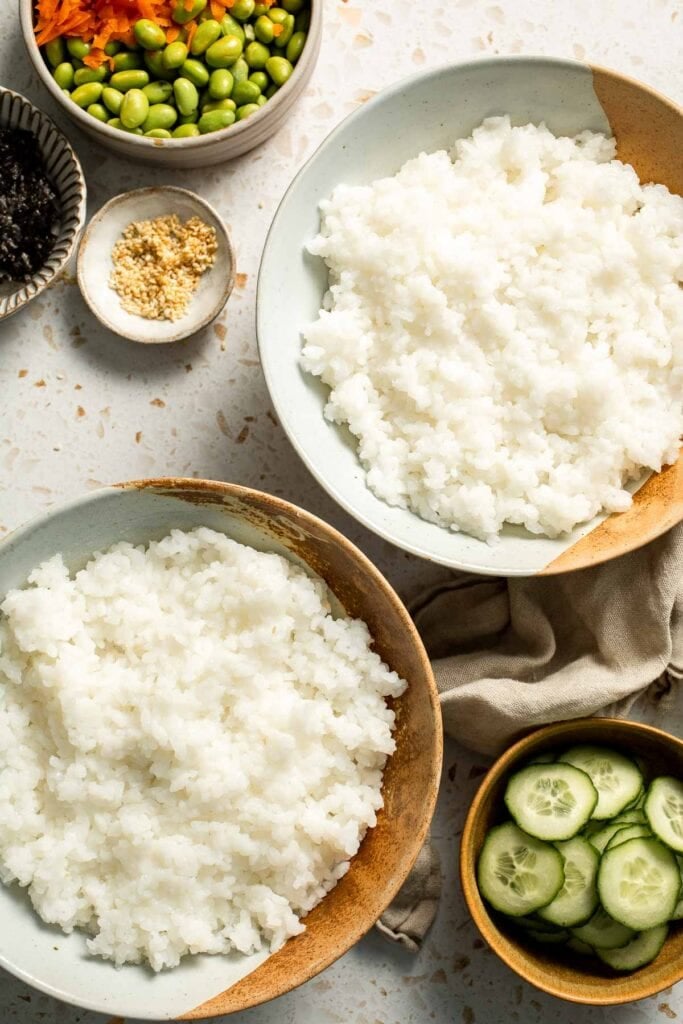
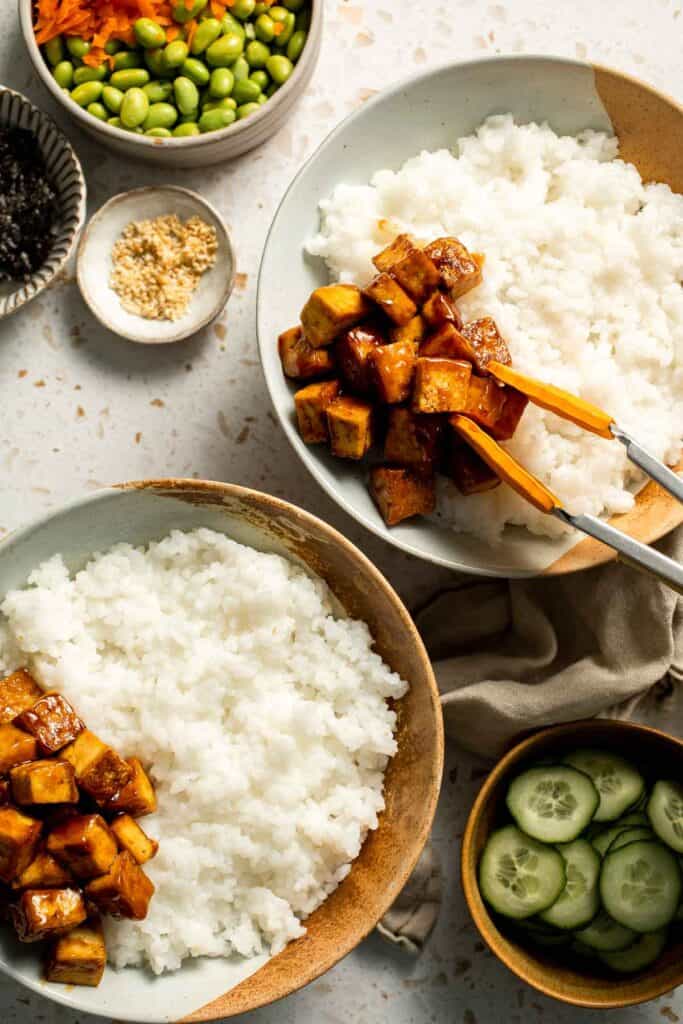
Recipe Variations
- Swap the protein. Try cooked shrimp, crab meat, or even a soft-boiled egg in place of tofu. For a spicy kick, add sriracha mayo or chili oil.
- Add crunch. Top with crispy fried onions, tempura flakes, or chopped roasted nuts for more texture.
- Include pickled elements. Add pickled ginger or pickled radish for brightness and zing.
How to Serve
This Sushi Bowl is delicious and filling served on its own. You can also pair it with some side dishes such as:
- Gomae Spinach Salad (or Goma-ae)
- Vegetable Dumplings
- Bubble Tea
- Chinese Garlic Cucumber Salad
- Shanghai Style Vegetarian Steamed Buns
Recipe Tips and Tricks
- Prep ingredients in advance. Chop veggies and cook rice ahead of time for easier assembly. Store toppings separately to maintain freshness and texture. This also allows you to customize each bowl at mealtime, whether you're serving a crowd or planning lunches for the week.
- Press tofu well. Removing excess moisture helps it crisp up better when pan-fried. Use paper towels and a heavy object or a tofu press for at least 15 minutes. Drier tofu gets golden and crisp on the outside without falling apart, which adds to the satisfying texture of the bowl.
- Cook sushi rice properly. Rinse it several times before cooking to remove excess starch. After cooking, season with a little rice vinegar and sugar for authentic flavor and that perfect sticky consistency. Let it cool slightly before assembling the bowls so it doesn't wilt the fresh vegetables.
- Thicken sauce properly. Dissolve the cornstarch in water before adding to the saucepan. Stir constantly over low heat until the sauce thickens to prevent lumps. A smooth sauce coats each component evenly and brings everything together in each bite.
Storing and Freezing Instructions
How to Store
Store the rice, tofu, sauce, and vegetables in separate airtight containers in the fridge for up to 3 days. Assemble the bowls fresh when ready to serve to preserve texture and flavor.
How to Reheat
Reheat the rice and tofu in the microwave or on the stovetop. Assemble bowls with cold veggies and toppings just before serving.
FAQ
Yes, sushi bowls are excellent for meal prep! Cook the rice and tofu in advance and store them in separate containers. Keep the sauce in a jar in the fridge. When ready to eat, reheat the rice and tofu, then assemble with fresh toppings. This method helps preserve the best texture and flavor in each component while saving time during the week.
Sushi rice gives the most authentic texture and flavor thanks to its short-grain structure and slight stickiness. However, you can substitute with jasmine rice, brown rice, or even quinoa for a different spin. Just keep in mind that non-sticky grains won't hold together as well, but they'll still taste great and soak up the sauce nicely.
Store each topping separately in airtight containers, and keep wetter ingredients like cucumber or avocado away from dry items like shredded carrot or nori. Assemble bowls right before eating. This approach keeps textures crisp and prevents sogginess, especially if you're packing lunches or prepping meals ahead.
More Bowl Recipes
- Teriyaki Grilled Salmon Rice Bowl
- Buddha Bowl
- Vietnamese Noodle Bowl with Chicken
- Mediterranean Bowl
- Vegetarian Burrito Bowl
- Indian Rice Bowls
Tried this recipe?
I'd love to hear what you think! Leave a comment and rating below to share your feedback. Your reviews help others discover this recipe and help me keep creating more free recipes for you. Snap a photo and tag me on social media @aheadofthyme too.

Easy Tossed Salad
This Easy Tossed Salad is crisp, colorful, and packed with fresh flavor! Made with crunchy romaine lettuce, juicy grape tomatoes, crisp cucumber, and a simple homemade balsamic vinaigrette, it comes together in just minutes. This salad is fresh, light, and full of satisfying textures. It can be used as a base recipe that's easy to customize with your favorite toppings, dressings, or add-ins to suit any meal or dietary need.
This quick side dish that works for any meal, from busy weeknights to casual get-togethers. It's also a great recipe to make ahead for meal prep or bring along to potlucks and barbecues. Since it's made with sturdy ingredients, it holds up well even if prepped a few hours in advance. And the homemade dressing adds a gourmet touch without any complicated steps - just shake or whisk and pour!
Why You'll Love this Easy Tossed Salad Recipe
- Packed with fresh veggies. This salad is all about fresh vegetables. The combination of romaine lettuce, sweet grape tomatoes, crisp cucumber, and yellow bell pepper gives you a great variety of textures and colors in every bite. It's the perfect way to brighten up any meal.
- Quick and easy to prepare. With no cooking required, minimal chopping, and a simple dressing, this salad comes together in under 10 minutes. It's great for last-minute meals, lunchboxes, or easy meal prepping for the week.
- Simple but flavorful dressing. With just a handful of pantry staples, the homemade balsamic vinaigrette elevates the salad without overwhelming it. The blend of tangy vinegar, smooth olive oil, zesty Dijon, and a touch of honey brings balance and depth to each bite.
- Versatile side dish. This salad pairs well with almost anything: grilled meats, pastas, sandwiches, or soups. It's a reliable go-to when you need a veggie side that's both easy and crowd-pleasing. Add protein like grilled chicken or chickpeas to make it a complete meal.
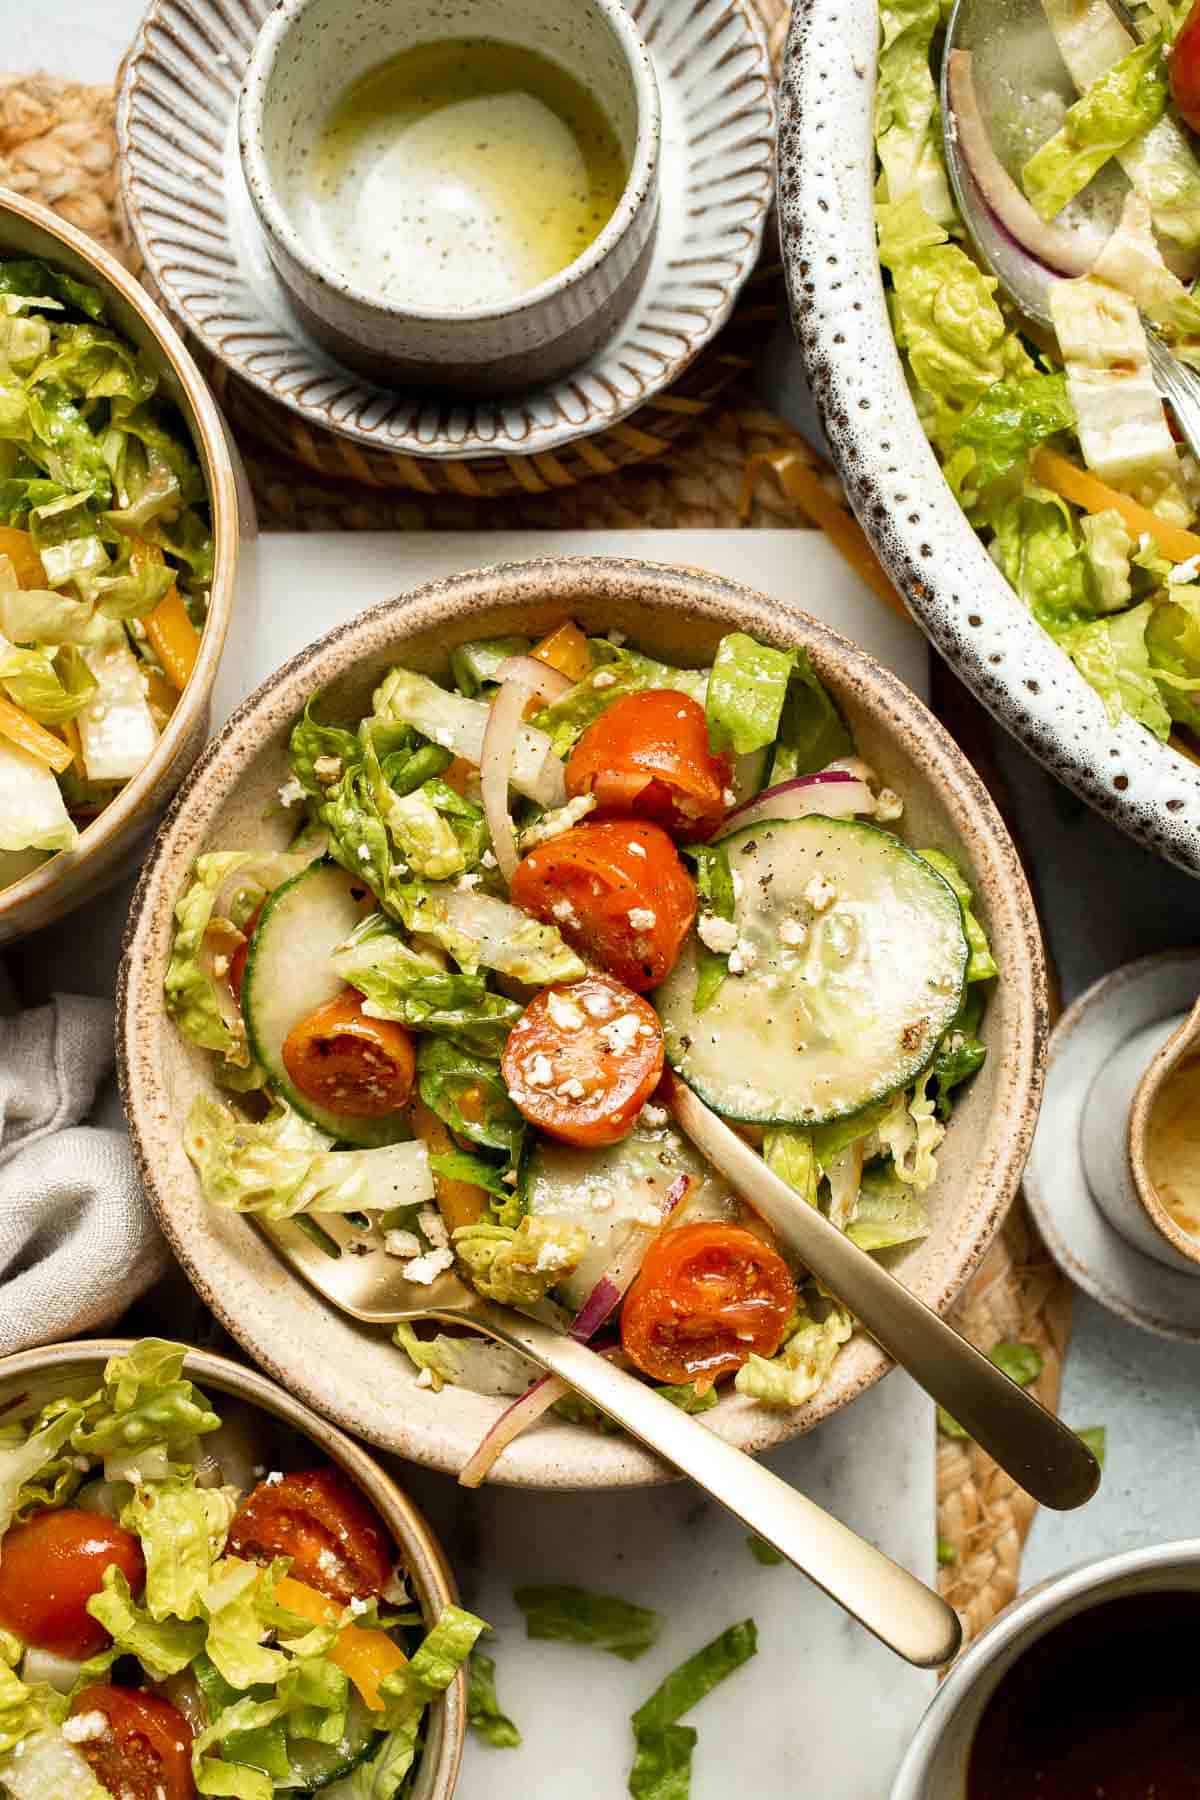
Ingredient Notes
To make this Easy Tossed Salad, you will need the following ingredients (full measurements in recipe card below):
- romaine lettuce - chopped into bite-sized pieces. You can substitute mixed greens or iceberg lettuce if preferred.
- grape tomatoes - halved for juicy pops of sweetness. Cherry tomatoes work well as a substitute.
- english cucumber - thinly sliced for crunch. Persian cucumbers can also be used.
- yellow bell pepper - diced or sliced. Red or orange bell peppers are great alternatives.
- red onion - thinly sliced for a little bite. Shallots or green onions can be used instead for a milder flavor.
- feta cheese - crumbled on top for a creamy, salty finish. You can substitute goat cheese or omit for a dairy-free version.
- dressing - the homemade vinaigrette is made with balsamic vinegar, olive oil, dijon mustard, honey, salt, and pepper. Red wine vinegar can be used instead of balsamic, and maple syrup can be used instead of honey.
You will also need measuring cups and spoons, a large salad bowl, a whisk, and a small mixing bowl or jar for the dressing.
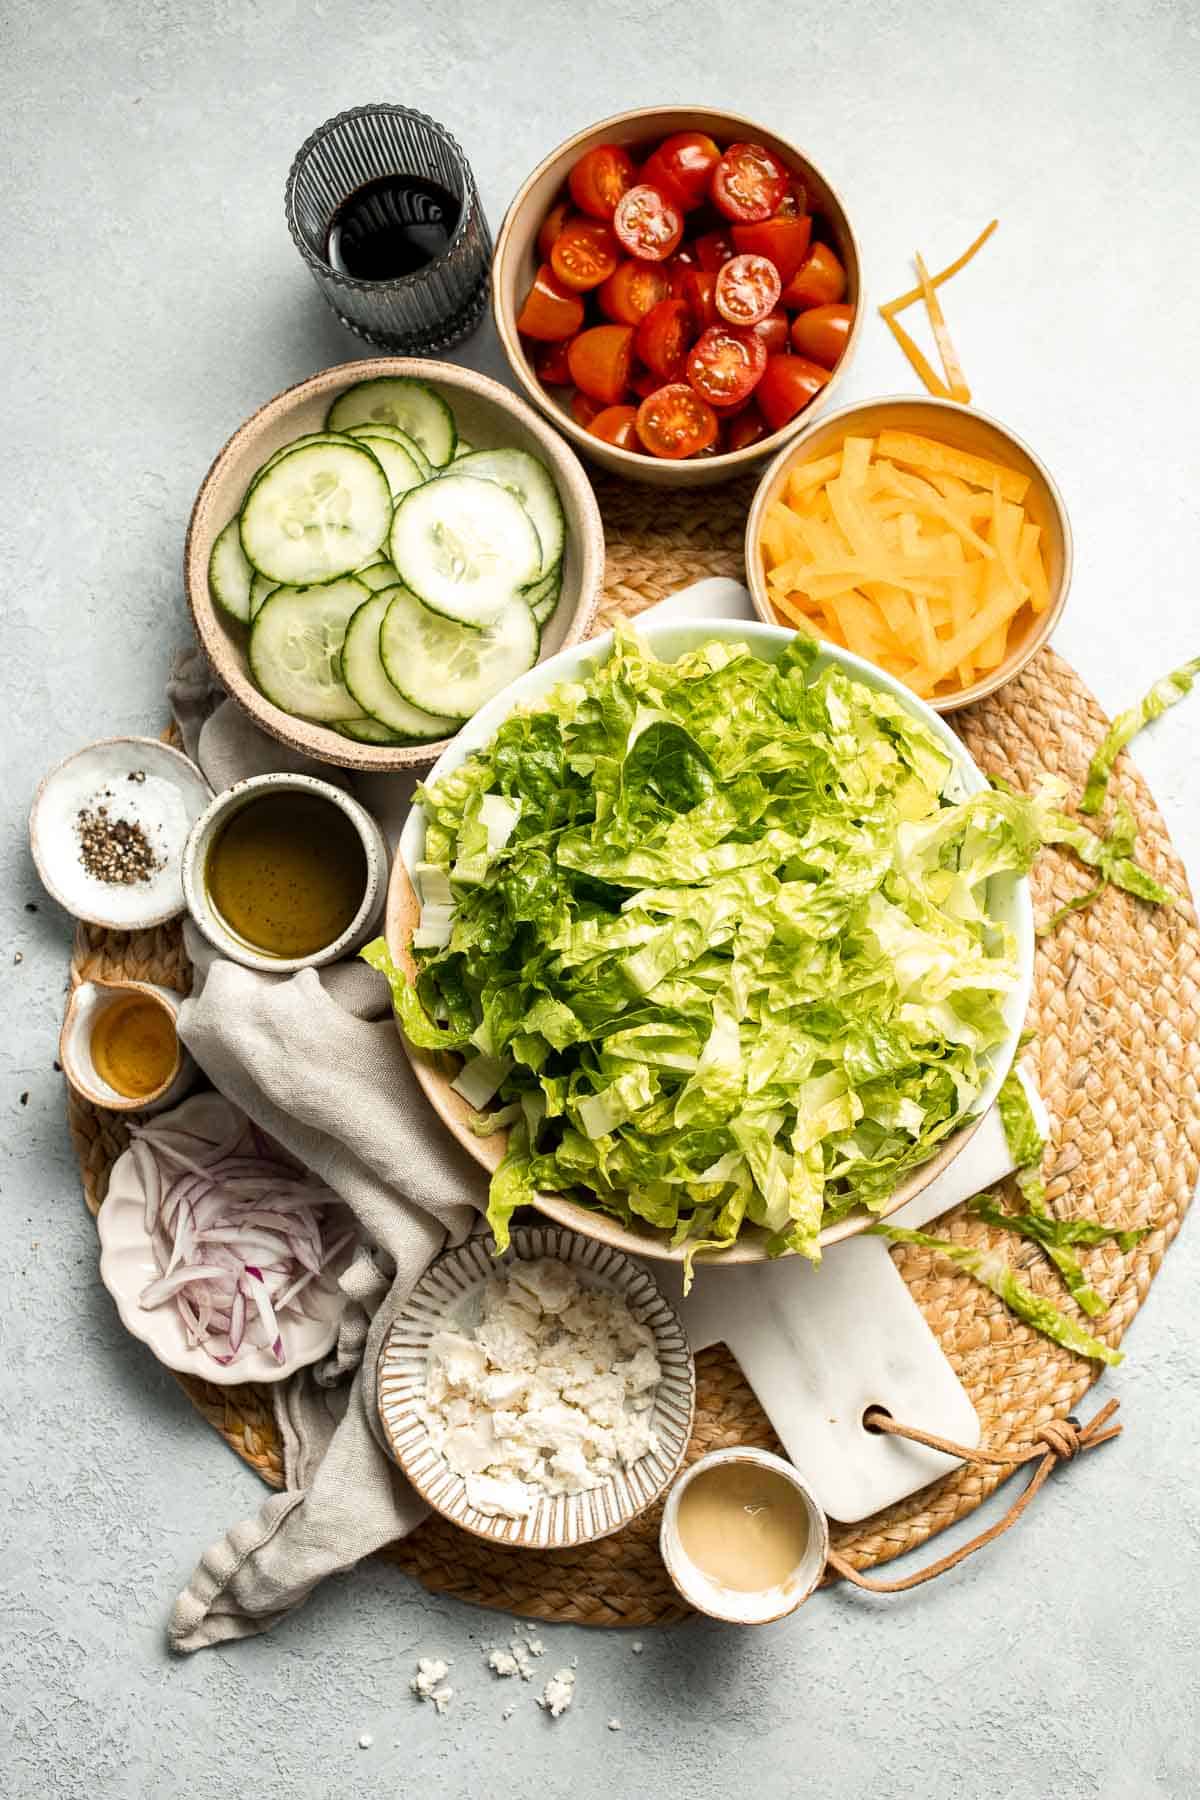
How to Make the Best Easy Tossed Salad
- Combine salad ingredients. In a large serving bowl, combine all the salad ingredients including lettuce, red onion, tomatoes, cucumber, bell pepper, and feta, if using.
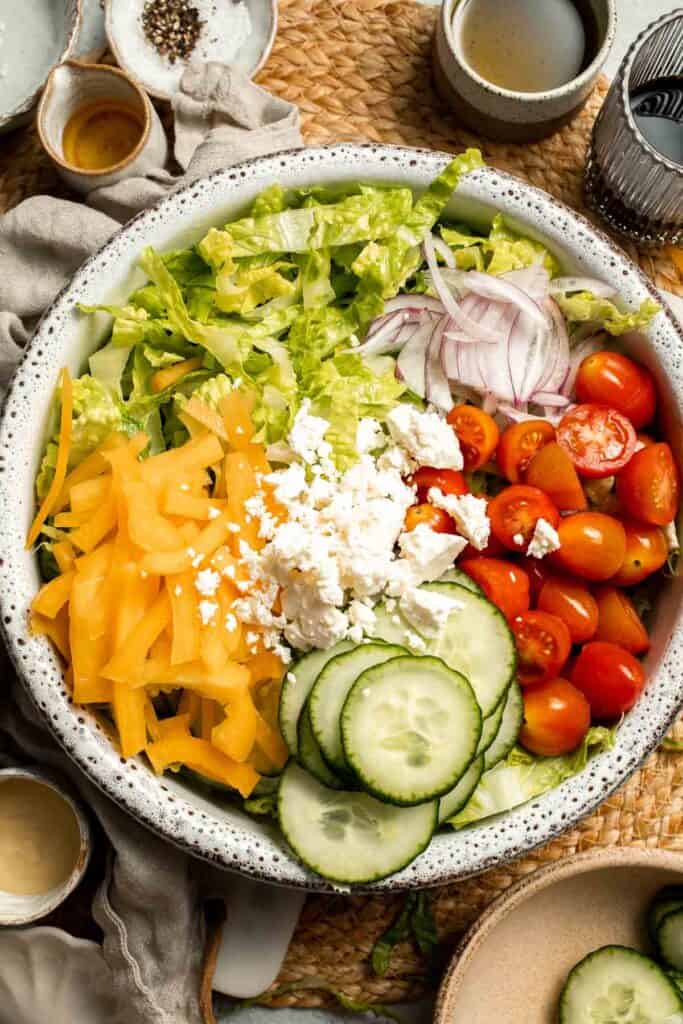
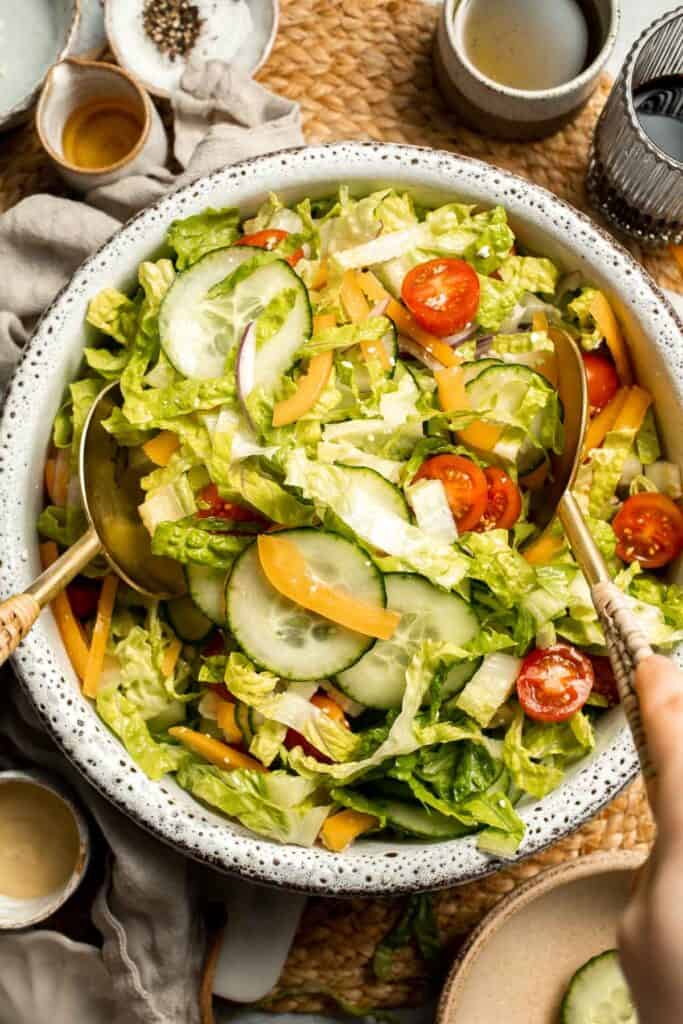
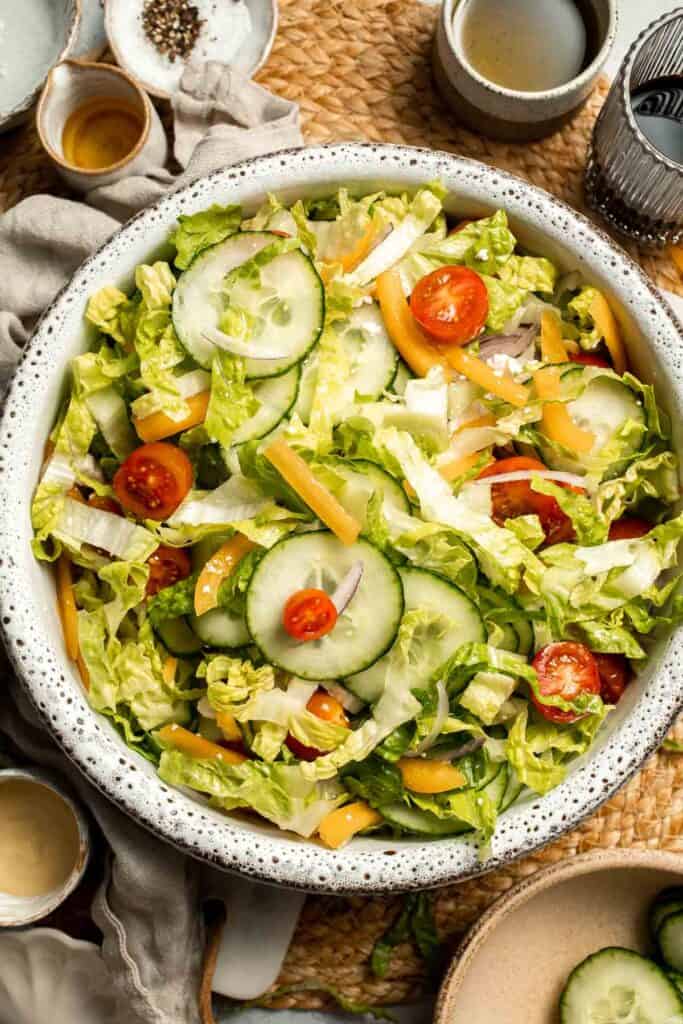
- Make dressing. In a small mixing bowl, mix together all the dressing ingredients (including balsamic vinegar, olive oil, Dijon mustard, honey, salt, and pepper) until smooth.
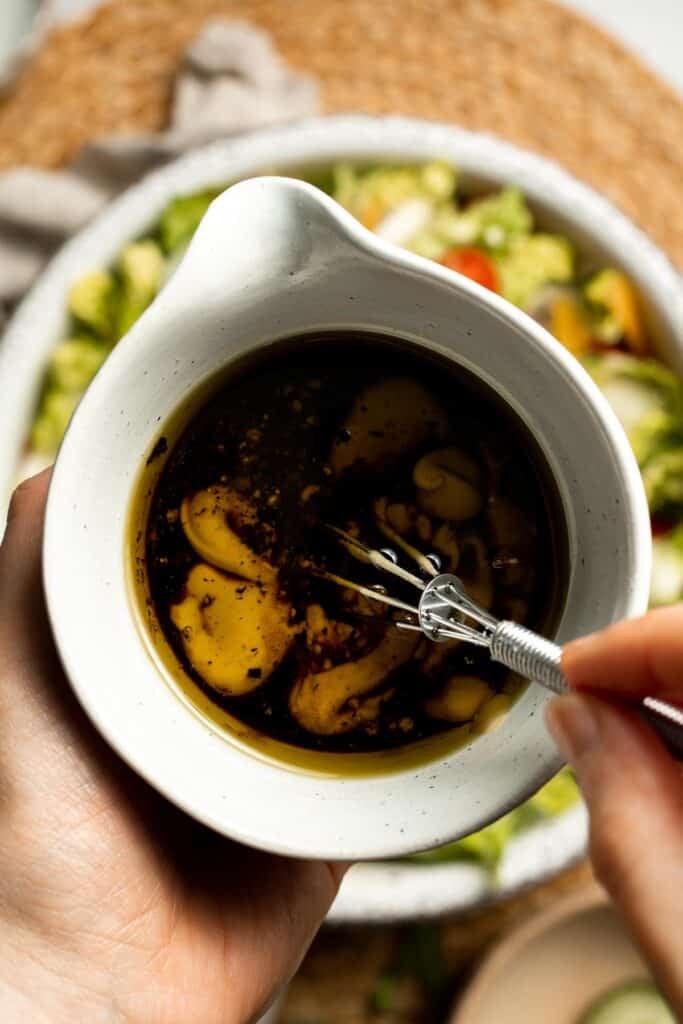
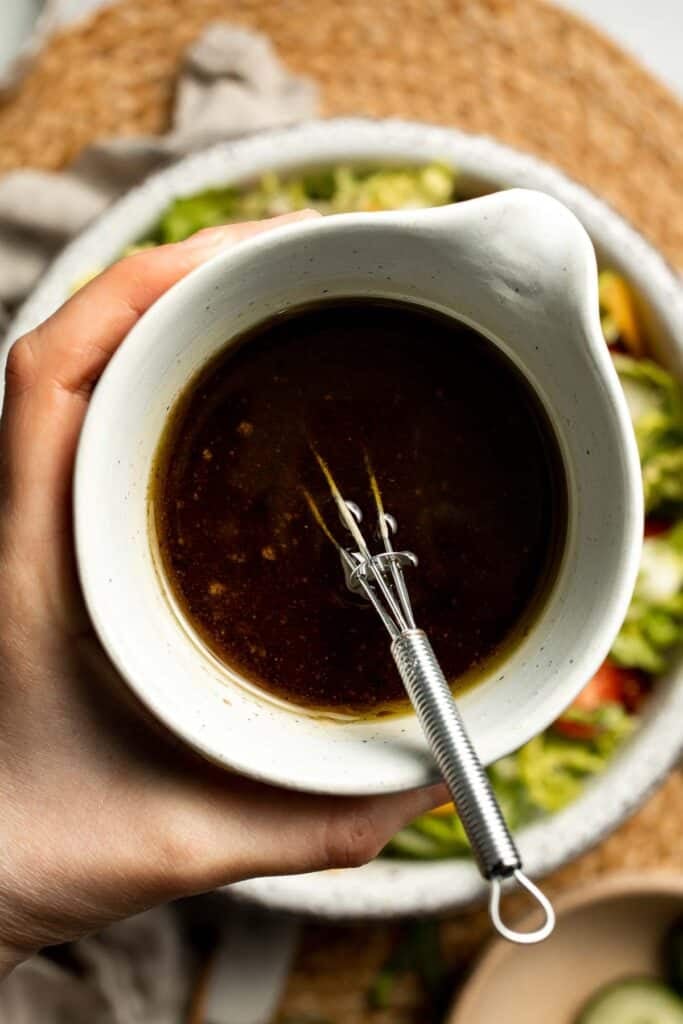
- Toss. Drizzle the dressing over the salad and toss to combine. Serve immediately.
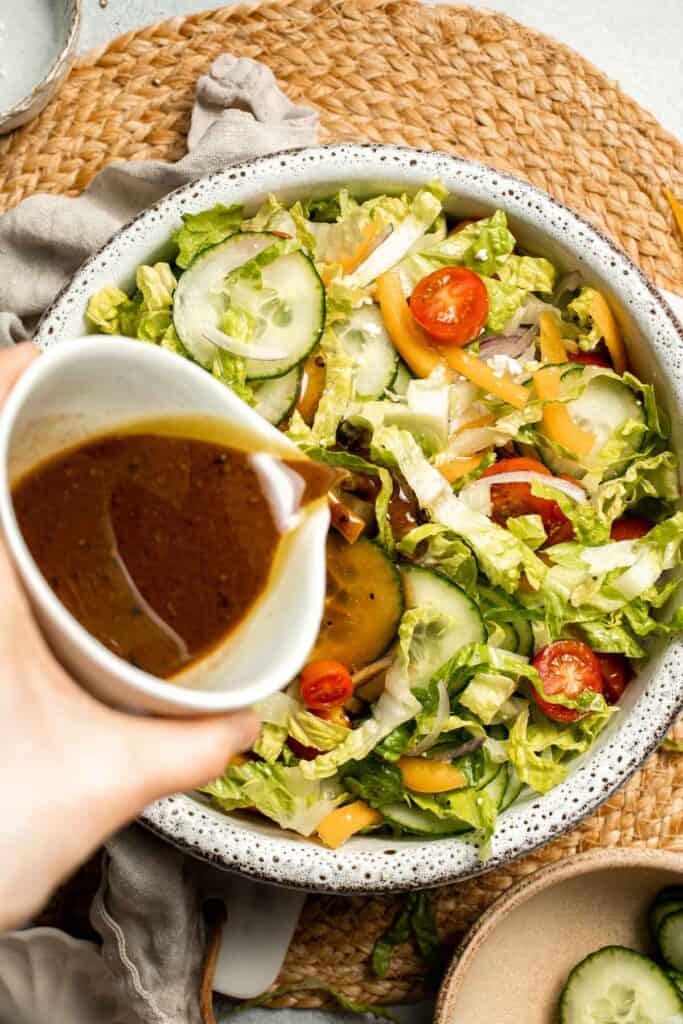
Recipe Variations
- Add protein. Add grilled chicken, shrimp, or chickpeas to make it a hearty main dish while keeping it balanced and wholesome.
- Make it vegan. Omit the feta cheese or use a plant-based version. Swap honey for maple syrup in the dressing.
- Add crunch. Toss in croutons, sunflower seeds, or slivered almonds for extra texture.
- Use a different dressing. Try ranch, lemon vinaigrette, or a creamy avocado dressing to switch up the flavors.
How to Serve
This Easy Tossed Salad makes a great side dish to a wide variety of meals. It pairs especially well with:
- Balsamic Chicken Kabobs
- Ribeye Steak
- Creamy Roasted Red Pepper Pasta
- Green Goddess Sandwich
- Ravioli Soup
- Pasta Bake with Sausage (Baked Ziti)
For more recipes, see our 60+ Easy Dinner Ideas.
Recipe Tips and Tricks
- Chop veggies evenly. Uniform pieces make the salad easier to eat and help ensure even distribution of flavor. It also helps the dressing coat the ingredients more effectively, so you get balanced flavor in every bite.
- Use fresh ingredients. Because the salad is raw, the freshness of your produce makes a big difference in taste and texture. Opt for firm cucumbers, crisp lettuce, and ripe but firm tomatoes for the best result.
- Whisk dressing well. Make sure the dressing is fully emulsified so it coats the veggies evenly. A jar with a lid works well - just shake it vigorously to blend everything quickly.
- Toss just before serving. To prevent soggy salad, add the dressing and toss right before serving. If prepping ahead, store the dressing separately and toss just before your meal.
Storing Instructions
Transfer any leftover salad (without dressing, if possible) to an airtight container and refrigerate for up to 2 days. If the salad is already dressed, it's best enjoyed within 24 hours.
FAQ
Yes, you can prepare the chopped vegetables and dressing ahead of time. Store them separately in the fridge. When ready to serve, simply toss the salad with the dressing. This helps keep the vegetables crisp and the flavors fresh. If you're bringing it to a gathering, assemble it just before serving for the best presentation and taste.
To bulk it up into a full meal, add your favorite protein. Grilled chicken, tuna, hard-boiled eggs, or chickpeas all work well. You can also toss in cooked grains like quinoa or farro for added fiber and nutrition. These additions not only increase satiety but also create a heartier, well-balanced dish.
If you're not serving the salad right away, keep the dressing separate and store chopped ingredients in a container lined with a paper towel. This absorbs excess moisture and helps the vegetables stay crisp. Dress the salad just before serving to maintain its texture and freshness. You can also wait to add softer or juicier ingredients, like tomatoes or cucumbers, until closer to serving time.
More Recipes
Tried this recipe?
I'd love to hear what you think! Leave a comment and rating below to share your feedback. Your reviews help others discover this recipe and help me keep creating more free recipes for you. Snap a photo and tag me on social media @aheadofthyme too.

Beef Empanadas
Homemade Beef Empanadas are a delicious celebration of bold Latin-inspired flavors, featuring a savory, spiced ground beef filling wrapped in buttery, flaky pastry. Made with simple pantry staples, these golden hand pies are the perfect balance of crisp exterior and hearty, flavorful interior. Whether you're baking a batch for a family dinner, prepping a party appetizer, or craving a satisfying lunch, these empanadas are a crowd-pleasing favorite.

Empanadas are a beloved comfort food throughout Latin America, and this version keeps things approachable and delicious. The filling is rich and hearty with ground beef, tender potatoes, and rich tomato flavor, while the dough is tender yet crisp once baked. These empanadas made from scratch are easy to make ahead, freeze beautifully, and reheat like a dream. It's the perfect meal prep recipe!
Why You'll Love these Beef Empanadas
- Flaky homemade dough. The simple pastry dough is made from scratch with all-purpose flour, butter, and an egg, creating a buttery, flaky crust that complements the savory filling. IIt's easy to make and handles well - no special tools required! You can also substitute with a store-bought pie dough for convenience if you prefer.
- Bold, spiced flavor. Aromatic cumin, paprika, oregano, and garlic give the beef filling authentic depth and warmth, while tomato paste adds richness and a subtle tang. The addition of potato makes each bite heartier and more satisfying too. Every bite of these homemade empanadas bursts with Latin-inspired flavor.
- Fun to make and eat. Handheld food brings a unique experience to those who eat it. It's just fun! These beef empanadas are just as fun to make. I recommend making these beef empanadas with friends or family for a memorable experience.
- Great for meal prep or entertaining. These empanadas can be made ahead and stored in the fridge or freezer. They reheat beautifully without losing texture, making them great for meal prep or entertaining. Serve as a great hand-held meal for gatherings or grab-and-go lunches.

Ingredients and Substitutions
To make these delicious Beef Empanadas, you will need the following ingredients (full quantities in the recipe card below):
- all-purpose flour - the base for the empanadas dough, providing structure and tenderness. You can also use whole wheat flour for a nuttier flavor, but it may yield a denser dough.
- salt - enhances flavor in both the dough and the filling.
- butter - cold, cubed butter creates a flaky, tender crust when worked into the flour.
- egg - one is used in the dough to help bind it, and another is used as an egg wash before baking for a golden finish.
- ice water - helps bring the dough together without melting the butter. Add more by the tablespoon if the dough is too dry.
- avocado oil - used to sauté the filling ingredients and adds a mild, neutral flavor. You can substitute this with any cooking oil such as vegetable oil, coconut oil, or olive oil.
- ground beef - the heart of the filling. Use lean or regular depending on your preference. Feel free to substitute with any ground meat you like such as ground turkey, chicken, or plant-based meat alternatives.
- onion - adds aromatic depth and slight sweetness to the filling. Shallots or green onions can be used for a milder flavor.
- garlic - brings a savory, aromatic boost to the beef mixture.
- seasoning - we used paprika, cumin, oregano, and salt.
- potato - shredded potato absorbs flavor and adds satisfying texture to the filling. Sweet potato or cooked lentils can be used for a twist or added nutrition.
- tomato paste - concentrated and rich, it adds depth and a subtle acidity.
- beef broth - keeps the filling moist and flavorful as it cooks. Feel free to use water instead.
You will also need measuring cups and spoons, a large mixing bowl, rolling pin, skillet or sauté pan, sharp knife, round cutter or small bowl, fork, parchment paper, baking sheet, and pastry brush.
How to Make the Best Beef Empanadas
First, let's make empanada dough.
- Pulse. In a food processor, add flour, salt and cubed butter. Pulse mix on and off for 1 minute, until the flour mixture turns into a small breadcrumb-like consistency.
- Form dough. Add egg and ice water. Close the lid and continue to pulse mix on and off for another 1 minute. If you squeeze the crumbs together and they stick together, that means the crumbs are good to go. If the dough won't come together, add more ice water, 1 tablespoon at a time.
- Chill. Bring the dough together into a ball. Cover it tightly in plastic cling wrap and place in the fridge for 30 minutes to 1 hour, up to overnight.
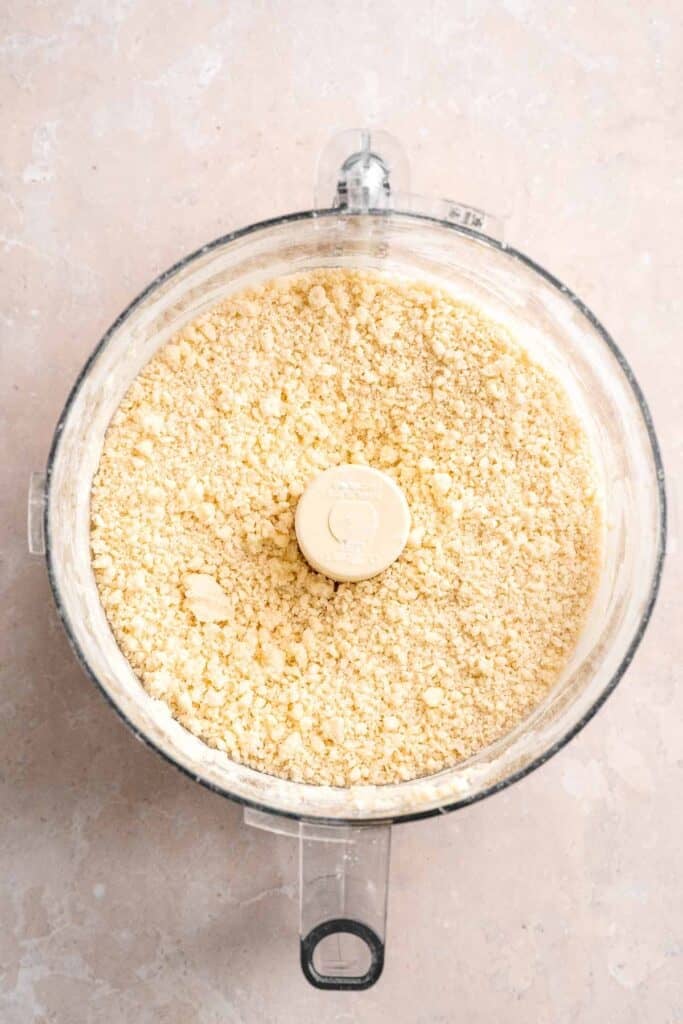
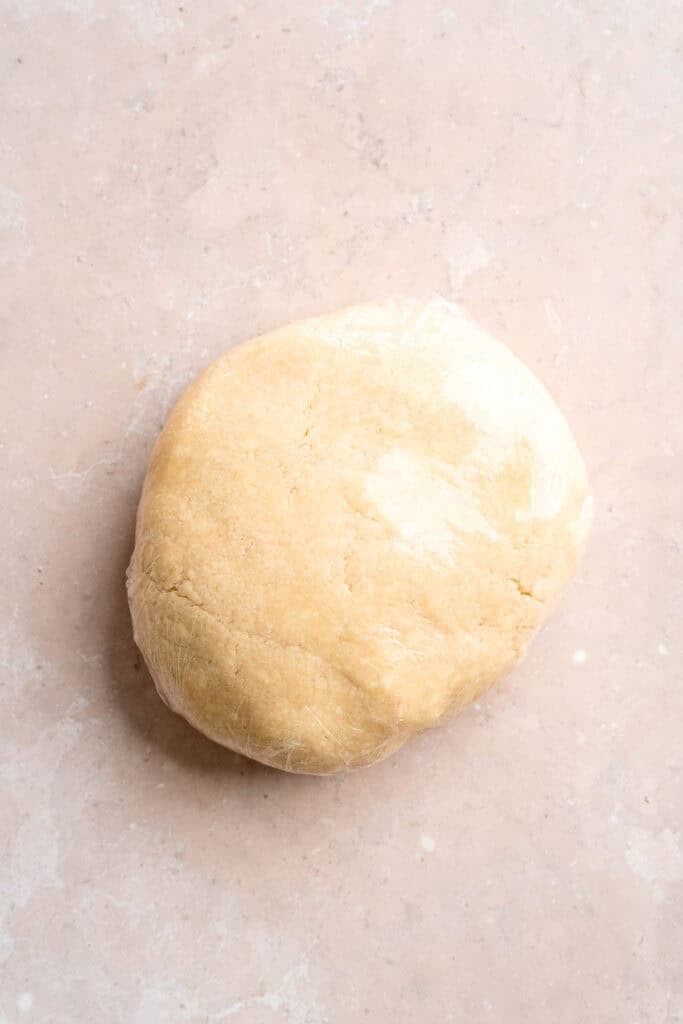
Next, prepare the beef filling.
- Cook beef. Heat oil in a large skillet over medium-high heat until the hot oil sizzles, about 1-2 minutes. Add ground beef and cook for 5-6 minutes until the meat browns and is no longer pink.
- Season. Add onion, garlic, paprika, cumin, oregano and salt. Mix well.
- Add potato. Add potato, tomato paste and broth. Reduce heat to low and stir well until everything is evenly combined.
- Simmer. Simmer for 10 minutes, stirring occasionally. The beef mixture should be juicy but not watery. Let the filling cool for 10 minutes.
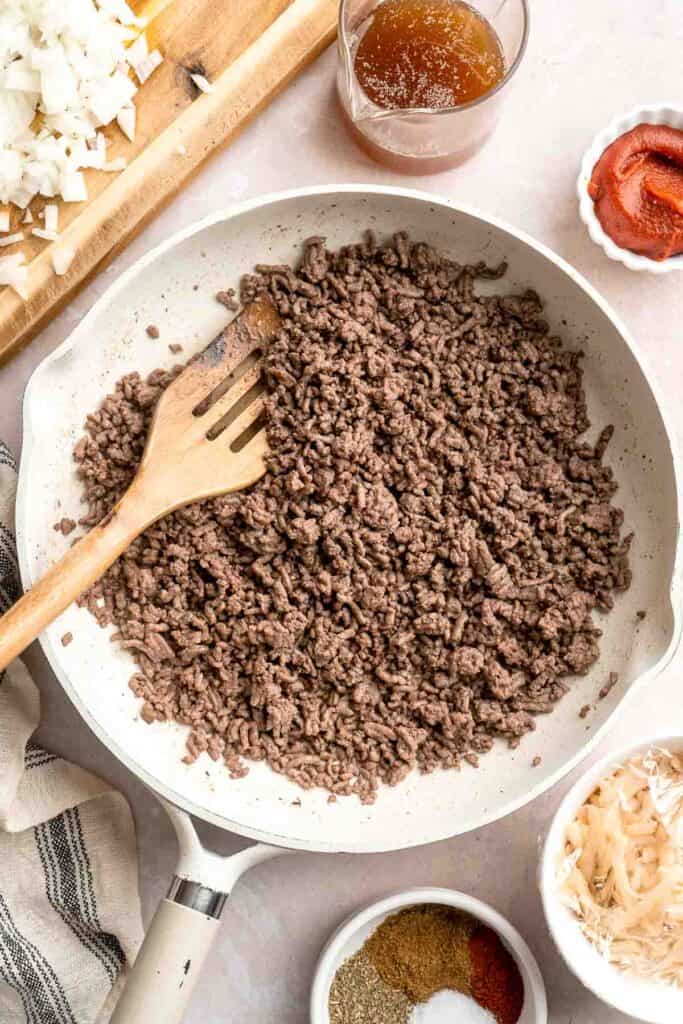
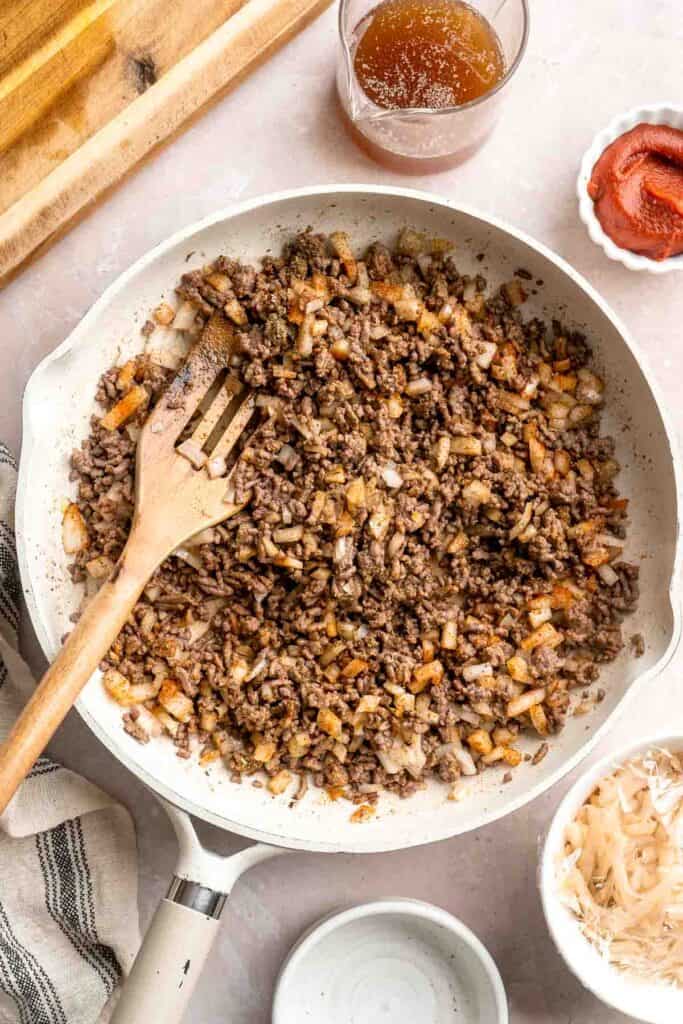
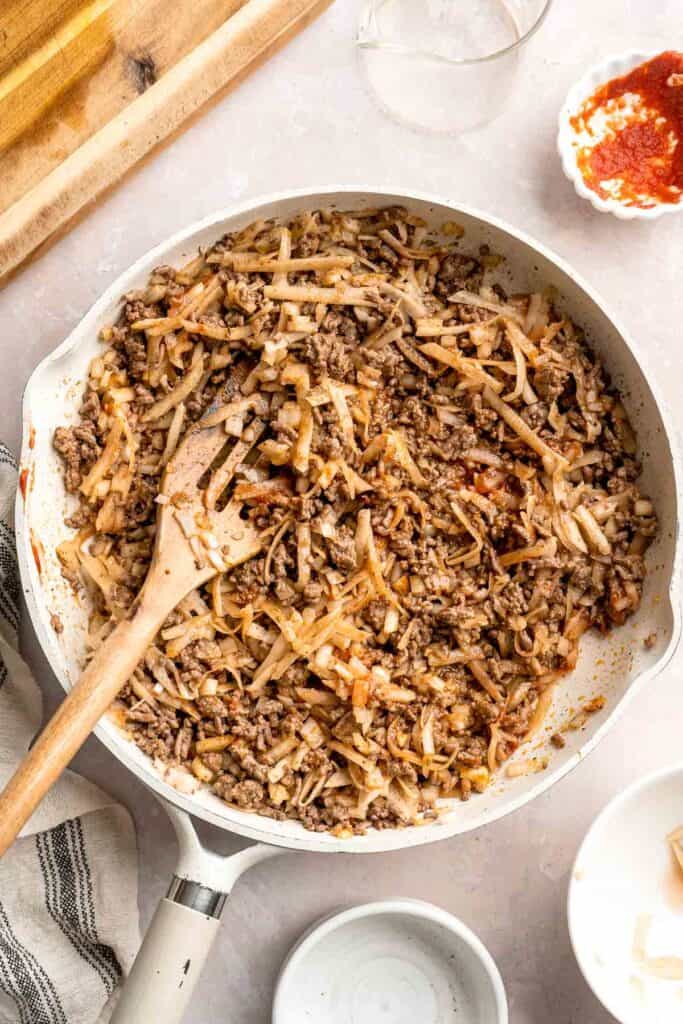
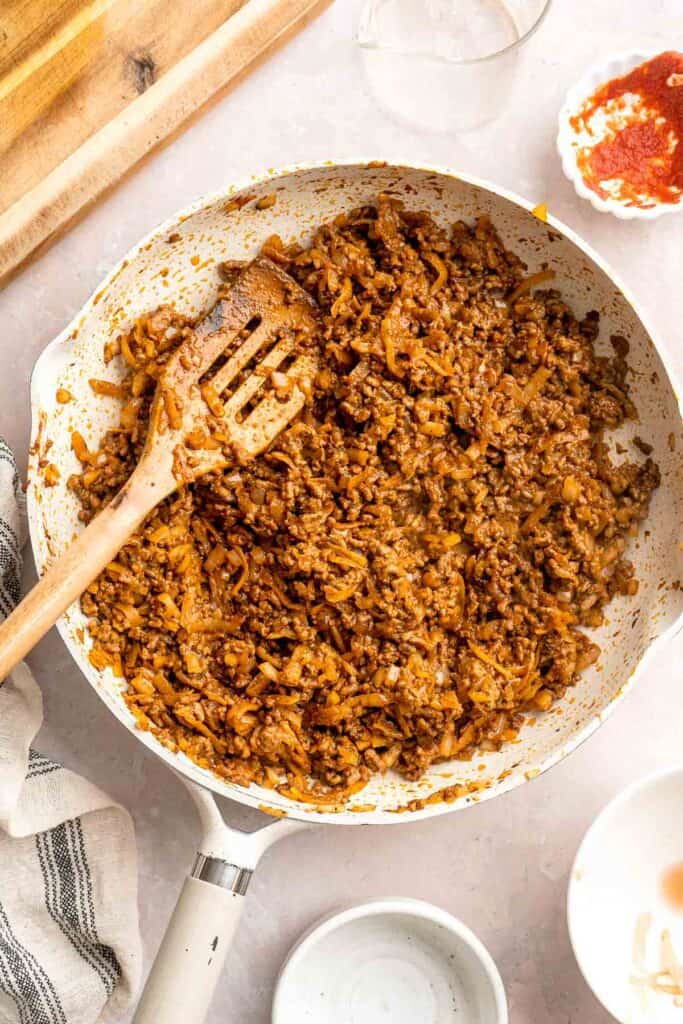
Now, assemble and fold the empanadas.
- Roll. Remove the dough from the fridge and divide into 10 equal pieces. On a lightly floured surface, roll each piece of dough out with a rolling pin into a 6-inch circle. For a cleaner cut, use a 6 inch round pastry cutter or bowl to cut a 6-inch circle from the each of the doughs.
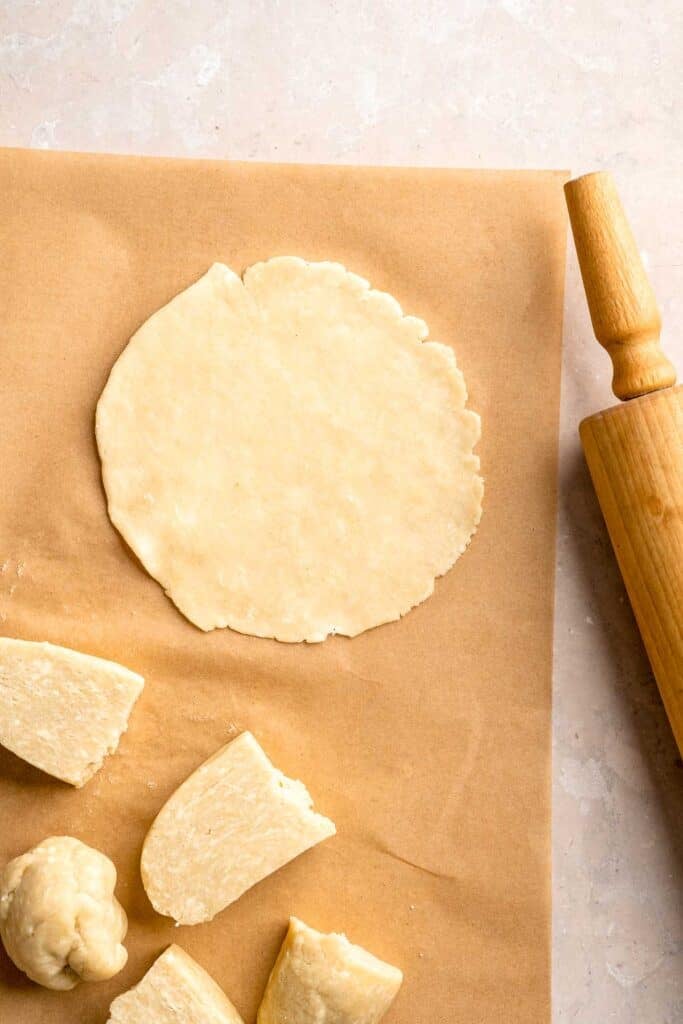
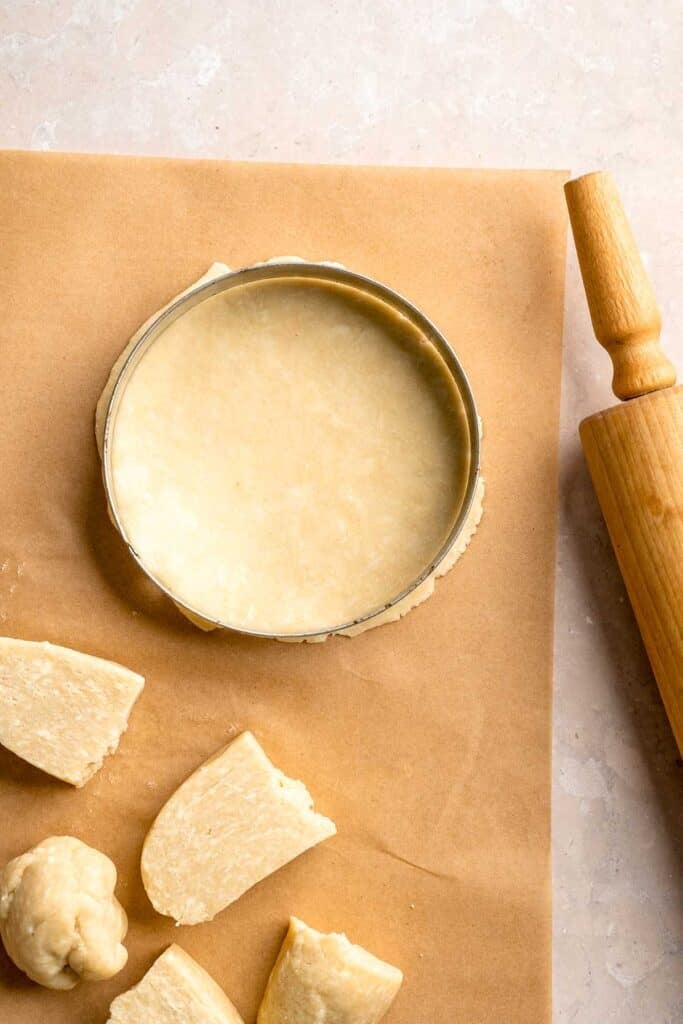

- Fill. Add about 2-3 tablespoons of the beef mixture into the center of each circle of dough.
- Fold. Fold the dough over into a half-moon shape and enclose the filling inside. Press the edges together to seal. You can use a bit of water or egg wash along the edge to help it stick.
- Pleat the edges. Start at one end of the sealed edge (usually the corner). Fold a small section of the edge over itself (like a mini triangle toward the center of the empanada) and press down to secure. Keep folding little sections over in the same direction, overlapping each one slightly, working your way down the edge. Each fold should be around ¼ inch (0.5-1 cm), depending on the size of your empanada. You'll end up with a rope-like, decorative edge.


- Seal. When you get to the end, tuck the last pleat under slightly and press to seal it. Place in a single layer on a large parchment lined baking sheet.

- Repeat. Repeat with all empanadas. Cover with a tea towel to prevent the dough from drying out.
Finally, let's bake the beef empanadas.
- Add egg wash. Brush empanadas with the egg wash.
- Bake. Bake in a 400F preheated oven until golden brown and crispy, about 25 minutes. Serve immediately.


How to Fry Emapanadas
We baked our empanadas, but you can also fry them instead for an even crispier texture. In a medium saucepan, heat neutral oil over medium-high heat to 350°F (175°C), about 4 minutes. Fry the empanadas in batches until golden and crisp, about 3-4 minutes per side. Drain on paper towels before serving.

Recipe Variations
- Add cheese. Stir in shredded cheddar, mozzarella, or Monterey Jack to the beef mixture for a cheesy, gooey surprise.
- Make it spicy. Add diced jalapeño or a pinch of cayenne to the filling for extra heat.
- Try a different dough. For a quicker version, use store-bought pie dough or puff pastry.
- Switch the shape. Instead of folding into half moons, try making rectangular or triangular shapes for a modern twist.
- Go vegetarian. Skip the meat and bulk up the filling with beans, lentils, mushrooms, or sautéed veggies like bell pepper and spinach.
- Make them mini. Use a smaller cutter to make bite-sized empanadas, perfect for party platters or lunchboxes.
How to Serve
These Beef Empanadas are delicious served on their own with a dipping sauce like guacamole, salsa, or spicy mayo, or paired with some side dishes for a more well-rounded meal. Some of our favorite sides to serve with these are:
- Black Beans and Rice
- Mexican Street Corn Salad
- Homemade Lemonade
- Oven Roasted Vegetables
- Arugula Salad

Recipe Tips and Tricks
- Use pre-made pie crust. If you are in a time crunch, using pre-made pie crusts makes the process so much faster, and they still create the perfect crispy, flaky exterior to hold your empanada filling.
- Keep the dough cold. For the flakiest pastry, work with chilled dough and cold butter. If it gets too soft, pop the dough back into the fridge for 10 minutes.
- Don't overfill. Too much filling can cause the empanadas to burst during baking or frying.
- Seal well. Use a fork to crimp the edges well, or fold and twist for a traditional repulgue-style seal to ensure they don't open up while cooking.
Storing and Freezing Instructions
How to Store
Let any leftover empanadas cool completely, then store them in an airtight container in the refrigerator for up to 4 days.
How to Reheat
Reheat in a 350°F (175°C) oven or air fryer until warmed through and crispy, about 10-20 minutes in the oven or 5-10 minutes in the air fryer. The oven or air fryer is best for reheating to maintain the crispy crust. Avoid the microwave unless you don't mind a softer texture.
How to Freeze
Empanadas freeze beautifully! To freeze before baking, place assembled empanadas on a baking sheet, freeze until solid, then transfer to a ziploc bag. They can be frozen r for up to 3 months. Bake from frozen, adding a few extra minutes to the cook time. Already baked empanadas can also be frozen and reheated in the oven.
FAQ
Yes! Beef empanadas are ideal for making ahead. You can prepare the dough and filling up to a day in advance and store them separately in airtight containers in the fridge. Alternatively, assemble the empanadas and refrigerate them unbaked for up to 24 hours. For longer storage, freeze them before or after baking. If freezing unbaked, place them on a tray to freeze individually, then store in a freezer-safe bag. Bake from frozen, adding a few extra minutes. Already baked empanadas can also be frozen and reheated in the oven for a fast, satisfying meal.
Definitely. If you're short on time, store-bought dough is a great alternative. While homemade dough has the best flavor and texture, refrigerated pie crust, puff pastry, or empanada wrappers work well. Just keep in mind that different doughs bake differently, so you may need to adjust cooking time based on thickness and moisture. Puff pastry bakes faster and gets crispier, while pie dough is more tender and takes longer. No matter what type you use, an egg wash before baking helps create that beautifully golden, flaky crust.
Avoiding soggy empanadas starts with properly cooking and cooling the filling. Cook the beef mixture until most of the liquid has evaporated and the texture is thick and cohesive. Let it cool completely before assembling as warm filling releases steam that can soften the dough. Also, don't overfill, as excess moisture may leak and prevent crisping. These simple steps - thickened filling, cooling before assembling, and not overstuffing - will help ensure that your empanadas bake up with a deliciously crisp and golden exterior.
More Ground Beef Recipes
- 25 Best Ground Beef Recipes
- Beef and Bean Burritos
- Beef Potstickers (Dumplings)
- Ground Beef Stuffed Peppers
- Homemade Taquitos
- Cheeseburger Sliders
Tried this recipe?
I'd love to hear what you think! Leave a comment and rating below to share your feedback. Your reviews help others discover this recipe and help me keep creating more free recipes for you. Snap a photo and tag me on social media @aheadofthyme too.

Chocolate Tart
This Chocolate Tart is rich, decadent, and layered with the perfect balance of velvety chocolate ganache and a crisp Oreo cookie crust. A colorful topping of fresh fruit like berries and figs makes it feel extra special - perfect for holidays, celebrations, or an elegant dessert anytime you're craving something indulgent. Plus, it's way easier to make than you may think! The simple ingredients and easy preparation mean you can create a show-stopping treat without a lot of fuss anytime the craving hits.
Chocolate lovers, this one's for you! This luxurious dessert features a silky-smooth filling made from a blend of semi-sweet and milk chocolate, nestled inside a buttery cookie crust that's simple to prepare. Finished with a scattering of vibrant fruit, it's the perfect blend of rich, sweet, and slightly tart flavors. Whether you're serving it at a dinner party or treating yourself, this chocolate tart is guaranteed to impress.
Why You'll Love this Chocolate Tart Recipe
- Rich and silky filling. The creamy ganache filling made with two types of chocolate and heavy cream results in an ultra-smooth, luxurious texture that practically melts in your mouth. Every bite delivers a satisfying richness without feeling too dense, making it a true chocolate lover's dream come true.
- Easy to make but looks impressive. Despite its elegant appearance, this Chocolate Tart is surprisingly simple to make, requiring just a handful of basic ingredients and easy-to-follow steps. No complicated techniques are needed - just melt, mix, and chill. It's the kind of dessert that makes you look like a pastry chef without spending hours in the kitchen.
- Make-ahead friendly. This tart needs time to chill, which means it's a great dessert to prepare in advance. Make it the night before an event and simply top with fresh fruit right before serving.
- Customizable toppings. Adding fresh fruit like berries or figs not only brings a beautiful pop of color but also adds a fresh, slightly tangy contrast to the rich chocolate. You can easily customize it with different fruits, nuts, a sprinkle of sea salt, or even edible flowers to suit the season or your taste preferences.

Ingredient Notes
To make this delicious Chocolate Tart, you will need the following ingredients (full measurements in recipe card below):
- oreo cookie crumbs - the base of the crust, providing sweet chocolate crunch. You can substitute with chocolate graham cracker crumbs if preferred.
- white sugar - sweetens the crust.
- unsalted butter - binds the crust and adds richness.
- chocolate - we use both semi-sweet chocolate and milk chocolate in the ganache filling. You can use all semi-sweet if you prefer or even swap with dark chocolate for an even richer result.
- heavy cream - essential for achieving a silky ganache texture. Full-fat coconut cream can be used as a non-dairy alternative.
- fruit - this is optional, for decorating on top. You can use seasonal fruit or omit for a minimalist finish.
You will also need measuring cups and spoons (or kitchen scale), a 9-inch tart pan with a removable bottom, a food processor (or zip-top bag and rolling pin), and a heatproof bowl for melting chocolate.
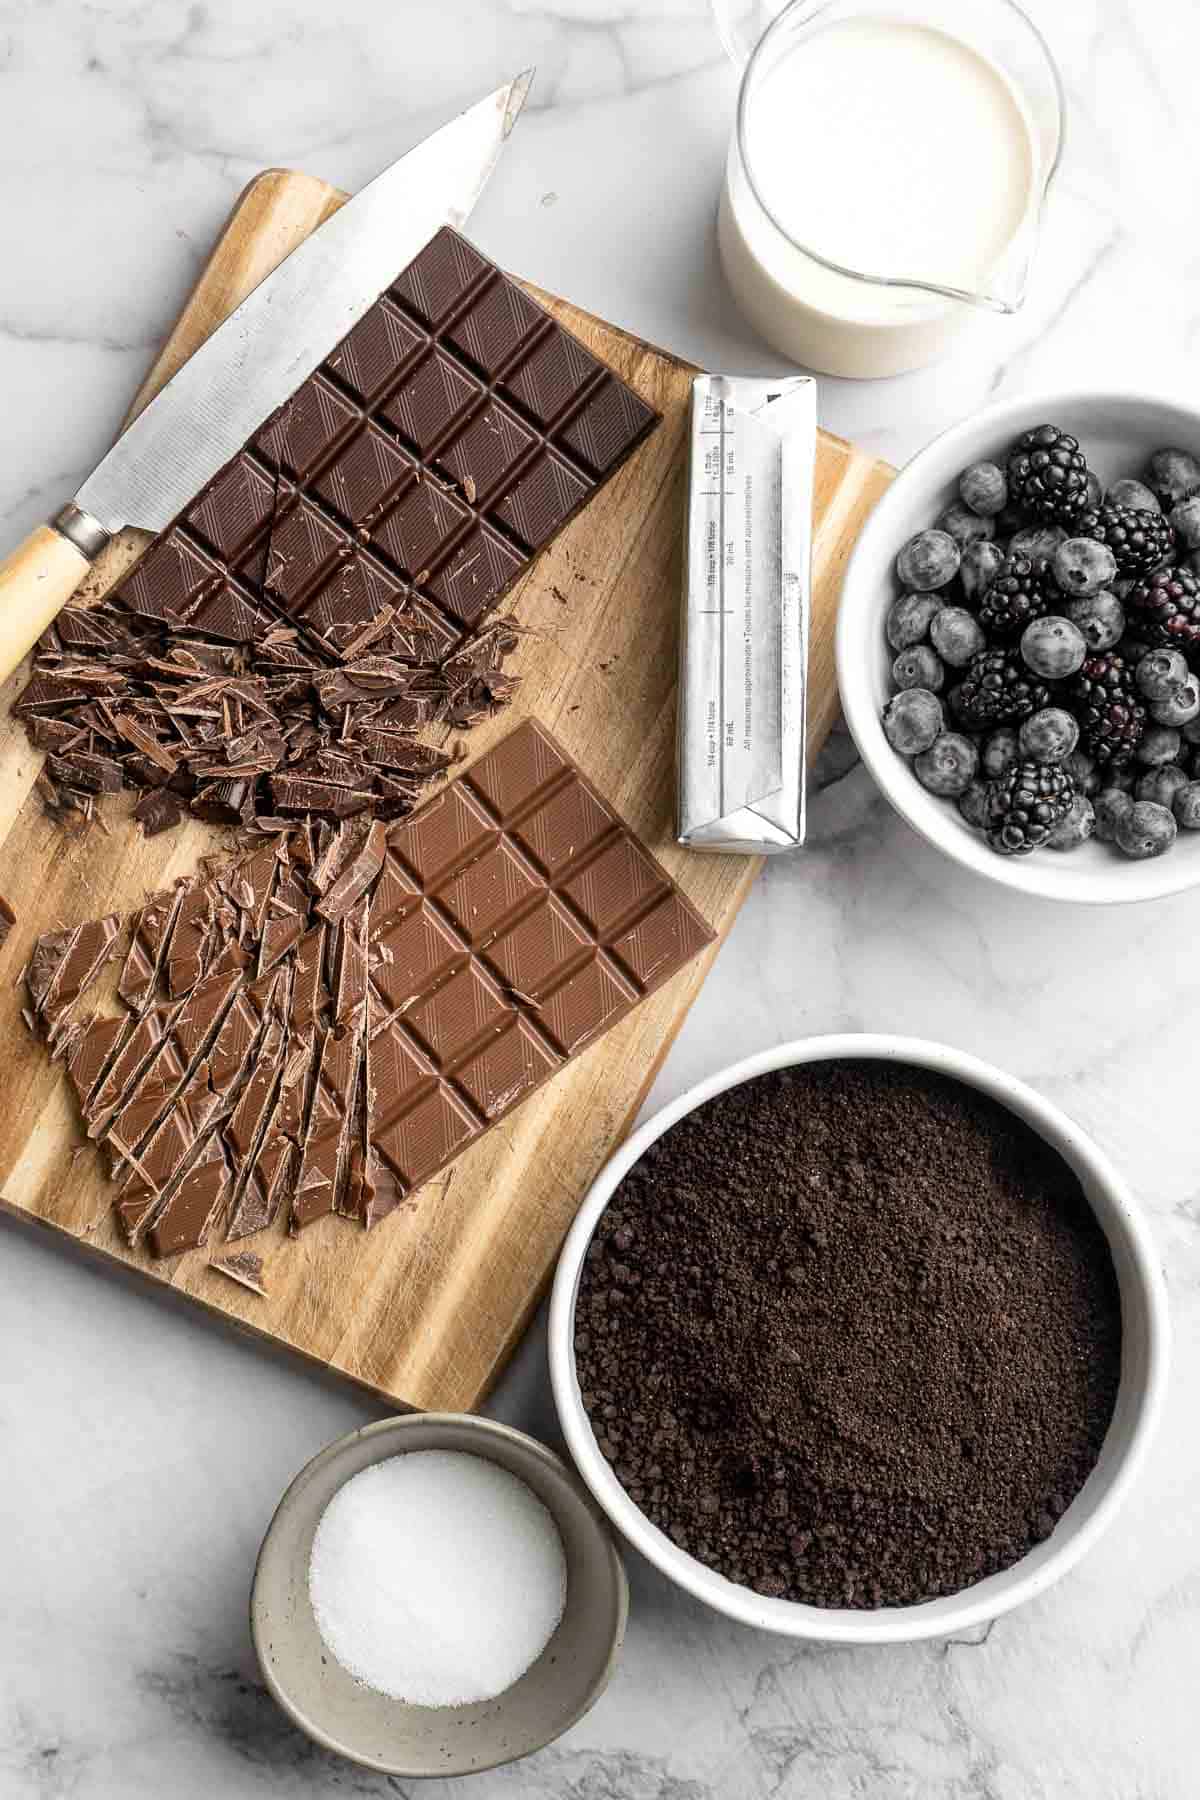
How to Make the Best Chocolate Tart
First, make the chocolate crust.
- Combine ingredients. In a medium mixing bowl, add the oreo cookie crumbs and sugar and whisk until well combined. Pour the melted butter into the bowl, then mix with a fork (or your hands) until the butter is well dispersed and the mixture resembles wet sand.
- Shape. Add the crust into a 9-inch non-stick tart pan and press it down evenly into the bottom and up the sides. Use a flat bottom measuring cup to really compact the crust down.
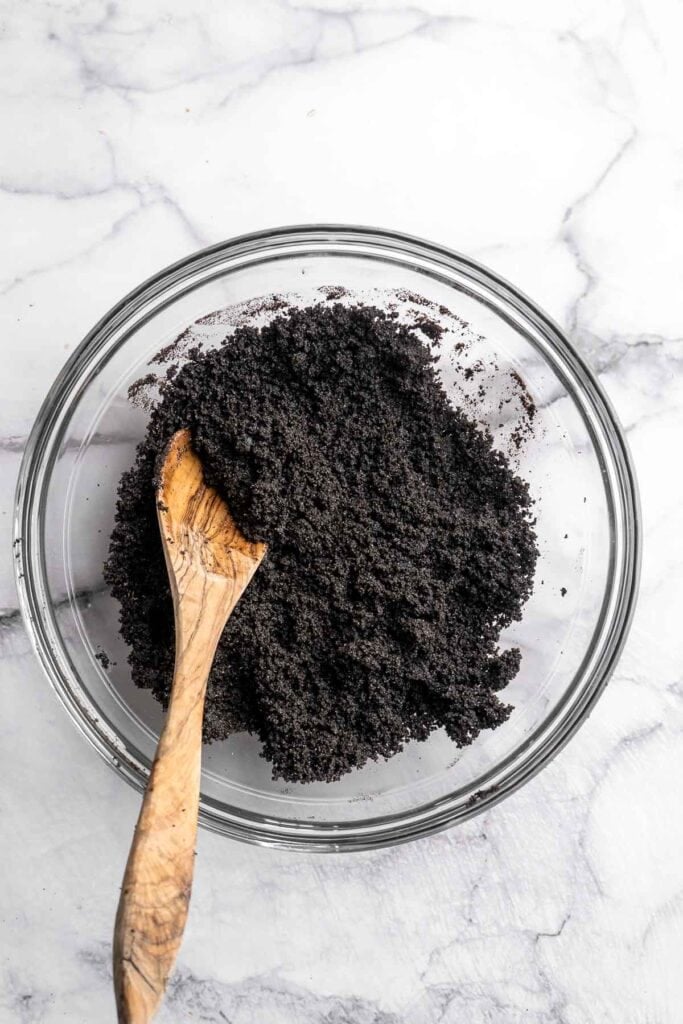
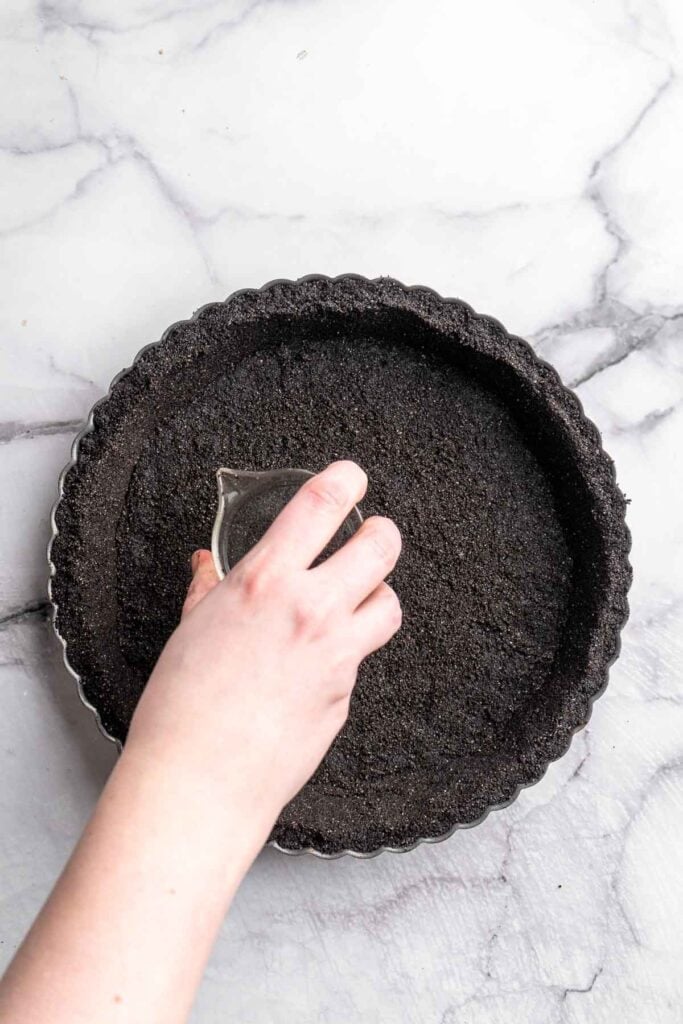
- Bake. Place the crust into a 350F preheated oven to bake for 11 minutes. Remove from oven and allow to cool to room temperature.
Next, make the chocolate ganache filling and assemble.
- Make ganache. In a medium to large size microwave-safe bowl, add the chopped chocolates, cream, and butter. Place into the microwave and microwave in 30 second intervals, stirring in between, until fully melted and smooth.
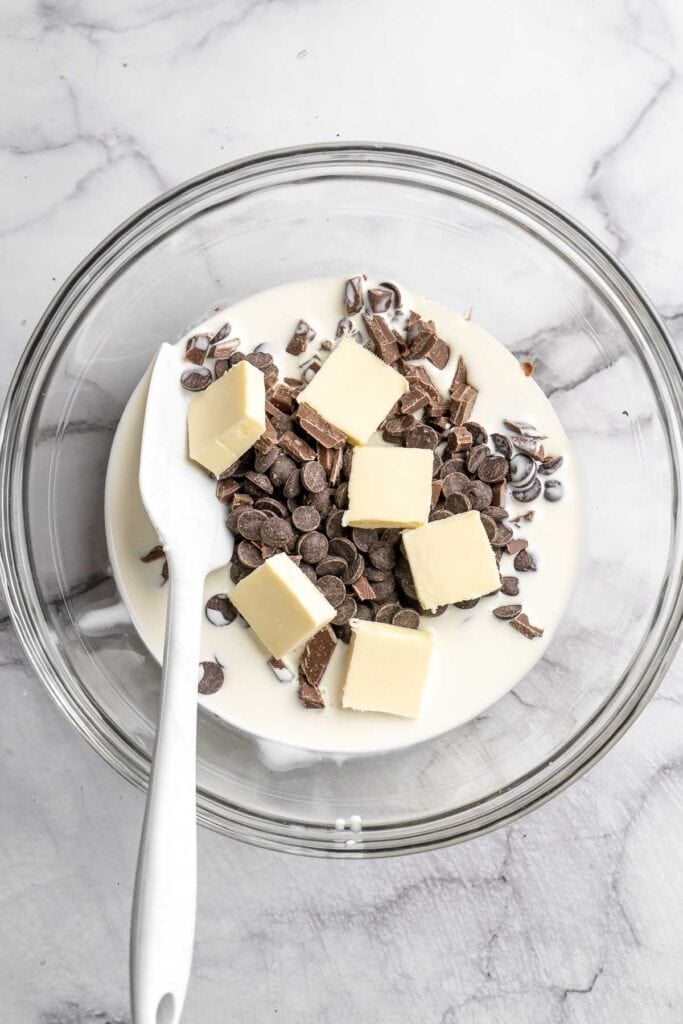
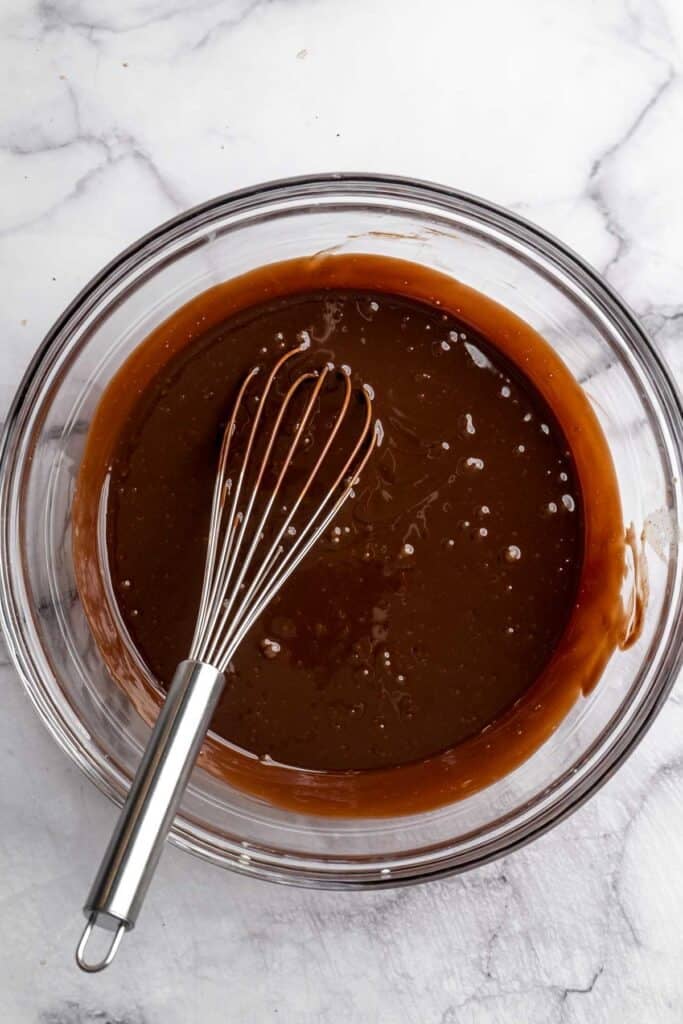
- Assemble and chill. Pour into the cooled crust, then place into the fridge to fully harden, at least 6 hours or preferably overnight.
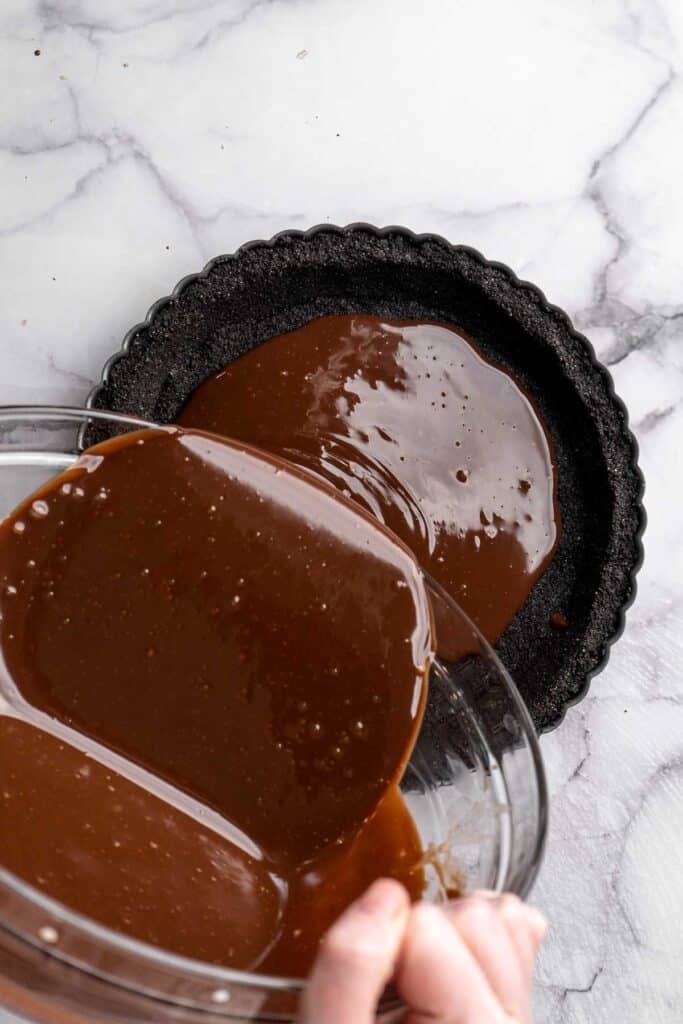
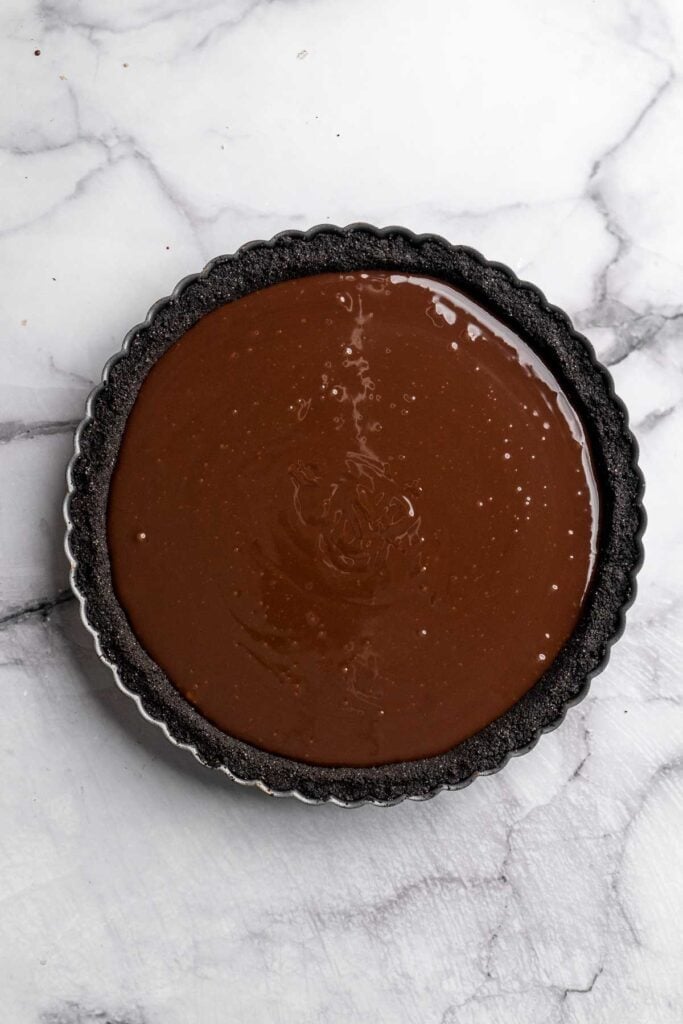
- Serve. Serve as is or decorate with assorted fruit once set.

Recipe Variations
- Add a hint of espresso. Stir in a teaspoon of instant espresso powder to the ganache for a deeper, more complex chocolate flavor. It enhances the richness without tasting like coffee.
- Make it nutty. Add ¼ cup of finely chopped hazelnuts, almonds, or pecans to the crust before pressing it into the tart pan. It adds extra texture and flavor that pairs beautifully with the chocolate.
- Use flavored chocolate. Try using flavored chocolate like orange-infused or mint chocolate to give your tart a unique twist. This simple swap can completely transform the dessert into something new.
- Add spice. For a subtle heat, add a pinch of cayenne or chili powder to the ganache. The spicy chocolate combination is a delicious surprise that's sure to impress.
How to Serve
This Chocolate Tart is best served chilled but slightly softened for slicing ease. Slice and serve with any of the following for a well-rounded dessert:
- Whipped cream
- No Churn Vanilla Ice Cream
- Winter Fruit Salad
- Almond Horns
- Strawberry Sorbet
- Cold Brew Coffee
- Fresh Fruit Tart

Recipe Tips and Tricks
- Use high-quality chocolate. Since chocolate is the star of the show, use the best quality you can find. It makes a noticeable difference in both taste and texture.
- Press the crust firmly. When forming the Oreo crust, press the crumbs very firmly into the tart pan and up the sides to ensure it holds together when sliced. A flat-bottomed measuring cup works great for this step and creates a smooth surface.
- Cut with a hot knife. Dip a sharp knife in hot water and wipe dry before slicing. This gives you clean, professional-looking slices every time.
- Let it sit at room temperature before serving. If the tart has been in the fridge for hours, let it sit out for 10-15 minutes to slightly soften. This brings out the best texture and flavor.
Storing and Freezing Instructions
How to Store
Store leftover Chocolate Tart in an airtight container in the refrigerator for up to 4 days. Keep the tart covered to maintain freshness and prevent it from absorbing fridge odors.
How to Reheat
This tart is best served cold or at room temperature, so reheating isn't necessary. If you prefer a slightly warm tart, microwave a slice for 10 seconds, but be cautious not to melt the ganache.
How to Freeze
You can freeze the entire tart (undecorated) by wrapping it tightly in plastic wrap, followed by foil. Freeze for up to 1 month. Thaw in the fridge overnight before serving and add fresh fruit just before serving.
FAQ
Absolutely! This dessert is perfect for preparing in advance. Make the tart a day ahead and chill it in the refrigerator. Add the fruit toppings just before serving for the freshest presentation. The flavor and texture actually improve as it rests, making it ideal for entertaining.
Yes, you can swap the Oreo crust with a graham cracker crust, Biscoff cookie crust, or even a shortbread cookie base. Each variation gives the tart a slightly different flavor and texture, so you can easily tailor it to your taste.
To avoid split ganache, make sure the cream isn't too hot when you pour it over the chocolate-just steamy, not boiling. Let the mixture sit for a few minutes before stirring gently from the center outward until smooth. If it starts to look oily, add a splash of warm milk and whisk gently to bring it back together.
Of course! You can top the Chocolate Tart with chocolate curls, crushed nuts, edible flowers, or even a dusting of cocoa powder or powdered sugar. These alternatives offer great texture and visual appeal without the need for fruit.
More Chocolate Recipes
- Chocolate Pecan Pie
- Hot Chocolate Cookies
- Chocolate Shortbread Cookies
- Hot Chocolate
- Chocolate Layer Cake
- Millionaire's Shortbread
Tried this recipe?
I'd love to hear what you think! Leave a comment and rating below to share your feedback. Your reviews help others discover this recipe and help me keep creating more free recipes for you. Snap a photo and tag me on social media @aheadofthyme too.

Vegetarian Breakfast Burritos
Vegetarian Breakfast Burritos are a hearty, flavorful, and satisfying way to start the day. Packed with crispy potatoes, sautéed bell peppers, fluffy scrambled eggs, melted cheese, and creamy avocado, they check all the boxes for a balanced breakfast that actually keeps you full. Wrapped up in a warm flour tortilla, they're great fresh off the pan or made ahead and frozen for busy mornings.
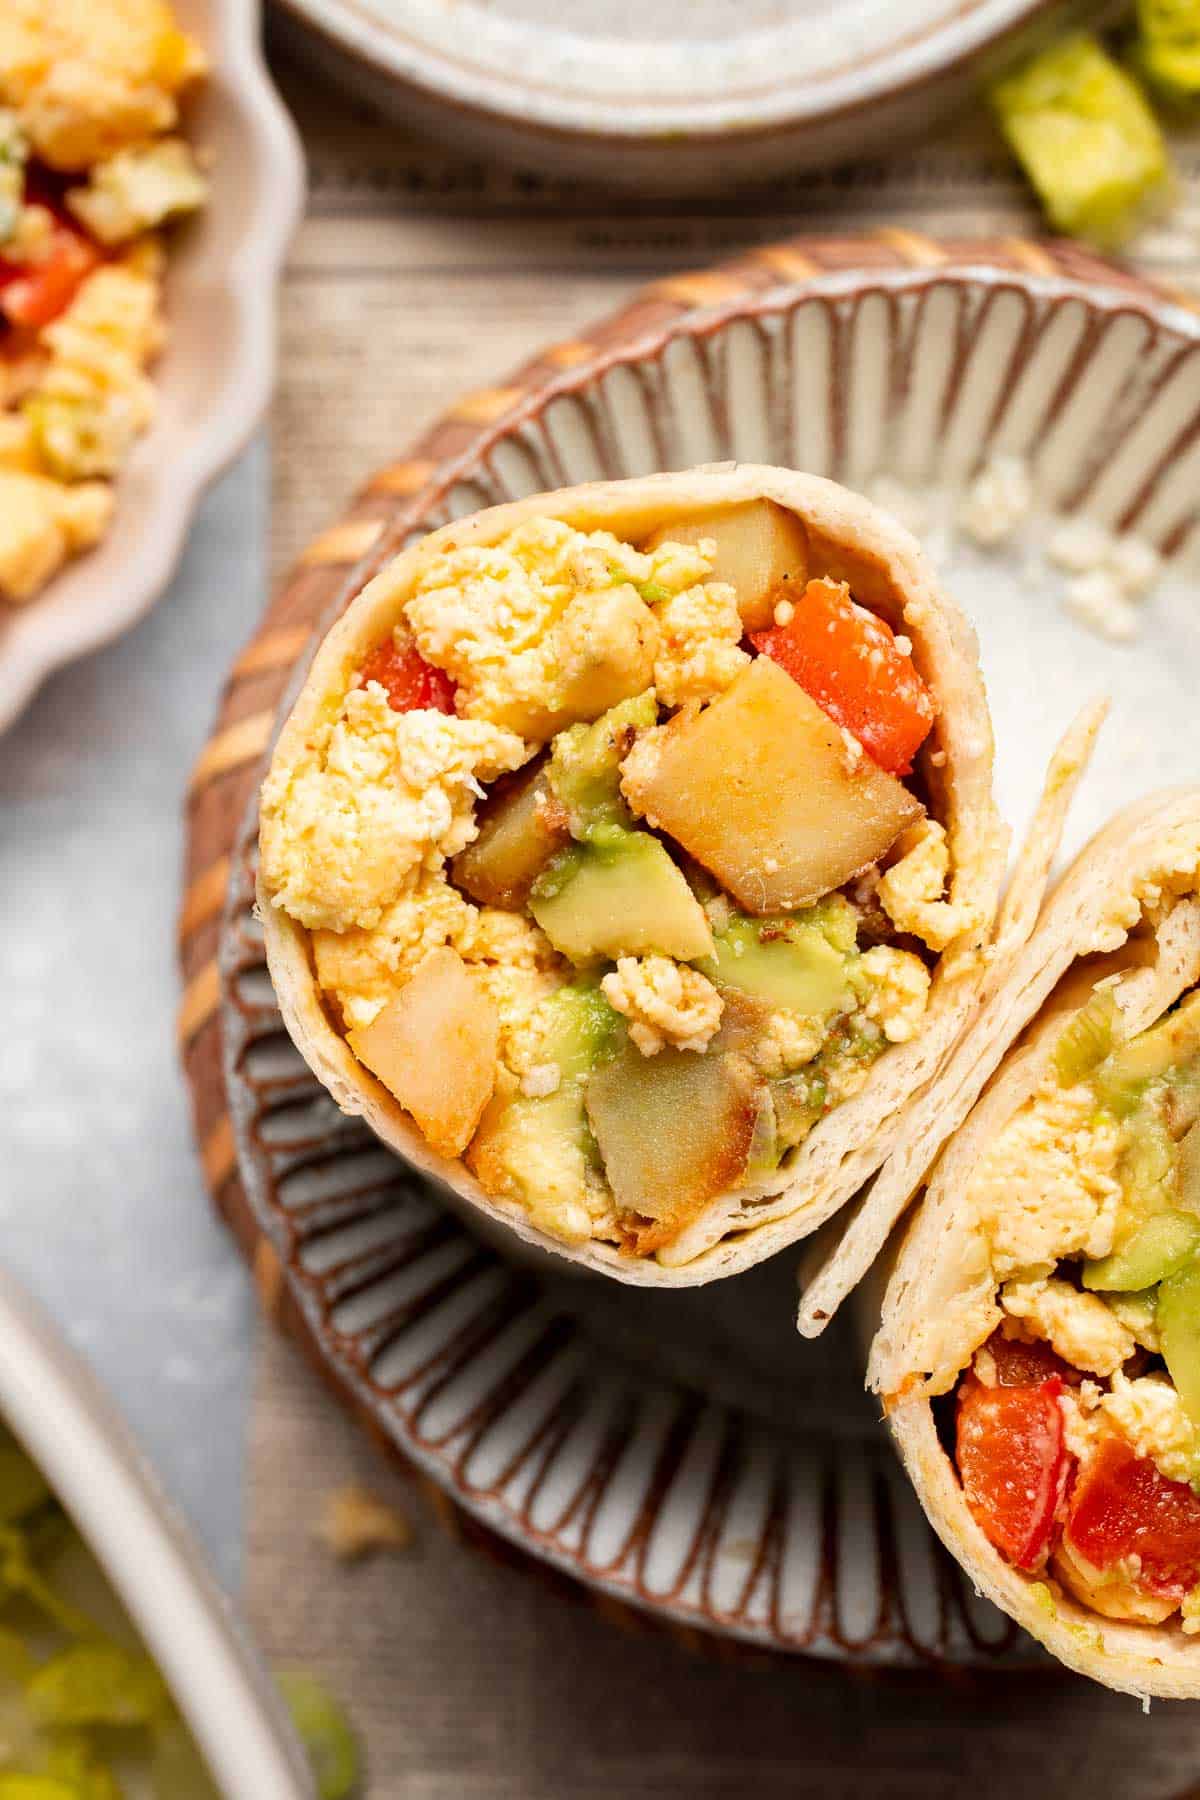
Breakfast burritos also happen to be a total meal prep win. Each wrap packs a little bit of everything: protein, carbs, healthy fats, and plenty of flavor. You can customize the fillings to suit your preferences. The best part? They freeze beautifully, so you can have a hot, filling breakfast ready in minutes. Make a batch on the weekend and thank yourself all week long.
Why You'll Love these Vegetarian Breakfast Burritos
- Perfect for meal prep. These veggie burritos hold up beautifully in the fridge or freezer, making them ideal for grab-and-go breakfasts throughout the week. Simply reheat and enjoy! They're also individually portioned, making it easy to plan ahead and control servings without hassle.
- Hearty and filling. With potatoes, eggs, cheese, and veggies, each burrito is a complete and balanced breakfast that will keep you energized and full for hours. The combination of carbs, protein, and healthy fats ensures lasting energy and minimal cravings between meals.
- Totally customizable. Whether you prefer cheddar or feta, red potatoes or russet, or want to add extra veggies or spice, this recipe is easy to adapt to your taste. You can even add meat if you are not on a plant-based diet. You can mix and match ingredients based on your dietary needs and what you have on hand.
- Family-friendly. These burritos are a hit with kids and adults alike. Serve with your favorite dips or toppings to make breakfast fun and satisfying for everyone. They're also great for picky eaters since you can tailor the fillings to suit individual preferences.
Ingredient Notes
To make these delicious Vegetarian Breakfast Burritos, you will need the following ingredients (full measurements in recipe card below):
- potatoes - red or russet potatoes work well. Dice them small so they cook quickly and crisp nicely. You can substitute with sweet potatoes for added fiber and natural sweetness.
- oil - olive oil is used to cook the potatoes, and avocado oil is used for sautéing the veggies. One or the other can also be used, if preferred.
- seasoning - we use paprika, garlic powder, salt and pepper to give the potatoes a smoky, savory flavor. You can use smoked paprika for a deeper flavor.
- eggs - scrambled until soft and fluffy. For a vegan version, substitute with tofu scramble.
- red bell pepper - adds color, sweetness, and crunch. Yellow or orange bell peppers can also be used.
- cheese - feel free to use cheddar cheese or feta cheese. Cheddar melts beautifully, while feta adds a tangy twist. Mozzarella or dairy-free cheese are also great alternatives.
- green onion - adds a fresh, slightly sharp flavor. Substitute with red or yellow onion for a stronger taste.
- avocado - sliced for a creamy, nutrient-rich finish. It can also be mashed, swapped with guacamole, or omitted if unavailable.
- flour tortillas - use large, soft tortillas that are easy to fold.
You will also need measuring cups and spoons, a large skillet or frying pan, and a mixing bowl.
How to Make the Best Vegetarian Breakfast Burritos
First, prepare the potatoes.
- Cook potatoes. Heat oil in a large non-stick skillet or stainless steel pan over medium heat until hot, about 1-2 minutes. Add cubed potatoes and toss well to coat. Cook without stirring for 5 minutes.
- Season. Add paprika, garlic powder, salt and pepper. Stir well to coat and continue cooking for another 8-10 minutes until tender, stirring occasionally.
Set aside on a plate.
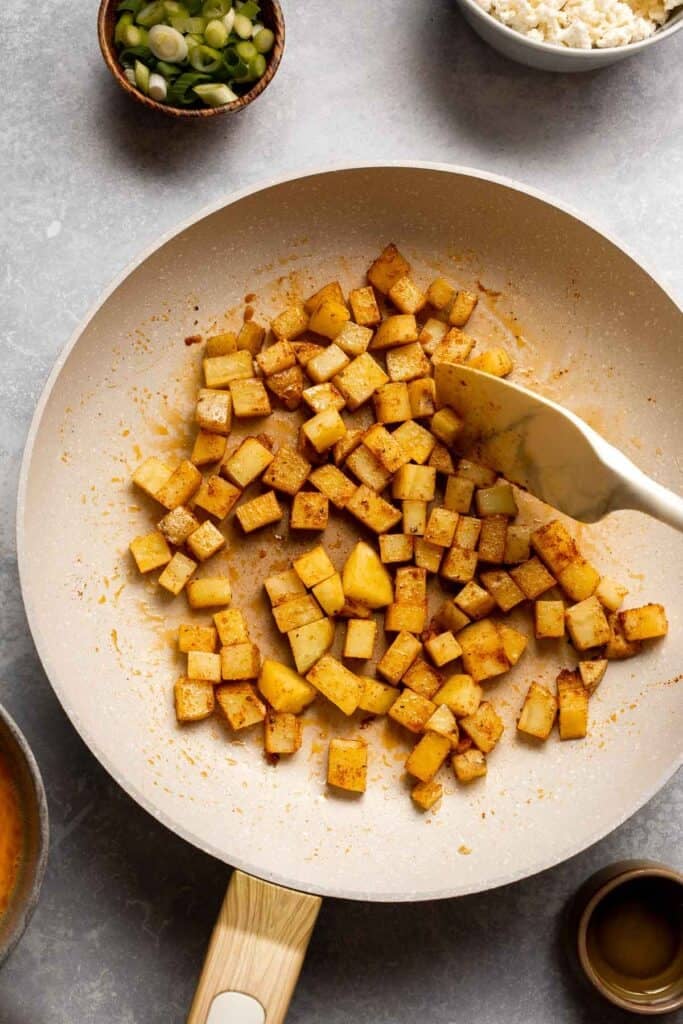
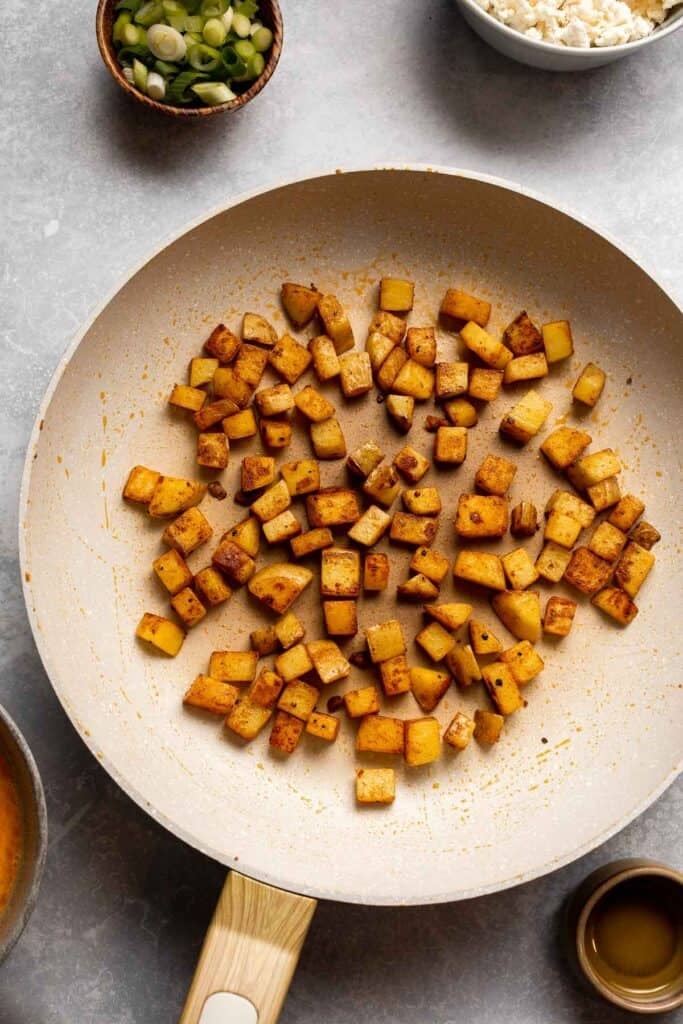
Next, prepare the eggs.
- Combine ingredients. In a medium mixing bowl, whisk together eggs, bell pepper, cheese and green onion until smooth.
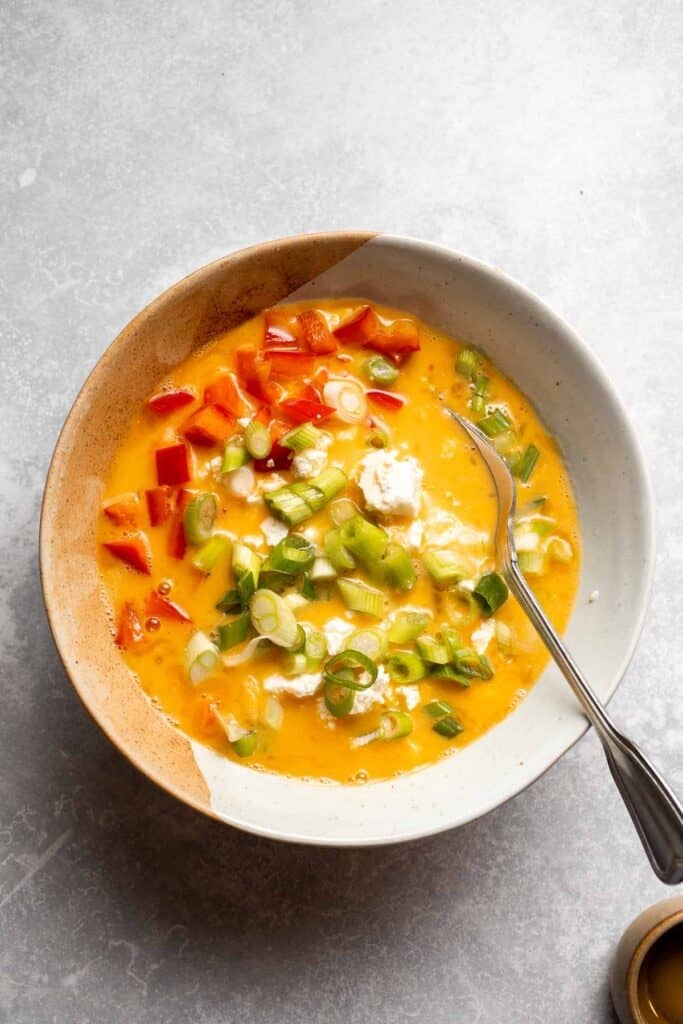
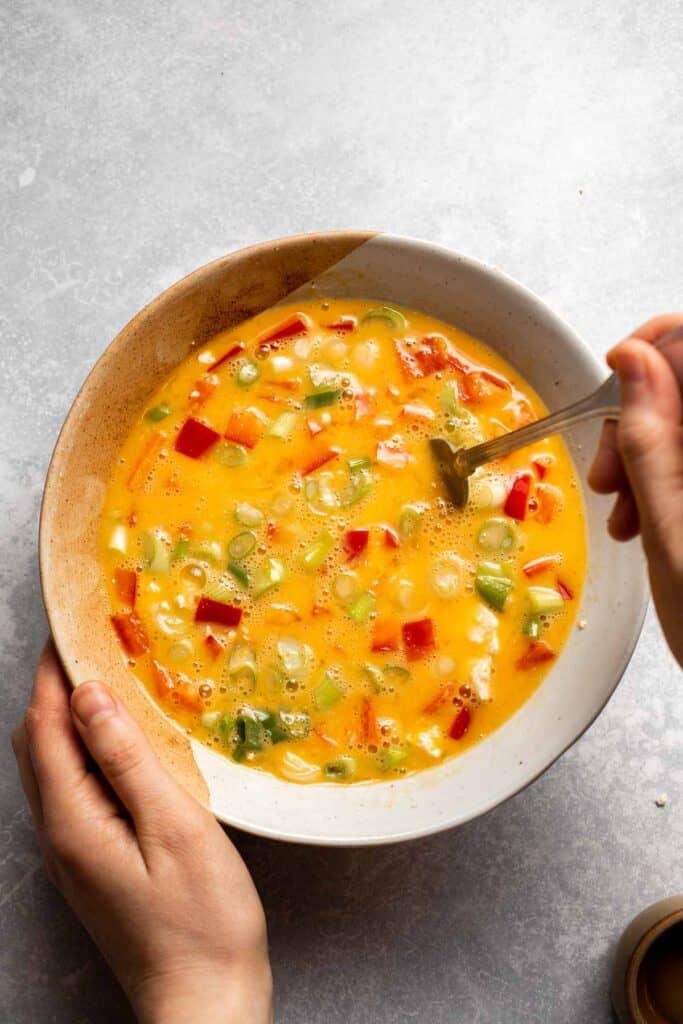
- Scramble eggs. Heat oil in the same skillet over medium-high heat until hot , about 1-2 minutes. Add egg mixture and use a spatula to mix together and scramble until set, about 3-4 minutes.
- Season. Season with salt and pepper. Set aside.

Now, let's assemble the burritos.
- Assemble. On each tortilla wrap, add an equal amount of egg mixture, cooked potato cubes and avocado slices.
- Fold. Fold up the bottom and top, then fold one edge in, and roll up tightly to seal. Make sure all the corners are tightly sealed.
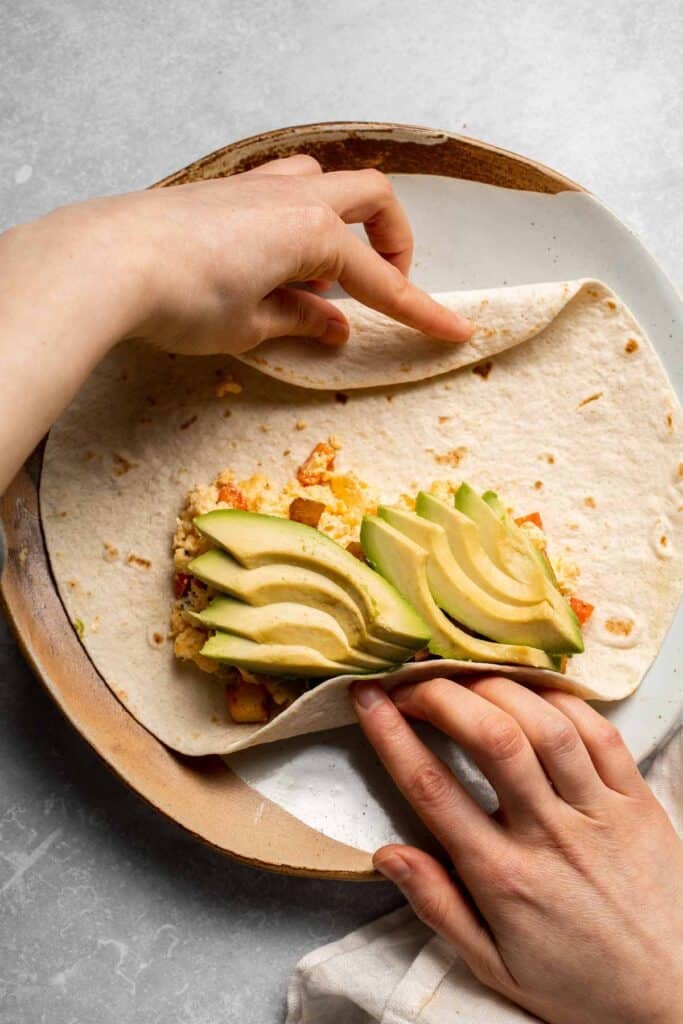
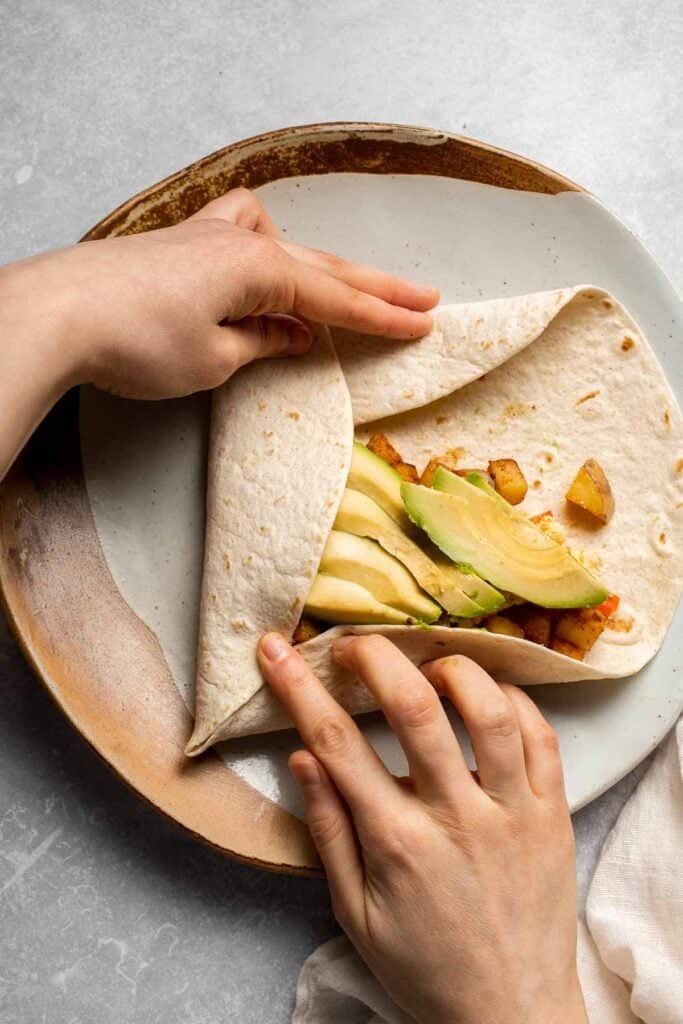
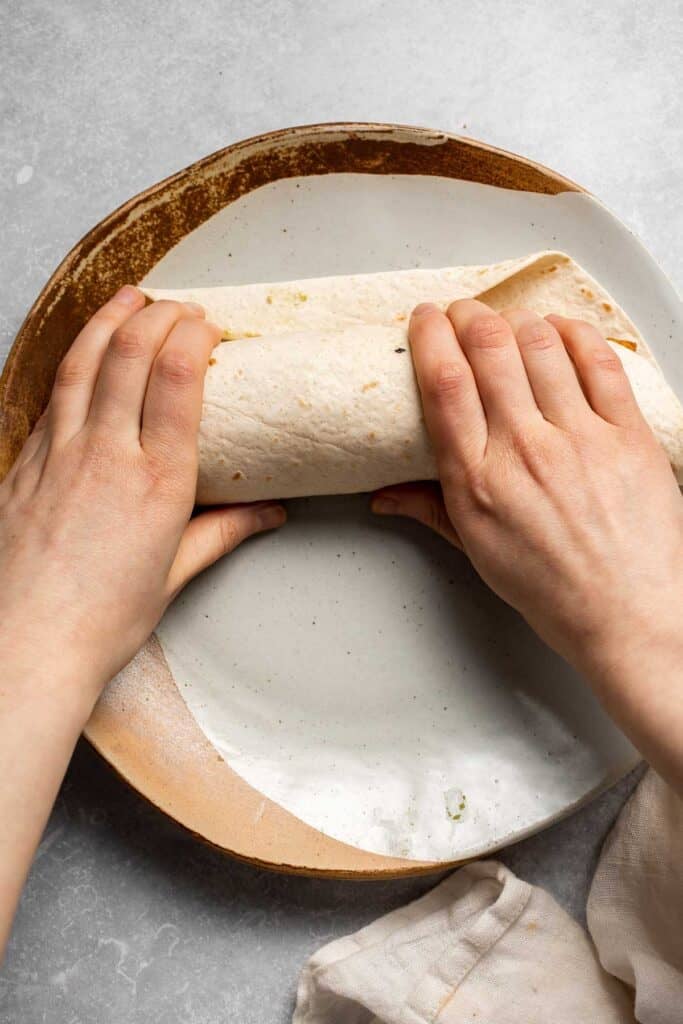

- Heat. Optionally, heat the burritos in a skillet over the stove over medium-high heat until crispy, about 3-4 minutes on each side.
- Serve. Slice in half and serve, or wrap each burrito tightly in aluminum foil and serve later.
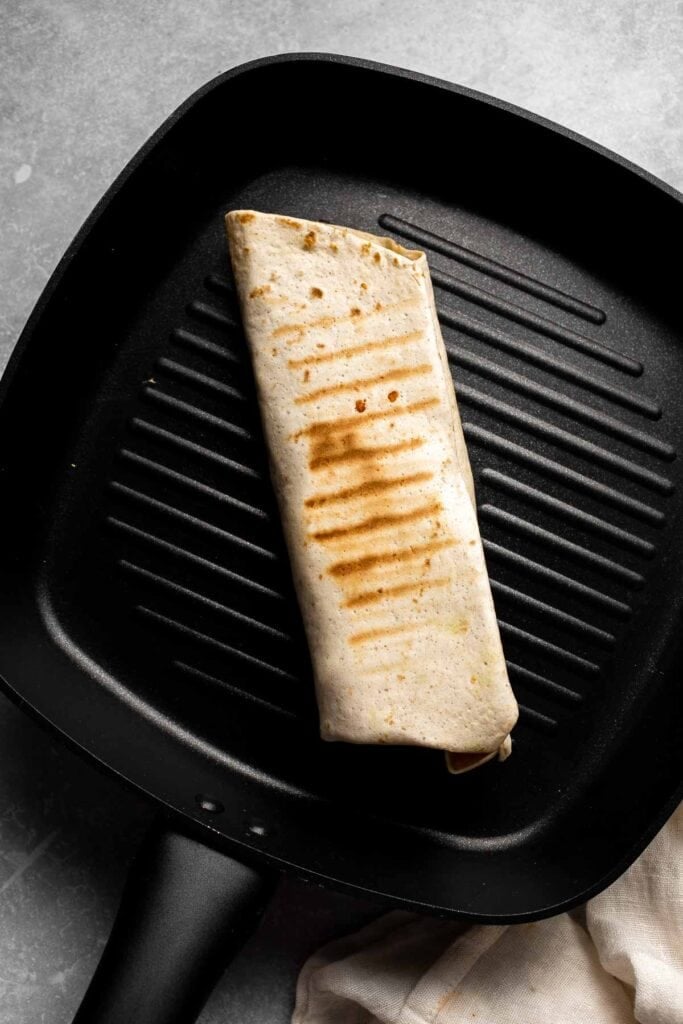

Recipe Variations
- Add beans. Black beans or refried beans make the burritos even heartier and add plant-based protein.
- Swap the veggies. Try mushrooms or zucchini for a different flavor profile. You can also mix in a handful of fresh spinach or kale while the eggs are cooking for added nutrients and color.
- Add meat. While this recipe is vegetarian, you can include cooked bacon, sausage, or even plant-based meat alternatives for extra protein and heartiness.
- Make it spicy. Add diced jalapeños, hot sauce, or spicy mayo to the scrambled eggs for a bit of heat and extra boldness.
- Try a different cheese. Swap cheddar for feta for a tangy twist or use pepper jack for a spicy variation.
- Go vegan. Use plant-based eggs, vegan cheese, and skip the sour cream for a fully vegan version.
How to Serve
These Vegetarian Breakfast Burritos are delicious served on their own or with some dippings on the side such as Guacamole, Pico de Gallo, or Mango Salsa. You can also serve it as part of a Mexican-inspired breakfast along with some other favorites such as:
- Huevos Rancheros
- Chilaquiles Verdes
- Mexican Street Corn Salad
- Herb Roasted Sweet Potatoes
- Mango Yogurt Smoothie
For more breakfast recipes, see our 50 Best Breakfast Ideas.
Recipe Tips and Tricks
- Cook the potatoes properly. Make sure to pan-fry the potatoes in a single layer over medium heat with enough oil to get them crispy and golden brown. Don't overcrowd the pan, and stir occasionally for even browning and a tender center.
- Scramble the eggs gently. Whisk the eggs to incorporates air into them, resulting in a fluffier scramble. Then, cook them low and slow for a soft, creamy texture. Stir constantly with a spatula to avoid overcooking or browning, and remove from heat just before they're fully set.
- Use freshly grated cheese. Pre-shredded cheese often contains anti-caking agents that can affect melting. Freshly grated cheese melts more smoothly and adds better flavor.
- Warm the tortillas. Briefly warming tortillas on a skillet or in the microwave makes them more pliable and easier to roll without tearing. A quick 20-second microwave or warm pan does the trick.
- Don't overfill the burritos. Adding too much filling can make them hard to roll and more likely to fall apart. Use a modest amount and wrap tightly.
Storing and Freezing Instructions
How to Store
Wrap each burrito tightly in foil or parchment paper and store in an airtight container in the refrigerator for up to 4 days.
How to Reheat
To reheat from the fridge, unwrap the burrito and microwave for about 1-2 minutes, flipping halfway. For a crisper texture, heat in a skillet over medium heat until warmed through and golden on the outside, about 5-6 minutes. If reheating from frozen, microwave for 3-4 minutes or bake at 375°F (190°C) for about 25 minutes.
How to Freeze
To freeze, wrap each burrito in foil and place in a freezer-safe bag. Freeze for up to 2 months. Reheat from frozen in the microwave or oven. For best results, thaw overnight in the fridge before reheating.
FAQ
Yes! These burritos are perfect for meal prep and can be made several days in advance. Store them wrapped in the fridge or freezer and reheat as needed. If freezing, consider wrapping each one in parchment followed by foil to reduce freezer burn and preserve freshness. Thaw overnight in the fridge before reheating for best texture.
Large, soft flour tortillas are the top choice because they're easy to fold and hold all the delicious fillings without breaking. Whole wheat tortillas are a great healthier option, and gluten-free varieties are available for those with dietary needs. Be sure to warm your tortillas slightly before assembling to avoid tearing and make them more pliable.
To make them more filling, add hearty ingredients like black beans, extra scrambled eggs, or more cheese. You can also include cooked grains like quinoa or brown rice. Pairing the burrito with a smoothie, yogurt, or fresh fruit on the side makes for a more complete and satisfying breakfast meal.
To prevent soggy burritos, let all the cooked ingredients cool before assembling. Avoid overloading with wet ingredients like salsa. Wrapping the burritos tightly in foil or parchment also helps retain their structure. For reheating, use a toaster oven or skillet to crisp them up instead of microwaving if you prefer a less soft texture.
More Egg Recipes
- 20 Best Egg Recipes
- Tex Mex Egg Muffins
- Avocado Toast with Poached Egg
- Spring Vegetable Frittata
- Egg and Potato Breakfast Casserole
- Avocado Egg Salad
Tried this recipe?
I'd love to hear what you think! Leave a comment and rating below to share your feedback. Your reviews help others discover this recipe and help me keep creating more free recipes for you. Snap a photo and tag me on social media @aheadofthyme too.

Creamy Roasted Red Pepper Pasta
This Creamy Roasted Red Pepper Pasta is cozy, comforting, and packed with flavor. Roasted red peppers blend into a silky sauce with garlic and a splash of cream for richness, creating a velvety coating that clings to every noodle. Finished with Parmesan and fresh basil, this vibrant dish feels elegant enough for company but comes together with simple ingredients in just 30 minutes.
There's something magical about a pasta dish that feels both indulgent and effortless. This recipe is proof that simple ingredients, when blended just right, can create something super flavorful and delicious. It's the kind of meal that works just as well for a cozy weeknight dinner as it does for a relaxed weekend gathering, and it's always a hit with both kids and adults alike.
Why You'll Love this Creamy Roasted Red Pepper Pasta Recipe
- Rich and creamy. Roasted red peppers bring a slightly sweet, smoky depth that blends beautifully with garlic and onion. When mixed with cream and Parmesan, the sauce turns into a velvety dream that's both comforting and full of dimension.
- Minimal ingredients. You don't need a long list to make something delicious. This pasta is made with everyday staples like pasta, onion, garlic, cream, and a jar of roasted peppers - no fancy ingredients or hard-to-find components required.
- Quick and easy. Ready in just 30 minutes, this recipe is perfect for busy weeknights when you want something warm and home-cooked without a ton of effort or cleanup. It's a great choice when you're short on time but still want something that feels special and satisfying.
- Customizable. You can blend the sauce until silky smooth or leave it slightly chunky for texture. It's easy to make it your own with different pasta shapes, herbs, or a pinch of spice based on your preferences or what you have on hand.
Ingredient Notes
To make this quick and easy Creamy Roasted Red Pepper Pasta, you will need the following ingredients (full measurements in recipe card below):
- pasta - any shape will work here. Use penne, rigatoni, fusilli, or spaghetti depending on what you have. Gluten-free pasta works just as well.
- extra virgin olive oil - used for sautéing the aromatics and adding depth to the sauce. Butter can be used if preferred for a richer taste.
- onion - yellow or white onion adds sweetness and builds flavor in the sauce. Shallots are also a great substitute.
- garlic - fresh garlic adds aromatic punch.
- heavy cream - brings richness and body to the sauce. Half-and-half can be used for a lighter version.
- roasted red peppers - the star of the sauce, these add sweet and smoky flavor. Look for roasted red peppers packed in water or olive oil (not vinegar-based) for the best flavor in your sauce. You can also roast your own peppers for a homemade touch. See our for Roasted Red Pepper Hummus instructions.
- salt - adjust to taste.
- parmesan cheese - adds savory depth and finishes the sauce with a touch of umami. Grana Padano or Pecorino Romano are good alternatives.
- basil - brings brightness and freshness to the final dish. Flat-leaf parsley can be substituted if needed.
You will also need measuring cups and spoons, a blender or food processor, large sauté pan, and a pot for cooking the pasta.
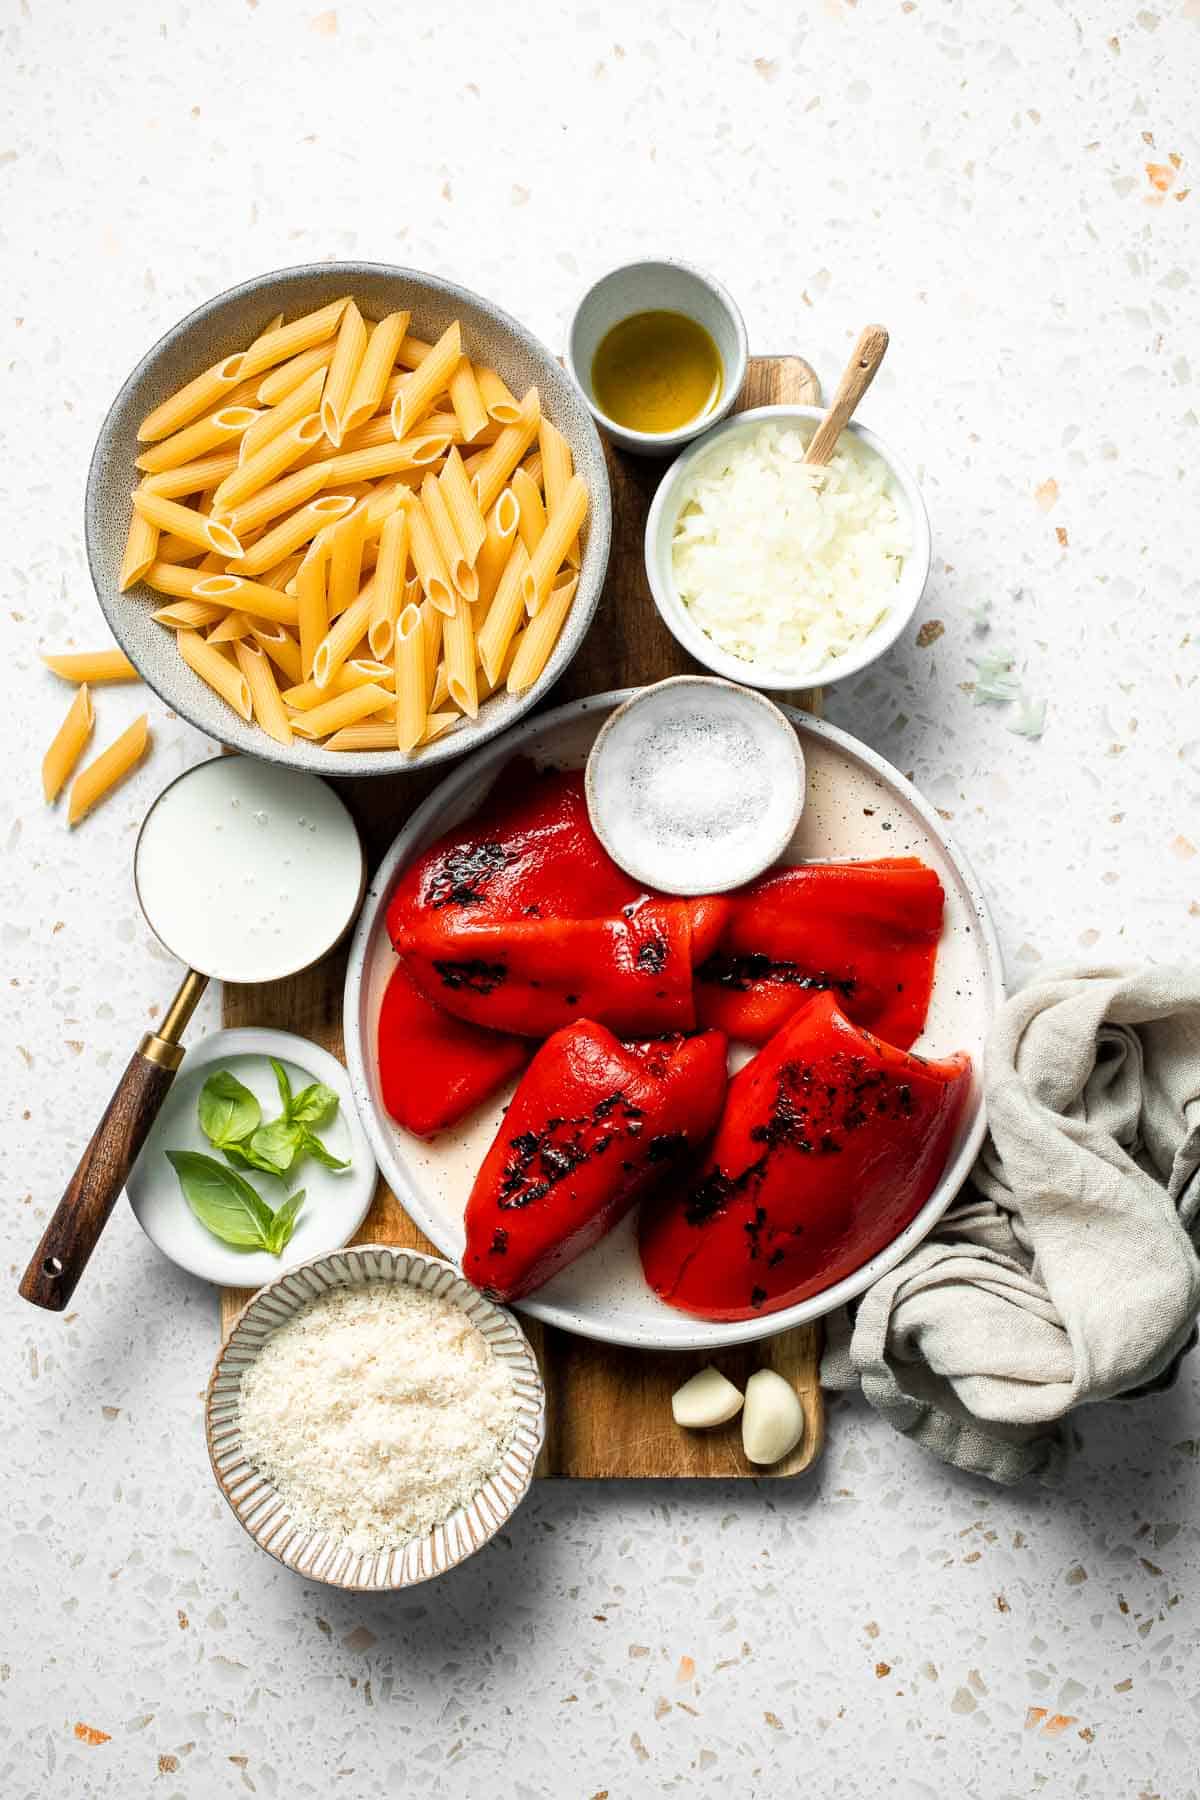
How to Make the Best Creamy Roasted Red Pepper Pasta
- Boil pasta. Bring a large pot of salted water to a boil over medium-high heat. Add pasta and cook until al dente according to package directions, about 8-10 minutes. Reserve ½ cup of the hot pasta water in a bowl. Drain the pasta and set aside in the pot.
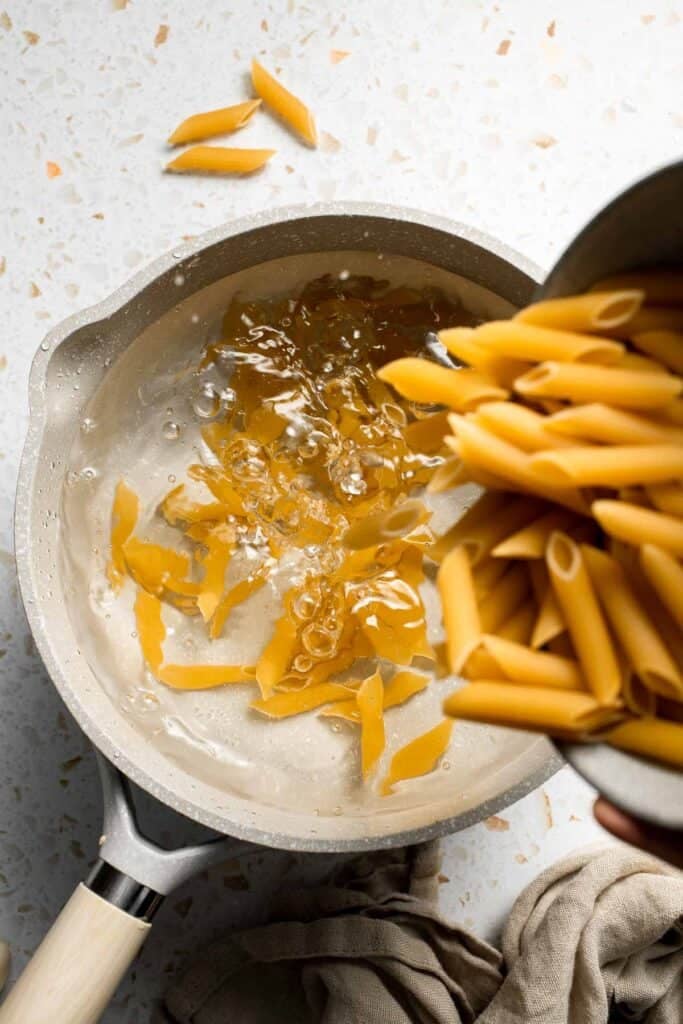

- Sauté aromatics. In a medium saucepan, heat oil over medium-high heat until it sizzles, about 1 minute. Add onion and garlic and sauté until fragrant, about 1 minute.
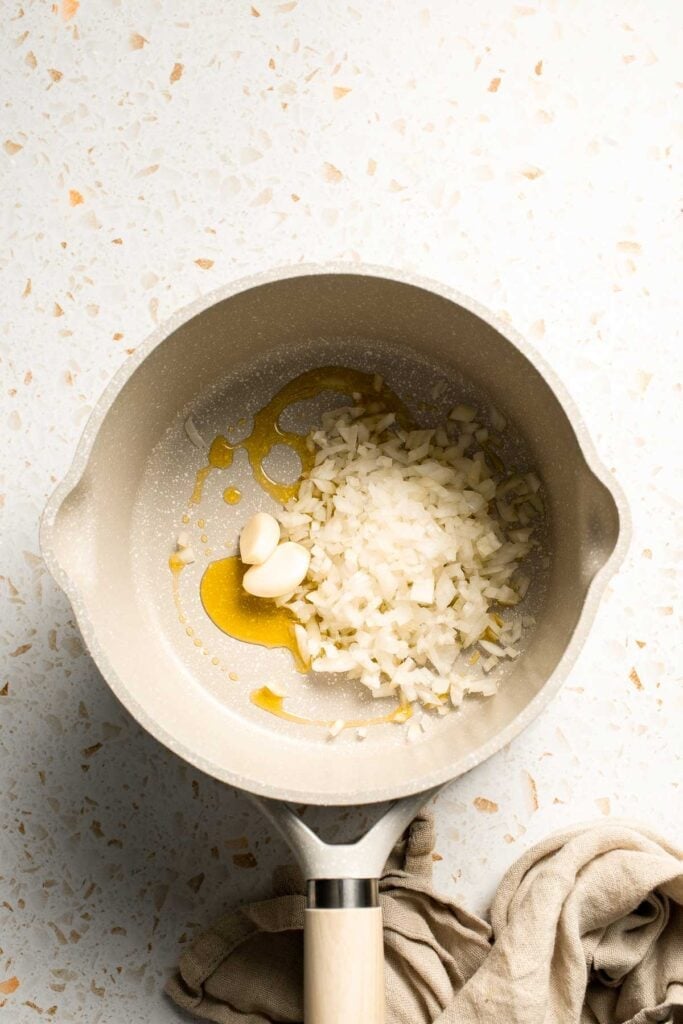
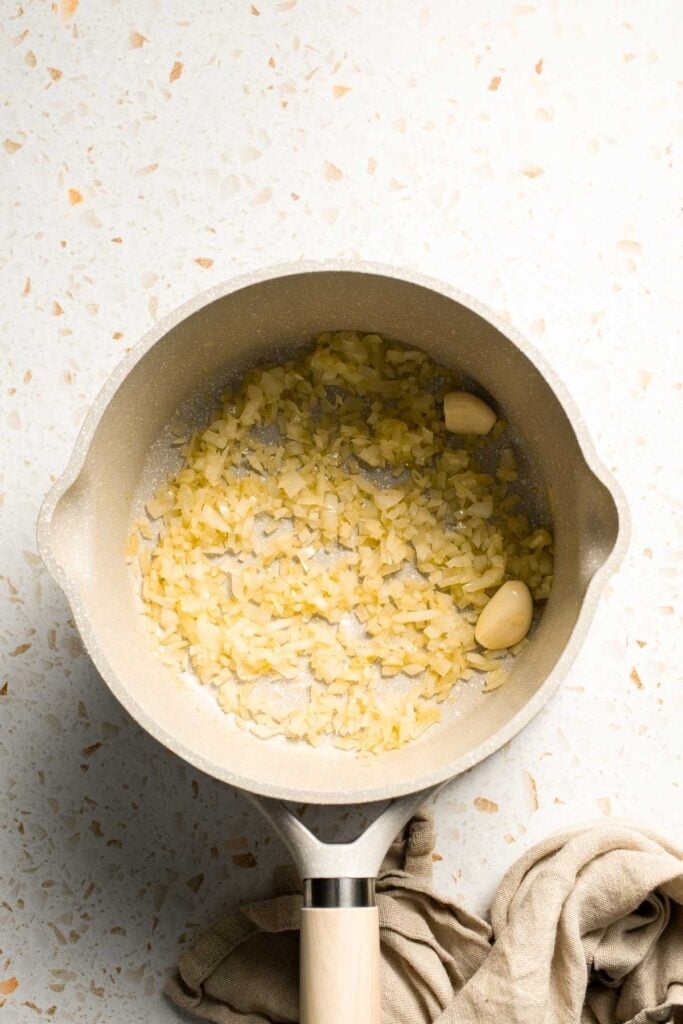
- Make sauce. Transfer the garlic-onion mixture to a blender and add heavy cream, roasted peppers, salt, and reserved ½ cup pasta water. Blend until smooth and creamy, about 1 minute.
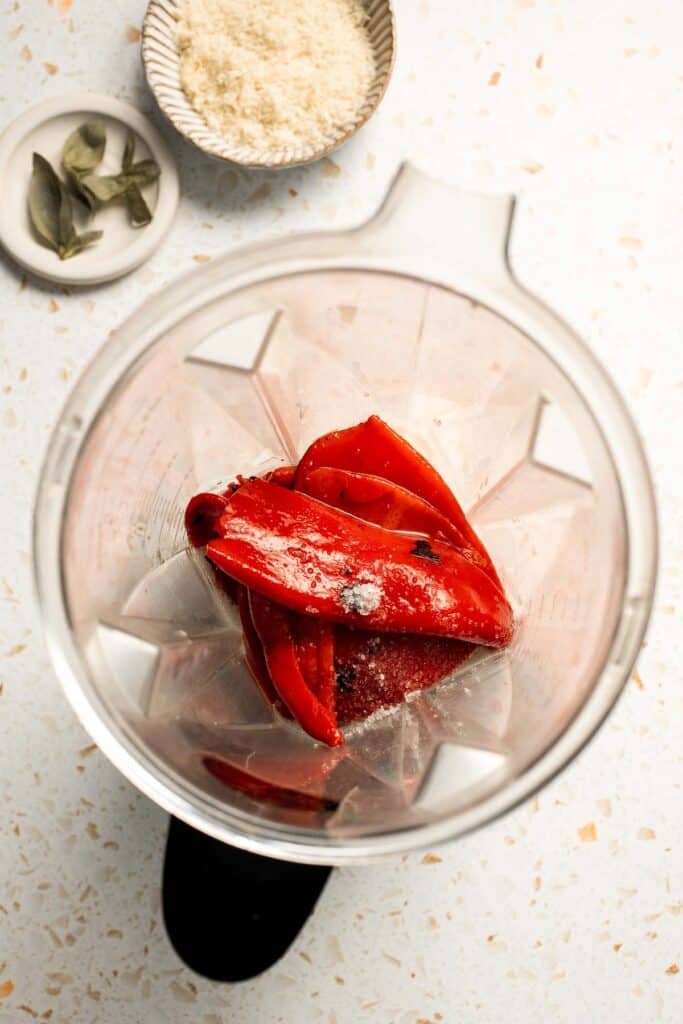
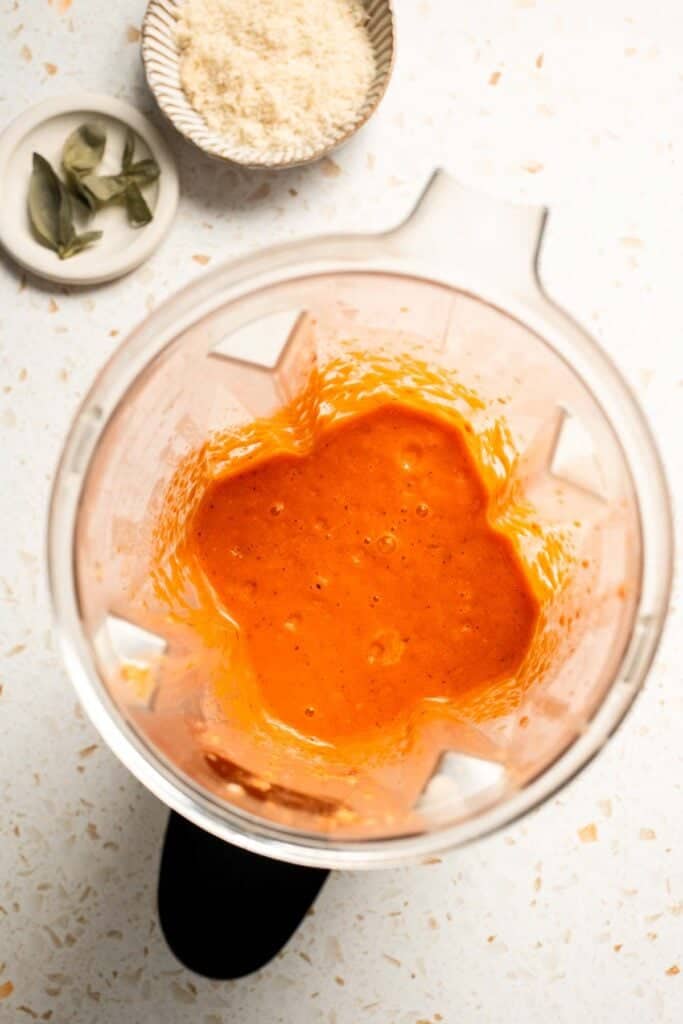
- Toss. Add the blended sauce and parmesan cheese to the cooked pasta and toss well. Cook over medium heat and stir constantly until creamy and warmed through, about 2-3 minutes.

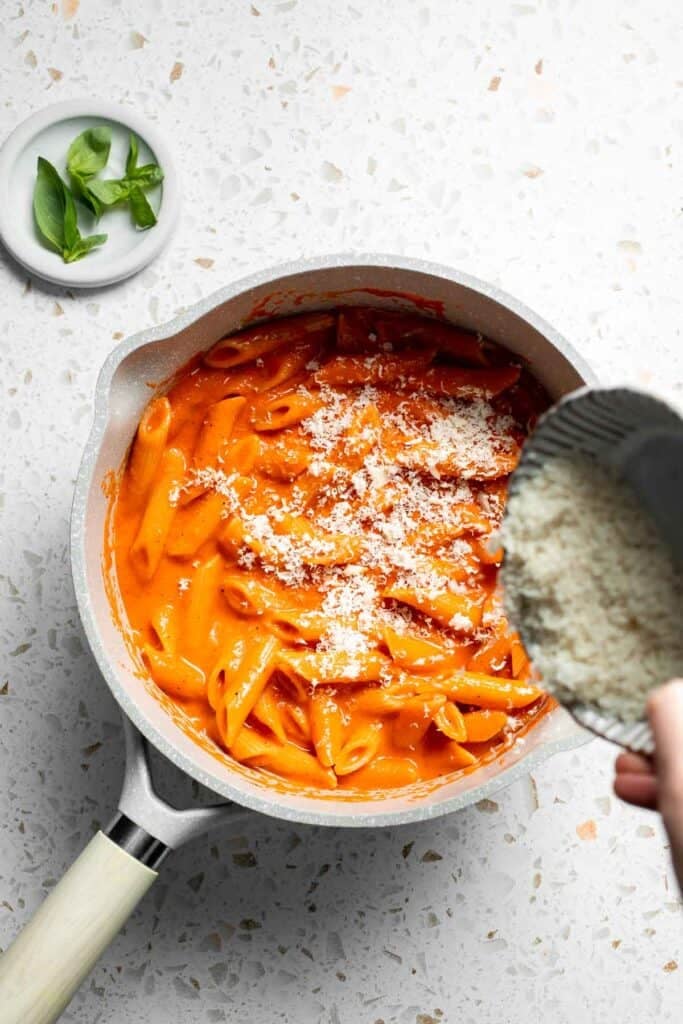
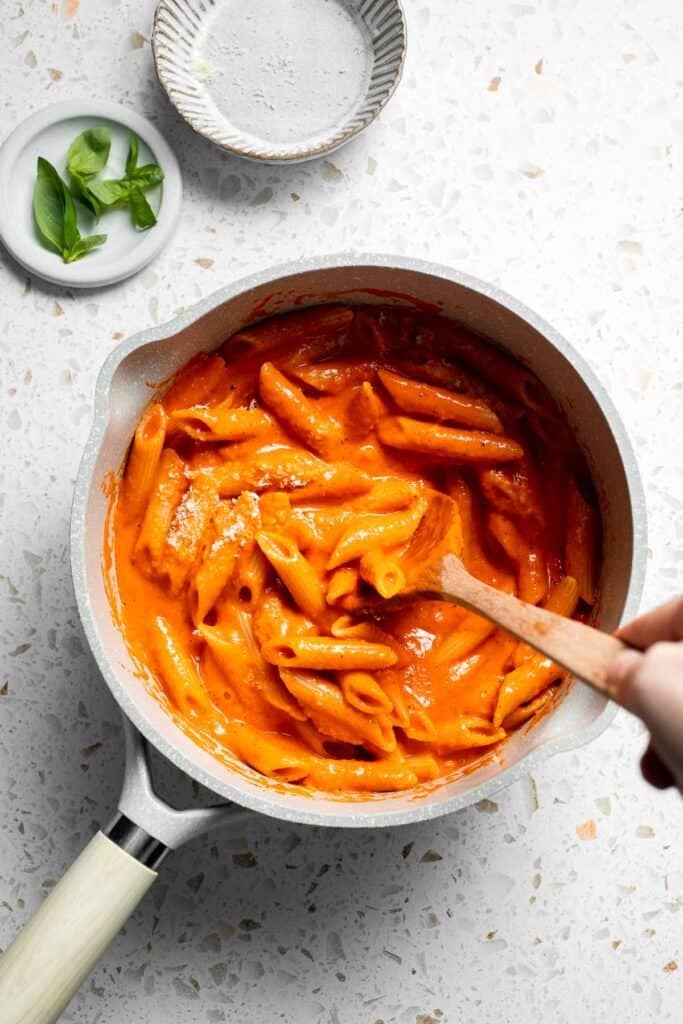
- Serve. Garnish with fresh basil and serve immediately.
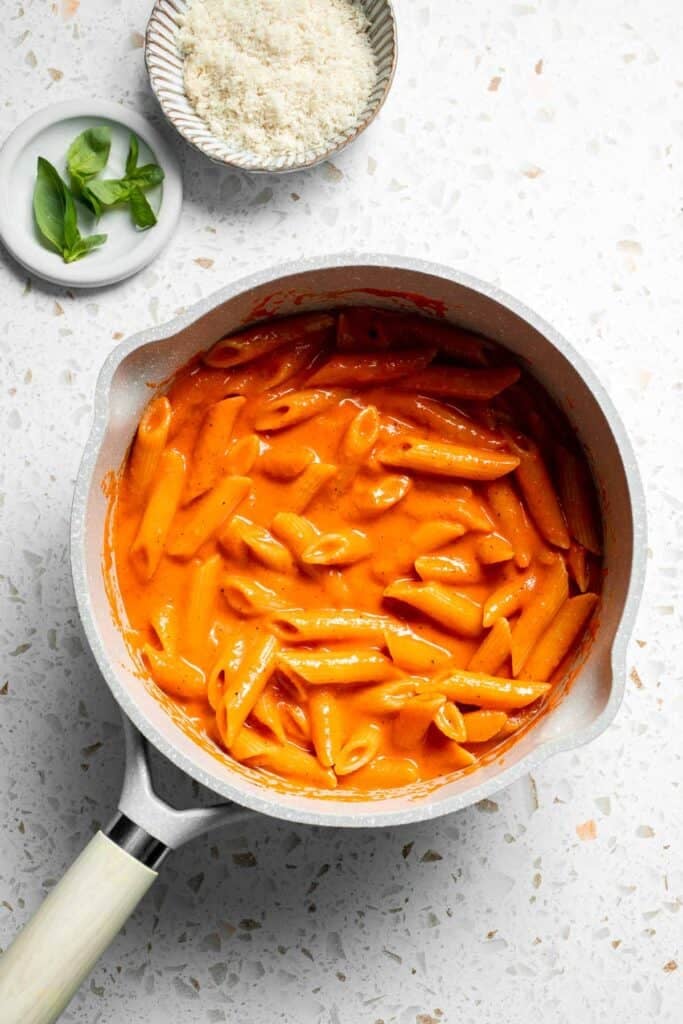
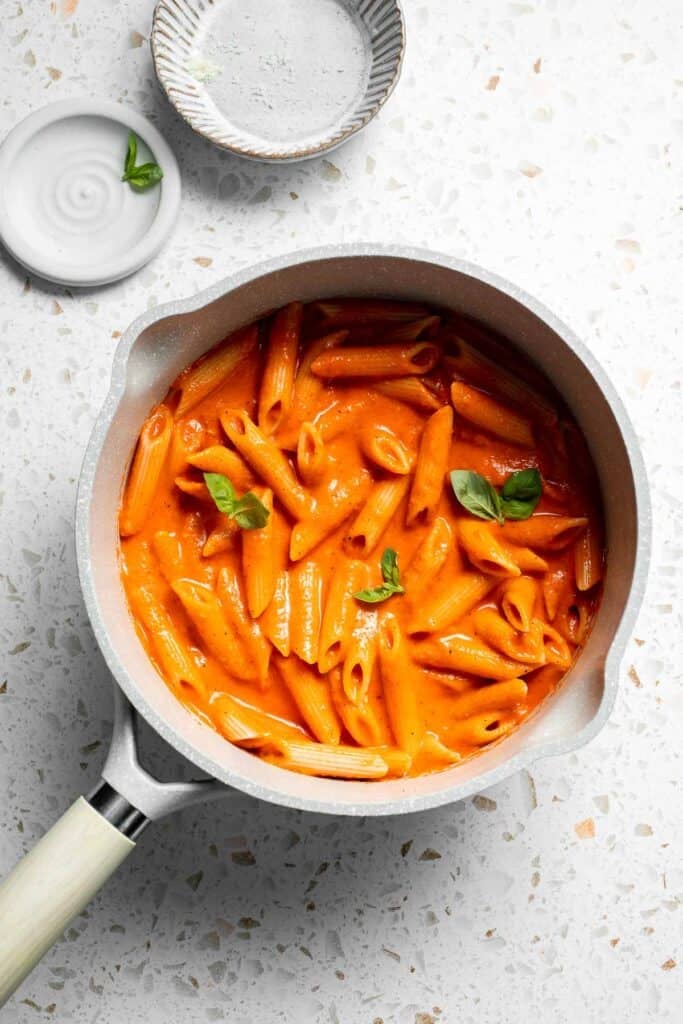
Recipe Variations
- Add heat. Toss in a pinch of red pepper flakes or a splash of hot sauce to give the creamy sauce a spicy kick.
- Make it vegan. Use a plant-based cream and skip the Parmesan or sub in a dairy-free alternative. The roasted peppers still shine without dairy.
- Add protein. Stir in cooked chicken, sautéed shrimp, or white beans to make it a more filling main dish.
- Use sun-dried tomatoes. Blend a few oil-packed sun-dried tomatoes with the roasted peppers for a deeper, more intense flavor.
- Add veggies. Mix in sautéed spinach, zucchini, or mushrooms to bulk up the dish with extra nutrients and texture.
How to Serve
This Creamy Red Pepper Pasta is delicious served on its own, or paired with some of my favorite sides including:
For more recipes, see our 30 Side Dishes for Pasta.
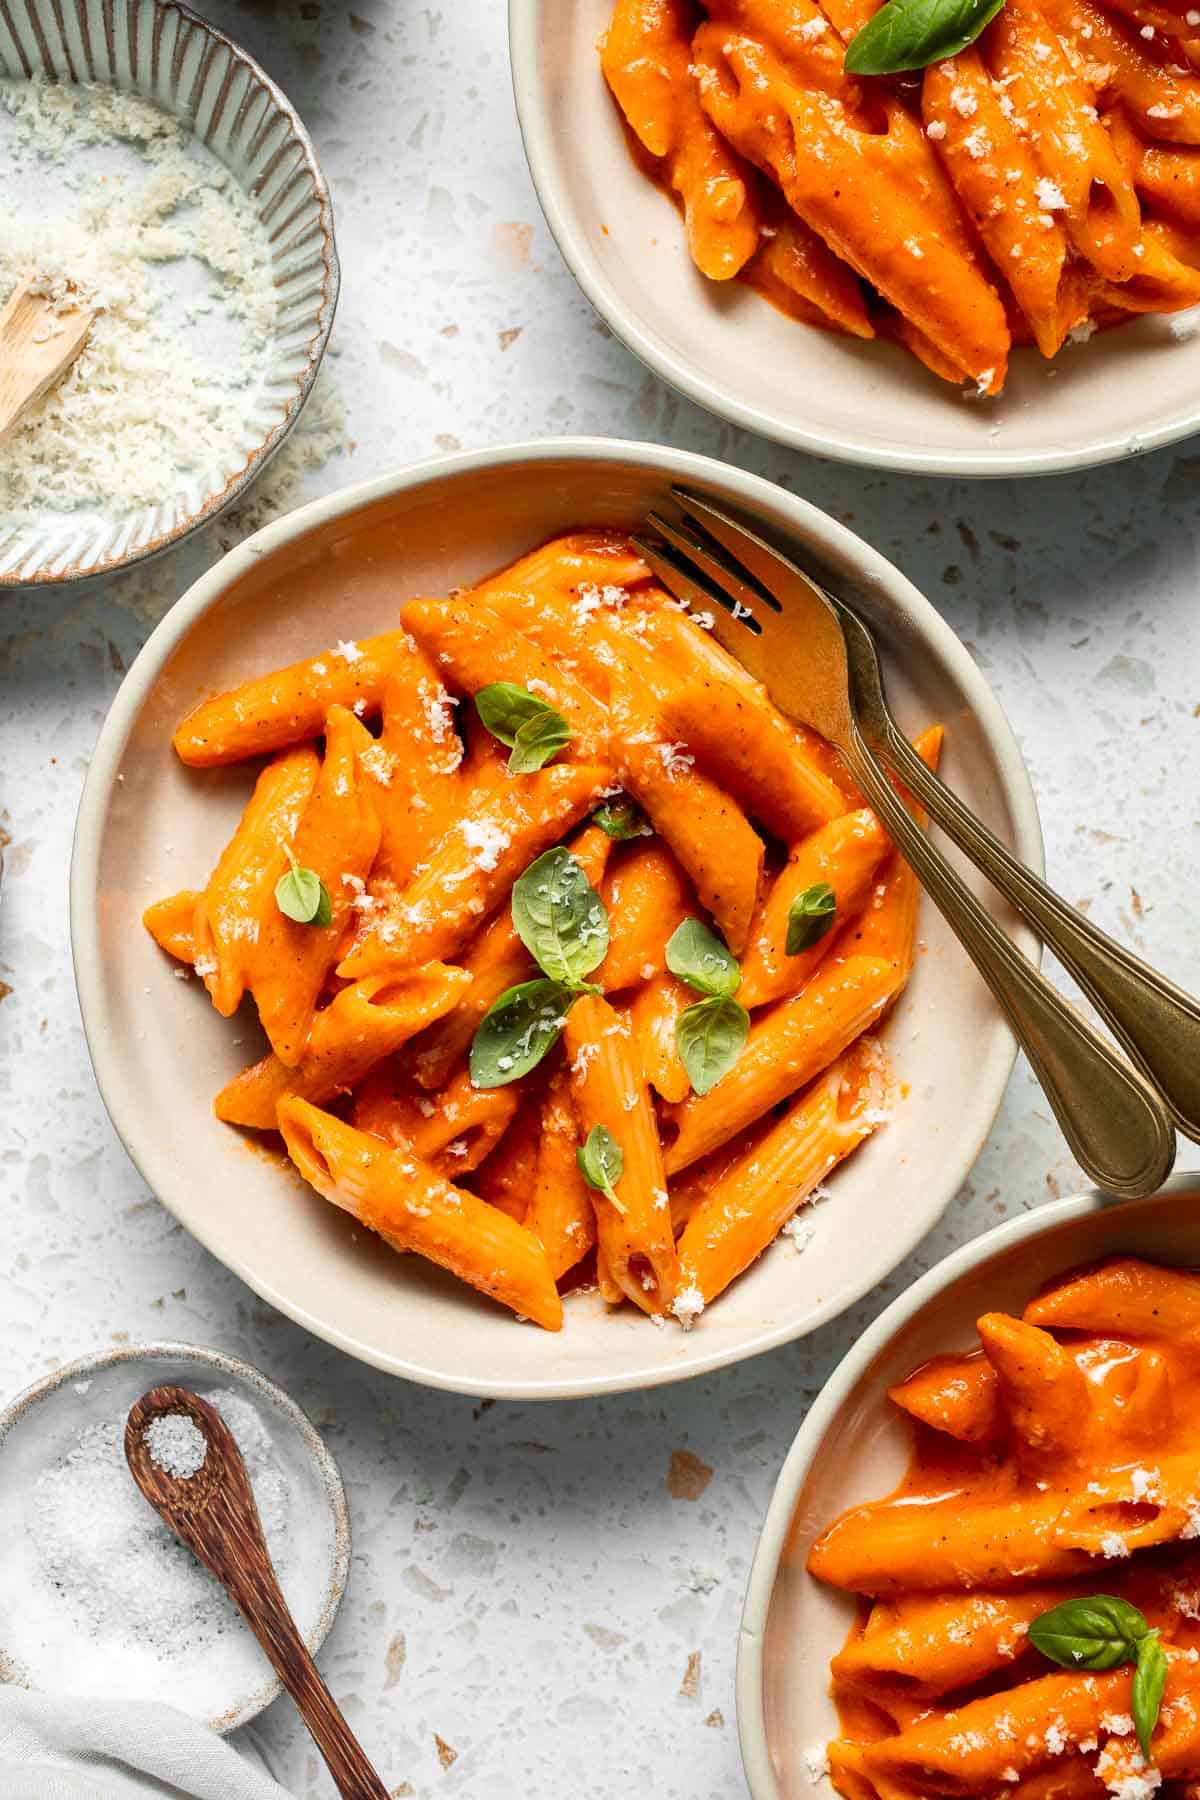
Recipe Tips and Tricks
- Blend until smooth. For the silkiest texture, blend the sauce thoroughly in a blender or food processor. If you prefer a bit more texture, pulse just a few times instead of fully puréeing.
- Warm the sauce before mixing. Once blended, return the sauce to the pan to heat through before adding the pasta. This keeps everything piping hot and ensures even coating.
- Garnish before serving. A sprinkle of Parmesan, a few torn basil leaves, and a drizzle of olive oil really elevate the presentation and flavor.
Storing and Freezing Instructions
How to Store
Store any leftover red pepper pasta in an airtight container in the refrigerator for up to 3 days. The sauce will thicken as it chills, but it reheats beautifully with a splash of milk or pasta water to loosen it up. Let the pasta cool to room temperature before refrigerating for best texture.
How to Reheat
Reheat pasta in a skillet over medium-low heat with a splash of milk, cream, or reserved pasta water to help restore the sauce's creamy consistency. Stir occasionally until heated through. You can also reheat it in the microwave in 30-second bursts, stirring between each to keep it from drying out.
How to Freeze
Avoid freezing pasta with the sauce already mixed in, as the texture of the noodles can become mushy. But you can freeze the sauce to get a head start on dinner any night of the week! Let the blended sauce cool completely, then store it in an airtight freezer-safe container or bag for up to 2 months. Thaw in the fridge overnight before reheating.
FAQ
Yes! You can blend the red pepper sauce up to 3 days in advance and store it in the refrigerator. When you're ready to serve, just warm it up in a pan and stir in your cooked pasta. This makes it a great option for meal prep or quick weeknight dinners. The flavors deepen a bit as it sits, making the sauce even better the next day.
Yes, the roasted red pepper sauce can be made in advance and stored in the refrigerator for up to 4 days. Just blend the sauce as directed, let it cool completely, and transfer it to an airtight container. When you're ready to serve, gently reheat the sauce in a saucepan over medium heat, then toss with freshly cooked pasta. Making the sauce ahead can be a huge time-saver for busy weeknights or meal prep.
You can use just about any pasta you like, but short shapes like penne, rigatoni, or fusilli are ideal because they hold onto the sauce really well. Long noodles like fettuccine or spaghetti work too, especially if you blend the sauce until completely smooth. The goal is to choose a pasta that can soak up all that delicious red pepper flavor.
More Vegetarian Pasta Recipes
- 40 Best Pasta Recipes
- Creamy Tomato Pasta
- Veggie Pasta
- Lemon Ricotta Pasta
- Cream Cheese Pasta
- Pasta Primavera
Tried this recipe?
I'd love to hear what you think! Leave a comment and rating below to share your feedback. Your reviews help others discover this recipe and help me keep creating more free recipes for you. Snap a photo and tag me on social media @aheadofthyme too.

Jalapeno Popper Dip
This Jalapeño Popper Dip is creamy, cheesy, and delicious - everything you love about the classic appetizer, served warm and scoopable. Loaded with tangy cream cheese, sharp cheddar, smoky paprika, and just the right amount of spice from fresh jalapeños, it's finished with a buttery, golden Panko topping that adds the perfect crunch. This crowd-pleasing dip is always the first thing to disappear at any gathering.
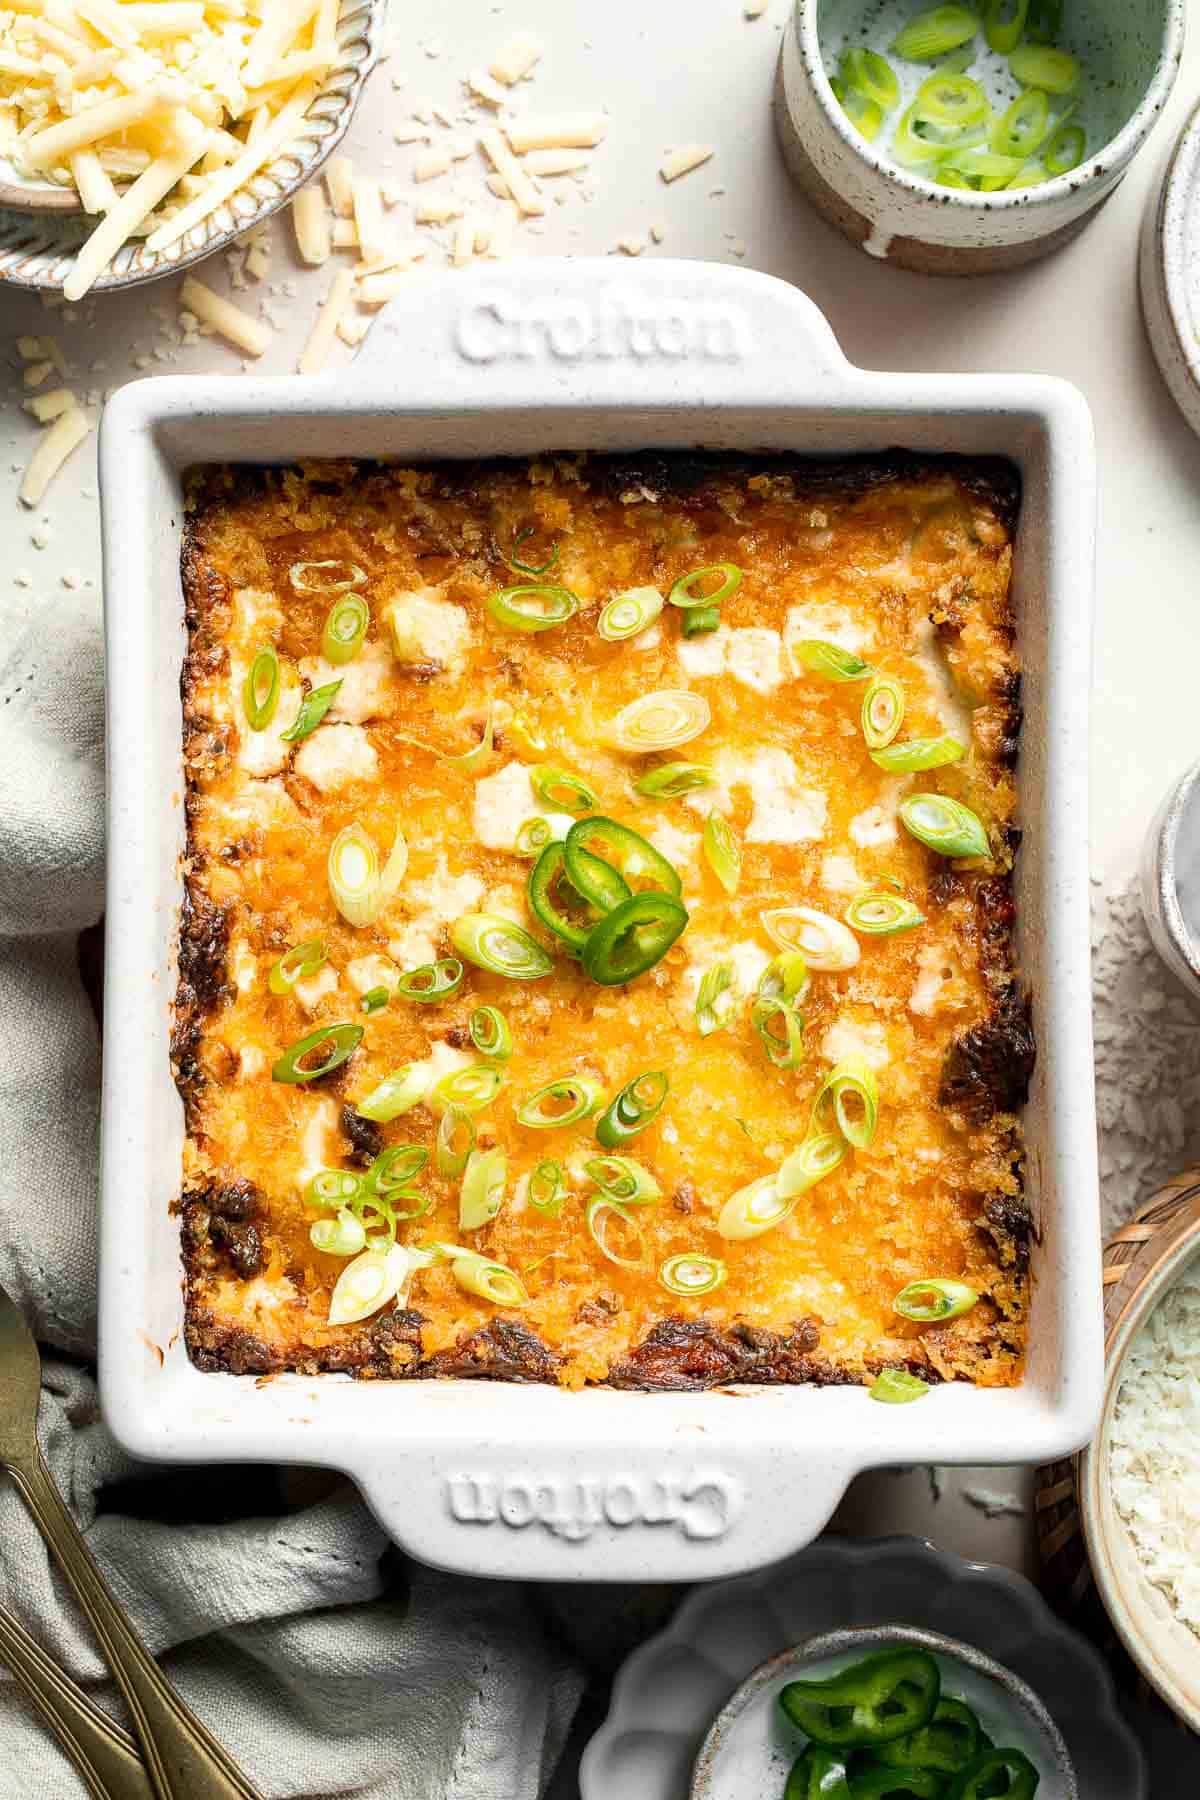
While it delivers all the bold, savory flavor of Jalapeño Poppers, this cheesy baked dip is even easier to make - no stuffing, wrapping, or frying required. Just mix, bake, and serve with chips or fresh veggies. It's ideal for game days, holidays, or any time you need a warm, comforting party snack that's guaranteed to impress.
Why You'll Love this Jalapeño Popper Dip Recipe
- Creamy, cheesy comfort food. The base is a rich blend of cream cheese, mayo, and shredded cheeses, making each bite ultra-smooth and flavorful. It's a decadent dip that's perfect for scooping with chips, crackers, or sliced veggies.
- Easy to make and serve. No complicated steps! Just mix the ingredients, top with buttery breadcrumbs, and bake until golden and bubbly. It's all the flavor of jalapeño poppers with none of the fuss.
- Perfect amount of spice. Fresh jalapeños add just enough heat to keep things interesting without overpowering the dip. You can easily adjust the spice level to suit your crowd.
- Crowd-pleasing favorite. This dip is always a hit at parties, potlucks, and game day spreads. It's warm, savory, and comforting - everything you want in a shareable appetizer.
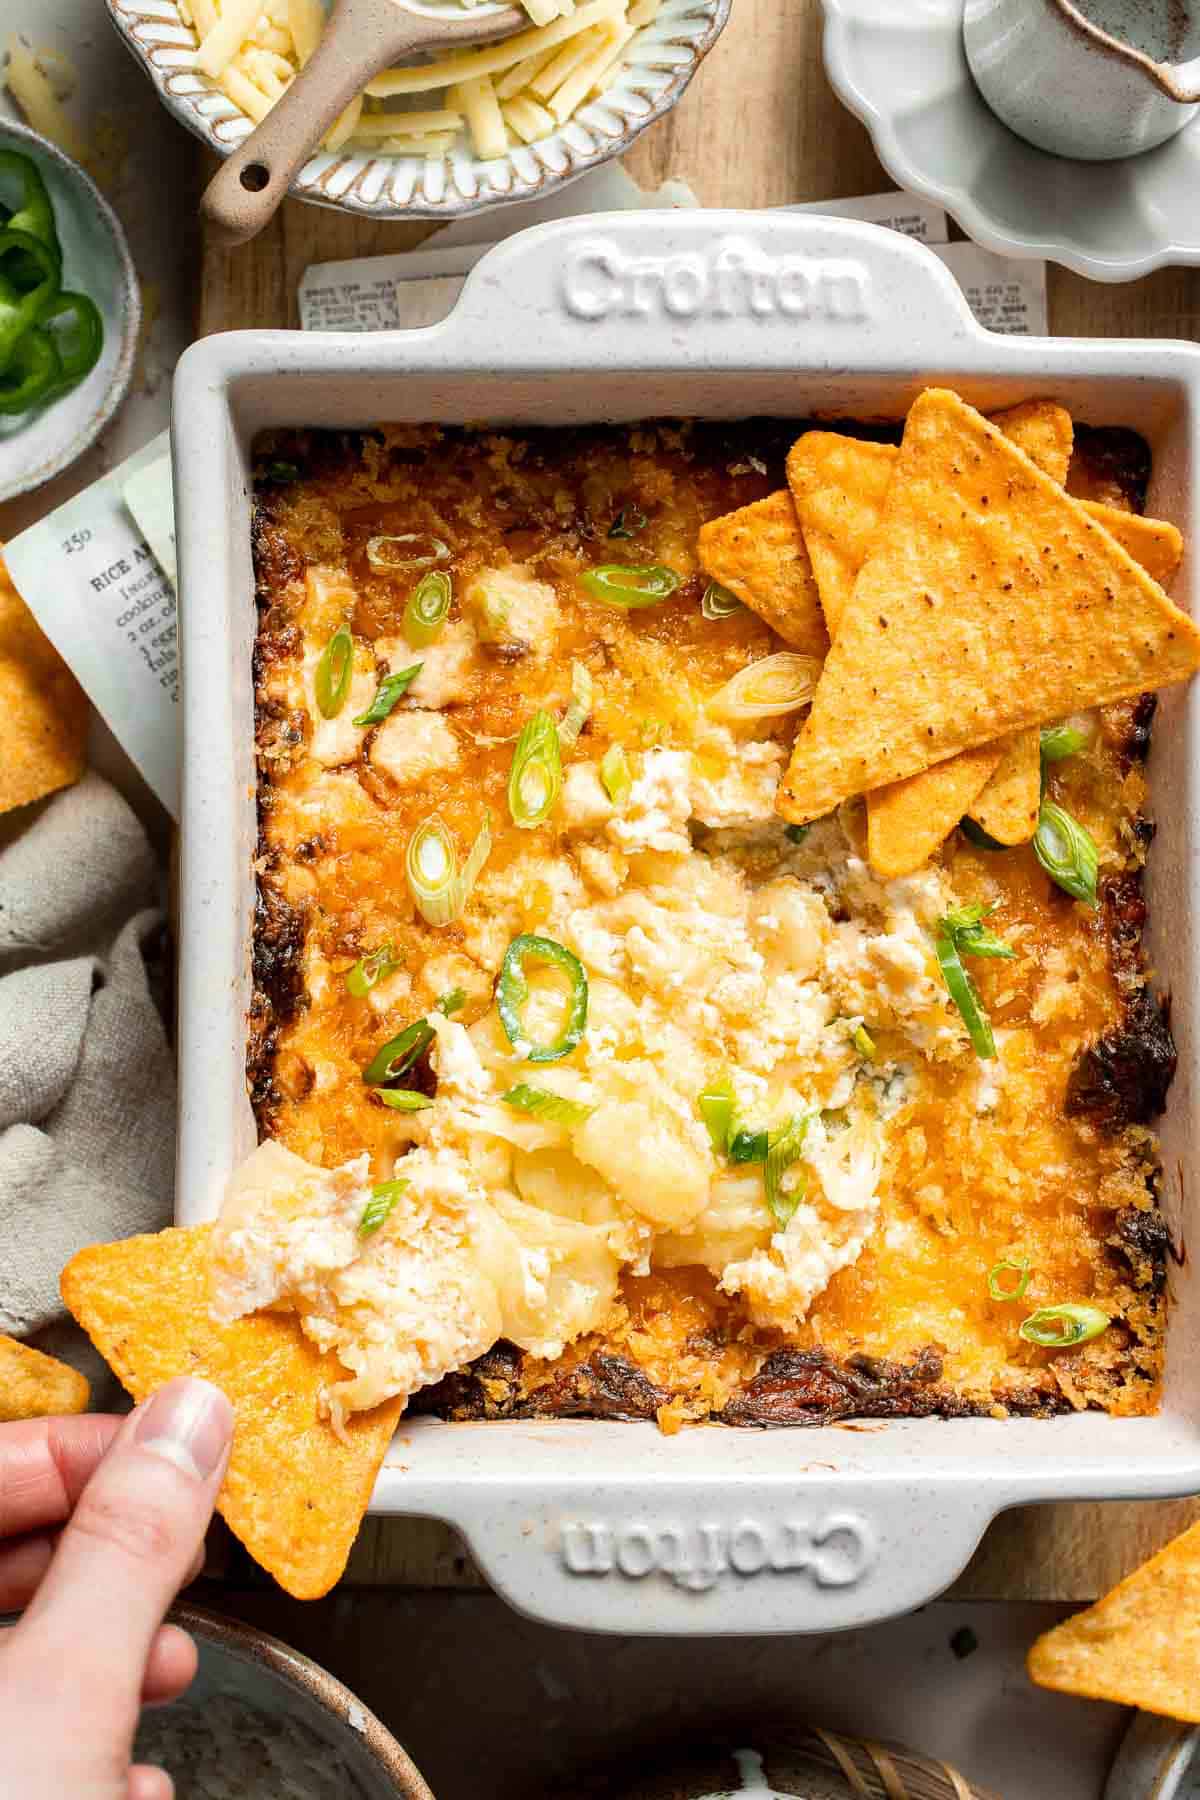
Ingredient Notes
To make this creamy and spicy Jalapeño Popper Dip, you will need the following ingredients (full measurements in recipe card below):
- jalapeño peppers - you can use more or less depending on your preferred spice level. For a milder dip, remove all seeds and membranes or substitute with canned green chiles.
- cream cheese - the creamy base of the dip. Be sure to soften it at room temperature for easier mixing.
- mayonnaise - adds tang and helps make the dip extra smooth. You can substitute with sour cream for a slightly lighter flavor and texture.
- garlic - gives the dip a savory, aromatic base. Fresh garlic works best here.
- paprika - adds a subtle smoky depth that complements the richness of the cheese.
- parmesan cheese - brings salty, nutty flavor and helps build that golden crust. Use freshly grated for the best texture.
- cheddar cheese - provides melty, gooey cheesiness throughout the dip. Sharp cheddar is best, but mild or a blend works too.
- panko breadcrumbs - give the top a crispy, buttery crunch that mimics classic jalapeño poppers. Regular breadcrumbs work too.
- butter - tossed with the breadcrumbs to create that perfectly golden topping.
- spring onion - added as a garnish that balances the richness of the dip.
You will also need measuring cups and spoons, a small baking dish (5x5 or similar), mixing bowls, a spatula, and a small saucepan or microwave-safe bowl for melting the butter.

How to Make the Best Jalapeno Popper Dip
- Combine ingredients. In a medium mixing bowl, add diced jalapeno, cream cheese, mayonnaise, garlic, paprika, parmesan cheese and cheddar cheese. Mix until evenly combined.

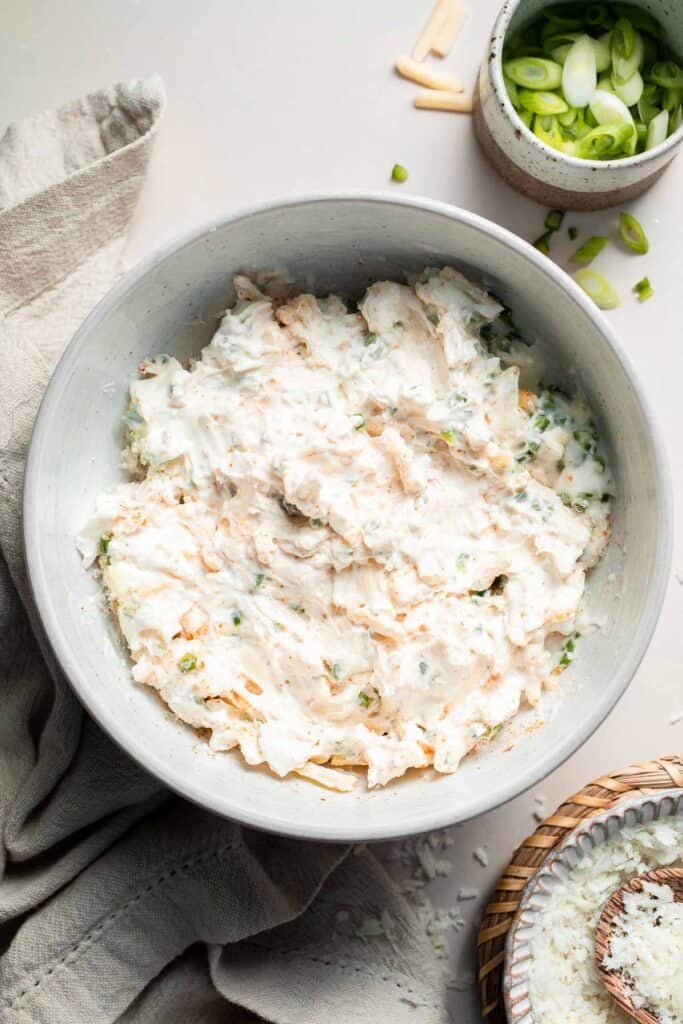
- Prepare topping. In a separate bowl, stir together the breadcrumbs and melted butter until well coated. Set aside.
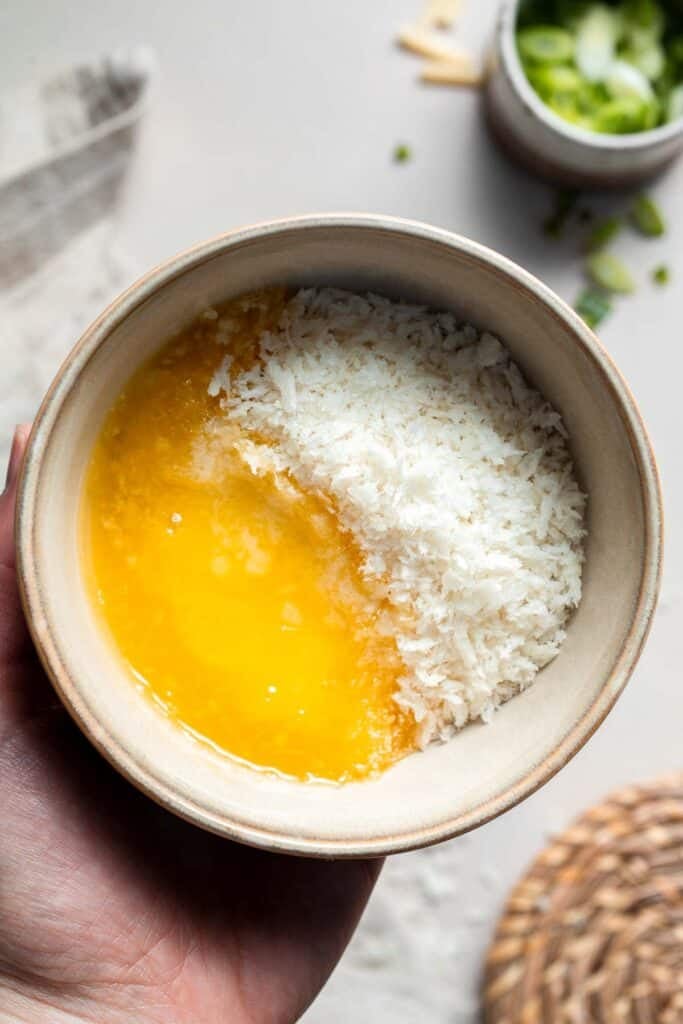

- Assemble. Transfer cheese mixture into a small baking dish (about 5x5-inches) and spread with crumb mixture on top.
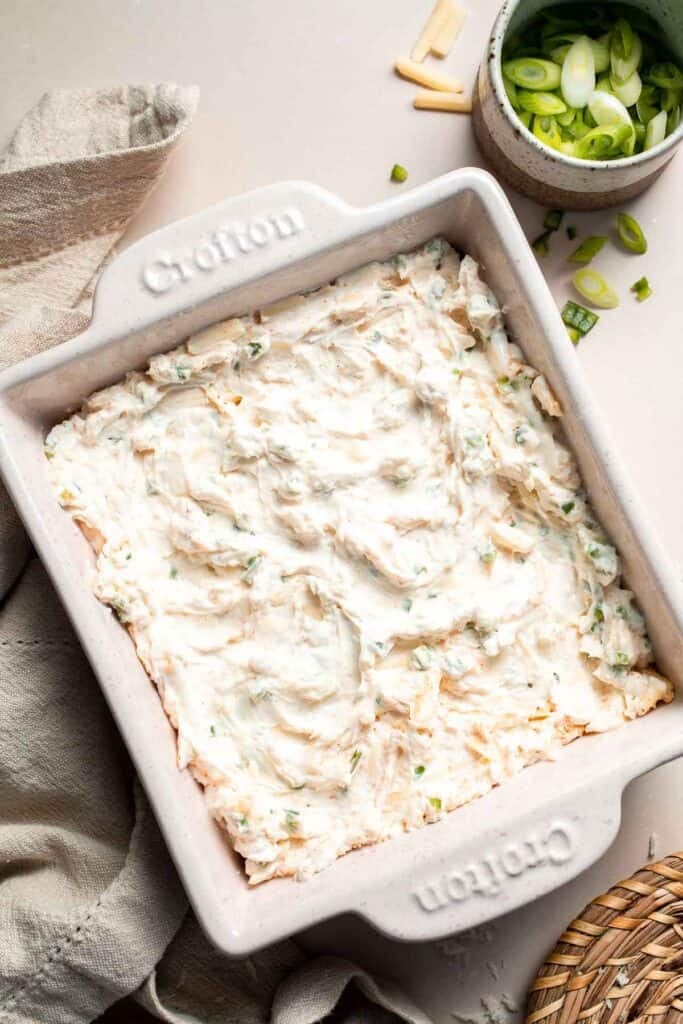
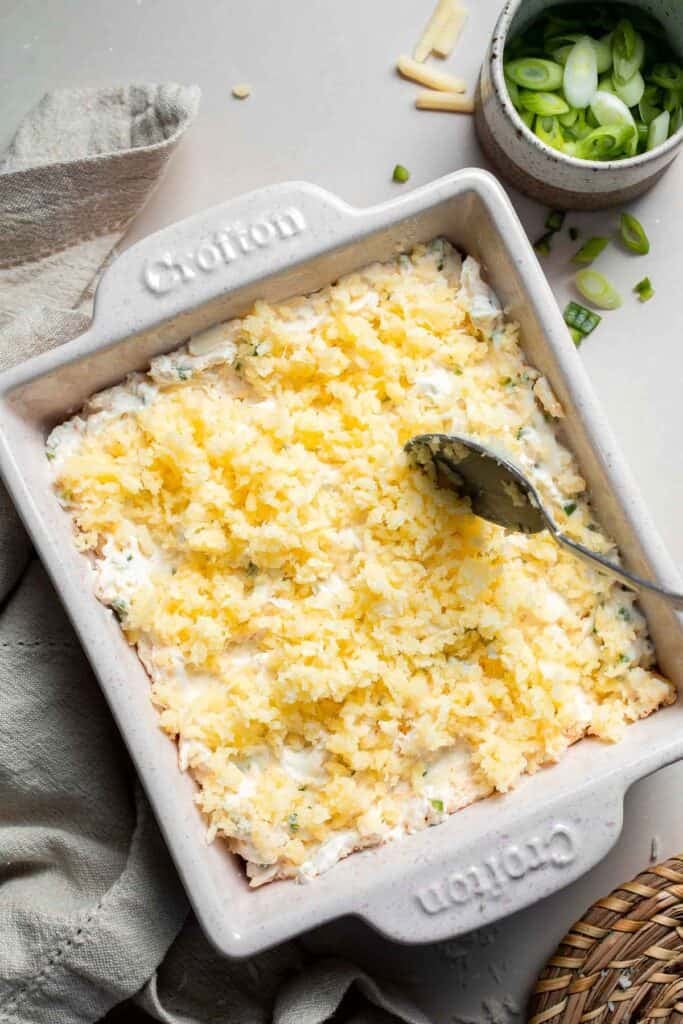
- Bake. Bake in a 350F preheated oven for 20-25 minutes until bubbly and crumbs are golden brown. If the crumb topping is not as brown as you would like, turn the broiler on high for a minute or two. Keep a close eye on the broiler so that you don't char the crumbs.
- Serve. Top with spring onions and serve warm or cold.
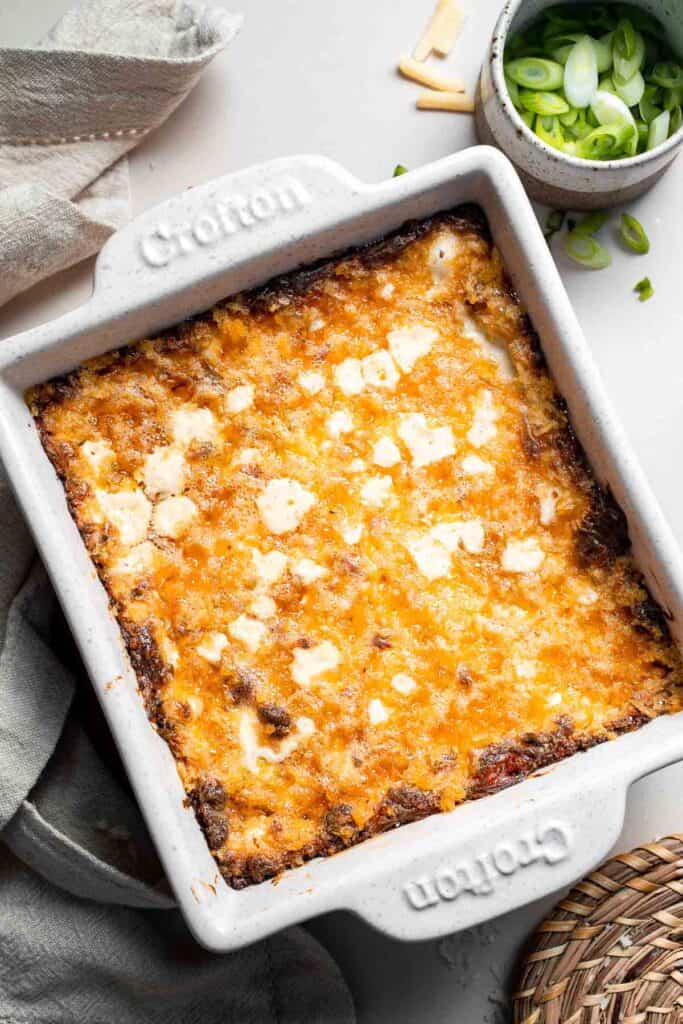
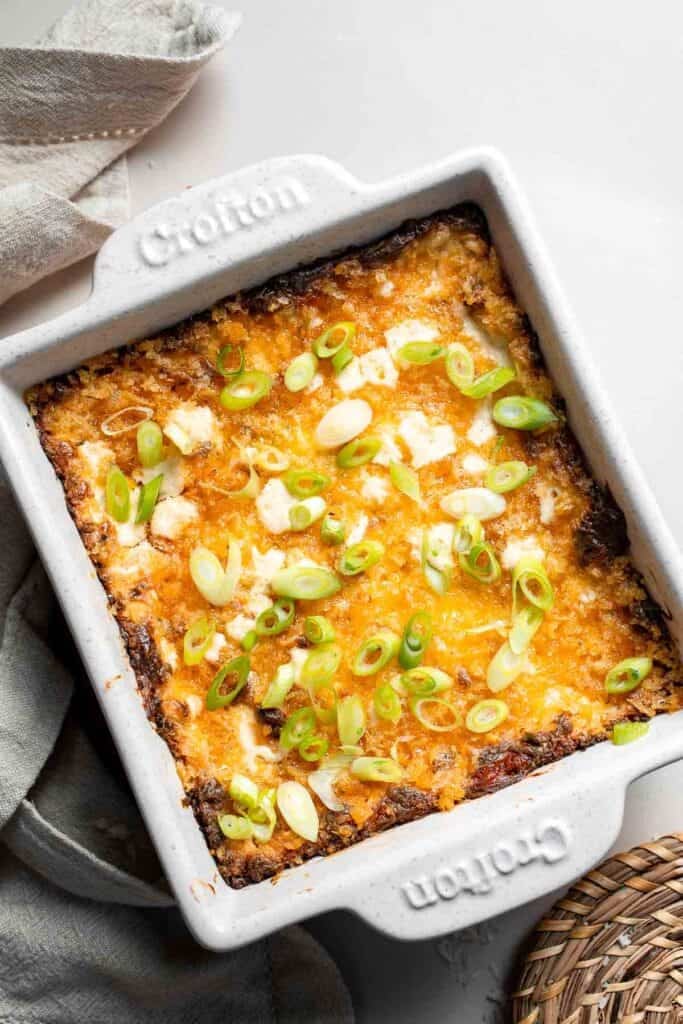
Recipe Variations
- Add bacon. Mix in crumbled cooked bacon for a smoky, salty boost. It is a classic pairing with poppers like in our Bacon Wrapped Jalapeño Poppers.
- Make it spicier. Add a pinch of cayenne pepper, hot sauce, or diced pickled jalapeños to turn up the heat even more.
- Swap the cheese. Try Monterey Jack or pepper jack in place of cheddar for a different flavor profile. Smoked gouda or mozzarella also work well.
- Make it lighter. Use light cream cheese and Greek yogurt in place of regular cream cheese and mayo for a slightly healthier dip that's still creamy and satisfying.
- Serve cold. Skip the baking and serve the mixed dip chilled with tortilla chips or veggie sticks for a quick no-bake version that still delivers big flavor.
How to Serve
This Jalapeno Popper Dip is best served warm and fresh from the oven. The creamy filling and crispy topping are perfect for scooping with your favorite dippers. Try it with:
- Tortilla chips or Tortilla Strips
- Toasted French Baguettes slices
- Veggies like celery or carrot sticks
- Salted Soft Pretzels
- Crackers
You can also spoon it over Baked Potatoes or spread it inside sliders for a fun twist on comfort food classics.
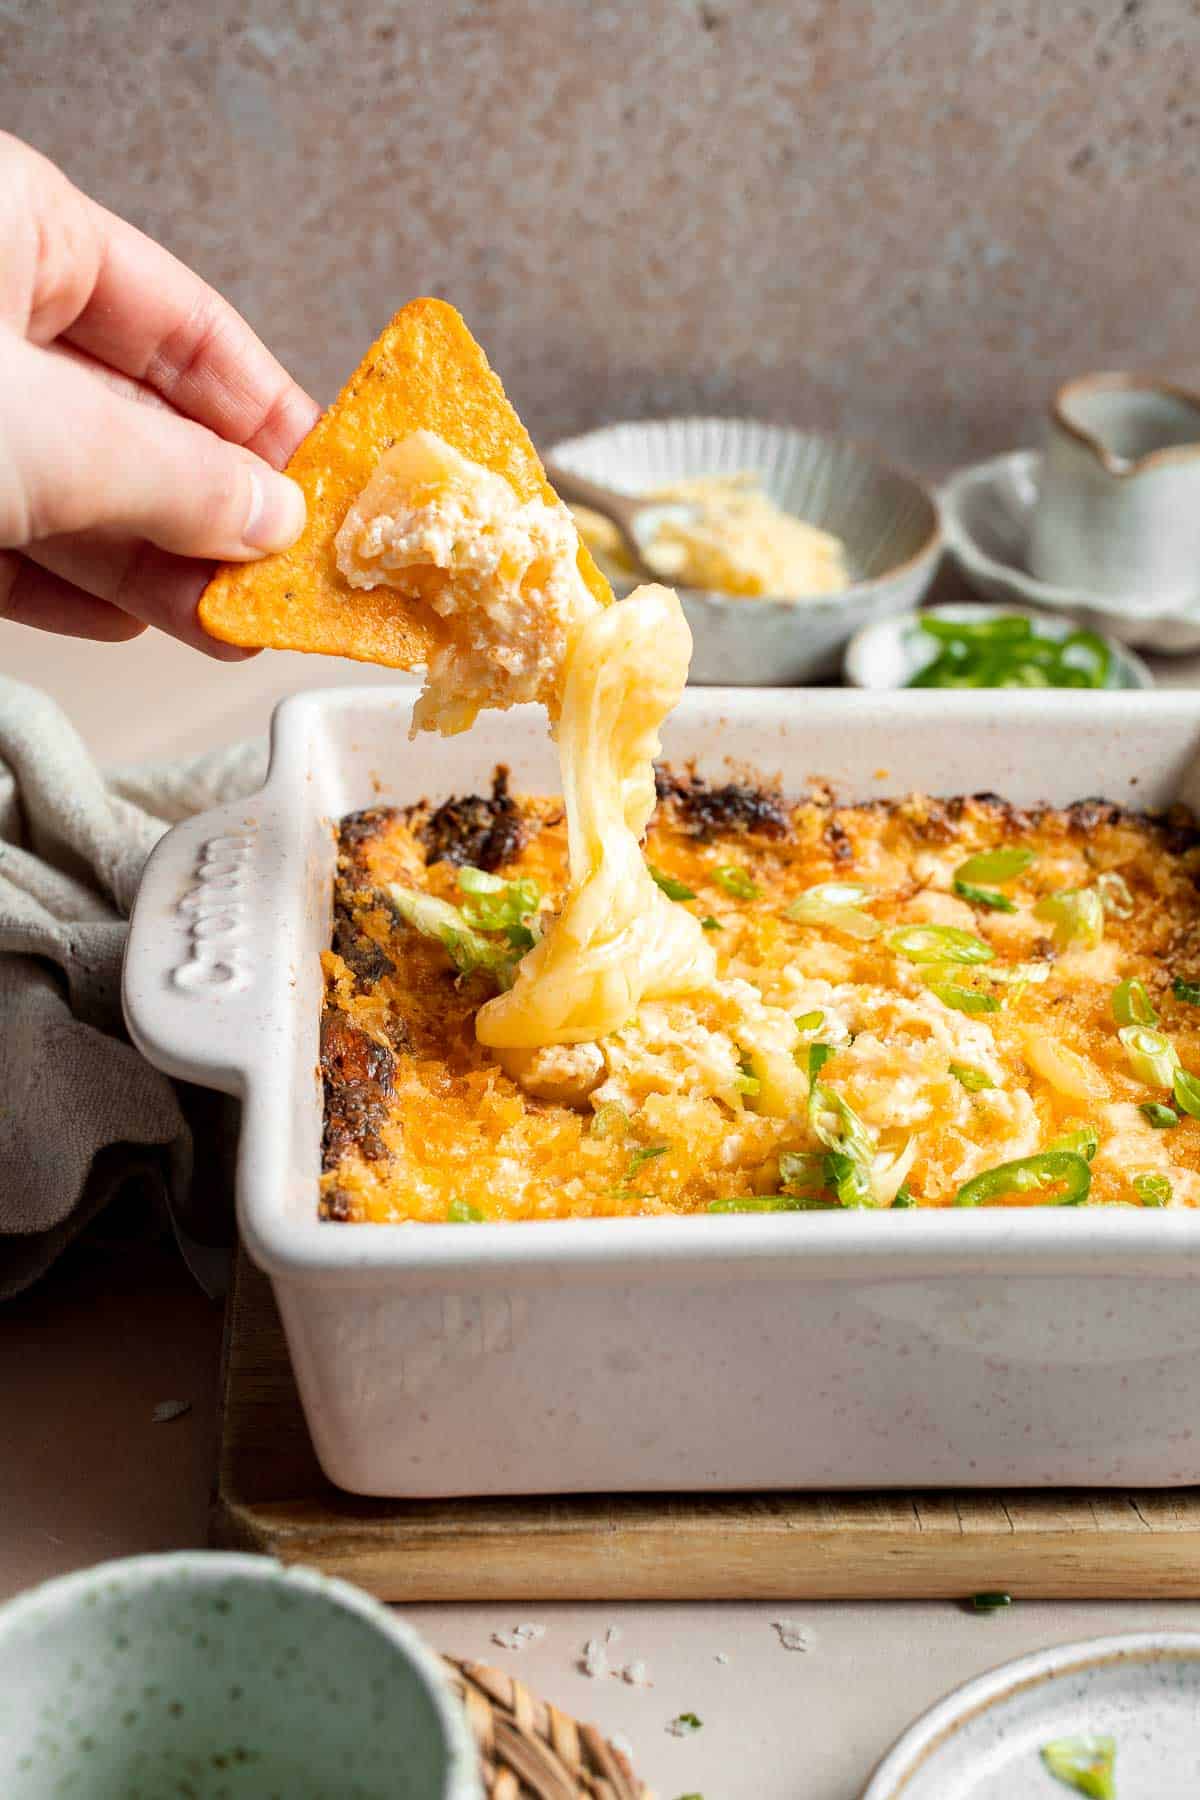
Recipe Tips and Tricks
- Soften the cream cheese. Let the cream cheese come to room temperature before mixing to avoid lumps and ensure a smooth base. Cold cream cheese is much harder to blend evenly.
- Taste and adjust spice. Jalapeños vary in heat so give one a taste before adding to the mix. If you're unsure, start with less and increase as needed.
- Use fresh cheese. Pre-shredded cheese often contains anti-caking agents that affect melting. For the best texture and flavor, grate your cheddar and parmesan fresh.
- Bake until golden and bubbly. You'll know it's ready when the edges are bubbling and the top is golden brown. Let it cool for a few minutes before serving to avoid burning your mouth!
Storing and Freezing Instructions
Make Ahead
You can prep this dish ahead of time. Just assemble the dip and refrigerate it unbaked for up to 24 hours, then bake it fresh when ready to serve.
How to Store
Leftover jalapeño popper dip should be cooled completely before storing. Transfer the dip into an airtight container or cover the baking dish tightly with plastic wrap or foil. It can be stored in the refrigerator for up to 3 to 4 days. To keep the texture of the topping as crispy as possible, store any extra Panko breadcrumb topping separately and add it fresh when reheating.
How to Reheat
To reheat leftover jalapeño popper dip, simply transfer the desired amount to an oven-safe dish and warm it in a preheated 350°F (175°C) oven for 10-15 minutes, or until bubbly and heated through. You can also reheat individual portions in the microwave in 30-second increments, stirring in between until evenly warm. For best results, cover the dip with foil in the oven to prevent the top from over-browning while the center heats. Avoid overheating, as it may cause the cheeses to become greasy.
How to Freeze
You can freeze this dip before or after baking. Wrap tightly and freeze for up to 1 month. Thaw overnight in the fridge, then bake or reheat until hot and bubbly. Note: the texture may change slightly after freezing due to the cream cheese.
FAQ
Yes, you can fully assemble the dip and store it in the fridge for up to 24 hours before baking. Keep the breadcrumb topping separate and add it just before baking so it stays crisp. When you're ready to serve, bake as directed, adding an extra 5 minutes if it's going straight from the fridge to the oven.
It really depends on the jalapeños you use. Fresh jalapeños can range from mild to medium heat. Removing the seeds and membranes helps tone it down, and you can also mix in a bit of sour cream to mellow the heat if it's too strong. You can always add extra spice, but it's harder to take it away, so taste as you go!
Sharp cheddar and parmesan work beautifully together, giving you a gooey base with a salty, nutty finish. But feel free to play around - Monterey Jack adds smoothness, pepper jack brings spice, and smoked gouda adds depth. Using a combination of two or three cheeses gives the best flavor and texture in every bite.
More Creamy Dip Recipes
- 20 Best Dip Recipes
- Baked Spinach Dip
- Pizza Dip
- Queso Mexican Cheese Dip
- French Onion Dip
- Baked Ricotta
Tried this recipe?
I'd love to hear what you think! Leave a comment and rating below to share your feedback. Your reviews help others discover this recipe and help me keep creating more free recipes for you. Snap a photo and tag me on social media @aheadofthyme too.

Homemade French Baguettes
There's nothing quite like the smell of fresh bread wafting from your kitchen, and these Homemade French Baguettes deliver just that - without any kneading! This no-fuss, no-knead baguette recipe yields beautifully golden loaves with a crisp crust and soft, airy interior. With just four basic ingredients and a little patience, you can bring the charm of a Parisian bakery straight to your home.

Though the process is slower than some breads, the long rest time does all the heavy lifting to develop incredible texture and flavor. This is a perfect weekend baking project or make-ahead recipe when you want to serve fresh bread with minimal hands-on effort. The result is worth every moment - crusty, rustic, and totally irresistible.
Why You'll Love this French Baguette Recipe
- Crispy, crackly crust. These baguettes bake up with that signature crusty exterior that shatters with every bite. It's what makes a baguette so satisfying and perfect for dipping, spreading, or enjoying plain with butter.
- No kneading required. This recipe uses a long fermentation process to develop gluten and flavor naturally, which means less hands-on time for you. Simply mix the dough, let it rest, and shape before baking.
- Minimal ingredients. Just flour, water, yeast, and salt - no fancy tools or special ingredients required! It's baking at its simplest and most traditional, , using pantry staples you likely already have on hand.
- Impressively authentic. These baguettes look and taste like they came from a bakery, but you made them from scratch. Serve them at dinner parties or alongside soup and watch them disappear fast.
Ingredient List
To make almost any rustic homemade bread, including these French Baguettes, you will need just 4 simple ingredients (full measurements in recipe card below):
- flour - all-purpose flour works great here, but you can also use bread flour for a slightly chewier texture.
- yeast - we used instant yeast but you can also use active dry. Instant yeast will rise a bit faster, but both work well in this slow-rise recipe.
- water - lukewarm water activates the yeast and hydrates the flour. Filtered water is ideal, but tap water works too.
- salt - enhances flavor and helps regulate yeast activity. Kosher salt or sea salt are both excellent choices.
You also need a kitchen scale (or measuring cups and spoons), mixing bowl, baking sheet or baguette pan, plastic wrap or kitchen towel for proofing, and a sharp blade or lame for scoring, and another baking pan to create steam in your oven.
How to Make No Knead French Baguettes
French baguettes are so so easy to prepare, taking only 10 minutes of actual active time. The rest of the time is just waiting time for the dough to rise.
Step 1: Prepare the dough
- Activate the yeast. In small cup, dissolve instant yeast in water and stir to mix together (the mixture should start to bubble and develop a yeasty aroma). Let it sit for 2 minutes.


- Prepare dough. In a large mixing bowl, add flour and salt. Pour in yeast mixture and whisk until fully combined, scraping down the sides of the bowl (there should be no dry flour particles visible). The mixture is very sticky and wet, with an 75% hydration (flour to water ratio).


- Allow dough to rise. Cover the bowl with plastic wrap and let it sit at room temperature for 2 hours, or until the dough doubles in size (Note that a higher room temperature will speed up the fermentation process and will cause the dough to rise faster). This is called first proofing or bulk fermentation.


Step 2: Stretch and fold
- Stretch and fold. Apply some water onto your hands and stretch and fold the dough in the bowl by folding the edges into the centre. Wet hands make it easier to work with the dough. Cover with a dry cloth and let the dough rest.


- Repeat. Repeat this stretch and fold step every 30 minutes (you will do it two more times). After 1 hour, with 3 rounds of stretch and folds in total, the dough will build up gluten strength and become less sticky.


Step 3: Divide and shape
- Divide. Using a spatula, transfer dough to a floured surface. Sprinkle dough with flour for easier handling. Divide the dough into 3 equal parts (250 grams each). Shape each dough into a round ball by pulling the edges over to the centre.


- Rest. Cover with a dry cloth and let it rest for another 45 minutes.


- Shape. Gently press each dough to flatten into an oval shape. Fold the edge over, one inch at a time, and press the edge to seal the seam firmly. It takes 3 folds to seal the seams. Roll the dough into a log with the 2 ends slightly pointy. Repeat this step with remaining 2 dough balls.


- Rest. Place each piece on a well-floured work surface and separate them apart. Sprinkle some flour over the dough and cover with a dry cloth. Let rest for about 45 minutes. This is called the final proofing.


Step 4: Bake
- Transfer. Carefully transfer each piece onto a parchment-lined 8x12-inch baking tray. Because the dough is still quite sticky, dust with flour to help handle them.
- Set up steam bath. Fill a baking pan with water and place it in the bottom of your oven. Preheat the oven to 450 F, and allow it to fill with steam from the water.
- Score. When the oven is ready, use a razor or sharp knife to make 3 incisions at about a 45° angle on each baguette.
- Spray and bake. Slide the baking tray in and spray some water over the dough immediately. Bake for 25 minutes.


- Cool. Let them cool for 20 minutes. To check if the bread is done, you can tap the bottom of the bread with your finger. The bread will sound hollow when done.
Recipe Variations
- Add herbs. Mix chopped rosemary, thyme, or oregano into the dough before the first rest for a flavorful twist.
- Cheese-stuffed baguette. Add shredded cheese to the center of the dough before shaping for a gooey, savory surprise inside.
- Olive baguettes. Fold chopped, pitted olives into the dough for a salty, Mediterranean-inspired variation that pairs beautifully with dips and spreads. See our Artisan Green Olive Sourdough Bread for a similar idea.
- Whole wheat version. Replace up to 1 cup of all-purpose flour with whole wheat flour for a heartier loaf with nutty flavor and added fiber.
Tips for Baking French Baguettes
Follow the tips below to ensure that you get that perfect French baguette every single time.
- Use unopened and unexpired yeast that was stored int a cool and dry area. Make sure the instant yeast is in an original, unopened package, and that it has not expired (note that instant yeast has a relatively shorter shelf life).
- The yeast mixture should start to bubble. When mixing the yeast in lukewarm water, the mixture should start to bubble and develop a yeasty aroma.
- Add steam to the oven. This is the key to getting the perfect crispy, crackly crust on french baguettes and gives them that classic bakery look and texture. You add steam to the oven by placing a baking pan with water on the bottom of the oven, and then preheating it.
- Use a bench scraper. French baguette dough is very sticky with 75% hydration (flour to water ratio). So a bench scraper is very helpful to help handle and transfer the dough. You can also use flour if needed during transfer.
- Fold and press when shaping the dough. There are many different techniques to use when shaping baguettes. The key is to fold and press to seal the edges so that air pockets get trapped inside the dough. This is why you see large air holes when you cut into baguettes.
- Serve fresh out of the oven. French baguettes are best when they are fresh out of the oven. If you need to store them for longer periods of time, you can freeze them to extend their freshness.
How to Serve French Baguettes
There are endless ways to serve baked French Baguettes, including:
- Warm from the oven with butter or jam.
- Sliced into rounds for bruschetta or crostini.
- As a sandwich with your favorite sandwich fix ins such as Lemongrass Chicken Banh Mi Sandwich, Caprese Sandwich, or Avocado Egg Salad.
- As a base for French bread pizza.
- Alongside soup, stew, or salad for a satisfying meal.
- With a cheese board or charcuterie board for a perfect appetizer.

Storing and Freezing Instructions
How to Store
This bread is best served fresh out of the oven. To store, wrap your baguettes in a clean kitchen towel or in a paper bag at room temperature for up to 2 days. Avoid airtight containers, which can make the crust soften.
How to Reheat
To reheat a baguette, place it directly on the oven rack at 350°F for 10-12 minutes, or until the crust is crisp and the interior is warmed through. You can also spritz it lightly with water before baking to revive the crust even more. Avoid microwaving, as it will make the crust rubbery instead of crisp.
How to Freeze
Freeze fully cooled baguettes by wrapping tightly in plastic wrap and then foil. Store in the freezer for up to 2 months. Thaw at room temperature and reheat in a hot oven for a just-baked feel. You can also slice them first, then store as above. To serve, reheat directly from frozen in the toaster under the defrost setting.
FAQ
Yes, you can adapt this recipe to use sourdough starter instead of commercial yeast. Use ½ cup active sourdough starter and reduce the water slightly. The rise time will be longer, but the flavor will be even more complex and tangy. You may need to experiment a bit to get the texture just right.
If your baguette doesn't come out with that signature crackly crust, it's likely due to lack of steam or baking at too low a temperature. Make sure your oven is properly preheated and add a pan of water or spray the inside of the oven during the first 10 minutes of baking. This helps create the crusty exterior that baguettes are known for.
Yes, you can shape the dough and let it rest overnight in the refrigerator. In the morning, bring it to room temperature for about 30-60 minutes before baking. This makes it easier to plan ahead and still serve fresh baguettes right when you need them.
While a baguette pan helps maintain shape and provides even browning, it's not required. A regular baking sheet with parchment works just fine. Just be sure to space the loaves apart and support the sides with rolled towels or foil if needed for shaping.
More Homemade Bread Recipes
- 50 Best Bread Recipes
- Small Batch No Knead Bread
- Ciabatta Rolls
- No Knead Tomato Focaccia
- Pita Bread
- Skillet Dinner Rolls
Tried this recipe?
I'd love to hear what you think! Leave a comment and rating below to share your feedback. Your reviews help others discover this recipe and help me keep creating more free recipes for you. Snap a photo and tag me on social media @aheadofthyme too.

Vegetable Risotto
This Vegetable Risotto is rich and creamy, loaded with tender vegetables and perfectly cooked arborio rice, and brought together with creamy Parmesan and a swirl of olive oil. It's the kind of dish that feels fancy but is totally approachable for a weeknight dinner. Whether you're serving it as a cozy main or a hearty side, this risotto is always a crowd-pleaser.
There's something incredibly comforting about a bowl of creamy, homemade risotto, especially when it's packed with fresh vegetables and cozy flavors. While risotto often gets a reputation for being fussy, this version is simple and requires only a few key techniques to give you restaurant-worthy results. Gently stirring in warm broth helps release the rice's starches, giving you that luscious texture without any cream. So so good!
Why You'll Love this Vegetable Risotto Recipe
- Naturally creamy without the cream. Arborio rice releases its starch as it cooks, creating a luxuriously creamy consistency that feels indulgent without needing heavy cream. You get all the comfort of a rich dish with lighter ingredients that still satisfy.
- A celebration of vegetables. This veggie risotto is a beautiful way to enjoy a variety of vegetables in one dish. From the sweetness of corn and peas to the hearty bite of broccoli and carrot, every forkful is balanced and flavorful.
- Perfect as a main or side. Serve this vegetable risotto as a satisfying vegetarian entrée or as a side dish for grilled meats or roasted proteins. It's versatile enough to fit anywhere on your menu and pair with a range of cuisines.
- Customizable. Risotto is flexible. Swap the veggies based on what's in season or on your preference. As long as you follow the recipe steps, you can make it your own while still getting that signature creamy texture.
Ingredient Notes
To make this creamy Vegetable Risotto, you will need the following ingredients (full measurements in the recipe card below):
- extra virgin olive oil - adds richness and helps sauté the vegetables. You can substitute with unsalted butter for a more classic risotto flavor.
- veggies - we use carrots, red onion, broccoli, peas, and corn. You can swap these out with different vegetbales if you prefer. For instance, yellow carrot or parsnip works well in place of the carrot, white or yellow onion works in splace of the red onion, and cauliflower or zucchini are great substitutes for broccoli.
- garlic - adds flavor. We use fresh garlic for the best flavor, but you can use garlic powder as well.
- italian seasoning - you can also use a mix of dried basil, oregano, and thyme instead.
- salt and pepper
- arborio rice - this rice is the star of risotto! Its high starch content gives risotto its signature creamy texture. Do not substitute with regular long grain rice.
- dry white wine - adds acidity and depth. You can use more vegetable broth if avoiding alcohol.
- vegetable broth - used gradually to cook the rice while adding flavor. Chicken broth can be used if you're not keeping it vegetarian.
- parmesan cheese - for a dairy-free version, use a vegan parmesan or nutritional yeast.
You will also need measuring cups and spoons, a large skillet, and a wooden spoon or silicone spatula.

How to Make the Best Vegetable Risotto
- Sauté veggies. Heat oil in a large skillet over medium-high heat until it sizzles, about 2 minutes. Add carrots, onion and broccoli. Sauté until tender, about 2-3 minutes.

- Add remaining and season. Add frozen peas, corn, garlic, Italian seasoning, salt and pepper. Stir well to combine evenly.
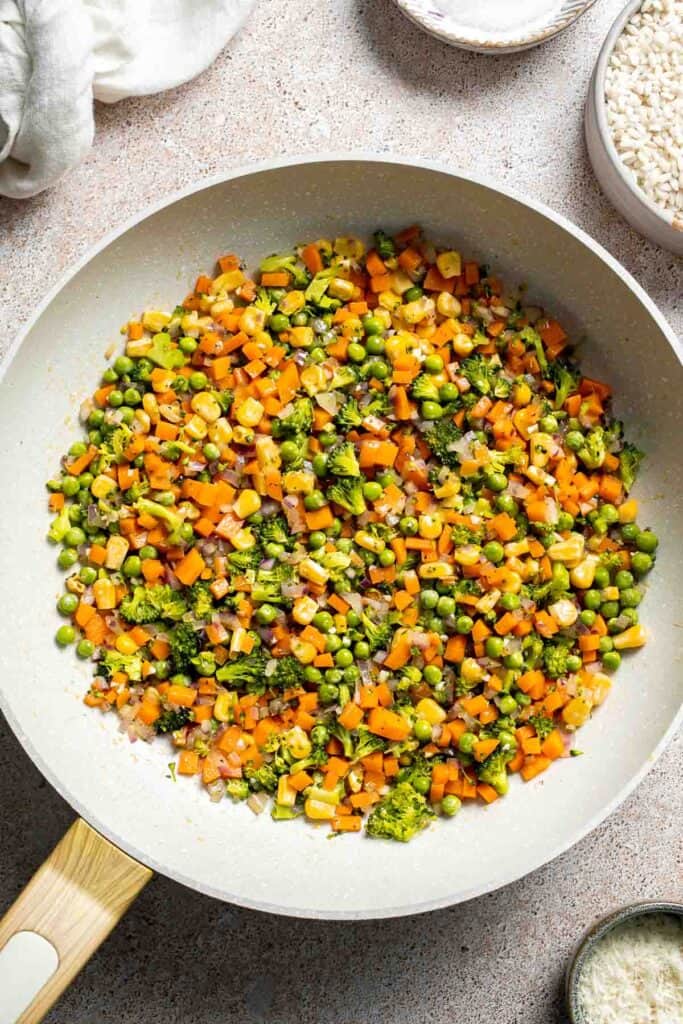
- Add rice. Add rice and toast for 1-2 minutes, stirring constantly.
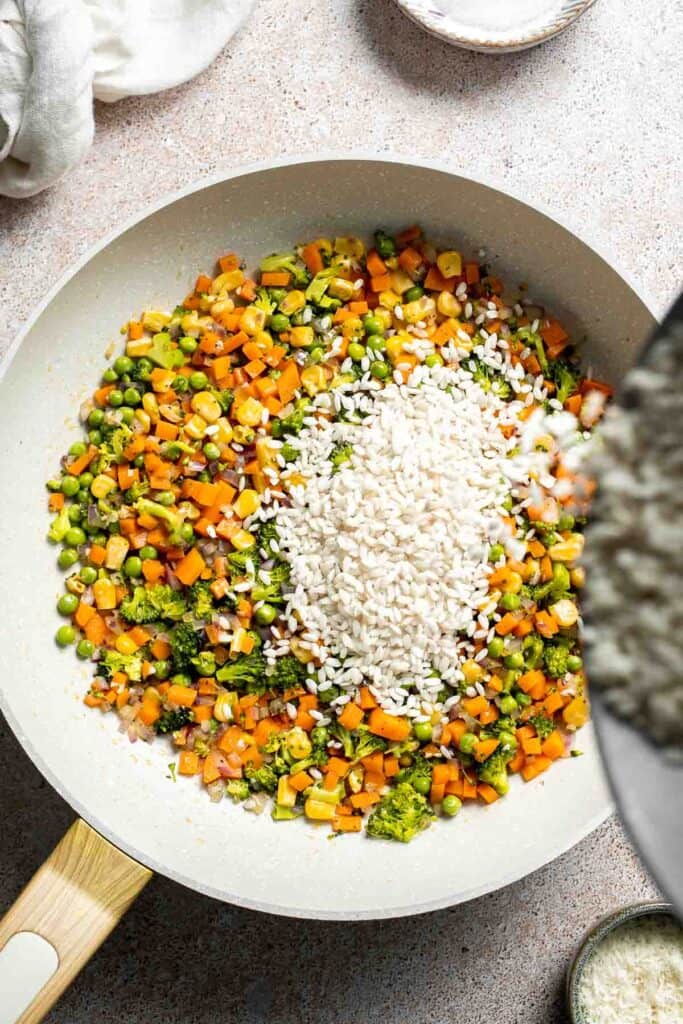
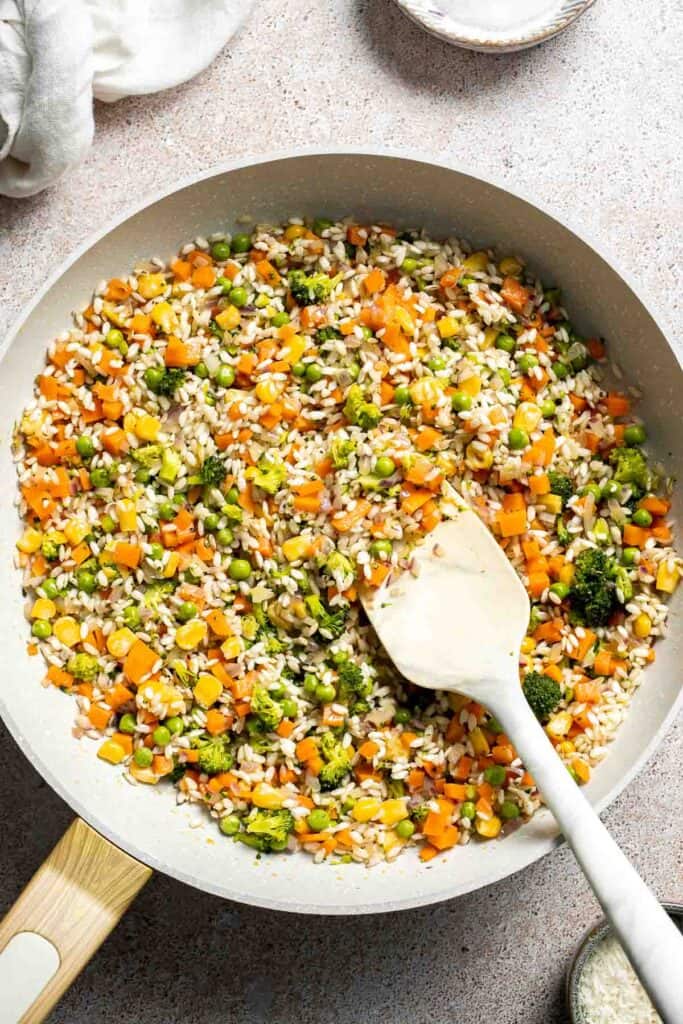
- Add wine. Add wine, stirring constantly until almost all the liquid has absorbed, about 3-4 minutes.
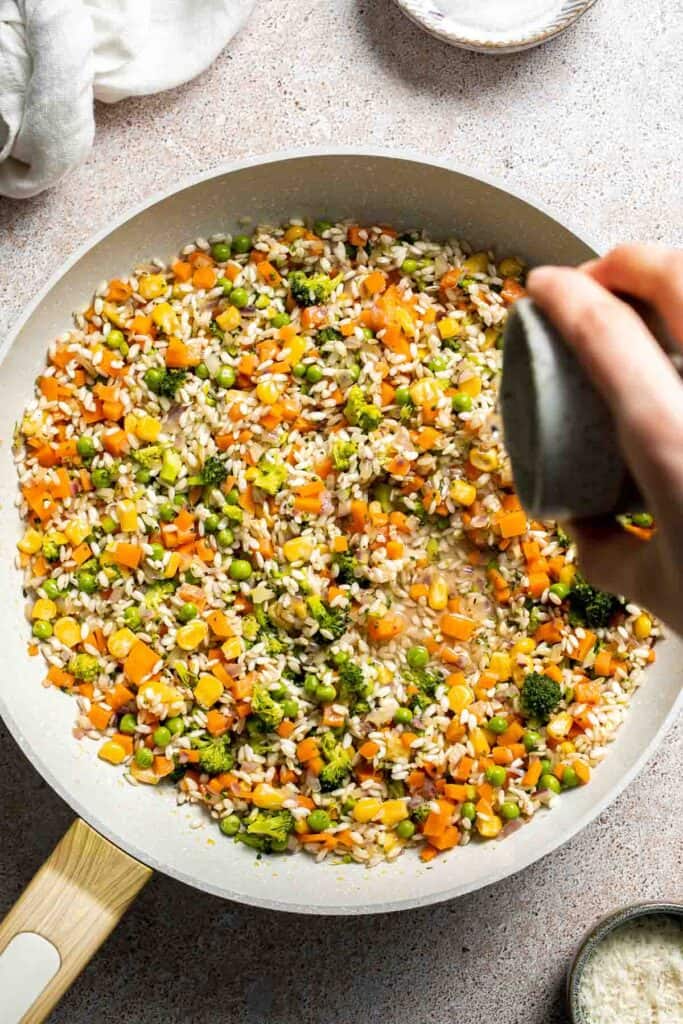
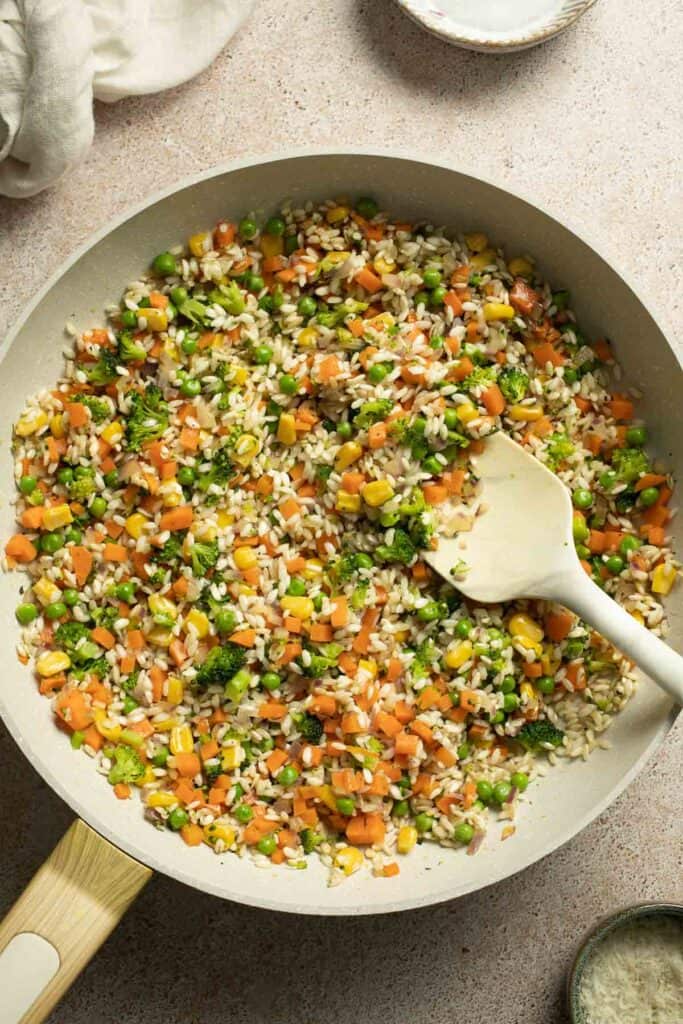
- Add broth. Add one cup of broth and keep stirring so that the rice doesn't stick to the pan. Cook until almost all the liquid is absorbed.
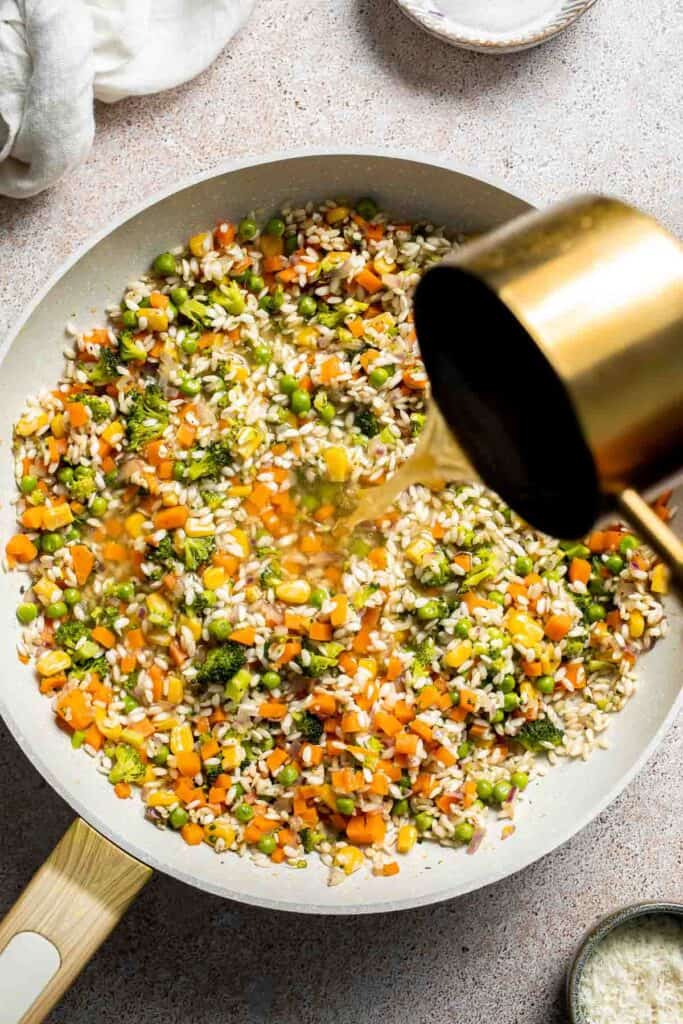
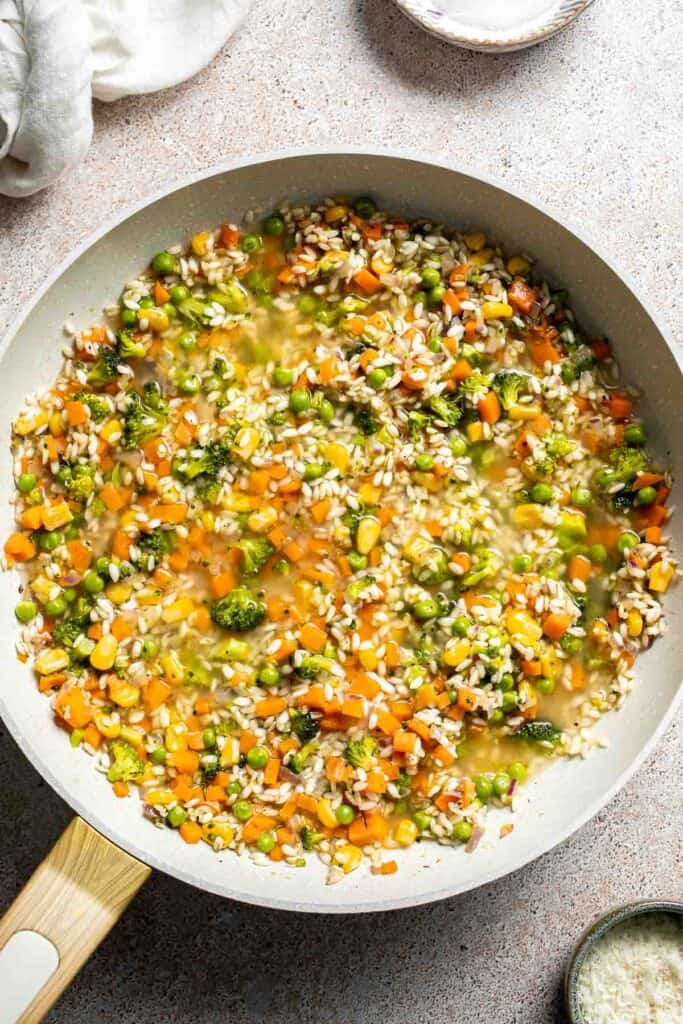
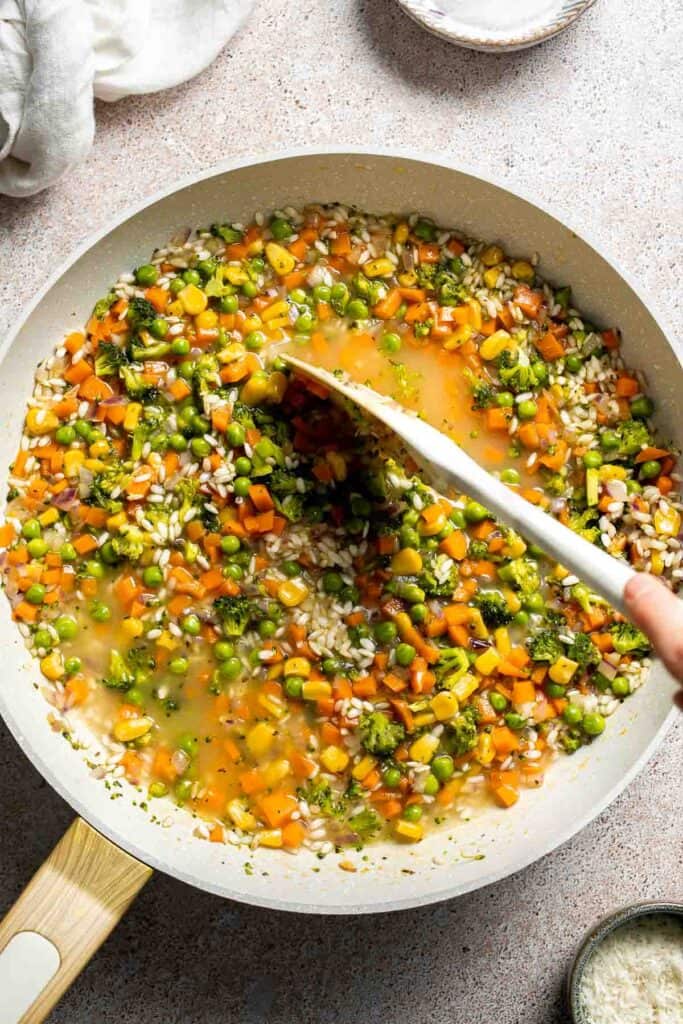
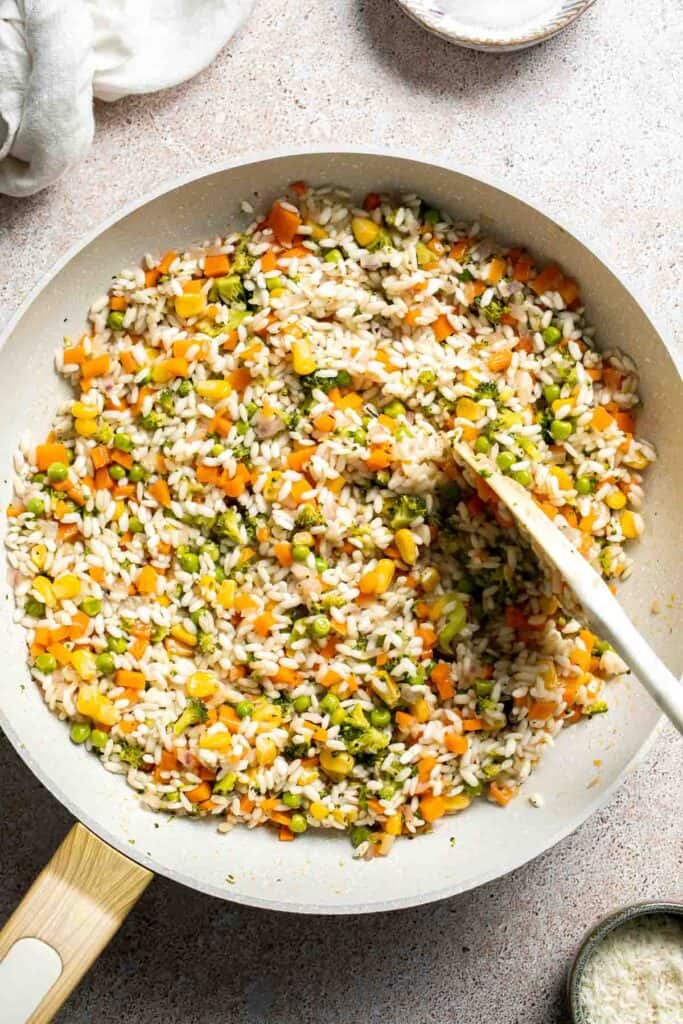
- Repeat. Repeat adding broth, one cup at a time, until all the broth has been added and absorbed, about 20 minutes. The rice should be cooked al dente. Repeat with more broth if needed (if the risotto is too dry).
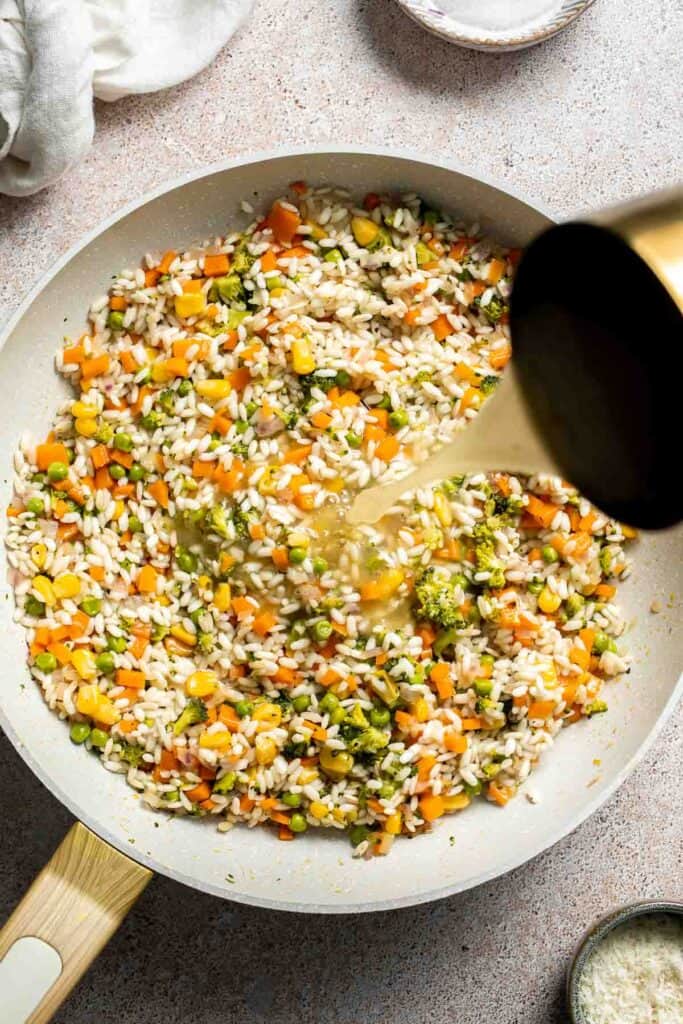
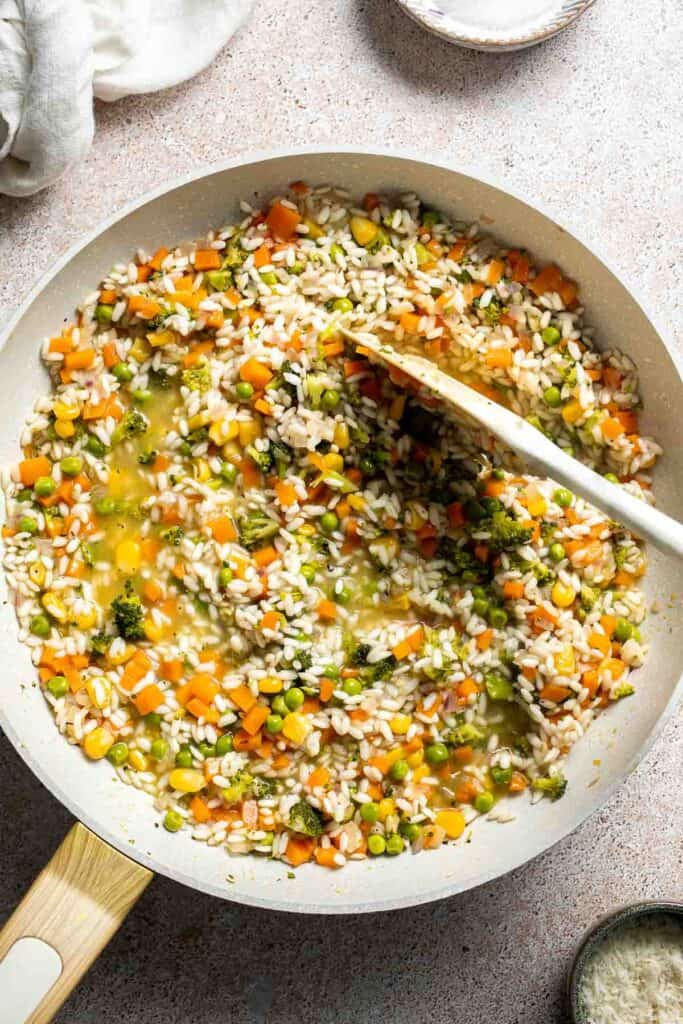
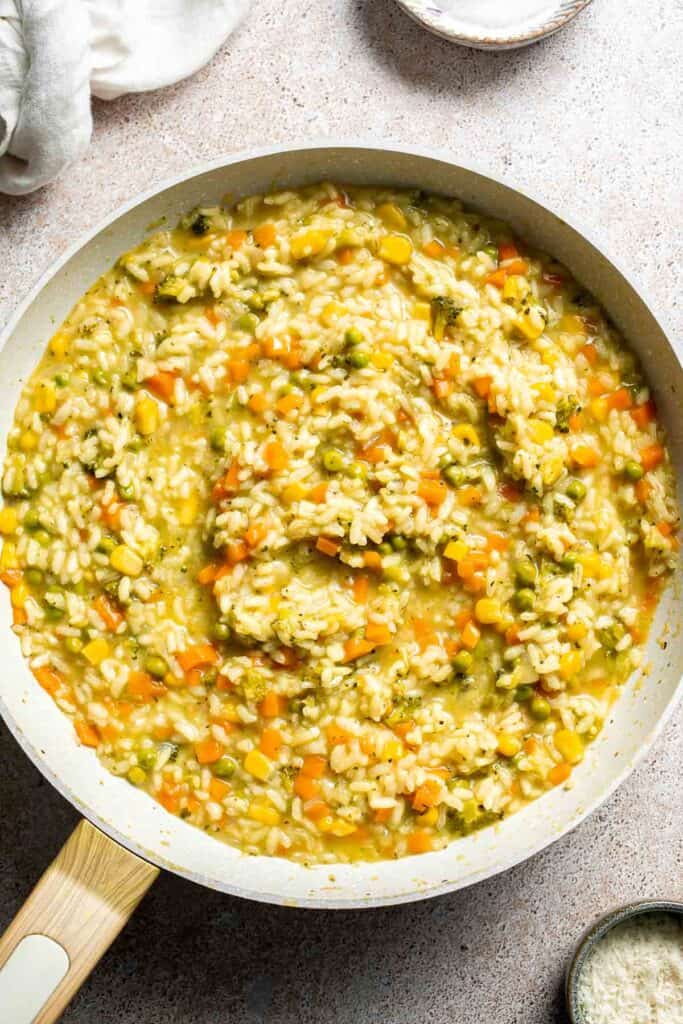
- Add cheese. Turn off the heat and add parmesan cheese. Stir well until creamy. The risotto should have a similar consistency of thick porridge. Serve immediately.
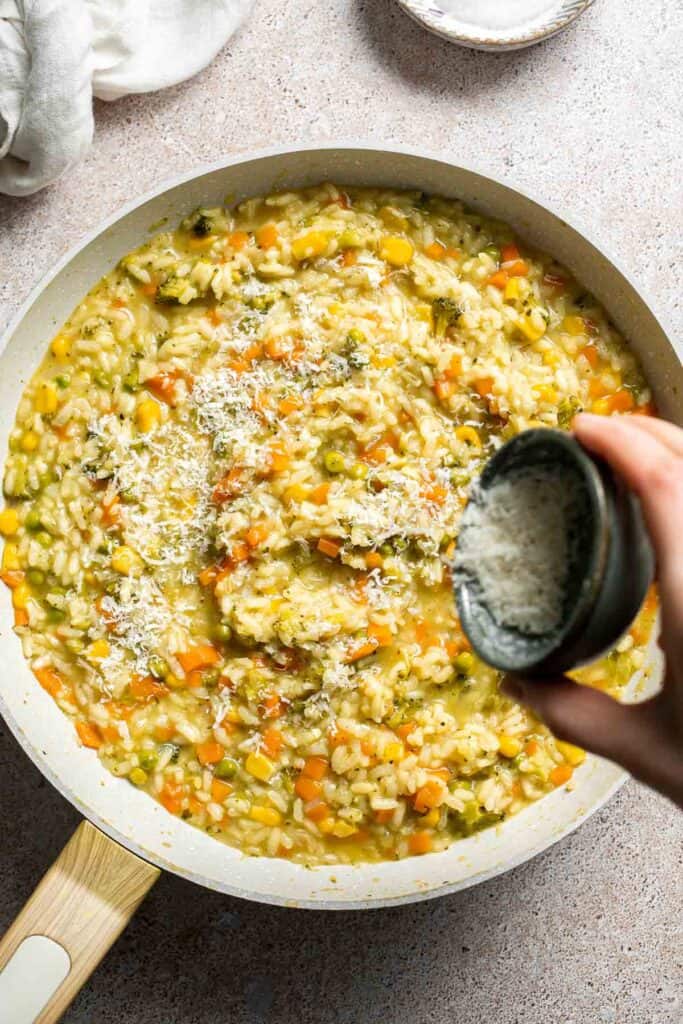
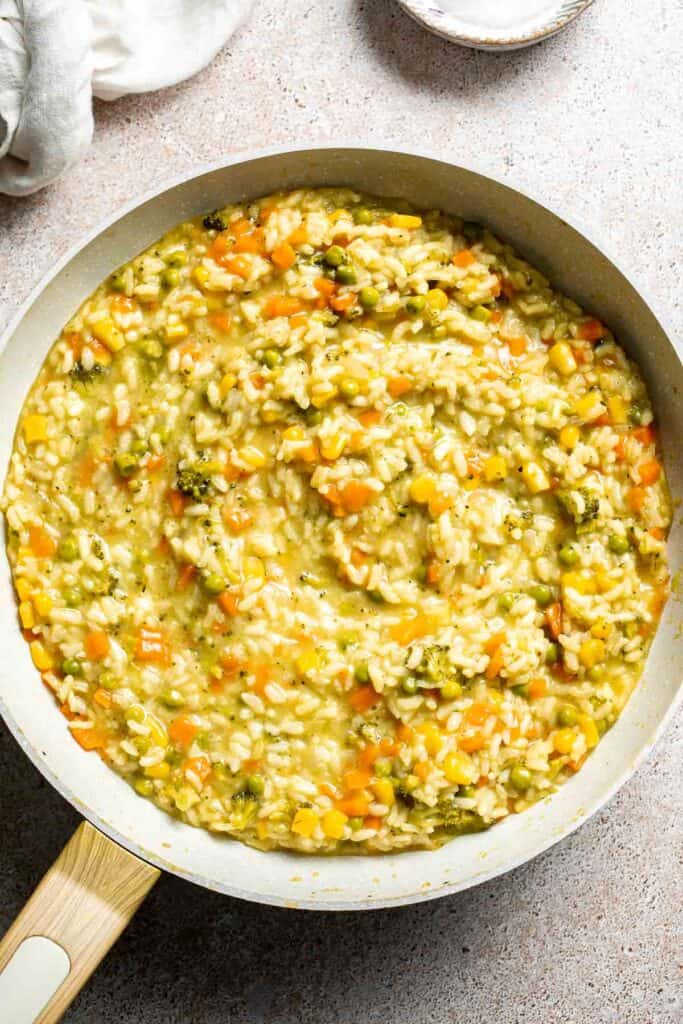
Recipe Variations
- Make it vegan. Skip the Parmesan or sub with nutritional yeast for cheesy flavor and use your favorite plant-based broth to turn this into a vegan main.
- Add lemon. Brighten the finished risotto with a squeeze of fresh lemon juice and some zest. It adds a fresh, citrusy contrast to the creamy richness.
- Top with herbs. A handful of chopped fresh basil, parsley, or chives at the end gives the dish a pop of flavor.
- Include protein. Add white beans, sautéed mushrooms, or even grilled tofu or shrimp for a heartier meal. This is an easy way to make the dish more filling while keeping it balanced.
- Spice it up. Stir in a pinch of red pepper flakes or top with chili oil for some gentle heat.
How to Serve
This Vegetable Risotto is delicious served on its own, or paired with some of my favorite sides including:
- Simple Italian Salad
- Italian Meatballs
- Balsamic Chicken Kabobs
- Cheesy Garlic Bread
- Sautéed Garlic Mushrooms
- Arugula Salad

Recipe Tips and Tricks
- Use warm broth. Keeping your broth warm ensures the rice cooks evenly without being shocked by cold liquid. This helps the risotto stay creamy and speeds up the cooking process.
- Stir often, but not constantly. Stirring helps release starch and prevents burning, but too much stirring can make the risotto gluey. Find a rhythm: stir every minute or so to keep things moving without overdoing it.
- Taste as you go. Seasoning and doneness can vary. Begin checking the rice texture after about 15 minutes of cooking and adjust salt or pepper as needed.
- Use a wide pan. A large sauté pan with a flat surface allows the rice to cook more evenly. Avoid deep pots, which can create uneven results.
- Finish with cheese off the heat. Stir in the Parmesan at the end after removing from heat for the creamiest result. This prevents the cheese from breaking or becoming grainy.
Storing and Freezing Instructions
How to Store
Store leftover risotto in an airtight container in the refrigerator for up to 3 days. It will thicken as it cools, so expect a less creamy texture when reheated unless you refresh it with liquid.
How to Reheat
Reheat on the stovetop over low heat, adding a splash of broth, milk, or water to loosen the texture. Stir frequently until warmed through. You can also microwave it in short bursts, stirring in between and adding liquid to help restore creaminess.
How to Freeze
Although risotto is best enjoyed fresh, you can freeze it if needed. Let it cool completely, then transfer to a freezer-safe container or zip-top bag, removing as much air as possible. Freeze for up to 1 month. Thaw in the refrigerator overnight, then reheat gently on the stove with added broth or water to bring back its creamy consistency. Note that the texture may be slightly less silky after freezing, but it will still be delicious.
FAQ
Yes, risotto can be made ahead of time, but it's best served fresh. If prepping in advance, cook it about 75% of the way (just before it becomes fully tender), then cool and refrigerate. When ready to serve, reheat with a bit of broth until it reaches a creamy, finished consistency. This partial cooking method helps avoid overcooked rice while still allowing you to get ahead on prep.
For best results, arborio rice is the preferred choice because of its high starch content. However, carnaroli or vialone nano rice are also excellent risotto varieties if you can find them. Long-grain or jasmine rice won't create the same creamy texture, so they're not recommended for traditional risotto. If needed, try pearled barley for a twist - it won't be the same, but still tasty!
Absolutely! Risotto is a great base for a variety of vegetables. Seasonal options like mushrooms, zucchini, leeks, or spinach work beautifully here. Just be sure to chop them small and cook them to the right tenderness so that they blend well with the creamy texture of the rice without overwhelming it.
More Vegetarian Rice and Risotto Recipes
- Creamy Parmesan (No Wine) Risotto
- Mushroom Risotto
- Butternut Squash Risotto
- Vegetarian Paella
- Greek Rice
- Black Beans and Rice
Tried this recipe?
I'd love to hear what you think! Leave a comment and rating below to share your feedback. Your reviews help others discover this recipe and help me keep creating more free recipes for you. Snap a photo and tag me on social media @aheadofthyme too.

Carrot Cake
This classic Carrot Cake is soft, moist, warmly spiced, and topped with an ultra-creamy cream cheese frosting. Made with fresh carrots, crushed pineapple, and warm spices, every bite is packed with flavor and texture - from the tender crumb to the slight crunch of optional chopped nuts. It's the kind of cake that disappears fast, so don't count on leftovers.
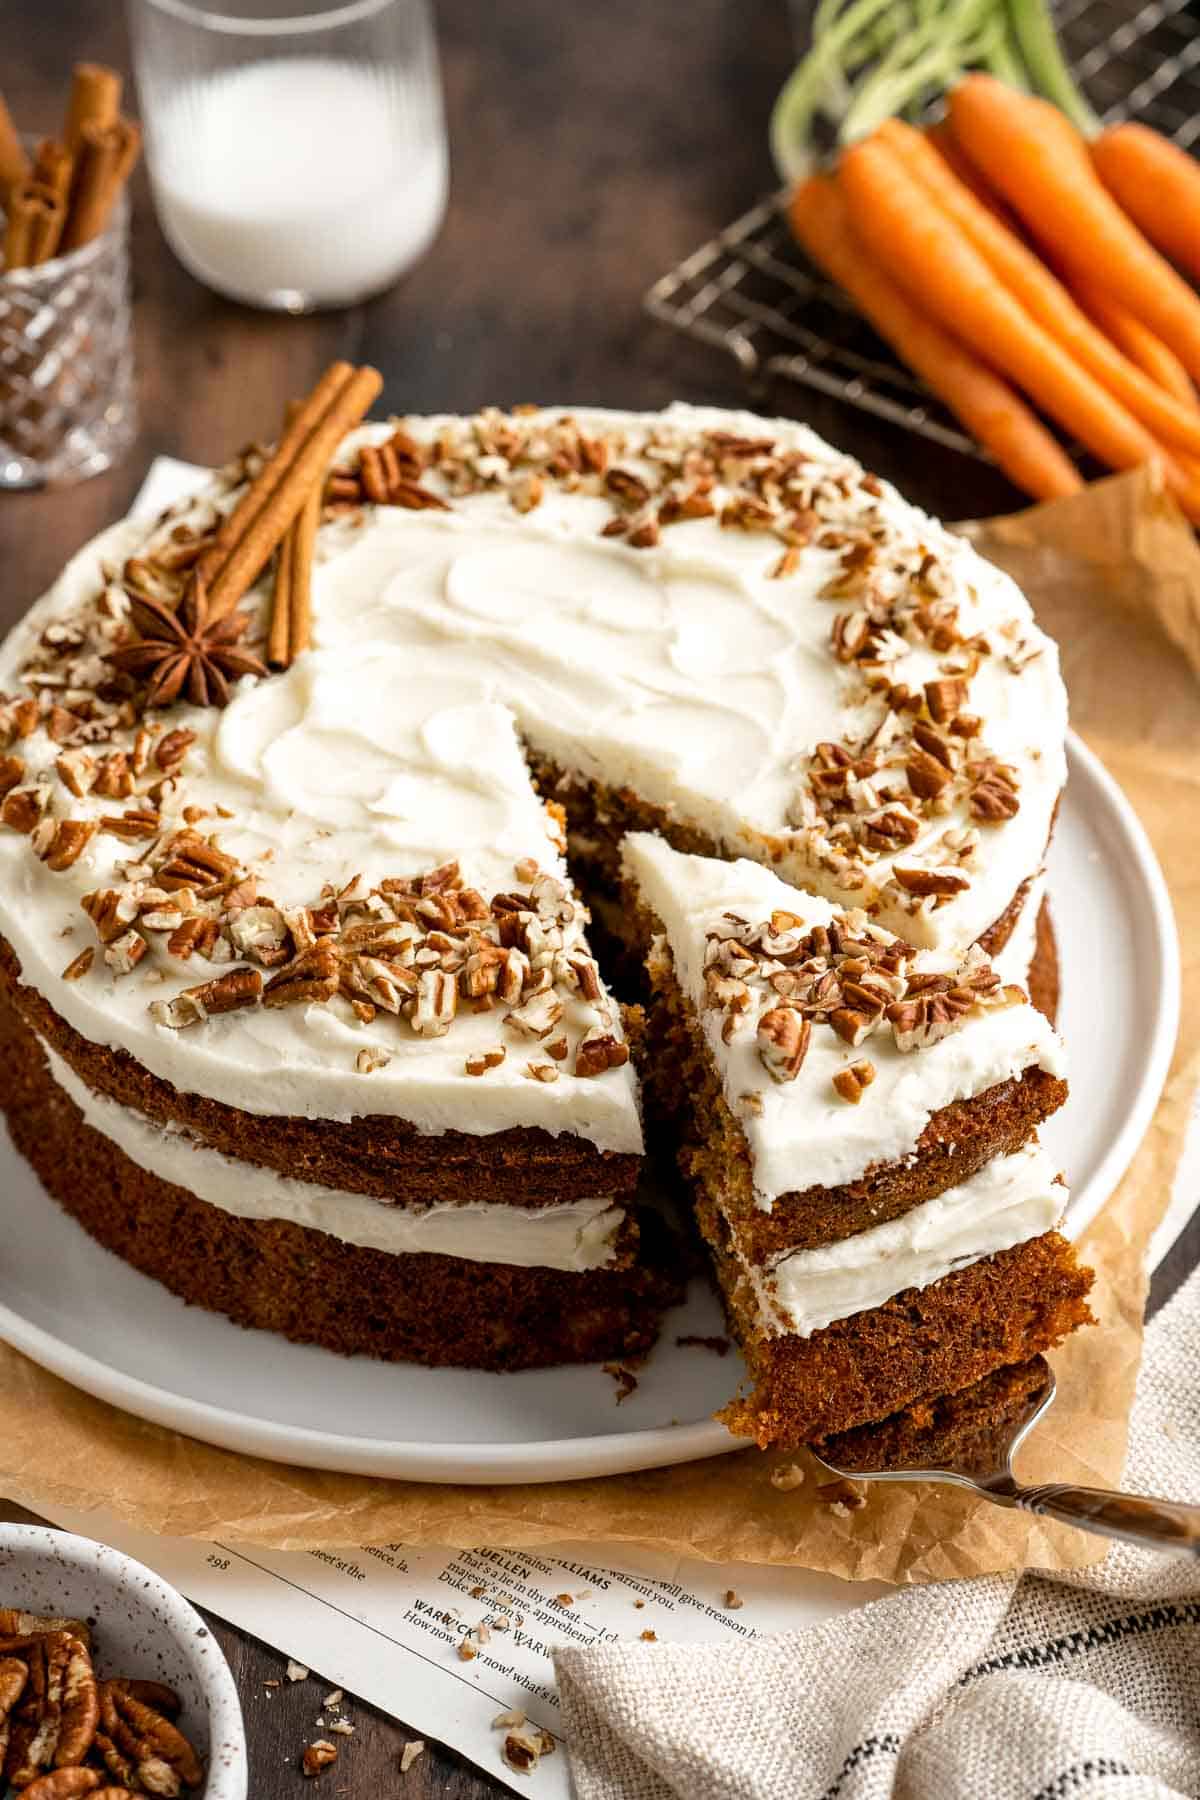
Carrot cake takes a little time to prepare, but it's completely worth the effort. The batter comes together in about 15 minutes and bakes into tall, flavorful layers that pair beautifully with the tangy cream cheese frosting. The result is a cake with the perfect balance between rich and comforting, yet light enough to enjoy any time of year. Make this showstopping dessert for holidays, birthdays, or whenever you're craving a nostalgic sweet treat.
Why You'll Love this Carrot Cake Recipe
- Incredibly moist crumb. Thanks to a combination of shredded carrots, crushed pineapple, oil, and sour cream, this cake stays perfectly moist for days. Every bite is tender, rich, and melt-in-your-mouth delicious, with just the right amount of density. It's everything you want from a classic carrot cake: rich but never heavy.
- Warmly spiced. A blend of cinnamon, ginger, nutmeg, and allspice gives this cake a cozy depth of flavor that balances so well with the natural sweetness of the carrots. The spice level is bold but not overpowering.
- Perfect cream cheese frosting. Cream cheese frosting is a must for carrot cake, and this version is ultra smooth, just sweet enough, and made with a hint of vanilla and a touch of pineapple for an extra pop of flavor. It's easy to spread and pipe, and you can adjust the consistency with cream.
- Beautiful and bake-sale ready. Whether you go for a rustic finish or decorate with chopped nuts and crushed pineapple, this cake always looks as good as it tastes. It's a stunner for Easter, birthdays, or any special gathering.
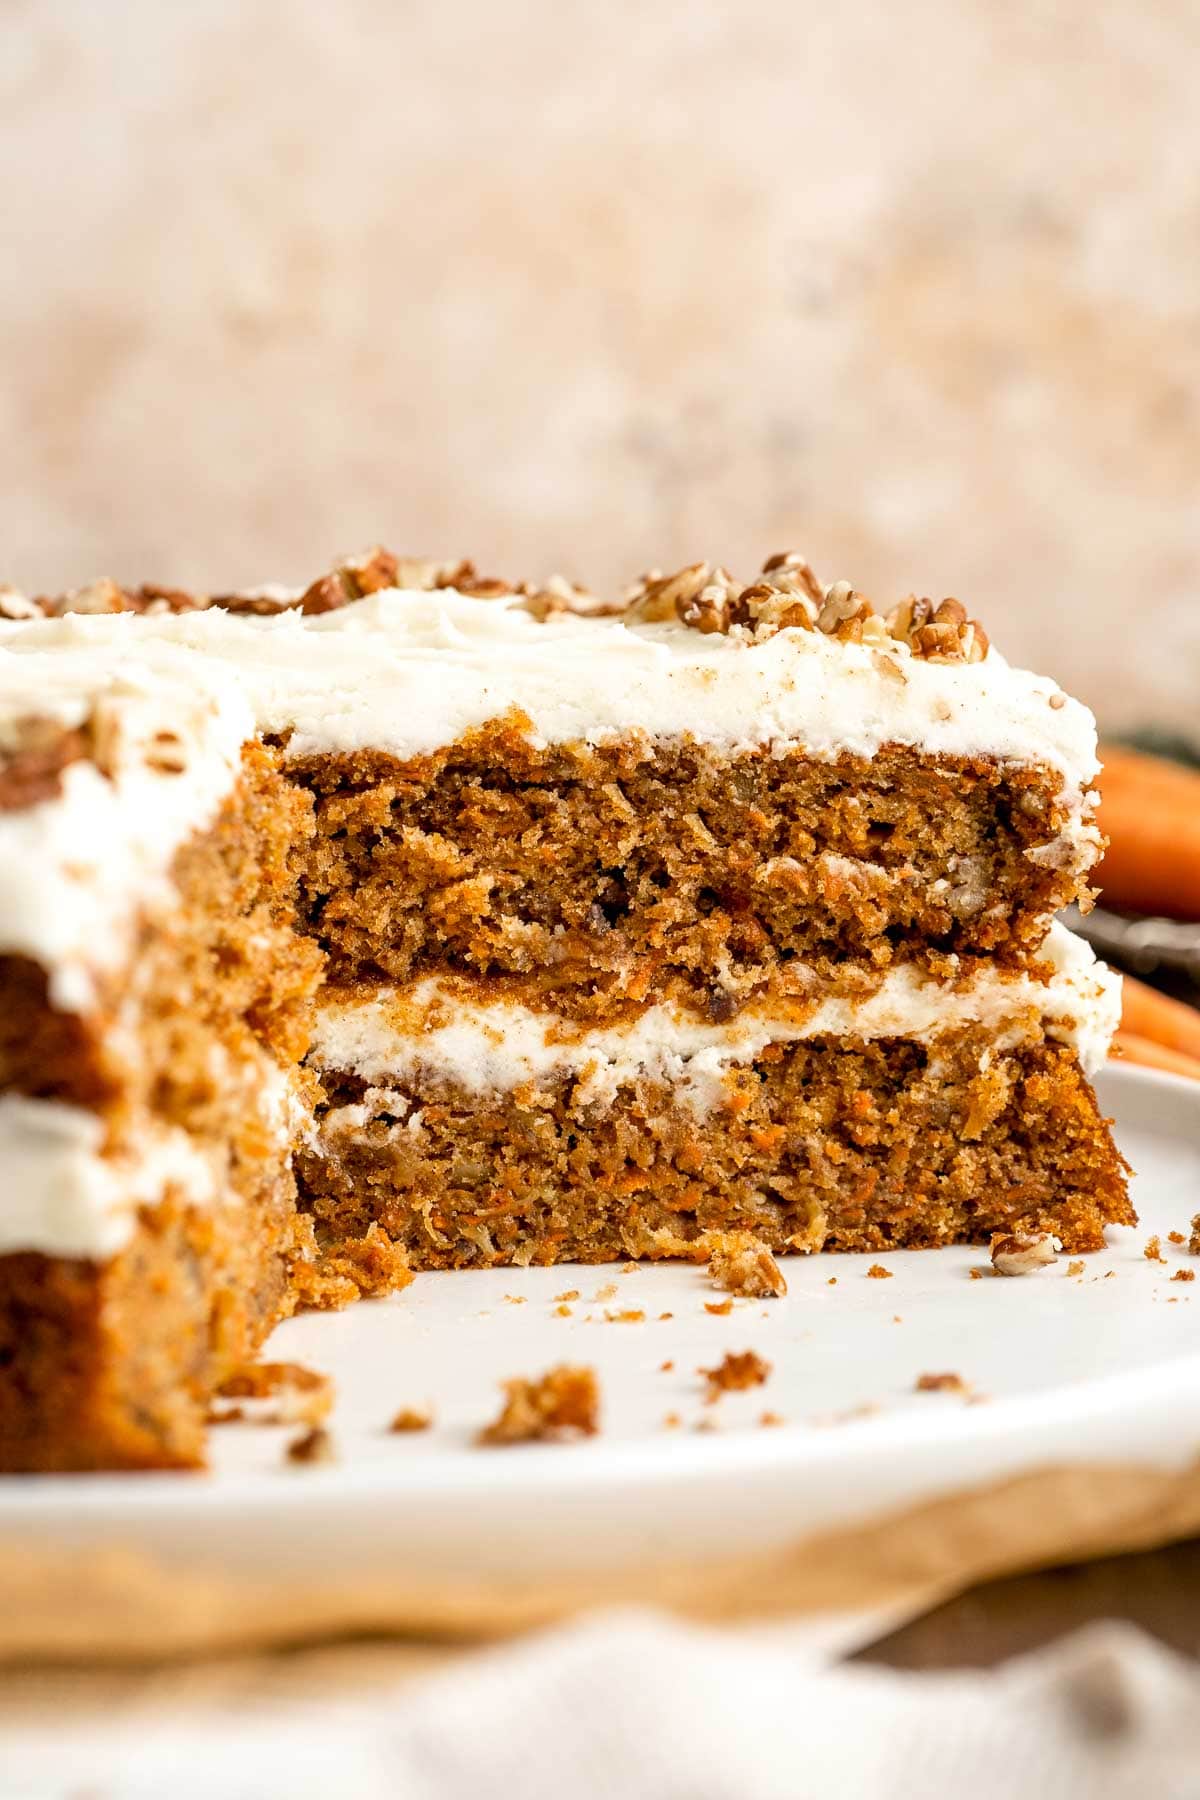
Ingredient Notes
To make this delicious Carrot Cake, you will need the following ingredients (full measurements in recipe card below):
- eggs - helps bind the batter and gives the cake structure.
- dark brown sugar - adds rich molasses flavor and extra moisture. Light brown sugar can be used if needed.
- white sugar - provides structure and a balanced sweetness.
- vegetable oil - keeps the cake incredibly moist.
- sour cream - adds richness and a slight tang that complements the spices. Greek yogurt also works well.
- vanilla extract - adds flavor to the cake and frosting.
- all-purpose flour - gives the cake its structure and softness.
- baking powder + soda - works together to help the cake rise.
- spices - cinnamon, ground ginger, nutmeg, allspice are warm spices that add depth and classic carrot cake flavor. Salt is added too.
- shredded carrots - the star ingredient. finely shred for the best texture and even baking.
- crushed pineapple - adds moisture and sweetness to the cake, and also added to the frosting for added texture. If you don't have crushed pineapple or prefer not to use it, you can swap it for unsweetened applesauce or finely grated apple. This will still keep the cake moist while adding a subtle fruity flavor. Just be sure to use the same amount (about 1 cup) and drain off any excess liquid. The texture might be slightly different, but it will still taste delicious.
- chopped nuts - an optional mix in that adds crunch and richness. Pecans or walnuts are a classic choice.
- butter + cream cheese - softened to room temperature for a smooth, creamy frosting.
- confectioners' sugar - sweetens and thickens the frosting.
- heavy cream - used to adjust the consistency of the frosting, if needed.
You will also need measuring cups and spoons (or kitchen scale) mixing bowls, a whisk, spatula, electric mixer or stand mixer, and two 9-inch round cake pans.

How to Make the Best Carrot Cake
First, make the carrot cake.
- Combine dry ingredients. In a large mixing bowl, whisk together the flour, baking powder, baking soda, salt and spices (cinnamon, ginger, nutmeg, allspice), until well-combined. Set aside.
- Combine wet ingredients. In a stand mixer fitted with the paddle attachment, beat together the brown sugar, white sugar, and eggs, on medium-high speed until thickened and voluminous. Turn to low, then drizzle in the oil, sour cream, and vanilla. Mix on medium until combined.


- Add dry to wet. Add the dry ingredients into the batter, then mix on low until fully combined and smooth.


- Add mix ins. Add in the carrots, pineapple, and nuts. Fold together with a spatula until combined.


- Divide batter. Prepare two round 9-inch cake pans by spraying them with baking spray. Divide the batter into the prepared cake pans and place the cakes into the oven.
- Bake. Bake in a 350F preheated oven for 35-40 minutes, or until an inserted toothpick comes out with just a few crumbs. Allow to cool in the pan for 15 minutes, then carefully remove from the pans and transfer to a wire rack to fully cool.


Next, make the cream cheese frosting.
- Beat. In a large mixing bowl, use an electric hand mixer to beat together the butter, vanilla, and salt, until slightly fluffy, about 2 minutes. Add in the confectioners' sugar, then beat again until combined and fluffy.


- Add cheese. Add in the softened cubed cream cheese, then beat again until fully combined, creamy and fluffy. Add in heavy cream if desired to achieve consistency.


- Frost. Spread half of the frosting onto 1 of the cooled cakes, then top with the other cake. Spread the remaining frosting over top of the second layer.


- Add nuts. Sprinkle chopped nuts on top for decoration, if desired.


Recipe Variations
- Add raisins. Fold in ½ cup of raisins along with the carrots and pineapple for extra sweetness and chewy texture. Golden or regular raisins both work well.
- Add coconut. Stir in ½ cup of shredded coconut for a tropical touch and added texture. Toasted coconut on top is another fun option.
- Try a citrus twist. Add 1-2 teaspoons of orange zest to the batter to brighten the spices and enhance the carrot flavor.
- Make it nut-free. Simply leave out the chopped nuts for an allergy-friendly version.
- Make it a sheet cake. Pour the batter into a greased 9x13-inch baking pan for an easy, one-layer version that's great for casual events or potlucks.
- Make cupcakes. Divide the batter into cupcake liners and bake at 350°F for about 20-22 minutes. Perfect for parties or portion control.
- Swap the frosting. Try it with a whipped mascarpone or buttercream frosting if you're not a fan of cream cheese. It'll still pair well with the spiced cake.
How to Serve
Carrot cake is best served at room temperature once the frosting has set. It is delicious served as a treat during holidays, potlucks, and birthdays and pairs especially well with:
For more spring dessert recipes, see our 50 Best Spring Desserts.

Recipe Tips and Tricks
- Use finely grated carrots. Finely shredding the carrots ensures they distribute evenly in the batter and bake up tender without any stringy texture. Avoid pre-shredded carrots as they tend to be too dry. Use a fine grater for best moisture and texture.
- Use room temperature ingredients. This helps everything blend more smoothly and evenly, especially for the frosting. Cold ingredients can result in a lumpy texture or uneven rise.
- Drain the pineapple. Excess moisture from the pineapple can make the cake soggy. Press it through a fine mesh sieve or cheesecloth or gently squeeze it in a paper towel to remove excess liquid.
- Don't overmix the batter. Mix just until the flour disappears to keep the cake tender. Overmixing can lead to a dense or tough cake, so go gently with your spatula and avoid overworking the batter.
- Cool completely. Let the cake cool fully before adding frosting to prevent it from melting or sliding off. If needed, chill the layers before assembling.
- Chill the frosting. If the frosting is too soft, pop it in the fridge for 10-15 minutes before spreading to make it more manageable and help it hold its shape better.
Storing and Freezing Instructions
How to Store
Store covered in the fridge for up to 5 days. Let it sit at room temp for 30 minutes before serving.
How to Reheat
Carrot cake is best enjoyed cold or at room temperature. If you prefer it warm, microwave a slice for 10-15 seconds. Be careful not to overheat the frosting.
How to Freeze
You can freeze unfrosted cake layers or individual frosted slices. Wrap tightly in plastic wrap and foil, then freeze for up to 2 months. Thaw in the fridge overnight before serving.
FAQ
Yes! In fact, carrot cake often tastes better the next day. You can bake the cake layers ahead of time, cool them completely, and store them in the fridge (wrapped) for up to 2 days. Frost it before serving or even the night before. The flavors will deepen, and the texture stays perfectly moist. It's a great option for entertaining or saving time on busy days.
It's not recommended. Pre-shredded carrots are usually too dry and thick for this recipe. They don't break down properly during baking and can lead to a drier, chunkier cake. Freshly shredded carrots provide better moisture and a finer texture that integrates smoothly into the batter.
Absolutely. Simply divide the batter into lined muffin tins, filling each about ¾ of the way full. Bake at the same temperature for 20-22 minutes or until a toothpick inserted in the center comes out clean. Let them cool completely before frosting. These are perfect for parties, school treats, or individual servings that are easy to store and serve.
Carrot cake has roots in medieval Europe when sweeteners were scarce, and carrots were used to naturally sweeten cakes and puddings. The modern version with spices, nuts, and cream cheese frosting gained popularity in the mid-20th century and is now a staple dessert in many parts of the world. It's beloved for its rustic charm, incredible flavor, and nostalgic familiarity.
More Carrot Dessert Recipes
- 40 Best Carrot Recipes
- Carrot Cake Cookies
- Carrot Bundt Cake with Cream Cheese Glaze
- Carrot Cake Shortbread Cookies
- Carrot Cake Biscotti
- Carrot Cake with Cheesecake Topping
Tried this recipe?
I'd love to hear what you think! Leave a comment and rating below to share your feedback. Your reviews help others discover this recipe and help me keep creating more free recipes for you. Snap a photo and tag me on social media @aheadofthyme too.

What Recipes to Cook in April
Are you wondering what to cook in April? Browse our collection of 50 best April recipes to cook for breakfast, lunch, dinner, and dessert!

April is here, and with it comes the vibrant energy of spring in full swing. The days are longer, the air is warmer, and the market stalls are bursting with seasonal favorites. It's the ideal time to refresh your cooking routine with dishes that are as bright and lively as the world outside. This month, we're leaning into the flavors of early spring - juicy berries, tender greens, crisp snap peas, and fragrant herbs - all perfect for meals that feel light yet satisfying. Whether you're craving an energizing breakfasts, a colorful salad, a breezy weeknight dinner, or a sweet treat to share, this collection of 50 spring-inspired recipes has something for every mood and moment.
What is in Season in April
April is the heart of spring - a time when fresh flavors truly begin to take center stage. As nature wakes up in full color, the kitchen becomes a playground for bright, crisp produce and lighter, feel-good meals. This month brings an abundance of seasonal stars, from tender greens and sweet carrots to juicy strawberries and vibrant herbs. Below, you'll find a lineup of our favorite fruits and vegetables at their seasonal best, along with recipes that let each ingredient shine.
| Fruits | Vegetables |
| Grapefruit Lemon Lime Oranges Papaya Tangerines | Artichokes Arugula Asparagus Beets Carrots Fennel Leeks Parsnip Peas Radish Rhubarb Scallions Spinach Spring Onions Swiss Chard Turnips |
Holidays in April
April is a month rich with meaningful celebrations, both cultural and seasonal. From Easter and Passover to Ramadan and Earth Day, the holidays observed during this time often center around themes of renewal, reflection, and connection.
April brings the joy of Easter, a time to gather with loved ones and celebrate the season of renewal. Whether you're planning a festive brunch, a classic holiday dinner, or a sweet dessert spread, we've got you covered. From glazed ham and spring vegetable sides to hot cross buns and carrot cake, these Easter recipes are perfect for creating a warm and welcoming table. Looking for inspiration? Check out our favorite Easter recipes:
- Easter Brunch Menu
- 40 Best Easter Mains and Entrees
- 30 Best Easter Appetizers
- 50 Best Easter Side Dishes
- 30 Best Easter Desserts
April Breakfast Recipes
 |  |
- Turkish Eggs. Turkish Eggs, or Çılbır, are a rich and comforting combination of poached eggs nestled over garlicky, herbed yogurt and drizzled with a spiced chili oil.
- Hot Cross Buns. Hot cross buns is a timeless classic Easter bread made with raisins, cinnamon, and a honey glaze. They are perfect for breakfast, a snack or dessert.
- Spinach Quiche. Spinach Quiche is a golden, savory classic with a tender flaky crust and a rich, creamy egg filling that's packed with flavor. Surprisingly easy to make!
- Carrot Cake Pancakes. Carrot Cake Pancakes combine two of the best foods, are fluffy soft and moist, loaded with classic flavors, and are ready in 15 minutes from prep to table!
- Sweet Potato Hash Browns.
- Spring Vegetable Frittata. Spring vegetable frittata is a delicious breakfast or served at any time of the day. It's a one-pan meal that starts on the stove and moves to the oven.
- Tater Tot Breakfast Casserole.
- Green Detox Smoothie. Green Detox Smoothie is quick and easy to make, delicious and nutritious, and loaded with antioxidants, nutrients, and vitamins for a quick energy boost.
- Pesto Babka. Pesto babka is a showstopping loaf of bread that is savory, delicious, and flavorful with beautiful twists and turns. Plus, it is surprisingly easy to make!
- Carrot Cake Muffins. Carrot cake muffins are moist, light, chewy and full of carrots which means breakfast this week is healthy! Carrot muffins are great for meal prep too.
April Lunch Recipes
 |  |
- Green Goddess Sandwich. Green Goddess Sandwich is a fresh and vibrant twist on a classic veggie sandwich, packed with a creamy herb sauce, crisp veggies, avocado, and mozzarella.
- Creamless Cream of Asparagus Soup. Creamless cream of asparagus soup is healthy, delicious, smooth, creamy, quick and easy to make. A perfect spring soup for a last minute lunch or dinner.
- Avocado Egg Salad. Avocado Egg Salad is a creamy, nutritious twist on the classic egg salad by adding avocado. Quick and easy to make as a sandwich, wrap, or on its own.
- Sushi Bowl.
- Carne Asada Tacos. Carne asada tacos are delicious, juicy, and tender Mexican street tacos loaded with steak bites that everyone will be raving about on Taco Tuesday!
- Easy Tossed Salad.
- Tuna Melt Grilled Cheese Sandwich. Get your hands on pantry staple canned tuna and make a delicious, crunchy tuna melt grilled cheese sandwich in less than 10 minutes! It's so tasty and easy!
- Korean Vegetable Pancakes.
- Turkey and Cheese Sliders. Turkey and Cheese Sliders are quick and easy, made with deli meat and Swiss cheese filled inside soft Hawaiian dinner rolls topped with a buttery sauce.
- Beet Salad. Beet Salad is a light, fresh, and vibrant salad packed with nutrients. It is loaded with beets, greens, feta, and walnuts, tossed in a homemade vinaigrette.
April Dinner Recipes
 |  |
- Creamy Tuscan Chicken. Creamy Tuscan chicken with sun-dried tomatoes and spinach is a quick and easy 30 minute Italian chicken dinner that is delicious, flavorful, and comforting.
- Asparagus Casserole. Asparagus Casserole is creamy and cheesy, featuring tender-crisp asparagus in a rich, garlicky sauce topped with a crispy panko and parmesan crust.
- Lemon Ricotta Pasta. Lemon Ricotta Pasta is bright, creamy, and bursting with fresh flavor - comfort food with a zesty twist. Ready in under 20 minutes!
- Pineapple Glazed Ham Slices. Sweet and savoury pineapple glazed ham slices are perfect for a holiday dinner. With a caramelized glaze, this ham is dressed to impress.
- Kimchi Fried Rice. Kimchi Fried Rice is a bold, flavorful dish that takes just minutes to prepare using a few simple ingredients - and a great way to use up leftover rice!
- Sheet Pan Lamb Chops. Sheet pan lamb chops with vegetables are healthy and delicious, easy to make, and easier to clean up. Perfect for busy weeknights or a holiday dinner.
- Chicken Enchiladas. Easy baked chicken enchiladas brings the taste of authentic Mexican food into your kitchen - saucy, spicy, and savoury. Perfect for a Mexican fiesta.
- Vegetable Stir Fry.
- Spring Pesto Pasta with Asparagus. Spring pesto pasta with asparagus and chives is light and made with simple ingredients in under 20 minutes. Serve it hot for dinner or cold as pasta salad.
- Seared Scallops. Garlicky, buttery, and perfectly seared scallops take less than 10 minutes to prep and cook. It's the easiest fancy, restaurant-grade meal to make at home.
April Appetizers and Snacks
 |  |
- Deviled Eggs. Classic deviled eggs are a simple, easy, and healthy appetizer to make when you need something quick for brunch, picnics, barbecues, potlucks, or Easter.
- Chinese Scallion Pancakes. Chinese Scallion Pancakes are crispy, flaky, and packed with savory flavor in every bite. Better than takeout and surprisingly easy to make at home!
- Mezze Platter.
- Prosciutto Wrapped Asparagus and Melon. Prosciutto wrapped asparagus and melon are salty, sweet, and juicy. They are easy to make with a handful of simple ingredients, then cooked on the grill.
- Jalapeno Popper Dip. This Jalapeño Popper Dip is creamy, cheesy, and delicious - everything you love about the classic appetizer, served warm and scoopable.
- Honey Mustard Chicken Wings. Honey mustard chicken wings are crispy on the outside but juicy and tender inside. Baked in an air fryer or oven, they have the best texture and flavor.
- Garlic Breadsticks. Soft garlic breadsticks are fluffy, airy, buttery, and delicious. They're an easy recipe that is perfect for beginners at baking bread.
- Marinated Mozzarella Balls. Marinated mozzarella balls is a delicious and simple yet stunning appetizer, made with fresh bocconcini soaked in olive oil, garlic, and fresh herbs.
- Hot Bean Dip.
- Salted Soft Pretzels. The best quick and easy salted soft pretzels are buttery, salty, and so delicious. They are golden brown and chewy on the outside, yet warm and soft inside.
April Desserts
 | |
- Spring M&M Cookies. Spring M&M Cookies are soft, chewy, and bursting with pastel colors and chocolatey goodness - perfect for celebrating the season, especially Easter!
- Carrot Cake. Made with fresh carrots, this classic Carrot Cake is soft, moist, warmly spiced, and topped with an ultra-creamy cream cheese frosting.
- Coconut Cream Pie. This Coconut Cream Pie made from scratch features a graham cracker crust topped with a creamy homemade coconut pudding filling and freshly whipped cream.
- Easter Egg Sugar Cookies. Cute, delicious, and easy-to-make Easter egg sugar cookies with royal icing are the perfect treat to make this Easter. Crisp outside and soft inside.
- Rhubarb Crisp. Old-fashioned Rhubarb Crisp is one of the coziest desserts to bake this season: a sweet, tart rhubarb filling and a crumbly, buttery crisp topping. So good!
- Peanut Butter Eggs. Chocolate-covered peanut butter eggs with a hard chocolate shell on the outside and a soft peanut butter interior inside are rich, sweet, and delicious.
- No Bake Bird's Nest Cookies. No Bake Bird's Nest Cookies are a fun and festive Easter treat made with butterscotch and peanut butter mixture and topped with chocolate mini eggs.
- Almond Biscotti. Small batch almond biscotti are crunchy, crumbly and packed with almonds, perfect for dunking into tea or coffee, and they are super easy to make.
- Chocolate and Vanilla Marble Cake. Chocolate and vanilla marble cake is delicious, moist, fluffy with the perfect golden brown crust. With two classic cake flavors, this loaf cake has it all.
- Easter Bark. Easter Bark is the perfect chocolate treat - sweet, rich, and pretty, loaded with chocolate mini eggs and sprinkles. It's a quick and easy no bake recipe.
More Spring Recipes
- Spring Produce Guide
- 60+ Spring Dinner Ideas
- 40 Best Salad Recipes
- 40 Best Pasta Recipes
- 50+ Healthy Lunch Ideas
- 50 Best Spring Desserts
Did You Make Any of These April Recipes?
Please leave a comment and rating below, and let me know what you thought of this round up of delicious recipes to cook this April. Be sure to snap a picture and tag me on Instagram @aheadofthyme or share it on the Pinterest pin so that I can follow along.
HUNGRY FOR MORE? Don't forget to sign up for my email newsletter so that you don't miss any recipes. You can also follow along on Instagram and Pinterest for more recipe updates.
- « Previous Page
- 1
- 2
- 3
- 4
- 5
- 6
- …
- 40
- Next Page »