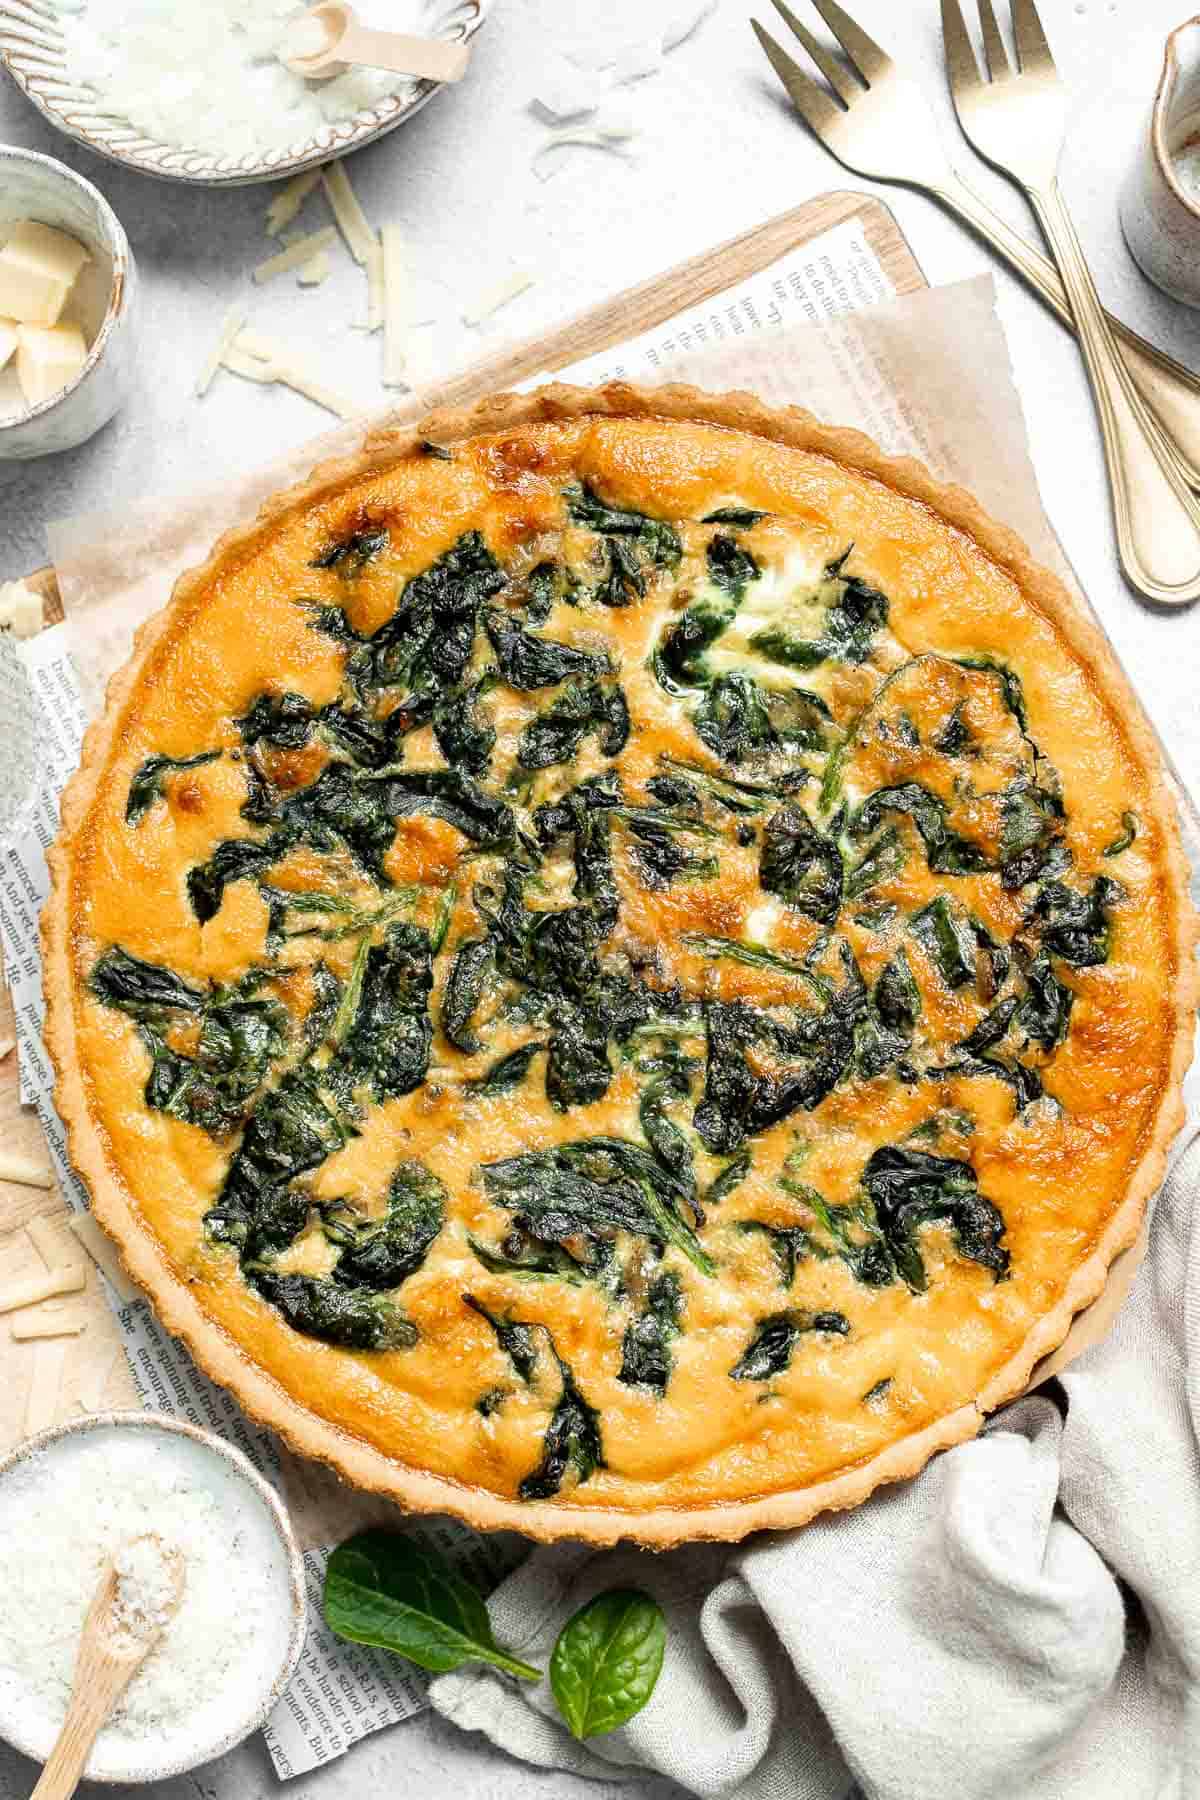
This Spinach Quiche is a golden, savory classic with a tender flaky crust and a rich, creamy egg filling that's packed with flavor. Wilted spinach, sautéed shallots, and melty cheese come together in each slice to create a dish that's comforting, delicious, and flavorful. Whether you're serving it for a fuss-free holiday brunch (it's an Easter favorite!), a light dinner, or meal prep for the week, it's a versatile favorite you'll make again and again.
This is one of those recipes that feels fancy but is surprisingly easy to throw together. With just a few pantry staples and fresh produce, you get a rich, custardy filling and flaky, golden crust. It's hard to beat the simplicity and satisfaction of a well-made quiche. Plus, it's easy to customize with whatever greens, cheeses, or herbs you have on hand.
Why You'll Love this Spinach Quiche Recipe
- Creamy, cheesy filling. The combination of heavy cream, cheddar, and Parmesan with eggs creates a luscious, custard-like interior that's cheesy, rich, and loaded with savory flavor in every bite. It's indulgent while still letting the fresh spinach shine through.
- Flaky pie crust. Using a pre-made or homemade 9-inch pie crust gives you that buttery, crisp texture that perfectly complements the creamy filling. It holds everything together beautifully and adds a satisfying crunch to each slice.
- Flavorful veggies. The sautéed shallots and spinach add sweet and earthy flavor that balances so well with the richness of the cheeses and eggs. You get a flavorful veggie bite in every forkful.
- Make-ahead friendly. Quiche stores and reheats beautifully, making it an excellent option for meal prep, brunch gatherings, or entertaining. Serve it warm, cold, or at room temp - it's delicious every time! It also freezes beautifully for later.
- Customizable. You can easily swap out cheeses, add veggies, or toss in some cooked bacon or ham. It's a great recipe to adapt to what you have on hand or to suit your flavor preferences.

Ingredient Notes
To make this delicious spinach quiche, you will need the following ingredients (full measurements in recipe card below):
- butter - used to sauté the aromatics and spinach. You can also substitute with olive oil if preferred.
- shallot (or white onion) - adds mild, aromatic flavor that enhances the spinach. Red onion can work too, but has a stronger bite.
- baby spinach - the star of the dish, providing earthy flavor and vibrant green color. Frozen spinach can be used - just thaw and squeeze dry before adding.
- eggs - the base of the custard filling that sets into a creamy texture.
- heavy cream - creates a rich, silky custard. Half-and-half can be used for a lighter texture, but don't use milk alone.
- pie crust - use a 9-inch crust, either store-bought or homemade crust.
- cheddar cheese - adds sharp, cheesy flavor that complements the eggs and spinach. Swiss or gruyère are great substitutes.
- parmesan cheese - adds savory, umami depth to the filling. Romano cheese or Grana Padano can be used in place of parmesan.
- salt and pepper
You will also need measuring cups and spoons, skillet, mixing bowls, baking sheet, and 9-inch pie dish

How to Make the Best Spinach Quiche
- Prep the crust. If using homemade pie dough, roll out the dough until you have a large 10 inch circle about ⅛-inch thick. Gently place it over a 9-inch pie dish and firmly press it into the bottom and sides. Trim the extra from the sides. Prick the bottom with a fork.
- Blind bake (optional). Line the pie dough with parchment paper on top and fill with dry beans or pie weights. You can skip this step, but the crust will have a better texture if you do it (more crisp and not as soft). Bake in a 400F preheated oven for 10-12 minutes, until very lightly golden. Carefully remove the weights and parchment paper and allow the crust to cool before filling.


- Sauté onion. In a large pan, melt butter over medium-high heat until it bubbles, about 1 minute. Add onion and saute until fragrant, about 1 minute.
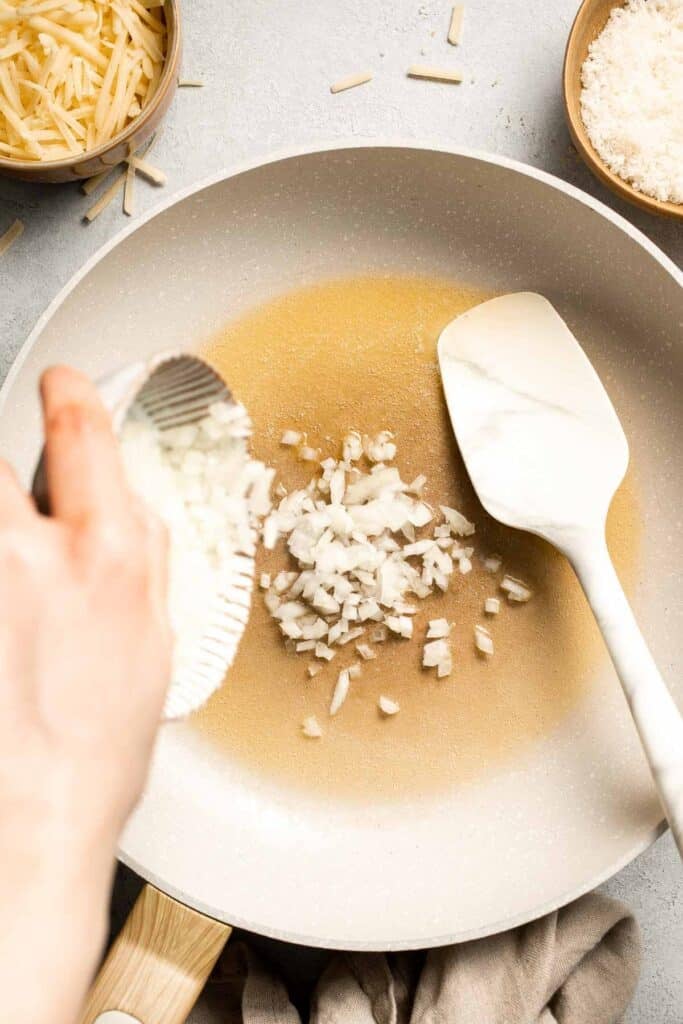

- Add spinach. Add baby spinach and toss until all the spinach has wilted, about 1-2 minutes. Season with salt and pepper. Set aside on a plate.


- Make filling. In a medium mixing bowl, whisk together eggs and heavy cream until smooth.


- Assemble. Place the pie crust on a large baking sheet. Add cheddar cheese and Parmesan cheese. Then add the spinach-onion mixture and spread evenly. Carefully pour the egg mixture on top.


- Bake. Bake in a 375F preheated oven until completely set and the top turns golden brown, about 40-45 minutes. Let cool for 5-10 minutes before slicing and serving.

Recipe Variations
- Add mushrooms. Sauté sliced mushrooms along with the shallots for an earthy twist.
- Make it crustless. Skip the pie crust and pour the filling into a greased pie dish or baking dish for a low-carb option. It still bakes up beautifully without the crust.
- Use different cheeses. Swap cheddar for Swiss, Gruyère, or feta to give the quiche a new flavor profile. Just be sure to use cheeses that melt well.
- Add fresh herbs. Stir in chopped fresh herbs like parsley, basil, or dill for a burst of freshness. It's an easy way to elevate the flavor with what's in your garden or fridge.
- Make mini quiches. Pour the filling into a muffin tin lined with mini crusts for individual portions that are perfect for brunch spreads or packed lunches.
- Use a cauliflower crust. For another low carb option, use a cauliflower crust. See our Spinach and Feta Quiche with Cauliflower Crust recipe for instructions.
How to Serve
This Spinach Quiche is delicious served warm, at room temperature, or even chilled straight from the fridge. It's a great choice for brunch, lunch, or a light dinner paired with fresh sides, including:

Recipe Tips and Tricks
- Blind bake the crust. Pre-baking the crust before adding the filling ensures it stays crisp and doesn't get soggy. This is optional though, based on your personal preference.
- Cool the spinach. After sautéing the spinach, let it cool slightly before mixing with the eggs. This prevents the hot spinach from cooking the eggs prematurely.
- Grate your own cheese. Pre-shredded cheese often contains anti-caking agents that affect melting. Grating your own ensures a smoother, creamier quiche.
- Don't overfill. Leave a little space at the top of the crust so the filling doesn't overflow as it bakes. The filling will puff slightly in the oven before settling.
- Let it rest before slicing. Give the quiche 10-15 minutes to cool before cutting. This allows the filling to set properly and makes cleaner slices.
Storing and Freezing Instructions
How to Store
Let quiche cool completely, then cover tightly and store in the refrigerator for up to 4 days. Reheat slices in the microwave or oven until warmed through.
How to Reheat
Reheat slices in a 350°F (175°C) oven for 10-15 minutes until warmed through. You can also microwave individual slices for 1-2 minutes, though the crust stays crispier in the oven.
How to Freeze
Wrap the fully cooled quiche (or individual slices) tightly in plastic wrap and foil. Freeze for up to 2 months. Thaw overnight in the fridge and reheat before serving.
FAQ
Yes! You can bake the quiche a day in advance and store it in the refrigerator. Simply reheat it in the oven before serving. Alternatively, prepare the crust and filling separately, then assemble and bake the next day. This makes entertaining or prepping for brunch much easier and stress-free.
You can use milk, but the texture won't be as rich or creamy. For a lighter version, try using half-and-half or a mixture of milk and cream. Keep in mind that using just milk may result in a looser custard. If you do use milk, whole milk is best for maintaining a good balance of flavor and structure.
Yes, using a microwave is a quick and easy way to melt the butterscotch chips and peanut butter. Simply place both ingredients in a microwave-safe bowl and heat in 30-second intervals, stirring between each until the mixture is fully melted and smooth. Be careful not to overheat it-this can cause the mixture to seize or burn. Once everything is melted evenly, proceed quickly to coat the noodles and form your nests before the mixture begins to set.
More Spinach Recipes
Tried this recipe?
I'd love to hear what you think! Leave a comment and rating below to share your feedback. Your reviews help others discover this recipe and help me keep creating more free recipes for you. Snap a photo and tag me on social media @aheadofthyme too.

Spring M&M Cookies
These Spring M&M Cookies are soft, chewy, and bursting with pastel colors and chocolatey goodness - perfect for celebrating the season! With buttery dough, melty chocolate chips, and crunchy M&M's in cheerful spring hues, they're the kind of cookie that brings a smile with every bite. Whether you're baking for Easter, a springtime party, or just want a sweet treat, these cookies are simple to make and sure to impress.

While these cookies look bakery-worthy, the recipe itself is incredibly beginner-friendly. No chilling is required, and the dough comes together in one bowl with pantry staples. The addition of cornstarch keeps the cookies soft in the center, while light brown sugar adds just the right amount of chew. It's a quick, no-fuss recipe that delivers bakery-style results every time.
Why You'll Love these Spring M&M Cookies
- Soft and chewy texture. These cookies are perfectly tender in the center with lightly crisp edges. The secret? A touch of cornstarch in the dough, which helps create that classic chewy bite while preventing the cookies from drying out.
- Festive and fun. With their pastel-colored M&M's and rich chocolate chips, these cookies are a sweet way to celebrate spring holidays, baby showers, or birthdays. You can even switch up the M&M colors for other seasons.
- Easy, no-chill dough. The dough comes together in just minutes with no refrigeration needed. This means you can go from craving cookies to enjoying them warm from the oven in under 30 minutes.
- Perfect for gifting or parties. These cookies hold their shape beautifully and look adorable on cookie platters or in gift bags. Their bright colors and delicious flavor make them an instant crowd-pleaser.

Ingredient Notes
To make these delicious spring M&M cookies, you will need the following ingredients (full measurements in recipe card below):
- butter - provides a rich flavor and tender texture. we use unsalted butter, but you can opt for salted butter can be used - just reduce added salt in the recipe.
- light brown sugar - adds moisture and a deep, caramel-like sweetness. Dark brown sugar can be used for a richer molasses flavor.
- granulated sugar - balances the brown sugar and adds a slight crispness to the edges.
- egg - binds the dough and helps with structure.
- vanilla extract - enhances the sweetness and rounds out the flavors. Almond extract can be substituted for a different twist.
- all-purpose flour - forms the base of the cookie dough.
- cornstarch - this is optional but it helps create soft, chewy centers. If unavailable, just leave it out.
- baking soda - provides lift and helps the cookies spread just the right amount.
- salt - balances the sweetness and enhances flavor.
- pastel colored M&M's - give the cookies their springtime look and add a bit of crunch. Use holiday-themed M&M's to adapt for other occasions.
- chocolate chips - provide pockets of melty chocolate in every bite. Dark or white chocolate chips can be used instead, depending on your preference.
You will also need measuring cups and spoons, mixing bowls, a hand or stand mixer, a spatula, baking sheets, and parchment paper or silicone mats.

How to Make the Best Spring M&M Cookies
- Combine wet ingredients. In a large mixing bowl, use a hand mixer or stand mixer cream together butter and sugars on medium speed until light and fluffy, about 2 minutes. Add egg and vanilla, and beat on low until incorporated.


- Add dry ingredients. Add flour, baking soda, and salt and stir with a large wooden spoon until just combined.


- Add mix ins. Fold in m&m's and chocolate chips.


- Scoop cookies. Use a medium cookie scoop to scoop out 2 tablespoons of cookie dough. Drop onto a large half sheet baking tray lined with a silicone baking mat or parchment paper. Space the cookies a few inches apart (you can fit about 6-8 on a large cookie sheet). Press in extra m&m's into the top of the cookies.


- Bake. Bake in a 350F preheated oven for 8-10 minutes, until edges just start to brown. Do not overbake. The cookies may not look done in the middle, but they will continue to cook as they are cooling.
- Smooth edges. Use a circular cup (or large cookie cutter) and gently swirl it around the cookies immediately. This will give the cookies the perfect round look as they cool. Allow the cookies to cool in the baking sheet for 5 minutes, then transfer to a wire cooling rack to cool completely.


Recipe Variations
- Add white chocolate. Swap half of the chocolate chips for white chocolate chips to brighten the cookie and add a creamy twist that complements the M&M's.
- Make them mini. Use a small cookie scoop to portion out mini cookies. They bake faster and are perfect for party trays or lunchbox treats.
- Mix in nuts. Add ½ cup chopped pecans or walnuts for an extra crunch and nutty flavor that pairs well with the chocolate and M&M's.
- Try peanut butter. Replace 2 tablespoons of butter with peanut butter for a subtle nutty taste that works especially well with pastel M&M's.
- Add sprinkles. Fold in a handful of spring-colored sprinkles along with the M&M's to make these cookies even more festive and fun for kids.
How to Serve
This Spring M&M Cookies are delicious served on its own as a sweet treat with a glass of cold milk or a warm cup of coffee or tea. They are also great on a dessert tray at spring parties, showers, or Easter brunch alongwith other springtime desserts such as:
- Carrot Bundt Cake with Cream Cheese Glaze
- Fresh Fruit Tart
- Strawberry Shortcake
- Sugar Cookie Bars
- Robin's Egg Cupcakes
For more recipe ideas, see our 50 Best Spring Desserts.

Recipe Tips and Tricks
- Use room temperature butter. Softened butter creams better with sugar, which gives the cookies a lighter texture. Cold butter won't incorporate properly and may result in uneven dough.
- Don't overmix the dough. After adding the flour, mix just until combined to avoid tough cookies. Overmixing can lead to dense, dry results.
- Reserve some M&M's for topping. Press a few extra M&M's on top of each dough ball before baking to make them look extra vibrant and bakery-style.
- Cool before transferring. Let the cookies cool for 5-10 minutes on the baking sheet before moving them to a wire rack. This helps them firm up and prevents breaking.
Storing and Freezing Instructions
How to Store
Store cooled cookies in an airtight container at room temperature for up to 5 days. Keep a slice of bread in the container to help maintain their softness.
How to Reheat
To enjoy cookies warm, microwave for about 10 seconds or place in a 300°F oven for 4-5 minutes. This helps restore that fresh-from-the-oven softness.
How to Freeze
To freeze baked cookies, let them cool completely, then store in a freezer-safe container or bag for up to 2 months. Thaw at room temperature.
To freeze unbaked cookie dough, scoop the dough onto a baking sheet, freeze until solid, then transfer to a bag. Bake from frozen, adding 1-2 extra minutes.
FAQ
Yes! You can make the dough in advance and refrigerate it for up to 48 hours. Let it sit at room temperature for 20-30 minutes before baking. You can also bake the cookies ahead of time and store them in an airtight container. They stay soft and chewy for several days, and can easily be refreshed with a short warm-up in the microwave.
Absolutely. The chocolate chips add gooey texture, but you can use only M&M's if you prefer a crunchier, candy-filled cookie. The cookies will still be delicious, but may be slightly firmer in texture without the added moisture from the chocolate chips. You can also increase the amount of M&M's slightly to compensate.
Cookie spread can depend on butter temperature, flour measurement, and oven temperature. If cookies spread too much, try chilling the dough for 30 minutes. If they don't spread enough, the dough may be too cold or there might be too much flour. Using a kitchen scale for measuring ingredients can help ensure consistency in baking results every time.
More Spring Cookie Recipes
- Mini Egg Easter Cookies
- Easter Egg Sugar Cookies
- No Bake Bird's Nest Cookies
- Carrot Cake Cookies
- Italian Easter Cookies
- Pistachio Macarons
Tried this recipe?
I'd love to hear what you think! Leave a comment and rating below to share your feedback. Your reviews help others discover this recipe and help me keep creating more free recipes for you. Snap a photo and tag me on social media @aheadofthyme too.

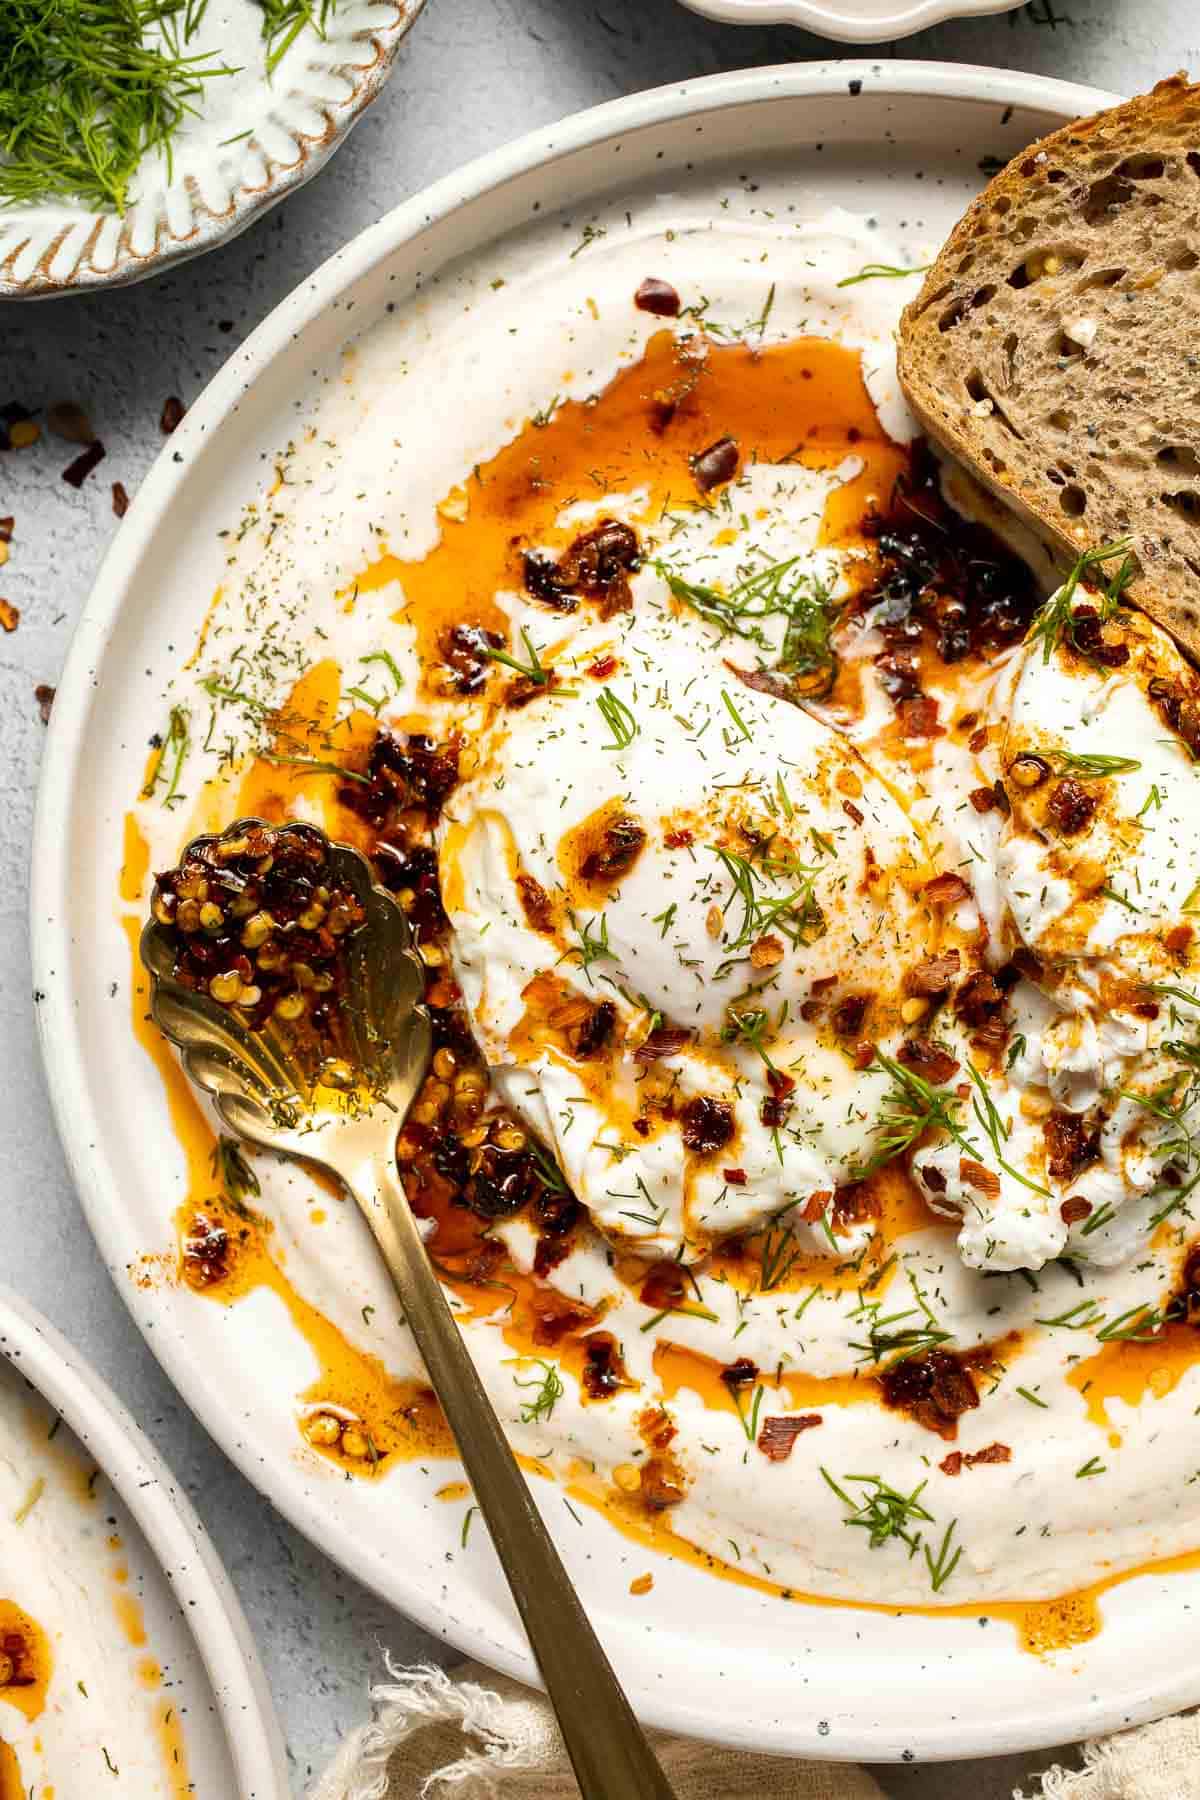
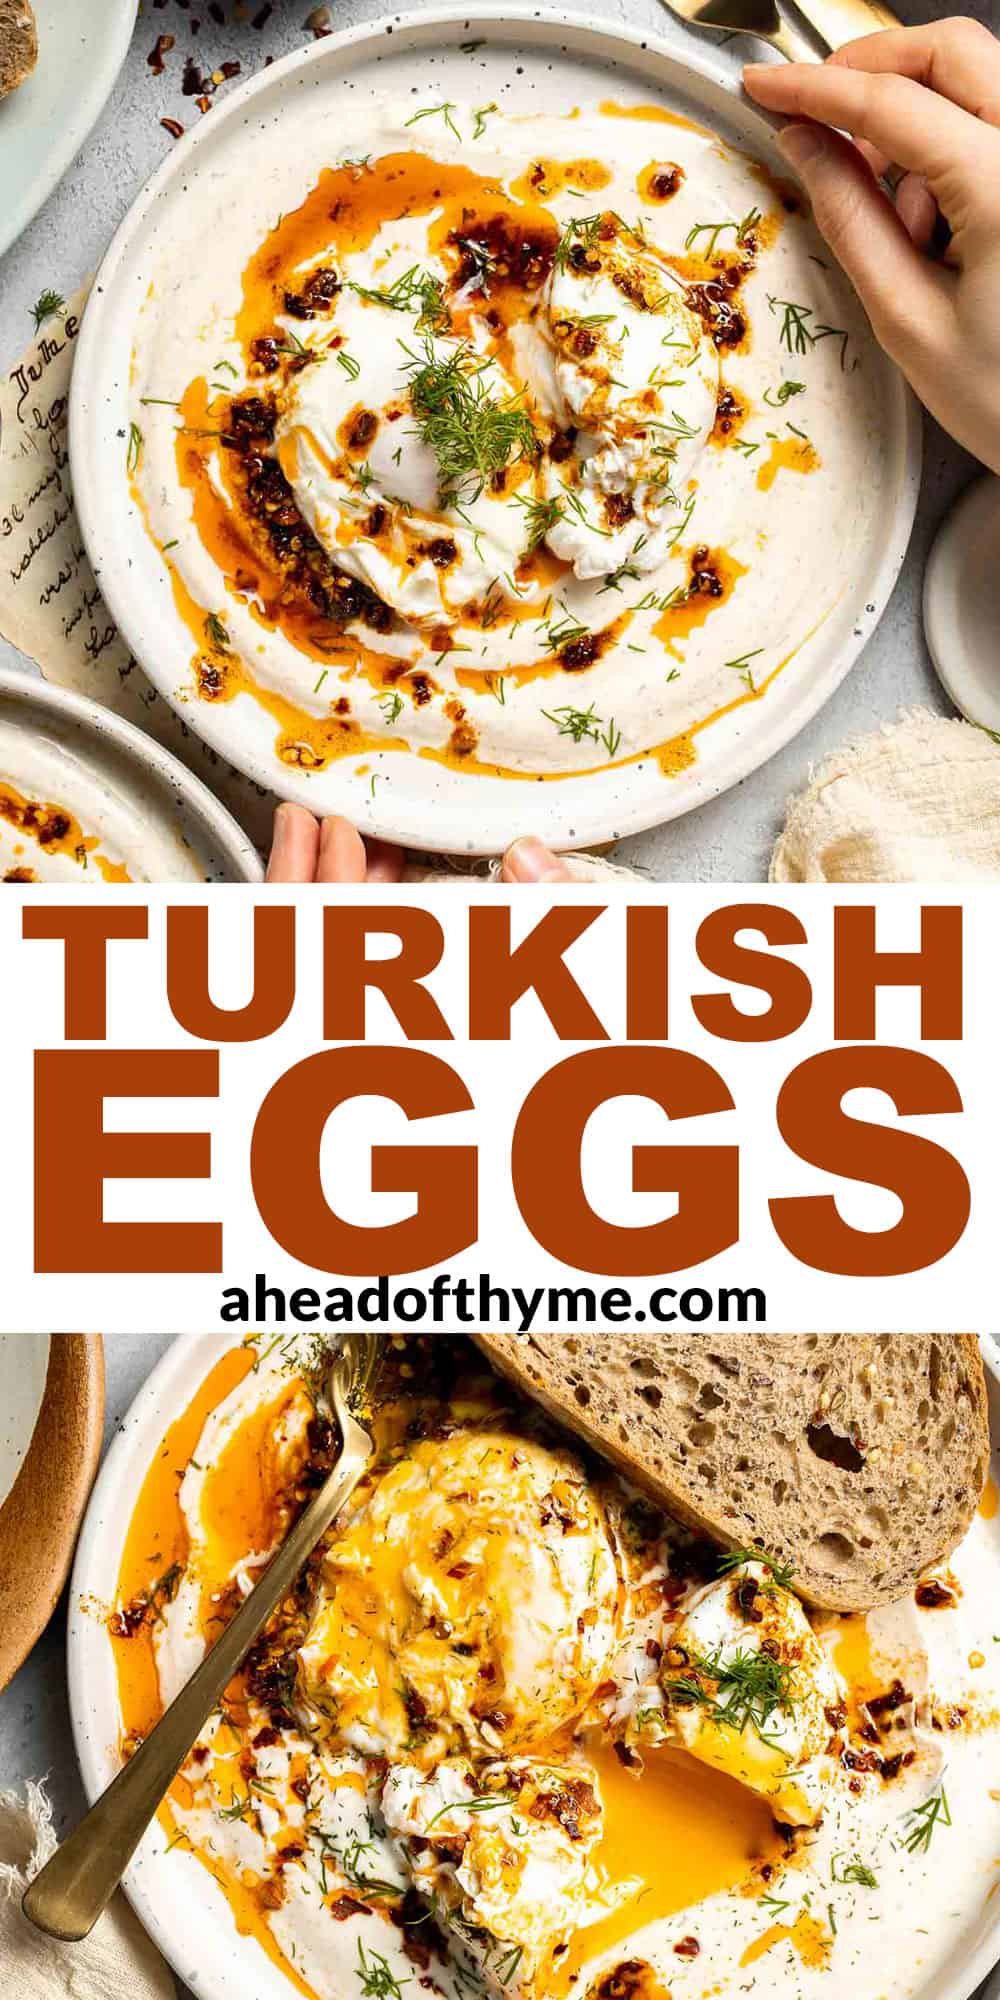
Turkish Eggs
Turkish Eggs, or Çılbır, are a stunning combination of poached eggs nestled over garlicky, herbed yogurt and drizzled with a smoky, spiced chili oil. Served with warm toasted bread for dipping, this dish is rich, comforting, and packed with bold flavor in every creamy, runny bite. The best part? It's unexpectedly easy to make.
While it is quick and easy to make with a simple ingredient list, the layering of flavors is anything but. The cool creaminess of the yogurt contrasts beautifully with the warm, just-set eggs, while the spiced chili oil ties everything together with smoky depth and gentle heat. Every element plays a specific role, resulting in a dish that feels elevated yet comforting-perfect for a slow weekend breakfast, brunch with friends, a light lunch, or a quick but satisfying dinner.
Why You'll Love these Turkish Eggs
- Bold, layered flavors. Creamy yogurt, runny poached eggs, and spicy chili oil create a flavor-packed bite with every spoonful. The smoked paprika and cumin add warmth, while the dill brings in a fresh herbal finish that balances everything so perfectly.
- Simple and wholesome. This balanced dish is packed with simple, good-for-you ingredients including eggs for protein, yogurt for probiotics, and olive oil for healthy fats. Just take these ingredients alongwith 15 minutes of time, and you can whip up these restaurant-worthy Turkish eggs.
- Perfectly poached eggs. This recipe is a great way to practice poaching eggs to perfection: soft, delicate whites with golden, runny yolks. When broken over the yogurt, they create an irresistible, rich sauce that melds into every layer.
- Perfect for any time of day. While traditionally served as a breakfast dish, Turkish eggs make a beautiful brunch, light lunch, or even dinner. It's versatile, filling, and always a hit when you want something a little different. Pair them with toast or flatbread to scoop up every last drop, or serve with a salad for a heartier plate.

Ingredient Notes
To make these flavorful Turkish eggs, you will need the following ingredients (full measurements in recipe card below):
- yogurt - forms the base of the dish and adds a cool, creamy tang. Greek yogurt can be used for a thicker texture.
- garlic - adds a punch of savory flavor to the yogurt. You can also saute the garlic first a milder taste.
- dried dill - adds a subtle herby note to the yogurt. Use fresh dill if preferred, but reduce the quantity slightly.
- smoked paprika - gives the yogurt a gentle warmth and smoky depth.
- extra virgin olive oil - used to make the chili oil. You can also substitute with melted butter which adds richness, while olive oil keeps it lighter.
- chili flakes - brings heat to the chili oil. Adjust the quantity based on spice preference.
- spices - smoked paprika, ground cumin, and salt adds flavor to the chili oil.
- eggs - poached and served over the yogurt for a runny, silky texture.
- fresh dill - sprinkled on top for color and a fresh, herby finish.
You will also need measuring cups and spoons, a small saucepan, mixing bowl, slotted spoon, and a shallow dish or plate for serving.

How to Make the Best Turkish Eggs
- Make yogurt sauce. In a mixing bowl, add yogurt, garlic, dill and paprika. Whisk together until evenly combined.


- Make chili oil. In a small saucepan, heat olive oil over medium heat. Stir in chili flakes and cook until fragrant, about 1 minute. Add paprika, cumin and salt. Mix well and turn off heat. Set aside.


- Poach the eggs. Bring a medium pot of water to a boil over medium-high heat. Reduce heat to medium to keep the water to a gentle simmer. Crack the egg, one at a time, into a small bowl or ladle. Slowly slide the egg into the simmering water. Cook until the desired consistency is achieved, about 3 minutes for a soft poached egg or 4-5 minutes for a firmer yolk. Use a slotted spoon to carefully remove the eggs.


- Assemble. Divide and spread the yogurt sauce evenly onto two plates. Top with 2 poached eggs and drizzle chili oil on top.


- Serve. Garnish with fresh dill and serve immediately. Serve with toasted bread on the side for dipping.


Recipe Variations
- Use harissa oil. Swap the homemade chili oil for harissa blended with olive oil for a North African twist that's smoky, spicy, and slightly sweet.
- Top with feta or labneh. Add crumbled feta or a dollop of labneh over the yogurt base to bring even more creamy, tangy contrast to the eggs.
- Add sautéed greens. For an extra nutrient boost, layer sautéed spinach or kale under the eggs. The greens pair beautifully with the garlicky yogurt and chili oil.
- Try different herbs. Experiment with fresh mint, parsley, or basil instead of dill for a different herbaceous flavor profile.
- Serve over grains. Instead of bread, spoon everything over a warm bowl of cooked farro or quinoa for a heartier meal with extra texture.
How to Serve
Turkish eggs is delicious served on its own with some crusty or toasted bread for scooping up the yogurt and egg mixture. It also pairs well with Mediterranean-inspired sides. Enjoy this dish with:
- Homemade Pita Bread
- Marinated Mozzarella Balls
- Cherry Tomato Salad
- Breakfast Potatoes
- Watermelon Feta Salad
- Pita chips
For more recipe ideas, see our 60 Best Mediterranean Diet Recipes.

Recipe Tips and Tricks
- Use room temperature yogurt. This helps keep the yogurt from tasting too cold against the warm eggs and oil. Cold yogurt can overpower the other elements.
- Poach eggs gently. Bring water to a gentle simmer (not a rolling boil) and add a splash of vinegar for best results. Crack each egg into a small bowl first for easier transfer.
- Make the chili oil ahead. The oil can be prepared in advance and stored at room temperature for up to a week. This makes the dish even faster to assemble on busy mornings.
- Dry the eggs slightly. After poaching, let eggs sit briefly on a paper towel to remove excess water before placing on the yogurt. This prevents watery yogurt and keeps the presentation clean.
Storing and Freezing Instructions
How to Store
Turkish eggs are best enjoyed fresh, but leftover yogurt sauce and chili oil can be stored in airtight containers in the fridge for up to 3 days. Store each component separately.
How to Freeze
Freezing is not recommended for this dish, as yogurt and poached eggs do not thaw well and the texture will be compromised.
FAQ
You can prepare the yogurt sauce and chili oil up to 2-3 days in advance and store them in the fridge. The eggs, however, are best poached fresh for the best texture. If needed, poached eggs can be made a few hours ahead and stored in a bowl of cold water in the fridge-just reheat in hot water before serving.
It can be! The spice level depends on how much chili you use in the oil. You can adjust the amount of chili flakes or opt for a milder pepper if preferred. The yogurt also helps balance out the heat, so it's flavorful without being overwhelming.
Çılbır (pronounced chuhl-bur) is the traditional Turkish name for this dish, dating back to the Ottoman Empire. It refers specifically to poached eggs served over yogurt. The combination has been enjoyed in Turkish cuisine for centuries and remains a beloved comfort food throughout the region today.
More Egg Recipes
- 20 Best Egg Recipes
- Avocado Toast with Poached Egg
- Mediterranean Scrambled Eggs
- Shakshuka
- Eggs in Purgatory
- Deviled Eggs
Tried this recipe?
I'd love to hear what you think! Leave a comment and rating below to share your feedback. Your reviews help others discover this recipe and help me keep creating more free recipes for you. Snap a photo and tag me on social media @aheadofthyme too.
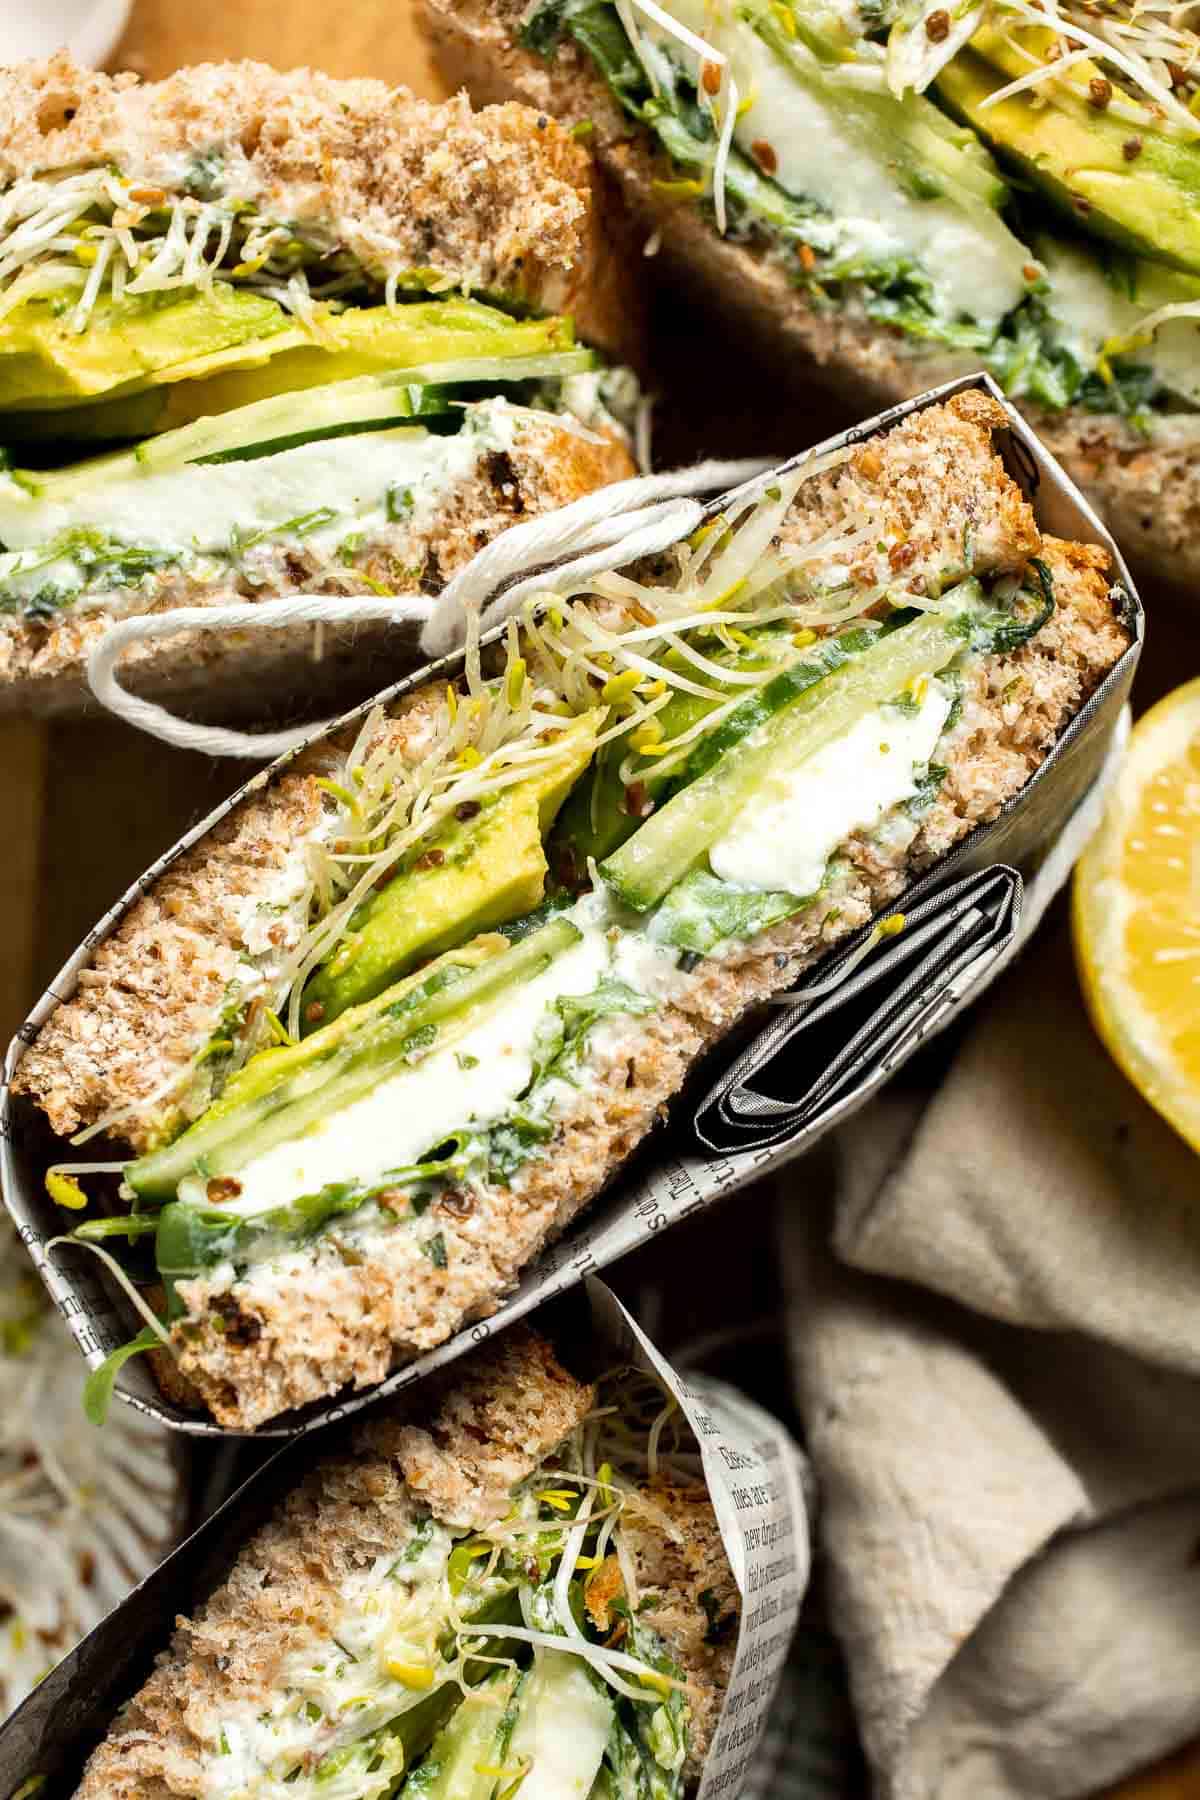
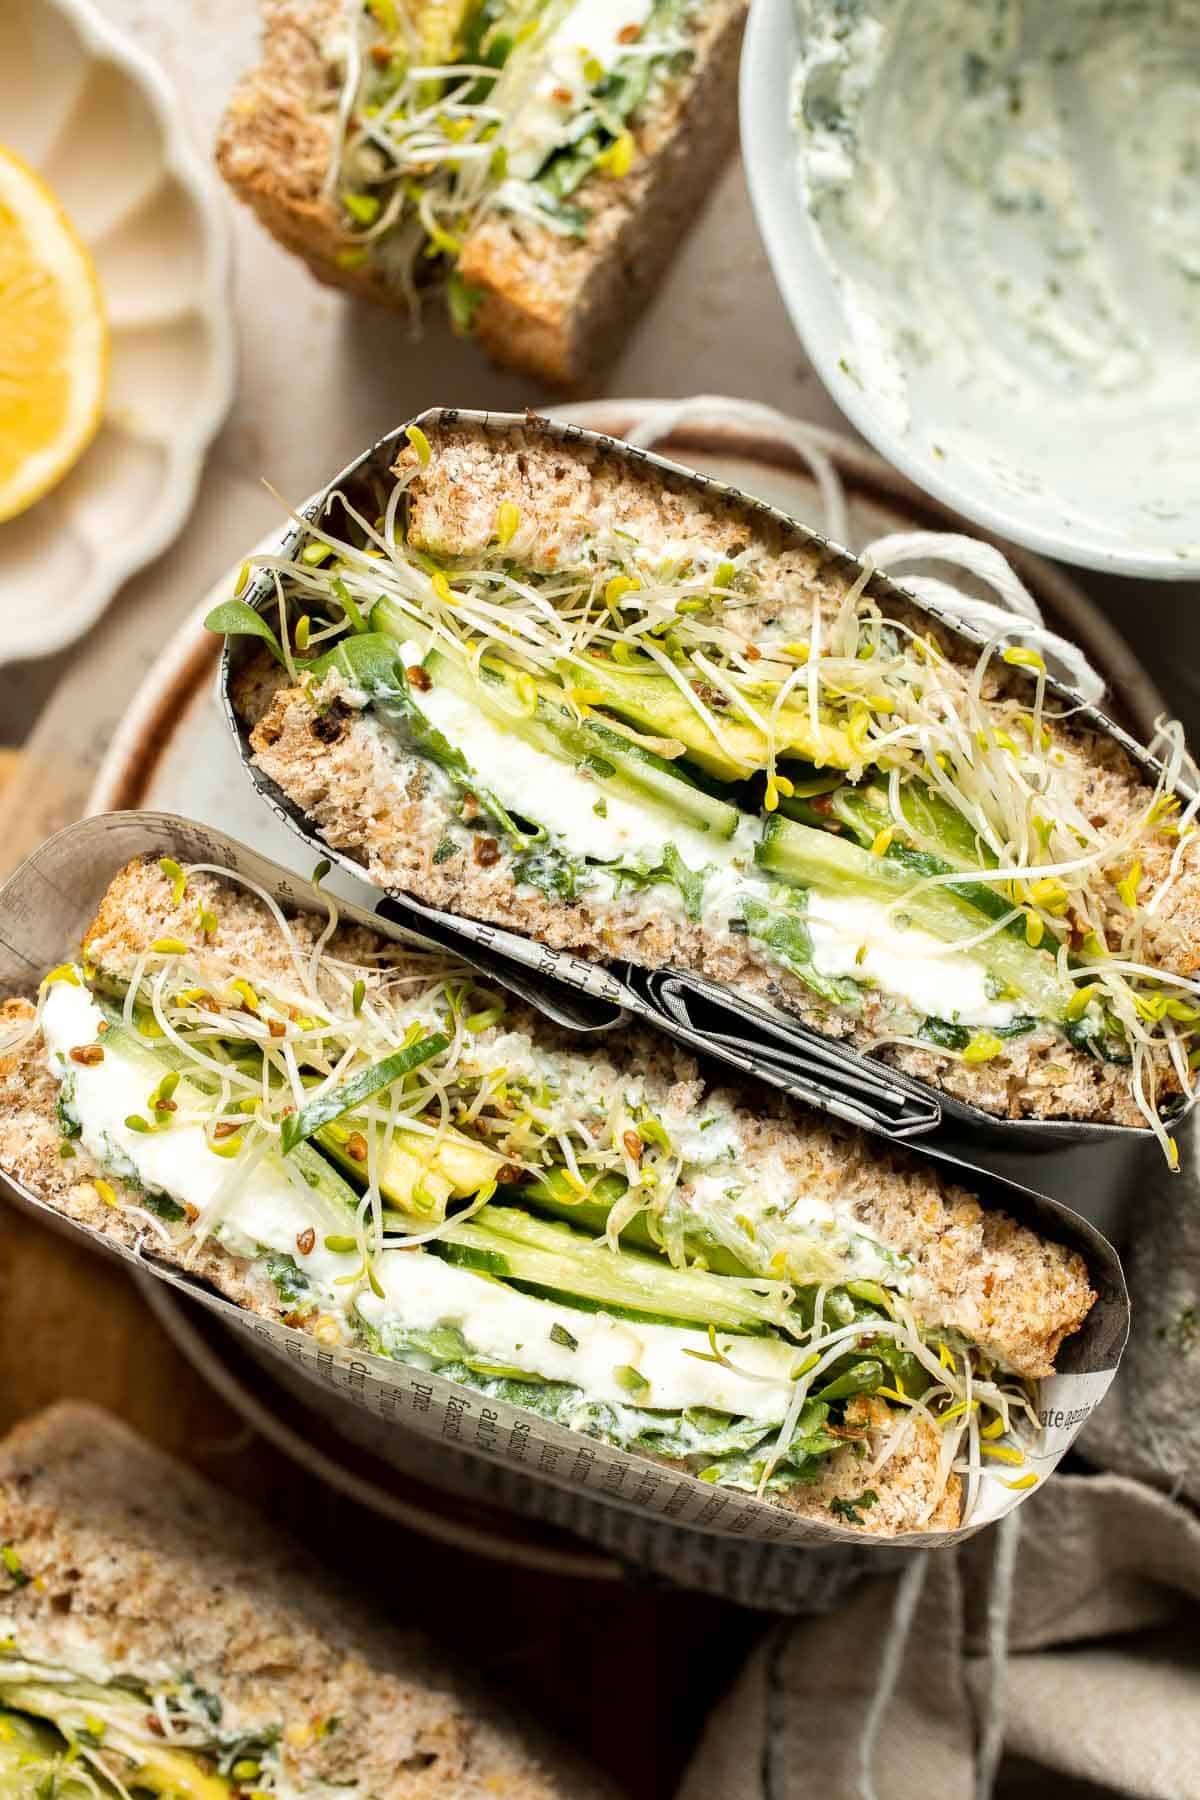
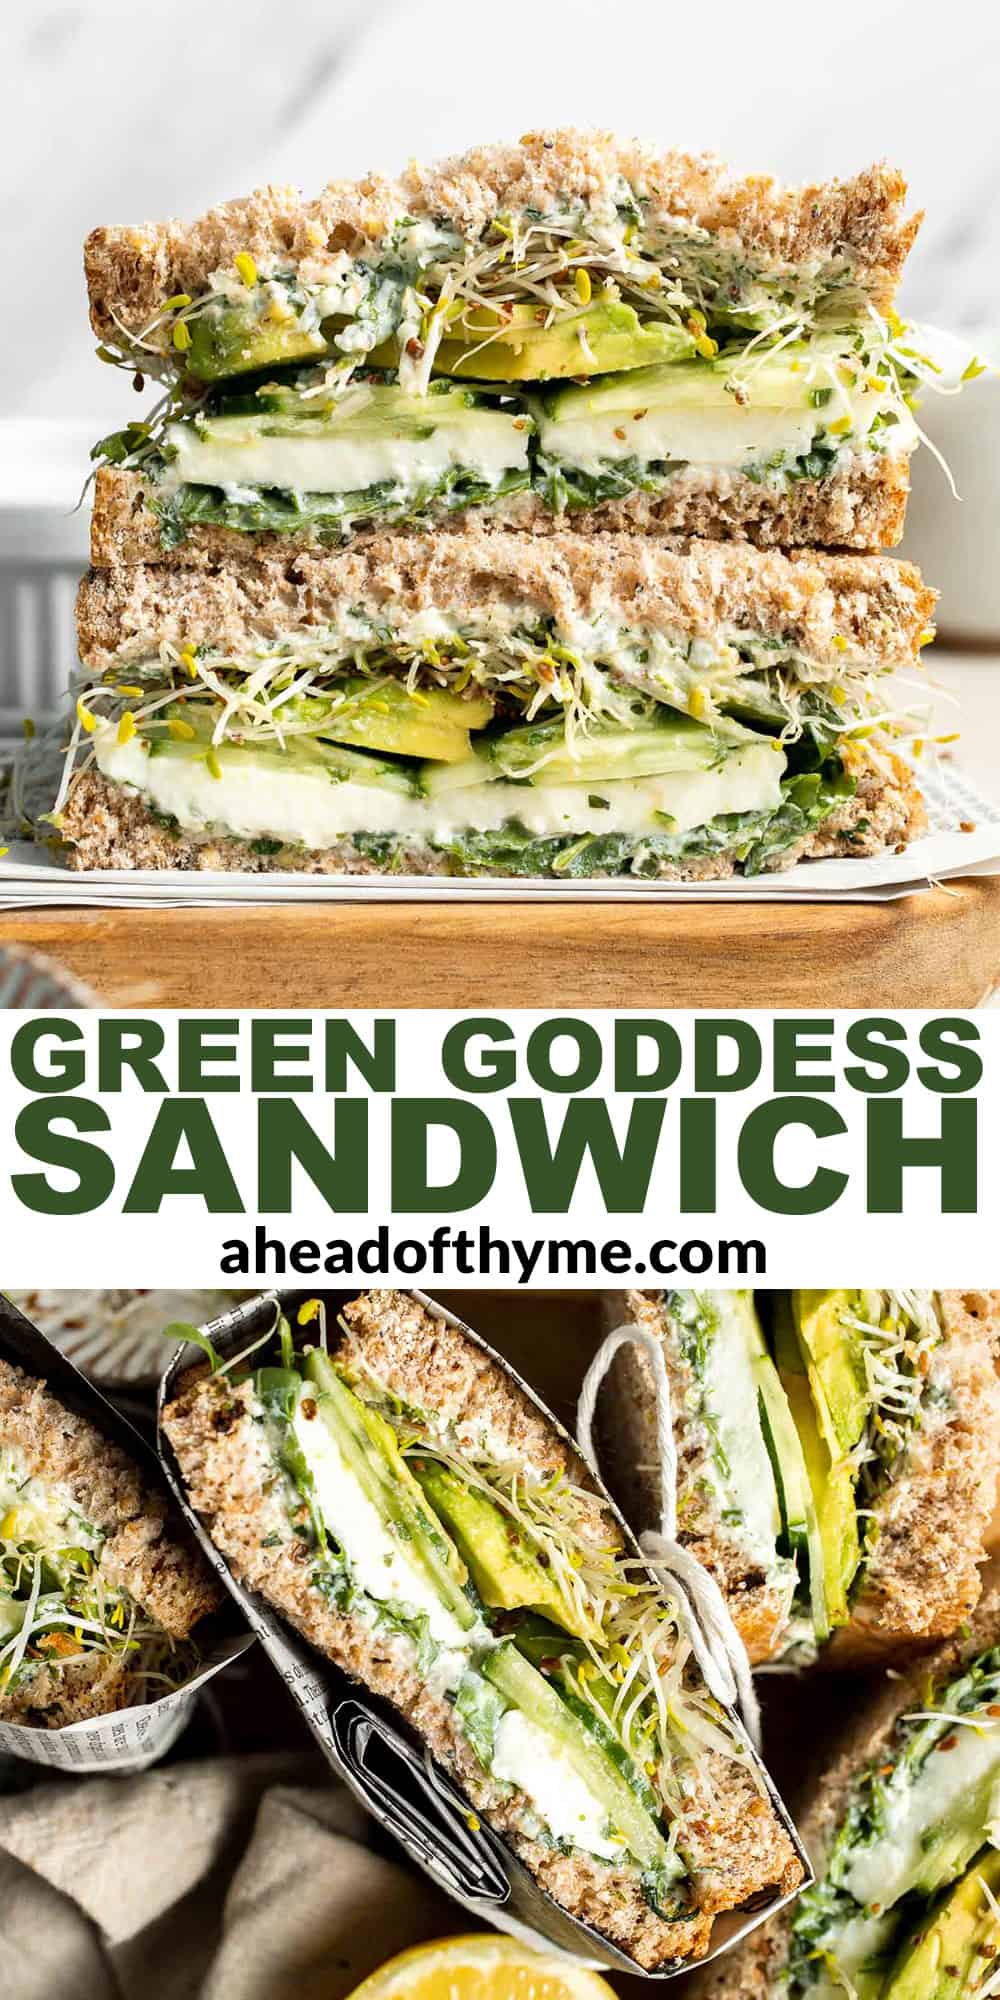
Green Goddess Sandwich
This Green Goddess Sandwich is a fresh and vibrant twist on a classic veggie sandwich. Creamy herb-packed sauce meets crisp veggies, creamy avocado, and mozzarella all layered between hearty slices of whole-wheat bread. Whether you're looking for a quick lunch, a picnic favorite, or a refreshing no-cook dinner, this fancy cucumber sandwich delivers big on taste and feel-good fuel.
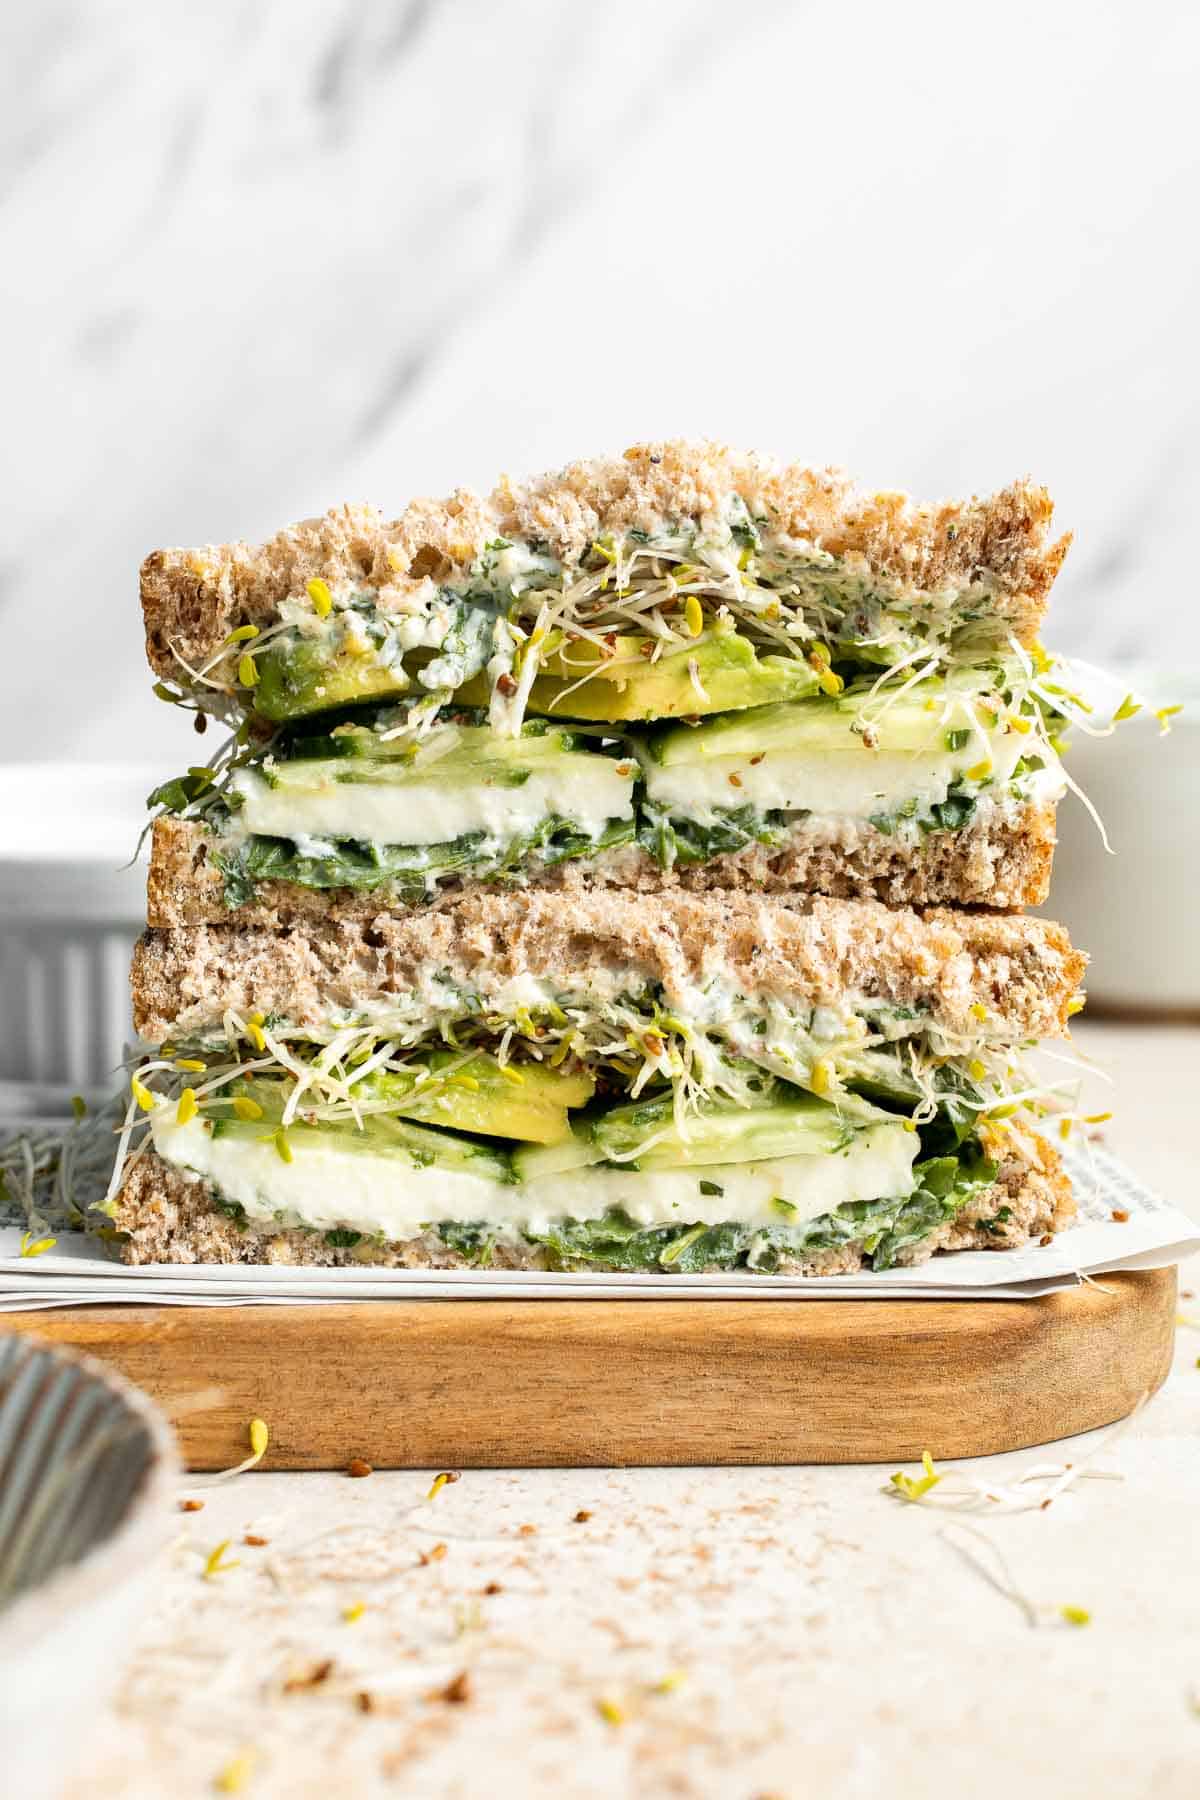
What sets this sandwich apart is the bold, herbaceous green goddess sauce - it's creamy, zesty, and full of fresh flavor that ties everything together. The mix of crunchy and creamy textures in each bite makes it especially satisfying. Plus, it's easy to customize and quick to prepare, making it a go-to for both busy weekdays and lazy weekend lunches. If you are craving a veggie-packed meal with tons of flavor but without any complicated prep, then this is for you!
Why You'll Love this Green Goddess Sandwich Recipe
- Fresh, herb-packed flavor: The green goddess sauce is the star of this cucumber sandwich. With a blend of Greek yogurt, mayonnaise, lemon zest, garlic, and fresh herbs, this sauce is bright and tangy, giving the sandwich a refreshing, herbaceous flavor that ties all the ingredients together.
- Quick and easy to make: In just about 10 minutes of prep, you'll have a delicious veggie sandwich ready to enjoy. The green goddess sauce comes together in no time, and assembling the sandwich is as simple as layering your ingredients. It's a quick, no-fuss lunch option for busy days.
- Healthy and nourishing. This sandwich is packed with nutritious ingredients that provide healthy fats, fiber, and protein. The avocado, Greek yogurt, and olive oil are rich in healthy fats, while the veggies offer vitamins, minerals, and antioxidants. It's a guilt-free meal that will keep you feeling satisfied and energized throughout the day.
- Customizable ingredients: You can easily make this sandwich your own by swapping in different ingredients. Use your favorite greens like spinach or kale instead of arugula, or change up the bread for a gluten-free option. The green goddess sauce is also versatile, so you can tweak the ingredients to suit your taste.
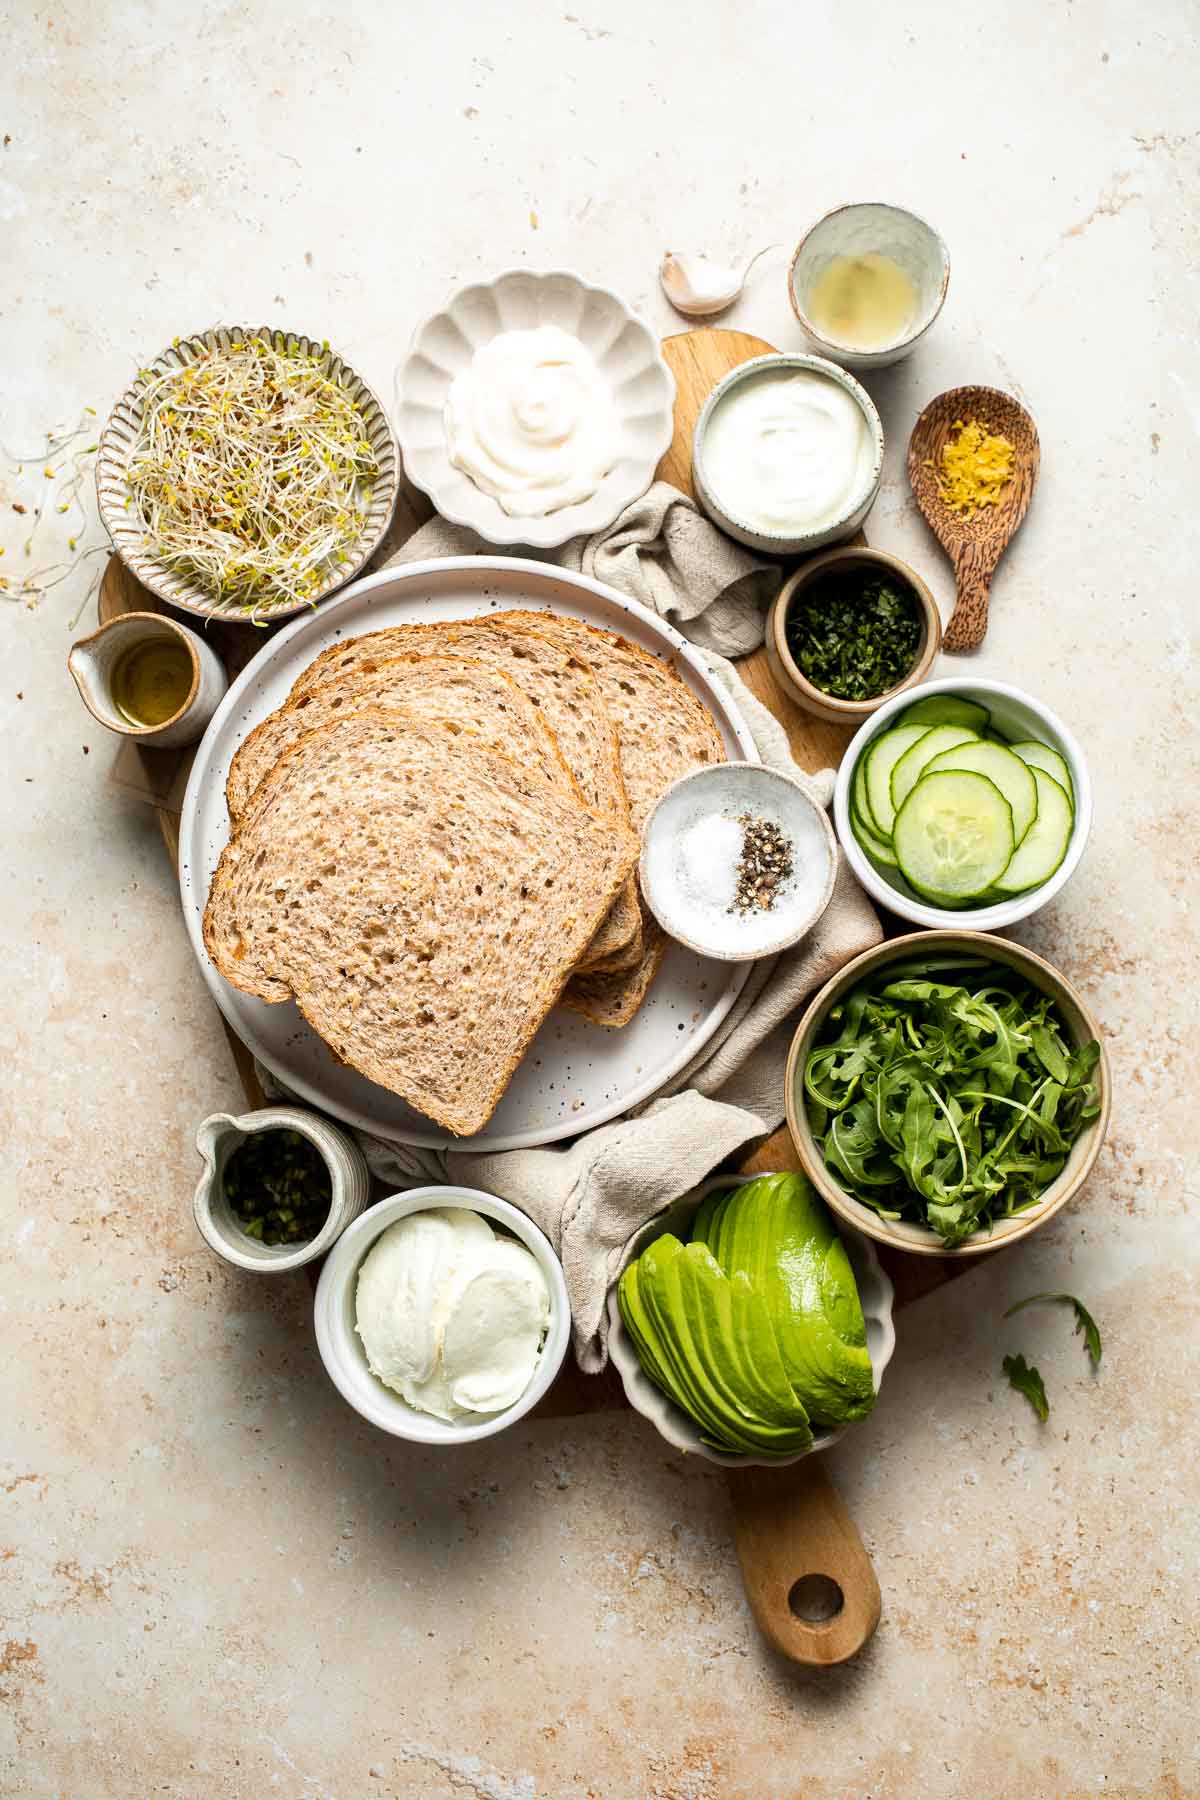
Ingredient Notes
To make this delicious Green Goddess Sandwich, you will need the following ingredients (full measurements in recipe card below):
- sliced bread - use hearty bread that holds up well to the sauce and toppings.
Feel free to use whole wheat, sourdough, multigrain, baguettes, or your favorite sandwich bread. - arugula - adds a peppery bite and freshness to the sandwich. Watercress, baby spinach, or mixed greens can be used as a substitute.
- mozzarella cheese - you can use provolone or feta cheese for a different flavor profile.
- english cucumber - adds a crisp, refreshing crunch to the sandwich. You can substitute with pickled cucumbers or other crunchy vegetables like radishes.
- avocado - enhances the texture and adds richness to the sandwich. You can replace with hummus or a spread of your choice if you prefer a lighter option.
- alfalfa sprouts - adds a fresh, crunchy texture and a hint of earthiness. Other sprouts like clover or radish sprouts work just as well.
- greek yogurt - forms the base of the green goddess sauce, adding a creamy texture and a slight tang. You can substitute plain yogurt or sour cream for a similar tangy flavor.
- mayonnaise - contributes richness and creaminess to the sauce.
- garlic - enhances the depth of flavor in the sauce. You can use garlic powder as an alternative if fresh garlic is unavailable.
- chives - adds a mild, onion-like flavor to the sauce. Green onions or shallots can be used as an alternative.
- tarragon - provides a distinct, slightly sweet herbal note to the sauce. If you don't have tarragon, fresh dill or basil can be used instead.
- lemon zest and juice - brighten up the sauce with a fresh, zesty flavor. You can replace lemon with lime for a different citrus twist.
- olive oil - adds richness to the sauce and helps blend the ingredients together. Any neutral oil, like avocado oil, can be used in place of olive oil.
- salt and pepper - for seasoning the sauce and balancing the flavors.
You will also need a small bowl for mixing the sauce, a knife for slicing the vegetables, and a spoon for spreading the sauce.
How to Make the Best Green Goddess Sandwich
- Make sauce. In a small mixing bowl, add yogurt, mayonnaise, garlic, chives, lemon zest and juice, olive oil, salt, and pepper. Whisk to combine.


- Spread. Spread 2 tablespoons of the yogurt-mayo sauce on each slice of bread.


- Assemble. Take 2 of the bread slices and top each of them with half of the arugula, mozzarella slices, cucumber, and avocado. Divide the alfalfa sprouts amongst the 2 slices as well and add on top of the avocado. Take the 2 remaining bread slices and place them on top (spread side down) and close the sandwiches.


- Slice. Cut the sandwiches in half and serve immediately.


Recipe Variations
- Add protein. Add slices of roasted chicken, turkey, or smoked salmon for a protein boost.
- Go vegan. Use vegan mayo and swap the mozzarella cheese for a plant-based cheese alternative. This would make the sandwich completely dairy-free while still being creamy and flavorful.
- Add pickles. For an extra zing, layer some pickles or pickled red onions inside the sandwich.
- Make it spicy. Add a few dashes of hot sauce or slices of jalapeño to the sandwich for a spicy kick.
- Add roasted veggies. For a heartier version, add roasted vegetables like sweet potatoes, bell peppers, or zucchini to the sandwich.
How to Serve
These green goddess sandwiches are delicious served on its own for a quick lunch or light dinner, or paired with some of my favorite sides including:
Recipe Tips and Tricks
- Use ripe avocados. Make sure your avocados are ripe for the best texture and flavor. A ripe avocado will be soft to the touch but not mushy. If your avocado isn't ripe, try placing it in a brown paper bag for a couple of days to speed up the ripening process.
- Make the sauce ahead of time. The green goddess sauce can be made in advance and stored in the fridge for up to three days. This saves time when assembling the sandwiches, and the flavors will develop even more after sitting in the fridge for a while.
- Toast the bread. For extra flavor and texture, toast the bread lightly before spreading the green goddess sauce on it. This adds a bit of crunch and warmth to the sandwich, making each bite even more satisfying.
- Use fresh herbs. Fresh herbs are key to getting that bright, zesty flavor in the green goddess sauce. If you're using dried herbs, use about ⅓ of the amount called for with fresh herbs.
Storing and Freezing Instructions
How to Store
Store the assembled sandwich in an airtight container in the fridge for up to 24 hours. The bread will soften a bit, but it will still be tasty. If you want to store the green goddess sauce separately, keep it in an airtight container in the fridge for up to 3 days.
How to Freeze
Freezing the sandwich is not recommended due to the freshness of the vegetables and the texture of the avocado. However, you can freeze the green goddess sauce for up to 1 month, then thaw and use it when ready to make the sandwich.
FAQ
The name "Green Goddess" comes from the vibrant green color of the sauce, which is made with fresh herbs like chives, tarragon, and lemon. The sauce was originally created at the Palace Hotel in San Francisco in the 1920s and was named after a popular play at the time called The Green Goddess. The sauce's name has since become iconic, associated with fresh, herbaceous flavors.
Yes, the green goddess sauce can be made ahead of time and stored in the fridge for up to 3 days. This actually allows the flavors to meld together and develop even more. Just be sure to store it in an airtight container to preserve its freshness. When ready to use, simply spread it on the bread for your sandwiches.
Yes, this sandwich can easily be made vegan by swapping out the mayo and mozzarella cheese for plant-based alternatives. You can use vegan mayo and vegan mozzarella or other plant-based cheese options that melt well (or leave out the cheese completely). The green goddess sauce will still be creamy and flavorful, and the sandwich will be just as satisfying.
More Vegetarian Sandwich Recipes
- Caprese Sandwich
- Vegan Hummus Wrap
- Pita Grilled Cheese
- Avocado Egg Salad
- Roasted Broccoli Grilled Cheese Sandwich
- Breakfast Bagel
Tried this recipe?
I'd love to hear what you think! Leave a comment and rating below to share your feedback. Your reviews help others discover this recipe and help me keep creating more free recipes for you. Snap a photo and tag me on social media @aheadofthyme too.
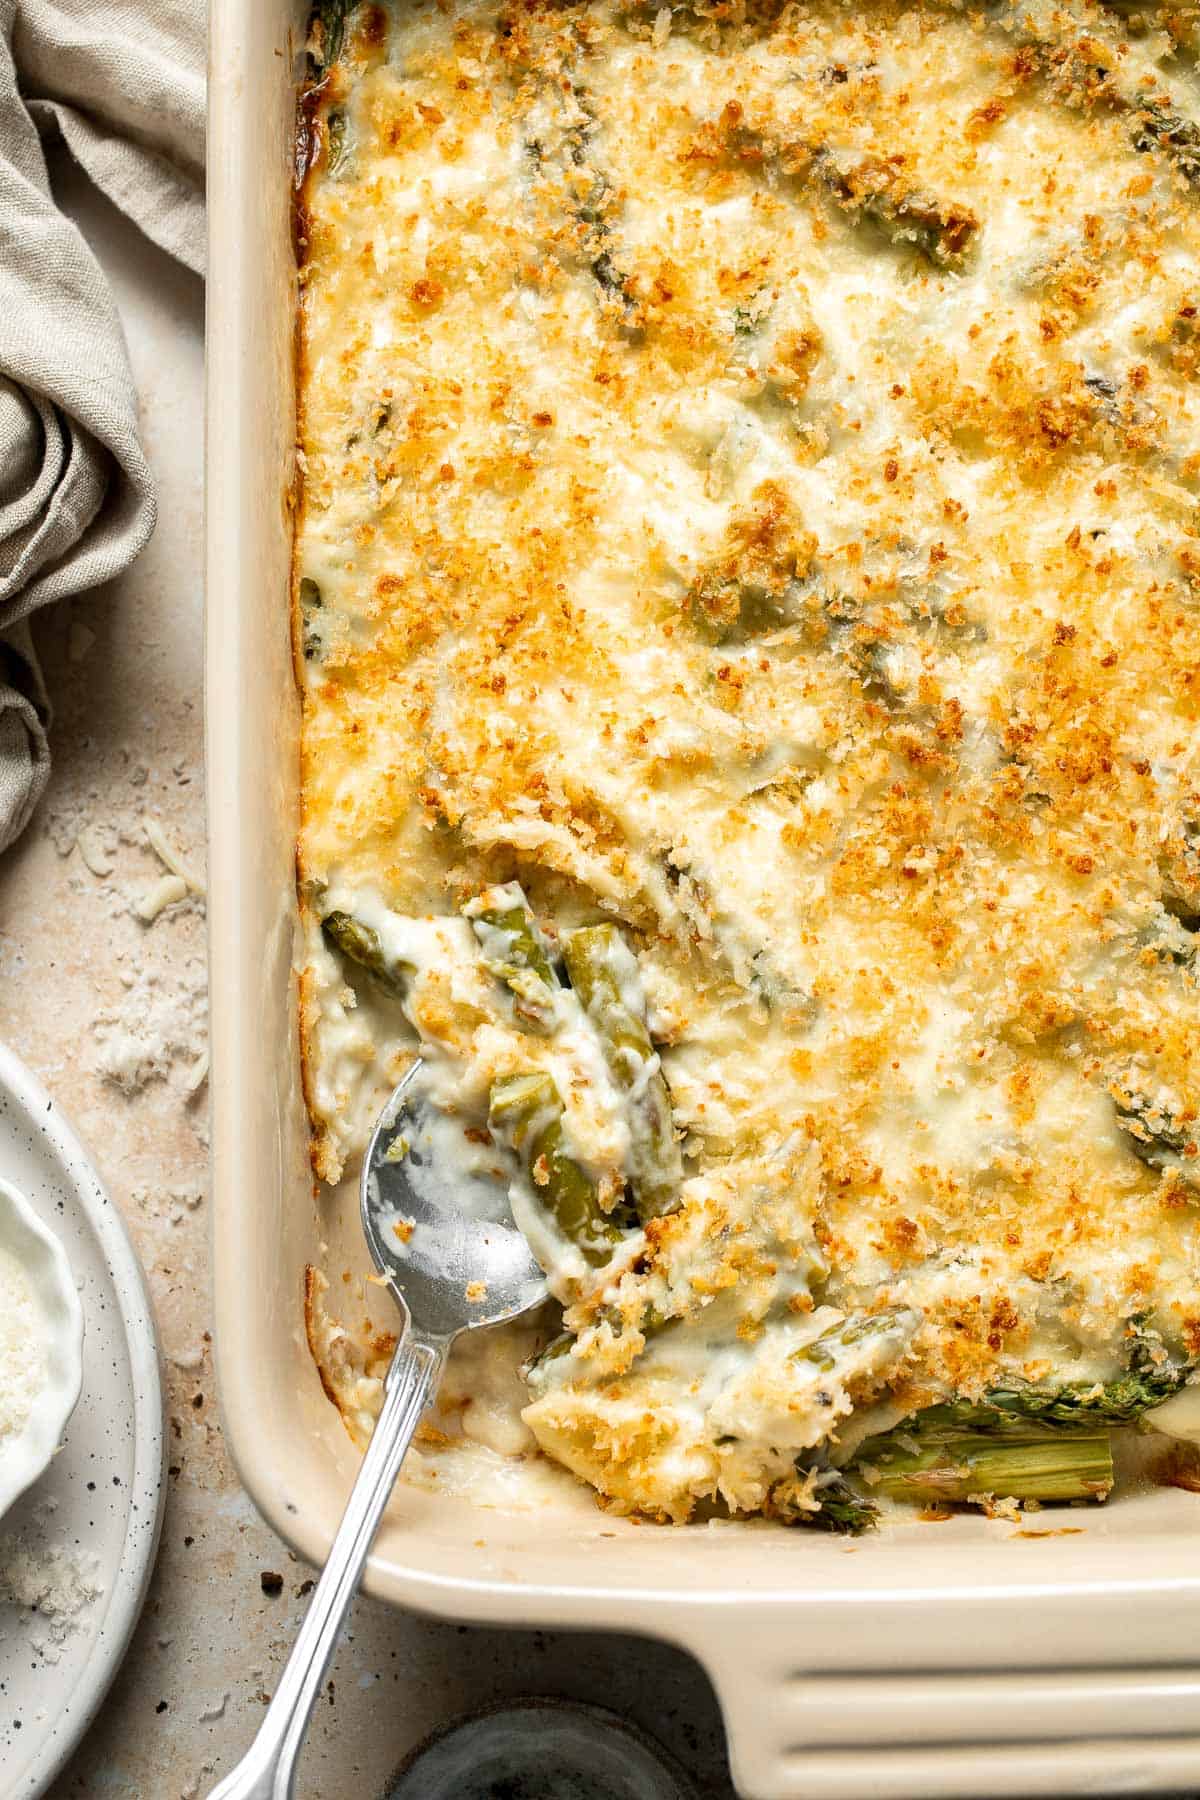
Asparagus Casserole
Asparagus Casserole is creamy, cheesy, and baked to bubbly golden perfection. Featuring tender-crisp asparagus in a rich, garlicky sauce topped with a crispy panko and parmesan crust, this crowd-pleasing dish is comfort food at its finest. This spring casserole is a delicious way to highlight fresh asparagus - the perfect spring side dish or a cozy vegetarian main.
While this recipe takes a little more effort than a simple steamed vegetable side, it still comes together very quickly with about 10 minutes of prep before it's ready to pop into the oven. It's rich, creamy, and full of cheesy goodness, making it a true comfort dish without hours in the kitchen. This casserole is perfect for holidays, potlucks, or as a hearty weeknight side that the whole family will love - and it's even better with fresh, in-season asparagus in the spring.
Why You'll Love this Asparagus Casserole Recipe
- Creamy and comforting. The rich sauce is made from butter, garlic, flour, milk, and just the right amount of mayonnaise for a velvety base. Combined with mozzarella cheese, it coats each piece of asparagus with a luscious, savory flavor that feels indulgent without being too heavy. It's the kind of cozy dish that satisfies every craving.
- Perfect texture balance. The asparagus stays tender-crisp, the creamy sauce surrounds it without making the dish soggy, and the crunchy panko topping adds the ideal contrast in every bite. It's the ultimate blend of creamy, crispy, and fresh.
- Great for gatherings. This casserole serves beautifully and can be doubled for larger groups. It's easy to assemble ahead of time and finish in the oven when guests arrive, making it perfect for holidays, brunches, and dinner parties. Everyone will want seconds this Easter.
- Versatile and customizable. You can adjust this recipe to suit your taste or pantry: use other cheeses, swap in different veggies, or add protein like chicken or ham. It's flexible and still delivers that comforting, creamy goodness every time.

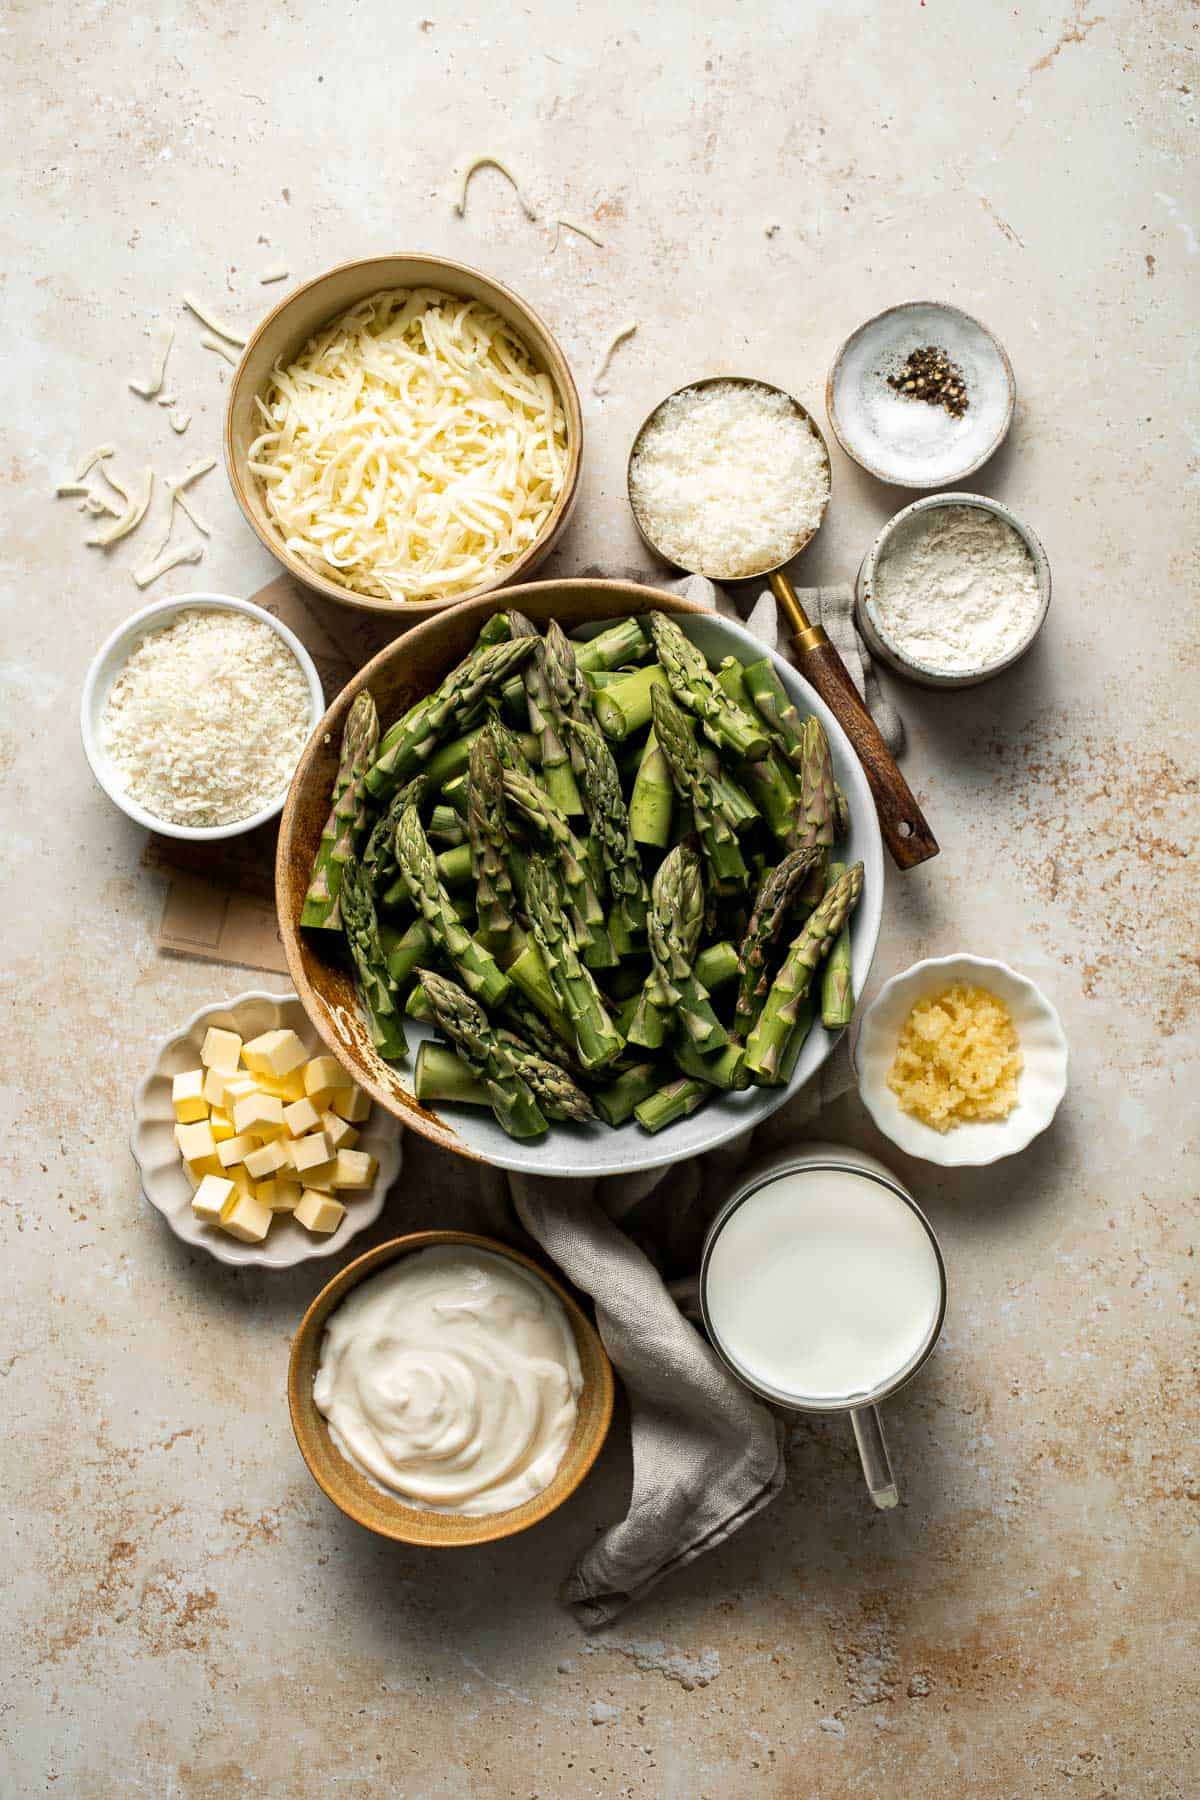
Ingredient Notes
To make this cheesy Asparagus Casserole, you will need the following ingredients (full measurements in recipe card below):
- asparagus - fresh asparagus is the star of the dish, bringing bright flavor and crisp texture. You can use frozen asparagus instead, but fresh yields the best results.
- butter - forms the base of the sauce and adds richness. Olive oil can also work.
- garlic - adds depth and savory flavor to the cream sauce. Garlic powder can be used if fresh isn't available, though fresh gives the best flavor.
- all-purpose flour - helps thicken the sauce into a creamy consistency. Cornstarch can be substituted (use half the amount), but the texture may vary slightly.
- whole milk - gives the sauce its smooth, creamy body. 2% milk works too, but avoid nonfat milk for the best texture.
- mayonnaise - adds a touch of tang and helps emulsify the sauce. Sour cream or Greek yogurt can be used for a similar richness with a slightly different flavor.
- mozzarella cheese - melts smoothly into the sauce and gives a gooey, cheesy pull. Other melty cheeses like monterey jack or white cheddar also work well here.
- salt and pepper - enhances all the flavors in the dish.
- panko breadcrumbs - used for the crispy topping. Regular breadcrumbs can be used, but panko gives a crunchier finish.
- parmesan cheese - adds a salty, umami-rich topping that browns beautifully. Romano or asiago can also be used for a similar sharpness.
You will also need measuring cups and spoons, a large saucepan or skillet, a casserole dish (9x13-inch), and a small mixing bowl for the topping.
How to Make the Best Asparagus Casserole
- Saute garlic. In a large skillet, melt 3 tablespoons butter over medium-high heat until it starts to bubble, about 1 minute. Add garlic and sauté until fragrant, about 1 minute.


- Make roux. Stir in flour until evenly combined and cook for 1 minute.


- Add liquids. Slowly add the milk, stirring as you incorporate it into the roux. Whisk in the mayonnaise and bring the sauce to a simmer. Reduce heat to medium and keep stirring until just thickened.


- Add cheese. Turn off the heat and stir in the shredded cheese until melted and well combined, about 1 minute. Season with salt and pepper.


- Assemble. Arrange chopped asparagus in a 9x13-inch casserole dish and top with the cheese sauce.


- Make breadcrumb topping. Melt the remaining 1 tablespoon butter and place into a small mixing bowl. Add Panko breadcrumbs and Parmesan cheese and stir well until evenly combined.


- Add topping. Sprinkle on top of the casserole.
- Bake. Bake in a 375F preheated oven until the asparagus is tender and the breadcrumbs are golden brown and the cheese is bubbly, about 25- 30 minutes. Let cool for 5-10 minutes and serve warm.


Recipe Variations
- Add protein. Stir in chopped cooked chicken, crumbled bacon, or diced ham before baking to make this casserole more filling and suitable as a main course. These salty additions pair wonderfully with the creamy sauce and asparagus.
- Make it spicy. Add a pinch of crushed red pepper flakes or a dash of hot sauce to the cheese sauce for a subtle heat that balances the richness. You can also top with pepper jack instead of mozzarella for extra kick.
- Swap the veggie. Replace some or all of the asparagus with broccoli, green beans, or peas for a slightly different take. This is a great way to use up whatever's in the fridge while still enjoying a similar creamy base.
- Top with nuts. For a bit of crunch and elegance, add a sprinkle of chopped almonds, walnuts, or pecans to the breadcrumb topping before baking. It adds a nutty contrast that complements the creamy interior.
- Add mushrooms. Sautéed mushrooms mixed into the sauce add an earthy flavor and meaty texture that blends beautifully with the asparagus. This variation is especially great for mushroom lovers or when serving as a vegetarian main.
How to Serve
This Asparagus Casserole is a warm, comforting side dish that's perfect for Easter or springtime meals, holiday dinners like Thanksgiving or Christmas, brunch with eggs or baked goods, or a cozy weeknight dinner alongside a protein.
Some of our favorite mains and sides to pair this with for a complete meal are:
- Roasted Spatchcock Chicken (Butterflied Chicken)
- Slow Cooker Turkey Breast
- Roasted Pork Tenderloin
- Wild Rice Pilaf
- Quinoa
- Garlic Breadsticks
For more recipe ideas, see our 40 Best Easter Mains and Entrees.

Recipe Tips and Tricks
- Use room-temperature ingredients. Letting your milk and mayo sit out for a few minutes before adding them to the sauce helps everything blend more smoothly and prevents curdling or clumping.
- Don't overbake. Keep an eye on the casserole during the last 5-10 minutes. You want the topping golden and crisp, but not overly browned or dry. Overbaking can cause the sauce to separate and the asparagus to go limp.
- Broil. For crunchier topping, broil the casserole for 1-2 minutes at the end, keeping a close eye to prevent burning.
- Let rest. Let the casserole rest for 5-10 minutes after baking. This helps the sauce set slightly and makes it easier to serve neat portions.
- Make it ahead. You can prep the casserole a day in advance, refrigerate it covered, and bake just before serving. Let it sit at room temperature for 20 minutes before baking to ensure even cooking.
Storing and Freezing Instructions
How to Store
Store any leftovers in an airtight container in the fridge for up to 3 days. The topping will lose a bit of crunch but can be reheated to restore some texture.
How to Reheat
Reheat individual portions in the microwave or reheat the entire casserole in a 350°F (175°C) oven until hot throughout, about 20 minutes. To regain the crunchy topping, consider adding a fresh sprinkle of panko and parmesan before reheating in the oven.
How to Freeze
This casserole can be frozen before baking. Assemble everything except the topping, wrap tightly, and freeze for up to 2 months. Thaw overnight in the fridge, add the topping, and bake as directed.
FAQ
While canned asparagus can technically be used, it has a much softer texture and milder flavor than fresh. This may result in a less satisfying dish, especially in terms of texture. If you do use canned, drain it very well and skip the blanching step. However, for the best results-especially for presentation and flavor-fresh asparagus is highly recommended.
Yes! To make this asparagus casserole gluten-free, simply substitute the all-purpose flour with a 1:1 gluten-free flour blend and use gluten-free panko breadcrumbs. Be sure to double-check that all your other ingredients, especially the mayonnaise and cheeses, are certified gluten-free. The texture will be slightly different, but still delicious and satisfying.
Absolutely. This casserole is great for prepping in advance. Assemble it completely except for the topping, cover, and refrigerate for up to 24 hours. When ready to bake, let it sit at room temperature for 20 minutes, then add the panko-parmesan topping and bake as directed. This makes it perfect for holiday meals or busy weeknights when you want a head start.
More Asparagus Recipes
- How to Cook Asparagus
- Asparagus Pasta
- Asparagus Frittata
- Sautéed Asparagus
- Asparagus Tart
- Cheesy Roasted Asparagus
Tried this recipe?
I'd love to hear what you think! Leave a comment and rating below to share your feedback. Your reviews help others discover this recipe and help me keep creating more free recipes for you. Snap a photo and tag me on social media @aheadofthyme too.

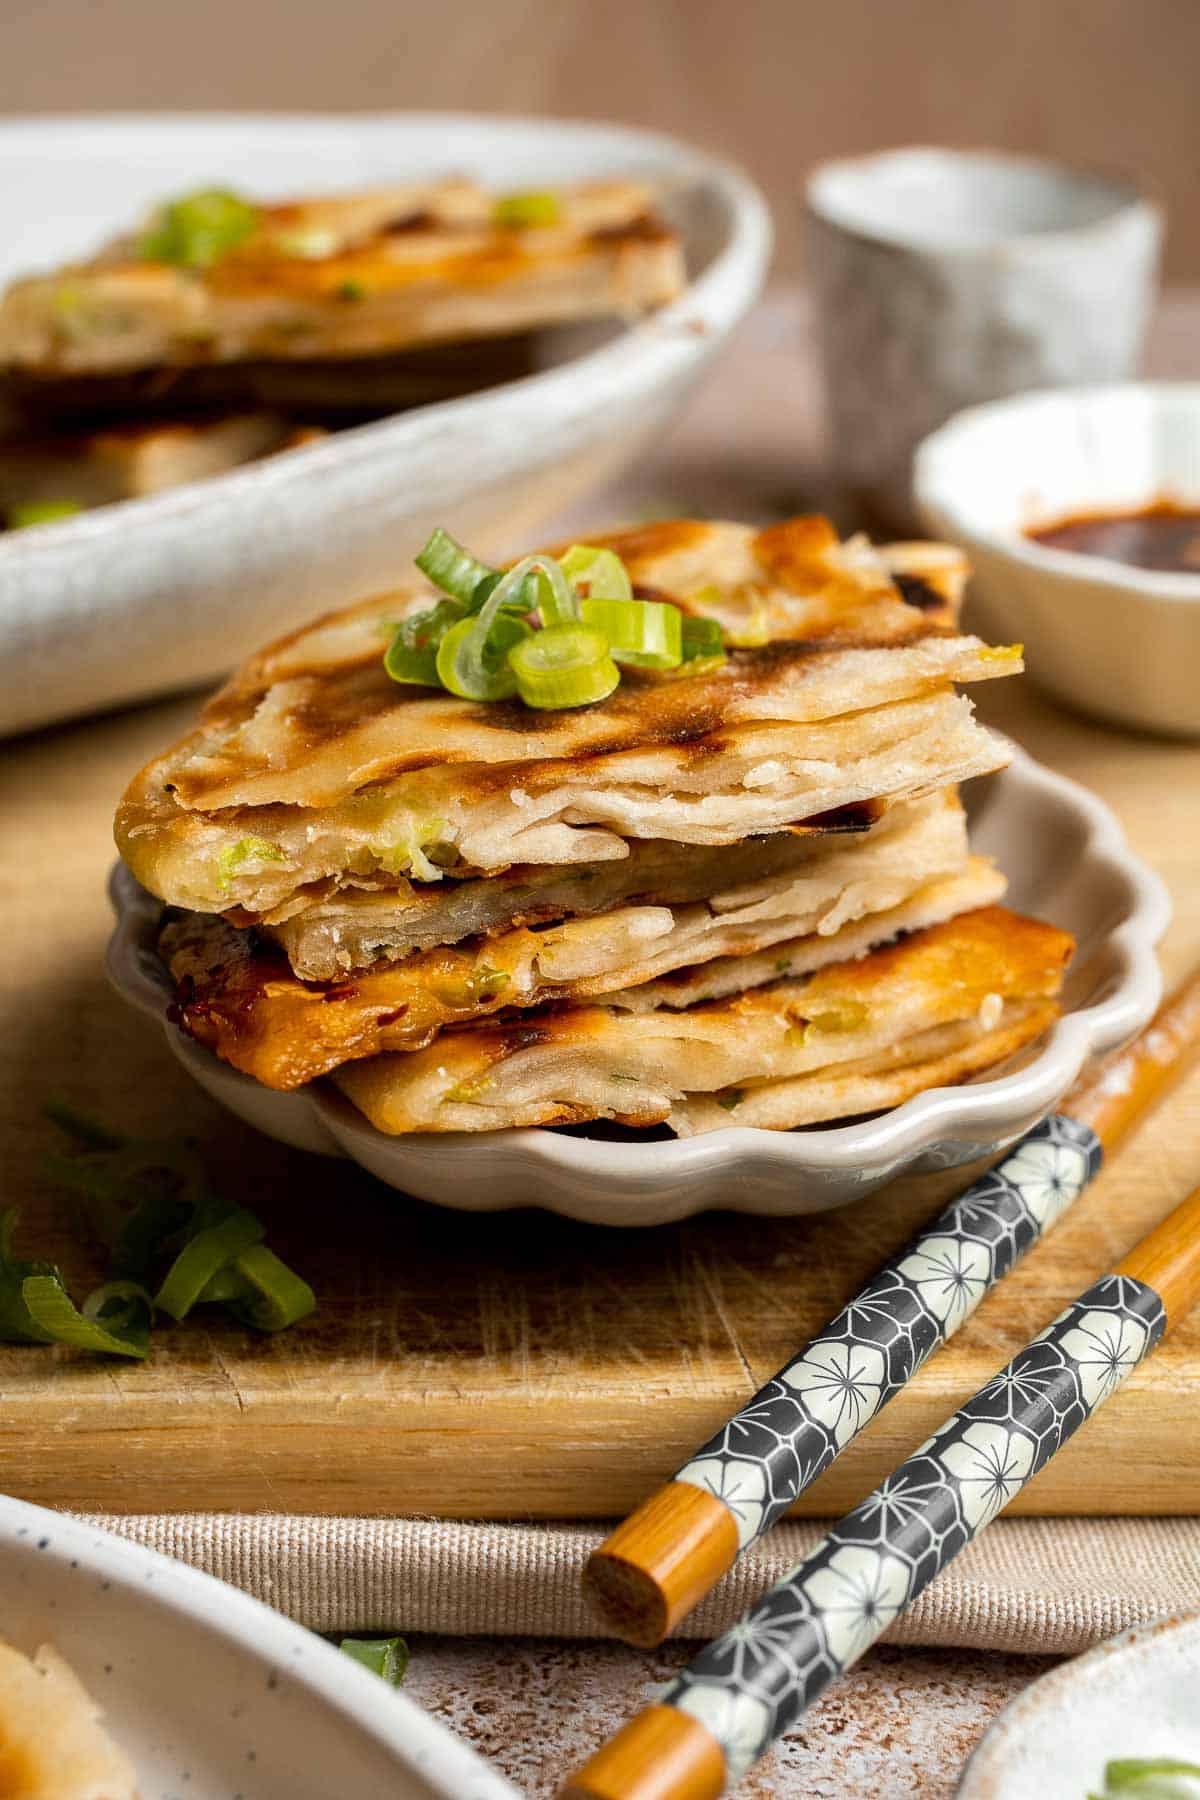
Chinese Scallion Pancakes
Chinese Scallion Pancakes are crispy, flaky, and packed with savory flavor in every bite. Made with just a handful of pantry ingredients and fresh scallions, these golden pan-fried pancakes are a beloved street food staple that's surprisingly easy to recreate at home. The dough is layered with scallions and oil, rolled up, and flattened to create irresistibly crisp, chewy layers that make every bite unforgettable.
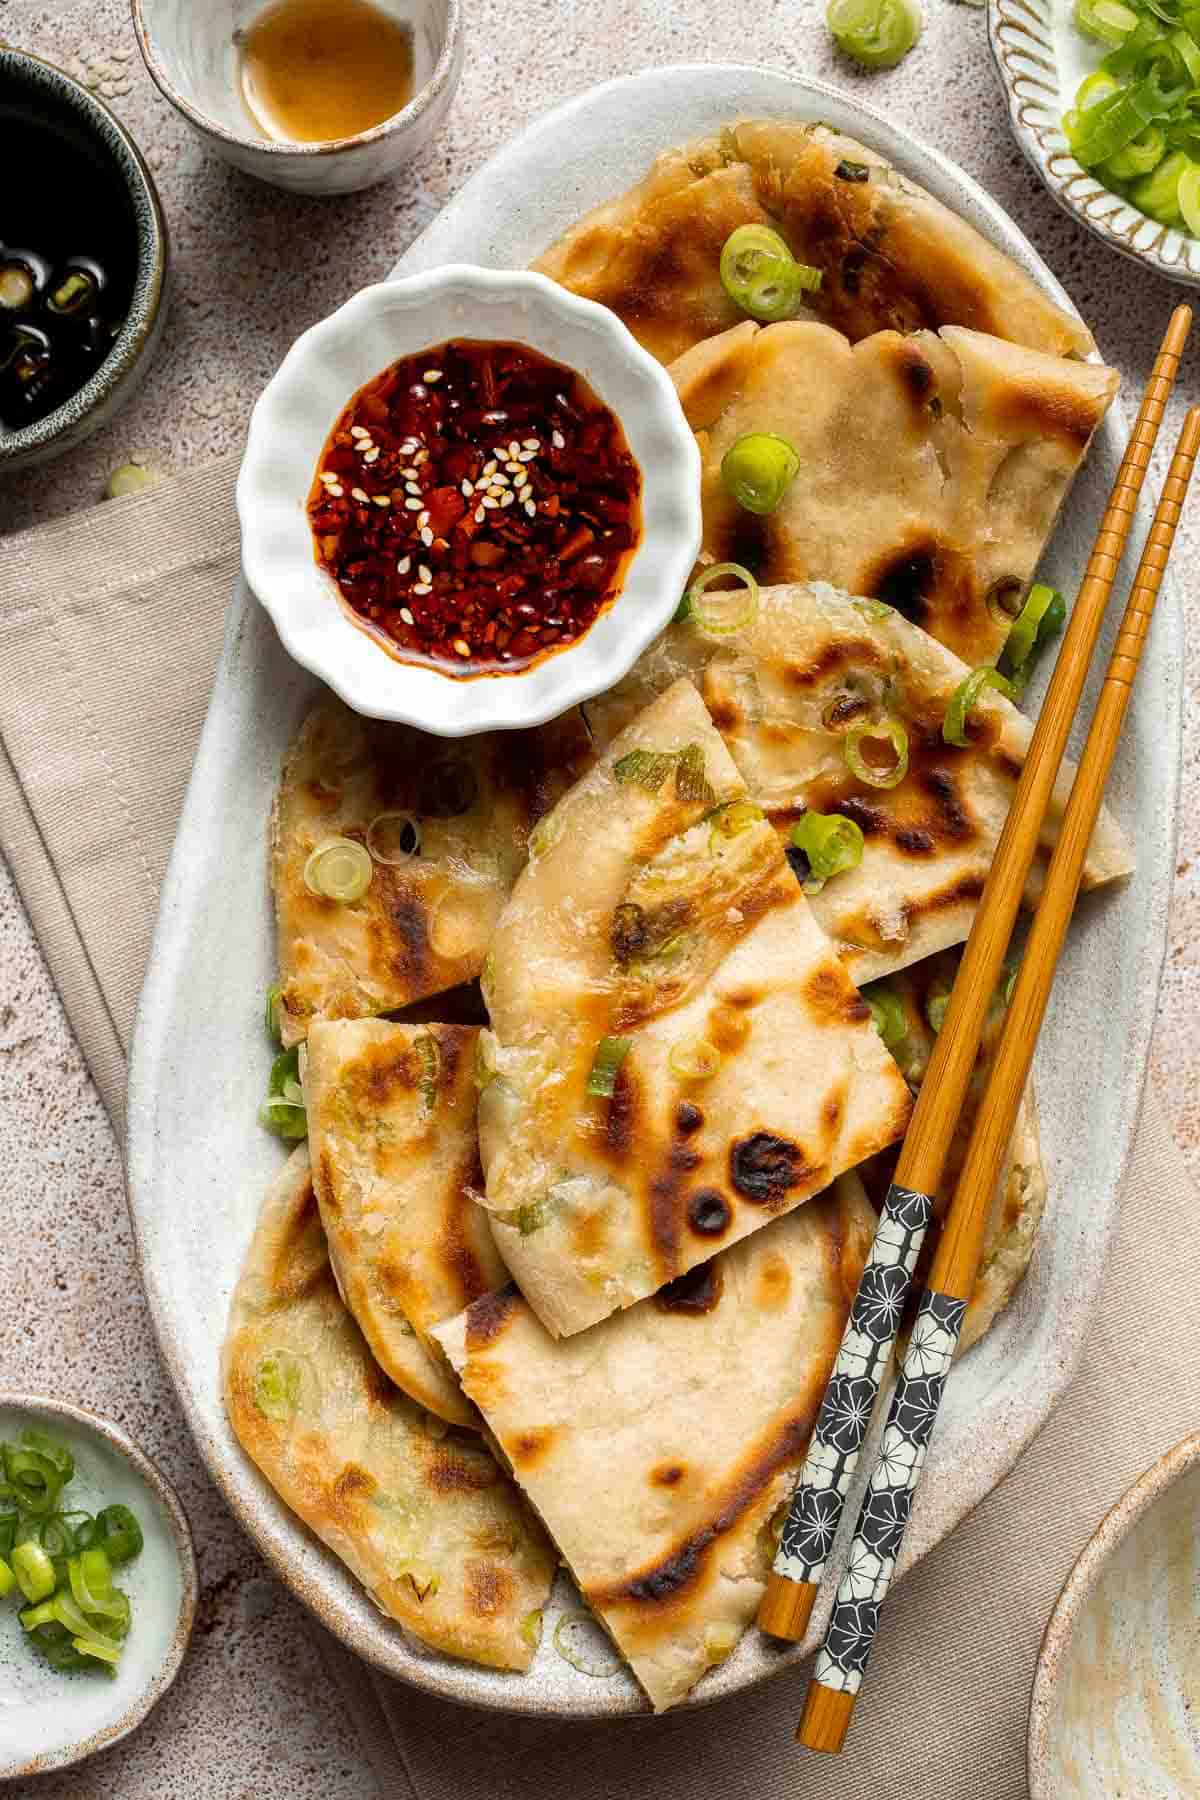
What makes scallion pancakes so special is the contrast between the delicate crispness on the outside and the chewy, flavorful layers inside. Plus, this recipe comes together with minimal ingredients and a few simple steps. Although it takes some time to prep, the results are well worth the effort. You'll be rewarded with golden, flaky pancakes that rival any takeout version. Serve them with a dipping sauce for a simple appetizer, snack, or side dish.
Why You'll Love these Chinese Scallion Pancakes
- Crispy, flaky layers. Rolling and coiling the dough creates delicate layers that crisp up beautifully when pan-fried. Each bite delivers that golden, savory crunch that makes scallion pancakes so addictive. The texture is everything you want in a flatbread - crisp edges with a tender, chewy middle.
- Simple pantry ingredients. All you need are flour, water, salt, oil, and scallions - ingredients you probably already have on hand. No special equipment or trips to the store are required. This makes it a budget-friendly and accessible dish you can whip up anytime.
- Customizable flavor. Use sesame oil for extra nuttiness or add spices like five-spice powder or chili flakes for a little kick. You can make these pancakes your own while still enjoying the traditional flakiness and flavor of the original.
- Fun to make. The dough-rolling and shaping process is a hands-on and enjoyable part of this recipe. It's a great kitchen project to do with kids or friends, and the end result is totally worth the effort.
Ingredient Notes
To make these delicious Chinese scallion pancakes, you will need the following ingredients (full measurements in recipe card below):
- all-purpose flour - forms the base of the dough and creates a chewy texture. Bread flour can also be used for a slightly chewier pancake.
- salt - seasons the dough and enhances overall flavor.
- boiling water - helps gelatinize the flour, making the dough softer and easier to work with.
- oil - sesame oil adds flavor and helps create the flaky layers when rolling the dough. Avocado oil, vegetable oil, or olive oil can be used if needed, but sesame oil offers the most traditional taste.
- fresh scallions or green onions - provide the signature sharp, savory bite and vibrant green color. Chives or leeks can be used instead, if desired.
You will also need measuring cups and spoons, a rolling pin, mixing bowl, and a nonstick or cast iron skillet for pan-frying.

How to Make the Best Chinese Scallion Pancakes
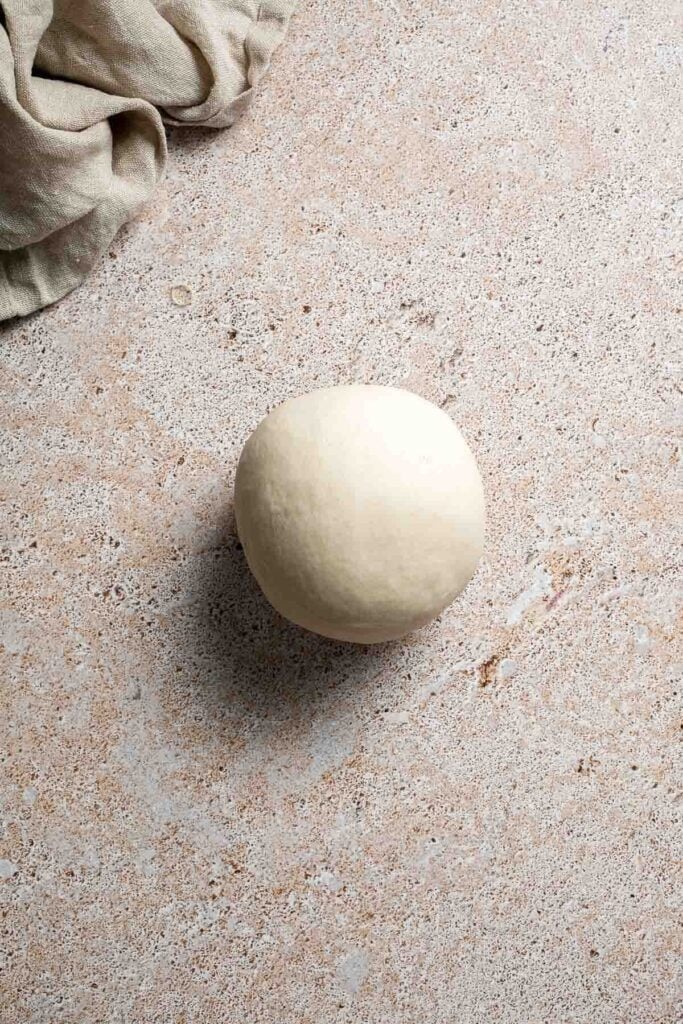
First, prepare the dough.
- Combine ingredients. In a large mixing bowl, mix together flour and salt. Slowly add in boiling water and stir well with a silicone spatula to combine, until there are no dry flour particles visible in the bowl. Make sure to scrape down the sides of the bowl.


- Rest. Cover and let the mixture rest for 10 minutes. (Adding hot boiling water in flour is a technique known as flour scalding, which breaks down starch in the flour and makes the dough softer and stretchier. It also makes the dough much easier to knead.)
- Knead. Transfer the dough onto a clean and lightly greased surface. Knead the dough for 5-10 minutes until the dough is smooth and not sticky at all.

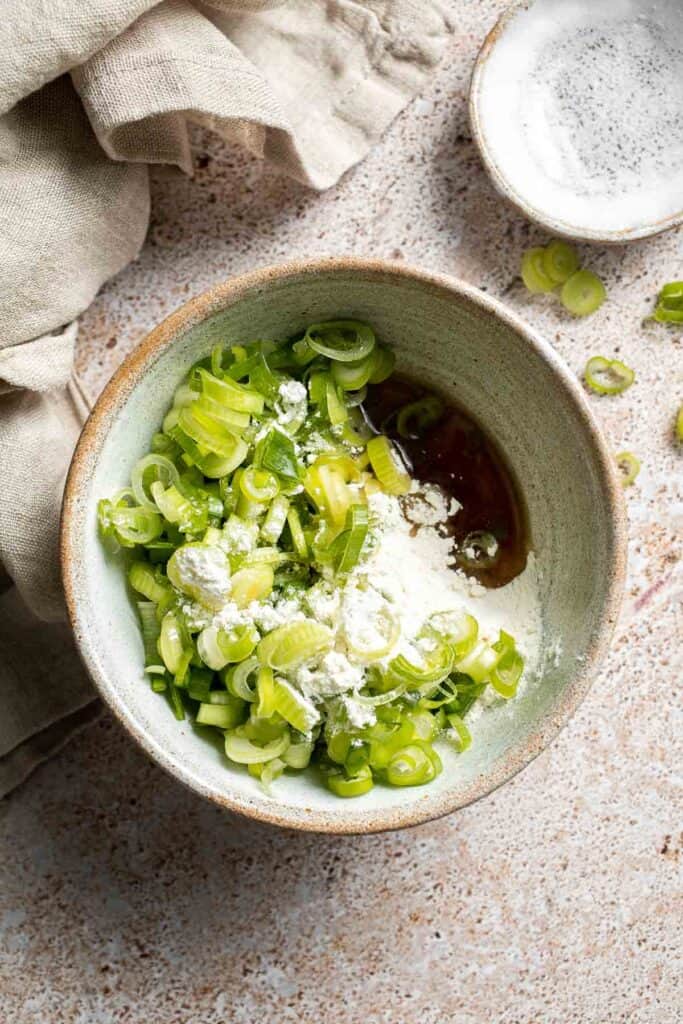
Now, make the filling.
In a medium mixing bowl, mix together avocado oil, flour, salt and green onion until it turns into a smooth paste. Set it aside.

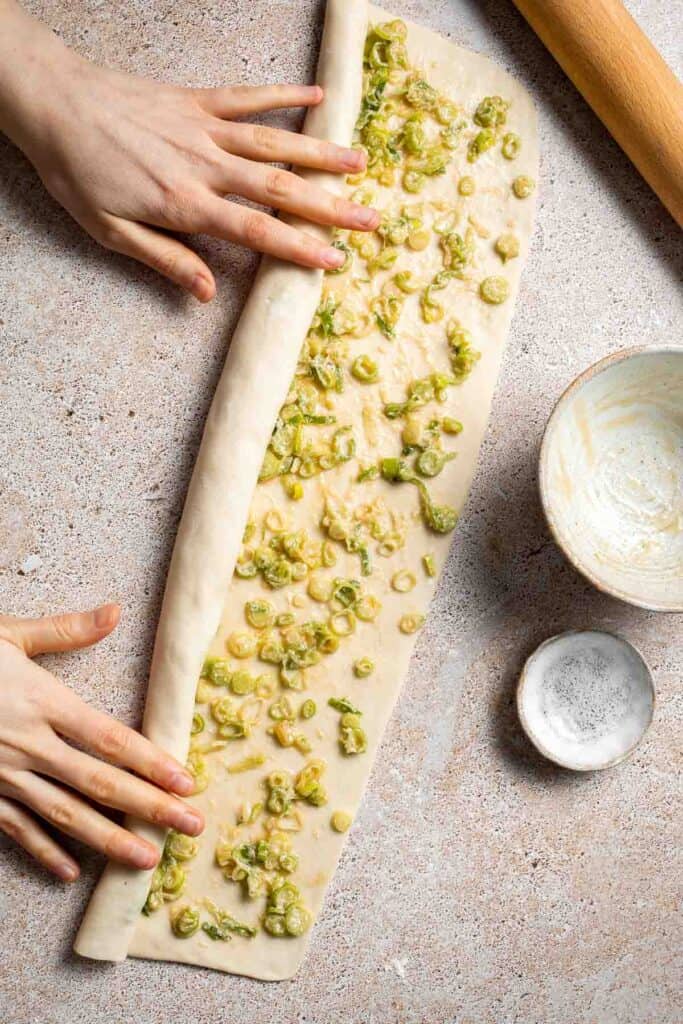
Let's shape the pancake.
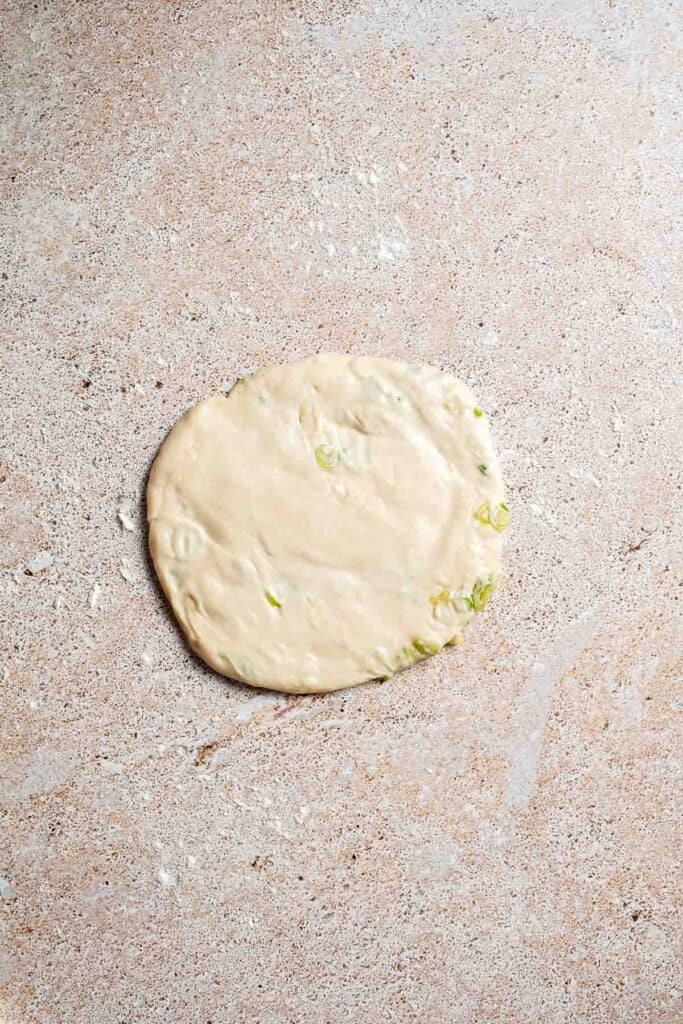
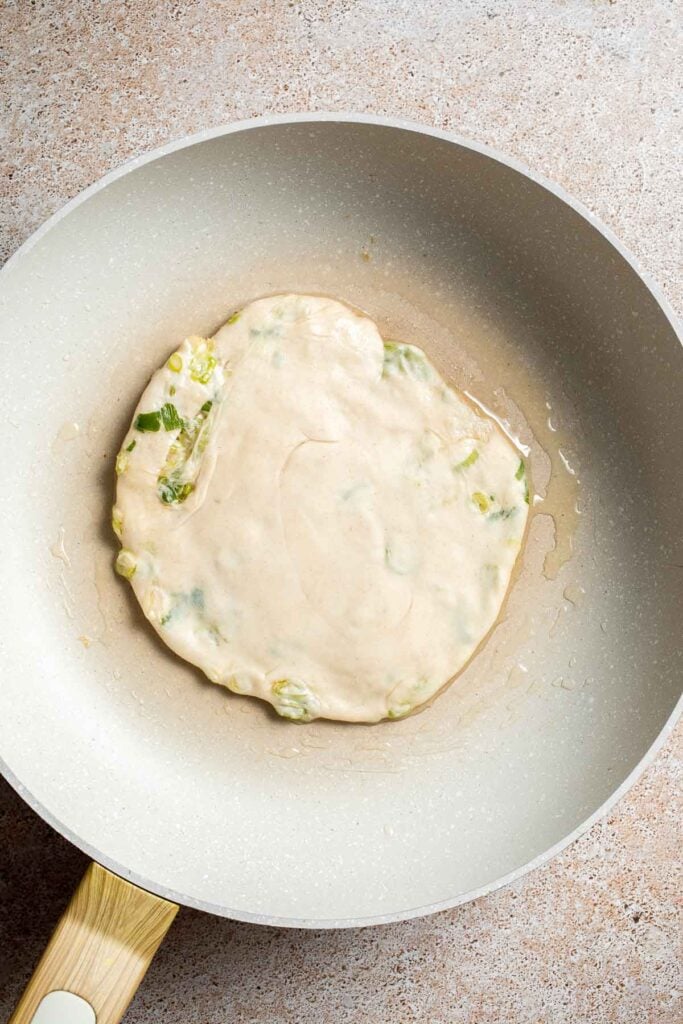
- Roll dough. On a lightly greased surface, use a rolling pin to roll the dough into a rectangle approximately 8 x 18-inches in size and ⅛ inch thick, with the long side facing you. Dust with flour if needed.
- Add filling. Gently spread the scallion filling evenly across the dough with a brush or with one hand.


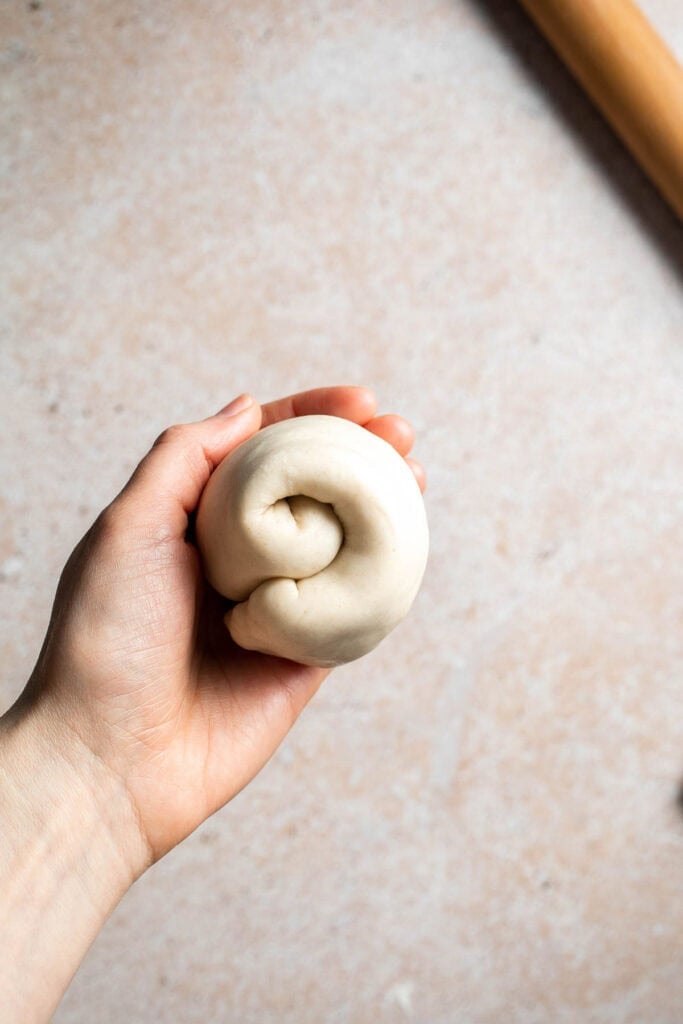
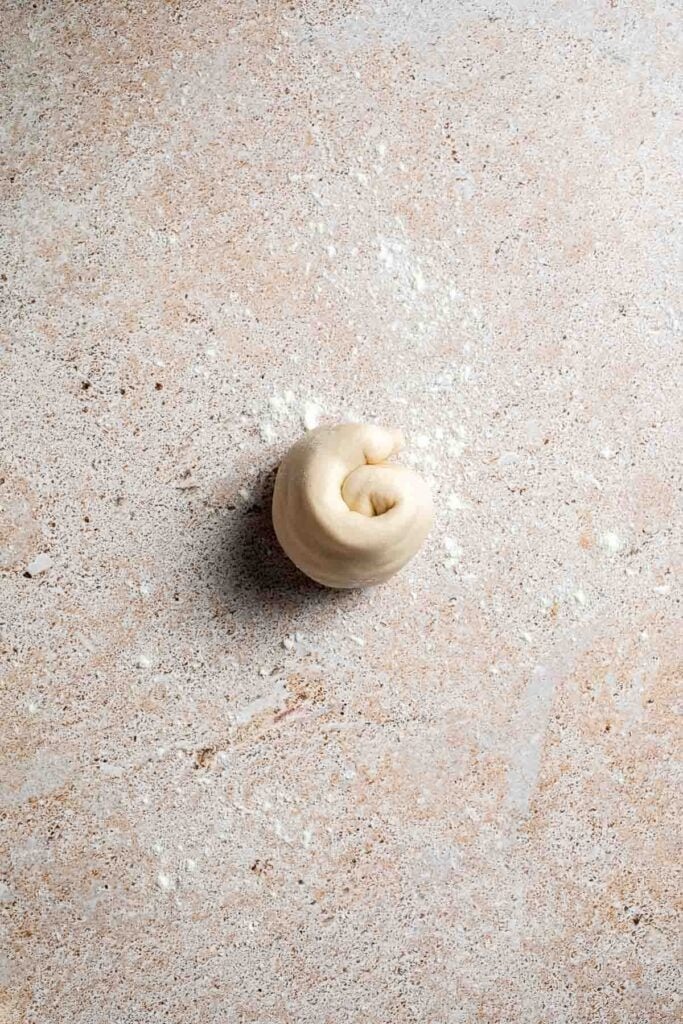
- Roll. From the longside (side closest to you), tightly roll the dough up into a tube. Slice into 4 even pieces, about 5 inch long.


- Coil into a disc. Take each piece, seal both ends and coil it up into a round disk.


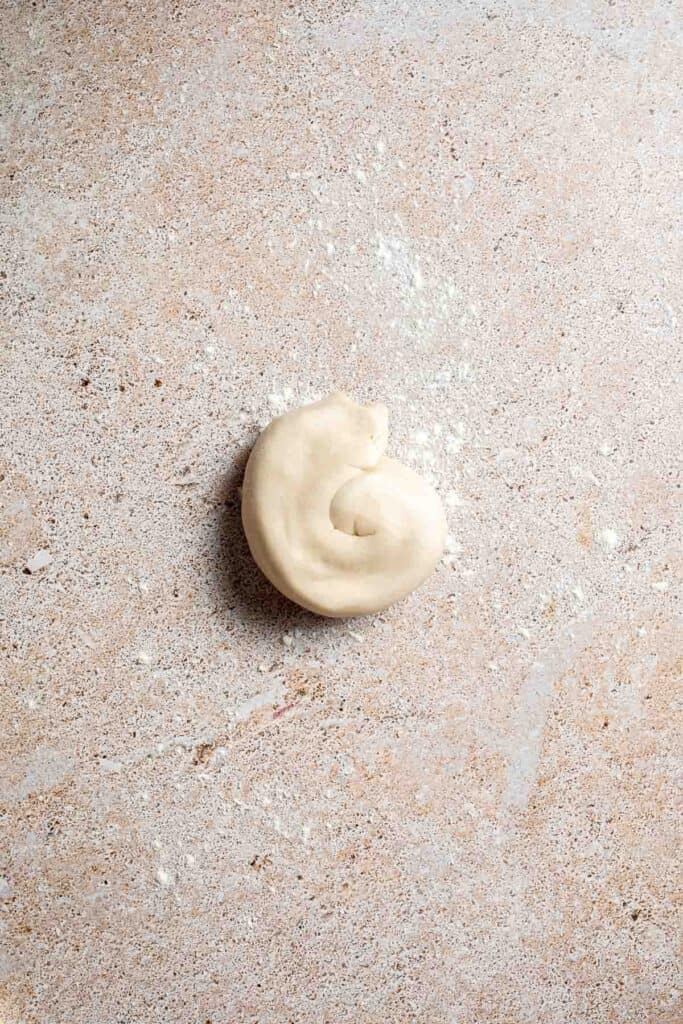
- Flatten. Gently press down on the round disk with your hand, then use a rolling pin to flatten into a pancake, about ¼ inch thick. This process creates multiple laminating layers of dough with scallion filling similar to making croissants. Repeat with the rest of the dough.

Now, let's cook the pancakes.
- Heat. Lightly grease a small non-stick frying pan with 1 tablespoon of vegetable oil, or spray with a little cooking spray oil. Heat over medium-high heat until the hot oil sizzles, about 1-2 minutes,
- Cook. Place one pancake in the pan at a time and cook until golden brown and crispy on both sides, about 3-4 minutes on each side, flipping occasionally. Repeat with all pancakes.
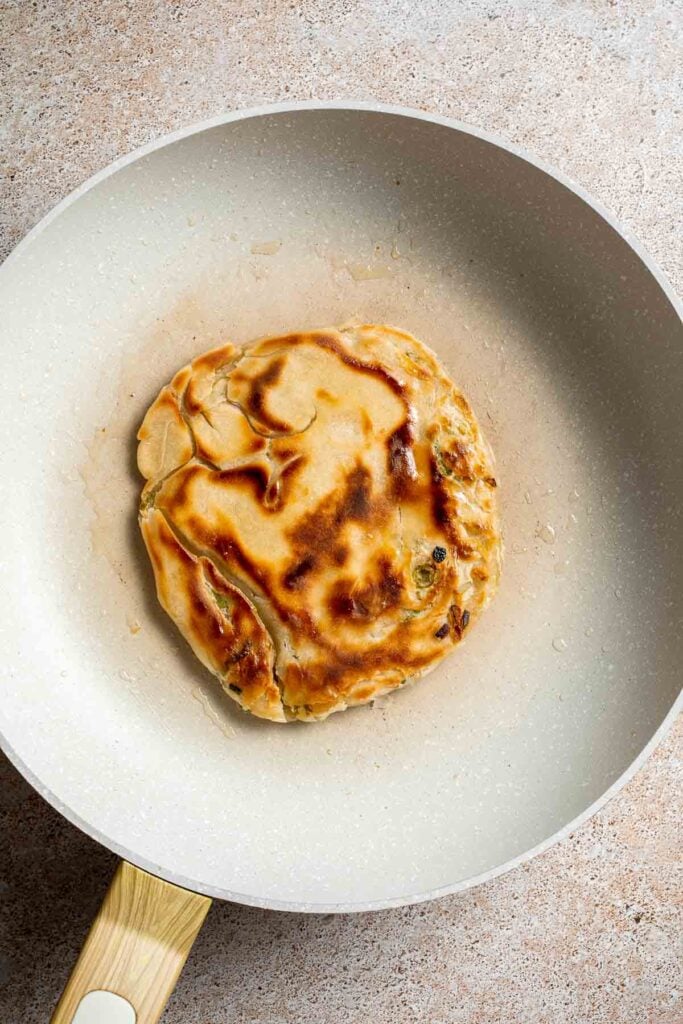
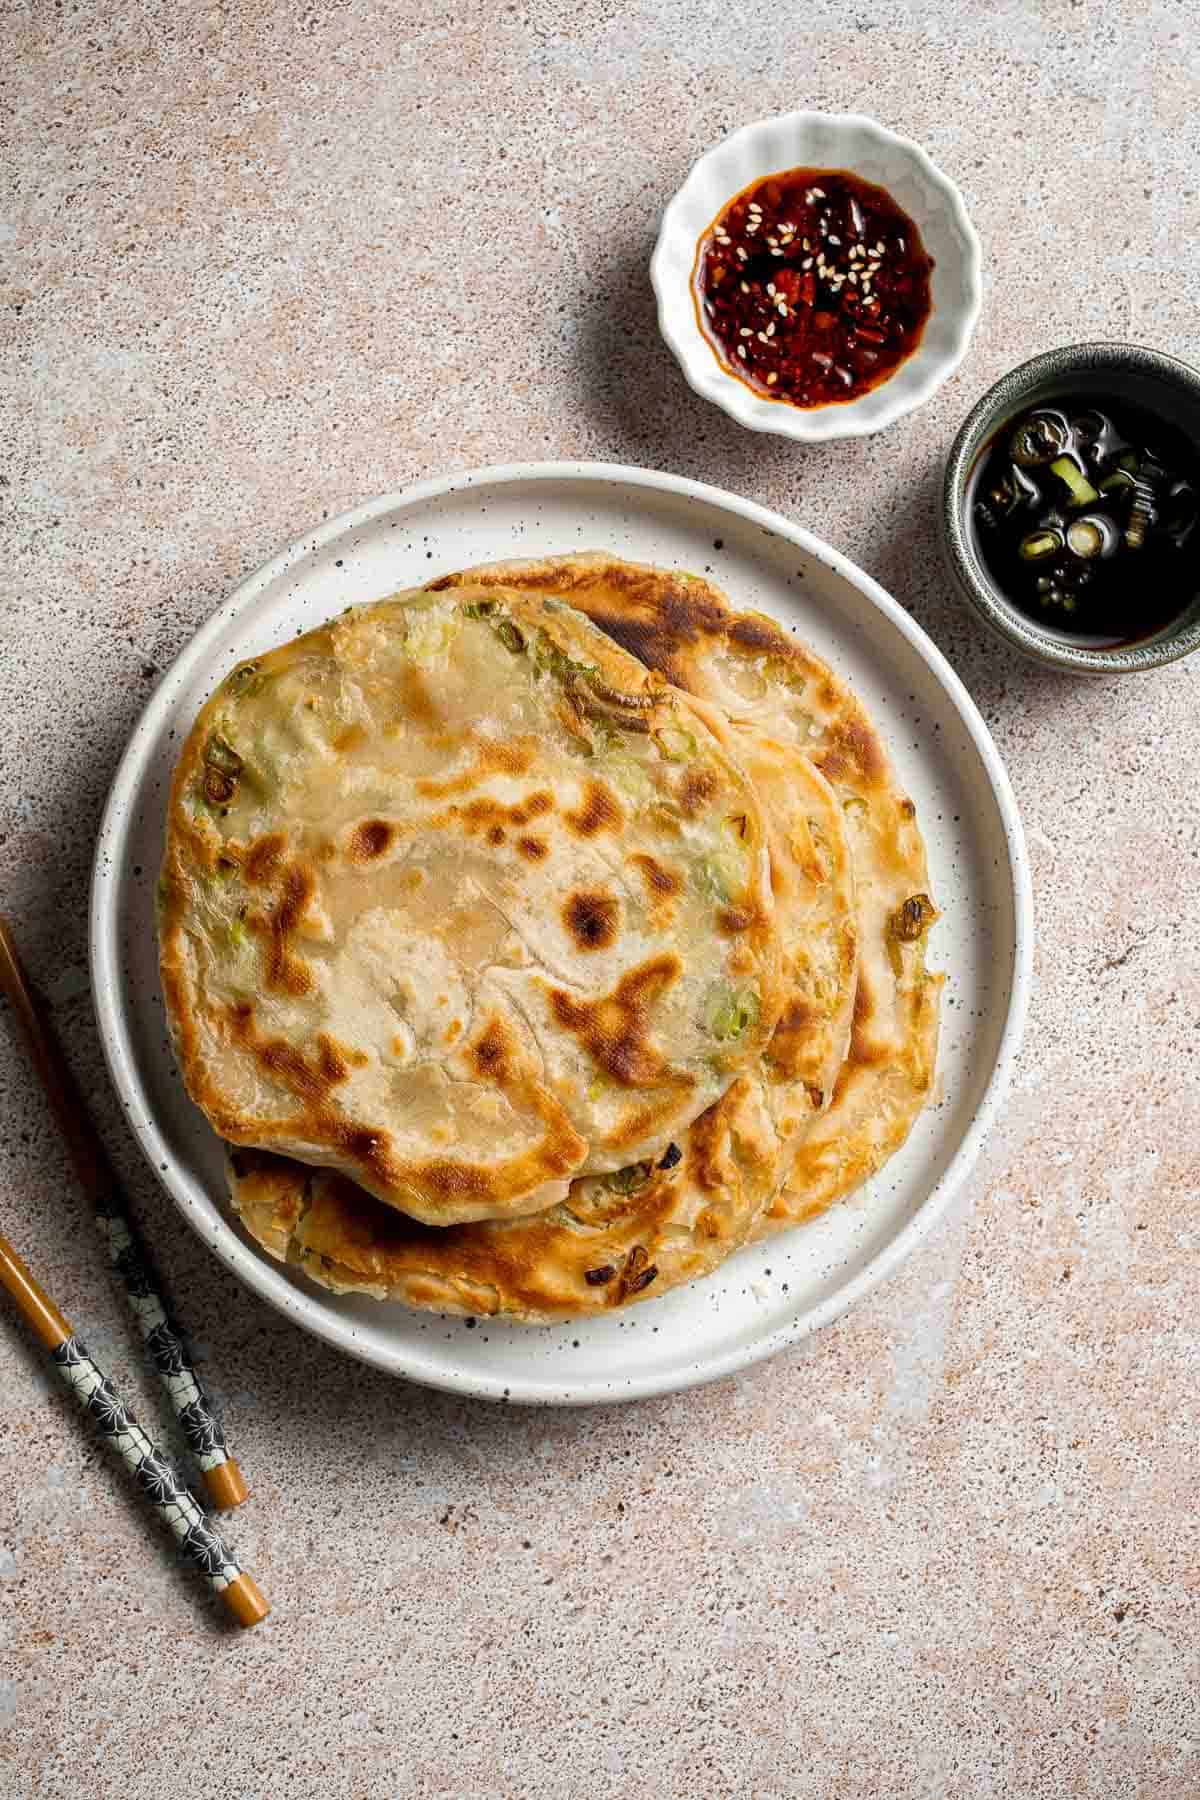
- Serve. Serve immediately with your favorite dipping sauce such as chili oil, rice vinegar, or soy sauce, if desired.
Recipe Variations
- Add spice. Sprinkle red pepper flakes, gochugaru, or a swirl of chili oil into the dough layers for a spicy twist that balances beautifully with the savory scallions. For bolder heat, you can also mix in minced fresh chili or a pinch of white pepper before rolling.
- Cheesy version. Add a layer of shredded cheese (like mozzarella, cheddar, or even gruyère) inside the dough before rolling it up. The cheese melts into the flaky layers, creating a gooey, savory fusion that's especially fun for kids or as a party snack.
- Make it mini. Divide the dough into smaller portions and roll out bite-sized pancakes. These are perfect for appetizers, party platters, lunch boxes, or little hands. You can even use cookie cutters to make fun shapes that kids will love.
- Add herbs. Incorporate chopped fresh cilantro, garlic chives, or a sprinkle of sesame seeds into the dough layers for extra complexity. This adds an aromatic, garden-fresh flavor that pairs wonderfully with the rich, crisp texture.
- Add chocolate. For a fun sweet-and-savory version, spread a very thin layer of dark chocolate or chocolate-hazelnut spread between the rolled dough layers before pan-frying. The heat softens the chocolate into the folds, creating a delightful fusion treat that's great for brunch or a snack.
How to Serve
Chinese scallion pancakes are delicious served on their own as an appetizer with soy-vinegar dipping sauce or chili oil, or as a side alongside a bowl of soup or noodles. Some of our favorite Asian dishes to pair this with are:
For more recipes, see our 60 Chinese Takeout Recipes at Home.

Recipe Tips and Tricks
- Use boiling water. Make sure the water is just boiled when added to the flour. This step helps create a supple dough that's easier to roll and layer. The heat partially cooks the starch, leading to better texture. Skipping this can result in a tougher dough that's more difficult to work with.
- Let the dough rest. Resting allows the gluten to relax, making the dough easier to roll out thin and reducing tearing. This step is key for those flaky layers, so don't skip it. A rested dough also cooks more evenly and has a better final texture.
- Roll evenly. Try to keep the dough a consistent thickness so the pancakes cook evenly in the skillet. Uneven dough may cause some spots to burn while others remain undercooked. A rolling pin with guide rings can be helpful if you want to be precise.
- Don't skimp on oil. A generous brushing of oil between layers helps achieve the iconic crispy texture. Pan-frying in enough oil also ensures a golden crust without sticking. If your pan is too dry, you'll miss out on that signature crispiness and risk tearing.
Storing and Freezing Instructions
How to Store
Store cooked pancakes in an airtight container in the refrigerator for up to 3 days.
How to Reheat
To reheat scallion pancakes and bring back their crisp texture, warm them in a nonstick or cast iron skillet over medium heat with a light splash of oil. Cook each side for 1-2 minutes until heated through and crispy again. Avoid microwaving, as it softens the texture and can make them rubbery. If reheating several at once, you can also place them in a 375°F (190°C) oven for 5-8 minutes until hot and crisp.
How to Freeze
Freeze uncooked pancakes between layers of parchment paper in a freezer-safe bag for up to 2 months. Cook from frozen, adding a couple of extra minutes to the cook time.
FAQ
Yes, the dough for scallion pancakes can be made in advance. After kneading and resting the dough, you can store it in the refrigerator for up to 24 hours. Let it come to room temperature before rolling it out. This is a great option if you want to prep ahead for easier cooking later. The texture may even improve with an overnight rest, making the pancakes even flakier and easier to work with.
If your pancake isn't turning out crispy, it's likely due to one of a few common reasons. Make sure to use enough oil when pan-frying-this is key for developing a golden, crunchy crust. Also, rolling the dough too thick can result in a chewy texture without the crispiness. Finally, avoid overcrowding the pan or using too low heat, which can cause steaming instead of frying. For the best results, cook one pancake at a time on medium-high heat.
Yes, you can use whole wheat flour, but the texture will be slightly denser and the flavor more earthy compared to all-purpose flour. To balance this, consider using a mix of half whole wheat and half all-purpose flour. Keep in mind that whole wheat flour absorbs more liquid, so you may need to slightly increase the amount of hot water. The pancakes will still be delicious, just a bit heartier and more rustic in texture.
More Chinese Appetizer Recipes
- 25 Best Dim Sum Recipes
- Beef Potstickers (Dumplings)
- Steamed Scallion Buns
- Chive Pancakes with Sourdough Starter
- Crispy Bottom Shanghai Pan-Fried Pork Buns
- Spicy Chili Oil Wontons
Tried this recipe?
I'd love to hear what you think! Leave a comment and rating below to share your feedback. Your reviews help others discover this recipe and help me keep creating more free recipes for you. Snap a photo and tag me on social media @aheadofthyme too.

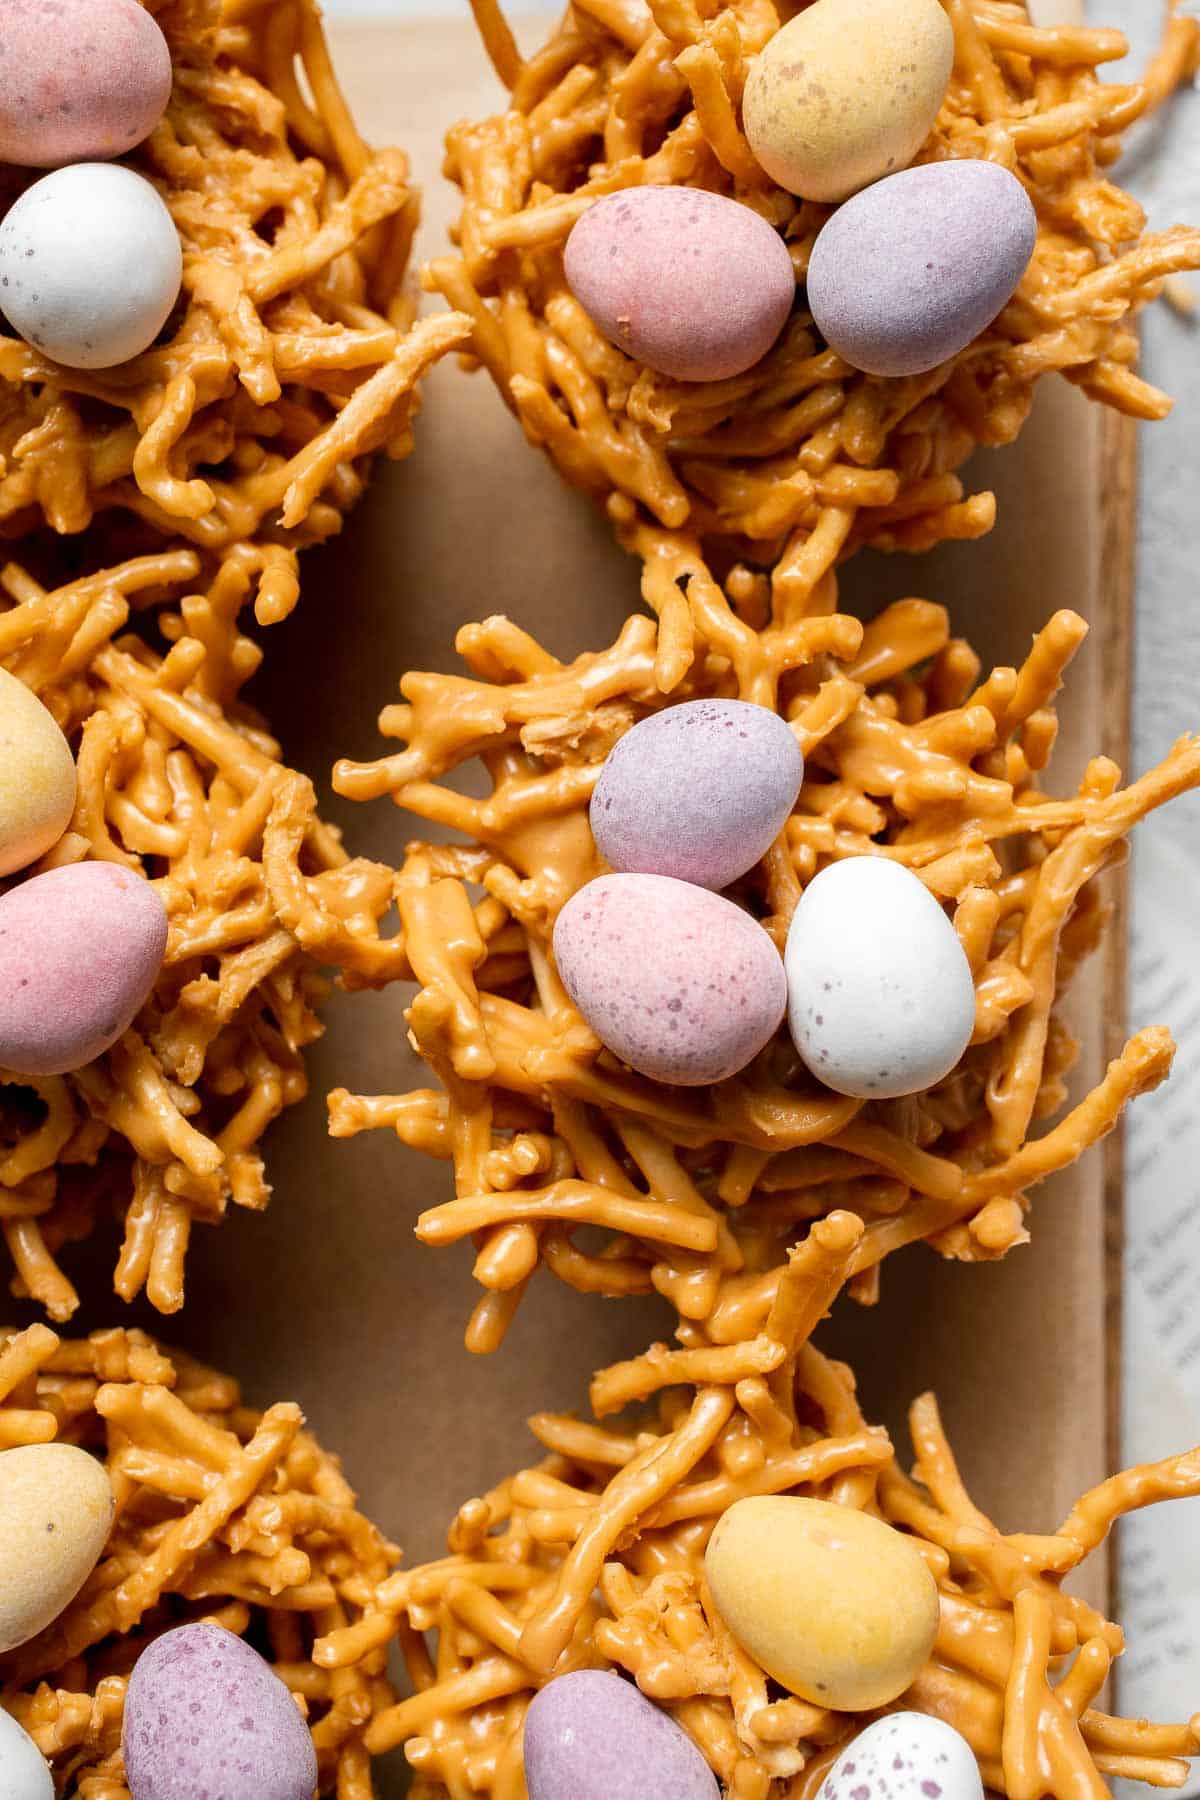
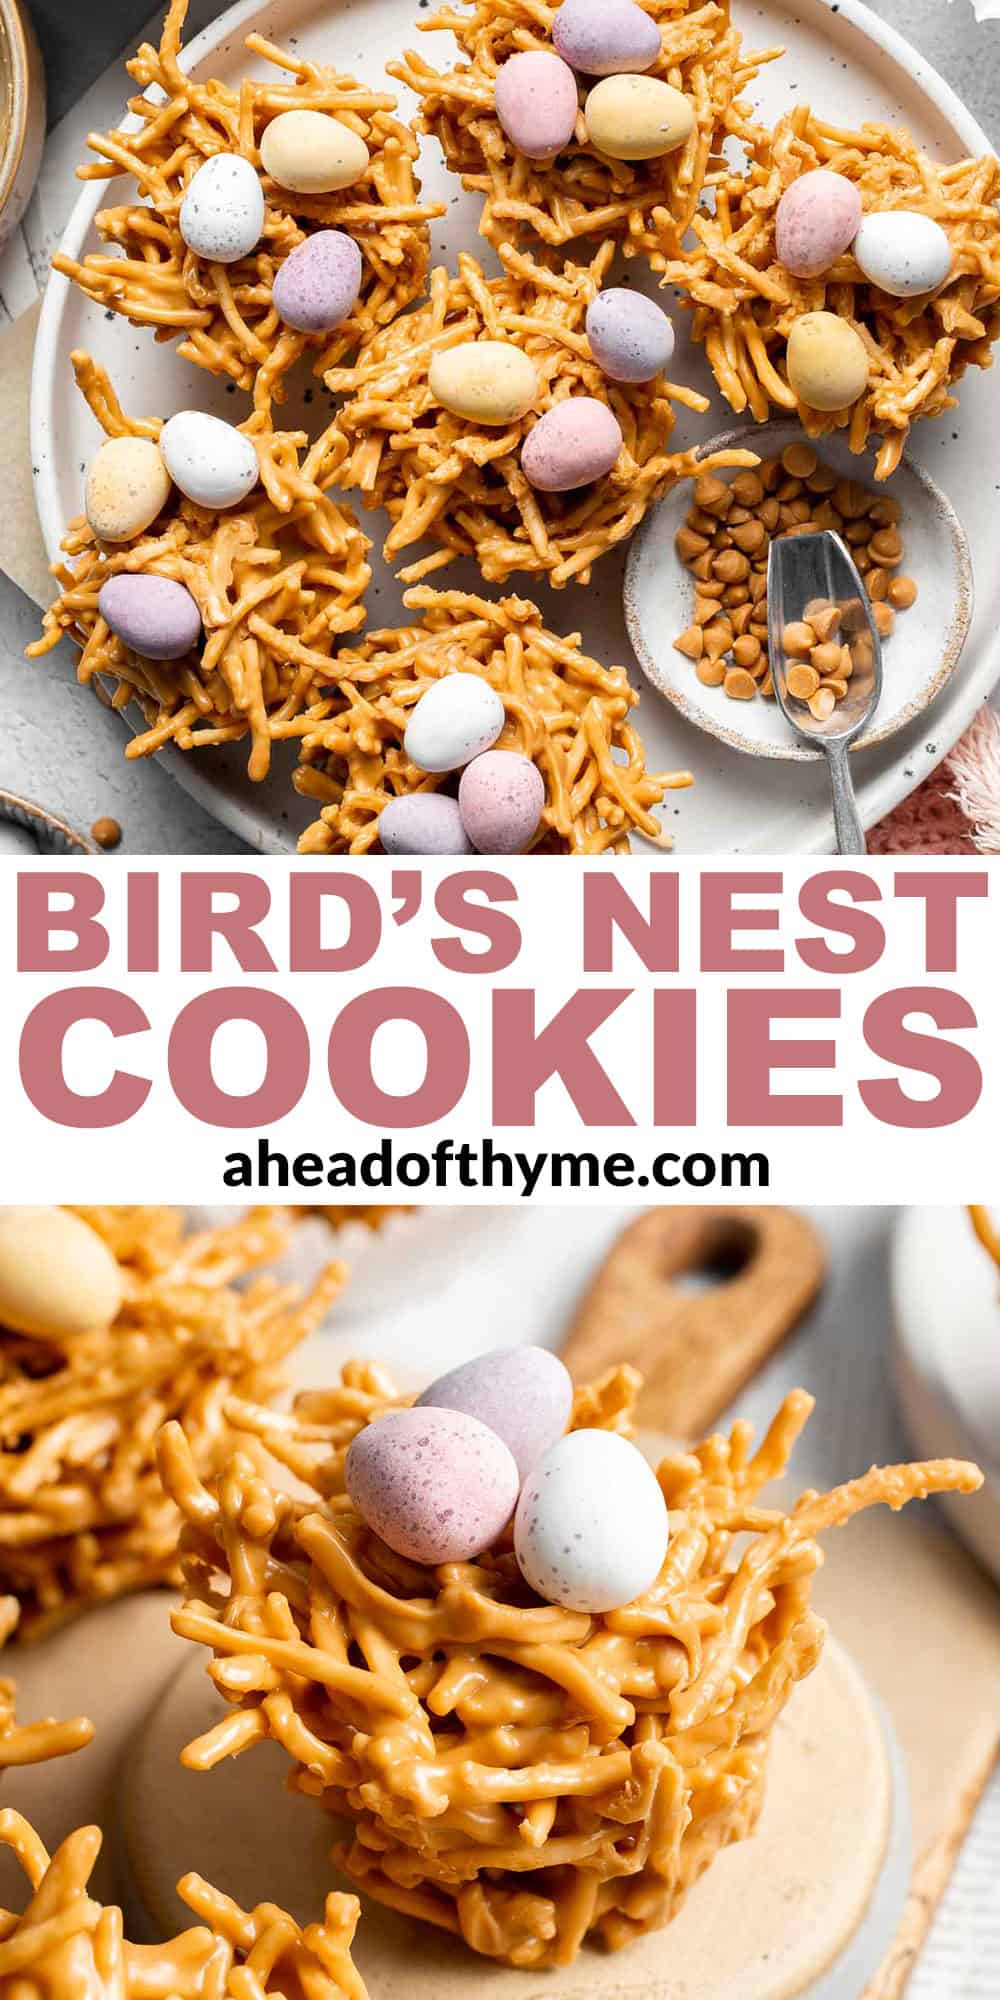
No Bake Bird's Nest Cookies
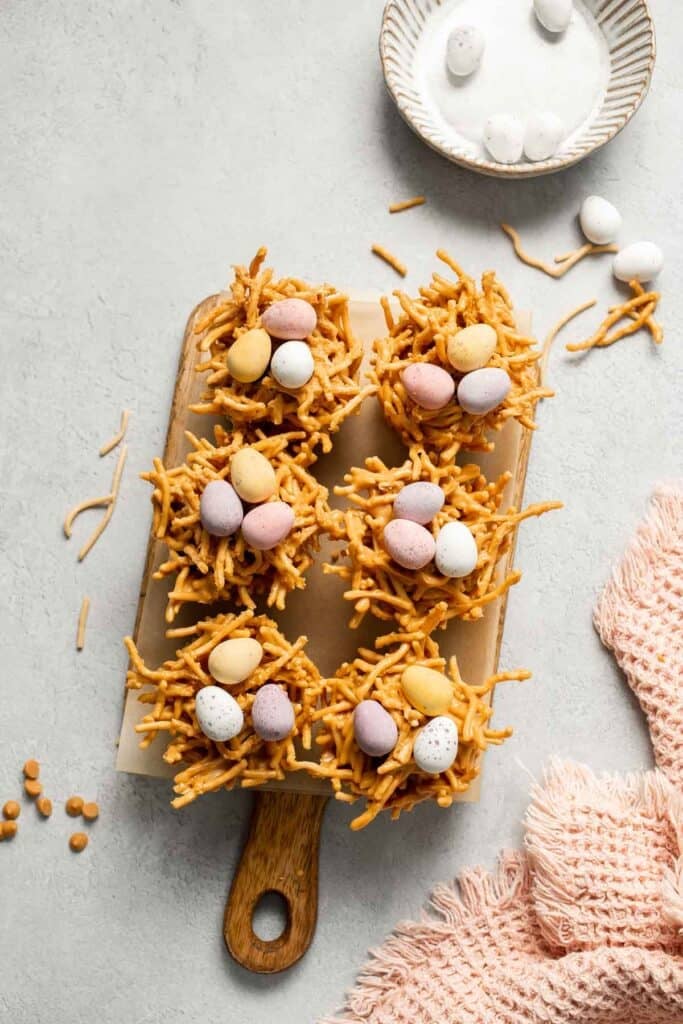
These No Bake Bird's Nest Cookies are a fun, festive treat that's as adorable as it is delicious. Made with crispy chow mein noodles coated in a rich butterscotch-peanut butter mixture and topped with colorful chocolate mini eggs, they're the perfect no-fuss dessert for springtime, Easter celebrations, or anytime you want a sweet and crunchy bite. No baking required, and they come together in just minutes!

Bird's nest cookies are one of my favourite Easter cookies to make (my Easter Egg Sugar Cookies and Italian Easter Cookies are up there too!). The combination of butterscotch chips and smooth peanut butter creates an irresistible sweet and salty coating that perfectly hugs each crunchy noodle. Plus, they are quick to make, with no oven time and minimal cleanup - perfect for baking with kids or whipping up a last-minute treat or gift.
Why You'll Love these No Bake Bird's Nest Cookies
- Adorably festive. With their nest shape and candy eggs, these cookies are a guaranteed hit at spring parties and Easter gatherings. They look impressive but are so easy to make! The playful appearance adds charm to any dessert spread, and they're a delightful project to make with kids or for themed celebrations.
- Sweet and salty perfection. The mix of butterscotch and peanut butter offers a rich, balanced flavor that pairs beautifully with the crunch of the chow mein noodles and sweetness of the chocolate eggs. Each bite delivers a perfect blend of creamy, crunchy, sweet, and savory that satisfies every craving.
- No baking needed. These cookies set up quickly at room temperature or in the fridge, making them a great choice for quick treats or warm-weather days when you don't want to turn on the oven. You'll save time without sacrificing flavor or presentation.
- Kid-friendly and fun. Kids can help mix, scoop, and decorate the nests with mini eggs, making this a fun and interactive kitchen activity for all ages. The simple, hands-on process makes this a great way to involve little ones in holiday prep.

Ingredient Notes
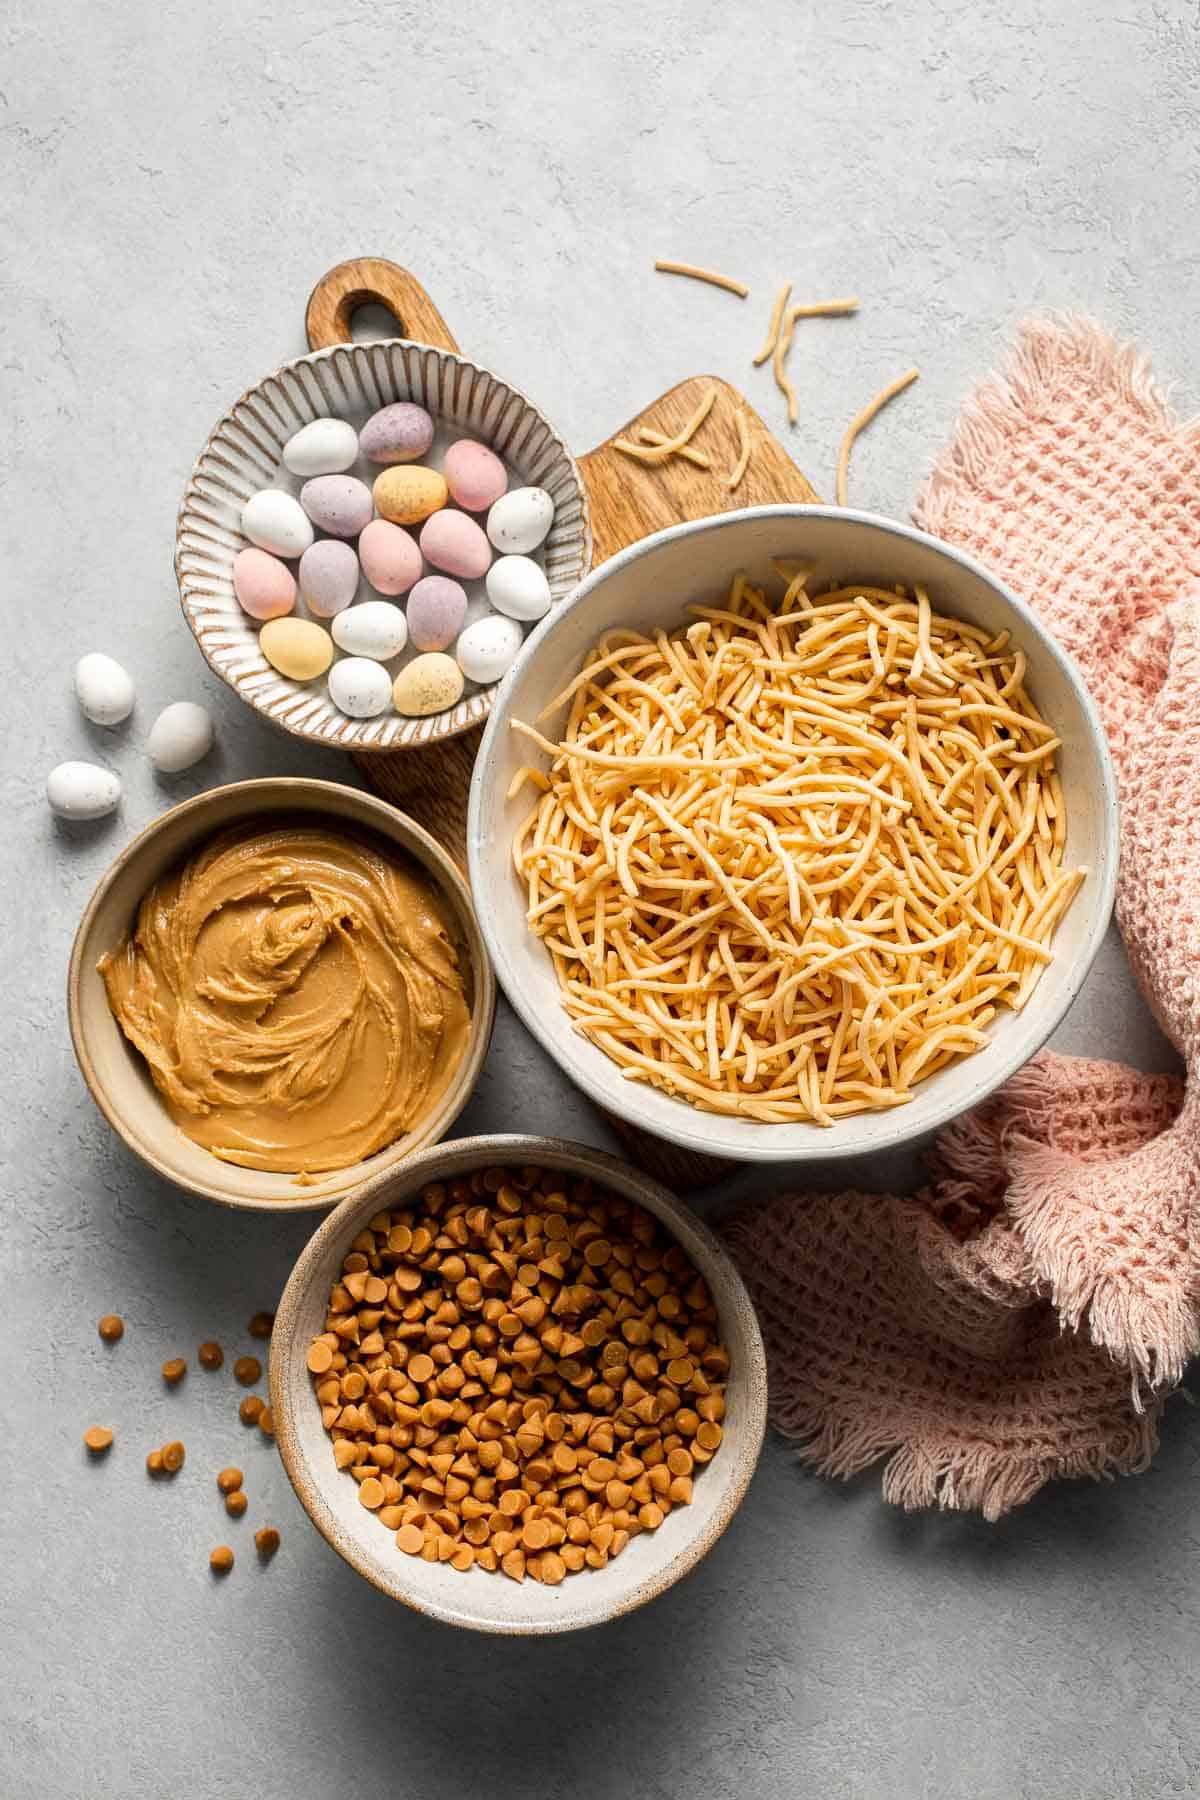
To make these festive No Bake Bird's Nest Cookies, you will need the following ingredients (full measurements in recipe card below):
- chow mein noodles - this is the base of the nests, adding crunchy texture and a fun shape.
Crunchy pretzel sticks or cornflakes can be used for a similar effect if chow mein noodles are unavailable. - butterscotch chips - these are melted down to create a sweet, caramel-like flavor. You can also use chocolate or white chocolate chips can instead for a different flavor profile.
- peanut butter - we use smooth peanut butter which adds creaminess and balances the sweetness with a touch of saltiness. You can use crunchy peanut butter for added texture. For nut allergies, use sunflower seed butter or a nut-free alternative.
- chocolate mini eggs - this classic Easter candy that completes the nest look. Pastel M&Ms or jelly beans also work well for decoration.
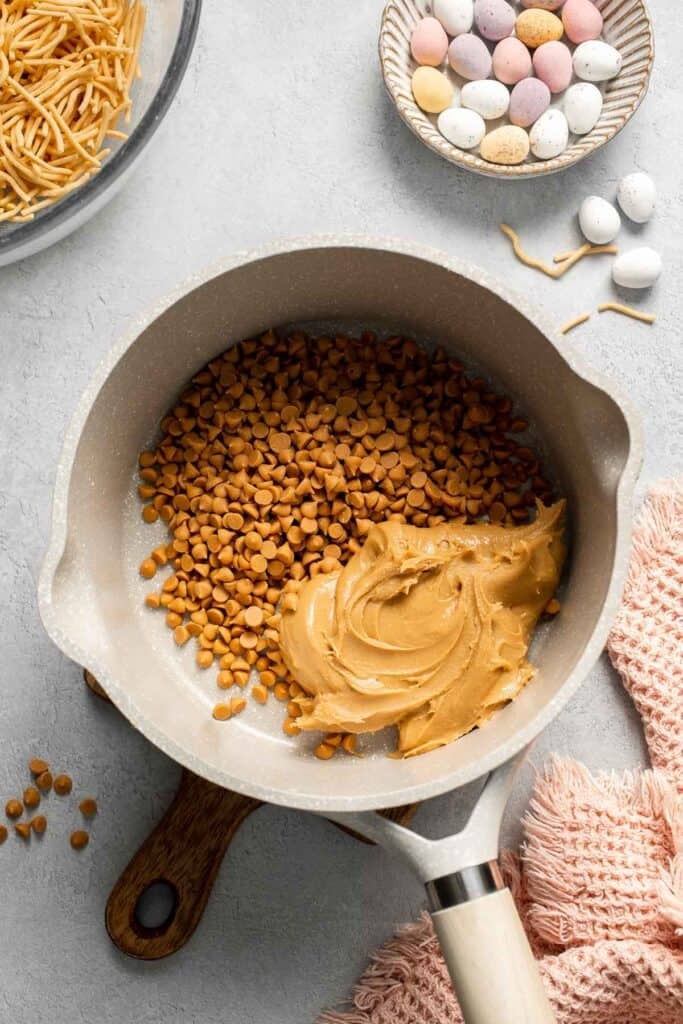
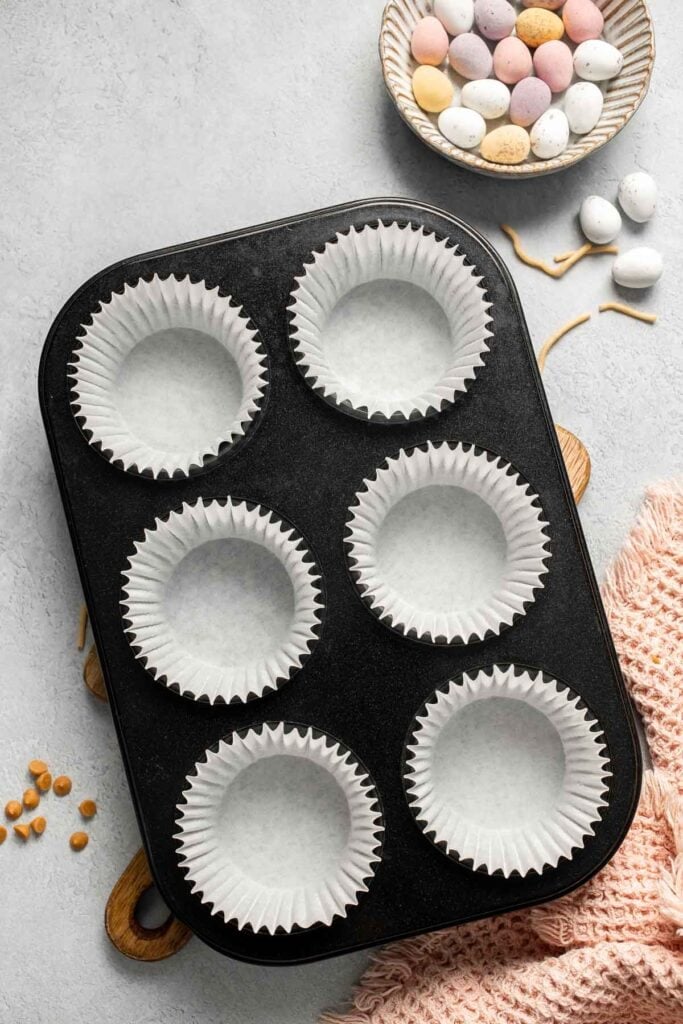
You will also need a large mixing bowl, a saucepan or microwave-safe bowl for melting, and a 12-tin muffin pan for shaping and setting the nests.
How to Make the Best No Bake Bird's Nest Cookies
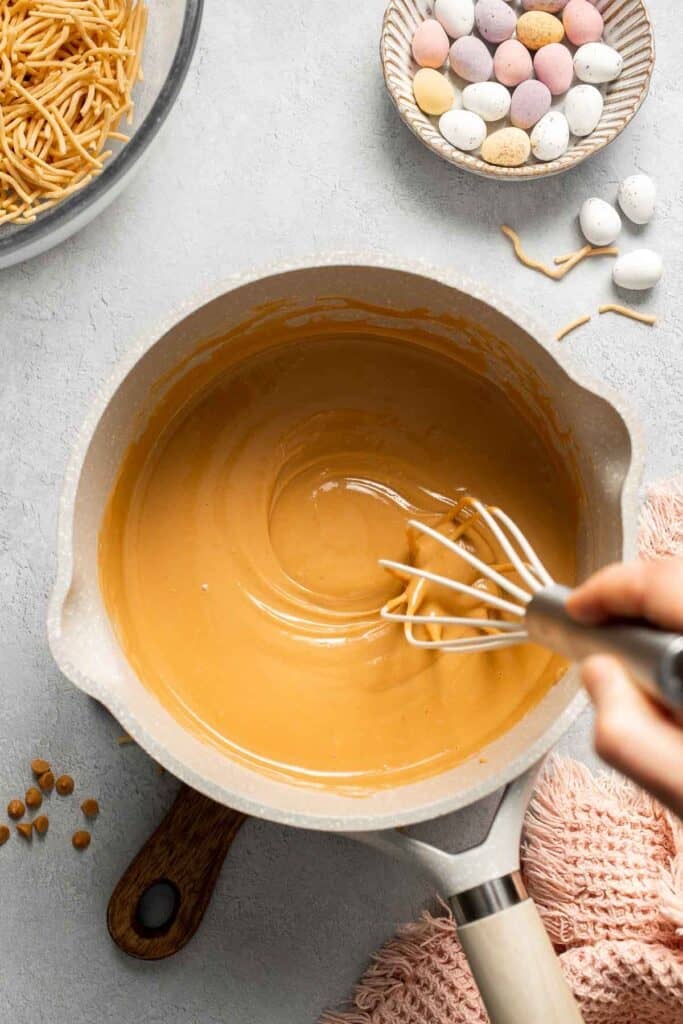
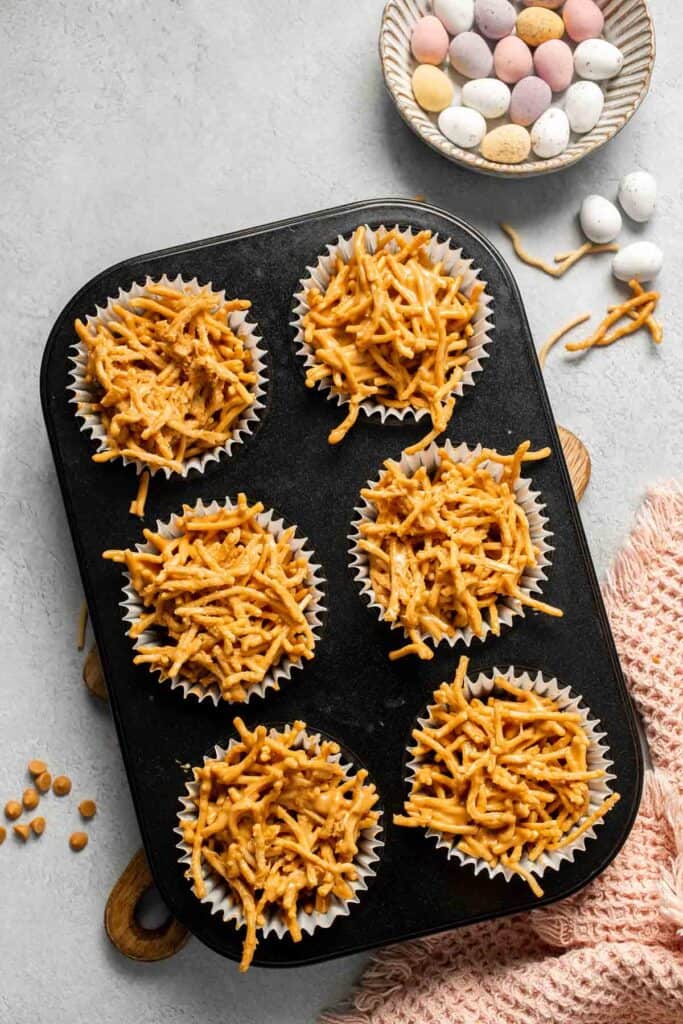
- Melt butterscotch and peanut butter. In a wide saucepan, add the butterscotch chips and peanut butter. Heat over low heat until melted, whisking continuously until melted. Alternatively, melt in the microwave in 30-second intervals, stirring in between each interval until smooth and combined.
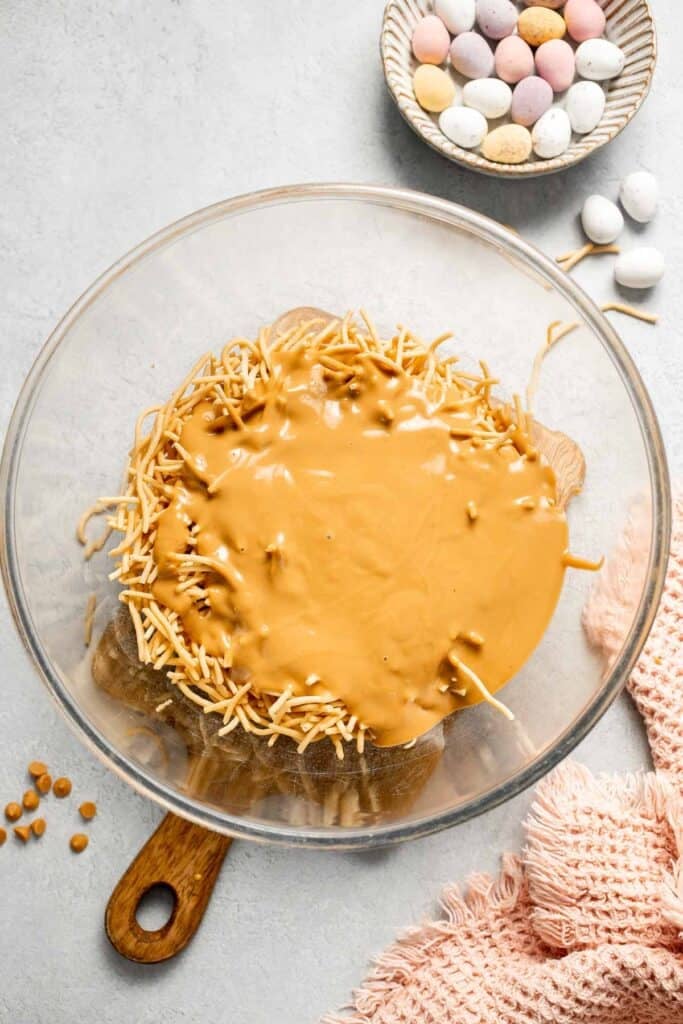
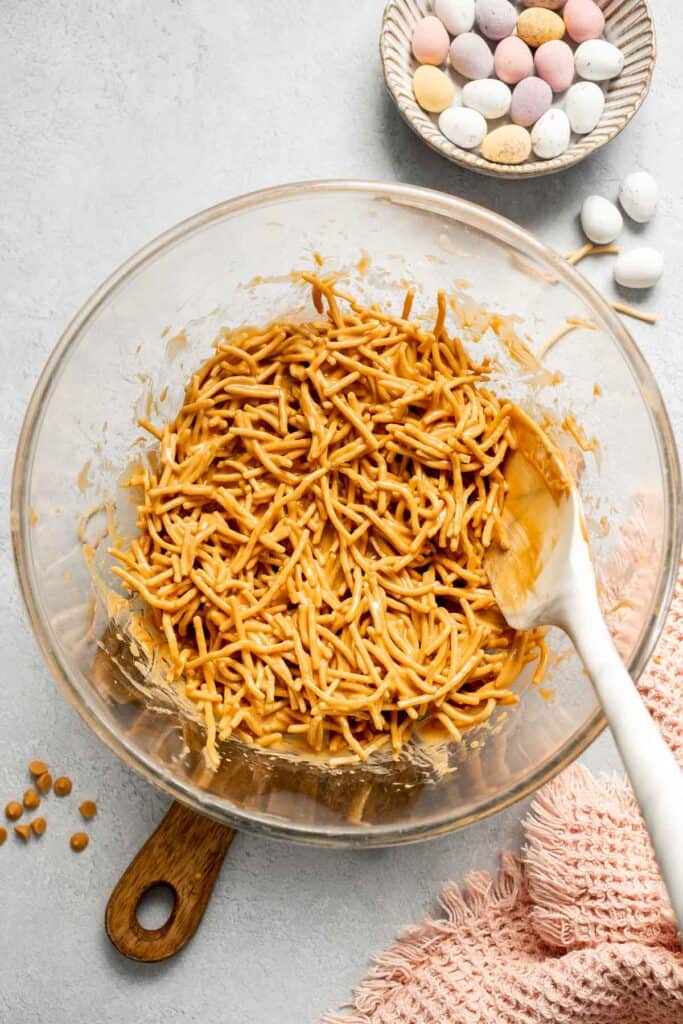
- Add noodles. Pour the butterscotch-peanut butter mixture into a large mixing bowl and add the chow mein noodles. Stir until the well combined and the noodles are fully coated.
- Assemble. Add a spoonful of the batter into each compartment of a 12-tin muffin pan and fill it up. (Note, to make it easier to remove the cookies when set, use a silicone muffin tray or line your muffin tray with cupcake liners).
- Add mini eggs. Place 3 chocolate mini eggs in the centre of each nest.
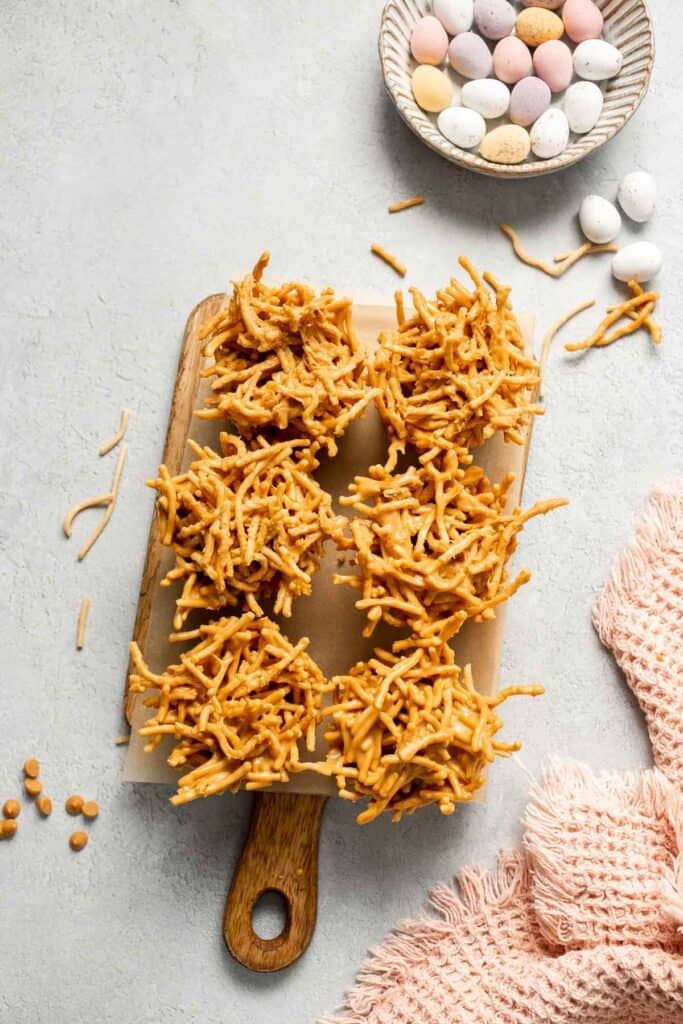
- Set. Let the nests cool completely, about 1-2 hours, then carefully remove from the muffin pan and serve.
Recipe Variations
- Make it nut-free. Use sunflower seed butter or a nut-free spread to accommodate allergies.
- Add a twist. Stir in a handful of shredded coconut or chopped pretzels for extra texture and flavor.
- Make them bite-sized. Use a mini muffin tin to create smaller nests that are perfect for parties or snack trays.
- Add chocolate. Drizzle melted chocolate over the nests once they're set, or stir mini chocolate chips into the mixture for an extra indulgent layer.
How to Serve
These Birds Nest Cookies are delicious served on their own as a sweet treat this spring, or paired as part of a larger Easter dessert spread with some of our favorites including:
- Easter Egg Sugar Cookies
- Bunny Ears Easter Cupcakes
- Peanut Butter Eggs
- Hot Cross Buns
- Carrot Bundt Cake with Cream Cheese Glaze
- Simnel Cake
For more recipes, see our 30 Best Easter Desserts.
Recipe Tips and Tricks
- Melt gently. Use low heat when melting the butterscotch chips and peanut butter to avoid scorching. Stir continuously and remove from heat as soon as the mixture is smooth and glossy to preserve the best texture and flavor.
- Work quickly. The mixture sets fast, so shape the nests right after mixing. Have your tools, parchment paper, and chocolate eggs ready before combining the ingredients so you can move swiftly without stress.
- Use a spoon or your fingers. Grease your hands lightly if shaping by hand to avoid sticking. You can also use two spoons to form the nests, especially if working with warm mixtures that need gentle handling.
- Let them set. Allow the nests to firm up at room temperature or pop them in the fridge for faster results. They'll be ready to serve once firm to the touch, typically within 30-60 minutes depending on room temperature.
Storing and Freezing Instructions
How to Store
Store the cookies in an airtight container at room temperature for up to 5 days. Keep them cool to avoid melting.
How to Freeze
Place the set nests in a single layer in a freezer-safe container. Freeze for up to 2 months. Thaw at room temperature before serving.
FAQ
Yes, you can absolutely make bird's nest cookies ahead of time! These cookies store well in an airtight container at room temperature for several days, so they're great for planning ahead. If you want to prepare them even earlier, they also freeze beautifully. Just let them thaw at room temperature before serving. Because they don't require refrigeration or delicate handling, they're ideal for prepping in advance for holidays, parties, or school events.
If you can't find chow mein noodles, don't worry - there are a few great substitutes you can try. Crunchy pretzel sticks broken into small pieces mimic the nest shape and texture quite well. Cornflakes also work as a base, giving a slightly different crunch and flavor. Even shredded wheat can be crushed and molded into a nest shape. While the look and texture might differ slightly, the end result will still be delicious and fun to eat.
Yes, using a microwave is a quick and easy way to melt the butterscotch chips and peanut butter. Simply place both ingredients in a microwave-safe bowl and heat in 30-second intervals, stirring between each until the mixture is fully melted and smooth. Be careful not to overheat it-this can cause the mixture to seize or burn. Once everything is melted evenly, proceed quickly to coat the noodles and form your nests before the mixture begins to set.
More Recipes with Chocolate Mini Eggs
- Mini Egg Easter Cookies
- Robin's Egg Cupcakes
- Mini Egg Easter Cheesecake
- Easter Bark
- Mini Egg Easter Fudge
- Easter Egg Caramel Brownies
Tried this recipe?
I'd love to hear what you think! Leave a comment and rating below to share your feedback. Your reviews help others discover this recipe and help me keep creating more free recipes for you. Snap a photo and tag me on social media @aheadofthyme too.
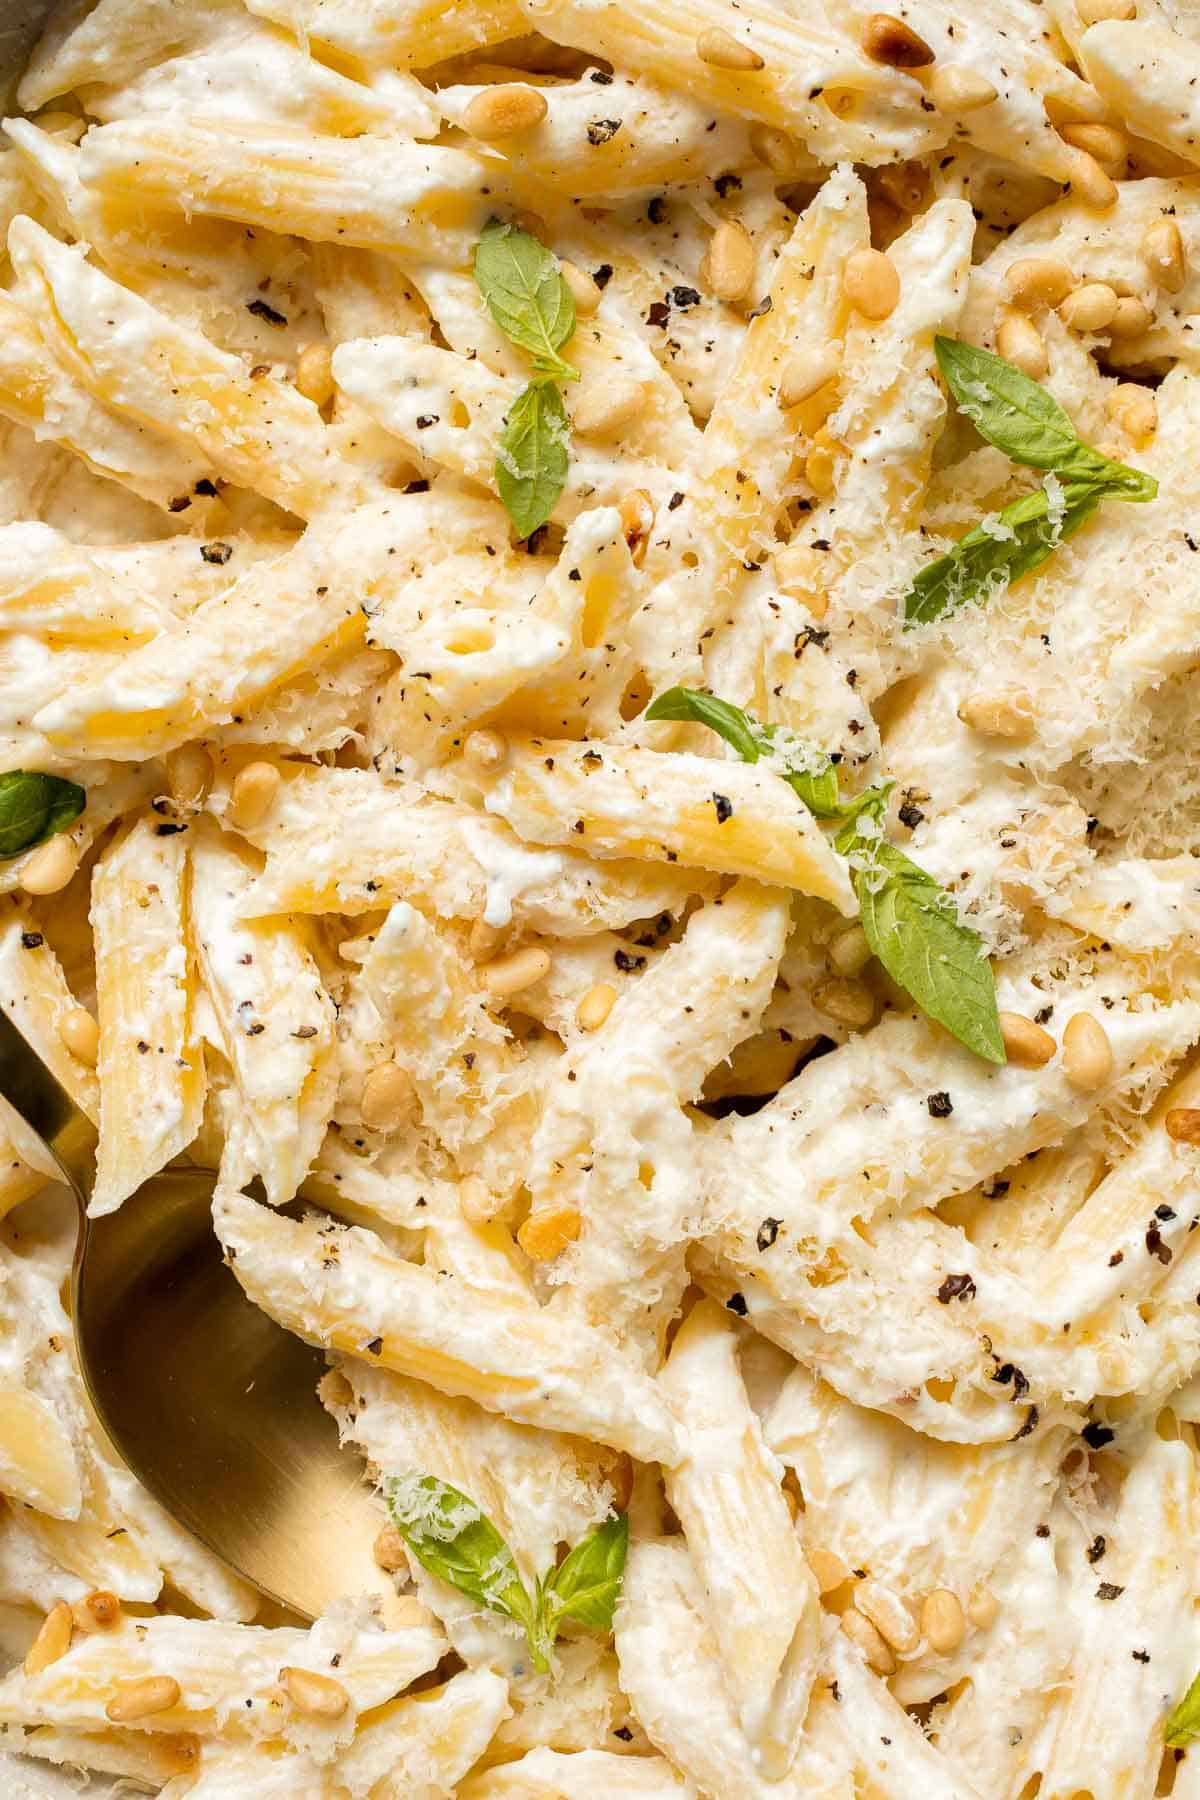
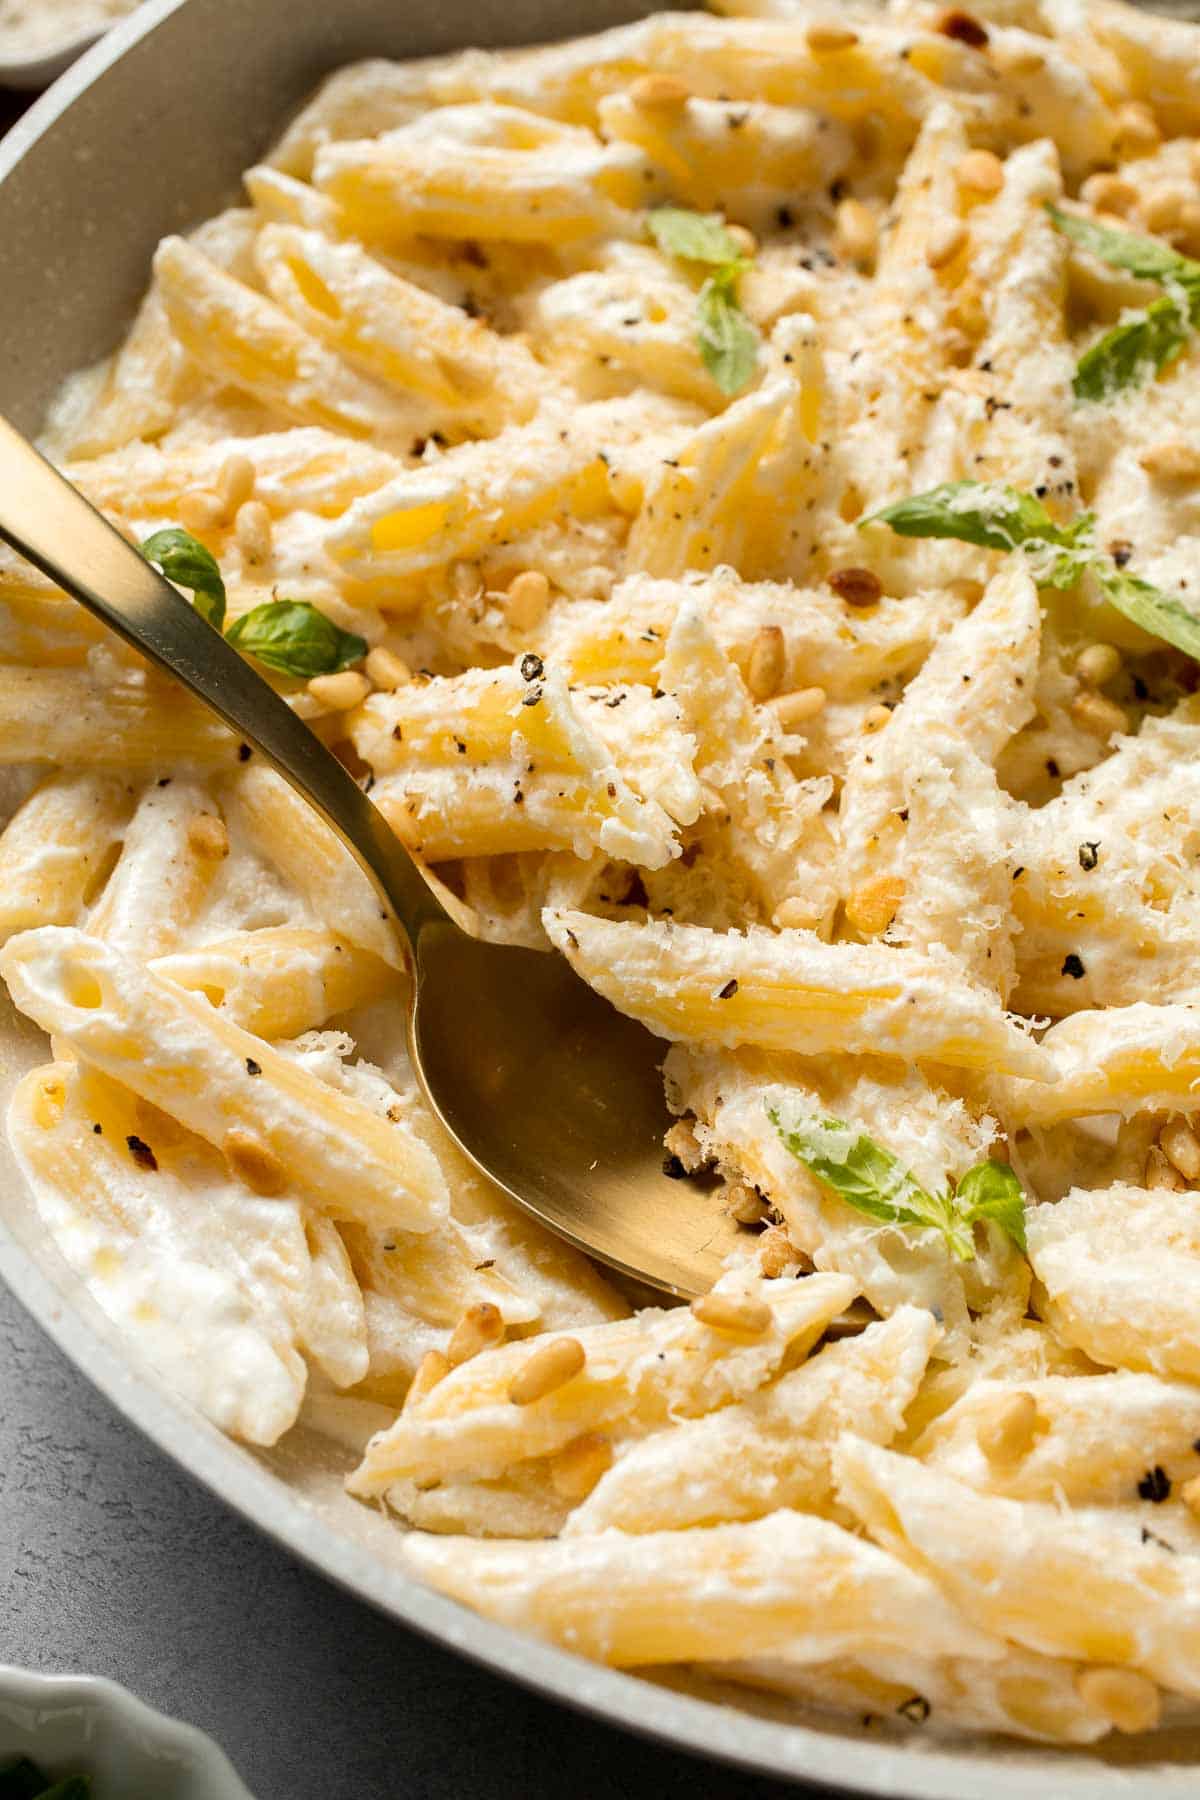
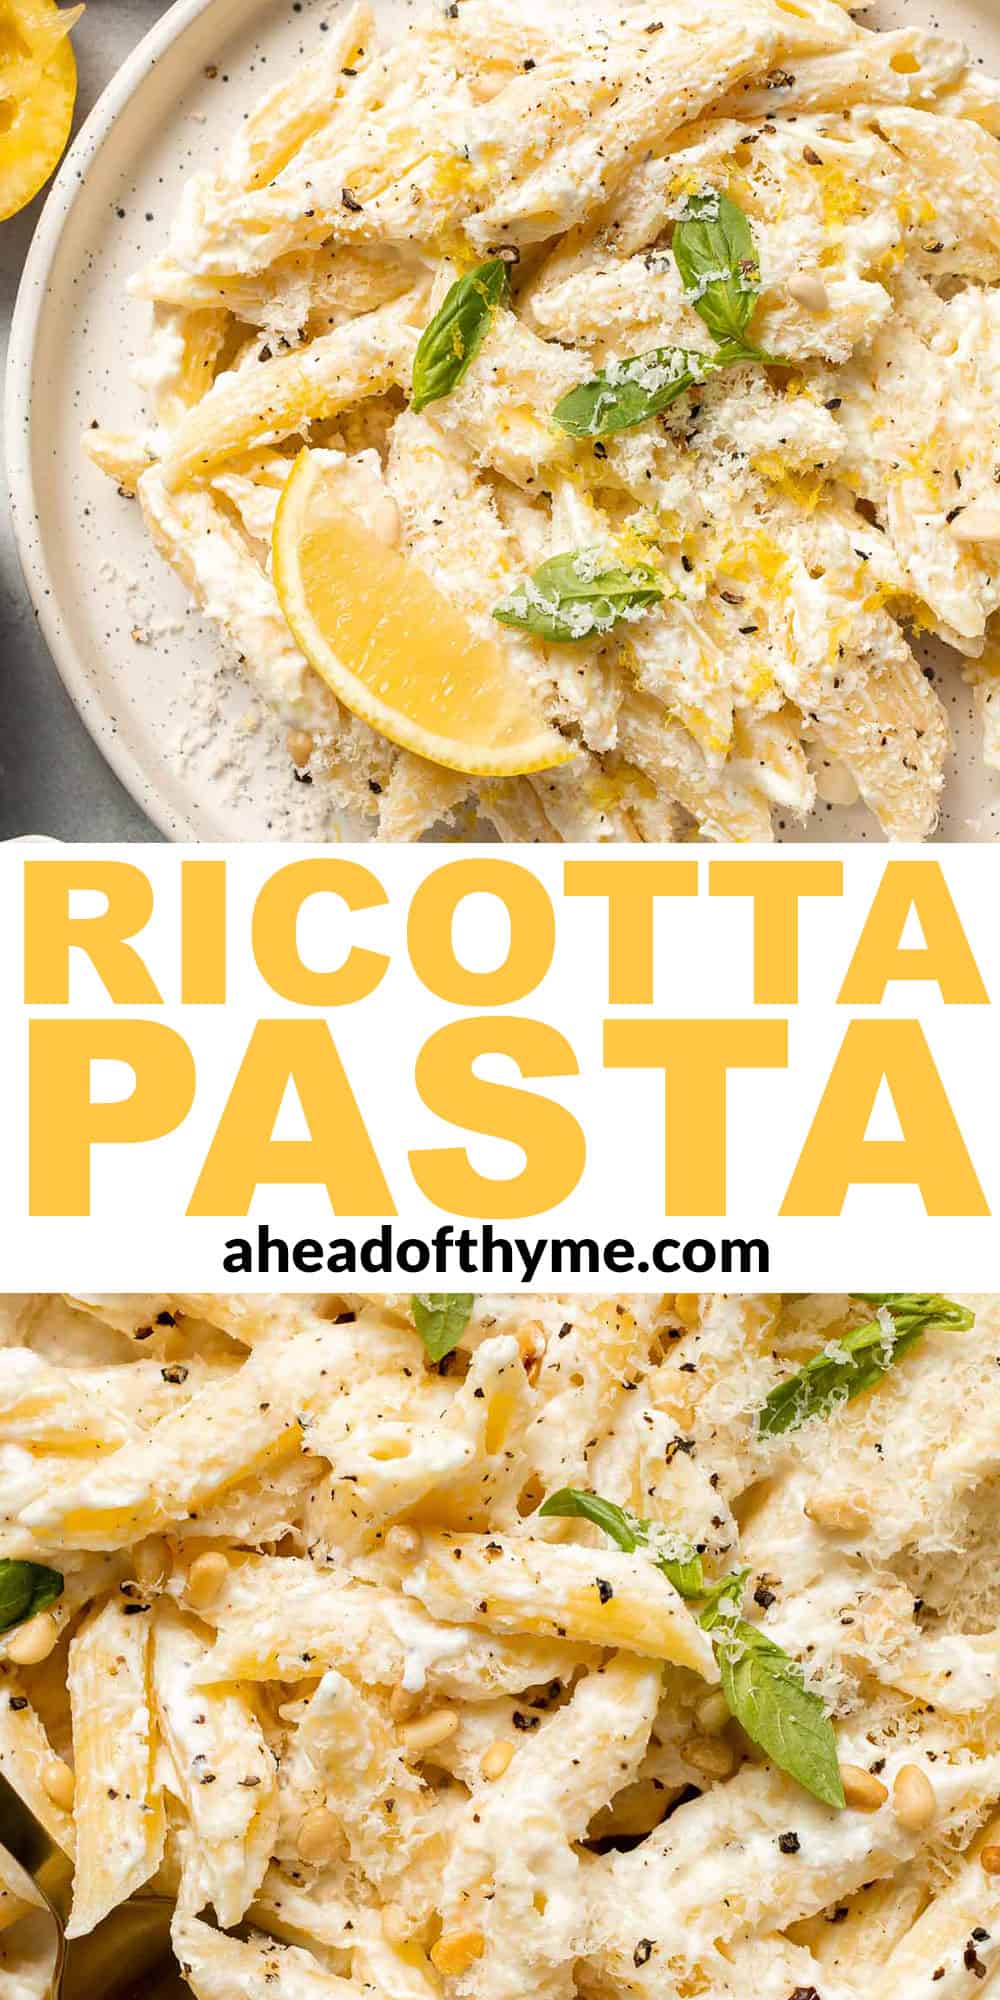
Lemon Ricotta Pasta
Lemon Ricotta Pasta is bright, creamy, and bursting with fresh flavor - comfort food with a zesty twist. This easy pasta recipe combines velvety ricotta cheese with vibrant lemon juice to create a luscious, tangy sauce that clings to every noodle. A touch of garlic, parmesan cheese, and fresh basil brings it all together for a simple yet elegant dish. It's hands down one of the best vegetarian pastas for spring and summer nights when you crave something light, cozy, and satisfying.
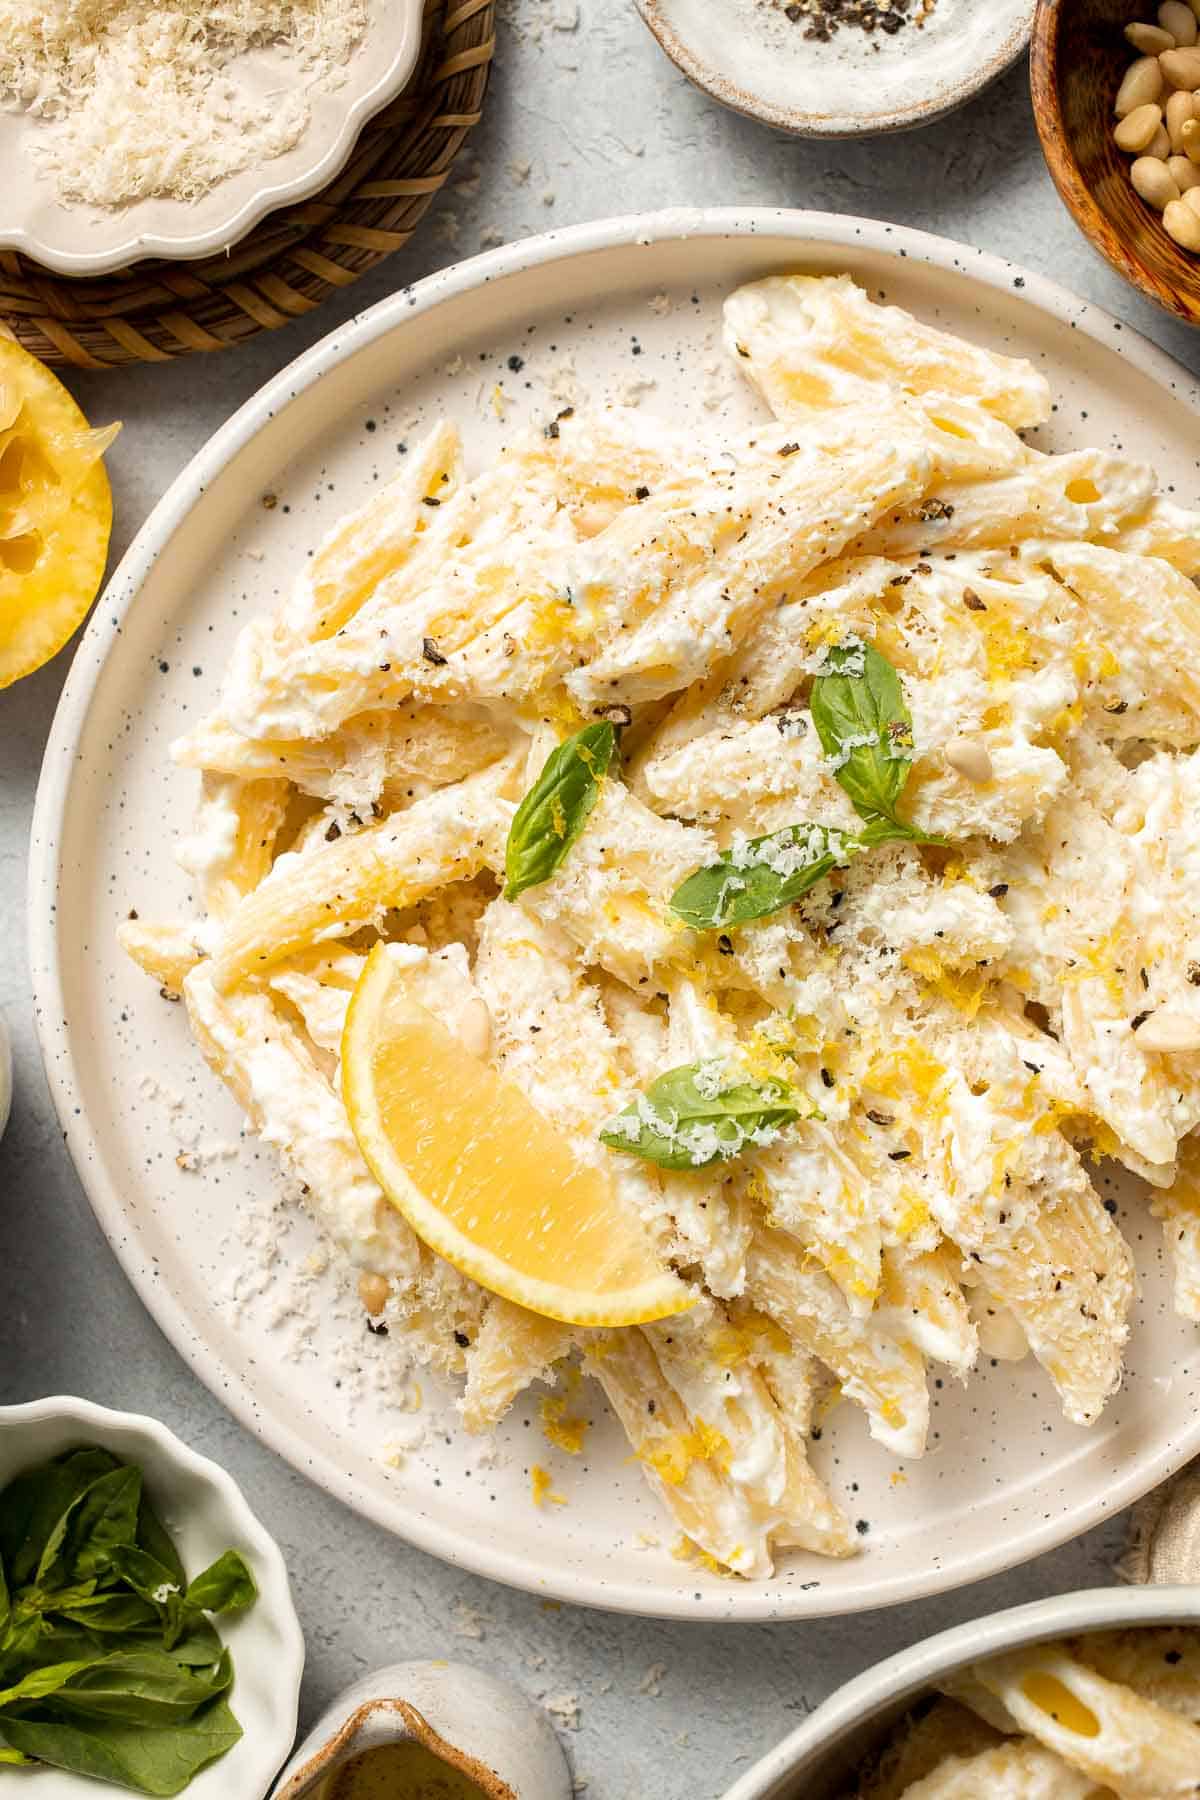
Ricotta brings a light, creamy richness that sets this pasta apart from heavier cream sauces. Its naturally mild, slightly sweet flavor creates the perfect canvas for the bright pop of lemon and savory parmesan. Best of all, this dish comes together in under 20 minutes with minimal prep - ideal for busy weeknights when you want something comforting, flavorful, and fuss-free.
Why You'll Love this Lemon Ricotta Pasta
- Ultra creamy texture. The combination of ricotta and a splash of pasta water creates a luxuriously smooth sauce that coats every bite. Ricotta cheese brings a smooth, slightly sweet creaminess to pasta, making it an excellent alternative to heavier cream-based sauces.
- Quick and easy. With just a handful of ingredients and a simple preparation method, this recipe is ideal for busy weeknights. It comes together in under 20 minutes, making it a convenient and delicious option when you need a fast meal.
- Bright, fresh flavor. Lemon juice, nutty parmesan, and fragrant garlic enhance the delicate flavors of ricotta, making this pasta taste light yet so indulgent. The balance of citrus and creamy cheese keeps every bite refreshing.
- Easy to customize. One of the best things about this lemon ricotta pasta is how easy it is to customize! You can swap out ingredients based on what you have on hand or adjust the seasonings to suit your taste. It also pairs well with various add-ins, from sautéed vegetables to grilled chicken. It's easy to tweak based on what you have on hand, making it a flexible recipe for any occasion.
Ingredient Notes
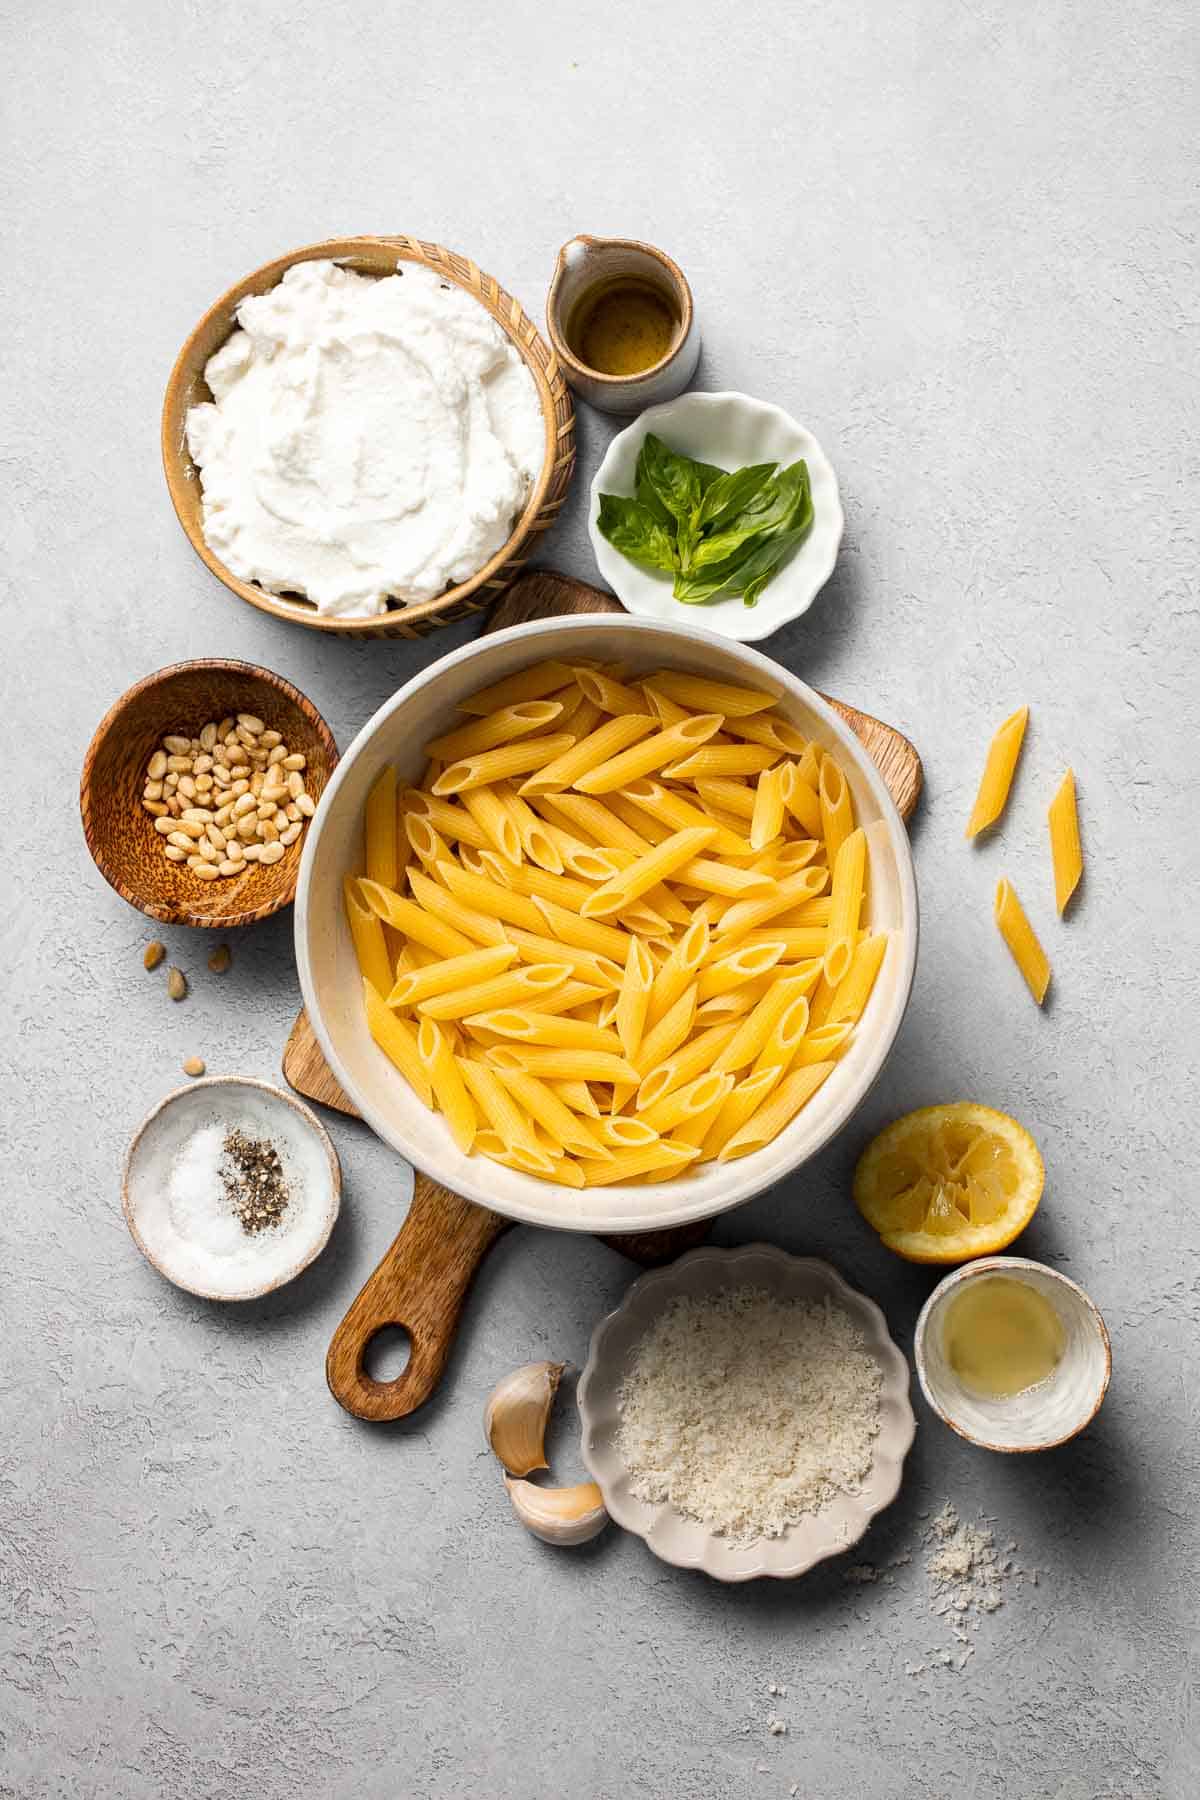
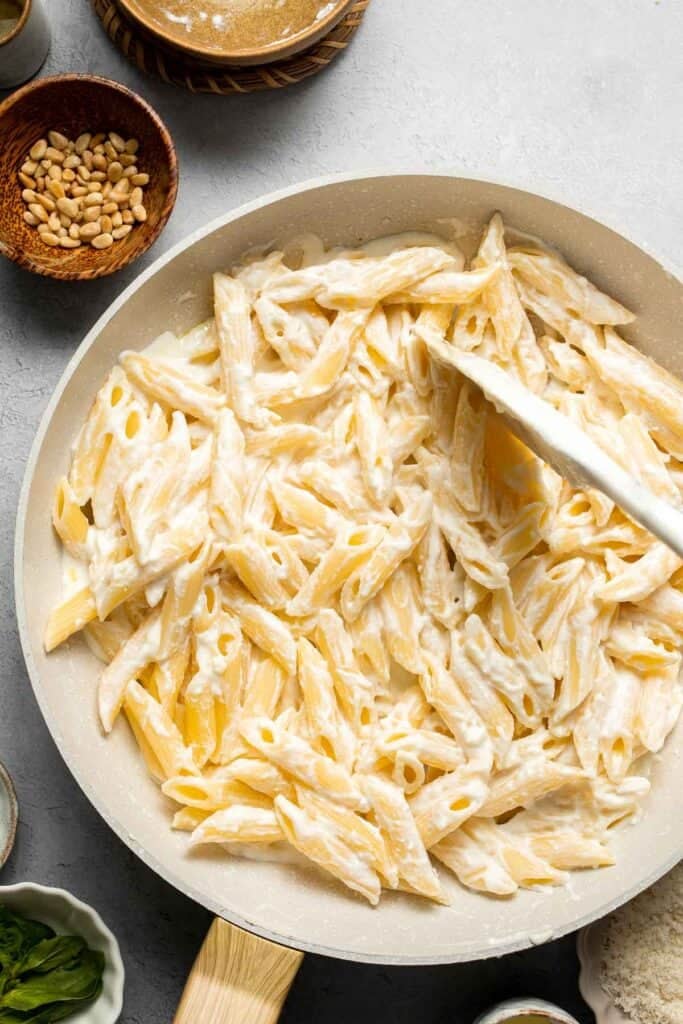
To make this delicious ricotta pasta, you will need the following ingredients (full measurements in recipe card below):
- pasta - any pasta shape works, but penne, spaghetti, or fettuccine hold the creamy sauce well. Use whole wheat or gluten-free pasta for a healthier or gluten-free option.
- olive oil - adds richness and enhances the flavor of the sauce.
- garlic - freshly minced garlic infuses the dish with flavor.
- ricotta cheese - the key ingredient for a creamy, luscious sauce. Swap ricotta cheese with cottage cheese for a slightly different texture but similar creaminess.
- lemon juice - brightens the flavors and balances the richness of the cheese. Lime juice can be used instead of lemon juice for a different citrusy note.
- salt and pepper
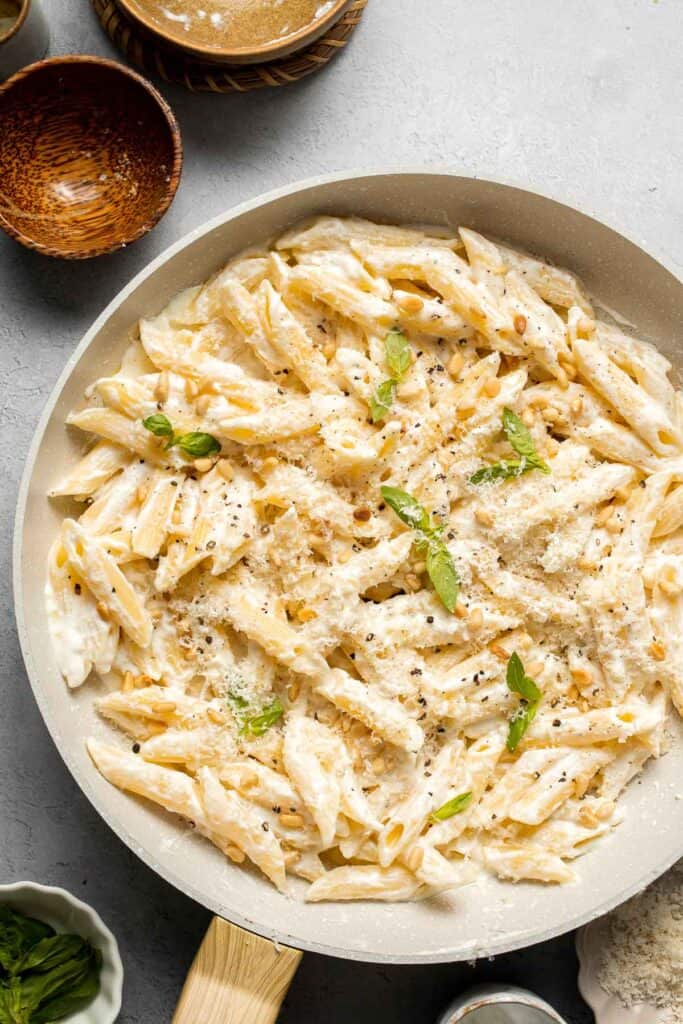
- pine nuts - added for a crunchy, nutty contrast (this is optional but recommended!). Almonds or walnuts can replace pine nuts if wanted.
- parmesan cheese - provides an extra layer of savory, umami goodness.
- basil - brings a fragrant, herbaceous touch to the pasta.
You will also need measuring cups and spoons, large pot, and a saucepan.
How to Make the Best Lemon Ricotta Pasta
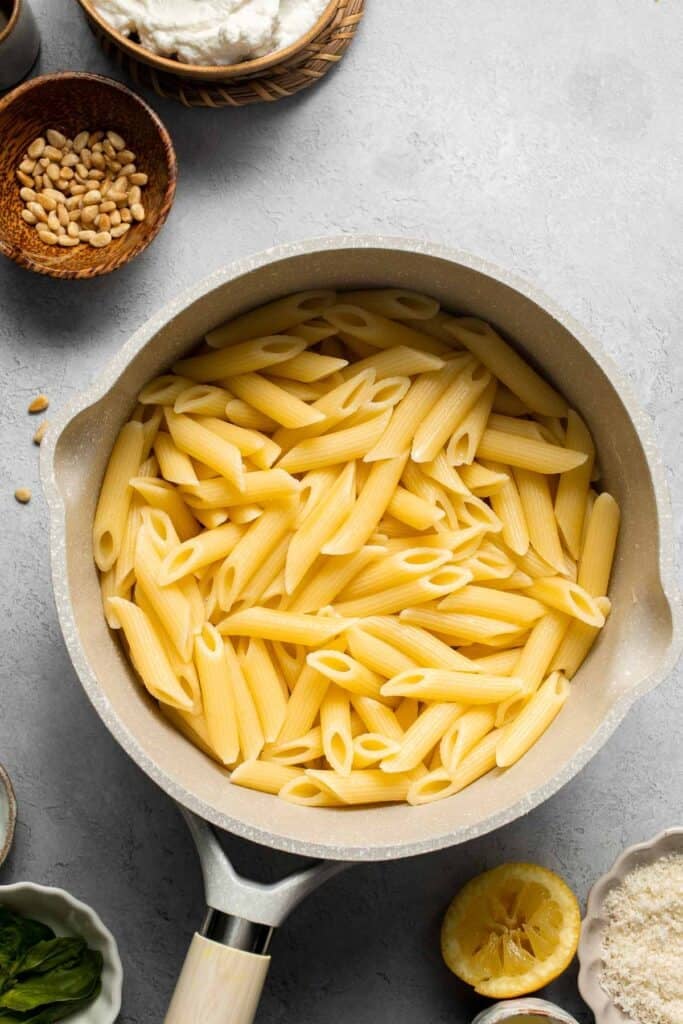
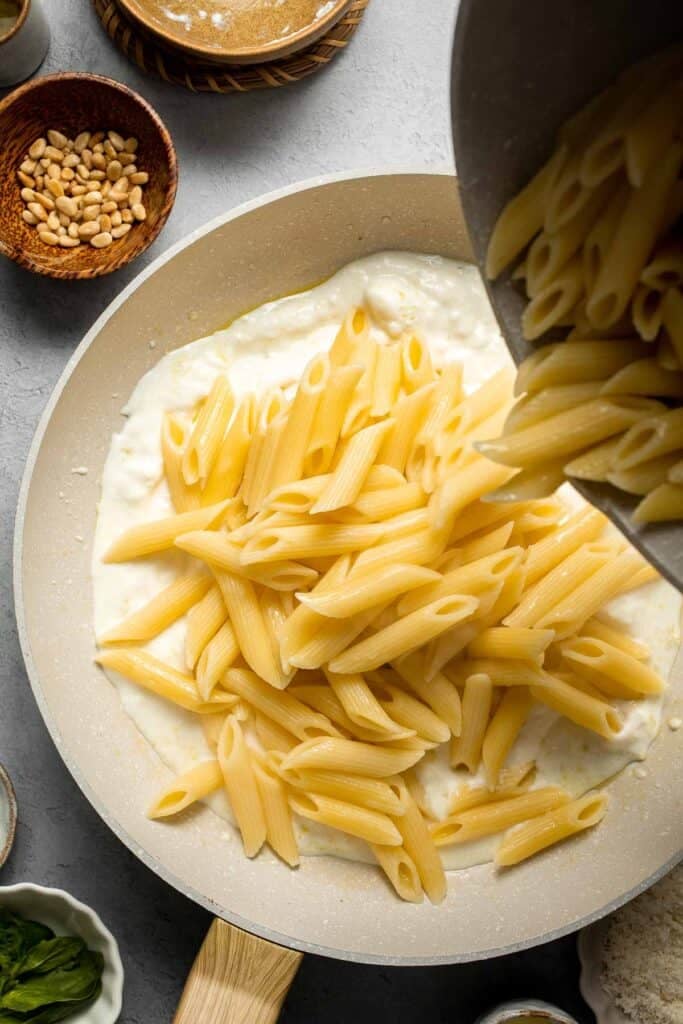
- Boil pasta. Bring a large pot of salted water to a boil over medium-high heat. Add pasta and cook until al dente according to package directions, about 8-10 minutes. Reserve ¼ cup of the hot pasta water in a bowl. Drain the pasta and set aside in the pot.

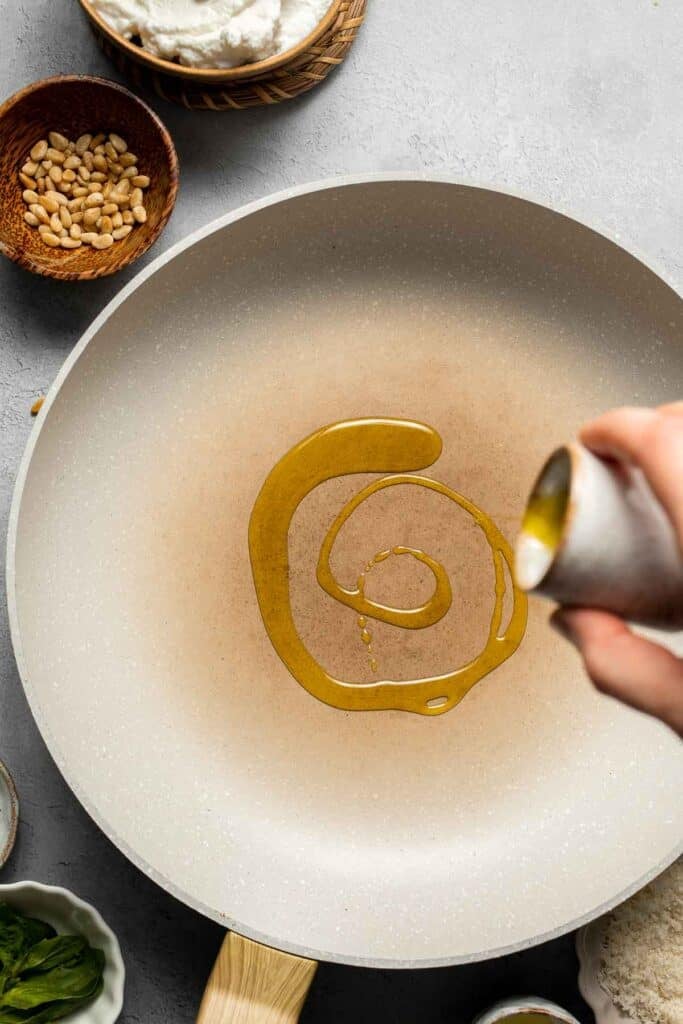
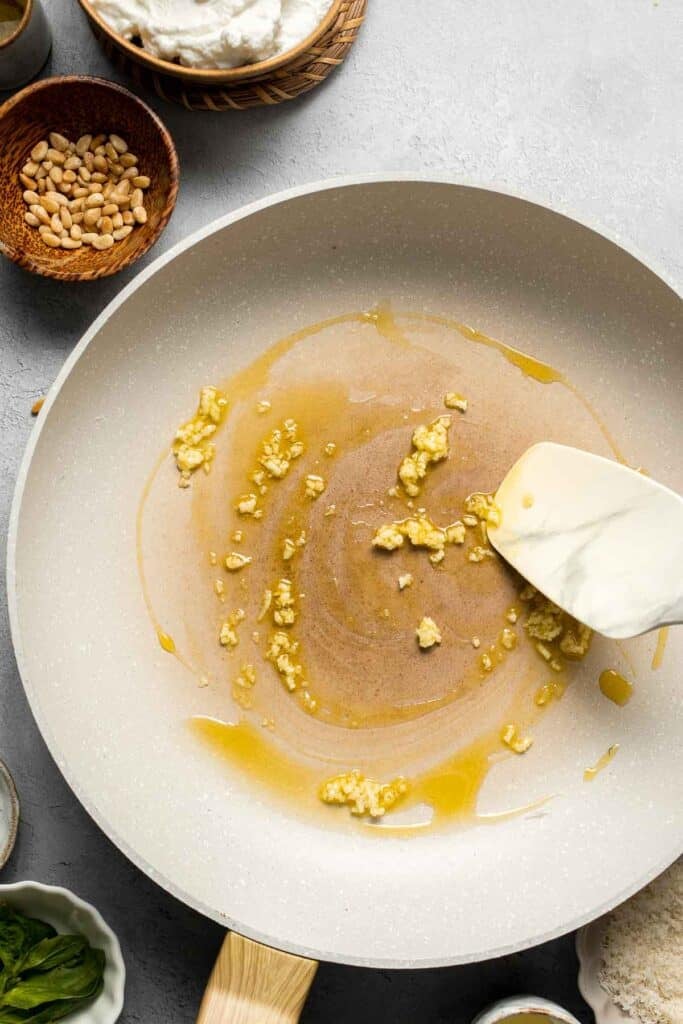
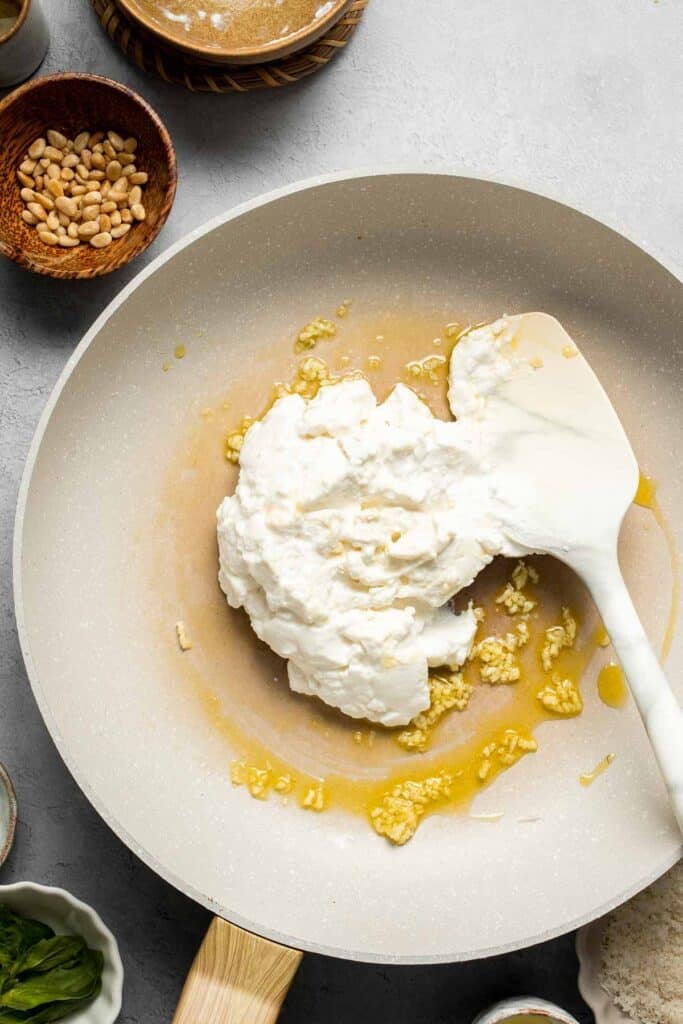
- Sauté aromatics. In a medium saucepan, heat oil over medium-high heat until it sizzles, about 1 minute. Add garlic and sauté until fragrant, about 30 seconds.
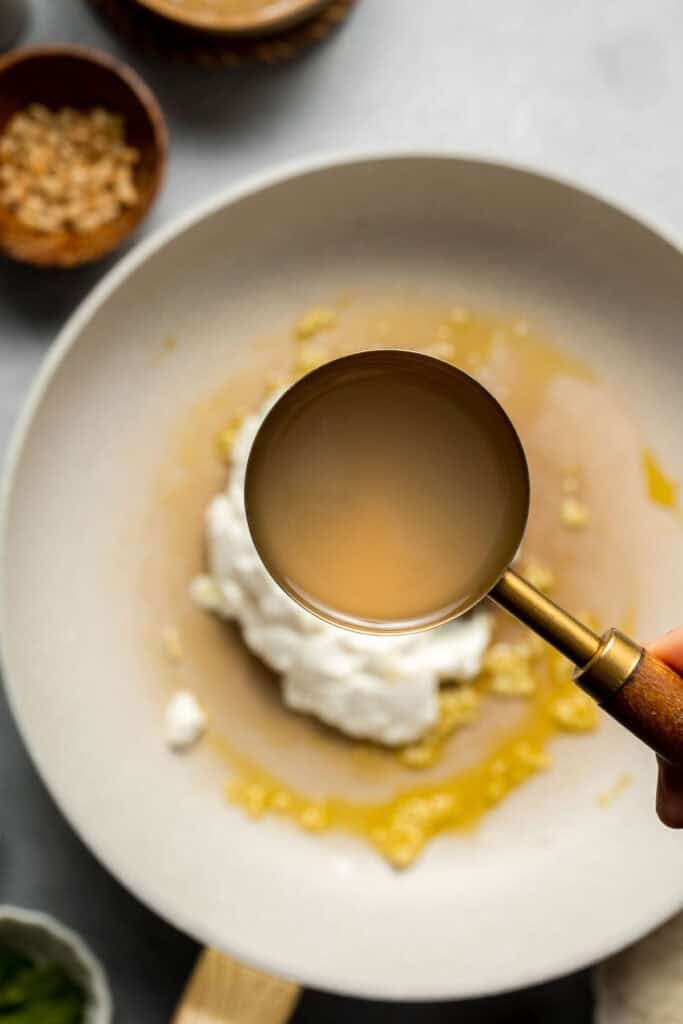
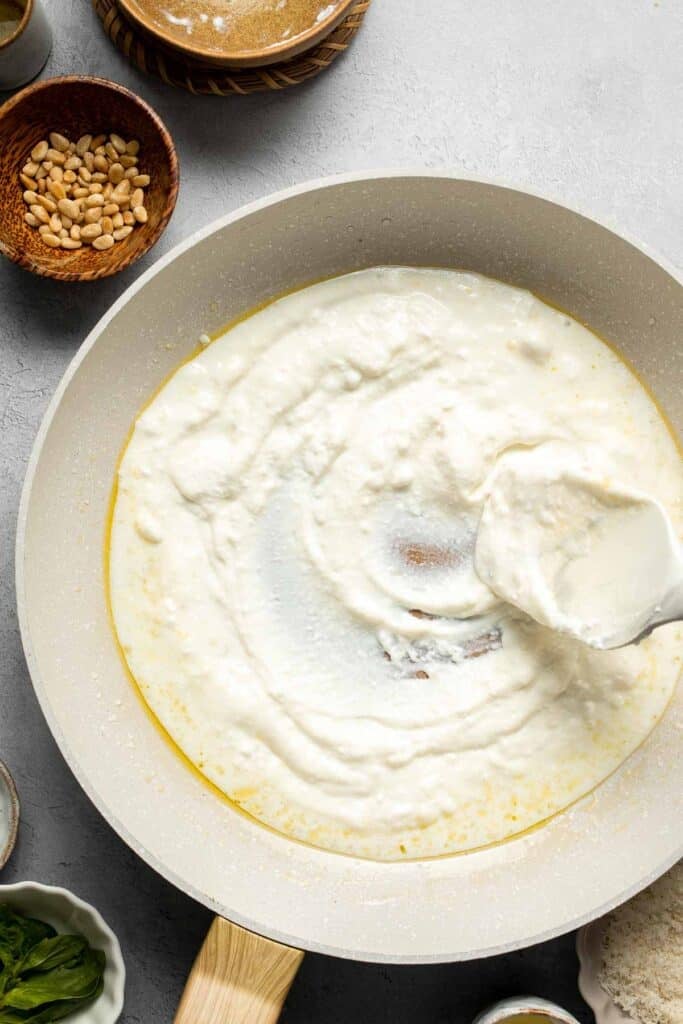
- Add cheese. Stir in ricotta cheese and reserved pasta water. Mix well until creamy.
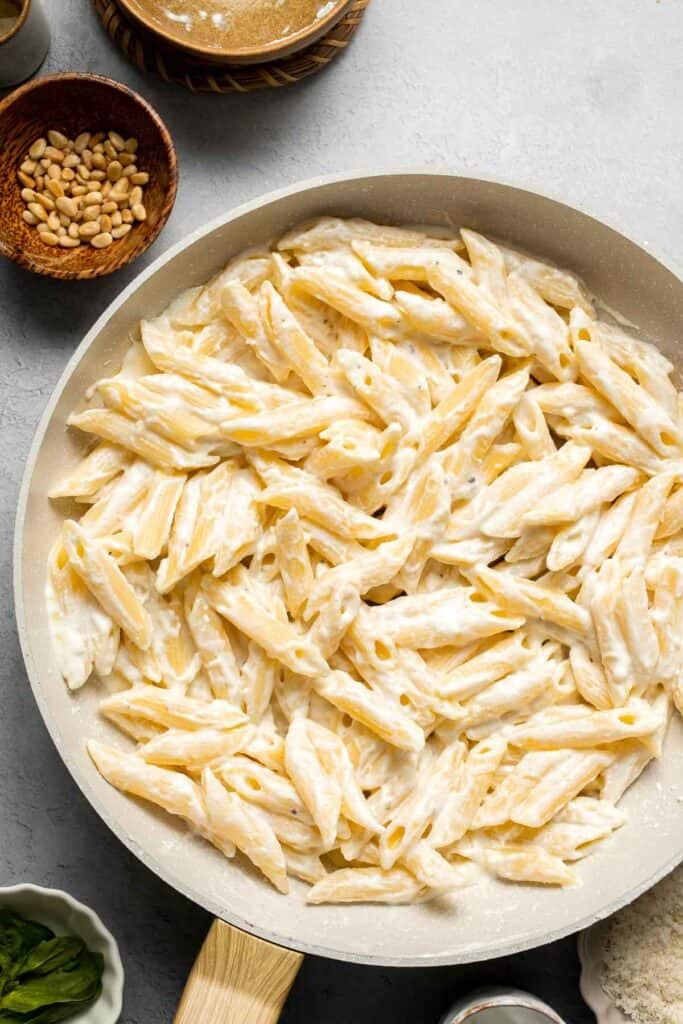
- Toss in pasta. Add cooked pasta to the pan and toss well. Season with salt and pepper and drizzle with lemon juice.
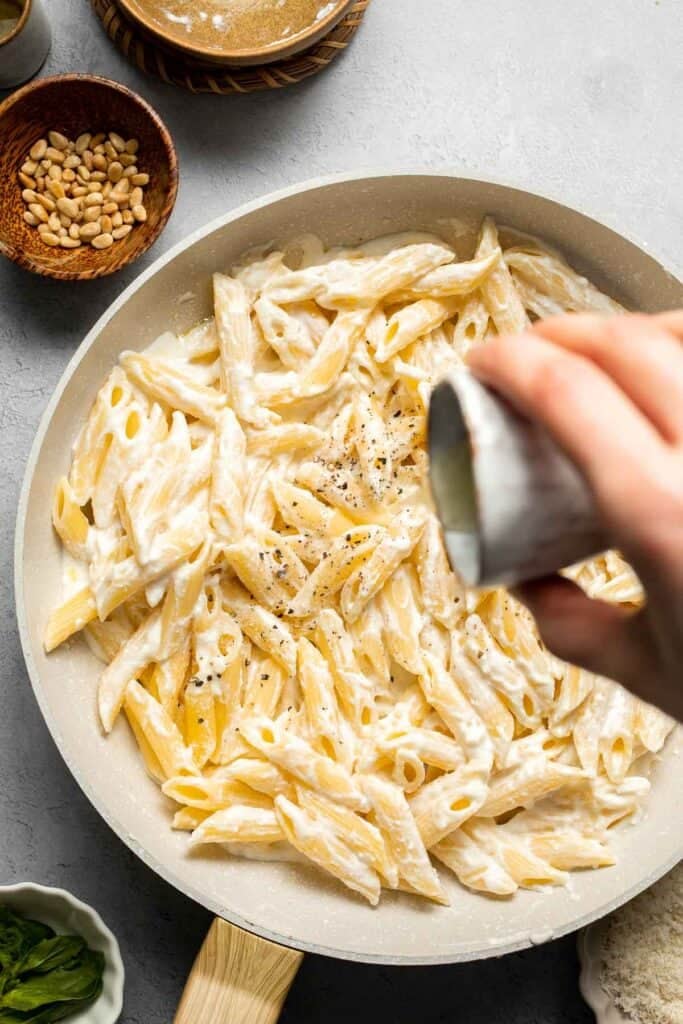
- Serve. Top with pine nuts and parmesan cheese. Garnish with fresh basil and lemon zest, if desired.
Recipe Variations
- Add veggies. Stir in sautéed spinach, cherry tomatoes, or roasted zucchini for a nutrient boost and extra flavor.
- Make it spicy. Add red pepper flakes or a dash of hot sauce for a little heat.
- Boost the protein. Mix in grilled chicken, shrimp, or crispy pancetta for a heartier dish.
- Use a different cheese. Swap Parmesan for pecorino Romano for a sharper, saltier bite.
How to Serve
This Lemon Ricotta Pasta is delicious on its own, but also pairs well with a variety of side dishes including:
- Simple Italian Salad
- Cheesy Garlic Bread
- Italian Lentil Soup
- Creamy Lemon Chicken Piccata
- Greek Salmon
For more recipes, see our 30 Side Dishes for Pasta.
Recipe Tips and Tricks
- Use high-quality ricotta. Fresh, high-quality ricotta makes a significant difference in flavor and texture. Whole milk ricotta also creates a creamier, richer sauce.
- Reserve pasta water. Adding a bit of starchy pasta water to the ricotta sauce helps create a silky, cohesive consistency that costs the pasta evenly.
- Don't overcook the pasta. Al dente pasta holds up better to the creamy sauce.
- Toast the pine nuts. A quick toast in a dry pan enhances their nuttiness and adds a delightful crunch.
- Serve immediately. Ricotta pasta is best enjoyed fresh, as the sauce thickens when cooled.
Storing and Freezing Instructions
How to Store
Transfer leftovers to an airtight container and store in the refrigerator for up to 3 days.
How to Reheat
Gently reheat the pasta on the stovetop over low heat, adding a splash of water or olive oil to loosen the sauce. Avoid overheating, as ricotta can become grainy.
How to Freeze
Ricotta pasta is best enjoyed fresh, but you can freeze leftovers for up to 1 month. Thaw in the refrigerator and reheat gently before serving.
FAQ
Ricotta cheese has a mild, creamy, and slightly sweet flavor that works beautifully in pasta dishes. It creates a rich and smooth sauce without being heavy. When combined with garlic, lemon juice, and Parmesan cheese, it adds a perfect balance of lightness and depth. Unlike aged cheeses, ricotta doesn't have a strong tang, making it a great base for both simple and complex pasta dishes.
Yes, but it's best enjoyed fresh. If you need to make it ahead, prepare the ricotta sauce and store it separately from the pasta. When ready to serve, cook the pasta and mix it with the sauce, adding reserved pasta water as needed to bring back the creamy consistency. Fresh basil and pine nuts should be added just before serving for the best flavor and texture.
Yes! If you don't have ricotta on hand, you can use cottage cheese for a similar texture, though it will be slightly tangier. Mascarpone cheese can be a luxurious substitute, adding an even creamier texture. For a sharper taste, a mix of ricotta and goat cheese works well.
More Ricotta Recipes
- Spinach and Ricotta Pasta Bake
- Ricotta Pancakes
- Baked Ricotta
- Whipped Ricotta Dip
- Stuffed Shells
- Ricotta Cookies
Tried this recipe?
I'd love to hear what you think! Leave a comment and rating below to share your feedback. Your reviews help others discover this recipe and help me keep creating more free recipes for you. Snap a photo and tag me on social media @aheadofthyme too.
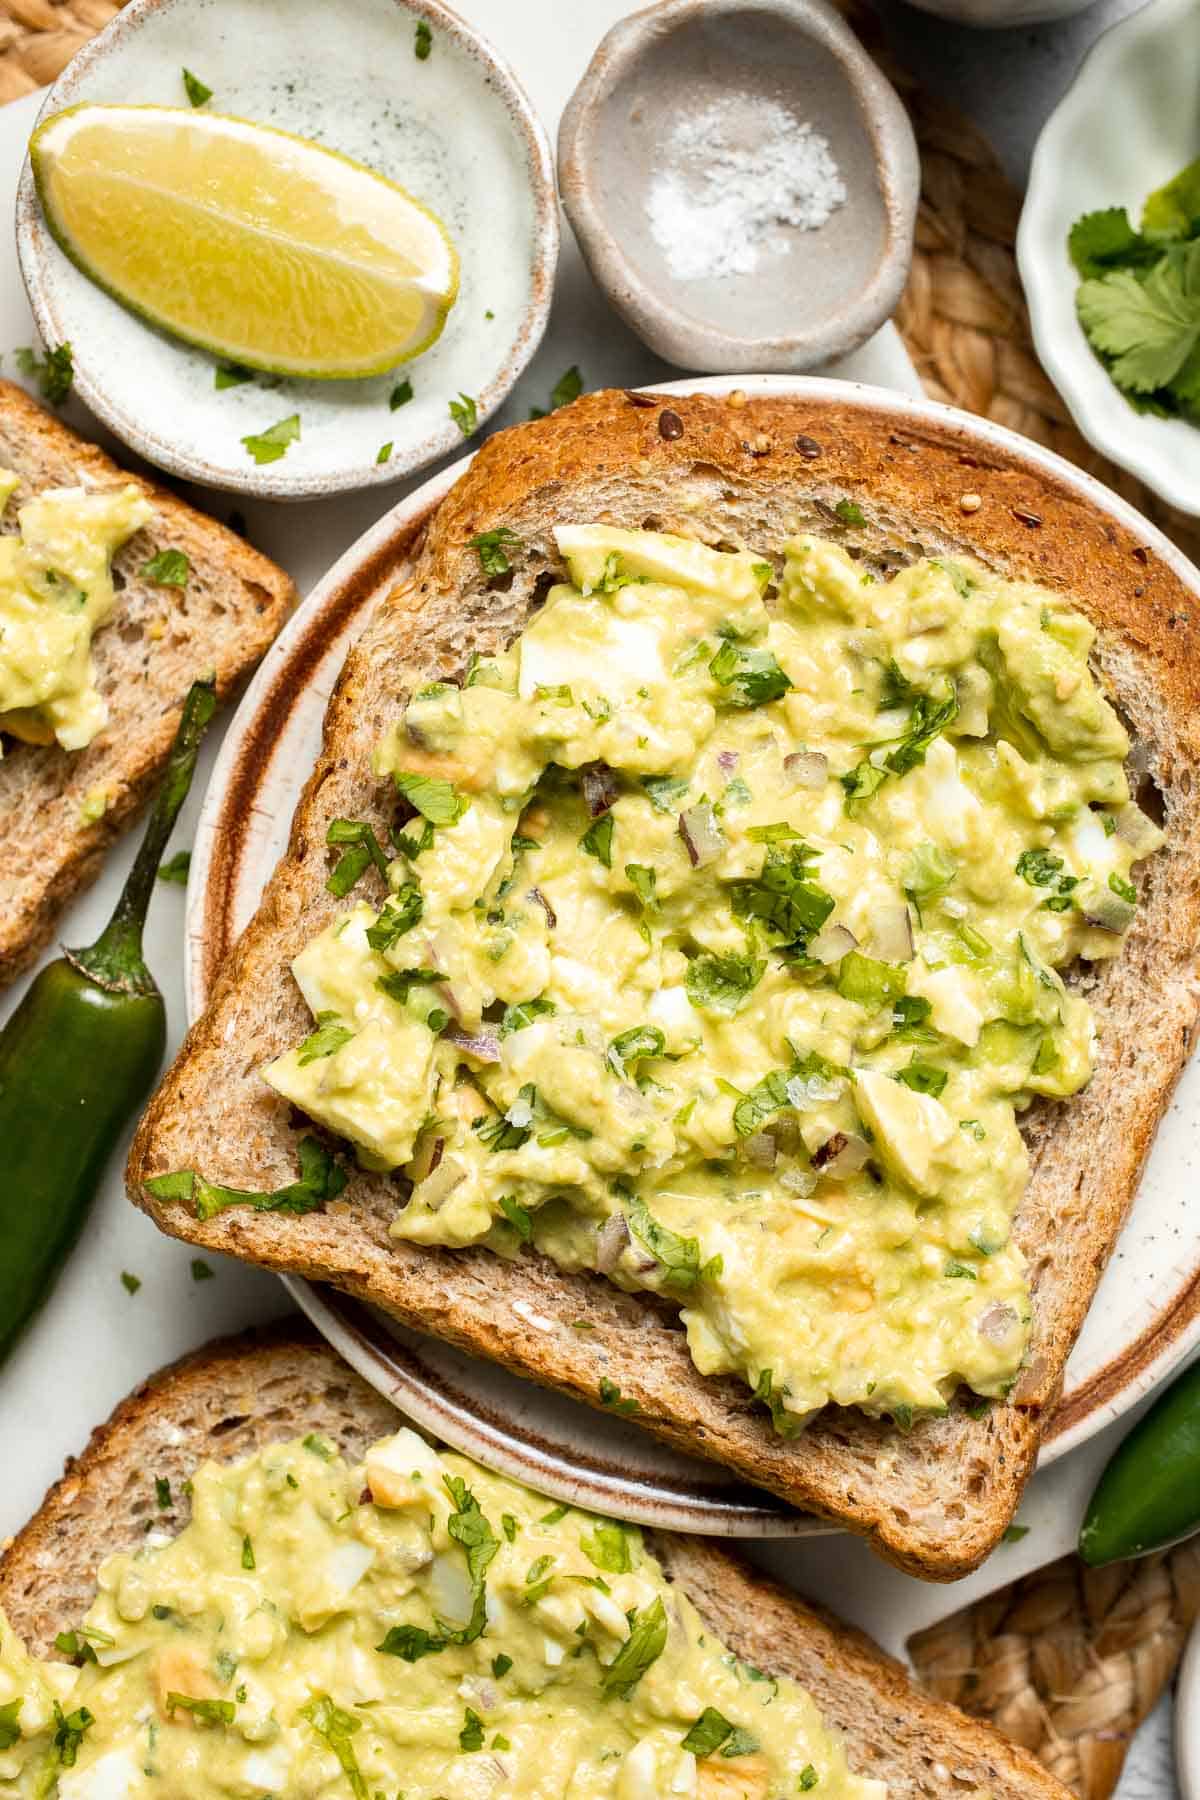
Avocado Egg Salad
This Avocado Egg Salad is a creamy, nutritious twist on the classic egg salad, combining rich avocado, hard-boiled eggs, and crunchy onions. With just a few simple ingredients, it comes together in minutes - perfect for a quick lunch or light dinner on busy days when you need something fast, delicious, and nourishing.

Egg salad is a timeless dish, loved for its simplicity and versatility. By adding avocado, you not only enhance the flavor but also boost the nutritional value with heart-healthy fats, fiber, and vitamins. This dish is naturally gluten-free and can be served in sandwiches, wraps, or even as a dip with crackers. Whether you're looking for a new way to enjoy egg salad or a healthy, filling recipe to add to your meal rotation, this avocado egg salad is sure to become a favorite!
Why You'll Love this Avocado Egg Salad
- Ultra creamy texture. The combination of mashed avocado and mayonnaise makes this egg salad extra smooth and velvety. Avocado naturally provides a buttery richness that enhances the overall creaminess, making every bite indulgent yet wholesome. If you're a fan of ultra-creamy egg salads, this one will be a game changer!
- Nutritious and satisfying. Avocados are loaded with healthy fats, fiber, and essential nutrients, while eggs provide high-quality protein. This combination keeps you full and energized for hours, making it a great option for a balanced meal or snack. Plus, the addition of fresh ingredients like lime juice and cilantro adds extra vitamins and minerals.
- Packed with fresh flavor. Bright lime juice, crisp red onion, and fresh cilantro bring a zesty freshness to this salad. A hint of jalapeño adds optional heat, making it a bold and flavorful dish that goes beyond your typical egg salad. Every bite is vibrant and delicious!
- Versatile and easy to make. This avocado egg salad is incredibly simple, requiring just a few ingredients and a quick mix. It's perfect for meal prep, sandwiches, wraps, or as a dip for veggies and crackers. You can also customize it with different add-ins to suit your taste preferences.
Ingredient Notes
To make this easy avocado egg salad, you will need the following ingredients (full measurements in recipe card below):
- eggs - hard-boiled eggs provide protein and structure. You can also use soft-boiled eggs for a creamier texture.
- avocado - choose ripe avocados for the best texture and flavor. If you don't have avocados, Greek yogurt can add creaminess instead.
- red onion - gives the salad a mild sharpness. Green onions or shallots can also be used for a milder onion flavor.
- cilantro - fresh and fragrant, adding brightness to the salad.
- mayonnaise - enhances creaminess and ties everything together. Substitute with Greek yogurt or leave it out for a lighter version.
- lime juice - prevents the avocado from browning and brightens up the flavors. Lemon juice can be used instead of lime juice for a slightly different citrusy note.
- sea salt - enhances all the flavors in the salad.
- jalapeño pepper (optional) - adds a spicy kick for those who enjoy a bit of heat.
You will also need measuring cups and spoons, a medium saucepan, and a large mixing bowl.

How to Make the Best Avocado Egg Salad
- Hard boil the eggs. Place eggs into a medium saucepan and cover completely with water by an inch. Bring to a boil over high heat. Then remove from heat, cover the saucepan with the lid, and set aside for 12 minutes in the boiling water. (You can also steam cook the eggs in a steamer basket for 15 minutes).


- Drain. Drain the water and fill with cold water to cool down the eggs quickly.
- Chop. Once eggs are cool, peel and roughly chop them. Set aside


- Mash avocado. In a large mixing bowl, add the avocado and mash with a fork. Don't over mash if you want the avocado to be a little chunky.


- Add remaining ingredients. Add chopped eggs, red onion, cilantro, mayonnaise, lime juice, salt, and jalapeño (if using). Stir to combine. Give it a taste and add more salt or lime juice if needed.


- Serve. Serve the avocado egg salad as is in a serving bowl or top it on your favorite bread.
Recipe Variations
- Add crunch. Mix in diced cucumber, celery, or chopped nuts like almonds or walnuts for an extra crunch that adds variety to the texture.
- Make it spicy. If you love heat, increase the jalapeño amount or add a pinch of red pepper flakes for an extra fiery twist.
- Boost the protein. Stir in diced cooked chicken or chickpeas to make this salad even more protein-packed and filling.
- Add herbs. Give it extra flavor with some chopped fresh herbs such as chives, parsley, or cilantro.
- Try different spreads. Instead of mayonnaise, use hummus, mashed cottage cheese, or even pesto for a unique twist.
How to Serve
This avocado egg salad is a delicious and versatile dish that can be served in many ways. Try serving it as a:
- sandwich - serve on toasted bread for an open-faced sandwich, or as a filling in between 2 pieces of bread for a regular hand-held sandwich.
- wrap - spread the avocado egg salad inside a whole wheat wrap with fresh greens and roll it up like a burrito.
- dip - serve it as a dip with crackers or sliced veggies.
- stuffed avocado - add the filling into an avocado half for a fun presentation and serve with a spoon.
Make it a more complete meal with some complementary side dishes including:
- Lemon Asparagus Soup with Parmesan
- Caprese Sandwich
- Pasta Primavera
- Stuffed Pepper Casserole
- French Bread Pizza

Recipe Tips and Tricks
- Use ripe avocados. The avocados should be soft but not overripe. If they have brown spots inside, scoop them out before mashing.
- Chop the eggs evenly. For the best texture, roughly chop the eggs instead of mashing them completely.
- Mix gently. Stir the ingredients together lightly to maintain some texture and avoid turning the salad into a paste.
- Serve fresh. Avocado tends to brown over time, so this salad is best enjoyed immediately or within a few hours.
Storing and Freezing Instructions
How to Store
Transfer the avocado egg salad to an airtight container and press a piece of plastic wrap directly onto the surface before sealing with the lid. This helps minimize oxidation and keeps it fresh for up to 24 hours in the fridge.
How to Freeze
Due to the avocado's delicate texture, freezing is not recommended. The salad will lose its fresh, creamy consistency after thawing.
FAQ
Yes, but it's best enjoyed fresh. Since avocado oxidizes quickly, the salad will start to brown within a day. If you need to prepare it in advance, store it in an airtight container with plastic wrap pressed directly onto the surface to slow down browning. Adding extra lime juice can also help preserve the color for a bit longer.
If you prefer a lighter alternative, Greek yogurt is a great substitute. It provides a tangy flavor while maintaining a creamy consistency. You can also use mashed avocado alone for a dairy-free and extra-healthy version.
For a spicier kick, add more diced jalapeño or a pinch of crushed red pepper flakes. You can also drizzle in a little hot sauce or mix in a spoonful of sriracha for an extra fiery boost.
More Recipes with Avocado or Eggs
- Avocado Toast with Poached Egg
- Deviled Egg Salad
- Avocado Hummus
- Breakfast Bagel
- Best Egg Salad Sandwich
- Deviled Eggs
Tried this recipe?
I'd love to hear what you think! Leave a comment and rating below to share your feedback. Your reviews help others discover this recipe and help me keep creating more free recipes for you. Snap a photo and tag me on social media @aheadofthyme too.

Kimchi Fried Rice
Kimchi Fried Rice is a bold, flavorful dish that takes just minutes to prepare! This spicy and savory stir-fried rice dish is a modern staple in Korean cuisine, made with fermented kimchi, umami-rich gochujang, and a few simple ingredients that transform plain rice into a delicious meal. Whether you enjoy it as a quick lunch, an easy 15-minute dinner, or a late-night snack, kimchi fried rice is a great way to use up leftover rice.

Kimchi is a staple in Korean cuisine, known for its fermented, tangy, and slightly spicy flavor. When stir-fried with rice, it creates a deep, umami-rich dish that's both comforting and packed with probiotics. This dish is versatile too - you can add proteins like tofu, chicken, or bacon to make it heartier, or keep it simple and plant-based. It's a great one-pan meal that's both budget-friendly and packed with probiotics, making it as nutritious as it is tasty!
Why You'll Love this Kimchi Fried Rice
- Bold and spicy flavors. Kimchi fried rice is anything but boring! The combination of tangy, fermented kimchi, spicy gochujang, and rich sesame oil creates a deep, bold flavor that hits all the right notes. The fermented tang of kimchi intensifies as it cooks, adding a savory, umami-packed punch that makes this dish stand out.
- Quick and easy. This dish comes together in just 15 minutes, making it an ideal choice for busy weeknights or whenever you need a fast, satisfying meal. Since it uses cooked rice, you can simply toss everything into a pan and have a flavorful dish ready in no time. There's minimal prep work involved, so it's great for beginners or anyone looking for a hassle-free recipe.
- Great for using leftovers. Have extra rice sitting in the fridge? This recipe is the perfect way to repurpose it into something delicious! In fact, day-old rice works even better than freshly cooked rice, as it absorbs the flavors and crisps up beautifully in the pan.
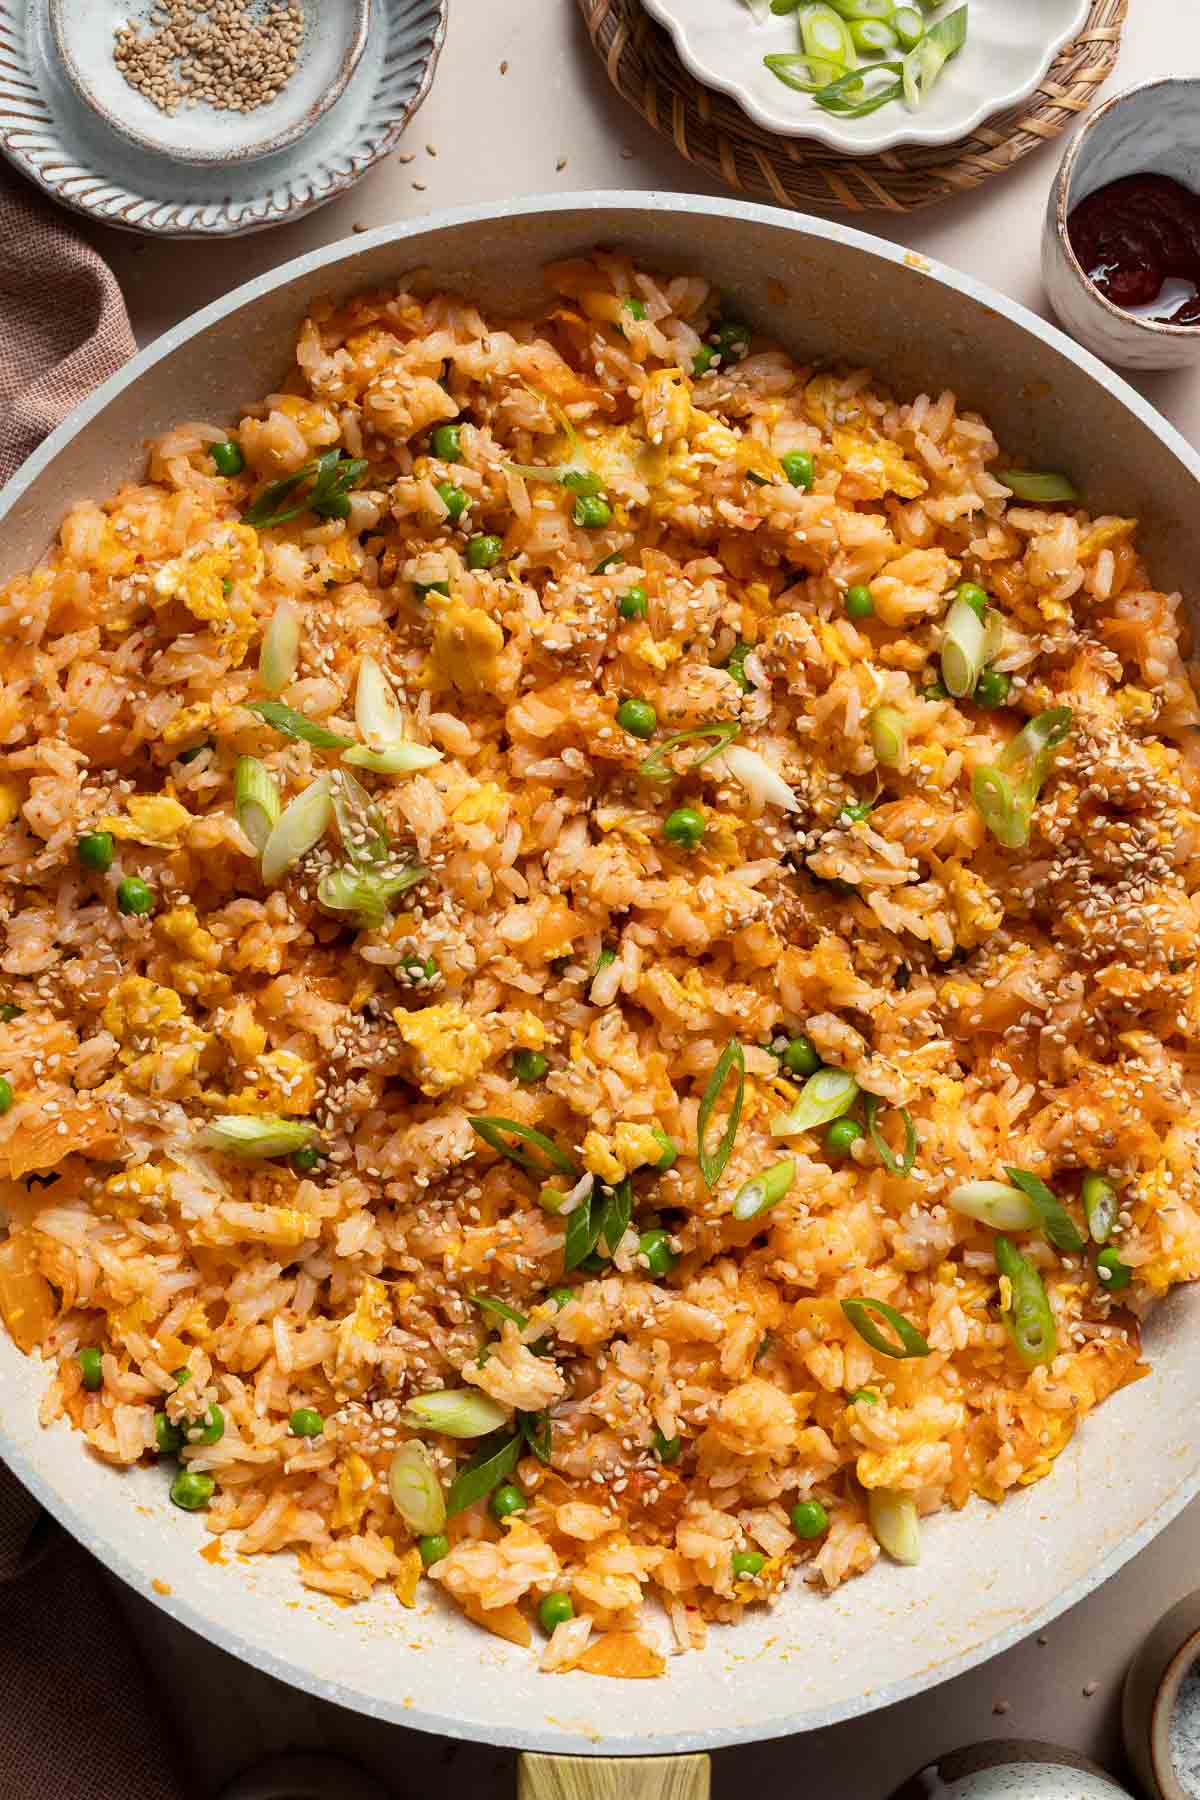
Ingredient Notes
To make this delicious Kimchi Fried Rice, you will need the following ingredients (full measurements in the recipe card below):
- avocado oil - used for stir frying, but you can substitute with vegetable oil, canola oil, or sesame oil for extra flavor.
- eggs - scrambled into the rice for protein and texture. Omit for a vegan version or use a tofu scramble as a substitute.
- cooked white rice - day-old jasmine rice works best, but any long-grain rice like basmati or even brown rice can be used.
- kimchi - the star ingredient that adds the signature tangy, spicy flavor. Use store-bought or homemade. For a milder option, try sautéed cabbage with a splash of vinegar and chili flakes.
- gochujang paste - this fermented red chili paste brings heat and umami. Substitute with sriracha, sambal oelek, or miso mixed with chili powder for a different take. If you don't like things spicy, just leave it out completely.
- green peas - Adds sweetness and texture. You can also use edamame, diced carrots, or omit them entirely.
- sesame oil - toasted sesame oil gives a deep, nutty flavor. If unavailable, you can leave it out, but the flavor won't be as rich.
- salt - adjust to taste based on the saltiness of your kimchi.
- green onions - used for garnish and fresh flavor. Chives or finely sliced shallots make good substitutes.
- roasted white sesame seeds - adds a toasty crunch. Swap with black sesame seeds or crushed peanuts for variation.
You will also need measuring cups and spoons, a large skillet or wok, and a spatula.
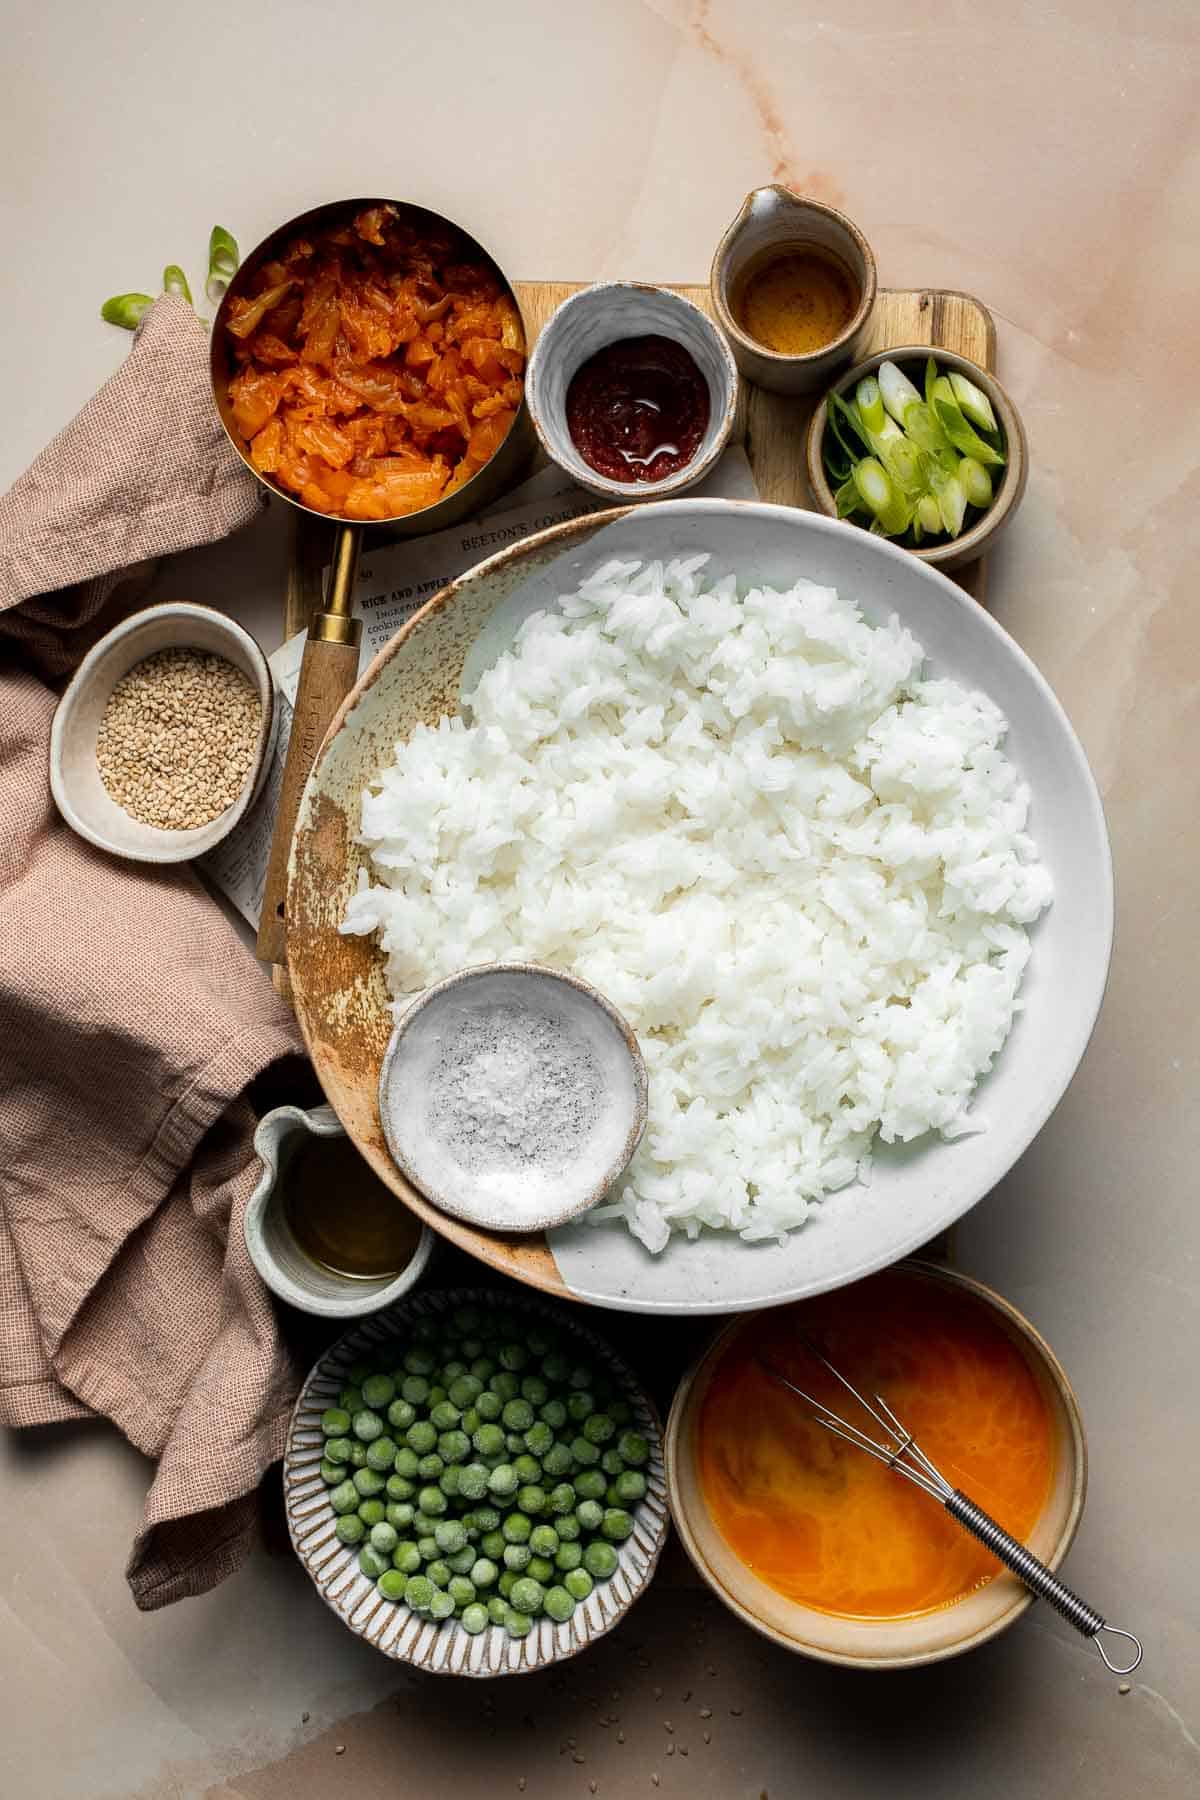
How to Make the Best Kimchi Fried Rice
- Cook eggs. Heat oil in a large wok or skillet over medium high until the oil sizzles, about 1-2 minutes Add beaten eggs. Stir fry until scrambled and cooked through, about 1-2 minutes, breaking it up into small bits.
- Add rice. Add rice and toss well to combine. If you are using leftover rice, add up to ¼ cup of kimchi juice or water to soften the rice.
- Add remaining ingredients. Add kimchi and green peas. Continue to toss and stir until peas are thawed and every grain of rice is separate. Season with sesame oil and salt.
- Serve. Sprinkle with green onion and sesame seeds. Serve immediately.
Recipe Variations
- Play with add-ins. This recipe can be expanded in many different ways. Toss in sautéed mushrooms, diced bell peppers, shredded carrots, or even crumbled seaweed for extra texture and umami flavor.
- Add protein. Stir in diced chicken, shrimp, or tofu to make this kimchi fried rice recipe even more filling. A classic option is to mix in thinly sliced pork belly for an extra-rich and savory dish. For a vegetarian option, try adding edamame or scrambled tofu.
- Make it extra spicy. If you love heat, add an extra spoonful of gochujang, a drizzle of sriracha, or some crushed red pepper flakes. Topping it with sliced fresh chili peppers can also enhance the spiciness and give each bite an extra kick.
How to Serve
This Kimchi Fried Rice is delicious on its own or paired with other Korean and Asian-inspired dishes such as:
- Korean Beef Bulgogi
- Korean Chicken Skewers
- Korean Ground Turkey
- Tofu Soup
- Chinese Garlic Cucumber Salad
- Kimchi Dumplings

Recipe Tips and Tricks
- Chop the kimchi finely. Cutting the kimchi into small pieces ensures that the flavor gets evenly distributed throughout the dish.
- Use day-old rice. Freshly cooked rice tends works but the texture might be a bit softer and stickier. Using rice that has been refrigerated overnight will achieve a firmer, chewier texture that crisps up beautifully in the pan.
- Adjust seasoning to taste. Kimchi and gochujang already contain salt, so taste your fried rice before adding additional seasoning. If you want more richness, a drizzle of soy sauce or a bit of butter can take the flavor to the next level.
- Don't skip the sesame oil. Adding sesame oil at the end gives the dish a rich, nutty aroma that enhances the flavors.
Storing and Freezing Instructions
How to Store
Allow the kimchi fried rice to cool to room temperature before transferring it to an airtight container. Store it in the refrigerator for up to 3 days.
How to Reheat
For best results, reheat Kimchi Fried Rice in a skillet over medium heat, stirring occasionally until warmed through. You can add a splash of water or sesame oil to keep it from drying out. Alternatively, microwave it in 30-second intervals, stirring in between.
How to Freeze
Once cooled to room temperature, place the rice in a freezer-safe container and freeze for up to 3 months. Thaw overnight in the refrigerator before reheating.
FAQ
Kimchi fried rice is a popular Korean dish made by stir-frying cooked rice with kimchi, gochujang, and a few simple ingredients. The result is a savory, slightly spicy, and deeply flavorful dish that is easy to customize and quick to prepare. It's a fantastic way to use up leftover rice and kimchi while creating a hearty, satisfying meal with minimal effort. Whether eaten as a main dish or a side, it's a staple in Korean home cooking and street food culture.
Kimchi fried rice has a mild to moderate level of spiciness, depending on the type of kimchi and the amount of gochujang used. If you're sensitive to spice, opt for mild kimchi and reduce or omit the gochujang. On the other hand, if you love extra heat, you can add chili flakes, spicy kimchi, or extra gochujang for a fiery kick. The spice level is easy to adjust, making it suitable for different preferences!
Yes, you can still make delicious kimchi fried rice without gochujang! If you don't have it on hand, try using a bit of soy sauce for umami, sriracha for spice, or a sprinkle of red pepper flakes to add heat. While gochujang adds a signature depth of flavor, the dish will still be tasty with just the kimchi providing the main seasoning. Adjust the ingredients to your spice preference for the best results.
More Fried Rice Recipes
- 30 Best Rice Recipes
- Vegetarian Fried Rice
- Pineapple Fried Rice
- Seafood Fried Rice
- Curry Chicken Fried Rice
- Leftover Turkey Fried Rice
Tried this recipe?
I'd love to hear what you think! Leave a comment and rating below to share your feedback. Your reviews help others discover this recipe and help me keep creating more free recipes for you. Snap a photo and tag me on social media @aheadofthyme too.

Persian Baklava
This Persian Baklava is a crispy and flaky pastry layered with finely ground nuts, infused with warm spices, and drenched in a fragrant rosewater and saffron honey syrup. This delicate dessert is a staple in most Middle Eastern cuisines, often served during special occasions and celebrations like Nowruz. The best part is that Persian baghlava is surprisingly easy to make!

Unlike other baklava varieties, Persian Baklava is known for its lighter texture, subtle sweetness, and distinct flavorings of pistachios, cardamom, rosewater, and saffron. The layers of crispy phyllo dough encase a spiced nut mixture, and the syrup is delicately perfumed rather than overly sugary. The result? A perfectly balanced pastry that melts in your mouth and pairs beautifully with tea or coffee.
Why You'll Love this Persian Baklava
- Aromatic and flavorful. Every bite of Persian Baklava is infused with the floral essence of rosewater, the warmth of cardamom, and the golden hue of saffron. These classic Persian ingredients make this bakhlava different from other kinds.
- Perfect balance of textures. The contrast between the crisp, flaky layers of phyllo dough and the soft, nutty filling is another reason that this dessert is so satisfying. The light syrup adds just the right amount of moisture and sweetness without making it heavy.
- Easier than you think. While baklava may seem intimidating to make, this recipe breaks it down into simple steps, making it approachable for home bakers. It's a lot easier than you think! Just chop up the nuts, make the filling, layer the phyllo dough, bake, and add the syrup. With a bit of patience, you'll have a stunning dessert to share.
- Great for gifting. Persian Baklava stays fresh for days and makes a beautiful homemade gift for family and friends during holidays and celebrations. Plus, this recipe makes a large batch of 36 baklava which makes it easy to distribute. for gifting.

Ingredient Notes
To make this delicious Persian Baghlava, you will need the following ingredients (full measurements in recipe card below):
- phyllo dough - these delicate, thin pastry sheets form the flaky layers. Handle them carefully and keep them covered to prevent drying out. You also want to use fresh phyllo dough. Dry or cracked sheets can make assembling difficult, so again, keep them covered with a damp towel.
- butter - melted butter is brushed between the layers of phyllo to achieve a crisp, golden finish.
- nuts - a combination of walnuts, pistachios, and almonds are finely ground to create the signature filling. You can also use just 2 out of the three varieties but keep the total portion amount the same (18 ounces). You can also use hazelnuts as a substitute for one of the nuts.
- sugar - sweetens the nut filling and is also used in the syrup.
- cardamom - a warm spice that adds depth and a distinctive Persian touch to the filling.
- cinnamon - another warm spices for flavor.
- rosewater - used in the syrup and gives this Persian baklava its signature floral aroma and taste.
- lemon juice - prevents the syrup from crystallizing and balances the sweetness.
- honey - used in the syrup for natural sweetness.
- saffron - this is optional but it adds a beautiful golden color.
You will also need measuring cups and spoons, 9x13-inch baking pan or sheet pan, food processor or blender, and saucepan.
How to Make the Best Persian Baklava
First, let's prep.
- Preheat. Preheat oven to 350F.
- Prep phyllo. Unroll the thawed phyllo pastry and trim it to fit a 9x13-inch baking pan (Depending on the brand you use, you may need to just cut it in half for a perfect fit, or trim the edges). Cover the phyllo with a damp cloth, to keep it from drying out.
- Grease. Use a silicone brush to brush some melted butter on the bottom and sides of a 9x13-inch baking pan. Set aside.
Then, make the filling.
- Chop the nuts. In a food processor or small blender, add the walnuts, almonds, and pistachios. Pulse mix for 1 minute until coarsely ground.


- Make filling. Transfer the crushed nuts to a medium mixing bowl. Add sugar, cardamon, and cinnamon, and stir until evenly combined.


How to assemble baklava
Assembling baklava is all about layering the delicate sheets of phyllo dough with the nut filling and then, after baked, drenching it in a sweet syrup.
- Layer 1: Phyllo. Take one sheet of phyllo dough and place on the lightly greased pan. Generously apply the butter mixture on top until evenly covered. Repeat until you have placed about ⅓ of the phyllo sheets (about 12 sheets), applying the butter mixture in between each layer.


- Layer 2: Filling. Add ⅓ of the nut mixture evenly over the dough layer.
- Layer 3: Phyllo. Add a layer of 6 sheets of phyllo dough (again each sheet is coated with butter mixture).


- Layer 4: Filling. Add a layer of ⅓ of the nut mixture.
- Layer 5: Phyllo. Add another layer of 6 sheets of phyllo dough (again each sheet is coated with butter mixture).
- Layer 6: Filling. Add remaining ⅓ of the nut mixture.
- Layer 7: Phyllo. Top with remaining phyllo sheets (all coated in butter). Brush the top sheet with butter.


Now, let's bake the baklava.
- Cut. Use a sharp knife and cut the baklava into 4 long rows about 1.5 inches thick, then cut diagonally 9 times to form 36 diamond shapes. Be sure to cut all the way through to the bottom layers.


- Bake. Bake the baklava in the preheated oven until golden brown on top, about 40-45 minutes.

Finally, let's add syrup and serve.
- Make the syrup. While the baklava is baking, make the syrup mixture by adding sugar, water, rose water, and lemon juice to a saucepan. Bring it to a boil over high heat and stir until the sugar dissolves. Then, reduce heat to low and allow the mixture to simmer for 20 minutes. Remove from heat and stir in the honey and saffron. Let cool completely.


- Add syrup. Remove baklava from the oven and immediately spoon the syrup over it. Let cool completely (uncovered at room temperature). Allow the baklava to sit at room temperature for a few hours before serving.
- Serve. Cut through the same lines you made before. Garnish with finely chopped pistachio and serve. You can also garnish with dried rose petals, if desired.


Recipe Variations
- Use different nuts. Swap out walnuts, almonds, or pistachios for almonds, cashews, hazelnuts, or a combination of your favorite nuts.
- Add orange blossom water. For a citrusy floral note, replace some or all of the rosewater with orange blossom water.
- Try a chocolate version. Add a thin layer of melted dark chocolate between the nut layers for a fun version. You can also add a drizzle of melted chocolate on top for a chocolatey twist.
- Cut them into squares. A very common way to cut baklava is to cut them into small squares instead of diagonals.
How to Serve
This Persian Baklava is delicious served as a dessert with Persian tea of coffee. Some delicious drinks and treats to pair this with are:

Recipe Tips and Tricks
- Brush each layer with butter generously. One of the secrets to achieving perfectly crisp and golden baklava is properly buttering each sheet of phyllo dough. This prevents the layers from drying out and helps them bake into that signature flaky texture. Be sure to brush melted butter evenly across the entire sheet, reaching the edges to avoid any dry spots. Using a pastry brush helps control the butter distribution and prevents oversaturation.
- Use a sharp knife to cut before baking. Baklava should be cut before baking to allow the syrup to penetrate every layer. A sharp knife ensures clean and precise cuts, preventing the delicate phyllo from tearing or crumbling. You can also refrigerate the baklava for 30 minutes before cutting to firm up the layers and make slicing easier.
- Let the syrup soak in. The key to achieving perfectly moist and flavorful baklava is allowing the cooled syrup to soak into the hot pastry (or vice versa). Pouring hot syrup over hot baklava can result in a soggy texture, while cold syrup over cold baklava won't absorb well. Allow at least a few hours for the syrup to fully absorb, but for best results, let it rest overnight so the flavors fully meld together.
Storing and Freezing Instructions
How to Store
Store baklava in an airtight container at room temperature for up to 5 days to maintain its crispy texture. You can also store it longer in the refrigerator for up to 2 weeks, but note that the texture can turn slightly soggy the longer it is stored.
How to Freeze
Freezing baked baklava
Allow the baklava to cool completely after baking and absorbing the syrup. Then, cut it into individual portions before freezing to make it easier to thaw and serve. Place the pieces in a single layer in an airtight container, separating layers with parchment paper to prevent sticking. Store in the freezer for up to 3 months. To serve, remove the desired number of pieces and let them thaw at room temperature for a few hours. You can also warm them slightly in the oven at 300°F (150°C) for 5-10 minutes to refresh their crispiness.
Freezing unbaked baklava
Assemble the baklava as usual, but do not bake or add syrup. Then, cover the baking tray tightly with plastic wrap and then with aluminum foil to prevent freezer burn.vFreeze for up to 3 months. When ready to bake, remove from the freezer and let it sit at room temperature for about 30 minutes before baking as directed. Once baked, pour the syrup over the hot baklava and let it soak before serving.
FAQ
Yes! Baklava is an excellent make-ahead dessert because it actually tastes better after sitting for a day or two. The syrup fully soaks into the layers, making it even more flavorful. You can prepare and bake baklava up to five days in advance and store it at room temperature in an airtight container. If making it even earlier, consider freezing it to keep the texture fresh and crisp for longer.
Baklava is best stored at room temperature in an airtight container to maintain its crispiness. Refrigerating it can make the phyllo layers soggy due to the moisture. However, if you live in a very humid climate or want to store it for an extended period, you can refrigerate it for up to two weeks. Just let it come to room temperature before serving to restore its best texture and flavor.
Baklava can become soggy if the syrup is too watery, if it's stored improperly, or if it was refrigerated. To keep it crispy, make sure the syrup has a slightly thick consistency before pouring it over the hot baklava. Also, allow it to cool uncovered for a few hours before covering it for storage. If already soggy, you can try crisping it up in the oven at 300°F (150°C) for a few minutes.
Yes! Reduce the amount of sugar in the nut mixture and use less syrup if you prefer a less sweet version. You can also use a honey-based syrup for a more natural sweetness.
More Persian Dessert Recipes
- Ghotab / Qottab Pastry (Persian Walnut Filled Crescents)
- Persian Love Cake
- Sohan (Persian Pistachio Brittle)
- Persian Rice Cookies with Poppy Seeds (Nan-e Berenji)
- Persian Chickpea Cookies with Pistachio (Nan-e Nokhodchi)
Tried this recipe?
I'd love to hear what you think! Leave a comment and rating below to share your feedback. Your reviews help others discover this recipe and help me keep creating more free recipes for you. Snap a photo and tag me on social media @aheadofthyme too.

Kookoo Sabzi (Persian Herb Frittata)
Kookoo Sabzi is a delicious and nutritious Persian frittata packed with fresh herbs, warm spices, and eggs. This classic Persian recipe is light and fluffy with a crisp, golden crust and a tender and soft interior. It is traditionally served for Nowruz (Persian New Year) but is enjoyed year-round as a delicious appetizer, side dish, or even a light main course.
While frittatas are often egg-forward, Kookoo Sabzi flips the script by using a generous amount of herbs - more than the eggs themselves. The result? A beautifully green, aromatic dish bursting with fresh flavors. Whether served warm or cold, as a side dish or a main course, this Persian favorite is a delicious way to enjoy nutrient-dense greens with minimal effort. Pair it with yogurt, fresh bread, or pickled vegetables for a delicious meal. It's stores and reheats well too, making it perfect for meal prep.
Why You'll Love this Kookoo Sabzi Recipe
- Packed with fresh herbs. Unlike a typical frittata, Kookoo Sabzi is made with more herbs than eggs, giving it a bright, earthy flavor and vibrant green color. Each bite bursts with the freshness of parsley, cilantro, dill, and chives, making it both nutritious and delicious.
- Easy to make. With a handful of ingredients including herbs and spices, and minimal prep, this Persian herb frittata comes together in under an hour. Simply chop the herbs (or throw it in a food processor to do all the work), whisk the eggs, mix everything together, and pan-fry to perfection.
- Healthy and nutritious. Kookoo Sabzi is loaded with fresh herbs, making it one of the healthiest frittatas! The herbs provides essential vitamins and antioxidants, eggs add high-quality protein, walnuts contribute heart-healthy fats, and turmeric offers anti-inflammatory properties. Whether you're looking for a protein-packed breakfast, a vegetarian-friendly meal, or a nutrient-dense snack, this dish checks all the boxes without sacrificing flavor.
- The best texture. Cooking Kookoo Sabzi in a pan with hot oil creates a beautifully crisp golden crust, while the inside remains soft and packed with flavor. It's a wonderful contrast of textures that makes every bite so satisfying.
- Perfect for any occasion. Whether you're making a quick weeknight meal, meal prepping for the week, or celebrating Nowruz (Persian New Year), this dish is a winner. It can be served warm or cold, as a side dish or main course, making it incredibly versatile.

Ingredient Notes
To make this delicious Kookoo Sabzi, you will need the following ingredients (full measurements in recipe card below):
- herbs - fresh herbs are the star of the dish! You'll need a mix of parsley, cilantro, dill, and chives (or spring onions). We also added in some dried fenugreek for added flavor, but you can leave it out if you cannot get your hands on it.
- eggs - the binding ingredient that holds everything together while keeping it light and fluffy.
- Greek yogurt - enhances the creaminess and adds a slight tang.
- walnuts - these are optional but we like to add them for their subtle crunch and rich, nutty flavor.
- barberries - these are also optional. They are tiny, tangy berries that provide bursts of tartness to complement the herbs.
- seasoning - you will need turmeric and paprika (optional), along with classic salt and pepper.
- cornstarch (or all-purpose flour) - helps with structure and binding.
- avocado oil - used for cooking the kookoo sabzi in a skillet.
You will also need measuring cups and spoons, mixing bowls, and a non-stick skillet.

How to Make the Best Kookoo Sabzi
- Combine herbs. In a large mixing bowl, combine all the herbs and mix until evenly distributed.


- Combine remaining ingredients. In another large bowl, whisk together eggs, yogurt, walnuts and barberries (if using), fenugreek, salt, pepper, turmeric powder, paprika, and cornstarch until smooth.


- Stir together. Add the egg mixture to the herbs. Stir until evenly combined.


- Add batter. In a non-stick 10-inch skillet, add oil and heat over medium heat for 1-2 minutes until hot. Add the batter and spread evenly.


- Cook. Cover the skillet and reduce the heat to low. Cook for 15-20 minutes until the top has set. You can run a rubber spatula along the outer edges of the frittata to make sure it's not sticking.
- Flip. Take a large plate (larger than the size of the pan) and place it upside down over the pan. Carefully flip the pan over to flip the frittata onto the plate.


- Cook on other side. In order to firm up the bottom half of the frittata, repeat the same process. Carefully slide the frittata back into the pan and cook for 10-15 minutes (covered) until the bottom is completely set.

- Cool. Remove from heat and allow it to cool. About 5-10 minutes.
- Serve. Garnish with crushed walnuts and dried barberries, if desired. Slice into wedges and serve warm or cold with Persian bread and yogurt.


How to Bake Kookoo Sabzi in the Oven
You can also bake Kookoo Sabzi instead. This is a great alternative if you prefer a hands-off method or want to use less oil.
To bake it, preheat your oven to 350°F (175°C) and lightly grease a baking dish or line it with parchment paper. Pour the herb and egg mixture into the dish, spreading it evenly. Bake for about 25-30 minutes, or until the edges are golden and the center is set. For a crispier top, you can switch to the broil setting for the last 2-3 minutes, keeping a close eye to prevent burning.
The baked version may not have the same crispy edges as the pan-fried one, but it still delivers a deliciously soft, flavorful interior. Let it cool slightly before slicing.
Recipe Variations
- Add potato. For a heartier variation, grate one medium potato and mix it into the batter. The potato adds a slight crispiness when fried and makes the frittata more filling.
- Add cheese. Fold in some feta, mozzarella, or Parmesan for a cheesy, saltier bite. The cheese complements the fresh herbs and adds a richer texture.
- Add meat. Mix in ground beef or lamb for extra protein. Lightly brown the meat with onions and spices before folding it into the batter.
- Make it gluten-free. Replace the flour or cornstarch with chickpea flour or simply omit it. The eggs and herbs will still bind together well, creating a naturally gluten-free version.
- Bake it. Instead of frying, bake the frittata in a greased dish at 350°F (175°C) for about 25-30 minutes. See full instructions above.
How to Serve
This Kookoo Sabzi is delicious served on its own as an appetizer with bread and yogurt or served as a side dish paired with Persian and Middle Eastern main dishes. During Nowruz, it's often served with sabzi polo (herbed rice) and fish, making it a festive and symbolic dish.
Some of my favorite ways to serve it are:
- Bread - Enjoy it with Persian flatbread (Lavash or Sangak Bread) for a classic experience.
- Yogurt - Serve it with a side of Mast-o-Khiar (Persian cucumber yogurt dip), or simply with Plain Yogurt.
- Rice - Pair it with Sabzi Polo (herb rice), Baghali Polo (dill rice), or plain Basmati rice.
- Sandwich - Stuff it into Pita Bread or in a French Baguette with pickled vegetables and fresh greens for a quick lunch.
- Grilled meats - Pair it with grilled meats like Persian Saffron Chicken Kebabs (Joojeh Kabob) or koobideh (ground beef kabobs).
- Platter - Enjoy it as part of a mezze platter with feta cheese, olives, and fresh herbs.

Recipe Tips and Tricks
- Use fresh herbs. The fresher the herbs, the more vibrant and flavorful the dish will be.
- Don't overmix the batter. Stir just until combined to keep the frittata light and fluffy.
- Flip carefully. If flipping the frittata is challenging, you can cut it into quarters and flip each section separately.
- Let it rest. Allow it to cool slightly before slicing for cleaner cuts.
Storing and Freezing Instructions
How to Store
To store leftover Kookoo Sabzi, let it cool to room temperature before placing it in an airtight container. It will stay fresh in the refrigerator for up to 4 days.
How to Reheat
Reheat in a pan over medium heat for a few minutes or microwave in short intervals until warmed through. For a crispier texture, use an air fryer or oven at 300°F for about 5-7 minutes.
How to Freeze
Kookoo Sabzi freezes well. Wrap individual slices in plastic wrap and place them in a freezer-safe bag or container. Freeze for up to 2 months. To reheat, thaw in the fridge overnight and warm in the oven or pan.
FAQ
Kookoo Sabzi is a Persian-style frittata that features a generous amount of fresh herbs bound together with eggs and lightly fried until golden brown. Unlike Western-style frittatas that rely heavily on eggs, Kookoo Sabzi is mostly herbs, giving it a deep green color and a fresh, earthy taste. It's often seasoned with turmeric, salt, and pepper and sometimes includes walnuts and barberries for extra texture and flavor.
Absolutely! Kookoo Sabzi is a fantastic make-ahead dish since it tastes just as good at room temperature or cold as it does fresh from the pan. Once cooked, allow it to cool completely before storing. You can refrigerate it in an airtight container for up to 4 days. If you're planning to serve it later, simply reheat slices in a pan over medium heat for a few minutes on each side, or warm them in the oven at 300°F (150°C) until heated through. Alternatively, Kookoo Sabzi can be served straight from the fridge as part of a mezze-style spread.
If your Kookoo Sabzi is falling apart, it's usually due to the ratio of eggs to herbs. Since this dish is heavy on herbs and light on eggs, it's important to use just enough eggs to bind everything together without making it too dense. If your mixture feels too dry, whisk in an extra egg before cooking. Another factor is chopping the herbs too coarsely - finely chopped herbs mix more evenly and hold together better when cooked. Also, make sure your pan is properly preheated and well-oiled before adding the mixture. If the heat is too low, the frittata may absorb too much oil and become soggy, making it harder to flip. A well-heated pan ensures a golden crust that helps keep it intact. Lastly, let it set before flipping - rushing this step can cause it to break apart.
While fresh herbs are best, you can use dried herbs if needed. Just reduce the amount since dried herbs are more concentrated in flavor.
More Persian Recipes
- Ghormeh Sabzi (Persian Herb Stew)
- Basmati Rice with Saffron
- Persian Shirazi Salad (Salad-e Shirazi)
- Persian Lentil Soup
- Persian Saffron Chicken Kebabs (Joojeh Kabob)
- Ghotab / Qottab Pastry (Persian Walnut Filled Crescents)
Tried this recipe?
I'd love to hear what you think! Leave a comment and rating below to share your feedback. Your reviews help others discover this recipe and help me keep creating more free recipes for you. Snap a photo and tag me on social media @aheadofthyme too.

What Recipes to Cook in March
Are you wondering what to cook in March? Browse our collection of 50 best March recipes to cook for breakfast, lunch, dinner, and dessert!
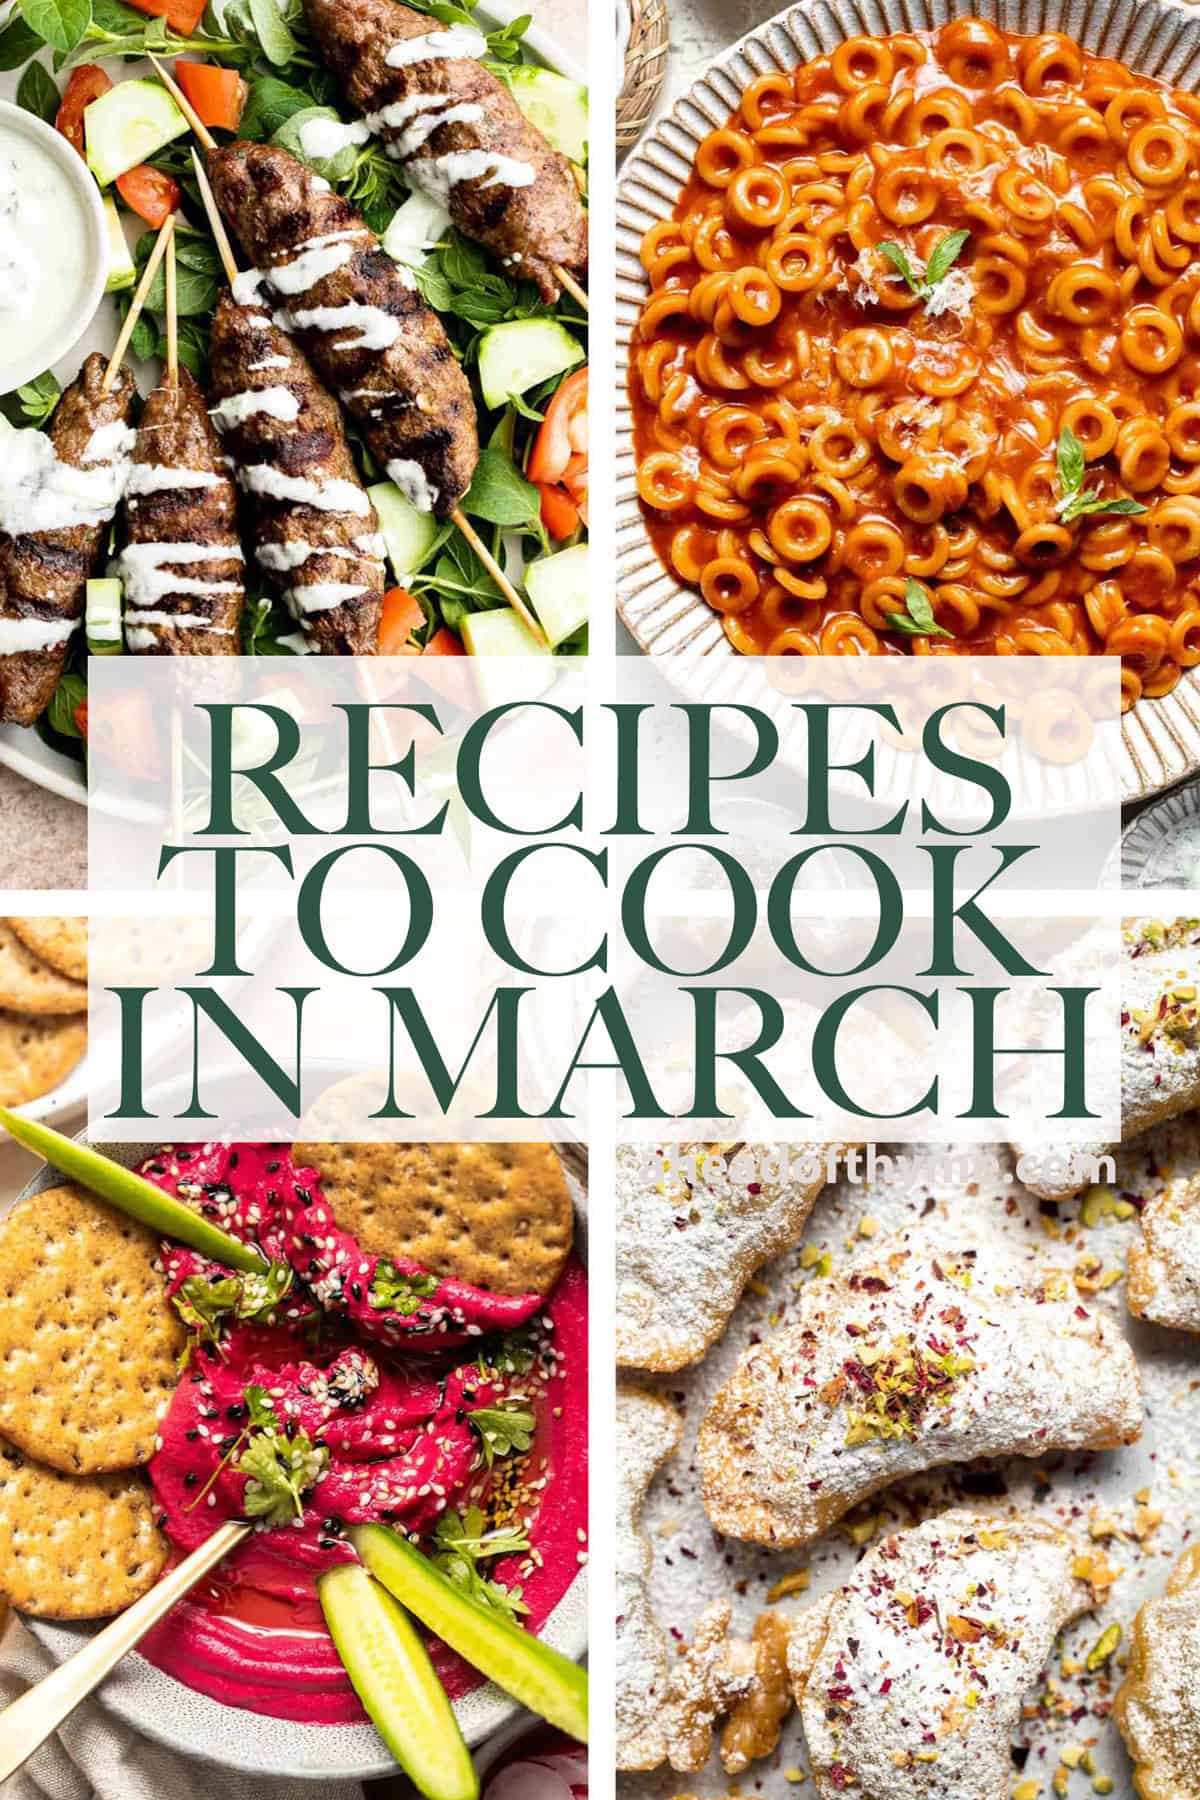
March has arrived, bringing the first signs of spring and a refreshing shift in seasonal flavors. As the days grow longer and the chill of winter starts to fade, it's the perfect time to embrace lighter, brighter meals while still enjoying cozy comfort foods. This month's recipes celebrate the best of late winter and early spring produce - think tender greens, crisp asparagus, sweet peas, and zesty citrus. Our latest collection of seasonal recipes highlights fresh, wholesome dishes that balance warmth and brightness. This roundup of the 50 best recipes to cook in March features nourishing breakfasts, vibrant salads, hearty yet refreshing dinners, and a hint of sweetness to welcome the new season.
What is in Season in March
March is all about embracing the transition from winter to spring through fresh, seasonal produce. This month, you'll find a mix of hearty winter staples and the first hints of vibrant spring ingredients, perfect for both comforting and lighter meals. Below is a list of some of our favorite fruits and vegetables at their peak this time of year. Follow the links to discover recipes that showcase each seasonal favorite!
| Fruits | Vegetables |
| Grapefruit Kiwi Lemon Lime Mandarins Oranges Pineapple Pomegranate Tangerines | Artichokes Arugula Asparagus Broccoli Brussels sprouts Cabbage Cauliflower Fennel Leeks Parsnip Radish Spinach Swiss Chard Turnips |
Holidays in March
March is a month of transition, bringing the first signs of spring and a mix of cultural, religious, and seasonal celebrations. As the days grow longer and nature begins to bloom, this time of year is filled with traditions that honor renewal, luck, and community. Whether it's a festival of colors, a day of remembrance, or a joyful gathering around food, March offers plenty of reasons to celebrate.
- St. Patrick's Day. Mid-March brings the joy of St. Patrick's Day, a time to celebrate with hearty Irish-inspired dishes. From traditional corned beef and cabbage to comforting Shepherd's Pie and soda bread, we've got everything you need for a festive feast. If you are hosting a green party, check out our 60 Green Recipes for St. Patrick's Day.
- Nowruz (Persian New Year). Marking the start of spring, Nowruz is a celebration of renewal, featuring symbolic dishes like herbed rice (sabzi polo), kuku sabzi, and sweet pastries. If you're looking to embrace the flavors of Persian cuisine, explore our Persian Recipes.
- Spring Gatherings. As winter fades, March is the perfect time for spring get togethers featuring bright and fresh meals including vibrant salads, light but satisfying pastas, and early spring produce like asparagus and peas. Need ideas? Check out our 60+ Best Spring Dinner Ideas.
March Breakfast Recipes
 |  |
- Carrot Cake Baked Oatmeal. Start your day off right with the coziest Carrot Cake Baked Oatmeal, with all the flavors of the classic dessert - but for breakfast!
- Chia Seed Pudding. Chia Seed Pudding is creamy, delicious, and healthy, loaded with protein, fiber, antioxidants, and healthy fats. Plus, it's easy to make with 3 ingredients.
- Vegetarian Breakfast Burritos. Vegetarian Breakfast Burritos are packed with crispy potatoes, veggies, fluffy eggs, cheese, and avocado. A balanced breakfast that actually keeps you full!
- Avocado Toast with Poached Egg. Avocado Toast with Egg is the perfect recipe to make for breakfast when you are short on time but looking for something delicious, healthy, and nutritious.
- Majoon (Banana and Date) Smoothie. Majoon banana and date smoothie is a delicious and healthy all-natural energy drink with bananas, dates and nuts. The perfect breakfast or snack.
- Chilaquiles Verdes. Chilaquiles Verdes feature crispy baked tortilla chips smothered in a homemade sauce loaded with salsa verde and features classic Mexican toppings.
- Mediterranean Scrambled Eggs. Mediterranean Scrambled Eggs with spinach, tomato, and feta is loaded with flavor and a quick and easy breakfast to make in under 10 minutes (with prep!).
- French Toast. This Classic French Toast is light and fluffy, crisp and browned on the edges, and so delicious. The best part? Breakfast is ready in under 15 minutes.
- Homemade Yogurt. Thick and creamy homemade yogurt is so easy to make at home with just 2 ingredients, a heavy pot, and just a few minutes of actual hands on prep work.
- Banana Chocolate Chip Oatmeal Muffins. Banana chocolate chip oatmeal muffins are a quick and easy breakfast or snack that you can meal prep and enjoy all week (or longer if you freeze them).
March Lunch Recipes
 |  |
- Artichoke Soup. Creamy artichoke soup is rich, healthy, delicious, easy to make, and freezer-friendly. This vegetarian soup is loaded with artichokes, leeks, and potatoes.
- Chicken Parmesan Stuffed Peppers. Chicken parmesan stuffed peppers are delicious, flavorful, healthy, and filling, and combines two all-time favorites. Great for meal prep and freezes well.
- Kookoo Sabzi. Kookoo Sabzi is a delicious and nutritious Persian frittata packed with fresh herbs, warm spices, and eggs. Serve as a delicious appetizer or side dish.
- Sesame Noodles. Easy Sesame Noodles are proof that simple ingredients can create incredible flavor. Ready in 20 minutes, it's perfect for lunch, meal prep, or weeknights.
- Italian Lentil Soup. Italian Lentil Soup transforms simple pantry staples (like lentils and canned tomatoes) and fresh veggies into a hearty meal to warm you up on a cold day.
- Persian Shirazi Salad. Persian Shirazi Salad with cucumber and tomato is a healthy, light, and simple salad packed with herbs and tossed in an olive oil lime dressing.
- Mexican Ground Beef Tacos. Ground beef tacos are delicious, authentic, and so easy to make. They're savory, spicy, creamy, and fresh. The perfect recipe for a Mexican fiesta.
- Roasted Broccoli Grilled Cheese. Take your grilled cheese game to the next level with Roasted Broccoli Grilled Cheese Sandwich made with broccoli, red peppers, cheddar, and mozzarella.
- Hamburger Soup with Macaroni (Goulash Soup). Hamburger soup with macaroni is a quick and easy weeknight dinner that's wholesome, filling, comforting and nutritious. Prep, cook and serve under an hour.
- Shrimp Taco Salad. Shrimp taco salad with cilantro lime dressing is flavourful, delicious, and easy to make. It has all the fixings and of shrimp tacos, but without the mess.
March Dinner Recipes
 |  |
- Homemade SpaghettiOs. This comforting Homemade SpaghettiOs recipe brings back all the nostalgia of the classic canned version but with better ingredients and flavor.
- Tofu Coconut Curry. Quick and easy Tofu Coconut Curry is nourishing, satisfying, and so delicious. It's ready in just 20 minutes, making it a one pot meal for busy weeknights.
- Persian Herb Rice.
- Greek Lamb Shanks. Greek lamb shanks are tender, flavorful, delicious, and literally fall off the bone. Make this Mediterranean lamb in the oven, instant pot, or slow cooker.
- Creamy Chicken Pesto Pasta. Creamy Chicken Pesto Pasta is a delicious 30 minute recipe that is packed with flavor, quick and easy to make, and will satisfy the whole family.
- Beef Kofta Kebabs. Mediterranean Beef Kofta Kebabs are juicy, tender, flavorful, and well seasoned . These grilled ground beef skewers are quick and easy to make in 30 minutes.
- Instant Pot Short Ribs. Instant Pot Short Ribs are rich, tender, and delicious. These short ribs fall-off-the-bone after being braised in a red wine broth in the pressure cooker.
- Creamy Tuscan Shrimp. Creamy Tuscan shrimp packed with sun-dried tomatoes, spinach, and garlic, is creamy, rich, and delicious. Make it in just 15 minutes, including prep!
- Vegetable Pasta Bake. Feed the whole family on busy weeknights with this hearty Vegetable Pasta Bake that is easy to make, packed with veggies, and loaded with flavor!
- Instant Pot Whole Chicken. Instant pot whole chicken with gravy is tender, juicy, and flavorful. It's the fastest way to cook a whole rotisserie chicken for dinner in just 40 minutes.
- Miso Black Cod (Sablefish). Flaky, oily, and tender, miso black cod (or sablefish) packed with delicious Asian flavours is an indulgent meal that's as healthy as it is delicious.
March Appetizers and Snacks
 |  |
- Sweet Chili Turkey Meatballs. Sweet chili turkey meatballs are delicious, tender and juicy, loaded with classic Thai flavors, and quick and easy to make. Savory, sweet, and tangy.
- Beet Hummus. Beet Hummus is a smooth and creamy vegan dip that is made with healthy ingredients including real beets. It's flavorful, delicious, vibrant and colorful.
- Cauliflower Tots. These Cauliflower Tots are everything you want in a tater tot - but better! They are crunchy on the outside, tender inside, higher in fiber, and cheesy.
- Pizza Fries. Baked Pizza Fries are loaded with a rich marinara sauce, melted cheese, and crispy pepperoni - transforming ordinary fries into the ultimate finger food.
- Roasted Asparagus and Mushrooms. Roasted garlic asparagus and mushrooms is a simple vegan sheet pan side dish that's easy to make, flavorful and delicious. Serve with your favorite protein.
- Black Bean Nachos. These loaded Black Bean Nachos are the ultimate vegetarian appetizer or snack - warm, crunchy, gooey, and so easy to make.
- Creamy Artichoke Dip. Homemade artichoke dip is a warm, creamy dip loaded with tender artichoke hearts. This easy to make appetizer is tangy, cheesy, and all-around delicious!
- Toasted Ravioli. Toasted Ravioli is a classic Italian appetizer that is crispy and golden on the outside, and tender and gooey on the inside. Ready in less than 30 minutes!
- Kimchi Dumplings. Kimchi Dumplings are savory, delicious, and flavorful. These Korean-inspired dumplings get seared and steamed to create classic crispy bottom potstickers.
- Cheese Quesadilla. This Cheese Quesadilla has the perfect combination of crispy, cheesy, and flavorful. Ready to serve in just a few minutes with your favorite toppings.
March Desserts
|  |
- Persian Baklava. Persian Baklava is a crispy, flaky pastry layered with ground nuts, infused warm spices, and drenched in a fragrant rosewater and saffron honey syrup.
- Lemon Bundt Cake. Lemon Bundt Cake with a sweet vanilla glaze is light, fluffy, and moist with a perfect golden brown crumb and made with real lemons.
- Carrot Cake Cookies. Carrot Cake Cookies are soft, chewy, cake-like cookies with a delicious homemade cream cheese glaze. They taste just like carrot cake but in cookie form.
- Pistachio Macarons. Pistachio Macarons are delicate, chewy, melt-in-your-mouth cookies filled with pistachio white chocolate ganache filling and chopped pistachios on top.
- Ghotab. Ghotab (or Qottab) are traditional Persian walnut-filled crescent pastries that are delicate and crisp outside with a spiced, nutty filling inside.
- Oreo Brownies. Oreo Brownies are a fudgy, rich and decadent dessert that is quick and easy to make from scratch in about 30 minutes using simple ingredients.
- Persian Love Cake. Persian Love Cake is a rich, moist, and nutty almond cake loaded with floral and citrus flavors, topped with a lemon glaze, pistachios, and rose petals.
- Classic Shortbread Cookies. These sweet, crisp, buttery, classic Shortbread Cookies are so light that they practically dissolve in your mouth. They're easy to make with 5 ingredients.
- Brookies Cookies. Brookies Cookies are the perfect combination of two iconic desserts - brownies and chocolate chip cookies. Quick and easy to make with no chilling!
- Nanaimo Bars.
More Spring Recipes
- Spring Produce Guide
- 60+ Spring Dinner Ideas
- 40 Best Salad Recipes
- 40 Best Pasta Recipes
- 50+ Healthy Lunch Ideas
- 50 Best Spring Desserts
Did You Make Any of These March Recipes?
Please leave a comment and rating below, and let me know what you thought of this round up of delicious recipes to cook this March. Be sure to snap a picture and tag me on Instagram @aheadofthyme or share it on the Pinterest pin so that I can follow along.
HUNGRY FOR MORE? Don't forget to sign up for my email newsletter so that you don't miss any recipes. You can also follow along on Instagram and Pinterest for more recipe updates.
Persian Shirazi Salad (Salad-e Shirazi)
Light, crisp, and bursting with fresh flavors, Persian Shirazi Salad (or Salad-e Shirazi in Farsi) is the ultimate side dish for any meal. Made with finely diced cucumbers, tomatoes, and onions, this simple yet vibrant salad is packed with herbs and tossed in a zesty lime and olive oil dressing. Whether you're serving it alongside a hearty Persian feast or pairing it with grilled meats, this refreshing salad is a must-try.
What makes salad Shirazi so special is its balance of flavors and textures. The crunchy cucumbers, juicy tomatoes, and aromatic herbs come together for a dish that is both refreshing and satisfying. Unlike traditional chopped salads, this one features finely diced vegetables, ensuring every bite is perfectly balanced. Plus, it's incredibly easy to make, requiring just a handful of ingredients and a few minutes of prep time.
Why You'll Love this Persian Shirazi Salad Recipe
- So quick and easy. With just a few fresh ingredients and minimal chopping, this salad comes together in under 10 minutes, making it perfect for busy days.
- Light, fresh, and hydrating. This salad is naturally hydrating, thanks to the high water content of cucumbers and tomatoes. The refreshing flavors make it an ideal dish for warm weather, providing a cooling contrast to heartier mains. Plus, the lime juice enhances the crispness of the veggies, making every bite feel incredibly fresh.
- Packed with herbs and flavor. Unlike similar cucumber-tomato salads, Shirazi Salad is loaded with fresh parsley and dried mint, giving it a uniquely fragrant and herbaceous taste. The combination of these herbs elevates the dish beyond just a simple side salad - it's an unforgettable part of the meal!
- Great for meal prep. This salad holds up well in the fridge, allowing you to prepare it in advance for quick and easy meals throughout the week. The flavors only get better as they meld together, making it even tastier the next day.

What is Shirazi Salad?
Shirazi salad (known as salad-e shirazi) is a traditional Persian salad that originated in southern Iran. Similar to a Greek salad, its main ingredients are tomato, cucumber, and onions, but it has a lot more herbs. The vegetables are also diced into small pieces, like in a pico de gallo.
Ingredient Notes
To make this flavorful Persian Shirazi Salad, you will need the following ingredients:
- tomatoes - use ripe, firm tomatoes for the best texture. Roma tomatoes or cherry tomatoes work well.
- cucumbers - Persian cucumbers are ideal for their thin skin and crisp texture. English cucumbers can also work. If using a regular cucumber, peel and deseed it to avoid excess moisture.
- onions - feel free to use any kind of onions. Red onions add a mild sweetness, but white or yellow onions can be used for a sharper bite.
- olive oil - as this forms the base of the salad dressing, try to use a good-quality extra virgin olive oil to enhance the flavors of the salad.
- lime juice - fresh lime juice gives the salad its signature tang. If you are out, lemon juice or a splash of vinegar can be used in place of lime.
- parsley - fresh herbs add a bright, fresh element.
- mint - this is a key ingredient that sets this salad apart. We used dried mint but you can easily substitute it with fresh mint instead. Note that dried mint provides a more concentrated flavor.
- salt and pepper
You will also need measuring cups and spoons and a sharp knife for precise chopping.

How to Make the Best Persian Shirazi Salad
Salad Shirazi is ridiculously easy to make in 5 minutes with a few simple ingredients. Once you have prepped and diced your vegetables, you simply toss them together with the dressing and herbs.
- Prep the veggies. Dice the tomatoes, cucumbers and onions into small ¼-inch pieces. Transfer to a medium mixing bowl.
- Add dressing and herbs. Add olive oil, lime juice, parsley, mint, salt, and pepper.
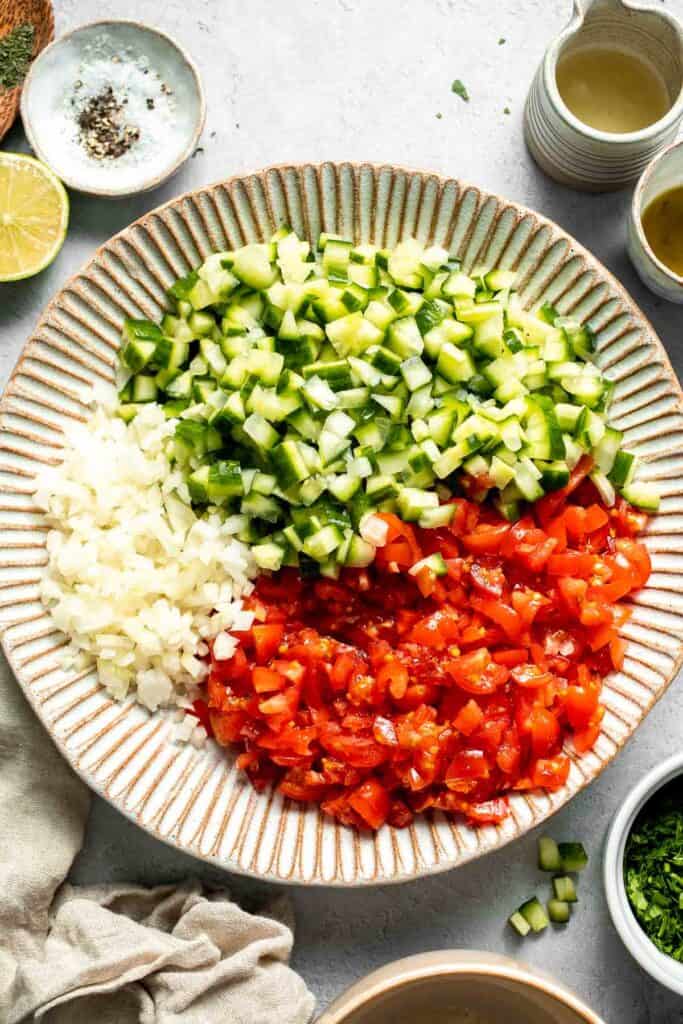

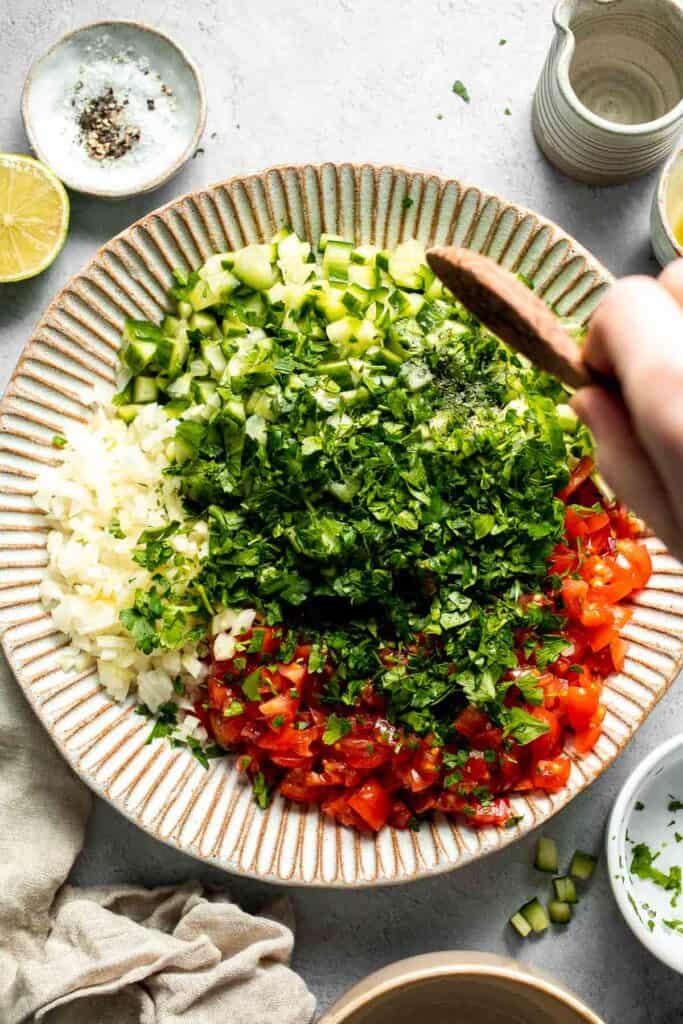
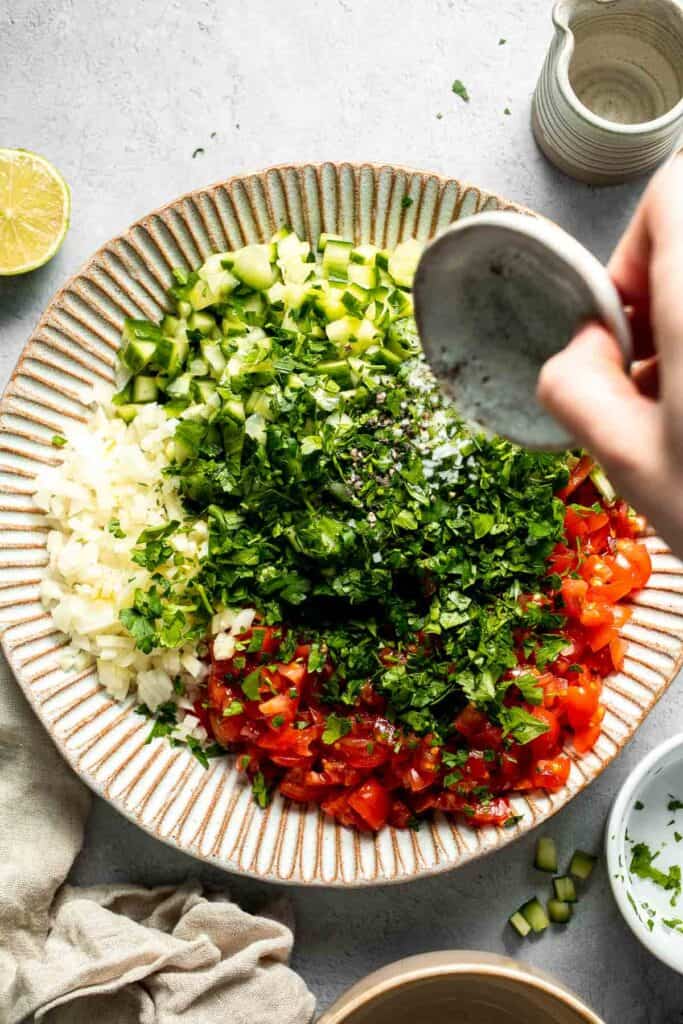
- Toss. Toss to combine.
- Serve or chill. Serve immediately, or cover and place in the refrigerator and chill for at least 30 minutes to allow the flavours to infuse together more.
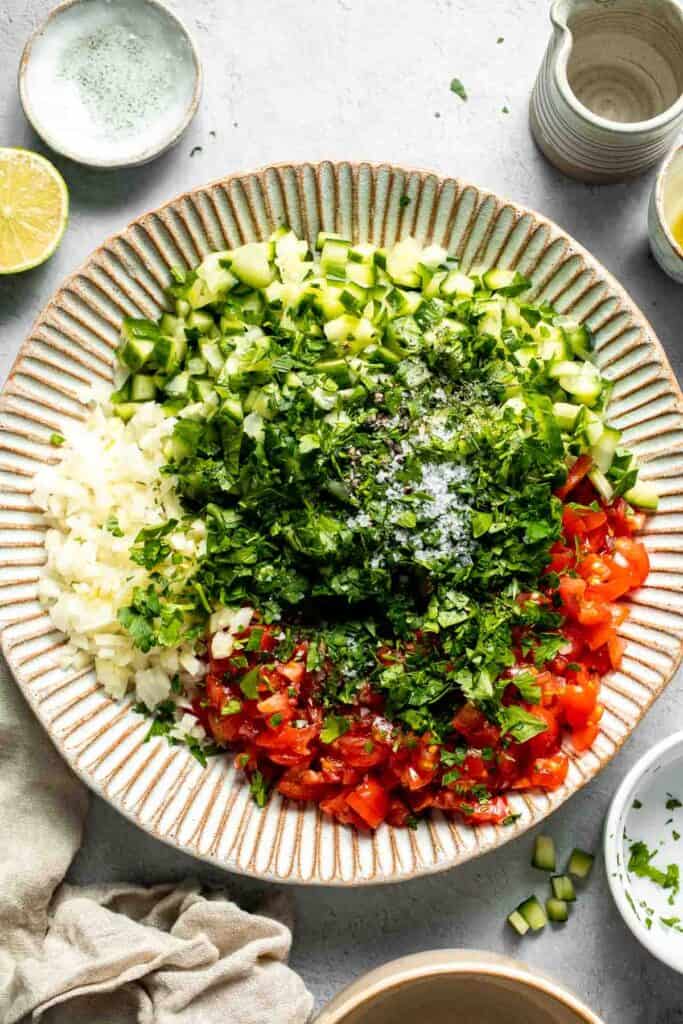
Recipe Variations
- Add pomegranate seeds. For a hint of sweetness and extra crunch, toss in some fresh pomegranate seeds. They add a lovely contrast to the tangy lime dressing.
- Incorporate sumac. A sprinkle of sumac will enhance the salad with a slightly tart, lemony flavor that pairs beautifully with the other ingredients.
- Make it spicy. Add a finely chopped chili pepper or a dash of Aleppo pepper for a bit of heat.
- Boost the protein. Toss in chickpeas or feta cheese for a more filling version of this salad while keeping it light and nutritious.
How to Serve
This Persian Shirazi Salad is delicious served on its own for lunch, but is especially good as a side salad paired with an entree. Whether you're serving it alongside grilled meats, rice dishes, or wraps, this salad complements a wide range of main courses. Some of our favorite pairings with this salad are:
- Persian Saffron Chicken Kebabs (Joojeh Kabob)
- Ghormeh Sabzi (Persian Herb Stew)
- Basmati Rice with Saffron
- Persian Lentil Soup
- Greek Lamb Souvlaki Skewers
Recipe Tips and Tricks
- Finely dice the ingredients. The small, uniform pieces ensure a perfect blend of flavors in every bite and help the dressing coat everything evenly.
- Use fresh lime juice. Bottled lime juice won't provide the same vibrant, citrusy flavor as freshly squeezed juice.
- Chill before serving. While you can serve the salad right away, letting it rest in the fridge for 30 minutes enhances the flavors and makes it even more refreshing. It allows the herby flavours to better infuse into each ingredient.
Storing Instructions
To store leftover Shirazi Salad, transfer it to an airtight container and refrigerate for up to 3 days. The flavors will continue to develop, making it even more delicious the next day.
FAQ
Due to the high water content of cucumbers and tomatoes, this salad does not freeze well. Freezing will cause the vegetables to become mushy upon thawing. It's best to prepare it fresh or store it in the fridge for short-term use.
Yes! Shirazi Salad can be made a few hours in advance and stored in the fridge. In fact, letting it sit for a bit allows the flavors to meld beautifully. If you want to prepare it the night before, store the dressing separately and mix it in just before serving to keep the vegetables crisp.
Fresh mint can be used, but dried mint gives the salad its signature taste. If using fresh mint, chop it finely and use a slightly larger quantity. You can also try basil or oregano for a unique twist on the traditional recipe.
More Salad Recipes with Tomatoes and Cucumbers
- 40 Best Salad Recipes
- Greek Salad with Lettuce
- Tabbouleh Salad
- Cherry Tomato Salad
- Tomato Cucumber Avocado Salad
- Quinoa Spinach Power Salad
Tried this recipe?
I'd love to hear what you think! Leave a comment and rating below to share your feedback. Your reviews help others discover this recipe and help me keep creating more free recipes for you. Snap a photo and tag me on social media @aheadofthyme too.

Tofu Coconut Curry
This quick and easy Tofu Coconut Curry features a velvety coconut base infused with aromatic spices, tender tofu that soaks up the bold flavors of the sauce, and fresh herbs with a squeeze of lime that brightens every bite. It's nourishing, satisfying, and so delicious. Plus, it's ready in just 20 minutes, making this a perfect one pot meal for busy weeknights or whenever you are craving a bowl of comfort.

There's nothing quite like a rich, flavorful curry that comes together in no time, and this coconut curry tofu does just that. Whether you're a longtime curry lover or just dipping your toes into plant-based meals, this vegan dish is just what you are looking for! Not only it is quick to prepare, but it's also endlessly versatile, so you can customize it just to how you like it.
Why You'll Love this Tofu Coconut Curry Recipe
- Ready in just 20 minutes. This vegan curry comes together in just 20 minutes, making it a great option for those evenings when you need a quick and satisfying meal. All you need to do is saute the tofu, add the soup base ingredients spices, then finish off with the veggies to create a rich and hearty tofu.
- Nutrient-dense and plant-based. Packed with protein-rich tofu, fiber-filled vegetables, and the healthy fats of coconut milk, this dish provides a well-rounded, nutrient-packed meal. It's naturally vegan and dairy-free, making it an excellent option for those with dietary restrictions or looking to add more plant-based meals to their diet.
- Rich, flavorful, and creamy. This dish is rich with the bold, aromatic flavors of Thai red curry paste, which blends seamlessly with the smooth, velvety coconut milk. The combination creates a luxurious, full-bodied sauce that coats the tofu and vegetables perfectly, making each bite incredibly satisfying.
- Customizable to your taste. One of the best things about Tofu Coconut Curry is how adaptable it is. You can easily adjust the heat level (add in some chili flakes or a dash of hot sauce), swap in different veggies (try spinach, muhsrooms or sweet potatoes), or add extra protein to suit your tastes and dietary needs.
Ingredient Notes
To make this comforting Tofu Coconut Curry, you will need the following ingredients (full measurements in recipe card below):
- vegetable oil - for sautéing the tofu and building a rich flavor base. You can also use coconut oil or avocado oil in place of regular vegetable oil.
- tofu - use extra firm tofu because it holds its shape well and absorbs the curry flavors beautifully.
- Thai red curry paste - this paste is the key to a bold, authentic flavor in this dish. It is made from red chilies, garlic, lemongrass, shallots, and other aromatic spices. If unavailable, use yellow curry paste for a milder flavor or green curry paste for a spicier alternative.
- coconut milk (regular or lite) - provides a creamy, luxurious texture.
- soy sauce (or fish sauce) - adds a touch of umami and depth. Use tamari for a gluten-free option or coconut aminos for a slightly sweeter alternative.
- lime juice - brightens the dish and balances the richness.
- red bell pepper - adds sweetness, color, and crunch. Swap with yellow or orange bell pepper, or use carrots for a similar texture.
- cilantro - for a pop of freshness and vibrant flavor. Thai basil or parsley can provide a different but complementary herby flavor.
You will also need measuring cups and spoons and a large pot or Dutch oven.
How to Make the Best Tofu Coconut Curry
- Sauté tofu. Heat oil in a large skillet until the hot oil sizzles, about 2 minutes. Add tofu and sauté until browned on all sides, about 5-7 minutes.


- Add red curry. Add red curry paste and mix well until evenly combined.

- Add curry base. Add coconut milk, soy sauce and lime juice. Stir well until smooth and bring it to a boil.


- Add veggies. Reduce heat to low and add bell pepper. Cook for another 2 minutes until tender.
- Serve. Sprinkle with cilantro and serve warm with rice.


Recipe Variations
- Add more veggies. This dish is a great way to incorporate extra vegetables! Try adding diced sweet potatoes, zucchini, or bell peppers for more texture and nutrients. You can also toss in leafy greens like spinach or kale toward the end of cooking.
- Make it extra spicy. Love heat? Add harissa, a pinch of cayenne, or chopped fresh chili peppers to the stew. This gives it a fiery kick that pairs beautifully with the warming spices.
- Make it nutty. Stir in a spoonful of peanut butter or cashew butter to the sauce for extra richness and a subtle nutty flavor that complements the coconut base.
- Add more protein. Want an even heartier dish? Stir in cooked chickpeas or add shredded chicken for a protein boost.
- Add more texture. Toss in crunchy water chestnuts or toasted cashews to give the curry an added bite and layers of texture.
- Incorporate tropical flavors. Add diced pineapple or mango for a hint of sweetness that balances the spiciness of the curry paste.
- Go low-carb. Instead of serving with rice, try pairing it with cauliflower rice, zucchini noodles, or a bed of sautéed greens for a lighter option.
How to Serve
Tofu Coconut Curry is delicious on its own, but pairing it with the right sides to soak up the rich, spiced broth makes it even better. Here are some of my favorite serving ideas:
- Easy Coconut Rice
- Garlic Naan Bread
- Quinoa
- Homemade Yogurt
- Basmati Rice with Saffron
- Homemade Pita Bread
- Persian Shirazi Salad with Cucumber and Tomato
Recipe Tips and Tricks
- Use high heat for the tofu. Searing tofu in a hot pan before adding it to the curry helps it develop a golden crust, which adds a delicious texture and prevents it from becoming too soft in the sauce.
- Don't rush the curry paste. Let the curry paste cook for a minute in oil before adding coconut milk. This enhances its flavors and brings out the deep, complex notes of the spices.
- Layer the flavors. If you have time, let the curry simmer a bit longer to allow all the ingredients to meld together. The extra time helps intensify the taste.
- Adjust the consistency. If you prefer a thicker curry, mash some of the tofu with the back of a spoon. For a soupier consistency, add a little more coconut milk or broth.
Storing and Freezing Instructions
How to Store
To store leftover Tofu Coconut Curry, allow the dish to cool to room temperature before transferring it to an airtight container. It will keep well in the refrigerator for 4-5 days.
How to Reheat
Warm the curry gently in a saucepan over medium heat, adding a splash of water or broth if needed. Alternatively, microwave it in a bowl, stirring occasionally until heated through.
How to Freeze
You can freeze this curry but note that the texture of the tofu may change. Let it cool completely, then transfer it to an airtight container or freezer-safe bag. It will keep for up to 3 months. When ready to eat, thaw overnight in the refrigerator and reheat.
FAQ
Thai red curry paste does add a little heat, but you can adjust the spice level by using less paste or choosing a milder brand. If you love spice, add extra chili flakes or fresh chopped chilies.
Yes! If you prefer a lighter option, use cashew cream, a blend of almond milk and coconut cream, or even a bit of vegetable broth with a splash of non-dairy milk for a different take on creaminess.
This dish is super flexible. Try adding spinach, green beans, zucchini, or mushrooms for extra texture and nutrition.
More Tofu Recipes
- Tofu Soup
- Mapo Tofu
- Tofu Lettuce Wraps
- Kung Pao Tofu
- Tofu and Mushroom Stir Fry
- Air Fryer Vegetable "Stir-Fry" with Tofu
Tried this recipe?
I'd love to hear what you think! Leave a comment and rating below to share your feedback. Your reviews help others discover this recipe and help me keep creating more free recipes for you. Snap a photo and tag me on social media @aheadofthyme too.

Ghotab / Qottab Pastry (Persian Walnut Filled Crescents)
These delicate, flaky Persian pastries called Ghotab (or Qottab) are traditional Iranian almond and walnut-filled crescents that are crisp outside with a spiced, nutty filling inside. They embody the essence of Persian sweets - aromatic, subtly sweet, and bursting with warm flavor. These stuffed cookies can be made anytime of the year, but they are particularly delightful during the Norouz new year festivities.

Cardamom, cinnamon, hyacinth, and rose water, that is just a sample of what my house smells like right now. It is Persian New Years (Now Ruz), so I am in a baking mood and whipping out a batch of my absolute favourite Persian pastries: Ghotab or Qottab (there are so many different spellings for this).
This pastry originated in the city of Yazd, where my dad was raised before moving to Tehran, so it really hits home. As a treat, my parents would buy us some from the Persian bakery stores. I remember a year when my great aunt came to visit us and it felt like she was in the kitchen the entire summer baking us batches of these sweet pastries. The homemade version was just something else. They tasted unbelievable and so much better than the store-bought pastries! Whether you're making them for a special occasion or simply indulging in a homemade dessert, these crescent-shaped pastries are sure to impress!
Why You'll Love This Qottab Recipe
- The perfect balance of flavors and textures. The contrast between the crisp, golden shell and the soft, fragrant walnut filling is what makes these pastries so good - both light and deeply satisfying. Unlike overly sweet desserts, Ghotab has just the right touch of sweetness, making it an excellent accompaniment to tea or coffee.
- Easy to prepare. This recipe stays true to its Persian roots while being approachable for home bakers. The dough comes together effortlessly, and the filling requires just a few ingredients. Whether you're a seasoned baker or new to Persian sweets, you'll find this recipe simple and rewarding.
- Great for gifting. Qottab stays fresh for days, making them a thoughtful, homemade treat to share with loved ones during special occasions or holidays. They are often made in large batches for Nowruz (Persian New Year) and other festivities. Plus, they store well and are freezer friendly.

Ingredient Notes
To make this delicious Ghotab recipe, you will need the following ingredients (full measurements in recipe card below):
- vegetable oil (or butter) - adds richness and tenderness to the dough. You also need vegetable oil for frying the pastries to crispy perfection.
- plain yogurt - keeps the pastry soft while adding a slight tangy flavor.
- egg yolks - helps bind the dough and adds a delicate richness.
- all-purpose flour - forms the base of the pastry dough, giving it structure and lightness.
- baking powder - ensures the dough is light and airy.
- confectioners' sugar - used in the dough and for dusting the finished pastries.
- walnuts - finely ground for the filling, adding a crunchy, nutty texture.
- almonds - also finely ground for the filling. You can also substitute it with walnuts to use only walnuts in this dessert if you wish.
- cardamon + cinnamon - warm spices that enhances the flavor of the filling.
- granulated sugar - sweetens the walnut filling.
You will also need measuring cups and spoons, a rolling pin, and a deep frying pan or cooking pot.
How to Make the Best Ghotab or Qottab Pastry
First, prepare the dough.
- Combine wet ingredients. In a large mixing bowl, add vegetable oil, yogurt, and egg yolks and stir together until fully combined.


- Combine dry ingredients. In another mixing bowl, combine the flour and baking powder. Sift the dry ingredients slowly to the large bowl, whisking continuously.


- Knead. Once your batter forms a soft and sticky dough, knead for a few minutes. Then, cover the bowl with plastic wrap and set aside for 2 hours (at room temperature).


Next, make the filling.
In a food processor or blender, grind the walnuts and almonds. Add cardamon, cinnamon, and sugar and continue to blend. Set aside.


Now, let's assemble the pastries.
- Roll and cut dough. Use a rolling pin and place the dough on a well-floured surface. Roll out the dough very thin, almost paper-like, to about 1/16 inch thick. Using a round 2-inch cookie cutter, cut out circular shapes.


- Fill and seal. Add 1.5 teaspoons of the nut filling onto the centre. Fold over to form half circle shape. Press down on the edges and roll them over to seal or seal them using a fork and make mini impressions onto the seal. Repeat with all the dough.


Finally, cook and serve.
- Heat oil. Fill up a pot with vegetable oil until it reaches about 2 inches high. Turn the heat on medium until bubbling hot, about 3-4 minutes.
- Fry. Take one crescent at a time and place into the hot oil to deep fry until browned (not that it will only take a few seconds until the crescents brown). Do not overcook or they will burn. Place the cooked crescents onto a paper towel-lined plate to remove any excess oil.
- Coat. In a small plate, pour out some confectioners' sugar. Dip the cooked crescents into the sugar while they are still hot, but cool enough to handle (or the confectioners sugar will not stick on properly). Place on a wire cooling rack and allow the crescents to cool completely.

Recipe Variations
- Add rose water. For a floral twist, add a few drops of rose water to the walnut filling to enhance its aroma.
- Use almonds or pistachios. While walnuts are traditional, you can substitute them with finely ground almonds or pistachios for a different nutty flavor.
- Bake instead of fry. If you prefer a lighter version, bake the pastries at 350°F (175°C) for about 15-20 minutes or until golden brown.
How to Serve
This Ghotab cookie is delicious served with a cup of tea or Chai Tea Latte for sweet treat after a classic Persian dinner including:
- Ghormeh Sabzi (Persian Herb Stew)
- Basmati Rice with Saffron
- Persian Saffron Chicken Kebabs (Joojeh Kabob)
- Persian Lentil Soup
- Persian Shirazi Salad with Cucumber and Tomato
Recipe Tips and Tricks
- Don't overfill. Using too much filling can cause the pastries to break open during frying, so keep it to a teaspoon per piece.
- Seal the edges well. Pressing the edges firmly ensures the filling stays intact. You can also use a fork to crimp the edges for extra security.
- Store properly. Keep the pastries in an airtight container at room temperature for up to a week. For longer storage, refrigerate or freeze them and reheat before serving.
Storing and Freezing Instructions
How to Store
Allow qottab to cool completely before storing. Place them in an airtight container at room temperature for up to 5-7 days. To maintain crispiness, avoid exposure to humidity.
How to Freeze
Arrange the ghotab pastries in a single layer on a baking sheet and freeze until firm. Transfer to an airtight container or freezer bag and store for up to 3 months. To serve, reheat in the oven at 300°F (150°C) for a few minutes until warm and crisp.
You can also freeze the uncooked qottab for later. Arrange them in a single layer on a baking sheet and freeze until solid. Then transfer to a freezer-safe bag. When ready to enjoy, fry them directly from frozen, adding an extra minute or two to the cooking time.
FAQ
Absolutely! The dough can be made a day ahead and stored in the refrigerator, wrapped tightly in plastic wrap. Let it come to room temperature before rolling it out.
Yes! If you want a lighter version, bake them in a 350°F (175°C) oven for 15-18 minutes, or until golden brown. They will have a slightly different texture-less crispy, but still delicious!
Sealing the edges tightly is key. Press down firmly with your fingers or use a fork to crimp the edges. You can also brush a little water along the edges before sealing to help them stick together better.
More Persian Dessert Recipes
- Persian Rice Cookies with Poppy Seeds (Nan-e Berenji)
- Sohan (Persian Pistachio Brittle)
- Persian Love Cake
- Pistachio Cookies
- Persian Chickpea Cookies with Pistachio (Nan-e Nokhodchi)
Tried this recipe?
I'd love to hear what you think! Leave a comment and rating below to share your feedback. Your reviews help others discover this recipe and help me keep creating more free recipes for you. Snap a photo and tag me on social media @aheadofthyme too.

Sesame Noodles
This easy Sesame Noodles recipe is proof that simple ingredients can create incredible flavor. With tender noodles tossed in a rich, savory sesame sauce, it's a simple yet satisfying meal that's ready in just 20 minutes! Whether you're making a quick lunch, a weeknight dinner, or meal prepping for the week ahead, this dish is guaranteed to become a staple in your rotation.
What makes these sesame noodles so special? It's the way the sauce clings to every strand, delivering a bold and satisfying taste in every bite. A drizzle of sesame oil, a splash of soy sauce, and a hint of garlic create a harmony of flavors that's both comforting and crave-worthy. Plus, you can dress it up however you like - add crunchy vegetables, a kick of spice, or your favorite protein. This dish is endlessly adaptable and always a hit, whether you prefer it warm or chilled.
Why You'll Love these Sesame Noodles
- Ready in just 20 minutes. This dish comes together in no time! Cook the noodles, whisk together the sauce, toss everything together, and it's ready to serve. Perfect for busy weeknights or meal prep.
- Bold and savory flavor. Sure, there are plenty of noodle recipes out there, but this one stands out for its rich, nutty flavor and perfectly balanced sesame sauce. The combination of soy sauce, garlic, and sesame oil creates a depth of umami that makes every bite irresistible.
- Customizable to your taste. One of the best things about these sesame noodles is how adaptable they are. Want it spicy? Add some chili flakes or a drizzle of sriracha. Prefer a protein boost? Toss in shredded chicken, tofu, or shrimp. It's a flexible, fuss-free dish that you can make your own!
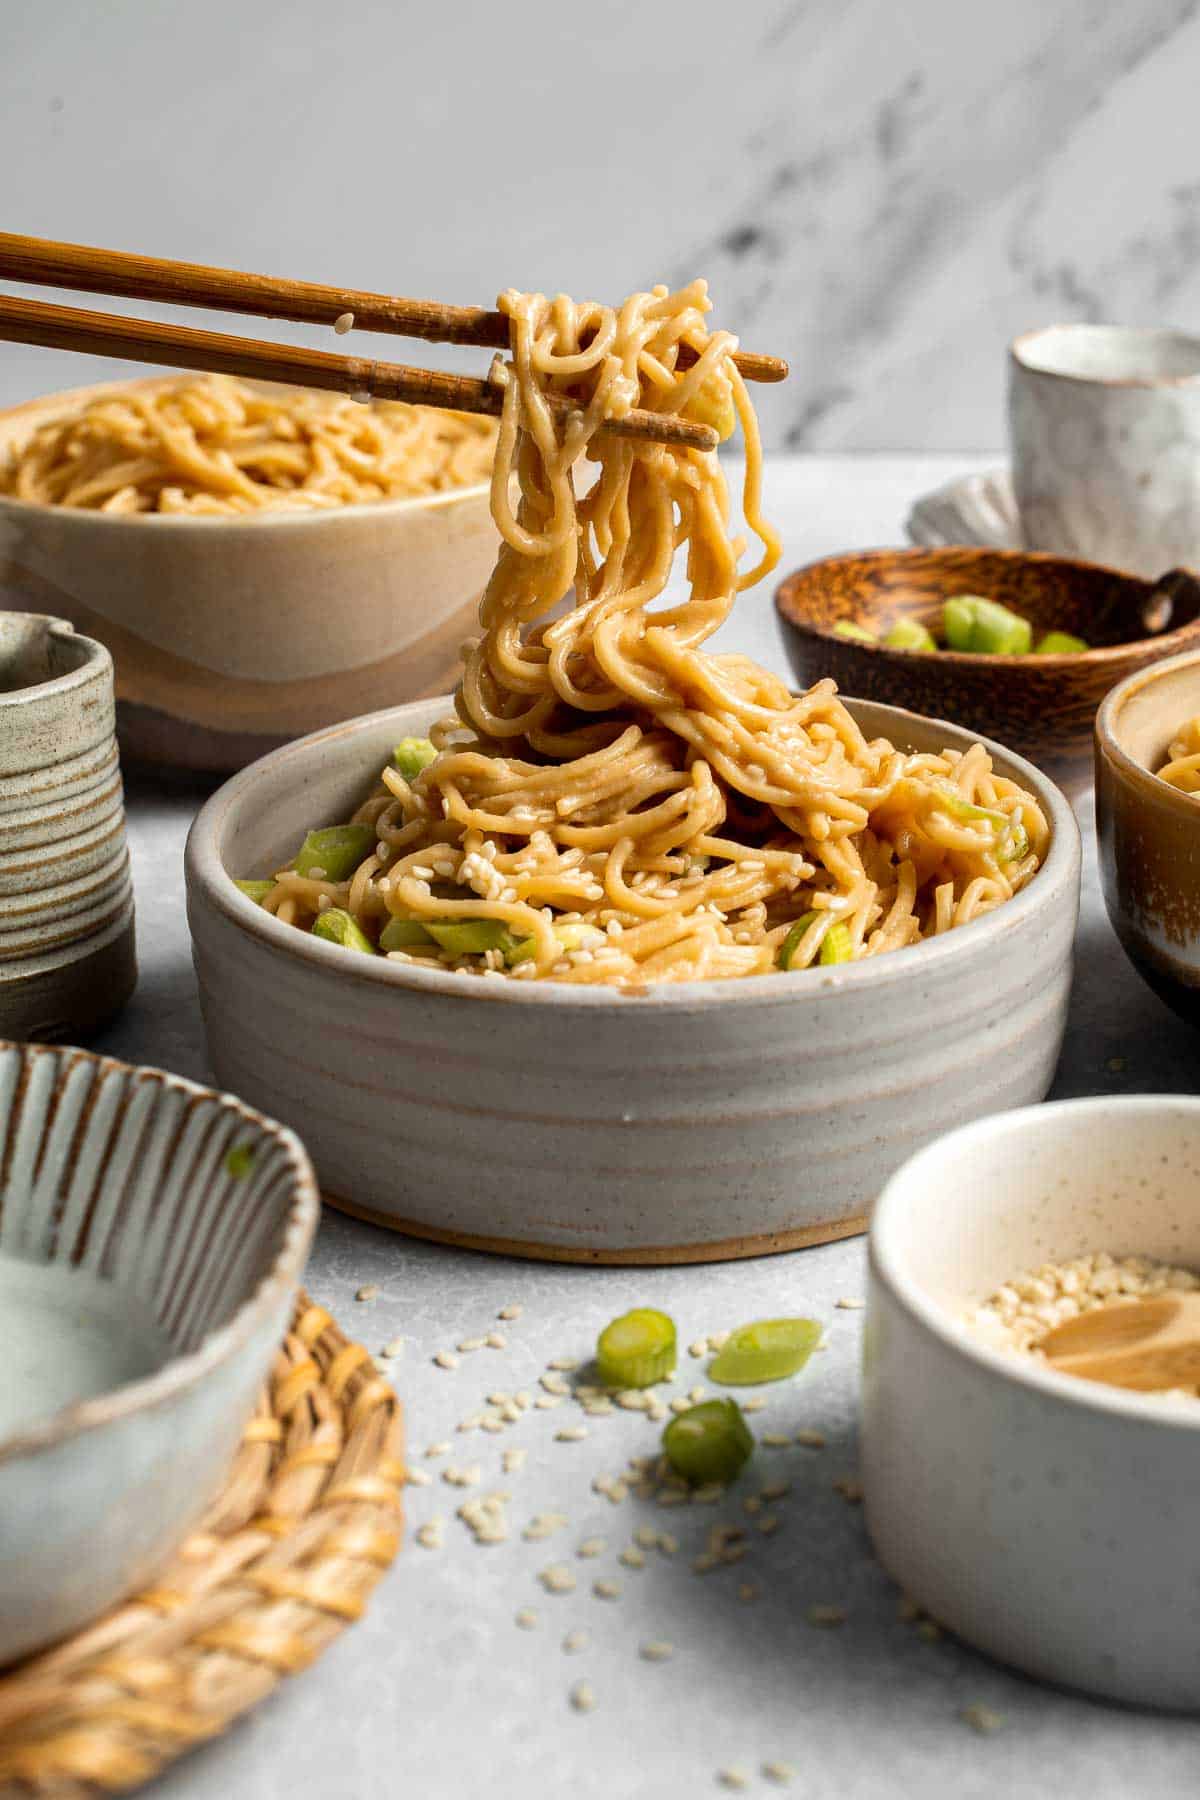
Ingredient Notes
To make these easy Sesame Noodles, you will need the following ingredients (full measurements in recipe card below):
- noodles - the typical type of noodles to use are wheat noodles or long pasta noodles (such as spaghetti!). You can of course substitute your favorite type of noodles such as ramen or rice noodles too.
- oil - for cooking the sauce in. Use vegetable oil, avocado oil, or coconut oil.
- garlic - essential aromatic that infuses the sauce with bold, savory flavor.
- soy sauce - adds rich, salty umami flavor to the sauce.
- rice vinegar (or Chinese black vinegar) - provides a subtle tang that balances the richness of the sauce.
- sesame oil - the star ingredient that gives these noodles their signature nutty flavor.
- tahini paste - adds creaminess, more sesame flavor, and depth to the sauce.
- peanut butter - this is optional, for extra creaminess and nutty flavor.
- sesame seeds - enhances the sesame flavor.
- scallions - For a fresh, mild onion flavor and a pop of color.
You will also need measuring cups and spoons and a large mixing bowl.
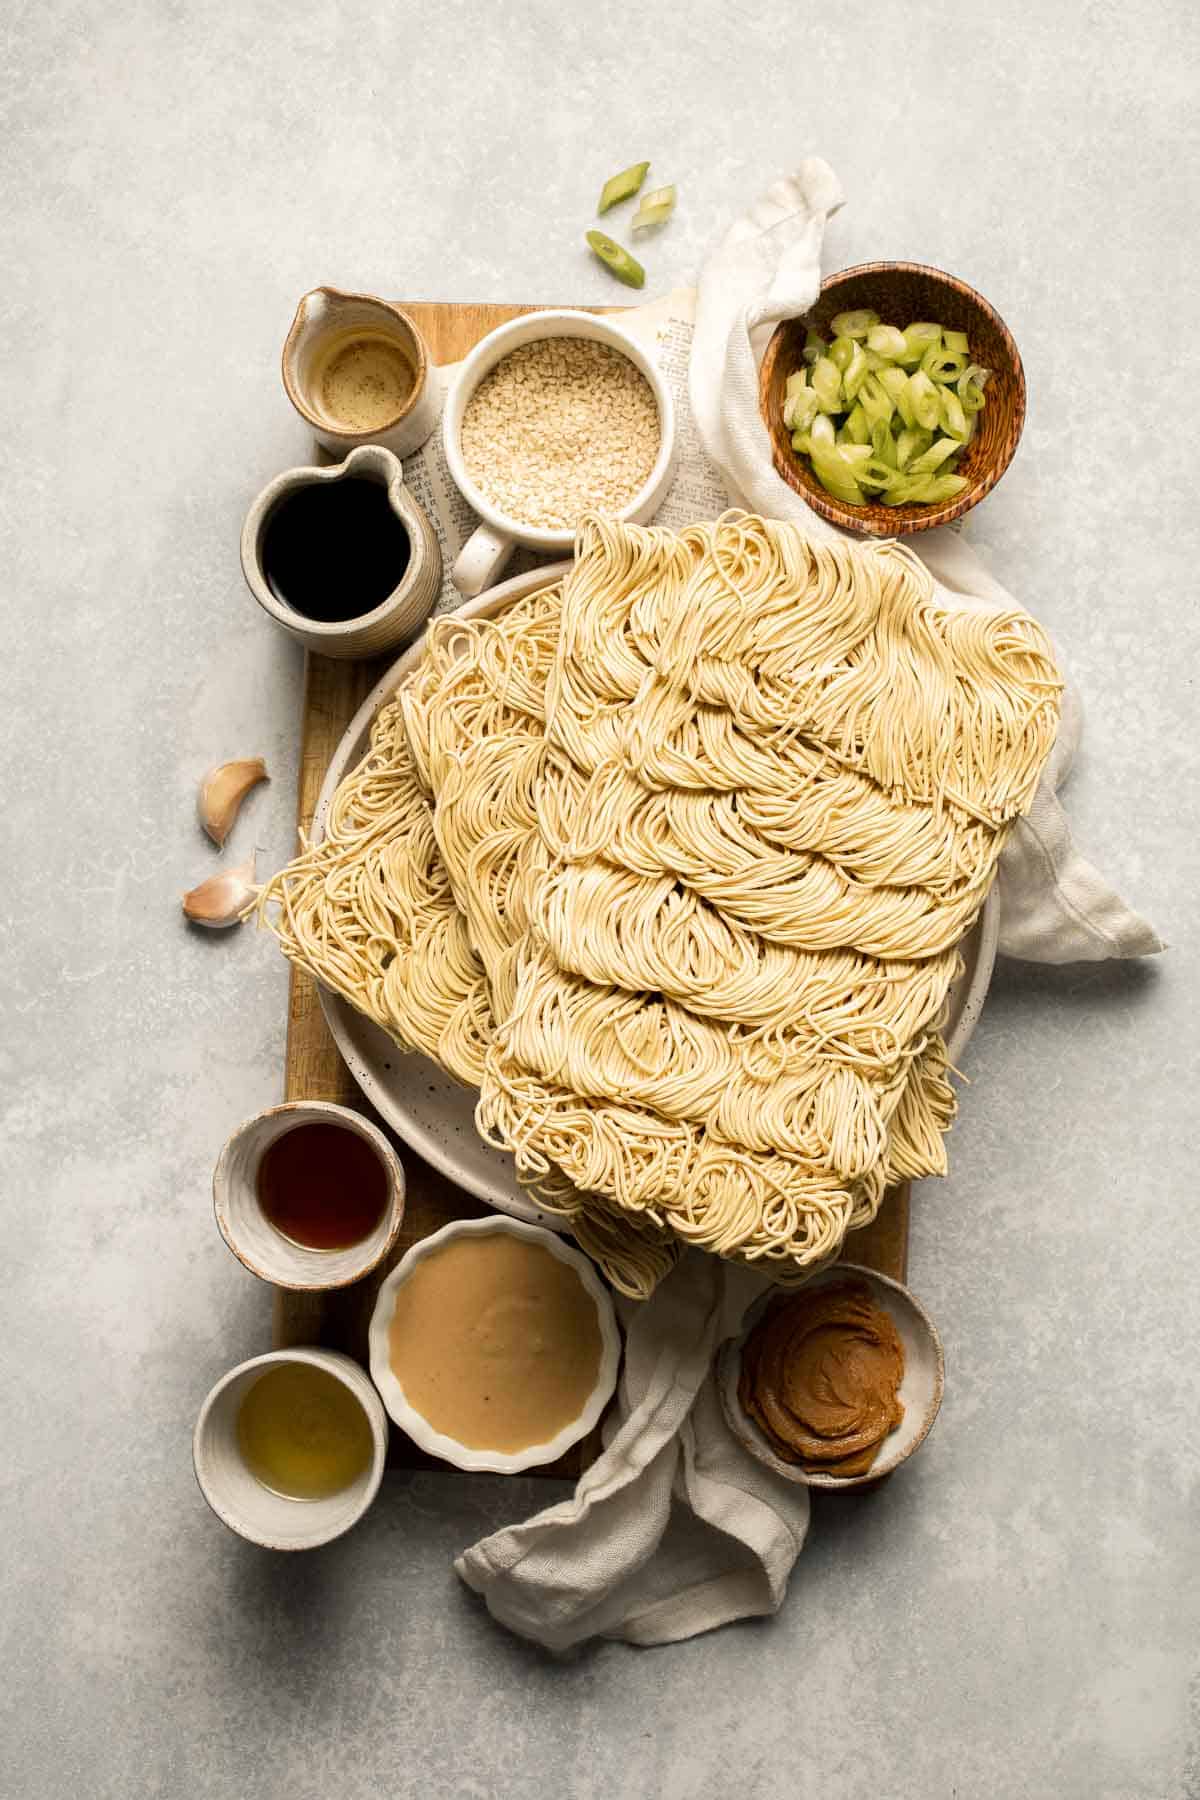
How to Make the Best Sesame Noodles
- Cook noodles. Bring a large pot of water to a boil and cook the noodles until al dente, or in accordance with package instructions, stirring occasionally. Reserve ¼ cup of the noodle cooking water in a small bowl. Drain and rinse the noodles under cold running water.


- Sauté aromatics. While the noodles are cooking, heat oil in a skillet until the oil sizzles, about 1-2 minutes. Add garlic and sauté until fragrant, about 30 seconds.
- Make sauce. Add soy sauce, vinegar, sesame oil, tahini paste, and peanut butter. Stir well until smooth. If the sauce mixture is too thick, stir in the reserved noodle water, 1 tablespoon at a time.


- Add noodles. Add cooked noodles into the sauce mixture and cook for another 1-2 minutes until the noodles are warmed through. Add sesame seeds and toss well.


- Serve. Sprinkle with scallions and sesame seeds. Serve immediately.


Recipe Variations
- Add more veggies. This dish is a great way to pack in extra vegetables! Try tossing in shredded carrots, sliced cucumbers, bell peppers, or edamame for added texture and nutrients.
- Make it spicy. Love a little heat? Add more red pepper flakes, a dash of chili oil, or a drizzle of sriracha to amp up the spice level.
- Switch up the protein. For a heartier meal, add grilled chicken, crispy tofu, or shrimp. Even a soft-boiled egg pairs beautifully with the rich sesame sauce.
- Try different noodles. While traditional sesame noodles are made with wheat noodles, you can experiment with soba, udon, or even zucchini noodles for a lighter option.
How to Serve
These sesame noodles are delicious served warm, cold, or at room temperature. Pair them with some of our favorite simple sides for a complete meal:
- Chinese Garlic Cucumber Salad
- Sautéed Garlic Green Beans
- Pork Dumplings
- Kung Pao Tofu
- Easy Wonton Soup
For more Chinese inspired side dishes, see our 25 Best Dim Sum Recipes.
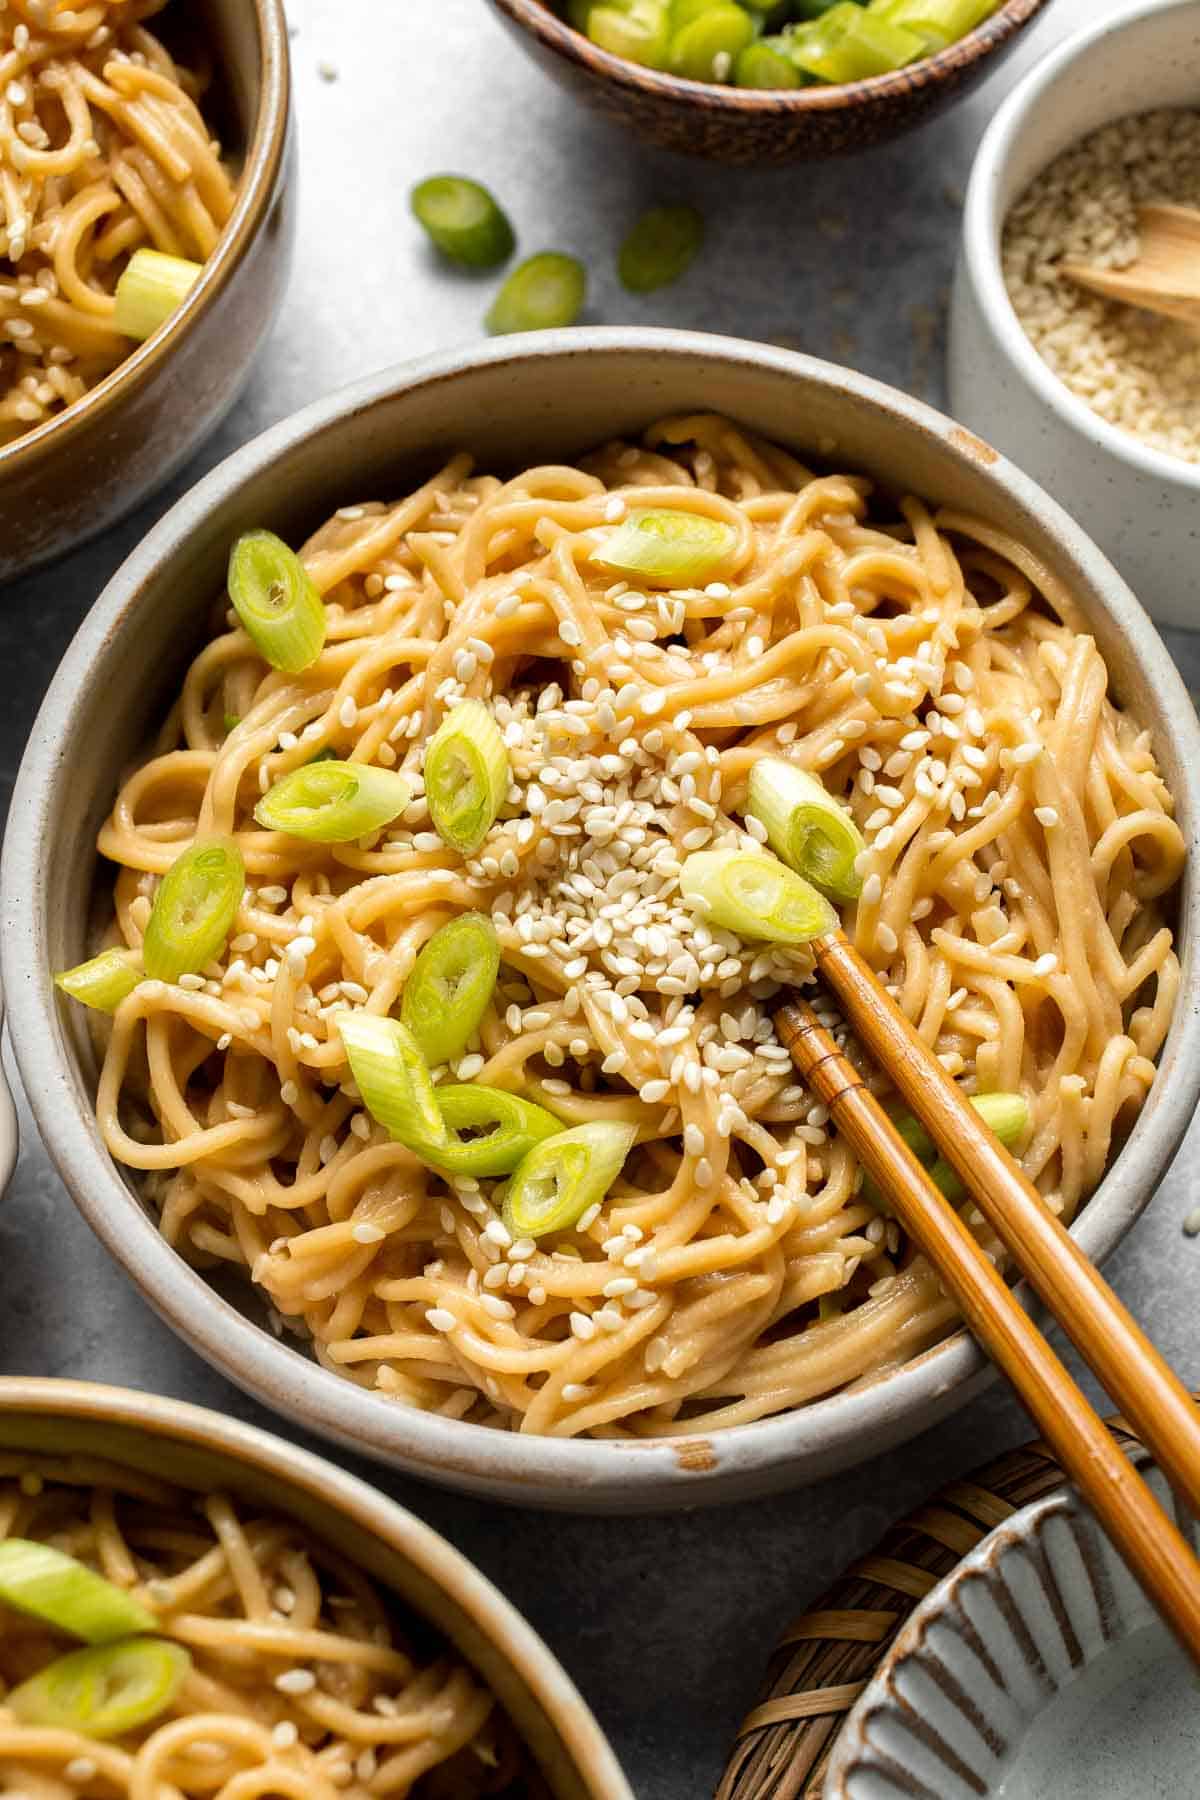
Recipe Tips and Tricks
- Don't overcook the noodles. Rinse the noodles under cold water after cooking to keep them from sticking together and to maintain the perfect texture.
- Adjust the sauce consistency. If the sauce is too thick, add a splash of warm water or extra soy sauce to thin it out.
- Try toasted sesame oil. For even more flavor, use toasted sesame oil rather than regular sesame oil. It has a deeper, nuttier aroma that enhances the dish.
Storing and Freezing Instructions
How to Store
Allow leftover sesame noodles to cool to room temperature, then transfer to an airtight container and refrigerate for up to 4 days.
How to Reheat
Sesame noodles are delicious cold as a noodle salad! But if you prefer them warm, reheat gently in the microwave or in a pan over low heat with a splash of water to loosen the sauce.
FAQ
It's not ideal to freeze these noodles, as the texture may change upon thawing. However, you can freeze the sauce separately for up to 3 months and toss it with freshly cooked noodles when ready to serve.
Yes! Sesame Noodles are a great make-ahead meal. The flavors deepen as they sit, making them even more delicious the next day. Just give them a quick toss before serving.
Spaghetti, ramen, or Chinese egg noodles work well. For a gluten-free option, try rice noodles or soba noodles.
More Recipes
- Noodle Recipes
- Peanut Noodles
- Spicy Dan Dan Noodles
- Vegan Soba Noodle Salad
- Vegetarian Chow Mein
- Lo Mein Noodles
Tried this recipe?
I'd love to hear what you think! Leave a comment and rating below to share your feedback. Your reviews help others discover this recipe and help me keep creating more free recipes for you. Snap a photo and tag me on social media @aheadofthyme too.

Moroccan Chickpea Stew
This comforting Moroccan Chickpea Stew is the perfect combination of bold flavors and effortless cooking. With tender chickpeas simmered in a fragrant, spiced tomato broth, it's a simple yet satisfying meal that's ready in just 30 minutes! Whether you're making a cozy weeknight dinner or meal-prepping for the week ahead, this vegan dish is guaranteed to fill your kitchen with warmth and spice.

Moroccan Chickpea Stew is all about balance - warm spices, hearty chickpeas, and a deeply savory tomato base come together for a meal that feels both nourishing and indulgent. I've made so many variations of this dish, but the essentials never fail. The chickpeas soak up the rich, aromatic broth, while a sprinkle of fresh herbs add brightness. The best part? It's incredibly versatile and loved by everyone, whether you're a spice enthusiast or just looking for an easy, comforting dinner. This one-pot wonder is a must-try!
Why You'll Love this Moroccan Chickpea Stew Recipe
- Ready in just 30 minutes. To make this easy vegan stew, start by sautéing onions and garlic with a fragrant blend of Moroccan-inspired spices. Then, add tomato paste, diced tomatoes, and chickpeas to create a rich and hearty stew. Serve it with fluffy couscous or crusty bread for a meal that feels special but couldn't be easier to make.
- Rich and fragrant. While there are plenty of chickpea stews out there, this one stands out with its bold, smoky spices and luscious, tomato-based broth. The combination of cumin, turmeric, and paprika gives it an irresistible depth, while the chickpeas add a satisfying, creamy texture. It's comfort food with a North African twist!
- Customizable to your taste. One of the best things about Moroccan Chickpea Stew is how adaptable it is. Want it extra spicy? Add some harissa or chili flakes. Prefer a heartier dish? Toss in lentils, sweet potatoes, or greens like spinach or kale. However you tweak it, the core flavors stay beautifully intact, making this dish endlessly flexible and always delicious.
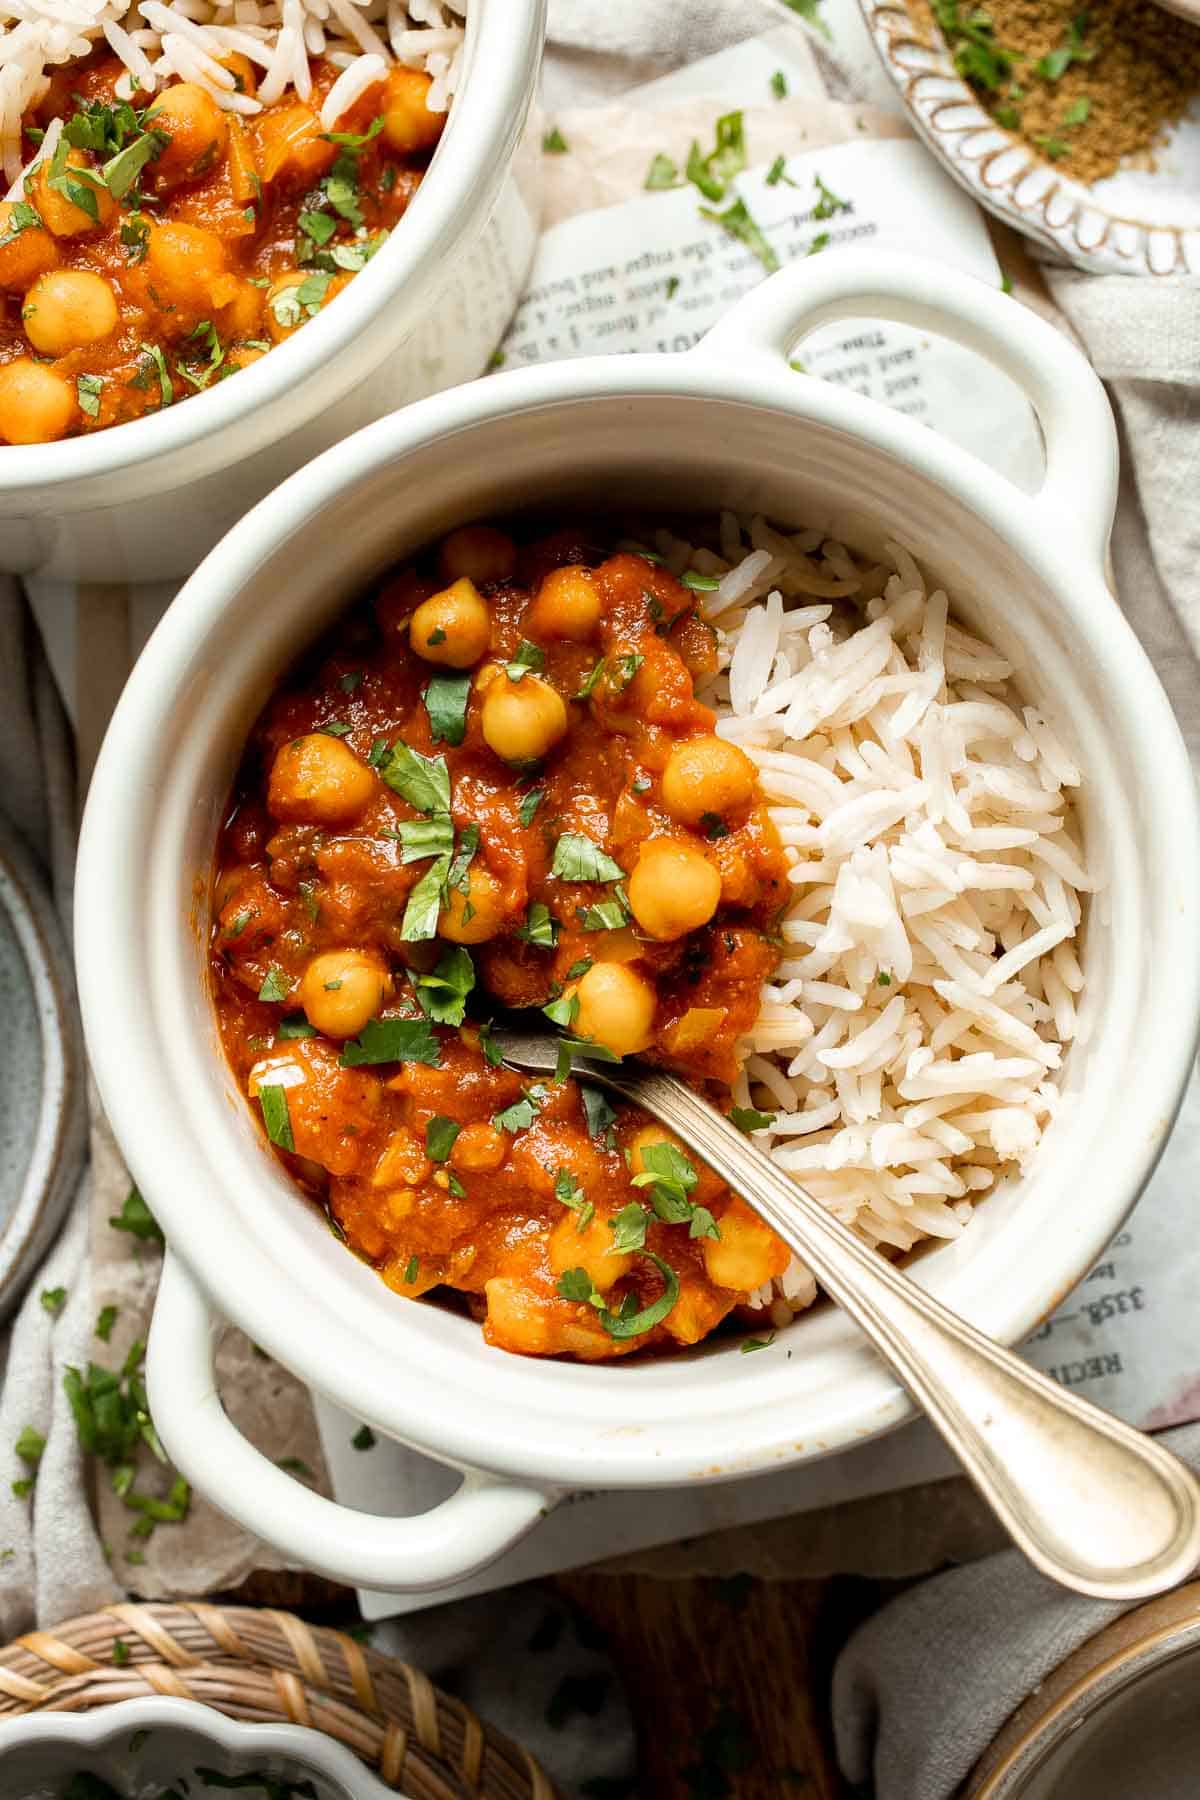
Ingredient Notes
To make this comforting Moroccan Chickpea Stew, you will need the following ingredients (full measurements in recipe card below):
- olive oil - for sautéing the aromatics and building a rich flavor base.
- onion + garlic - these aromatics add depth and sweetness to the stew.
- seasoning - this soup is seasoned with paprika, cumin, turmeric, salt, and pepper.
- diced tomatoes - this forms the base of the stew. Use high-quality canned tomatoes for the best depth of flavor.
- tomato paste - intensifies the tomato flavor and adds richness.
- chickpeas - the star of the dish, providing a creamy texture and plant-based protein. We used canned chickpeas but you can easily substitute with dry chickpeas. If using dried chickpeas, substitute with ½ cup of dried chickpeas, soak them overnight, then cook until tender before adding to the stew. See How to Cook Dried Beans for cooking instructions and tips.
- vegetable broth (or water) - for the base of the stew.
- fresh cilantro - for a pop of freshness and color.
You will also need measuring cups and spoons and a large pot or Dutch oven.
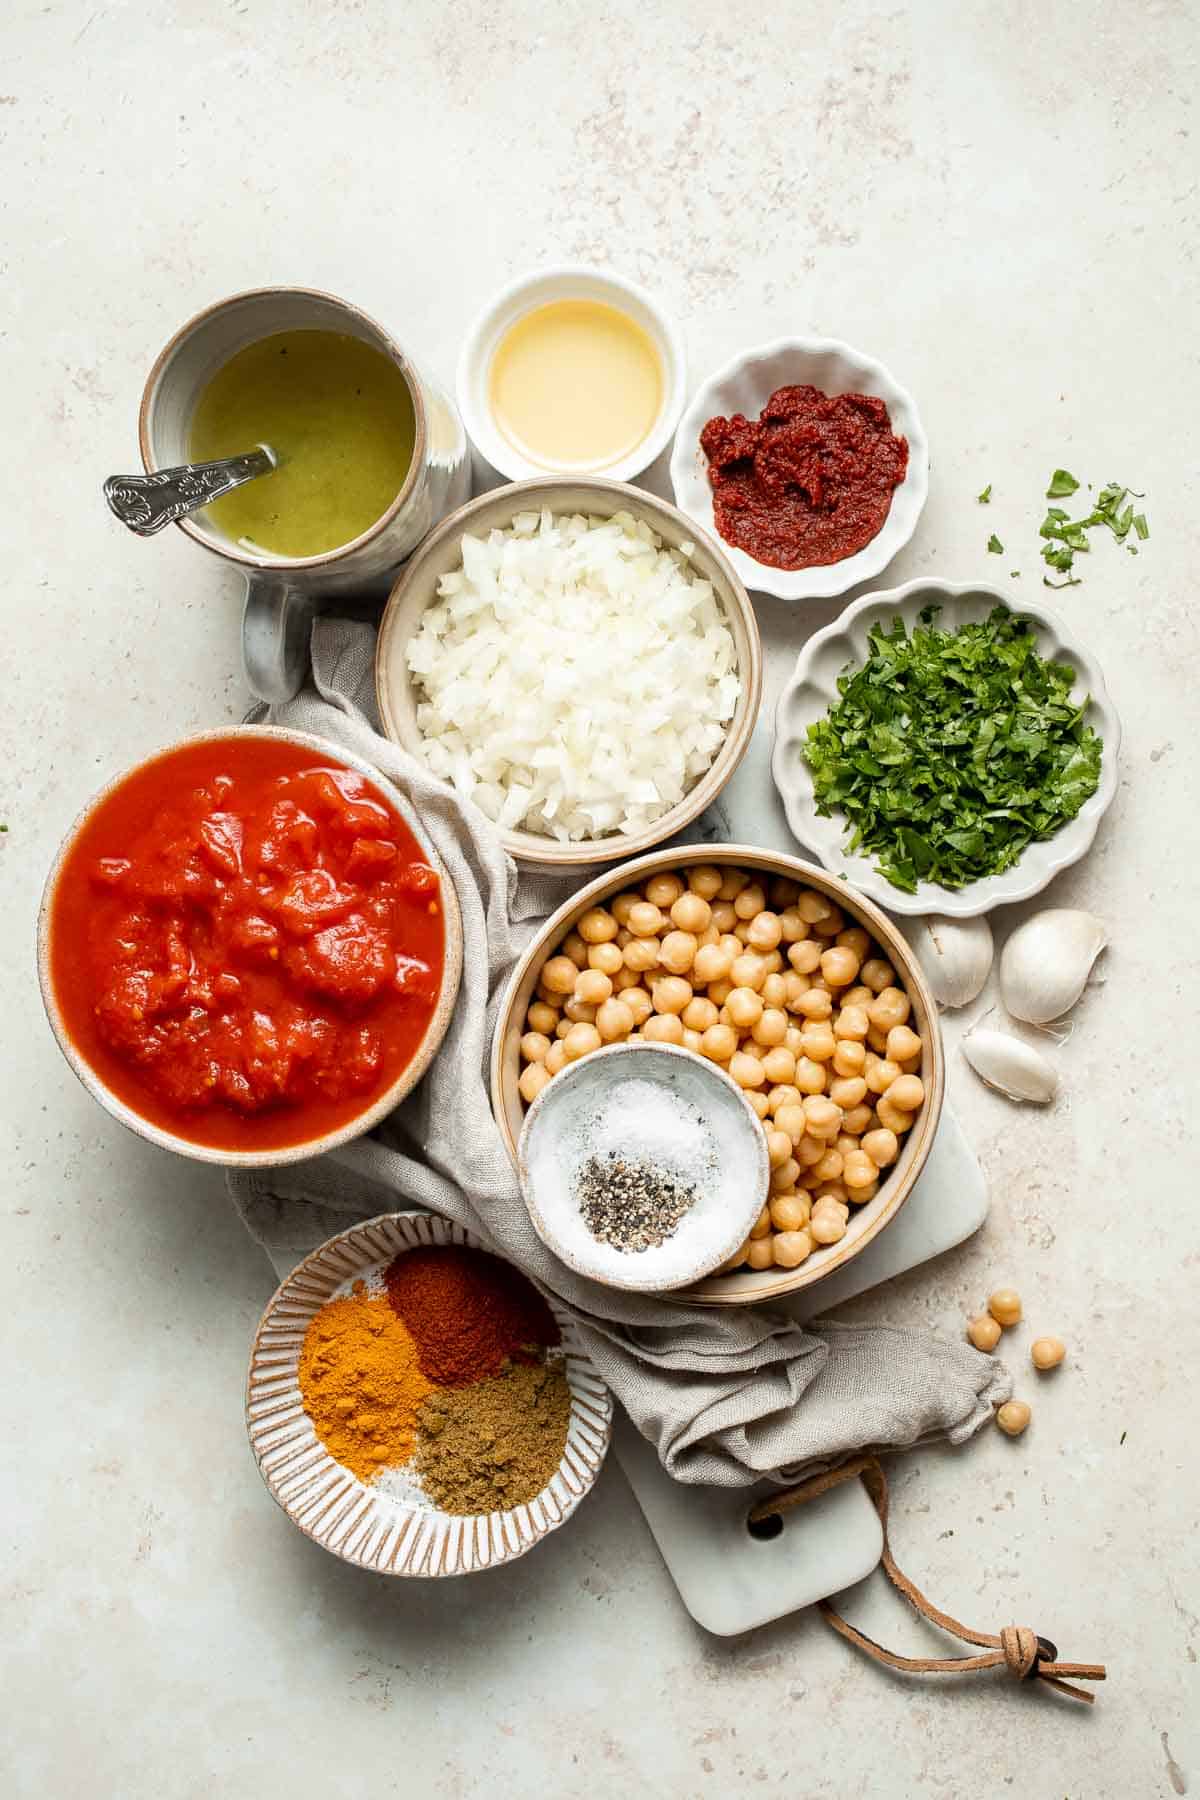
How to Make the Best Moroccan Chickpea Stew
- Sauté aromatics. In a medium pot, heat oil over medium-high heat until the hot oil sizzles, about 1-2 minutes. Add onions, garlic, paprika, cumin and turmeric. Stir well until fragrant, about 1 minute.

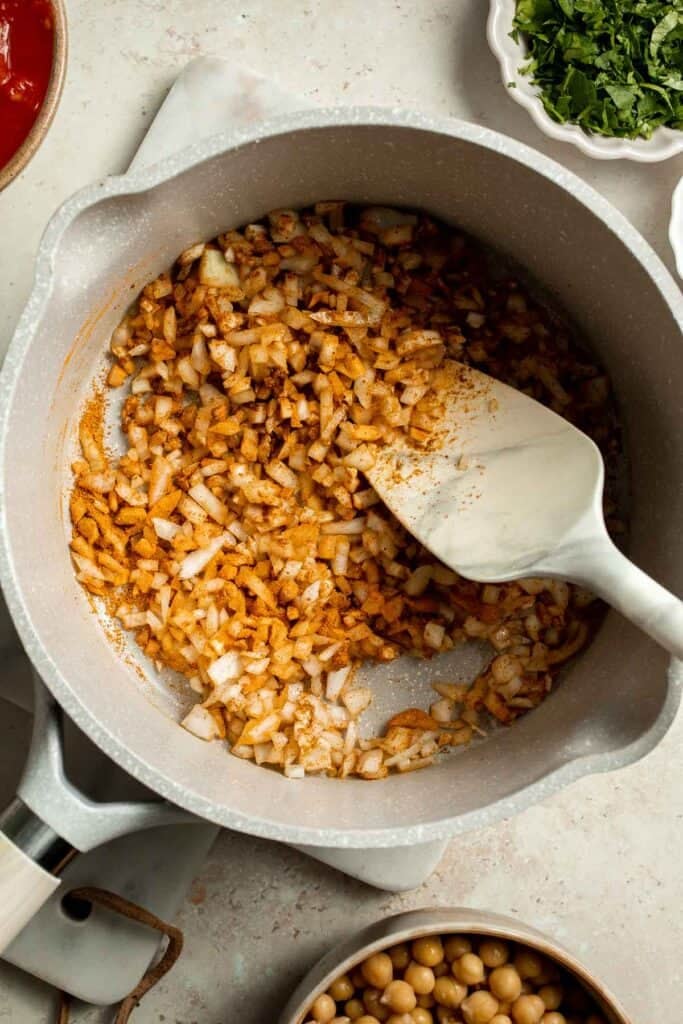

- Add chickpeas and soup base. Add tomato paste, diced tomatoes, chickpeas and vegetable broth. Stir well and bring it to a boil.


- Simmer. Reduce heat to medium and simmer for 15-20 minutes, stirring occasionally to prevent chickpeas from sticking to the bottom of the pot. Season the stew with salt and pepper.
- Serve. Garnish with cilantro and serve warm with a side of couscous, crusty bread, or rice.


Recipe Variations
- Add more veggies. This dish is a great way to incorporate extra vegetables! Try adding diced sweet potatoes, zucchini, or bell peppers for more texture and nutrients. You can also toss in leafy greens like spinach or kale toward the end of cooking.
- Make it extra spicy. Love heat? Add harissa, a pinch of cayenne, or chopped fresh chili peppers to the stew. This gives it a fiery kick that pairs beautifully with the warming spices.
- Switch up the protein. Want an even heartier dish? Stir in cooked lentils or add shredded chicken for a protein boost.
- Incorporate dried fruit. For a subtle sweetness, add a handful of chopped dried apricots or golden raisins. They complement the warm spices and create a delicious contrast of flavors.
How to Serve
Moroccan Chickpea Stew is delicious on its own, but pairing it with the right sides to soak up the rich, spiced broth makes it even better. Here are some of my favorite serving ideas:
- Pita Bread
- Couscous
- Basmati Rice with Saffron
- Oven Roasted Vegetables
- Flatbread
- Maple Roasted Carrots with Yogurt Sauce
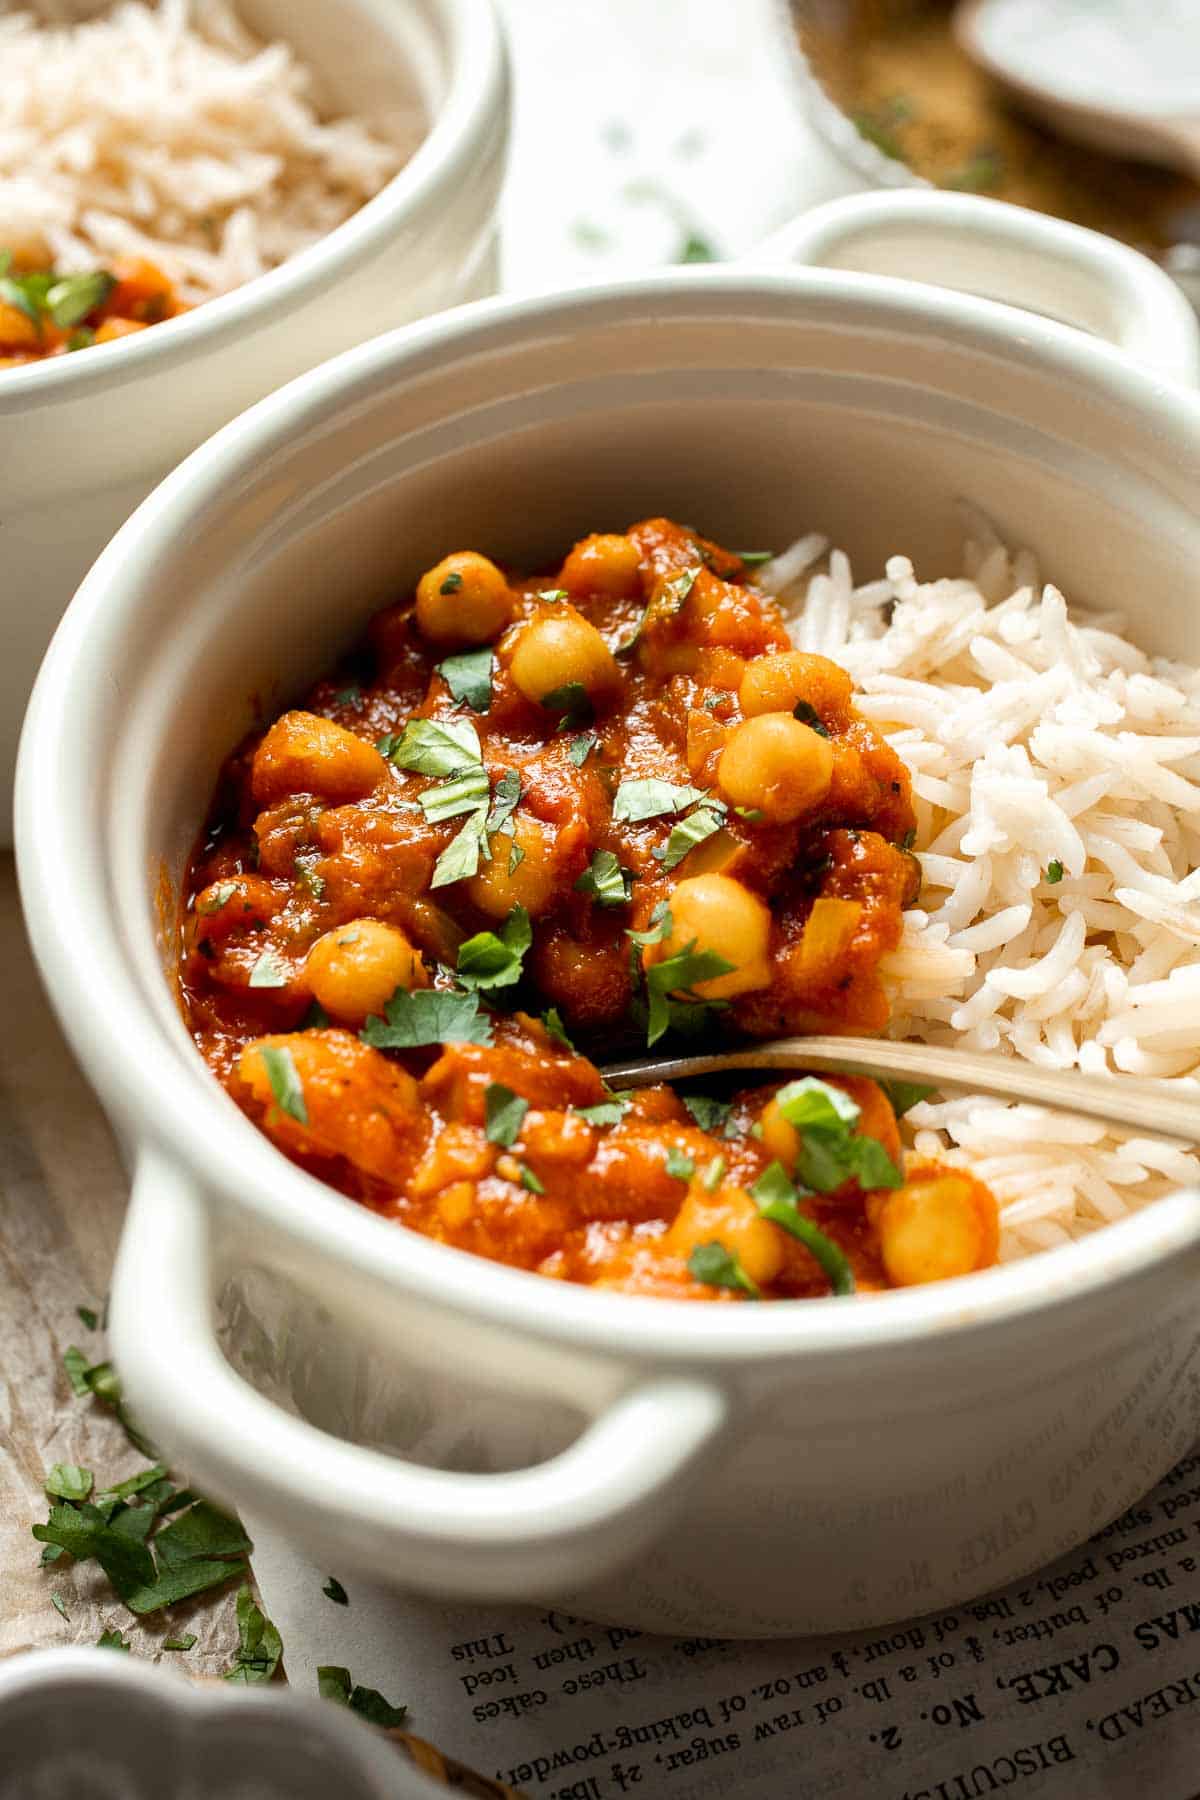
Recipe Tips and Tricks
- Let the spices bloom. To get the most flavor from the spices, toast them in the oil for about a minute before adding liquid. This helps release their essential oils and deepen the dish's aroma.
- Adjust the consistency. If you prefer a thicker stew, mash some of the chickpeas with the back of a spoon. For a soupier consistency, add a little more broth.
- Balance the flavors. If the stew tastes too acidic from the tomatoes, add a pinch of sugar or a drizzle of honey to round out the flavors.
Storing and Freezing Instructions
How to Store
To store leftover Moroccan Chickpea Stew, allow the dish to cool to room temperature before transferring it to an airtight container. It will keep well in the refrigerator for 4-5 days.
How to Reheat
Warm the stew gently in a saucepan over medium heat, adding a splash of water or broth if needed. Alternatively, microwave it in a bowl, stirring occasionally until heated through. Serve with fresh herbs and a squeeze of lemon for extra brightness.
How to Freeze
This stew freezes beautifully. Let it cool completely, then transfer it to an airtight container or freezer bag. It will keep for up to 3 months. When ready to eat, thaw overnight in the fridge and reheat on the stove.
FAQ
Absolutely! The flavors only improve with time, making it a great make-ahead meal. Prepare the stew a day or two ahead and store it in the fridge. Reheat before serving and enjoy!
Yes! To make Moroccan Chickpea Stew in the slow cooker, start by sautéing the onion, garlic, and spices in a pan as directed to enhance their flavors. Then, transfer them to the slow cooker along with the diced tomatoes, tomato paste, chickpeas, and vegetable broth. Cook on low for 6-8 hours or on high for 3-4 hours. Stir in the fresh cilantro just before serving. The slow cooker method allows the flavors to deepen and meld beautifully while requiring minimal hands-on time.
For a creamier texture, you can blend a small portion of the stew and stir it back in, or add a splash of coconut milk. Another option is to mash some of the chickpeas with a fork before simmering, which helps thicken the broth naturally. Coconut milk adds a slight sweetness and silkiness, making the dish even more luxurious while keeping it completely plant-based.
More Cozy Stew Recipes
- Butternut Squash Curry with Chickpeas
- Lentil Stew
- Ghormeh Sabzi (Persian Herb Stew)
- Indian Butter Chicken
- Cauliflower Curry
- Tuscan White Bean Soup
Tried this recipe?
I'd love to hear what you think! Leave a comment and rating below to share your feedback. Your reviews help others discover this recipe and help me keep creating more free recipes for you. Snap a photo and tag me on social media @aheadofthyme too.

Homemade SpaghettiOs
This comforting Homemade SpaghettiOs recipe brings back all the nostalgia of the classic canned version but with better ingredients and a fresher, richer flavor - and none of the preservatives! With tender anellini pasta coated in a rich, savory tomato sauce, this easy dish is ready in just under 30 minutes. It's a perfect quick meal for busy weeknights or a comforting bowl of goodness any time.
There's something magical about a bowl of SpaghettiOs. This recipe is proof that sometimes, the simplest combinations are the most satisfying. Tiny O-shaped pasta + creamy tomato sauce + a hint of cheesy richness = pure comfort in every spoonful. While the store-bought version is a childhood favorite, this homemade version is even better - real ingredients, a richer sauce, and a taste that appeals to kids and adults alike. Whether you grew up loving SpaghettiOs or are introducing them to your own family for the first time, this homemade take is guaranteed to be a hit!
Why You'll Love this Homemade SpaghettiOs Recipe
- Ready in under 30 minutes. This recipe starts by building a rich, flavorful tomato sauce with garlic, olive oil, and Italian seasoning. Then, add the anellini pasta and let it simmer until tender, soaking up all that savory goodness. Finally, stir in Parmesan for a cheesy finish that makes every bite irresistible. So simple, yet so satisfying!
- Creamy and nostalgic. Store-bought SpaghettiOs have a signature creamy tomato sauce, and this homemade version takes it up a notch. The blend of tomato sauce and a touch of Parmesan creates a silky, savory coating for every pasta ring. It's the comforting childhood favorite you remember - only better!
- Family-friendly. Whether you're cooking for picky eaters or just craving a comforting dish from your past, this homemade SpaghettiOs recipe is a crowd-pleaser for all ages.
- Perfect for meal prep. This recipe makes enough for several servings, so you can enjoy a warm, cozy bowl all week long. Whether you're making a quick lunch or an easy dinner, it's a family-friendly meal that's just as good (if not better!) the next day.

Ingredient Notes
To make this delicious Homemade SpaghettiO's, you will need the following ingredients (full measurements in recipe card below):
- extra virgin olive oil - adds richness and helps sauté the garlic.
- garlic - provides a fragrant, savory base for the sauce.
- tomato paste - enhances the depth of tomato flavor with a touch of natural sweetness. You can also use ketchup instead.
- marinara sauce - marinara sauce (or tomato sauce) is the main component of the sauce, providing a smooth, flavorful base. I recommend using a good-quality marinara. A high-quality tomato sauce makes all the difference in flavor.
- Italian seasoning - a blend of dried herbs that infuses the sauce with classic Italian flavor.
- salt - for seasoning.
- anellini pasta - the signature O-shape ring pasta shape that makes SpaghettiOs so fun to eat. If you can't find anellini pasta, try ditalini, small shells, or even elbow macaroni.
- water - to help cook the pasta and adjust the consistency of the sauce.
- Parmesan cheese - adds a rich, nutty, and slightly salty finish. If you need a substitute, try nutritional yeast for a dairy-free option or Pecorino Romano for a slightly sharper flavor.
- fresh basil - for garnish and a pop of fresh flavor.
You will also need measuring cups and spoons and a large pot.

How to Make the Best Homemade SpaghettiOs
- Sauté aromatics. Heat oil in a medium pot over medium-high until hot, about 1 minute. Add garlic and sauté until fragrant, about 1 minute.
- Add sauce. Add tomato paste, marinara sauce, Italian seasoning and salt. Stir well until smooth.


- Add pasta. Add pasta and water. Give it a stir and reduce heat to medium.


- Cook. Cook the pasta until al dente, about 10-12 minutes or according to the package instructions. Add a little bit of water if needed and stir occasionally to ensure the pasta doesn't stick to the bottom of the pot.


- Add cheese. Add parmesan cheese and stir until melted and creamy.
- Serve. Garnish with basil and serve immediately.


Recipe Variations
- Make it creamy. Stir in a splash of heavy cream or a bit of butter for a richer, creamier sauce.
- Add more flavor boosters. This recipe is a great base, but you can easily enhance the sauce with extra ingredients! Try sautéing finely minced garlic for extra depth, stirring in a splash of balsamic vinegar for a slight tang, or adding a pinch of red pepper flakes for a subtle heat. Each addition helps create a more complex and satisfying sauce.
- Use different pasta shapes. While anellini pasta is the classic choice for that nostalgic SpaghettiOs feel, you can swap it out for ditalini, small elbow macaroni, or even orzo for a fun twist. Just be sure to adjust the cooking time based on the pasta you choose.
- Make it dairy-free. If you're avoiding dairy, simply leave out the Parmesan cheese or swap it for a plant-based alternative. A small spoonful of nutritional yeast can also add a hint of cheesy umami flavor without the dairy.
- Add protein. Want to make this a more filling meal? Stir in cooked lentils, crumbled tempeh, ground turkey, or even shredded chicken for a heartier version of homemade SpaghettiOs.
How to Serve
These homemade SpaghettiOs are delicious served on its own, or paired with some of my favorite pasta sides including:
- Garlic Breadsticks
- Simple Italian Salad
- Mediterranean Roasted Vegetables
- Grilled Cheese Roll Ups
- French Bread Pizza
For more recipes, see our 30 Side Dishes for Pasta.

Recipe Tips and Tricks
- Season as you go. The key to a well-balanced, flavorful sauce is seasoning throughout the cooking process. Taste as you go and adjust with a little salt or an extra sprinkle of Italian seasoning to ensure every bite is just right.
- Don't overcook the pasta. Anellini pasta is small and cooks quickly, so keep an eye on it! For the best texture, cook the pasta until just al dente, then remove it from the heat. It will continue to soften in the sauce, so stopping early helps prevent mushy noodles.
- Adjust the sauce consistency. If the sauce is too thick, add a splash of water or broth. If it's too thin, let it simmer longer.
- Enhance the depth of flavor. If you want to give your sauce that slow-simmered, all-day taste, stir in a touch of balsamic vinegar or a small pinch of sugar to balance the acidity of the tomatoes. A drizzle of extra virgin olive oil at the end adds a rich, velvety finish!
Storing and Freezing Instructions
How to Store
Let the pasta cool completely before transferring to an airtight container. Store in the refrigerator for up to 3-4 days.
How to Reheat
Reheat leftover pasta in a saucepan over medium heat, adding a splash of water or broth to loosen the sauce. Alternatively, microwave in 30-second intervals, stirring in between, until warmed through.
How to Freeze
This spaghettiO pasta recipe freezes well in an airtight container for up to 2 months. For the best texture, it's best to freeze the sauce separately from the pasta. If you freeze the pasta in the sauce, it may become too soft once thawed and reheated. Simply cook fresh anellini pasta when ready to serve and stir it into the warmed sauce.
FAQ
Anellini pasta is the classic choice for that signature O-shape, but if you can't find it, ditalini or small elbow macaroni make great substitutes. You want a small pasta that holds its shape well and has a nice bite.
Yes! For the Instant Pot, sauté the garlic and tomato paste using the sauté function, then add the remaining ingredients (except pasta and cheese) and pressure cook for 5 minutes. Stir in the cooked pasta and cheese at the end. For the slow cooker, let the sauce simmer on low for 4-6 hours, then add freshly cooked pasta just before serving.
Absolutely! Just swap the anellini pasta for your favorite gluten-free pasta. Be sure to check the cooking time on the package, as gluten-free pasta can sometimes cook faster or require extra stirring to prevent sticking.
More Tomato Pasta Recipes
- 40 Best Pasta Recipes
- Creamy Tomato Pasta
- Veggie Pasta
- Spaghetti Bolognese
- Skillet Lasagna
- Baked Gnocchi
Tried this recipe?
I'd love to hear what you think! Leave a comment and rating below to share your feedback. Your reviews help others discover this recipe and help me keep creating more free recipes for you. Snap a photo and tag me on social media @aheadofthyme too.

What Recipes to Cook in January
Are you wondering what to cook in January? Browse our collection of 50 best January recipes to cook for breakfast, lunch, dinner, and dessert!

January has arrived, bringing with it a fresh start and crisp winter days. After the indulgence of the holidays, this month is perfect for embracing cozy, nourishing meals and bright, seasonal flavors. From hearty soups to warming casseroles and vibrant salads, January's recipes are all about comfort and renewal. Our latest collection of seasonal recipes highlights the best of winter produce - think citrus, root vegetables, and leafy greens - alongside wholesome dishes that are as satisfying as they are refreshing. This roundup of the 50 best recipes to cook in January features warming breakfasts, nutrient-packed soups and stews, satisfying weeknight dinners, and a touch of citrusy sweetness to brighten even the coldest days.
What is in Season in January
January is all about celebrating the best of winter produce. This month, you'll find an abundance of fresh, vibrant ingredients that are perfect for cozy, comforting meals. Below is a list of some of our favorite fruits and vegetables you'll see at their peak this time of year. Click the links to explore recipes that highlight each seasonal star!
| Fruits | Vegetables |
| Apples & Pears Kiwi Lemon Mandarins Oranges Pomegranate Tangerines | Root vegetables: Beets, Carrots, Parsnip, Radish, Turnips Cruciferous vegetables: Broccoli, Brussels sprouts, Cabbage, Cauliflower Leafy greens: Collard greens, Kale, Spinach Winter squash: Acorn squash, Butternut squash, Spaghetti squash Leeks Potatoes Sweet Potatoes |
Holidays in January
January is a time for new beginnings and meaningful celebrations, starting with New Year's Day and extending into other winter festivities. Over the years, we've shared countless seasonal recipes to make this month special and delicious!
- New Year's Day. The year kicks off with comforting meals and celebratory spreads. Whether you're hosting a New Year's brunch or sticking to traditional foods for good luck (see our 40 New Year's Breakfast and Brunch Recipes), we have you covered with dishes like black-eyed peas, cornbread, and hearty casseroles.
- Lunar New Year. Although it sometimes falls in February, Lunar New Year often begins in late January. Celebrate with traditional dishes that symbolize prosperity and health, like dumplings, longevity noodles, and sticky rice cakes. Browse our collection of festive 50 Chinese New Year Recipes for inspiration!
- Winter Gatherings. January is the perfect month for cozy get-togethers. Warm up with hearty soups (check out our 60 Best Soup Recipes), classic winter stews, and shareable appetizers.
Lunar New Year Recipes
Let's be real. The Lunar New Year is all about food so it's never too early to start preparing your holiday dinner menu. More Chinese New Year recipes →
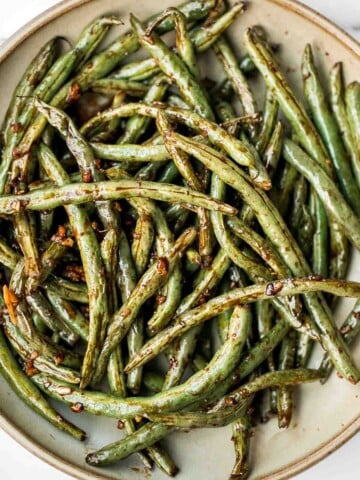


January Breakfast Recipes
 | 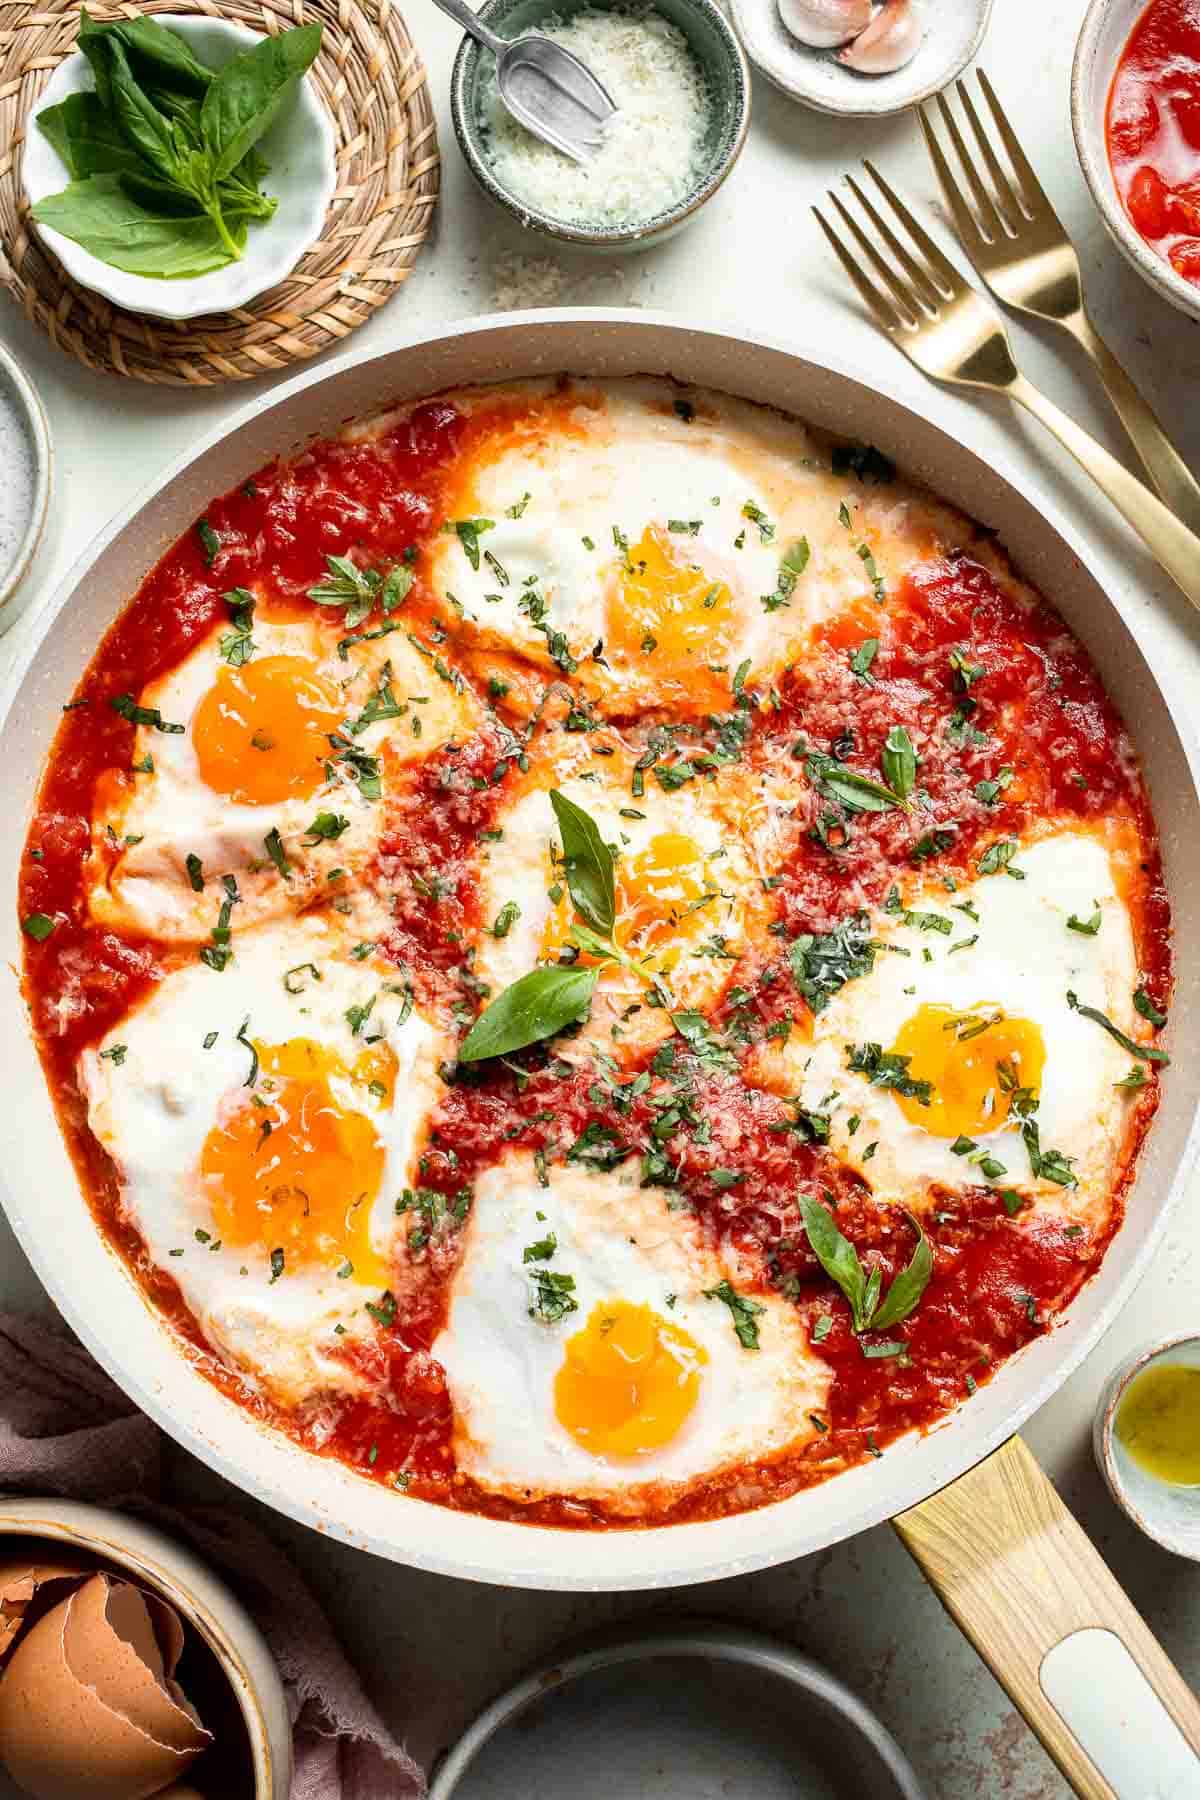 |
- Ricotta Pancakes. Ricotta Pancakes have dreamy, fluffy texture on the inside with perfectly crispy edges on the outside thanks to fresh ricotta. Ready in just 15 minutes!
- Eggs in Purgatory. Eggs in Purgatory is made with perfectly poached eggs nestled in a rich, spicy tomato sauce, it's a simple yet satisfying meal that's ready in 25 minutes!
- Winter Fruit Salad. Easy Winter Fruit Salad combines juicy citrus, sweet grapes, crisp apples, permissions, and tart pomegranate, tossed together with a honey-lime dressing.
- Homemade Pop Tarts. These Homemade Pop Tarts buttery, flaky, and filled with sweet strawberry jam with a pink vanilla glaze on top - a major upgrade on the store-bought kind!
- Breakfast Potatoes. Breakfast Potatoes are crispy on the outside while soft and tender inside. These skillet potatoes are delicious, flavorful, and ready in 30 minutes.
- Green Detox Smoothie. Green Detox Smoothie is quick and easy to make, delicious and nutritious, and loaded with antioxidants, nutrients, and vitamins for a quick energy boost.
- Breakfast Bagel. With layers of scrambled eggs, melty cheese, fresh tomato, creamy avocado, and peppery arugula, this Breakfast Bagel is a perfect way to start your day.
- Spinach and Feta Quiche with Cauliflower Crust. Spinach and feta quiche is healthy and gluten-free with a keto cauliflower crust and savoury vegetarian filling. Serve for breakfast, lunch or dinner.
- Homemade Granola. Homemade Granola is quick and easy to make at home using simple ingredients and 5 minutes of prep. This healthy snack is crunchy, delicious, and flavorful.
- Buttermilk Biscuits. These classic Buttermilk Biscuits are perfectly tender with buttery, flaky layers. Quick and easy to make in just 30 minutes using a handful of ingredients.
January Lunch Recipes
 |  |
- Vietnamese Pho. Vietnamese Pho is a one-of-a-kind soup known for its aromatic beef broth served over tender rice noodles, beef sirloin, fresh herbs, and other garnishes.
- French Bread Pizza. Quick and easy French Bread Pizza is loaded with garlic butter, customizable toppings, and a balance of crispy crust and gooey cheese. Ready in 20 minutes!
- Winter Pomegranate Salad. Festive Winter Pomegranate Salad is studded with sweet pomegranate seeds, apples, oranges, and feta, all tossed in a homemade balsamic vinaigrette.
- Lasagna Soup. This hearty Vegetarian Lasagna Soup has all the flavor of traditional lasagna but in soup form - and without any meat. Ready in only 30 minutes!
- Baked Potato. This Baked Potato is a delicious, hearty side dish that pairs well with any main course. It's fluffy and creamy inside, and golden brown and crispy outside.
- Chicken Meatballs. Baked Chicken Meatballs are tender, juicy, and flavorful (no dry meatballs here!). Made in just 45 minutes using simple ingredients. So quick and easy!
- Tofu Soup. This homemade Tofu Soup is light and satisfying - with tender tofu cubes, vibrant veggies, and a savory broth for a deep, rich flavor that will warm you up.
- Pita Grilled Cheese. Quick easy pita grilled cheese is loaded with Mediterranean flavors of spinach, olive, and sun-dried tomato stuffed inside pita bread with cheddar cheese.
- Sweet Kale Salad. This Sweet Kale Salad is loaded with hearty greens, veggies, and homemade poppy seed dressing - inspired by the Taylor Farms salad kit from Costco.
- Chicken Pot Pie Soup. Chicken Pot Pie Soup has all the classic flavors of chicken pot pie, but in a hearty soup form with tender chicken, veggies, and a rich creamy broth.
January Dinner Recipes
 |  |
- Eggplant Rollatini. Eggplant Rollatini features roasted eggplant stuffed with creamy ricotta, baked in marinara, and topped with cheese - the best vegetarian comfort food!
- Creamy Lemon Garlic Chicken. Creamy lemon garlic chicken is a quick and easy dinner idea that brings a restaurant-quality meal home. It's a flavorful and delicious 30-minute recipe.
- Beef and Broccoli Stir Fry. Beef and broccoli stir fry is a classic Chinese-American dish that is delicious, savory, hearty, and saucy. Better than takeout and ready in 25 minutes.
- Farfalle Pasta with Mushroom Rosé Sauce. Farfalle pasta with mushroom rose sauce is creamy yet light, delicious and flavorful, and quick and easy to make in 20 minutes. Best comfort food dinner!
- Kung Pao Chicken. Kung Pao chicken is a Chinese chicken dish that is stir-fried with crisp vegetables and tossed in a delicious Asian sauce packed with flavour.
- Phyllo Meat Pie (Egyptian Goulash). Phyllo meat pie (Egyptian goulash) is a savory pie made of well-seasoned ground beef that lies between layers of flaky, crispy, golden phyllo pastry dough.
- Baked Beans. Homemade Baked Beans are the perfect side dish with their sweet and savory flavor, tender beans, and glossy sauce. So much better than canned baked beans!
- General Tso's Chicken. Baked General Tso's Chicken is a saucy, savoury, sweet, spicy Chinese-American takeout favourite made healthier with baked chicken, not fried.
- Manicotti. Classic Manicotti is everything you love about Italian comfort food - creamy ricotta, tender pasta, and a rich, savory marinara sauce baked until bubbly.
- Korean Ground Turkey. Korean ground turkey is flavorful, saucy, and delicious. It's quick and easy to make in just 20 minutes, great for meal prep and freezes well.
January Appetizers and Snacks
 |  |
- Chinese Beef Dumplings with Celery. Chinese Beef Dumplings are filled with juicy ground beef, finely chopped celery, and a blend of aromatic seasonings. Make them steamed, boiled or pan-fried!
- Buttermilk Cornbread. Buttermilk Cornbread tastes just like grandma used to make - moist tender texture, crisp edges, and a hint of sweetness to balance out your favorite chili.
- Air Fryer Chicken Tenders. Air fryer chicken tenders are juicy and moist inside while crispy and golden brown outside. A healthy, delicious, and quick kid-friendly recipe.
- Classic Hummus. Whip up smooth and creamy classic hummus dip at home in just 5 minutes, by combining chickpeas, tahini, olive oil, lemon juice and garlic in the blender.
- Spicy Chili Oil Wontons. Easy spicy chili oil wontons, a signature Sichuan dish ready in just 10 minutes, hits every sense of your palate -- sour, spicy, sweet and nutty.
- Sweet Potato Tater Tots. These homemade Sweet Potato Tater Tots are an easy to make appetizer using a few simple ingredients. They're oven-baked and healthier than storebought!
- Spinach Artichoke Dip. This baked spinach artichoke dip is quick, easy, creamy, flavorful, and delicious. This warm dip is baked in the oven and served with bread or crackers.
- Potato Stacks. Potato Stacks are crispy, cheesy, and flavorful, making them the perfect side dish with crunchy edges and soft gooey centers bursting with amazing flavor.
- Crispy Bottom Shanghai Pan-Fried Pork Buns. Crispy bottom Shanghai pan-fried pork buns are crunchy on the bottom and fluffy and airy inside with a juicy and flavourful pork and spring onions filling.
- Bacon Wrapped Chicken Bites. Bacon wrapped chicken bites are one of the best appys ever - well seasoned tender juicy chicken is wrapped in bacon and oven-baked to crisp perfection.
January Desserts
 |  |
- Jam Thumbprint Cookies. Jam Thumbprint Cookies are soft and buttery, with a sweet and fruity jam filling, and a drizzle of almond glaze. They literally melt in your mouth!
- Gingerbread Cupcakes. Homemade Gingerbread Cupcakes are tender and fluffy, packed with cozy flavors, and topped with a luscious cream cheese frosting. Ready in under an hour!
- Lemon Loaf with Lemon Glaze (Starbucks Copycat). Inspired by Starbucks lemon loaf, this moist, homemade lemon loaf with lemon glaze has the perfect balance between sweet and tangy, and so so flavourful.
- Almond Horns. Almond Horns are chewy, horseshoe-shaped crescent cookies covered in crunchy almonds and dipped in chocolate, inspired by the classic German Mandelhörnchen.
- Homemade Glazed Donuts. Homemade Glazed Donuts are made with tender, pillowy dough and topped with a sweet glaze. Making doughnuts at home are a lot easier than you'd think!
- Coffee Cake Cookies. Coffee Cake Cookies combine a soft, cinnamon cookie base with a crumbly streusel topping and a drizzle of sweet glaze. A classic dessert in cookie form!
- Cranberry Orange Bread. This Cranberry Orange Bread is moist and tender, loaded with fresh cranberries and zesty orange, and drizzled with homemade orange glaze on top.
- Chocolate Layer Cake. This Chocolate Layer Cake has two layers of incredibly moist and tender chocolate cake held together with homemade chocolate fudge frosting.
- Hot Chocolate Cookies. Hot Chocolate Cookies are soft and chewy, loaded with classic hot cocoa ingredients, and is so easy to make in just 20 minutes (no chilling required!).
- Peanut Butter Balls. Soft, sweet, and creamy, these no bake Peanut Butter Balls are perfect as bite-sized treats for the holidays or any day you need a little pick-me-up.
More Winter Recipes
- 60+ Winter Dinner Ideas
- 50 Best Comfort Food Recipes
- 60 Best Soup Recipes
- 40 Best Pasta Recipes
- 30 Best Casserole Recipes
Did You Make Any of These January Recipes?
Please leave a comment and rating below, and let me know what you thought of this round up of delicious recipes to cook this January. Be sure to snap a picture and tag me on Instagram @aheadofthyme or share it on the Pinterest pin so that I can follow along.
HUNGRY FOR MORE? Don't forget to sign up for my email newsletter so that you don't miss any recipes. You can also follow along on Instagram and Pinterest for more recipe updates.
Eggs in Purgatory
This comforting Eggs in Purgatory dish is the ultimate combination of bold flavors and effortless cooking. With perfectly poached eggs nestled in a rich, spicy tomato sauce, it's a simple yet satisfying meal that's ready in just 25 minutes! Whether you're making a cozy brunch or a quick weeknight dinner, this dish is guaranteed to warm you up from the inside out.
Eggs in Purgatory is like a culinary love letter to simplicity. Eggs + tomato sauce + crusty bread = pure bliss. I've made so many variations of this classic dish, but the basics never fail. The eggs cook gently in the simmering sauce, soaking up the smoky, garlicky flavors, while a sprinkle of fresh herbs and Parmesan takes it over the top. The best part? It's endlessly customizable and loved by everyone, from spice enthusiasts to picky eaters. This one-pan wonder is a guaranteed hit for any occasion!
Why You'll Love this Eggs in Purgatory Recipe
- Ready in just 30 minutes. This dish starts by building a deeply flavorful tomato sauce with garlic, onions, and a hint of red pepper flakes for a touch of heat. Once the sauce is simmering, crack the eggs right into the pan and let them poach gently to perfection. Serve it up with crusty bread or over creamy polenta for a meal that feels fancy but couldn't be simpler to make.
- Bold and savory. Sure, there are plenty of tomato-and-egg recipes out there, but this one stands out for its rich, spicy flavor and silky poached eggs. The sauce is spiked with Italian seasoning, giving it that irresistible Italian-inspired depth, while the runny yolks add a luscious, velvety texture to every bite. It's comfort food at its finest!
- Customizable to your taste. One of the best things about Eggs in Purgatory is how adaptable it is. Want it extra spicy? Add more chili flakes or a drizzle of hot sauce. Prefer a heartier dish? Toss in chickpeas, spinach, or even some crumbled sausage for a twist. You can make it your own while still keeping the soul of the dish intact. It's endlessly versatile and always satisfying!
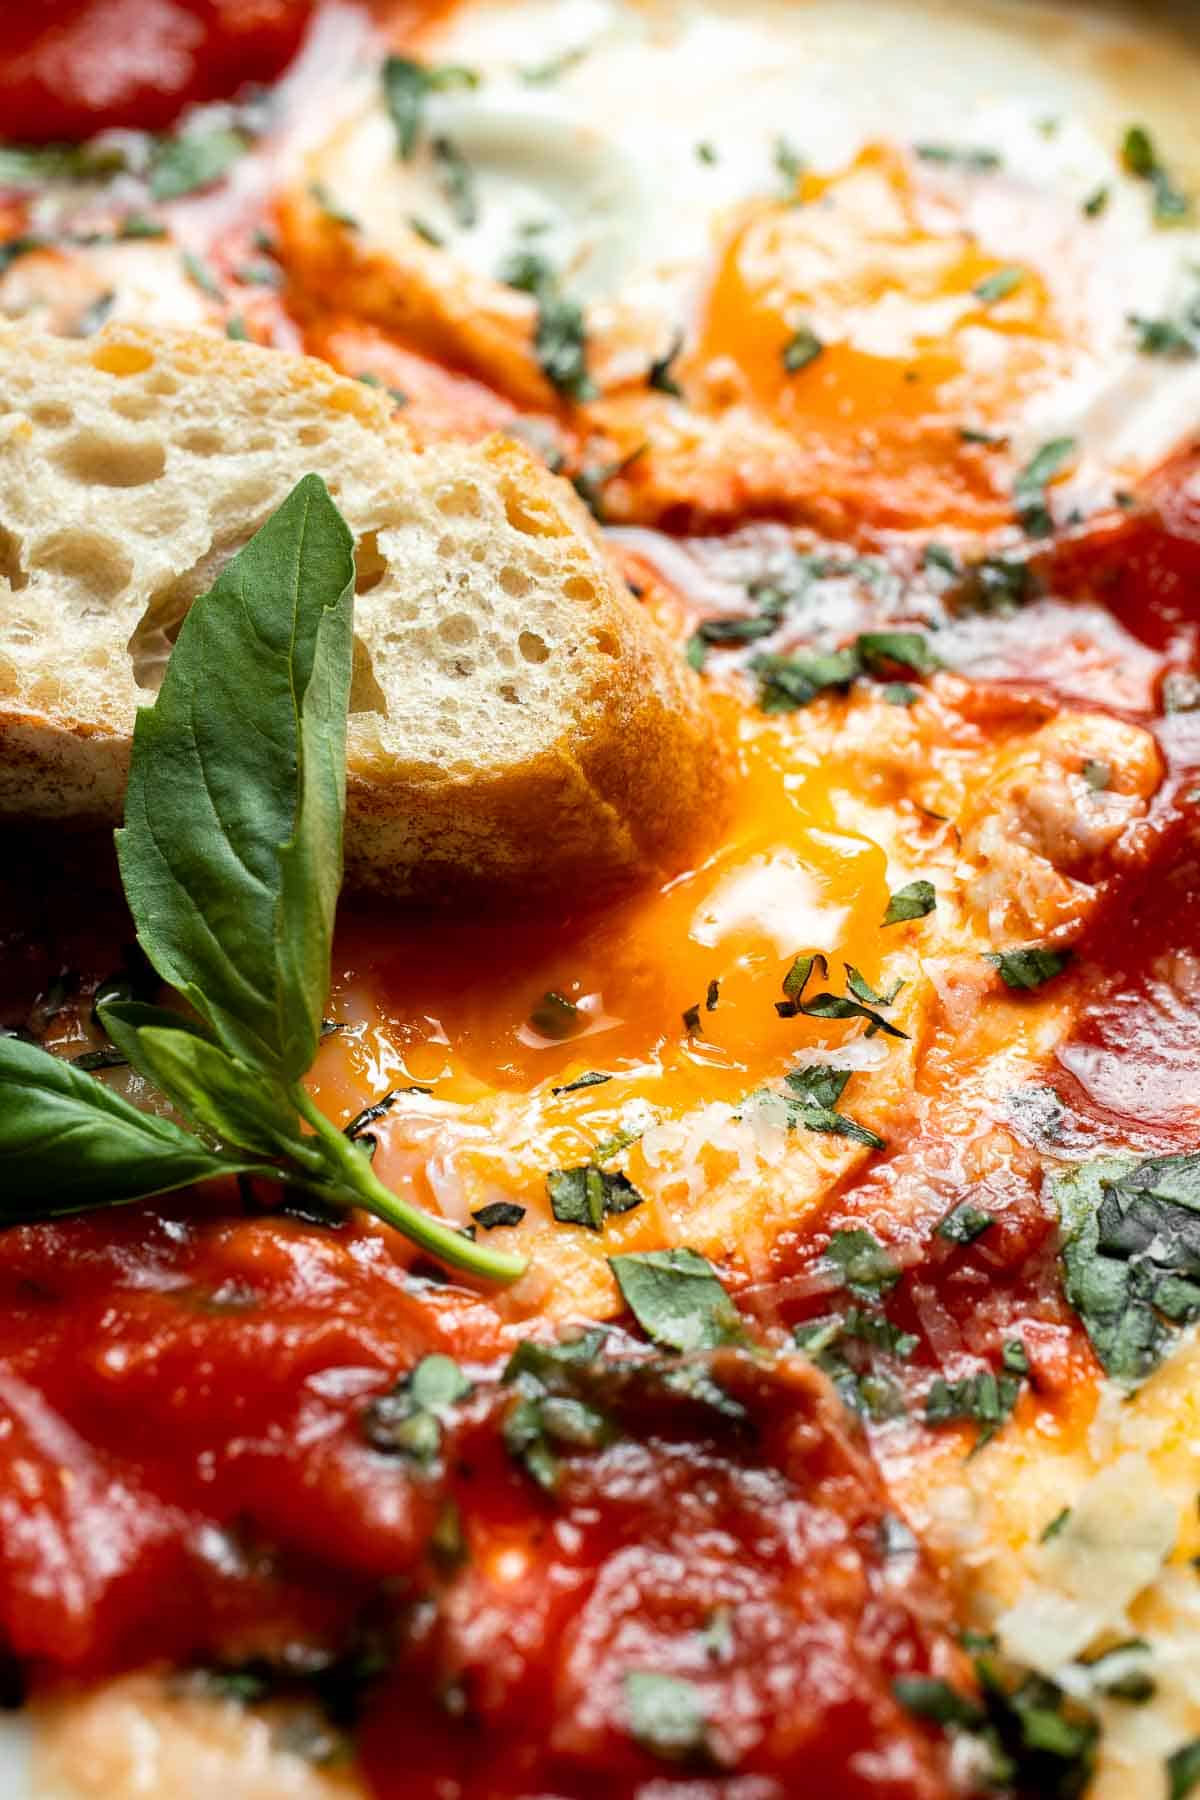
Ingredient Notes
To make this delicious Eggs in Purgatory recipe, you will need the following ingredients (full measurements in recipe card below):
- olive oil - to sauté the aromatics and give the dish a rich, velvety base.
- onion + garlic - essential aromatics that build the foundation of the sauce.
- red bell pepper - adds a touch of sweetness and texture to the tomato sauce.
- crushed tomatoes or marinara sauce - this is the heart of the dish. Use high-quality canned crushed tomatoes or your favorite marinara sauce for the best flavor. We like using our homemade marinara sauce.
- Italian seasoning - a blend of dried herbs like oregano, basil, and thyme that infuses the sauce with classic Italian flavor.
- red pepper flakes - added for a little kick of heat. Adjust the amount to suit your spice tolerance.
- salt + pepper - for seasoning.
- eggs - crack them directly into the simmering sauce for perfectly poached eggs with luscious yolks.
- parmesan cheese - freshly grated for a salty, nutty finish. The real deal is a must for that perfect melt and flavor.
- fresh herbs - use fresh basil or parsley for a pop of freshness to brighten the dish. Sprinkle it on just before serving for the best results.
- baguette bread - served on the side for dunking into the rich sauce and runny yolks. It's the perfect accompaniment!
You will also need measuring cups and spoons and a large skillet.
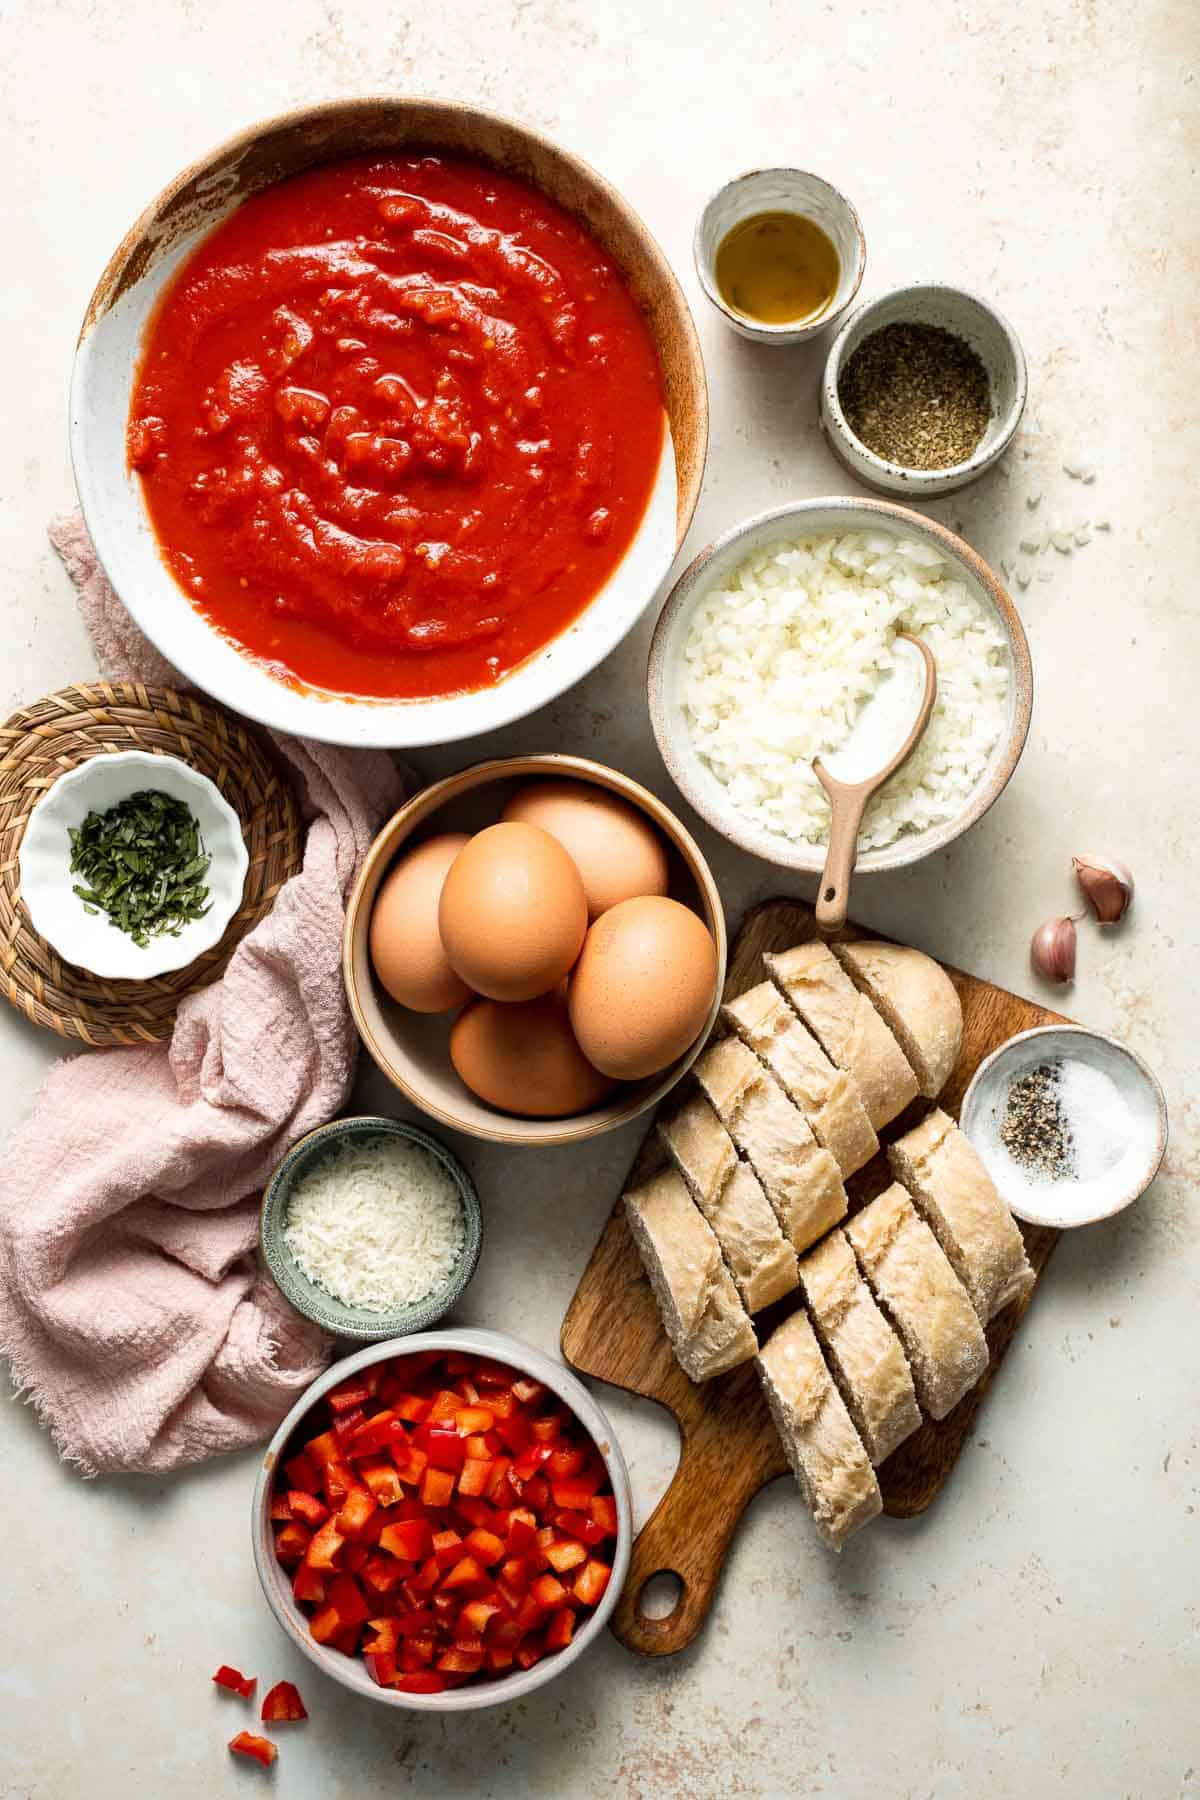
How to Make the Best Eggs in Purgatory
- Sauté aromatics. Heat oil in a large skillet for 2 minutes over medium-high heat until the hot oil sizzles. Add onion, garlic, bell pepper, and sauté until fragrant and soft, about 2-3 minutes.
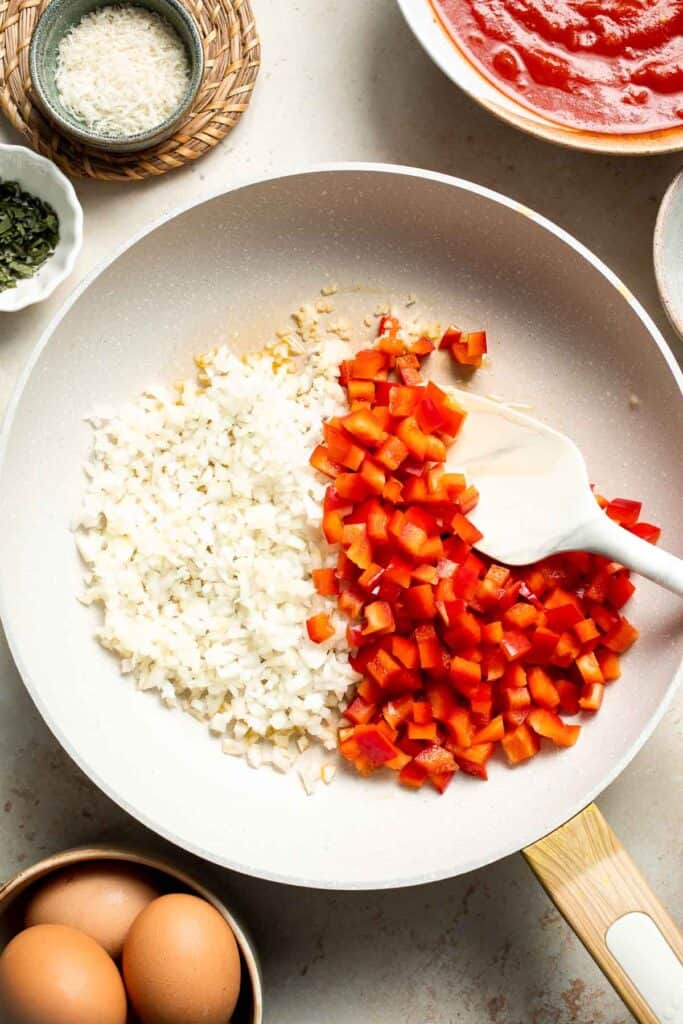

- Add remaining ingredients. Add crushed tomatoes, Italian seasoning, red pepper flakes, and salt. Stir occasionally and bring the mixture to a simmer over medium low heat. Cover the lid and simmer for 7-10 minutes.


- Add eggs. Gently crack each egg into the same skillet over the tomato sauce mixture, spaced evenly apart. Cover the lid and cook until the eggs are set to your desired doneness, about 3-5 minutes. If you prefer runny egg yolks, cook for 2-3 minutes.
- Add toppings. Top with cheese, black pepper and basil. Serve immediately with toasted baguette slices.

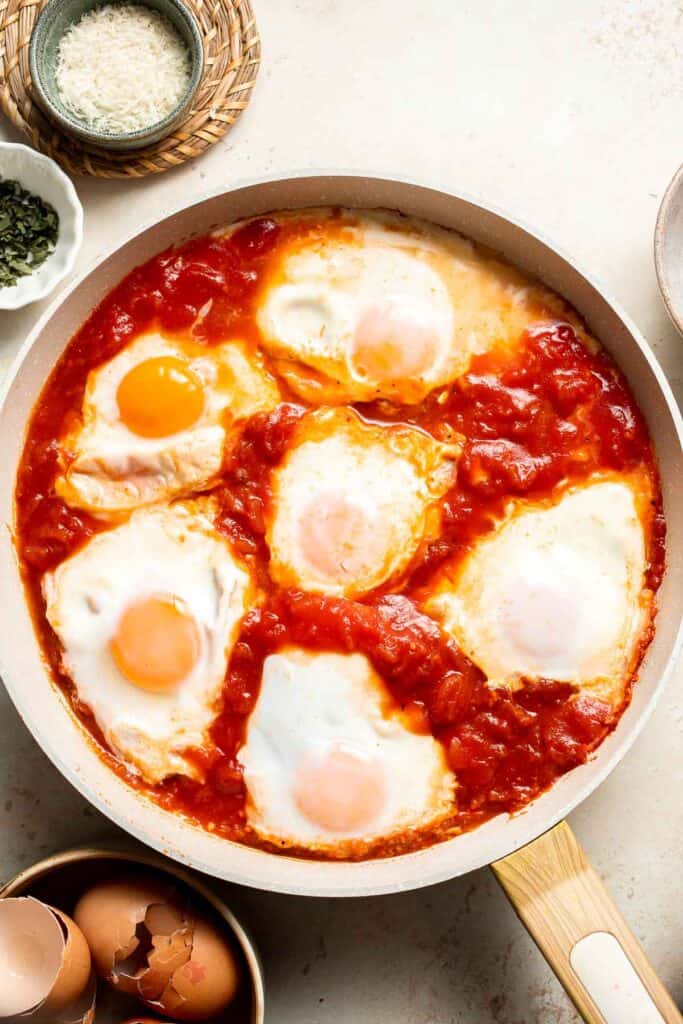

Recipe Variations
- Add more veggies. This dish is a great way to sneak in extra vegetables! Try adding sautéed spinach, chopped kale, or diced zucchini to the sauce for added nutrients. You can also toss in mushrooms or shredded carrots, which will soak up the sauce's savory flavors without overwhelming the dish.
- Make it extra spicy. Love a little heat? Add more red pepper flakes, a pinch of cayenne, or even some chopped fresh chili peppers to the sauce. It's an easy way to give the dish a fiery kick.
- Switch up the cheese. Parmesan is a classic, but you can experiment with pecorino romano for a sharper flavor or even sprinkle a bit of feta or goat cheese for a tangy twist.
- Add plant-based protein. For a heartier meal, try stirring in cooked white beans or chickpeas into the sauce. They add extra texture and protein without taking away from the simplicity of the dish.
How to Serve
Eggs in Purgatory is delicious served as a standalone dish for brunch or lunch, but pairing it with the right sides takes it to the next level. Here are some of my favorite accompaniments:
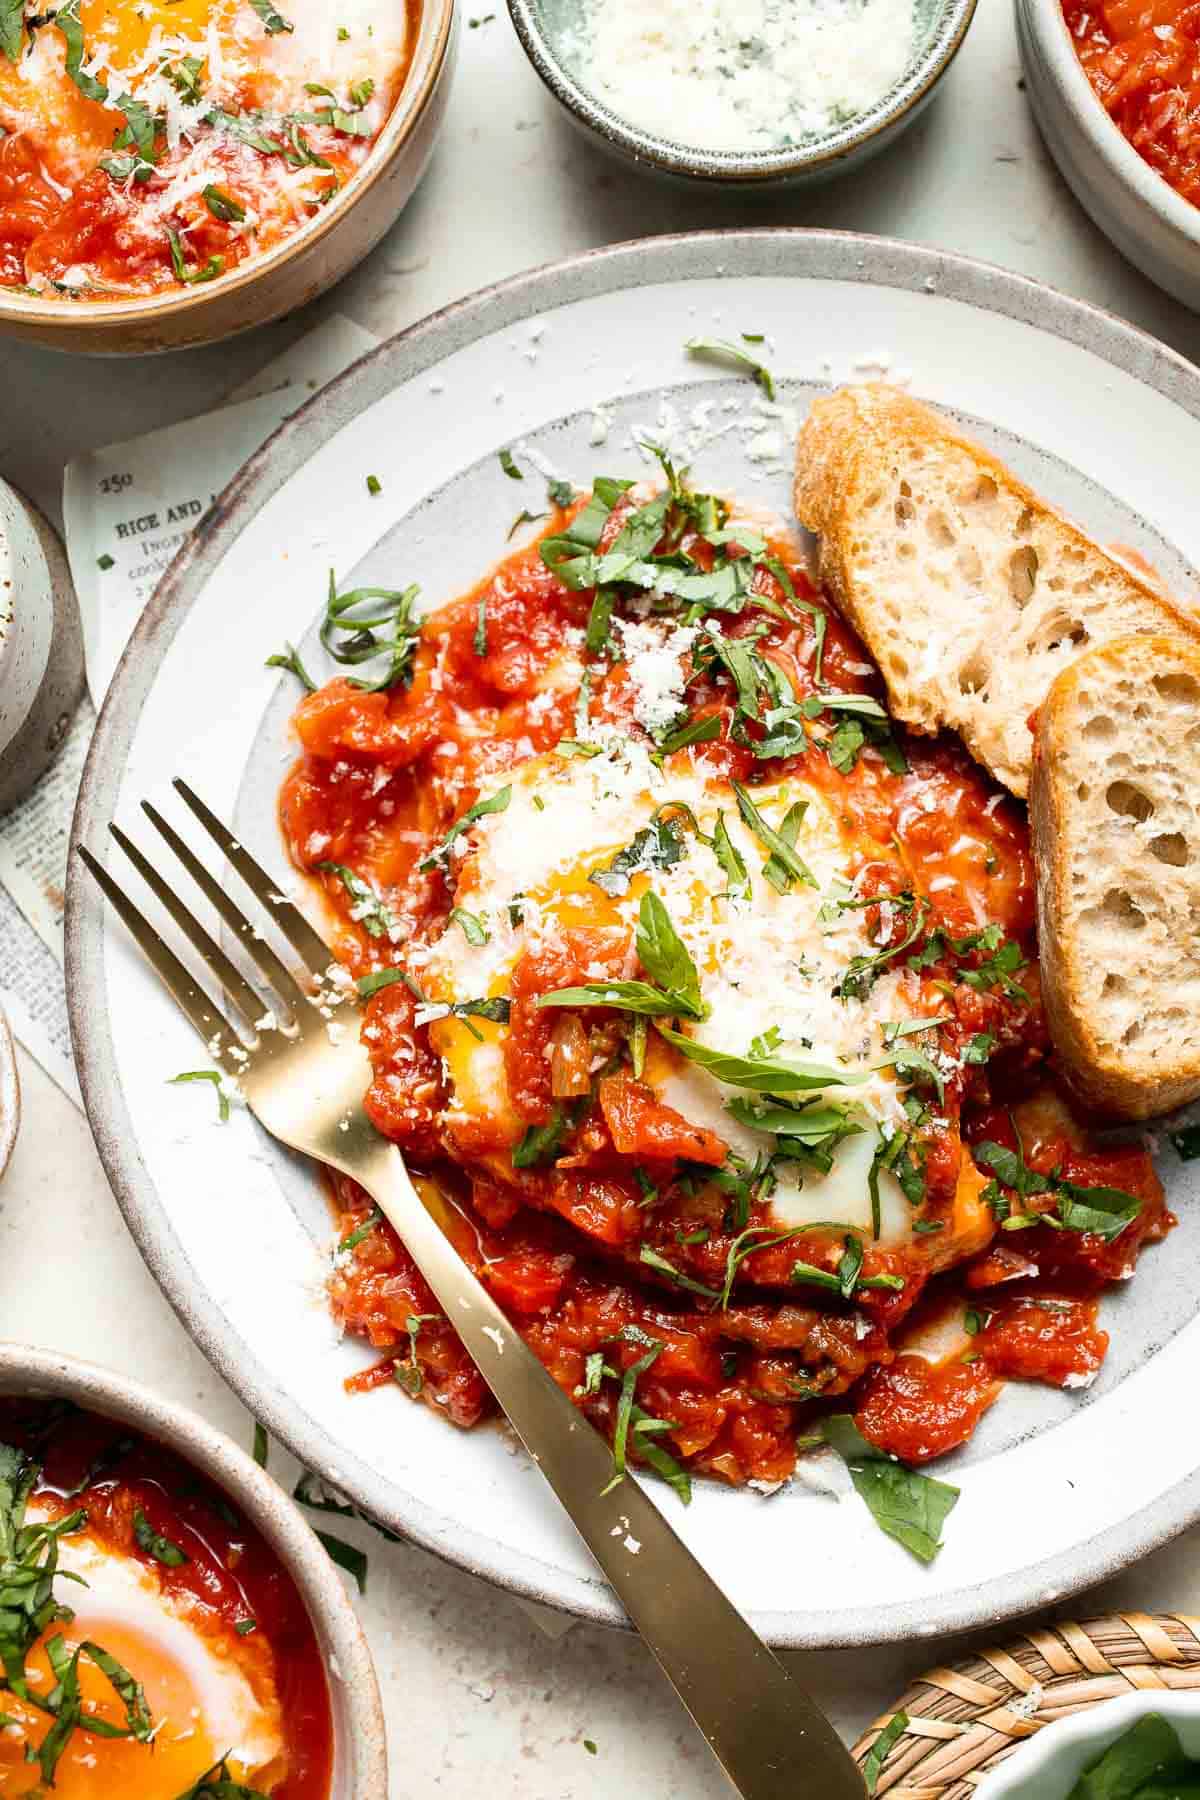
Recipe Tips and Tricks
- Don't overcook the eggs. Keep an eye on the eggs while they poach in the sauce. For beautifully runny yolks, turn off the heat as soon as the whites are set. Remember, the eggs will continue cooking slightly from the residual heat of the sauce.
- Boost the umami. For a deeper, richer tomato sauce, add a splash of balsamic vinegar, a pinch of sugar, or a small dollop of tomato paste as the sauce simmers. These simple additions can elevate the dish and make the flavors pop.
- Toast your bread. Lightly toast your baguette slices or rub them with garlic for extra flavor before serving. It's a small step that takes your dipping game to the next level!
Storing and Freezing Instructions
How to Store
To store leftover Eggs in Purgatory, allow the dish to cool to room temperature before transferring it to an airtight container. Store the sauce and eggs separately if possible, as the eggs may overcook when reheated. Leftovers can be kept in the refrigerator for 3-4 days. For convenience, portion out individual servings to make reheating easier.
How to Reheat
Warm the tomato sauce gently in a saucepan over medium heat until heated through. If the eggs were stored separately, add them to the sauce during the last few minutes of reheating to avoid overcooking. Alternatively, microwave the sauce in a bowl, then add a freshly poached egg for a quick option. Pair with fresh bread or your favorite sides and enjoy!
FAQ
It's not ideal to freeze this dish with the eggs included, as poached eggs don't reheat well and can become rubbery. However, you can freeze the tomato sauce separately! Let it cool completely, then transfer it to an airtight container or freezer bag. It will keep for up to 3 months. When ready to serve, reheat the sauce and add freshly poached eggs for the best texture and flavor.
Yes! The tomato sauce can be prepared a day or two ahead and stored in the refrigerator. When you're ready to serve, reheat the sauce on the stove, then poach the eggs directly in the warm sauce. This saves time while ensuring the eggs are perfectly fresh and runny.
Crusty baguette slices are a classic choice, but you can also use ciabatta, sourdough, or even focaccia. For a heartier option, try serving it with toasted garlic bread or breadsticks for extra flavor.
More Egg Recipes
- 20 Best Egg Recipes
- Shakshuka
- Caprese Frittata
- Egg Muffins
- Mediterranean Scrambled Eggs
- Avocado Toast with Poached Egg
Tried this recipe?
I'd love to hear what you think! Leave a comment and rating below to share your feedback. Your reviews help others discover this recipe and help me keep creating more free recipes for you. Snap a photo and tag me on social media @aheadofthyme too.

Tofu Soup
This homemade Tofu Soup is the perfect balance of light and satisfying - with tender tofu cubes, vibrant veggies, and a savory broth for a deep, rich flavor that will warm you up from the inside. It's nourishing, packed with protein, and comes together in just 20 minutes! Whether you're warming up on a chilly evening or craving something cozy, this vegan soup hits all the right notes.
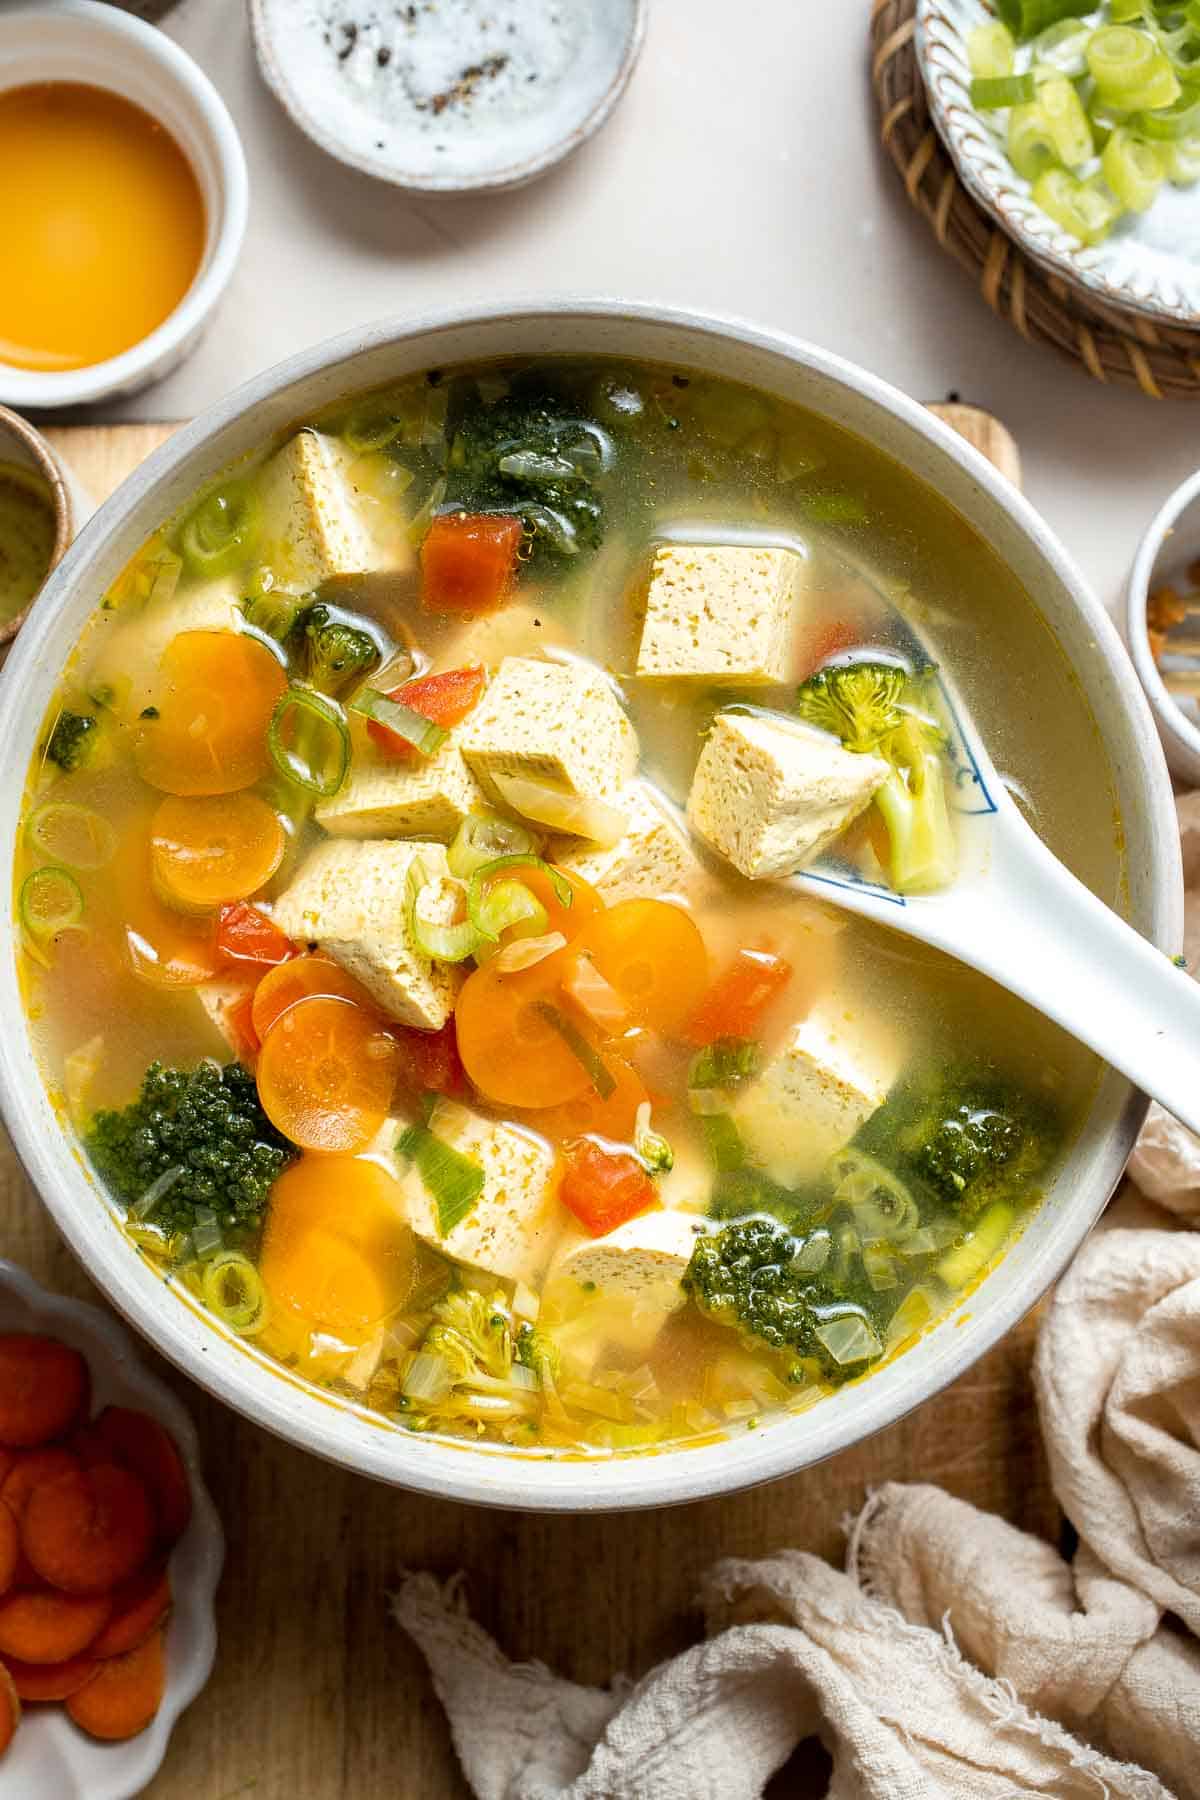
Tofu is a constant staple in our fridge because it's just so versatile and easy to prepare. Itis. is like a blank canvas waiting to soak up all the goodness you throw at it. Whether you're frying it until crispy or letting it soak up broth in this vegan tofu soup, it's inexpensive, filling, and packed with plant-based protein. I've made so many tofu-based recipes over the years (like this Mapo Tofu or these Tofu Lettuce Wraps), but this soup is a standout! We love how the tofu acts like sponge, absorbing all of the flavors and seasonings around it. Pair it with some leftover Vegetable Dumplings or fresh noodles and enjoy!
Why You'll Love This Tofu Soup
- Ready in 20 minutes. This easy tofu soup is one of the fastest, easiest meals for those busy weeknights, and it's so good for you! This recipe is proof that healthy, delicious meals don't have to take all day! It's ready to serve in just 20 minutes - that's faster than delivery!
- Naturally plant-based. Every component of this recipe is naturally vegan from the vegetable broth to the tofu (and gluten-free too!). You can certainly add meat, if you prefer, but this makes it suitable for a wide range of dietary needs. Great for the whole family!
- Loaded with veggies. With onion, carrots, tomato, broccoli, and spring onion, this is almost more vegetable soup than tofu soup (in a good way). It's so filling and satisfying for being such a light soup!
Ingredient Notes
To make this delicious Tofu Soup, you will need the following ingredients (full measurements in recipe card below):
- avocado oil - to sauté the aromatics. Olive oil works, too.
- aromatics - diced onion and sliced carrots
- roma tomato - chopped to add a little freshness to each bite.
- broccoli florets
- vegetable broth - to keep this soup vegan, use vegetable broth. Chicken broth is a great substitute if you are not vegan.
- medium firm tofu - you'll need about ½ pound of tofu, drained to remove any excess liquid.
- miso paste - for a salty, umami flavor.
- sesame oil - adds a rich nuttiness.
- salt and black pepper - to taste.
- fresh spring onion - sliced green onions add a pop of color and freshness.
You will also need measuring cups and spoons, and a cooking pot.

How to Make the Best Tofu Soup
- Sauté aromatics. In a medium sized cooking pot, heat oil over medium-high for 1 minute. Add onion and carrot and sauté until fragrant, about 1-2 minutes.


- Add soup base. Add vegetable broth, tomato, tofu, and miso paste. Stir well and bring to a boil.


- Add broccoli. Reduce heat to medium and add broccoli. Continue cooking for another 2-3 minutes until tender.


- Season. Season with sesame oil, salt and pepper to taste.
- Serve. Garnish with spring onions and serve warm.

Recipe Variations
- Adjust the vegetables. You can really use the vegetables of your choice. Feel free to add fresh mushrooms, corn, collard greens or kale, napa cabbage, bok choy, etc. Use what you like!
- Make it spicy. For a spicy soup, add chili oil, sriracha, or Korean red pepper flakes.
- Add meat. This soup is vegan on its own, but you can easily add cooked chicken, ground meat, braised pork belly, shrimp, fish, and more. I recommend adjusting the broth to match the meat, like using chicken broth if you add chicken or fish broth for a seafood version. You can also stir scrambled eggs into the hot soup, like Hot and Sour Soup, for a thicker texture and extra protein.
- Play with garnishes. For extra texture, pan fry tofu until golden brown for a fun, crispy tofu garnish. You can also add sesame seeds, kimchi, fresh cilantro, or fried shallots.
How to Serve
This Tofu Soup is delicious served on its own, or paired with some of my favorite Chinese dishes including:
- Beef and Broccoli Stir Fry
- General Tso's Chicken
- Chinese Beef Dumplings
- Mongolian Chicken
- Spicy Chili Oil Wontons
- Cashew Chicken
For more recipes, see our 60 Chinese Takeout Recipes at Home.
Recipe Tips and Tricks
- Prep ahead of time. If you know you want to make this soup on a busy night, prep everything in advance, like chopping the onions and carrots and draining the tofu. Those don't take much time, but it can be so helpful to have them ready to go!
- Layer flavor. This is such a quick recipe, which is why it's important to use the right ingredients and follow the instructions carefully. Sauteing the onions and carrots releases their flavor and the miso paste and sesame oil give the hot broth depth and dimension. Don't skip any of these elements!
- Use the right tofu. The firmness of the tofu affects the final texture and flavor. I prefer to use medium firmness tofu, which is still soft enough. Extra firm tofu can be overly chewy in soup and silken tofu tends to fall apart.
Storing and Freezing Instructions
How to Store
Store leftover tofu soup in an airtight container in the fridge for 3-4 days.
How to Reheat
To reheat, warm the leftovers in a saucepan over medium heat until heated through.
FAQ
Yes, tofu is a great ingredient to add to soup because it soaks up all the flavors and seasonings from the broth. Plus, it doesn't need to be cooked ahead of time, making it a quick way to add protein. I recommend using medium firmness tofu for the best texture. Many people like silken tofu, which is even softer and more delicate, but it tends to fall apart and look curdled when stored as leftovers.
Since this tofu miso soup is loaded with vegetables, including delicate tomato pieces, it's best served fresh or reheated from the fridge. Freezing can damage the texture of the tofu and the vegetables.
The goal is to add umami or savory flavors, which make the stock much more satisfying than ordinary broth. I like to add flavor through miso paste and sesame oil, which complement each other well and add a ton of flavor in just a couple of minutes. You can also add a little fish sauce, light soy sauce, or dried mushrooms to make the broth your own.
More Asian Soup Recipes
- 60 Best Soup Recipes
- Easy Wonton Soup
- Hot and Sour Soup
- Creamy Vegan Ramen
- Thai Red Curry Noodle Soup
- Coconut Curry Ramen
Tried this recipe?
I'd love to hear what you think! Leave a comment and rating below to share your feedback. Your reviews help others discover this recipe and help me keep creating more free recipes for you. Snap a photo and tag me on social media @aheadofthyme too.

Winter Fruit Salad
This easy Winter Fruit Salad combines juicy citrus, sweet grapes, crisp apples, and tart pomegranate, all tossed together with a simple honey-lime dressing. It is a vibrant and colorful dish that's as gorgeous as it is delicious, making it a standout treat on any dinner table. Even better, it comes together in just 15 minutes with minimal prep (or even faster if you are quick at chopping fruit!).

Winter fruits are so underrated, yet they bring some of the best flavors to the table. From the brightness of orange and permissions and the tangy flavor of kiwi, to the crispness of apples, this fruit salad highlights everything the season has to offer. It's refreshing, sweet, and tart. Serve it at brunch or as a treat after a hearty lunch or dinner this winter.
Why You'll Love This Winter Fruit Salad
- Quick and effortless. This winter fruit salad comes together in just 15 minutes, making it a lifesaver when you're short on time but still want a dish that impresses. Whether it's a festive holiday spread or a work potluck, this fruit salad is the perfect quick addition.
- A symphony of flavors. The combination of juicy citrus, crisp apples, tangy kiwi, mellow permissions, and the subtle sweetness of honey in the dressing creates a beautifully balanced dish. Add the crunch of pomegranate, and you've got a dish that's as satisfying as it is flavorful.
- Bright and beautiful. During the colder months, meals can often feel heavy or dull. This salad brings a burst of vibrant color and freshness to the table, making it an eye-catching centerpiece for any gathering or a cheerful pick-me-up on an ordinary day.
- So healthy. Packed with fiber, vitamins, and antioxidants from all the fresh fruit, this dish is as nutritious as it is delicious. Plus, it's naturally vegetarian, and you can easily adjust it to suit different dietary needs - swap the honey for maple syrup to make it vegan!

Ingredient Notes
To make this delicious Winter Fruit Salad, you will need the following ingredients (full measurements in recipe card below):
- clementine oranges - these juicy, sweet oranges add a burst of citrus flavor. Peel them and separate into segments for easy eating. Feel free to substitute with any type of citrus that you like such as mandarins, tangerines, blood oranges, etc.
- grapes - choose red or green grapes for a pop of sweetness and crisp texture. Slice them in half for bite-sized perfection.
- kiwi - vibrant with a tangy-sweet flavor, kiwi adds both color and a tropical twist. Peel and slice into thin rounds or small chunks.
- persimmons - Fuyu persimmons work best for their firm texture and honey-like sweetness. Slice into small wedges for a beautiful presentation.
- apples - Crisp varieties like Honeycrisp, Fuji, or Pink Lady add crunch and balance the other fruits' softness. Thinly slice or dice as desired.
- pomegranate - pomegranate seeds provide a delightful crunch and tartness. You can extract seeds from a fresh pomegranate or buy prepackaged arils to save some time.
- honey - adds a natural sweetness to the dressing, balancing the citrus and tangy flavors. Feel free to substitute with maple syrup for a vegan option.
- lime - fresh lime juice brings brightness and keeps the fruits from browning. You can also use lemon if you prefer.
- poppy seeds - gives the dressing a subtle nuttiness and visual appeal.
You will also need measuring cups and spoons, a small mixing bowl, and large serving bowl.

How to Make the Best Winter Fruit Salad
- Assemble. Chop and prep fruit. Arrange the prepared fruits in a large serving bowl


- Make dressing. In a small mixing bowl, add honey, lime juice, and poppy seeds, and stir until combined.


- Toss. Drizzle dressing on top and toss to coat evenly. Serve immediately or store in the refrigerator.


Recipe Variations
- Add more fruits. You don't have to stop with the listed ingredients. Pears, dried cranberries, or even blood oranges can enhance the salad's flavor and visual appeal. They all pair wonderfully with the honey-lime dressing.
- Incorporate greens. If you want to stretch this dish into a more traditional salad, toss the fruits with a bed of baby spinach, arugula, or spring greens. The added greens balance the sweetness of the fruit with a peppery or mild bite.
- Sweeten the dressing. The honey-lime dressing is already lightly sweet, but you can adjust to taste with more honey or a splash of maple syrup if desired.
- Add crunch. Sprinkle toasted nuts like walnuts, pistachios, or pecans over the top for texture, or mix in crumbled feta cheese for a savory touch.
How to Serve
This Winter Fruit Salad is refreshing and delicious served on its own as a light lunch, snack, or side. It feels right at home on a casual brunch tables as well, along with some other favorites such as:
- Breakfast Strata
- Avocado Toast with Poached Egg
- Hash Browns
- Ricotta Pancakes
- French Toast
- Chia Seed Pudding
For more recipes, see our 40+ Best Brunch Ideas.
Recipe Tips and Tricks
- Dress right before serving. To keep the fruits vibrant and fresh, add the honey-lime dressing just before serving. This prevents the salad from becoming soggy and ensures the flavors stay bright and balanced.
- Prep ahead. Save time by slicing and prepping all the fruits a few hours ahead of your gathering. Store them separately in airtight containers to maintain their texture and freshness, then combine everything when ready to serve.
- Customize for dietary needs. If you're serving a crowd, consider offering the poppy seeds or honey-lime dressing on the side for those with dietary restrictions. This also allows guests to adjust the sweetness and seasoning to their preference.
- Store leftovers smartly. If you have extras, store the undressed fruit in an airtight container in the fridge for up to two days. It's perfect for a quick snack or a next-day breakfast topping!
Storing Instructions
This easy winter fruit salad is best stored without the dressing to keep the fruits fresh and crisp. Place the prepared fruits in an airtight container and store them in the fridge for up to 2-3 days. Keep the honey-lime dressing in a separate container or mason jar on the side for up to a week. Shake well before using, and dress the salad right before serving to preserve its texture and flavor.
FAQ
Winter offers a variety of delicious fruits that shine in a fruit salad. Clementine oranges, kiwis, persimmons, pomegranates, apples, and grapes are all excellent choices. Their mix of sweetness, tartness, and texture makes them a perfect combination for a winter-themed dish. Feel free to experiment with other seasonal fruits like blood oranges or pears to customize your salad.
A simple honey-lime dressing is perfect for enhancing the natural sweetness and tartness of the fruits without overpowering them. The honey adds a touch of warmth, while the lime juice brightens the flavors. Adding poppy seeds gives the dressing a subtle nuttiness and a visually appealing touch. You can also try a yogurt-based dressing for a creamy twist.
You can prep the fruits a day ahead, slicing and storing them separately in airtight containers to maintain their freshness. To prevent browning, toss apple slices in a little lime juice before storing. Wait to combine the fruits and add the dressing until right before serving to keep the salad vibrant and crisp. When stored properly, the prepared fruit will stay fresh for 2-3 days in the fridge.
More Recipes with Fresh Fruit
- Fresh Fruit Tart
- Winter Pomegranate Salad
- Summer Fruit Salad
- Mandarin Orange Salad
- Green Detox Smoothie
- Fruit and Yogurt Parfait with Granola
Tried this recipe?
I'd love to hear what you think! Leave a comment and rating below to share your feedback. Your reviews help others discover this recipe and help me keep creating more free recipes for you. Snap a photo and tag me on social media @aheadofthyme too.

Manicotti
This classic Manicotti is everything you love about Italian comfort food - creamy ricotta filling, tender pasta, and a rich, savory marinara sauce baked to bubbly perfection. It's hearty, satisfying, and perfect for a cozy weeknight dinner or a special family gathering. Plus, it's surprisingly simple to make and comes together in just over an hour!
Manicotti is one of those dishes that always delivers. Pasta + cheese + sauce = culinary magic. I have an entire repertoire of baked pasta recipes to prove it, and this manicotti is a standout. The ricotta mixture is light and creamy, the marinara sauce adds a zesty tang, and the melted mozzarella on top takes it to the next level. Best of all, it's a crowd-pleaser that everyone loves, from picky eaters to die-hard pasta fans. Serve it with garlic breadsticks and a fresh green salad for a meal that feels like a celebration!
Why You'll Love this Manicotti Recipe
- Easy to make. This manicotti recipe comes together in just a few simple steps. Start by filling the pasta shells with a creamy ricotta mixture, then layer them in a baking dish with marinara sauce. Top with plenty of cheese and bake until bubbly and golden. It's an impressive dish that's much easier to make than it looks!
- Rich and cheesy. The ricotta filling is light and fluffy, with just the right amount of parmesan for a nutty kick, while the melted mozzarella on top adds that irresistible stretch factor. Every bite is creamy, cheesy, and bursting with flavor.
- Perfect for gatherings. Whether you're hosting a dinner party or making a family meal, this recipe is guaranteed to please a crowd. It's hearty enough to feed 6-8 people, and any leftovers reheat beautifully for an easy next-day meal. Serve with a crisp green salad and some garlic bread for the ultimate Italian-inspired feast!
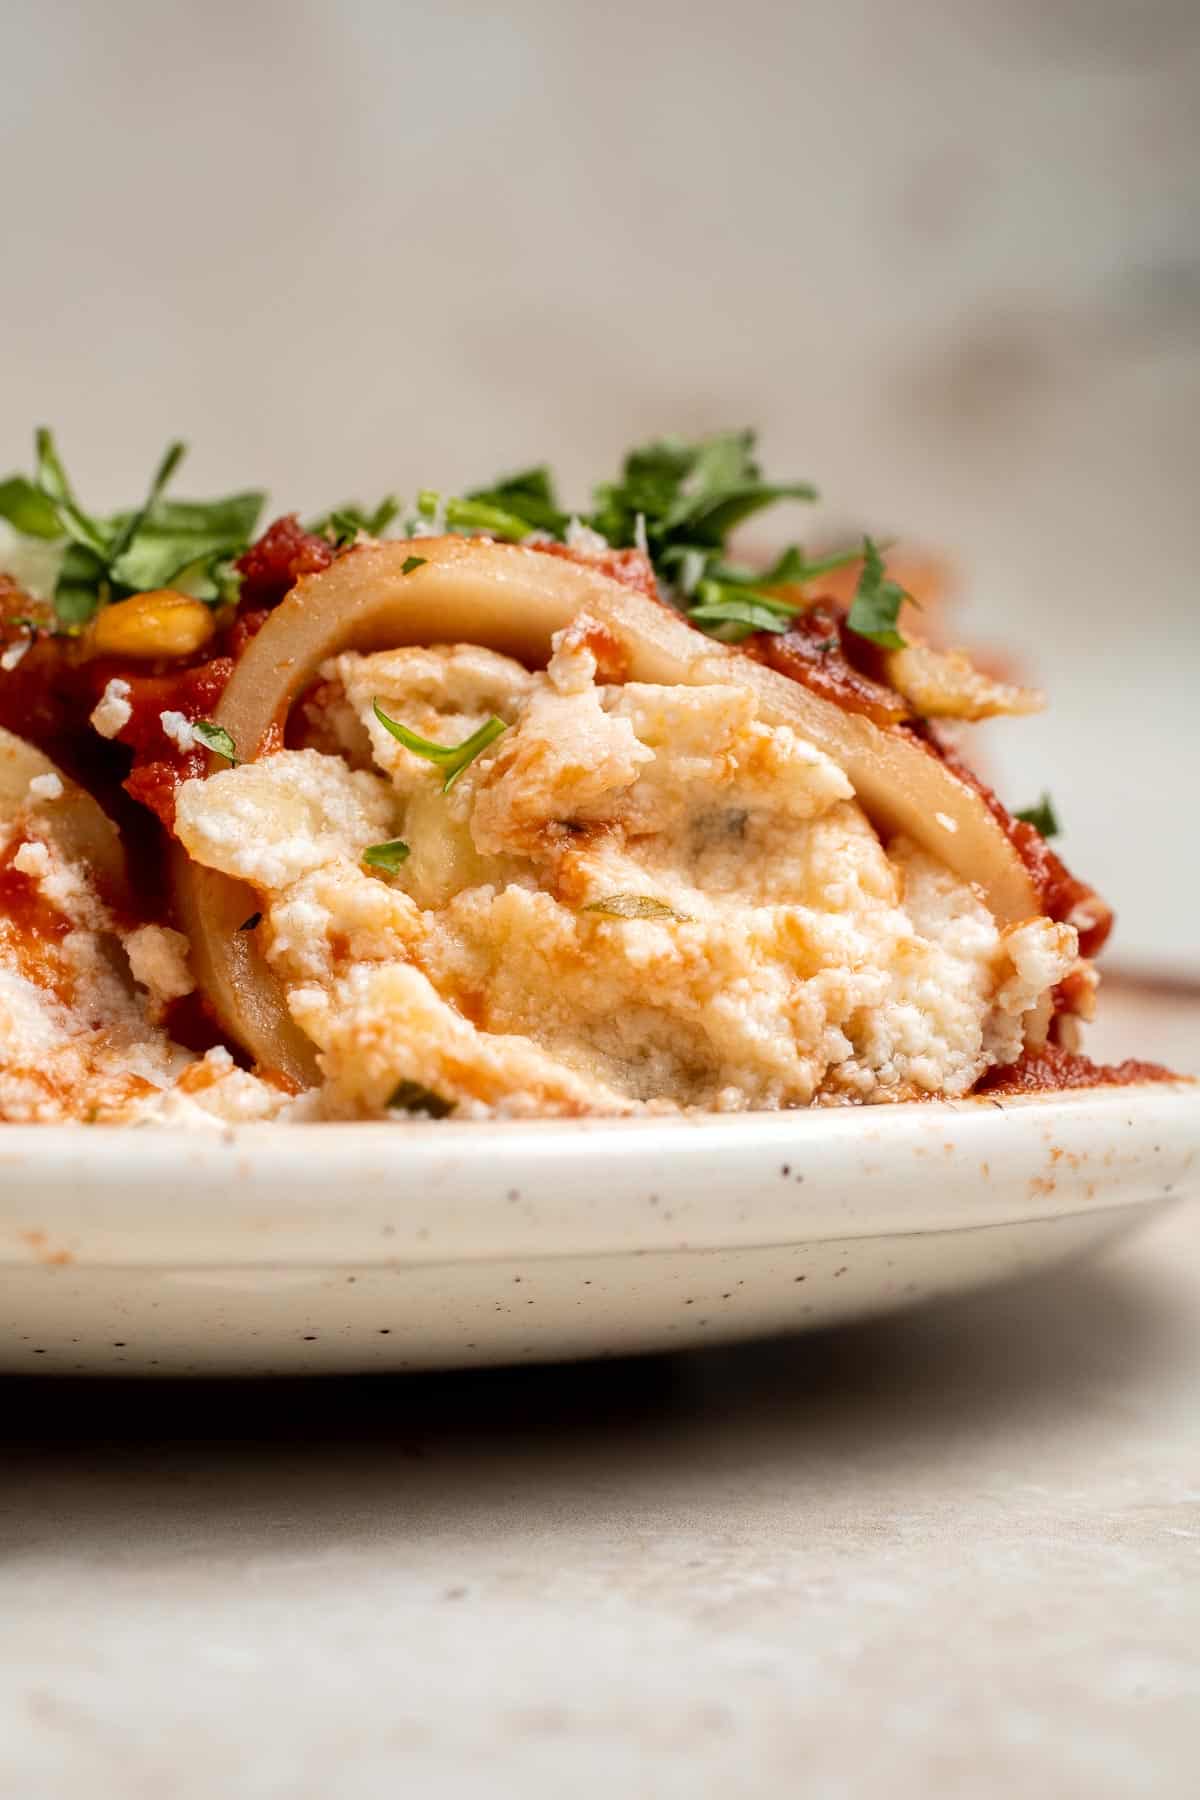
Ingredient Notes
To make this delicious Vegetarian Lasagna Soup, you will need the following ingredients (full measurements in recipe card below):
- Manicotti shells - these tubular pasta shells are perfect for stuffing. Be sure to cook them until al dente to prevent them from tearing while filling. If you can't find manicotti, large pasta shells or cannelloni can work as substitutes.
- ricotta cheese - the creamy base of the filling. Use whole milk ricotta for the richest flavor and texture. If your ricotta is watery, drain it in a fine mesh sieve or cheesecloth for 10-15 minutes to avoid a runny filling.
- mozzarella cheese - adds melty, gooey goodness. For best results, shred your own mozzarella as it melts better than pre-shredded kinds.
- Parmesan cheese - adds a nutty, salty flavor to the filling. Freshly grated parmesan has the best taste and texture, but pre-grated works as well.
- egg - helps bind the ricotta mixture, giving it structure and a light, fluffy texture.
- parsley - finely chopped for a fresh herby flavor and as a colorful garnish. Fresh basil is works too, but is harder to find during the winter months.
- marinara sauce - we love using our homemade marinara sauce, but store-bought works just fine. or If using store-bought, opt for a high-quality marinara with minimal added sugar.
You will also need measuring cups and spoons, large pot or 4 quart Dutch oven, and mixing bowl.

How to Make the Best Manicotti
- Cook pasta shells. Bring a large pot of salted water to a boil over medium-high heat. Add Manicotti shells and cook until al dente, about 8-10 minutes (or according to package directions). Rinse the noodles under cold water to stop the cooking process and set aside in the pot.


- Make cheese filling. In a medium mixing bowl, combine ricotta cheese, 1 cup mozzarella, Parmesan, beaten egg, and parsley. Stir well to combine together. Set aside.

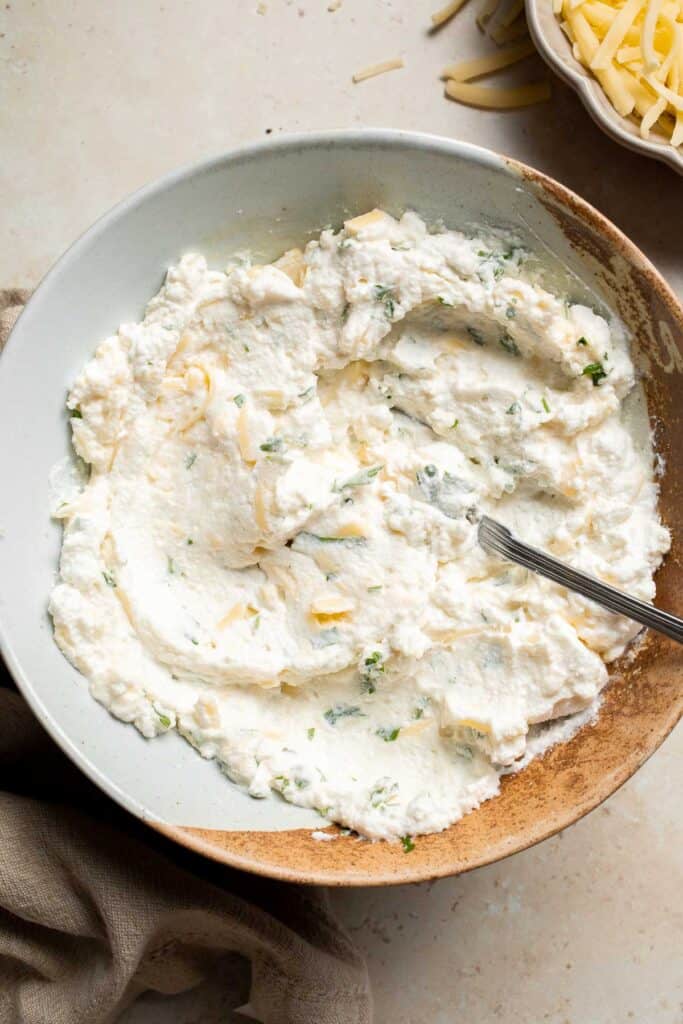
- Assemble shells. In a large baking sheet, assemble the Manicotti by dividing the cheese mixture evenly and fill it inside manicotti shells until full. You can use a large piping bag for easy stuffing.


- Assemble dish. In a 10x15-inch casserole dish, spread 1 cup marinara sauce evenly on the bottom. Arrange the stuffed Manicotti shells evenly on top.


- Add toppings. Spread the remaining marinara sauce over and sprinkle the remaining 1 ½ cups mozzarella cheese on top.
- Bake. Bake (covered with foil) in a 350F preheated oven for 30-35 minutes. Remove the foil and bake uncovered for another 5-10 minutes or until the melted cheese turns golden brown and bubbly. Optionally, turn the oven to broil and broil on high for 1-2 minutes to get the crispy and brown cheesy crust.


- Rest. Let the Manicotti rest and cool for 10 minutes before serving.
- Serve. Serve with grated Parmesan and fresh parsley on top, if desired.


Recipe Variations
- Boost the filling with veggies. Want to add more nutrients to your manicotti? Mix in finely chopped spinach, sautéed mushrooms, or grated zucchini into the ricotta filling. These veggies blend seamlessly into the cheese mixture and add extra flavor and texture without overpowering the dish.
- Switch up the sauce. While classic marinara is always a hit, you can change things up with a creamy Alfredo sauce, a robust meat sauce, or even a spicy arrabbiata for an extra kick.
- Try a different cheese blend. While ricotta, mozzarella, and parmesan are traditional, you can swap or add cheeses like provolone, fontina, or asiago for a more complex flavor. If you're feeling adventurous, mix in a bit of blue cheese for a bold taste.
- Make it meaty. If you love a heartier dish, add cooked ground beef, Italian sausage, or shredded chicken to your filling. Alternatively, layer the meat between the sauce and stuffed shells for added richness.
- Create a baked pasta twist. If stuffing shells feels like too much work, deconstruct the dish. Use the same ingredients, layer them in a casserole dish, and bake it as a manicotti-inspired pasta bake. It's just as delicious with half the effort!
How to Serve
This Manicotti is delicious served on its own, or paired with some of my favorite pasta sides including:
- Simple Italian Salad
- Pull Apart Garlic Bread
- Oven Roasted Vegetables
- Garlic Knots
- Tomato Burrata Salad
- Tomato Basil Soup
For more recipes, see our 30 Side Dishes for Pasta.

Recipe Tips and Tricks
- Cook the shells to al dente. Manicotti shells should be slightly undercooked before stuffing, as they will continue to soften in the oven. Boil them just until al dente to prevent them from becoming too mushy after baking.
- Use a piping bag for the filling. Filling manicotti shells can be tricky, but a piping bag or even a large zip-top bag with the corner snipped off makes the job so much easier. It helps you evenly distribute the cheese mixture without tearing the pasta.
- Layer sauce generously. Make sure to spread a layer of marinara sauce on the bottom of the baking dish before adding the stuffed shells. This keeps the pasta from sticking and ensures every bite is packed with flavor.
- Let it rest before serving. Allowing the baked manicotti to sit for 5-10 minutes after removing it from the oven will help the layers set, making it easier to serve and enhancing the flavors.
Storing and Freezing Instructions
How to Store
To store leftover manicotti, let the dish cool completely, then transfer it to an airtight container. Refrigerate for up to 3-4 days. If you have any unused filling, you can store it separately in a sealed container in the fridge to use for a fresh batch later. Use within 3 days.
How to Reheat
For best results, reheat manicotti in the oven. Place the portion you want to serve in an oven-safe dish, cover with foil, and bake at 350°F until warmed through, about 20-25 minutes. You can also reheat in the microwave for quicker results, but the pasta may soften further
How to Freeze
To freeze, assemble the dish without baking, then wrap it tightly in plastic wrap followed by a layer of aluminum foil. Place in the freezer and freeze for up to 3 months. When ready to bake, thaw overnight in the refrigerator, then bake as directed, adding 10-15 extra minutes to account for the colder start. Alternatively, you can freeze individual portions for easy reheating later.
FAQ
Yes, manicotti is an excellent make-ahead dish! Assemble it up to 24 hours in advance, cover tightly, and refrigerate until you're ready to bake. Just add a few extra minutes to the bake time if the dish is cold from the fridge. This makes it perfect for entertaining or busy weeknights.
The classic manicotti filling uses a blend of ricotta, mozzarella, and Parmesan cheese for a creamy, melty, and flavorful filling. For a more indulgent dish, you can add mascarpone for extra richness. If you'd like a slightly tangy flavor, mix in a little goat cheese or cream cheese.
Absolutely! Substitute the regular manicotti shells with gluten-free pasta shells or even thinly sliced zucchini or eggplant for a veggie-based alternative. See our Eggplant Rollatini recipe. Be sure to also check that your marinara sauce and any other packaged ingredients are labeled gluten-free.
More Baked Pasta Recipes
- Spinach and Ricotta Pasta Bake
- Baked Feta Pasta
- Pasta Bake with Sausage (Baked Ziti)
- Baked Mediterranean Pasta
- Baked Ravioli
- Vegetable Pasta Bake
Tried this recipe?
I'd love to hear what you think! Leave a comment and rating below to share your feedback. Your reviews help others discover this recipe and help me keep creating more free recipes for you. Snap a photo and tag me on social media @aheadofthyme too.

Chinese Beef Dumplings with Celery
These plump Chinese Beef Dumplings are filled with juicy ground beef, finely chopped celery, and a blend of aromatic seasonings that pack every bite with savory, umami goodness. They are bursting with flavor and make the perfect appetizer, snack, or main dish. One batch makes enough for a small army, so you'll have leftovers for days!
We love making homemade dumplings, whether they're for special occasions or just because, and I have a collection of dumpling recipes to prove it! These beef and celery dumplings are one of our all-time family favorites! The filling comes together in just moments, and you can cook the dumplings using three methods including steamed, boiled, or pan-fried - and they're just as delicious steamed as they are pan-fried. Everyone loves them, from kids to seasoned dumpling enthusiasts!
Why You'll Love These Chinese Beef Dumplings
- Super simple recipe. Since the meat will be cooked in the steaming process, you don't have to spend any time cooking it before hand. This means you can simply add all of the filling ingredients together and start shaping!
- Great for special occasions. We often make dumplings for Chinese New Year as they symbolize abundance and prosperity. They're also a nice touch when we have friends or family over, especially on those cold winter days!
- Freeze extras for later. Did you know you can freeze your uncooked dumplings and cook them from frozen? Game changer! Since one batch makes one hundred dumplings, this is a great way to put them all to use!
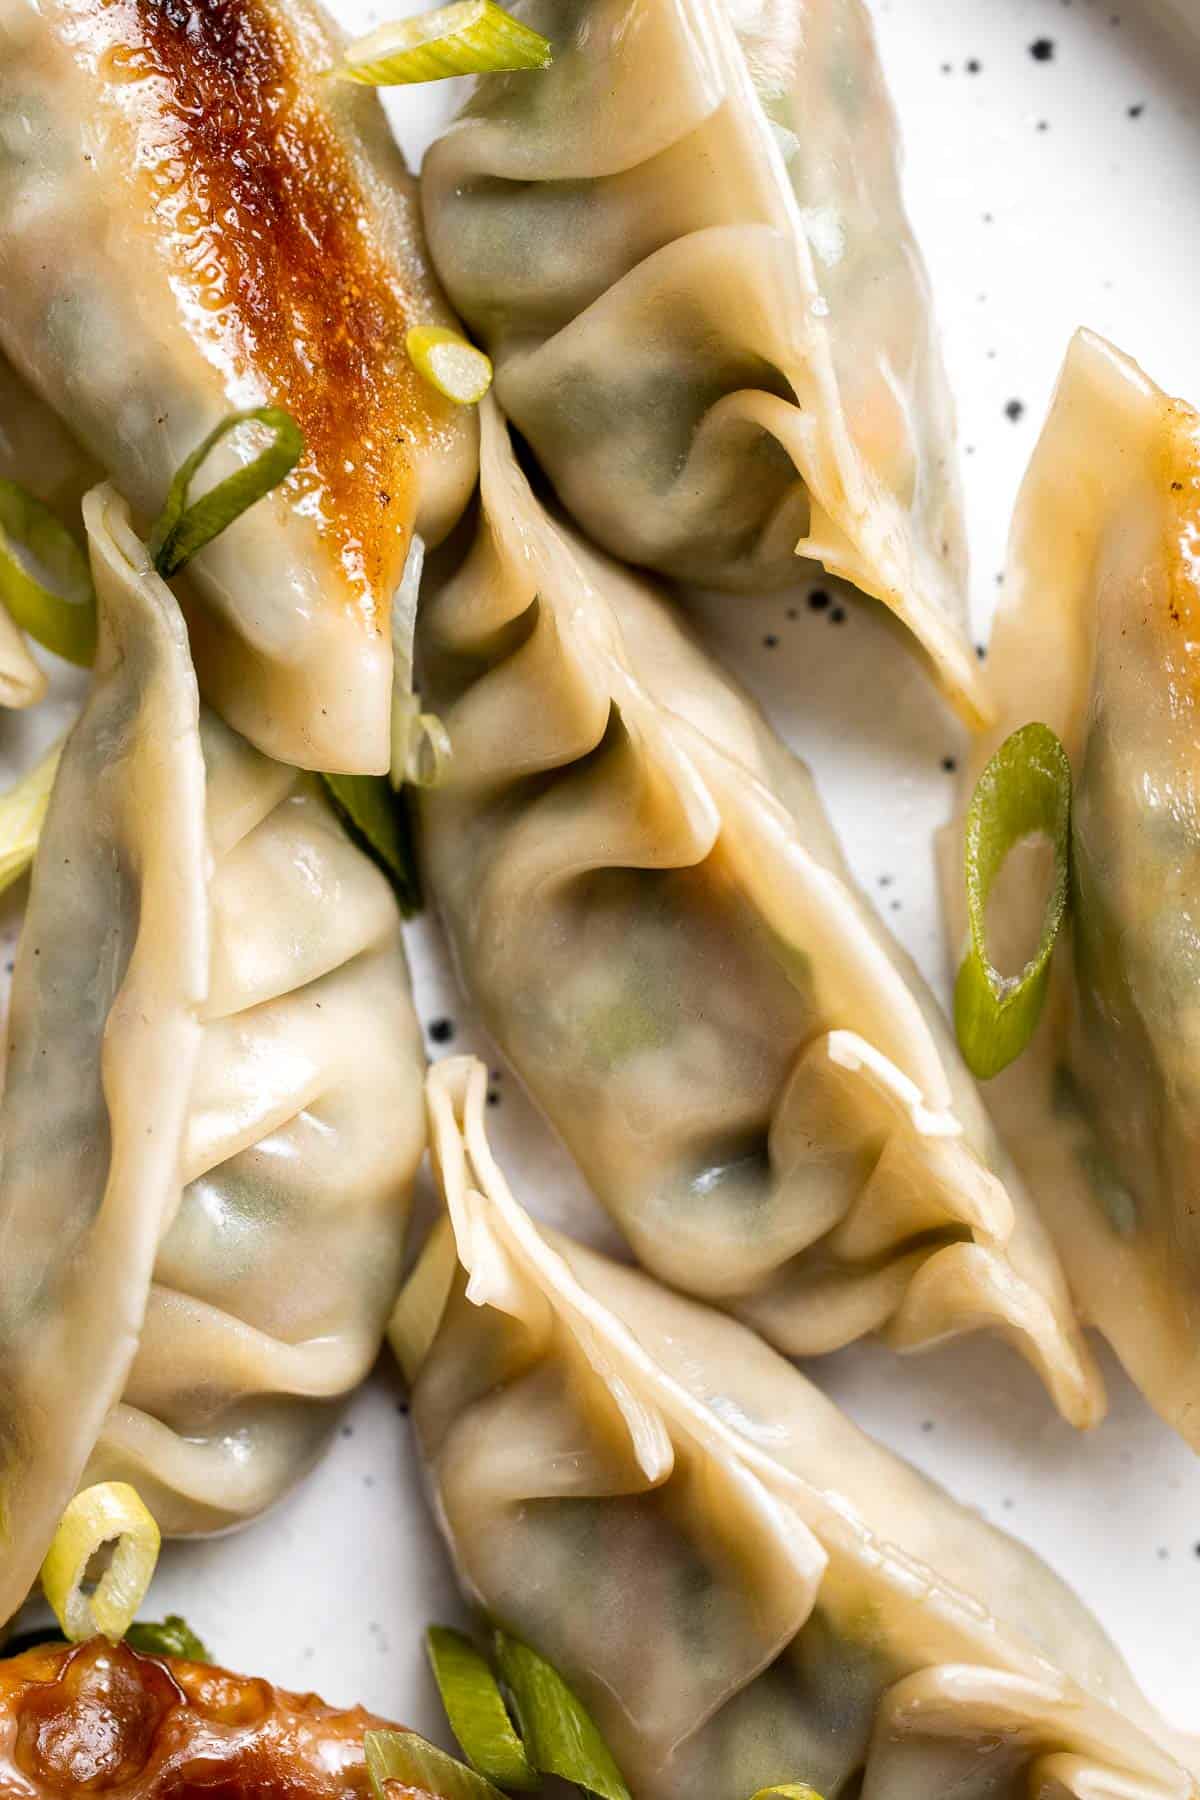
Ingredient Notes
To make this delicious Chinese Beef Dumplings, you will need the following ingredients (full measurements in recipe card below):
- ground beef - make sure it is fully thawed for even mixing.
- Chinese celery - Chinese celery is more aromatic than regular celery and is commonly available at Asian grocery stores.
- corn - use either fresh or frozen kernels.
- egg - to bind the filling together.
- soy sauce - for a savory flavor. Light soy sauce works great.
- Chinese cooking wine - this will add a sweet, tangy flavor after it cooks down.
- sesame oil - this is optional but adds a great flavor.
- salt
- sugar - a little sweetness to balance out the flavors
- dumpling wrappers - I usually buy store-bought wrappers for convenience, but homemade dumpling dough is a nice touch for special occasions.
You will also need a large bowl, spoon, a small dish of water, fork, sheet pan or plates, and cooking equipment (large skillet, steamer pot, or large pot).
How to Make the Best Chinese Beef Dumplings
First, combine the ingredients.
In a large mixing bowl, combine all ingredients including ground beef, celery, corn, egg, soy sauce, Chinese cooking wine, sesame oil, salt, and sugar. Mix well until fully combined.
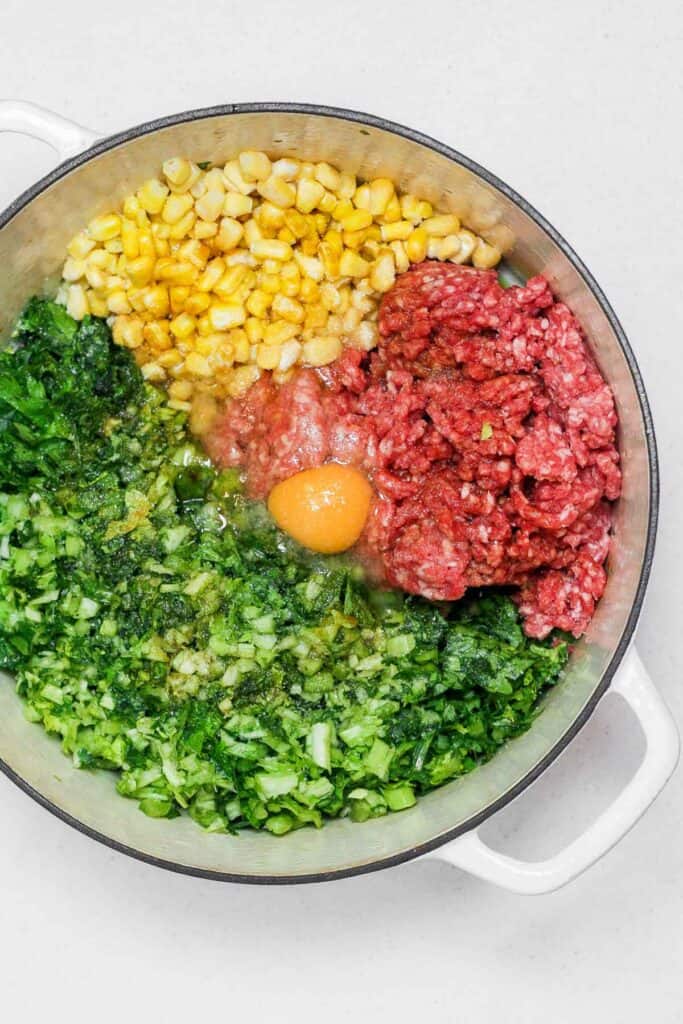
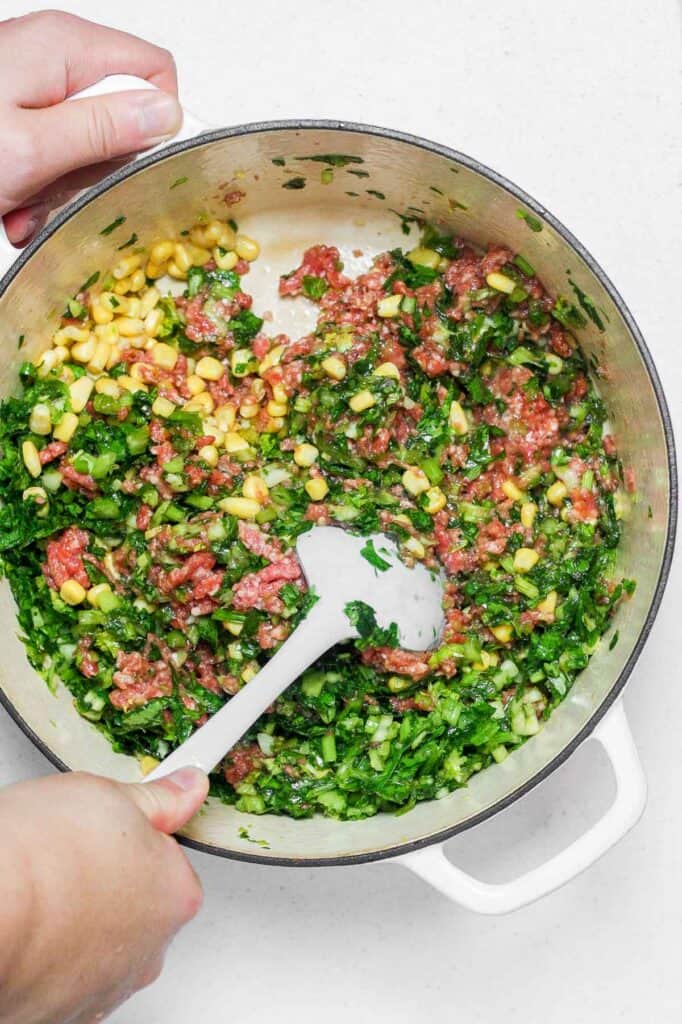
Next, let's learn how to fold dumplings.
Folding a dumpling for the first time, may seem pretty intimating. But once you try a few and get the hang of it, you will find that it is actually super easy. You just need to follow these simple steps:
- Add filling. Scoop a spoonful of the mixture into the centre of a dumpling wrapper.
- Wet edges. Dip your finger in water and smear along the edges of the dumpling wrapper.
- Fold. Fold the dumpling wrapper over to create a half-moon shape, enclosing the filling inside.
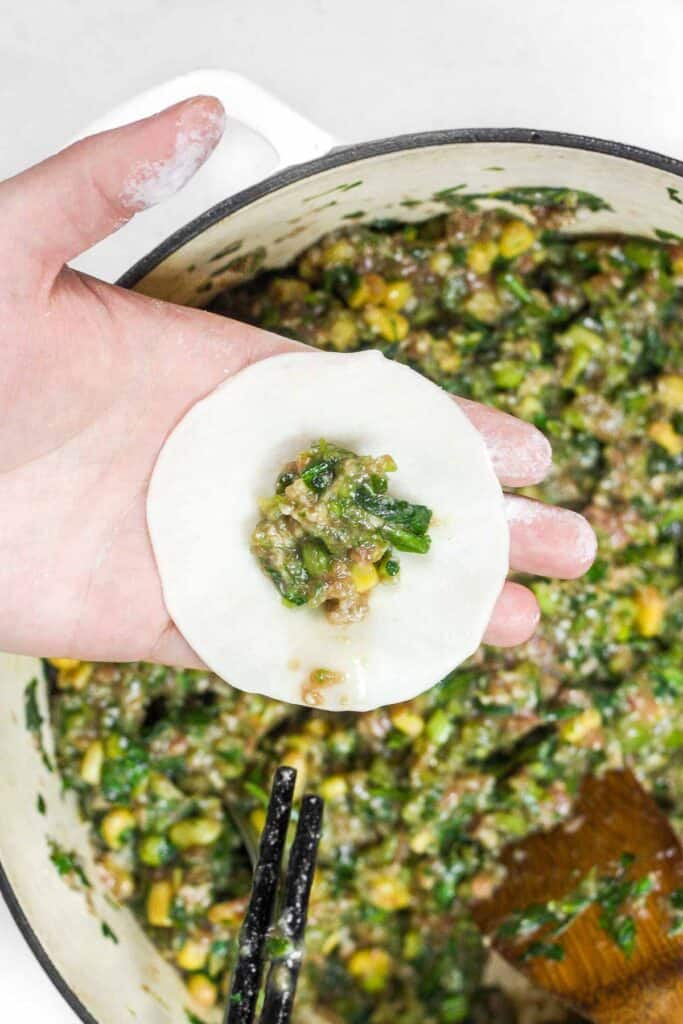
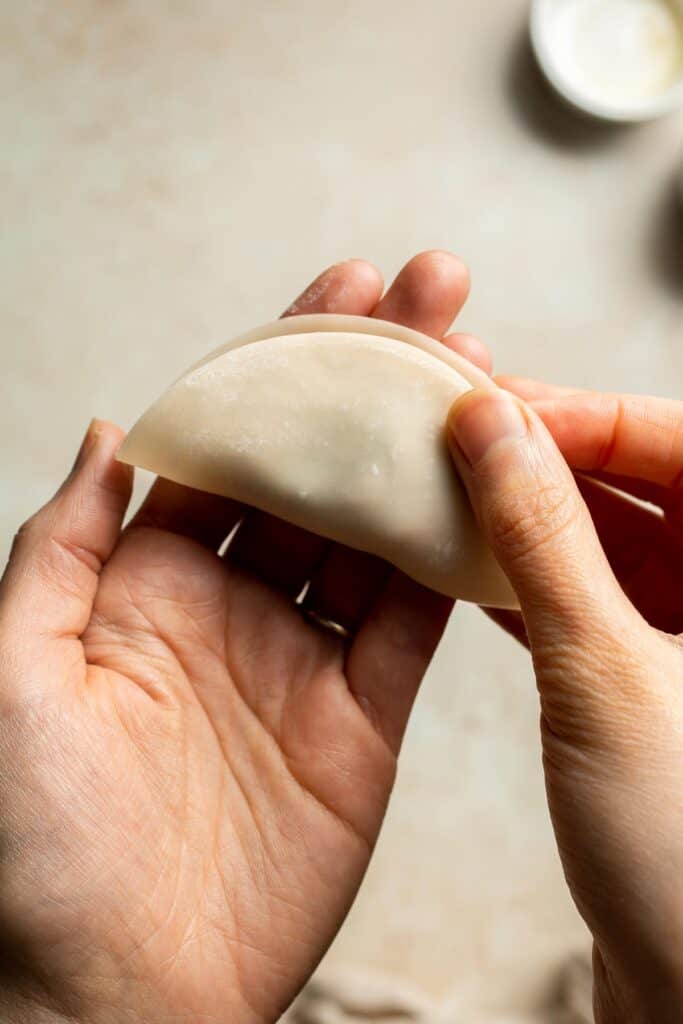

- Seal. Seal the filling inside by pleating the edges together with your finger or pinch the edges together with a fork.
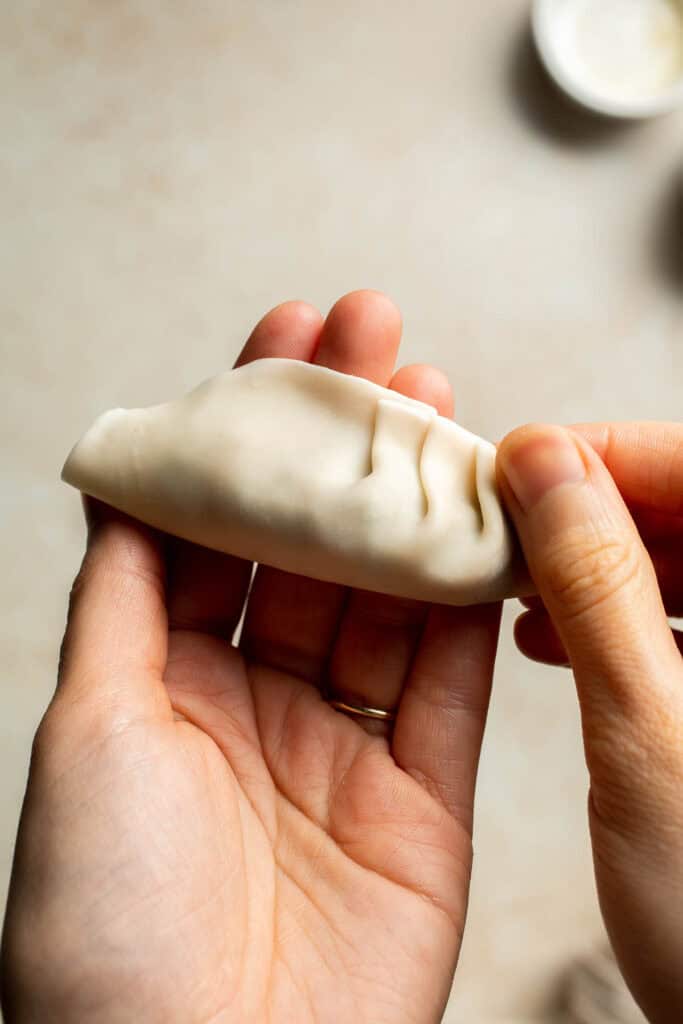

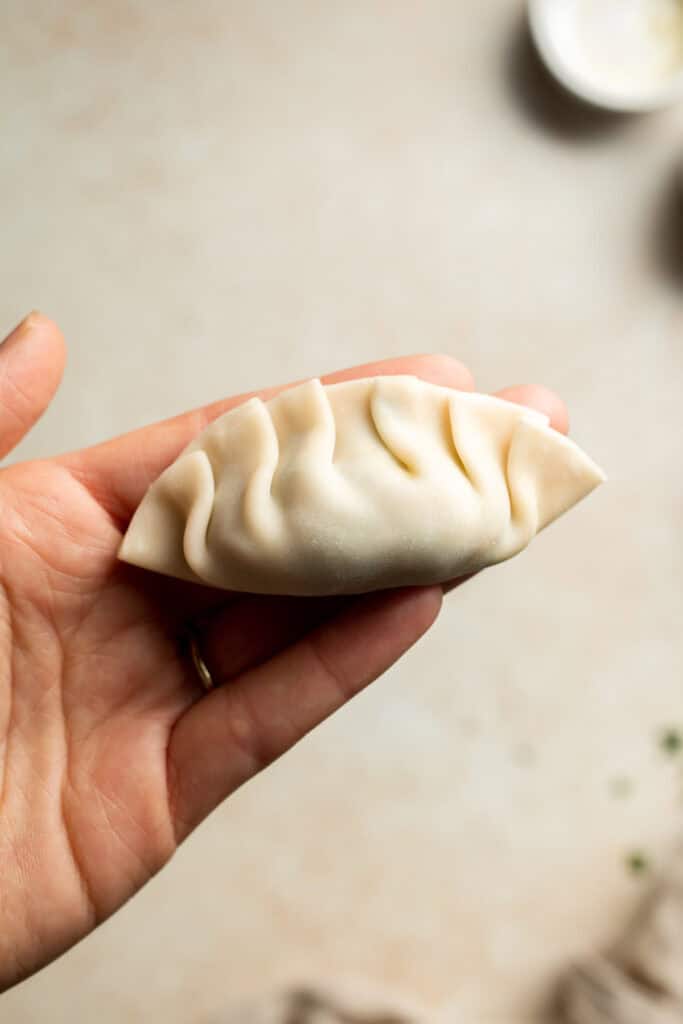
- Repeat. Repeat until all the mixture and dumpling wrappers are used up.

Lastly, let's cook the dumplings.
There are three main ways to cook these dumplings: fry them in a pan (to create potstickers), steam them, or boil them.
- Pan-fry: In a large skillet, heat vegetable oil over medium heat. Add some dumplings and cook 2-3 minutes until the bottom is crisp and golden. Add water (enough to cover the dumplings halfway up), cover, and steam the dumplings for about 5 minutes until the liquid is absorbed.
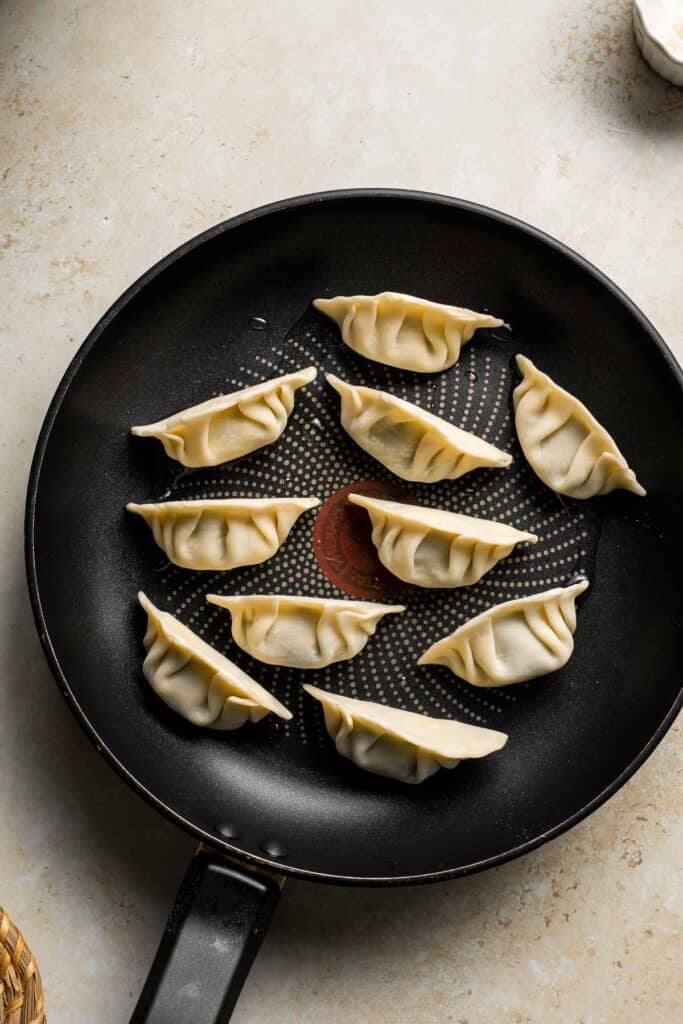
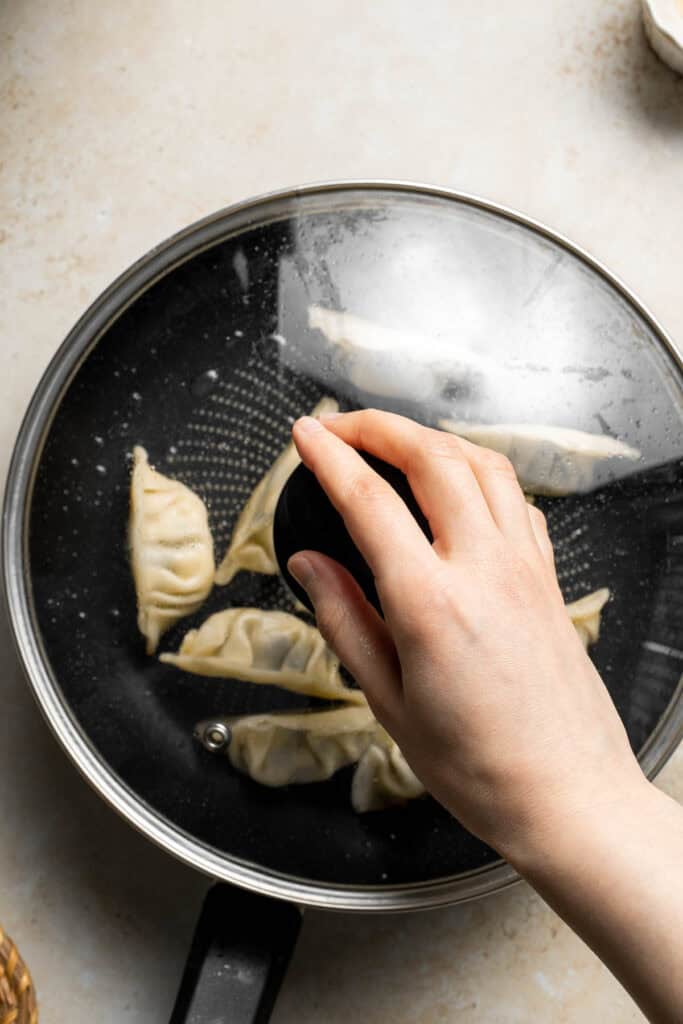

- Steam: In a pot, bring water to boil . Place dumplings in steamer on top and steam for 15 to 20 minutes until tender.
- Boil: Fill a large pot with ⅔ water and bring to a boil. Add dumplings and cook until they float and continue to cook for 2-3 minutes.
Repeat with remaining dumplings or store uncooked dumplings in the fridge for up to 2 days or in the freezer for up to 3 months.
Recipe Variations
- Change the protein. Instead of ground beef, use ground pork, turkey, or your preferred ground meat. Really lean meats can be too low in fat and cause the filling to dry out, so bear that in mind.
- Add more veggies. Feel free to thinly slice Napa cabbage and green onions to bulk up these dumplings even more.
- Make a dipping sauce. I like to use the dipping sauce from these pork dumplings, which is spicy and savory in all the right ways. You can also drizzle some chili oil on top for a pop of heat.
How to Serve
These Chinese Beef Dumplings are delicious served on its own with soy sauce, chili oil, or vinegar for dipping, or as part of a larger dim sum appetizer spread along with other favorites such as:
- Crispy Bottom Shanghai Pan-Fried Pork Buns
- Spicy Chili Oil Wontons
- Vegetarian Spring Rolls
- Steamed Scallion Buns
- Savoury Chive Pancakes with Sourdough Starter
- Shanghai Style Vegetarian Steamed Buns
For more recipes, see our 25 Best Dim Sum Recipes.

Recipe Tips and Tricks
- Make homemade dumpling wrappers. Homemade is always best! This dumpling dough recipe makes enough for 60 dumplings and is a great choice for special occasions.
- Source the right ingredients. It might be tricky to find Chinese celery or cooking wine in a regular grocery store, but it's worth the effort to source the ingredients listed in the recipe instead of making substitutions.
- Get comfy. Find yourself a comfortable spot and watch TV while you prep the dumplings. It makes the time pass quickly, and you won't ache the next day.
Storing and Freezing Instructions
How to Store
Store leftover uncooked dumplings in an airtight container in the fridge for 2 days. If cooked, they can last for 3-4 days.
How to Reheat
Cooked dumplings can be microwaved or steamed in a covered skillet with a splash of water.
How to Freeze
You can freeze uncooked dumplings and cook on another day. To freeze, place the uncooked dumplings on a baking sheet lined with parchment paper and freeze for 1-2 hours until hard. Then, transfer the dumplings into airtight ziploc bags or a freezer-safe container and freeze for up to 3 months.
Frozen dumplings can be cooked directly from frozen following the instructions above. If pan-frying, add an extra ¼ cup of water after the water evaporates and steam for an additional 5 minutes.
FAQ
For the dumpling filling, I like to use a mixture of ground beef with corn, Chinese celery, Chinese cooking wine, egg, soy sauce, and a little sugar, salt and pepper. It's savory, hearty, and comforting with a little tanginess and sweetness to offset all the meaty flavors. It's really a perfect balance.
The easiest method is to line a sheet pan with parchment paper and arrange the dumplings in a single layer. Freeze for several hours until frozen solid, then transfer to a freezer-safe bag or airtight container. Freeze for up to 3 months!
That's a personal preference. You can cook these dumplings by pan-frying, steaming, or boiling, each of which gives the dumpling wrapper a slightly different texture. I'm partial to pan-frying because you get that crispy, crunchy bottom that contrasts the juicy filling. Steaming is great but takes about 20 minutes while boiling only takes 2-3 minutes (once you get the water boiling). Each method has its advantages and disadvantages, and I encourage you to try them all to find your favorite method.
More Dumpling Recipes
- Beef Potstickers (Dumplings)
- Egg and Chive Vegetarian Dumplings
- Chicken Potstickers
- Pork Dumplings
- Vegetable Dumplings
- Kimchi Dumplings
Tried this recipe?
I'd love to hear what you think! Leave a comment and rating below to share your feedback. Your reviews help others discover this recipe and help me keep creating more free recipes for you. Snap a photo and tag me on social media @aheadofthyme too.

French Bread Pizza

This quick and easy French Bread Pizza is a game-changer for busy weeknights or casual gatherings. It's loaded with a delicious garlic butter flavor, customizable toppings, and the perfect balance of crispy crust and gooey cheese. Best of all, it's ready in just 20 minutes! Dinner doesn't get much easier or more satisfying than this.
We love meals that come together almost instantly, and of course, anything pizza-related is always a good choice! Pizza is one of those universally loved meals, and this French Bread Pizza takes all the work out of it. No need for dough-making or pizza stones - just grab a loaf of French bread, your favorite sauce, and toppings, and you're good to go. We love how versatile it is! You can go classic with pepperoni and mozzarella, pile on veggies for a healthier twist, or even create a barbecue chicken version. Whether you're feeding picky eaters or adventurous foodies, this recipe is guaranteed to please everyone at the table.
Why You'll Love This French Bread Pizza
- Quick and easy to make. French Bread Pizza is the easiest way to get dinner on the table quickly since it starts with a base of store-bought French bread instead of using homemade pizza dough. Just brush on a layer of garlic-butter and pizza sauce, sprinkle some herbs, and add your toppings. They're so good on those stressful, busy weeknights when there's no time to wait (and they're way better than hitting the drive-thru)!
- So flavorful. The buttery garlic spread takes a minute to mix together, but it's worth it for the garlic bread flavor that soaks into the hearty French bread. You can taste it in every bite!
- Customizable. Every part of this recipe is customizable. Use whole wheat bread instead of a regular loaf of French bread, grab either pizza sauce or marinara sauce from the pantry, and, of course, add any toppings you'd like. It's a great recipe that can be made to suit any preferences.
- Family friendly. Even the pickiest eaters tend to rally for pizza. This is one of those no-complaint recipes that the whole crew will love, and the kids can even help make them! Plus, it's just as easy to make one as it is to make a bunch, so you can easily make a separate pizza for each person in the family or cut it into slices to share.

Ingredient Notes
To make this delicious French bread pizza, you will need the following ingredients (full measurements in recipe card below):
- French bread - use a full-sized 15 ounce French loaf from the store (or make one from scratch!). See our Homemade No Knead French Baguettes recipe.
- butter - use softened butter as the base of the garlic sauce.
- olive oil - this will seep into the thicker sections of the bread for extra flavor.
- garlic - finely chop a little fresh garlic for a garlic bread flavor. Garlic powder can work in a pinch.
- pizza sauce - use your favorite pizza sauce (homemade pizza sauce or storebought sauce) or even marinara sauce.
- Italian seasoning - this will give every bite that classic pizza sauce flavor.
- mozzarella cheese - mozzarella is perfect for that melted cheese pull.
- Parmesan cheese - add a little grated Parmesan for a salty, umami flavor.
- toppings - use your favorite pizza toppings, like pepperoni slices, mushrooms, green peppers, olives, etc.
- fresh parsley - this is an optional garnish for serving. The green adds a nice color!
You will also need a half sheet baking pan, parchment paper or a silicone mat, a serrated knife, a small mixing bowl, and a spoon.

How to Make the Best French Bread Pizza
- Prep. Line a large half sheet baking pan with parchment paper or a silicone baking mat. Slice the French bread in half, lengthwise. Place the bread, cut side up, on the lined baking sheet.
- Spread sauce. In a small mixing bowl, add butter, olive oil, and garlic, and stir to combine until smooth. Spread the garlic mixture evenly over the halved bread. Top with pizza sauce. Sprinkle Italian seasoning on top.


- Add cheese. Add mozzarella cheese and parmesan cheese on top.
- Add toppings. Add your favorite pizza toppings such as pepperoni, mushrooms, green peppers, and/or olives.


- Bake. Bake in a 375F preheated oven for 12-15 minutes or until the cheese is melted and bubbly. Turn on the broiler and broil on HI for another 1-2 minutes until the cheese becomes golden brown and the edges of the bread become crispy.
- Serve. Sprinkle with basil (if using), slice, and serve.


Recipe Variations
- Gluten-free pizza bread. Check your local grocery store for gluten-free French bread.
- Barbecue chicken French bread pizza. Just like regular pizza, you can adjust the sauce and toppings however you'd like. Try making a BBQ chicken pizza with homemade BBQ sauce, shredded chicken, sliced red onions, mozzarella, and crumbled blue cheese.
- Air fryer French bread pizza. Pop this easy French bread pizza in the air fryer to keep from heating your whole oven. You might not be able to get the golden brown color, but the crust will still have a crunchy bite on the outside, and the cheese will become nice and melty.
- Margherita French bread pizza. Lay slices of fresh mozzarella over the thin layer of sauce and garnish with fresh basil after baking. Such a nice, light meal!
- Adjust the toppings. There are so many delicious toppings you can add to take your pizza to the next level. Try adding Italian sausage, caramelized onions, red pepper flakes, roasted veggies, or more to take your pizza over the top.
How to Serve
This French bread pizza is delicious served on its own, or paired with some of my favorite sides for a delicious meal you'll want every Friday night:
- Simple Italian Salad
- Potato Leek Soup
- Green Bean Fries
- Arugula Salad
- Creamy Garlic Mushrooms
- Ravioli Soup
For more recipes, see our 35 Best Italian Side Dishes.

Recipe Tips and Tricks
- Use day-old bread. If the fresh bread is too soft on the inside, it can absorb too much liquid while baking and become soggy. For best results, use day-old bread and consider toasting the sliced loaf in the oven for 10-15 minutes to dry it out just a little bit before adding your toppings.
- Slice safely. The best knives for slicing a thick, crusty loaf like this are long serrated knives or carving knives. These will keep you from crushing the bread as you cut it and help it cut much more smoothly. Always remember to slice away from yourself as well.
- Work ahead. Simplify your pizza night tradition by gathering your ingredients ahead of time. You can even make the garlic butter in the morning and refrigerate it during the day. Take it out when you preheat the oven to let it soften up. It'll be so much easier to have everything you need on hand!
Storing and Freezing Instructions
How to Store
Store leftover pizza in an airtight container in the fridge for 2-3 days.
How to Reheat
To warm your leftovers, it's best to bake them in the oven or air fryer to remelt the cheese and warm the bread all the way through. Try baking the slices at 350 degrees F for 5-10 minutes.
How to Freeze
You can actually freeze French bread pizza at home to make later! You'll want to fully assemble the pizzas, then freeze them for several hours on a baking tray until they are solid. Wrap each one in foil or plastic wrap, then tuck the frozen French bread pizzas into a freezer-safe bag. You can bake the frozen pizzas directly in the oven, but you might want to bump the heat up to 400 or 425 degrees F to cut through the chill.
FAQ
If your pizza turned out soggy, it's possible that your bread was too soft. The liquid from the sauce can wick down into the bread and give it a soggy, spongy texture. This can also happen if you use a watery pasta sauce instead of a thicker pizza sauce. To prevent this, consider toasting the bread halves in the oven for 10-15 minutes at 350 F to dry it out a little bit before adding the sauce and toppings.
Absolutely! Although it's not exactly traditional, marinara sauce or spaghetti sauce are great substitutes in a pinch. You can also make homemade pizza sauce with just a few pantry staples, so you might be able to make the sauce yourself!
If your last batch of French bread pizza was lackluster, this most likely happened due to either a lack of seasoning or biting through a big, dry piece of bread. French bread is pretty thick, and if you don't add something to soak into the bread, it can become a little dry.
That's why this homemade French bread pizza recipe calls for adding a layer of garlic butter. As it bakes, those flavors melt into the bread to make sure every bite is full of flavor They actually end up tasting like garlic bread pizzas! You can also try adding a little sprinkle of salt on top to make sure the flavors of your toppings really pop.
More Pizza Recipes
- Easy Skillet Neapolitan Margherita Pizza
- Garlic Mushroom Focaccia Pizza
- BBQ Chicken Pizza
- Mediterranean Flatbread
- Salami and Mushroom Skillet Pizza
- Pepperoni Pizza Rolls
Tried this recipe?
I'd love to hear what you think! Leave a comment and rating below to share your feedback. Your reviews help others discover this recipe and help me keep creating more free recipes for you. Snap a photo and tag me on social media @aheadofthyme too.

Ricotta Pancakes
Ricotta Pancakes have dreamy, fluffy texture on the inside with perfectly crispy edges on the outside. The secret? Fresh ricotta is what takes traditional pancakes to the next level, making them ultra soft and tender. Plus, they are ready in just 15 minutes, making them ideal for a laid-back Saturday morning or as a little extra indulgence on a special occasion. Serve ricotta pancakes with just a drizzle of maple syrup and some butter or topped with heaps of fresh fruit and whipped cream.
We love to make a big weekend breakfast around here and are often trying different pancakes, waffles, and more, just to see what the family thinks. These pancakes with ricotta always get more mmms and yums, which I credit to the ricotta itself. That extra fat adds so much moisture, making the pancakes soft and tender while also adding a subtle creaminess. It's honestly shocking just how much this tiny change can make. Decorate them in all your favorite toppings, serve them with some bacon and eggs, and enjoy a cozy weekend brunch with the whole family!
Why You'll Love These Ricotta Pancakes
- Ready in 15 minutes. There's no need to spend hours in your kitchen to make a delicious, family-friendly breakfast. This ricotta pancake recipe is ready in a mere 15 minutes and delivers and amazing texture - soft, tender, and irresistibly fluffy - so you can easily throw them together even while still feeling groggy from sleep.
- Easy to throw together. Most of the ingredients in these ricotta pancakes are simple pantry staples like flour, sugar, butter, and salt. The most decadent or expensive ingredient is easily the ricotta cheese, but it is so worth the extra couple of bucks!
- Dress up or down. The flavor of the pancakes is so lovely on its own or with a drizzle of maple syrup, but you can really go wild with them. Add chocolate chips, fresh fruit, orange zest, warm spices, and more. Plus, that's just the fillings! You can go wild with toppings, too.

Ingredient Notes
To make these delicious Ricotta Pancakes, you will need the following ingredients (full measurements in recipe card below):
- all purpose flour - scooped and leveled for even measuring.
- granulated sugar - adjust this to your preference. They can be served without any sugar or make them nice and sweet.
- baking powder - to raise the pancake batter and make it nice and fluffy.
- salt
- eggs
- full rat ricotta cheese - the extra fat will add a rich creaminess that makes these pancakes quite tender and decadent.
- whole milk - to thin out the pancake batter and add extra tenderness.
- melted butter - unsalted butter is best.
- vanilla extract
- butter and real maple syrup - for topping
You will also need measuring cups and spoons, mixing bowls, and a frying pan or griddle.

How to Make the Best Ricotta Pancakes
- Combine dry ingredients. In a large mixing bowl, sift together the flour, baking powder, sugar and salt.


- Combine wet ingredients. In another mixing bowl, whisk together the eggs, ricotta, milk, melted butter, and vanilla until combined.


- Add wet to dry. Add the wet ingredients to the dry ingredients and whisk until just combined (will be lumpy). Do not over mix.


- Heat. Lightly grease a large frying pan or griddle with butter. Heat over medium heat and add pancake batter using a ⅓ measuring cup. Pour as many as fit in your pan or griddle.
- Cook. Cook for 2-2 minutes until small bubbles have began to form on the surface and the edges firm up. Flip the pancake over and cook for another 1-2 minutes until the other side is also golden brown and cooked through.


- Repeat. Repeat until batter is used up.
- Serve. Serve warm with your favorite toppings such as pats of butter on top and a drizzle of maple syrup, or fresh fruit and whipped cream.
Recipe Variations
- Play with add-ins. Pancakes are one of the most versatile foods out there! They can be serve with a range of different flavors. I like to keep it simple and add lemon zest and a little lemon extract for refreshing lemon ricotta pancakes, or you can sprinkle dark chocolate chips, sliced strawberries, fresh blueberries, and more.
- Try cake flour. If you have a box of cake flour on hand, feel free to use it! Cake flour is lower in protein and makes the most amazing pancakes, cakes, cupcakes, and more. Although it's totally optional, this is a nice way to use some up if you have it around.
- Go savory. Skip the sugar in the batter, and add fresh chives, shredded cheddar cheese, and a little garlic powder. Delicious with eggs!
- Adjust the consistency. Feel free to add more milk for the thickest, fluffiest pancakes or less for thinner ones.
How to Serve
These Ricotta Pancakes are delicious served on its own, or paired with other breakfast and brunch recipes as part of larger spread. Some of our favorite dishes to pair with these fluffy pancakes are:
- Mediterranean Scrambled Eggs
- Hash Browns
- French Toast
- Egg and Potato Breakfast Casserole
- Skillet Cinnamon Rolls
- Berry Smoothie Bowl
For more recipes, see our 50 Best Breakfast Ideas.

Recipe Tips and Tricks
- Use full fat ricotta. I know it's tempting to buy the low fat or fat free stuff, but fat equals flavor! It will also help make your pancakes extra soft and tender.
- Don't add too much flour. It's very easy to accidentally add too much flour to pancake batter, especially if you scoop into your flour container with the measuring cup. This compresses the flour and causes you to add more than necessary, which makes your pancakes dry and heavy. It's best to scoop the flour into the measuring cup with a spoon, then level it flat.
- Preheat properly. A properly preheated griddle is key to making the perfect pancake. It helps to spray the griddle or skillet for the first pancake, but you'll get that classic golden brown color once the griddle fully preheats and the oil cooks off!
Storing and Freezing Instructions
How to Store
Leftover pancakes can be stored in an airtight container in the fridge for 3-4 days. They will start to stick together, so it can be helpful to place a thin piece of wax paper or parchment between each one.
How to Reheat
You can heat pancakes for 30 seconds to 1 minute on a microwave-safe plate, but the best method is to bake them in a countertop oven (or air fryer) or warm them in a skillet. This keeps them from becoming chewy on the outside and soggy in the middle, and gives them a fresh-from-the-griddle flavor.
How to Freeze
Just like regular pancakes, ricotta pancakes freeze really well! Just arrange them in a single layer on a baking sheet lined with parchment paper and freeze solid. Place a piece of parchment paper between each one, then transfer to a freeze-safe bag.
FAQ
Ricotta and cottage cheese are quite similar and are often substituted in lasagna and other recipes. Technically, you can use small curd cottage cheese in these pancakes, but the larger curds won't integrate into the batter as well. This will result in little pieces of melting cheese curds throughout your pancakes...not ideal. If you want to use cottage cheese, try blending until smooth and creamy to break down the curds. Then whisk it in like normal.
If you somehow run out of ricotta, sour cream is perhaps the best substitute. It has a thick consistency, sufficient fat, and a nice tanginess that mimics the effect you get from ricotta. It's not a perfect swap, but it's pretty good!
Nope! The ricotta blends into the pancake batter and adds a creamy richness, similar to sour cream. There's no cheesy flavor whatsoever!
More Pancake Recipes
- Old Fashioned Pancakes
- Blueberry Pancakes
- Sheet Pan Pancakes
- Mini Pancakes (Silver Dollar Pancakes)
- Carrot Cake Pancakes
- Pumpkin Pancakes
Tried this recipe?
I'd love to hear what you think! Leave a comment and rating below to share your feedback. Your reviews help others discover this recipe and help me keep creating more free recipes for you. Snap a photo and tag me on social media @aheadofthyme too.

Gingerbread Cupcakes
Homemade Gingerbread Cupcakes are packed with the cozy flavors of molasses, brown sugar, and warm spices like cinnamon, ginger, and cloves. Their tender, fluffy texture is perfectly complemented by a luscious cream cheese frosting that adds a tangy, sweet finish. These cupcakes are the ultimate festive treat, ideal for Christmas parties, holiday gatherings, or simply enjoying with a mug of hot cocoa by the fire.
Gingerbread is one of my favorite holiday flavors - it's comforting, nostalgic, and so versatile! From classic Gingerbread Cookies to Gingerbread Sheet Cake, it always feels like a warm hug in dessert form. These gingerbread cupcakes are a standout for so many reasons: they're incredibly soft, filled with holiday spices, and topped with a frosting that's impossible to resist. Despite their bakery-worthy flavor, they're surprisingly simple to make and can be ready in under an hour, making them perfect for last-minute holiday baking!
Why You'll Love These Gingerbread Cupcakes
- Festive holiday flavor. These gingerbread cupcakes are perfectly spiced with cinnamon, ginger, and cloves, and they have a rich molasses flavor that feels like the holidays in every bite. Topped with a creamy, tangy cream cheese frosting, they strike the ideal balance of sweetness and spice. They're indulgent yet comforting - just what you want in a holiday dessert.
- Easy to make. Don't be intimidated by their festive appearance, this recipe is super simple! Mixing the wet and dry ingredients separately ensures a light, fluffy texture, while the cream cheese frosting comes together with just a few easy steps. It's a foolproof recipe that even beginner bakers can master.
- Quick and convenient. One of the best things about these gingerbread cupcakes is how fast they are to make. With no chilling or complicated steps required, you can whip up a batch in under an hour. They're perfect for last-minute holiday gatherings, cozy nights in, or as a sweet addition to any Christmas dessert spread!

Ingredient Notes
To make these delicious Pumpkin Cupcakes, you will need the following ingredients (full measurements in recipe card below):
- fancy molasses - this is essential to get that classic, rich gingerbread flavor.
- hot water - helps dilute the molasses for smoother incorporation into the batter.
- all purpose flour - this is the perfect base for cupcakes. Always scoop and level to avoid adding too much flour.
- baking powder - this will give the gingerbread cake batter a nice, fluffy texture.
- spices - I like to use a mixture of ground cinnamon, ginger, allspice, and cloves for that classic gingerbread flavor. You also need a little salt to bring out the flavor.
- eggs - use room temperature eggs to bind the batter together and get a lovely rise.
- brown sugar - dark brown sugar adds a deep, caramel-like sweetness that pairs perfectly with the spices.
- vanilla extract - adds flavor to both the cupcakes and frosting.
- vegetable oil - this is the secret to really moist and tender cupcakes with lots of flavor.
- sour cream - the added moisture in the sour cream gives the cake a very moist texture and it balances the sugar and spices.
- cream cheese - let the cream cheese come to room temperature for easy whipping.
- butter - adds richness and creaminess to the frosting
- confectioners' sugar - powdered sugar will sweeten the frosting and make it pipeable. Feel free to adjust to taste.
- gingerbread men sprinkles - these are entirely optional but adds a festive, eye-catching touch to the frosted cupcakes.

Baking Tools
You will also need the following baking tools and equipment:
- measuring cups and spoons (or a kitchen scale)
- 12-cup muffin pan
- cupcake liners
- mixing bowls
- whisk
- stand mixer
- wire rack
- piping bag
- Wilton 1M tip
How to Make the Best Gingerbread Cupcakes
First, make the gingerbread cupcakes.
- Prep molasses. In a small mixing bowl, whisk together the molasses and hot water until well-combined. Set aside.
- Combine dry ingredients. In a medium mixing bowl, add the flour, baking powder, salt, cinnamon, ginger, allspice, and cloves, then whisk together to combine.
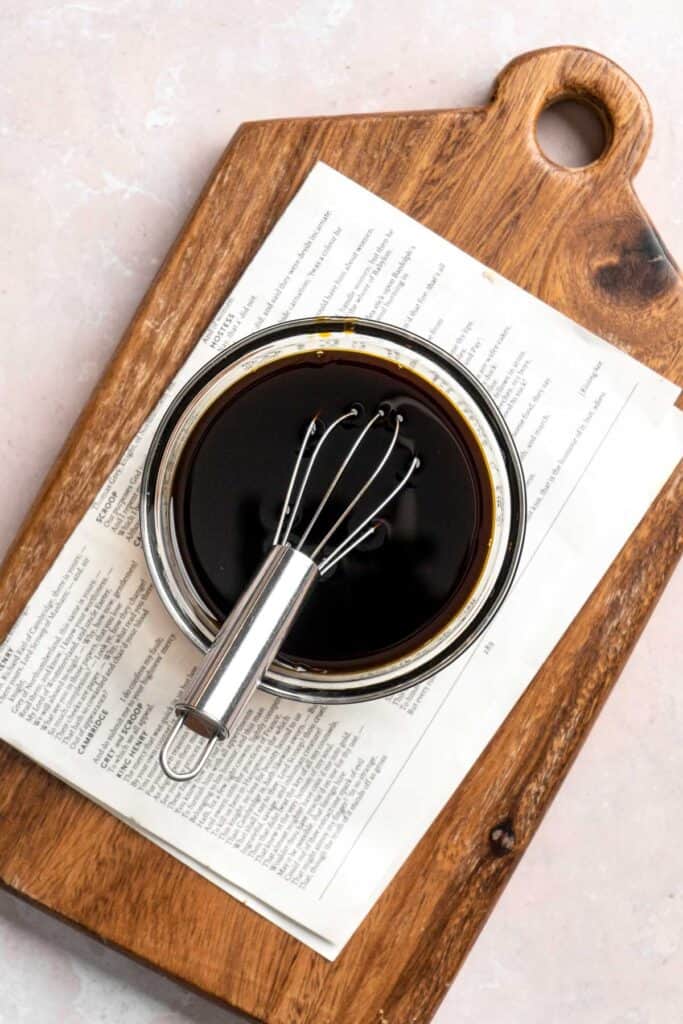

- Combine wet ingredients. In a stand mixer fitted with the paddle attachment (or in a large mixing bowl using a hand mixer), add eggs, brown sugar, and vanilla. Beat on high for around 5 minutes. The mixture should look thick, fluffy, and be tripled in volume.
- Add oil. Scrape down the sides of the bowl and then slowly drizzle in the oil. After all the oil has been added, beat for an additional minute.

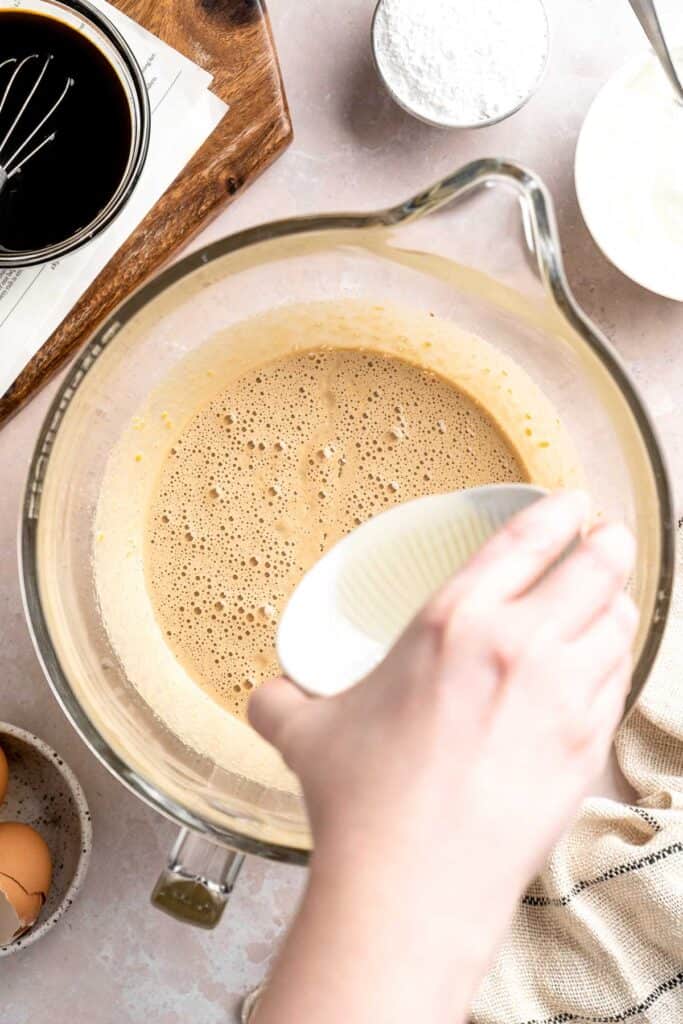
- Alternate adding ingredients to wet ingredients. On low speed, add the dry mixture to the stand mixer in 3 additions, alternating with the sour cream and water-molasses mixture. Beat only until the batter becomes smooth.


- Divide batter. Line a 12-tin muffin pan with cupcake liners. Divide the batter into the 12 cupcake liners. You can use a cookie scoop to easily add the batter to the liners.
- Bake. Bake in a 350°F preheated oven for 18-20 minutes, or until a toothpick comes out clean. Allow the cupcakes to cool completely before frosting.


Then, make the cream cheese frosting.
- Whip. In a stand mixer fitted with the whip attachment, beat together the cream cheese and butter at medium-high speed for about 2 minutes, or until fluffy. (You can also beat in a mixing bowl with a hand mixer)
- Add sugar. Scrape the sides of the bowl, then gradually add in confectioners' sugar in small additions, beating on low between each addition and scraping at the sides.


- Add vanilla. Add vanilla and salt. Turn stand mixer to high speed and beat for 2-3 minutes.
- Pipe. Transfer the frosting into a large piping bag fitted with a Wilton 1M tip. Carefully pipe the frosting in a classic swirl pattern onto each cupcake. Start in the center and move in a circular pattern closer to the edges, then move up and back towards the center.
- Add sprinkles. Top each cupcake with gingerbread men sprinkles and serve.

Recipe Variations
- Switch up the frosting. Not a fan of cream cheese frosting? These gingerbread cupcakes are equally delightful with a classic buttercream or a silky caramel frosting for added holiday decadence. For a bold twist, try a spiced whipped cream topping to keep things light and airy.
- Add a surprise filling. Take these cupcakes to the next level by coring the center and adding a dollop of spiced apple compote, caramel sauce, or even a rich chocolate ganache before frosting. Each bite will be a delicious surprise!
- Decorate with flair. Sprinkle crushed gingersnaps, festive holiday sprinkles, or even drizzle them with a little melted white chocolate to give your cupcakes an extra festive look.
- Make them mini. Looking for bite-sized treats? Bake the batter in a mini muffin tin for 10-12 minutes to create adorable gingerbread cupcake bites that are perfect for parties or dessert platters.
How to Serve
These Gingerbread Cupcakes are delicious served on their own as a sweet treat after dinner or at parties. It is also great paired with other classic winter treats are part of a larger dessert spread, including:
- Christmas Cookie Platter
- Holiday Yule Log Cake (Bûche de Noël)
- Hot Chocolate
- Christmas Crack Candy
- Chocolate Peppermint Christmas Bark
For more recipes, see our 30 Best Christmas Dessert Recipes.

Recipe Tips and Tricks
- Measure molasses carefully. Molasses is the star of gingerbread cupcakes, but a little goes a long way. Use a measuring cup sprayed with cooking oil to easily pour it out without the sticky mess.
- Bring ingredients to room temperature. For a smooth batter and evenly risen cupcakes, ensure your eggs, sour cream, and cream cheese are at room temperature before mixing. Cold ingredients can cause the batter to curdle or mix unevenly.
- Whip frosting thoroughly. Cream cheese frosting should be whipped until light and fluffy. Start by creaming the butter and cream cheese until smooth, then gradually add the powdered sugar to avoid lumps. Take your time for a velvety texture!
- Don't overmix the batter. Once you combine the wet and dry ingredients, mix just until no streaks of flour remain. Overmixing can lead to dense cupcakes instead of the light, tender texture you want.
- Use fresh spices. Spices like ginger, cinnamon, and cloves lose potency over time. For the boldest, richest flavor, use freshly opened spices when making your gingerbread cupcakes.
Storing and Freezing Instructions
How to Store
Keep leftover unfrosted cupcakes in an airtight container at room temperature for 2-3 days. For frosted cupcakes, store them in the refrigerator for 5-6 days. To enjoy their best flavor and texture, let the frosted cupcakes sit at room temperature for a while before serving.
How to Freeze
For the best results, I recommend freezing the cupcakes unfrosted and storing the frosting separately. However, you can also freeze them fully decorated if needed. Place the cupcakes in a freezer-safe container and store them for up to 2-3 months. When ready to enjoy, let the cupcakes thaw in the refrigerator and bring them to room temperature before serving for the best flavor and texture.
FAQ
Cream cheese frosting is a classic pairing for gingerbread cupcakes, as its tanginess complements the warm spices and rich molasses perfectly. For a unique twist, try a brown butter cream cheese frosting - it adds a nutty depth that elevates the cozy gingerbread flavors. Other great options include cinnamon buttercream, a smooth caramel frosting, or even a dollop of whipped cream for a lighter finish.
Molasses is essential for the traditional gingerbread flavor, but if you don't have any on hand, you can substitute dark corn syrup or a mixture of honey and dark brown sugar. Keep in mind that these alternatives will slightly alter the flavor, making it less rich and robust.
The key to moist gingerbread cupcakes lies in the ingredients and mixing technique. Using vegetable oil instead of butter ensures a tender crumb, while sour cream adds extra moisture and richness. Be sure not to overmix the batter - stir just until the ingredients are combined. Lastly, avoid overbaking, as even a few extra minutes can dry out the cupcakes.
More Gingerbread Dessert Recipes
- Gingerbread Cake
- Gingerbread House
- Gingerbread Bundt Cake
- Gingerbread Macarons
- Gingerbread Cookies
- Gingerbread Cinnamon Rolls
Tried this recipe?
I'd love to hear what you think! Leave a comment and rating below to share your feedback. Your reviews help others discover this recipe and help me keep creating more free recipes for you. Snap a photo and tag me on social media @aheadofthyme too.

Winter Pomegranate Salad
Festive Winter Pomegranate Salad is studded with sweet pomegranate seeds, apples, oranges, and feta, all tossed in a homemade balsamic vinaigrette. It is the jewel of any holiday table! This winter salad requires a few pantry staples and is ready in literally just 10 minutes (or less if you are quick at chopping veggies!). It's the perfect side dish for any gathering.

The second the temperature drops, many of us lean on rich, hearty meals, like soups, casseroles, and roasts, often relying on starchy veggies for sustenance. But really, winter offers some of the brightest, most refreshing flavors, like hearty greens, tart apples, all types of citrus, ruby-red pomegranates, and more. This colorful salad celebrates all of that wintry abundance and adds a lovely pop of freshness. The beautiful colors make it extra special for Christmas dinner, but it's a welcome addition any night of the week!
Why You'll Love This Winter Pomegranate Salad
- Ready in 10 minutes. This may be the best thing about this beautiful salad. What else can you make that only takes less than 10 minutes that tastes and looks this good? Whether you need a last minute salad for a holiday event or just want to add more greens to winter meals, this is the perfect choice.
- Packed with flavor. This pomegranate salad features the perfect balance between sweet and tangy flavors. From the sweet fruits, to the nutty walnuts, to the sharp, tangy flavor of feta and the vinaigrette - it all works!
- Festive side dish. Winter is notoriously dark and dreary, so why not add some color and whimsy to your meals? This is such a simple way to serve up extra fruits and veggies during an indulgent time of the year, and the bright colors and bold flavors will make you want to eat it every week.
- Easy vegetarian option. If you're hosting a gathering and need dishes that meet a variety of dietary preferences, this is a great option. It is naturally vegetarian with crowd-pleasing flavors everyone will love!
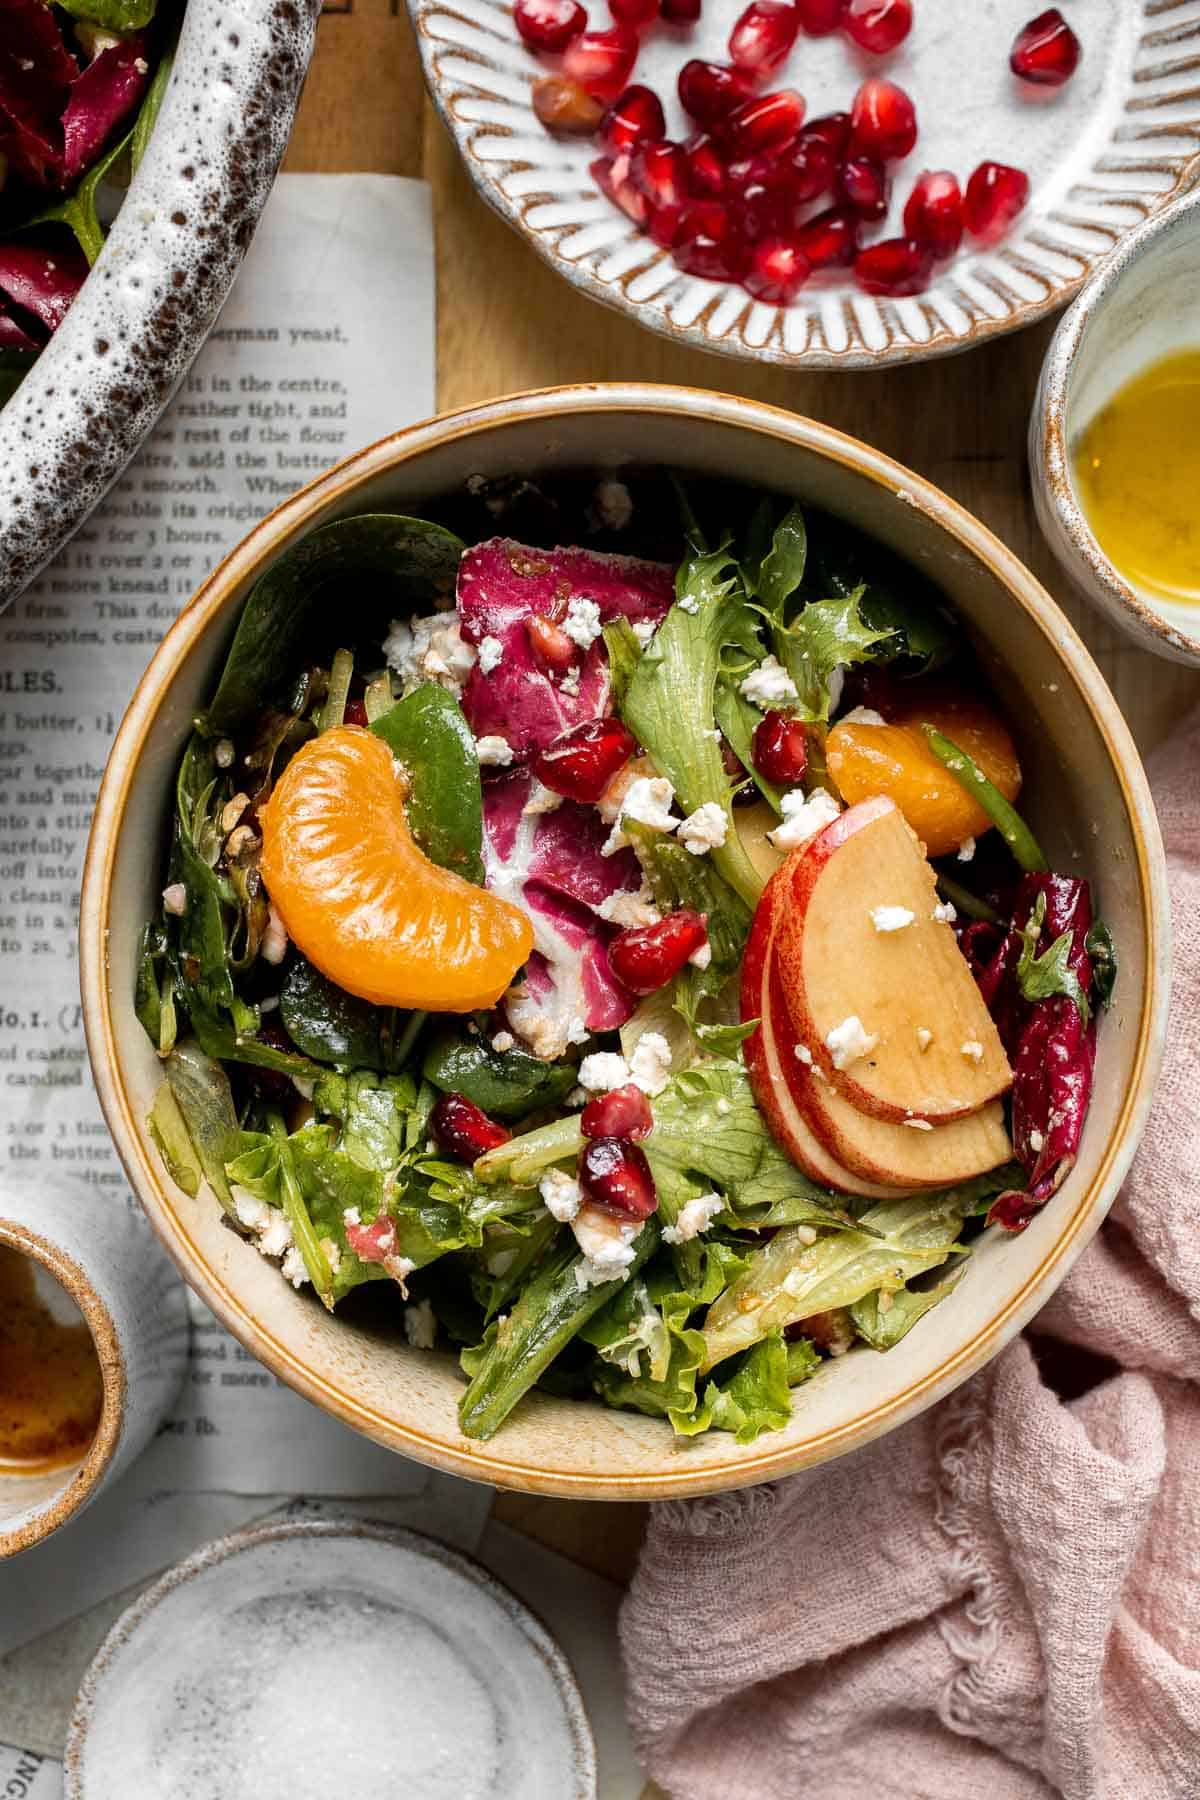
Ingredient Notes
To make this delicious Winter Pomegranate Salad, you will need the following ingredients (full measurements in recipe card below):
- salad greens - or your favorite type of mixed greens. Spring mix greens are tender, mild, and inexpensive, making them a great base.
- baby spinach - for extra texture and color. Baby kale, baby arugula, or sliced radicchio or escarole would be a great alternative.
- apples - look for firm, crisp apples, like Pink Lady, Honeycrisp, or Cosmic Crisp.
- mandarin oranges - these can be fresh oranges that you peel or use mandarin oranges packed in water and strain off the liquid.
- pomegranate seeds - you can either clean a whole pomegranate yourself or get a container of pomegranate arils from the produce section at your local grocery store.
- walnuts - ideally toasted to bring out their flavor. Pecans, sunflower seeds, or pumpkin seeds work nicely, as well.
- feta cheese - or substitute with crumbled goat cheese. Blue cheese would taste great as well, but is more hit-or-miss when you're serving a crowd.
- extra virgin olive oil
- balsamic vinegar - or for a milder flavor, substitute with lemon juice. Either option works well.
- Dijon mustard - this is optional, but it helps emulsify the vinaigrette and make it nice and creamy.
- salt + pepper
You will also need measuring cups and spoons, small mixing bowl, and large serving bowl.
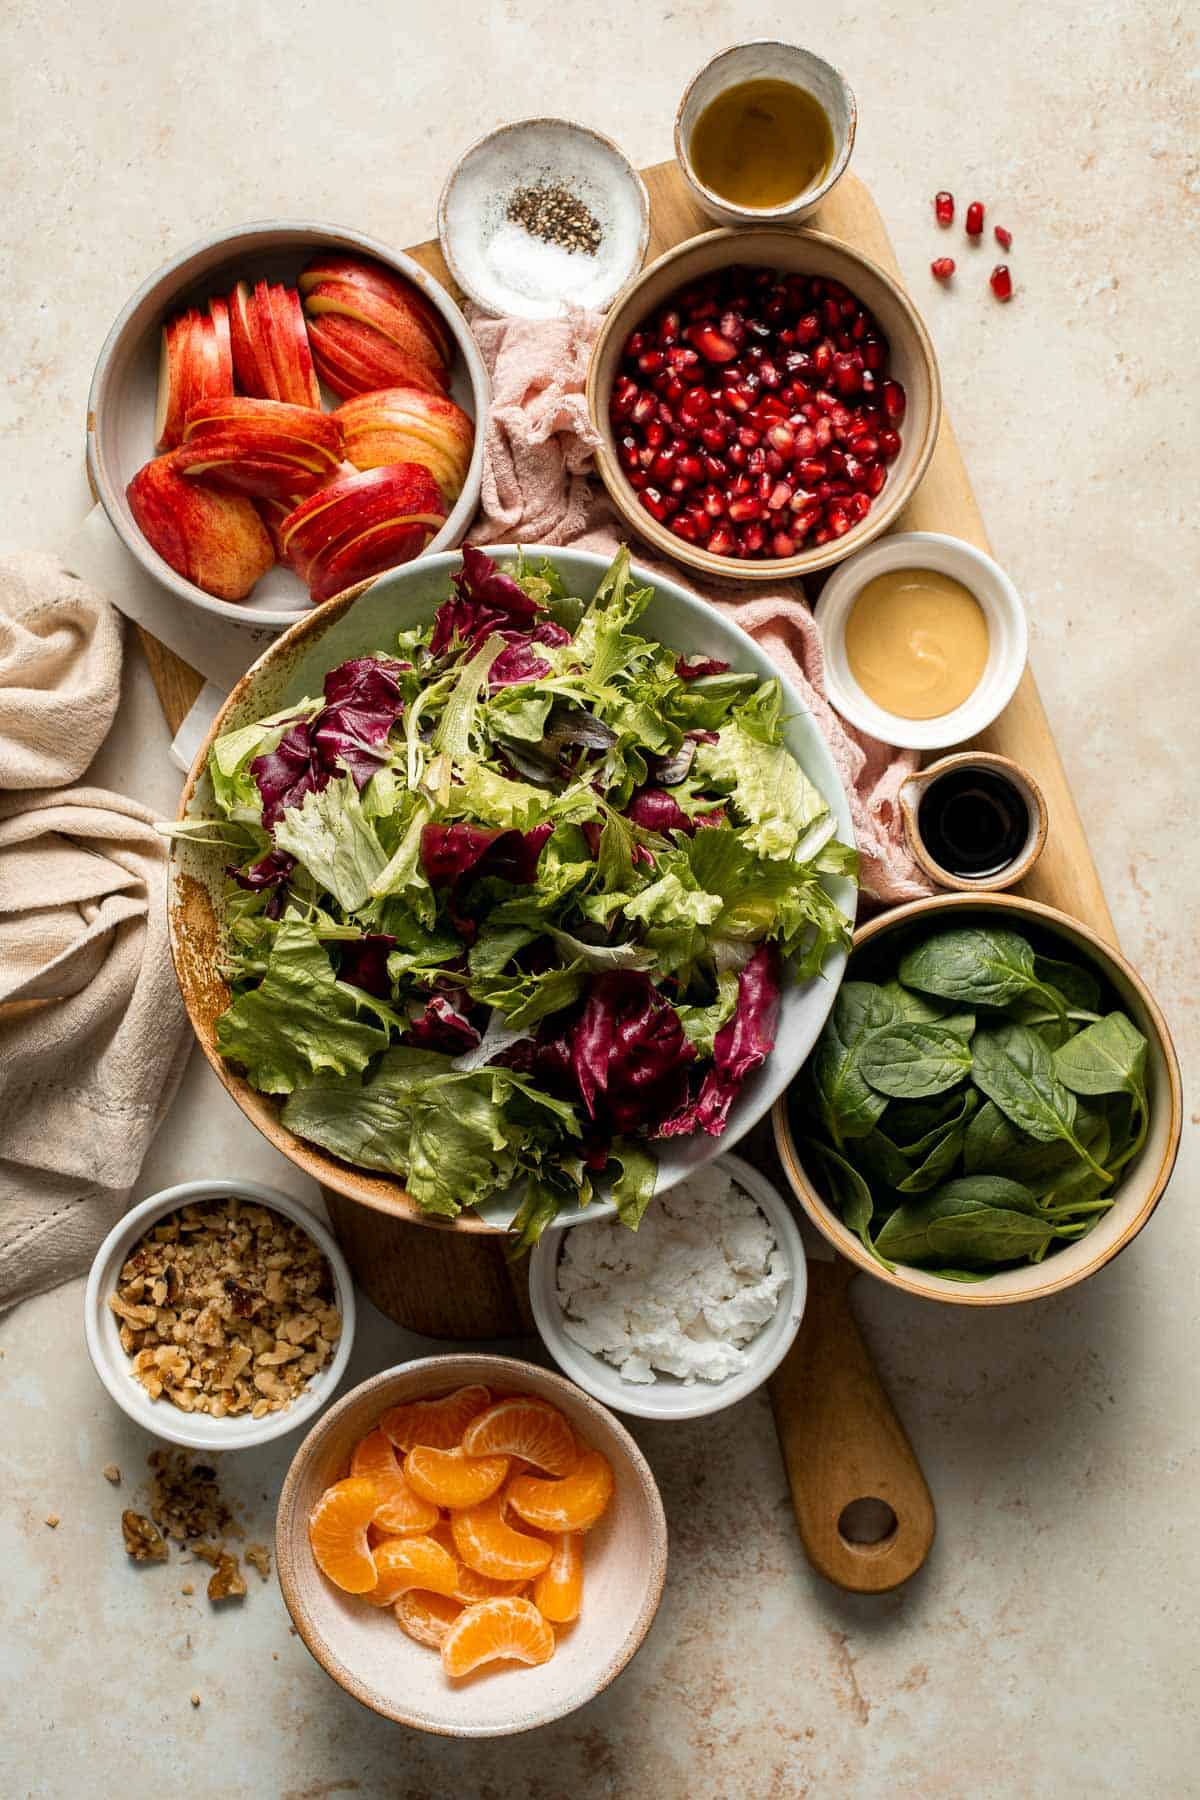
How to Make the Best Winter Pomegranate Salad
- Combine. In a large serving bowl, arrange salad mix, baby spinach, apple slices, mandarin slices, pomegranate, walnuts, and feta cheese.
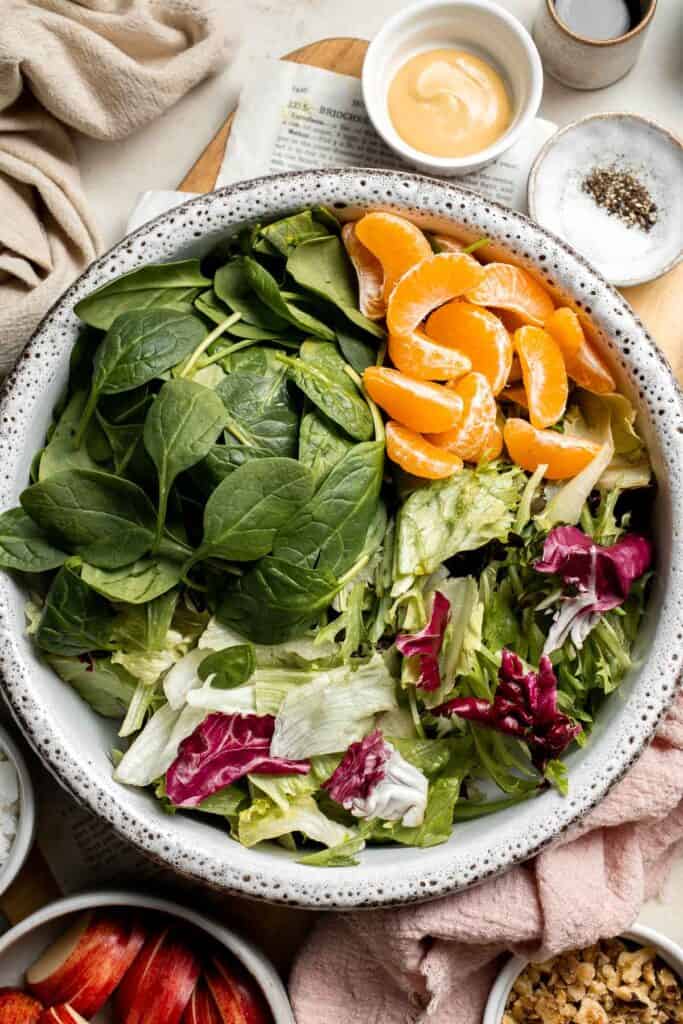

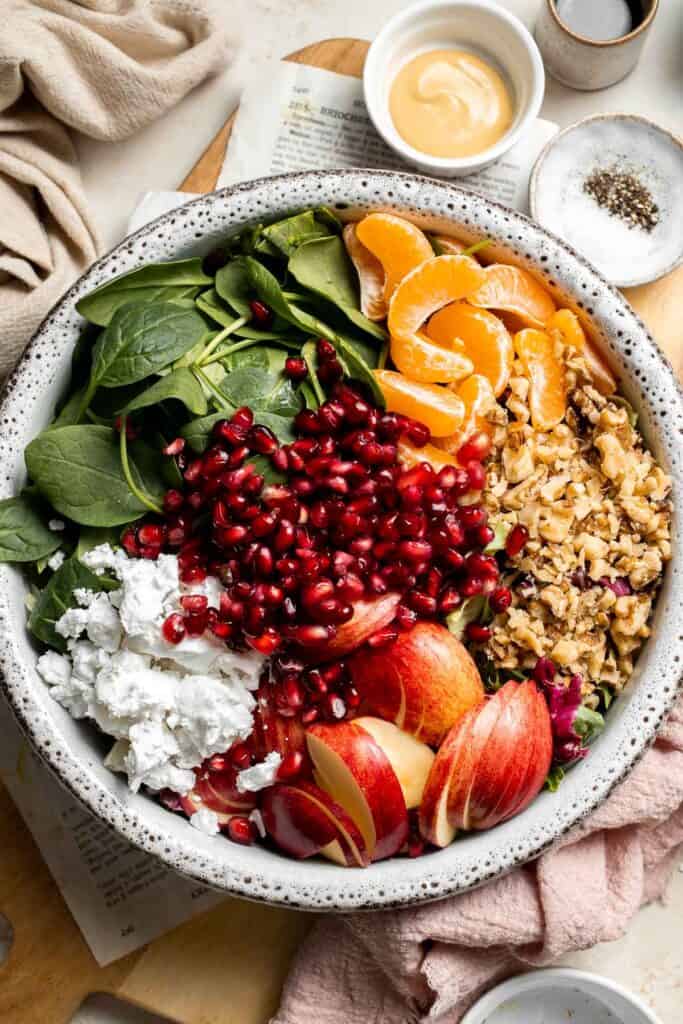
- Prepare dressing. In a small mixing bowl, whisk together olive oil, balsamic vinegar, dijon mustard, salt, and pepper until smooth.
- Toss and serve. Pour the dressing on the salad and toss to combine. Serve immediately

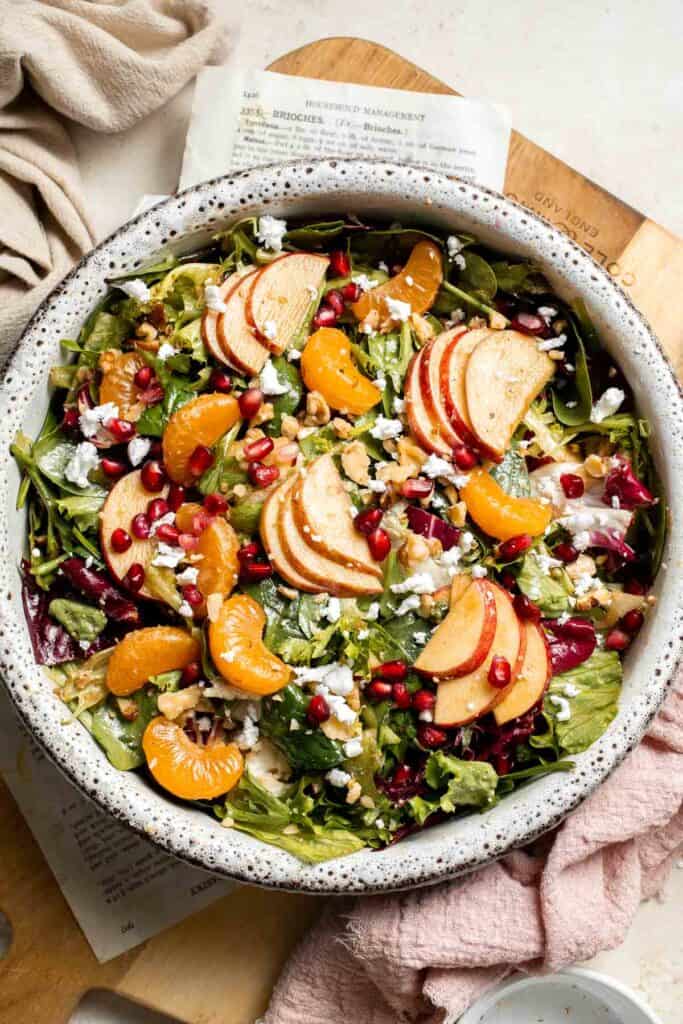
Recipe Variations
- Use kale. This salad would make a gorgeous winter kale salad, but I recommend either massaging the thin strips of kale first to make them tender. So nice for meal prep!
- Add more produce. You don't need to add too much, but if you have leftover roasted veggies, like squash or sweet potatoes, they'd go really nicely with the fruity flavors. It'd also be lovely with some thinly sliced red cabbage, fresh fennel, avocado, or red onion.
- Sweeten the dressing. Since the fruits are so sweet, I typically don't add any sweetness to the salad dressing, but you can certainly add a little honey or maple syrup to taste.
- Add protein. For the meat eaters, consider offering grilled chicken breast or crumbled bacon as extra toppings.
How to Serve
This Winter Pomegranate Salad is delicious served on its own for lunch, or paired with some of my favorite entrees. It is especially good for Christmas dinner paired with a main course such as:
- Holiday Glazed Baked Ham
- Prime Rib Roast
- Juiciest Roast Turkey
- Mushroom Wellington
- Roasted Pork Tenderloin
- Herb-Crusted Rack of Lamb
- Ground Beef Meat Pie
For more recipes, see our 25 Best Christmas Mains and Entrees.
Recipe Tips and Tricks
- Dress right before serving. Unlike kale or hearty winter greens, this recipe uses delicate leafy greens that will wilt after they sit in the dressing. For the best flavor, dress immediately before serving.
- Make extra. Honestly, most of us could tolerate an extra plate of salad (or two) during this time of year. If you make an extra batch and leave it in the fridge, you can either portion it out for meal planning or enjoy a refreshing side salad with your leftover holiday entrees.
- Toss or serve separately. If your guests have particular dietary constraints, consider serving any allergens on the side, like the nuts or cheese. Bonus - serving the feta on the side will make the salad vegan, as well.
Storing Instructions
This simple winter salad should be stored undressed, with the extra salad dressing in a mason jar on the side. It will keep in an airtight container in the fridge for 2-3 days.
FAQ
The answer depends on where you live, but there are quite a few fruits that are either in season or fresh from storage during this time of year. Apples and pears are wonderful options as well as all types of citrus (lemon, lime, orange, blood orange, mandarins, etc.), pomegranates, persimmons, avocados, and more. Fortunately, most of these ingredients pair well together and would be right at home in this salad.
I recommend using a vinaigrette as it will have enough acidity to balance the sweetness of the fruits. Keep it simple with balsamic vinaigrette or make a bright lemony vinaigrette for an extra pop of brightness. Apple cider vinegar or red wine vinegar work, too. You can use store-bought dressing in a pinch, but I promise, it's easier, cheaper, and more flavorful to make it yourself at home!
If you want to prep the salad the day before or use it for meal prep, it can help to coat the apple pieces in lemon juice to keep them from browning. Store the greens and all the toppings in an airtight container in the fridge and either refrigerate the dressing or make it right before serving. The greens and toppings will stay fresh for about 2-3 days, but really, this delicious winter salad is so simple, you can easily throw it together right before your holiday dinner.
More Winter Salad Recipes
- 40 Best Salad Recipes
- Christmas Salad
- Sweet Kale Salad
- Mandarin Orange Salad
- Butternut Squash Quinoa Salad
- Winter Kale Salad with Apple Cider Vinaigrette
Tried this recipe?
I'd love to hear what you think! Leave a comment and rating below to share your feedback. Your reviews help others discover this recipe and help me keep creating more free recipes for you. Snap a photo and tag me on social media @aheadofthyme too.

Vegetarian Lasagna Soup
This hearty Vegetarian Lasagna Soup has all the flavor of traditional lasagna but in soup form - and without any meat! It's packed with bold flavors, nourishing ingredients, and fiber to keep you full for hours. Plus, it's ready in only 30 minutes! There's no better way to warm up on a cold night.

Lasagna is like a math equation that just works. Pasta + sauce + your favorite fillings = dinner perfection. I have a bunch of lasagna recipes to prove it and really, it doesn't even have to be in casserole form! We absolutely love this deconstructed lasagna soup, which ditches the Italian sausage and meat (like in our Classic Lasagna Soup) and uses extra veggies and tender cannellini beans to fill you up. Best of all, absolutely everyone loves it, including picky kids and staunch meat lovers. It's a crowd-pleaser for the whole family!
Why You'll Love This Vegetarian Lasagna Soup
- Ready in just 40 minutes. This recipe starts by extracting deep flavor from the aromatic veggies, then simmering the broth and tomatoes for a rich, tomato-forward soup base. Then, add the beans and broken pasta noodles and let them soften. Finally, top with dollops of the triple cheese mixture for that creamy, melt-in-your-mouth flavor that's essential to any type of lasagna. So good!
- Rich and creamy. There are other vegetable lasagna soup recipes out there, but not all of them replicate the molten cheese moment we all look forward to. Instead, you essentially get a tomato-y noodle soup, which is delicious, but it doesn't give you those lasagna vibes. The mixture of ricotta, mozzarella, and parmesan cheese adds so much flavor and you'll want to spoon a little bit into every bite!
- Feeds a crew. If you have a large family, one pot of this soup makes enough for 6-8 servings, or you can make it on the weekend for the most delicious leftovers all week! It's cozy, comforting, and delicious, all in one bowl!
Ingredient Notes
To make this delicious Vegetarian Lasagna Soup, you will need the following ingredients (full measurements in recipe card below):
- olive oil - to sauté the aromatics and bring out their flavors.
- aromatics - start with diced onion, minced garlic, and carrots for a flavorful, filling broth.
- tomato paste + diced tomatoes - this adds a rich, umami note that makes the broth even more satisfying.
- vegetable broth
- seasonings - season to taste with salt and black pepper and add Italian seasoning blend for lots of herby goodness.
- lasagna noodles - broken into small pieces. Gluten-free noodles work, too!
- canned white beans - it's best to rinse and drain them first. You can substitute other types of beans, but navy or cannellini beans have the best texture and a mild, creamy flavor.
- ricotta cheese - this will be mixed with the other cheeses for a cheesy garnish. I recommend full fat ricotta, whenever possible.
- mozzarella cheese
- parmesan cheese - freshly grated and be sure to use the real deal. The powdered parmesan in a tube won't melt the same.
- parsley - finely chopped for flavor and as a garnish. Fresh basil is nice, too, but is harder to find during the winter months.
You will also need measuring cups and spoons, large pot or 4 quart Dutch oven, and mixing bowl.
How to Make the Best Vegetarian Lasagna Soup
- Sauté aromatics. Heat oil in a large pot or Dutch oven over medium-high heat until the hot oil sizzles, about 1 minute. Add onion, garlic and carrot. Saute until fragrant, about 1-2 minutes.


- Add soup base. Add tomato paste, diced tomatoes, vegetable broth. Stir well until smooth and bring it to a boil. Season with salt, pepper and Italian seasoning.
- Add lasagna noodles and cook. Add broken lasagna noodles and white beans. Reduce heat to medium low and cook until the noodles are al dente, about 10-12 minutes. Stir occasionally to prevent noodles and beans from sticking to the bottom of the pot.


- Combine cheese. In a medium mixing bowl, stir together 3 cheeses and parsley.


- Serve. Serve immediately with a dollop of the cheese mixture on top. Sprinkle extra chopped parsley on top, if desired.


Recipe Variations
- Add more fresh veggies. This recipe is a super simple way to sneak in some extra greens! Add either fresh baby spinach or frozen spinach, shredded zucchini, finely chopped mushrooms, or whichever veggies you want to finish up. They'll take on the flavor of the rich tomato broth, so it won't feel like you're eating a bowl full of veggies.
- Use different noodles. Of course, it isn't really lasagna soup without lasagna noodles, but you can use any type of pasta you prefer! I like to use pasta with a frilly texture, similar to the wavy edge of the lasagna sheets.
- Ditch the dairy. Since this version has that creamy ricotta mixture you dollop on top, it isn't exactly dairy-free. You can either skip that garnish or use vegan cheese for a similar flavor.
- Add "meat." If you mix the texture of meat in this vegetarian lasagna soup recipe, try browning a plant-based ground beef or vegan sausage.
How to Serve
This Vegetarian Lasagna Soup is delicious served on its own, or paired with some of my favorite soup sides including:
- Garlic Breadsticks
- Simple Italian Salad
- Baked Mozzarella Sticks
- Spinach Cheese Rolls
- Tomato Burrata Salad
- Whipped Feta Crostini
For more recipes, see our 25 Side Dishes for Soup.
Recipe Tips and Tricks
- Season as you go. To build a really rich, flavorful soup, you'll want to taste the broth throughout the cooking process. As needed, add a little bit more salt. This will season the individual ingredients to really bring the soup together.
- Don't overcook. Once you turn off the hot soup, the noodles will continue to cook and soften from the heat of the broth. For the best texture, turn down the heat part way through the cooking time and remove from the heat as soon as the noodles are al dente. The faster they cool down, the more they will keep their texture.
- Sneak a splash of umami. To give your broth a really rich, simmered-all-day flavor, feel free to add a little splash of soy sauce or vegan Worcestershire sauce. Either option will add a hearty, savory note that makes the soup even more satisfying.
Storing and Freezing Instructions
How to Store
The best way to store leftover lasagna soup is to let it cool to room temperature, then transfer it to an airtight container and refrigerate for 3-4 days. Store the leftover ricotta mixture on the side, not on the soup as it will melt into the broth after reheating. It can help to portion out the leftovers into individual servings to make it easier to reheat however much you need at a time.
How to Reheat
Microwave the leftovers for several minutes or, better yet, warm them in a small saucepan over medium heat until steaming hot. Top with the leftover cheese mixture and serve.
FAQ
In general, I do not recommend freezing noodle soups. You can, but the noodles become really soft and almost soggy after freezing, thawing, and reheating. If you know you want to freeze this soup, consider making it without the pasta and then adding cooking those in the broth while reheating.
I like to use actual lasagna noodles, which I break into pieces, but you can truly use any pasta shape. Since lasagna noodles generally have that wavy, crinkly texture, look for noodles with a similar design to keep that texture.
Yes! A digital pressure cooker is ideal since you can sauté the veggies in the same pot and actually cook everything using the sauté feature. For the slow cooker, you'll want to cook the veggies on the stove first, and then add everything (except the lasagna noodles to the pot). Let the mixture slow cook for 2-3 hours on high then add the dried pasta and let it cook for an additional 30-45 minutes or until tender. Serve with the ricotta cheese topping and enjoy!
More Soup Recipes with Pasta
- Pasta e Fagioli Soup
- Minestrone Soup
- Lasagna Soup
- Ravioli Soup
- Lemon Chickpea Orzo Soup
- Mac and Cheese Soup
Tried this recipe?
I'd love to hear what you think! Leave a comment and rating below to share your feedback. Your reviews help others discover this recipe and help me keep creating more free recipes for you. Snap a photo and tag me on social media @aheadofthyme too.

What Recipes to Cook in December
Are you wondering what to cook in December? Browse our collection of 50 best December recipes to cook for breakfast, lunch, dinner, and dessert!

December is here, and we're diving headfirst into the magic of the holiday season. Frosty mornings, twinkling lights, and evenings spent by the fire set the perfect mood for this festive month. From comforting holiday meals to indulgent treats, December is all about celebrating and togetherness. Our latest collection of seasonal recipes captures the spirit of the season - the richer and cozier, the better! This roundup of the 50 best recipes to cook in December features festive breakfasts, hearty soups and stews, warm and satisfying dinners, savory holiday appetizers, and decadent, spice-filled desserts to sweeten every occasion.
What is in Season in December
December is a month when winter produce takes center stage. Below, you'll find a list of some of our favorite fruits and vegetables that you'll see popping up at grocery stores and farmers' markets in the cooler season. Click on the links to discover delicious recipes featuring each ingredient!
Holidays in December
December is filled with holiday cheer, with Christmas and New Year's taking center stage. Over the years, we've shared hundreds of festive recipes, so you'll have everything you need to make this season truly delicious!
- Christmas. Mid-month, the excitement builds for Christmas! Check out our Christmas recipe collections, including holiday dinners (see our 25 Best Christmas Mains and Entrees, 30 Best Christmas Appetizers, and 50 Best Christmas Side Dishes), festive desserts (see our 30 Best Christmas Dessert Recipes and 30 Best Christmas Cookies) and Breakfast and Brunch Recipes for Christmas morning.
- New Year's Eve. We wrap up December and welcome the new year with sparkling celebrations and party-worthy recipes. Explore our roundups of 40 New Year's Eve Appetizers, 40 New Year's Eve Dinner Ideas, and 30 New Year's Eve Desserts to ring in the new year in style!
Christmas Guides


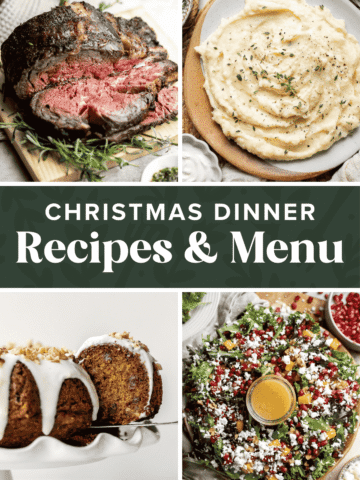
Christmas Recipes
Let's be real, Christmas dinner is all about the food. We have got you covered for every recipe that you need from appetizers and side dishes, to main entrees and desserts, and more!


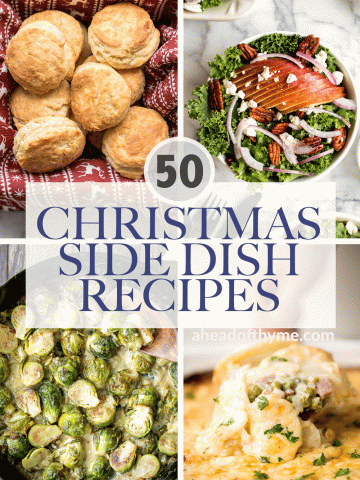

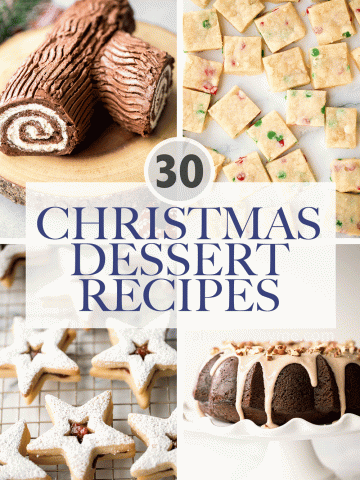
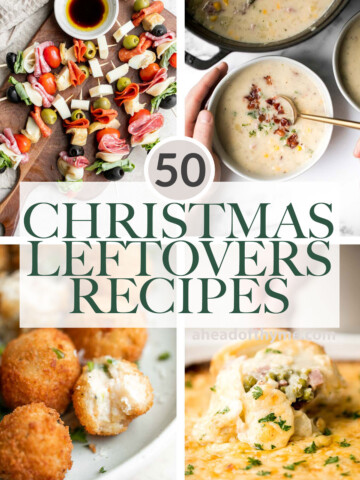
December Breakfast Recipes
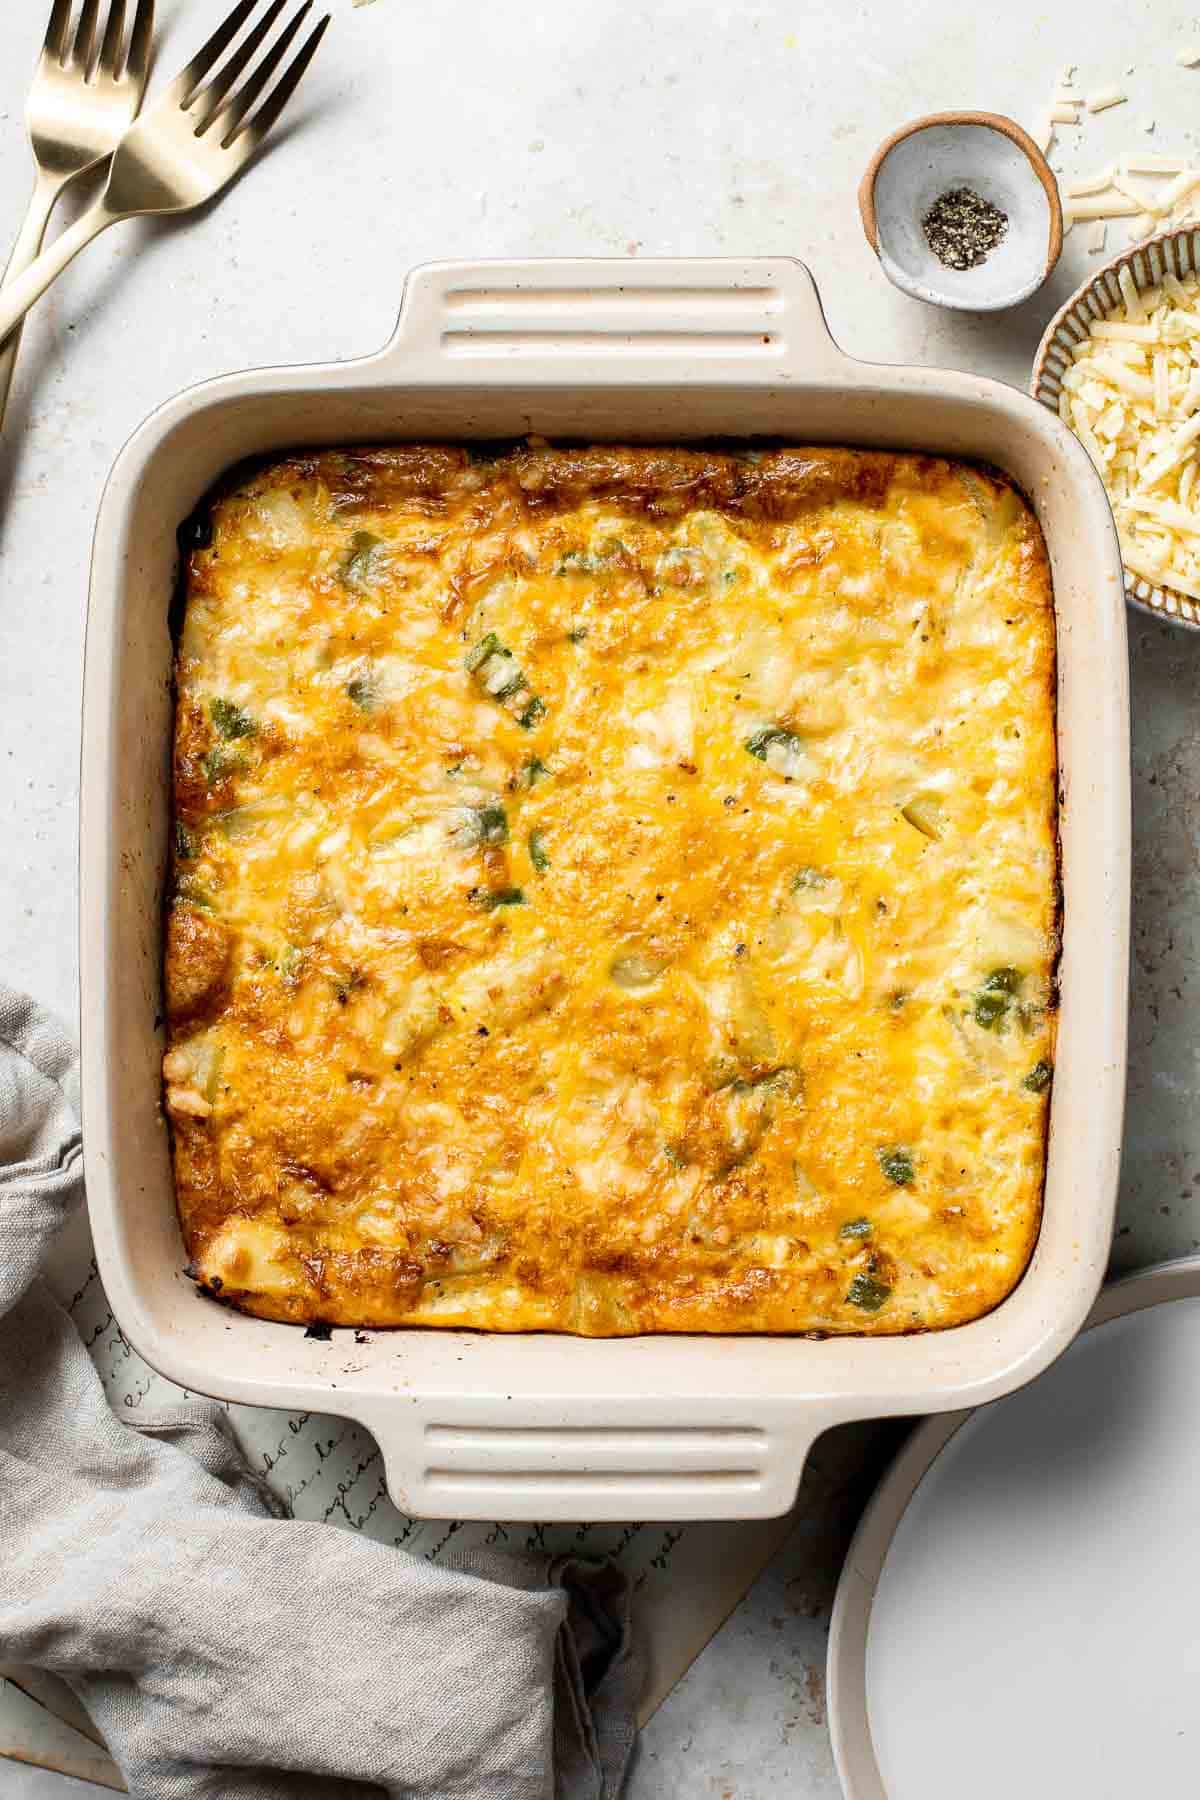 |  |
- Egg and Potato Breakfast Casserole. Egg and Potato Breakfast Casserole is an easy vegetarian breakfast bake loaded with veggies. It is completely customizable and can be made ahead of time.
- Star Bread. This pull-apart star bread is a beautiful, buttery, sugary, and delicious holiday bread that tastes as good as it looks and is actually easy to make.
- Gingerbread Cinnamon Rolls. Gingerbread Cinnamon Rolls are made with a rich gingerbread filling and topped with cream cheese frosting. A must-have during the holiday season!
- Oat Porridge. Oat Porridge is a healthy, delicious breakfast that's warm, comforting, cozy, and great for all ages. A quick easy recipe to warm you up on cold mornings.
- Breakfast Strata. Breakfast Strata is a hearty baked casserole dish loaded with bread, eggs, ham, cheese, and veggies that will keep you full until lunchtime.
- Baked Gingerbread French Toast Casserole. Festive baked gingerbread french toast casserole with cranberries is soft on the inside and crispy outside. The best holiday breakfast on Christmas morning.
- Cranberry Bliss Bars. Skip the trip to Starbucks and make homemade Cranberry Bliss Bars instead with a blondie base with dried cranberries and topped with cream cheese frosting.
- Gingerbread Pancakes. Soft and fluffy gingerbread pancakes are festive and loaded with holiday spices for the perfect breakfast on a winter morning or Christmas Day.
- Cranberry Sauce Oat Bars. Easy cranberry sauce oat bars with a buttery crust, cranberry sauce filling, and crumbly pecan oat topping is the best way to use leftover cranberry sauce.
- Cinnamon Raisin Challah Bread. Sweet cinnamon raisin challah bread is airy, soft and fluffy with a beautiful golden crust coated with almonds. It is braided and baked in a loaf pan.
December Lunch Recipes
 |  |
- Christmas Salad. This fresh and festive Christmas Salad is made with delicious winter fruits and has a gorgeous wreath-like appearance. It's earthy, sweet, nutty, and tangy.
- Creamy Wild Rice Soup. This homemade Creamy Wild Rice Soup is a simple recipe made with mushrooms, nutty wild rice, and yellow potatoes to offer a variety of textures and flavors.
- Twice Baked Potatoes. Twice Baked Potatoes are the perfect side dish or appetizer with tender baked potato boats, gooey, cheesy filling, and classic baked potato toppings.
- One Pot Chili Mac and Cheese. This Chili Mac and Cheese recipe combines two of the best classic comfort dishes using one pot only in just 30 minutes. A family-friendly weeknight dinner.
- Lentil Stew. Lentil Stew is a hearty and filling vegan meal loaded with vegetables like carrots and potatoes. This well seasoned vegetarian stew is ready in 45 minutes.
- Cranberry Meatballs. Cranberry Meatballs are sticky, sweet and tangy. These delicious bites are the perfect holiday appetizer, or a great way to use up leftover cranberry sauce.
- Ravioli Soup. This simple Ravioli Soup is a quick, cozy meal with plump pillows of ravioli simmered in a hearty homemade tomato soup. Ready in just 20 minutes!
- Baked Sweet Potato. Baked Sweet Potato takes almost no effort to make (in the oven or grill) and always taste amazing. They're soft and tender, naturally sweet, and delicious!
- Homemade Potato and Cheese Perogies. Homemade Potato and Cheese Perogies are comforting, delicious, and satisfying. These cheddar pierogi from scratch as easier to make than you think!
- Pot Roast Soup. This easy Pot Roast Soup is made in 30 minutes with leftover beef and veggies simmered in broth. It's hearty, flavorful, and nourishing comfort food.
December Dinner Recipes
 |  |
- Chicken Pot Pie. Homemade chicken pot pie is loaded with a delicious, creamy, savory filling contained by a crispy, buttery, and flaky pie crust. It stores and freezes well.
- Butternut Squash Ravioli. Homemade Butternut Squash Ravioli is a vegetarian dinner filled with roasted butternut squash and served with a nutty brown butter sauce with crispy sage.
- Creamy White Chicken Lasagna. Creamy white chicken and spinach lasagna with tender shredded chicken is the most comforting creamiest cheesiest white lasagna. Easy to make ahead & freeze.
- Coconut Curry Beef Stew. Warm and cozy, easy one pot coconut curry beef stew is hearty yet creamy, packed with tender beef chunks, potatoes and carrots, and creamy coconut milk.
- Chicken a la King. Chicken a la King is rich, creamy, and hearty comfort food. This 30-minute dinner recipe contains chicken and veggies in a cream sauce made from scratch.
- Ground Beef Meat Pie. Ground beef meat pie with a flaky puff pastry double crust pie is filled with ground beef cooked with vegetables and seasonings. The ultimate comfort food.
- Spinach and Ricotta Pasta Bake. Spinach and Ricotta Pasta Bake is the ultimate cozy comfort meal, packed with creamy ricotta and tender spinach, tossed in marinara, and baked until bubbly.
- Pineapple Glazed Ham Slices. Sweet and savoury pineapple glazed ham slices are perfect for a holiday dinner. With a caramelized glaze, this ham is dressed to impress.
- Roast Stuffed Chicken. Roast Stuffed Chicken is easy to make and has everything you need for a meal in one pan. Serve it for a special occasion or weekly for Sunday roast dinner.
- Ghormeh Sabzi (Persian Herb Stew). Ghormeh sabzi is a classic traditional Persian herb stew with beef or lamb, fresh herbs, and kidney beans, that's slowly cooked, developing so much flavor.
December Appetizers and Snacks
 |  |
- Cranberry Whipped Feta Dip. This Cranberry Whipped Feta Dip is a festive, creamy appetizer that comes together in minutes with just a handful of simple ingredients.
- Bacon Wrapped Scallops. Bacon Wrapped Scallops are the most decadent appetizer to serve at your next part. Tender, fresh scallops are wrapped in bacon slices before baked.
- Antipasto Skewers. Antipasto skewers with tortellini are a quick, easy, and delicious appetizer with the best parts of a traditional antipasto platter but easier to eat.
- Fried Mac and Cheese Balls. Fried mac and cheese balls are crispy on the outside, creamy and cheesy on the inside, and have the perfect crunch. Best way to use leftover mac and cheese.
- Smashed Sweet Potatoes. Crispy Smashed Sweet Potatoes are the perfect side dish for your fall and winter meals - sweet, savory, and so simple to make!
- Charcuterie Board. This easy charcuterie board is the perfect appetizer to impress with minimal effort- made with cheese, cured meats, crackers, dips, olives, fruit, and nuts.
- Cranberry Baked Brie. Cranberry baked brie is a sweet and savory appetizer you need to try this holiday season. It's quick and easy, melty and gooey, and so delicious.
- Air Fryer Short Ribs. Air fryer short ribs are crispy, flavorful, and delicious. The easy marinade ensures they're tender and juicy inside, while the air fryer makes them crispy.
- Cheesy Garlic Bread. Cheesy Garlic Bread is toasty and crispy on the outside, tender and soft inside with a garlic butter and melty cheese on top. Make in under 20 minutes!
- Cheese Fondue. This Swiss Cheese Fondue with warm, melty cheese is a classic. Serve it as a quick and easy appetizer or dinner with bread, potatoes, and more.
- Gingerbread Granola. Quick and easy gingerbread granola with nuts, cranberries and warm winter spices is vegan, gluten-free, and refined sugar-free. The best Christmas snack.
December Desserts
 |  |
- Christmas Cookie Platter. Our Christmas Cookie Platter this year, filled with festive treats and holiday cheer, with the best mix of colors, shapes, and flavors to impress.
- Gingerbread House. This gingerbread house recipe with template is easy to make, fun to decorate, and delicious - soft and chewy, yet crunchy and sturdy with crisp edges.
- Hot Chocolate. Homemade Hot Chocolate is made with actual chocolate, melted into milk, and whisked until smooth and creamy. No more prepackaged mixes!
- Christmas Sugar Cookies with Royal Icing. Christmas sugar cookies with royal icing are golden brown and crisp on the outside, but soft and tender inside. The best and festive gourmet holiday cookie.
- Cranberry Pie. This Cranberry Pie features an orange-infused cranberry pie filling steeped with warm, aromatic spices, all nestled under a gorgeous lattice pie crust.
- Gingerbread Bundt Cake with Maple Cinnamon Glaze. This showstopping festive gingerbread bundt cake with maple cinnamon glaze and pecans is moist, soft, and fluffy, and packed with warm holiday spices.
- Christmas Cupcakes. These festive Christmas Cupcakes are made of moist and fluffy vanilla funfetti cake topped with red and green buttercream frosting. So fun to make!
- Yogurt Fruitcake. Perfect for the holidays, this super moist and tender, festive yogurt fruitcake is loaded with dried fruits and nuts for a burst of flavour in every bite.
- Gingerbread Men Cookies. Classic gingerbread cookies with royal icing are soft and chewy in the centre but crisp on the edges. Add these festive cookies to your holiday baking list.
More Winter Recipes
- 60+ Winter Dinner Ideas
- 50 Best Comfort Food Recipes
- 60 Best Soup Recipes
- 40 Best Pasta Recipes
- 30 Best Casserole Recipes
Did You Make Any of These December Recipes?
Please leave a comment and rating below, and let me know what you thought of this round up of delicious recipes to cook this December. Be sure to snap a picture and tag me on Instagram @aheadofthyme or share it on the Pinterest pin so that I can follow along.
HUNGRY FOR MORE? Don't forget to sign up for my email newsletter so that you don't miss any recipes. You can also follow along on Instagram and Pinterest for more recipe updates.
Christmas Cookie Platter
Say hello to our Christmas Cookie Platter this year, filled with festive treats and holiday cheer. It has the perfect mix of colors, shapes, and flavors to impress - the best way to showcase your holiday baking this season. With just a bit of planning, and following our step-by-step guide, you can create a stunning cookie tray that's as fun to assemble as it is to enjoy!
I'm sharing my complete how-to guide to building the best Christmas cookie platter. You'll find tips for selecting cookies, arranging them beautifully, and even a few extra tricks to elevate your display. Whether you plan to bake every cookie from scratch or mix in a few store-bought favorites, this guide has everything you need. From choosing the best flavors to crafting the perfect presentation, you'll find ideas for creating a festive, inviting platter that's sure to be a highlight of the holiday season. Let's make this the year of the unforgettable Christmas cookie platter!

How to Create the Best Christmas Cookie Platter
Step 1: Choose the cookies.
When selecting cookies for your Christmas cookie platter, aim for variety. Mixing different shapes, sizes, and flavors will make the platter visually appealing. You can include a combination of homemade and store-bought cookies, or go all-in with your own creations. I recommend choosing at least 6 different types, but don't hesitate to go above and beyond if you're feeling ambitious. Start planning about a month in advance, and adjust as new ideas and inspirations strike.
Step 2: Add other festive treats.
Consider adding a few extra goodies to your platter to really elevate it. Candy canes, peppermint bark, chocolate truffles, or even chocolate covered oreos make for great additions. These treats can add variety and texture to the platter, ensuring there's something for everyone.


Step 3: Check your baking tools.
Before you start, make sure you have all the necessary equipment. Depending on the cookies that you're baking, you'll typically need these basics: measuring cups and spoons, mixing bowls, electric mixer, and baking sheets. You might also need a silicone baking mat, wire cooling racks, a cookie scoop, or Christmas-themed cookie cutters and a rolling pin. Double-check your kitchen inventory to avoid any last-minute trips to the store.
Step 4: Create a shopping list.
Now that you've decided what cookies and extras to include, it's time to make your shopping list. Write down all the ingredients for your cookies, as well as any additional treats or candies you want to include. Don't forget to check your kitchen for baking supplies to see if you need anything like cookie tins or liners, festive ribbons, or dividers to section off the platter.
Step 5: Plan your baking schedule.
With a full cookie platter ahead of you, it can feel overwhelming. To stay organized, make a baking schedule. Start by identifying the easiest cookies and work your way up to the more complex ones. Some cookies may need chilling, rolling, cutting, or decorating, so take that into account. Spread out your baking sessions across a few days if necessary - many cookies freeze well, so you can bake ahead and freeze the finished cookies until it's time to assemble the platter.
See our Christmas Baking Guide + Checklists for step-by-step help!
This comprehensive Christmas Baking Guide with free checklists includes info on baking ingredients and tools, tons of tips, mistakes to avoid, and recipes.
Step 6: Assemble the platter.
When it's time to put your platter together, think about how to arrange the cookies to create visual interest. Group cookies of different shapes, sizes, and colors together, and avoid large sections where all the cookies look the same. To keep things organized, use mini cupcake liners for smaller cookies, burlap twine or ribbons to bundle cookies, and cardstock to create sections within your platter. A well-arranged platter is not only a treat for the taste buds but also a feast for the eyes!


Cookie Platter Tips and Tricks
- Create visual interest. Arrange cookies of varying sizes and shapes in sections around the platter. Place larger, round cookies on the edges and smaller, intricate cookies in the center for contrast. Cluster cookies by flavor or color to create a more organized look, or mix them up for a playful vibe.
- Use small bowls and liners for separation. Incorporate mini bowls or cupcake liners to hold smaller cookies, candies, or chocolate-covered pretzels. These not only help with portion control but add dimension to the platter. Layering different heights with stacked cookies or using small jars for peppermint candies can also add depth.
Cookies in our Christmas Cookie Platter
The cookies that I included in our Christmas cookie platter this year are:
- Gingerbread Macarons
- Chocolate Peppermint Cookies
- Red Velvet Blossoms
- Brookies Cookies
- Chocolate Ginger Cookies
- Cinnamon Roll Cookies
- Maple Cookies
- Coffee Cake Cookies
I usually like to include traditional holiday cookies like Christmas Sugar Cookies, Gingerbread Men Cookies, and Chocolate Crinkle Cookies, as well as a few fun additions like Mexican Wedding Cookies or festive Stained Glass Window Cookies. Here are some of my favorite cookies to add.
More Christmas Cookies
For a collection of all our Christmas recipes, see our Best Christmas Cookies. I am also sharing a handful below.
Christmas Monster Cookies are soft, chewy, festive and packed with holiday cheer! Loaded with oats, peanut butter, chocolate chips, and red and green MnM's.

Classic gingerbread cookies are soft and chewy in the centre but crisp on the edges, and warmly spiced. Decorate with royal icing to complete the look on these festive holiday cookies.

Peppermint Macarons with festive red shells, creamy peppermint buttercream, and a white chocolate candy cane topping are the ultimate Christmas cookies.
Christmas sugar cookies with royal icing are golden brown and crisp on the outside, but soft and tender inside. The best and festive gourmet holiday cookie.

Sweet and crunchy Peppermint Kiss Cookies are the perfect Christmas cookies made with a sugar cookie dough, real candy canes, and a peppermint kiss on top.

Hot Chocolate Cookies are soft and chewy, loaded with classic hot cocoa ingredients, and is so easy to make in just 20 minutes (no chilling required!).
Jam Thumbprint Cookies are soft and buttery, with a sweet and fruity jam filling, and a drizzle of almond glaze. They literally melt in your mouth!
Stained glass window cookies with a soft crisp sugar cookie base and smooth jolly rancher hard candy center are the prettiest holiday cookies and easy too.

Italian Christmas Cookies (Ricotta Cookies)
Super moist, soft, and sweet Italian Christmas Cookies (Ricotta Cookies) are easy festive holiday treats that are ready in just 30 minutes!

Easy Peanut Butter Cup Cookies are tall and thick, classic Christmas cookies made with peanut butter cookie dough and a mini Reese's cup pressed in.

Snickerdoodles are a classic holiday cookie that are soft, puffy, and chewy with crisp edges and a cinnamon-sugar coating. Easy to make and easy to eat.

Chocolate Spritz Cookies are a rich and indulgent twist on classic buttery spritz cookies. Dip them in extra chocolate or top with colorful sprinkles.

Candy cane cookies are fun, festive holiday cookies with a red and white twist, buttery, crumbly, and sugary with peppermint for a classic Christmas flavor.

Hot Chocolate
There's nothing better than a warm mug of Hot Chocolate on a cold winter day. This homemade hot cocoa is made with actual chocolate, melted into milk, and whisked until smooth and creamy. It's rich, sweet, and delicious. You'll wonder why you bothered with the prepackaged mixes for so long!

Have you ever had real hot chocolate? If your hot chocolate comes with powdered anything, it's not the real deal. Cocoa powder doesn't have nearly the same richness and flavor as real chocolate, which is the base of this deceptively simple (and luxurious) hot chocolate recipe. Make a small serving to warm up after a long day out in the snow, or make a big batch, grab all your favorite toppings, and host a hot cocoa bar at your next holiday party. I promise you'll fall in love from the first sip!
Why You'll Love This Hot Chocolate
- Made with real chocolate. Unlike watered-down hot cocoa from those paper packets, homemade hot chocolate starts with a base of real melted chocolate. It's similar to a warm chocolate ganache, thinned until smooth and sippable. It tastes like you splurged on the finest liquid chocolate at a fancy café. It's truly the best!
- Just 3 simple ingredients. You really just need three elements to make your own hot chocolate: milk, chocolate, and vanilla extract. That's it! They're common pantry staples, which means you can make the best hot cocoa ever literally anytime. It's as simple as the powdered mixes (but so much better!).
- Great for the holiday season. During the cold winter months, a nice mug of hot cocoa can warm you up from the inside out! It's like a hug in a mug and makes everything better. This homemade hot chocolate recipe is perfect for any holiday party, brunch, or winter gathering, and is so flavorful, your friends and family will ask for you to be on hot chocolate duty every year.
Ingredient Notes
To make this delicious Hot Chocolate, you will need the following ingredients (full measurements in recipe card below):
- milk - you can use either dairy or non-dairy milk. For an even richer, creamier drink, replace some of the milk with half and half or heavy cream.
- chocolate - grab some quality semi-sweet chocolate and coarsely chop it.
- vanilla extract - a splash of vanilla extract adds an extra aromatic note. But it is totally optional!
- toppings - if you are like me, hot chocolate is all about the toppings! Add your favorite garnishes (totally optional!) including whipped cream, mini marshmallows, chocolate sauce, or shaved chocolate.
You will also need a medium saucepan and whisk.

How to Make the Best Hot Chocolate
- Heat. In a medium saucepan, add milk, chopped chocolate, and vanilla extract. Heat over medium-low heat, whisking continuously until smooth (do not boil).
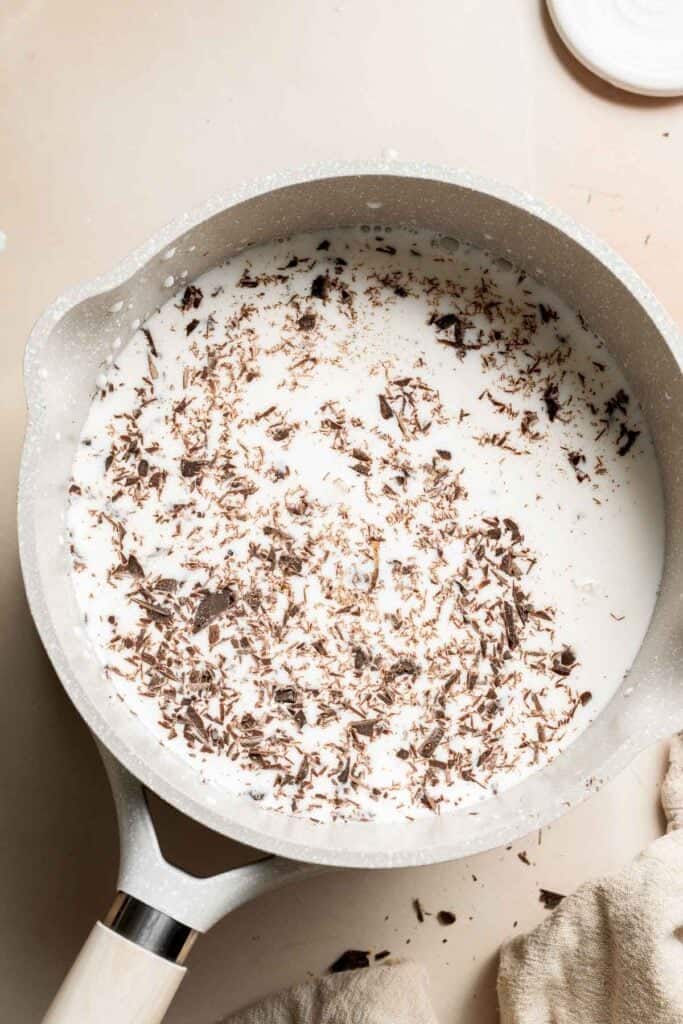
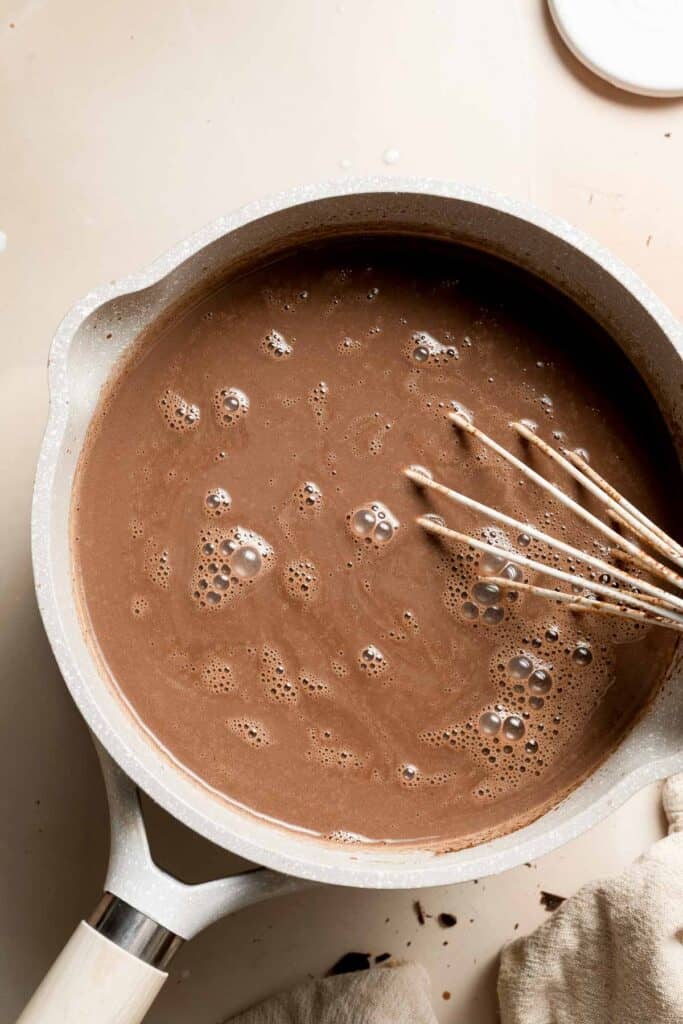
- Serve. Serve immediately as is, or with your favorite toppings including whipped cream, mini marshmallows, and a drizzle of chocolate sauce.


Recipe Variations
- Adjust the flavor. Use whichever type of chocolate you prefer (white, milk, or dark chocolate), replace the vanilla extract with almond or peppermint extract, or add spices, like a dash of cinnamon, cardamom, or a pinch of cayenne, for extra flavor.
- Sweeten to taste. I find that the chocolate has so much flavor and just enough sweetness that you don't really need to add any sugar. But if you prefer a sweeter drink, feel free to stir in a little white sugar, brown sugar, or maple syrup to taste.
- Pop it in the slow cooker. If you want to serve hot chocolate at a party or to a large crowd, make a big batch on the stove then transfer it to a crock pot and heat it over low. Serve with all your favorite toppings for a homemade hot chocolate bar!
- Make a real mocha. Add a shot of espresso (or two) for the easiest mocha ever. So good!
How to Serve
This Hot Chocolate is delicious served on its own, or paired with some of my favorite cookies including:
- Spritz Cookies
- Pinwheel Cookies
- Samoas Cookies
- Jam Thumbprint Cookies
- Brookies Cookies
- Butter Cookies
For more recipes, see our 50 Best Cookie Recipes.

Recipe Tips and Tricks
- Don't scorch. I like to use a heavy-bottomed saucepan and stir constantly. Milk scorches and boils very easily, so keep a close eye on it!
- Use a higher-fat milk. For a creamier hot chocolate, use a high fat milk like whole milk, coconut milk, etc. The fat will make the drink extra creamy and luxurious, and also bring out the rich chocolate flavor.
- Use the good stuff. Inexpensive grocery store chocolate chips will work, but you'll get a much more refined, nuanced flavor if you use higher-quality chocolate. Work with your budget, but try to splurge on the chocolate, if you can.
Storing and Freezing Instructions
How to Store
Let any leftover hot chocolate cool to room temperature, then transfer to an airtight container or jar and store in the fridge for 3-4 days.
How to Reheat
To reheat, warm the leftover cocoa in a small saucepan on the stove until piping hot.
FAQ
Store-bought hot chocolate mix relies on unsweetened cocoa powder, but real hot chocolate is best with actual melted chocolate. I recommend using chocolate bars, instead of chocolate chips, as they melt the best, but either option will work. Semi-sweet or bittersweet chocolate is ideal, as the bitterness will help offset the sweet, creamy flavor.
Technically, you can melt chocolate and warm milk in the microwave, but you'll get the best smoothest consistency and reduce the likelihood of a messy microwave by making your hot chocolate on the stove. The whisking process ensures everything incorporates really well and adds to the silky smooth texture.
In this situation, it's best to use a dairy-free milk, like almond milk or soy milk, and use a vegan chocolate made without added dairy. If your non-dairy milk seems especially thin, add a little non-dairy creamer or coconut cream for a richer, creamier flavor.
More Hot Drink Recipes
- White Hot Chocolate
- Peppermint Hot Chocolate
- Chai Tea Latte
- Slow Cooker Apple Cider
- Golden Milk Turmeric Latte
- Matcha Latte
Tried this recipe?
I'd love to hear what you think! Leave a comment and rating below to share your feedback. Your reviews help others discover this recipe and help me keep creating more free recipes for you. Snap a photo and tag me on social media @aheadofthyme too.

Creamy Polenta
This homemade Creamy Polenta is simple, warm, and comforting in all the right ways. Best of all, you only need a handful of simple ingredients and about 30 minutes of time to transform dry cornmeal into a smooth, creamy side to serve with roasted veggies and your favorite proteins. It's simple, rustic, and luxurious - what's not to love?
When the temperatures drop, there's nothing more comforting than a spoonful of smooth, creamy polenta infused with butter and molten Parmesan cheese. This version is made to be vegetarian, so it can be paired with any entree, but we especially enjoy it with Roasted Chicken, Italian sausages, Short Ribs, and more. It's the perfect creamy side dish for all of your hearty winter roasts and stews!
Why You'll Love This Creamy Polenta
- Just 3 ingredients. Okay, the ingredients list may include 5 components, but two are water and salt. You really just need cornmeal, butter, and Parmesan cheese for the creamiest polenta ever. It's such an easy recipe!
- Smooth and creamy. If you've ever had overcooked polenta that's turned into a thick mass, you know that there's an art to making it properly. This recipe has just the right creamy consistency every time!
- Vegetarian-friendly. This creamy polenta recipe is made with water instead of chicken stock, making it suitable for vegetarians and carnivores alike. You can definitely use chicken stock if you are not following a plat-based diet.
Ingredient Notes
To make this delicious Creamy Polenta, you will need the following ingredients (full measurements in recipe card below):
- cornmeal - I use Bob's Red Mill yellow corn polenta. In general, you want to use a coarse-ground cornmeal.
- water
- salt - added to taste.
- butter - for a rich, glossy creaminess.
- Parmesan cheese - grated into the cornmeal mixture just before serving. Real Parmigiano-Reggiano cheese is made with rennet and is not vegetarian. Look for parmesan cheese made with bacterial enzymes instead.
You will also need measuring cups and spoons and a medium pot or 4 quart Dutch oven.
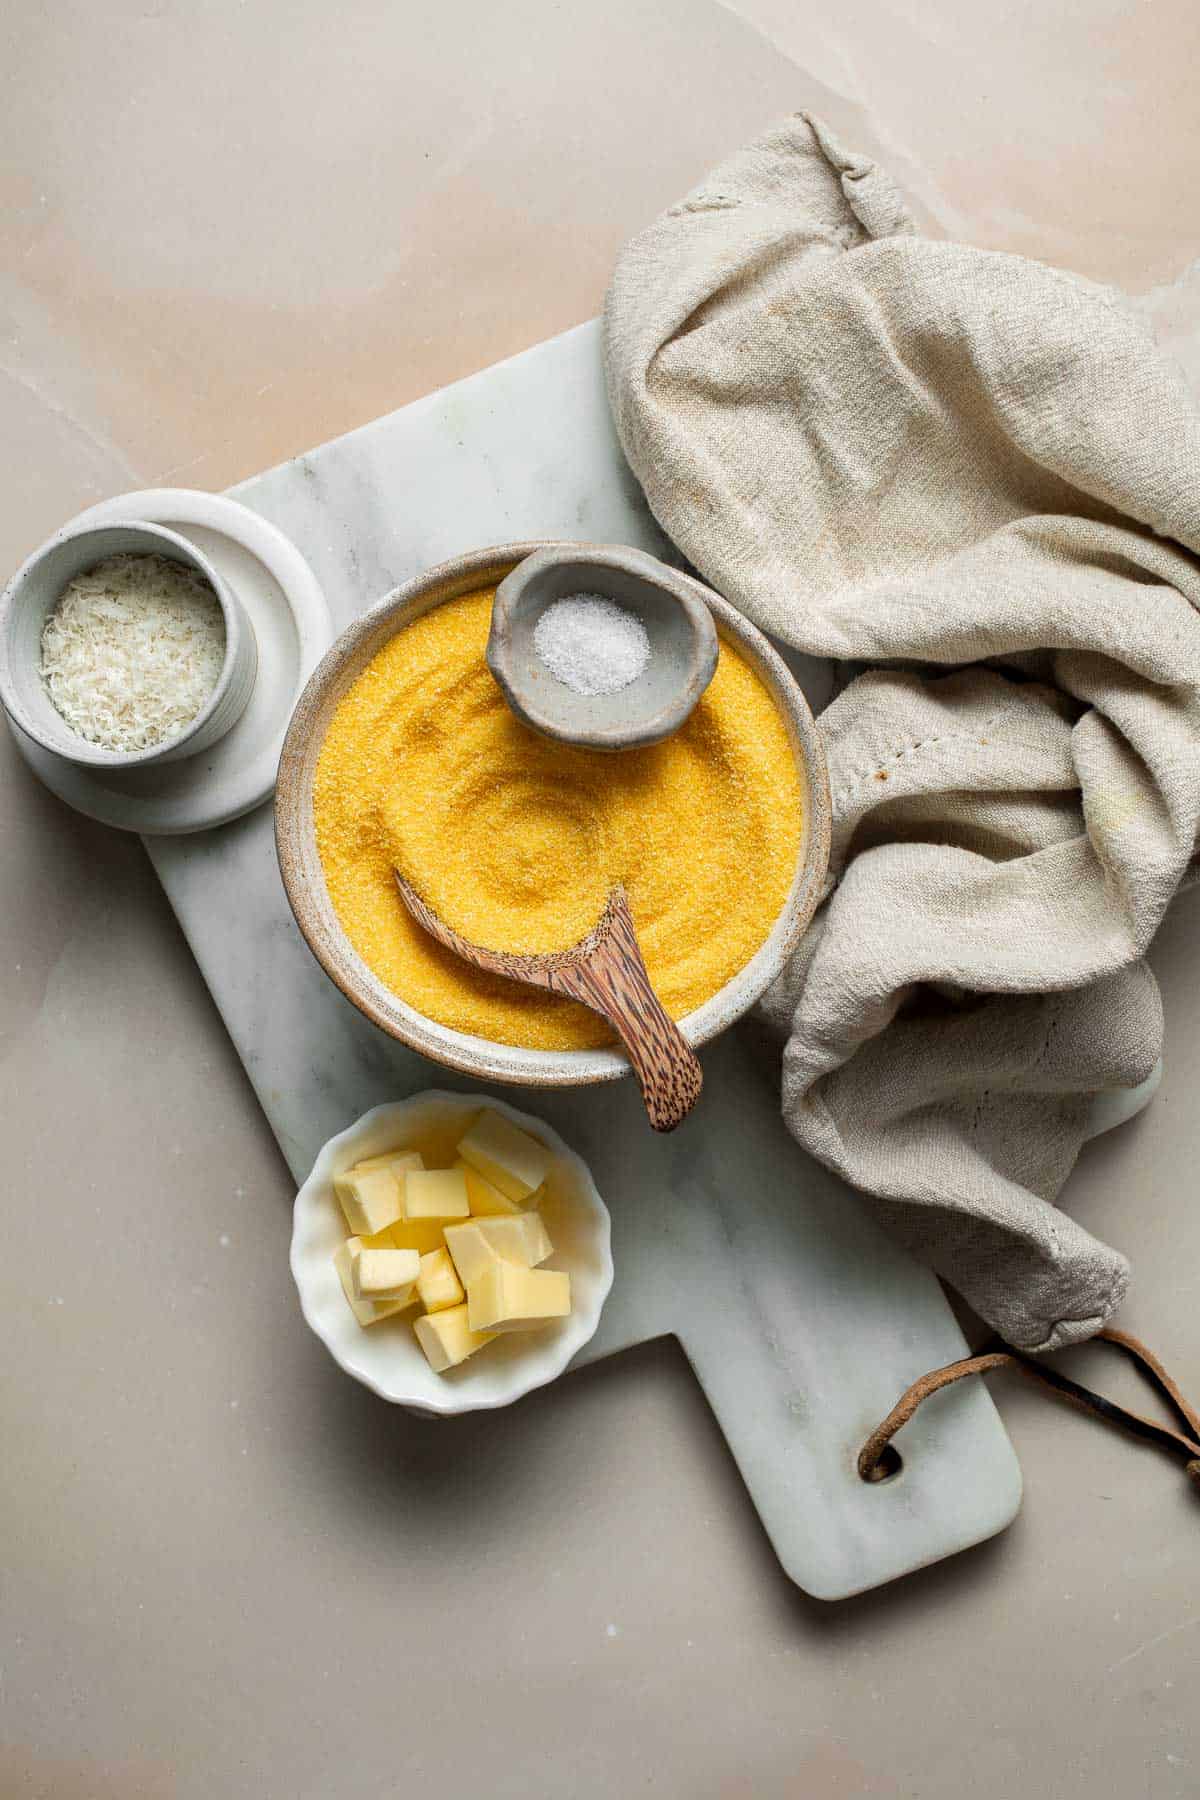
How to Make the Best Creamy Polenta
- Cook cornmeal. In a medium pot or Dutch oven, add cornmeal, water and salt. Bring to a simmer over medium heat, whisking constantly to prevent the cornmeal from forming lumps. Reduce the heat to low and simmer for another 15-20 minutes until cooked through and thickened to a desired consistency.
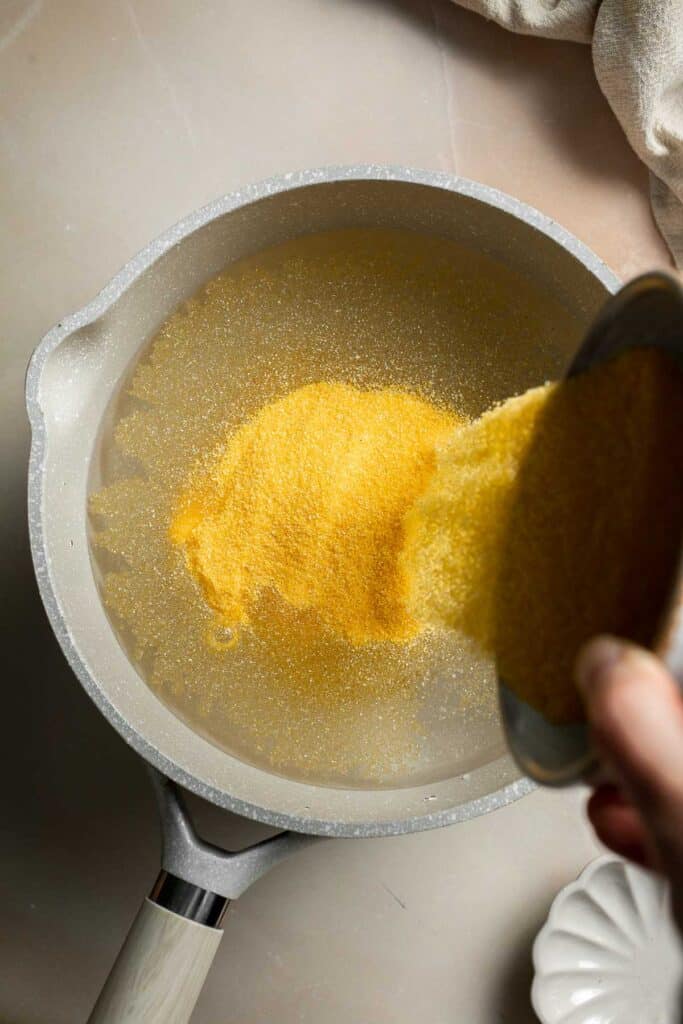
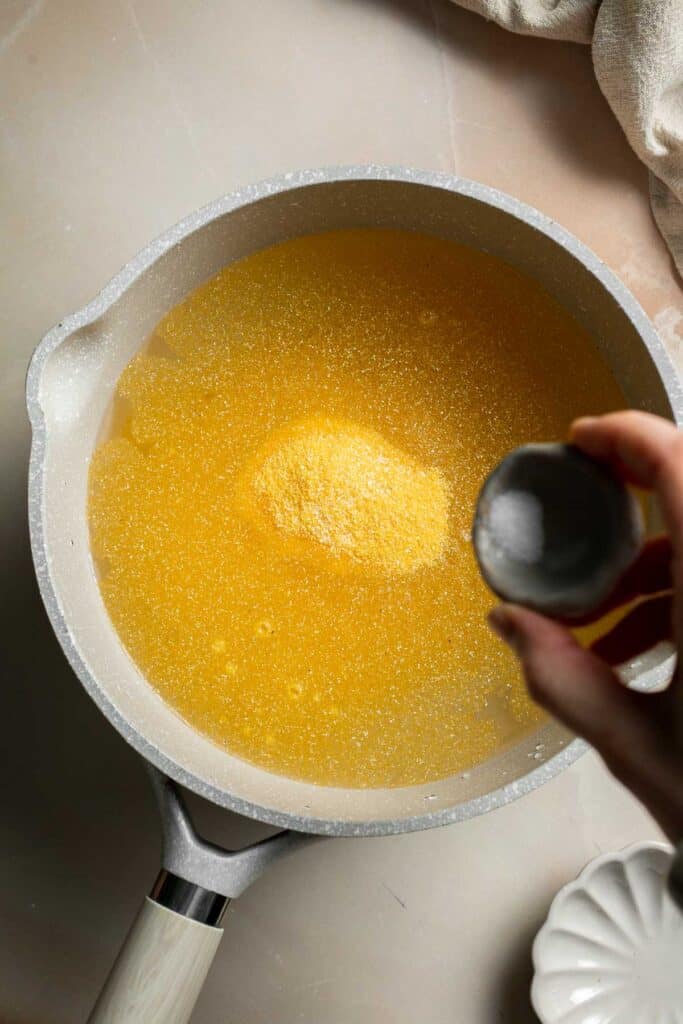
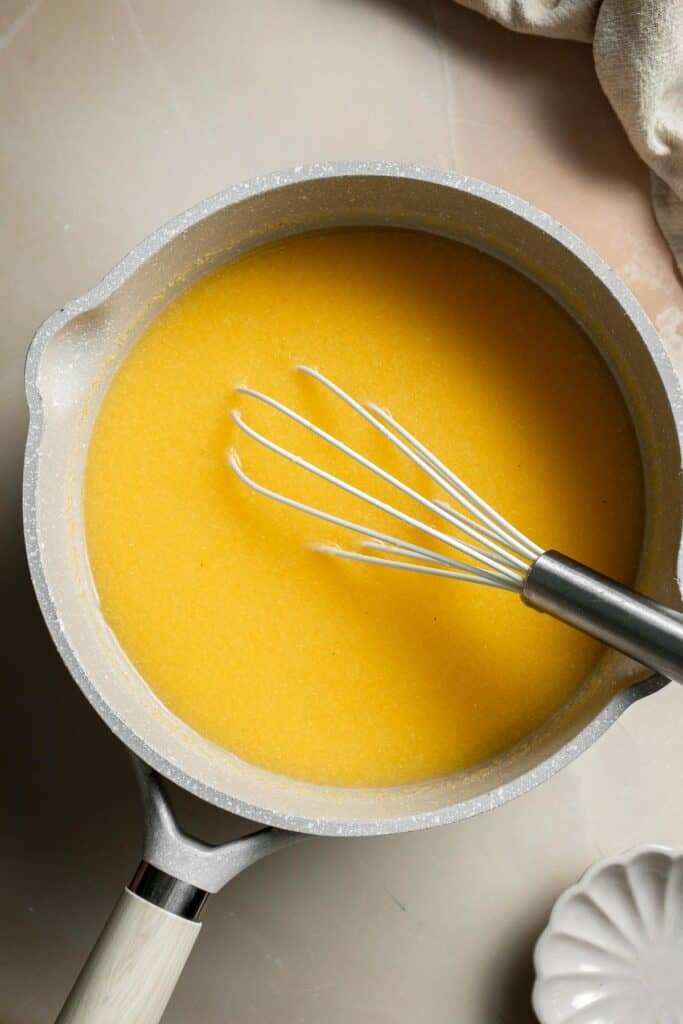
- Adjust thickness. Adjust the thickness by adding extra ½ cup of water at a time and stirring until smooth. Make sure to scrape the bottom of the pot often with a whisk to prevent the polenta grains from scorching during cooking.
- Add butter and Parmesan. Turn off the heat and stir in butter. Stir in Parmesan cheese until combined. Serve immediately.
Recipe Variations
- Make it vegan. Replace the cheese with dairy-free parmesan and use butter-flavored shortening instead.
- Infuse with extra flavor. Swap the water with vegetable or chicken stock for an even richer flavor. You can also add different spices and seasonings, like black pepper, smoked paprika, or even a little nutmeg.
- Cheese it up. For a really creamy cheesy polenta, feel free to add more Parmesan cheese.
How to Serve
This Creamy Polenta is delicious served as a side in place of rice of pasta. Some of my favorite entrees to pair this with are:
- Instant Pot Short Ribs
- Garlic Butter Shrimp
- Chicken Meatballs
- Ratatouille
- Greek Salmon
- Instant Pot Osso Buco
Recipe Tips and Tricks
- Use the right cornmeal. Not all types of cornmeal are the same. For perfect polenta, you generally want to use medium to coarse-grind cornmeal, which have larger sized pieces. Fine cornmeal or cornflour can make the mixture pasty and gluey, which is not pleasant to eat.
- Stir often. Those fine grains of cornmeal are prone to sticking to the pan and burning if you don't stir almost constantly. Polenta requires a bit of patience and attention, but it's worth it.
- Season well. Salt will bring out the flavor of the cornmeal and make your polenta taste more like a main dish than a side. Taste it often and continue to season as it cooks.
Storing and Freezing Instructions
How to Store
Store leftover polenta in an airtight container in the fridge for 3-4 days. As it cools, it will thicken and turn firm. If you want to use the leftovers to make polenta cakes or fries, store the leftovers in a square pan or dish for even cutting. If you prefer soft polenta, store it in whichever container you prefer.
How to Reheat
Slice and panfry the thickened polenta as polenta cakes or warm it over the stove with extra water or stock until it softens again.
How to Freeze
To freeze your homemade polenta, it's best to cut the polenta into thick slices, wrap them with plastic wrap, and freeze for up to 3 months. Thaw in the fridge before reheating.
FAQ
Polenta and grits are more alike than they are different, but there are some key differences to note. First, grits are made from ground white corn or hominy, which is cooked into a cornmeal mush for a popular breakfast or side in the American South. Polenta is a traditional Italian dish from northern Italy made from coarse yellow cornmeal, which is cooked until either smooth and creamy or until it sets firm, which can then be sliced into rounds for frying. Both are delicious in their own ways!
We're generally aware of two types of polenta: the plastic-wrapped tubes of firm polenta, often sliced and served as polenta cakes, and the soft, creamy polenta nestled under roasted meats and veggies. Creamy polenta can be reheated, but the natural corn starch in the cornmeal will cause it to thicken and gel in the fridge. To bring it back to a soft, creamy texture, warm it on the stove with extra water or chicken broth, similar to reheating oatmeal. Or, slice it into thick rounds to panfry polenta fries or cakes. You get the best of both worlds!
If you're struggling with lumpy polenta, the secret is constant stirring. You can even stir the water before adding the yellow cornmeal to help separate the grains and minimize clumping. As it cooks, stir constantly and you should have perfect polenta with a smooth consistency every time.
More Recipes with Cornmeal
- Cornmeal Cheddar Biscuits
- Buttermilk Cornbread
- Cornbread Muffins
- Corn Casserole
- Rosemary Cornbread
- Pepperoni Pizza Rolls
Tried this recipe?
I'd love to hear what you think! Leave a comment and rating below to share your feedback. Your reviews help others discover this recipe and help me keep creating more free recipes for you. Snap a photo and tag me on social media @aheadofthyme too.

Samoas Cookies
Homemade Samoas Cookies (aka Caramel deLites) have a buttery shortbread base, gooey coconut caramel topping, and melted chocolate drizzle. They're buttery and crumbly yet soft and chewy with a freshly made flavor that blows the original out of the water. Keep a stash in the freezer to satisfy your cravings long after Girl Scout cookie season ends!
Samoas are my all-time favorite Girl Scout cookie, and I always buy a few boxes to support my local troop. But if you want to enjoy that caramel chocolate goodness any time of the year, you'll need this recipe! The flavor is so much fresher than the original, and they're honestly quite relaxing to make. I love cutting out the dough, molding the caramel, and dunking the cookies in melted chocolate. Just be careful - you'll want to eat them all at once!
Why You'll Love These Samoas Cookies
- Spot on flavor. Samoas are iconic cookies. You have to get just the right balance of textures and flavors to even dare compare them to the classic! I promise these copycat cookies taste like the real thing - if not better!
- Enjoy any time of year. When you make your own Samoas at home, you can enjoy them longer after your stash of cookies runs out. "Cookie season" is now officially any season!
- Control the quality. No offense to the Girl Scouts, but their favorite cookies are quite processed and contain several preservatives and stabilizers to keep their quality consistent. Make your own at home to make them to your standards!
Ingredient Notes
To make these delicious Samoas Cookies, you will need the following ingredients (full measurements in recipe card below):
- all purpose flour
- unsalted butter - make sure the butter is completely softened to room temperature to get the best crunch and crumble.
- salt
- vanilla extract
- confectioners' sugar - for just enough sweetness.
- baking powder - this will help the shortbread cookies rise just a little bit and get the perfect crunch.
- shredded coconut - use sweetened coconut for the right amount of sweetness. Use unsweetened if you want it less sweet.
- store-bought caramels - like Kraft caramels or Werthers chewy caramels. You'll need to unwrap each one, which I like to do in front of the TV.
- heavy cream - to soften the rich caramel layer just a bit.
- semi-sweet chocolate - finely chopped.
- coconut oil - to help turn the chocolate into a crisp shell-like coating.

Baking Tools
You will also need the following baking tools and equipment:
- measuring cups and spoons
- 2 large baking sheets
- parchment paper
- mixing bowls
- electric hand mixer
- spoon
- rolling pin
- 3-inch round cookie cutter
- one-inch cookie cutter
- wire rack
How to Make the Best Samoas Cookies
First, make the shortbread cookie base.
- Cream butter. In a large mixing bowl, add the butter, salt, and vanilla, and beat together with a electric hand mixer until smooth and creamy. Add in the confectioners' sugar, then continue to beat for 3-4 minutes, or until pale and fluffy.


- Add dry ingredients. Add in the baking powder. Spoon in the flour in increments while you continue to mix the batter with the hand mixer. Once all the flour has been fully mixed in, the batter should look slightly dry and slightly crumbly. Use your hands to bring it into a dough ball.


- Roll dough. Place the cookie dough ball onto a piece of parchment, flatten lightly, then place another piece of parchment on top. Use a rolling pin to roll the dough out to be about ¼-inch thick. Transfer to the fridge to cool for at least an hour or overnight.
- Cut cookies. Use a 3-inch round cookie cutter, alongside a 1-inch round cookie cutter, to cut out donut-shaped cookies out of the dough. Place the cut out cookies onto 2 large baking sheets lined with parchment paper (or work in batches with one sheet pan).


- Bake. Place the cookies into a 350F preheated oven to bake for 8-10 minutes. Allow to cool for 5 minutes, then transfer to a wire rack to fully cool.


Next, make the caramel coconut layer.
- Toast the coconut. Spread coconut onto one of the previously used baking sheets. Place into the 350F preheated oven to toast until evenly golden, about 10 minutes, stirring every 2 minutes to ensure even toasting. Set aside to cool while you prepare the caramel.


- Melt caramels. In a medium saucepan, add the caramels, heavy cream, and salt. Heat over medium-low heat, while stirring occasionally, until caramel is fully melted and incorporated with the cream, and is the mixture is lightly bubbling.
- Divide. Remove from the heat, then divide the caramel by pouring half into a separate bowl. Add the toasted coconut to one of the caramel halves, and fold together until completely incorporated.


Assemble the cookies.
- Assemble. Working quickly so the caramel sauce does not harden, use an offset spatula to spread a thin layer of the remaining caramel sauce onto each cookie, then use your hands to top each cookie with caramel-coconut mixture. Note: if the caramel does harden too much, you can microwave it for about 10 seconds to reliquefy it.


- Cool. Allow the cookies to cool fully so that the coconut caramel layer adheres properly to the shortbread base. About 1-2 hours.
Finally, add the chocolate layer.
- Melt chocolate. When cookies are fully cooled, add chocolate and coconut oil to a microwave-safe bowl, then place into the microwave then microwave in 30 second intervals, until fully melted and smooth.
- Dip. Dip the bottom of each cookie into the melted chocolate, then place onto a parchment lined baking sheet.
- Drizzle. After all of the cookies have been dipped, pour the remaining chocolate into a squeeze bottle or piping bag, then drizzle chocolate over top of the coconut caramel layer on each cookie.


- Rest. Allow the chocolate to fully harden before enjoying!


Recipe Variations
- Use dark chocolate chips. Semi-sweet chocolate is already pretty dark, but you can go even darker if you prefer. Since the cookies are so sweet, they can handle a little extra bitterness.
- Try flavored caramels. These days, you can buy lots of different flavors of caramel chews at the grocery store, like pumpkin spice, caramel apple, etc. It'd be fun to try different flavors for the holidays!
- Change the shape. When you make your own homemade Samoas, you can adjust the shape however you'd like. Instead of rounds, try cutting the cookie dough into thin strips or squares. No cookie cutter needed!
How to Serve
These Samoas Cookies are delicious served on their own as a sweet treat or snack. It is especially good paired with a hot drink like warm milk, tea, or coffee. Some of our favorite drinks to serve with these cookies are:
- Easy Peppermint Hot Chocolate
- Golden Milk Turmeric Latte
- Chai Tea Latte
- Slow Cooker Apple Cider
- White Hot Chocolate
- Matcha Latte

Recipe Tips and Tricks
- Be patient. Every component of this recipe requires a little patience. The butter must be perfectly softened, the cookies need to cool, and the caramel needs time to solidify. Give yourself time to make this copycat recipe just right and try not to rush!
- Watch the caramel. Even though this recipe uses storebought caramel, it's possible to overcook it or let it firm up too much. If the caramel is too thick, it can snap the cookies and be difficult to use. If needed, microwave the caramel mixture for 10 seconds or so to help soften it up.
- Wet your hands. Dampen your hands before placing the coconut caramel mixture on top of the cookies to keep it from sticking.
Storing and Freezing Instructions
How to Store
Store any leftover Samoa cookies in an airtight container at room temperature for 4-5 days, but I like to keep them in the fridge for a chewier bite. They also last a little bit longer, too.
How to Freeze
If you're going through the effort to make these cookies, you should certainly tuck some into the freezer for later! They freeze very well, and I enjoy eating them straight from the freezer. They're hard and chewy in all the right ways. If you prefer them a little softer, place them on a plate at room temperature for about 10 minutes then serve.
FAQ
Samoa cookies are one of the most popular Girl Scout cookies ever due to their crumbly, buttery shortbread cookie base, caramel coconut layer, and melted chocolate base and drizzle. They're buttery, chewy, sweet, and rich, and it's impossible not to love them!
Two companies bake Girl Scout cookies: Little Brownie Bakers (Samoas) and ABC Bakers (Caramel deLites), and the name depends on the manufacturer. There are some subtle differences between the end product, too. Although each cookie follows the same general recipe, Caramel Delites usually have slightly taller cookies.
The only source of gluten in this recipe comes from flour, which is a crucial component in the cookie base. You can try using a 1:1 gluten-free flour replacement, but bear in mind that the cookies may be more delicate and crumbly (not necessarily a bad thing).
More Cookie Recipes with Chocolate
- 50 Best Cookie Recipes
- Coconut Macaroons
- Chocolate Thumbprint Cookies
- Chocolate Crinkle Cookies
- Hot Chocolate Cookies
- Chocolate-Dipped Shortbread Heart Cookies
Tried this recipe?
I'd love to hear what you think! Leave a comment and rating below to share your feedback. Your reviews help others discover this recipe and help me keep creating more free recipes for you. Snap a photo and tag me on social media @aheadofthyme too.

Maple Cookies
Soft, buttery and, chewy in all the right ways, these sweet Maple Cookies are about to be the only cookie you want to make this fall. They're made with real maple syrup, maple extract, and a maple glaze for a potent punch of maple flavor in every bite. Plus, they require no chilling so you can bake and serve in about 30 minutes. What's not to love?

These soft maple brown sugar cookies are a true celebration of the season's most iconic flavor. They're golden brown on the outside with chewy centers enriched with several layers of rich maple flavor. They're just sweet enough and pair perfectly with a hot cup of coffee or your favorite Chai Tea Latte. Serve them at Thanksgiving, alongside your favorite Christmas cookies, or just because. They're absolutely irresistible!
Why You'll Love These Maple Cookies
- Quick to make. This is a super simple recipe that requires basically three steps. Mix the dry ingredients together, mix the wet, then combine the two and bake. Making maple brown sugar cookies is very simple, requires no resting in the fridge, and can be served as soon as the glaze sets!
- Iconic fall flavor. Fall and winter baking tend to rely heavily on apple, pumpkin spice, nuts, and orange. Although they're all great on their own, maple syrup is such a distinct, traditional flavor that deserves extra special attention. It fits right alongside the more popular options and is the perfect cookie for fall.
- Soft, chewy, and tender. The butter, brown sugar, and cornstarch gives these maple syrup cookies crisp edges and the most perfectly chewy centers. You'll want to nibble through way through them to savor every bite!
Ingredient Notes
To make these delicious Maple Cookies, you will need the following ingredients (full measurements in recipe card below):
- all purpose flour - it's very important that you use just the right amount of flour. Scoop the flour into your measuring cup and level it before adding it to the dough.
- cornstarch - to absorb extra moisture and make the cookies extra tender.
- baking powder - always use fresh, active baking powder and baking soda. It helps to sift them first, too.
- baking soda
- salt
- unsalted butter - fully softened at room temperature.
- light brown sugar - for a soft, chewy texture and rich, sweet flavor.
- egg
- dark maple syrup - this may also be called Grade B syrup, depending on where you live. Only use pure maple syrup for the best results.
- vanilla extract
- maple extract - this adds an extra boost of maple flavor to complement the syrup.
- maple butter glaze - the easy glaze comes together quickly with melted butter, dark maple syrup, vanilla extract, confectioners's sugar, and milk. Use milk to thin the glaze to your desired consistency.
You will also need measuring cups and spoons, mixing bowls, electric mixer, small cookie scoop, baking sheets, and wire cooling rack.

How to Make the Best Maple Cookies
First, make the maple cookies.
- Combine dry ingredients. In a medium to large sized mixing bowl, whisk together the flour, cornstarch, baking soda, baking powder, and salt, until well-combined. Set aside.
- Combine wet ingredients. In a large mixing bowl, add butter and brown sugar, then beat with an electric hand-mixer until light and fluffy looking, around 3 minutes. Add in the egg, maple syrup, vanilla and maple extract, then beat again until well-combined, smooth, and fluffy, about 1-2 minutes.
- Add dry to wet. Add the dry mixture into the wet, then beat together until fully-combined.


- Scoop cookies. Prepare 2 baking sheets with parchment paper. Using a small cookie scoop, scoop out the maple cookies, then place onto the prepared baking sheets, ensuring 2-inch between each cookie.
- Bake. Place into a 350F preheated oven to bake for 9 minutes. Remove the cookies from the oven, allow to cool for 5 minutes, then transfer to a cooling rack to fully cool before glazing.


Then, make the maple butter glaze.
In a small mixing bowl, whisk together the melted butter, maple syrup, vanilla, maple extract, confectioners' sugar, and milk until smooth. Use a spoon to drizzle the glaze over the cooled cookies. Allow the glaze to set before enjoying.

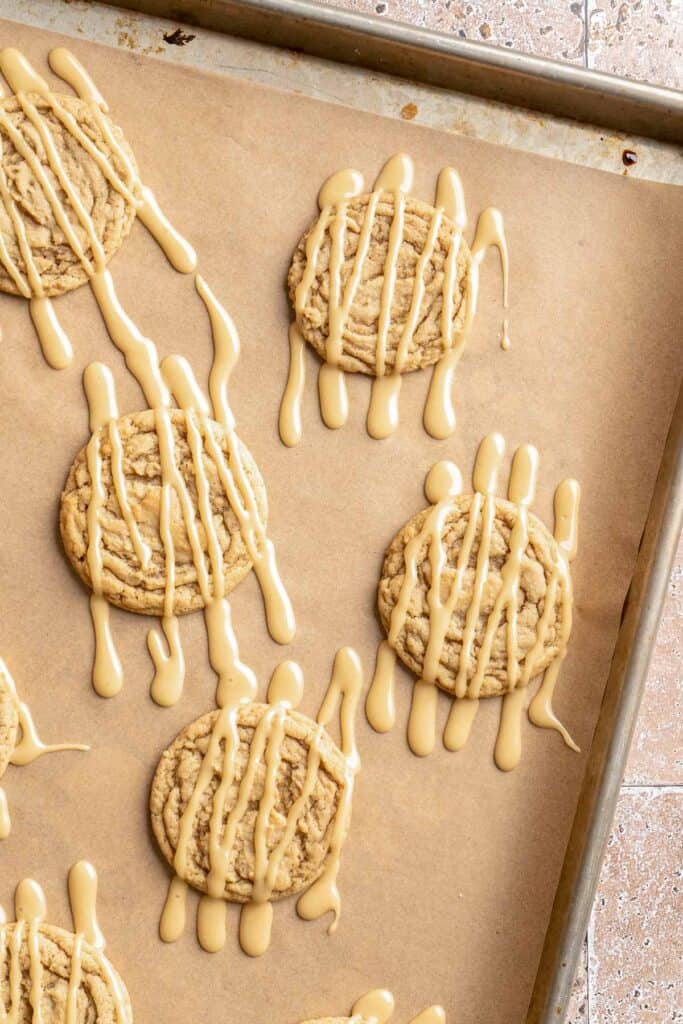
Recipe Variations
- Add some spices. To play up with rich fall flavors, add some cinnamon, apple pie spice, or even a little cardamom for an aromatic note.
- Add salt. Just like salted caramel, maple pairs wonderfully with a little salt to balance the sweetness and bring out the flavor. Try adding a pinch of salt to the butter for the maple icing or use melted salted butter. You can also sprinkle some flaked salt on top for serving.
- Skip the glaze. Instead of drizzling each one with the glaze, sprinkle or roll them with cinnamon sugar for a crunchy bite.
How to Serve
These Maple Cookies are delicious served on their own, or paired with a hot drink including:
- Chai Tea Latte
- Pumpkin Spice Latte
- Slow Cooker Apple Cider
- Peppermint Hot Chocolate
- Golden Milk Turmeric Latte
- Matcha Latte
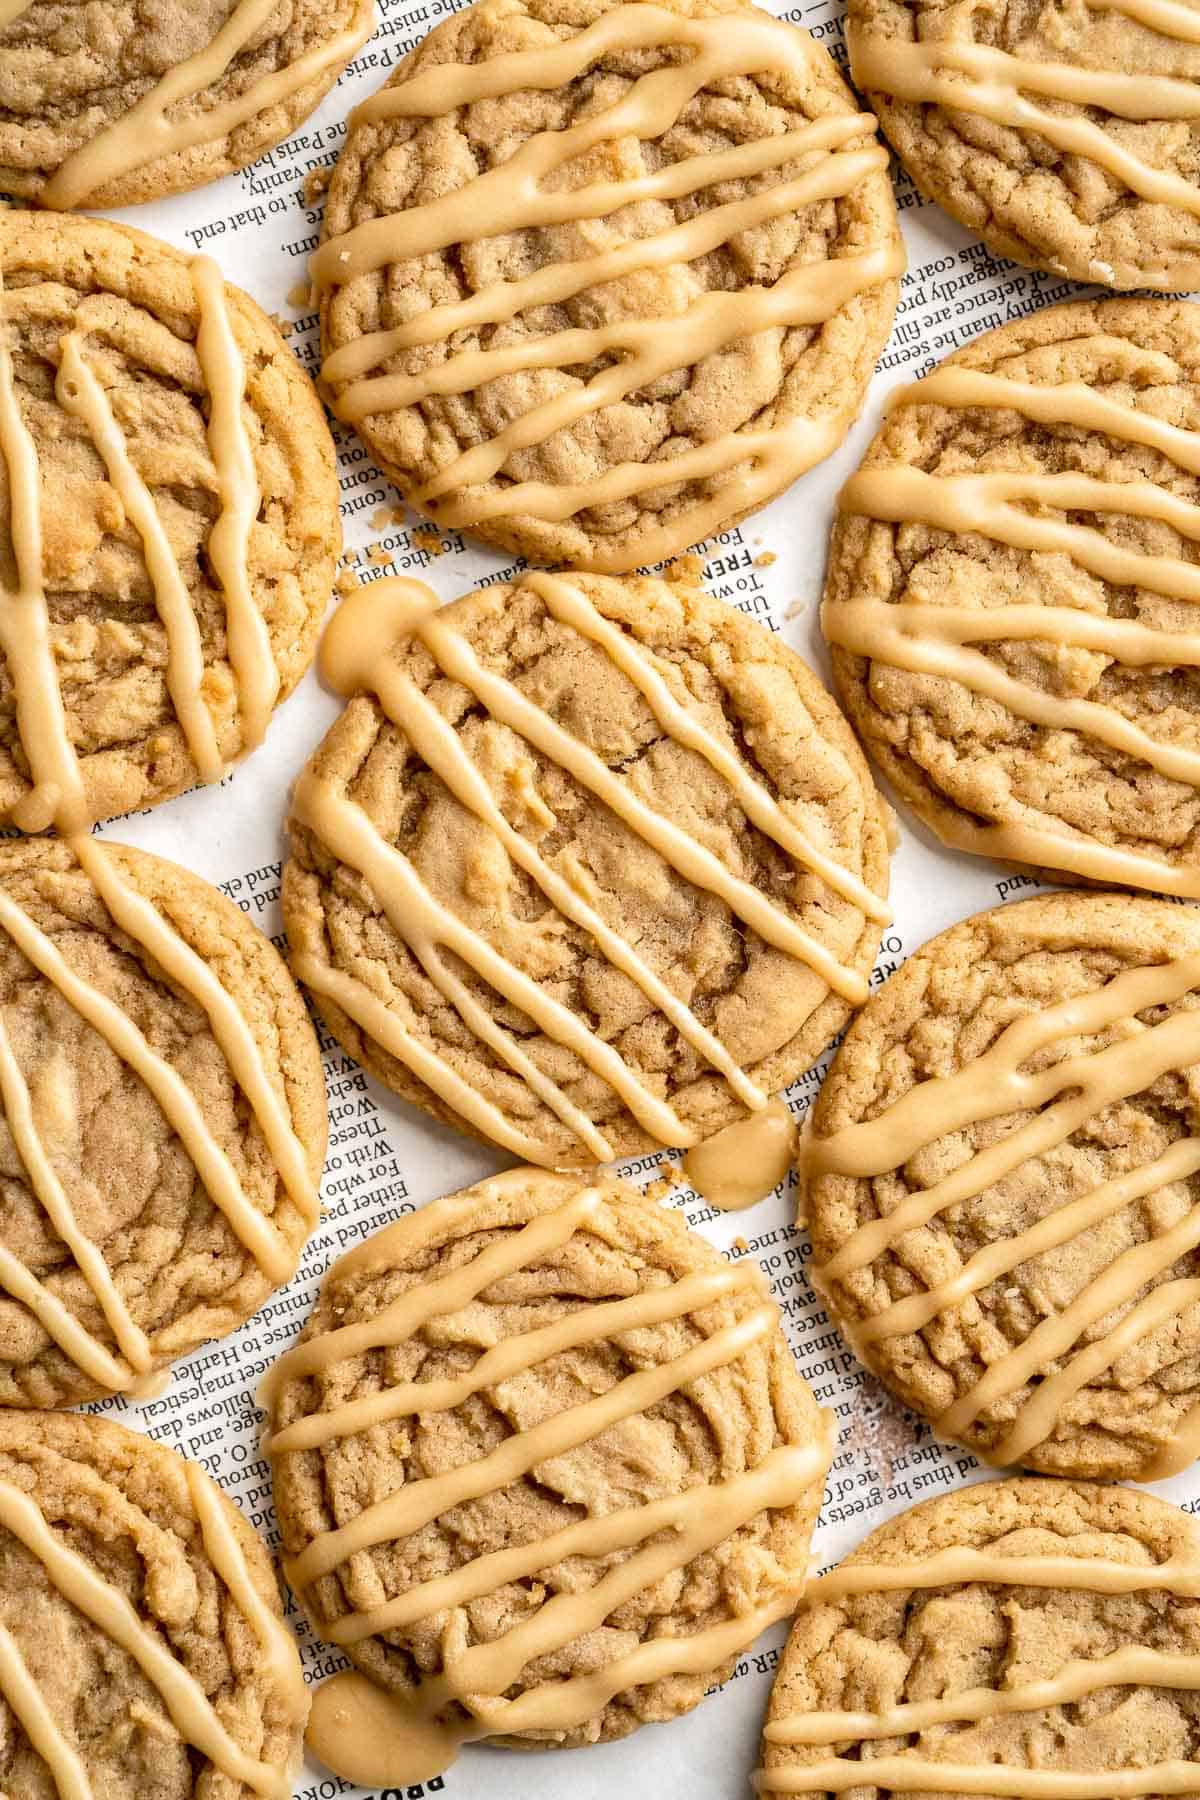
Recipe Tips and Tricks
- Use real maple syrup. If you only have that corn syrup-laden breakfast syrup in your fridge, skip it and get the good stuff. It's pricier, but the flavor difference is night and day.
- Cool on the tray. This recipe calls for letting the freshly baked cookies rest for a solid 5 minutes on the hot cookie sheet before moving them to a wire rack. This is crucial because it allows the soft, chewy cookies to firm up just enough without becoming too firm.
- Don't overmix. You want the flour mixture and wet ingredients to just come together. Overmixing can cause them to become dense and flat. Less is more.
Storing and Freezing Instructions
How to Store
Store leftover cookies in an airtight container at room temperature for 3-5 days. If glazed, it's best to store them in the fridge as the glaze contains dairy. They're best at room temperature, so let them warm up on a plate at room temperature before serving.
How to Freeze
Feel free to freeze leftover baked cookies or the cookie dough! Baked cookies can be tucked into a freezer-safe bag and stored for about 3 months. Raw cookie dough balls can be frozen on a prepared baking sheet, then transferred to a freezer-safe container. Let them thaw in the fridge before baking like normal.
FAQ
This maple cookie recipe gets an extra dose of maple flavor by using dark maple syrup (also called Grade B or robust maple syrup). It has a darker, richer flavor, which stands out against the sweetness of light brown sugar. If you were to use Grade A or amber maple syrup, you would still get a nice flavor, but it would be more subtle.
Yes, but you don't want to add too many and weigh down the dough. I'd recommend sticking with add-ins that complement the maple flavor, like chopped pecans or walnuts, dark chocolate chips, or even cinnamon chips.
Maple leaf cookies require a dryer, more shortbread-like cookie to roll out and keep its shape after baking. These chewy maple cookies spread in the oven and would not be a good fit.
More Soft and Chewy Cookie Recipes
- 50 Best Cookie Recipes
- Date Cookies
- Chai Cookies
- Eggnog Cookies
- Chocolate Ginger Cookies
- Cream Cheese Cookies
Tried this recipe?
I'd love to hear what you think! Leave a comment and rating below to share your feedback. Your reviews help others discover this recipe and help me keep creating more free recipes for you. Snap a photo and tag me on social media @aheadofthyme too.

Coffee Cake Cookies
Coffee Cake Cookies combine a soft, cinnamon cookie base with a crumbly streusel topping and a drizzle of sweet glaze. Each bite captures the cozy, buttery flavors of classic coffee cake, but in a fun, portable cookie form. Perfect for breakfast, dessert, or sharing at your next cookie exchange, these cookies are guaranteed to be a hit!
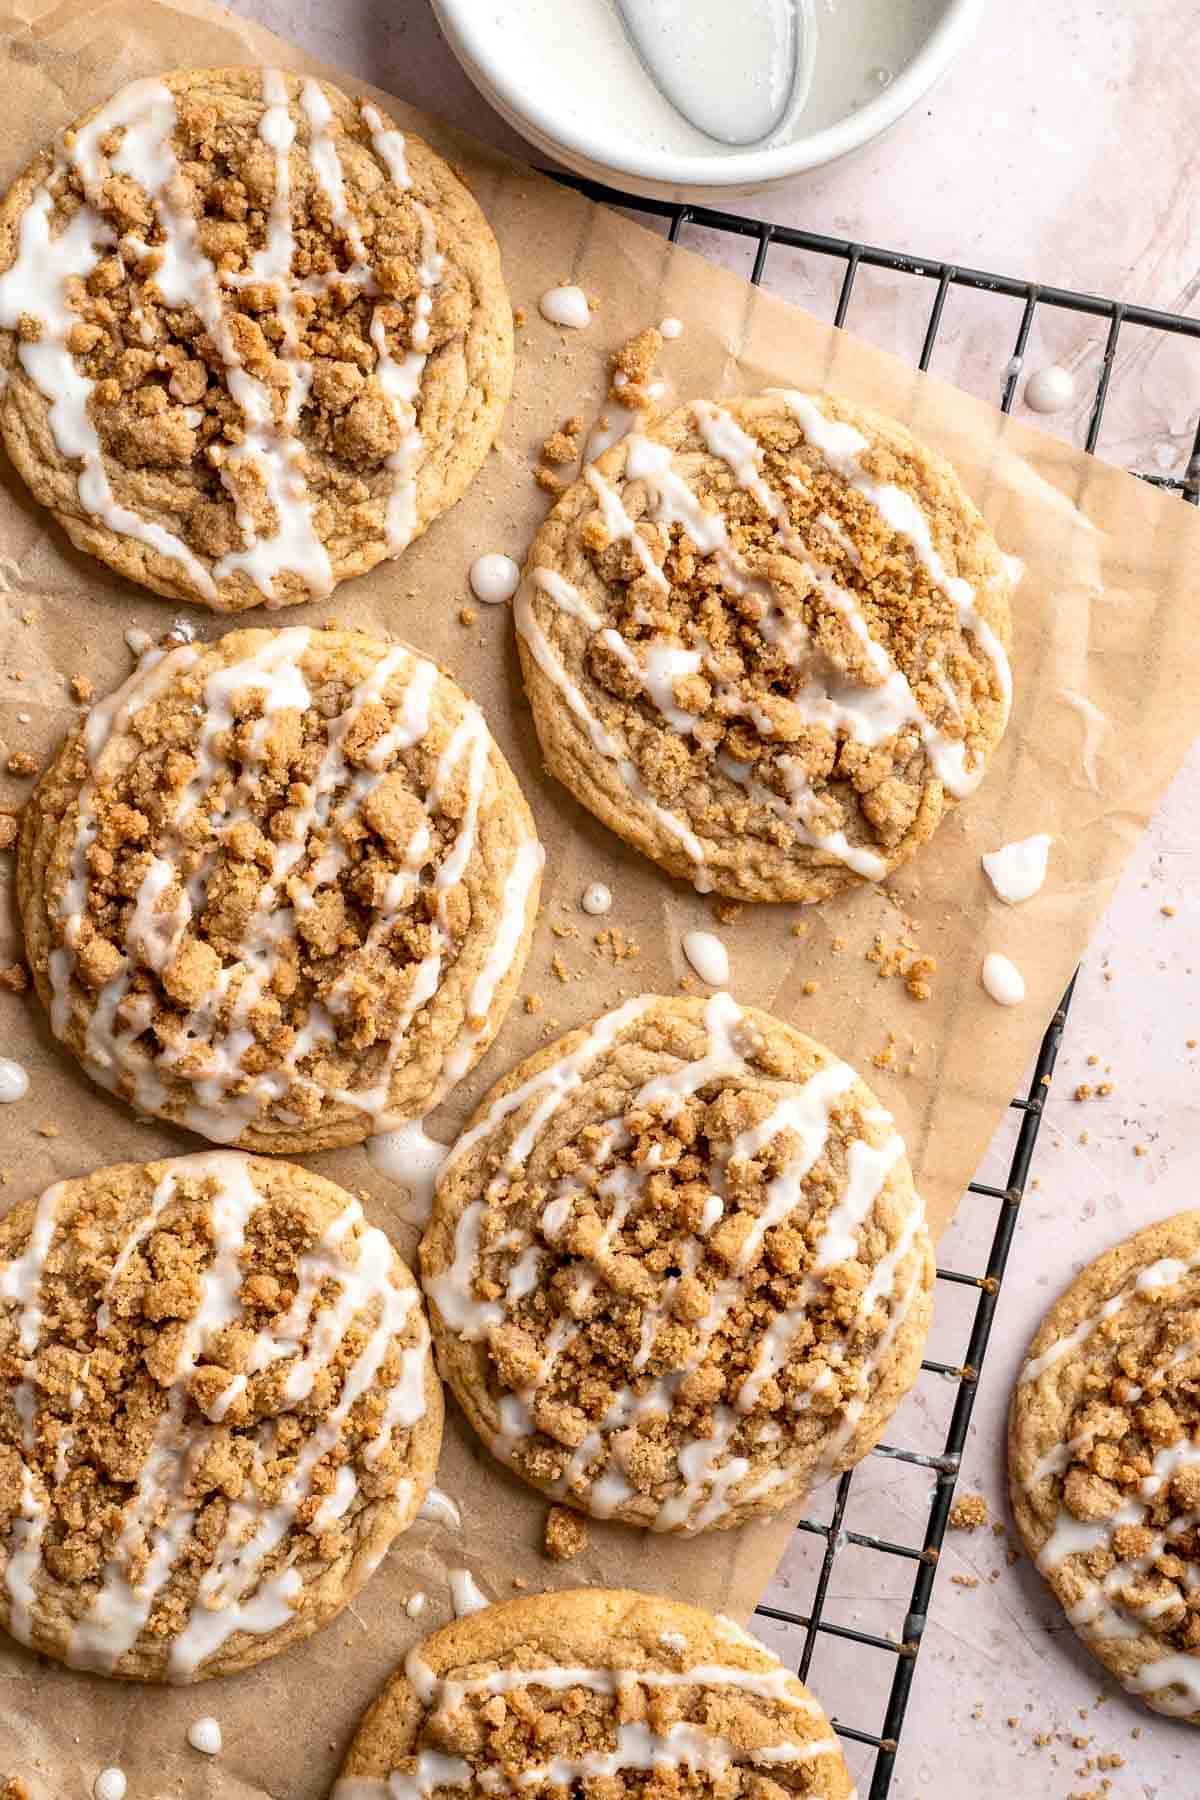
I've always had a soft spot for coffee cake. That buttery crumb topping and the warm spice of cinnamon feel like a comforting hug on a plate. But there is just something about enjoying all the same flavors of your favorite desserts in cookie form - like these Pecan Pie Cookies or Cinnamon Roll Cookies. They're perfect for mornings with a cup of coffee, wrapping up in a holiday cookie box, or sneaking a late-night treat. Bonus: They're easy enough to make on a weekday but special enough to impress guests. Save this recipe because you'll keep coming back to it!
Why You'll Love These Coffee Cake Cookies
- Coffee cake flavor in cookie form. If you adore classic coffee cake, these cookies deliver the same warm, buttery flavors in a fun, handheld treat. Skip the hassle of slicing and serving a whole cake - just grab a cookie and enjoy!
- Perfect for any occasion. With their nostalgic cinnamon-spiced crumb topping and sweet glaze, these cookies are great for everything from holiday brunches to afternoon coffee breaks. They're also a crowd-pleaser for cookie exchanges or dessert tables.
- Soft, buttery texture. The cookie base is tender and pillowy, pairing perfectly with the crumbly streusel topping. And don't forget the glaze - it adds just the right touch of sweetness to balance the spiced flavors.

Ingredient Notes
To make these delicious Pecan Pie Cookies, you will need the following ingredients (full measurements in recipe card below):
- all purpose flour - for the cookies and streusel topping.
- cinnamon - you need this classic fall spice in both the cake and streusel topping.
- baking powder + soda - this recipe calls for two leavening agents to help the cookies puff up nicely.
- butter - you need melted butter for the cookies to give them a chewy texture and buttery flavor. You also need melted butter for the streusel topping.
- sugar - you will need both light brown sugar and white sugar in the cookies and streusel topping. You will need confectioners' sugar for the glaze.
- eggs - to help bind the cookies.
- vanilla extract
- milk - a little milk for the glaze.
You will also need measuring cups and spoons, baking sheets, parchment paper, several mixing bowls, a whisk, a spatula, a small cookie scoop, a wire rack, one tablespoon measuring spoon (for making the wells to hold the filling), and a medium saucepan.
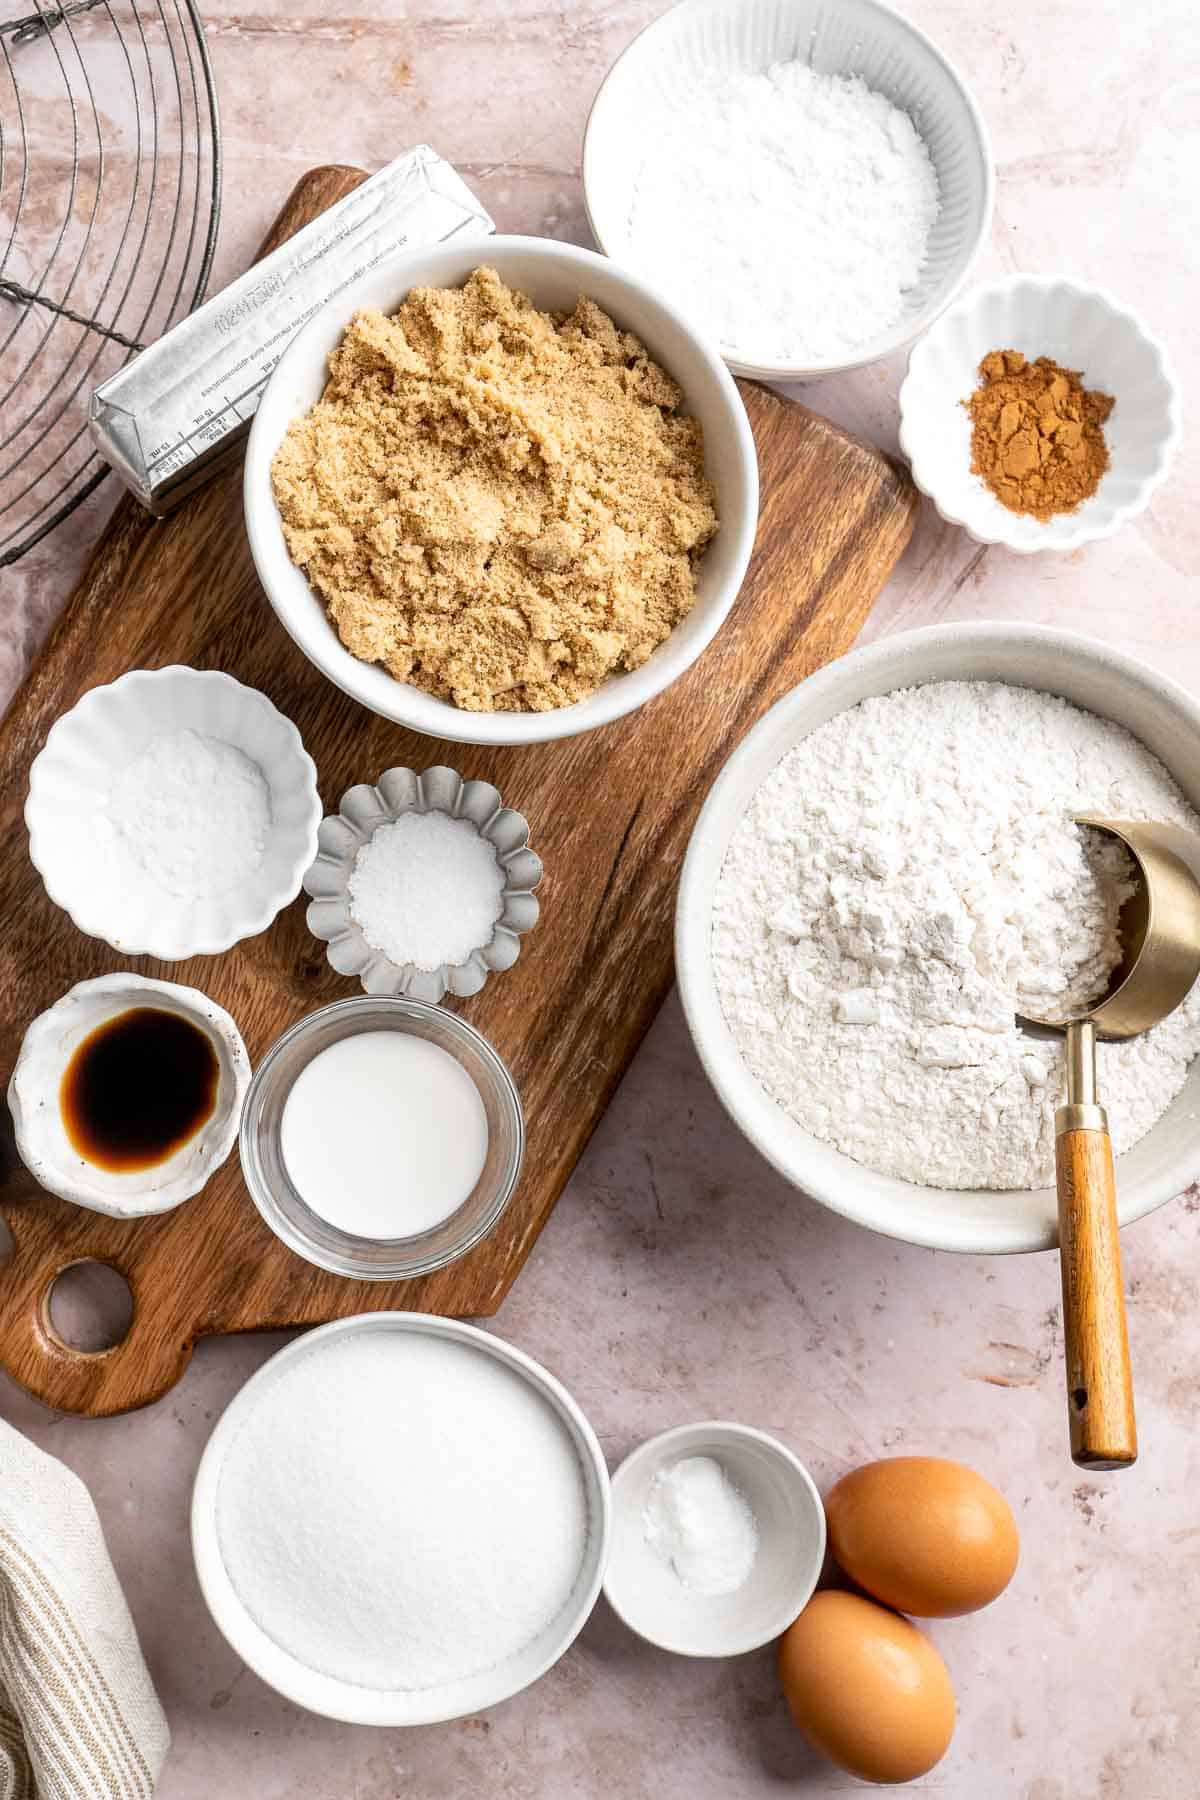
How to Make the Best Coffee Cake Cookies
Make the cinnamon cookies.
- Combine dry ingredients. In a medium to large sized mixing bowl, whisk together the flour, cinnamon, baking soda, baking powder, and salt, until well-combined. Set aside.
- Combine wet ingredients. In a large mixing bowl, whisk together the melted butter, brown sugar, white sugar, egg, and vanilla, until very smooth and well-combined.
- Add dry to wet. Add the dry mixture into the wet, then stir together until fully-combined. Set aside while you make the streusel.


Make the streusel topping.
In a medium mixing bowl, whisk together the flour, brown sugar, white sugar, cinnamon, and pinch of salt, then drizzle in the melted butter. Mix together until it resembles wet sand.
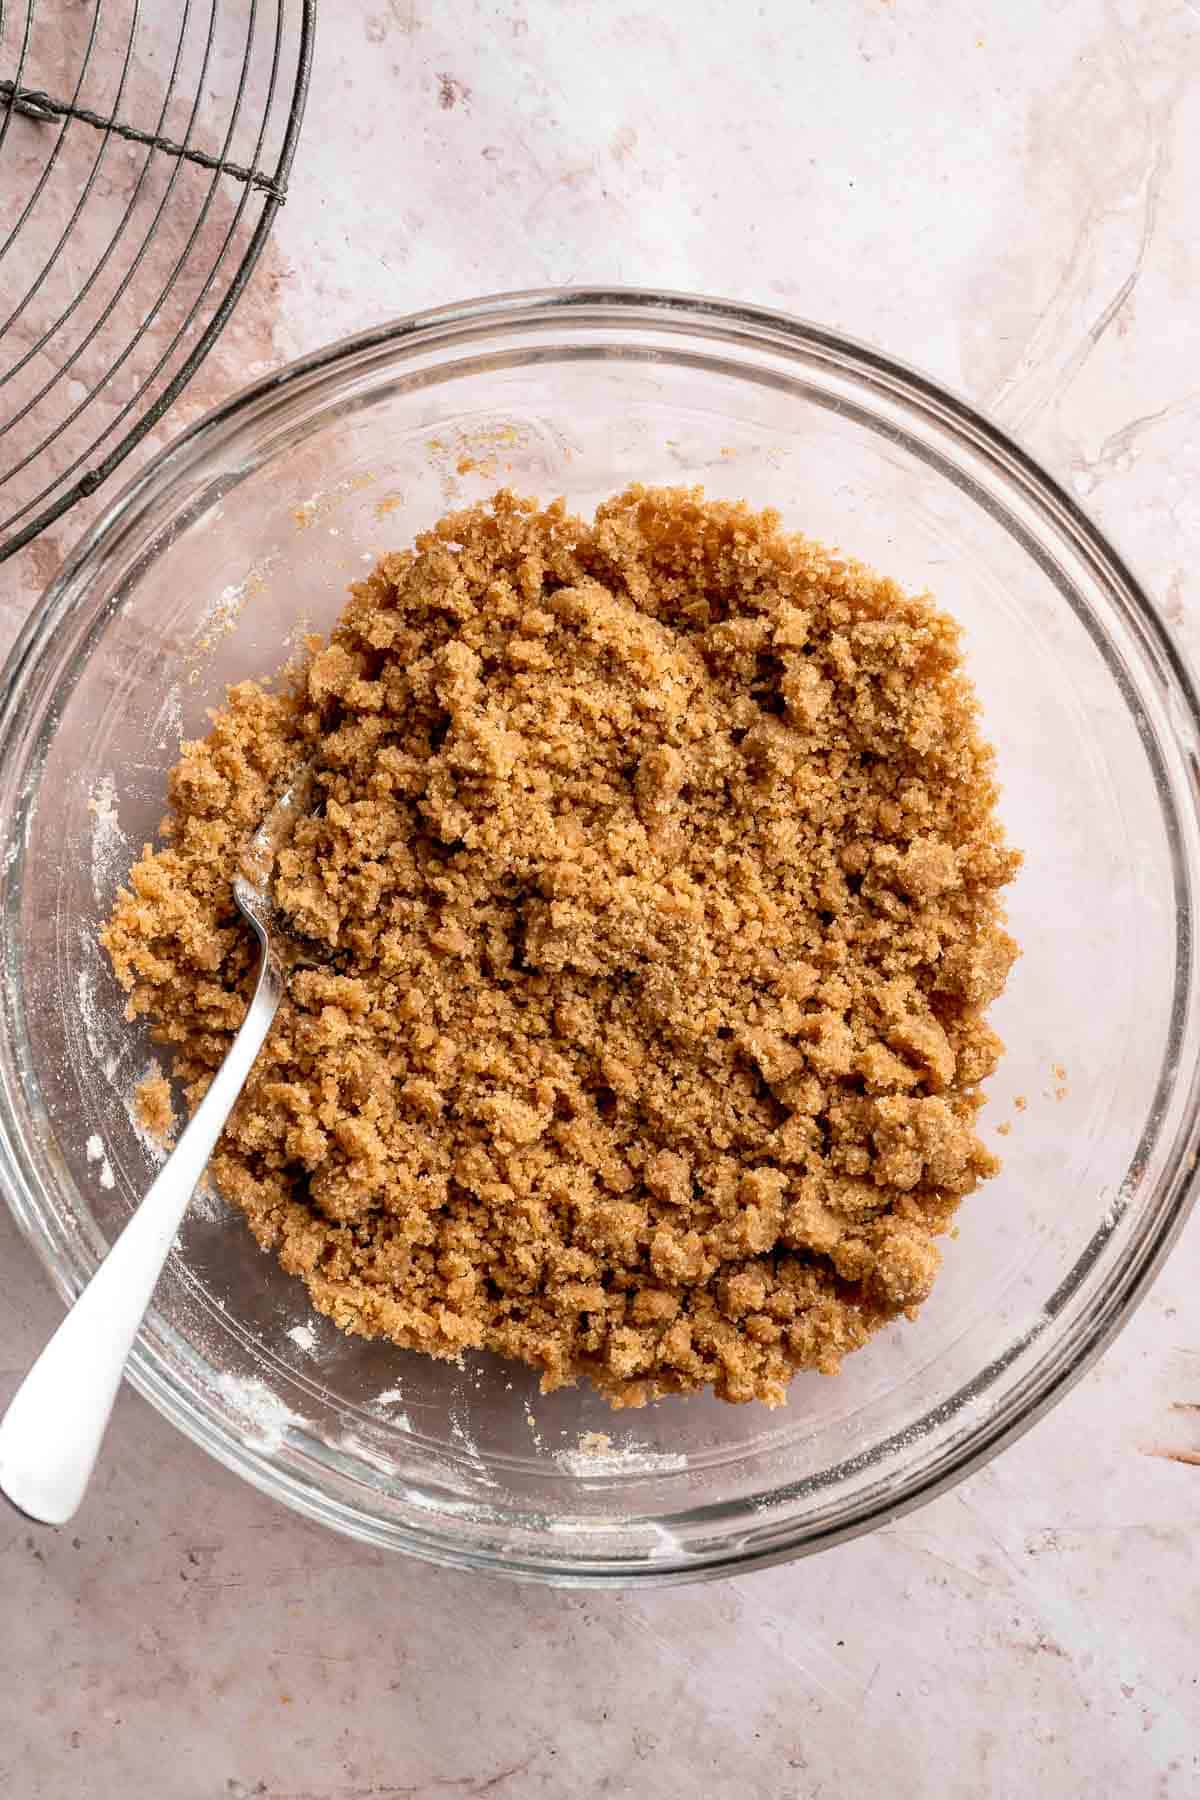
Assemble and bake.
- Scoop cookies. Prepare a baking sheet with parchment paper. Using a medium cookie scoop, scoop out the cinnamon cookies, then place onto the prepared baking sheet. Use your hands to slightly flatten the cookies.
- Add streusel. Press a heaping amount of streusel on top of each cookie.


- Chill. After all of the cookies have been assembled, place them into the freezer for 20 minutes.
- Bake. Prepare another baking sheet with parchment, then place 6 cookies onto baking sheet. Place into a 375F preheated oven to bake for 12-13 minutes. Repeat baking with remaining cookies, then allow cookies to cool completely on a wire rack before glazing.

Make the glaze.
In a small mixing bowl, whisk together the confectioners' sugar and milk until smooth. Use a spoon to drizzle the glaze over the cooled cookies. Allow glaze to set before enjoying.


Recipe Variations
- Add cinnamon chips. Mix cinnamon chips into the cookie dough for an extra burst of warm spice in every bite. These pair perfectly with the buttery cookie base and streusel topping.
- Use almond extract. Swap out the vanilla extract for almond extract to give the cookies a subtle nutty flavor that complements the crumbly topping beautifully.
- Make them fruity. Add a layer of fruit preserves, like raspberry or strawberry, under the streusel topping before baking. This twist turns your coffee cake cookies into a fruity, jam-filled delight!
- Top with nuts. Sprinkle chopped pecans, almonds, or walnuts over the streusel topping for added crunch and flavor.
- Try maple glaze. Instead of the classic powdered sugar glaze, drizzle the cookies with a maple syrup glaze for a cozy, fall-inspired touch.
How to Serve
These Coffee Cake Cookies are delicious served on their own as a snack or dessert, paired with a warm drink including:
They are also great served as part of a larger dessert spread with some other fall favorites. See our 50 Best Fall Desserts for more ideas.
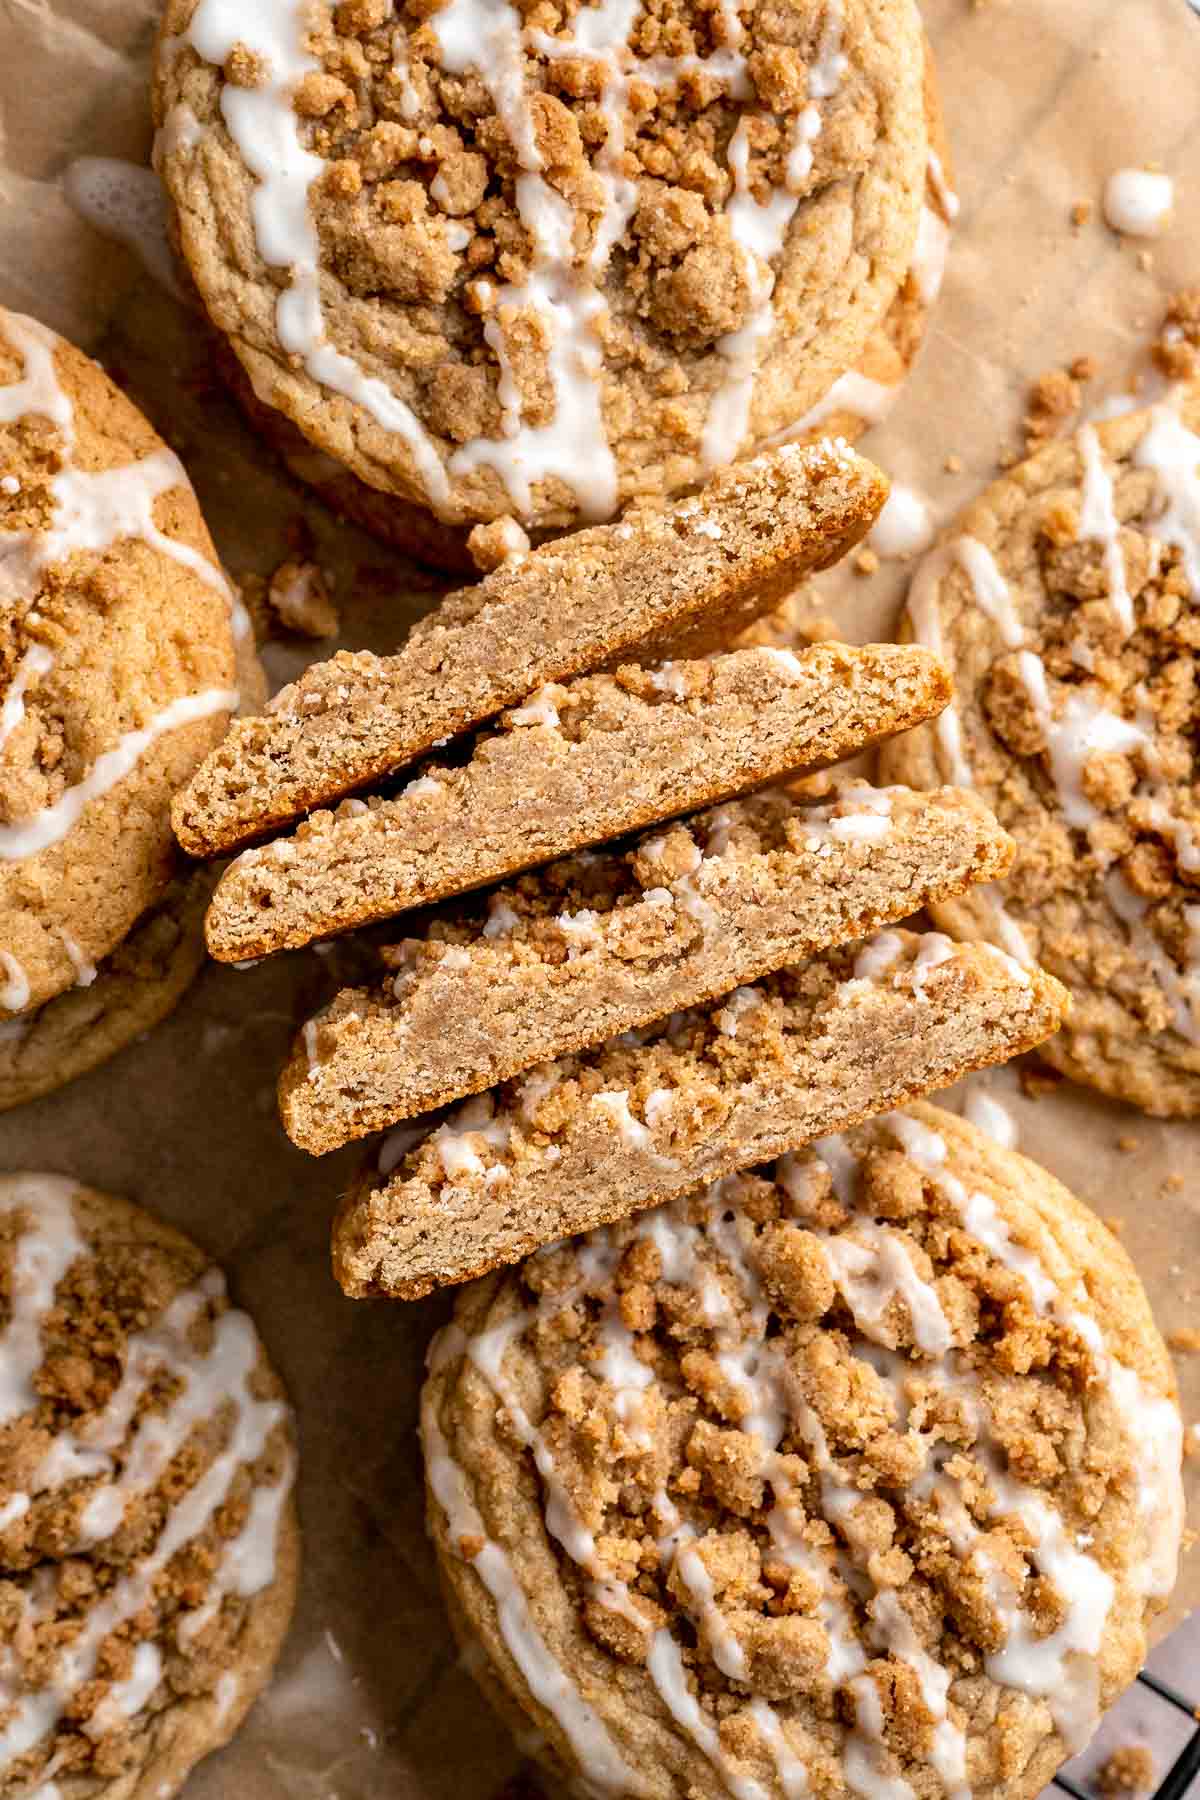
Recipe Tips and Tricks
- Chill the dough. Because these cookies have a buttery base, chilling the dough is key to keeping the cookies from spreading too much in the oven. You can even prep the dough a day in advance and let it chill overnight. So easy!
- Get the crumb topping just right. The streusel topping is what makes these cookies special, so make sure to mix it until it resembles coarse sand. If it clumps together, simply break it up with your fingers. Sprinkle generously for that signature coffee cake crumble!
- Bake with parchment paper. Using parchment or a silicone baking mat helps prevent sticking and ensures your cookies bake evenly without the bottoms browning too quickly.
- Glaze after cooling. The sweet glaze adds a finishing touch, but be sure the cookies are completely cooled before drizzling. Otherwise, the glaze might melt and slide off.
Storing and Freezing Instructions
How to Store
Store the cooled and glazed cookies in an airtight container at room temperature for up to 4 days. For easy storing (and to prevent a mess), store the cookies in muffin cups or layered with parchment paper.
How to Freeze
The baked cookies can be frozen in a single layer on a large baking sheet, then transfer them to a freezer bag or freezer-safe container and freeze for up to 3 months.
You can also freeze the unbaked cookie dough balls. Just prepare the cookie balls, freeze on a parchment lined baking sheet for 1-2 hours until hard, and transfer to a freezer bag or airtight container. When you're ready to bake, simply thaw the dough, add the streusel topping, and bake as usual.

FAQ
Yes! The streusel topping is what gives coffee cake cookies their signature texture and flavor. It's a mix of buttery, crumbly sweetness that perfectly complements the soft, tender cookie base. If you're in a pinch, you can skip the topping, but the cookies will lack that classic coffee cake vibe.
Yes, but moderation is key to maintain the structure of the cookies. Try mix-ins like chopped pecans, walnuts, or even dried fruit like raisins or cranberries to mimic the flavors of a traditional coffee cake. Avoid overly heavy add-ins that might overpower the delicate flavors.
Despite the name, coffee cake cookies typically don't contain coffee. They're inspired by the flavors of coffee cake, which is meant to pair with coffee, not taste like it. However, you can add a teaspoon of espresso powder to the dough or topping for a subtle coffee twist!
More Cookie Recipes with Cinnamon
- 50 Best Cookie Recipes
- Cinnamon Roll Cookies
- Snickerdoodles
- Chocolate Ginger Cookies
- Carrot Cake Cookies
- Gingerbread House
Tried this recipe?
I'd love to hear what you think! Leave a comment and rating below to share your feedback. Your reviews help others discover this recipe and help me keep creating more free recipes for you. Snap a photo and tag me on social media @aheadofthyme too.

Jam Thumbprint Cookies
Jam Thumbprint Cookies are soft and buttery, with a sweet and fruity filling, and a drizzle of almond glaze. This classic treat is made with a tender shortbread dough and a dollop of your favorite jam - it literally melts in your mouth! Even better, these cookies come together quickly and don't require fancy equipment or techniques. They're a perfect addition to any cookie platter or an easy way to sweeten up your day!
These buttery jam filled cookies are a true celebration of simple, timeless flavors. They're golden and tender with a melt-in-your-mouth texture, accented by the sweet, fruity burst of jam in every bite. Just the right amount of sweetness makes them perfect alongside a cup of tea or your favorite latte. Whether you serve them during the holidays, at a summer picnic, or simply to brighten up an afternoon, these cookies are as versatile as they are irresistible!
Why You'll Love these Jam Thumbprint Cookies
- Perfectly soft and buttery. The dough is rich and tender, creating a melt-in-your-mouth cookie that's just sturdy enough to hold a dollop of your favorite jam. Every bite of this jam filled thumbprint cookie is a delightful mix of buttery goodness and fruity sweetness.
- Easy to make. The good thing is that despite how gorgeous and sophisticated these jam thumbprint cookies look, they are simple to make! All you need is a handful of ingredients and less than 20 minutes of prep work (note that you will need to account for a 1 hour cooling time as well for the dough). With a cookie this easy, they are basically a go-to for any holiday!
- Uses simple baking staples. If you love to bake, you probably already have the ingredients for this thumbprint cookie recipe. These cookies use classic shortbread cookie staples like flour, sugar, and butter.

Ingredient Notes
To make these delicious Jam Thumbprint Cookies, you will need the following ingredients (full measurements in recipe card below):
- butter - use unsalted butter to control the flavor of the cookies. If you need to use salted butter, omit the salt called for in this recipe.
- sugar - use your preferred granulated sugar (like cane sugar, date sugar, or coconut sugar), or use a sugar-free substitute like stevia or monk fruit.
- vanilla extract - you can use an equal amount of vanilla bean paste for a richer vanilla flavor, or try a different extract flavor such as almond extract.
- salt
- all-purpose flour
- jam - use any kind of jam that you have such as raspberry jam, strawberry jam, or marmalade. We like using our easy homemade Strawberry Jam made with no pectin. I recommend making your own if you have the time.
- almond glaze - made in minutes using confectioners' sugar, almond extract, and milk. You could use vanilla extract instead for a different flavor.
You will also need measuring cups and spoons, electric mixer (hand mixer or stand mixer), cookie scoop, baking tray, and wire cooling rack.
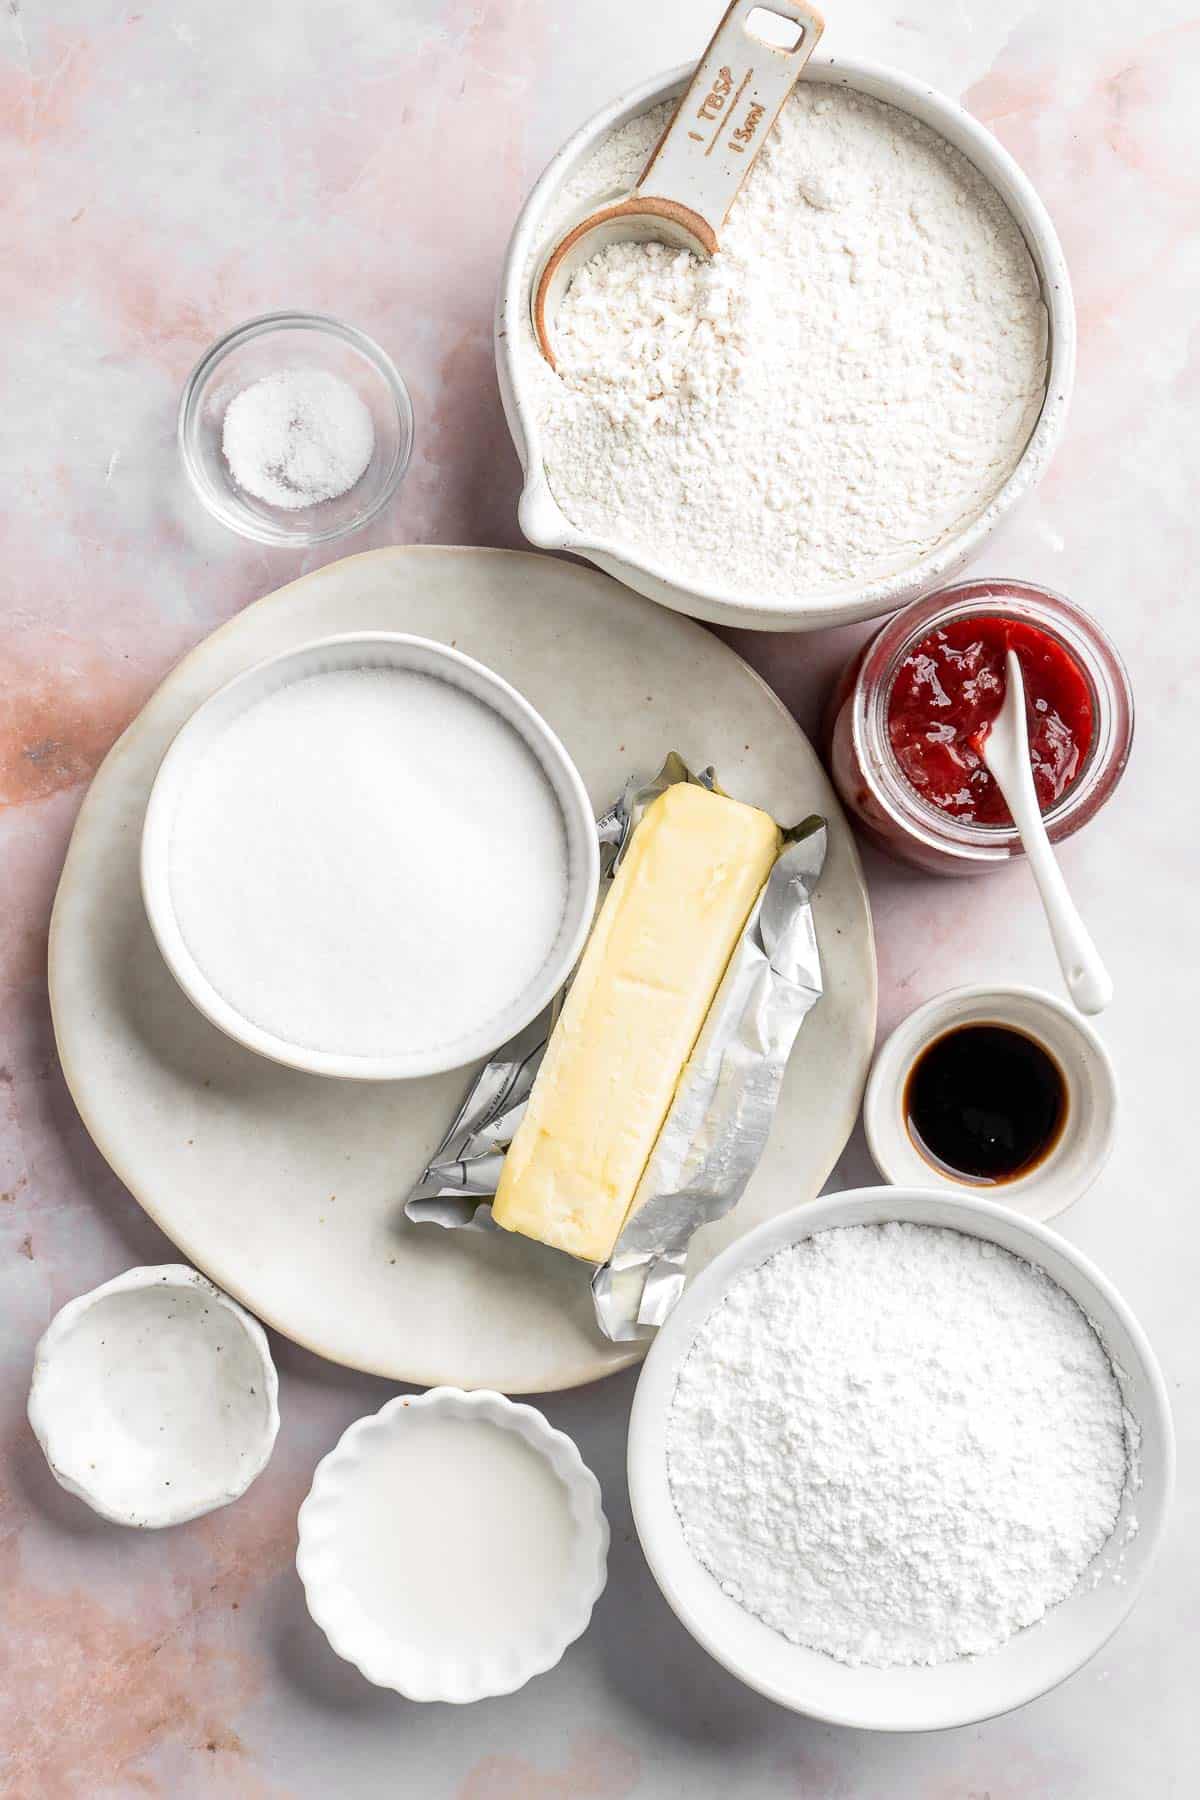
How to Make the Best Jam Thumbprint Cookies
First, make the thumbprint cookies.
- Combine wet ingredients. Use a stand mixer (or hand mixer) and cream the butter and sugar together in a mixing bowl on medium speed until light and fluffy, about 2-3 minutes. Add vanilla and salt, and continue to beat on medium until fully incorporated.
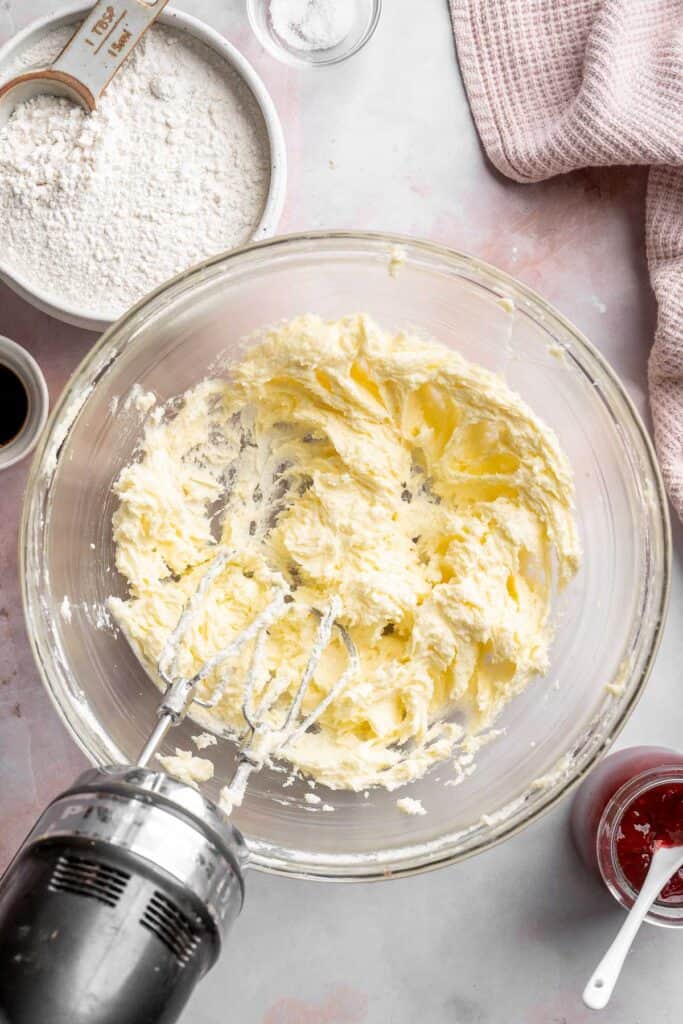

- Add dry ingredients. Gradually add the flour until just combined, and the mixture has formed a dough.
- Shape dough. Use your hands to shape the dough into a ball (it will be a little crumbly).
- Chill. Tightly wrap the dough with plastic cling wrap and chill for at least one hour in the refrigerator.


- Scoop cookies. Line a large half sheet baking pan with parchment paper or a silicone baking mat. Use a cookie scoop or spoon to take 1 tablespoon of dough at a time, and roll into 1-inch balls. Place on the prepared cookie sheet.


- Indent. Make an indentation with your thumb (or the back of a small spoon or measuring spoon) into the centre of each ball. The edges may crack slightly.
- Fill. Use a small spoon to fill the indentation with jam - be careful that you do not overfill the indentations. Place the cookie sheet into refrigerator to chill while the oven preheats.

- Bake. Bake in a 350F preheated oven for 13-15 minutes or until edges are lightly browned. Allow the cookies to cool on the cookie sheet for 5 minutes before carefully transferring to a wire cooling rack to cool completely.

Then, add the almond glaze.
- Combine ingredients. In a medium mixing bowl, whisk together confectioners' sugar, almond extract and 1 tablespoon of milk. Add remaining milk, 1 teaspoon at a time, until you reach the desired consistency. If the mixture is too thick, add more milk. If it is too thin, add more sugar.
- Drizzle. Using a spoon or a piping bag fitted with a fine round tip to drizzle the glaze over the cooled cookies. Let set for 1-2 hours.


Recipe Video
Recipe Variations
- Change the filling. Instead of filling these thumbprint cookies with jam, fill them Lemon Curd, a chocolate ganache (like in these Chocolate Thumbprint Cookies), Nutella, or Salted Caramel Sauce.
- Add a nutty touch. Roll the dough balls in finely chopped nuts like almonds, pecans, or hazelnuts before pressing the thumbprint for extra crunch and flavor.
- Skip the glaze. For a less sweeter version, make these thumbprint cookies without the glaze. They are so good either way!
- Sprinkle with powdered sugar. For an alternative finish, lightly dust the baked cookies with powdered sugar just before serving for a festive look.
How to Serve
These Jam Filled Thumbprint Cookies are delicious served on their own, or paired with a hot drink including:
- Chai Tea Latte
- White Hot Chocolate
- Ginger Turmeric Tea
- Slow Cooker Apple Cider
- Matcha Latte
- Pumpkin Spice Latte

Recipe Tips and Tricks
- Choose good jam. Opt for high-quality, thick jam to ensure it stays in place while baking. Runny or overly sweet jams can spread too much or overwhelm the cookie's flavor.
- Don't overfill. A teaspoon of jam per cookie is plenty. Adding too much can cause the jam to bubble over and make a mess on your baking sheet.
- Cool on the tray. This recipe calls for letting the freshly baked cookies rest for a solid 5 minutes on the hot cookie sheet before moving them to a wire rack. This is crucial because it allows the soft, chewy cookies to firm up and hold their shape.
Storing and Freezing Instructions
How to Store
Store jam thumbprint cookies in a single layer in an airtight container. Store in a cool, dry place for up to 4 days at room temperature. You can also store them longer in the refrigerator, about 10 days.
How to Freeze
Freeze jam filled thumbprint cookies uncovered on a parchment lined baking sheet for 1-2 hours until hard Then, transfer to an airtight container or freezer bag and store for up to 3 months. Allow them to thaw in the fridge or at room temperature before serving.
FAQ
Any type of jam works well for thumbprint cookies! Classics like raspberry, apricot, or strawberry are always crowd-pleasers. If you want a seasonal twist, try fig or cranberry jam for a festive touch. Just make sure the jam isn't too runny, as it might spread too much during baking.
Yes, you can! While a buttery shortbread-style dough is traditional, you could use a sugar cookie dough for a sweeter flavor or even a nut-based dough for extra texture. Adjust baking times slightly as needed.
Absolutely! The dough can be prepared in advance and chilled for up to two days before baking. Baked cookies also store well and can be frozen for up to three months. Just bring them to room temperature before serving!
More Cookie Recipes
- 50 Best Cookie Recipes
- Classic Shortbread Cookies
- Lemon Curd Cookies
- Almond Crescent Cookies
- Italian Ricotta Cookies
- Raspberry and White Chocolate Shortbread Cookies
Tried this recipe?
I'd love to hear what you think! Leave a comment and rating below to share your feedback. Your reviews help others discover this recipe and help me keep creating more free recipes for you. Snap a photo and tag me on social media @aheadofthyme too.

Chocolate Peppermint Cookies
Chocolate Peppermint Cookies bring the cool, minty flavor of the holidays together with rich, fudgy chocolate in a festive, chewy treat. These cookies are studded with crushed candy canes and chocolate chips, making them as beautiful as they are delicious. Each bite bursts with holiday cheer, combining the perfect balance of refreshing peppermint and indulgent cocoa.

These chocolate peppermint cookies are one of my go-to treats for the holiday season. The rich chocolate base pairs perfectly with the minty bursts from crushed candy canes, giving them a flavor that feels like a cozy cup of Peppermint Hot Chocolate. Plus, they're super quick and easy to make (and no chilling required!) - perfect for baking with family, a cookie exchange, or making at the last minute when you are craving something sweet.
Why You'll Love These Chocolate Peppermint Cookies
- Quick and easy to make. This recipe comes together in no time with just a handful of steps. Mix the dough, fold in the chocolate chips and crushed candy canes, and bake. There is no chilling required, so you'll have fresh cookies ready to enjoy quickly!
- Classic holiday flavor. Chocolate and peppermint are a timeless holiday pairing. The cool, minty notes of peppermint perfectly balance the rich, fudgy chocolate, making these cookies a festive addition to your seasonal baking lineup.
- Chewy and decadent. These cookies boast soft, fudgy centers with crisp edges, thanks to the perfect blend of butter, sugar, and cocoa powder. Add the crunch of candy canes, and every bite is a delicious mix of textures and flavors!
- Great for gifting. Chocolate peppermint cookies look beautiful on holiday trays with their festive candy cane bits. They are a great addition to any Holiday Cookie Box with other classics like Christmas Monster Cookies, Peanut Butter Blossoms, and Stained Glass Window Cookies.

Ingredient Notes
To make these delicious chocolate peppermint cookies, you will need the following ingredients (full measurements in recipe card below):
- all-purpose flour - this is the perfect go-to flour for achieving a tender, chewy texture.
- cocoa powder - provides a rich, chocolatey base.
- baking powder + baking soda - gives the sugar cookie dough the perfect puffy texture.
- salt - the salt will activate the baking soda and highlight the flavors in these delicious cookies.
- butter - only use softened room temperature butter. Unsalted butter is best for cookie recipes.
- sugar - you will need both white sugar and light brown sugar in this recipe. They add sweetness without taking away from the peppermint flavor.
- egg - helps bind the ingredients together and gives the cookies structure.
- vanilla extract - this adds flavor.
- peppermint extract - this is optional for adding in extra minty flavor.
- chocolate chips - go for semi-sweet chocolate chips or dark chocolate. You can cut a chocolate bar into chunks if you prefer.
- candy canes - crush candy canes for a pop of mint flavor. You can also crush peppermint candies instead.
You will also need the following baking tools and equipment: measuring cups and spoons, large baking tray, silicone baking mat (or parchment paper), mixing bowls, electric mixer, medium cookie scoop, and wire cooling rack.

How to Make the Best Chocolate Peppermint Cookies
- Combine dry ingredients. In a medium to large sized mixing bowl, add in flour, cocoa powder, baking soda, baking powder, and salt. Whisk well to combine, then set aside.
- Combine wet ingredients. In a large mixing bowl, use a hand mixer or stand mixer to cream together butter, white sugar, and brown sugar on medium speed until light and fluffy, about 3-4 minutes. Add in egg, vanilla extract and beat again until smooth and fluffy.


- Add dry to wet. Add in the flour mixture, then beat together until well combined.
- Fold in mix ins. Fold in the chocolate chips and crushed candy canes until well-dispersed.


- Scoop cookies. Line a large half sheet baking tray with a silicone baking mat or parchment paper. Use a medium cookie scoop to scoop out 2 tablespoons of cookie dough onto the prepared baking sheet. Place the cookie balls onto the lined baking sheet, spaced at least 2 inches apart (you can fit about 6 on a large cookie sheet).
- Top with extra mix ins. Press in extra chocolate chips and candies on the top.
- Bake. Bake in a 350F preheated oven (in batches) for 10-12 minutes, until edges just start to brown. Remove from oven and allow the cookies to cool in the baking sheet for 5 minutes, then carefully transfer to a wire cooling rack to cool completely. Repeat baking in batches with remaining cookies.


Recipe Variations
- Add a chocolate drizzle. For extra indulgence, add a drizzle or white chocolate or dark chocolate on top.
- Dip and sprinkle. After baking, dip half of each cookie in melted chocolate (white or dark) and sprinkle with additional peppermint candy pieces for a decorative finish.
- Use white chocolate. Swap out chocolate chips with white chocolate chips for a fun twist and extra holiday flair.
- Make them festive. Roll the dough balls in red and green sanding sugar before baking or top the finished cookies with holiday-themed sprinkles for extra cheer.
- Add espresso powder. For a more intense chocolate flavor, add a teaspoon of espresso powder to the dry ingredients.
How to Serve
Chocolate Peppermint Cookies are perfect on their own, but they also make a delicious addition to a holiday cookie platter with other favorites like:
You can also enjoy them with a warm mug of hot chocolate or coffee for the ultimate cozy treat!

Recipe Tips and Tricks
- Use good quality cocoa powder. For the richest chocolate flavor, opt for a high-quality cocoa powder. Dutch-processed cocoa works wonderfully for a deep, indulgent taste.
- Crush the candy canes. Place candy canes in a zip-top bag and use a rolling pin to crush them into small pieces, but avoid turning them into powder. This ensures even distribution and a delightful crunch.
- Don't overmix. You want the flour mixture and wet ingredients to just come together. Overmixing can cause them to become dense and flat. Less is more.
- Don't overbake. These cookies should come out of the oven when the edges are just set but the centers still look slightly soft. They'll firm up as they cool for that perfect chewy texture.
Storing and Freezing Instructions
How to Store
Keep chocolate peppermint cookies in an airtight container at room temperature for up to 5 days. You can also refrigerate them for up to a month.
How to Freeze
These cookies freeze beautifully! Baked cookies can be stored in a freezer-safe container for up to 3 months. Just thaw at room temperature before serving. You can also freeze raw cookie dough balls. Place them on a baking sheet until firm (1-2 hours), then transfer to a freezer-safe bag. You can also bake from frozen, adding a minute or two to the baking time.
FAQ
Crushed candy canes or peppermint candies work perfectly in this recipe. They add both flavor and a festive crunch. For a subtler texture, you can also use peppermint extract, but go light-peppermint can quickly overpower other flavors.
Absolutely! Chocolate chips, white chocolate chunks, or even chopped Andes mints are great additions. Just don't overload the dough to maintain the chewy texture.
Yes! The dough can be prepared and chilled for up to 24 hours before baking. You can also freeze the dough balls for later use. Just bake straight from frozen, adding an extra minute or two to the baking time.
More Recipes with Peppermint
- Peppermint Macarons
- Peppermint Kiss Cookies
- Chocolate Peppermint Christmas Bark
- Peppermint Fudge
- Peppermint Brownies
- Peppermint Snowball Cookies
Tried this recipe?
I'd love to hear what you think! Leave a comment and rating below to share your feedback. Your reviews help others discover this recipe and help me keep creating more free recipes for you. Snap a photo and tag me on social media @aheadofthyme too.

Cinnamon Roll Cookies
Cinnamon Roll Cookies bring all the cozy, spiced flavors of a classic cinnamon roll into a soft, buttery cookie form. Swirled with a cinnamon-sugar filling and topped with a drizzle of sweet icing, these cookies are the perfect way to enjoy a beloved breakfast treat any time of day. Great for special occasions, but easy enough to slice-and-bake any time you need a cookie fix!
Is there a better dessert than traditional Cinnamon Rolls? The warm spices, rich brown sugar, and tender, fluffy dough melt in your mouth. This cinnamon roll cookie recipe honors that tradition with a subtle change. Instead of the yeasted dough, it uses a soft and chewy sugar cookie dough, but the rest of the flavors are all there. My favorite thing about them? You can freeze the log ahead of time, then thaw, slice and bake whenever! It's my new favorite cookie recipe, and we love them for birthdays, brunches, or even holiday cookie boxes.
Why You'll Love These Cinnamon Roll Cookies
- Stunning presentation. That perfect swirl of cookie dough looks so high-end that your guests will ask where you bought your cookies! It's not all looks, though. The brown sugar butter filling adds a sweet, buttery crunch to the coil, and I love the tanginess of the cream cheese topping. Simple but refined at the same time.
- Classic flavor. These recipe will give you cinnamon rolls in cookie form.The trick is to make a soft, chewy sugar cookie, roll it into a rectangle, then top it with actual cinnamon roll filling for that telltale cinnamon flavor and iconic swirl. Each slice looks picture-perfect, especially when drizzled with a simple cream cheese glaze.
- Great make-ahead option. Since the spiral cookie dough needs to be rolled out and chilled, you can easily make it a few days before you need it or even freeze the cookie dough log for later. Just slice off however many cinnamon roll sugar cookies you need, bake, and serve. Such a time saver!
- New holiday favorite. With the soft sugar cookie inside and delicious cinnamon sugar swirl, these cinnamon cookies taste like Snickerdoodle Cookies on steroids. They're warm and cozy with layers of cinnamon spice and look right at home on any holiday dessert table.

Ingredient Notes
To make these delicious Cinnamon Roll Cookies, you will need the following ingredients (full measurements in recipe card below):
For the cinnamon roll cookies:
- all-purpose flour - sift the flour to remove any clumps and avoid adding too much and drying out the dough.
- cinnamon
- baking powder - this is the main leavening agent and helps the dough puff up. Always use fresh, active baking powder for the best rise.
- salt
- unsalted butter - fully softened at room temperature. This will be creamed with the sugars, so it needs to be tender and pliable.
- brown sugar - the mixture of different sugars offers sweetness, extra flavor, crisp edges, and a chewy bite. Light brown sugar has just enough flavor without overpowering the cinnamon, and it is ideal for this recipe.
- white sugar
- vanilla extract
- egg - to bind the cookie dough together.
For the cinnamon roll filling:
- unsalted butter - melted and slightly cooled.
- brown sugar - for that classic cinnamon filling flavor.
- cinnamon - this is key! You need just the right amount.
For the cream cheese glaze:
- cream cheese - at room temperature.
- milk - to thin out the glaze. Any type of milk will do.
- vanilla extract
- confectioners' sugar - add as much as you'd like until you reach the desired consistency.
You will also need EQUIPMENT.

How to Make the Best Cinnamon Roll Cookies
First, make the cinnamon roll cookies.
- Combine wet ingredients. In a stand mixer with paddle attachment (or large bowl with electric mixer), add butter, brown sugar, and white sugar. Beat on medium-high speed until light and fluffy looking, around 2-3 minutes. Add in the vanilla and egg, then beat again until well-combined, smooth, and fluffy, about 1-2 minutes.


- Combine dry ingredients. In a small mixing bowl, whisk together the flour, cinnamon, baking powder, and salt, until well-combined.
- Add dry to wet. Add in the dry ingredients, then beat on low until just combined and smooth. The dough will be soft, resembling gingerbread dough.


- Chill. Gather the dough together and wrap into a flat rectangle shape with plastic wrap. Place into the fridge for 1 hour to harden.

Next, make the cinnamon-sugar filling.
In a small mixing bowl, whisk together the brown sugar and cinnamon. Set aside.

Let's assemble the cookies.
- Roll dough. Remove dough from the fridge and place onto a well-floured parchment paper or surface. Using a rolling pin, roll the dough out to be about 11x8-inch in size.

- Add filling. Brush the surface with the melted butter, then sprinkle all of the cinnamon sugar mixture over top. Lightly press the cinnamon sugar down into the surface of the dough.


- Roll. Starting from the long side, roll the dough up into a log as you would with cinnamon rolls.


- Chill. Wrap the dough log in plastic wrap, then place into the fridge for at least 1 hour, up to overnight.
Now, slice and bake.
- Slice cookies. Remove the dough log from the fridge. Using a sharp knife, slice ½-inch cookies out of the log.
- Bake. Line 2 large baking sheets with parchment paper. Place cookies onto the prepared baking sheets. Place into a 350F preheated oven to bake for 10-11 minutes, or until the cookies seem soft but set. Remove cookies from the oven and allow to fully cool before glazing.


Finally, make the cream cheese glaze.
Add all of the glaze ingredients into a medium mixing bowl. Use a whisk or electric hand mixer to beat together until smooth and creamy. Drizzle glaze over the cooled cookies. Allow glaze to fully set before enjoying.


Recipe Variations
- Use fresh spices. You can certainly use up an old jar of cinnamon, but you'll get a much richer flavor with fresh cinnamon. This is a great recipe to try out different varieties of cinnamon, too!
- Try a different glaze. Cream cheese frosting is a classic topping for homemade cinnamon rolls, but there are so many options. They're great without any glaze, like a buttery cinnamon sugar cookie, or you can make a simple vanilla glaze, add some cinnamon, and more. Play with the flavors in the drizzle to highlight the season!
- Play with spices. Of course, cinnamon rolls rely on cinnamon, but you can certainly use apple pie spice, pumpkin spice, or other spice combinations to customize the flavor.
How to Serve
These Cinnamon Roll Cookies are delicious served with a hot drink like coffee or tea. Try it with:

Recipe Tips and Tricks
- Chill the dough. This is essential! We need the butter to firm up before baking, or the cookies will spread and lose their shape. It also makes them harder to slice neatly. Give them at least an hour of chill time before slicing and baking.
- Use a sharp knife. If you use a dull knife, you'll compress the swirl and disturb the round shape of the cookies. For best results, use a very sharp slicing knife, like a granton edge knife, and gently saw through the dough instead of pressing straight down.
- Trim off the ends. The outside ends of the dough log won't look quite as perfect as the inside slices. You can either flip the cookies over (hiding the imperfect outer edges underneath) or save them for taste testing.
Storing and Freezing Instructions
How to Store
Once baked, the unglazed cookies can be stored in an airtight container at room temperature for about 3 days. The sweet icing contains dairy and should be refrigerated. You can also refrigerate the log of cookie dough for 2-4 days before baking.
How to Freeze
Leftover cookies can be frozen for up to 3 months, but you can also freeze the roll of cookie dough. To bake, thaw the log of dough in the fridge and then slice rounds and bake like normal. To keep the dough fresh, wrap it in several layers of plastic wrap.
FAQ
You want a chewy sugar cookie base with a buttery, sweet flavor to emulate the flavor of cinnamon rolls, but it needs to be firm enough to hold the swirl during rolling and baking. This recipe is soft and chewy, thanks to the butter and brown sugar, with a warm flavor from the cinnamon. It feels more like gingerbread dough and pairs perfectly with the cinnamon roll filling, keeping its distinct swirl even after slicing and baking.
Two answers: chill the dough and use a sharp knife. The dough needs to be totally chilled to solidify the butter, which will help hold the jelly-roll style spiral in place. Then, use a very sharp knife meant for slicing to cut through the cookie dough without any drag marks. I'm partial to a Granton edge blade, which is also great for slicing bread, roasts, and more. It makes the smoothest cut every time and is a game-changer!
Honestly, it helps to use a measuring tape or pastry mat with the measurements listed. Use your knife to make a small indentation on the cookie dough log every ½ inch, then go back through and cut. Precise cuts don't necessarily matter at home, but it can really take the appearance over the top.
More Cookie Recipes with Cinnamon
Tried this recipe?
I'd love to hear what you think! Leave a comment and rating below to share your feedback. Your reviews help others discover this recipe and help me keep creating more free recipes for you. Snap a photo and tag me on social media @aheadofthyme too.

Brookies Cookies
Brookies Cookies are the perfect combination of two iconic desserts - brownies and chocolate chip cookies. They have the fudgy richness of brownies and are chewy and buttery with crisp edges like a classic chocolate chip cookie. The best part? They require no chilling, so you can bake right away!
Brookies are one of the best dessert mashups ever. If you're not familiar, brookies are basically fudgy brownies baked with a layer of chocolate chip cookie dough on top. Although I love the original, brookie cookies are my favorite way to enjoy this flavor combination. They're fudgy and chewy with my crackly, gooey brownie cookie recipe on one side and no-chill chocolate chip cookie dough on the other. They're the perfect sweet treat for birthdays, holidays, cookie boxes, or any time you need to satisfy a cookie craving.
Why You'll Love These Brookies Cookies
- Nostalgic flavor. Brookies instantly bring back the flavor of my favorite childhood desserts. There's nothing quite like the taste of warm, freshly baked chocolate chip cookies and brownies, and they're even better together. These homemade brookies taste like being a kid again!
- Easy to make. There are no boxed mixes or store-bought cookie dough here! The two different doughs are made completely from scratch, but I promise, they're easy recipes. Like, so easy, you don't even need to chill the dough. It does require a little extra effort to make two doughs, but it's absolutely worth it!
- Great for chocolate lovers. With brownie cookie dough on one side and classic chocolate chip dough on the other, this cookie combo has chocolate in every bite! The brownie cookie dough is made with real melted chocolate and has chocolate chips folded in, so you get that crunchy, melty chocolate chip texture on either side. They're a little over-the-top, but in all the right ways.
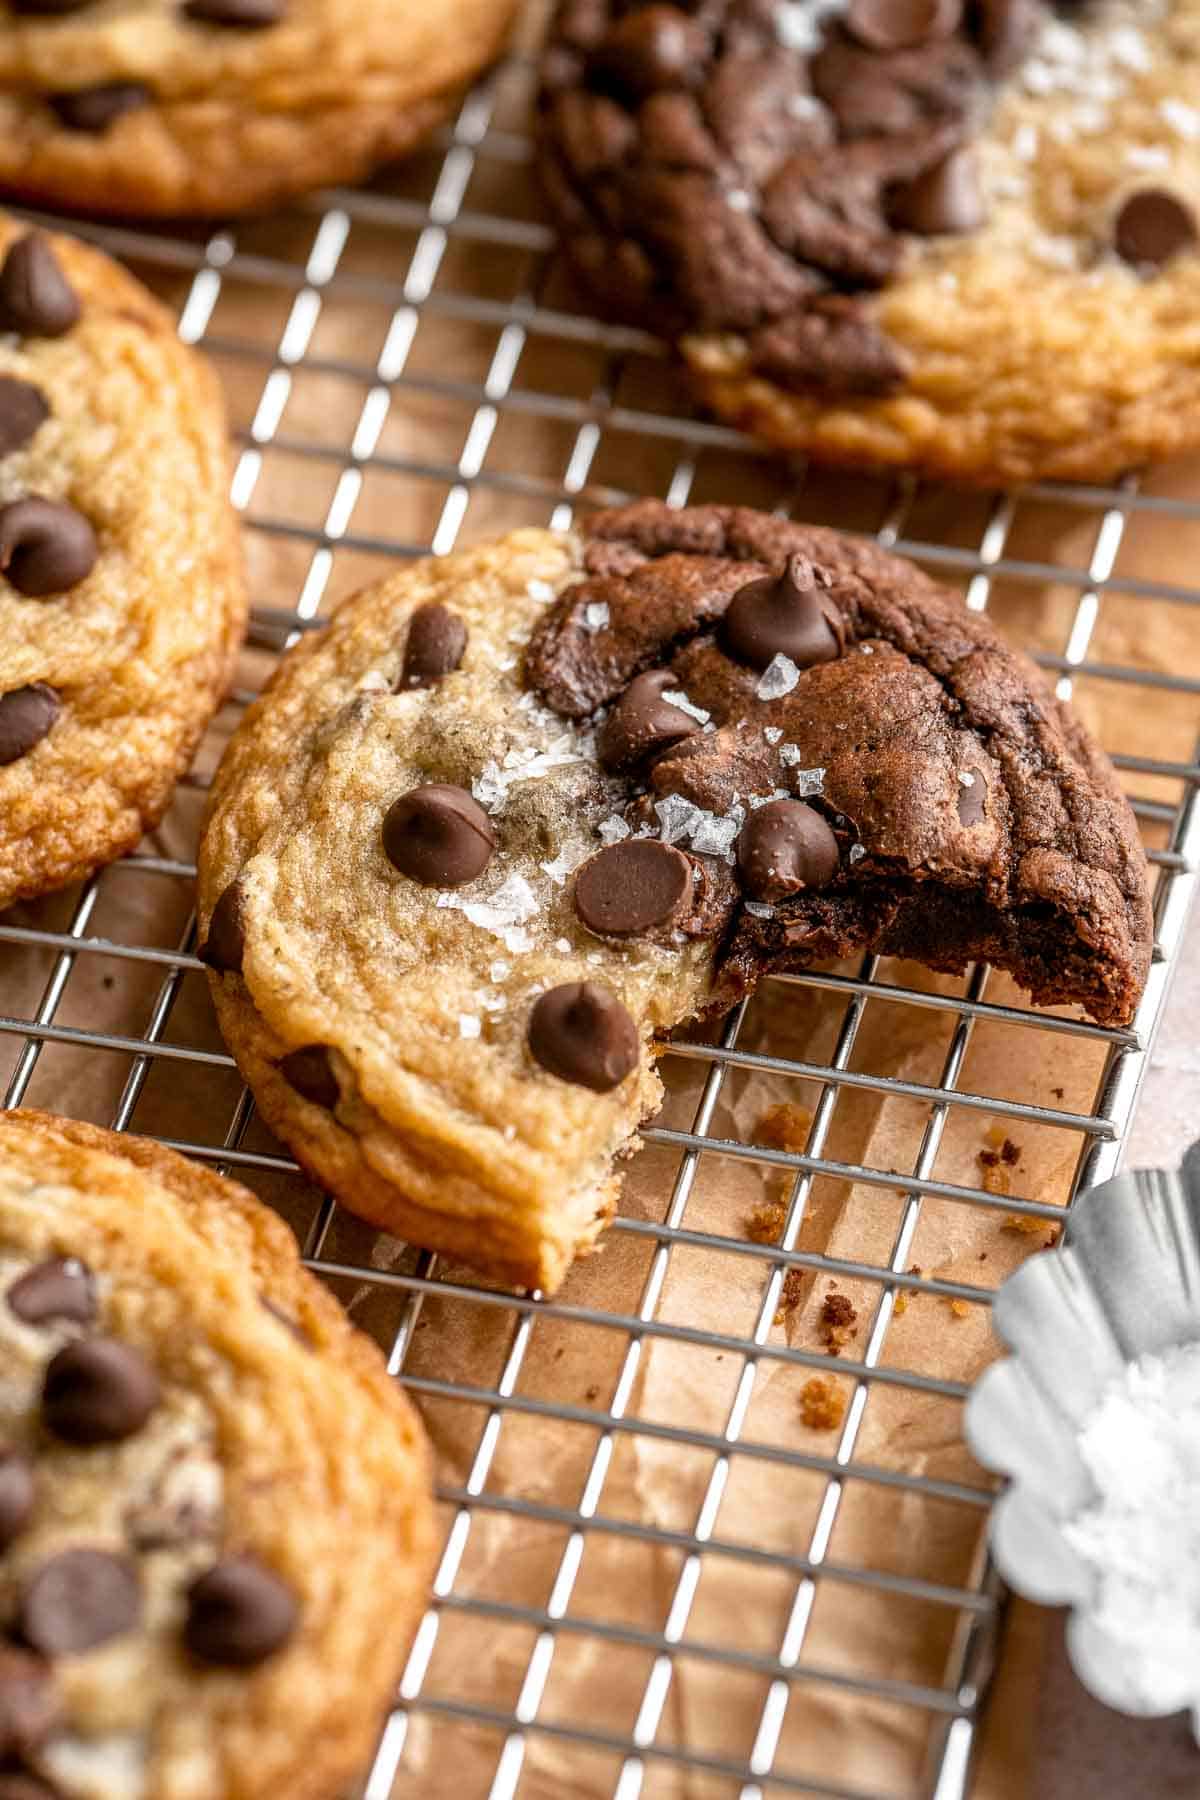
Ingredient Notes
To make these delicious Brookies Cookies, you will need the following ingredients (full measurements in recipe card below):
- all purpose flour - for both the brownie cookie dough and chocolate chip cookie dough. Be sure to use regular all purpose, not self-rising or whole wheat.
- baking soda - in both cookie doughs to help the cookies puff up.
- sugar - you will need white sugar in both cookies, and light brown sugar in the chocolate chip cookie dough as well to give it that classic chocolate chip cookie flavor and chewy texture.
- unsalted butter - butter should be softened to room temperature for the chocolate chip cookies, but not necessary for the brownie cookies as they get melted with the chocolate.
- eggs - added at room temperature.
- vanilla extract - added to both doughs for flavor.
- salt - added to both doughs to balance out the sweetness.
- Dutch processed cocoa - sifted to remove lumps.
- semi-sweet chocolate - finely chopped. This will be melted for a rich, fudgy, decadent texture in the brownie cookies
- chocolate chips - I like to use semi-sweet or dark chocolate chips. Save some extra to press on top of the cookies before baking.
You will also need measuring cups and spoons, several mixing bowls, a whisk, a sifter, an electric hand mixer, a spatula, parchment paper, 2 large baking sheets, and a cookie scoop.
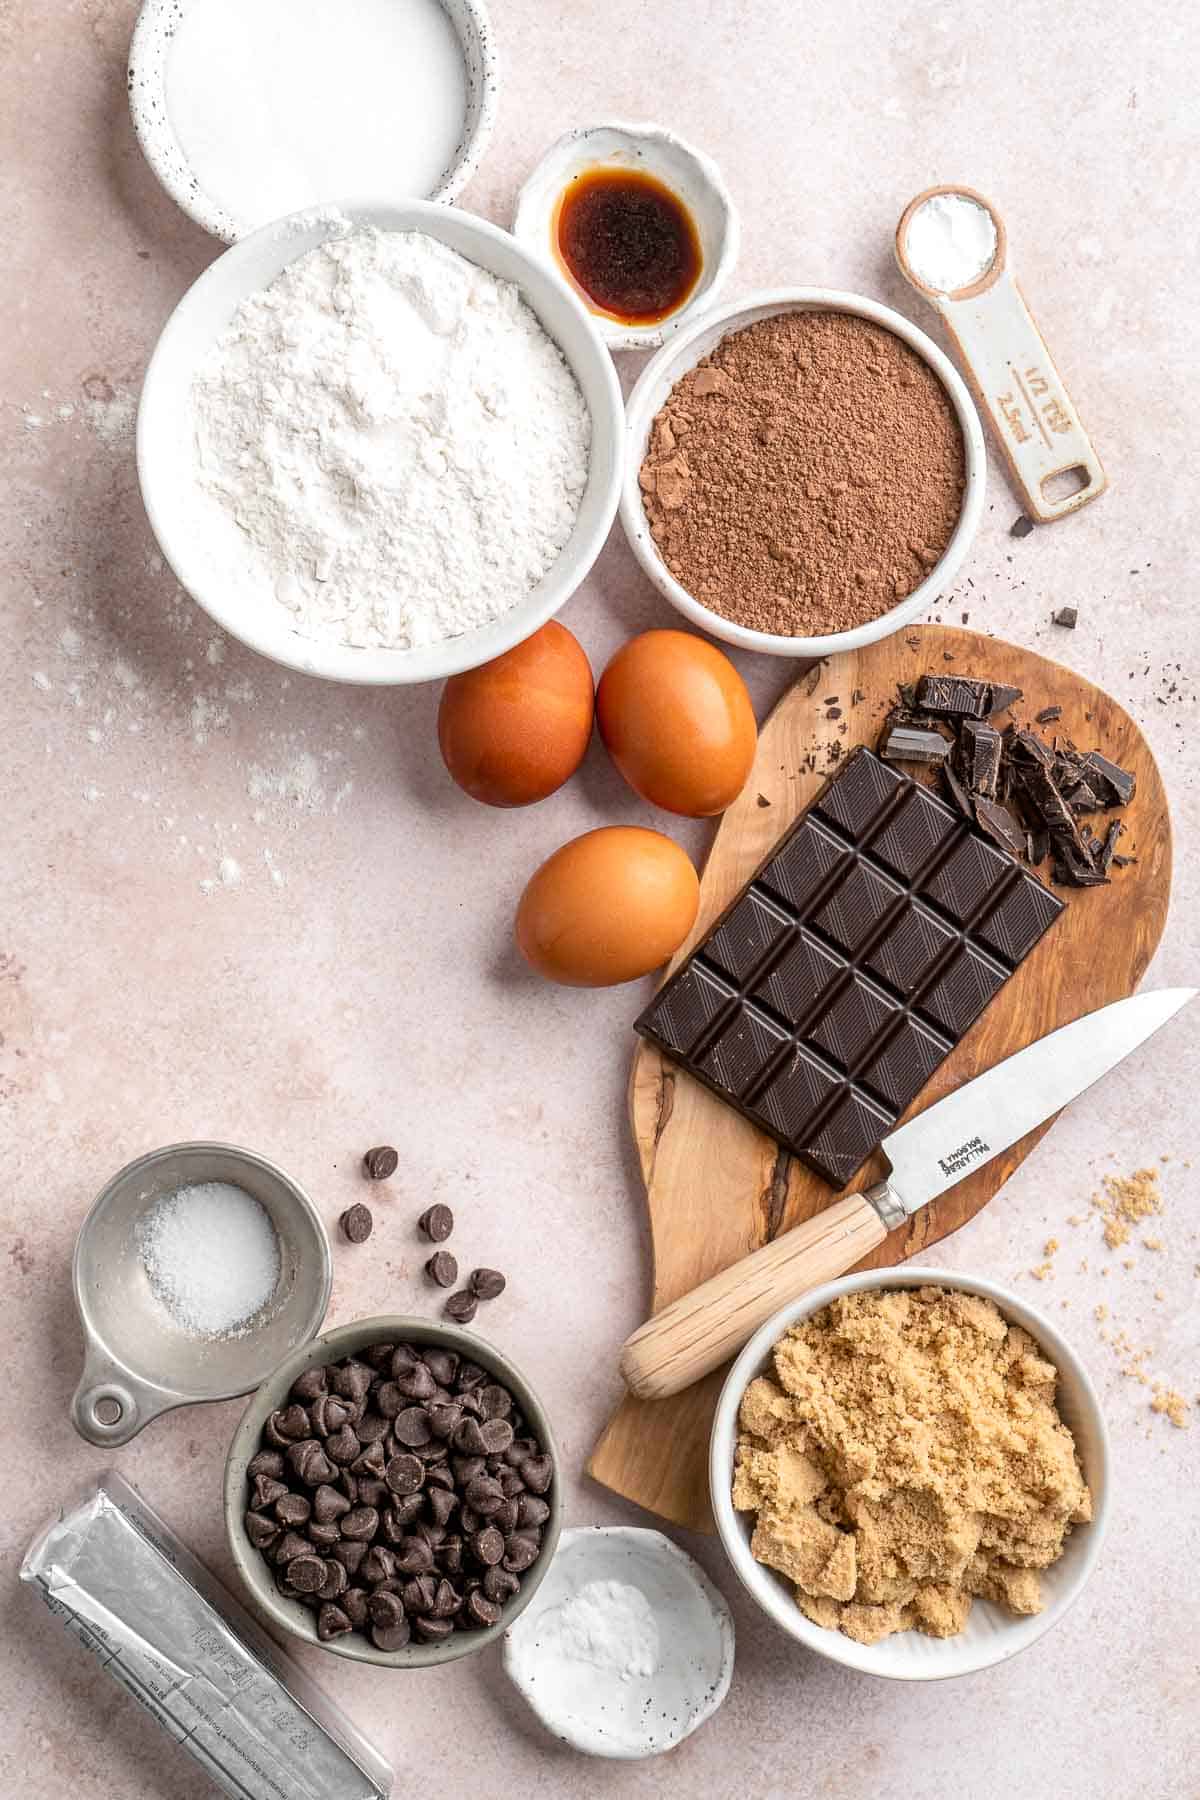
How to Make the Best Brookies Cookies
First, make the brownie cookie dough.
- Melt chocolate. In a small mixing bowl, add the butter and chopped chocolate. Place into the microwave and heat in 30 second intervals, stirring in between, until full melted and smooth. Set aside.
- Combine dry ingredients. In a medium mixing bowl, whisk together the flour, sifted cocoa powder, baking powder, and salt, until very well-combined. Set aside.


- Combine wet ingredients. In a large mixing bowl, add the eggs, sugar, and vanilla. Using an electric hand mixer, beat together on high speed until the mixture looks very pale and fluffy, about 4 minutes.
- Add melted chocolate. Pour in the melted chocolate/butter mixture, then beat again until combined.


- Add dry to wet. Add in the dry ingredients, then beat again until combined. Note that the batter will be more runny than cookie dough and liquidy. It will harden up once chilled. Fold in chocolate chips (if using).
- Chill. Place the brownie cookie dough into the fridge to cool slightly while you make the chocolate chip cookie dough, about 15 minutes.


Next, make the chocolate chip cookie dough.
- Combine dry ingredients. In a medium to large sized mixing bowl, whisk together the flour, baking soda, baking powder, and salt, until well-combined. Set aside.
- Combine wet ingredients. In a large mixing bowl, use a hand mixer or stand mixer cream together butter and sugars on medium speed until light and fluffy, about 2 minutes. Add egg and vanilla, and beat on low until incorporated.

- Add dry to wet. Add the dry mixture into the wet, then stir until fully-combined, then fold in the chocolate chips.


Assemble and bake:
- Scoop chocolate chip cookie dough. Use a small cookie scoop to scoop out the chocolate chip cookies (about 1 tablespoon full), and place onto one of the prepared baking sheets.
- Scoop brownie cookie dough. Remove the brownie cookie batter from the fridge, then use the same cookie scoop to scoop out the brownie cookies, and place onto the same cookie sheet with the chocolate chip cookies.

- Preheat. Preheat the oven to 350F. Line 2 large baking sheets with parchment paper.
- Chill. Return the cookie balls into the fridge and chill for 15 minutes while the oven preheats.
- Combine cookie balls. Take each chocolate chip cookie dough ball, and firmly press it together with a brownie cookie dough ball, then lightly roll it together to further form them together. Make 6 blended cookie balls, and place the rest back in the fridge to keep them cool.

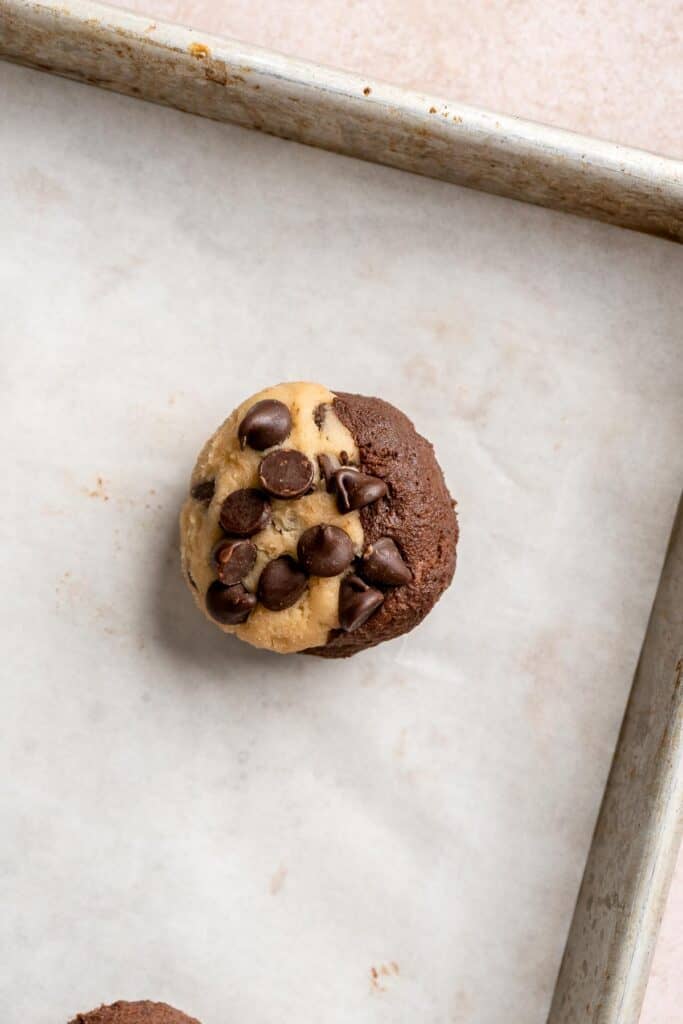
- Bake. Place the 6 cookies onto the second prepared baking sheet, then place into the oven to bake for 10-14 minutes. When done, the edges should look golden and the centres should look set. Allow the cookies to cool on the baking sheet for 5 minutes, then carefully transfer them to wire cooling rack to cool.Note: It is best to work in batches while baking, while keeping the remaining cookies cold in the fridge between batches.
- Cool. Allow the cookies to cool on the baking sheet for 5 minutes, then carefully transfer them to wire cooling rack to cool.


- Repeat. Repeat baking with remaining cookies.
Recipe Video
Recipe Variations
- Make ice cream sandwiches. Place a scoop of vanilla ice cream between two cookies and press down. Freeze for an hour or two to firm up the ice cream, or eat right way! They can also be rolled in mini chocolate chips for extra crunch.
- Try different add-ins and toppings. For a really decadent dessert, fold pieces of caramel candy into the brownie cookie dough or sprinkle a little flaky sea salt on top. I also like to press a few extra chocolate chips on top of the cookies before baking to give them a professional look.
- Play with different cookie variations. Substitute the chocolate chip cookie dough with a different cookie dough, like peanut butter cookie dough, oatmeal chocolate chip, monster cookies, or more. Focus on buttery cookie doughs with a chewy texture for the best result.
How to Serve
These Brookies Cookies are delicious served with a hot drink like warm milk, tea, or coffee. Some classics to serve with this are:
- Peppermint Hot Chocolate
- Chai Tea Latte
- Golden Milk Turmeric Latte
- White Hot Chocolate
- Ginger Turmeric Tea
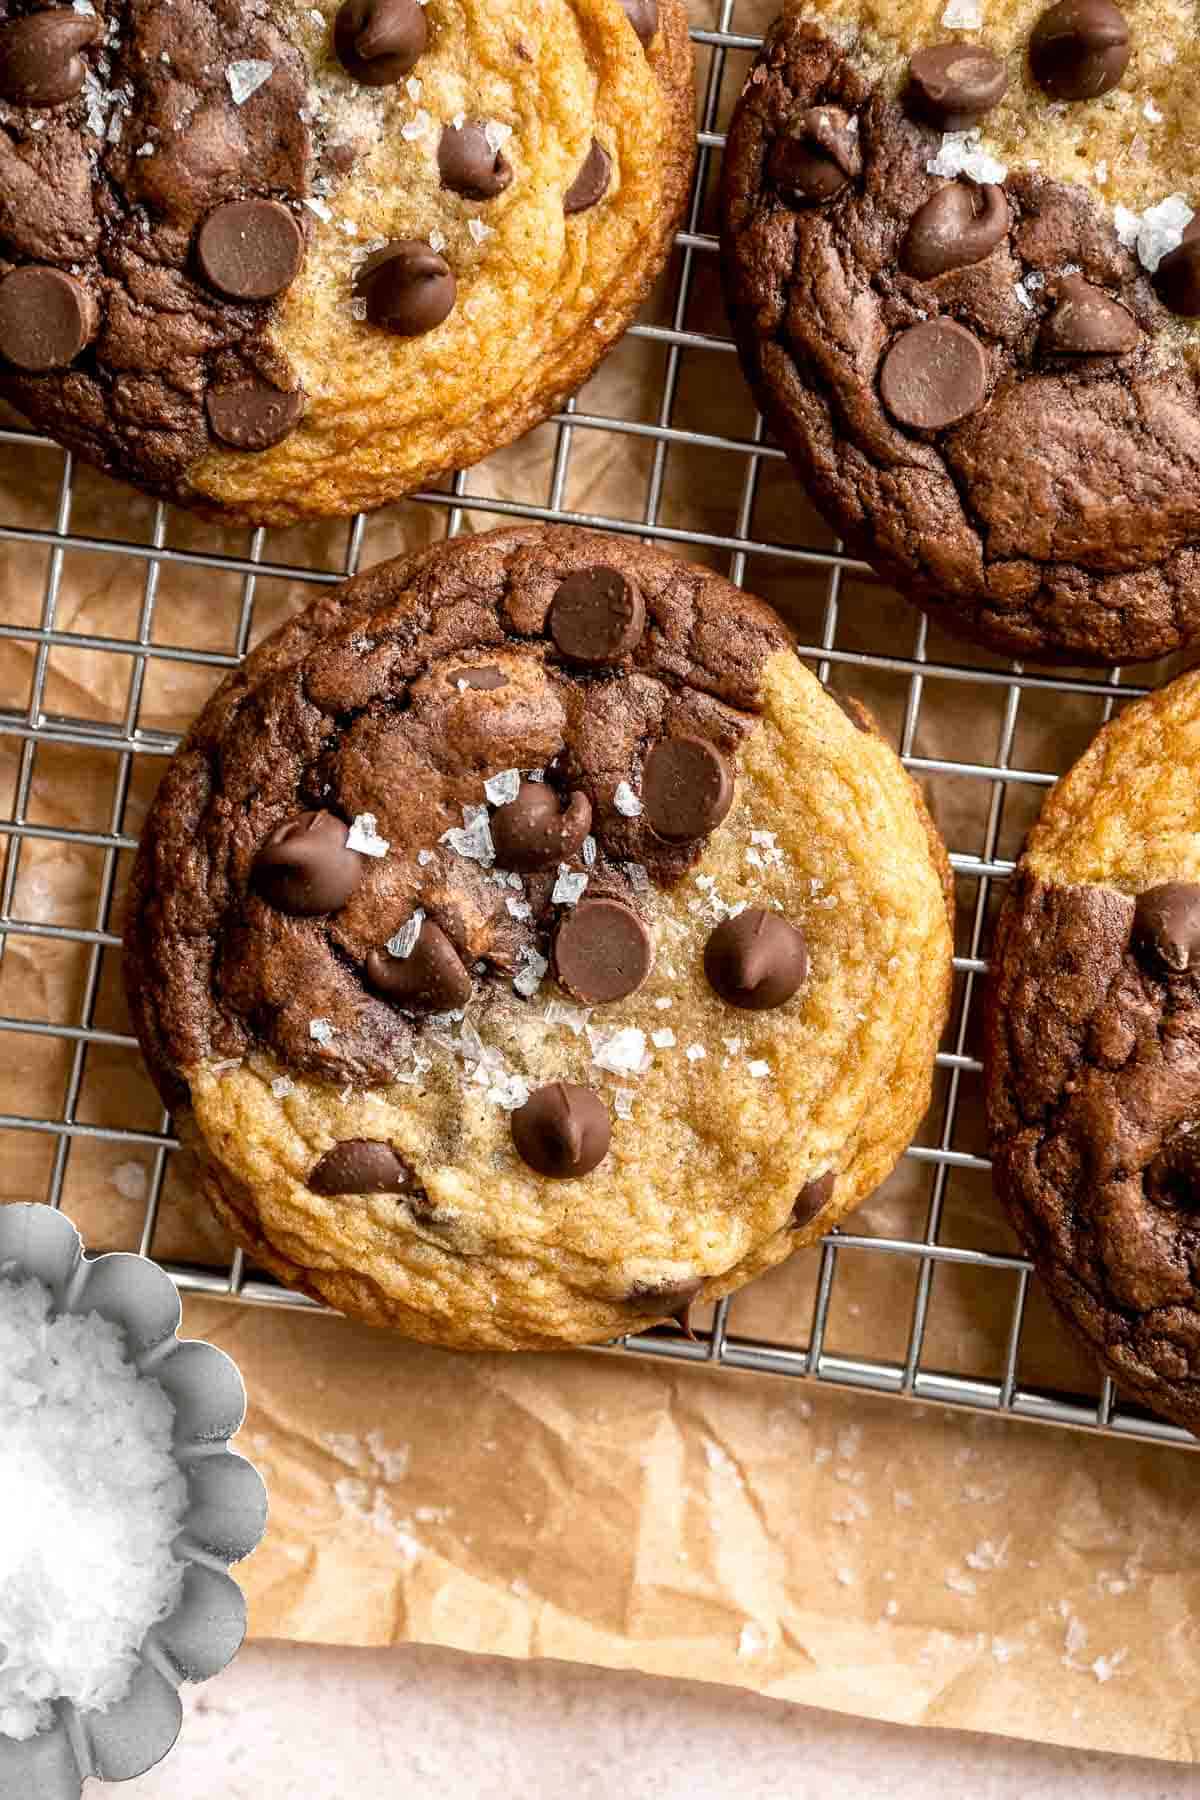
Recipe Tips and Tricks
- Give yourself a little time. The brownie portion of these cookies is softer than the chocolate chip side and will need extra time to firm up. I recommend baking these cookies 2-3 hours before you need them for the best texture.
- Sift the dry ingredients. Baking powder and baking soda often clump, which can cause your cookie dough to rise unevenly and have little pockets of sour flavor. Sifting takes barely any extra time and is worth it!
- Don't overmix. To get the right balance of textures, avoid pressing the different cookie doughs together too much. Roll them together gently in the palms of your hands. Likewise, you don't want to press too gently, or they won't hold together. They should look like a round ball when done.
Storing and Freezing Instructions
How to Store
Store leftover cookies in an airtight container at room temperature for 2-3 days.
How to Freeze
For longer storage, store excess cookies in a freezer-safe bag for up to 6 months. You can also freeze the cookie dough solid on a sheet pan for 1-2 hours until hard, then transfer to an airtight container or freezer bag for up to 3 months. Thaw and bake later for a smaller serving.
FAQ
Brookies are a mash-up of two delicious desserts: decadent brownies and chewy chocolate chip cookies. They're traditionally made by pressing a layer of cookie dough over fudgy brownies, and these brookie cookies take the same flavors in a new direction. Replace the brownie part with a rich chocolate brownie dough, then roll it together with chewy chocolate chip cookie dough and bake. They're essentially chocolate chip brownie swirl cookies, and you get the best of both desserts in each bite!
Yes! This is a great way to enjoy freshly baked cookies later without needing to make the cookies from scratch. I recommend shaping the cookie dough how you want it, then freeze the cookie dough balls on a sheet pan lined with parchment paper. Once frozen solid, transfer them to a freezer-safe, airtight container and freeze for up to 3 months. Thaw the cookie dough in the fridge then bake like normal.
There are several different ways to merge the separate cookie doughs together. I like to roll out small cookie dough balls from each of the separate doughs, then press the one of each type together. Roll them gently in the palms of your hands to meld them together into one larger ball. You get a little swirly, yin-and-yang effect, and the two contrasting sides look stunning together.
More Cookie Recipes
- 50 Best Cookie Recipes
- Brownie Cookies
- Double Chocolate Chip Cookies
- Chocolate Chunk Peanut Butter Cookies
- White Chocolate Chip Cookies
- Monster Cookies
Tried this recipe?
I'd love to hear what you think! Leave a comment and rating below to share your feedback. Your reviews help others discover this recipe and help me keep creating more free recipes for you. Snap a photo and tag me on social media @aheadofthyme too.

Mexican Wedding Cookies
Mexican Wedding Cookies are a classic treat known for their snow-white powdered sugar coating and pecan-studded shortbread that melts in your mouth. They look like little snowballs rolled in sugar and are a must-have on your holiday cookie plates. One of my all-time favorite cookies!

Did you know Mexican wedding cookies have a laundry list of different names? They also go by Russian tea cakes, pecan snowball cookies, butter balls, and more! Whatever you call them, they're the perfect holiday cookie - super simple to make with a wonderful bite, just enough nutty flavor from the pecans, and a mouthful of powdered sugar to sweeten them up. Pair them with Italian Christmas Cookies, Red Velvet Crinkle Cookies, Peanut Butter Blossoms, and more for the most delicious Christmas cookie tray ever!
Why You'll Love These Mexican Wedding Cookies
- Nostalgic flavor. Many of us grew up eating classic Mexican wedding cookies and look forward to sharing them with our own families. There's nothing quite like that buttery, nutty bite under the soft bite of powdered sugar! They're always a little messy to eat, but that's part of the fun.
- Super simple to make. Inside of that cloud of powdered sugar is, essentially, a rounded shortbread cookie made with pieces of pecans. The recipe only requires 5 ingredients, and the cookie dough comes together in just a few minutes in the mixer. Even total beginners can nail this simple recipe. Easy peasy!
- Essential for the holidays. It isn't the holiday season without a plate of these tender, buttery cookies to enjoy with hot chocolate or to serve for Santa on Christmas Eve. They look picture-perfect in your Christmas cookie boxes, too!

Ingredient Notes
To make these delicious Mexican Wedding Cookies, you will need the following ingredients (full measurements in recipe card below):
- unsalted butter - it's essential to use room temperature butter or your cookies won't get that light, buttery texture.
- confectioners' sugar - this will keep the shortbread cookies really light and tender while adding essential sweetness. You also need powdered sugar for rolling the cookies in.
- all purpose flour
- vanilla extract - for flavor.
- pecans - finely chopped. I like to toast the pecans first to bring out their flavor.
You will also need measuring cups and spoons, a stand mixer (or a hand mixer with large mixing bowl), large sheet pan, parchment paper or silicone mat, cookie scoop, and wire rack.

How to Make the Best Mexican Wedding Cookies
- Cream wet ingredients. Cream the butter and sugar together using a stand mixer or hand mixer on medium speed until light and fluffy, about 2 minutes. Add vanilla and beat on medium until incorporated.


- Add flour. Gradually add the flour and beat on low speed until combined, and a dough has formed.


- Add pecans. Add pecans and beat on low speed until incorporated.


- Chill. Cover and chill for 1 hour.
- Scoop cookies. Line a half sheet baking pan with parchment paper or a silicone baking mat. Scoop out a tablespoon of dough and roll into a 1-inch ball with your hands and place at least 1 inch apart on the baking sheet. Once the baking sheet is full, transfer to the refrigerator and chill until oven is preheated.
- Bake. Bake in a 350F preheated oven for 15-18 minutes, until they are golden brown on the bottom edges.


- Roll. Allow cookies to cool on the baking sheet for 5 minutes, then roll them in a bowl of confectioners' sugar while still warm, until completely coated.
- Cool and re-roll. Transfer the cookies to a wire cooling rack to cool completely. The sugar at this stage will melt and be slightly sticky. Roll them again in confectioners' sugar once completely cooled.


Recipe Variations
- Try different nuts. Instead of pecans, use walnuts, hazelnuts, cashews, pistachios, etc.
- Amp up the nutty flavor. Replace the vanilla extract with almond extract for an extra pop of nuttiness to complement the pecans.
- Play with add-ins. Mexican wedding cookies are known for their pecan flavor, but you can certainly make some creative adaptations. Try using candied pecans instead of toasted pecans or add sprinkles, mini chocolate chips, etc. Add a little ground cardamom for a fruity, herby note. They're also lovely with a bit of fresh orange zest!
- Ditch the sugar coating. If you prefer the pieces of pecans but aren't a big fan of the powdered sugar coating, make these pecan sandies instead. The cookie recipes are almost identical minus the sugar coating!
How to Serve
These Mexican Wedding Cookies are delicious served on with a hot drink like tea or coffee. Some if my favorites include:
- Easy Peppermint Hot Chocolate
- Chai Tea Latte
- Matcha Latte
- Slow Cooker Apple Cider
- White Hot Chocolate
- Golden Milk Turmeric Latte
Recipe Tips and Tricks
- Roll twice. This is the trick to getting that classic white snowball appearance. Roll the cookies while still warm, then roll a second time after cooling for an even coating of powdered sugar.
- Use room temperature butter. When your ingredients list is this short, the quality and condition of the ingredients makes a big difference! The butter must be fully softened, or it won't turn light and fluffy in the mixer. You can't rush this step!
- Freeze and bake later. If you know you want to serve these Mexican wedding cookies throughout the holiday season, make a batch, roll the cookies into dough balls, then freeze them solid on a cookie sheet. Transfer the cookie dough balls into a freezer-safe container and then bake and roll in sugar following the instructions in the recipe card. You'll get that freshly baked flavor without any fuss.
Storing and Freezing Instructions
How to Store
Store any leftover cookies in an airtight container at room temperature for 3-4 days or freeze the baked cookies for later. If you need to stack several layers, place a piece of parchment paper between the layers to keep them from smudging too much.
How to Freeze
Store the baked cookies in a freezer-safe container, then freeze them for up to 3 months. Do not thaw in the fridge, as this can cause the powdered sugar to become wet. Place the frozen cookies on a cookie platter at room temperature and enjoy right away.
You can also freeze the cookie dough balls on a parchment lined sheet pan for 1-2 hours until hard. Then transfer to a freezer bag or airtight container and freeze for up to 3 months. When ready to bake, thaw the dough balls in the fridge and bake like normal. Roll in a powdered sugar and enjoy!
FAQ
Mexican wedding cookies have a long culinary history, spanning hundreds of years across Europe, the Middle East, Latin America, and beyond. Although they are commonly enjoyed in Mexico (and called polvorones), traditional Mexican wedding cookies most likely descend from shortbread cookies made in the ancient Middle East, as similar recipes appear across Europe. These days, they are a popular option for Christmas, Easter, baby showers, and any other special occasions.
Yes, but the powdered sugar can easily absorb moisture and liquefy while thawing. It's best to either eat the cookies cold from the freezer or freeze the uncooked dough balls, bake them off, and roll in sugar for a freshly baked taste.
The difference is minimal. Personally, I grew up with pecan sandies being more like pecan shortbread - buttery, crisp, with a melt-in-your-mouth flavor. However, many people grew up with them rolled into little balls and tossed in confectioner's sugar after baking, just like Mexican wedding cookies. That sugar topping is really the main difference, although there are subtle variations between different recipes.
More Shortbread Cookie Recipes
- 50 Best Cookie Recipes
- Classic Shortbread Cookies
- Whipped Shortbread Cookies
- Chocolate Shortbread Cookies
- Cut Out Shortbread Cookies
- Christmas Shortbread Cookie Bites
Tried this recipe?
I'd love to hear what you think! Leave a comment and rating below to share your feedback. Your reviews help others discover this recipe and help me keep creating more free recipes for you. Snap a photo and tag me on social media @aheadofthyme too.

- « Previous Page
- 1
- …
- 3
- 4
- 5
- 6
- 7
- …
- 40
- Next Page »