
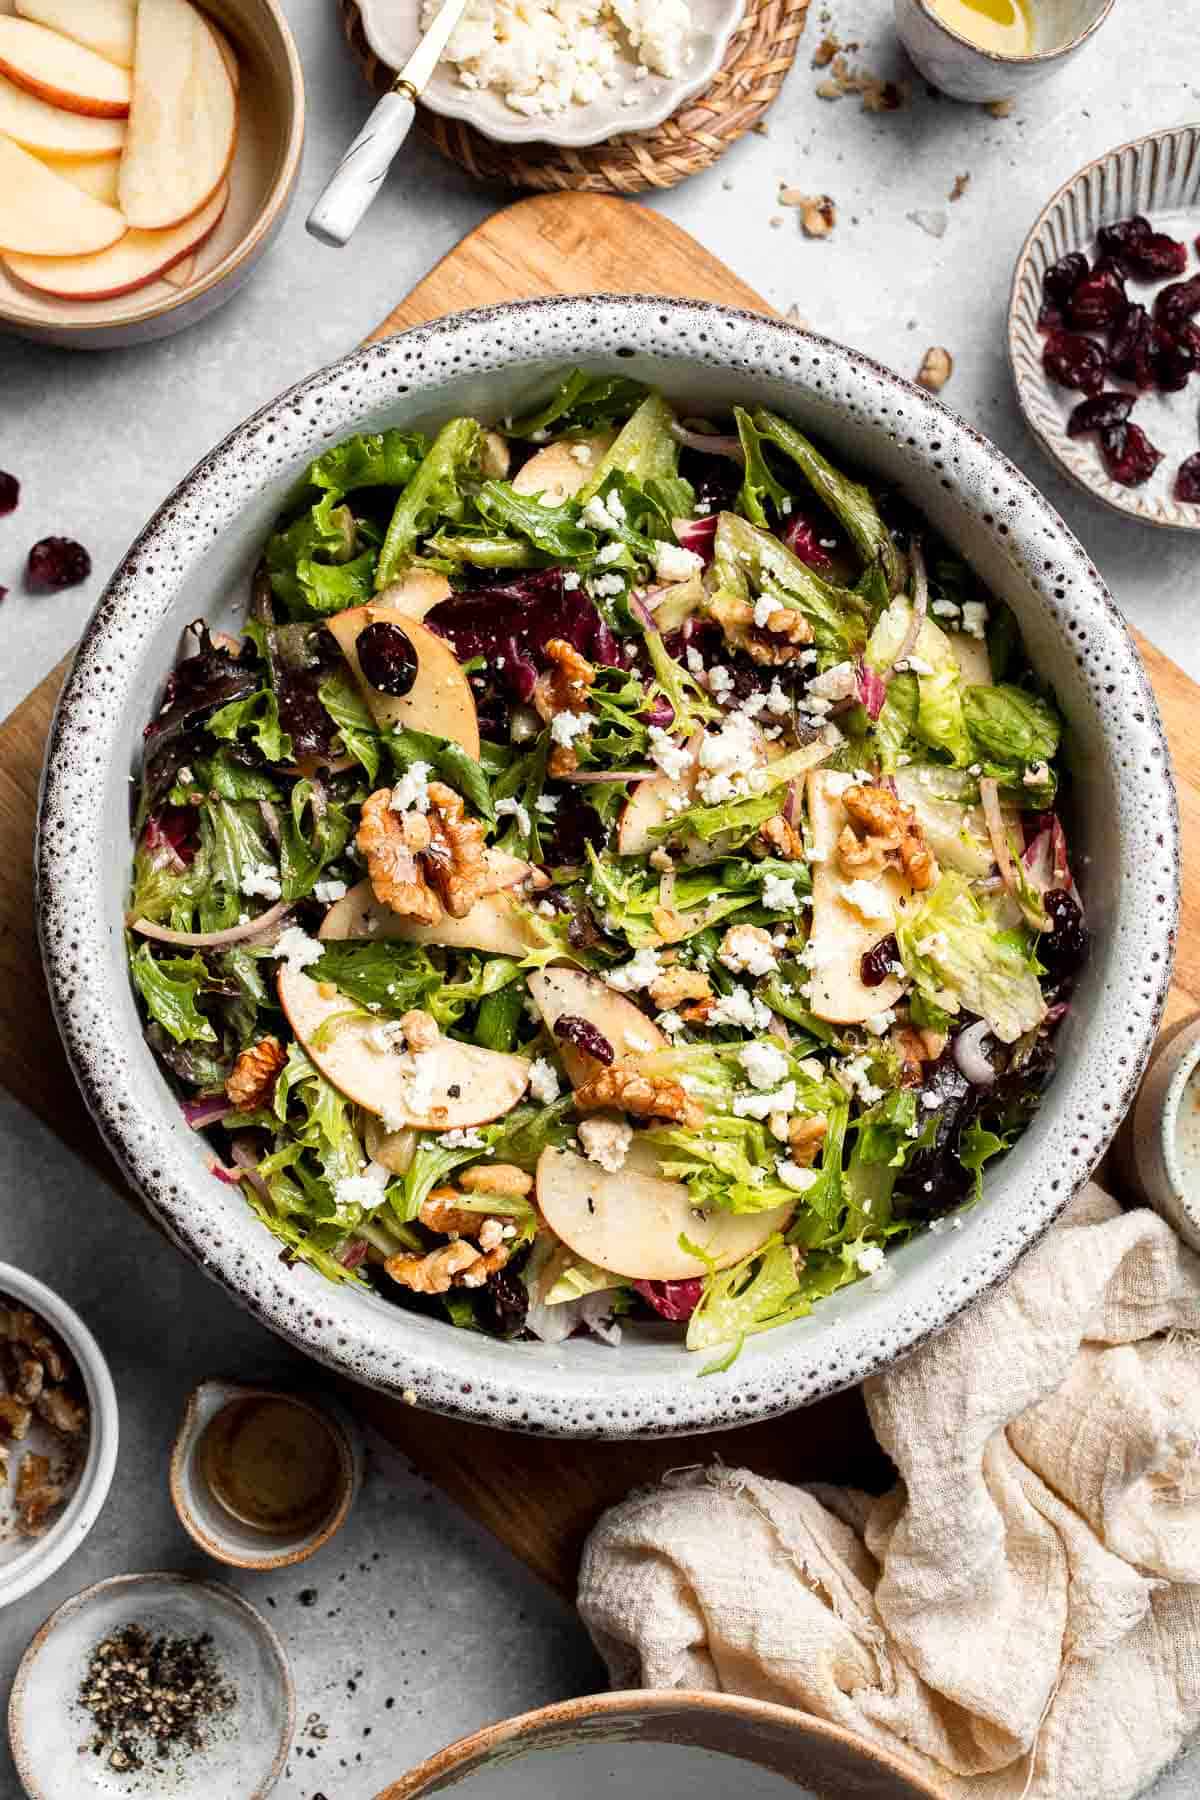
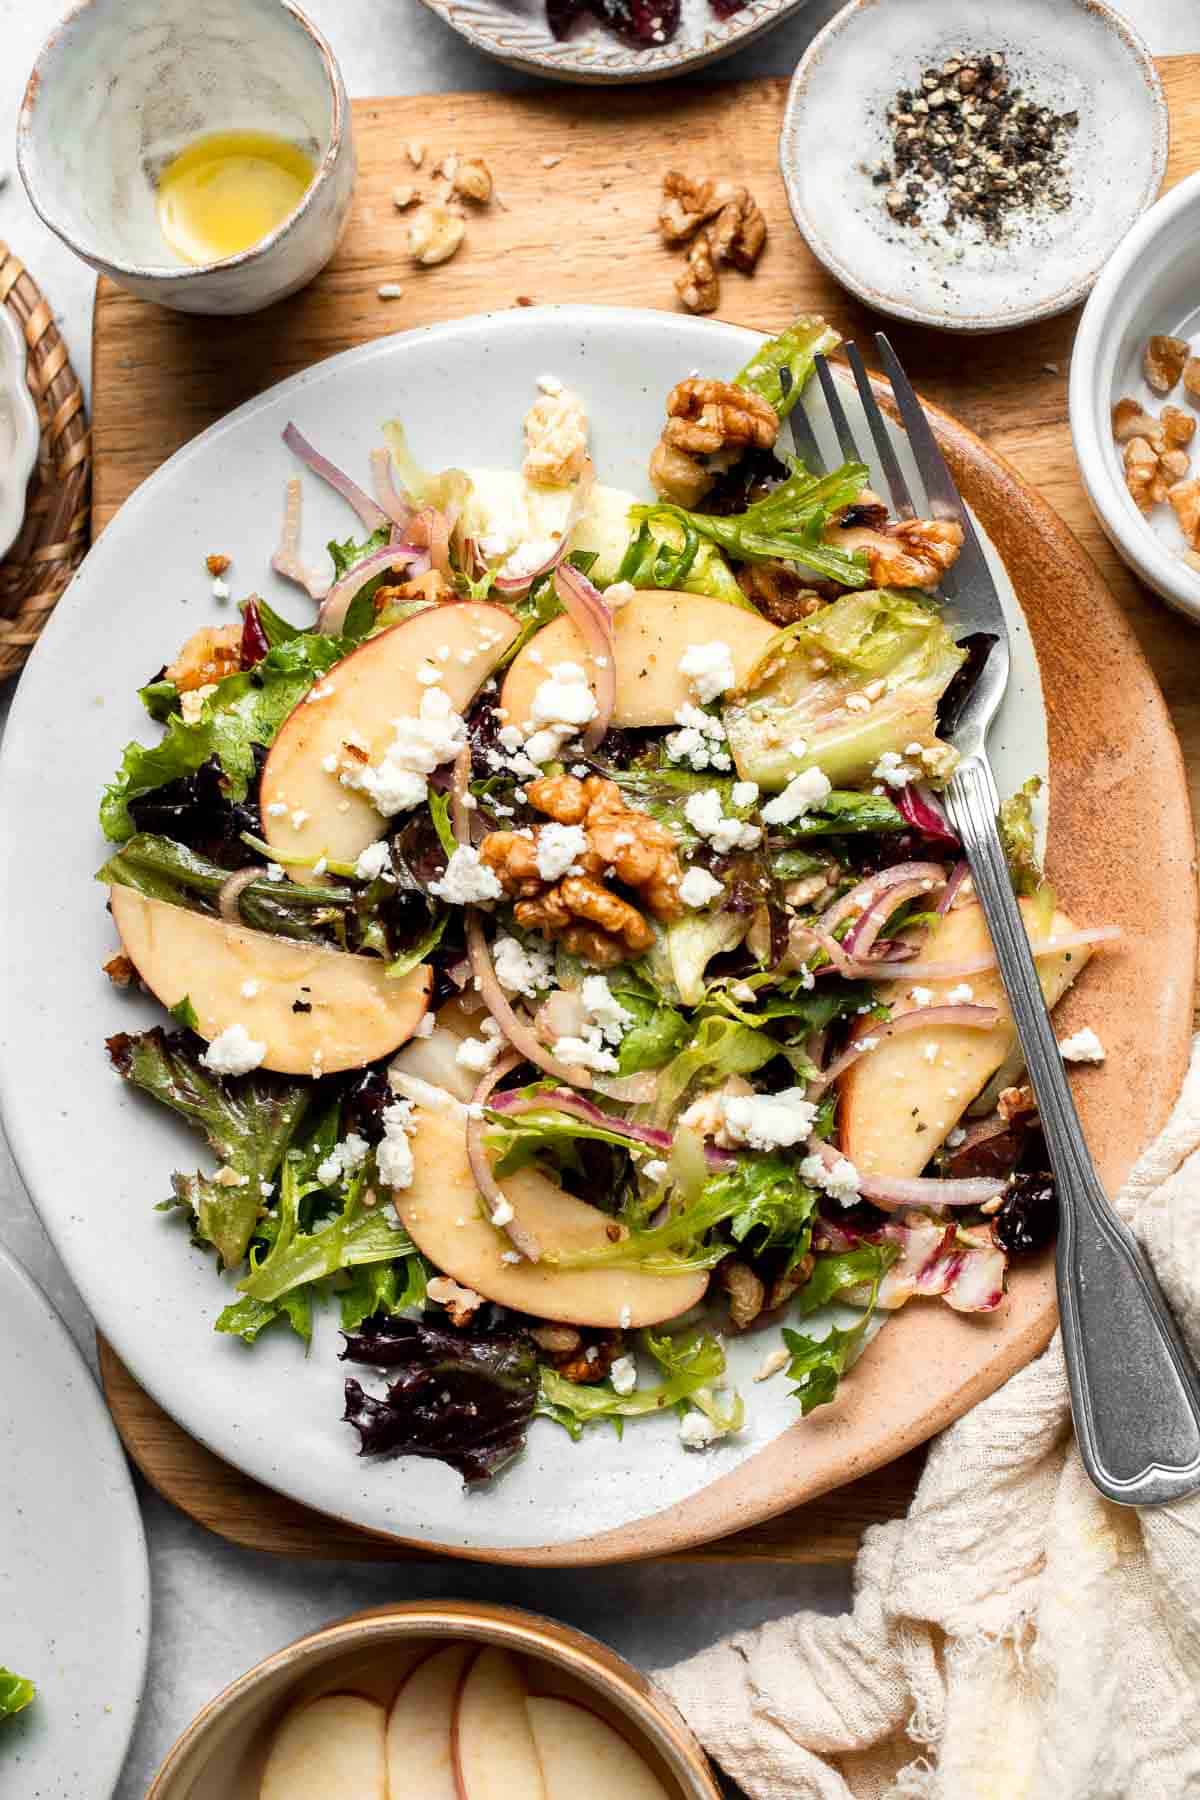
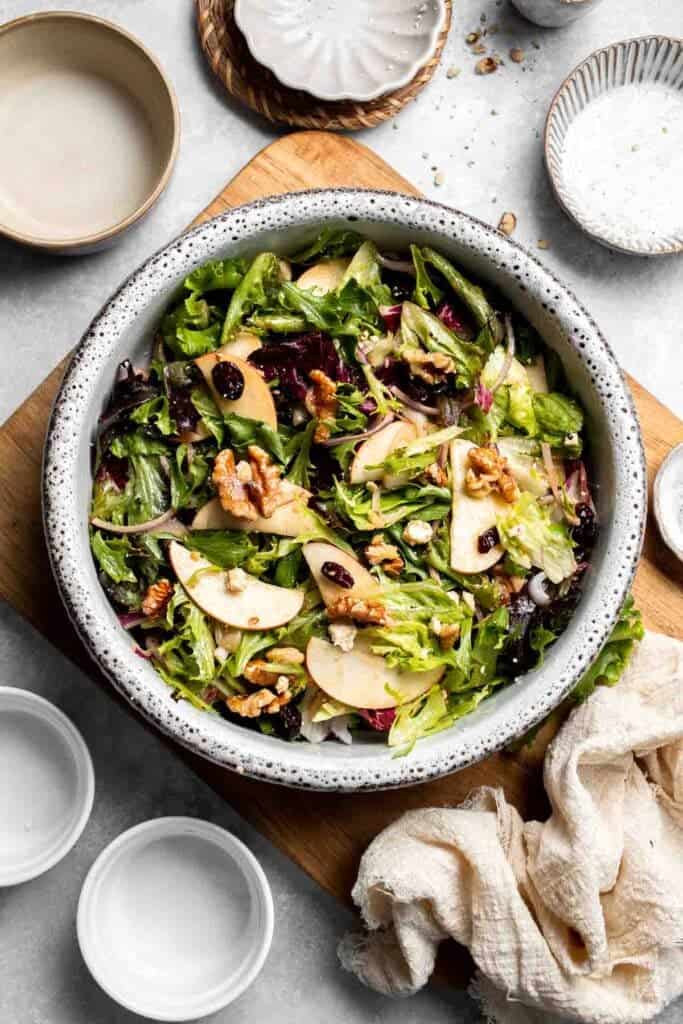
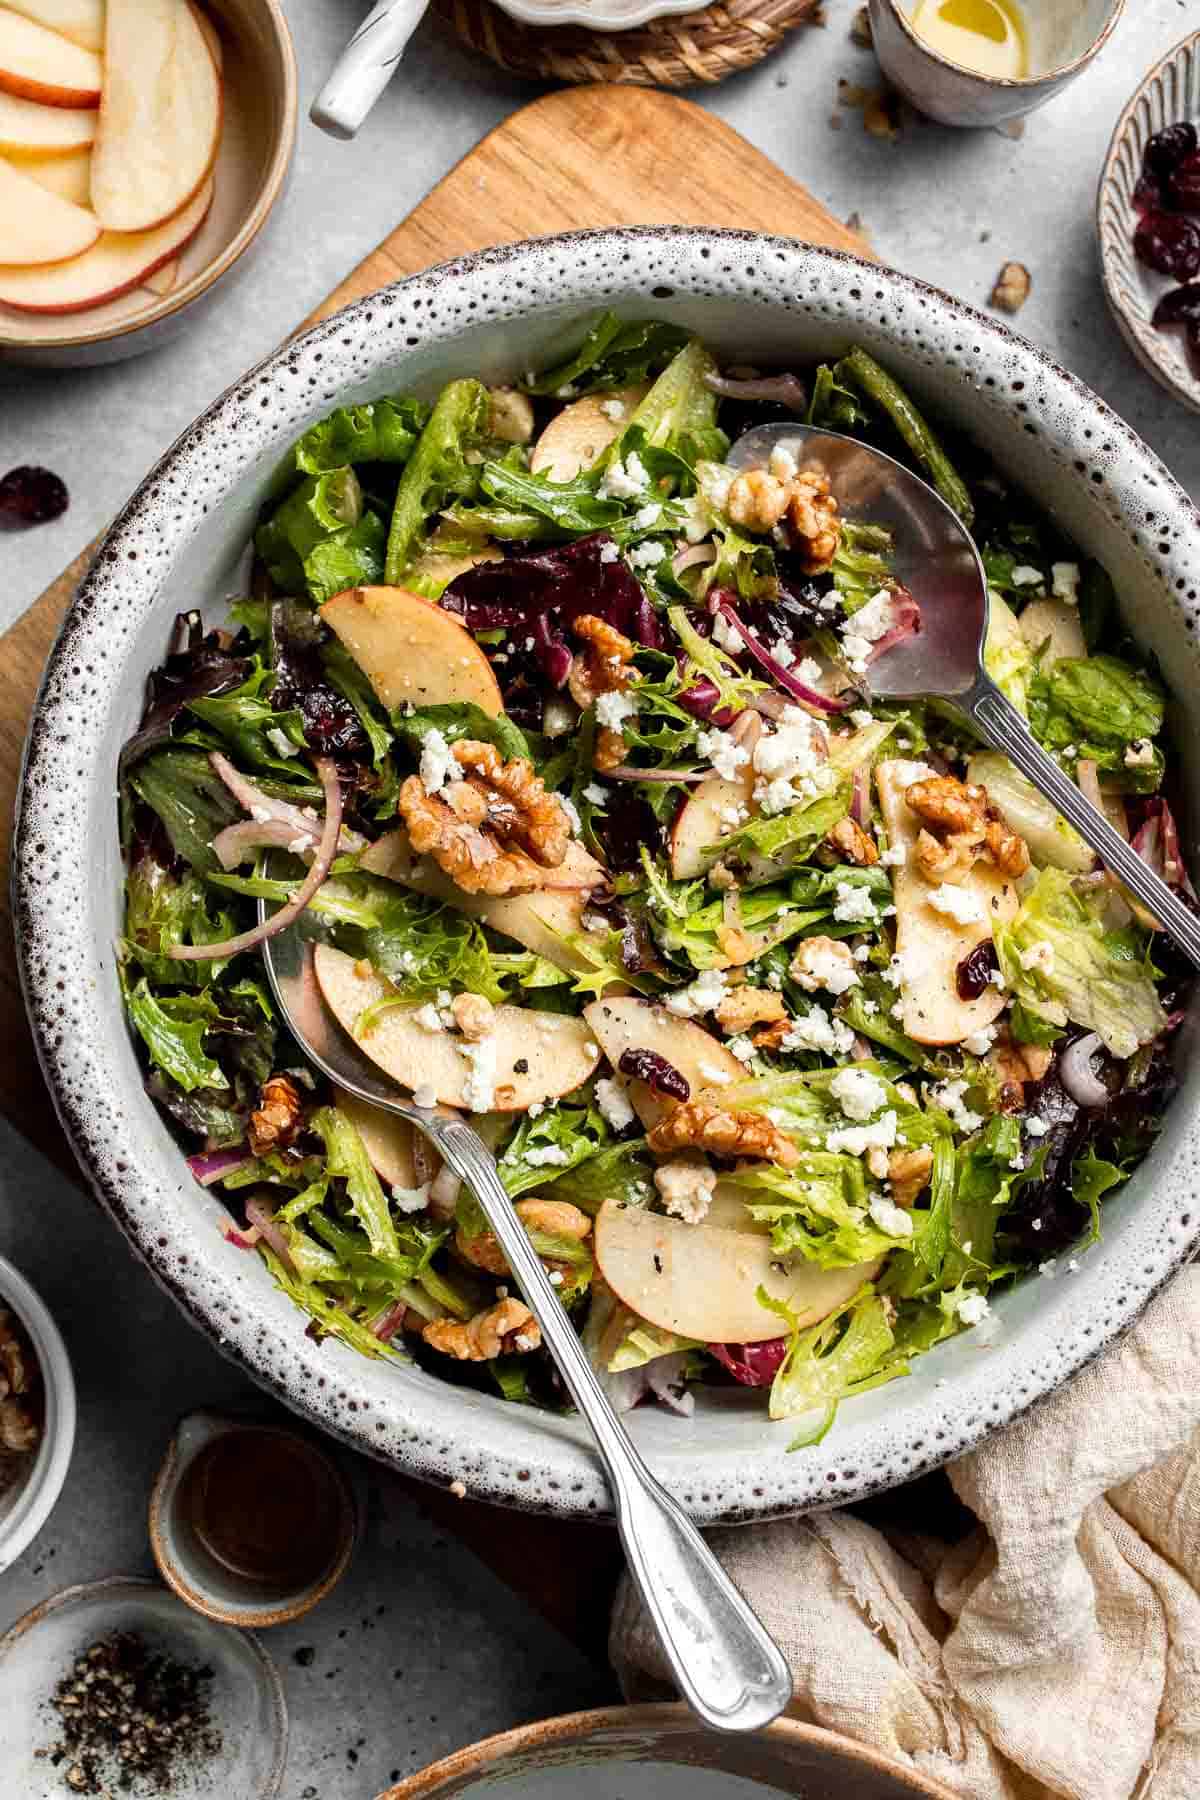
Apple Walnut Salad with Homemade Balsamic Vinaigrette is crisp, colorful, and refreshing - basically everything you want in a salad. With crunchy apples, buttery walnuts, tangy feta, and sweet cranberries tossed over tender spring greens, this salad has that perfect balance of sweet, salty, and savory. Drizzle it with an easy homemade balsamic vinaigrette, and you've got a vibrant dish that looks fancy but takes just minutes to make.
It's the kind of salad you'll want to make on repeat. Perfect for weeknight dinners, healthy lunches, or holiday spreads, this salad is hearty enough to serve on its own but versatile enough to pair with mains like roasted chicken, salmon, or steak. The homemade balsamic dressing ties it all together with a bold, tangy finish that you just can't get from a store-bought bottle.
If you loved this salad, try our Arugula Salad with Apple and Pecan and Fall Harvest Salad with Butternut Squash and Apple next. These apple salads pair beautifully with Roasted Butternut Squash Soup for a cozy, fall-friendly dinner.
Why You'll Love This Recipe
- A salad that actually satisfies. Crisp apples, crunchy walnuts, and tangy feta create a symphony of flavors and textures, all tied together with a zippy balsamic vinaigrette. It's refreshing, satisfying, and the kind of salad you'll crave again and again.
- Ready in minutes. This salad comes together in just 10 minutes with simple, everyday ingredients. No cooking required - just slice, toss, drizzle, and serve. It's proof that salads can be beautiful without being complicated.
- Good-for-you ingredients. Packed with leafy greens, fruit, nuts, and a light homemade vinaigrette, this salad is naturally gluten-free, vegetarian, and nutrient-dense. You'll get fiber, protein, healthy fats, and antioxidants all in one delicious bowl.
- Perfect for any occasion. Weeknight dinner? Holiday spread? Potluck with friends? This salad fits right in. Elegant enough for entertaining on Thanksgiving but simple enough for a Tuesday night.
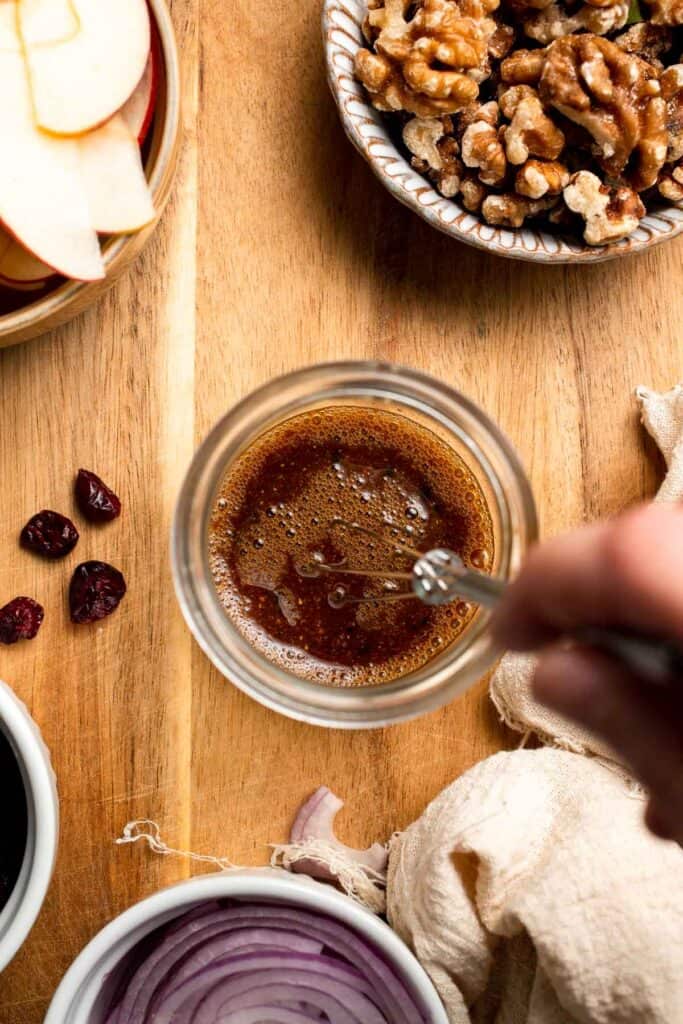
- A homemade vinaigrette. Forget store-bought bottles! Making your own balsamic vinaigrette takes just 2 minutes with pantry staples you already have on hand. It tastes fresher, brighter, and better than anything you'll find at the store. Plus, you can double the batch and keep extra in the fridge all week for easy meals.
Ingredients and Substitutions
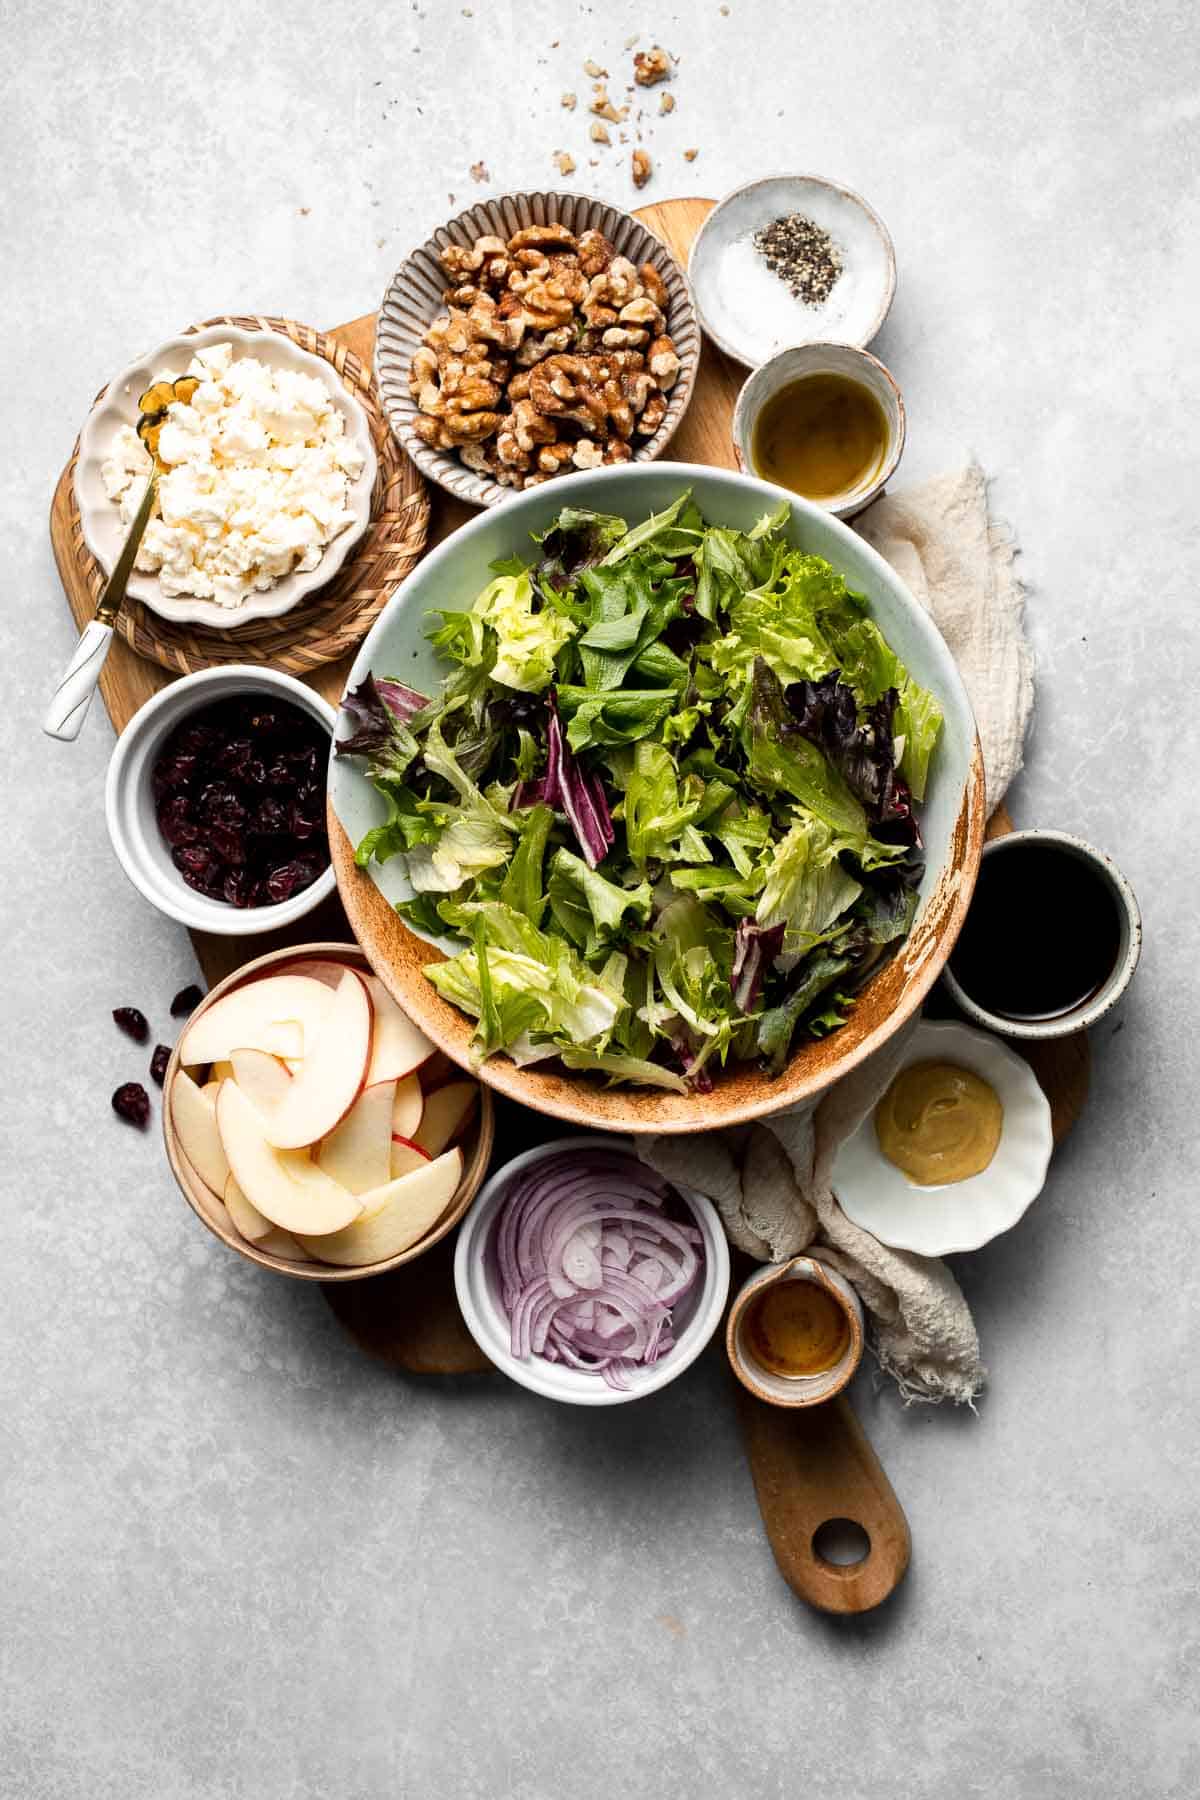
To make this delicious Apple Walnut Salad, you will need the following ingredients (see recipe card below for quantities):
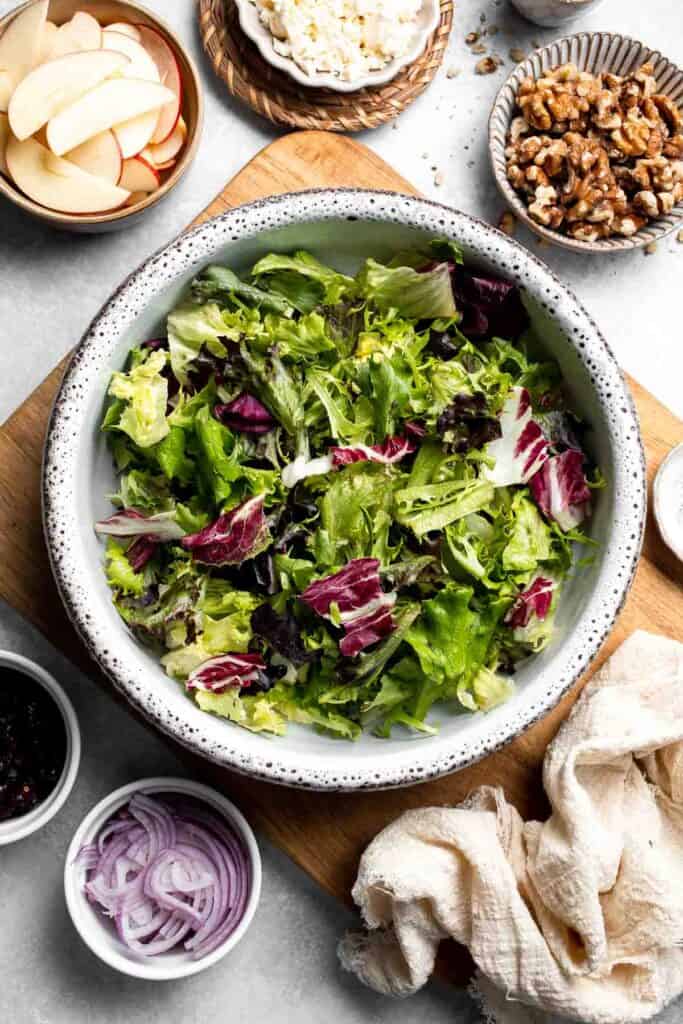
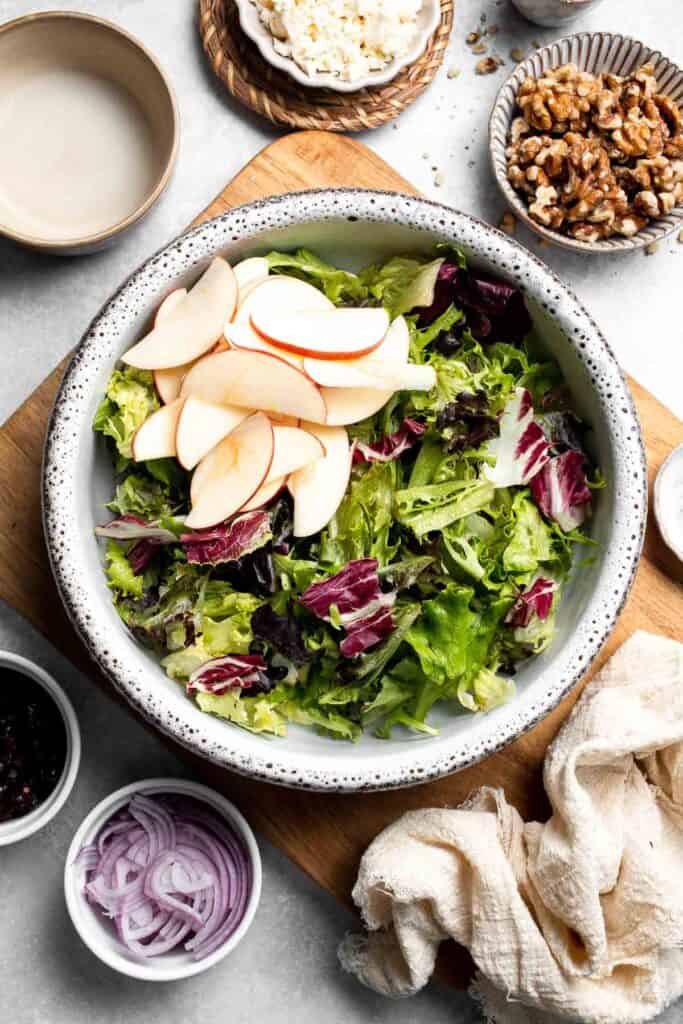
- spring mix salad greens - Tender, mild greens are a great base. Baby spinach, baby kale, or arugula are also delicious alternatives that bring a slightly stronger flavor.
- apple - Use a crisp variety like Honeycrisp apples, Pink Lady, Fuji, Gala, or Granny Smith for the best crunch and flavor. You can even mix red and green apples for a pop of color.
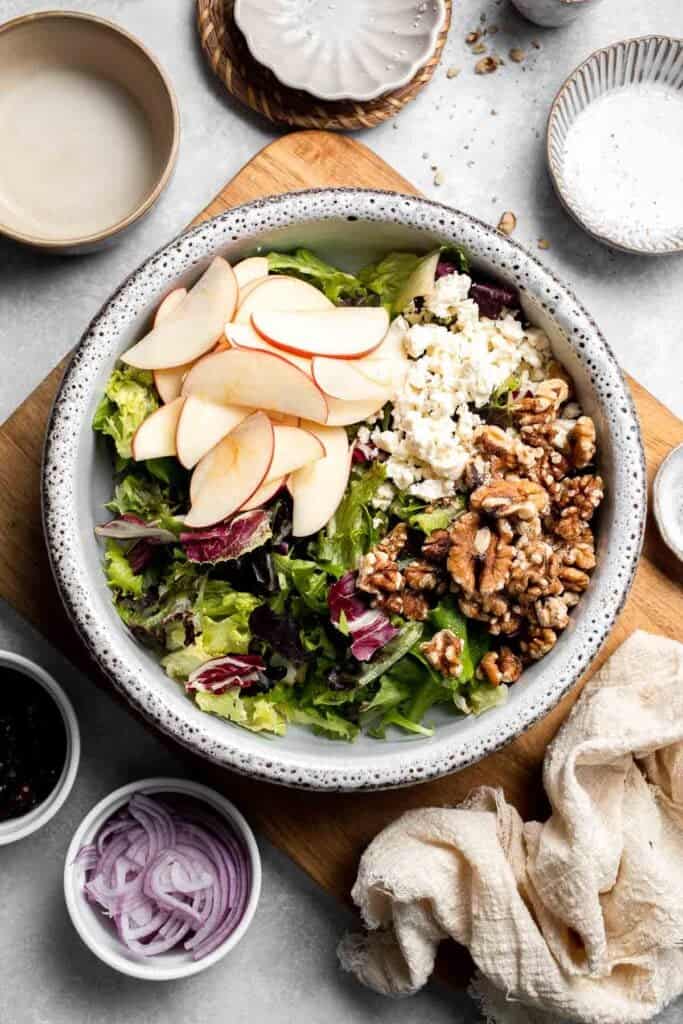
- walnuts - Buttery and slightly bitter, they balance the sweetness of apples and cranberries. Pecans, almonds, or hazelnuts also work if that's what you have on hand. For a sweet twist, try candied walnuts or Candied Pecans.
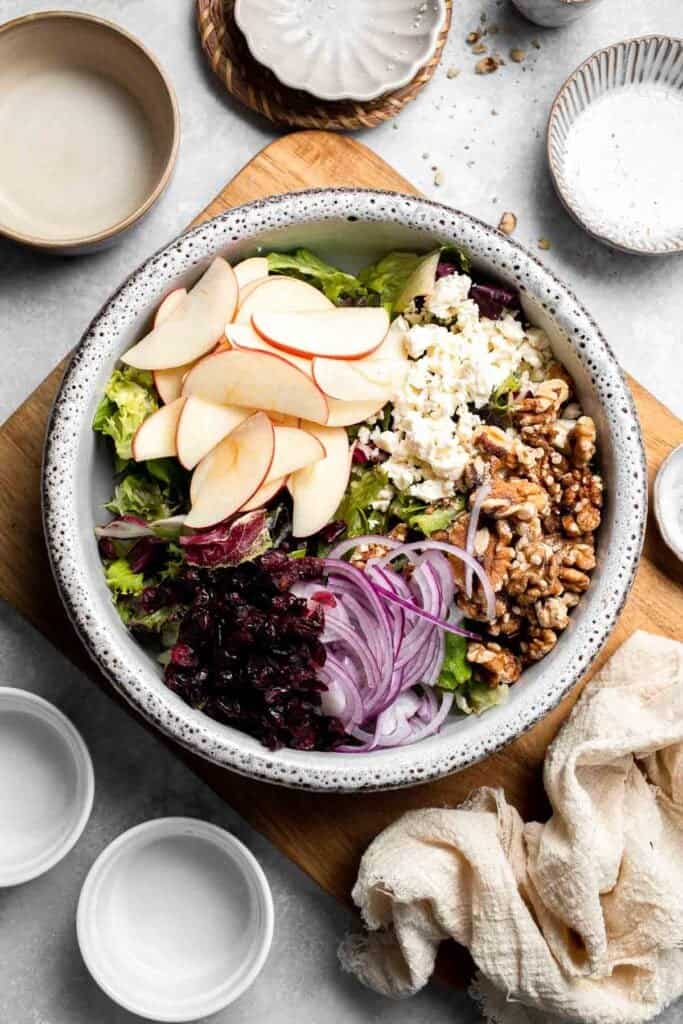
- red onion - Add a sharp bite that keeps the salad from being too sweet. For a milder flavor, soak them in cold water for 10 minutes before adding.
- dried cranberries - Sweet and tart, they add chewiness and a burst of color. Raisins, dried cherries, or even chopped dates make great swaps.
- feta cheese - Tangy and salty, creamy feta cheese ties everything together. You can also substitute with other cheese with a similar texture. Goat cheese brings creaminess, while blue cheese ir gorgonzola adds a bold savory punch.
- balsamic vinegar - The base of the vinaigrette. Apple cider vinegar or red wine vinegar can be used if you want a slightly different tang.
- Dijon mustard - Adds tang and helps emulsify the dressing so it doesn't separate. Yellow mustard can be used, but Dijon gives the best flavor.
- honey - A touch of sweetness to balance acidity. Maple syrup is a great vegan substitute and adds deeper caramel notes.
- salt and pepper - Essential for seasoning the dressing and brightening the flavors.
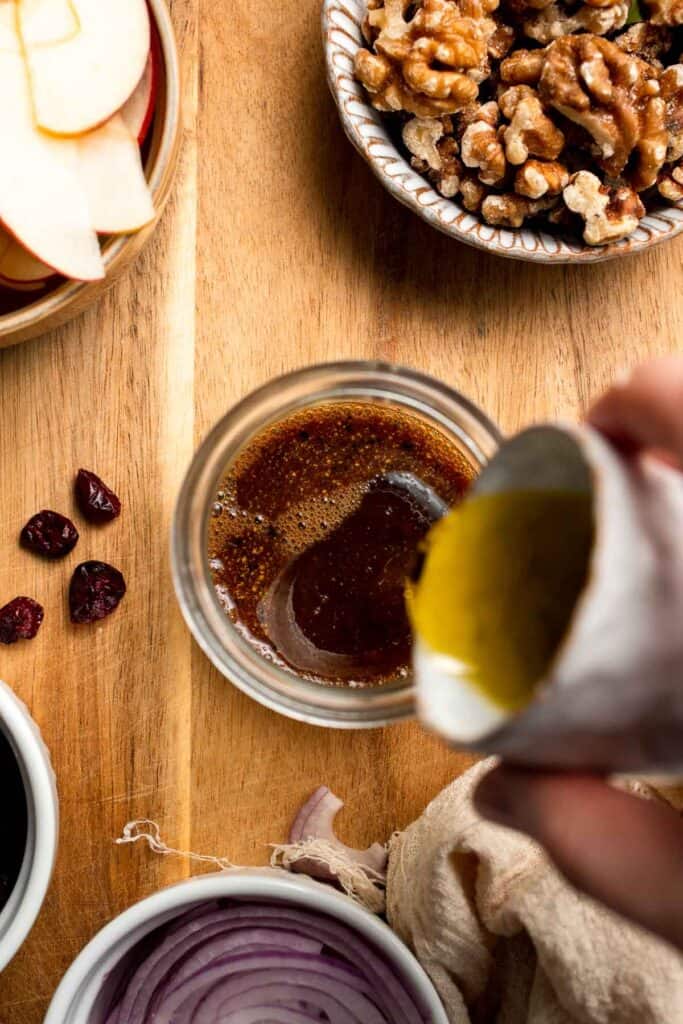
- extra virgin olive oil - Whisks into the vinaigrette for a silky finish. Avocado oil also works if you prefer.
Equipment
You'll also need measuring cups and spoons, a sharp knife and cutting board, a large salad bowl, and a small bowl and whisk (or mason jar with a lid) for making the vinaigrette.
Instructions
- Combine the salad. In a large serving platter, add the salad greens, apple slices, red onions, walnuts, dried cranberries, and feta cheese.
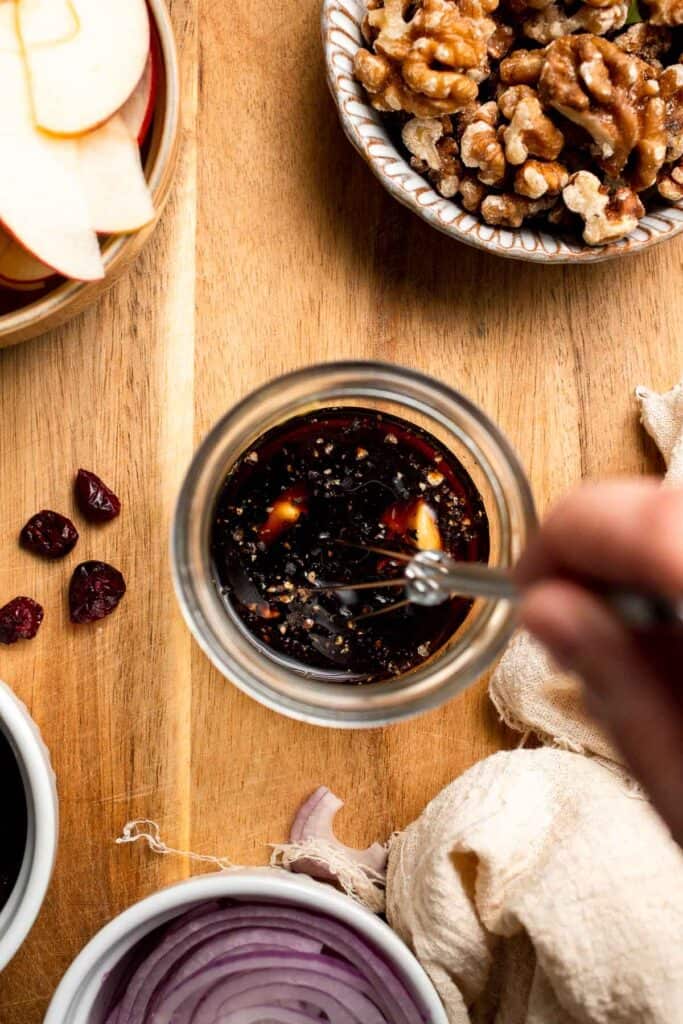
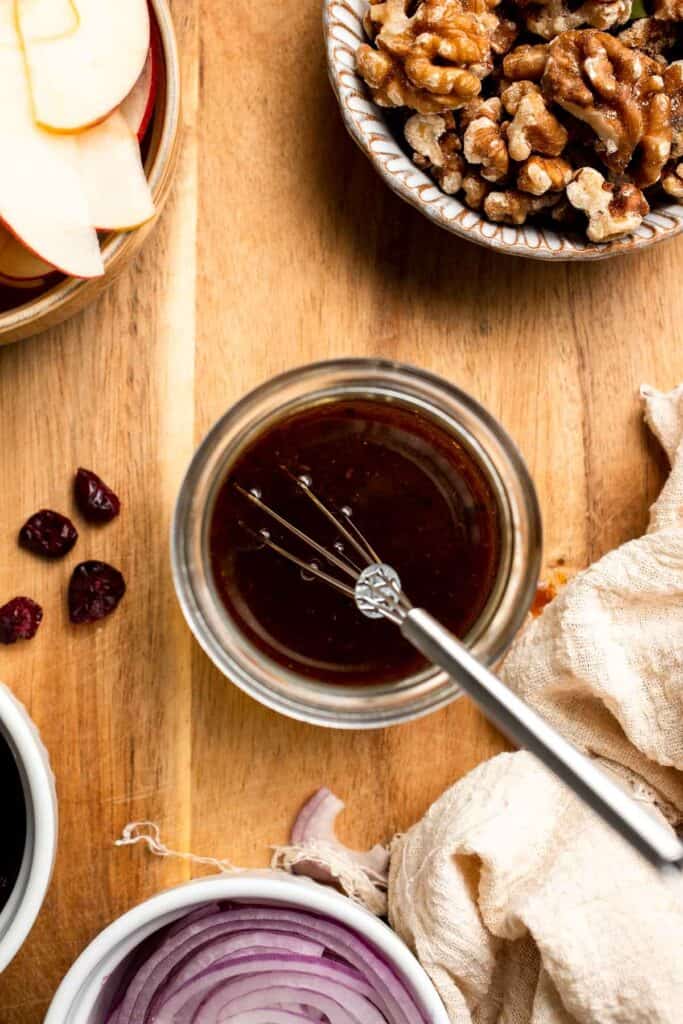
- Make the dressing. In a small mixing bowl, whisk together the dressing ingredients (balsamic vinegar, Dijon mustard, honey, salt, and black pepper). Slowly drizzle in the olive oil while whisking until the dressing is smooth and emulsified.
- Toss and serve. Pour the salad dressing on top and toss salad gently to combine. Taste and adjust with extra salt and pepper if needed. Serve immediately.


Expert Tip: Slice the Apples Last
Apples oxidize and brown quickly, so slice them right before serving the salad. If prepping ahead, toss them lightly in lemon juice or soak briefly in water with lemon juice to keep them looking fresh and crisp.
More Tips and Tricks
- Balance the flavors. Taste the vinaigrette before tossing. If it's too tangy, add a touch more honey; if it's too sweet, add a splash more vinegar. Small tweaks make a big difference.
- Layer, don't dump. For a prettier presentation, layer greens on the bottom, then sprinkle toppings evenly before drizzling with dressing. It turns the salad into a showstopper.
- Double the dressing. The vinaigrette keeps well in the fridge for up to a week, so make extra to use on other salads or even as a marinade for chicken.
Recipe Variations
- Add protein. Top with grilled chicken, salmon, or chickpeas to turn this salad into a complete meal. Shrimp or steak also make great additions, or even a sprinkle of bacon bits.
- Toast the walnuts. Toasting walnuts in a dry skillet for 3-4 minutes until fragrant makes them extra crunchy and enhances their nutty flavor.
- Add seeds. For extra crunch, add in some sunflower seeds or pumpkin seeds.
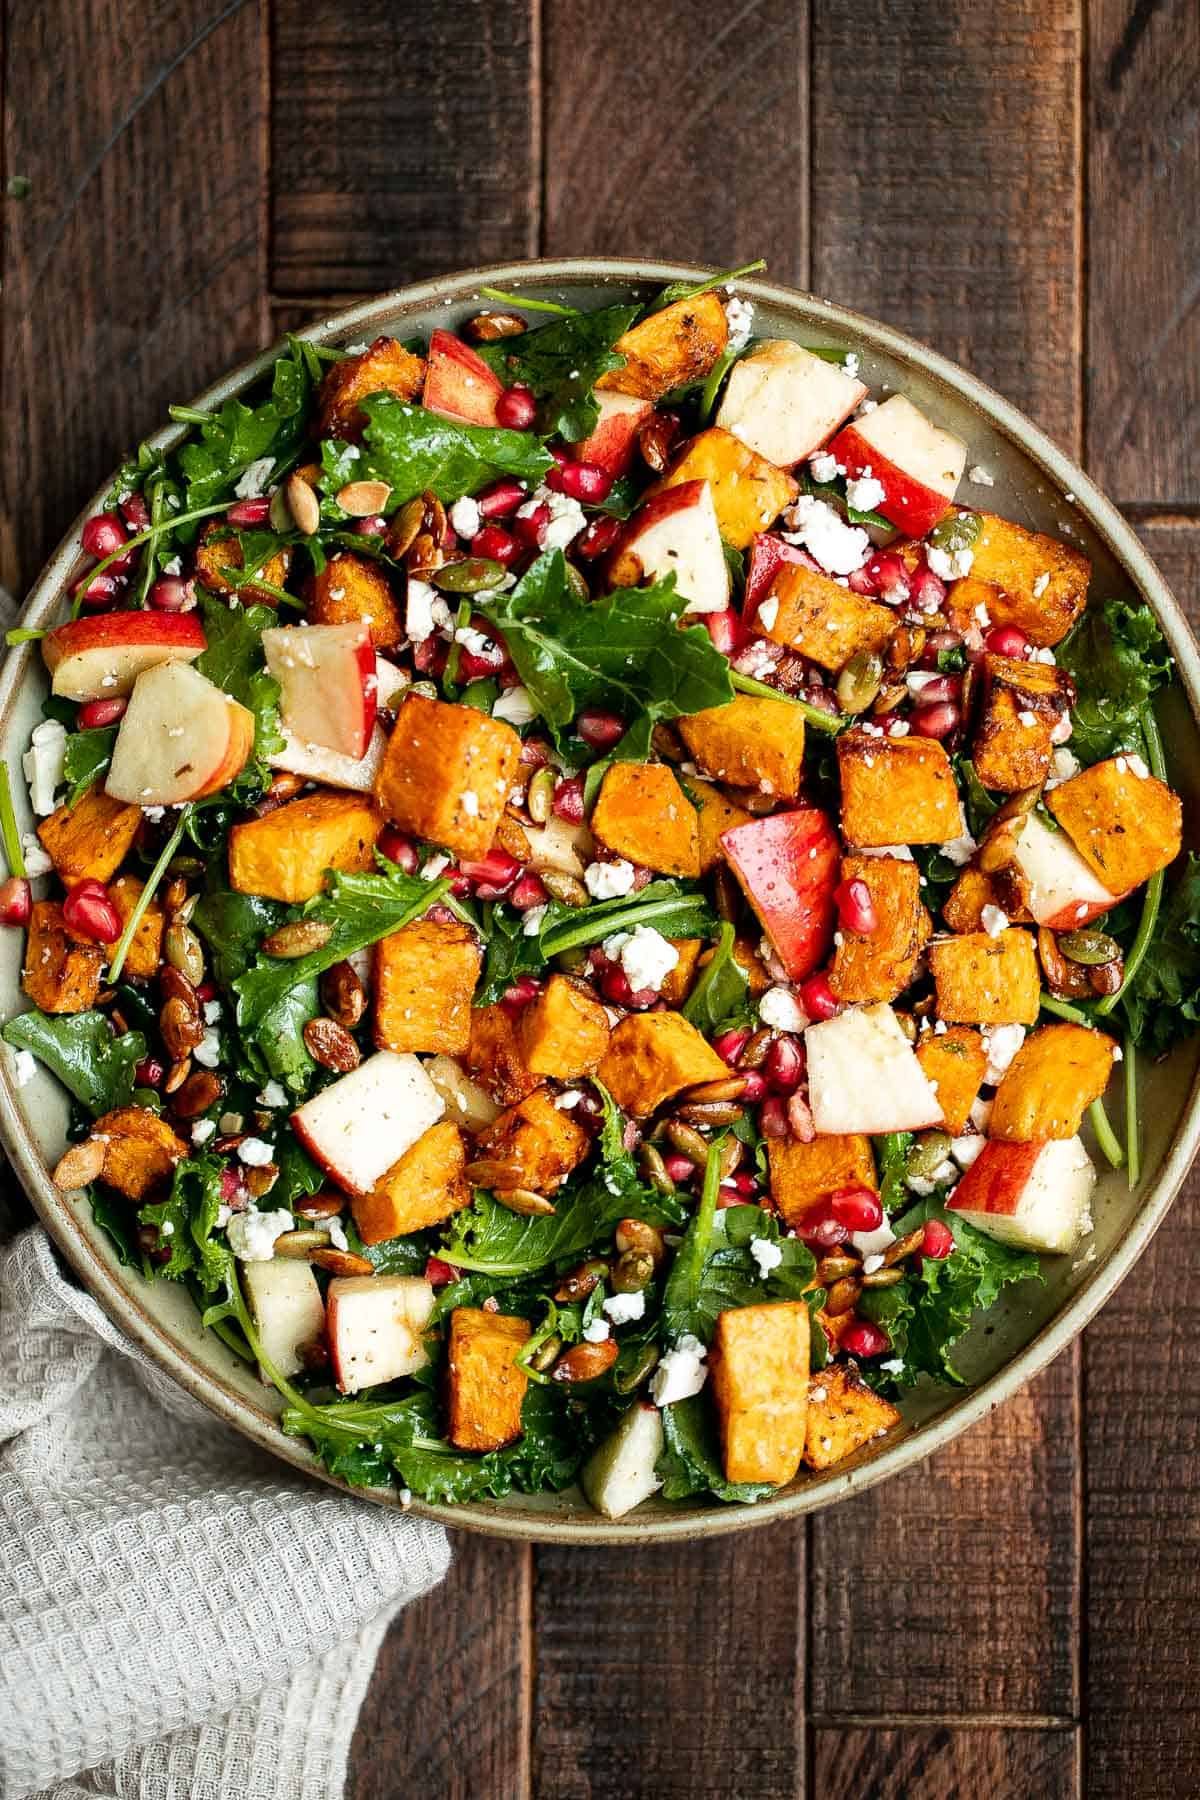
- Turn it into a harvest salad. Add roasted butternut squash or sweet potatoes for an extra fall vibe. See our Fall Harvest Salad with Butternut Squash and Apple.
- Use kale. Use chopped kale instead of spring mix and massage it with a little olive oil before tossing.
- Make it vegan. To make this salad vegan, omit the cheese or replace with a vegan feta alternative.
- Cheesy twist. Use blue cheese crumbles for a bold, savory punch that contrasts beautifully with sweet apples.
Storage
Store undressed salad in an airtight container in the fridge for up to 2 days. Keep dressing in s a separate container such as a small jar.
How to Serve
This salad is fresh, crisp, and versatile, making it the perfect starter, side, or even a light main course. It pairs wonderfully with roasted chicken or turkey for a hearty meal, or with cozy soups like butternut squash or tomato for a warming combo. It's also a fantastic partner to salmon, pork chops, or steak, since the tangy balsamic vinaigrette cuts through the richness of the protein. For a simple great lunch, enjoy it with a slice of crusty bread or alongside a grain dish like quinoa or farro.
These are my favorite dishes to serve with this apple walnut salad:


Dinner Ideas
For more recipe ideas to pair this with on busy weeknights, check out our collection of easy dinner recipes, featuring one-pan dishes, quick pasta, roasted vegetables, light sides, and flavorful meals that come together in no time.
FAQ
Yes! Walnuts add crunch, a nutty flavor, and healthy fats that balance the sweetness of apples and cranberries in salads. They also make the salad more filling.
Many salads use walnuts, but this apple walnut salad is a classic. Waldorf salad, spinach salads, and fall harvest salads often feature walnuts too.
It's often referred to as an apple walnut salad. A classic example is Waldorf salad, which combines apples, walnuts, celery, and mayonnaise dressing. This recipe is a lighter, fresher take on the same flavor pairing.
Walnuts are a classic pairing, but pecans, almonds, pistachios, and hazelnuts also taste great with apples in both sweet and savory recipes.
Balsamic vinaigrette is the perfect match for apple walnut salad, balancing sweet and tangy flavors. Honey mustard or apple cider vinaigrette also pair well.
It depends on the salad, but vinaigrettes like balsamic, Italian, or lemon-herb are versatile. Creamy dressings like Caesar or ranch are classics too.
Homemade vinaigrettes with olive oil, vinegar, and a touch of honey or mustard are usually healthiest, since you control the ingredients. They're light, flavorful, and free from preservatives.
More Salad Recipes with Apples
Looking for other recipes like this? Try these:


Tried this recipe?
I'd love to hear what you think! Leave a comment and rating below to share your feedback. Your reviews help others discover this recipe and help me keep creating more free recipes for you. Snap a photo and tag me on social media @aheadofthyme too.
This post was originally published in 2018. It has since been updated with new photos and content.

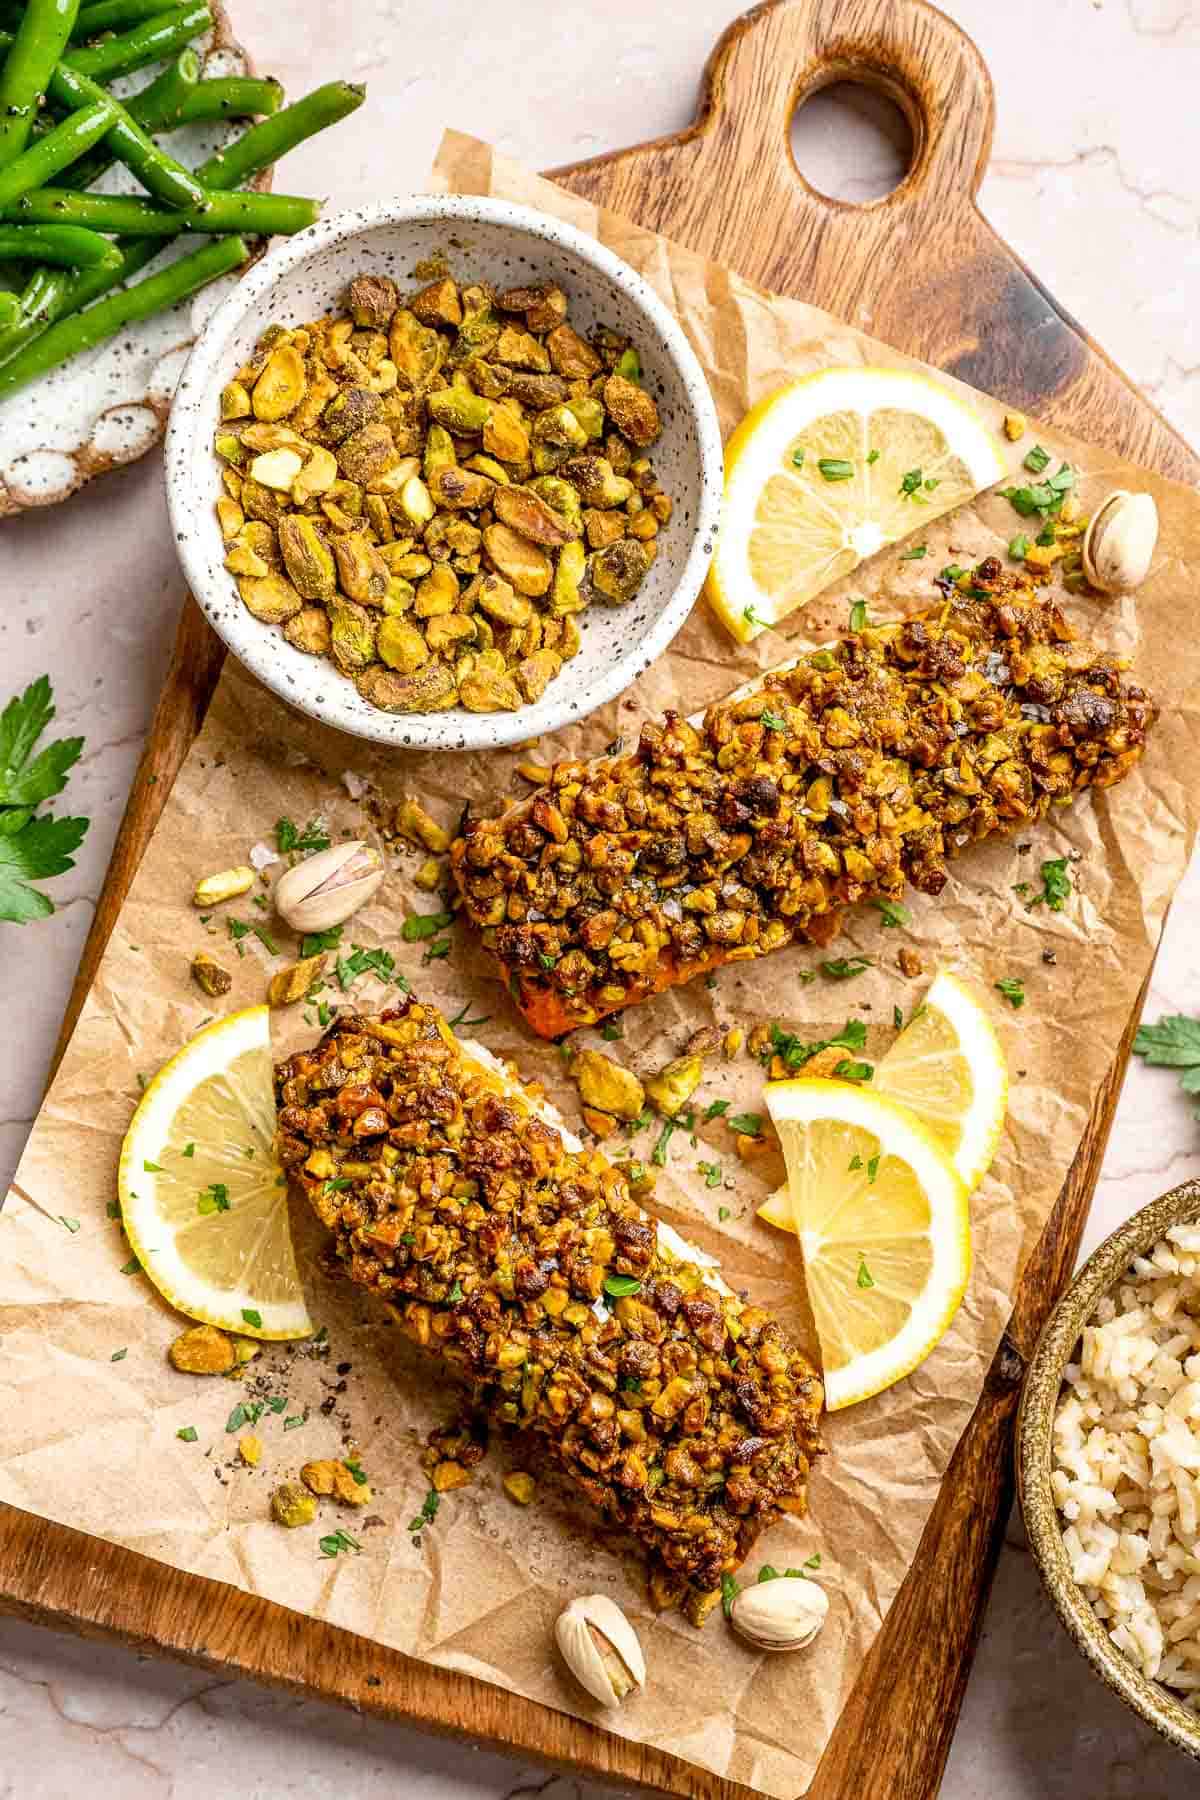
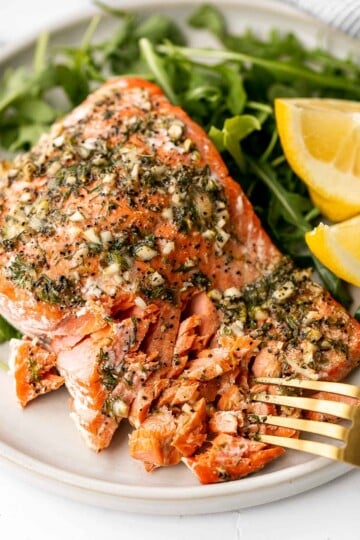
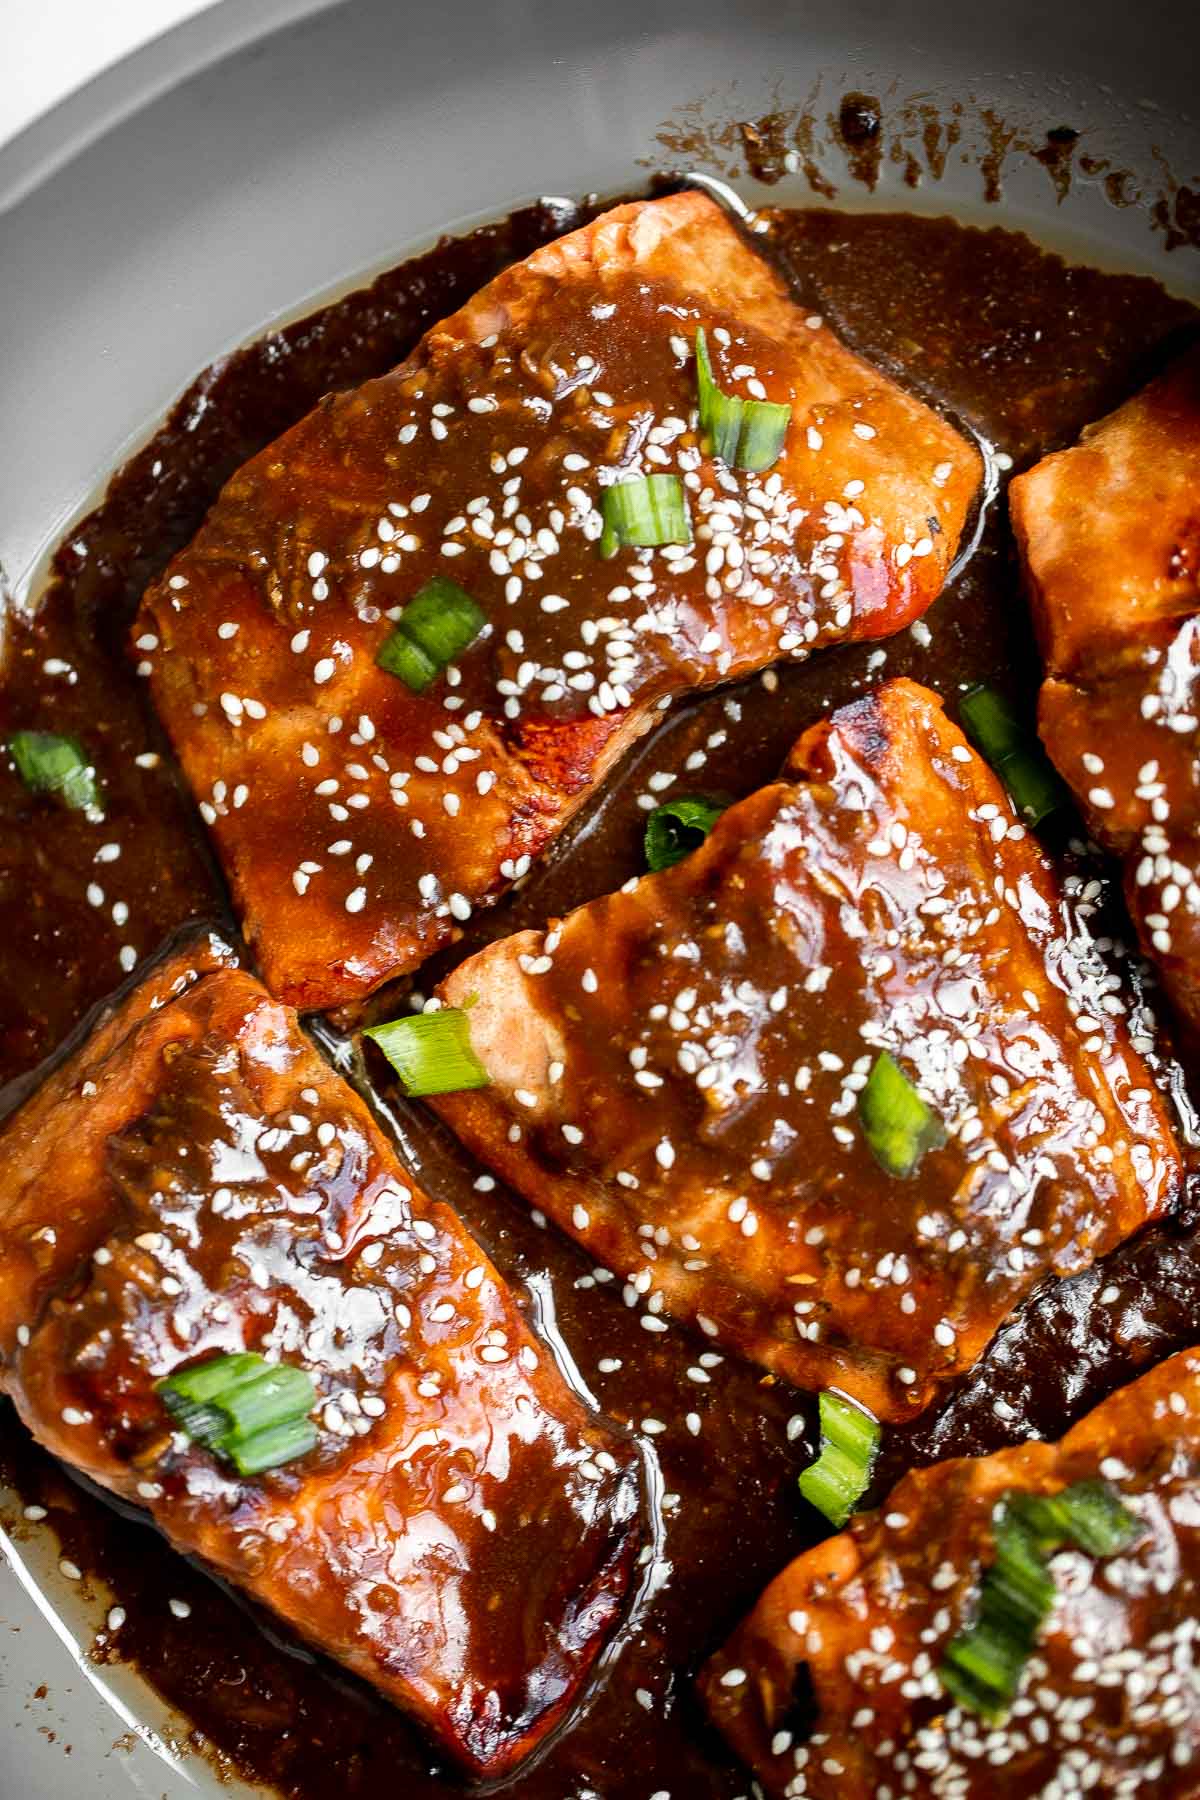
Pistachio-Crusted Salmon
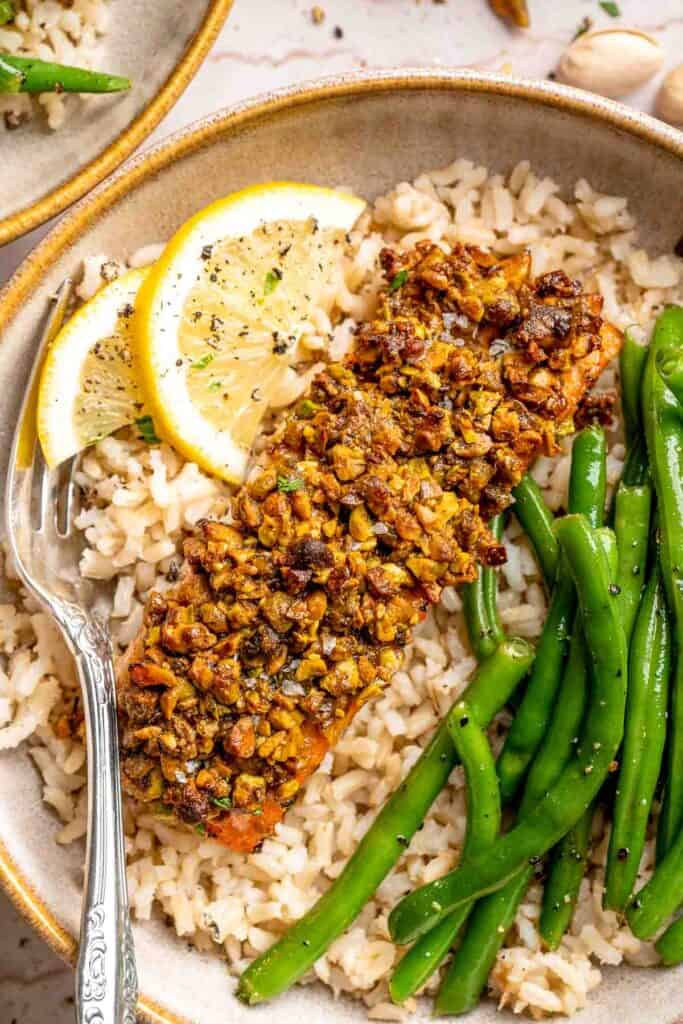
Pistachio Crusted Salmon is the kind of dish that feels restaurant-worthy but comes together in under 30 minutes. Tender, flaky wild salmon fillets are brushed with a garlicky Dijon-honey glaze, topped with a crunchy pistachio crust, and baked until golden. It's elegant, flavorful, and surprisingly simple.
This recipe proves that healthy doesn't have to be boring. Salmon is rich in omega-3s, pistachios add plant-based protein and crunch, and the lemon-garlic glaze ties it all together with a bright, zesty finish. Whether you're serving it for a weeknight dinner or to impress guests, this recipe is a guaranteed win.
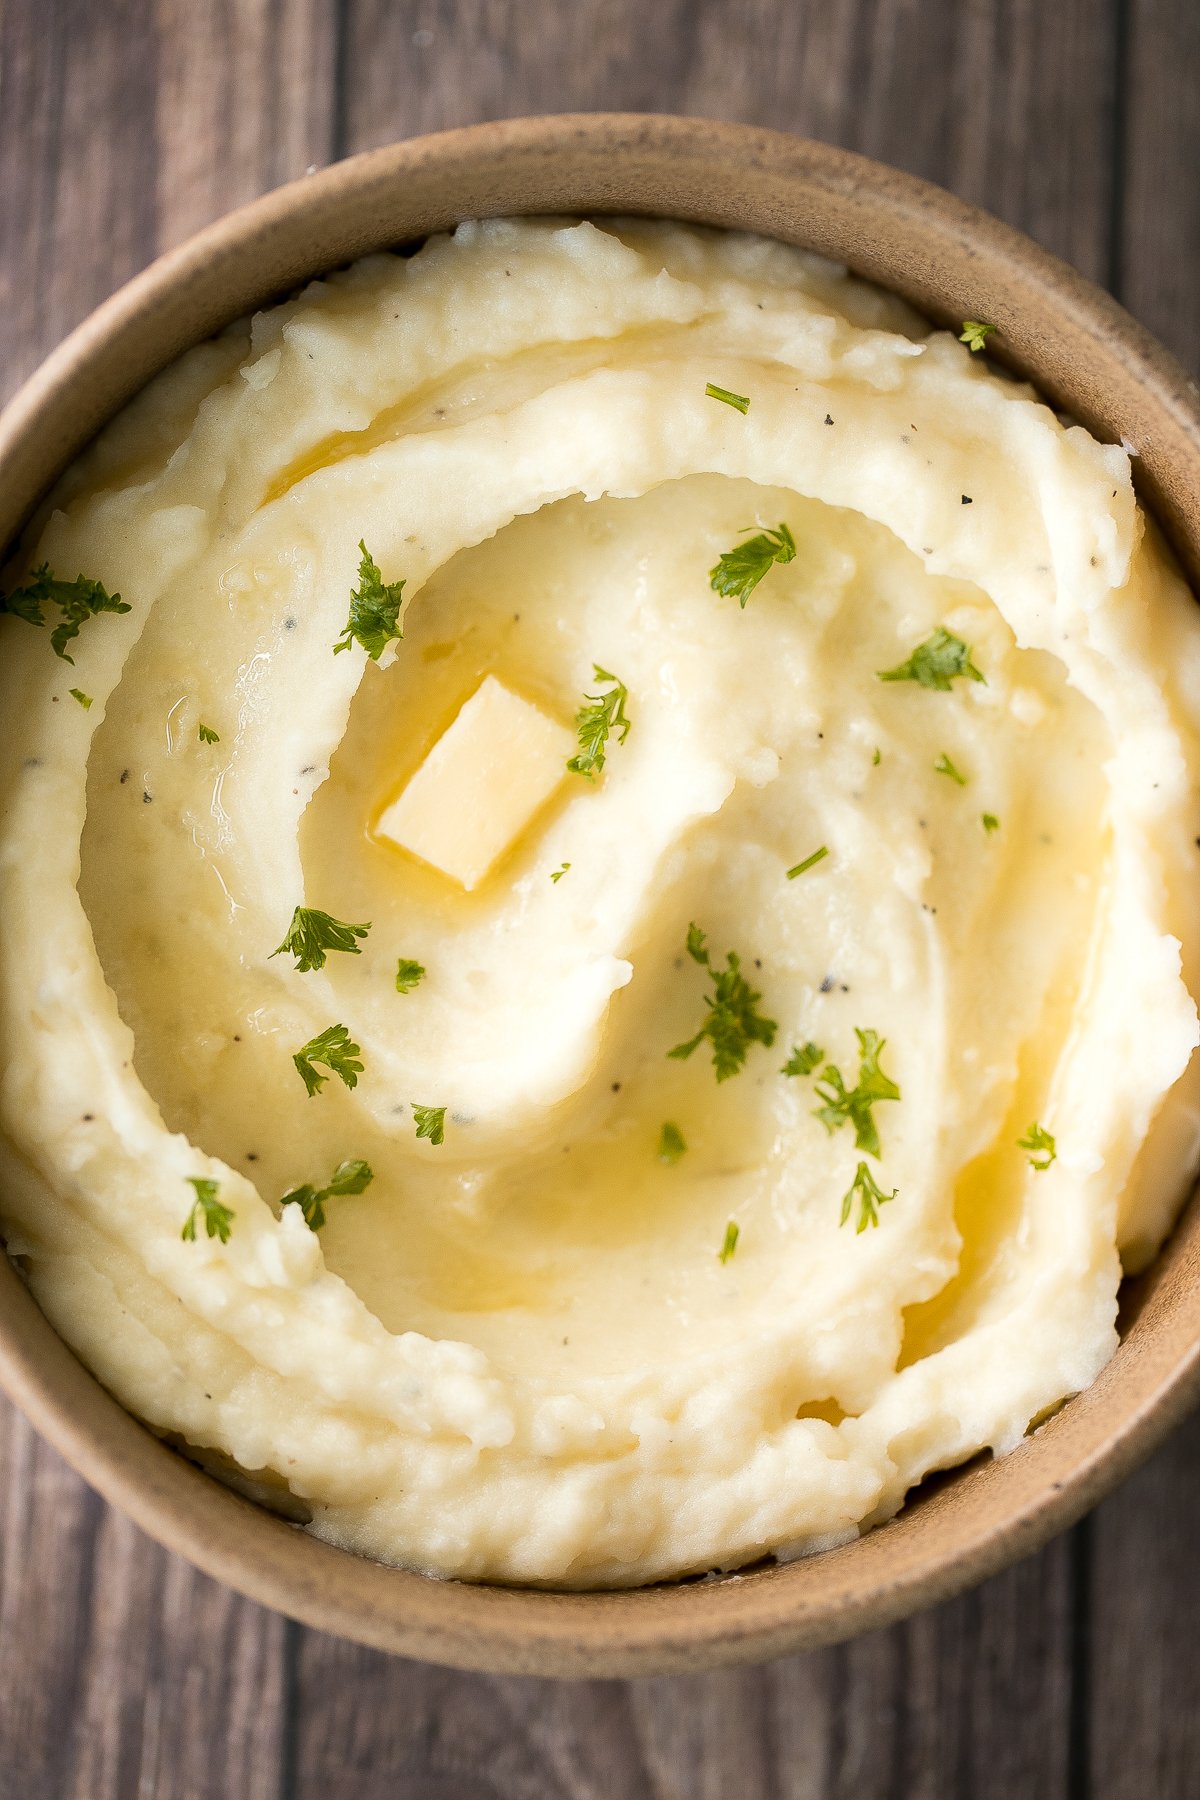
If you liked this recipe, you should try my Garlic Butter Salmon or Almond-Crusted Halibut with Lemon Garlic Butter next. Pair them with Baked Mashed Potatoes and a crisp Easy Tossed Salad and you've got yourself a fresh, balanced meal.

Did you know that this recipe was my first salmon recipe that I published after over a year of blogging back in 2017? I first tried pistachio-crusted salmon at a local steakhouse on my birthday that year. You might be thinking, who orders seafood at a steakhouse? I do. And as soon as I took that first bite, I was instantly inspired. This dish is drool-worthy amazing. Somehow the nutty pistachio mixed with the honey, lemon and garlic flavours in the glaze work wonders when combined with wild salmon. I just knew that I had to make my own version of pistachio-crusted salmon. And lucky for you, after some trial and error, here we are.
Why You'll Love This Recipe
- Quick and easy. Just 10 minutes of prep and 15 minutes in the oven. This dinner is on the table fast. It's what I love about salmon. No matter how exquisite the dish, it is always quick and easy to make. It truly makes the perfect weeknight dinner.
- Nutty, crunchy crust. Coarsely chopped pistachios give salmon the most satisfying golden crust without overpowering its natural flavor.
- Healthy and wholesome. Packed with protein, omega-3s, and good fats from both salmon and pistachios, this is a meal you can feel good about.
- Restaurant quality at home. With its vibrant crust and zesty glaze, this salmon looks fancy but is effortless to make.
Ingredients and Substitutions
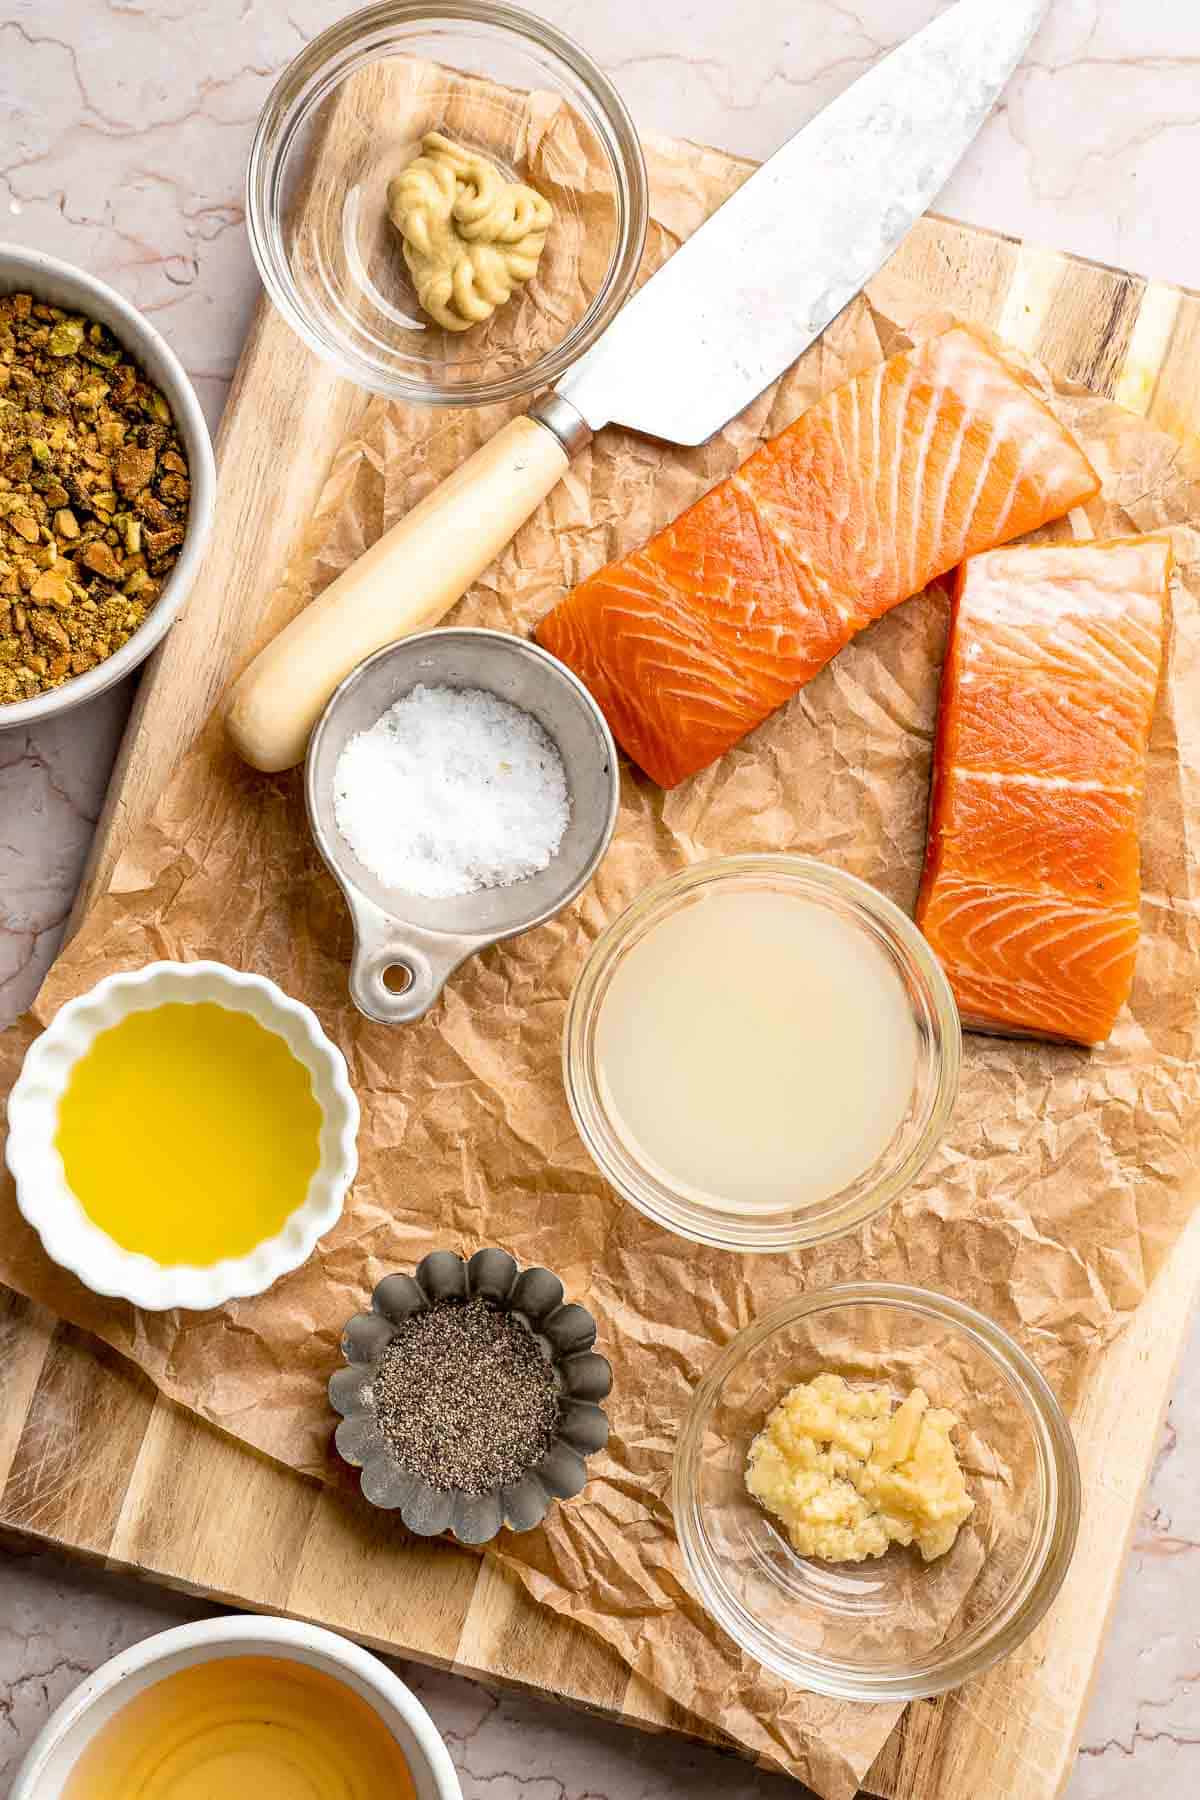
To make this easy and delicious pistachio-crusted salmon, you will need the following ingredients (see recipe card below for quantities):
- salmon fillets - We used 2 wild salmon fillets that are about 6 ounces or 175 grams each. You can also use farmed salmon or even trout.
- salt and pepper - Essential for seasoning the fillets.
- garlic - Freshly minced is recommended for the best, bold flavor. Garlic powder also works if that is what you have on hand. Use ¼ teaspoon garlic powder as a substitute.
- olive oil - Helps create the glaze. Avocado oil works too.
- Dijon mustard - Adds tang and depth. Yellow mustard can be used, but Dijon gives the best flavor.
- lemon juice - Freshly squeezed for brightness. Lime juice is a good substitute.
- honey - Balances the tang and enhances caramelization. Maple syrup is a good swap for a slightly different sweetness.
- pistachios - Coarsely chop the raw pistachios for crunch. Walnuts, almonds, or pecans can also be used.
Equipment
You'll also need measuring cups and spoons, a sharp knife and cutting board, a small mixing bowl for the glaze, and a parchment-lined baking sheet for easy cleanup.
How to Make the Best Pistachio-Crusted Salmon
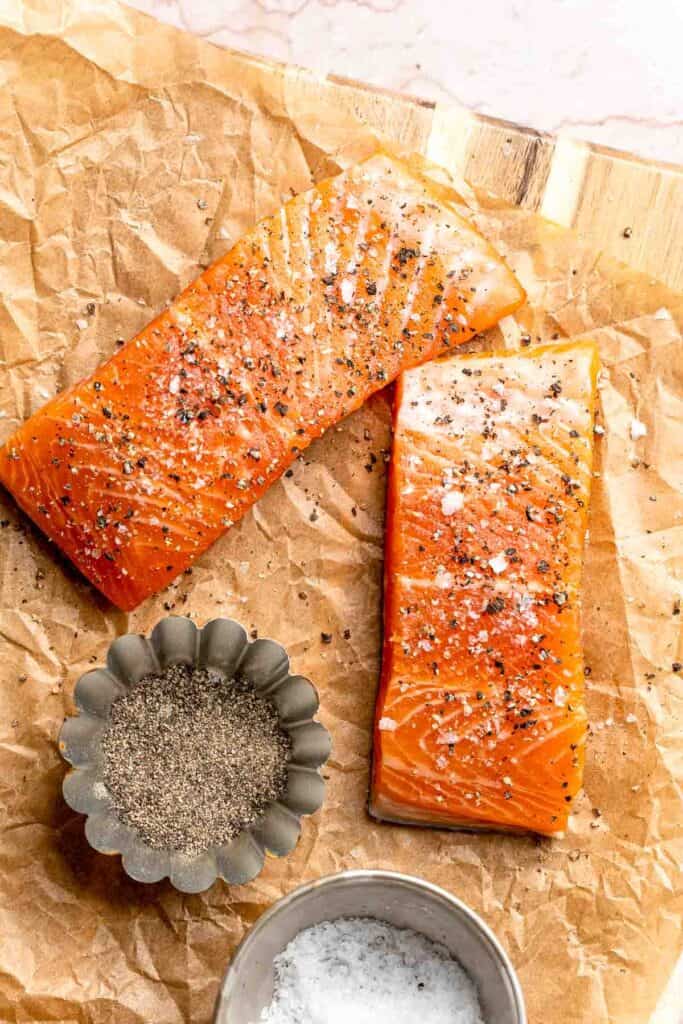
Prep salmon
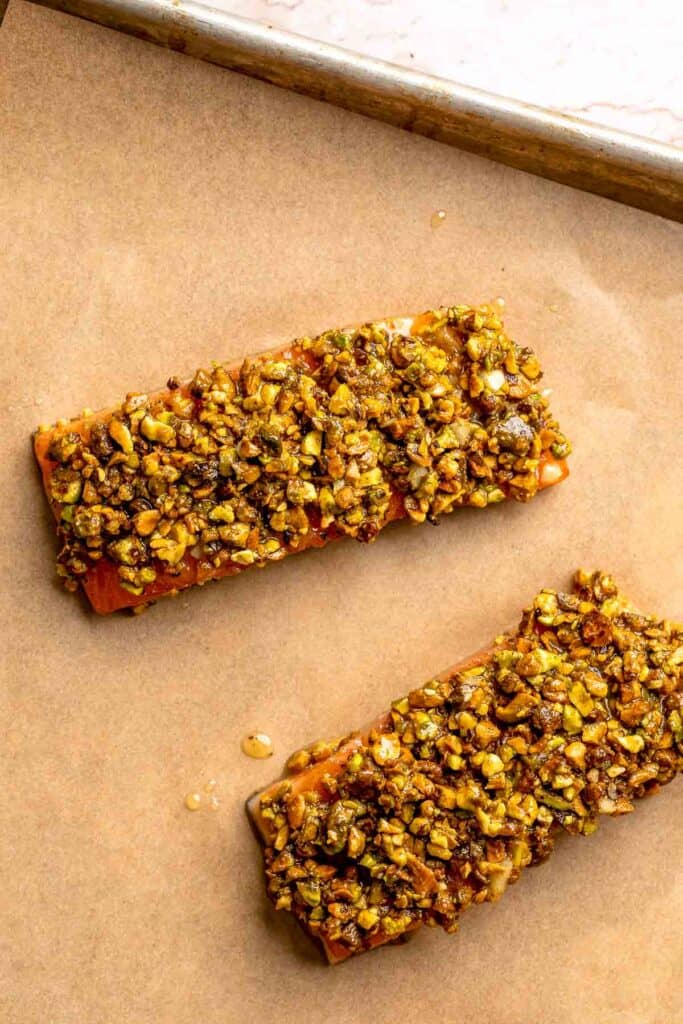
Rinse salmon and pat dry. Place salmon on a lined baking sheet. Season with salt and pepper to taste. Place salmon on a parchment-lined quarter sheet baking pan, skin side down.
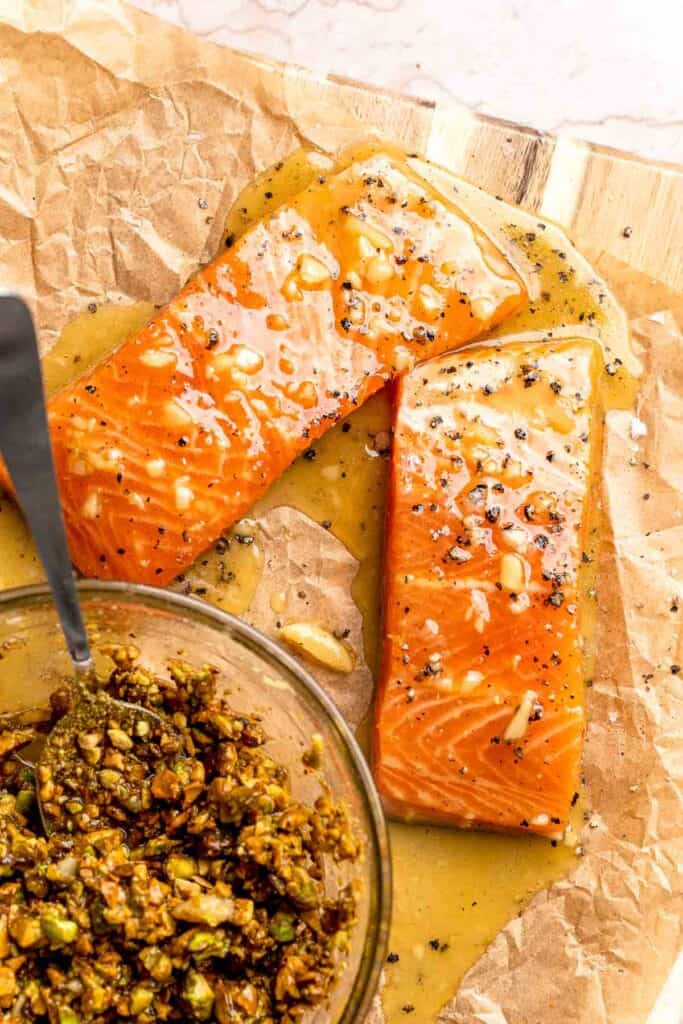
Make garlic-Dijon-honey mixture
In a small mixing bowl, combine garlic, olive oil, mustard, lemon juice, and honey. Spread ¾ of the mixture evenly over the salmon.
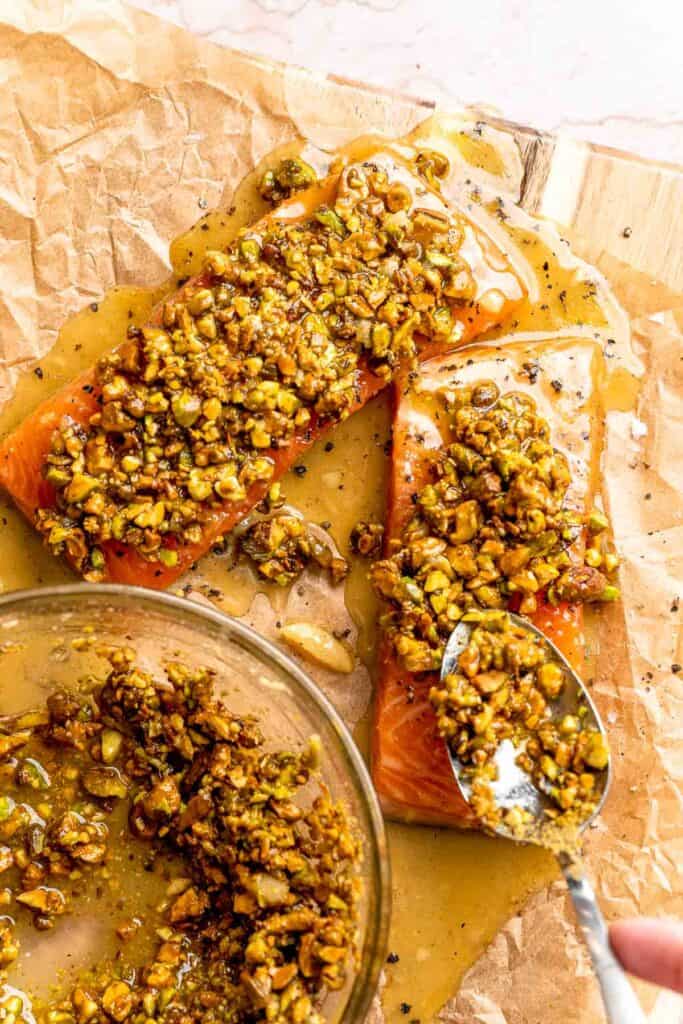
Add pistachios
Add pistachios to the remaining mixture and stir to combine. Spoon the pistachio mixture on top of the salmon and press lightly into salmon using the back of a spoon.
Bake
Bake in a 375°F preheated oven for 15-20 minutes until salmon is flaky.
Serve
Remove from oven and let rest for 5 minutes before serving.
Air Fryer Instructions
- Prep the salmon. Pat the salmon fillets dry with paper towels, then season lightly with salt and pepper. Brush with the garlic-Dijon-honey glaze.
- Add the crust. Press the chopped pistachios firmly onto the top of each fillet to coat.
- Arrange in basket. Place the salmon in a single layer in the air fryer basket lined with parchment paper or lightly greased.
- Air fry. Cook at 375°F (190°C) for 10-12 minutes, or until the salmon flakes easily with a fork and reaches an internal temperature of 125-130°F for medium.
- Serve. Let rest for 2-3 minutes, then serve your air fryer salmon warm with your favorite sides.
Recipe Video
Expert Tip: Don't Overcook the Salmon
The secret to tender, flaky salmon is not overbaking. Salmon is done when it flakes easily with a fork and reaches an internal temperature of 125-130°F for medium. Pull it out just before it's fully cooked as it will finish cooking as it rests.
More Tips and Tricks
- Pat the salmon dry. This helps the glaze stick and ensures a crispy crust.
- Chop the pistachios evenly. Too fine and they'll turn into powder, too coarse and they'll fall off. Aim for small, crunchy bits.
- Use parchment paper. Parchment paper makes cleanup easier and helps prevent the crust from sticking.
- Glaze generously. The garlic-Dijon-honey mixture not only flavors the fish but also helps the pistachios stick.
- Serve immediately. Salmon is best right out of the oven while the crust is golden and crisp.
Recipe Variations
- Herbed crust. Mix fresh parsley, fresh dill, or basil into the pistachio crust for extra flavor.
- Spicy twist. Add a pinch of cayenne pepper or red chili flakes to the glaze for gentle heat.
- Maple pistachio salmon. Swap honey for maple syrup for a different sweetness that pairs beautifully with pistachios.
- Parmesan pistachio crust. Stir grated parmesan into the nut crust for extra richness.
- Different nuts. Try almonds, walnuts, or pecans instead of pistachios for variety.
- Pistachio-crusted salmon bites. Cut salmon into smaller cubes, coat, and bake for a fun appetizer version. See our Salmon Bites for tips.

Storage
How to Store
Store leftover pistachio-crusted salmon in an airtight container in the refrigerator for up to 3 days.
How to Reheat
Reheat gently in a 300°F preheated oven or air fryer for 5-10 minutes until warmed through. Avoid microwaving as it can dry out the salmon and soften the crust.
How to Freeze
Freezing cooked salmon is not recommended as it will cause the salmon to become rubbery and tough, and the pistachio cruse loses its texture once thawed.
How to Serve
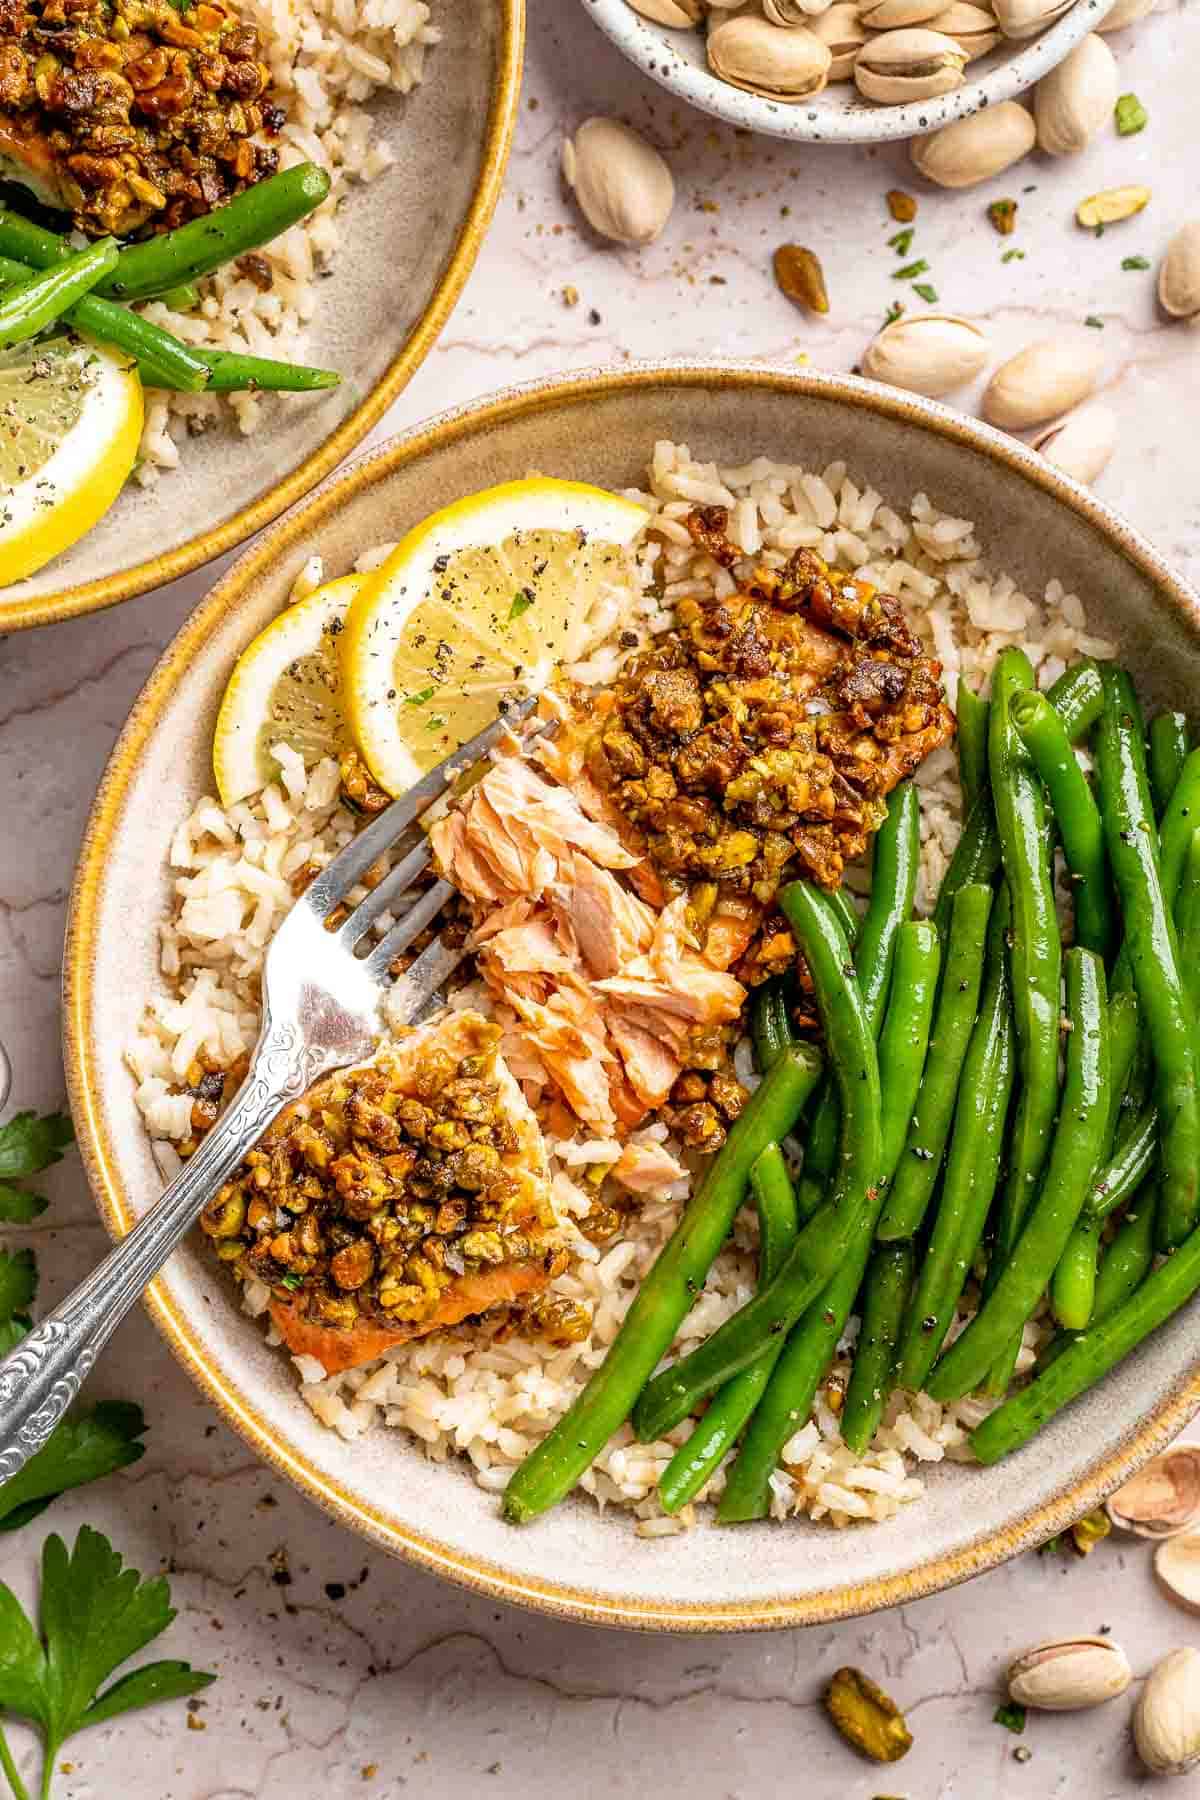
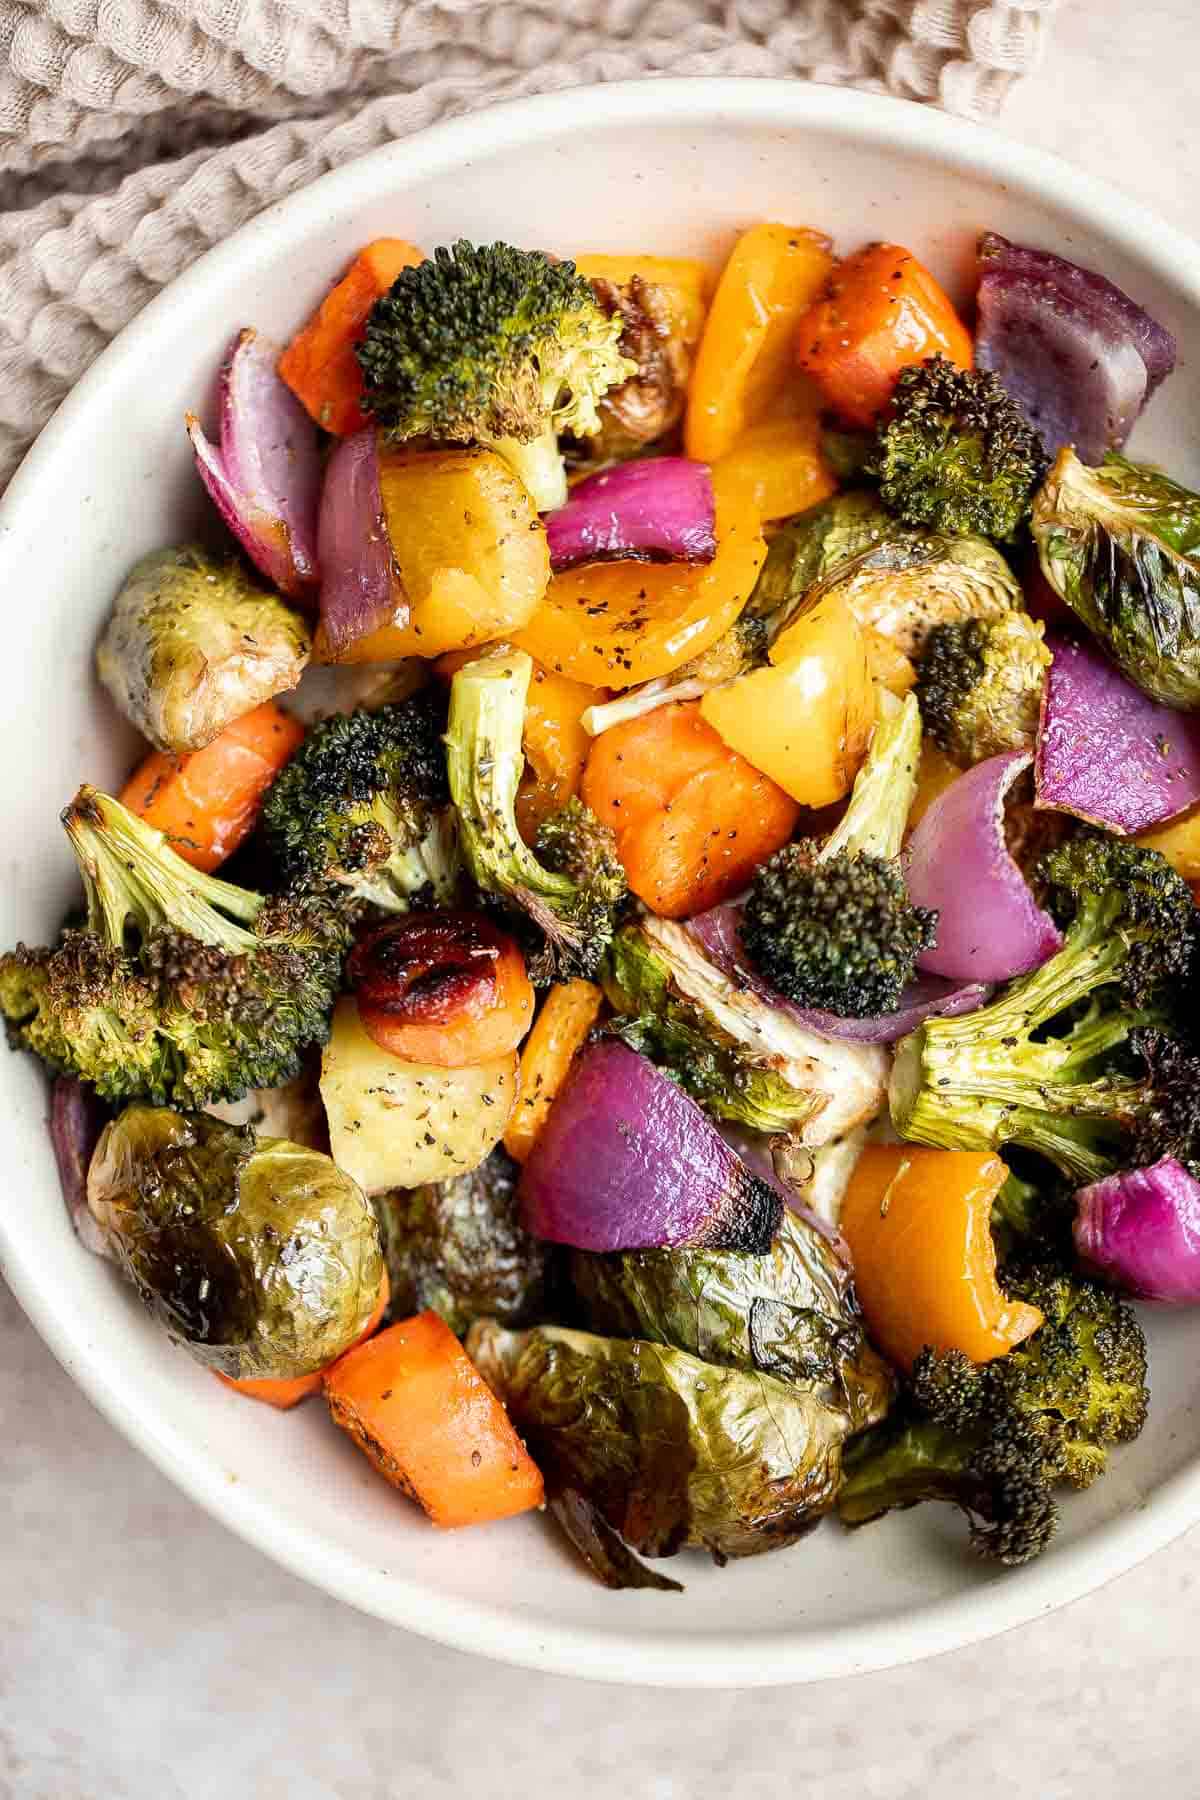
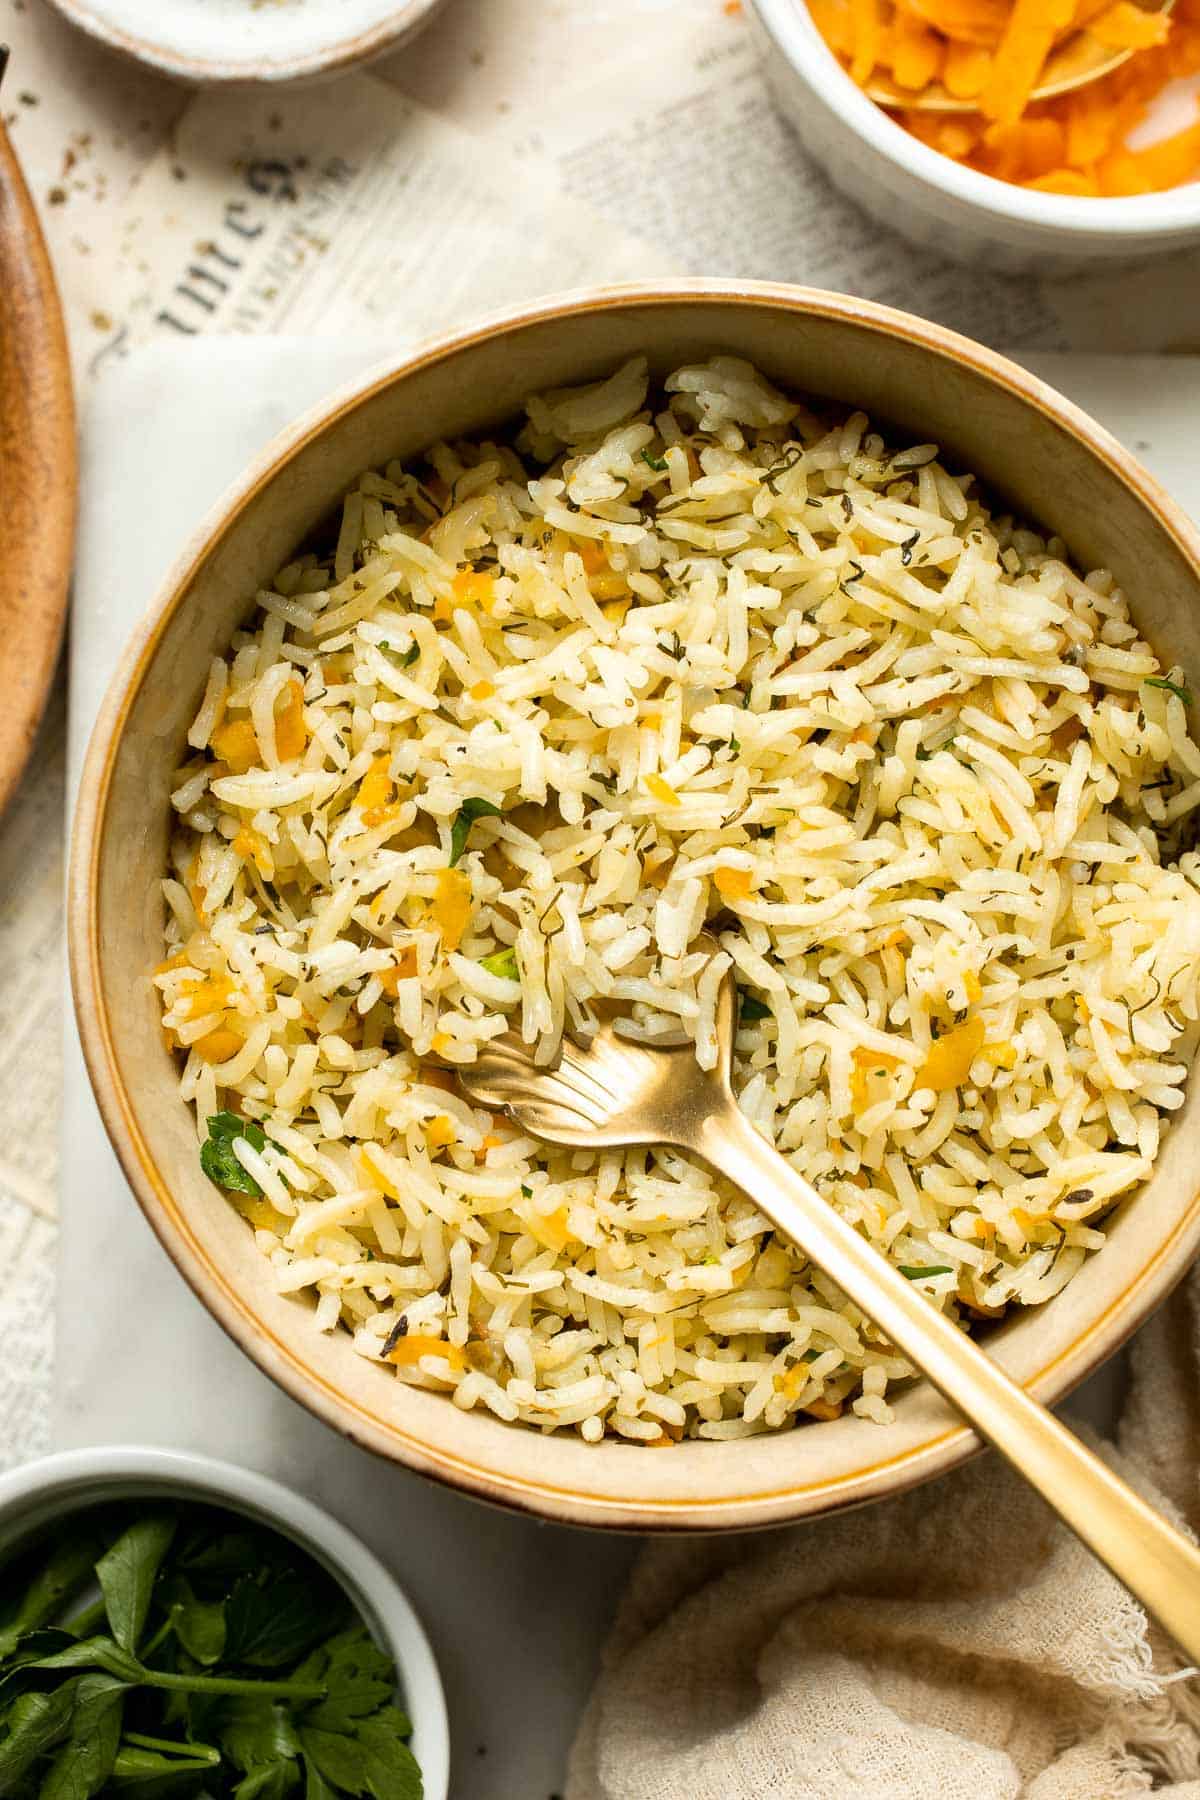
Pistachio crusted salmon is fancy enough for entertaining yet simple enough for weeknights. Pair it with a starchy potato side dish or mashed cauliflower (for a lower carb option), a side of rice or other grains, roasted vegetables such as broccoli or asparagus, and/or a crisp side salad for balance. For a lighter option, serve it over quinoa or couscous with a squeeze of fresh lemon.
These are my favorite dishes to serve with this pistachio crusted salmon:

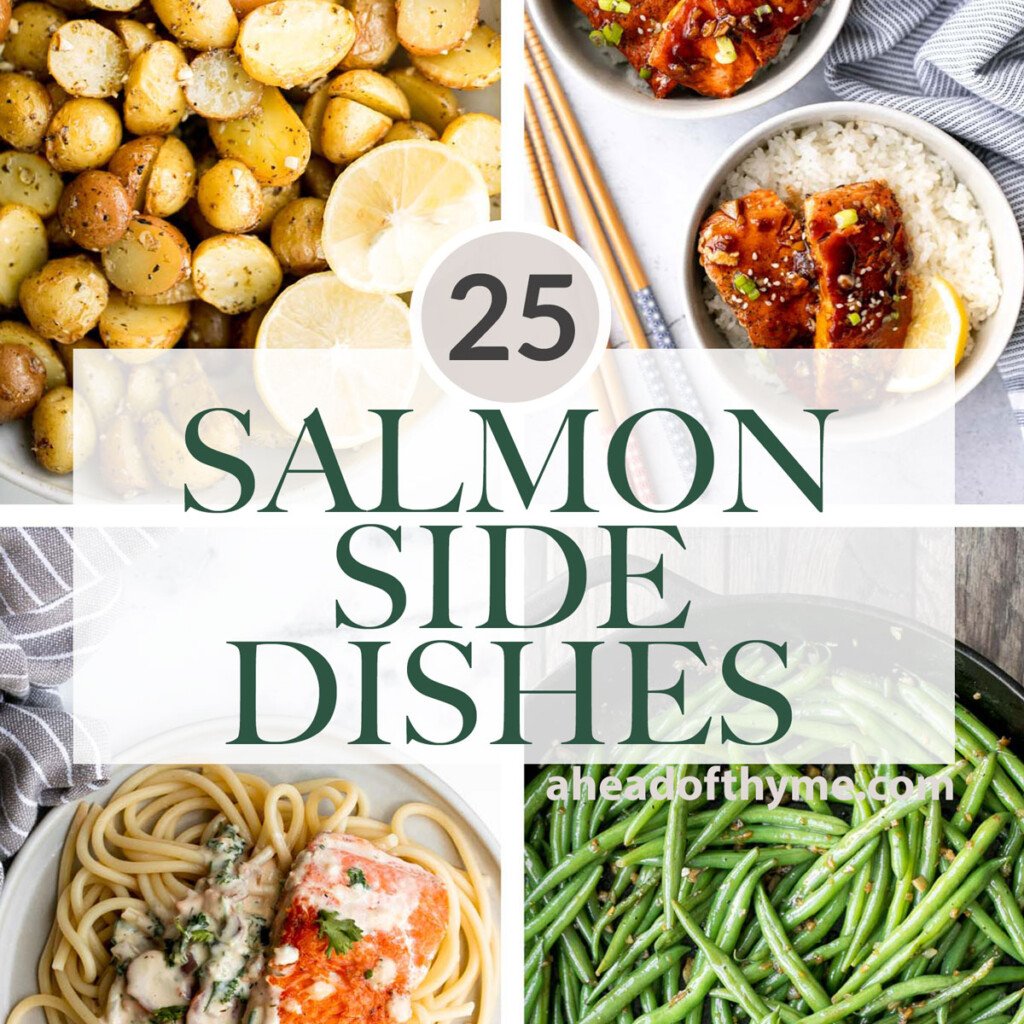
Side Dishes for Salmon
For more recipe ideas, explore our collection of side dishes that pair perfectly with salmon, including fresh salads, roasted vegetables, light grains, and flavorful appetizers that complement the richness of the fish.
FAQ
Yes! Pistachios add a nutty crunch that complements salmon's rich, buttery flavor. The combination is both elegant and balanced, perfect for weeknights or dinner parties.
Pat the fillets dry, brush with a sticky glaze (like Dijon, honey, and olive oil), and press the pistachios firmly on top. Bake at high heat until the crust is golden and crisp.
Chop pistachios coarsely with a knife or pulse in a food processor a few times. Be careful not to over-process, or you'll end up with pistachio powder instead of crunchy bits.
Simple sides like rice, roasted vegetables, or salad let the salmon shine. Creamy mashed potatoes or a fresh citrus salad are also great pairings.
Pistachios are classic, but walnuts, almonds, pecans, or even macadamia nuts also make delicious crusts for salmon. Each nut brings a slightly different flavor and texture.
More Salmon Recipes
Looking for other recipes like this? Try these:


Tried this recipe?
I'd love to hear what you think! Leave a comment and rating below to share your feedback. Your reviews help others discover this recipe and help me keep creating more free recipes for you. Snap a photo and tag me on social media @aheadofthyme too.
This recipe was originally published in 2017 and has been updated with new photos and content.

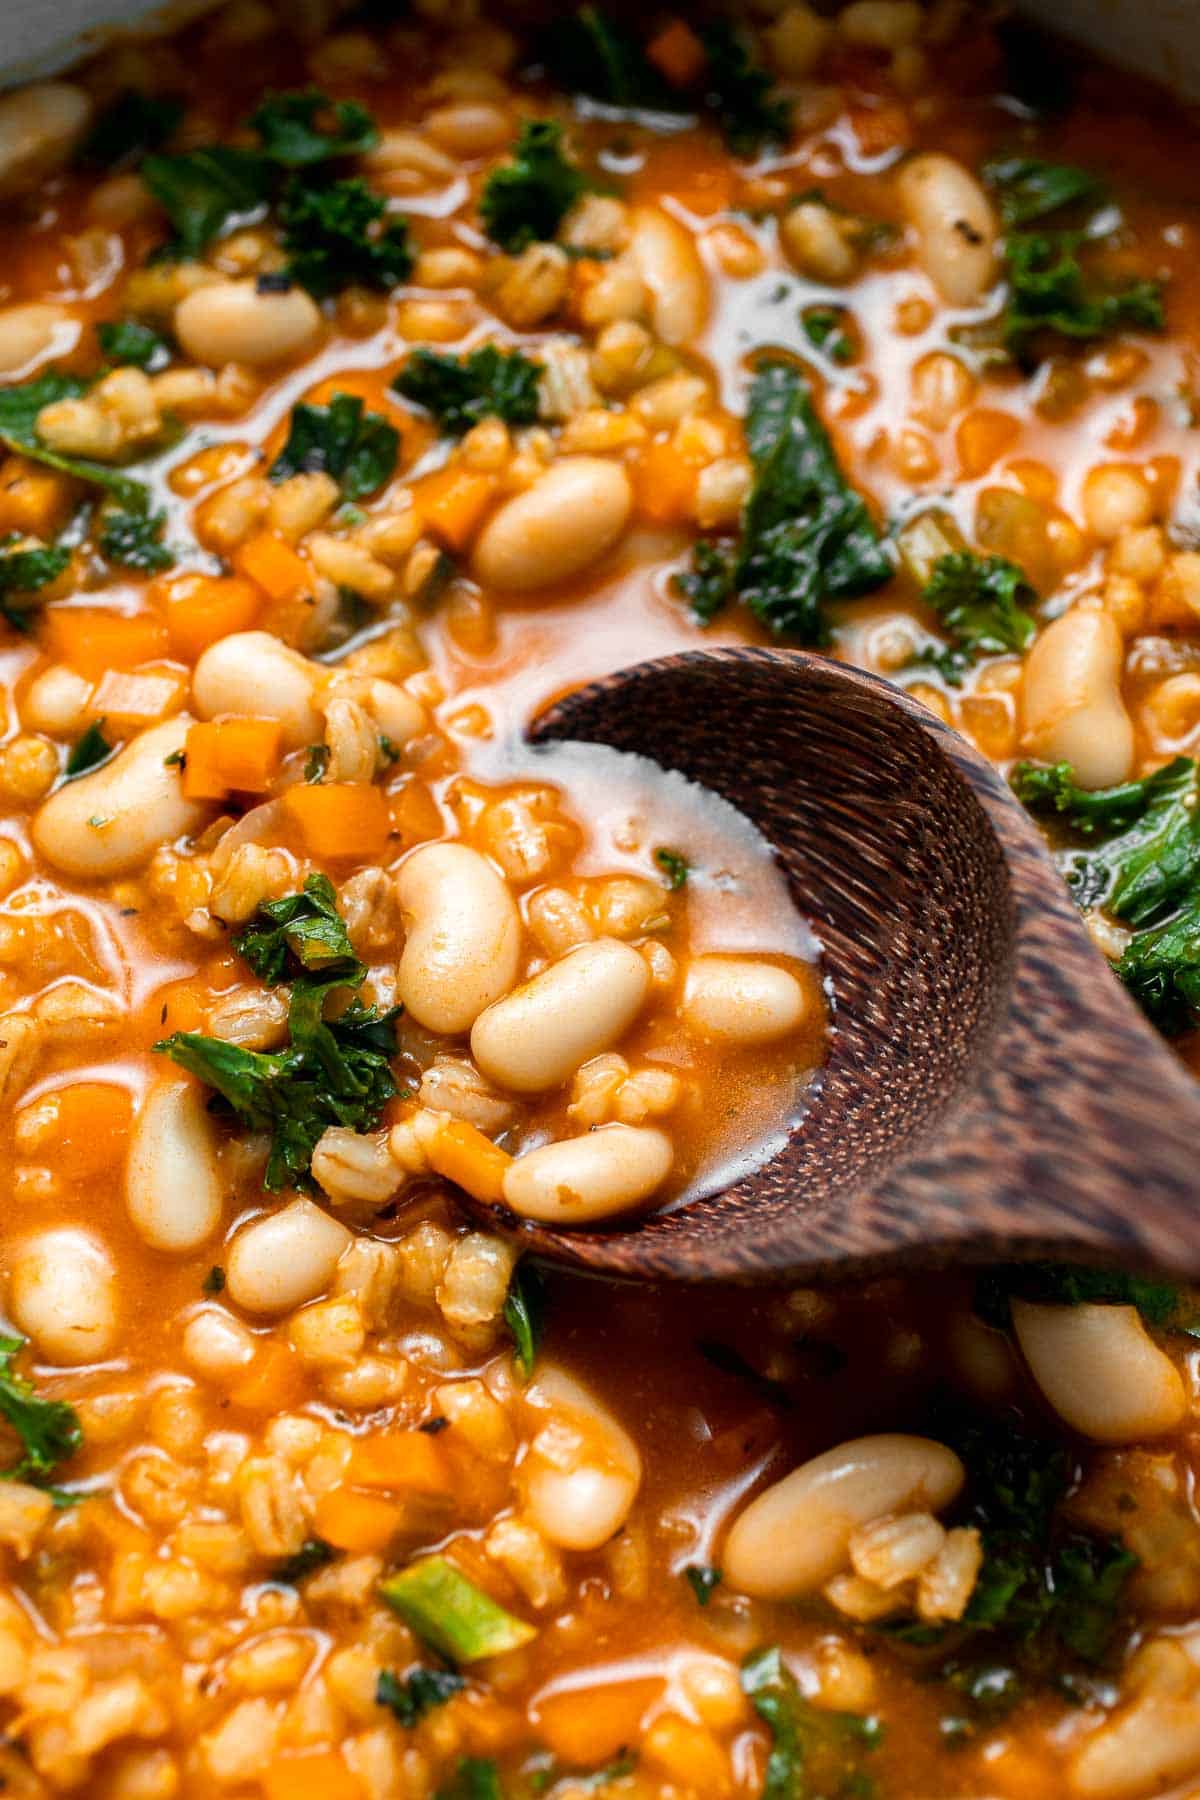
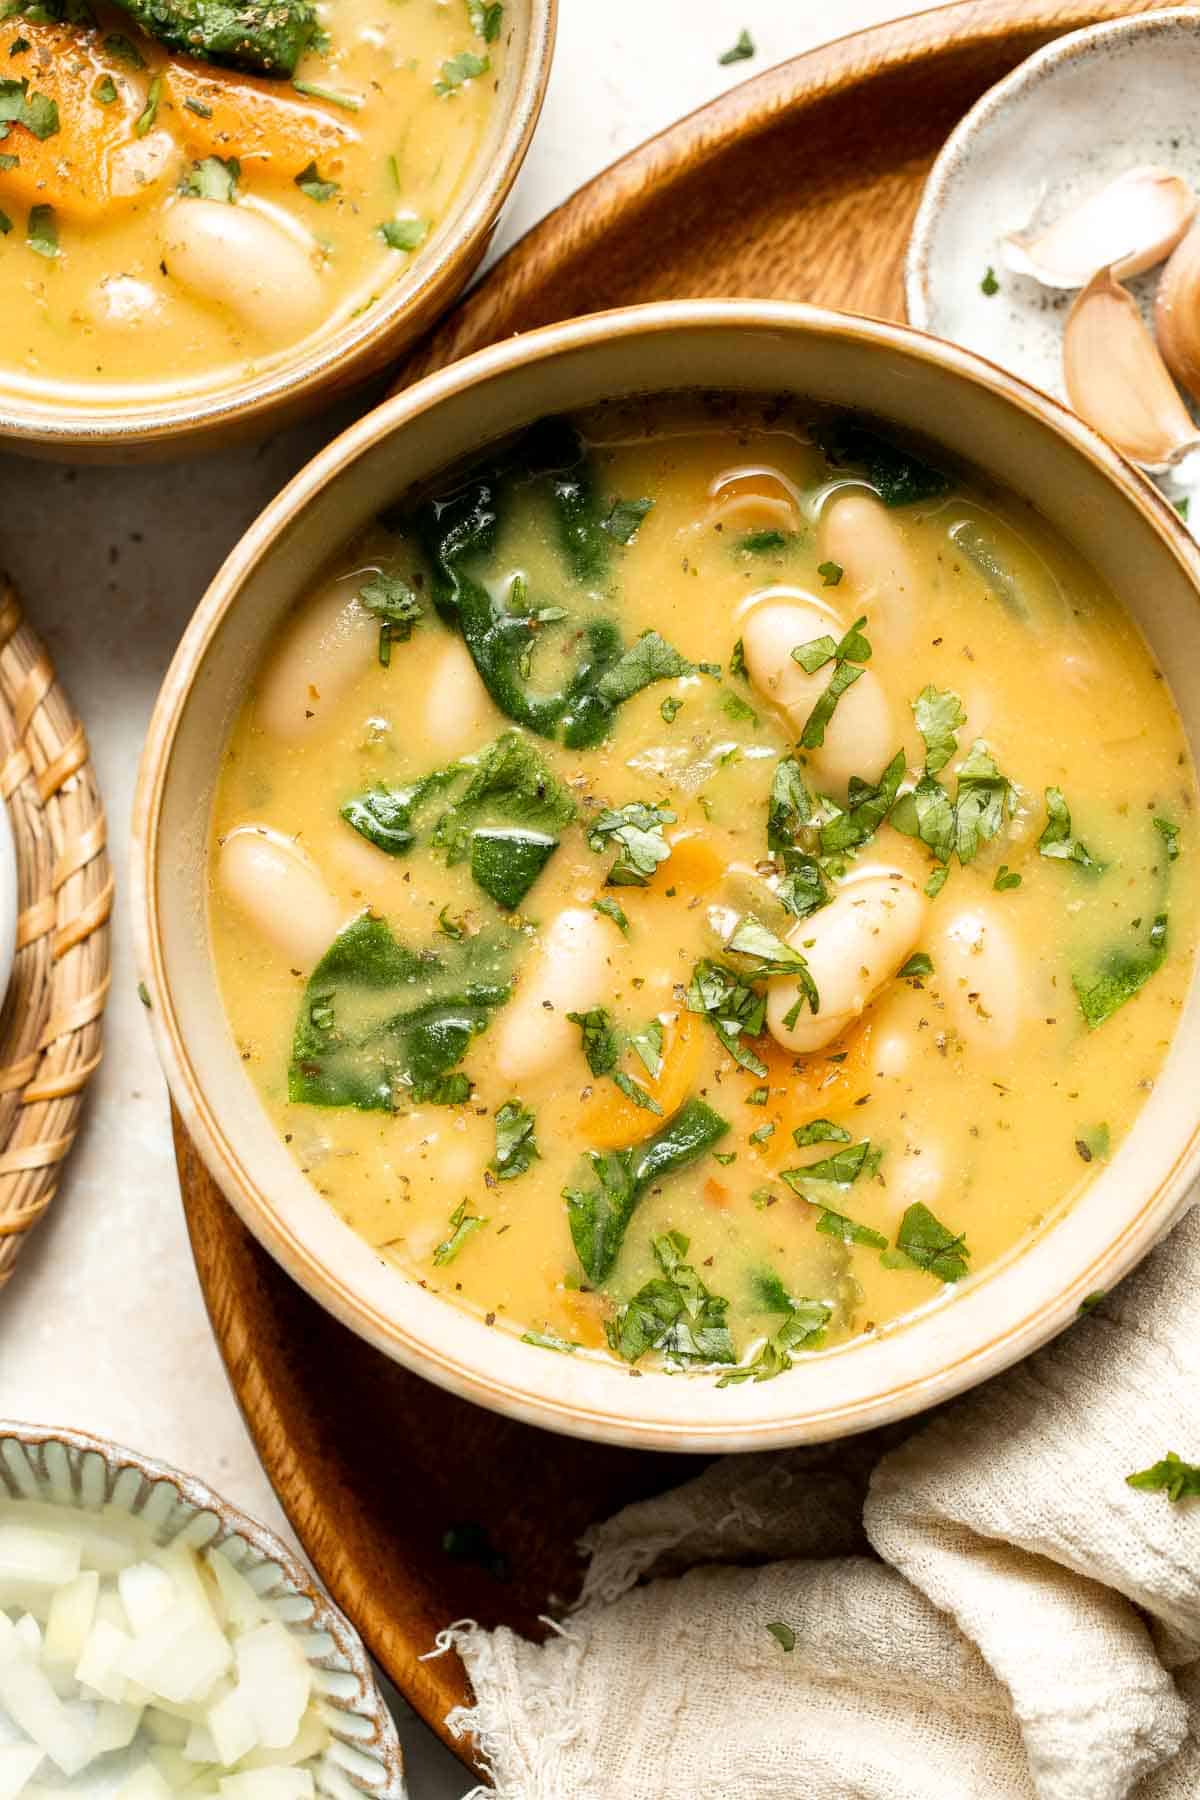
Old Fashioned Vegetable Barley Soup

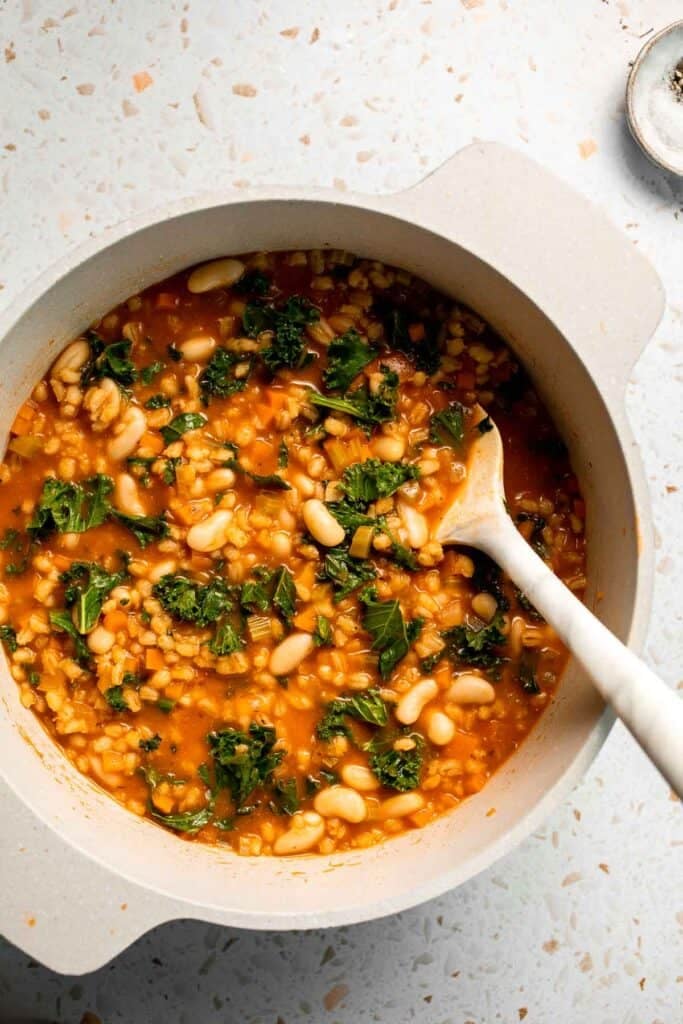
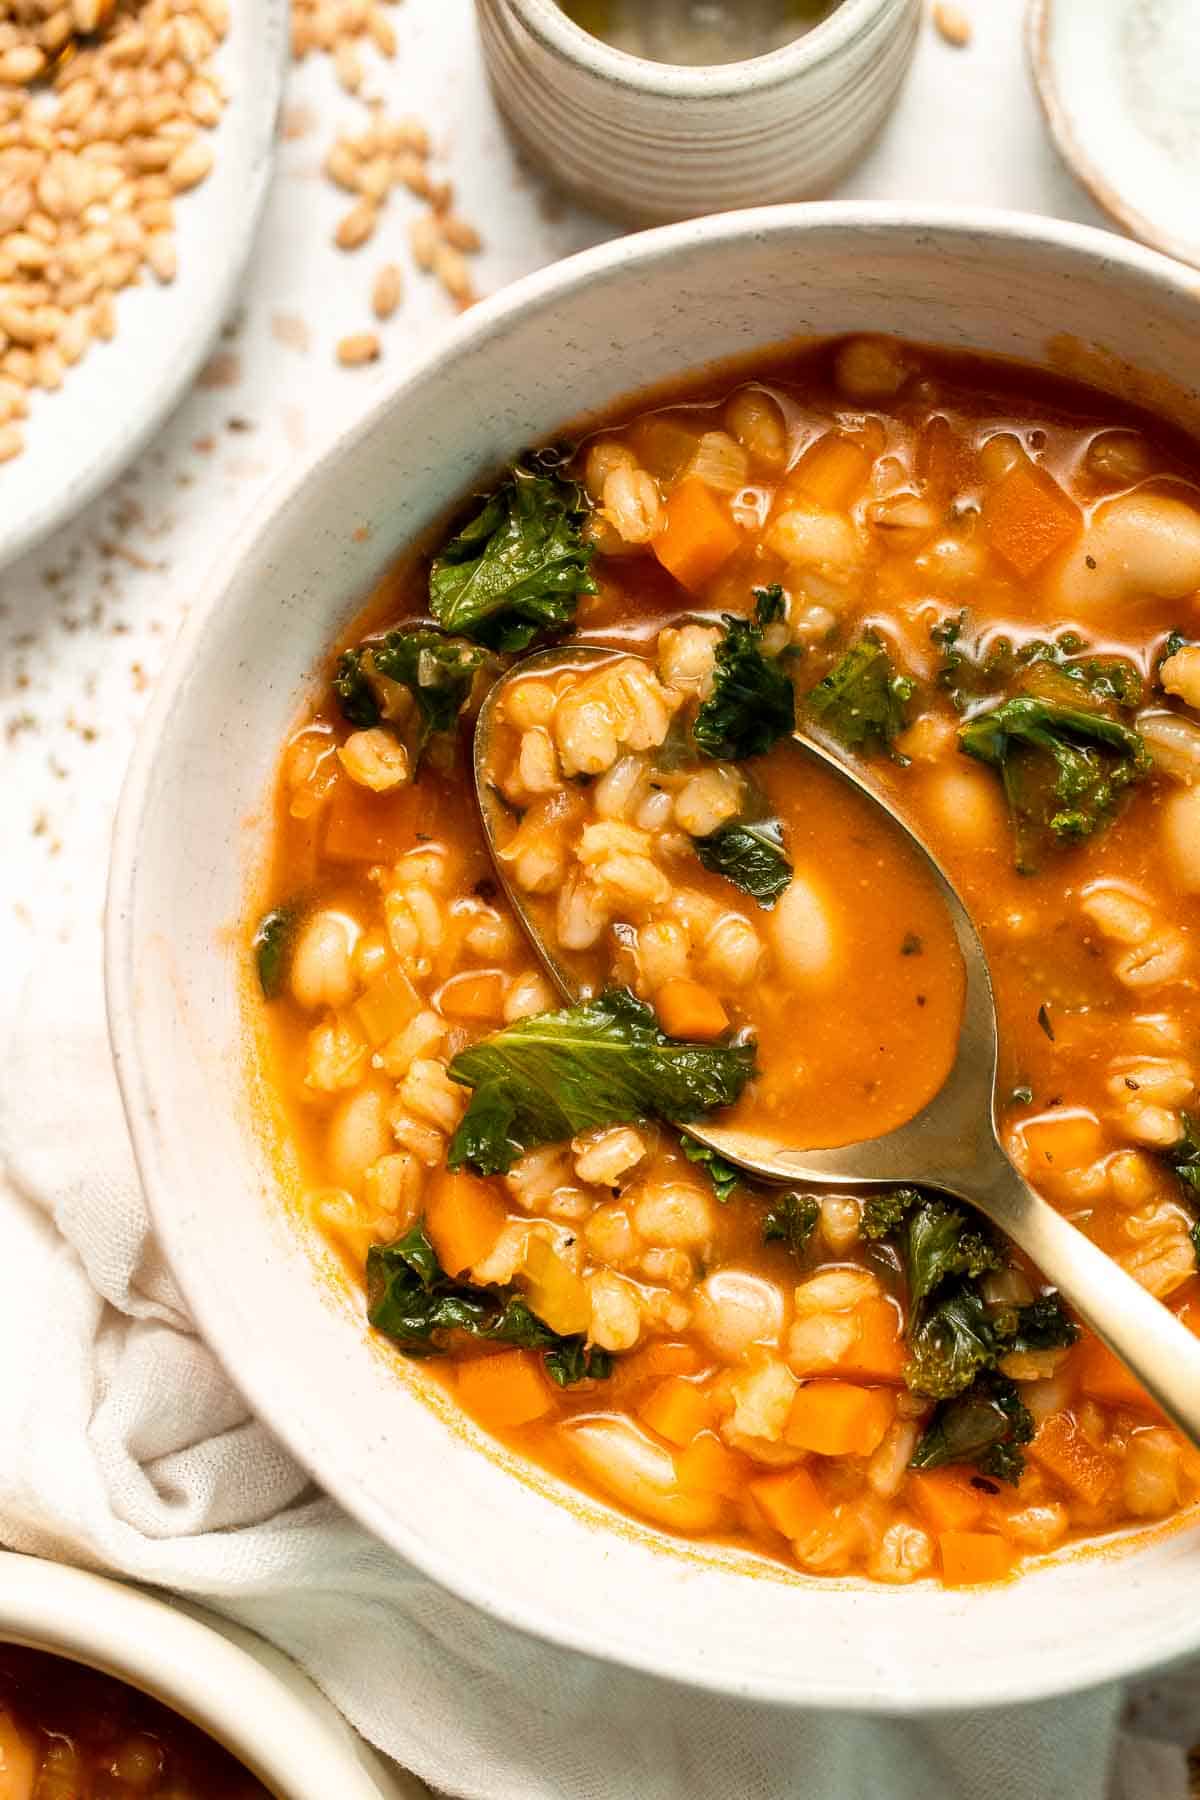
Old Fashioned Vegetable Barley Soup is cozy, nourishing, and full of homestyle flavor. It's the kind of soup that feels like a warm hug on a cold night. Despite its classic name, this recipe is easy to make in one pot on the stovetop, or you can try the crock pot vegetable barley soup or Instant Pot barley soup methods below for even more convenience.

Loaded with veggies, cannellini beans, and tender pearl barley simmered in a savory tomato-based broth, it's wholesome comfort food made simple. What makes this soup special is the barley. It adds a nutty flavor and chewy texture that makes every spoonful feel satisfying. Pair that with the sweetness of carrots, the earthiness of kale, and the umami kick from miso paste, and you've got a healthy, soul-warming recipe that's both wholesome and delicious.
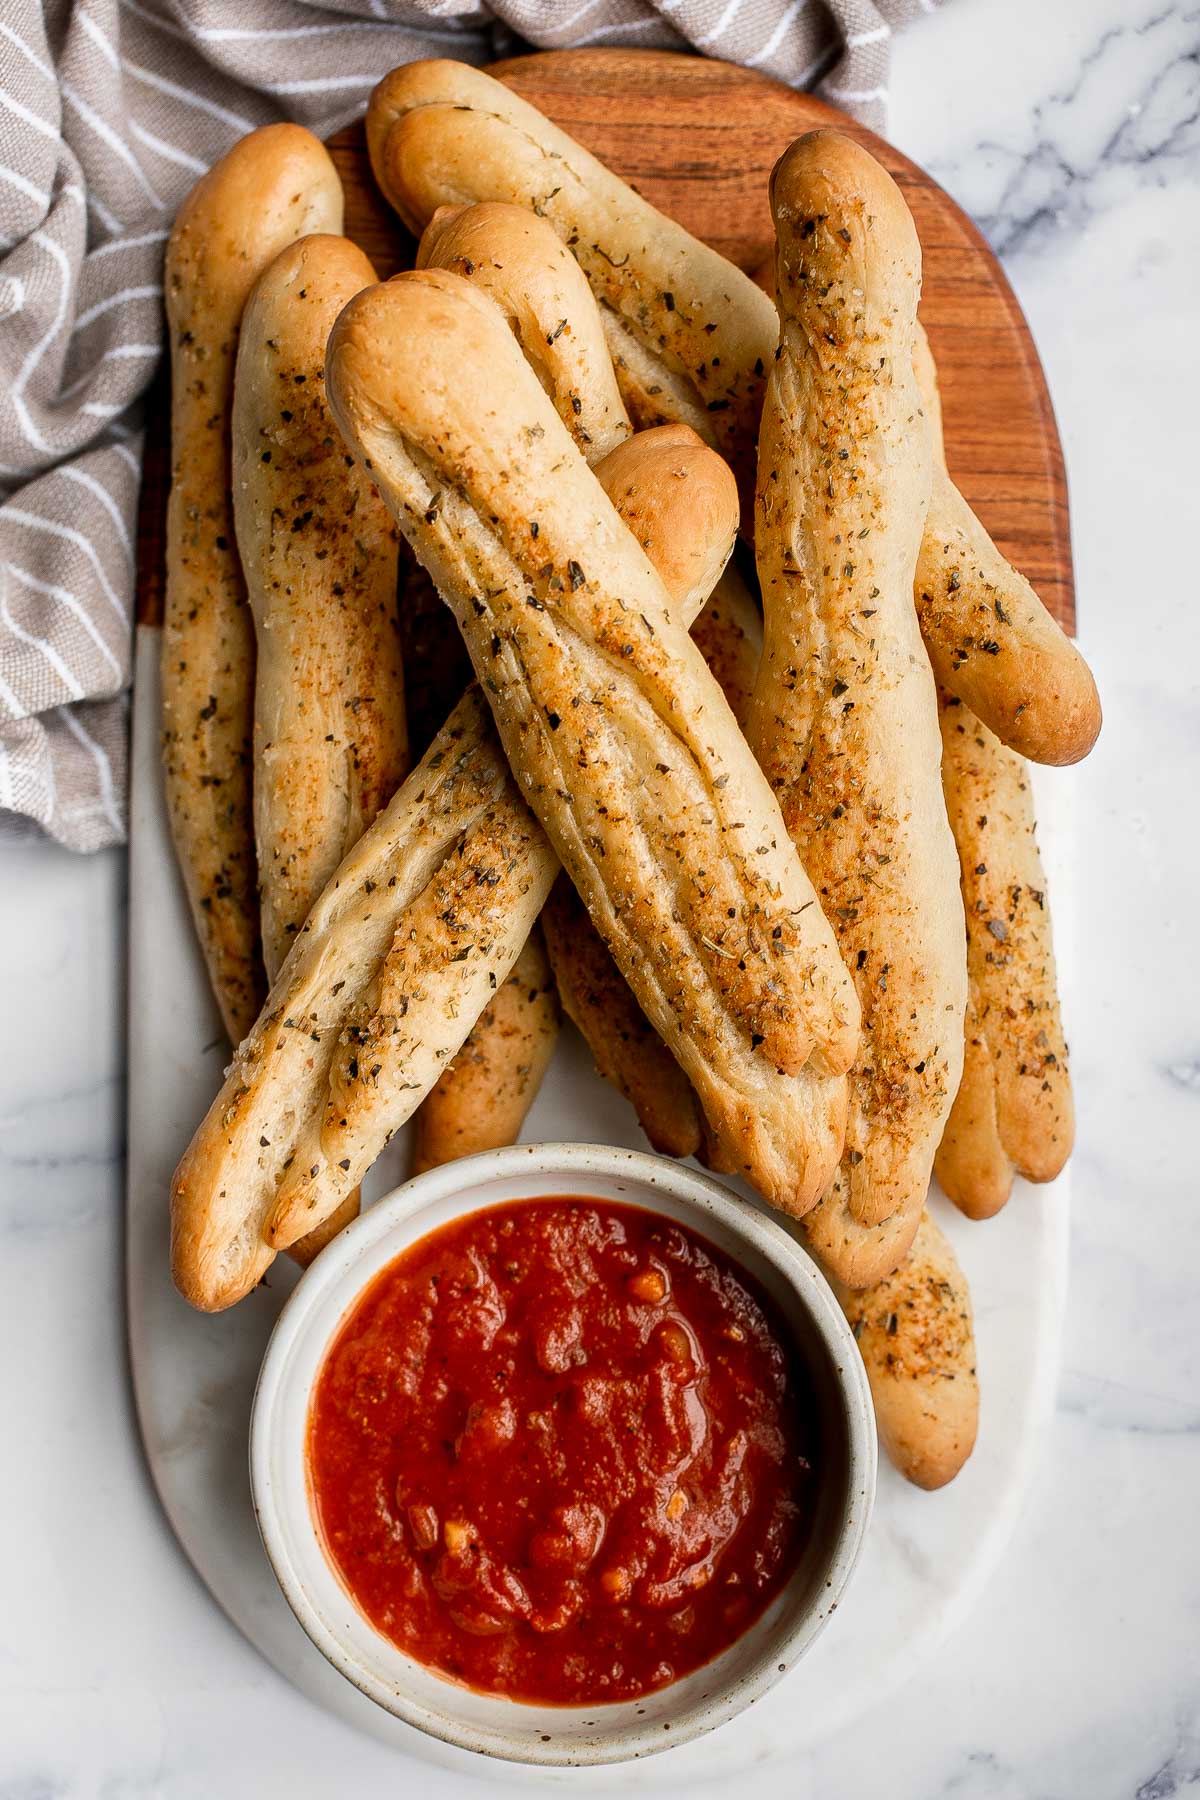
If you liked this recipe for vegetable barley soup, you should try my Beef Cabbage Barley Soup or Vegetarian Mushroom Barley Soup next. They pair perfectly with Garlic Knots for a cozy, filling dinner that's perfect any night of the week.
Why You'll Love This Recipe
- Hearty and filling. Pearl barley gives this soup a satisfying chew that makes it more substantial than most vegetable soups. Add in beans and kale, and it's practically a meal in a bowl.
- Nutritious and wholesome. Packed with vegetables, plant-based protein from beans, and fiber from barley, this kale barley soup is naturally vegan, low-fat, and good for you.
- Easy one-pot recipe. Everything cooks in one pot in under an hour, and most of the work is simple chopping and simmering. this vegetable and barley soup is weeknight-friendly and meal-prep gold.
- Cozy and versatile. Serve this soup with barley on its own, with bread, or alongside a salad. Plus, it freezes beautifully, so you can keep extra portions on hand for busy days.
Ingredients and Substitutions
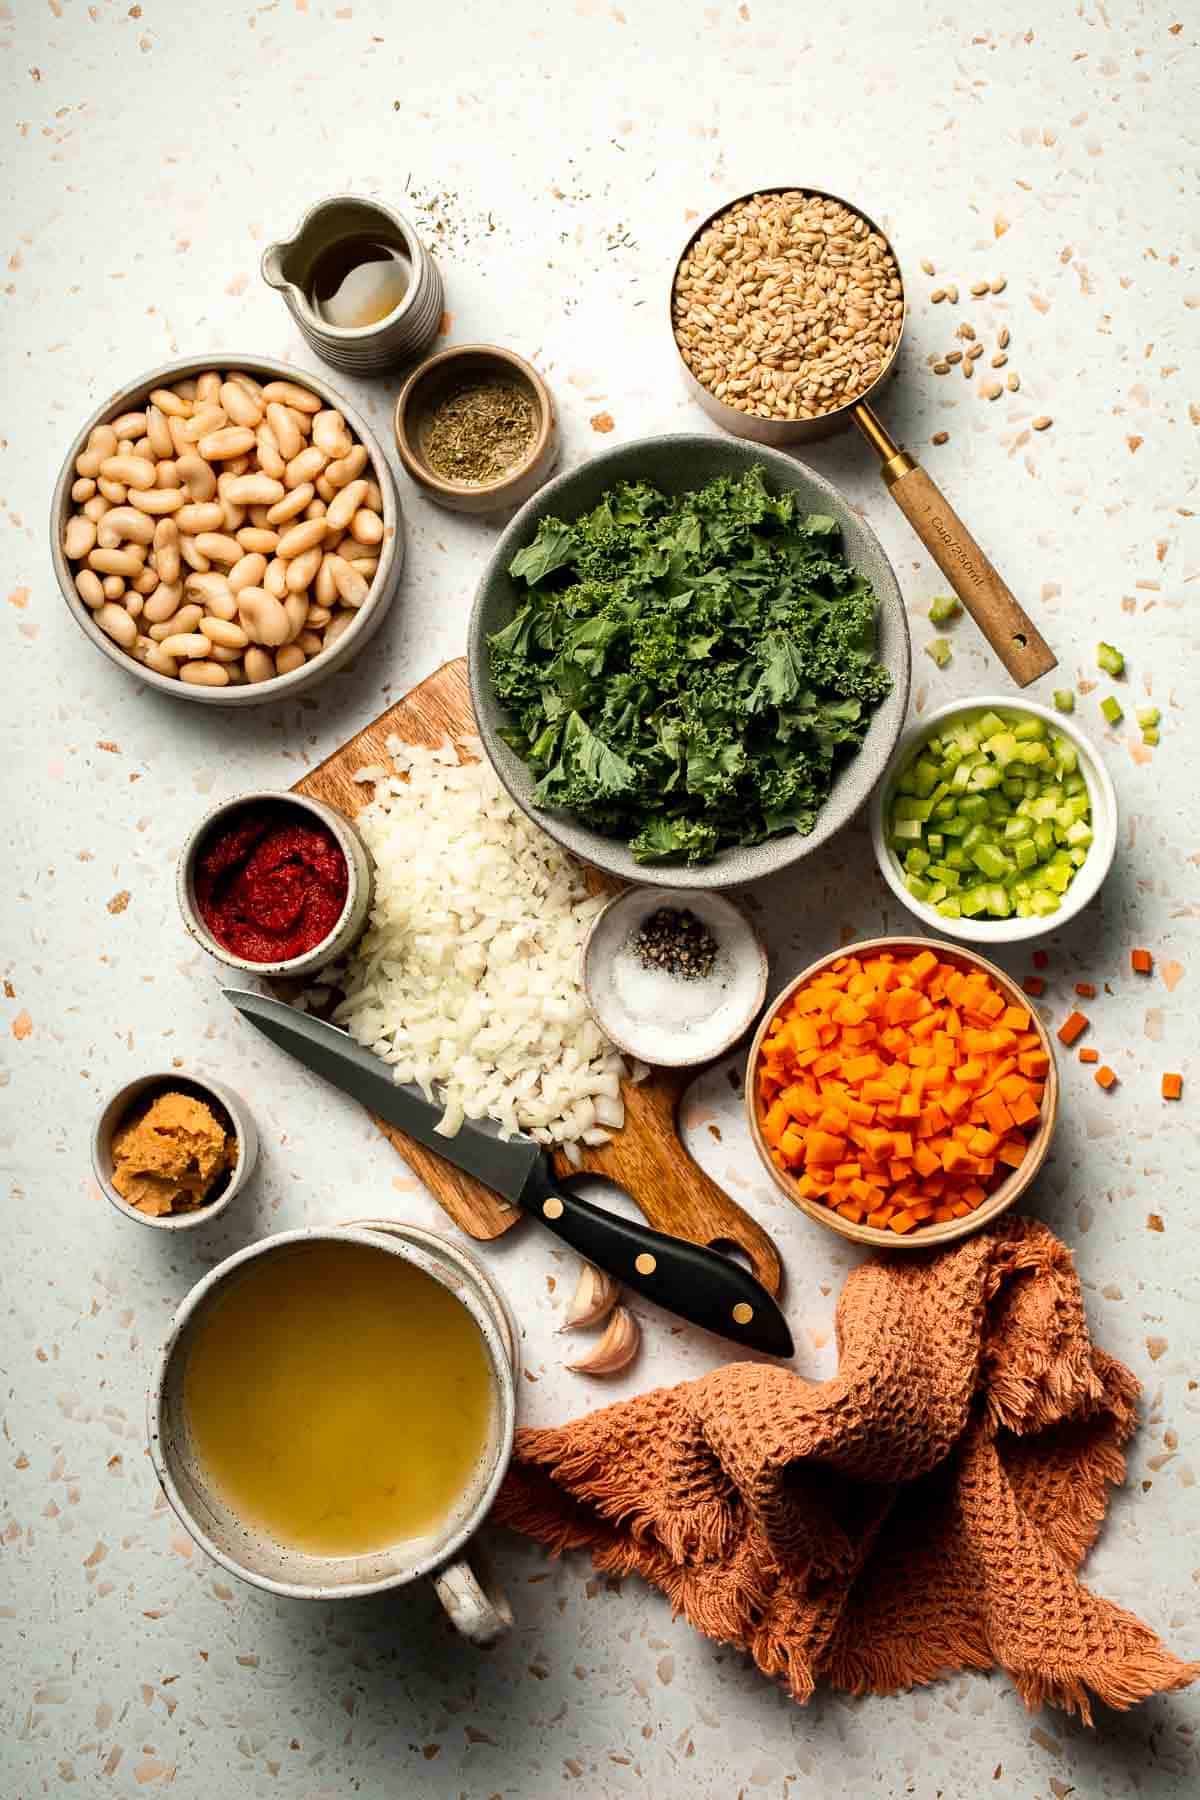
To make this delicious Vegetable Barley Soup, you will need the following ingredients (see recipe card below for quantities):
- extra virgin olive oil - For sautéing the veggies and adding richness. Avocado oil also works.
- onion - Adds savory depth. Yellow or white onions are best, but red onions work too.
- garlic - Essential for flavor. Use fresh for the best taste, or substitute with garlic powder if needed.
- celery - Adds aromatic flavor and texture. Can substitute with fennel for a subtle anise note.
- carrots - Bring natural sweetness and color. Parsnips are a fun alternative.
- pearl barley - A chewy, nutty grain that makes the soup hearty and filling. While pearl barley is technically a refined grain (the outer bran is polished off so it cooks faster), it's still rich in fiber and nutrients. If you prefer a true whole grain option, use hulled barley instead - just note it takes longer to cook. Hulled barley works but takes longer to cook. If you prefer gluten-free, swap with brown rice or quinoa.
- Italian seasoning - Adds herbal flavor to this bean and barley soup. Use dried oregano, basil, or thyme individually if you don't have a blend.
- vegetable stock - The flavorful base of the soup. Use homemade or store-bought vegetable broth. For extra richness, add a splash of soy sauce or tamari.
- tomato paste - Brings depth and umami. You can substitute with canned crushed tomatoes if needed.
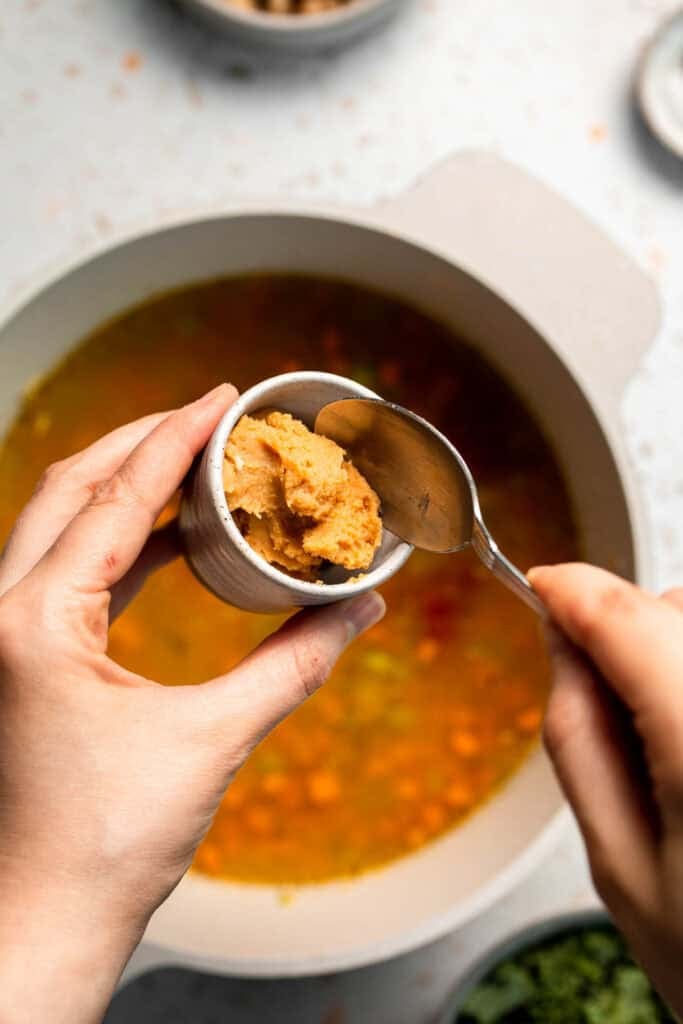
- miso paste - This optional ingredient adds a savory, umami boost. If you don't have miso, soy sauce or nutritional yeast are good alternatives.
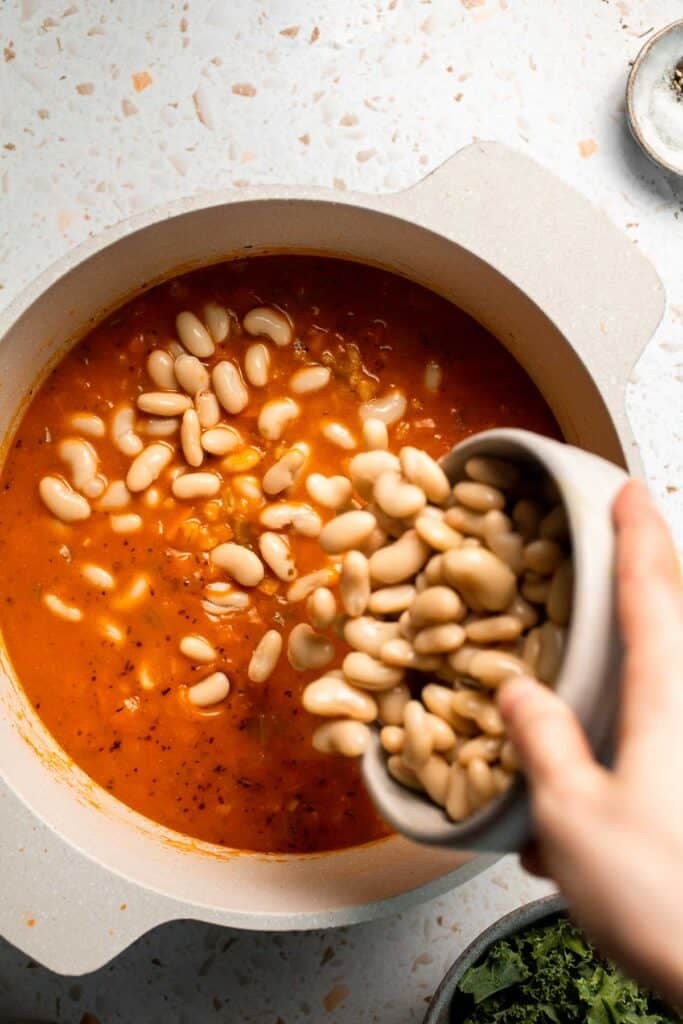
- cannellini beans - Creamy white beans that add protein. Chickpeas, navy beans, or great northern beans also work.
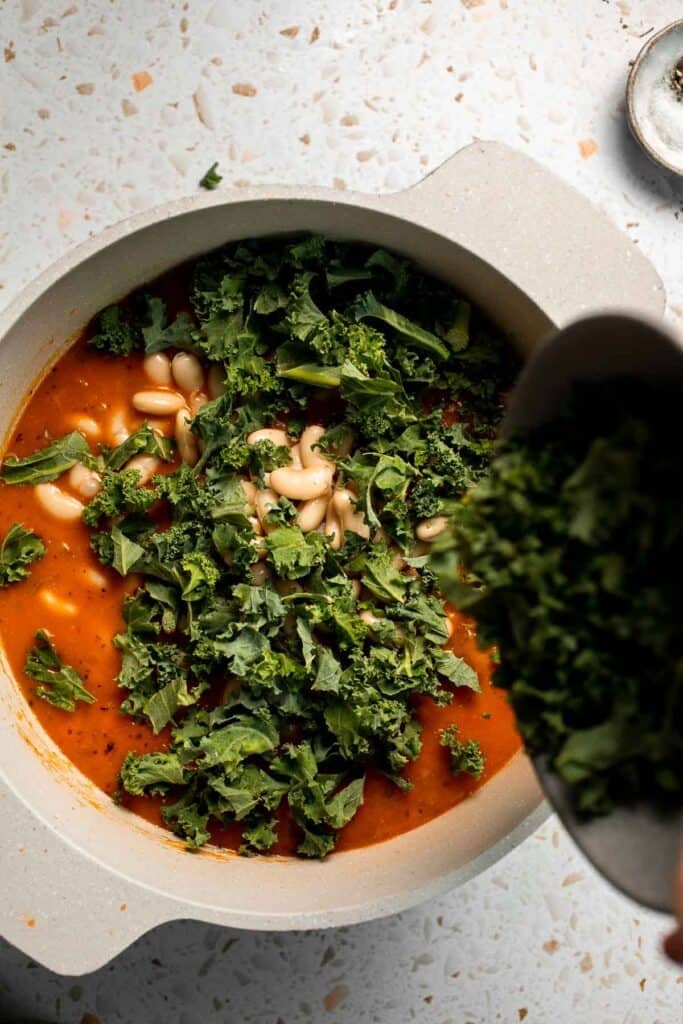
- kale - Adds heartiness and extra nutrients to this vegetable barley soup recipe. Spinach or Swiss chard are good substitutes.
- salt and pepper - Essential for seasoning. Adjust to taste.
Equipment
You'll also need measuring cups and spoons, a large pot or Dutch oven, a wooden spoon for stirring, a sharp knife and cutting board for chopping, and a ladle for serving.
Instructions
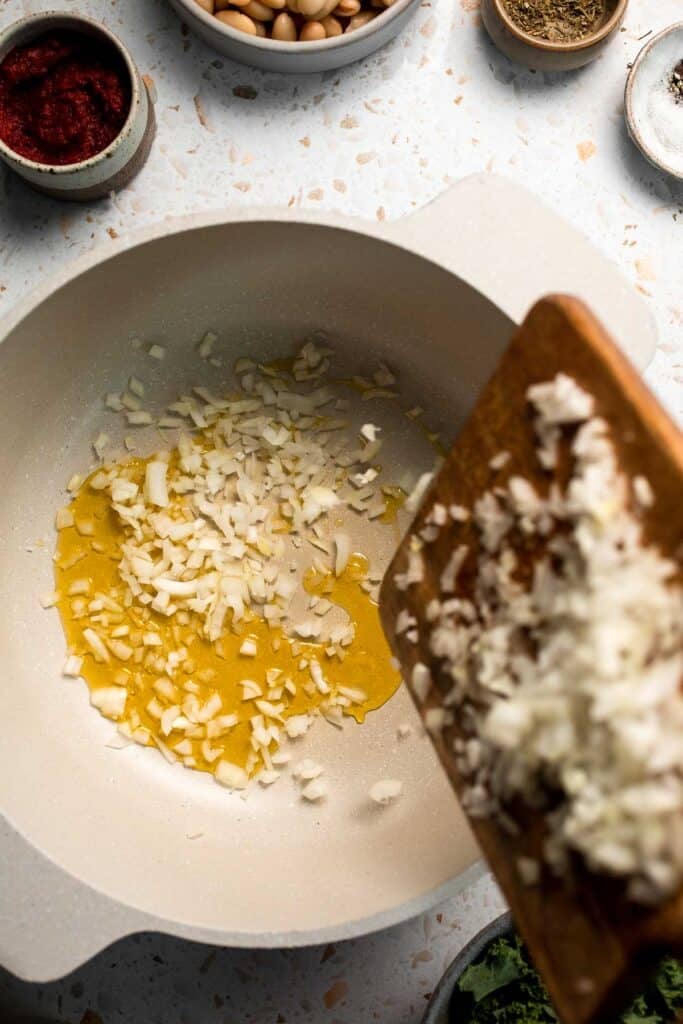
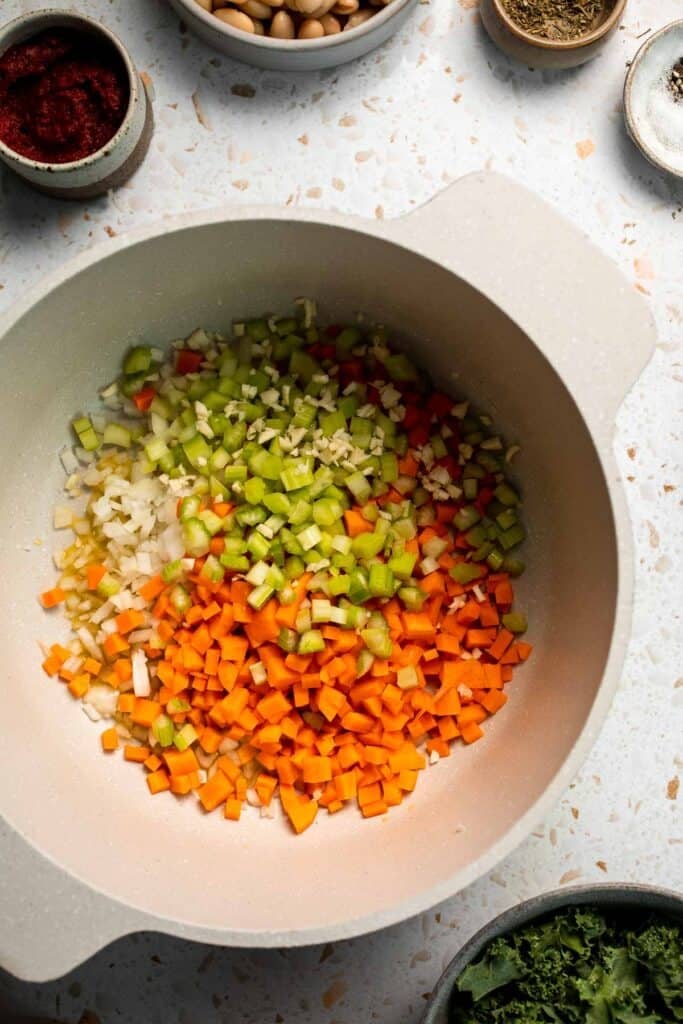
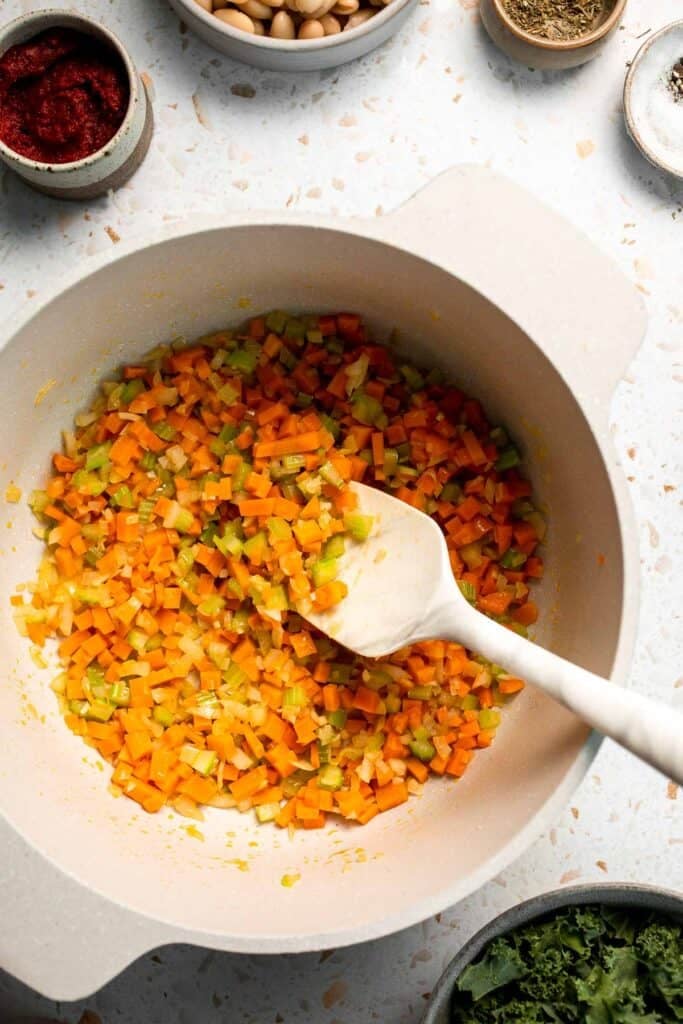
- Sauté aromatics. Add olive oil in a large soup pot or Dutch oven and heat over medium until the hot oil sizzles, about 1 minute. Add onion, garlic, celery, carrots. Sauté until tender, about 2-3 minutes.

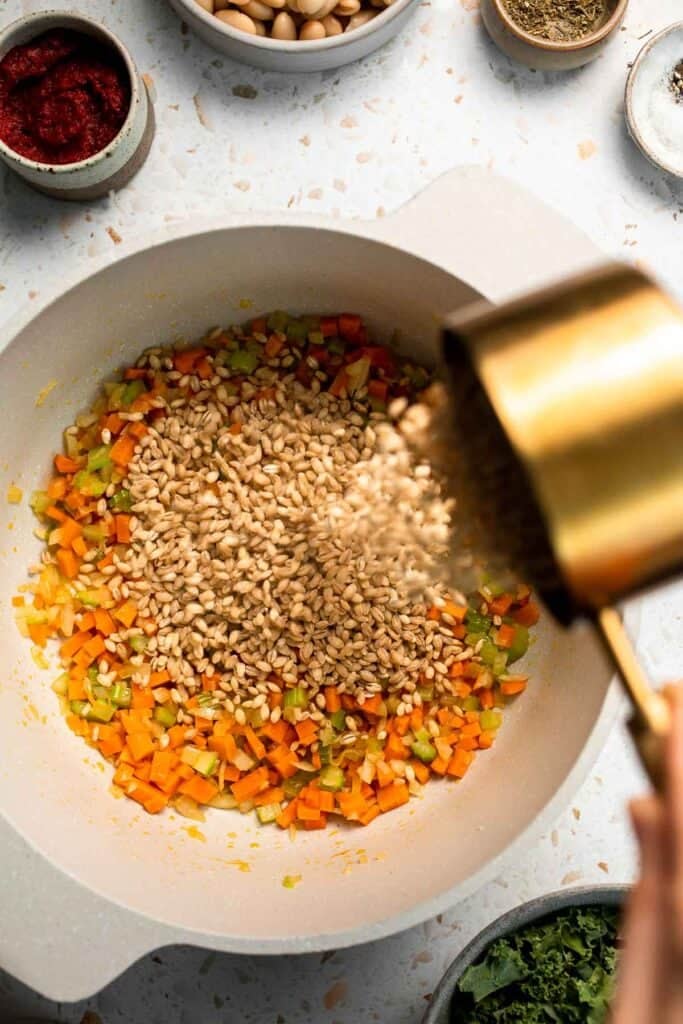
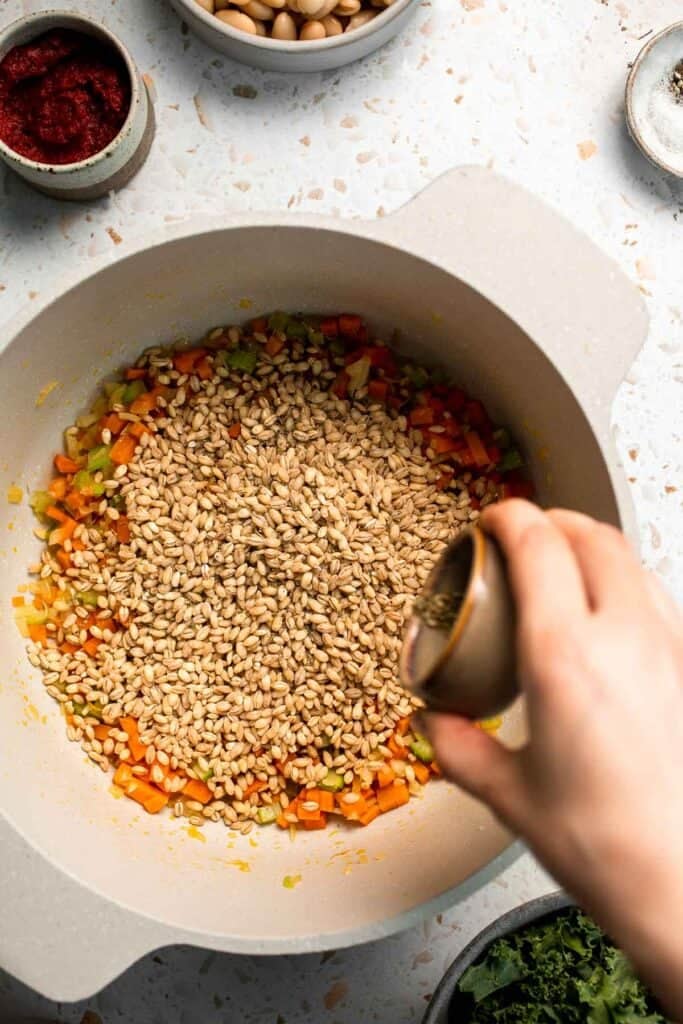
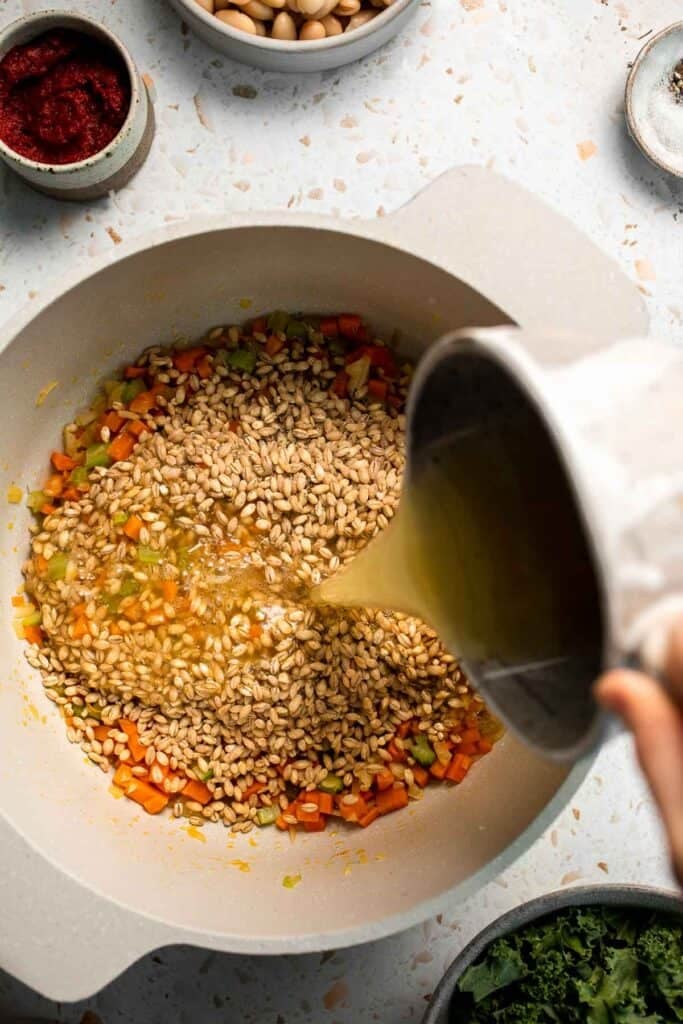
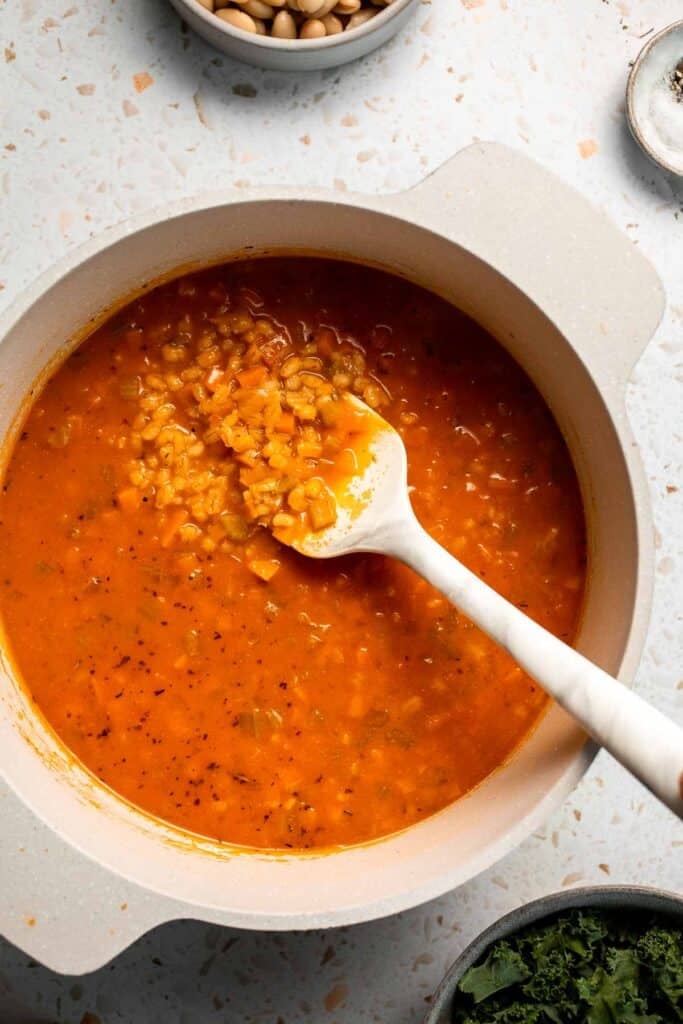
- Toast the barley. Stir in the pearl barley and Italian seasoning, and cook for 1-2 minutes to bring out the nutty flavor.
- Build the broth. Add vegetable stock, tomato paste, and miso paste (if using). Stir well to combine, then bring the mixture to a boil.

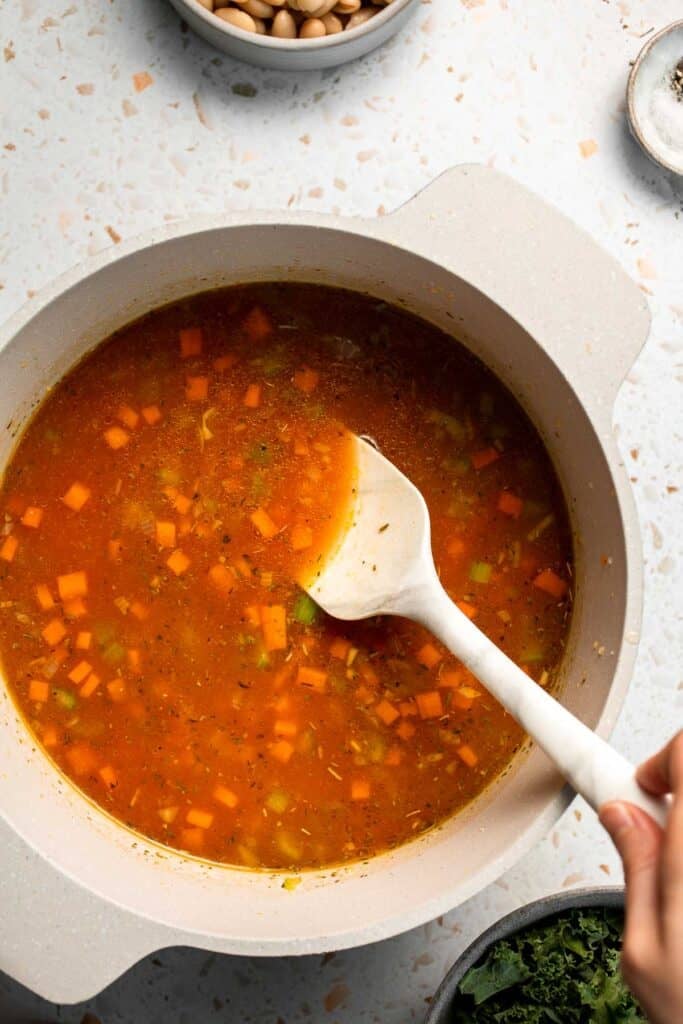
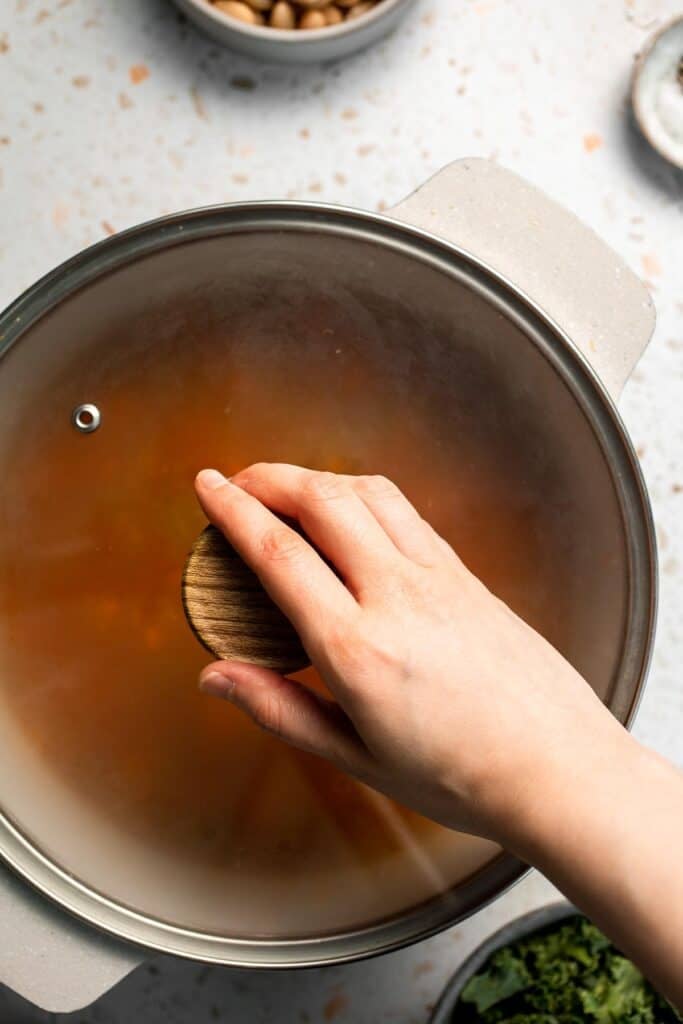
- Simmer until tender. Reduce heat to medium-low, cover, and let the soup simmer for 30-40 minutes, stirring occasionally (to prevent the barley from sticking to the bottom of the pot), until the barley is tender but still chewy.
- Add beans and greens. Stir in the cannellini beans and kale. Simmer for another 2-3 minutes until the kale is wilted and the beans are heated through.
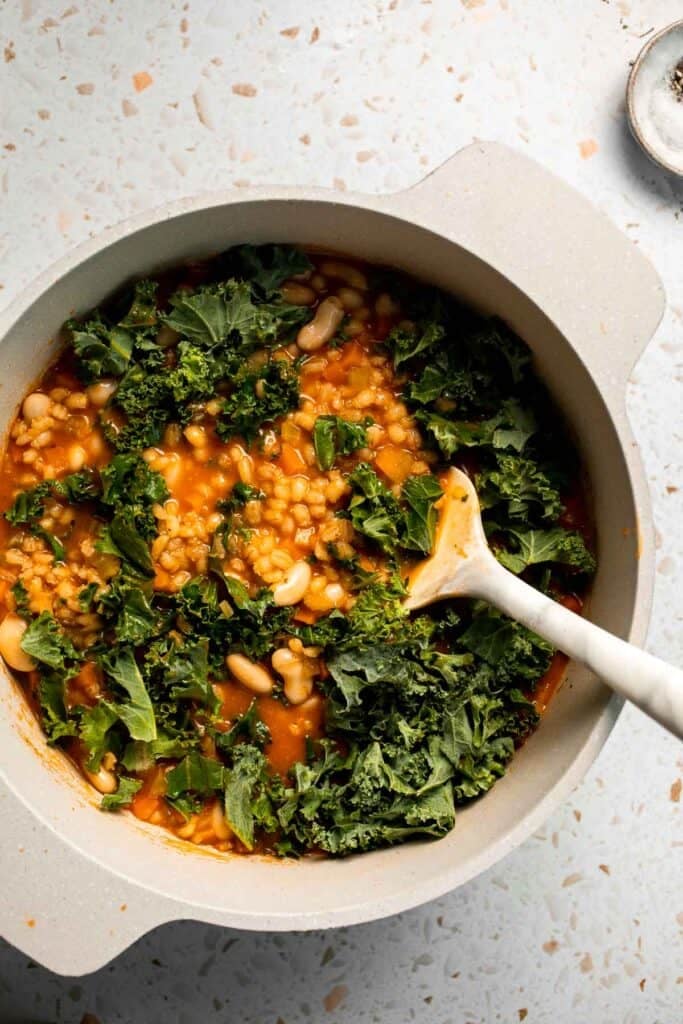
- Season and serve. Taste and adjust with salt and pepper as needed. Ladle into bowls and serve warm.
How to Cook in the Slow Cooker
- Prep the veggies. Heat olive oil in a skillet over medium heat. Sauté onion, garlic, celery, and carrots for 5 minutes until softened (optional but adds flavor).
- Add to slow cooker. Transfer sautéed veggies to a slow cooker. Stir in pearl barley, Italian seasoning, vegetable stock, tomato paste, miso paste (if using), beans, salt, and pepper.
- Cook low and slow. Cover and cook on Low for 6-7 hours or High for 3-4 hours, until barley is tender.
- Add greens. Stir in kale during the last 20 minutes of cooking. Taste, adjust seasoning, and serve.
How to Cook in the Instant Pot
- Sauté the aromatics. Set Instant Pot to Sauté. Heat olive oil, then cook onion, garlic, celery, and carrots for 4-5 minutes until softened. Stir in Italian seasoning and pearl barley, and cook 1 minute.
- Build the broth. Stir in vegetable stock, tomato paste, miso paste (if using), beans, salt, and pepper. Scrape up any browned bits from the bottom.
- Pressure cook. Seal lid and cook on High Pressure for 20 minutes. Allow a 10-minute natural release, then quick release remaining pressure.
- Add greens. Stir in kale, then cover for 5 minutes on Keep Warm mode until wilted. Taste and adjust seasoning before serving.
Expert Tip: Toast the Barley First
For extra flavor, toast the barley in the pot for a couple of minutes before adding the stock. It brings out its nutty flavor and makes the soup even richer and more aromatic.
More Tips and Tricks
- Don't overcook the barley. Barley continues to absorb liquid as it sits. Stop cooking when it's tender but chewy.
- Boost the umami. Tomato paste and miso paste both add savory depth. If you don't have miso, try a splash of soy sauce or Worcestershire sauce.
- Layer the flavors. Sauté the vegetables until slightly caramelized before adding stock. It makes the broth more complex.
- Adjust consistency. If the soup gets too thick, just stir in more stock or water before serving.
- Brighten at the end. A squeeze of lemon juice or a sprinkle of fresh herbs (parsley or dill) before serving makes the flavors pop.
Recipe Variations
- Beef and barley soup. Add cooked beef chunks or brown ground beef with the vegetables for a meaty version. See our Beef Cabbage Barley Soup.
- Swap the veggies. Play around with different veggie combos. Try green beans, zucchini, cauliflower, bell pepper, or peas.
- Gluten-free swap. Replace barley with brown rice or quinoa for a gluten-free alternative.
- Root veggie version. Add sweet potatoes, parsnips, or turnips for an earthy twist.
- Spicy barley soup. Add red pepper flakes or a diced jalapeño for a gentle kick.
- Mediterranean style. Use chickpeas instead of cannellini beans and season with cumin, coriander, and smoked paprika.
- Add herbs. Give it a herby flavor by adding into the soup base bay leaves or add a garnish of parsley or cilantro.
- Creamy finish. Stir in a splash of coconut milk or cashew cream at the end for a creamier texture.
Storage
How to Store
Keep leftover soup in an airtight container in the fridge for up to 5 days.
How to Reheat
Warm on the stovetop over medium heat, adding extra stock or water if the soup has thickened. You can also microwave in 1-minute intervals, stirring in between.
How to Freeze
Divide into portioned containers and freeze in the freezer for up to 3 months. Thaw overnight in the fridge, then reheat as directed.
How to Serve
Vegetable barley soup is hearty enough to be served on its own, but it's also perfect with a sandwich or simple sides that round out the meal.
These are my favorite dishes to serve with this barley soup:


Side Dishes for Soup
Looking for the perfect accompaniments to your favorite soups? Explore our collection of soup side dishes, including crusty breads, fresh salads, savory crackers, and hearty sandwiches that complement and elevate any bowl of soup.
FAQ
It's a hearty, veggie-packed soup made with pearl barley, beans, and greens simmered in a savory broth. It's wholesome, filling, and naturally plant-based.
Yes! Barley is perfect for vegetable soup because it thickens the broth while adding a chewy, nutty bite. It makes the soup heartier and more filling.
Absolutely. Barley is high in fiber, vitamins, and minerals, while vegetables and beans add even more nutrients. Together, they create a balanced, nourishing soup that's both satisfying and good for you.
No, pearl barley can be cooked directly in the soup. It absorbs flavor from the broth as it cooks, which makes it even tastier.
No, pearl barley does not need soaking, as it cooks relatively quickly. Hulled barley benefits from soaking to reduce cooking time.
Aromatics like onions, garlic, celery, and carrots create the base, while herbs, spices, and umami-rich ingredients like tomato paste or miso deepen the flavor.
Caramelize the vegetables, toast the barley, and add umami boosters like tomato paste, miso, or soy sauce. Fresh herbs and lemon juice at the end also brighten the flavor.
Barley generally has more fiber and protein than white rice and a lower glycemic index, which helps keep you full longer. Both are nutritious, but barley offers more heart-healthy benefits.
Yes! It freezes beautifully. Just portion into airtight containers, freeze for up to 3 months, and reheat gently. Add extra stock if it thickens after thawing.
More Hearty Soup Recipes
Looking for other recipes like this? Try these:

Tried this recipe?
I'd love to hear what you think! Leave a comment and rating below to share your feedback. Your reviews help others discover this recipe and help me keep creating more free recipes for you. Snap a photo and tag me on social media @aheadofthyme too.

20 Best Easy Apple Desserts

Apple desserts are the definition of cozy comfort food. From classic apple pie to quick crisps and warm apple donuts, these treats are simple to make and always a crowd-pleaser. With their sweet-tart flavor and natural juiciness, apples shine in just about every type of dessert.

So if you're wondering "what desserts to make with apples," you're in the right place. We're sharing 20 of the best easy apple dessert recipes that are beginner-friendly and made with everyday ingredients like fresh apples, cinnamon, butter, and sugar. From quick no-fuss treats to impressive baked goods, you'll find an apple dessert here for every mood, season, and occasion - pies, crisps, cobblers, cakes, muffins, cheesecakes, and more.
This collection was inspired by my love of baking with apples, especially in the fall when they're at their peak. If you enjoy these recipes, don't miss my 50 Best Fall Desserts for even more cozy inspiration to pair with the season.
Why You'll Love Baking with Apples
- Naturally sweet and versatile. Apples bring just the right amount of natural sweetness and moisture to desserts, making them perfect for everything from pies and crisps to cakes and muffins.
- Pairs perfectly with warm spices. Cinnamon, nutmeg, cloves, and caramel are classic companions that highlight the cozy flavor of baked apples.
- Seasonal yet timeless. While apple desserts are especially popular in the fall, they're delicious year-round and easy to make with whatever variety is in season.
- Beginner-friendly. Apples are forgiving to work with - no special techniques required. Slice, dice, or bake them whole and you'll end up with something delicious.
- Crowd-pleasing. Whether you're baking for family, friends, or a holiday gathering, apple desserts are always a guaranteed hit.
Best Apple Desserts
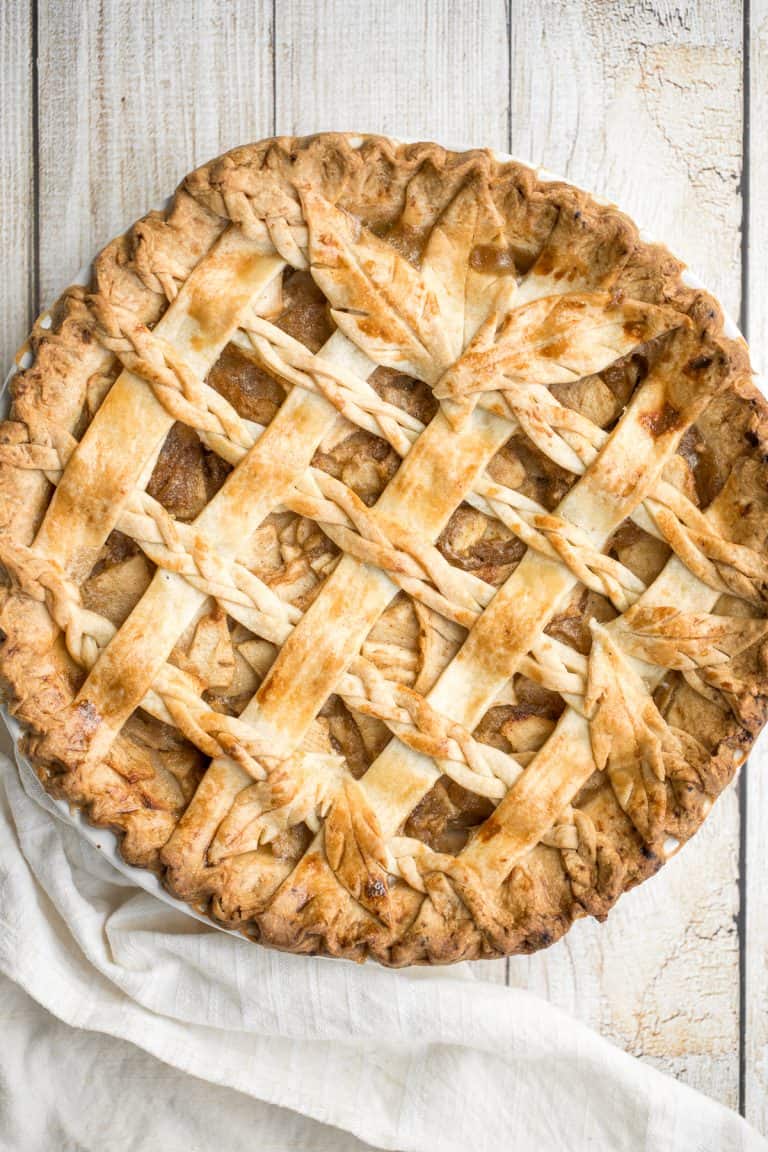
Braided Lattice Apple Pie
This braided lattice apple pie is packed with cinnamon apples tossed in a caramel sauce and sealed in a buttery, flaky pie crust with a braided lattice top. Serve with a scoop of vanilla ice cream.
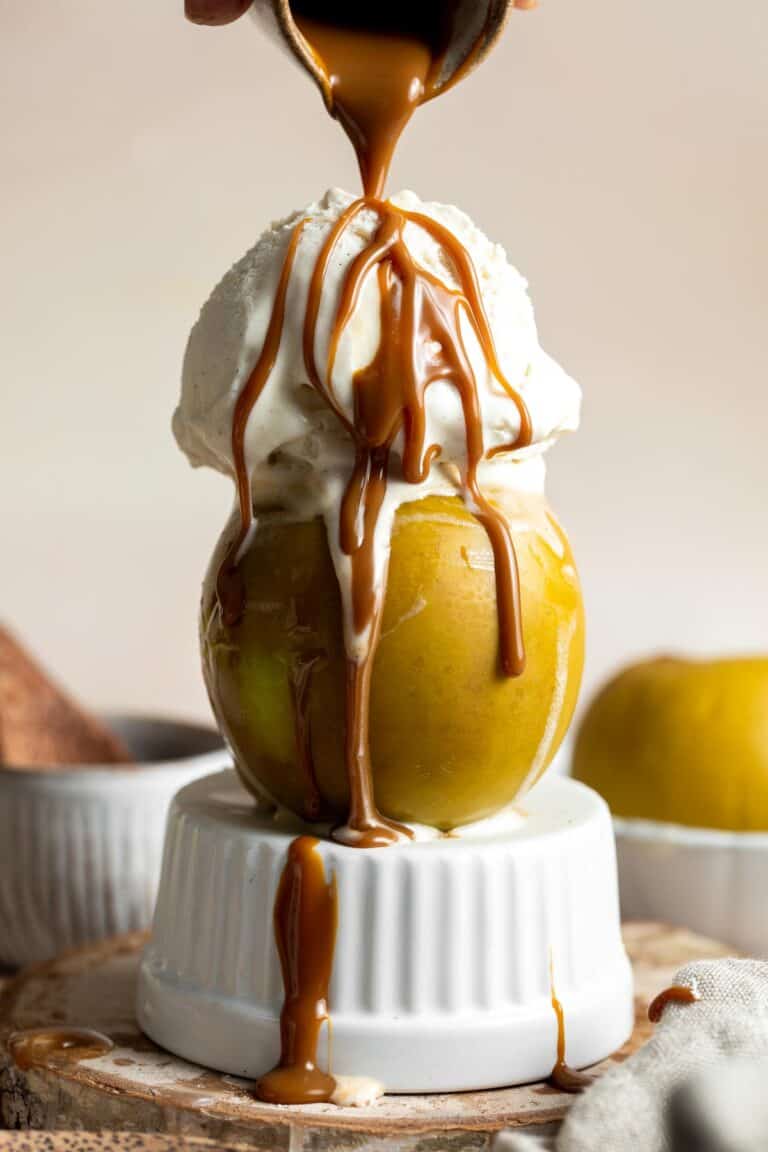
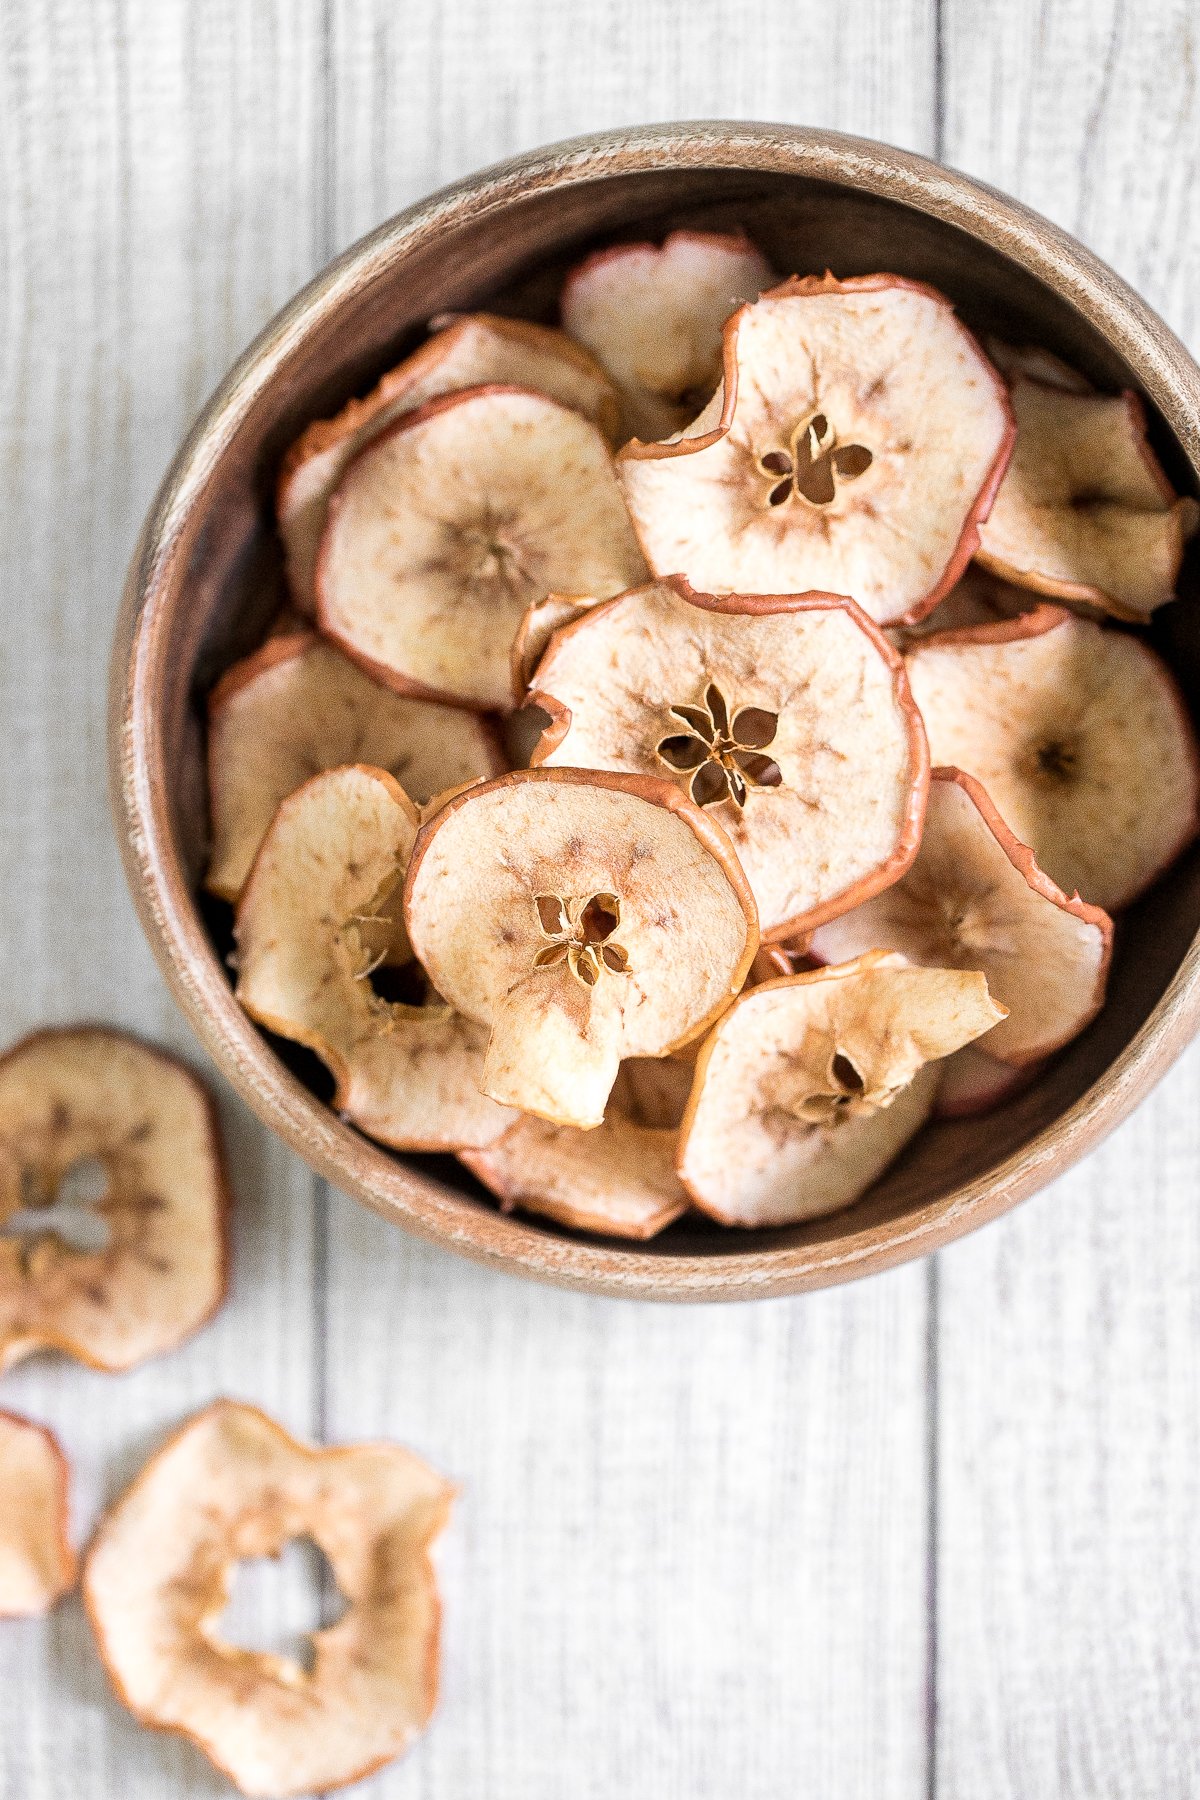
Baked Apples
Baked Apples are soft, warm, and tender, with a crunchy sweet cinnamon oat filling. This cozy and comforting fall dessert is quick easy to make too.

Apple Tart
This Apple Tart is a cozy fall dessert made with tart apples nestled in a flaky crust and topped with cinnamon sugar. It's like an apple pie but way better!
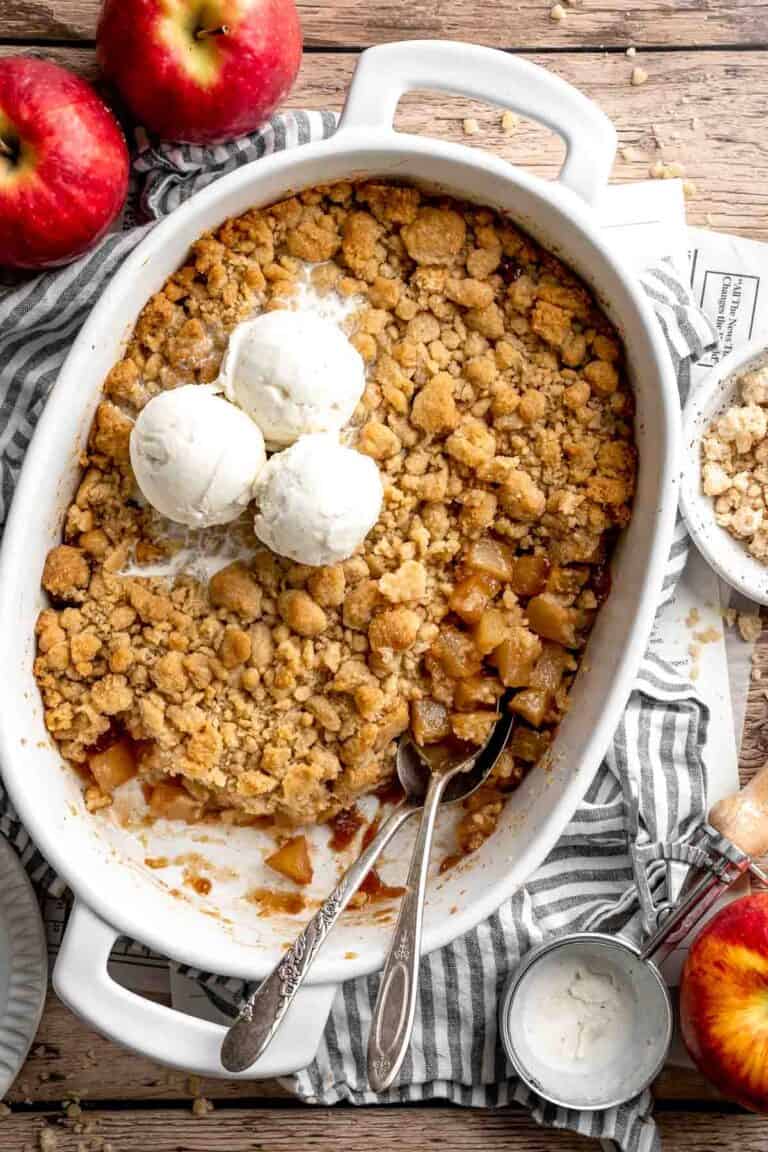
Apple Crumble
Made with tender apples and topped with a buttery brown sugar crumble, this old-fashioned Apple Crumble is the perfect fall dessert!

Apple Turnovers
With a buttery, flaky crust and spiced sweet apple filling, these homemade Apple Turnovers are hands down one of the best ways to enjoy this seasonal fruit.

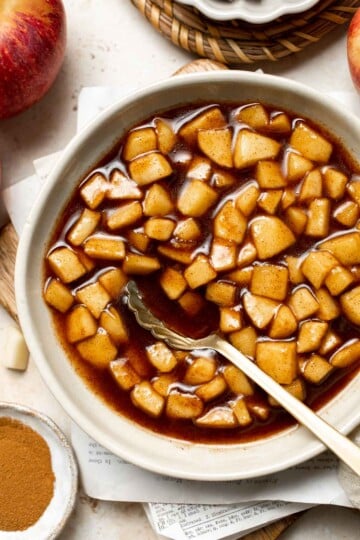
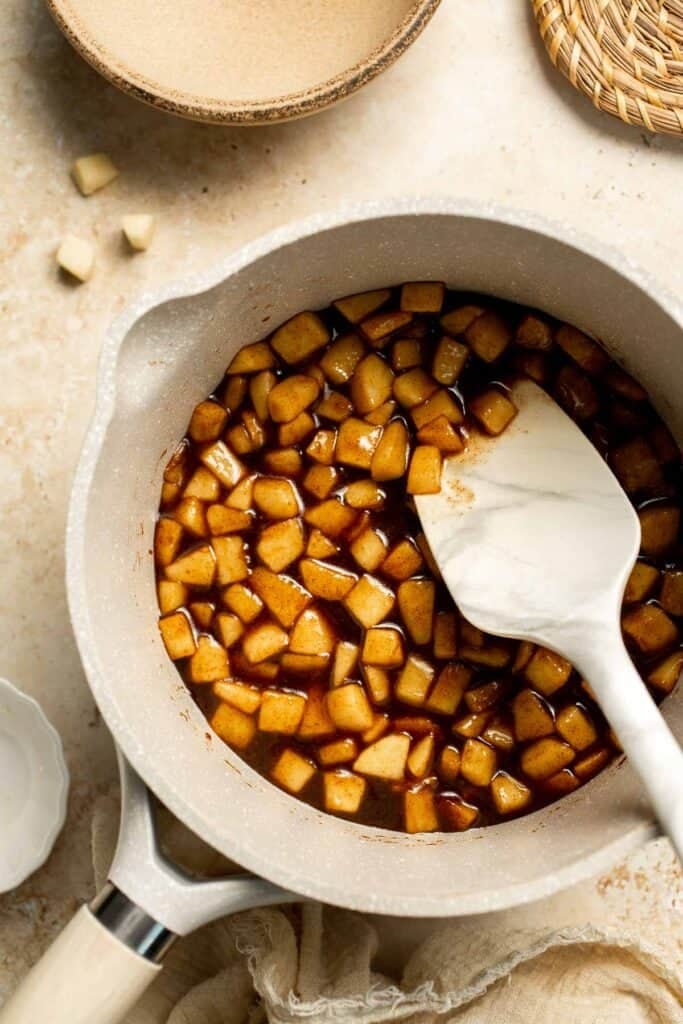
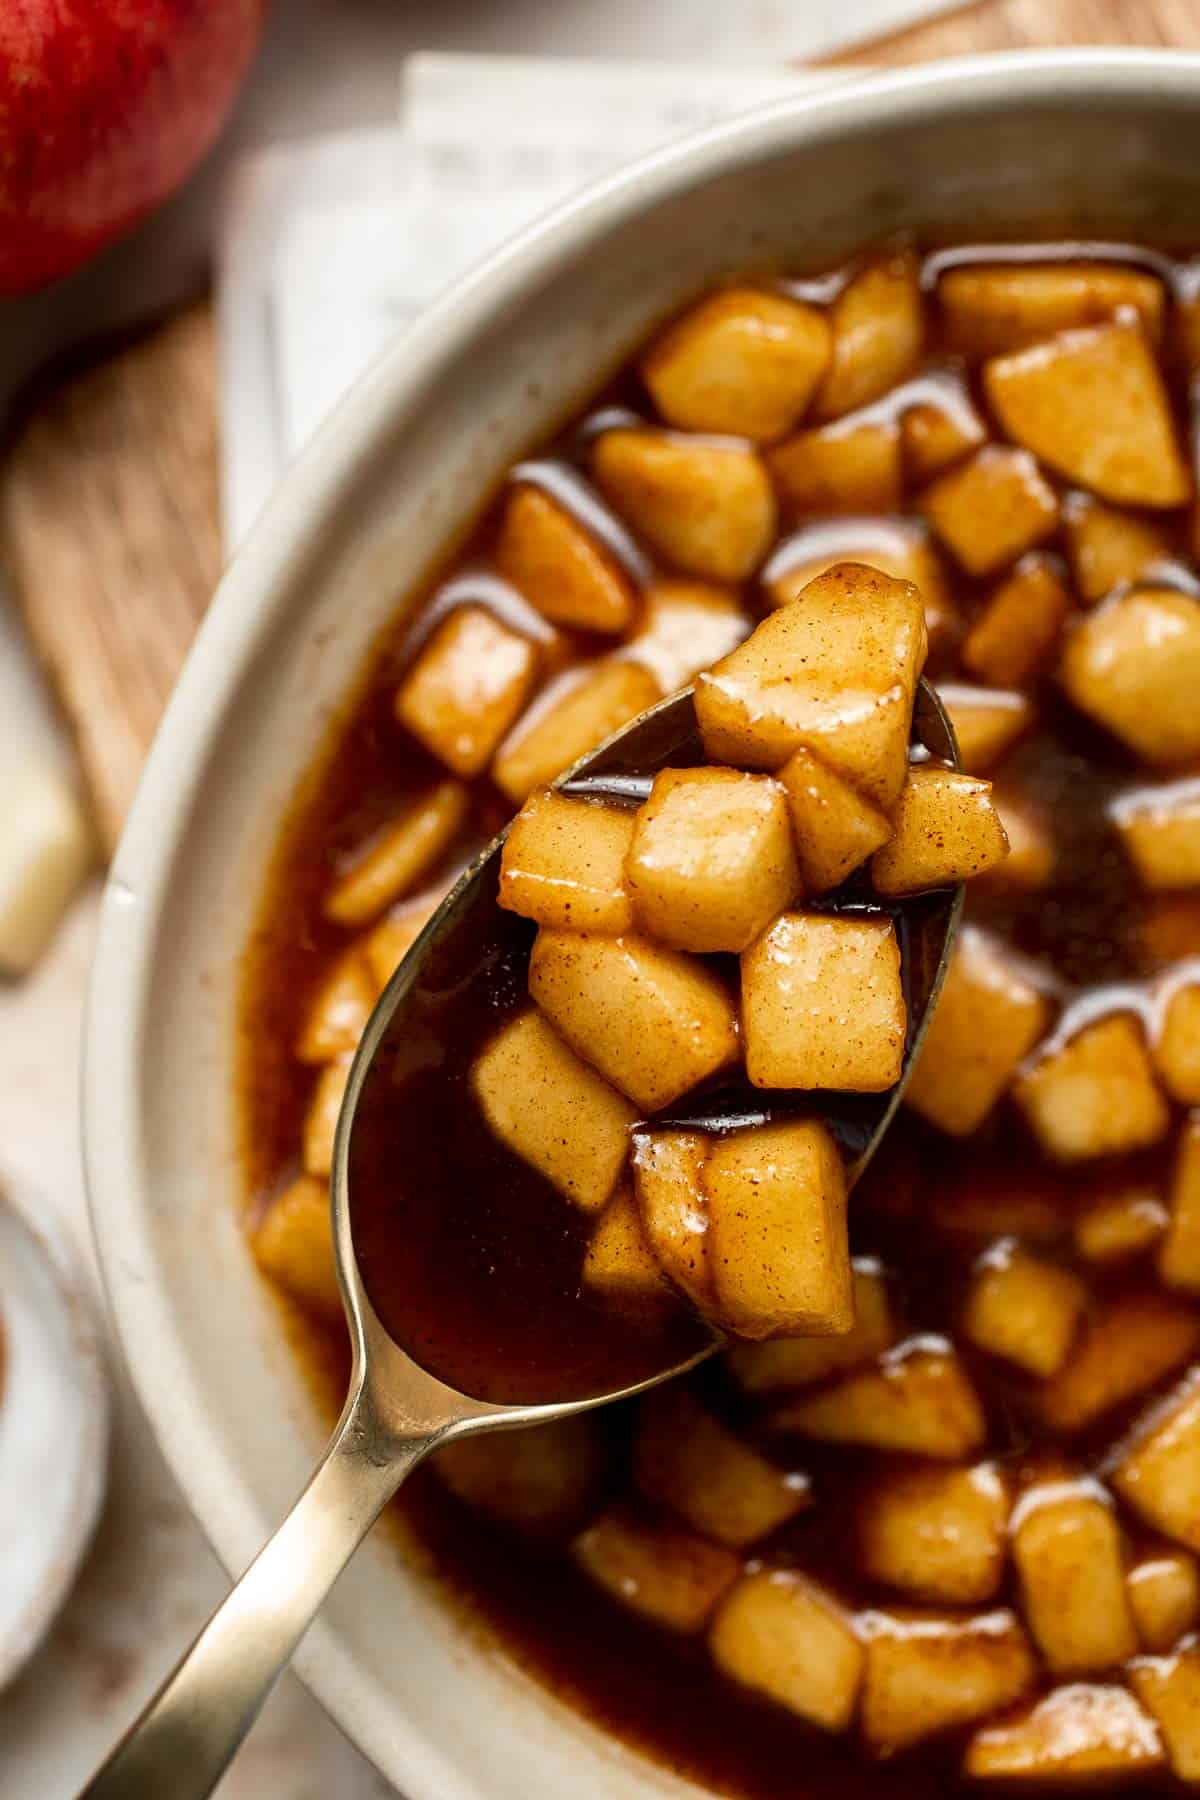
Caramelized Apples
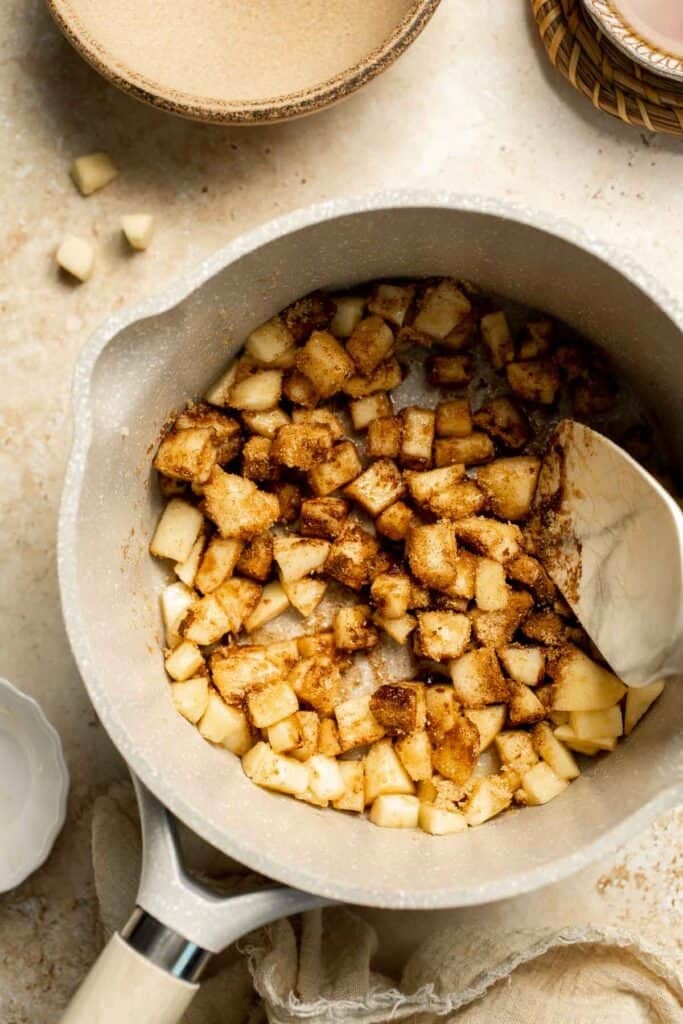
Add a touch of sweetness to your breakfast or dessert with this easy caramelized apple topping recipe. Perfect for pancakes, waffles, ice cream, and more!

Apple Crisp
This easy apple crisp with tender cinnamon-sugar apples and crispy oat topping is sweet, tart, and just as delicious as an apple pie but takes a lot less effort.
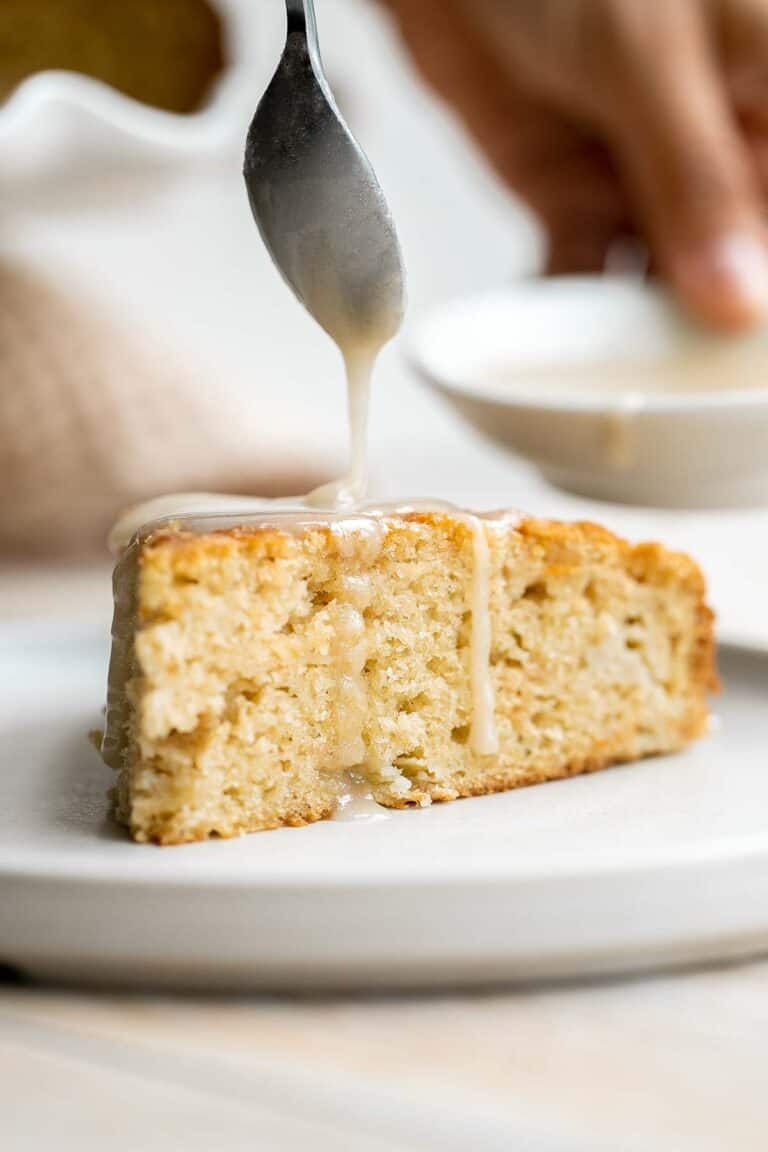
Apple Cake
Easy Apple Cake has a dense and moist crumb and is loaded with fresh apples, cinnamon sugar, and nuts. It's quick, easy, and ready to eat in under an hour.

Caramel Apples
Homemade Caramel Apples are sweet, delicious, and fun to make. Chewy caramel made from scratch covers crisp juicy apples, topped with optional toppings.

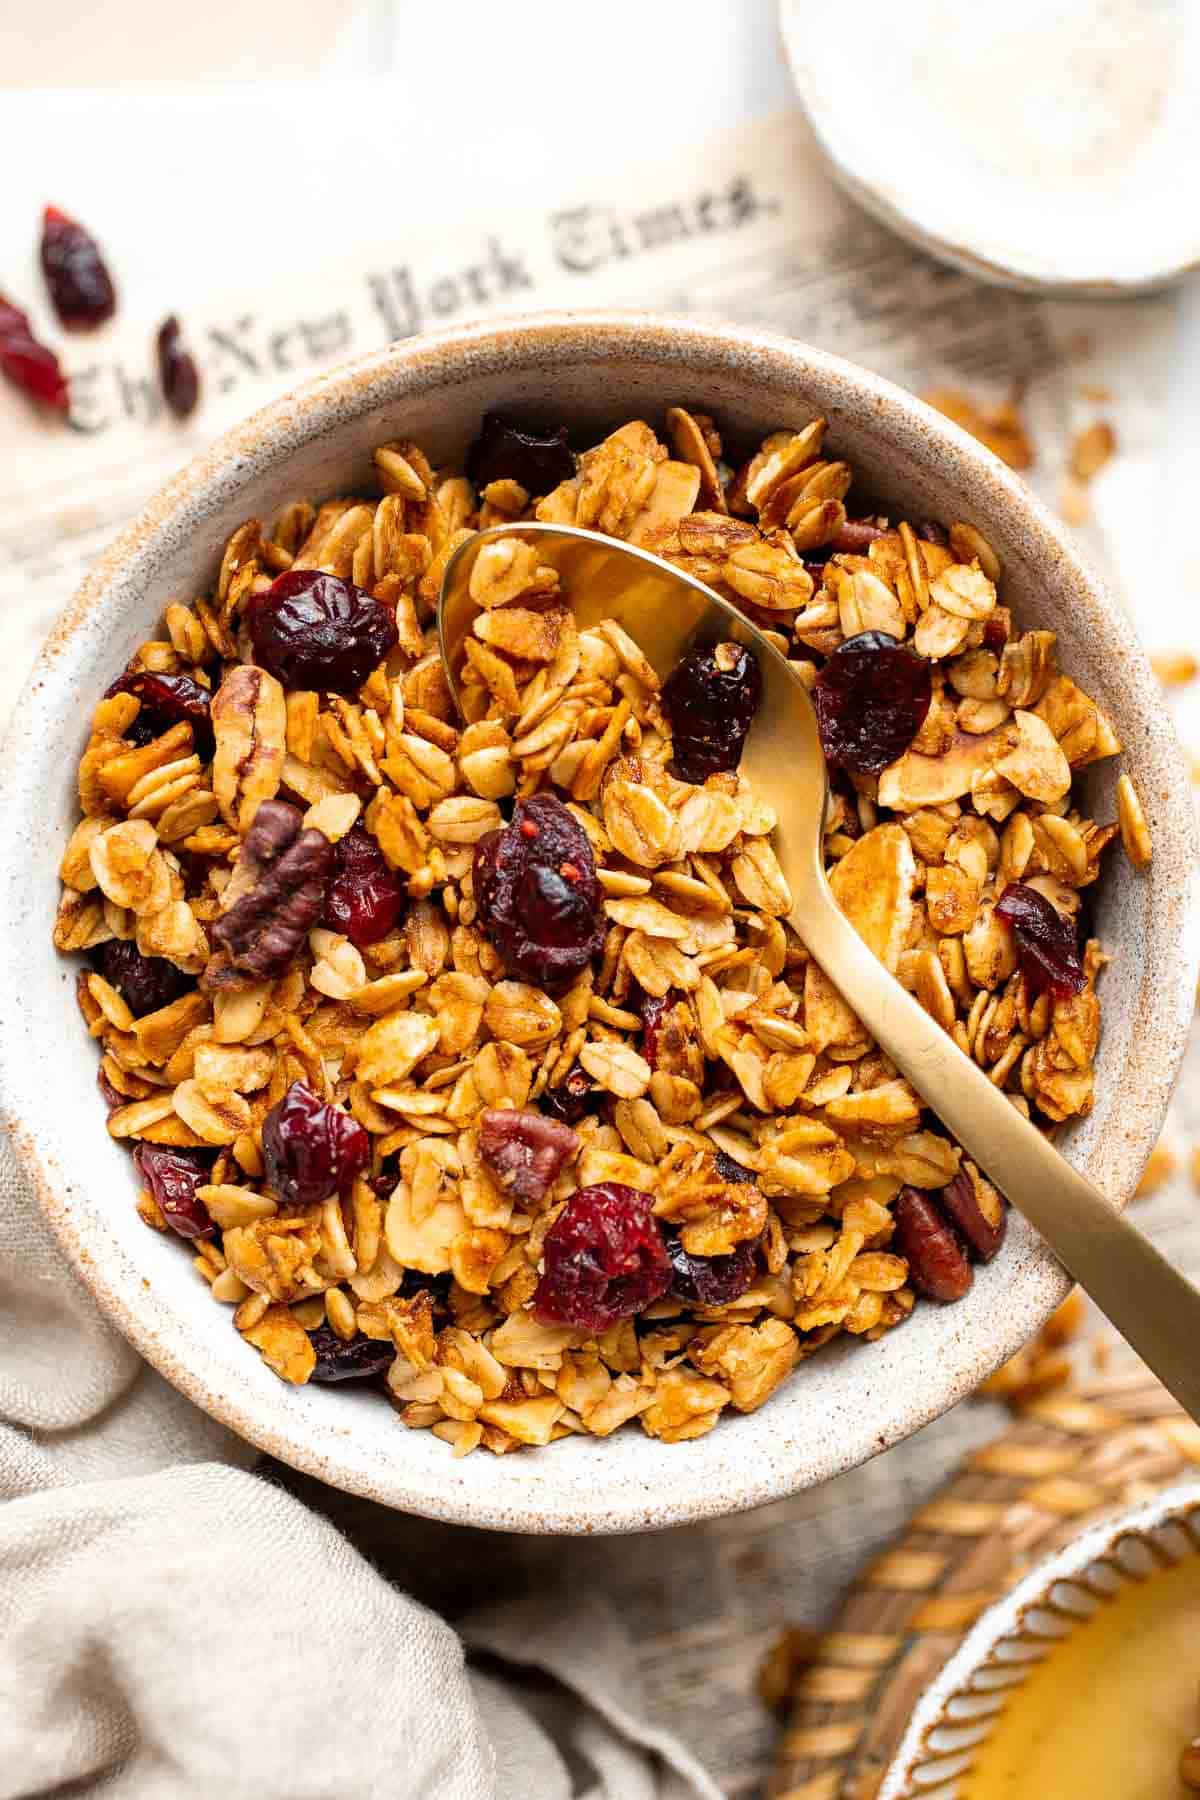
Cinnamon Apple Oatmeal Muffins
Cinnamon Apple Oatmeal Muffins with a streusel topping are fast, easy and delicious- loaded with apples, oats, and fall spices. A quick nutritious bite for breakfast or snack time.

Baked Apple Cider Donuts Recipe
Indulge in the flavors of fall with these delicious baked apple cider donuts coated in spiced cinnamon sugar. An easy to make and cozy fall treat!
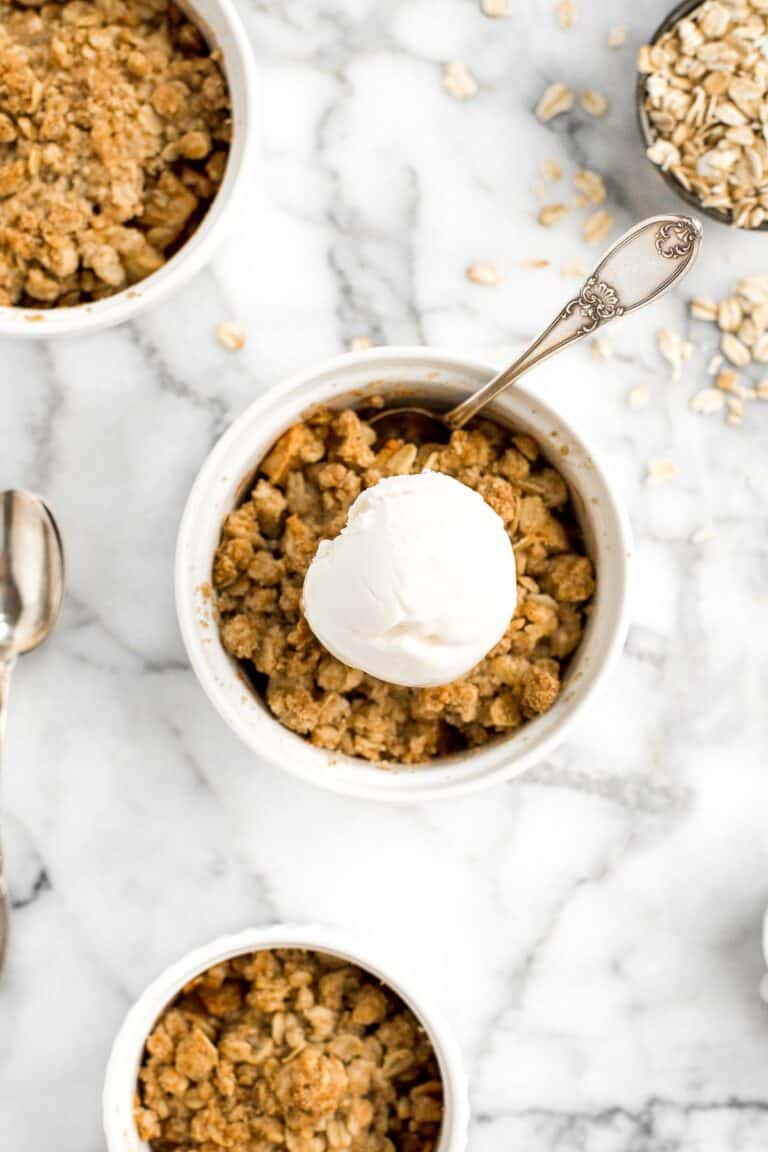
Individual Apple Crisp
Individual apple crisp is a sweet tart fall dessert served in single-sized portions with all the crunchy corners of crumble. And so quick and easy to prep.
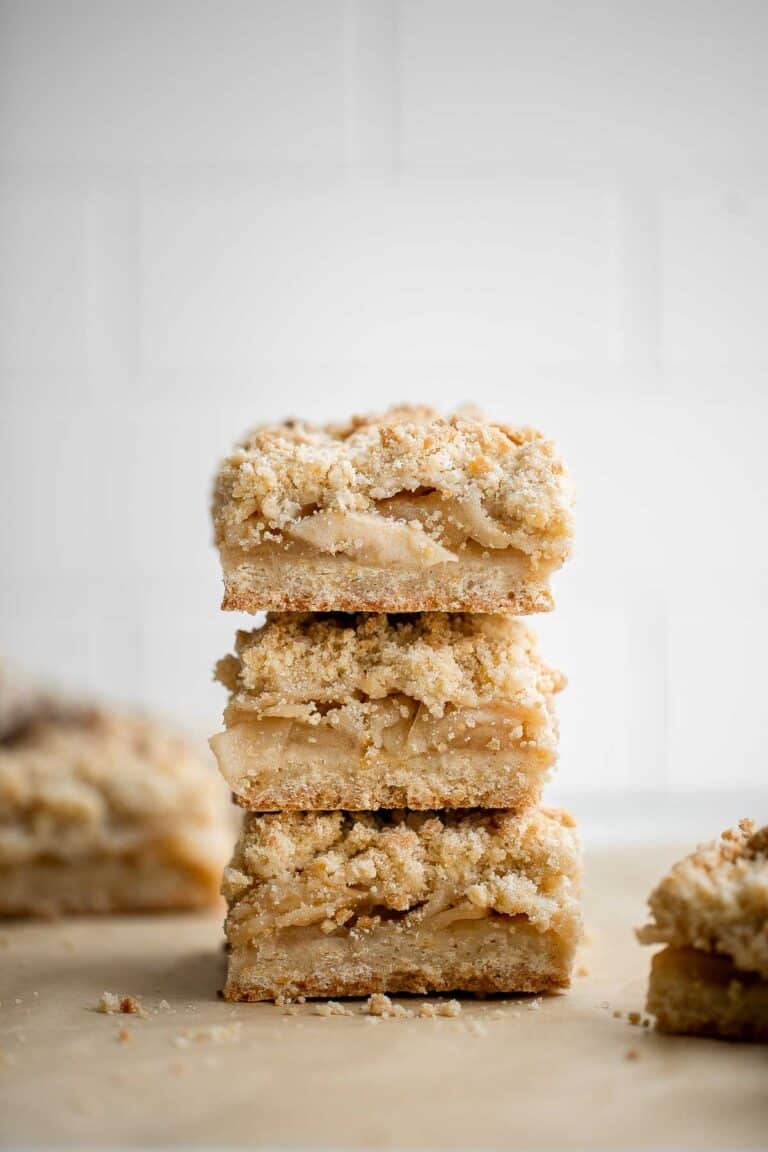
Apple Pie Bars
Homemade Apple Pie Bars are sweet, tart, and crumbly. With 3 delicious layers including a flaky pastry crust, cinnamon apple filling, and crumbly topping.

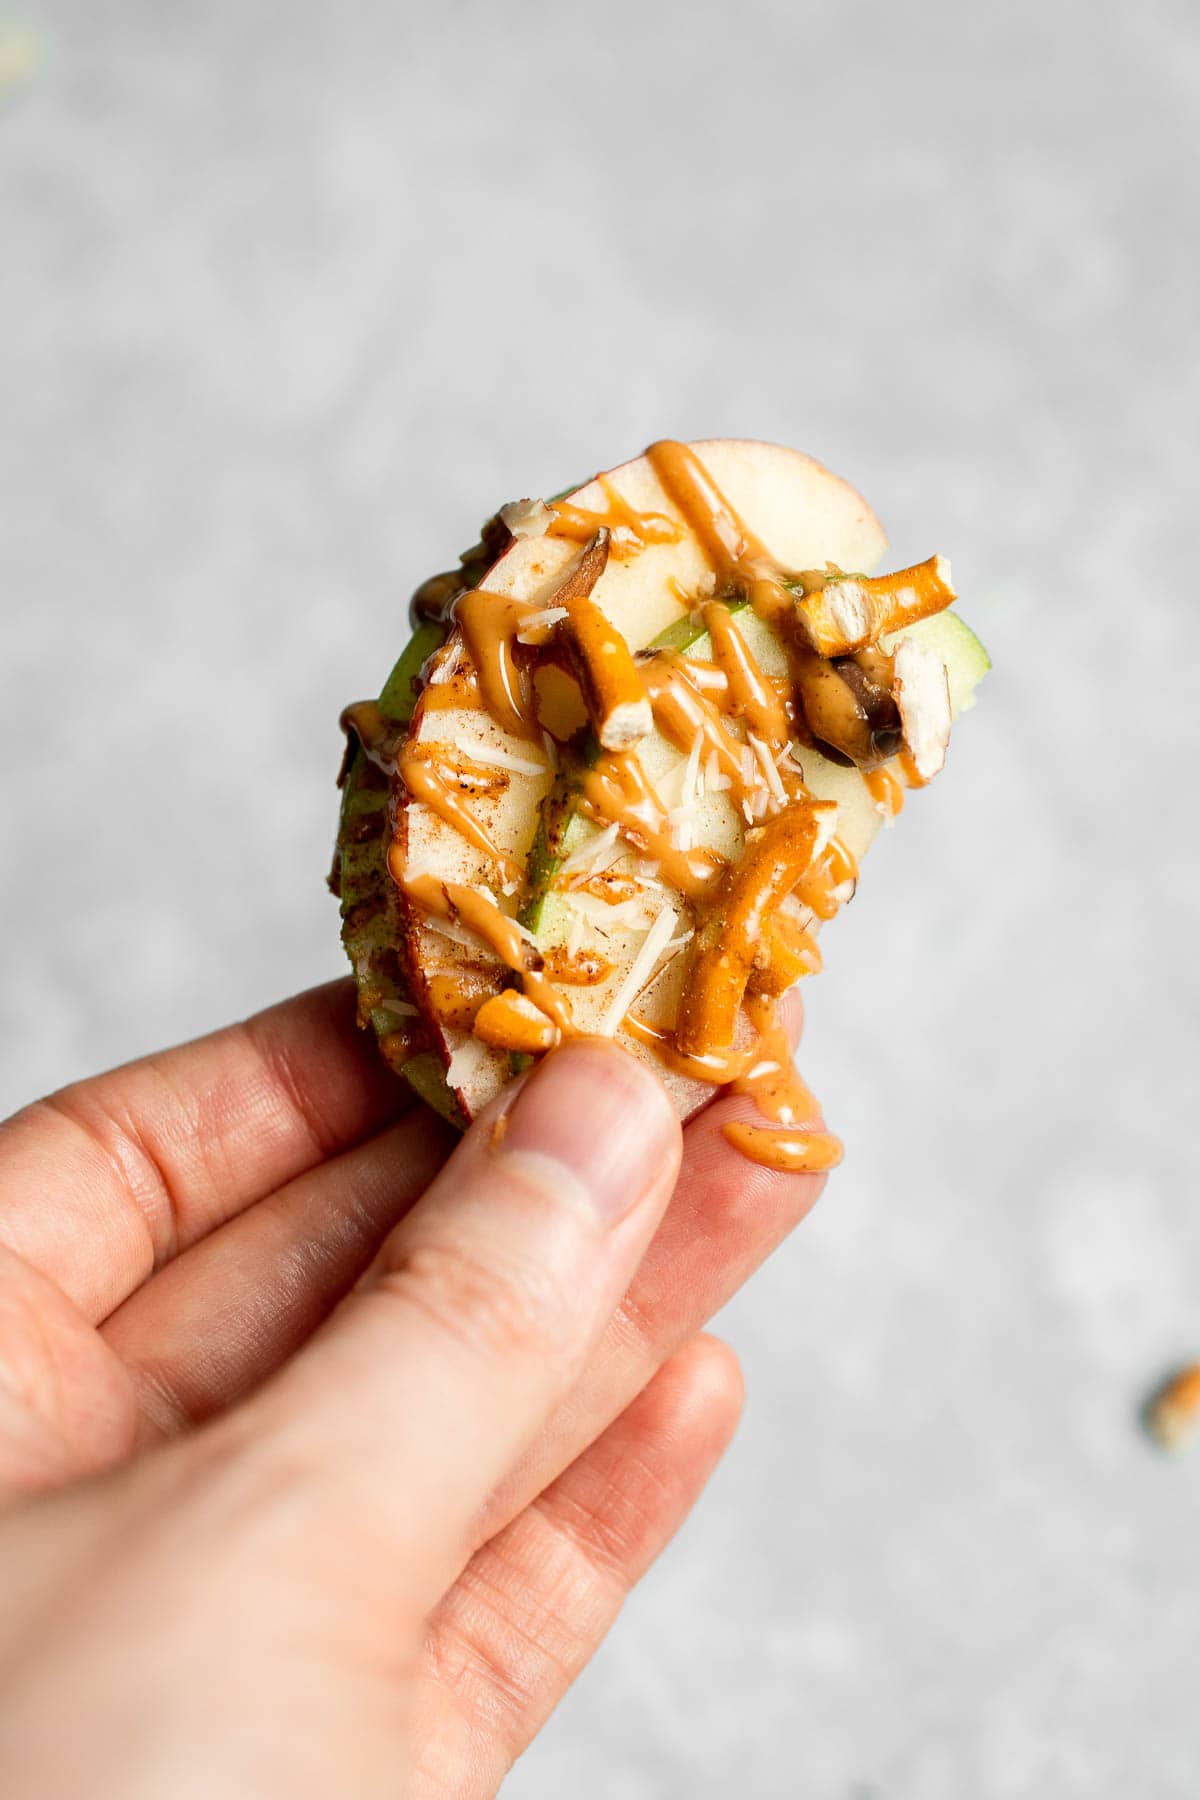
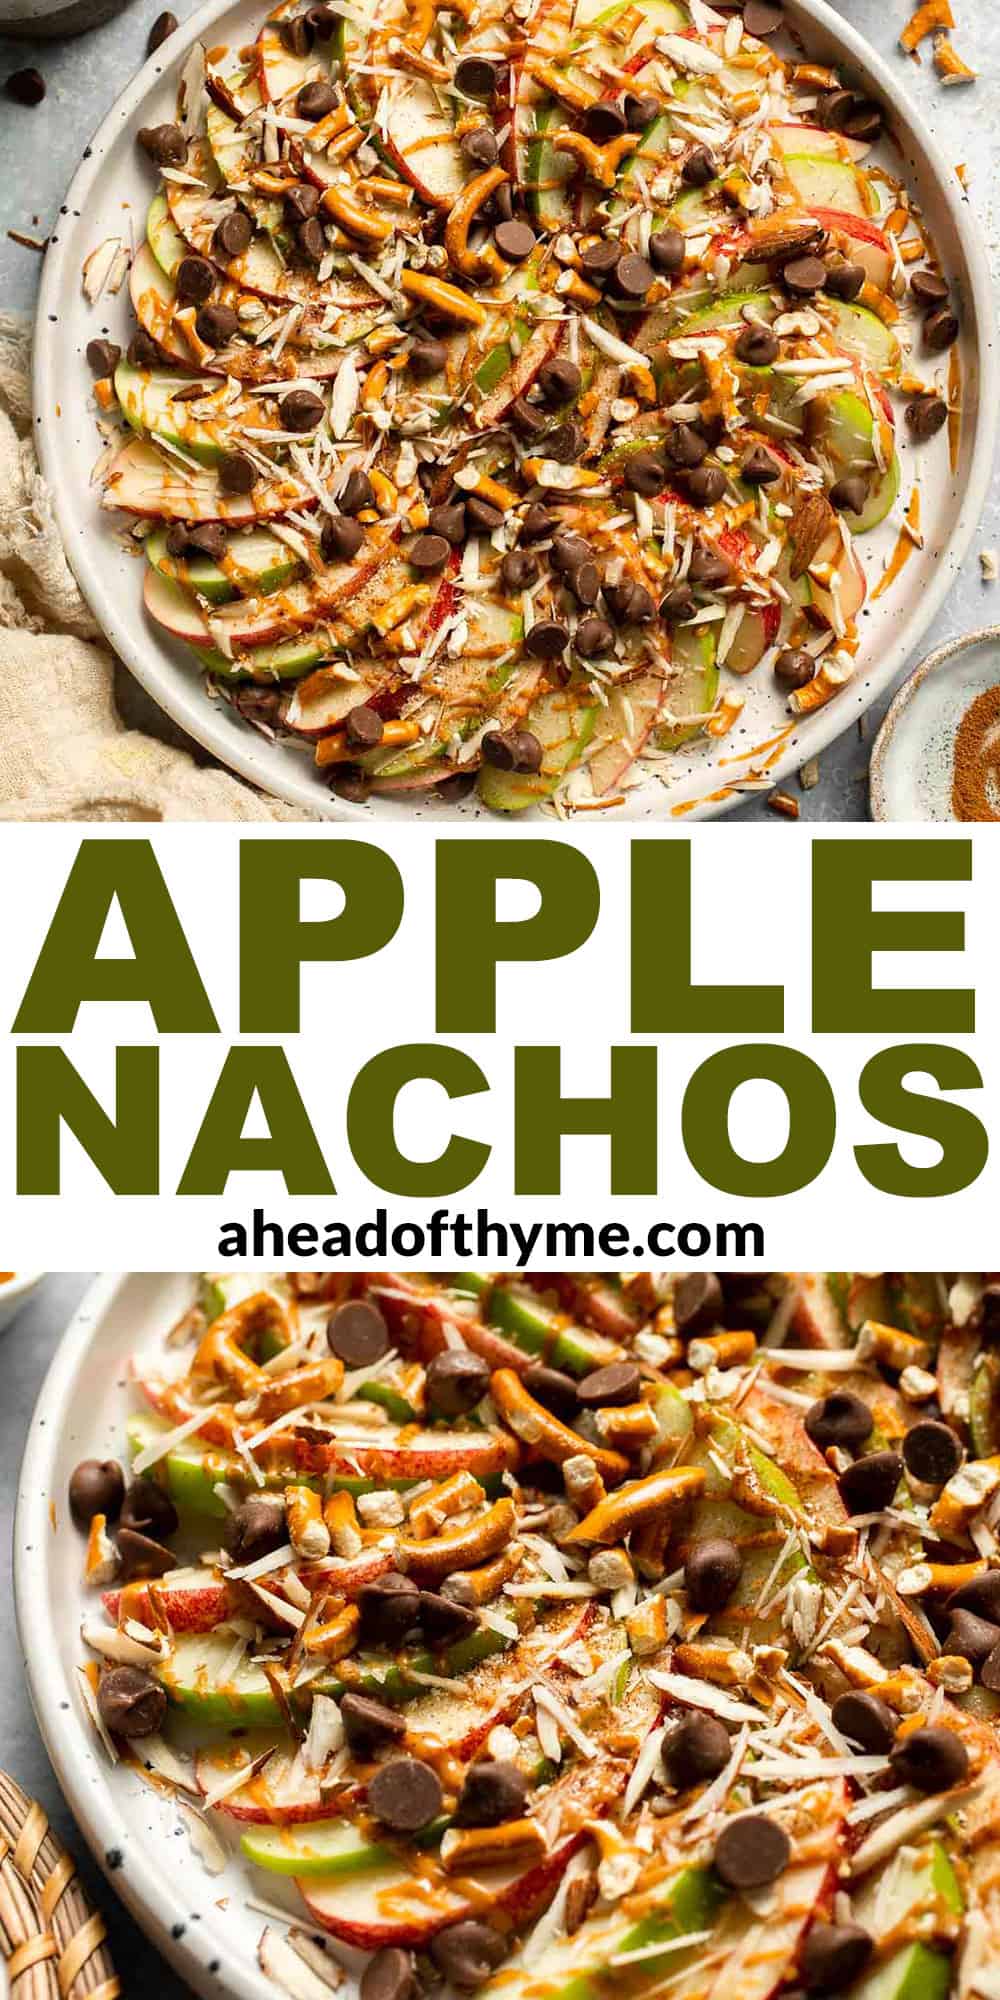
Apple Nachos
Apple Nachos are a quick, healthy snack made with crisp apples, nut butter, and toppings. Fun, customizable, and ready in minutes!
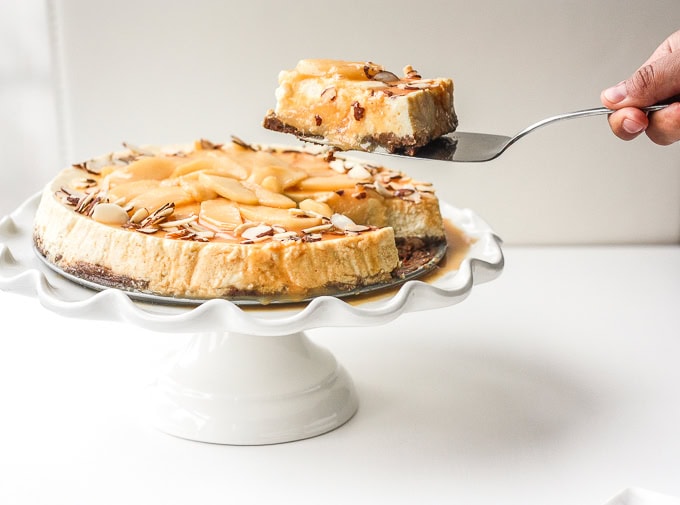
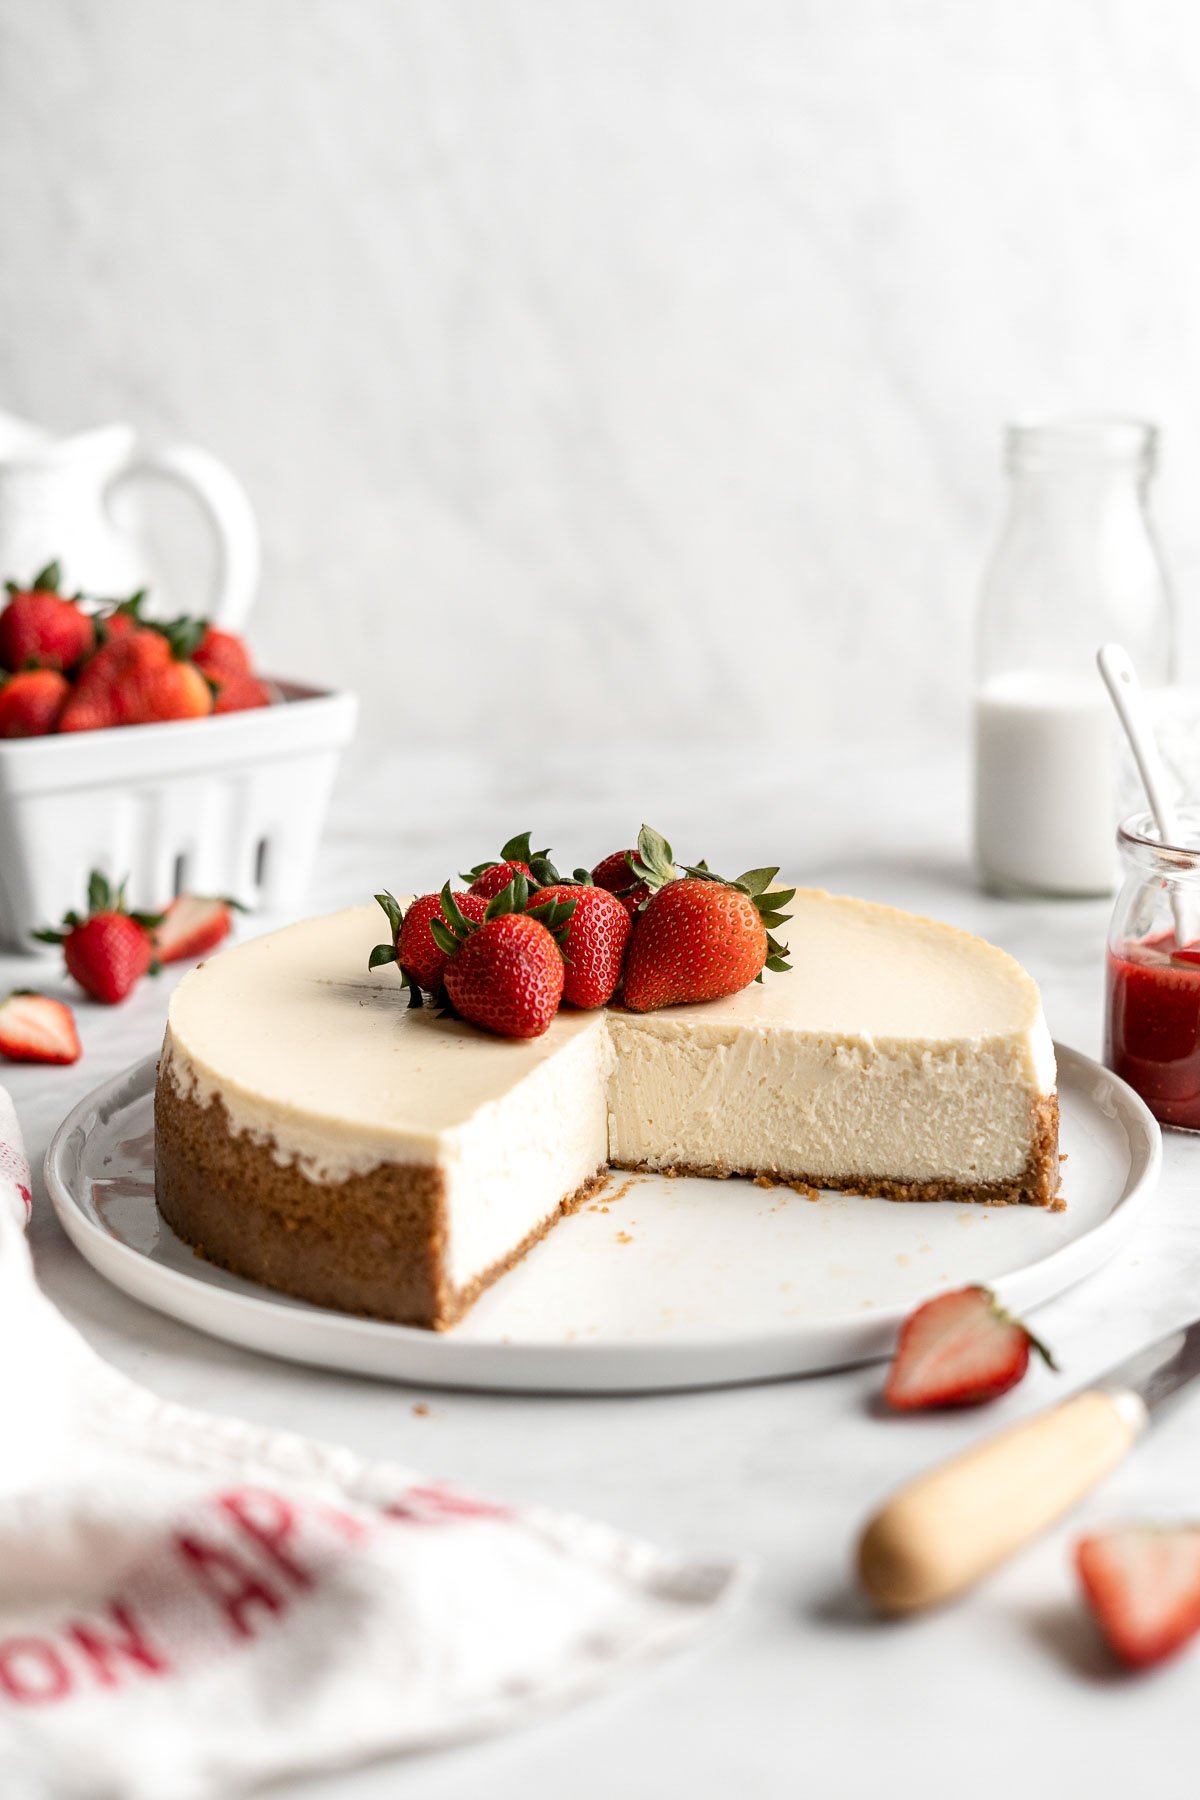
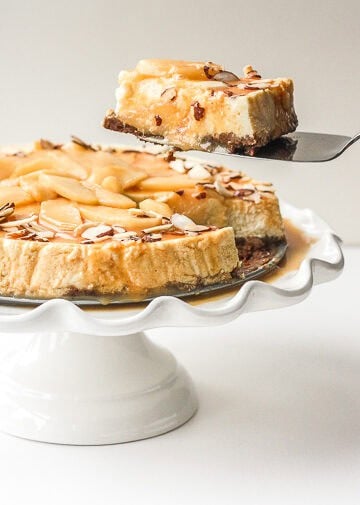
Healthier Caramel Apple Fall Cheesecake
Decadent and light, homemade healthier caramel apple fall cheesecake is made with a graham cracker crust, topped with caramel apples and caramel sauce. It's fall heaven.

Applesauce Bread
Homemade applesauce bread is fluffy, moist, and delicious. Loaded with fall flavors that transforms your favorite snack into a loaf cake.

Easy Homemade Apple Hand Pies
Easy homemade apple hand pies are the perfect fall treat -- stuffed with tender, sweet and cinnamon apples and wrapped in crispy, flakey, buttery crust.
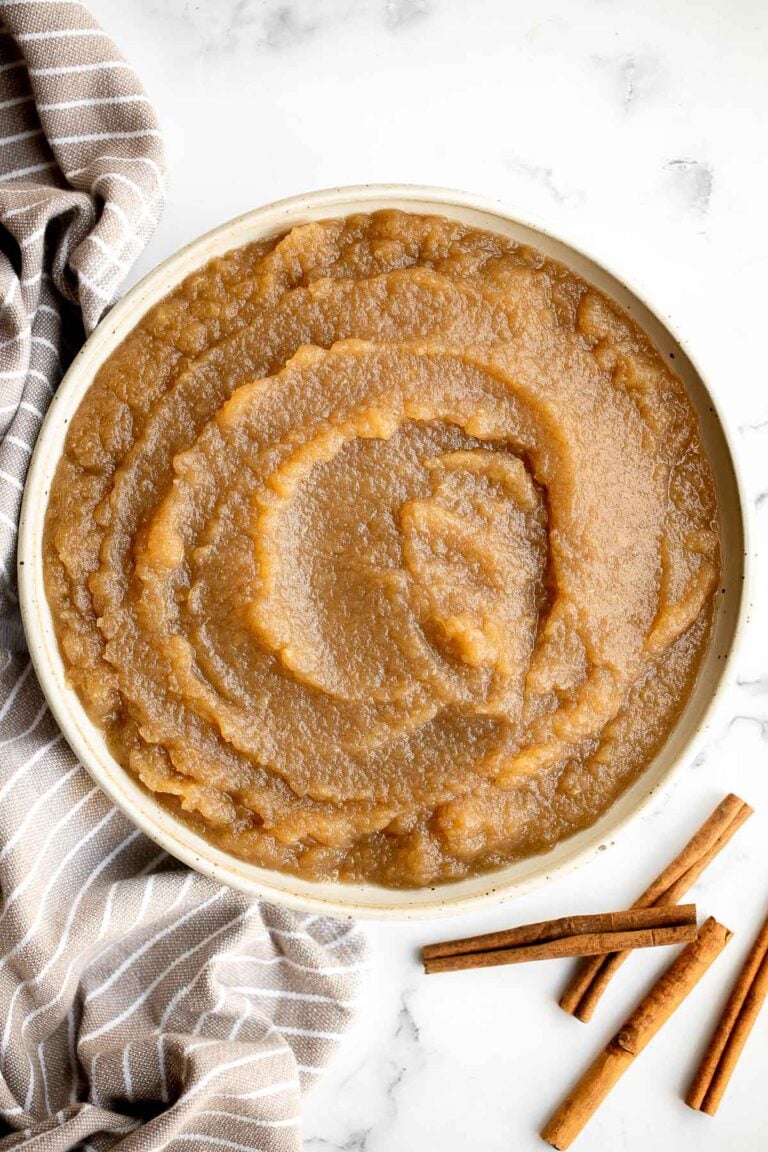
Homemade Applesauce
Homemade applesauce is a quick and easy fall treat with just 3 ingredients and very little time and effort. Serve it as a healthy snack or dessert.

Cranberry-Apple Cobbler with Biscuits
This sweet and tart cranberry apple cobbler recipe with biscuits is packed with fresh fruit and a buttery biscuit topping. This holiday favourite is easy to make.

Healthy Apple Pie Fall Smoothie
Healthy Apple Pie Fall Smoothie is quick and easy to make in minutes, delicious and nutritious, and tastes like apple pie - without the calories.
Storage
How to Store
Most apple desserts will keep well for 3-4 days when stored in an airtight container at room temperature or in the refrigerator. Baked goods like apple muffins, bread, or cake can sit at room temperature if covered, while pies, crisps, and cheesecakes are best kept chilled.
How to Reheat
Reheat baked apple desserts in the oven at 300°F for 10-15 minutes until warmed through. For individual portions, the microwave works too, in 20-30 second intervals. If the dessert has a crumb topping or crust, reheating in the oven helps keep it crisp.
How to Freeze
Many apple desserts are freezer-friendly, especially pies, crisps, and muffins. Wrap tightly in plastic wrap or foil, then place in a freezer-safe bag or container for up to 3 months. Thaw overnight in the refrigerator before reheating. For crisps and cobblers, freeze just the filling and topping separately, then assemble and bake fresh for the best texture.
FAQ
The best baking apples are firm, slightly tart varieties that hold their shape and flavor. Granny Smith apples, Honeycrisp apples, Pink Lady, Braeburn, and Jonagold are all great options. You can also use fuji or gala apples. They balance sweetness and tartness, making them perfect for pies, crisps, and cobblers. Mixing two different apple varieties often gives the best flavor and texture in baked desserts.
Yes, soft apples can still be used in certain desserts like applesauce, apple butter, or smoothies where texture isn't as important. However, for pies and crisps, soft apples may break down too much and create a mushy filling. If you need to use them up, try baking them whole with cinnamon and sugar for a simple, cozy treat.
To prevent apples from browning, toss the slices in a little lemon juice before using them. You can also use lime juice, orange juice, or even a diluted solution of water and vinegar. The acid slows oxidation and keeps the apples looking fresh and appetizing. If the apples will be baked, a bit of browning won't affect the final dish.
Apples pair beautifully with warm spices. Cinnamon is the classic choice, but nutmeg, cloves, cardamom, and allspice add extra depth. Ginger can bring a little zing, while vanilla or maple syrup can enhance the sweetness. Combining a few of these spices will give your apple dessert layers of flavor.
Yes, many apple desserts freeze well, especially pies, crisps, and muffins. Allow them to cool completely, wrap tightly in plastic wrap or foil, and store in a freezer bag for up to 3 months. When ready to enjoy, thaw in the refrigerator overnight and reheat in the oven until warmed through. This makes it easy to bake ahead for holidays or gatherings.
More Recipe Collections
Looking for other recipes like this? Try these:


Tried any of these apple dessert recipes?
I'd love to hear what you think! Leave a comment and rating for the apple recipe that you made to share your feedback. Your reviews help others discover the recipe and help me keep creating more free recipes for you. Snap a photo and tag me on social media @aheadofthyme too.
Apple Nachos (Easy and Healthy Snack)

Apple Nachos are proof that snack time doesn't have to be boring to be healthy. Crisp apple slices get drizzled with warm almond butter, dusted with cinnamon, and showered with crunchy, sweet, and salty toppings. It's like a party platter disguised as fruit: fun, colorful, and on the table in minutes.
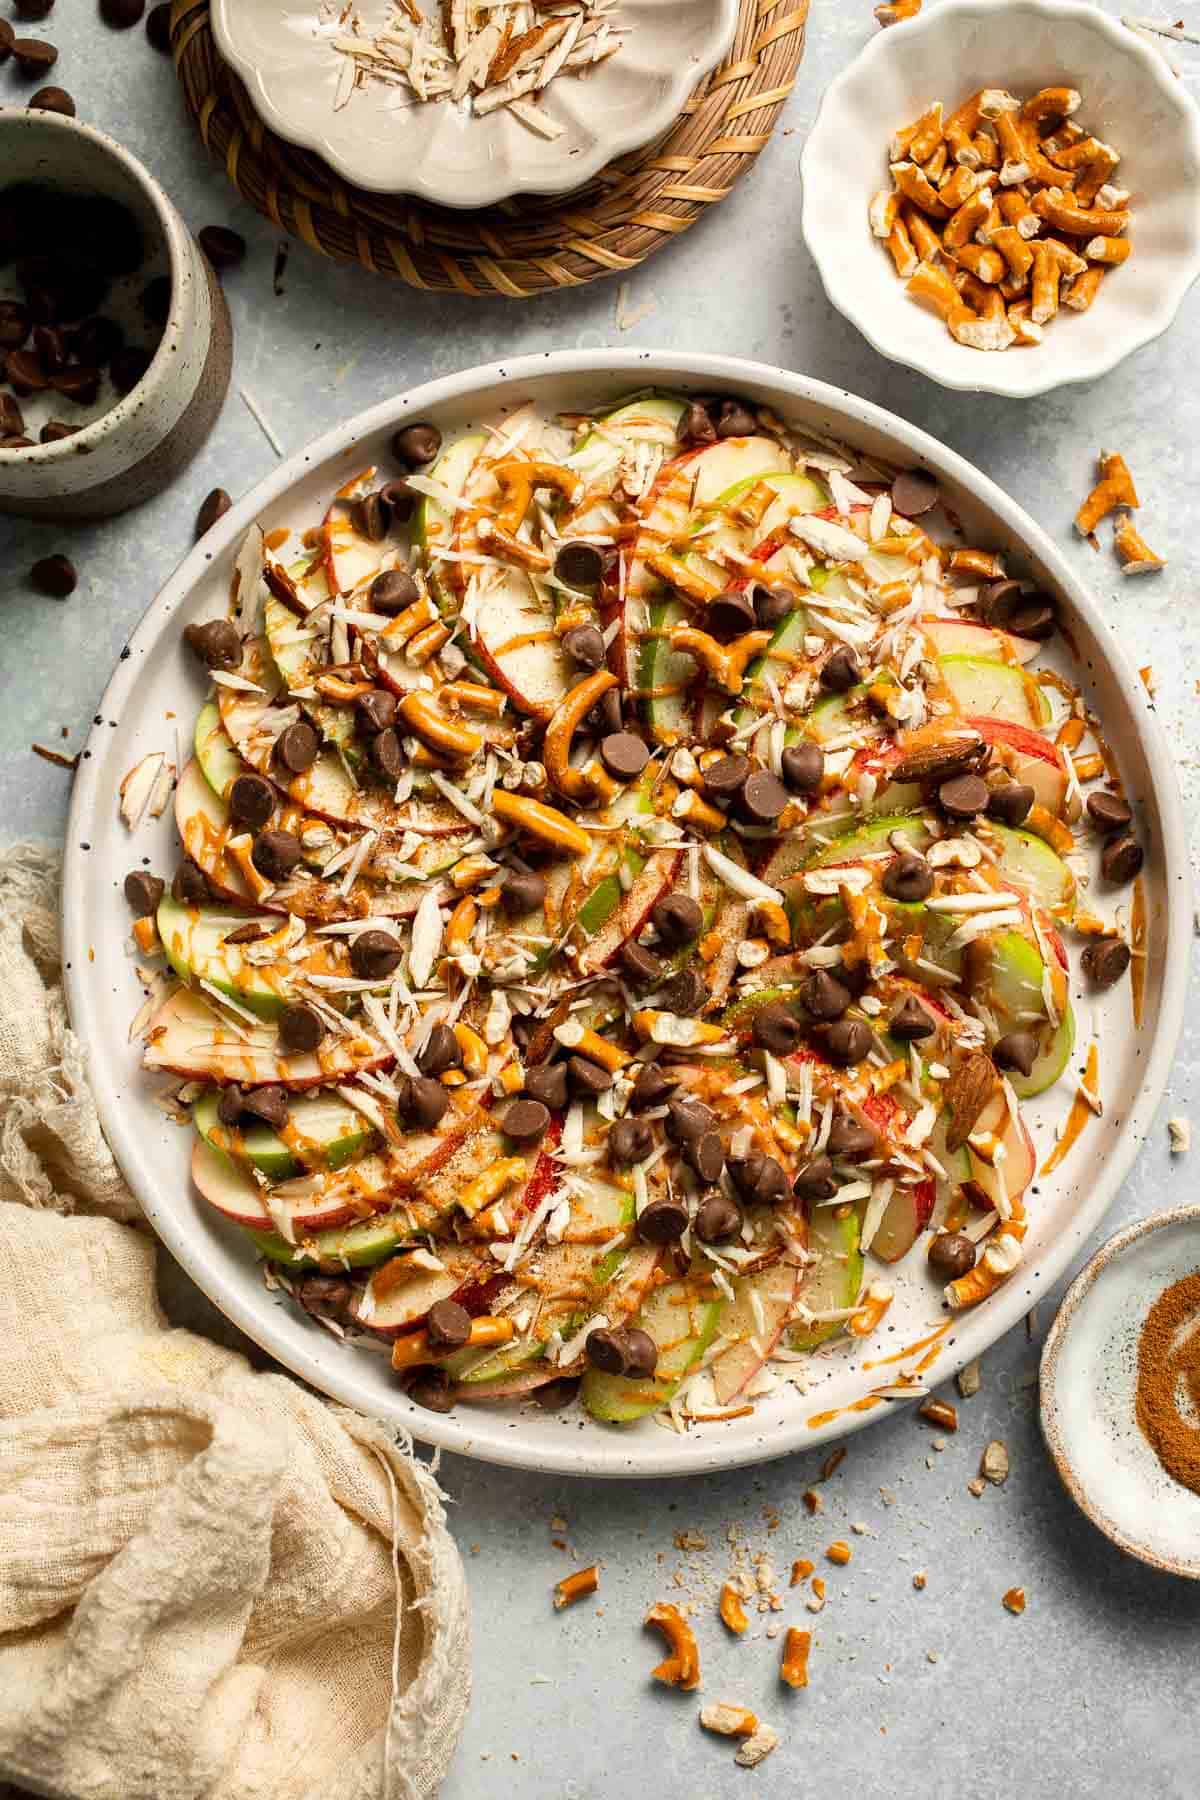
The best part? Apple nachos come together in minutes with pantry staples, making them a go-to snack for kids, after-school fuel, or even a quick dessert. It's especially perfect in the fall when apples are at their peak, though honestly, you'll want these year-round. Kids love it, adults secretly love it more, and you can make it as virtuous or as indulgent as you like. Think granola and yogurt one day, caramel and chocolate chips the next.
If you liked this apple nachos recipe, you should try our Caramel Apples or Apple Tart next. They also pair really well with Hot Chocolate for a cozy snack that feels special but couldn't be easier.
Why You'll Love This Recipe
- Quick and fun. In just a few minutes, you can have a plate of apple nachos ready to snack on. It's a no-fuss, no-cook recipe that's as fun to make as it is to eat.
- Healthy and wholesome. Apples bring fiber and vitamins, nut butter adds protein and healthy fats, and a sprinkle of toppings keeps things exciting without going overboard. It's snack time you can actually feel good about.
- Kid-friendly and customizable. Kids love "building" their nachos with different toppings, and you can mix and match based on what's in your pantry. It's the perfect way to sneak in fruit while keeping snack time playful.
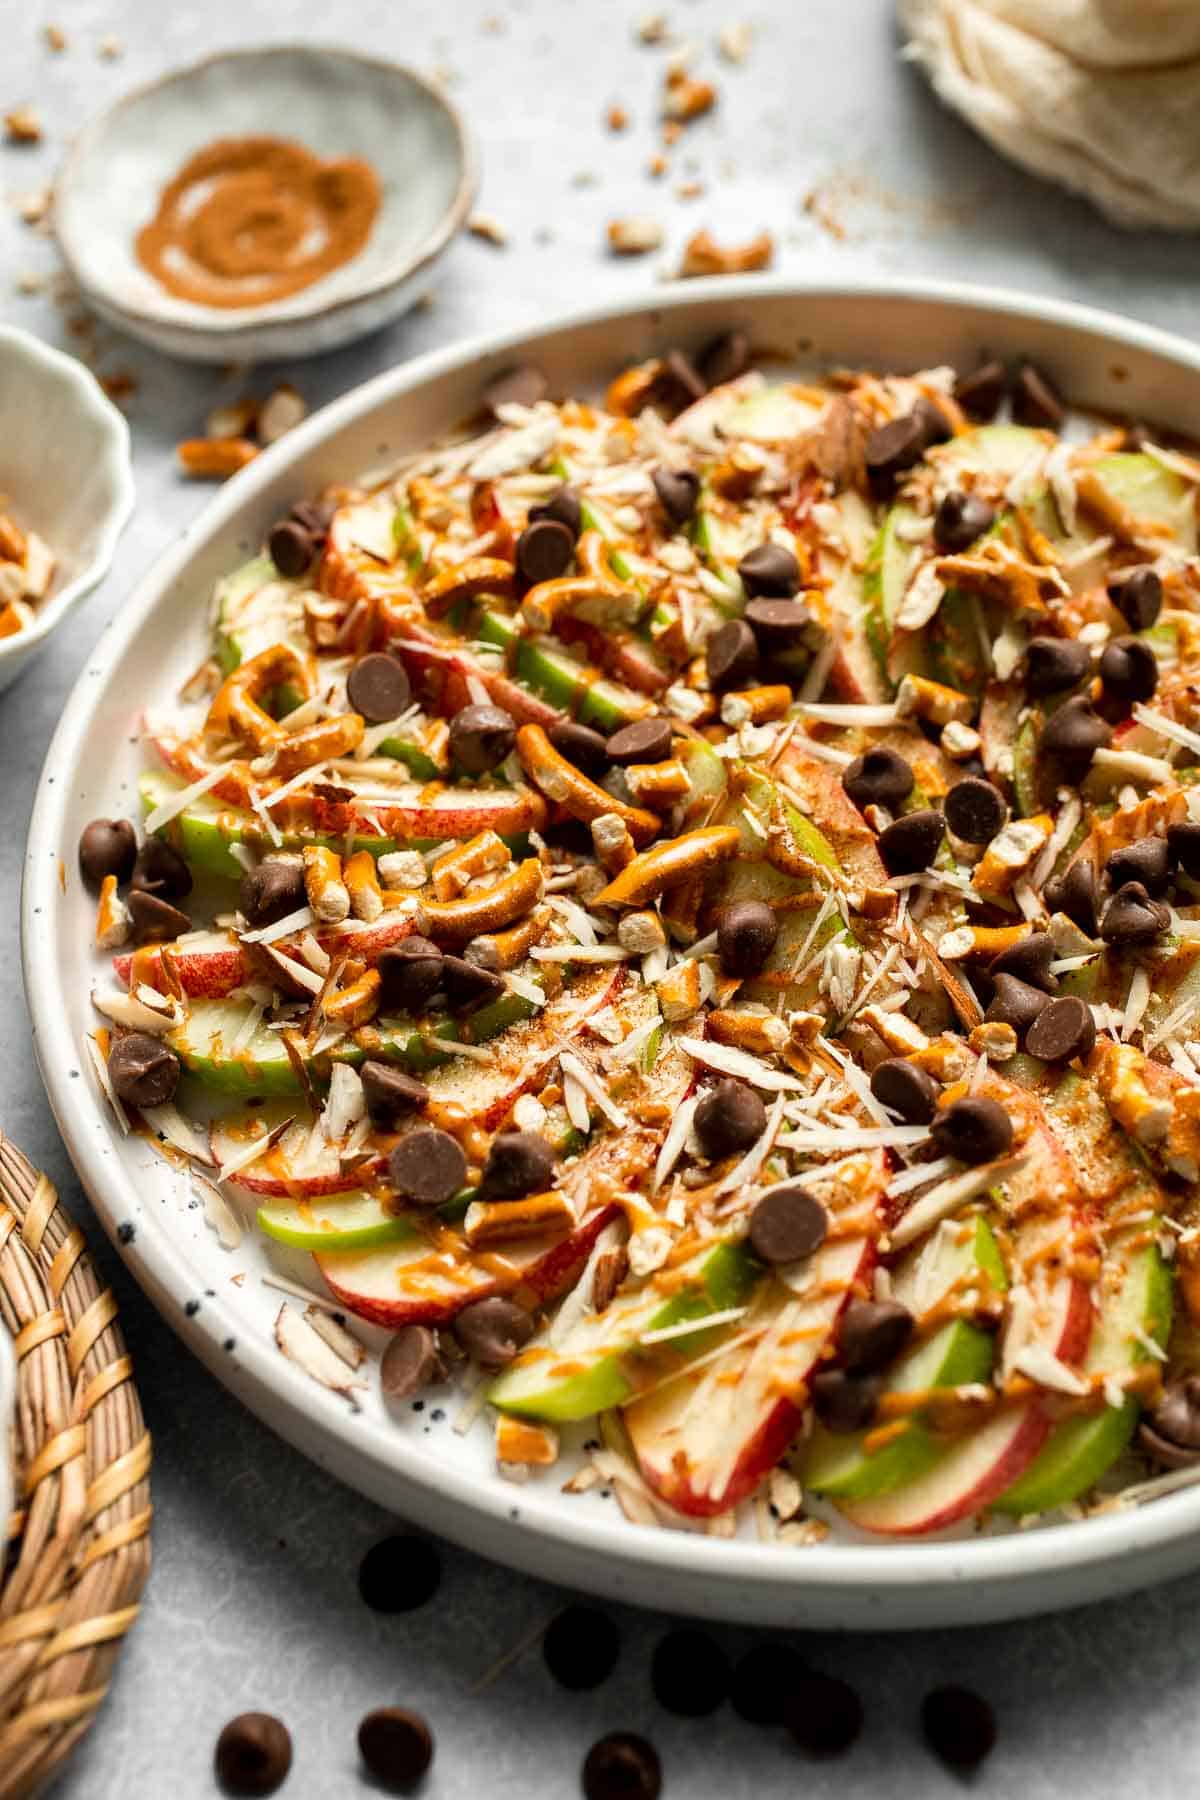
- Sweet meets salty. The combo of crisp apples, creamy nut butter, crunchy pretzels, and melty chocolate chips hits every craving: sweet, salty, crunchy, and satisfying all at once.
Ingredients and Substitutions
To make this easy and healthy Apple Nachos, you will need the following ingredients (see recipe card below for quantities):
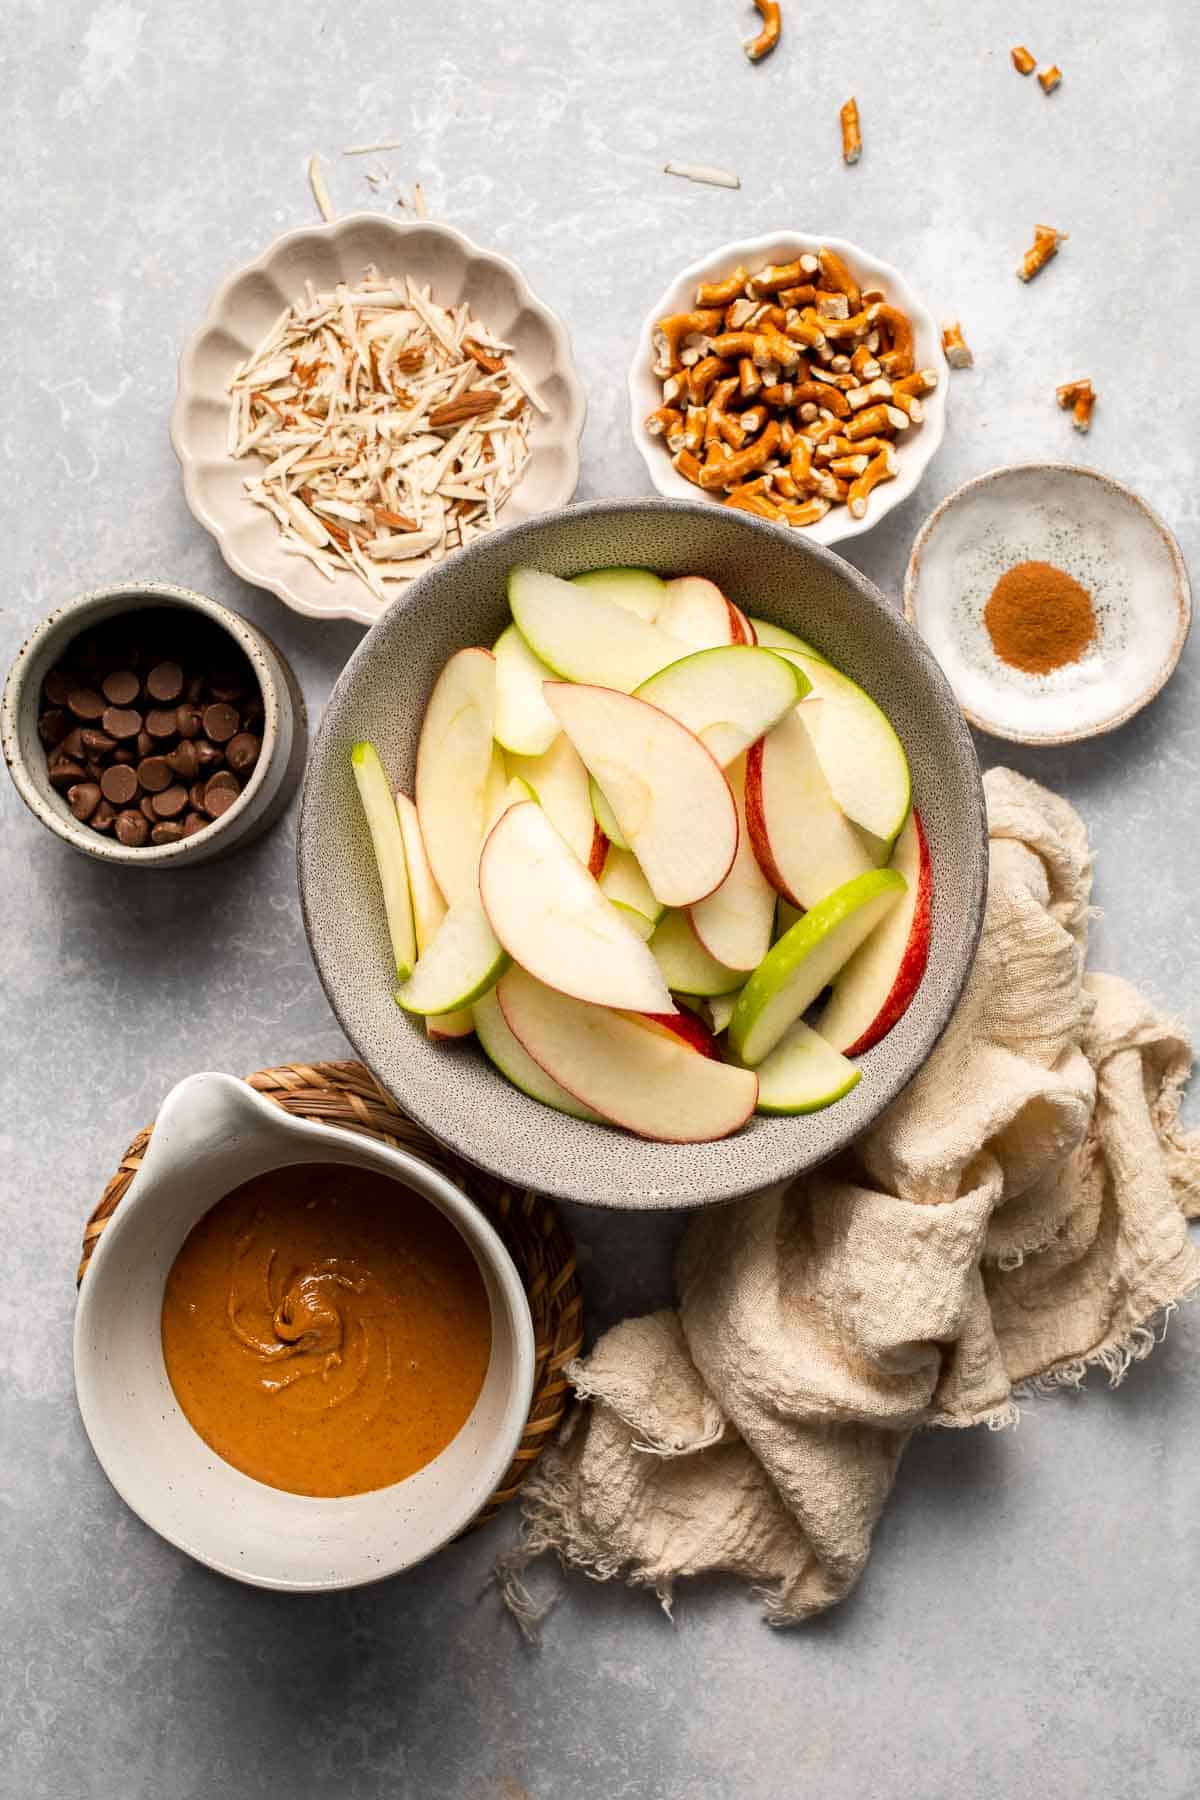
- apples - Use any kind of apples sliced into ¼-inch wedges (try fuji apples, granny smith apples, or gala apples). We used one red and one green apple for a pretty color contrast and balance of sweet and tart flavors.
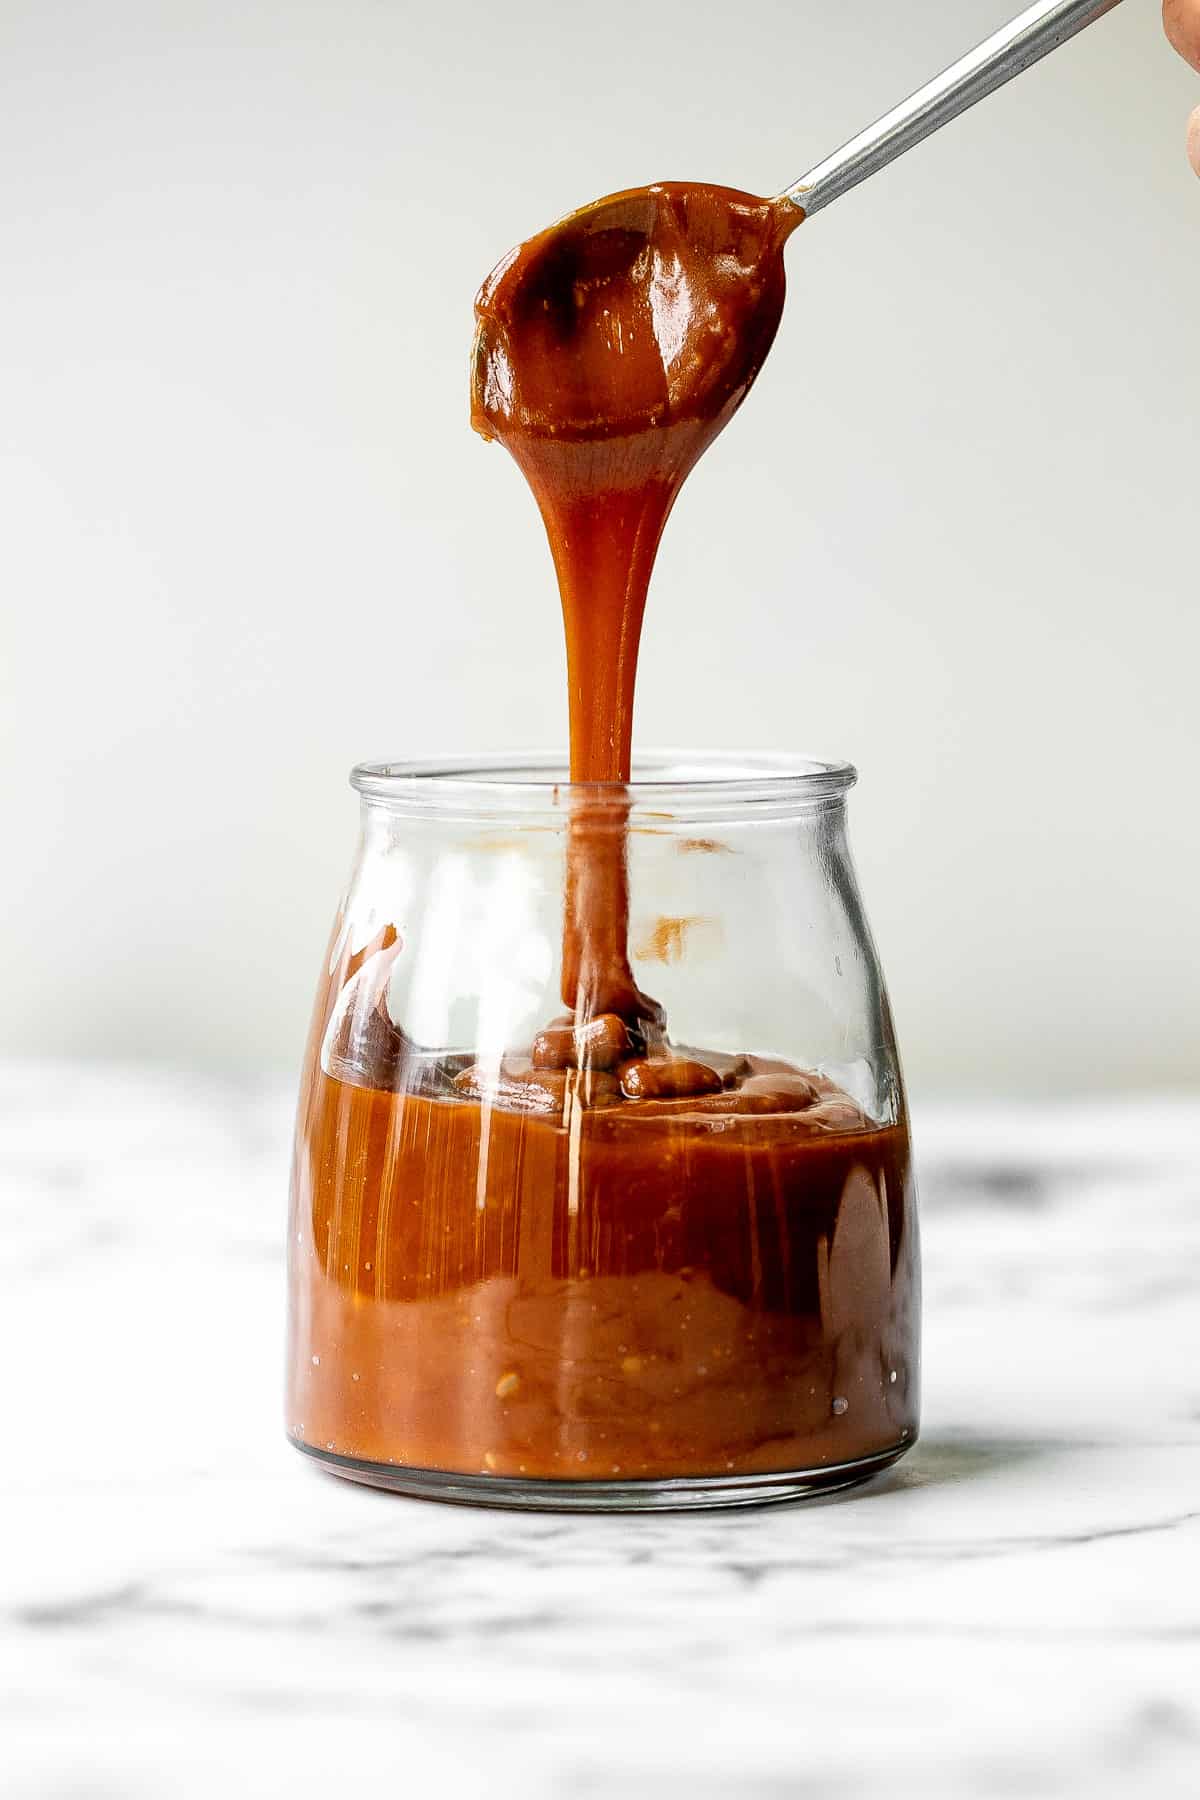
- nut butter - Adds creaminess and protein. We used our super easy Homemade Almond Butter, but Peanut butter, cashew butter, or sunflower seed butter also work. For a nut-free option, try tahini. It's nutty, sesame flavor is less sweet but tastes amazing drizzled over apples with chocolate and cinnamon.
- ground cinnamon - Adds warmth and cozy spice. Pumpkin pie spice is another fun option.
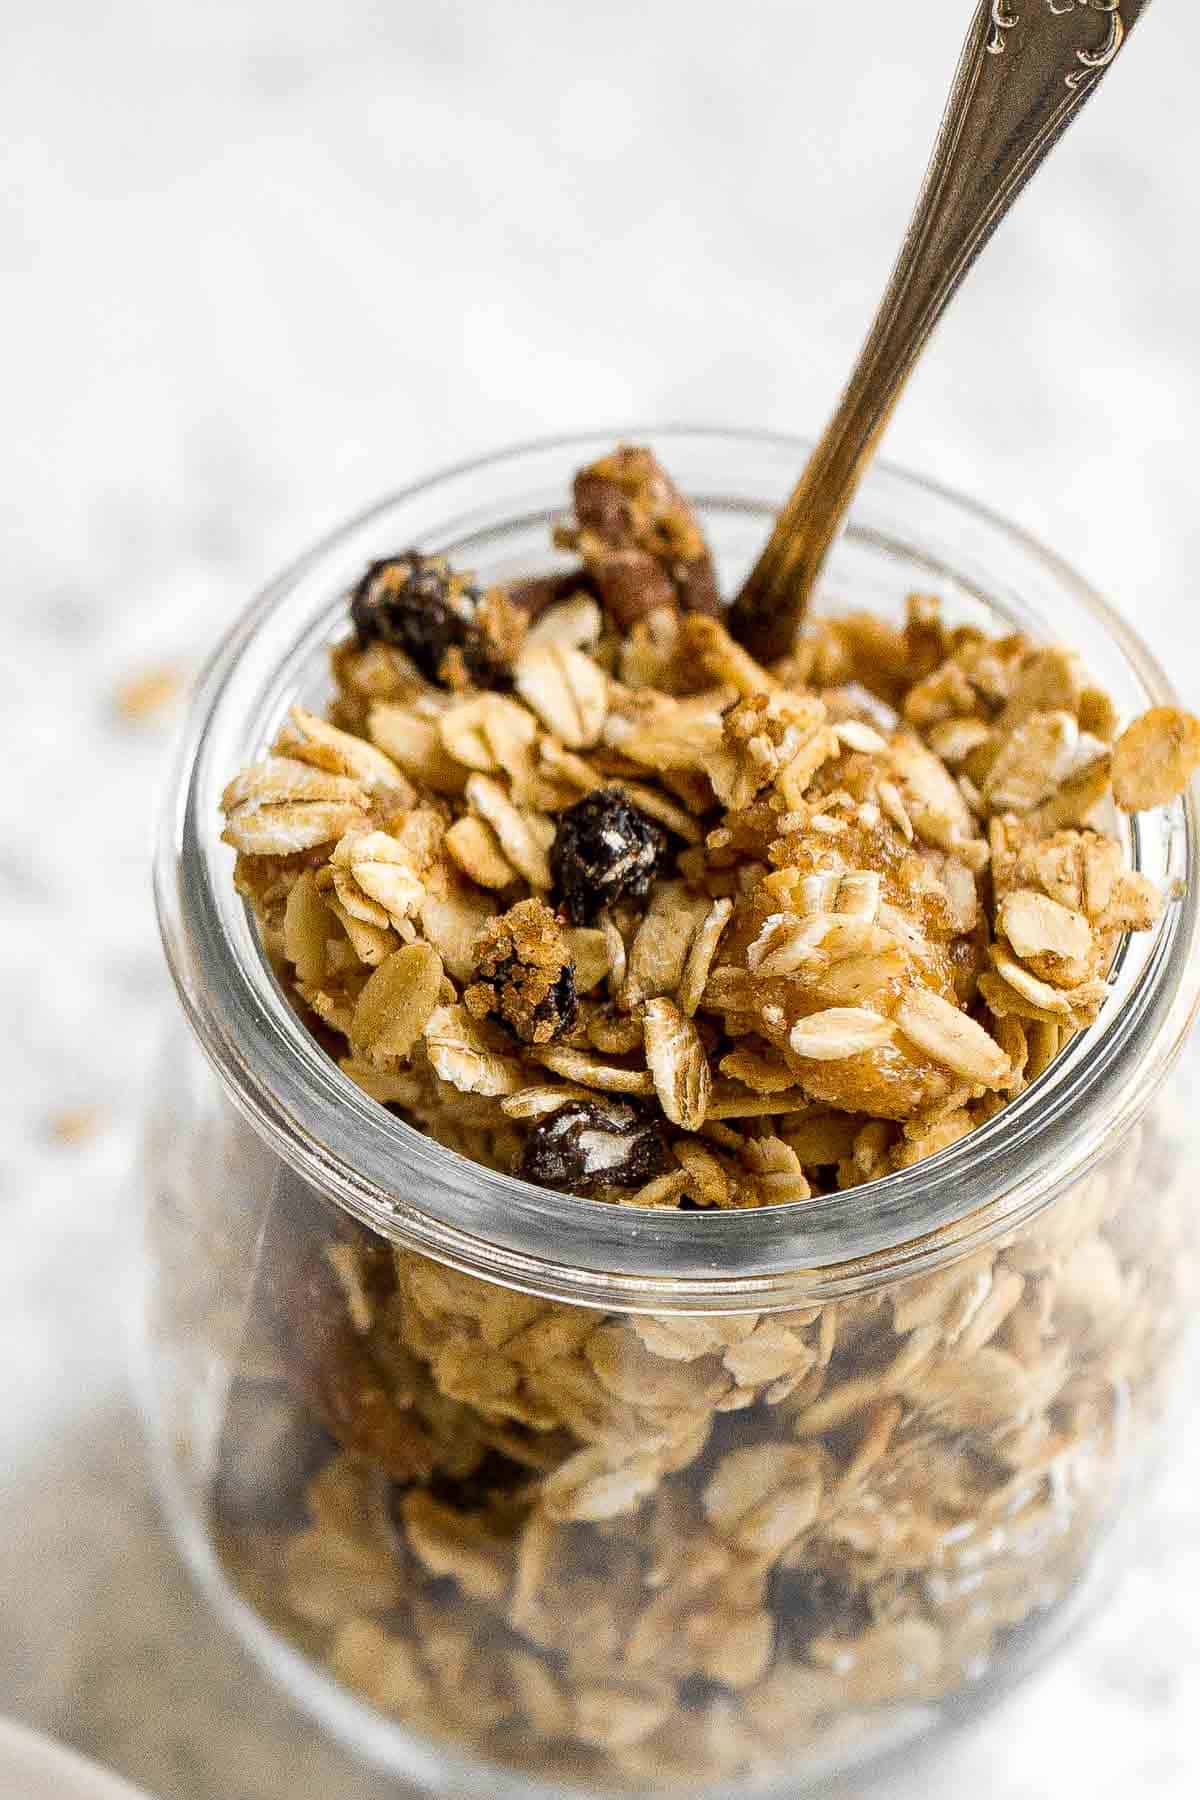
- toppings - Choose 3 to 4 of your favorite toppings to keep things balanced and fun. We used slivered almonds, crushed pretzels, and mini chocolate chips. Some more topping ideas are: chopped nuts (walnuts, pecans, peanuts), granola, shredded coconut, crushed graham crackers, crushed Oreos, M&M's, toffee bits, marshmallows, and sprinkles.
Equipment
You'll also need measuring cups and spoons, a sharp knife for slicing apples, a cutting board, and a microwave-safe bowl or small saucepan to warm the nut butter for drizzling.
Instructions
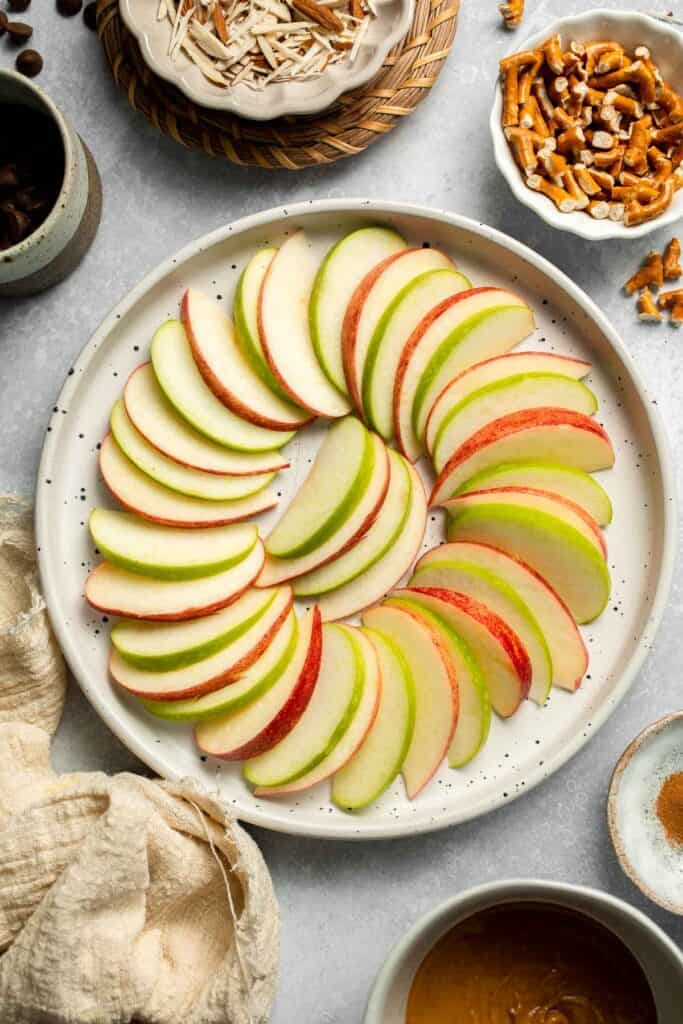
Arrange apples
Arrange the apple slices in a single layer on a large plate or platter.
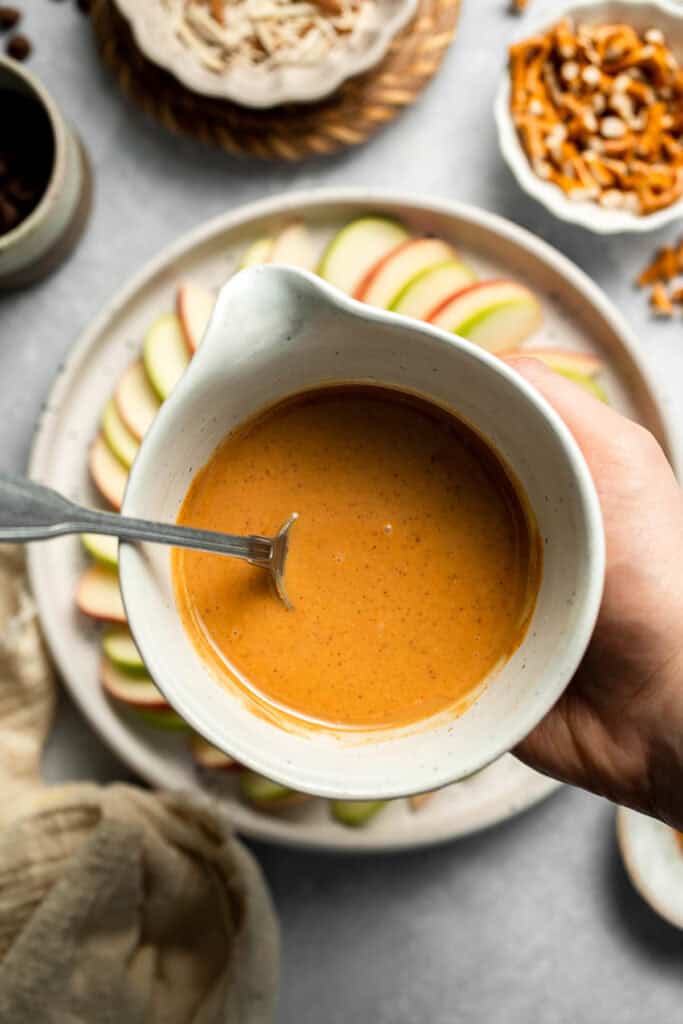
Warm the nut butter
Place the almond butter in a microwave-safe bowl and heat for 20-30 seconds, or until it softens and becomes easy to pour. (Don't overheat or it will seize.)
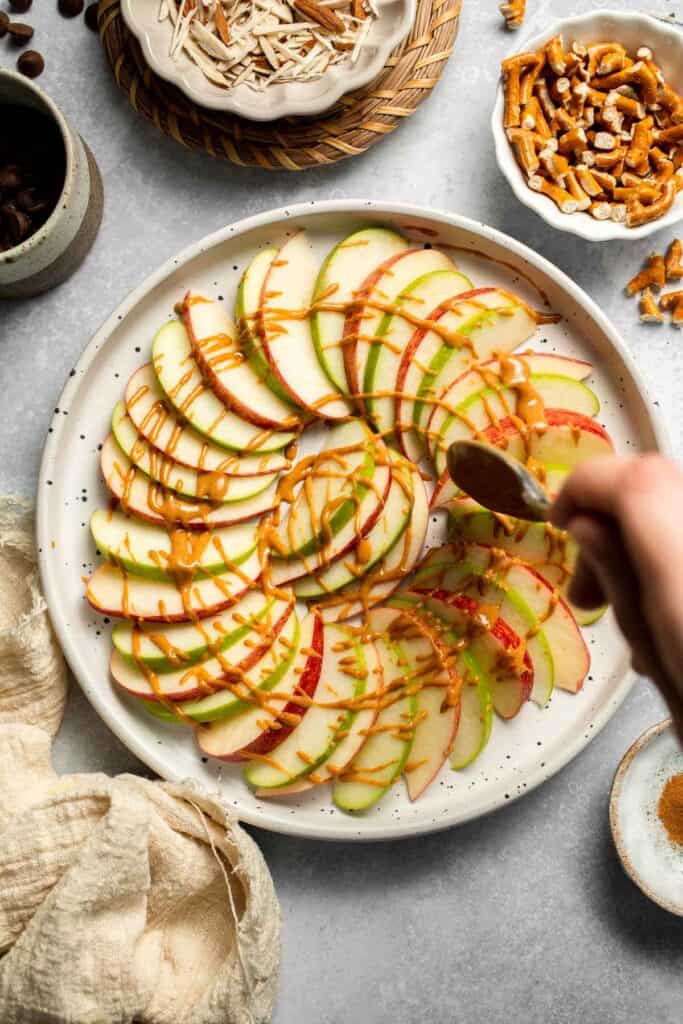
Drizzle
Pour the warm nut butter evenly over the apple slices while it is still soft.
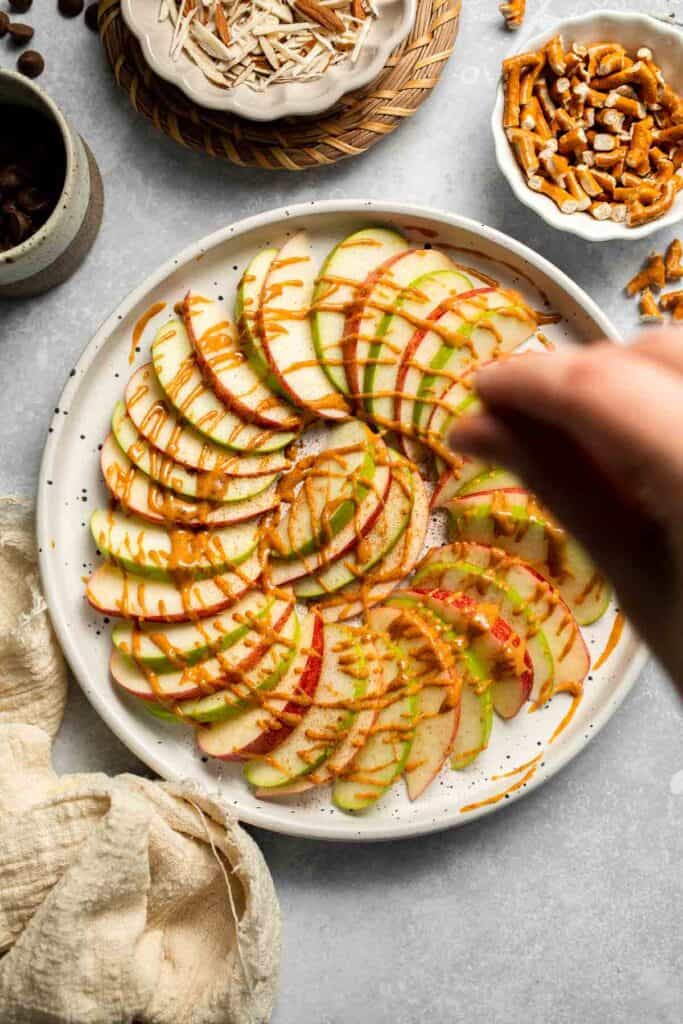
Add spice
Sprinkle cinnamon on top.
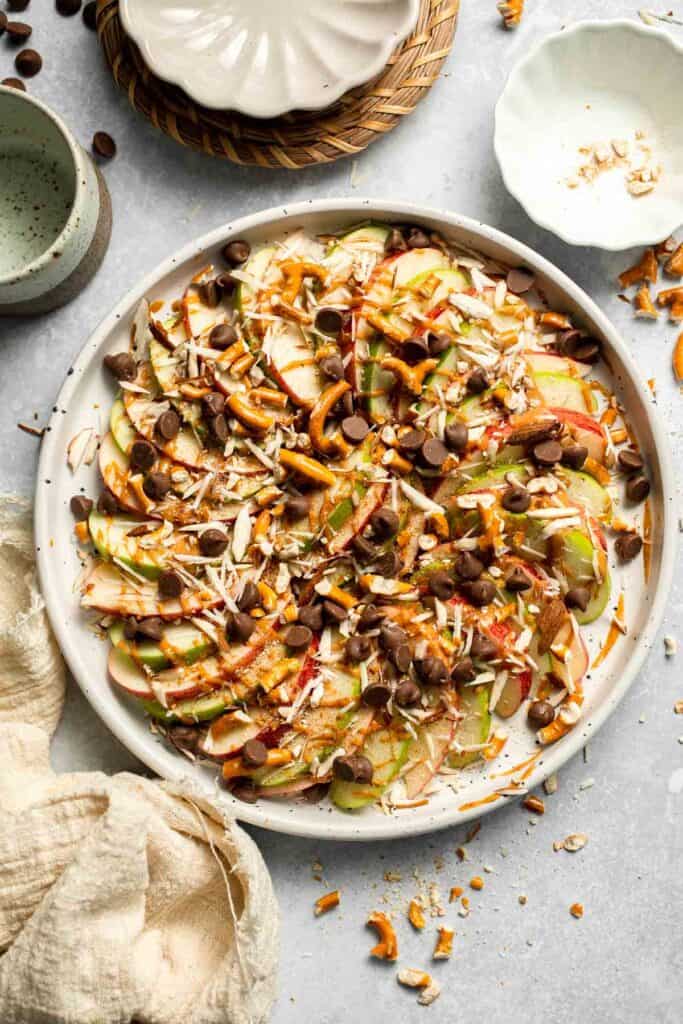
Add toppings
Sprinkle with your chosen toppings (ie. slivered almonds, crushed pretzels, and chocolate chips). Serve immediately.
Expert Tip: Keep Apples from Browning
If you're making apple nachos ahead, toss the slices with a little lemon juice or soak them briefly in a water + lemon mixture. It keeps the apples looking crisp and fresh, even after sitting out for a while.
More Tips and Tricks
- Pat apples dry. After slicing, blot with a paper towel so the toppings stick better.
- Play with toppings. Use whatever you have on hand: dried fruit, granola, coconut flakes, or candy pieces all work.
- Serve immediately. Apple nachos are best fresh, while the apples are crisp and the toppings crunchy.
- Make it a spread. Lay out toppings in bowls and let everyone build their own nacho plate.
Recipe Variations
- Caramel apple nachos. Drizzle with warm caramel sauce and sprinkle with crushed peanuts for a decadent dessert version.
- Breakfast nachos. Use yogurt as the drizzle and top with granola and fresh berries for a morning treat.
- Trail mix nachos. Add raisins, sunflower seeds, and coconut flakes for a hiking-inspired twist.
- Candy apple nachos. Top with M&Ms, sprinkles, or crushed candy bars for a fun party snack.
- Nut-free nachos. Swap nut butter for sunflower seed butter and use pumpkin seeds for crunch to make it allergy-friendly.
- Holiday nachos. Sprinkle with dried cranberries and white chocolate chips for a festive look.
- Keep it vegan. This recipe is naturally vegan-friendly if you pick the right toppings! Swap in dairy-free chocolate chips and check that your pretzels are vegan (many brands are, but it's always good to double-check).
- Keep it gluten-free. To keep this recipe gluten-free, simply use gluten-free pretzels (there are plenty of great store-bought options) or use a different topping that doesn't have gluten.
Storage
How to Store
Best eaten fresh, but you can keep leftovers in an airtight container in the fridge for up to 24 hours.
How to Freeze
Not recommended, as apples turn mushy after thawing.
How to Serve
Apple nachos are perfect as a healthy snack, quick dessert, or even a fun breakfast idea. They're light, fresh, and endlessly customizable - basically a snack board disguised as nachos.
These are my favorite dishes to serve with apple nachos:


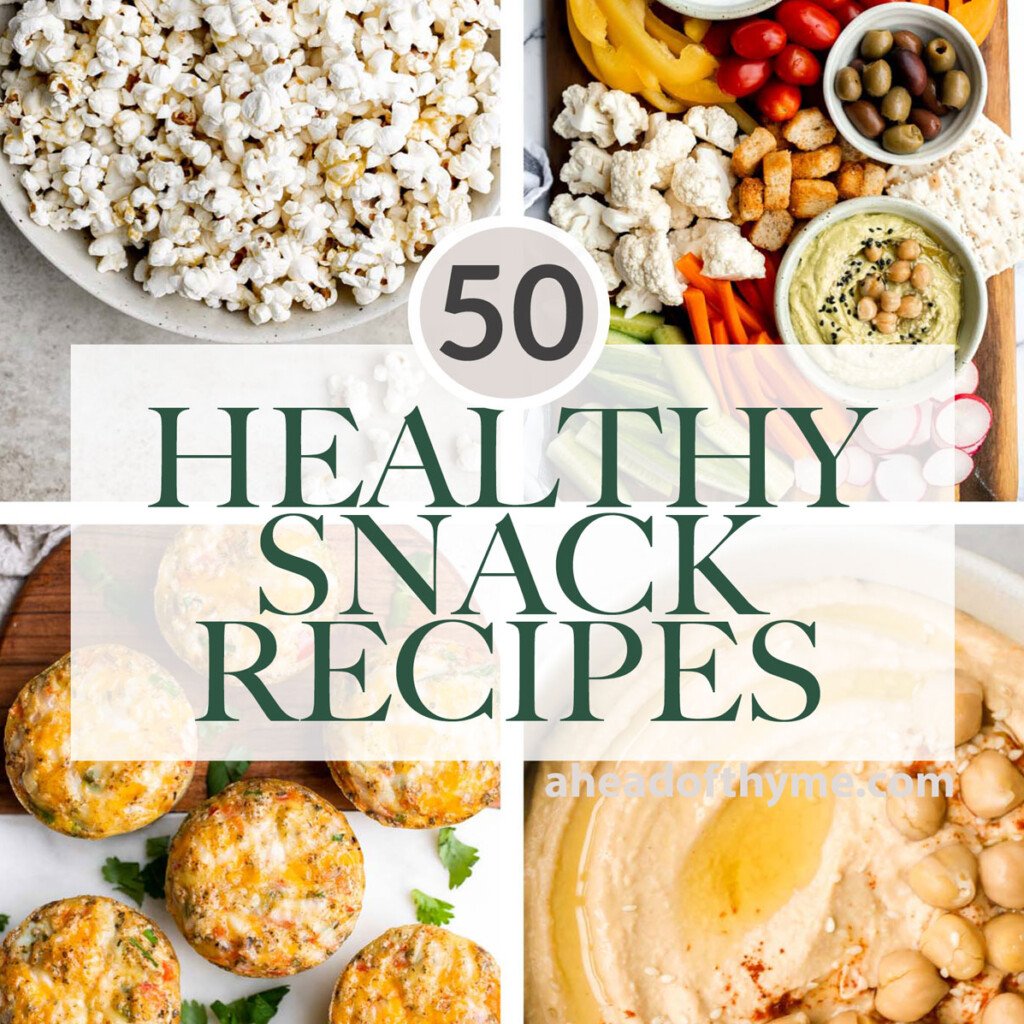
Healthy Snacks
If serving this as part of a large snack spread, see our collection of healthy snack ideas, featuring bite-sized finger foods, fresh fruit and veggie options, protein-packed bites, wholesome dips, and easy-to-make treats everyone will enjoy.
FAQ
Apple nachos are sliced apples layered on a plate and drizzled with nut butter, then sprinkled with toppings like nuts, chocolate chips, and pretzels. They're a fun, fresh take on nachos that's healthier and lighter.
Yes! Apples bring fiber and vitamins, nut butter adds protein and healthy fats, and toppings can be as wholesome as you want. If you keep the portions balanced, apple nachos make a nutrient-packed snack.
A mix of sweet and tart apples is best. Try Granny Smith or Pink Lady for tartness, and Honeycrisp or Fuji for sweetness. Combining colors also makes the nachos look extra appealing.
Toss apple slices with a little lemon juice, or soak them in water with lemon juice for a few minutes before draining. It slows oxidation and keeps the apples looking fresh.
Just about anything! Nuts, seeds, granola, pretzels, chocolate, dried fruit, and caramel all work. Keep it simple and healthy, or load it up like a dessert plate.
Dress them up with toppings! A drizzle of nut butter, a sprinkle of cinnamon, or fun add-ins like granola, dried fruit, or chocolate chips instantly turn plain apple slices into something exciting.
More Apple Recipes
Looking for other recipes like this? Try these:


Tried this recipe?
I'd love to hear what you think! Leave a comment and rating below to share your feedback. Your reviews help others discover this recipe and help me keep creating more free recipes for you. Snap a photo and tag me on social media @aheadofthyme too.
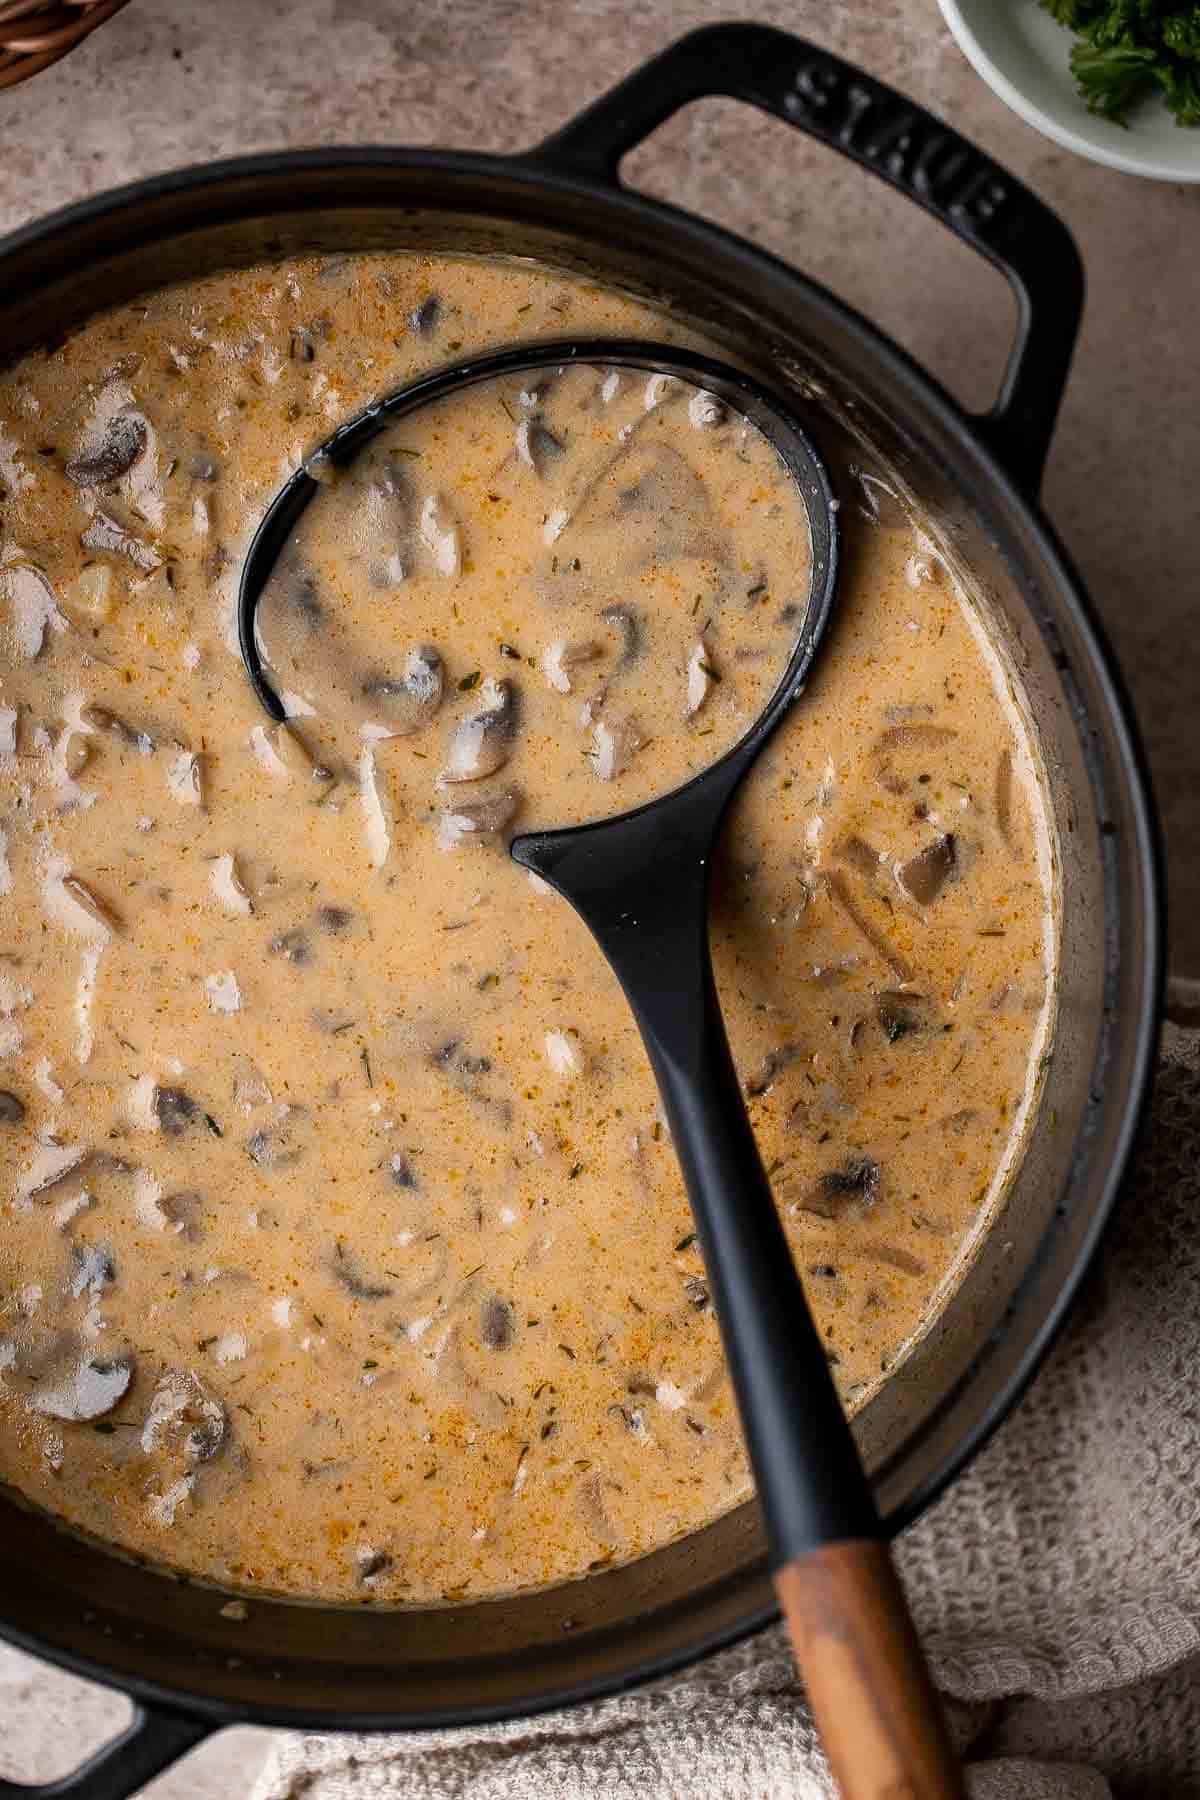
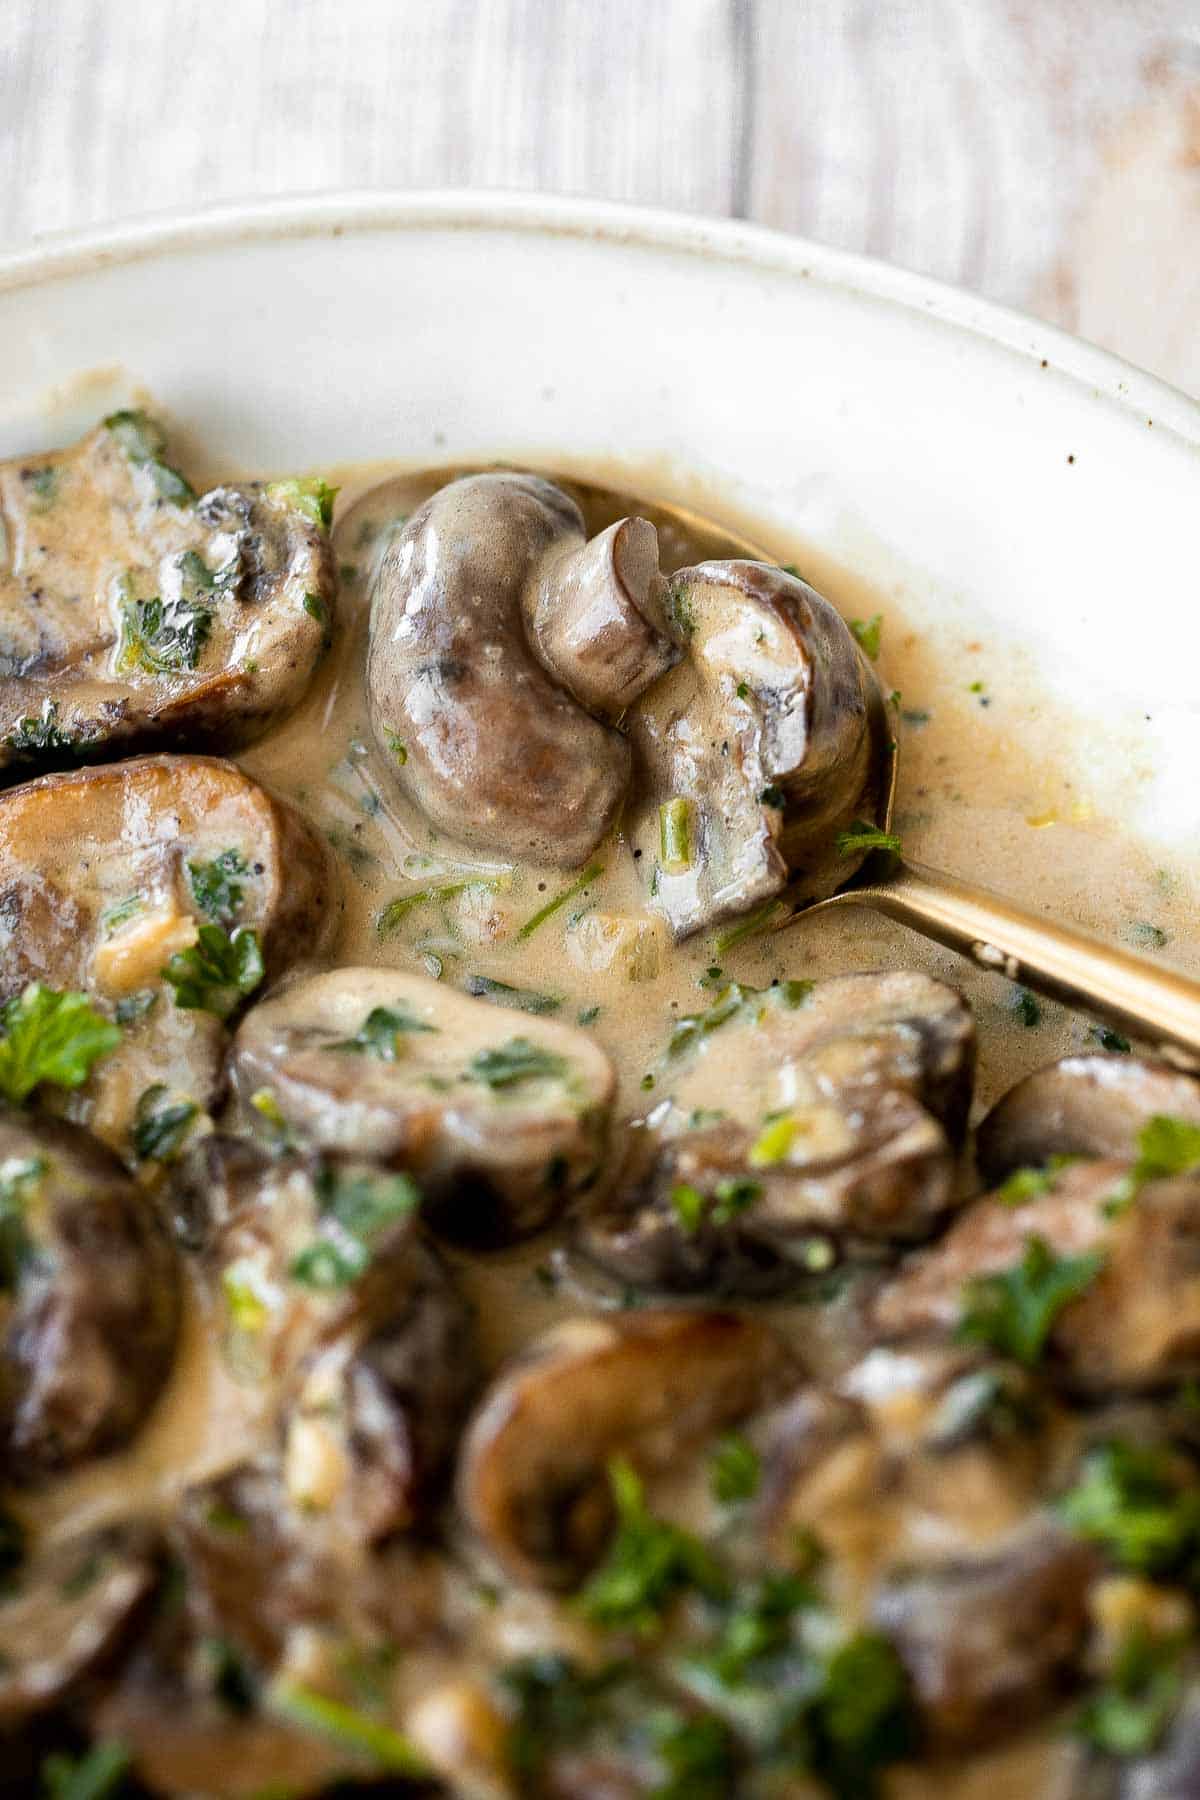
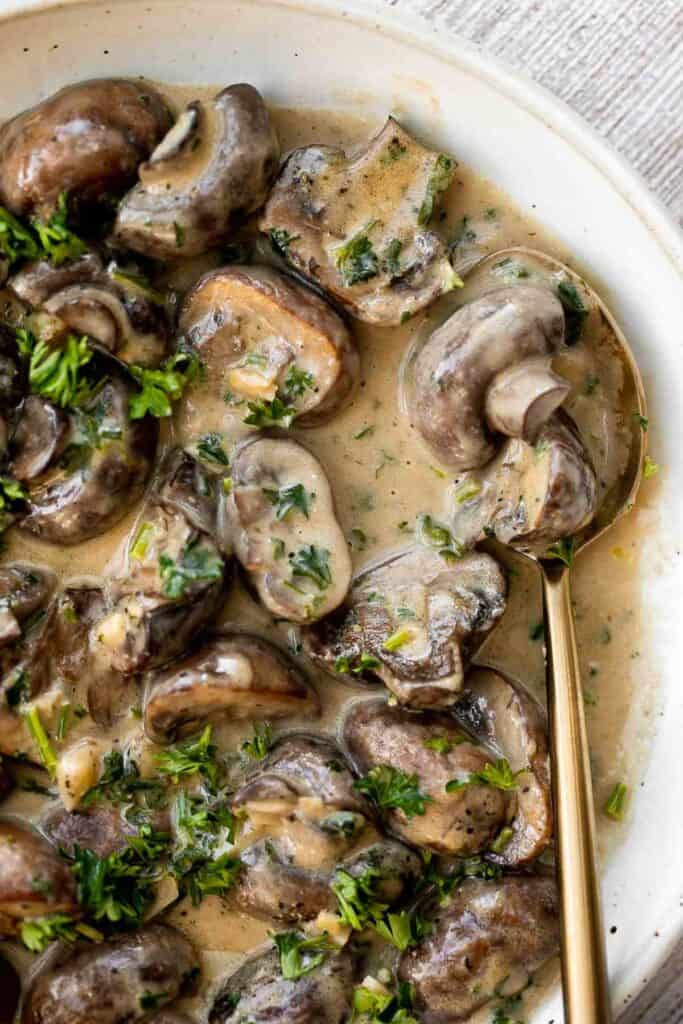
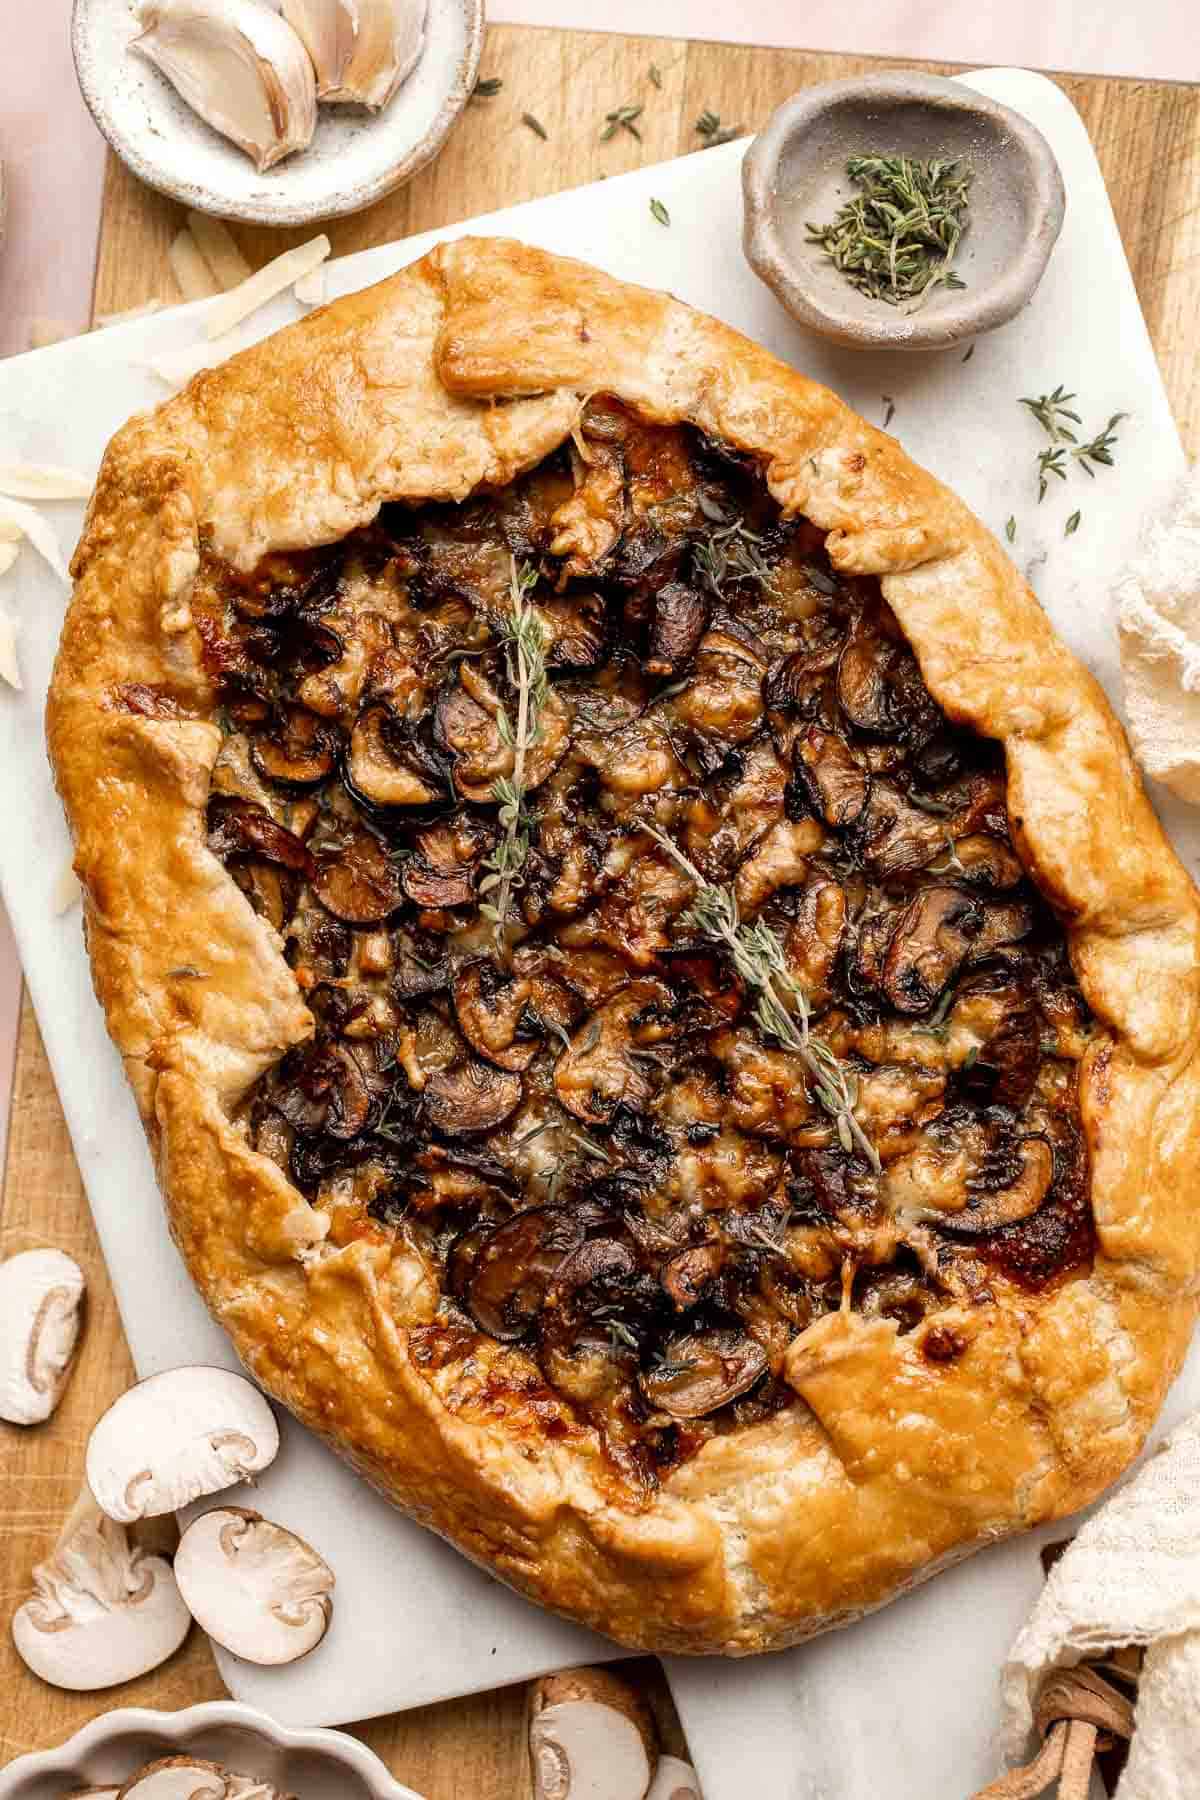
Creamy Garlic Mushrooms with Parmesan

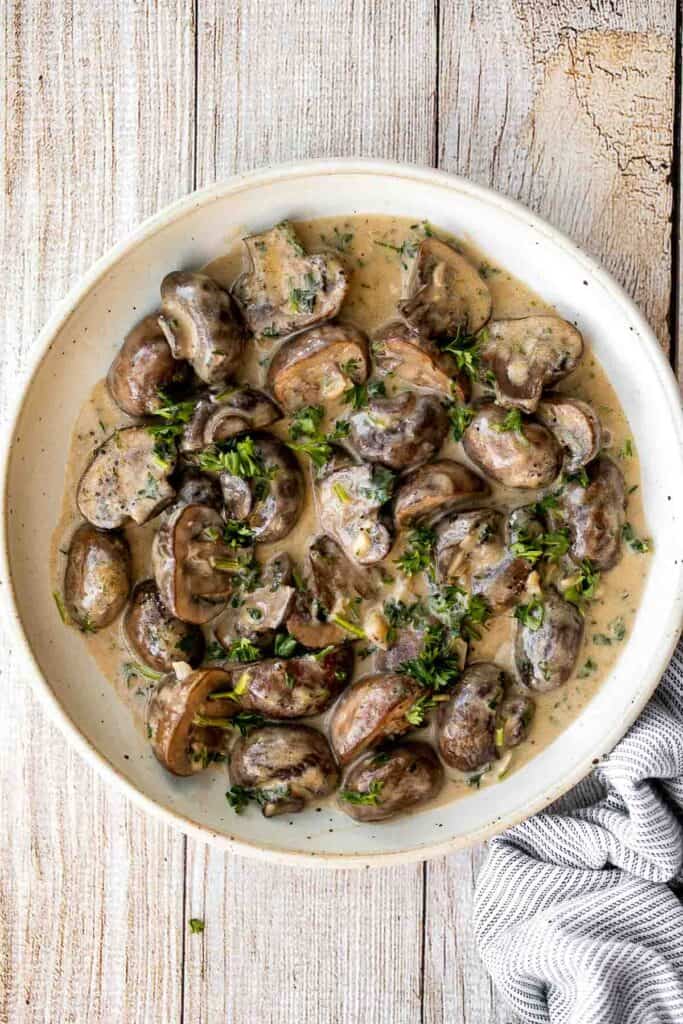
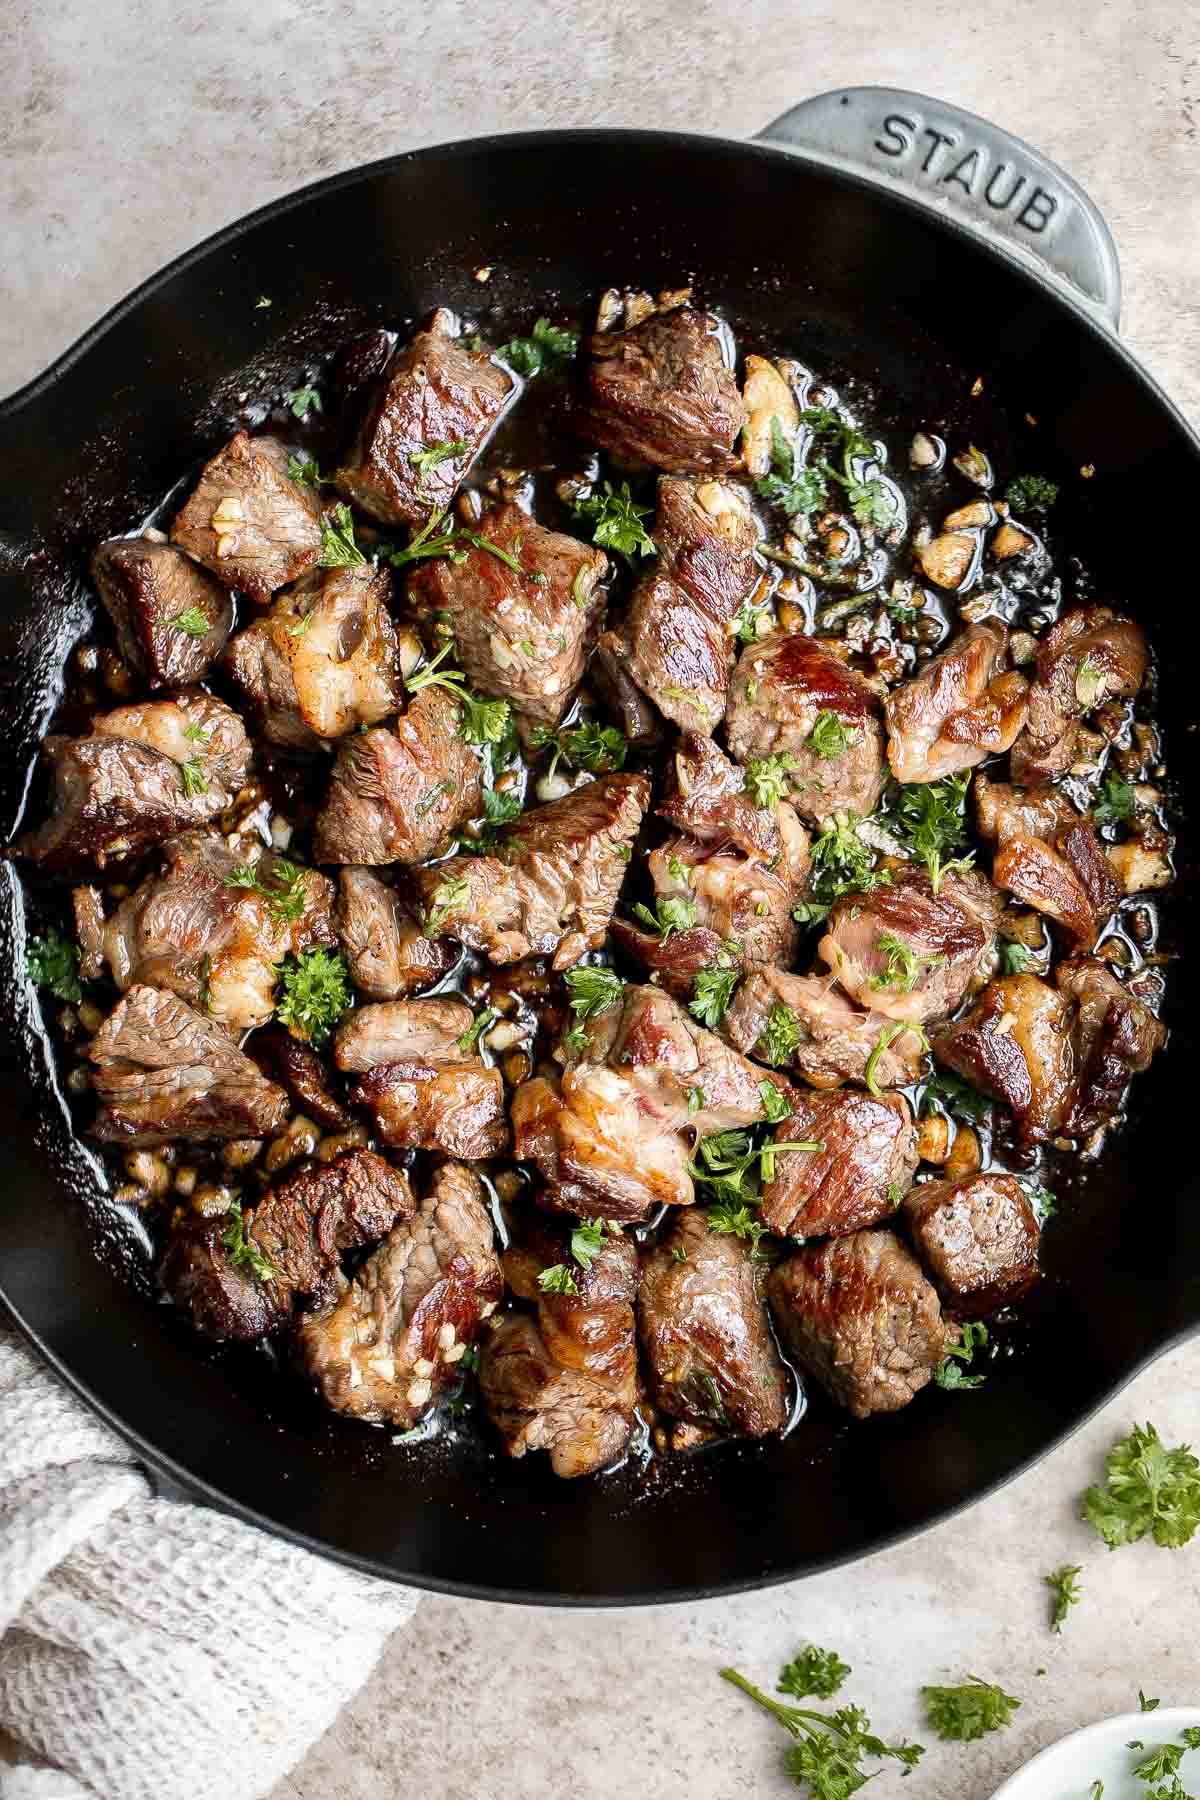
Creamy Garlic Mushrooms with Parmesan are the kind of side dish that steals the show. Buttery mushrooms in a silky garlic cream sauce with fresh parsley and parmesan are the very definition of comfort food. Rich, savory, and quick, this recipe takes only 15 minutes start to finish, prep included!

Mushrooms don't need much to taste amazing, and this dish proves it. A little garlic, cream, and cheese magic turns them into a total crowd pleaser that has everyone (not only mushroom lovers) going back for seconds. The meaty texture of the mushrooms soak up the buttery garlic sauce like little sponges of flavor, and the creamy parmesan is just begging for crusty bread to be dunked in. Honestly, it's the kind of recipe you'll want to add to your weekly dinner rotation. However you serve them, they bring big flavor with minimal effort = the best kind of kitchen magic.
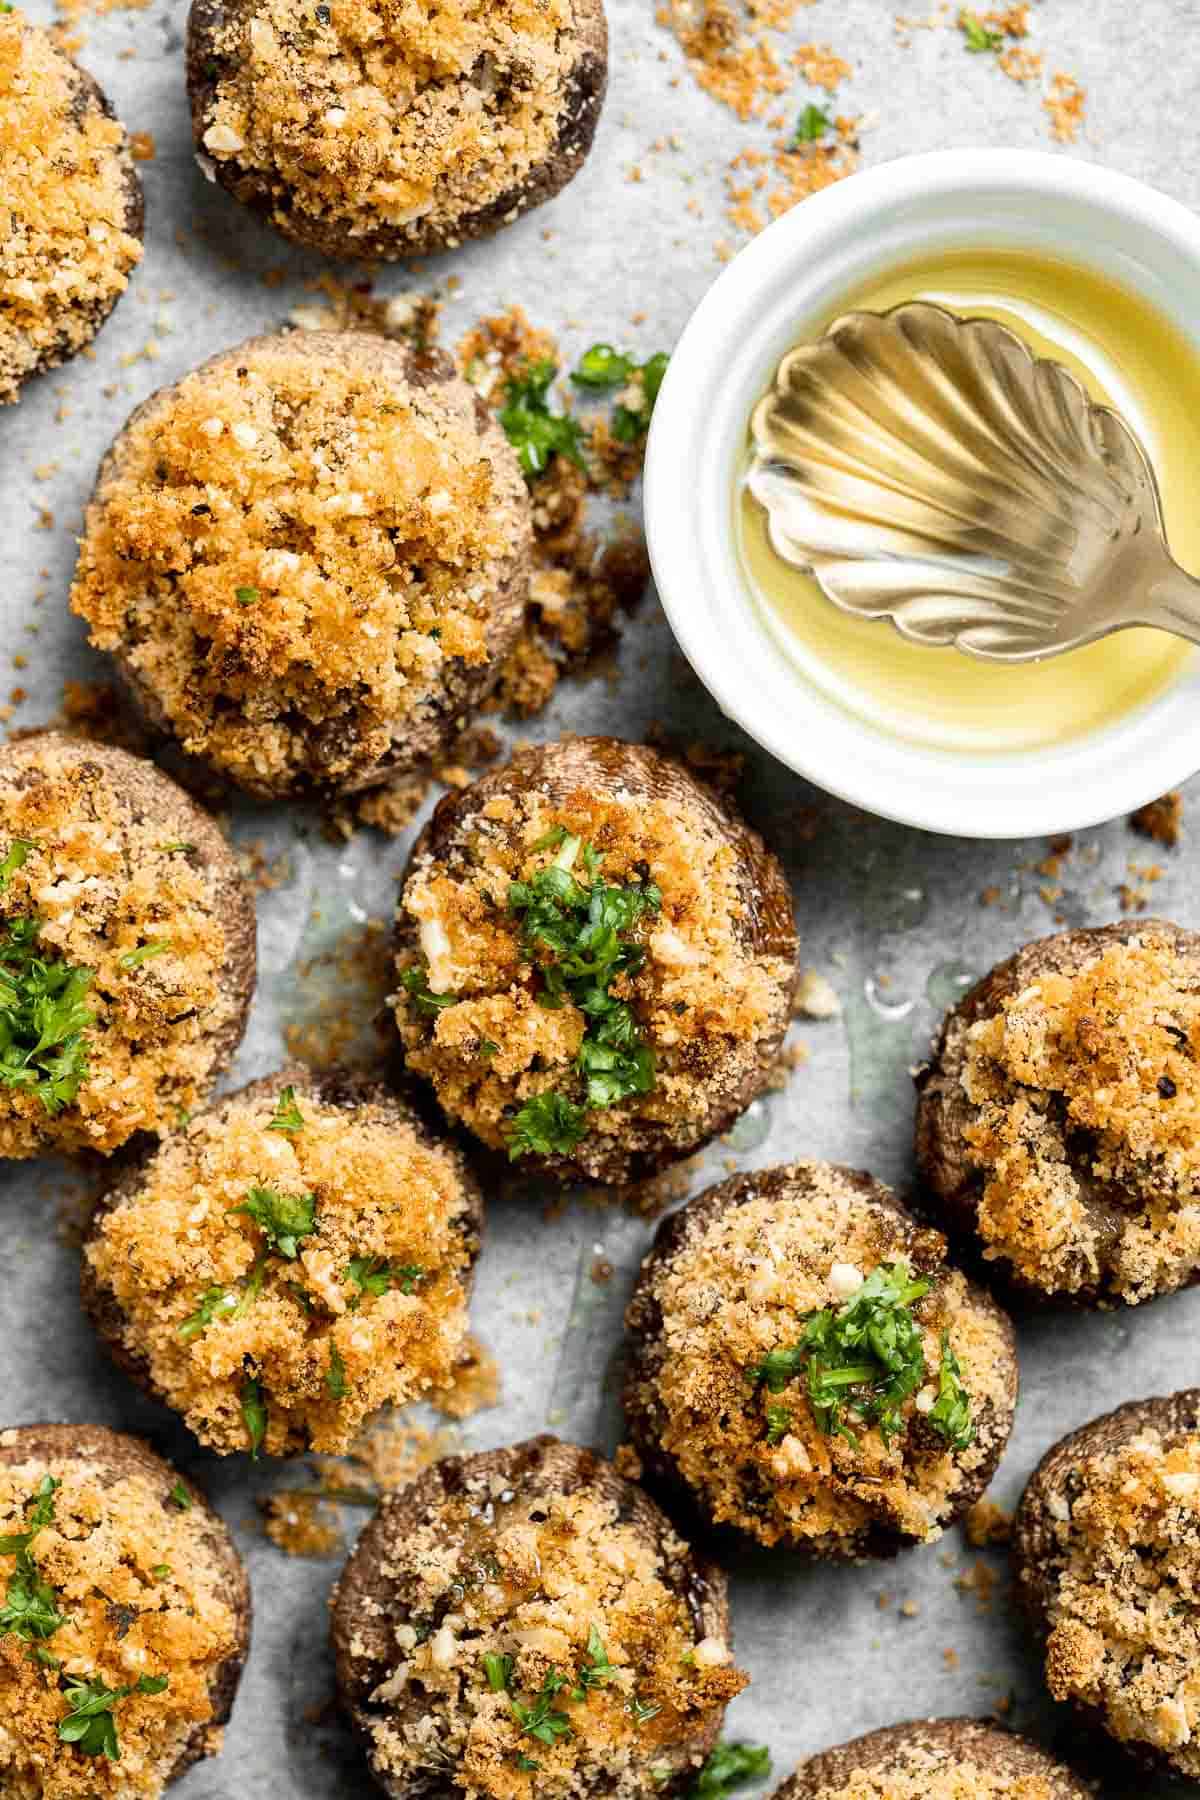
If you love this creamy garlic mushroom recipe, try my Sautéed Garlic Mushrooms or Vegetarian Stuffed Mushrooms next. They also pair beautifully with Pull Apart Garlic Bread for the ultimate cozy dinner (and a perfect Meatless Monday option).
Why You'll Love This Recipe
- Mushrooms are a super superfood. Not only do mushrooms add big, earthy flavor, but they're also packed with essential nutrients, vitamins, and antioxidants. They're naturally gluten-free, cholesterol-free, and low in calories, yet loaded with benefits for brain health, bone health, and your immune system. They may even support weight management and have anti-aging perks - basically, they're delicious little powerhouses disguised as comfort food.
- Garlicky and creamy. A rich garlic cream sauce makes just about anything taste amazing, and mushrooms are no exception. Their savory, earthy flavor pairs beautifully with butter, cream, and parmesan, turning a simple skillet dish into something crave-worthy. Honestly, grab some crusty bread and this could be dinner all on its own - that's how fast it disappears.
- Quick and fuss-free. One pan, 15 minutes, and a few everyday ingredients are all it takes to whip up this dish. It's proof that you don't need a complicated recipe to get restaurant-level flavor. These creamy garlic mushrooms are big on taste and low on effort = the weeknight dinner dream.
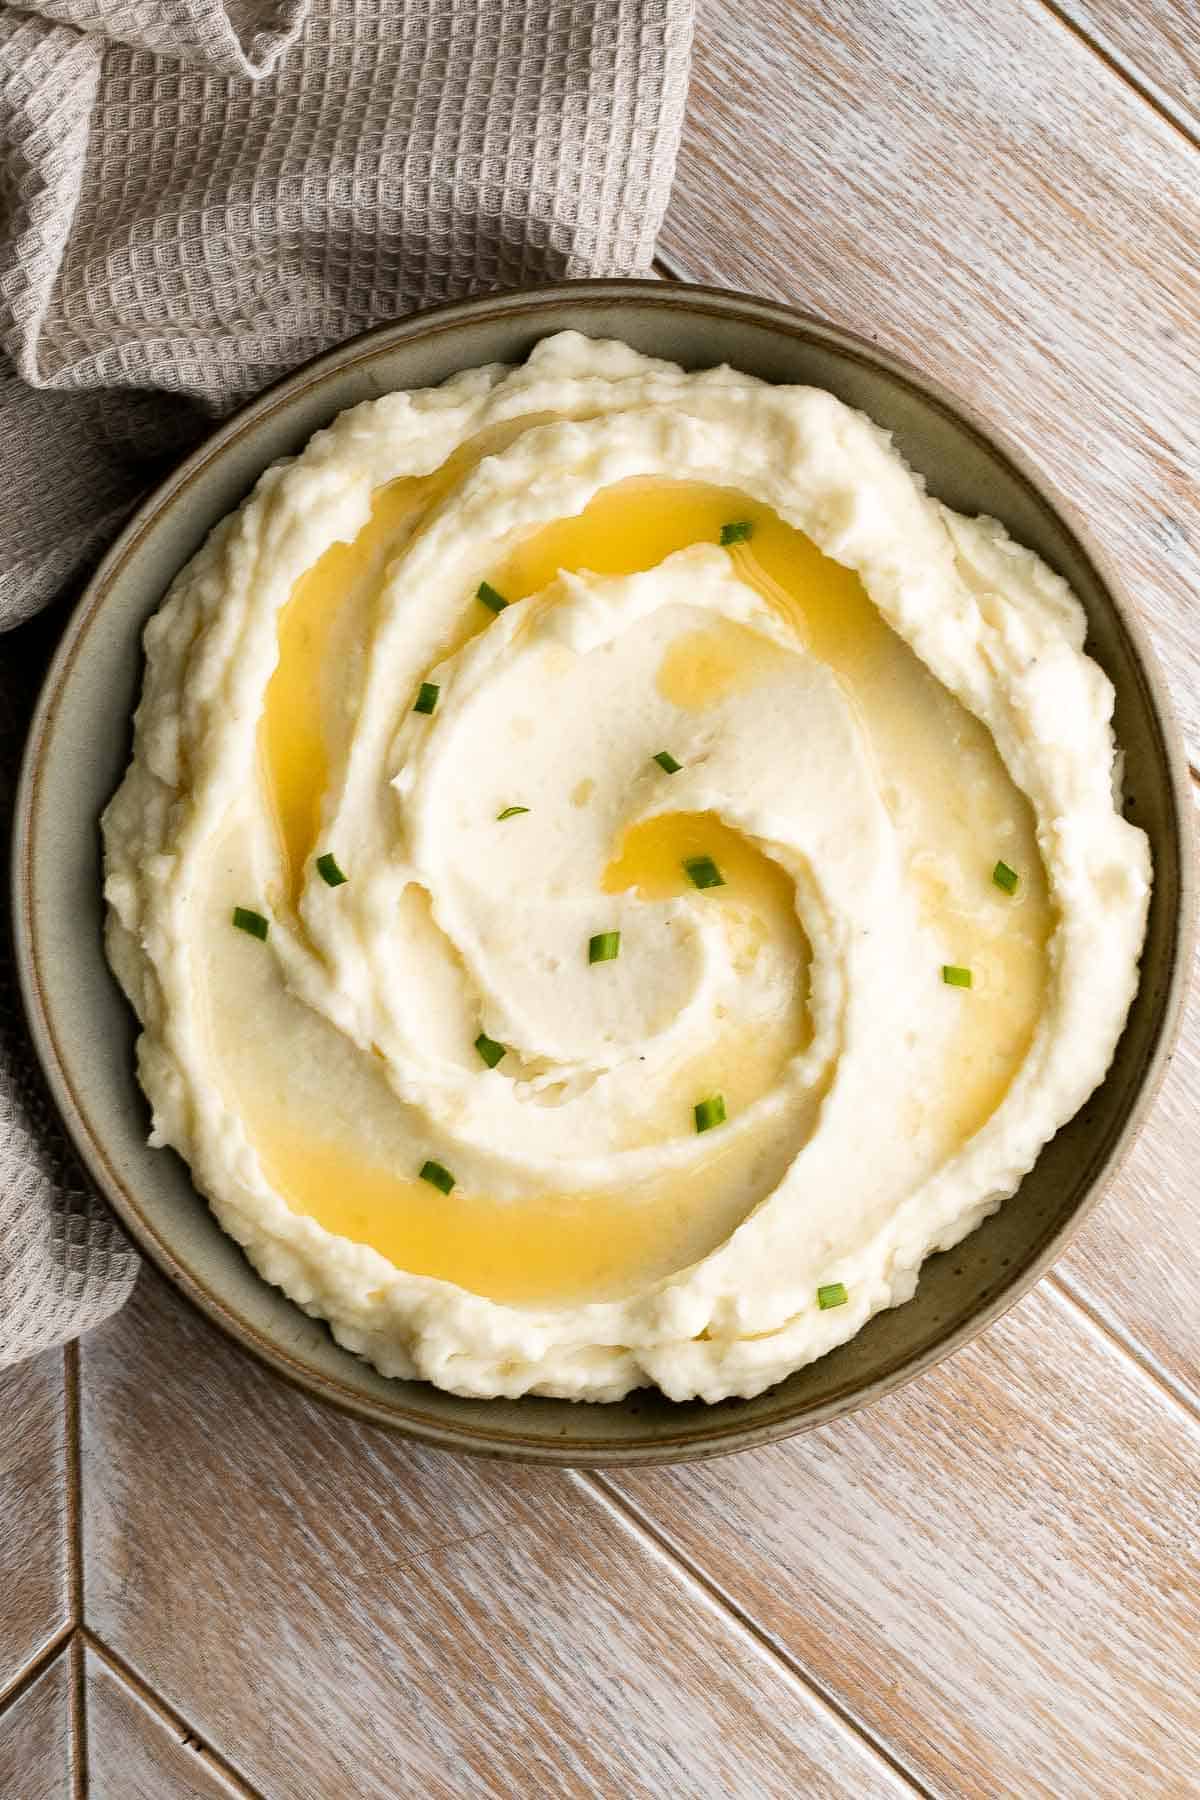
- Endlessly versatile. Serve them as a side with chicken, steak, or fish, toss them with pasta, spoon them over toast, or even pile them onto mashed potatoes. However you serve them, this recipe is one you'll come back to again and again.
Ingredients and Substitutions
To make these quick and easy creamy garlic mushrooms, you will need the following ingredients:
- olive oil - Used to sauté the mushrooms and lock in their earthy flavor. You can also use avocado oil.
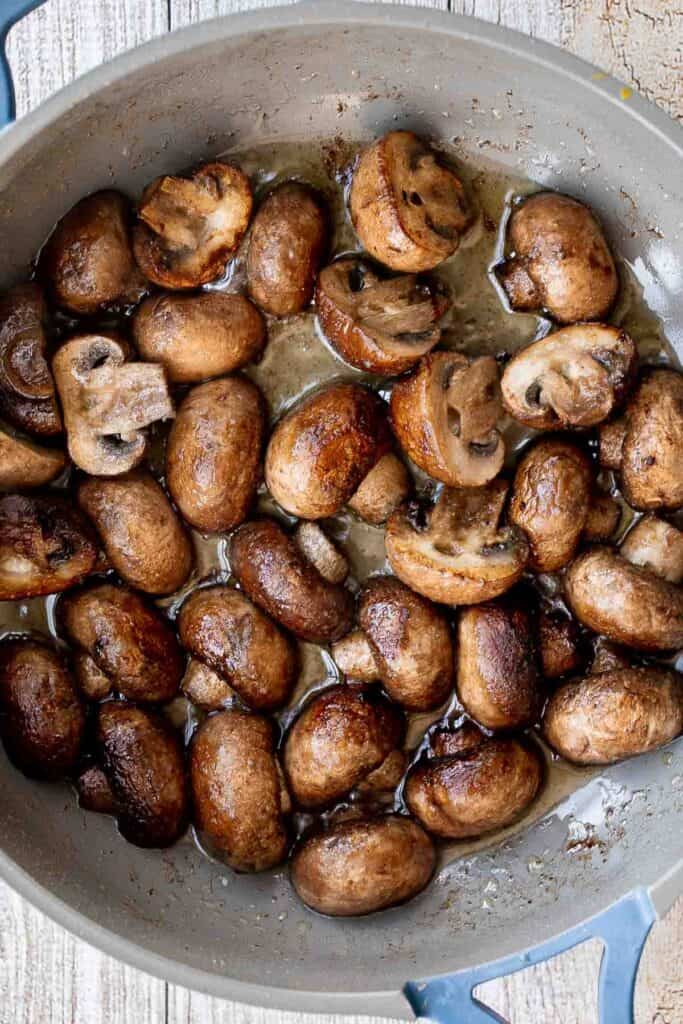
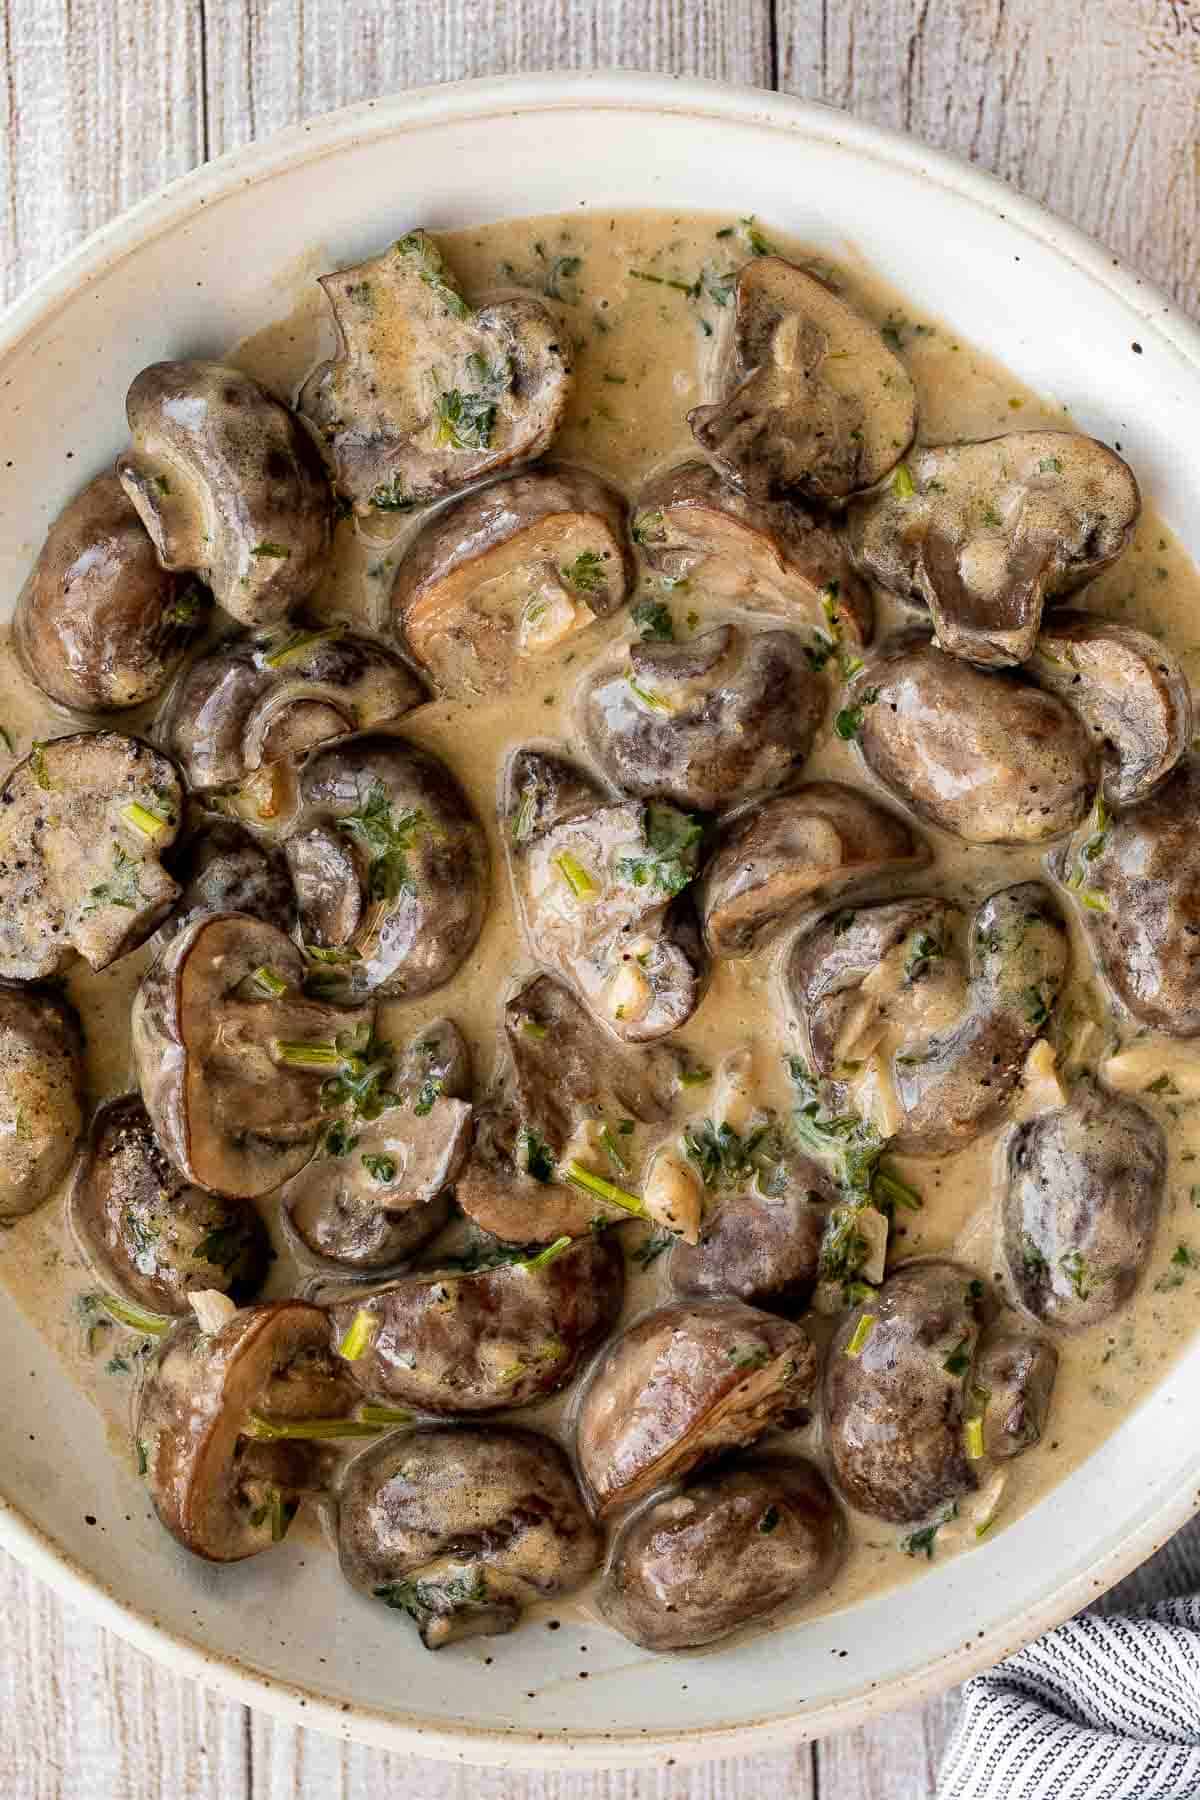
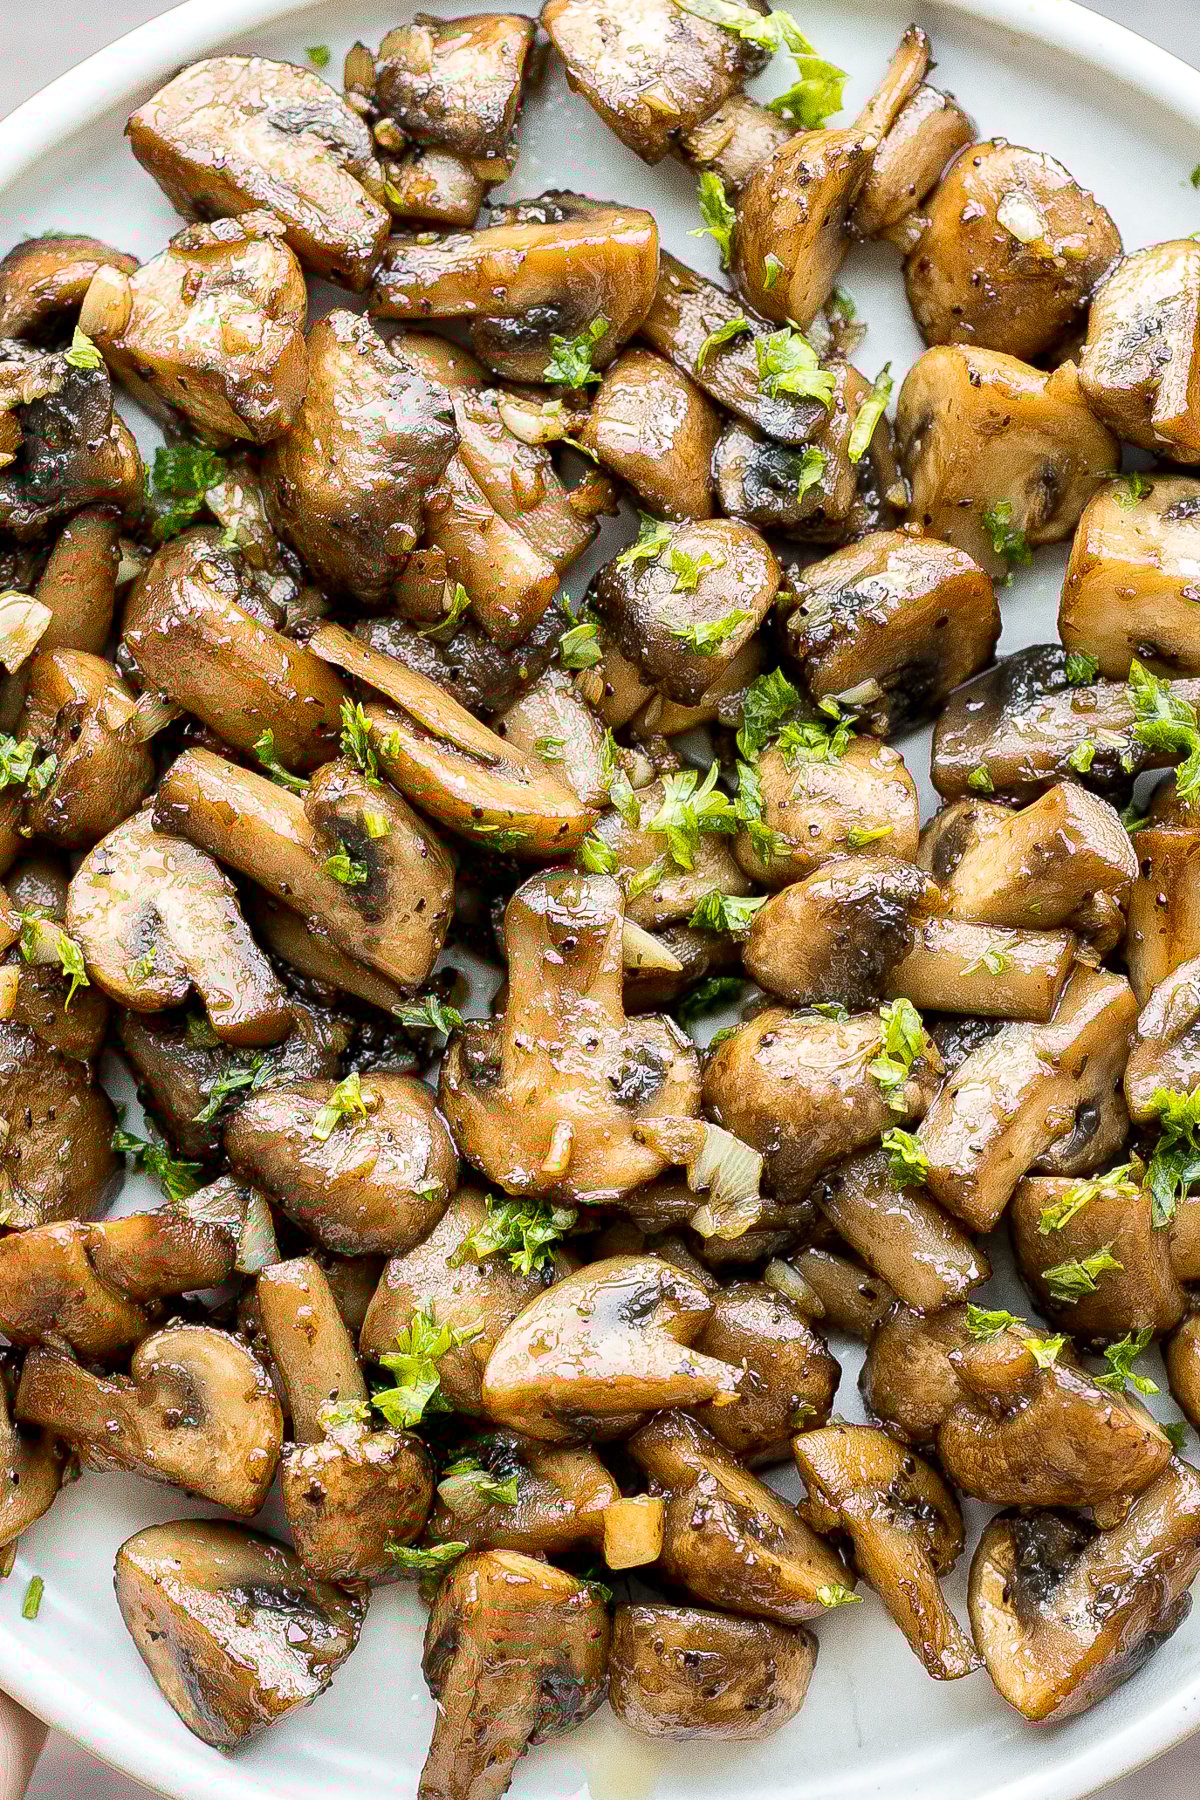
- brown mushrooms - Meaty, earthy, and perfect for soaking up creamy sauces. White button mushrooms or cremini mushrooms work just as well. I halved mine for this recipe, but you can slice them or leave them whole. Just keep in mind that the cooking time may vary as sliced mushrooms cook a little quicker, while whole mushrooms will need a few extra minutes.
- salt and black pepper - Essential for seasoning. Adjust to taste.
- butter - Adds richness and depth.
- garlic - Use fresh garlic for the best flavor. Garlic paste can be substituted if needed.
- all-purpose flour - Helps thicken the delicious creamy sauce. Substitute with cornstarch if gluten-free.
- heavy cream - Creates a luscious sauce. Half and half works for a lighter version, or use coconut milk for a dairy-free alternative.
- parsley - Adds freshness and color. Substitute with thyme or chives for variety.
- parmesan cheese - Adds nutty, salty flavor and helps thicken the sauce. Pecorino Romano is a great substitute. For an extra rich variation, you can stir in a little cream cheese with the parmesan to make the sauce even creamier.
Equipment
You'll also need measuring cups and spoons, a large skillet or shallow saucepan, a wooden spoon or spatula, and a sharp knife for prepping the mushrooms and garlic.
Instructions
- Sauté the mushrooms. In a large skillet, heat the olive oil over medium-high heat for about 2 minutes until shimmering. Add the mushrooms, season with salt and pepper, and sauté for 5-7 minutes, stirring occasionally, until golden brown on all sides.
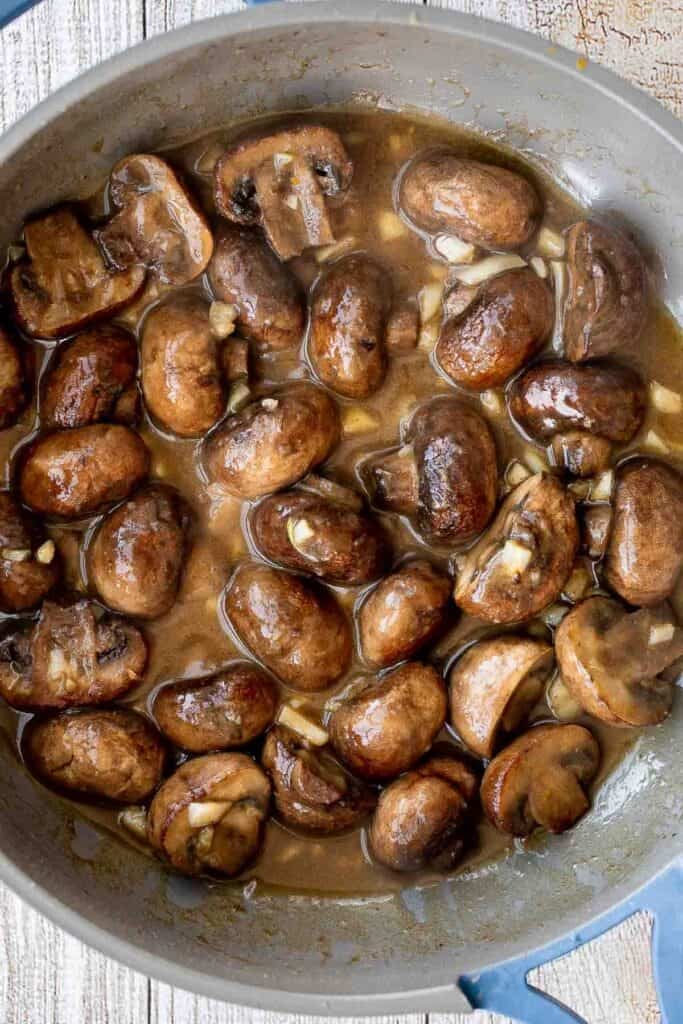
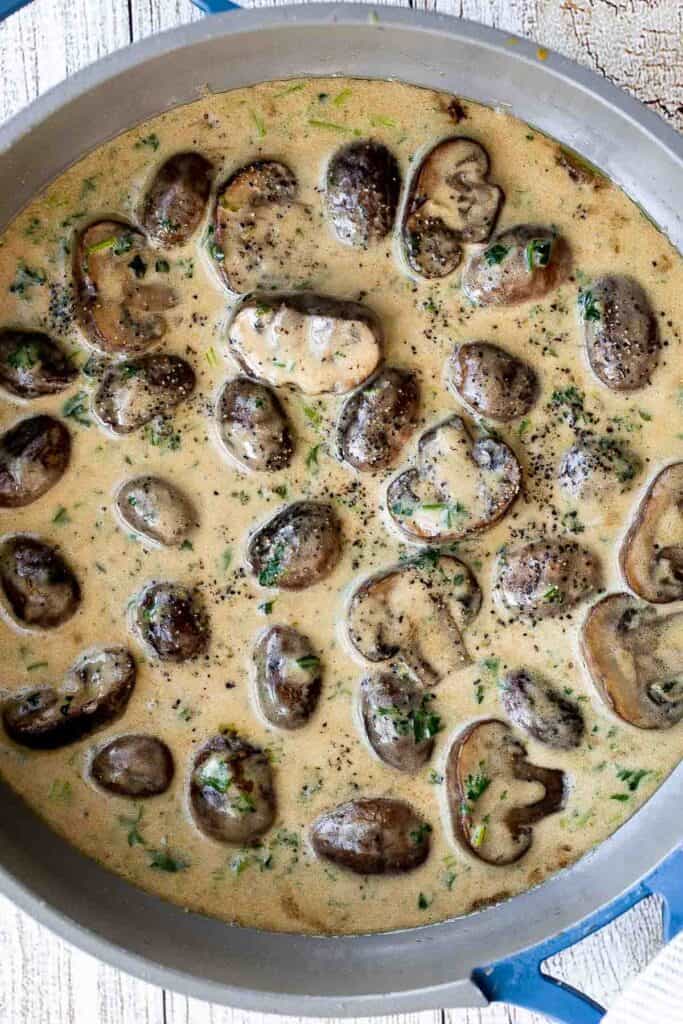
- Make the sauce. Add the butter, garlic, and flour. Cook for 1 minute, stirring, until fragrant and well combined. Pour in the heavy cream, parsley, and parmesan. Stir and bring to a gentle simmer, then reduce heat to medium and cook until the sauce thickens to your desired consistency.
- Serve. Garnish with extra pepper and grated parmesan cheese, if desired. Serve warm over pasta, mashed potatoes, risotto, rice, or simply with crusty bread for dipping.
Expert Tip: Don't Overcrowd the Pan
Cook mushrooms in batches if needed. Overcrowding makes them steam instead of sear, and you'll miss out on that golden-brown flavor that makes this dish irresistible.
More Tips and Tricks
- Use fresh mushrooms. Avoid canned mushrooms. Fresh ones release less liquid and soak up the sauce better.
- How to clean mushrooms. When you bring mushrooms home, they'll usually have a bit of dirt. The best way to clean them is to gently wipe each one with a damp paper towel, then give them a quick rinse under cold water if needed. Never soak mushrooms since they act like sponges and will absorb too much water, which keeps them from browning properly in the pan.
- Thicken the sauce. If the sauce is too thin, let it simmer for a few extra minutes or add a bit more flour.
- Finish with cheese. Stir parmesan in at the very end so it melts smoothly and adds nutty depth.
Recipe Variations
- Add spinach. Stir in a handful of baby spinach during the last few minutes of cooking until wilted. It adds color, nutrients, and freshness without overpowering the creamy garlic sauce. Kale or Swiss chard also work if you want a heartier green.
- Add protein. Turn this side into a one-pan main by adding cooked chicken pieces or cooked pork tenderloin slices right into the sauce. For extra indulgence, stir in crispy bacon or pancetta (just skip the salt at first, then season to taste once everything comes together). Shrimp also makes a delicious swap for a lighter protein boost.
- Spice it up. Give the dish a gentle kick with a pinch of red chili flakes or cayenne pepper.
- Herby twist. Fresh thyme, rosemary, or tarragon bring a fragrant upgrade that pairs perfectly with mushrooms. Add them during cooking so the herbs have time to release their aroma into the sauce.
- Extra cheesy. Love cheese? Swap parmesan for a mix of Italian cheeses like provolone, fontina, or mozzarella. The sauce will turn gooey and stretchy.
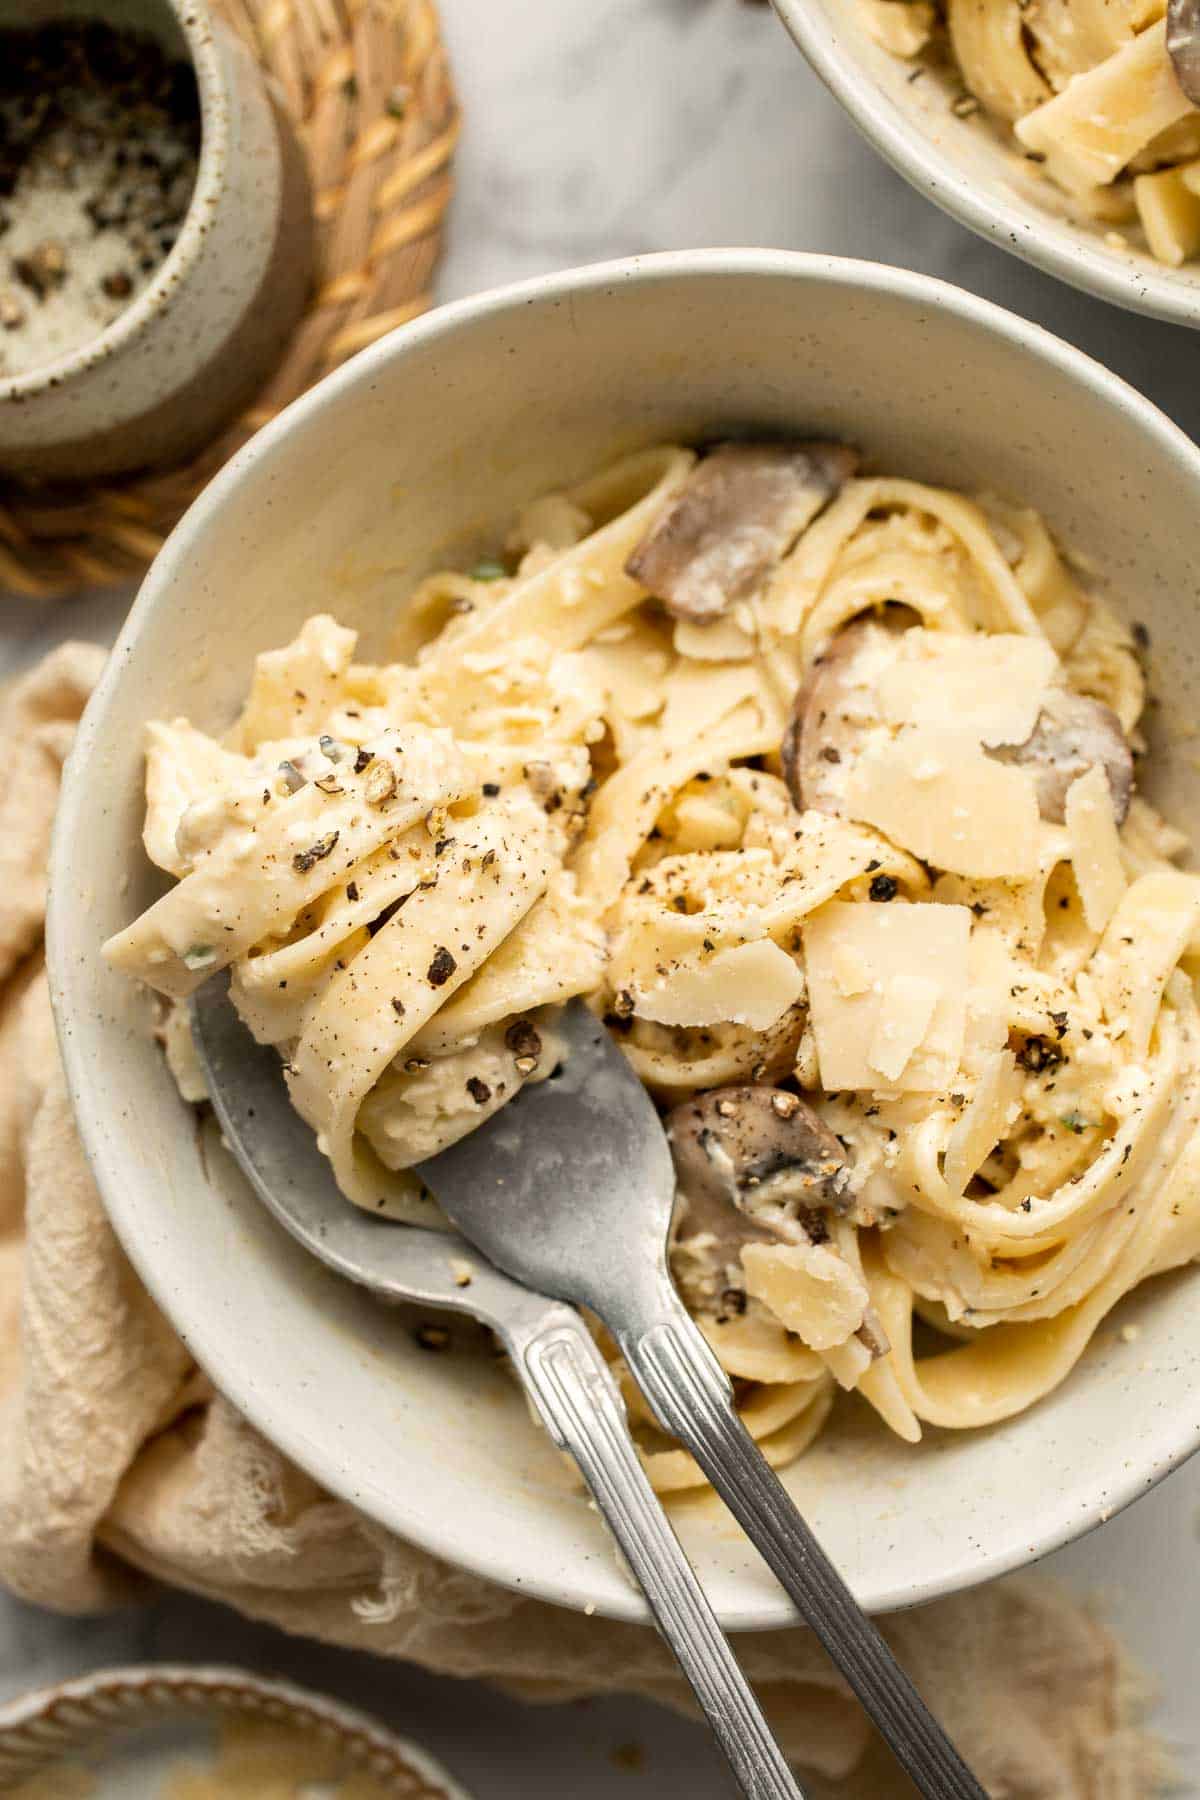
- Toss in pasta. Transform this side into a quick, hearty dinner by tossing the mushrooms and sauce with your favorite pasta and a little reserved pasta water. Sprinkle on extra parmesan and fresh parsley before serving. See our Creamy Mushroom Pasta for tips.
- Low-carb option. Serve the mushrooms and sauce over zucchini noodles, spaghetti squash, or even cauliflower rice for a lighter twist.
Storage
How to Store
Keep leftovers in an airtight container in the fridge for up to 3 days.
How to Reheat
Warm gently on the stovetop over low heat for about 5 minutes, adding a splash of cream or milk to loosen the sauce.
How to Freeze
Cream-based sauces don't freeze well (they tend to split), so it's best to enjoy this dish fresh.
How to Serve
Creamy garlic mushrooms are endlessly versatile. Serve them as a side, a topper, or even a main. They bring instant comfort to any meal.
These are my favorite dishes to serve with creamy mushrooms:
Dinner Ideas
For more recipe ideas to pair this with on busy weeknights, check out our collection of easy dinner recipes, featuring one-pan dishes, quick pasta, roasted vegetables, light sides, and flavorful meals that come together in no time.
FAQ
Sauté mushrooms in oil until browned, then add butter and garlic. Stir in flour, cream, parmesan, and parsley, and cook until the sauce is silky and thick. It's fast, simple, and packed with flavor. See our recipe card above for full instructions.
Let the sauce simmer a few extra minutes to reduce, or whisk in a little more flour. Adding parmesan also helps thicken naturally while boosting flavor.
You can use half and half, milk with a little cornstarch, or dairy-free options like coconut milk or cashew cream. They'll change the flavor slightly, but still create a luscious sauce.
Besides flour, you can thicken by simmering longer, adding a cornstarch slurry, or stirring in extra cheese. Adjust based on how rich and thick you want it.
It's not recommended, as the cream sauce can separate and turn grainy once thawed. For best results, make and enjoy fresh.
Yes, prepare ahead and store in the fridge. Reheat gently with a splash of cream or milk to bring back the sauce's silky texture.
Simply cook your favorite pasta, then toss it directly in the mushroom cream sauce. Add extra parmesan and parsley before serving for the ultimate quick comfort food. See our Creamy Mushroom Pasta for the recipe and tips.
More Mushroom Recipes
Looking for other recipes like this? Try these:
Tried this recipe?
I'd love to hear what you think! Leave a comment and rating below to share your feedback. Your reviews help others discover this recipe and help me keep creating more free recipes for you. Snap a photo and tag me on social media @aheadofthyme too.
This post was originally published in 2021. It has since been updated with new content.

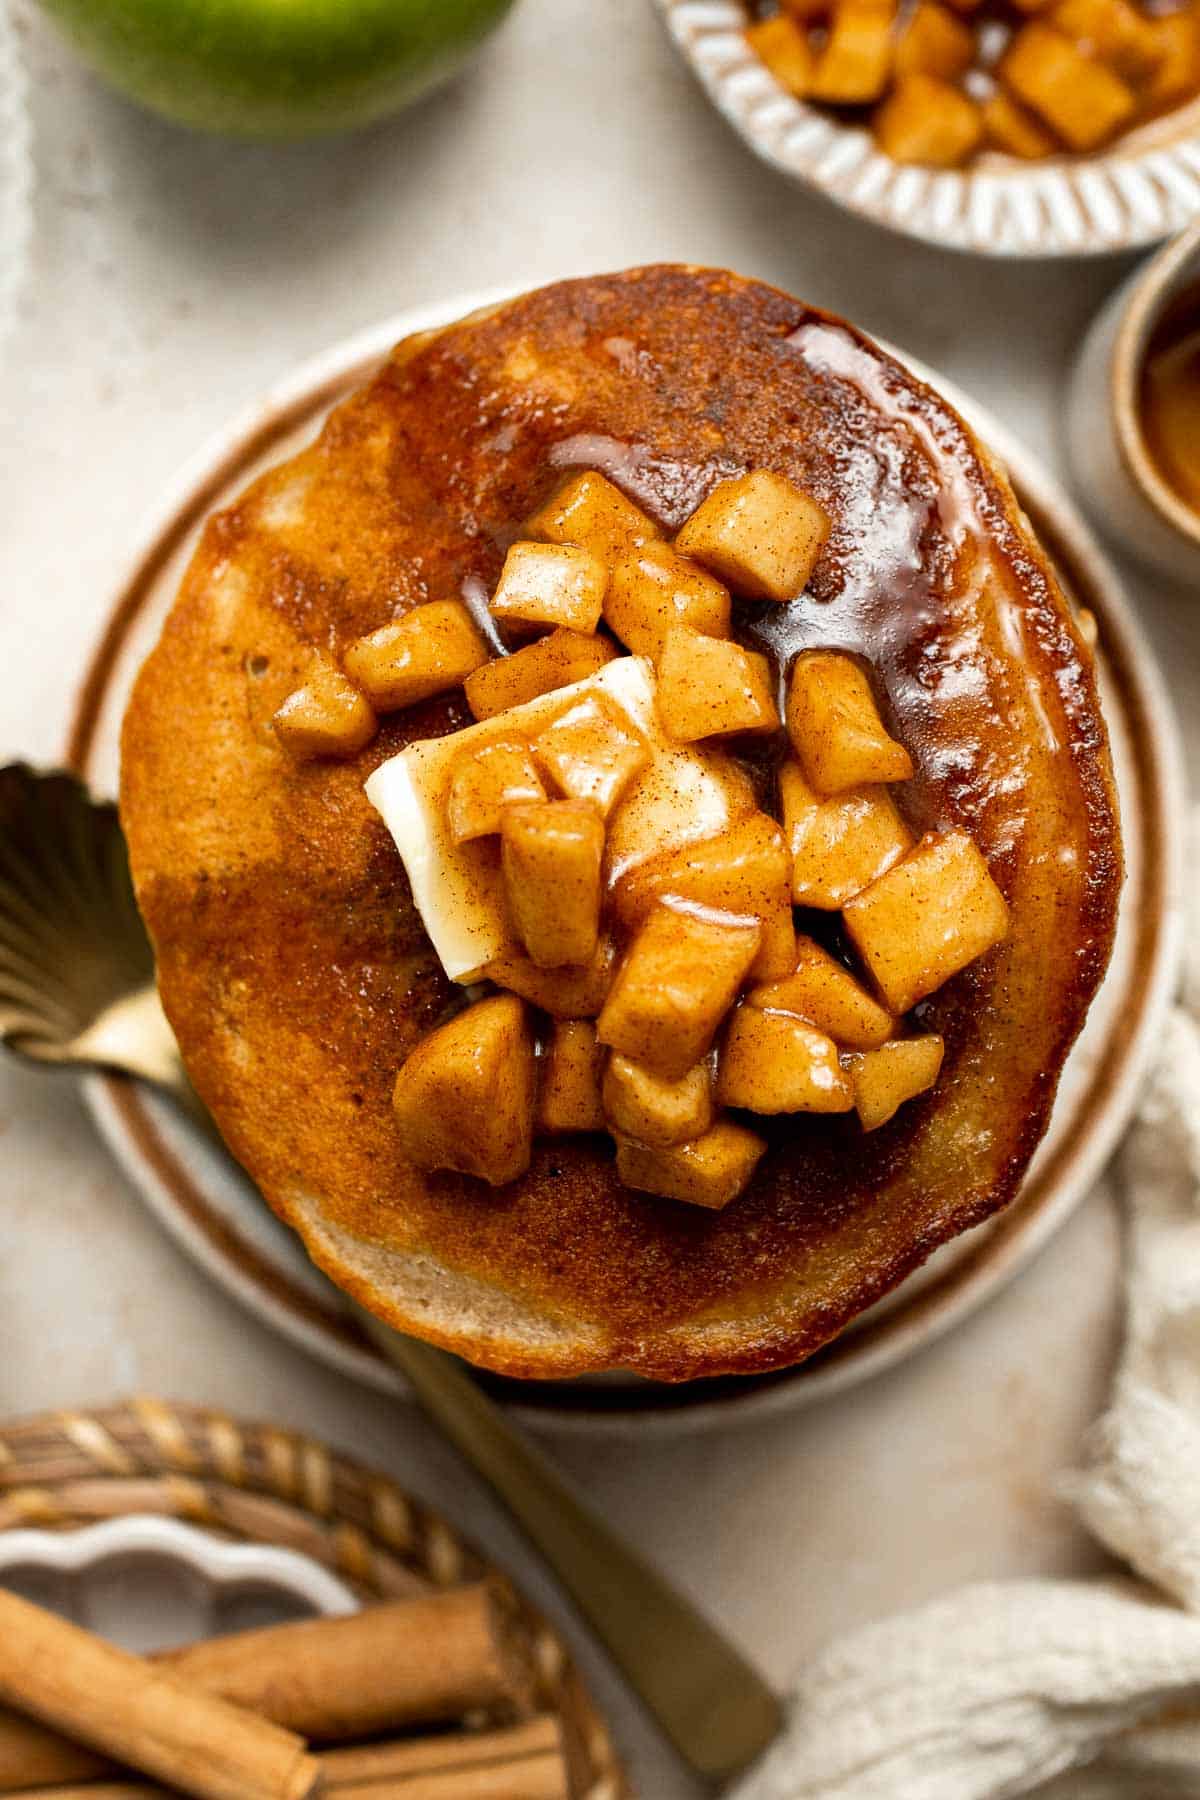
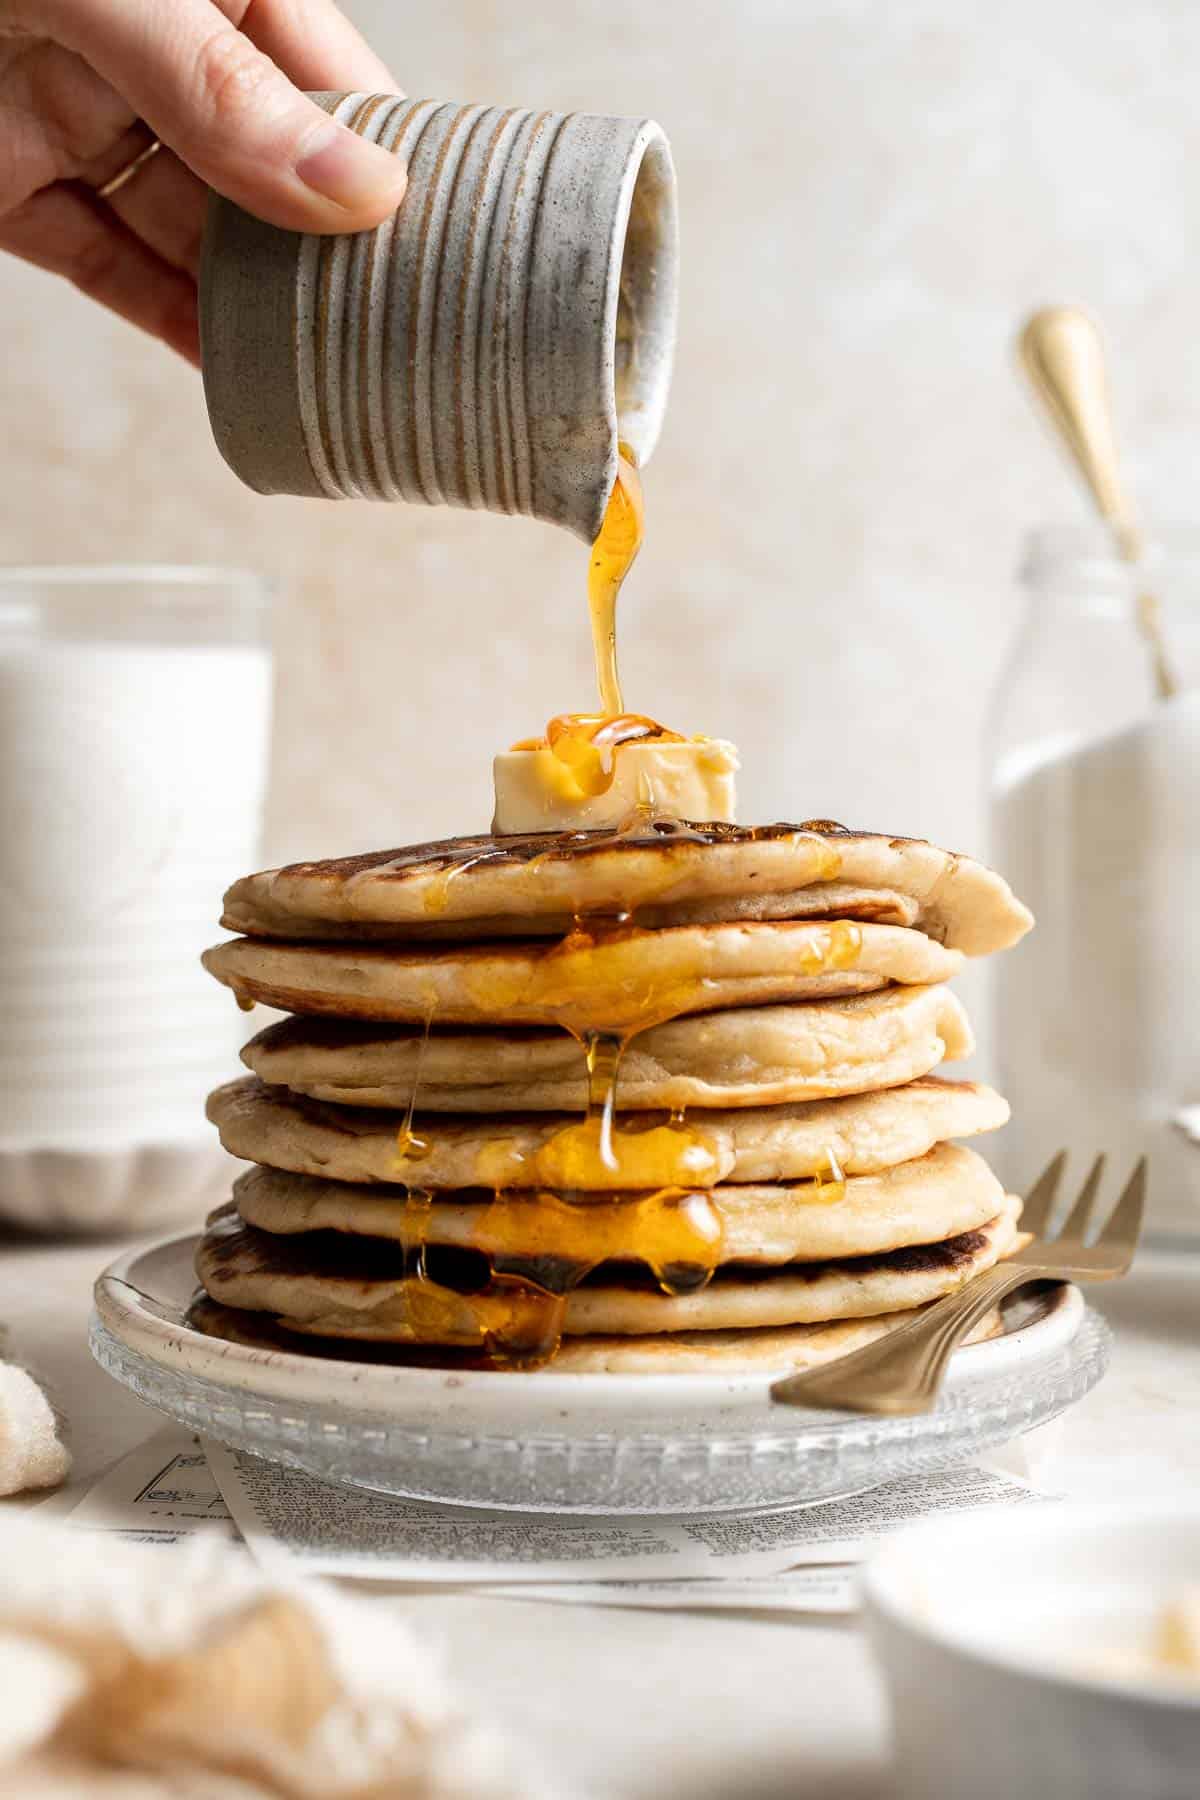
Easy Apple Cinnamon Pancakes Recipe

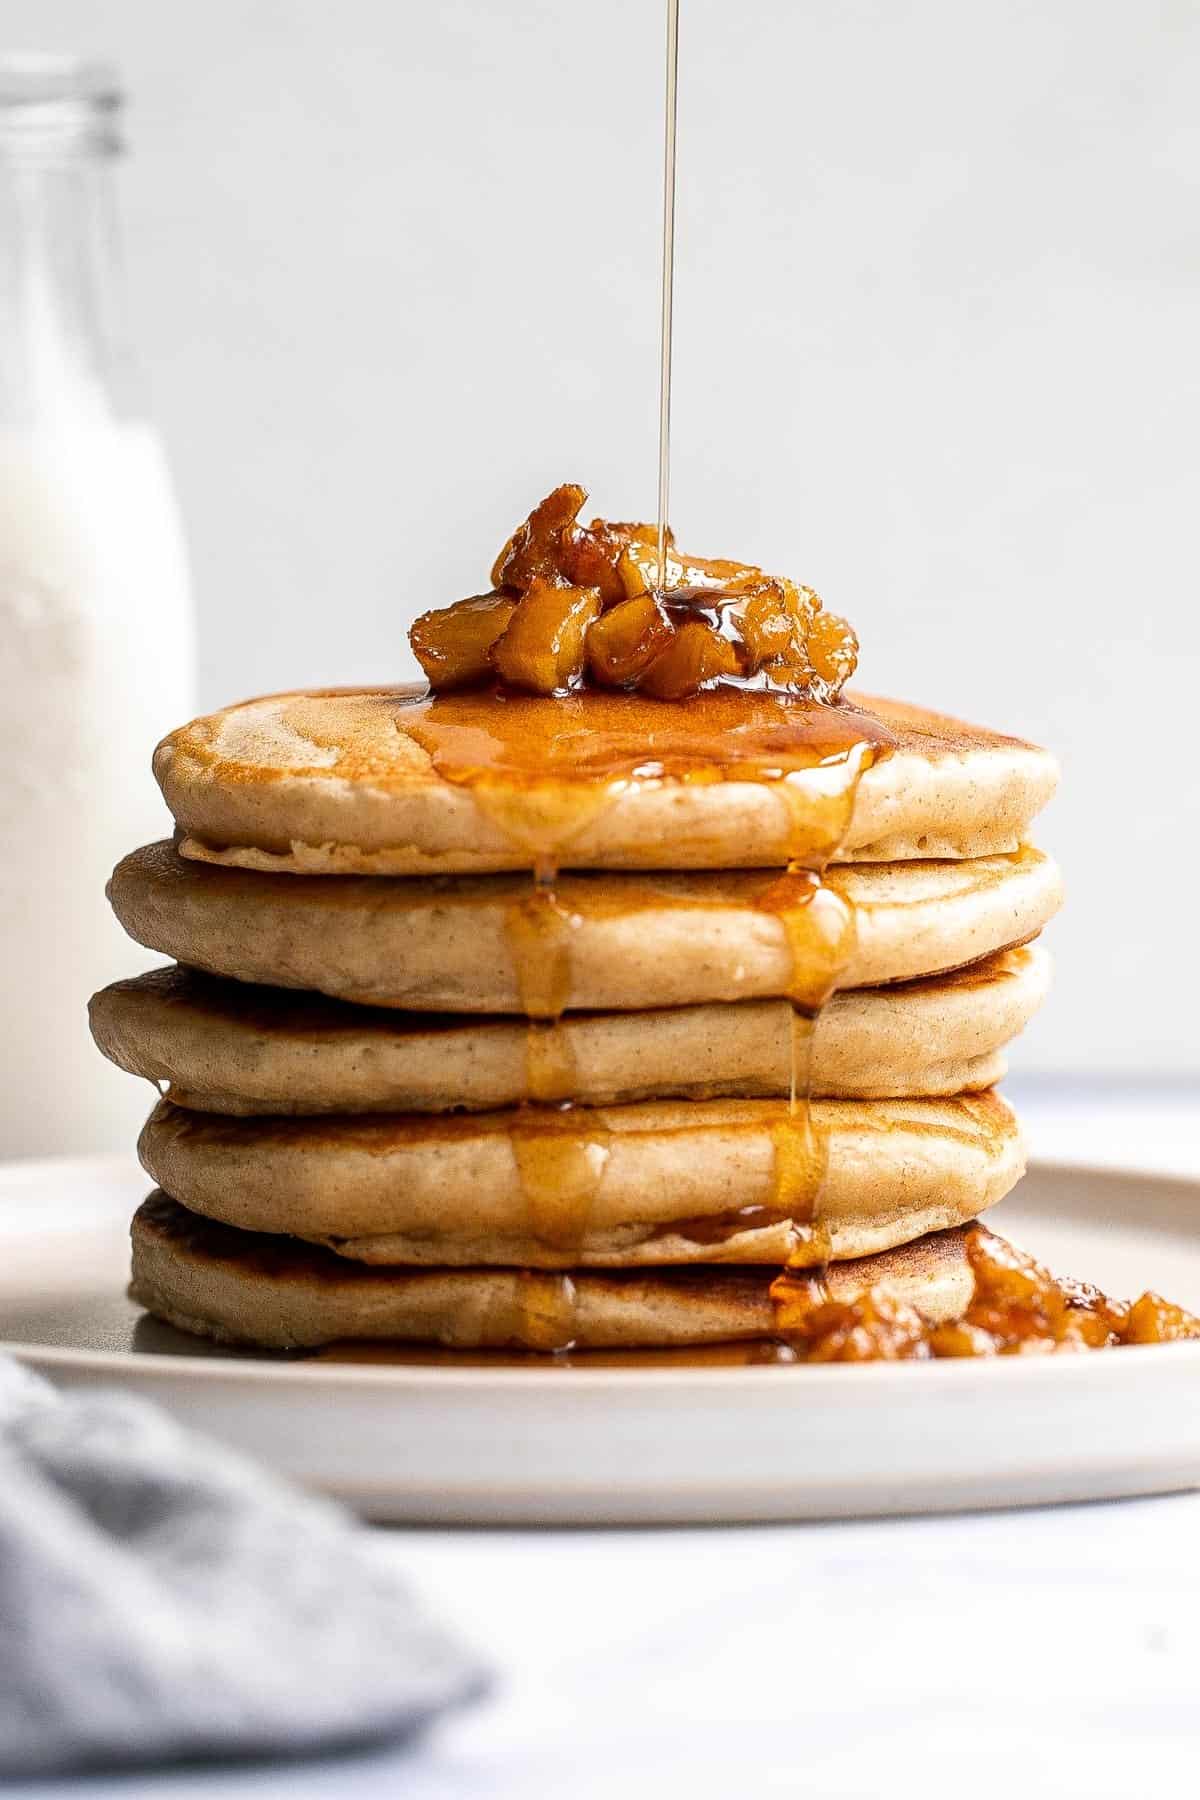
Easy Apple Cinnamon Pancakes are basically fall stacked on a plate. Fluffy, golden pancakes get a sweet upgrade with shredded tart apples and a sprinkle of warm cinnamon. It's like apple pie met your favorite diner pancakes - only way easier and totally breakfast-approved. So cozy!

These apple pancakes come together in minutes with pantry staples and one juicy apple. The batter is light, the apples melt right in, and the cinnamon makes your kitchen smell like the coziest autumn morning. Top with butter, maple syrup, or my caramelized apples if you're feeling fancy, and you've got weekend brunch bragging rights.
If you liked this apple cinnamon pancake recipe, you should try our Applesauce Pancakes or Cinnamon Apple Baked Oatmeal next. Pair them with Caramelized Apples for the kind of breakfast that makes you want to linger at the table.
Why You'll Love This Recipe
- Fluffy and flavorful. Baking powder gives these pancakes a cloud-like rise, while shredded apples tucked into the batter for natural sweetness and extra moisture. Cinnamon makes them taste like apple pie for breakfast.
- Quick and easy. Just one bowl of dry, one bowl of wet, and a quick mix. These pancakes hit the griddle in minutes. A fall breakfast that feels way fancier than it is. They're perfect for lazy weekend mornings or weekday treats.
- Kid-tested, parent-approved. Apples and cinnamon are a flavor duo that wins over everyone. Kids love the sweetness, and adults love the cozy vibes. They're pancakes that truly keep the peace.
- Customizable stacks. Keep them classic and plain, with butter and syrup, or go big with caramelized apples, nuts, or whipped cream. They're versatile enough to fit any kind of breakfast mood.
Ingredients and Substitutions
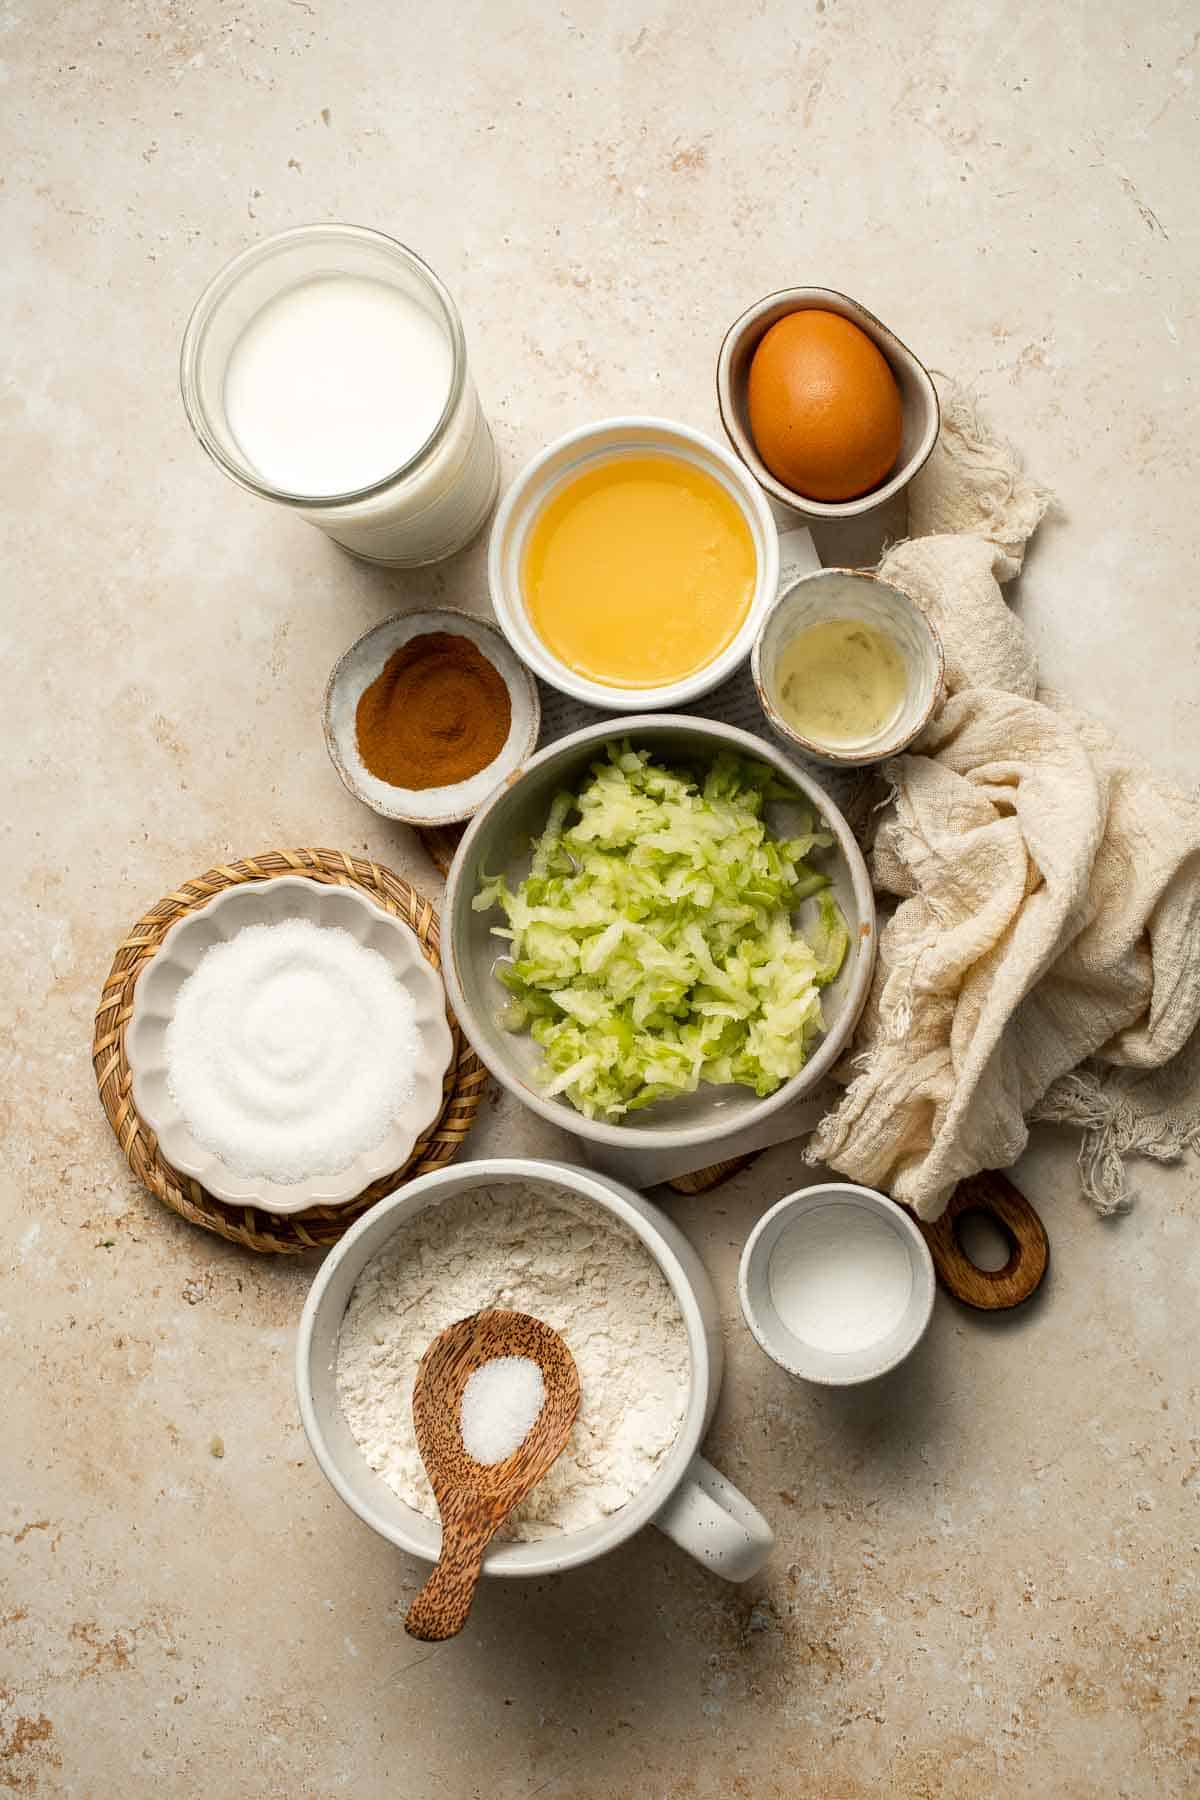
To make these delicious Apple Cinnamon Pancakes, you will need the following ingredients (see recipe card below for quantities):
- all-purpose flour - The base of the pancakes, giving them structure. Whole wheat flour can be used for a heartier version.
- baking powder - Essential for fluffy pancakes with a good rise. Don't skip this.
- granulated sugar - Adds sweetness. Adjust to taste (1 tablespoon for less sweet, 2 for sweeter). You can also use brown sugar or coconut sugar.
- ground cinnamon - Warm spice that pairs perfectly with apples. Apple pie spice works as an alternative.
- salt - Balances the sweetness and brings out all the flavors.
- milk - Any milk works: whole milk, almond, oat, or soy.
- unsalted butter - Adds richness to the batter. For dairy-free, swap with coconut oil or vegetable oil.
- vanilla extract - Adds warmth and rounds out the flavor.
- egg - Provides structure and stability for the pancakes.
- tart apple - Shredded tart apples (like Pink Lady or Granny Smith apples) balance the sweetness. Shredding helps them melt right into the batter.
- vegetable oil - For cooking the pancakes on the griddle. Neutral oils like canola work too.
- caramelized apples topping - An optional finishing touch for extra apple flavor and sweetness. Try our easy recipe: Caramelized Apples (Topping for Pancakes, Desserts, and More).
Equipment
You'll also need measuring cups and spoons, a mixing bowl, a whisk, a rubber spatula, a box grater for shredding the apple, a nonstick skillet or griddle, and a spatula for flipping the pancakes.
Instructions
- Combine dry ingredients. In a large mixing bowl, sift together the flour, baking powder, sugar, cinnamon, and salt.


- Add wet ingredients to dry. Make a well in the centre of the large bowl. Then, add milk, melted butter, vanilla extract, and egg. Whisk until combined (the batter will be lumpy).


- Add apple. Add the grated apple and stir until just combined. Let the batter sit for 5 minutes.


- Scoop batter. Lightly oil a griddle or large frying pan (you can simply dampen a paper towel with vegetable oil and rub on the surface). Heat pan over medium heat and add the pancake batter using a ¼ measuring cup. Pour as many as fit in your pan or griddle.
- Cook. Cook for 2-3 minutes until small bubbles begin to form on the surface and edges and the pancake are dry and golden brown. Flip the pancake over and cook for another 1-2 minutes until the other side is also golden brown.


- Repeat. Repeat in batches until batter is used up.
- Serve. Serve with caramelized apple topping. Add a drizzle of maple syrup if desired.


Expert Tip: Shred the Apples for Best Texture
Shredded apples fold seamlessly into the pancake batter, giving the pancakes natural sweetness and moisture without leaving big chunks. The result? Pancakes that stay fluffy but taste like they're infused with apple flavor in every bite.
More Tips and Tricks
- Don't overmix the batter. Mix until the dry ingredients are just combined with the wet (a few lumps are fine). Overmixing makes tough pancakes.
- Rest the batter. Let the batter sit for 5 minutes before cooking. This helps the flour hydrate and gives the baking powder time to activate, resulting in fluffier pancakes.
- Cook on medium heat. Too hot and they'll burn before cooking through; too low and they won't rise properly. A medium, steady heat is best.
- Flip once. Wait until bubbles form on top and edges look set, then flip. Flipping too early or too often deflates pancakes.
- Keep them warm. Place cooked pancakes on a baking sheet in a 200°F oven while you finish the rest. This keeps them fluffy and warm until serving time.
Recipe Variations
- Use apple chunks. Instead of shredding, fold in small apple chunks (diced apples) for more texture.
- Add more spices. Add nutmeg, ginger, or apple pie spice for a deeper fall flavor.
- Add nuts. Stir in chopped walnuts or pecans for crunch.
- Make oatmeal pancakes. Replace ¼ cup of flour with rolled oats for a hearty twist.
- Give them an apple cider twist. Swap half the milk with apple cider for an extra apple punch.
- Make them gluten-free. Swap the all-purpose flour with a 1:1 gluten-free baking blend. The pancakes stay fluffy, soft, and just as delicious - no one will even guess they're gluten-free.
- Add protein. Replace half the milk with plain Greek yogurt for extra tang and creaminess. It also adds a nice protein boost.
See this applesauce version on our site!

Storage
How to Store
Keep leftover pancakes in an airtight container in the refrigerator for up to 3 days.
How to Reheat
Warm in the microwave for 20-30 seconds or pop them in a toaster for a quick refresh.
How to Freeze
Freeze cooled pancakes in a single layer on a baking sheet, then transfer to a freezer bag for up to 3 months. Reheat straight from frozen in the toaster or microwave.
How to Serve
Apple cinnamon pancakes are delicious on their own, but they really shine with toppings. Stack them high, drizzle with syrup, and let the fun begin.
These are my favorite dishes to serve with apple cinnamon pancakes:


Breakfast Recipes
Our collection of breakfast sides pairs perfectly with this recipe, making your morning meal complete. From fresh fruit and yogurt parfaits to creamy spreads, nut butters, and simple egg dishes, these easy additions add flavor, texture, and variety to your meal.
FAQ
Yes! Apples add moisture, natural sweetness, and flavor. Shredded apples blend into the batter for fluffy pancakes, while chunks give a heartier bite. Both work, but shredded apples are perfect for an even texture.
Start with a basic pancake batter, stir in shredded apples and cinnamon, and cook on a skillet until golden brown. The cinnamon adds warm spice, while the apples melt into the batter for natural sweetness. Top with caramelized apples or syrup for extra indulgence.
Apples are fantastic, but bananas, blueberries, pumpkin, and strawberries are also popular. Apples and pumpkin add a cozy, spiced flavor, while berries bring freshness and tang. It depends on whether you want a fruity burst or a sweet, spiced bite.
Restaurants often use buttermilk, extra eggs, or specialized griddles for perfectly even cooking. They may also whip the batter less for fluffier texture. At home, you can replicate this by not overmixing, resting the batter, and cooking on medium heat.
Shredded apples don't need pre-cooking. They soften perfectly as the pancakes cook. If using chunks, sauté them briefly in butter and cinnamon first for extra flavor and tenderness.
Both work, but vegetable oil is more forgiving because butter can burn at higher heat. If you want buttery flavor, cook with oil and add a pat of butter on top before serving.
Flipping too early or pressing down on the pancakes are the two biggest mistakes. Wait for bubbles to form and edges to set before flipping, and never press - it squeezes out the fluffiness.
Don't overmix the batter, let it rest, and use fresh baking powder. Cooking on steady medium heat also helps them rise evenly. For an extra boost, separate the egg, whip the whites, and fold them in for cloud-like pancakes.
More Pancake Recipes
Looking for other recipes like this? Try these:


Tried this recipe?
I'd love to hear what you think! Leave a comment and rating below to share your feedback. Your reviews help others discover this recipe and help me keep creating more free recipes for you. Snap a photo and tag me on social media @aheadofthyme too.

Caramelized Apples (Topping for Pancakes, Desserts, and More)
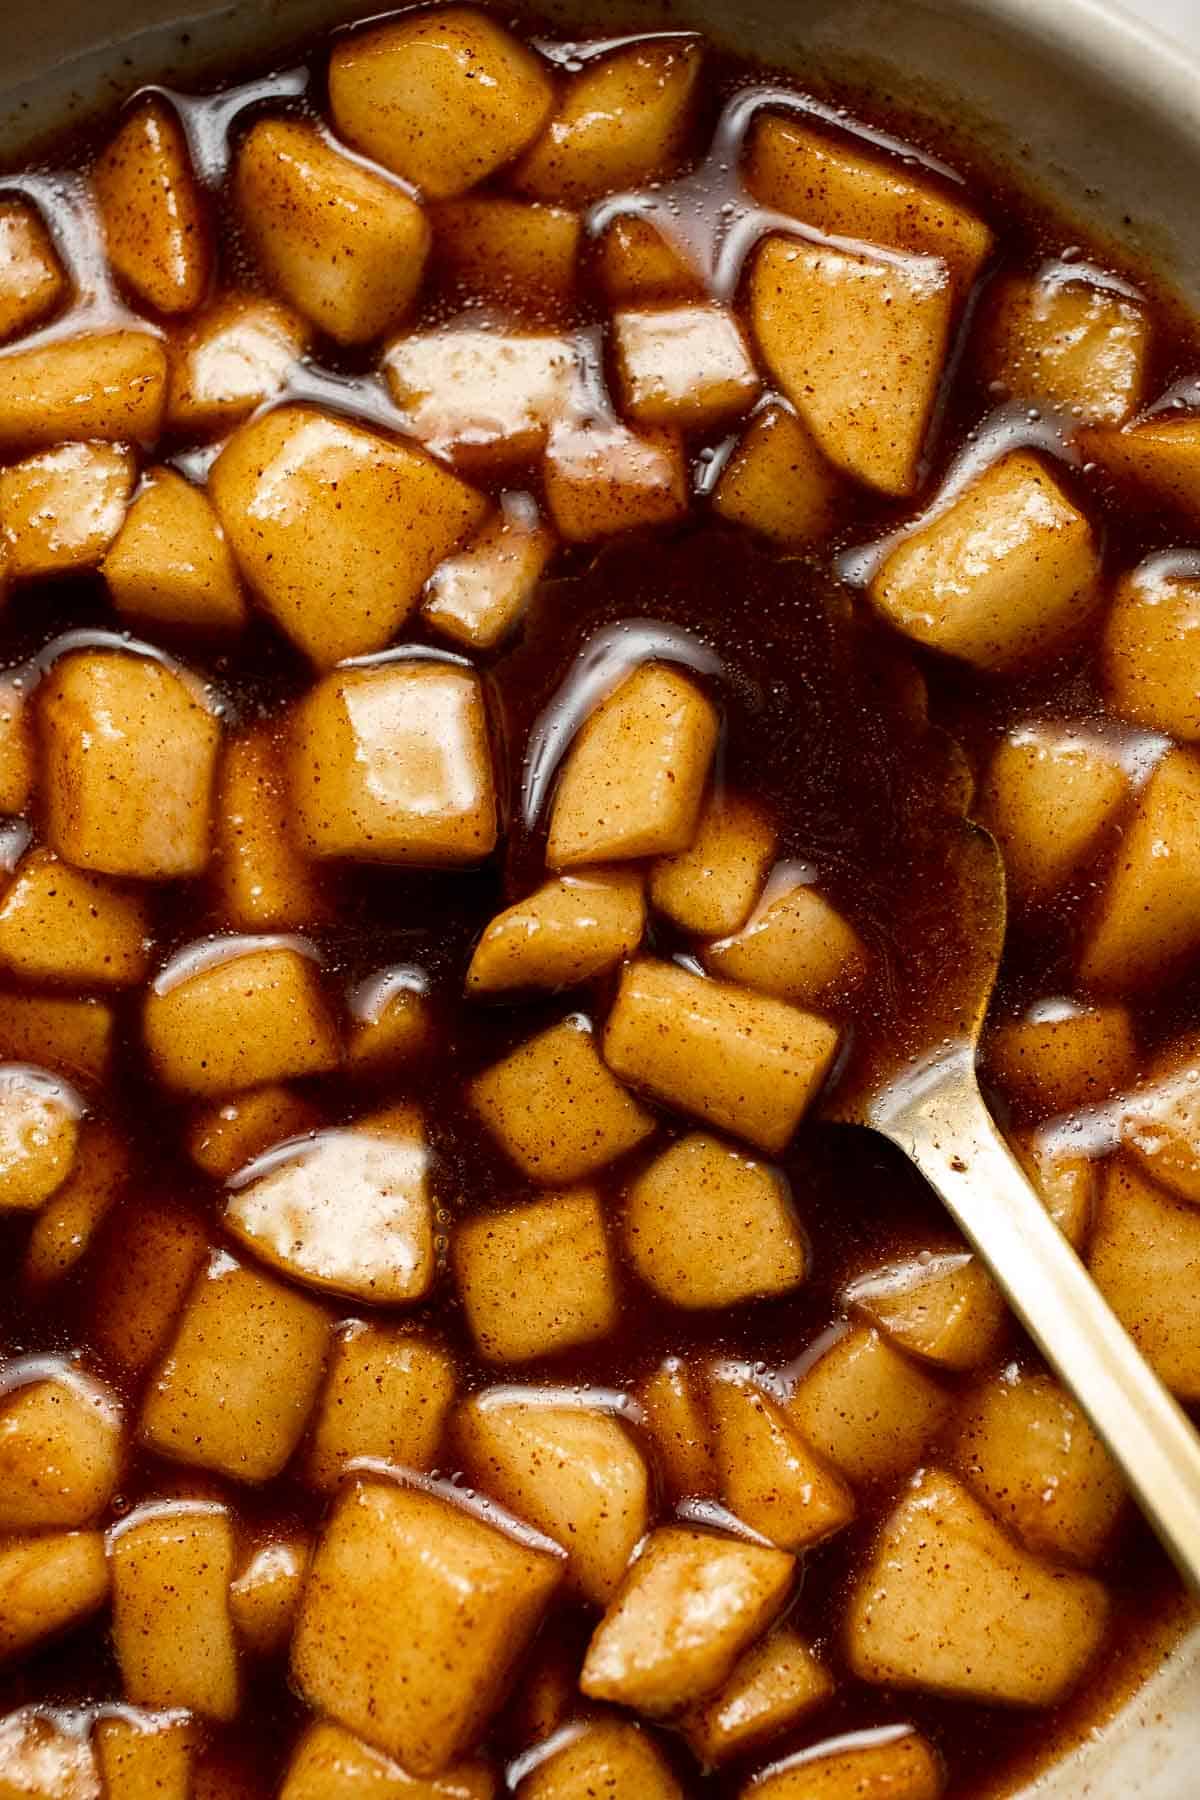
Caramelized Apples are your shortcut to making anything taste like fall instantly. Tender, buttery apples coated in brown sugar, cinnamon, and a drizzle of maple syrup turn ordinary pancakes, waffles, or even a scoop of ice cream into something magical. They're quick, easy, and taste just like warm apple pie filling - without the crust.

The best part? You only need a handful of pantry staples and 10 minutes on the stovetop. This recipe makes a simple but impressive topping that works at breakfast, brunch, or dessert time. Think cozy weekend mornings, apple-spiced sundaes, or a sweet upgrade to your oatmeal. Basically, if it could use a little fall flair, caramelized apples are the answer.
This recipe was inspired by our Baked Apples and Caramel Apples and pairs beautifully with Old Fashioned Pancakes for the ultimate cozy breakfast spread.
Why You'll Love This Recipe
- Quick and easy. Just five ingredients, one pan, and 10 minutes until you'll have warm, caramel-coated apples ready to spoon over anything.
- Cozy fall flavor. Butter, cinnamon, and maple syrup give these apples that nostalgic apple-pie vibe in a fraction of the time.
- Versatile topping. From pancakes and waffles to yogurt, oatmeal, ice cream, or even cake or cheesecake, caramelized apples make everything taste better.
- Family-friendly favorite. Kids love them, adults love them, and you can scale the recipe up or down depending on how many people you're serving.
Ingredients and Substitutions
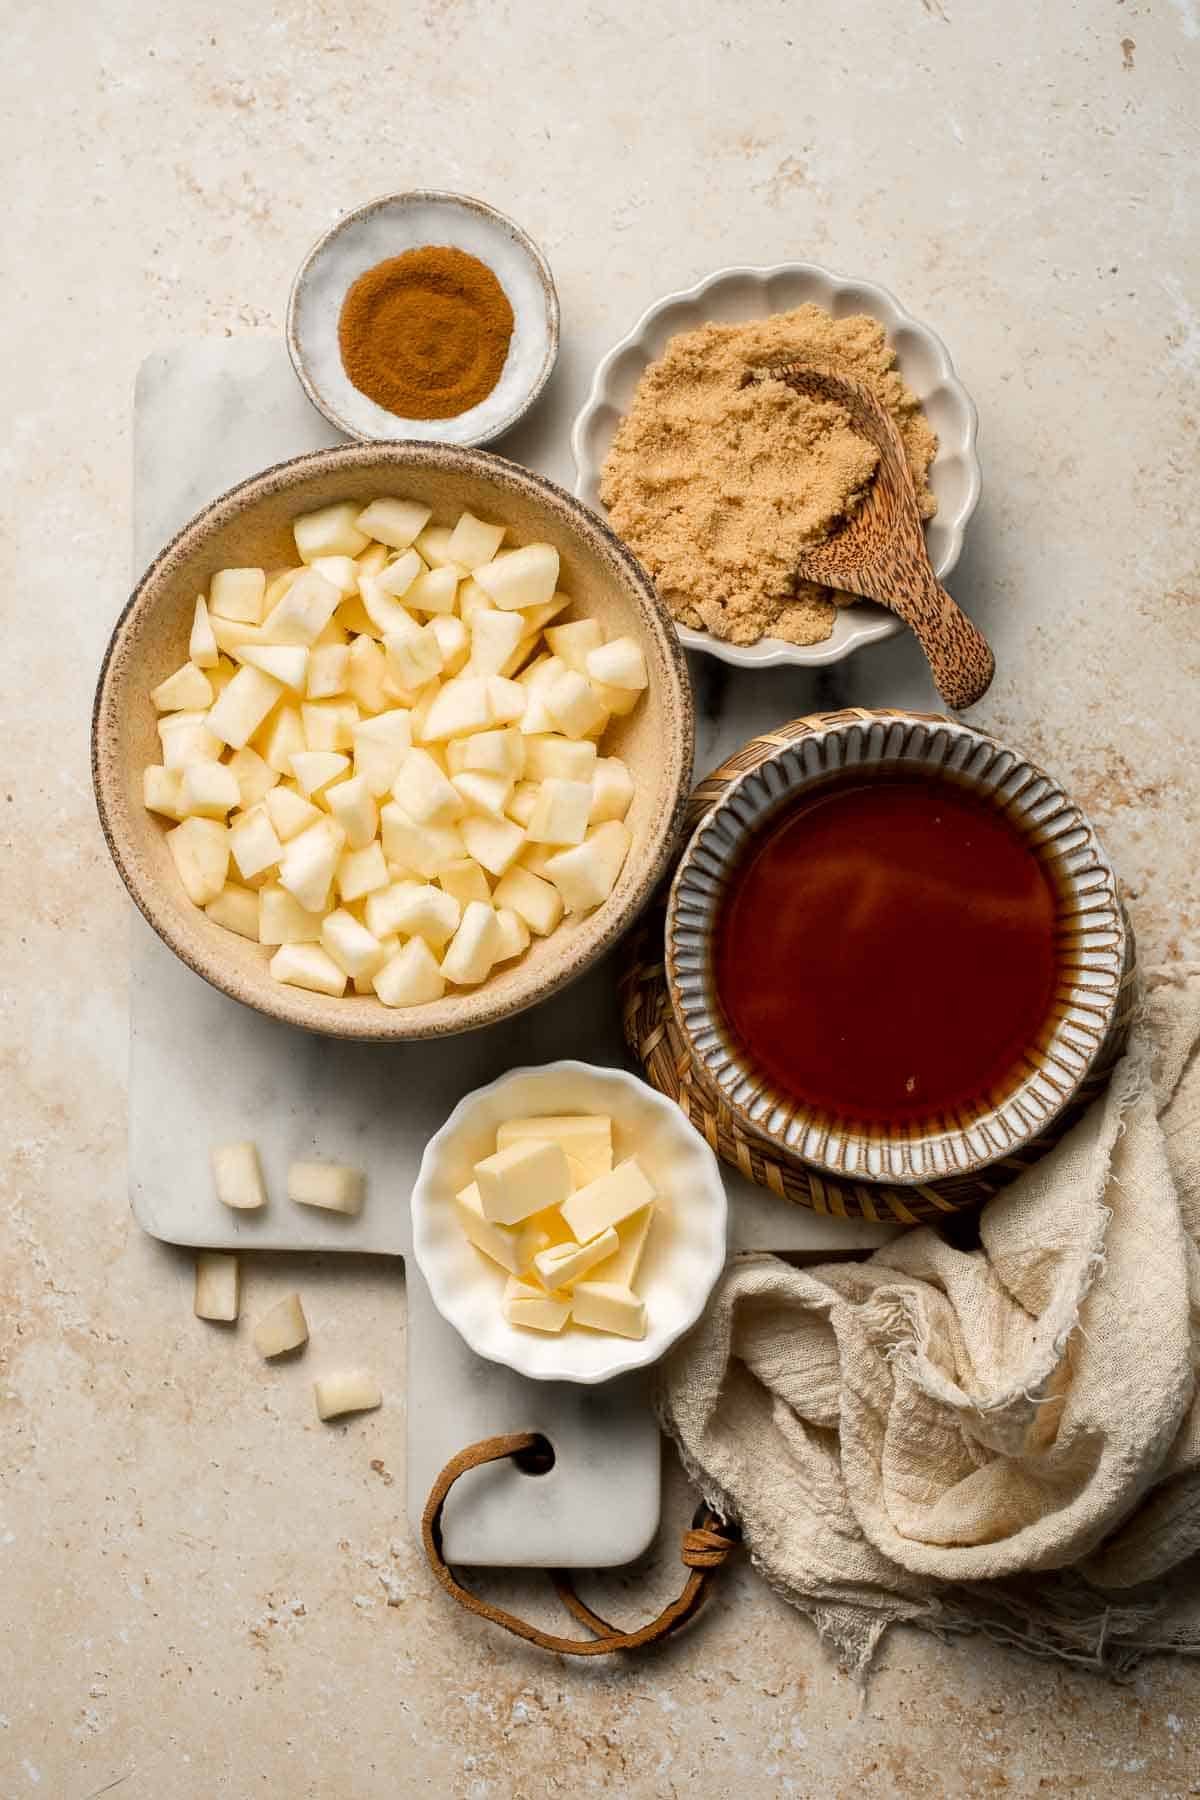
To make this delicious Caramelized Apples, you will need the following ingredients (see recipe card below for quantities):
- butter - Melts into the apples and sugar to create a rich caramel sauce. Use vegan butter or coconut oil for a dairy-free version.
- apples - Choose firm, sweet-tart apples like Honeycrisp, Granny Smith, or Fuji. Dice for a topping, or slice if you prefer a more rustic look.
- brown sugar - Sweetens the apples and helps them caramelize. White sugar works too, but brown sugar adds depth and molasses flavor. You can also swap in coconut sugar for a less sweet, slightly nutty alternative.
- ground cinnamon - Adds warm spice and that classic apple-pie aroma. You can swap in apple pie spice for a shortcut.
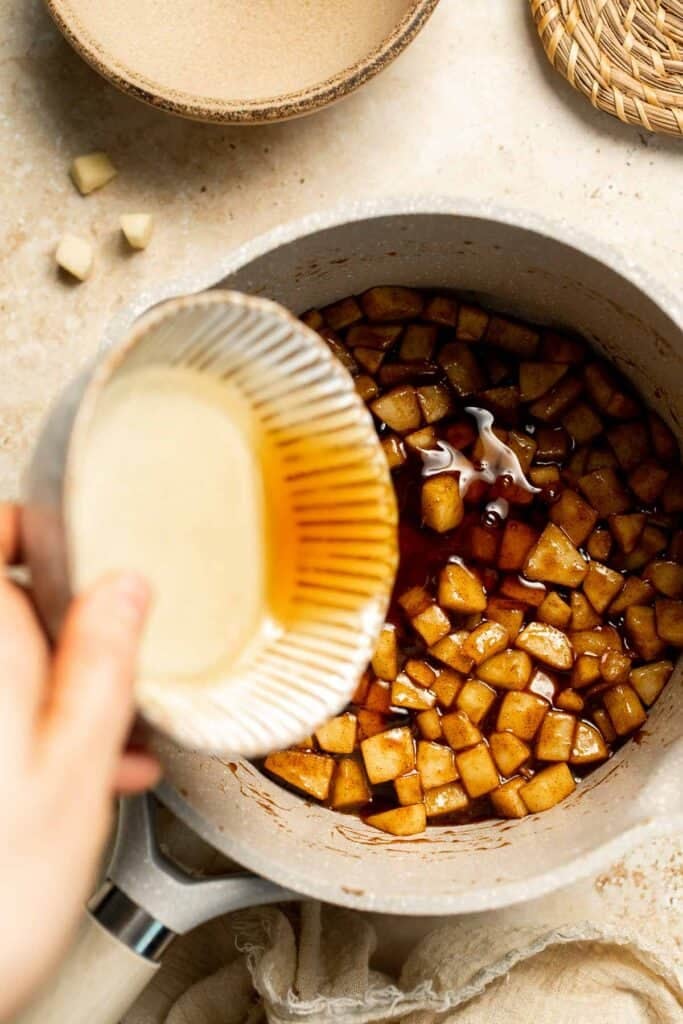
- maple syrup - Enhances the caramel flavor and makes the sauce glossy. Honey works as a substitute if needed.
Equipment
You'll also need measuring cups and spoons, a sharp knife for prepping the apples, a cutting board, and a medium skillet or sauté pan. A wooden spoon or silicone spatula is handy for stirring as the apples caramelize.
Instructions
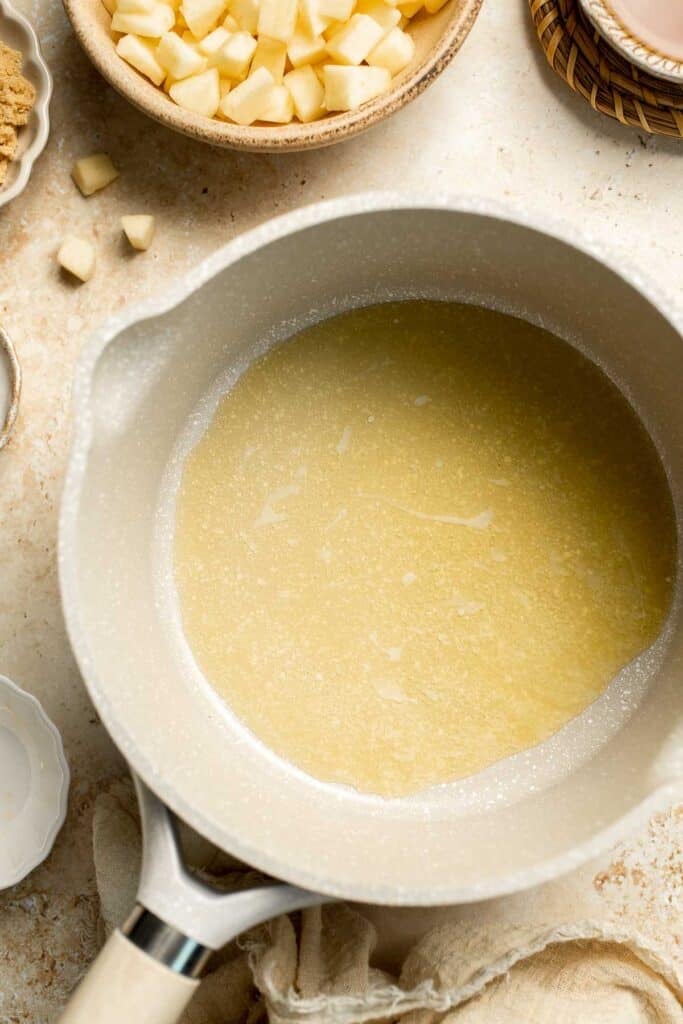
- Melt the butter. In a medium skillet over medium heat, melt the butter until it's fully melted and bubbling slightly.
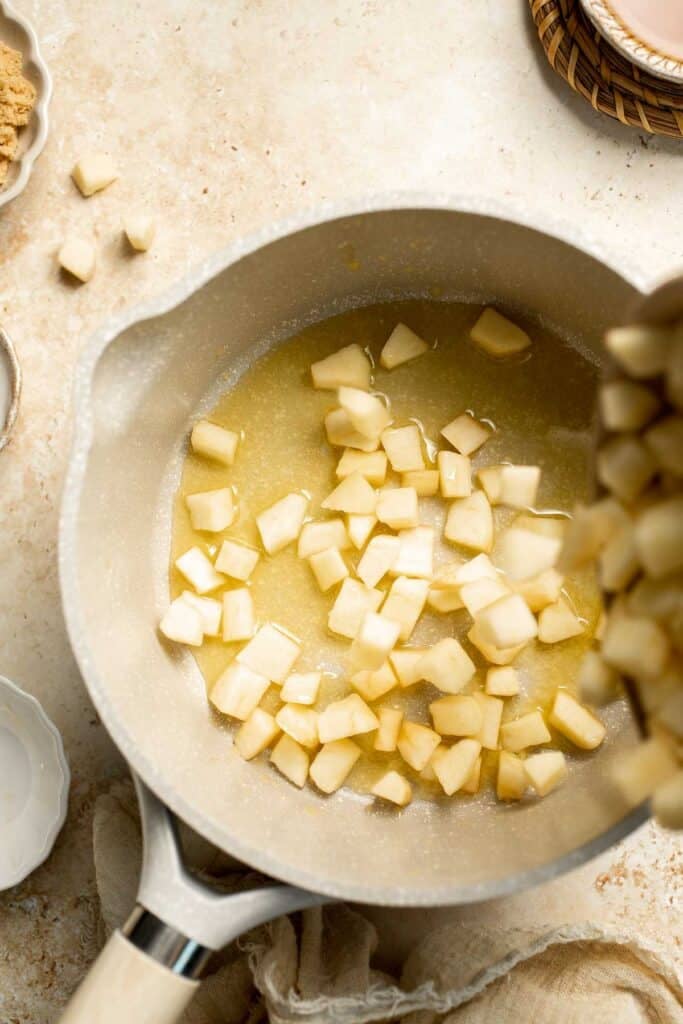
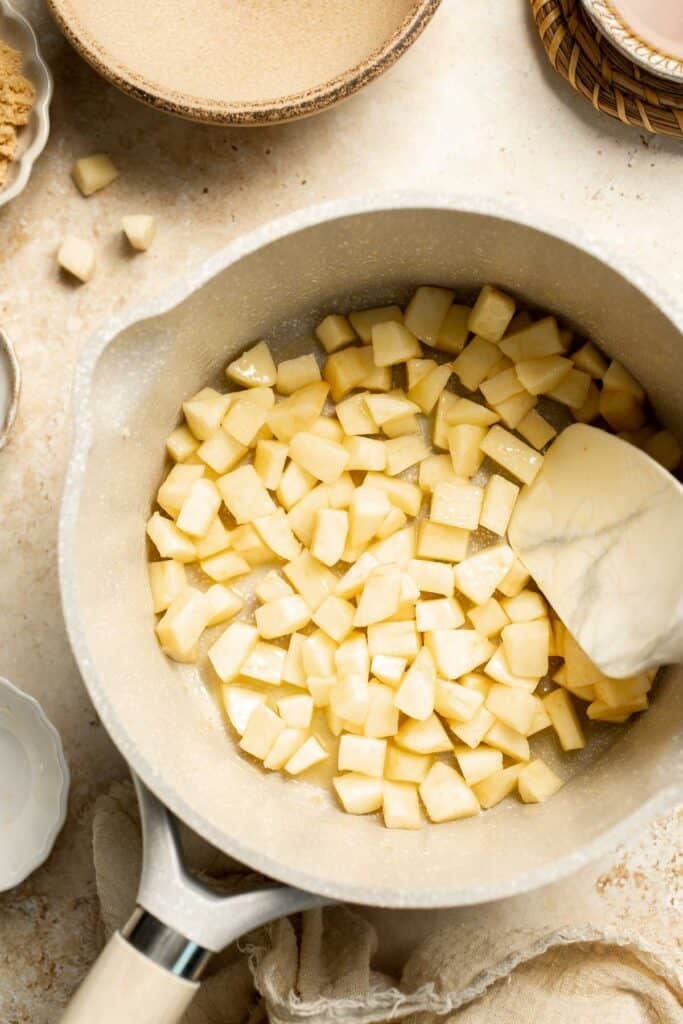
- Add the apples. Stir in the diced apples until they are coated with butter.
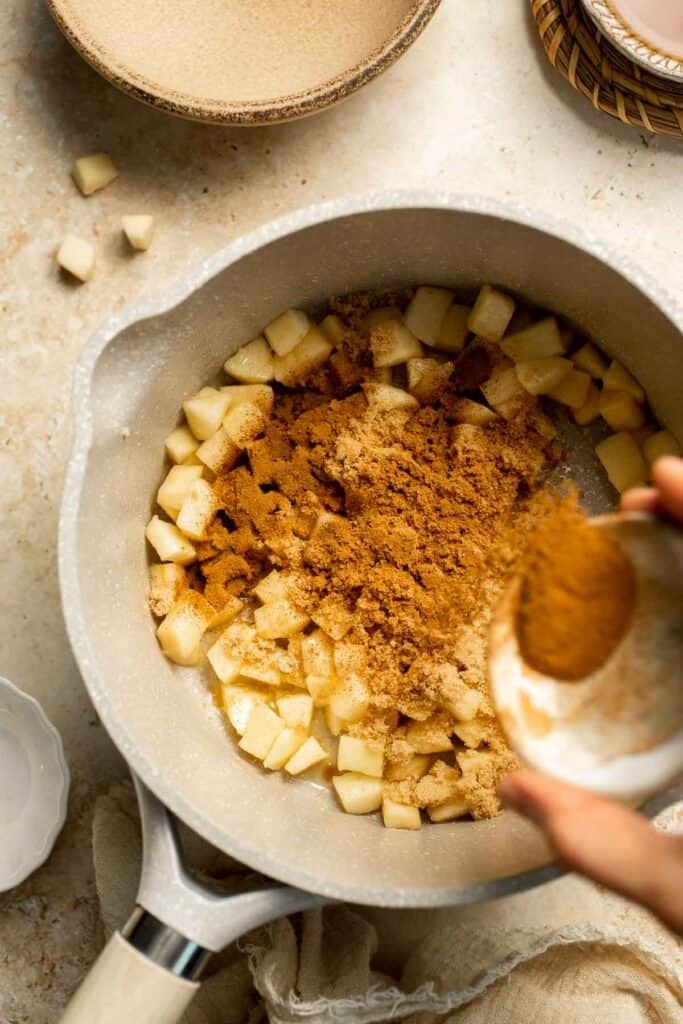
- Sweeten and spice. Sprinkle in the brown sugar and cinnamon, then stir to coat the apples evenly.
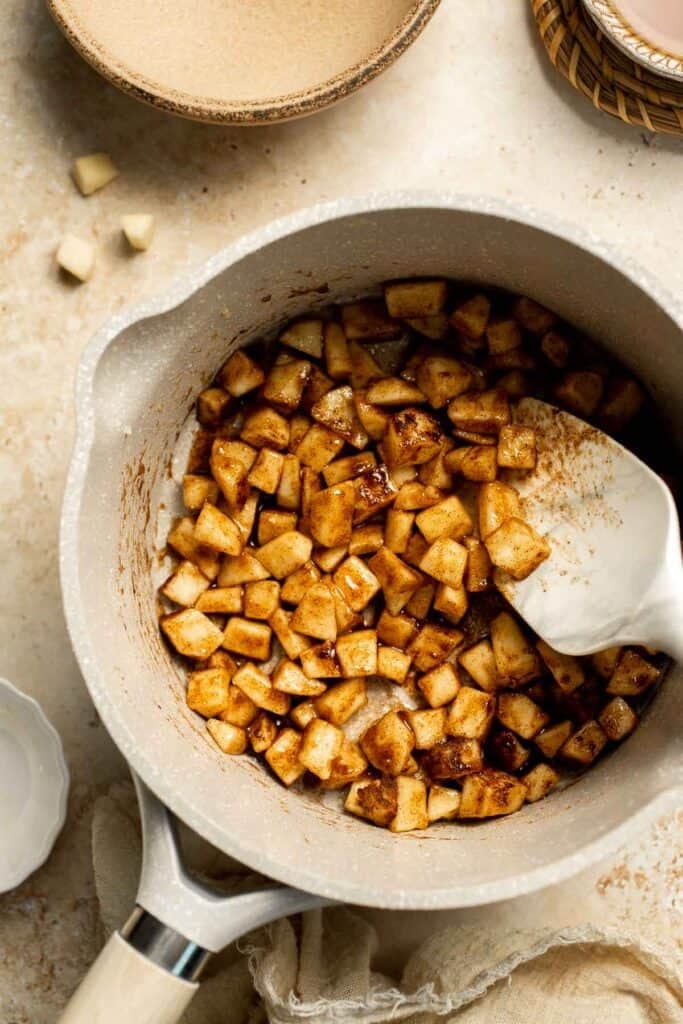
- Cook. Cook until apples are soft and tender, about 3 to 5 minutes, stirring occasionally.
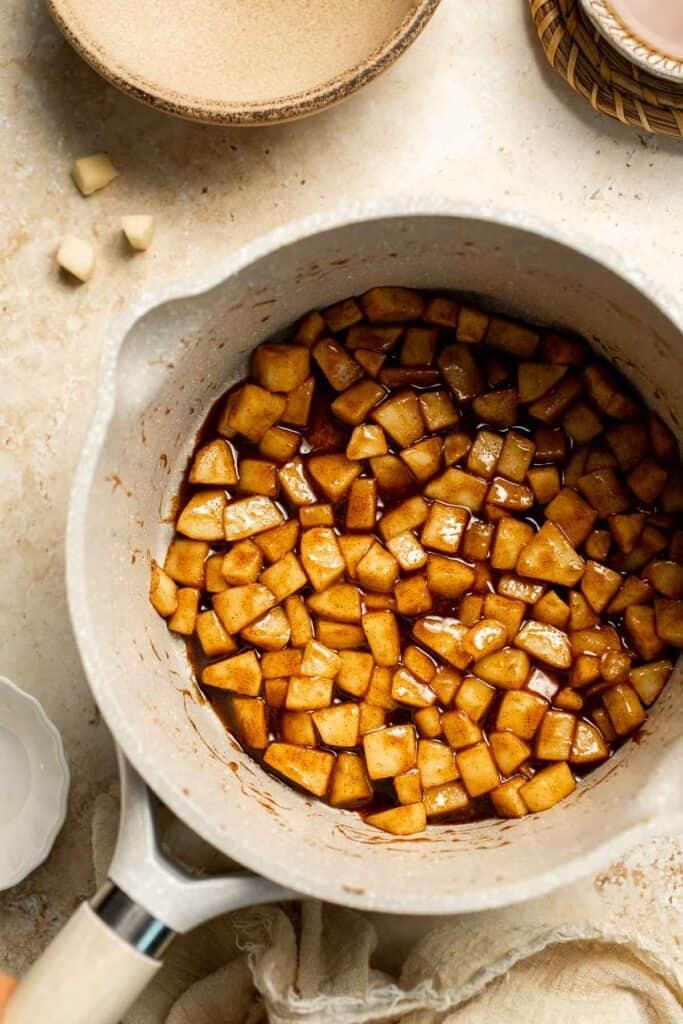
- Add the maple syrup. Pour in the maple syrup and toss to combine. Remove from heat.


Expert Tip: Pick the Right Apples
Not all apples caramelize the same! Firm apple varieties like Honeycrisp, Granny Smith, Pink Lady, or Fuji hold their shape and give you that perfect tender-but-not-mushy bite. Softer apples will break down too quickly and turn into applesauce (still tasty, but not the goal here).
More Tips and Tricks
- Cut evenly. Dice apples into similar sizes so they cook at the same rate and caramelize evenly.
- Medium heat is key. Too hot and the sugar will burn before the apples soften. Gentle heat gives you tender, glossy fruit.
- Stir gently. Toss the apples as they cook, but don't over-stir. Letting them sit a bit helps the caramel form.
- Adjust sweetness. Taste the apples near the end. If you prefer sweeter, add a little more maple syrup or sugar.
Recipe Variations
- Apple pie style. Add a pinch of nutmeg and cloves for a true apple-pie flavor.
- Boozy apples. Deglaze the pan with a splash of bourbon or rum for a grown-up version.
- Nutty topping. Stir in toasted pecans or walnuts at the end for crunch.
- Add vanilla. Add a teaspoon of vanilla extract for an extra layer of flavor.
- Spiced cider apples. Replace the maple syrup with apple cider for a tangy twist.
- Savory apples. Skip the cinnamon, reduce the sugar slightly, and serve alongside savory dishes like pork chops or roast chicken. So good!
Storage
How to Store
Keep cooled caramelized apples in an airtight container in the fridge for up to 5 days.
How to Reheat
Warm in a skillet over medium heat or microwave in 30-second intervals until heated through.
How to Freeze
Freeze in portions in freezer bags or airtight containers for up to 3 months. Thaw in the fridge overnight, then reheat gently before serving.
How to Serve
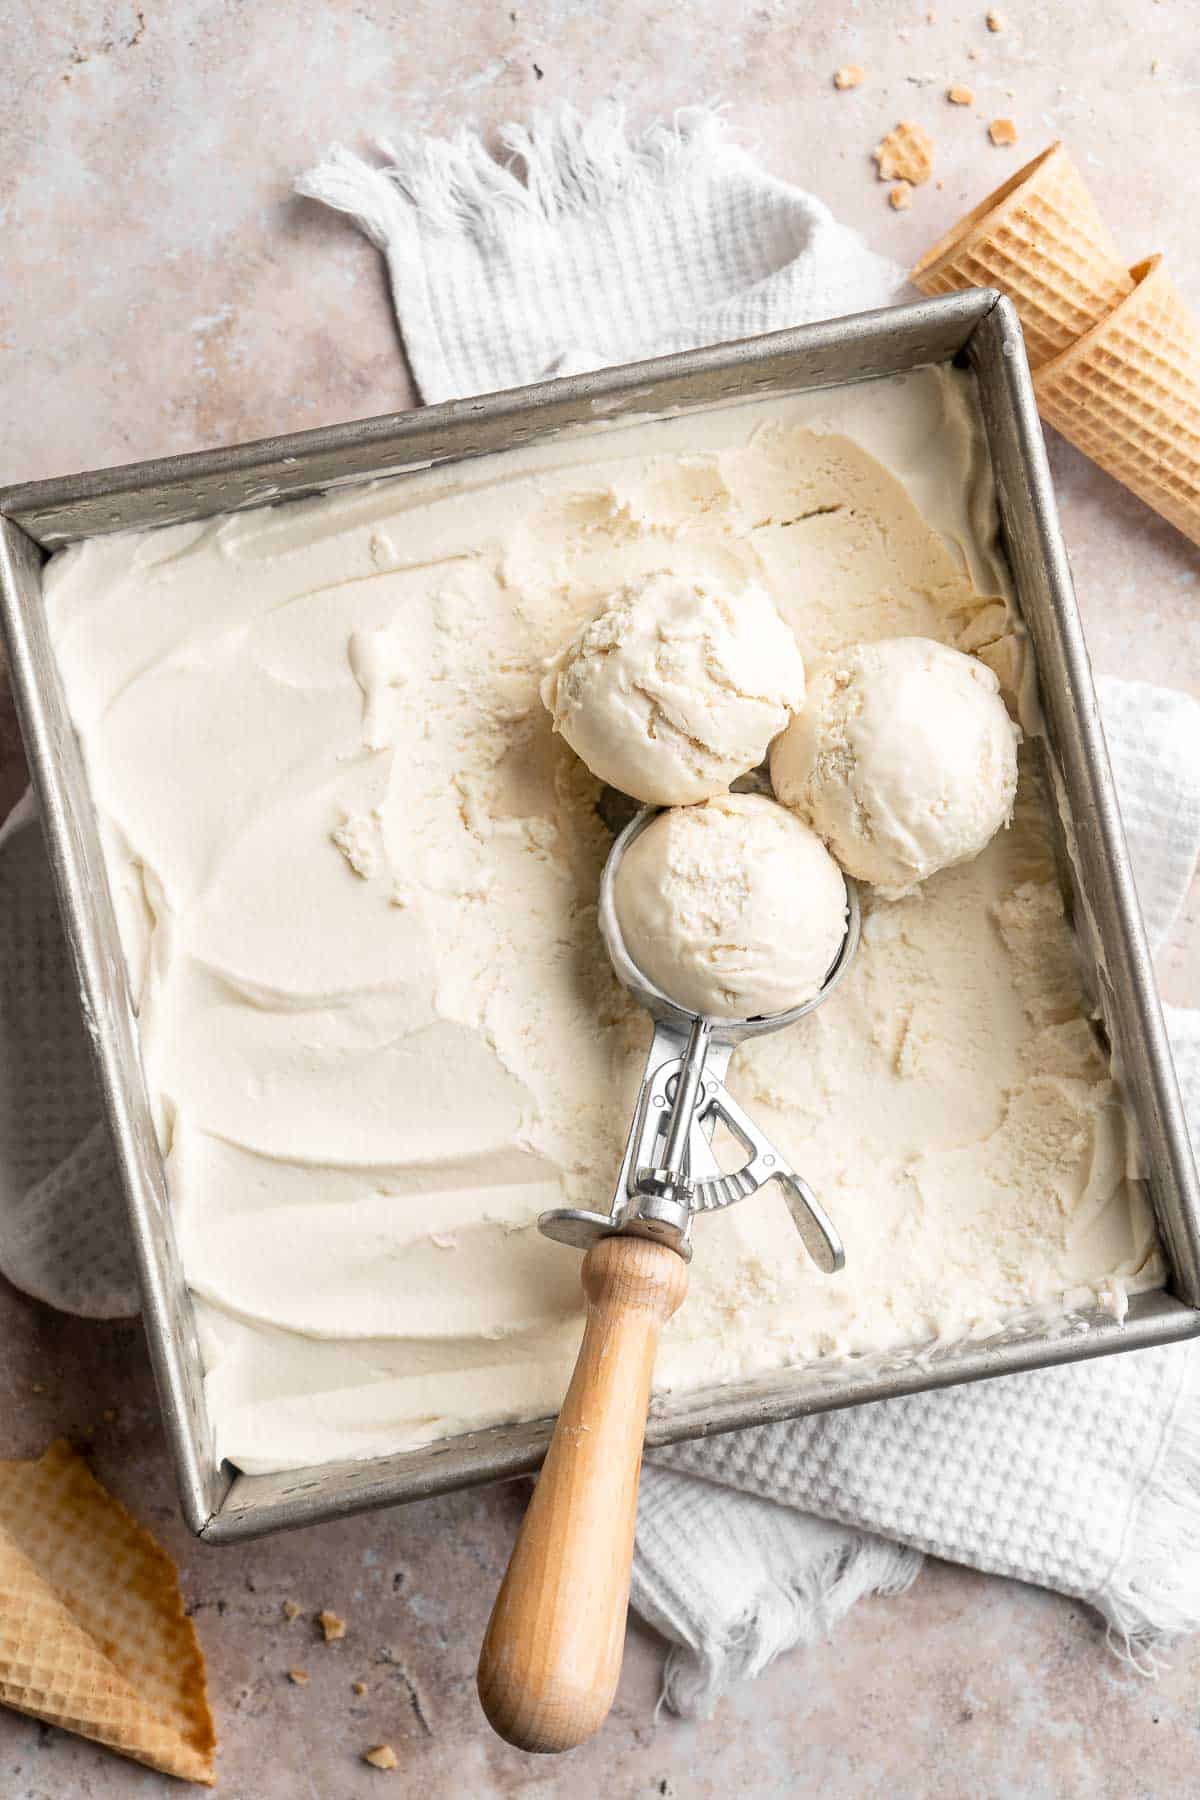
Caramelized apples are the ultimate multitasker! They instantly dress up breakfast, snacks, and desserts (especially a scoop of vanilla ice cream). Sweet, buttery, and perfectly spiced, they go with just about everything.
These are my favorite dishes to pour some caramelized apples on:

Brunch Recipes
These saucy apples are perfect for brunch, pairing well with pancakes, waffles, French toast, yogurt bowls, or ricotta toast. Browse our favorite brunch recipes for more ideas to make your morning meal complete.
FAQ
Caramelizing apples means cooking them with butter and sugar until they're soft, glossy, and coated in a golden caramel sauce. The sugar melts with the butter, then thickens as it cooks, giving you tender apples with a sweet, sticky finish. Cinnamon and maple syrup make them taste even more like fall.
Use a skillet over medium heat, melt butter, and add diced apples. Sprinkle with sugar and cinnamon, then stir in maple syrup. Cook for 8-10 minutes, stirring occasionally, until the apples are tender and the sauce is thickened. Keep the heat moderate so the sugar doesn't burn.
Always start with firm apples so they don't turn mushy. Cut them evenly, cook over medium heat, and don't overcrowd the pan (work in batches if needed). Taste as you go - add extra maple syrup for sweetness or a splash of lemon juice for brightness.
Using too high heat (burnt sugar), soft apples (mushy texture), or skipping the stirring (uneven cooking) are the biggest pitfalls. Also, adding liquid too early can stop the sugar from caramelizing. The trick is steady heat, firm apples, and patience.
While they're made with butter and sugar, caramelized apples are still a lighter treat compared to traditional desserts. Apples bring fiber and vitamins, and you control the sweetness. Plus, they are gluten-free. Think of them as a balance between indulgence and a fruit-based topping - wholesome with a little decadence.
Apples usually take 8-10 minutes over medium heat to become tender and caramelized. Softer fruits like peaches or berries will take less time, while firmer fruits like pears may need a little longer. The key is cooking until the fruit is glossy and tender.
Yes, like any cooked fruit, they'll eventually spoil. Stored in the fridge, they last about 5 days. If they smell sour, look watery, or develop an off texture, it's time to toss them. Freezing extends their life up to 3 months.
More Apple Recipes
Looking for other recipes like this? Try these:


Tried this recipe?
I'd love to hear what you think! Leave a comment and rating below to share your feedback. Your reviews help others discover this recipe and help me keep creating more free recipes for you. Snap a photo and tag me on social media @aheadofthyme too.

Classic Easy Meat Lasagna Recipe (with Video)

This Classic Easy Meat Lasagna is the ultimate comfort food, with layers of tender pasta, rich meat sauce, and cheesy goodness that makes every bite irresistible. This recipe is simple, approachable, and perfect for family dinners, gatherings, or when you just crave a hearty Italian classic at home.

Lasagna has a timeless charm: it's cozy, filling, and a dish that never fails to bring people together around the table. While there are plenty of variations, this one keeps things straightforward with ground beef, ricotta, mozzarella, parmesan, and a tomato-based sauce. It's a no-fuss, crowd-pleasing dinner you can rely on again and again.
If you liked this classic lasagna recipe, you should try our Lasagna Roll Ups or Lasagna Soup next. These pair beautifully with Easy Rosemary Garlic Focaccia Bread for a complete Italian-style feast.

Why You'll Love This Recipe
- Classic comfort food made easy. This easy lasagna recipe delivers that nostalgic, hearty flavor we all crave without any complicated steps. You'll love the layers of savory beef sauce, creamy ricotta, and melty mozzarella that come together effortlessly.
- Perfect for make-ahead meals. You can assemble this lasagna ahead of time and refrigerate or freeze until ready to bake. It's a lifesaver for busy weeknights or meal prepping for the week ahead.
- Crowd-pleasing family favorite. Lasagna is one of those dishes everyone loves - kids, adults, and guests alike. It's filling, satisfying, and guaranteed to disappear quickly at the dinner table.
- Simple pantry staples. With ingredients like ground beef, tomato sauce, ricotta, and pasta, you can easily whip this up with what you already have on hand. The best lasagna recipe!
Ingredients and Substitutions
To make this delicious and easy Meat Lasagna, you will need the following ingredients (see recipe card below for quantities):
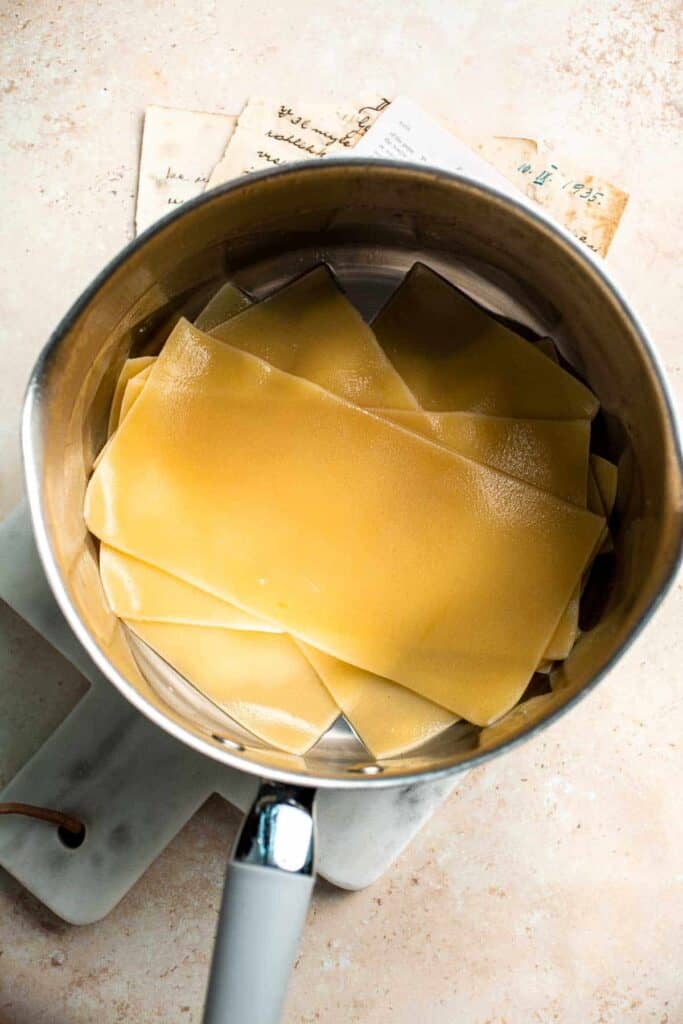
- lasagna noodles - Use 9 dry lasagna noodles for this recipe. You can use oven-ready noodles to skip boiling, but traditional ones give the best texture.
- olive oil - Prevents sticking when boiling noodles, and is used for sautéing the meat and vegetables. Substitute with avocado oil if preferred. Butter also works for sautéing.
- salt - Used both for boiling pasta and seasoning the sauce. Adjust to taste.
- ground beef - Lean ground beef gives the lasagna its hearty, meaty base. Swap with ground turkey, chicken, or Italian sausage for variation.
- onion - Finely chopped onion adds depth and sweetness to the sauce. You can substitute with shallots for a milder flavor.
- garlic - Fresh minced garlic brings bold flavor to the sauce. Garlic powder works in a pinch, though fresh is best.
- tomato sauce - Provides the rich base of the meat sauce. Use store-bought or homemade marinara sauce.
- tomato paste - Deepens the tomato flavor and adds richness. Don't skip this, it's the secret to a flavorful sauce.
- fresh parsley - Brightens both the sauce and cheese mixture. Substitute with basil or oregano if desired.
- ricotta cheese - Creamy and mild, it makes the cheesy filling luscious. Cottage cheese can be swapped in, though it's less rich.
- mozzarella cheese - Half goes into the ricotta filling and half gets sprinkled on top for that gooey, cheesy finish.
- parmesan cheese - Adds salty, nutty flavor in both the filling and topping. Pecorino Romano makes a good alternative.
- egg - Helps bind the ricotta filling together for a smooth texture.
Equipment
You'll also need measuring cups and spoons, a large pot for boiling noodles, a skillet for the meat sauce, a mixing bowl, 9x13-inch casserole dish, spoon or spatula, and foil for baking.
Instructions
Prepare the layers
- Cook the lasagna noodles: Bring a large pot of water to a boil over medium-high heat. Add the lasagna noodles, olive oil, and salt, and cook until al dente (fully cooked but still firm), about 10 minutes or according to package directions. Drain and rinse under cold water to stop the cooking process, then set aside in the pot.
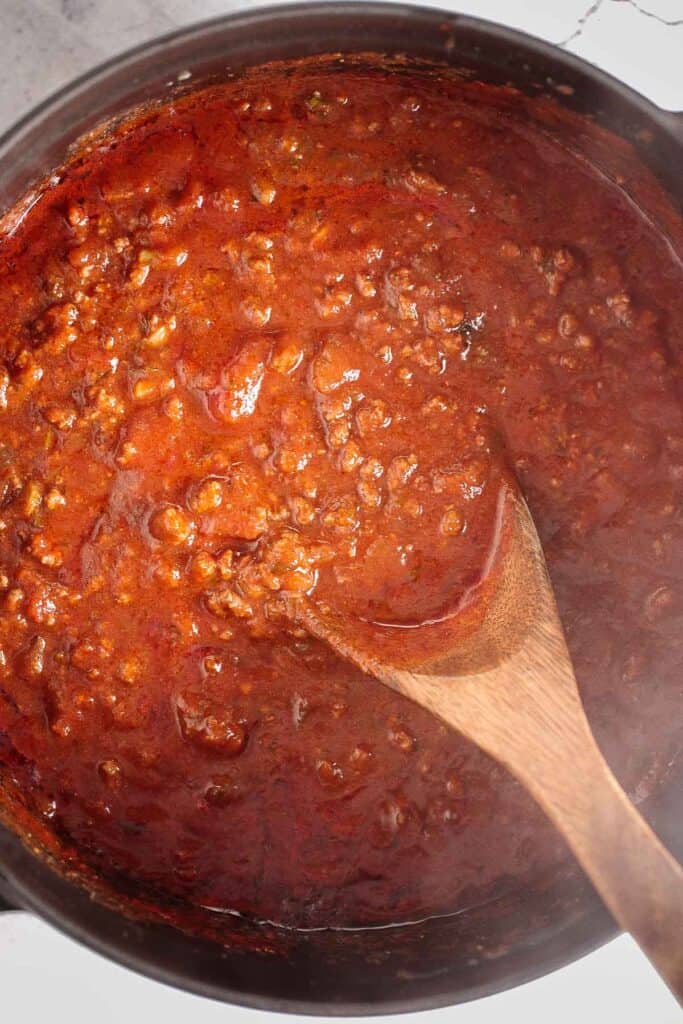
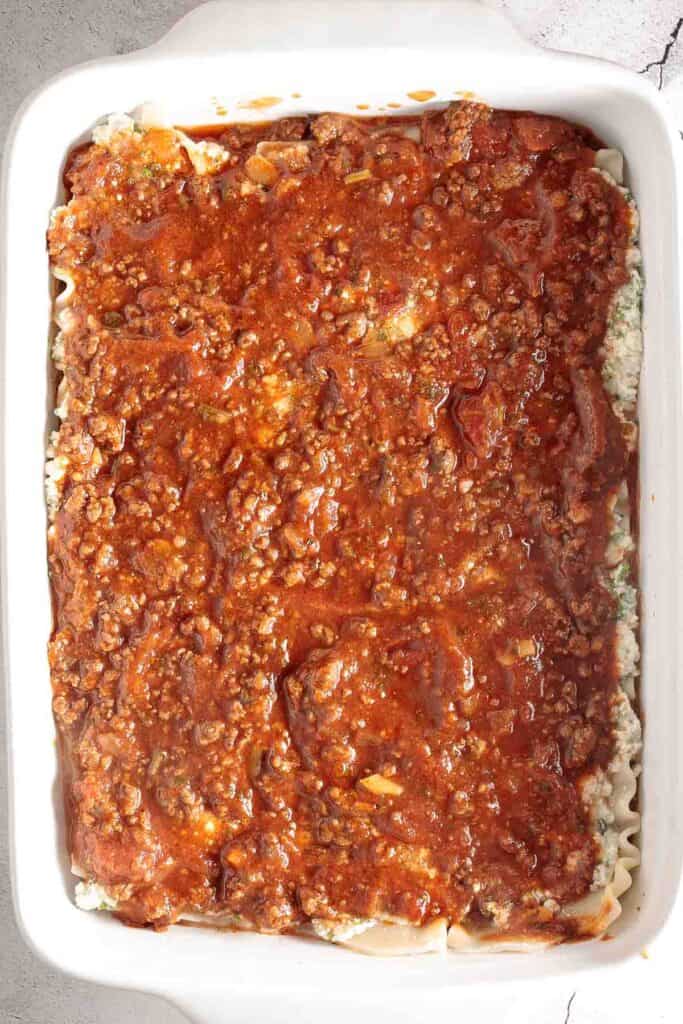
- Make the meat sauce: Heat oil in a large pot or Dutch oven over medium-high heat for 2 minutes until hot. Add ground beef and cook for 5-7 minutes until browned. Stir in onion and garlic and cook for another 3-4 minutes until tender. Add tomato sauce, tomato paste, salt, and parsley. Stir to combine, bring to a simmer, then reduce heat to low and simmer uncovered for 10 minutes. Remove from heat and set aside.
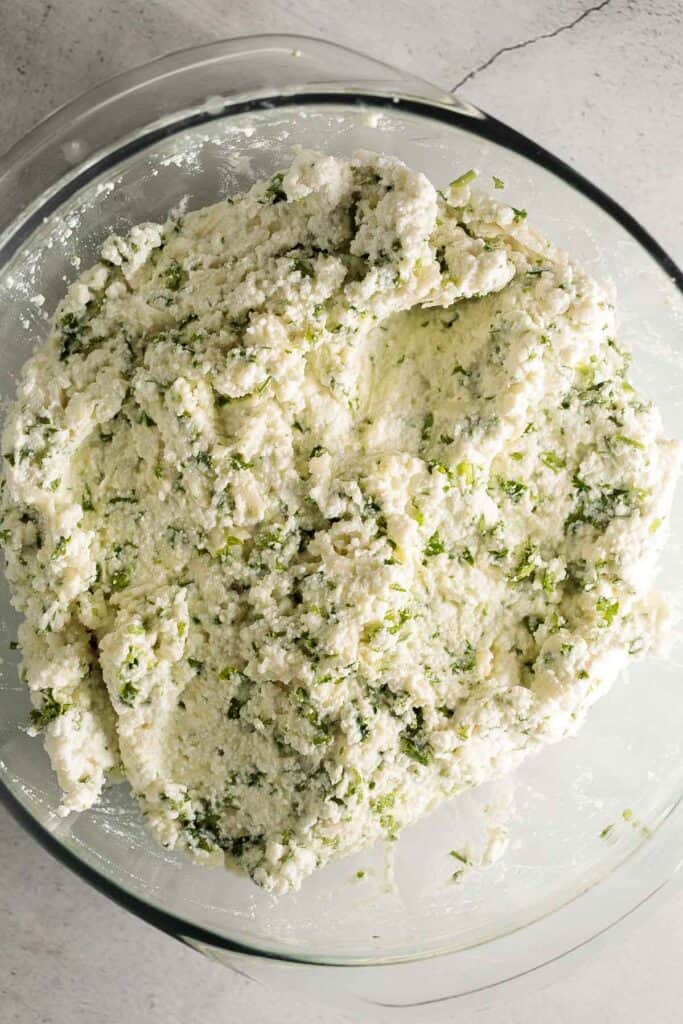
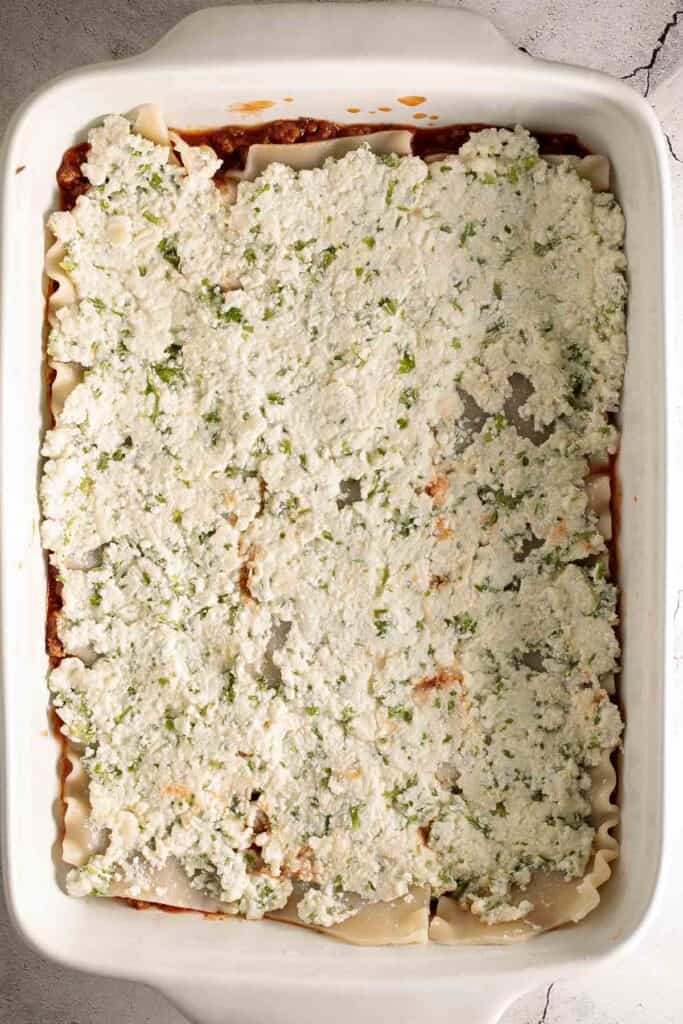
- Prepare the cheese mixture: In a medium mixing bowl, combine ricotta cheese, 1 cup mozzarella, ¼ cup Parmesan, beaten egg, and parsley. Stir until fully combined.
Layer the lasagna
Assembling a lasagna is simple. It's all about layering noodles, meat sauce, and the cheese mixture, then finishing with a generous sprinkle of shredded cheese on top. Here's the order to layer your lasagna:
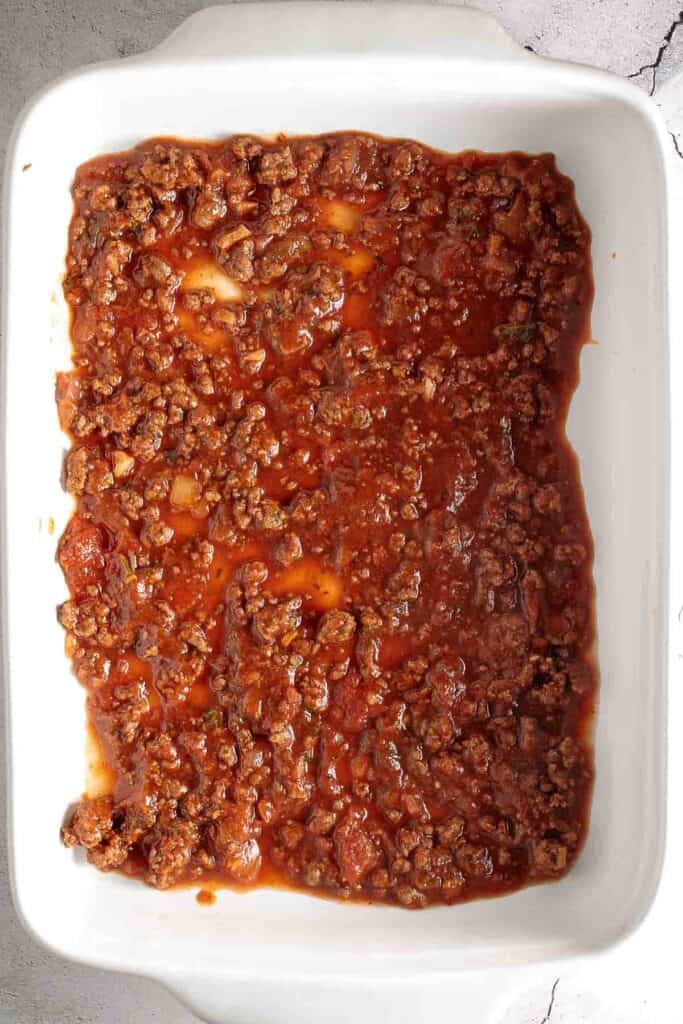
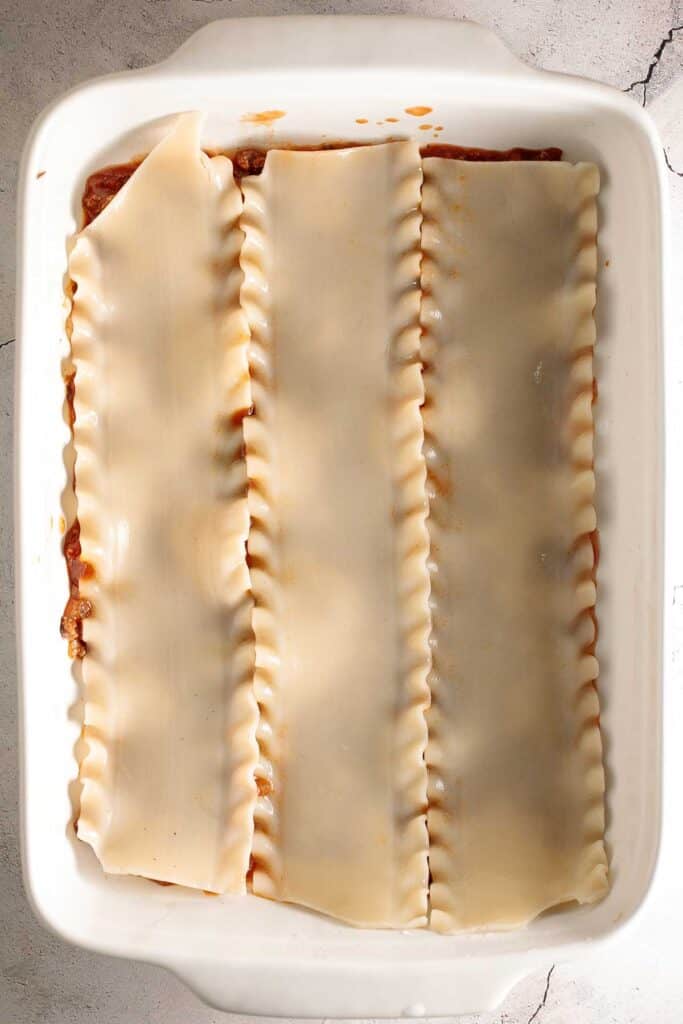
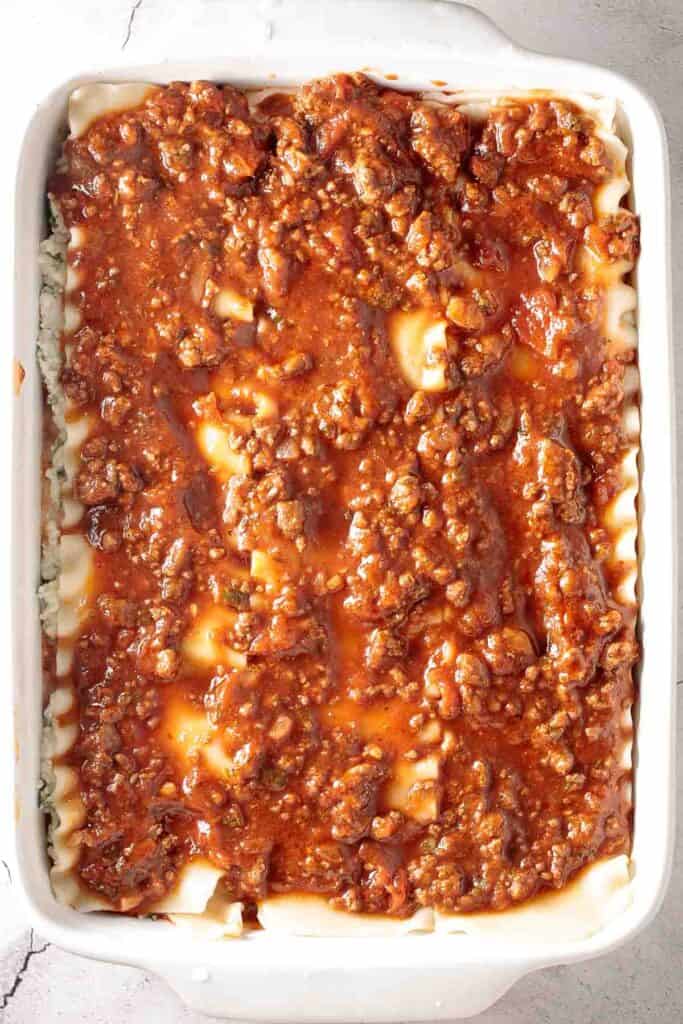
- Sauce: Spread 1 cup of the meat sauce evenly in the bottom of a 9x13-inch baking dish.
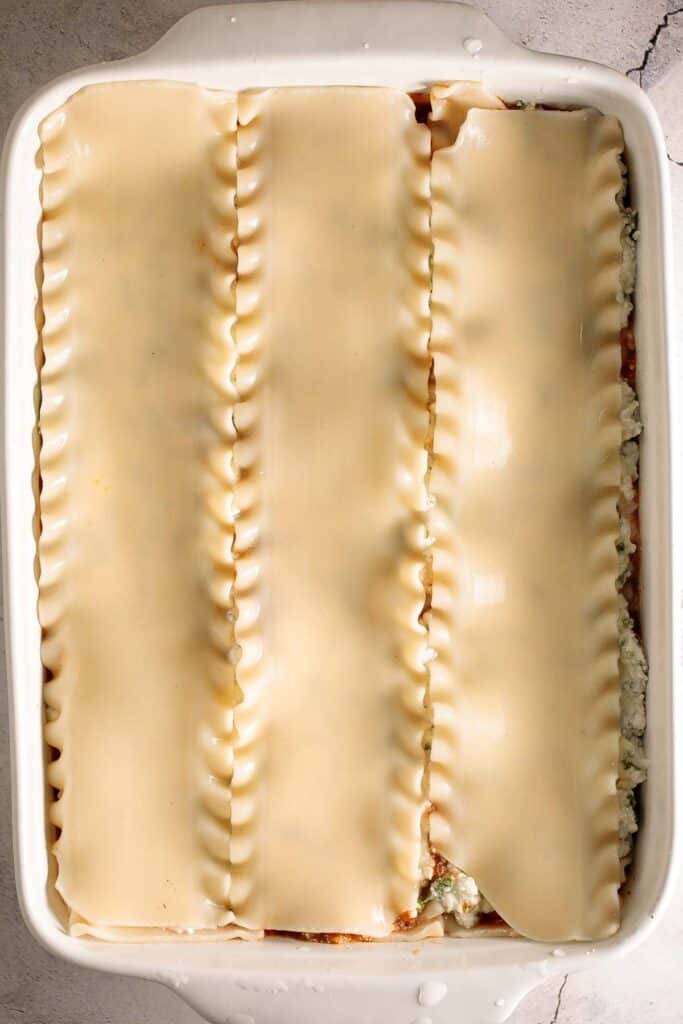
- Noodles: Layer 3 noodles on top.
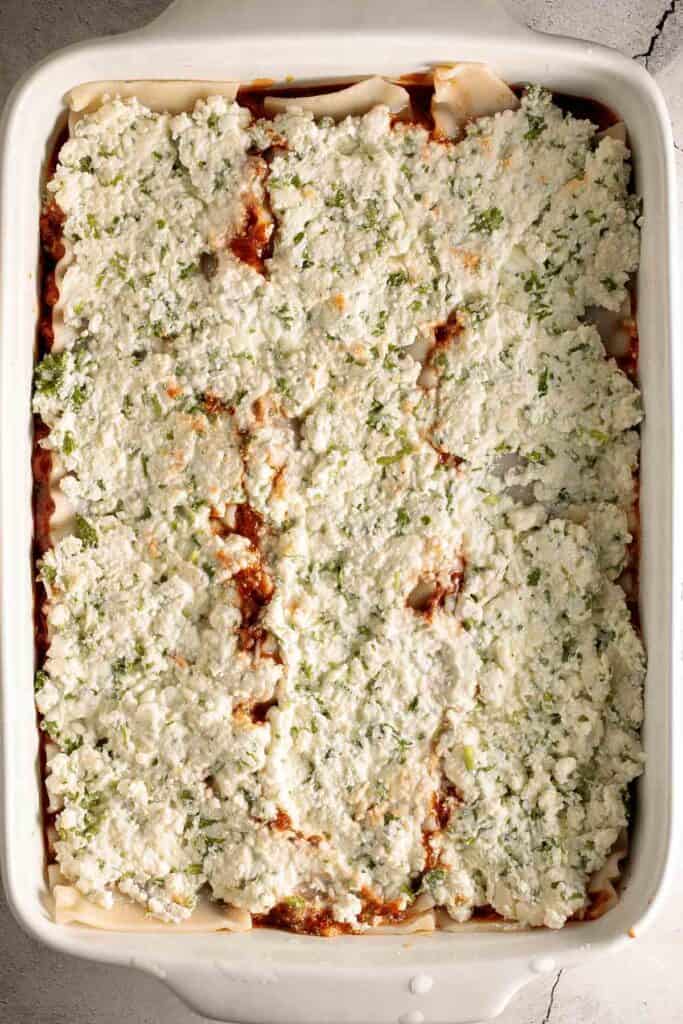
- Cheese: Spread half of the cheese mixture evenly over the noodles.
- Sauce: Spread half of the remaining meat sauce on top.
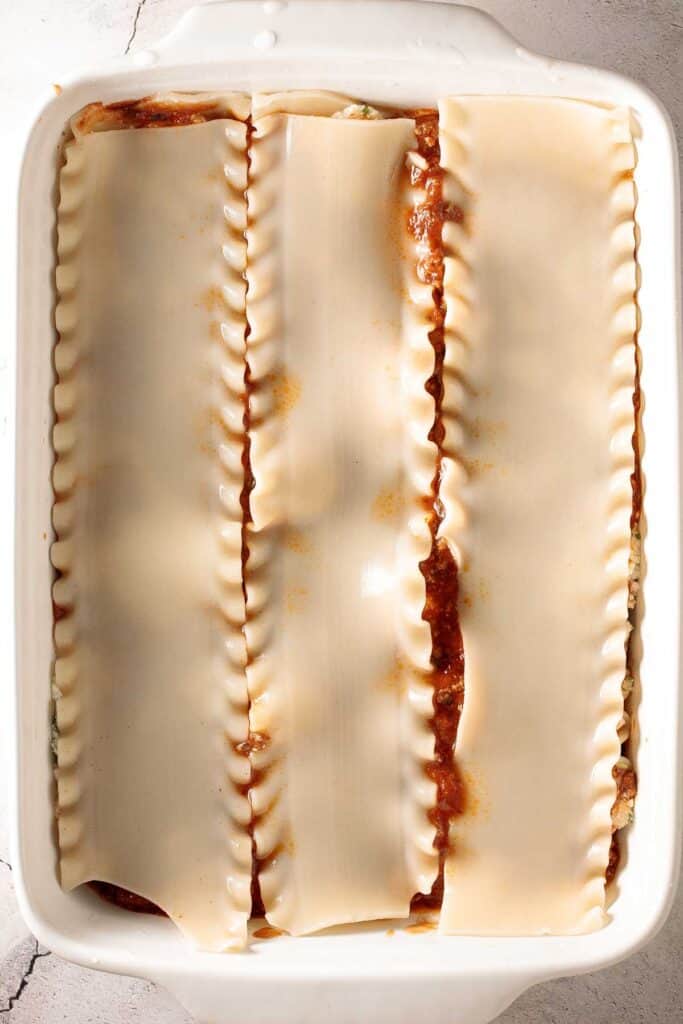
- Noodles: Layer another 3 lasagna noodles.
- Cheese: Spread the rest of the cheese mixture.
- Noodles: Add the final 3 noodles.
- Sauce: Top with remaining meat sauce.
- Shredded cheese: Sprinkle the remaining mozzarella and Parmesan evenly on top.

Bake the lasagna
- Lightly grease a piece of aluminum foil and cover the dish, greased side down (this prevents cheese from sticking).
- Bake covered in a 375F preheated oven for 45 minutes. Remove foil and bake uncovered for 20 minutes, until the cheese is golden and bubbly.
- For an extra crispy crust (optional), broil on high for 3-4 minutes, keeping a close eye to avoid burning.
- Let the lasagna cool for 10 minutes before slicing and serving.
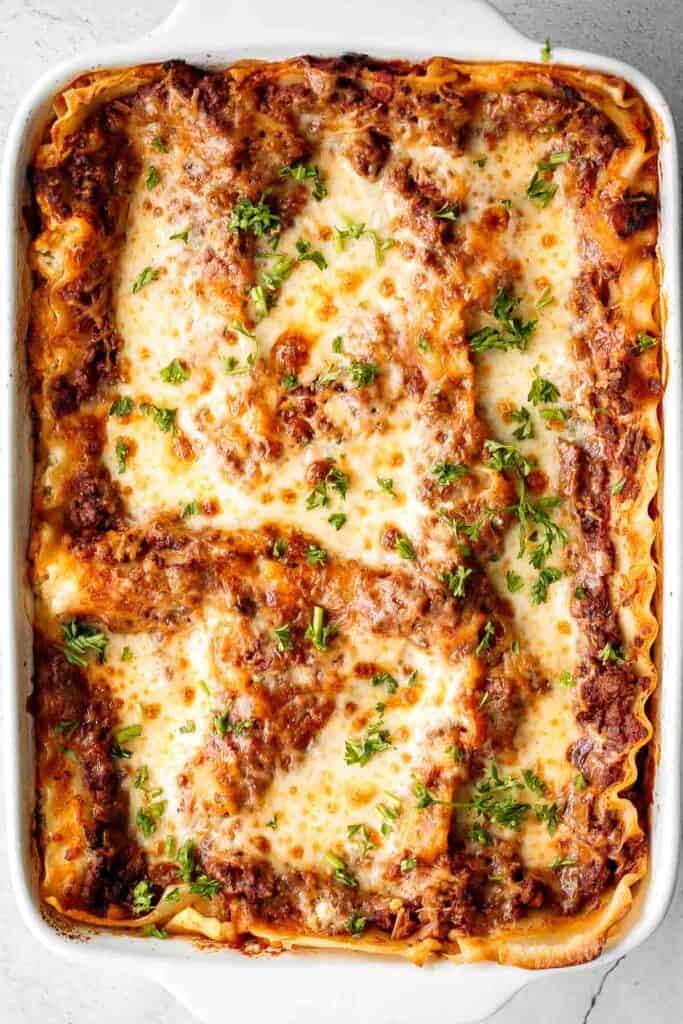
Recipe Video
Expert Tip: Layer Strategically
For the most balanced bite, spread thin, even layers of meat sauce and ricotta filling across the noodles. Don't overload any single layer as the magic comes from consistency. Ending with sauce and cheese on top ensures a golden, bubbling crust that makes the lasagna irresistible.
More Tips and Tricks
- Cook noodles al dente. Slightly undercook your lasagna noodles before layering. They'll continue cooking in the oven, which prevents them from becoming mushy.
- Drain excess grease. After browning ground beef, always drain extra fat. This keeps your lasagna rich but not greasy.
- Let it rest. Once baked, allow lasagna to rest for at least 15 minutes before slicing. This helps layers set and makes clean slices.
- Use foil wisely. Cover with foil while baking to prevent drying out, then uncover for the last 10 minutes to brown the cheese topping.
- Make it ahead. Assemble the lasagna a day in advance and refrigerate. Bake straight from the fridge, adding a little extra time if needed.
Recipe Variations
- Swap with sausage. Swap the ground beef for Italian sausage for a bolder, spiced version.
- Add veggies. Add sautéed mushrooms, carrot, zucchini, or spinach to the layers for extra nutrition and flavor.
- Make it spicy. Add red chili flakes or hot Italian sausage to bring some heat to the dish.
- Load up the cheese. Double down on cheese by mixing in provolone or fontina along with mozzarella and parmesan.
- Change the sauce. Skip the tomato sauce and use a creamy béchamel or Alfredo sauce with chicken or turkey. See our Creamy White Chicken and Spinach Lasagna.
- Make it gluten-free. Use gluten-free noodles or zucchini slices or eggplant for a lighter, low-carb version. See our Zucchini Lasagna or Eggplant Lasagna.
See this skillet version of this recipe on our website!
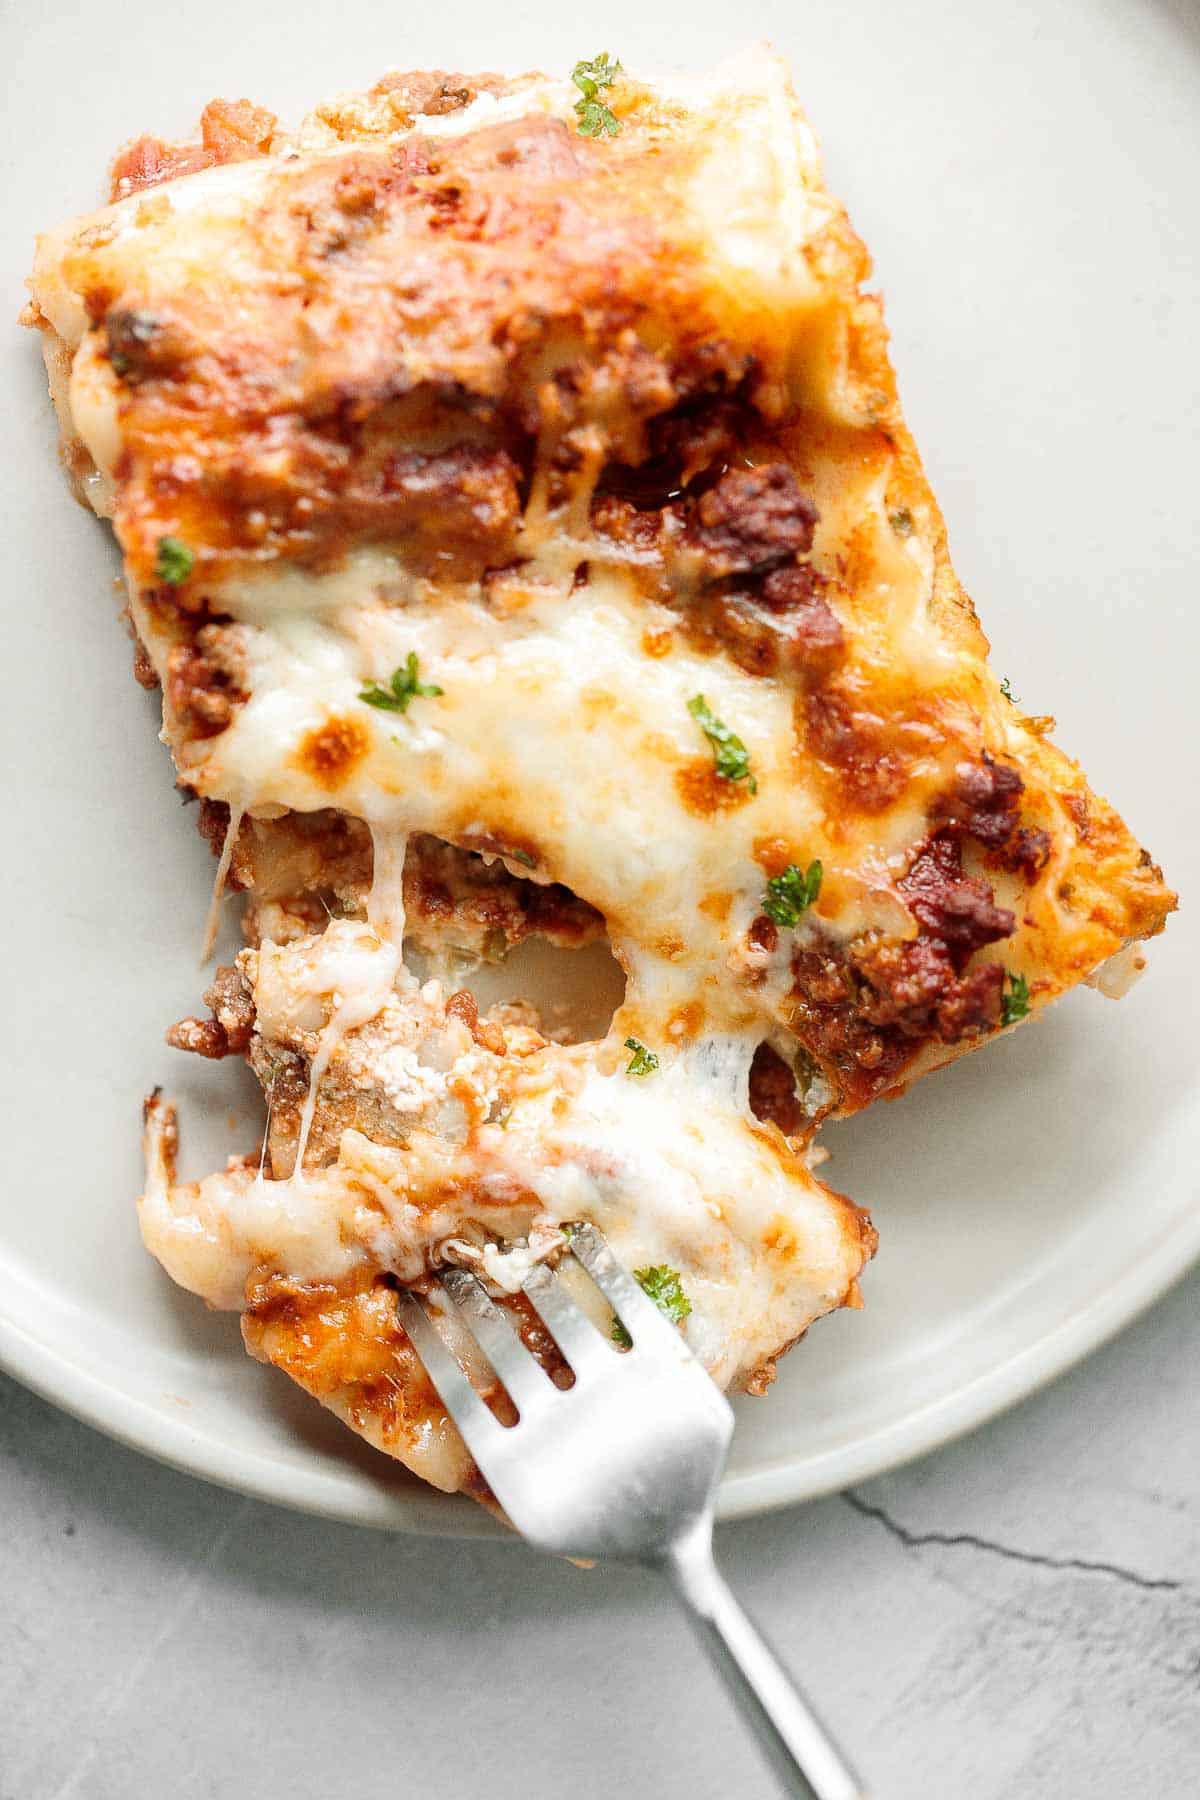
Storage
How to Store
Store leftover lasagna tightly covered with foil or transfer to an airtight container, then store in the refrigerator for up to 4 days.
How to Reheat
Reheat individual portions in the microwave until warmed through, or cover the whole dish with aluminum foil and warm in a 350°F oven for 20-25 minutes, or until heated through. You can also reheat in the air fryer uncovered at 350°F for 5-10 minutes.
How to Freeze
Wrap cooled lasagna tightly in plastic wrap and foil, or portion into airtight containers. Freeze for up to 3 months. Thaw overnight in the fridge before reheating.
How to Store Before Cooking
Cover the assembled, uncooked lasagna tightly with foil and store in the refrigerator for up to 2 days, or in the freezer for up to 3 months. If you plan on freezing, it's best to assemble the lasagna in a disposable aluminum baking pan to make both storage and cleanup easier. When ready to enjoy, you can bake directly from frozen. Keep the frozen lasagna covered with foil and bake at 375°F for about 60-75 minutes, then uncover and bake for an additional 10-15 minutes until the cheese is golden and bubbly.
How to Serve
Lasagna is a meal in itself, but it's even better with a few sides to round out the plate. Think crusty bread for soaking up sauce, a crisp salad to balance richness, and a refreshing drink.
These are my favorite dishes to serve with this meat lasagna:


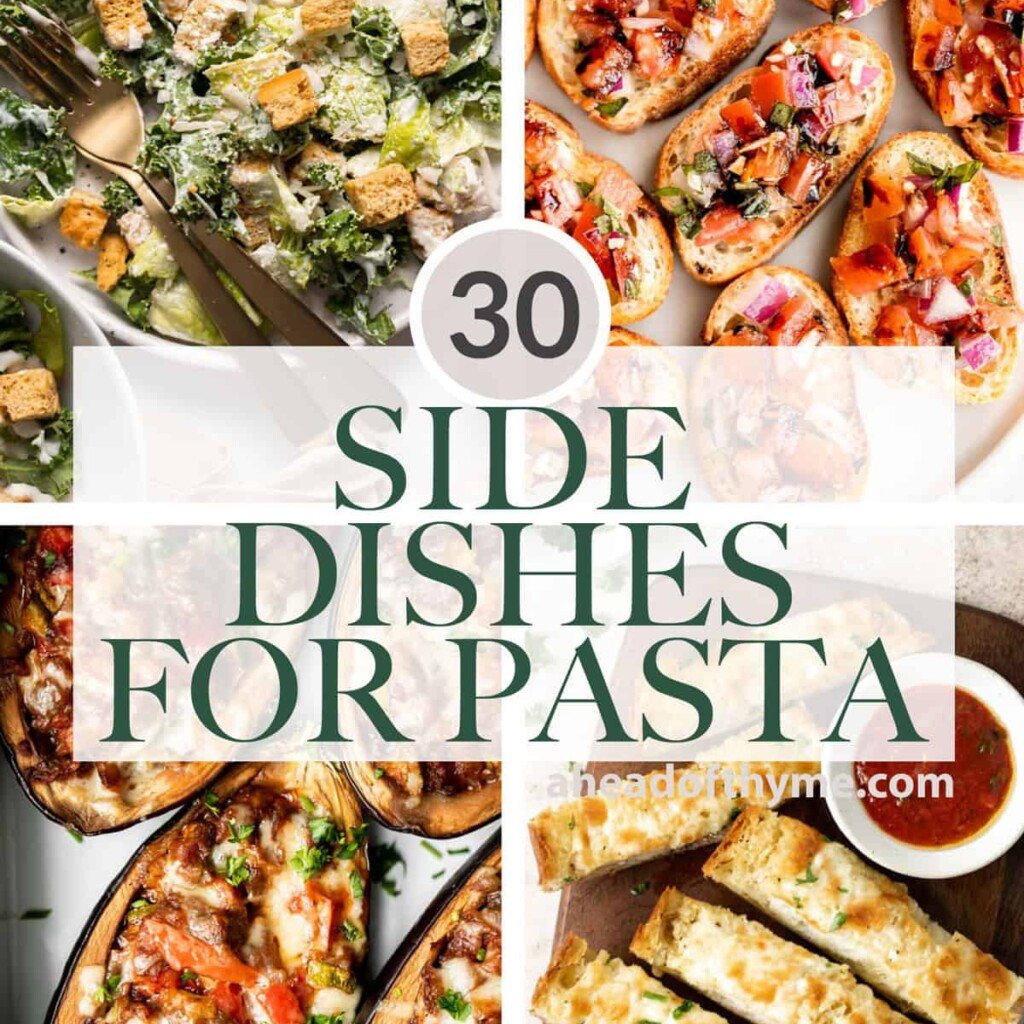
Side Dishes for Pasta
For more recipe ideas, check out our collection of pasta side dishes, featuring everything from fresh salads and roasted vegetables to crusty breads and flavorful appetizers that pair perfectly with any pasta dinner.
FAQ
The secret is all about balance: well-seasoned sauce, creamy ricotta filling, and even layering. Cooking noodles al dente, draining excess grease, and resting before serving also make a huge difference. Some cooks swear by adding fresh herbs or a splash of red wine to the sauce for an extra depth of flavor.
Yes, always cook the ground beef fully before layering. Raw meat won't cook properly inside lasagna and could make the dish greasy. Browning the beef also develops flavor and ensures the sauce is rich and delicious. Drain excess fat for the best results.
A traditional lasagna includes lasagna noodles, a tomato-based meat sauce, and a ricotta-mozzarella-parmesan cheese mixture. Seasonings like garlic, onion, and parsley add depth. These core layers create the hearty, layered pasta casserole everyone loves.
Use quality ingredients and don't rush the sauce. Letting it simmer helps the flavors develop. Season each layer lightly, use a mix of cheeses, and let the baked lasagna rest before cutting. Adding herbs like parsley or basil boosts freshness and flavor.
If lasagna tastes bland, season the sauce more generously with salt, pepper, herbs, and garlic. A splash of balsamic vinegar, red wine, or extra parmesan can instantly brighten flavors. Serving it with a side of garlicky bread or seasoned salad can also elevate the meal.
More Lasagna Recipes
Looking for other recipes like this? Try these:
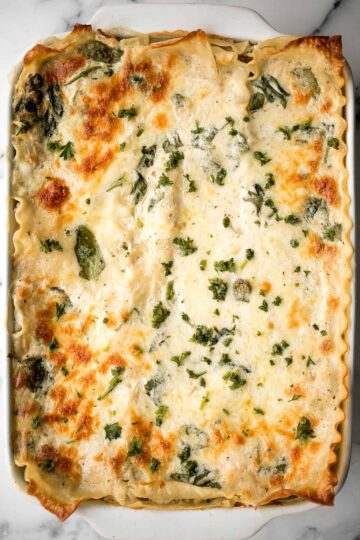
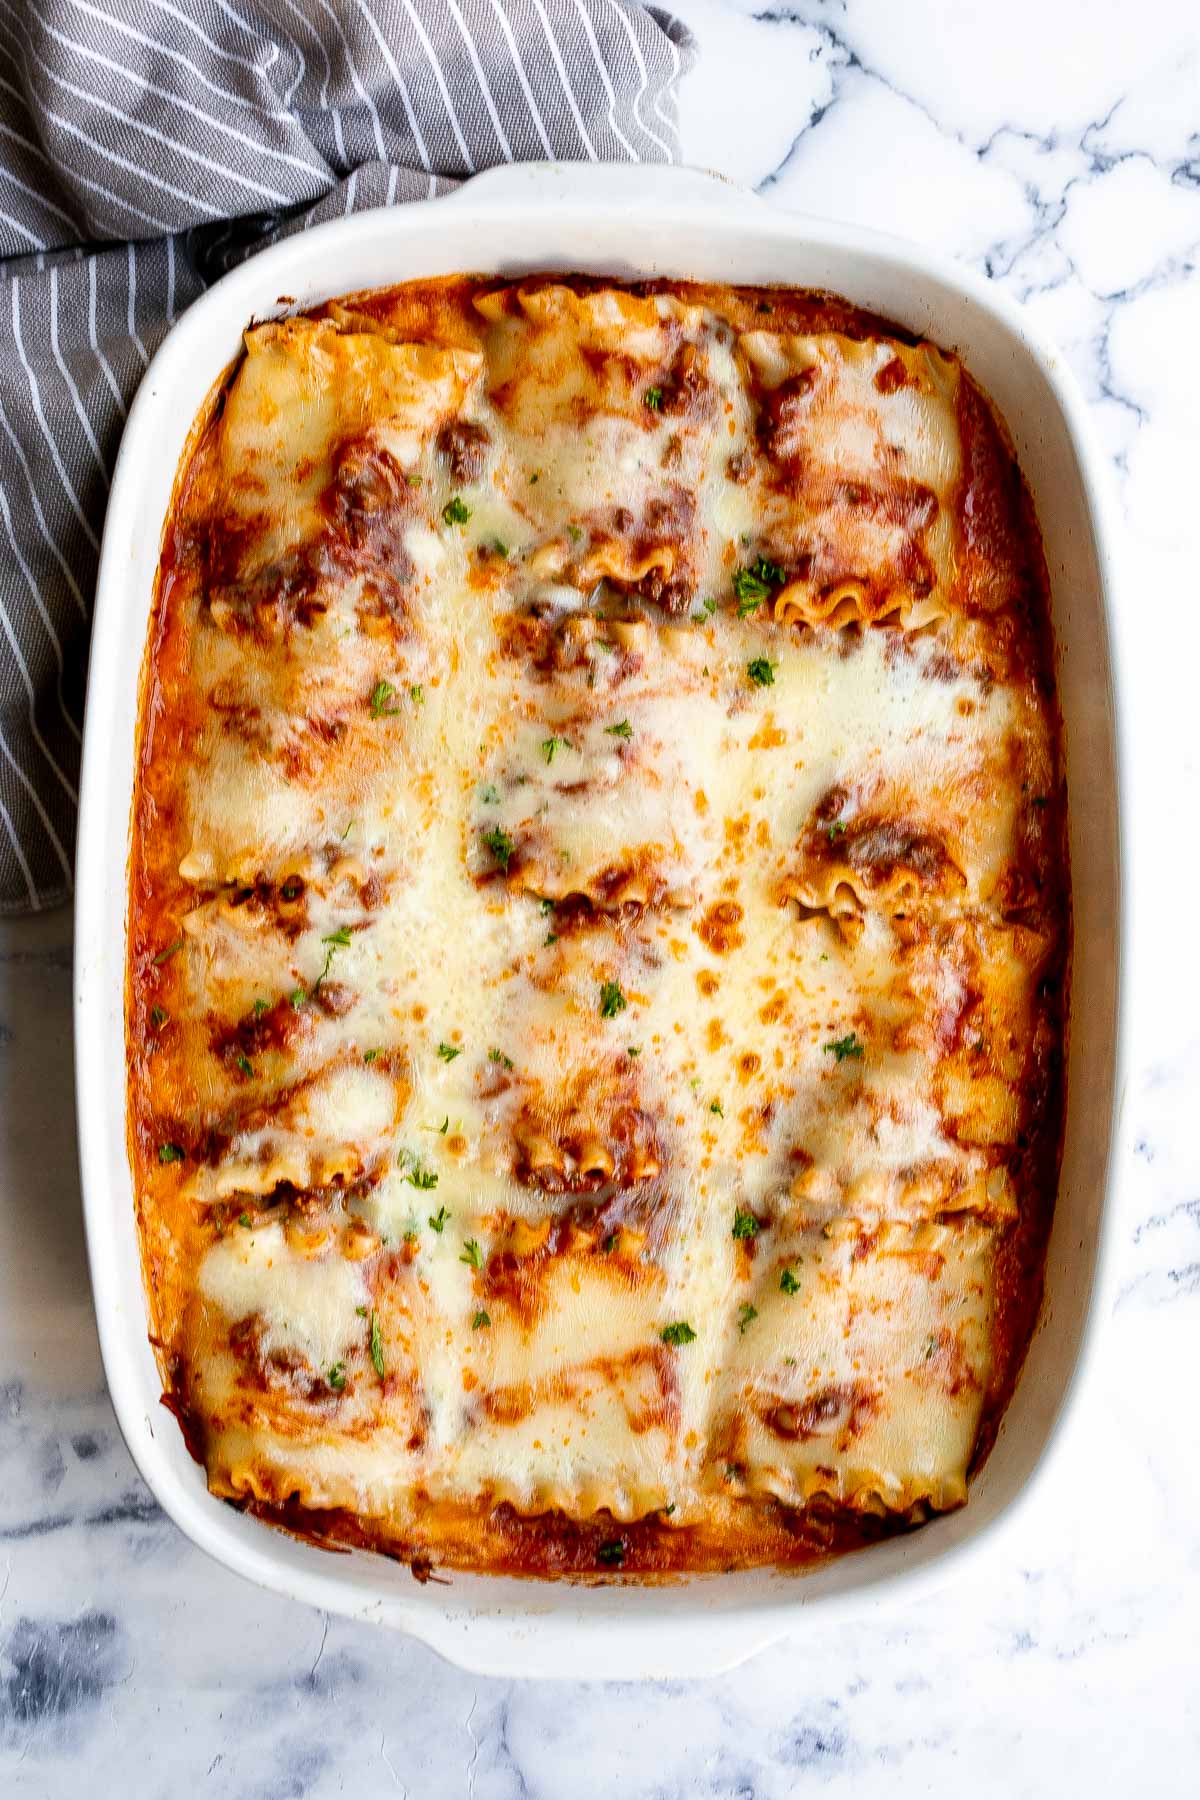
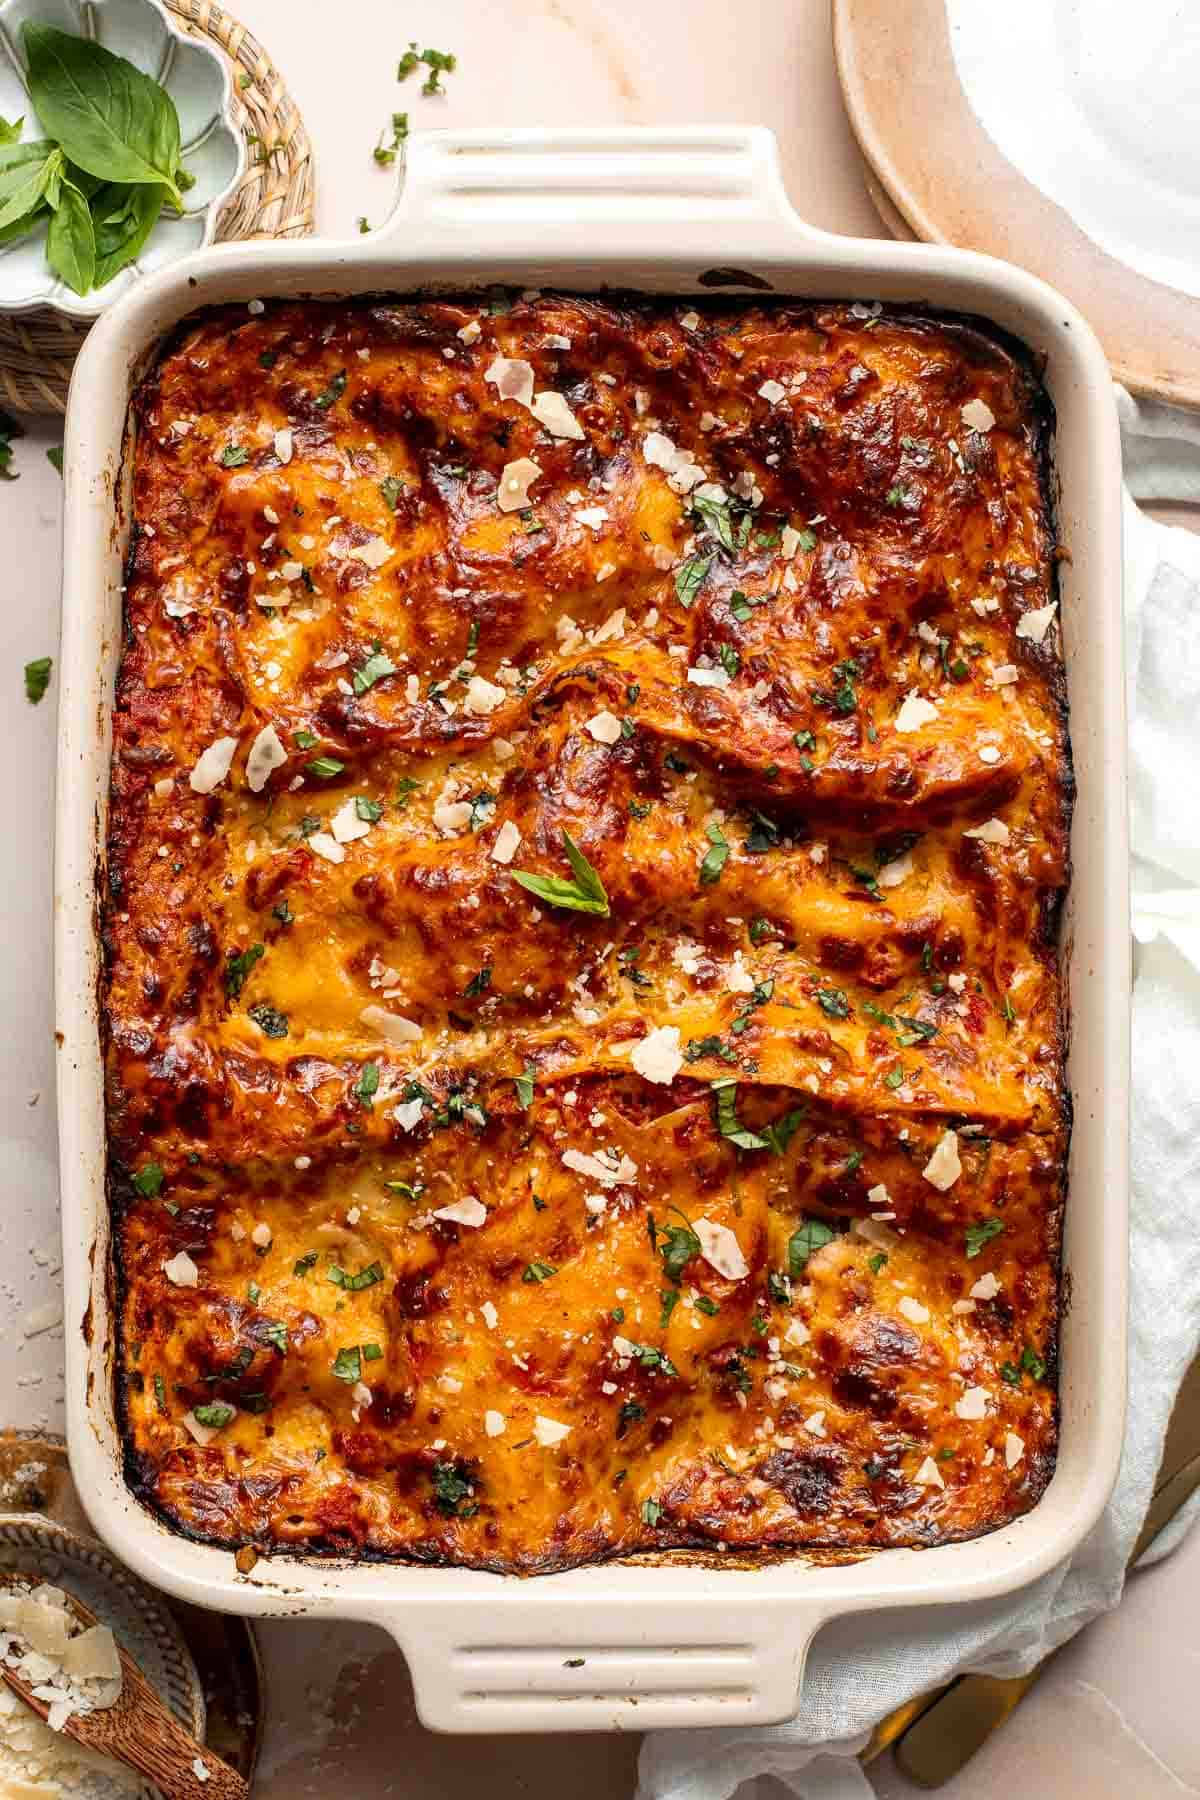
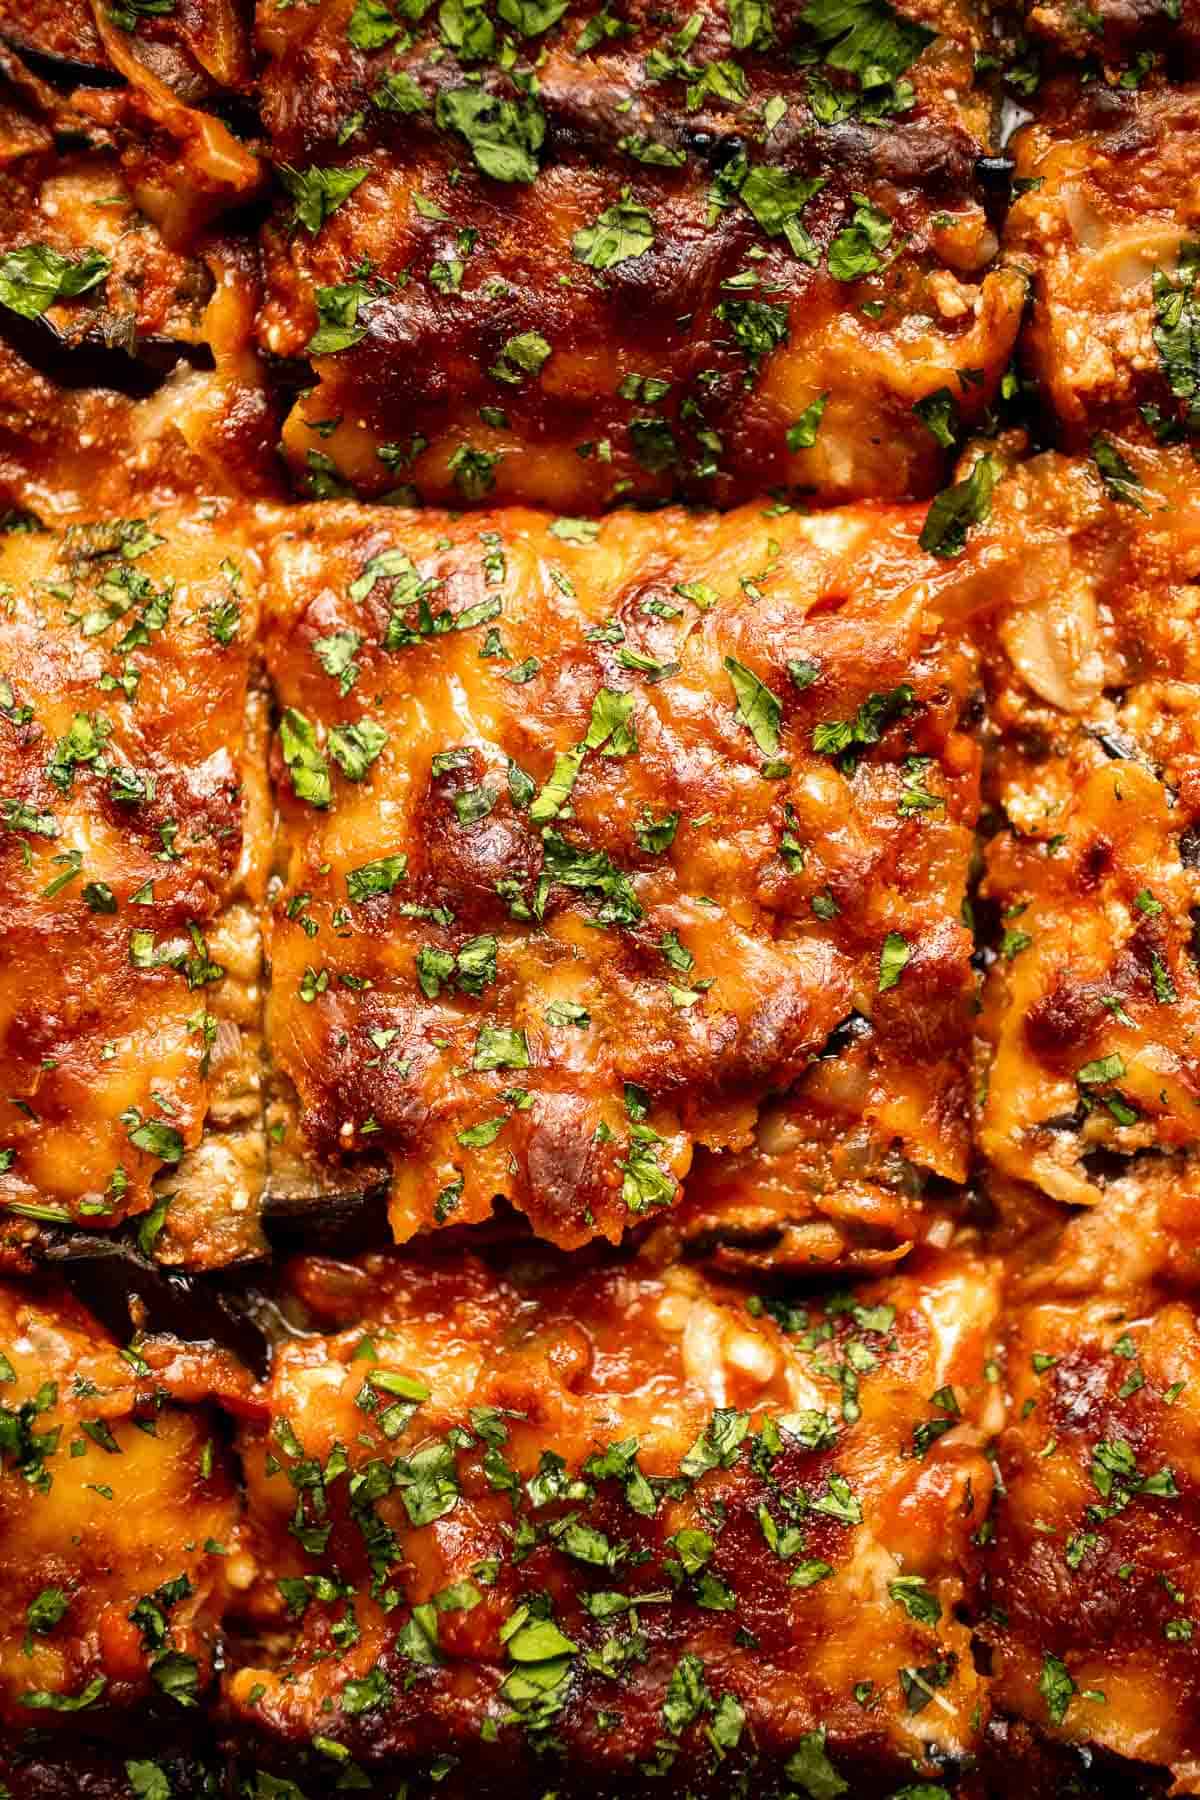
Tried this recipe?
I'd love to hear what you think! Leave a comment and rating below to share your feedback. Your reviews help others discover this recipe and help me keep creating more free recipes for you. Snap a photo and tag me on social media @aheadofthyme too.
This post was originally published in 2020 and has been updated with new content.

Vegan Red Lentil Soup with Carrots

This Vegan Red Lentil Soup with Carrots is cozy, hearty, and packed with flavor, making it the perfect bowl of comfort for chilly days. Made with simple pantry staples like red lentils, carrots, onions, and spices, this one-pot soup is creamy without any dairy, nourishing, and ready in under an hour. It's like a warm hug in a bowl!
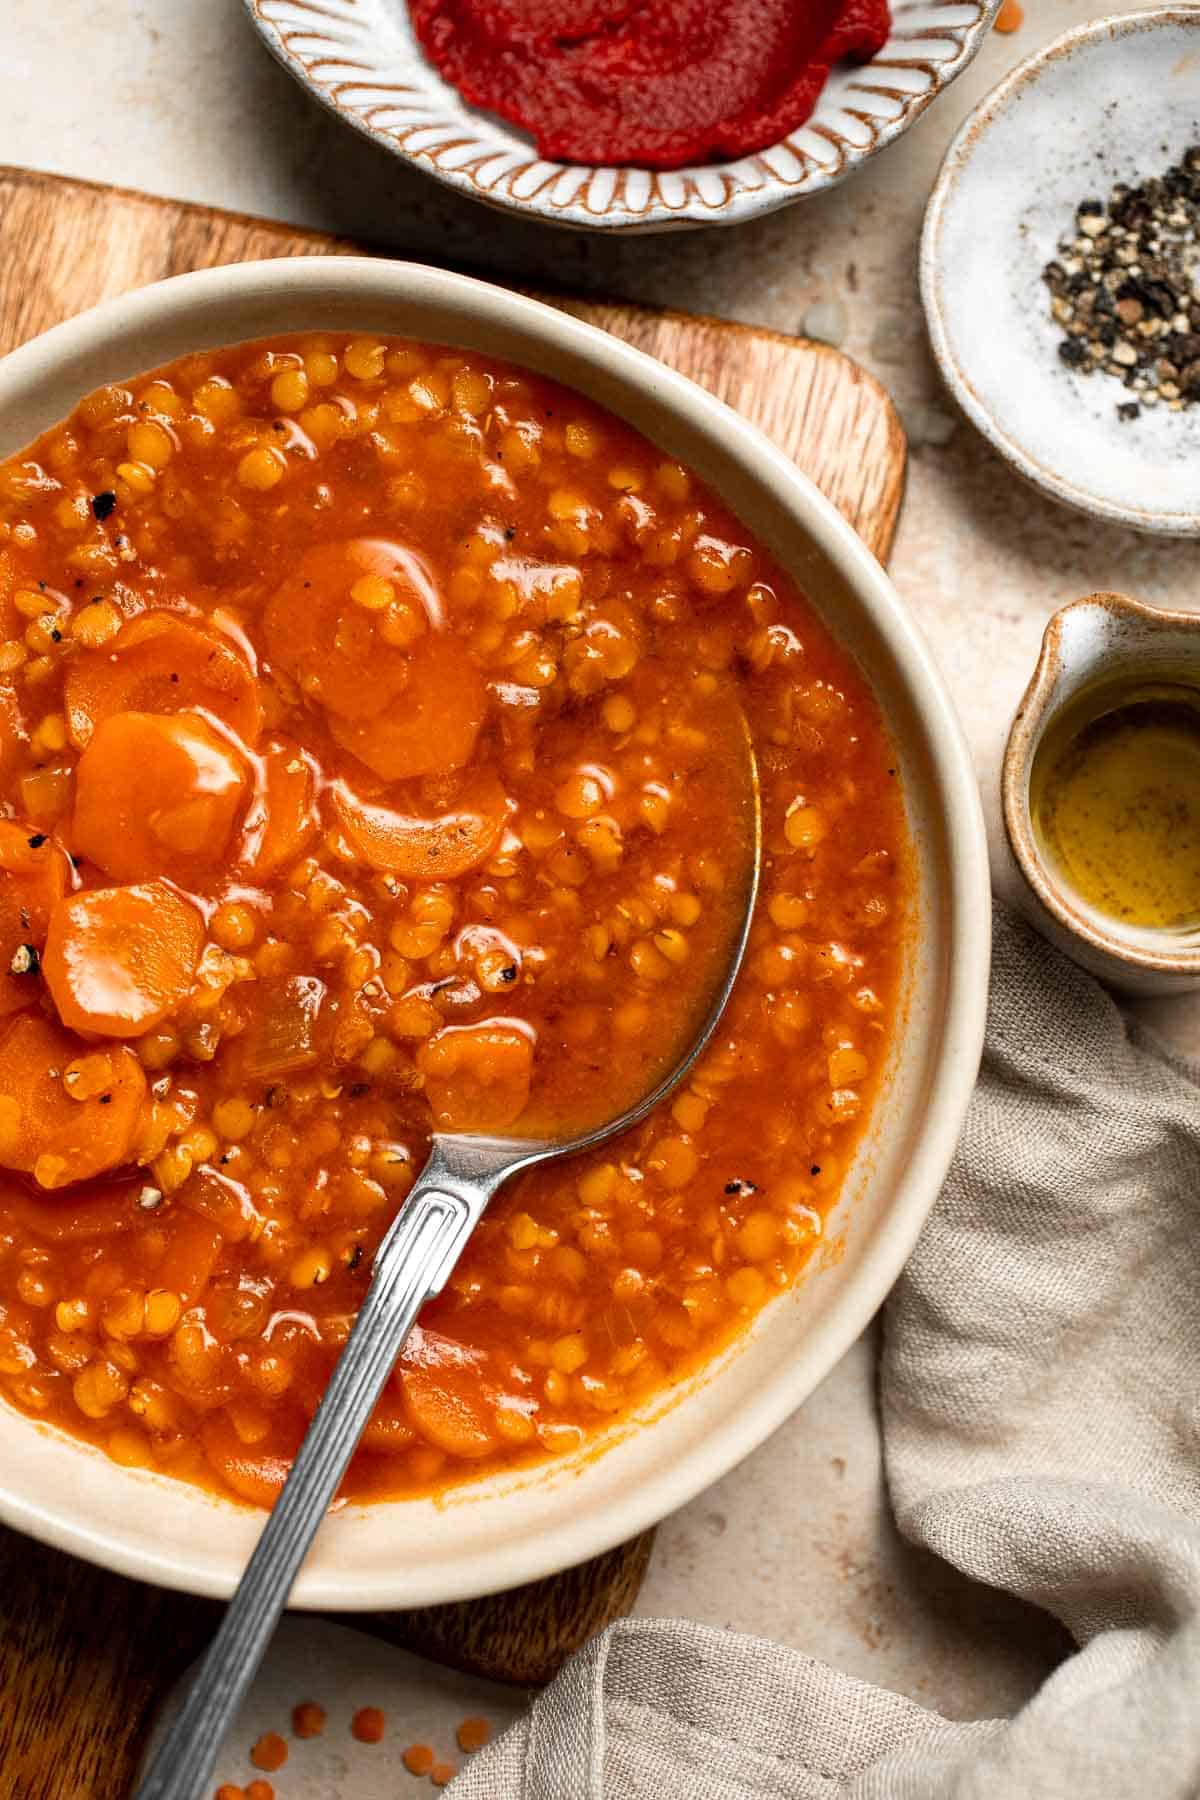
Red lentils are the secret weapon here. These budget-friendly and protein-packed legumes cook fast, break down into a velvety texture, and soak up all the warm spices like paprika, cumin, and turmeric. Pair them with naturally sweet carrots and a swirl of tomato paste, and you've got a soup that's wholesome, vibrant, and tastes way fancier than the effort it takes. No wonder lentil soups are a staple in so many cuisines!
This red lentil soup recipe was inspired by my Lentil Stew and pairs perfectly with Homemade Pull Apart Garlic Bread for the kind of meal that makes you forget it's actually vegan. Trust me - this soup is about to become your go-to cozy night staple.
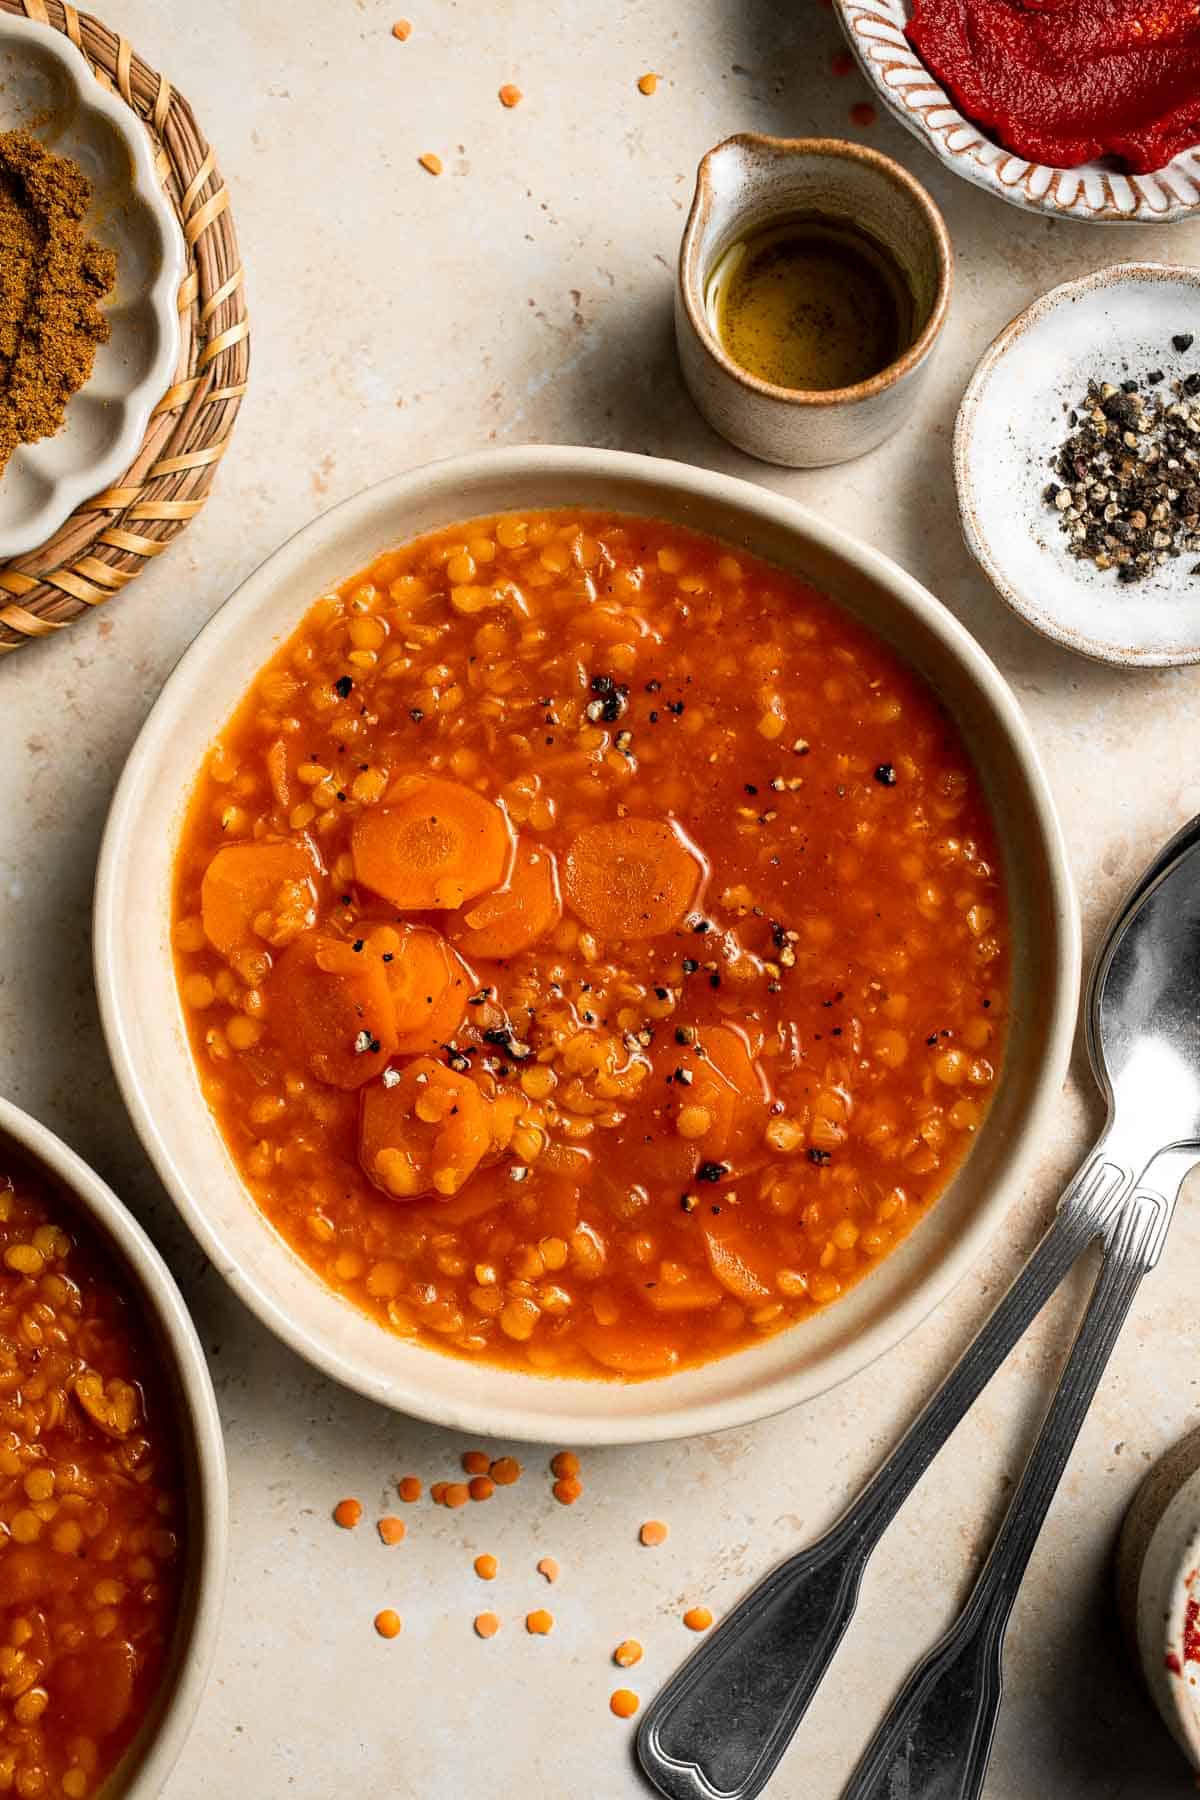
Why You'll Love This Recipe
- Creamy and flavorful without cream. Red lentils break down as they cook, creating a naturally thick and creamy soup base. Add in warm spices and you've got a soup that's rich in flavor without needing dairy.
- Nutritious and filling. Lentils are a powerhouse of plant-based protein, fiber, and essential nutrients. Carrots add natural sweetness and extra vitamins, while the spices provide anti-inflammatory benefits. It's healthy comfort food at its best.
- Quick and easy. This soup comes together in about 40 minutes with just one pot and a handful of ingredients. It's the perfect weeknight dinner when you want something cozy and wholesome without a lot of fuss.
- Vegan, gluten-free, and customizable. Naturally vegan and gluten-free, this soup fits a variety of diets. You can adjust the seasoning, add coconut milk for creaminess, or throw in extra veggies to make it your own.
Ingredients and Substitutions
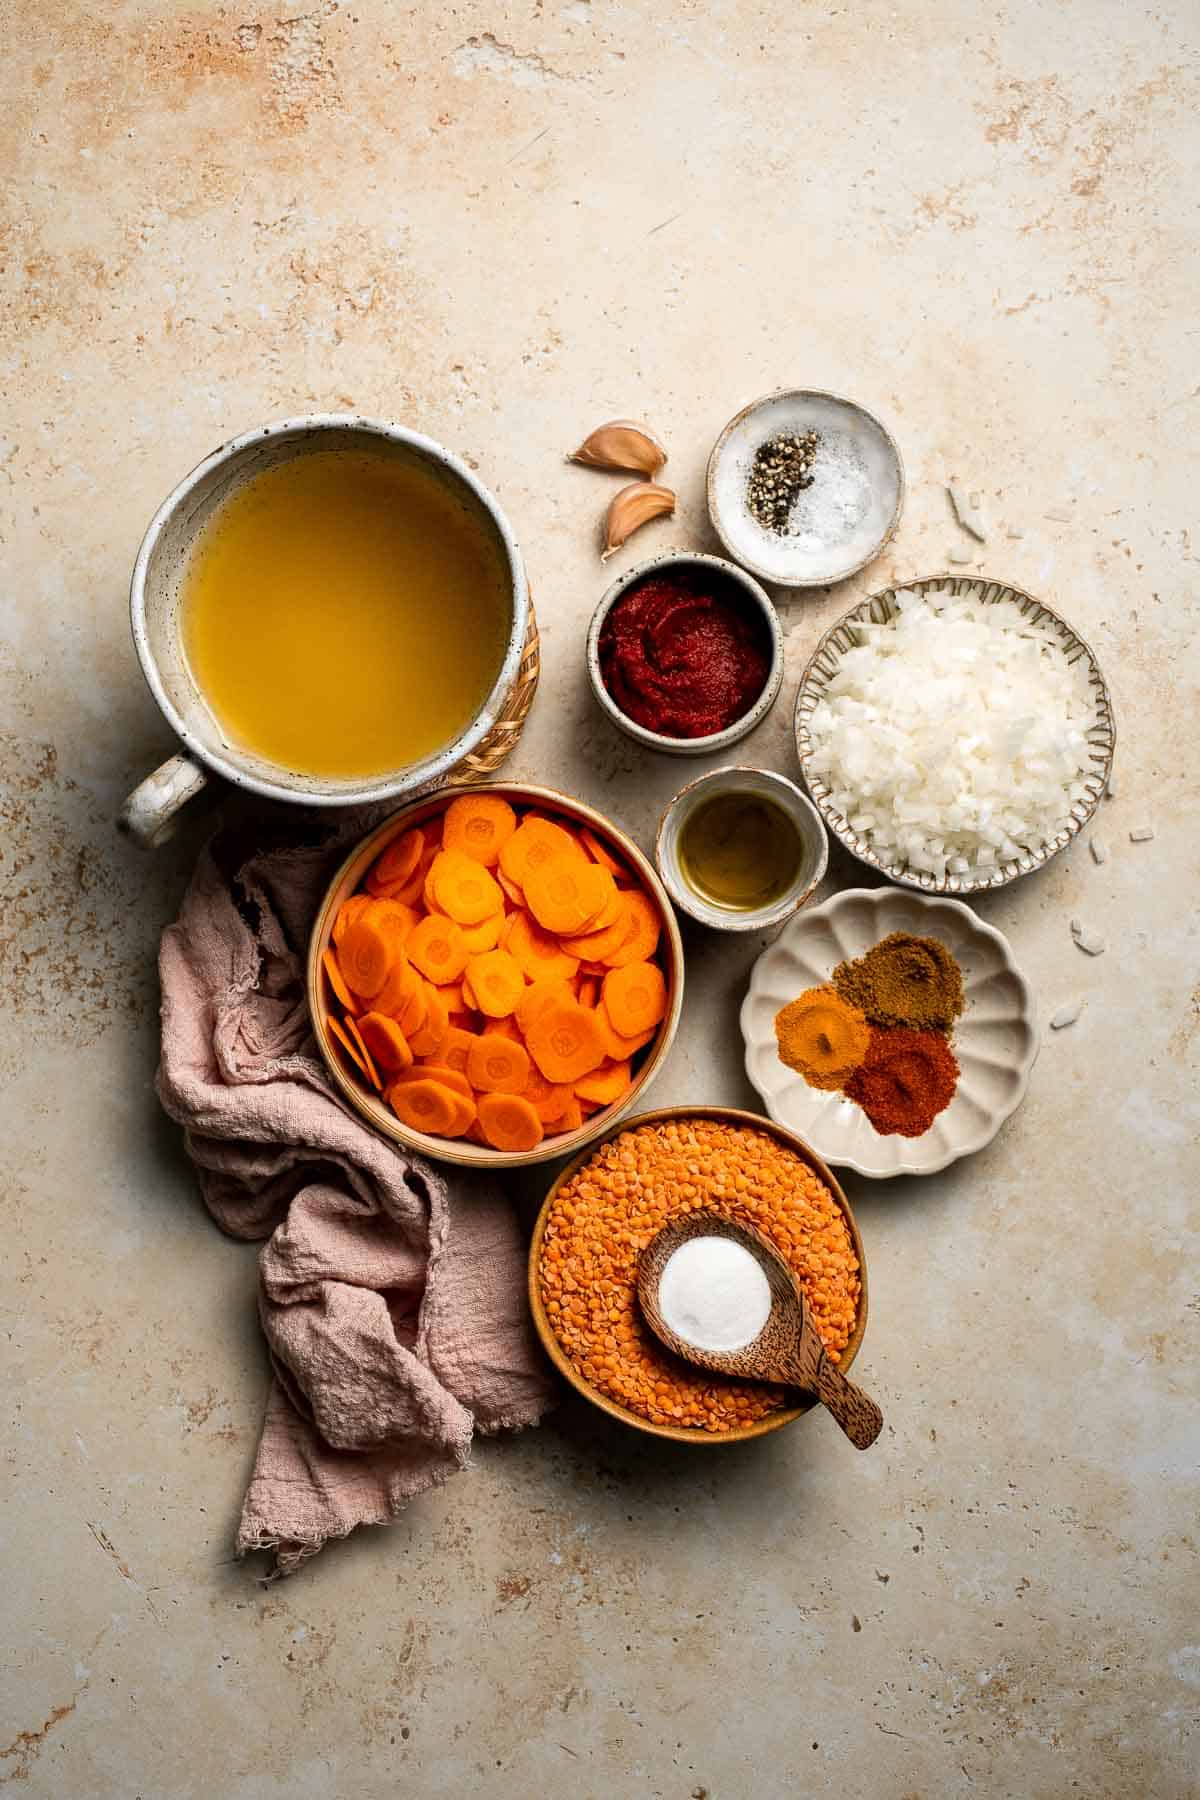
To make this delicious Vegan Red Lentil Soup, you will need the following ingredients (see recipe card below for quantities):
- red lentils - The star of the dish! They cook quickly and break down for a creamy texture. Use green or brown lentils if needed, but note they won't get as creamy.
- baking soda - Added when soaking lentils to soften them faster and reduce cooking time. You can skip it if short on time, but add a few minutes to the cooking time.
- extra virgin olive oil - Adds richness and helps sauté the aromatics. Avocado oil or coconut oil are great substitutes.
- onion - A flavor base for the soup. Substitute with shallots or leeks for a different twist.
- garlic - Essential for depth and savoriness. Use fresh garlic cloves, but garlic powder works if you're in a pinch.
- carrots - Add natural sweetness and bright color. You can also use sweet potatoes or parsnips.
- paprika - Adds a gentle smokiness and depth. Smoked paprika gives an even bolder flavor.
- turmeric - Earthy, warming, and adds a beautiful golden hue.
- cumin or curry powder - Both work well for warm, aromatic flavor. Choose whichever you prefer.
- tomato paste - Provides acidity and richness.
- vegetable stock - The liquid base. Use homemade or store-bought, or substitute with water plus bouillon. If not on a vegan diet, you can use chicken stock or beef broth.
- salt and pepper - Essential for seasoning. Adjust to taste before serving.
Equipment
You'll also need measuring cups and spoons, a large pot or Dutch oven, a wooden spoon or spatula for stirring, a sharp knife for chopping, and an immersion blender (optional) if you want an extra-smooth finish.
Instructions
- Soak lentils. Add lentils and baking soda into a large mixing bowl. Pour boiling water on top to cover the lentils, and let it soak for 10 minutes. Rinse and drain. Soaking beans in baking soda water can help them cook faster.
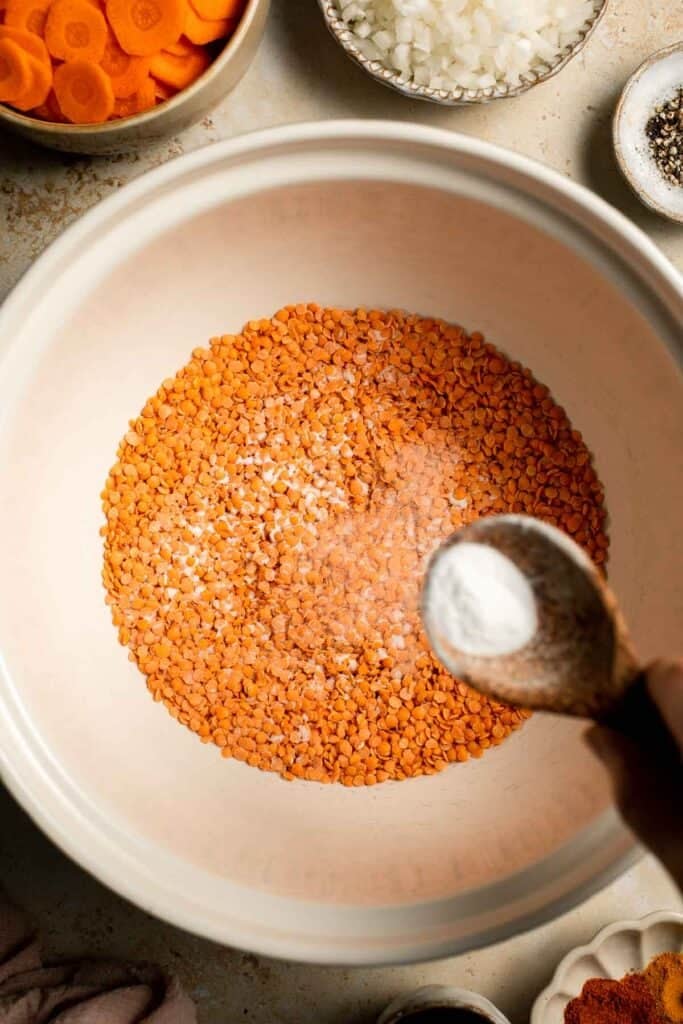
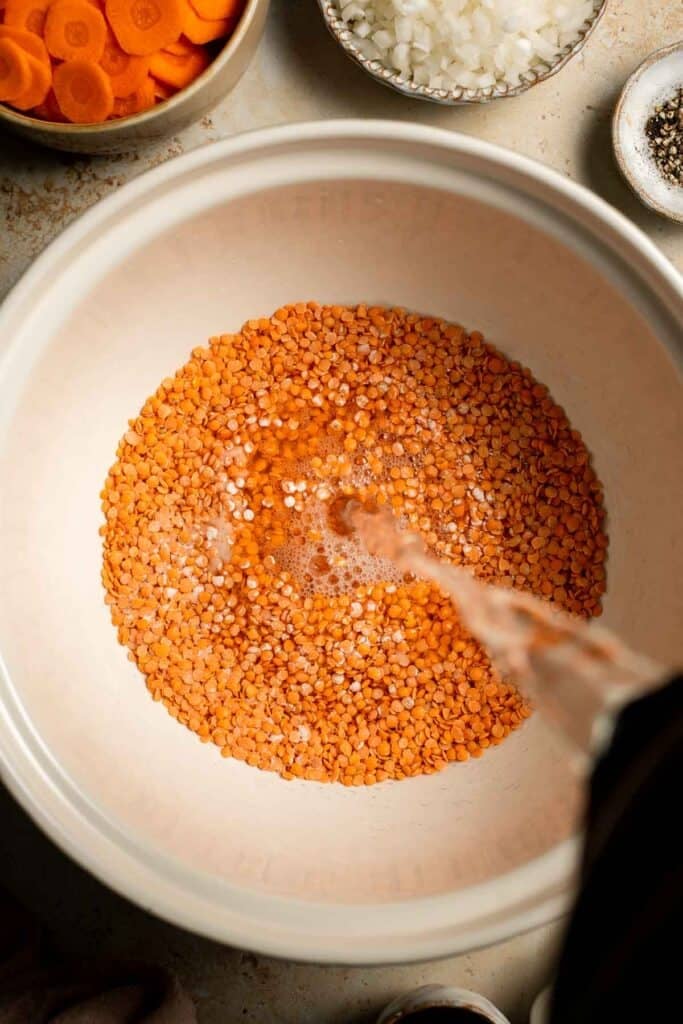

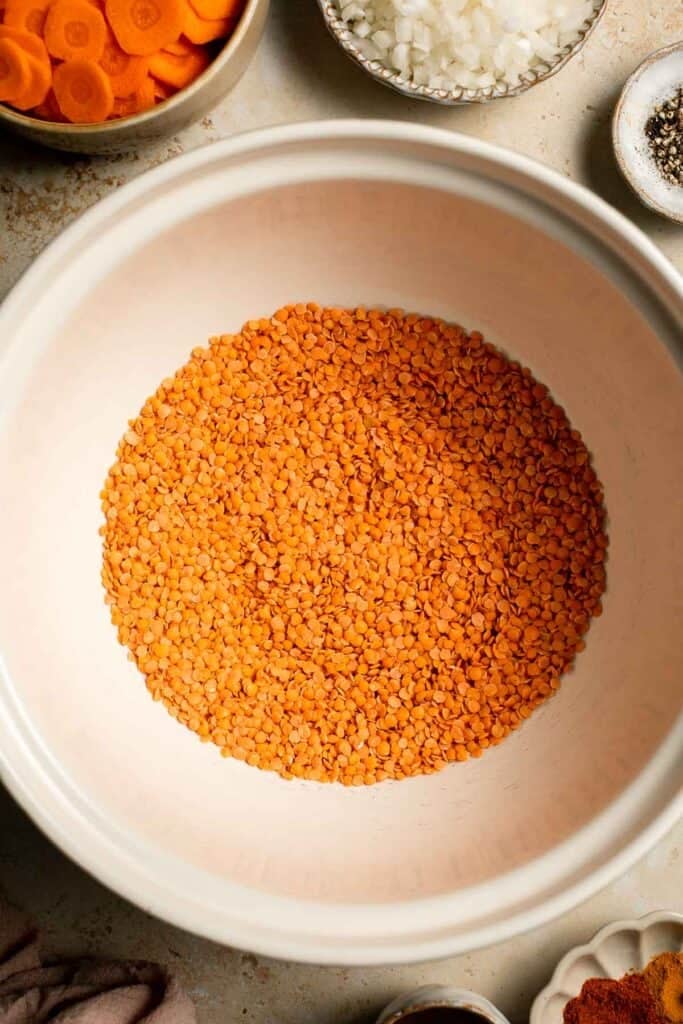
- Sauté aromatics. In a large pot, heat oil over medium-high heat. Add onions, garlic, and carrots and sauté until fragrant, about 2 minutes.
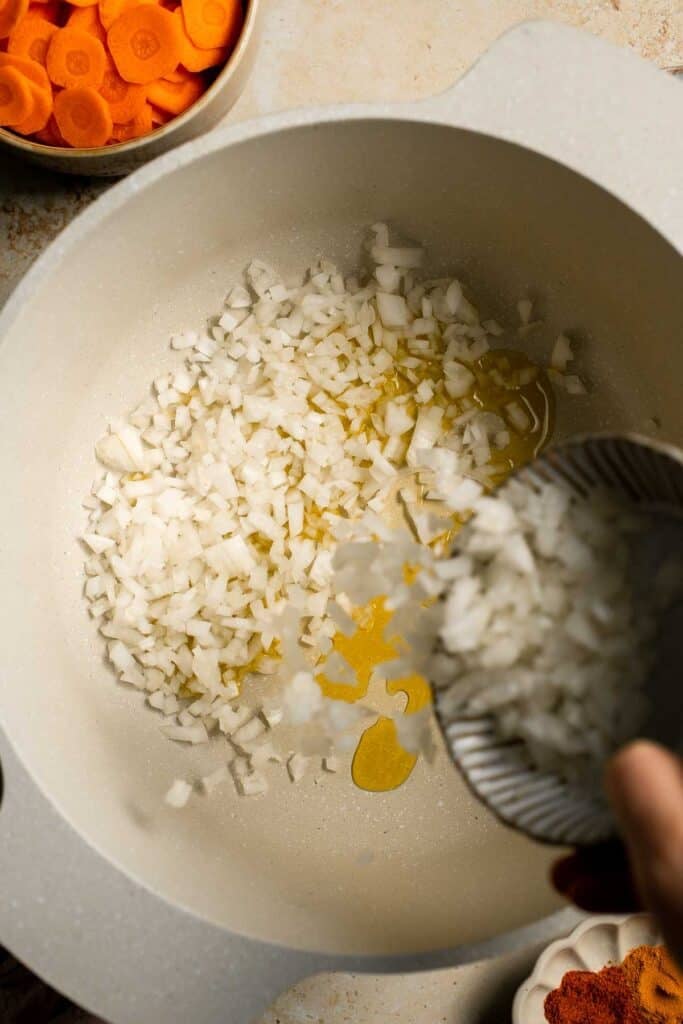
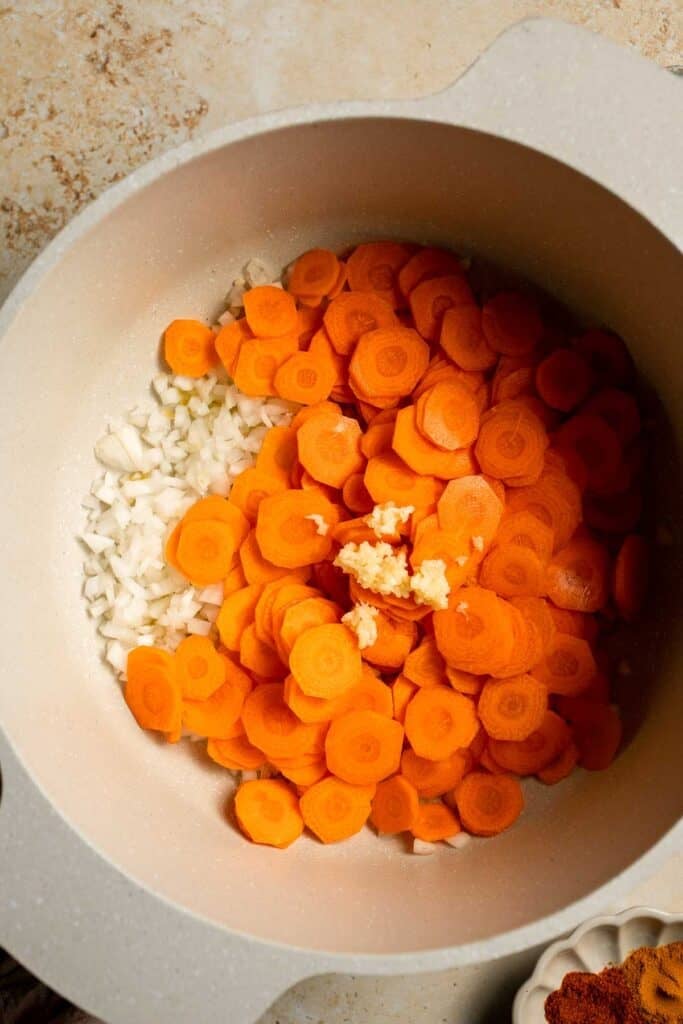
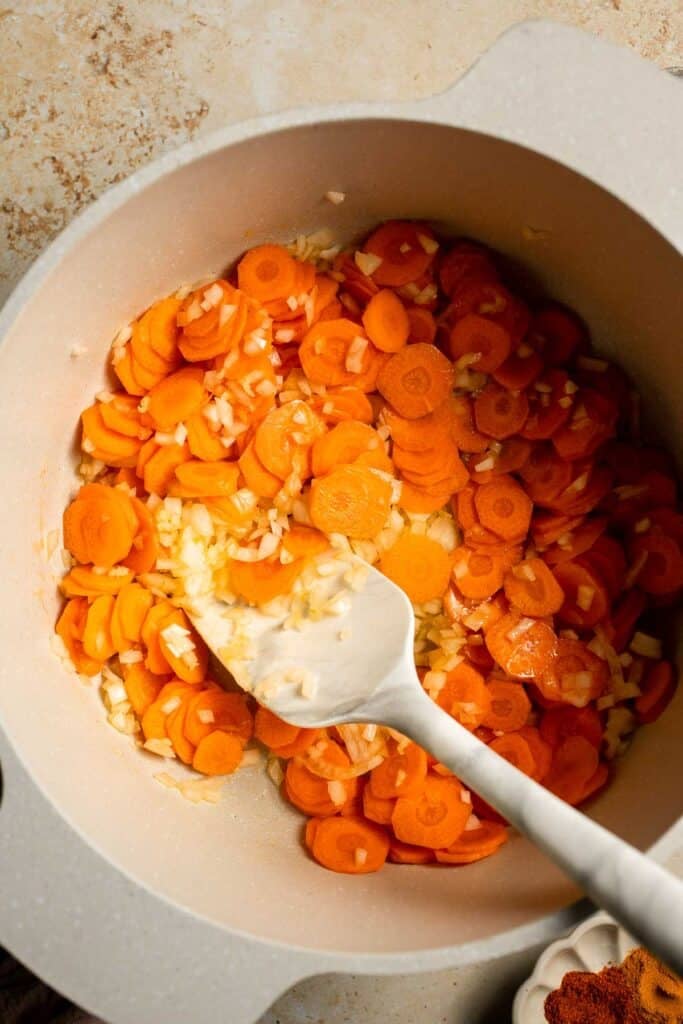
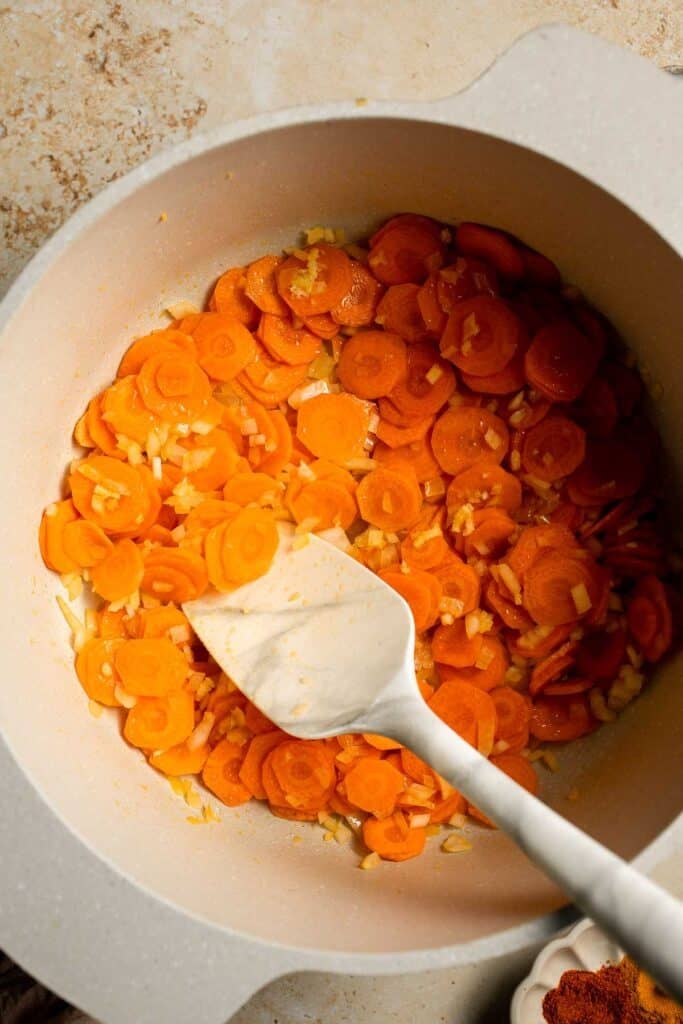
- Toast lentils. Add lentils and toast for 3-4 minutes, stirring occasionally.
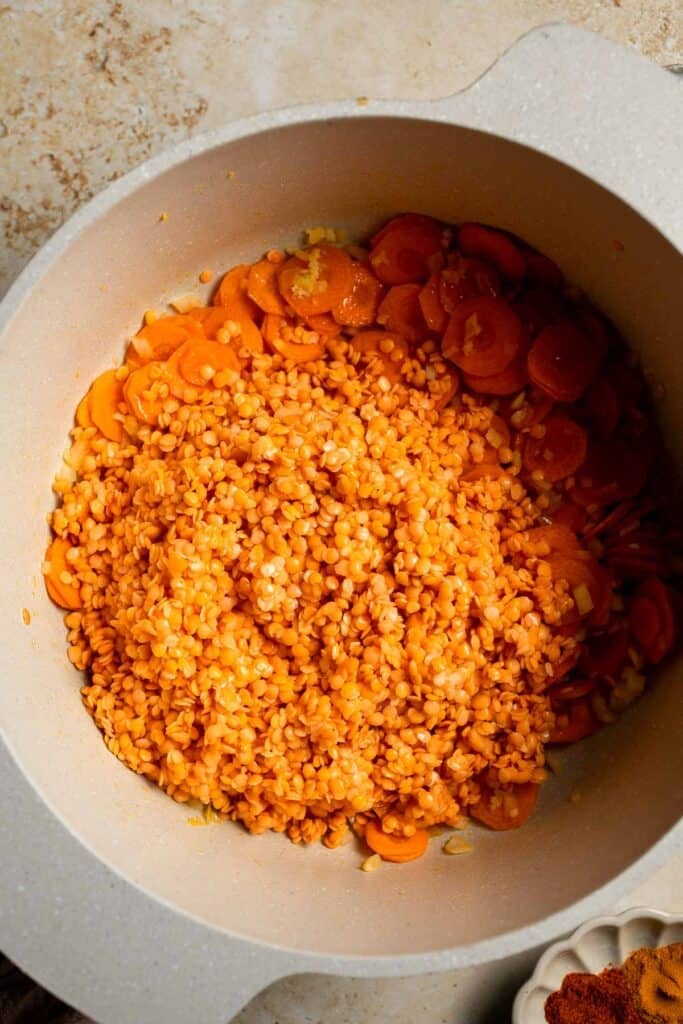
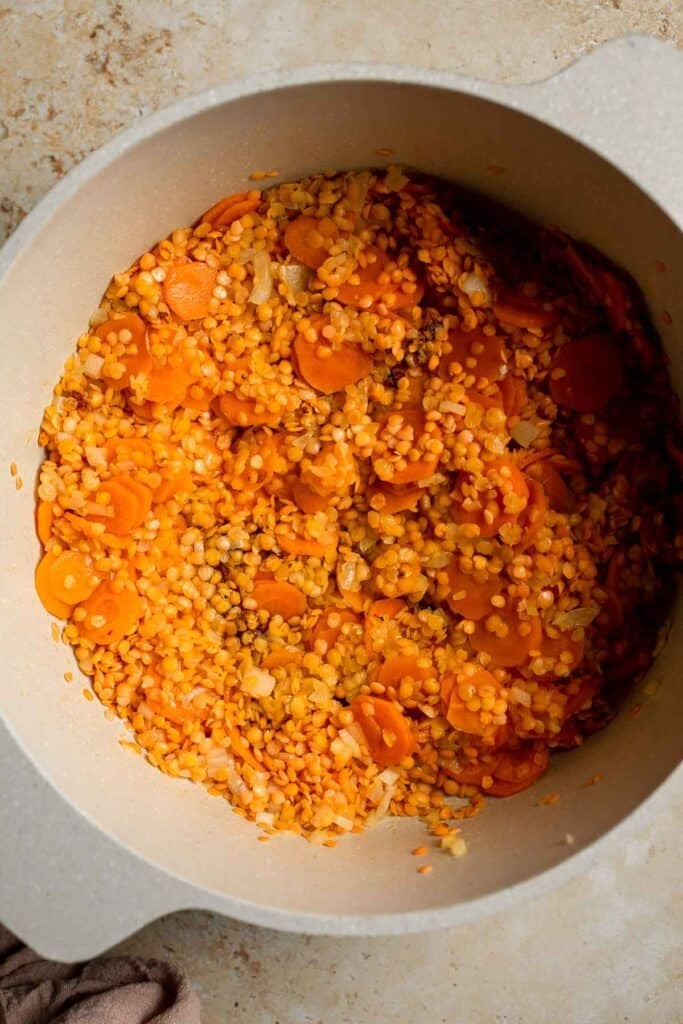
- Season. Add paprika, turmeric, cumin, and tomato paste. Mix well until evenly combined.
- Make the soup base. Add vegetable broth and bring to a boil, then turn the heat down to low and simmer covered for 15-20 minutes, stirring occasionally. Once done, lentils should be tender but not mushy.
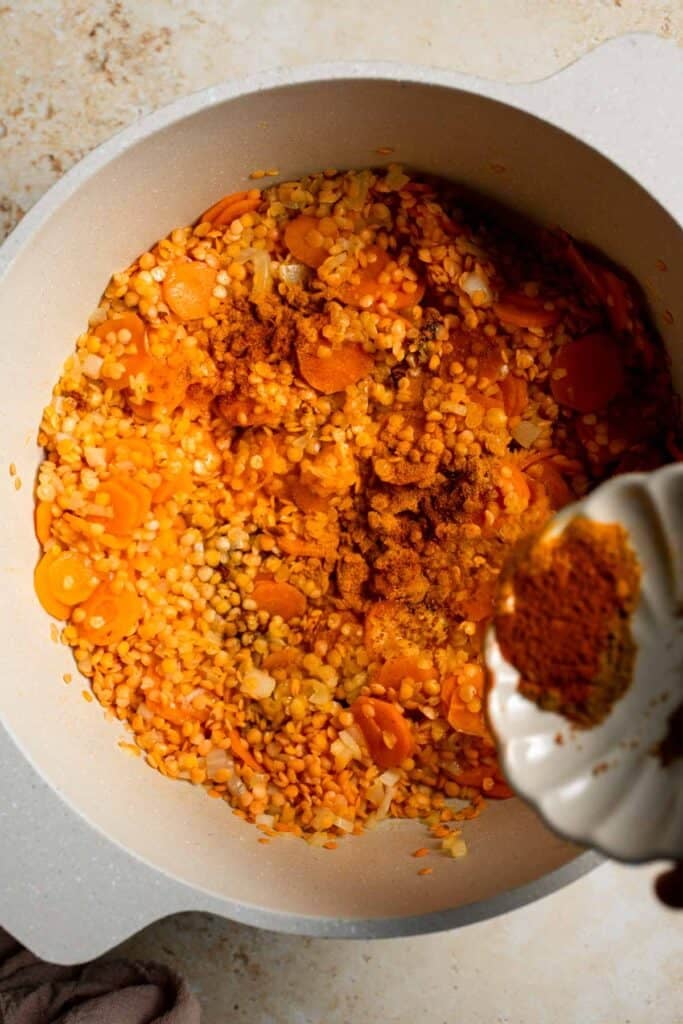
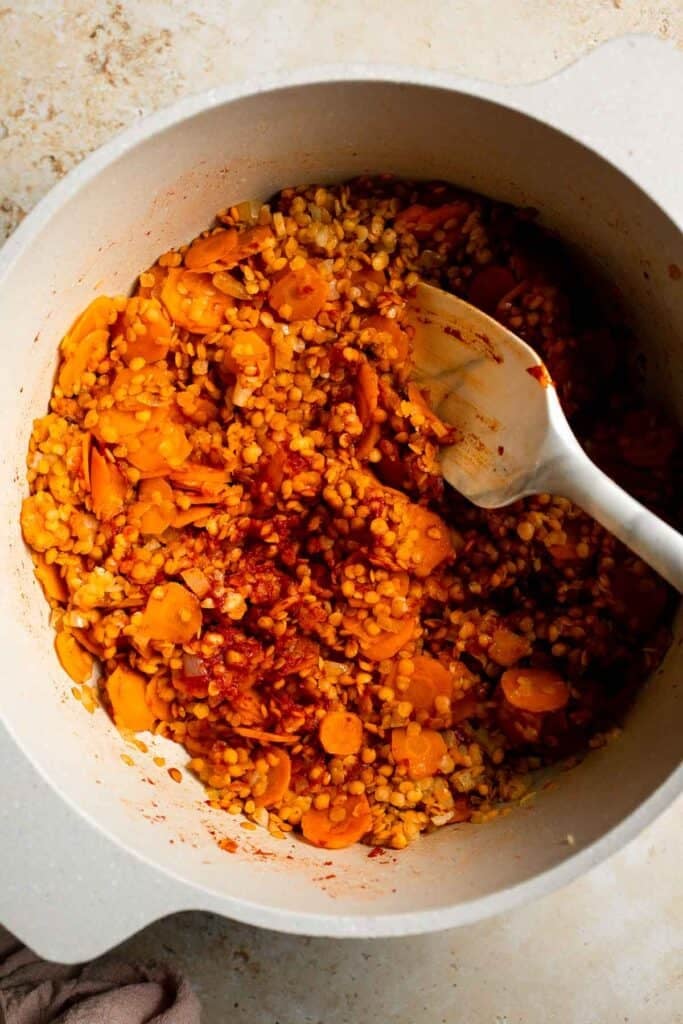
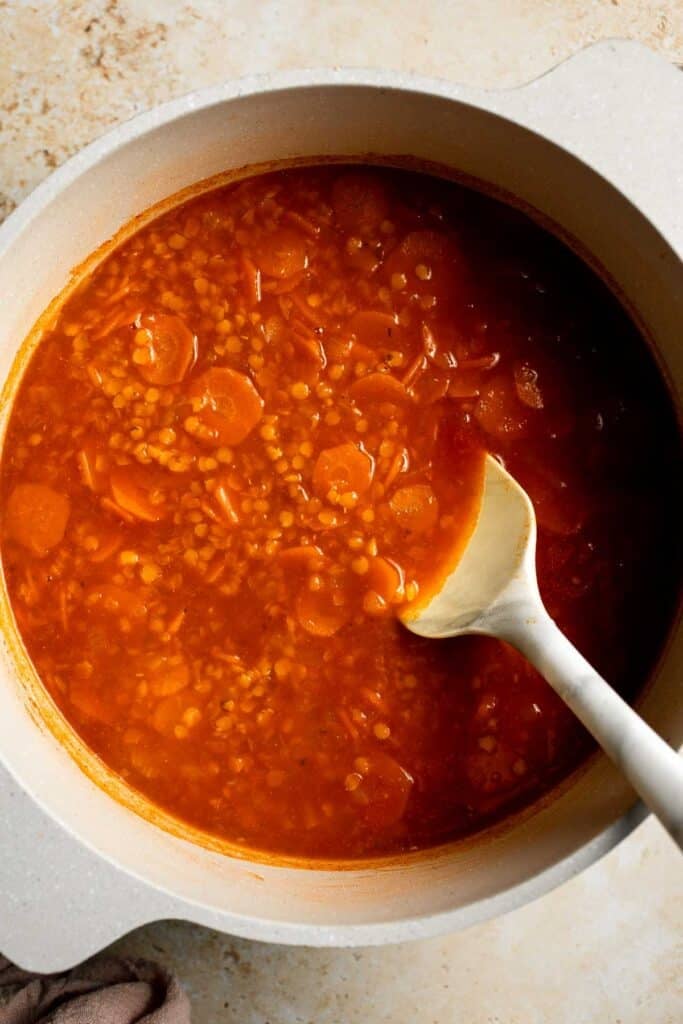
- Serve. Season with salt and black pepper and serve warm.
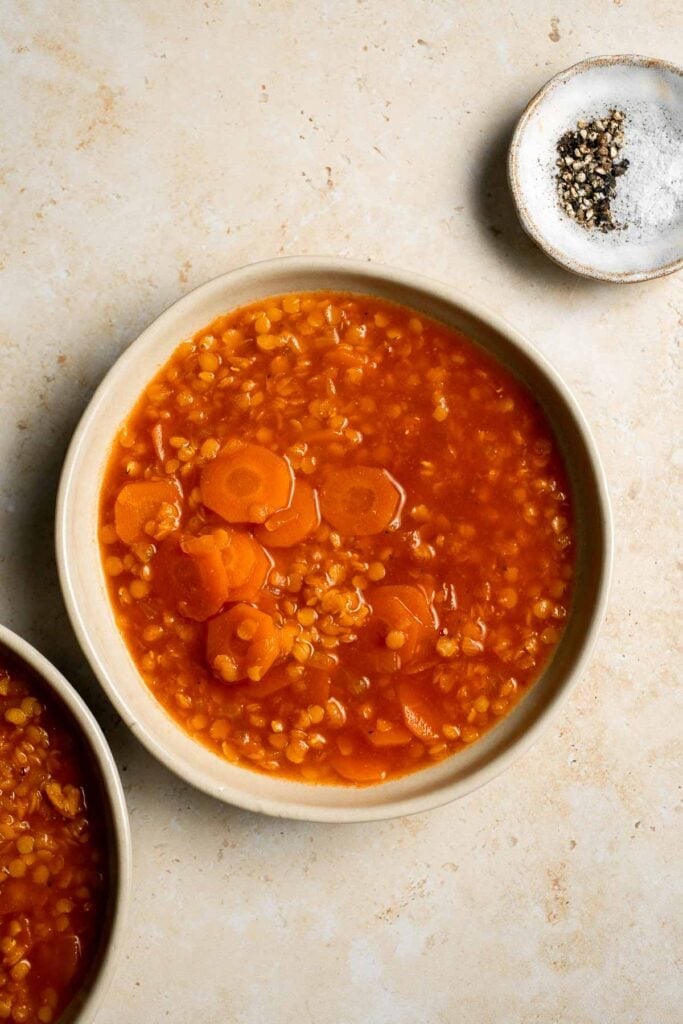
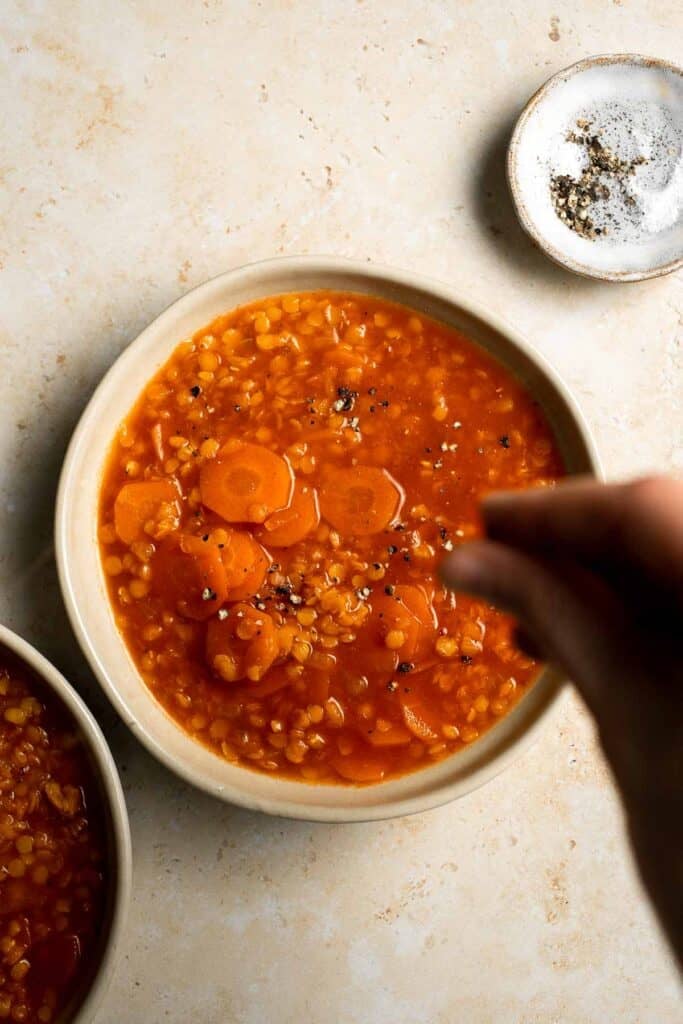
How to Cook in the Instant Pot
- Sauté the aromatics. Set the Instant Pot to Sauté mode. Add olive oil, then cook the onions, garlic, and carrots for 3-4 minutes until softened. Stir in paprika, turmeric, and cumin (or curry powder) and cook for 30 seconds to bloom the spices.
- Add the base. Stir in the tomato paste, red lentils, vegetable stock, salt, and pepper. Mix well, scraping up any browned bits from the bottom.
- Pressure cook. Seal the lid and cook on High Pressure for 8 minutes. Allow the pressure to release naturally for 10 minutes, then carefully quick release any remaining steam.
- Blend or not. Stir well, then blend with an immersion blender if you want it creamy, or leave it chunky for a rustic texture.
- Finish and serve. Taste and adjust seasoning. Serve hot with bread or a drizzle of olive oil.
Bonus: No need to soak the lentils first when using the Instant Pot as they cook perfectly under pressure.
Expert Tip: Choose Your Texture
One of the best parts about red lentil soup is that you control the texture. For a rustic, hearty bowl, leave it chunky with tender lentils and carrots. For a silky, restaurant-style finish, blend the whole pot with an immersion blender. Or meet in the middle: puree half the soup and leave the rest chunky for the perfect balance of creamy and hearty.
More Tips and Tricks
- Soak for easier digestion. Soaking red lentils in water with a pinch of baking soda makes them cook faster and easier to digest. If you skip soaking, just extend the cooking time slightly.
- Don't skip the aromatics. Onions, garlic, and carrots create the foundation of flavor. Let them soften and caramelize a bit before adding the lentils for a deeper taste.
- Taste as you go. Lentil soup needs salt to bring out its earthy flavor. Taste and adjust the seasoning before serving for the best results.
- Add a finishing touch. A squeeze of lemon juice, drizzle of olive oil, or sprinkle of fresh herbs (like fresh parsley or fresh cilantro) right before serving brightens the whole dish.
Recipe Variations
- Add more veggies. Toss in spinach, kale, or zucchini in the last few minutes of cooking for extra nutrition.
- Make it spicy. Stir in chili flakes, cayenne pepper, or fresh chili for some heat.
- Try coconut curry lentil soup. Add ½ cup coconut milk and a little curry paste for a creamy, Indian-inspired twist. Try our Coconut Curry Lentil Soup for another variation.
- Give it a Moroccan twist. Add cinnamon, coriander, and a pinch of allspice for a fragrant and earthy North African variation.
- Add lemon. Finish with fresh lemon juice and zest for a bright, tangy kick.
- Add ginger. Double the carrots and add fresh grated ginger for a zesty, sweet, and savory twist.
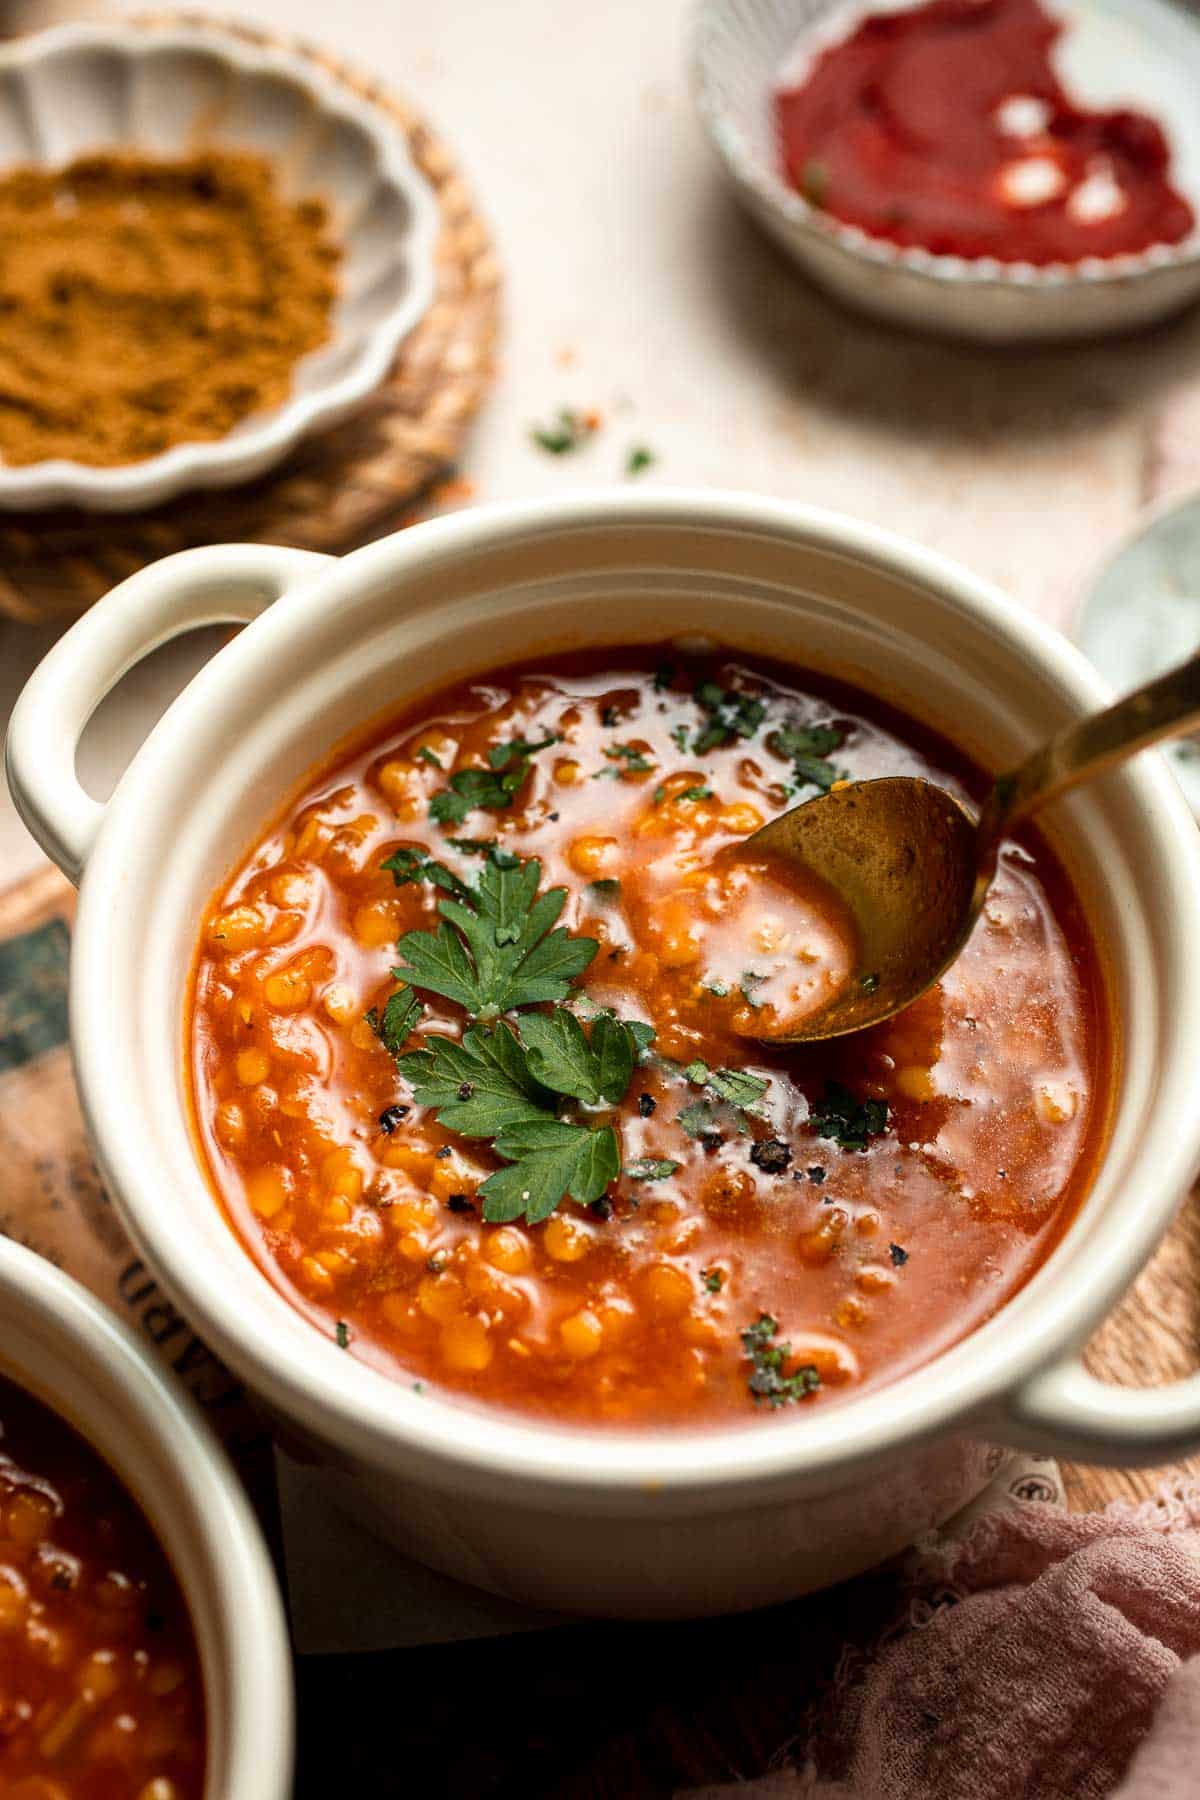
Storage
How to Store
Keep cooled soup in an airtight container in the refrigerator for up to 5 days.
How to Reheat
Warm gently on the stovetop over medium heat, adding a splash of stock or water if it's too thick. You can also microwave in 1-minute intervals, stirring in between.
How to Freeze
Freeze in portion-sized containers for up to 3 months. Thaw overnight in the fridge, then reheat on the stove.
How to Serve
This red lentil soup is hearty enough to serve on its own, but it also pairs wonderfully with simple sides for a complete meal. It's cozy, comforting, and versatile. Try it with:
- A dollop of vegan yogurt or drizzle of olive oil for garnish
- Crusty bread or garlic bread for dipping
- A simple green salad for balance
- Rice or quinoa for extra heartiness
These are my favorite dishes to serve with this red lentil soup:

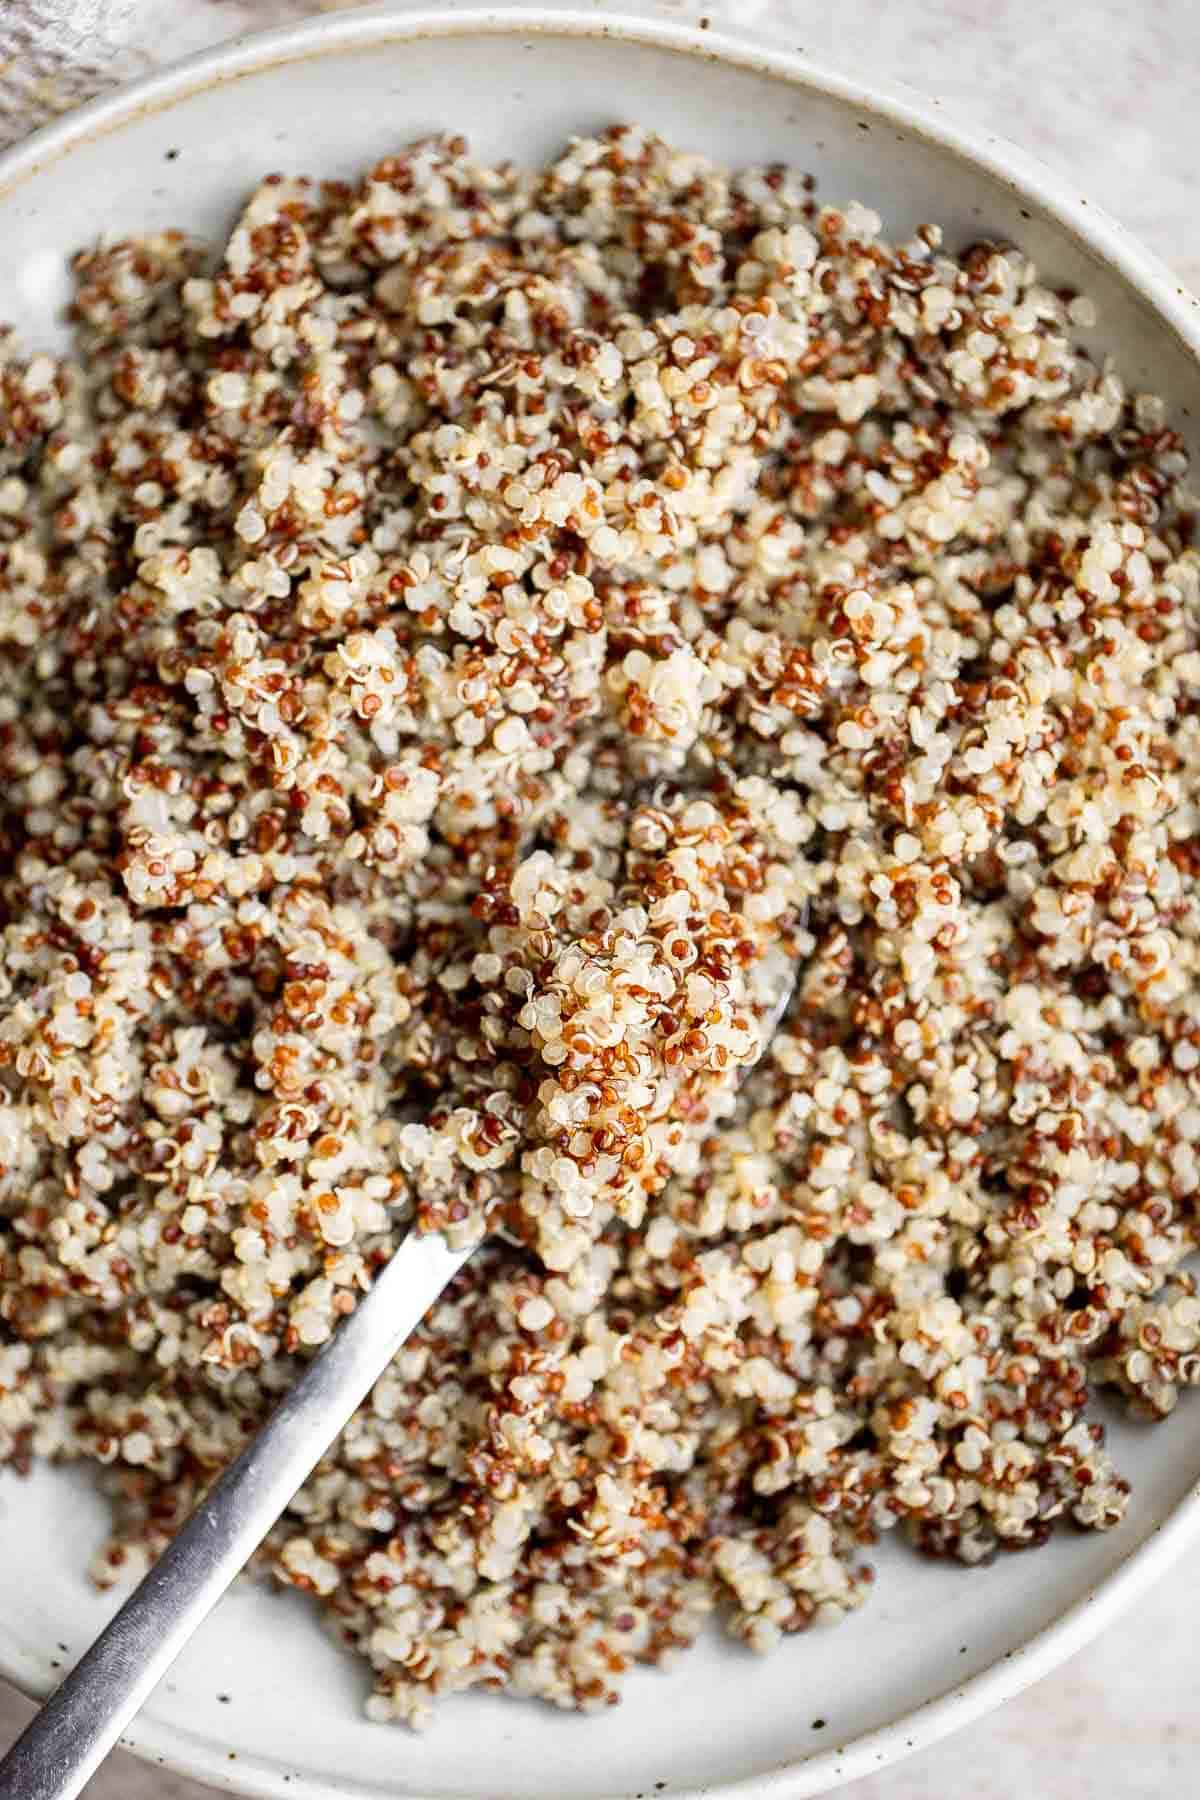
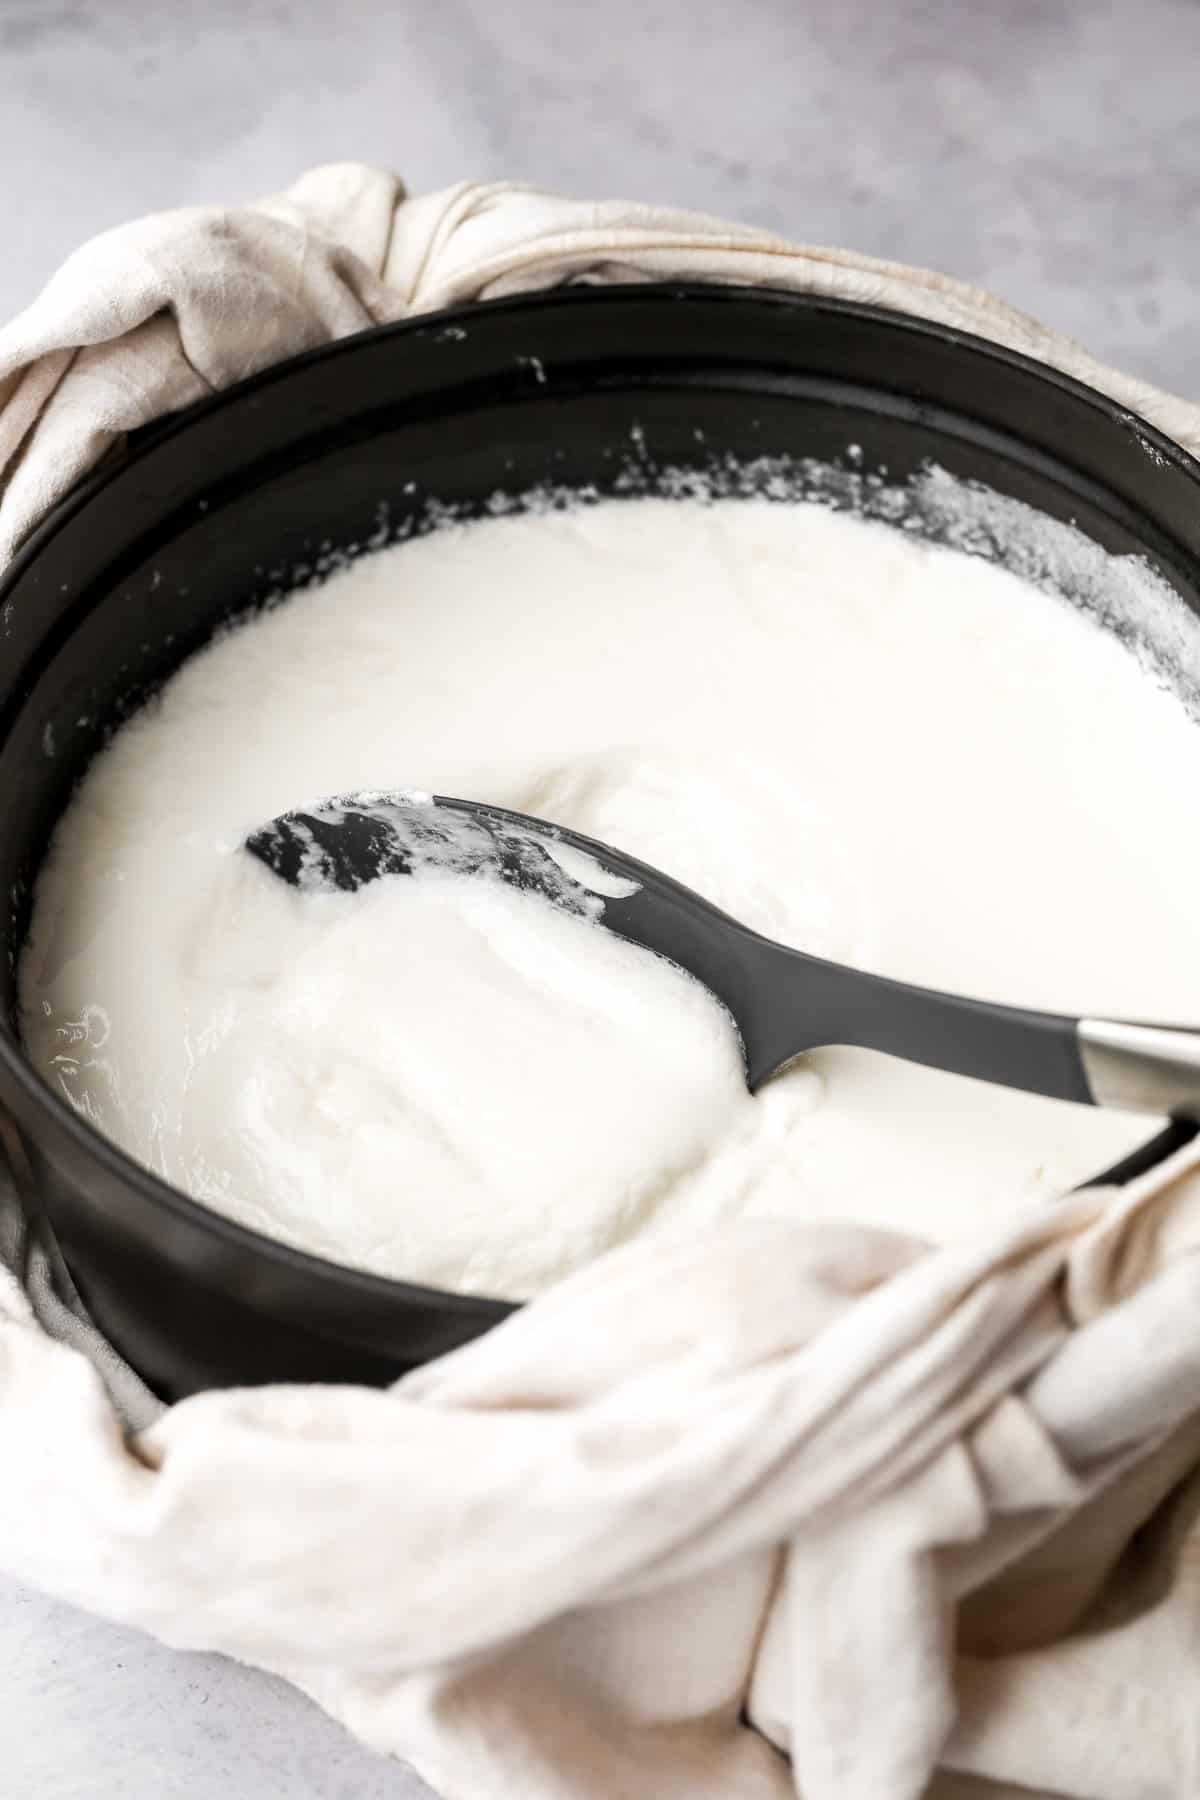
Side Dishes for Soup
Looking for the perfect accompaniments to your favorite soups? Explore our collection of soup side dishes, including crusty breads, fresh salads, savory crackers, and hearty sandwiches that complement and elevate any bowl of soup.
FAQ
Red lentil soup is savory, earthy, and slightly sweet from the carrots, with a warm spice profile from paprika, cumin, and turmeric. The lentils break down into a creamy texture that makes the soup feel rich and hearty without being heavy. It's cozy, flavorful, and deeply satisfying.
Absolutely! Lentils are full of plant-based protein, fiber, iron, and folate, making them one of the most nutrient-dense legumes. Carrots add vitamins and natural sweetness, while spices like turmeric bring anti-inflammatory benefits. This soup is low in fat, naturally vegan, gluten-free, and perfect for a balanced, healthy meal.
Unlike other lentils, red lentils don't require soaking. Soaking simply speeds up cooking and makes them easier to digest. If you skip soaking, you'll just need to simmer the soup a little longer. Either way, the lentils will cook down and become creamy.
All lentils are nutritious, but red lentils cook the fastest and are easier to digest. Green and brown lentils hold their shape better, while black (beluga) lentils are highest in antioxidants. It depends on what you're looking for, but red lentils are perfect for creamy soups like this one.
Yes! Stirring in coconut milk adds creaminess and a subtle sweetness that pairs beautifully with the spices. It also makes the soup more filling and gives it a slightly tropical flavor. Add it toward the end of cooking for the best results.
A splash of vinegar or lemon juice added at the very end brightens up the flavors and balances the earthiness of the lentils. Adding it too early can toughen the lentils, so always wait until they're fully cooked before stirring in an acidic ingredient.
Classic choices include cumin, turmeric, and paprika, but you can also use curry powder, coriander, cinnamon, or chili flakes. The beauty of lentil soup is that it adapts well to different spice profiles (from smoky and earthy to spicy and fragrant) depending on your mood.
More Lentil Soup Recipes
Looking for other recipes like this? Try these:
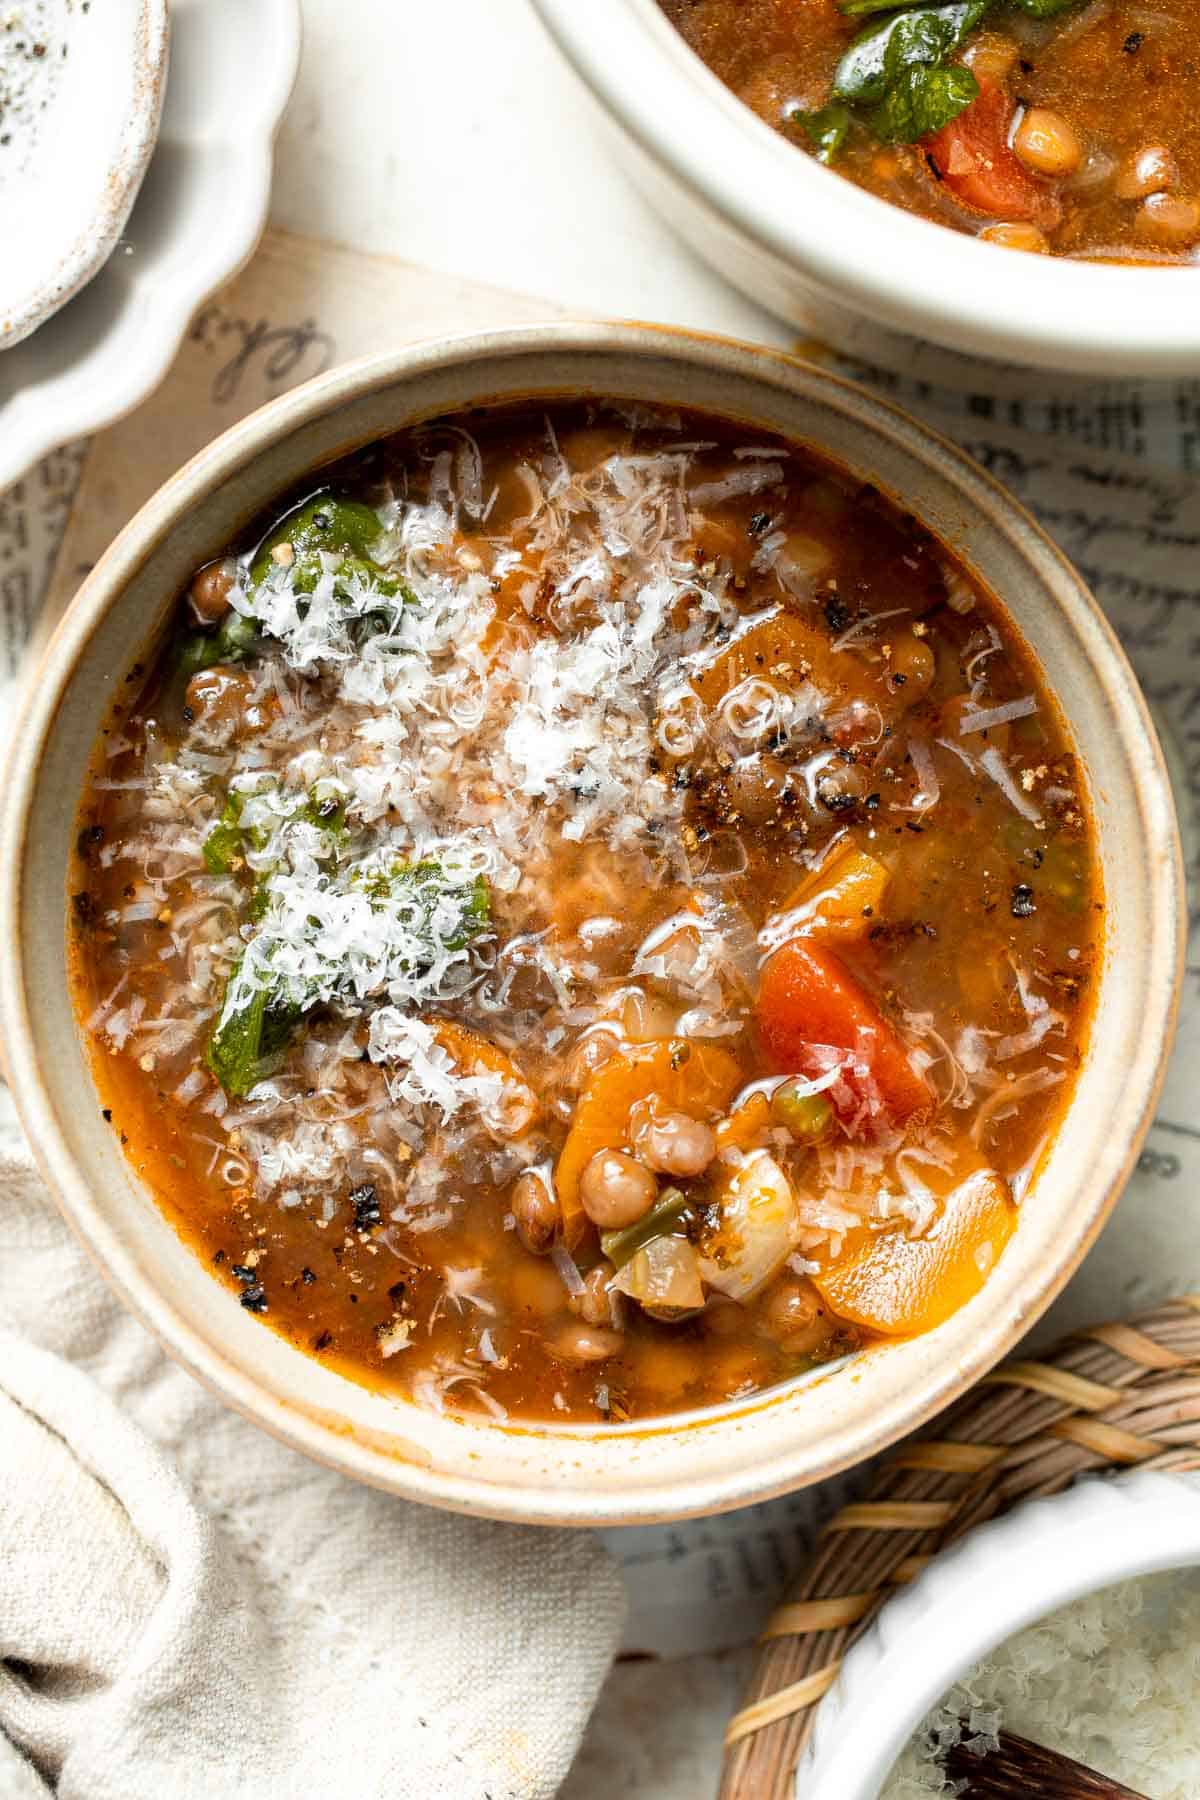

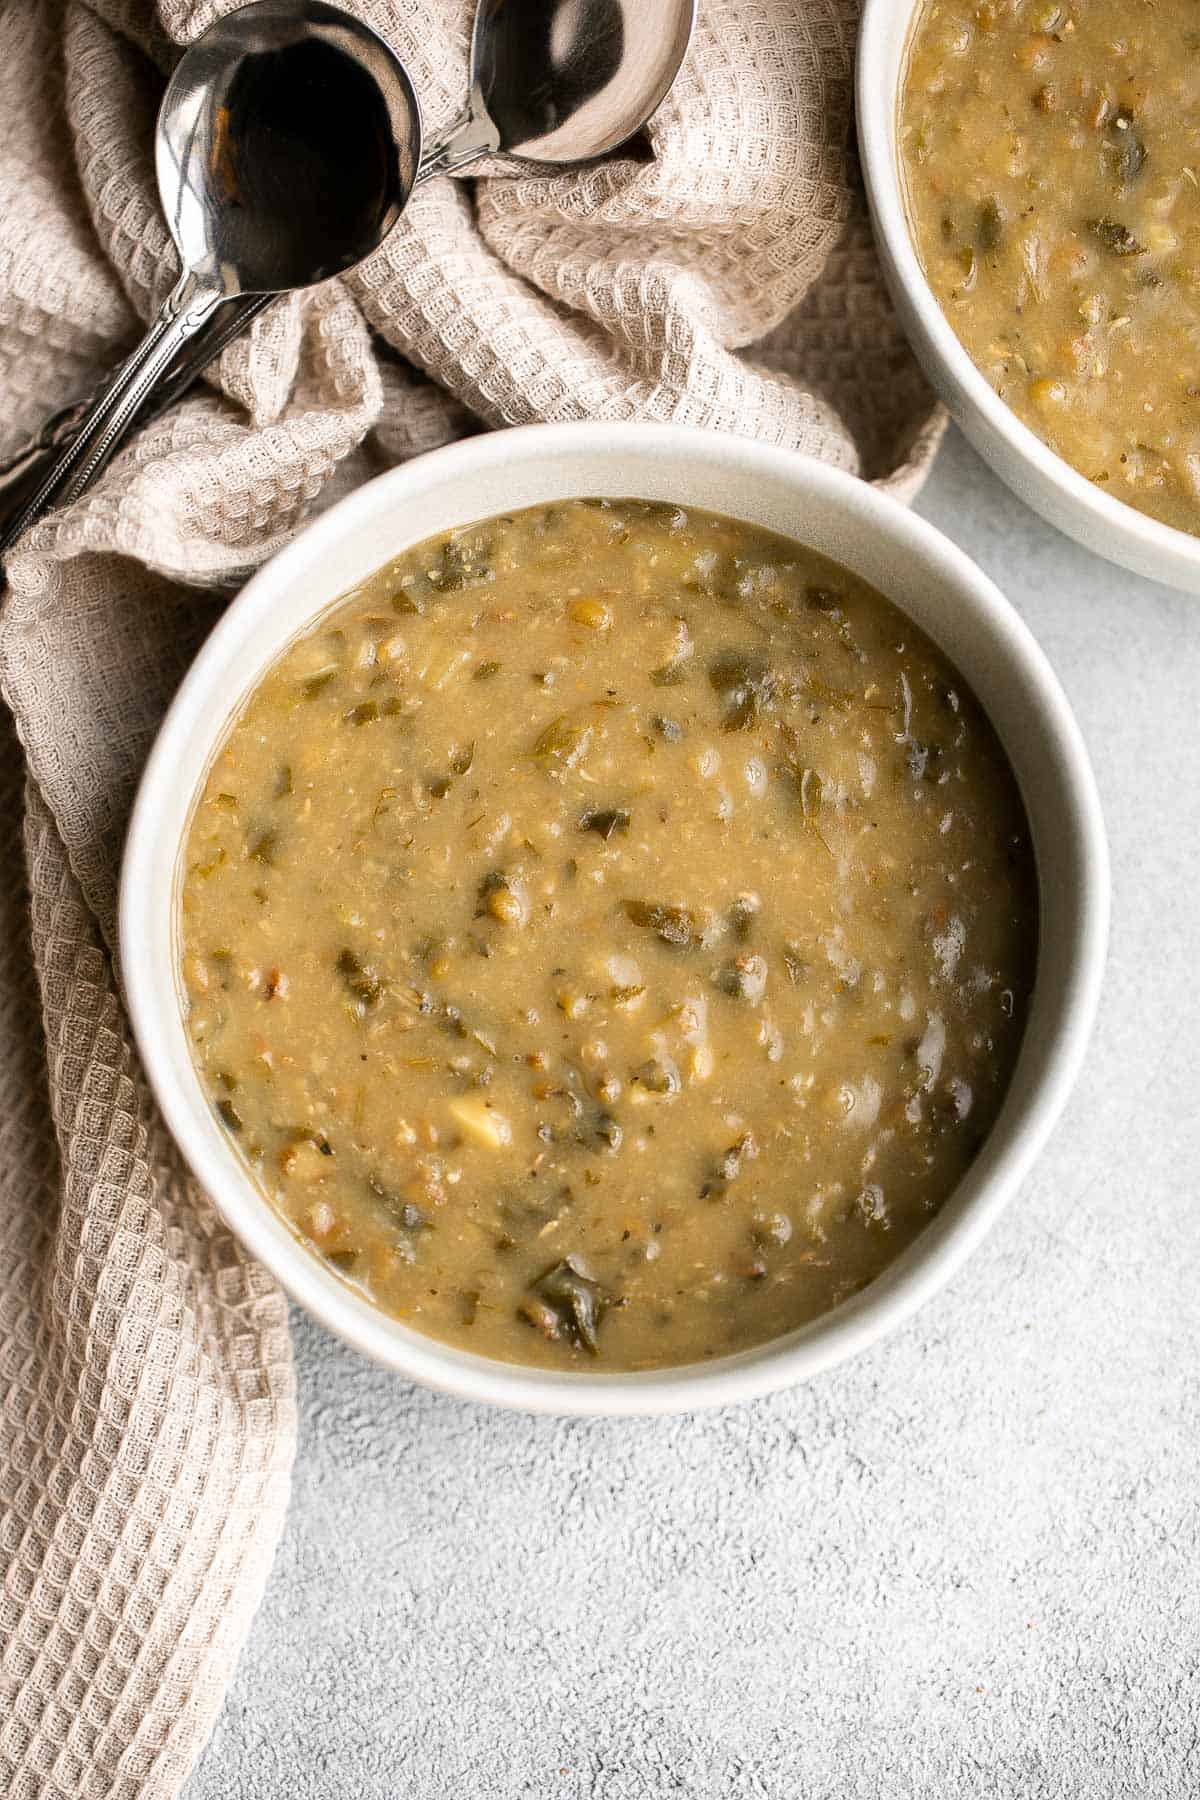
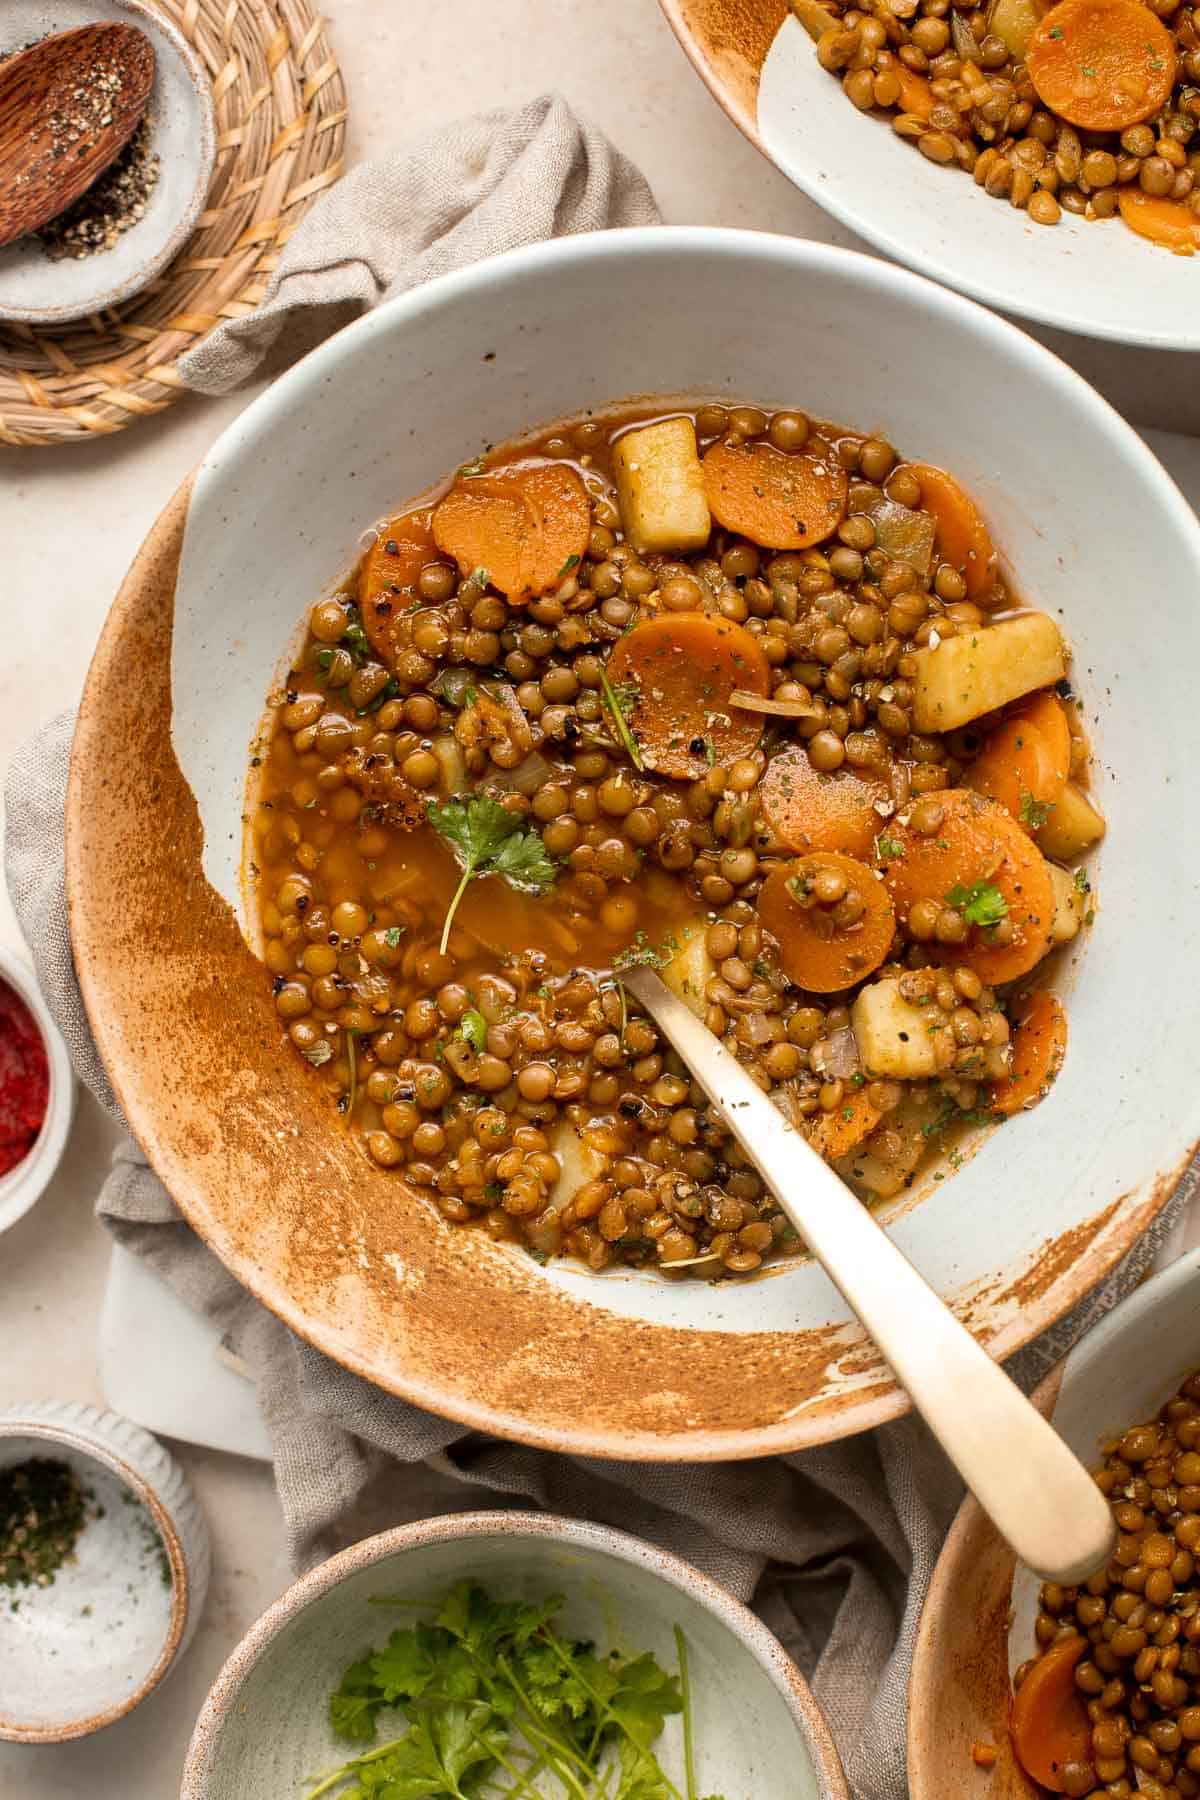
Tried this recipe?
I'd love to hear what you think! Leave a comment and rating below to share your feedback. Your reviews help others discover this recipe and help me keep creating more free recipes for you. Snap a photo and tag me on social media @aheadofthyme too.

25+ Easy Side Dishes for Soup (What to Serve with Soup)

When the weather gets cooler, soup is always the first thing that comes to mind. It's cozy, comforting, and nourishing - but sometimes you want to turn it into a complete meal that's filling and wholesome. So if you're wondering "what to serve with soup", you're in the right place.
We're sharing over 25 of the most popular and beginner-friendly side dishes for soup, from warm, buttery breads and grilled cheese sandwiches to crisp salads and roasted veggies. These recipes are simple to make, big on flavor, and guaranteed to pair perfectly with your favorite warm bowl of soup.

This roundup was inspired by my love for serving hearty soups with equally delicious side dishes. If you enjoy this collection, be sure to check out my 50 Best Bread Recipes and 40 Best Salad Recipes for even more easy, family-friendly ideas.
Best Side Dishes for Soup

Garlic Breadsticks
Soft garlic breadsticks are fluffy, airy, buttery, and delicious. They're an easy recipe that is perfect for beginners at baking bread.
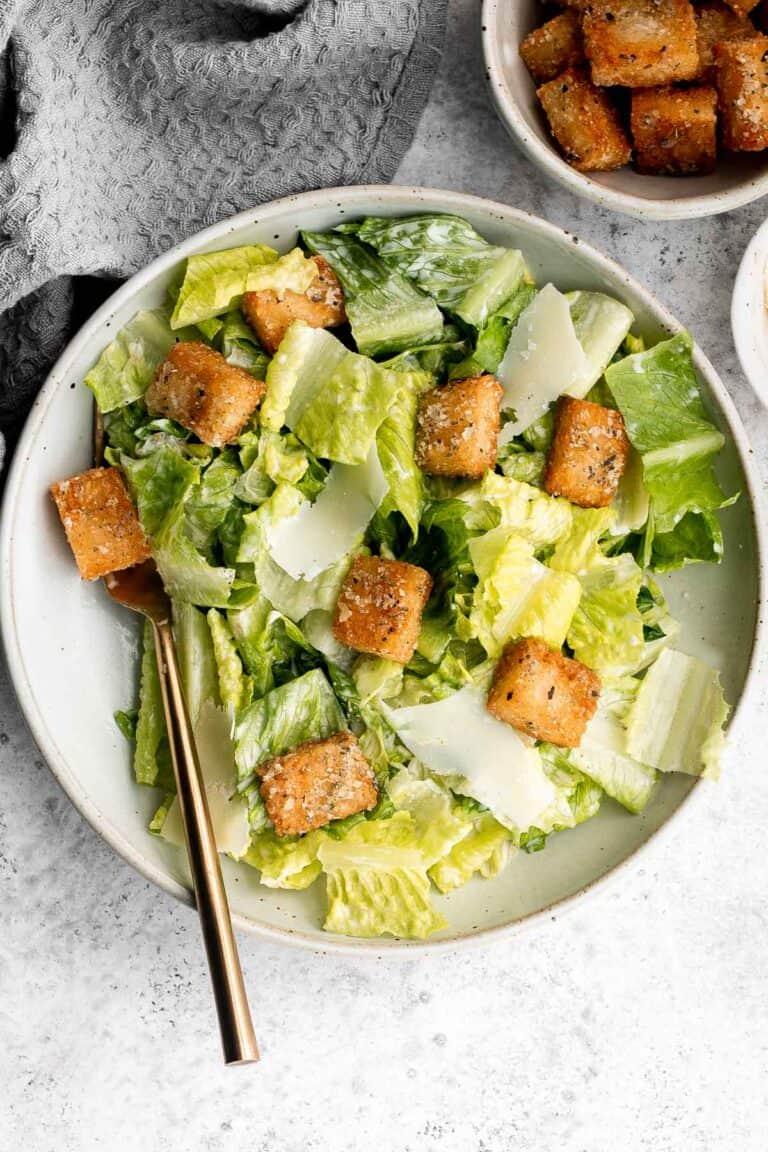
Caesar Salad
Classic Caesar Salad is fresh, crisp, delicious, and flavorful. With three simple ingredients tossed in a creamy Caesar dressing, it's ready in minutes. You can also add in some bacon bits.

Grilled Cheese Roll Ups
Grilled cheese roll ups are a fun twist on a classic grilled cheese that gives you a hot handheld lunch to enjoy. They're kid-friendly and easy to make. I especially like pairing this with tomato soup.
Pigs in a Blanket
Pigs in a blanket from scratch are a delicious and easy appetizer or snack to make for your next party or gathering - juicy, cheesy, flaky, and buttery. A great side!
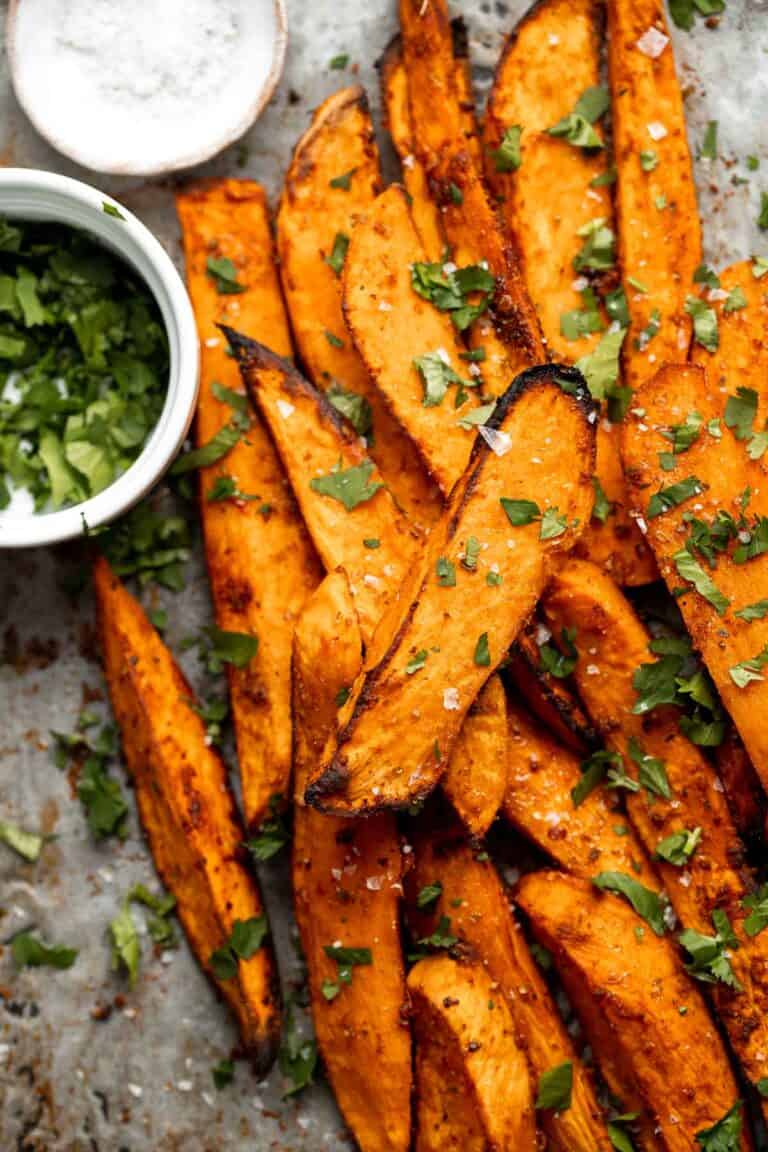
Baked Sweet Potato Wedges
Baked Sweet Potato Wedges are crispy, delicious, flavorful. Serve as an appetizer or side dish. They are salty, savory, and sweet, with a hint of spice.

Cheesy Garlic Bread
Cheesy Garlic Bread is toasty and crispy on the outside, tender and soft inside with a garlic butter spread topped with melty cheese. This comforting appetizer is easy to make in under 20 minutes - including prep!
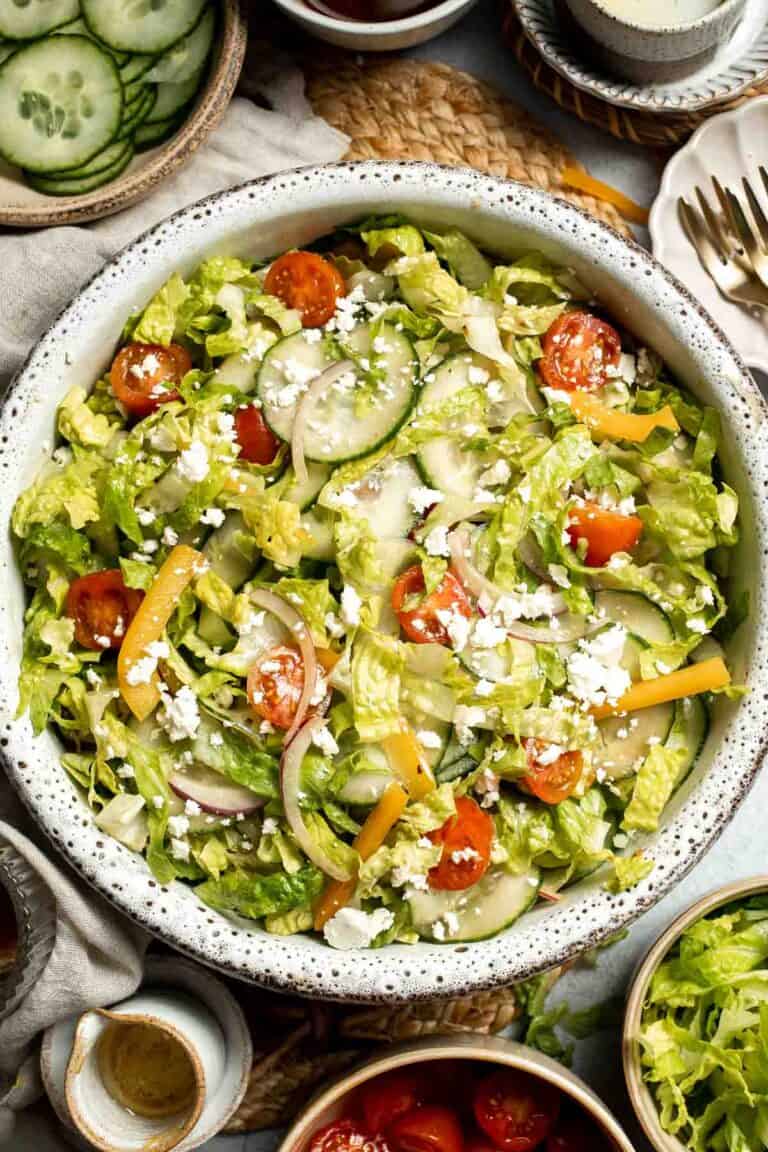
Easy Tossed Salad
Easy Tossed Salad is crisp, colorful, and fresh, made with crunchy romaine lettuce, juicy tomatoes, crisp cucumber, and a simple balsamic vinaigrette. Pair it with chicken soup for a filling meal.
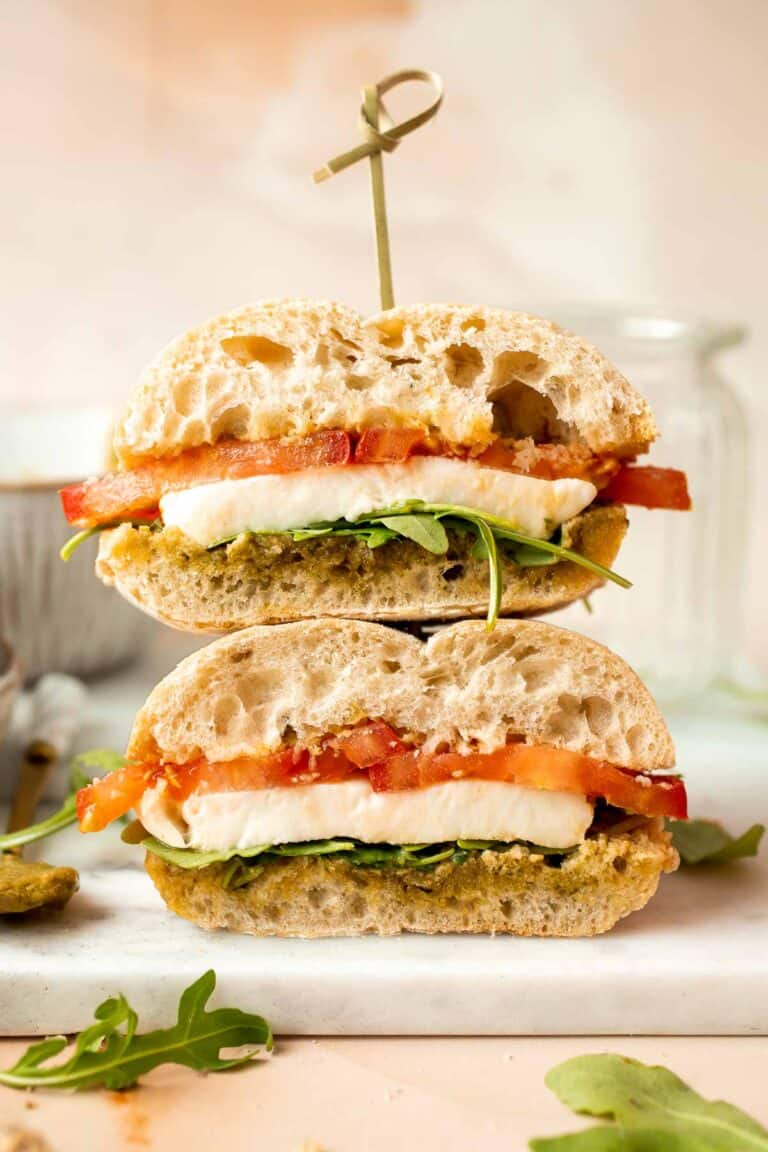
Caprese Sandwich
This vegetarian Caprese Sandwich is packed with layers of fresh tomatoes, mozzarella, greens, and a balsamic basil pesto sauce in between ciabatta buns.
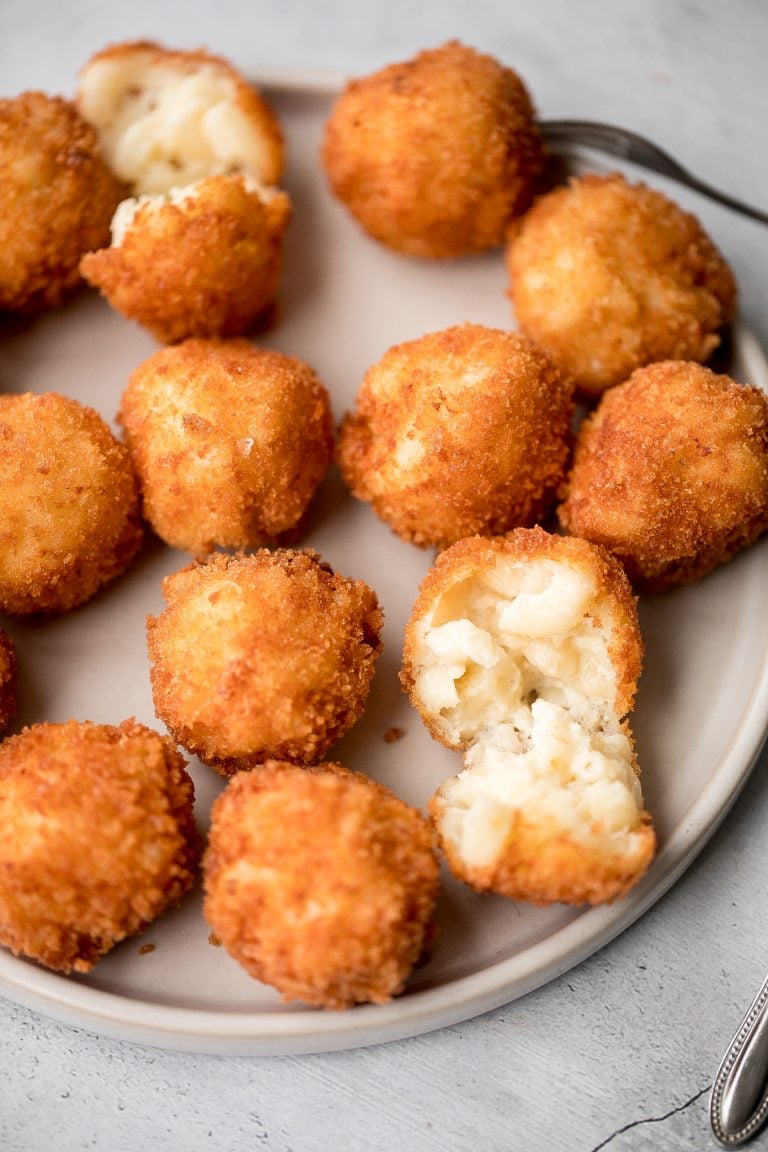
Fried Mac and Cheese Balls
Fried mac and cheese balls are crispy on the outside, creamy and cheesy on the inside, and have the perfect crunch. Best way to use leftover mac and cheese.
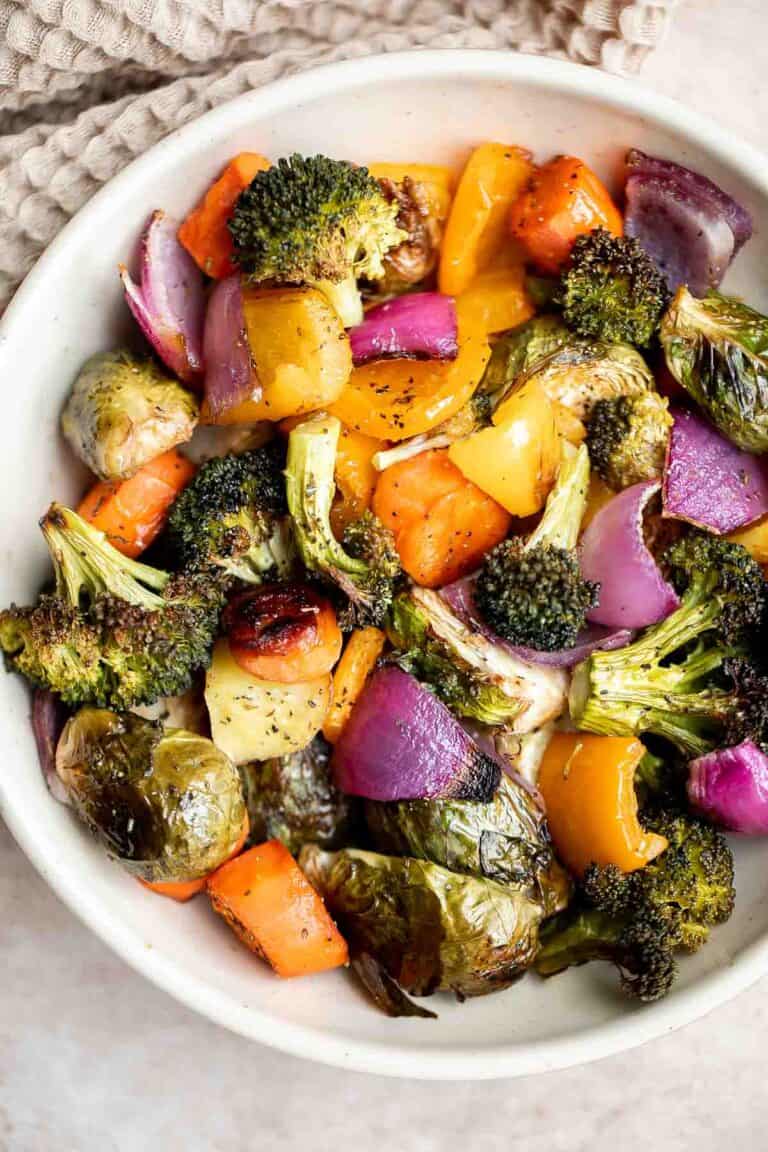
Oven Roasted Vegetables
Oven Roasted Vegetables are a delicious flavorful side dish that goes well with almost any dinner main. Customize it with whatever veggies you have on hand.
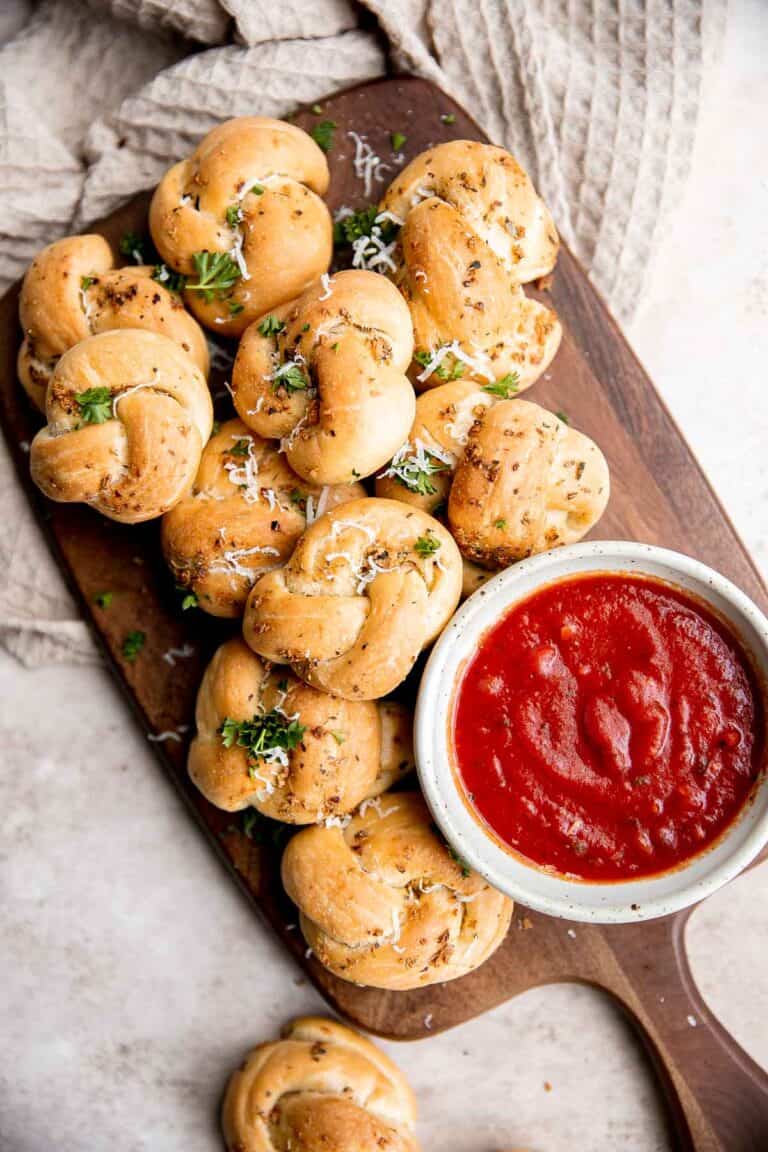
Garlic Knots
Garlic knots are fluffy on the inside, crispy on the outside, and topped with delicious savory garlic herbed butter that will have you begging for more. My favorite soup with this is Italian soup.
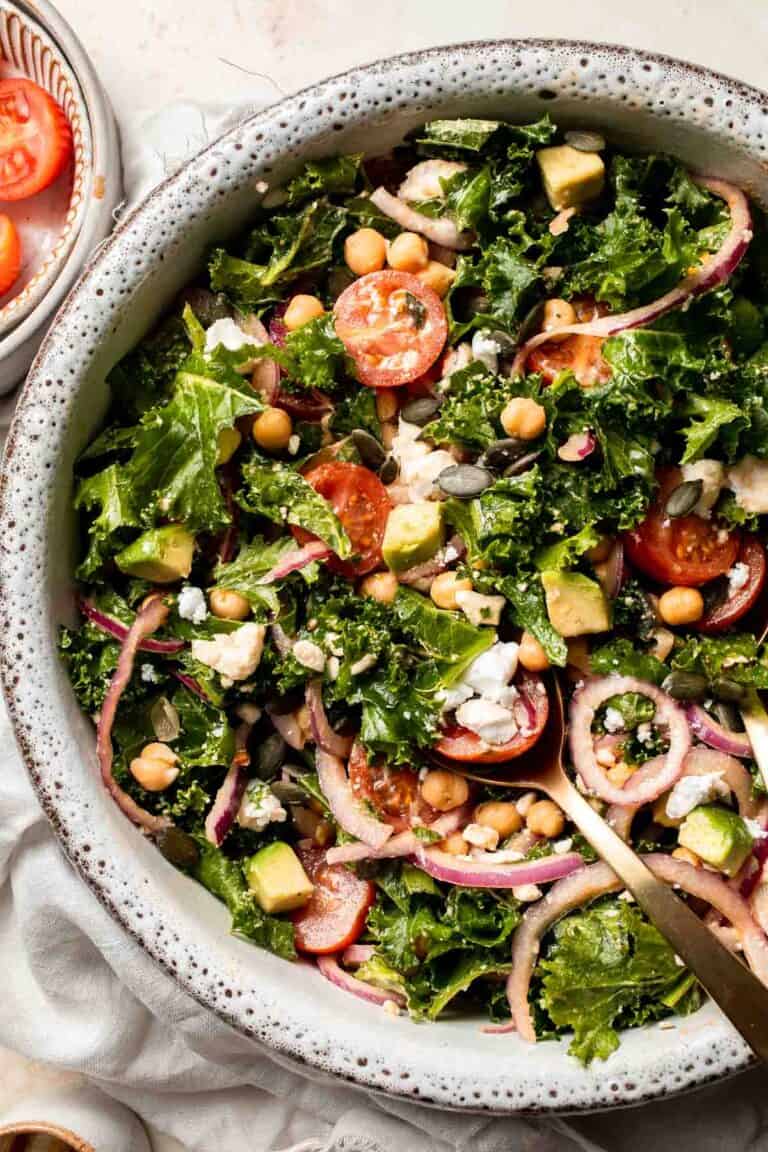
Kale Chickpea Salad
This Kale Chickpea Salad is light and refreshing, made with a mixture of fresh veggies, chickpeas, tangy feta, and a homemade lemon dijon vinaigrette.
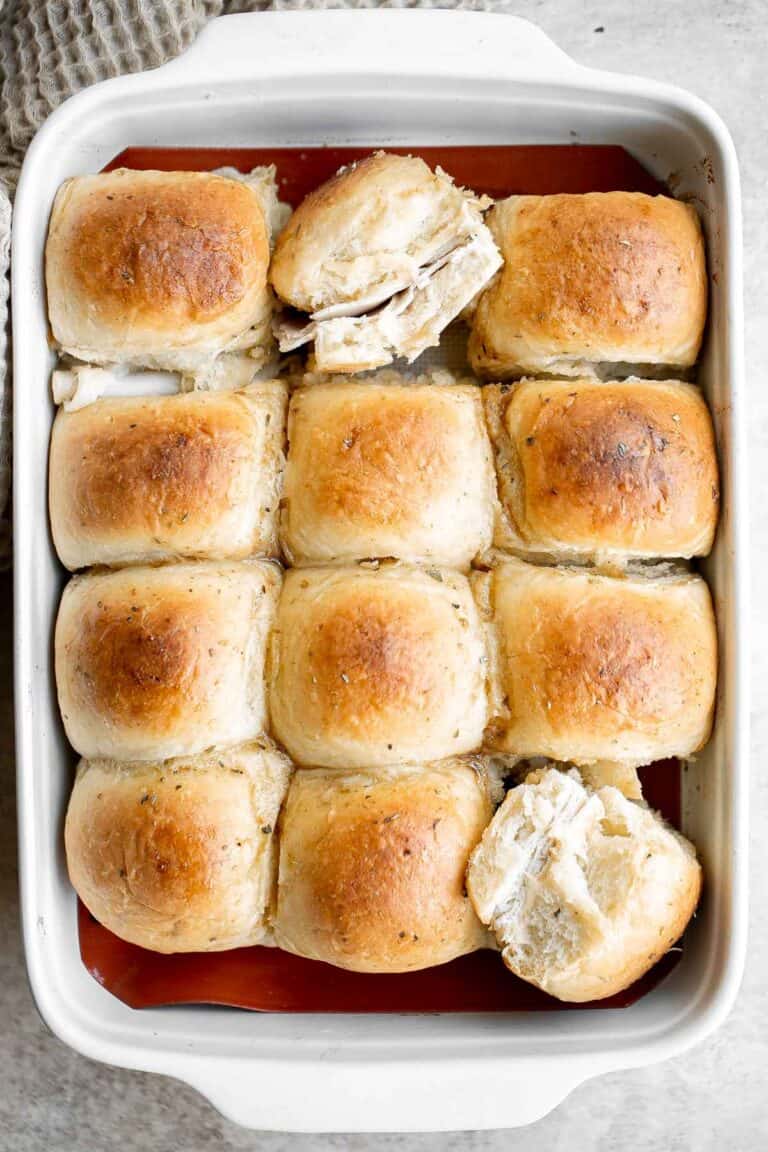
Turkey and Cheese Sliders
Turkey and Cheese Sliders are quick and easy, made with deli meat and Swiss cheese filled inside soft Hawaiian dinner rolls topped with a buttery sauce.
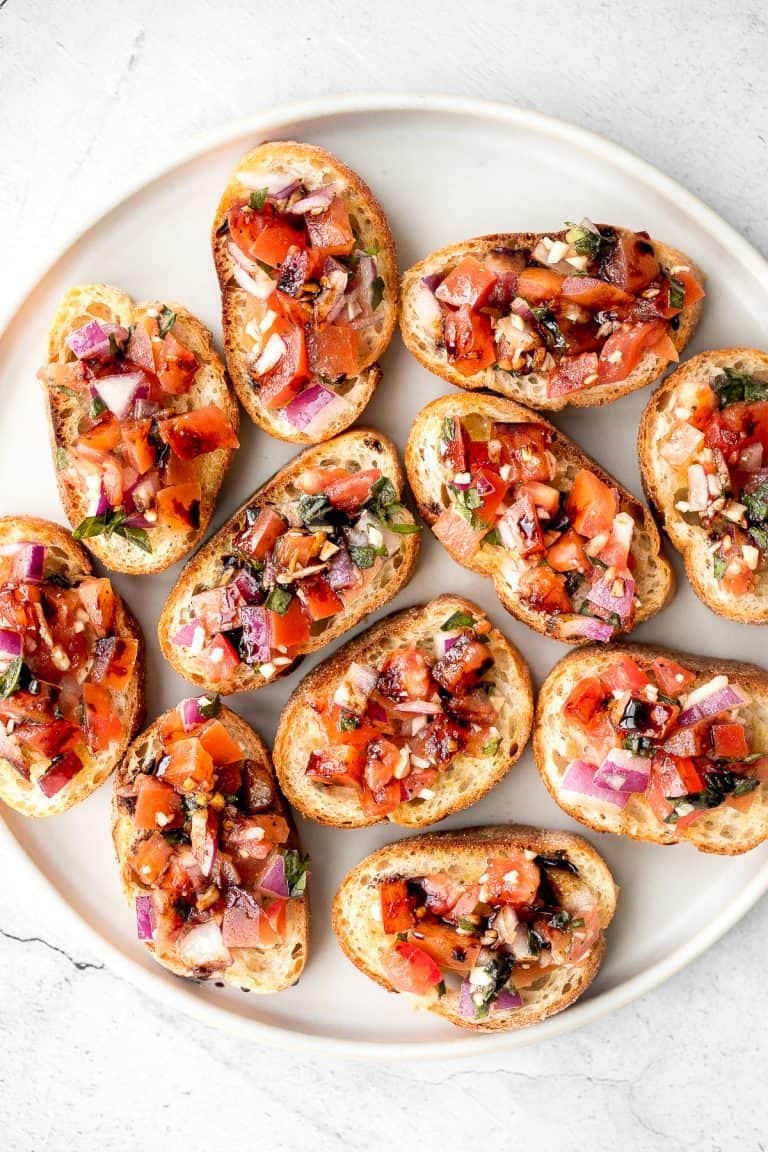
Tomato Bruschetta with Balsamic Glaze
Tomato bruschetta with balsamic glaze is an easy Italian appetizer topped with fresh ingredients including tomatoes, onions, garlic, basil and olive oil. Delicious, fresh and simple.
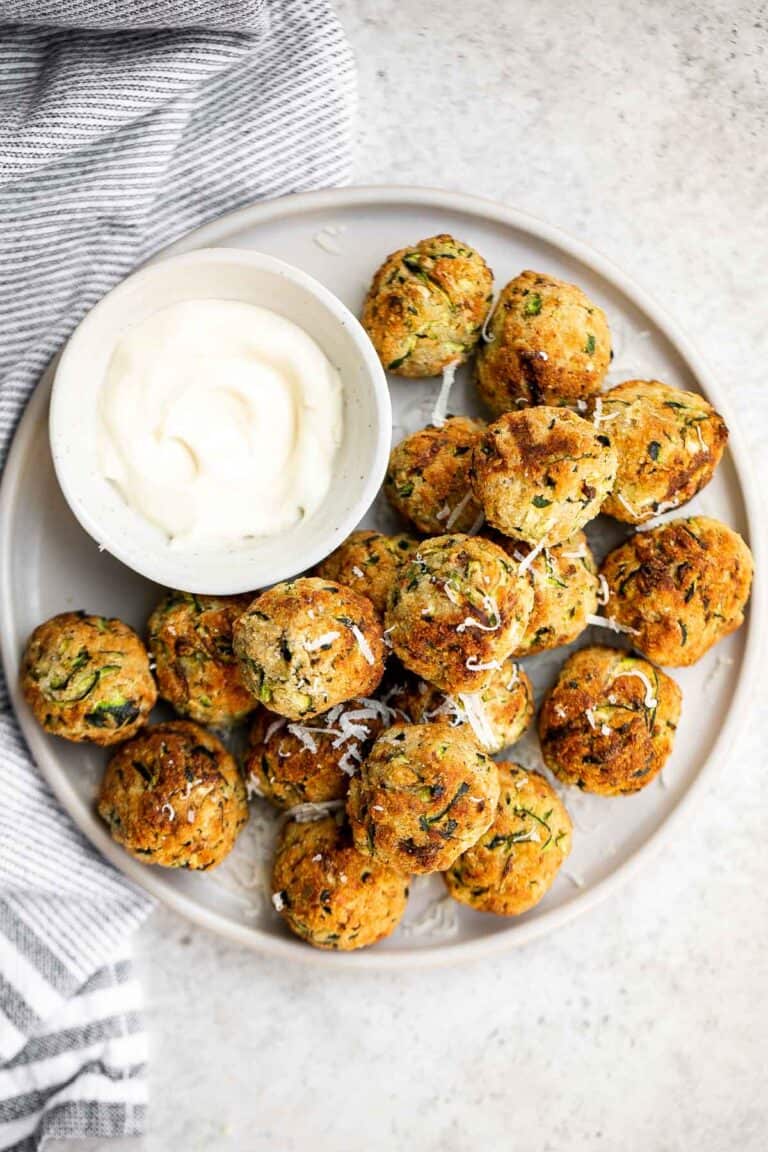
Zucchini Bites
Zucchini Bites are savory balls that are loaded with fresh zucchini. They're quick and easy to make in under 30 minutes in the air fryer or oven.

Easy Small Batch Ciabatta Rolls
Easy small batch ciabatta rolls are fluffy and airy with a perfect crunchy, crackly crust. They take only 10 minutes to prepare and require no kneading.
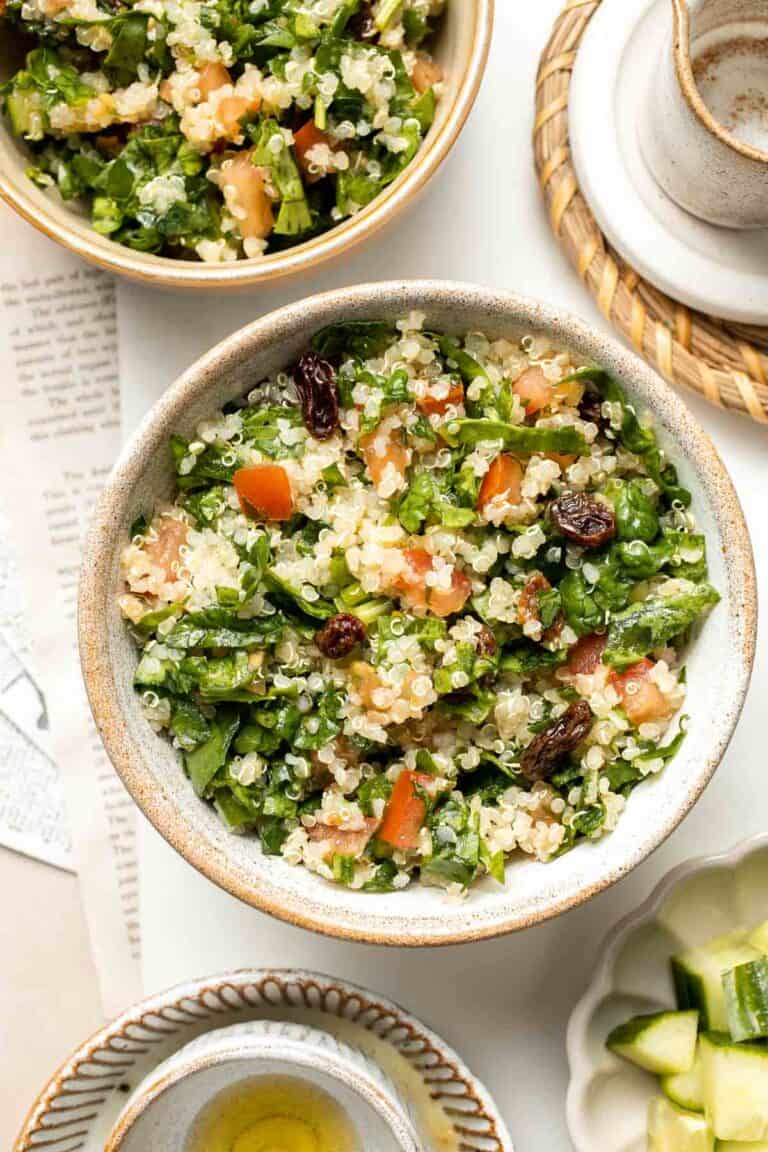
Quinoa Spinach Power Salad
Quinoa Spinach Power Salad is made with tender quinoa, tomatoes, cucumbers, and raisins dressed in a homemade lemon vinaigrette. Gluten-free and vegan too.
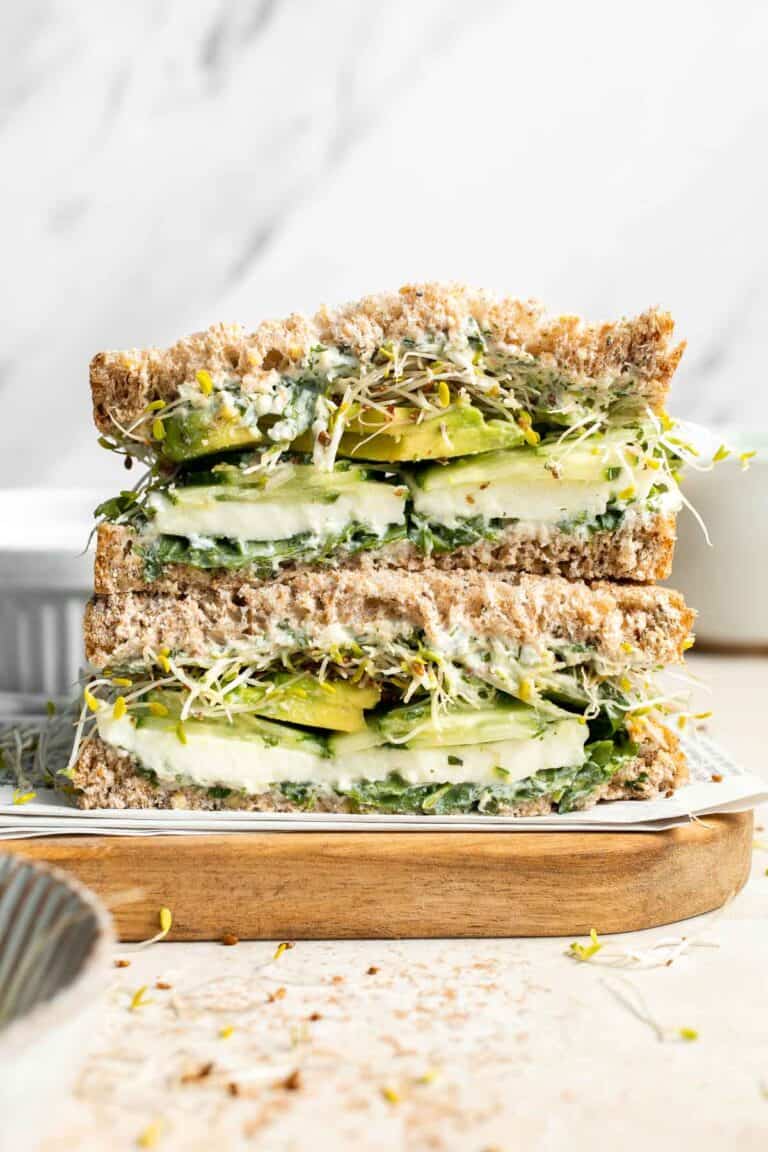
Green Goddess Sandwich
Green Goddess Sandwich is a fresh and vibrant twist on a classic veggie sandwich, packed with a creamy herb sauce, crisp veggies, avocado, and mozzarella.

Baked Mozzarella Sticks
Baked Mozzarella Sticks are a cheesy appetizer that's crispy on the outside and gooey on the inside. They're baked instead of fried for a lighter twist.
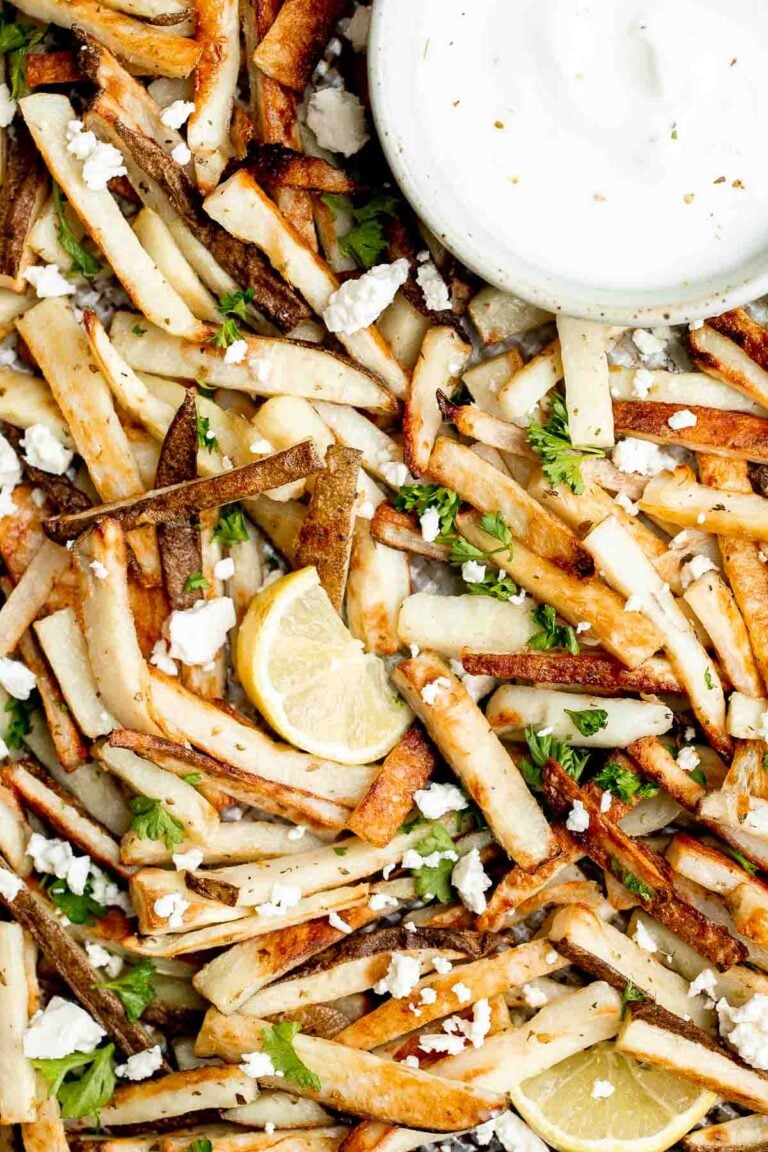
Greek Fries
Homemade Greek fries bring a Mediterranean twist on a classic side dish, crispy fries are topped with crumbled feta cheese, fresh parsley, and lime juice.

Garlic Cheddar Biscuits
Flaky Garlic Cheddar Biscuits are a simple but delicious and flavorful no yeast bread that is ready for the oven with less than 15 minutes prep. These buttery biscuits with cheddar cheese are so good with soup!
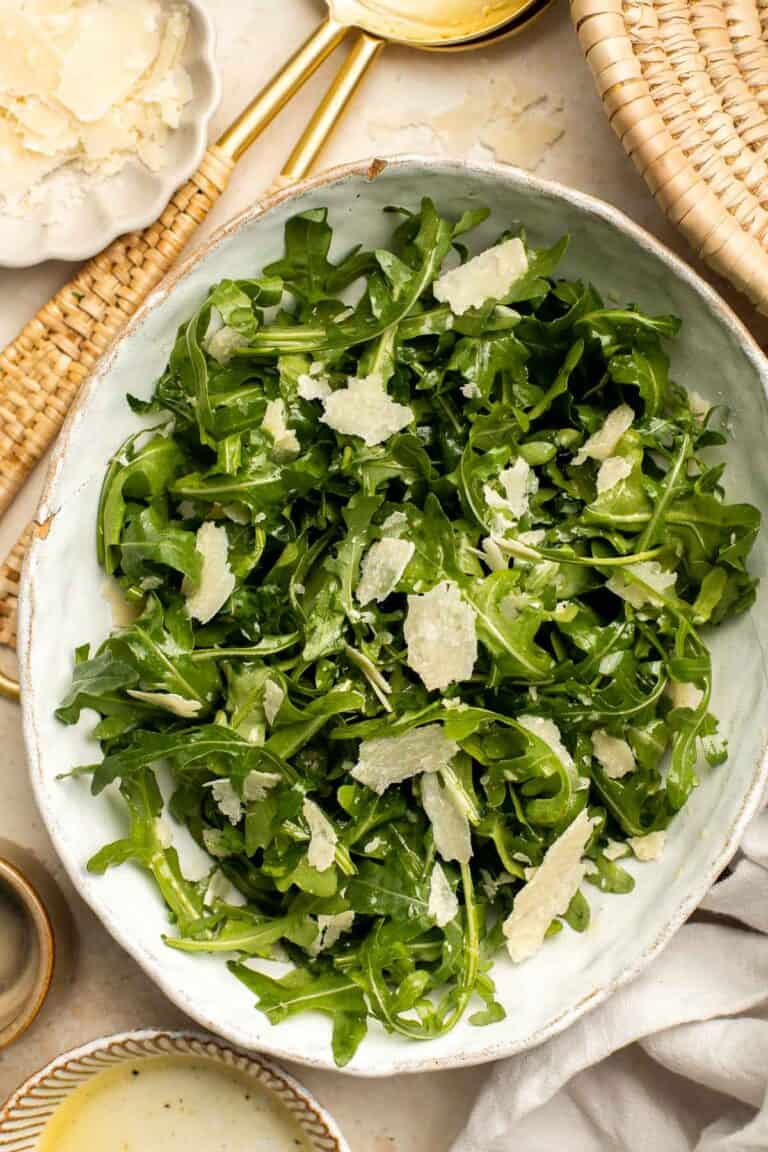
Arugula Salad
This Arugula Salad with Parmesan cheese and a simple homemade lemon dressing is healthy, fresh, and delicious. This versatile salad is easy to customize and goes well with almost any soup. I love it with potato soup!

Tuna Melt Grilled Cheese Sandwich
Get your hands on pantry staple canned tuna and make a delicious, crunchy tuna melt grilled cheese sandwich in less than 10 minutes! It's so tasty and easy!

Pepperoni Pizza Rolls
Easy pepperoni pizza rolls are crispy on the bottom, tender and chewy inside, packed with pepperoni and cheese, and baked until bubbly. A total crowd pleaser for adults and kids alike!

Crispy Corn Fritters
Crispy Corn Fritters are golden, savory, and quick to make. Perfect as a snack, appetizer, or side with your favorite summer meals!
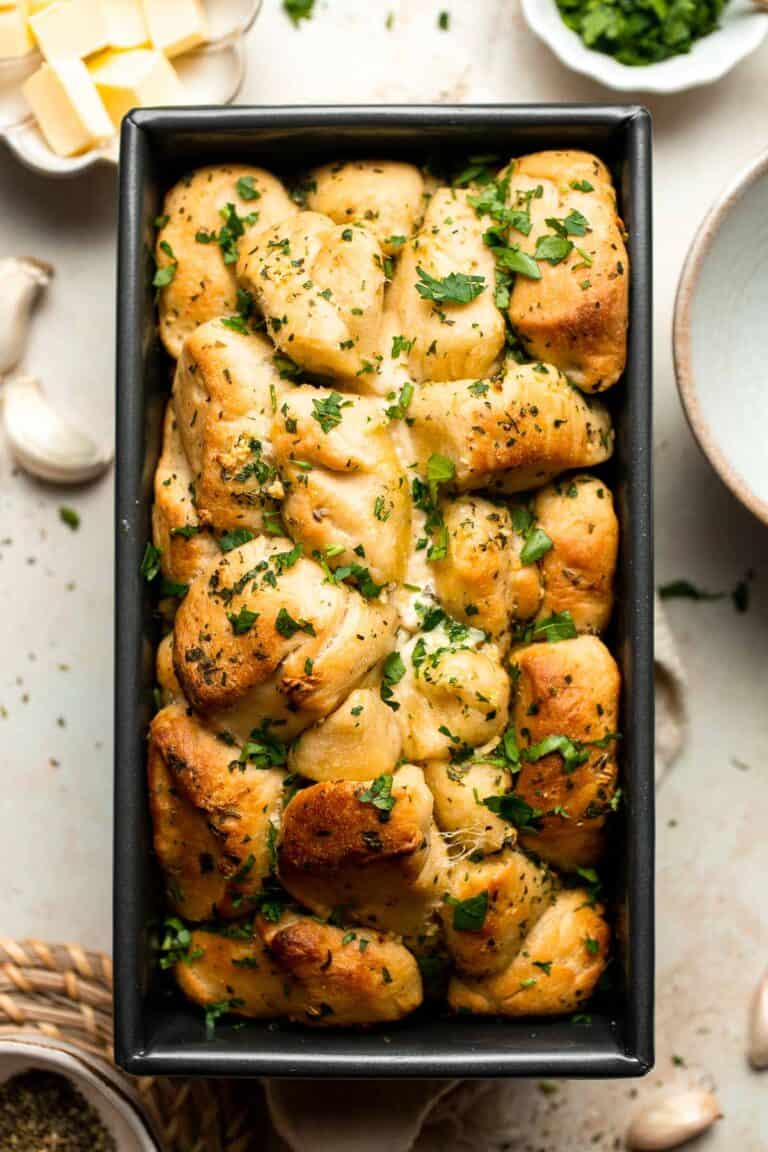
Pull Apart Garlic Bread
Homemade Pull Apart Garlic Bread is fluffy, buttery, flavourful, and tears easily for optimal sharing. You won't be able to stop grabbing these bites!
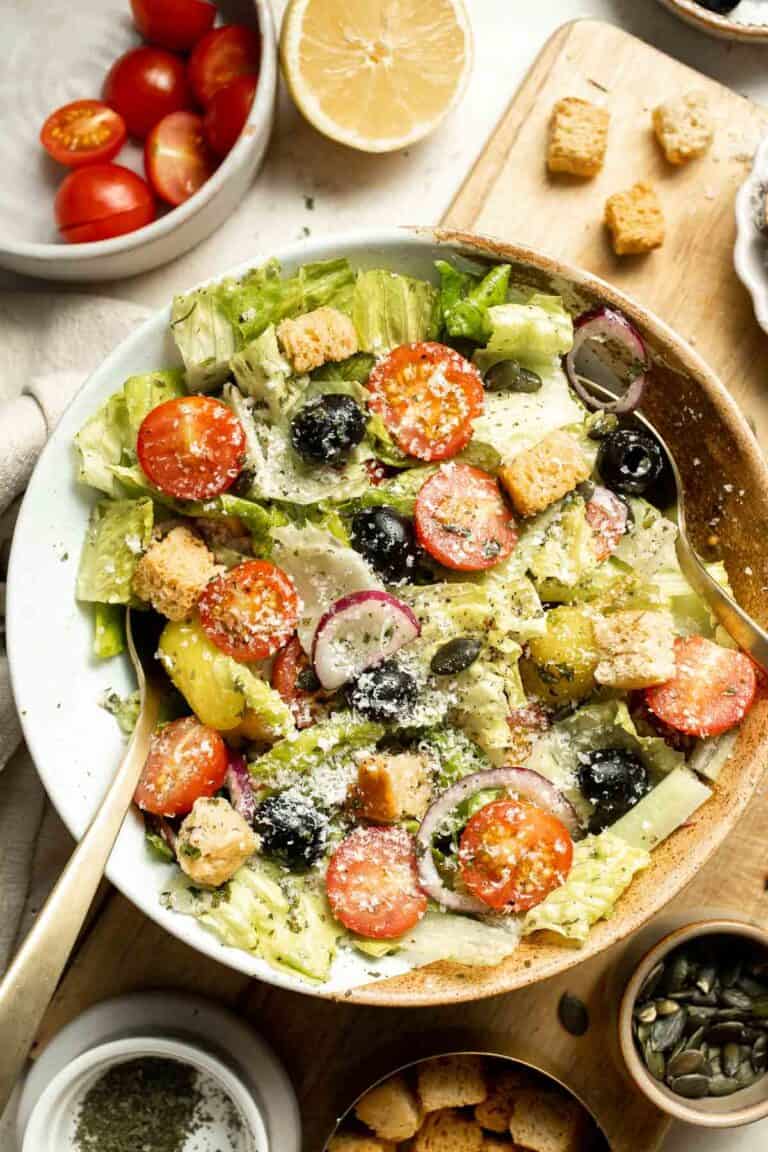
Simple Italian Salad
Simple Italian Salad is fresh, delicious, and flavorful. This Olive Garden copycat is loaded with fresh veggies including lettuce, tomatoes, and red onions, and lightly tossed in homemade dressing.

Spinach Cheese Rolls
Spinach cheese rolls are an easy appetizer that's creamy, cheesy, comforting, and delicious. Serve as an appy at parties, for a school lunch, or snack.
FAQ
A good side dish for soup is one that complements the flavors and textures of the soup without overpowering it. Classic choices include crusty bread, grilled cheese, or simple dinner rolls for dipping. Fresh salads, roasted vegetables, or light sandwiches are also great options. The key is to balance hearty soups (such as tortilla soup, chicken noodle soup, or french onion soup) with lighter sides, and lighter soups with something a bit more filling.
If you don't want to use bread, there are plenty of other delicious dippers. Try crackers, breadsticks, pita chips, or even pretzels for crunch. Roasted potato wedges or easy flatbreads like naan or tortillas can also be used in place of traditional bread. For a lighter option, fresh veggie sticks like carrots or celery are surprisingly satisfying dipped into warm soup.
To turn soup into a full meal, pair it with a side that adds protein and substance. Sandwiches, wraps, grain salads, or roasted vegetables can round out the bowl nicely. You can also serve it with a baked potato, a simple pasta side, or even a slice of quiche for a heartier pairing. Combining soup with one or two of these sides makes dinner feel complete and balanced.
Bread is a classic, but it's not your only option. Serve soup with fresh salads, roasted vegetables, simple grains like rice or quinoa, or even small savory muffins. Grilled sandwiches, wraps, or finger foods like quesadillas or empanadas also work really well. These sides bring variety and texture to the meal while keeping things easy and approachable.
Soup at a party can be both elegant and practical. Serve it in small cups or mugs for easy handling, or create a "soup bar" with a variety of toppings and sides so guests can customize their bowls. Pair it with breads, rolls, or light finger foods like sliders or salad cups for a complete spread. Offering two contrasting soups (like one creamy and one brothy) is also a fun way to give guests options.
More Recipe Collections
Looking for other recipes like this? Try these:

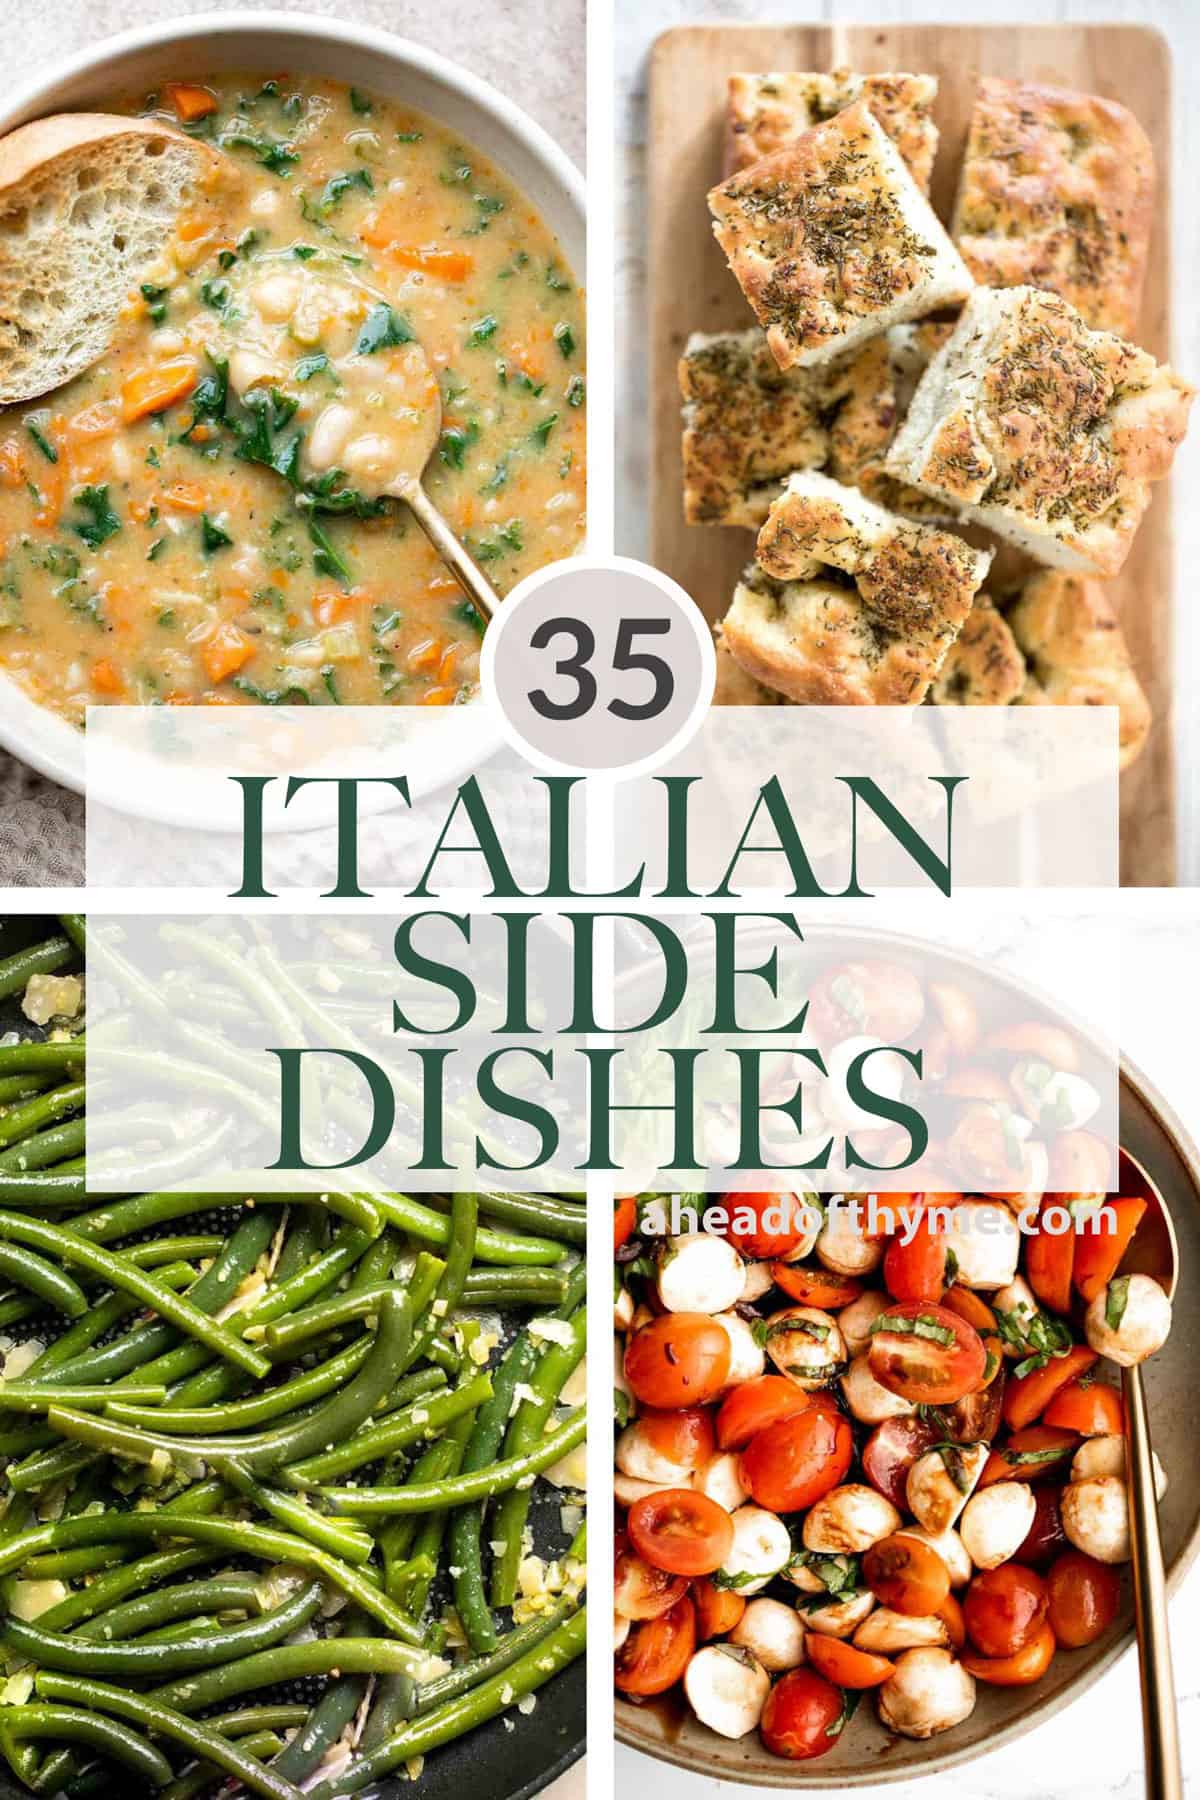
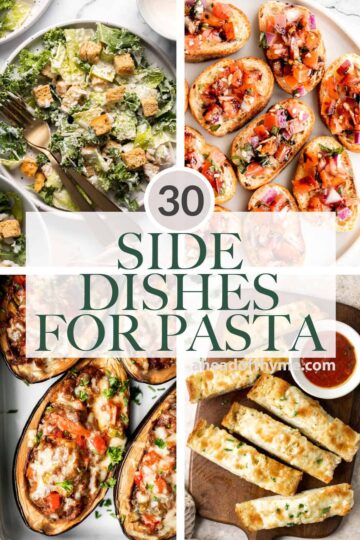

Tried any of these soup sides?
I'd love to hear what you think! Leave a comment and rating for the soup side dish recipe that you made to share your feedback. Your reviews help others discover the recipe and help me keep creating more free recipes for you. Snap a photo and tag me on social media @aheadofthyme too.
This recipe roundup was originally posted in 2022 and was updated recently with new content.
Baked Apple Cider Donuts Recipe

Baked Apple Cider Donuts are the ultimate fall treat: soft, fluffy, and rolled in spiced cinnamon sugar with just the right hint of apple cider. They're cozy, aromatic, and so easy to make at home, so you can bake a fresh batch whenever the craving hits.

Apple cider donuts are a seasonal classic, showing up at pumpkin patches, apple orchards, and fall festivals. But here's the secret: they're just as good (maybe better) baked right in your own oven. You don't need a fryer, and the reduced apple cider gives them that rich, concentrated flavor that makes every bite taste like autumn.
This apple cider donut recipe pairs perfectly with a mug of Chai Tea Latte for the coziest fall snack ever. If you liked this recipe, you should try our Homemade Glazed Donuts or Cinnamon Apple Oatmeal Muffins next.

Why You'll Love This Recipe
- Baked, not fried. Forget messy hot oil, these donuts are baked in a simple donut pan. They're still soft, fluffy, and perfectly golden, with way less fuss (and way less cleanup).
- Packed with cozy fall flavor. Reducing the apple cider concentrates its flavor, then pairing it with warm spices like cinnamon, ginger, and cloves makes these donuts taste like pure fall in every bite.
- That cinnamon-sugar coating. The donuts are brushed with melted butter and rolled in spiced sugar for that bakery-style finish. It's crunchy, sweet, and gives the perfect contrast to the soft donut inside.
- Easy and foolproof. The batter comes together quickly with pantry staples and bakes up in just 10 minutes. Even if you've never made donuts before, this recipe is simple enough to nail on your first try.
Ingredients and Substitutions
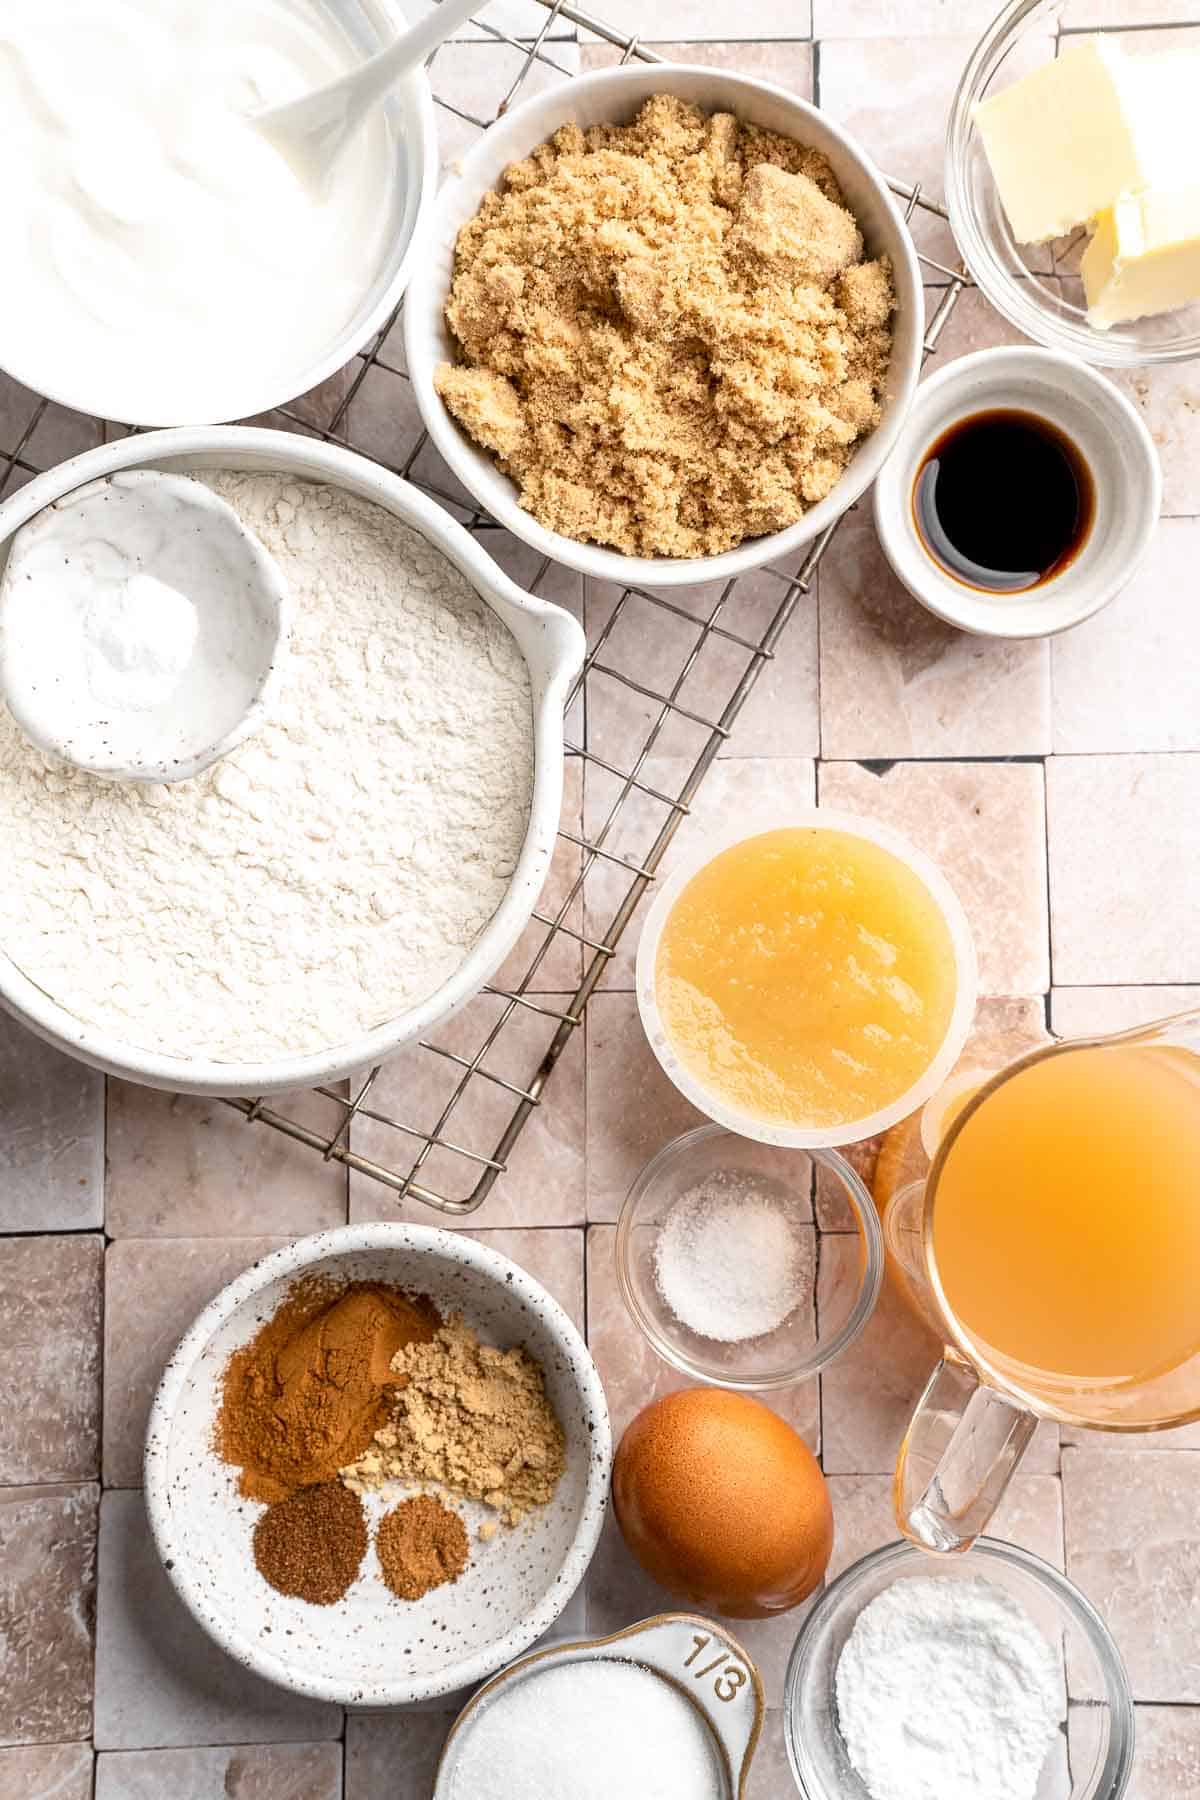
To make these easy and delicious baked apple cider doughnuts, you will need the following ingredients (see recipe card below for quantities):
- apple cider - The star flavor! Reduce it to concentrate the flavor and give the donuts a bold apple punch.
- all-purpose flour - The base of the donuts, giving them structure and a tender crumb.
- baking powder + baking soda - Work together for lift and lightness.
- kosher salt - Enhances all the warm spice flavors.
- spices - cinnamon, ground ginger, ground cloves, and nutmeg adds warmth and fall flavor. Nutmeg is in the batter only, while the rest are used in both the donuts and the sugar coating for double the cozy spice. For a shortcut, swap the spices with 2 teaspoon of apple pie spice.
- butter - Unsalted butter is melted into the batter for richness, and also used for brushing the donuts before coating them in spiced sugar.
- brown sugar - Sweetens the donuts and adds a caramel-like note. We use light brown sugar, but feel free to use dark brown sugar if that's what you have on hand.
- sour cream - Keeps the donuts moist and tender, adding a little tang. Greek yogurt can be substituted.
- unsweetened apple sauce - Boosts the apple flavor and helps keep the donuts light and soft.
- egg - Provides structure and helps bind the batter.
- vanilla extract - Adds warmth and rounds out the sweetness.
- granulated sugar - Used in the spiced sugar coating for a crisp, sweet finish.
Equipment
You'll also need measuring cups and spoons, a medium saucepan for reducing the cider, a whisk, two mixing bowls, a rubber spatula, a 6-cavity donut pan, and a pastry brush for applying the melted butter before coating the donuts.
Instructions
Step 1: Make the Apple Cider Donuts
- Reduce the cider. Pour the apple cider into a medium saucepan over medium-high heat. Bring to a boil, then continue boiling until reduced to ½ cup, stirring occasionally. Set aside to cool for 15 minutes.
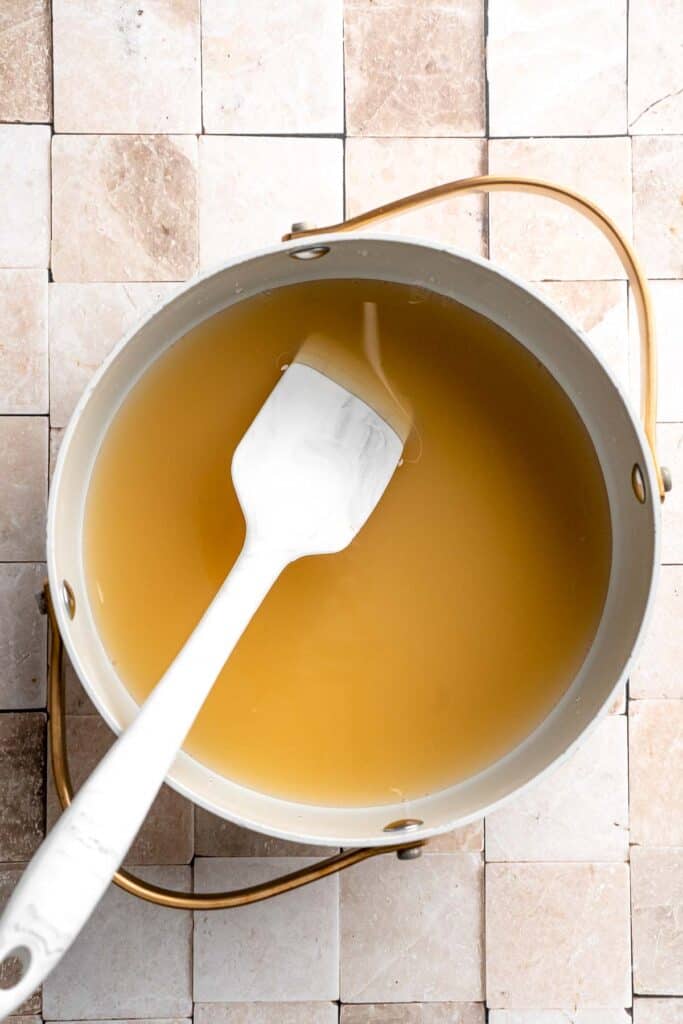
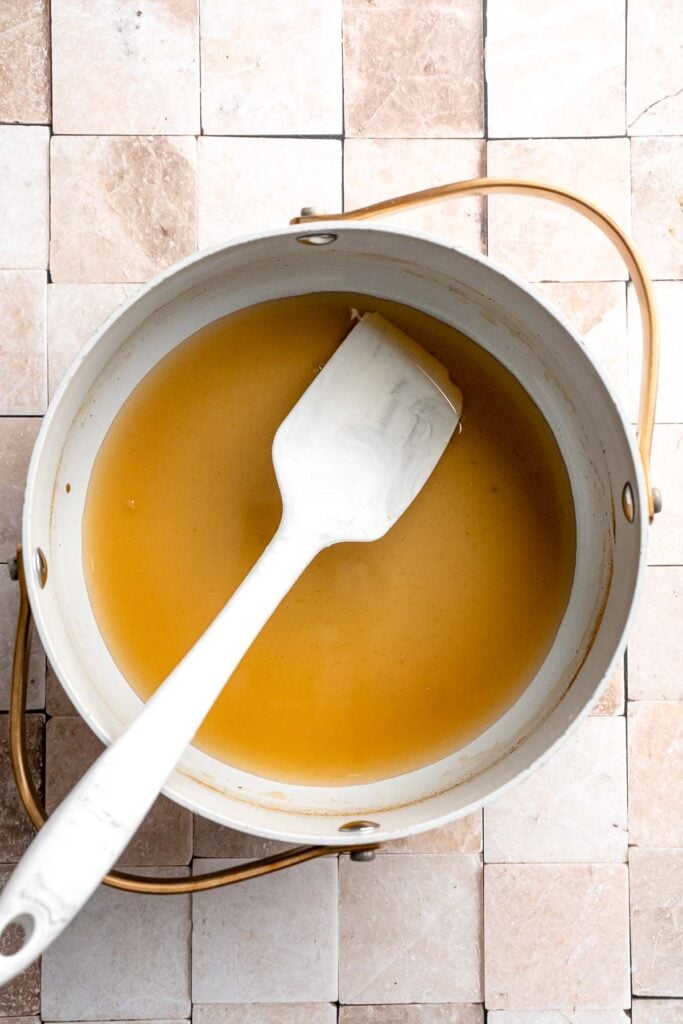
- Mix dry ingredients. In a medium mixing bowl, whisk together flour, baking powder, baking soda, salt, cinnamon, ginger, cloves, and nutmeg until well combined.
- Mix wet ingredients. In a large bowl, whisk together the cooled reduced apple cider, melted butter, brown sugar, sour cream, apple sauce, egg, and vanilla until smooth.
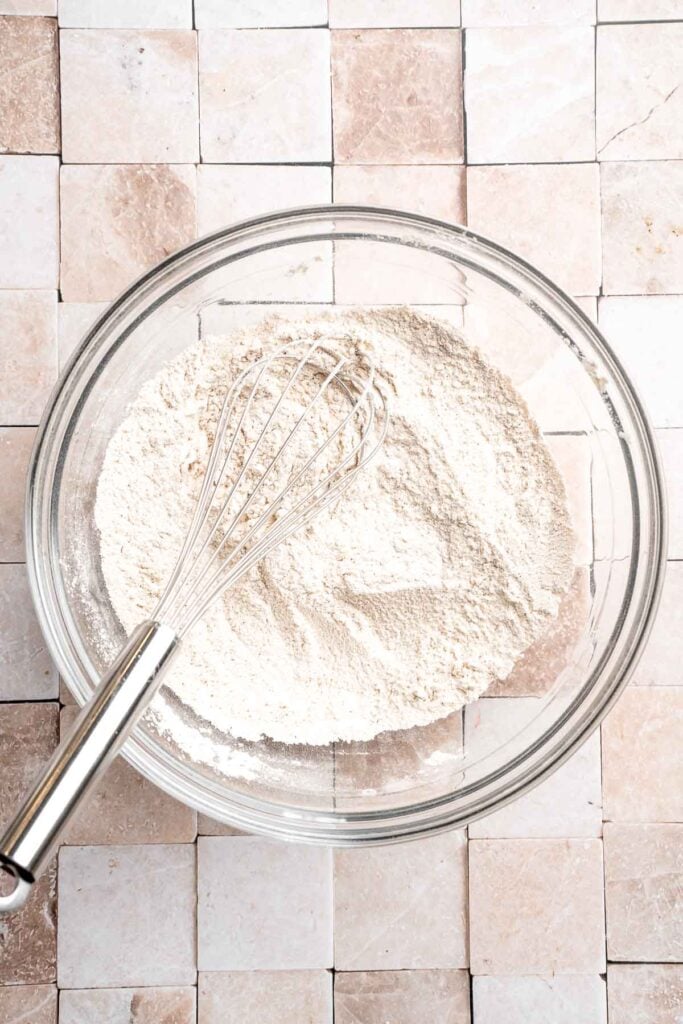
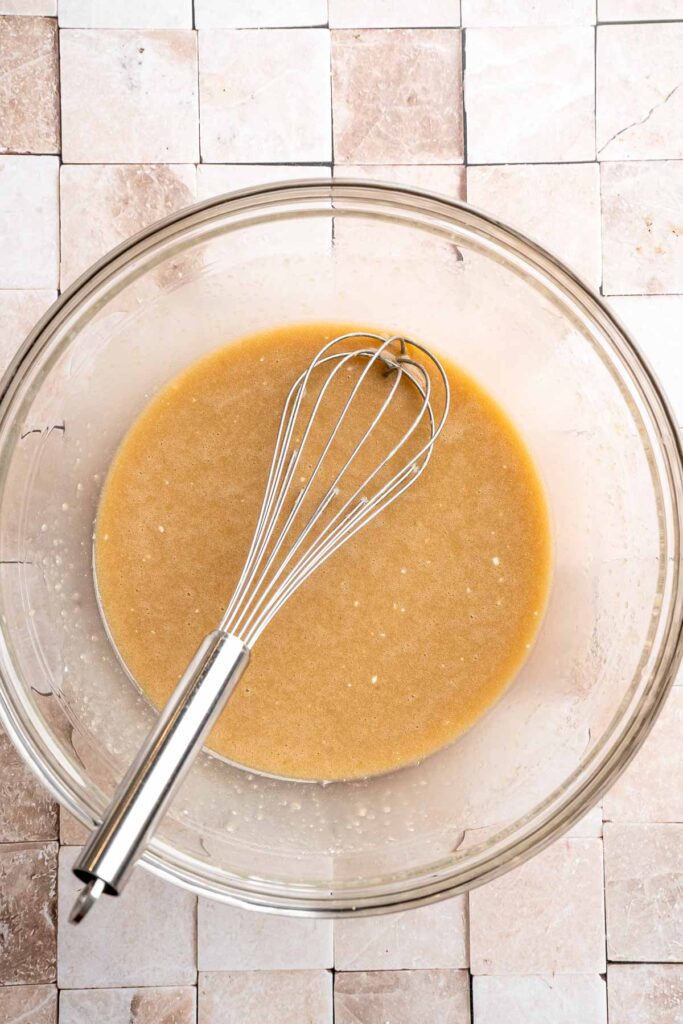
- Combine wet and dry. Add the dry ingredients into the wet mixture, then whisk until just combined and smooth (do not overmix).
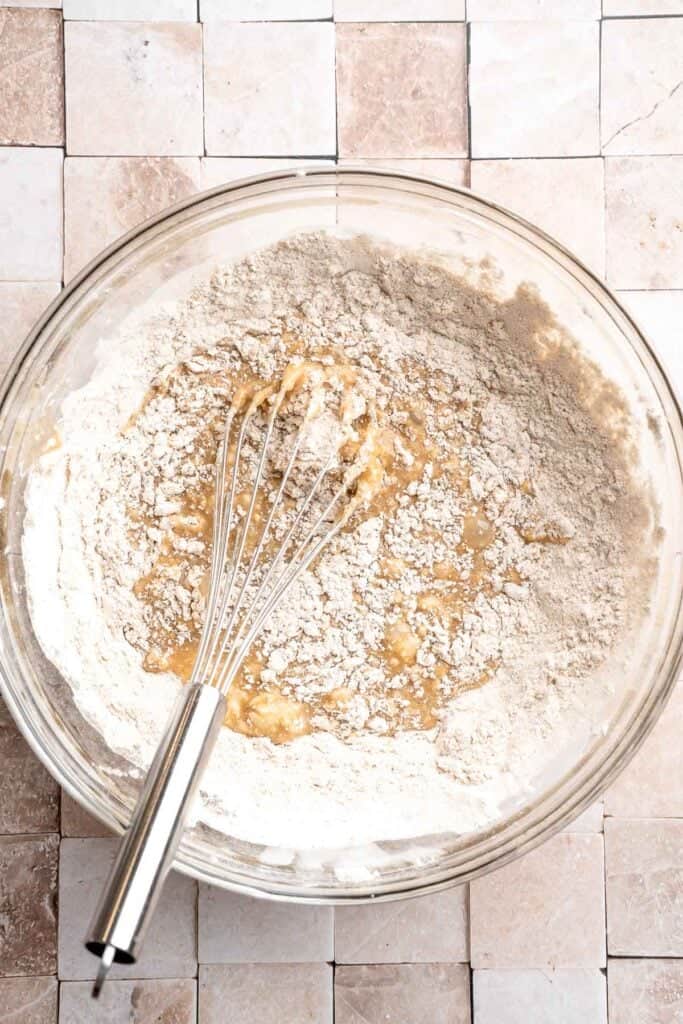
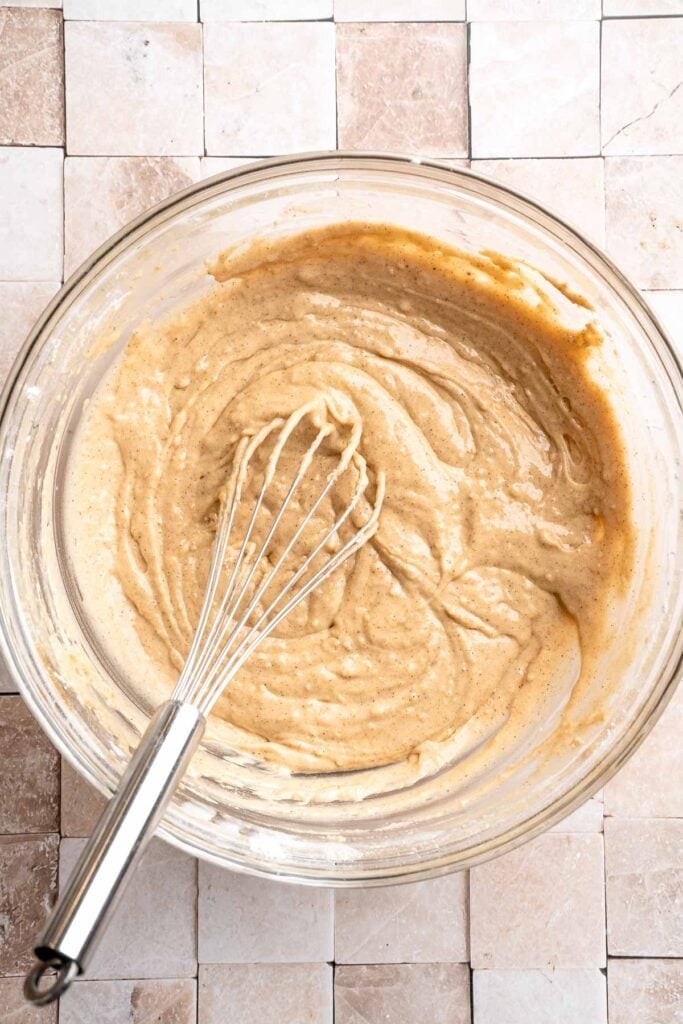
- Fill the pans. Prepare 2 doughnut pans by lightly spraying with cooking spray. Transfer the batter into a piping bag and pipe evenly into each donut cavity, filling each about ¾ full.
- Bake the donuts. Bake in a 350°F preheated oven for 10-11 minutes, or until an inserted toothpick comes out clean. Cool in the pans for 5-10 minutes, then transfer to a wire rack.


Step 2: Make the Spiced Sugar Coating
- Mix the coating. In a medium mixing bowl, whisk together white sugar, cinnamon, ginger, and cloves until evenly combined.
- Coat the donuts. Once donuts are cool enough to handle, brush with melted butter using a pastry brush. Immediately toss in the spiced sugar mixture until coated, then return to the cooling rack.


- Repeat. Repeat with remaining donuts.


Expert Tip: Reduce the Apple Cider for Intense Flavor
Don't skip this step! Boiling down the apple cider concentrates its flavor, which is what makes these donuts taste so rich and seasonal. Start with 1 ½ cups and simmer until reduced to about ½ cup - that's where the magic happens.
More Tips and Tricks
- Use a piping bag. For neat donuts, spoon the batter into a piping bag (or a zip-top bag with the corner snipped) and pipe it into the donut pan. This avoids mess and gives evenly shaped rings.
- Don't overmix. Stir the batter until just combined to keep the donuts tender. Overmixing will make them dense and chewy instead of soft and fluffy.
- Generously coat with butter. When brushing the donuts before rolling them in sugar, be generous with the butter. It helps the coating stick and gives that classic bakery-style crunch.
- Cool slightly before coating. Let the donuts rest for 1-2 minutes out of the pan before brushing with butter and rolling in sugar. If they're too hot, the sugar melts instead of sticking.
- Switch up the coating. Instead of cinnamon sugar, try powdered sugar, maple glaze, or even a drizzle of caramel sauce for a fun twist.
Recipe Variations
- Make donut holes. Make the batter in a mini muffin pan to create donut holes. Roll them in the same spiced sugar for bite-sized treats.
- Add a glaze. Skip the sugar coating and dip in a simple apple cider glaze made with powdered sugar, cider, and vanilla for a shiny, sweet finish. See our Homemade Glazed Donuts.
- Add pumpkin. Double up on the fall flavor by adding pumpkin! Add ¼ cup pumpkin puree to the batter along with a little extra cinnamon for a pumpkin-spice upgrade.
- Make them vegan. Swap the sour cream for vegan yogurt and the egg for a flax egg. Use plant-based butter for the coating.
- Dip in chocolate. After baking, dip the cooled donuts halfway in melted dark chocolate and sprinkle with cinnamon sugar for a decadent twist.
- Stuff them. Pipe apple butter or jam into the donuts for a surprise filling. It's like a handheld apple pie! See our Baked Jelly Donuts with Strawberry Jam.

Storage
How to Store
Keep cooled donuts in an airtight container at room temperature for up to 2 days, or refrigerate for up to 5 days.
How to Reheat
Warm in the microwave for 10-15 seconds or in a 300°F preheated oven for 5 minutes to refresh softness. Roll in extra sugar if needed.
How to Freeze
Freeze cooled, uncoated donuts in a freezer bag for up to 2 months. Thaw at room temperature, brush with butter, and roll in spiced sugar just before serving.
How to Serve
These baked apple cider donuts are the definition of cozy. They're perfect as a grab-and-go breakfast, a sweet snack with coffee, or the star of your fall dessert table. Serve them fresh and warm for maximum apple-cider magic.
These are my favorite recipes to pair with these apple donuts:


Fall Desserts
Why not create a full autumn dessert spread? Pair these with pumpkin muffins, caramel apple pie, pecan bars, or cinnamon cookies for a cozy, seasonal treat table. These desserts complement each other perfectly with warm fall flavors and a mix of soft, crunchy, and gooey textures.
FAQ
Absolutely! Baking donuts in a donut pan gives them a soft, cake-like texture without needing to deep fry. While fried donuts are more yeasty and chewy, baked donuts are fluffier and lighter. They're also easier, faster, and a little less indulgent, making them perfect for home bakers.
Yes! Traditionally, many apple cider donuts are fried, but this recipe bakes them in the oven. You'll still get soft, fluffy donuts with a spiced sugar coating, but without the mess of hot oil. Baking also makes them easier to prepare at home, especially if you don't have a deep fryer.
Apple cider donuts are a fall classic because they capture everything we love about the season in one bite: warm spices, cozy apple flavor, and that nostalgic orchard treat vibe. Reducing apple cider concentrates its flavor, making each donut taste sweet, spiced, and perfectly autumnal. They're basically fall wrapped in cinnamon sugar.
Baked apple cider donuts are a bit lighter than fried donuts since they're made without hot oil. They still taste indulgent but aren't as heavy or greasy. That said, they're still a sweet treat, so enjoy them in moderation. The good news is you can enjoy two without feeling weighed down the way fried donuts sometimes do.
Yes, though the apple cider flavor is more subtle than drinking apple cider straight. Reducing the cider intensifies the apple flavor and pairs beautifully with cinnamon, cloves, and nutmeg. The result is a donut that tastes warmly spiced with a gentle apple tang, rather than overwhelmingly sweet. It's balanced and comforting.
The name comes from the main ingredient: apple cider, which is boiled down to infuse flavor into the donuts. When apple orchards in the U.S. began selling fall treats, apple cider donuts became their signature. The cider gives them a unique taste that sets them apart from plain cake donuts.
Apple cider donuts are said to have originated in the northeastern United States, where apple orchards and cider mills are abundant. They became especially popular in New England as a seasonal treat during fall harvests. Today, they're a staple at orchards, fairs, and pumpkin patches all over the country.
More Apple Recipes
Looking for other recipes like this? Try these:


Tried this recipe?
I'd love to hear what you think! Leave a comment and rating below to share your feedback. Your reviews help others discover this recipe and help me keep creating more free recipes for you. Snap a photo and tag me on social media @aheadofthyme too.

Baghali Polo (Persian Dill Rice with Fava Beans)
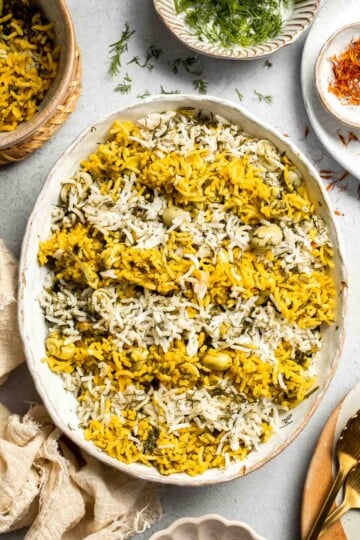
Baghali Polo, also known as Persian Dill Rice, is a classic Persian rice dish made with fragrant basmati rice, tender fava beans, and loads of fresh dill. It's light and fluffy with a golden kiss of saffron. This aromatic, colorful staple is the kind of rice that can easily steal the spotlight from whatever you serve it with. If you love Persian cuisine, this recipe is a must-try!

Rice is at the heart of Persian cuisine, and Baghali Polo is one of its most celebrated variations. If you've never made Persian rice before, this dish is the perfect place to start - it looks impressive yet it's surprisingly simple enough to make at home on a weeknight. Often served with lamb shank, roasted chicken, or beef, this fluffy green and white rice dish is a staple for festive gatherings like Norouz, weddings, and mehmoonis (big family gatherings).
If you liked this recipe, you should try our Basmati Rice with Saffron or Rice Pilaf with Carrots next. If you're looking for a way to dress up rice, this is your golden ticket (literally, thanks to saffron).

Why You'll Love This Recipe
- Easy to make. Baghali polo looks like something you'd only find at a Persian wedding banquet, but you don't need chef-level skills to pull it off. All you need is a handful of ingredients and a little patience while it steams to perfection.
- So much flavor. This isn't your everyday rice. The combination of herbs and beans make this dish nutritious and delicious. Dill provides a fresh herby flavor, fava beans add a rich, buttery, and slightly nutty flavor, and the saffron ties it all together with a floral, golden glow.
- A showstopper side. This Persian dill rice might just be the centerpiece of the table. With its flecks of green dill and golden saffron, it looks like you've gone all out (even when you haven't). Whether you're serving lamb shanks, roast chicken, or even a simple salad, this rice has main-character energy.
- A taste of Persian tradition. Whether you're new to Persian cuisine or looking to recreate a nostalgic family recipe, Baghali Polo is a great way to experience the rich culture of Iran in a simple, classic dish. This recipe that carries family stories and celebration on every plate.
Ingredients and Substitutions

To make this delicious Baghali Polo, you will need the following ingredients (see recipe card below for quantities):
- basmati rice - Long-grain basmati rice is the key to fluffy, separate grains that won't clump together. Jasmine rice works if you're in a pinch, but the texture and fragrance of basmati are what make this dish shine.
- water - Essential for both parboiling and steaming the rice. Use filtered water if possible for the cleanest flavor.
- fava beans - Traditionally made with fava beans (broad beans), but feel free to use lima beans which are easier to find and taste just as buttery. You can use frozen or canned beans year round, or use fresh fava beans when in season. You'll need to remove them from the pods, blanch them in boiling water for a minute, then peel off the tough outer skins before adding them to the rice though.
- vegetable oil - Keeps the rice fluffy and prevents sticking. Canola or sunflower oil also work well. Plus, it's key if you want to make tahdig, that irresistible crispy crust at the bottom.
- salt - Simple but essential, so don't hold back.
- dill - The star of the show! Its bright, herbaceous flavor is what makes this rice unique. Fresh dill weed is best, but you can substitute with dried dill (use only ¾ cup since dried is more potent).
- butter - A little melted butter adds richness and helps the saffron bloom into a gorgeous golden hue. For a dairy-free option, swap in olive oil.
- saffron - A small pinch goes a long way, adding both color and that delicate floral aroma. Blooming saffron in hot water releases its magic.
- hot water - Used for blooming saffron so it fully infuses into the rice.
Equipment
You'll also need measuring cups and spoons, a medium pot for cooking rice, a colander for draining, a large nonstick pot for steaming, a clean kitchen towel or paper towels for covering the pot, a mortar and pestle for grinding the saffron, and a small bowl for blooming the saffron.
Instructions
- Wash the rice. In a medium mixing bowl, wash the rice thoroughly until the water is clear, about 3 times. Rinse, drain, and set aside.

- Parboil the rice. Fill a medium cooking pot with water (about 5 cups) and bring to a boil. Add the rinsed rice and frozen fava beans to the boiling water and cook for 7-8 minutes until parboiled or al dente (the rice should be soft yet firm inside). Use a colander to drain the rice.


- Layer. Place the pot back on medium heat and add vegetable oil. Scoop half the drained rice mixture back into the pot. Add the chopped dill, and top with the rest of the rice and bean mixture.


- Prep for steam. Using the edge of a spatula, make 5 holes in the surface of the rice to let the steam out. Sprinkle salt on top.


- Steam. Pour ¼ cup of water around the edges. Wrap the lid in a clean towel and put it on the pot. Place on medium heat and let the rice steam for 15 minutes, until the steam comes out from the bottom of the pot.

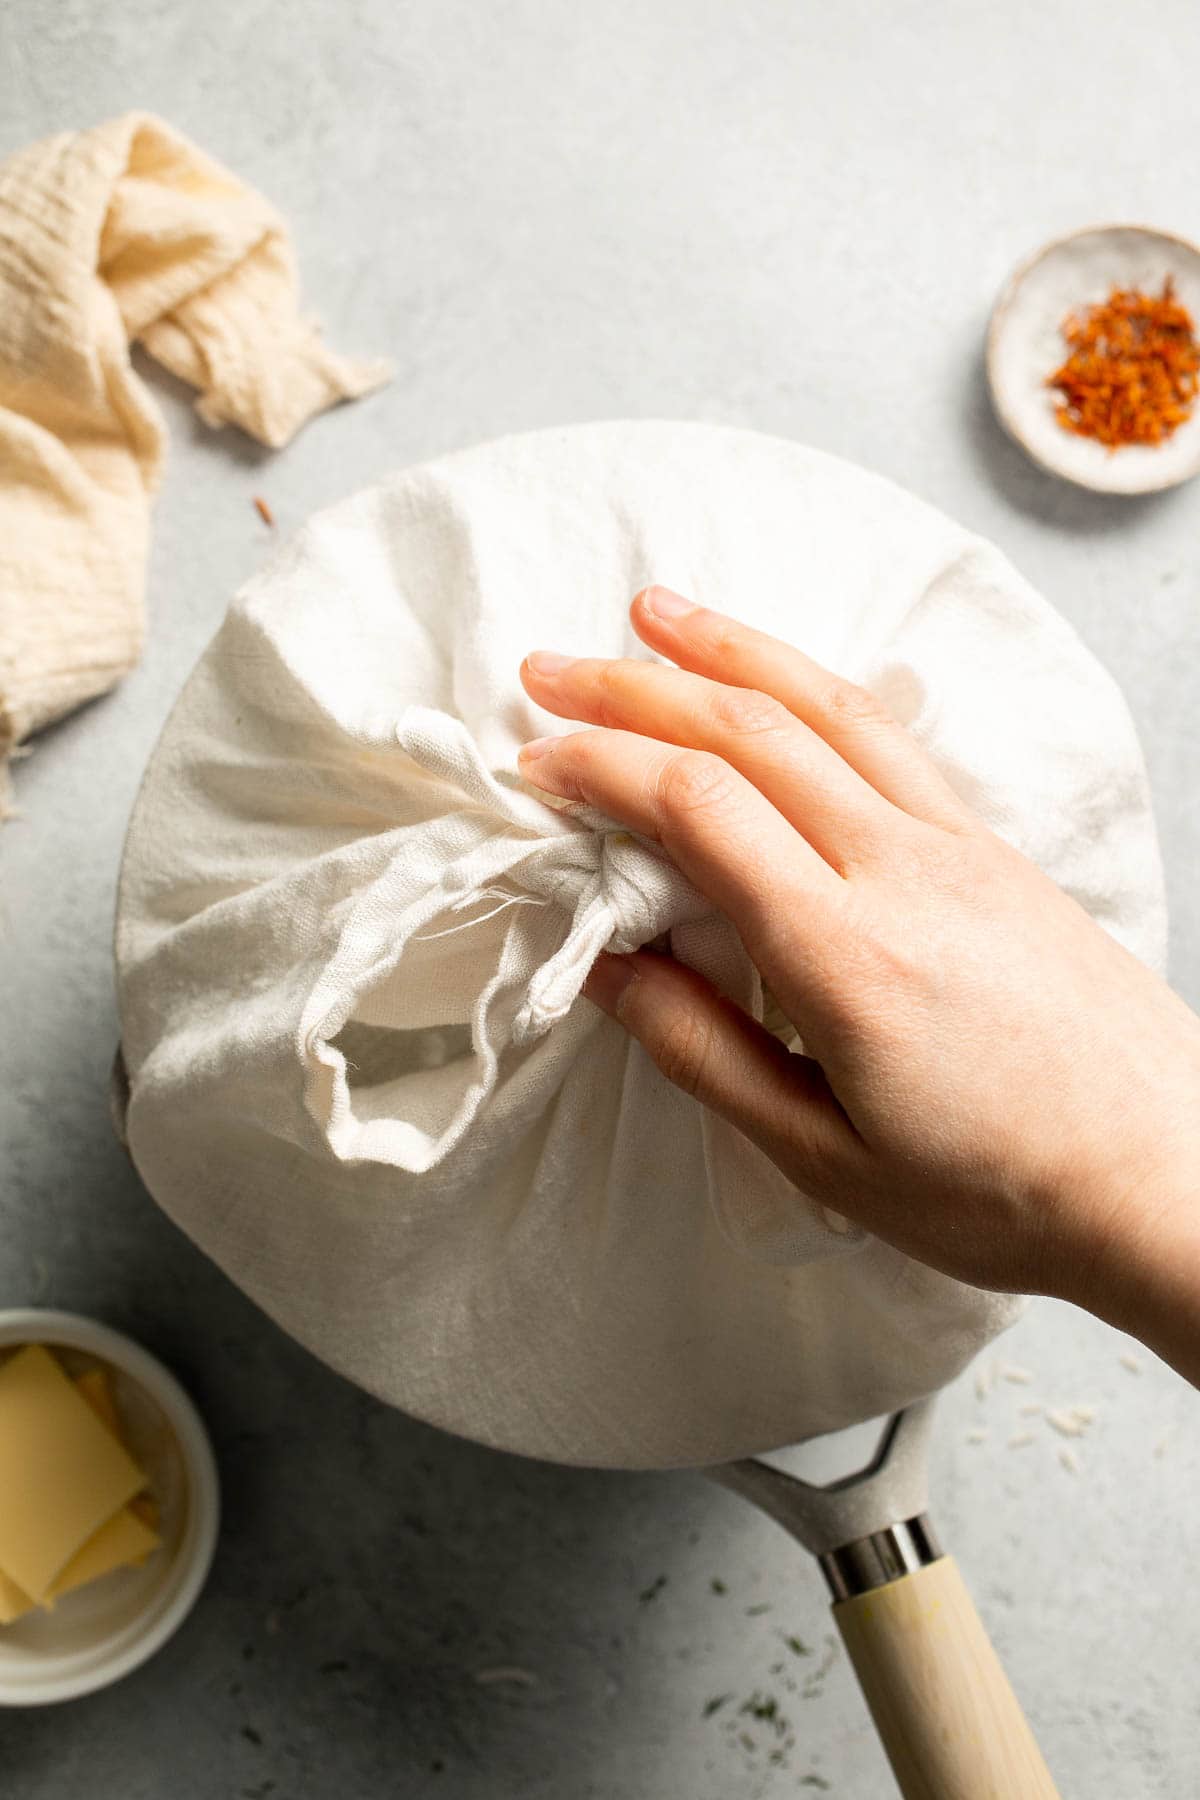
- Add butter. Pour melted butter on top of the rice, cover, and steam for 20-30 more minutes on medium-low heat.


- Bloom the saffron. Grind a pinch of saffron using a mortar and pestle. If you don't have one of those, just grind it in a small bowl using the back of a small spoon. Next, add hot water and mix evenly.


- Fluff. Fluff the entire rice with a fork until the dill and beans are combined.
- Add saffron. Remove 1 cup of the cooked rice. Add the steeped saffron water on top of the reserved cup of rice. Fluff to combine.


- Serve. Serve the dill rice on a platter, creating a pattern with the yellow saffron rice. You could also just fluff it all to combine.


Expert Tip: Don't Skip Blooming the Saffron
For the richest color and flavor, always bloom saffron in hot water before adding it to the rice. This simple step helps release its full aroma and golden hue, turning your baghali polow from good to unforgettable.
More Tips and Tricks
- Rinse your rice. Wash the basmati rice in several changes of water until it runs clear. This removes excess starch and guarantees fluffy, separated grains that don't stick together.
- Use the two-step cooking method. First, parboil the rice until just tender, then steam it with the dill and beans. This is the traditional Persian method, and it's what gives the rice its incredible light, fluffy texture.
- Go big on the dill. Don't be shy with the fresh dill, it's what gives baghali polo its signature flavor. The more dill, the better the flavor.
- Layer for even flavor. When steaming, alternate rice with beans and dill for even flavor in every scoop.
- Tahdig makes it next-level. Want to win over everyone at the table? Create crispy tahdig, the crispy golden crust at the bottom of the pot. Add oil and a thin layer of rice before steaming, then let it cook until golden and crunchy. It's the part everyone fights over! You can also make tahdig with potatoes.
Recipe Variations
- Add mixed herbs. Add parsley, cilantro, or green onions along with dill for a more herbaceous twist.
- Make it garlicky. Sauté minced garlic in oil before layering the rice for a bold, savory depth of flavor that pairs especially well with chicken or fish.
- Go vegan. Skip the butter and use olive oil instead for a plant-based version.
- Add chicken. Add cooked shredded chicken between layers of rice for a complete one-pot meal.
- Give it a sweet and savory twist. Stir in golden raisins or tart barberries before steaming for pops of sweetness.

Storage
How to Store
Allow the dill rice to cool to room temperature, then transfer to an airtight container. Store in the fridge for up to 4 days.
How to Reheat
Reheat gently on the stove with a splash of water, or in the microwave covered with a damp paper towel to retain moisture.
How to Freeze
Cool completely, then freeze all or in portions in airtight containers or freezer bags for up to 3 months. Thaw overnight in the fridge before reheating.
How to Serve
Baghali polo is the star of the show at Persian meals, often served alongside slow-braised meats. Its fluffy rice, tender beans, and fresh dill make it versatile enough to pair with many main dishes including Persian stews, grilled meats, and yogurt-based side dishes.
These are my favorite dishes to serve with this Iranian dill rice:

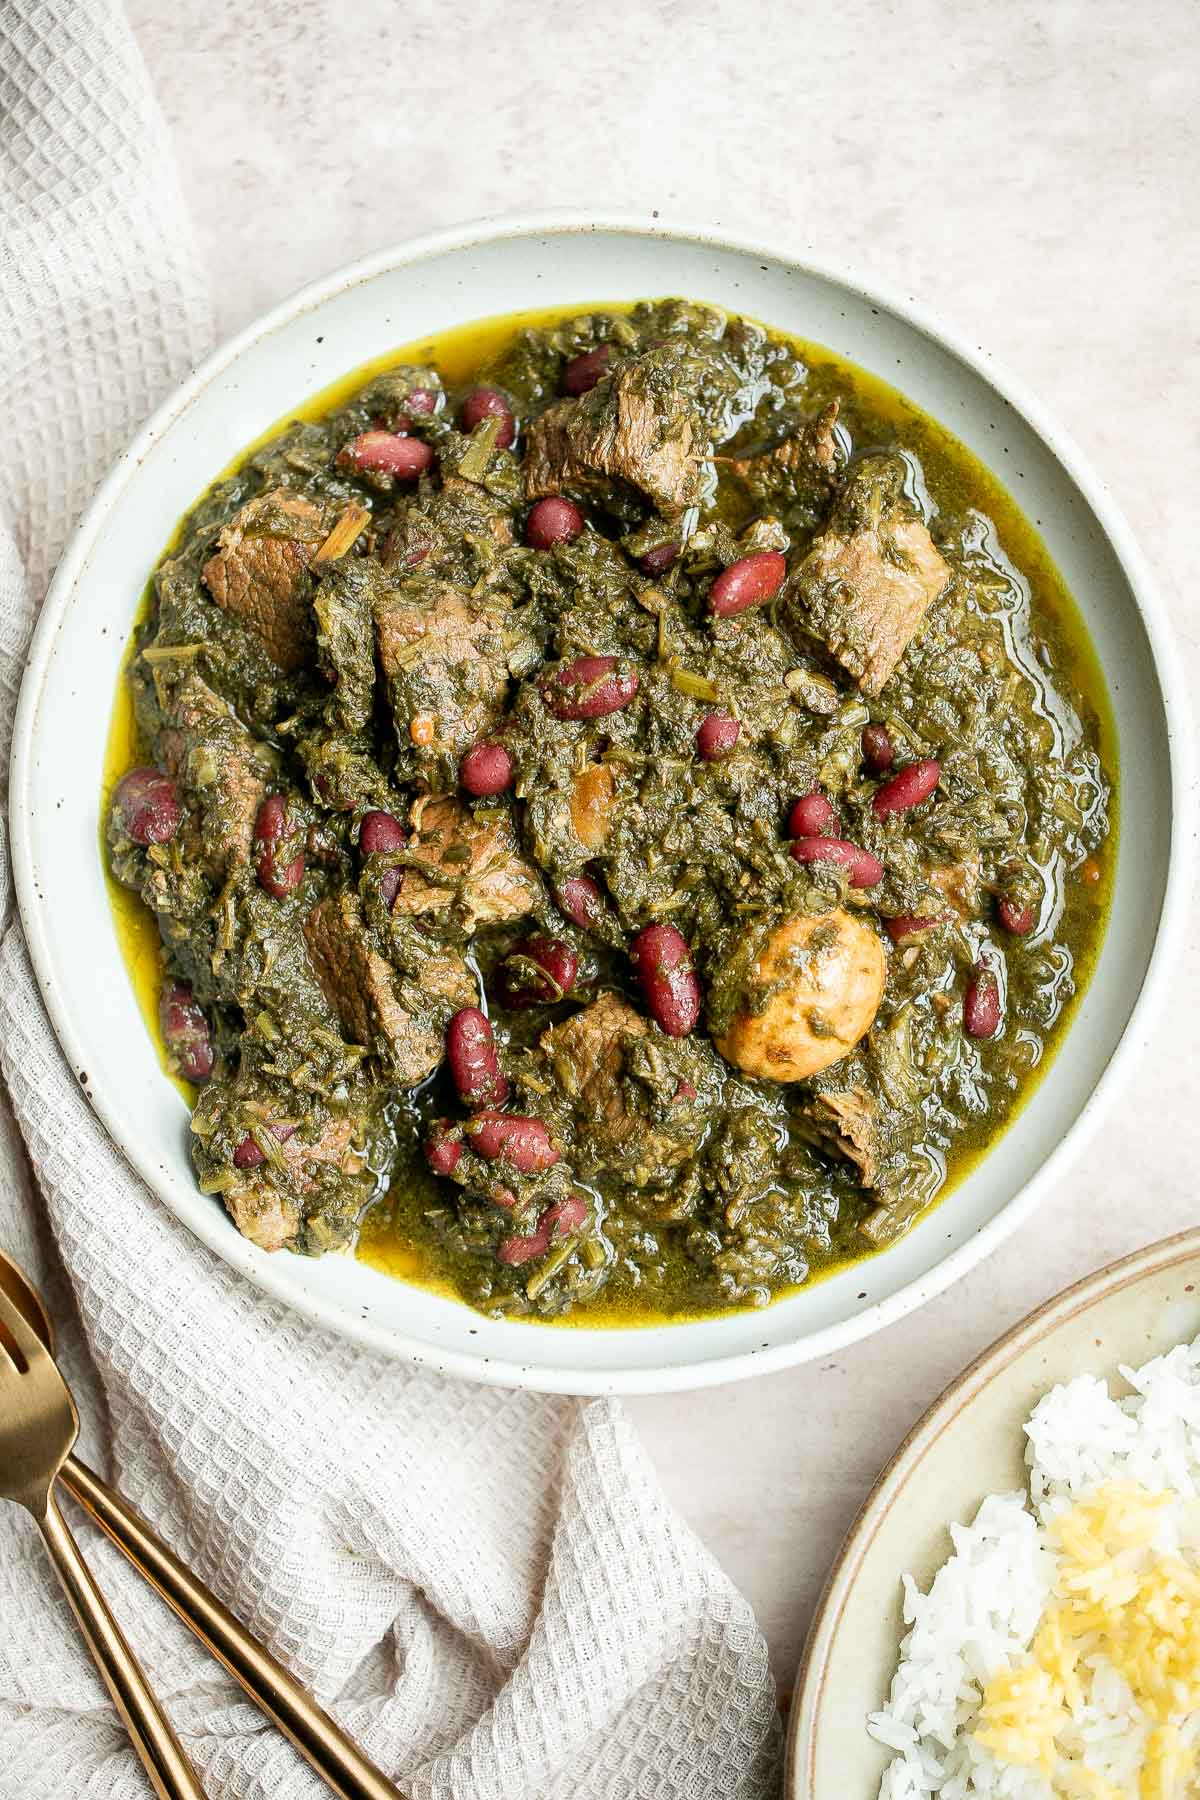
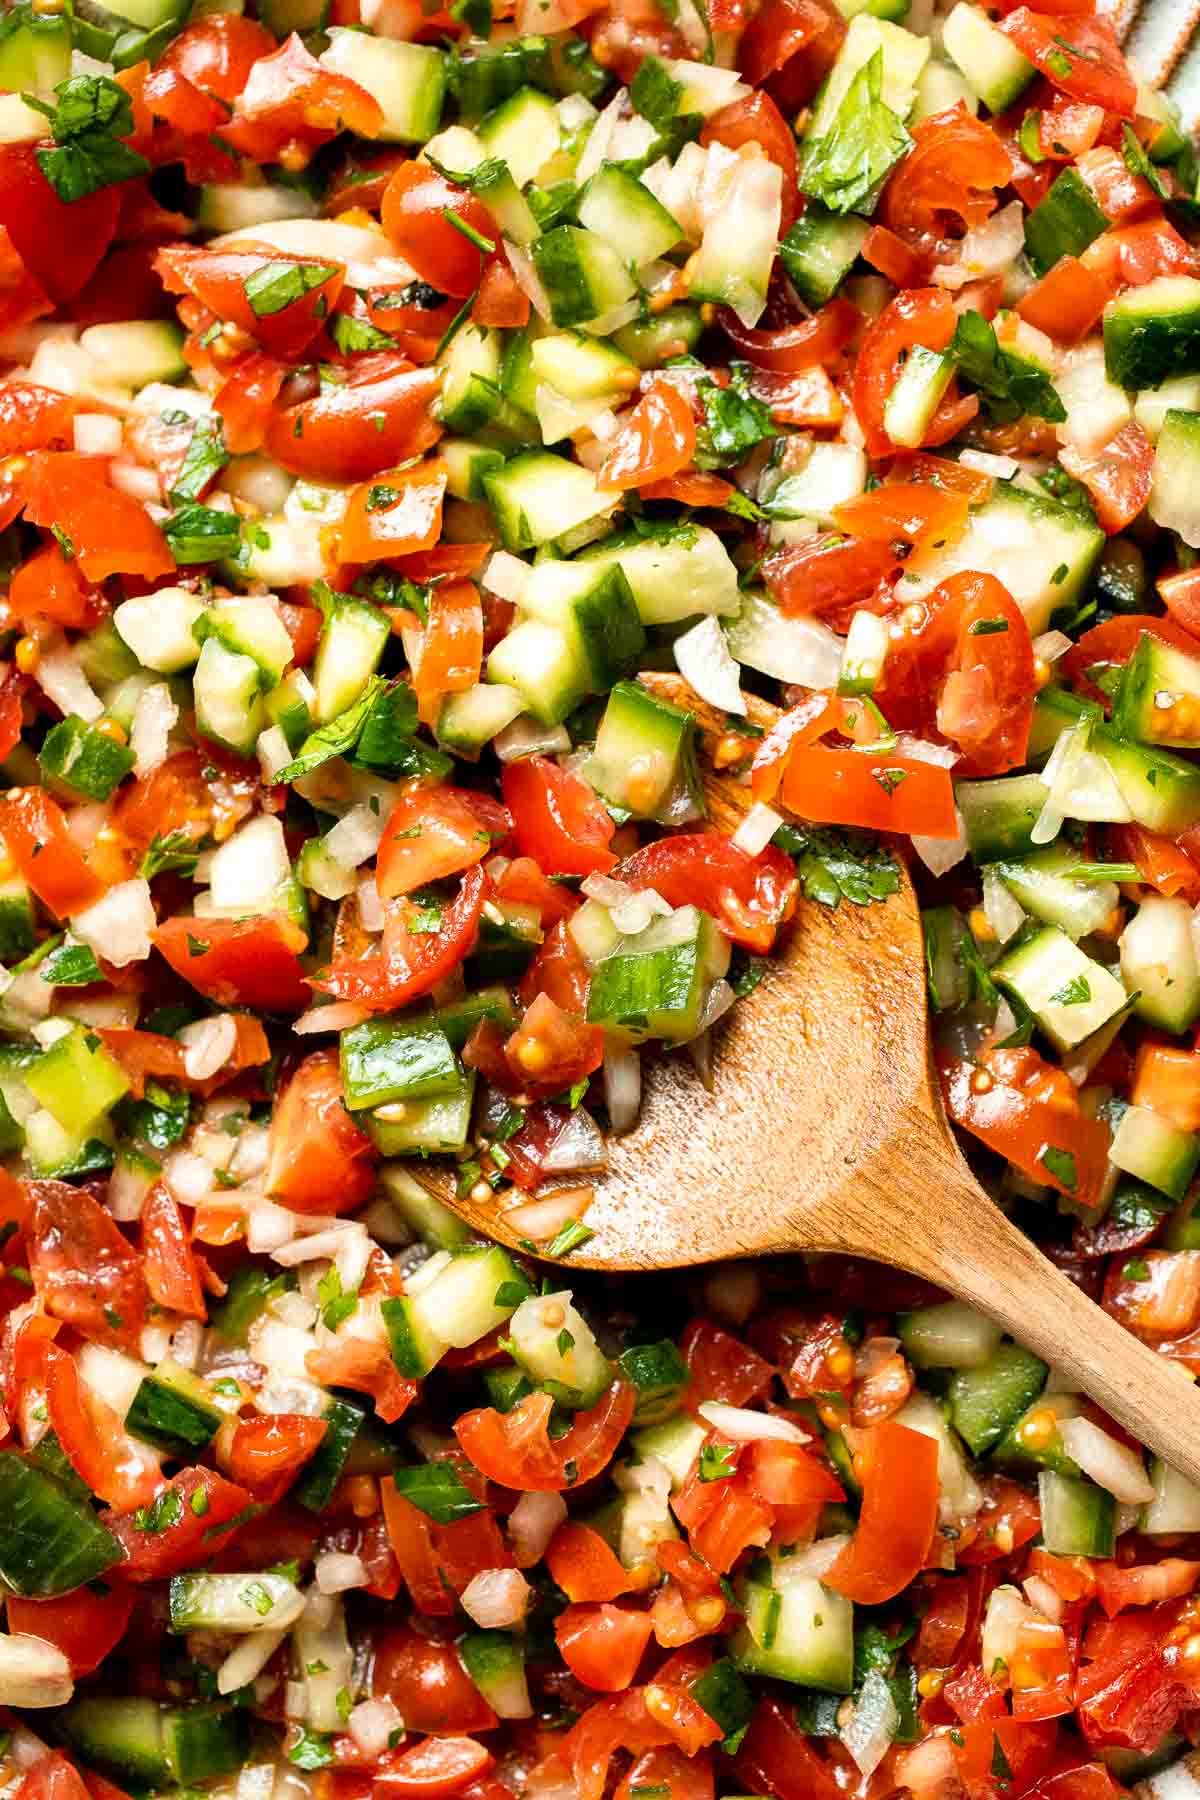
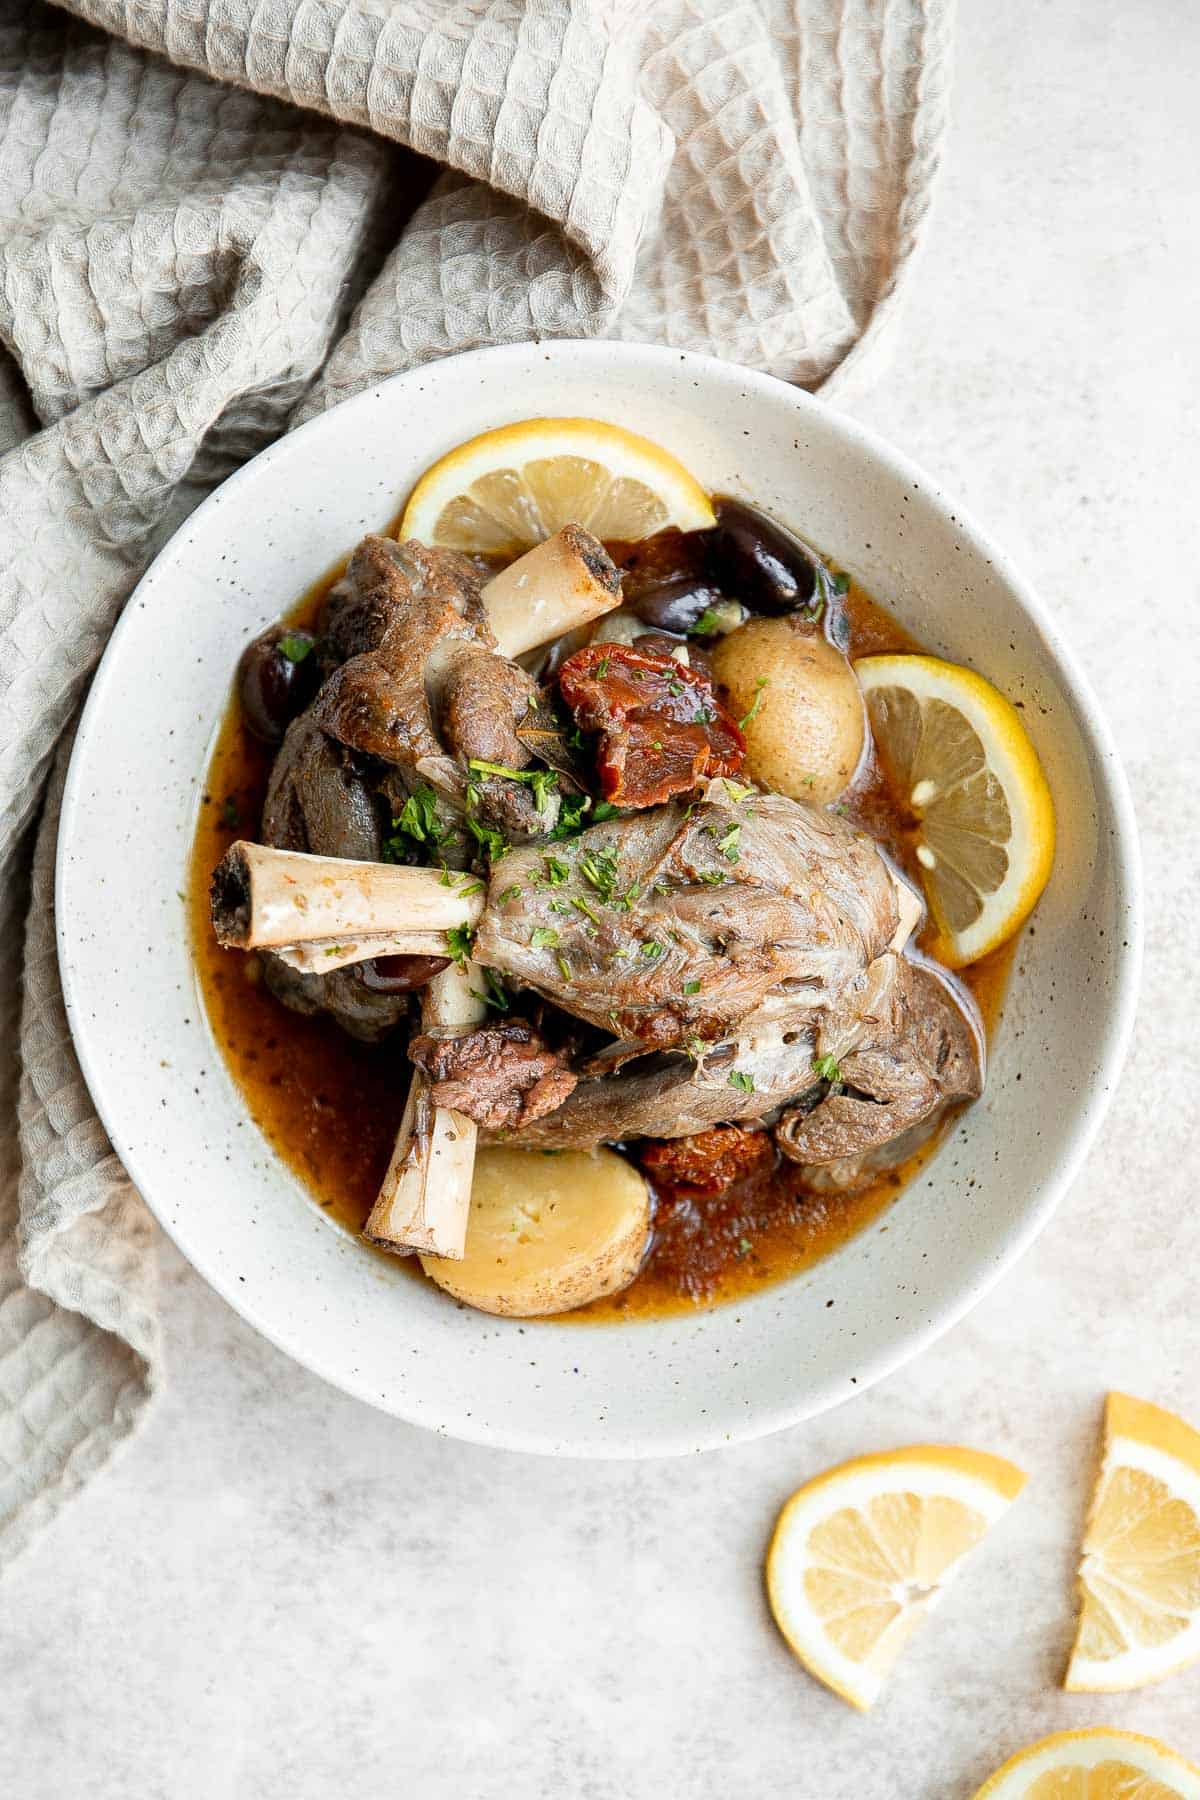
FAQ
Baghali Polo is a beloved dish in Iranian cuisine. The word u0022baghaliu0022 means fava beans, while u0022polou0022 refers to the Persian method of making fluffy, layered rice. Traditionally, Baghali Polo is layered and steamed to perfection, creating a dish with soft, delicate grains and a crispy, golden tahdig (crust) at the bottom. The combination of fresh or dried dill, tender beans, and saffron-infused rice creates a dish with so much flavor.
In Persian, "baghali" means fava beans (also called broad beans in English). That's why you'll often see baghali polo described as "Persian dill rice with fava beans" or "broad bean rice." Both terms are correct. While traditional baghali polo uses fava beans, lima beans are often substituted since they're easier to find.
Traditionally, it's served with braised lamb shanks for a rich, comforting meal. But it also pairs well with roasted chicken, baked fish, or even vegetarian sides like yogurt dips and roasted vegetables.
Yes! Once cooled, divide into freezer-safe containers or bags and freeze for up to 3 months. To reheat, steam on the stovetop with a splash of water or microwave with a damp paper towel to restore moisture. The rice will taste just as fluffy as the day you made it. Freezing is a great way to meal prep, so you always have a special side dish ready to go.
The classic and traditional choice is doogh, a refreshing yogurt-based drink with mint. Otherwise, Persian tea, sparkling water with lemon, or even a crisp white wine complement the flavors beautifully.
Baghali polo originates from Iran and is one of the most iconic Persian rice dishes. It's especially popular at celebrations, weddings, and Nowruz (Persian New Year), making it a dish tied deeply to culture and tradition.
More Rice Recipes
Looking for other recipes like this? Try these:
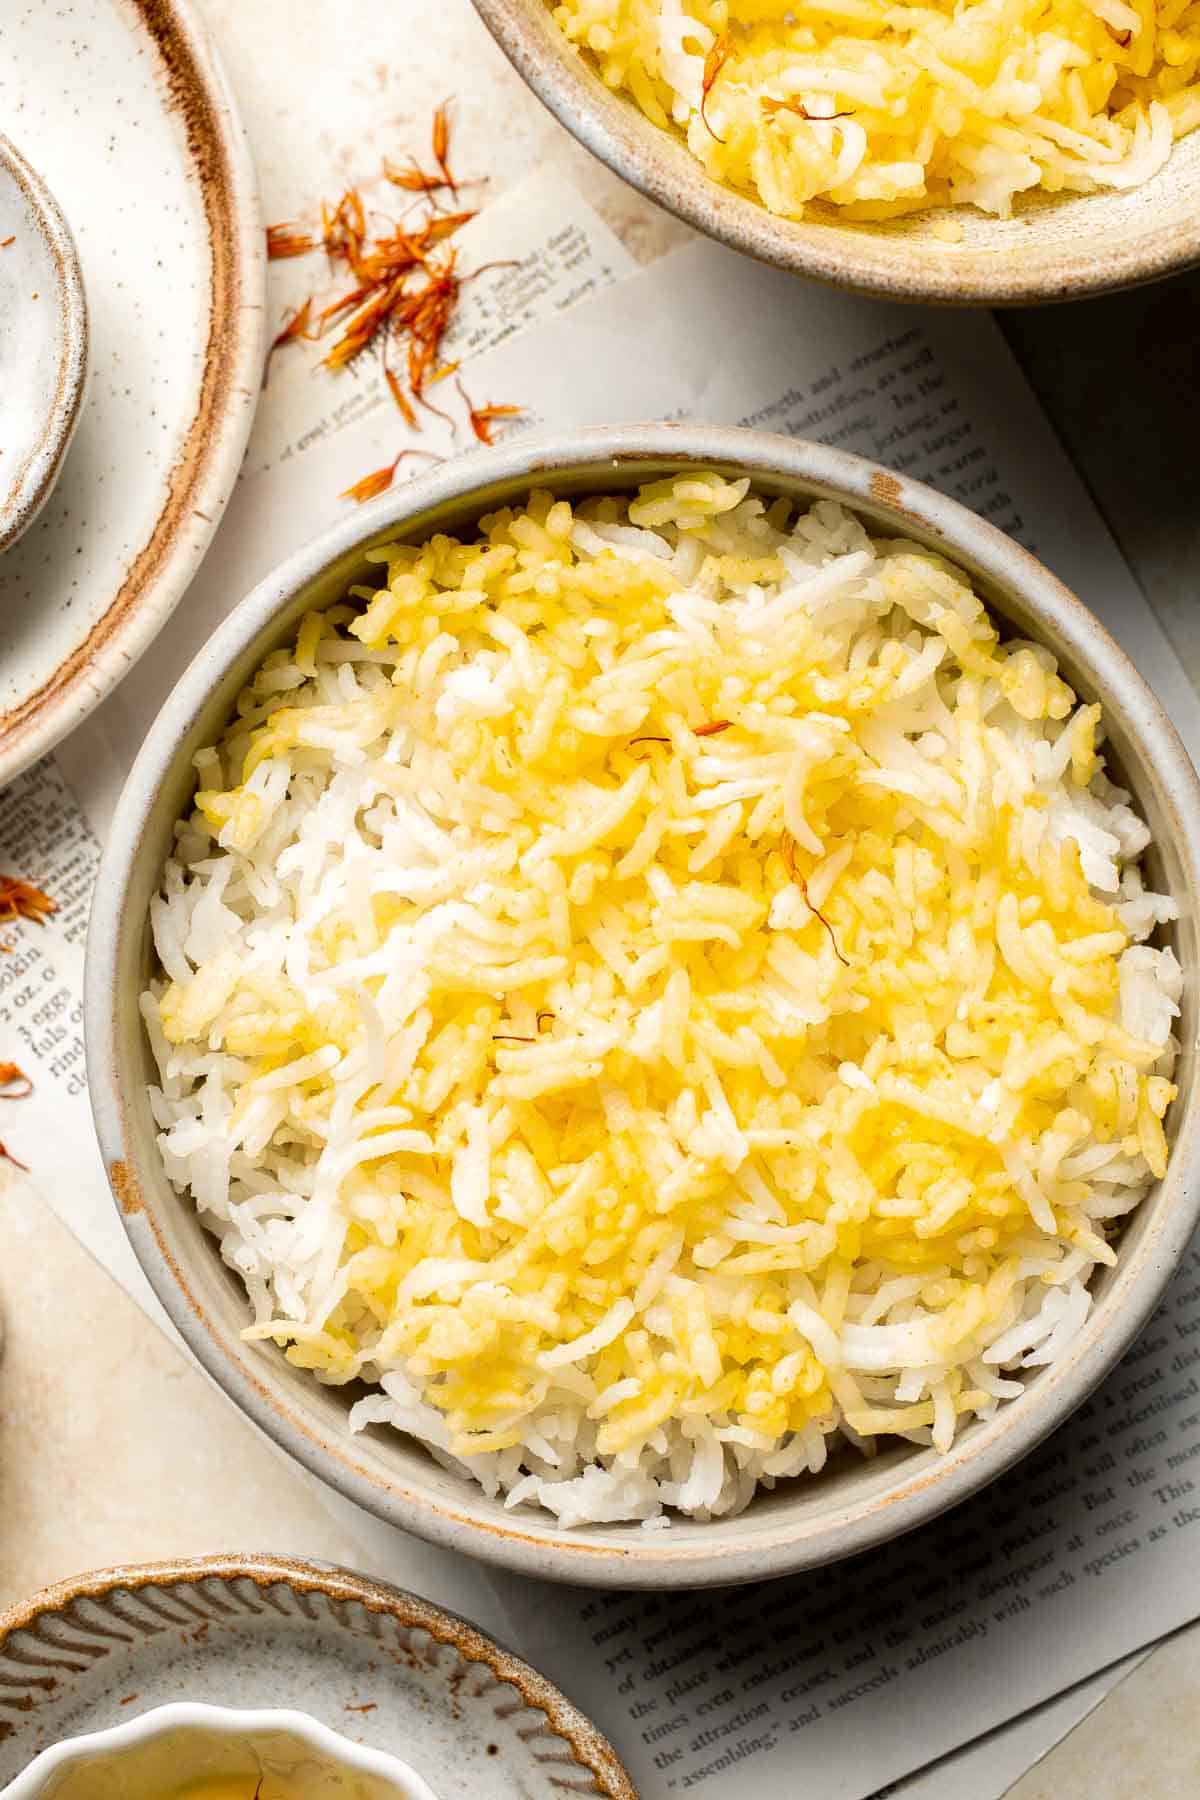
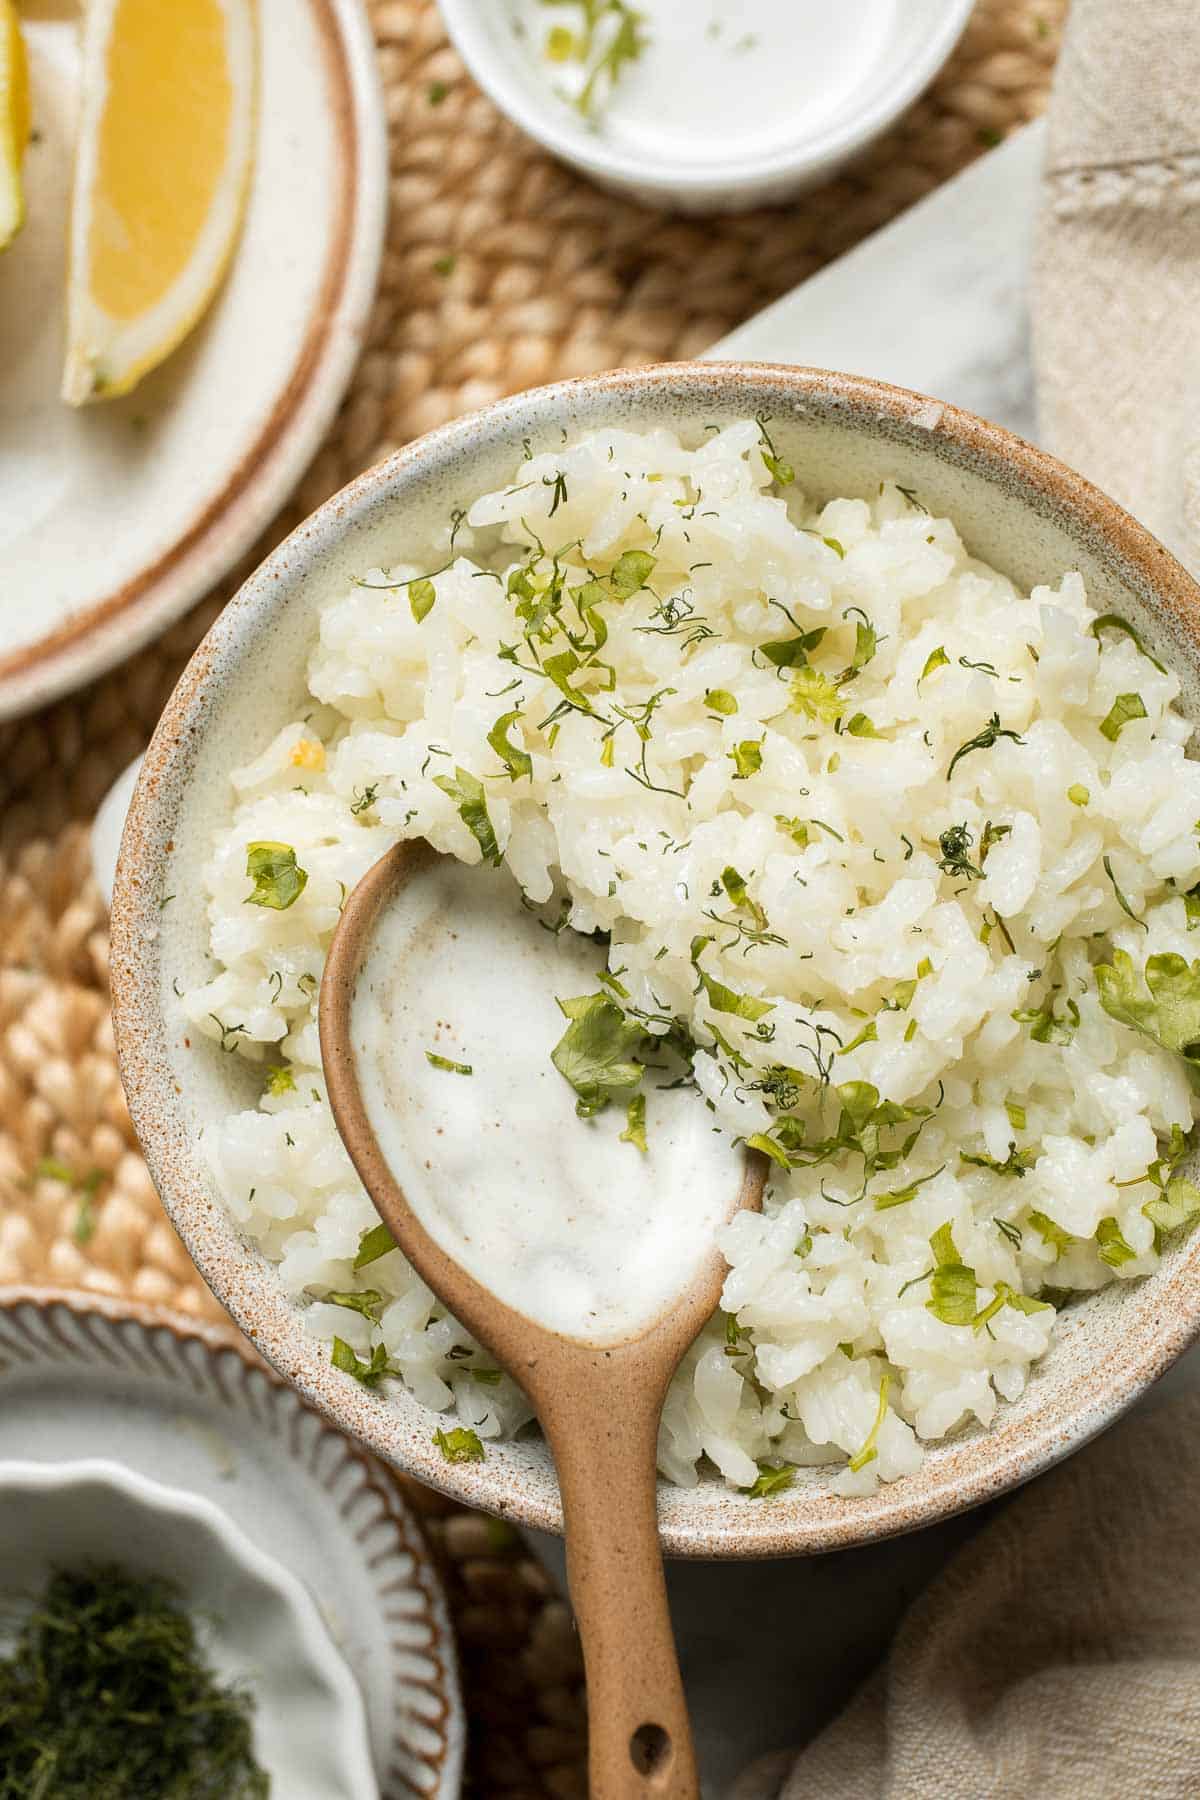
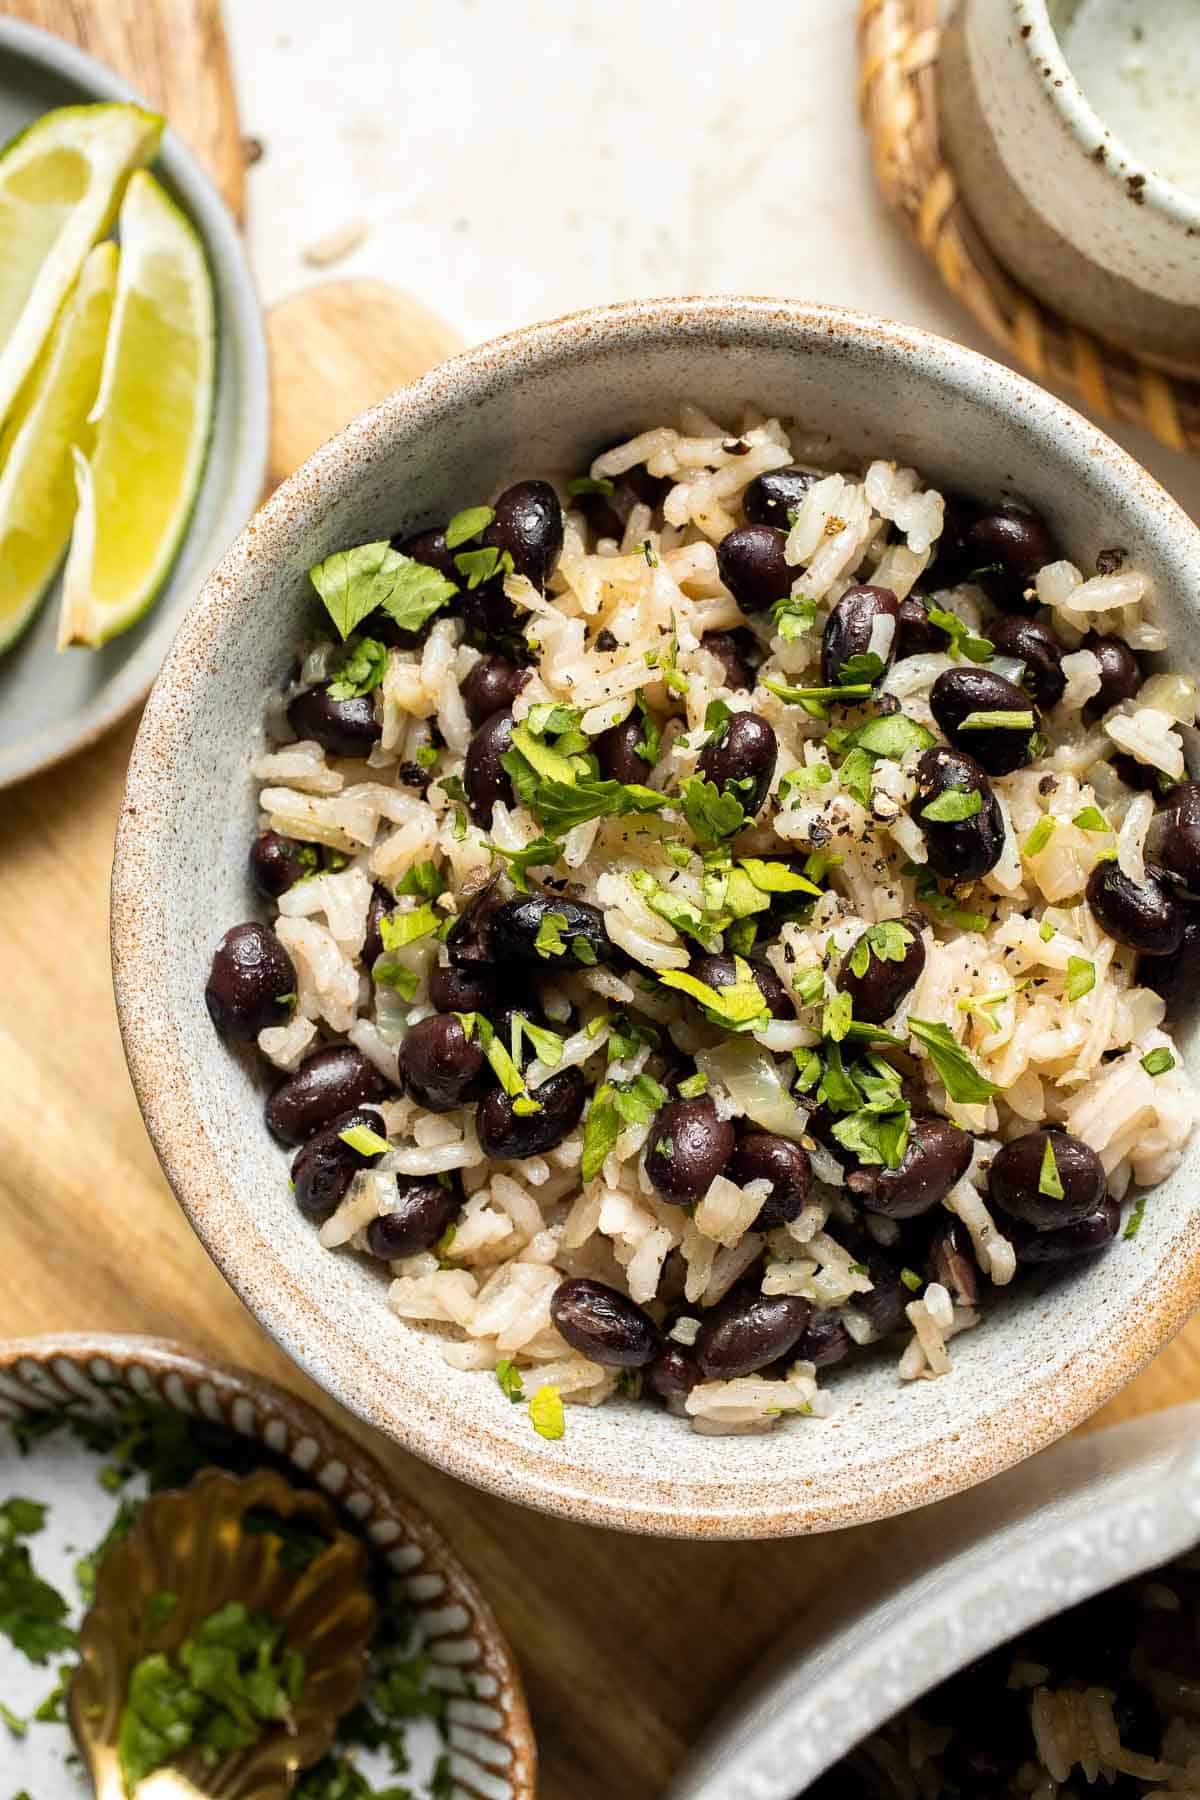
Tried this recipe?
I'd love to hear what you think! Leave a comment and rating below to share your feedback. Your reviews help others discover this recipe and help me keep creating more free recipes for you. Snap a photo and tag me on social media @aheadofthyme too.

Peanut Butter Muffins with Streusel Topping
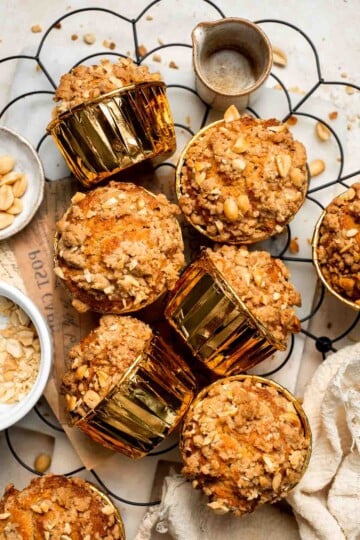
These Peanut Butter Muffins with Streusel Topping are basically a hug in muffin form. Soft, fluffy, protein-packed, and full of nutty goodness, they're crowned with a buttery, peanut-studded crumble that makes them taste straight out of a bakery case. Think peanut butter cookie meets muffin, but fluffier, softer, and way easier to justify for breakfast.
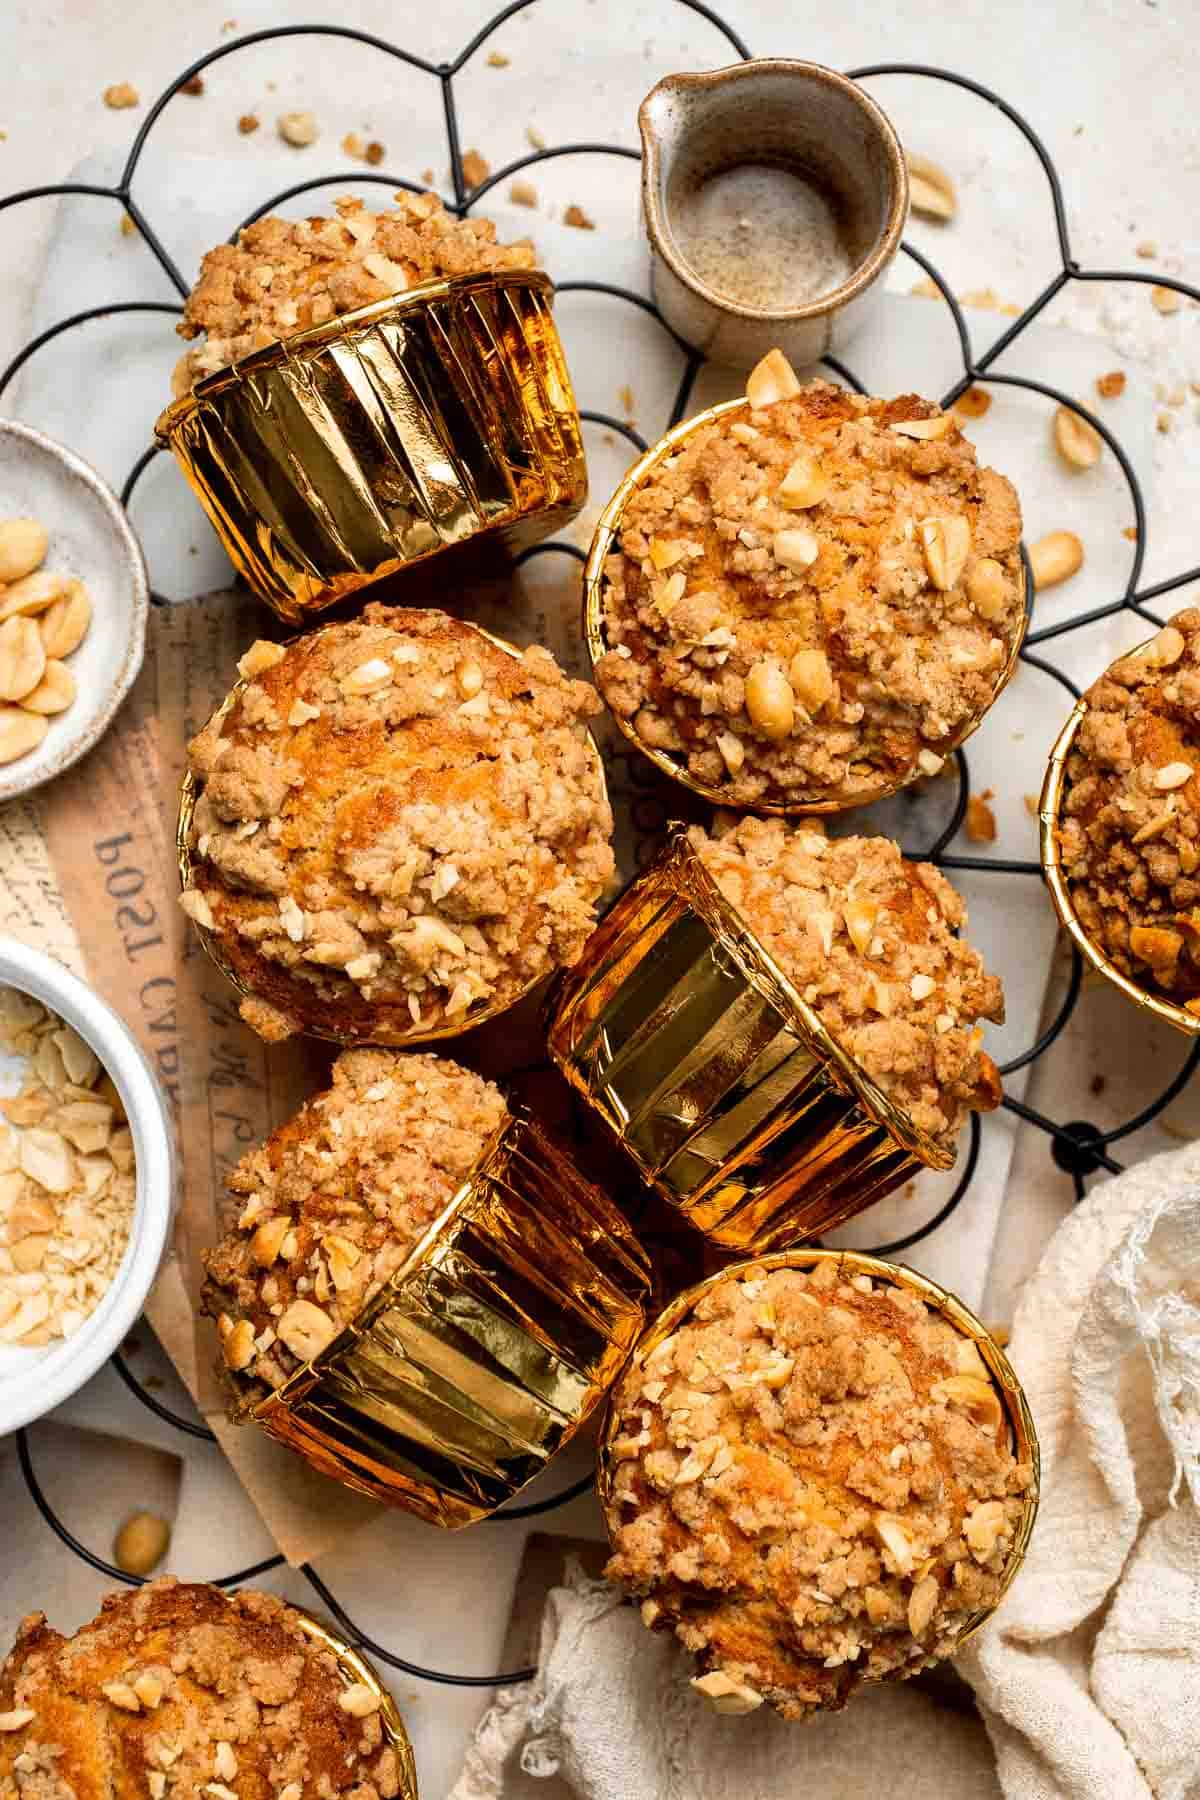
The best part? They're just as satisfying as they are delicious, perfect for fueling up in the morning or grabbing as a midday snack. And they couldn't be easier - ready in under 30 minutes, no mixer required, using pantry staples you probably already have. Peanut butter makes them hearty and protein-rich, brown sugar locks in the moisture, and that golden, crunchy streusel is your wow factor. These muffins aren't just snack-worthy, they're full-on meal-prep gold.
This peanut butter muffin recipe was inspired by my Cinnamon Apple Oatmeal Muffins and happens to pair like a dream with a swipe of my No Pectin Strawberry Jam - hello PB&J vibes!
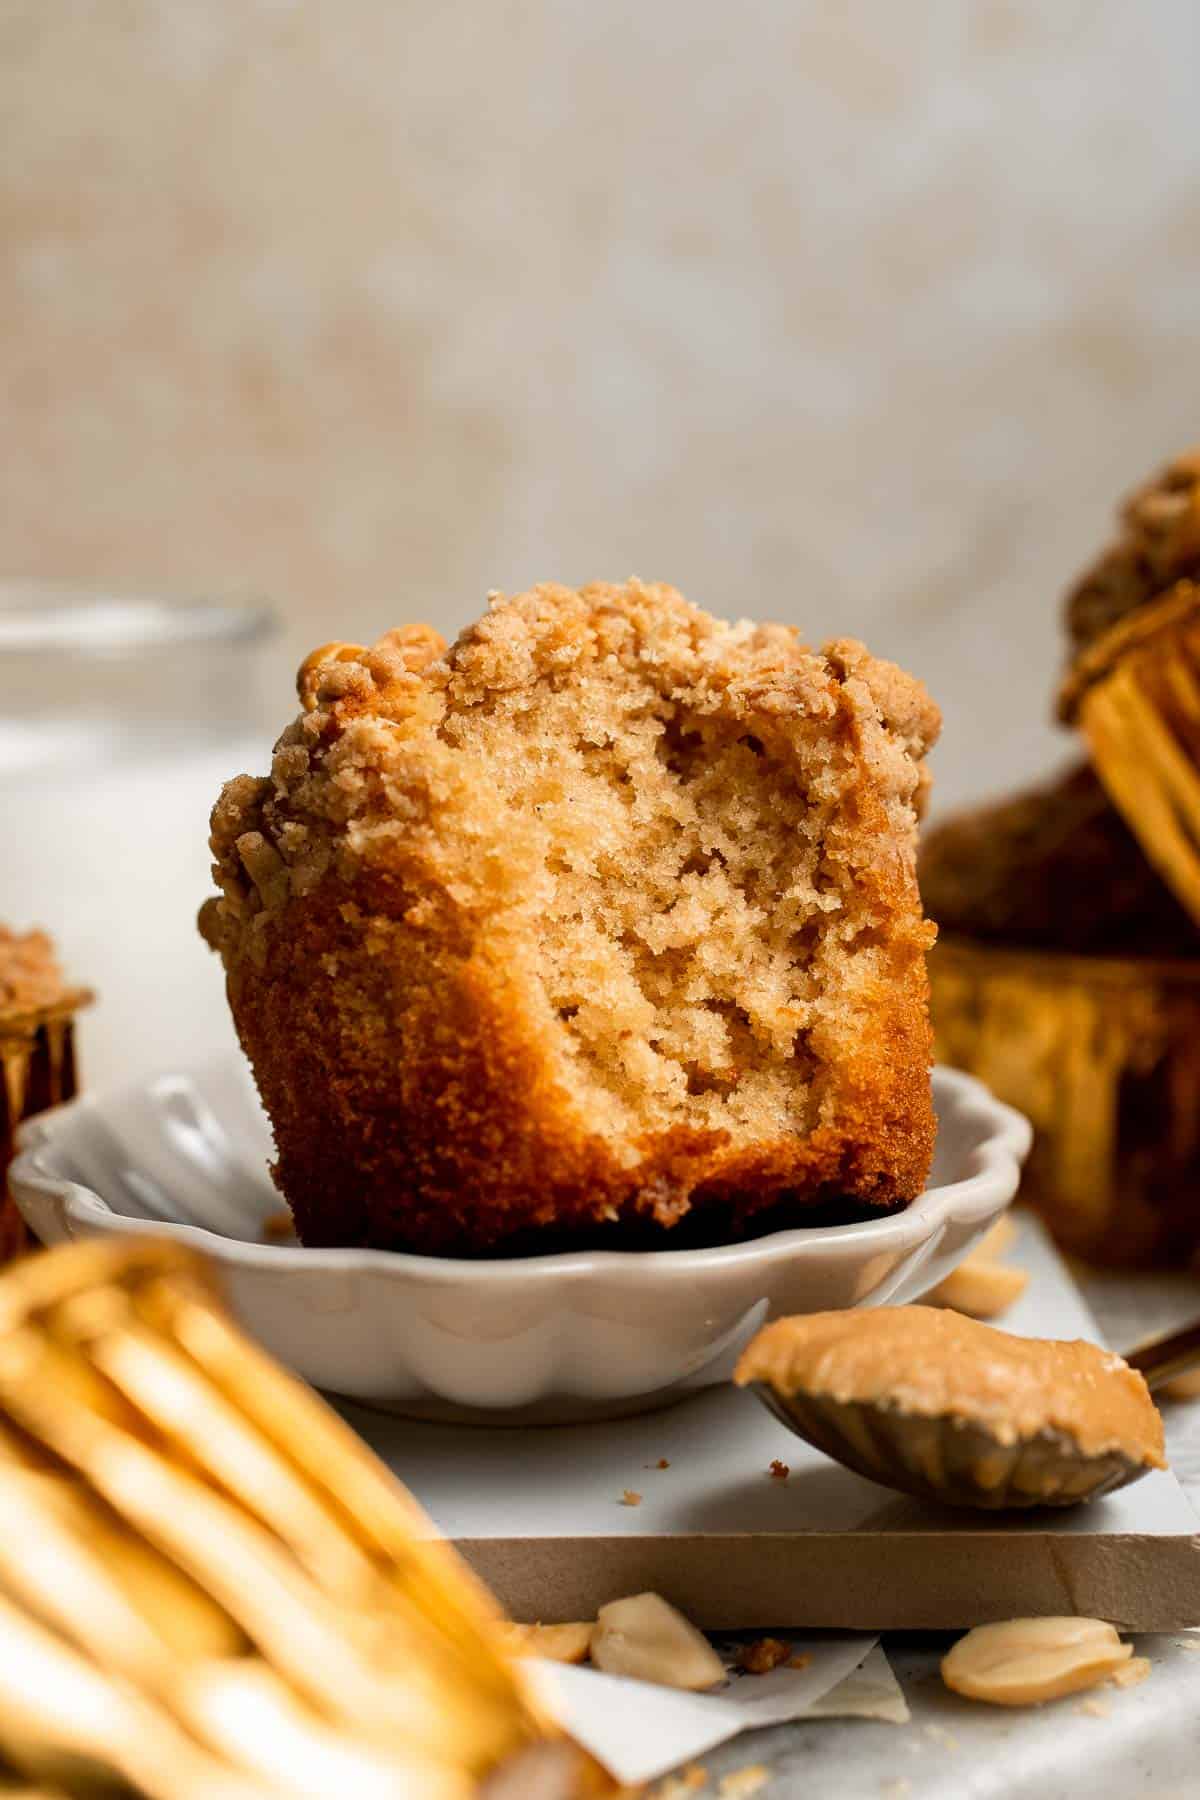
Why You'll Love This Recipe
- Moist, fluffy, and protein-packed. These muffins aren't just soft and delicious. The peanut butter adds a boost of protein to keep you fuller for longer, making them as practical as they are tasty. Each bite is moist, tender, and bursting with peanut butter flavor.
- Bakery-style streusel topping. Sweet, crumbly, and a little crunchy, the peanut butter streusel plus chopped peanuts on top takes these from "homemade" to "you bought these at a fancy café." Trust me, no one's skipping the topping on these bakery style muffins.
- Quick and foolproof. No fancy equipment, no weird steps - just whisk, stir, and bake. From craving to muffin tray in under half an hour, which is exactly how fast muffin magic should happen. The perfect quick bake for busy mornings or last-minute cravings.
- Endlessly customizable. Go PB&J with a dollop of jam, stir in chocolate chips for peanut butter cup vibes, or swap the peanut butter for almond butter. This recipe is your playground.
Ingredients and Substitutions
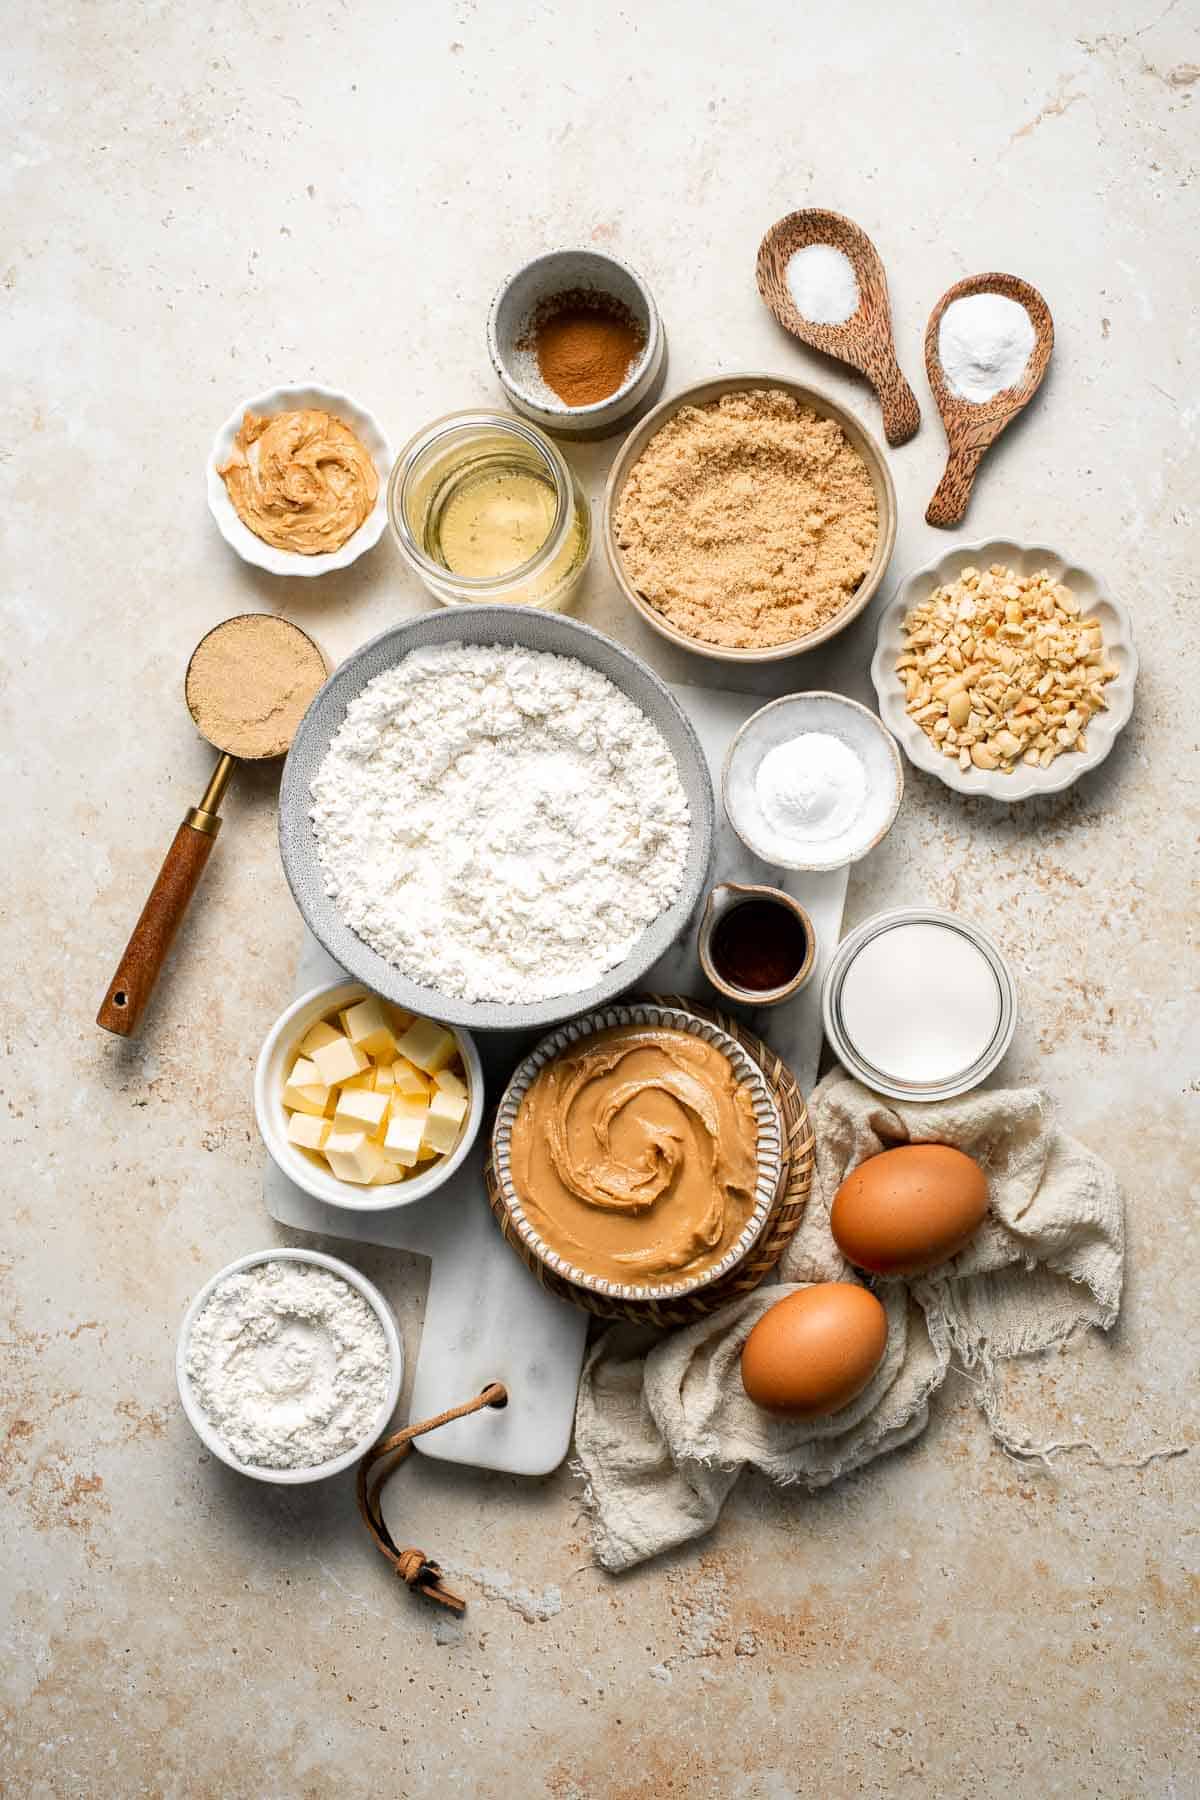
To make these easy Peanut Butter Streusel Muffins, you will need the following ingredients (see recipe card below for quantities):
- all-purpose flour - The base for both the muffins and the streusel. Whole wheat flour can be used for a heartier muffin.
- brown sugar - Adds sweetness and moisture. It's used in both the muffins and the streusel. White sugar can be substituted, but brown sugar gives better flavor.
- baking soda + baking powder - These two are the dynamic duo that make your muffins rise tall and fluffy. Don't skip them, or you'll end up with flat little hockey pucks instead of pillowy muffins.
- salt - Just a pinch makes all the flavors pop.
- milk - Whole milk works best, but non dairy such as almond milk, oat, or soy milk are good alternatives.
- eggs - Holds everything together and gives these muffins lift. Use large eggs at room temperature.
- creamy peanut butter - The star ingredient! Peanut butter goes into the batter and the streusel, making every bite nutty and rich. Use no-stir peanut butter for the best texture.
- vegetable oil - Keeps the muffins moist. Melted butter can also be used.
- vanilla extract - Adds flavor.
- butter - Used in the streusel topping for richness and crumbly texture. Cold butter works best for creating a crisp crumble. When it melts in the oven, magic happens.
- cinnamon - Adds a warm and cozy spice to the streusel.
- peanuts - Chopped and sprinkled on top for crunch. Swap with almonds or walnuts if you prefer.
Equipment
You'll also need measuring cups and spoons, two mixing bowls, a whisk, a rubber spatula, a standard 12-cup muffin pan, muffin liners, and a small bowl for making the streusel. No stand mixer, no stress.
Instructions
- Combine dry ingredients. In a large mixing bowl, whisk together flour, brown sugar, baking soda, baking powder, and salt. Set aside.
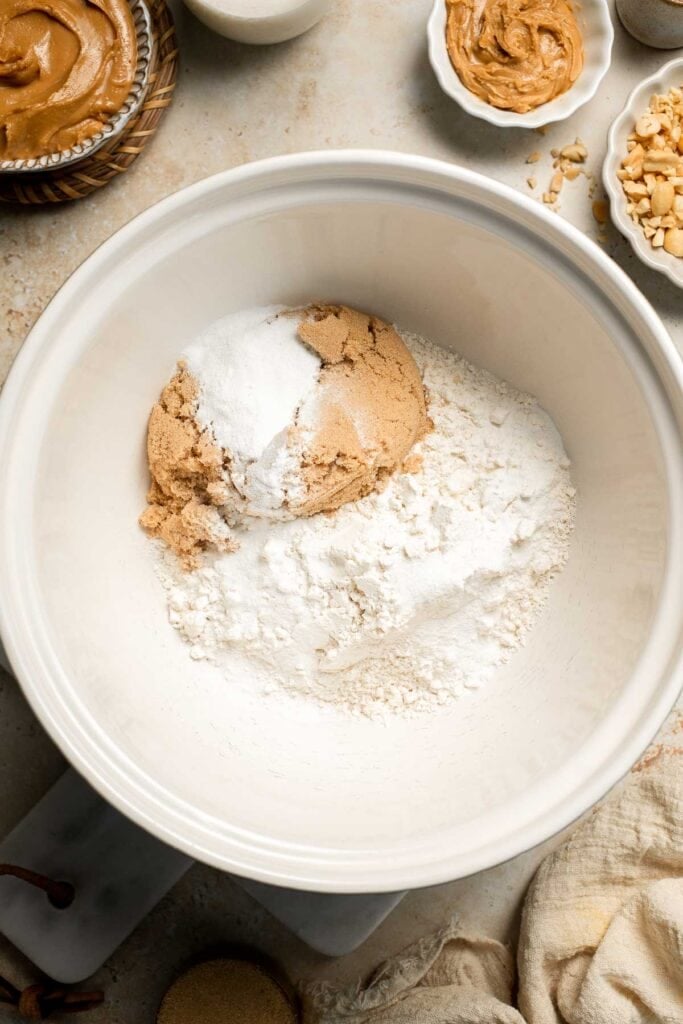
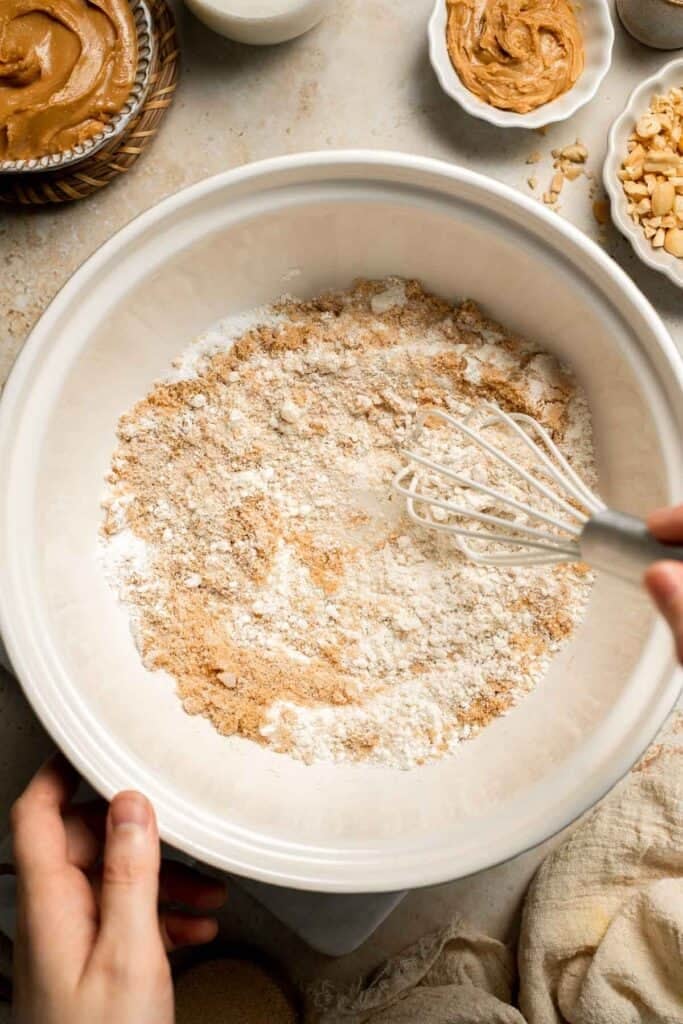
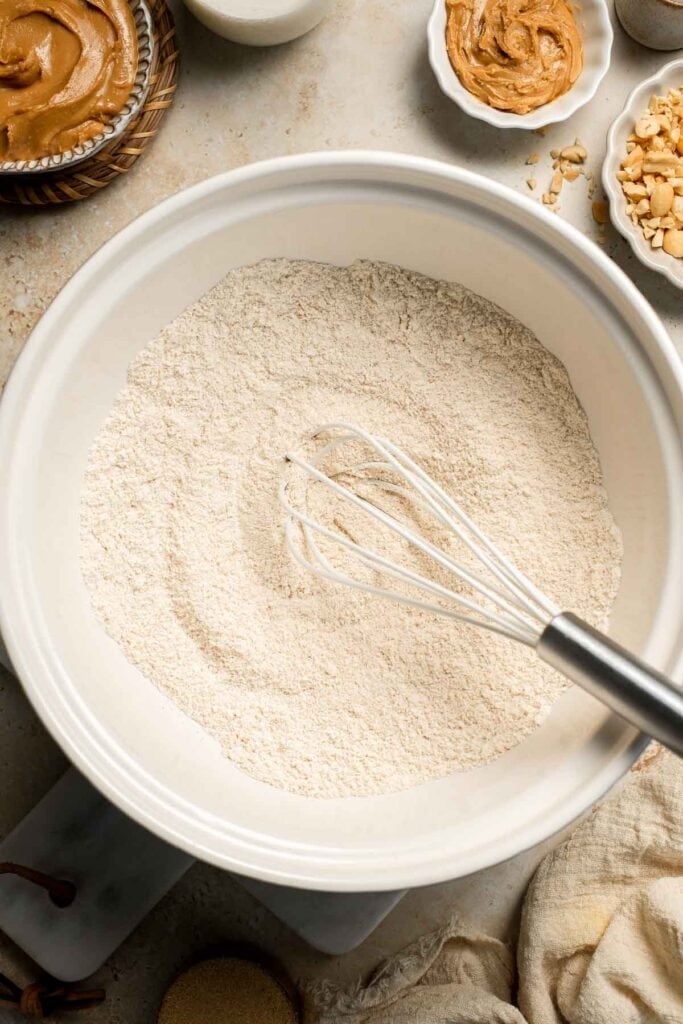
- Combine wet ingredients. In a medium bowl, stir together milk, eggs, peanut butter, oil, and vanilla until smooth.
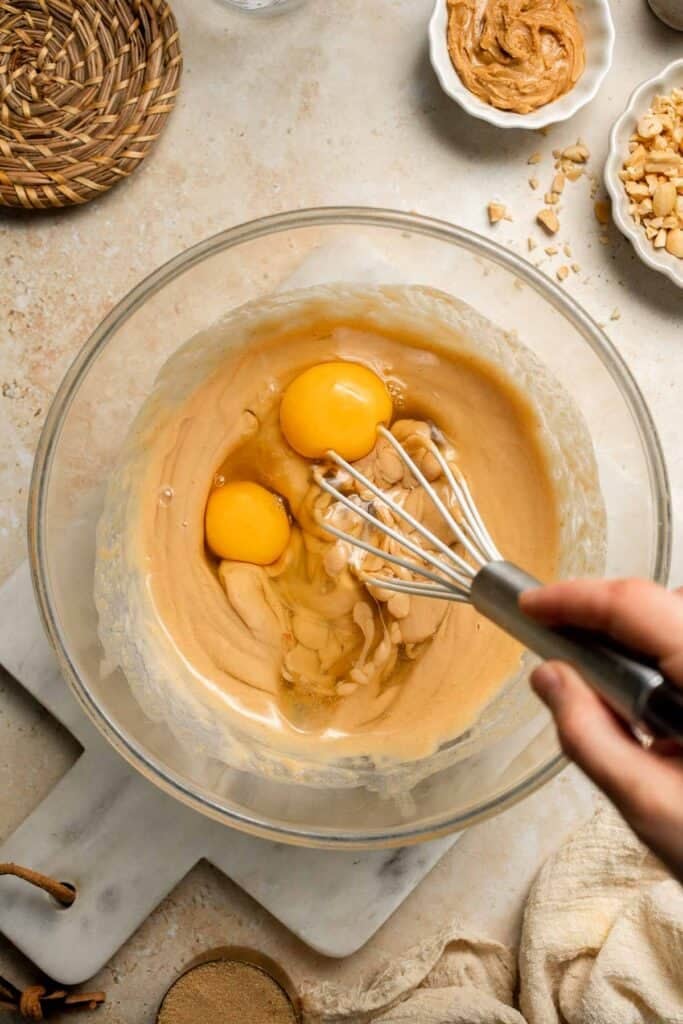
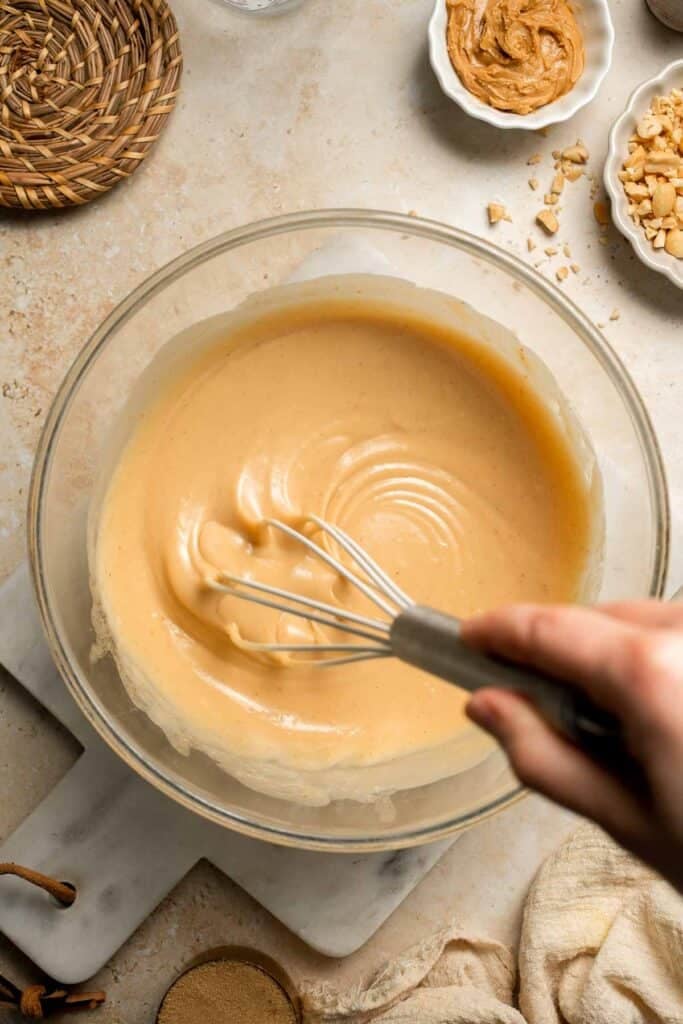
- Add wet to dry. Pour the wet ingredients into the dry ingredients. Use a spatula to mix until just combined (do not overmix).
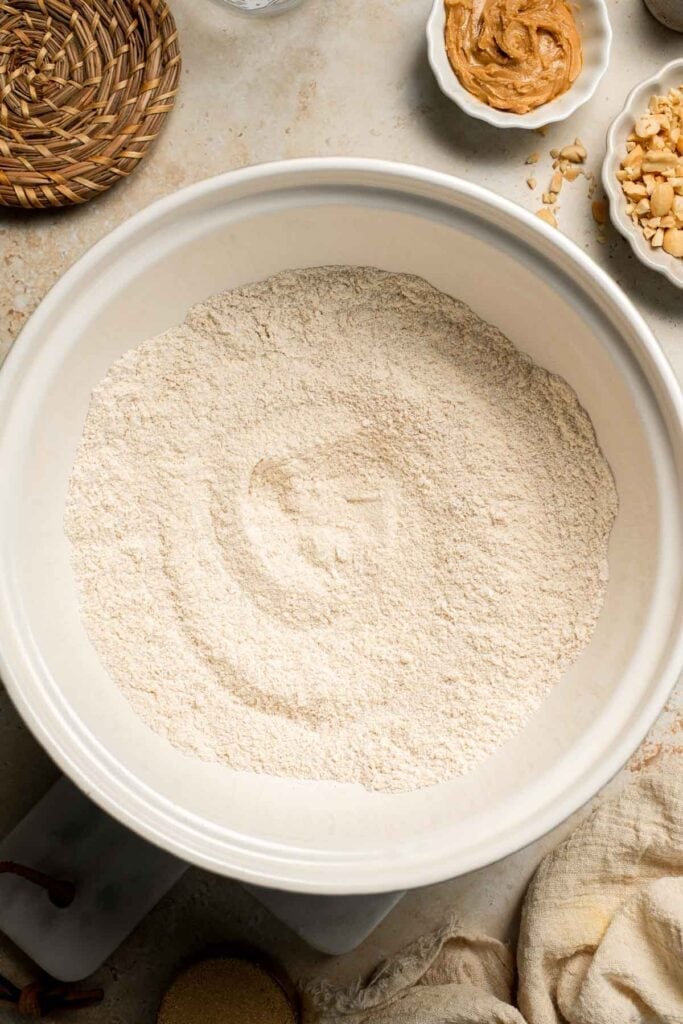
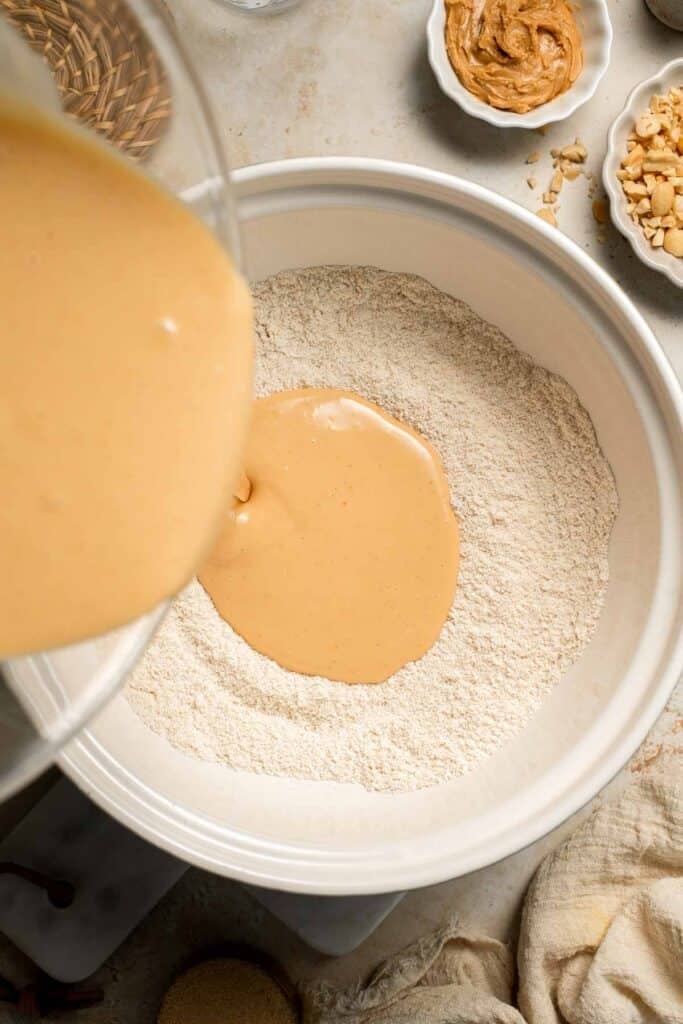
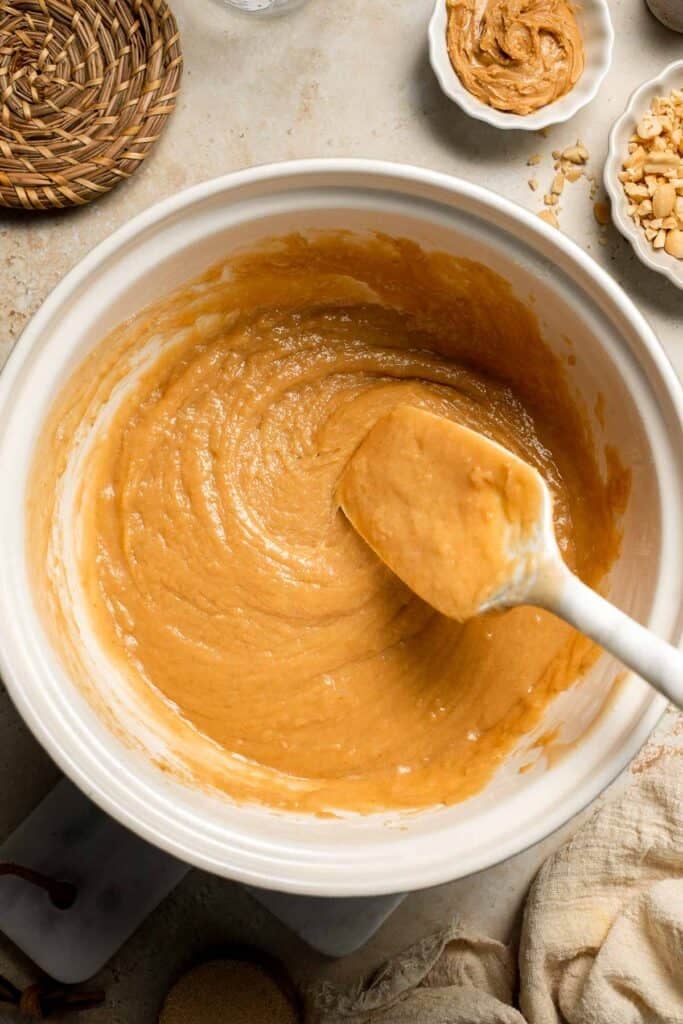
- Scoop batter. Line a standard 12-cup muffin pan with paper liners. Use a medium cookie scoop to divide the batter evenly into the prepared muffin pan, filling each of the muffin cups about ¾ full.
- Make the streusel. In a medium bowl, combine flour, brown sugar, and cinnamon. Add cold butter cubes and peanut butter, then use your fingers, a pastry cutter, or a fork to work it into coarse crumbs.
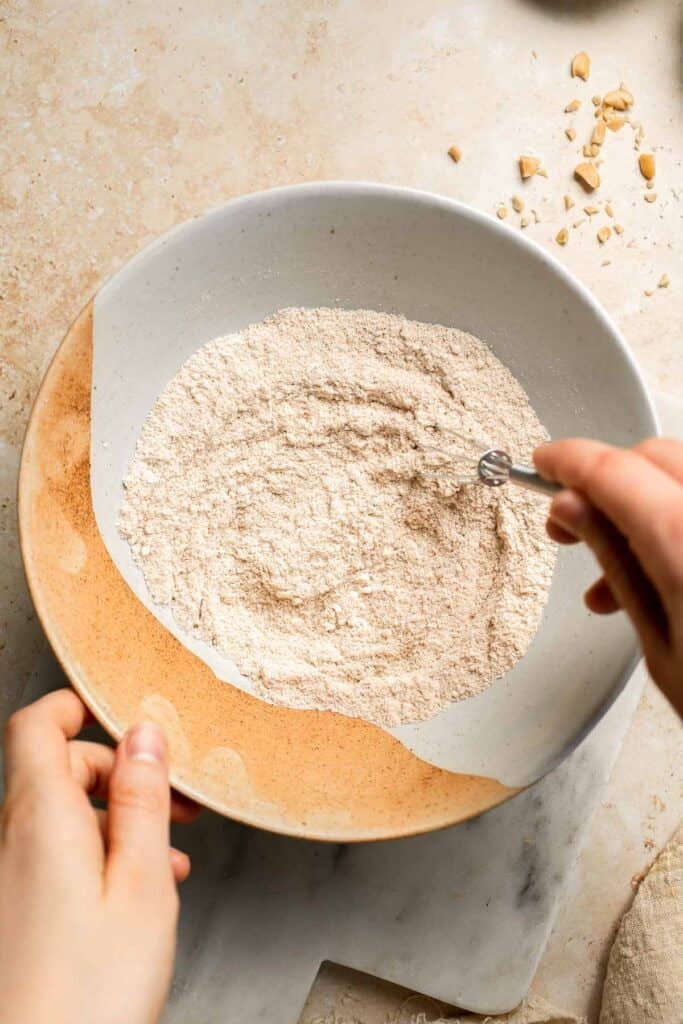
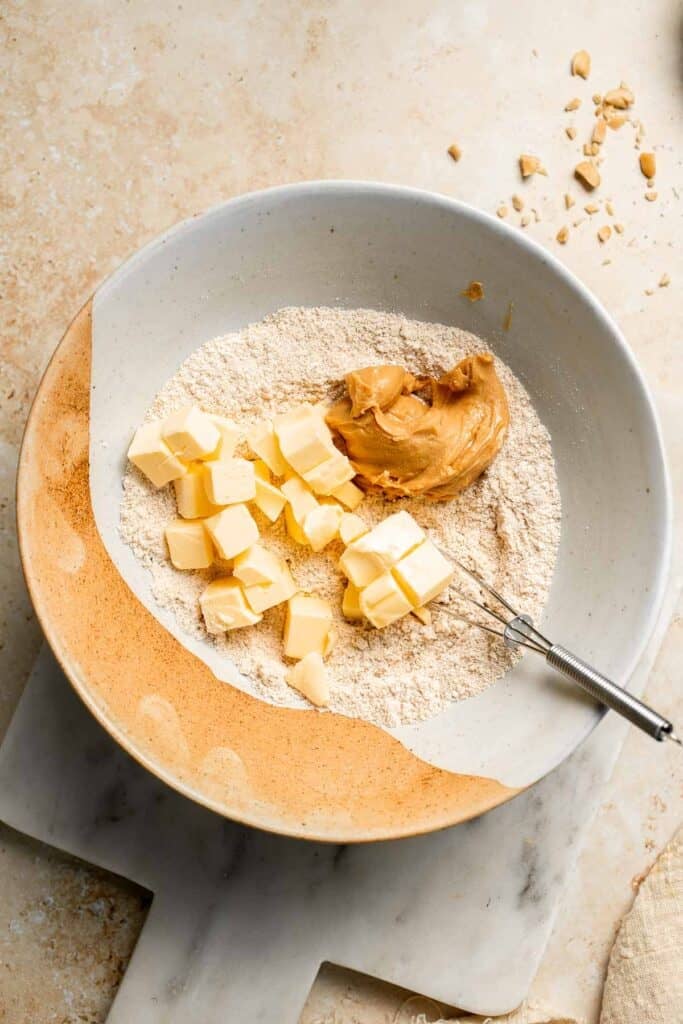
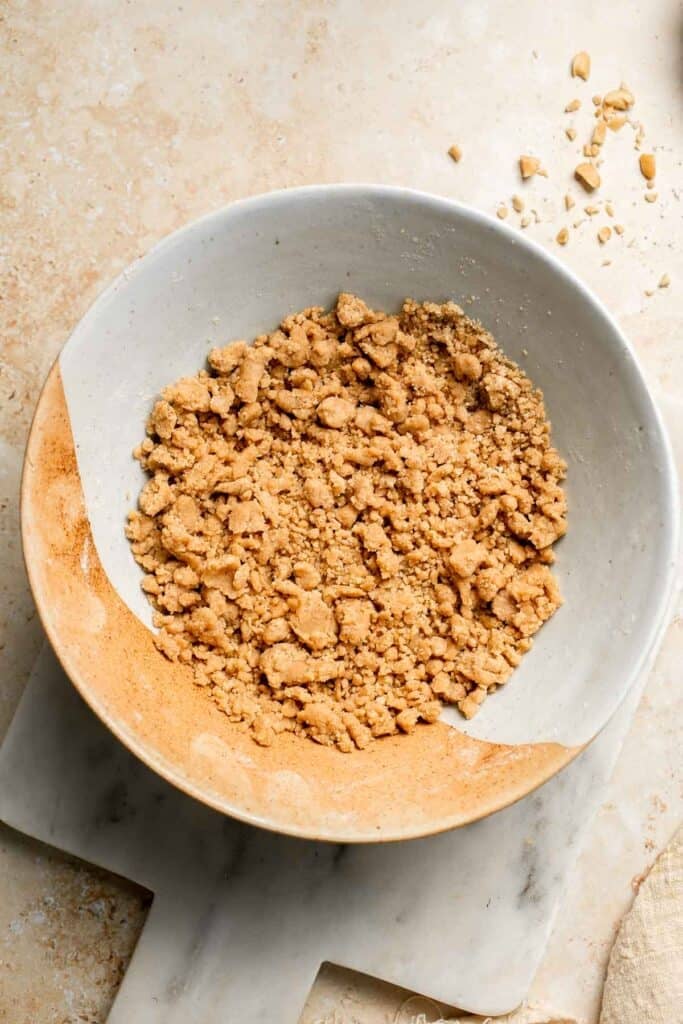
- Top with streusel and peanuts. Sprinkle the streusel evenly over the muffin batter. Then , gently press chopped peanuts into the topping so they stick while baking.


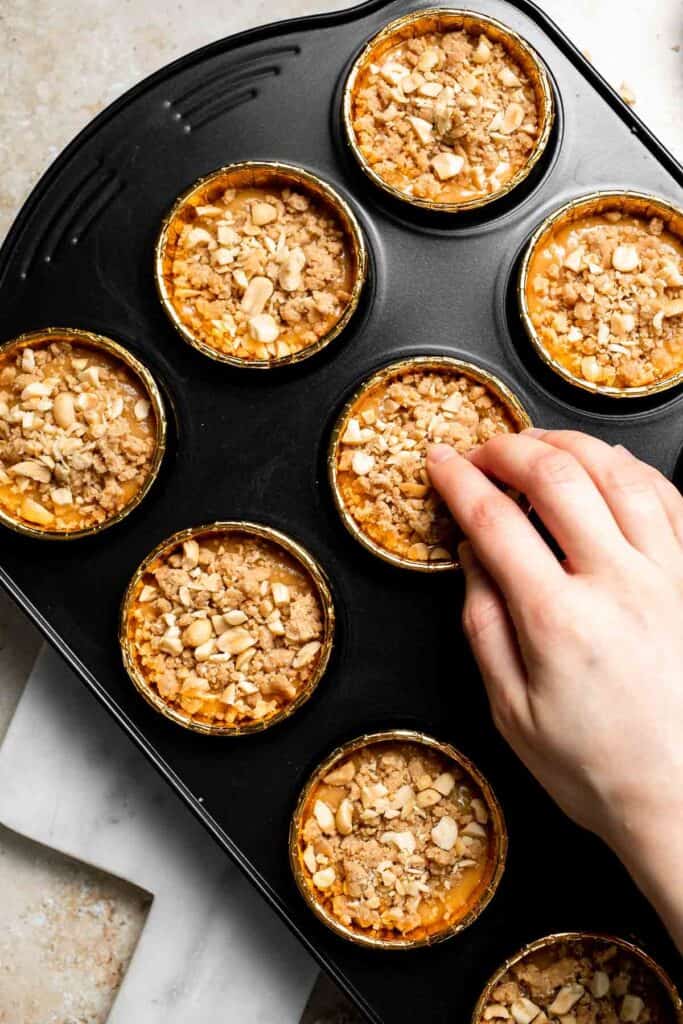
- Bake. Bake in a 375°F preheated oven for 20 minutes, or until golden brown and a toothpick inserted into the center comes out clean.
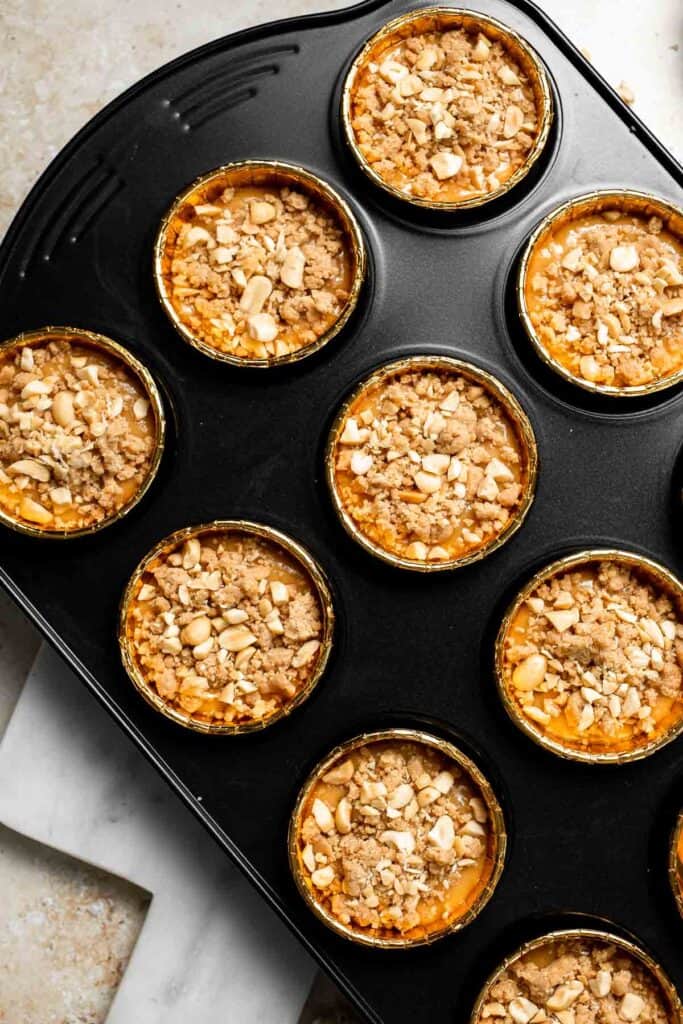
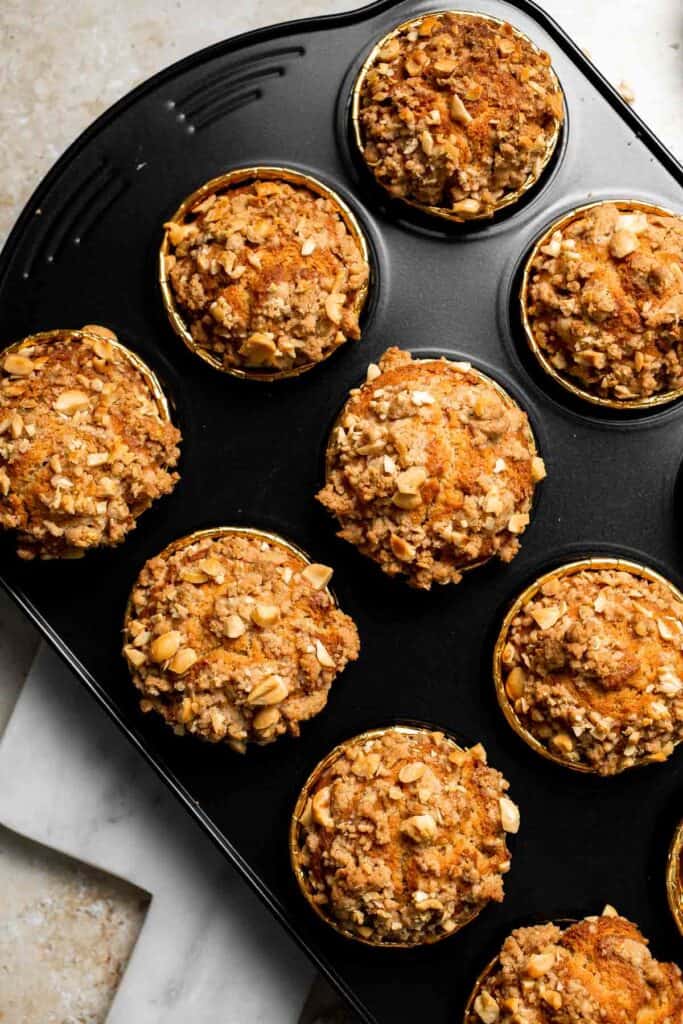
- Cool. Cool in the pan for 5 minutes, then transfer muffins to a wire cooling rack to cool completely.

Expert Tip: Use Room Temperature Ingredients
For the fluffiest peanut butter muffins, make sure your eggs and milk are at room temperature before mixing. This helps the batter come together smoothly without overmixing, ensuring light and tender muffins every time.
More Tips and Tricks
- Don't overmix the batter. Stir until just combined to avoid tough, dense muffins. A few streaks of flour in the batter are fine.
- Use a cookie scoop. Use a cookie scoop or measuring cup to make portioning the batter quick and guarantees all your muffins bake evenly.
- Chill the streusel. A few minutes in the fridge firms up the butter and helps it crumble beautifully over the muffins.
- Line your tin. Paper liners not only keep things neat but also lock in moisture. Bonus: easier cleanup.
- Cool before removing. Let the muffins sit in the pan for 5-10 minutes to set before transferring to a wire rack. This prevents breaking or sticking.
Recipe Variations
- PB&J muffins. Add a teaspoon of jam into the center of each muffin before baking for a nostalgic peanut butter and jelly twist.
- Add chocolate chips. Fold in ½ to 1 cup of chocolate chips for delicious chocolate chip peanut butter cupcakes for the ultimate peanut butter cup vibe.
- Add banana. Swap half the milk with mashed ripe bananas for extra moisture and sweetness.
- Nut butter swap. Almond butter or cashew butter work well in place of peanut butter.
- Add oats. Stir in ½ to 1 cup of rolled oats to the batter for extra texture and a hearty, wholesome bite. If adding closer to a cup then decrease the flour by 2-3 tablespoons.
- Frosted muffins. Add a drizzle of peanut butter glaze or cream cheese frosting to turn them into dessert muffins.
- Make muffin tops. Skip the liners and bake the batter on a greased muffin top pan or a lined baking sheet with muffin top molds. They bake up faster, with extra surface area for that golden, crunchy streusel. Perfect if you're one of those people who secretly only eats the muffin tops anyway (no judgment, we get it).
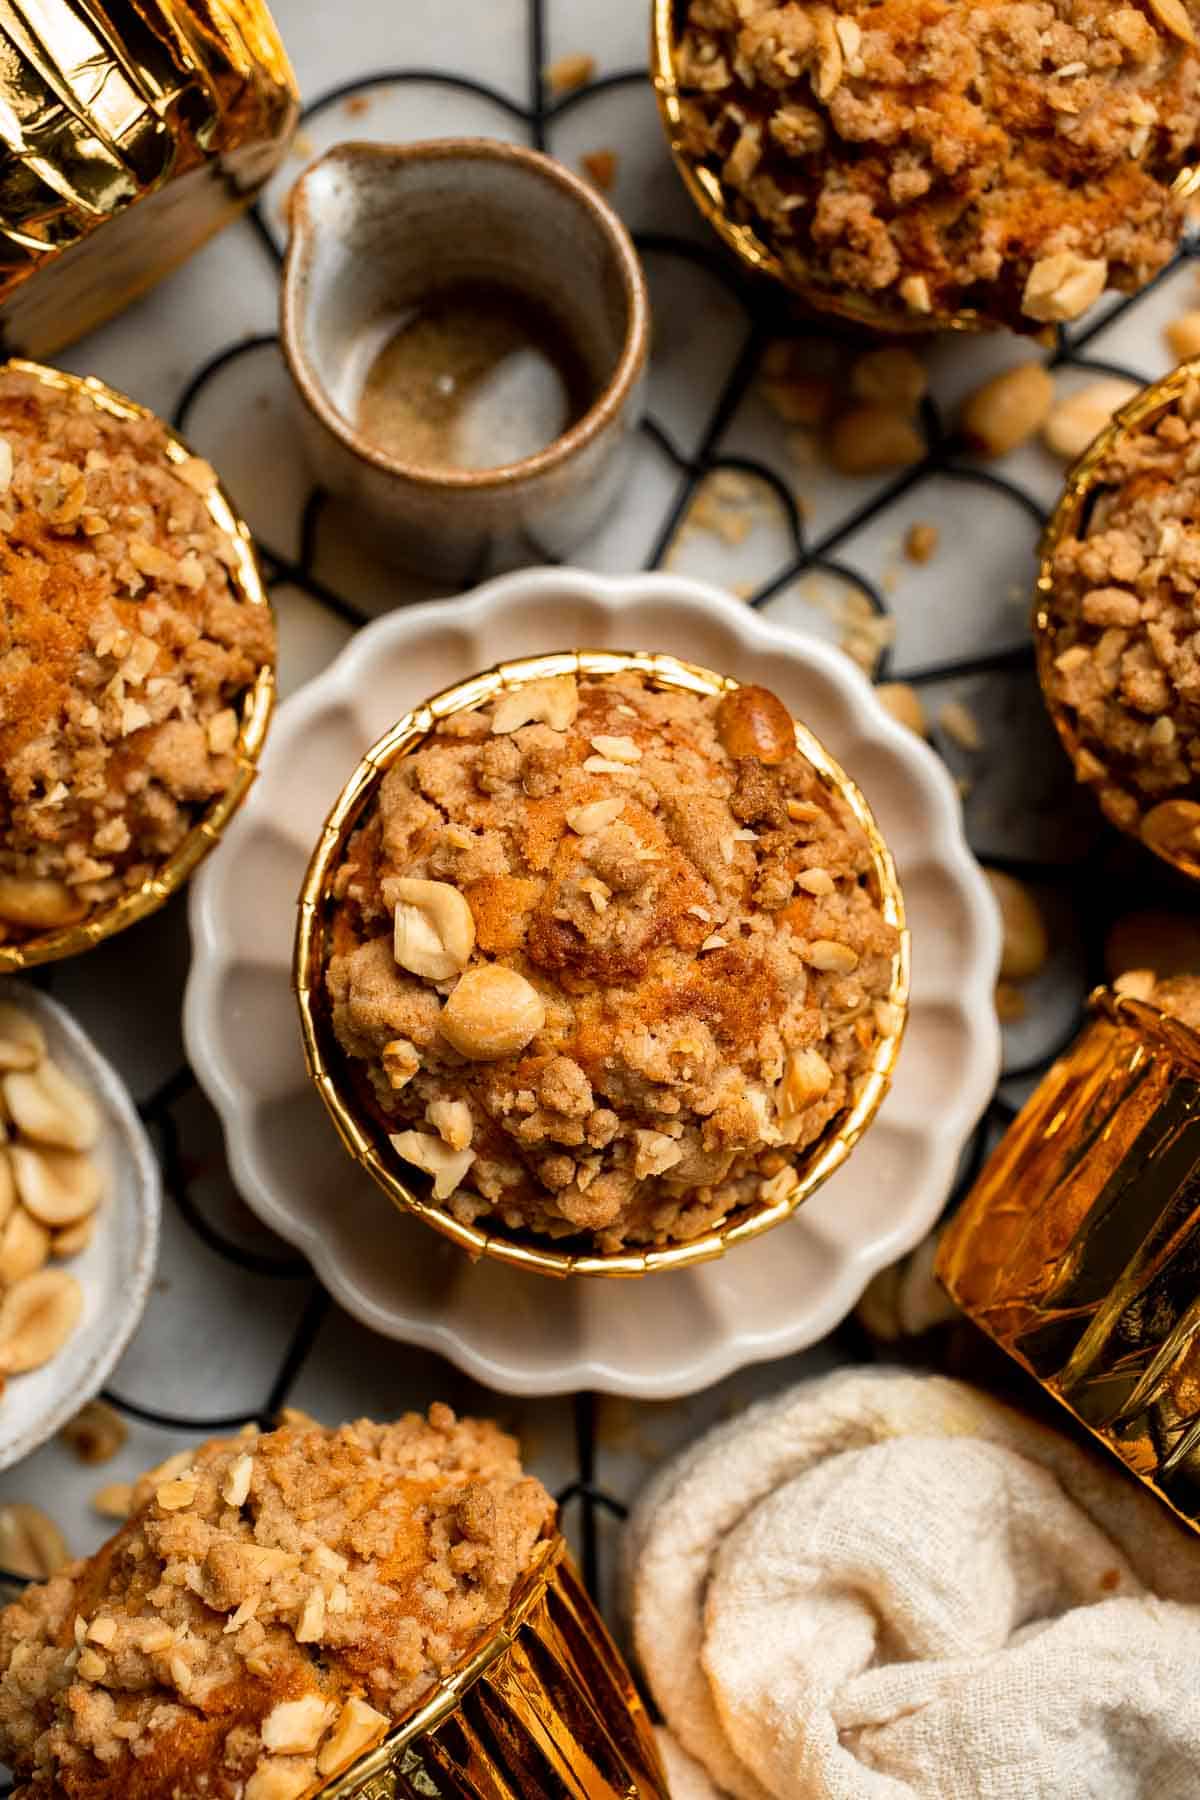
Storage
How to Store
Keep cooled muffins in an airtight container at room temperature for up to 3 days. For longer freshness, refrigerate for up to 1 week.
How to Reheat
Warm muffins in the microwave for 15-20 seconds or in a 300°F oven for 5 minutes to refresh their softness.
How to Freeze
Wrap muffins individually in plastic wrap and store in a freezer bag for up to 3 months. Thaw at room temperature or warm in the microwave before serving.
How to Serve
Muffins are versatile. You can keep it simple with coffee or fruit, or build them into a full breakfast or brunch spread.
These peanut butter muffins are perfect as a grab-and-go breakfast, a lunchbox snack, or an afternoon pick-me-up with coffee or tea. Their soft, nutty crumb pairs well with both sweet and savory sides. Try them with:

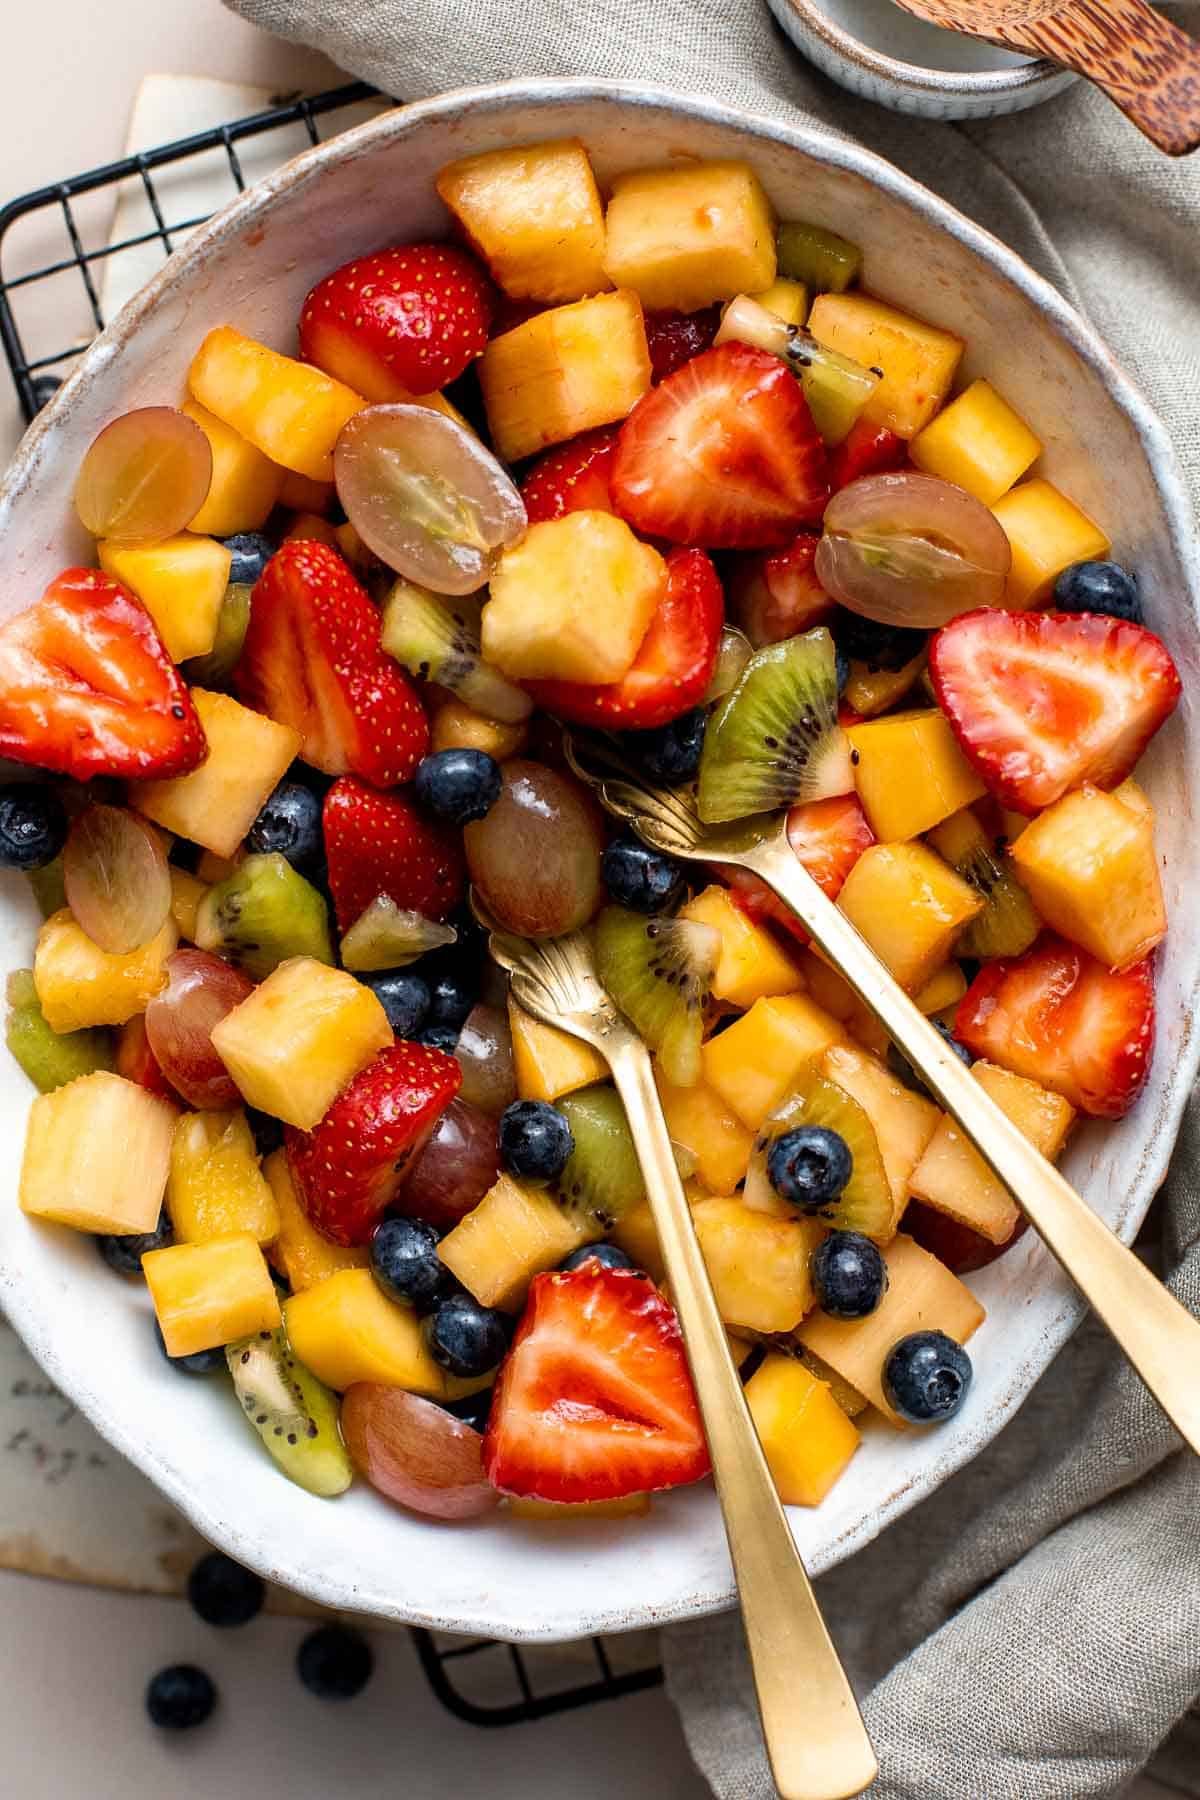

Breakfast Recipes
Our collection of breakfast sides pairs perfectly with this recipe, making your morning meal complete. From fresh fruit and yogurt parfaits to creamy spreads, nut butters, and simple egg dishes, these easy additions add flavor, texture, and variety to your meal.
FAQ
It's as easy as whisk, stir, and bake. Mix your dry ingredients in one bowl, your wet (plus peanut butter) in another, then combine. Scoop into muffin tins, sprinkle with streusel and peanuts, and bake until golden. The key is not to overmix as that's how you keep them fluffy and tender.
Craving one muffin right now? Mix flour, sugar, baking powder, milk, an egg, oil, and peanut butter in a microwave-safe mug. Microwave for 1-2 minutes until set. It won't be as lofty as oven muffins, but it'll scratch that peanut butter itch in record time.
Peanut butter works best when blended with the wet ingredients so it mixes evenly (without clumps). To add peanut butter to a muffin recipe, simply replace part of the fat (oil or butter) with creamy peanut butter. This not only infuses flavor but also adds richness and moisture. Want extra fun? Swirl a spoonful into the batter before baking for ribbons of peanut buttery goodness.
Mash ripe bananas (about 1 cup) and swap them for half the milk in this recipe. Bananas add natural sweetness and extra moisture, while peanut butter brings depth and richness. It's like banana bread met peanut butter heaven. The perfect breakfast muffin.
Yes, but stir it well first. Natural peanut butter with oil separation can make muffins greasy or inconsistent. For the most reliable texture, stick with creamy no-stir peanut butter. If you do use natural, reduce added oil slightly.
Usually it's from overbaking, too much flour, or overmixing. Use the spoon-and-level method to measure flour, bake until a toothpick comes out with moist crumbs (not bone-dry), and mix the batter gently. A splash more milk or oil can also help keep them moist
More Muffin Recipes
Looking for other recipes like this? Try these:
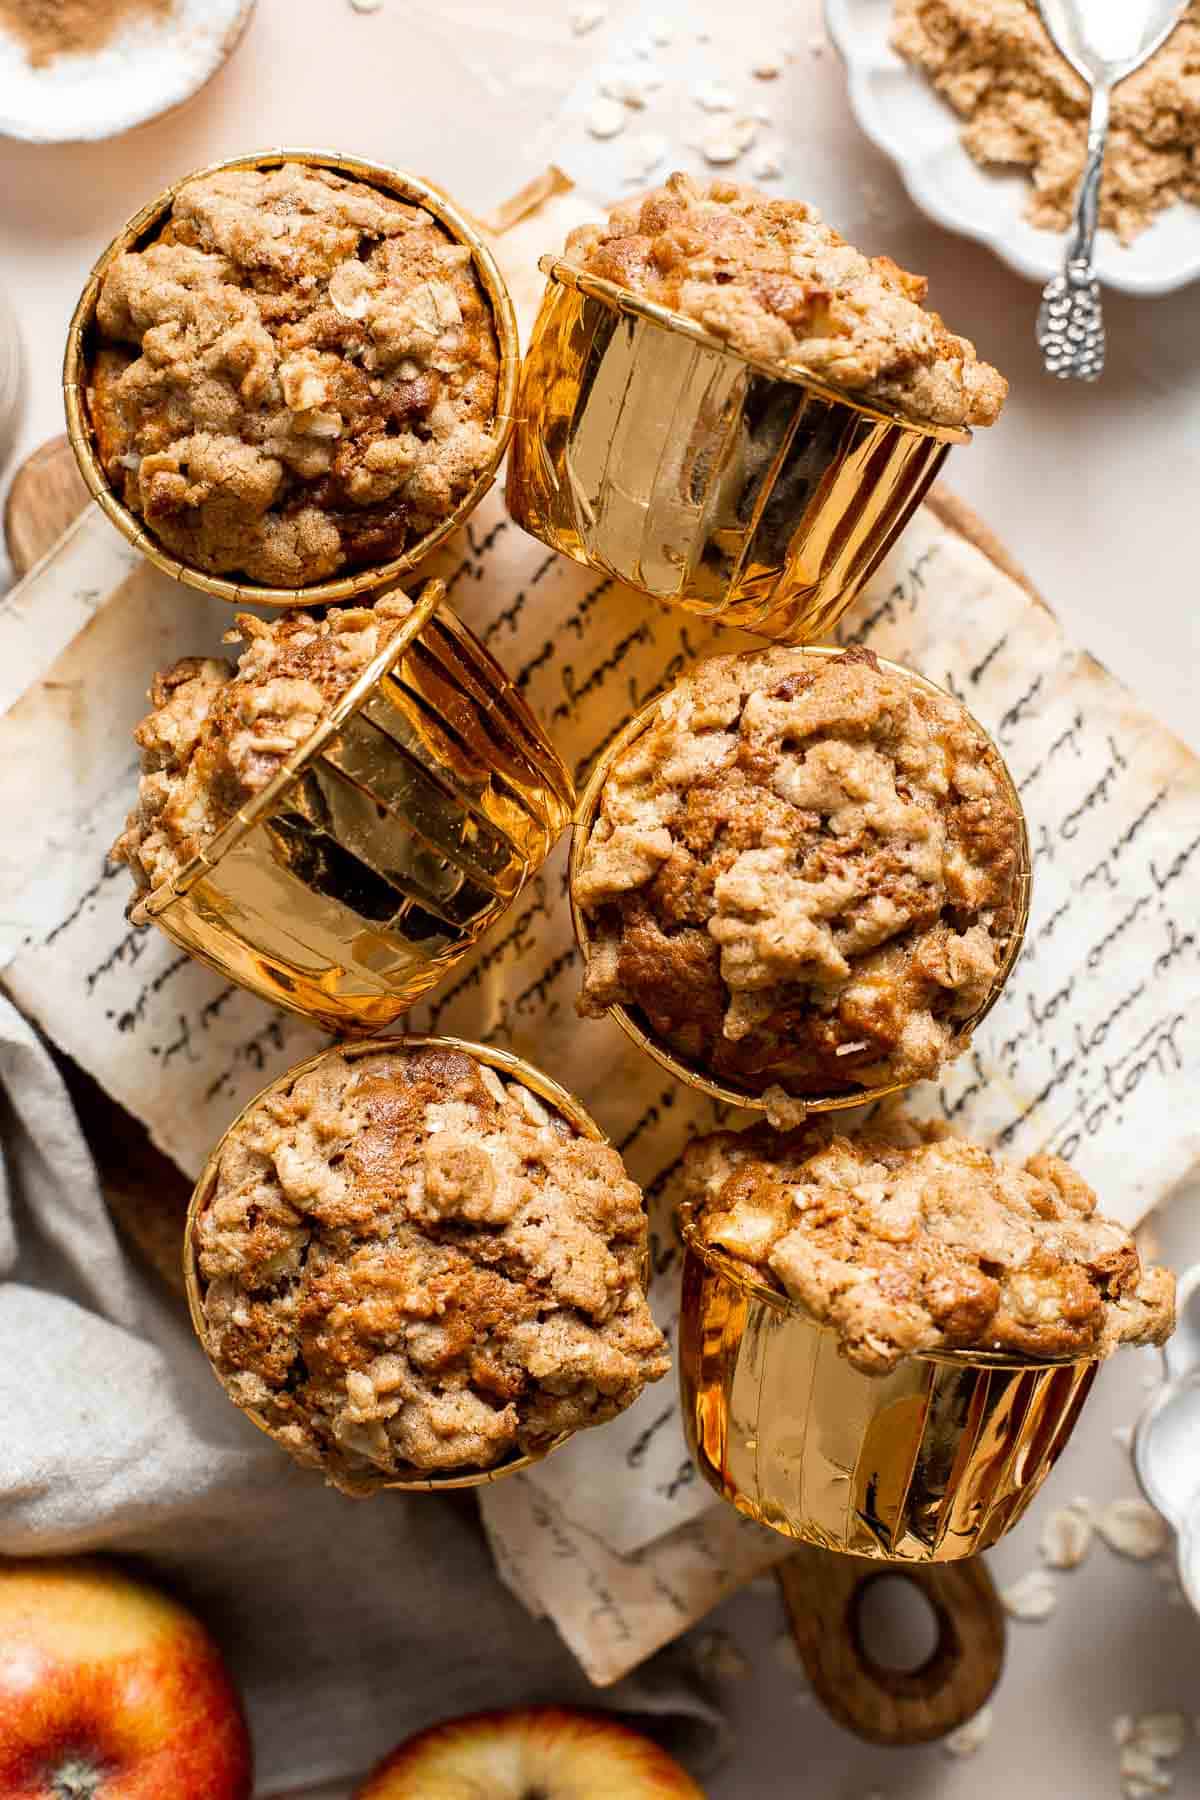

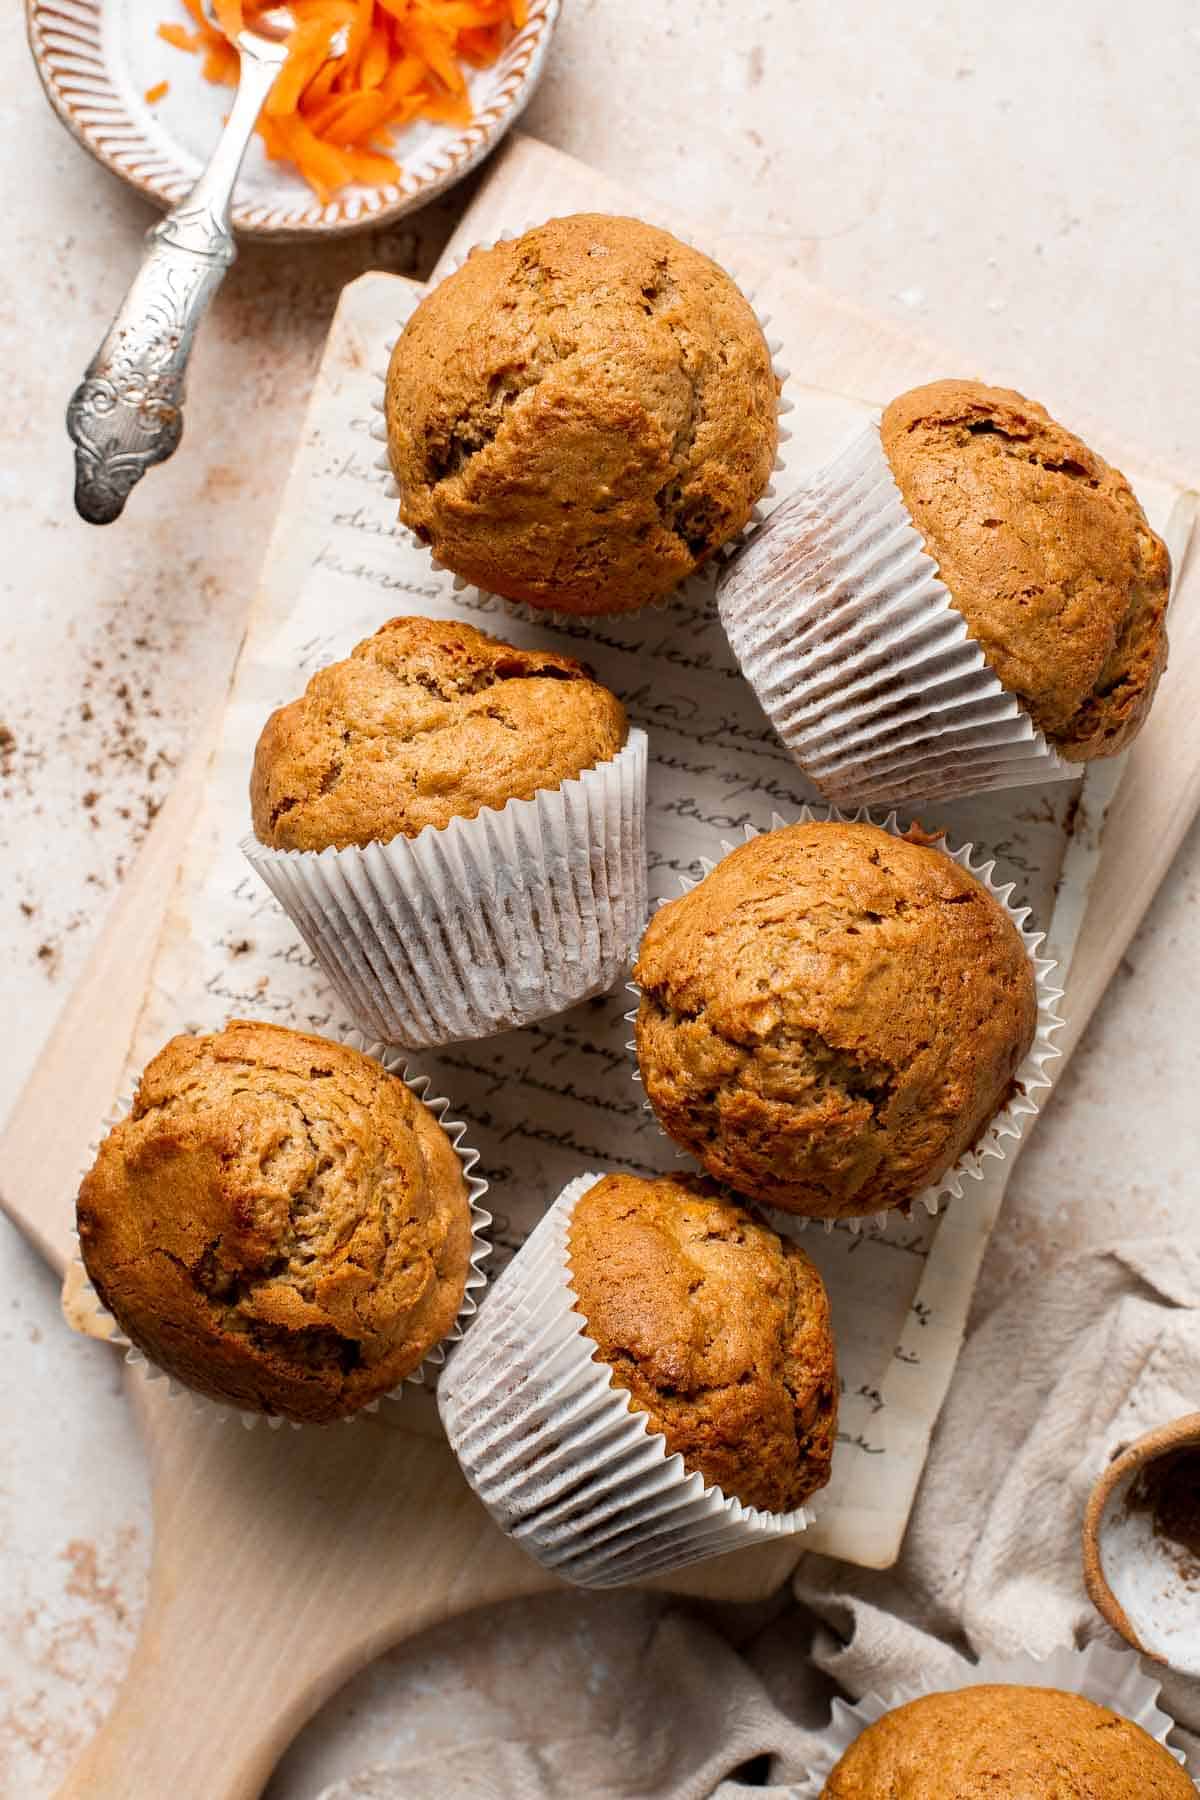

Tried this recipe?
I'd love to hear what you think! Leave a comment and rating below to share your feedback. Your reviews help others discover this recipe and help me keep creating more free recipes for you. Snap a photo and tag me on social media @aheadofthyme too.

Quick and Easy Vegetarian Ramen
This quick and easy Vegetarian Ramen is rich, comforting, and packed with bold umami flavor. Made with a simple broth, plenty of fresh veggies, chewy noodles, and the perfect soft-boiled egg on top, it proves that homemade ramen can be just as fast as instant. Put down that cup of noodles, the real deal made from scratch is only 20 minutes away.
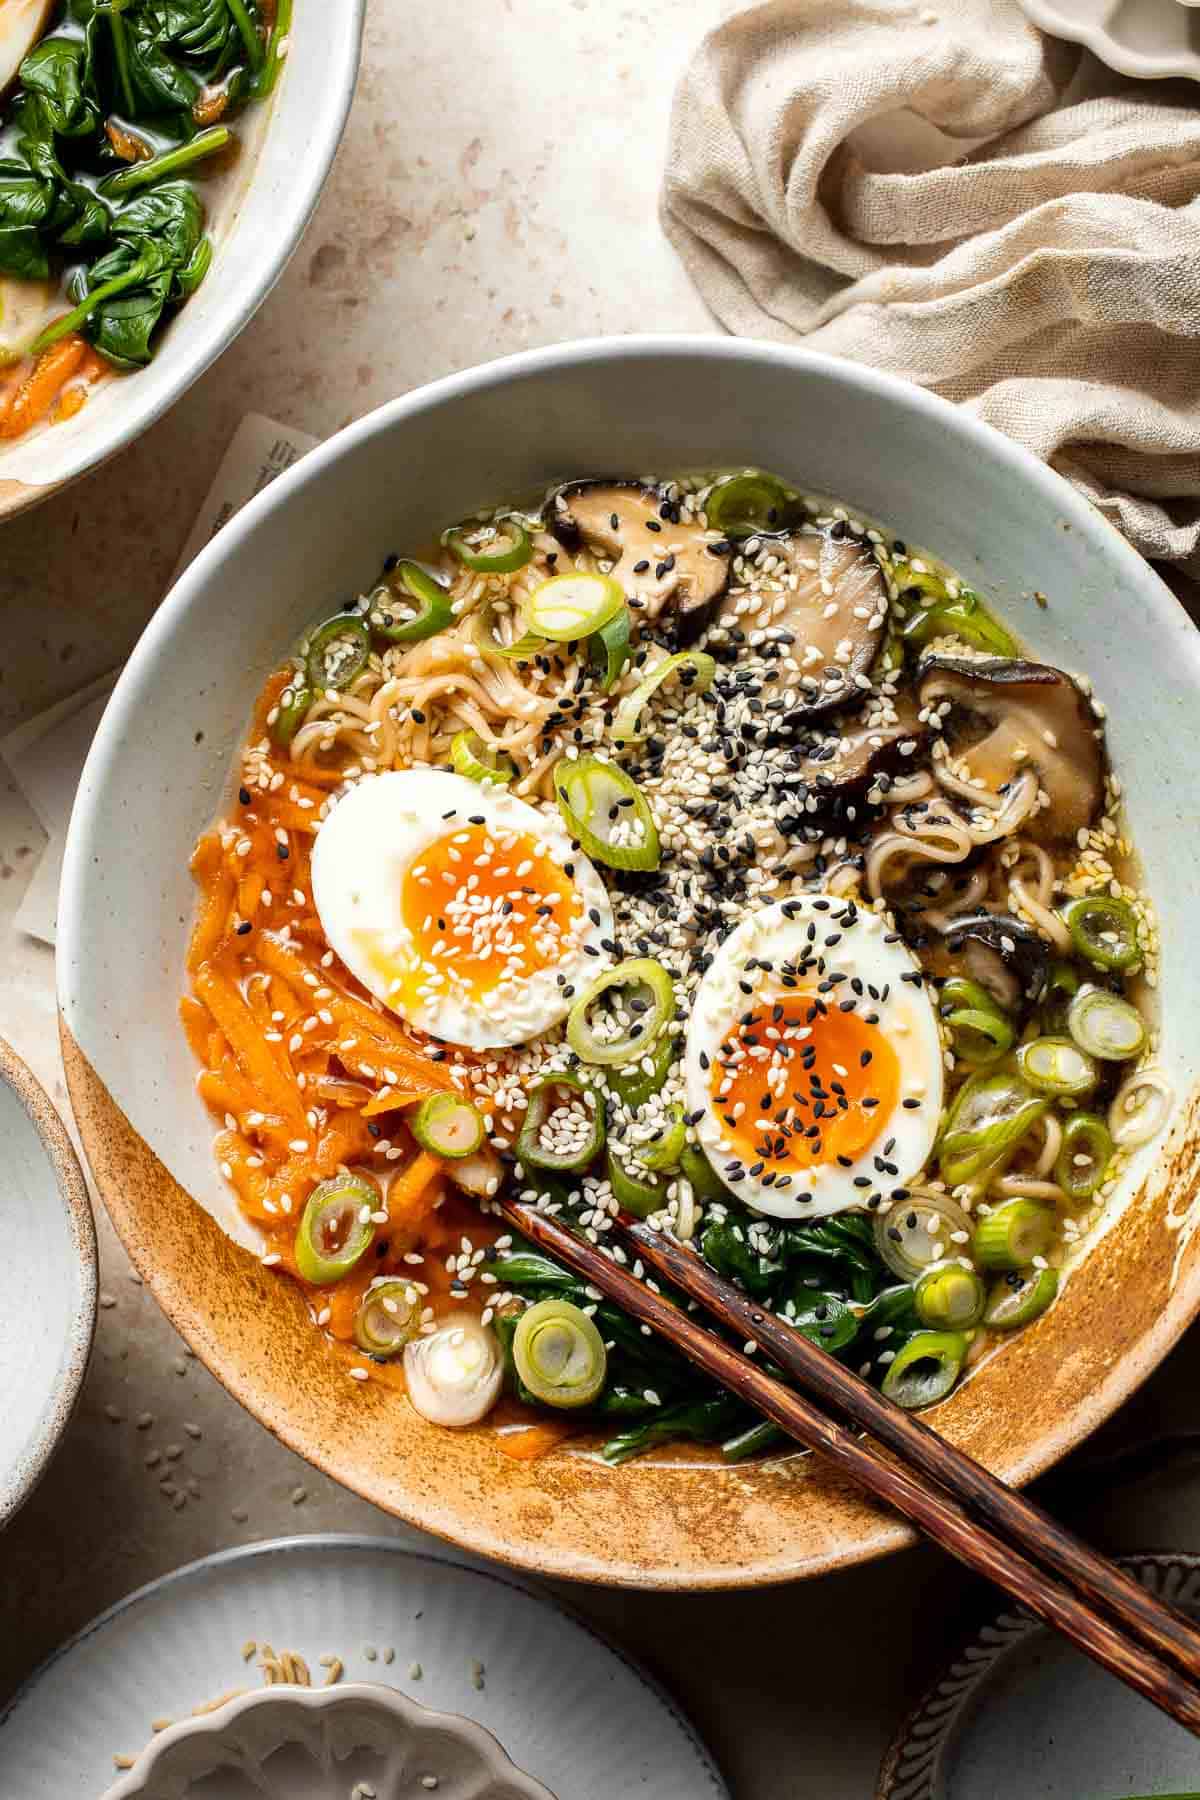
I always keep a few packs of dry ramen noodles in my pantry for those "too tired to cook" nights. This quick and easy plant-based vegetarian ramen has become my go-to whenever I'm craving something warm and cozy after a busy day. And let's set the record straight - lazy meals don't have to mean boring meals. They can be fresh, flavorful, and absolutely delicious. Forget the instant cup noodles with dried carrots and peas that magically rehydrate with boiling water (let's leave that for the college kids!). Real ramen is just as easy, but so much better, made with wholesome ingredients that turn a simple bowl into true comfort food.
If you liked this recipe, you need to try our Creamy Vegan Ramen or Vegetarian Peanut Miso Ramen next. For a stir-fried option, try Peanut Butter Ramen Noodles or the viral Tiktok Ramen.
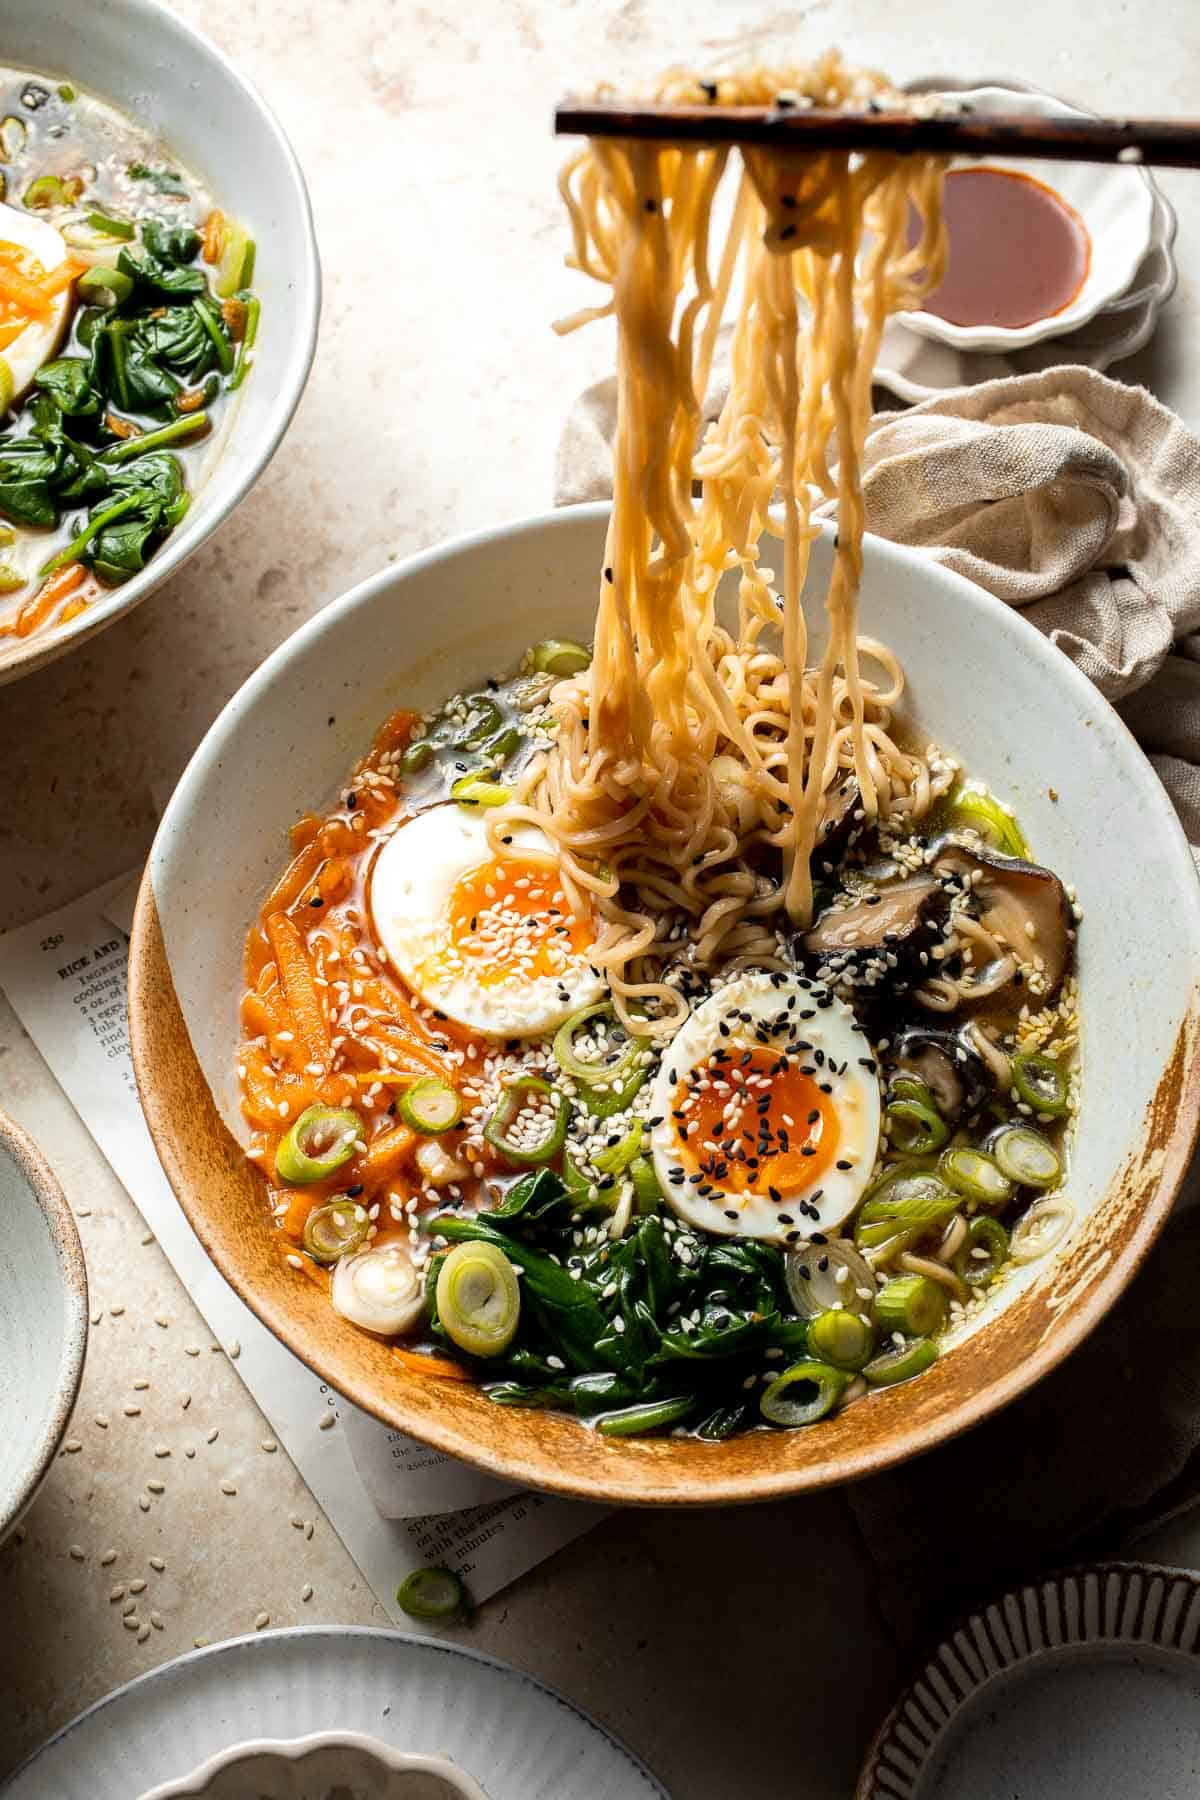
Why You'll Love This Vegetarian Ramen Recipe
- Quick and easy. Ready in just 25 minutes, this ramen is faster than takeout and perfect for busy weeknights. It uses simple, wholesome ingredients and pantry staples you likely already have on hand, making it both convenient and satisfying. This recipe is one of the first on my list anytime I need something really delicious, really quickly.
- Rich and flavorful broth. Vegetarian ramen doesn't have to mean bland. This broth starts with sautéed garlic and ginger in sesame oil, then layers in soy sauce, mirin (or rice vinegar), and vegetable stock for a bold, umami-rich base with just the right touch of sweetness.
- Better than takeout. Homemade ramen noodle soup is fresher, healthier, and far more budget-friendly than a restaurant bowl. You get all the cozy comfort of your favorite ramen shop without leaving home.
- Healthy and nourishing. Packed with fresh vegetables and plant-based protein, this ramen is hearty enough to fill you up but still feels light and balanced. It's comfort food that you can feel good about.
- Endlessly customizable. Think of this as your base recipe to build on. Swap in seasonal vegetables, try different toppings, or adjust the spice level to your taste. Each bowl can be personalized, making it fun and family-friendly even for picky eaters.
Ingredients and Substitutions
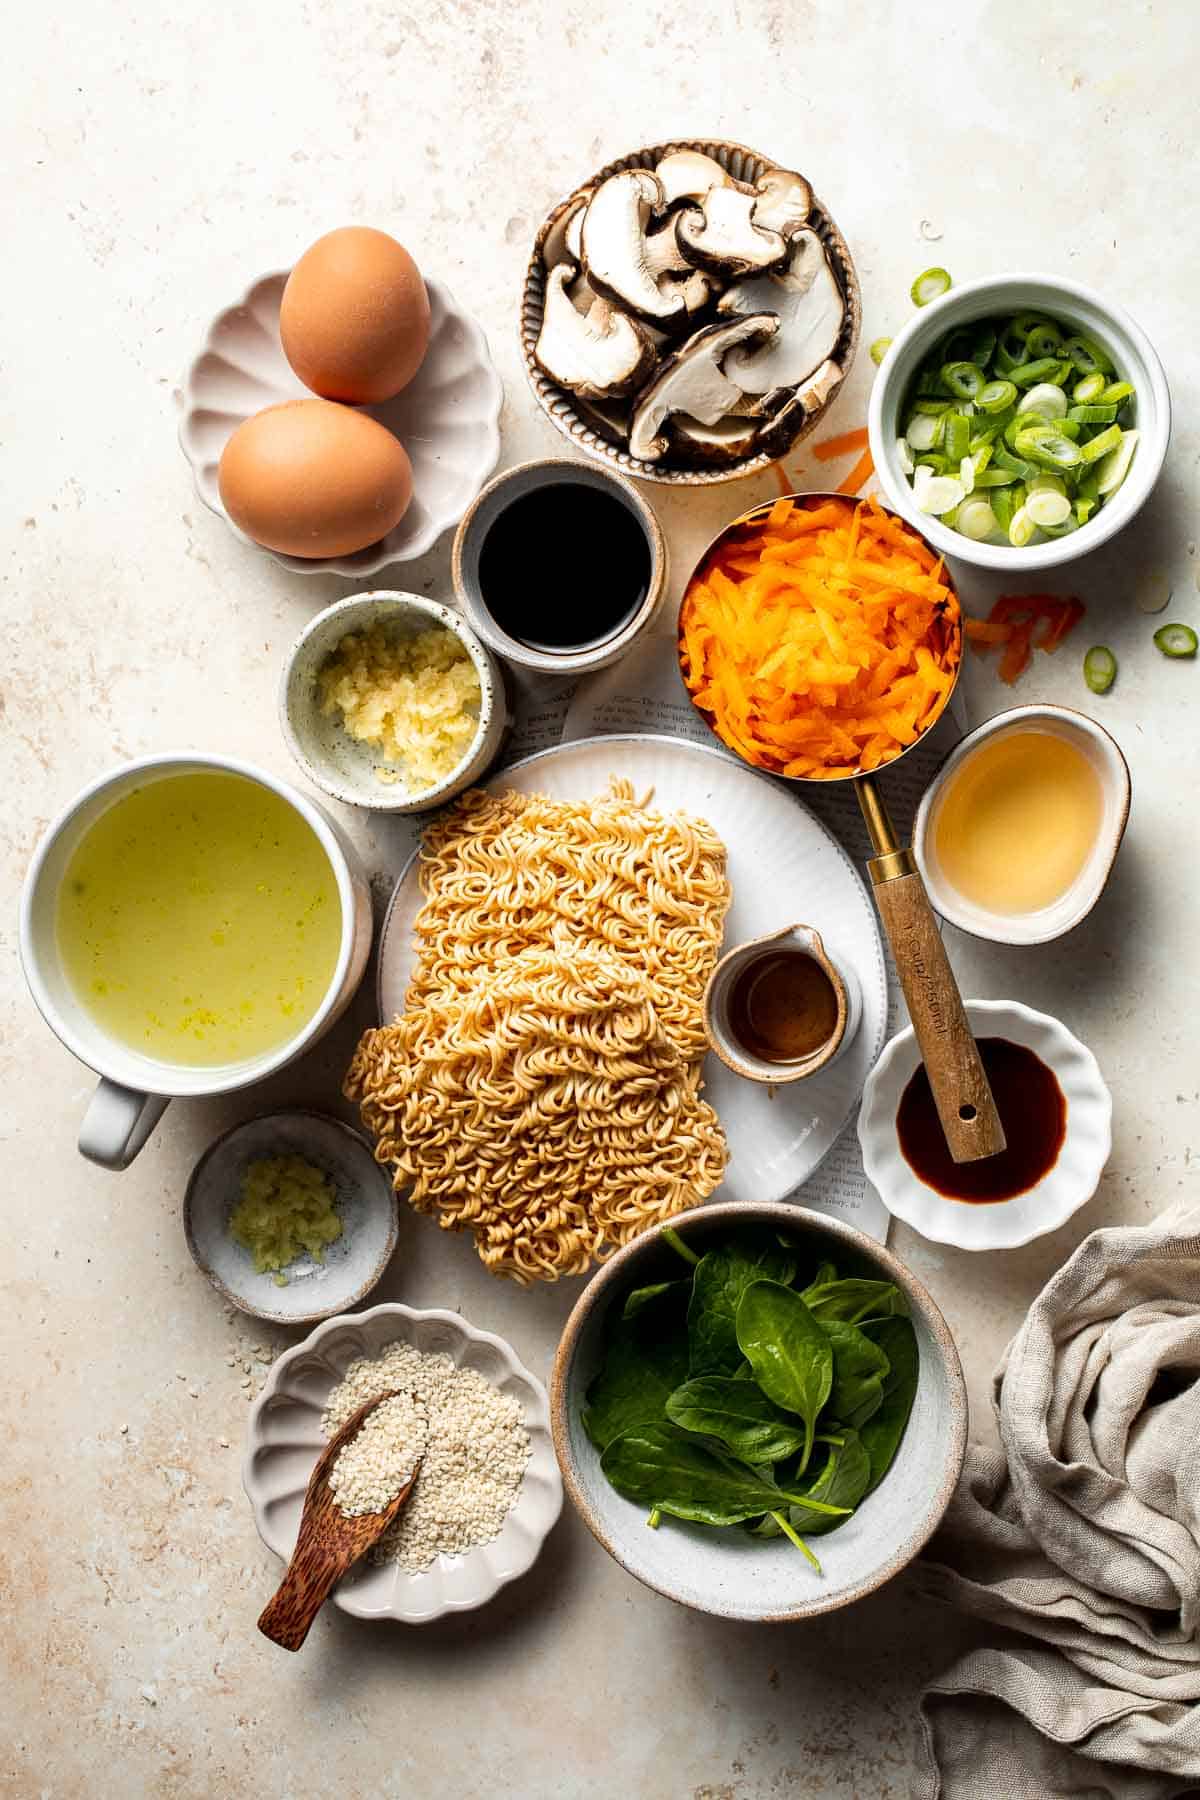
The best thing about ramen is how customizable it is. The foundation of any good bowl is the soup base. That, you don't want to change or skip. But when it comes to proteins and vegetables, the options are endless. Mix and match whatever you have on hand to create a ramen that's uniquely yours every time.
To make this delicious vegetarian ramen, you will need the following key ingredients (see recipe card below for quantities):
- Broth - A good ramen starts with flavorful broth. I use vegetable stock simmered with fresh ginger and garlic for depth, plus sesame oil, soy sauce (shoyu), and a splash of mirin or rice vinegar for balance. If you're not vegetarian, you can use chicken broth or even beef broth for a richer base. Tamari works as a gluten-free substitute for shoyu.
- Noodles - Dried ramen noodles are quick and convenient, but you can also use fresh ramen noodles for a chewier, springier texture (found in Asian markets). You can also swap with soba noodles, udon, or even spaghetti. Just be sure to adjust the cooking time to what's on the package.
- Vegetables - I love adding shiitake mushrooms and fresh baby spinach for umami and freshness, but ramen is incredibly customizable. Try bok choy, napa cabbage, bamboo shoots, corn, carrots, or bean sprouts depending on what's in season or in your fridge.
- Protein - Soft-boiled eggs are the classic topping for this vegetarian ramen, but you can swap with crispy tofu, tempeh, or edamame for a plant-based protein boost. If you're not strictly vegetarian, shredded rotisserie chicken, beef slices, pork, or prawns are all delicious additions.
- Toppings - Don't skip the garnishes - they really bring the ramen together. Scallions, shredded carrots, sesame seeds, nori strips, or chili oil add freshness, crunch, and a finishing touch. For extra heat, stir in sriracha or your favorite hot sauce.
Equipment
You will also need measuring cups and spoons, a large soup pot or Dutch oven, 2 smaller cooking pots for cooking the eggs and spinach, a ladle, tongs for handing noodles and toppings, and ramen bowls for serving.
How to Make Quick and Easy Vegetarian Ramen
Step 1: Prepare the soup base.
- Saute aromatics. Heat the sesame oil in a large pot over medium heat. Add the garlic and ginger and cook for a couple minutes until soft and fragrant.

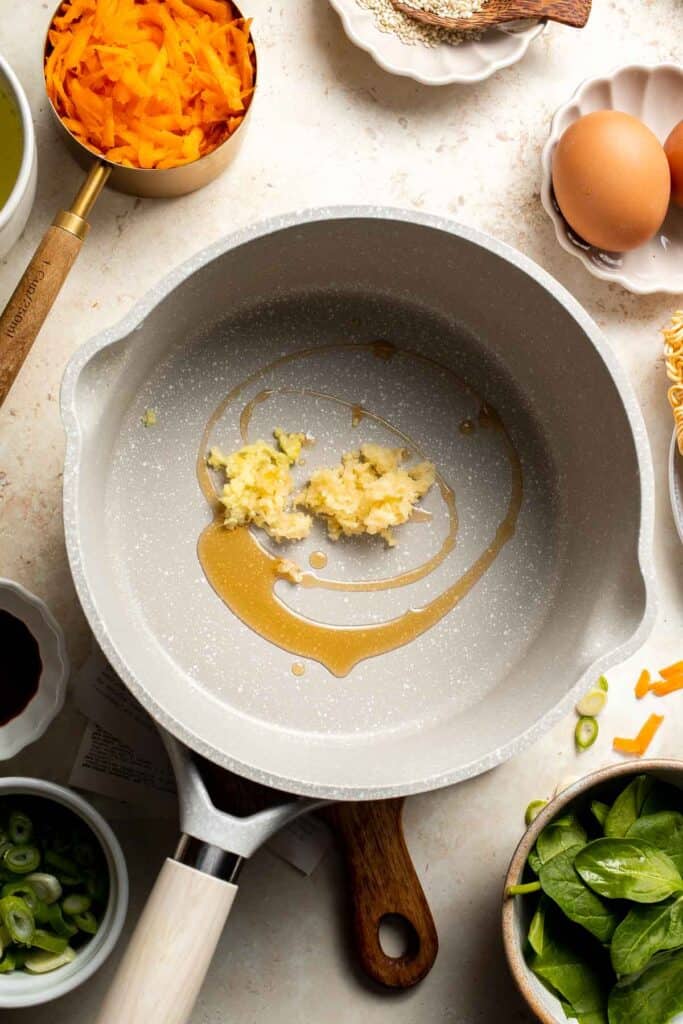
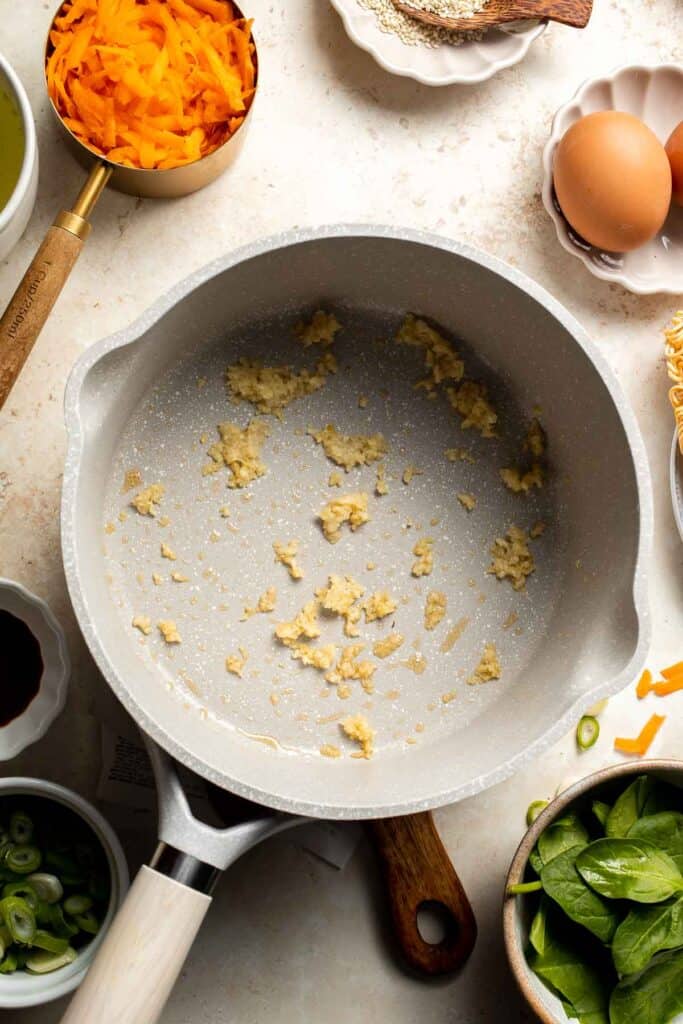
- Add sauce. Stir in the soy sauce and mirin and cook for another minute.

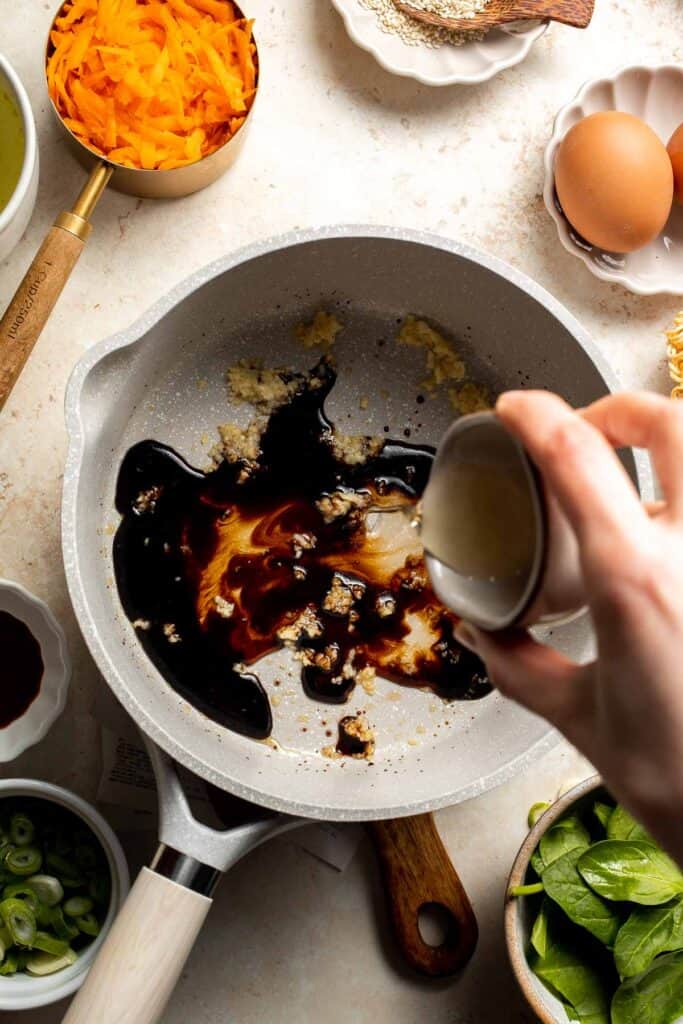
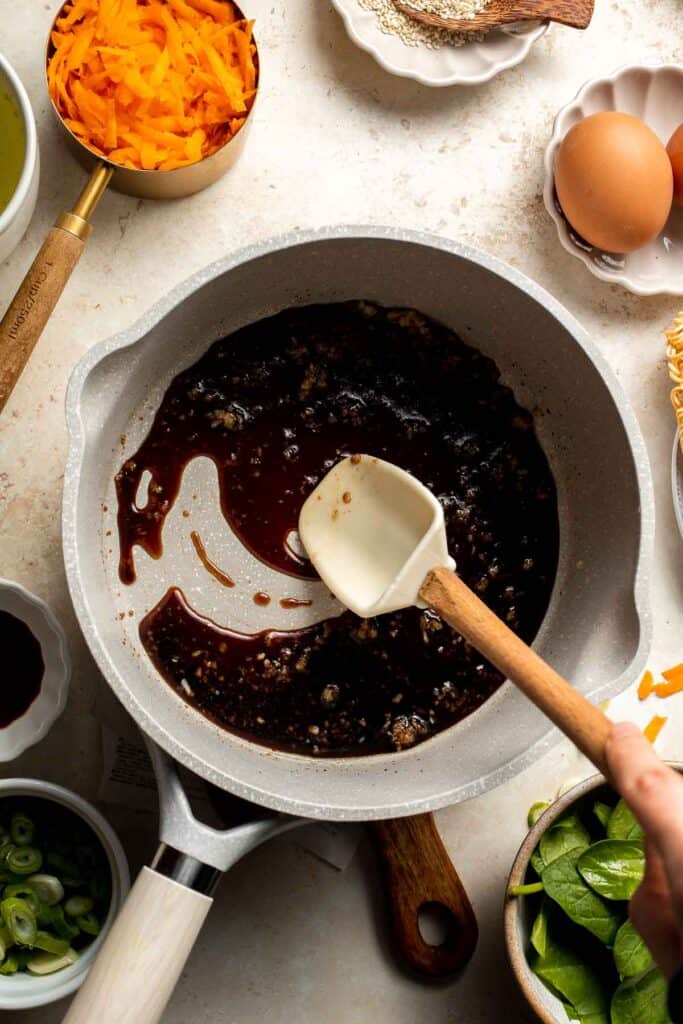
- Add stock. Add the stock and bring to a simmer. Simmer for 5 minutes.
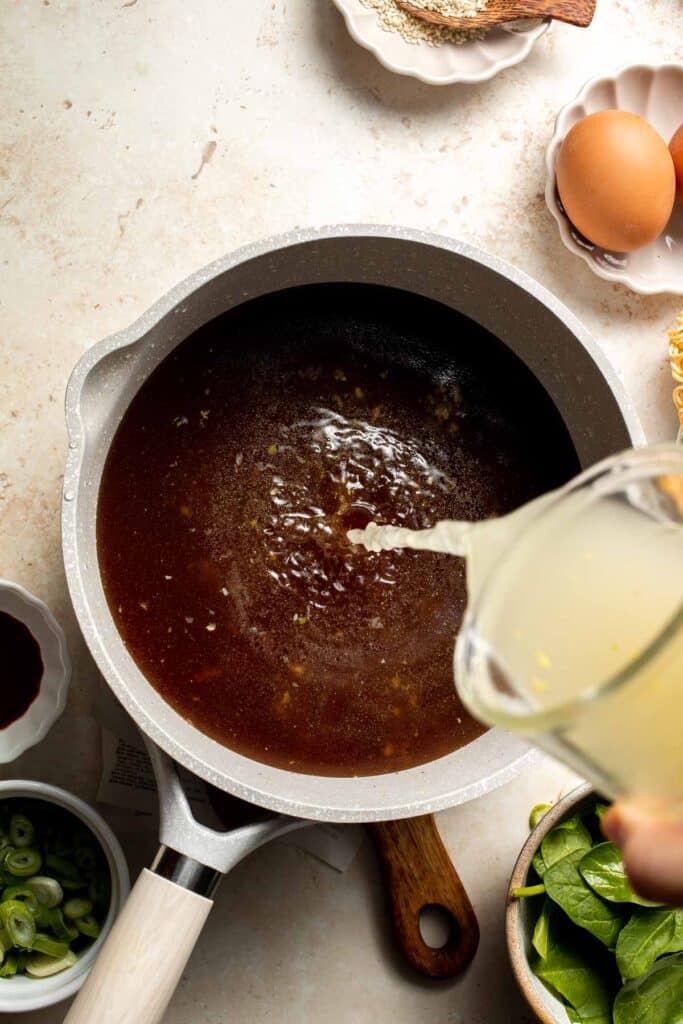
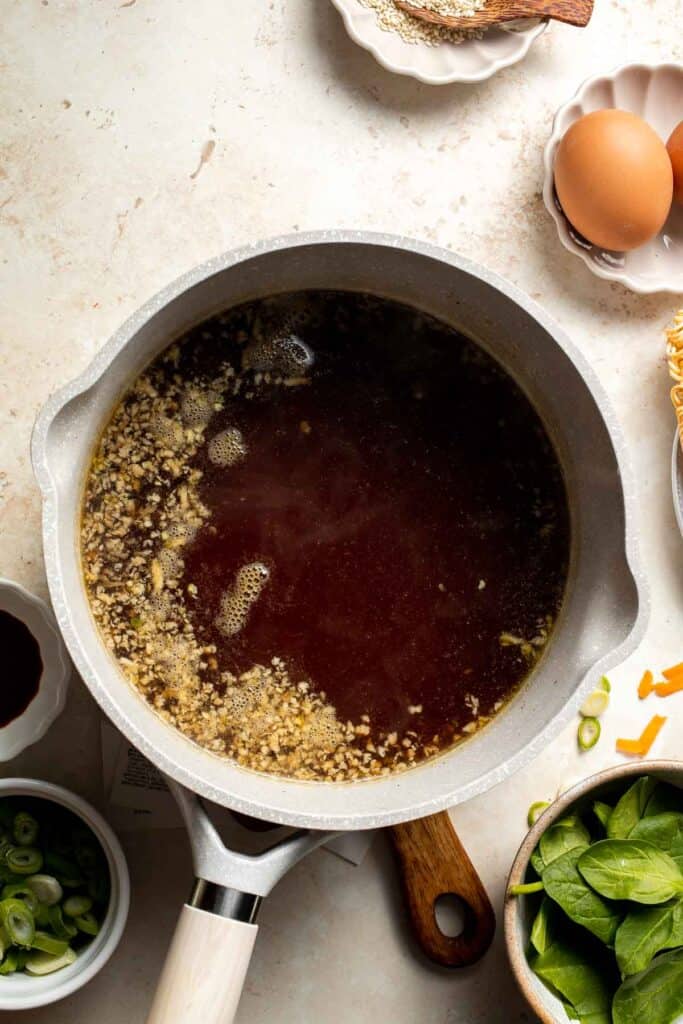
- Add mushrooms. Add the mushrooms and simmer for another 10 minutes.
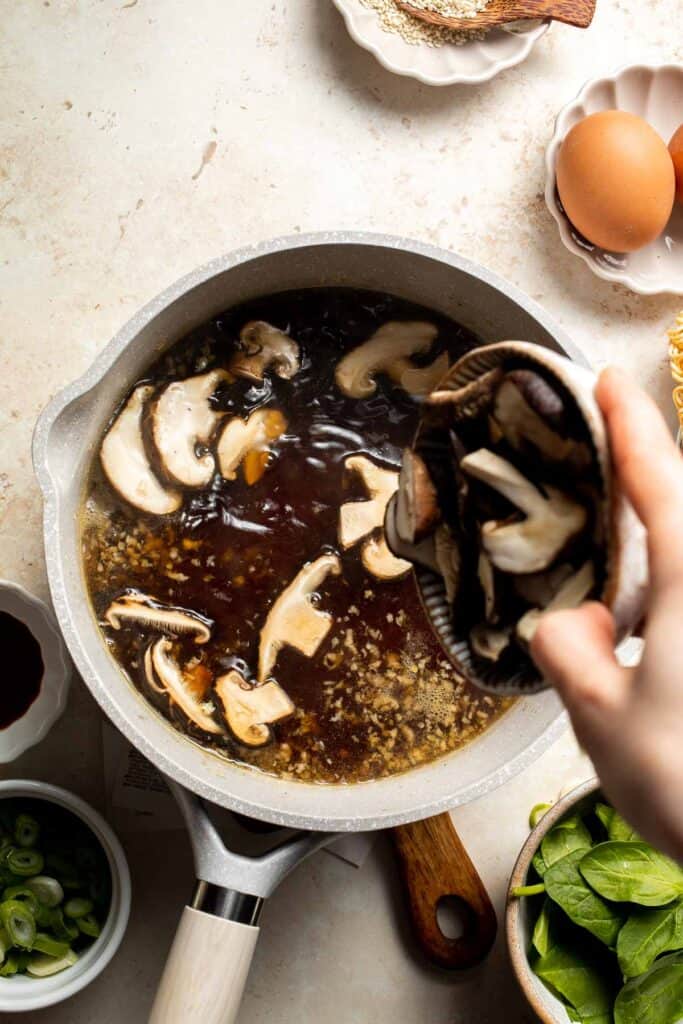
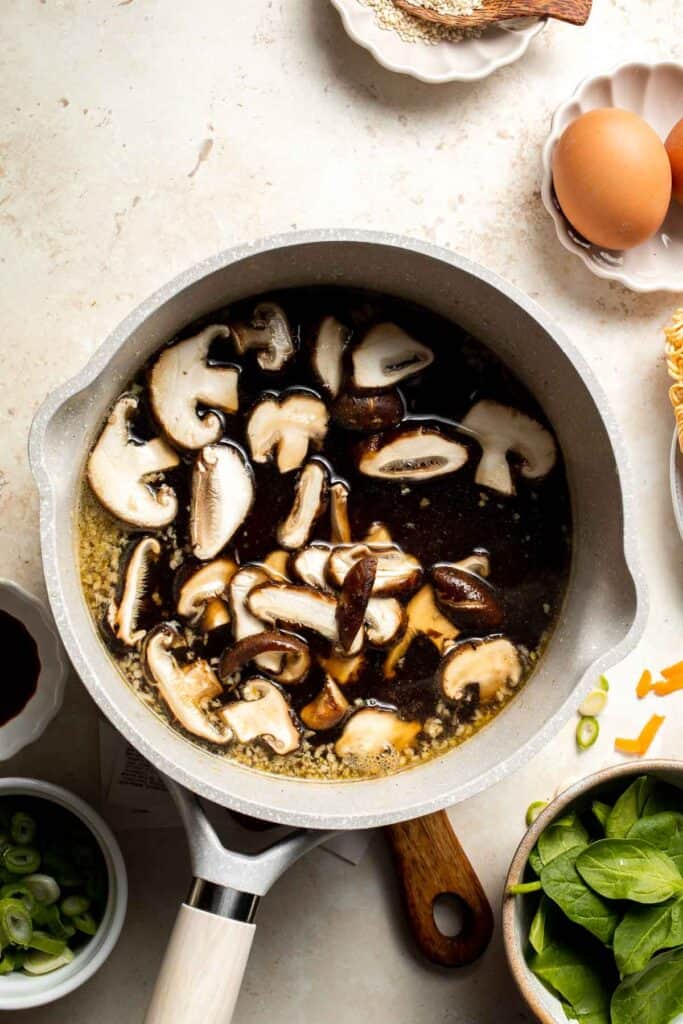
Step 2: Make the soft-boiled eggs.
- Boil eggs. Meanwhile, bring a small pot of water to a boil. Add the eggs and cook for exactly 7 minutes for a slightly runny yoke or 8 minutes for a soft yolk.
- Place in ice bath. Remove eggs from the pot and place in a bowl of ice water to stop the cooking process.
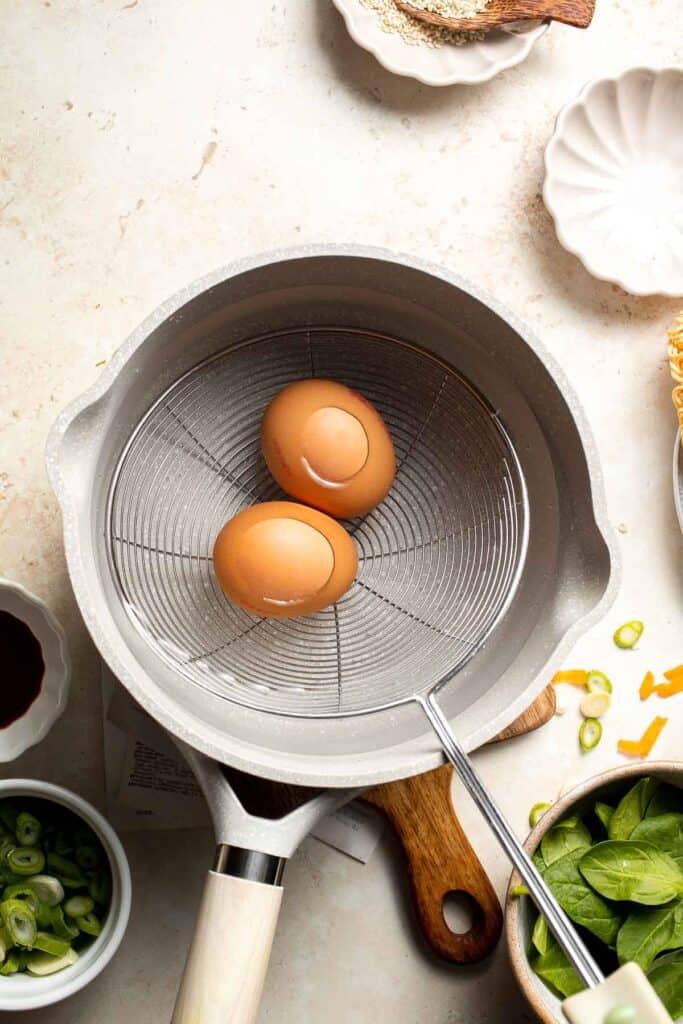
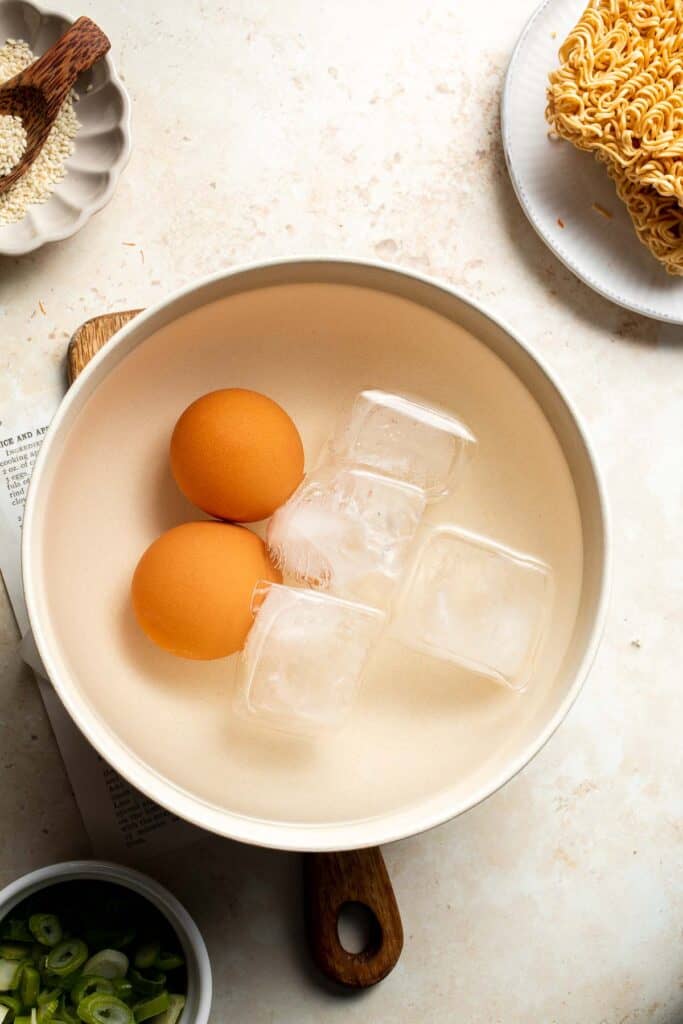
- Peel eggs. After a few minutes, peel the shells off carefully and slice the eggs in half, lengthwise. Set aside.
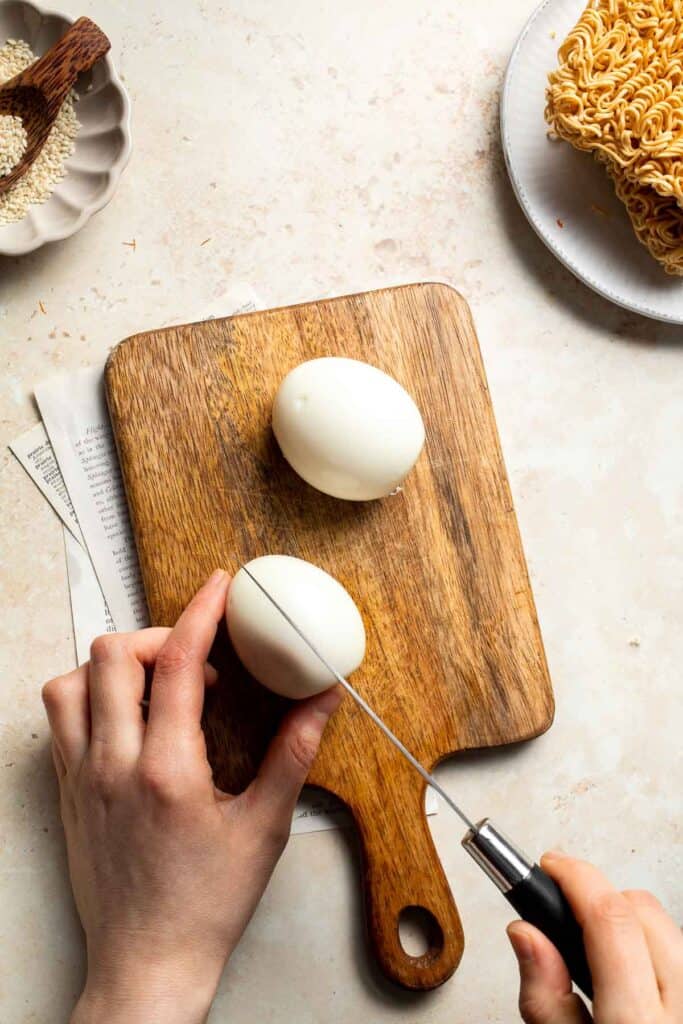
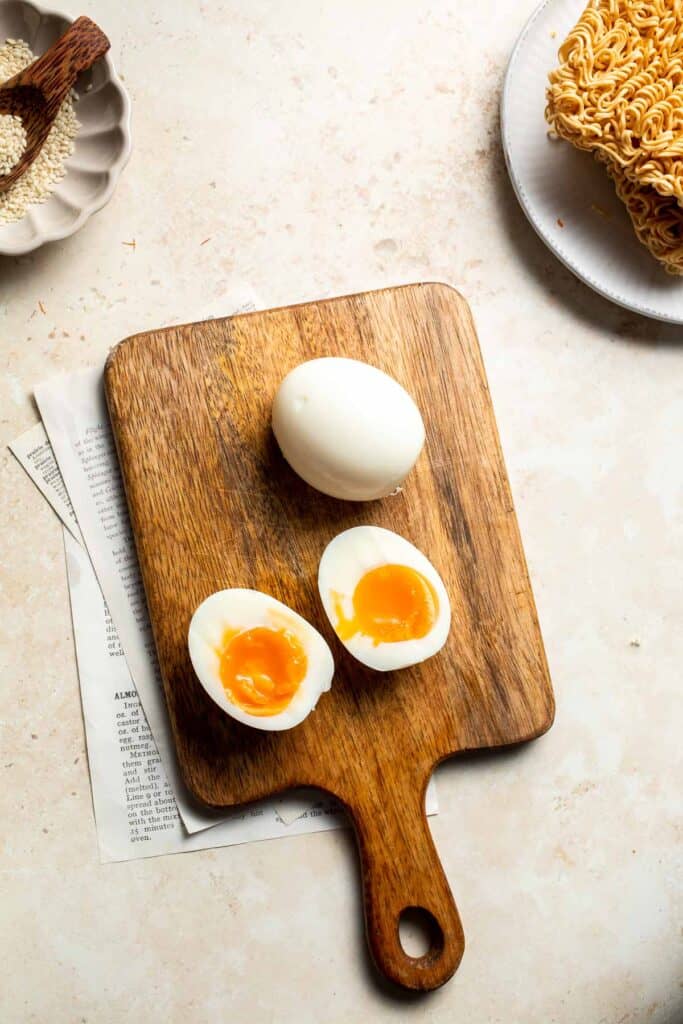
Soy Sauce Eggs
If you have more time to prepare, you can make Ramen Eggs instead. These are salty, savory, and umami with a firm white and jammy center. Make them with a simple 4-ingredient marinade.
Step 3: Cook the spinach.
Bring another pot of water to a boil. Add the spinach and cook for about a minute, until just wilted. Remove from pot and run under cold water to stop the cooking process. Drain and set aside.
Step 4: Add noodles.
Add ramen noodles to the soup base and cook for 2-3 minutes or according to package instructions. Then, add hot sauce, to taste (optional).
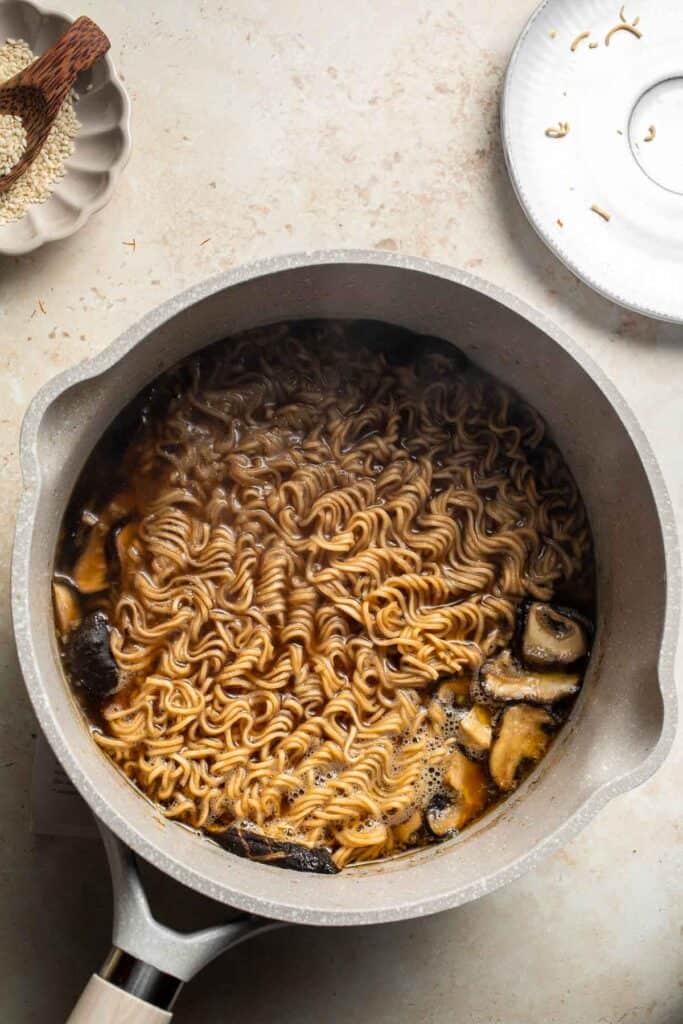
Step 5: Serve.
Divide the soup into 2 large bowls. Top with an egg, spinach, carrots and green onions. Sprinkle with sesame seeds (optional) and serve immediately.


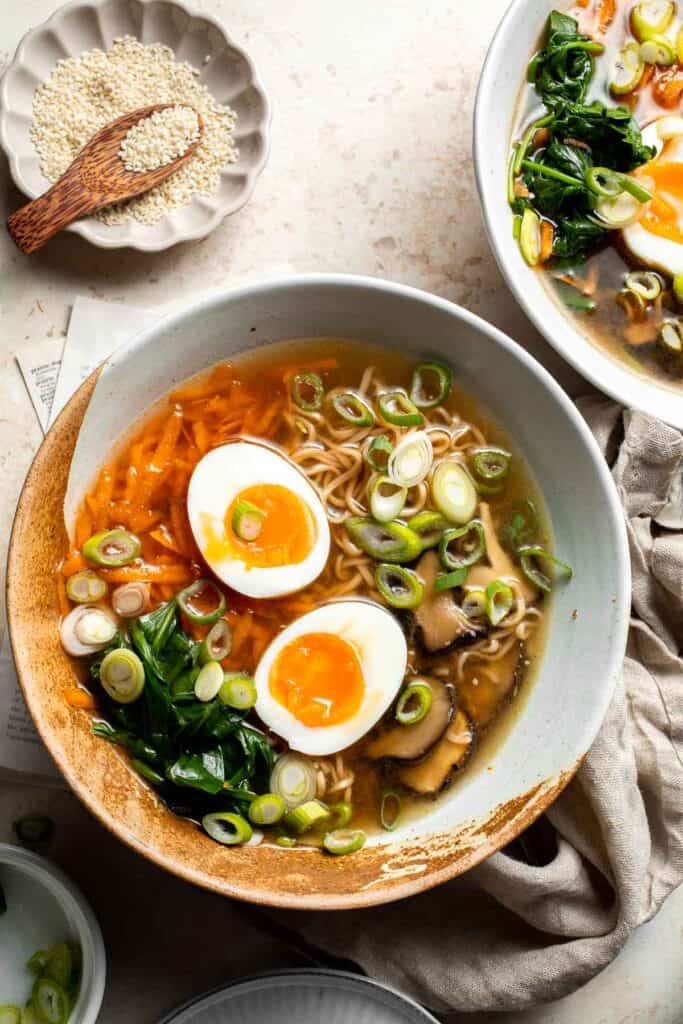
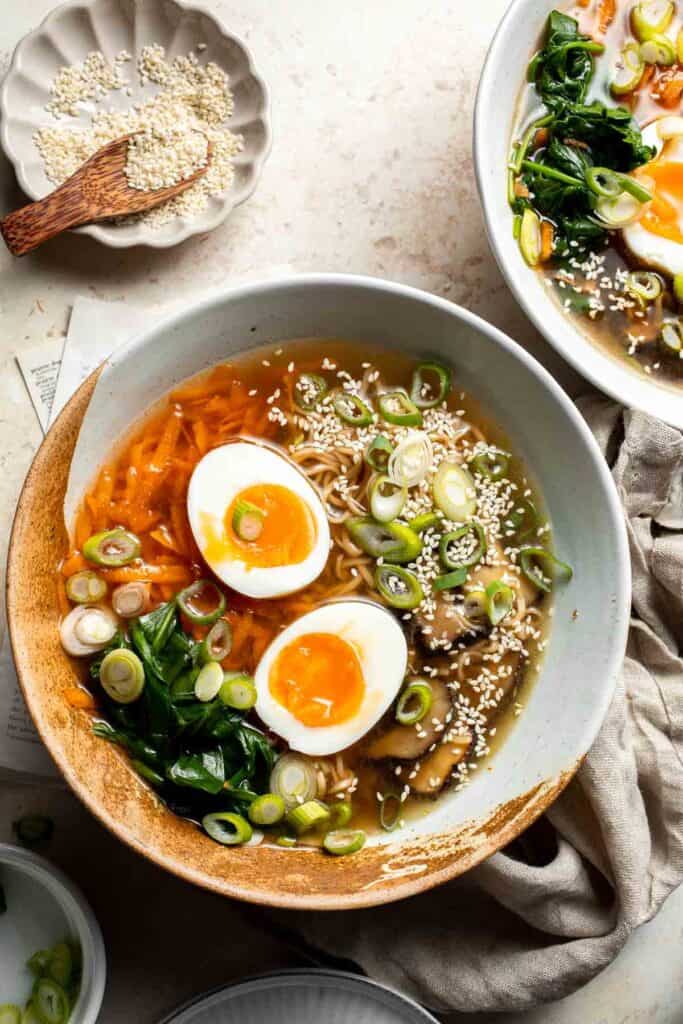
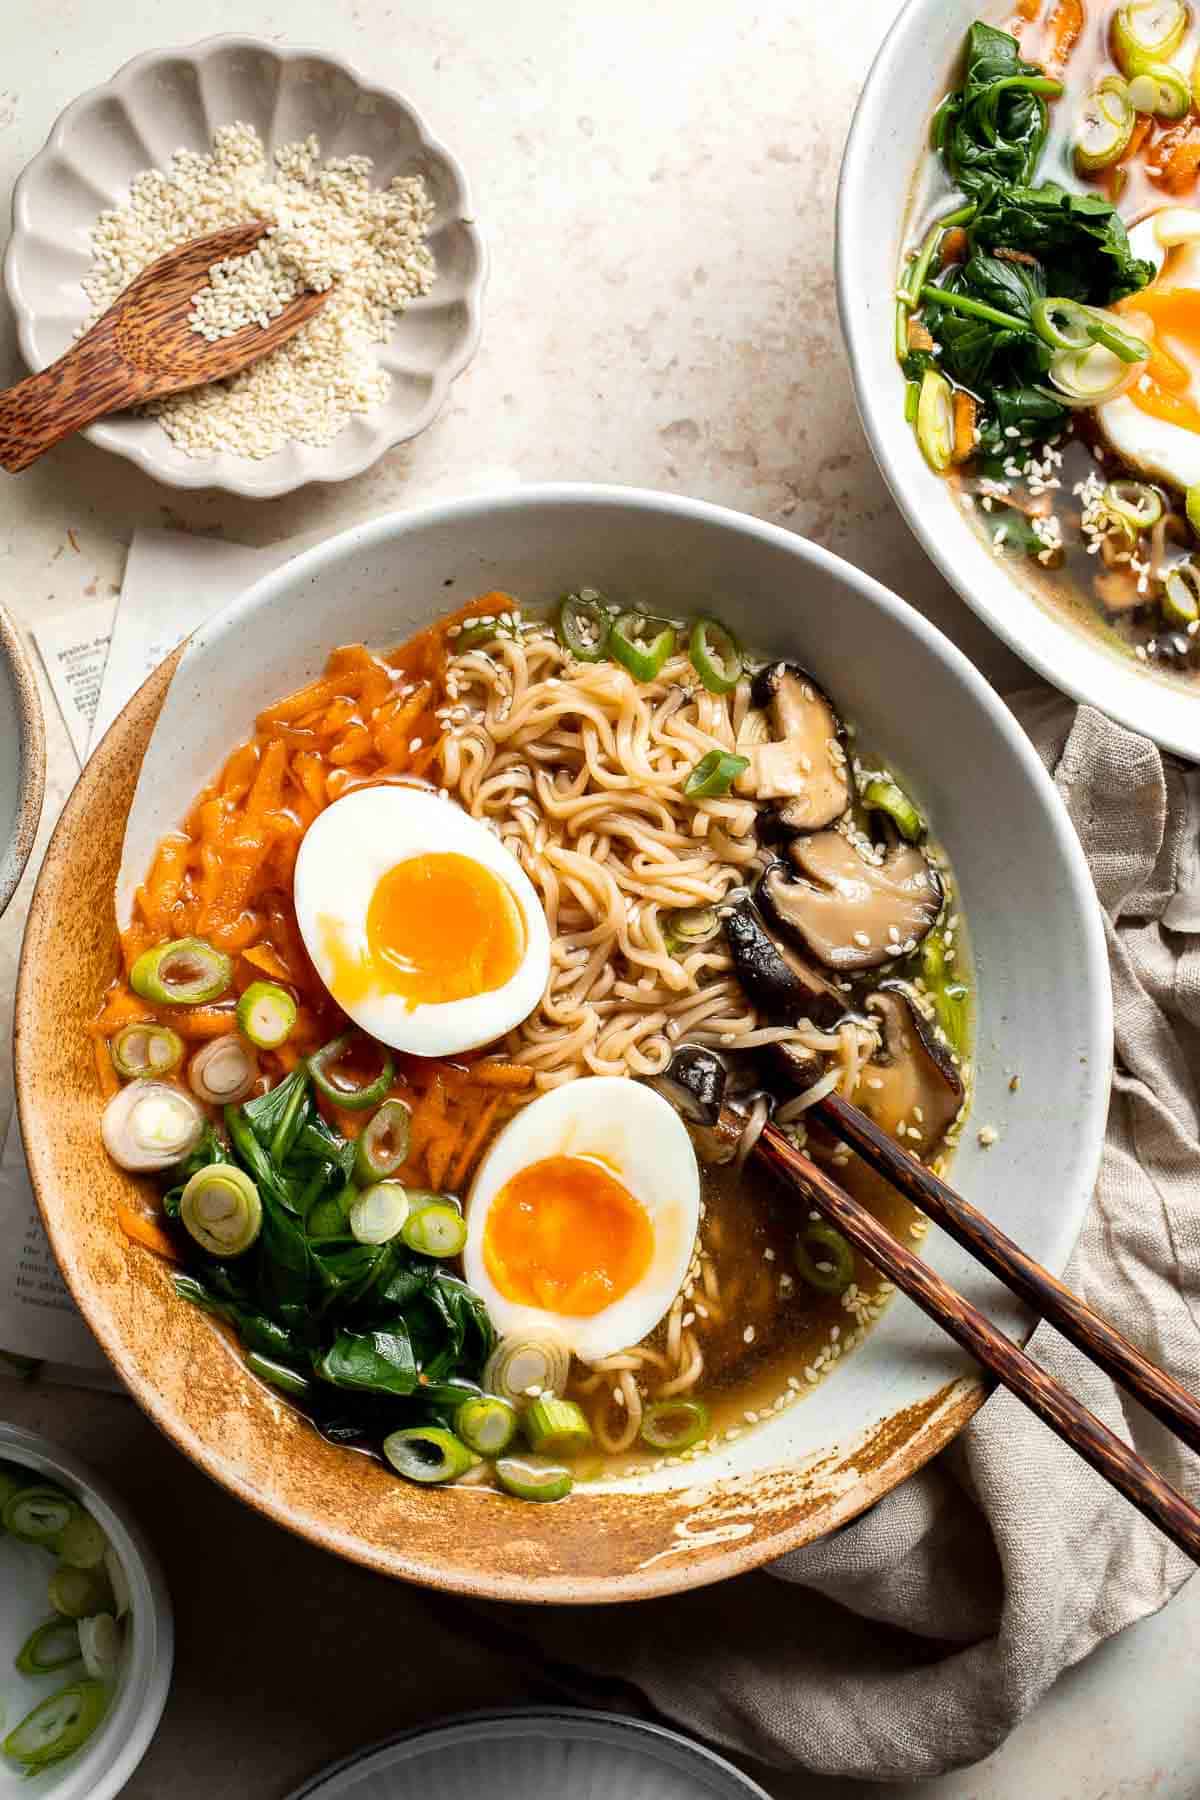
Recipe Video
Expert Tip: Leftovers Edition
Cook your noodles separately from the broth if you're planning on leftovers. This keeps them from soaking up all the liquid and turning mushy. When ready to serve, simply add the noodles to a hot bowl of broth and top with your favorite veggies and garnishes for a just-cooked taste every time.
More Tips and Tricks
- Use fresh aromatics. Store-bought garlic paste and ginger may be convenient, but freshly minced garlic and grated ginger add much brighter, more complex flavor to the broth.
- Make your own broth. For the best depth, simmer kitchen scraps like onion skins, carrot peels, and celery ends in water for a few hours. Homemade broth tastes cleaner and richer than boxed stock. If you're not strictly vegetarian, you can also try this ramen with our our Slow Cooker Bone Broth or Asian Beef Broth.
- Stay stocked. Keep pantry staples like vegetable stock, noodles, soy sauce, mirin, and rice vinegar on hand, along with fresh garlic and ginger. Having these basics makes it easy to whip up homemade ramen anytime.
- Balance the flavors. Taste as you go and adjust seasonings. A splash of soy sauce boosts umami, while rice vinegar or lime juice brightens the broth.
- Cook noodles properly. Ramen noodles should be slightly chewy (al dente) so they don't turn soggy in the broth. If storing leftovers, cook noodles separately and add them fresh when serving.
Recipe Variations
- Customize the veggies. Ramen is incredibly forgiving and a great way to use up what's in your fridge. Go for baby bok choy, mushrooms, bamboo shoots, bean sprouts, or sweet corn. Add nori sheets for a savory sea flavor or roasted veggies for a heartier twist.
- Keep it simple. Cooking for picky eaters? Stick to just noodles and broth, then let everyone add toppings to their own bowl. This "build-your-own ramen" approach keeps everyone happy at the table.
- Make it spicy. Craving heat? Stir in gochujang, sriracha, chili paste, or a drizzle of chili oil to transform your ramen into a spicy bowl of comfort. You can also add sliced fresh chili peppers for extra kick.
- Turn it into creamy ramen. Stir in coconut milk for a rich, velvety broth with a hint of sweetness. This is especially good if you love Thai- or curry-inspired flavors. For a fusion spin, check out our Coconut Curry Ramen.
- Give it a nutty twist. Whisk in a spoonful of peanut butter or tahini for a savory, nutty depth that makes the broth extra satisfying. Garnish with crushed peanuts or sesame seeds for crunch.
- Vegan version. Skip the soft-boiled egg for a completely plant-based bowl. Tofu, tempeh, or edamame add plenty of protein to keep it filling.
- Protein boost. Want something heartier? Add marinated tempeh, crispy baked tofu, or pan-seared seitan slices. These plant-based proteins soak up the broth beautifully while adding extra bite.
- Add miso. For an umami-rich upgrade, whisk in a spoonful of miso paste. White miso adds a mild, slightly sweet taste, while red miso gives deeper savoriness. For inspiration, see our Creamy Vegetarian Peanut Miso Ramen.
- Lighten the base. This recipe is made with a simple soy sauce-based vegetarian broth (or a shoyu broth), but you can easily adjust the flavor profile. For a lighter option, try a shio-style broth seasoned mainly with salt for a clean, delicate taste.
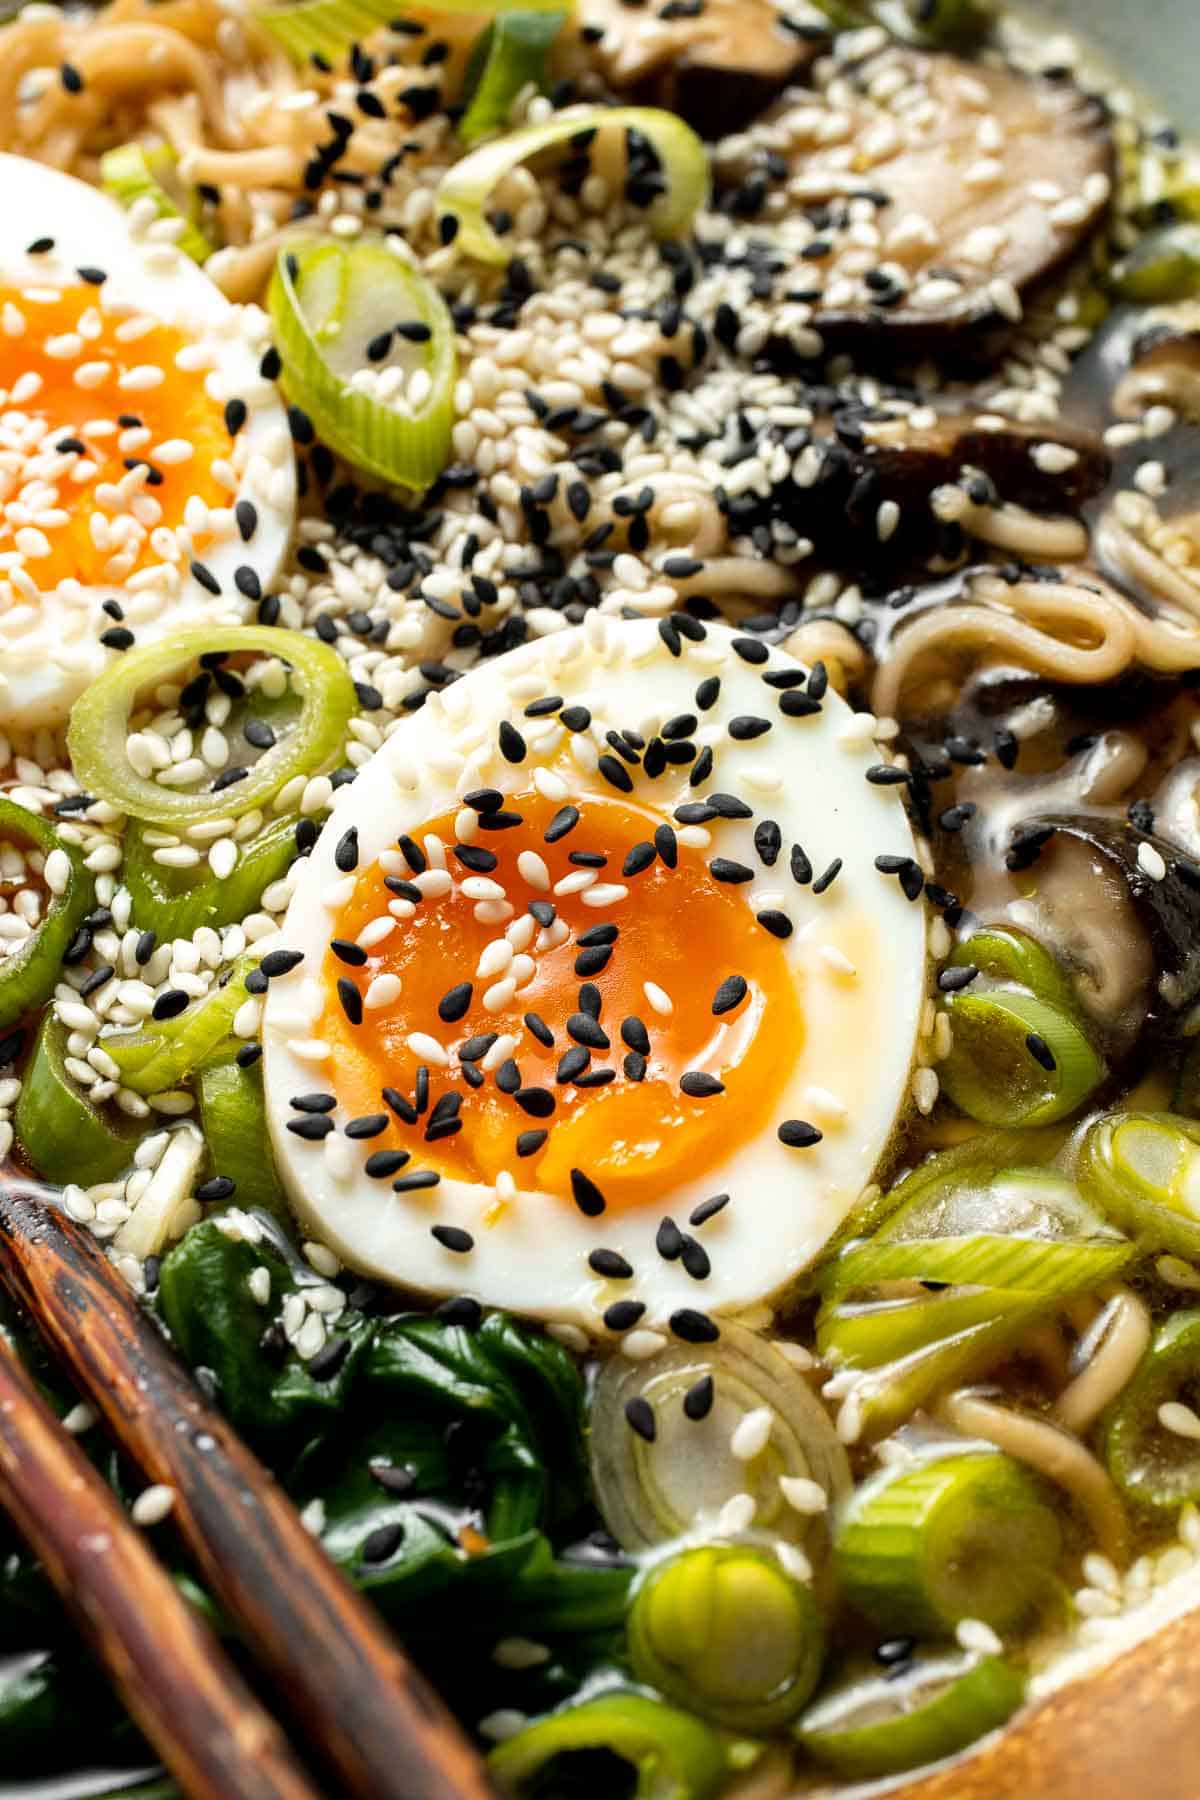
Storage
How to Store
Allow the ramen to cool before transferring to an airtight container and refrigerating for 3-4 days. For the best texture, store the ramen broth, noodles, and toppings in separate containers. Delicate vegetables and garnishes are best added fresh when serving, since they don't reheat as well.
How to Reheat
Warm up the leftover broth on the stove over medium-heat, then add noodles. Once the broth is nice and hot, add it to your serving bowl and decorate with your favorite toppings. You can also reheat the broth in the microwave, but add a splash of water if broth reduces.
How to Freeze
Freeze just the broth (without noodles or delicate veggies) for up to 2 months. Add fresh noodles and toppings after thawing.
How to Serve
Vegetarian ramen is delicious as a cozy meal on its own, but you can round out the meal with sides. Pair it with spring rolls, crispy dumplings, or a light cucumber salad for freshness. Add a drizzle of chili oil or sesame seeds on top for extra flavor.
These are my favorite dishes to serve with ramen:
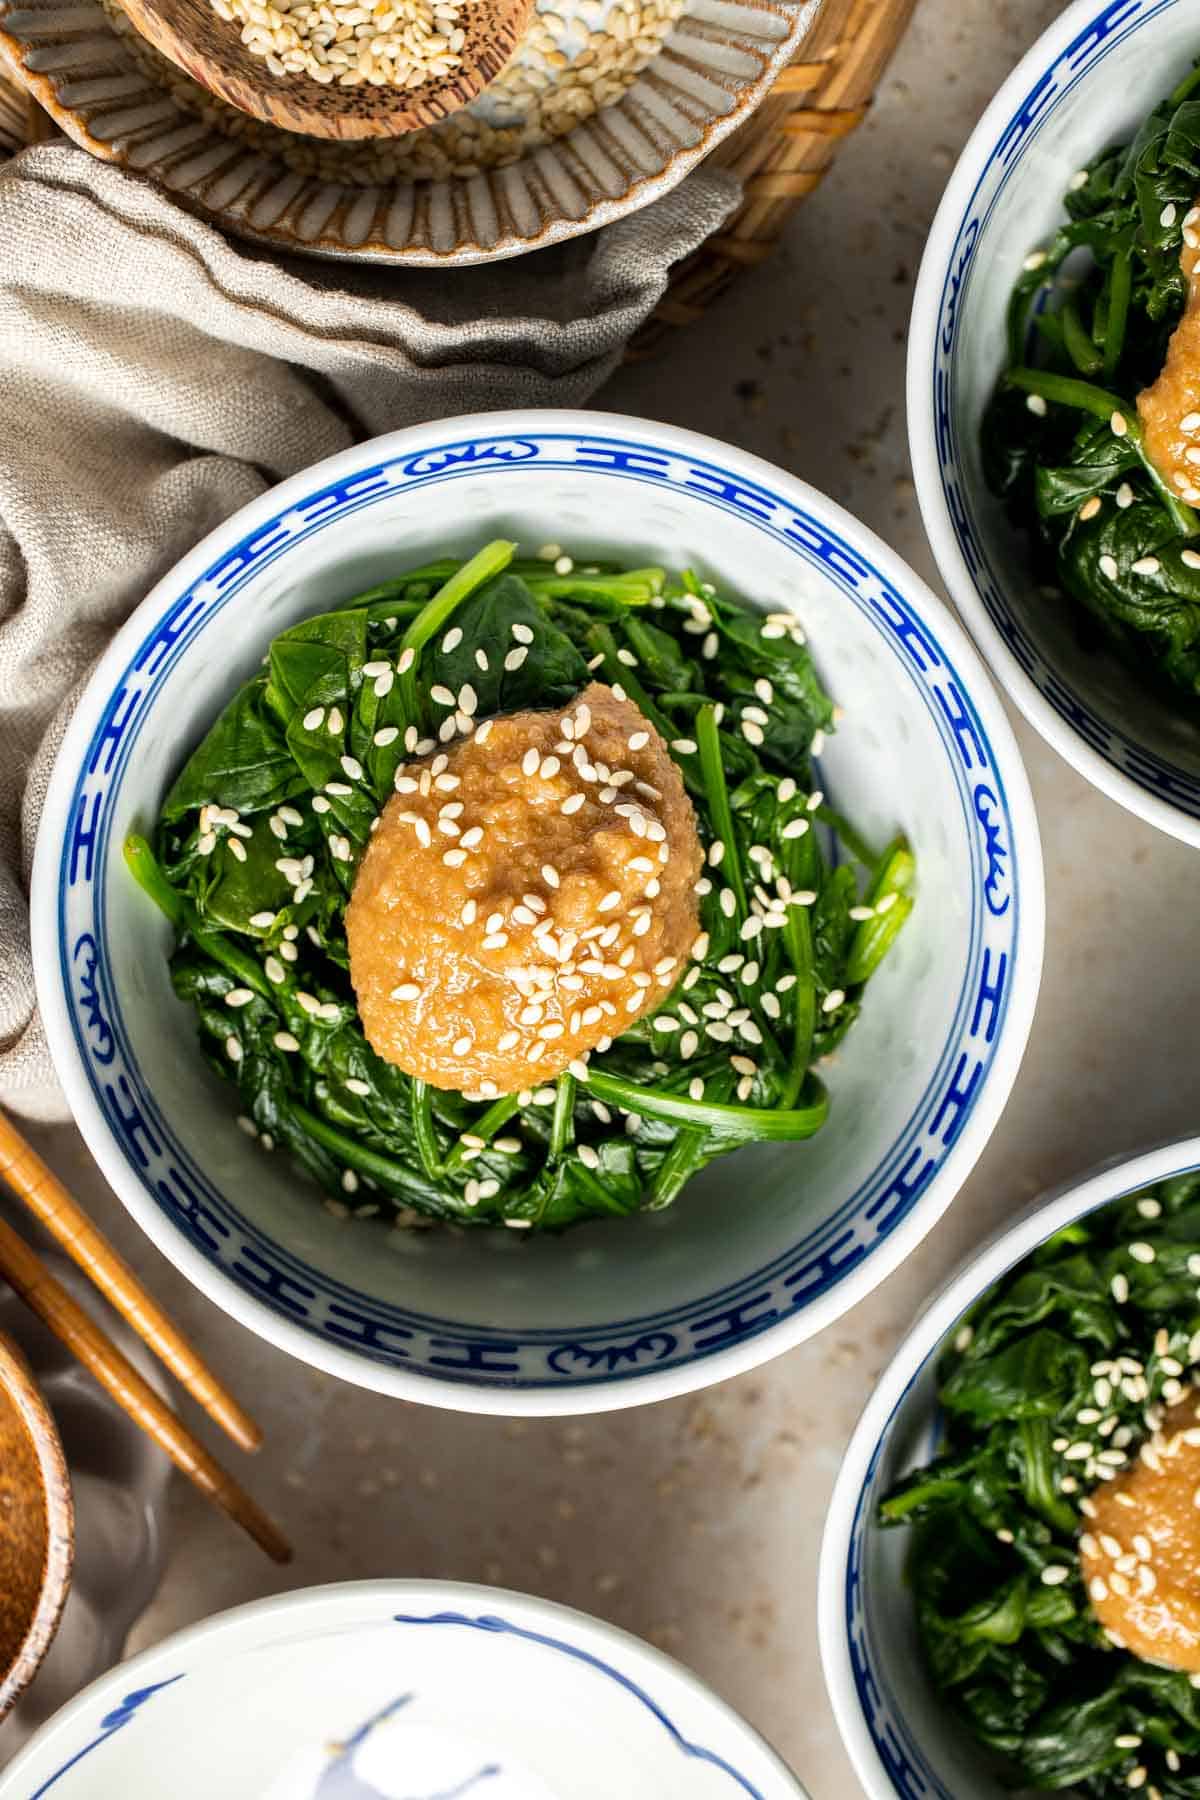

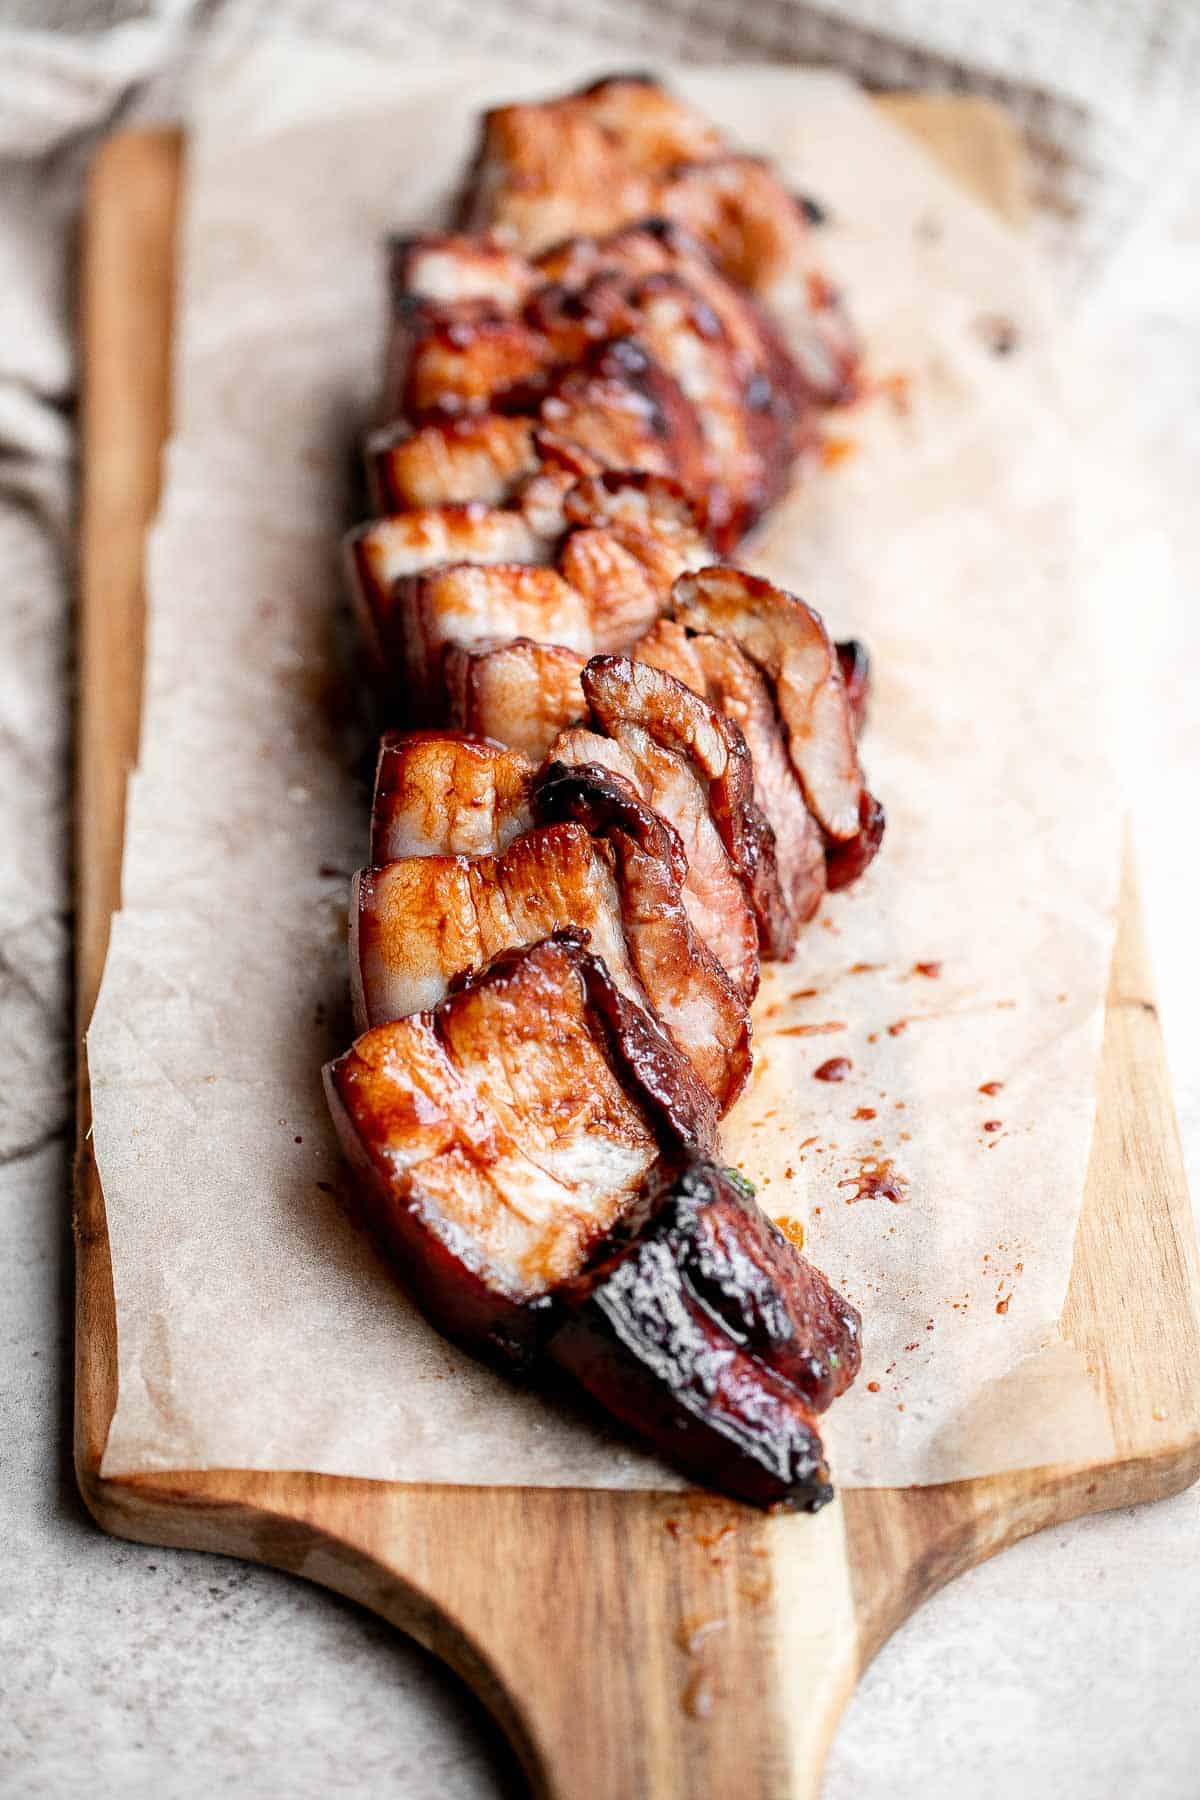

Dim Sum Recipes
Our collection of dim sum side dishes is full of bite-sized, flavorful options that pair beautifully with a steaming bowl of noodles. Try delicate dumplings and fluffy bao buns or crispy spring rolls and savory buns.
FAQ
While ramen recipes vary widely, the five essential components are broth, noodles, tare (the seasoning base), oil, and toppings. For vegetarian ramen, this could mean a flavorful vegetable or miso-based broth, chewy ramen noodles, miso paste or soy sauce for seasoning, sesame oil or chili oil for depth, and fresh toppings like scallions and vegetables. With just these five core elements, you can build endless variations.
Many ramen noodle brands are naturally vegetarian. The noodles are made from wheat and usually contain water, salt, and sometimes fat or oil. Storebought brands will also contain preservatives and such, but it's the spice packets that generally contain any animal products. You can always double-check the ingredients before you buy or buy dried ramen noodles separately at an Asian grocery store.
You definitely do not have to use the spice packets in your instant ramen, and you'll have a much fresher, more authentic flavor if you don't! I like to start by cooking aromatic ingredients (garlic and ginger) in sesame oil, then letting them simmer in a mixture of vegetable broth, soy sauce, and mirin. As the flavors mingle together, prepare the shiitake mushrooms, soft boiled egg, green onions, carrots, and any other toppings. This version has so much more flavor and won't leave you feeling bloated after eating all that salt, either!
The secret to a good vegetarian ramen is to add a savory, umami flavor. That can be done very simply with soy sauce, which most of us already have on hand. This will add a deep, savory flavor in an instant. The sesame oil helps with this, too! For an even more flavorful broth, consider stirring in a small amount of white miso paste or simmering dried shiitake mushrooms.
Vegetarian ramen is endlessly customizable with vegetables, proteins, and toppings. Try mushrooms, bok choy, spinach, carrots, corn, bean sprouts, or bamboo shoots for freshness. Add protein with tofu, tempeh, seitan, edamame, or a soft-boiled egg if you're not vegan. Finish with garnishes like scallions, sesame seeds, chili oil, or nori strips to bring extra flavor and texture.
It depends on the type of vegetable and the texture you want. Heartier vegetables like carrots, broccoli, or mushrooms are best lightly sautéed or simmered in the broth so they soften and release flavor. Quick-cooking veggies like spinach or bok choy can be added raw or in the last minute of cooking so they stay crisp and fresh. Cooking times should be staggered so every topping is tender yet vibrant when you serve your ramen.
More Ramen Recipes
Looking for other recipes like this? Try these:

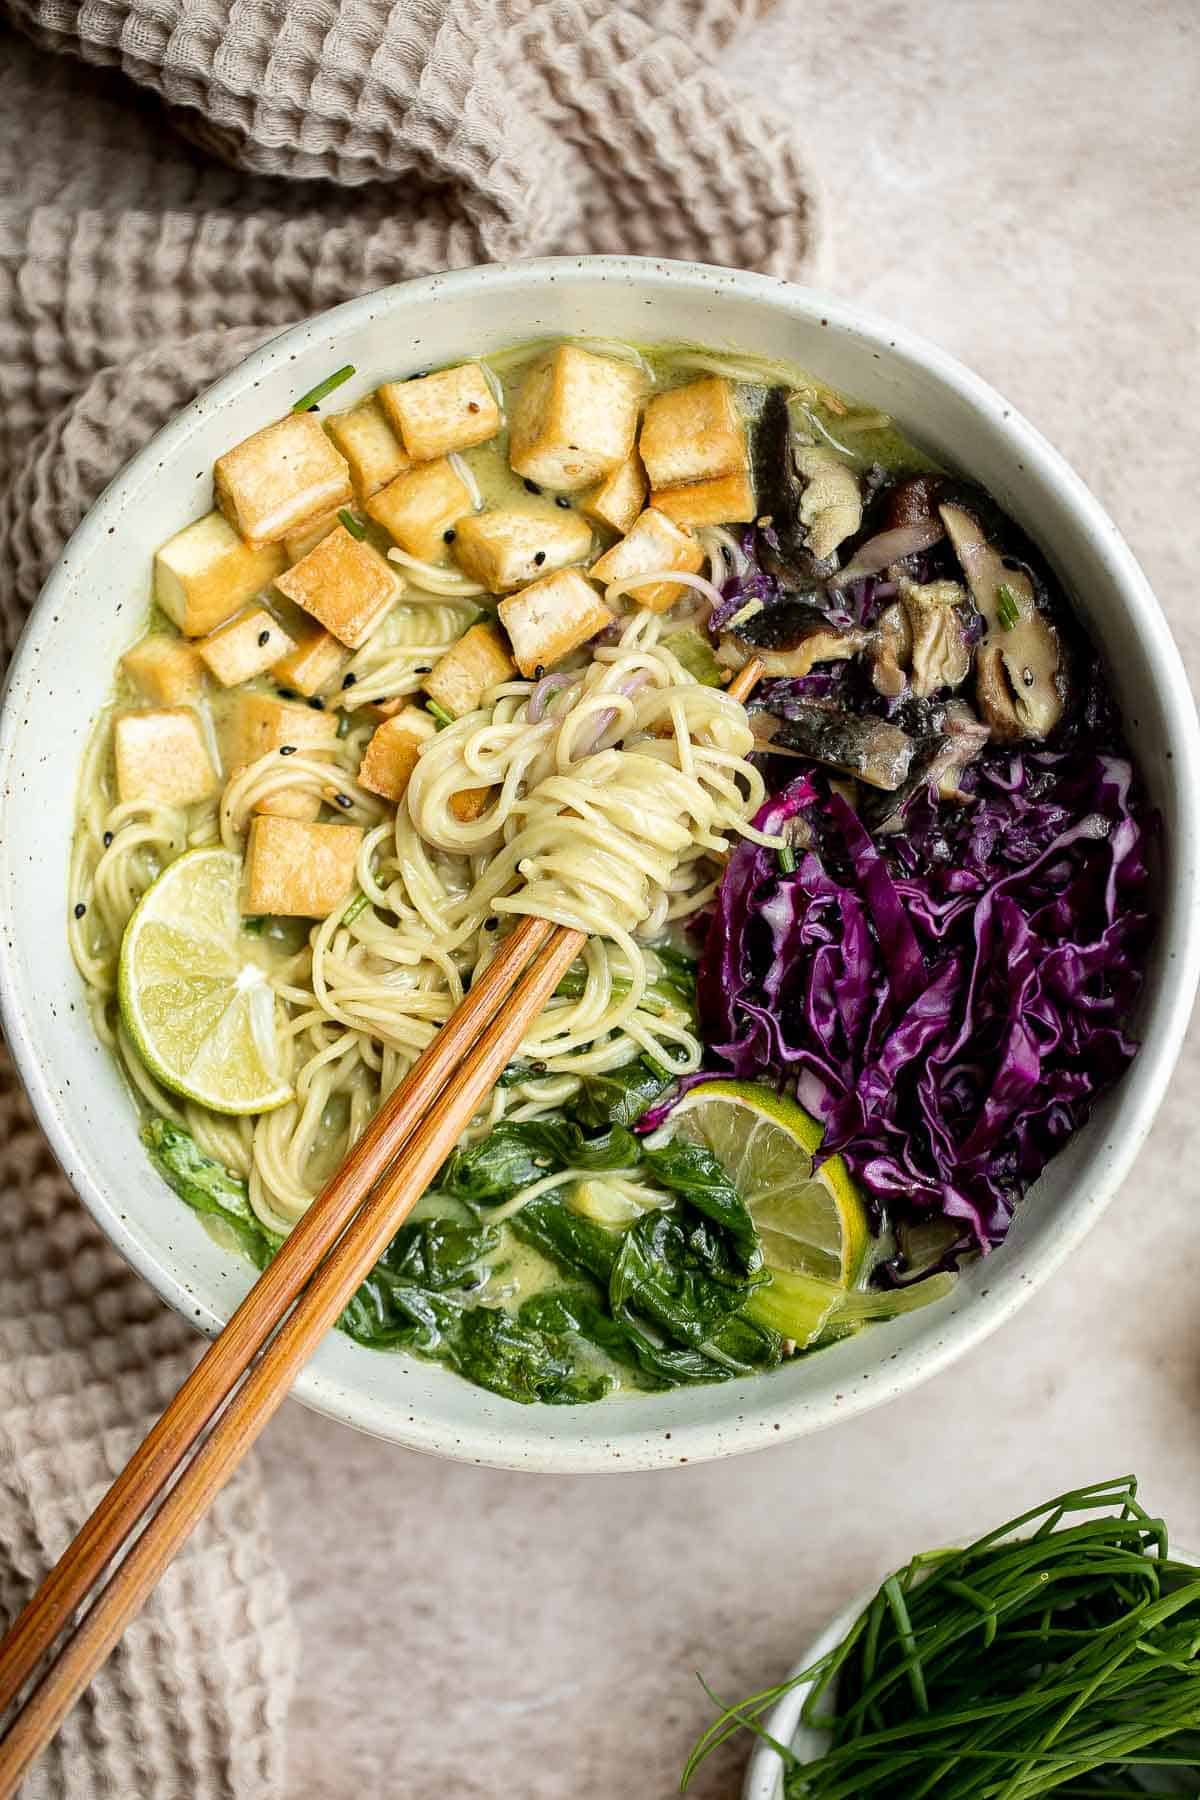

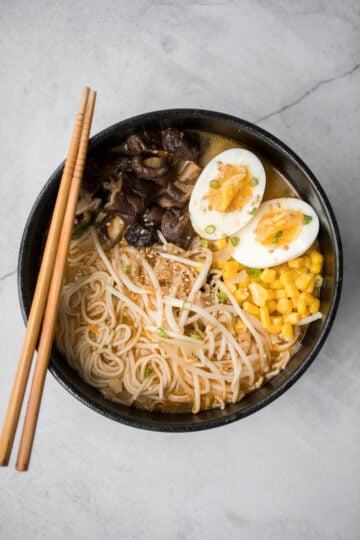
Tried this recipe?
I'd love to hear what you think! Leave a comment and rating below to share your feedback. Your reviews help others discover this recipe and help me keep creating more free recipes for you. Snap a photo and tag me on social media @aheadofthyme too.

One Pan Marry Me Chicken with Sun-Dried Tomatoes

They say this dish is so good it'll make anyone want to put a ring on it - and honestly, they might be right. One Pan Marry Me Chicken with Sun-Dried Tomatoes is rich, creamy, and absolutely packed with flavor thanks to juicy chicken, a velvety Parmesan cream sauce, and those tangy-sweet sun-dried tomatoes. It's simple enough for weeknights, but elegant enough to feel straight out of a restaurant.
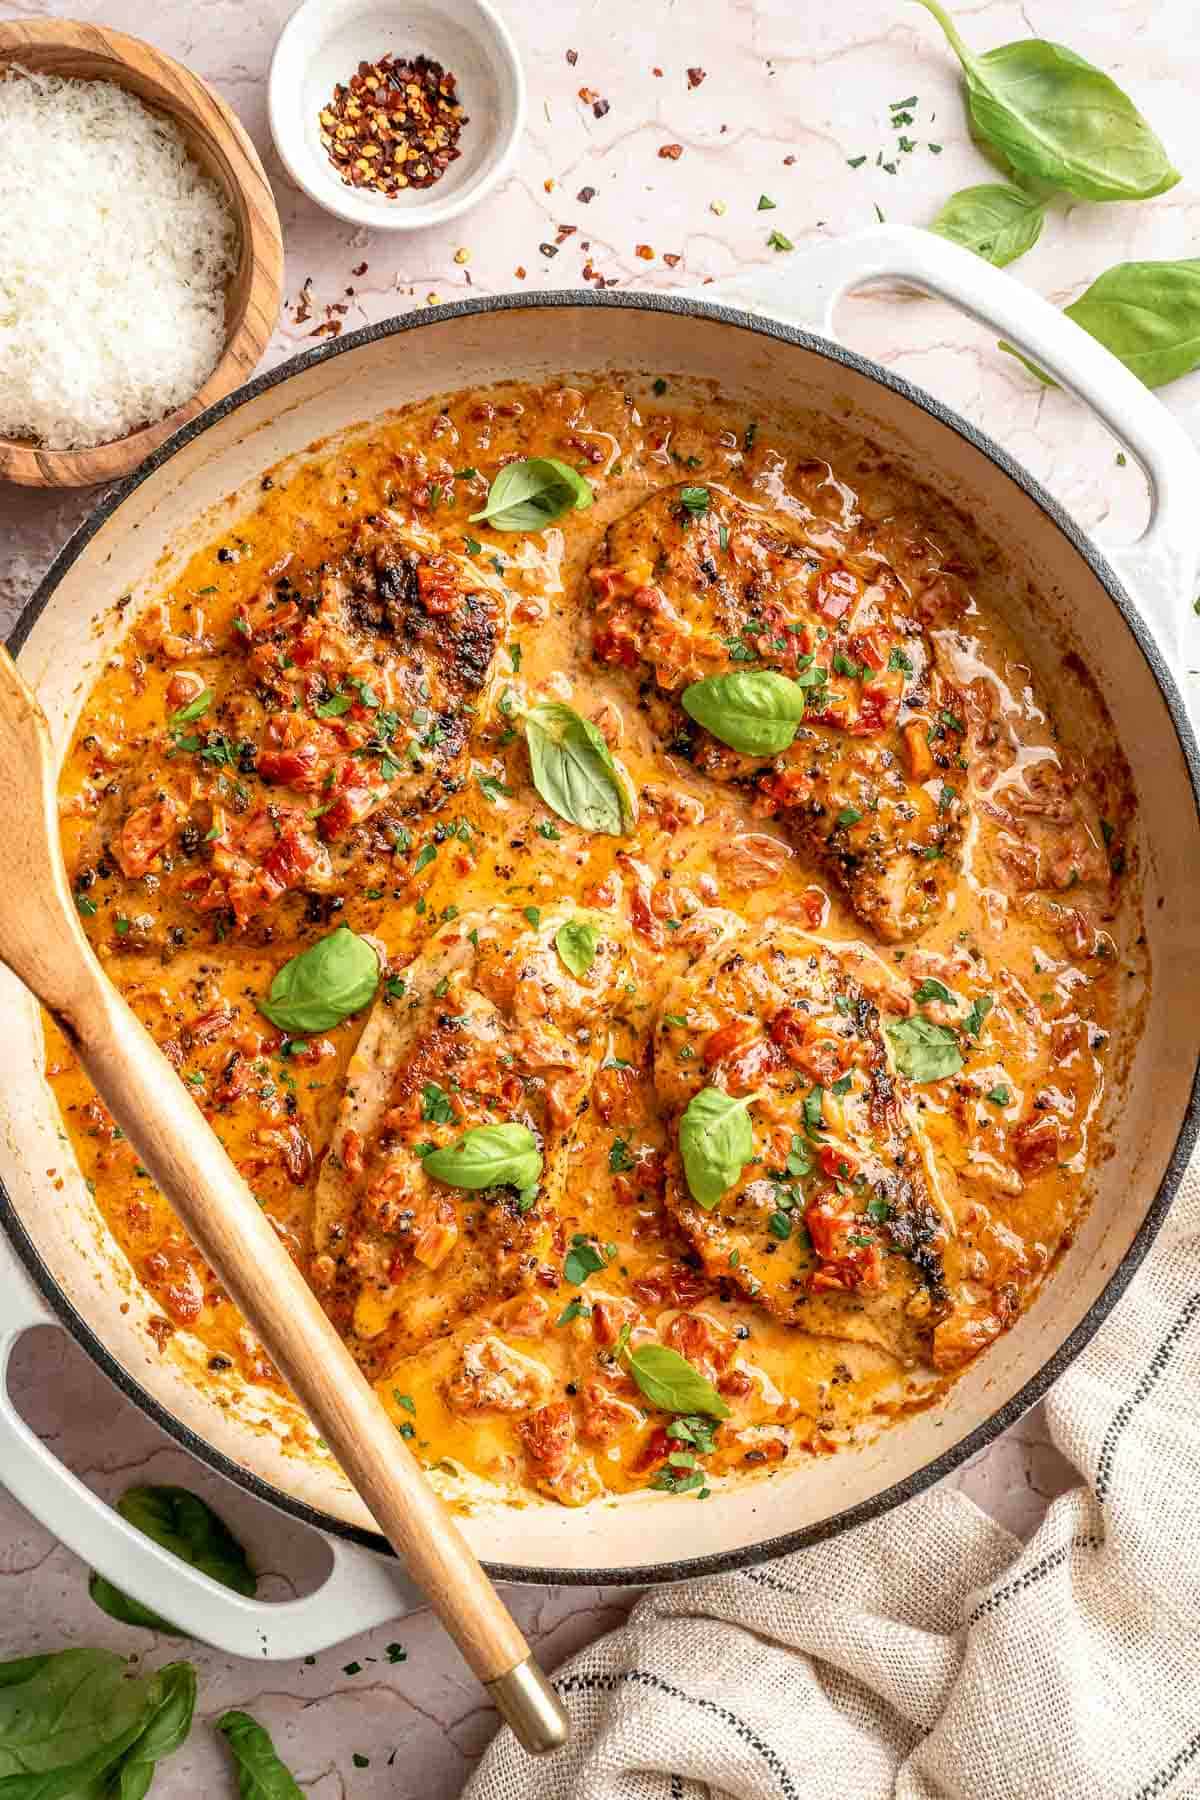
The best part? This recipe all comes together in one skillet in just about 30 minutes. That means less time cooking and cleaning, and more time actually enjoying your dinner (and soaking up all those compliments). It's the kind of meal that feels like a little luxury without requiring hours in the kitchen - weeknight cooking at its absolute best.
If you like this marry me chicken recipe, you should try our Creamy Tuscan Chicken and Creamy Pesto Chicken next. This dish also pairs perfectly with Brown Butter Mashed Potatoes or some fresh Homemade Bread for dipping into all that dreamy sauce.
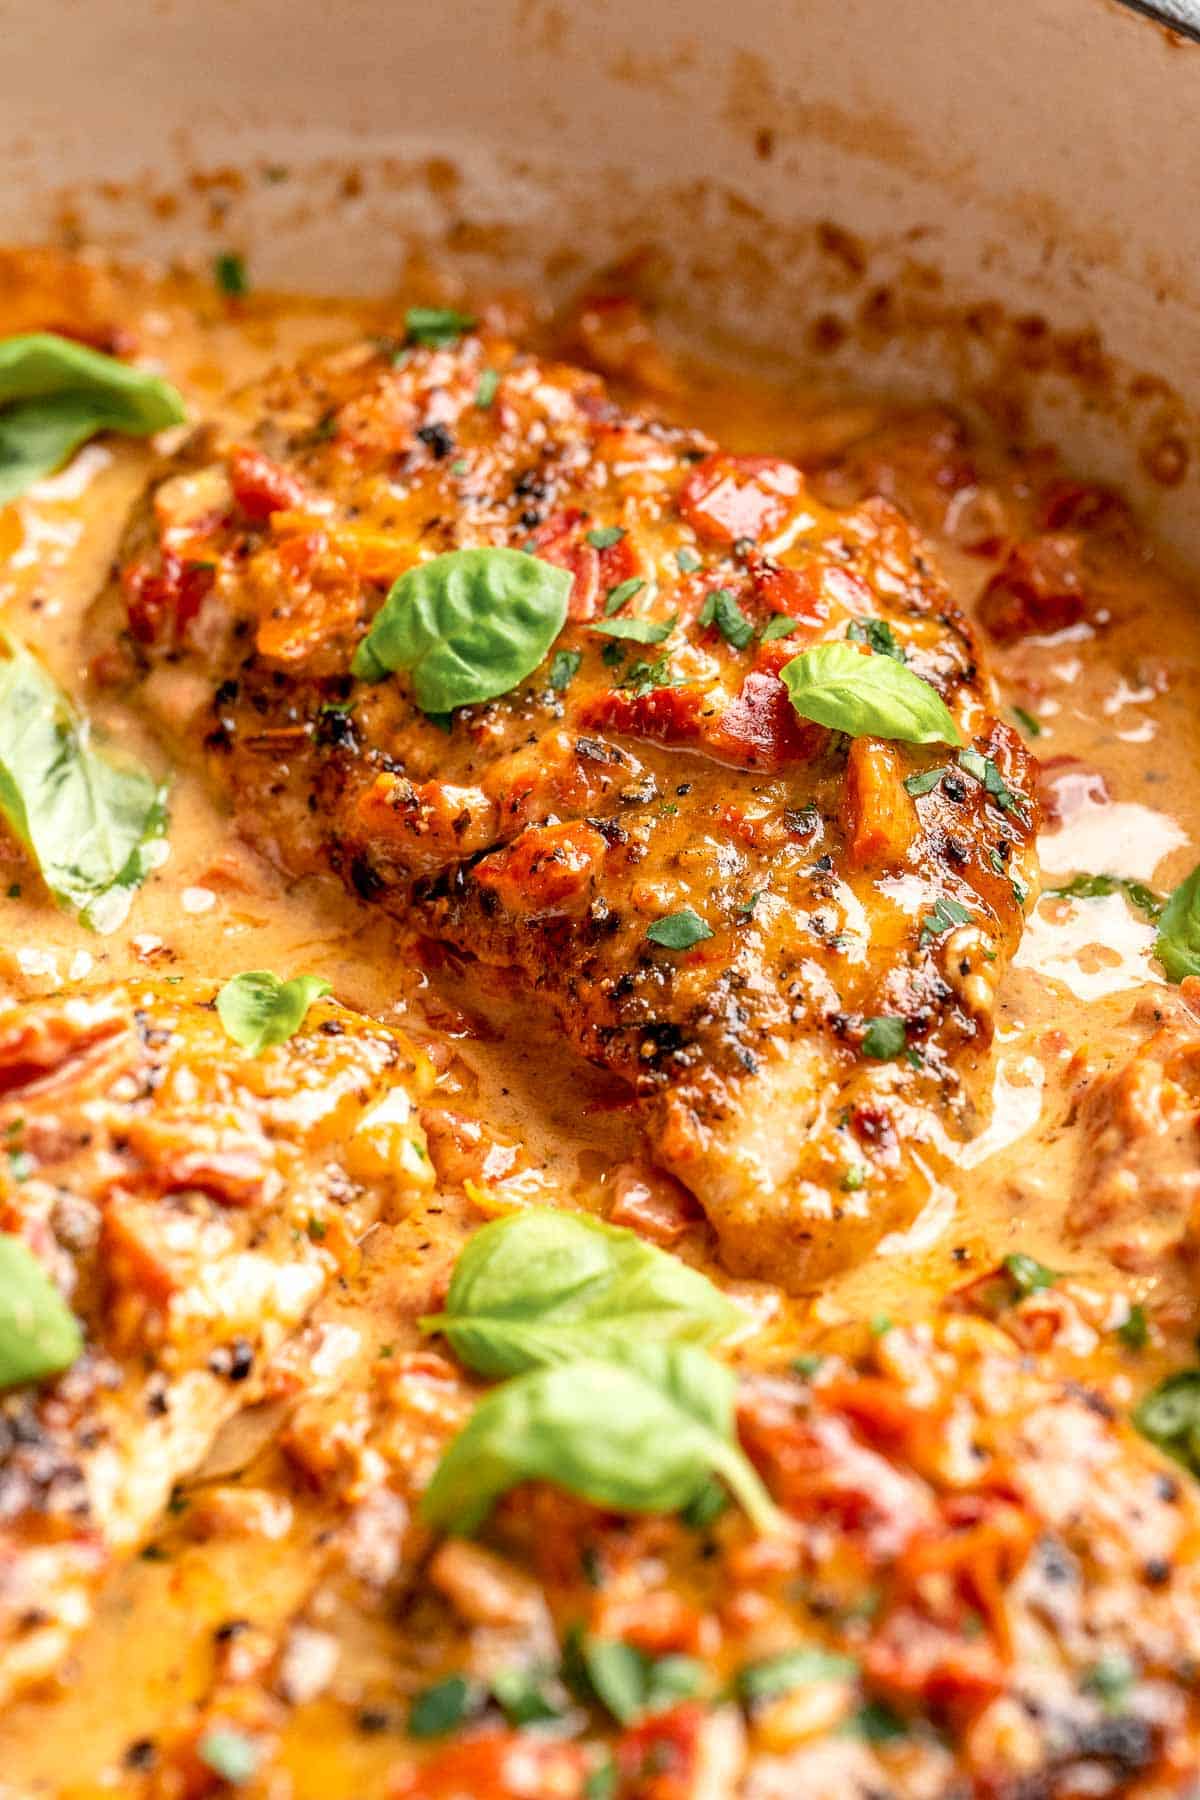
Why You'll Love This Recipe
- Restaurant-quality flavor at home. This Marry Me Chicken is all about juicy chicken cutlets simmered in a luscious Parmesan cream sauce with sun-dried tomatoes. The balance of creamy, tangy, savory, and slightly spicy flavors makes it taste like a dish you'd order at a fancy restaurant, but you get to whip it up in your own kitchen any night of the week.
- One pan wonder. Everything comes together in a single skillet - the seared chicken, the garlic, the cream, the Parmesan. That means less mess, fewer dishes, and maximum flavor. It's a weeknight hero that doesn't sacrifice elegance, which is exactly the kind of cooking we all need more of.
- Quick and easy. From start to finish, this recipe takes about 30 minutes. The steps are simple, straightforward, and beginner-friendly, so you don't need advanced skills to pull it off. The result is a silky, flavorful sauce and perfectly tender chicken that tastes like you worked way harder than you actually did.
- Crowd-pleaser. Whether you're cooking for family, friends, or even date night, this recipe never fails to impress. The creamy sun-dried tomato sauce clings beautifully to pasta, mashed potatoes, or bread, making it a versatile entree that everyone at the table will rave about.
Ingredients and Substitutions
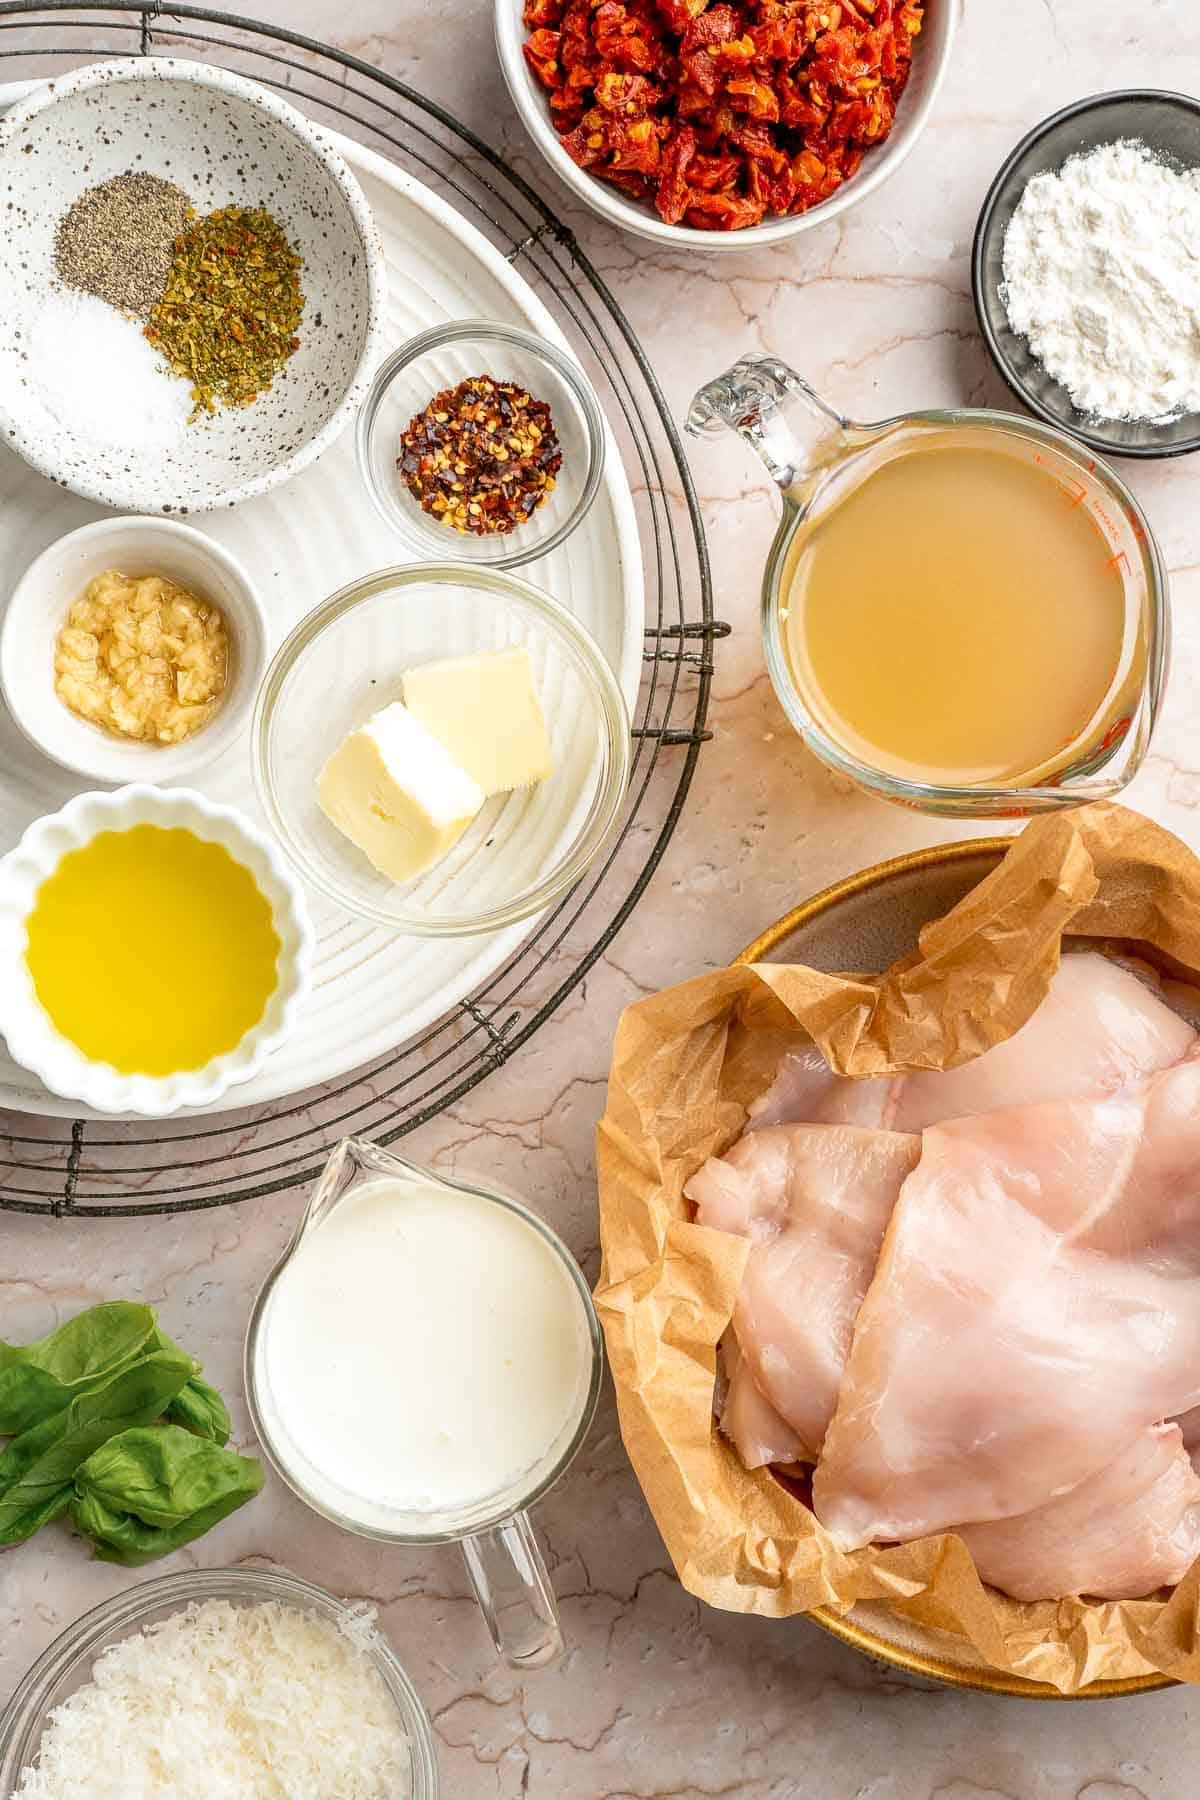
To make this delicious Marry Me Chicken, you will need the following ingredients (see recipe card below for quantities):
- chicken cutlets - Boneless and skinless, about 1 pound. You can also slice large chicken breasts in half lengthwise to make cutlets, or swap for boneless skinless chicken thighs if you like richer flavor.
- salt and black pepper - Essential for seasoning the chicken and balancing the creamy sauce.
- Italian seasoning - Adds a quick boost of herby flavor. Use a mix of dried oregano, thyme, and basil if you don't have premade Italian seasoning.
- all-purpose flour - Lightly coating the chicken helps it brown beautifully and gives the sauce a little thickness. For gluten-free, swap with rice flour or almond flour.
- extra virgin olive oil - For searing the chicken with great flavor. Avocado oil also works.
- butter - Adds richness to the sauce and balances the tangy sun-dried tomatoes.
- garlic - Freshly minced garlic infuses the sauce with irresistible aroma and depth.
- chili flakes - Just a touch for subtle heat. Add more red pepper flakes if you like it spicy, or omit for mild.
- heavy cream - The base of the sauce that makes it so rich and velvety. Half-and-half works in a pinch but won't be as thick.
- chicken stock - Adds savory depth and helps thin out the cream. Vegetable stock can be used instead.
- sun-dried tomatoes - The star ingredient. Use oil-packed for the best flavor. Drain before chopping.
- Parmesan cheese - Freshly grated Parmesan melts into the sauce and adds a salty, nutty punch. Pecorino Romano is a good substitute.
- fresh basil - A fragrant garnish that brightens everything up. Parsley works too if that's what you have
Equipment
You'll also need measuring cups and spoons, a cutting board and sharp knife, a large skillet or sauté pan, a spatula or tongs for turning chicken, and a whisk for the sauce.
Instructions
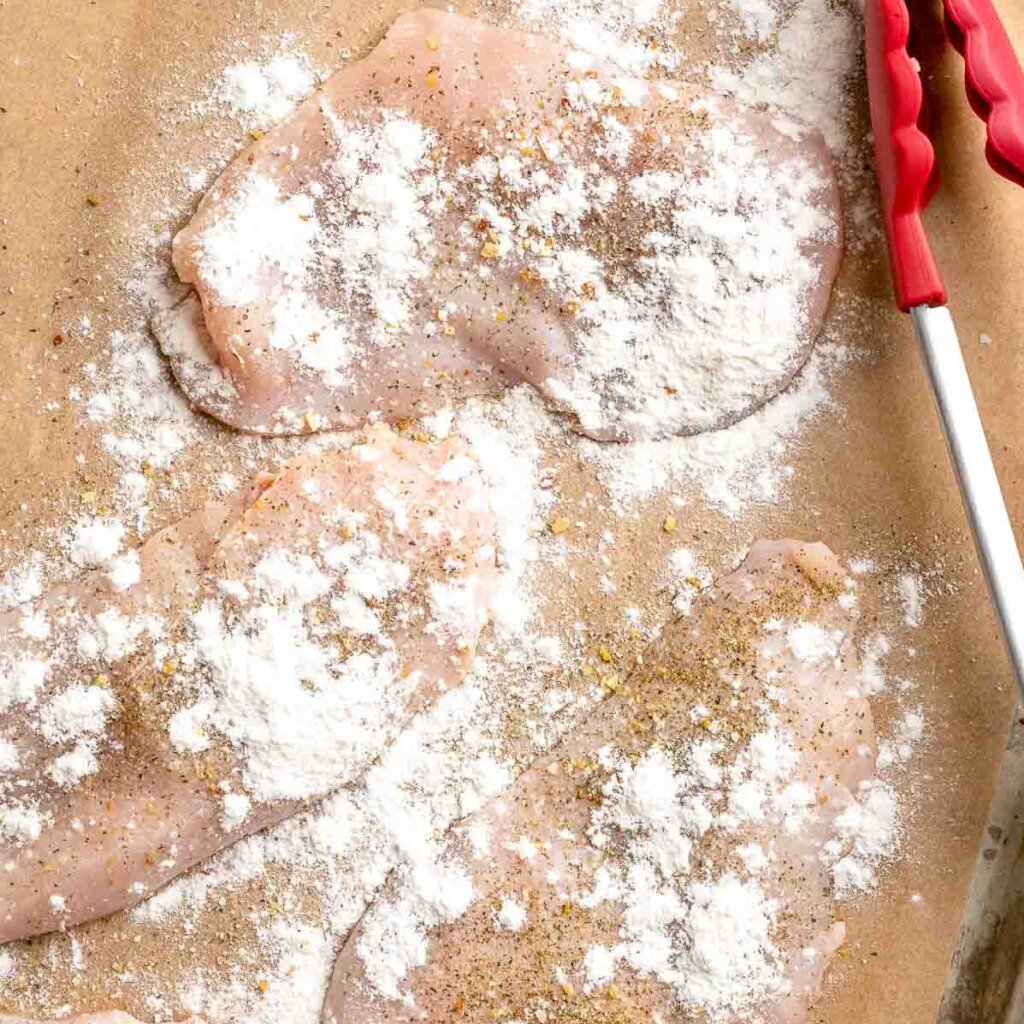
Prepare the chicken
Pat the chicken cutlets completely dry with a paper towel. Season all over with salt, pepper, and Italian seasoning, then lightly evenly coat with flour.
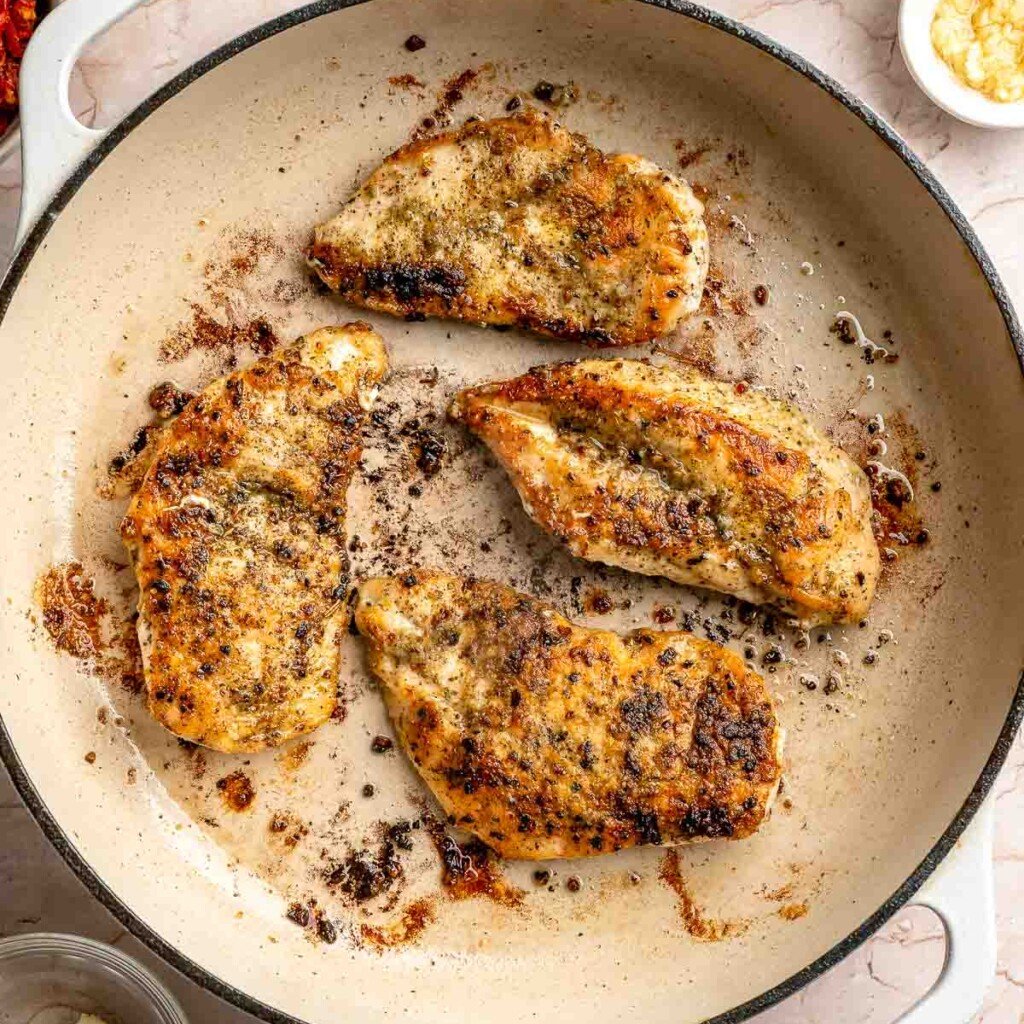
Sear the chicken
Heat oil in a large skillet over medium-high heat until hot and shimmering, about 1-2 minutes. Add the chicken and sear until golden brown and cooked through, about 5 minutes per side. Transfer to a plate and set aside.
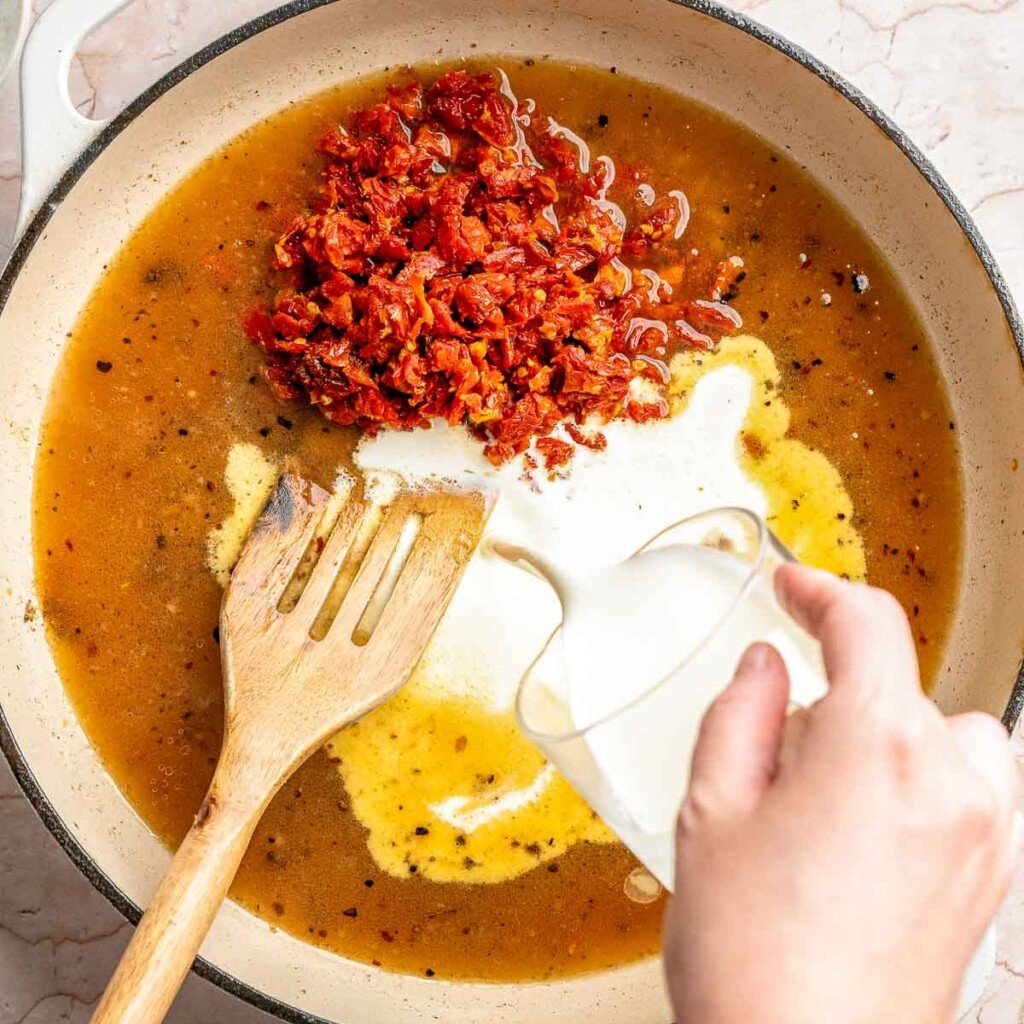
Make the sauce base
In the same skillet, add butter, garlic, and chili flakes. Sauté until fragrant, about 1 minute. Stir in the heavy cream, chicken stock, sun-dried tomatoes, and Parmesan cheese.

Simmer
Mix until smooth and bring to a gentle simmer over medium heat, about 3-4 minutes.

Finish the chicken
Return the chicken to the skillet and spoon the sauce over to coat. Simmer together until the sauce thickens to your desired consistency, about 3-4 minutes. Taste and season with additional salt and pepper if needed.

Expert Tip: Use Thin Cutlets
The key to juicy chicken that cooks quickly is starting with thin cutlets. If your skinless chicken breasts are thick, slice them in half horizontally before cooking. This helps the chicken cook evenly and stay tender in the sauce.
More Tips and Tricks
- Don't overcook the chicken. Use a meat thermometer to check for doneness (165°F is perfect). Overcooking will make it dry.
- Deglaze the pan. After searing the chicken, scrape up the brown bits at the bottom of the pan when adding stock. Those bits add loads of flavor.
- Use freshly grated Parmesan. Pre-shredded cheese doesn't melt as smoothly. Grating fresh makes the sauce extra silky.
- Balance the sauce. Taste and adjust seasoning at the end. A pinch more salt, pepper, or chili flakes can make the flavors pop.
- Serve right away. The sauce thickens as it cools, so enjoy this meal fresh off the stove for the best texture.
Recipe Variations
- Make it spicy. Add extra chili flakes or stir in a spoonful of Calabrian chili paste for bold heat.
- Mushroom twist. Add sliced mushrooms when sautéing the garlic for extra earthiness and bulk.
- Greens boost. Stir in spinach or kale right before serving for added color and nutrients.
- Cheesy upgrade. Mix in mozzarella or fontina cheese along with Parmesan for a gooey, extra-cheesy sauce.
- Add tomato paste. For an extra boost of depth and richness, stir in 1-2 tablespoons of tomato paste when you add the garlic and chili flakes. It intensifies the savory flavor of the sauce, gives it a deeper red hue, and balances the creaminess with a subtle sweetness.
- Lighter version. Swap heavy cream with half-and-half or evaporated milk. The sauce won't be as thick but will still be delicious.
- Pasta pairing. Slice the chicken and toss it directly with cooked pasta for an easy one-pan creamy pasta dinner.

Storage
How to Store
Transfer leftovers to an airtight container and refrigerate for up to 3 days.
How to Reheat
Warm gently in a skillet over medium-low heat, adding a splash of chicken stock or cream to loosen the sauce.
How to Freeze
Cool completely, then store in freezer-safe bags or containers for up to 2 months. Thaw overnight in the fridge before reheating.
How to Serve
This creamy chicken with sun-dried tomatoes shines with simple sides that soak up the sauce. Serve it with pasta, rice, or mashed potatoes, and add roasted veggies or bread to round out the meal. Serve with Mashed Cauliflower or Zucchini Noodles for a low-carb option.
These are some popular recipes to serve with Marry Me Chicken:

Side Dishes for Chicken
Looking for the perfect accompaniments to your chicken dinner? From roasted vegetables and fresh salads to creamy mashed potatoes and flavorful grains, our collection of sides has something for every type of chicken recipe.
FAQ
The name "Marry Me Chicken" comes from the idea that this dish is so good, it could inspire a marriage proposal. The rich sauce, tender chicken, and sun-dried tomato flavors make it incredibly comforting and impressive at the same time. It's the kind of meal you serve when you want to wow someone - whether that's your partner, family, or even just yourself.
The "real" name is simply creamy chicken with sun-dried tomatoes, or creamy Parmesan chicken. The playful name "Marry Me Chicken" was given to this dish because it's so delicious that it's rumored to inspire a marriage proposal after just one bite. While not an official culinary term, the nickname has stuck because it captures how irresistible and memorable the dish is. At its core, though, it's a classic creamy skillet chicken recipe that combines simple, familiar ingredients in a way that feels luxurious and unforgettable - no wedding required to enjoy it!
Marry Me Chicken is made with boneless, skinless chicken cutlets, seared until golden, and then simmered in a creamy Parmesan sauce with garlic, sun-dried tomatoes, chicken stock, and heavy cream. Fresh basil on top adds brightness. It's a simple set of ingredients, but they come together into a meal that tastes indulgent and restaurant-worthy, all in one pan.
Marry Me Chicken is all about balance: rich, creamy, and garlicky with a tangy-sweet kick from sun-dried tomatoes and a nutty, salty depth from Parmesan cheese. The sauce is velvety and indulgent without being overwhelming, thanks to the chicken stock which lightens it up. The fresh basil at the end adds a pop of herby brightness that ties everything together. Overall, the flavor is savory, comforting, and crave-worthy - the kind of dinner that tastes like it came from a restaurant but is easy enough to make at home. It's warm, cozy, and special all at once.
While the two recipes are similar, Marry Me Chicken tends to focus on a creamy Parmesan sauce with sun-dried tomatoes and Italian seasoning, while Tuscan chicken often includes extras like spinach, mushrooms, or artichokes for a more layered vegetable base. Tuscan chicken can also sometimes feature a slightly heavier cream-to-stock ratio, making it richer and thicker. Both are one-pan chicken recipes with bold Mediterranean-inspired flavors, but Marry Me Chicken is a little more streamlined and straightforward. Think of it as the elegant yet fuss-free cousin of Tuscan chicken - with just enough indulgence to win anyone over.
Yes! You can make the sauce and chicken up to 1 day ahead, then store separately in the fridge. When ready to serve, reheat the sauce gently in a skillet and add the chicken back in to warm through. Just avoid overcooking the chicken during reheating to keep it tender.
Marry Me Chicken pairs beautifully with simple sides that soak up the sauce. Mashed potatoes, buttered noodles, rice, or crusty bread are classic choices. You can also add a fresh green salad or roasted veggies like asparagus or broccoli to balance out the richness.
More Creamy Chicken Recipes
Looking for other recipes like this? Try these:


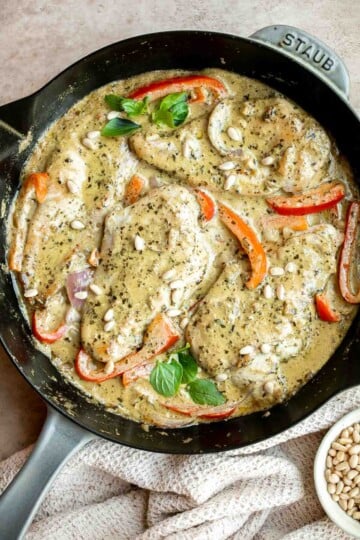

Tried this recipe?
I'd love to hear what you think! Leave a comment and rating below to share your feedback. Your reviews help others discover this recipe and help me keep creating more free recipes for you. Snap a photo and tag me on social media @aheadofthyme too.

45+ Best Ground Beef Recipes For Every Occasion
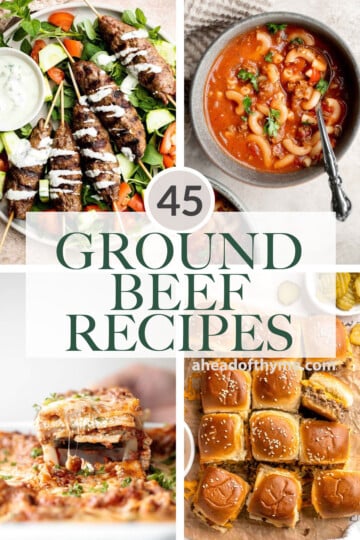
Looking for the best ground beef recipes to make this week? You're in the right place. Ground beef is one of the most versatile ingredients in the kitchen: affordable, hearty, and easy to cook with. That's why I've rounded up over 45 of the very best ground beef recipes you can make at home. From cozy classics like meatloaf and chili to easy weeknight dinners like tacos and stuffed peppers, these recipes prove that ground beef can do it all - and taste amazing while doing it.
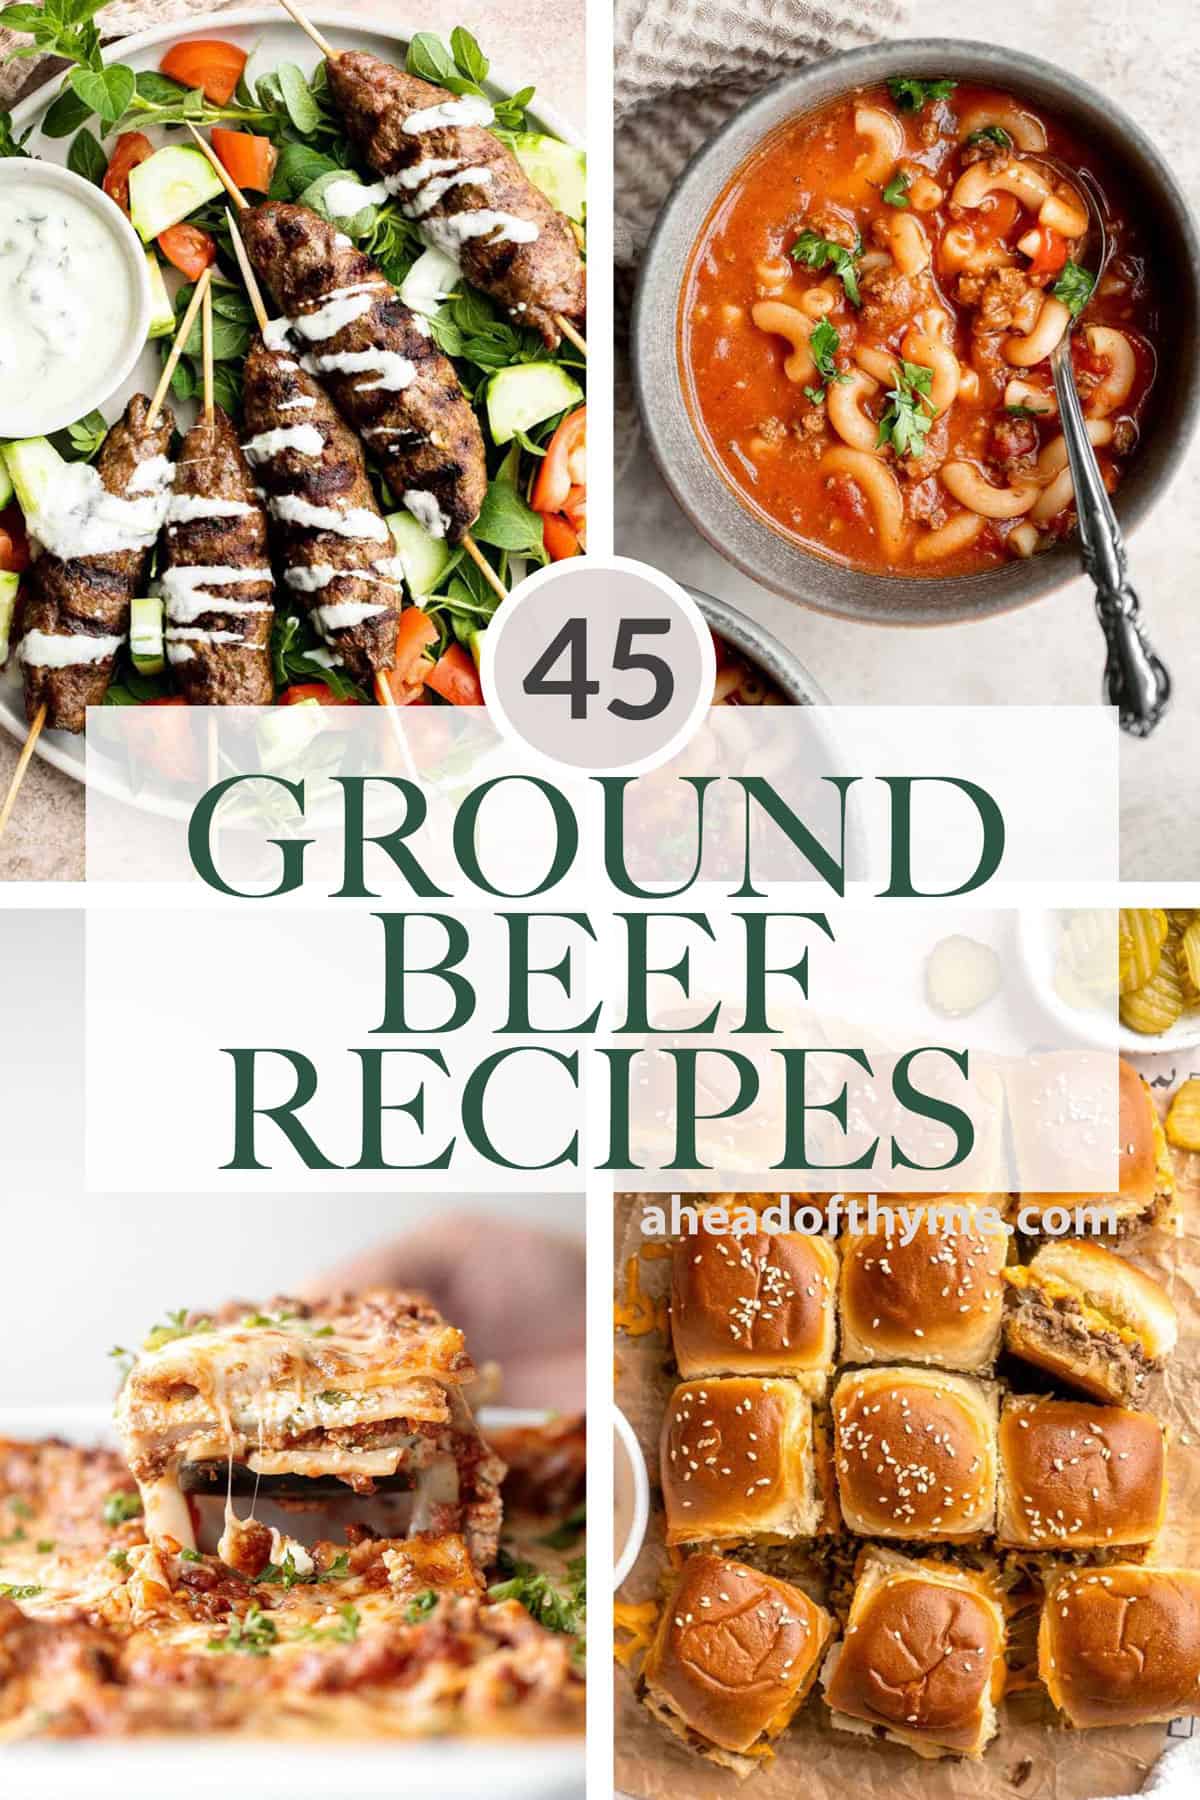
When it comes to versatility, ground beef is hard to beat. It works in everything from quick 30-minute meals to slow-cooked comfort food and even lighter, veggie-packed dinners. Whether you're feeding your family on a busy weeknight, meal prepping for the week ahead, or making a crowd-pleasing dish for friends, there's a ground beef recipe here for every occasion.
This collection was inspired by my love for creating simple, flavor-packed ground beef recipes that never disappoint. If you love these recipes, be sure to check out my 60+ Easy Dinner Ideas next. They're just as easy and satisfying.
Ground Beef Classics
Classic ground beef recipes never go out of style. From juicy burgers to lasagna and meatloaf, these timeless favorites are hearty, comforting, and always guaranteed to please.
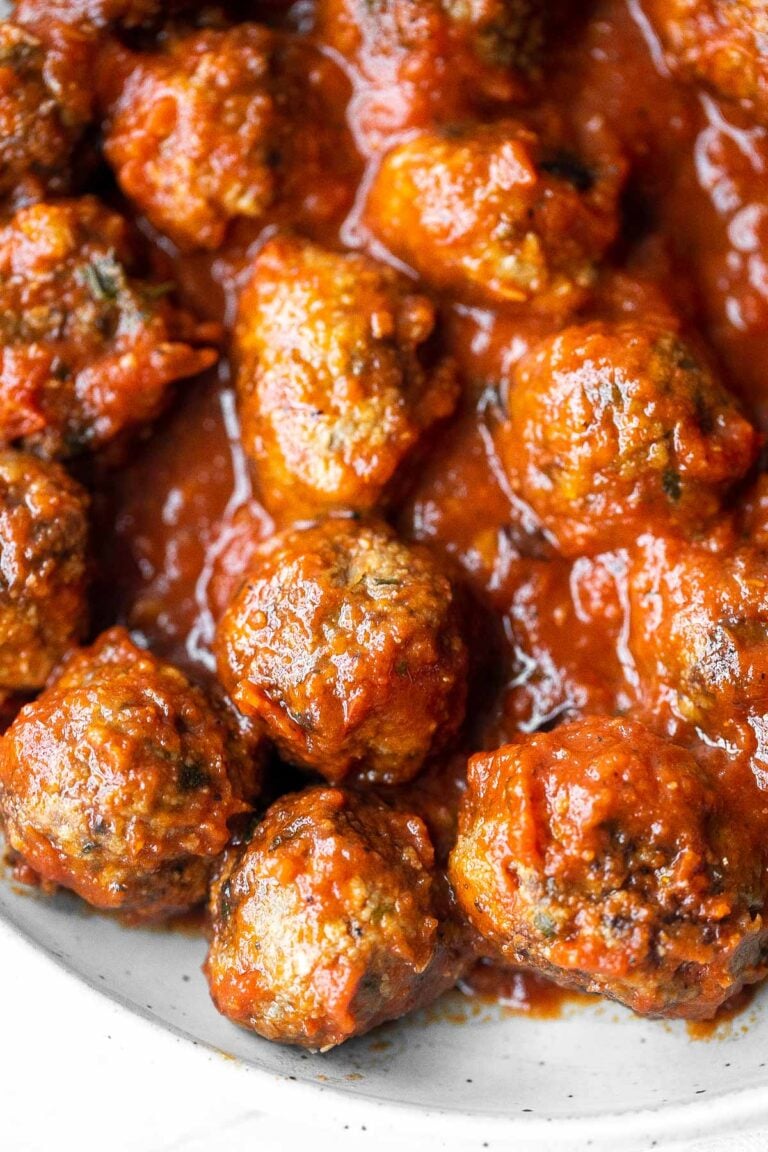
Italian Meatballs
Quick, easy homemade Italian meatballs are juicy, flavourful, and delicious, simmered in a rich and savoury tomato sauce. Make them in just 30 minutes.

Classic Juicy Hamburgers
Better than the steakhouse, these classic juicy hamburgers are perfectly seasoned, so flavourful and delicious. Make them on the grill or on the stove.
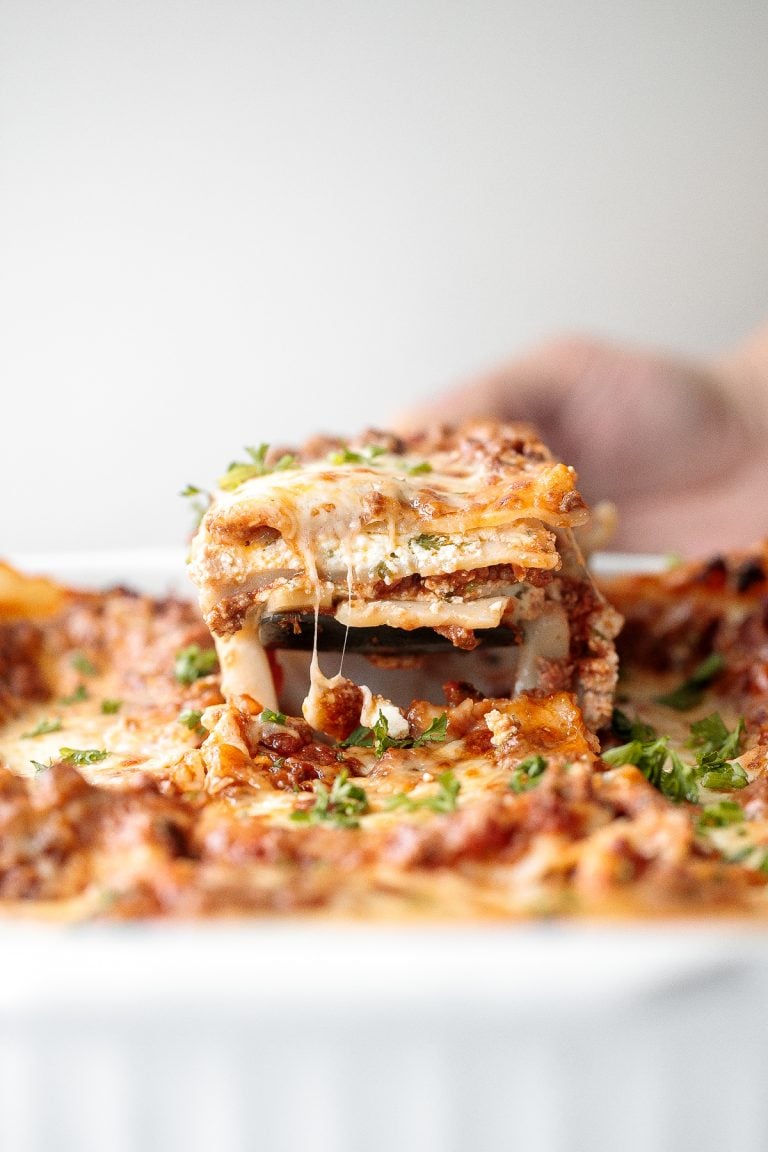
Easy Meat Lasagna
Classic easy meat lasagna is the ultimate Italian comfort food with layers of tender lasagna, meaty tomato sauce, cheese filling and melted cheese on top.
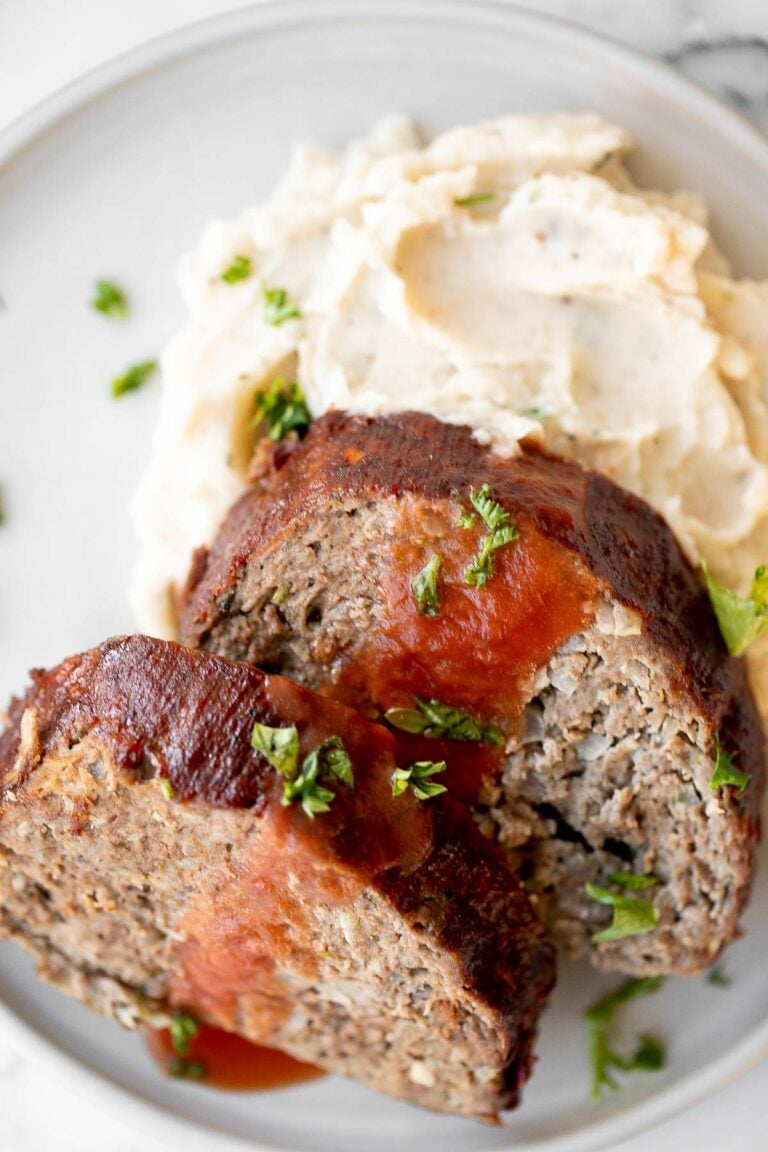
Classic Meatloaf
This hearty classic meatloaf with a caramelized glaze will nourish your body and soul. Feed the whole family with a simple yet flavourful classic.
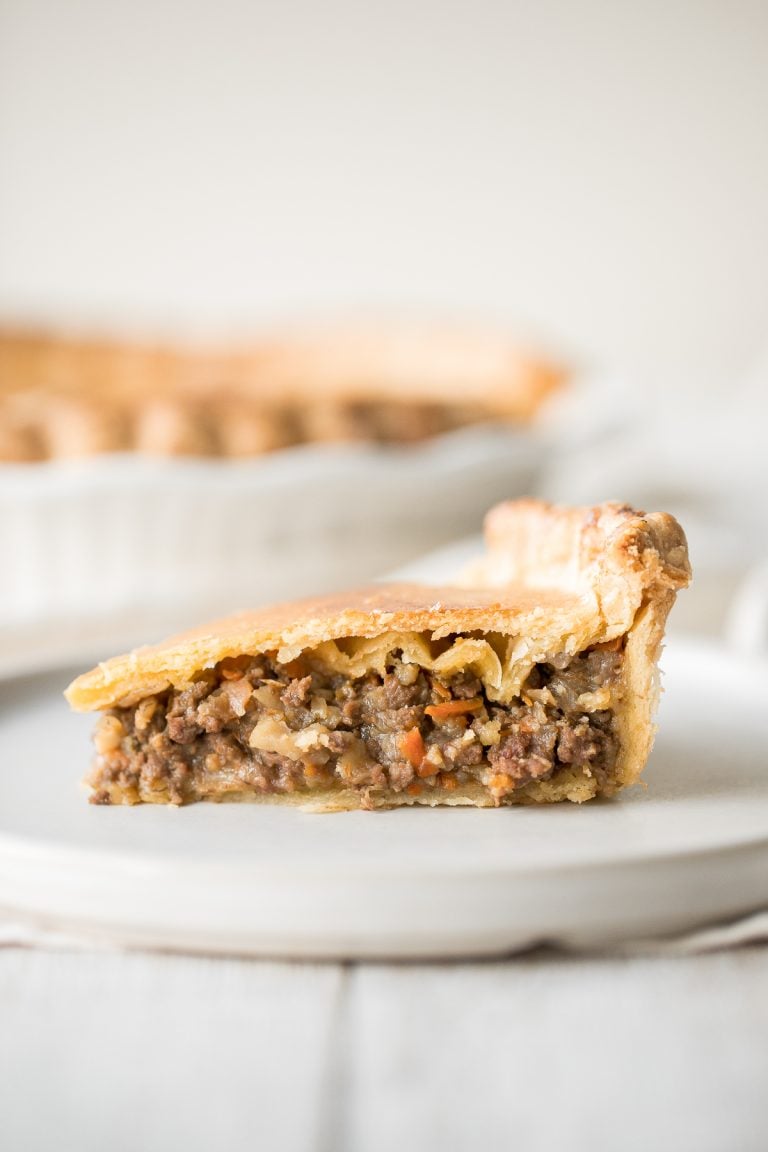
Ground Beef Meat Pie
Ground beef meat pie with a flaky puff pastry double crust pie is filled with ground beef cooked with vegetables and seasonings. The ultimate comfort food.

Cheeseburger Sliders
Easy Cheeseburger Sliders have the classic flavor of your favorite burgers in bite-size form without the fuss of forming or grilling a single burger patty!
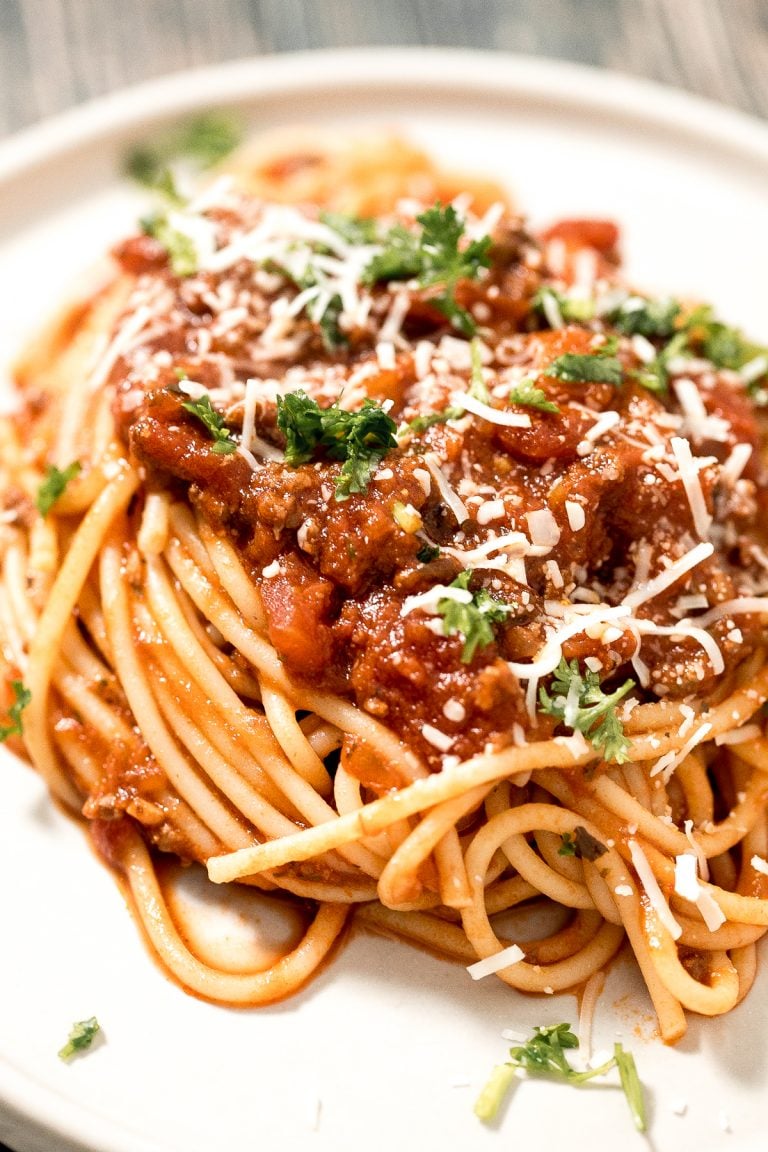
Spaghetti Bolognese
Quick easy spaghetti bolognese with a rich, thick, delicious and flavourful meat sauce is a family favourite ready in 30 minutes. Best weeknight dinner.
Comfort Food Favorites
When you're craving something cozy and indulgent, these ground beef comfort food recipes deliver. Think cheesy casseroles and baked pasta that warm you from the inside out.

Lasagna Roll Ups
Lasagna roll ups are a twist on traditional lasagna. Lasagna noodles are filled with cheese and meat sauce and rolled up. Make ahead and freezer-friendly!
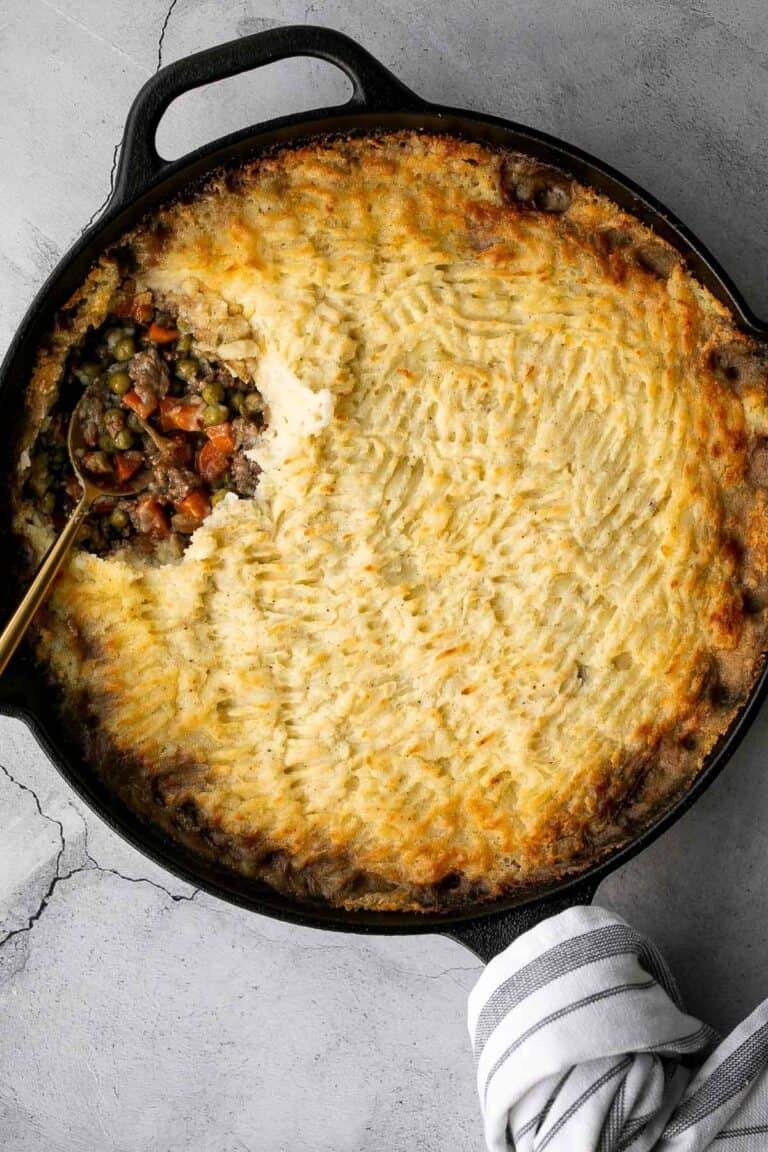
Skillet Shepherd's Pie
Skillet shepherd's pie is a savoury and hearty traditional comfort food. With flavourful beef and fluffy potatoes, this cozy meal it will warm you up.
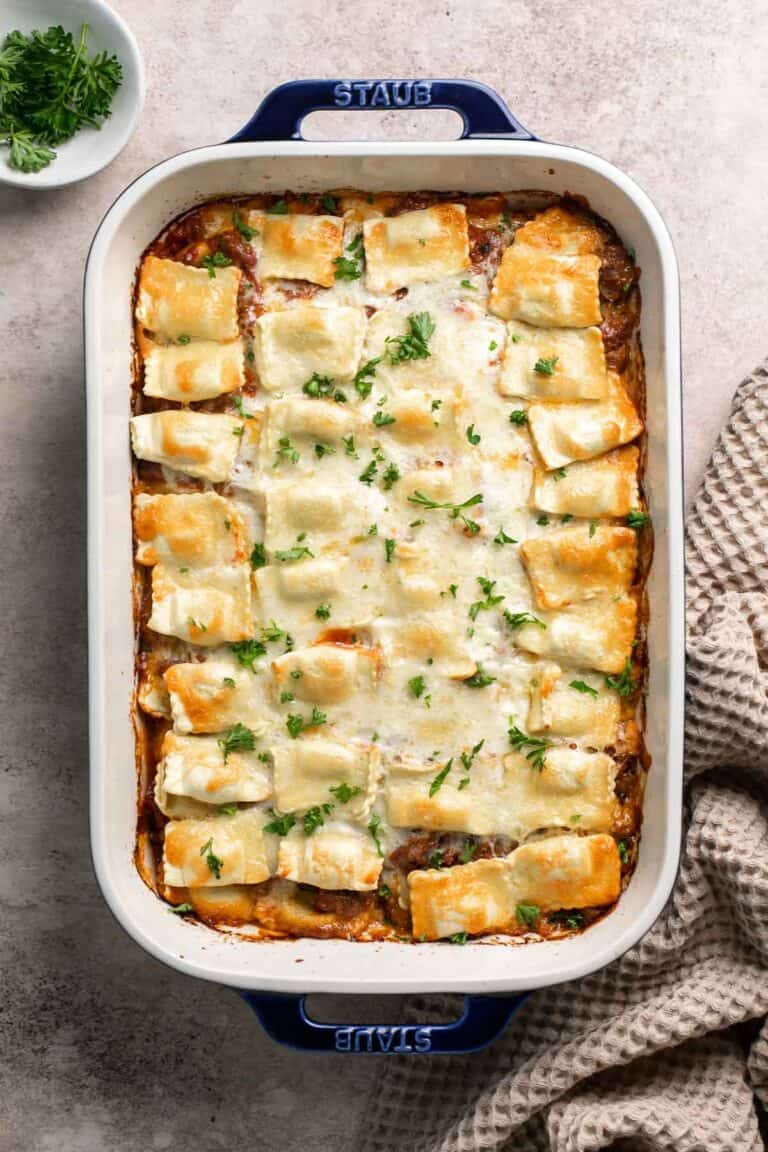
Baked Ravioli
Baked Ravioli is simple delicious comfort food that is perfect for a weeknight family dinner or for entertaining. It's hearty, comforting, and kid-friendly.

Tater Tot Casserole
This Tater Tot Casserole is classic comfort food that incorporates delicious layers of tater tots, melted cheese and a creamy beef and vegetable mixture.
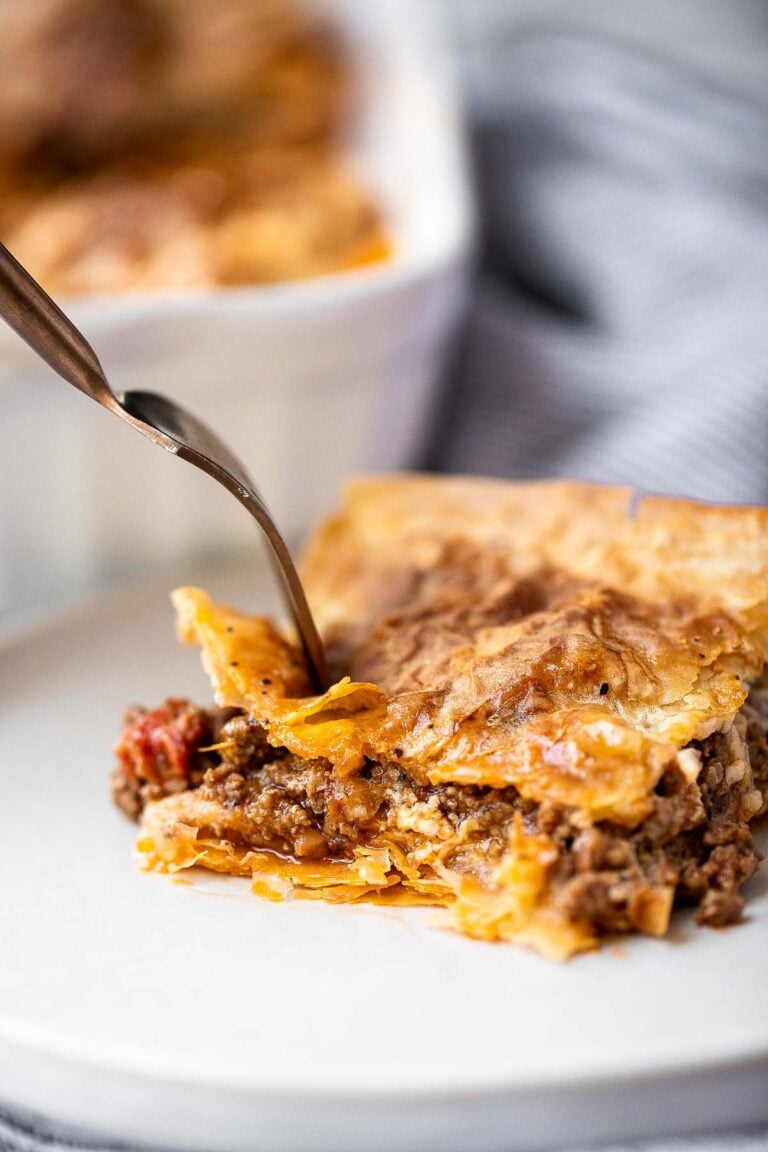
Phyllo Meat Pie (Egyptian Goulash)
Phyllo meat pie (Egyptian goulash) is a savory pie made of well-seasoned ground beef that lies between layers of flaky, crispy, golden phyllo pastry dough.
Quick and Easy Weeknight Meals
Busy weeknights call for fast and fuss-free dinners. These quick ground beef recipes come together in 30 minutes or less without skimping on flavor. Perfect for busy nights.
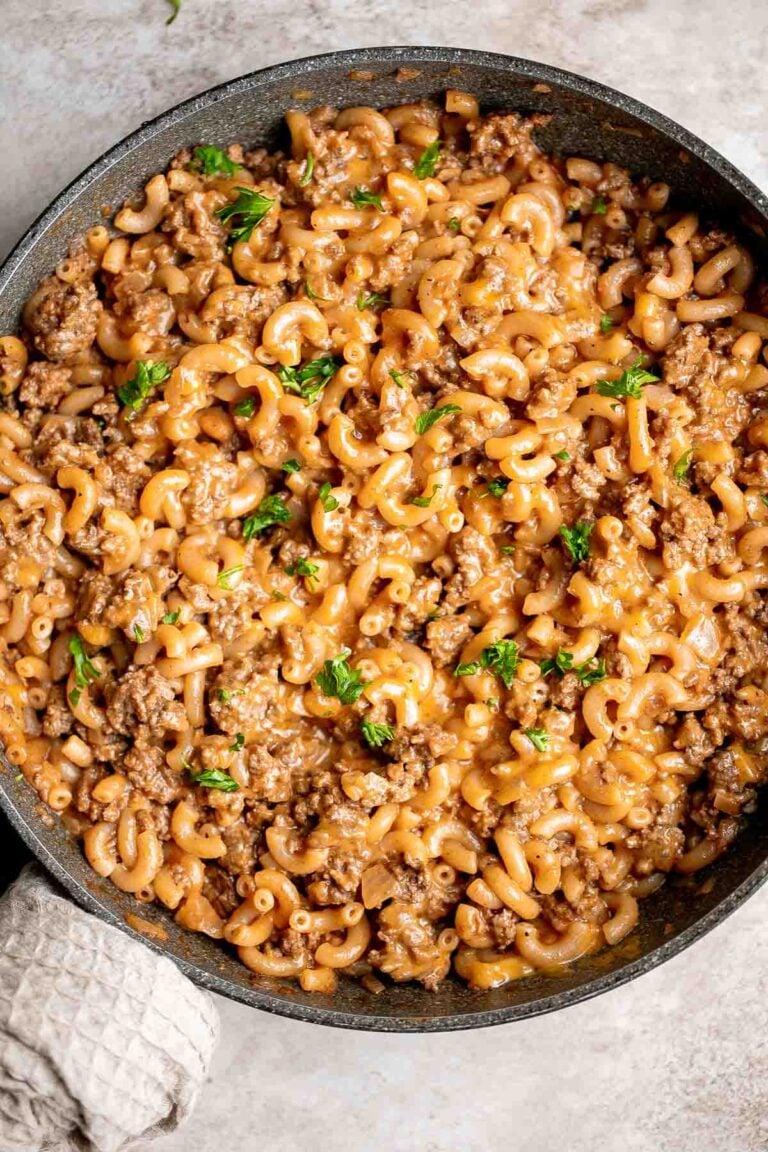
Homemade Hamburger Helper
Homemade hamburger helper is a family favorite but you can make a cheaper, healthier, and way tastier version at home, ready in just 30 minutes.

Mexican Ground Beef Tacos
Spice up Taco Tuesday with these delicious, authentic, and easy-to-make Mexican ground beef tacos. Perfect for a quick weeknight dinner or a fiesta! Serve with sour cream, guacamole, or pico de gallo.
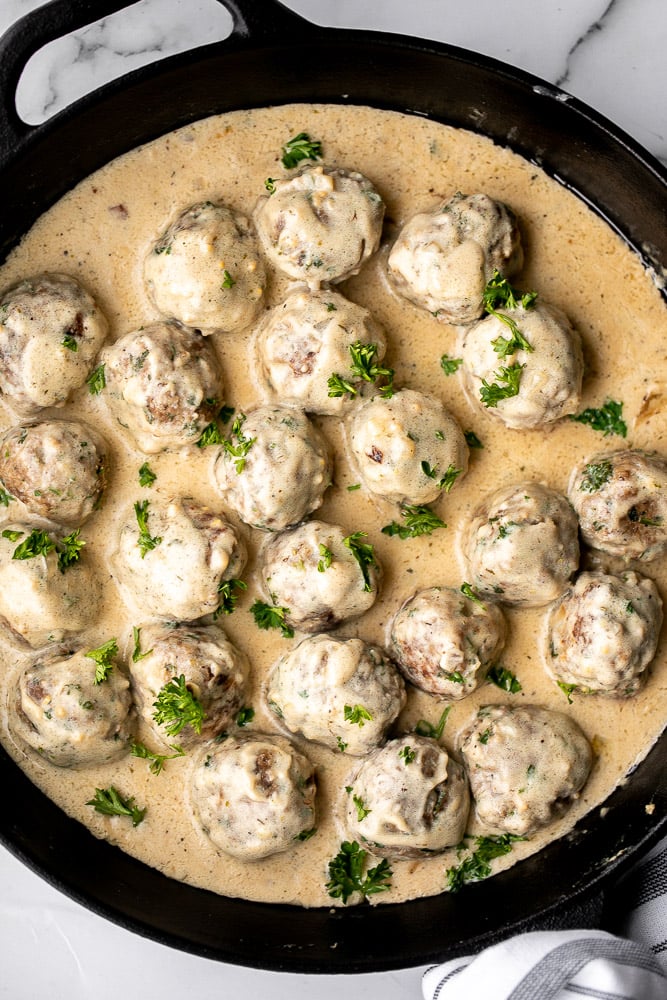
Swedish Meatballs
Delicious, comforting homemade Swedish meatballs are seared and smothered in a creamy gravy sauce and taste so much better than IKEA meatballs.
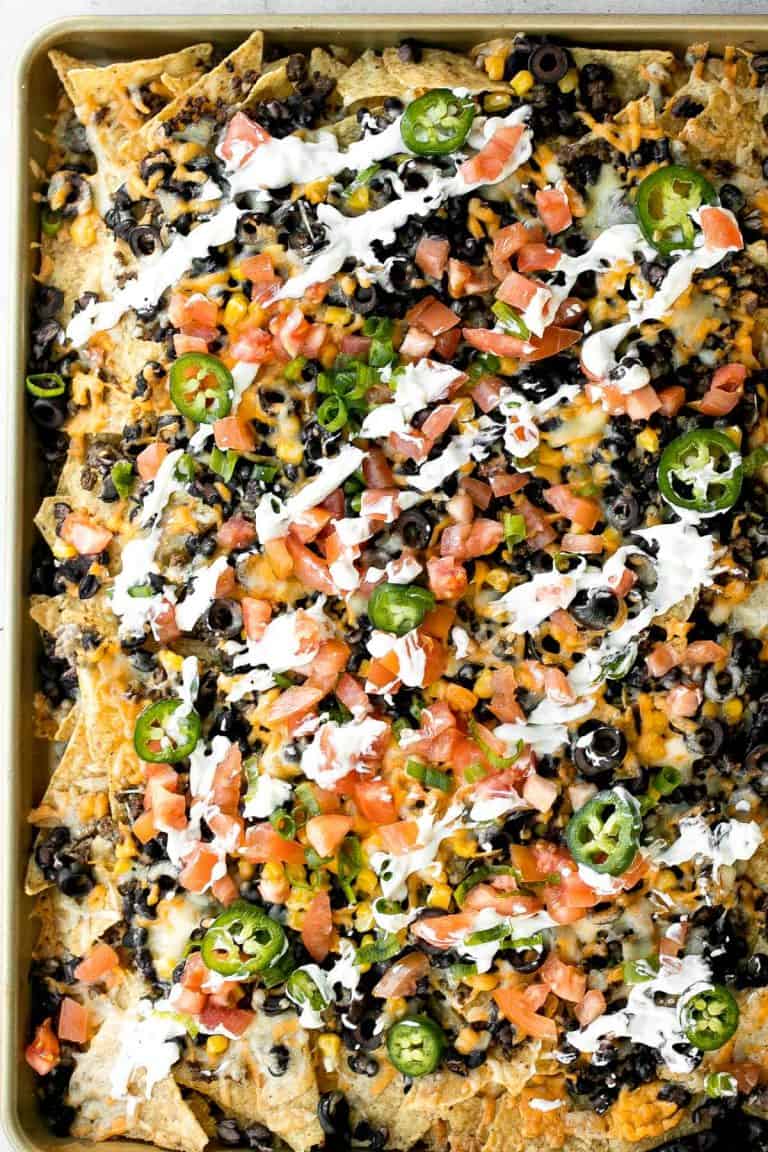
Sheet Pan Nachos
Oven-baked loaded sheet pan nachos topped with cheddar cheese are a crowd pleaser for an easy weeknight dinner or a crave-worthy appetizer to serve on game day.
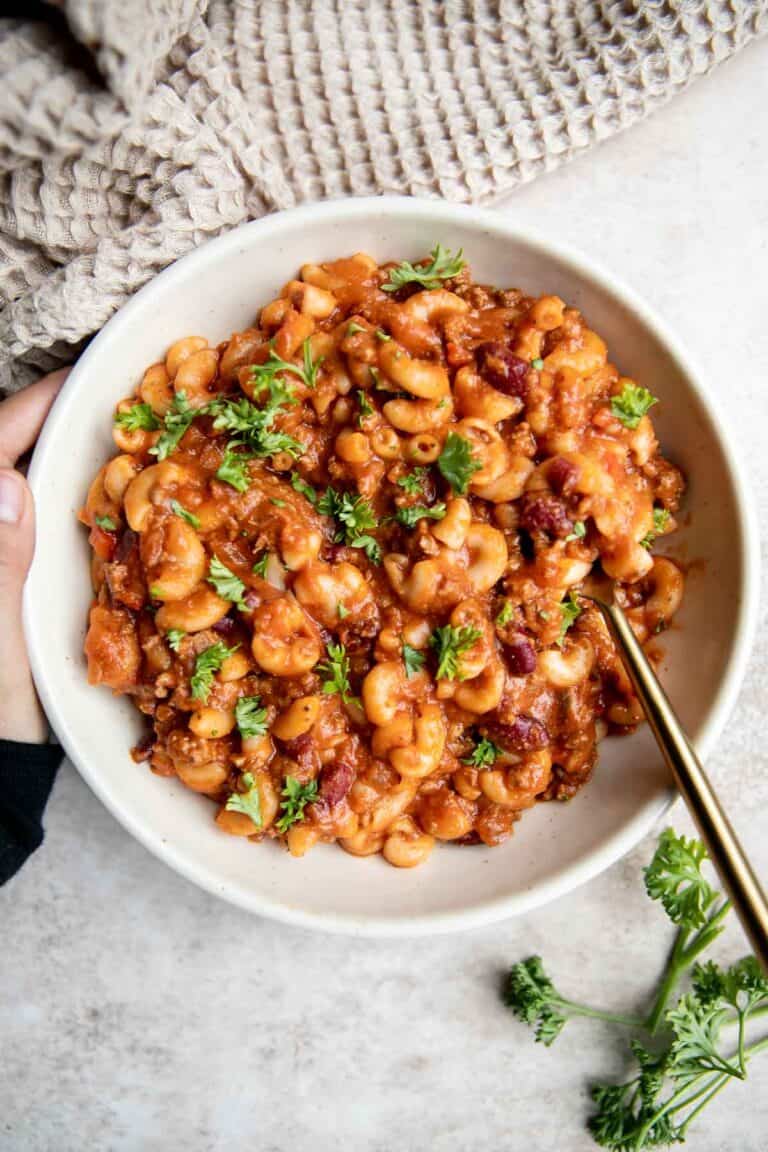
One Pot Chili Mac and Cheese
This Chili Mac and Cheese recipe combines two of the best classic comfort dishes using one-pan only in just 30 minutes. A family-friendly weeknight dinner.
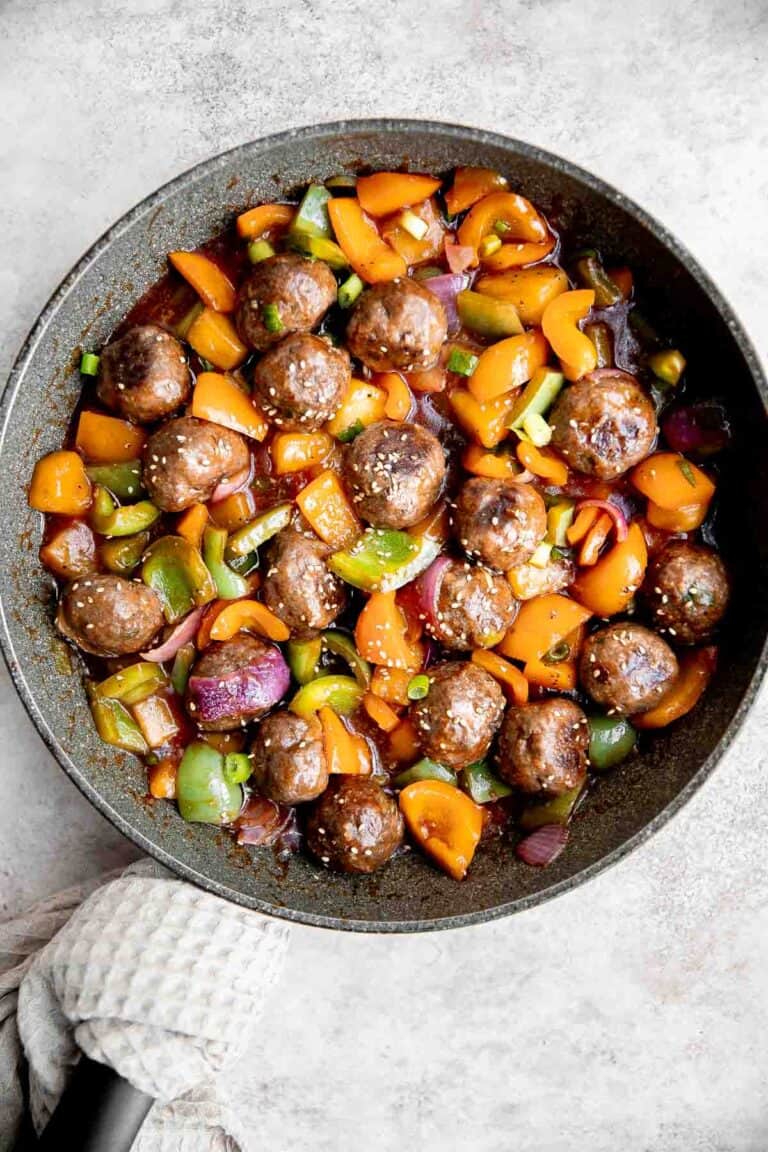
Sweet and Sour Meatballs
Sweet and sour meatballs are quick, easy, delicious, and flavorful, tossed in a bell peppers and pineapple stir fry with homemade sweet and sour sauce.

Homemade Crunchwrap
Homemade Crunchwrap is a crispy, cheesy, flavor-packed meal inspired by the fast-food favorite - only better! Easy to customize and freezer-friendly too.
International-Inspired Dishes
Ground beef shines in cuisines all around the world. From Mexican burritos to Chinese dumplings and Middle Eastern kebabs, these dishes bring global flavors to your kitchen.

Beef Empanadas
Homemade Beef Empanadas are a celebration of bold Latin-inspired flavors, featuring a savory, spiced ground beef filling wrapped in buttery, flaky pastry.
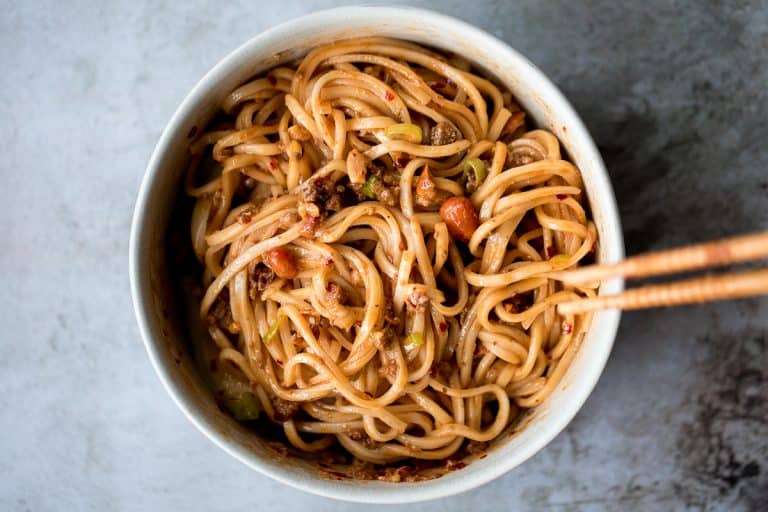
Spicy Dan Dan Noodles
Toss thin wheat noodles in a spicy chili oil sauce and top with seasoned ground beef to make numbing, spicy Sichuan Dan Dan noodles in under 15 minutes.

Beef Kofta Kebabs
Mediterranean Beef Kofta Kebabs are juicy, tender, flavorful, and well seasoned. These grilled ground beef skewers are quick and easy to make in 30 minutes.

Beef Potstickers (Dumplings)
Homemade Chinese beef potstickers (dumplings) are crispy on the outside and tender and juicy inside packed with a delicious beef filling.

Homemade Taquitos
Homemade Taquitos are crispy, delicious, and flavorful. These rolled tacos are filled with seasoned ground beef and melty cheese and can be fried or baked!
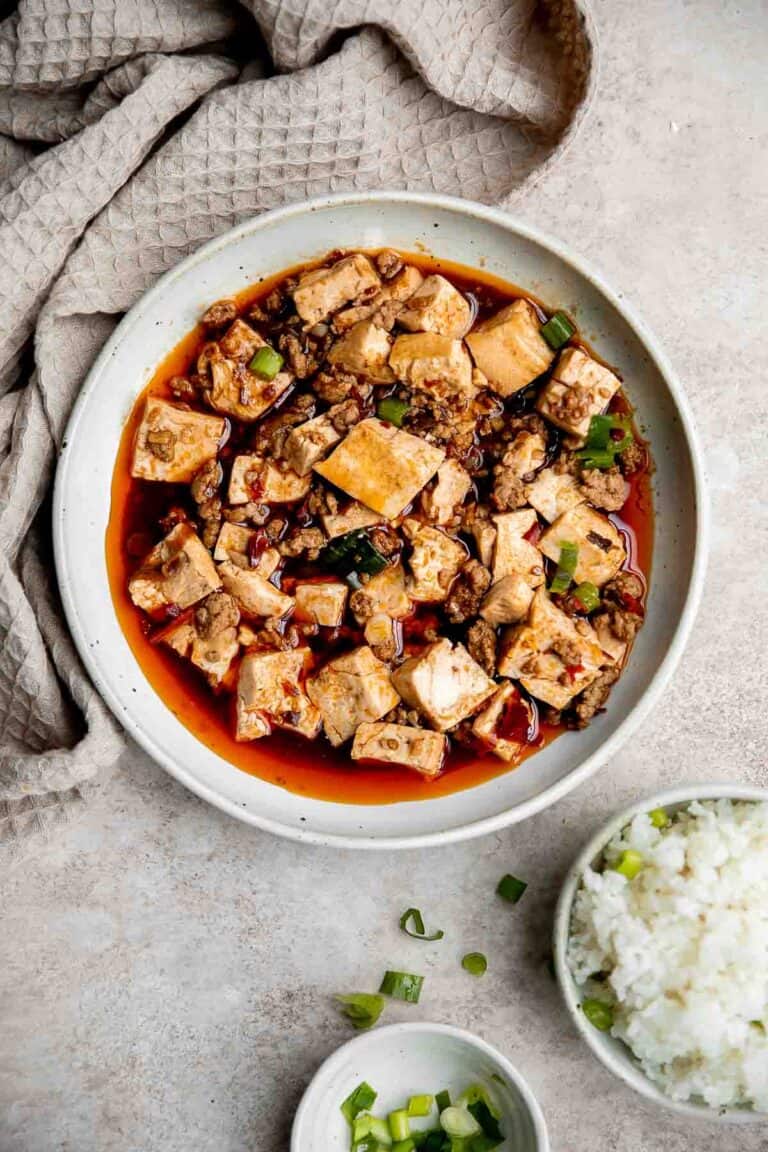
Mapo Tofu
Mapo tofu is quick, easy, delicious, flavorful, spicy, and numbing that is ready in just 20 minutes. Serve it with steamed rice on busy weeknights.
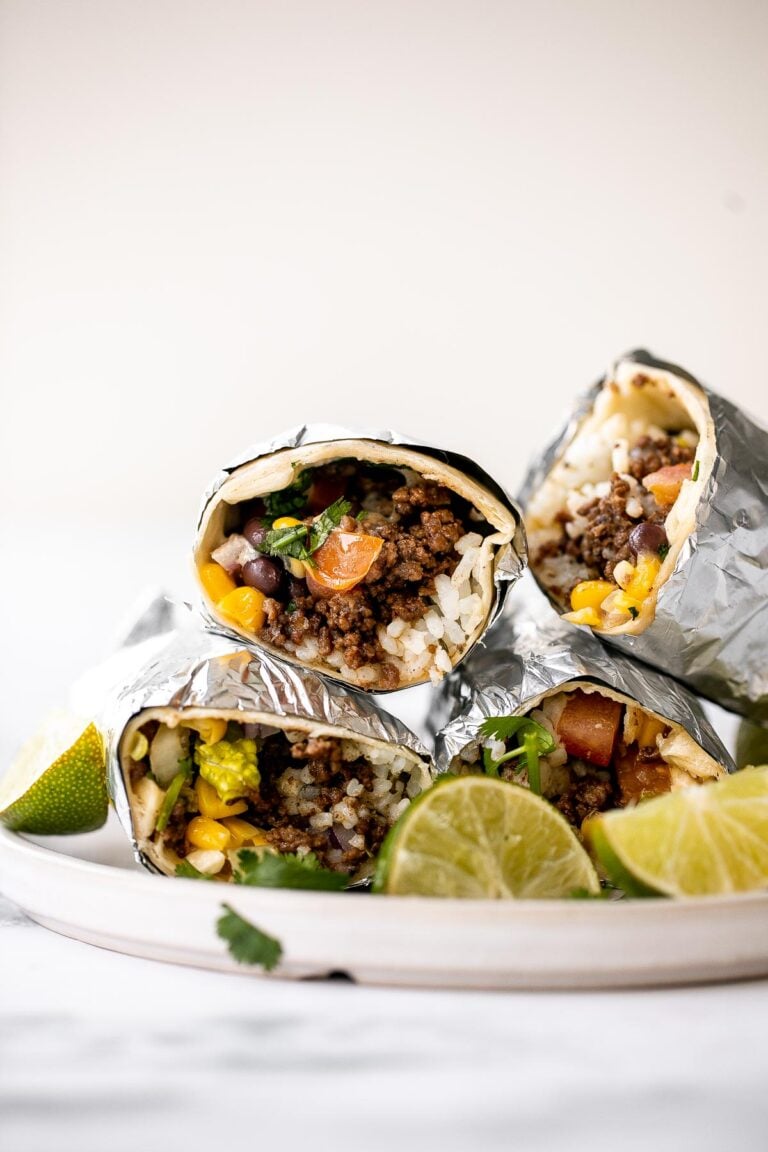
Beef and Bean Burritos
Hearty and filling beef and bean burritos are easy to make ahead, freezer-friendly, and take just 30 minutes for restaurant-quality Mexican food at home.

Chinese Beef Dumplings with Celery
Chinese Beef Dumplings are filled with juicy ground beef, finely chopped celery, and a blend of aromatic seasonings. Make them steamed, boiled or pan-fried!
Meatball Recipes
Meatballs are the ultimate bite-sized comfort food. From Asian-inspired flavors to sweet holiday glazes, these recipes show just how versatile ground beef meatballs can be.
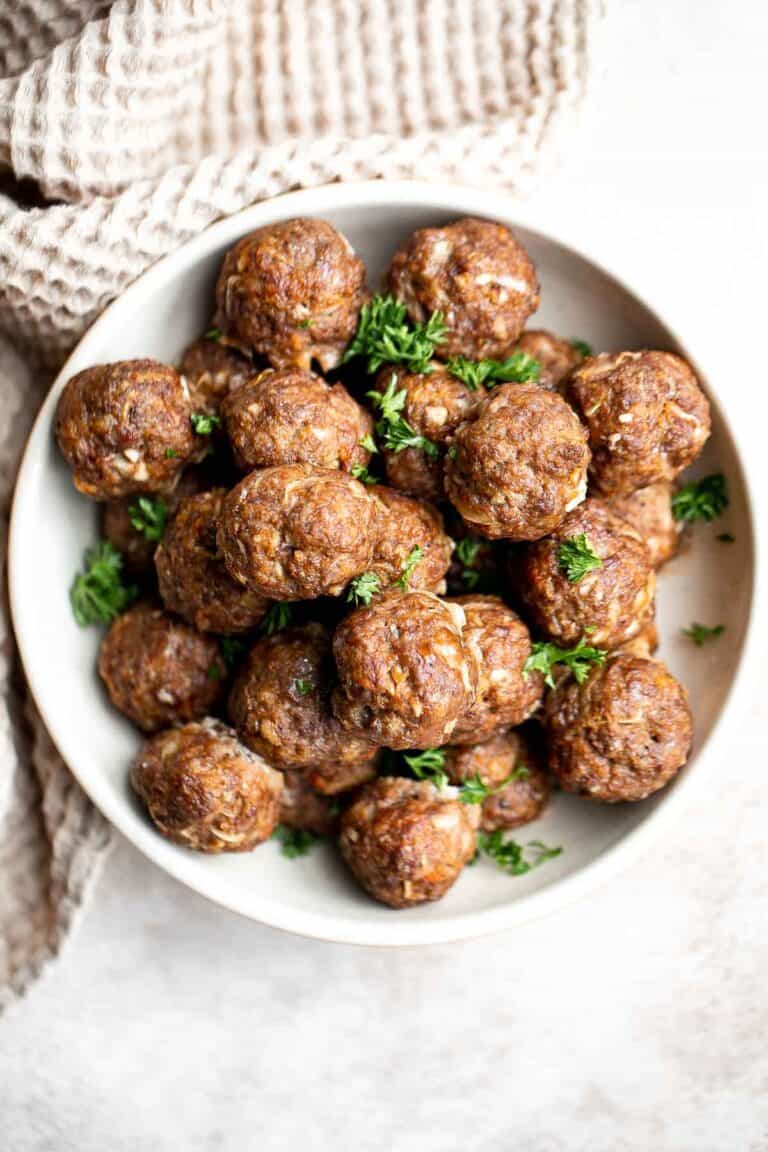
Easy Baked Meatballs
Easy Baked Meatballs are juicy, tender, loaded with flavor, and kid-friendly. Enjoy delicious homemade meatballs in under an hour using simple ingredients.

Teriyaki Meatballs
Teriyaki meatballs are our latest go to weeknight dinner - quick and easy to cook in the air fryer or oven, saucy and flavorful, and freezer-friendly.
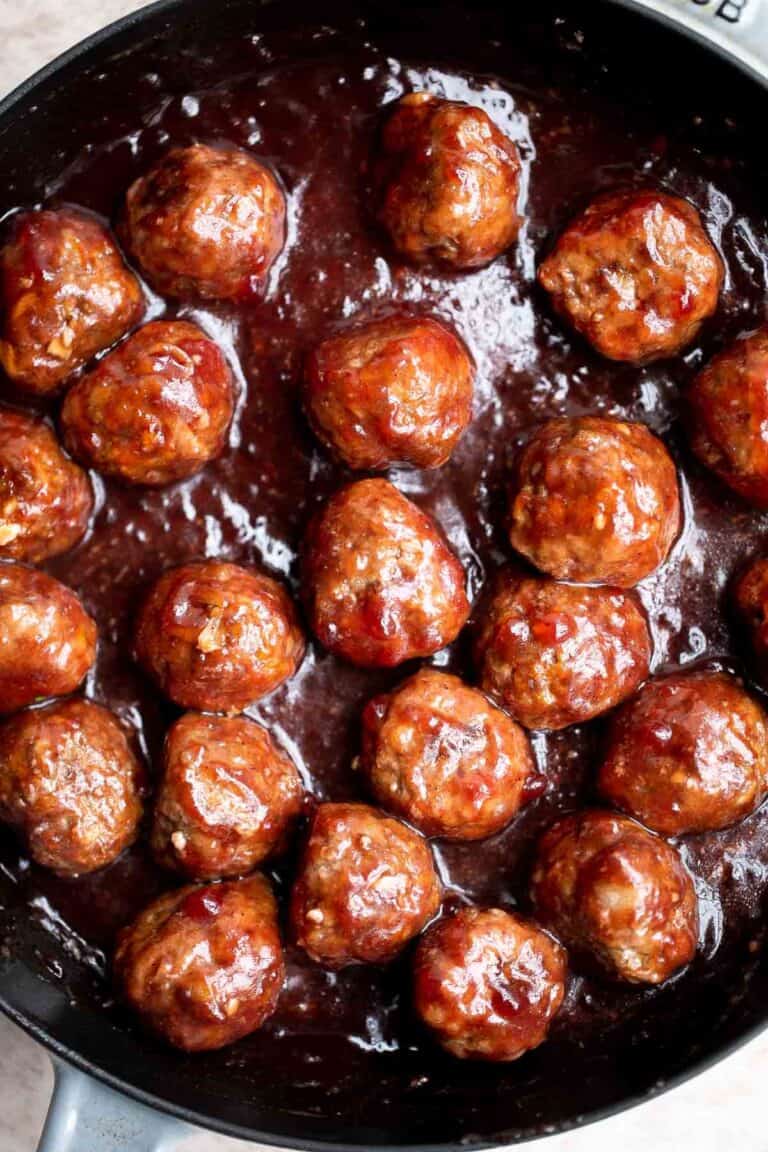
Cranberry Meatballs
Cranberry Meatballs are sticky, sweet and tangy. These delicious bites are the perfect holiday appetizer, or a great way to use up leftover cranberry sauce.
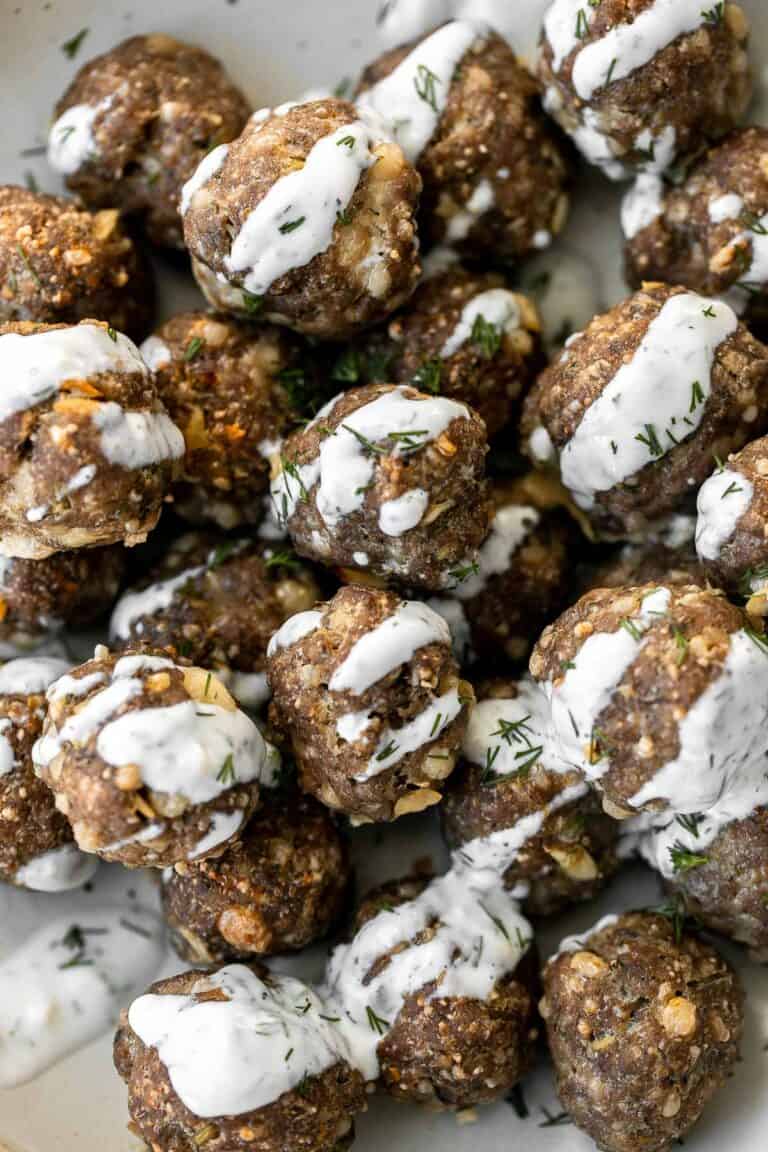
Greek Meatballs
Baked Greek meatballs are juicy, tender, flavorful, and delicious. They are quick and easy to make in 30 minutes, and freezer-friendly.
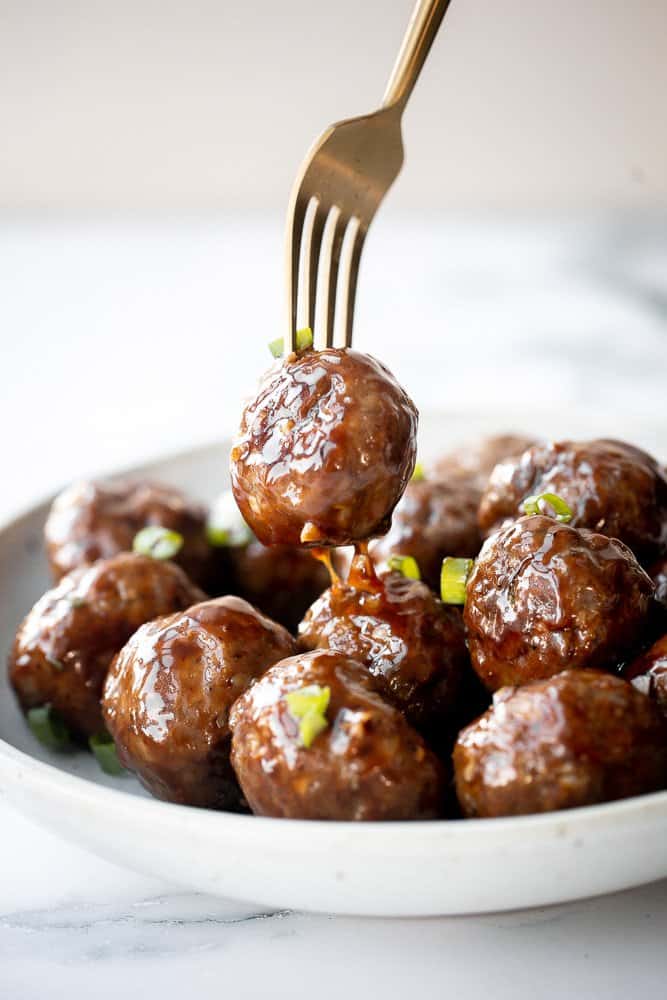
Sticky Honey Garlic Meatballs
Sticky honey garlic meatballs are a delicious and flavourful 30-minute meal to add to your weekly dinner rotation. A total crowd please. Serve over rice or mashed potatoes.
Healthy and Lighter Options
Ground beef isn't just for heavy dishes, it can be light and wholesome too. These recipes pair beef with fresh vegetables and simple seasonings for a balanced, satisfying meal.
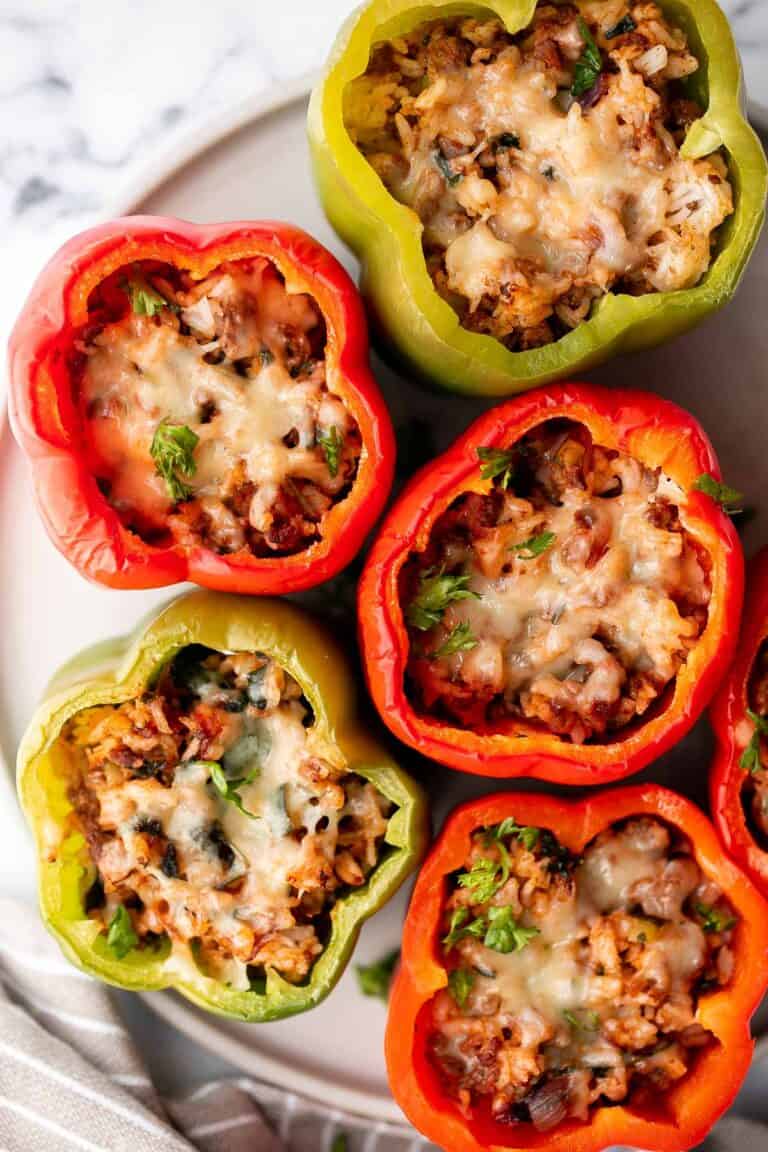
Ground Beef Stuffed Peppers
Ground beef stuffed peppers are delicious, healthy, and filling. Stuffed with beef rice and veggies, they're easy to make ahead and freezer-friendly.
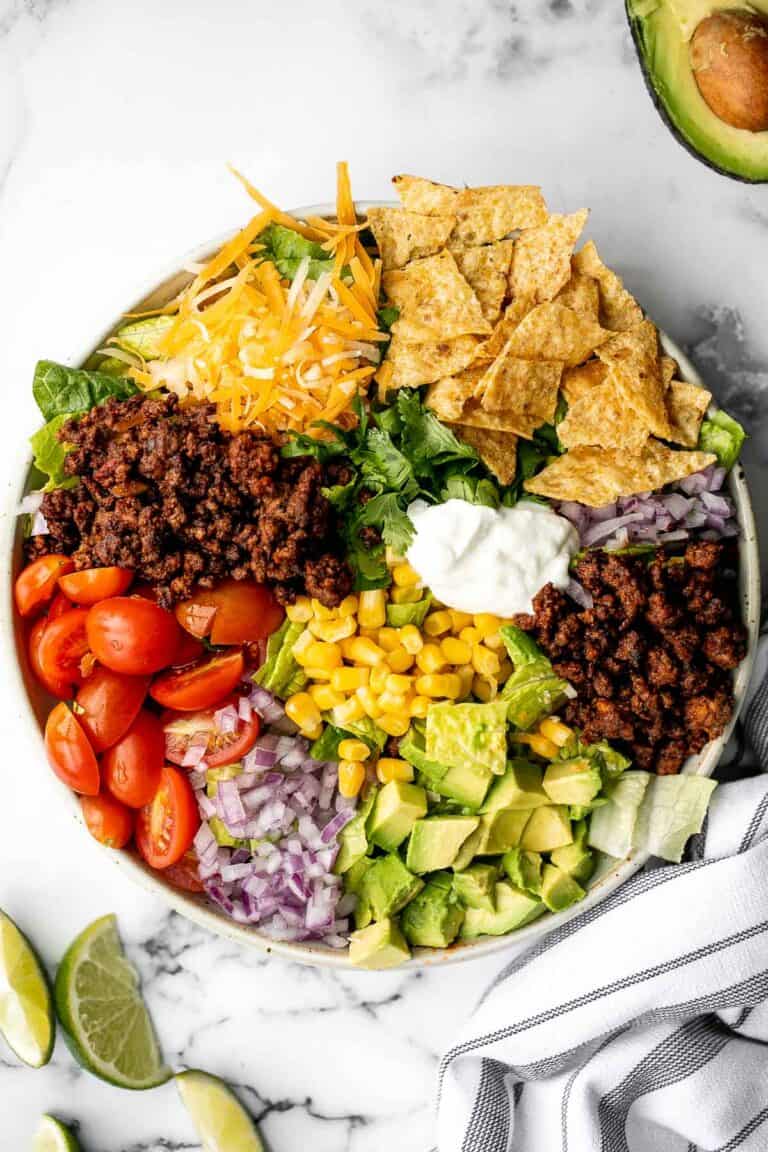
Beef Taco Salad
Beef taco salad is a simple, filling, and delicious meal loaded with ground beef seasoned with homemade taco seasoning, veggies, your favorite taco fillings, and a creamy lime dressing. Make it in 20 minutes.

Stuffed Zucchini Boats
Stuffed Zucchini Boats are a fun, low carb dinner filled with a hearty meat sauce, topped with cheese, and baked until melty and bubbly. This classic dish is perfect for the height of zucchini season, and a true family favorite!
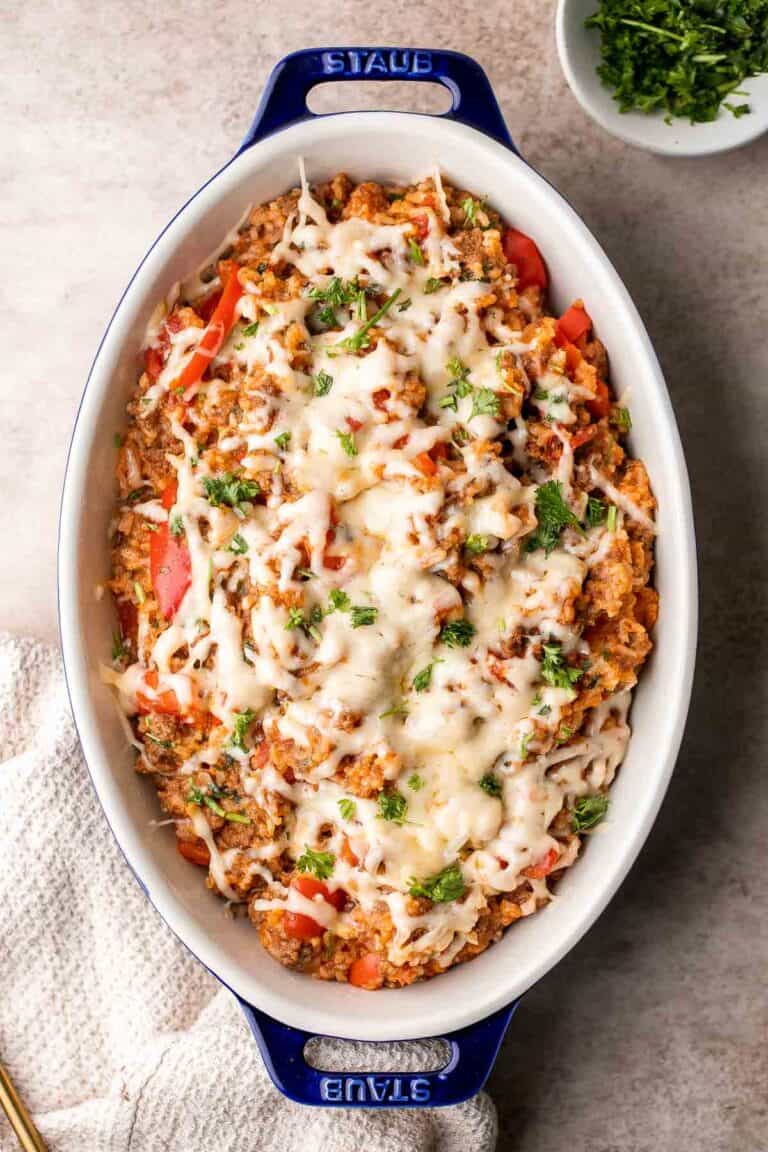
Stuffed Pepper Casserole
Skip the stuffing process with this easy Stuffed Pepper Casserole and cook the peppers with beef, rice, tomatoes, and spices for a delicious one pot meal.

Mexican Stuffed Peppers
Mexican stuffed peppers are a delicious, wholesome, low-carb, healthy meal loaded with fun Mexican flavors. It freezes well and is perfect for meal prep.
Soups and Stews
Warm, hearty, and nourishing, ground beef soups are a comforting staple year-round. These cozy bowls are perfect for chilly nights, meal prep, or feeding a hungry crowd.
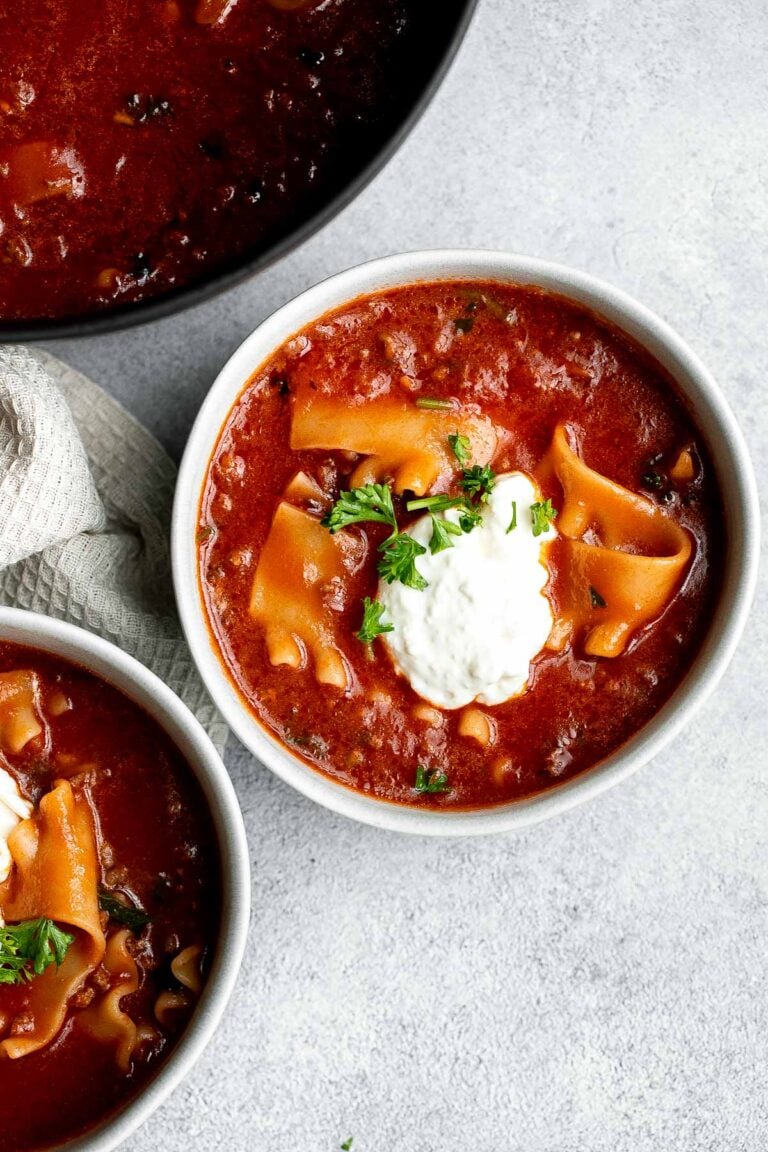
Lasagna Soup
Lasagna soup is a twist on a classic Italian recipe with all the same delicious comforting flavors in the form of a hearty one pot soup.
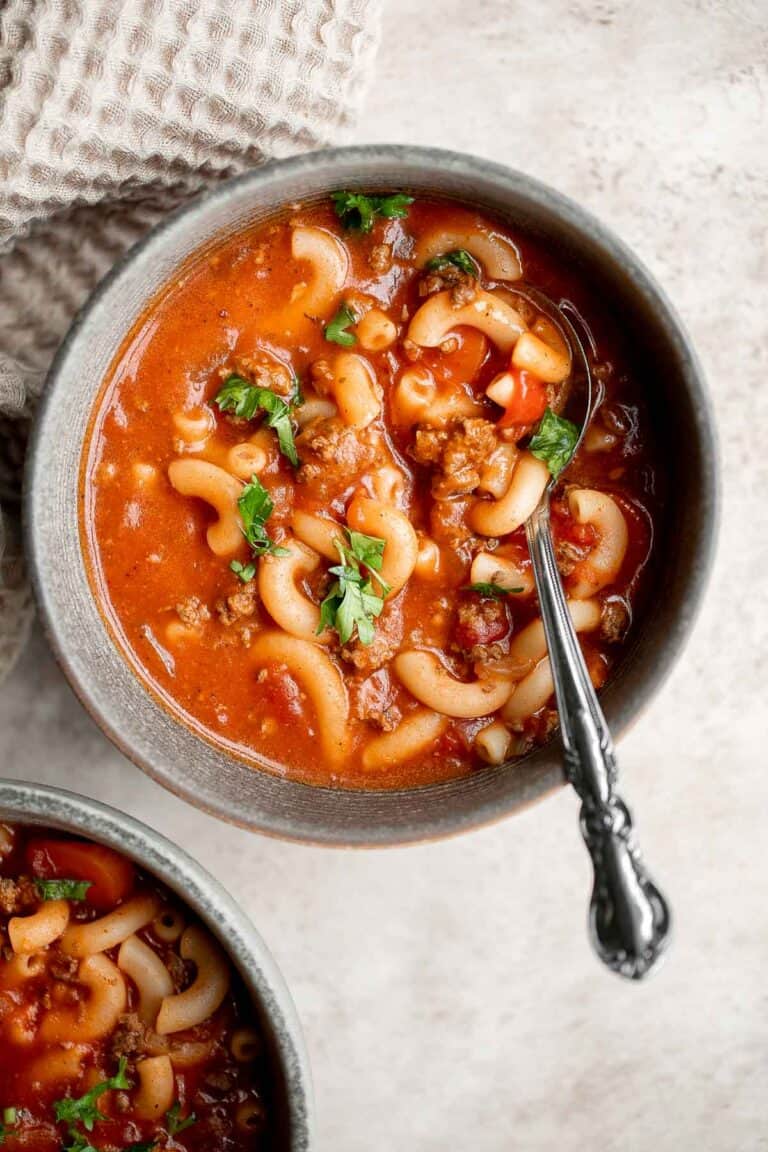
Hamburger Soup with Macaroni (Goulash Soup)
Hamburger soup with macaroni is a quick and easy weeknight dinner that's wholesome, filling, comforting and nutritious with beef broth. Prep, cook and serve under an hour.
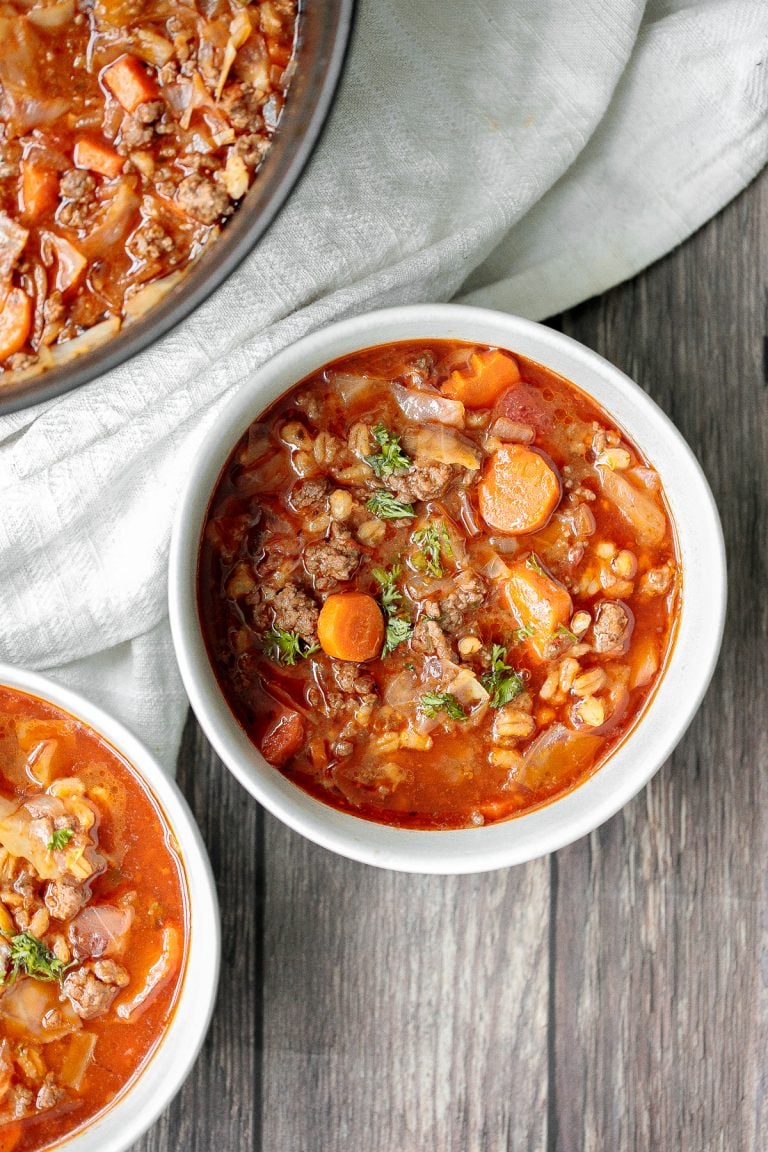
Beef Cabbage Barley Soup
Hearty beef cabbage barley soup is wholesome, filling and flavourful. This one pot meal can be made ahead and is freezer-friendly. Prep it in 10 minutes.
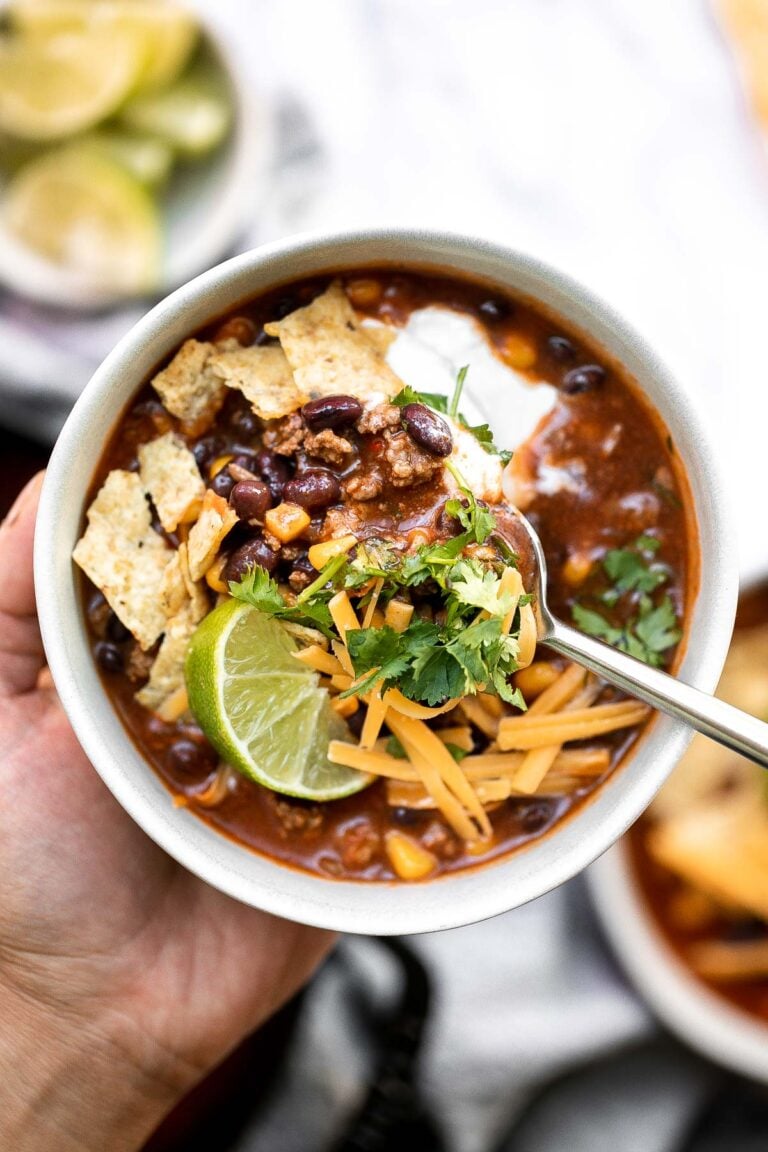
Beef Taco Soup
Beef taco soup is a delicious take on tacos, transforming it into a hearty, wholesome, filling soup topped with all the taco fixings. Ready in 30 minutes.
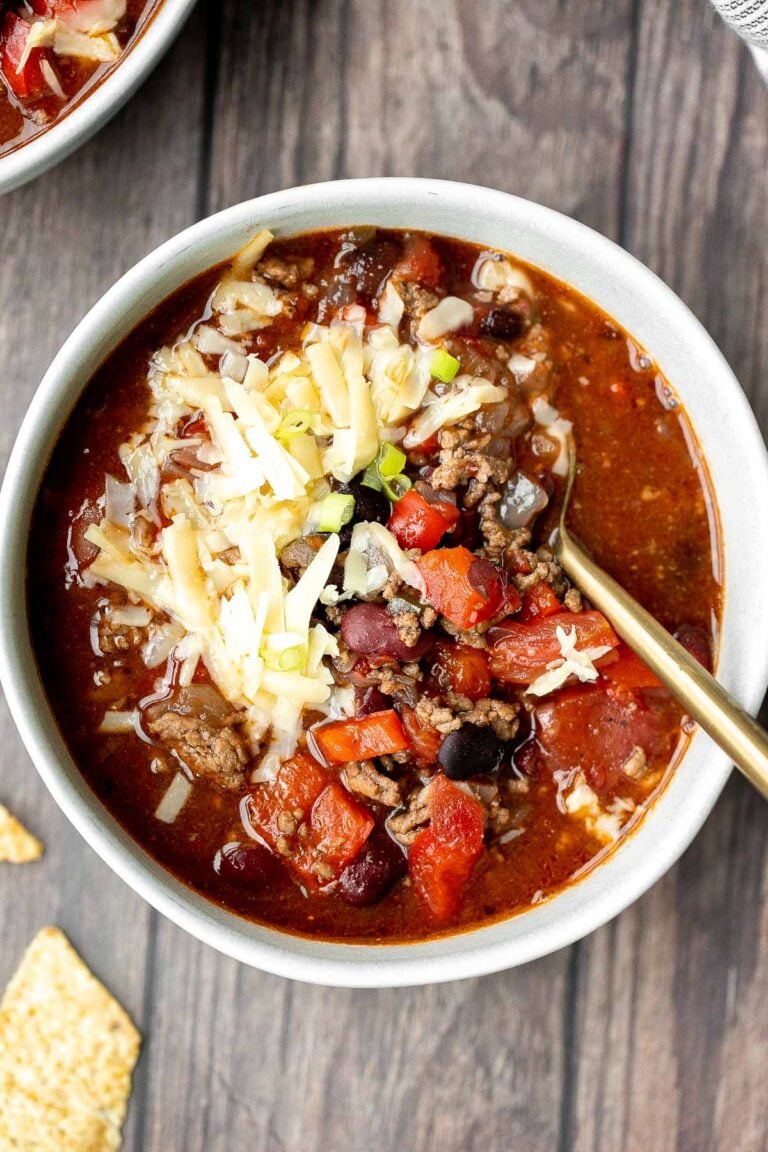
Slow Cooker Beef Chili
Hearty slow cooker beef chili is an easy, comforting, low-maintenance dinner in fall and winter months. It's a family favourite crockpot chili.
How to Store Ground Beef
Store any leftover ground beef recipes in an airtight container in the refrigerator for up to 3 days. Most of these dishes are also freezer-friendly, simply transfer to a freezer-safe container or bag and store for up to 3 months.
When ready to enjoy again, and depending on the recipe card, most can reheat in the air fryer at 300°F for 5-10 minutes, in the oven at 300°F for about 10 minutes, or on the stovetop over medium heat until warmed through. If frozen, thaw overnight in the fridge (or at room temperature for a few hours) before reheating for best results.
Substitutions for Ground Beef
You can easily substitute ground beef with other ground meats like ground turkey, chicken, or pork in most of these recipes. Ground turkey and chicken are leaner options that lighten up the dish while still keeping it flavorful, while ground pork adds extra richness. Just keep in mind that leaner meats may cook faster and can dry out more easily, so adjust the cooking time and seasonings as needed for the best results.
Make It Tonight
What makes ground beef so special is how approachable it is. A single pound can stretch into tacos for the whole family, simmer into a hearty soup, or transform into something impressive like homemade empanadas. It's the kind of ingredient that invites creativity, whether you're cooking something nostalgic or trying a new cuisine.
Beyond its versatility, ground beef has a way of bringing people together. A pot of chili on game day, a bubbling lasagna shared at the table, or even simple sliders on a weeknight - these meals often become the moments we remember most.
So while ground beef may seem like an everyday staple, it's anything but ordinary. With a little inspiration, it can anchor meals that are comforting, exciting, and always delicious.
FAQ
Ground beef is one of the fastest proteins to cook, so it's perfect for quick meals. Tacos, burritos, sheet pan nachos, or a simple skillet stir-fry can be ready in under 30 minutes. You can also make quick soups like beef taco soup or whip up cheeseburger sliders when you need something fast. Even a homemade hamburger helper or chili mac can come together on a busy weeknight without much effort.
If all you have on hand is ground beef, you can still create a satisfying meal. Season it with salt, pepper, and garlic powder, then serve it over rice, pasta, or wrapped in tortillas. You can also shape it into patties for simple burgers or make a quick stir-fry by adding frozen veggies from your freezer. Ground beef is so versatile that even on its own, it can become the base for something delicious.
The healthiest ground beef option is typically lean or extra lean beef, such as 90/10 or 93/7 blends (that's lean meat versus fat). These options reduce overall fat and calories while still keeping enough flavor and juiciness for most recipes. Grass-fed beef is also considered healthier because it's often higher in omega-3 fatty acids and contains fewer additives. No matter which you choose, pairing lean ground beef with lots of vegetables is a great way to make your meals lighter.
The best method depends on the dish you're making, but generally sautéing in a skillet is the most versatile. Cooking ground beef in a hot pan allows you to break it into crumbles, develop flavor, and control doneness. For burgers or meatballs, grilling or baking works well for sealing in juices. Always drain excess fat if needed and season generously to bring out the best flavor.
To make a hamburger healthier, start with lean ground beef or a mix of beef and veggies (like mushrooms or zucchini). Skip the heavy toppings and load up with lettuce, tomato, avocado, or grilled vegetables instead. Opt for a whole wheat or lettuce bun to cut down on refined carbs. Pairing your burger with a side salad instead of fries also makes a big difference in keeping the meal balanced.
Yes, ground beef can fit into a weight loss plan when eaten in moderation. Choosing lean ground beef helps reduce calorie and fat intake while still giving you plenty of protein to keep you full. Stick to portion sizes of about 4 ounces per serving and balance your meal with vegetables or whole grains. Cooking methods like grilling, baking, or sautéing without heavy oils also make ground beef healthier for weight loss.
Eating ground beef daily is generally not recommended, especially if it's higher in fat content. While it's a good source of protein, iron, and B vitamins, moderation is key for a balanced diet. Experts often suggest enjoying beef a few times per week and mixing in other proteins like chicken, fish, beans, or lentils. If you do eat it often, opt for leaner cuts and healthier cooking methods.
Ground beef takes on seasoning really well, so don't be shy with herbs and spices. Garlic, onion, paprika, cumin, or Italian seasoning can transform basic beef into something bold and delicious. You can also mix in fresh herbs, soy sauce, Worcestershire, or chili paste for extra depth. Browning beef properly in a hot skillet before adding sauces is another easy way to build rich flavor.
More Recipe Collections
Looking for other recipes like this? Try these:

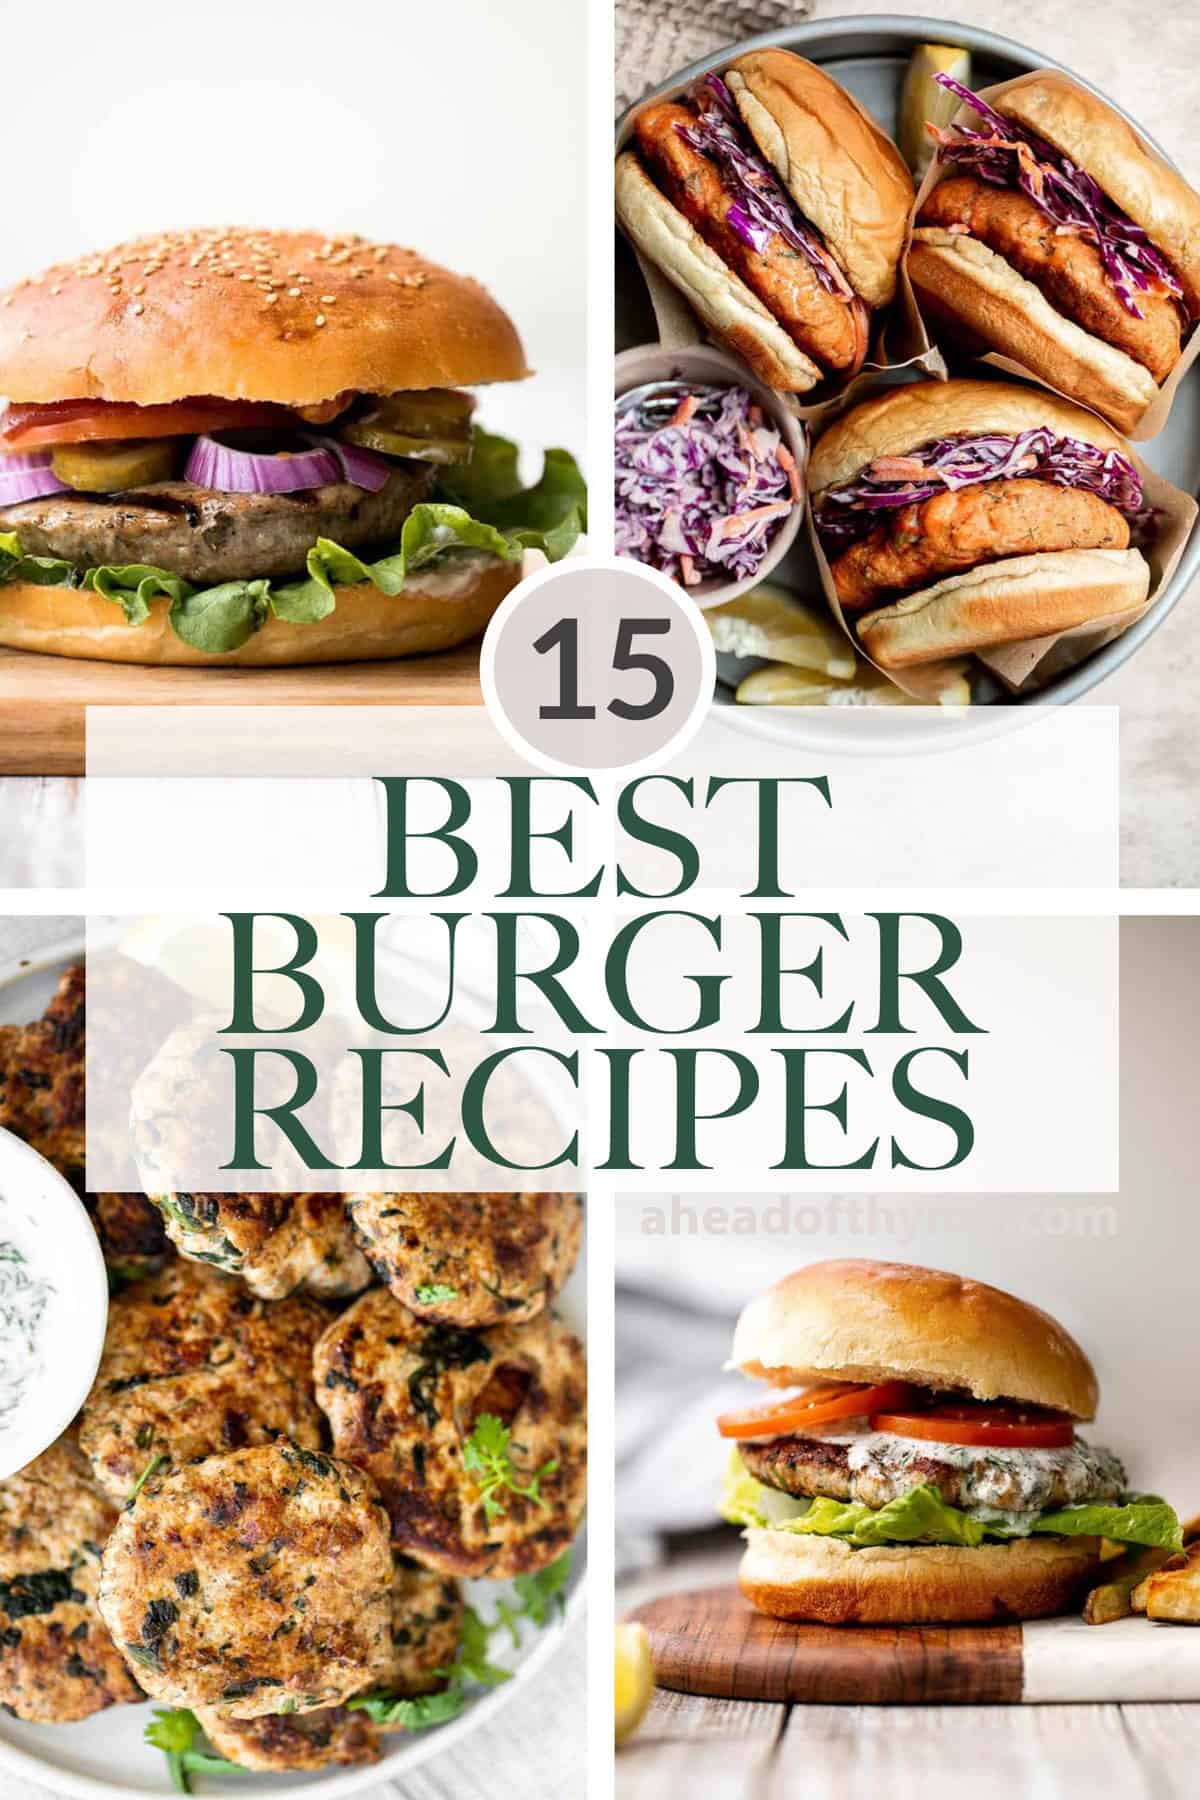
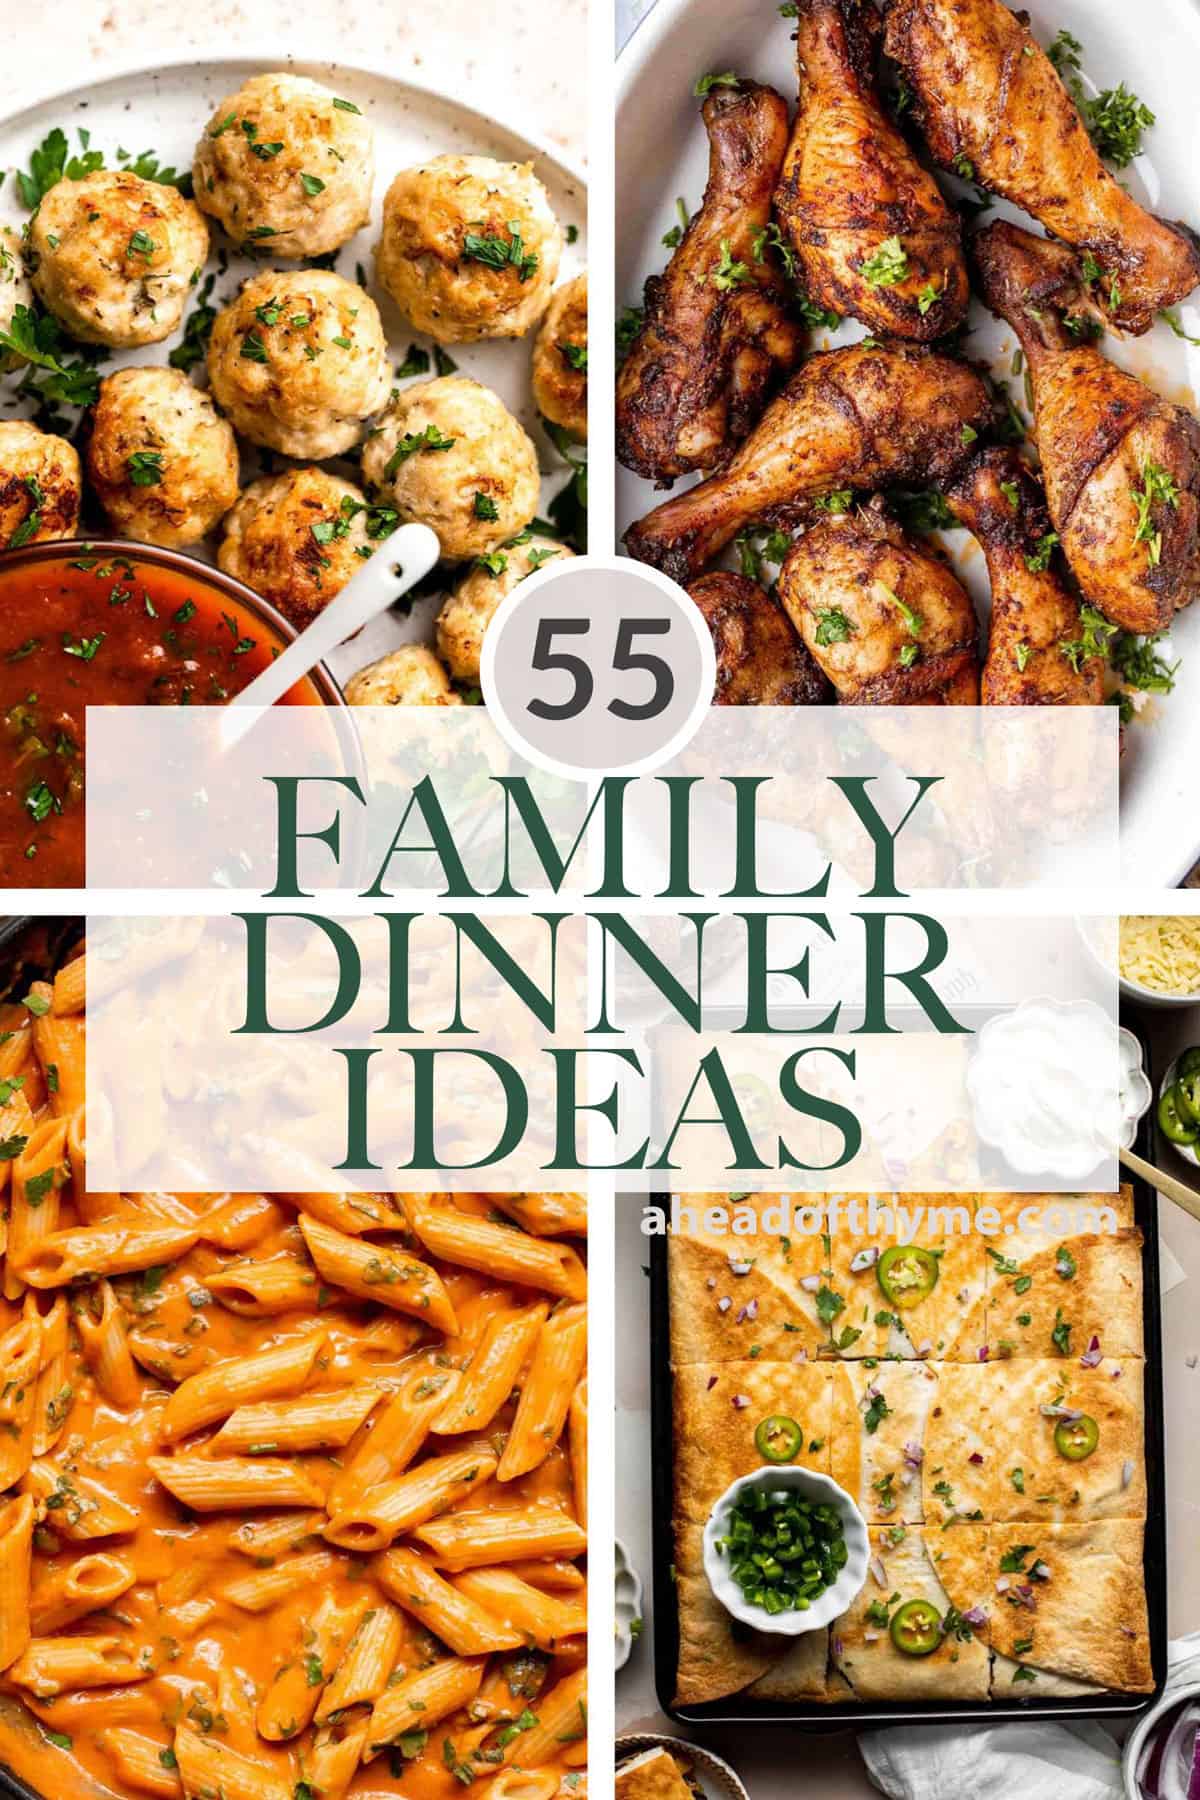

Tried any of these ground beef recipes?
I'd love to hear what you think! Leave a comment and rating for the ground beef recipe that you made to share your feedback. Your reviews help others discover the recipe and help me keep creating more free recipes for you. Snap a photo and tag me on social media @aheadofthyme too.
This round up was originally posted in 2021 and was updated with new recipes.
Homemade Nutella (Chocolate Hazelnut Spread)

Move over store-bought jars, Homemade Nutella is here to change your life. This easy, creamy, chocolate hazelnut spread comes together in just 20 minutes with simple pantry staples. It's rich, silky, and so much better than anything you'll find in the grocery aisle.
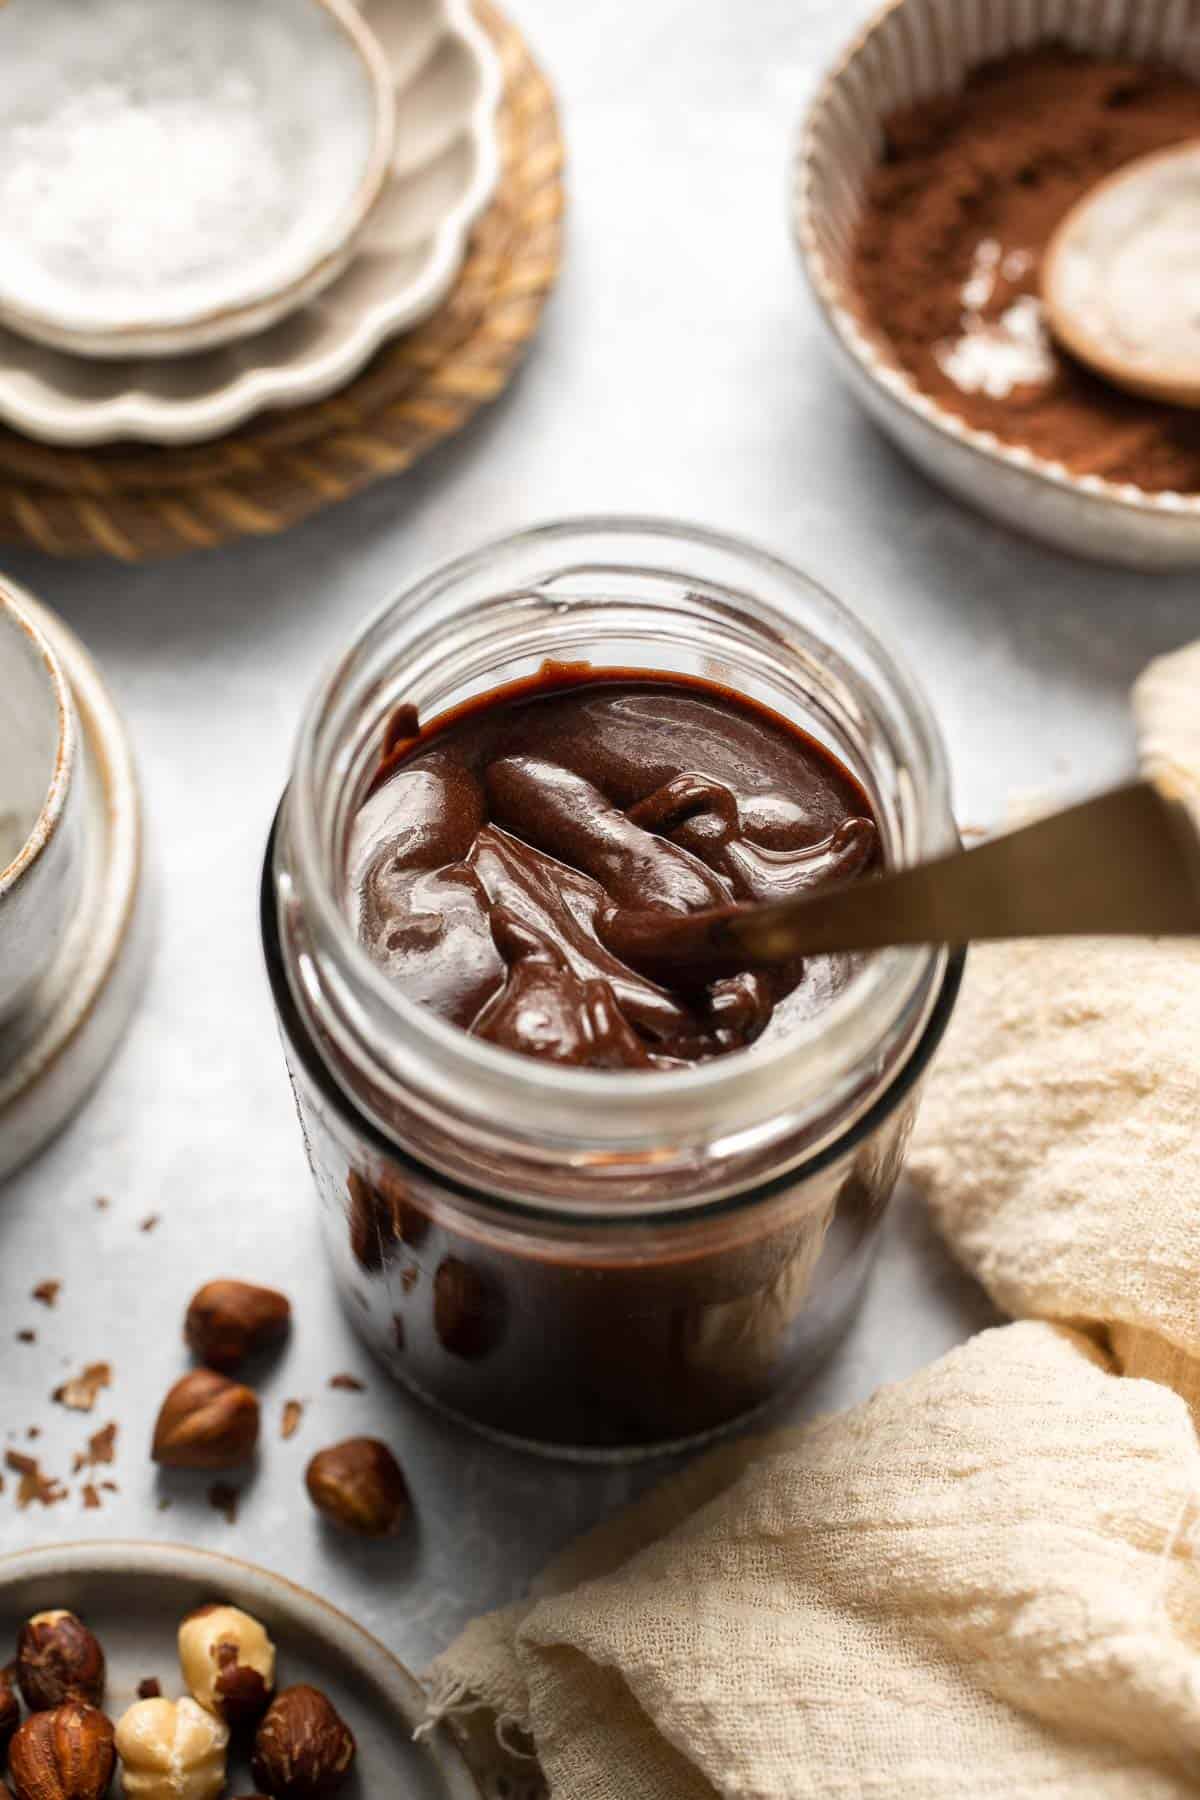
Nutella has been a breakfast and snack favorite for decades, but making it at home means you control exactly what goes in. No mystery oils or preservatives, just toasted hazelnuts, cocoa, vanilla, and a touch of sweetness. Plus, it's customizable so you can make it healthier with honey or richer with extra cocoa. Whatever your heart desires!
This recipe was inspired by my Homemade Almond Butter and can be used perfectly with my Nutella Crepes or Nutella Cookies for a breakfast treat that feels straight out of a Parisian café.
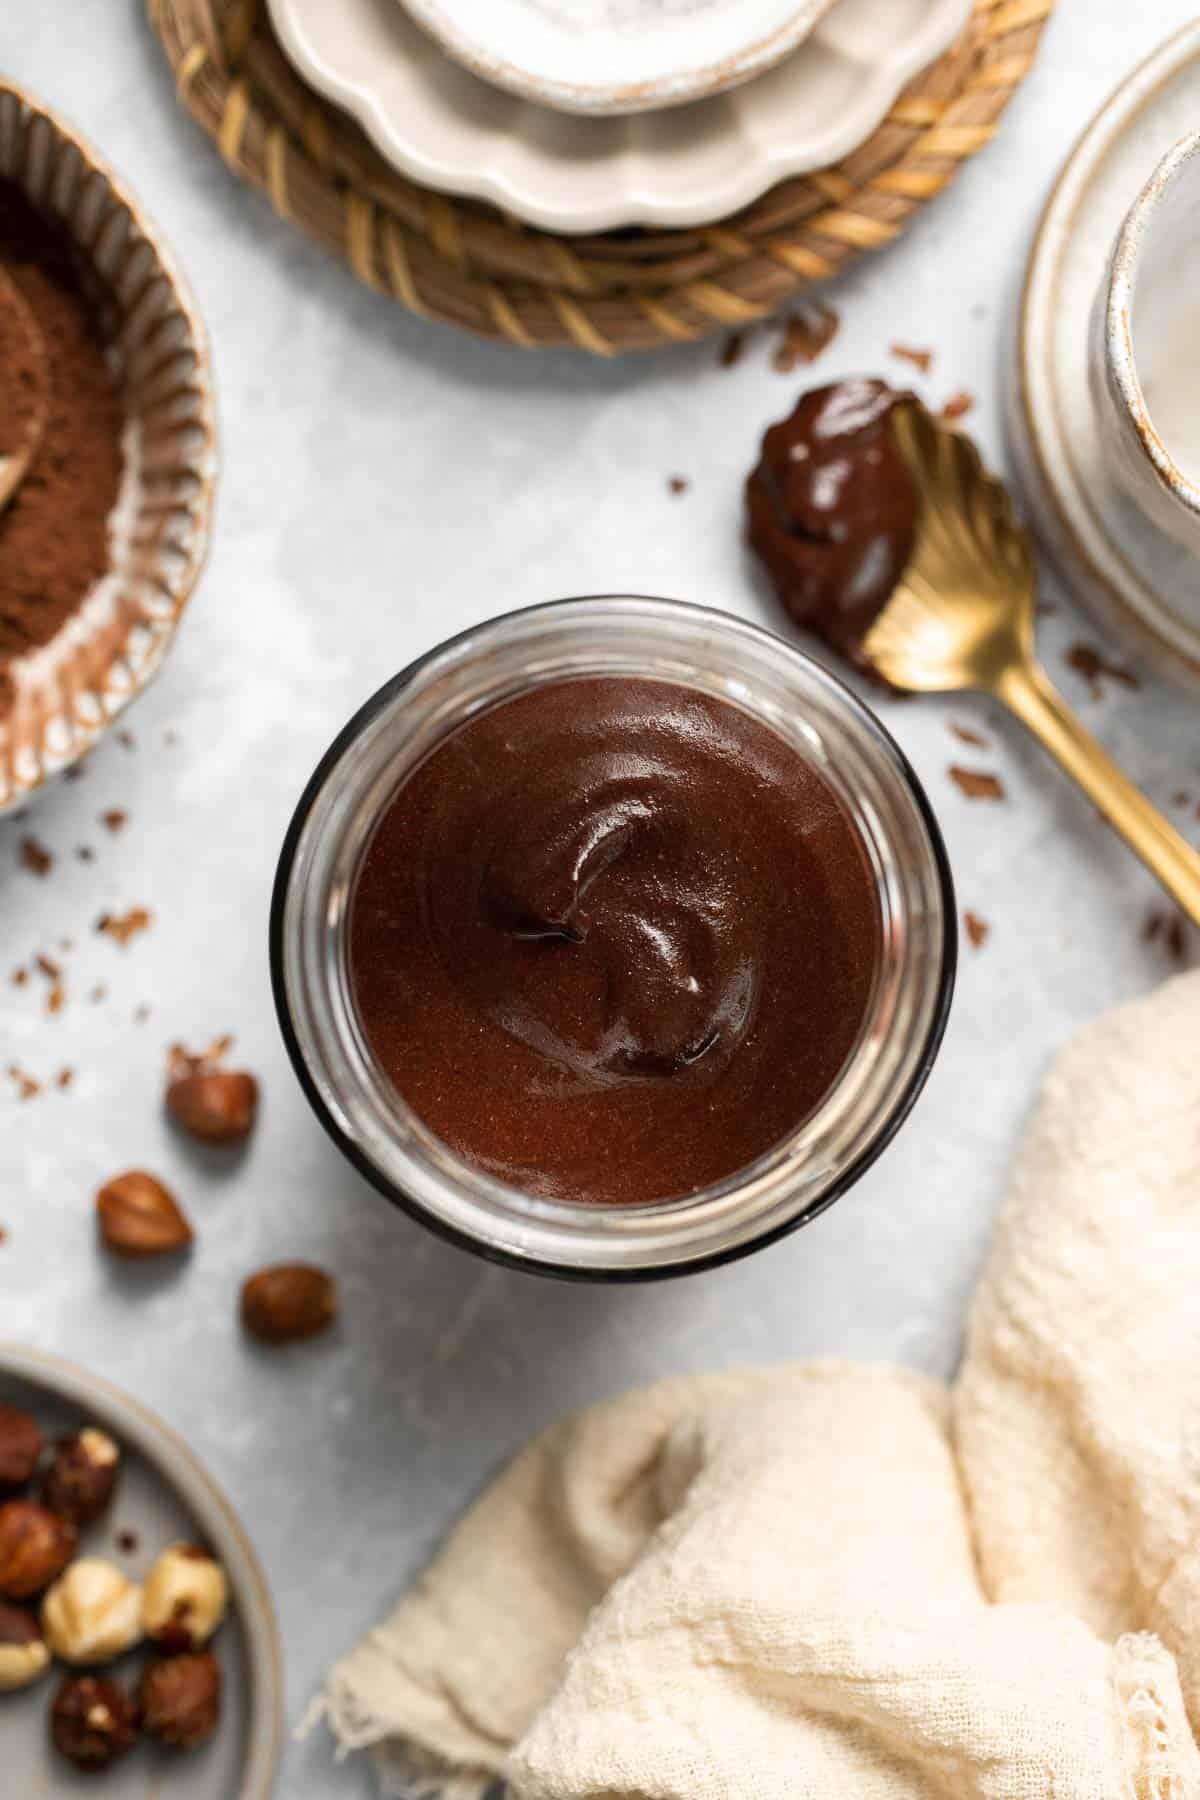
Why You'll Love This Recipe
- Better than store-bought. Homemade Nutella is fresh, pure, and customizable, unlike the jars from the store that are packed with palm oil and preservatives. You'll taste the difference right away. The deep roasted hazelnut flavor shines through and blends perfectly with chocolate for a spread that feels gourmet and indulgent. Once you try it, there's no going back.
- Quick and easy. All you need is 20 minutes, a food processor, and a few pantry staples. Roast your hazelnuts, blitz everything together, and boom: silky chocolate hazelnut spread. This homemade nutella recipe is perfect for busy mornings, last-minute desserts, or meal prepping snacks for the week. No complicated steps, no fuss, just deliciously creamy Nutella every time.
- A healthier option. Making Nutella at home means you decide how much sugar and what type of sweetener to use. Go refined sugar-free with honey or maple syrup, or stick with powdered sugar for a classic taste. Either way, you'll end up with a cleaner, healthier spread without sacrificing flavor.
- Versatile and delicious. Use homemade Nutella as a spread for toast, pancakes, and waffles, swirl it into oatmeal, or drizzle over fruit. You can even bake with it, stuff it into cookies, or just enjoy a spoonful straight from the jar. It's one of those recipes that never lasts long because there are endless ways to use it.
Ingredients and Substitutions
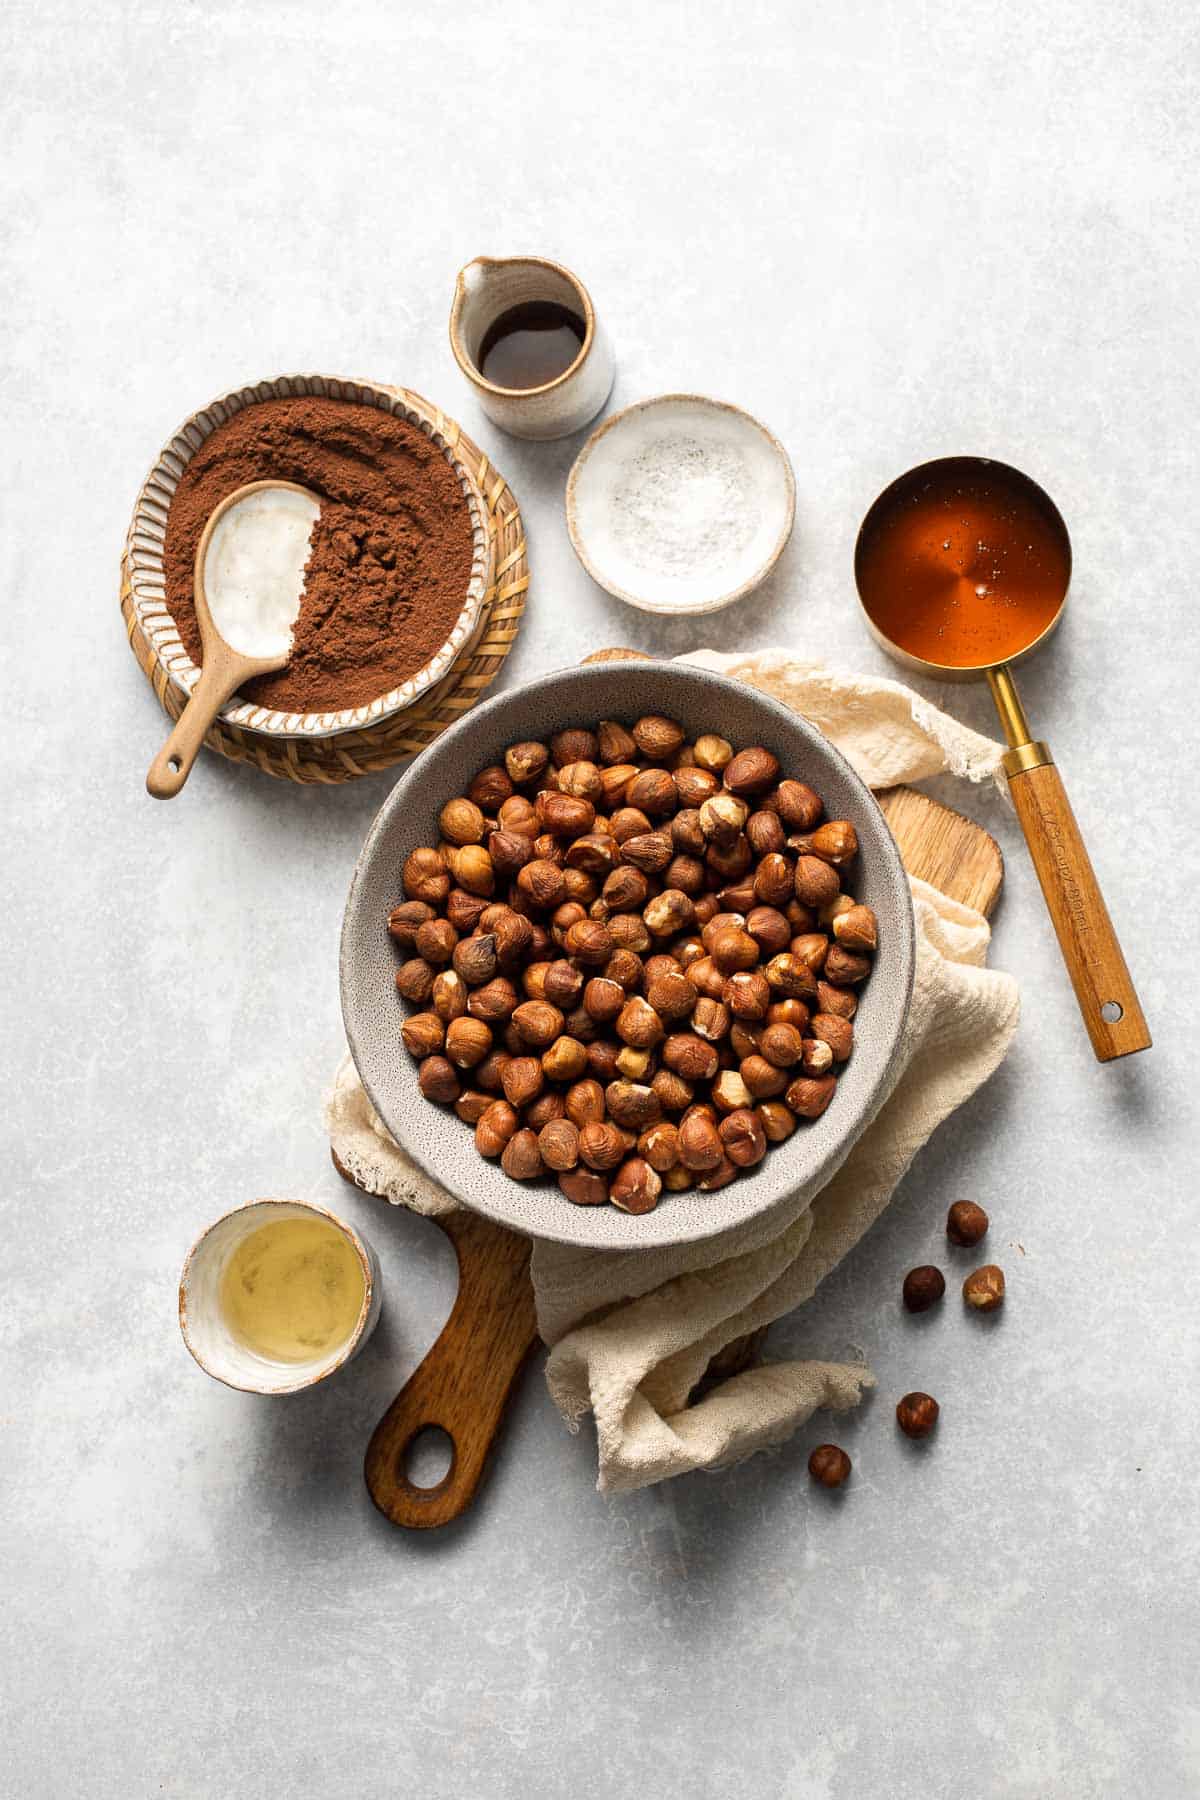
To make this easy homemade nutella, you will need the following ingredients (see recipe card below for quantities):
- raw hazelnuts - The base of this spread. Toasting the hazelnuts deepens their nutty flavor and helps loosen the skins. If you can't find raw hazelnuts, use pre-roasted (but skip the roasting step). Almonds can also be used for a chocolate almond spread.
- oil - Use hazelnut oil or avocado oil to add smoothness and help achieve that luscious, spreadable consistency. Hazelnut oil enhances the nutty flavor, while avocado oil is a mild, neutral option. You can also use coconut oil for a slightly different flavor and natural sweetness, or vegetable oils or canola oil if that's what you have.
- vanilla extract - Enhances sweetness and rounds out the flavors. If you want an extra layer of flavor, try almond extract or hazelnut extract instead.
- cocoa powder - Unsweetened cocoa powder balances the hazelnuts with a deep chocolatey flavor. Use Dutch-processed cocoa for a darker, smoother taste, or natural cocoa for a sharper bite. You can substitute with raw cacao powder for a deeper, slightly more bitter chocolate flavor.
- sweetener - Powdered sugar or honey sweetens the spread. Powdered sugar blends easily for a smooth texture, while honey or maple syrup gives natural sweetness and a slightly different flavor. Feel free to swap in coconut sugar, maple syrup, or another favorite natural sweetener to adjust to your taste.
- salt - Just a pinch makes the chocolate flavor pop. Don't skip it as it balances the sweetness and keeps the spread from tasting flat.
Equipment
You'll also need measuring cups and spoons, a baking tray for roasting hazelnuts, a food processor or high-speed blender (like a vitamix), and a spatula for scraping down the sides.
Instructions
- Roast the hazelnuts. Spread the hazelnuts in a single layer on a parchment lined baking sheet. Bake in 350°F preheated oven until the skins are dark, about 10 minutes.
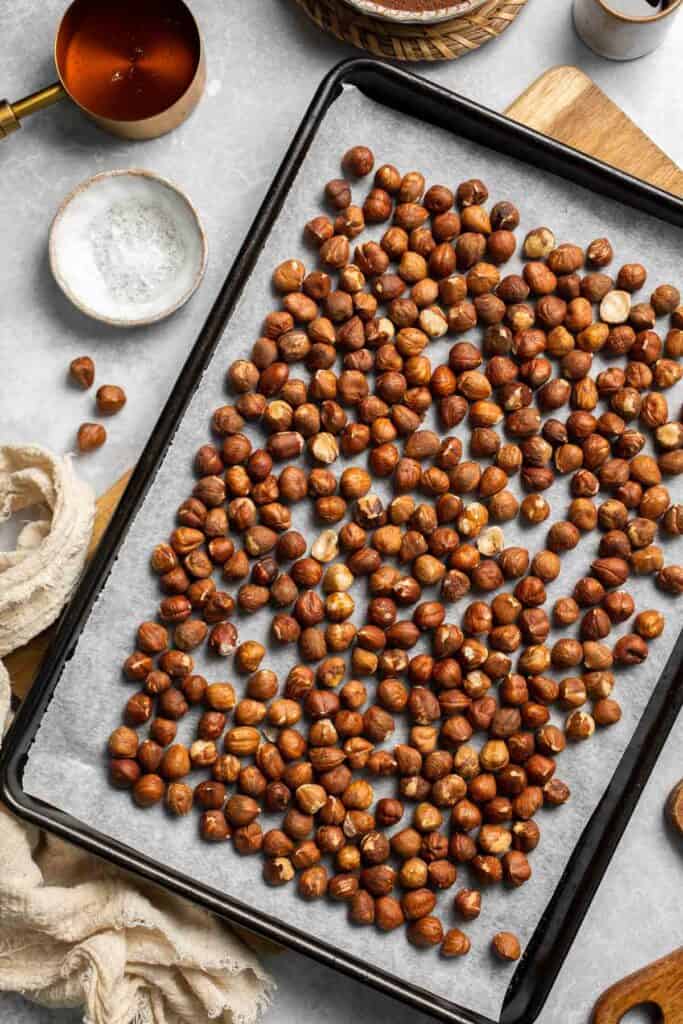

- Remove skins. Transfer the warm roasted hazelnuts to a clean kitchen towel and rub them together to loosen most of the skins. Don't worry if some bits remain. Set aside to cool completely.
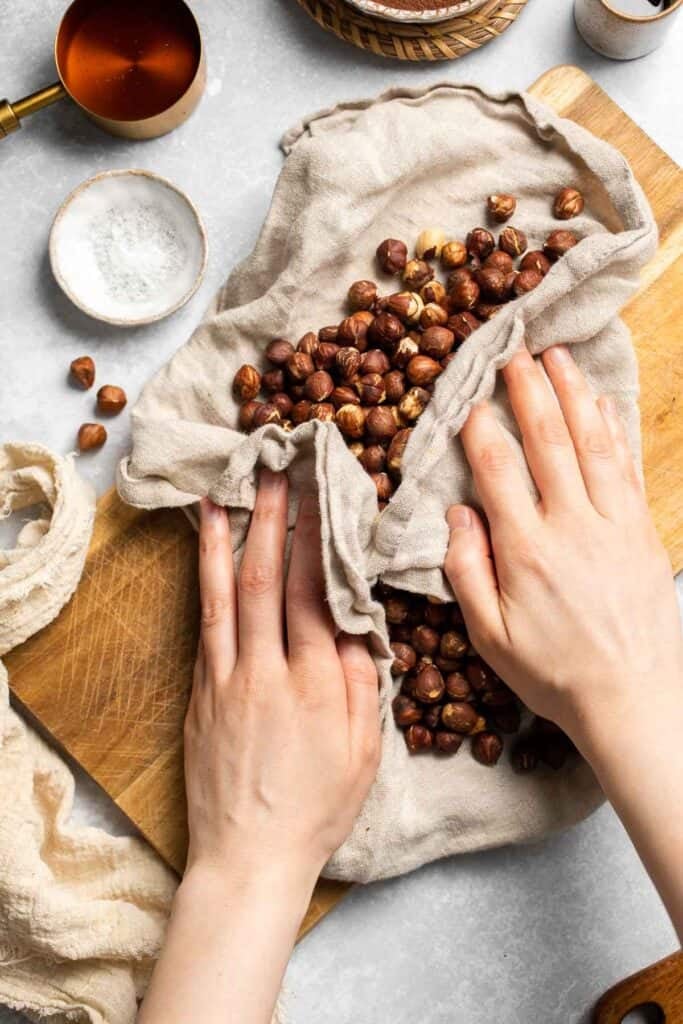


- Blend hazelnuts. Place the hazelnuts in a food processor or blender. Blend until they break down into a thick paste.
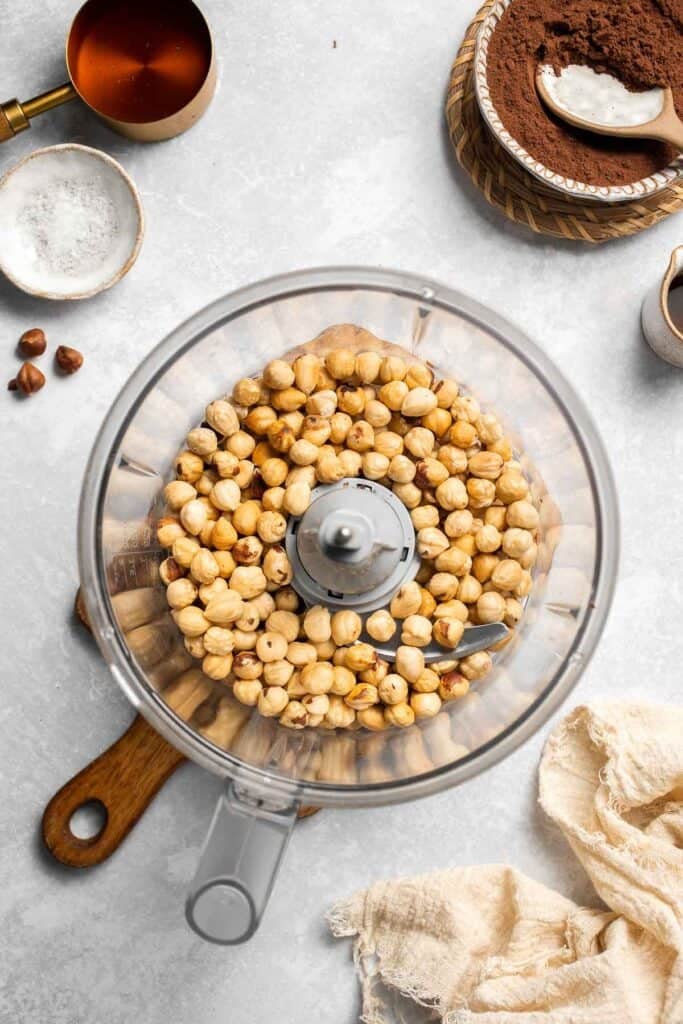
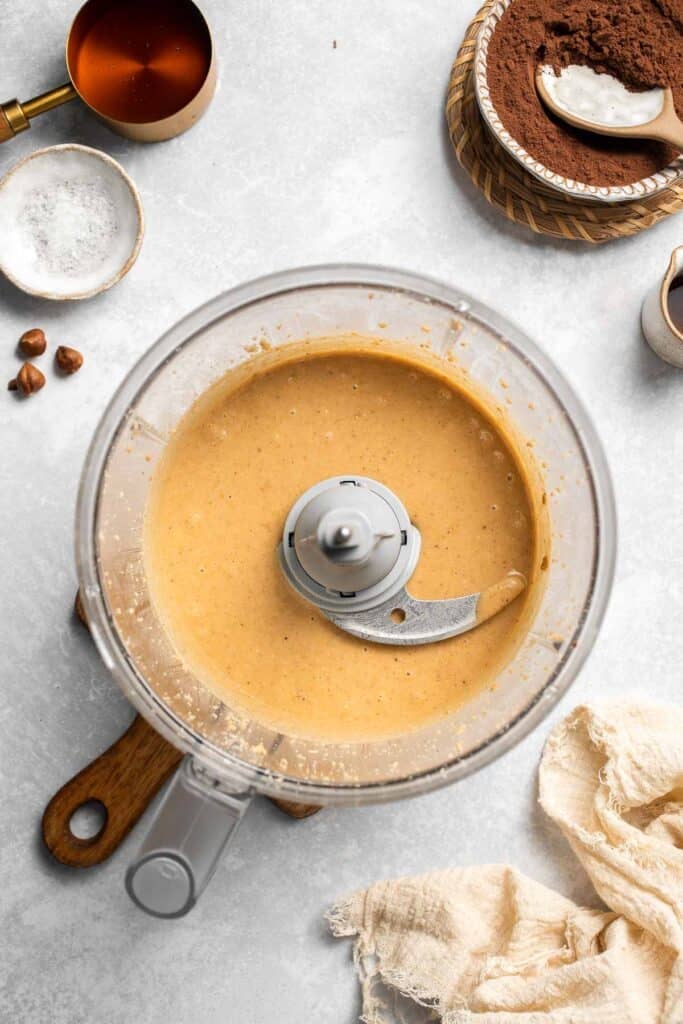
- Blend remaining ingredients. Add the hazelnut oil, vanilla extract, cocoa powder, powdered sugar (or honey), and salt. Continue blending until silky smooth, 1-2 minutes. Scrape down the sides as needed.
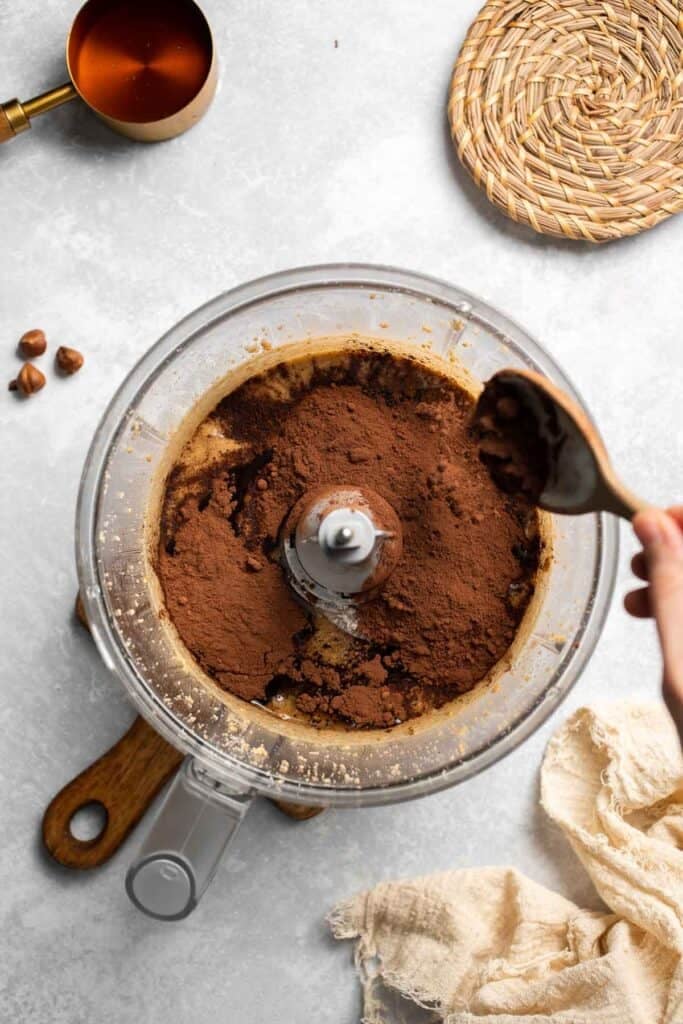
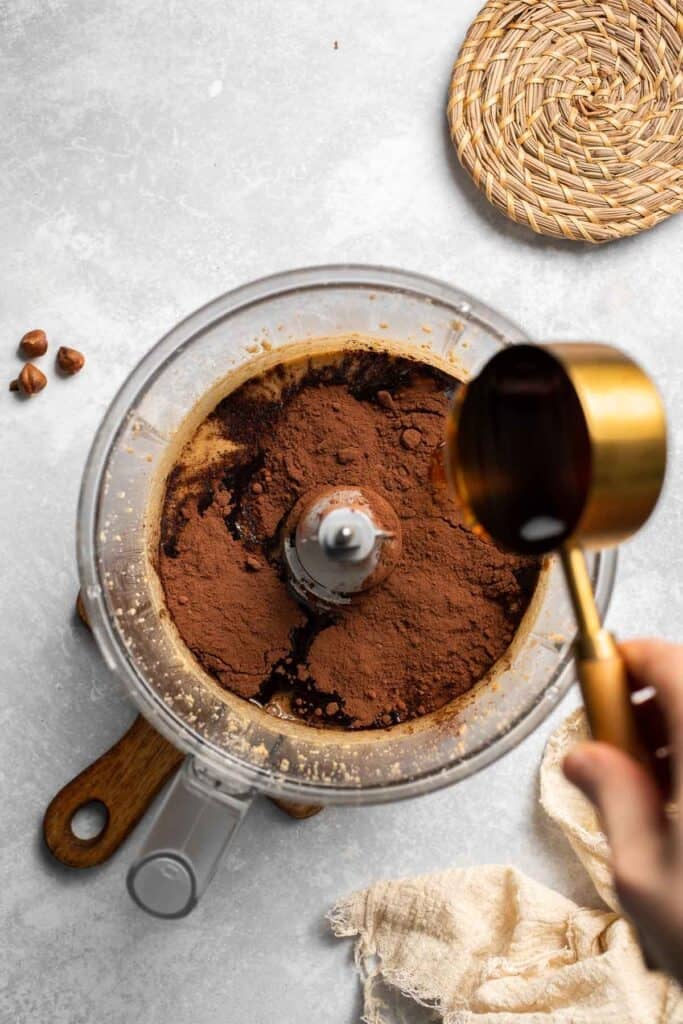
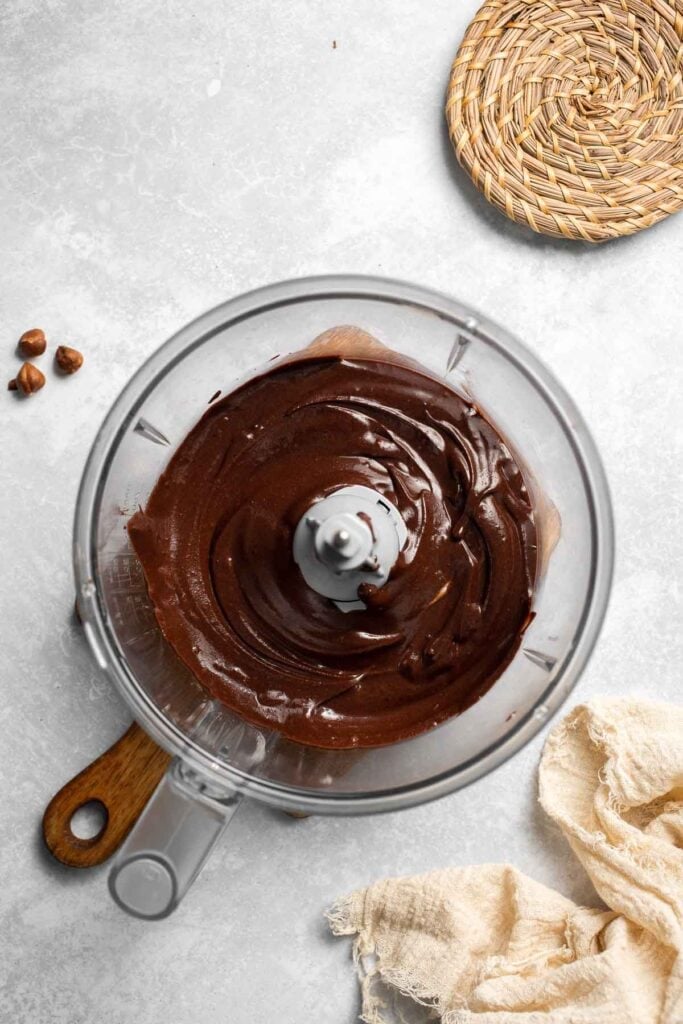
- Store. Transfer the homemade nutella to an airtight jar or container. Store at room temperature for up to 2-3 weeks, or in the refrigerator for a slightly firmer spread.
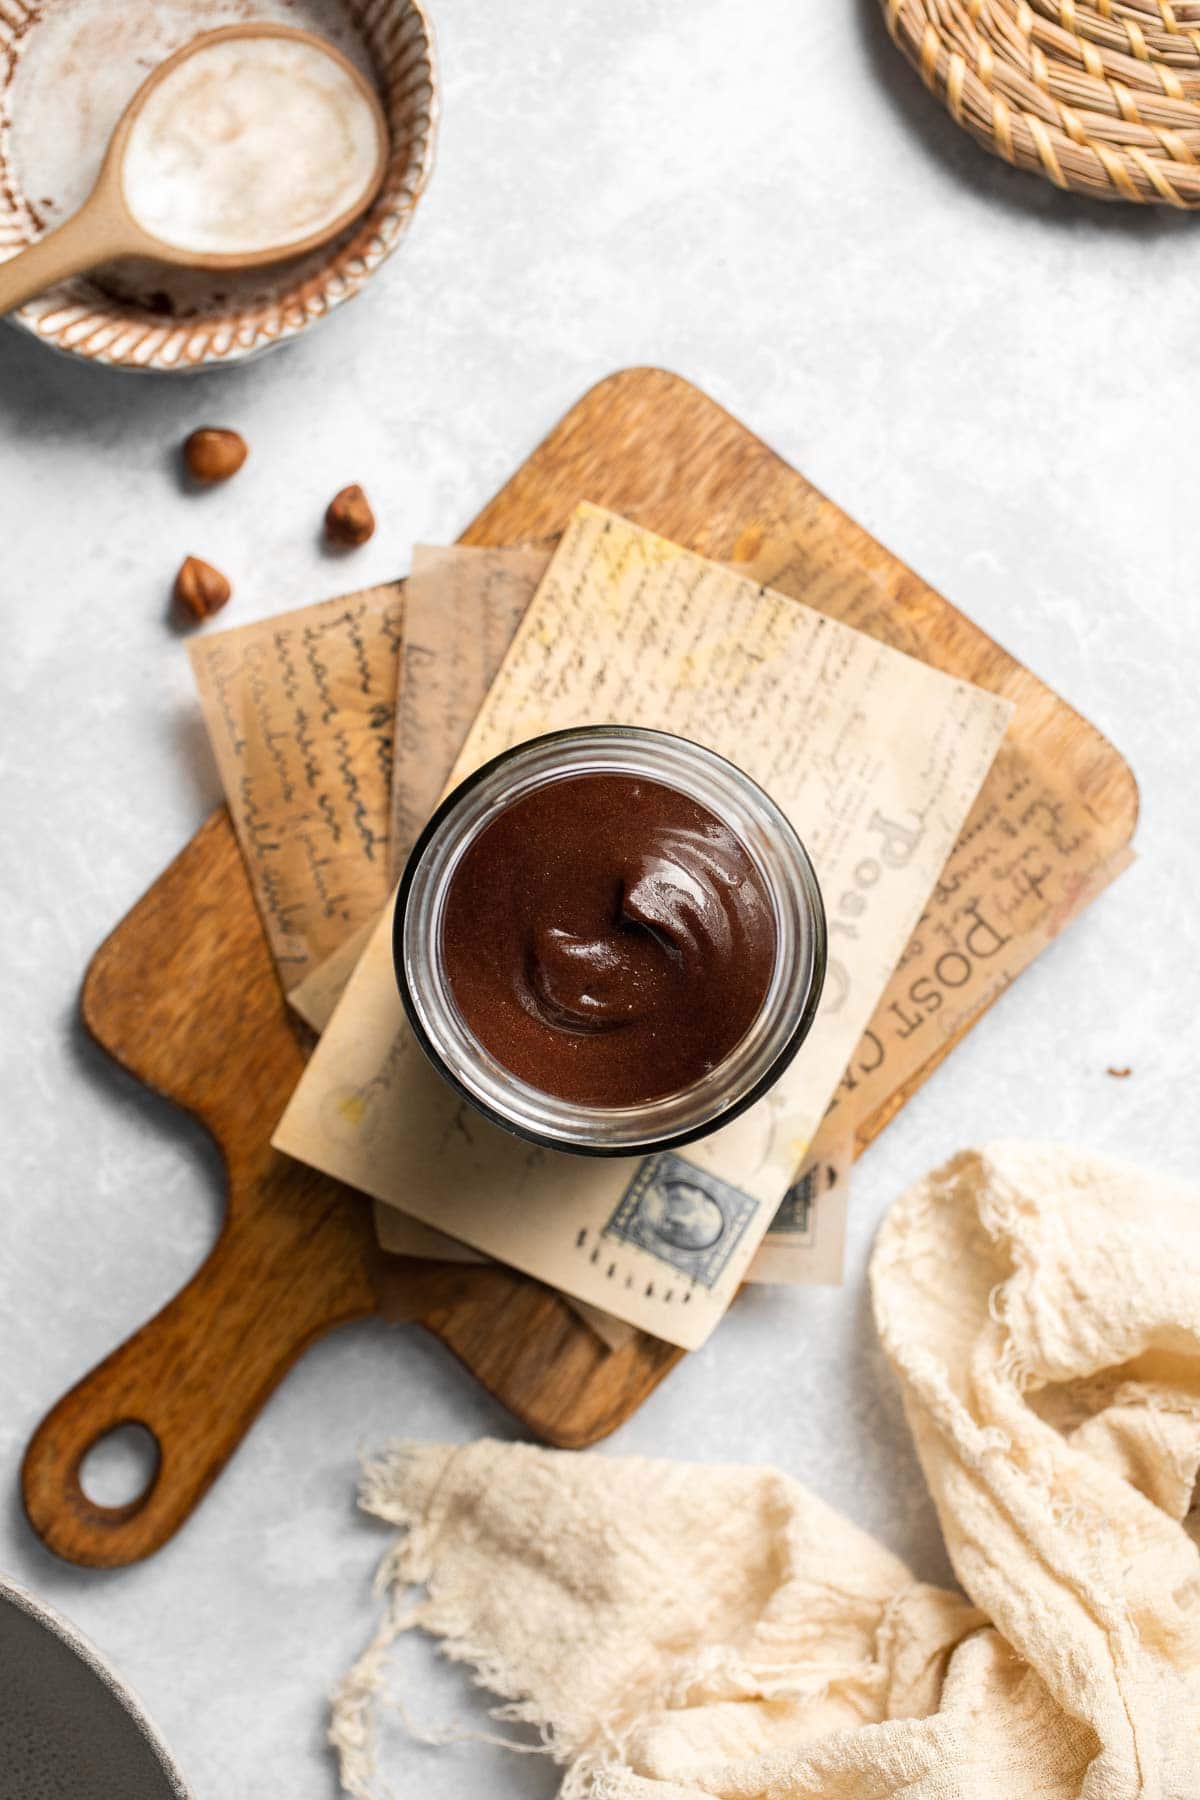
Expert Tip: Warm Hazelnuts Blend Better
Process the hazelnuts while they're still warm from roasting. Warm nuts release their natural oils more easily, creating a smoother, creamier butter that blends beautifully with the chocolate.
More Tips and Tricks
- Toast the hazelnuts well. Don't skip the roasting step. It deepens the nutty flavor and makes the skins easier to remove, giving your Nutella a cleaner taste and smoother texture.
- Use a powerful food processor. A high-speed blender or food processor makes all the difference. The stronger the machine, the creamier and faster your Nutella will come together.
- Adjust sweetness to taste. Some like Nutella sweeter, others more on the dark chocolate side. Start with less sweetener and add gradually until it's just right for you.
- Add oil slowly. Start with the suggested amount of oil and add more only if needed. Too much can make the spread runny, while too little can make it too stiff.
- Store it right. Homemade Nutella doesn't last forever like store-bought, so keep it in an airtight jar. Refrigeration extends shelf life, but know it may firm up slightly.
Recipe Variations
- Extra chocolatey. If you're a chocoholic, double up on the cocoa powder or add in a few ounces of melted chocolate before blending. Dark chocolate creates a richer, fudgier spread with a flavor closer to chocolate truffles than the standard Nutella, while milk chocolate creates a sweeter, creamier variation closer to the store-bought version.
- Naturally sweetened. Skip powdered sugar entirely and use dates, maple syrup, or coconut sugar instead. Dates add thickness, while maple syrup adds a deeper, caramel-like sweetness and a slightly softer texture.
- Add maple syrup. Swap the powdered sugar with maple syrup for a deeper, caramel-like sweetness and a slightly softer texture.
- Vegan Nutella. Stick with powdered sugar or maple syrup for sweetness and avoid any dairy-based chocolate add-ins. Opt for vegan chocolate or raw cacao powder instead of regular cocoa powder if you want that extra rich chocolate flavor. This version is naturally vegan-friendly and dairy-free.
- Spiced Nutella. Add warmth and depth with spices like cinnamon, nutmeg, or cardamom. Even a pinch of chili powder or cayenne can add an exciting kick. This variation pairs perfectly with toast in the morning or drizzled over fruit.
- Chunky hazelnut spread. Blend the hazelnuts into a butter, but reserve a small handful to chop and fold back in at the end. This gives you little crunchy bits of hazelnut for texture - like a nutty twist on "crunchy" peanut butter.
- Change the nuts. Swap half of the hazelnuts for roasted almonds for a chocolate-almond-hazelnut blend that's just as creamy and delicious. Try it with pecans or cashews too. Pecans create a buttery richness and cashews create an even creamier spread.
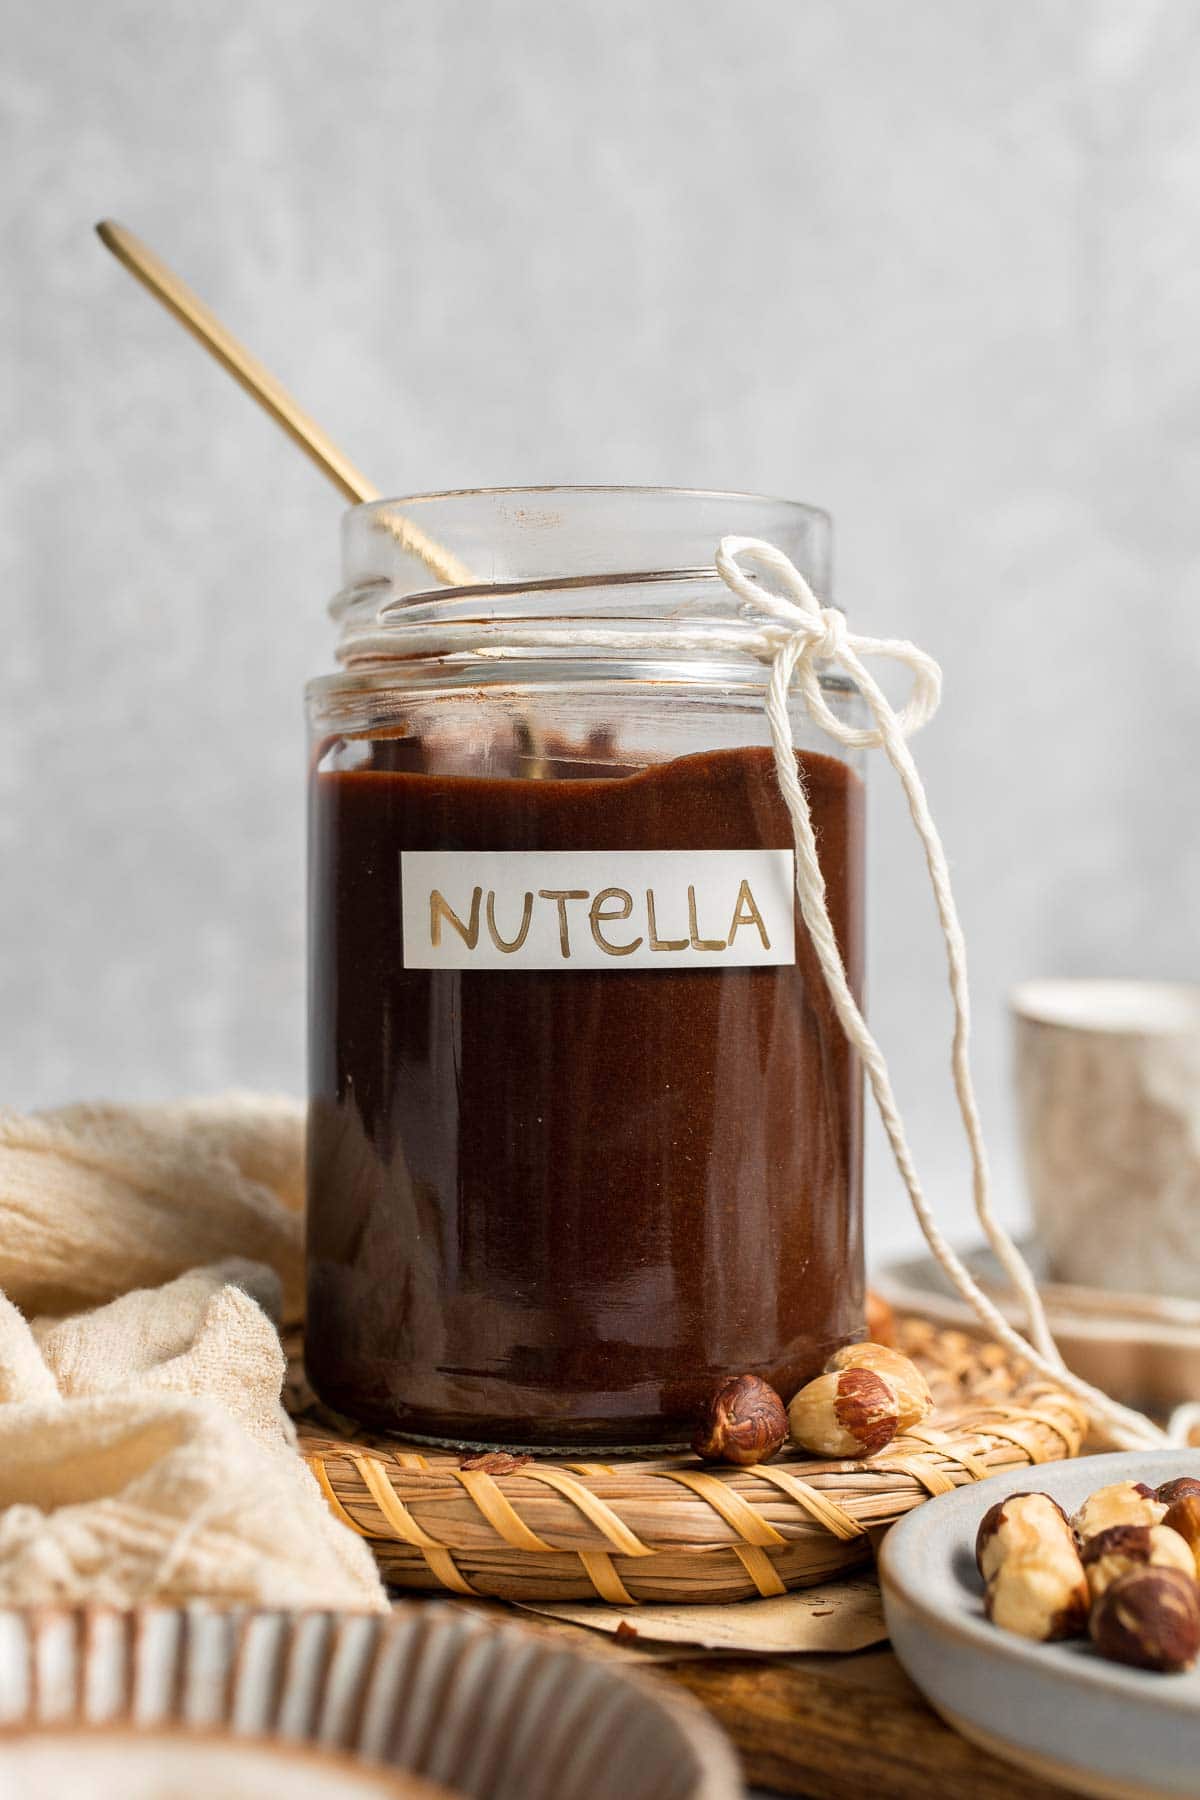
Storage
How to Store
Store homemade Nutella in a clean, airtight jar at room temperature for up to 2 weeks. For longer freshness, store in the fridge for up to 1 month, though the spread may firm up slightly.
How to Reheat
If refrigerated, let the jar sit at room temperature for 15-20 minutes to soften. You can also microwave a small portion for 5-10 seconds to make it spreadable again.
How to Freeze
You can freeze homemade Nutella in a freezer-safe jar or container for up to 3 months. Thaw overnight in the refrigerator and stir well before using.
How to Serve
Homemade Nutella is versatile and irresistible. Spread it on breakfast favorites, swirl it into baked goods, or just enjoy it straight from the spoon. Some options:
- Use as filling for crêpes, cakes, or cookies
- Slather on toast, pancakes, or waffles
- Drizzle over fruit like bananas, apples, or strawberries (or dip them in!)
- Swirl into oatmeal or yogurt bowls or even ice cream
These are my favorite dishes to serve Nutella with:
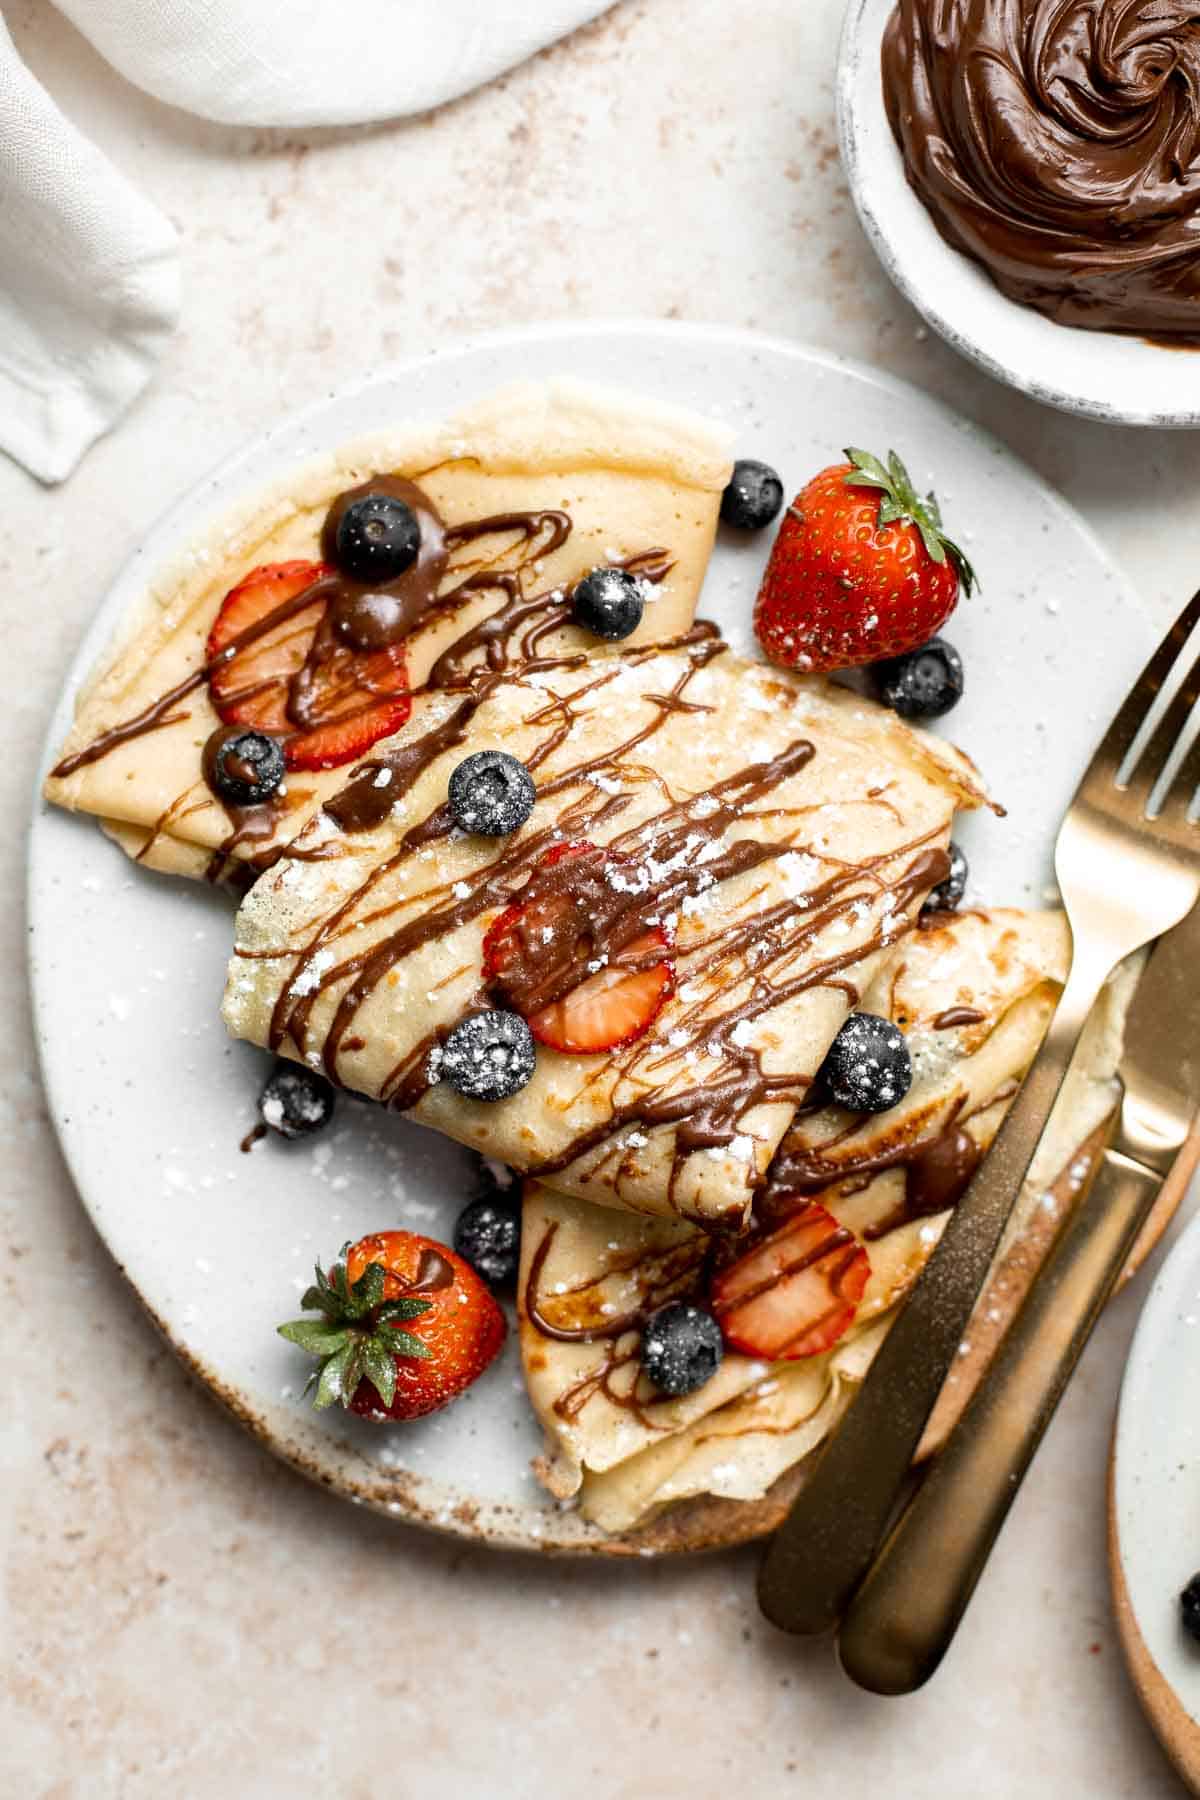
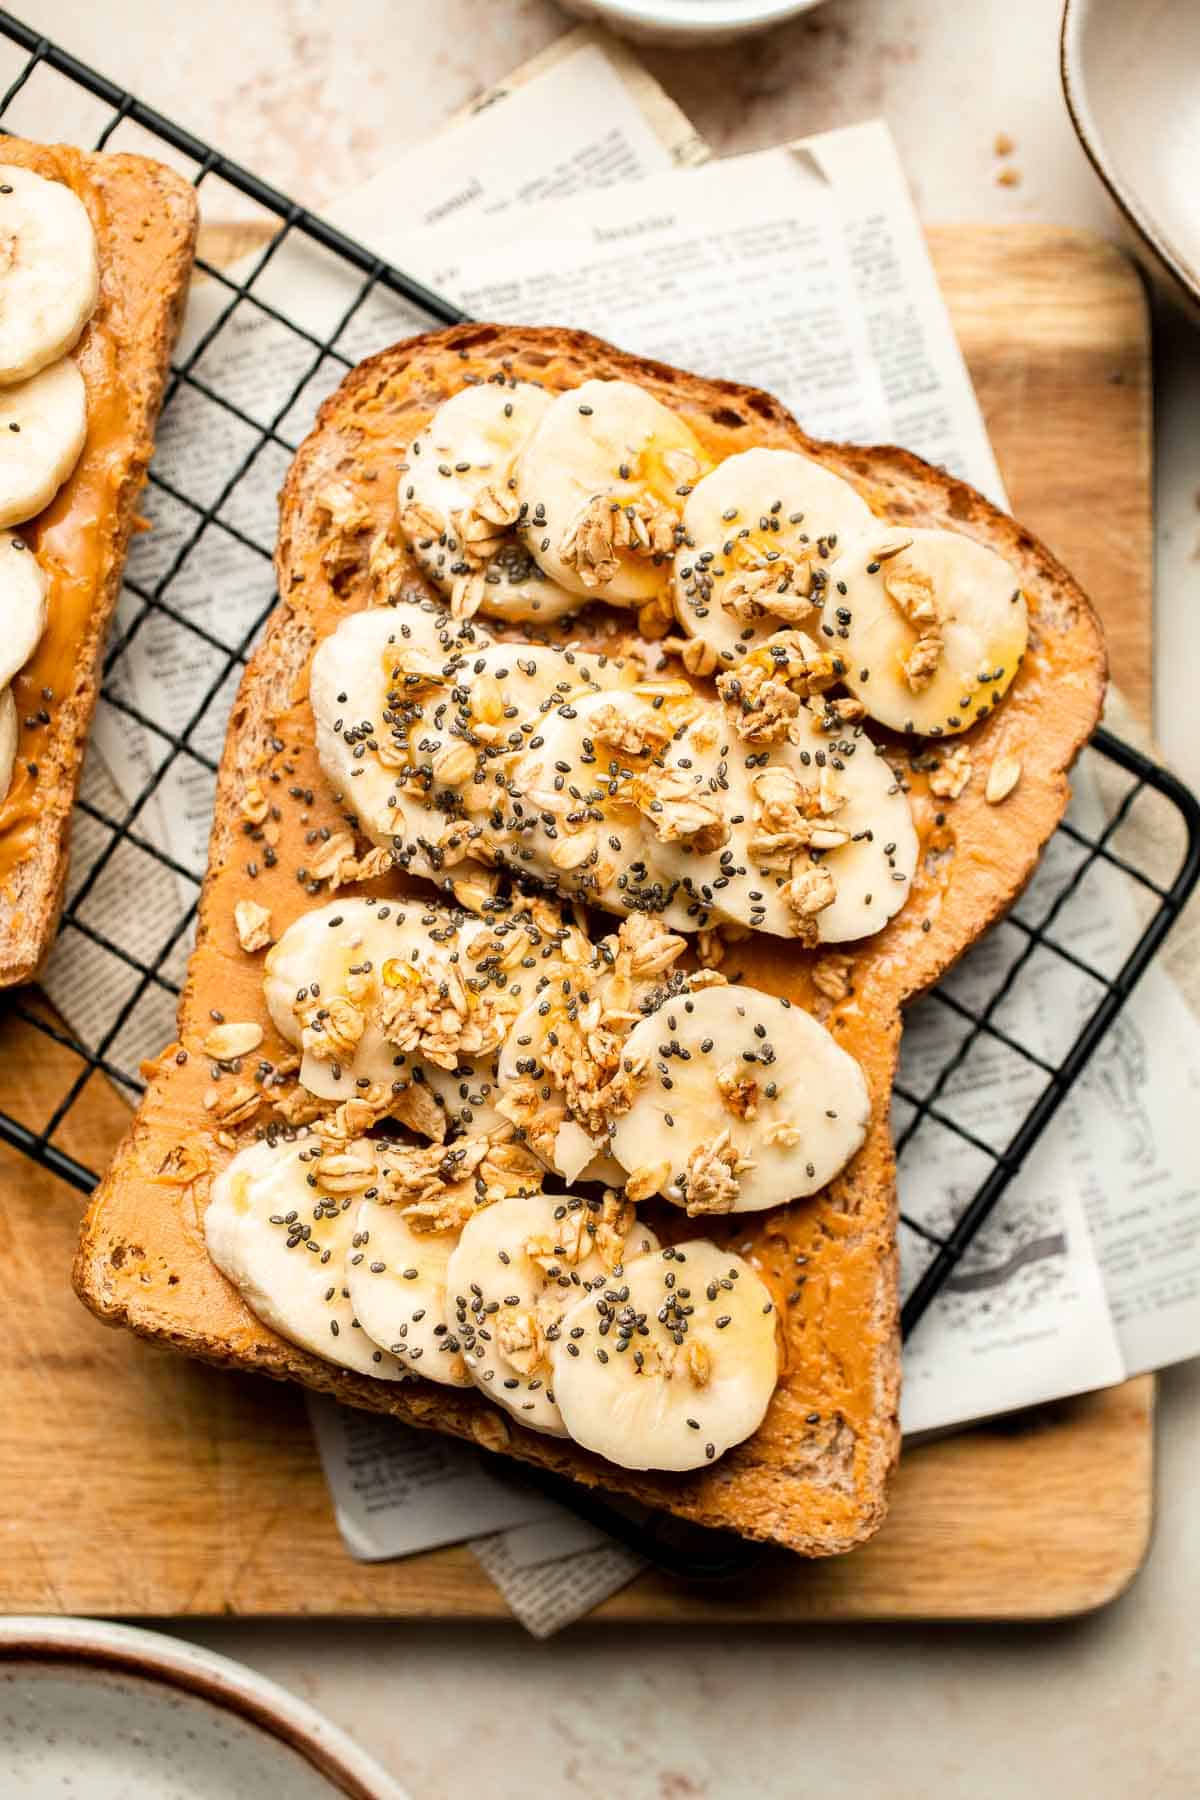

Breakfast Recipes
Nutella makes every breakfast better! From warm toast and fluffy pancakes to crepes, waffles, and overnight oats, there are endless ways to enjoy its rich, chocolate-hazelnut goodness. Check out our collection of breakfast ideas to find the perfect ways to pair Nutella with your morning favorites.
FAQ
Making your own Nutella at home is easier than you might think. Start with raw hazelnuts, roast them until fragrant, and rub off most of the skins. Blend the nuts in a food processor until they turn into a paste, then add cocoa powder, powdered sugar or honey, vanilla extract, hazelnut oil, and a pinch of salt. Keep blending until the mixture is silky smooth and spreadable. The key is patience - let the processor run long enough to break down the nuts into a creamy butter before adding other ingredients. In just 20 minutes, you'll have a healthier, homemade chocolate hazelnut spread.
Classic Nutella that you buy in stores is made from seven simple ingredients: sugar, palm oil, hazelnuts, skim milk powder, cocoa solids, soy lecithin (an emulsifier), and vanillin (an artificial flavoring). Hazelnuts are a key component, but sugar and oil make up a large portion of the recipe, which is why homemade versions often taste fresher and nuttier. When you make your own at home, you have full control over the sweetness, type of oil, and quality of cocoa powder used. That way, you can replicate the delicious flavor of Nutella while cutting back on additives or excess sugar.
Yes, Nutella really does contain hazelnuts! In fact, it's the main nut ingredient in the recipe. That said, store-bought Nutella isn't as hazelnut-heavy as many people assume. The nuts make up about 13% of the jar, while sugar is the largest ingredient by weight. Making your own Nutella at home lets you flip that ratio, so the hazelnuts are the star and the flavor is more authentic, nutty, and wholesome.
The so-called "secret ingredient" in Nutella is really the combination of sugar and palm oil. While hazelnuts and cocoa provide the signature flavor, sugar and oil are what give Nutella its ultra-smooth, spreadable texture. Palm oil, in particular, helps the spread stay soft at room temperature. In homemade Nutella, you can use healthier oils like hazelnut oil or avocado oil instead, and adjust the sweetness to your preference. This way, the secret isn't so secret. It's just about balancing richness, sweetness, and smoothness to make a spread that tastes indulgent while being more wholesome than the store-bought jar.
In terms of nutrition, Nutella and peanut butter are quite different. Peanut butter is generally higher in protein and healthy fats, with less sugar, making it more nutrient-dense and filling. Nutella, on the other hand, is higher in sugar and lower in protein, which means it's more of a treat than a protein-rich spread. That doesn't mean Nutella can't fit into a balanced diet - it's just best enjoyed in moderation. If you want a healthier option, making your own Nutella at home lets you reduce the sugar, choose a high-quality cocoa powder, and highlight the hazelnut flavor.
The secret to getting creamy Nutella at home is in the blending process. First, roast your hazelnuts to bring out the oils, then blend them long enough to turn into a silky nut butter before adding any other ingredients. A food processor or high-speed blender works best. Adding hazelnut oil (or another mild oil) helps loosen the texture, while powdered sugar or honey sweetens without making it grainy. Finally, scraping down the sides and blending for an extra minute or two will make the spread smoother. Patience is key - the longer you blend, the creamier your homemade Nutella will be.
More Chocolatey Recipes
Looking for other recipes like this? Try these:
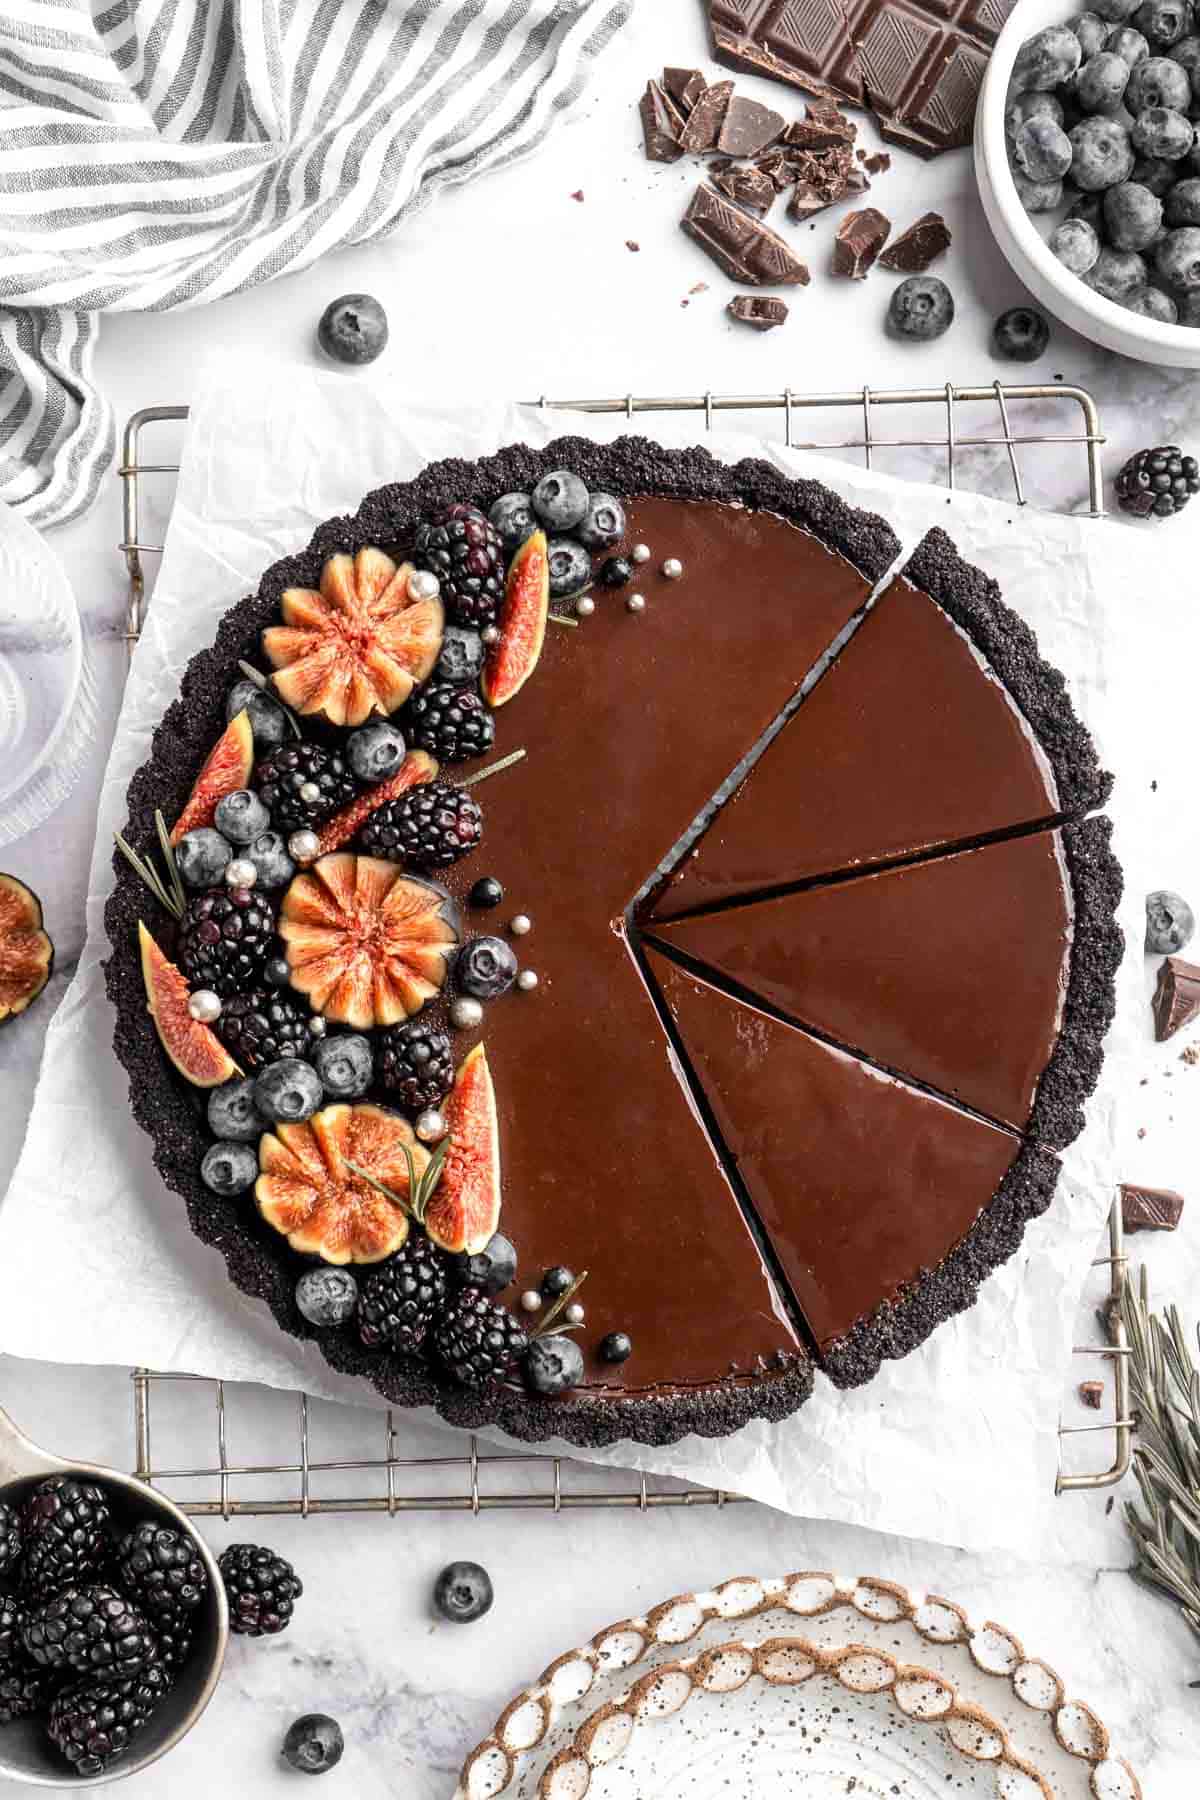


Tried this recipe?
I'd love to hear what you think! Leave a comment and rating below to share your feedback. Your reviews help others discover this recipe and help me keep creating more free recipes for you. Snap a photo and tag me on social media @aheadofthyme too.
Creamy Tomato Pasta

This Creamy Tomato Pasta is cozy, comforting, and ready in just 20 minutes using staple ingredients that are easy to find! Who says weeknight dinners have to be boring? This indulgent yet secretly simple meal is made from scratch with tender penne tossed in a luscious tomato-cream sauce that's silky smooth and downright irresistible. This quick and easy recipe is comfort food perfection.
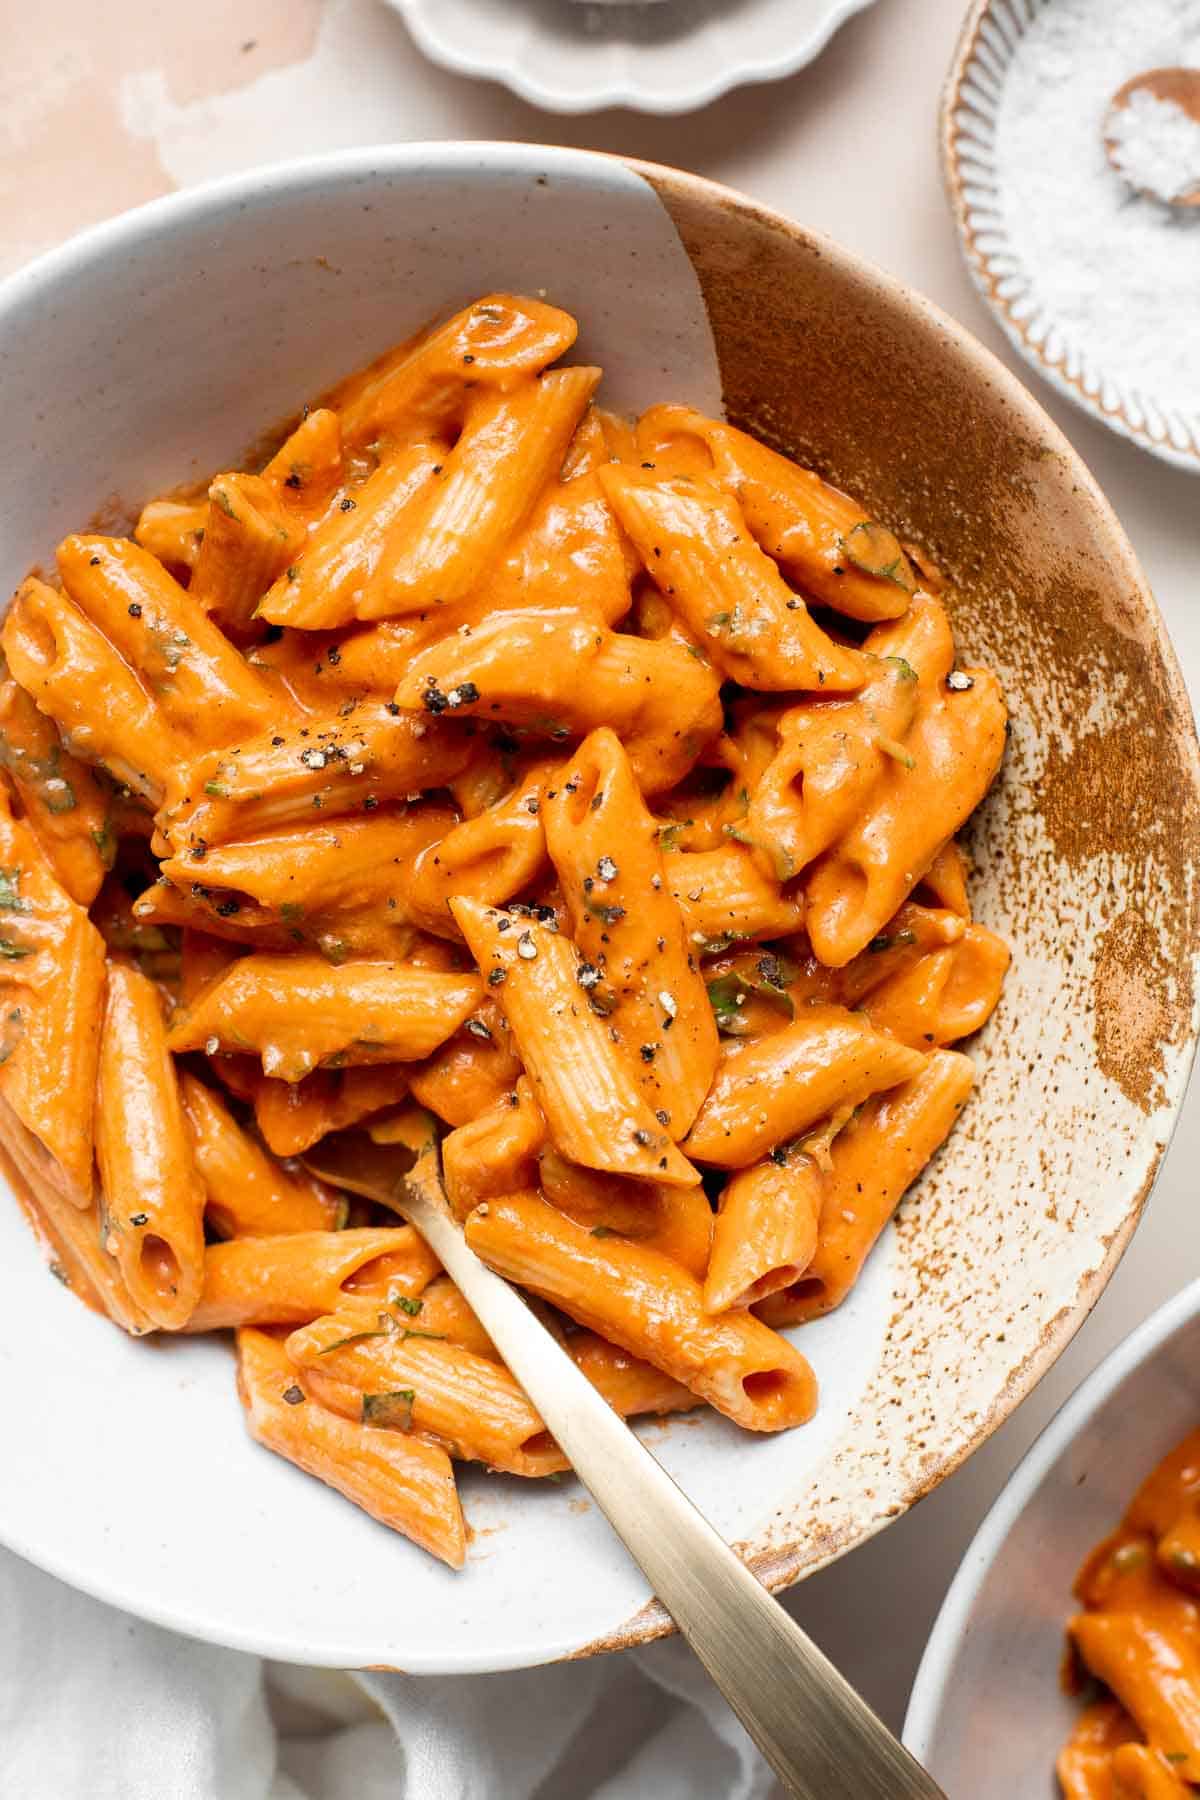
I love this recipe because it's fast, fuss-free, and family-friendly. With effortless preparation and endless flavor, this carb-loaded meal is perfect for busy weeknights when you need dinner on the table in a hurry. Creamy tomato pasta is filling, flavorful, and kid-friendly. Make a big batch because the whole family with be asking for seconds - seriously, don't expect leftovers.
This recipe was inspired by my love for quick pasta dinners that deliver big flavor without a long ingredient list. If you like this one, try my Cacio e Pepe or Spaghetti Carbonara next. Both are just as easy and delicious.
How is this so simple yet so good and why am I only learning it now 😭
- Harry ★★★★★

Why You'll Love This Creamy Tomato Pasta Recipe
- Quick and easy dinner. This creamy tomato pasta is ready to serve in just 20 minutes from start to finish. It's a simple and uncomplicated, beginner-friendly dish that packs a lot of flavor without requiring a lot of hassle. A true weeknight lifesaver!
- Simple pantry ingredients. One of the best parts of this recipe is that it relies on staples and real ingredients you probably already have: pasta, tomato sauce, cream, and parmesan. It's the perfect "what's for dinner?" solution when the fridge looks empty and a year-round comfort food you can whip up anytime.
- Incredibly versatile. This pasta with creamy tomato sauce is the definition of flexible. It can be served as main dish for dinner or a side dish to another entree (hello Chicken Parm!). Plus, you can customize it by adding in your favorite protein, veggies, and spices. However you serve it, it will be a favorite you'll never get tired of!
- Perfect comfort food. Cozy, rich, and creamy, this pasta checks all the boxes when it comes to comfort food. It's the kind of meal that can make even a plain Tuesday night feel a little more special, without requiring hours in the kitchen. Pair with garlic bread or a crisp side salad, and you've got a weeknight dinner worth repeating.
- Kid-friendly and crowd-pleasing. Creamy pasta dishes are always a hit with the whole family. Even picky eaters will go back for seconds! Plus, the recipe is easy to scale up, so you can double it to feed a crowd, bring it to a potluck, or make extra for leftovers (but don't be surprised if there aren't any).
Ingredients and Substitutions
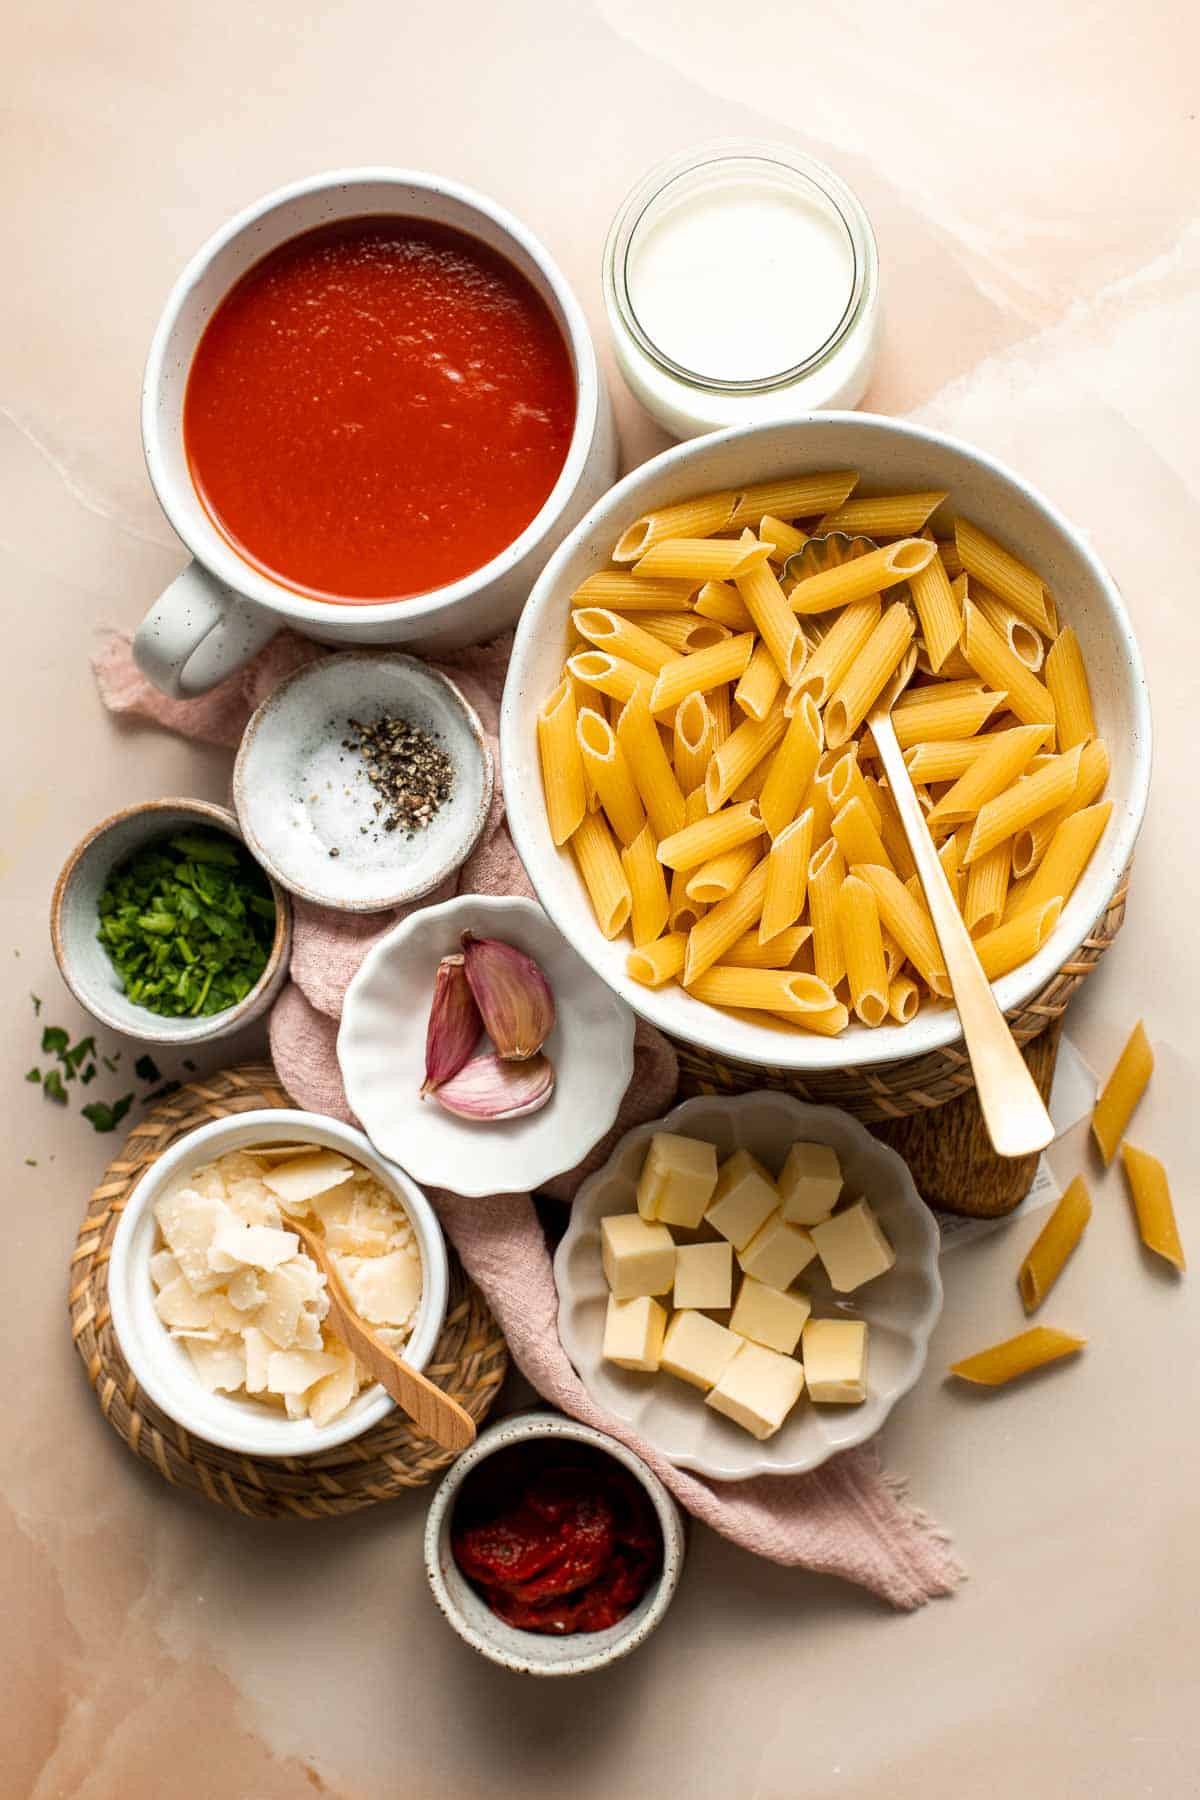
To make this delicious creamy tomato pasta, you will need the following ingredients (full measurements in recipe card below):
- pasta - Penne holds the sauce beautifully, but you can swap with your favorite pasta shape. Try rotini, rigatoni, fusilli, cavatappi, or spaghetti. Use gluten-free pasta if needed.
- butter - Adds richness and helps sauté the garlic. Olive oil works too if you prefer.
- garlic - Fresh garlic cloves gives the sauce its base flavor. Use a tablespoon of pre-minced garlic instead if in a rush, but fresh tastes best.
- tomato sauce - Provides the tangy tomato base. Crushed tomatoes can be used for a chunkier sauce. Use homemade or store-bought.
- tomato paste - Deepens the tomato flavor. You can skip it, but the sauce won't be as rich. You can use tomato puree in place of tomato paste at a 3:1 ratio.
- heavy cream - Creates the luscious creamy texture. Substitute with half-and-half, coconut cream or milk (for dairy-free), or cashew cream. Note these alternatives will change the taste of the pasta making it slightly sweeter.
- Parmesan cheese - Adds a rich, salty, nutty flavor. Pecorino Romano or Asiago cheese are both great swaps for Parmesan.
- salt and pepper - Essential seasonings to balance flavors.
- fresh parsley - Adds freshness at the end. Fresh basil or oregano also pair beautifully. You can also leave it out completely if you prefer.
Equipment
You will also need measuring cups and spoons, saucepan, large skillet, wooden spoon or spatula, and a colander.
Instructions
- Cook pasta. Bring a large pot of salted water to a boil over medium-high heat. Add pasta and cook until al dente, about 10 minutes or according to package directions. Drain the pasta well and set aside.
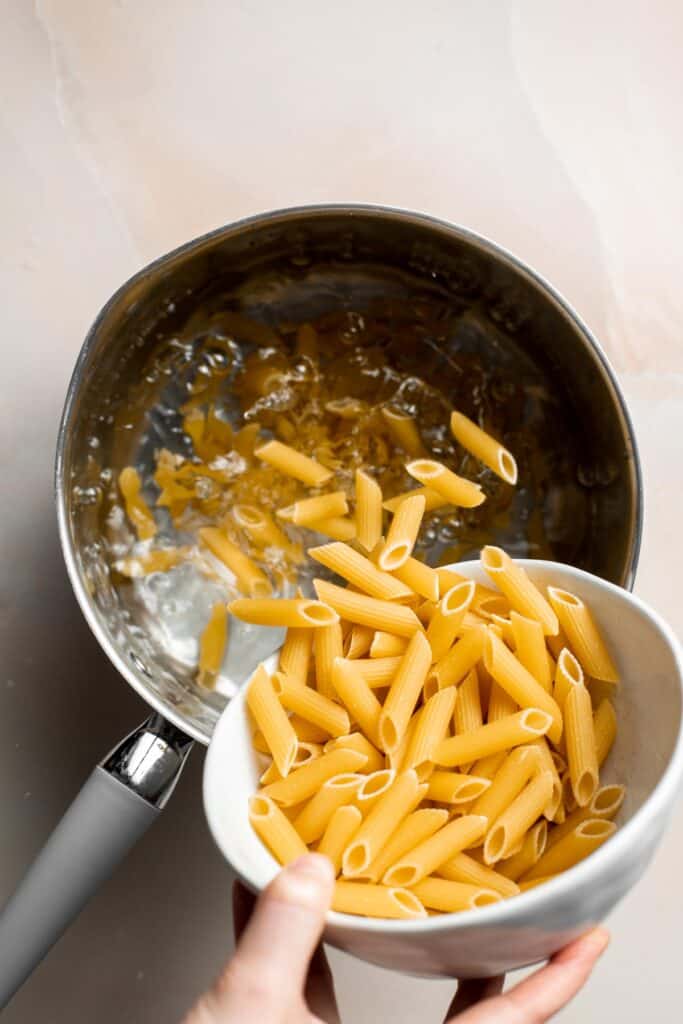
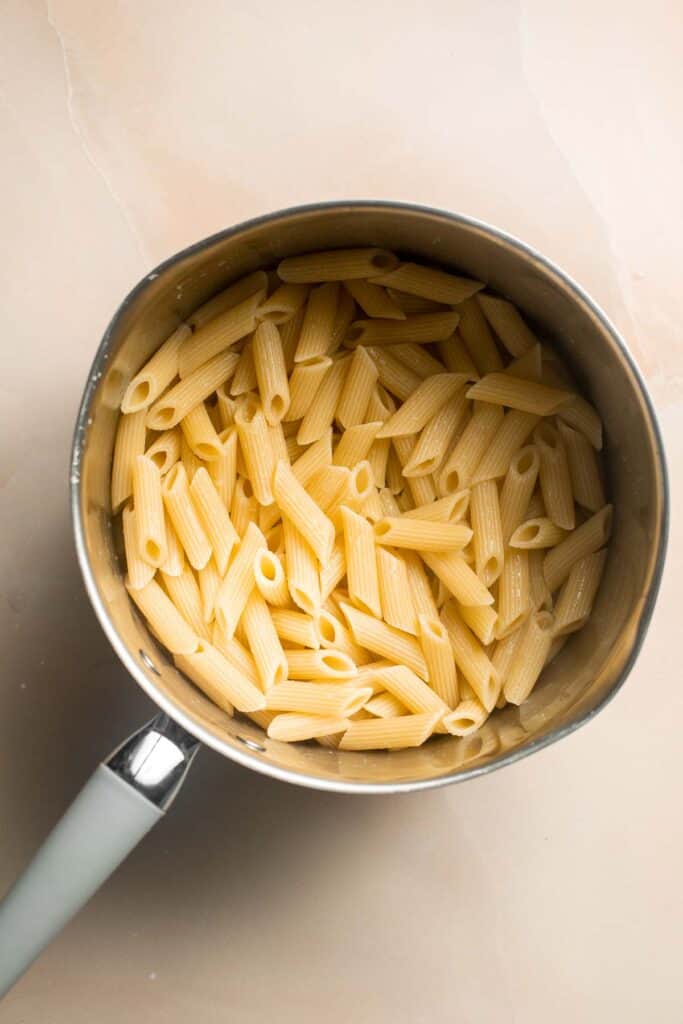
- Sauté garlic. Meanwhile, heat butter in a large skillet over medium-high heat until bubbly hot, about 1 minute. Add garlic and sauté until fragrant, about 1 minute.
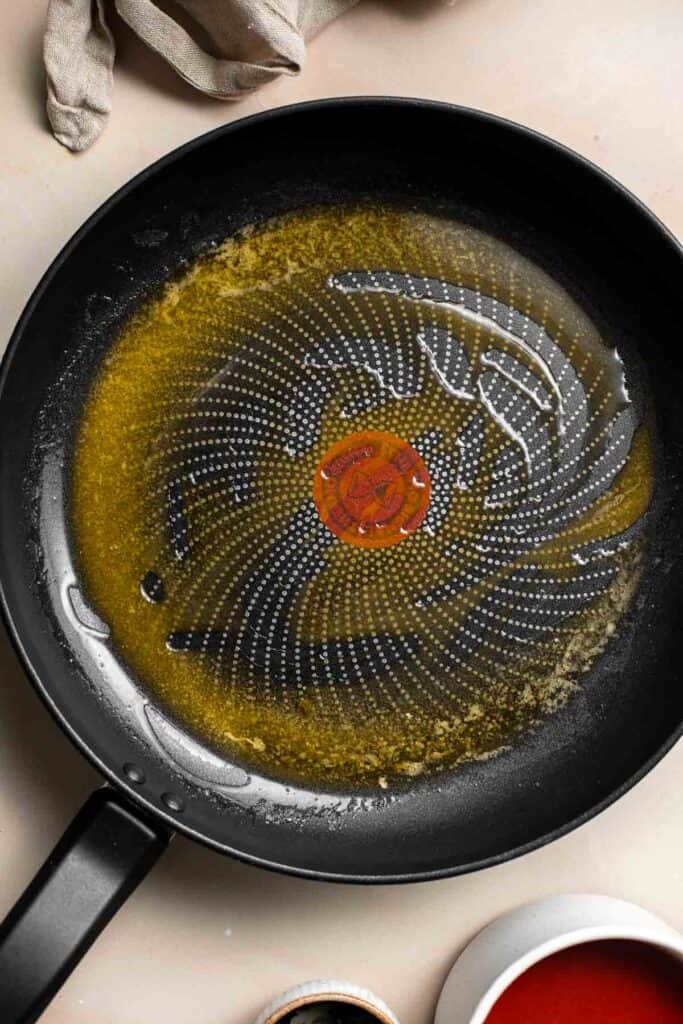
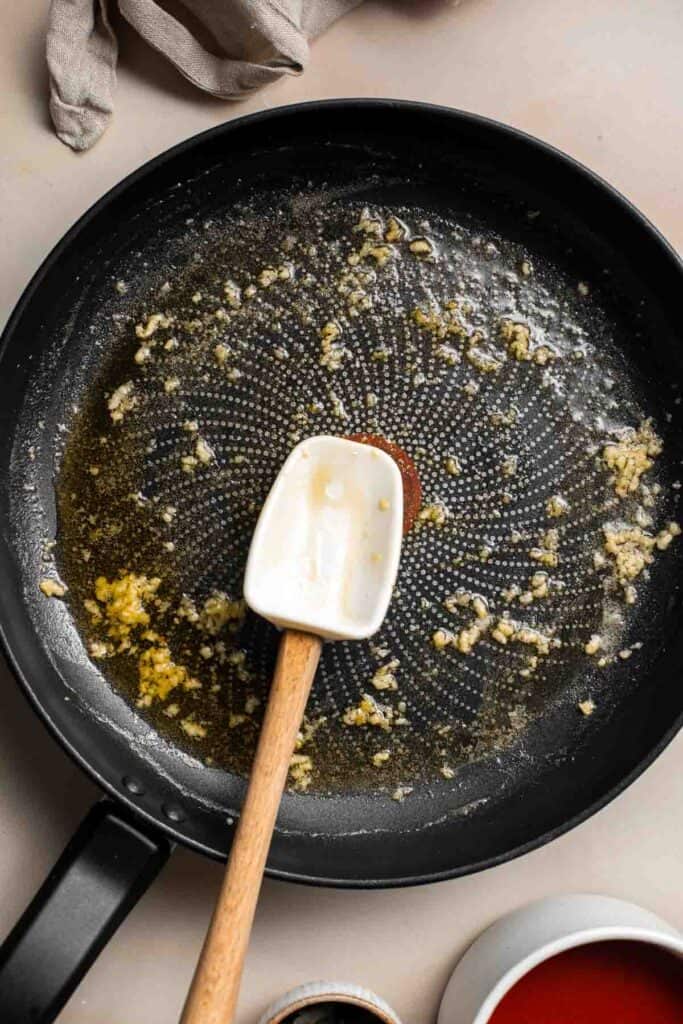
- Add tomato sauce. Pour in tomato sauce and tomato paste. Stir and bring it to a simmer, about 4-5 minutes.
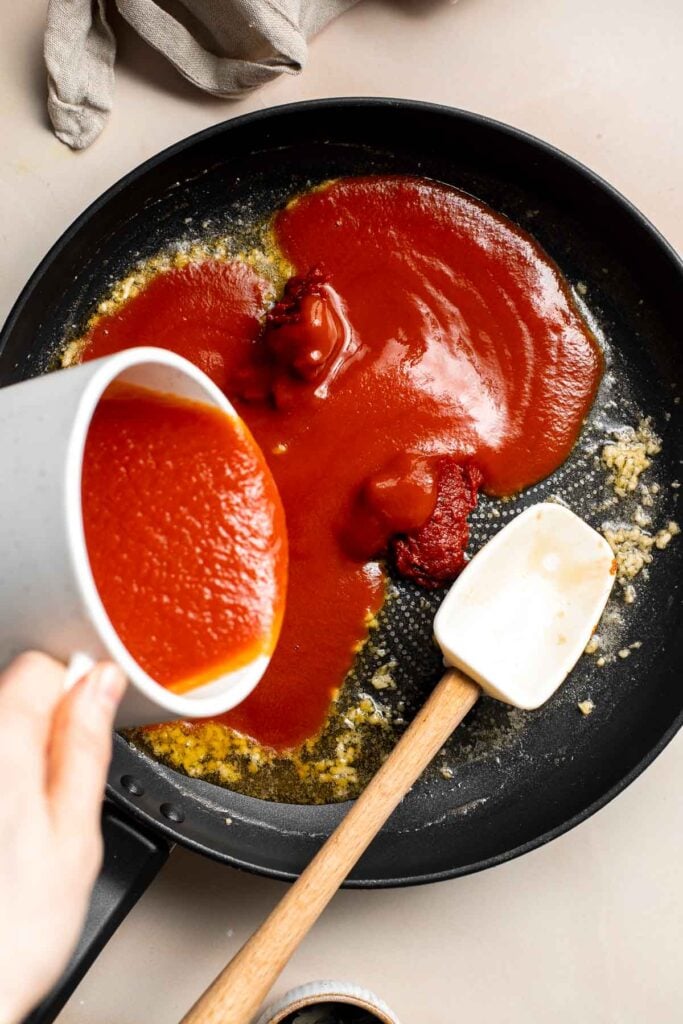
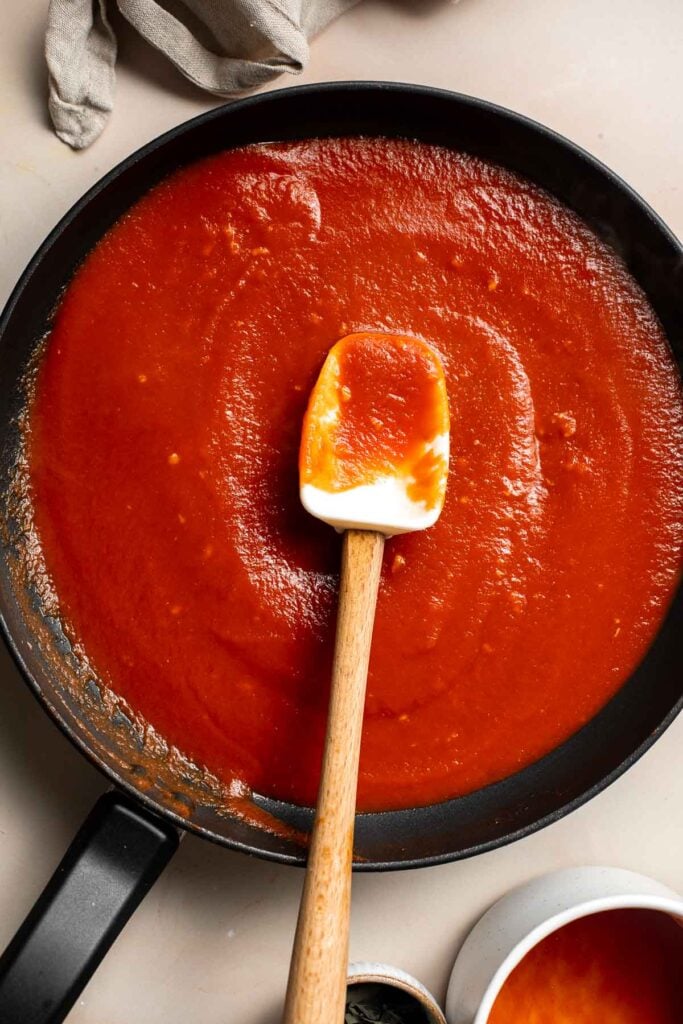
- Add cream. Reduce the heat to low and stir in heavy cream and Parmesan cheese. Cook until thickened to a desired consistency, about 3 minutes. Season with salt and pepper.
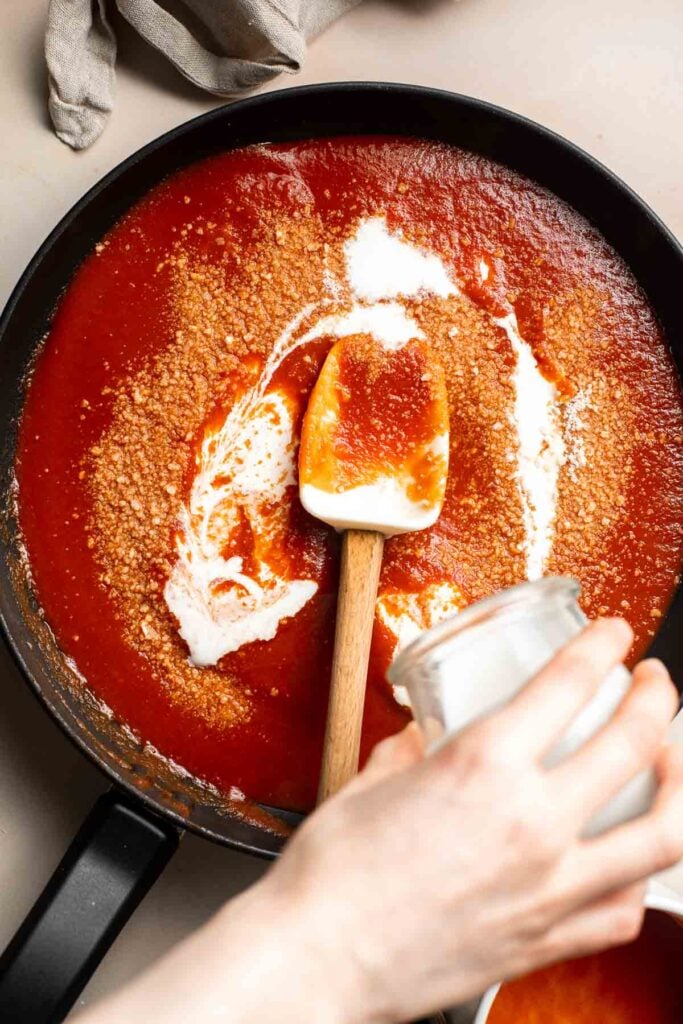
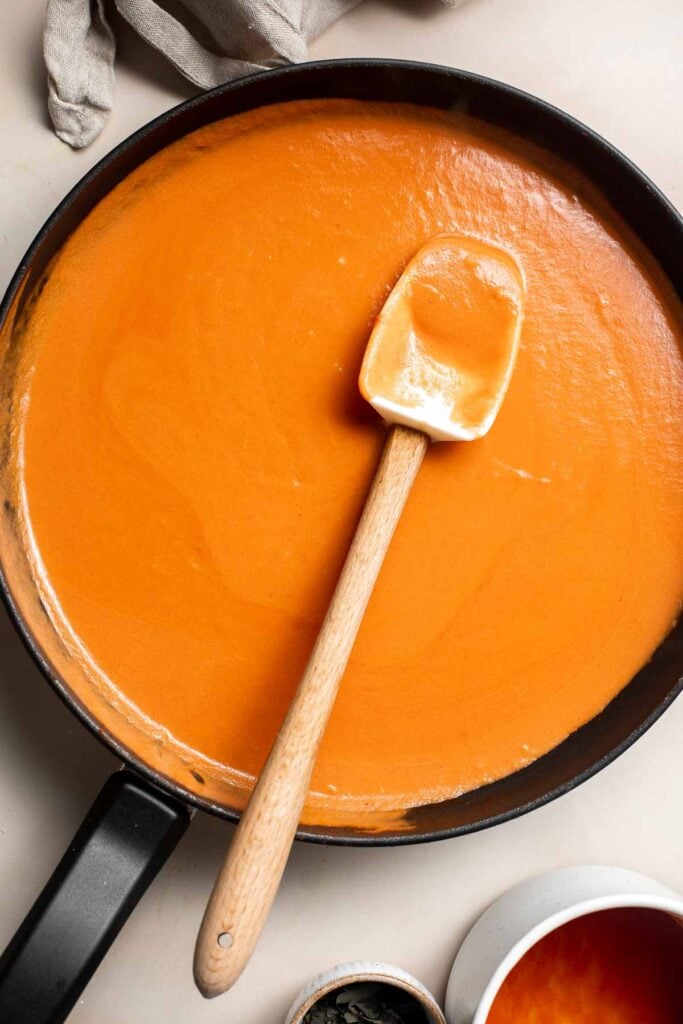
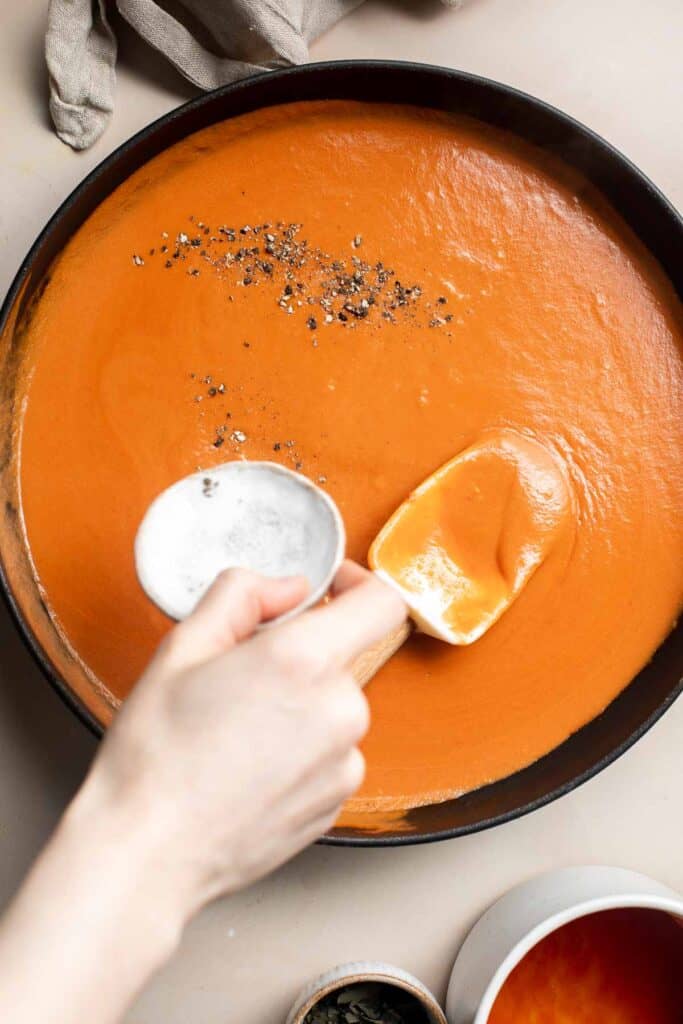
- Toss in pasta. Add in the cooked pasta and toss well to coat evenly. Garnish with parsley and serve warm.

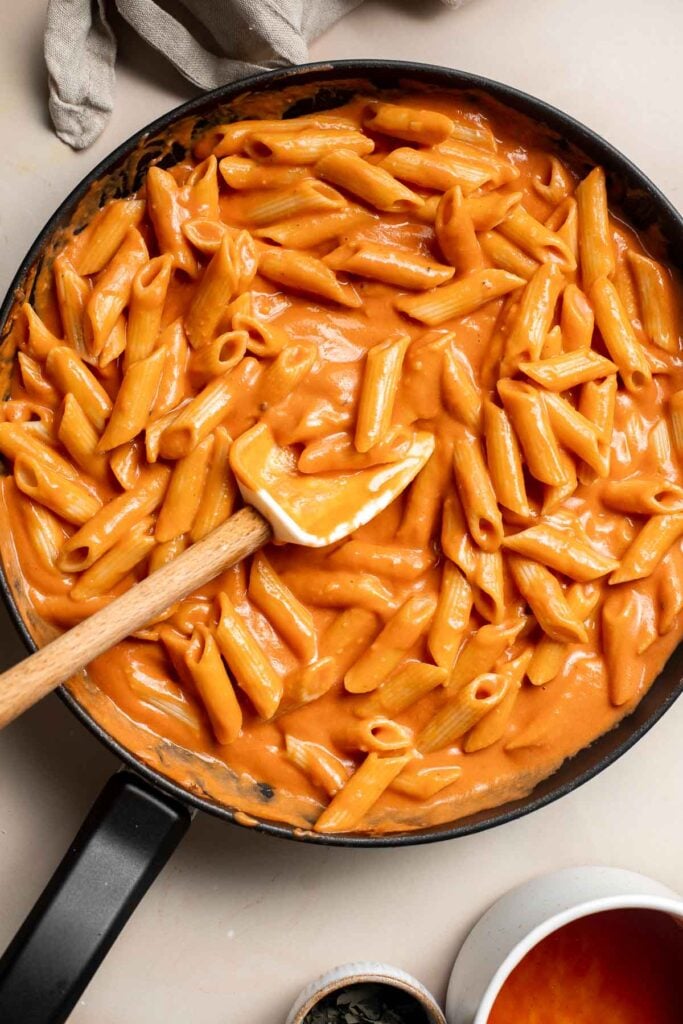
Recipe Video
Expert Tip: Don't Overcook the Pasta
Boil your pasta until just al dente - tender but still slightly firm to the bite. It will continue to cook a little when tossed in the hot sauce, so this ensures it doesn't turn mushy and keeps that perfect texture.
More Tips and Tricks
- Salt your pasta water generously. It should taste like the sea - this is the first chance to flavor the pasta itself.
- Don't rush the garlic. Garlic burns quickly, so sauté just until fragrant, not brown.
- Simmer gently. Be careful not to overheat the cream, as it can curdle and separate. Add the cream to the sauce at the end of cooking and keep the heat low. A slow simmer prevents the cream from curdling and keeps the sauce silky.
- Use freshly grated cheese. Pre-shredded cheese has anti-caking agents that prevent it from melting smoothly. Freshly grated Parmesan will give you the best creamy consistency.
- Top with cheese. Serve with a generous sprinkling of parmesan cheese (really, don't skimp on the cheese!).
- Garnish with fresh herbs. We garnished with fresh parsley, but you can use other fresh herbs such as basil or oregano. Herbs add a burst of freshness and color to the dish.
Recipe Variations
- Add protein. Feeding a crowd or eating a late lunch? Make the pasta a little more filling by adding a pre-cooked protein like grilled or oven baked chicken, shrimp, beef, or Italian sausage.
- Add veggies. Sauté some veggies before you add in the garlic to make this pasta more heartier. Some great options are mushrooms, broccoli, and zucchini. You can also stir in a few handfuls of spinach at the end until wilted (in the last minute of cooking).
- Make it spicy. Make spicy creamy tomato pasta by adding some red pepper flakes or cayenne pepper to the tomato sauce for a bit of heat.
- Turn it into pasta alla vodka: Add a splash of vodka to the tomato sauce for a unique flavor. Simmer the sauce until the alcohol has cooked off before adding the cream.
- Go cheesy. Stir in extra mozzarella for a gooey, cheesy version of this pasta.
- Dairy-free version. Use coconut cream and vegan Parmesan for a dairy-free creamy tomato pasta.
- Lighter option. Use half-and-half instead of cream, or Greek yogurt for a tangy, creamy finish.
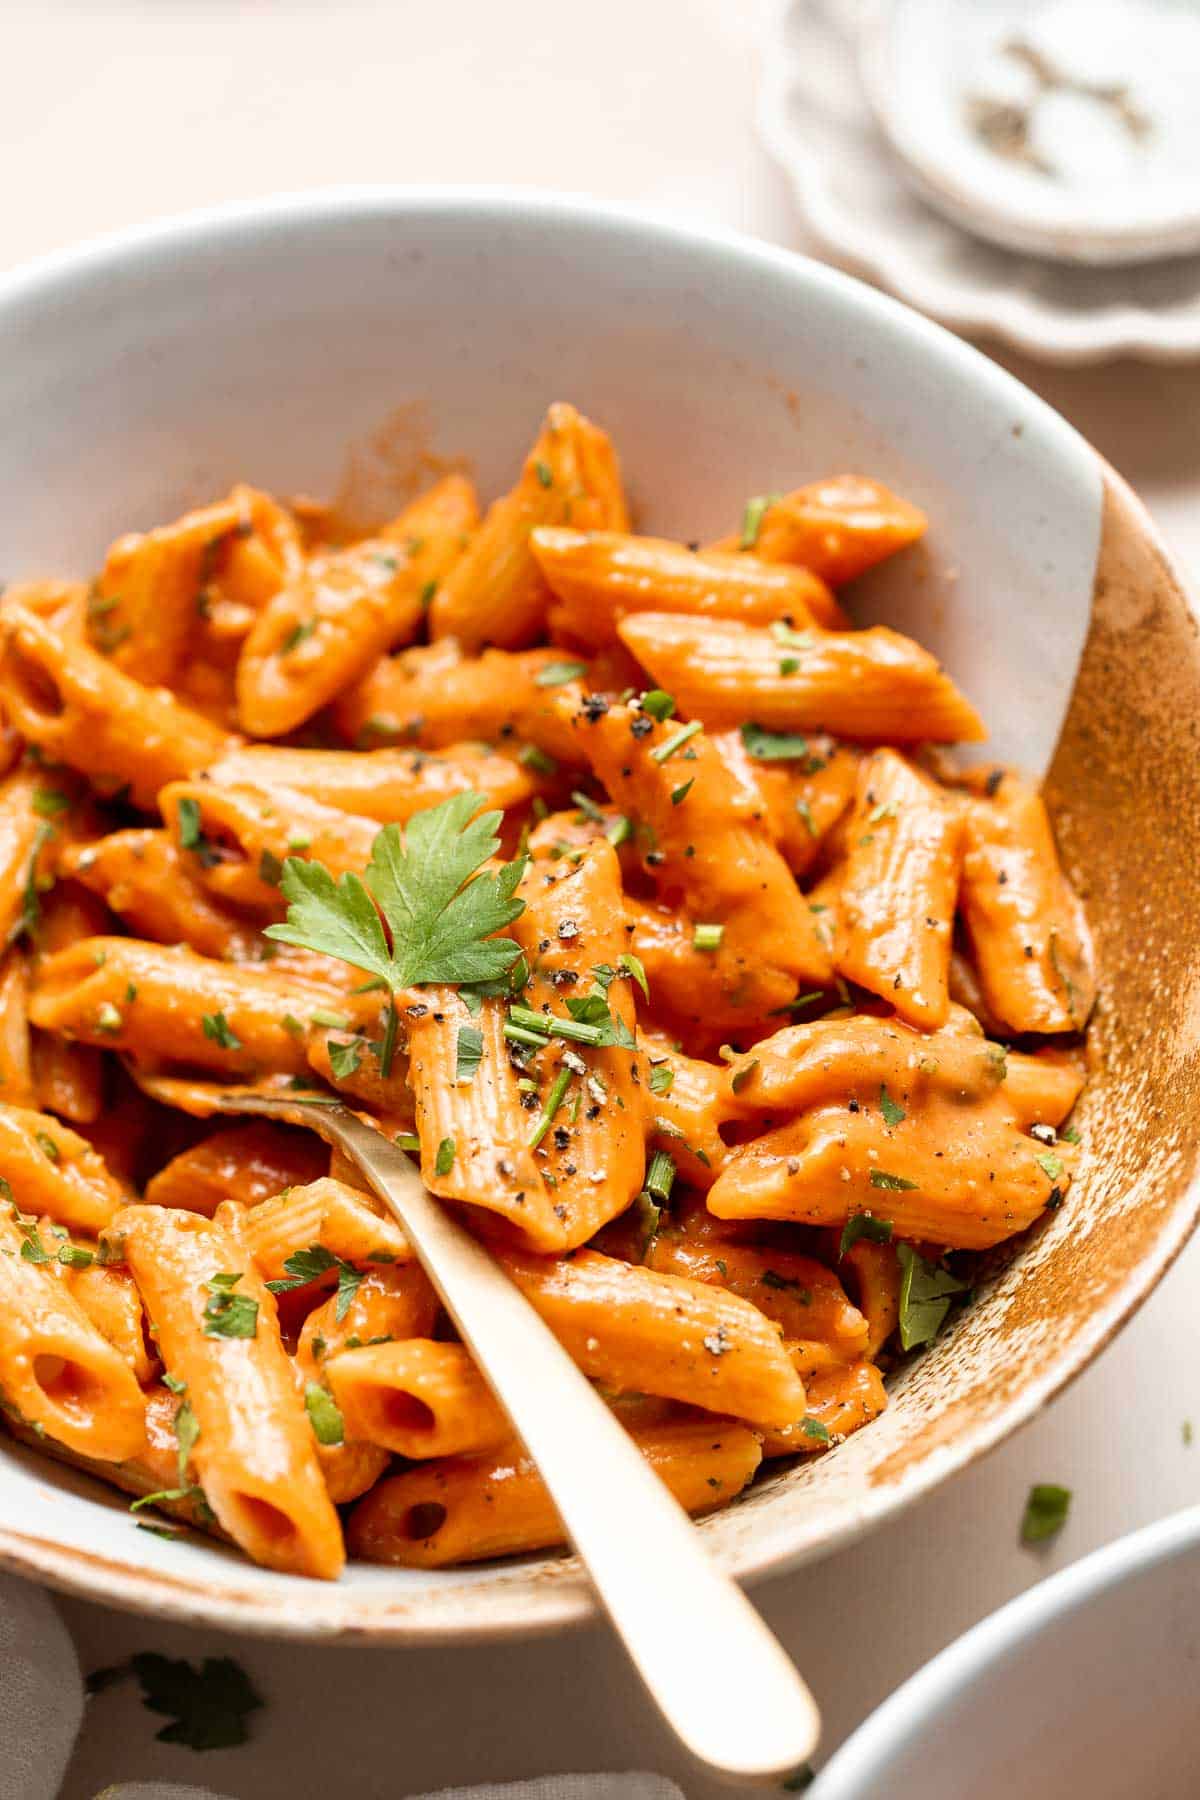
Storage
How to Store
Transfer any leftover tomato pasta into an airtight container and refrigerate for up to 2-3 days.
How to Reheat
Reheat in the microwave in 30-second increments until heated through, or in a skillet on the stovetop for 5-10 minutes, stirring occasionally until warm. Add a splash of water or cream if the sauce has thickened in the fridge.
How to Freeze
It's best to freeze the creamy tomato sauce separately from the pasta, since pasta tends to get mushy once frozen and reheated. Transfer the cooled sauce into an airtight, freezer-safe container or resealable bag, leaving a little space for expansion. Freeze for up to 2 months. When ready to enjoy, thaw in the fridge overnight before reheating.
How to Serve
Creamy tomato pasta is delicious on its own, but it's even better paired with Italian-inspired sides.
- Try it with garlic bread, focaccia, or ciabatta to soak up the sauce.
- Add a light salad like Arugula Salad or Caesar Salad.
- Pair with roasted veggies like zucchini, broccoli, or asparagus.
These are my favorite dishes to serve with creamy tomato pasta:
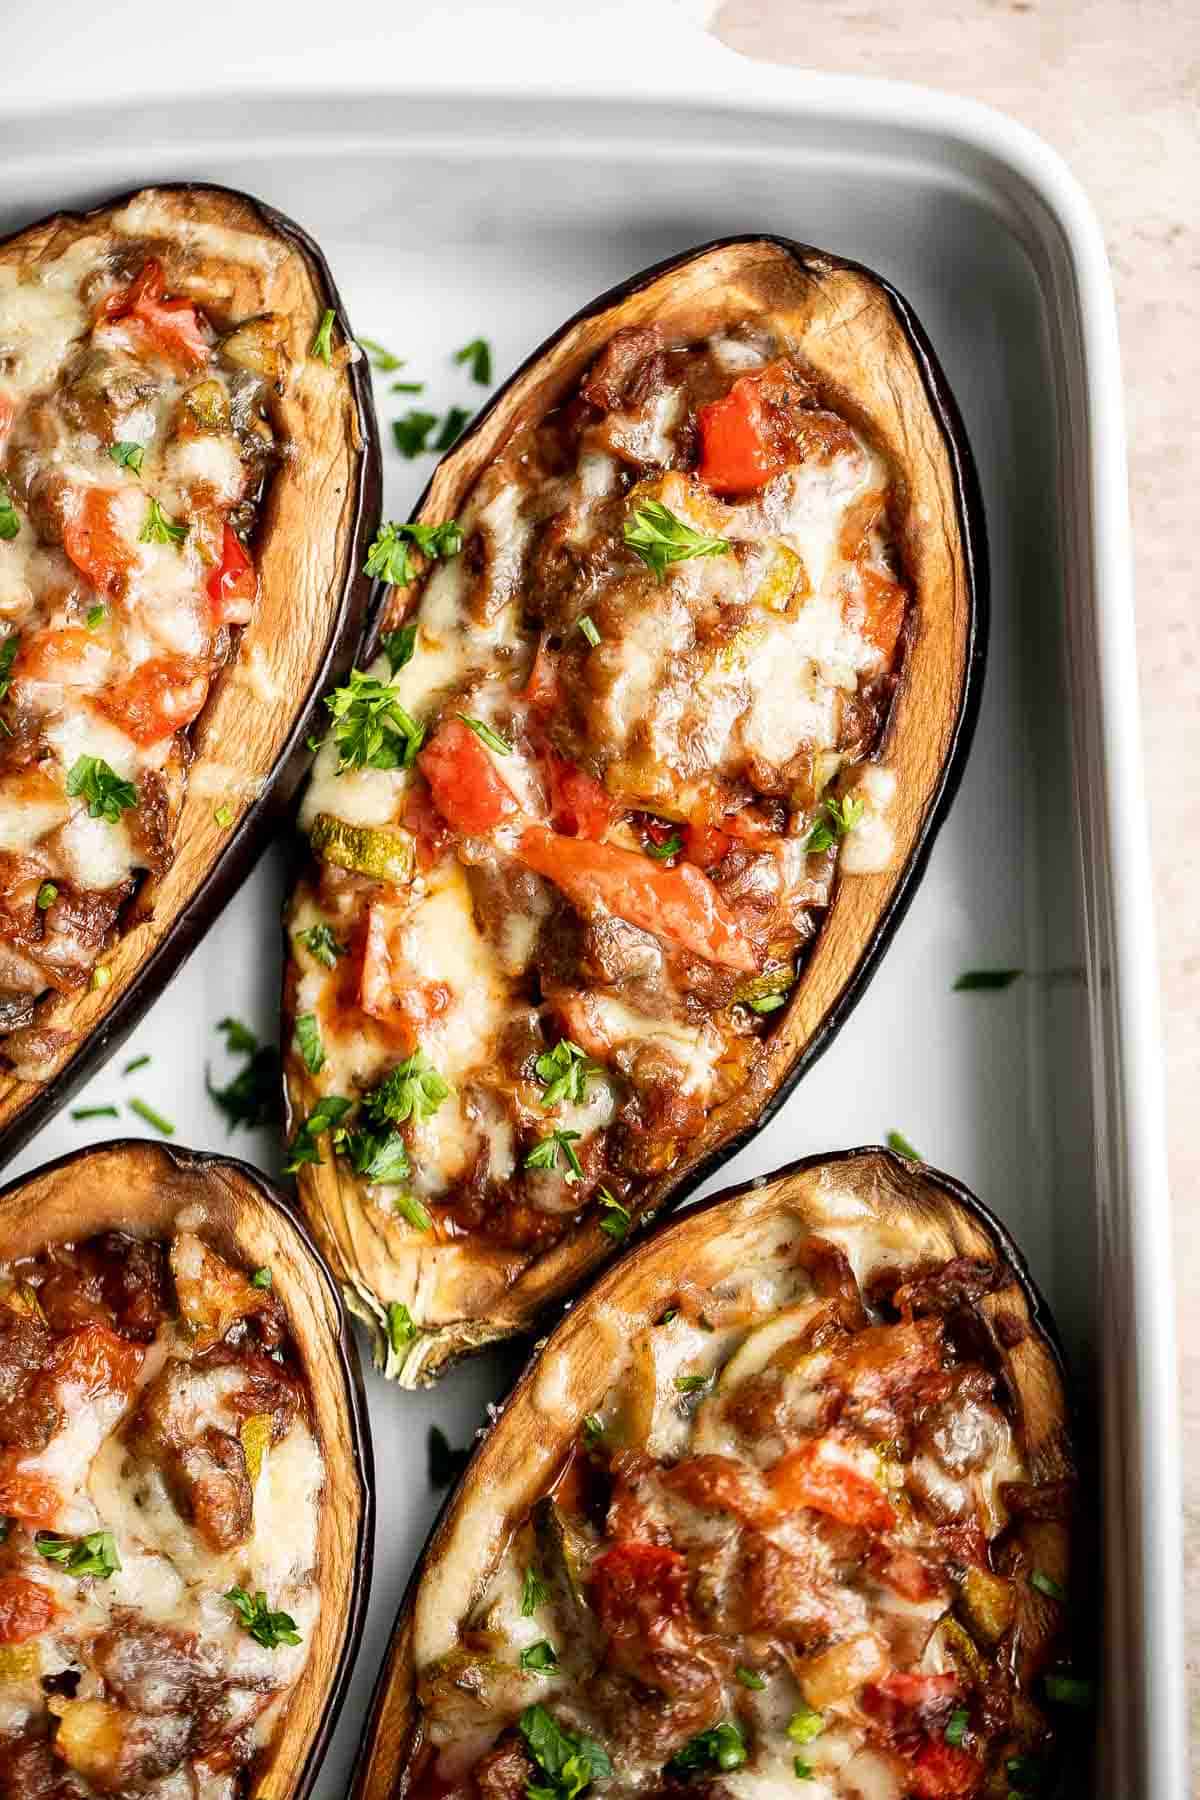
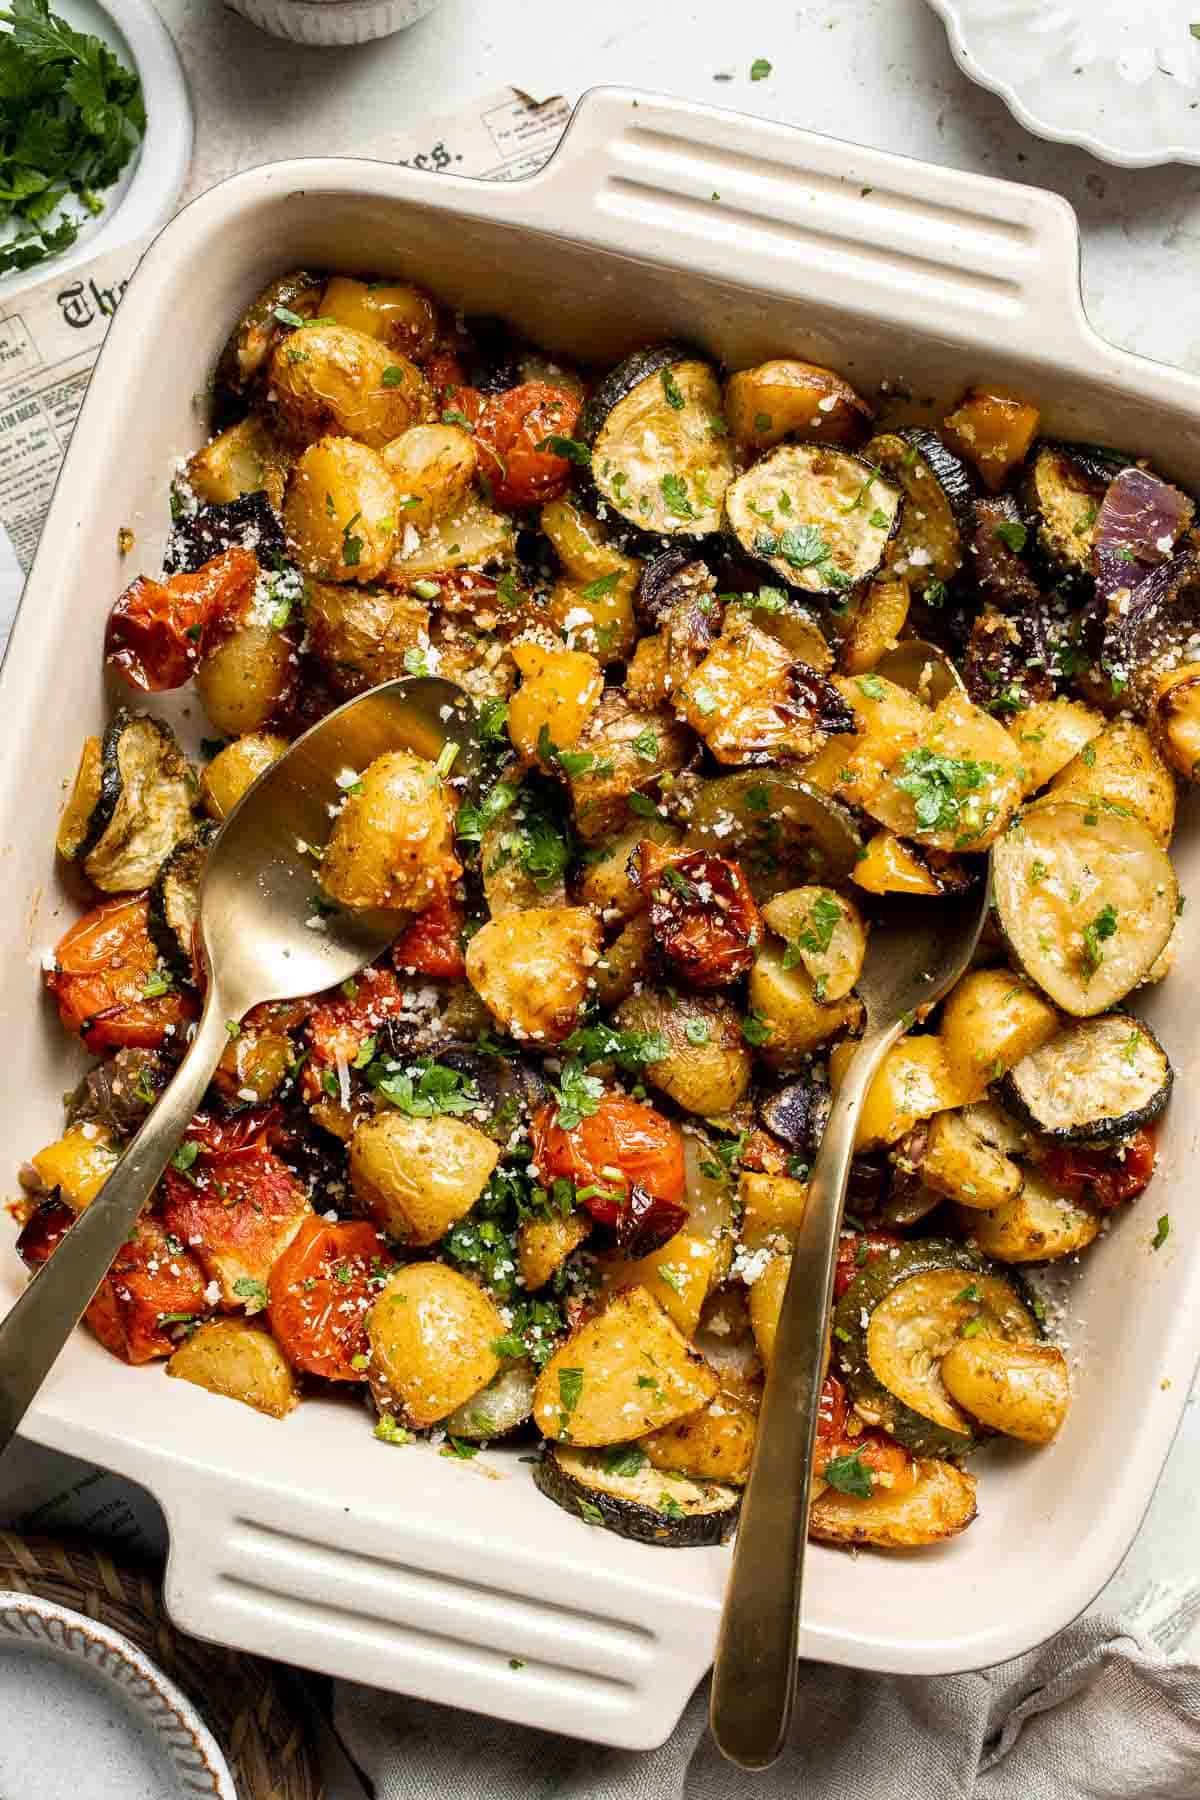
Side Dishes for Pasta
For more recipe ideas, check out our collection of pasta side dishes, featuring everything from fresh salads and roasted vegetables to crusty breads and flavorful appetizers that pair perfectly with any pasta dinner.
FAQ
Creamy tomato pasta is often called pasta alla rosa in Italian, which literally means "pink pasta." The pinkish hue comes from mixing tomato sauce with cream, creating a silky and balanced sauce that's both tangy and rich.
Heavy cream is the most common choice because it creates the richest and creamiest sauce without curdling. You can also use half-and-half for a lighter sauce or coconut milk for a dairy-free option.
Cream balances the acidity of the tomatoes, making the sauce smoother and less sharp. It also thickens the sauce and gives it a velvety texture, turning a basic tomato sauce into a restaurant-style dish.
You can swap the heavy cream with alternatives like cashew cream, coconut milk, or blended silken tofu. Even a bit of whole milk mixed with butter can mimic creaminess while keeping the dish lighter.
Always lower the heat before adding cream and stir it in slowly. High heat can cause cream to split. Adding cream after the tomato sauce has simmered helps keep it smooth and stable.
Yes, heavy cream naturally thickens the sauce as it reduces during simmering. For an even thicker sauce, let it cook a few minutes longer or add a little extra Parmesan cheese.
More Pasta Recipes
Looking for other recipes like this? Try these:
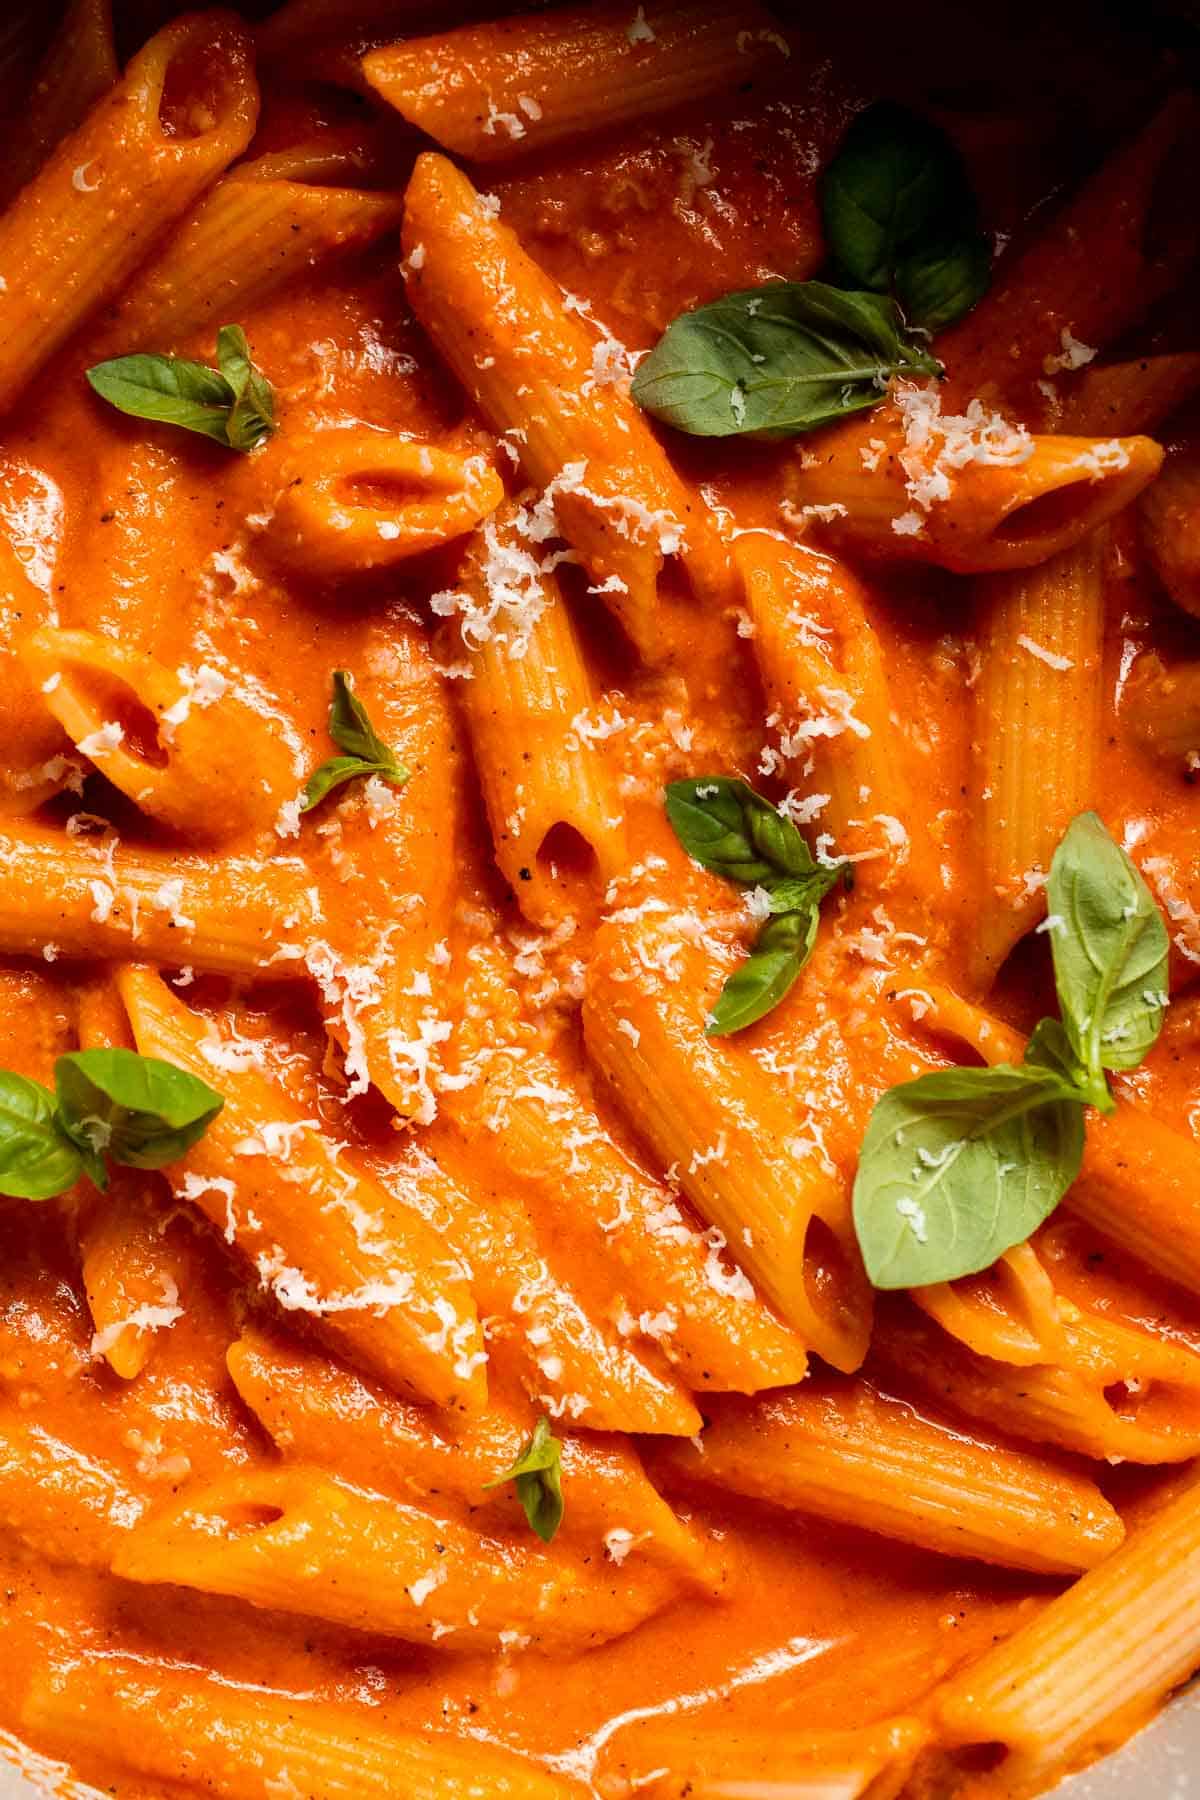
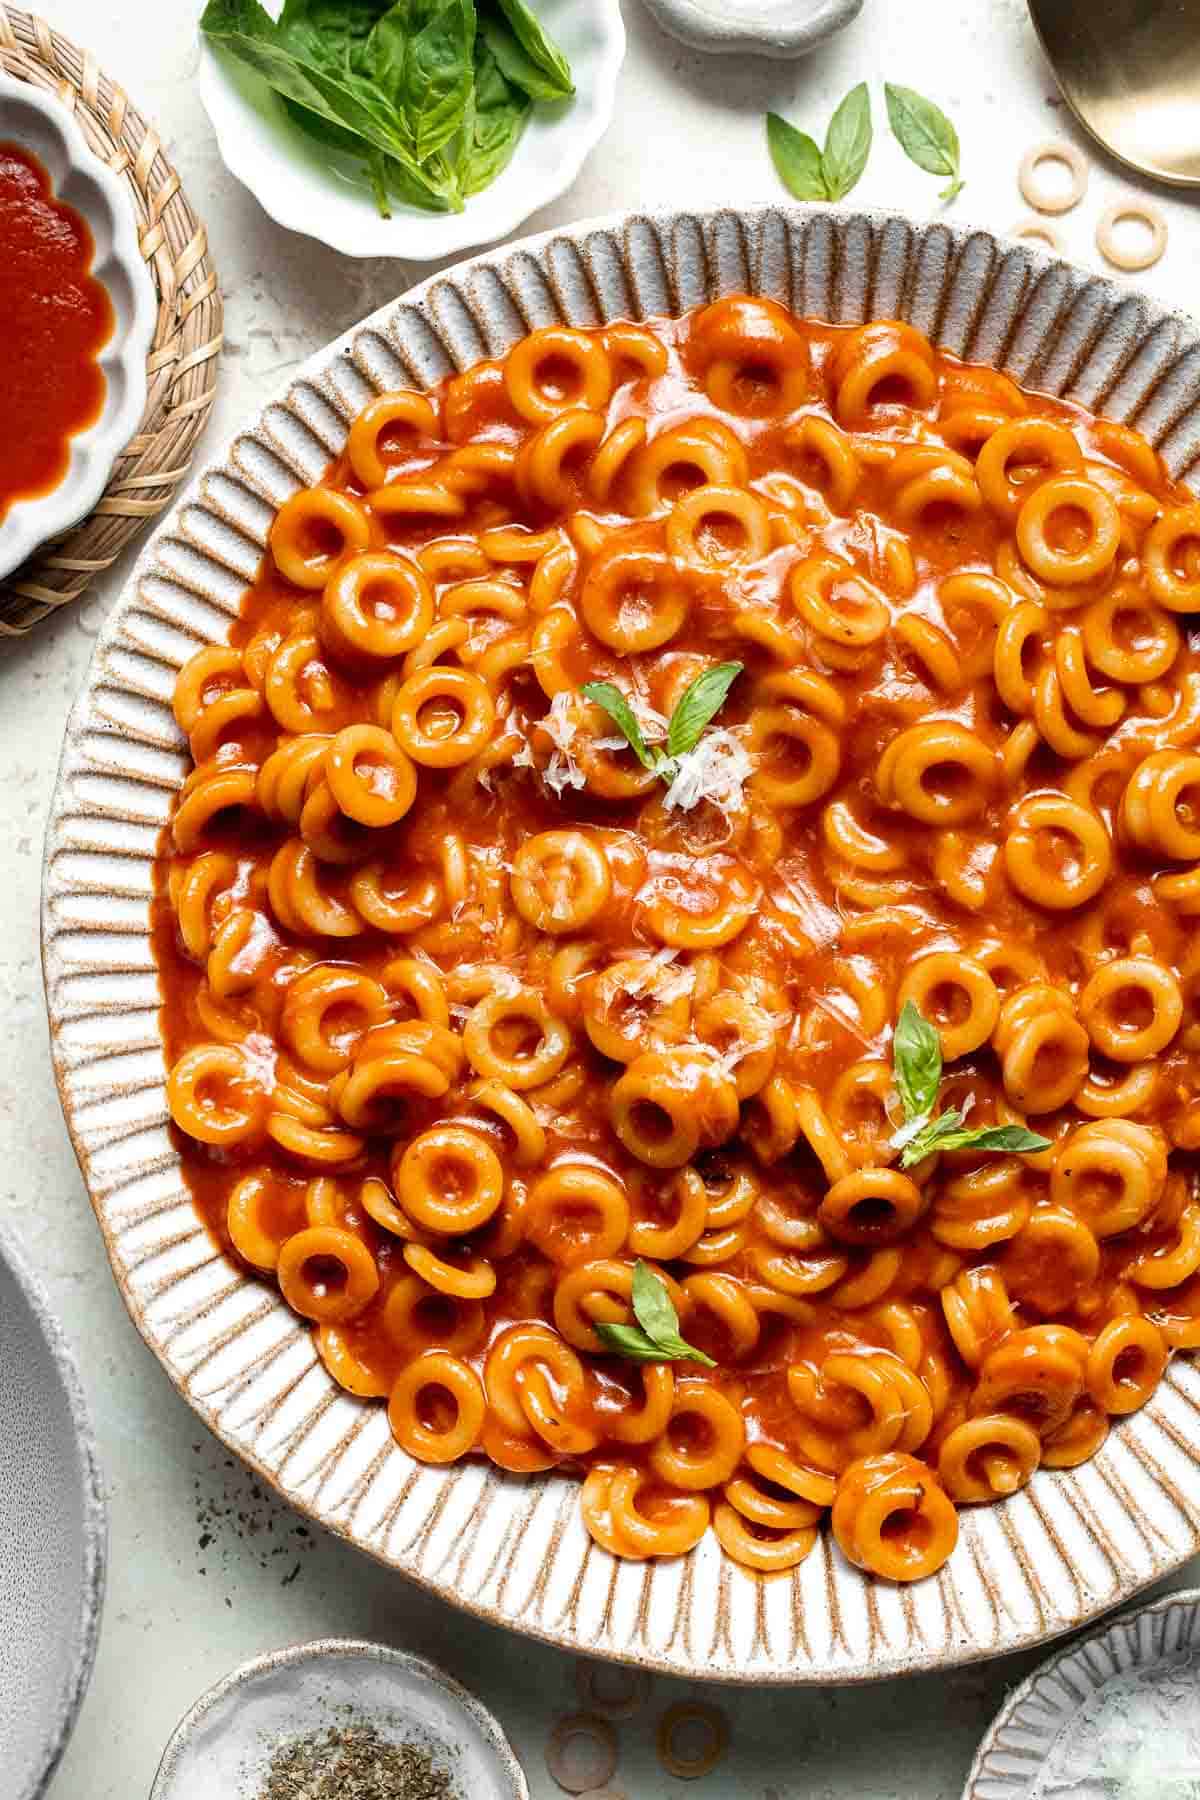
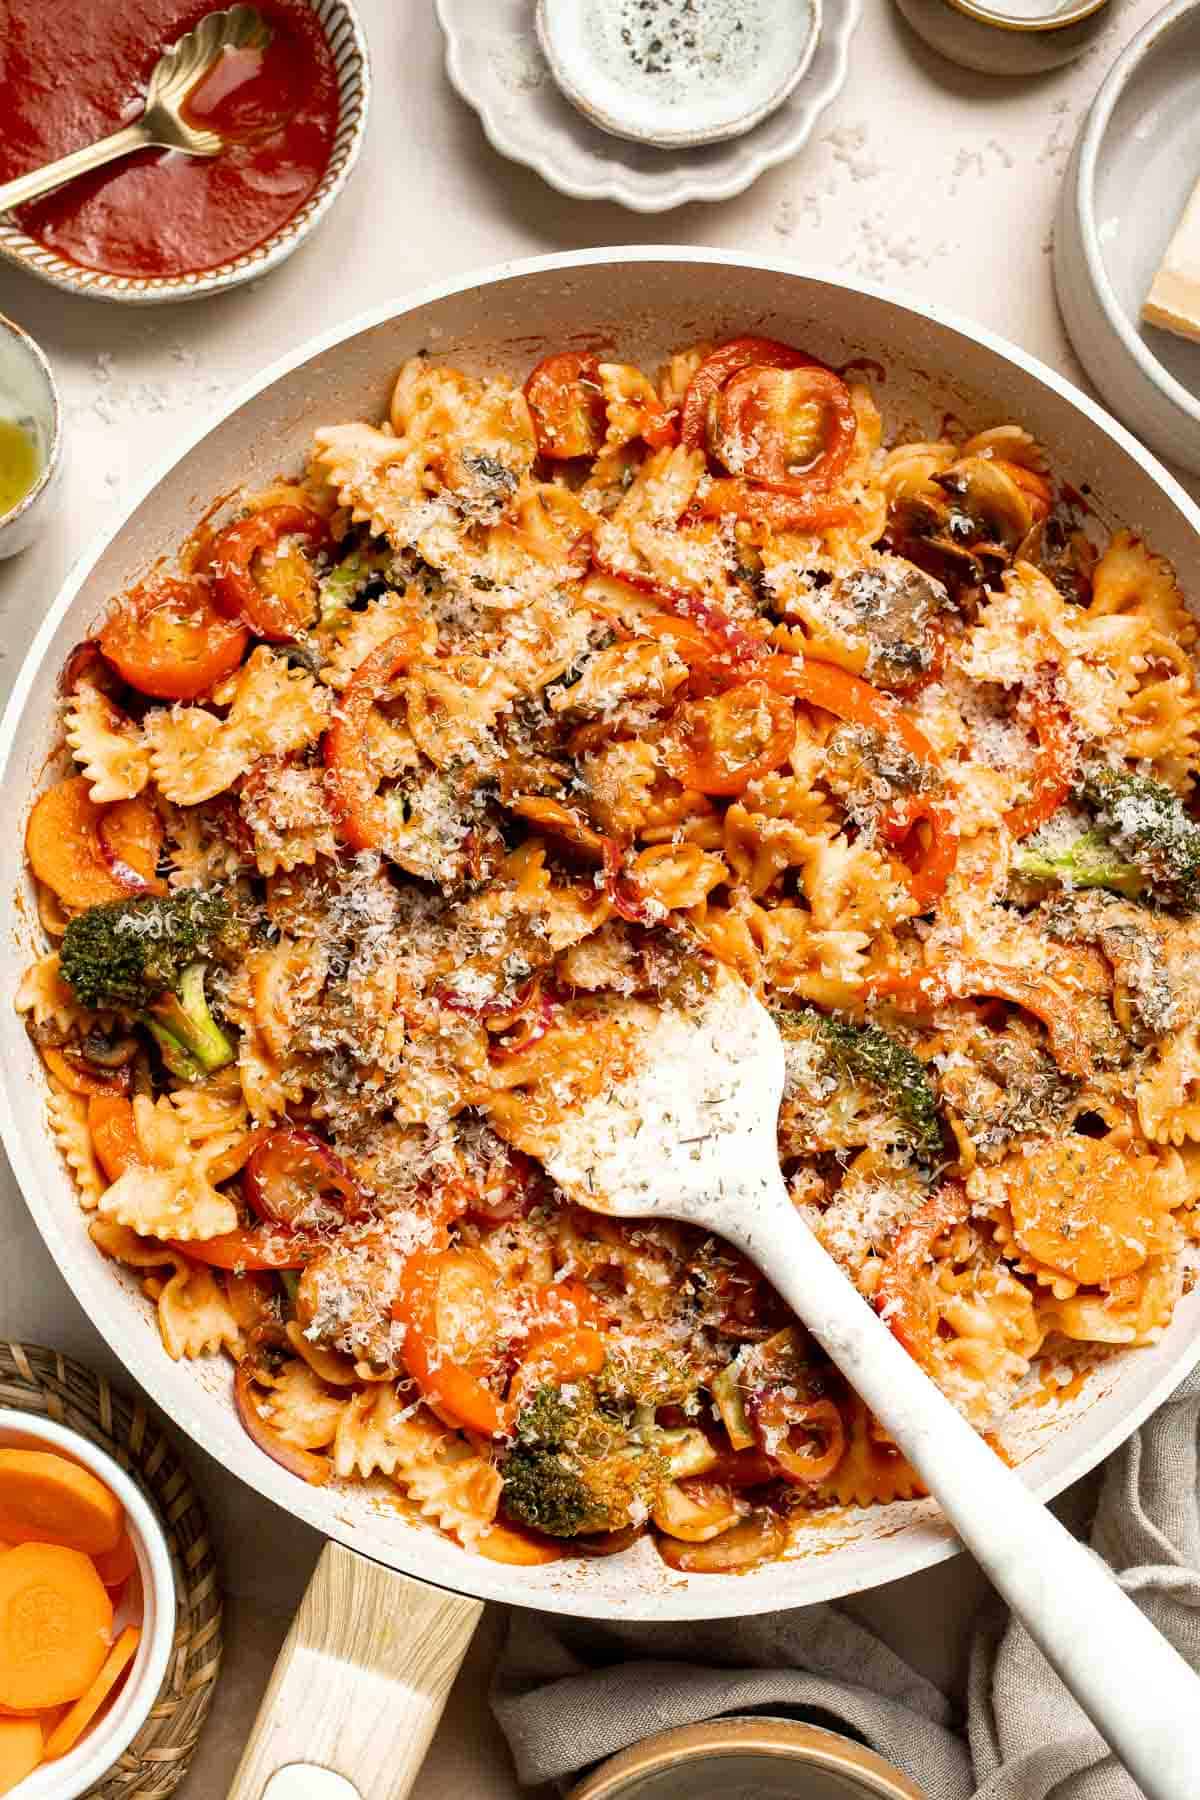

Tried this recipe?
I'd love to hear what you think! Leave a comment and rating below to share your feedback. Your reviews help others discover this recipe and help me keep creating more free recipes for you. Snap a photo and tag me on social media @aheadofthyme too.
This recipe was originally posted in 2023 and was updated with new content.

Creamy Garlic Shrimp
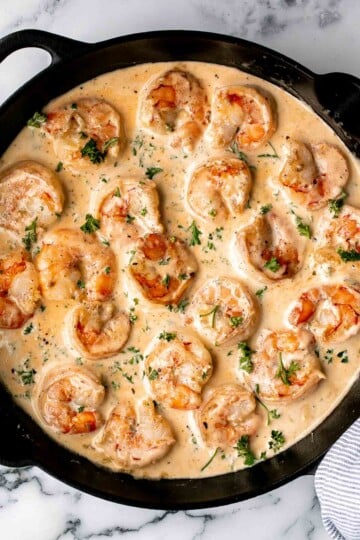
Creamy Garlic Shrimp is a delicious, quick and easy 15-minute meal (yes, including prep!) that absolutely deserves a spot in your weeknight dinner rotation. Juicy jumbo shrimp are seared to golden perfection, then tossed in a rich, cheesy garlic cream sauce that clings to every bite. The result? A comforting seafood dinner that's luxurious yet simple enough to whip up anytime. Serve it over pasta, rice, or creamy mashed potatoes, or keep things cozy with some crusty bread for dunking. This dish is pure comfort food goals.

Shrimp is one of my go-to ingredients for super fast dinners because it cooks in just minutes. And if you know me, you know I'm all about the easy 30-minute meals around here. But a 15-minute dinner, prep included? That's a no-brainer win. Perfect for busy weeknights, last-minute guests, or when you're craving something indulgent without spending hours in the kitchen.
The best part? This creamy garlic shrimp recipe has that rich, decadent flavor you'd expect from a fancy restaurant, but it's easy enough to whip up on a busy weeknight. The creamy garlic sauce clings to every bite of tender shrimp, making it feel indulgent without being complicated. It's cozy, impressive, and guaranteed to earn a spot in your regular dinner rotation.
If you liked this recipe, you should try our Creamy Tuscan Shrimp or Shrimp Alfredo next.
This creamy garlic shrimp over fresh red mashed potatoes was perhaps the very best meal I've ever made for myself! It was so good I could hardly believe it and wish I'd had someone to share it with. It was even better than shrimp and grits I've had at good restaurants. Exquisite, thank you for the recipe!
- Edgar ★★★★★

Why You'll Love This Recipe
- Quick and easy. This dish takes just 15 minutes from start to finish, including prep time! That means you can have a delicious seafood dinner on the table in less time than it takes to order takeout. It's the ultimate weeknight hack for busy nights.
- Simple ingredients, big payoff. You don't need anything fancy here - just shrimp, garlic, cream, and a few pantry staples. Yet the end result tastes like something you'd order at a nice restaurant.
- Rich, creamy garlic sauce. The sauce is a dreamy blend of garlic, butter, cream, and cheese that's thick, luscious, and bursting with flavor. Every shrimp is coated in pure garlicky goodness, making each bite irresistible.
- Family-friendly comfort food. This recipe delivers indulgent flavors that both kids and adults love. It feels fancy but is approachable enough to win over picky eaters, making it a solid go-to for family dinners.
- Perfect for entertaining. Even though it's easy, this dish has a wow factor. The creamy garlic sauce and plump shrimp make it an elegant choice for dinner parties, holidays, or date nights at home.
Ingredients and Substitutions
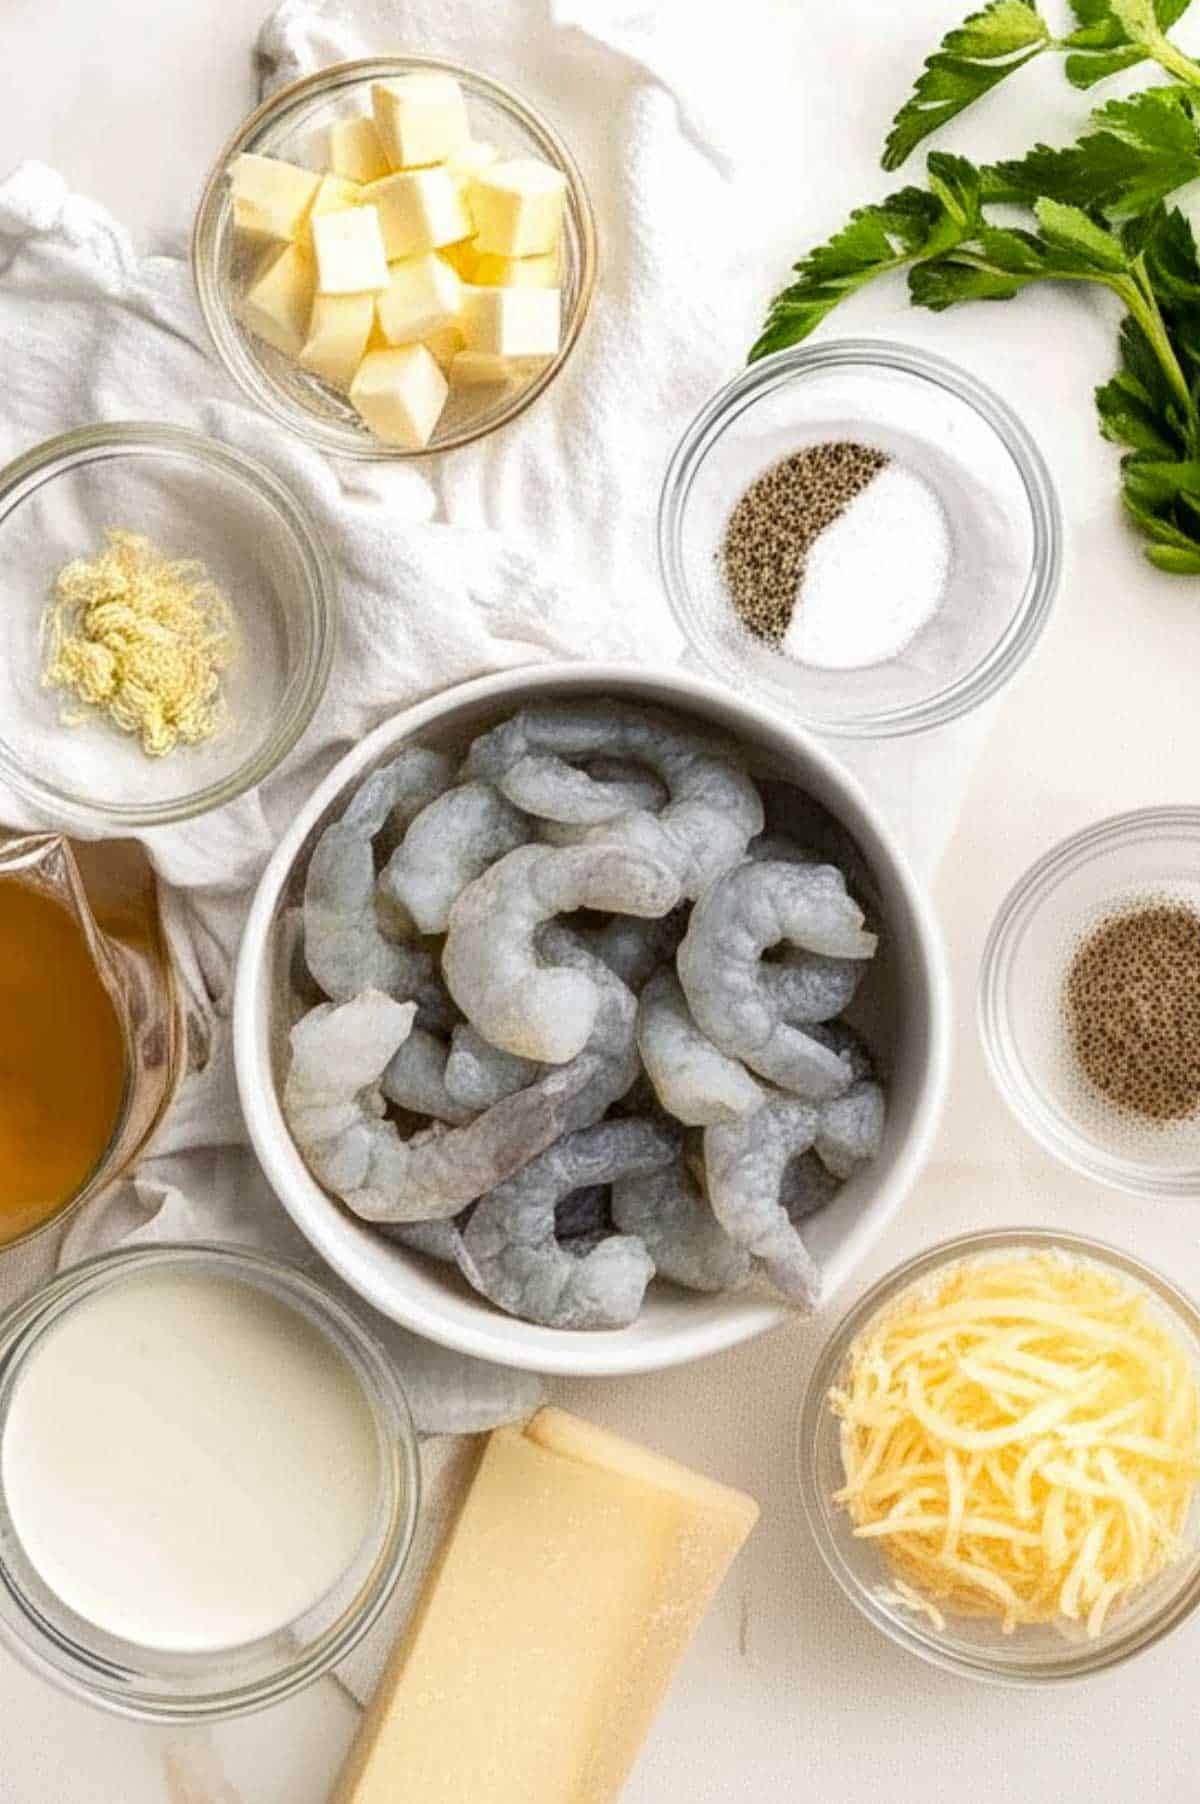
To make delicious creamy garlic shrimp, you will need the following ingredients (see recipe card below for quantities)::
- vegetable oil - Helps the shrimp sear without sticking. Olive oil or avocado oil are great substitutes.
- shrimp - I used jumbo shrimp, but you can use any kind shrimp or prawns. Frozen shrimp (thawed first) works too. You also want to peel, devein, and remove the tails for easy eating. Peeled, deveined, and tails removed for easy eating. To prepare the shrimp, cut through the shell along the back with kitchen scissors. Remove the shells and tails, and rinse to remove the veins. Pat dry each shrimp completely with a paper towel.
- salt and pepper - Essential seasoning for the shrimp.
- butter - Adds richness to the sauce. You can use salted or unsalted.
- garlic - Fresh garlic is best for a bold flavor, but garlic paste works in a pinch.
- white wine - Sauvignon blanc or pinot grigio adds depth and a hint of acidity. Substitute chicken stock if you prefer alcohol-free.
- heavy cream - The base of the sauce. For a lighter version, use half-and-half, though the sauce will be thinner.
- Italian seasoning - A blend of herbs like oregano, basil, and thyme. You can swap in dried parsley or your favorite herb mix.
- white cheddar cheese - Gives the sauce a creamy, slightly tangy finish. Parmesan cheese is a great alternative.
- fresh parsley - For garnish. Basil or chives also work well.
Equipment
You'll also need measuring cups and spoons, a large skillet (I used a cast-iron skillet), a mixing spoon or spatula, a sharp knife, and a cutting board.
Instructions

Sear the shrimp
Heat oil in a large skillet over medium high heat for 2 minutes until the hot oil is sizzling hot. Add shrimp and sear for 2-3 minutes on each side until they turn pink and are fully cooked through. Season with salt and pepper. Set aside on a plate.

Make the sauce base
Add butter and garlic to the same skillet and sauté until fragrant, about one minute.

Add liquids and cheese
Add wine and stir well to combine, about one minute. Add heavy cream, Italian seasoning, and white cheddar. Stir well and bring the sauce to a simmer. Reduce the heat to medium and keep stirring until thickened to a desired consistency.

Return the shrimp
Return the cooked shrimp to the skillet and toss well to coat.

Garnish
Garnish with parsley.

Serve
Serve immediately with pasta, rice, or mashed potatoes.
Recipe Video
Expert Tip: Don't Overcook the Shrimp
Shrimp turn rubbery quickly if cooked too long. As soon as they turn pink and opaque, remove them from the pan (about 2-3 minutes per side). They'll finish gently cooking later in the sauce.
More Tips and Tricks
- Pat shrimp dry. Always pat shrimp dry with paper towels before seasoning and cooking. This helps them sear properly and develop that golden, flavorful crust instead of steaming in the pan.
- Deglaze with wine. Scraping the browned bits off the pan with white wine (or stock) adds tons of flavor.
- Use fresh garlic. While garlic powder works in a pinch, fresh minced garlic adds a much deeper, more robust flavor to the sauce. It's worth it here since garlic is the star.
- Simmer the sauce gently. Once you add cream and cheese, keep the sauce at a gentle simmer. Boiling can cause it to separate or turn grainy. Stir often for a silky texture.
- Add the cheese slowly. Stir in shredded cheese a little at a time until it melts smoothly into the sauce. This ensures a velvety finish without clumps.
- Taste and adjust. Always taste before serving - sometimes a pinch more salt or a squeeze of lemon makes all the difference.
Recipe Variations
- Add veggies. Stir in spinach, sun-dried tomatoes, mushrooms, or zucchini during the simmer step for extra color, flavor, and nutrition.
- Swap the cheese. Use Parmesan, Asiago, or Romano cheese instead of cheddar for a different flavor profile. Parmesan makes it taste extra Italian-inspired.
- Make it spicy. Add extra chili flakes (red pepper flakes), cayenne pepper, or even a splash of hot sauce to give your shrimp a fiery kick.
- Lighten it up. Substitute half-and-half for heavy cream for a lighter sauce (though it won't be as rich and thick). You can also use less cheese or swap in a lower-fat variety.
- Citrusy twist. Add a squeeze of lemon juice at the end for brightness.
- Serve it Cajun-style. Swap Italian seasoning for Cajun spice for a smoky, Southern spin.
- Swap the protein. Love the creamy garlic sauce but not in the mood for shrimp? Try it with seared chicken breast, salmon fillets, or even scallops. The sauce pairs beautifully with almost any protein!
- Pasta night. Turn this into creamy garlic shrimp pasta by tossing the sauce with fettuccine, spaghetti, or linguine. The sauce clings beautifully to noodles.

Storage
How to Store
Store leftovers in an airtight container for up to 3 days in the refrigerator.
How to Reheat
Reheat on the stove over medium-low heat for 5-10 minutes until shrimp is warmed through, or in the microwave. The sauce may have thickened up in the refrigerator, so add a little water to thin out the sauce a bit until you achieve a desired consistency.
How to Freeze
Cream-based sauces don't freeze well - it may separate. If freezing, cook the shrimp separately and freeze them, then make the sauce fresh when reheating.
How to Serve
This creamy garlic shrimp is versatile and pairs beautifully with so many sides.
- Try it over pasta like fettuccine, linguine, or spaghetti for a rich and comforting meal.
- Spoon it over steamed rice, mashed potatoes, or creamy polenta for something hearty.
- Keep things lighter by serving with roasted vegetables, zucchini noodles, cauliflower rice, or a fresh garden salad.
- And don't forget a side of crusty bread or garlic bread for soaking up every last drop of that sauce!
These are some of my favorite dishes to serve with this creamy shrimp:
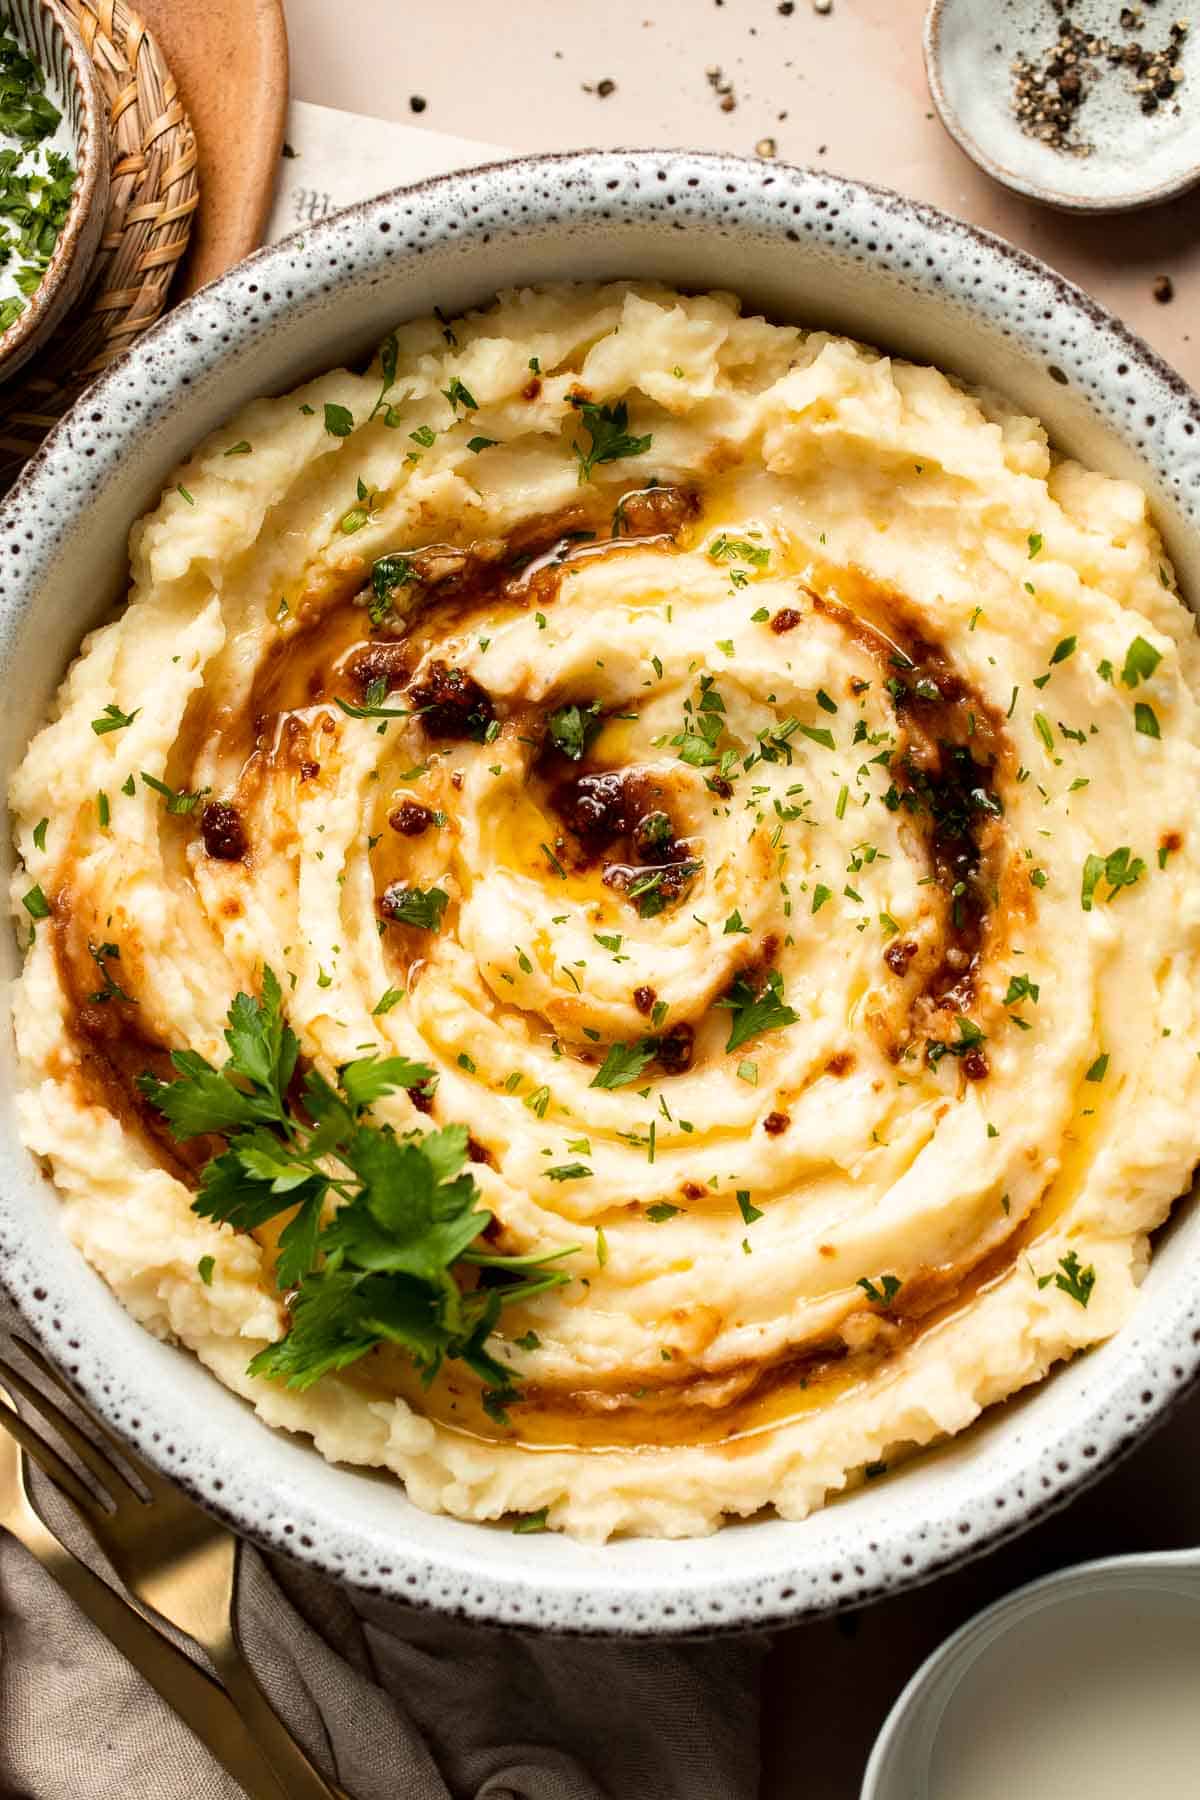
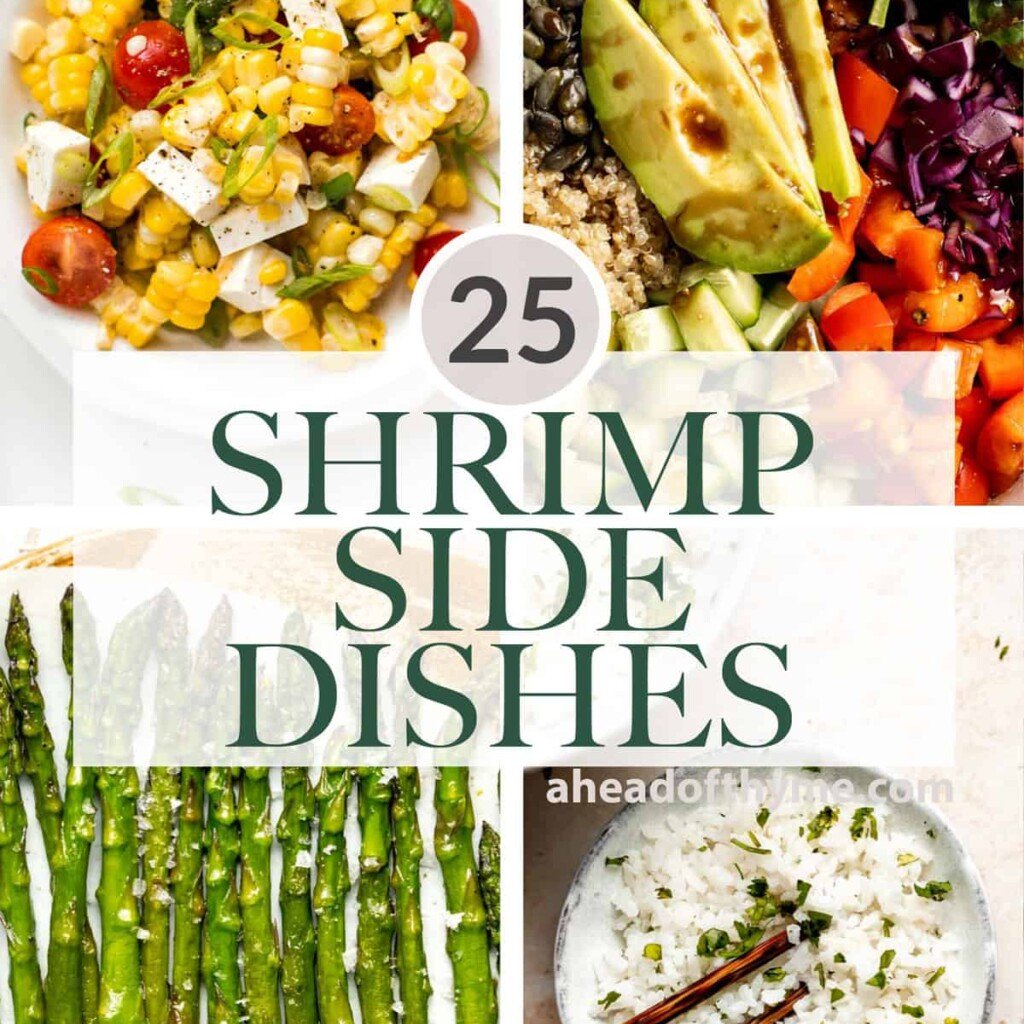
Side Dishes for Shrimp
Looking for the perfect sides to serve with shrimp? Our collection of shrimp side dishes has you covered, featuring everything from fresh, crisp salads and roasted vegetables to hearty grains, zesty slaws, and flavorful dips.
FAQ
The secret to juicy shrimp is cooking them quickly over medium-high heat and not overcooking them. Shrimp only take a few minutes per side, and once they turn pink and opaque, they're done. Overcooking makes shrimp rubbery and tough, so keep a close eye on them. Marinating shrimp beforehand with olive oil, garlic, or lemon also helps keep them tender and flavorful. Finally, patting them dry before seasoning ensures they sear nicely in the pan, locking in juices and creating that irresistible, juicy bite every time.
To keep shrimp moist, avoid long cooking times and start with dry, well-prepped shrimp. Patting them dry before cooking prevents steaming and helps them caramelize quickly, sealing in natural juices. Cooking in butter or oil also helps retain moisture and adds flavor. Another tip is to cook shrimp in a flavorful sauce, like a creamy garlic sauce, which keeps them tender and coated in richness. If you're boiling or poaching, make sure the water is well-seasoned and don't let the shrimp linger in the heat too long.
Creamy garlic sauce usually starts with butter or oil, fresh garlic, and a splash of white wine or broth for depth. Heavy cream is then added to give the sauce its velvety texture, along with seasonings like Italian herbs, salt, and pepper. A handful of cheese - Parmesan, white cheddar, or even cream cheese - can be stirred in to make the sauce extra thick and rich. The result is a luxurious, garlicky sauce that's perfect for coating shrimp, pasta, or even chicken.
Making creamy garlic sauce for shrimp is quick and simple. Start by sautéing minced garlic in butter or olive oil until fragrant. Add a splash of white wine (or chicken broth) to deglaze the pan and bring depth of flavor. Stir in heavy cream and let it simmer gently until it thickens slightly. Season with salt, pepper, and Italian herbs, then finish with shredded Parmesan or white cheddar for richness. Toss in cooked shrimp, coat them generously, and you've got the ultimate creamy garlic sauce.
Shrimp pairs well with so many vegetables because of its naturally sweet, delicate flavor. Classic pairings include zucchini, asparagus, broccoli, spinach, and bell peppers, which balance shrimp's richness with freshness and color. Mushrooms and cherry tomatoes also work beautifully, adding depth and a burst of juiciness. For heartier meals, toss shrimp with roasted potatoes, green beans, or corn. In creamy garlic shrimp recipes, spinach or sun-dried tomatoes are especially popular because they blend seamlessly into the sauce while adding vibrant flavor and extra nutrition.
To make creamy garlic shrimp pasta, simply cook pasta of your choice (like fettuccine or linguine) until al dente, then toss it directly into the pan with your creamy garlic shrimp. The starchy pasta water can be added to loosen the sauce and help it cling to the noodles. This turns the shrimp dish into a complete meal with a silky, flavorful sauce coating every strand of pasta. Finish with extra Parmesan cheese, fresh parsley, and maybe a squeeze of lemon for brightness.
More Shrimp Recipes
Looking for other recipes like this? Try these:

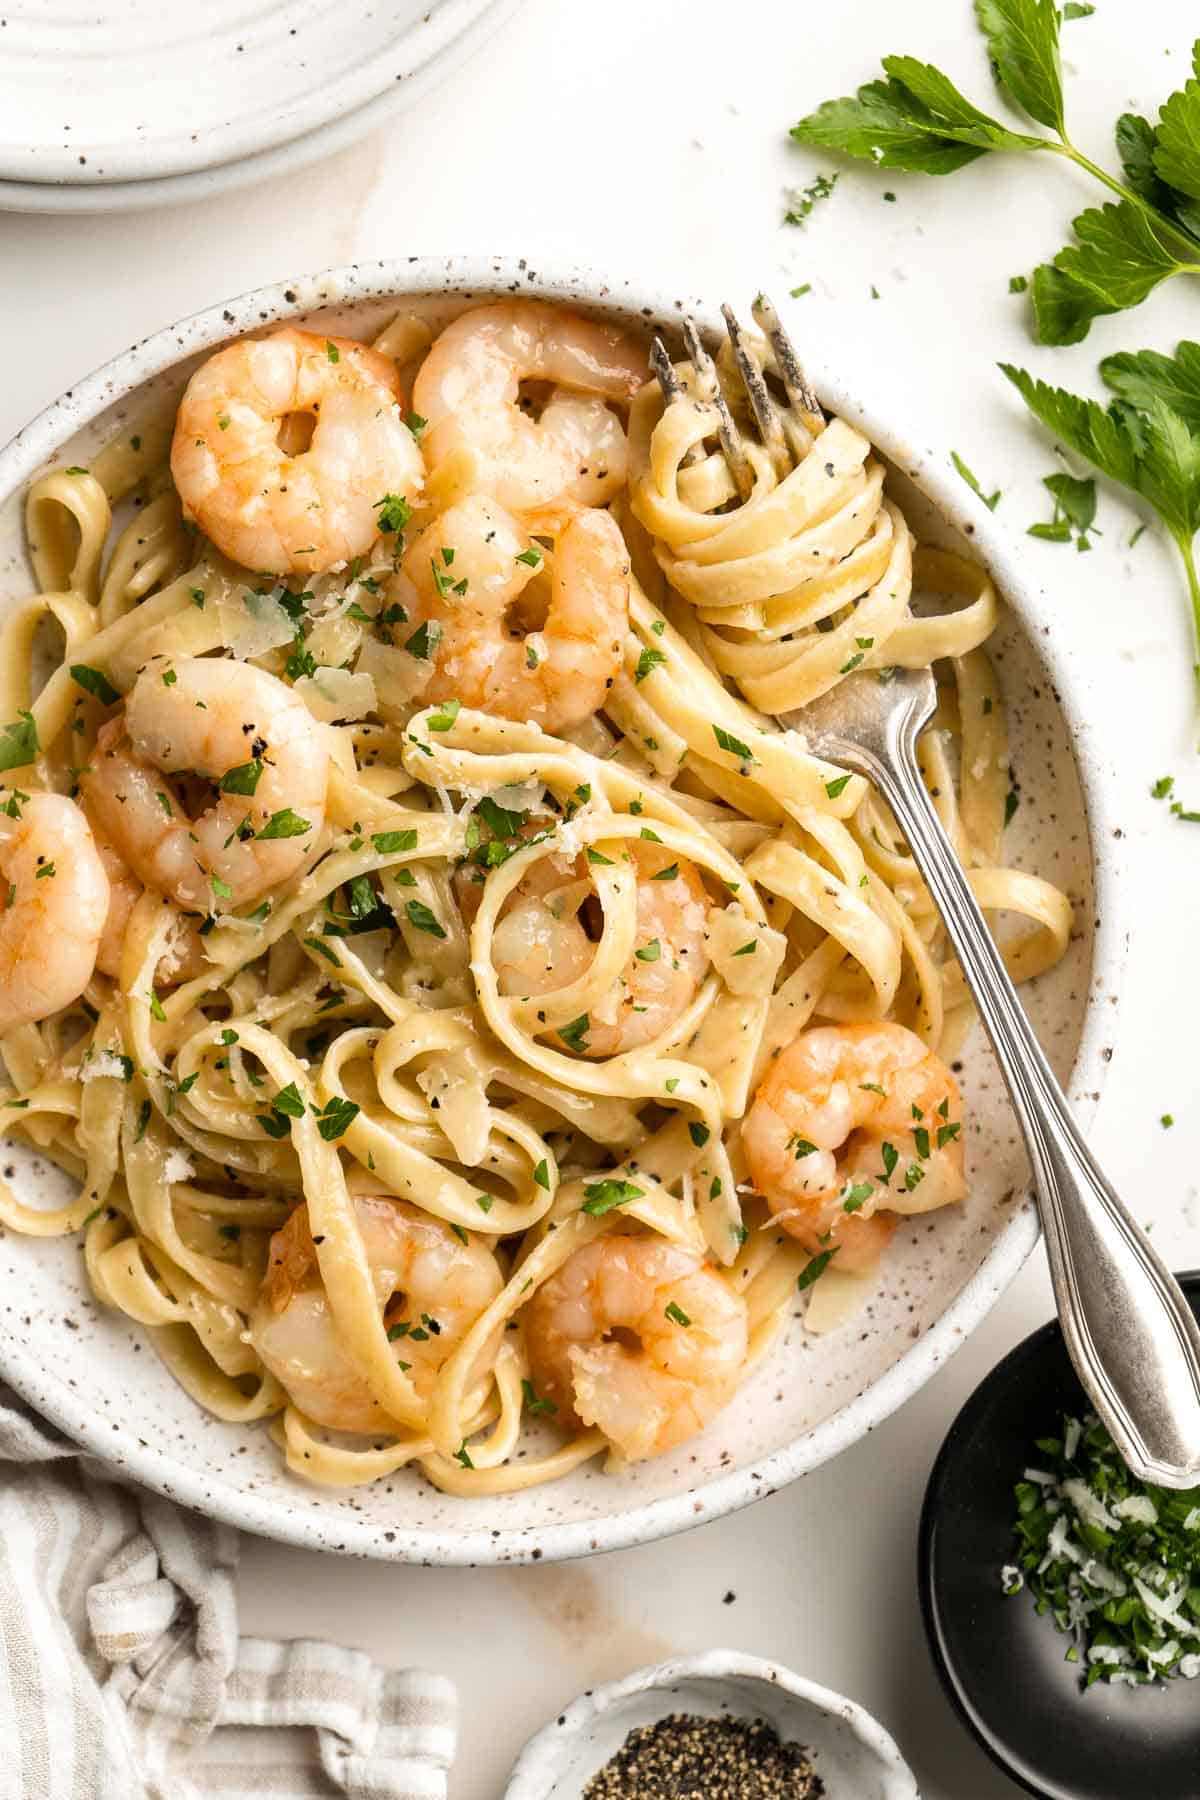
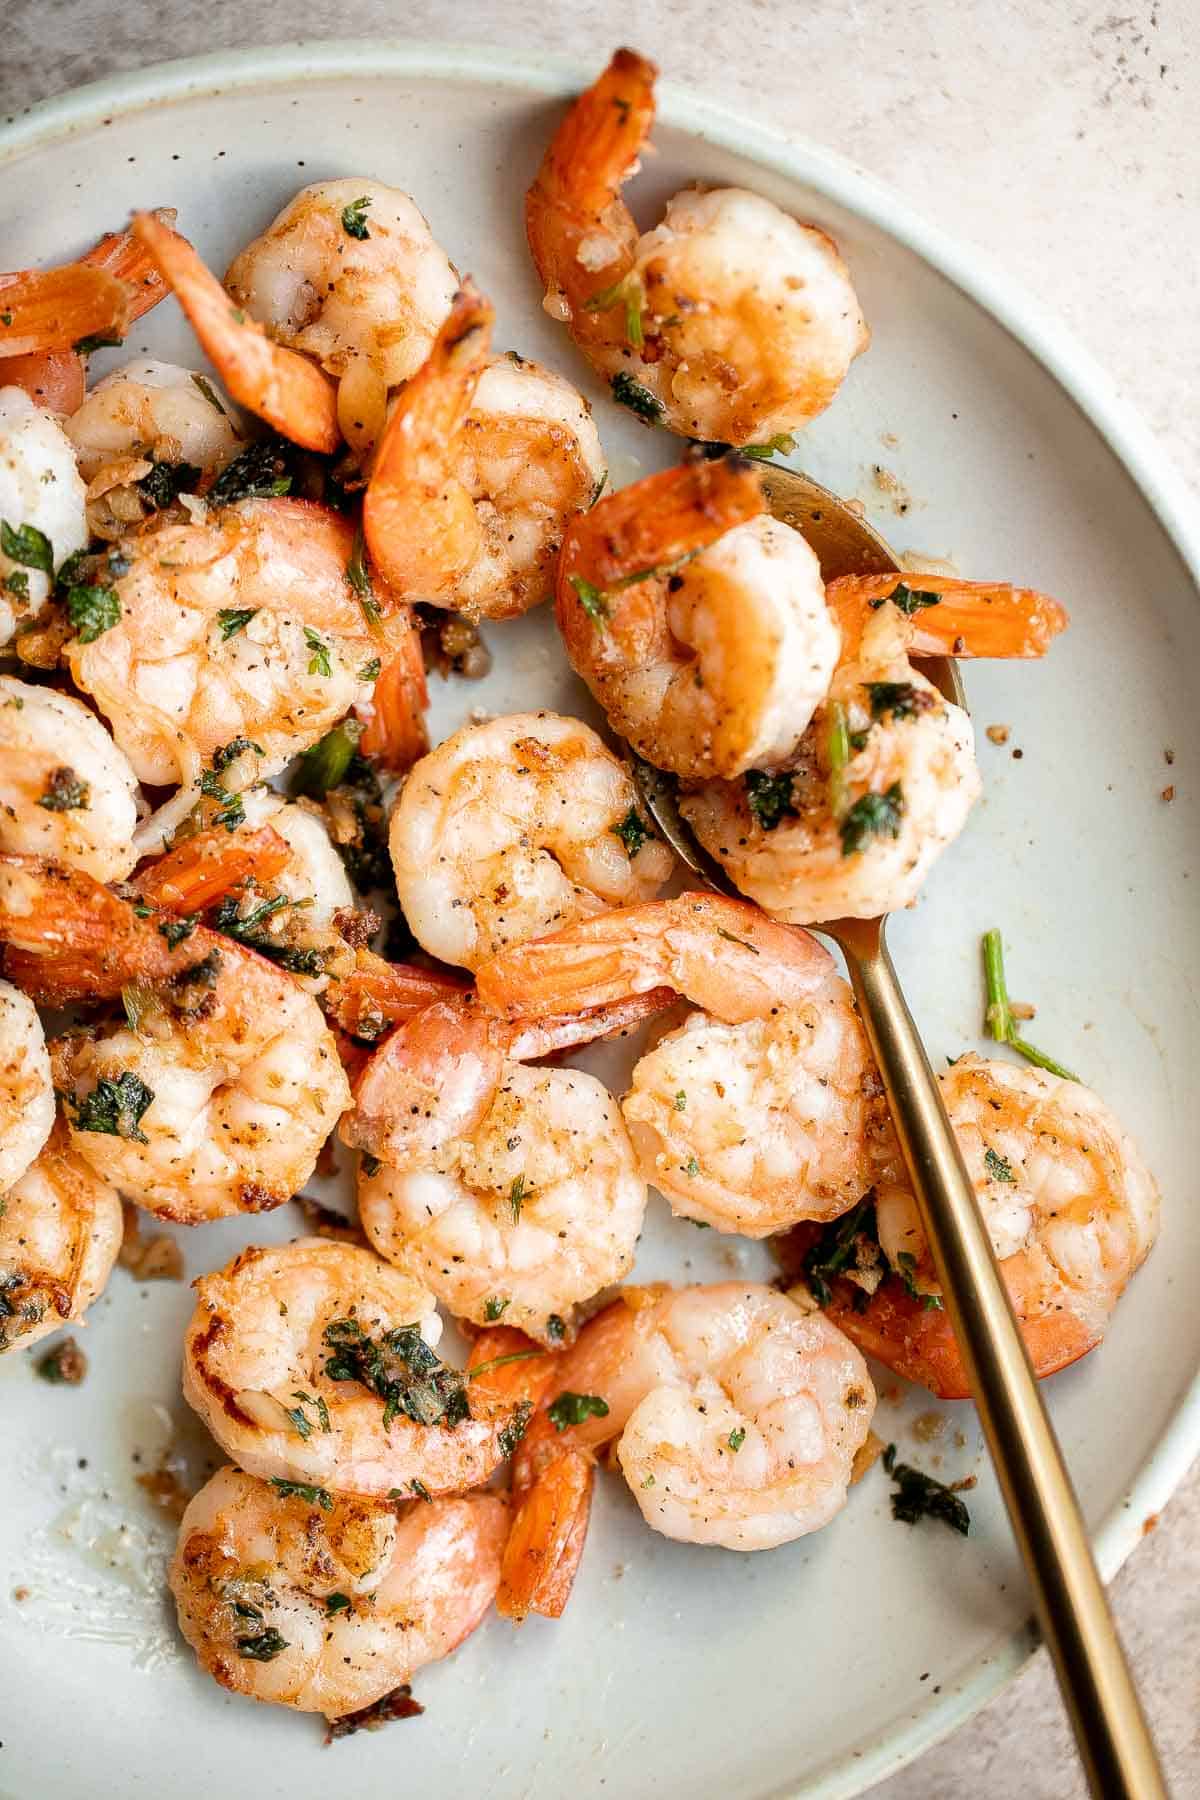
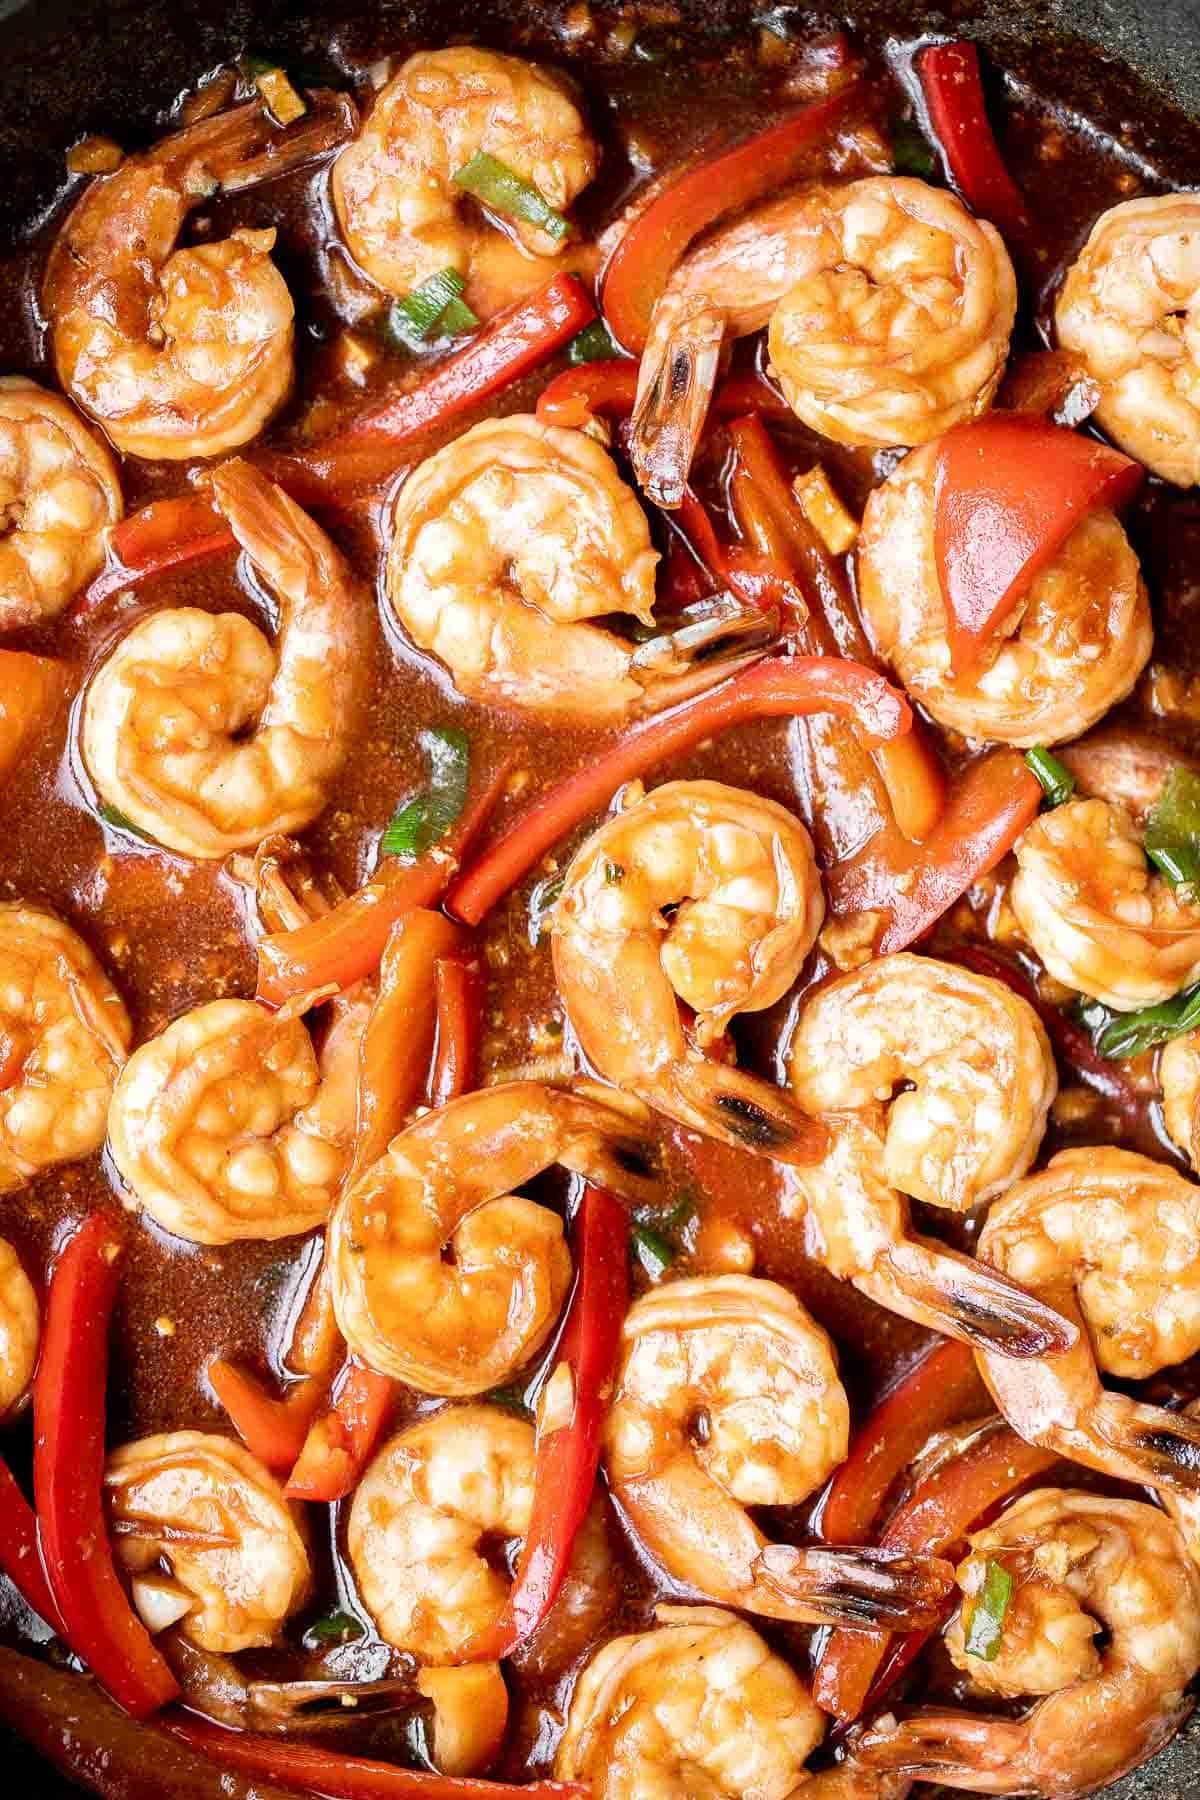
Tried this recipe?
I'd love to hear what you think! Leave a comment and rating below to share your feedback. Your reviews help others discover this recipe and help me keep creating more free recipes for you. Snap a photo and tag me on social media @aheadofthyme too.
This recipe was originally posted in 2021 and was updated with new content.

Baked Cheddar Cheese Sticks

Who says snack time can't feel like a party? These Baked Cheddar Cheese Sticks are crispy, golden, and downright addictive - all without the deep fryer. Made with real cheddar string cheese, a crunchy breadcrumb coating, and baked until bubbly, they're a fun twist on the classic mozzarella sticks we all know and love.

What I love most? They're baked, not fried, which means less mess, less oil, and a lighter bite you can feel good about serving any time. They're kid-approved, crowd-pleasing, and totally versatile. Perfect as a game day appetizer, an after-school snack, or even a quick party starter when you need something everyone will grab in seconds. Trust me, once these cheesy sticks hit the table, they disappear fast!
Try these cheddar cheese sticks with Homemade Marinara Sauce, creamy Ranch Dressing, or even a spicy Chipotle Mayo for dipping.
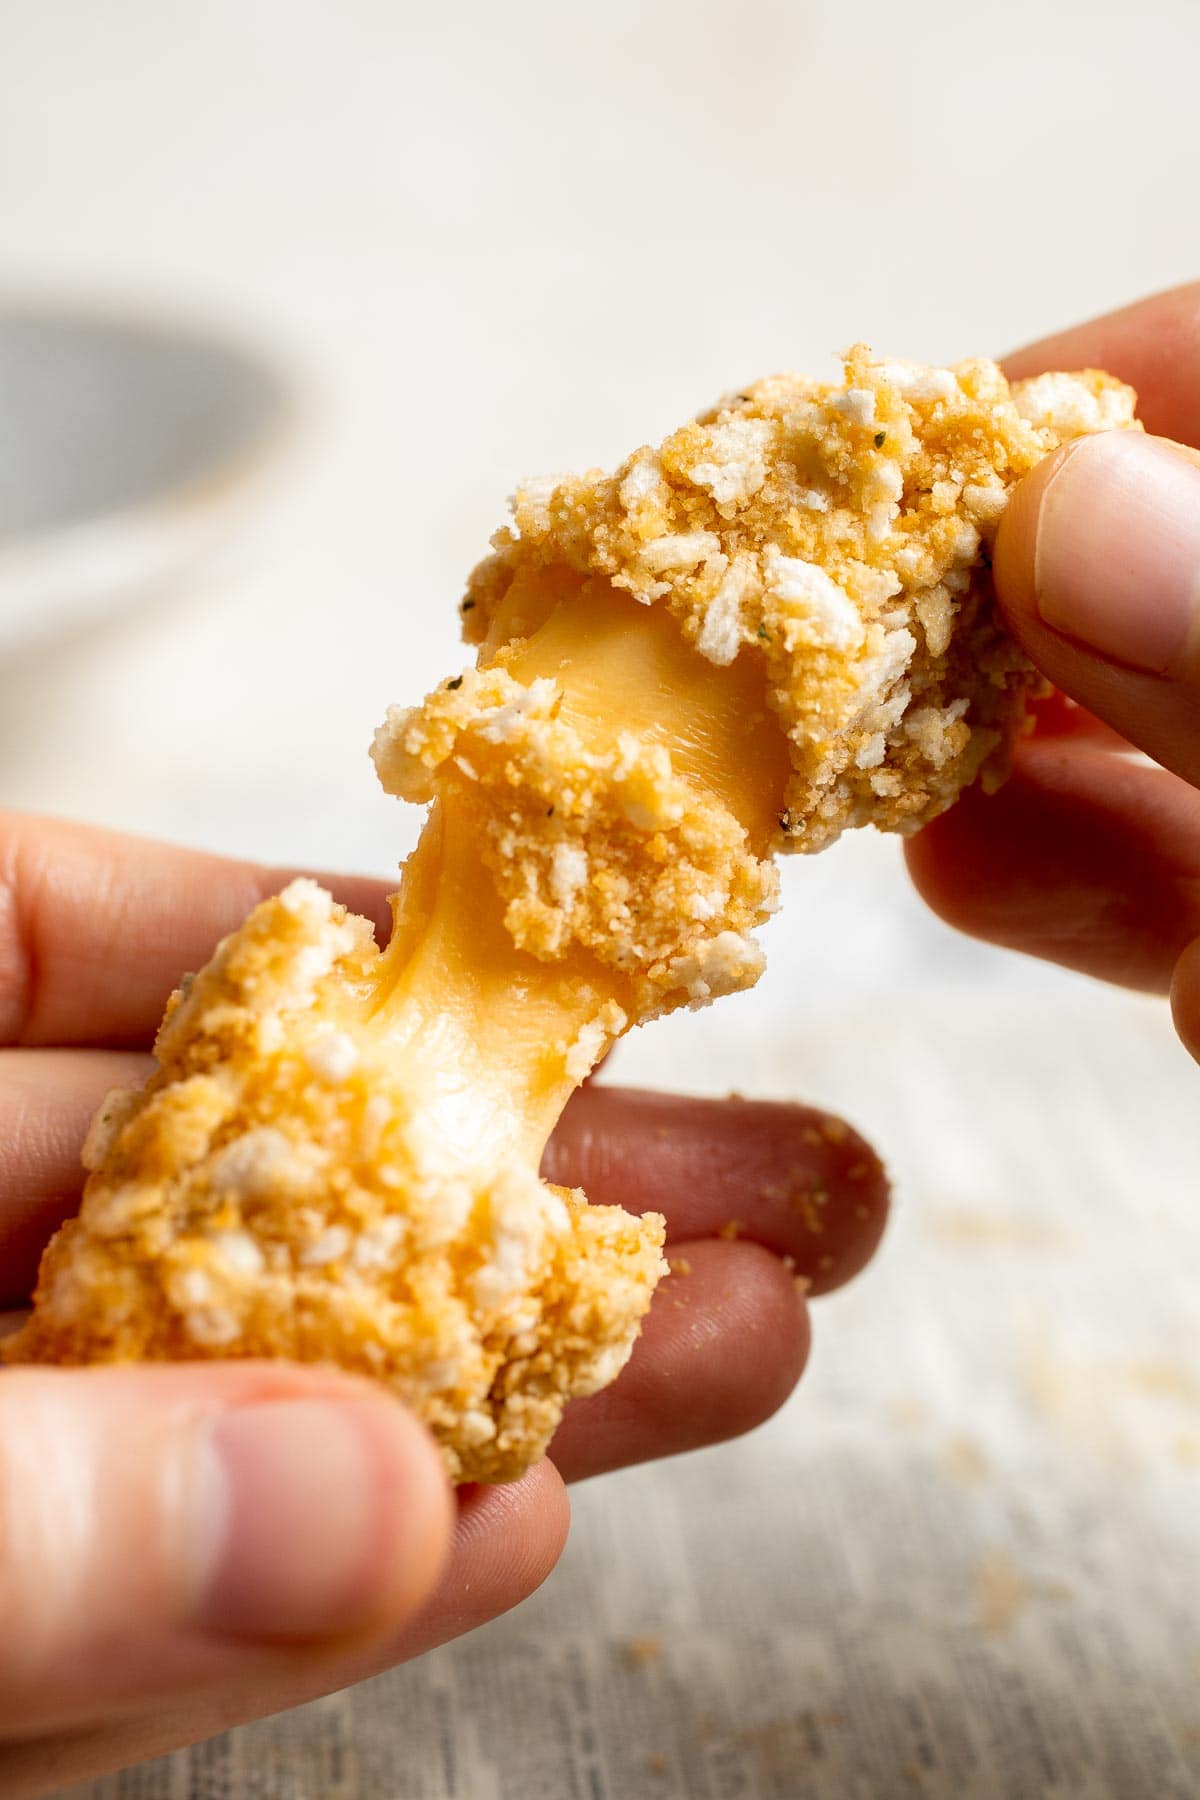
Why You'll Love This Recipe
- Cheddar twist on a classic. Forget mozzarella, these cheese sticks are made with cheddar string cheese, giving them a sharper, bolder flavor that's extra satisfying and pairs so well with herbs and garlic. It's a fresh take on the snack everyone already loves.
- Crispy, golden perfection. Thanks to a simple flour, egg, and seasoned panko breadcrumb coating, these cheddar sticks bake up with that crave-worthy crunch. No soggy coating here - just crispy, crunchy bliss with every bite.
- Oven-baked, not fried. No oil splatters, no greasy mess, and no guilt. Baking keeps them lighter while still delivering the crunchy outside and gooey inside we're after. They're healthier than fried cheese sticks but still taste indulgent.
- Fun for kids and adults. These are the kind of snacks that disappear in minutes at parties, after school, or even at family movie night. Kids love the gooey cheese pull, while adults appreciate the flavor upgrade from cheddar.
- Quick and easy to prep. Just dredge the cheese, coat it, and bake. That's it. You can even prep them ahead, keep in the freezer, and bake from frozen for whenever a snack craving strikes.
Ingredients and Substitutions
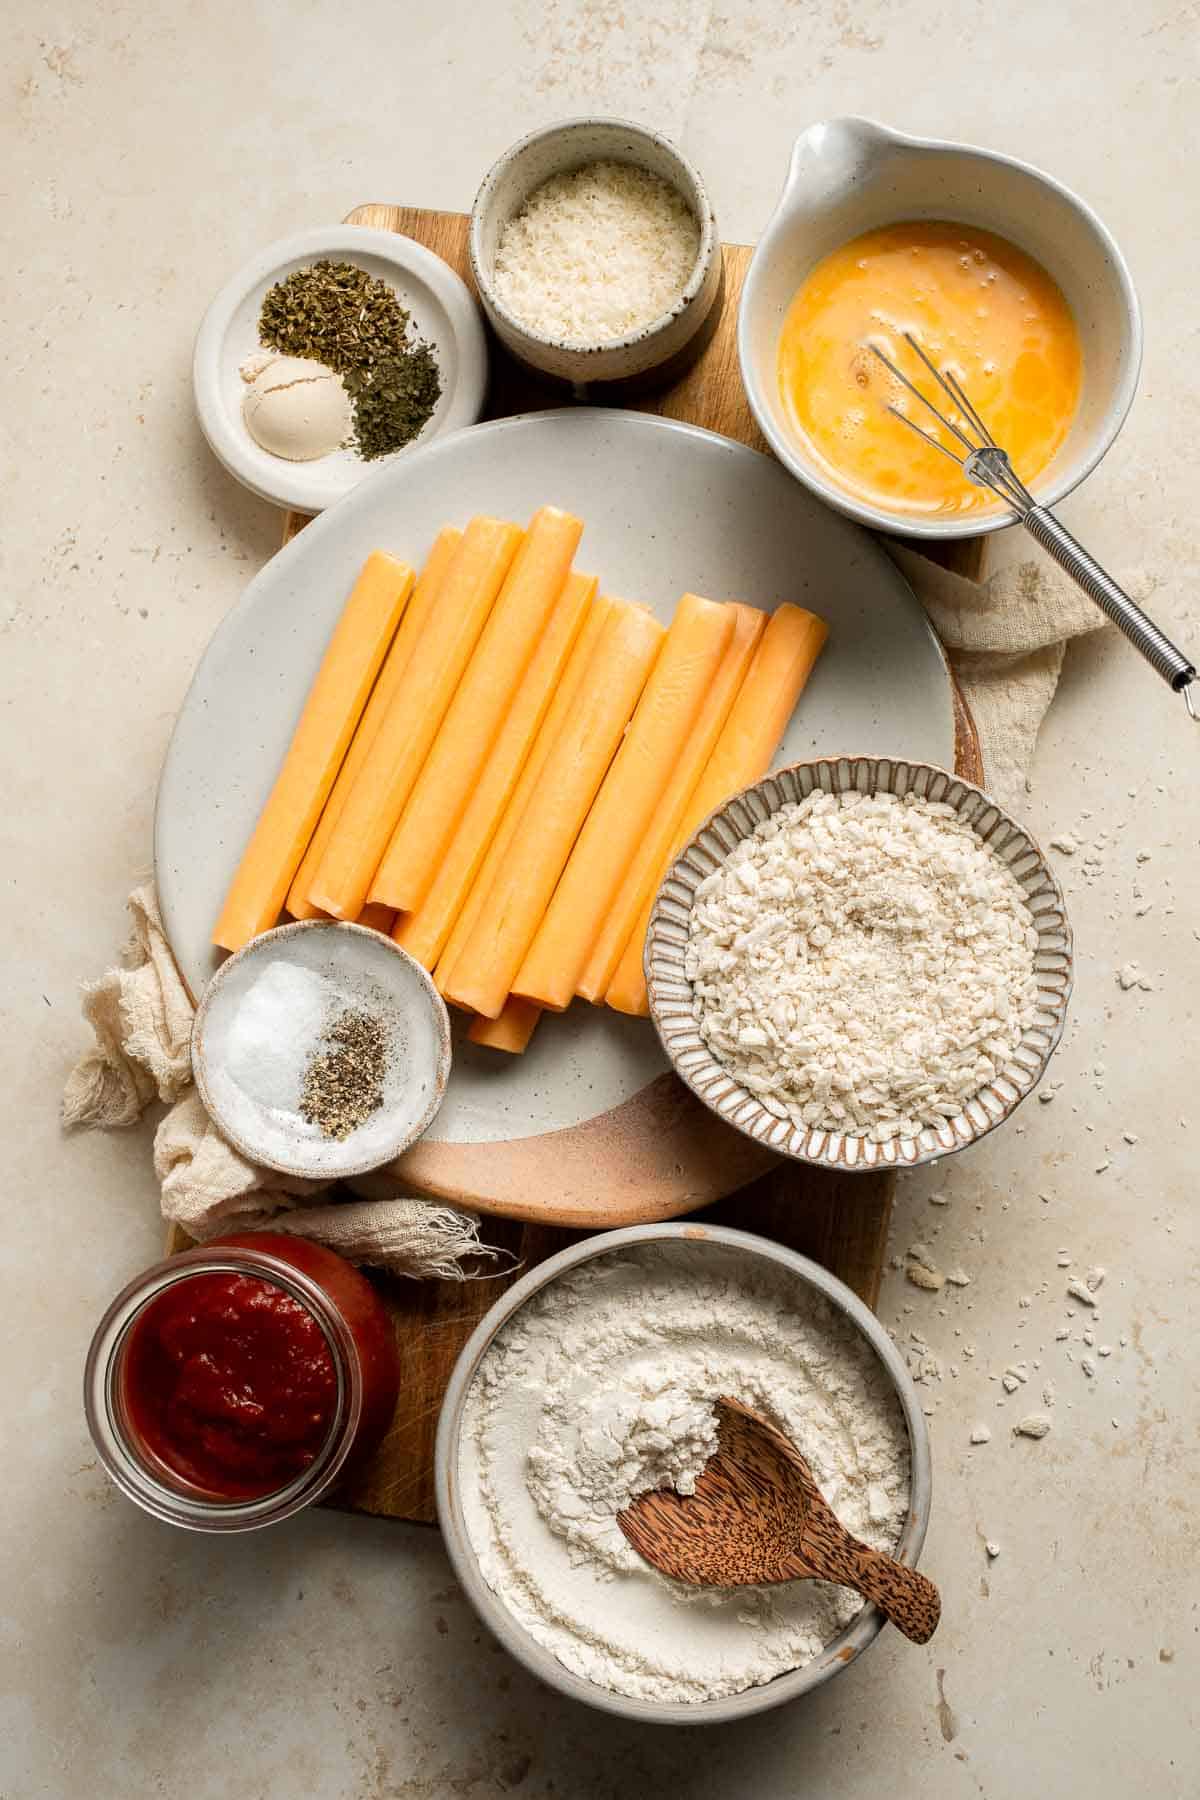
To make these easy Baked Cheddar Sticks, you will need the following ingredients (see recipe card below for quantities):
- cheddar string cheese - The star of the recipe! Using string cheese keeps the portion size just right and makes breading easy. You can swap in mozzarella string cheese or even pepper jack for a spicy twist.
- flour - Helps the coating stick. All-purpose flour works best, but you can use gluten-free flour if needed.
- salt and pepper - Simple seasoning to enhance the flavor of both the cheese and coating.
- eggs - Beaten eggs act as the glue that helps the breadcrumbs stick to the cheese.
- panko breadcrumbs - The secret to that light, crispy coating. Regular breadcrumbs work too, but panko makes them extra crunchy.
- parmesan cheese - Adds salty, nutty flavor to the coating. Romano or Asiago would also work.
- garlic powder - A must for savory flavor in the coating. Onion powder can be substituted if you want a different flavor balance.
- dried oregano - Classic Italian herb that pairs beautifully with cheddar. You could also try dried basil or thyme.
- dried parsley - Adds freshness and color to the breading mix. Optional but recommended.
Equipment
You'll also need measuring cups and spoons, mixing bowls, a baking sheet, parchment paper, and a wire rack (optional, for extra crispiness).
Instructions
- Cut the cheese. Take each cheddar cheese string cheese and use a sharp knife to cut it in half to create 2 shorter strips. Set aside.
- Set up the breading station. Use three shallow bowls: in the first bowl, whisk together the flour, salt, and pepper. In the second, add the beaten eggs. In the third, mix together the panko breadcrumbs, Parmesan, garlic powder, oregano, and parsley.

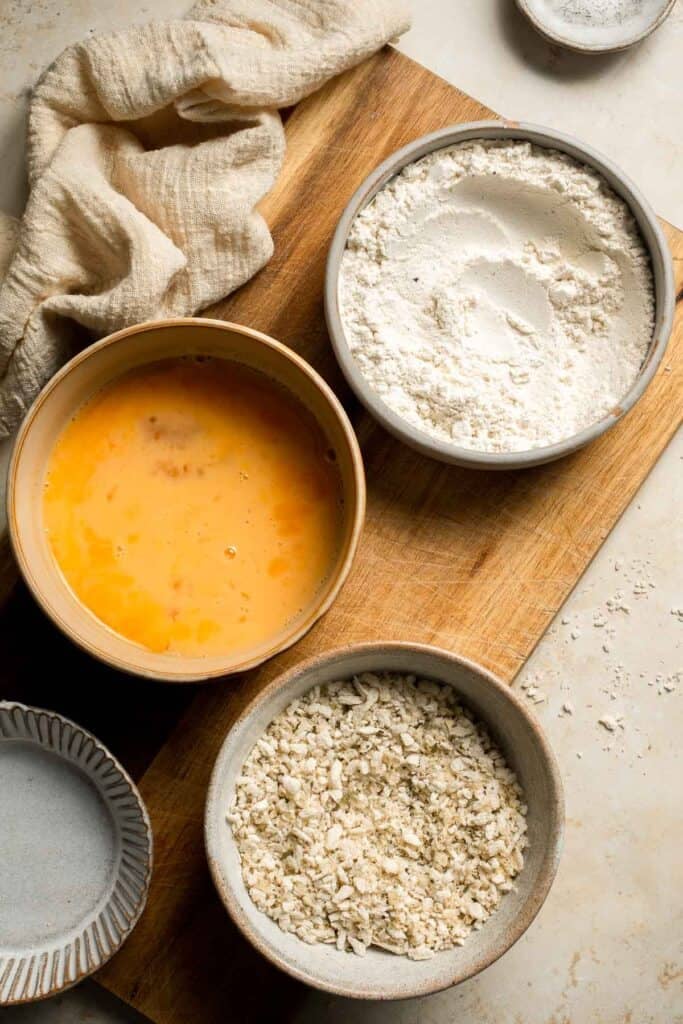
- Coat the cheese sticks. Working one piece at a time, dredge the halved cheddar sticks in the flour to coat, then dip into the eggs, making sure all sides are covered. Finally, roll in the breadcrumb mixture until completely coated. Repeat until all are breaded.
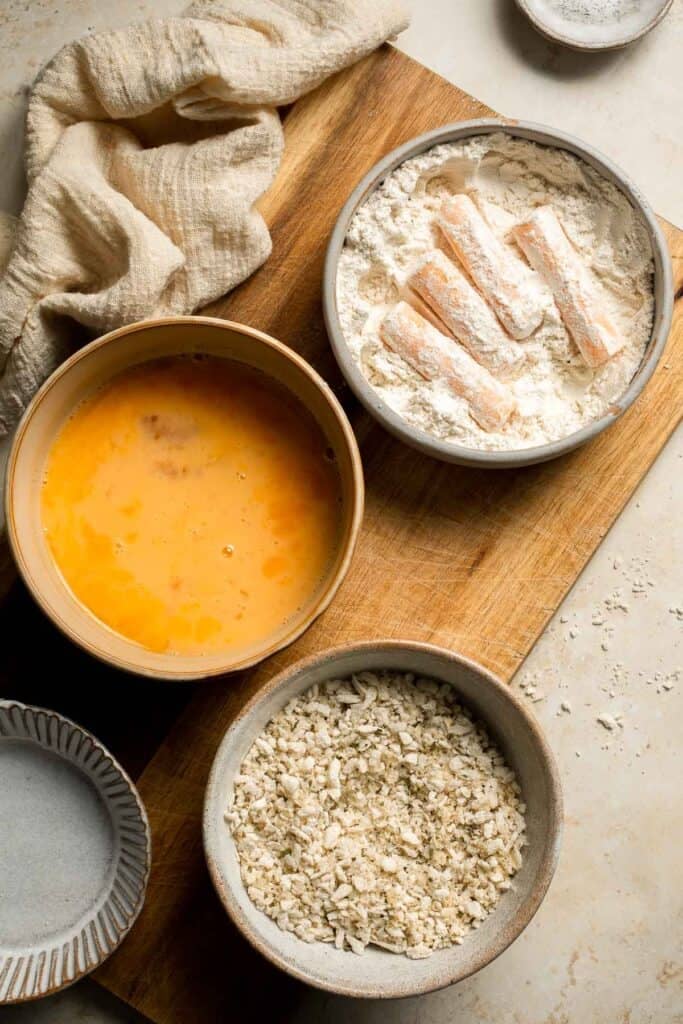
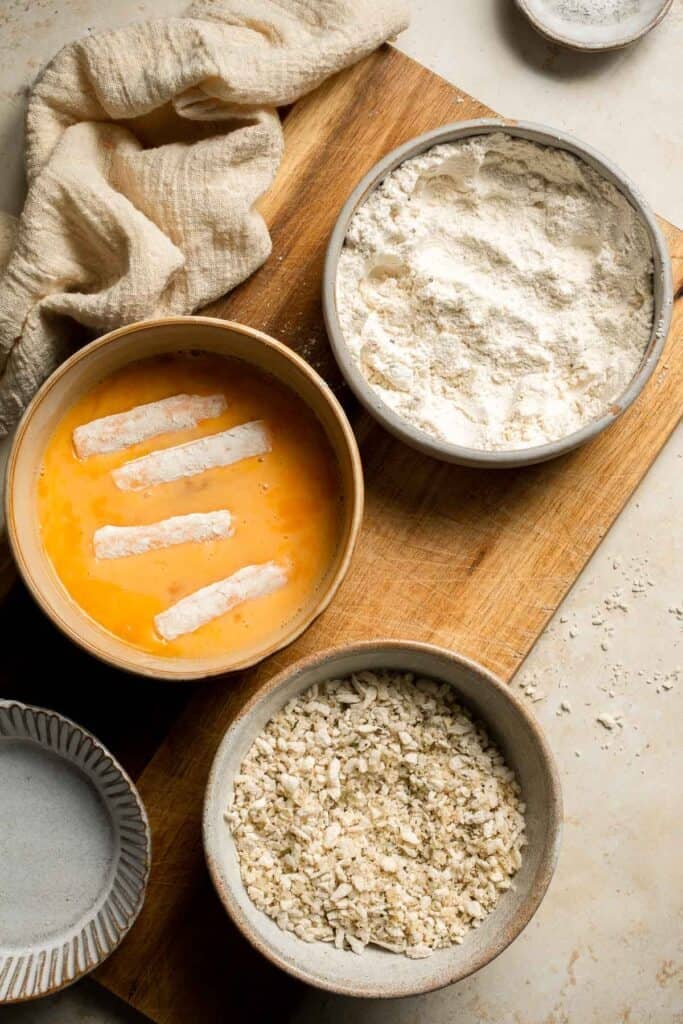
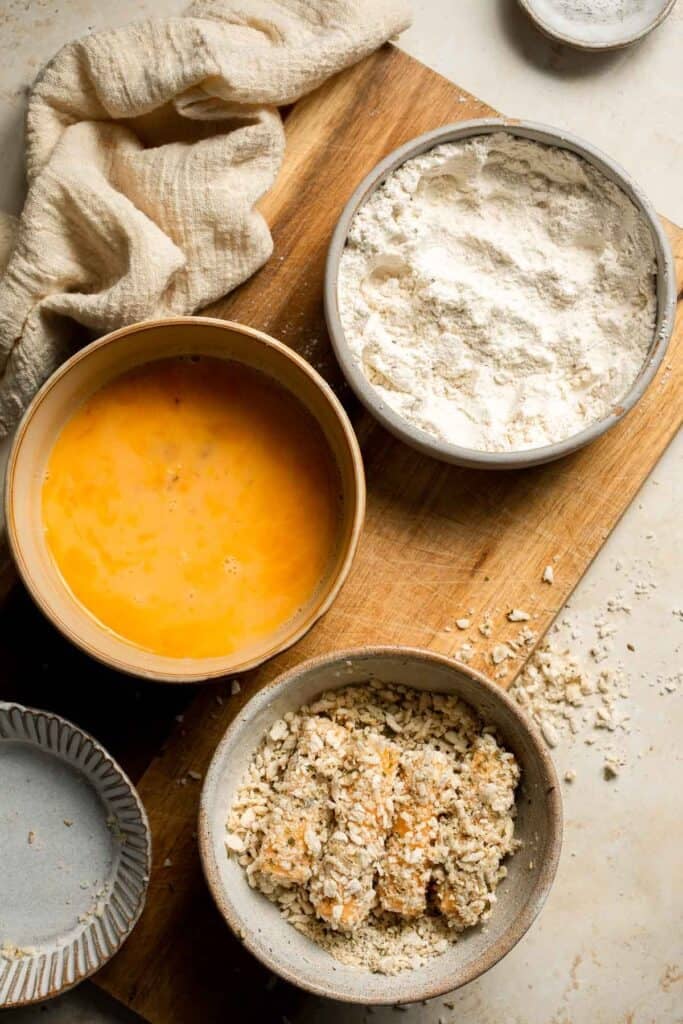
- Freeze. Place the coated cheddar cheese sticks on a parchment-lined baking sheet (this prevents sticking). Freeze for at least 2 hours, or until completely solid.
- Bake. When ready to cook, preheat your oven to 400°F and position the rack in the lower third of the oven. Bake the frozen cheddar cheese sticks for 8-10 minutes, until the coating is golden and crispy. Keep a close eye on them - they'll start to ooze if baked too long!


- Serve. Enjoy hot with marinara, pizza sauce, ranch, or your favorite dipping sauce.
Expert Tip: Freeze Before Baking
Don't skip the freeze step! It keeps the cheese from oozing out before the coating crisps up, ensuring gooey centers and crunchy outsides.
More Tips and Tricks
- Double coat for extra crunch. Dip each cheese stick twice in the egg and breadcrumb mixture for a thicker crust. The extra coating locks in the cheese for a more dramatic cheese pull.
- Don't skip parchment paper. Parchment paper prevents sticking and makes cleanup easy, especially since cheese can sometimes ooze a little in the oven.
- Bake on a rack if possible. Setting the cheese sticks on a wire rack over your baking sheet helps them crisp evenly all around, no soggy bottoms.
- Watch the oven closely. These go from perfect to melty mess fast. Start checking at the 8-minute mark. Keeping them just golden ensures the cheese stays inside.
- Serve hot and fresh. Cheese sticks are best eaten right away for maximum gooeyness. Reheating works, but nothing beats that fresh-from-the-oven pull.
Recipe Variations
- Spicy cheddar sticks. Add cayenne pepper or chili flakes to the breadcrumb mixture for a little kick that balances beautifully with extra sharp cheddar cheese. Other spices like smoked paprika are another variation to try.
- Different cheeses. Try mozzarella, pepper jack, or Colby Jack string cheese instead of cheddar. Each will give a slightly different flavor and meltiness.
- Gluten-free version. Use gluten-free flour and breadcrumbs for a fully gluten-free snack that everyone can enjoy.
- Extra cheesy coating. Mix in more Parmesan (or even shredded cheddar) to the breadcrumb coating for a richer, more indulgent flavor.
- Herb lovers. Add dried basil, thyme, or Italian seasoning for a more herb-forward crust. Perfect if you want a classic Italian appetizer vibe.
See this mozzarella version of this recipe on my website!

Storage
How to Store
Keep leftovers in an airtight container in the fridge for up to 3 days. To absorb extra moisture, consider lining the container with paper towels.
How to Reheat
Reheat in a 375°F oven or air fryer for 5-7 minutes until crispy again.
How to Freeze
Coat the cheese sticks, then freeze unbaked on a tray. Once solid, transfer to a freezer bag. Bake straight from frozen, adding 2-3 extra minutes.
How to Serve
These baked cheddar cheese sticks are a party favorite! Serve them hot with marinara sauce, ranch, or any dip you love. They're perfect for game days, after-school snacks, or even as a fun appetizer at casual get-togethers.
We like serving them alongside pizza night, burgers, or wings, for the ultimate comfort food spread. Some of my favorite dishes to serve with baked cheddar cheese sticks are:

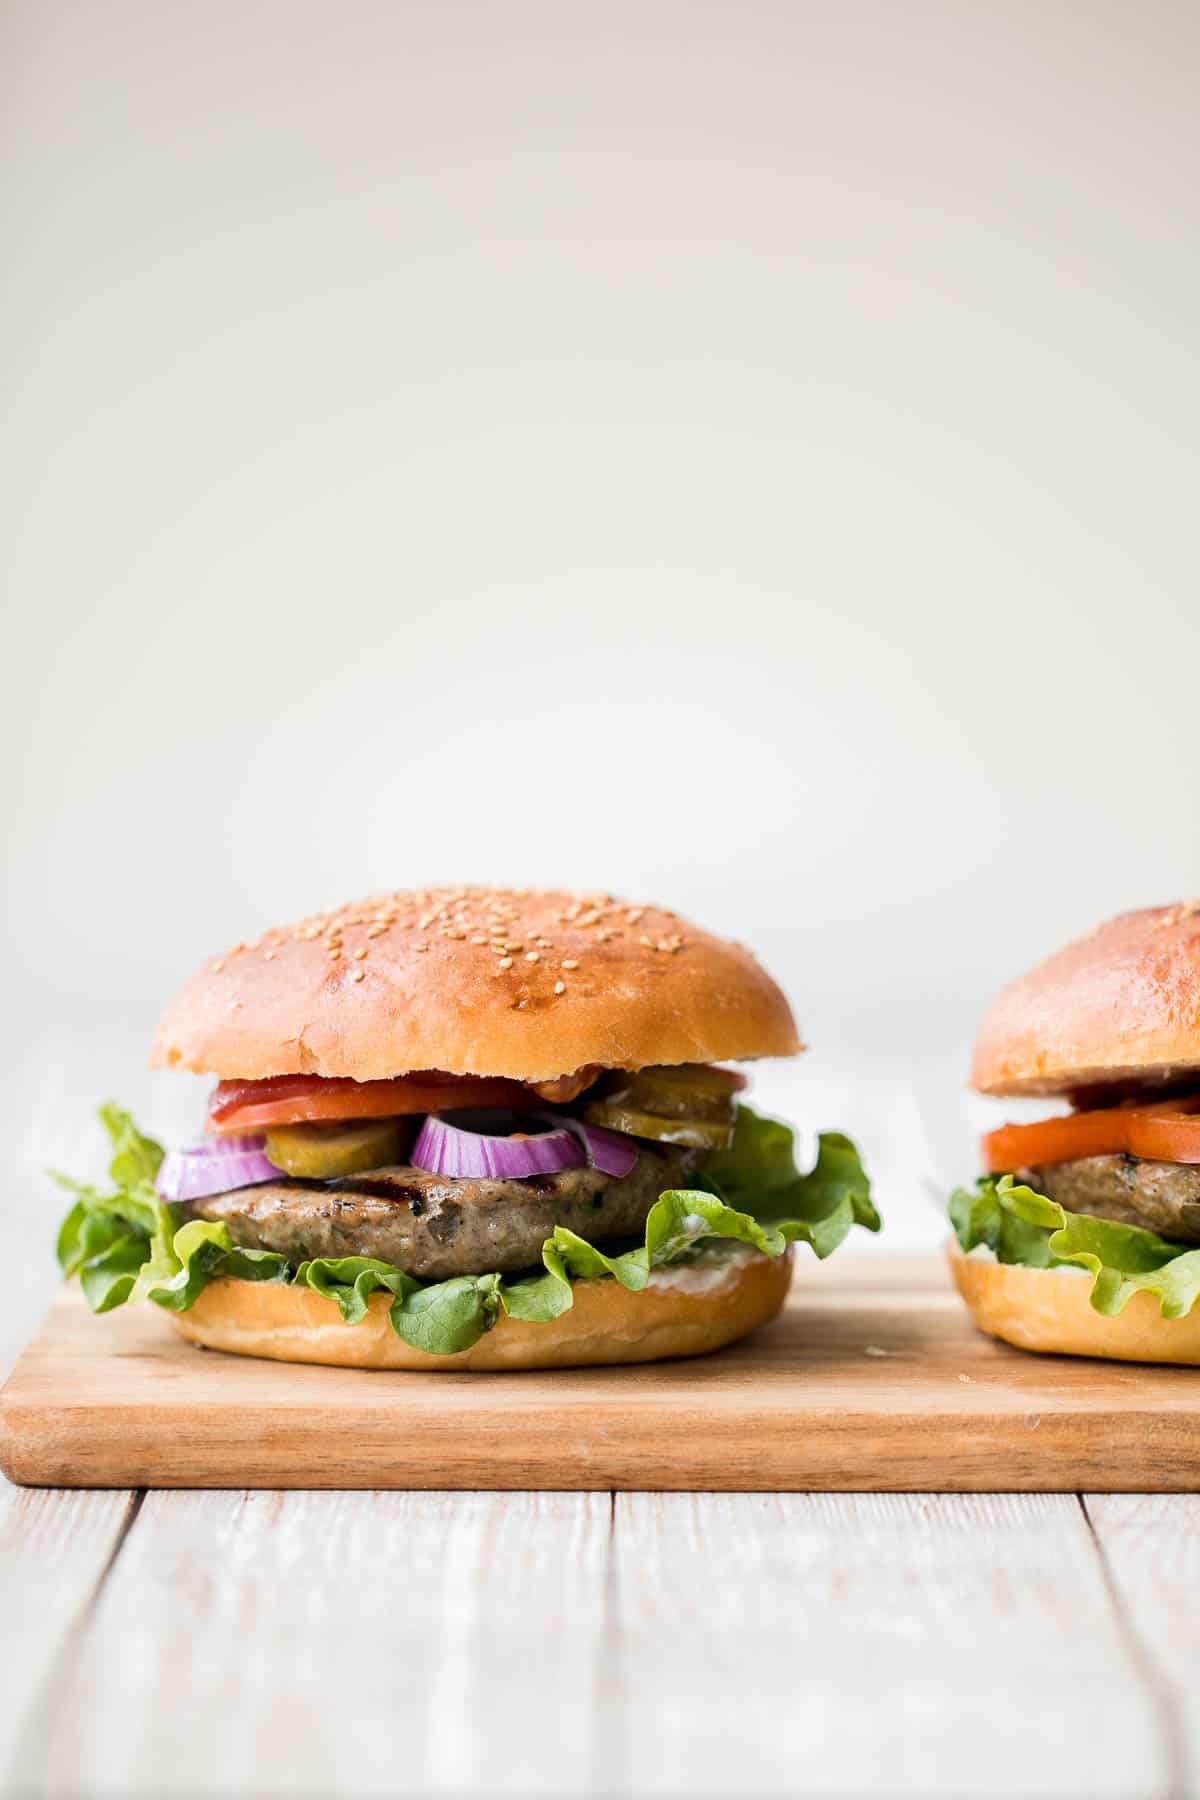
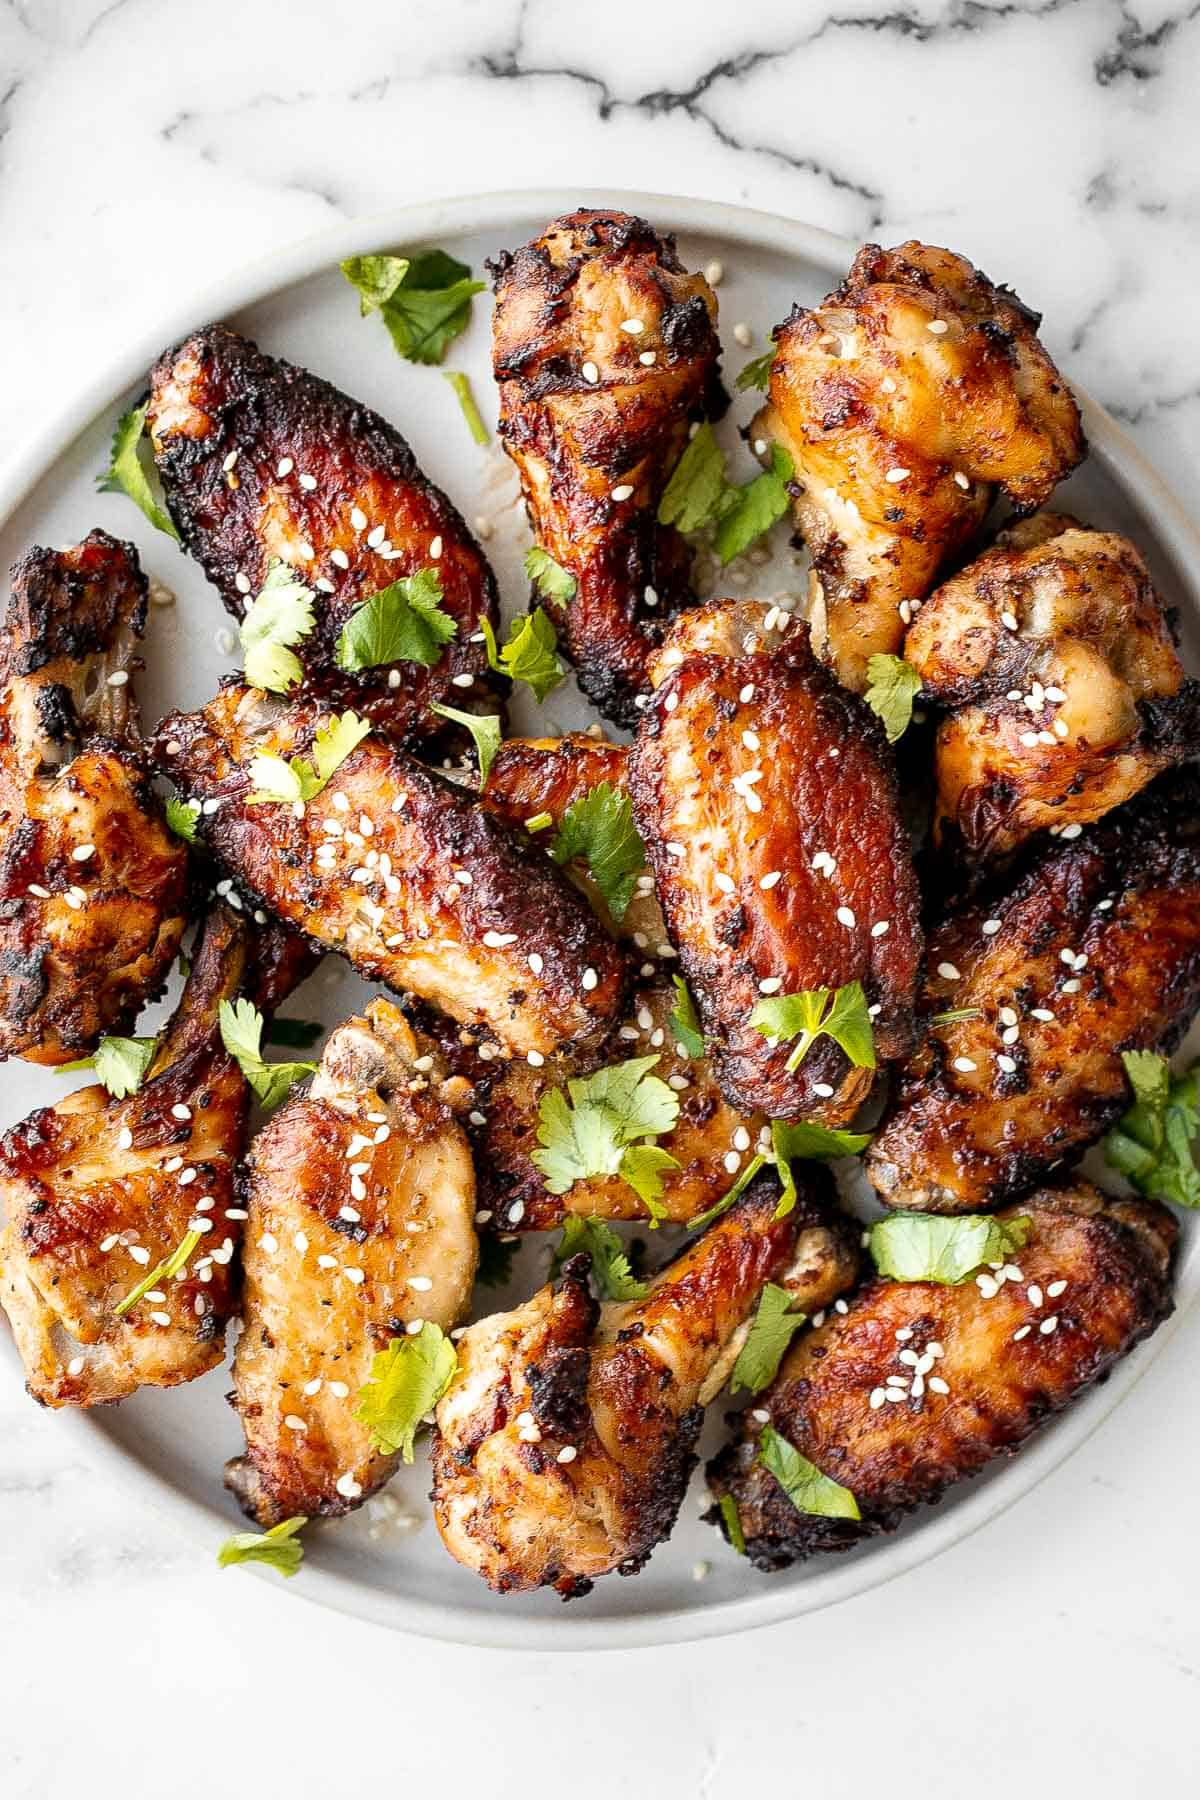


Easy Appetizers
If you're planning a larger appetizer spread, browse our collection from bite-sized finger foods and shareable snack platters to creamy dips, holiday appetizers, and more. These recipes are perfect for entertaining, casual gatherings, or anytime you want a delicious, crowd-pleasing starter.
FAQ
Yes! Cheddar is fantastic for cheese sticks, offering a richer and sharper taste than mozzarella. The cheddar string cheese melts just enough to stay gooey inside while the crunchy breadcrumb coating adds texture. This combo makes them both flavorful and fun to eat.
Yes - in fact, string cheese makes this recipe almost foolproof. It's portioned, holds its shape well, and melts into a perfectly gooey center without completely spilling out in the oven. Cheddar string cheese works especially well for flavor and texture.
Absolutely! Baking is an easy, mess-free alternative to frying. You'll still get that golden, crispy coating without the heavy oil. It's a healthier, weeknight-friendly method, and the best part is that cleanup is quick.
Yes, cheddar bakes beautifully! It melts into a creamy, gooey texture while still holding enough structure to create that irresistible cheese pull in recipes like cheese sticks. Unlike mozzarella, which is super stretchy, cheddar develops a richer, sharper flavor as it bakes, making it perfect for oven-baked snacks and casseroles. Just remember that because cheddar has a slightly lower melting point, freezing it before baking helps keep everything intact and prevents the cheese from leaking out too quickly.
Compared to fried cheese sticks, baked cheddar cheese sticks are definitely a lighter option. By skipping the oil and baking instead, you cut down on calories and fat while keeping all the cheesy satisfaction. They're not health food, but they're a smarter indulgence that feels balanced when paired with fresh sides like salad or veggies.
They can if overbaked, which is why freezing before baking is key. It slows down the melting process so the coating crisps up first. As long as you keep a close eye on them, you'll get perfect results every time with gooey centers and crispy shells.
Classic marinara is the go-to, but cheddar cheese sticks also shine with ranch dressing, honey mustard, buffalo ranch, or even a smoky BBQ dip. For a fun spread, serve a few different sauces so everyone can pick their favorite.
More Cheese Recipes
Looking for other recipes like this? Try these:


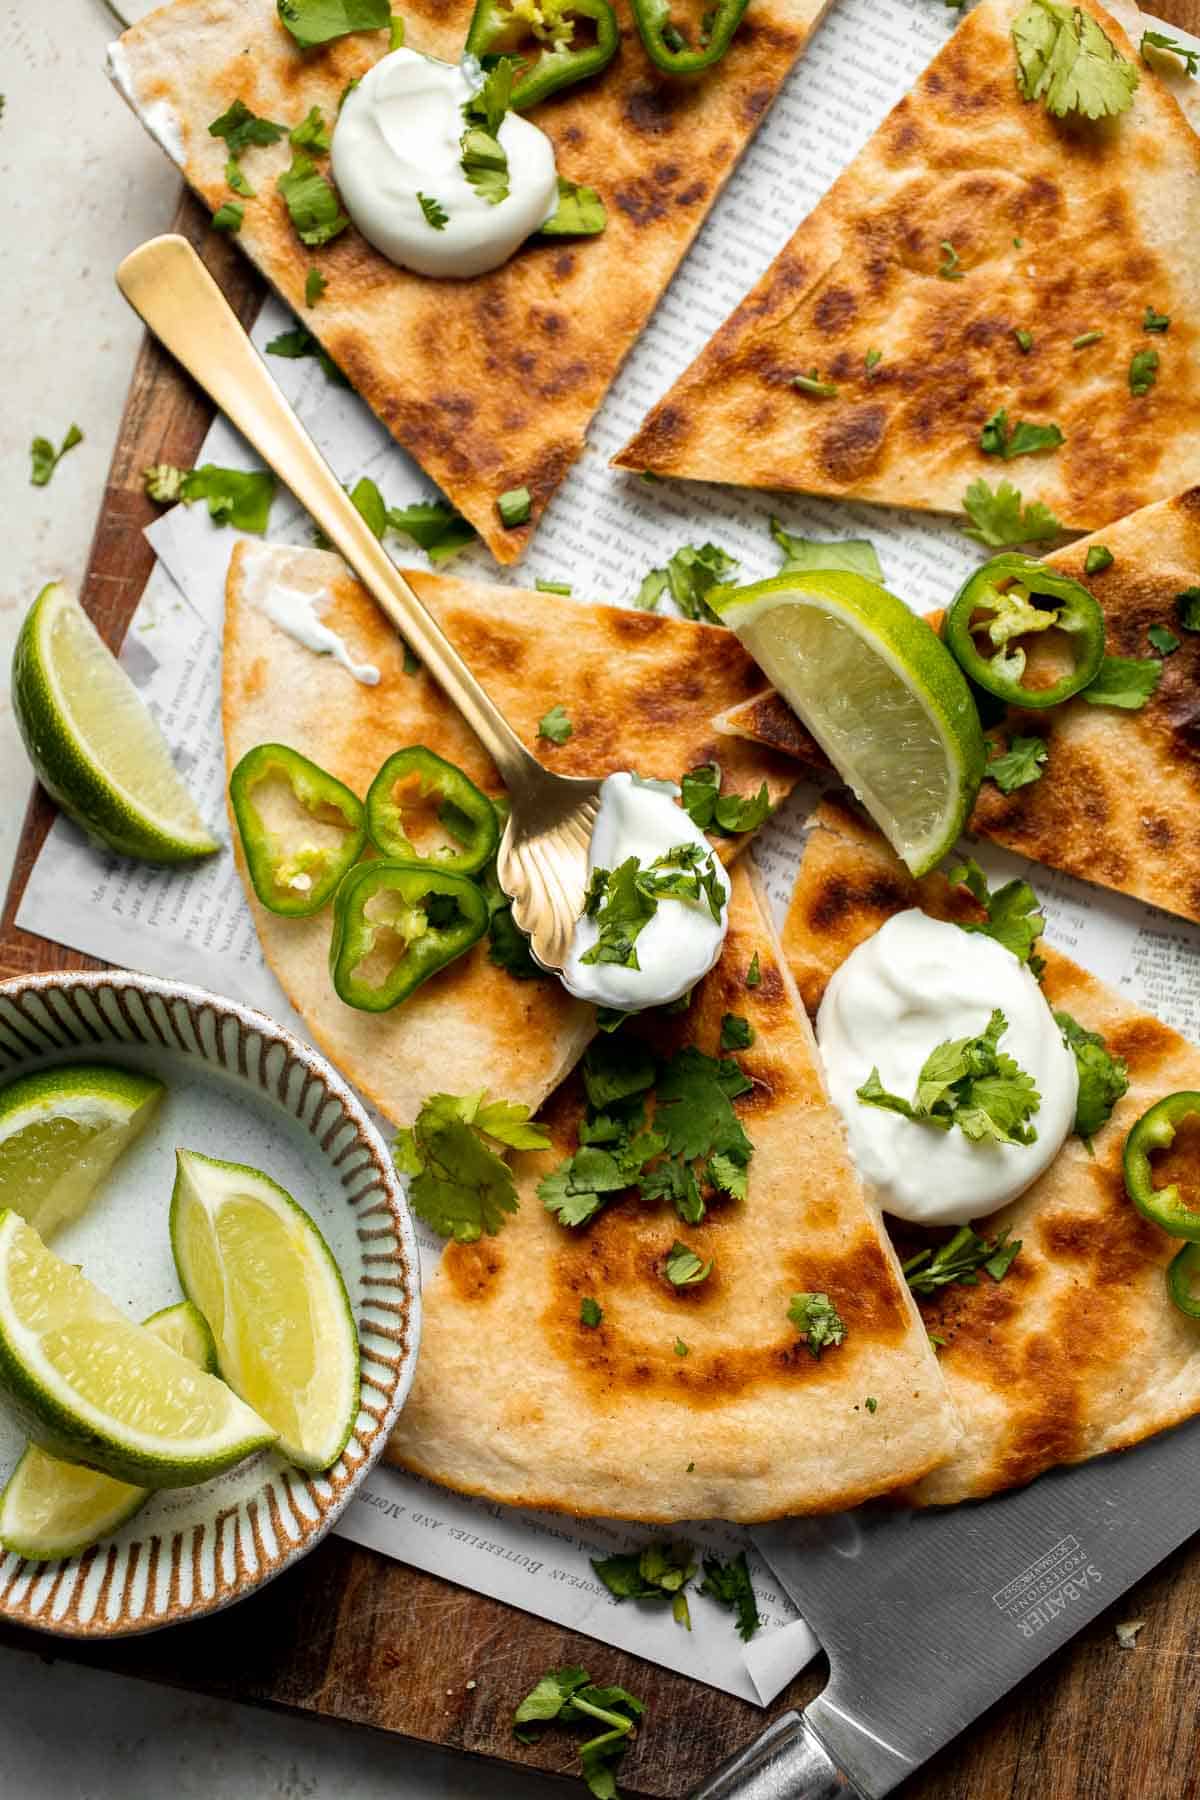
Tried this recipe?
I'd love to hear what you think! Leave a comment and rating below to share your feedback. Your reviews help others discover this recipe and help me keep creating more free recipes for you. Snap a photo and tag me on social media @aheadofthyme too.

25 Delicious Zucchini Recipes That Will Make You Love Veggies

Looking for the most delicious zucchini recipes to make this season? You're in the right place. This humble summer veggie is one of the most versatile ingredients you can bring into your kitchen, and it deserves the spotlight. That's why I've rounded up 25 zucchini recipes that will actually make you love veggies. Whether you're roasting it until golden, baking it into breads, or twirling it into pasta, zucchini proves it can do just about anything - and taste amazing while doing it.
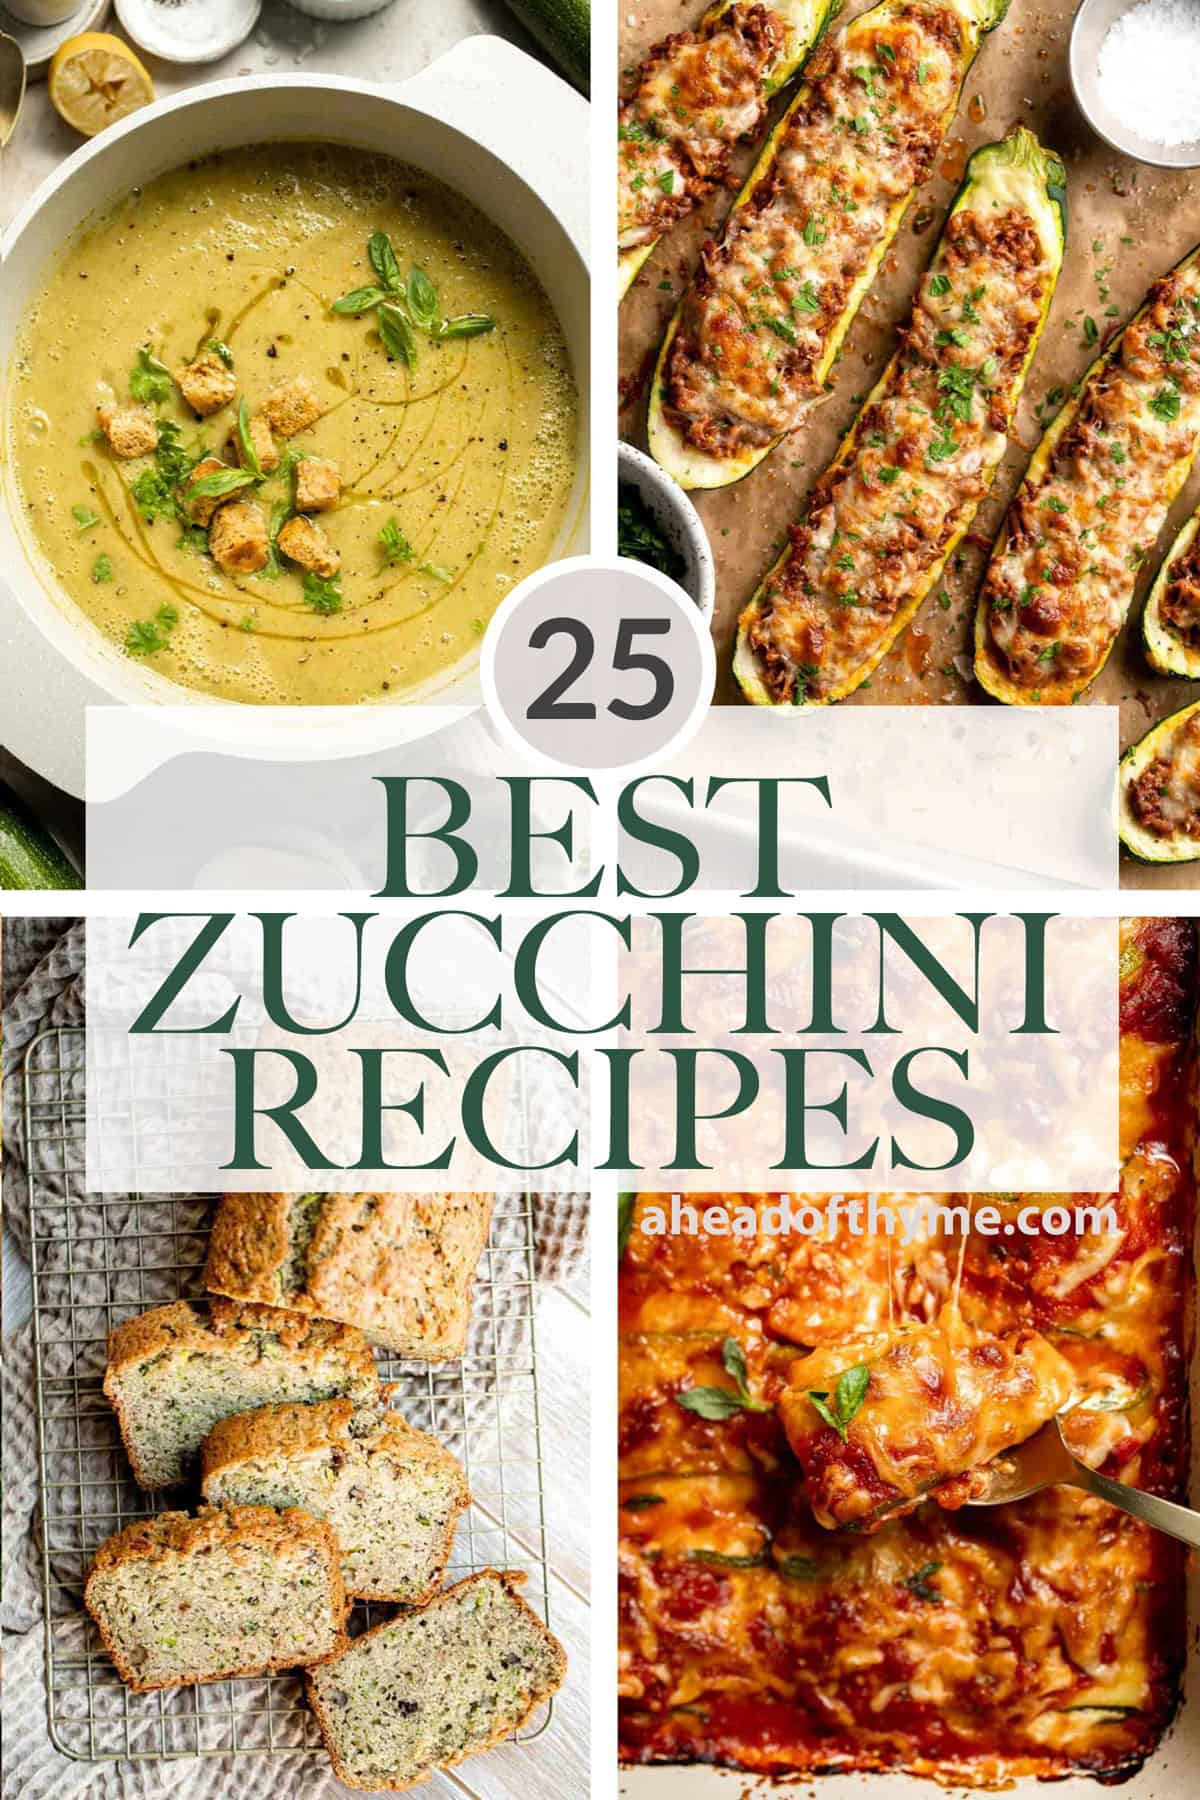
From light and fresh salads to cozy baked casseroles, there's truly something for every craving on this list. Zucchini shines as a low-carb alternative in classic comfort foods, but it also holds its own as the star of the show in dishes like ffritters, soups, and stuffed zucchini boats. These recipes aren't just healthy, they're so tasty that they might convert even the biggest veggie skeptics.
And the best part? Zucchini is budget-friendly, healthy, and available year-round, but it's at its peak in the summer months - making this the perfect time to put your farmer's market haul to good use. These recipes will inspire you to get creative with zucchini and maybe even discover a new family favorite.
Zucchini Appetizers and Snacks
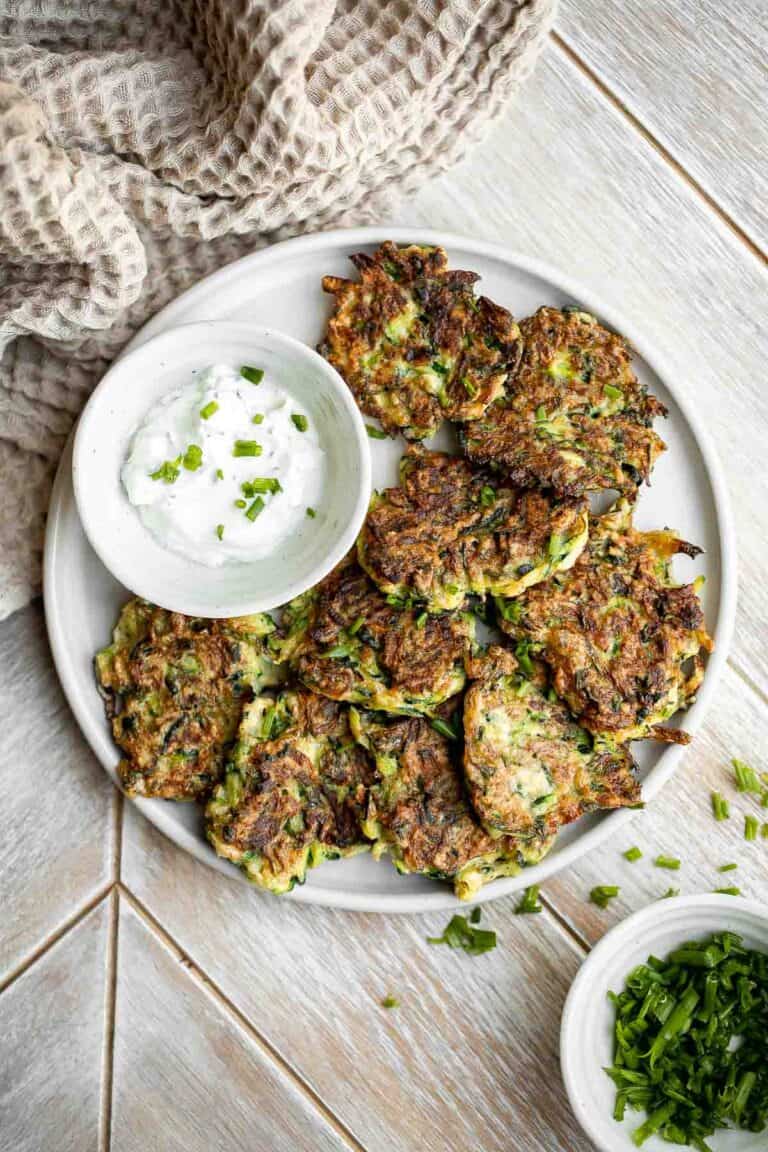
Zucchini Fritters
Zucchini fritters are crispy outside, tender inside, and loaded with zucchini. These healthy bites are one of my favorite ways to use up summer zucchini.

Baked Zucchini Fries
Baked Zucchini Fries are healthy, flavorful, and delicious. This summer vegetable is crispy on the outside while soft and creamy on the inside.

Zucchini Muffins
Quick and easy zucchini muffins are loaded with fresh zucchini which makes them fluffy, moist, delicious, and full of nutrients. Freezer-friendly too!

Air Fryer Zucchini Chips
Air fryer zucchini chips make an excellent snack or side dish - they are savory, salty, and flavorful! A quick and easy recipe made with 5 ingredients.
Zucchini Bites
Zucchini Bites are savory balls that are loaded with fresh zucchini. They're quick and easy to make in under 30 minutes in the air fryer or oven.
Zucchini Side Dishes

Roasted Zucchini
Roasted Zucchini is a light and healthy summer veggie side dish that s easy to make using a handful of simple ingredients and minimal effort.
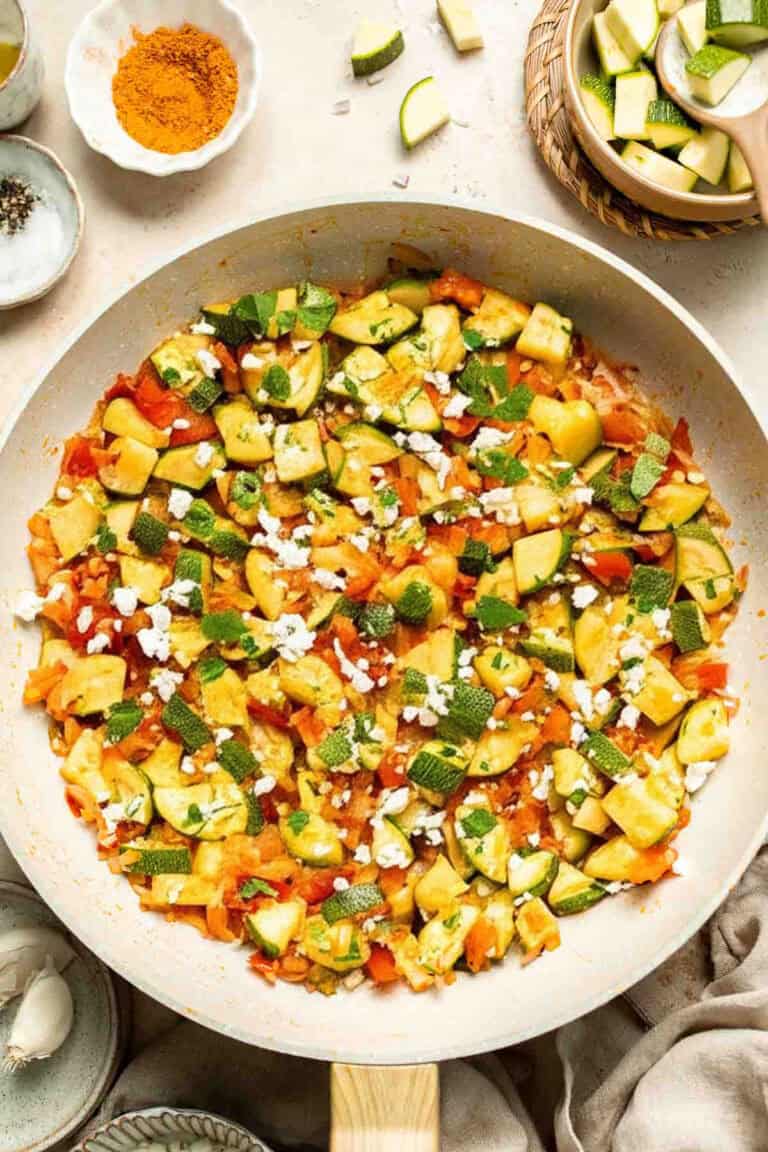
Calabacitas (Mexican Zucchini)
Calabacitas (Mexican Zucchini) is a traditional side dish made with zucchini, corn, tomatoes, and peppers. Make these colorful veggies in just 20 minutes.
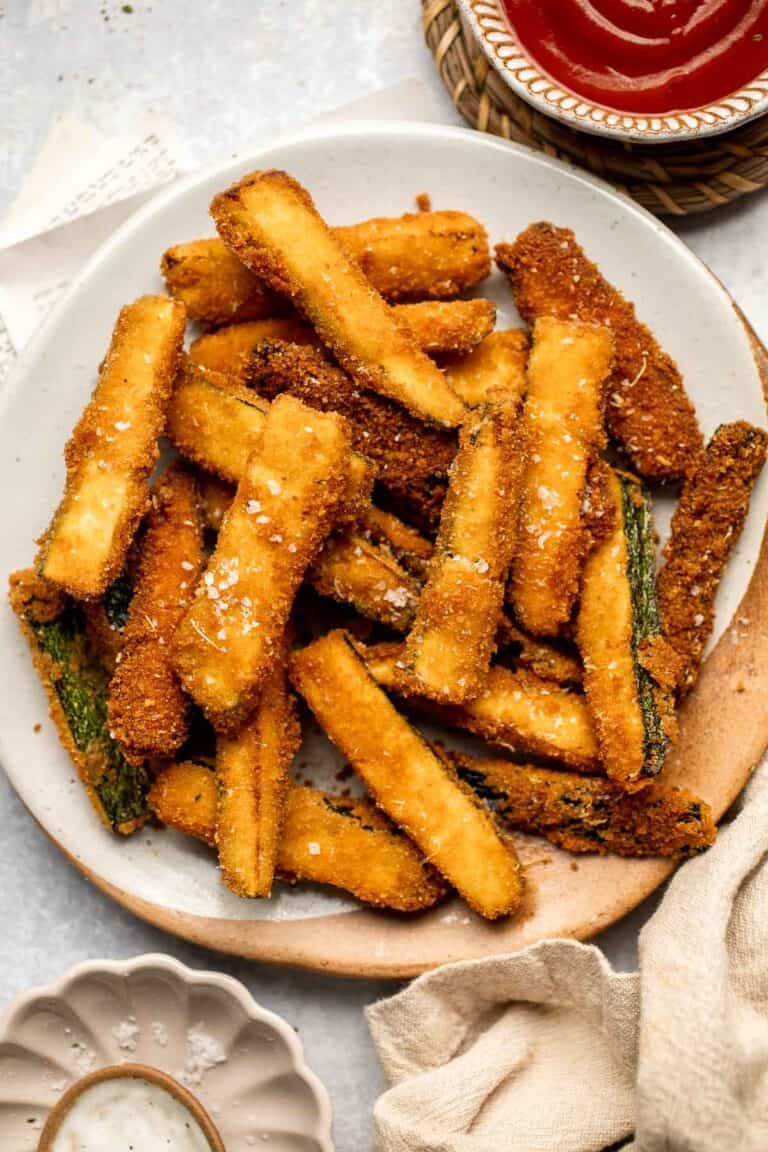
Fried Zucchini
Fried Zucchini are flavorful, savory, and delicious. Soft and tender zucchini fries are coated in a golden crispy breadcrumb exterior. So good!

Cheesy Baked Zucchini with Marinara
Cheesy Baked Zucchini with Marinara will save your weeknight dinner routine (and the kids love it too!). It's low carb, vegetarian, gluten-free, and keto.
Zucchini Mains

Baked Zucchini Roll Ups (Low Carb Lasagna)
Baked Zucchini Roll Ups are a low carb lasagna alternative with ricotta, marinara, and cheese rolled in tender zucchini slices. It's healthier and lighter!
Stuffed Zucchini Boats
Stuffed Zucchini Boats are a fun, low carb dinner filled with a hearty meat sauce, topped with cheese, and baked until melty and bubbly.
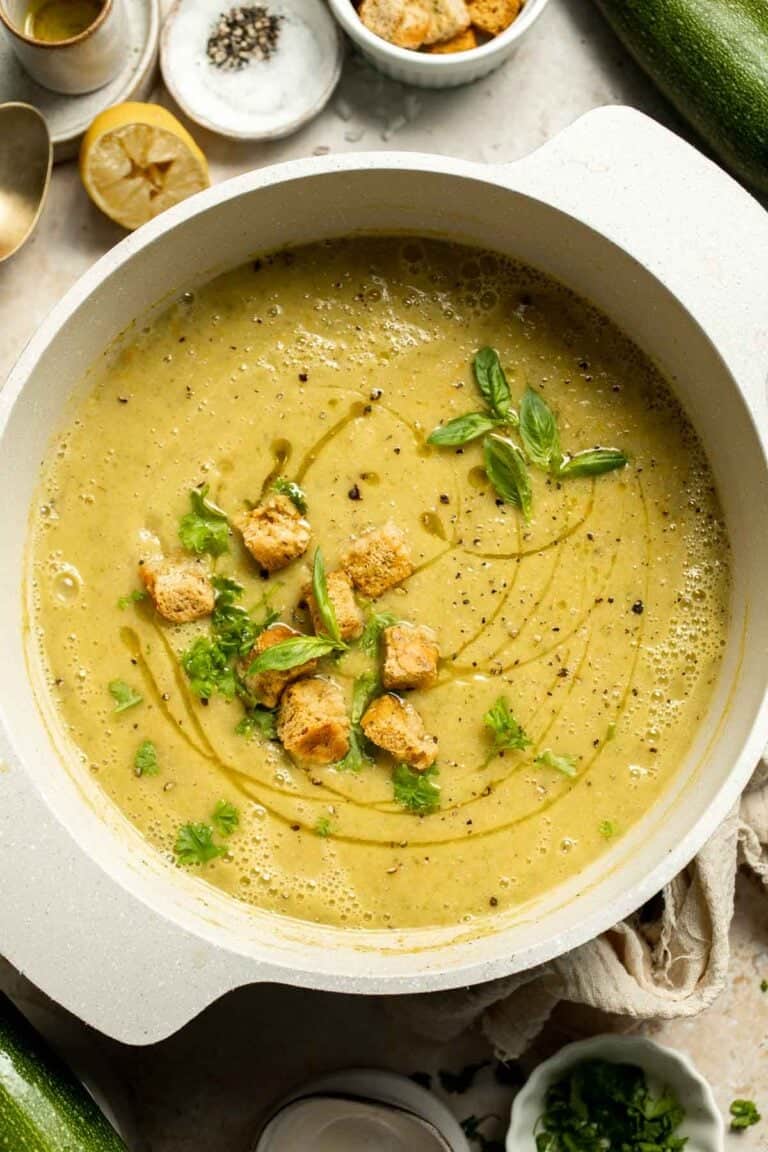
Creamy Zucchini Soup (without Cream)
This Creamy Zucchini Soup is made without using cream (using secret ingredient white beans!). It's smooth, healthy, flavorful, vegan, and dairy-free.

Lemon Zucchini Pasta
Fresh and vibrant, this Lemon Zucchini Pasta with garlic, basil, and Pecorino Romano is ready in 20 minutes for a light, flavorful dinner this summer.
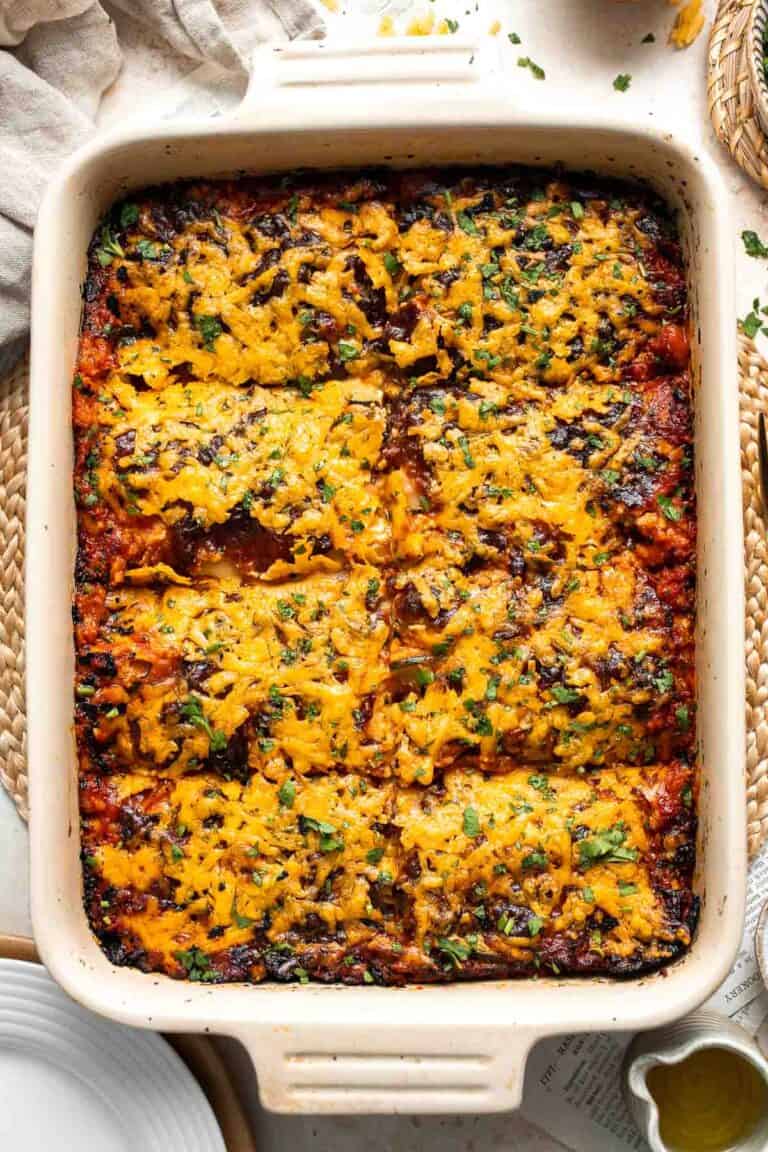
Zucchini Lasagna
Zucchini Lasagna is a keto-friendly, vegetarian and gluten-free version of traditional lasagna that still serves up the same delicious taste!
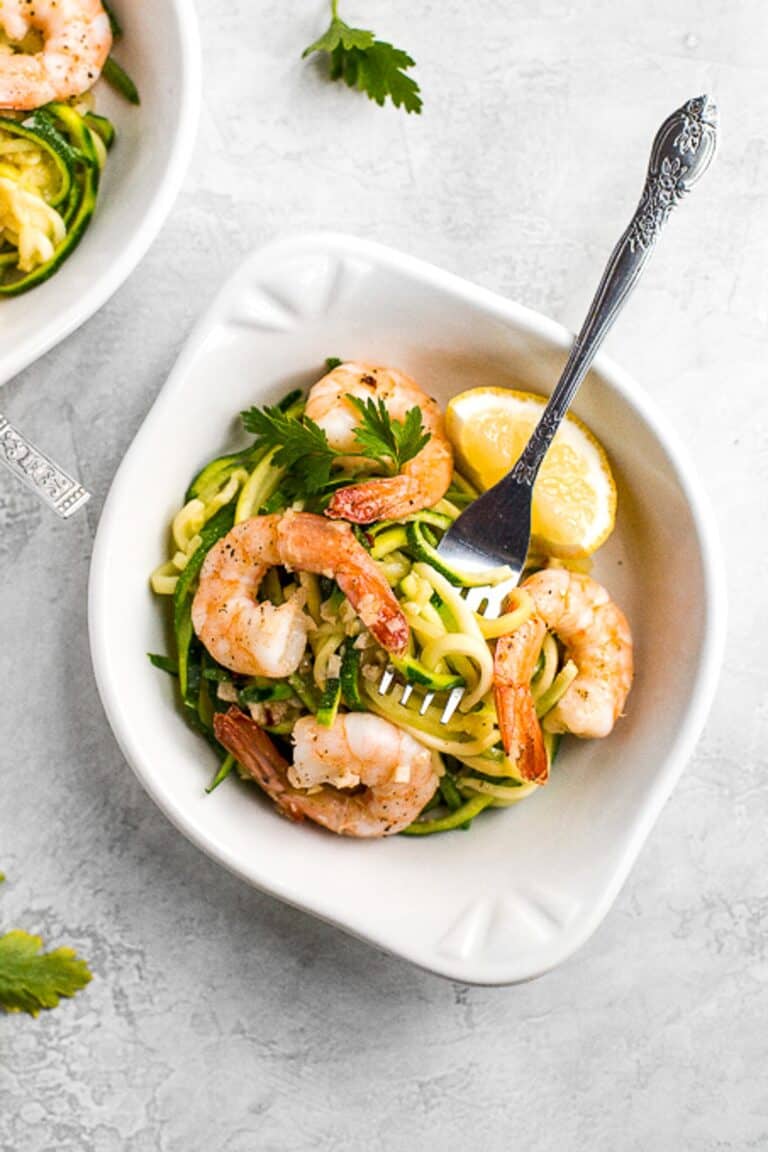
Shrimp Scampi with Zucchini Noodles
Shrimp scampi with zucchini noodles is a low-carb, keto, and gluten-free version of a classic pasta dish. It is healthy, garlicky, flavorful, and delicious.
Zucchini Breads and Baking
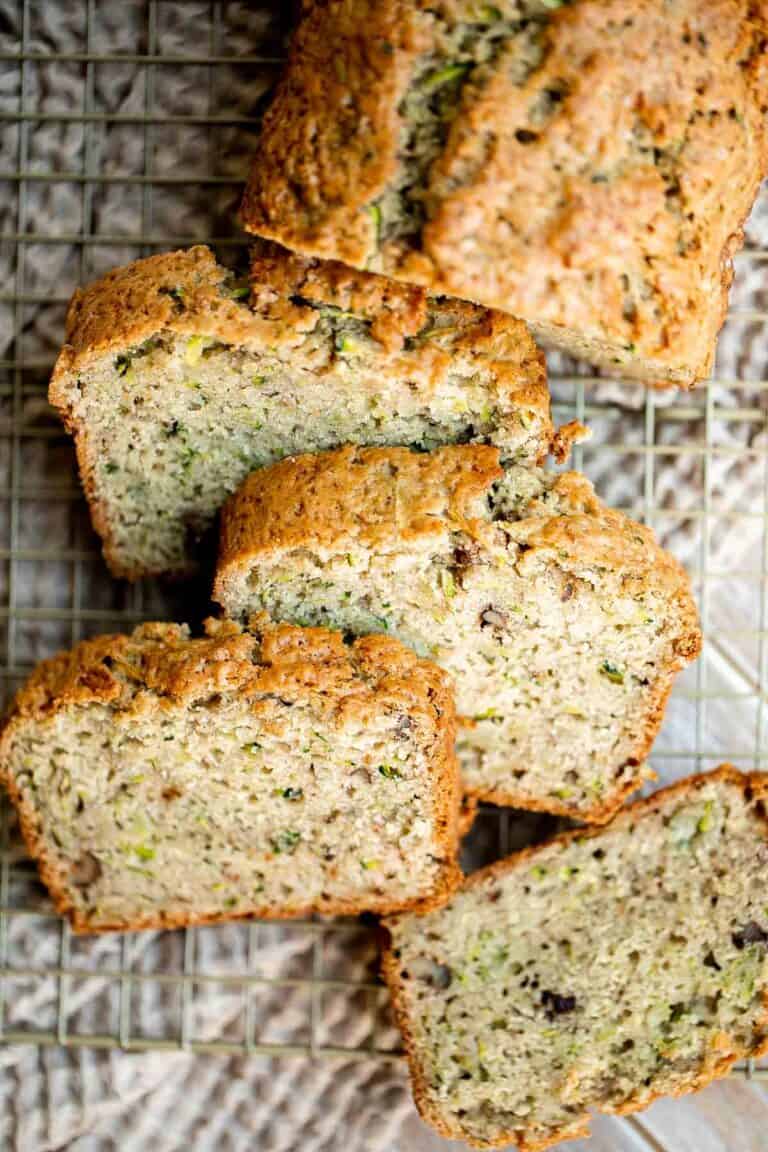
Zucchini Bread
This easy Zucchini Bread is moist, light, and fluffy. It's loaded with real zucchini - but you wouldn't even know it because you can't taste it! So good.

Chocolate Zucchini Cake
Chocolate zucchini cake is moist, fluffy, and delicious. Loaded with fresh zucchini for a burst of nutrition, and topped with a homemade cream cheese icing.

Chocolate Chip Zucchini Muffins
Chocolate chip zucchini muffins are moist, fluffy, and delicious. They are made healthier with fresh zucchini and yogurt which also adds amazing texture.
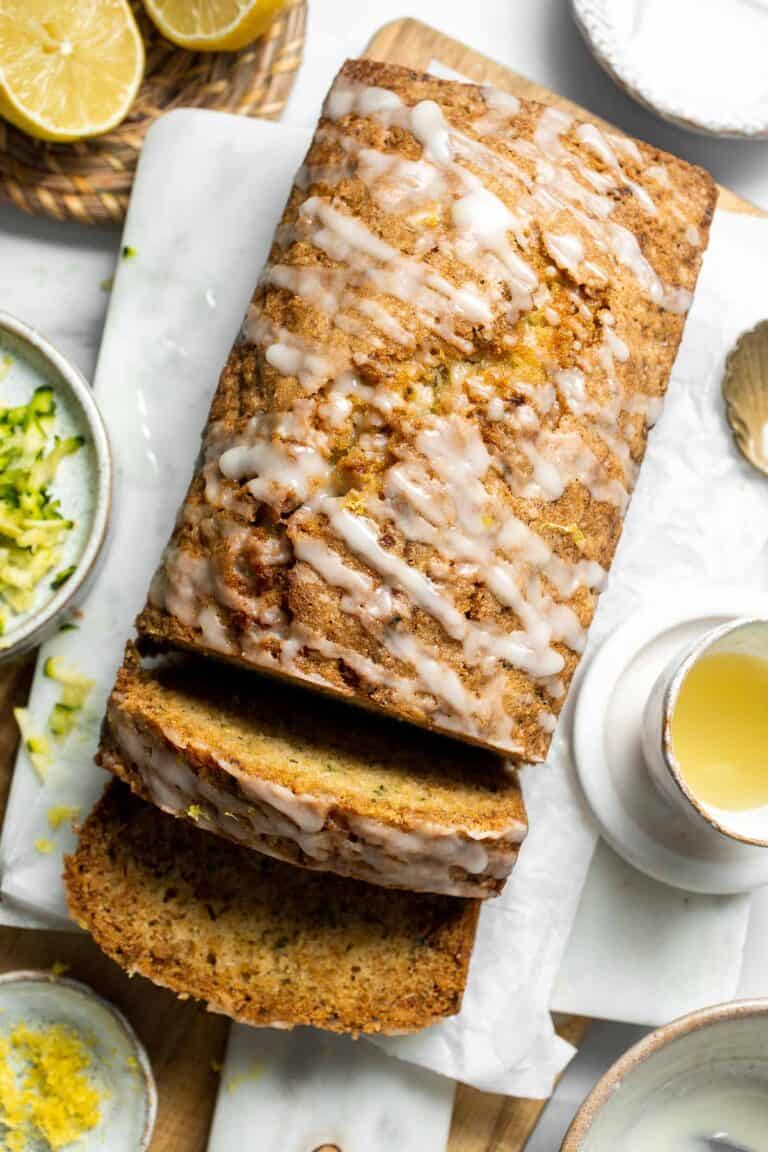
Lemon Zucchini Bread
This Lemon Zucchini Bread is moist and tender, loaded with fresh zucchini with a burst of lemon, and a homemade lemon glaze on top.
Our Thoughts on Zucchini
With so many delicious ways to enjoy zucchini, you'll never run out of ideas for this garden favorite. These recipes prove just how versatile it is - from savory casseroles to cozy baked goods and everything in between.
I recommend starting with a few easy sides like Roasted Zucchini or Calabacitas, then working your way to the more indulgent recipes like Zucchini Lasagna Roll Ups or Chocolate Zucchini Cake. However you serve it, zucchini is here to make your meals more vibrant, flavorful, and satisfying.
So grab a few fresh zucchini from the farmer's market (or your backyard garden!) and start cooking. And if you make one of these recipes, don't forget to come back and let me know which one was your favorite!
FAQ
If you're swimming in zucchini from the garden or market, the possibilities are endless! You can roast them, grill them, sauté them, spiralize into zucchini noodles, bake them into bread, muffins, or fritters, or even stuff them for a hearty meal. Zucchini also works beautifully in soups, salads, and casseroles. The mild flavor means it takes on whatever seasoning or sauce you add, so it never gets boring. That's why we rounded up 25 of the best zucchini recipes to keep you inspired all season long.
The best way to cook zucchini depends on your mood! Roasting and grilling bring out a smoky, caramelized flavor, while sautéing keeps things quick and light. Baking it into bread or muffins adds moisture and a subtle sweetness. The key is not to overcook zucchini - it's best when it's tender but still has a little bite.
Nope, no need! Zucchini skin is thin, tender, and completely edible. It adds extra nutrients and color to your dish, so leave it on. Just give the zucchini a good wash before using, and you're good to go.
Zucchini is a blank canvas, so it pairs well with tons of seasonings. The classics include garlic, onion, salt, pepper, and Italian seasoning, which bring out its natural sweetness. For a bold twist, try chili flakes, smoked paprika, or cumin for a little heat and depth. Lemon zest or juice adds brightness, while fresh herbs like basil and parsley give it freshness. The best part is that this summer squash works with just about any cuisine - from Mexican spices like taco seasoning to Asian-inspired soy sauce and ginger.
The secret to great-tasting zucchini is all in how you cook and season it. High-heat methods like roasting, grilling, or pan-searing bring out its natural sweetness and give it caramelized edges that add tons of flavor. Proper seasoning with garlic, herbs, or spices makes a huge difference. Pairing zucchini with bold ingredients like tomatoes, cheese, or lemon also elevates the taste. Avoid overcooking - tender-crisp zucchini has a better texture and flavor than mushy zucchini. With the right method, even picky eaters end up loving it!
Soaking zucchini in salt water isn't necessary, but salting does help if you want to reduce excess moisture. A quick method is sprinkling sliced zucchini with salt, letting it sit for 10-15 minutes, then patting it dry with paper towels. This draws out some of the water and prevents dishes like fritters, casseroles, or baked zucchini from turning soggy. Soaking in salt water for longer isn't needed unless you're preparing zucchini in a way where texture really matters, like grilling or frying.
Zucchini holds a lot of water, which can sometimes make recipes watery. To fix this, sprinkle sliced or shredded zucchini with salt and let it sit for 10-15 minutes, then squeeze or pat dry to release excess moisture. For shredded zucchini (like in breads or fritters), place it in a clean kitchen towel and wring out the liquid. Roasting or grilling at high heat also helps evaporate water and concentrate flavor. This simple step ensures your zucchini recipes come out crisp, not soggy.
Because zucchini is mild and slightly sweet, it pairs beautifully with both bold and fresh flavors. Tomatoes, garlic, lemon, and cheese (Parmesan, mozzarella, or feta) are classic pairings. It also goes well with onions, bell peppers, and corn for colorful veggie dishes. For proteins, try chicken, steak, shrimp, burgers, or beans for plant-based meals. Zucchini also pairs wonderfully with pasta, rice, or grains to bulk up meals. Its versatility means it works equally well in Mediterranean, Mexican, Italian, or Asian-inspired recipes.
Fresh herbs are a game changer when cooking zucchini. Fresh basil, parsley, oregano, and thyme bring out Italian-inspired flavors, while cilantro adds brightness to Mexican dishes. Dill and chives give it a fresh, delicate touch, and rosemary adds earthiness when roasting. Even mint can work in zucchini salads for a refreshing twist. If you're short on fresh herbs, dried Italian seasoning or herbes de Provence add plenty of depth. No matter which you choose, herbs elevate zucchini from simple to spectacular.
The trick is cooking it quickly and over high heat. Roasting at a high temperature, grilling, or a fast sauté helps the zucchini keep its texture. Avoid overcrowding the pan so the zucchini can brown instead of steam. If you're baking zucchini into bread or muffins, be sure to squeeze out any excess water first.
More Recipe Collections
Looking for other recipe roundups like this? Try these:
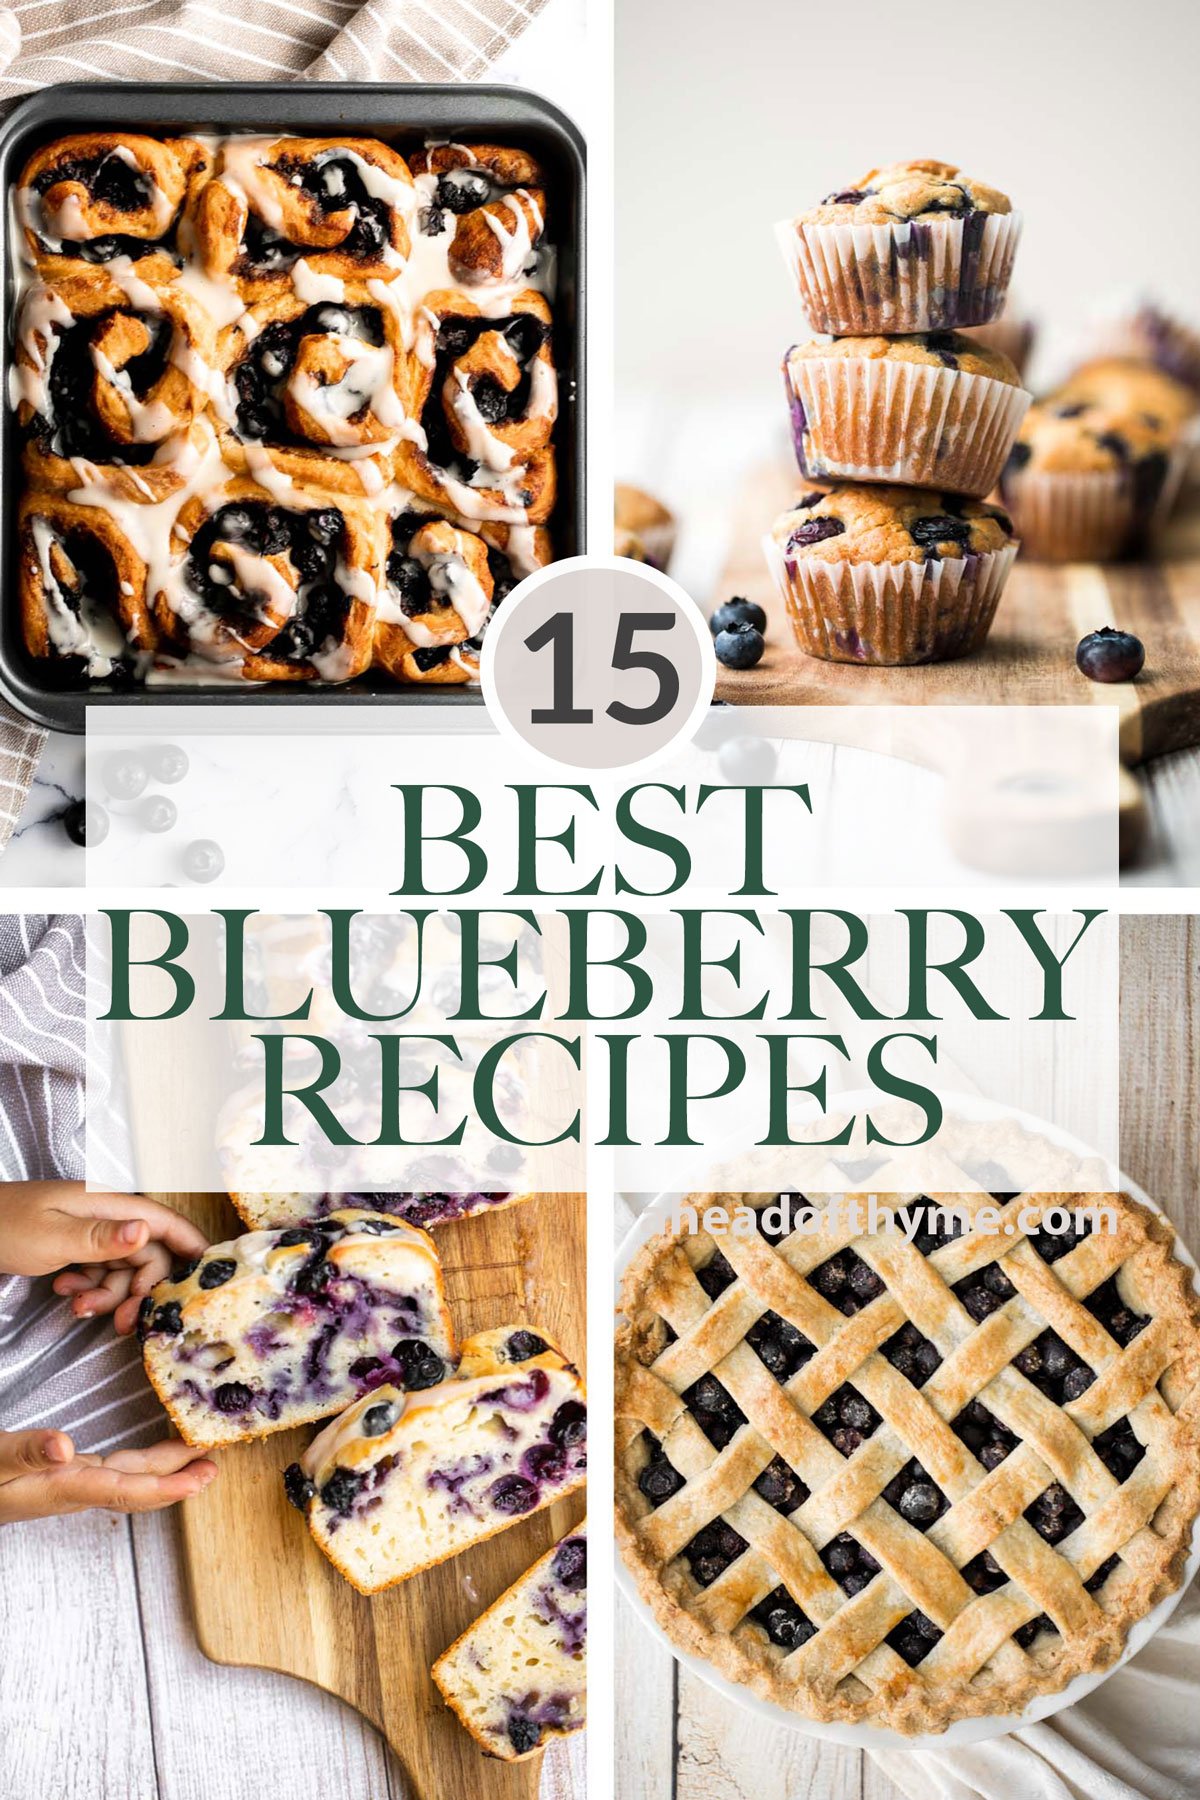
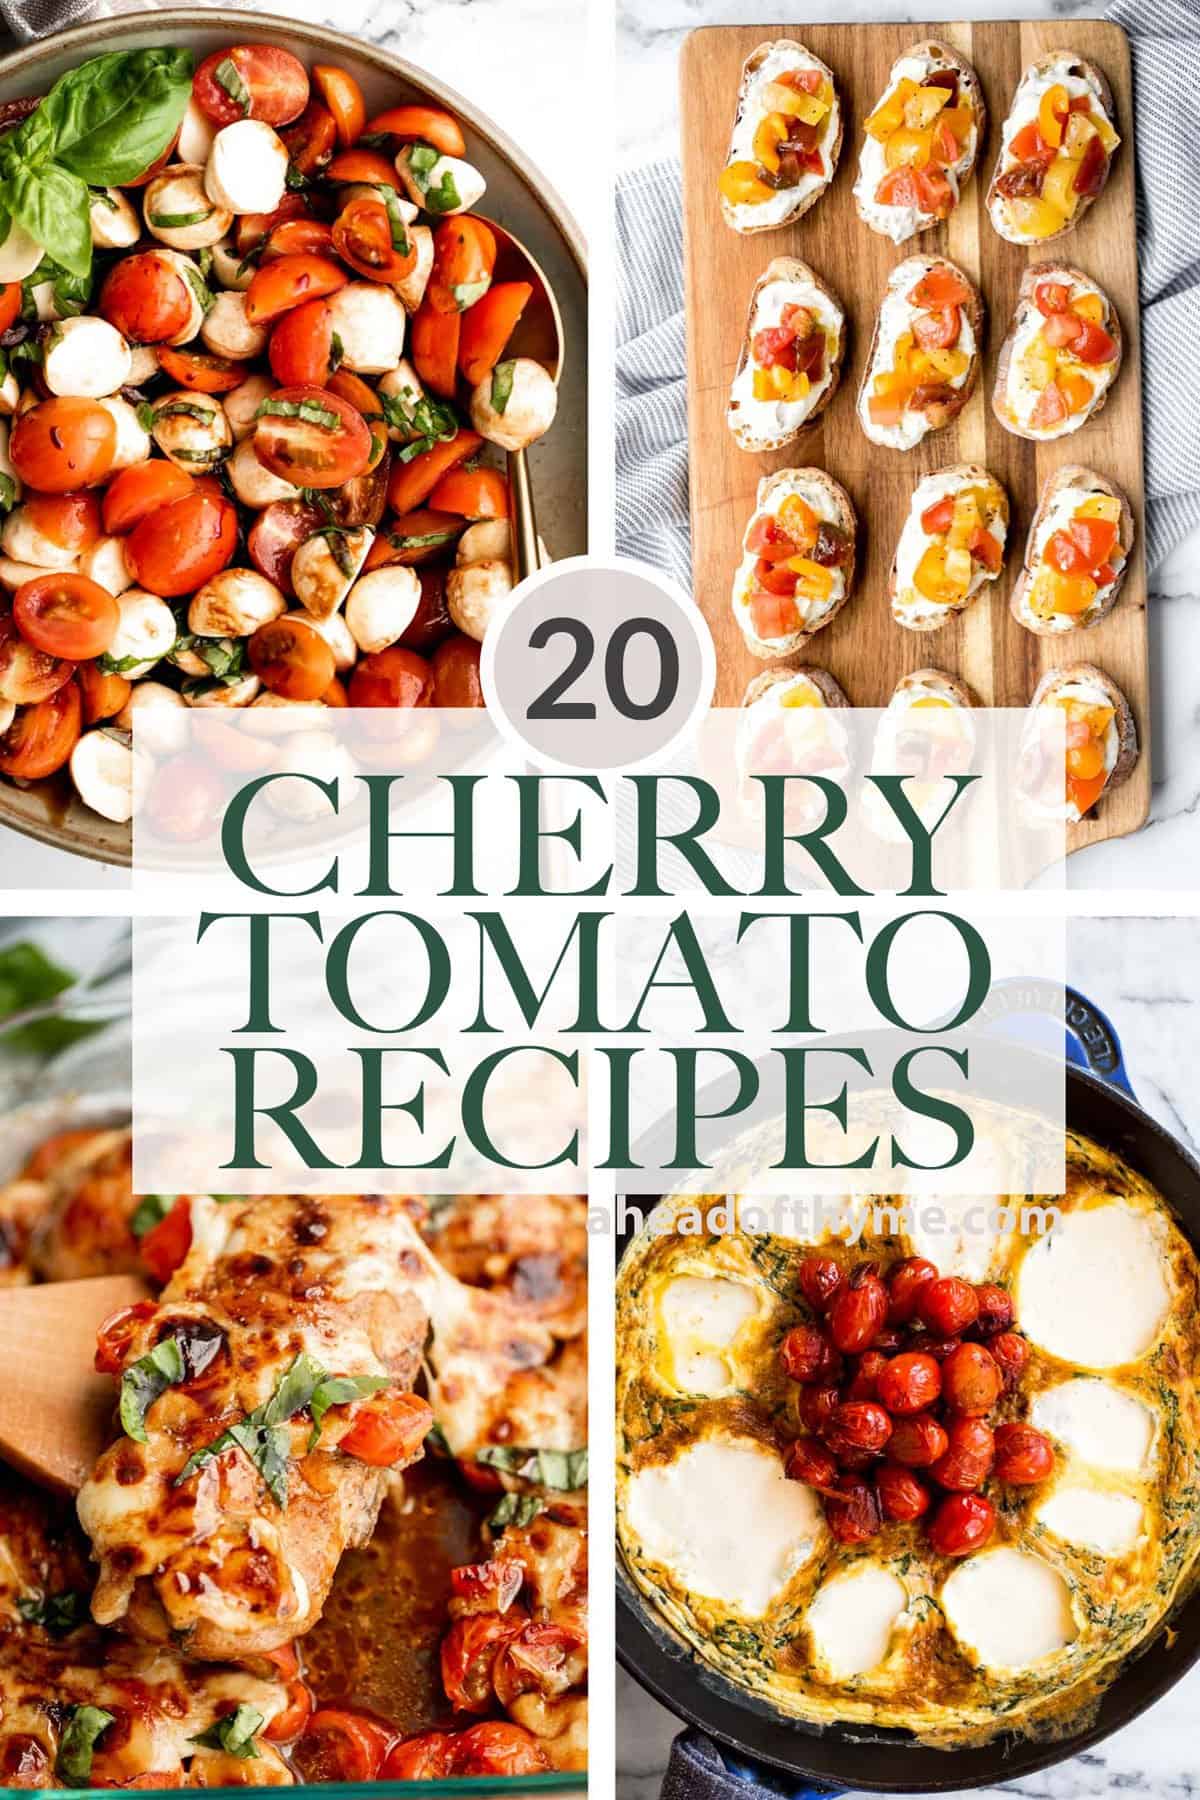
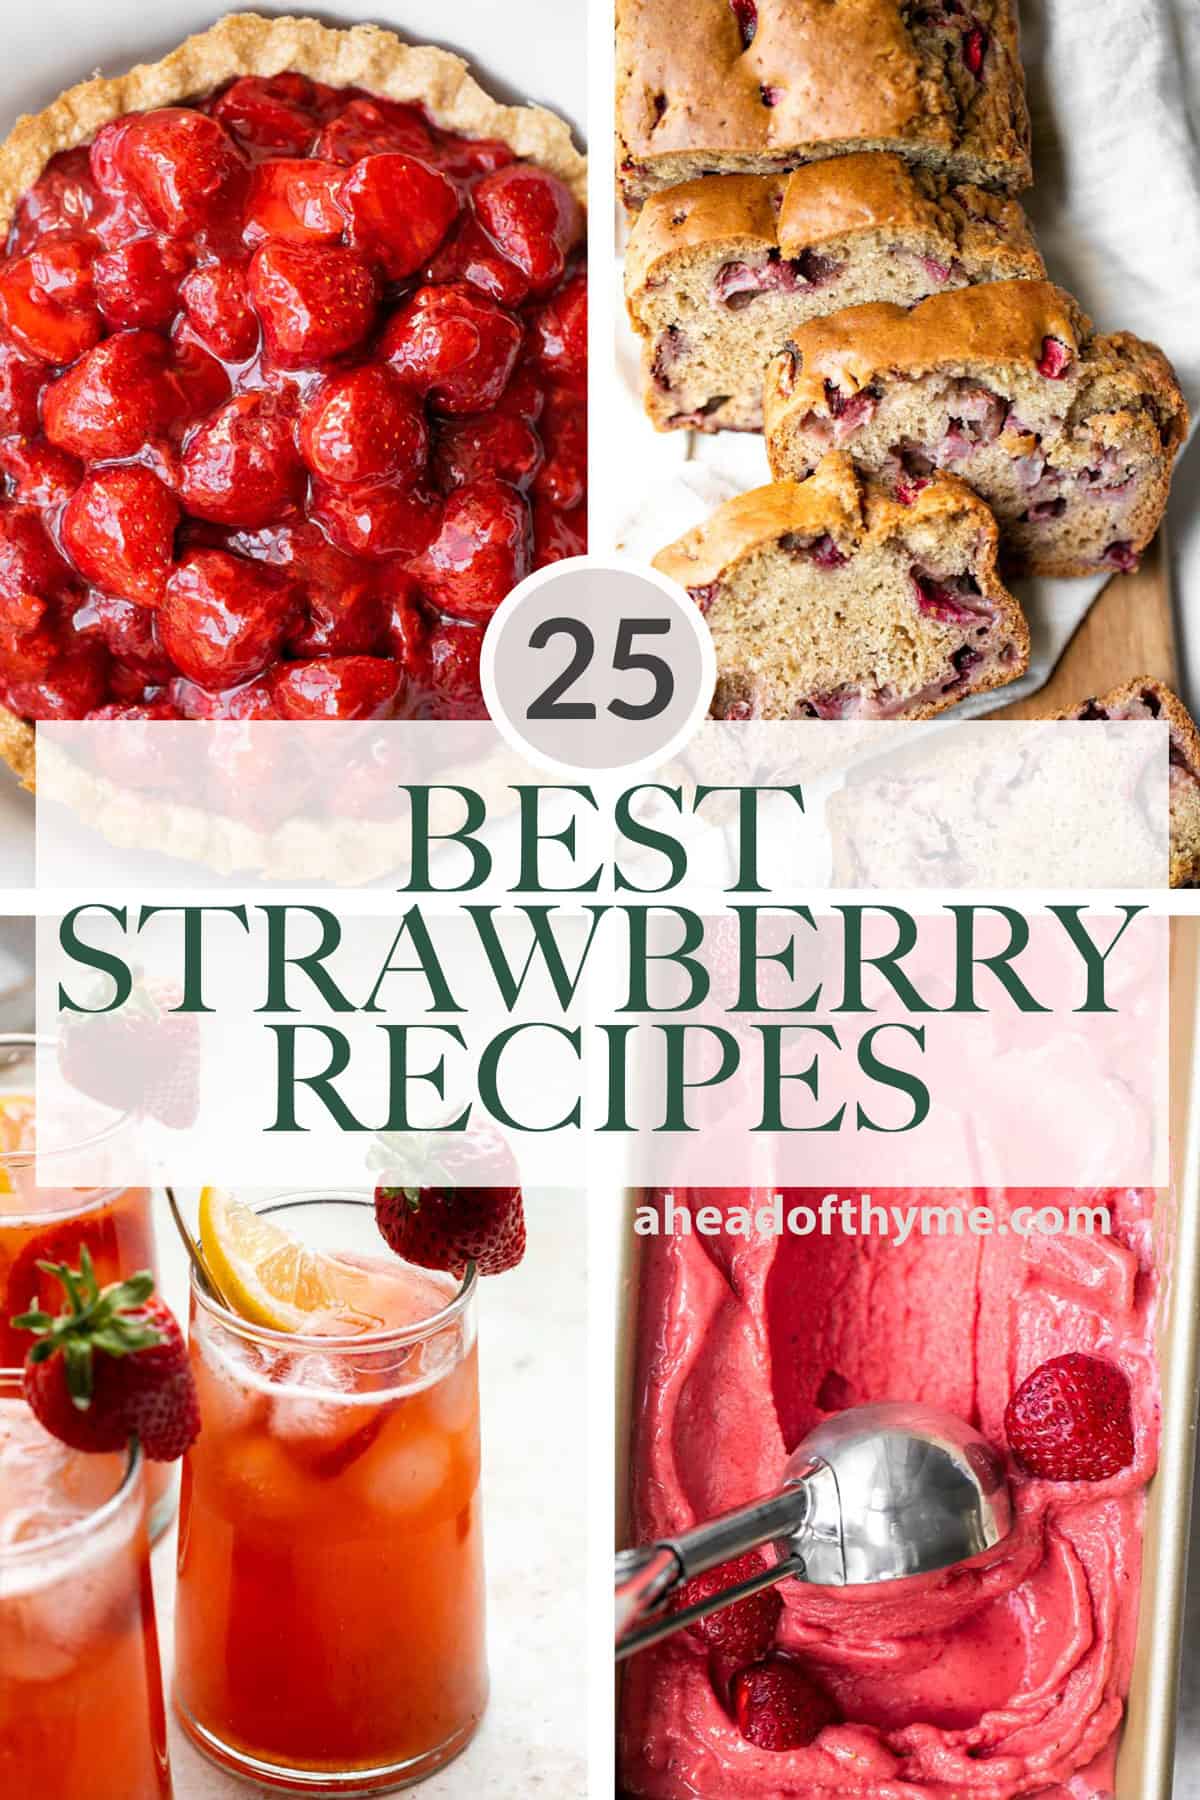

Tried any of these zucchini recipes?
I'd love to hear what you think! Leave a comment and rating for the zucchini recipe that you made to share your feedback. Your reviews help others discover this recipe and help me keep creating more free recipes for you. Snap a photo and tag me on social media @aheadofthyme too.
Vegan Stuffed Peppers
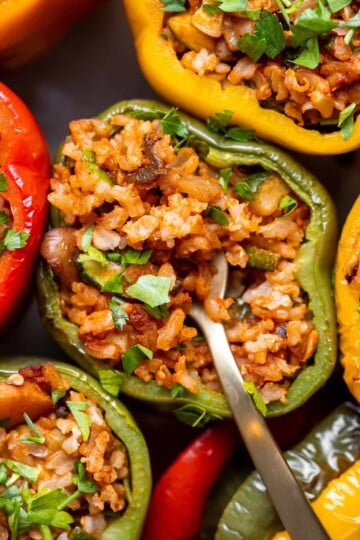
Who says stuffed peppers need meat to be satisfying? These Italian-inspired Vegan Stuffed Peppers are so hearty, juicy, and flavorful, you'll never miss it. Fresh bell peppers are filled with pan-fried mushrooms, tender rice, and a medley of veggies, all baked together into a cozy, colorful dish that's as gorgeous as it is delicious.

And here's the best part: they look fancy and complicated but are secretly so easy to make. Just cook the filling, stuff the peppers, and bake until perfectly tender. In under an hour, you've got a wholesome meal that's weeknight-friendly, Meatless Monday-approved, and totally guest-worthy. Yes, they can pull double duty as both a quick family dinner and a dinner-party star.
Plus, they're loaded with fresh summer produce like peppers, zucchini, and herbs. Nothing beats the taste of homegrown bell peppers at their peak. They add natural sweetness and make the dish truly shine.
If you liked this recipe, you have to try our Vegetarian Stuffed Peppers or Chicken Parmesan Stuffed Peppers next. Pair these vegan stuffed peppers with a crisp Arugula Salad or warm, crusty Ciabatta Rolls for the ultimate combo.
Thank you for this simple, fantastic-tasting recipe using pantry and refrigerator staples as ingredients. My brother, a meat-eater, requested stuffed peppers for his birthday dinner. He loved them, and didn't realize there was no meat in them.
- Eva ★★★★★
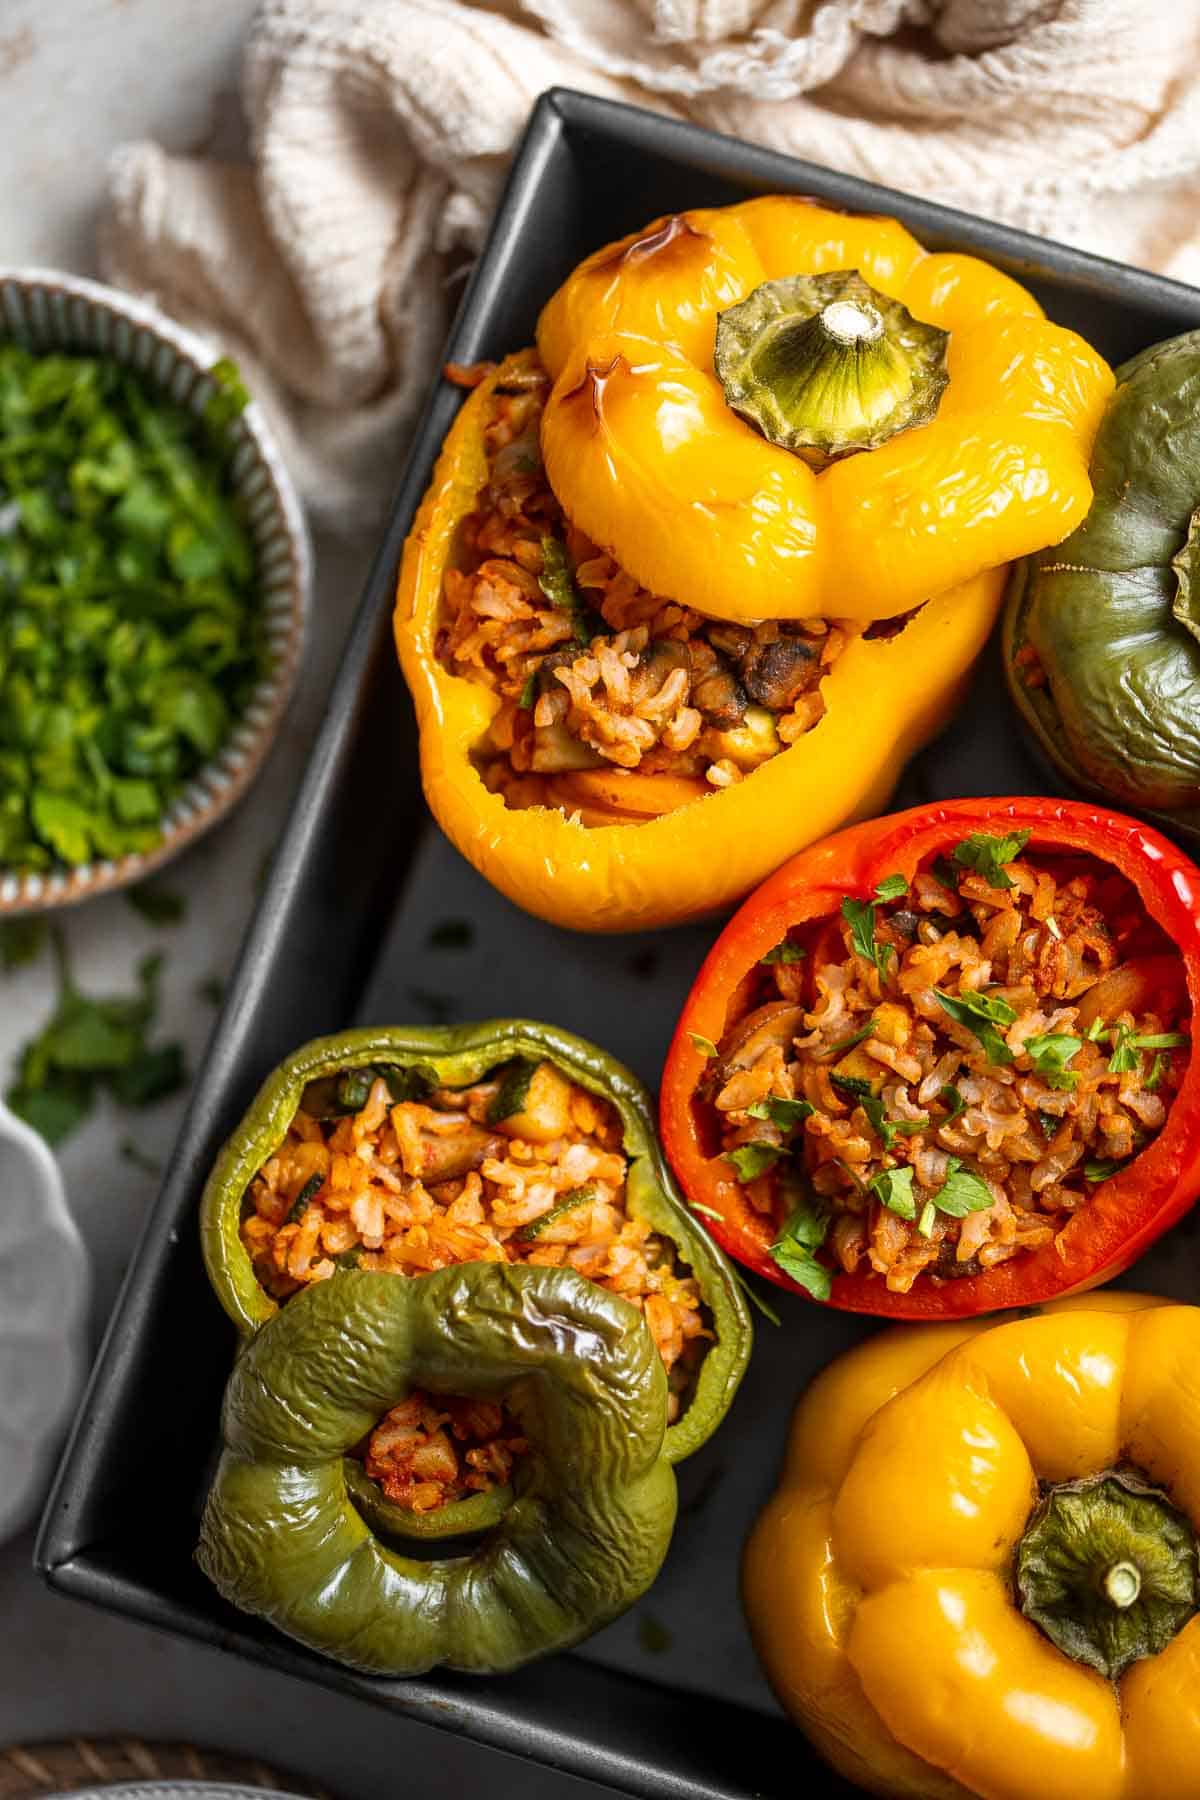
Why You'll Love This Recipe
- Perfect for every occasion. Whether you're looking for an easy family dinner, meal prepping lunches for the week, or looking for a vegan entree for date night or dinner parties, these stuffed peppers fit the bill. They also reheat like a dream, which means leftovers are a win.
- Ready in under an hour. From start to finish, you only need about 45 minutes. While the filling cooks, you can prep the peppers, and once they're in the oven you get 20 minutes of hands-off time to tidy up or prep a quick side.
- They are healthy and filling. Stuffed with brown rice, mushrooms, and fresh vegetables, these colorful peppers strike the perfect balance of being light yet filling. It's a plant-based dish that leaves you feeling energized rather than weighed down. They are a great healthy and gluten free option for Meatless Mondays!
- So much flavor. The sautéed onions and mushrooms add depth, the carrots and zucchini bring sweetness and freshness, and the tomato purée ties everything together. It's a simple combination that tastes way more complex than the effort it takes.
- Serve as a main or side dish. These vegan stuffed peppers are hearty enough to act as an entree, but you can also serve them as a side dish at a large meal! In fact, they can be served any time of day - breakfast, lunch, or dinner. Whip out the recipe anytime you need a vegan option.
Ingredients and Substitutions
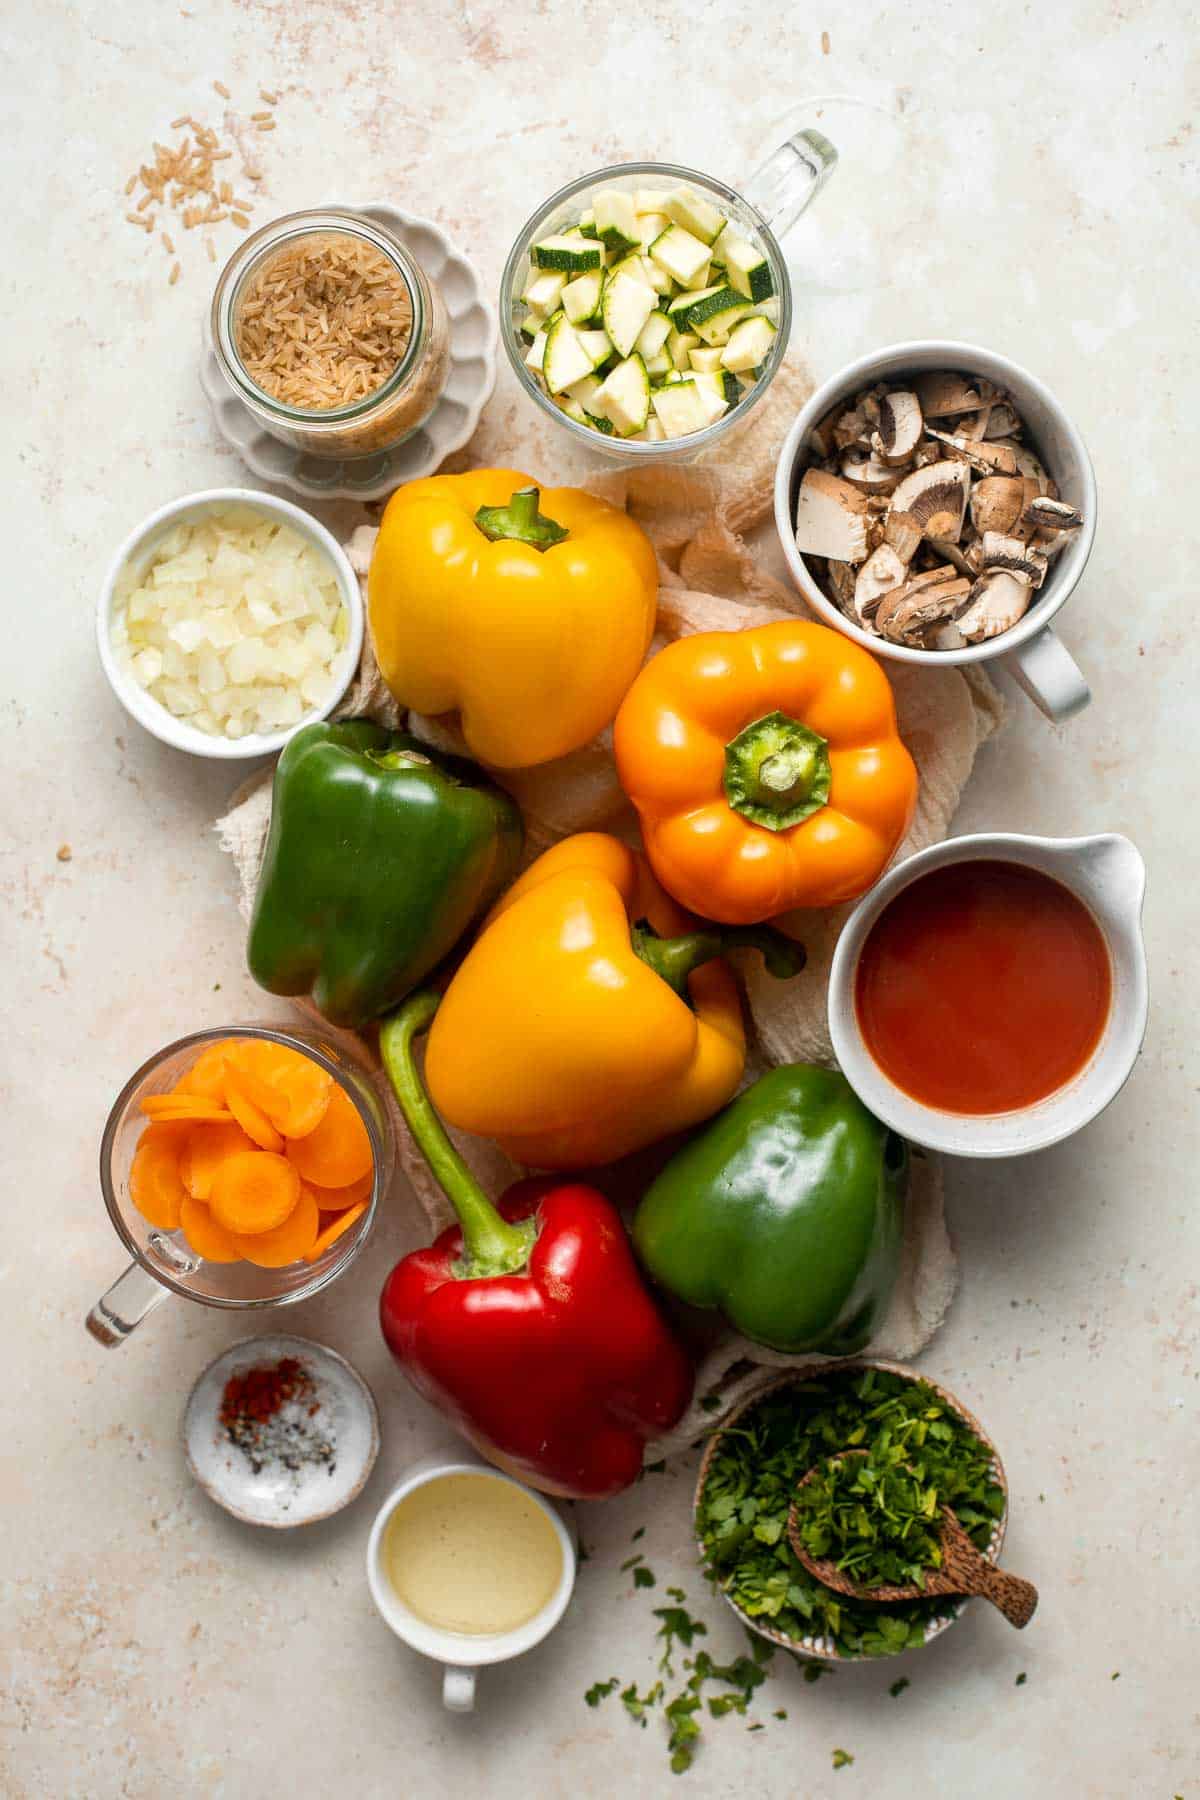
To make these easy vegan stuffed bell peppers, you will need the following ingredients (full measurements in recipe card below):
- whole grain brown rice - You can cook your own or use pre-cooked rice to save time. About 2 ¼ cups cooked rice is perfect. White rice, quinoa, couscous, or farro also make great substitutes.
- bell peppers - Use any color you like - red, yellow, orange, or green. Red and yellow are sweeter, while green has a sharper, more savory bite.
- olive oil - Avocado oil or vegetable oil works just as well. Use whichever you have on hand.
- onions - Yellow or white onions add sweetness and depth. Red onions can also be used for a sharper flavor.
- cremini mushrooms - Cremini (or brown mushrooms) add a lovely earthy taste. Swap with white mushrooms, baby portobellos, or even chopped large portobellos.
- carrots - Add natural sweetness and bulk. Parsnips or sweet potatoes can work in a pinch.
- zucchini - Brings lightness and moisture. Yellow squash is a great substitute.
- parsley - Fresh parsley brightens everything. Other fresh herbs like dill, chives, or cilantro can be swapped in. You can also substitute the the ⅓ cup fresh parsley in the filling with 1 tablespoon of dried Italian seasoning (dried herbs are more concentrated, so you need less). Also, add it earlier in cooking (when sautéing the onions or mushrooms) so it has time to bloom and infuse the filling.
- tomato puree - Adds richness and acidity. Tomato sauce or even crushed tomatoes work well too.
- chili powder - Adds warmth and a touch of spice. You can use smoked paprika or cayenne for a kick.
- salt and pepper
Equipment
You will also need measuring cups and spoons, saucepan, skillet, and a baking pan (such as an 8-inch square baking pan).
How to Make the Best Vegan Stuffed Bell Peppers
- Cook rice. Cook the rice in a small saucepan of salted water, according to package instructions. Drain the rice in a colander and set aside.
- Prepare bell peppers. Prepare the bell peppers by cutting the tops off (lids) and set aside. Scoop out the inside and remove and discard the seeds. Place the peppers on a lightly greased baking pan (such as an 8-inch square baking pan) and lightly season with salt and pepper. Set aside.
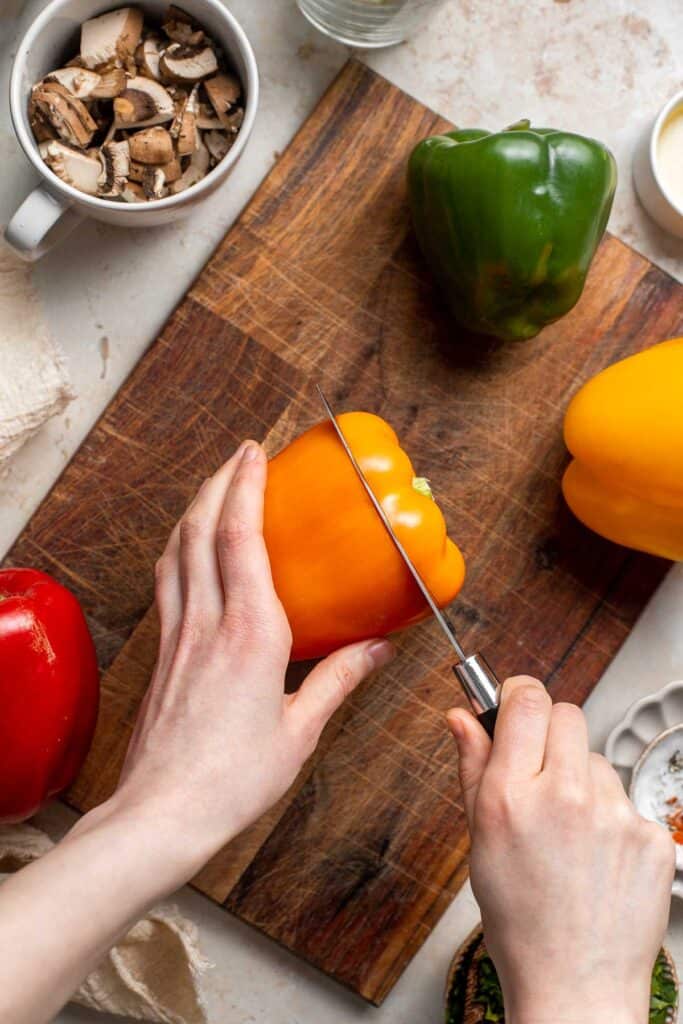
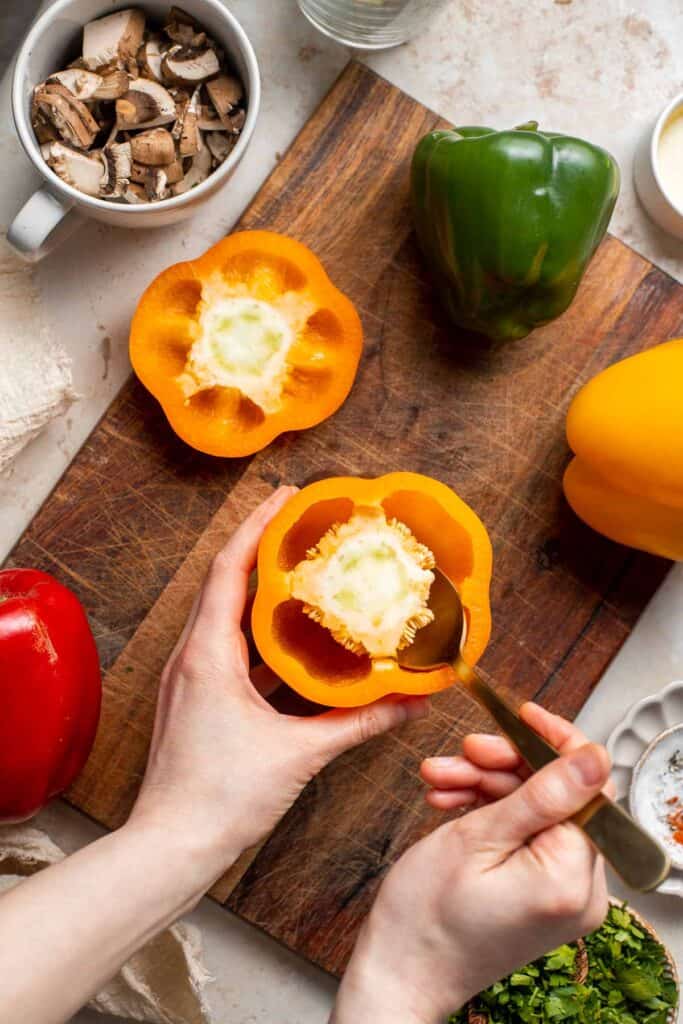
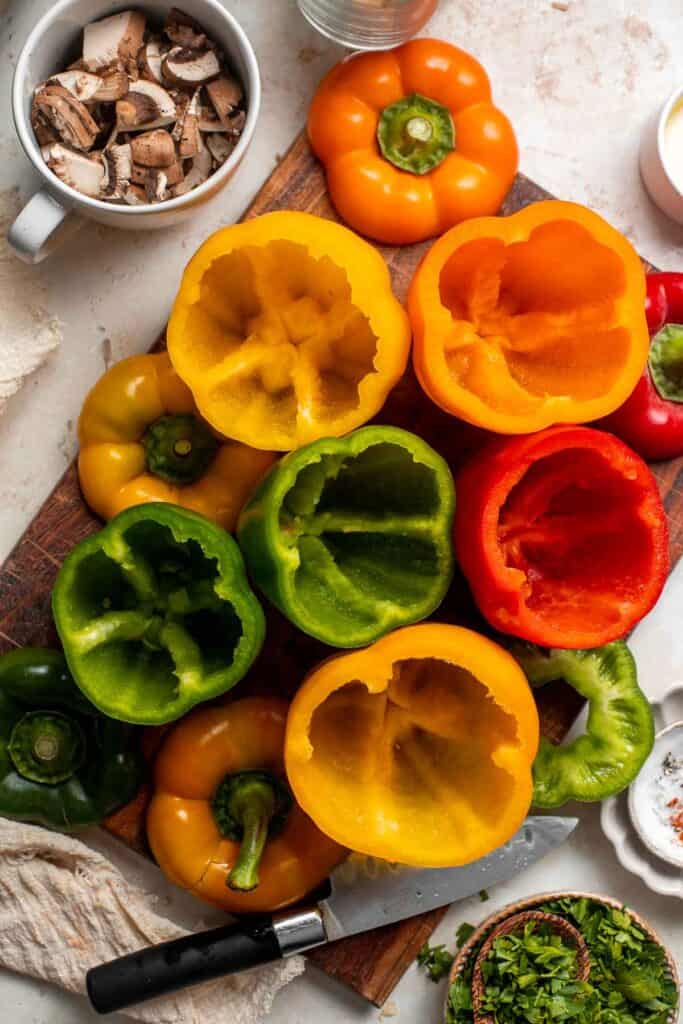
- Cook mushrooms. In a large skillet heat olive oil until sizzling hot, about 1 minute. Add onion and sauté until soft and tender, about 2-3 minutes. Add the mushrooms and cook until soft, another 5-8 minutes.
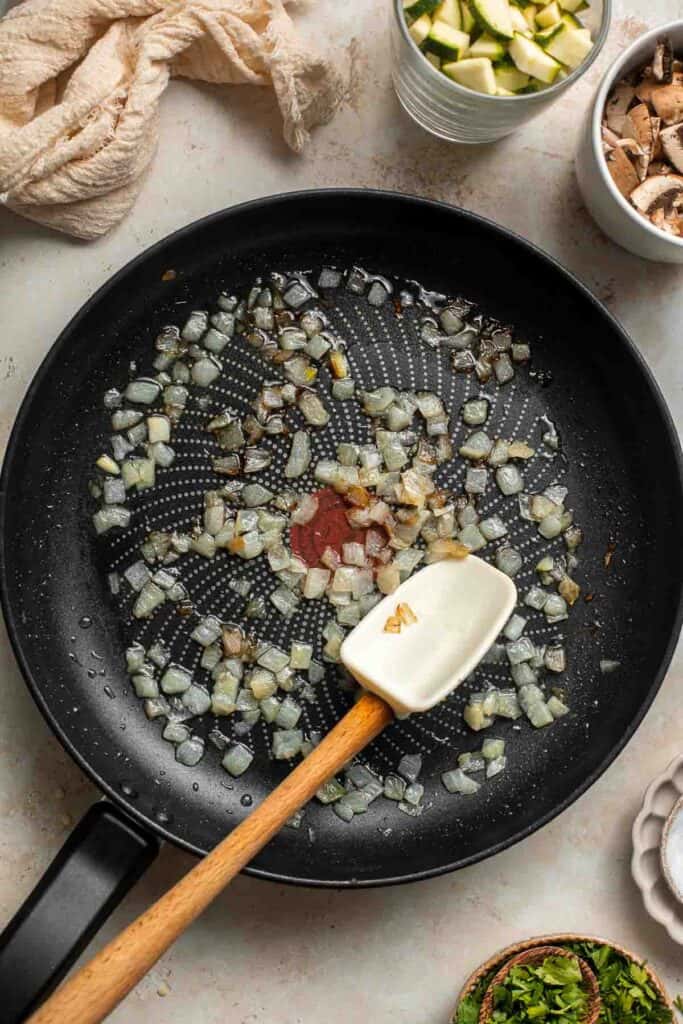
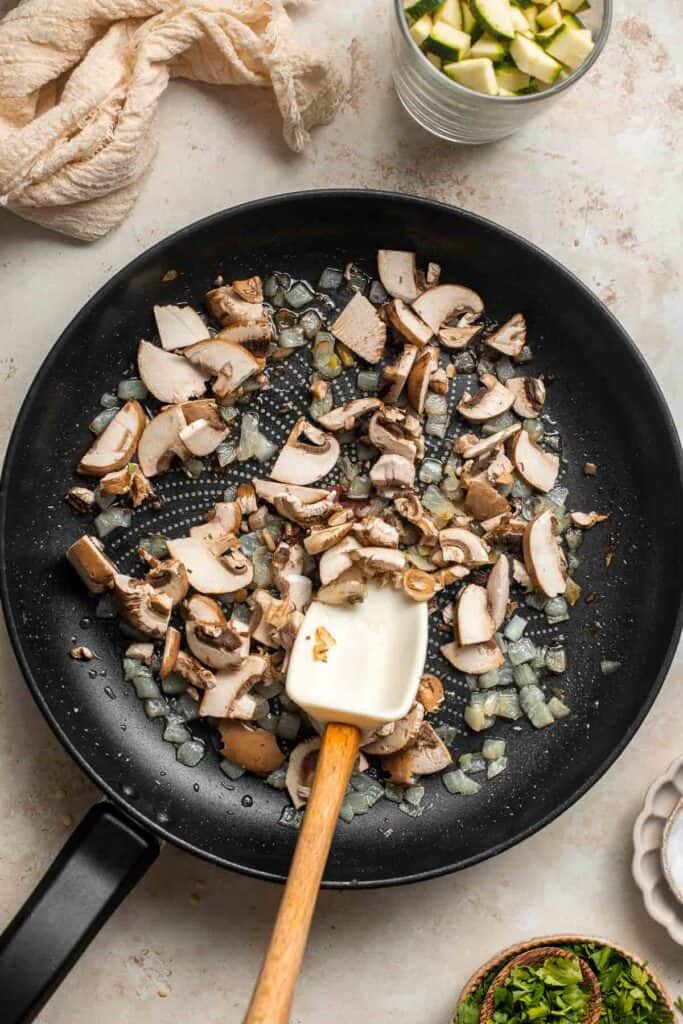
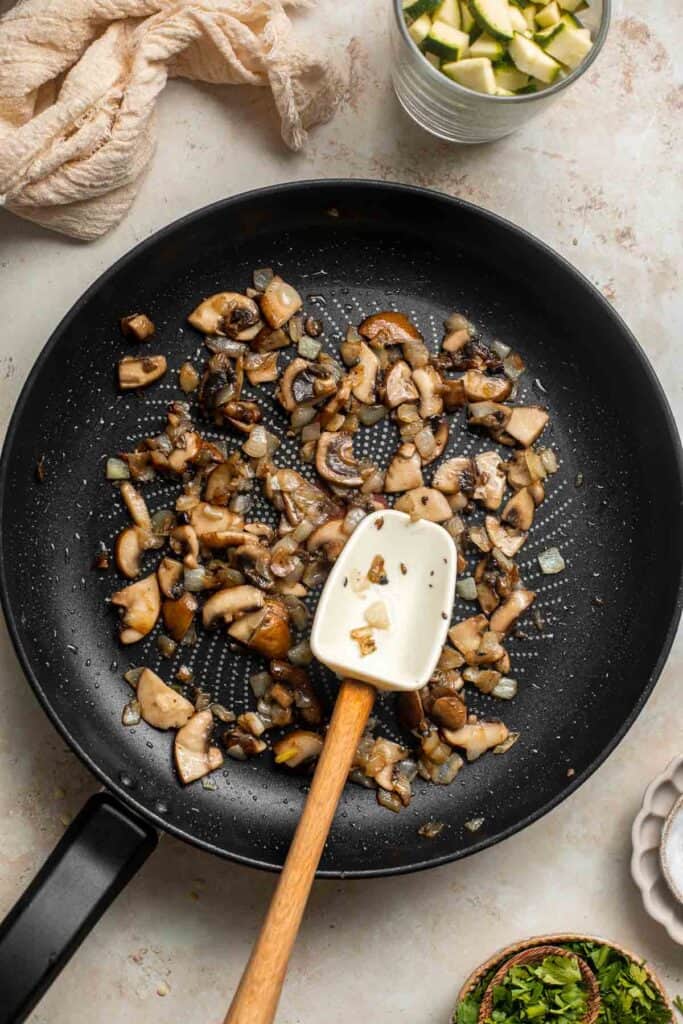
- Add veggies. Add carrots and zucchini and cook for 5 minutes, stirring occasionally. Remove from the heat.
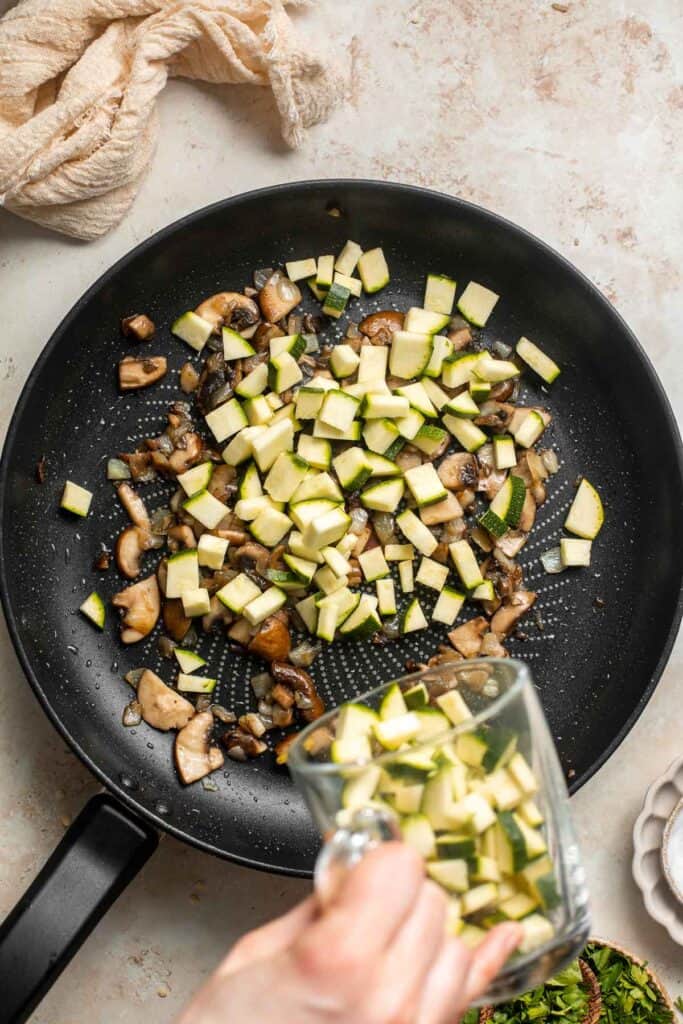
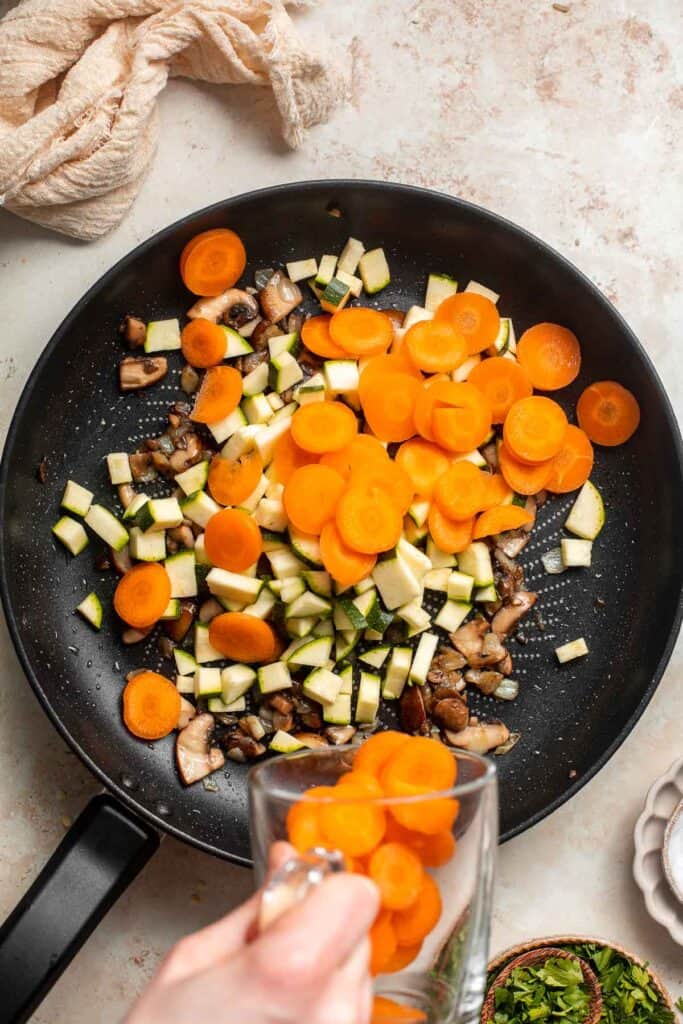
- Add rice. Add cooked rice, ⅓ cup parsley, and tomato purée. Stir until well combined. Season to taste with salt, pepper, and a pinch of chilli.
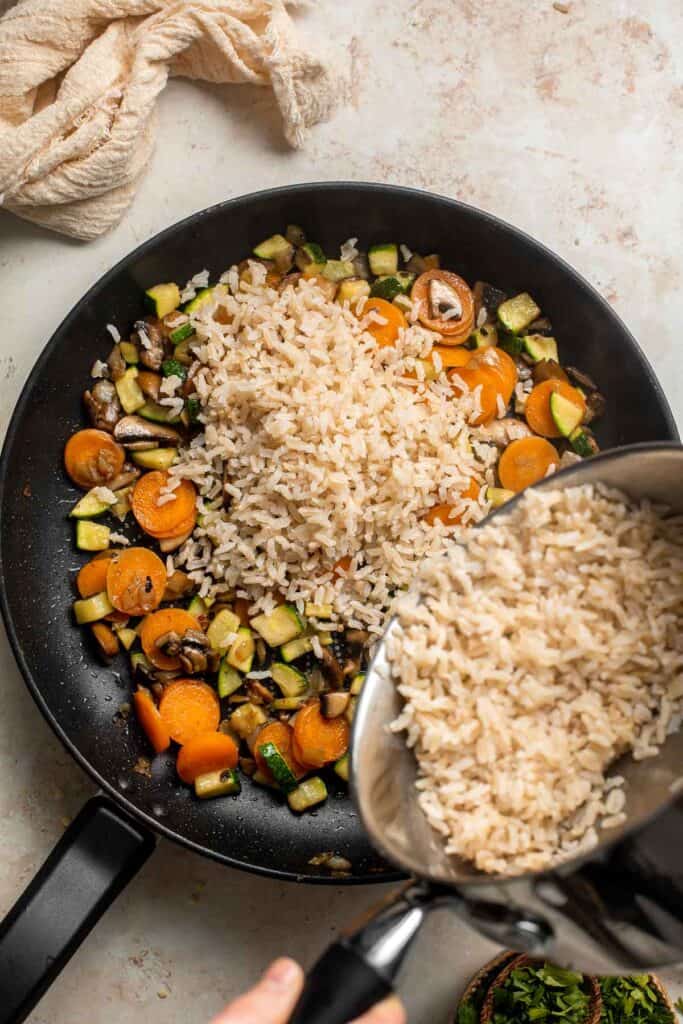
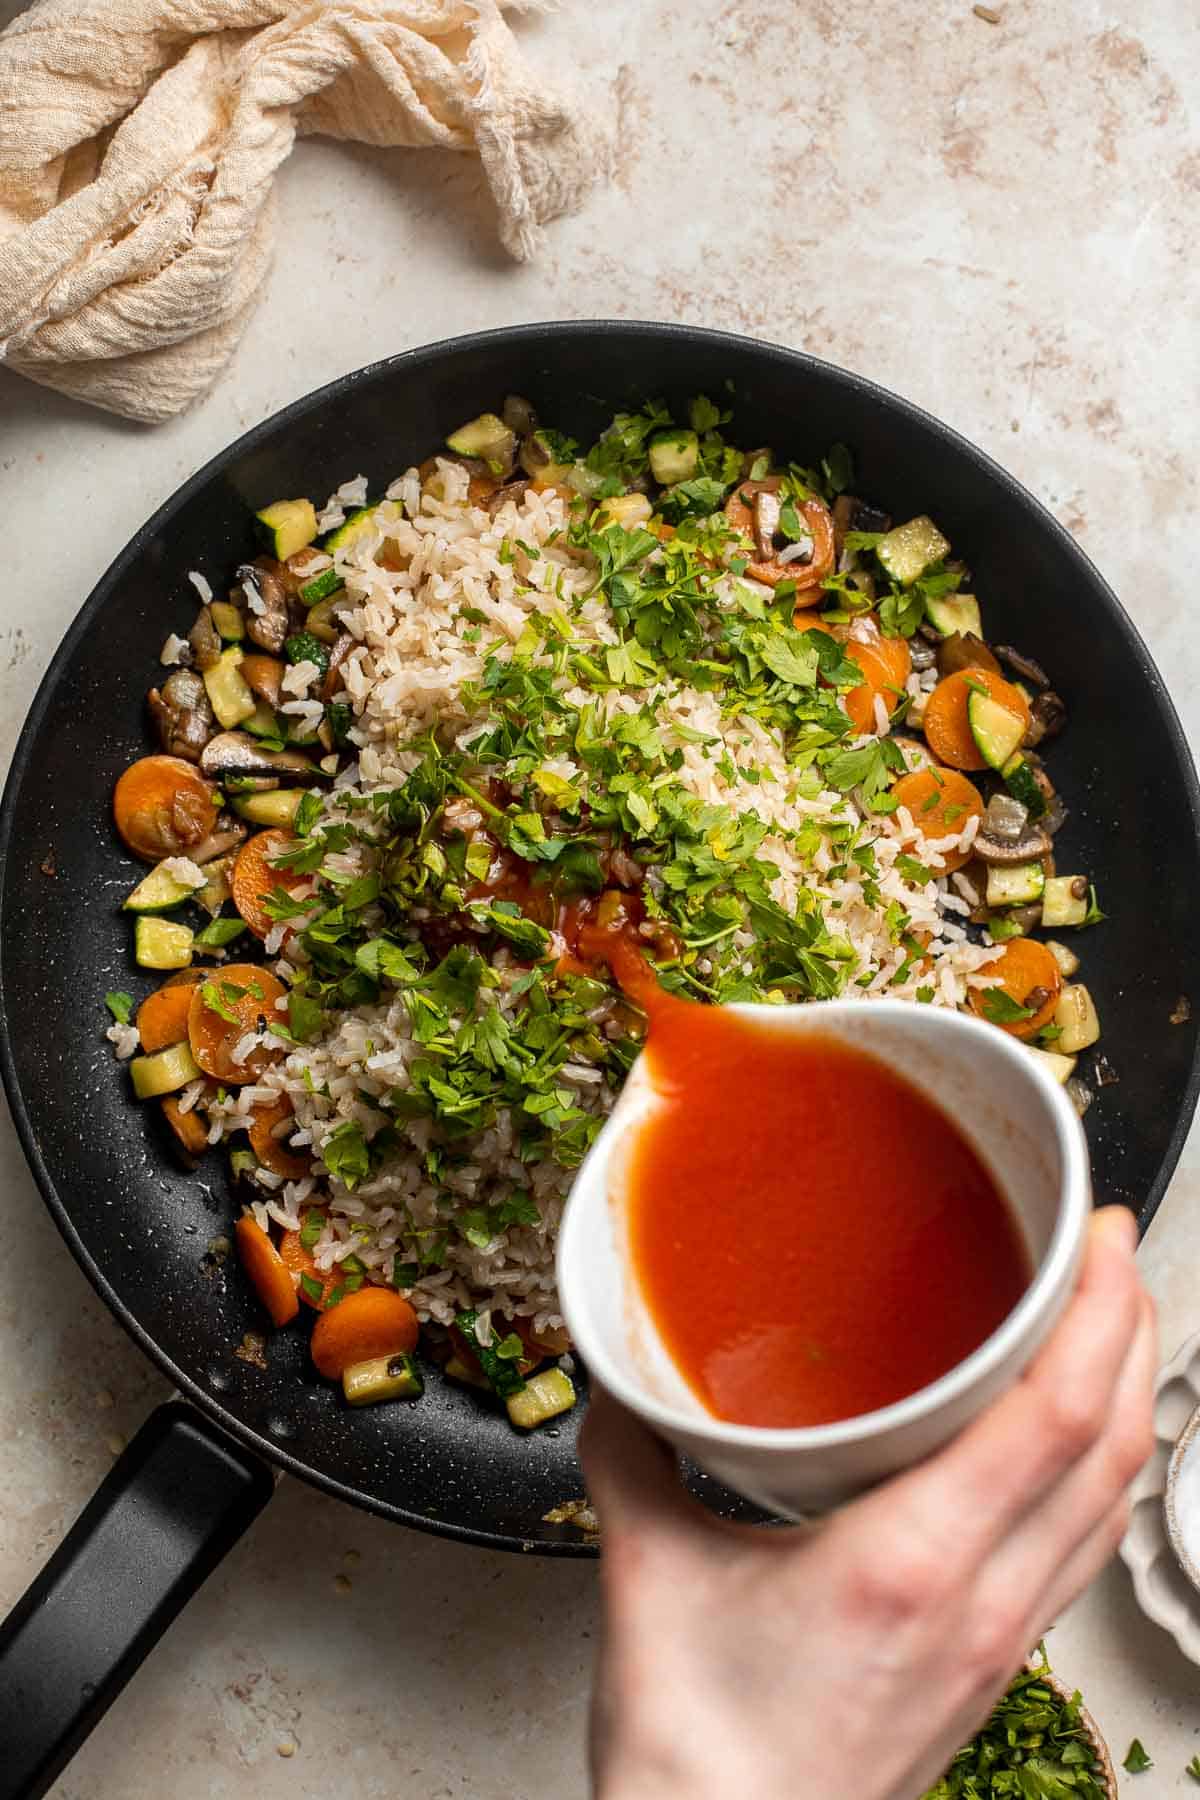
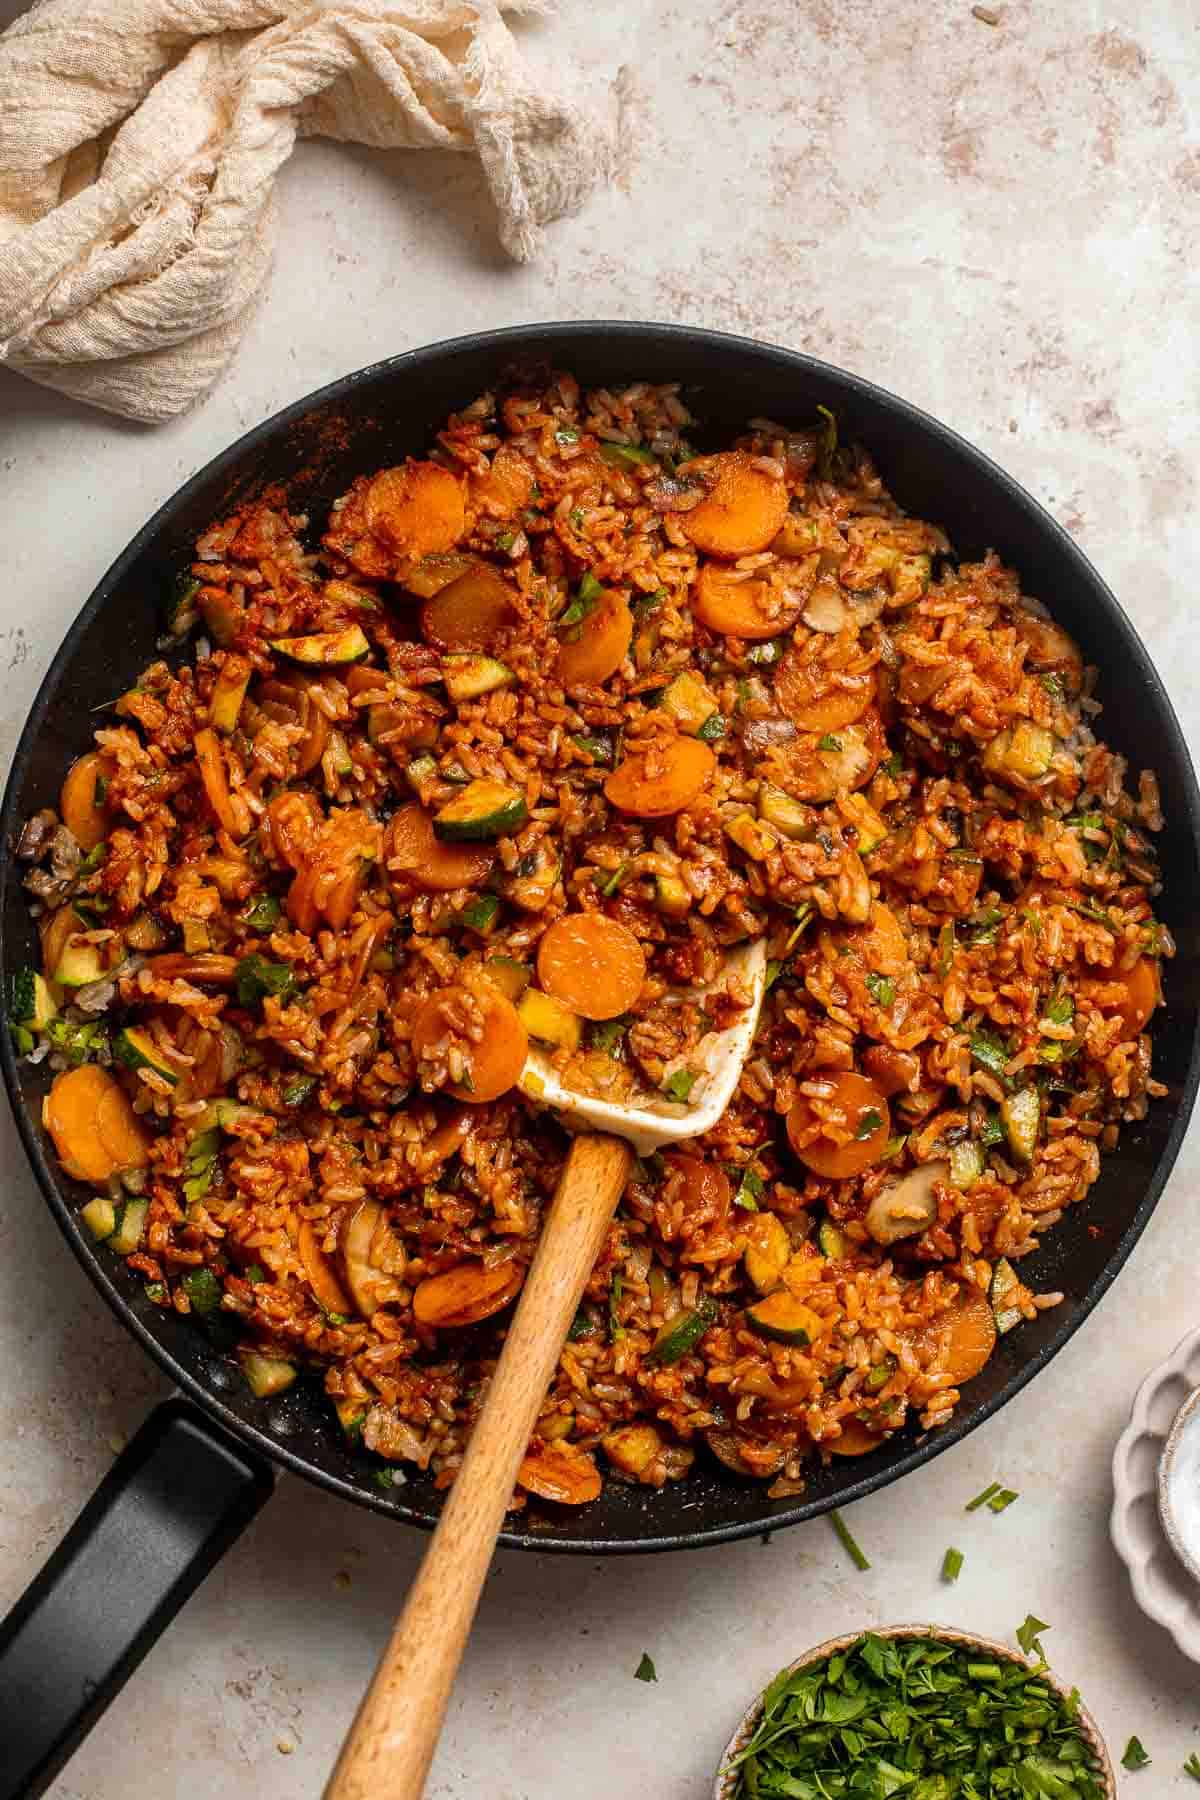
- Stuff peppers. Divide the rice mixture between the peppers, filling them up and place the lids on top.
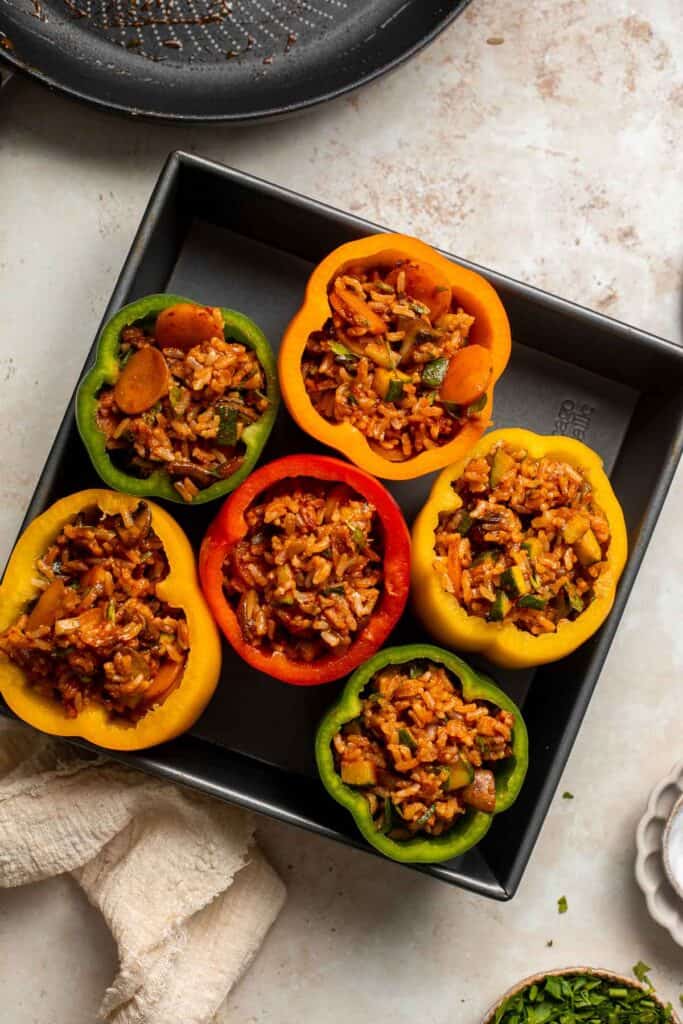
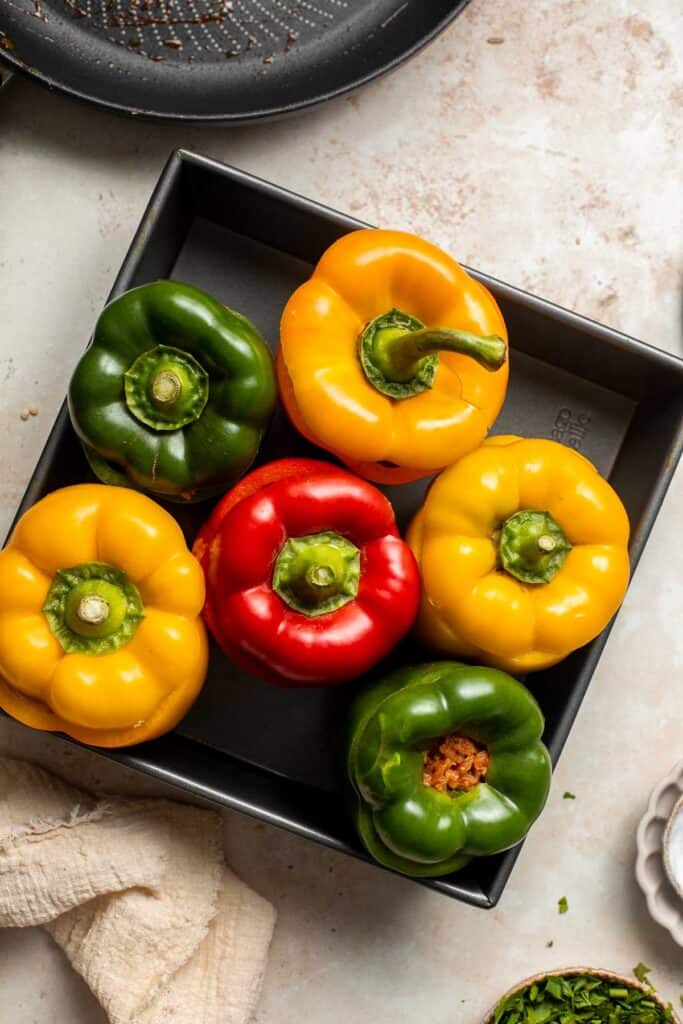
- Bake. Bake in a 425 °F preheated oven for 20-25 minutes, until the peppers soften and turn slightly brown on the edges.
- Serve. Sprinkle remaining parsley on top and serve warm.
Recipe Video
Expert Tip: Choose the Right Peppers
Choose large, firm peppers that can stand upright on their own in the baking dish and holds their shape. This makes stuffing them so much easier and helps them cook evenly without tipping over.
More Tips and Tricks
- Par-cook your rice. Using pre-cooked or leftover rice makes this recipe faster and ensures the filling doesn't dry out.
- Season generously. Don't skimp on herbs, spices, or salt - the rice and veggies really soak up flavor.
- Chop evenly. Cut your veggies into uniform small pieces so they cook at the same rate and fit well inside the peppers.
- Don't overbake. The peppers should be tender but still hold their shape. Check at 20 minutes to be safe.
- Let them rest. Allow the stuffed peppers to sit for 5 minutes after baking. This helps the flavors settle and makes them easier to handle.
Recipe Variations
- Spice things up. One of the best things about these easy vegan stuffed peppers is that you can customize the flavor simply by adding your favorite spice blend. Add jalapeños, chili flakes, or hot sauce to the filling for extra heat.
- Add cheese (or a cheese substitute). Customize these ve gan stuffed capsicum even further by topping them with a vegan cheese alternative (or regular cheese, if dairy is okay for you). You can broil or bake them for a few more minutes to melt the cheese. You can also use shredded vegan cheese or crumbled vegan feta, depending on the flavor profile you're going for.
- Protein boost. Stir in cooked lentils, quinoa, or chickpeas to make them extra filling. They'll bulk up the filling, add great texture, and keep you satisfied longer.
- Add some crunch. Add some texture to the filling mixture by mixing in chopped nuts or seeds such as walnuts, pecans, or sunflower seeds.
- Mexican-inspired. Mix in black beans, corn, and cumin for a Southwest twist.
- Mediterranean twist. Add chopped spinach, olives, and crumbled vegan feta for a fresh, bright spin.
- Switch out the bell peppers. Bell peppers are classic, but don't be afraid to mix it up! Poblano or Anaheim peppers are great alternatives if you want a smokier, slightly spicier flavor while still keeping the filling hearty and delicious.

Storage
How to Store
Transfer cooled stuffed peppers into an airtight container or wrap them tightly in plastic cling wrap and store in the fridge for up to 4 days.
How to Reheat
Reheat leftover stuffed peppers in the microwave in 30 second increments until heated through. You can also reheat in the oven at 350℉ for 10-15 minutes, or in the air fryer at 350℉ for 5-10 minutes.
How to Freeze
Wrap the leftover stuffed bell peppers tightly in aluminum foil and plastic cling wrap or transfer them to a freezer-safe container and freeze for up to 3 months. Reheat directly from frozen in the oven, adding extra bake time as needed.
How to Serve
I love serving these stuffed peppers with some fresh cilantro or parsley on top and sometimes with a light salad on a side. Plus, if you are a meat lover, you can "unveganize" this recipe and add some chicken, turkey, or chorizo. Have fun and enjoy!
These are my favorite dishes to serve with vegan stuffed peppers:
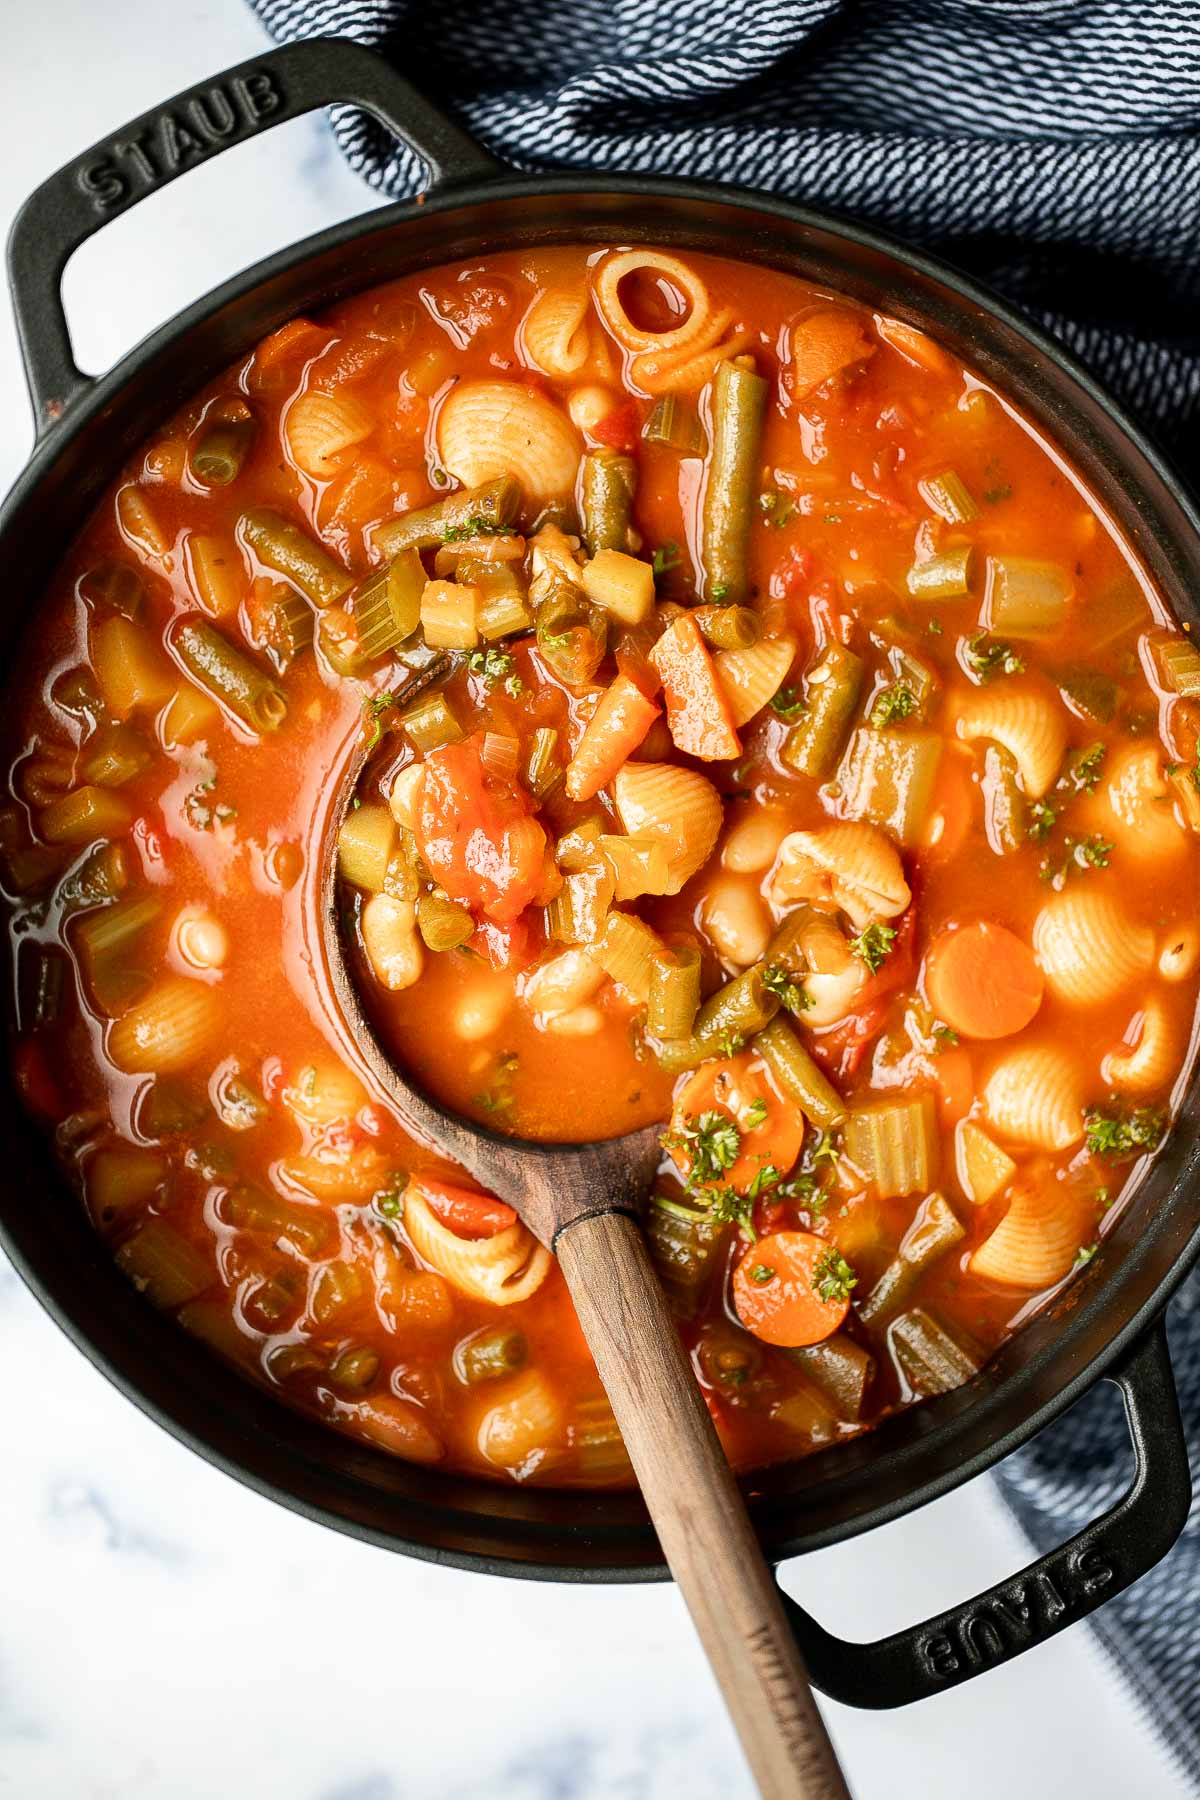
Vegetable Side Dishes
Looking to serve this with a veggie side? Try something from our collection: from roasted and sautéed vegetables to flavorful veggie medleys, these sides add color, nutrition, and delicious flavor to any main course.
FAQ
The trick is to control the liquid. Make sure your rice isn't overcooked or mushy, and let any excess moisture evaporate from the sautéed vegetables before mixing them in. Also, don't add too much tomato purée - just enough to bind the filling. If you want firmer peppers, you can reduce the bake time slightly or choose peppers with thicker walls, like red or yellow.
Vegetarian stuffed peppers can be filled with almost anything! Common bases include rice, quinoa, couscous, or lentils, combined with vegetables like mushrooms, zucchini, corn, spinach, or onions. Herbs and spices boost the flavor, while tomato purée or sauce helps bind the filling. Cheese (vegan or dairy) is optional but delicious for topping. This versatility makes stuffed peppers great for using up leftover veggies or pantry staples. You can also lean into different cuisines by adding beans and cumin for a Mexican-inspired version, or feta and olives for a Mediterranean twist.
Stuffed bell peppers are incredibly versatile, so you can mix and match your favorite vegetables depending on the season or what you have on hand. Classic choices include mushrooms, onions, zucchini, carrots, and spinach because they cook down nicely and blend well with rice or grains. You can also add corn, peas, eggplant, or even leafy greens like kale or Swiss chard for extra nutrients. For more Mediterranean flair, toss in artichokes, sun-dried tomatoes, or olives. The key is to choose veggies that soften and release flavor as they bake, creating a hearty filling that complements the natural sweetness of the peppers.
It depends on the recipe and the size of your peppers. Smaller or thinner peppers usually soften perfectly during baking without pre-cooking. Larger or thicker-skinned peppers may benefit from a quick pre-bake (about 5-10 minutes) before stuffing, ensuring they cook through without leaving the filling dry. Pre-cooking also makes the peppers more tender and reduces total bake time. For this recipe, since the peppers bake at a high temperature (425°F) for 20-25 minutes, there's usually no need to pre-cook unless your peppers are very large.
Stuffed peppers are hearty on their own but shine even more with the right side dishes. A simple salad with a tangy vinaigrette balances the richness, while crusty bread or garlic focaccia is perfect for soaking up any sauce. For a fuller meal, pair them with roasted vegetables like green beans, asparagus, or Brussels sprouts. You can also serve them with soup, such as minestrone or tomato basil, for a cozy, well-rounded dinner. The goal is to keep sides light and fresh to complement the hearty stuffed peppers
More Stuffed Pepper Recipes
Looking for other recipes like this? Try these:
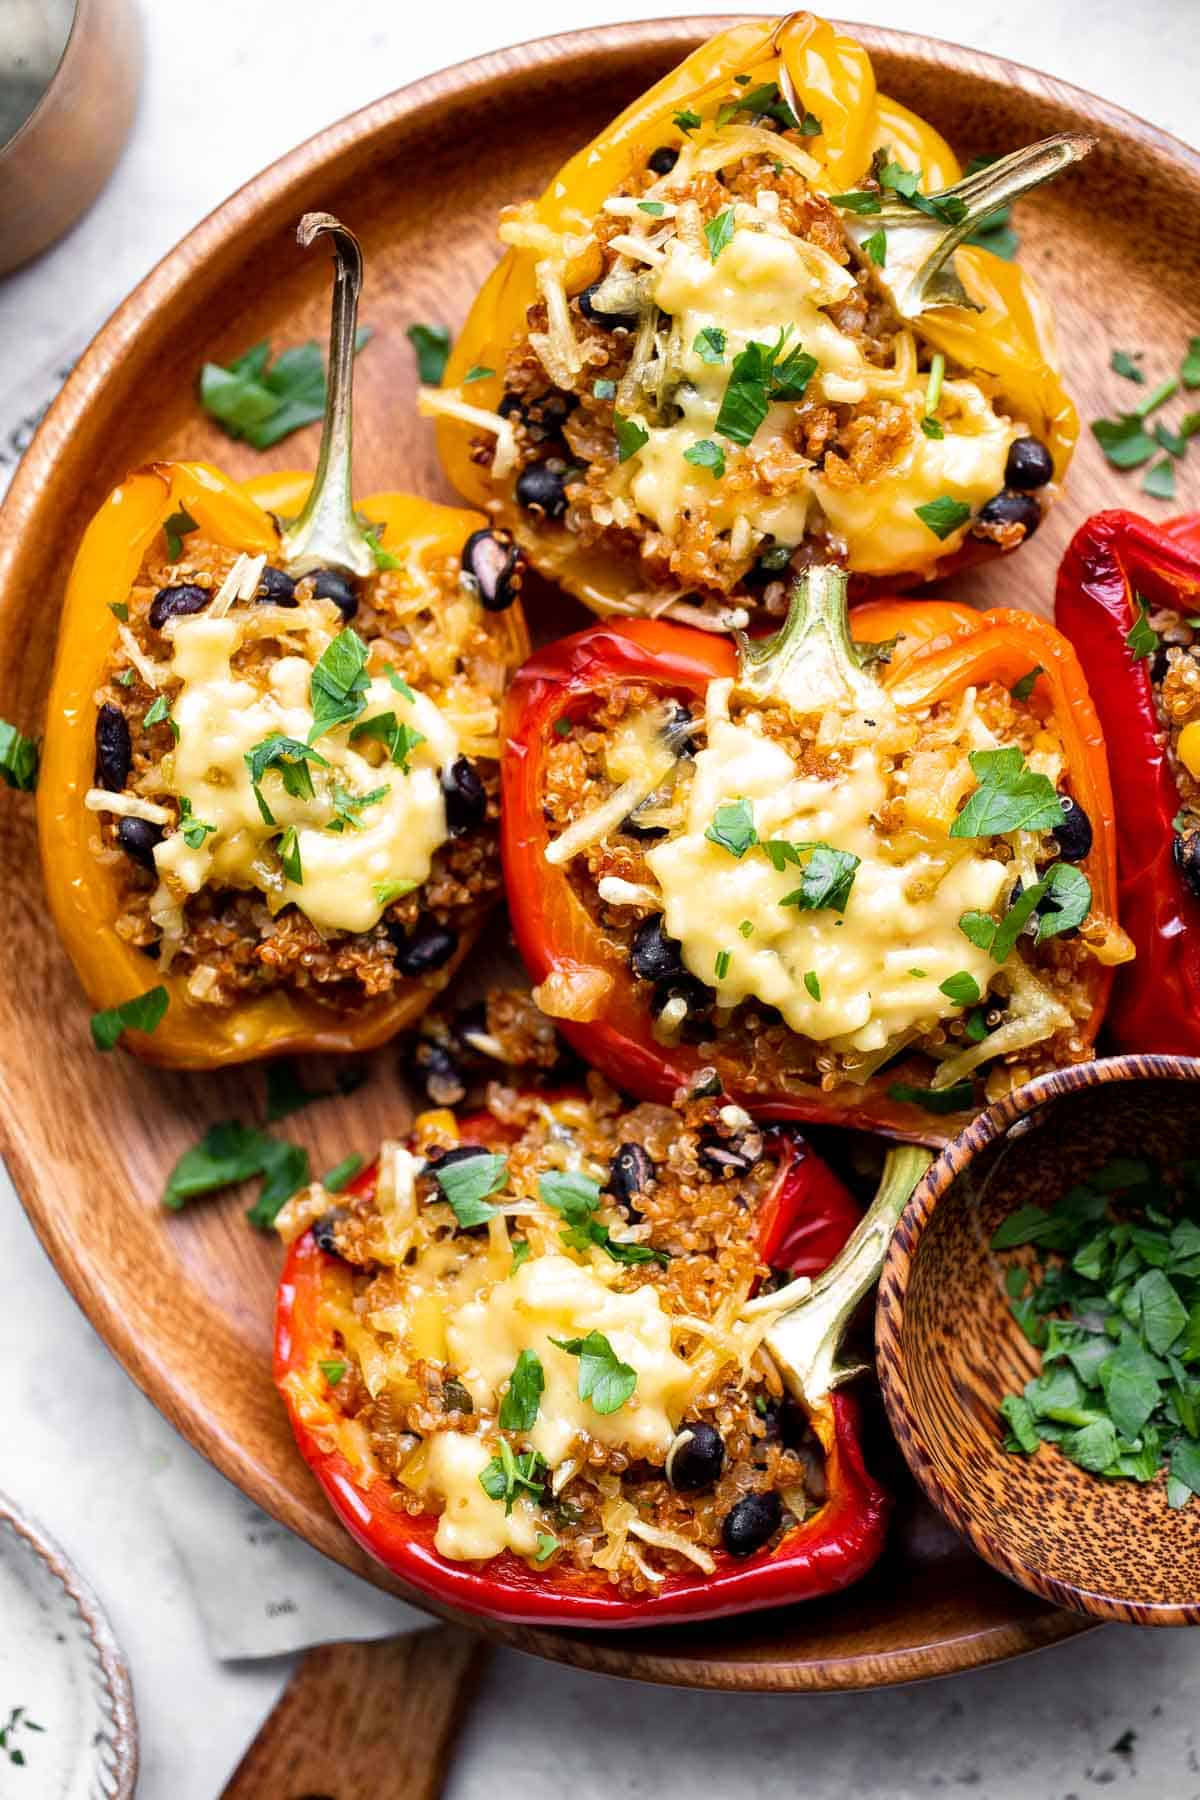
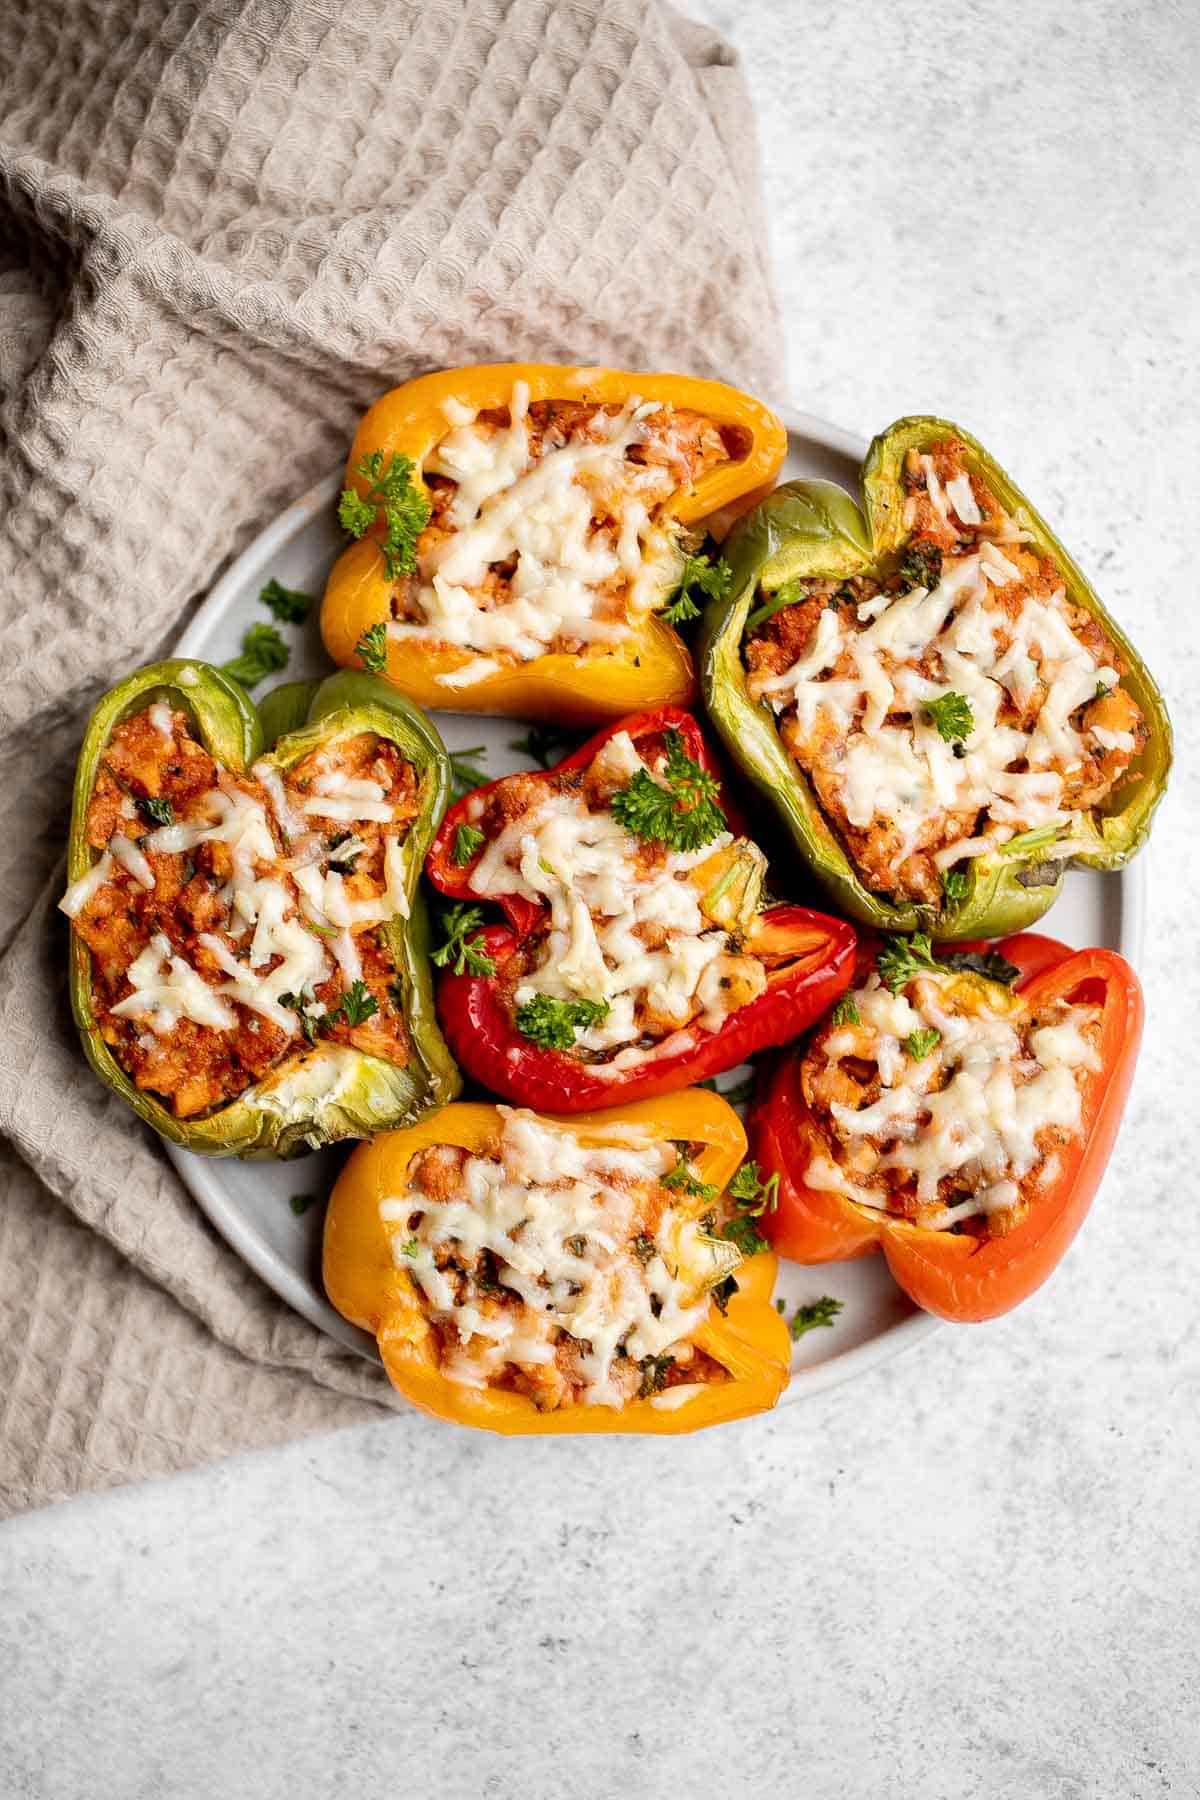

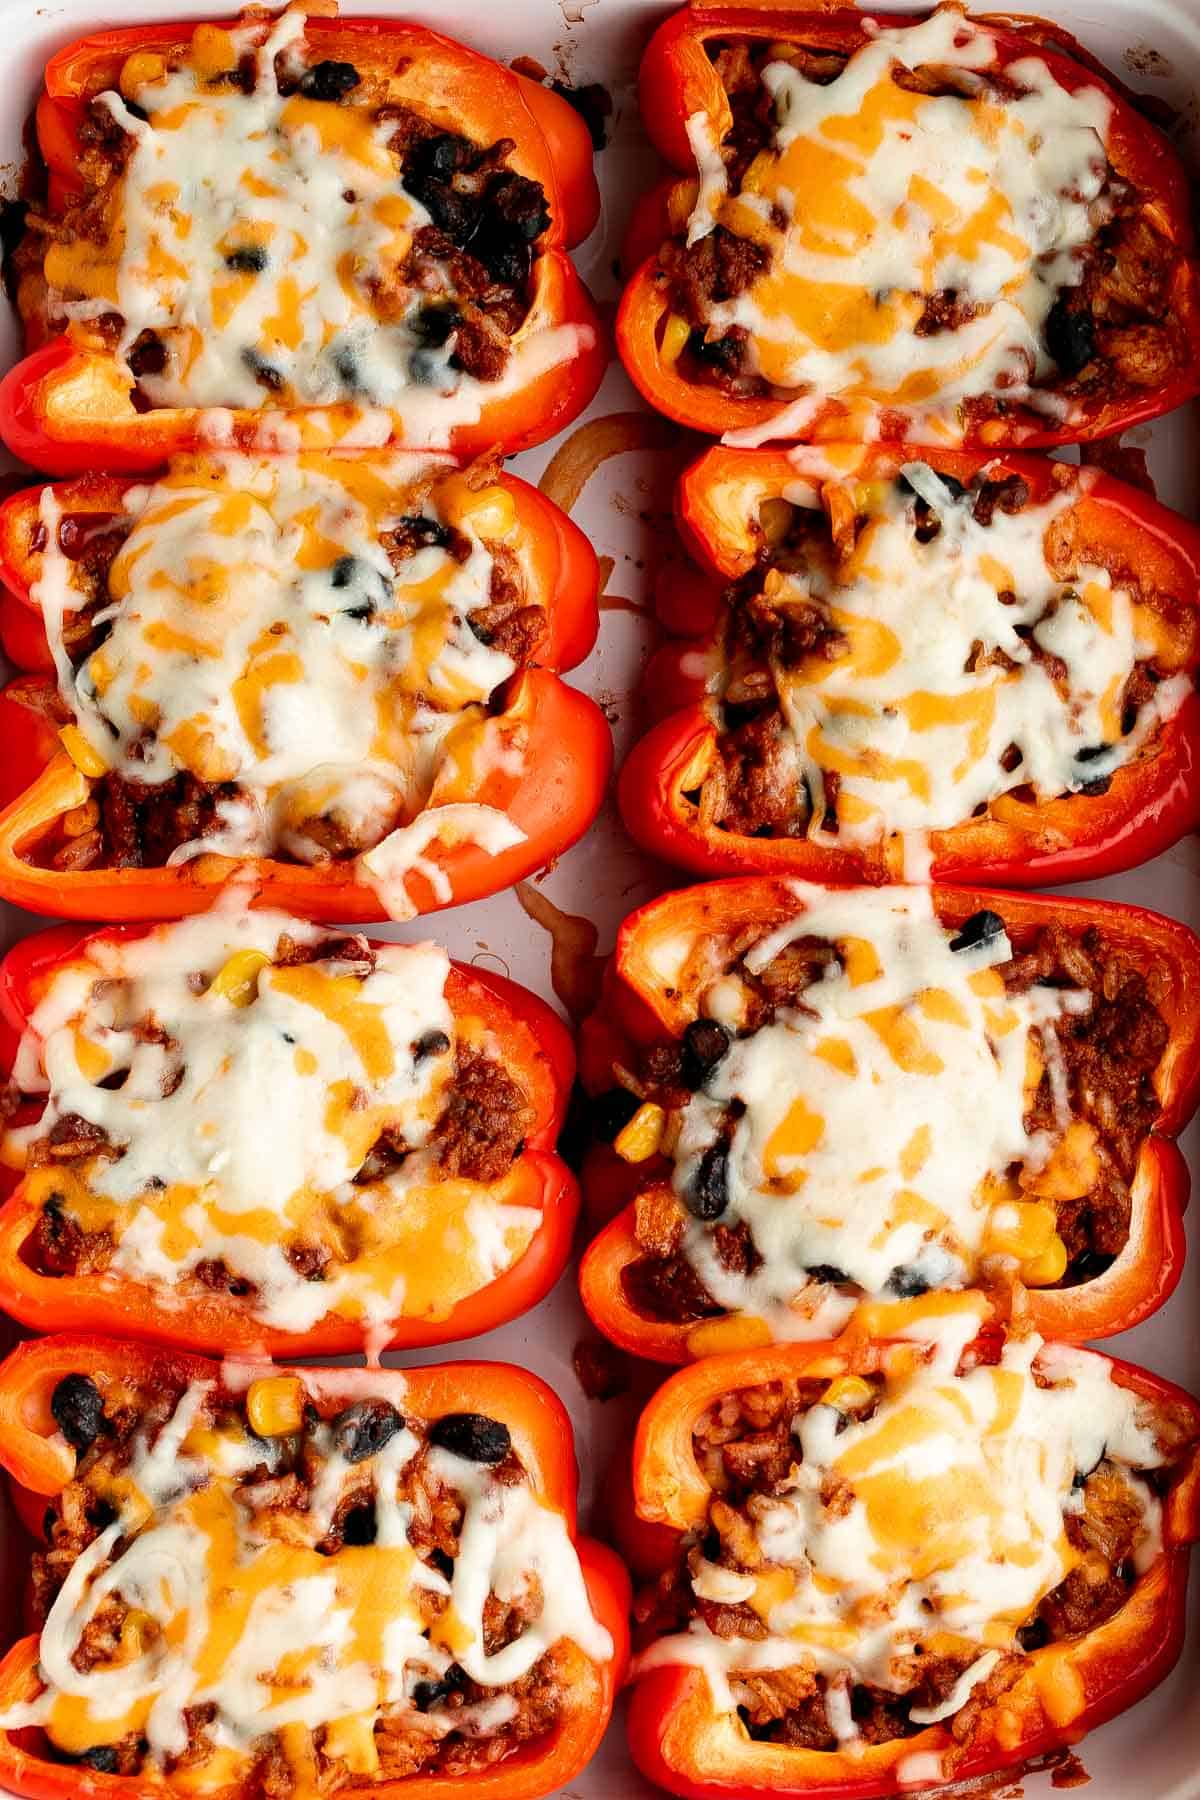
Tried this recipe?
I'd love to hear what you think! Leave a comment and rating below to share your feedback. Your reviews help others discover this recipe and help me keep creating more free recipes for you. Snap a photo and tag me on social media @aheadofthyme too.

Calabacitas (Mexican Zucchini)

Zucchini and corn, but make it fiesta-level delicious. That's exactly what happens in this Calabacitas (Mexican Zucchini) recipe: a quick, colorful skillet of tender zucchini, juicy corn, sweet tomatoes, and just the right amount of heat from jalapeño. And the best part? It's ready in 20 minutes, start to finish. Top it with salty cotija cheese and fresh cilantro, and you've got a side dish that might just steal the show from the main course.

If you've got summer produce taking over your kitchen (looking at you, zucchini mountain), this is the fastest way to put it to good use. But don't let the "summer" thing stop you - frozen corn and year-round zucchini mean this recipe can be your go-to veggie side anytime. Plus, it's one of those dishes that somehow tastes even better the next day. Leftovers? What leftovers.
If you like this calabacitas recipe, then you should try our Mexican Street Corn (Elote) or Huevos Rancheros next. This veggie dish is a perfect sidekick to Carne Asada or anything coming hot off the grill.
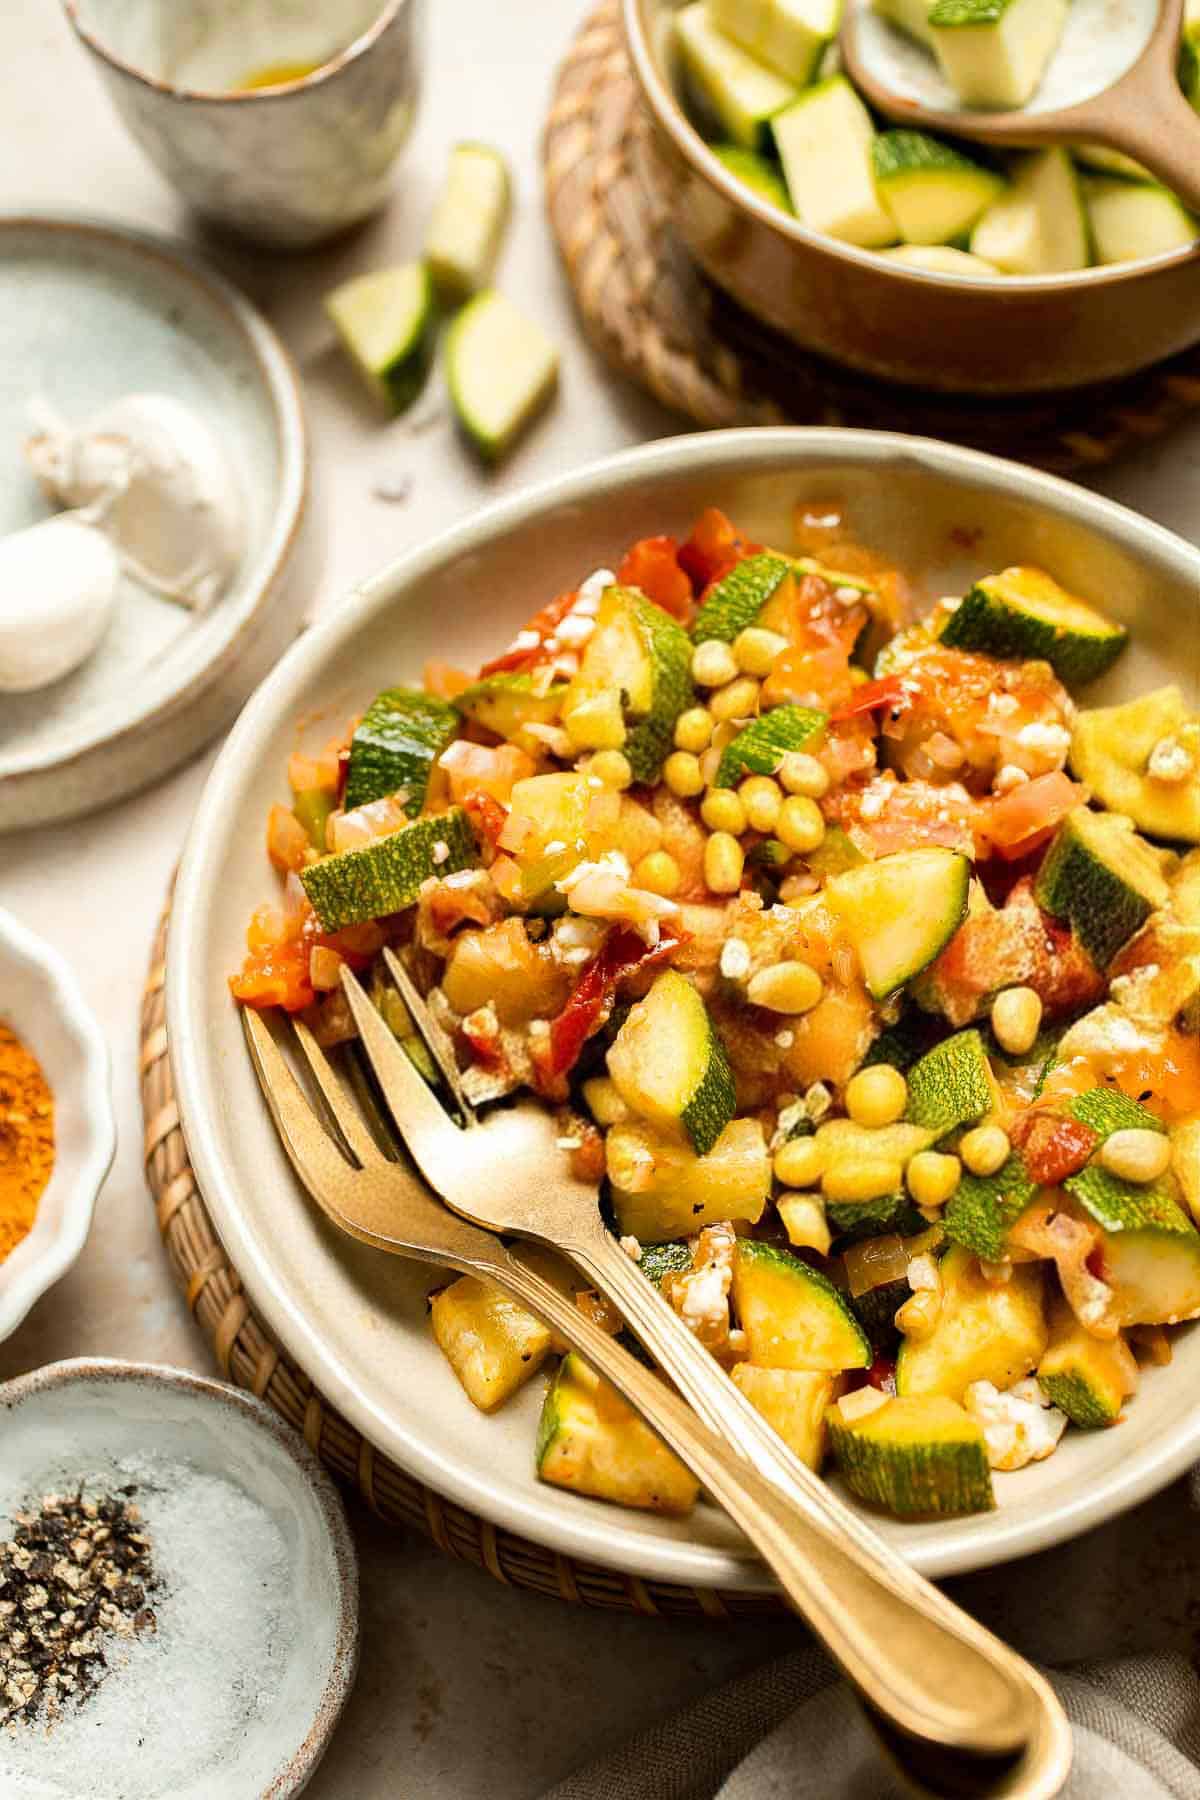
Why You'll Love This Recipe
- Veggies that don't taste boring. Zucchini, corn, and tomatoes get a glow-up with garlic, onions, and just the right seasoning - no sad, soggy vegetables here.
- One pan, 20 minutes, done. This is weeknight cooking at its finest: minimal cleanup, maximum flavor.
- Make it your own. Keep it mild, spice it up, swap in yellow squash, or toss in beans. Calabacitas is here for your kitchen creativity.
- Plays well with others. Serve it with tacos, grilled steak, enchiladas, or just pile it over rice for a super easy vegetarian dinner.
Ingredients and Substitutions
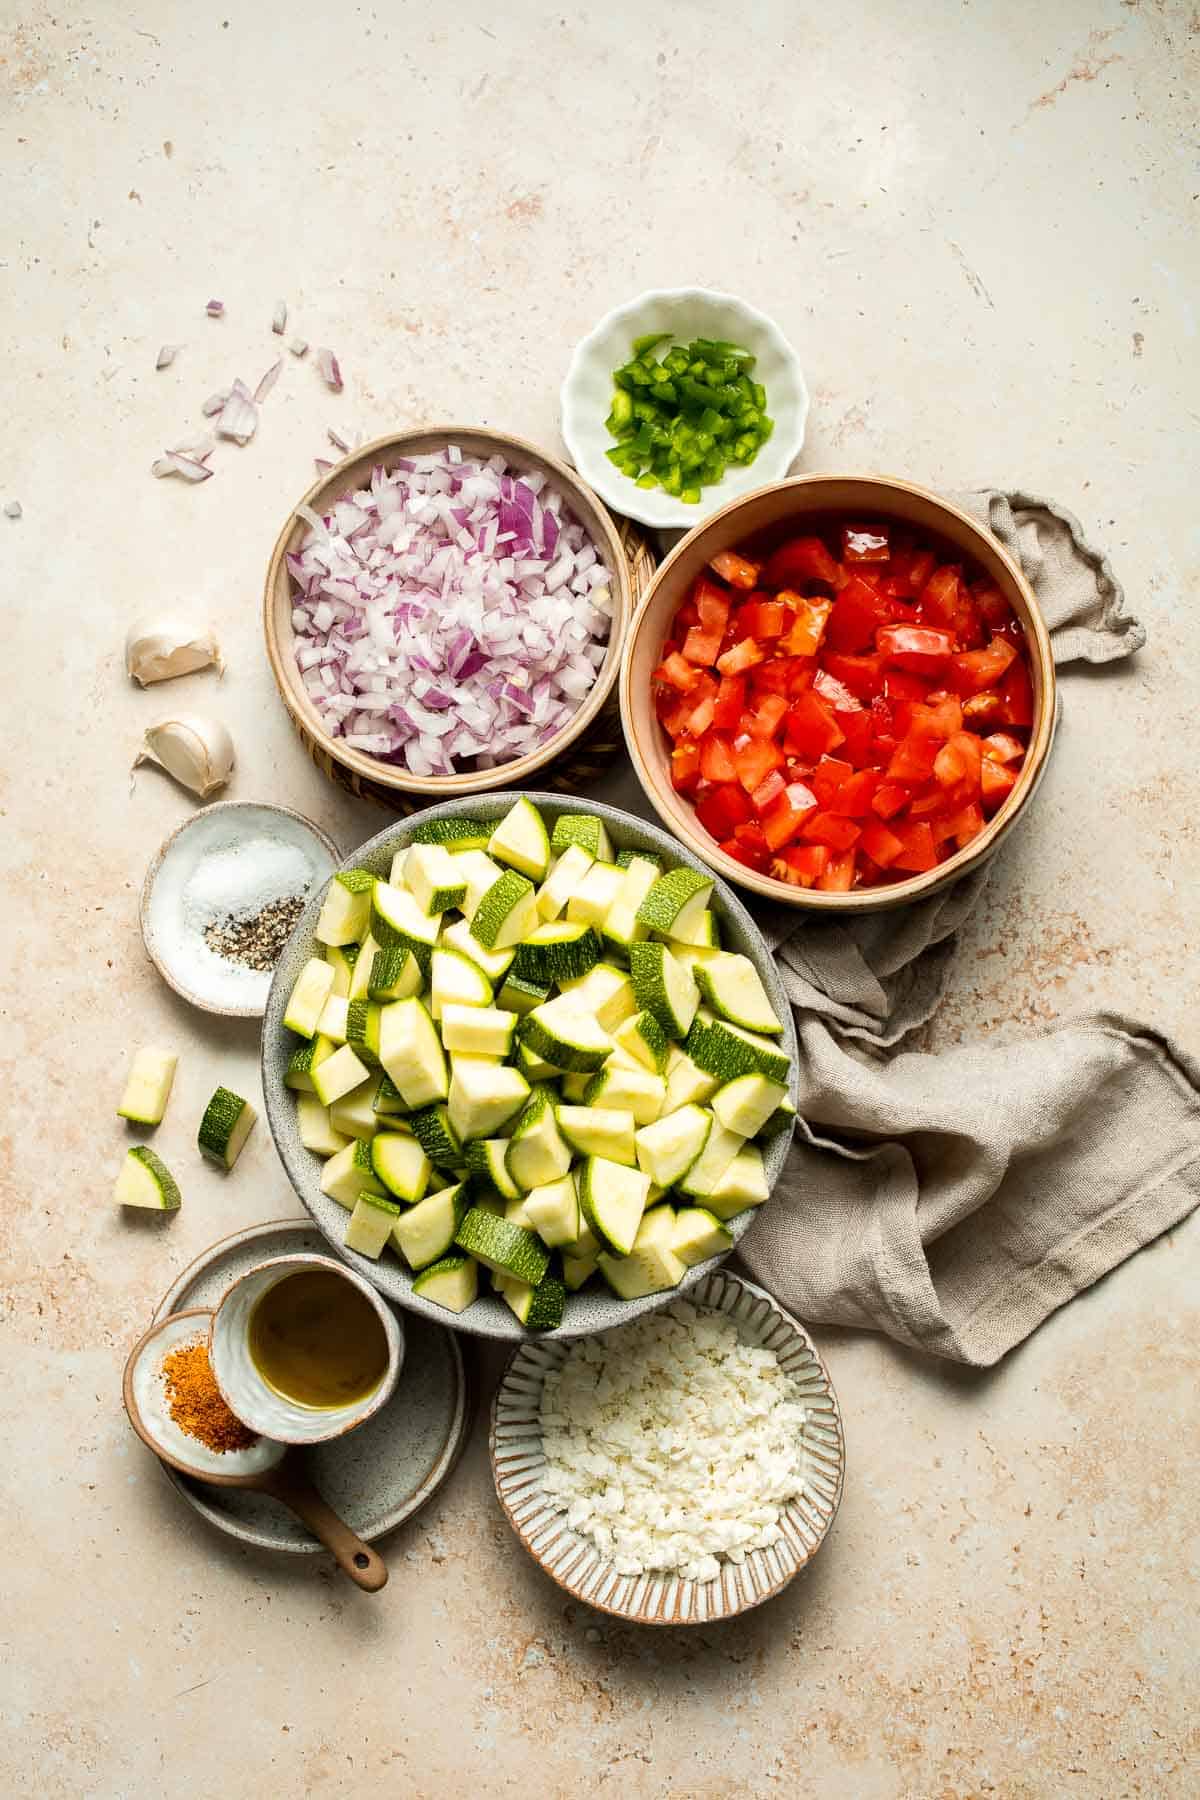
To make this delicious calabacitas or Mexican zucchini, you will need the following ingredients (see recipe card below for quantities):
- avocado oil - Keeps things light and lets the veggies shine. Olive oil is totally fine too.
- red onion - Brings a little sweetness and color contrast. Yellow or white onion works if that's what you have.
- garlic - Fresh is best for that punchy, savory flavor.
- roma tomatoes - Juicy, slightly tangy, and perfect for this quick sauté. Cherry tomatoes cut in half are a solid swap.
- zucchini - Our star veggie! Cut into ½-inch cubes so it cooks evenly. Yellow squash is a perfect stand-in.
- corn - Sweet and crisp. Fresh off the cob is unbeatable, but frozen or canned (drained) is just fine.
- jalapeño or serrano pepper - Adds a gentle kick (or a serious one if you want). Skip the seeds for mild heat, or use bell pepper for zero spice.
- taco seasoning - Your shortcut to perfect flavor. You can also make your own with ground cumin, paprika, and oregano.
- salt and pepper - Season to taste. Always taste at the end - veggies soak up more flavor than you think.
- cotija cheese - That salty, crumbly magic on top. Feta works in a pinch, or skip for dairy-free.
- cilantro - this optional garnish adds a bright finish. Swap with parsley if cilantro's not your thing.
Equipment
You'll also need measuring cups and spoons, a large skillet or frying pan, a cutting board, and a sharp knife.
Instructions
- Saute aromatics. Heat the oil in a large skillet over medium-high heat until it shimmers and sizzles, about 1-2 minutes. Add the onion and garlic and cook until fragrant and softened, about 1 minute.
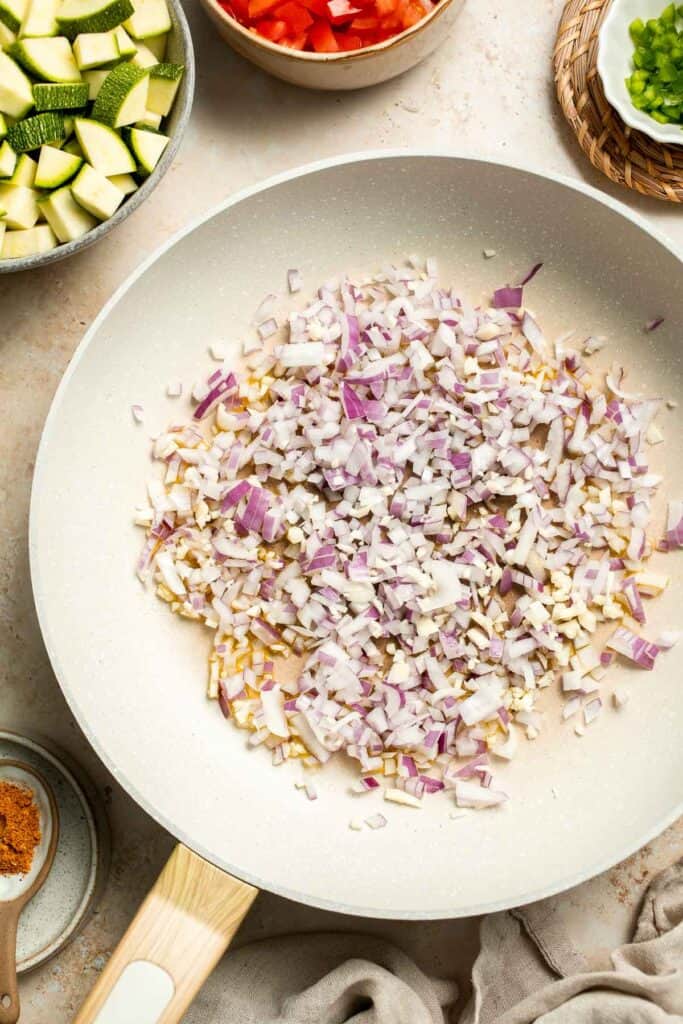
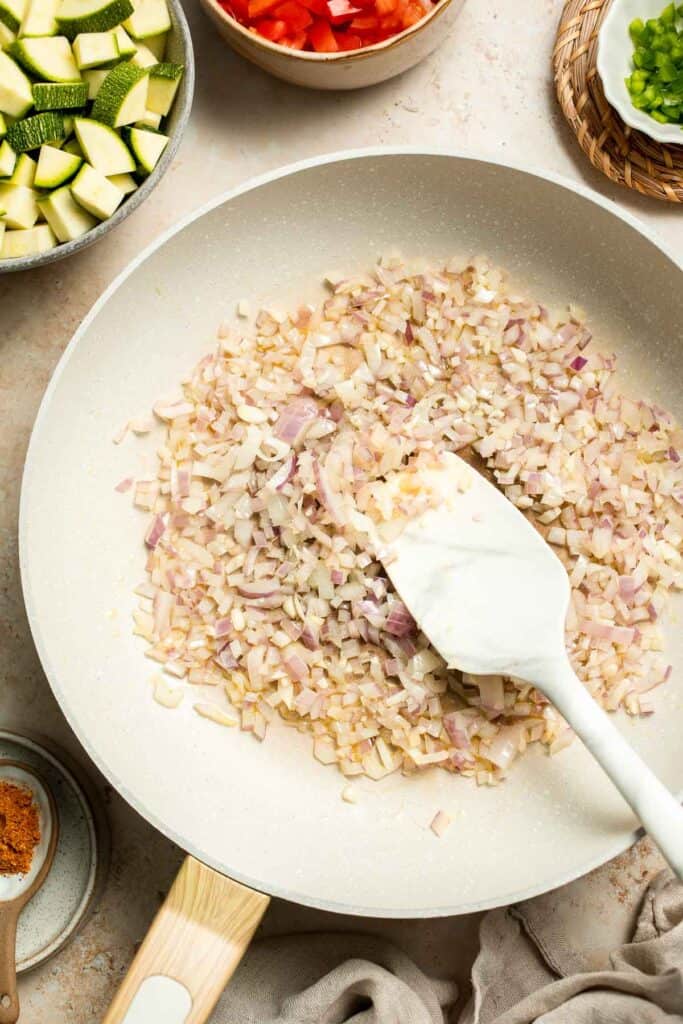
- Add tomatoes. Stir in the diced tomatoes and cook until they start to break down and release their juices, about 2-3 minutes.
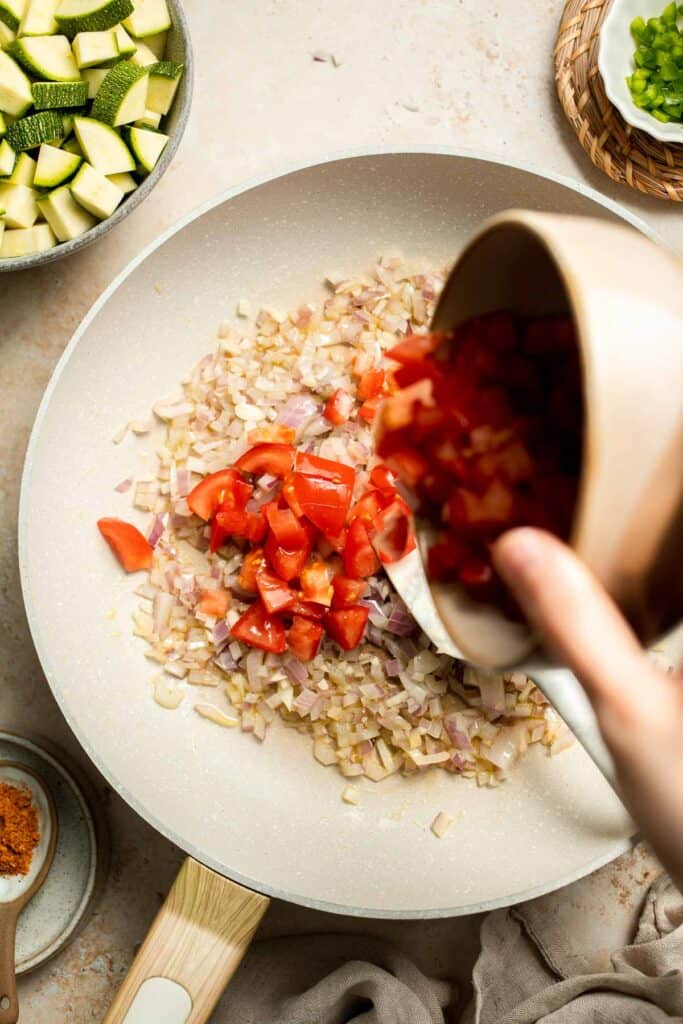
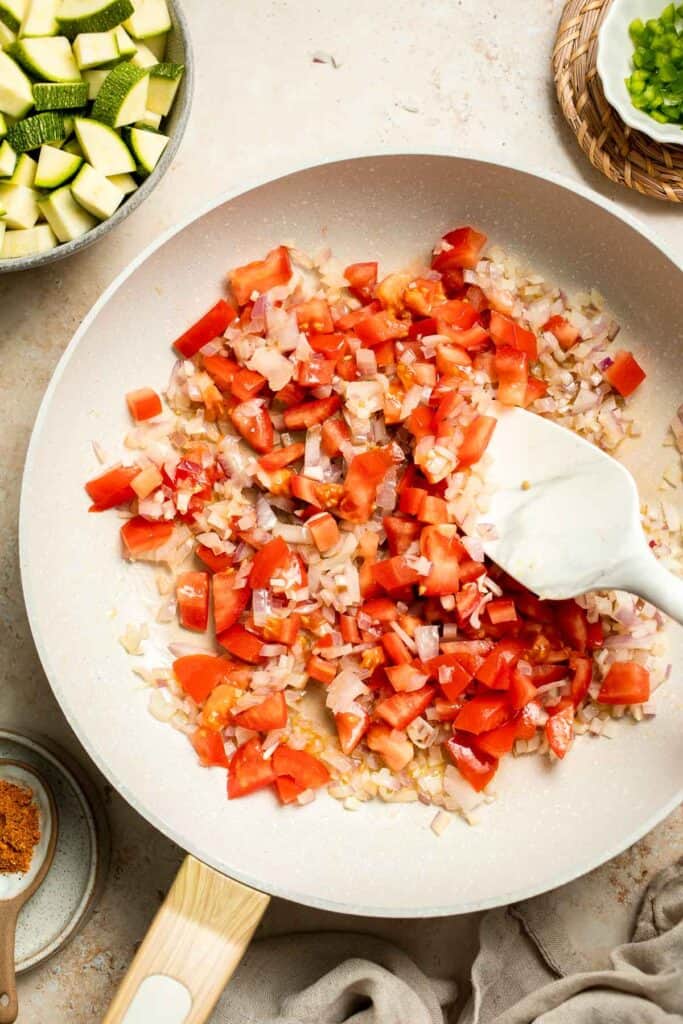
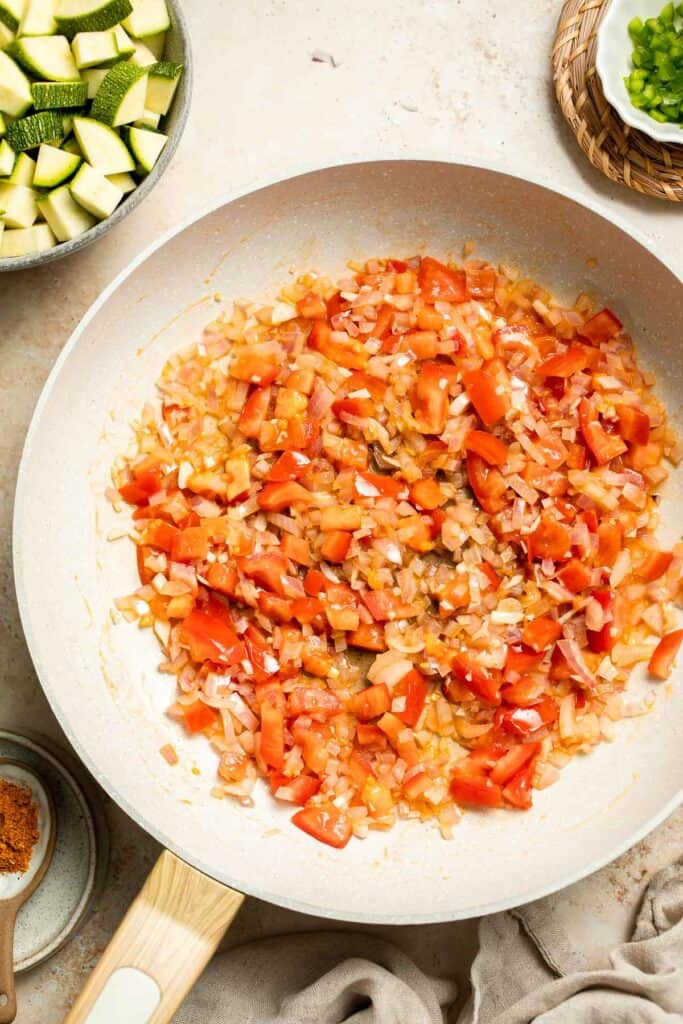
- Add veggies and seasoning. Stir in the zucchini, corn, jalapeño (or serrano), taco seasoning, salt, and pepper. Mix until everything is evenly coated.
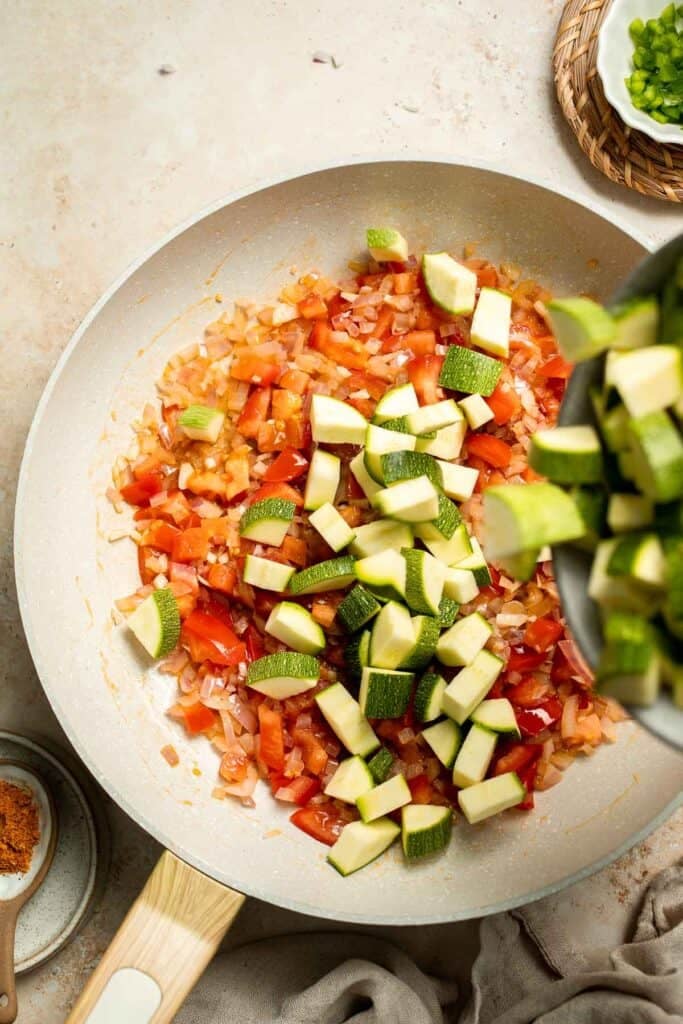
- Cook. Cover the skillet with a lid and cook until the zucchini cubes are tender but not mushy and still hold their shape, about 3-5 minutes. If the pan looks too dry, add a splash of water.
- Serve. Remove from heat and sprinkle with cotija cheese and fresh cilantro, if using. Serve immediately while warm.
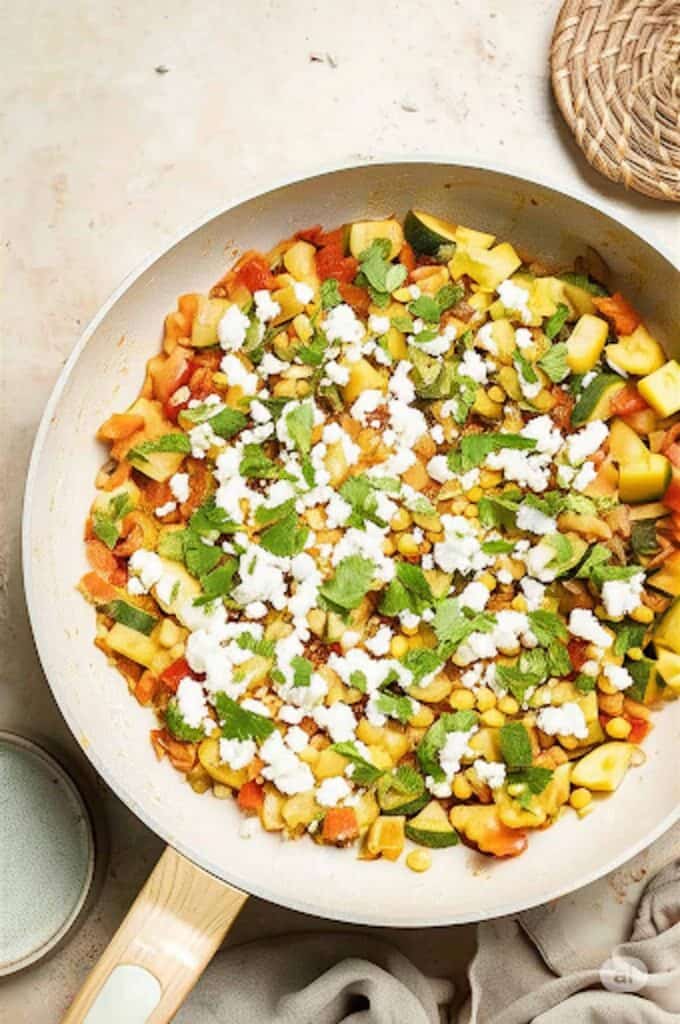
Expert Tip: Cut Evenly
Cut the zucchini evenly so they cook at the same rate. Uneven zucchini chunks = uneven cooking. Stick to ½-inch cubes so you don't end up with half-mushy, half-crunchy chaos.
More Tips and Tricks
- Don't overcook the zucchini. Zucchini cooks quickly and can turn mushy if left too long. Keep it tender-crisp for the best texture.
- Use fresh corn when in season. Fresh corn off the cob has unbeatable sweetness and crunch, but frozen corn is a great year-round alternative.
- Control the spice level. Adjust the amount of jalapeño or serrano to suit your preference. For no spice, use bell peppers. Jalapeños are mild, serranos bring the heat. Bell peppers = spice-free.
- Add the cheese at the end. Cotija should be added after removing from the heat to prevent it from melting completely into the dish.
- Make it a meal. Stir in cooked black beans or shredded rotisserie chicken to turn calabacitas into a hearty main dish.
Recipe Variations
- Cheesy calabacitas. Stir in shredded cheddar cheese or Monterey Jack before serving for extra creaminess.
- With beans. Add cooked black beans, pinto beans, or even chickpeas for added protein and fiber.
- Mix your squash. Use half zucchini and half yellow squash for more color and flavor variety.
- Add other veggies. Try tossing in green bell peppers, mushrooms, or even spinach or kale at the end for a boost of greens. You can mix and match depending on what's in your fridge or at the farmer's market.
- Smoky twist. Swap the jalapeño for roasted poblano peppers for a smoky twist.
- Saucy version. Double the amount of tomatoes for a saucier dish (more like a veggie stew), perfect over rice.
- Breakfast version. Top with a fried egg for a savory, protein-packed breakfast or brunch.
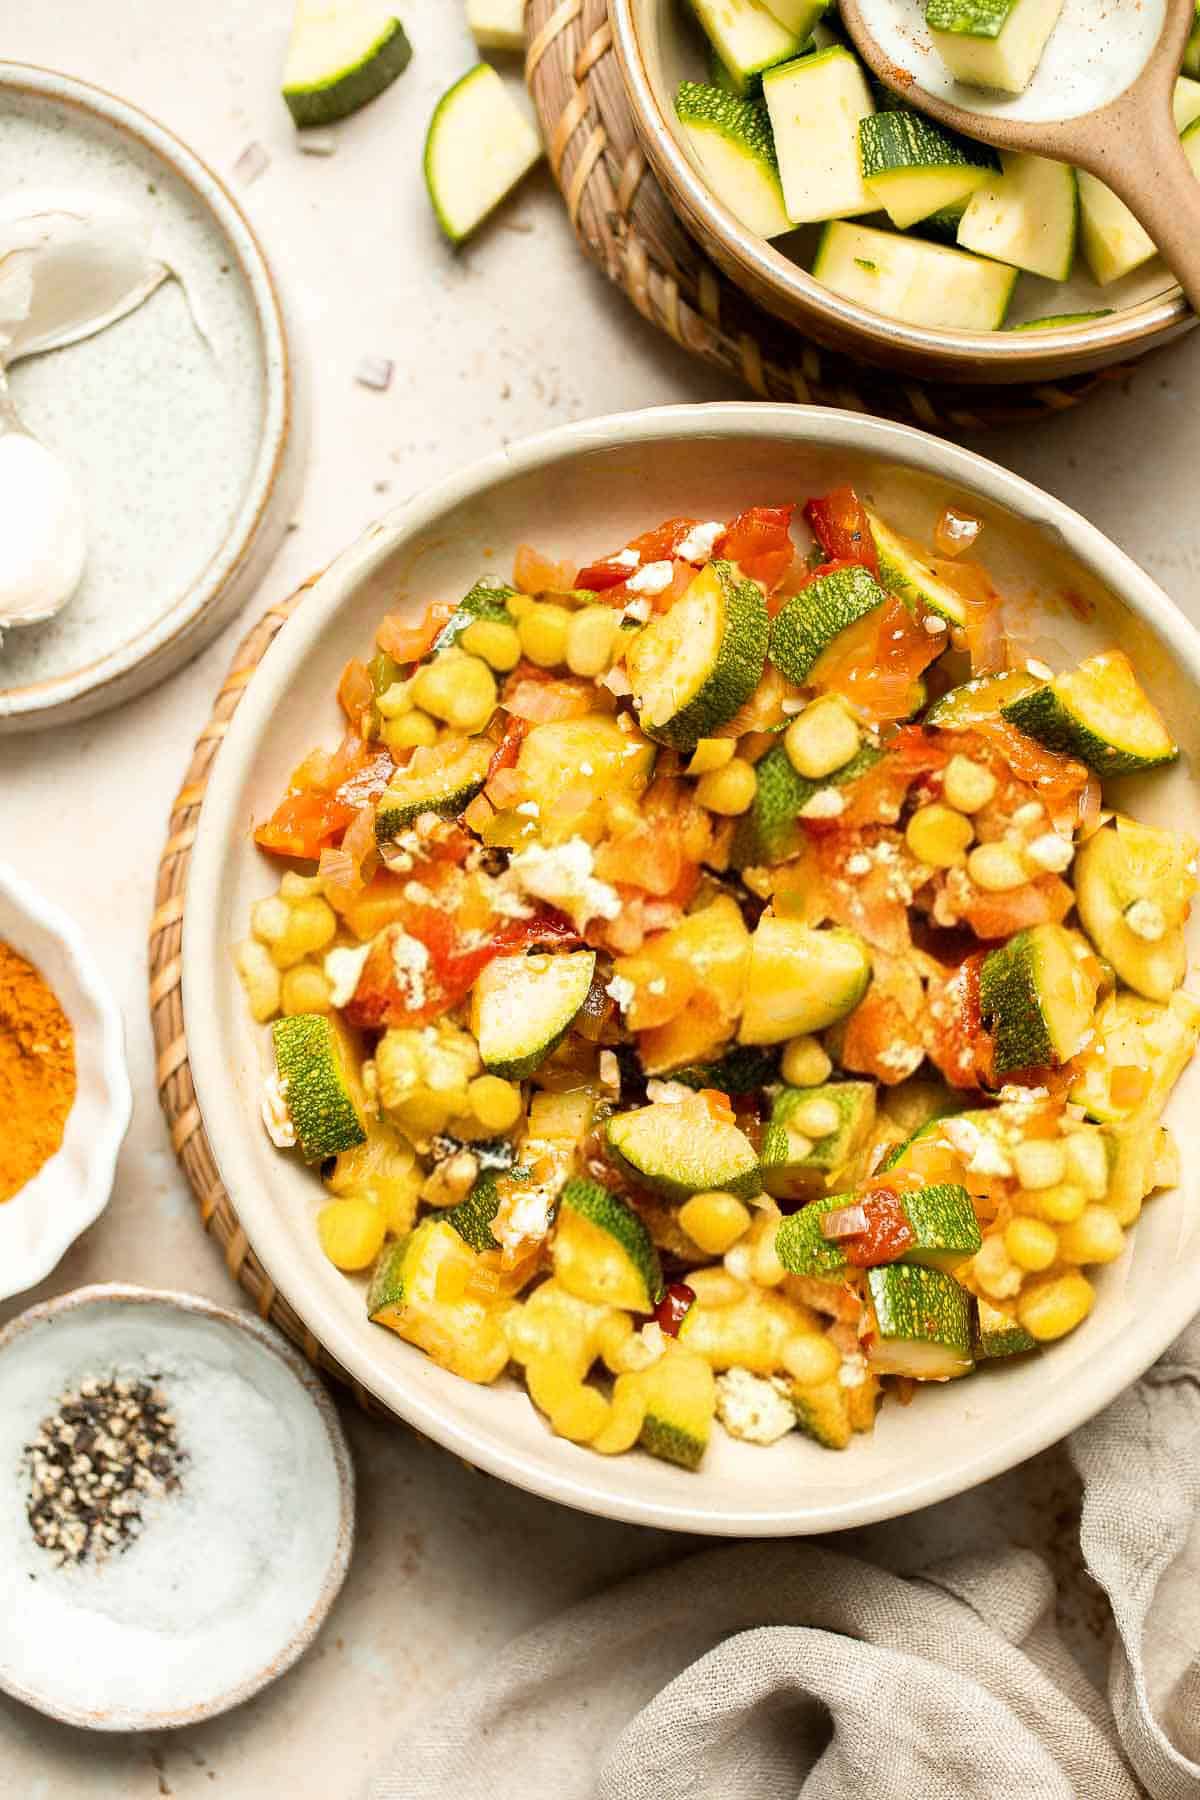
Storage
How to Store
Cool completely at room temperature, then store in an airtight container in the fridge for up to 4 days.
How to Reheat
Reheat in a skillet over medium heat for 3-4 minutes until warmed through, or microwave in 30-second intervals, stirring in between.
How to Freeze
While calabacitas is best fresh, you can freeze it without the cheese for up to 2 months. Thaw in the fridge before reheating.
How to Serve
Pile it next to tacos and enchiladas, spoon it over cilantro-lime rice, wrap it in a corn tortilla, serve it with grilled meats, or just eat it straight from the skillet. No judgment.
These are my favorite dishes to serve with fresh and colorful calabacitas:
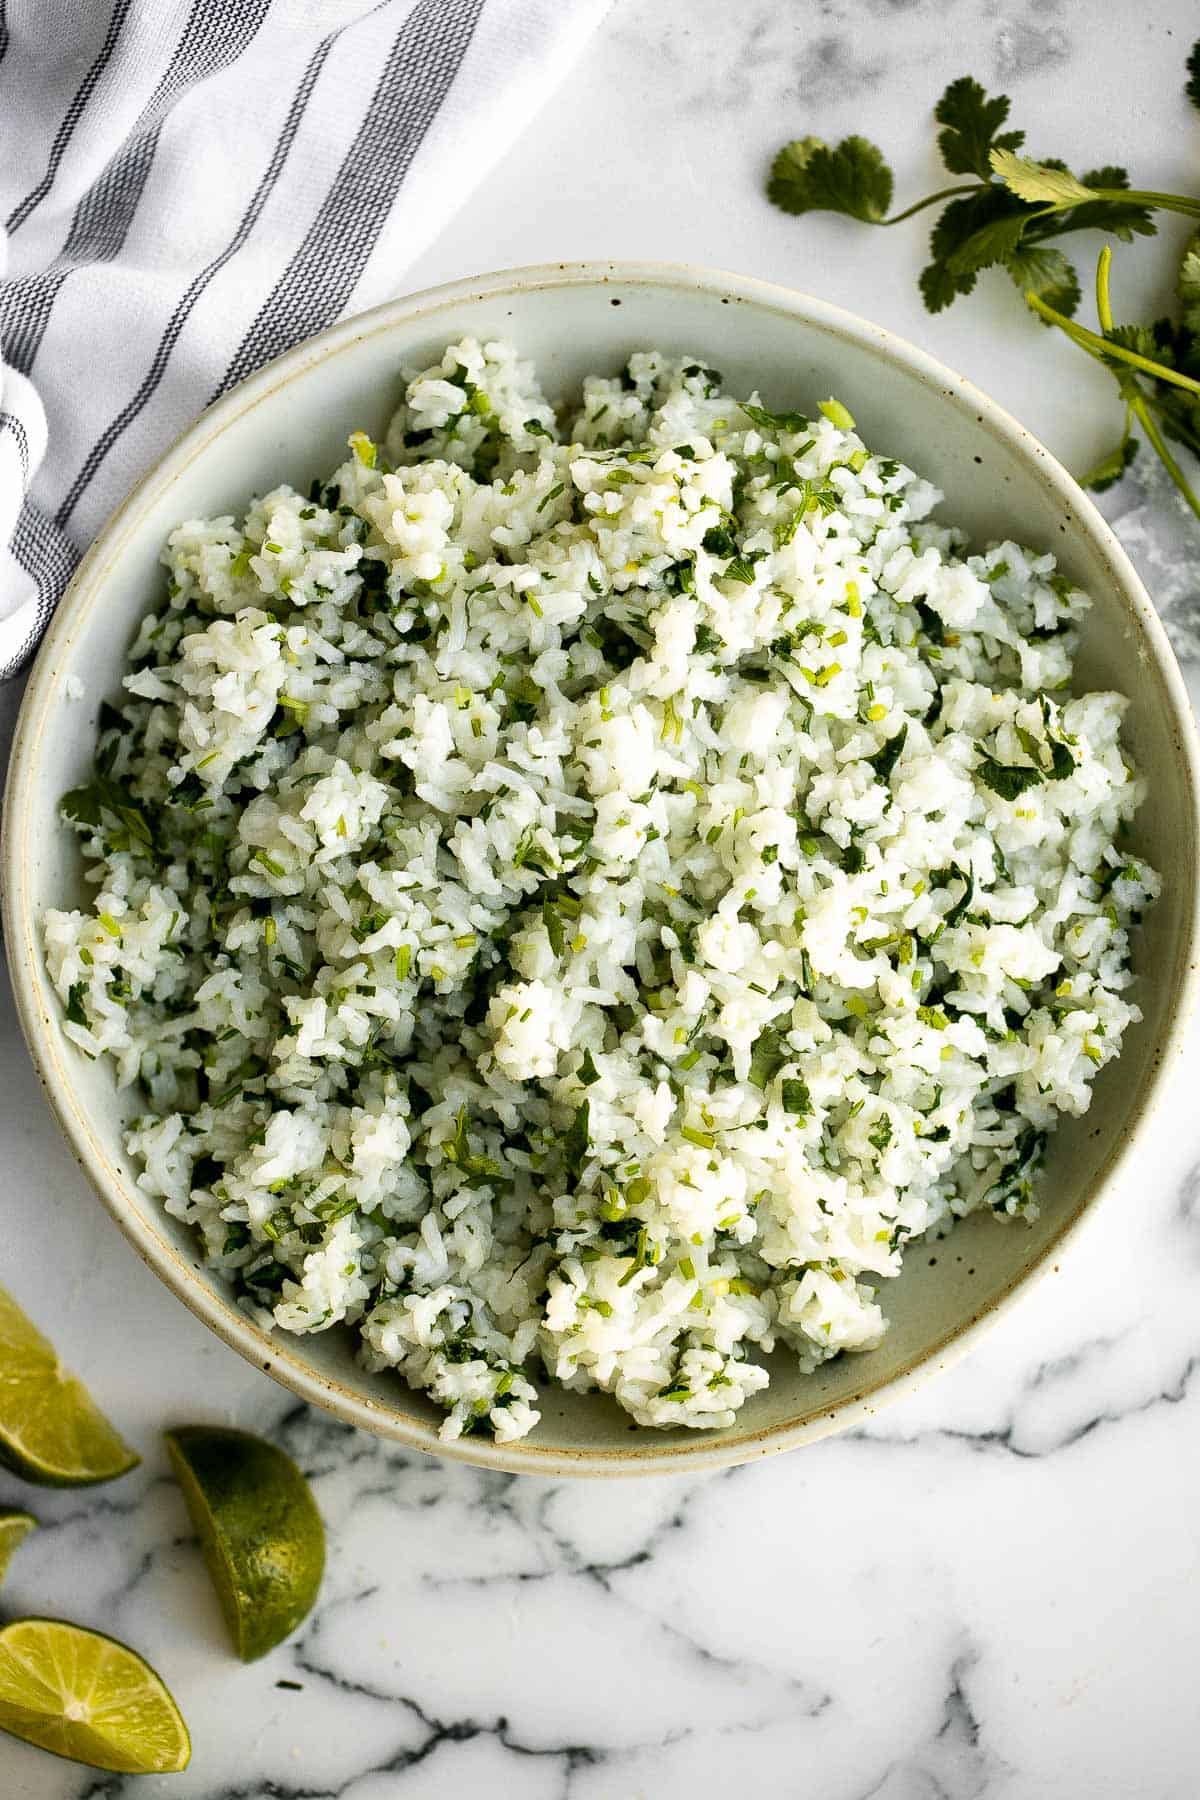
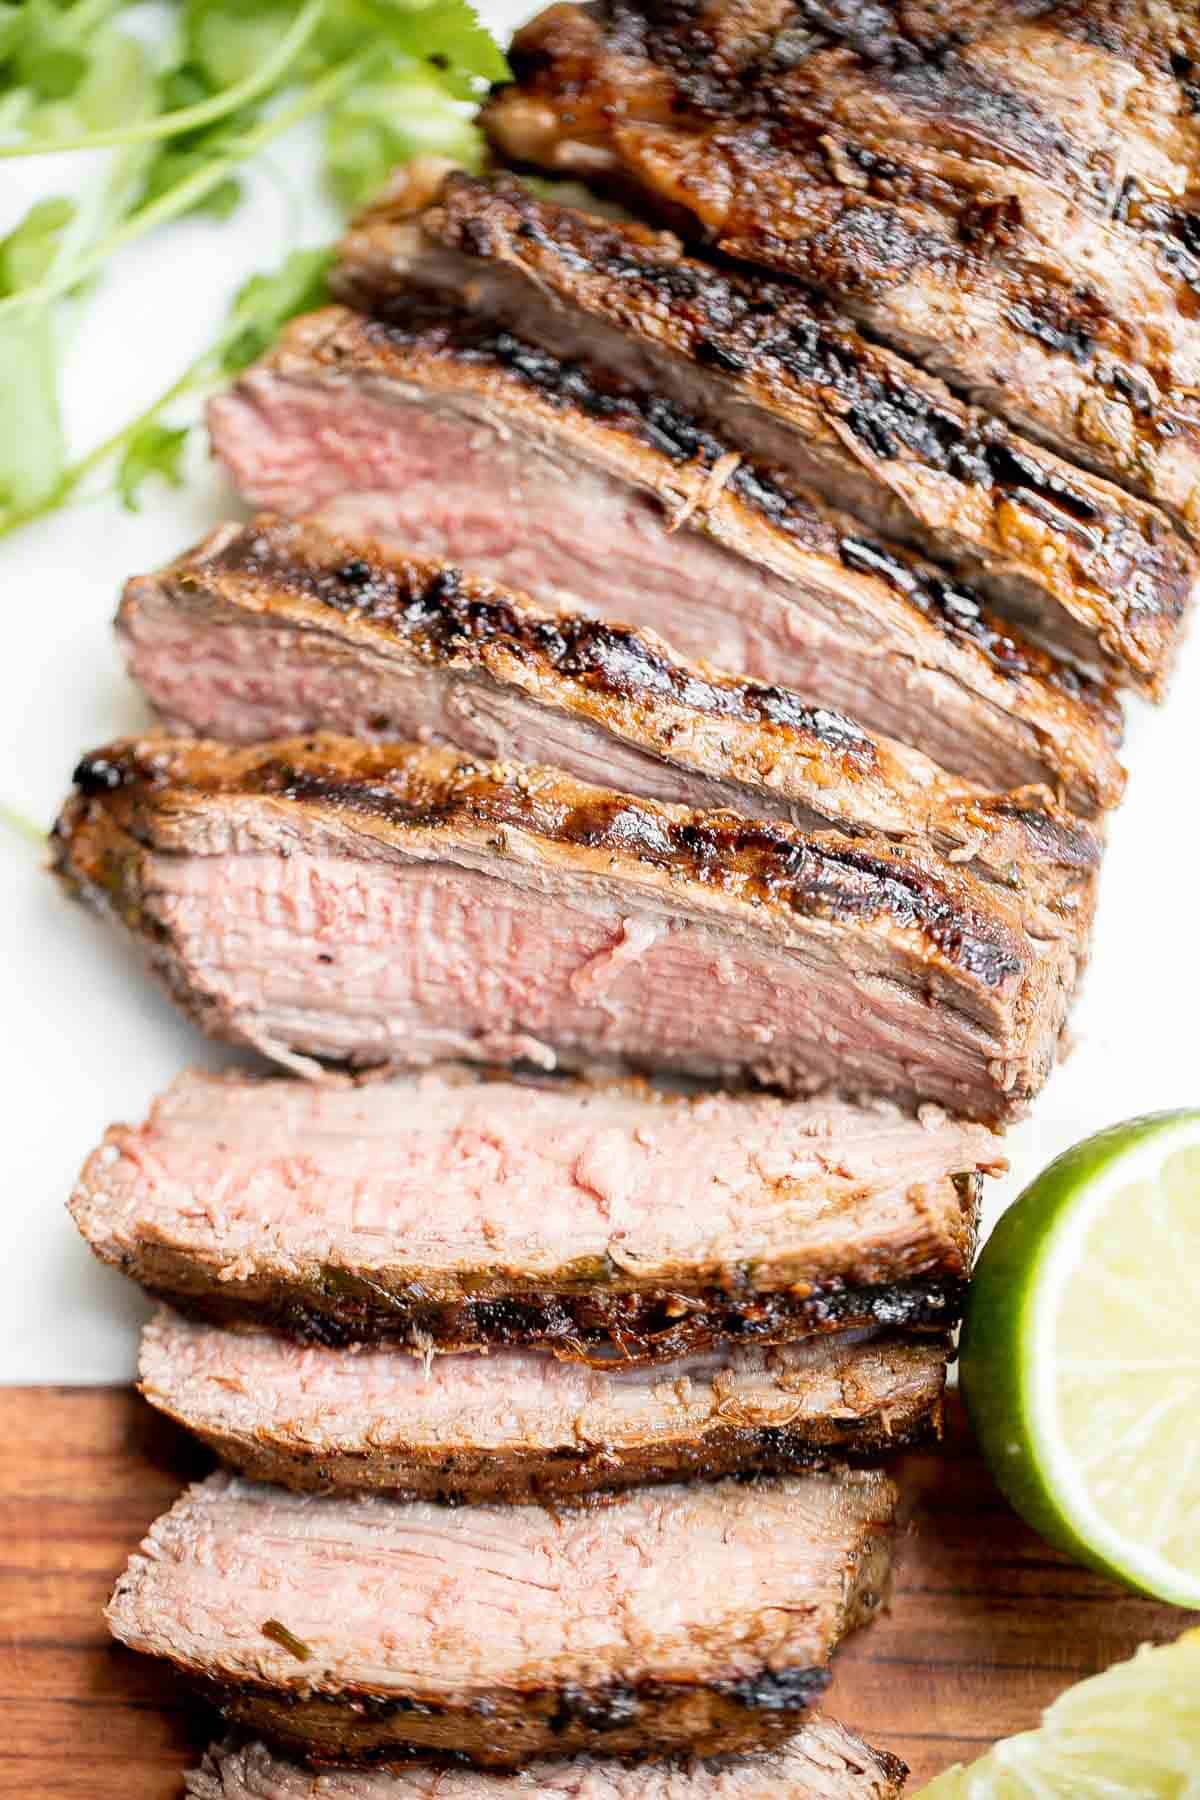
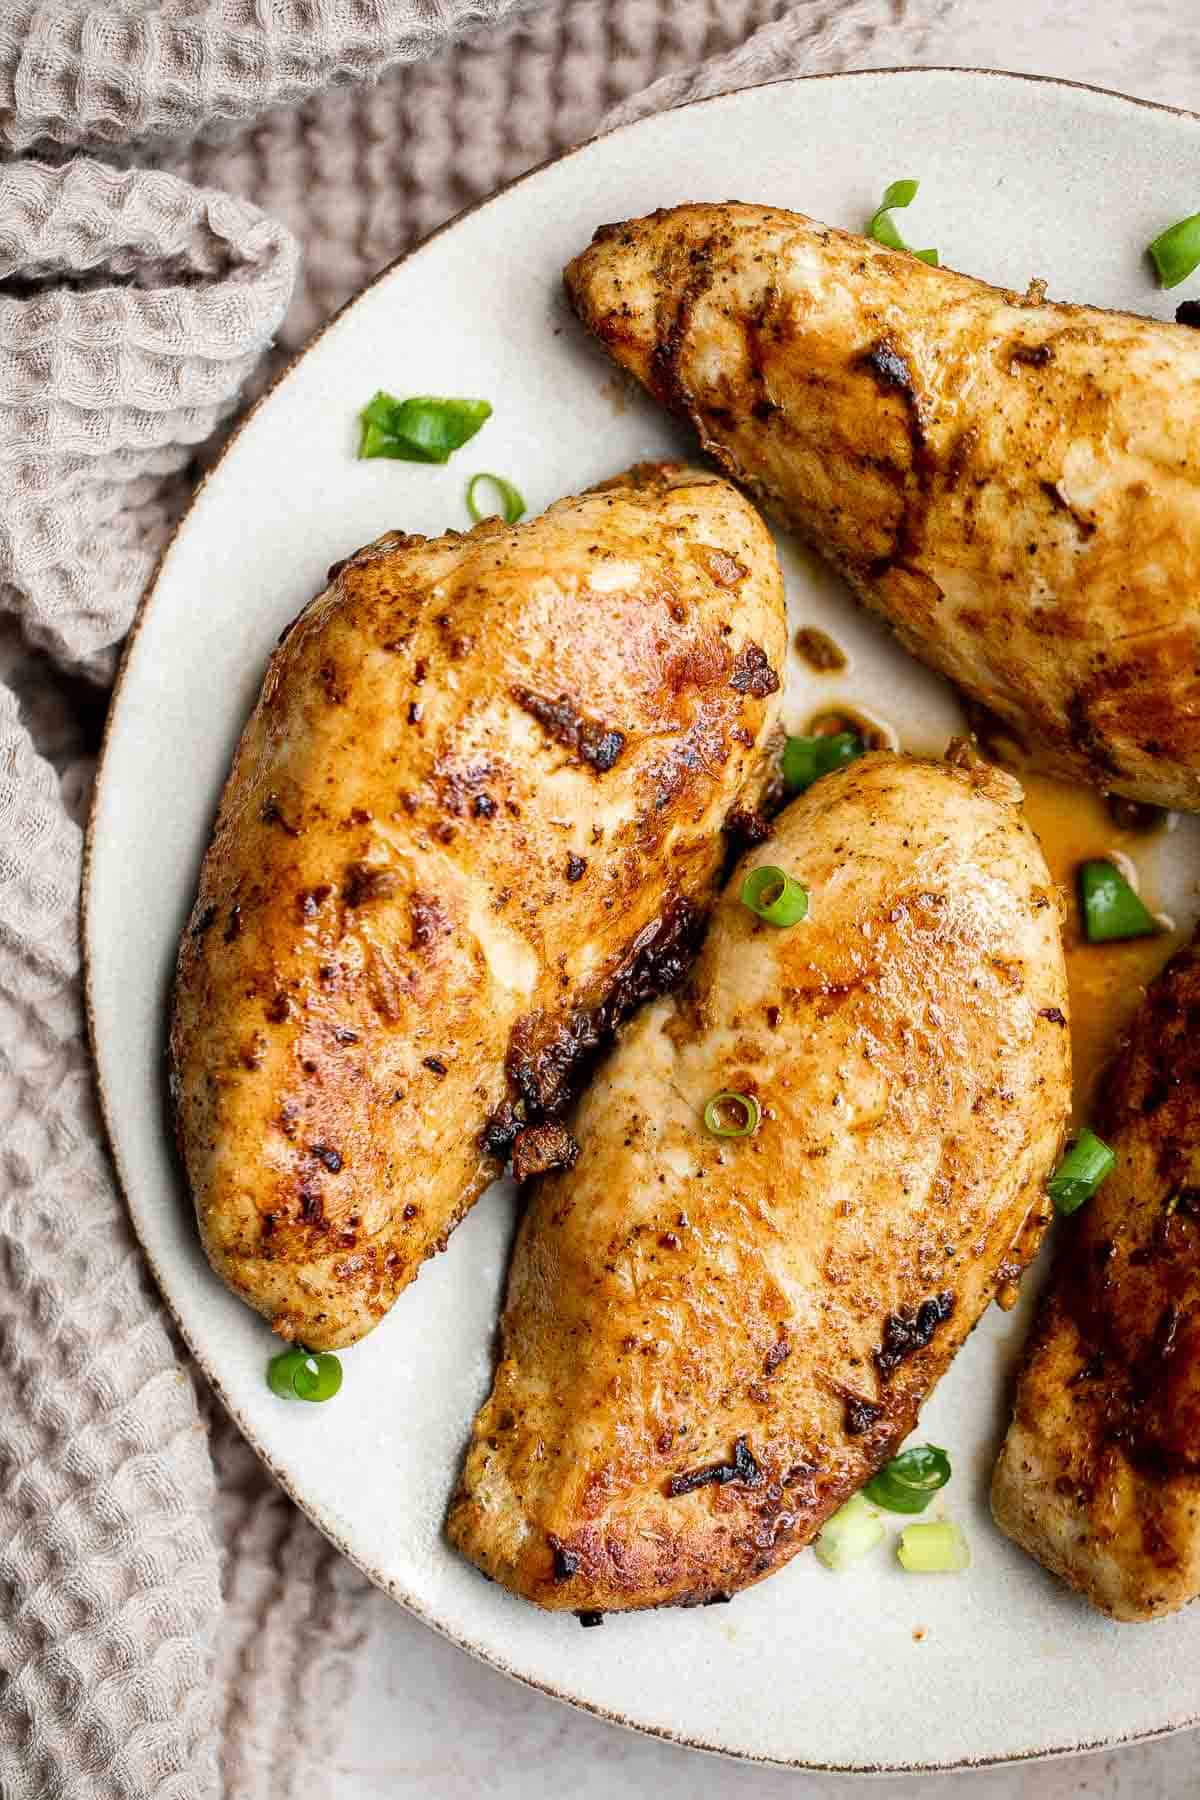
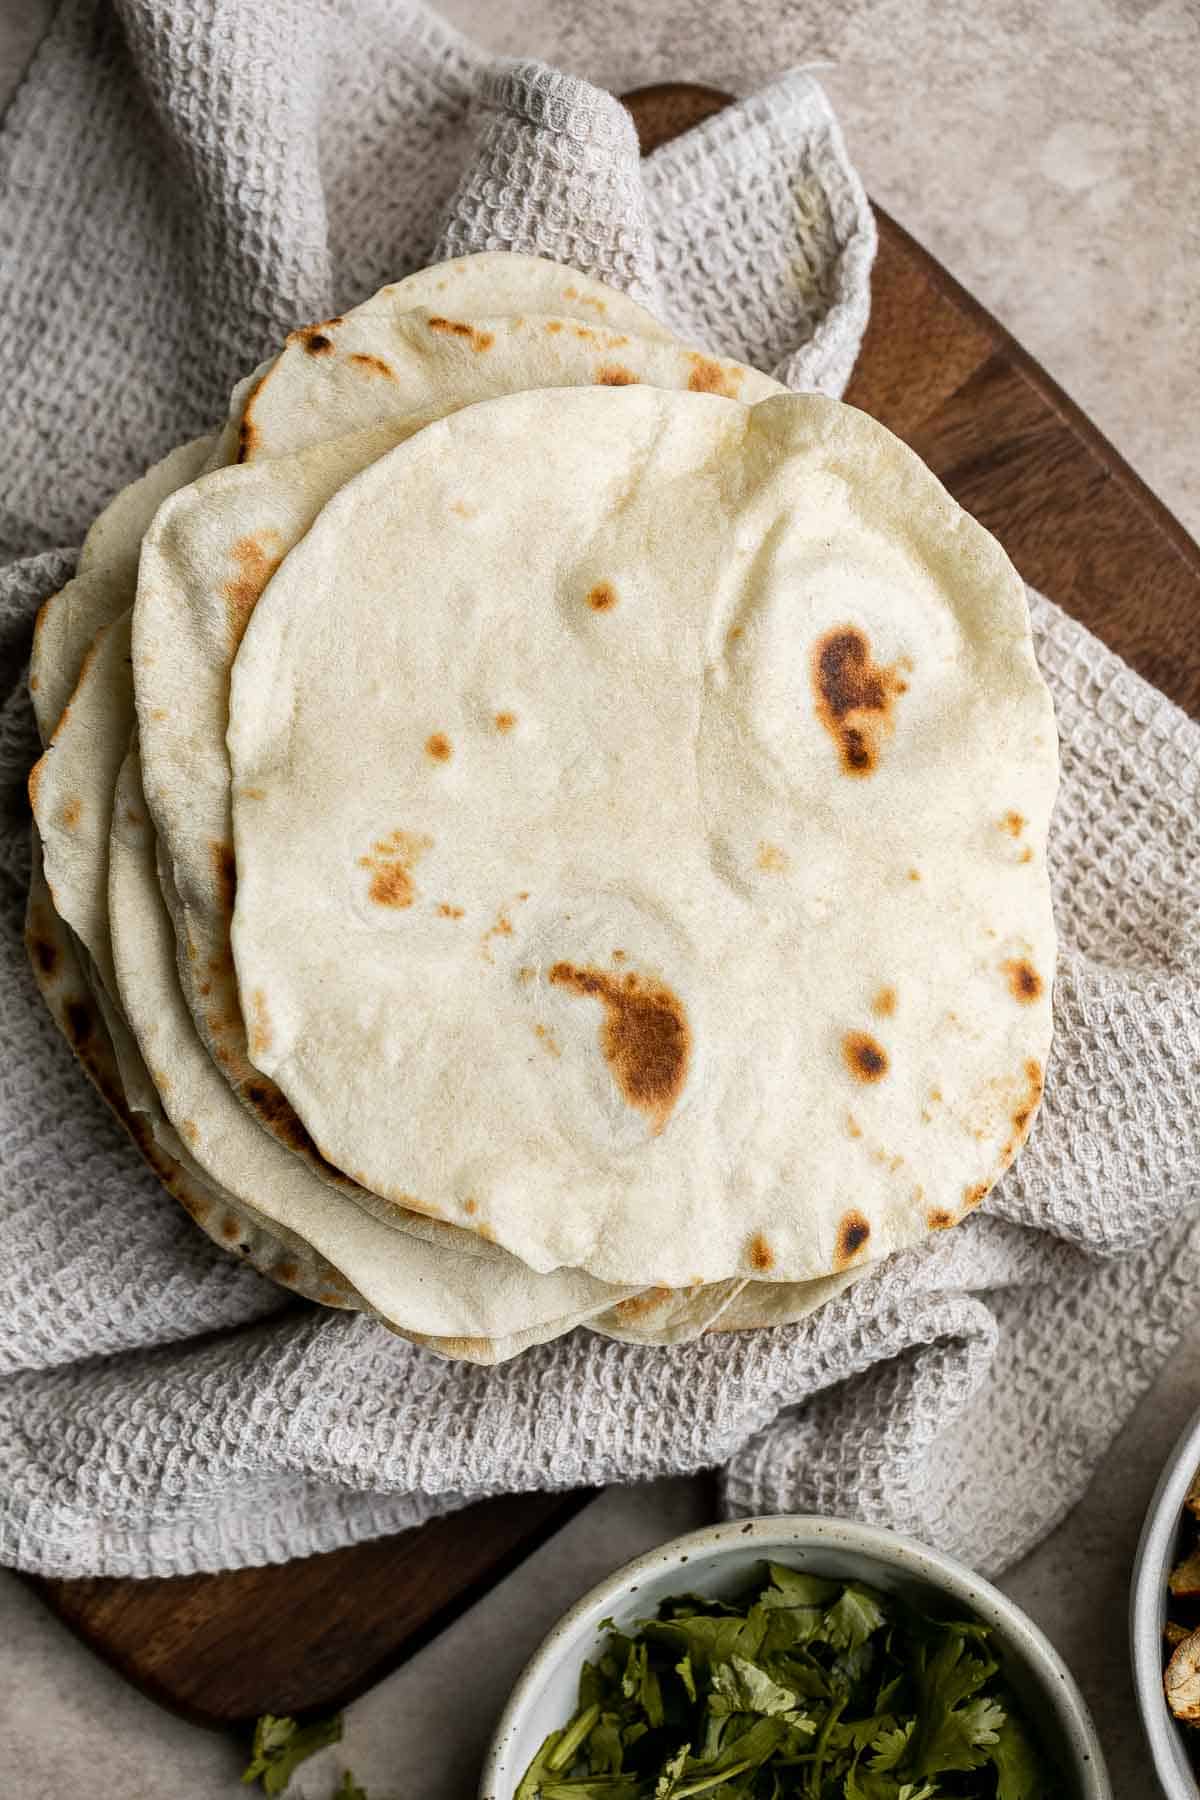
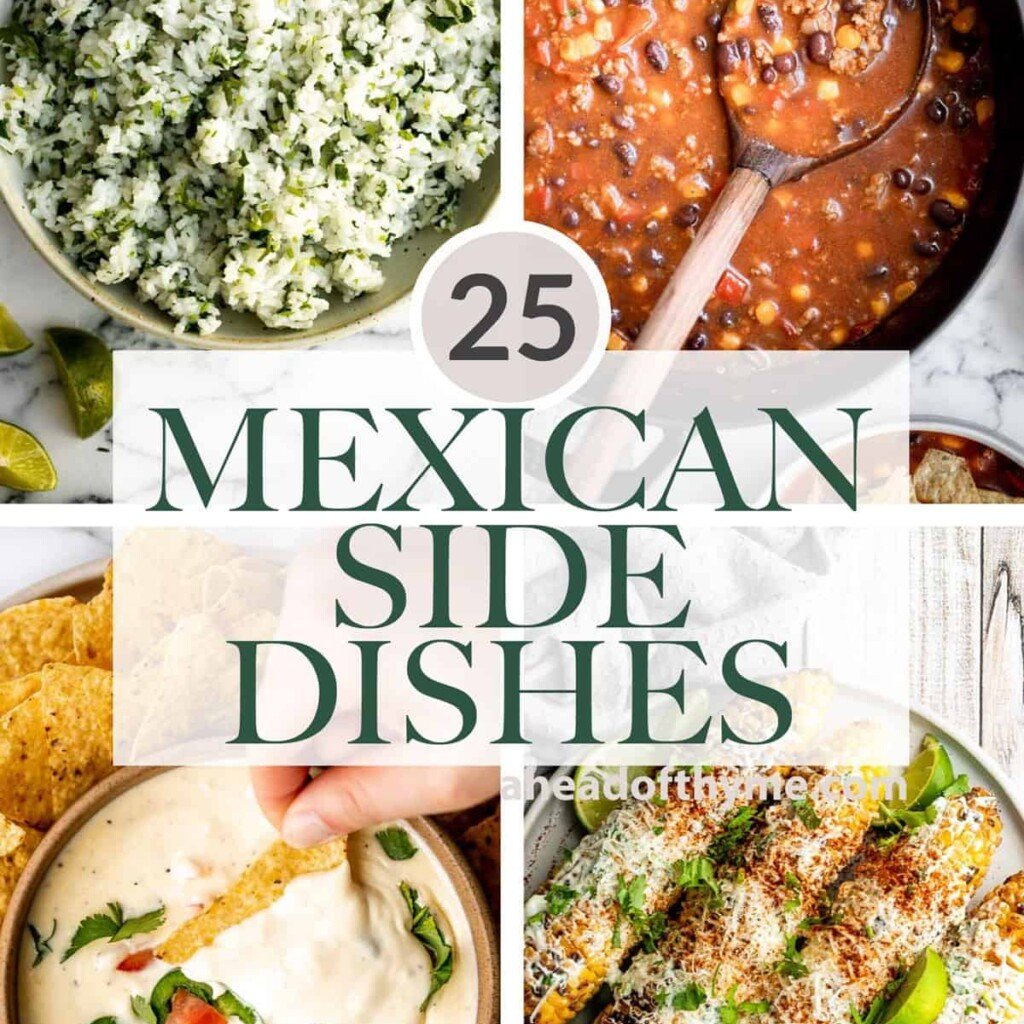
Mexican Side Dishes
Explore our vibrant collection of Mexican side dishes, perfect for adding bold flavors to any meal. From zesty salsas and street-style corn to seasoned rice and beans, these recipes bring a taste of Mexico to your table with ease and authenticity.
FAQ
Calabacitas is a Mexican veggie dish made with zucchini (or Mexican squash), corn, tomatoes, onions, peppers, and seasonings. Cheese and herbs are often added at the end for extra flavor. Everything is quickly sautéed so the veggies stay bright, tender, and a little crisp - never mushy. It's colorful, healthy, and insanely versatile.
"Calabacita" means "little squash" in Spanish. In Mexico, it usually refers to zucchini or a similar light green squash. The dish itself celebrates this humble veggie by pairing it with corn, tomatoes, and peppers in a quick, flavorful sauté.
Pretty much! Calabacita often means zucchini in Mexican cooking, though there's also a specific Mexican squash that's slightly rounder and lighter in color. Both taste and cook the same, so you can use them interchangeably here.
Yellow squash, Mexican squash, and pattypan squash all have that mild, slightly sweet flavor and tender texture. They're all great zucchini stand-ins for calabacitas.
Absolutely. It's loaded with fresh veggies, naturally gluten-free, and low in calories. Plus, zucchini and corn pack in fiber, vitamins, and antioxidants. Skip the cheese if you want it dairy-free.
More Zucchini Recipes
Looking for other recipes like this? Try these:


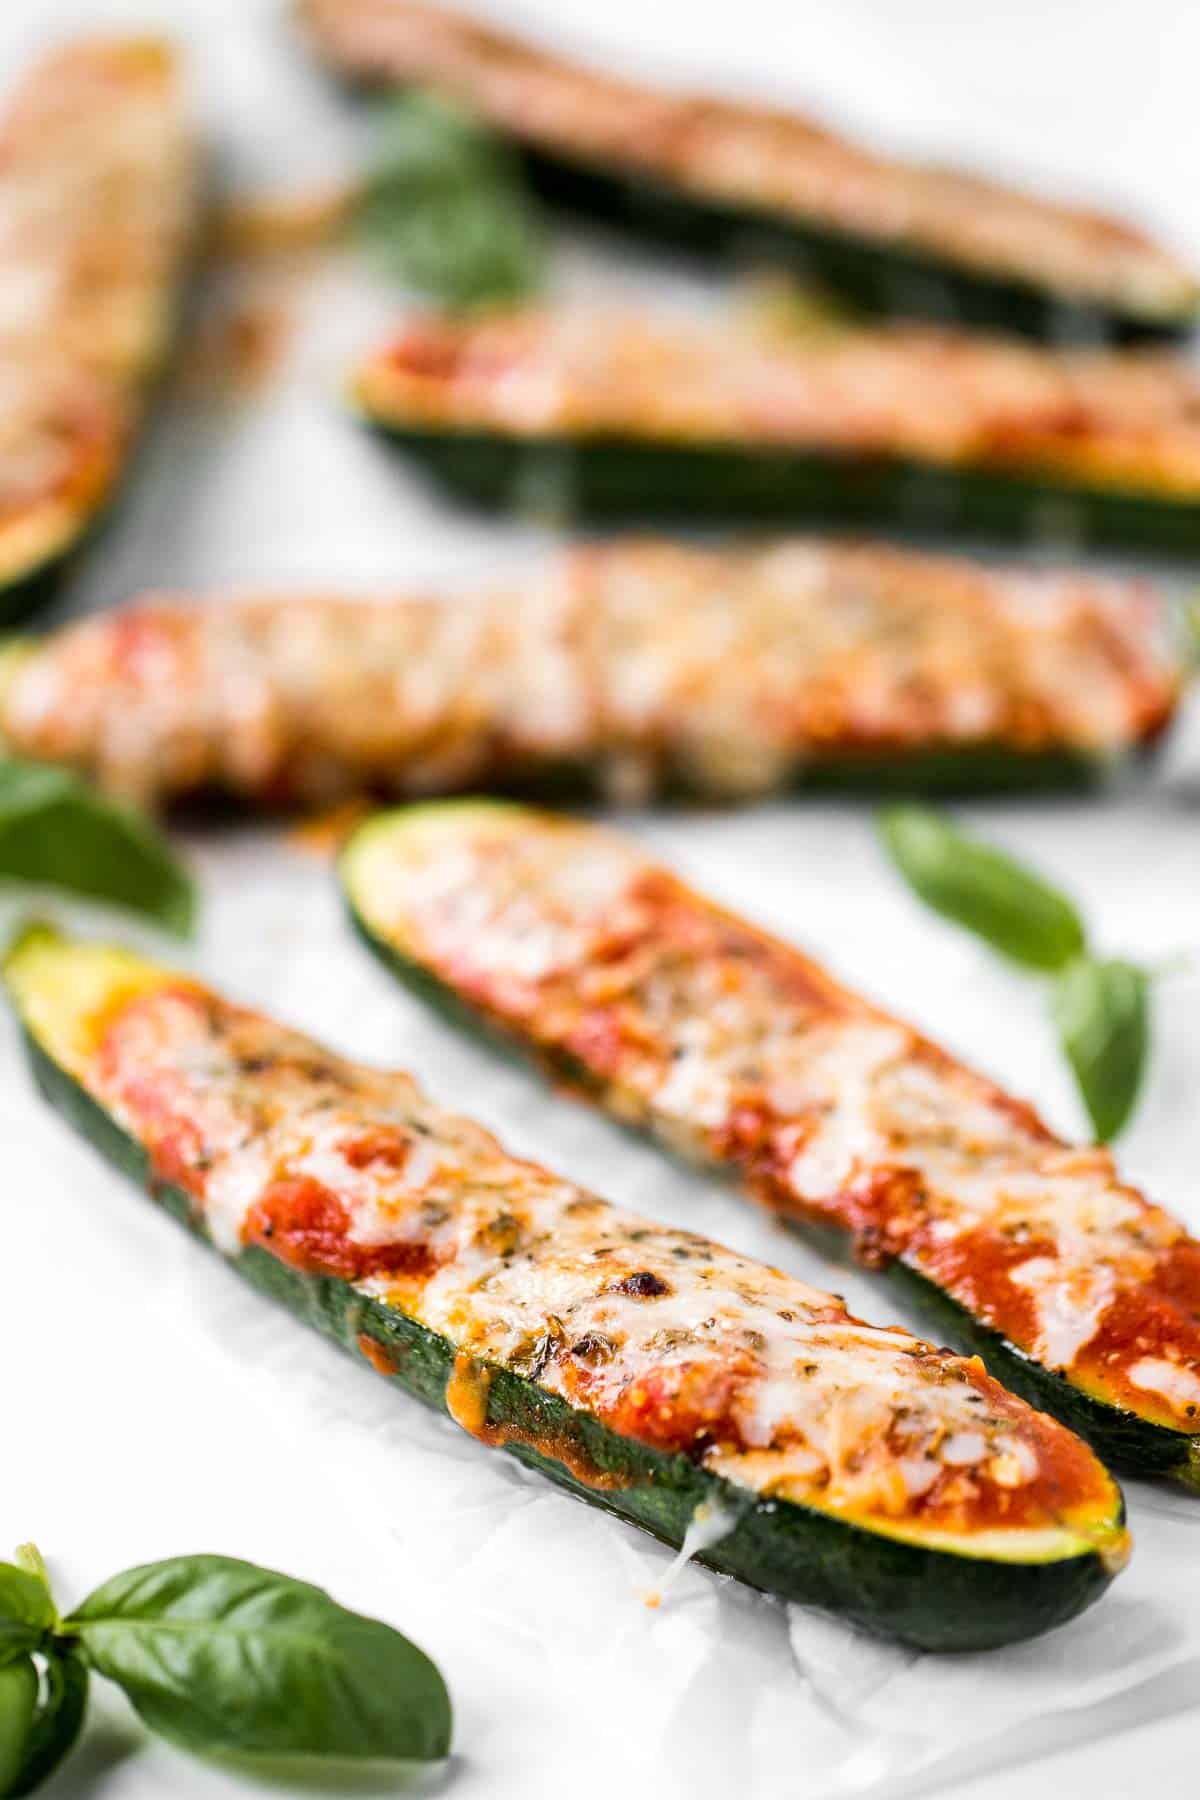
Tried this recipe?
I'd love to hear what you think! Leave a comment and rating below to share your feedback. Your reviews help others discover this recipe and help me keep creating more free recipes for you. Snap a photo and tag me on social media @aheadofthyme too.
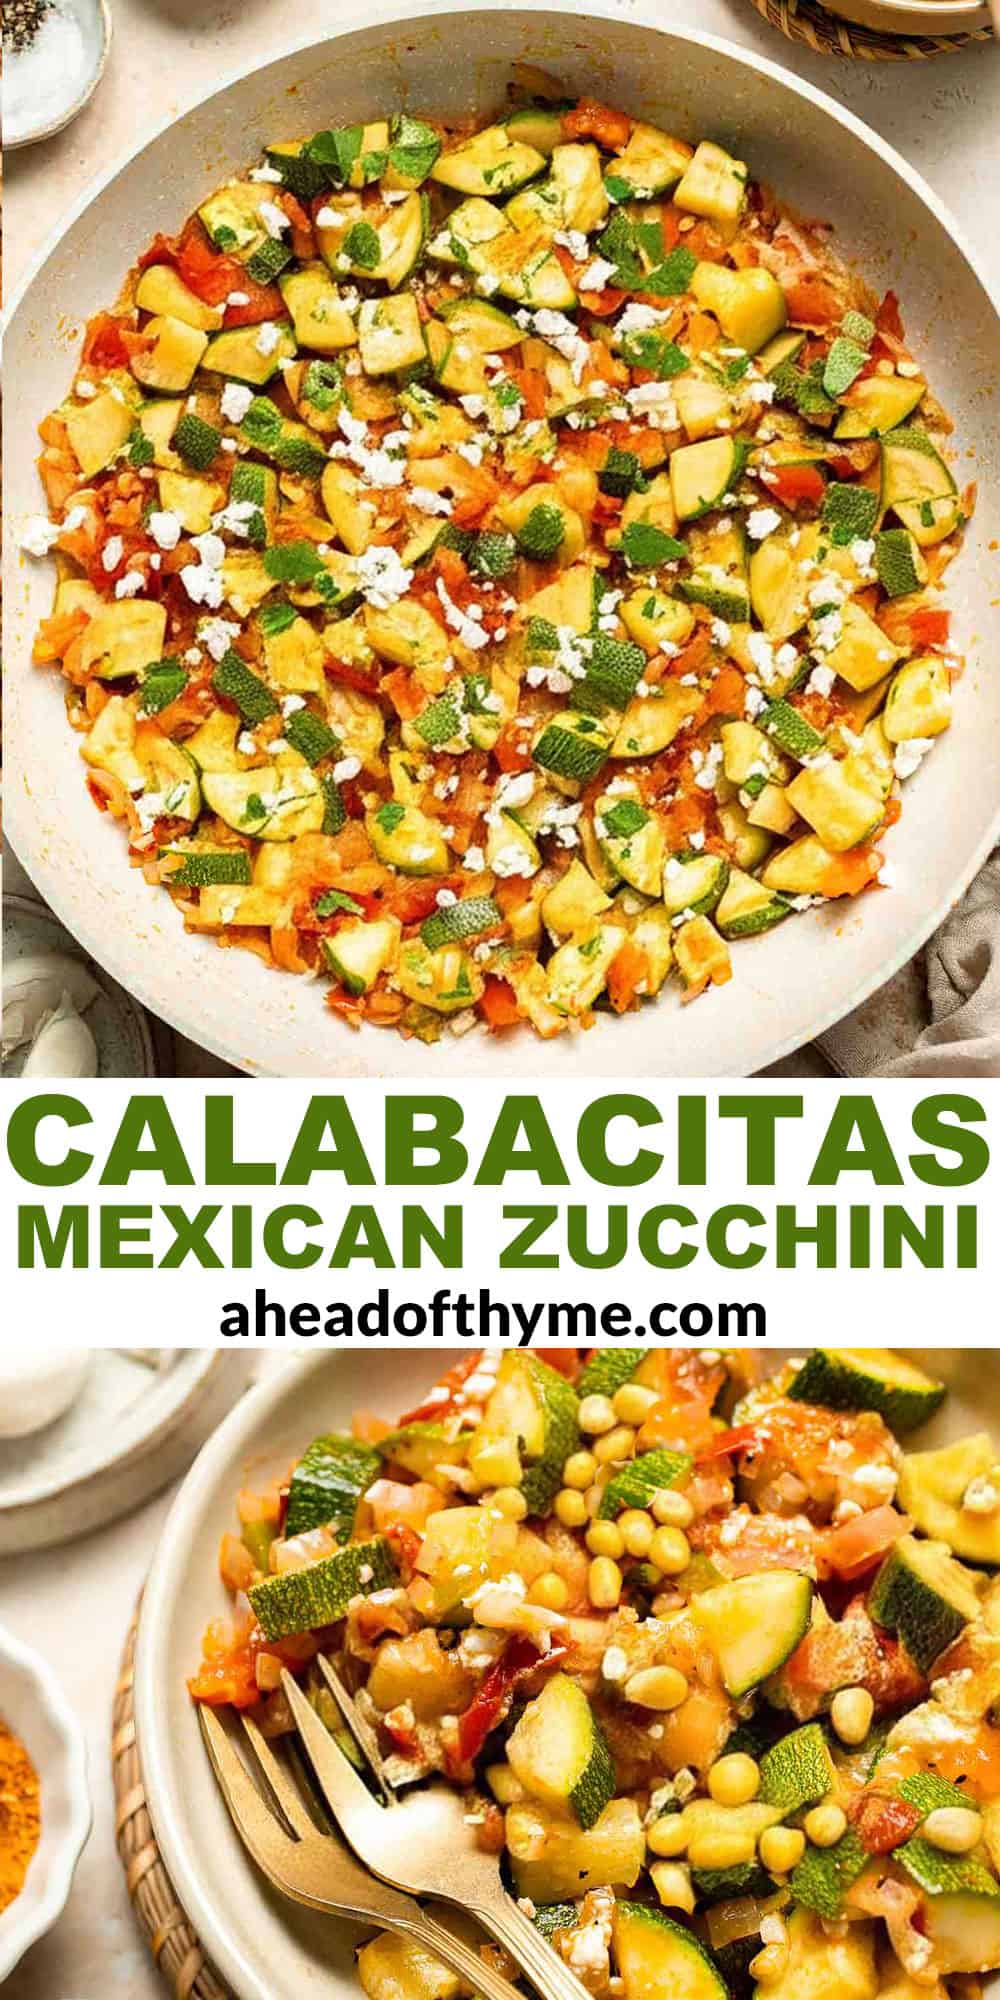
Sour Cream Coffee Cake with Cinnamon Swirl
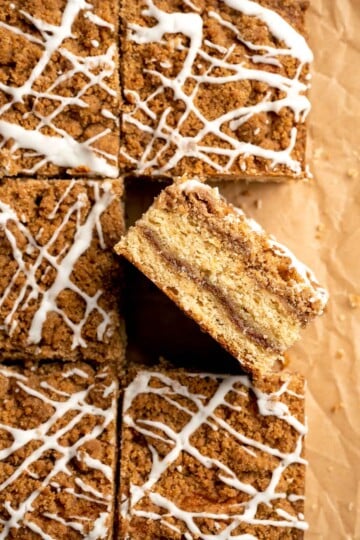
This Sour Cream Coffee Cake with Cinnamon Swirl is a buttery, tender cake layered with a sweet cinnamon-sugar ribbon and topped with a crunchy streusel. Oh, and did I mention the drizzle of vanilla glaze? Yeah, this is coffee cake goals. It's the kind of treat that feels like it belongs at a fancy brunch, but is easy enough to whip up on a cozy weekend morning.
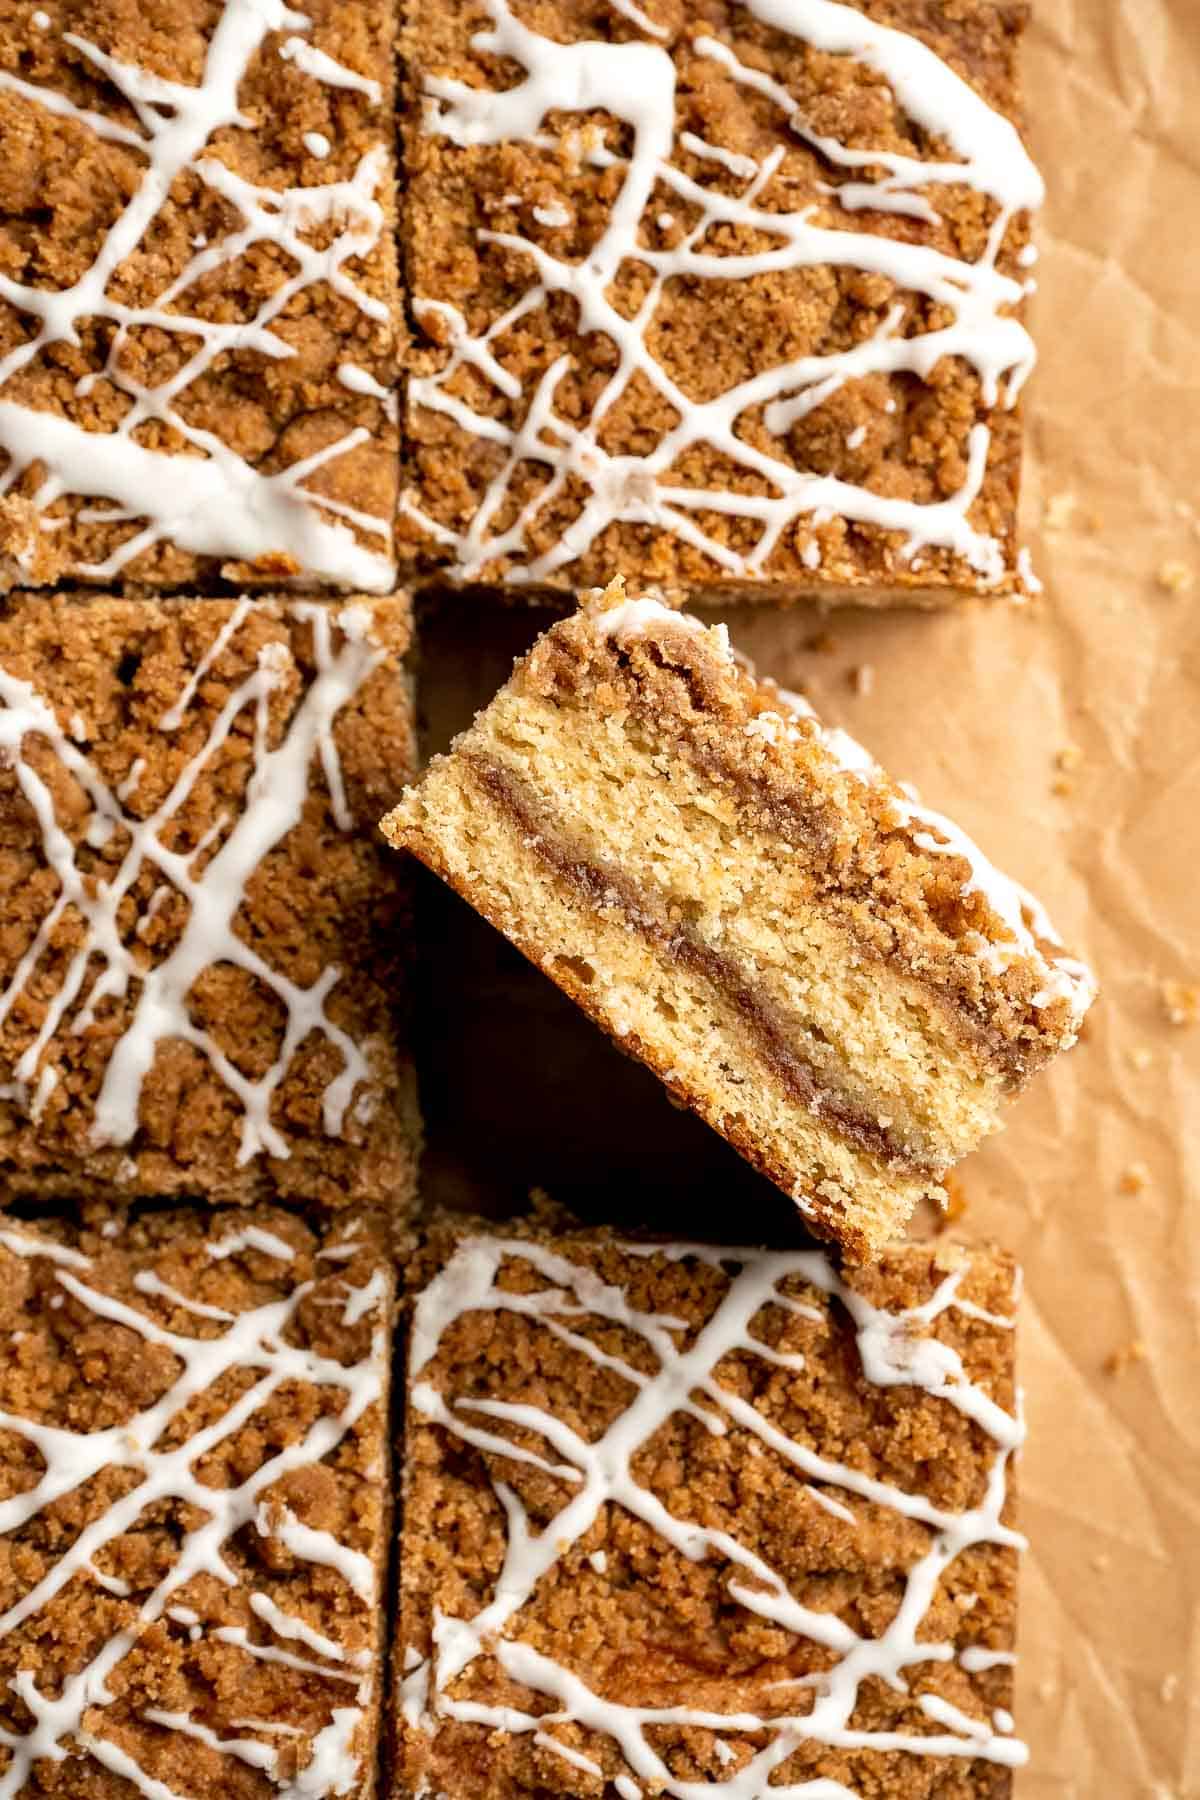
The sour cream keeps this classic coffee cake crazy moist, while the cinnamon swirl gives you that warm, nostalgic flavor that makes coffee cake an all-time classic. Add the crumbly streusel topping and you've got the perfect texture contrast - soft, fluffy cake meets buttery crunch. It's basically impossible to eat just one slice.
This recipe was inspired by my Cinnamon Apple Oatmeal Muffins, and it pairs beautifully with a big cup of coffee or Chai Tea Latte or Pumpkin Spice Latte. Bake it for holidays, brunch parties, or just because you deserve cake for breakfast (no judgment).
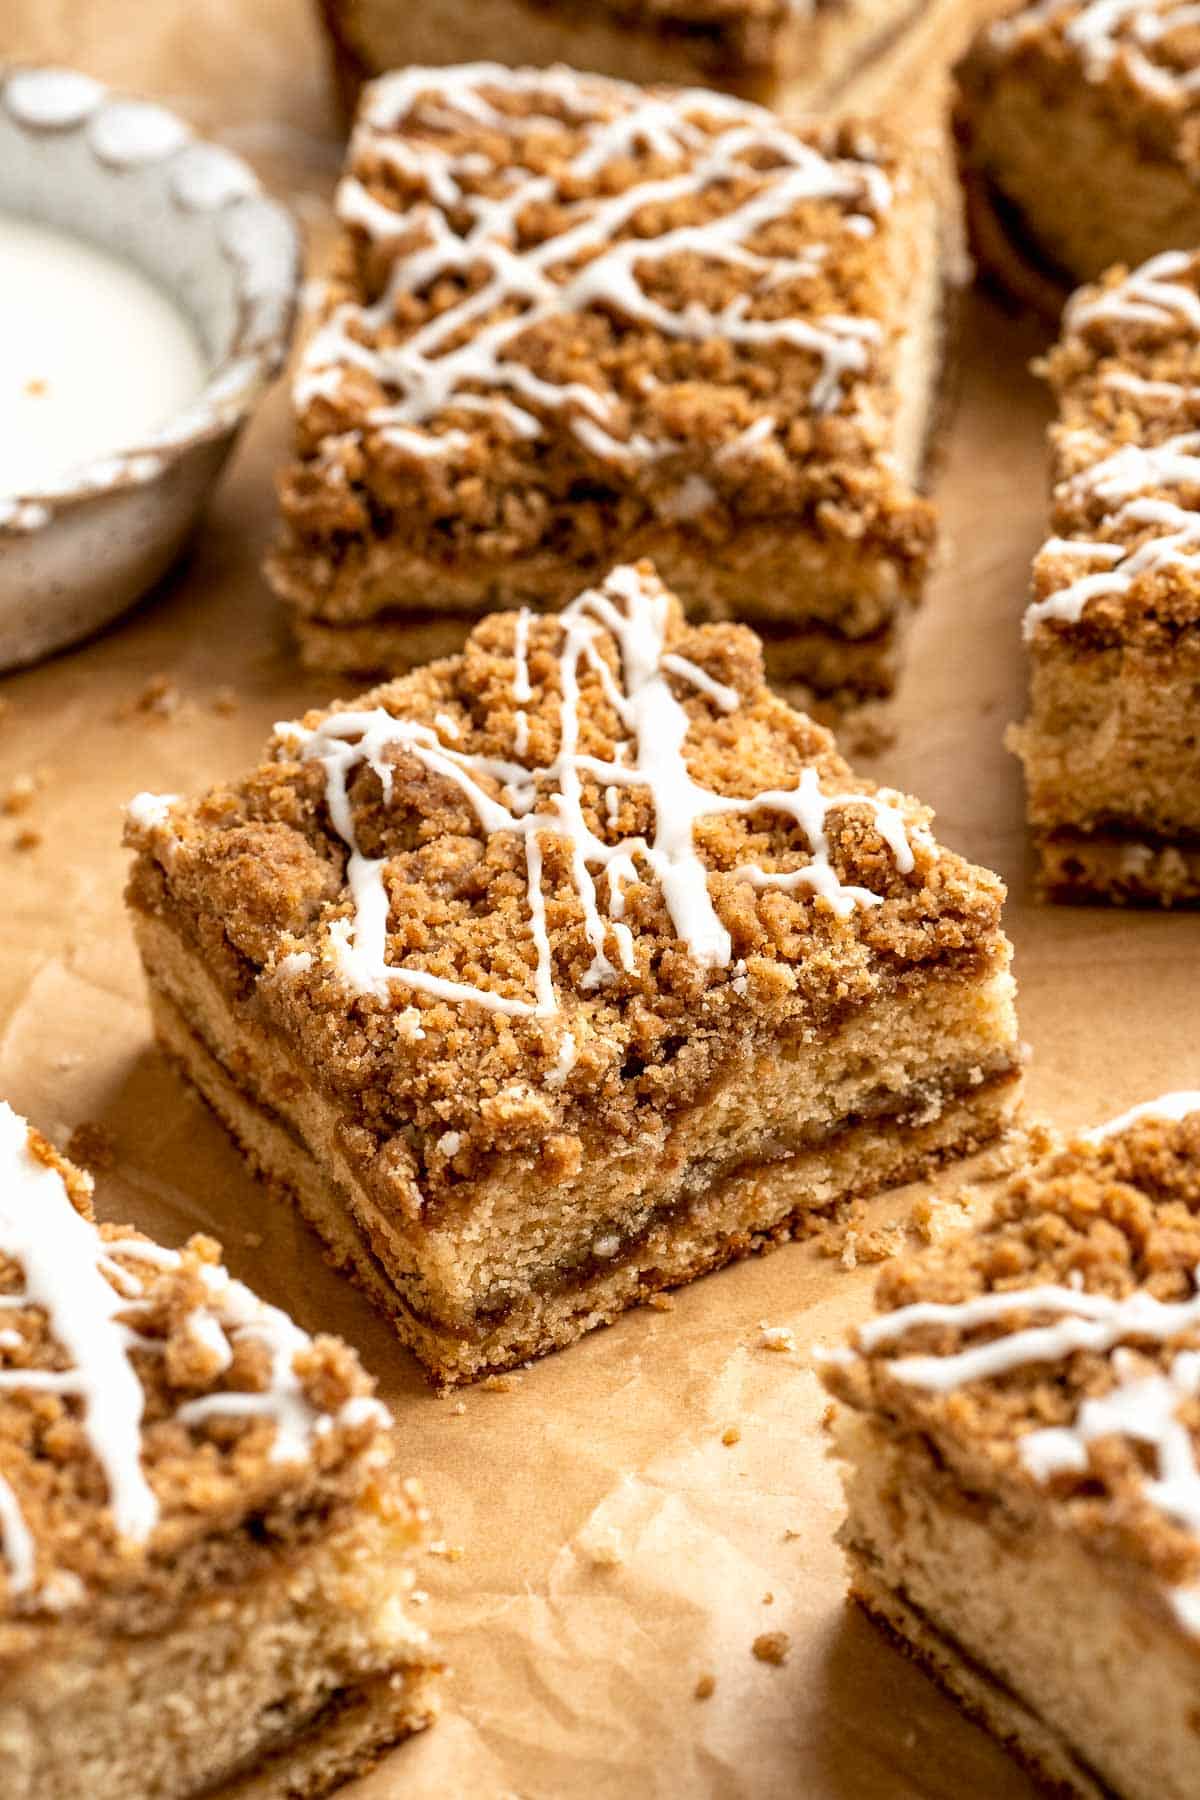
Why You'll Love This Recipe
- Soft, moist, and flavorful. Sour cream works magic in this recipe, keeping the cake incredibly tender and soft (for days!) while adding a subtle tang that balances the sweetness. Every bite is fluffy, buttery, and packed with cinnamon flavor.
- Three layers of goodness. You get a buttery cake base, a warm cinnamon-sugar ribbon running through the middle, and a crunchy streusel topping that makes every bite exciting. The vanilla glaze ties it all together.
- Great for sharing (or not). This cinnamon streusel coffee cake looks impressive enough for entertaining but is easy enough to make on a whim. You can cut generous squares for guests or keep it in the kitchen for snacking. It works for breakfast, brunch, dessert, or even as an afternoon snack.
- Make-ahead friendly. The cake stays moist for days, and the flavors actually deepen after the first day. You can also bake it ahead, glaze it before serving, and it'll taste like it just came out of the oven.
- Customizable and forgiving. Swap spices, add fruit, or try different glazes - this recipe adapts easily to your preferences. And thanks to the sour cream, it stays moist even if you're not a cake-baking pro. It's one of my favorite coffee cake recipes!
Ingredients and Substitutions
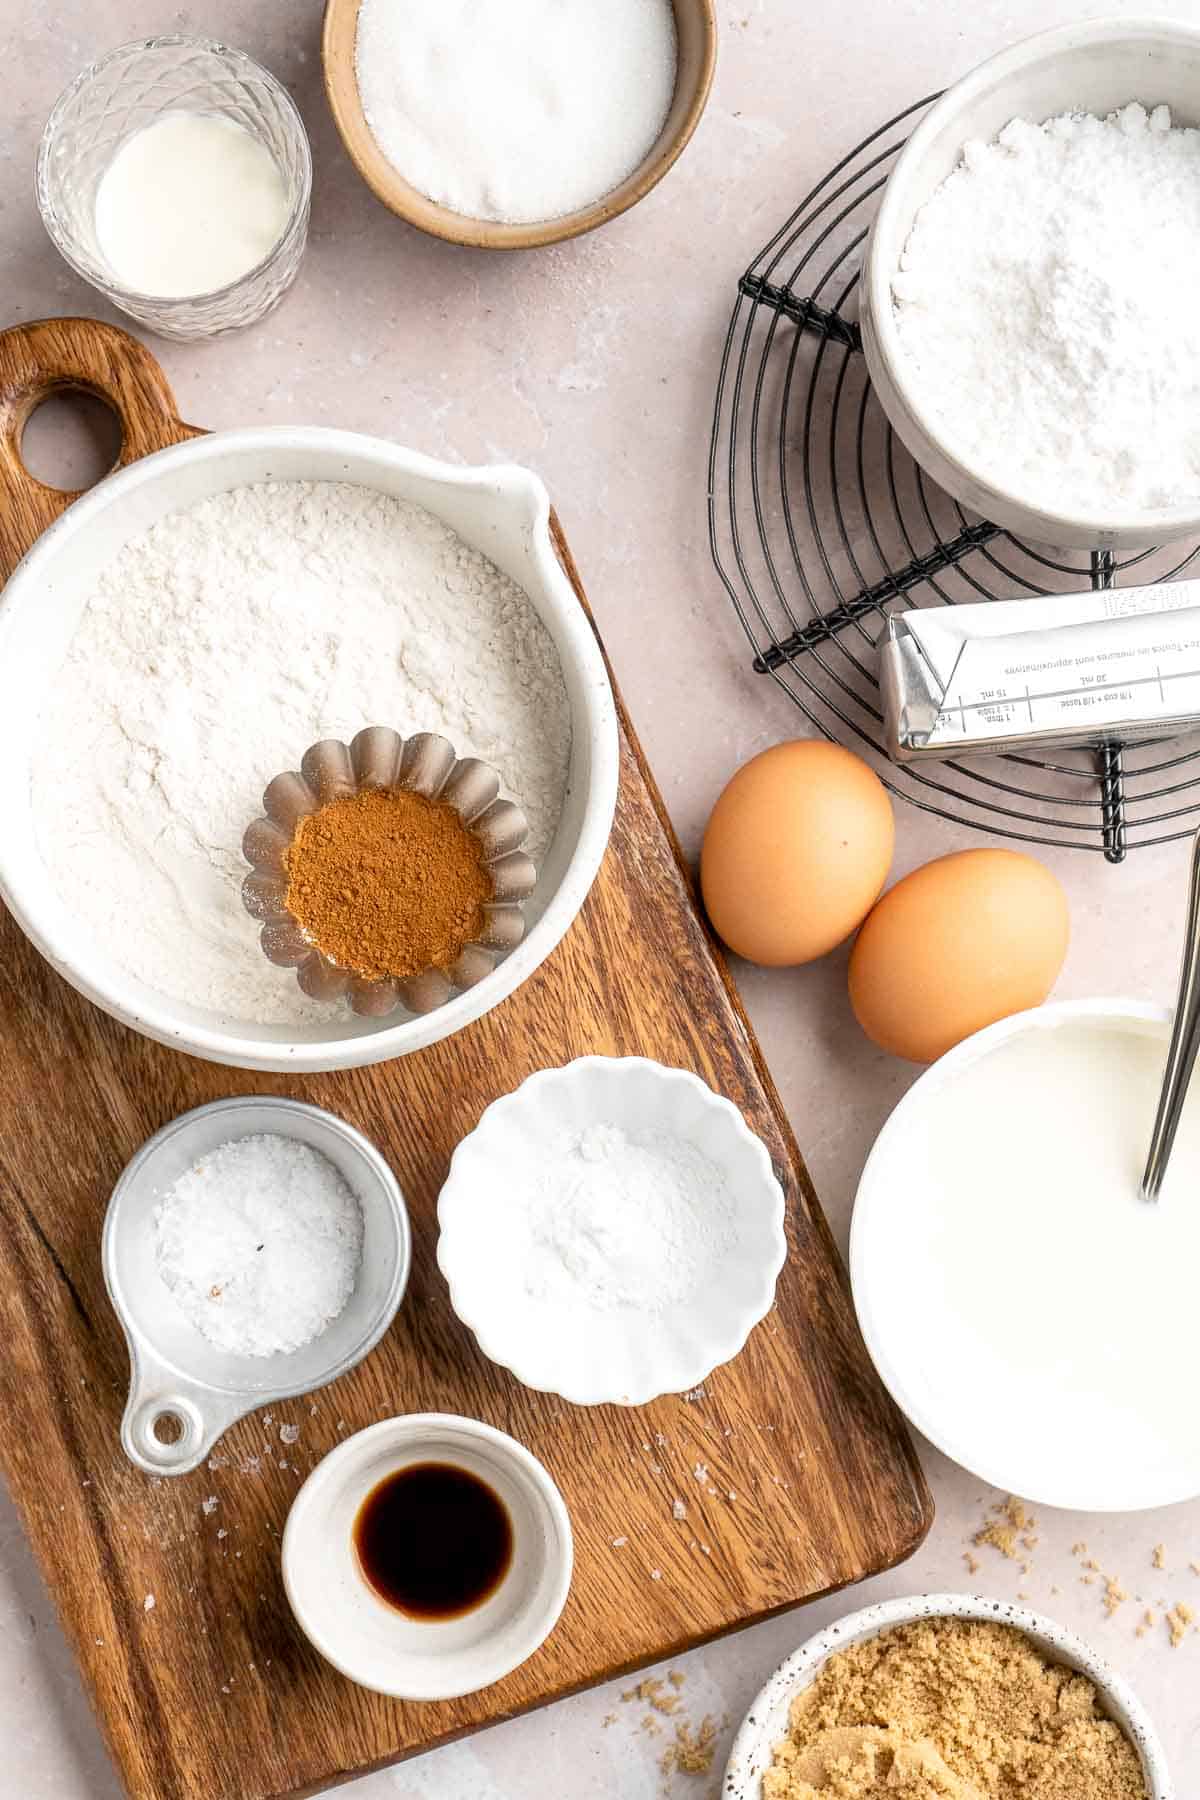
To make this delicious sour cream coffee cake, you will need the following ingredients (see recipe card below for quantities):
- all-purpose flour - The foundation for the cake, streusel, and cinnamon swirl. Use the spoon-and-level method for accuracy. You can swap in a gluten-free 1:1 baking flour if needed.
- light brown sugar - Used in the streusel, cinnamon swirl, and cake batter for sweetness and moisture. Dark brown sugar can be used for a deeper molasses flavor.
- cinnamon - Brings warm, aromatic spice to the streusel and cinnamon swirl. You can mix in a pinch of nutmeg or cardamom for variation.
- kosher salt - Balances sweetness and enhances flavor throughout the cake. If using table salt, reduce the amount by about half.
- unsalted butter - Cold butter for the streusel, room temperature softened butter for the cake. Adds richness and structure. Salted butter can be used, but reduce added salt slightly.
- white sugar - Used in the cake batter for sweetness and a light, tender crumb.
- baking powder - Ensures the cake rises properly. Make sure it's fresh for the best results.
- eggs + egg yolk - Eggs add structure and richness, while the extra yolk makes the cake moist and tender.
- vanilla extract - Infuses warmth and sweetness into the cake and glaze. Almond extract can be swapped in for a different flavor profile.
- sour cream - Keeps the cake moist and tender while adding subtle tang. Greek yogurt is a great alternative.
- confectioners' sugar - For the smooth vanilla glaze. If lumpy, sift before mixing.
- milk - Thins the glaze to the perfect drizzling consistency. You can use half-and-half for a richer glaze.
Baking Equipment
You'll also need measuring cups and spoons, mixing bowls, a 9x9-inch baking pan, a whisk, a spatula, an electric hand mixer, and parchment paper.
Instructions
Step 1: Make the streusel topping.
In a large mixing bowl, whisk together the flour, brown sugar, cinnamon, and salt until combined. Add the cold cubed butter and, using your fingers or a pastry cutter, work it into the dry ingredients until the mixture looks like wet sand with some small clumps. Place in the fridge to chill while you prepare the rest of the cake.
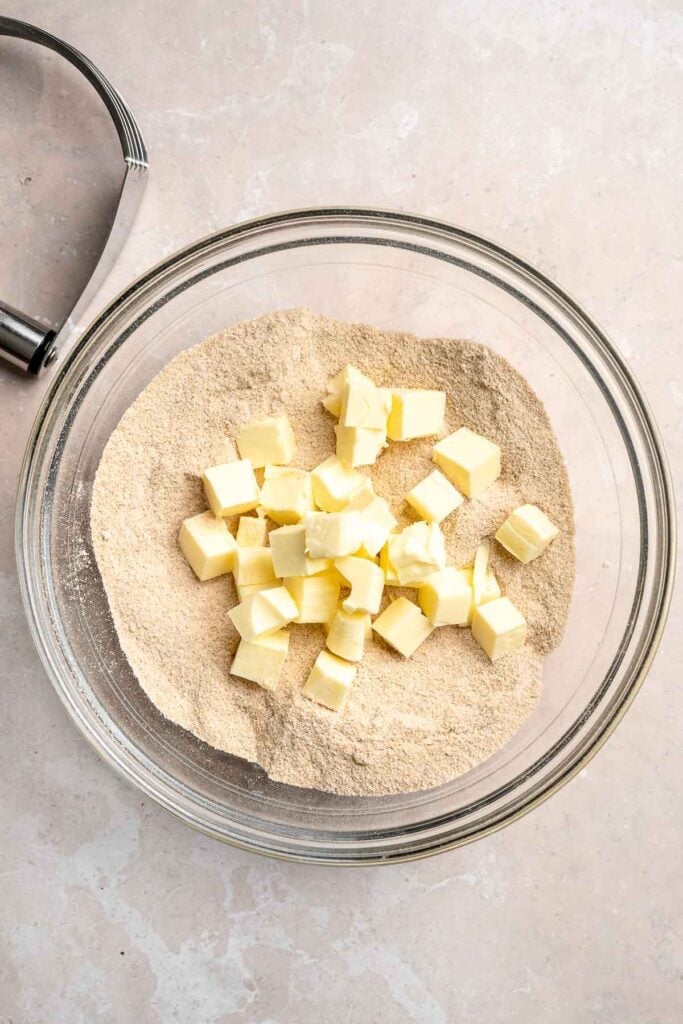
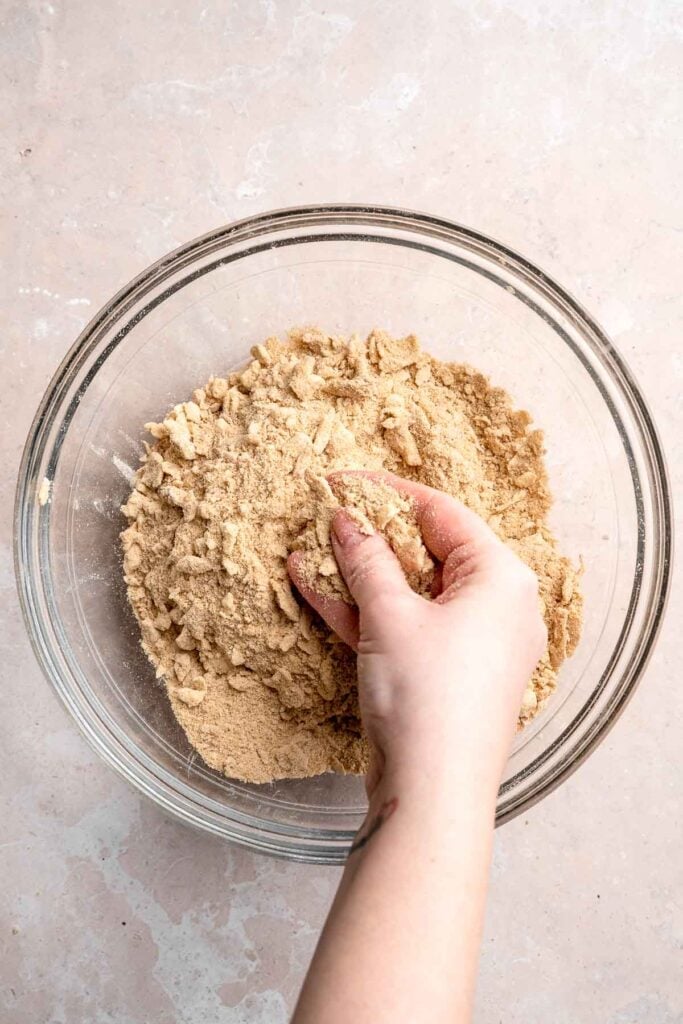
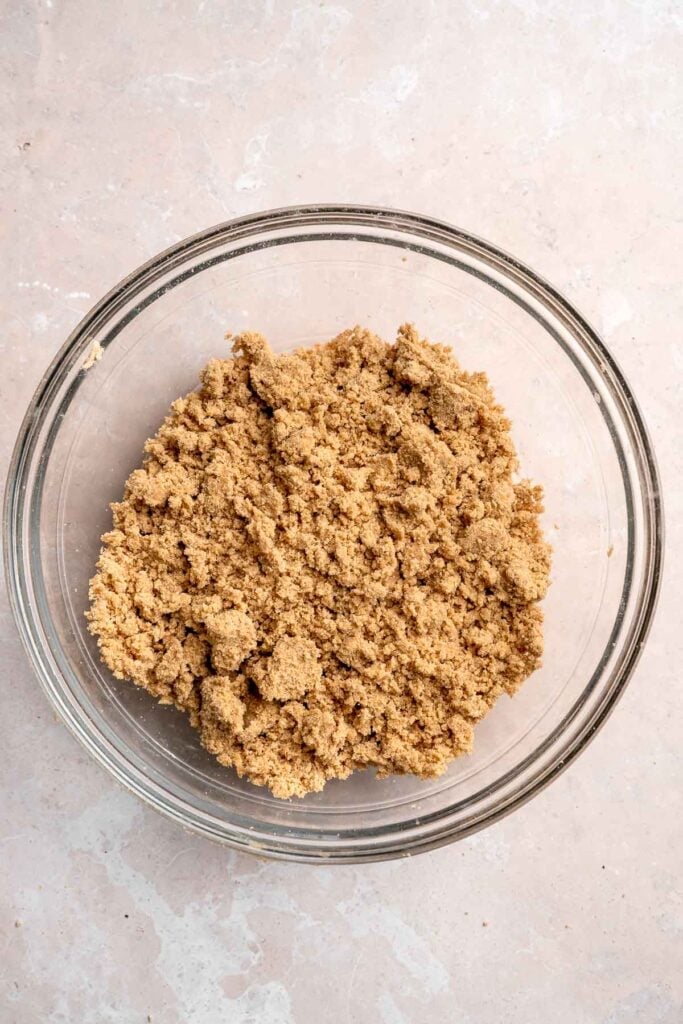
Step 2: Make the cinnamon swirl.
In a small mixing bowl, whisk together the brown sugar, flour, and cinnamon until well combined. Set aside.

Step 3: Make the coffee cake.
- Mix the dry ingredients. In a medium mixing bowl, whisk together the flour, baking powder, and salt until evenly combined.
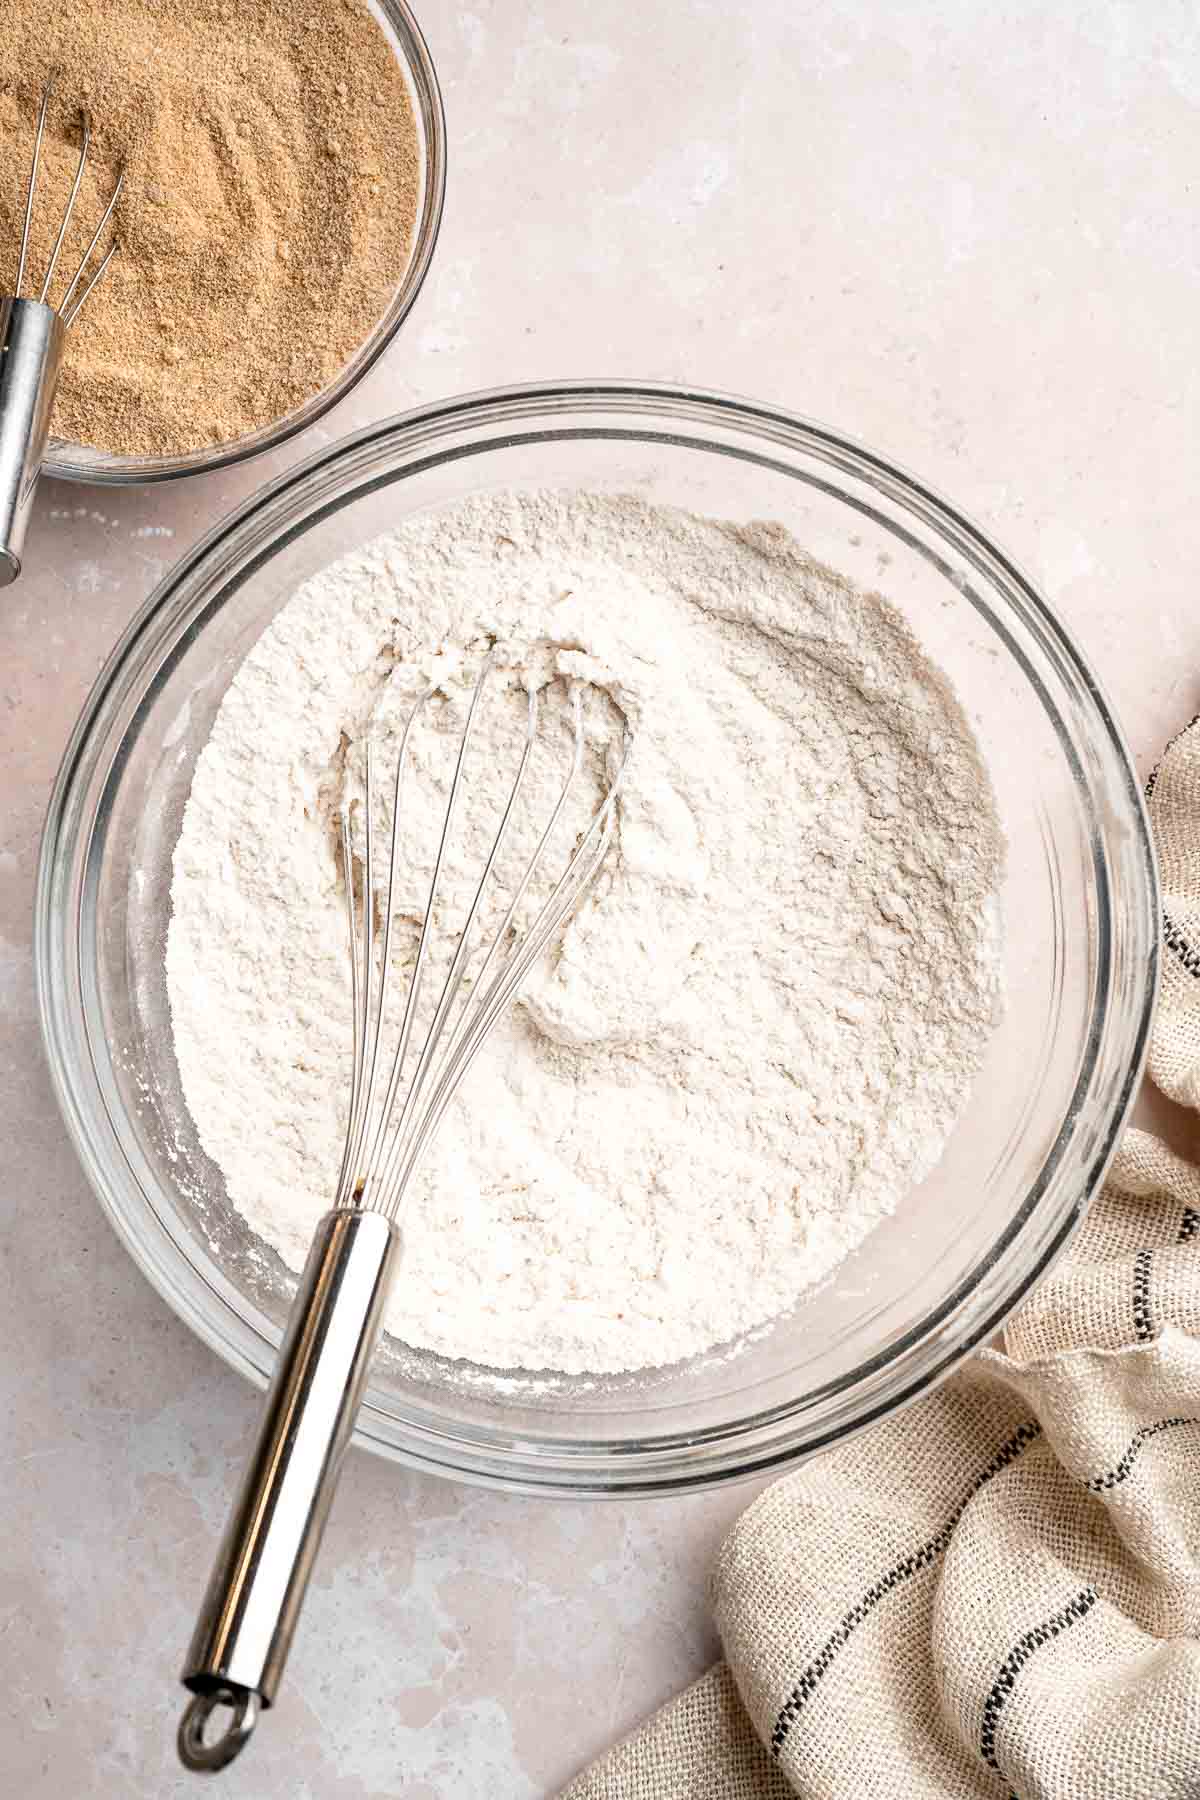
- Cream the butter and sugars. In a large mixing bowl, add the butter, white sugar, and brown sugar. Beat with an electric hand mixer on medium-high speed until light, fluffy, and pale, about 3-4 minutes.
- Add the eggs and vanilla. Beat in the eggs, egg yolk, and vanilla extract until the mixture is smooth and well combined.
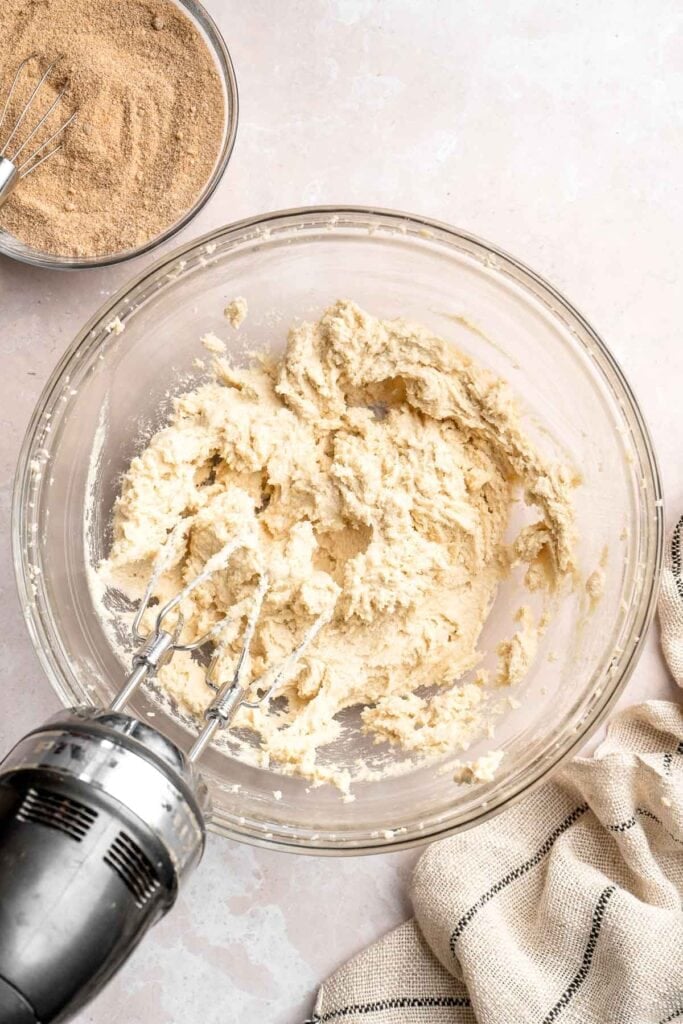
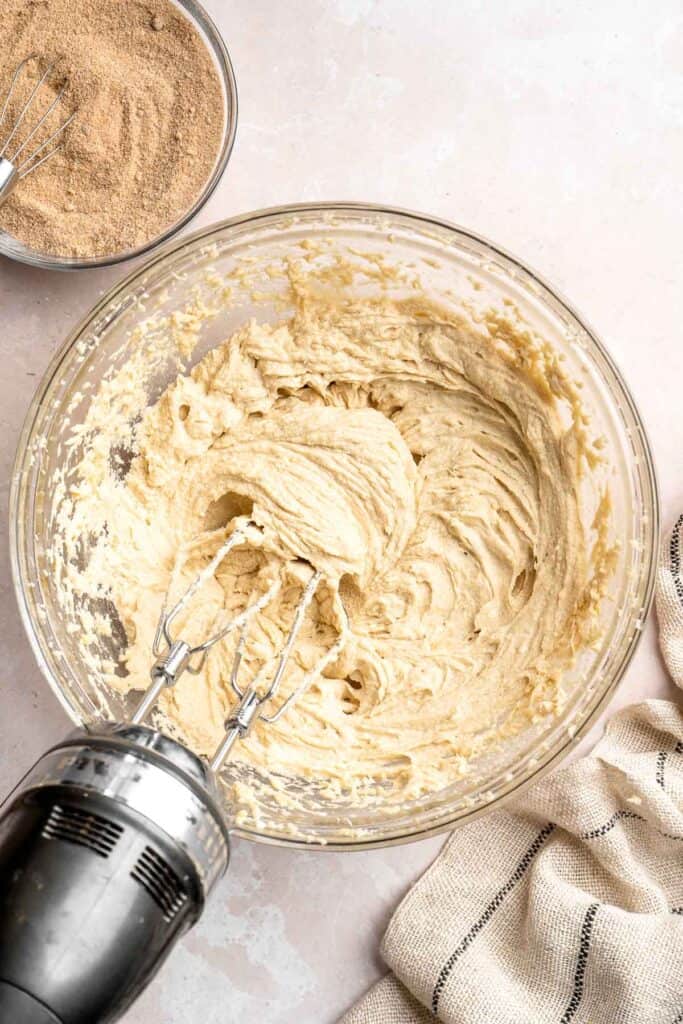
- Alternate the flour and sour cream. Add one-third of the flour mixture to the butter mixture and mix on low speed until just combined. Add half the sour cream and mix again. Continue alternating the flour mixture and sour cream, finishing with the last portion of the flour mixture. Mix until just combined - don't overmix.
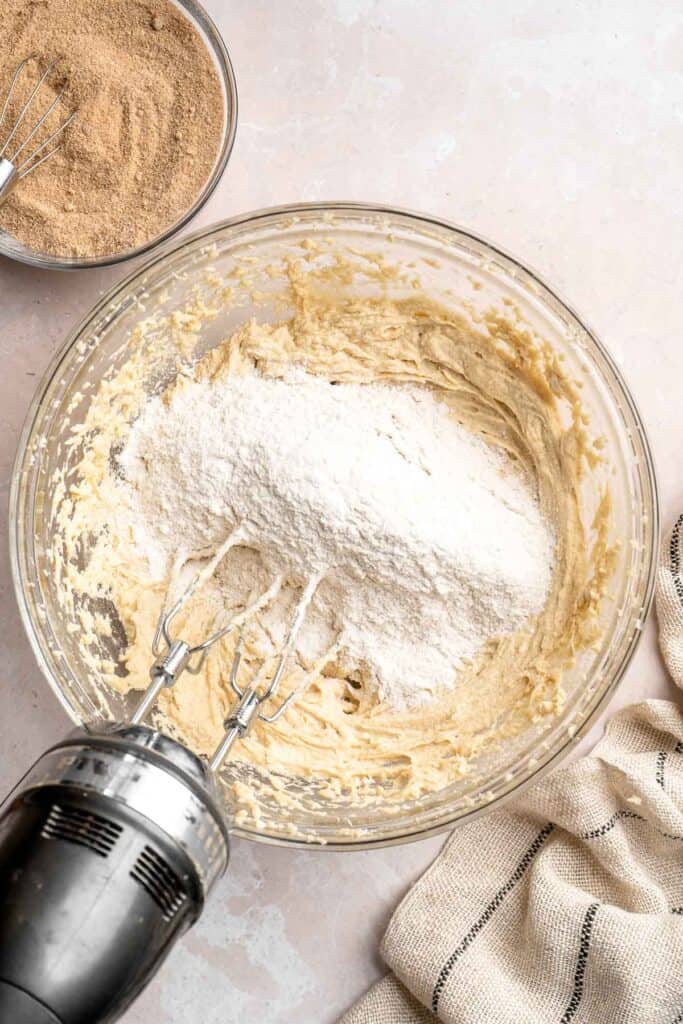
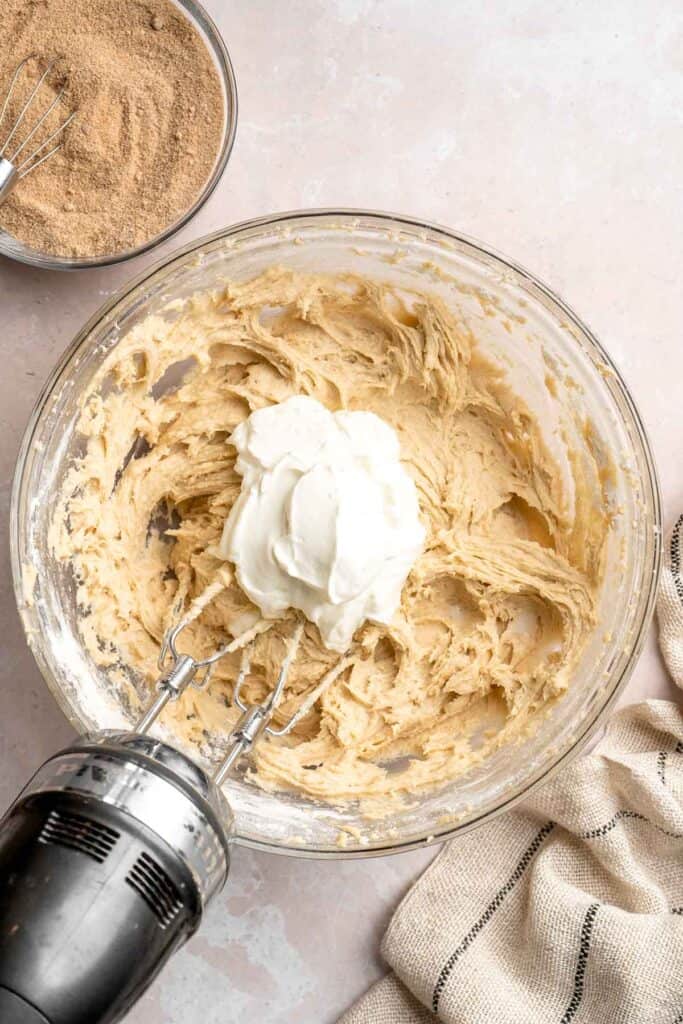
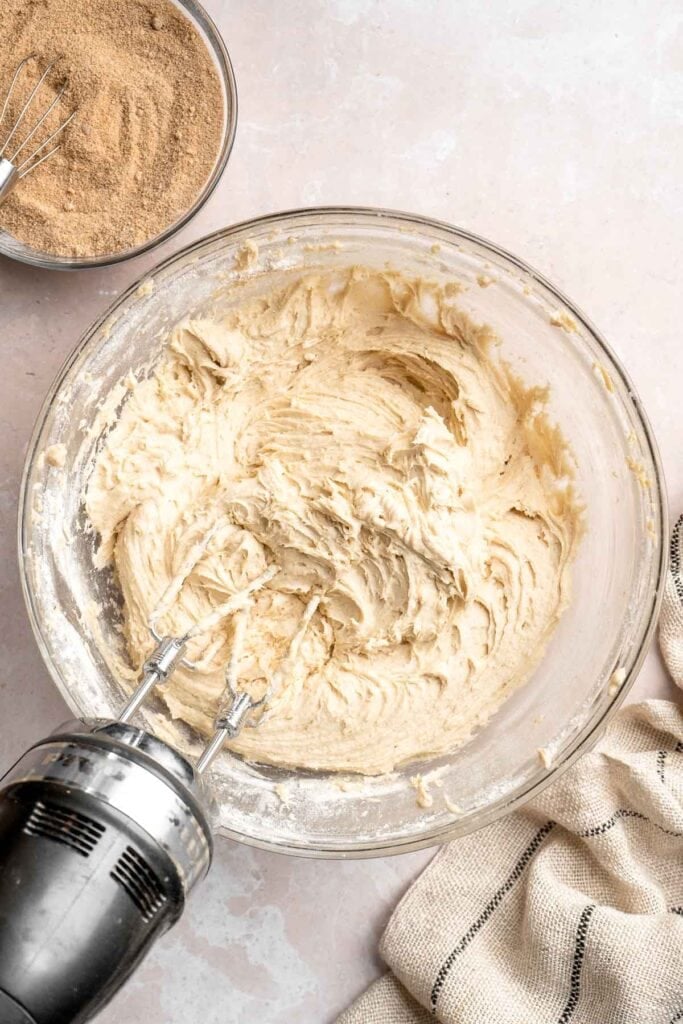
- Assemble the cake. Line a 9-inch square baking pan with parchment paper, leaving some overhang for easy removal later. Spread half the batter evenly into the prepared baking dish. Sprinkle the cinnamon swirl mixture evenly over the batter. Carefully spread the remaining batter on top of the cinnamon layer, smoothing it out with a spatula. Sprinkle the chilled streusel topping evenly over the top.
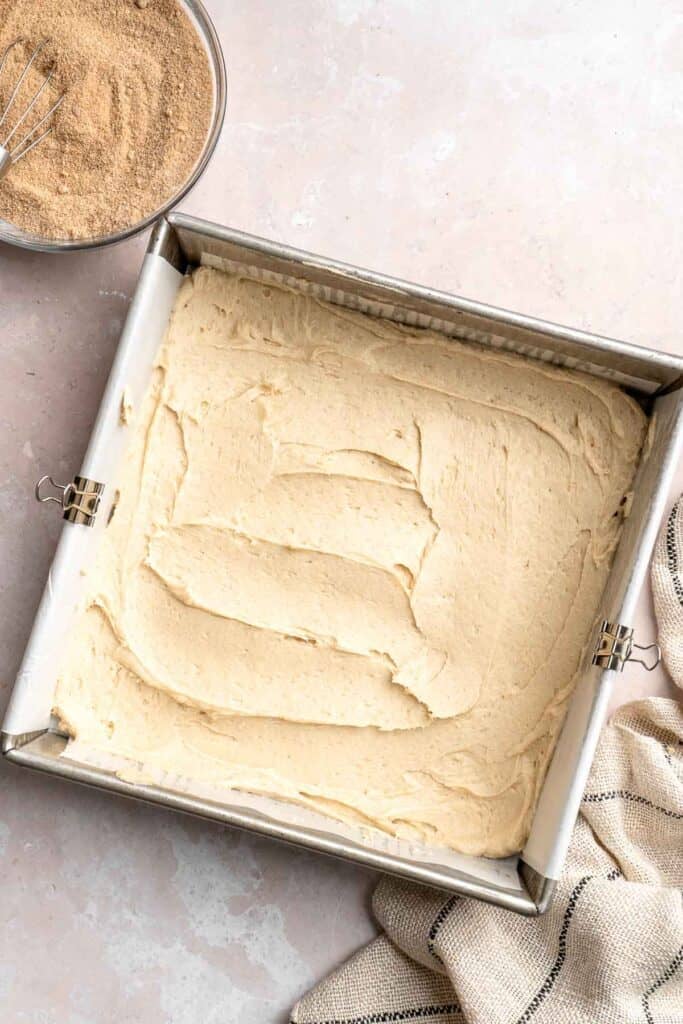
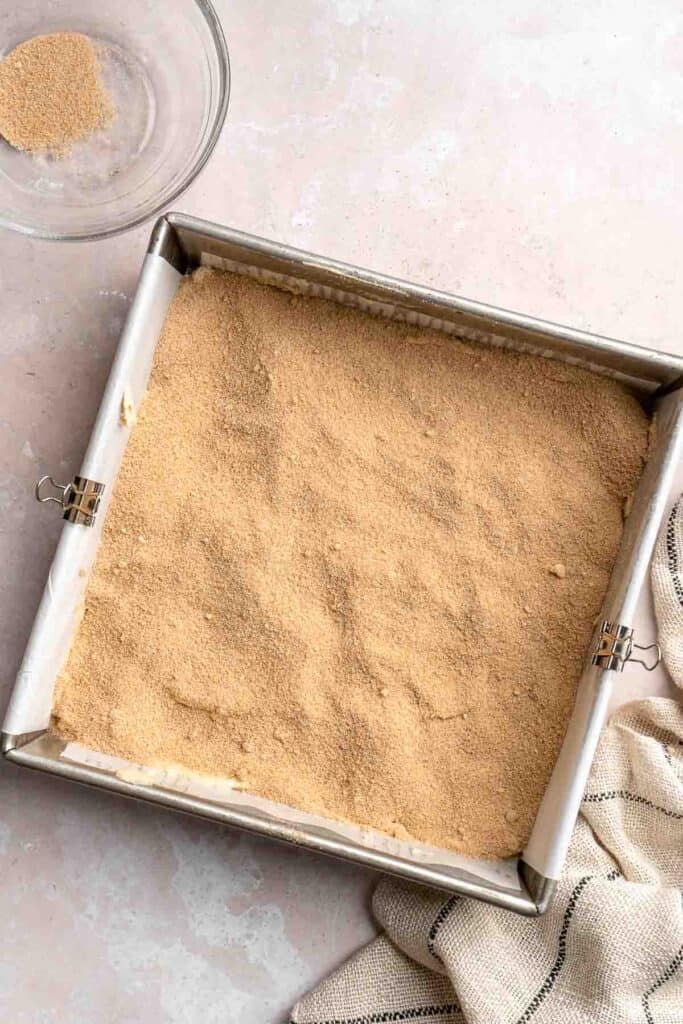
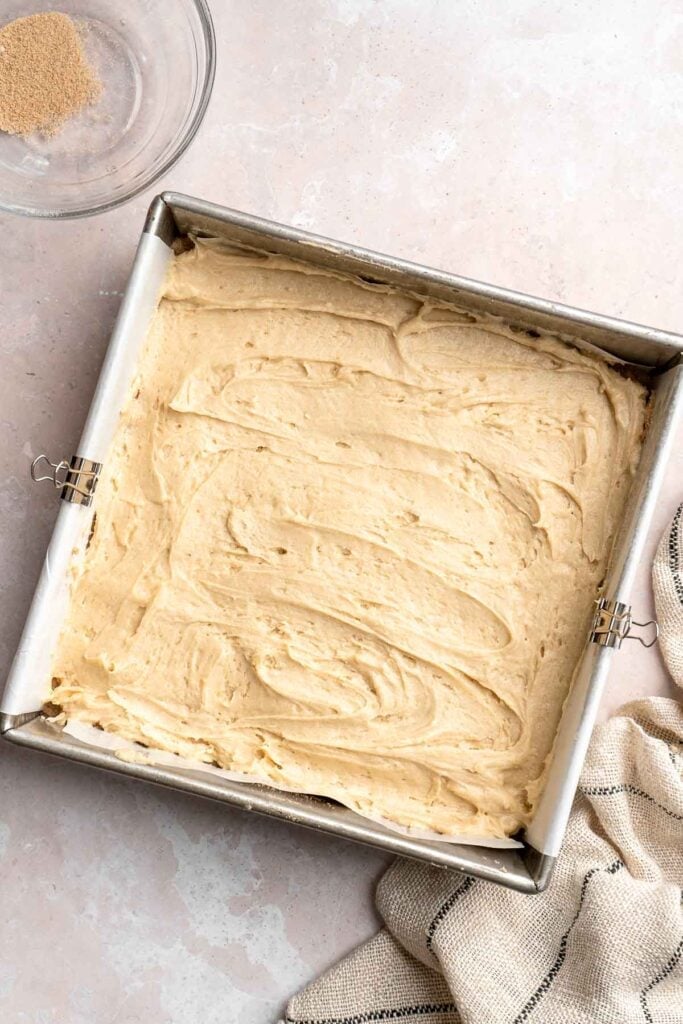
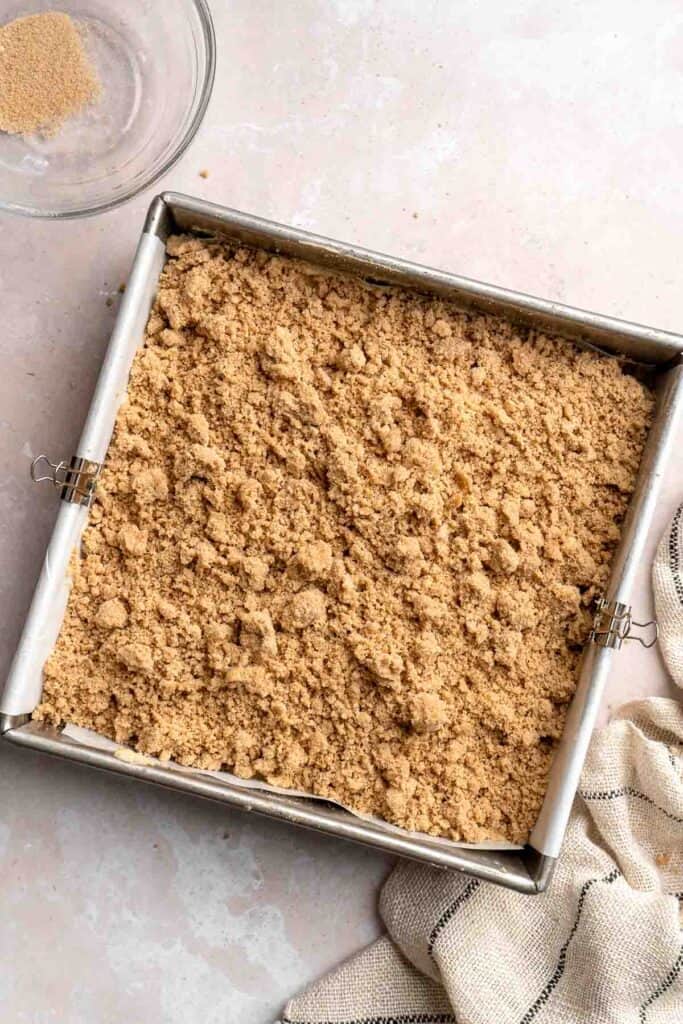
- Bake the cake. Bake in a 350°F (175°C) preheated oven for 50-55 minutes, or until a toothpick inserted into the center comes out clean. Let the cake cool in the pan for 5 minutes, then lift it out using the parchment overhang and transfer to a wire rack. Allow to cool completely before glazing.
Step 4: Make the vanilla glaze.
In a medium mixing bowl, whisk together the confectioners' sugar, milk, and vanilla until smooth. Drizzle over the cooled cake, then let the glaze set before slicing and serving.
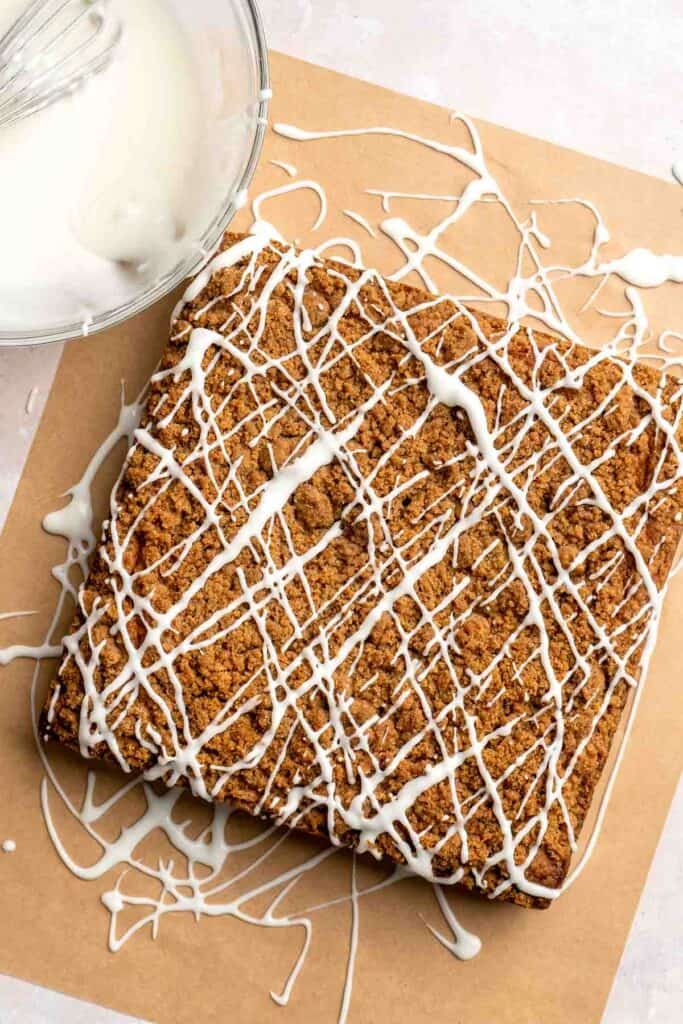

Expert Tip: Chill the Streusel Before Baking
Keeping the streusel topping in the fridge while you make the batter helps it hold its crumbly texture during baking. Cold butter = crunchy topping magic.
More Tips and Tricks
- Measure flour correctly. Use the spoon-and-level method to avoid packing in too much flour, which can make the cake dense.
- Don't skip room temperature butter. It creams more easily with the sugar, creating a light, fluffy base for the cake.
- Spread the batter gently. Especially when layering over the cinnamon swirl, to keep the layers neat.
- Cool completely before glazing. A warm cake will melt the glaze into the crumb instead of letting it sit beautifully on top.
- Store with care. Wrap well or store in an airtight container to keep the cake moist for days.
Recipe Variations
- Add fruit. Blueberries, raspberries, or chopped apples work beautifully with the cinnamon swirl. Try our Blueberry Buckle Cake.
- Nutty twist. Add chopped walnuts or pecans to the streusel for extra crunch.
- Chocolate lovers. Replace the cinnamon swirl with mini chocolate chips mixed with brown sugar.
- Glaze swap. Try a maple glaze or cream cheese frosting instead of vanilla glaze.
- Spiced-up version. Add nutmeg, cardamom, or allspice to the batter for extra warmth.
- Mini loaves. Divide the batter into small loaf pans for individual servings (adjust baking time).
For a cookie variation, see our Coffee Cake Cookies.
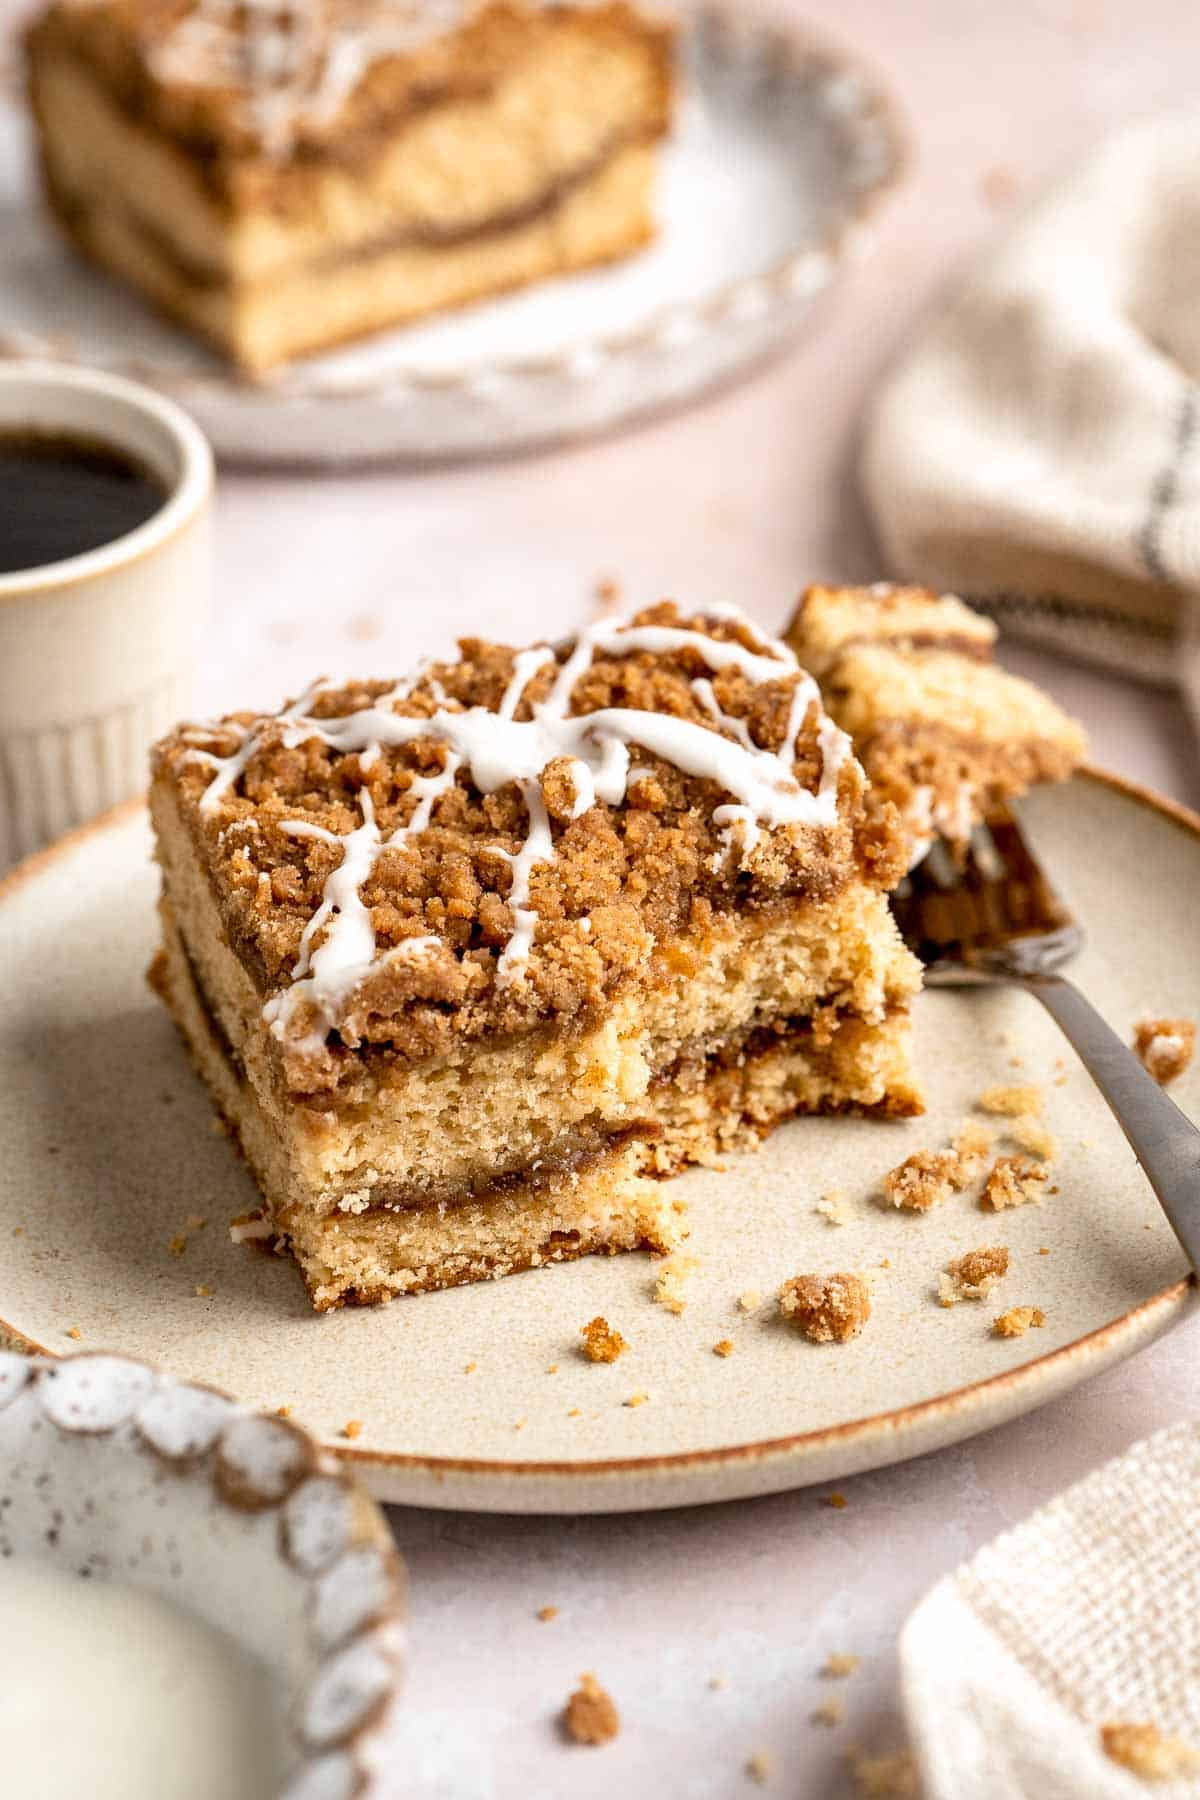
Storage
How to Store
Wrap the cake tightly in plastic wrap or store in an airtight container at room temperature for up to 3 days, or refrigerate for up to 5 days.
How to Reheat
Warm slices in the microwave for 10-15 seconds to bring back that fresh-from-the-oven softness.
How to Freeze
Wrap unglazed cake tightly in plastic wrap and then foil. Freeze for up to 2 months. Thaw at room temperature, then glaze before serving.
How to Serve
This cake is delicious all on its own, but it also loves company. Pair it with coffee or tea for the perfect breakfast treat, or dress it up with fresh fruit and whipped cream for dessert.
These are my favorite recipes to serve with this cinnamon coffee cake:
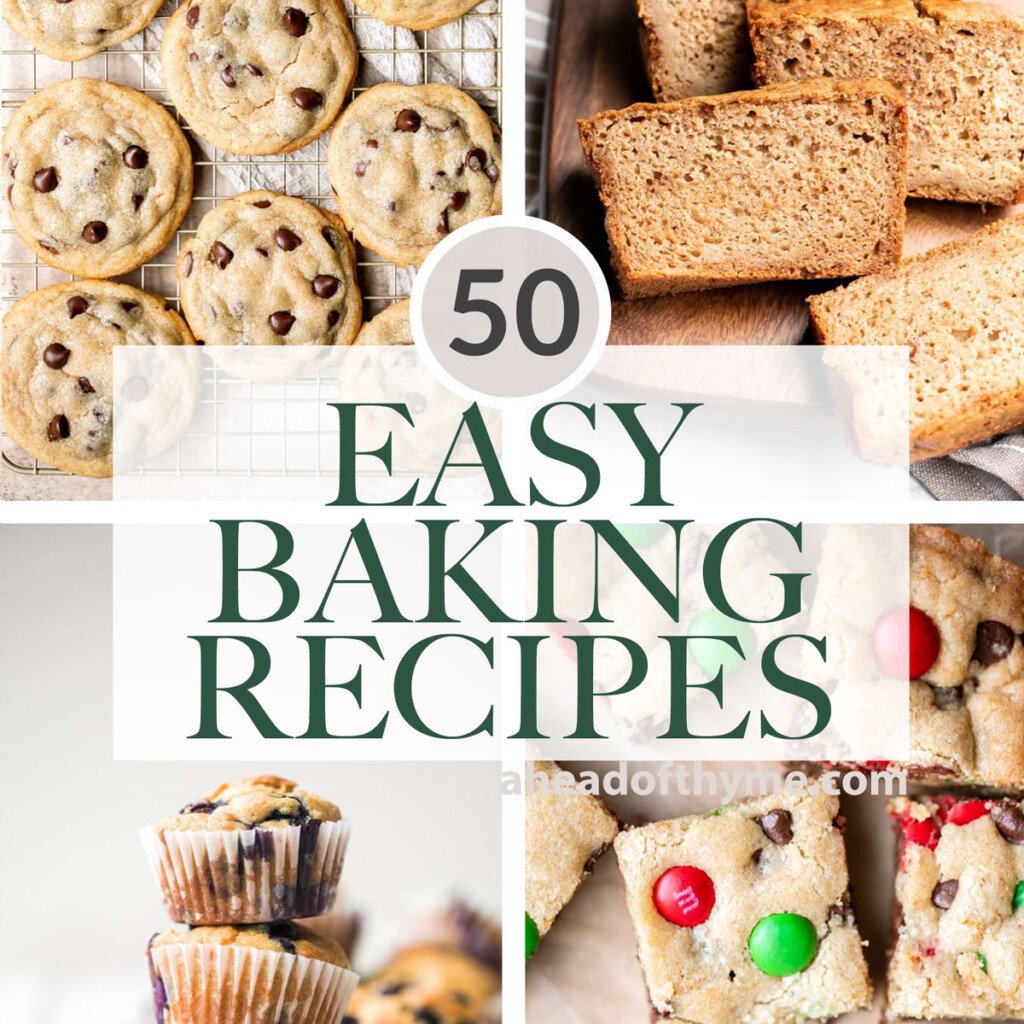
Easy Baking Recipes
Discover our collection of easy baking recipes, perfect for beginners or busy bakers. From quick breads and muffins to cookies and simple cakes, these recipes make homemade baked goods effortless, delicious, and satisfying every time.
FAQ
They're close cousins, but not exactly the same. Both have a buttery cake base and a crumb topping, but crumb cake typically has a much thicker layer of crumbs - sometimes equal in height to the cake itself. Coffee cake usually has a thinner streusel layer and may include extra elements like a cinnamon swirl or glaze. Coffee cake is also a broader category that includes different flavor variations, while crumb cake refers specifically to the heavy-crumb style. Think of it this way: all crumb cakes are coffee cakes, but not all coffee cakes are crumb cakes. And both are excellent with a big cup of coffee.
Crumb cake is sometimes called streusel cake, especially in German baking traditions where "streusel" refers to the crumbly topping made of butter, sugar, and flour. In some parts of the U.S., it's also called New York-style crumb cake, known for its tall, buttery crumb layer. In Germany, you might hear it called "Streuselkuchen," which translates literally to "crumb cake." No matter what you call it, the idea is the same - a soft cake base topped generously with sweet, buttery crumbs that bake into a slightly crunchy layer. It's the perfect pairing for coffee or tea at breakfast or as an afternoon treat.
A cake becomes a coffee cake when it's designed to be served alongside coffee or tea, typically in the morning or as a snack. Coffee cakes are usually less sweet than dessert cakes and have a tender crumb that's perfect for nibbling with a hot drink. They often include a streusel topping, cinnamon swirl, or fruit filling, and are sometimes finished with a glaze. Despite the name, most coffee cakes don't actually contain coffee - the name refers to the tradition of enjoying them with coffee, not baking it into the cake. It's all about creating a cozy, shareable treat that feels indulgent but approachable.
Not usually! The name "coffee cake" comes from the custom of serving the cake with coffee, not from coffee being an ingredient. Most traditional coffee cakes are flavored with cinnamon, vanilla, or fruit, and topped with streusel or glaze. That said, you can make a coffee-flavored coffee cake by adding brewed coffee or espresso powder to the batter, which gives it a richer, mocha-like flavor. So while coffee cake doesn't require coffee in the recipe, the two make such a perfect pairing that it's easy to see how the name stuck.
Great coffee cake starts with a soft, tender crumb - usually achieved by using sour cream, buttermilk, or yogurt for extra moisture. The flavor should be balanced: sweet but not overwhelming, with warm spices like cinnamon and a hint of vanilla. A good streusel topping should be buttery and crumbly, adding texture without being greasy or overly dense. Bonus points if there's a cinnamon swirl or fruit layer in the middle. And of course, the best coffee cakes are fresh, ideally enjoyed the day they're baked, with a cup of coffee or tea in hand. It's all about comfort in every bite.
Sour cream is a secret weapon in coffee cake because it adds both moisture and richness without making the batter too thin. Its acidity helps tenderize the gluten in the flour, creating a softer crumb that stays moist for days. Sour cream also adds a subtle tang that balances the sweetness of the cake, making each bite more flavorful. It's especially helpful in recipes like this one, where you want a rich, bakery-quality texture without layers of frosting. If you don't have sour cream, full-fat Greek yogurt is the best substitute - it offers similar moisture and a slight tang, though the flavor will be a touch different.
More Cake Recipes
Looking for other recipes like this? Try these:
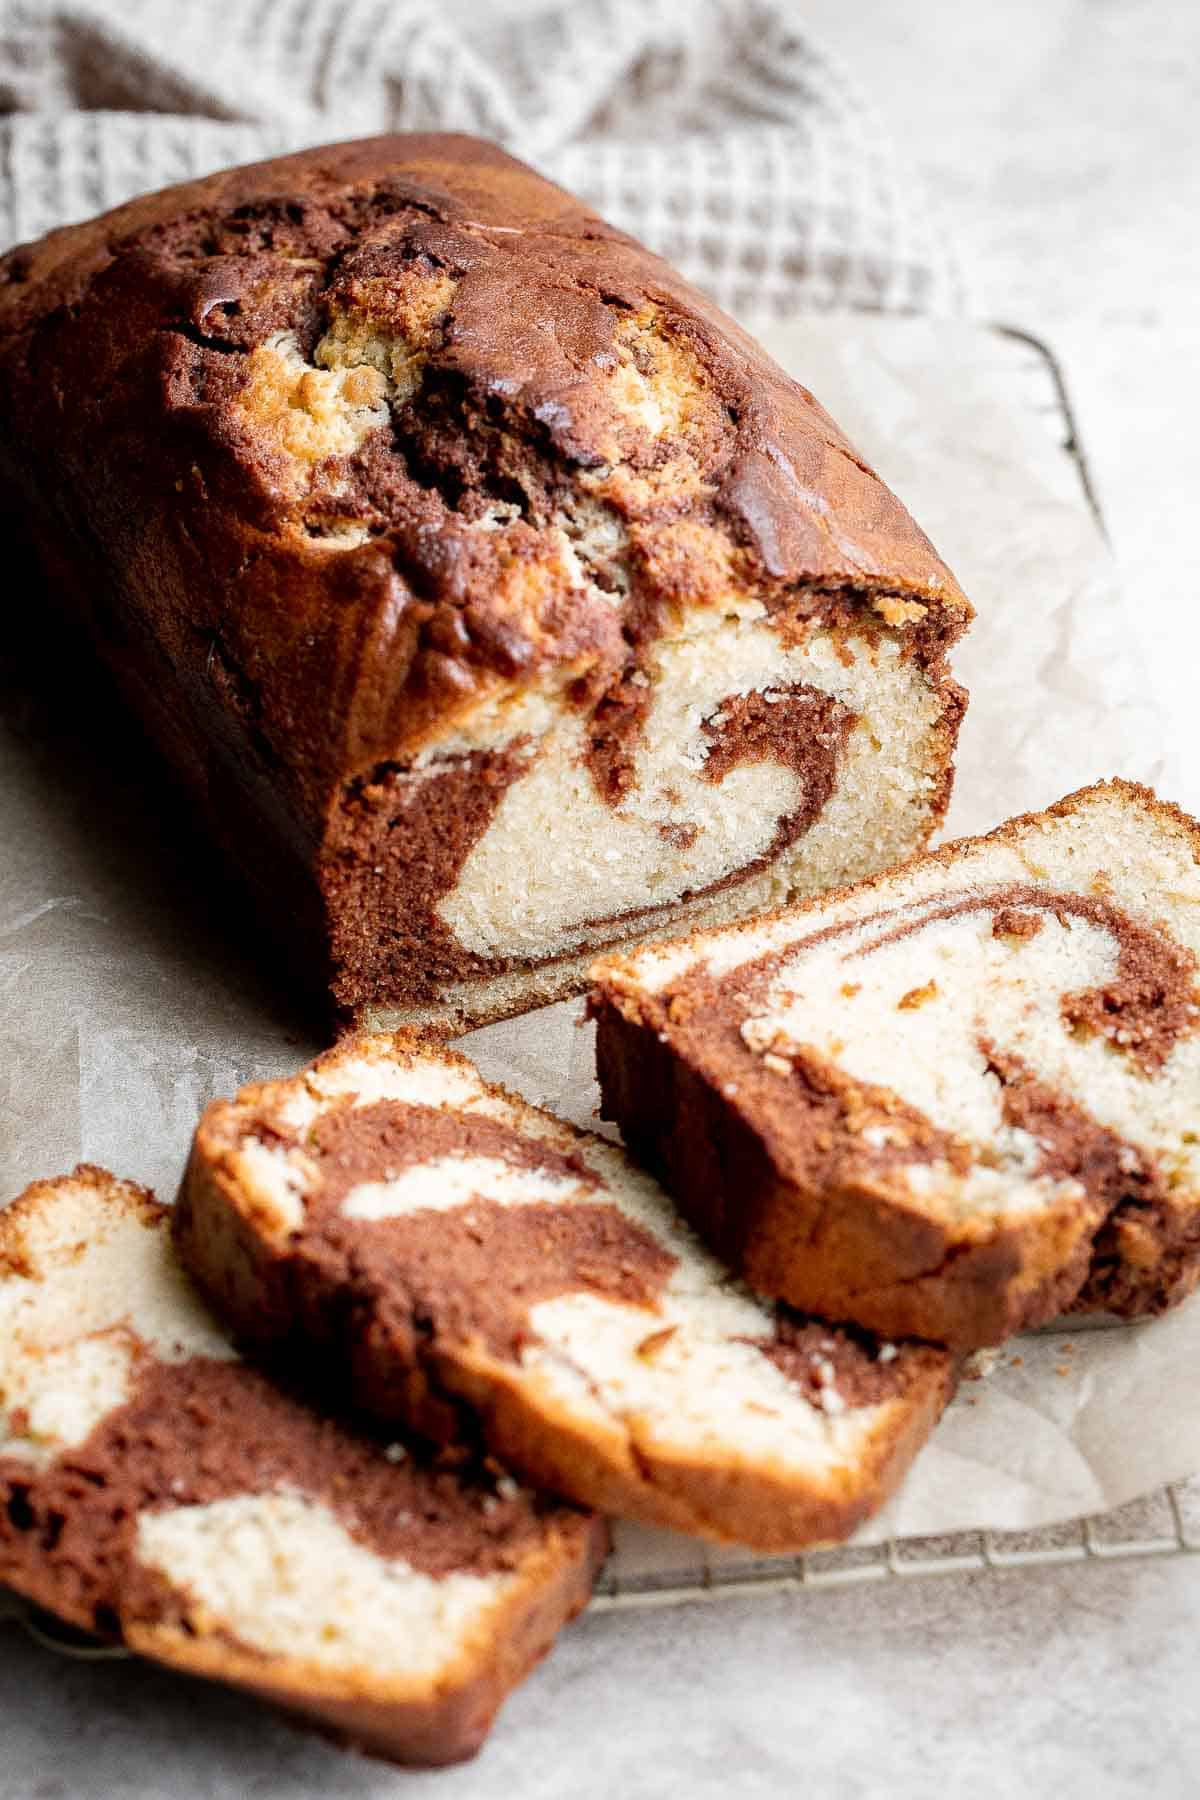
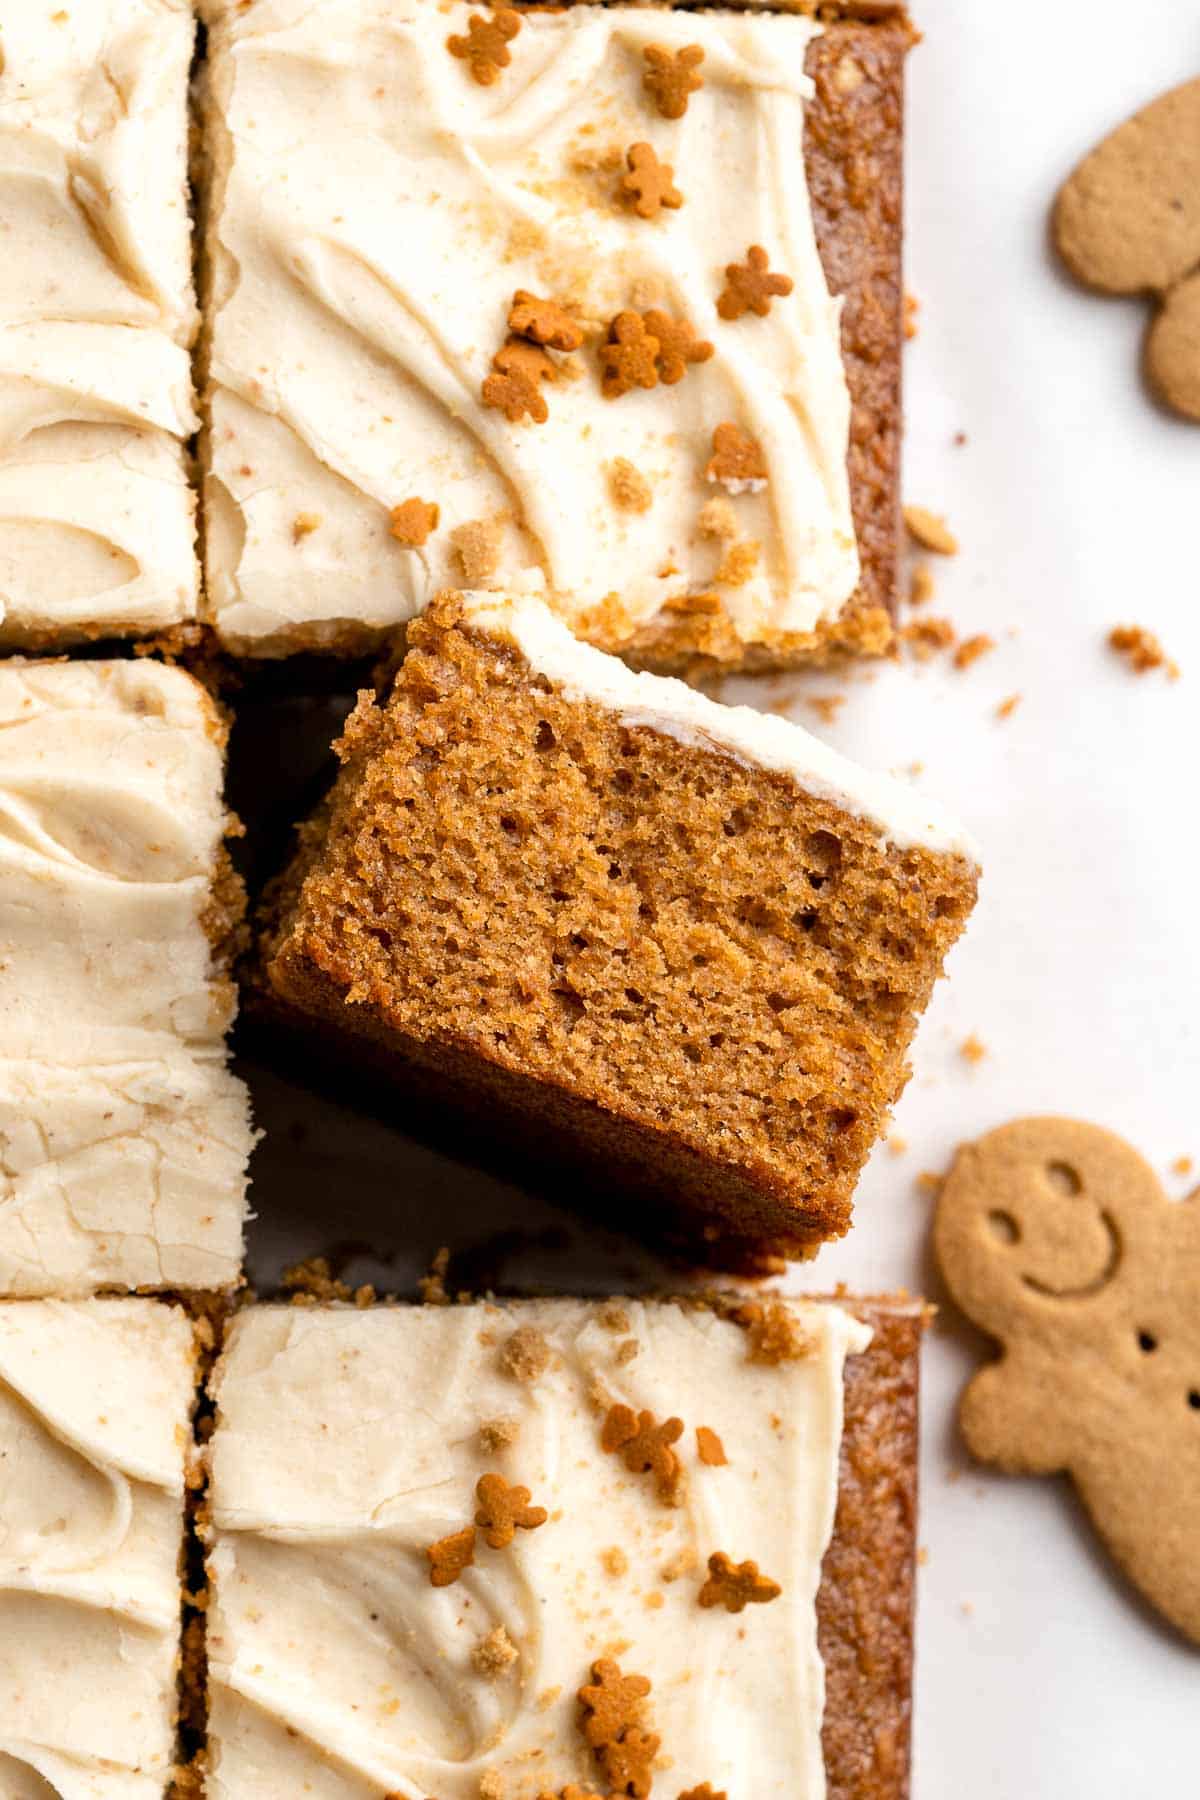

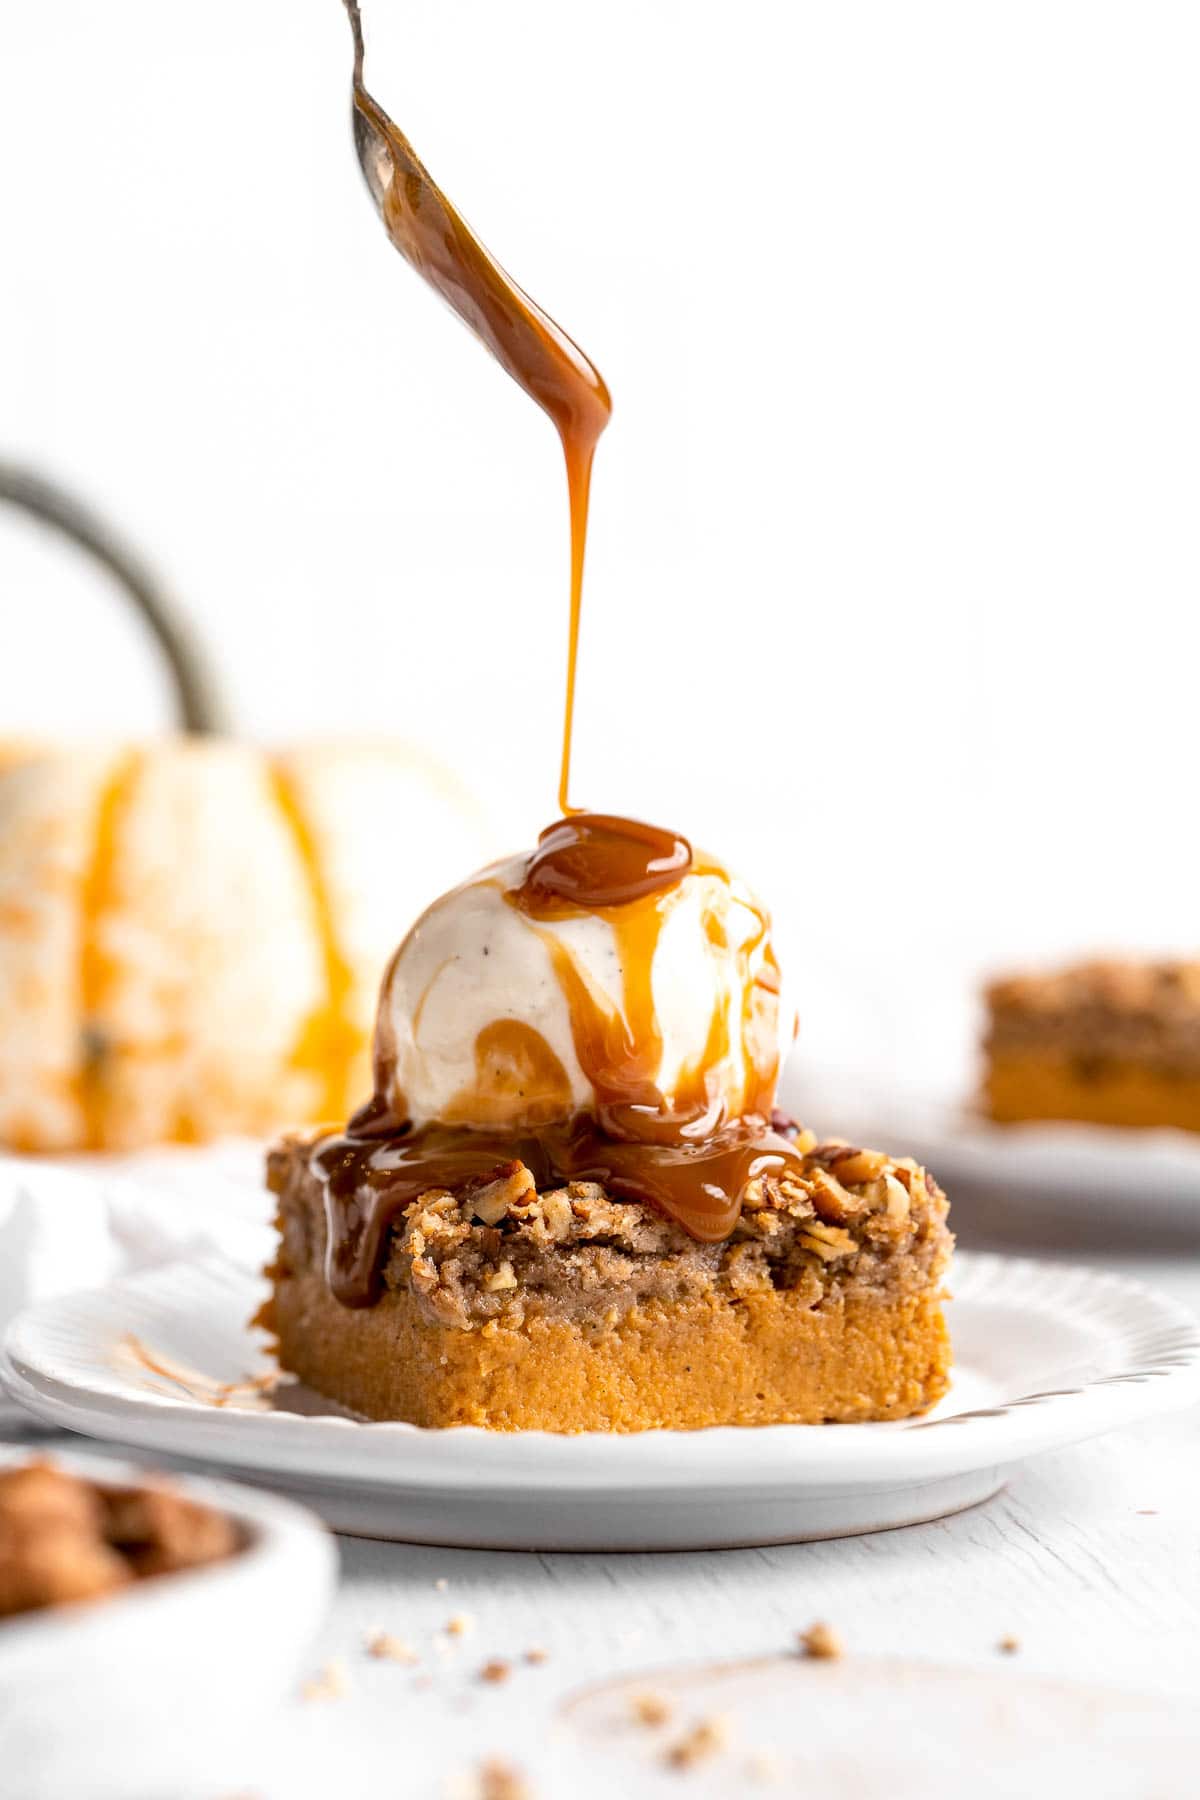
Tried this recipe?
I'd love to hear what you think! Leave a comment and rating below to share your feedback. Your reviews help others discover this recipe and help me keep creating more free recipes for you. Snap a photo and tag me on social media @aheadofthyme too.

Mexican Ground Beef Tacos
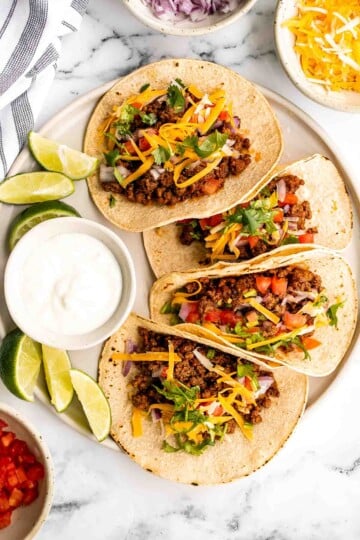
Mexican Ground Beef Tacos are the kind of dinner that says "fiesta" with every bite - but with zero drama and maximum flavor. These beef tacos are delicious, authentic, and so easy to make. Tender, perfectly seasoned ground beef wrapped in soft flour tortillas, then topped with crisp tomatoes, onions, fresh cilantro, cheese, and a generous squeeze of lime. It's savory, spicy, and fresh = taco happiness in your hands.

These tacos are deceptively simple, yet bursting with layered Mexican flavors - without the fuss. They're packed with spices like cumin, chili powder, and paprika, and balanced with the brightness of fresh lime juice. It's the kind of recipe that feels like a weeknight hack but belongs on a special table. A traditional Mexican dish that is perfect for a Mexican fiesta, to celebrate Cinco de Mayo, or for any time of year!
If you like this ground beef taco recipe, you should try our Carne Asada Tacos, Homemade Taquitos, or Shredded Beef Enchiladas next. Whether you're hosting Taco Tuesday or just craving a quick and delicious dinner, these tacos bring joy - and maybe a second helping.
I made these tacos for the #cookingAOT challenge and my husband said they were the best ground beef tacos he's ever had! I think the tomato paste and beef both in this recipe really makes the taco meat extra flavorful. Definitely using this recipe for ground beef tacos from now on!
- Kristen ★★★★★
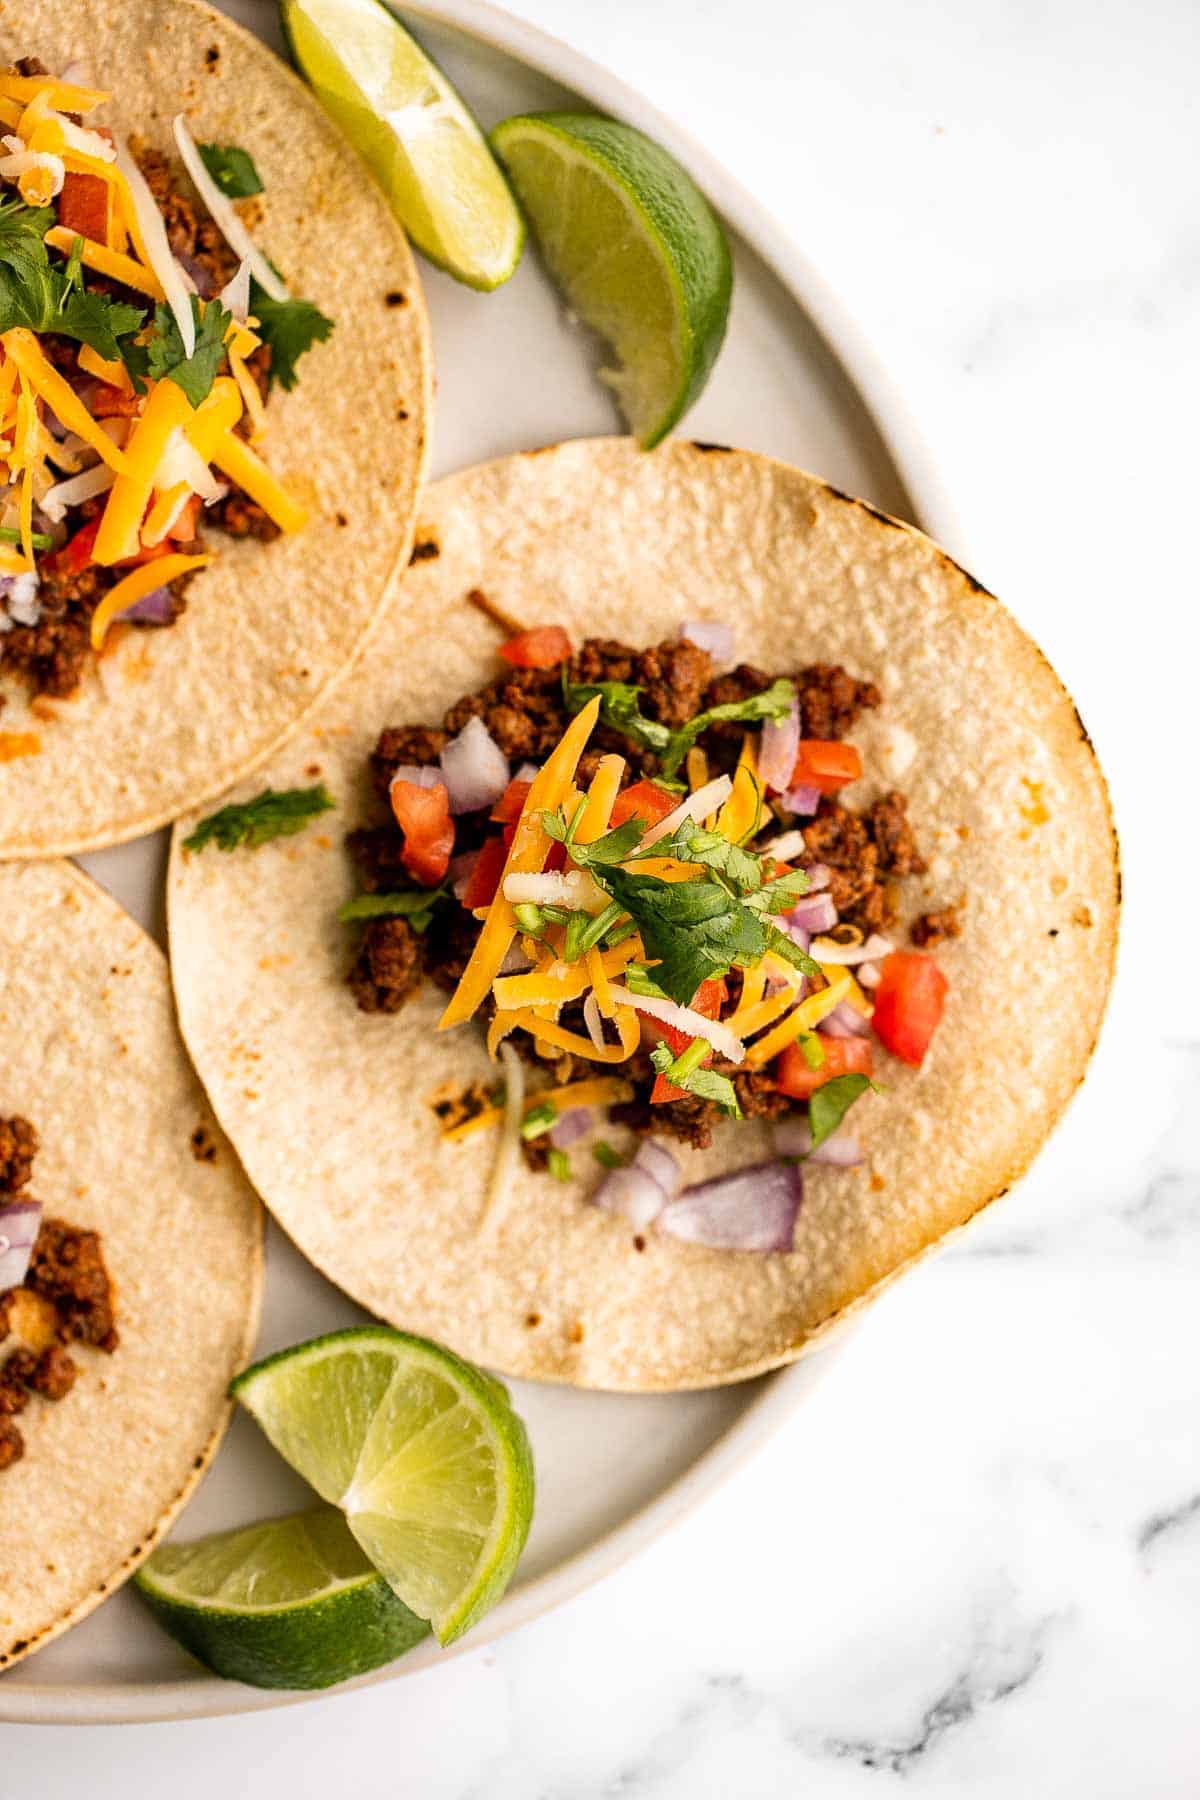
Why You'll Love This Recipe
- Easy to love. These ground beef tacos are so yummy that it's hard not to love them. Ground beef, tomatoes, onion, and cheese, all wrapped up in a corn or flour tortilla, make a whole meal that's filling and delicious.
- Balanced flavor layers. Savory, spiced beef meets creamy sour cream, fresh citrus, and crisp veggies - all swaddled in a soft tortilla. There's texture and freshness in every bite, which is why these tacos taste way more sophisticated than the time you spent cooking them.
- Quick to make. These tacos come together in under 25 minutes using pantry-friendly spices and ground beef. You spoon the beef into tortillas, add fresh toppings, and boom - you have a homemade Mexican masterpiece without spending hours at the stove.
- Perfect for family taco night. Have a fun and interactive taco night where kids and adults can build their own perfect taco. Lay out bowls of cheese, onions, tomatoes, cilantro, sour cream, and lime, and watch them assemble, experiment, and devour. It's fun, engaging, tasty, and mess-free once cleanup begins.
- Endless customization. Put these tacos on full decor: swap in ground turkey or chicken, go vegetarian with chopped mushrooms or chickpeas, or kick up the heat with jalapeños and chipotle powder. Tacos are blank canvases - craft them to your cravings.
Ingredients and Substitutions
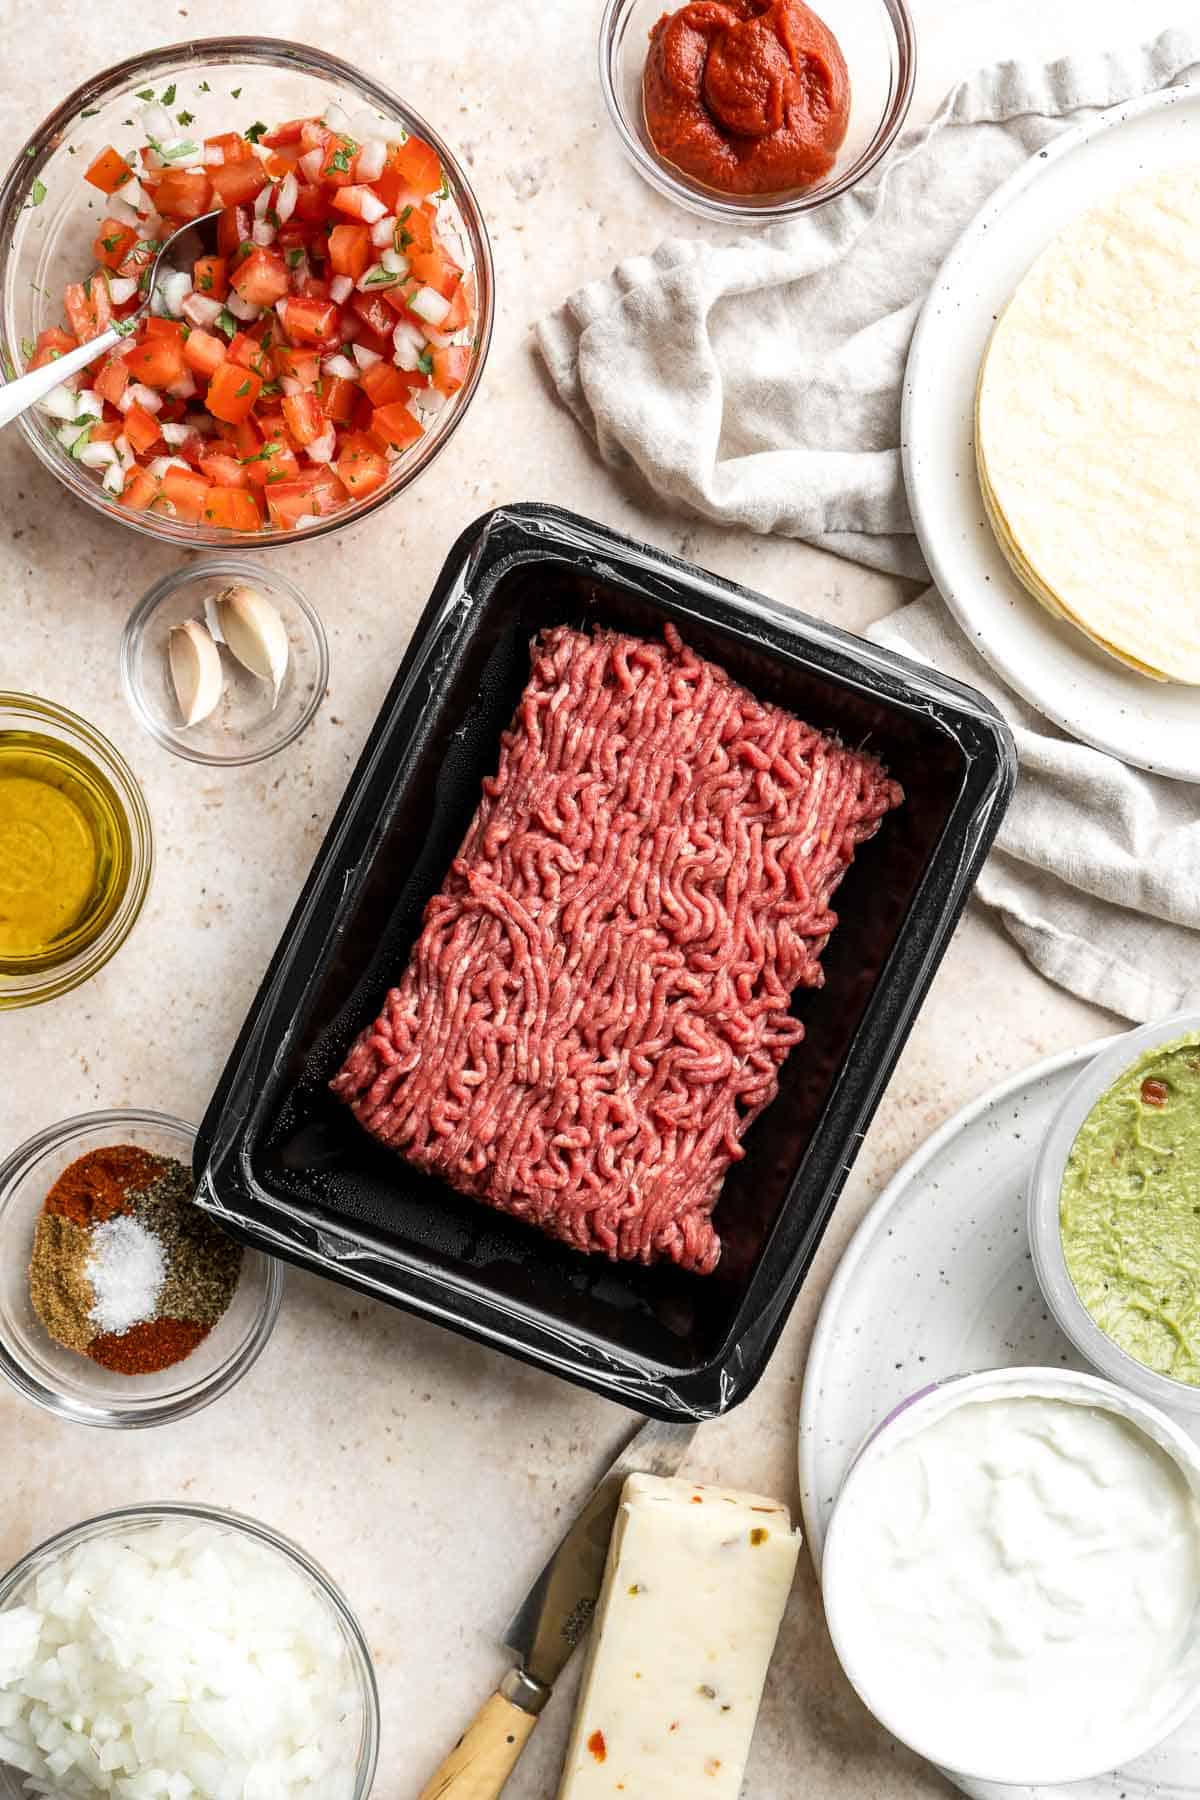
To make these delicious and easy Mexican ground beef tacos, you will need the following ingredients (see recipe card below for quantities):
- vegetable oil - For browning the beef; swap for olive oil or avocado oil if desired.
- ground beef - Nostalgic, juicy, and richly flavored. Substitute with ground turkey, diced or shredded chicken, pork, or even crumbled tofu, chickpeas, or tempeh for a vegetarian twist.
- taco seasoning - Create homemade taco seasoning using cumin, chili powder, paprika, garlic powder, dried oregano (or Italian seasoning), salt and pepper. Store-bought taco seasoning packets can work too - just check sodium levels and adjust to taste.
- tomato paste - Adds depth and richness. A spoonful of tomato sauce or crushed tomatoes works in a pinch.
- beef broth or water - Keeps the meat perfectly saucy. Broth adds flavor, while water is fine if you're watching sodium. Try our homemade bone broth.
- tortillas - Soft and dreamy small flour tortillas are the perfect vessel for tacos. Corn tortillas, lettuce cups, gluten-free tortillas, or even hard taco shells are great alternatives. You can even make your own homemade flour tortillas - they are easier than you think!
- cheese - This adds a Tex Mex twist to these tacos. Leave it out for a true authentic Mexican ground beef taco. We love melty and flavorful cheese so we used a Mexican blend of cheese. Cheddar, Monterey Jack, or mozzarella also work deliciously.
- tomatoes - Adds freshness. Swap in salsa or pico de gallo for ease.
- onions - Red onion or white onion are great choices. Green onions can work too.
- cilantro - Herbaceous vibe upgrade. Parsley or green onions can sub, but cilantro is classic.
- lime - Optional, for squeezing on the tacos. A squeeze of juice wakes up the whole taco. Lemon is a fine backup - though not as authentic, still refreshing!
Equipment
You'll also need measuring cups and spoons, a trusty skillet (cast-iron skillet or nonstick works), a sharp knife, a cutting board, and a sheet of parchment to warm tacos easily or to catch any taco-tossing drips.
Instructions
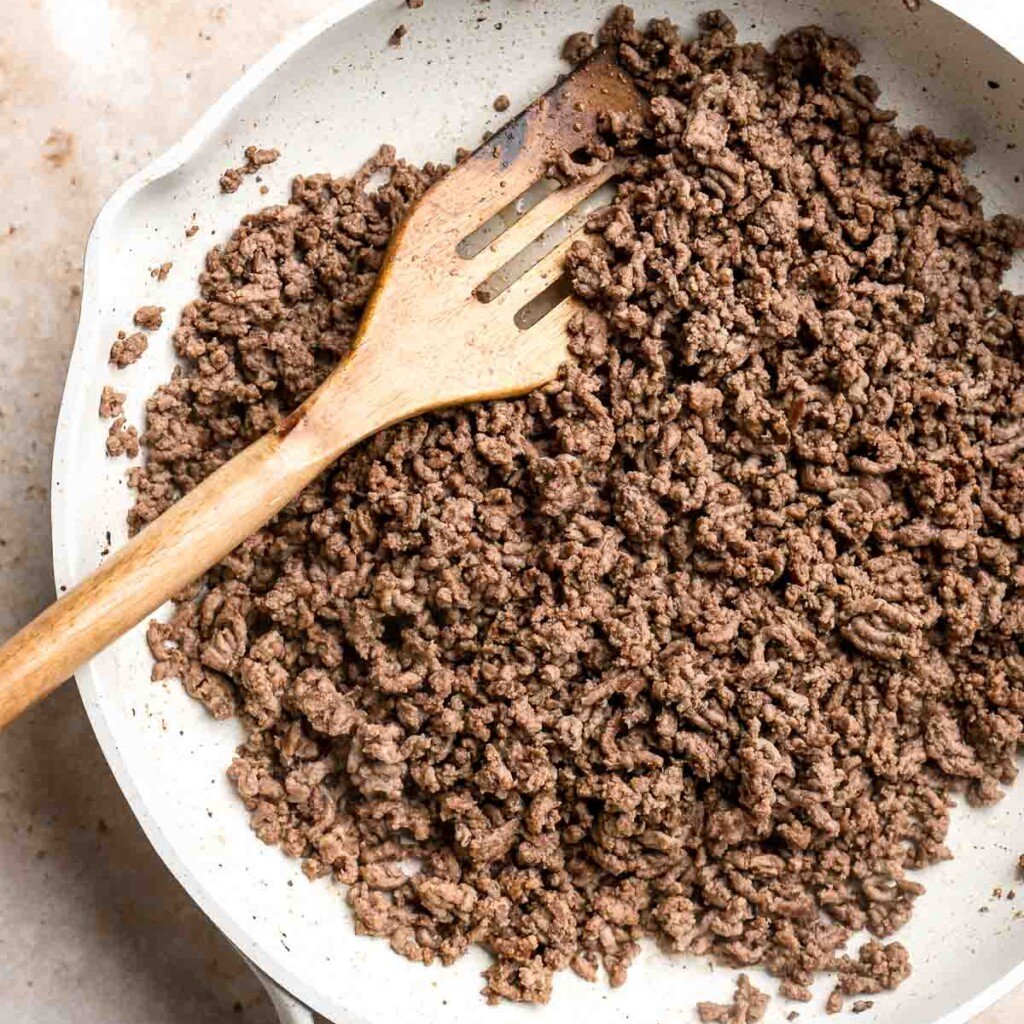
Cook the ground beef
Heat the oil in a large skillet over medium-high heat until the hot oil is shimmering and sizzling, about 1-2 minutes. Add the ground beef and break it up as it browns. Stir well to cook evenly until browned, about 6-8 minutes.
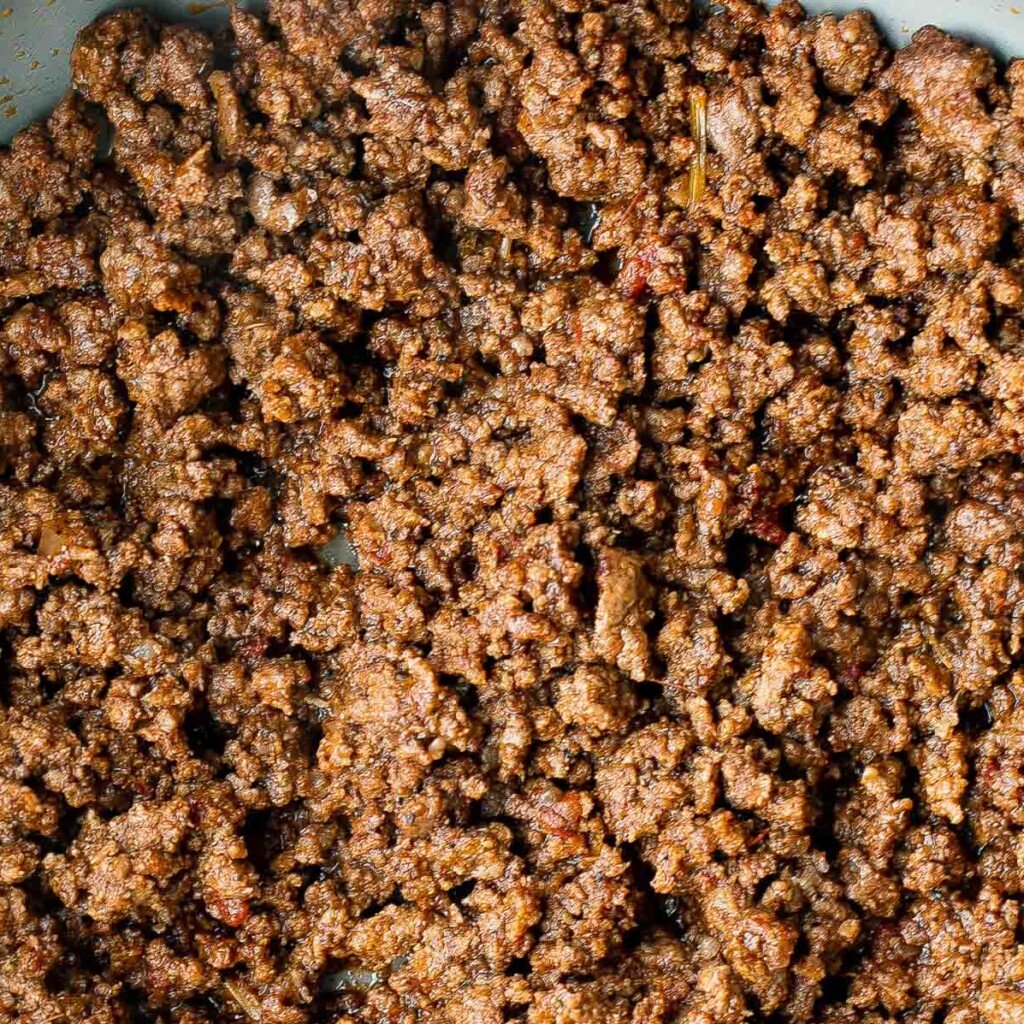
Season
Add in the spices (cumin, chili powder, paprika, garlic powder, and oregano), salt, pepper, and tomato paste. Stir it all together to combine. Then, and broth (or water) and reduce the heat to medium. Let the mixture simmer for 3-5 minutes until the sauce thickens a bit, stirring occasionally. Turn off heat and set aside.
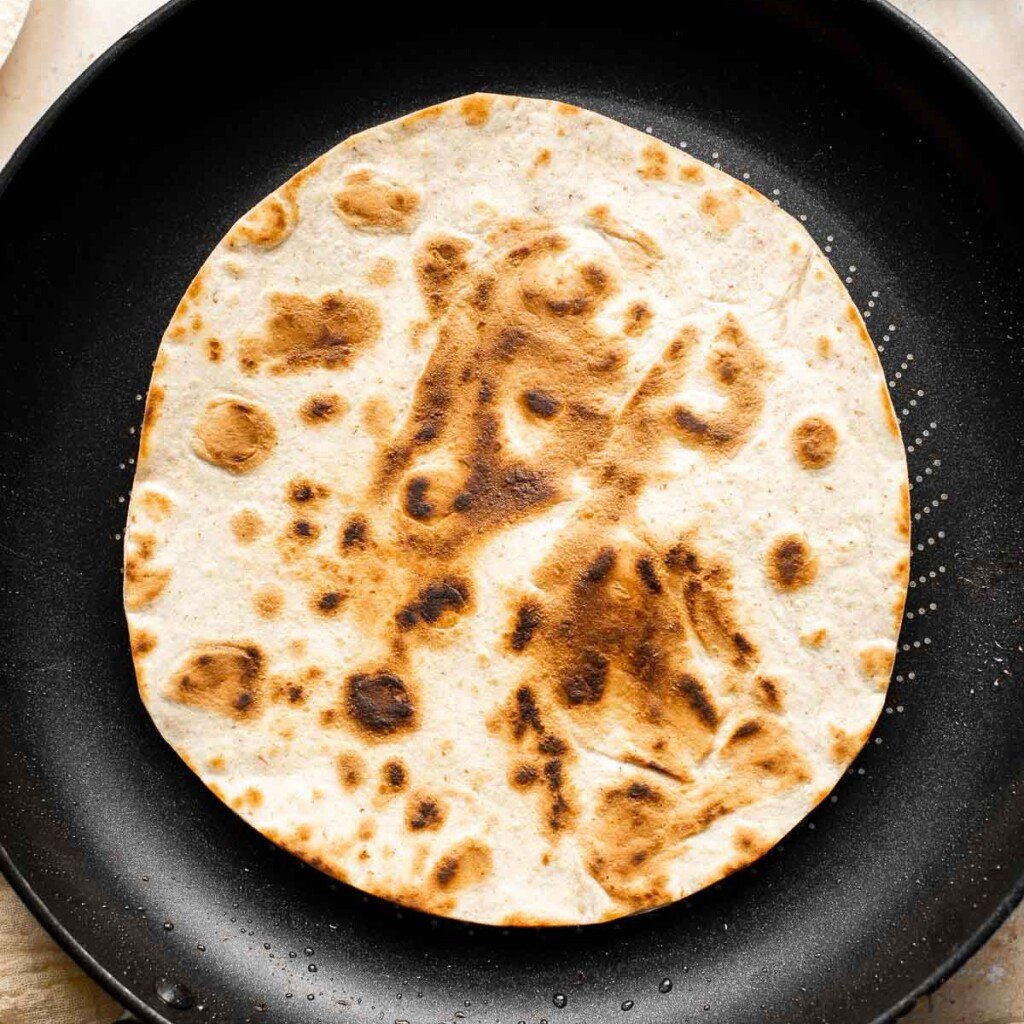
Warm the tortillas
Heat the soft flour tortillas according to the package instructions, or heat in an ungreased skillet over medium-high heat for 30 seconds per side. You can also stack them on the stove or microwave between damp towels until soft and just pliable, or heat it directly on a gas burner for a few seconds to get char marks on the edges.
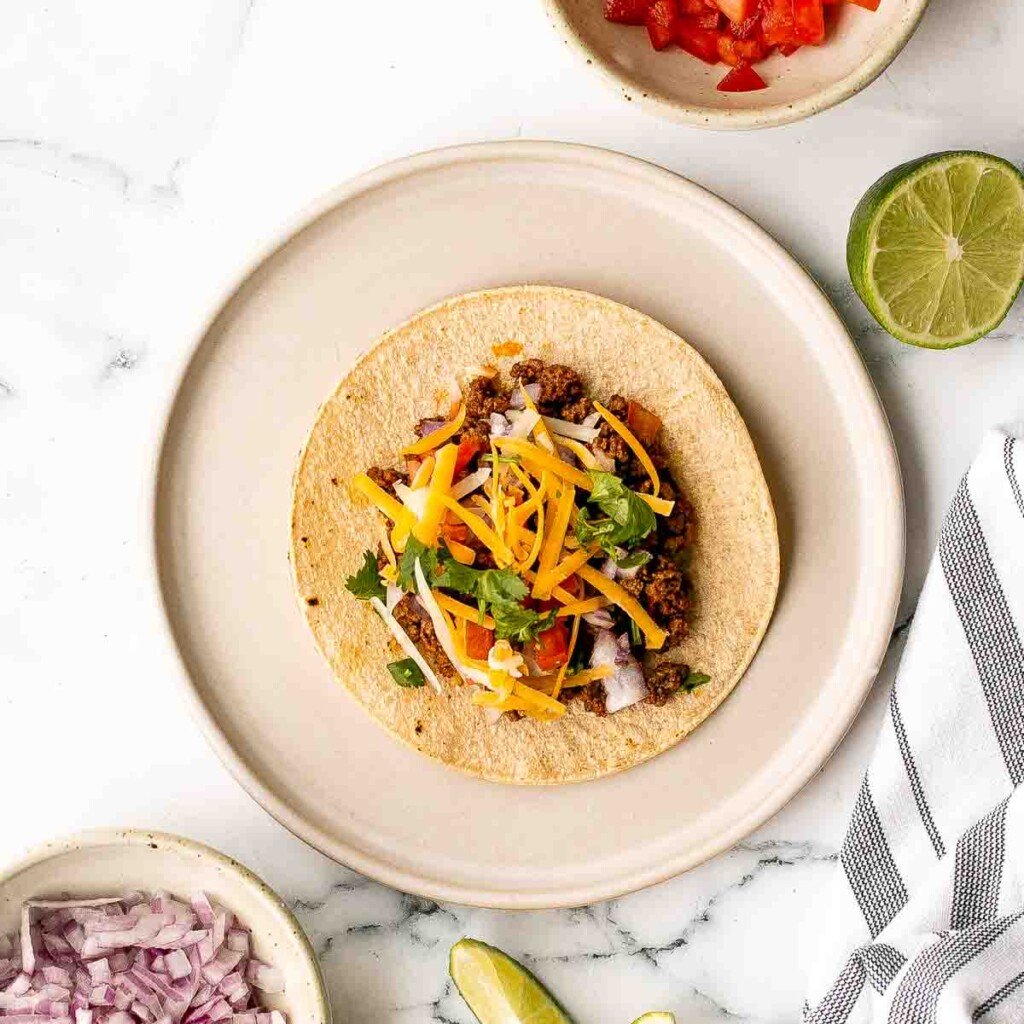
Assemble
Spoon 2-3 tablespoons of the ground beef mixture into each tortilla. Top with cheese (if using), tomatoes, onion, and cilantro. Add a squeeze of fresh lime juice, to taste.
Recipe Video
Expert Tip: Layer the Flavors
Seasoned meat tastes even better when the spices bloom in the pan. After browning the beef, let the spices and tomato paste sizzle in the fat for a moment before adding liquid. That extra toast and stir releases aromatic oils and deepens flavor across the taco.
More Tips and Tricks
- Drain excess fat if needed. After browning the beef, drain off excess grease (especially if using higher-fat meat) before adding liquid or spices. This keeps your taco filling flavorful without being greasy.
- Prep toppings ahead. Chop onions, cilantro, and any other toppings before cooking the beef so they're ready to serve hot from the skillet. This also keeps the tacos from cooling while you scramble to garnish them.
- Prep once, serve twice. Cook the meat ahead of time and refrigerate for taco night later. Just reheat, warm the tortillas, and stack your toppings. Dinner in 10 minutes flat.
- Steal the show with fresh garnishes. Cilantro, onions, and fresh lime juice make these ground beef tacos shine. And you don't have to stop there. Add your favorite taco toppings including pico de gallo, guacamole, refried beans, or avocado for even more flavor!
Recipe Variations
- Add beans. Stir in cooked black beans, pinto beans, or refried beans during the last few minutes of cooking for extra protein. This bulks up the filling and makes the tacos heartier. Great for bigger groups!
- Mix in vegetables. Add finely diced bell peppers, zucchini, corn, or mushrooms to the beef mixture. This not only boosts nutrition but also adds sweetness and texture.
- Make it mild or spicy. Add a diced jalapeño, a pinch of cayenne pepper, or a drizzle of hot sauce to ramp up heat. For kids? Skip the spice and serve with mild salsa.
- Top with a creamy element. Serve with sour cream, Mexican crema, or a quick avocado crema for balance and richness against the spiced beef.
- Make it gluten-free and/or dairy-free. Simply substitute corn tortillas instead of flour tortillas to remove the gluten, and serve without cheese to remove the dairy. Now everyone can enjoy the Mexican beef tacos, regardless of dietary preferences.
- Serve it as a taco salad. Skip the tortillas and pile the beef over lettuce, add your favorite toppings and a drizzle of yogurt or creamy dressing - yum!
- Make taco bowls. Serve the beef over Mexican rice or cauliflower rice with all the taco toppings for a hearty, no-fuss dinner bowl.

Storage
How to Store
Divide the beef, tortillas, and toppings into separate airtight containers. Store for up to 4 days in the fridge. Assemble when you're ready to eat.
How to Reheat
Warm the meat in a skillet over medium-low heat. Add a splash of water if it's dried out too much when stored in the fridge. Alternatively, you can reheat in the microwave in 20-second increments until warmed through. Heat tortillas on the stove or microwave.
How to Freeze
Once at room temperature, freeze the cooked beef in a freezer-safe bag or container for up to 3 months. Thaw overnight and reheat gently before building tacos.
How to Serve
These tacos are ready to party on their own, but they shine with sides that boost texture and balance. Think bright, crunchy, creamy, or cheesy - all combo-winning additions with a deconstructed taco vibe.
These are my favorite dishes to serve with ground beef tacos:
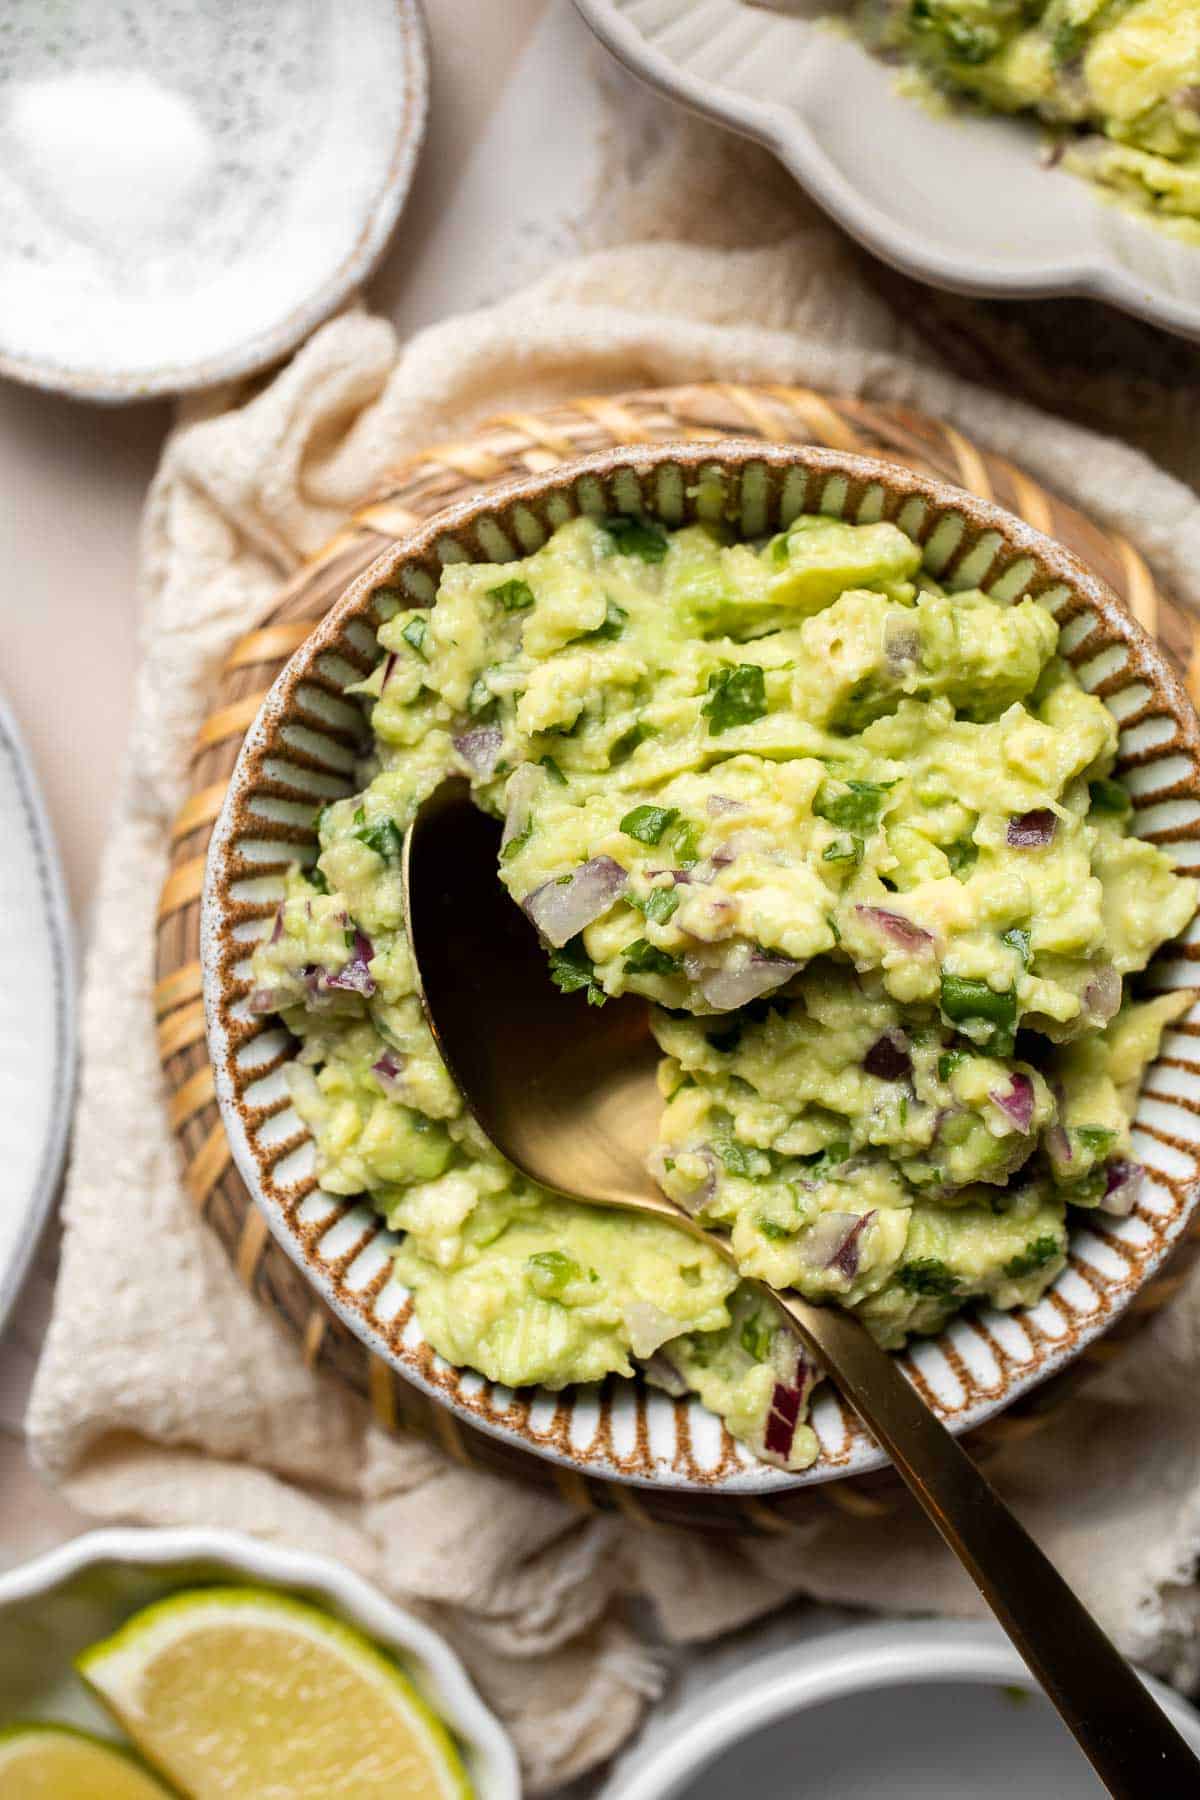

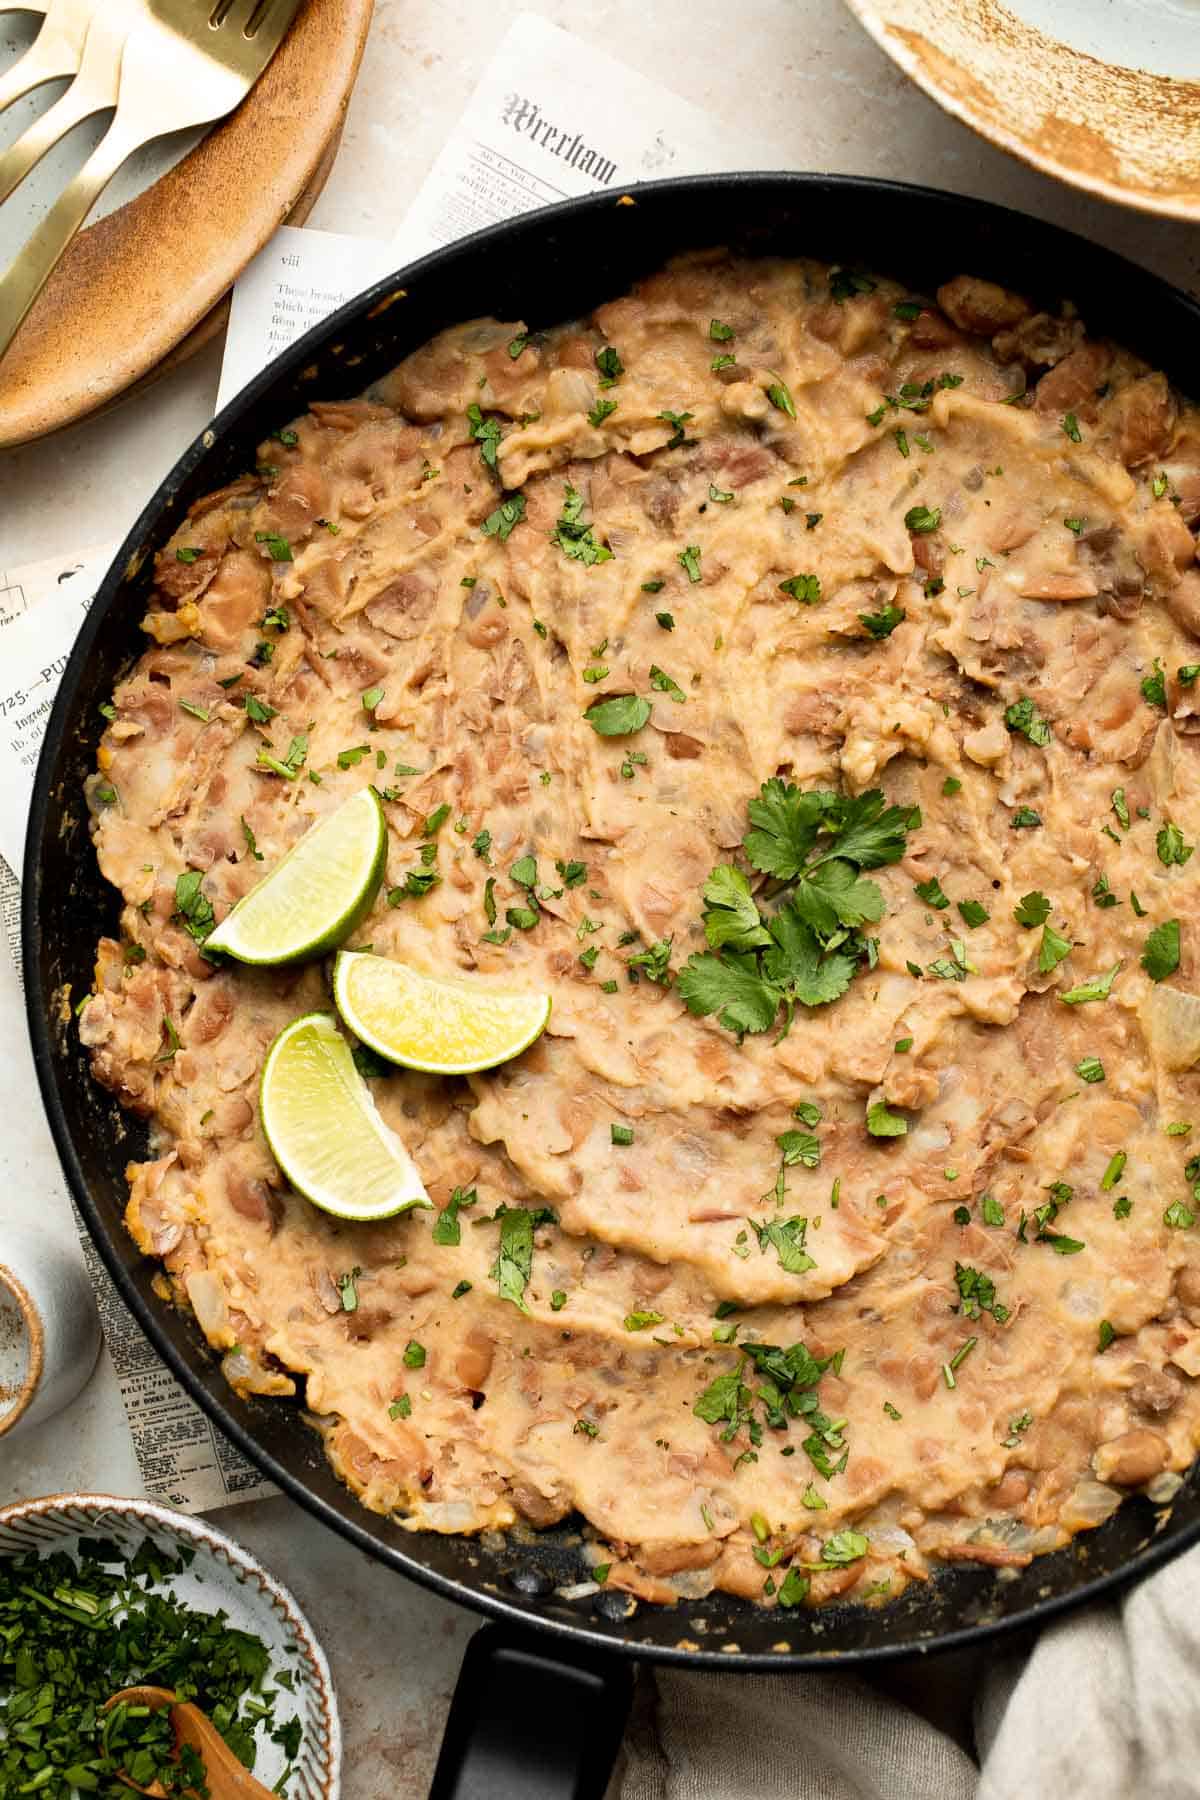
Mexican Side Dishes
Explore our vibrant collection of Mexican side dishes, perfect for adding bold flavors to any meal. From zesty salsas and street-style corn to seasoned rice and beans, these recipes bring a taste of Mexico to your table with ease and authenticity.
FAQ
Authentic Mexican ground beef starts with quality beef (often 80/20 for flavor) and fresh aromatics like onion and garlic sautéed until fragrant. The meat is cooked slowly over medium heat, breaking it up as it browns. Traditional seasonings like cumin, chili powder, oregano, paprika, and sometimes cinnamon or cloves add depth. A splash of beef broth or tomato sauce keeps the meat moist and allows flavors to meld. Unlike some Americanized versions, authentic recipes focus on a balanced spice blend without excessive salt or pre-made packets. The beef is typically simmered until tender, juicy, and richly seasoned, ready to be piled into warm corn tortillas and topped with fresh garnishes like onions, cilantro, and salsa.
Mexican restaurants achieve ultra-tender taco beef through a combination of fat content, slow simmering, and liquid. Many use 80/20 beef, which naturally stays juicier. After browning, they add broth or tomato sauce and allow the meat to gently simmer, often covered, so it absorbs moisture and flavors. Some cooks incorporate a touch of baking soda into the raw meat to help break down proteins, creating a softer bite. Constant stirring and breaking up the meat into fine crumbles also helps prevent chewy clumps. This method allows each bite to be tender, flavorful, and perfectly suited for folding into a tortilla without falling apart.
The secret to finely crumbled taco beef is in the cooking technique. Instead of dumping the beef in and letting it clump, the meat is added in small portions to a hot pan and broken apart immediately with a spatula or wooden spoon. Frequent stirring keeps it loose. Some cooks even use a potato masher or whisk halfway through cooking to achieve tiny, uniform crumbles. Adding a little liquid, such as broth or tomato sauce, also helps the meat break down more evenly. This fine texture not only makes the beef easier to scoop into tortillas, but it also allows seasoning and sauce to coat every piece.
Authentic Mexican tacos are all about balance and freshness. They usually start with a warm corn tortilla (soft and slightly charred) topped with a modest amount of well-seasoned meat such as carne asada, carnitas, or seasoned ground beef. Garnishes are simple: fresh chopped onions, cilantro, and a squeeze of lime. Salsas (red, green, or both) are offered on the side so each person can customize heat and flavor. You won't typically find shredded lettuce, piles of cheese, or sour cream on a traditional Mexican taco; those are more common in Tex-Mex adaptations. The focus is on letting the meat and fresh toppings shine.
Mexican taco meat is seasoned with a fragrant blend of spices and herbs, usually including cumin, chili powder, paprika, oregano, garlic, and onion. The spice mix varies by region - some add smoked paprika for depth, while others use guajillo or ancho chile powder for earthy heat. Salt and pepper are always essential, and fresh aromatics like garlic and onion are often sautéed with the meat. Sometimes a splash of lime juice or vinegar is added at the end to brighten flavors. This seasoning approach focuses on creating rich, complex layers rather than just heat, resulting in meat that's deeply flavorful without overpowering the other taco elements.
Mexican seasoning is a broad term that covers the spice blends used in authentic Mexican cooking - ranging from taco meat to stews, soups, and marinades. It often includes a wider range of dried chiles, herbs like Mexican oregano, and sometimes warm spices like cinnamon or cloves. Taco seasoning, on the other hand, is a more specific blend created for seasoning taco meat, especially in Tex-Mex cuisine. Store-bought taco seasoning tends to be heavier on chili powder, cumin, paprika, garlic powder, and salt. Authentic Mexican seasoning blends are often fresher, less salty, and tailored to the specific dish, whereas taco seasoning is standardized for convenience.
More Taco Recipes
Looking for other recipes like this? Try these:

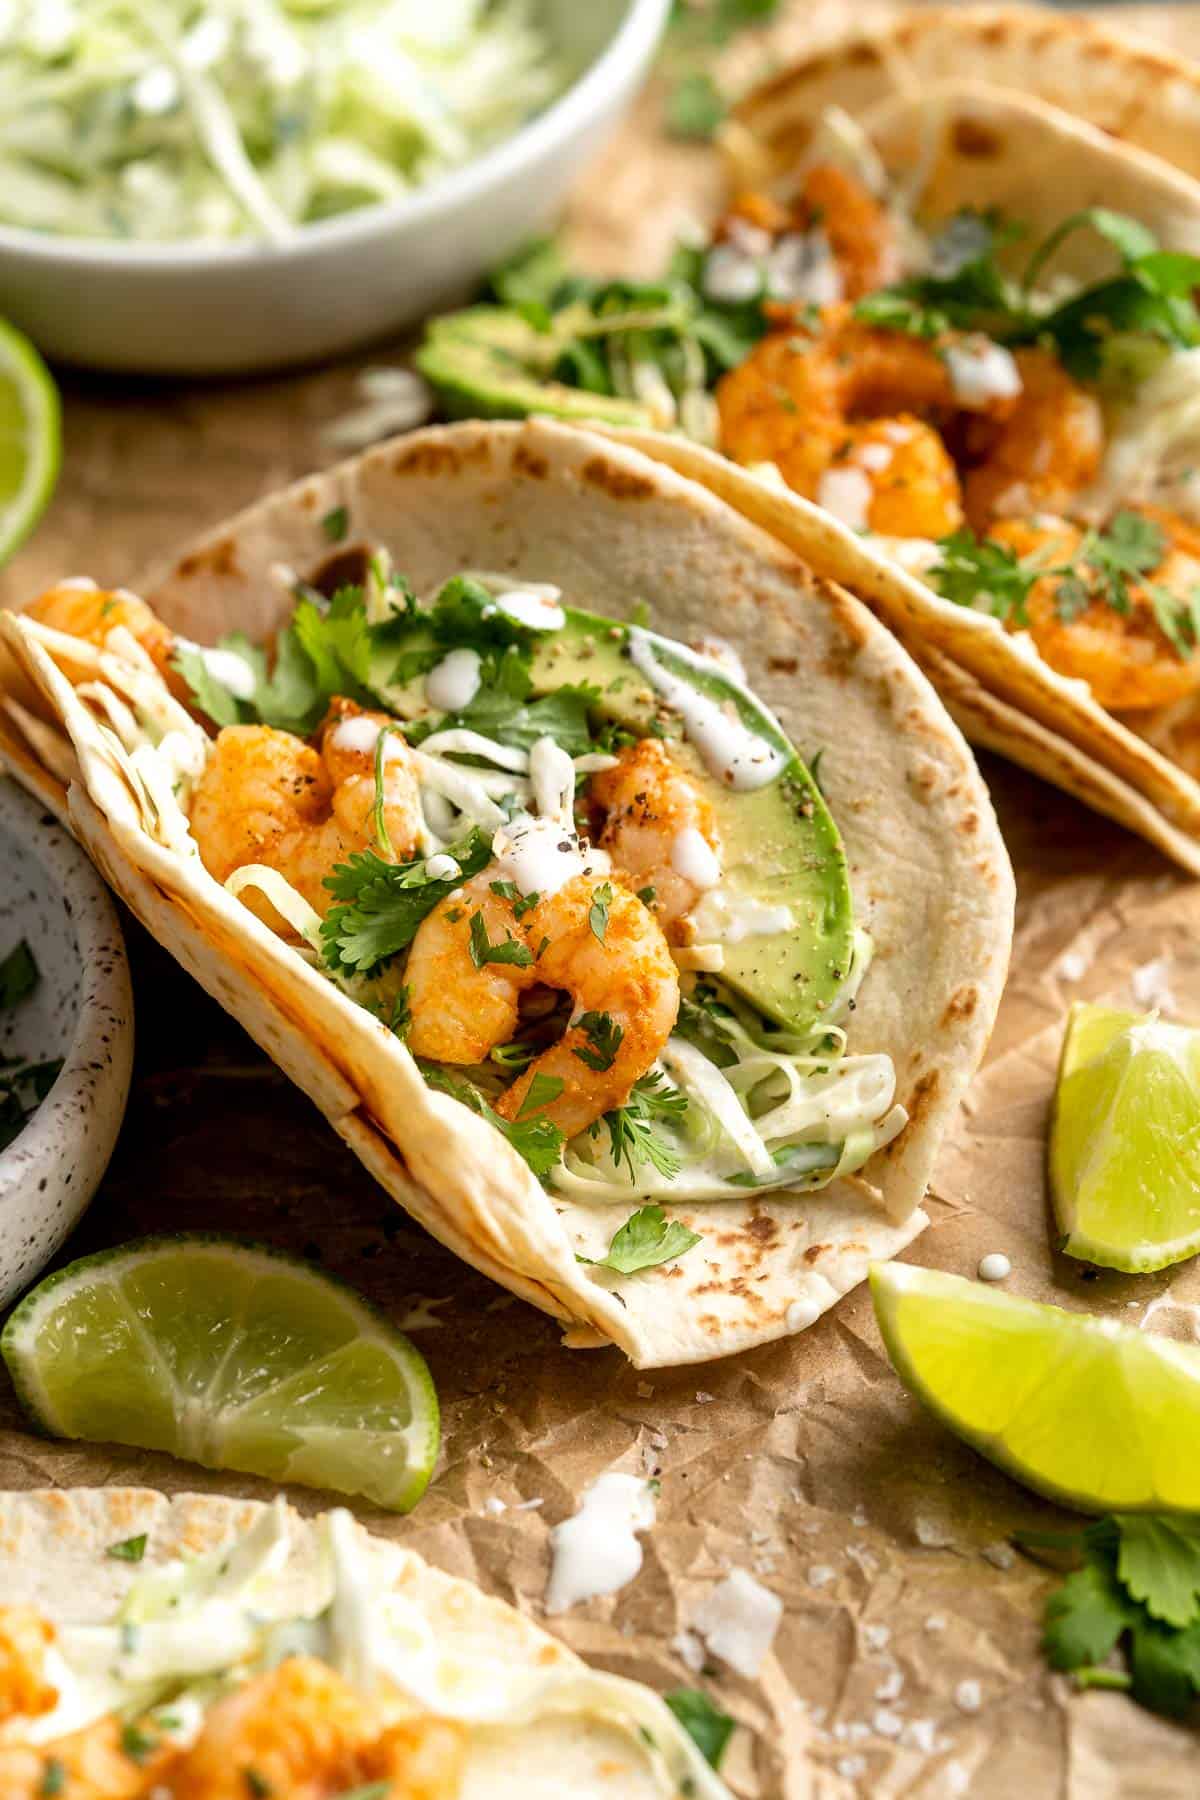
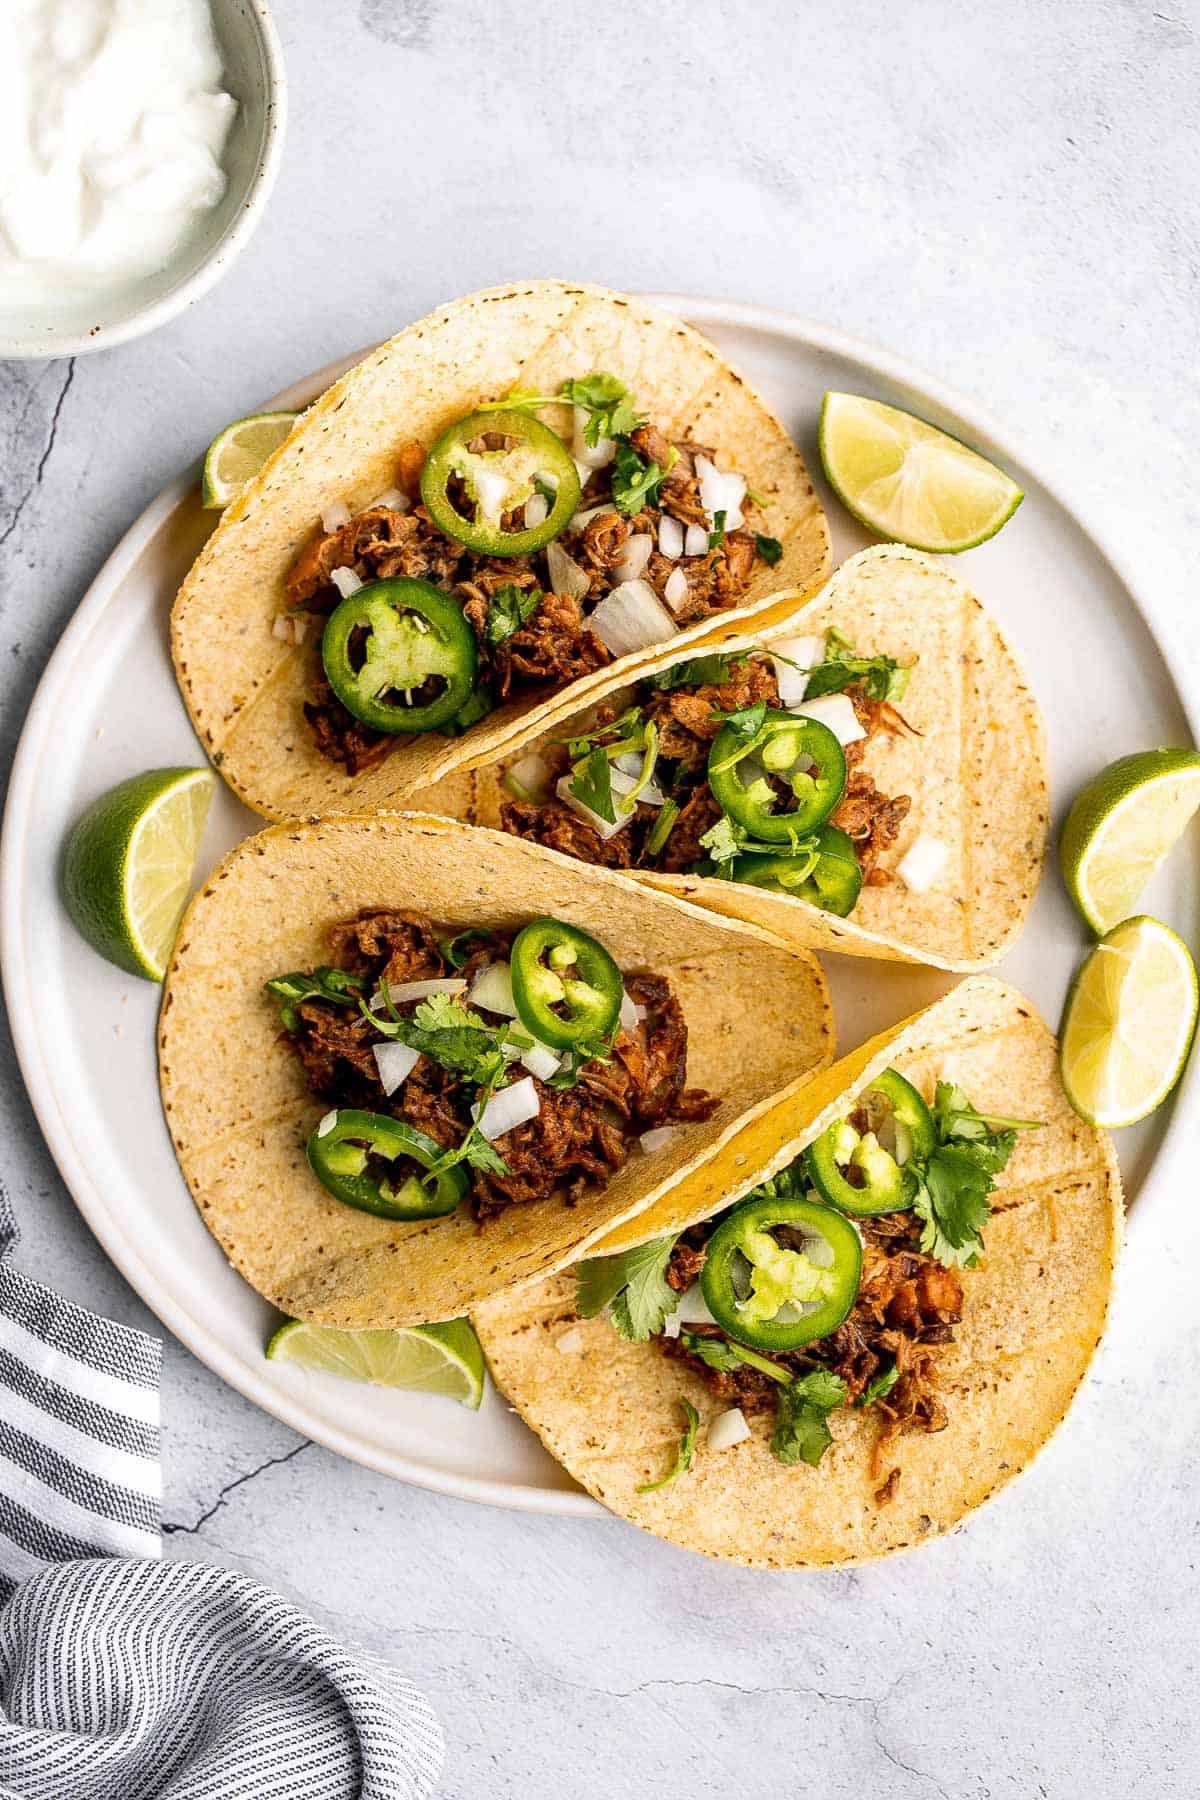

Tried this recipe?
I'd love to hear what you think! Leave a comment and rating below to share your feedback. Your reviews help others discover this recipe and help me keep creating more free recipes for you. Snap a photo and tag me on social media @aheadofthyme too.

Creamy Zucchini Soup (without Cream)
Who needs cream anyway? This Creamy Zucchini Soup comes out crazy silky, smooth, and velvety without the cream. It's a healthy pureed soup with fresh zucchini and white beans for that sneaky richness, plus garlic, carrots, celery, and herbs. This vegan soup is somehow both light enough for lunch and filling enough for dinner. Seriously, even your most cheese-obsessed friend won't miss the cream.

If you've got a mountain of zucchini taking over your kitchen (thanks, summer gardens!), this recipe is basically your new best friend. But honestly? It's not just a summer fling - you can whip this comforting meal up any time, year-round thanks to pantry-friendly ingredients. Serve it with fresh herbs and a handful of crunchy croutons and boom, you've got a bowl that's actually nice to look at. Tastes even better.
This zucchini soup recipe was inspired by my Creamless Cream of Asparagus Soup and it's basically its green, summer-loving cousin. Pair it with some Rosemary Garlic Focaccia Bread so you can shamelessly dunk big, crusty slices right into the bowl. It's the kind of cozy, feel-good meal that works for a quick solo lunch or a full-on dinner spread with friends - either way, you'll be scraping the bottom of the bowl wondering why you didn't make a double batch.

Why You'll Love This Recipe
- Creamy without cream. This soup gets its dreamy texture from pureed white beans and zucchini - not a drop of dairy in sight. It's indulgent-feeling without the heaviness, which means you can have seconds without the post-meal nap. It's perfect for those who are lactose-intolerant.
- Loaded with good stuff. Between the zucchini, carrots, celery, garlic, and beans, every spoonful is packed with fiber, vitamins, and plant-based protein. Basically, it's comfort food that's secretly a health win. Gluten-free too!
- Flavor that sings. Italian seasoning, garlic, a little cayenne for warmth, and fresh lemon juice make this cream of zucchini soup taste like it's been simmering all day - except it hasn't, because we have lives.
- Meal-prep magic. This zucchini white bean soup is just as good (if not better) the next day. It freezes like a champ, reheats beautifully, and can be dressed up or down depending on your mood.
Ingredients and Substitutions
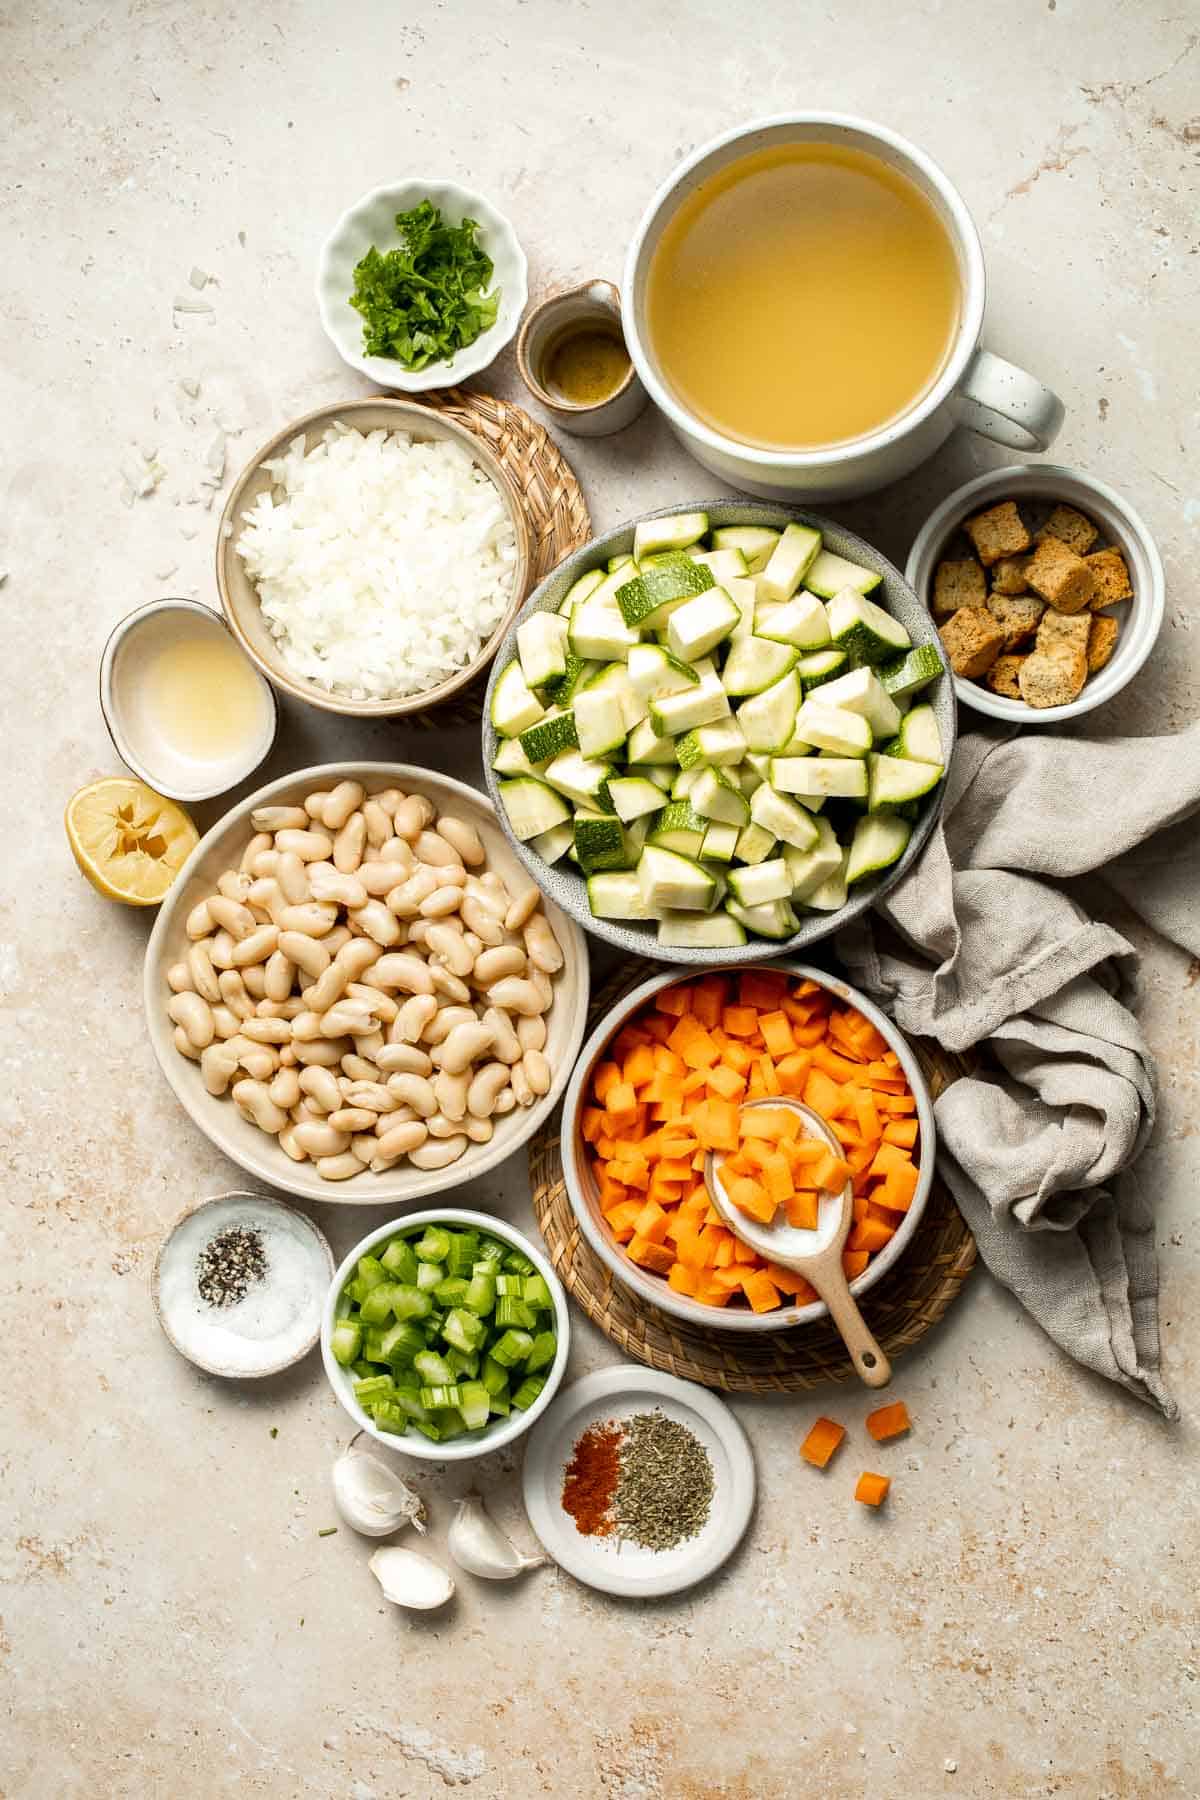
To make this easy Creamy Zucchini Soup, you will need the following ingredients (see recipe card below for quantities):
- extra virgin olive oil - Adds richness and helps soften the vegetables. Avocado oil can be used as a substitute.
- yellow onion - Provides a sweet, aromatic base. White onion works as well.
- garlic - Fresh cloves = maximum flavor. Use more or less to taste.
- celery - Adds depth and mild bitterness to balance the sweetness of carrots.
- carrots - Provide natural sweetness and color.
- zucchini - Fresh, firm zucchini is the star here. No need to peel unless it's got a tough skin.
- white beans - Cannellini beans or Great Northern beans add creaminess and protein.
- Italian seasoning - A blend of dried herbs for instant flavor. Or mix basil, oregano, and thyme yourself.
- cayenne red pepper powder - Just a pinch for a gentle kick. Leave it out if you're spice-shy.
- salt and pepper - Because flavor matters.
- vegetable stock - Go low-sodium if you want to control salt. You can also substitute with chicken broth or beef broth if you aren't sticking to a vegan diet.
- lemon juice - Brightens the flavors up. Freshly squeezed is best.
- herbs - Fresh dill, parsley, or basil make excellent garnishes.
- croutons - Optional, but why not add some crunch? Try our Easy Homemade Croutons or Rice Croutons.
Equipment
You'll also need measuring cups and spoons, a large soup pot or Dutch oven, a sharp knife, a cutting board, a wooden spoon for stirring, and an immersion blender (or countertop blender) for pureeing.
Instructions
- Sauté aromatics. In a large stockpot or 6 quart Dutch oven, heat oil over medium-high heat until the hot oil sizzles, about 1 minute. Add onion, garlic, celery, and carrot. Sauté until tender, about 3-5 minutes, stirring often.
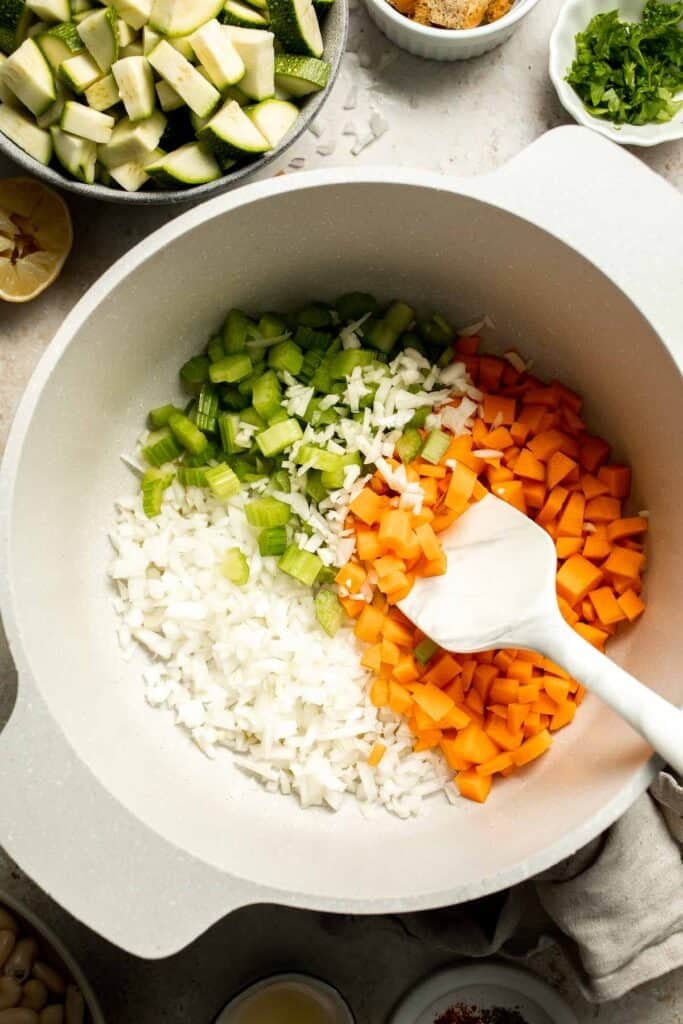
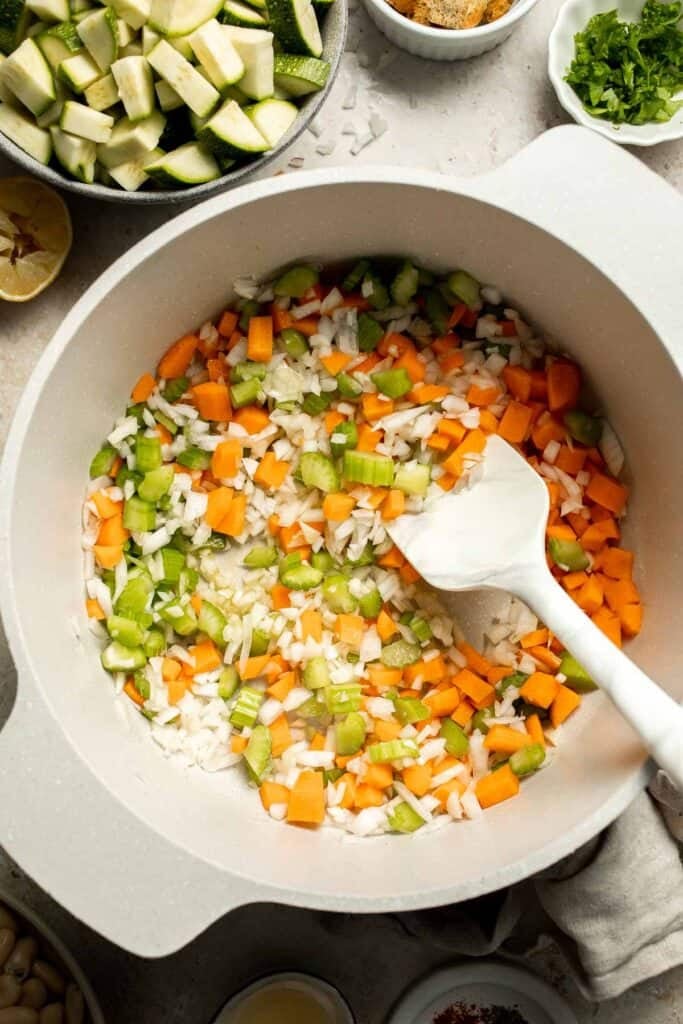
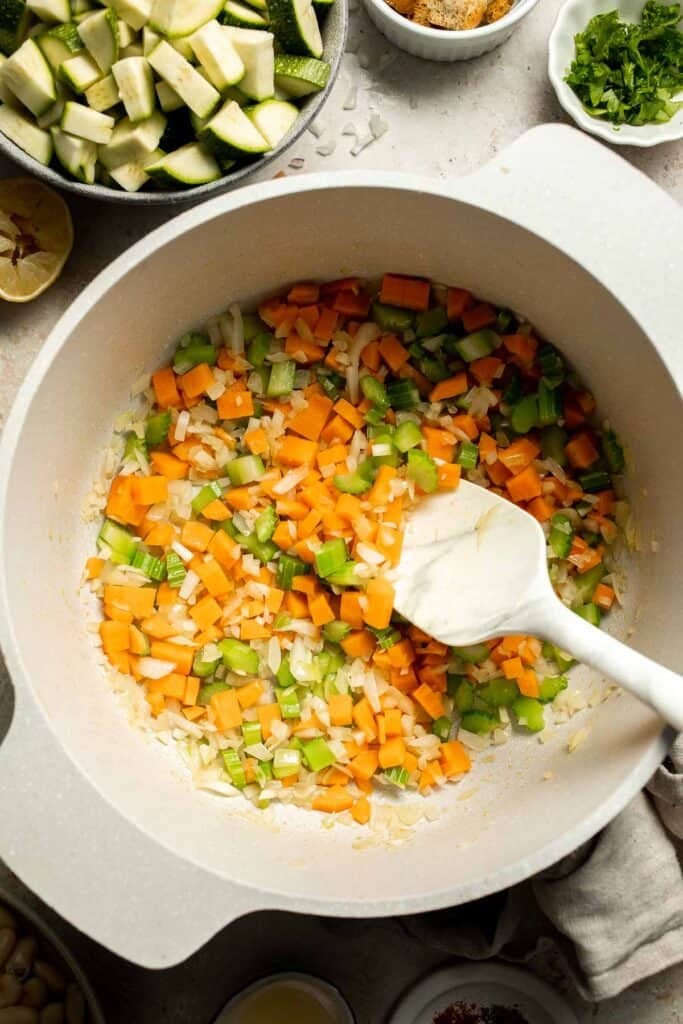
- Add ingredients. Add zucchini, white beans, Italian seasoning, cayenne pepper, and vegetable stock. Stir to combine and bring the soup to a simmer.
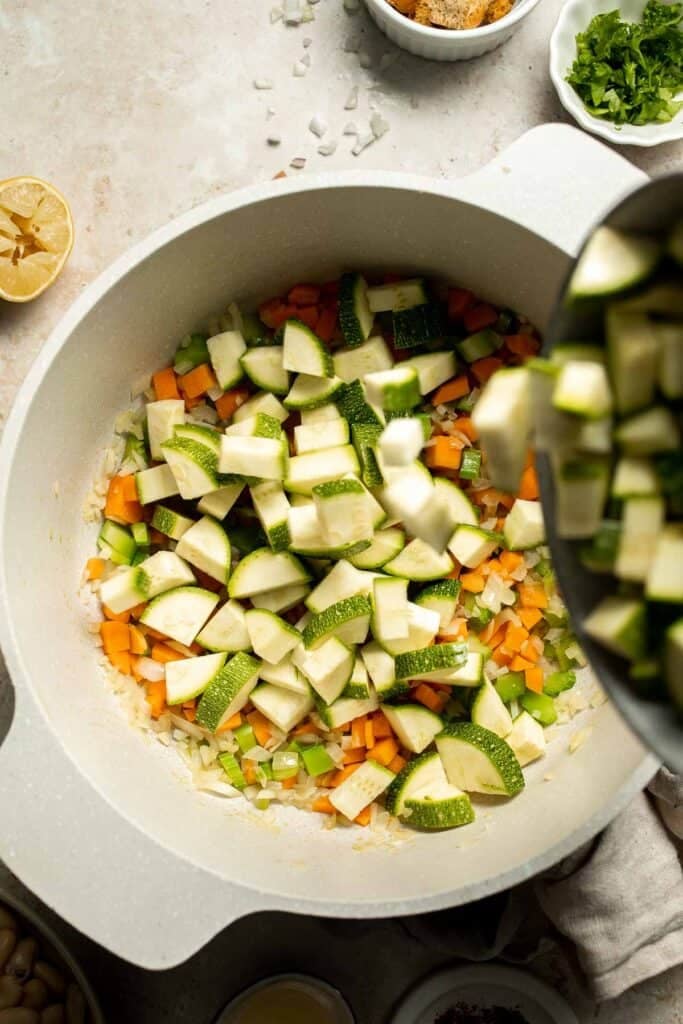
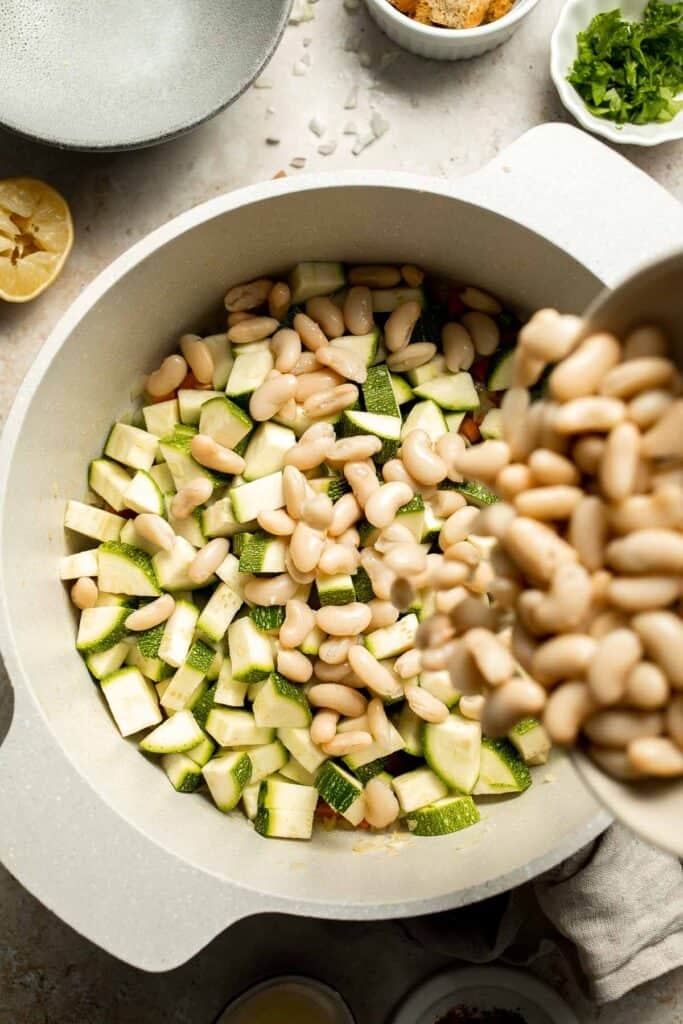
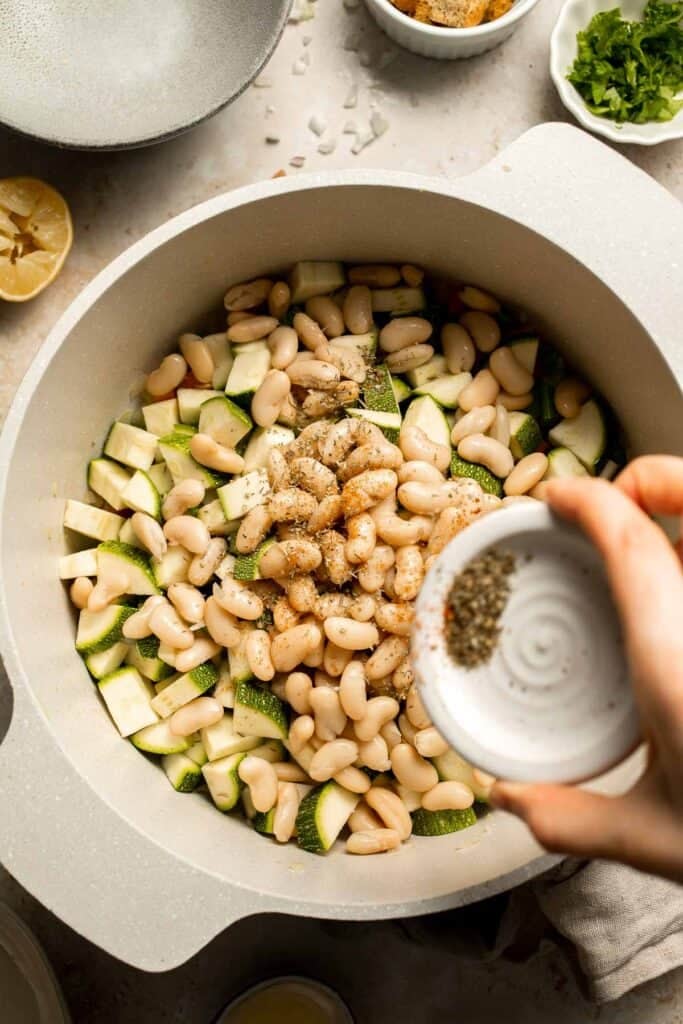
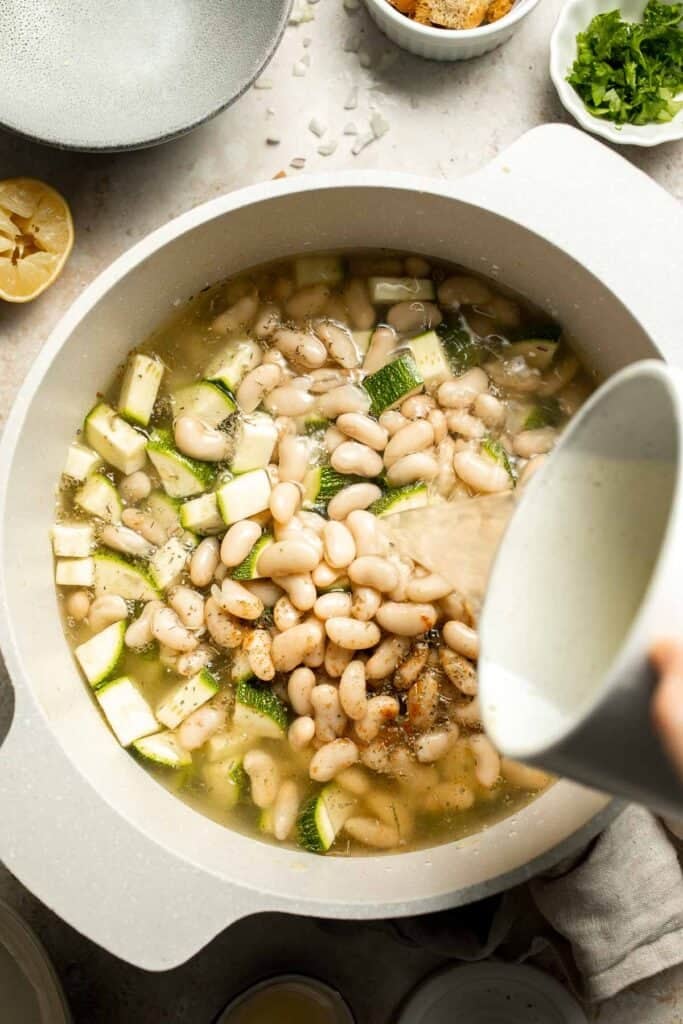
- Simmer. Turn the heat down to medium-low and cover the lid. Allow the soup to simmer for 15 minutes, stirring occasionally.
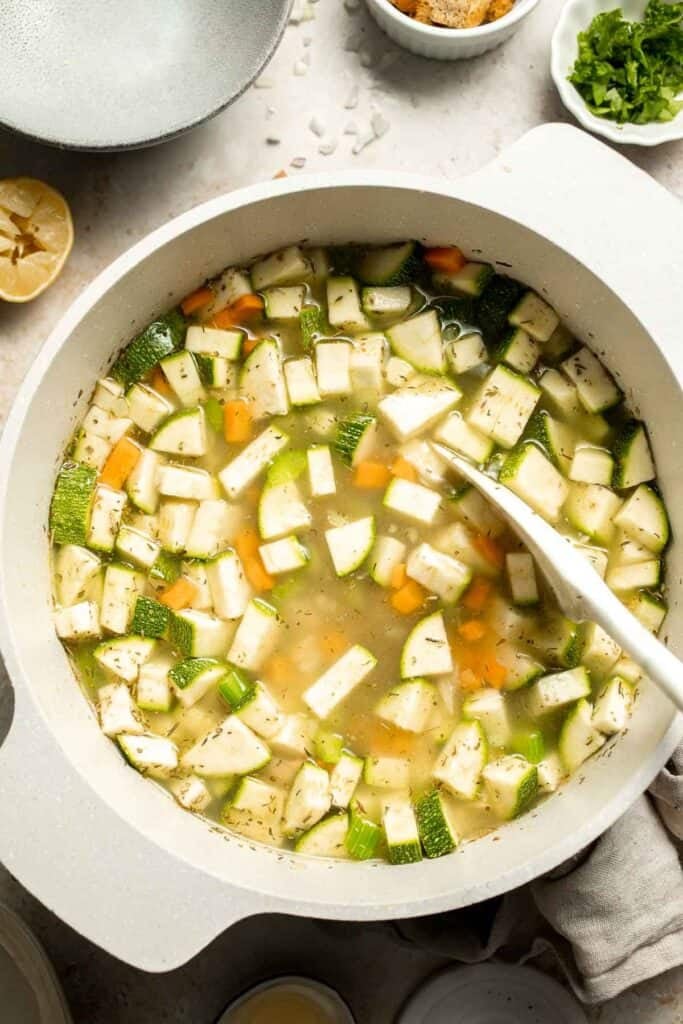

- Puree. Use an immersion blender to puree the soup. You can also transfer the soup (in batches) to a blender to puree. (For a chunkier soup, use a potato masher or a fork to mash some of the zucchini cubes and beans).
- Serve. Top with a drizzle of lemon juice and olive oil, a sprinkle of fresh herbs, and croutons and serve immediately. You can also add a sprinkle of Parmesan cheese if desired.
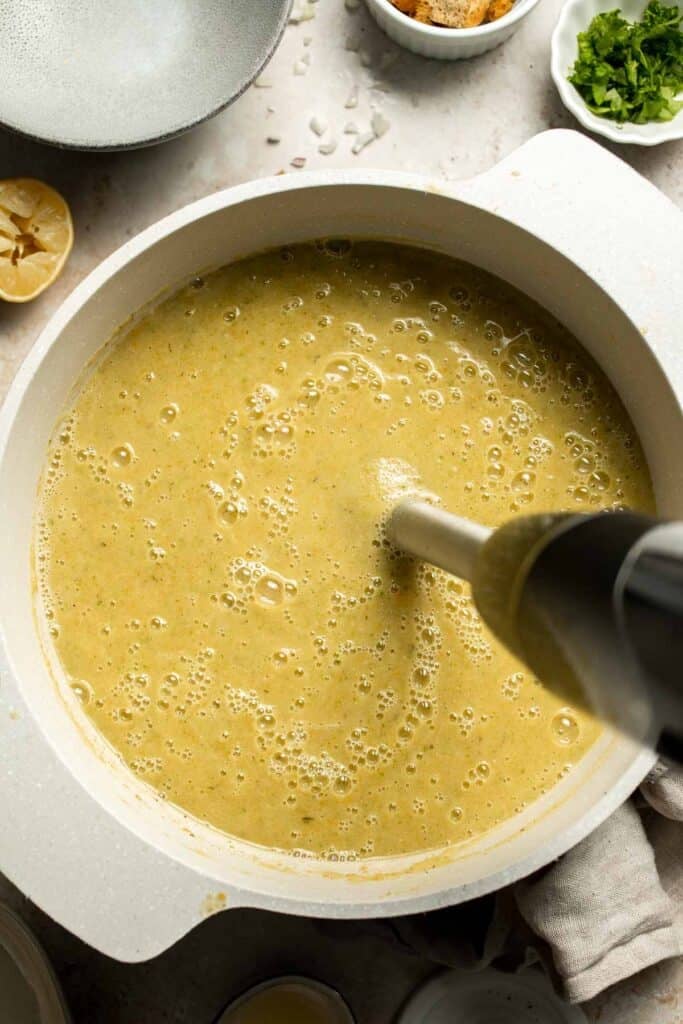
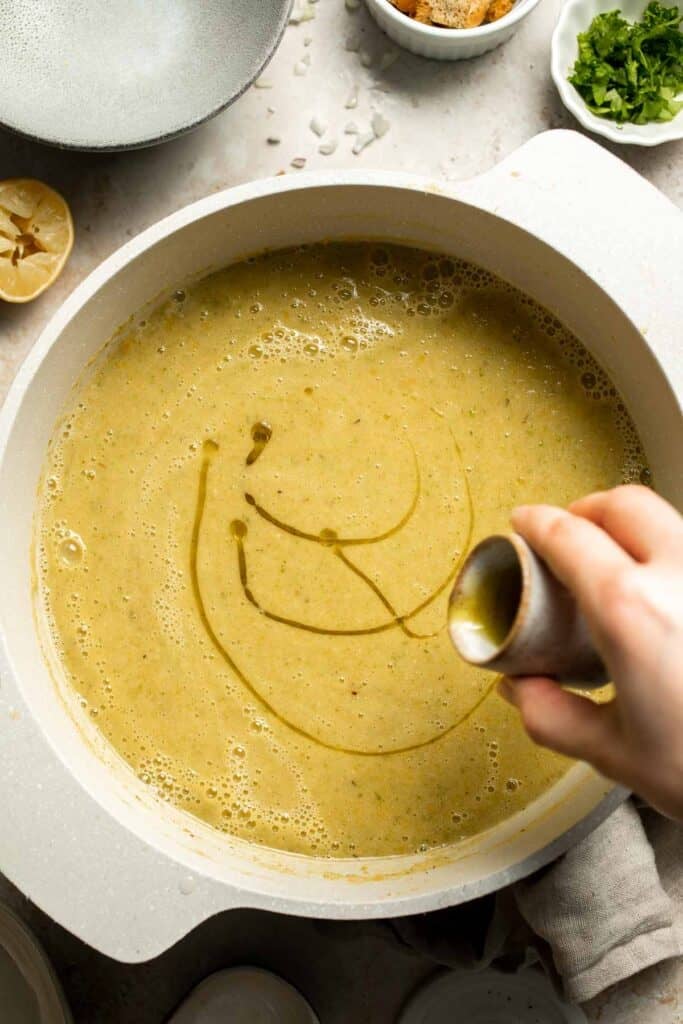
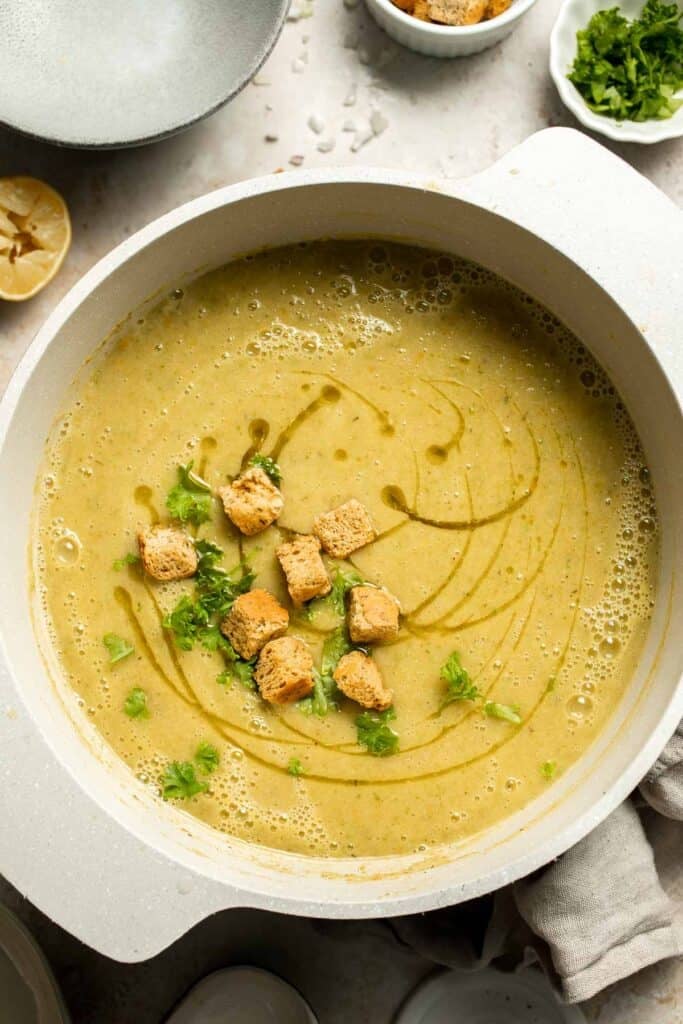
Expert Tip: Blend Until Completely Smooth
For that "how is this dairy-free?" texture, blend the soup until it's completely smooth. An immersion blender is your best friend here, but if you want next-level silkiness, carefully blend in batches in a high-speed blender. Be careful with hot liquids though.
More Tips and Tricks
- Use fresh zucchini. Fresher zucchini = sweeter soup. Avoid giant, seedy ones unless you want to spend extra time scooping.
- Season in layers. Add salt and pepper at different stages to build balanced flavor rather than seasoning only at the end.
- Adjust thickness. Add more stock for a thinner soup, or simmer longer uncovered for a thicker consistency. Your bowl, your call.
- Top like a pro. Fresh herbs, a swirl of olive oil, and crunchy croutons take this soup from "yum" to "YUM."
Recipe Variations
- Spicy zucchini soup. Add extra cayenne or a diced chili for a fiery kick.
- Herb overload. Toss in fresh basil or dill right before serving for a burst of green freshness.
- Add potatoes. Add diced potatoes for an even heartier, thicker soup.
- Coconut twist. Swap some of the stock with coconut milk for a subtle tropical flavor.
- Roasted vegetable base. Roast zucchini, carrots, and garlic before blending for a deeper, sweeter flavor.
- Cheesy finish. Sprinkle freshly grated Parmesan on top for extra richness (skip if you are keeping it vegan).

Storage
How to Store
Cool soup completely, then store in an airtight container in the refrigerator for up to 4 days.
How to Reheat
Warm on the stovetop over medium-low heat, stirring occasionally, until heated through. Add a splash of stock if it's too thick.
How to Freeze
Ladle cooled soup into freezer-safe containers, leaving room for expansion. Freeze for up to 3 months. Thaw overnight in the refrigerator before reheating.
How to Serve
Creamy zucchini soup is delicious on its own, but it's even better when paired with delicious sides that complement its smooth, savory flavor. Garnish with croutons and fresh herbs, then serve alongside crusty bread, grilled sandwiches, or fresh salads for a well-rounded meal.
These are my favorite dishes to serve with Zucchini Soup:

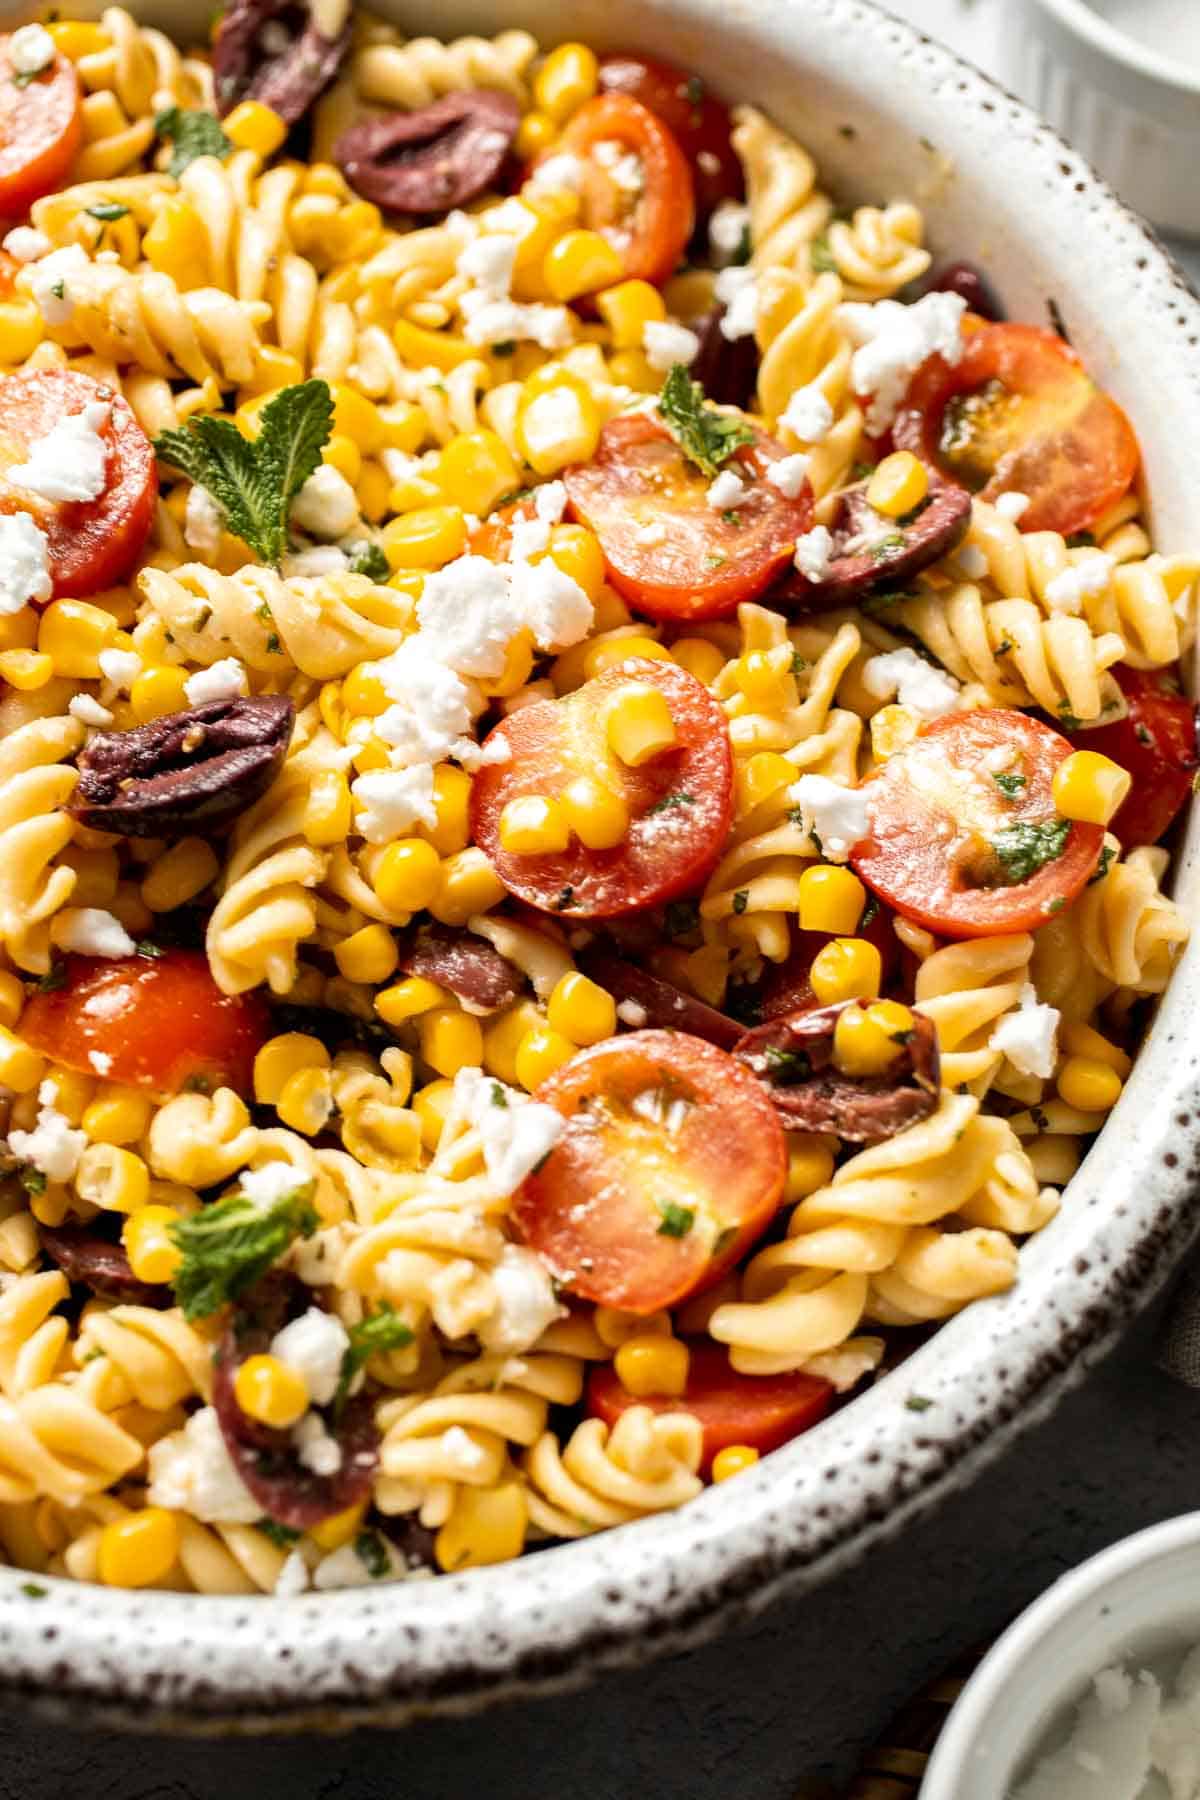
Side Dishes for Soup
Looking for the perfect accompaniments to your favorite soups? Explore our collection of soup side dishes, including crusty breads, fresh salads, savory crackers, and hearty sandwiches that complement and elevate any bowl of soup.
FAQ
Absolutely. Zucchini's mild flavor plays well with herbs, garlic, and other veggies, and it blends like a dream for creamy soups without cream. It's also quick-cooking, which means you can get a silky-smooth, flavorful bowl on the table in less time. And because zucchini is naturally low in calories but high in vitamins and fiber, you're getting something that's both tasty and good for you.
Nope! Unless the skin is super thick or your zucchini is past its prime, keep it on. The peel softens during cooking, adds color, boosts nutrients, and saves you prep time. Just wash it well before chopping. Bonus: leaving the skin on keeps your soup a gorgeous shade of green.
For pureed soup, big or small cuts will blend down, but aim for uniform chunks about ½ to 1 inch so they cook evenly. If you're going chunky-style (no blend), go a little bigger so they hold their shape. Always lop off the ends first. Even cuts not only cook better but also help the soup blend more quickly, meaning you'll spend less time at the stove and more time enjoying your bowl. It's a small detail that makes a big difference.
Zucchini loves company. Basil, oregano, thyme, and parsley are classics. Dill adds brightness, while cayenne or red pepper flakes bring gentle heat. Garlic and onion deepen the flavor, and a splash of lemon at the end makes it pop. You can also experiment with cumin or coriander for an earthy twist, or rosemary for a Mediterranean vibe. Because zucchini's flavor is so mild, it's a perfect blank canvas for whatever spice mood you're in, from fresh and herby to bold and smoky.
Very. This one's naturally low-calorie, fiber-rich, and full of vitamins A and C. The white beans add plant protein, olive oil gives healthy fats, and it's totally dairy-free. Basically, it's a bowl of health that tastes like comfort food. Zucchini also supports hydration since it's high in water content, and the fiber helps with digestion. Add in the antioxidants from fresh herbs and garlic, and you've got a nutrient-packed meal that still feels indulgent. Healthy eating really doesn't get much more delicious than this.
Add all vegetables, beans, seasonings, and stock to the crock pot. Cook on low for 6-7 hours or high for 3-4 hours, until vegetables are very tender. Use an immersion blender to puree the soup directly in the pot, or transfer in batches to a countertop blender. Return to the pot, stir in lemon juice, adjust seasoning, and garnish with fresh herbs or croutons before serving. This slow-cooking method allows flavors to meld beautifully and is perfect for hands-off preparation on busy days.
More Zucchini Recipes
Looking for other recipes like this? Try these:
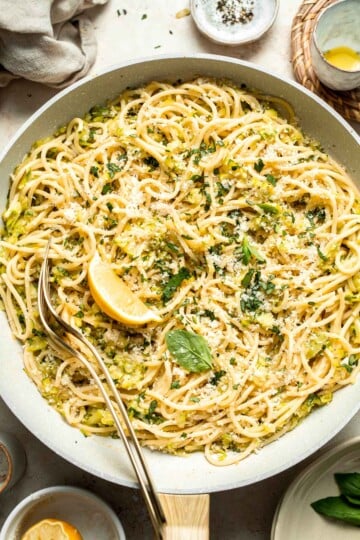


Tried this recipe?
I'd love to hear what you think! Leave a comment and rating below to share your feedback. Your reviews help others discover this recipe and help me keep creating more free recipes for you. Snap a photo and tag me on social media @aheadofthyme too.

Creamy Pesto Chicken
This Creamy Pesto Chicken is the weeknight dinner you didn't know you were missing - tender, juicy chicken breasts swimming in a dreamy, garlicky, basil-packed sauce that's basically sunshine in a skillet. And here's the best part: it's ready in about 30 minutes. One pan, minimal cleanup, maximum flavor.
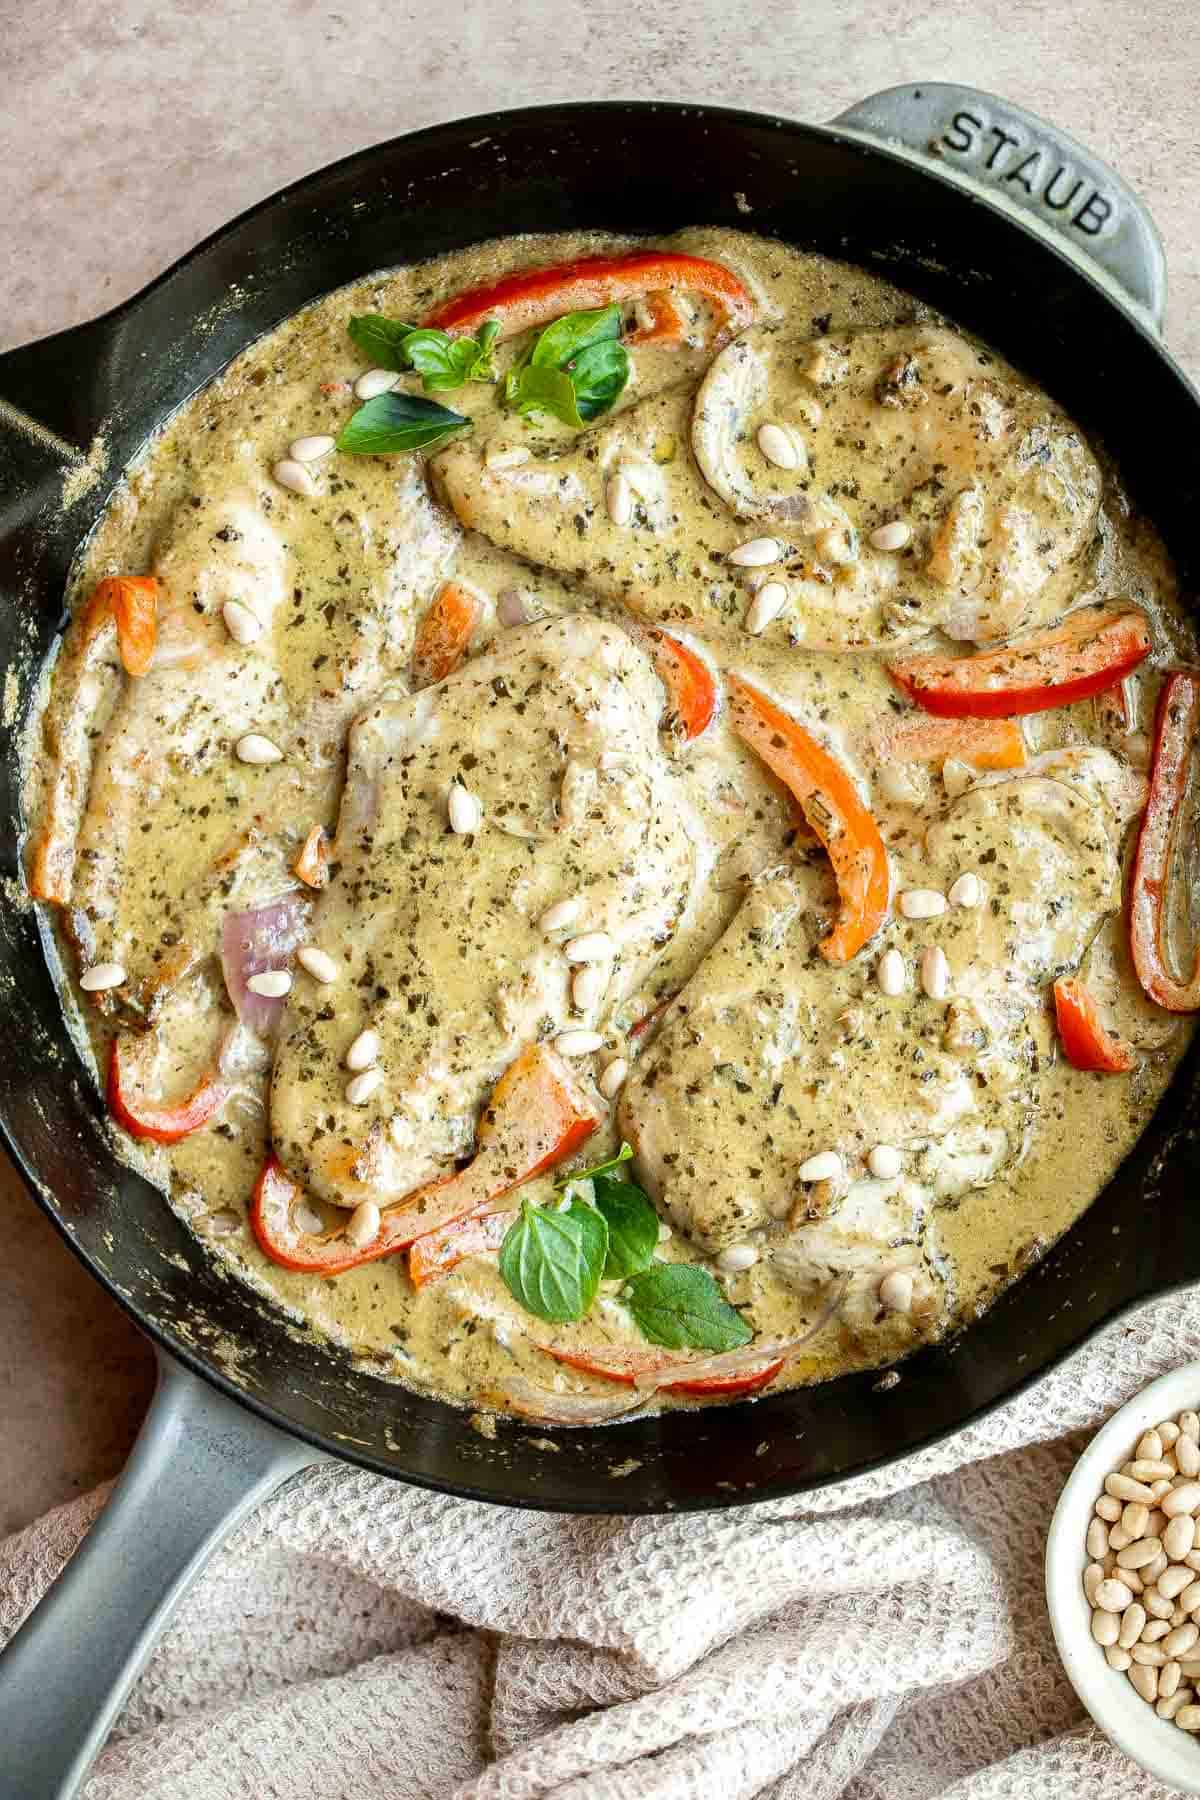
We're talking restaurant-level creamy pesto sauce made with butter, cream, and a double hit of pesto (yes, double!), with pops of sweetness from red onion and bell pepper. It's the kind of meal that looks like you fussed over it for hours, but actually took less time than scrolling TikTok for dinner ideas. Serve this chicken dinner to the family on busy weeknights, to impress a date on Date Night, or even to meal prep lunches for the week with pasta or rice.
This creamy pesto chicken recipe was inspired by my Pesto Penne Pasta, but here the chicken gets to be the star! If you like this recipe, you should try our Pesto Whole Chicken or Thai Basil Chicken next.

Why You'll Love This Recipe
- Easy chicken dinner in under 30 minutes. Creamy pesto chicken is an easy chicken recipe that takes just 25 minutes to cook. Everything cooks in a single skillet (it's a one pan wonder!). Just sear the chicken, make the creamy sauce with veggies, and toss the chicken back in. Plus, this easy to follow recipe is perfect for beginners to build confidence in the kitchen.
- Chicken that is tender and juicy every time. This pesto chicken is tender and juicy every time especially since it's tossed in the rich creamy pesto sauce. So even if you get distracted and overcook your chicken a bit, it's no problem. The creamy pesto sauce swoops in like a hero to keep every bite tender, juicy, and flavorful.
- So much flavor, so little effort. Even though this recipe is easy to make doesn't mean it's lacking at all. That pesto packs a herby punch, the cream makes it silky, the garlic makes it cozy, and the red pepper brings sweet pops of color. Dinner MVP, right here.
- Ridiculously versatile. Serve it over rice, pasta, mashed potatoes, or mop it up with some bread. You can also use any leftover chicken to make a hot pesto chicken panini with roasted tomatoes and mozzarella or a cold pesto chicken wrap with arugula and cucumber. Even toss it into a salad. The options are endless!
Ingredients and Substitutions
To make this delicious Creamy Pesto Chicken, you will need the following ingredients (full measurements in recipe card below):
- chicken breasts - Boneless and skinless breasts seared in vegetable oil (olive oil works too). You can also swap with boneless chicken thighs for a juicier bite.
- pesto - We used our homemade Basil Pesto because it adds the freshest flavor and is so easy to make in just minutes. You can of course also use store-bought pesto sauce too - whichever is more convenient!
- butter + heavy cream - The perfect combination to a rich and creamy sauce.
- aromatics - We sauté red onion and minced garlic which adds the best flavor to this chicken dish. Yellow onion works too.
- red bell pepper - Adds sweetness and crunch. Feel free to substitute with another vegetable of your choice. A common substitute are cherry tomatoes.
- salt and pepper - The must-have seasoning duo.
- garnishes - we topped this pesto chicken with fresh basil and pine nuts, which I totally recommend. The pine nuts add a nice crunch which is a nice contrast to the smooth and creamy chicken.
Equipment
You'll also need measuring cups and spoons, a large skillet, a sharp knife, a cutting board, tongs for flipping the chicken, and a wooden spoon for stirring the sauce.
Instructions
- Season the chicken. Use a paper towel to pat the chicken breasts completely dry. Season generously on both sides with salt, pepper, and pesto sauce. Let sit for 5 minutes to absorb the flavors.
- Sear the chicken. Heat the oil in a large skillet over medium-high heat until hot and shimmering, about 2 minutes. Add the chicken and sear until golden brown and cooked through, about 5 minutes per side. The internal temperature should reach 165°F (74°C) on a meat thermometer. Transfer the chicken to a clean plate and let it rest.


- Sauté the aromatics. In the same skillet, add the butter and melt until bubbling, about 1 minute. Stir in the onion and garlic, and sauté until fragrant, about 1 minute.
- Make the sauce. Whisk in the cream and pesto sauce. Bring to a gentle simmer and cook, stirring occasionally, until the sauce thickens to your liking, about 2-3 minutes.
- Add the veggies. Stir in the bell pepper and cook until just tender, about 1 minute. Season the sauce with additional salt and pepper to taste.
- Add chicken and finish the dish. Return the chicken to the skillet and toss to coat in the sauce. Let it warm through for 1 minute. Garnish with fresh basil and toasted pine nuts, then serve immediately.


Recipe Video
Expert Tip: Don't Overcrowd the Pan
Give each chicken breast enough space so it browns instead of steaming. If your skillet is on the smaller side, sear the chicken in batches. This ensures you get that golden, flavorful crust on the outside while keeping the meat juicy inside.
More Tips and Tricks
- Season the chicken before searing. Season both sides of your chicken breasts with salt and pepper before they hit the pan. It locks in flavor and helps you get that golden, tasty crust.
- Double the pesto. Stir some pesto into the sauce while cooking, then swirl in an extra spoonful right before serving for maximum basil flavor.
- Slice before saucing. Cutting the chicken into strips before adding it back to the skillet lets the sauce coat every piece evenly. This is totally a preference thing.
- Top like you mean it. Fresh basil leaves, toasted pine nuts, or a sprinkle of Parmesan give this dish a chef's-kiss finish.
Recipe Variations
- Spicy pesto chicken. Add crushed red pepper flakes or a pinch of cayenne to the sauce for subtle heat.
- Cheesy upgrade. Stir in grated Parmesan or top with mozzarella, then broil for a few minutes until bubbly.
- Pesto swap. Use sun-dried tomato pesto for a deeper, slightly smoky flavor.
- Veggie boost. Add extra vegetables like asparagus, broccoli, or roasted cherry tomatoes for more color and nutrients. Mushrooms work well too!
- Low-carb twist. Serve over zucchini noodles or cauliflower rice or a lighter option.
- Seafood twist. Swap the chicken for shrimp and cut the cooking time in half for a quick creamy pesto shrimp instead.

Storage
How to Store
Store leftovers in an airtight container in the fridge for 3 days . By the fourth day, it's probably still good to eat, but if it hasn't been stored properly, you may need to toss it.
How to Reheat
Reheat creamy pesto chicken over the stove on medium-low heat until warmed through. You may need to add a splash of cream or water if the sauce has thickened up too much when storing.
How to Freeze
Freeze in a freezer-safe container for up to 2 months. Thaw in the fridge overnight before reheating.
How to Serve
Creamy pesto chicken loves carbs, so pile it on top of pasta, rice, or mashed potatoes. Or, keep it light and serve with a crisp salad or roasted vegetables. Don't forget bread - that sauce deserves to be sopped up.
These are my favorite dishes to serve with this pesto chicken:
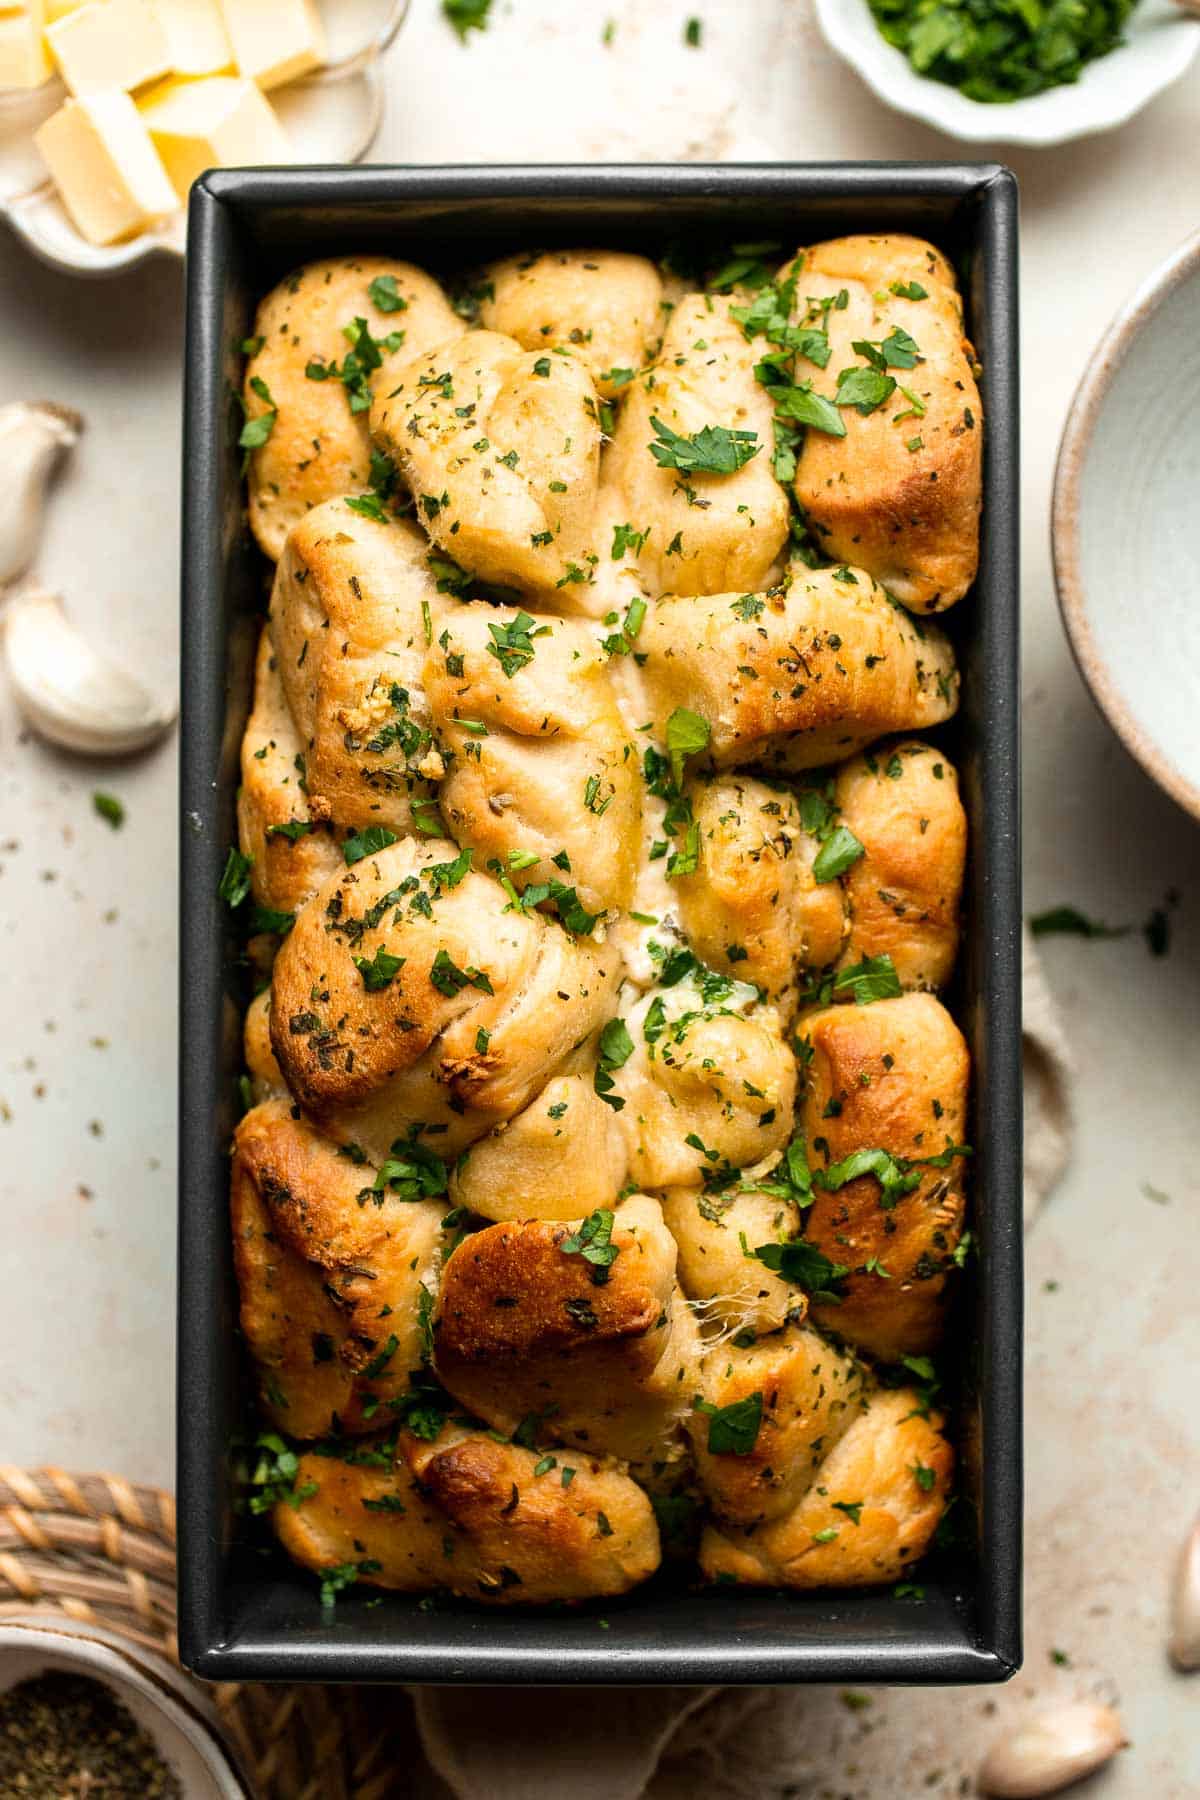
Vegetable Side Dishes
Looking to serve this with a veggie side? Try something from our collection: from roasted and sautéed vegetables to flavorful veggie medleys, these sides add color, nutrition, and delicious flavor to any main course.
FAQ
The core four ingredients for creamy pesto chicken are chicken breasts, pesto sauce, heavy cream, and butter. These create the base for the rich, flavorful dish. From there, you can build on the flavor with extras like garlic, onion, or vegetables. The chicken gets seared until golden, the sauce is made with cream and butter, and pesto ties it all together with fresh, herby goodness. While those four are the essentials, I love adding red peppers, basil, and pine nuts on top to make the final dish look and taste even more impressive.
Classic basil pesto is made with fresh basil leaves, garlic, pine nuts, Parmesan cheese, and olive oil. Some versions swap the pine nuts for walnuts or almonds, and you can also adjust the ratio of cheese or oil based on your taste. Fresh lemon juice is sometimes added for brightness, and a pinch of salt balances the flavors. Store-bought pesto often has the same core ingredients but may include stabilizers or alternative oils. Homemade pesto has a fresher, more vibrant flavor, making it worth whipping up if you have a few extra minutes. See our Basil Pesto Recipe for instructions.
To make pesto creamier, mix it with a splash of heavy cream, half-and-half, or even Greek yogurt for a lighter twist. Adding cream not only smooths out the texture but also tones down any sharpness from the garlic or Parmesan. You can gently warm the pesto with the cream in a skillet, which helps the flavors meld without cooking the fresh herbs too much. For extra richness, melt in a little butter before adding the cream. This technique works beautifully for pasta sauces, spreads, or as the base for creamy pesto chicken.
Creamy pesto sauce is the best of both worlds - it's rich and silky from the cream and butter, but still fresh and vibrant from the basil, garlic, and Parmesan in the pesto. The cream softens the pesto's sharpness, making it smoother and more mellow while still letting the herbs shine. You'll taste the nuttiness from the pine nuts, a hint of tang from the cheese, and a savory depth from the garlic. It's comforting, slightly indulgent, and bursting with flavor, making it just as good tossed with pasta as it is spooned over juicy chicken.
Start by cooking pasta until al dente, reserving a little pasta water. In a large skillet, sear seasoned chicken breasts until golden, then set aside. Make the sauce by sautéing garlic and onion in butter, stirring in pesto and heavy cream until smooth. Add the chicken back to the skillet, slice if desired, and simmer until cooked through. Toss in the cooked pasta, adding a splash of pasta water if needed to loosen the sauce. Top with fresh basil, pine nuts, and Parmesan for a creamy, satisfying dinner that's ready in under 30 minutes. See our Creamy Chicken Pesto Pasta for the full recipe.
More Creamy Chicken Recipes
Looking for other recipes like this? Try these:
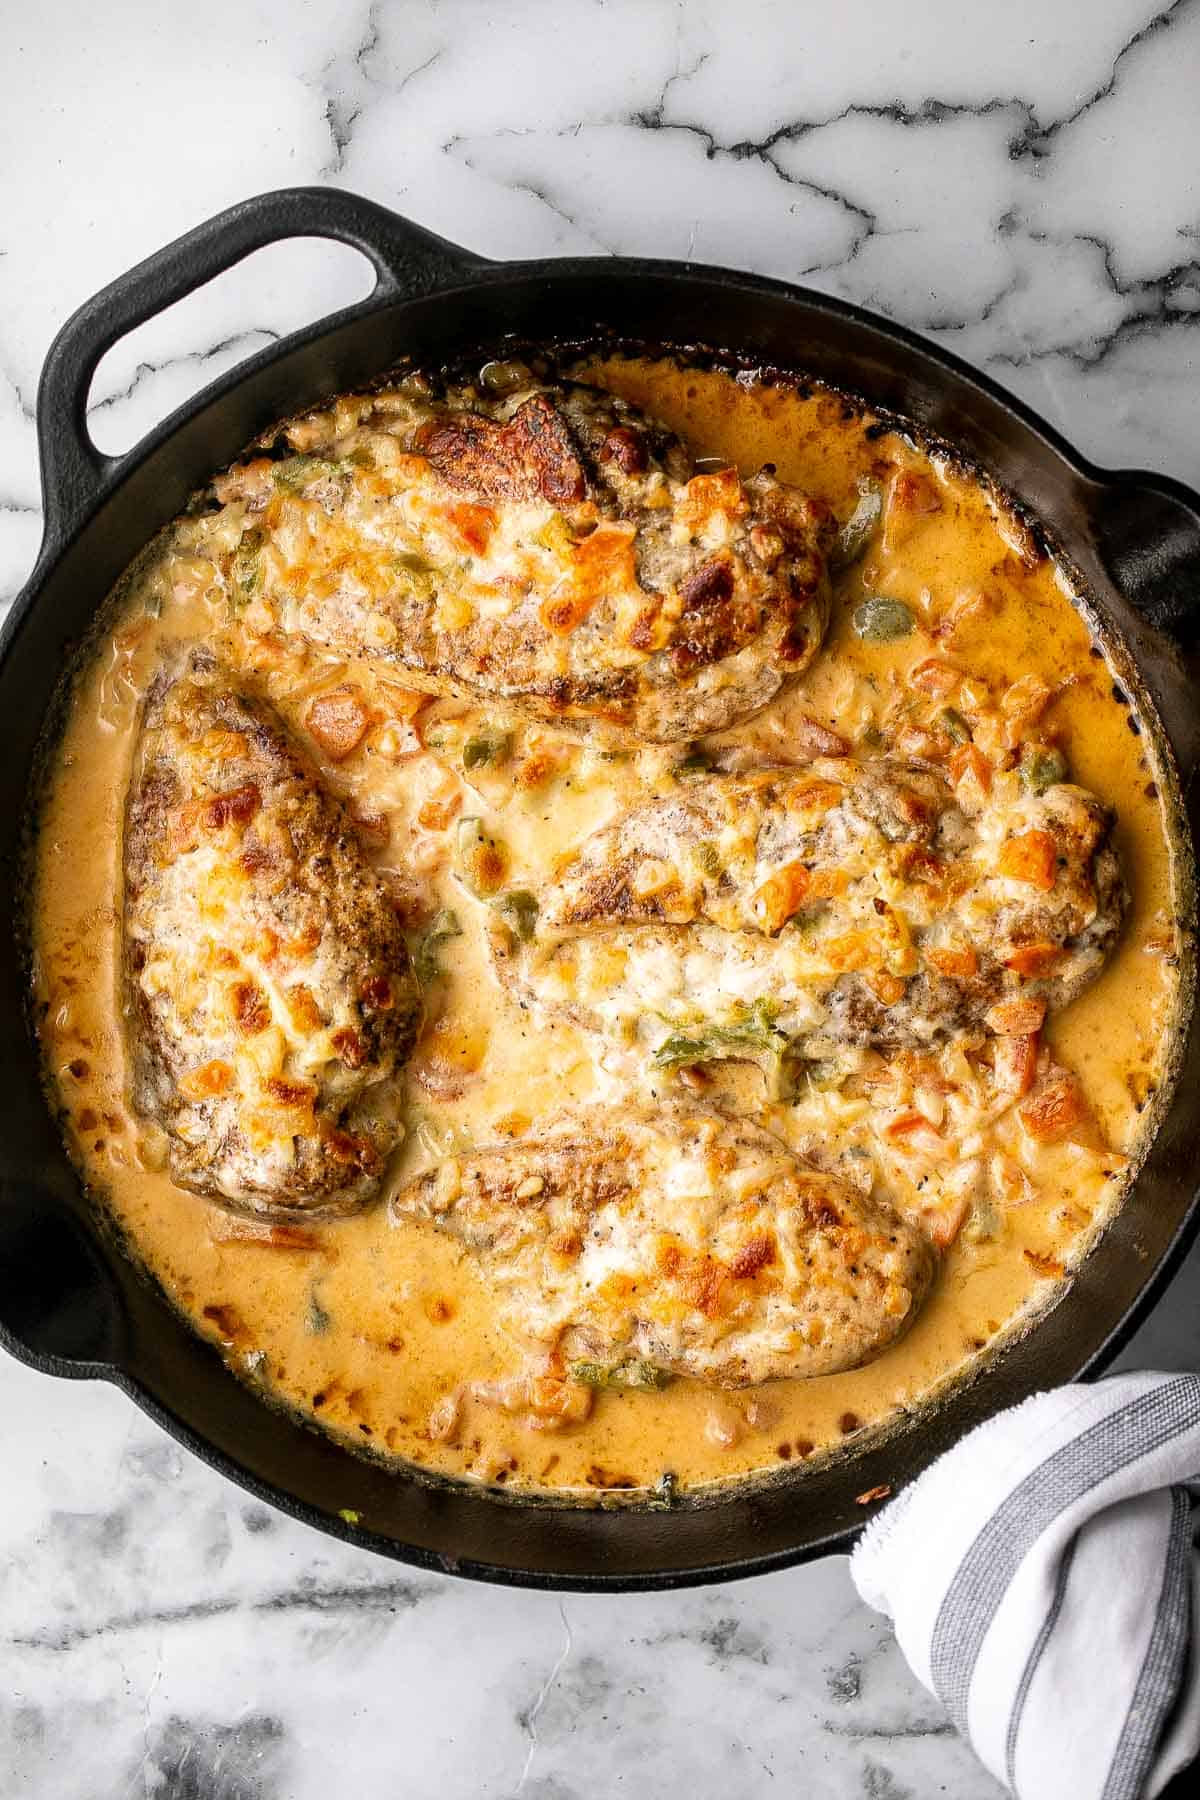
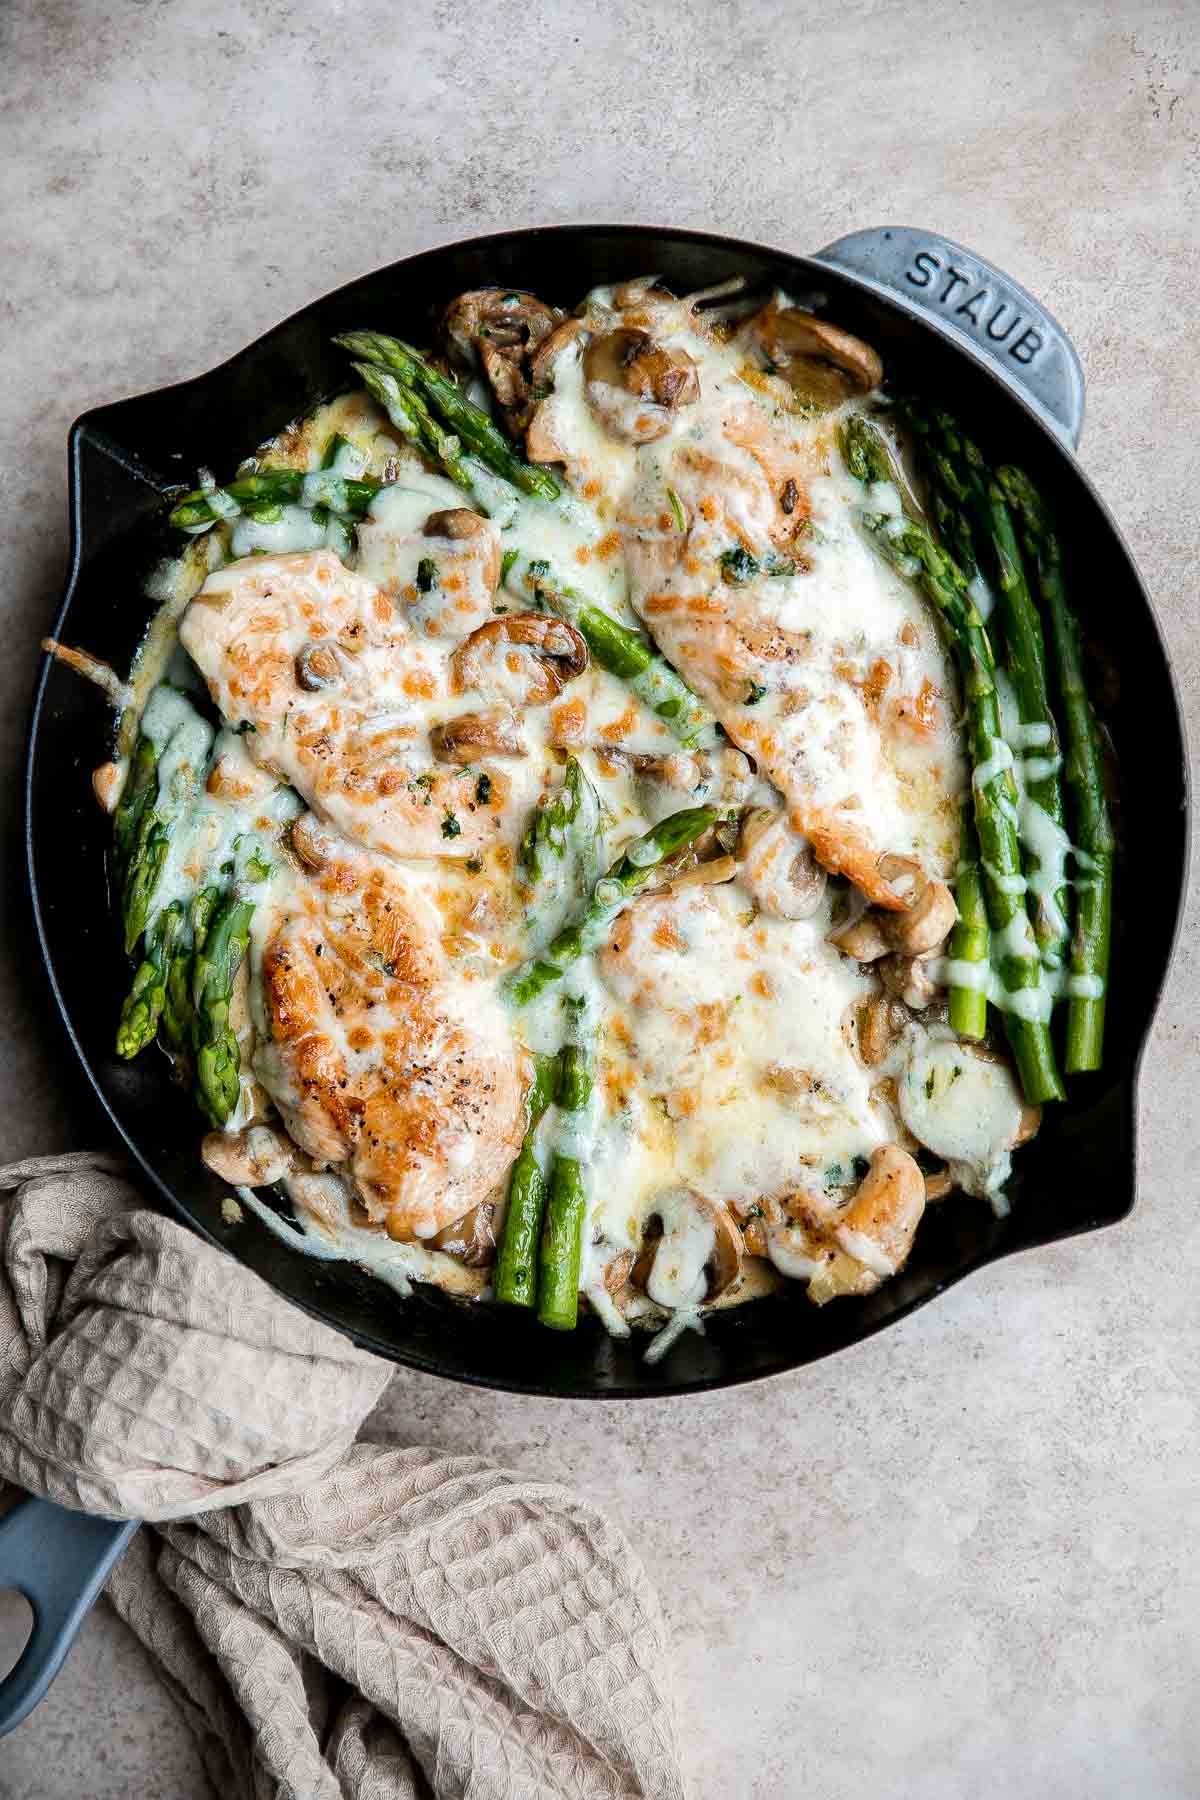
Tried this recipe?
I'd love to hear what you think! Leave a comment and rating below to share your feedback. Your reviews help others discover this recipe and help me keep creating more free recipes for you. Snap a photo and tag me on social media @aheadofthyme too.

Roasted Cherry Tomatoes with Garlic
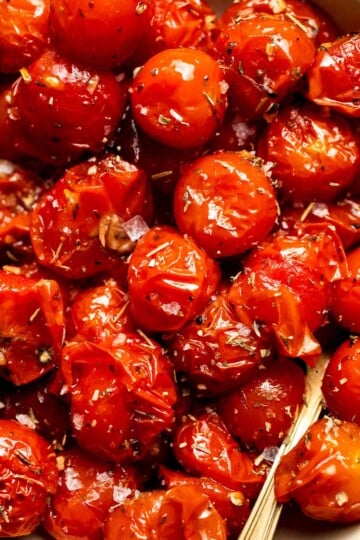
Who needs fancy sides when you can have Roasted Cherry Tomatoes with Garlic? These little bursts of juicy sweetness get all roasty and jammy in the oven, mingling with garlicky goodness, Italian herbs, and a drizzle of balsamic. It's the kind of simple recipe that somehow feels a little fancy but takes almost no effort. Bonus: roasting makes those tomatoes taste like candy - the vegetable kind, of course.
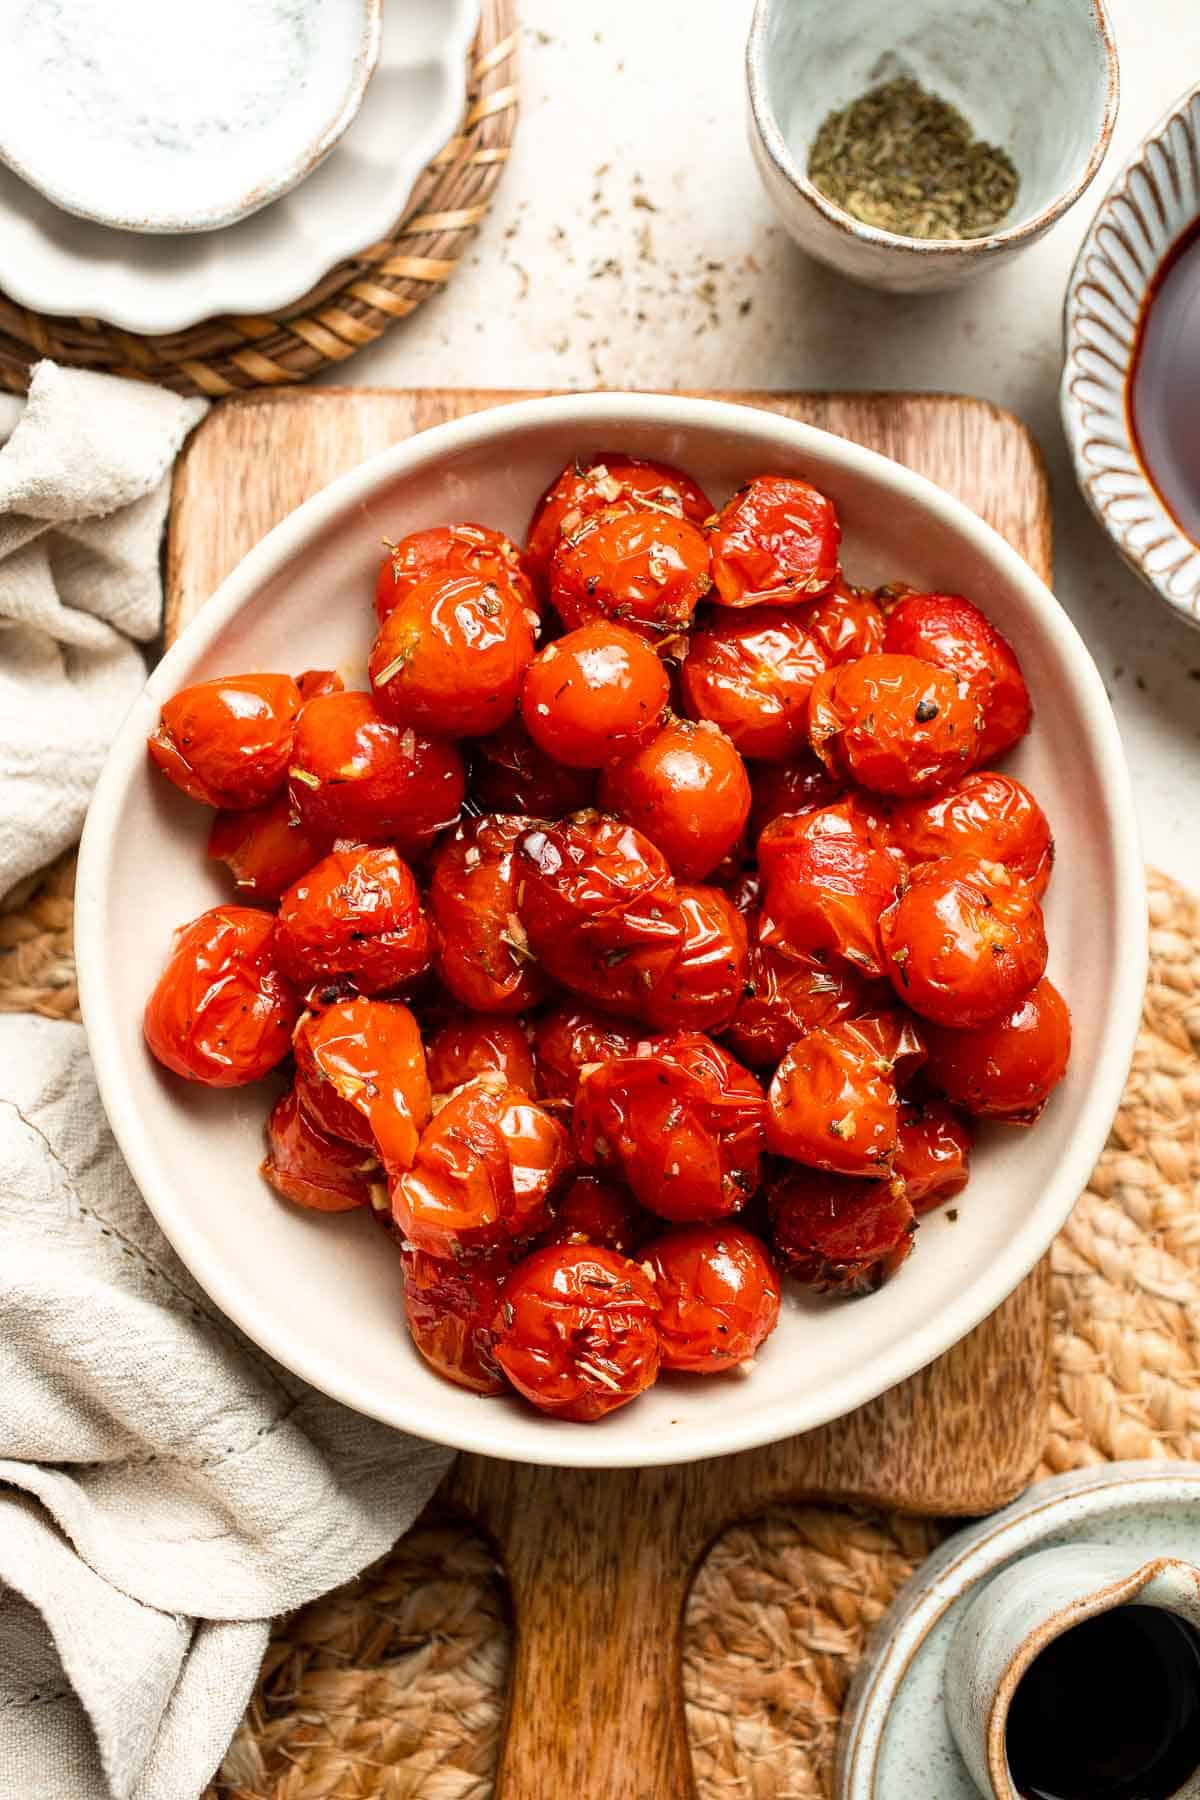
Peak tomato season might be summer, but honestly, this dish is worth making year-round whenever you can get your hands on good cherry tomatoes. They're basically the oven-baked cousin of blistered tomatoes, except with even less babysitting and cleanup. Serve them at a weeknight dinner, a backyard BBQ, or straight off the sheet pan (we won't judge) - either way, they bring a pop of color and flavor that makes any plate happier.
This recipe was inspired by my Mediterranean Roasted Vegetables and it pairs wonderfully with this crusty Artisan Green Olive Sourdough Bread or Homemade French Baguettes to soak up every last drop of garlicky balsamic goodness and watch them disappear in minutes.

Why You'll Love This Recipe
- Big flavor, tiny effort. Sweet cherry tomatoes, roasted garlic, Italian herbs, and balsamic come together in minutes for a side dish that's ridiculously flavorful with almost zero work. Plus, roasting takes it over the top. This simplicity makes it perfect for both everyday meals and special occasions.
- Perfect seasonal side. When cherry tomatoes are in peak season, they're naturally sweet and juicy, and roasting enhances their flavor even more. Raw tomatoes are delicious, but they don't even compare to the flavor of roasted tomatoes. This makes it an ideal recipe to enjoy during summer and early fall.
- Ridiculously versatile. There are tons of ways to serve roasted cherry tomatoes. Toss them on pasta, spoon over grilled meats, pile onto crostini or open-faced sandwiches, or even use them as a pizza topping. Their concentrated flavor pairs well with countless dishes. Get creative!
- Quick and effortless. These glossy, jewel-toned roasted tomatoes look like they belong on a chef's tasting menu, but they're weeknight-simple and totally stress-free. Prep takes just minutes, and the oven does the rest. Simply coat the tomatoes in spices and oil, bake on a sheet pan, and enjoy. This recipe is low-maintenance, and there's minimal cleanup!
Ingredients and Substitutions
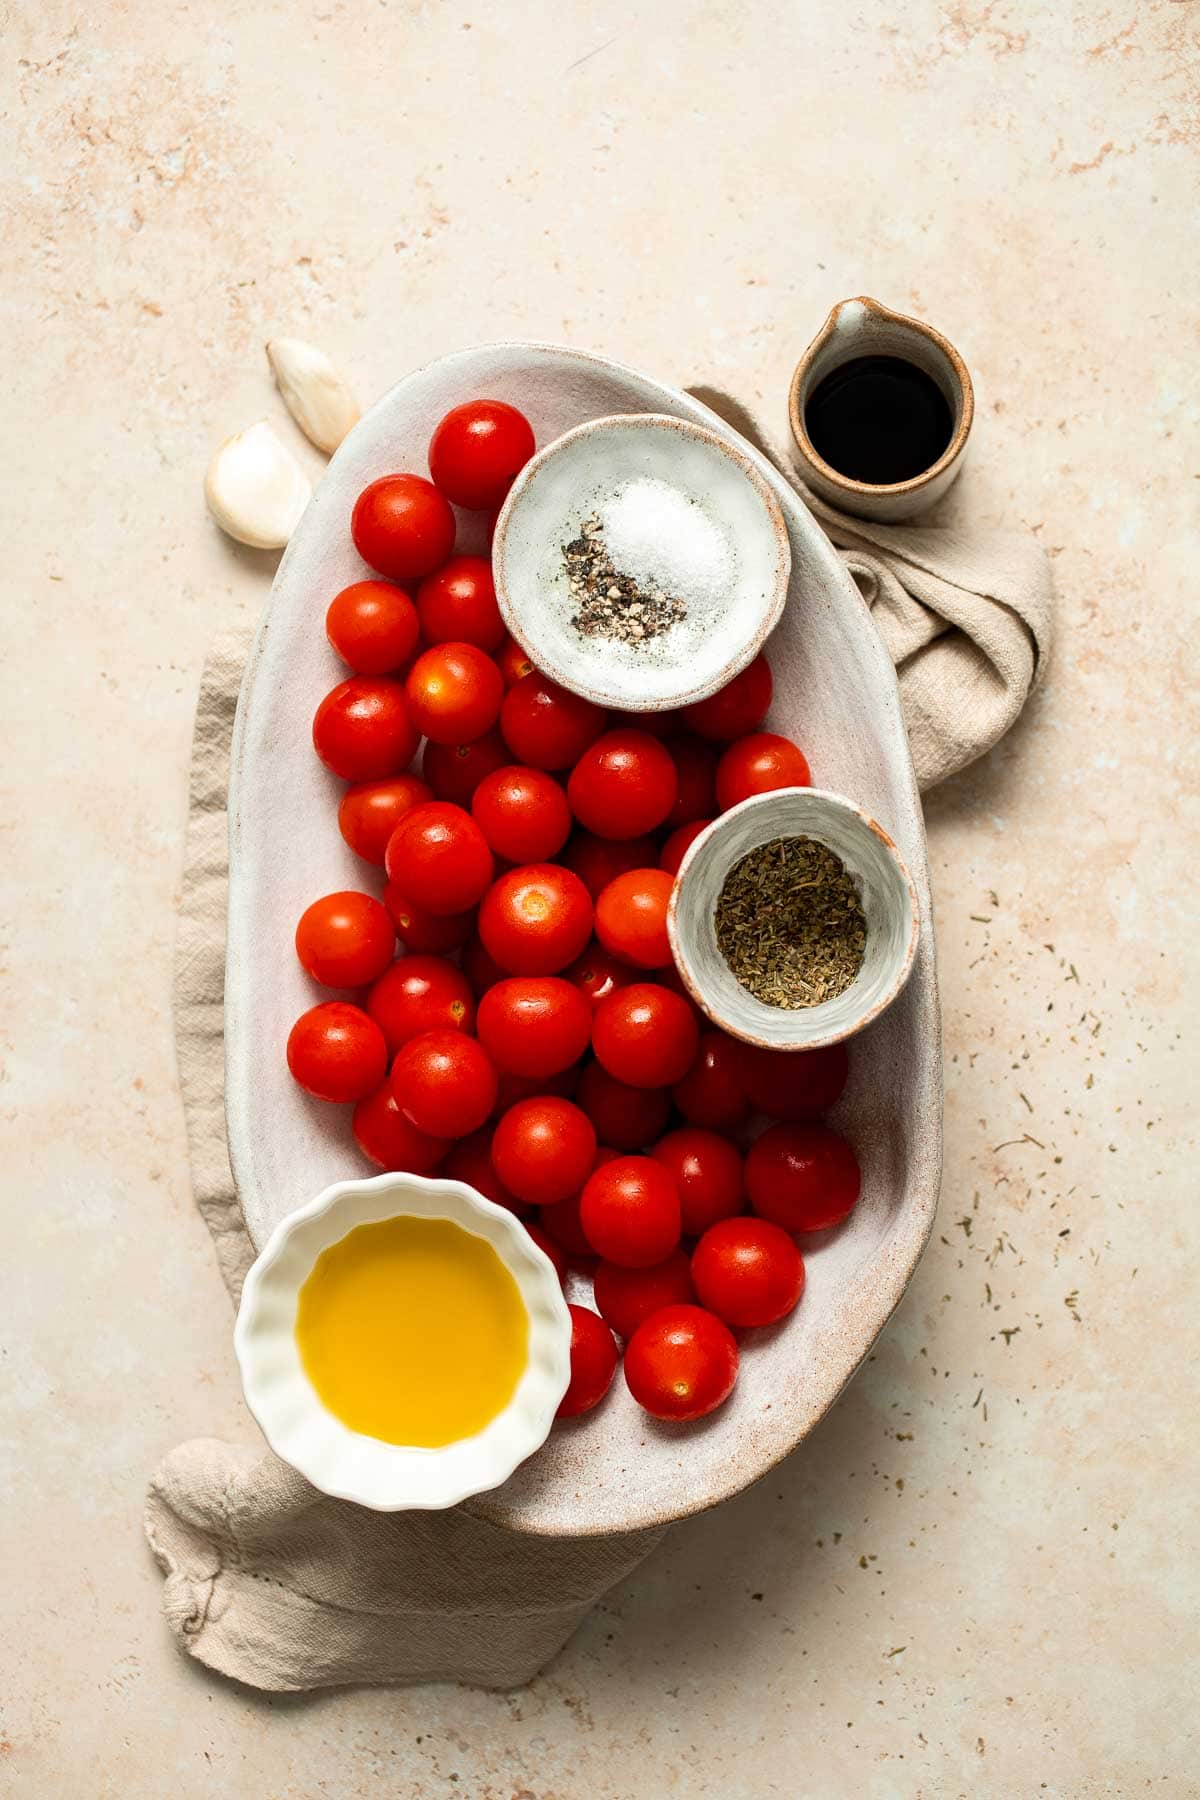
To make these easy Roasted Cherry Tomatoes with Garlic, you will need the following ingredients (see recipe card below for quantities):
- cherry tomatoes - Choose fresh, ripe cherry tomatoes for the sweetest flavor. You can also use grape tomatoes or small heirloom varieties.
- extra virgin olive oil - Adds richness and helps the tomatoes roast evenly. Avocado oil is a good alternative.
- garlic - Fresh garlic cloves give the best flavor. Use more or less depending on preference.
- Italian seasoning - A blend of dried herbs like oregano, basil, and thyme adds classic Mediterranean flavor. You can also use fresh herbs.
- balsamic vinegar - Brings tangy sweetness and balances the flavors. Red wine vinegar can be used for a lighter flavor.
- salt and pepper - Enhances flavor and balances sweetness. Adjust to taste.
Equipment
You'll also need measuring cups and spoons, a large mixing bowl, a sharp knife, a cutting board, a large baking sheet, and parchment paper for easy cleanup.
Instructions
- Season. In a large mixing bowl, Add cherry tomatoes, oil, garlic and Italian seasoning. Toss well to combine.
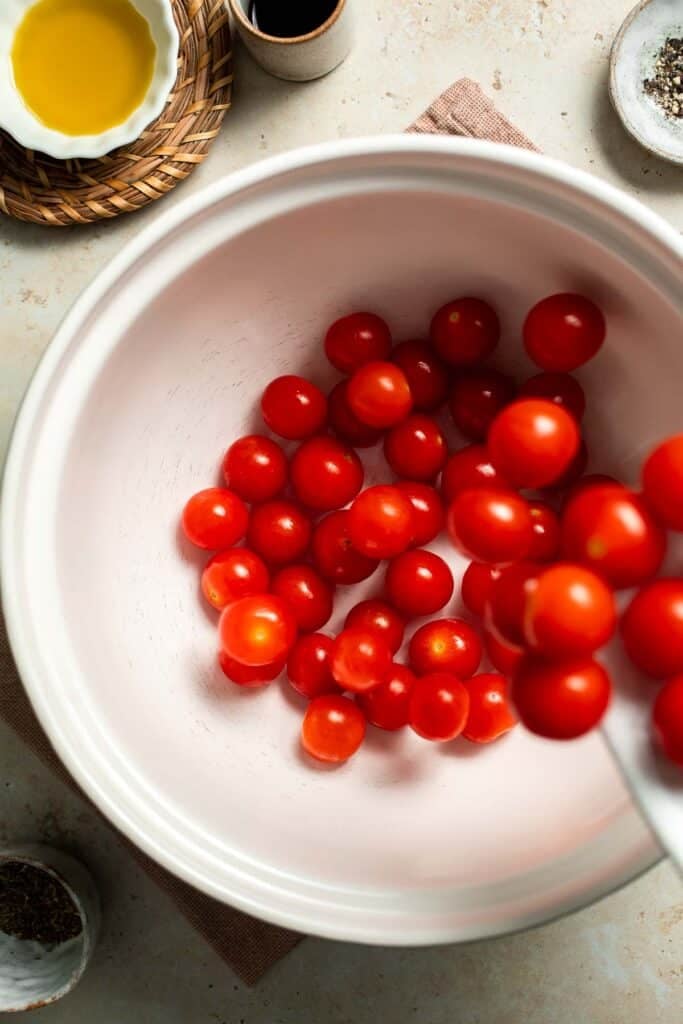
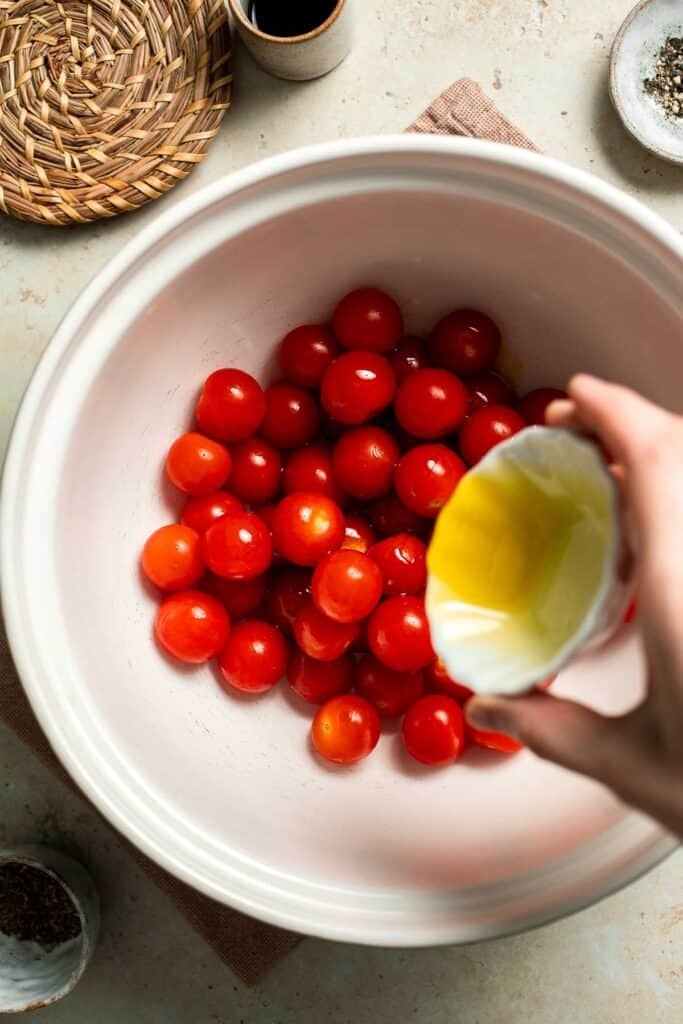
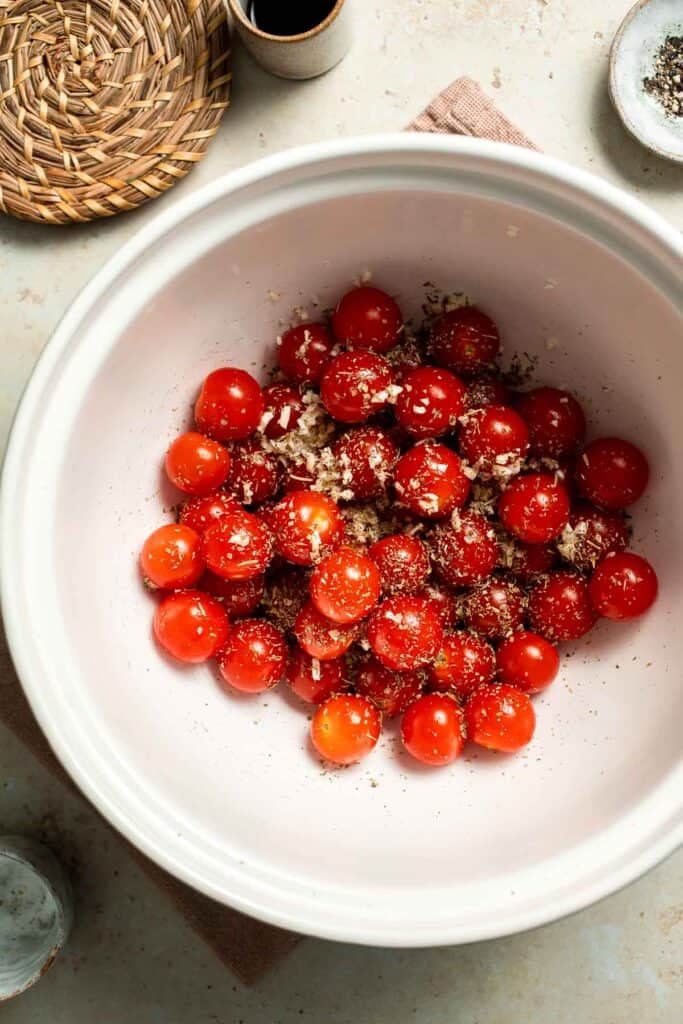
- Roast. Place the cherry tomatoes in an even layer on an oven safe cast-iron skillet or rimmed baking sheet and bake in a 400F preheated oven until the tomatoes are burst and tender, about 20 minutes.
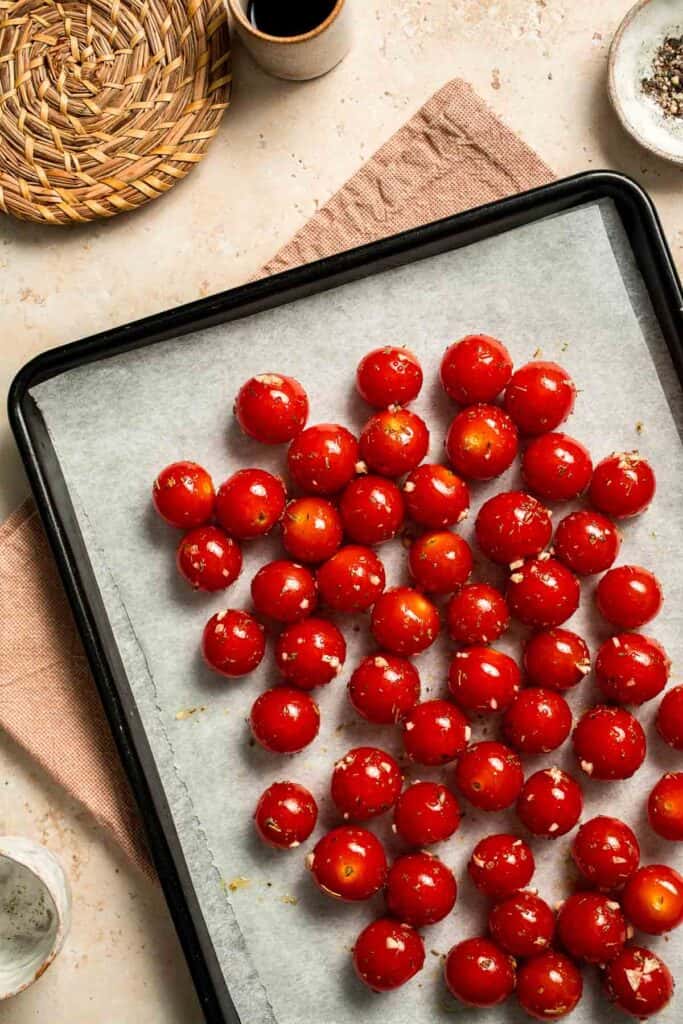
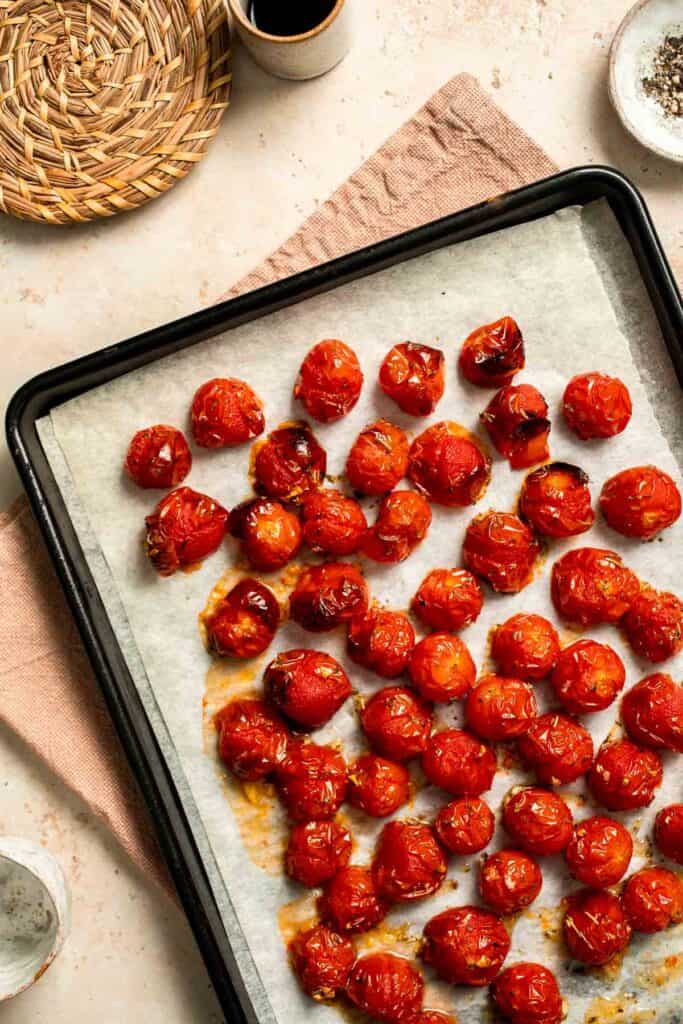
- Serve. Drizzle with balsamic vinegar and season with salt and pepper to taste. Serve immediately.
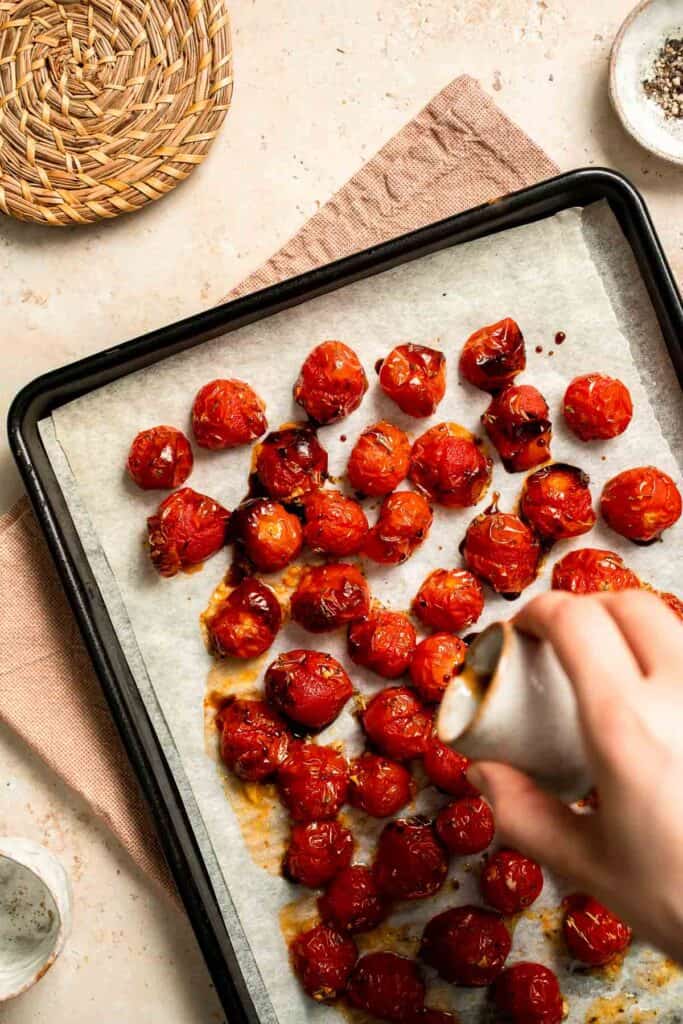
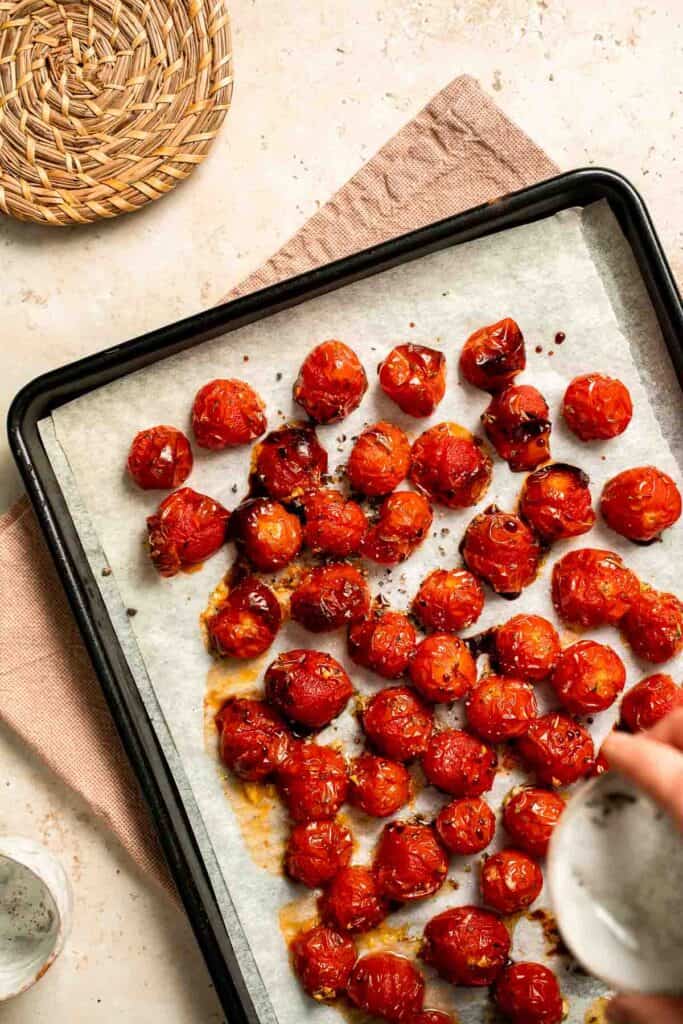
Expert Tip: Line Your Pan for Easy Cleanup
Line your sheet pan with parchment paper or foil to make cleanup a breeze. It will catch all the flavorful drippings and prevents stubborn baked-on residue. For extra insurance against sticking, you can lightly spray the foil with cooking oil before adding the tomatoes. This not only makes removing them easier after roasting but also ensures they roast evenly without tearing or leaving bits behind.
More Tips and Tricks
- Pick ripe tomatoes. The sweeter the tomato, the better the end result - even roasting can't save flavorless ones. Avoid tomatoes that are overly soft or bruised.
- Don't overcrowd the pan. Spread tomatoes out in a single layer to ensure they roast rather than steam, which keeps their texture intact and prevents sogginess.
- Experiment with herbs. Fresh basil, oregano, rosemary, or thyme can be added before or after roasting for different flavor profiles.
Recipe Variations
- Make it spicy. Add a pinch of red pepper flakes before roasting for a subtle kick of heat.
- Add cheese. Top with fresh mozzarella or sprinkle with Parmesan immediately after roasting for extra richness.
- Switch up the vinegar. Try sherry vinegar or champagne vinegar for a different tang.
- Mix with other vegetables. Add sliced zucchini, bell peppers, or mushrooms to roast alongside the tomatoes for a colorful medley.
- Turn into a pasta sauce. Mash the roasted tomatoes slightly and toss with pasta, olive oil, and Parmesan for a quick meal.
- Serve on crostini. Spoon roasted tomatoes over toasted bread with a drizzle of olive oil for an easy appetizer. See our Whipped Ricotta Crostini for instructions.
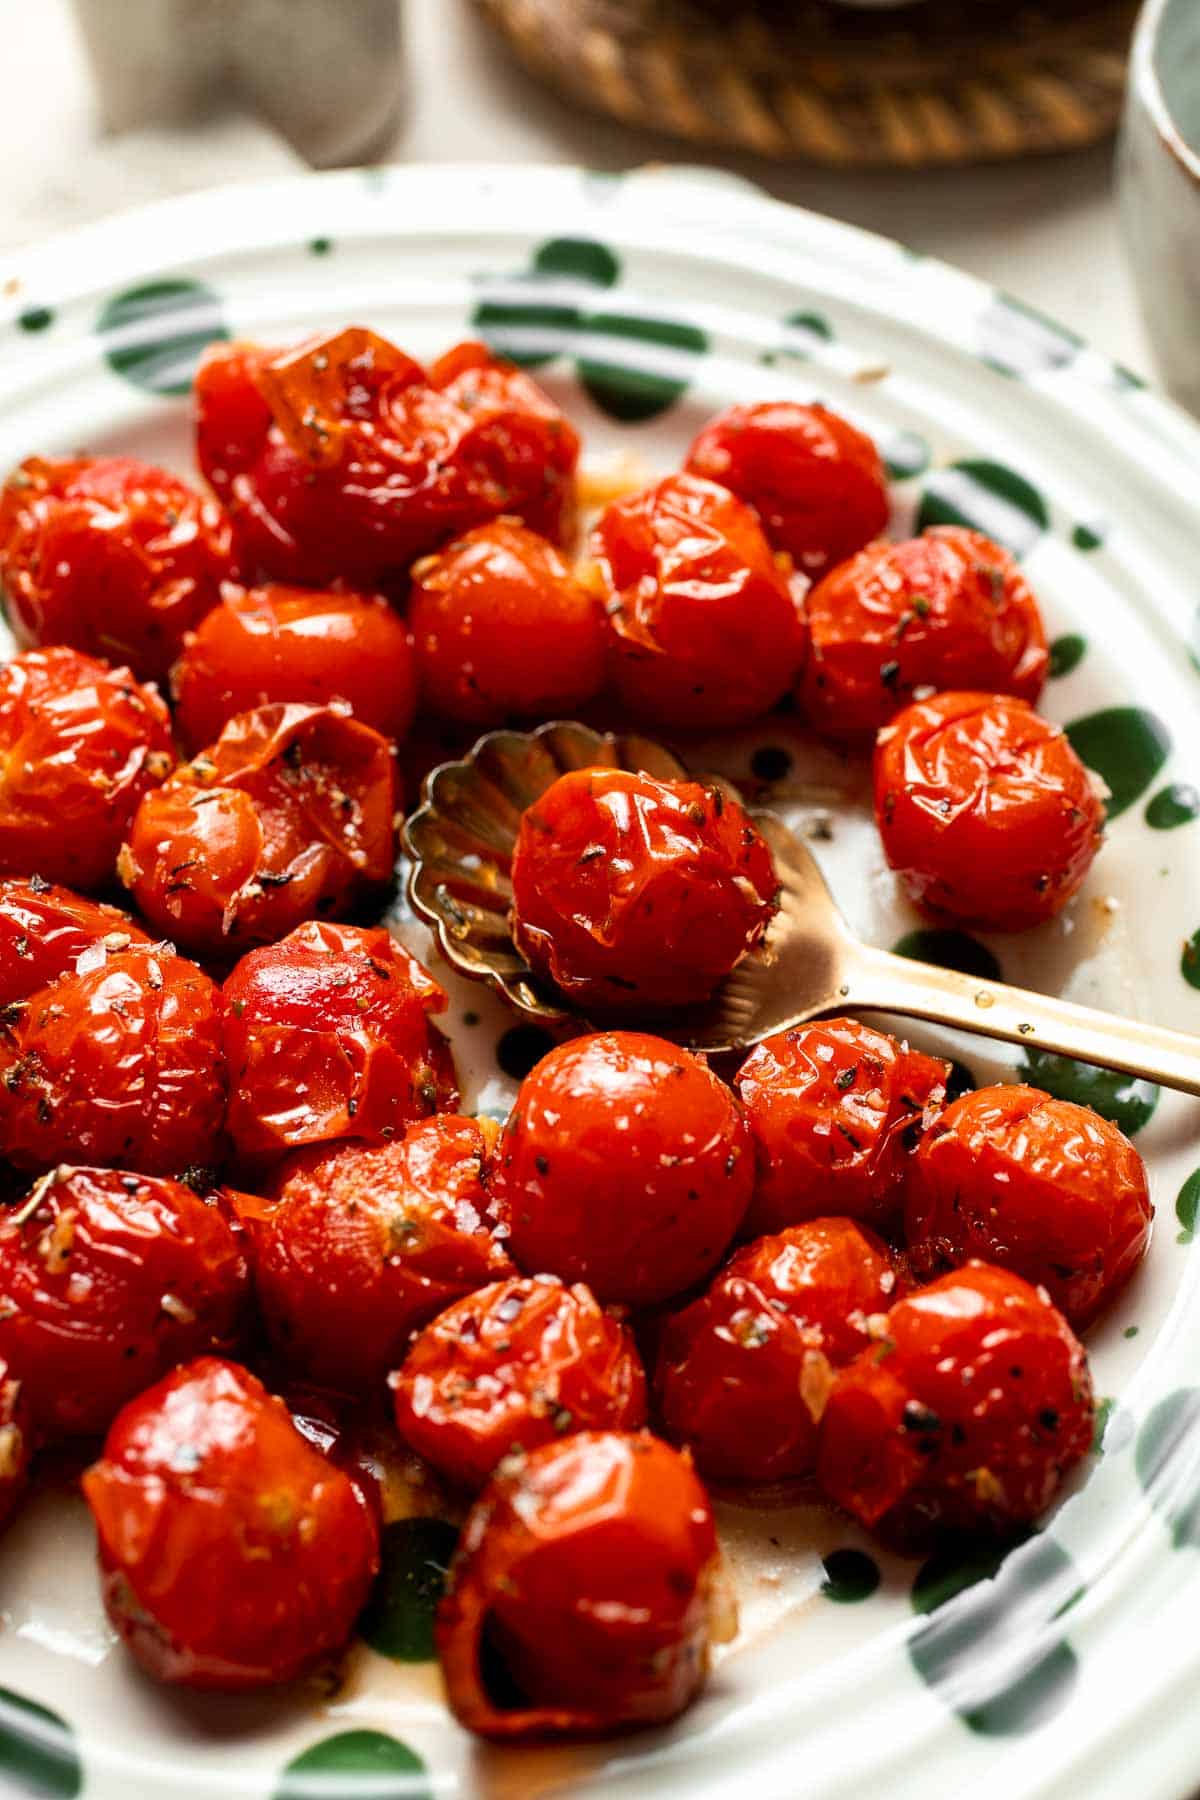
Storage
How to Store
Transfer cooled roasted cherry tomatoes to an airtight container and store in the refrigerator for up to 4 days.
How to Reheat
Reheat leftovers in a skillet over medium-low heat until warmed through, or in the oven at 350°F for about 8 minutes. You can also serve them cold or at room temperature in salads or pasta dishes.
How to Freeze
Place cooled roasted tomatoes in a freezer-safe bag or container, removing as much air as possible. Freeze for up to 3 months. Thaw in the refrigerator before reheating or using in recipes.
How to Serve
These roasted cherry tomatoes are a total multitasker. Sweet, garlicky, and tangy, they can shine on their own or elevate almost anything you put them on. Toss them with pasta and fresh basil, serve alongside grilled meats, add to grain bowls or salads, add them to a sandwich, or layer on pizza.
These are my favorite dishes to serve with roasted tomatoes:
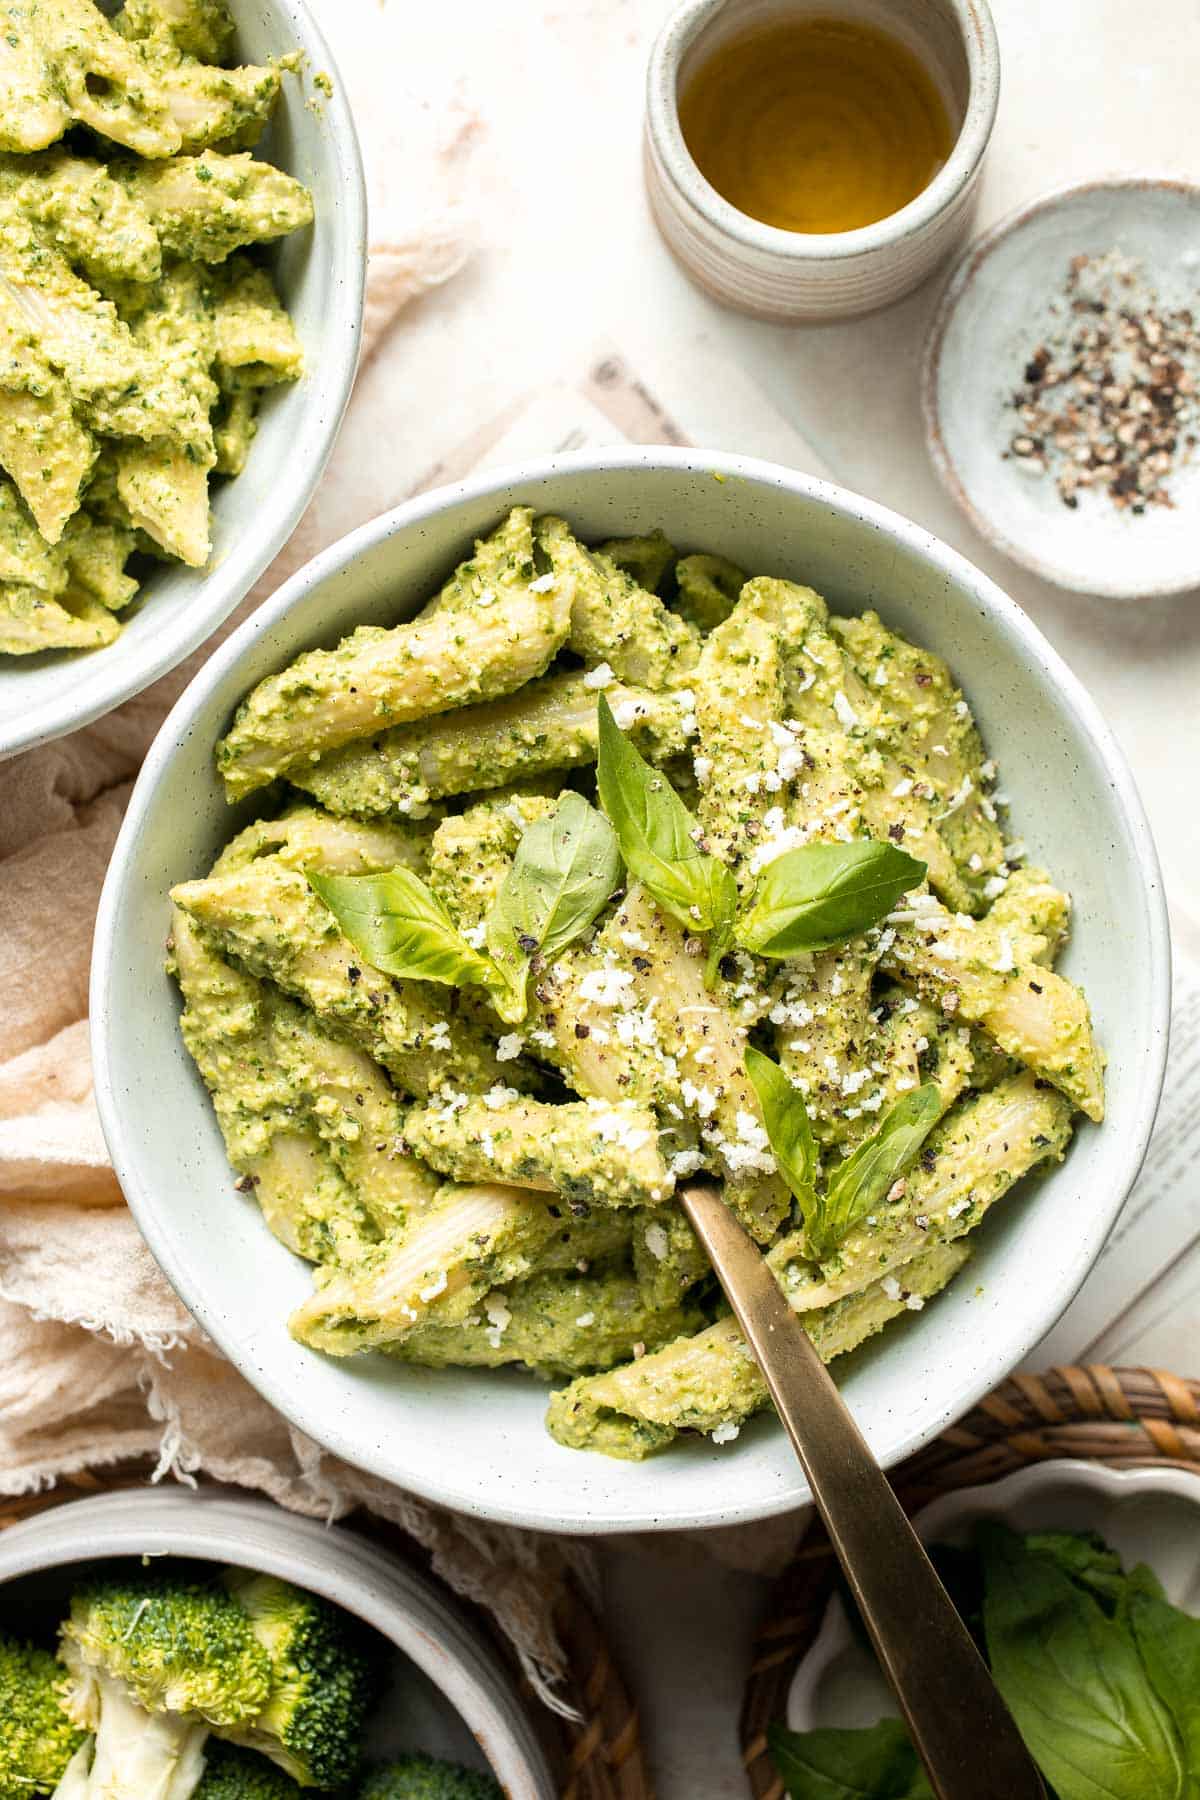


Summer Dinners
For more recipe ideas, check out our collection of summer dinners, featuring refreshing salads, grilled vegetables, light sides, and vibrant dishes that make the perfect accompaniment to any warm-weather meal.
FAQ
Yes, roasted cherry tomatoes can be made ahead and stored in the fridge for up to 4 days. The flavor actually deepens as they sit, making them even sweeter and more concentrated. Simply reheat before serving, or enjoy them cold or at room temperature in salads, pasta dishes, or as a topping for bread.
Sogginess usually occurs when tomatoes are overcrowded on the baking sheet, which traps steam instead of allowing them to roast. Spread them in a single layer with space in between. Also, roasting at a high temperature (around 425°F) helps caramelize the outside quickly, locking in juices without making them watery.
You can, but the texture will be softer after roasting since freezing breaks down the tomato's structure. They work well for sauces and soups but won't hold their shape as nicely as fresh ones. If using frozen, roast directly from frozen without thawing to prevent excess moisture.
Cherry tomatoes roast quickly because of their small size and high natural sugar content. At 425°F (220°C), they typically take about 15-20 minutes to become tender, caramelized, and slightly wrinkled. The exact time depends on the size of the tomatoes and your preferred texture. For softer, jam-like tomatoes, you can roast them closer to 20 minutes. For firmer results that still hold their shape, check them around the 12-15 minute mark. Keep an eye on them in the last few minutes because once the skins begin to burst, they can overcook and lose too much juice. Stirring once midway through helps them cook evenly and prevents sticking.
You can roast cherry tomatoes either whole or cut in half, and each method gives slightly different results. Leaving them whole helps them retain more juices inside, resulting in a sweeter, juicier bite. Cutting them in half allows for more surface area to caramelize, which can intensify the savory, roasted flavor and create a softer texture. If you choose to halve them, place them cut side up to keep juices from spilling too much during roasting. Whole tomatoes are ideal for tossing with pasta or serving as a side, while halved tomatoes work wonderfully in bruschetta, grain bowls, and spreads. Ultimately, it's a matter of preference and how you plan to serve them.
If you're roasting halved cherry tomatoes, placing them cut side up is generally best because it helps keep the juices inside and prevents them from spilling and burning on the pan. This position also allows the tops to caramelize slightly while preserving their shape. Roasting skin side up can cause more juice loss, which might lead to drier tomatoes. For whole cherry tomatoes, you don't need to worry about orientation, just spread them out evenly on the baking sheet. Regardless of position, make sure to leave space between the tomatoes so hot air can circulate around them, helping them roast evenly instead of steaming.
More Cherry Tomato Recipes
Looking for other recipes like this? Try these:
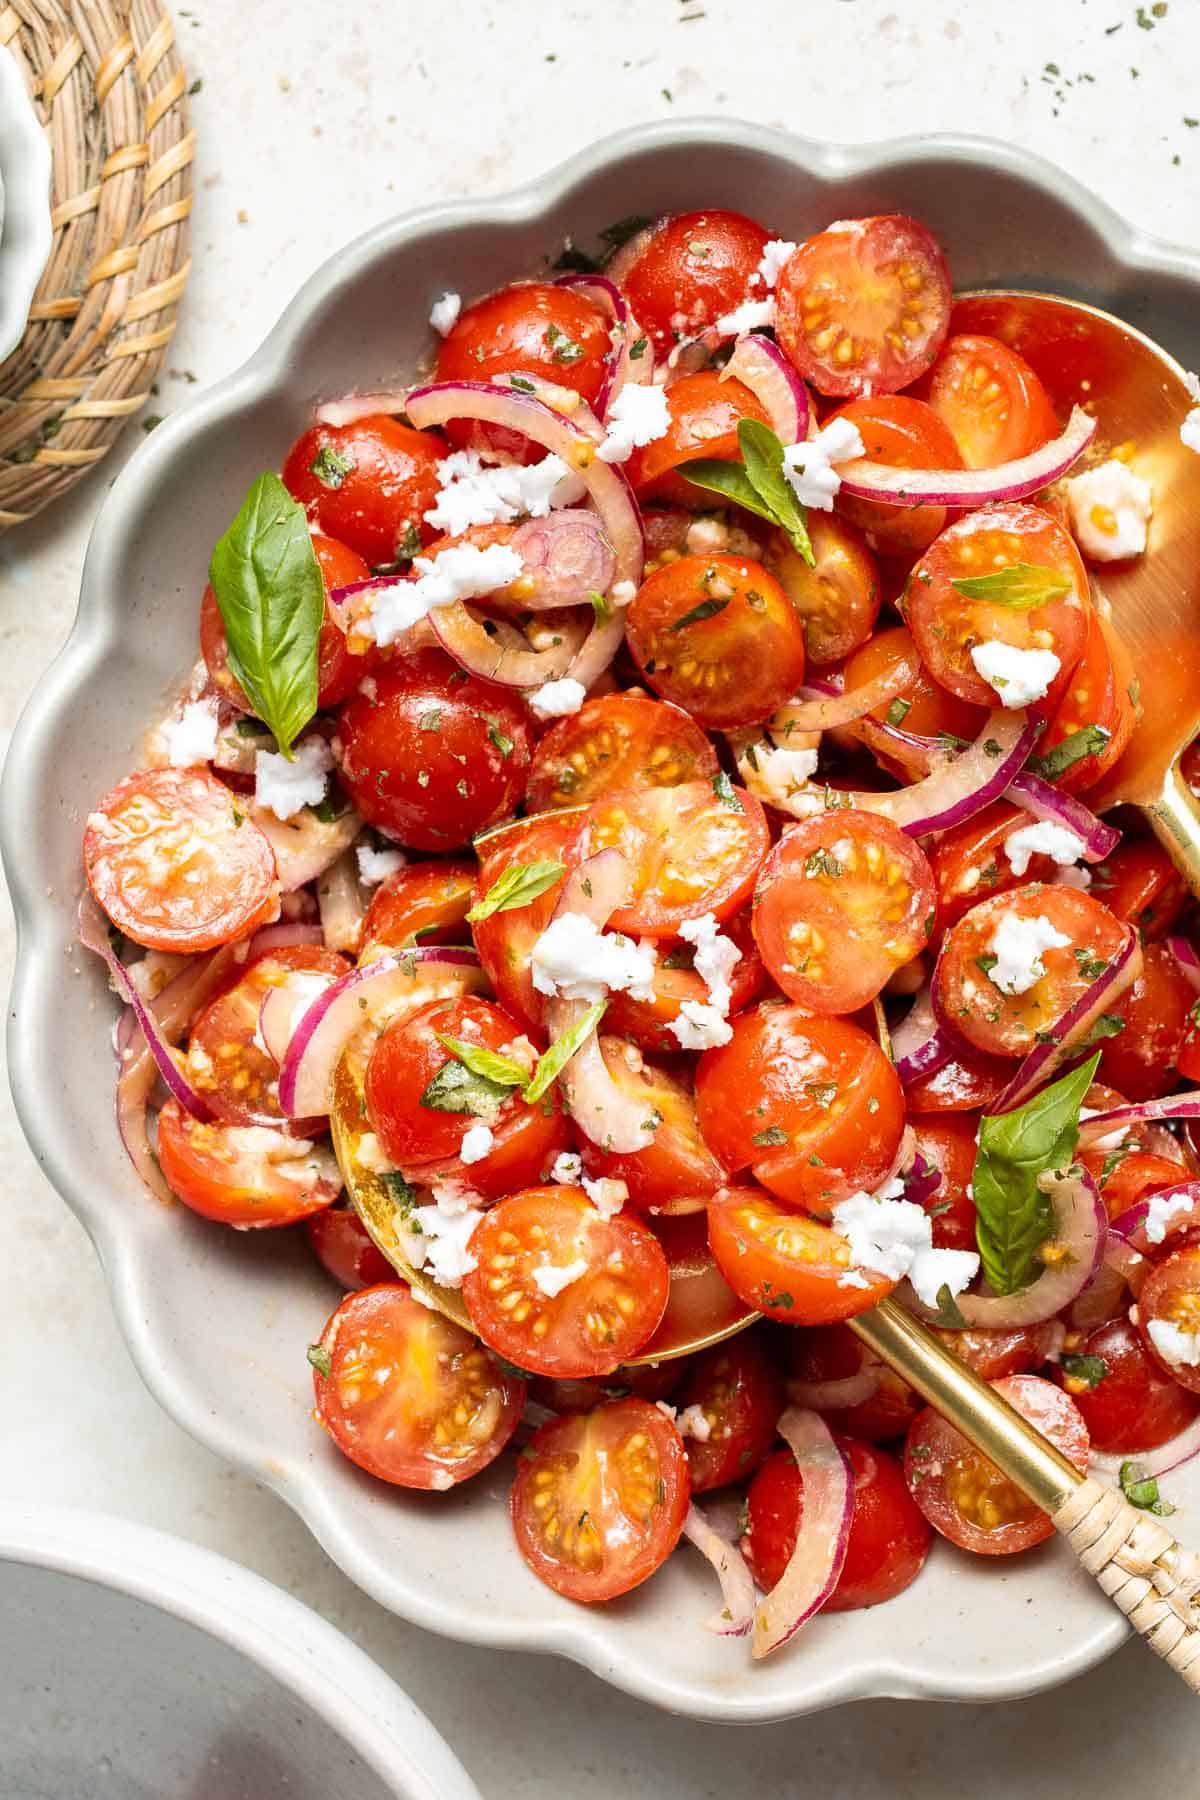
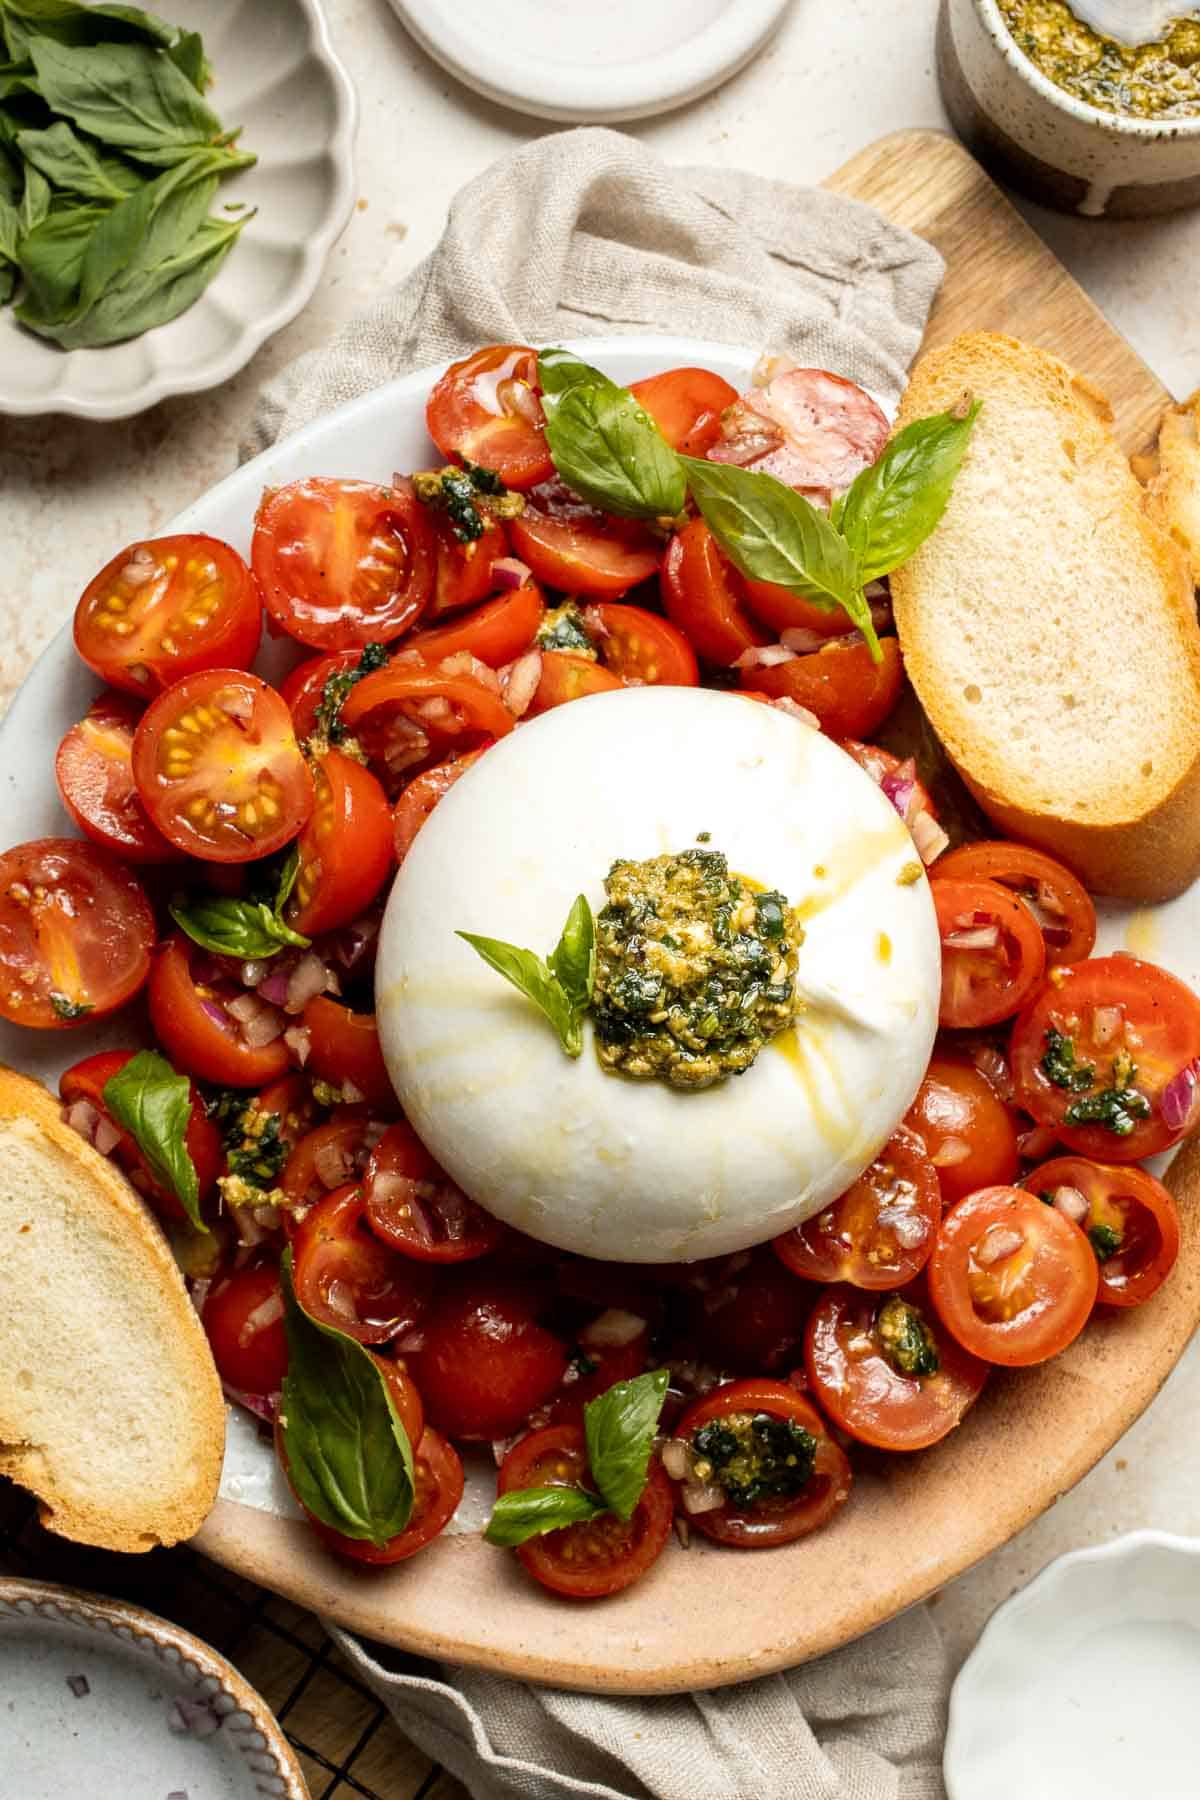
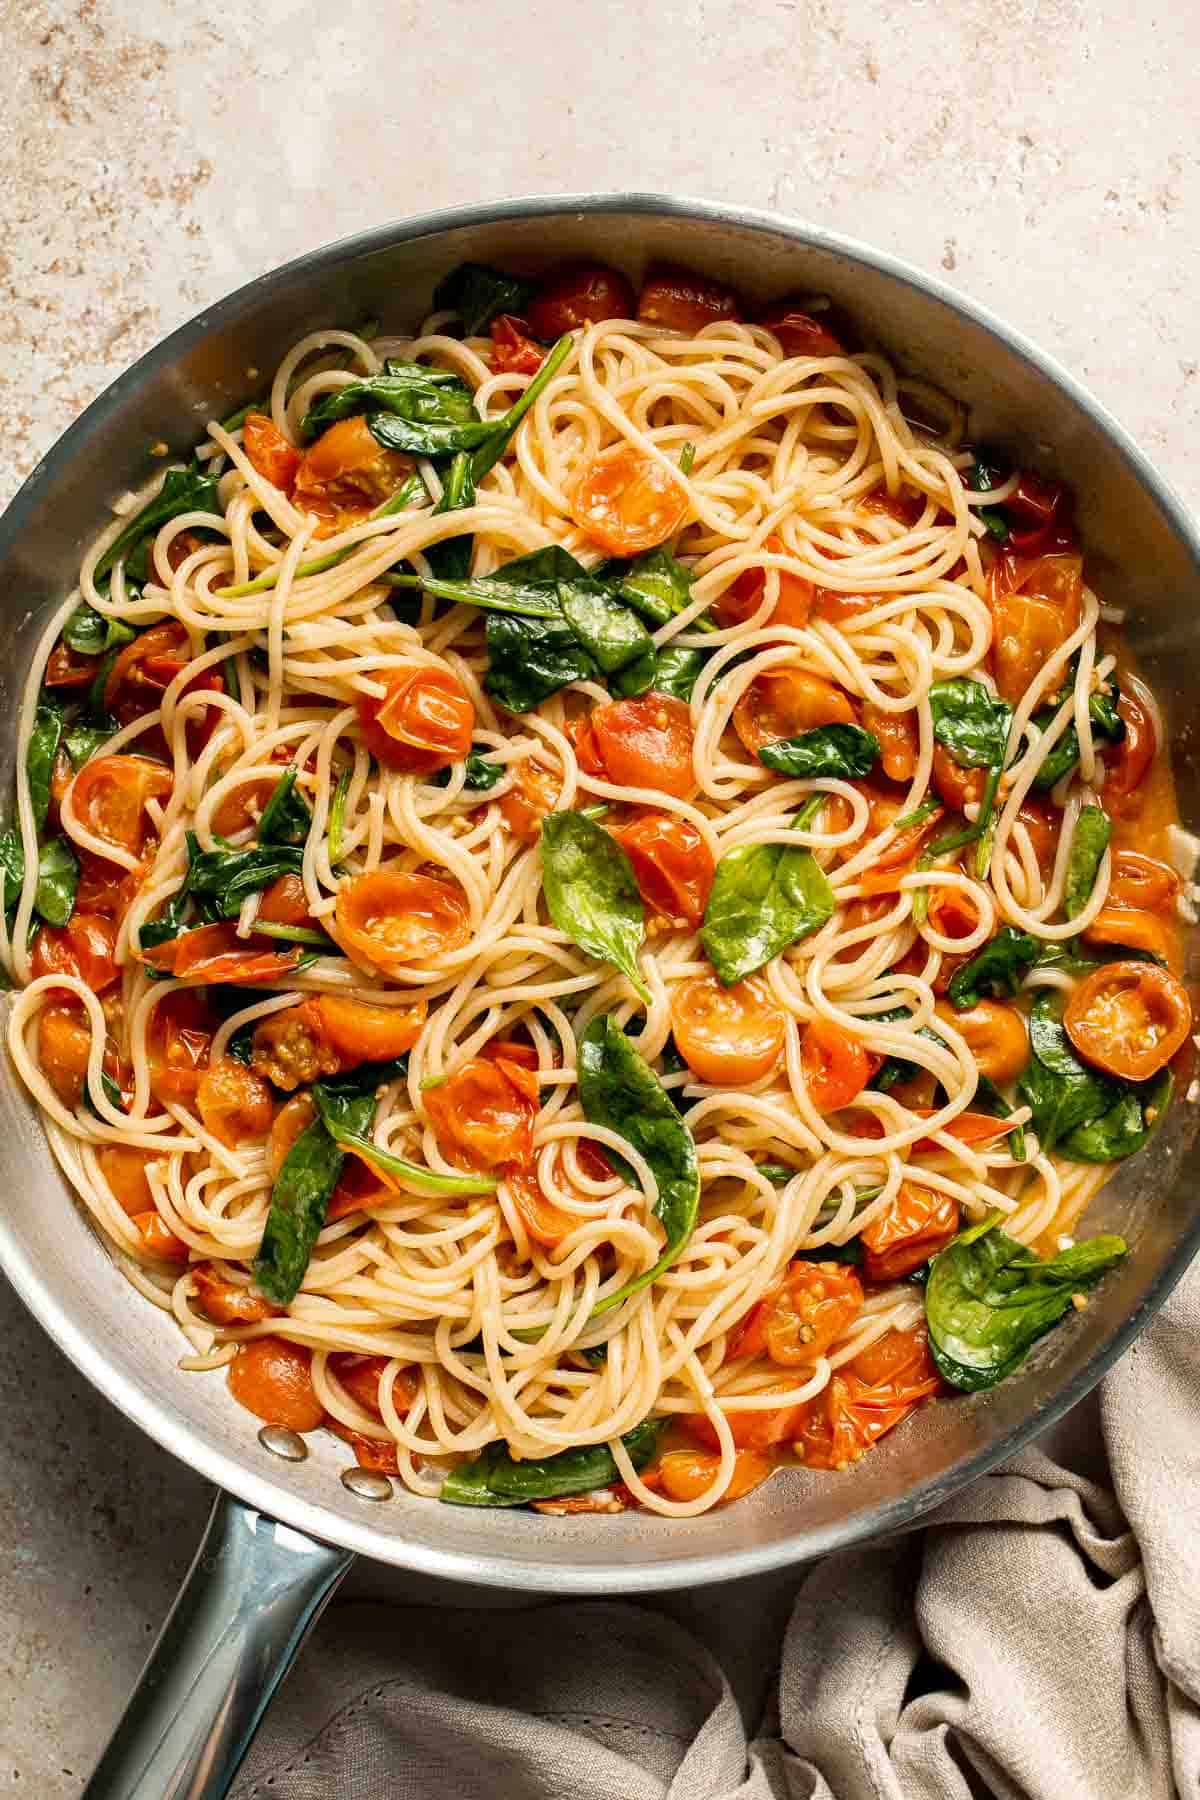
Tried this recipe?
I'd love to hear what you think! Leave a comment and rating below to share your feedback. Your reviews help others discover this recipe and help me keep creating more free recipes for you. Snap a photo and tag me on social media @aheadofthyme too.

Vietnamese Salad Rolls with Shrimp and Peanut Dipping Sauce

Fresh, light, healthy, and bursting with flavor, Vietnamese Salad Rolls with Shrimp are a refreshing dish you'll want to make on repeat all summer long. Filled with tender shrimp, soft vermicelli noodles, crisp vegetables, and fragrant herbs, then wrapped in delicate rice paper, they're as beautiful as they are delicious. Served with a creamy homemade peanut sauce, every bite is a perfect balance of fresh, savory, and tangy.
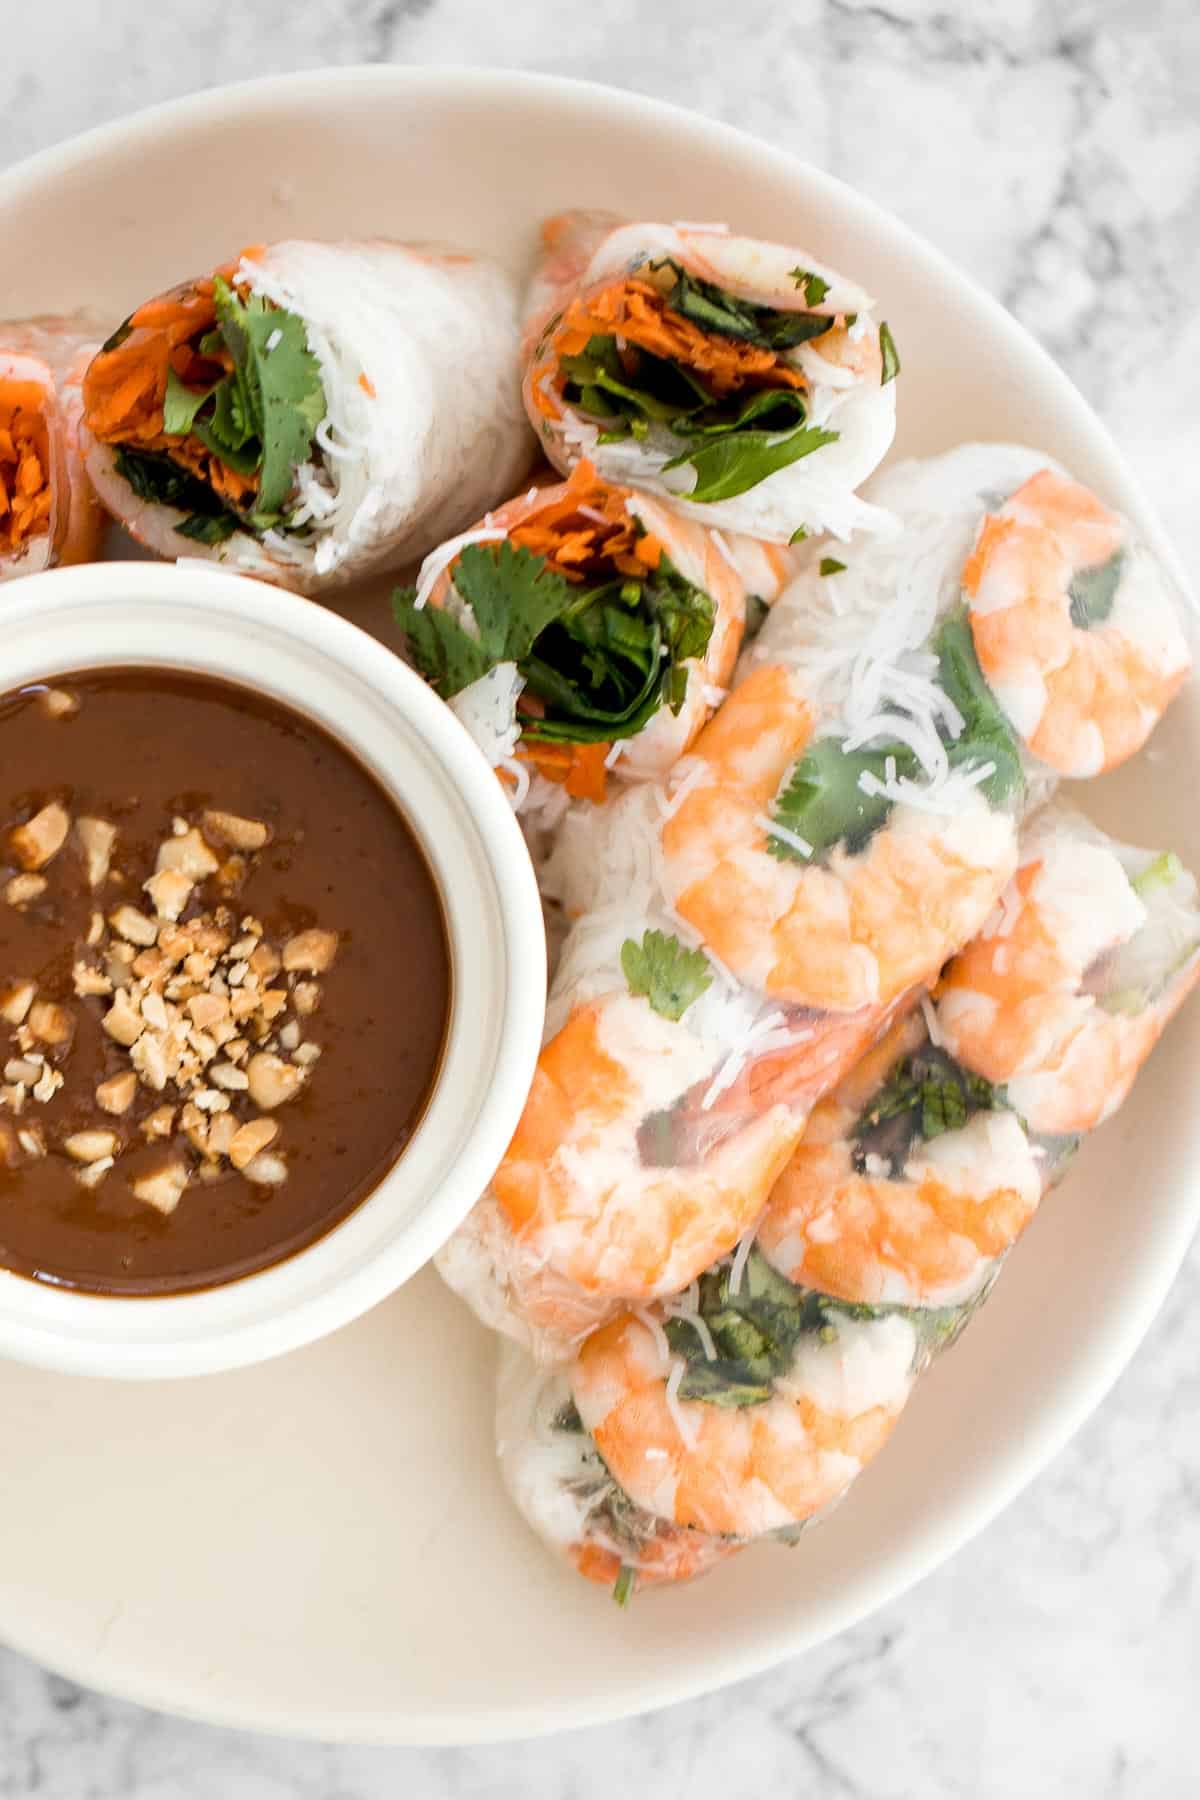
Traditionally served in Vietnamese cuisine, these shrimp salad rolls (also known as spring rolls, summer rolls, or rice paper rolls) are the unfried version of traditional spring rolls. The base always includes rice wrappers, vermicelli noodles, protein, fresh vegetables, and herbs, but the filling possibilities are endless. They're a refreshing choice for spring and summer when you want something light yet satisfying. Plus, rice paper rolls are naturally gluten-free and dairy-free, making them a versatile, crowd-pleasing option for almost any gathering.
If you liked this recipe, then you should try our Vietnamese Summer Rolls with Chicken and Vietnamese Chicken Salad next.

Why You'll Love This Recipe
- Fresh, vibrant flavors in every bite. These Vietnamese salad rolls combine sweet shrimp, crisp vegetables, and aromatic herbs wrapped in delicate rice paper. The mix of textures and flavors creates a healthy, refreshing, and flavorful dish, perfect for warm days or anytime you want something light.
- Healthy and customizable. Naturally gluten-free and dairy-free, these fresh Vietnamese spring rolls are perfect for a wide range of dietary needs. You can swap the shrimp for tofu, chicken, or extra veggies, making them a versatile option for family meals, potlucks, or meal prep.
- Perfect make-ahead appetizer or lunch. These shrimp spring rolls can be prepped in advance and stored in the fridge, ready to grab for a quick lunch, a picnic snack, or as a colorful appetizer for guests. They hold up well and taste just as fresh a few hours later.
- Irresistible peanut dipping sauce. The homemade peanut sauce is creamy, tangy, and slightly sweet, elevating each bite of the salad roll. It's simple to whip up in minutes, and you can adjust the sweetness or tang to your taste.
Ingredients and Substitutions

To make these fresh Vietnamese salad rolls, you will need the following ingredients (see recipe card below for quantities):
- rice wrappers - Also called rice paper, these are essential for wrapping. Look for round sheets about 8-9 inches in diameter. To prepare the rice wrappers, I dipped them into warm water for one second. However, keep in mind that the texture and thickness of rice wrappers depends on the brand used. You might need to dip them in for a few more seconds to make them pliable, so refer to the package instructions.
- noodles - I used Wai Wai brand thin vermicelli rice noodles (they are widely available in most Asian grocery stores). You can substitute with glass noodles or omit for a lighter roll.
- shrimp - Use fresh or frozen shrimp that are peeled, deveined, and cooked. You can substitute with other protein such as poached chicken, firm tofu, or omit for vegetarian rolls.
- vegetables - I used carrots and shredded them to make it easy. You can also slice or julienne them. Feel free to use other vegetables that you have one hand such as cucumber, bell peppers, green or red cabbage, lettuce, or avocado.
- herbs - we use fresh and bright fresh herbs including cilantro, basil, and mint. You can swap the cilantro with parsley, if desired. For the basil leaves, Thai basil is ideal for its anise-like flavor, but sweet basil works in a pinch. And lastly, mint adds a cooling element and fragrance. If unavailable, add extra basil or cilantro.
- peanut dipping sauce - made with a combination of hoisin sauce (or substitute with black bean sauce), peanut butter (creamy or chunky), water, fresh lime juice (or substitute with lemon juice), honey (or substitute with sugar) and topped with roasted peanuts. Water can be adjusted for consistency, adding more for a thinner sauce.
Equipment
You'll also need measuring cups and spoons, a medium saucepan for cooking noodles, a large bowl for softening rice wrappers, a cutting board, a sharp knife, and a small mixing bowl for the sauce.
Instructions
- Prepare the shrimp. Bring a medium pot of water to a boil over high heat. Add the shrimp and cook for 2-3 minutes until pink and opaque. Do not overcook, as this can make them tough. Drain and immediately run under cold water to cool. Once cool enough to handle, slice each shrimp in half lengthwise.
- Prepare the vermicelli noodles. Bring a separate pot of water to a boil over high heat. Add the vermicelli noodles and cook for 2 minutes until tender. Drain well using a strainer, then rinse under cold water to stop the cooking. Shake off any excess water.
- Prepare the rice wrappers. Fill a large shallow bowl or dish with warm water, about 1-2 inches deep. Working with one wrapper at a time, quickly dip it into the warm water for 1-2 seconds, or according to package instructions. Shake off excess water and place the softened wrapper on a clean, dry, flat surface. It will continue to soften and become slightly sticky.
- Assemble the salad rolls. Arrange 2 tablespoons of vermicelli noodles in the center of the wrapper in a horizontal log shape, leaving about 2 inches of space on each side. Place 3 shrimp halves, pink side down, in a row just above the noodles. Add 2 tablespoons of shredded carrots in a row just below the noodles. Place 1 tablespoon of cilantro, ½ tablespoon of basil, and ½ tablespoon of mint on top of the shrimp.


- Wrap the salad rolls. Starting from the bottom, roll the wrapper up tightly but gently over the noodles. Fold the left and right sides inward, then continue rolling until sealed. If the wrapper feels too dry or stiff, lightly moisten your fingers and the wrapper to help soften.


- Make the peanut sauce. In a small mixing bowl, combine hoisin sauce, peanut butter, water, lime juice, and honey. Stir until smooth and well combined. Sprinkle chopped roasted peanuts on top for garnish.


Recipe Video
Expert Tip: Keep Rolls from Sticking
Place finished rolls slightly apart on a plate lined with lettuce leaves or parchment paper to prevent them from sticking together while you work. This also helps maintain their shape, ensures the rice paper stays soft and pliable, and makes serving much easier later on.
More Tips and Tricks
- Prep and dry fillings. Have shrimp, noodles, vegetables, and herbs ready before softening the rice wrappers, and make sure they're fairly dry. Excess moisture can cause the wrappers to tear or disintegrate over time.
- Use warm water for rice wrappers. Warm water softens rice paper quickly and evenly, making it easier to wrap. Follow package instructions since thickness varies by brand and hence soaking time can vary.
- Don't overfill and roll tightly. Overstuffing can cause the rice paper to tear. Keep portions moderate so you can wrap tightly without breaking. Hold the fillings in place with your fingers as you roll, tucking in the sides before finishing to create a neat seal.
- Serve fresh or store properly. For the best texture, serve right after making. If storing, wrap each roll individually in plastic wrap and refrigerate.
- Make extra sauce. The peanut sauce is a crowd favorite and pairs well with satay skewers, grilled meats, or tossed into noodles.
- Be patient. Be patient the first time you try to roll and wrap the salad rolls. It can take several attempts to figure out the technique. You can start with less filling, and once you get the hang of it, increase the amount of filling used.
Recipe Variations
- Make it vegetarian. Swap the shrimp for tofu, tempeh, or just extra vegetables for a plant-based option that's just as flavorful.
- Add more crunch. Include cucumber strips, lettuce, or bean sprouts for additional texture.
- Spicy twist. Add thin slices of red chili or jalapeño inside the rolls or mix sriracha into the peanut sauce.
- Herb-forward rolls. Increase the amount of basil, mint, and cilantro for a more aromatic bite.
- Fusion flavors. Swap the peanut sauce for Thai sweet chili sauce or a soy-ginger dip for a different profile.
- Extra protein. Add thin slices of cooked chicken, beef, or even smoked salmon alongside the shrimp for a heartier roll. See this chicken version of this recipe.

Storage
How to Store
Salad rolls are best enjoyed fresh. Once they sit for a few hours, excess moisture can cause the rice wrappers to break apart. If you have leftovers, wrap each roll individually in plastic wrap or store in an airtight container lined with damp paper towels to prevent sticking. Refrigerate for up to 24 hours (maximum 2 days) for the best texture and flavor.
How to Reheat
These rolls are best enjoyed cold or at room temperature, so reheating isn't necessary. However, if the peanut sauce thickens, stir in a splash of warm water to loosen before serving.
How to Freeze
Freezing is not recommended for fresh salad rolls, as the rice paper becomes tough and the vegetables lose their texture once thawed.
How to Serve
These Vietnamese salad rolls make a refreshing appetizer, light lunch, or party snack. They pair wonderfully with other Southeast Asian dishes or as part of a fresh and colorful spread.
These are my favorite dishes to serve with these Vietnamese Salad Rolls with Shrimp:


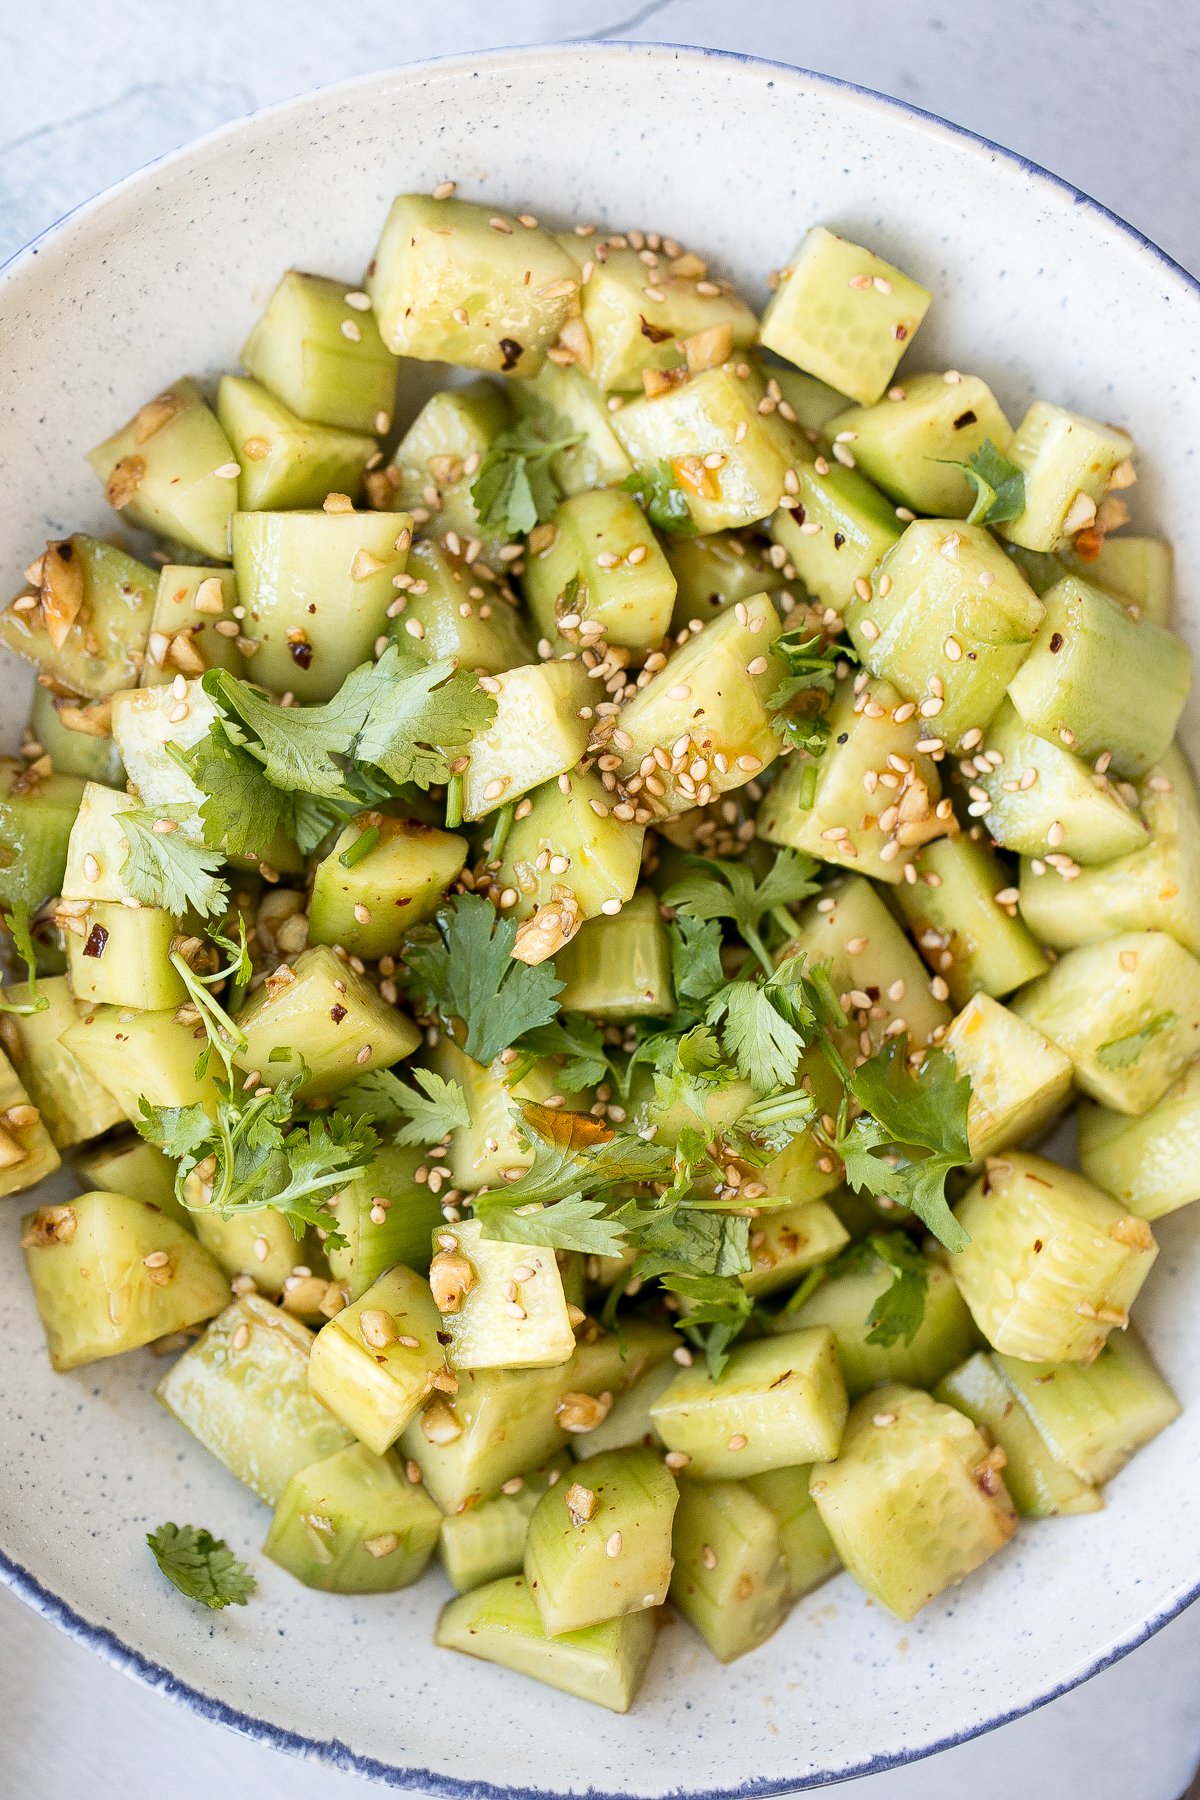
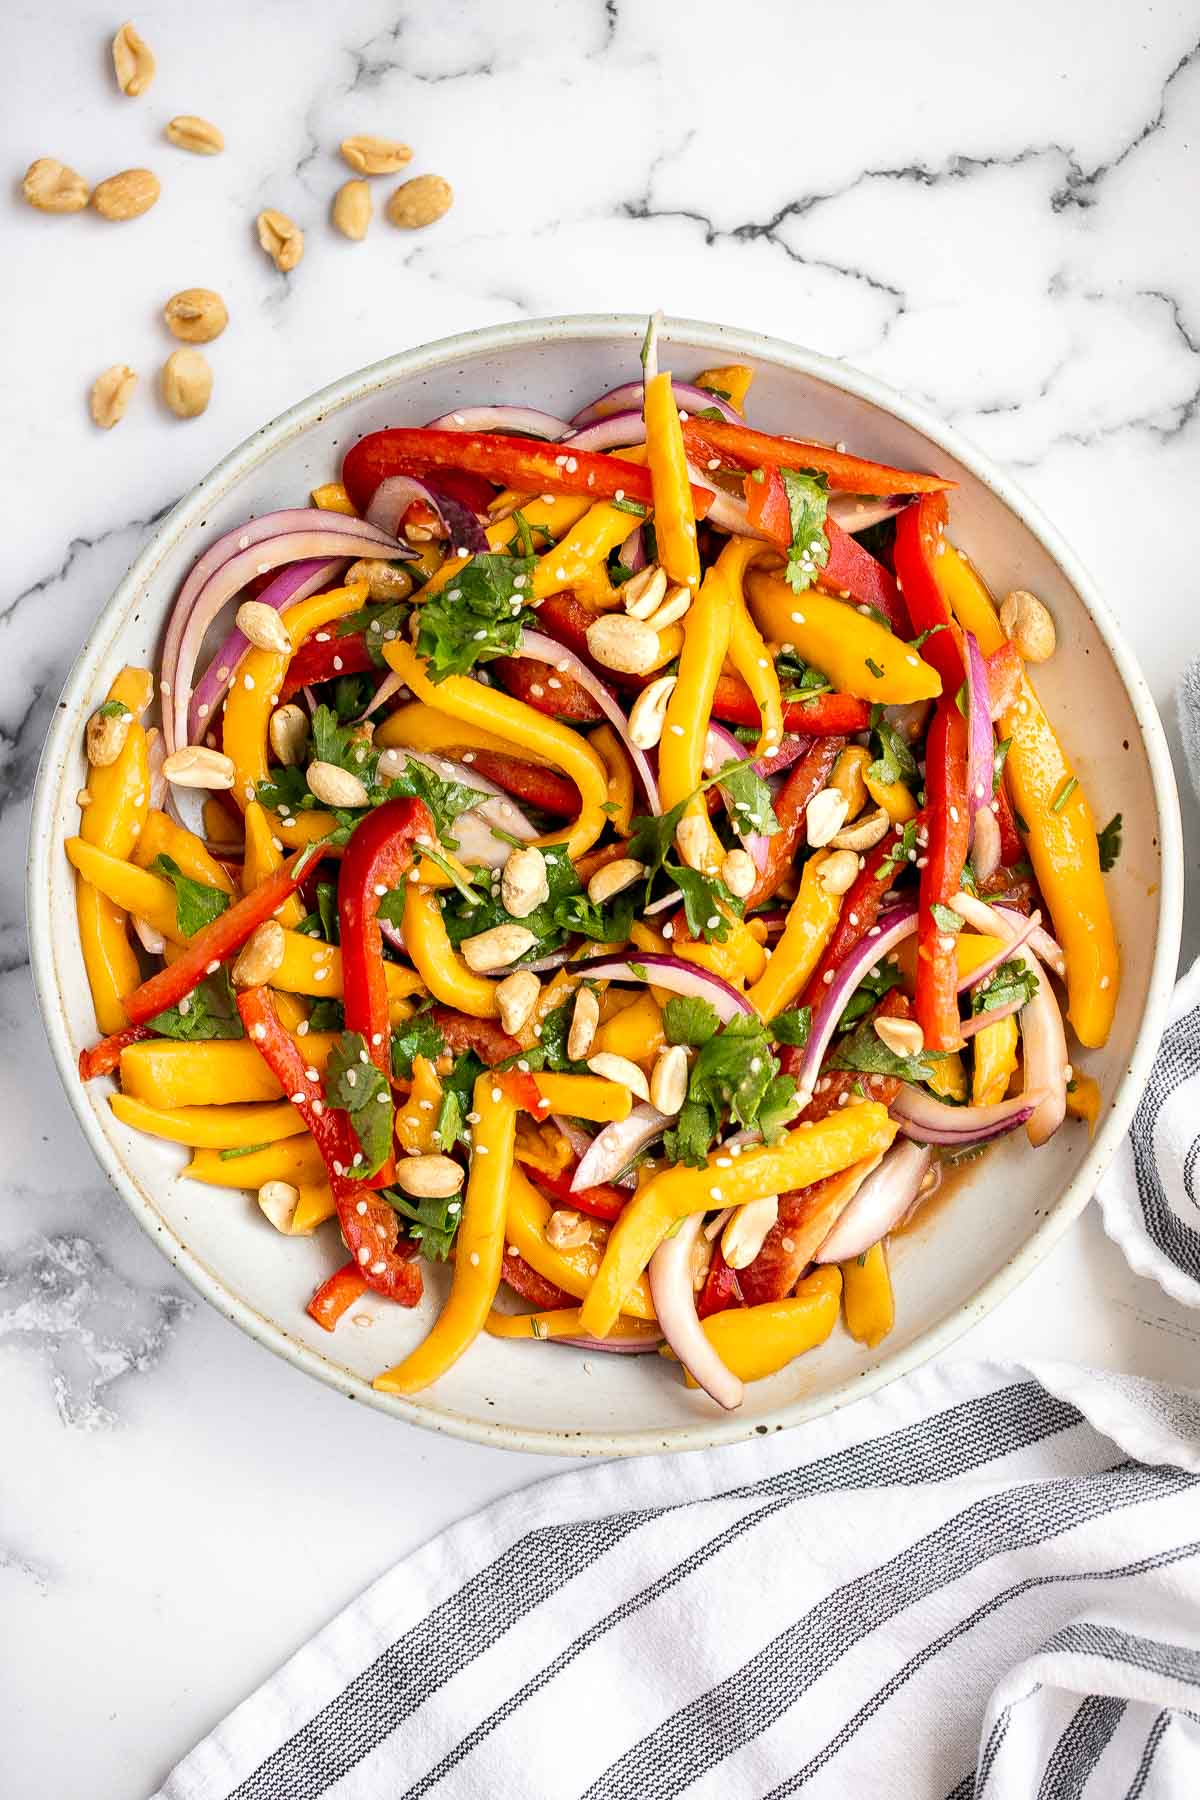
FAQ
To make Vietnamese shrimp salad rolls, start by preparing your ingredients. Cook large shrimp until pink and opaque, then slice them in half lengthwise for easier rolling. Boil rice vermicelli noodles until tender, drain, and rinse under cold water. Julienne carrots and wash fresh herbs like mint, basil, and cilantro. Fill a large shallow bowl with warm water, dip a rice paper wrapper until just softened, then place it on a clean surface. Layer shrimp, noodles, carrots, and herbs in the center. Fold the bottom over the filling, tuck in the sides, and roll tightly to seal. Repeat until all ingredients are used. Serve immediately with peanut dipping sauce. Work quickly so the rice paper stays pliable and avoid overfilling for easier wrapping.
Yes, Vietnamese salad rolls are a healthy choice, especially compared to deep-fried appetizers. They're low in fat, packed with lean protein from shrimp, and full of vitamins from fresh herbs and vegetables. The rice paper wrappers are naturally gluten-free and low in calories, while the vermicelli noodles add carbohydrates for energy. The fresh ingredients provide fiber, antioxidants, and essential nutrients. The peanut dipping sauce adds calories and fat, but you can control the portion or choose a lighter sauce. Overall, they're a balanced option that's both satisfying and nourishing, especially when enjoyed with plenty of herbs for extra flavor and health benefits.
Both sushi and rice paper rolls can be healthy, but rice paper rolls often have fewer calories and less sodium than many sushi options, especially those with mayonnaise-based sauces or fried fillings. Rice paper rolls feature fresh vegetables, lean protein like shrimp, and herbs without the added oils or tempura batter found in some sushi rolls. Sushi includes seasoned white rice, which adds carbohydrates and calories. Sushi can be higher in omega-3s if it contains raw fish like salmon or tuna. Ultimately, the healthier choice depends on fillings, sauces, and portion size. For light, low-calorie meals, rice paper rolls shine, while sushi with raw fish offers more heart-healthy fats.
Vietnamese fresh spring rolls (also called salad rolls) are not always vegetarian, as they often contain shrimp, pork, or chicken. However, they can easily be made vegetarian by replacing the protein with tofu, tempeh, or extra vegetables like avocado, bell peppers, and lettuce. The rice paper, noodles, herbs, and vegetables are naturally plant-based, so it's simply a matter of choosing fillings that fit your diet. For vegan rolls, replace honey in the dipping sauce with maple syrup or sugar. This flexibility makes them a versatile dish that adapts to nearly any dietary preference without losing fresh, vibrant flavor.
Rice paper tears when it's over-soaked, overfilled, or rolled too tightly. Use warm water and soak the wrappers only until pliable (about 5-7 seconds). Keep fillings compact in the center, and roll gently while maintaining light tension. If the wrapper tears, you can wrap another sheet around it for reinforcement. Storing rolls individually wrapped in plastic helps prevent accidental tearing during storage. With practice, your rolls will become neater, more secure, and easier to assemble without damage.
More Shrimp Recipes
Looking for other recipes like this? Try these:


Tried this recipe?
I'd love to hear what you think! Leave a comment and rating below to share your feedback. Your reviews help others discover this recipe and help me keep creating more free recipes for you. Snap a photo and tag me on social media @aheadofthyme too.

Lemon Zucchini Pasta
This Lemon Zucchini Pasta is light, fresh, and bursting with flavor, making it the perfect weeknight dinner when you want something quick and satisfying. Tender spaghetti is tossed with sautéed zucchini, garlic, and fragrant Italian herbs, then finished with a squeeze of bright lemon juice and a sprinkle of salty Pecorino Romano for the perfect balance of freshness and richness.

Zucchini is in peak season during the summer, but this zucchini pasta recipe is a year-round favorite thanks to its simple ingredient list and quick preparation time. It's an easy way to turn fresh produce into a comforting yet light pasta dinner that everyone will love. The combination of lemon and zucchini creates a refreshing flavor that pairs beautifully with the nutty, savory notes of aged cheese.
This recipe was inspired by my Lemon Ricotta Pasta, and it pairs well with Cheesy Garlic Bread or an Arugula Salad for a complete, restaurant-quality meal at home.
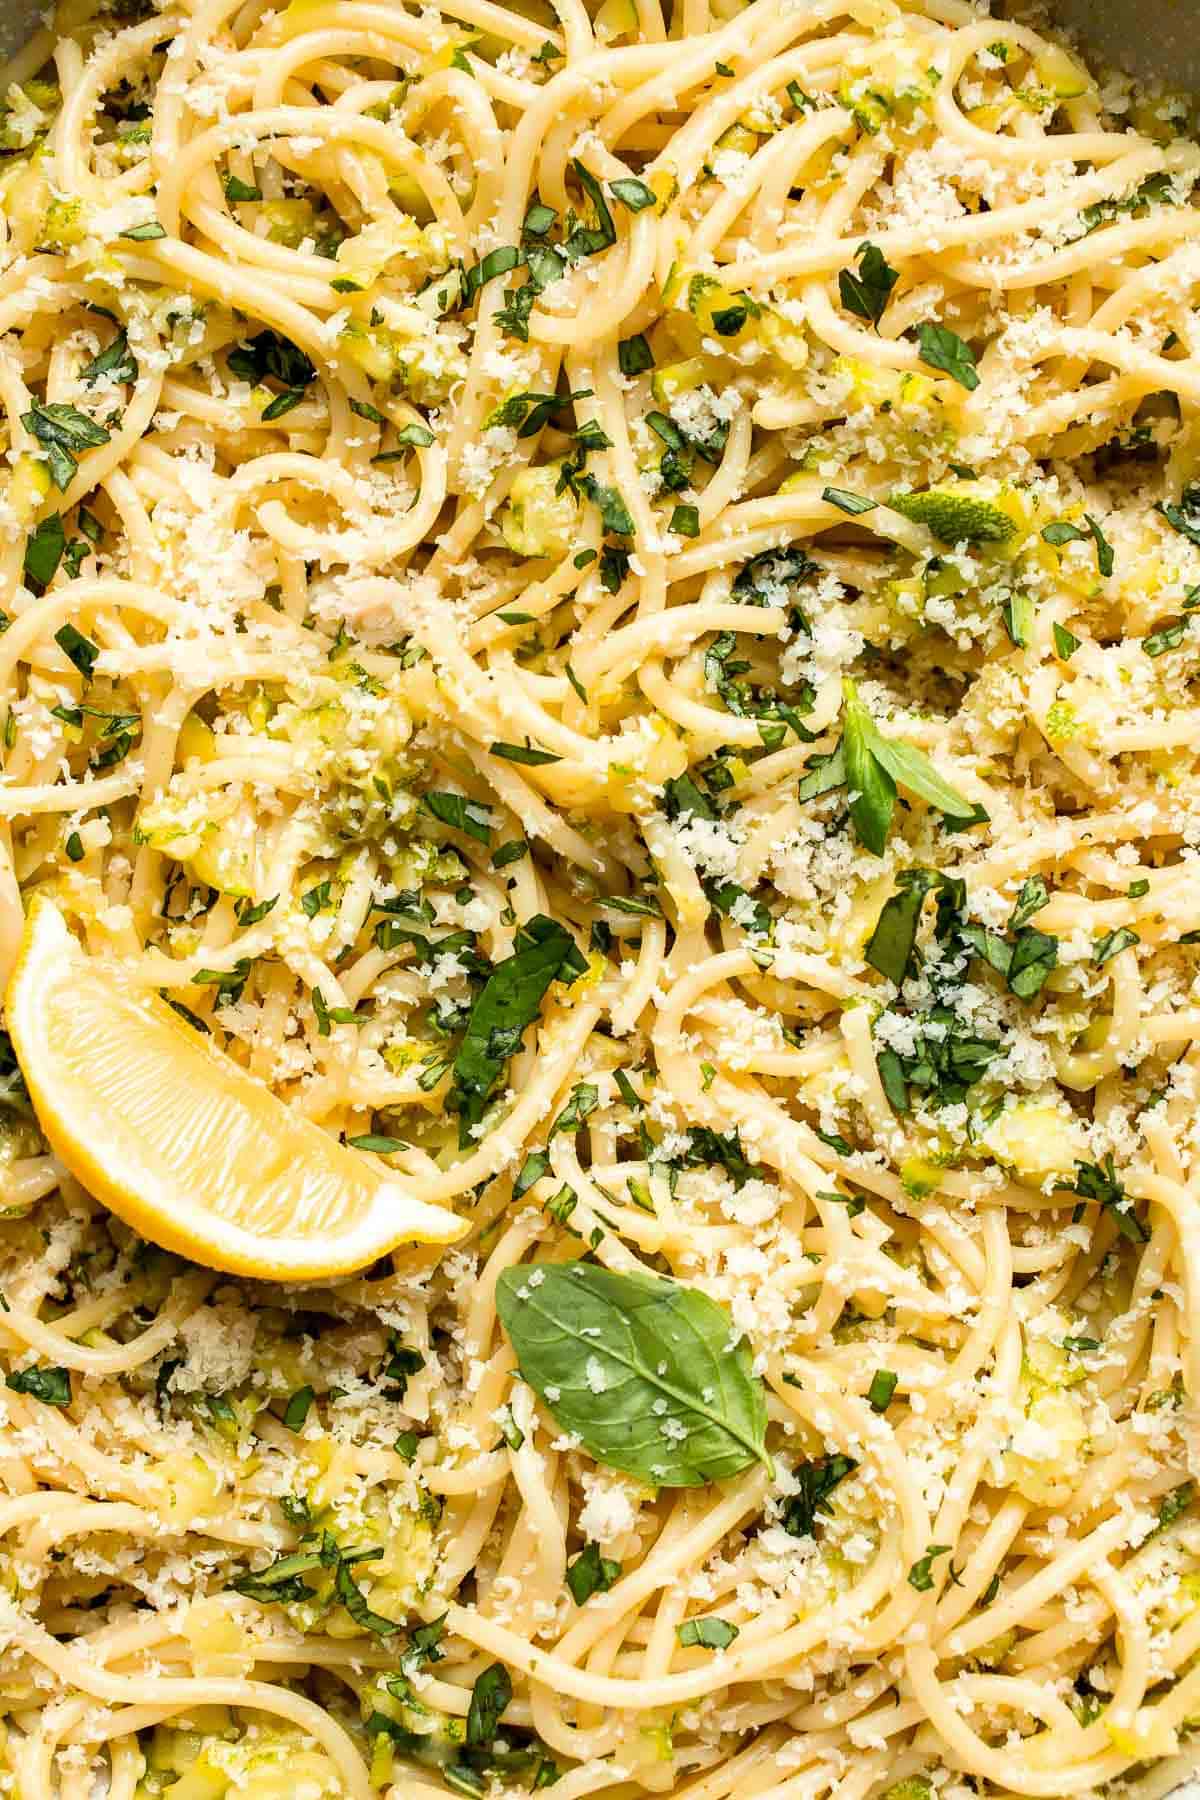
Why You'll Love This Recipe
- Fresh, bright flavor. The combination of tender zucchini, fragrant garlic, and zesty lemon makes every bite vibrant and refreshing. The lemon juice balances the richness of the olive oil and cheese, creating a pasta dish that tastes indulgent without being heavy.
- Quick and easy. This zucchini spaghetti comes together in just 20 minutes from start to finish, making it perfect for busy weeknights. Minimal chopping and simple cooking steps mean you can have a flavorful, wholesome dinner on the table faster than takeout.
- Simple, wholesome ingredients. Made with fresh zucchini, aromatic garlic, extra virgin olive oil, and quality cheese, this pasta recipe uses pantry staples and fresh produce to create a restaurant-worthy meal at home.
- Versatile and customizable. This lemon zucchini pasta can be adapted with different herbs, vegetables, or proteins to suit your taste. Add grilled chicken, shrimp, or chickpeas for extra protein, or toss in spinach, cherry tomatoes, or mushrooms for variety. See our Recipe Variations below for ideas.
Ingredients and Substitutions
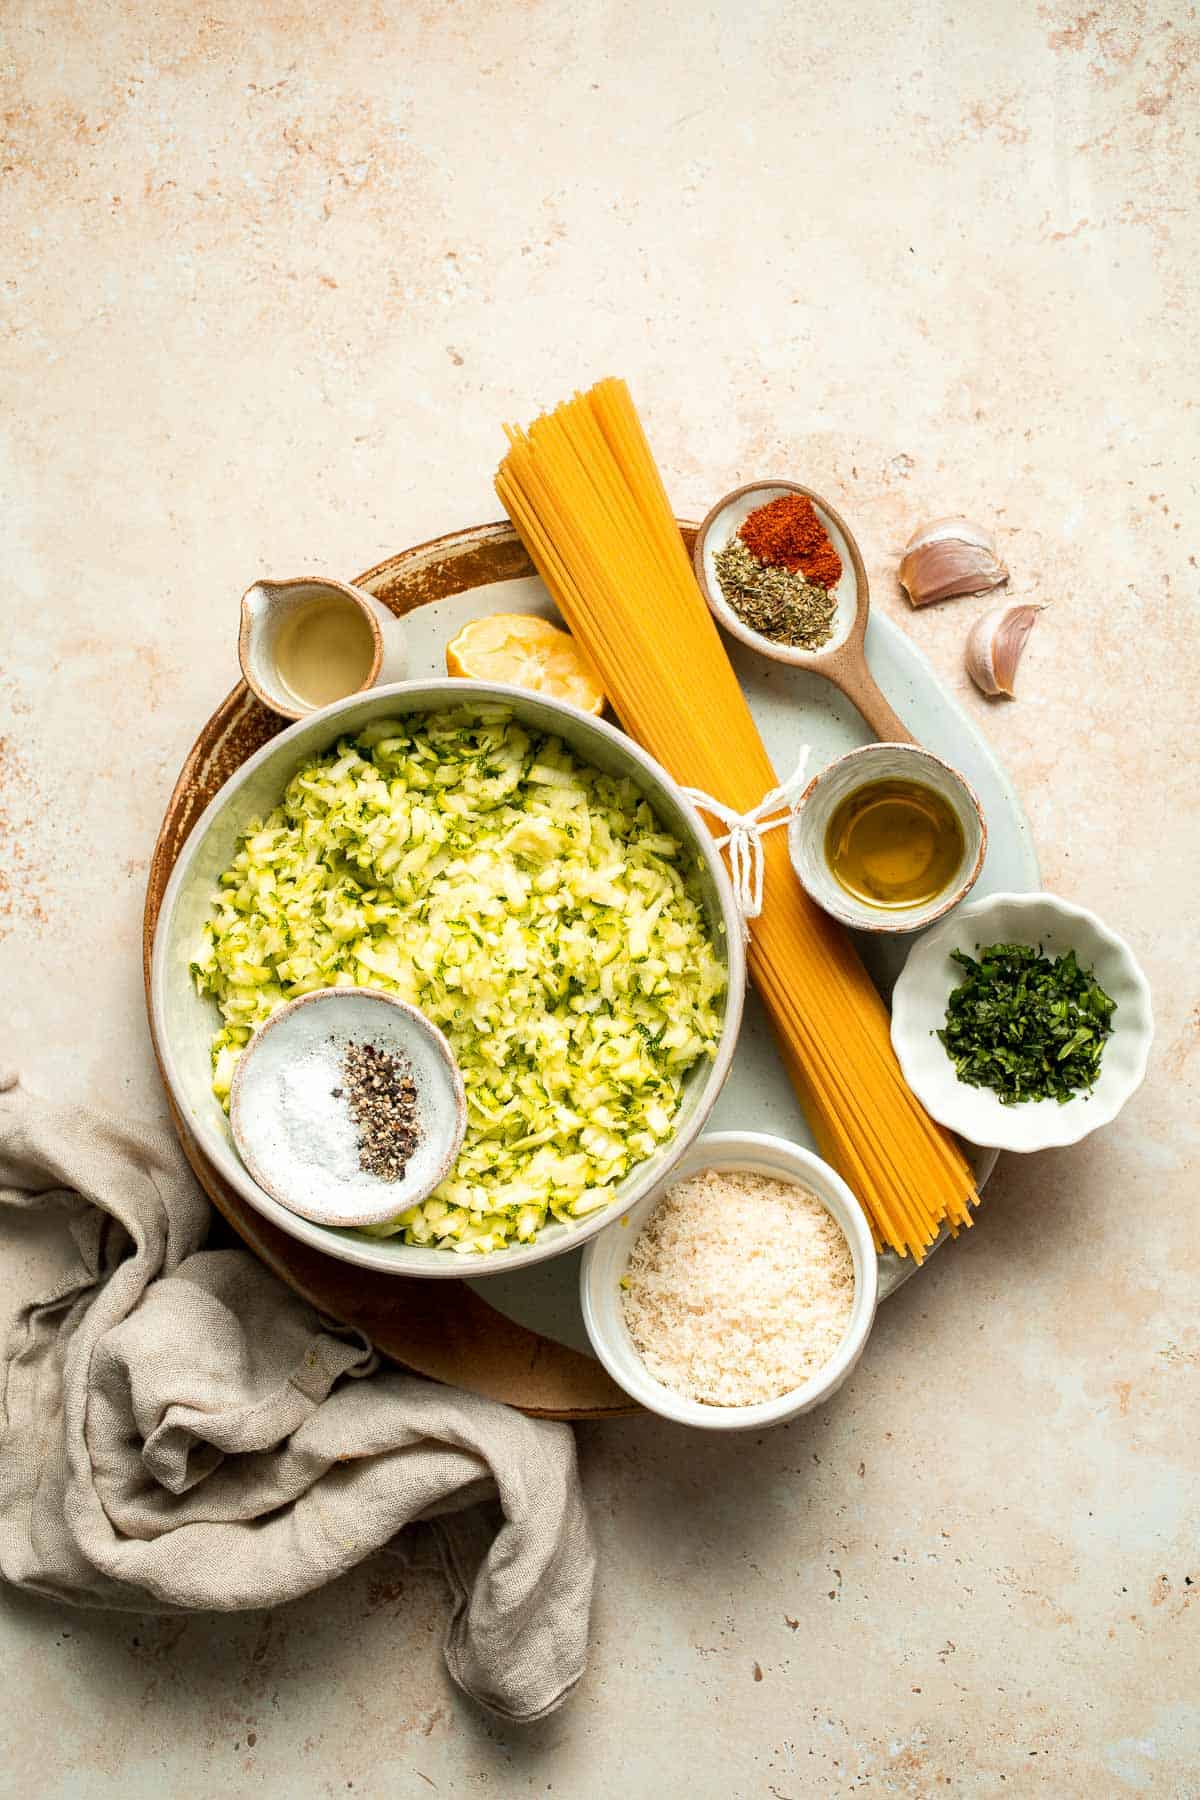
To make this quick and easy Lemon Zucchini Pasta, you will need the following ingredients (see recipe card below for quantities):
- pasta - Use spaghetti or your favorite long pasta like linguine, fettuccine, or bucatini. Gluten-free pasta works well too.
- olive oil - Adds richness and helps coat the pasta. You can also use avocado oil.
- garlic - Freshly minced garlic adds a fragrant, savory base. Avoid garlic powder for this recipe.
- zucchini - Slice the medium zucchini into thin half-moons or ribbons for even cooking. Yellow squash can be substituted as well.
- paprika - Adds subtle warmth and color. Smoked paprika gives a bolder flavor.
- Italian seasoning - A blend of oregano, basil, thyme, and rosemary adds depth. Use fresh herbs if you prefer. If using fresh herbs, use ½ tablespoon instead.
- salt - Essential for seasoning both the pasta water and the dish.
- pecorino cheese - Can be substituted with Parmesan cheese. Pecorino adds a salty, tangy bite, while Parmesan offers a nutty flavor.
- lemon juice - Freshly squeezed for the brightest taste. Avoid bottled juice. You can also add some lemon zest for a stronger lemon flavor.
- black pepper - Adds a gentle kick. Freshly cracked is best.
- basil - Fresh basil leaves add a sweet, herbal finish. Substitute with parsley if desired.
Equipment
You'll also need measuring cups and spoons, a large pot for boiling pasta, a colander for draining, a large skillet or sauté pan, a wooden spoon or spatula, and a microplane or grater for the cheese.
Instructions
- Cook the pasta. Bring a large pot of salted water to a boil. Add the pasta and cook until al dente, about 8-10 minutes or according to package instructions. Reserve 1 cup of the hot pasta water, then drain the noodles and set aside.
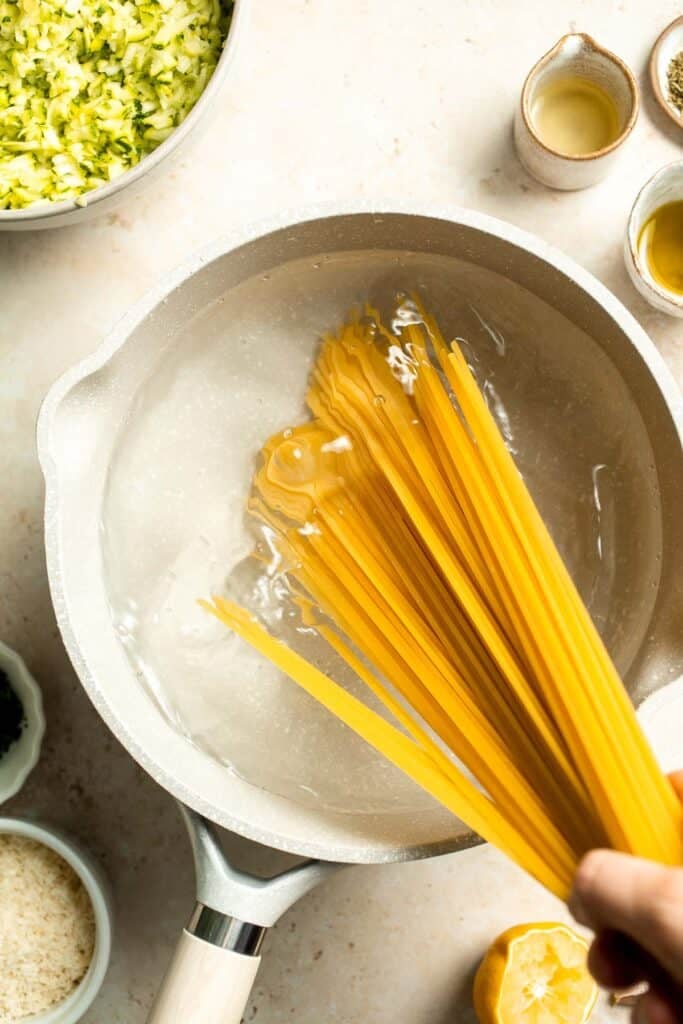
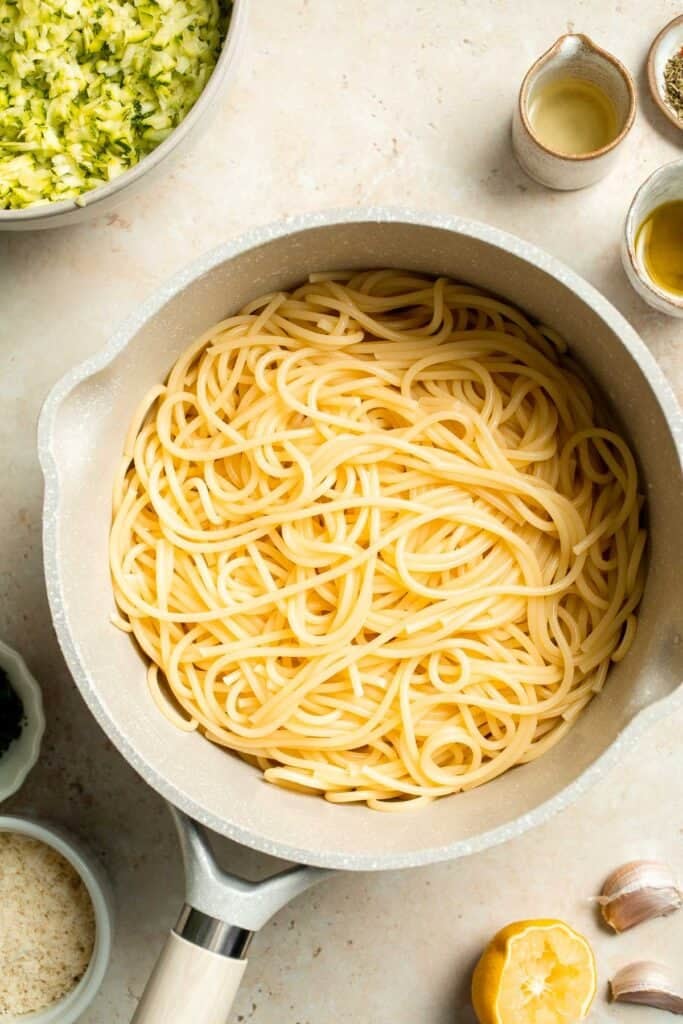

- Sauté the aromatics. Meanwhile, heat the oil in a large skillet over medium-high heat until shimmering, about 1 minute. Add the garlic, zucchini, paprika, Italian seasoning, and salt. Sauté until the zucchini is tender, about 3-5 minutes.
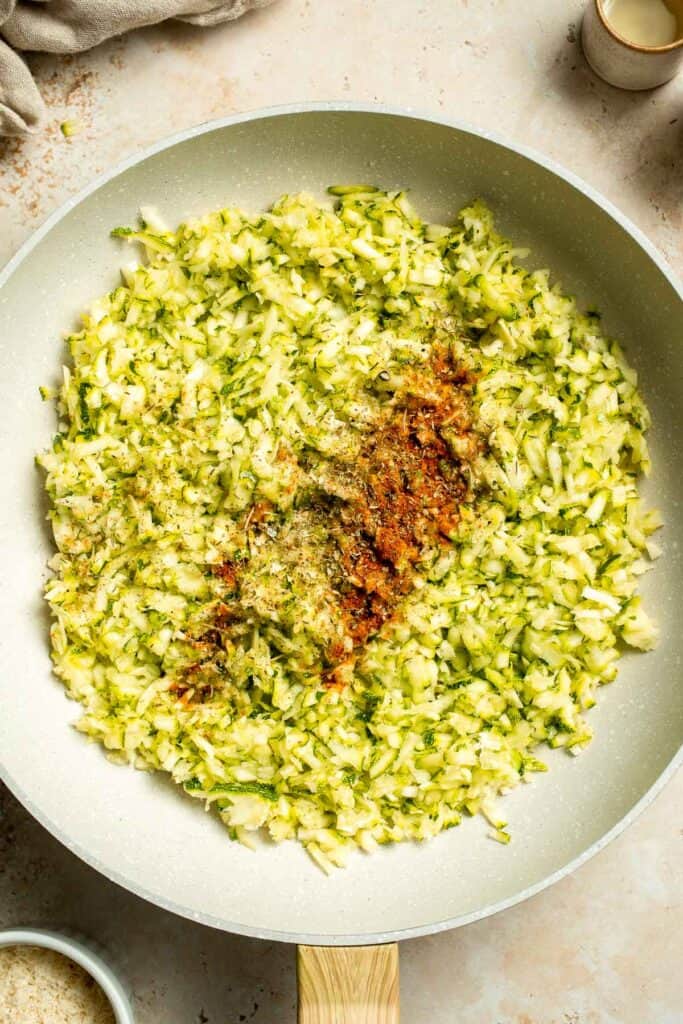

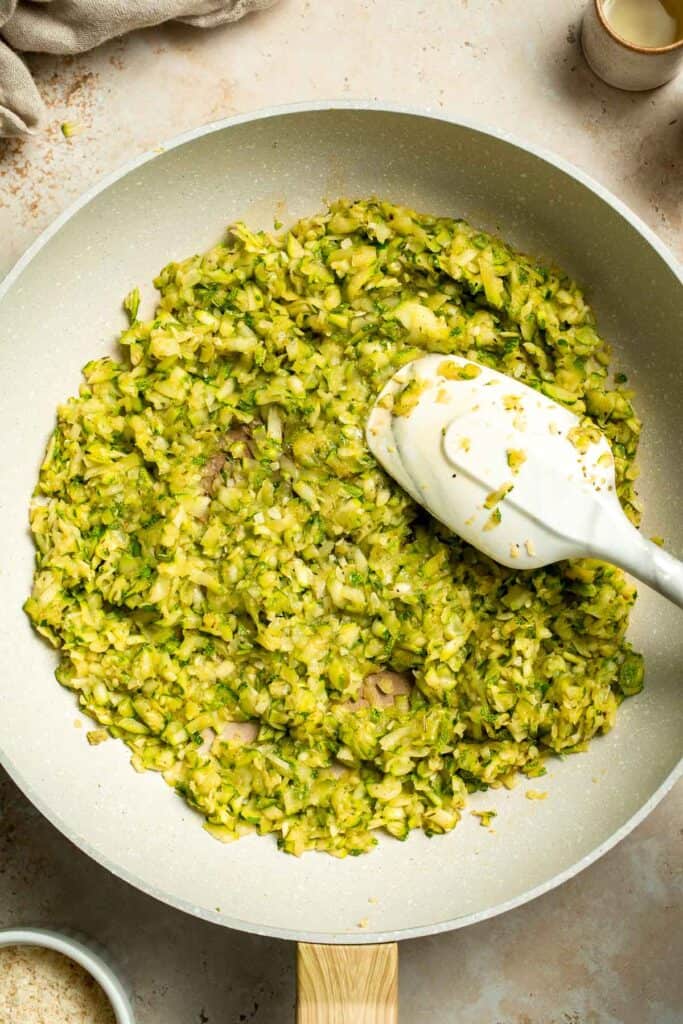
- Make the sauce. Stir in ½ cup of reserved pasta water (adding more gradually if needed), cheese, lemon juice, and black pepper. Mix well and bring to a simmer over medium heat. Let the sauce cook until slightly thickened, about 3-5 minutes, stirring constantly. Remove from heat. For a smoother texture, transfer to a blender and puree for about 30 seconds.
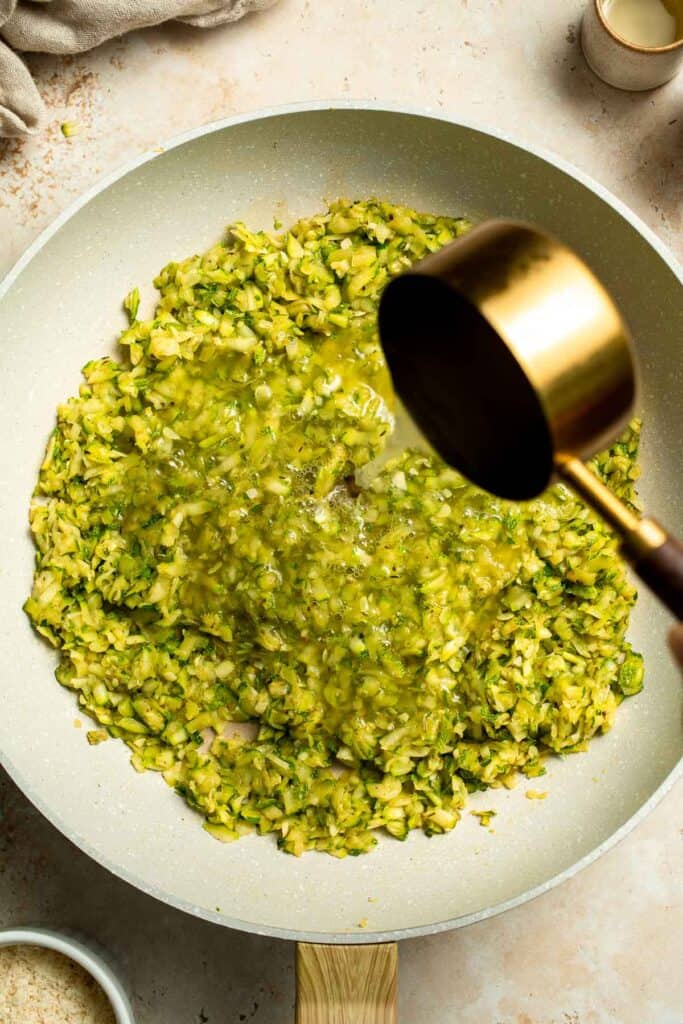
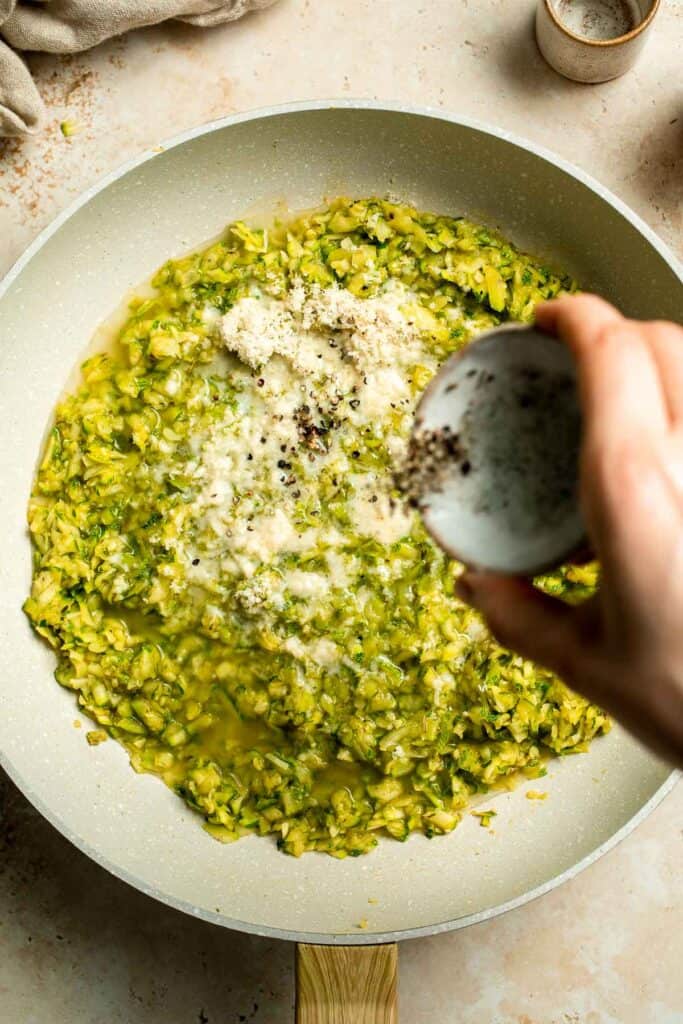
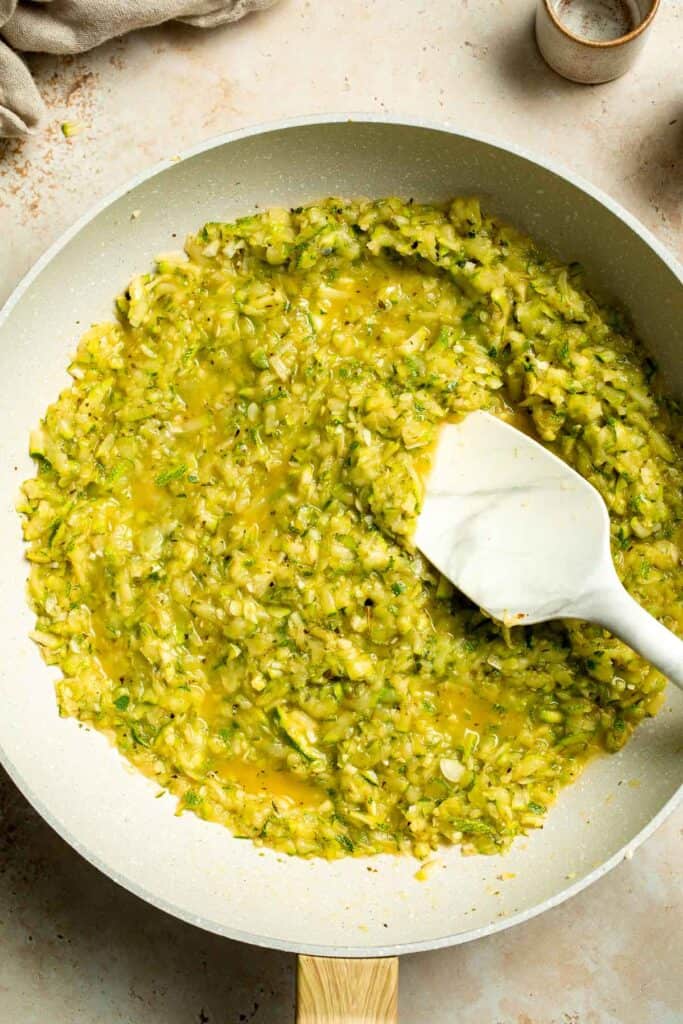
- Combine with pasta. Add the cooked pasta and basil to the skillet and toss until well coated in the sauce.
- Serve. Garnish with extra pecorino cheese and fresh basil, if desired, and serve immediately.
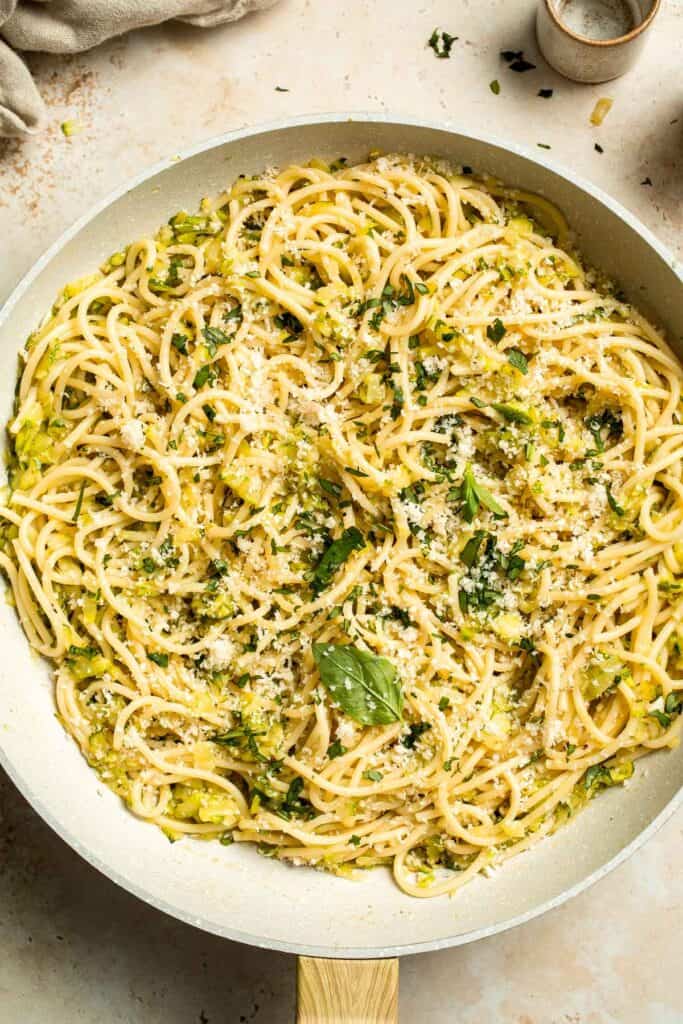
Expert Tip: Reserve Pasta Water
Before draining your pasta, scoop out a cup of the starchy cooking water. Adding a splash to your skillet not only helps the sauce cling to the noodles for a silky finish, but it also allows you to adjust the consistency without adding extra oil or butter, keeping the dish light yet luscious.
More Tips and Tricks
- Cook pasta al dente. Slightly undercooking pasta allows it to finish cooking in the skillet with the sauce, ensuring perfect texture and flavor absorption.
- Use fresh lemon juice. Freshly squeezed lemon juice has a brighter, cleaner flavor than bottled and will make the dish taste fresher.
- Toss pasta with sauce off the heat. This helps prevent overcooking and keeps the cheese from clumping or becoming greasy.
- Garnish just before serving. Add fresh basil and extra cheese right before serving for maximum flavor and presentation.
Recipe Variations
- Add protein. Toss in grilled chicken, shrimp, or seared scallops for a heartier meal. The added protein makes it a more filling main course.
- Make it spicy. Add red pepper flakes, chili oil, or a pinch of cayenne into the zucchini mixture to give the pasta a gentle heat that balances beautifully with the lemony brightness.
- Add a crispy panko topping. Toast panko breadcrumbs in a skillet with a little olive oil until golden brown and crunchy, then sprinkle over the finished pasta for extra texture and flavor. For even more taste, add a pinch of garlic powder, lemon zest, or grated Parmesan to the breadcrumbs before toasting.
- Use different herbs. Swap basil for parsley, dill, or chives for a different flavor twist. Fresh herbs change the overall aroma and can give the dish a seasonal refresh.
- Add more vegetables. Spinach, asparagus, cherry tomatoes, or artichokes add both color and extra nutrition.
- Make it more creamy. Stir in a splash of heavy cream, mascarpone, or ricotta for a luscious sauce that blends well with the lemon and cheese. See our Lemon Ricotta Pasta.
- Try zucchini noodles. Replace half or all the pasta with spiralized zucchini to create a lighter, lower-carb version while still enjoying the same garlicky, lemony flavors. See our Shrimp Scampi with Zucchini Noodles.
Storage
How to Store
Transfer leftovers to an airtight container and store in the fridge for up to 3 days.
How to Reheat
Warm gently in a skillet over medium heat with a splash of water, broth, or olive oil to loosen the sauce. Avoid high heat, which can make the zucchini too soft and alter the pasta's texture. You can also reheat in the microwave with a teaspoon or two of water, and cover loosely. Heat in 30-45 second intervals, stirring between each, until warmed through.
How to Freeze
Freezing is not recommended, as zucchini releases a lot of water once thawed and pasta tends to lose its al dente bite. If you must freeze, undercook both pasta and zucchini slightly, then reheat from frozen to reduce mushiness.
How to Serve
Lemon zucchini pasta is delicious as a light main course or a refreshing side dish, perfect for pairing with grilled meats, seafood, or fresh salads. The bright lemon flavor makes it a fantastic summer dish, but it's just as enjoyable year-round whenever you want something fresh and uplifting. It's also an ideal option for dinner parties because it's easy to make ahead and serve family-style for guests to help themselves.
These are my favorite side dishes to serve with this Lemon Zucchini Pasta:

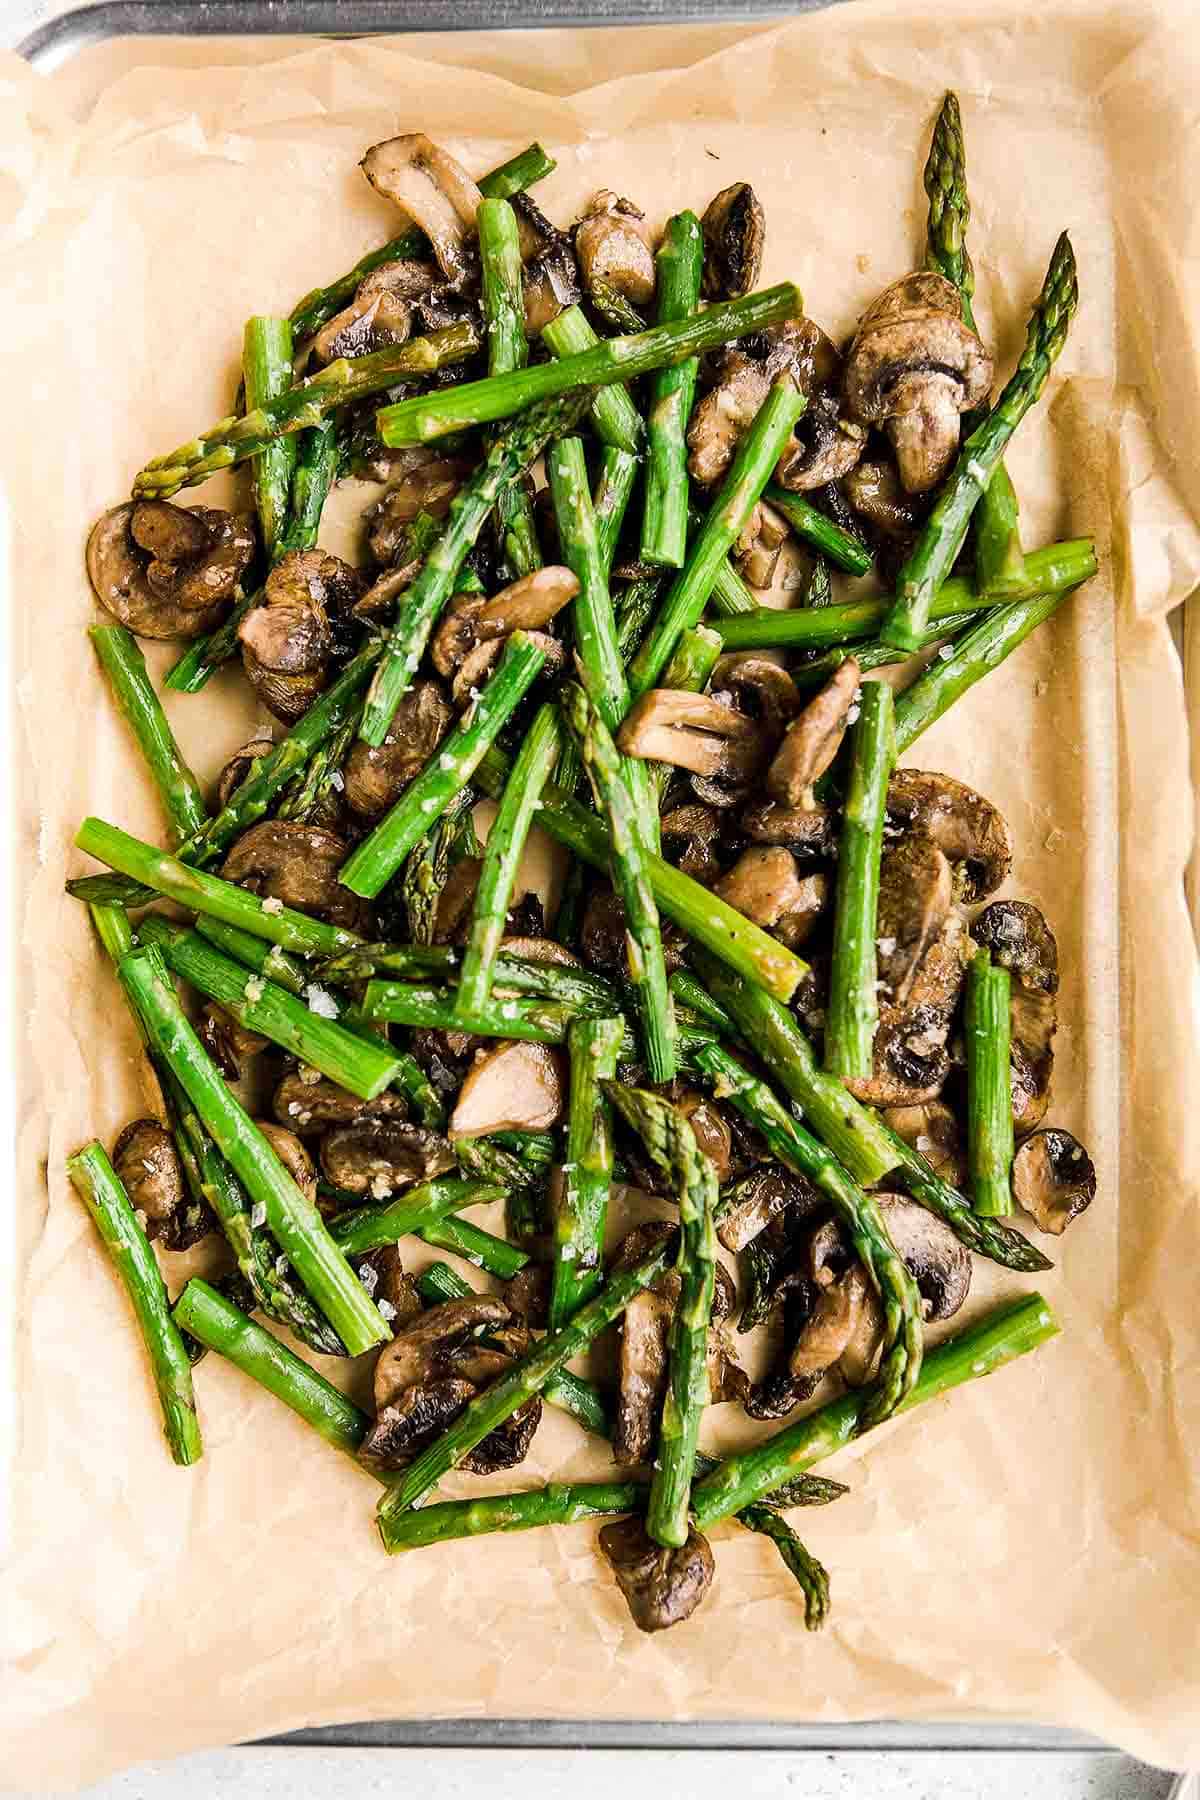
Side Dishes for Pasta
For more recipe ideas, check out our collection of pasta side dishes, featuring everything from fresh salads and roasted vegetables to crusty breads and flavorful appetizers that pair perfectly with any pasta dinner.
FAQ
You can create a luscious, creamy pasta without cream by using alternatives like reserved pasta water, olive oil, butter, or pureed vegetables. In this lemon zucchini pasta, the starchy pasta water emulsifies with olive oil and pecorino cheese to create a silky sauce that clings to each strand. You can also use ricotta, mascarpone, or Greek yogurt for added creaminess while keeping the dish lighter and dairy-flexible.
To thicken pasta without cream, reserve about 1 cup of the pasta cooking water and add it gradually to the sauce while tossing. The starches from the water bind with the fat in olive oil or cheese, creating a thicker texture. You can also add a slurry of cornstarch and water, stir in beaten eggs off the heat, or use pureed cooked vegetables for natural thickening.
Absolutely. Zucchini blends beautifully into pasta sauces because of its mild, slightly sweet flavor. You can finely grate or dice it for a more subtle texture, or slice it into ribbons or rounds for more bite. Cooking zucchini down into tomato-based sauces adds a tender, slightly silky texture, while blending it into creamy sauces boosts nutrition without overpowering the flavor.
Yes. Zucchini is a popular ingredient in pasta dishes and can be used in many ways - sliced, spiralized, grated, or roasted. It adds a fresh, light quality that balances richer sauces. In this lemon zucchini pasta, it's sautéed until tender, adding a naturally sweet flavor that pairs perfectly with the tang of lemon juice and the savory depth of pecorino cheese.
Zucchini pairs well with fresh herbs like basil, parsley, and mint, as well as tangy flavors like lemon and balsamic vinegar. It complements cheeses such as Parmesan, pecorino, ricotta, and feta. Garlic, onion, and mild chili flakes add depth, while olive oil enhances its natural sweetness. For a heartier pairing, try zucchini with tomatoes, mushrooms, or grilled meats.
Yes. Courgette and zucchini are the same vegetable, with "courgette" being the term commonly used in the UK, Ireland, and parts of Europe, while "zucchini" is used in North America and Australia. Both refer to the same tender summer squash, which is harvested young for the best texture and flavor. The terms are interchangeable in recipes, so you can follow the same cooking methods regardless of the name used.
More Zucchini Recipes
Looking for other recipes like this? Try these:
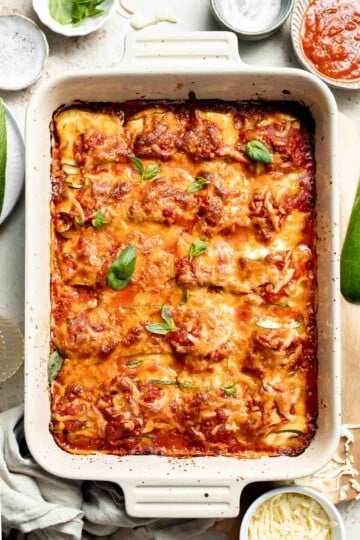

Tried this recipe?
I'd love to hear what you think! Leave a comment and rating below to share your feedback. Your reviews help others discover this recipe and help me keep creating more free recipes for you. Snap a photo and tag me on social media @aheadofthyme too.
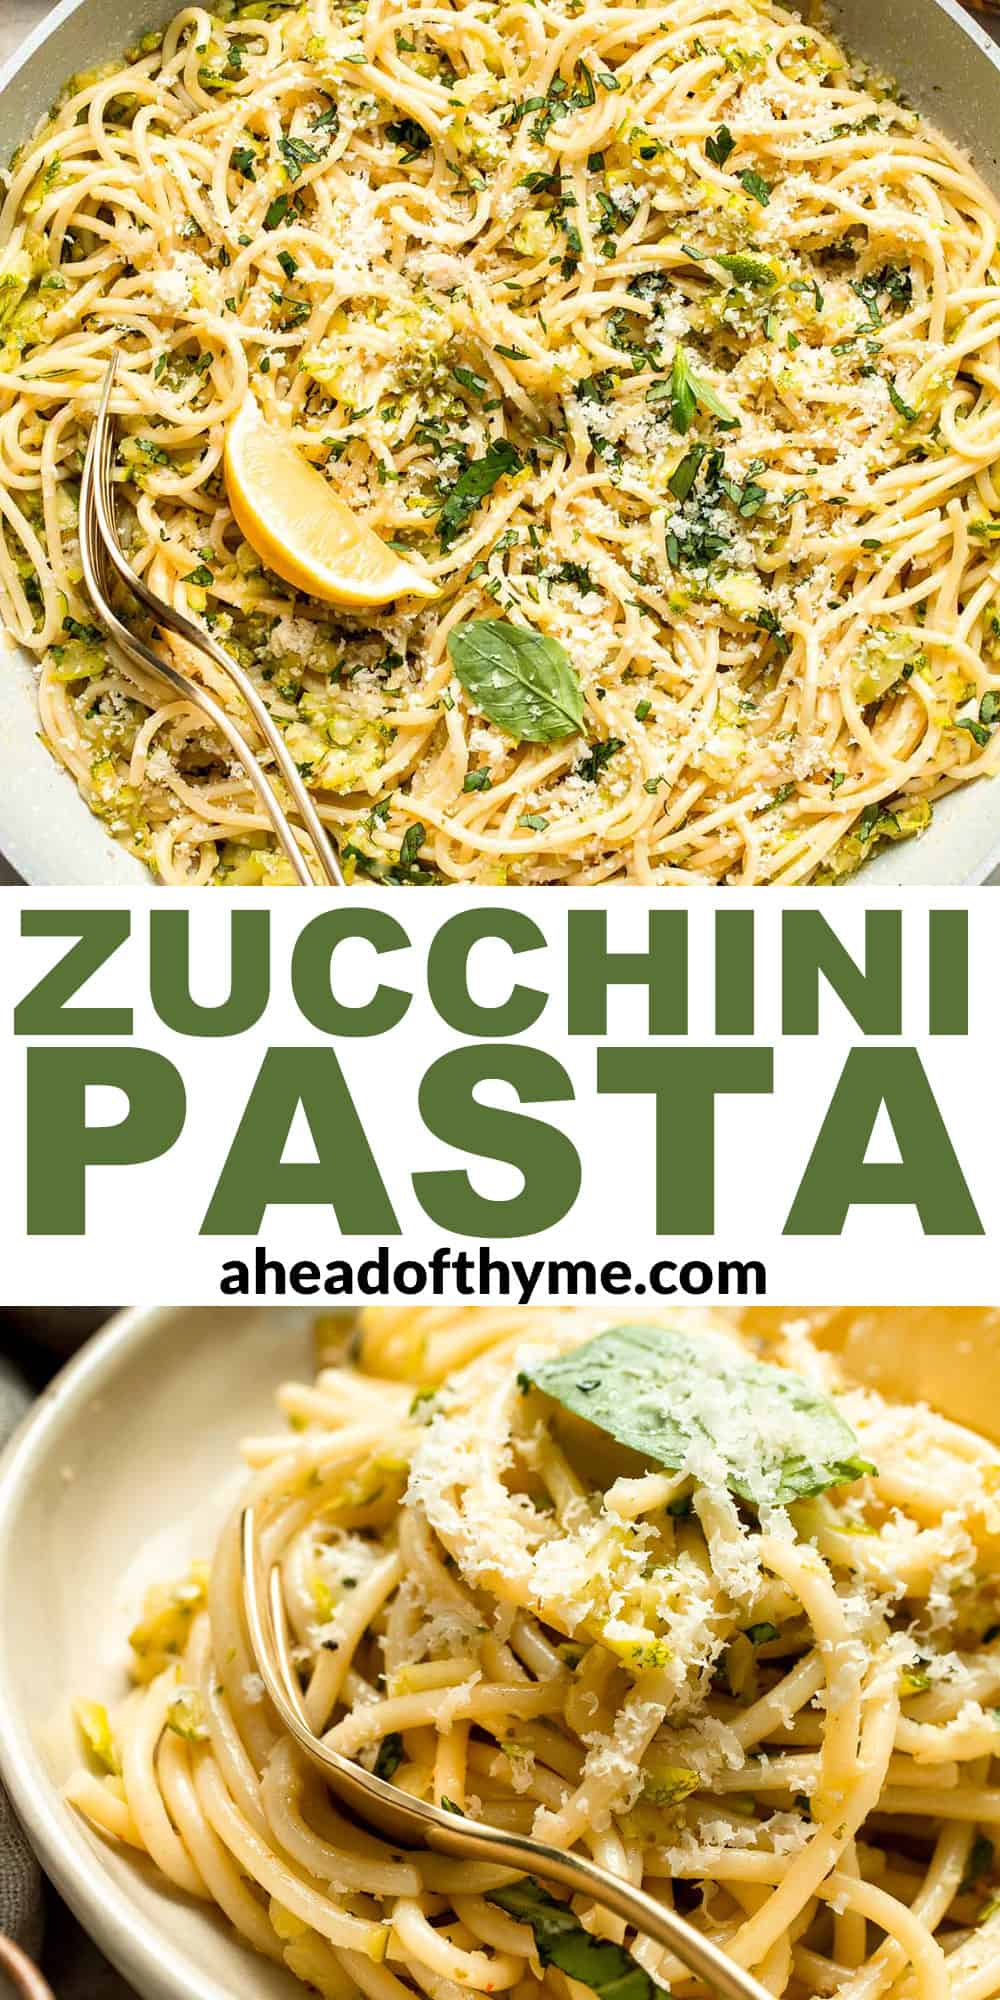
Classic Lemon Bars with Shortbread Crust

Classic Lemon Bars with Shortbread Crust are a timeless dessert that combines the best of both worlds: a buttery, melt-in-your-mouth shortbread crust topped with a zesty, smooth lemon curd layer. This lemon bar recipe offers a delightful balance of sweet and tart flavors, with the perfect combination of textures. The shortbread crust is rich and crumbly, while the lemon curd is bright and tangy, creating a bite-sized treat that's irresistible.

These homemade lemon bars are simple to make, yet they look and taste like a showstopper. Whether you're hosting a party, baking for a holiday, or just craving a sweet treat with your afternoon tea, they're sure to be a hit. They're elegant enough for special occasions, yet simple enough to enjoy on any day. Their bright, refreshing flavor makes them a crowd-pleaser that works year-round.
If you like this recipe, you need to try our French Lemon Tart or Lemon Curd Cookies next.

Why You'll Love This Recipe
- Perfect balance of flavors. The sweet and buttery shortbread crust pairs wonderfully with the tart, citrusy lemon curd layer. This classic combination gives you the best of both worlds, with rich and zesty flavors in every bite. These two layers really form the best lemon bars ever!
- Easy to make. Despite it's bakery style aesthetic, these tangy lemon bars are surprisingly easy to make. With just a few simple ingredients, you can have this treat ready in less than an hour. The process involves basic baking steps, so even novice bakers can create a delicious dessert without stress.
- Perfect texture. The shortbread crust is wonderfully crumbly and buttery, while the lemon curd layer is smooth, creamy, and slightly firm. Together, they create a perfect contrast in textures, making each bite satisfying. The crispness of the crust complements the soft, luscious lemon filling for a truly irresistible treat.
- Store and share-friendly. These lemon bars are easy to store and share, making them perfect for potlucks or gift-giving. You can easily cut them into squares, wrap them up, and share the love. They stay fresh in the fridge for a few days, and the flavors actually improve over time! We like it best the next day!
Ingredients and Substitutions
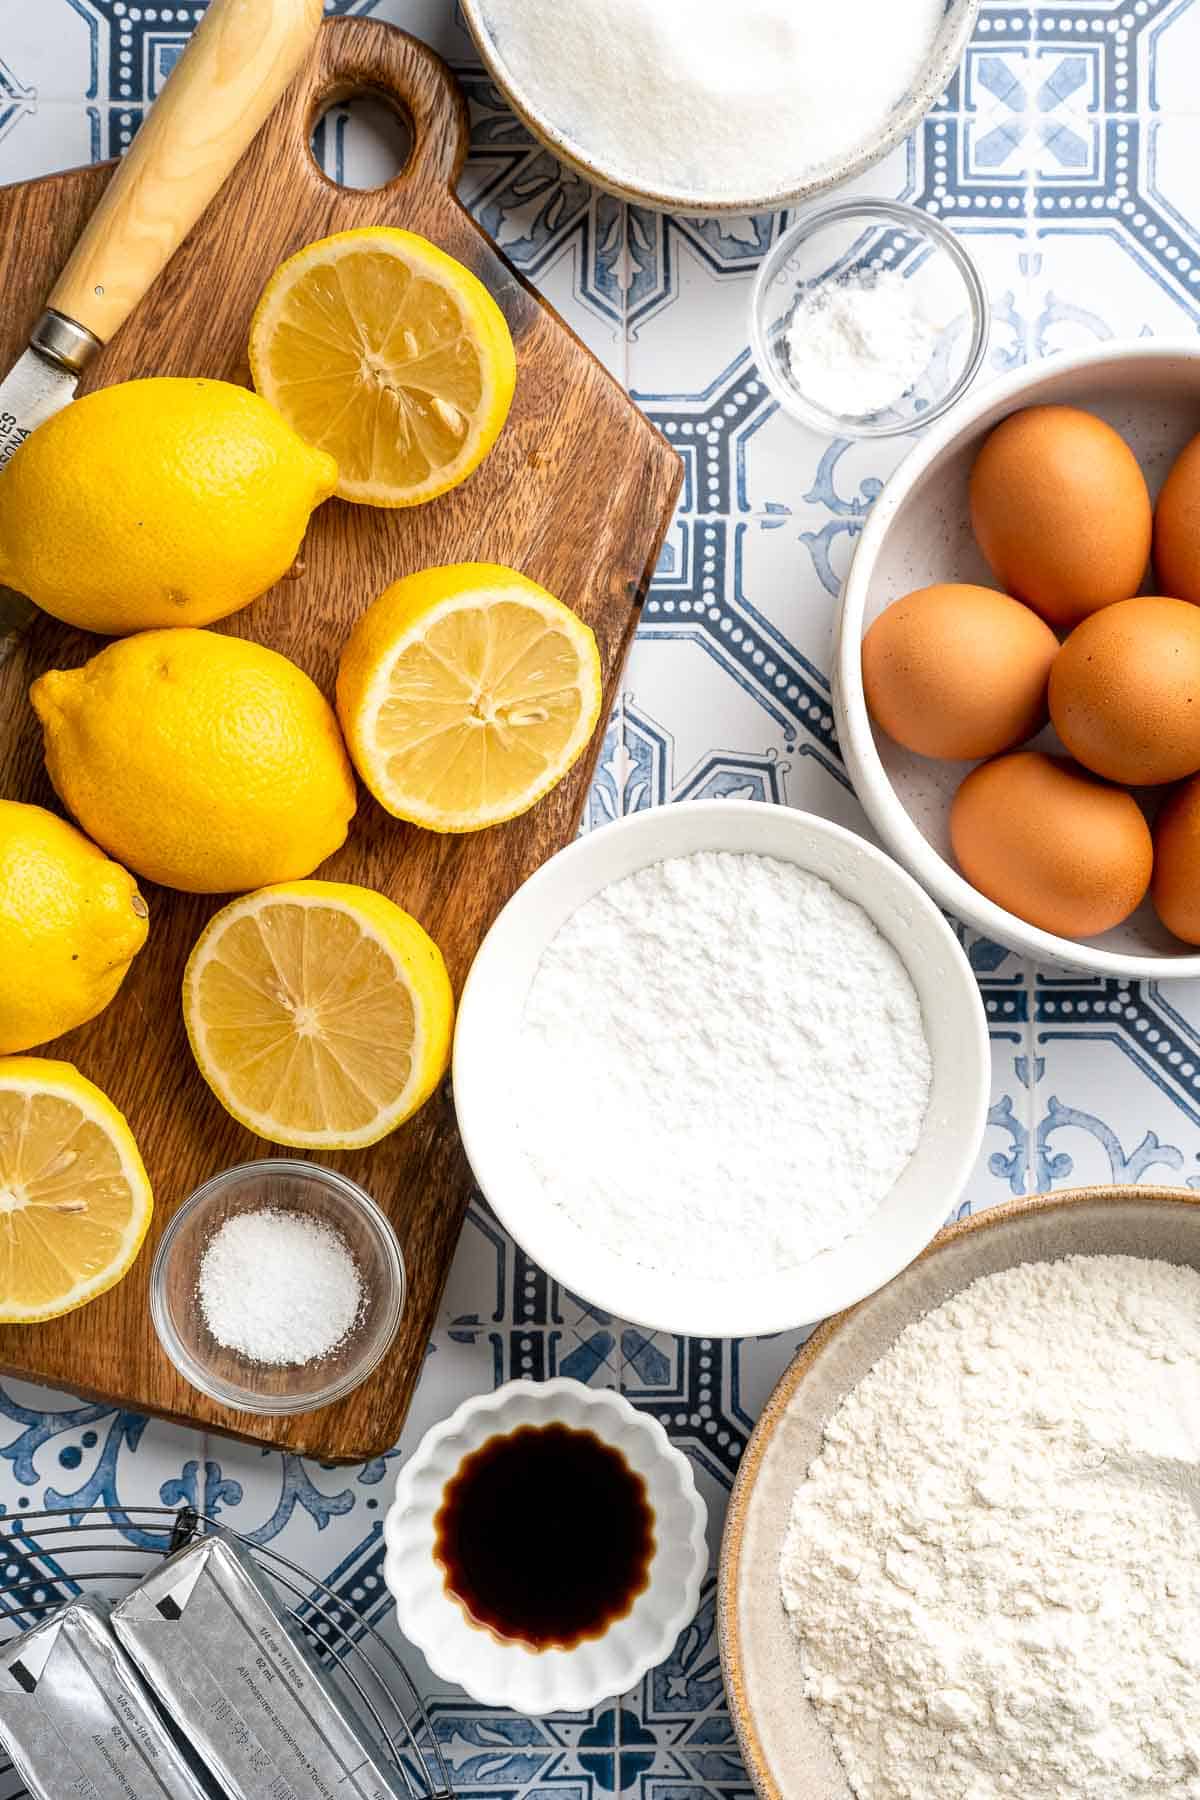
To make these Classic Lemon Bars with Shortbread Crust, you will need the following ingredients (see recipe card below for quantities):
- butter - The base for both the shortbread crust and the lemon curd layer. We use unsalted butter but you can substitute with salted butter and reduce the amount of added salt.
- kosher salt - Used in both the crust and lemon curd layer. You can substitute with table salt, but use half the amount.
- vanilla extract - Adds a hint of sweetness to the crust. For a twist, use almond extract instead of vanilla for a slightly nutty flavor.
- confectioners' sugar - Used in the shortbread crust to help create a light, melt-in-your-mouth texture. You can substitute with regular sugar, but the texture will be slightly different.
- baking powder - Helps the crust rise a little, giving it a lighter texture.
- all-purpose flour - The main ingredient for the crust, giving it structure. You can substitute with a gluten-free flour blend for a gluten-free version.
- lemon zest - Adds a fresh citrus aroma to the lemon curd layer. Be sure to use fresh zest for the most intense lemon flavor.
- lemon juice - Freshly squeezed for the curd layer to provide a tangy, bright flavor. While fresh is preferred, bottled lemon juice can be used in a pinch.
- white sugar - Sweetens the lemon curd and balances the acidity of the lemon juice. You can substitute with coconut sugar for a more natural alternative.
- eggs - Large eggs provides structure and richness to the lemon curd. For an egg-free option, use a flax egg or an egg replacer.
- egg yolks - Adds richness and helps the lemon curd set properly. You can omit the egg yolks for a lighter, less rich curd, but the texture may be different.
Equipment
You will also need measuring cups and spoons (and/or a kitchen scale), a 9x9-inch square baking dish, a mixing bowl, a whisk for the curd, a rolling pin, and a sharp knife for slicing the lemon bars.
Instructions
First, make the shortbread cookie crust.
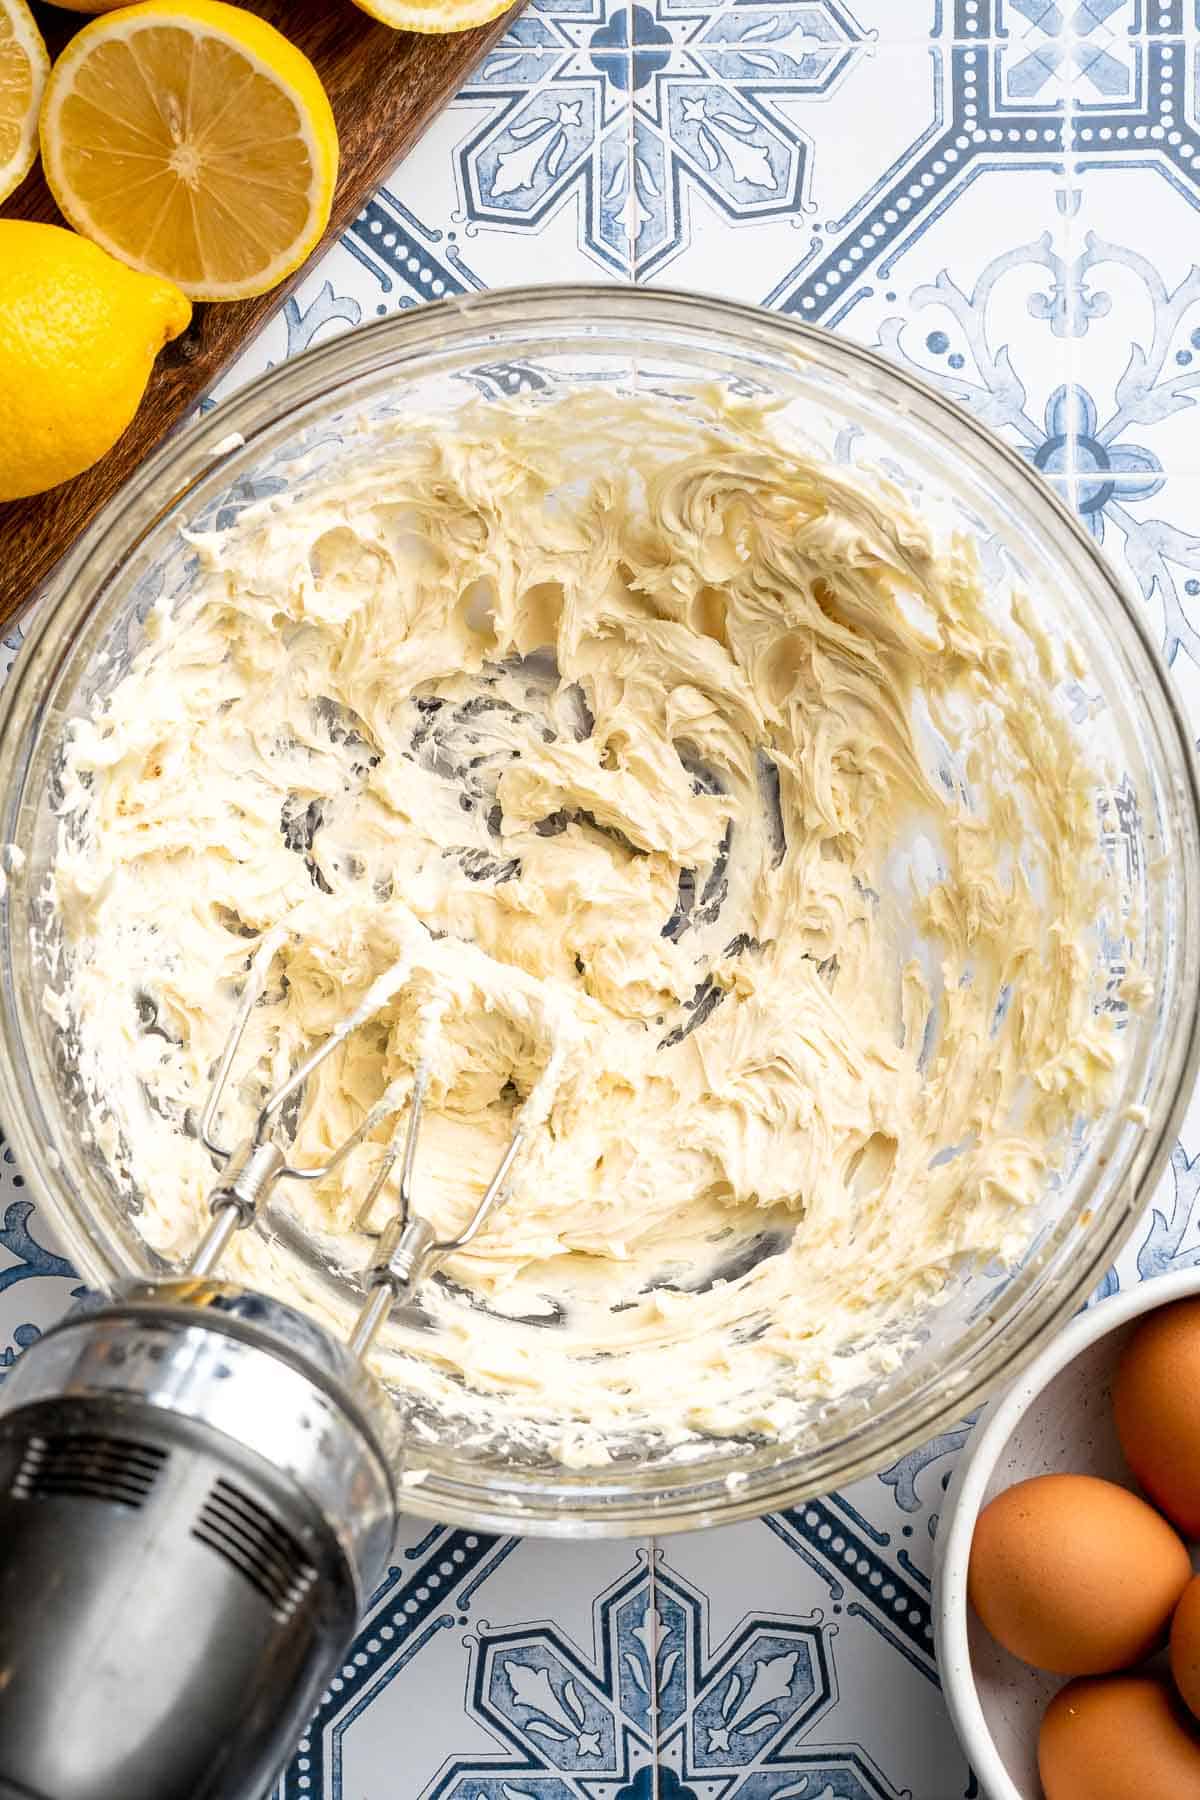
- Step 1: In a large bowl, beat together the butter, salt, and vanilla using an electric hand mixer until smooth and creamy. You can also use the bowl of a stand mixer with the paddle attachment.
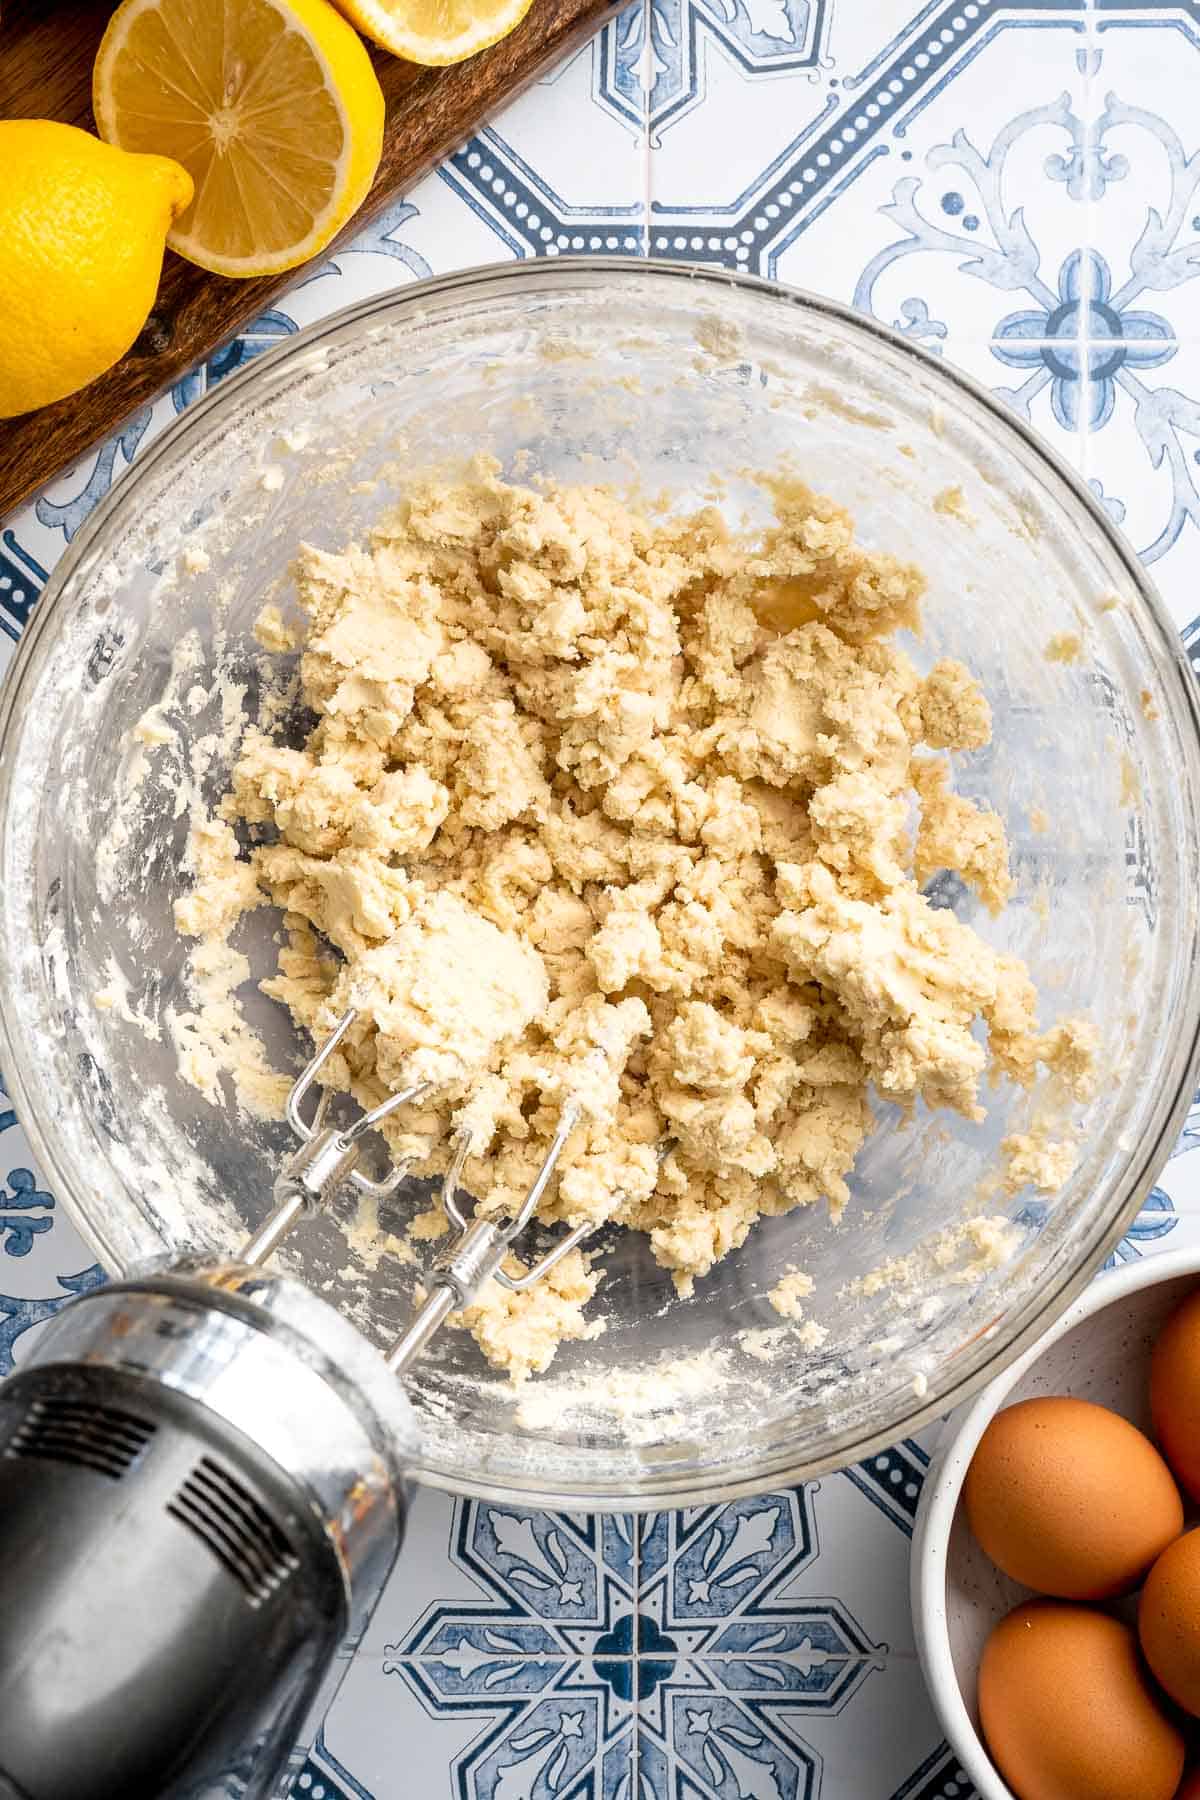
- Step 2: Add the confectioners' sugar. Continue mixing for 3-4 minutes, or until the mixture becomes pale and fluffy.
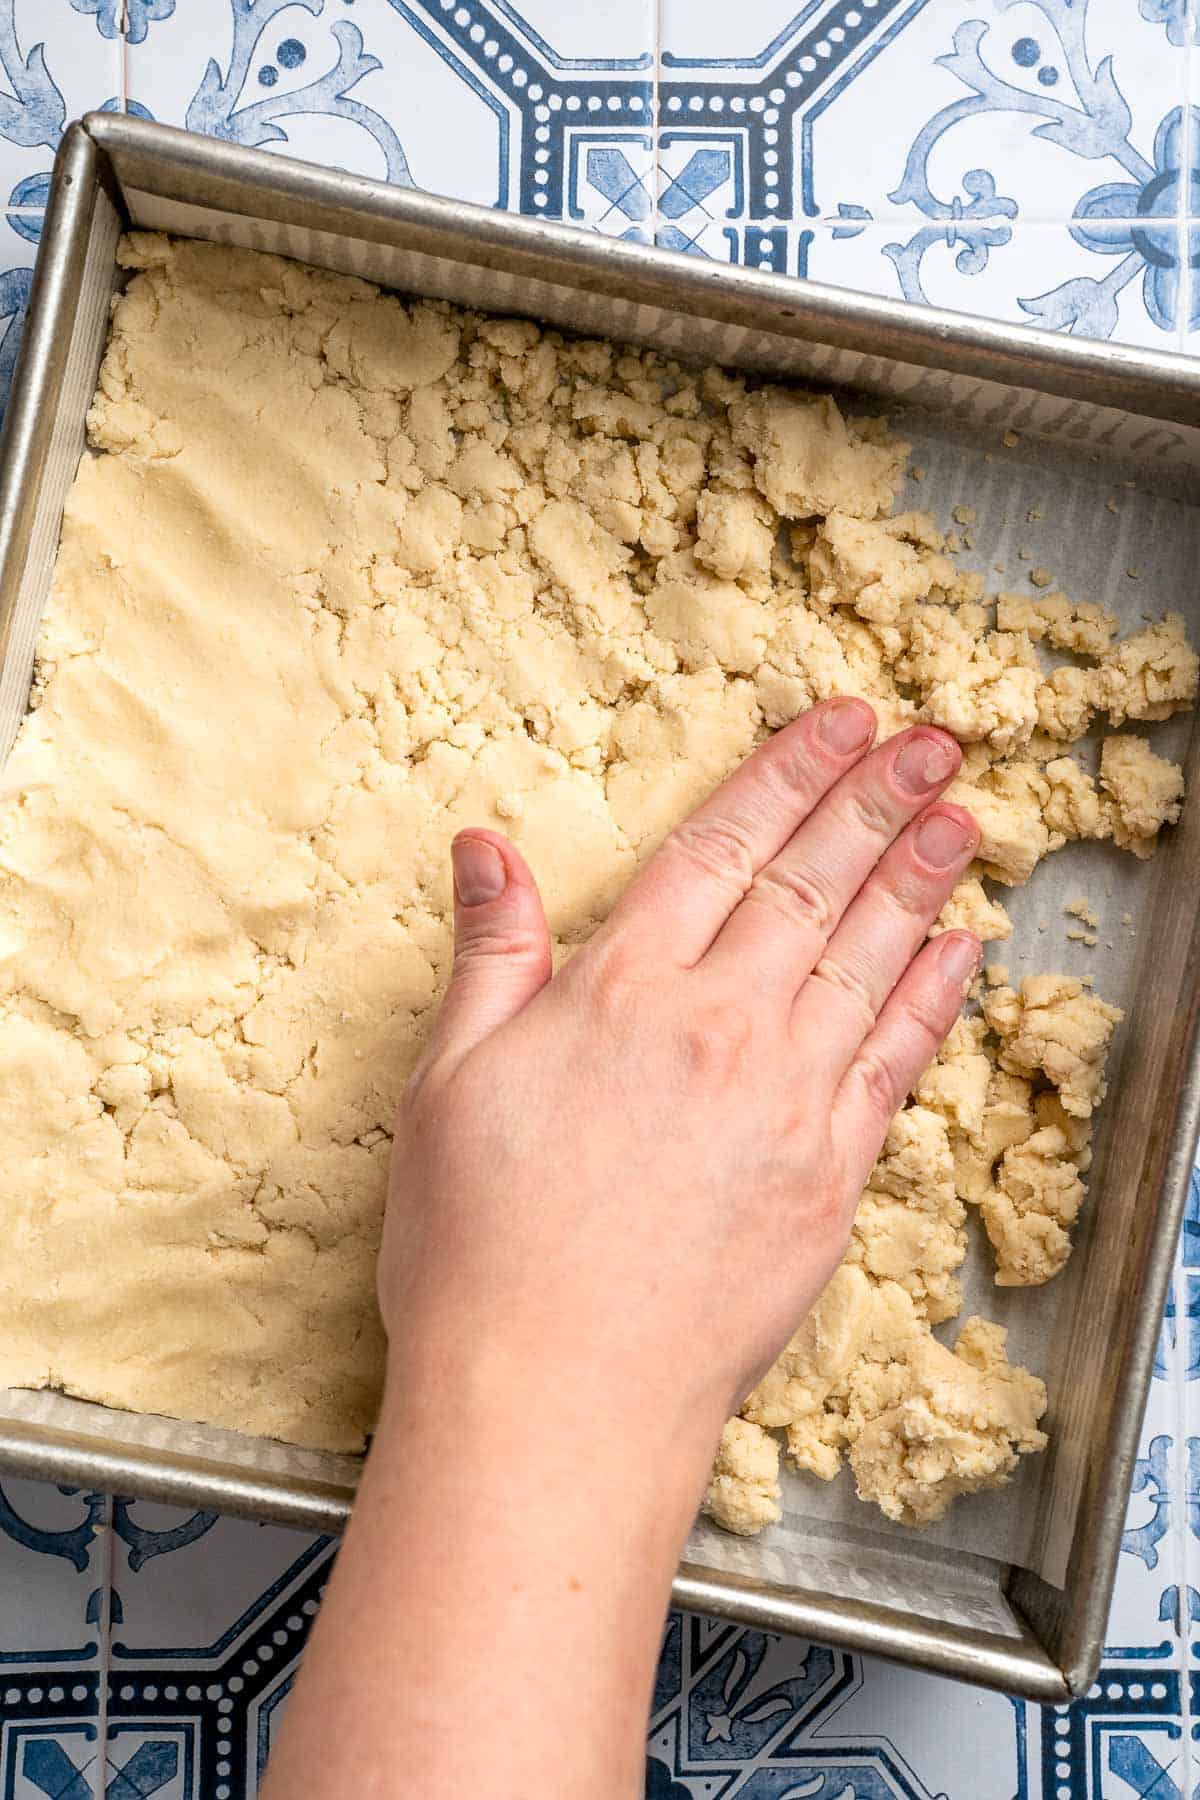
- Step 3: Line a 9-inch square baking pan with parchment paper with an overhang. Gather the dough into a ball and transfer it to the prepared pan. Use your hands to evenly spread the dough across the bottom.
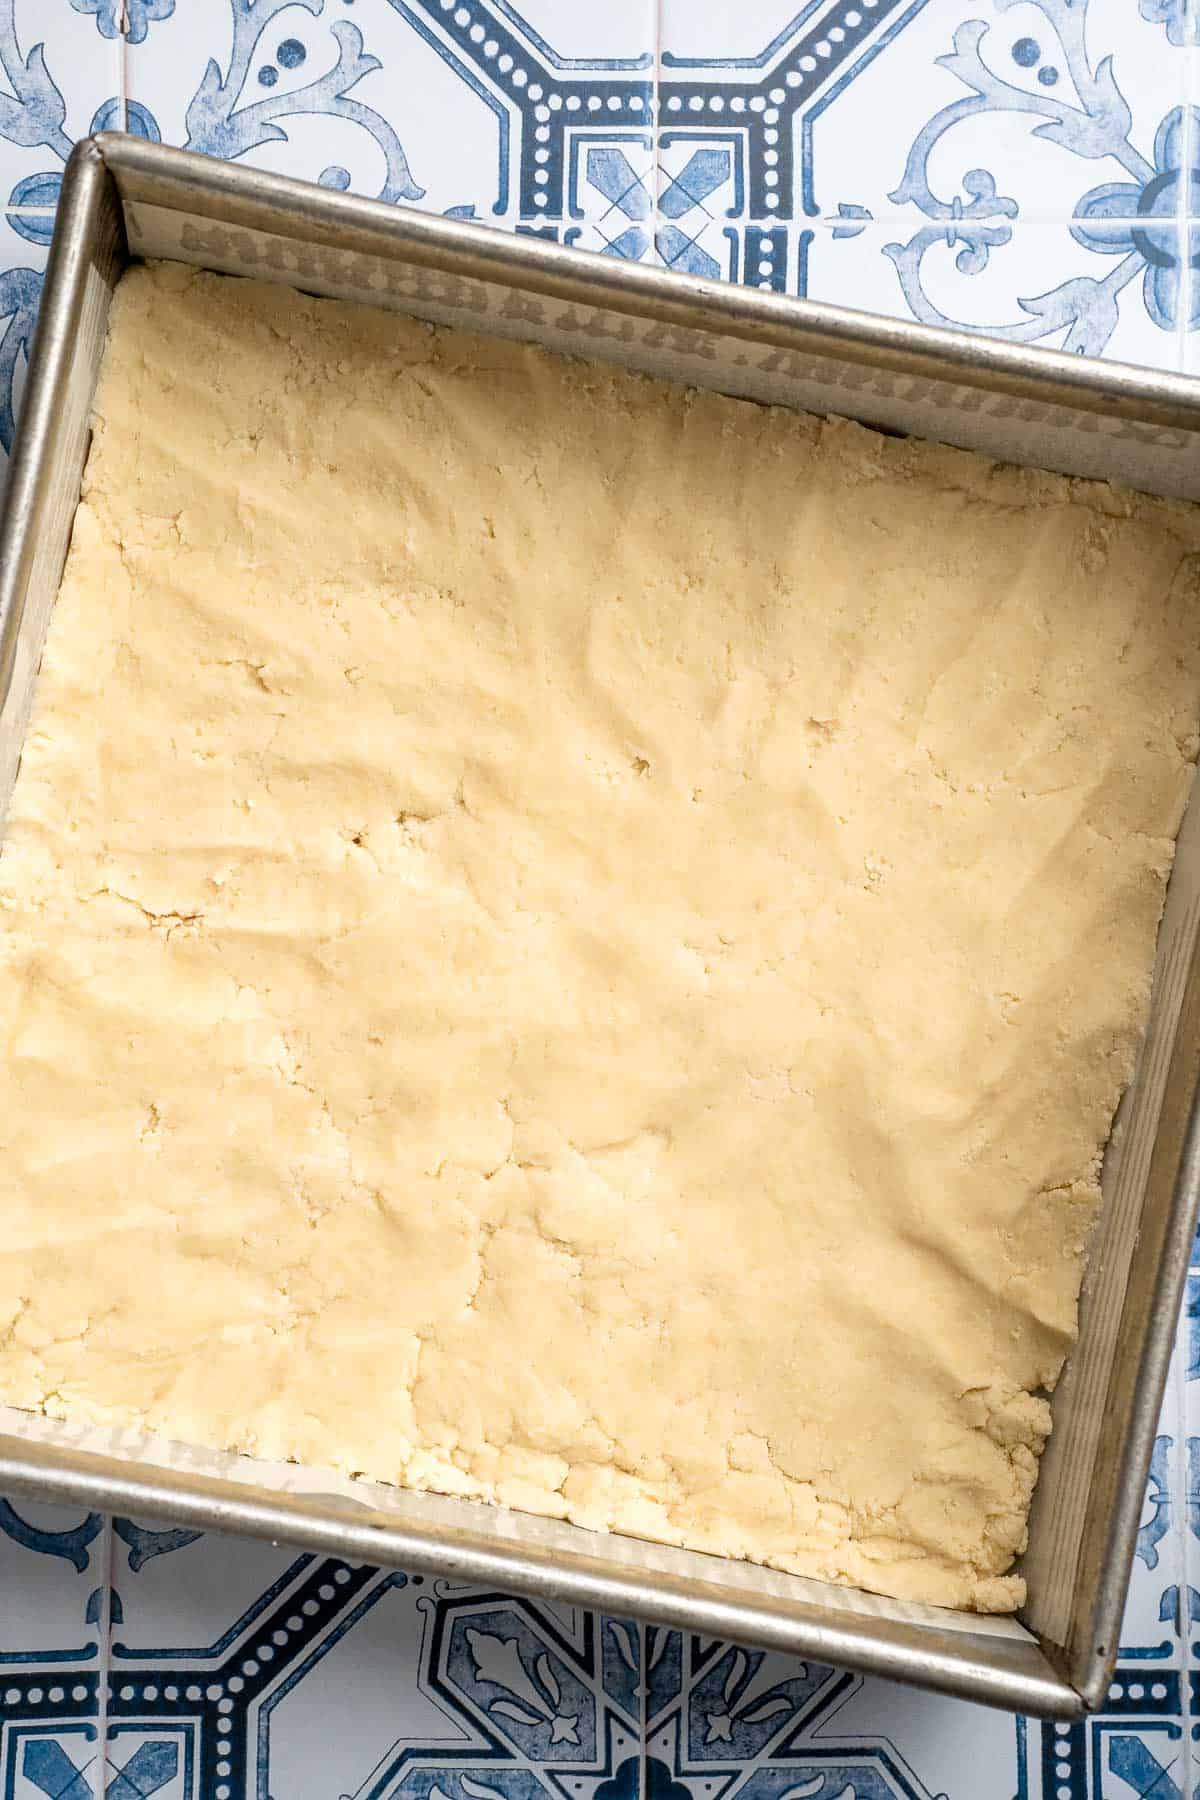
- Step 4: Bake in a 350°F (175°C) preheated oven for 18 minutes, or until the crust is lightly golden.
Then, make the lemon curd layer.
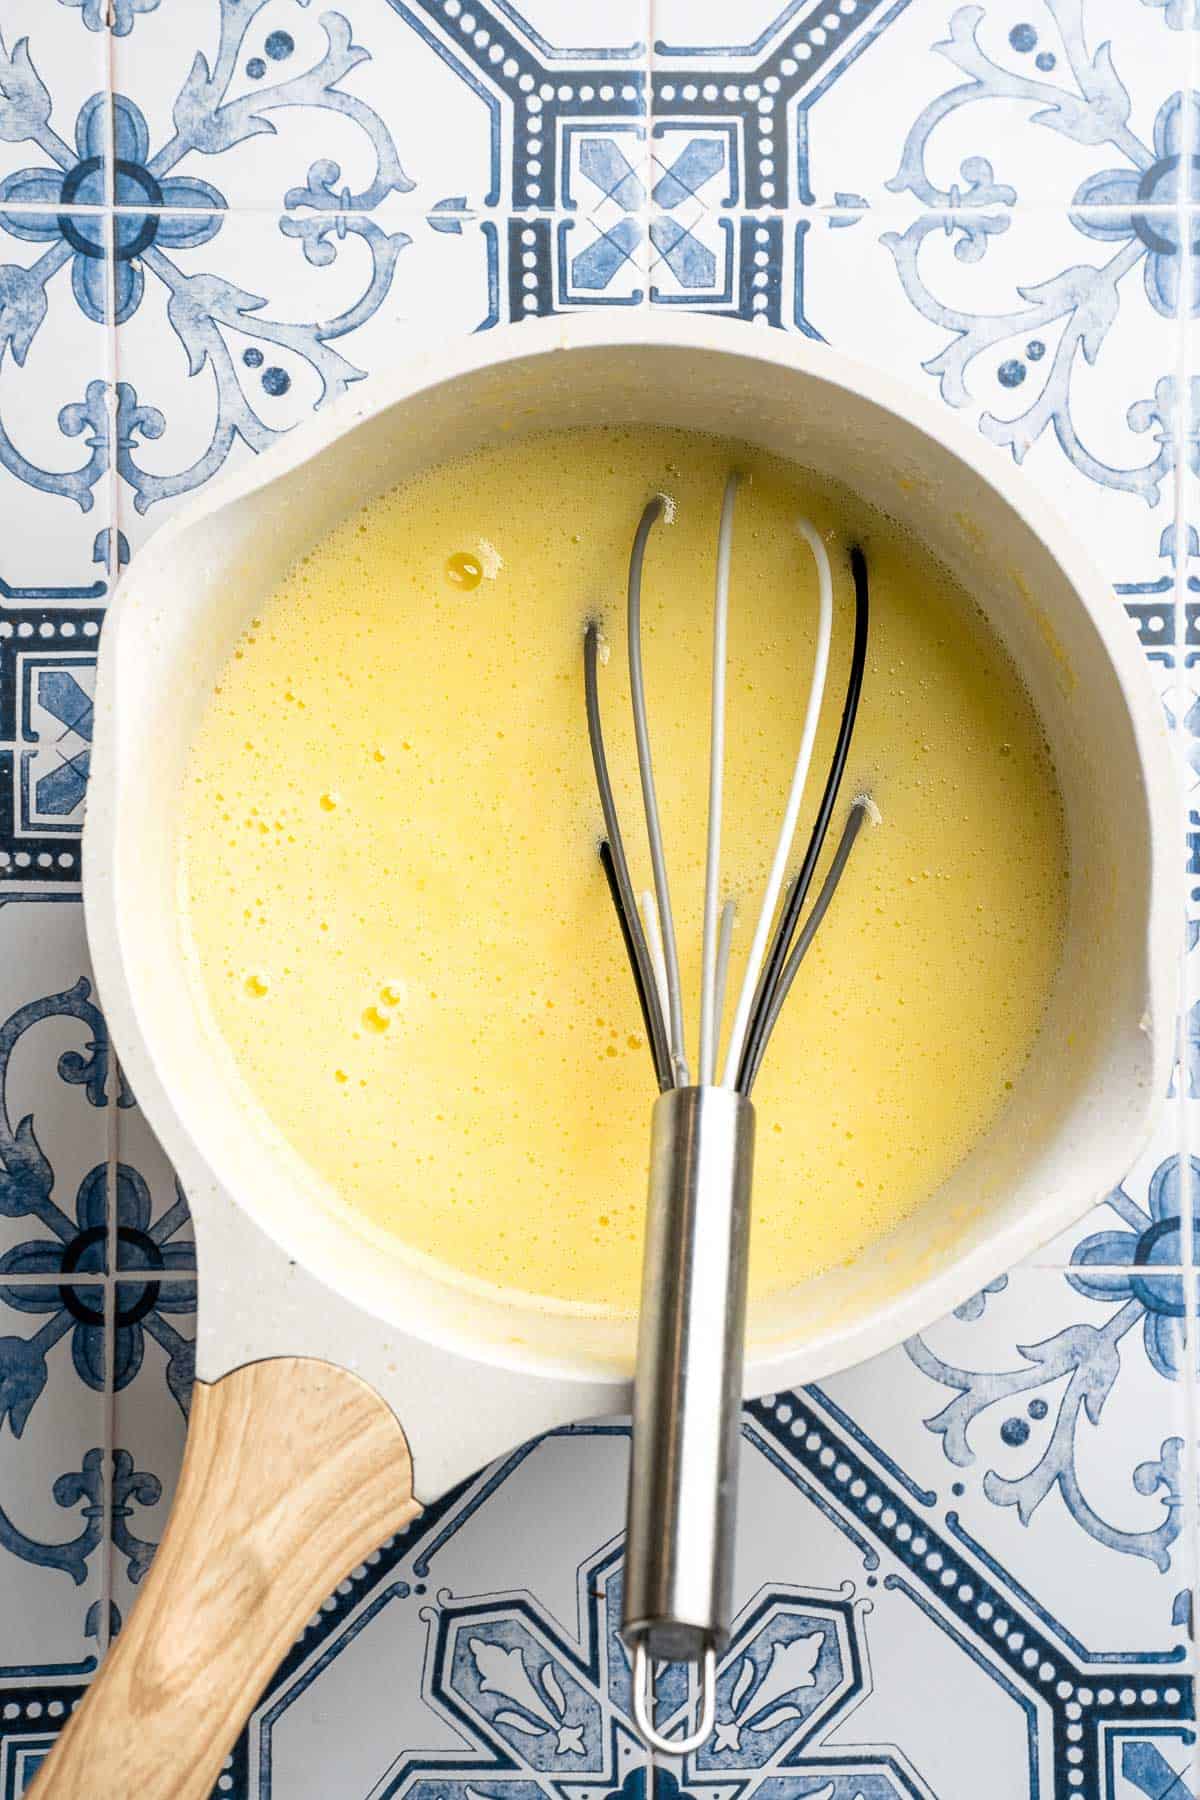
- Step 1: In a medium saucepan, whisk together the lemon zest, lemon juice, sugar, eggs, and egg yolks.
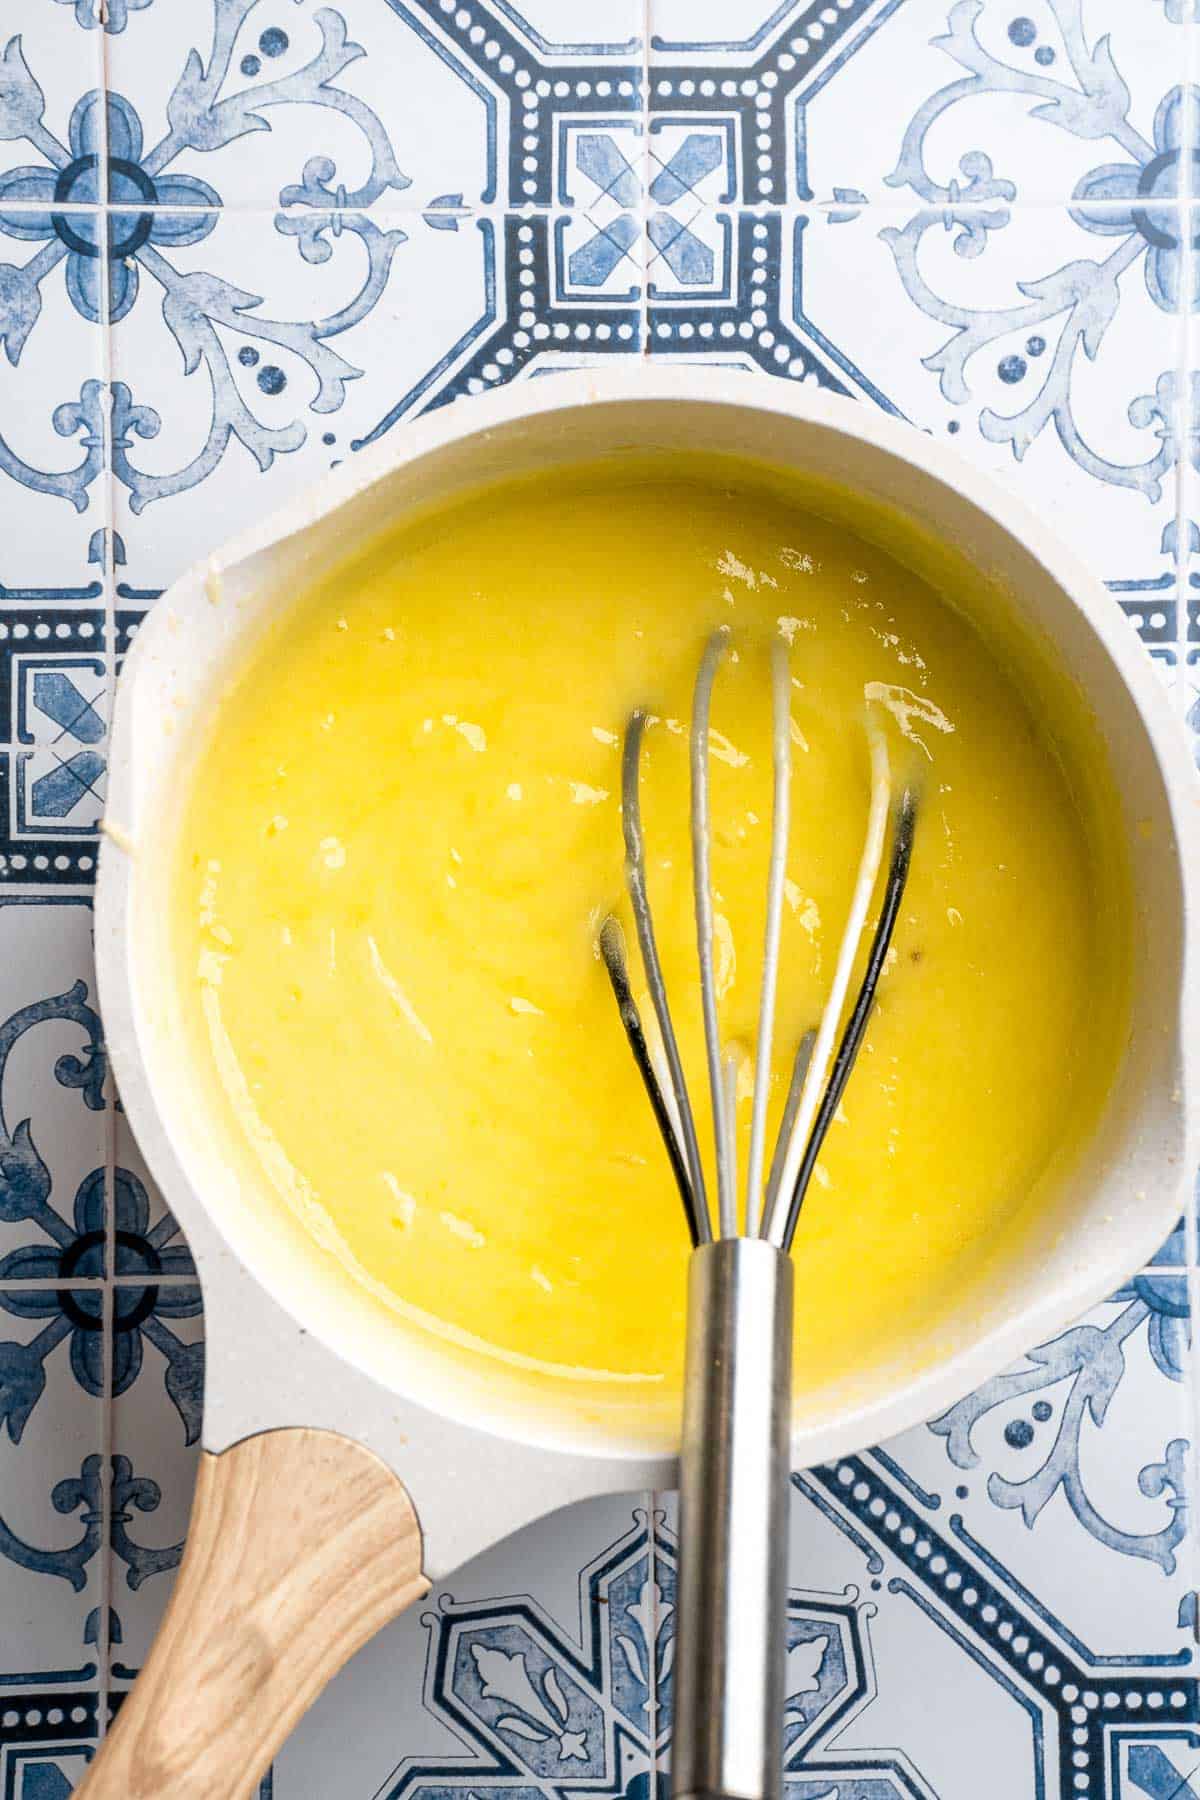
- Step 2: Place the saucepan over medium-low heat and whisk continuously for about 8-10 minutes, until the curd thickens to a pudding-like consistency (165°F as read on a kitchen thermometer).

- Step 3: Remove from heat immediately and stir in the cold cubed butter and salt.
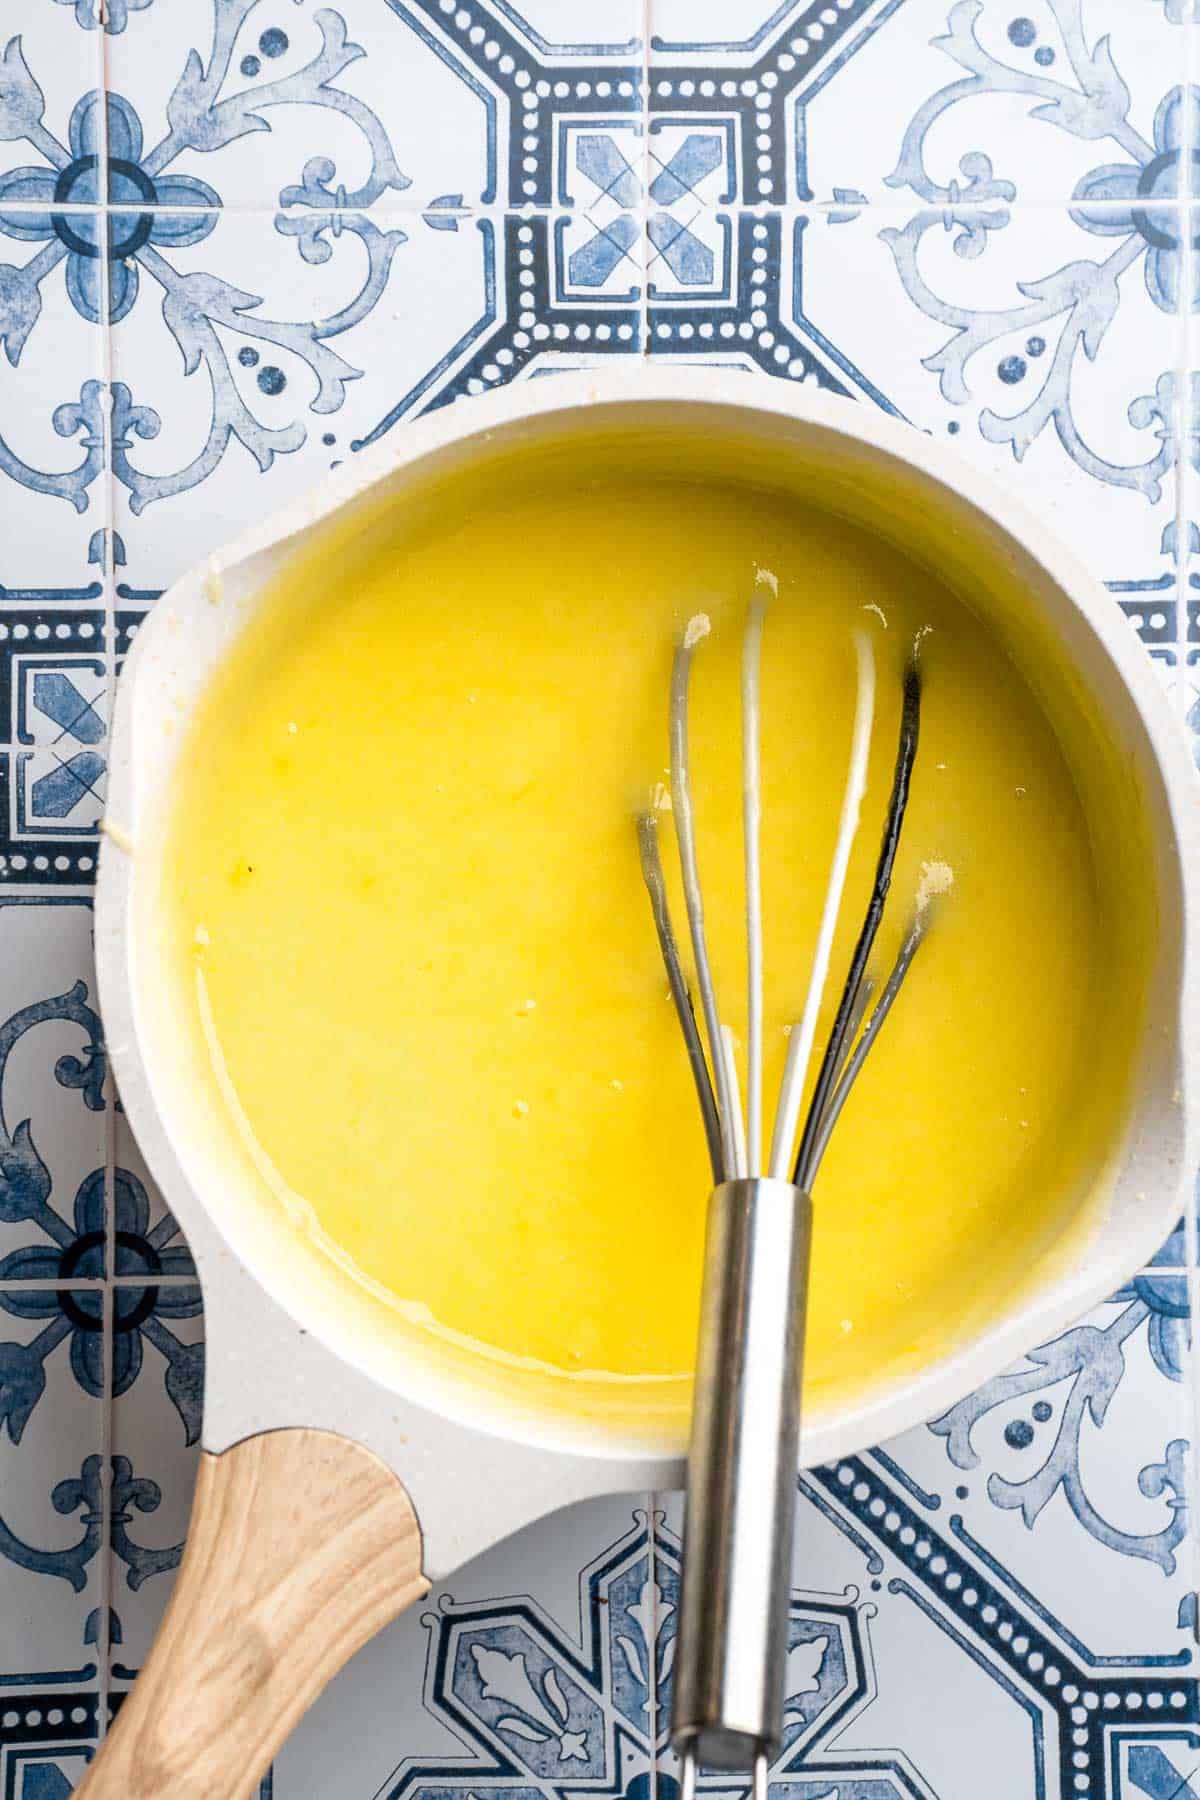
- Step 4: Whisk until the mixture is smooth and fully combined.
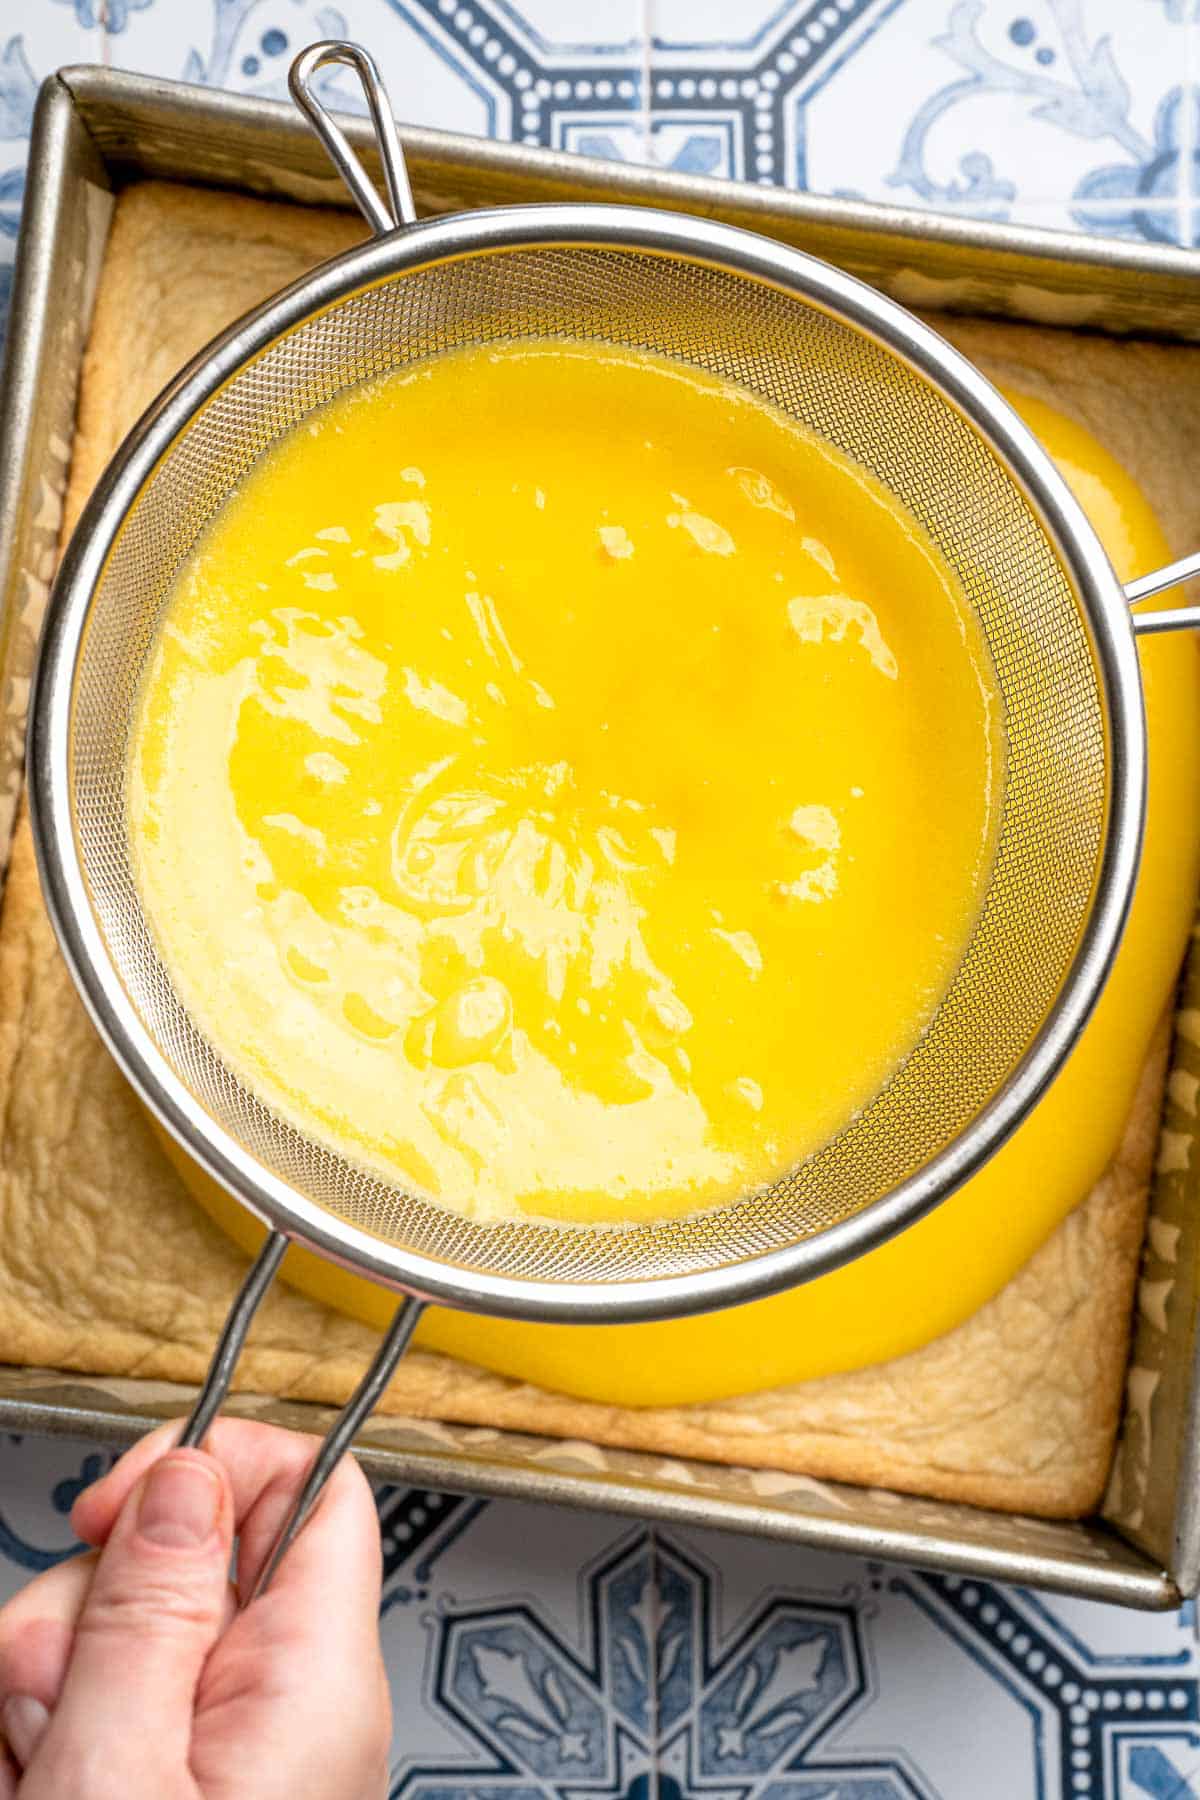
- Step 5: Place a fine mesh sieve over the cooled shortbread crust, then pour the hot curd through the sieve. Gently press the curd with a spatula to push the filling through, leaving any solids behind.
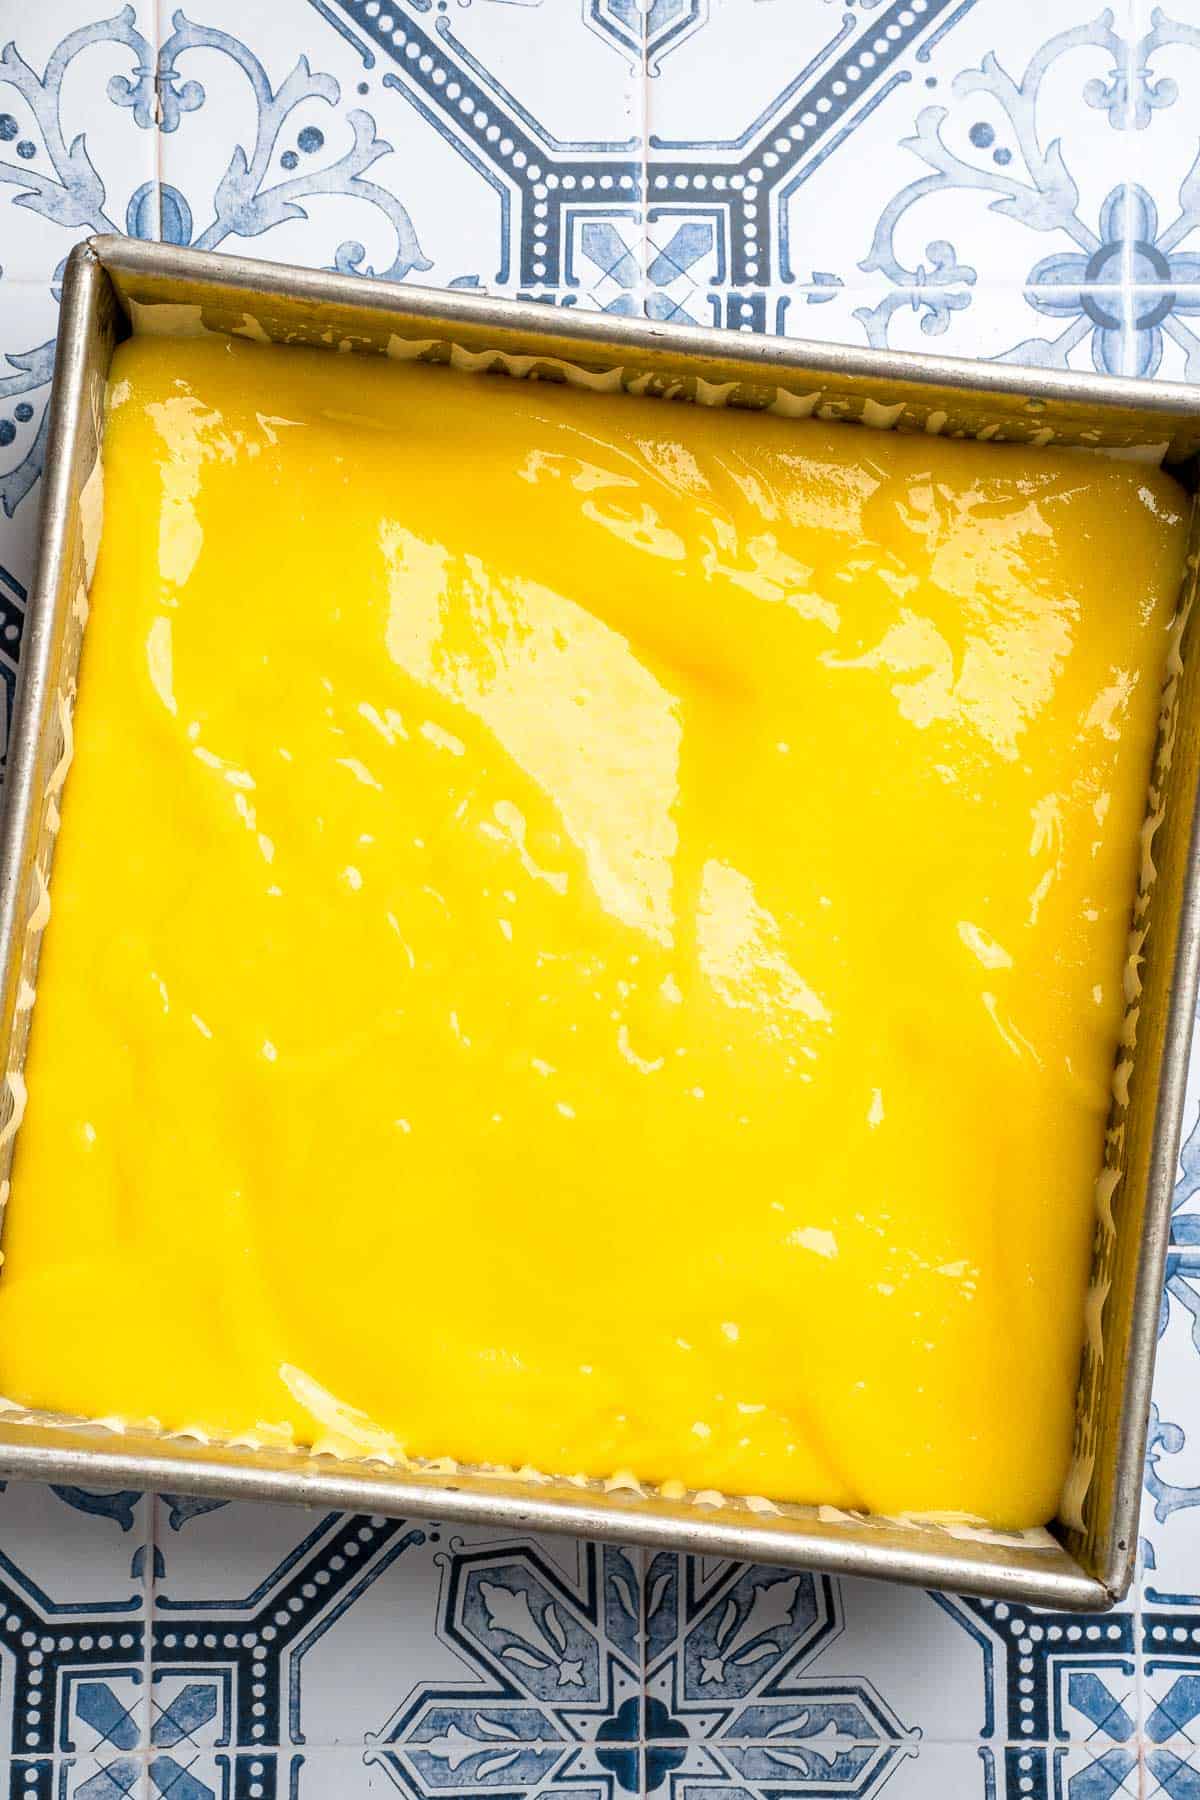
- Step 6: Reduce the oven temperature to 325°F (165°C). Return the pan to the oven and bake for 15 minutes, or until the center of the curd is slightly jiggly.
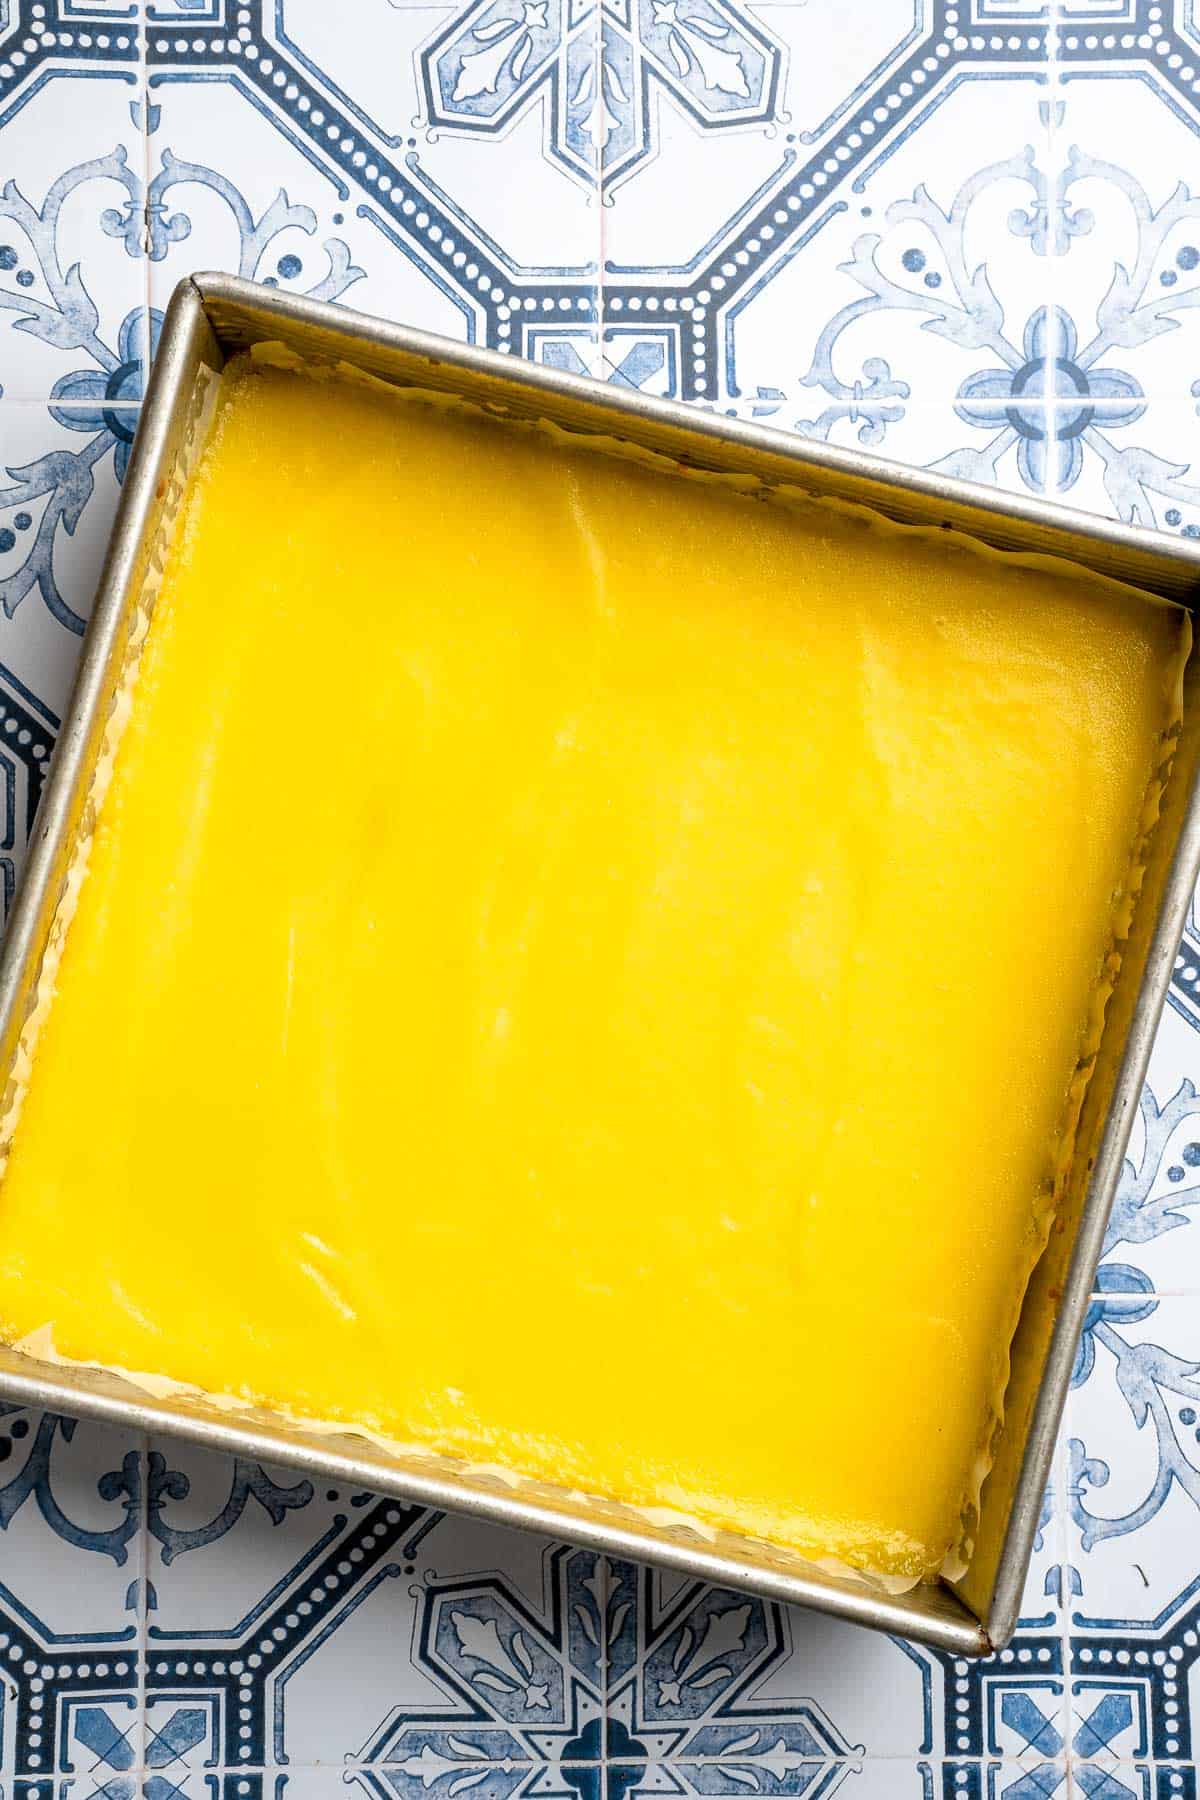
- Step 7: Remove from the oven and let cool at room temperature for 45 minutes. Transfer to the fridge and chill for at least 8 hours, or preferably overnight, to fully set.

- Step 8: Once cooled and firm, slice into 16 squares.
Expert Tip: Strain the Curd
For an extra smooth lemon curd layer, make sure to strain the mixture through a fine mesh sieve to remove any egg bits and zest before pouring it over the crust. This will ensure a perfectly silky texture. I like to use this fine mesh sieve.
More Tips and Tricks
- Use fresh lemons. Fresh lemon juice and zest are key to achieving the best flavor. Bottled juice tends to have a more acidic and less vibrant taste.
- Chill before cutting. Let the lemon bars cool completely before cutting them into squares. Chilling them in the fridge will help the lemon curd set properly and make the bars easier to slice.
- Check for doneness. The lemon curd layer should be slightly firm but still still jiggles a little when you take it out of the oven. It will continue to set as it cools.
Recipe Variations
- Add raspberries. Make lemon raspberry bars by adding in a layer of fresh raspberries or raspberry jam on top of the shortbread crust before pouring the lemon curd. It adds a fruity twist.
- Add ginger. Add a touch of ground ginger to the lemon curd for a warm, spicy contrast to the tartness of the lemon.
- Make them gluten-free. Swap the all-purpose flour with a gluten-free flour blend to make these bars suitable for those with dietary restrictions.
- Add coconut. Make coconut lemon bars by adding shredded coconut to the crust for an extra texture and flavor boost.
- Make lemon merignue bars. Add a layer of fluffy meringue on top of the lemon curd before baking for a more decadent dessert. See our Lemon Meringue Pie for instructions on how to make the best merignue.
- Add herbs. Mix in some fresh herbs like mint or basil into the crust or lemon curd for an added layer of complexity.

Storage
How to Store
Store leftover lemon bars in an airtight container in the refrigerator for up to 5 days. They'll stay fresh and retain their flavor for several days, making them a great make-ahead dessert.
How to Reheat
While lemon bars are usually served chilled, you can also bring them to room temperature for about 10-15 minutes before serving if you prefer them a little warmer.
How to Freeze
Lemon bars can be frozen for up to 3 months. To freeze, slice them first, then place them in a single layer on a baking sheet. Freeze until solid, then transfer to a freezer-safe container. Thaw in the fridge overnight before serving.
How to Serve
These Classic Lemon Bars with Shortbread Crust are the perfect treat for any occasion. Serve them on their own as a refreshing dessert, or pair them with a cup of tea for an afternoon treat. They're also great for parties, potlucks, or holiday gatherings, as they're easy to transport and share. Garnish with a light dusting of powdered sugar or fresh lemon zest for added flair. They're best enjoyed chilled, but you can also serve them at room temperature.
These are my favorite desserts to pair with these Lemon Bars:


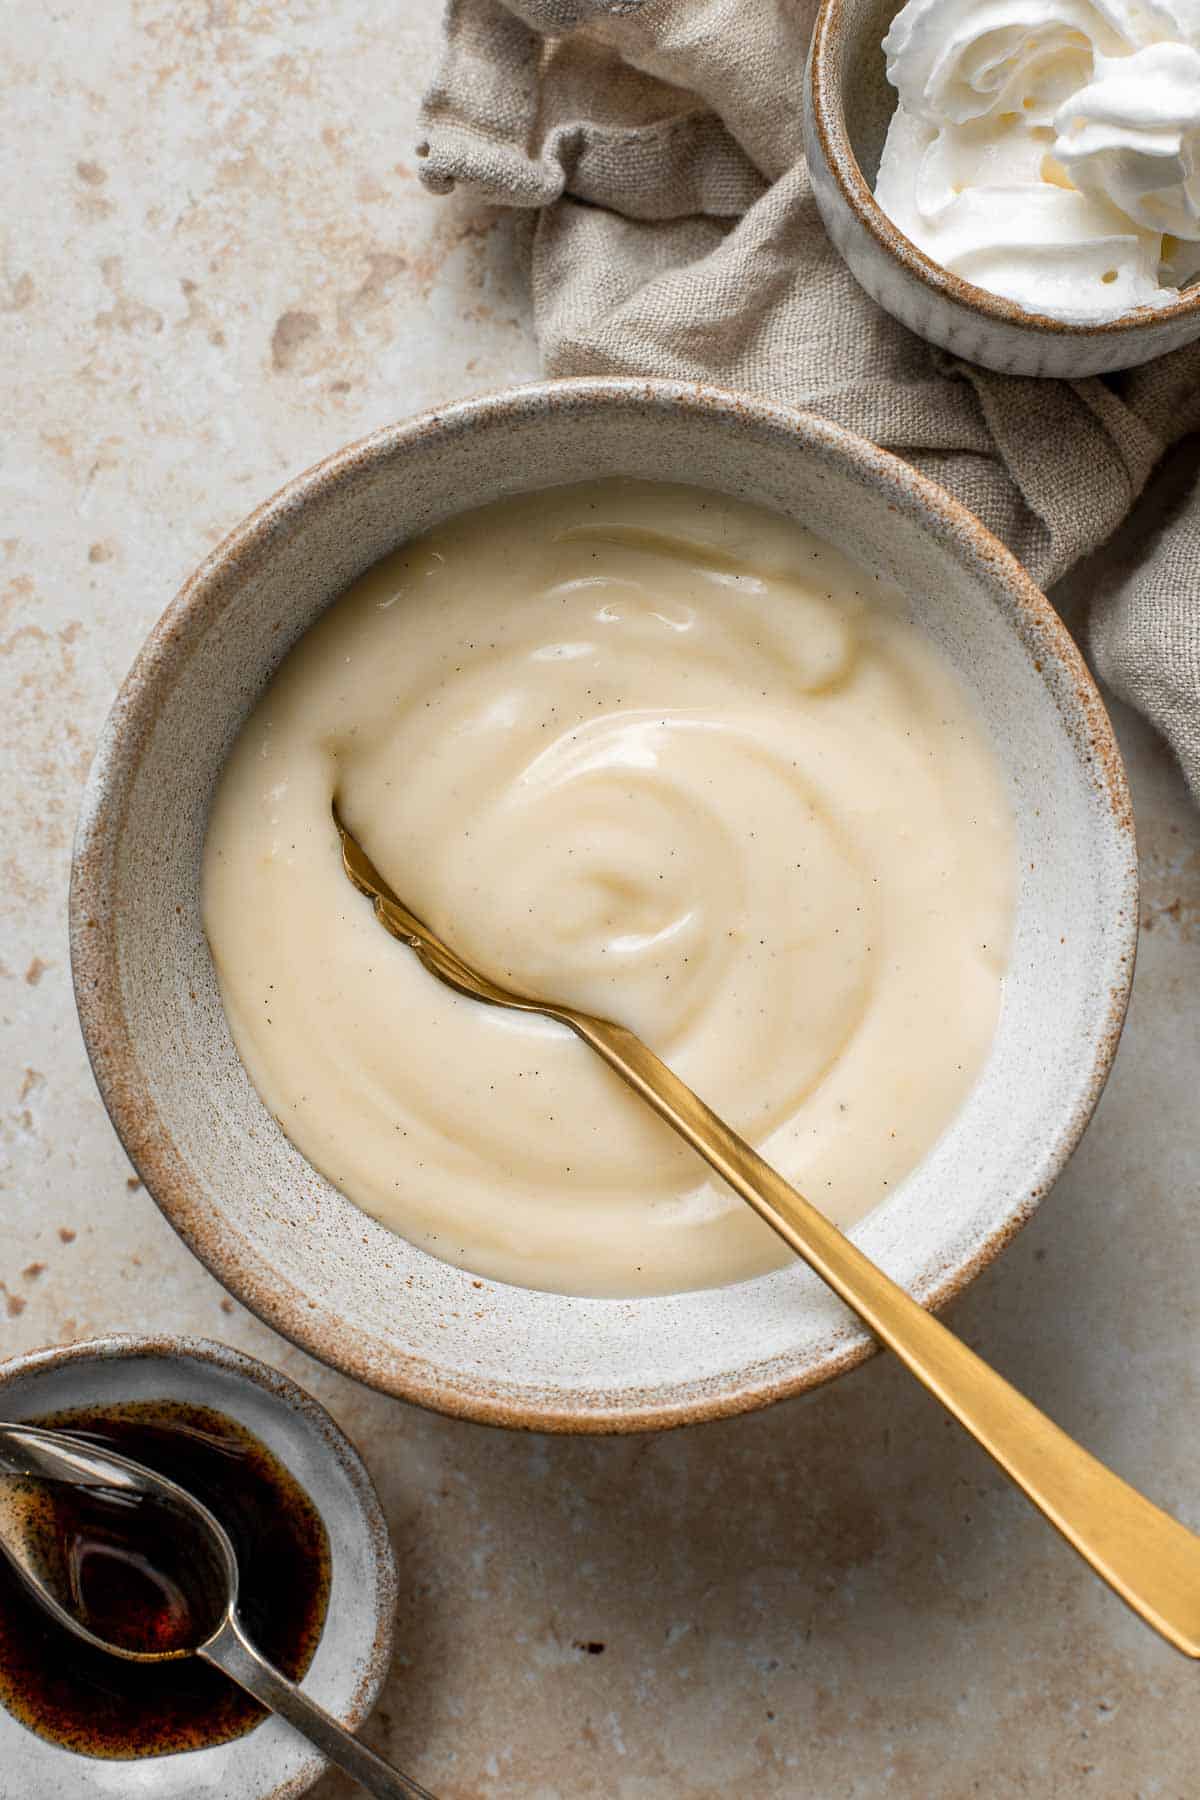
FAQ
A good lemon bar has a perfect balance of sweet and tart flavors. The crust should be buttery and crumbly, while the lemon curd layer should be smooth, creamy, and tangy. The texture of the curd should be firm enough to hold its shape when sliced but still melt in your mouth. The key to a great lemon bar is using fresh lemon juice, a buttery crust, and a well-balanced filling that's neither too sweet nor too tart.
Lemon bars are not difficult to make at all. With just a few simple ingredients and a little bit of patience, you can create a delicious, classic dessert. The shortbread crust is quick to prepare, and the lemon curd layer is easy to whisk together. With the right timing and a little attention, you'll be able to make perfect lemon bars every time.
The crust on top of your lemon bars may form due to the top layer of the lemon curd setting while baking. This happens if the lemon curd layer is slightly overbaked, causing it to firm up and form a thin crust. To avoid this, bake the bars just until the curd layer is set but still slightly jiggly in the center. This will give you a smooth top without a crust forming.
While fresh lemon juice is always the best option for flavor, you can use bottled lemon juice if necessary. However, bottled juice tends to have a more acidic and less vibrant flavor than freshly squeezed lemon juice. For the best results, always opt for fresh lemons when making lemon bars, as the natural oils in the peel and the fresh juice enhance the overall taste.
Typically, one medium lemon yields about 2-3 tablespoons of juice. If using bottled lemon juice, check the label to see how much juice is in one lemon's worth. For a quick reference, use approximately 2-3 tablespoons of bottled lemon juice for every lemon called for in a recipe.
Lemon bars can turn brown for several reasons, such as overbaking or using too much sugar in the lemon curd layer. If you bake the bars too long or at too high of a temperature, the top of the lemon curd can caramelize and brown. To prevent this, make sure to bake at the recommended temperature and keep a close eye on the bars toward the end of the baking time.
Overcooking lemon bars can cause the curd layer to become too firm, dry, or even crack. The texture may also turn rubbery or overly set, which takes away from the creamy, smooth consistency. To avoid overcooking, bake the lemon bars until the edges are set and the center is still slightly jiggly, as it will continue to firm up as it cools.
Lemon bars can crack or split if they're overbaked or if the curd layer sets too quickly. This usually happens if the oven temperature is too high, causing the filling to bake too fast. To prevent this, bake at a moderate temperature and check for doneness by gently tapping the baking pan. If the bars are firm around the edges but slightly jiggly in the center, they are done.
Lemon bars that have gone bad may show signs like an off smell, discoloration, or a change in texture, such as becoming overly soggy or hard. If the lemon curd layer separates or starts to look watery, it's time to discard them. Always check for any mold or signs of spoilage, especially if they've been stored for more than a few days in the fridge.
More Lemon Recipes
Looking for other recipes like this? Try these:


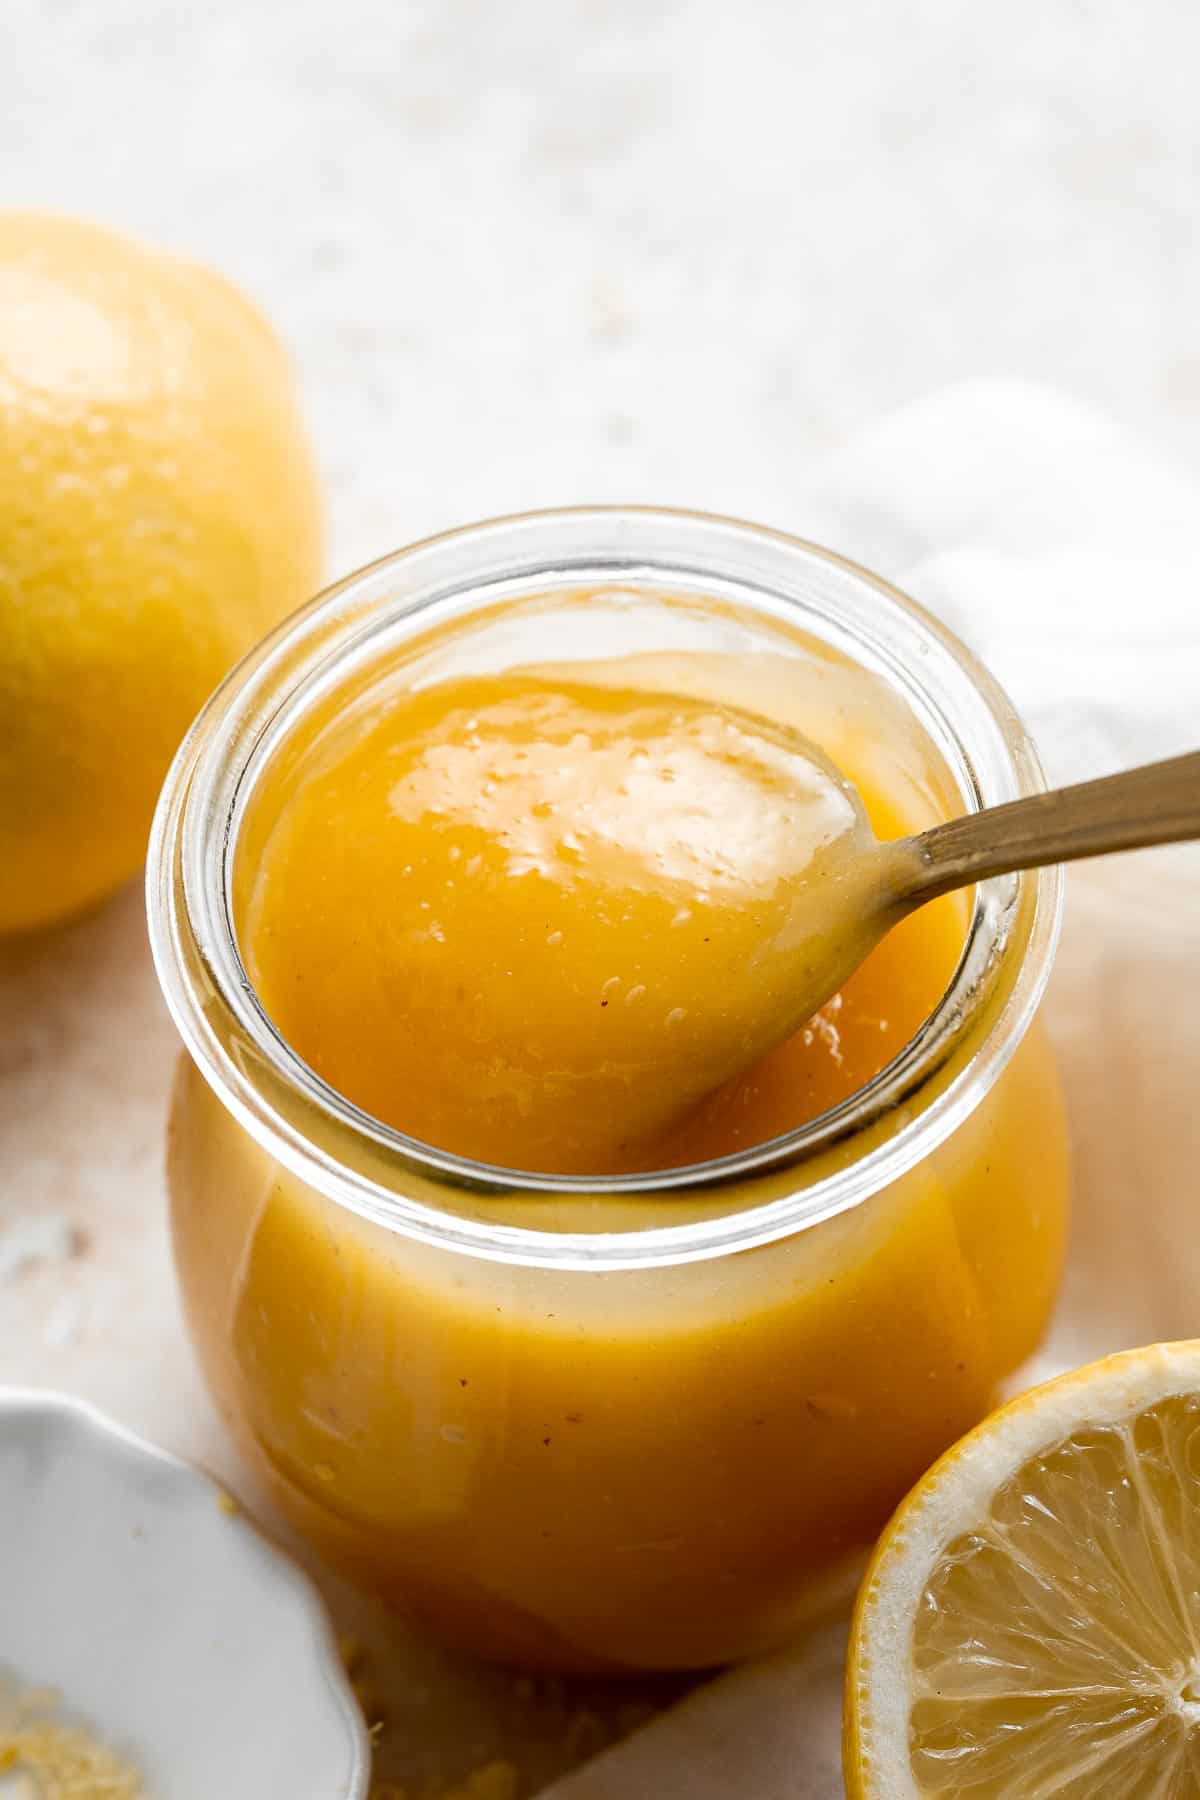
Tried this recipe?
I'd love to hear what you think! Leave a comment and rating below to share your feedback. Your reviews help others discover this recipe and help me keep creating more free recipes for you. Snap a photo and tag me on social media @aheadofthyme too.

Grilled Romaine Caesar Salad
This Grilled Romaine Caesar Salad is a summer twist on the classic Caesar salad. The smokiness from grilling the romaine lettuce adds a new layer of flavor, while the creamy homemade dressing ties everything together. Topped with crispy croutons and Parmesan, this salad is both delicious and indulgent.
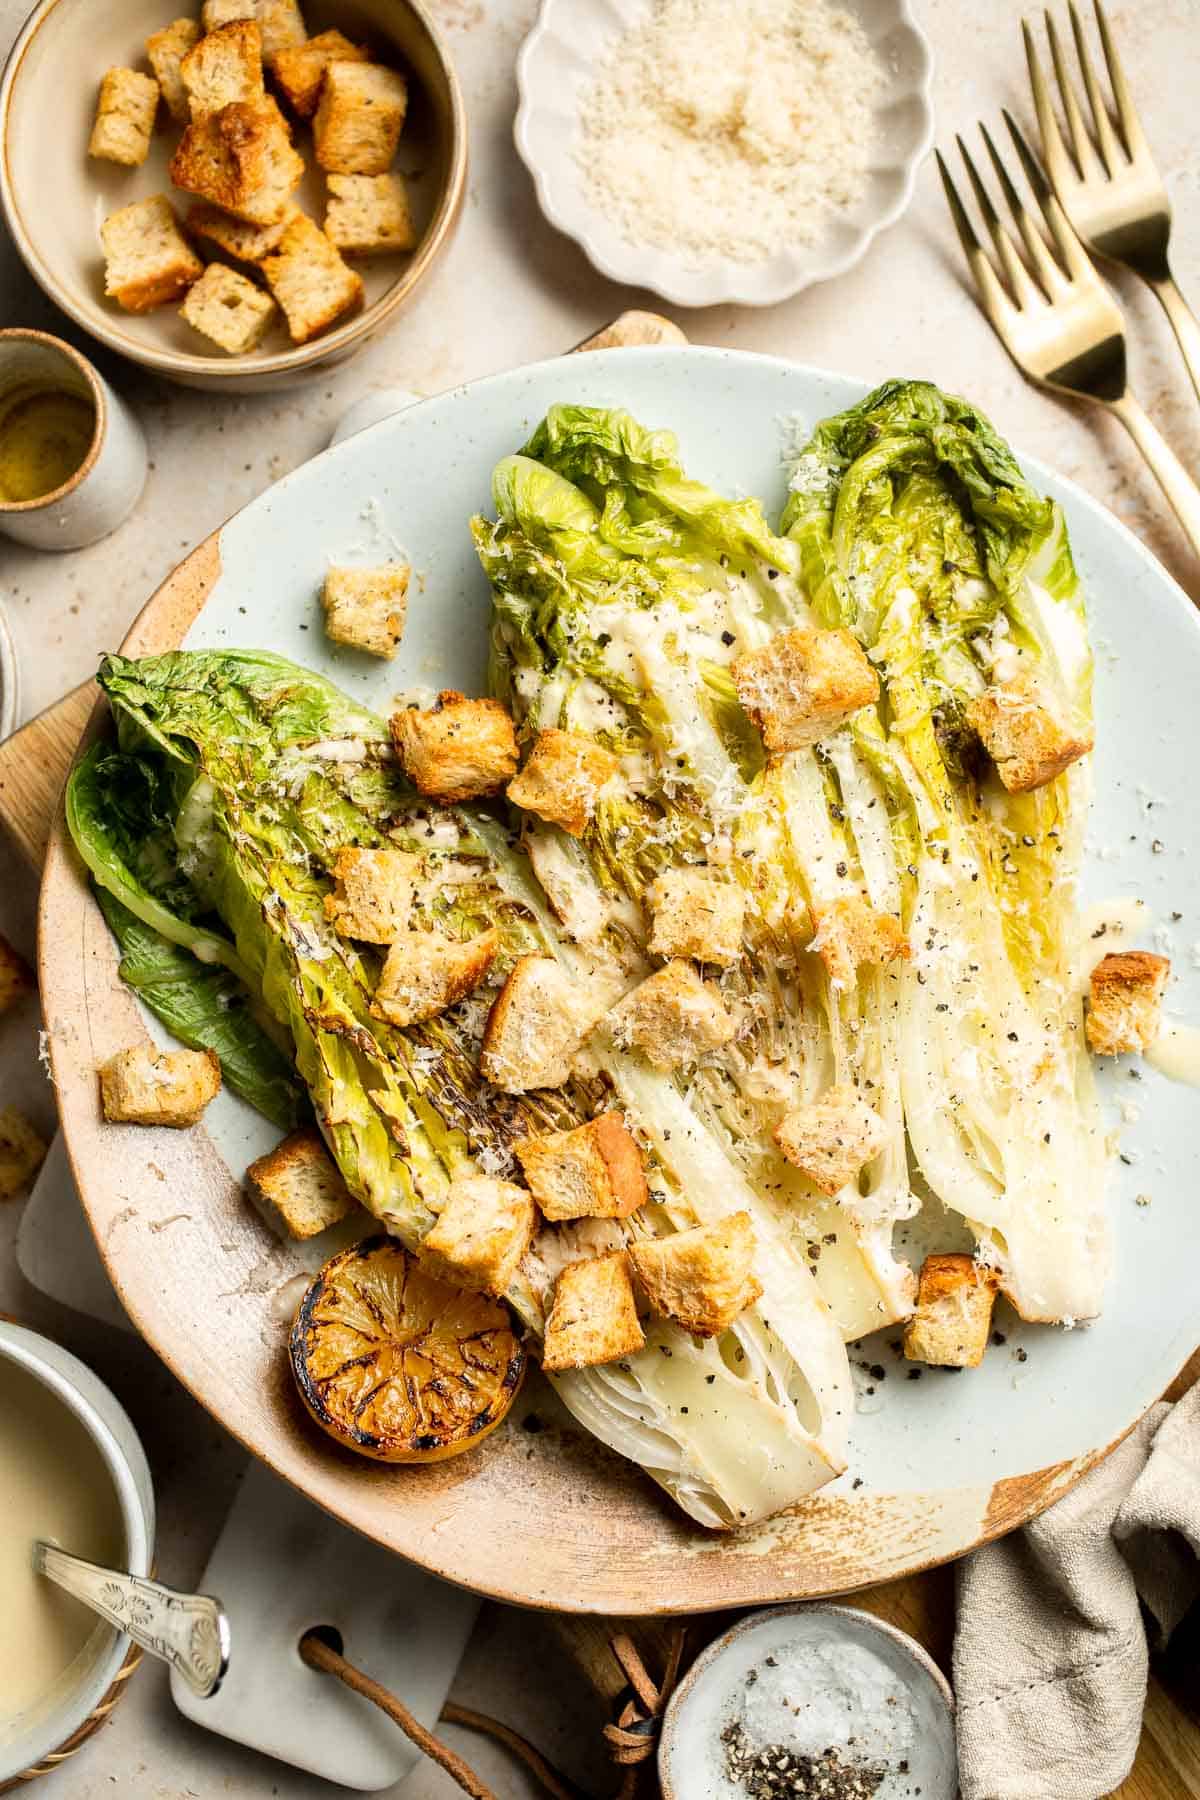
Whether you're hosting a BBQ, craving a fresh side dish, or looking for a new take on a salad, this grilled version will quickly become a favorite. It's quick, easy, and packed with flavor. In just a few simple steps, you'll have a smoky, crispy salad ready to serve.
If you liked this fresh spin on Classic Caesar Salad, then you need to try our Kale Caesar Salad or Mexican Caesar Salad next.
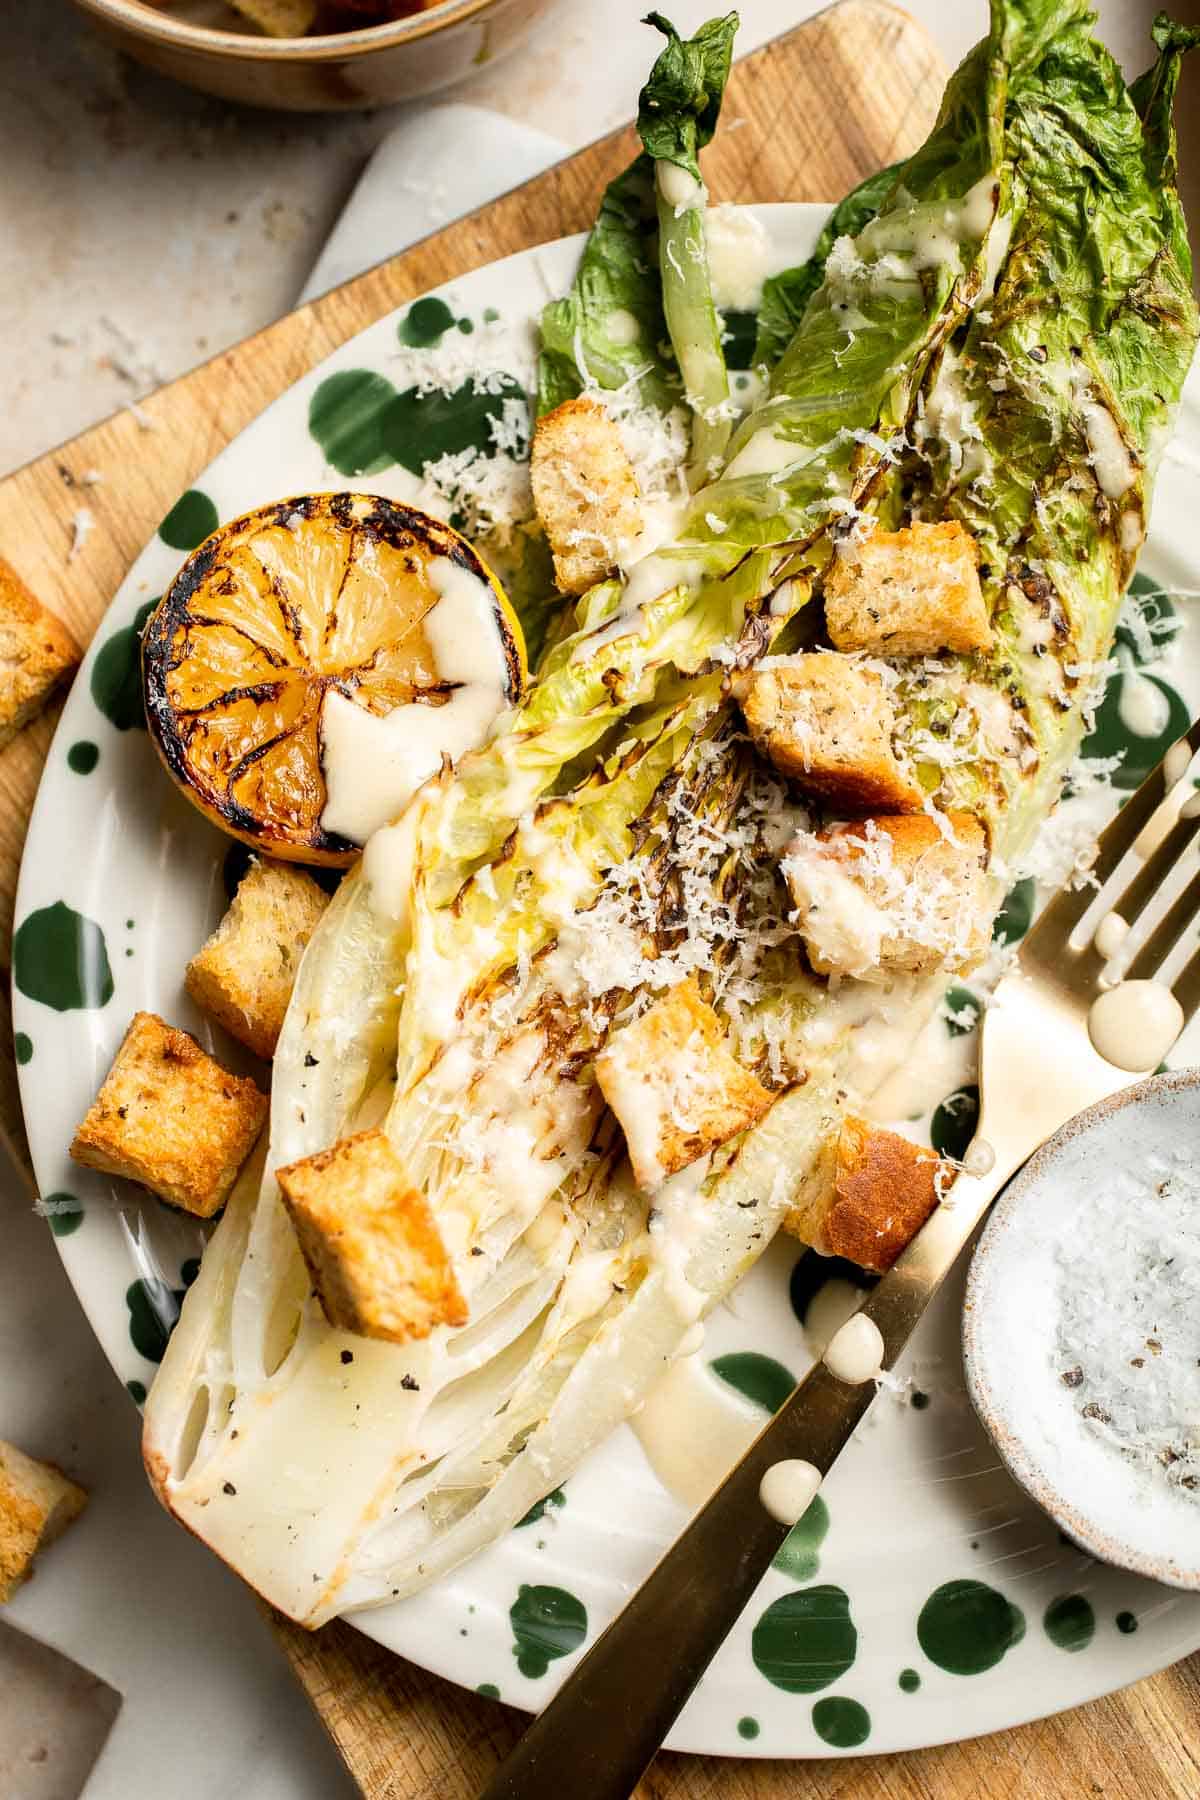
Why You'll Love This Recipe
- Smoky, rich flavor. Grilling the romaine lettuce brings out a smoky, slightly charred flavor that complements the rich and creamy Caesar dressing perfectly. The char adds a new depth to the salad that you won't get from traditional raw lettuce, making it extra flavorful.
- Simple and quick. This romaine salad is easy to prepare with minimal effort, making it the perfect side dish for a busy weeknight or an impressive addition to an outdoor dinner party. The whole salad comes together in under 20 minutes, so you won't be spending all your time cooking.
- Healthy twist on a classic. By grilling the lettuce and using a homemade dressing, this version of the Caesar salad is healthier than traditional versions that are heavy on store-bought dressings and fried croutons. You control the ingredients, which means you can make it as nutritious as you'd like without compromising on taste.
- Perfect for BBQs. If you're looking for a salad that's perfect for grilling season, this one fits the bill. It's a great side dish for burgers, grilled meats, and vegetable skewers. The grilled lettuce adds a fun twist to your typical salad lineup.
Ingredients and Substitutions
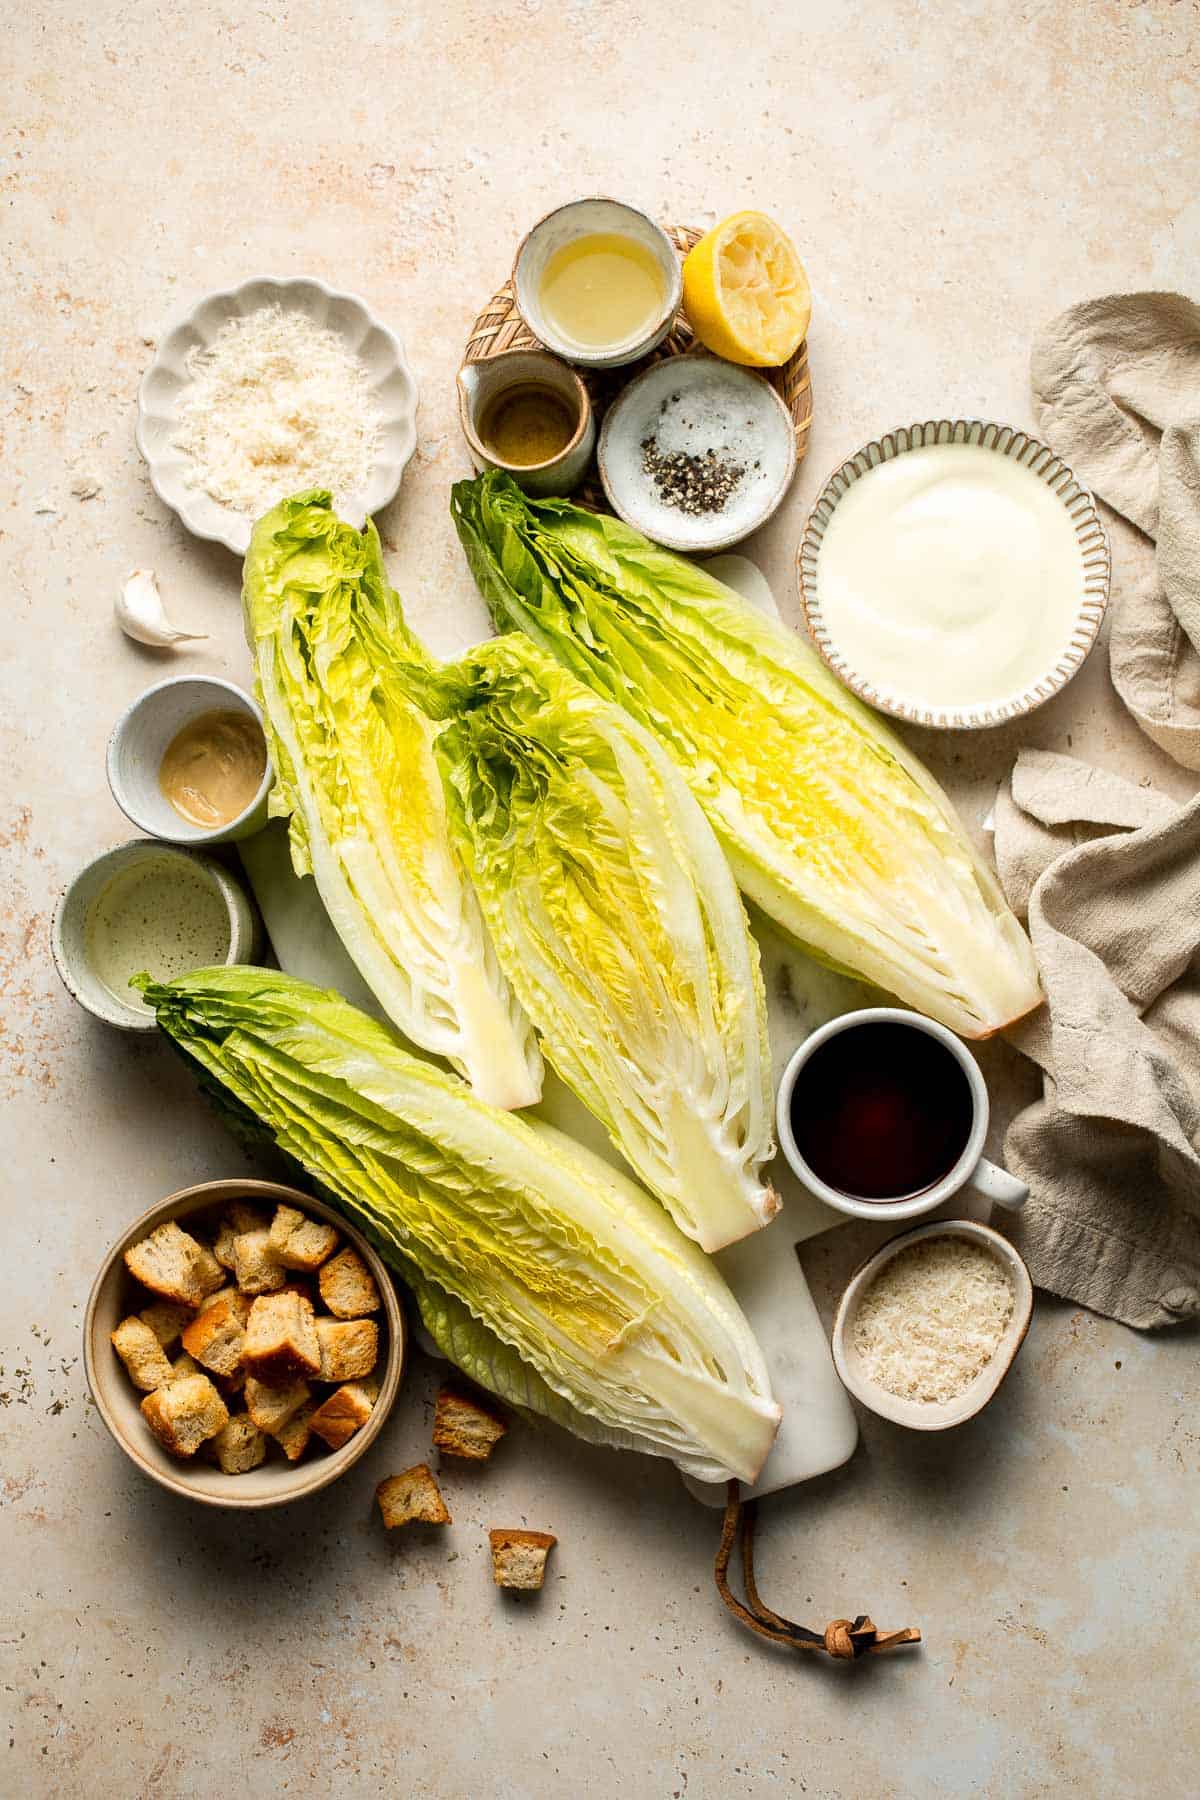
To make this Grilled Romaine Caesar Salad, you'll need the following ingredients (see recipe card below for quantities):
- romaine lettuce - The star of this salad, with its crisp texture and slightly bitter flavor that holds up perfectly when grilled. You can also use other leafy greens, but romaine is ideal for its texture and flavor.
- olive oil - Used for brushing the lettuce before grilling, helping it get that perfect char.
- salt and pepper - For seasoning the lettuce to bring out it's natural flavors.
- croutons - Homemade croutons or store-bought for a crispy crunch. You can use gluten-free croutons or skip them for a low-carb version.
- Parmesan cheese - Shredded or shaved parmesan for sprinkling over the grilled lettuce for that classic caesar salad flavor. You can substitute with Pecorino Romano or another hard cheese.
- caesar salad dressing - feel free to use storebought dressing or homemade. For homemade, you will need mayonnaise, parmesan, lemon juice, olive oil, garlic, anchovy paste, dijon mustard, and Worcestershire sauce. For substitutions:
- mayonnaise - substitute with Greek yogurt or vegan mayo for a lighter or plant-based version.
- Parmesan cheese - for a stronger cheese flavor, use Pecorino Romano.
- garlic - use garlic powder for a quicker alternative.
- anchovy paste - you can omit this to make the dressing vegetarian or use a vegan anchovy paste alternative.
- Worcestershire sauce - omit if you're looking for a vegetarian version, as some Worcestershire sauces contain anchovies.
Equipment
You'll need measuring cups and spoons, a grill or grill pan, a mixing bowl, a whisk for the dressing, a sharp knife for chopping the lettuce, and a spatula for grilling.
Instructions
- Grill the romaine lettuce. Preheat the grill over medium-high heat for about 2-3 minutes until it's hot. Place the halved romaine lettuce evenly spaced apart on the grill and brush with olive oil. Grill for about 2-3 minutes on each side, or until the lettuce is nicely charred. (Alternatively, you can broil the lettuce on high in the oven for 2 minutes on each side until the edges are lightly charred).
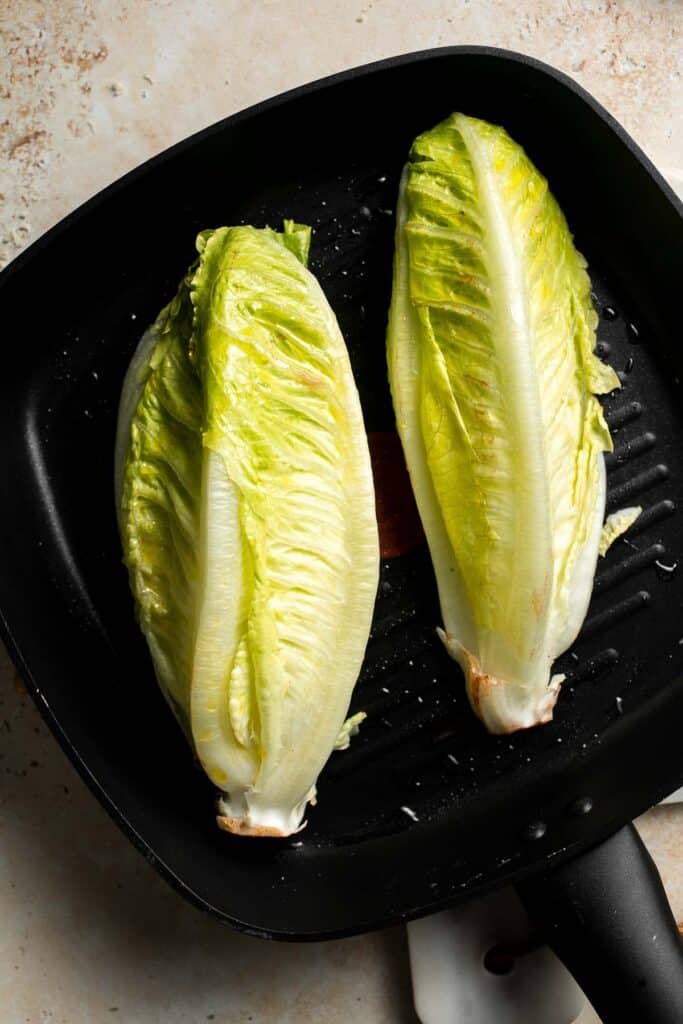
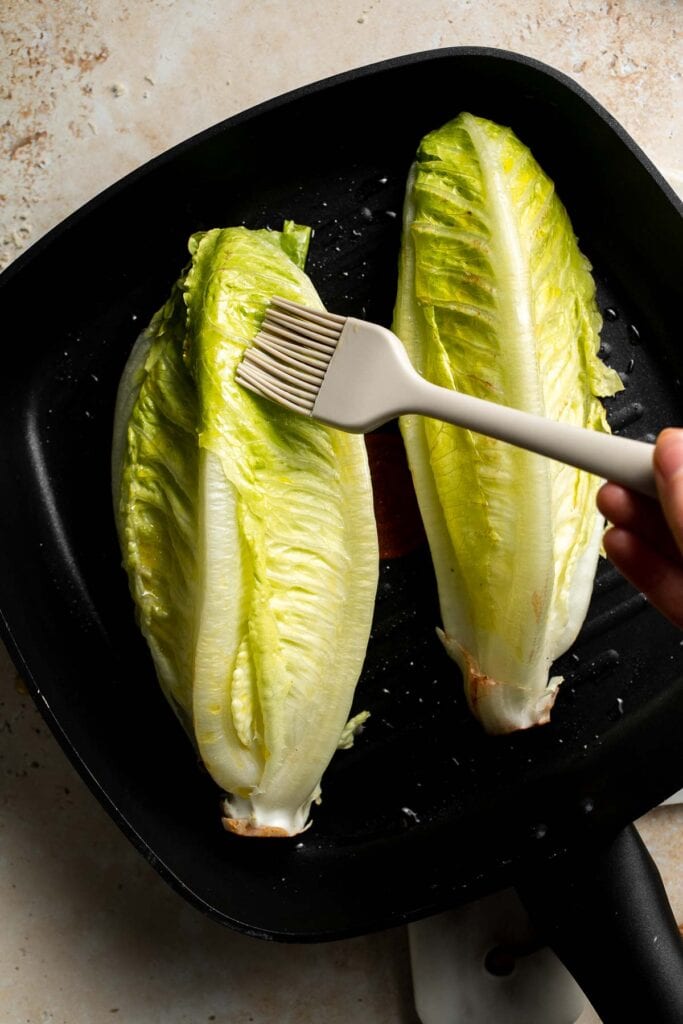
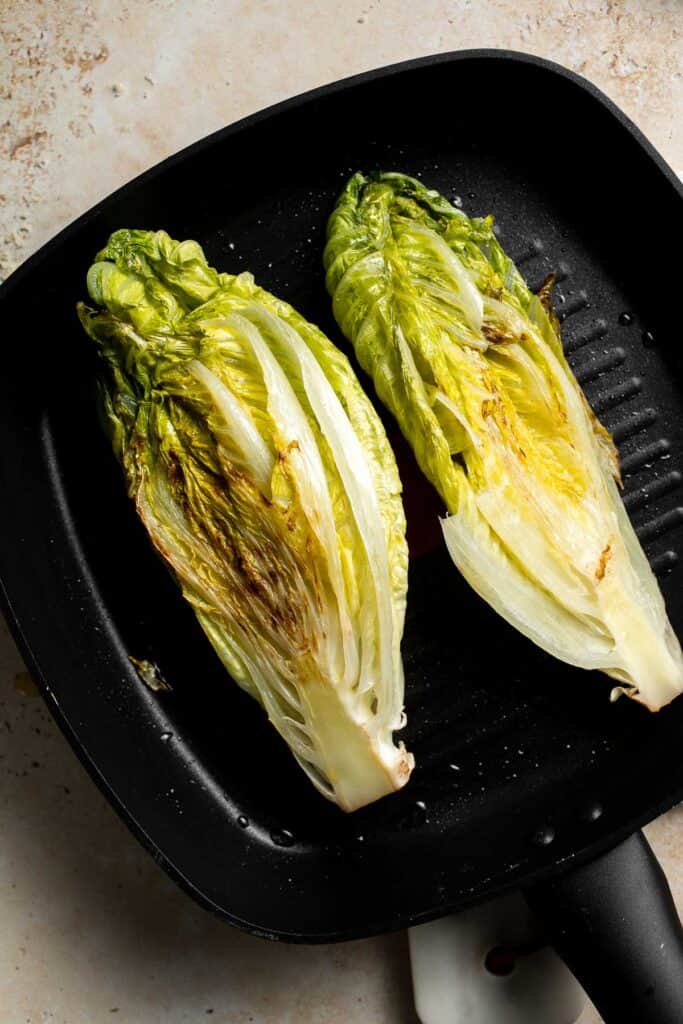
- Make the dressing. In a small mixing bowl, whisk together all the salad dressing ingredients until smooth.
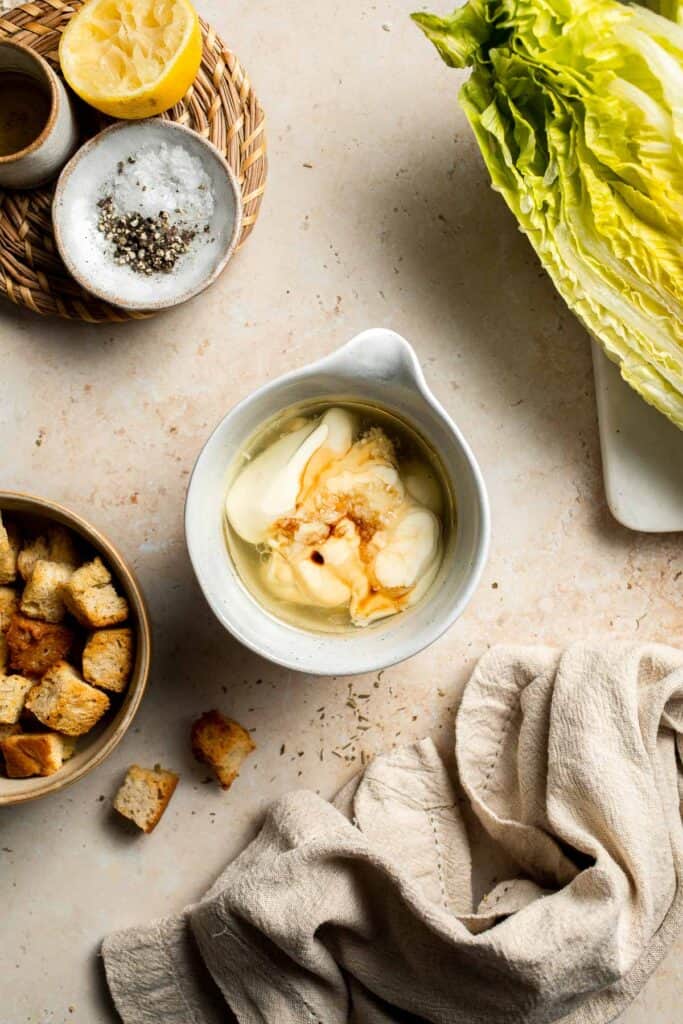
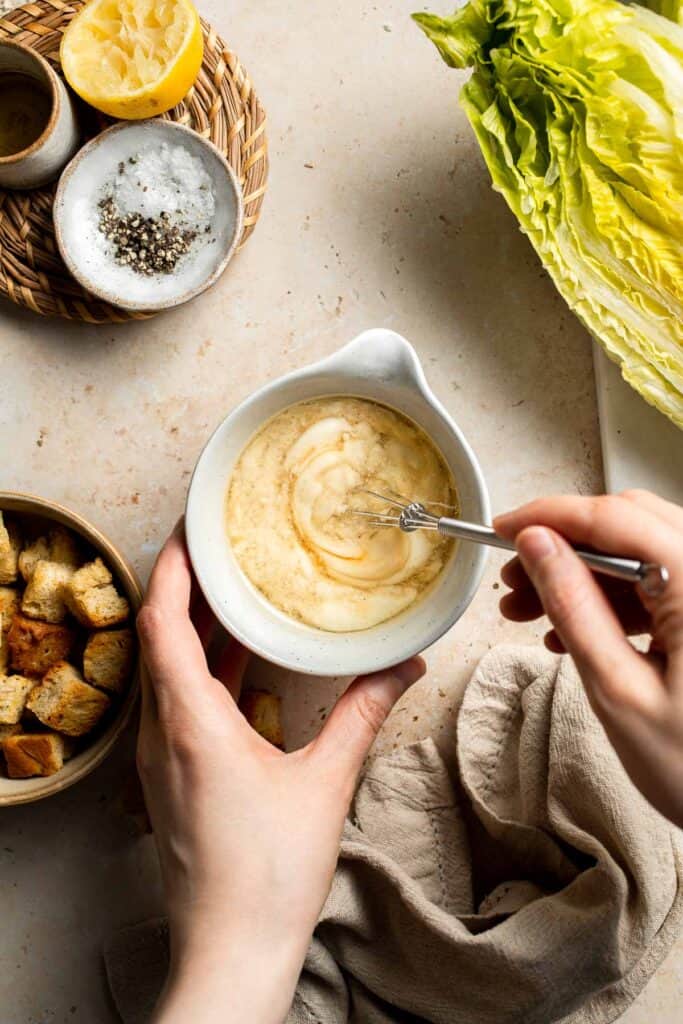
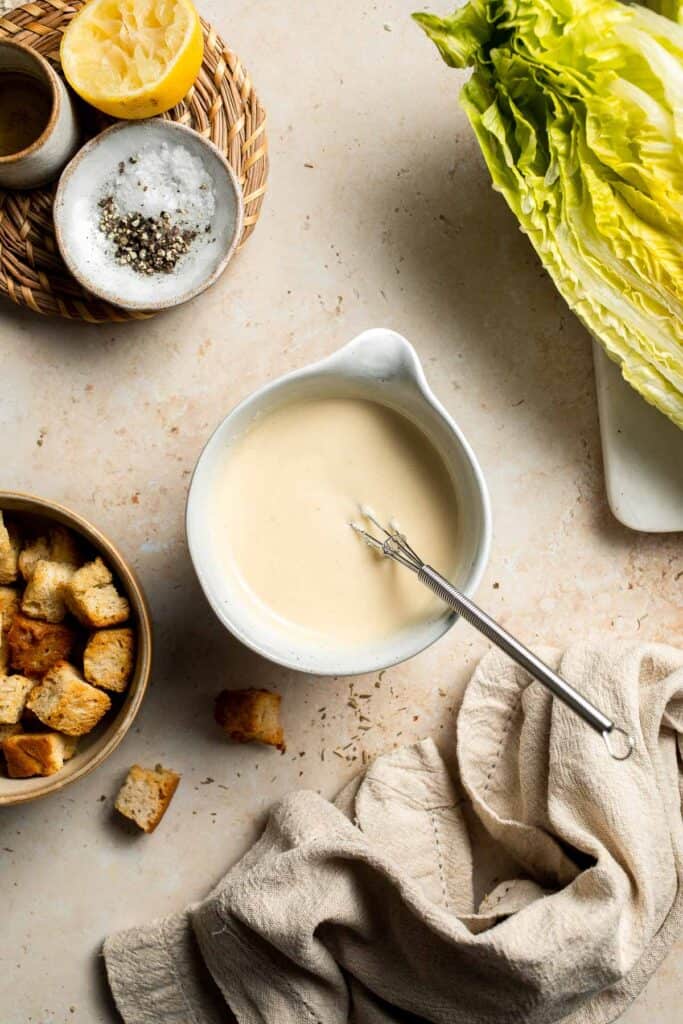
- Assemble. Arrange the grilled lettuce on a plate and drizzle the dressing evenly over the top. Top with croutons and a sprinkle of Parmesan cheese. You can also add some bacon bits on top, if desired. Serve immediately.
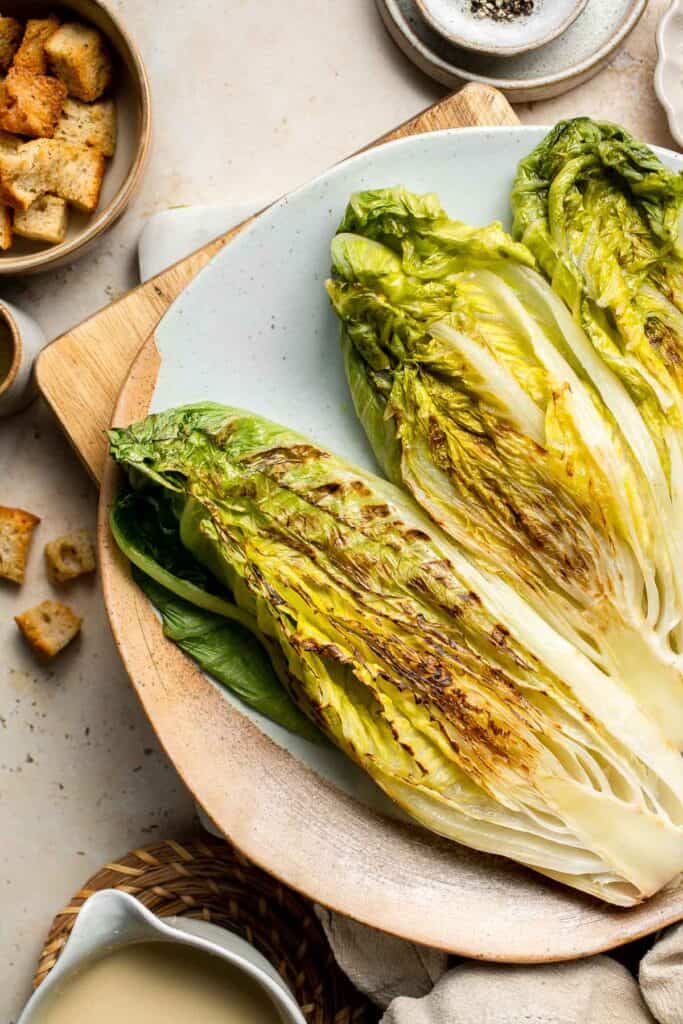
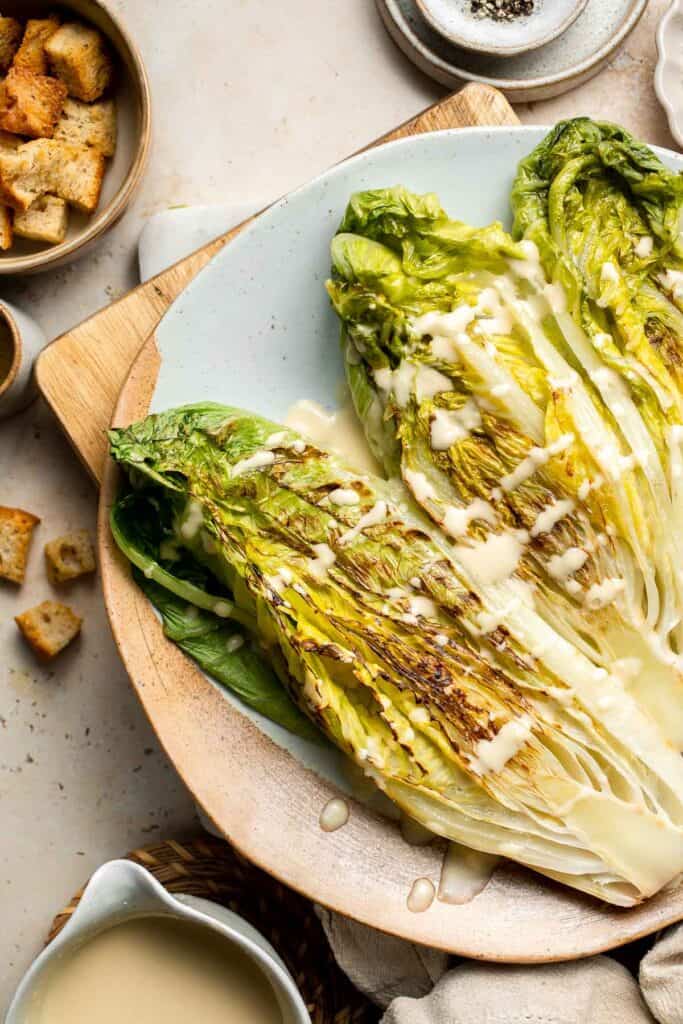
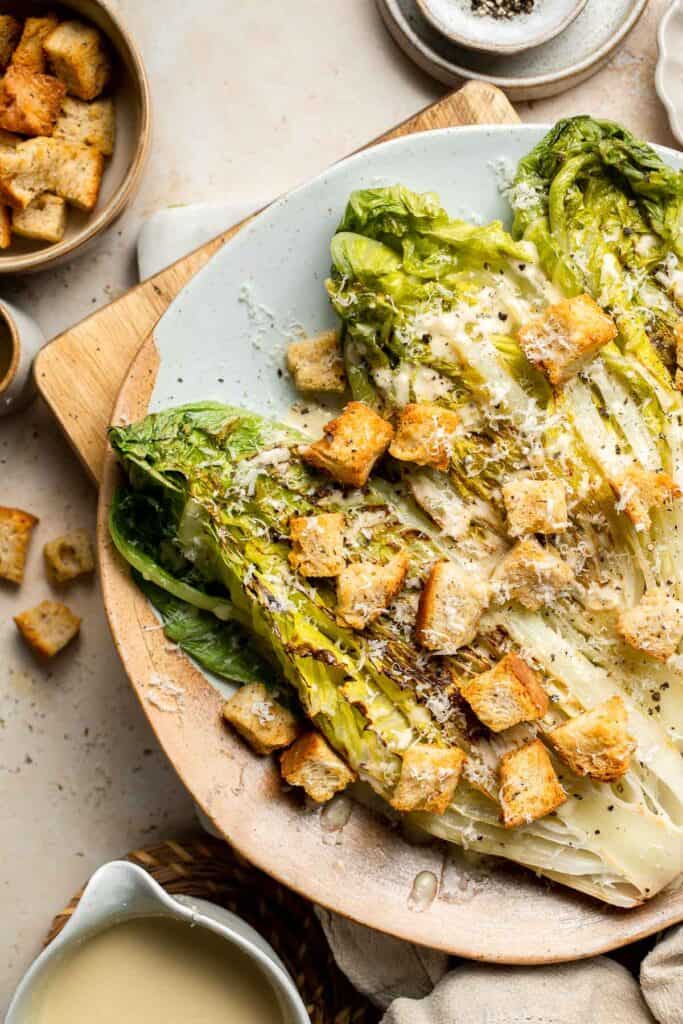
Expert Tip: Don't Overcook
Make sure not to overcook the lettuce on the grill. Just a couple of minutes per side is enough to give the romaine a nice char and smoky flavor without wilting it too much. Keep the heat medium-high to achieve that perfect crispy exterior while keeping the inside slightly tender.
More Tips and Tricks
- Use fresh, crisp romaine. For the best texture, use fresh romaine lettuce that's crisp, not wilted. Wilted lettuce won't hold up well to grilling.
- Grill in stages. If you're making a bigger batch and grilling a large amount of lettuce, do it in batches so the leaves get an even char.
- Customize your croutons. For extra flavor, season your croutons with garlic powder, Italian herbs, or Parmesan before toasting them. See our Easy Homemade Croutons Recipe for ideas.
- Control the dressing thickness. If the Caesar dressing is too thick, add a bit of water or extra lemon juice to thin it out to your liking.
- Add extra toppings. Feel free to top your salad with extra Parmesan, fresh herbs, or even a drizzle of balsamic glaze for added flavor.
Recipe Variations
- Add grilled chicken. Add grilled chicken breasts to the salad for a heartier, protein-packed meal.
- Add veggies. Switch it up by adding in other veggies such as tomatoes, red onion, or cucumber.
- Make it spicy. Add a pinch of red pepper flakes to the dressing or drizzle the salad with sriracha for a spicy twist.
- Make it gluten-free. Use gluten-free croutons or skip them entirely for a gluten-free meal.
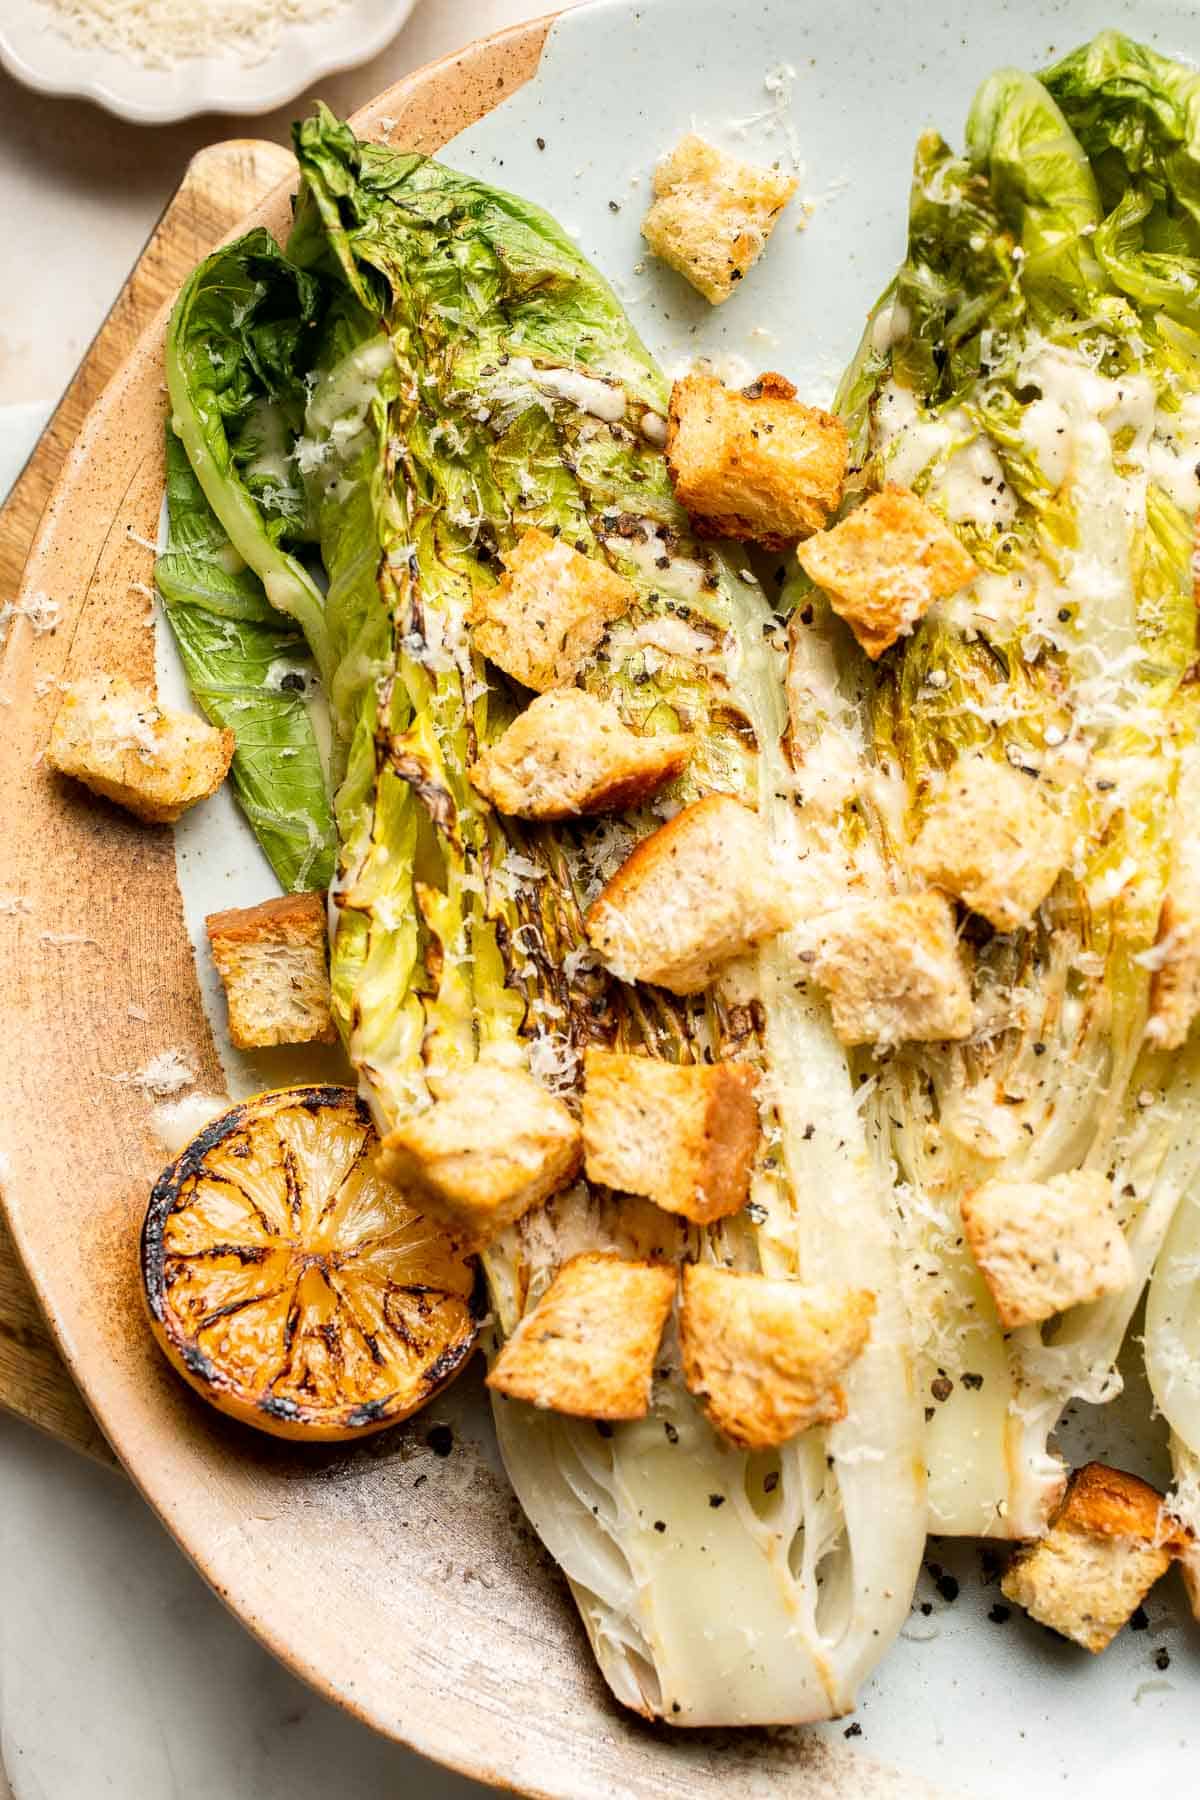
Storage
How to Store
Store any leftover grilled romaine in an airtight container in the refrigerator for up to 2 days. The lettuce will lose some of its crispness but will still taste great.
How to Reheat
Grilled romaine can be served cold, but if you prefer it warm, reheat it gently in the microwave for a few seconds or on a low-heat skillet for 1-2 minutes. Be sure not to overheat, as it will lose its texture.
How to Freeze
Freezing grilled romaine is not recommended, as it will affect the texture. It's best to enjoy it fresh or store leftovers for a day or two.
How to Serve
Grilled Romaine Caesar Salad is perfect on its own or paired with grilled meats like chicken or steak. For a complete meal, you can add grilled shrimp, roasted vegetables, or even a fried egg on top for extra protein. Serve it as a side dish at a BBQ or as a main course for a lighter meal.
These are my favorite dishes to serve with this grilled romaine lettuce caesar salad:
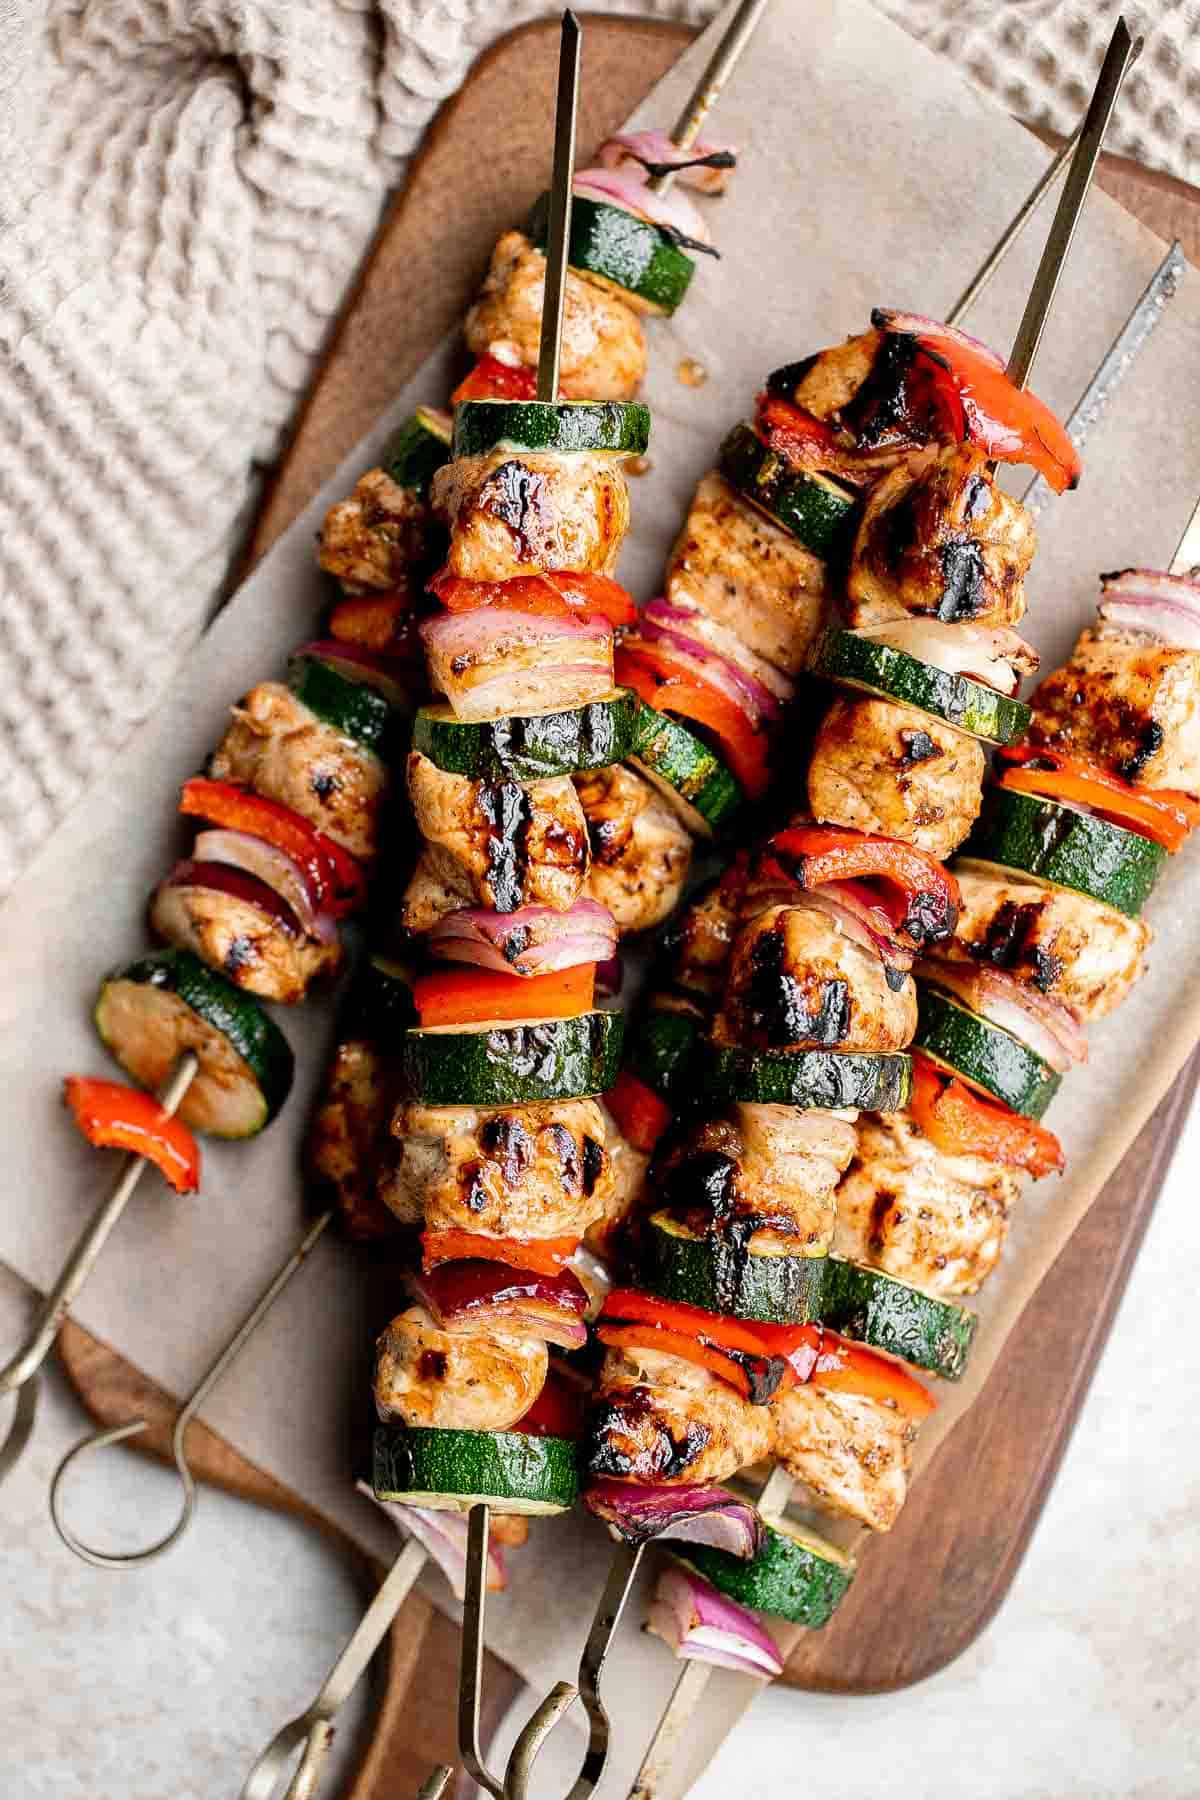


FAQ
Grilling romaine lettuce brings out a smoky flavor and adds a slight char that enhances its natural sweetness. The heat from the grill also softens the lettuce while maintaining its crisp texture. This method adds a unique, savory twist to salads that raw romaine just can't offer, making grilled romaine an exciting addition to any meal. The grilling process also adds a subtle bitterness that balances out the creamy dressing in Caesar salads.
Yes, grilled romaine lettuce is healthy! It's low in calories and high in vitamins A and K, as well as fiber. Grilling the lettuce doesn't strip away its nutrients, and it's a great way to add extra flavor without adding many calories. Pairing it with a homemade Caesar dressing, which can be made with healthier ingredients like olive oil and lemon juice, makes for a nutritious, satisfying salad option. Just be mindful of the dressing and crouton portions for a balanced meal.
Charred lettuce, like grilled romaine, has become popular because it adds a unique smoky flavor that enhances the overall taste of a salad or dish. The slight charring caramelizes the natural sugars in the lettuce, giving it a richer flavor. It also adds a textural contrast, with crispy, charred edges and a tender interior. Charred lettuce can bring an unexpected twist to otherwise simple salads, making them more flavorful and exciting.
Romaine lettuce is one of the more resilient leafy greens, so it doesn't lose many nutrients when cooked, including when it's grilled. While some vitamins like vitamin C may degrade slightly with heat, romaine retains most of its beneficial nutrients, including fiber and antioxidants. Grilling romaine is a healthy cooking method, as it preserves its core nutrients while adding a smoky flavor that enhances its natural taste. Just be careful not to overcook it.
More Caesar Salad Recipes
Looking for other recipes like this? Try these:


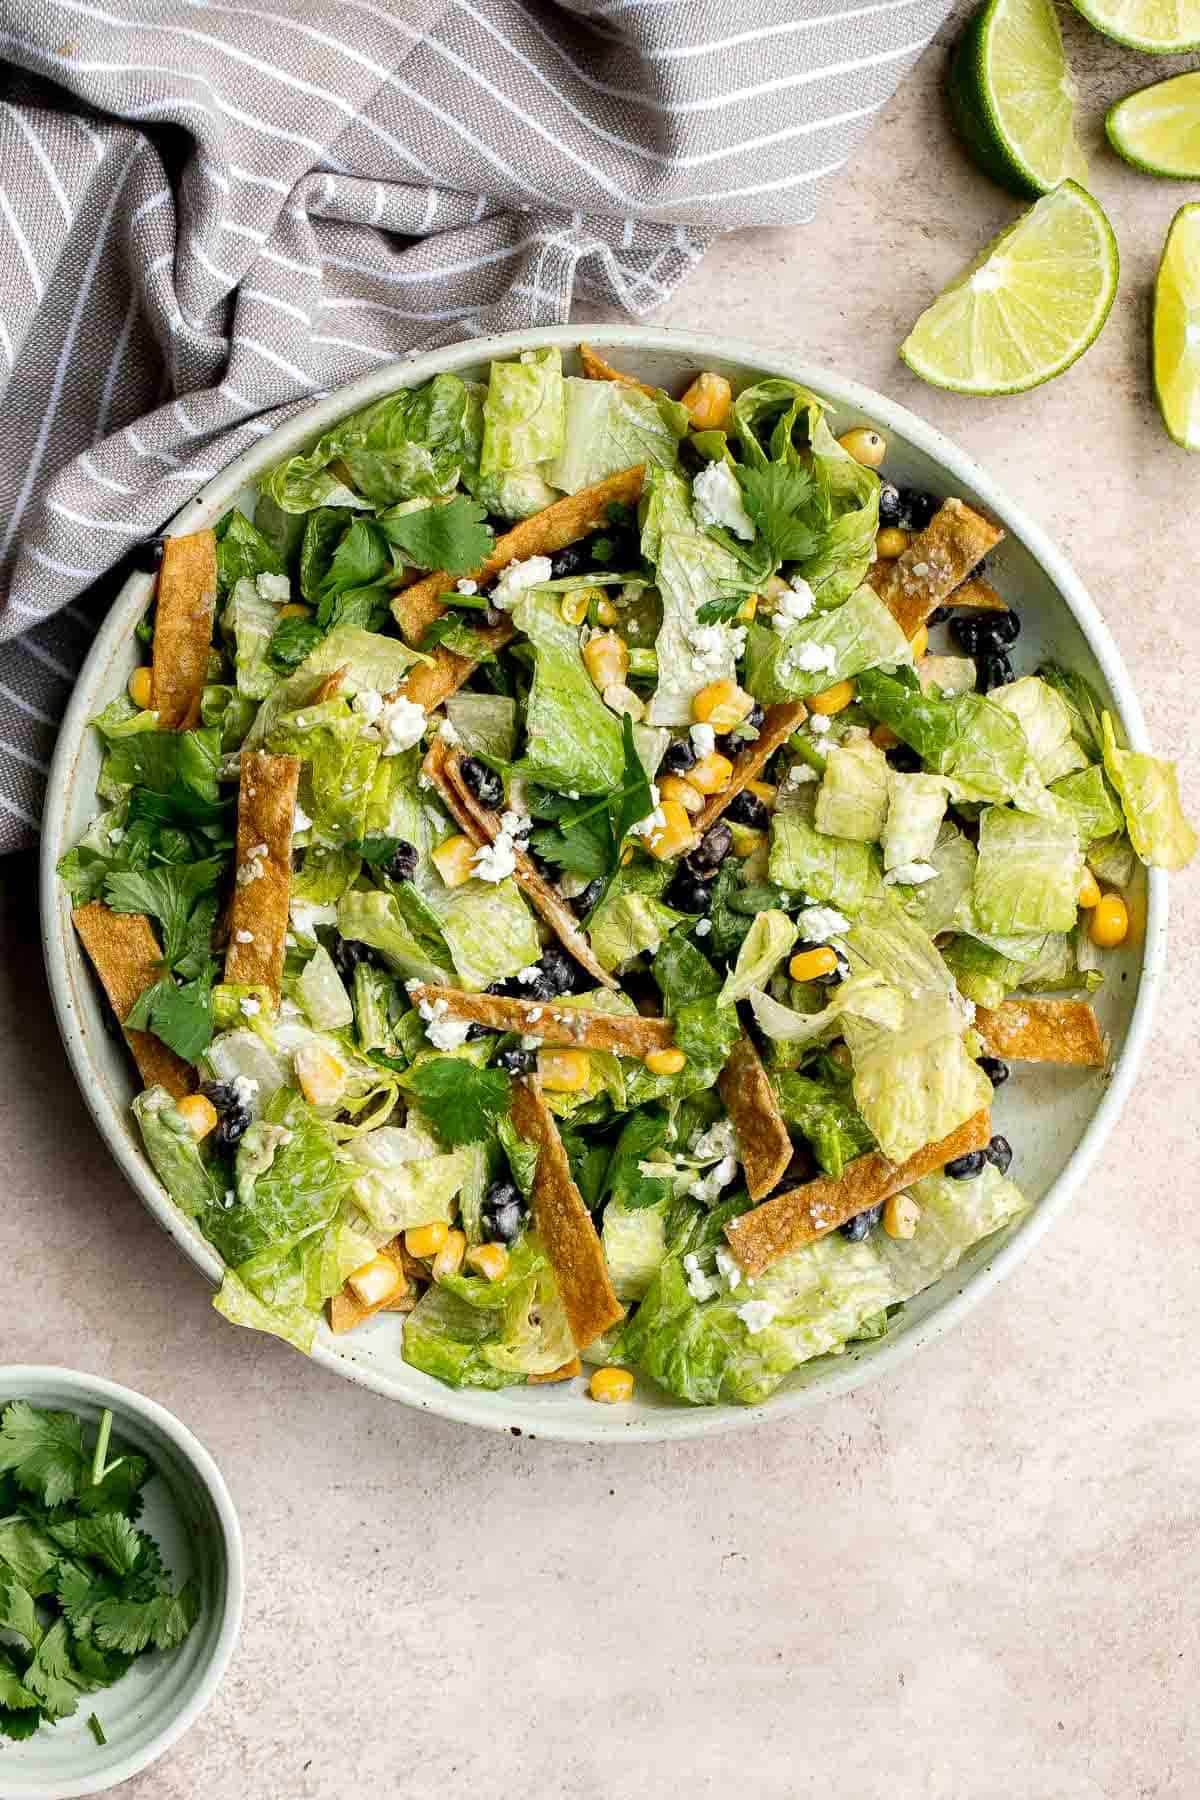
Tried this recipe?
I'd love to hear what you think! Leave a comment and rating below to share your feedback. Your reviews help others discover this recipe and help me keep creating more free recipes for you. Snap a photo and tag me on social media @aheadofthyme too.

Easy Homemade Croutons Recipe
Homemade Croutons are a simple and delicious way to add crunch and flavor to your dishes. Made with just a few pantry staples, they're a great way to use up leftover bread and transform it into a crispy, golden topping for soups, salads, or even snacking. Once you try these homemade croutons, you'll never go back to store-bought ones!
This easy homemade crouton recipe takes just 20 minutes and requires minimal ingredients, yet the result is a flavorful, crispy treat: golden on the outside and light and airy on the inside. With endless seasoning options and versatility, these croutons will elevate any dish you pair them with. They disappear fast, so be sure to make a double batch!
If you like this recipe, try our gluten-free Rice Croutons next.
Why You'll Love This Recipe
- Quick and easy to make. These homemade croutons come together in just 20 minutes with minimal ingredients, making them the perfect addition to any meal. Whether you're looking to use up leftover bread or simply want a quick snack, these croutons are the perfect solution.
- Crispy and golden perfection. The baking process ensures that every piece is crispy on the outside, while the inside stays light and airy. The perfect crunch you'll get from these croutons adds texture and depth to any dish they accompany.
- Endless customization. You can adjust the seasonings to fit your tastes, whether you prefer a classic garlic flavor, Italian herbs, or something more adventurous like smoked paprika. This recipe allows you to get creative and make the croutons as bold or subtle as you like.
- Great way to use up leftover bread. Instead of tossing out stale or leftover bread, you can repurpose it into a delicious, crunchy topping for soups, salads, or even snacking. It's a simple, waste-reducing way to enjoy food that would otherwise be discarded.
Ingredients and Substitutions
To make these easy homemade croutons, you will need the following ingredients (see recipe card below for quantities):
- bread - Use any type of bread you prefer, such as sourdough, baguette, ciabatta, whole wheat, or white bread. Stale or slightly dried bread works best for croutons.
- olive oil - Helps achieve a golden, crispy texture and enhances the flavor. You can substitute with melted butter or avocado oil for a different taste.
- garlic powder - Adds savory depth. Feel free to swap it out with nutritional yeast, onion powder, or freshly minced garlic.
- dried herbs - We use Italian seasoning to flavor the croutons, but feel free to use a mix of thyme, rosemary, or oregano. You can also use fresh herbs if available.
- salt and black pepper - Essential for seasoning the croutons and bringing out the flavors. Adjust to taste.
Equipment
You'll also need measuring spoons, a large baking sheet, a large mixing bowl for tossing the bread, and a sharp knife for cutting the bread into cubes.
Instructions
- Season. In a large mixing bowl, add bread cubes and evenly drizzle with olive oil. Add Italian seasoning and garlic powder and toss well until evenly coated.


- Bake. Place the bread cubes in a single layer on a parchment lined baking sheet. Bake in a 375°F preheated oven until golden, about 15-20 minutes. Tossing halfway through baking to cook evenly on both sides.


- Cool. Let cool completely and season with salt and pepper. You can store the leftover croutons in a sealed container for up to a week.


Expert Tip: Avoid Overcrowding
For extra crispy croutons, make sure to spread the bread cubes in an even layer on the baking sheet. Avoid overcrowding to ensure they bake evenly on all sides.
More Tips and Tricks
- Use stale bread. Stale bread holds up better in the oven and absorbs the olive oil and seasonings better than fresh bread.
- Cut the bread evenly. Try to cut the bread into cubes that are roughly the same size for even baking.
- Season generously. Don't skimp on the seasonings! Make sure the bread is well-coated in oil and spices to maximize flavor.
- Flip halfway through. To ensure that all sides of the croutons are crispy, flip them halfway through the baking time.
- Store properly. Let the croutons cool completely before storing them in an airtight container. They'll stay fresh for about a week.
Recipe Variations
- Cheesy. Add a sprinkle of grated Parmesan or cheddar to the croutons before baking for a cheesy twist.
- Spicy. Add a pinch of red pepper flakes or smoked paprika to the seasoning mix for a bit of heat.
- Herb. Use fresh herbs like thyme, rosemary, or basil for a fragrant, earthy flavor.
- Garlic butter. Melt butter with garlic powder and toss it with the bread cubes for a rich, garlic-flavored crouton.
Storage
How to Store
Store leftover croutons in an airtight container at room temperature for up to 1 week. They will stay crispy and fresh for several days. If you're storing them for longer, keep them in the fridge.
How to Freeze
If you have extra croutons, freeze them in an airtight container or freezer-safe bag for up to 3 months. To reheat, just bake them from frozen for 10 minutes at 350°F (175°C).
How to Serve
Homemade croutons are incredibly versatile and can be served in a variety of ways. They're perfect for adding a crunchy texture to your favorite soups (we love it with tomato soup!) or as a topping for fresh salads to make them more filling. You can also sprinkle them on top of grain bowls or roasted vegetables for added flavor and crunch. For a quick snack, enjoy croutons on their own or dip them in hummus or guacamole. If you're feeling adventurous, try using croutons as a topping for your favorite pasta dishes or on top of casseroles for a satisfying crunch.
These are my favorite dishes to top with homemade croutons:
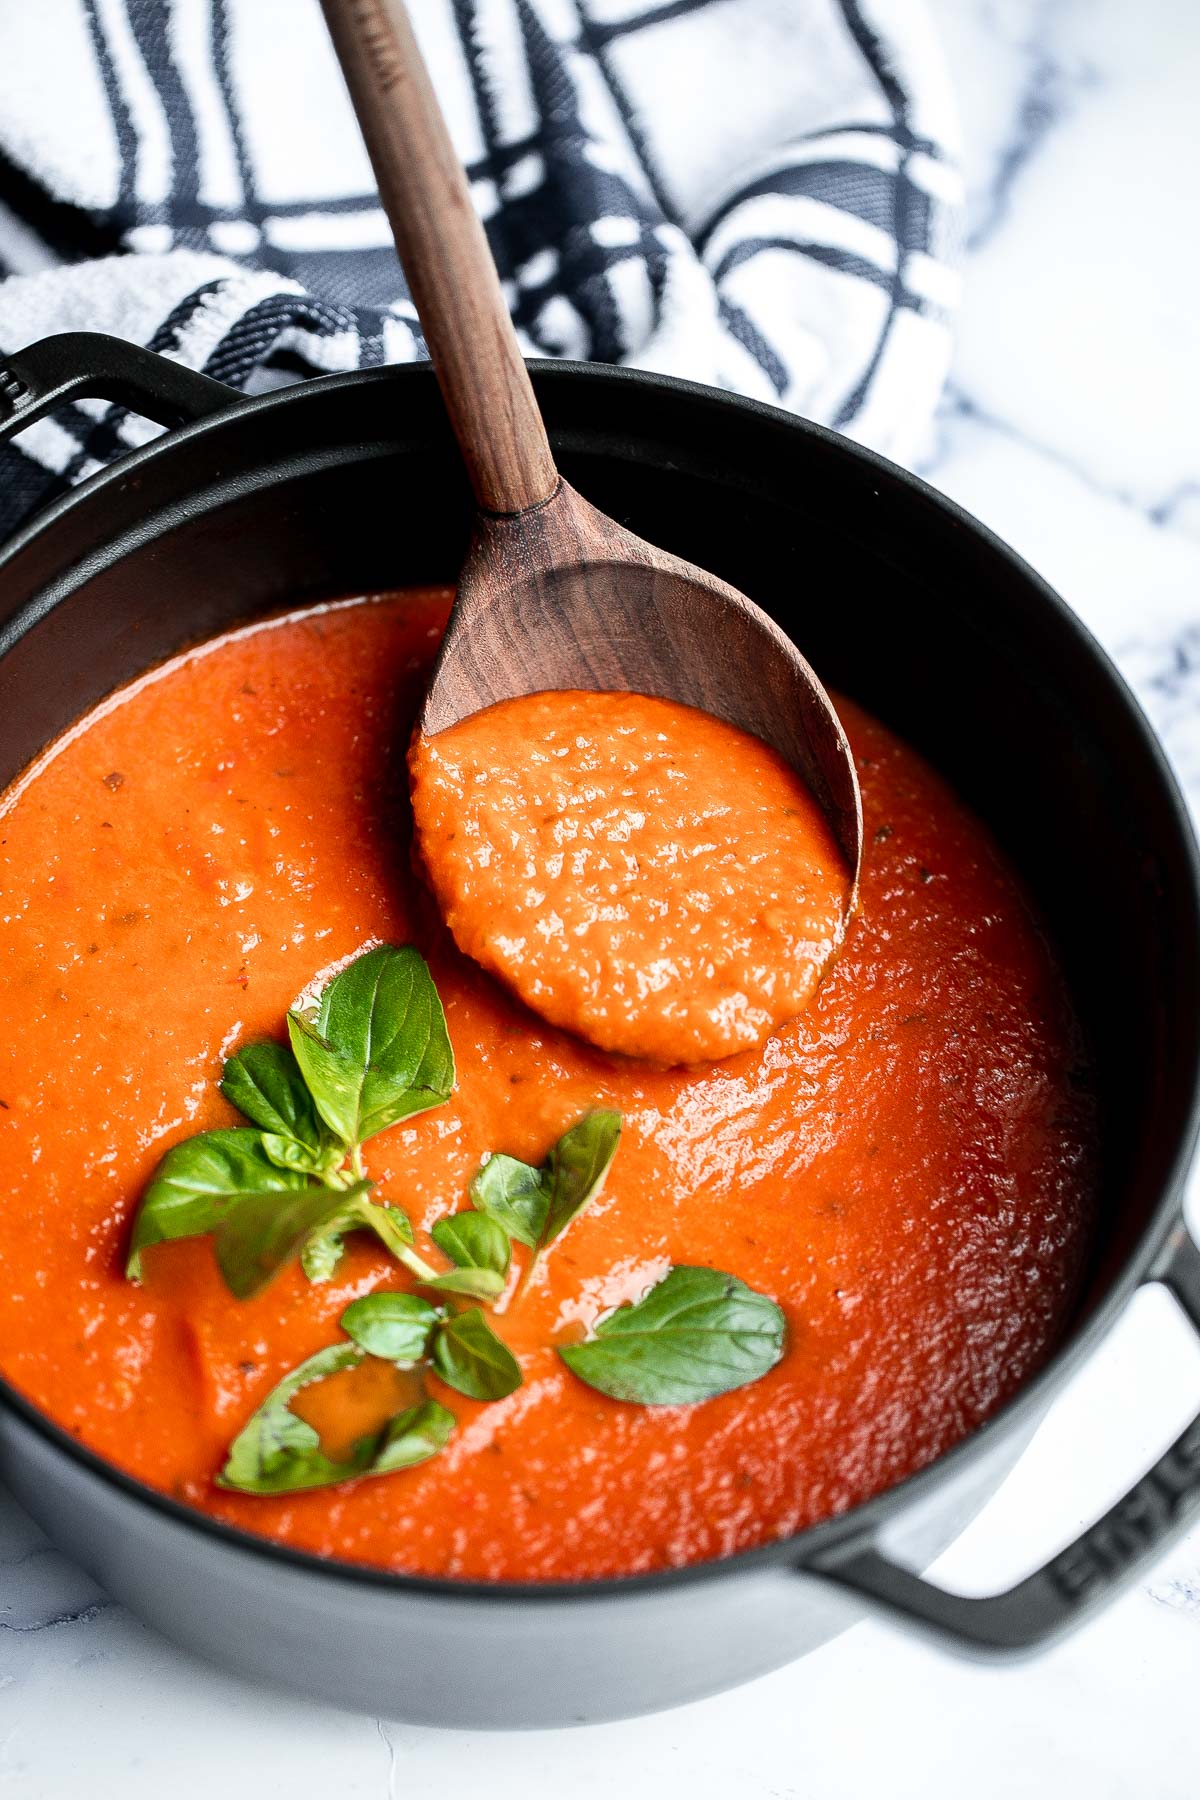

FAQ
The basic ingredients for croutons are bread, oil or butter, and seasoning. The bread is cubed, then tossed with oil (like olive oil) or melted butter, and seasoned with salt, pepper, and optional herbs or spices. The bread is then baked until golden and crispy. You can customize the seasoning depending on the flavor profile you're going for, such as garlic powder, Italian herbs, or even cheese for a savory kick. Croutons can be flavored to fit any dish you pair them with.
Yes, you can use virtually any type of bread for croutons. Sourdough, baguette, ciabatta, whole wheat, white bread, or even gluten-free bread all make great croutons. It's important to use slightly stale bread because it holds up better in the oven and absorbs the oil and seasonings more efficiently. Fresh bread may not achieve the same crispy texture and could become soggy. If you're using fresh bread, you can toast it lightly in the oven before cutting it into cubes.
If your croutons aren't turning crispy, it could be because they haven't been baked long enough or the oven temperature is too low. Make sure to bake the croutons at 375°F (190°C) and flip them halfway through to ensure they cook evenly on all sides. Also, using too much butter or oil can make the croutons greasy, so be sure to use a light coating. If the bread cubes are too large, they may also need more time in the oven to crisp up fully.
If your bread is very hard, you can still make croutons by simply cutting it into cubes and following the usual recipe. However, if the bread is too tough to cut, you can soften it slightly by wrapping it in a damp towel and microwaving it for 20-30 seconds. This will make it easier to cut. Once cubed, follow the regular instructions for tossing the bread in oil or butter and seasoning, then bake it until it's golden and crispy.
To make croutons in a frying pan, heat a small amount of oil or butter over medium heat. Once hot, add your cubed bread and toss to coat the pieces in the oil. Stir occasionally, allowing the bread cubes to toast evenly on all sides. Depending on the heat, it may take 5-10 minutes for the croutons to become golden and crispy. Keep an eye on them to avoid burning. Once they're crispy, remove from the pan and season to taste. These stovetop croutons are great for a quick, no-bake option!
More Bread Recipes
Looking for other recipes like this? Try these:

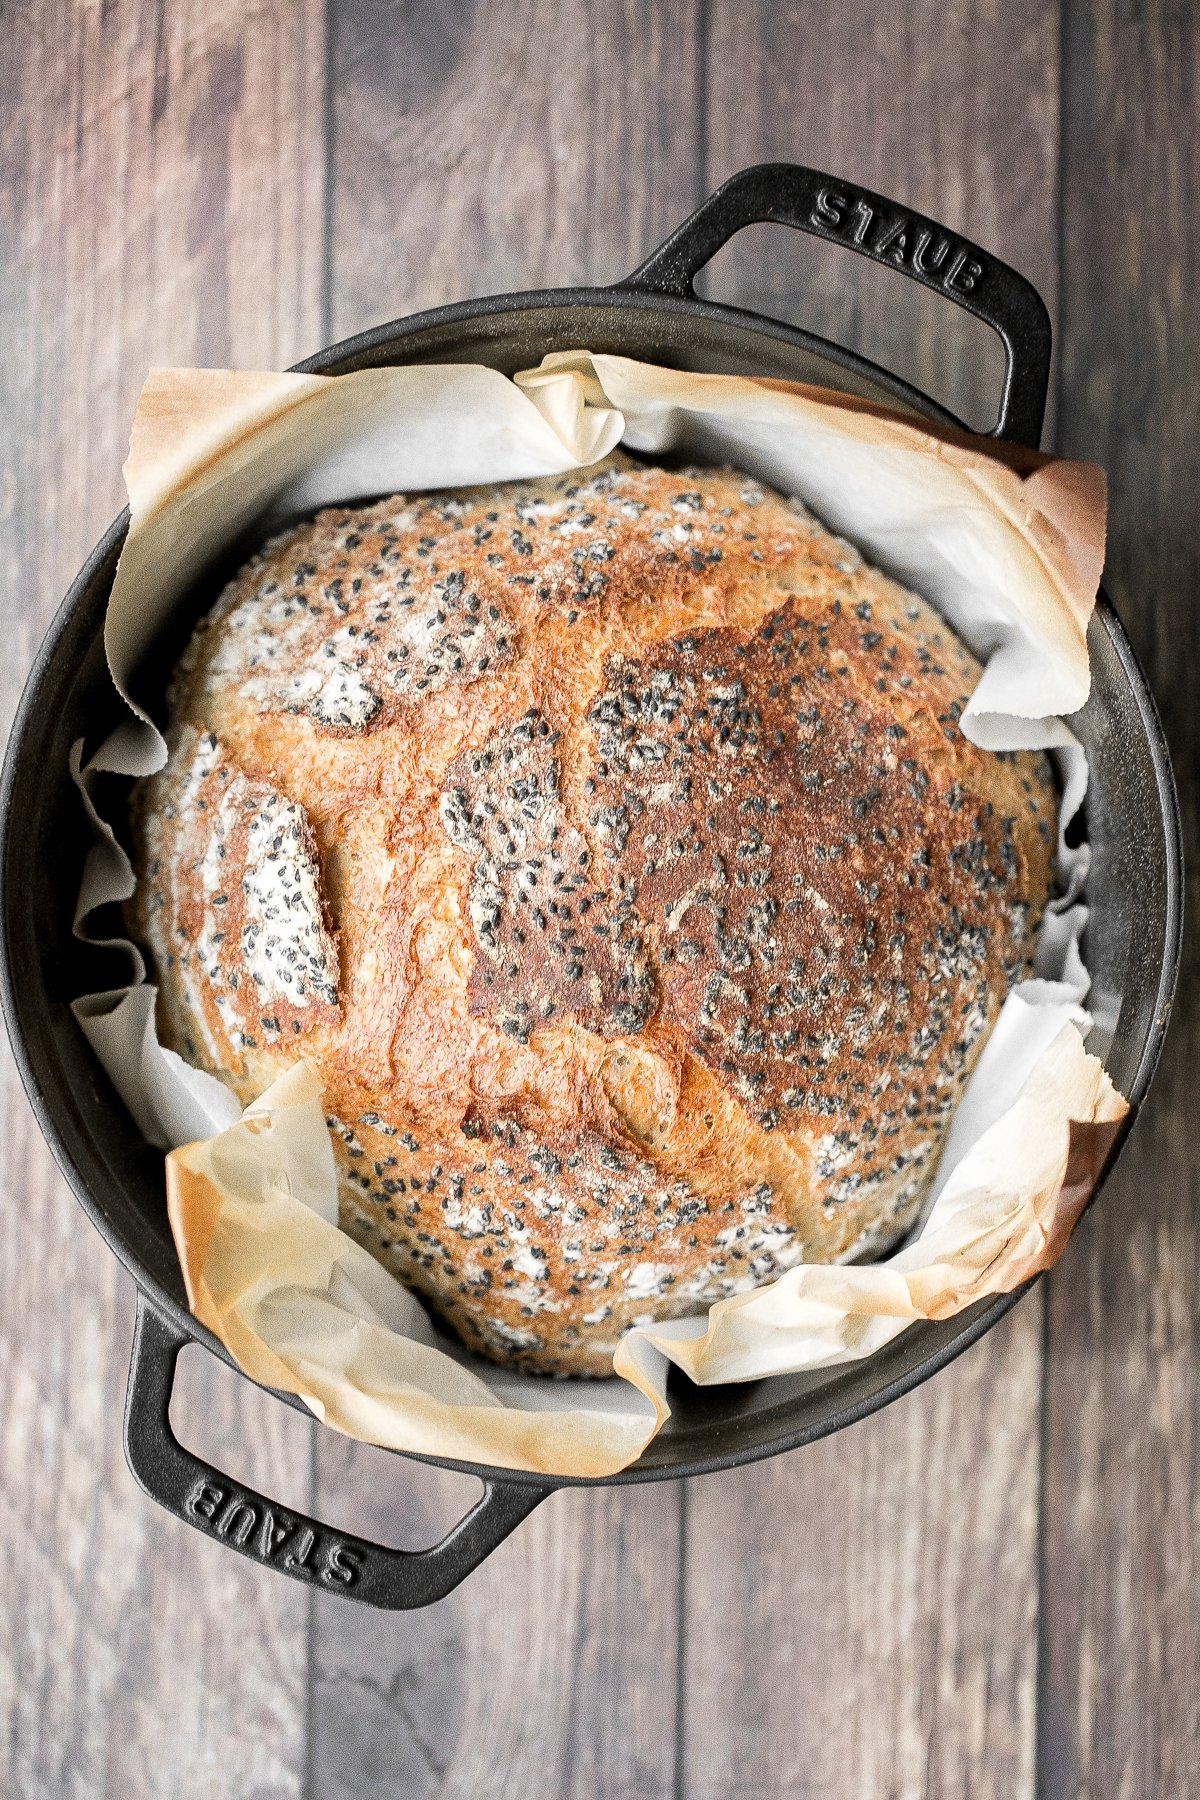
Tried this recipe?
I'd love to hear what you think! Leave a comment and rating below to share your feedback. Your reviews help others discover this recipe and help me keep creating more free recipes for you. Snap a photo and tag me on social media @aheadofthyme too.

Greek Salmon (with Video)
Greek Salmon is the perfect way to bring Mediterranean flavors to your dinner table in just 20 minutes. Oven-baked until flaky and tender, this salmon is infused with fresh garlic, lemon, and dill, creating a healthy, flavorful meal that's quick and easy to make. Whether you're looking for a weeknight dinner option or a crowd-pleasing dish for a special occasion, this Mediterranean salmon recipe will not disappoint.
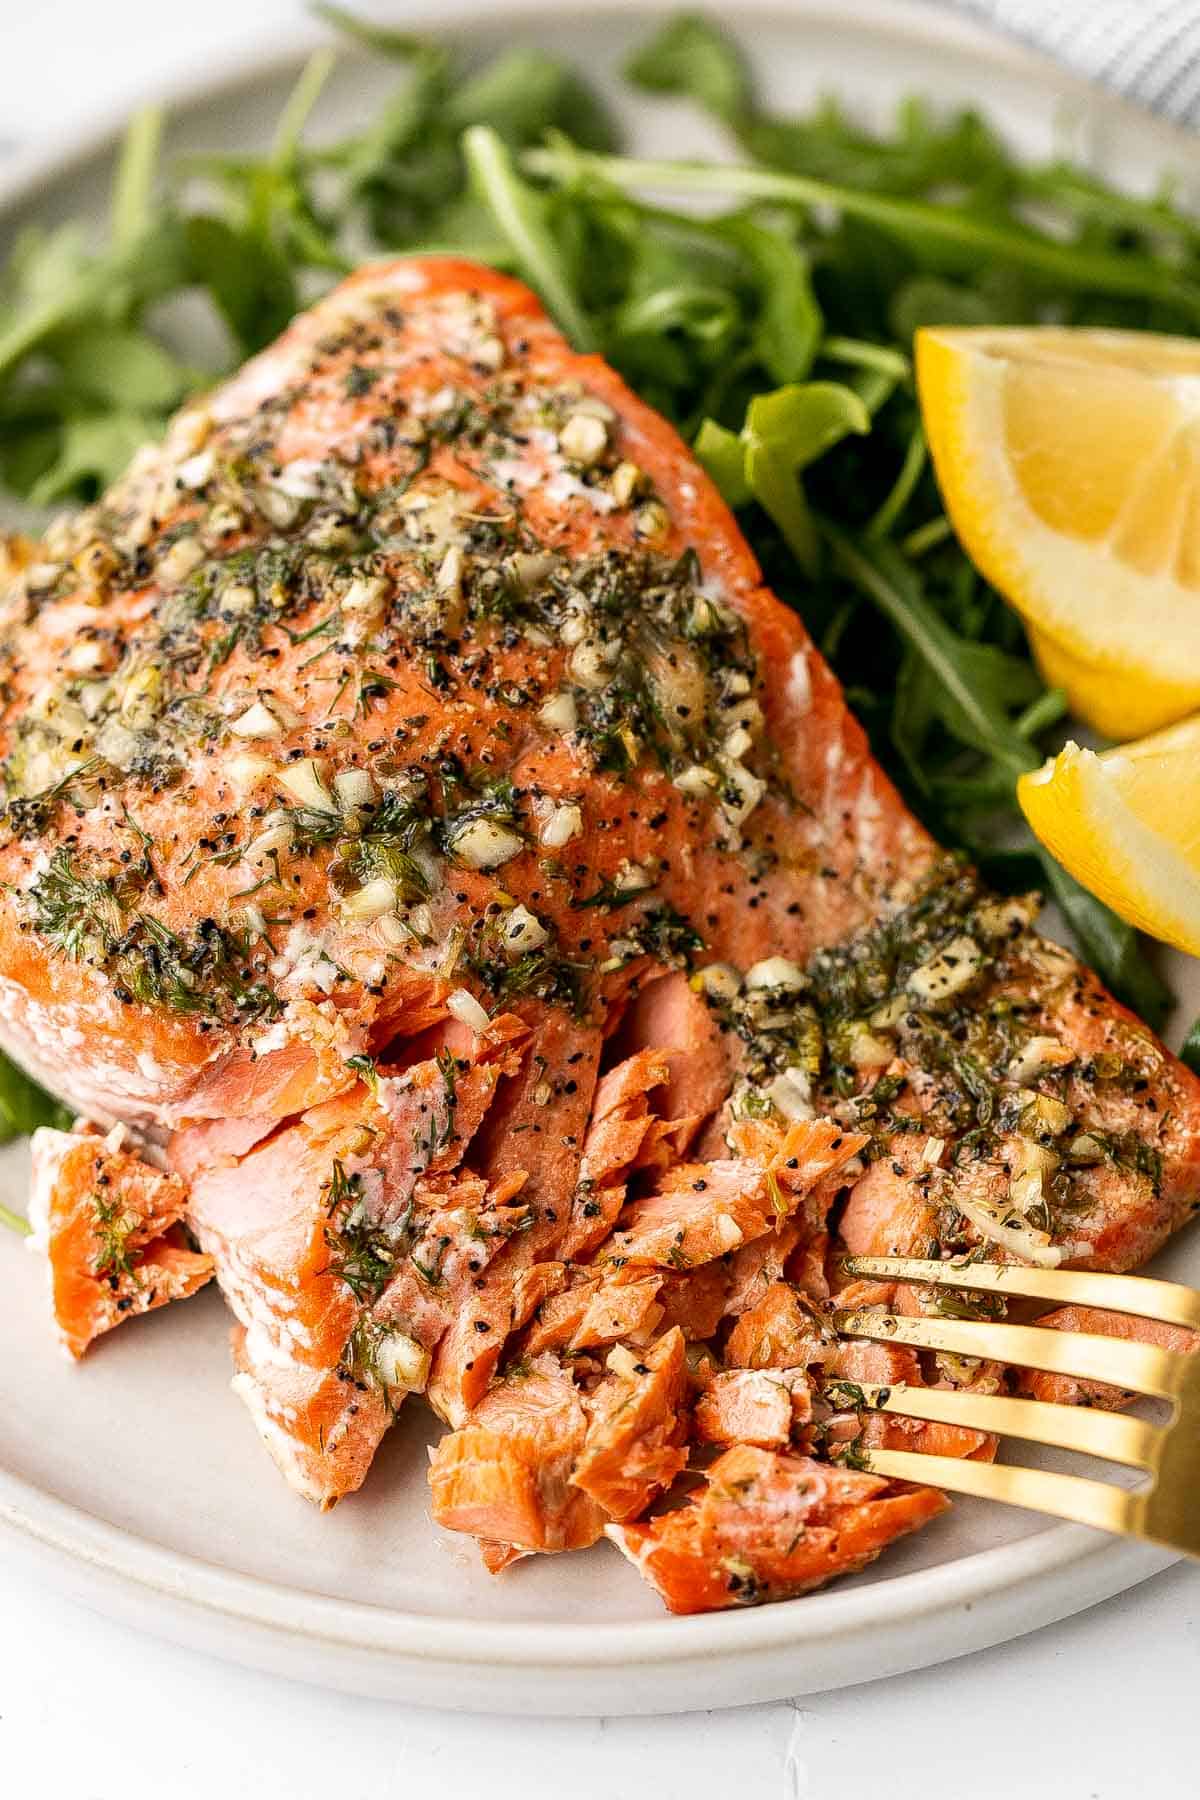
Salmon is a versatile fish, and this Mediterranean-style recipe is a great way to add seafood to your weekly rotation. The combination of fresh ingredients makes this oven-baked salmon vibrant and delicious, all while being heart-healthy and packed with omega-3s. It's a perfect meal to enjoy as part of a balanced Mediterranean diet, and it's so simple to prepare!
If you liked this recipe, you will have to try our Garlic Butter Salmon or Salmon Bites next.
I've tried many baked salmon recipes and they mostly turn out SO boring and/or dry. If I'm lucky I'll get one that results in something mediocre enough to make me think in my head that I could possibly revisit the recipe in the future. Possibly is the underscored word here. Then I somehow happen upon your blog after looking, yet again, through tens of recipes and basically strike the baked salmon lottery. Not only was the salmon very flavorful, it was also perfectly moist AND very exciting to eat. I wanted more and more! Thank you a million times over for the best baked salmon I've had in my entire life.
- Wendy ★★★★★
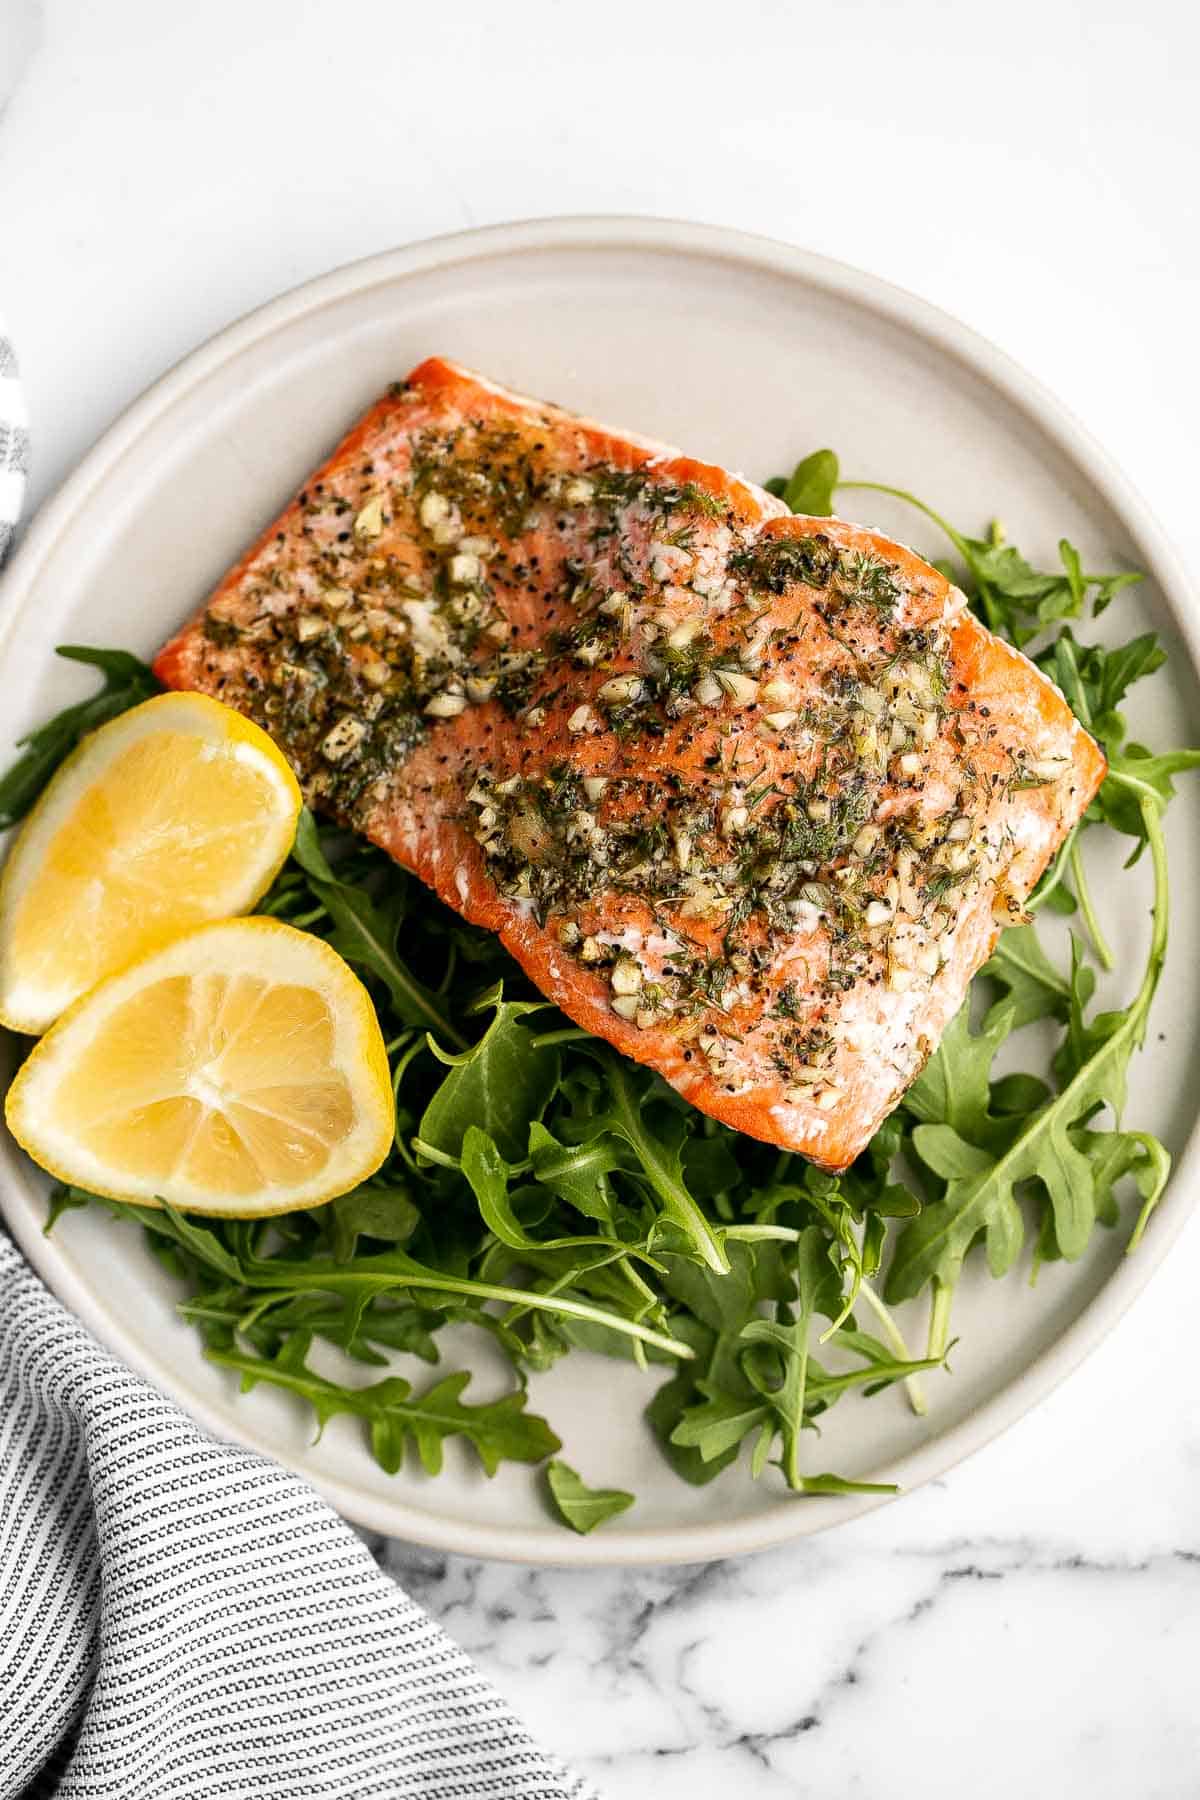
Why You'll Love This Recipe
- Greek salmon is easy and fast! Don't worry about having enough time to cook your salmon. This recipe is easy to prep, pop into the oven, and bakes in just 15 minutes, which leaves you enough time to make side dishes, finish errands, and spend time with the people who matter most. It's the ideal weeknight dinner!
- Fresh Mediterranean flavors. This easy and healthy salmon is packed with some classic Mediterranean ingredients like fresh dill, garlic, and lemon juice. The Mediterranean diet is known for its delicious, fresh ingredients, and this recipe highlights the best of them. It's the perfect meal when you are craving something fresh and light.
- Salmon is rich in vitamins and nutrients. Salmon is one of the healthiest fish out there. It contains omega-3 fatty acids, protein, tons of B vitamins, potassium, and selenium. When you eat Mediterranean salmon, you're choosing to feed your family a meal that's healthy and delicious!
- Impressive and elegant. Despite being easy and quick to prepare, this Greek salmon recipe looks and tastes like something you'd get at a restaurant. The vibrant lemon and dill seasoning, combined with the perfectly baked salmon, makes it a show-stopping dish that will impress your guests.
Ingredients and Substitutions
To make this quick and easy, delicious Greek salmon, you will need the following ingredients (full measurements in recipe card below):
- salmon - You'll need about 1 pound of salmon cut into fillets. I cut mine into 2 large fillets, but you can also cut it into 4 smaller portions for individual servings. Fresh, wild-caught salmon is ideal, but farmed salmon works too.
- olive oil - Adds healthy fats and helps to keep the salmon moist while baking. Use extra virgin olive oil for the best flavor.
- lemon juice - Fresh lemon juice adds a tangy and bright note that enhances the salmon's natural flavors. You can also add lemon zest for a more intense lemon flavor.
- fresh dill - A key herb in Mediterranean cooking, fresh dill adds a fragrant, herbaceous note that complements the richness of the salmon.
- dried oregano - You can substitute this with Italian seasoning for a more robust, herby flavor. Oregano is a staple in Mediterranean cooking and adds depth to the dish.
- garlic - Fresh garlic adds a savory depth to the flavor. You can mince or crush it, depending on your preference.
- salt and pepper - Essential for seasoning the salmon to bring out the best flavors.
Equipment
You will also need measuring cups and spoons, a small mixing bowl, and a quarter sheet baking pan.
Instructions

Prep
Preheat the oven to 400 degrees. Pat dry salmon fillets and place skin-side down on a lined quarter sheet baking pan.
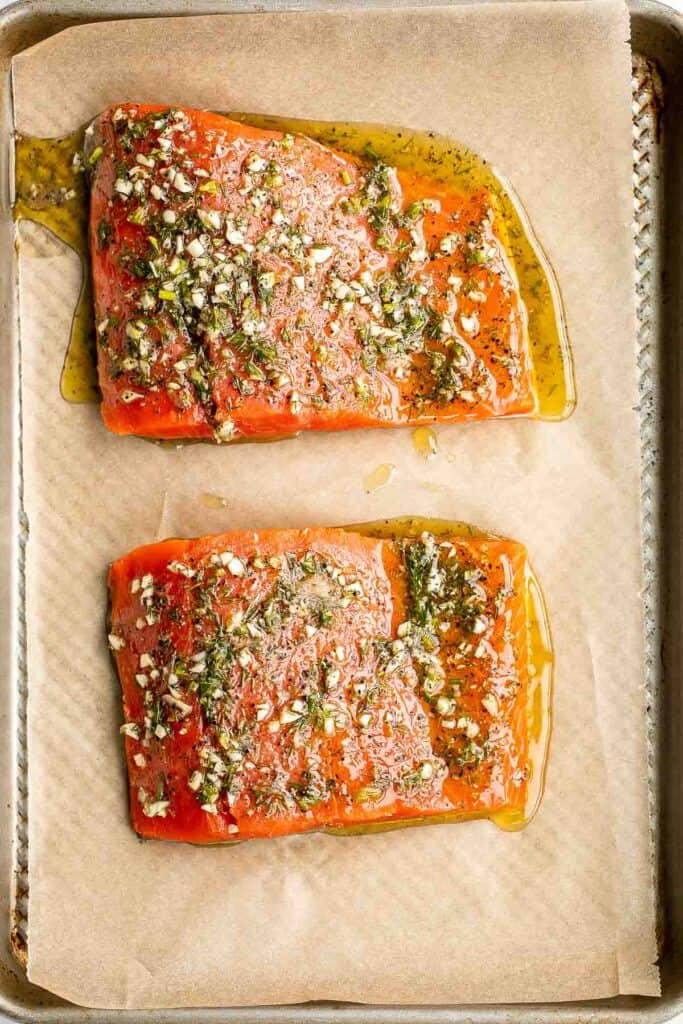
Marinate
In a small mixing bowl, stir to combine olive oil, lemon juice, dill, oregano, garlic, salt, and pepper. Brush or pour the marinade over the salmon and let it sit while the oven is preheating.
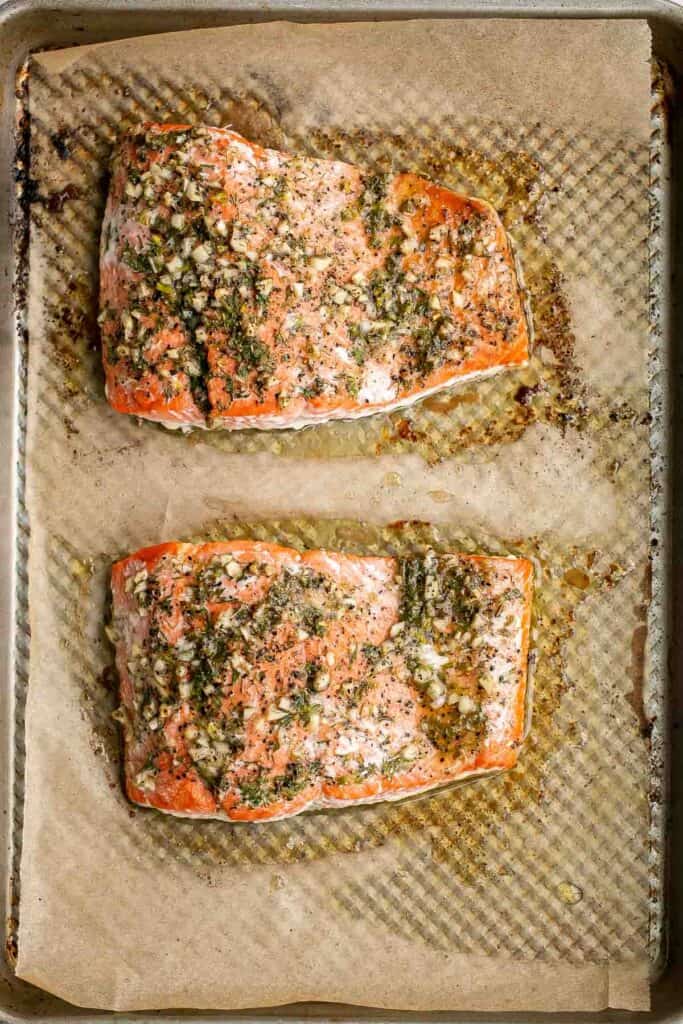
Bake
Bake for 15 minutes. Let rest for 5 minutes, then serve with an extra squeeze of lemon juice on top, if desired. You can also sprinkle with your favorite garnishes such as fresh parsley or feta cheese.
Recipe Video
Expert Tip: Checking for Doneness
For perfectly baked salmon, check for doneness by gently flaking the fish with a fork. If it flakes easily and is opaque, it's done. Avoid overcooking to keep the salmon tender and moist.
More Tips and Tricks
- Don't skip the marinade. Let the salmon marinate for at least 15 minutes (or up to 1 hour) to allow the flavors to really soak into the fish.
- Use fresh dill. While dried dill can work, fresh dill really makes a difference in flavor and adds a fragrant, vibrant note to the dish.
- Serve immediately. This dish is best enjoyed fresh out of the oven. However, you can store leftovers in the fridge for up to 2 days and reheat gently.
Recipe Variations
- Make it spicy. Add a pinch of cayenne pepper or red chili flakes to the marinade for a spicy kick.
- Cook in the air fryer: You can easily cook this salmon in the air fryer. To air fry, place the salmon in a single layer into the air fryer basket (you may have to do this in 2 batches). Air fry at 400F for about 10 minutes.
- Add citrus. Use orange juice in place of lemon juice for a slightly sweeter citrus flavor.
- Increase the texture. For extra flavor and texture, coat the salmon with a mixture of fresh herbs, breadcrumbs, and Parmesan before baking.
- Add sauce. Add a drizzle of balsamic glaze or tahini sauce on top of the salmon after baking for a tangy, sweet finish that complements the Mediterranean flavors.
- Add pesto. Once cooked, top it with homemade or store-bought basil pesto for a rich, herby layer of flavor that pairs beautifully with the fish.
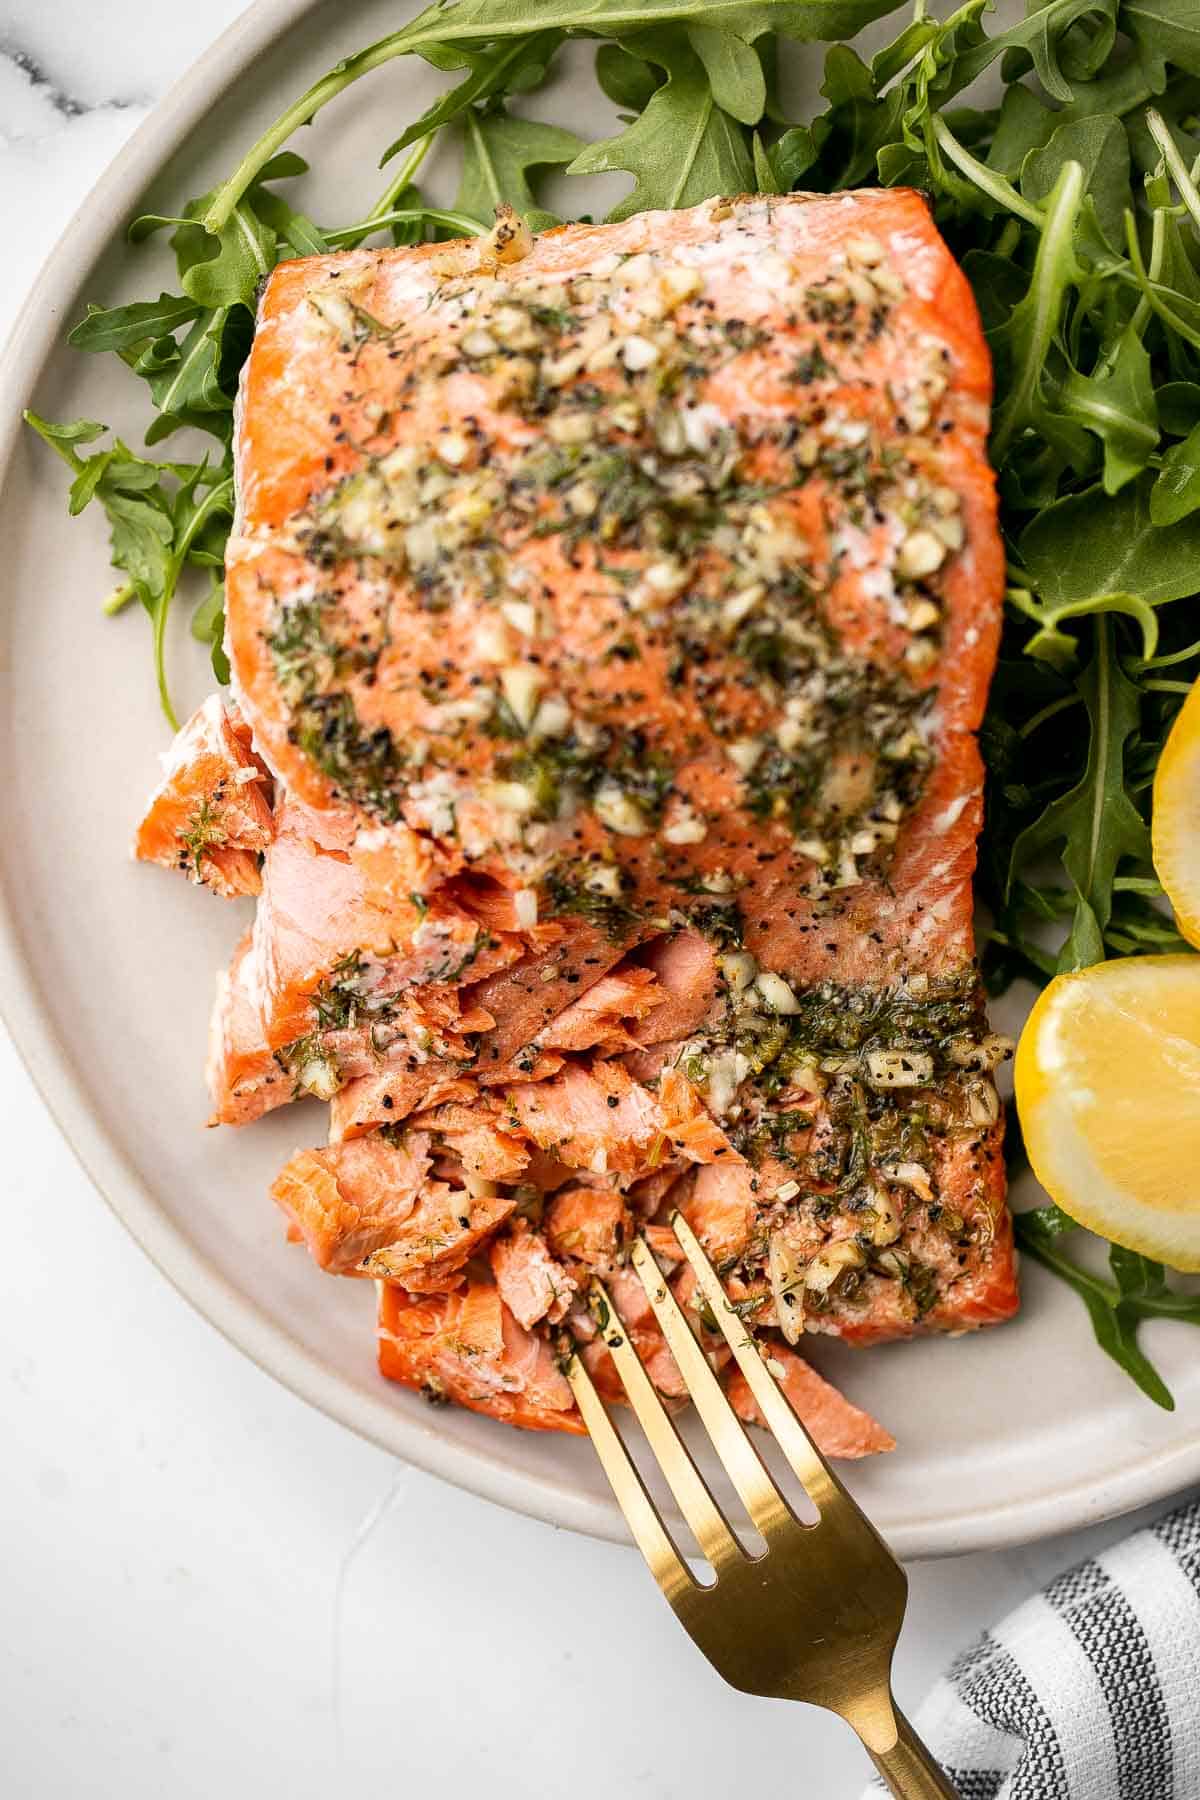
Storage
How to Store
Leftover salmon will keep in the refrigerator for up to 3-4 days when stored in an airtight container. Allow the fish to cool to room temperature before placing in the refrigerator.
How to Reheat
Reheat in a skillet over medium-low heat until warmed through, about 5 minutes, or in a preheated oven or air fryer at 300F for about 5-10 minutes until warmed through. You can reheat in the microwave for about 1 minute, but note that it can dry out the salmon a bit so use this method cautiously. You can also eat leftovers cold over a salad or in a sandwich.
How to Freeze
While it's best enjoyed fresh, you can freeze cooked salmon for up to 3 months. Let the salmon cool completely, then wrap it tightly in plastic wrap and foil before freezing. Thaw in the fridge overnight before reheating.
How to Serve
Mediterranean Salmon is incredibly versatile and can be served in a variety of ways. For a complete meal, serve it over a bed of quinoa or couscous, pair it with roasted vegetables, or alongside a Greek salad, topped with fresh cucumbers, cherry tomatoes, kalamata olives, and feta cheese, for a lighter option.
These are some of my favorite sides to serve with this Greek Salmon.

Side Dishes for Salmon
For more recipe ideas, explore our collection of side dishes that pair perfectly with salmon, including fresh salads, roasted vegetables, light grains, and flavorful appetizers that complement the richness of the fish.
FAQ
Mediterranean salmon refers to a preparation style that incorporates the fresh, vibrant flavors of the Mediterranean region. This typically includes ingredients like olive oil, fresh herbs (dill, oregano), garlic, lemon, and sometimes anchovy paste for added umami. The dish highlights the healthy fats, lean protein, and rich flavors that are staples in Mediterranean cuisine. Grilled or oven-baked, this version of salmon is often served with simple sides like vegetables, salads, or grains, making it a wholesome and flavorful meal.
Mediterranean seasonings for salmon often include a combination of fresh herbs like dill, oregano, and basil, along with garlic and citrus (lemon or orange). Olive oil is also a key ingredient, helping to enhance the natural flavors of the fish. These seasonings are not only delicious but also contribute to the health benefits of the Mediterranean diet, which focuses on fresh, whole ingredients and healthy fats.
Yes, salmon is an excellent choice on a Mediterranean diet. It's rich in omega-3 fatty acids, which are heart-healthy and contribute to reducing inflammation. The Mediterranean diet emphasizes whole foods like fish, olive oil, vegetables, and herbs, making salmon a perfect fit. Its high protein content and healthy fats make it a filling and nutritious meal that aligns with the principles of the Mediterranean eating style.
The most flavorful way to cook salmon often involves marinating it to infuse it with seasonings and herbs, then grilling or baking it. Grilling adds a smoky flavor, while baking keeps it moist and tender. For added flavor, you can top the salmon with a sauce like a tangy lemon-dill dressing or a Mediterranean-inspired glaze. Another flavorful method is pan-searing the salmon with garlic and herbs for a crispy exterior and juicy interior.
Both pan-frying and oven-baking salmon have their benefits. Pan-frying results in a crispy exterior while keeping the inside moist, and it's faster than baking. However, oven baking is a gentler method that evenly cooks the salmon and retains its moisture, especially if you're cooking thicker fillets. For a more hands-off approach, oven-baking is often preferred. If you're looking for a crispy skin, pan-frying might be your best bet. Ultimately, the best method depends on the texture and flavor you prefer.
Mediterranean spices for salmon typically include dried oregano, thyme, cumin, and paprika. Fresh herbs like dill, parsley, and basil are also commonly used in Mediterranean cuisine. These herbs and spices add rich, aromatic flavors to the fish while enhancing its natural taste. Olive oil, garlic, and citrus (lemon or orange) are also key components of Mediterranean salmon dishes, adding moisture, tanginess, and freshness to balance the spices.
More Salmon Recipes
Looking for other recipes like this? Try these:
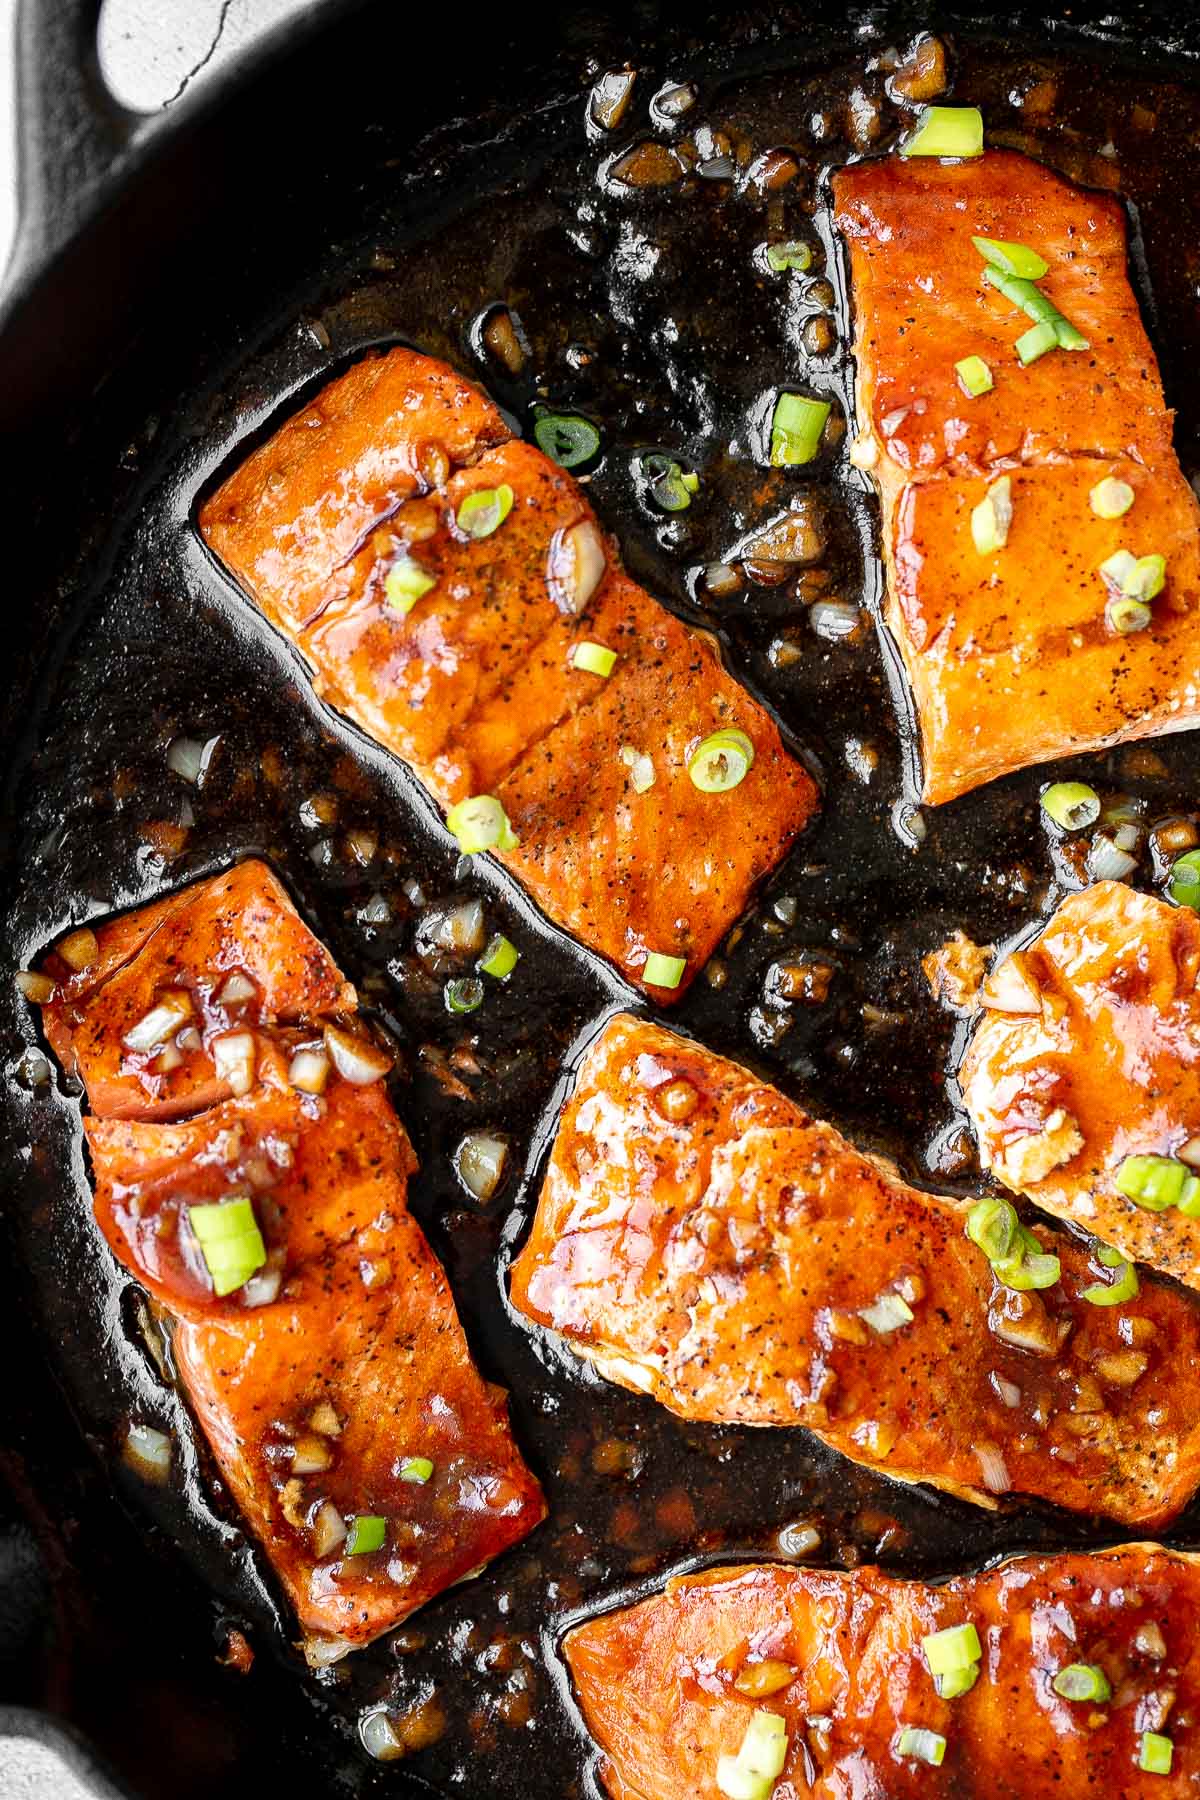
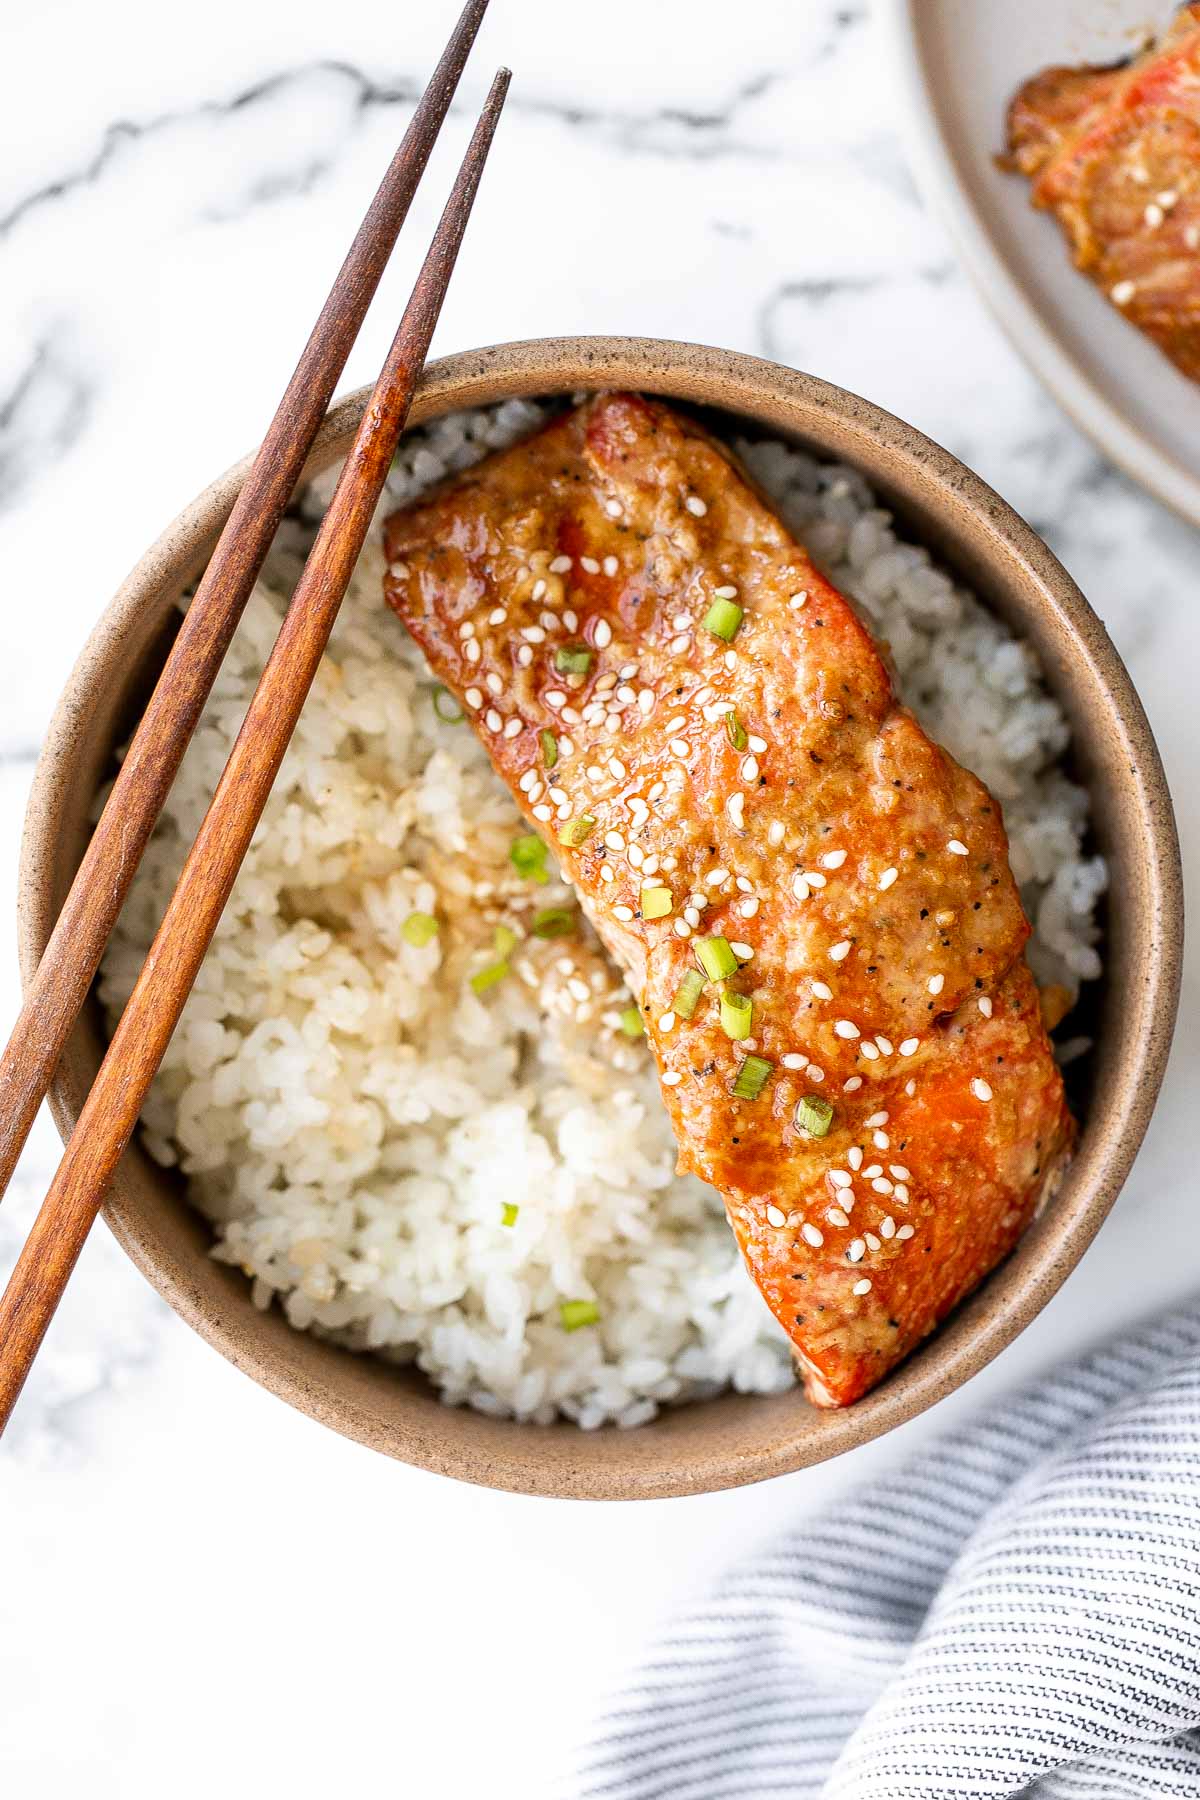

Tried this recipe?
I'd love to hear what you think! Leave a comment and rating below to share your feedback. Your reviews help others discover this recipe and help me keep creating more free recipes for you. Snap a photo and tag me on social media @aheadofthyme too.

Grilled Tofu Skewers (Vegan)
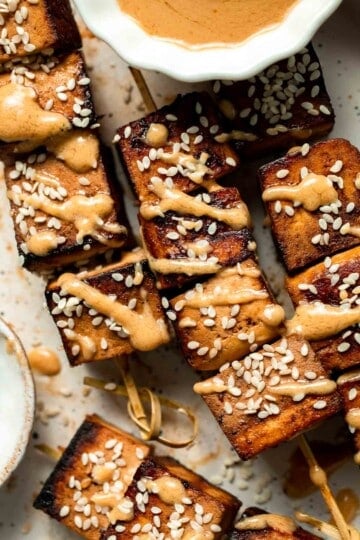
Grilled Tofu Skewers are a delicious, protein-packed vegan dish that's perfect for BBQs, weeknight dinners, or meal prep. These skewers are marinated in a savory blend of soy sauce, sesame oil, and spices, then grilled to crispy perfection. The result is a smoky, golden exterior with a soft and juicy interior, making them the ideal plant-based alternative for your next occasion.

The best part of this dish is its simplicity and versatility. The tofu is threaded onto skewers, grilled to a golden brown, and served with a rich peanut dipping sauce that enhances the flavors even further. It's a quick, easy, and nutritious meal or snack that you can enjoy on its own or serve alongside other sides. Whether you're a tofu lover or just looking for a new way to enjoy plant-based food, these grilled tofu skewers might quickly become a go-to recipe in your grilling recipe collection.
If you like this recipe, then you should try our Kung Pao Tofu or Tofu Lettuce Wraps next.
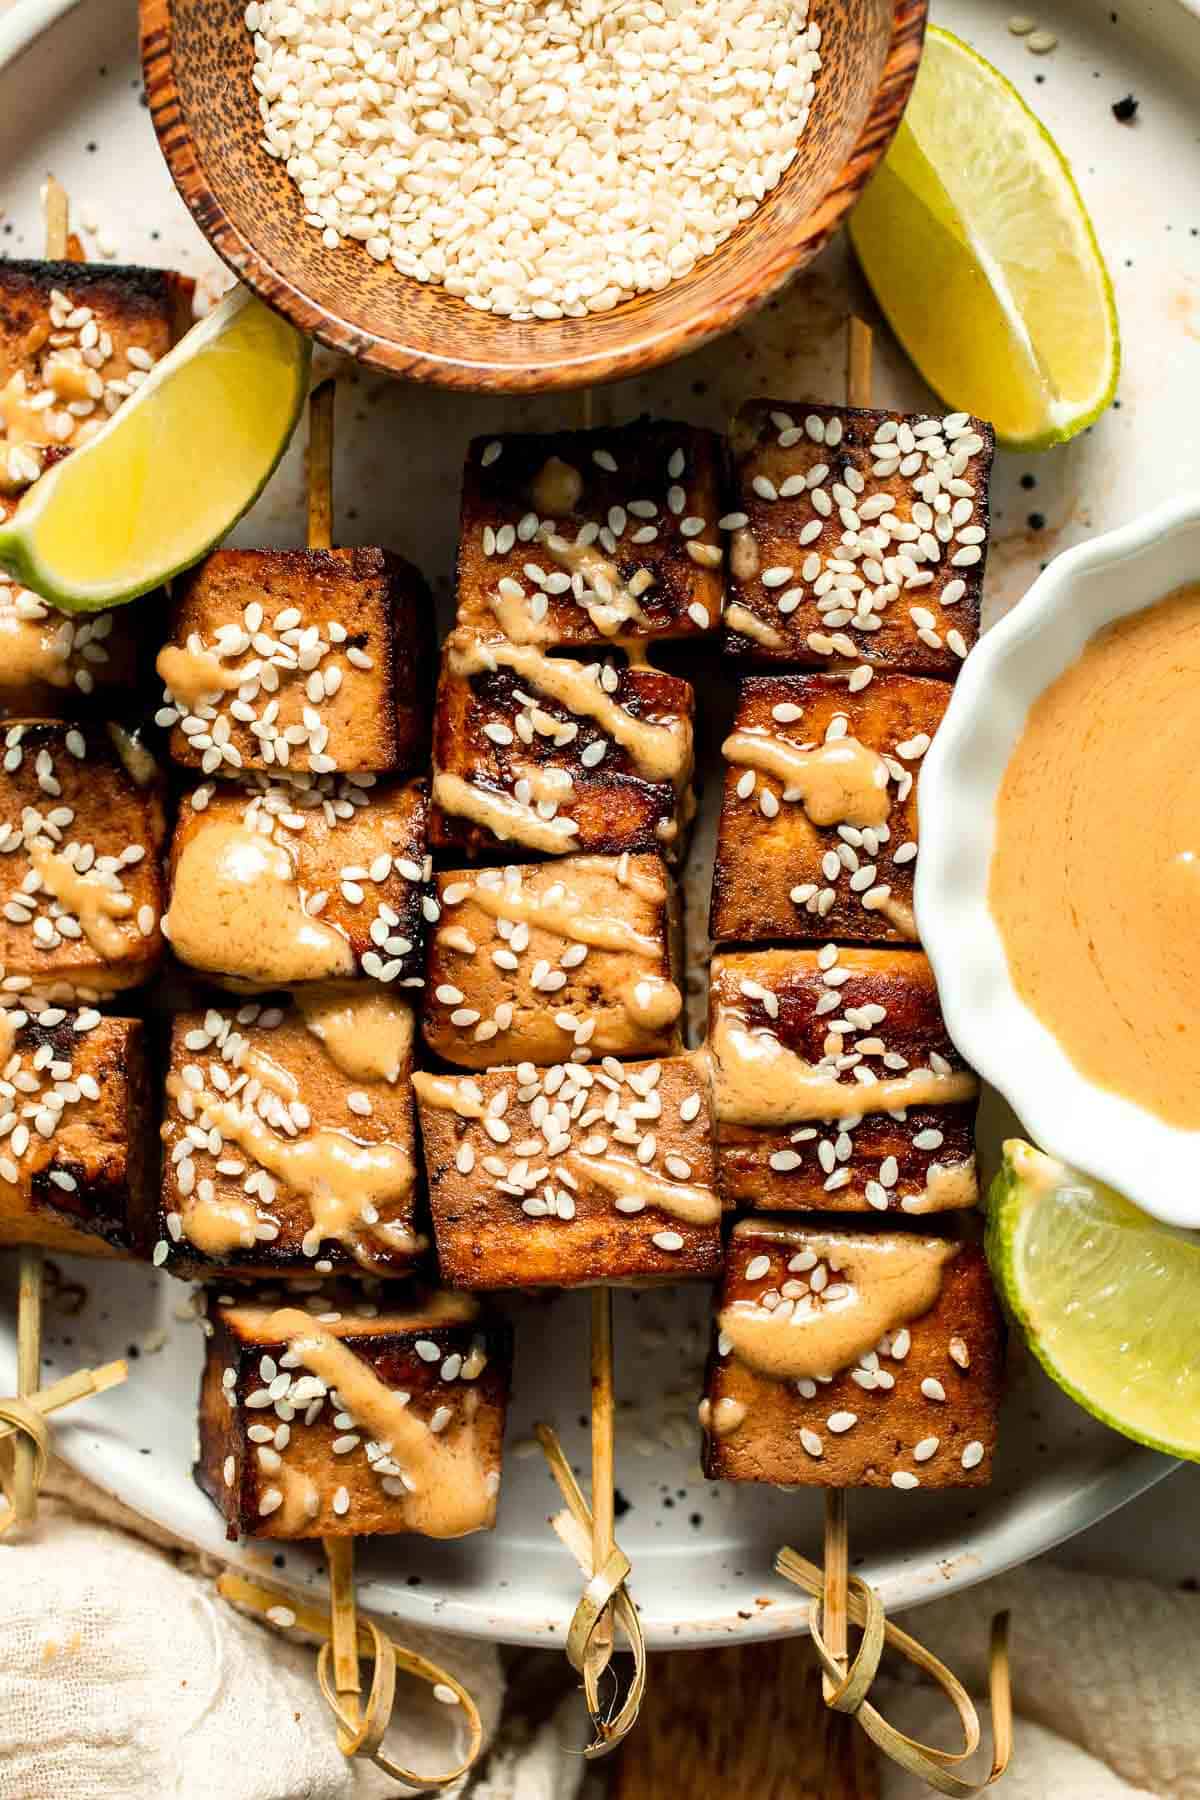
Why You'll Love This Recipe
- Vegan and protein-packed. Tofu is an excellent source of plant-based protein, making this dish both nutritious and filling.
- Flavorful and smoky. The marinade gives the tofu an irresistible flavor that gets enhanced by grilling, creating a crispy, smoky exterior and a soft, flavorful interior.
- Simple to make. With just a few pantry staples and veggies, you can create a meal that's easy and quick to prepare.
- Perfect for meal prep. These tofu skewers are great for prepping ahead of time. Grill a batch for the week, and you have a delicious, ready-to-eat protein for salads, wraps, or bowls.
- Customizable. Add your favorite vegetables or spices to make these skewers your own. They're flexible and adaptable to any flavor profile.
Ingredients and Substitutions
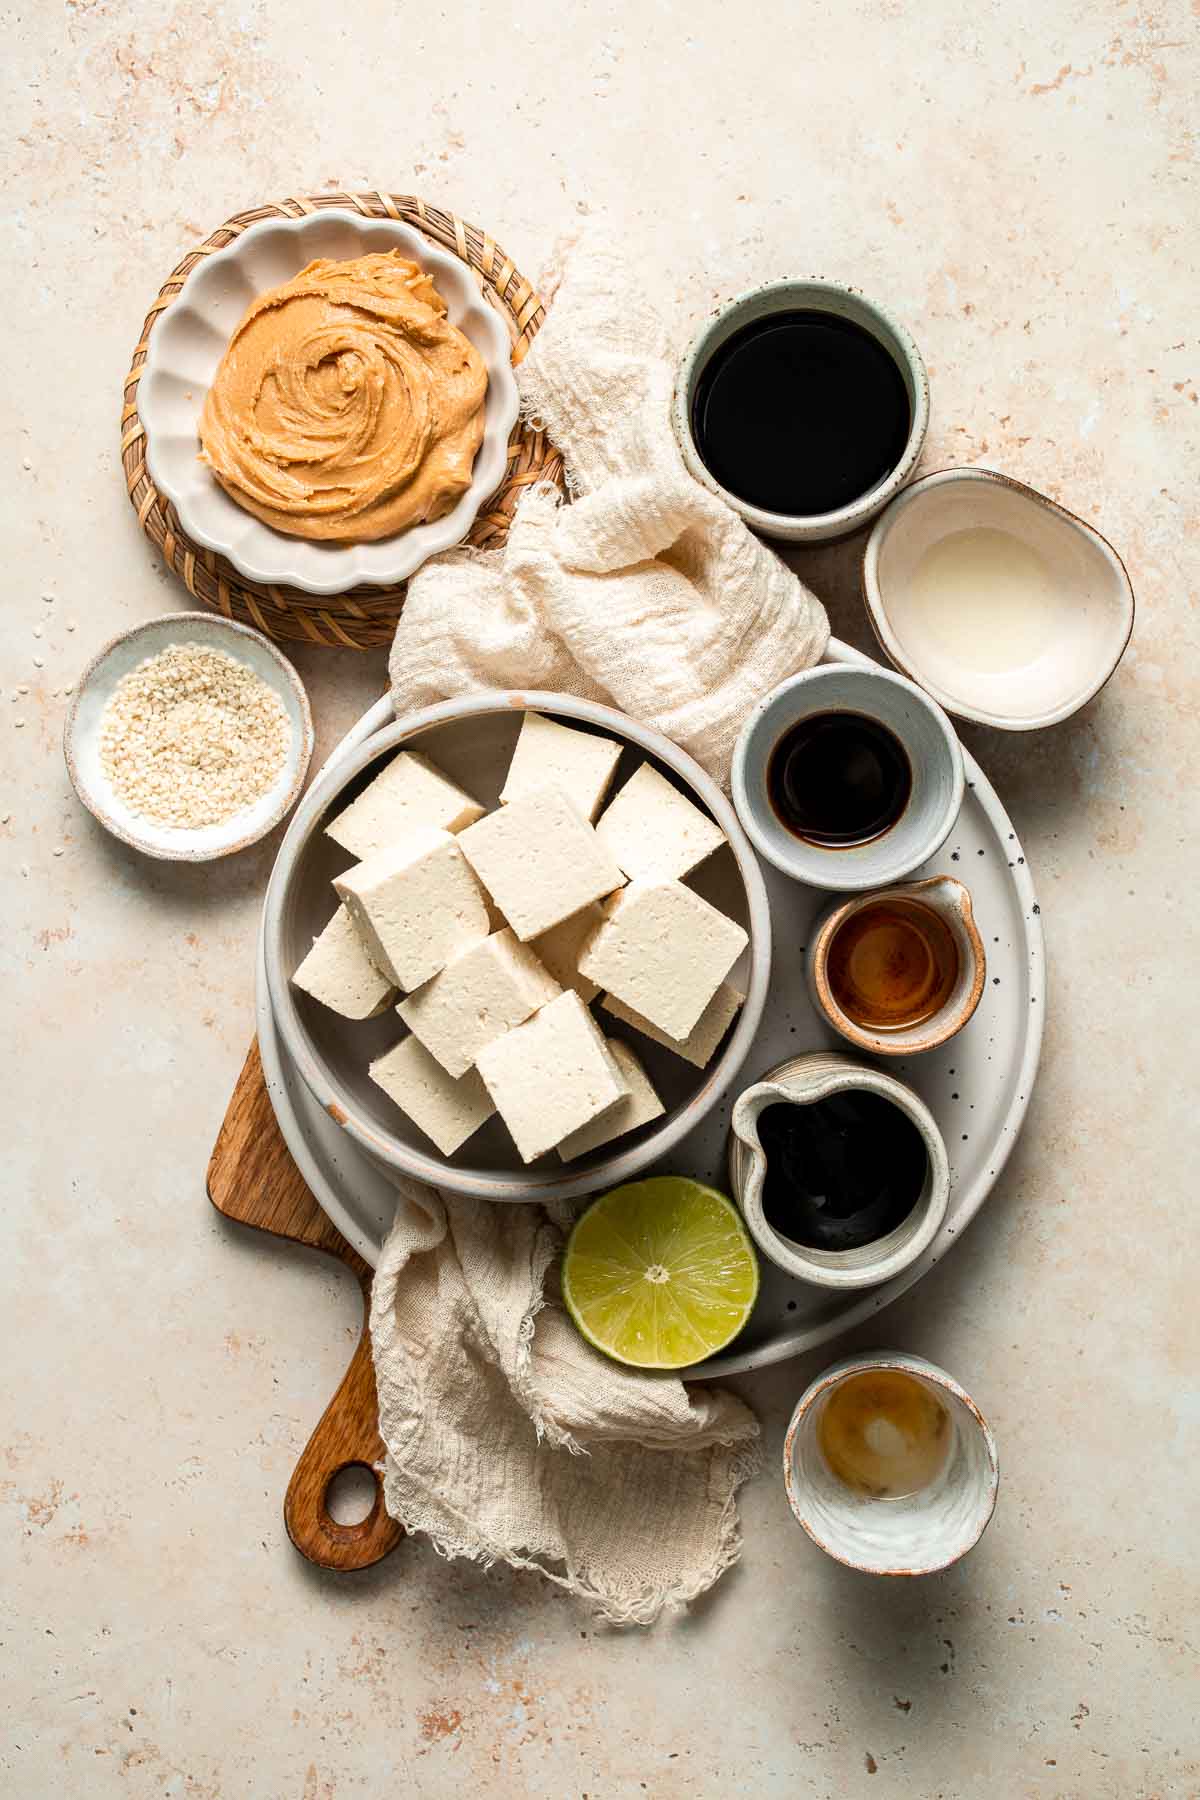
To make these grilled tofu skewers, you will need the following ingredients (see recipe card below for quantities):
- tofu - Choose firm or extra-firm tofu for the best texture on the grill. Press the tofu to remove excess water for a firmer consistency.
- soy sauce - Adds saltiness and umami flavor. Tamari is a gluten-free alternative, and coconut aminos can be used for a soy-free option.
- sesame oil - Provides a nutty richness and flavor to the marinade. You can use a light sesame oil for a milder flavor or toasted sesame oil for a deeper, roasted flavor.
- vinegar - Adds a touch of acidity to balance the flavors. Use balsamic vinegar for a slight sweetness or white vinegar for a sharper tang.
- sesame seeds - Used as a garnish for a crunchy texture and an extra layer of sesame flavor.
- peanut dipping sauce - Serve these skewers with peanut sauce or your favorite dipping sauce. To make it, you will need hoisin sauce or sweet soy sauce, peanut butter, water, sesame oil, and lime juice.
Equipment
You'll also need bamboo skewers (soaked in water for 30 minutes to prevent burning), a grill or grill pan, a small bowl for the marinade, and a basting brush for the oil.
Instructions
- Combine. In a large mixing bowl, toss the cubed tofu chunks with soy sauce, sesame oil, and vinegar. Stir well to coat the tofu evenly in the marinade.


- Thread. Thread the marinated tofu onto bamboo skewers, leaving a little space between each cube. Add 4-5 cubes to each skewer.
- Grill. Lightly brush the grill pan or large skillet with oil. Preheat the pan over medium-high heat for 1-2 minutes until the oil starts to shimmer. Place the skewers in the pan, ensuring they're evenly spaced. Grill for 3-4 minutes per side, or until golden brown and crispy. Occasionally brush with the leftover soy sauce marinade on each side to enhance the flavor.
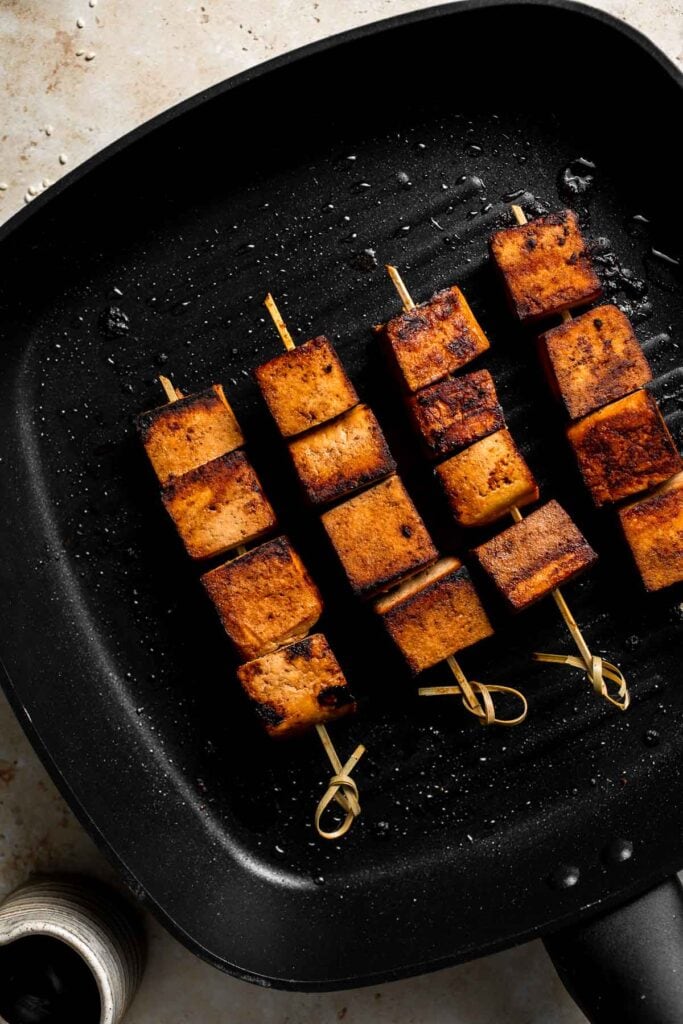
- Make sauce. Make the peanut dipping sauce by whisking together hoisin sauce, peanut butter, water, sesame oil, and lime juice until smooth. Set aside.

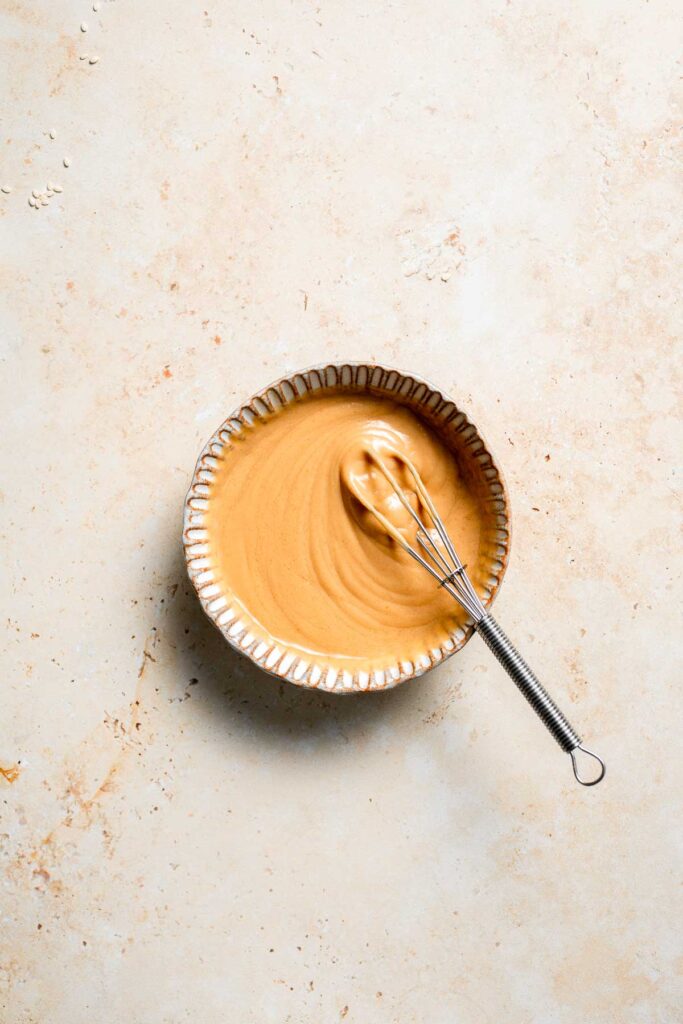
- Serve. Once grilled, sprinkle the tofu skewers with sesame seeds and serve immediately with the peanut dipping sauce.
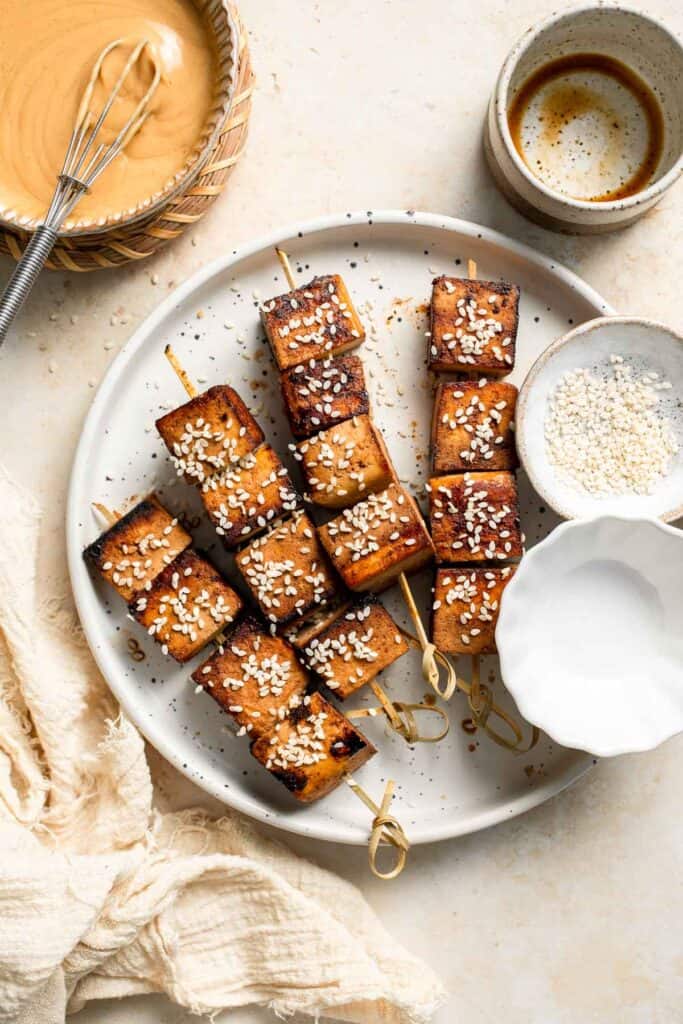

Top Tip: Press the Tofu
For extra crispy tofu, press out as much water as possible before marinating it. The less moisture in the tofu, the better it will absorb the marinade and grill up to a crispy, golden texture.
More Tips and Tricks
- Marinate longer. For the best flavor, marinate the tofu for at least a half an hour, or overnight in the fridge. The longer it sits, the more flavorful the tofu will be.
- Use skewers for easy flipping. To make grilling easier, use bamboo skewers for threading the tofu. This not only allows for even grilling but also makes it simpler to turn the skewers without the tofu falling apart.
- Cook on the stovetop. If you don't have access to an outdoor grill, use a non-stick grill pan to achieve similar grill marks and crispiness. Just make sure the pan is well-heated before placing the skewers in.
- Don't overcrowd the skewers. When threading tofu onto the skewers, leave some space between each piece. This allows the heat to circulate better and ensures that the tofu gets that crispy, caramelized exterior.
- Brush with oil for extra crispiness. For an extra crispy and flavorful finish, brush the tofu cubes with olive oil or sesame oil before grilling. This helps achieve a golden-brown crust and prevents sticking on the grill.
Recipe Variations
- Add veggies. Feel free to load up the skewers with a variety of your favorite veggies such as mushroom, red onion, pineapple, or tomatoes. The more colorful, the better!
- Spicy. Add a dash of chili flakes or cayenne pepper to the marinade for a spicy kick.
- Teriyaki. Substitute the soy sauce marinade with teriyaki sauce, adding a touch of grated ginger and garlic. Once grilled, top with sesame seeds and sliced green onions.
- Mediterranean. Marinate tofu in olive oil, lemon juice, garlic, oregano, and basil. Thread it with veggies like bell peppers, onions, and zucchini, then grill and serve with a side of tzatziki sauce or hummus.
- Smoky. Season tofu with smoked paprika, garlic powder, onion powder, and a little olive oil.
- Sweet chili. Marinate tofu in a mix of sweet chili sauce, soy sauce, and lime juice. Add a little garlic and chili flakes for extra flavor. After grilling, drizzle with more sweet chili sauce.
Storage
How to Store
Store leftover grilled tofu skewers in an airtight container in the refrigerator for up to 3-4 days.
How to Reheat
Place the skewers in a preheated oven at 350°F (175°C) for 5-7 minutes until heated through. Alternatively, you can heat them in a skillet over medium heat for a few minutes, turning occasionally to ensure they're evenly warmed.
How to Freeze
Grilled tofu skewers can be frozen for up to 1 month. To freeze, place them in an airtight container or freezer-safe bag. When ready to eat, thaw overnight in the refrigerator and reheat as directed.
How to Serve
Grilled tofu skewers are incredibly versatile and can be served in a variety of ways, making them the perfect addition to any meal. For a complete meal, serve them over a bed of rice or quinoa. You can also wrap them in a tortilla or flatbread with hummus and fresh veggies for a tasty and satisfying wrap. For a lighter option, add them to a salad as a protein-packed topping, or pair them with a side of grilled vegetables for a colorful and nutrient-rich dish.
We like to elevate the flavor with our homemade peanut sauce drizzled on top or served on the side. Some of my other favorite sauces to serve with tofu skewers are:
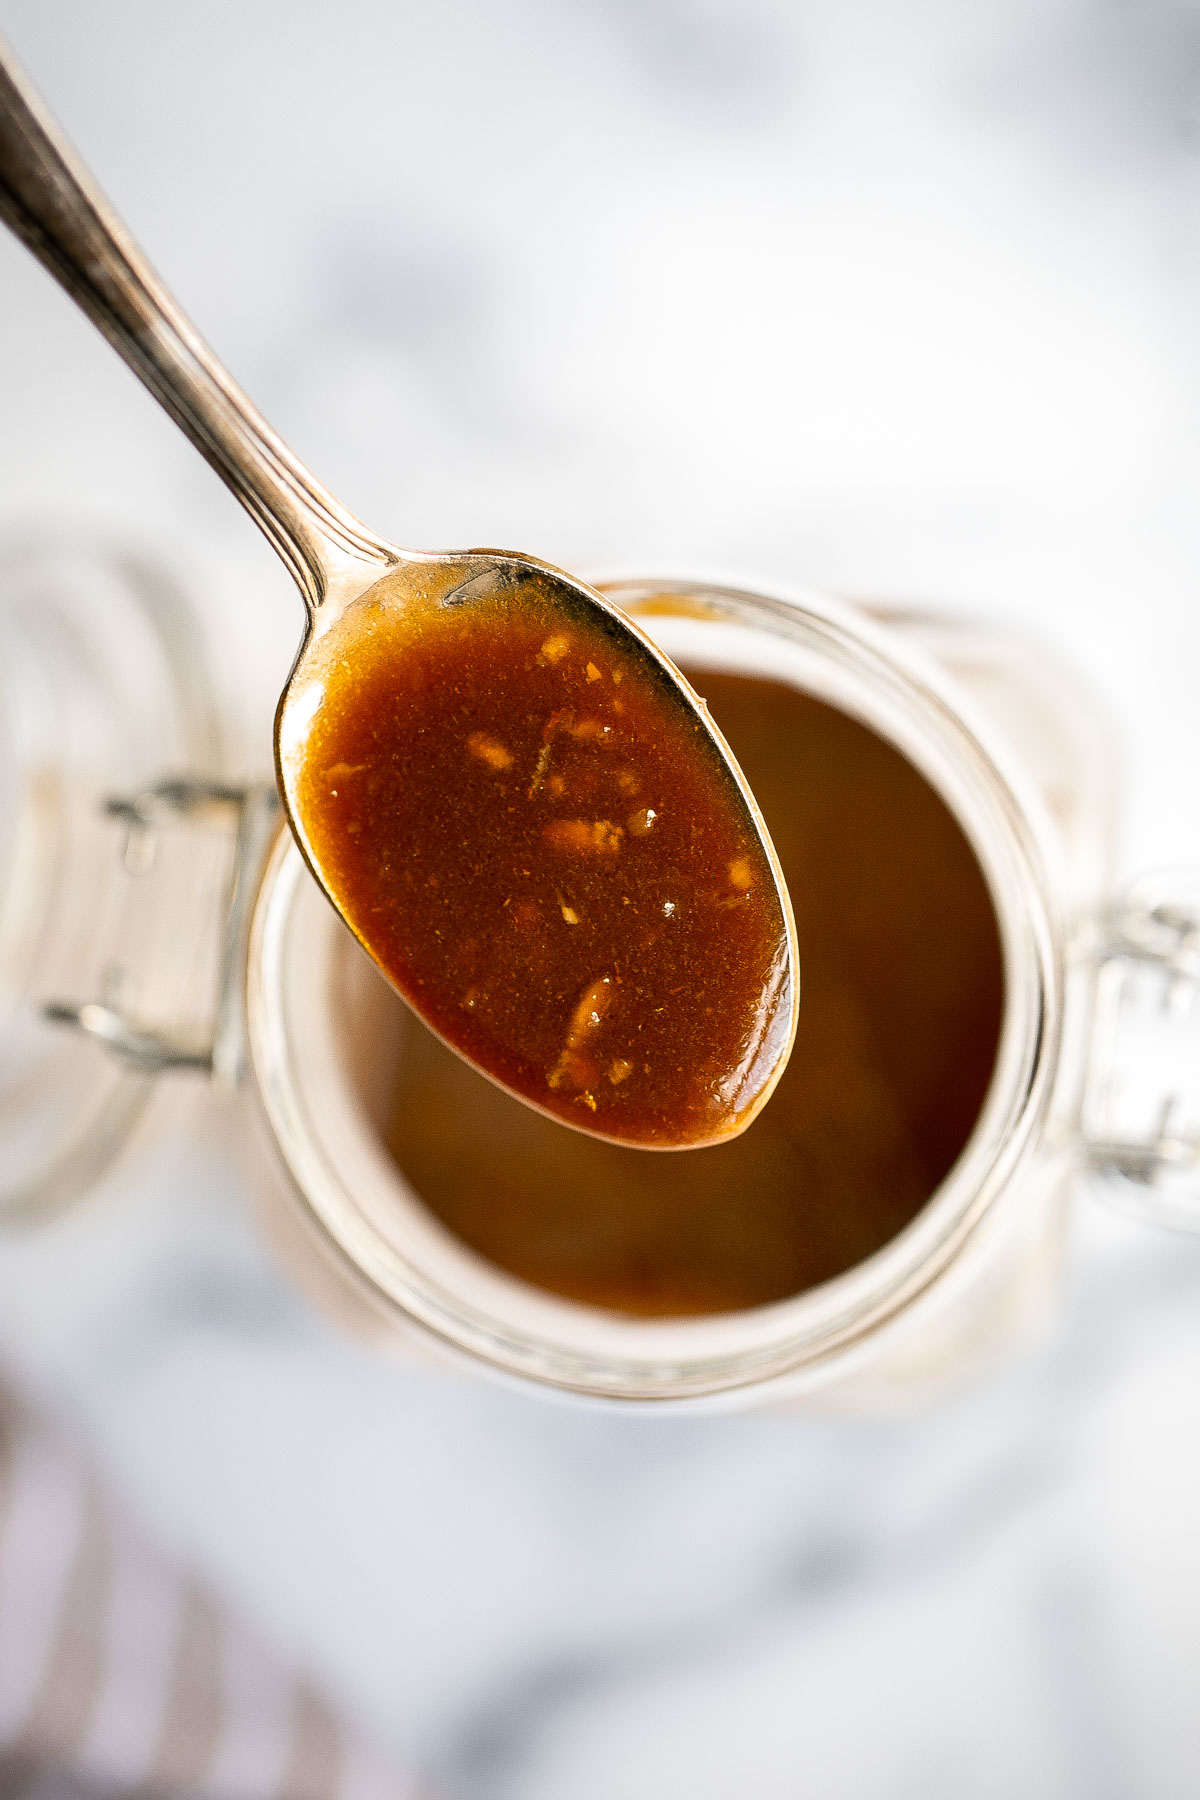

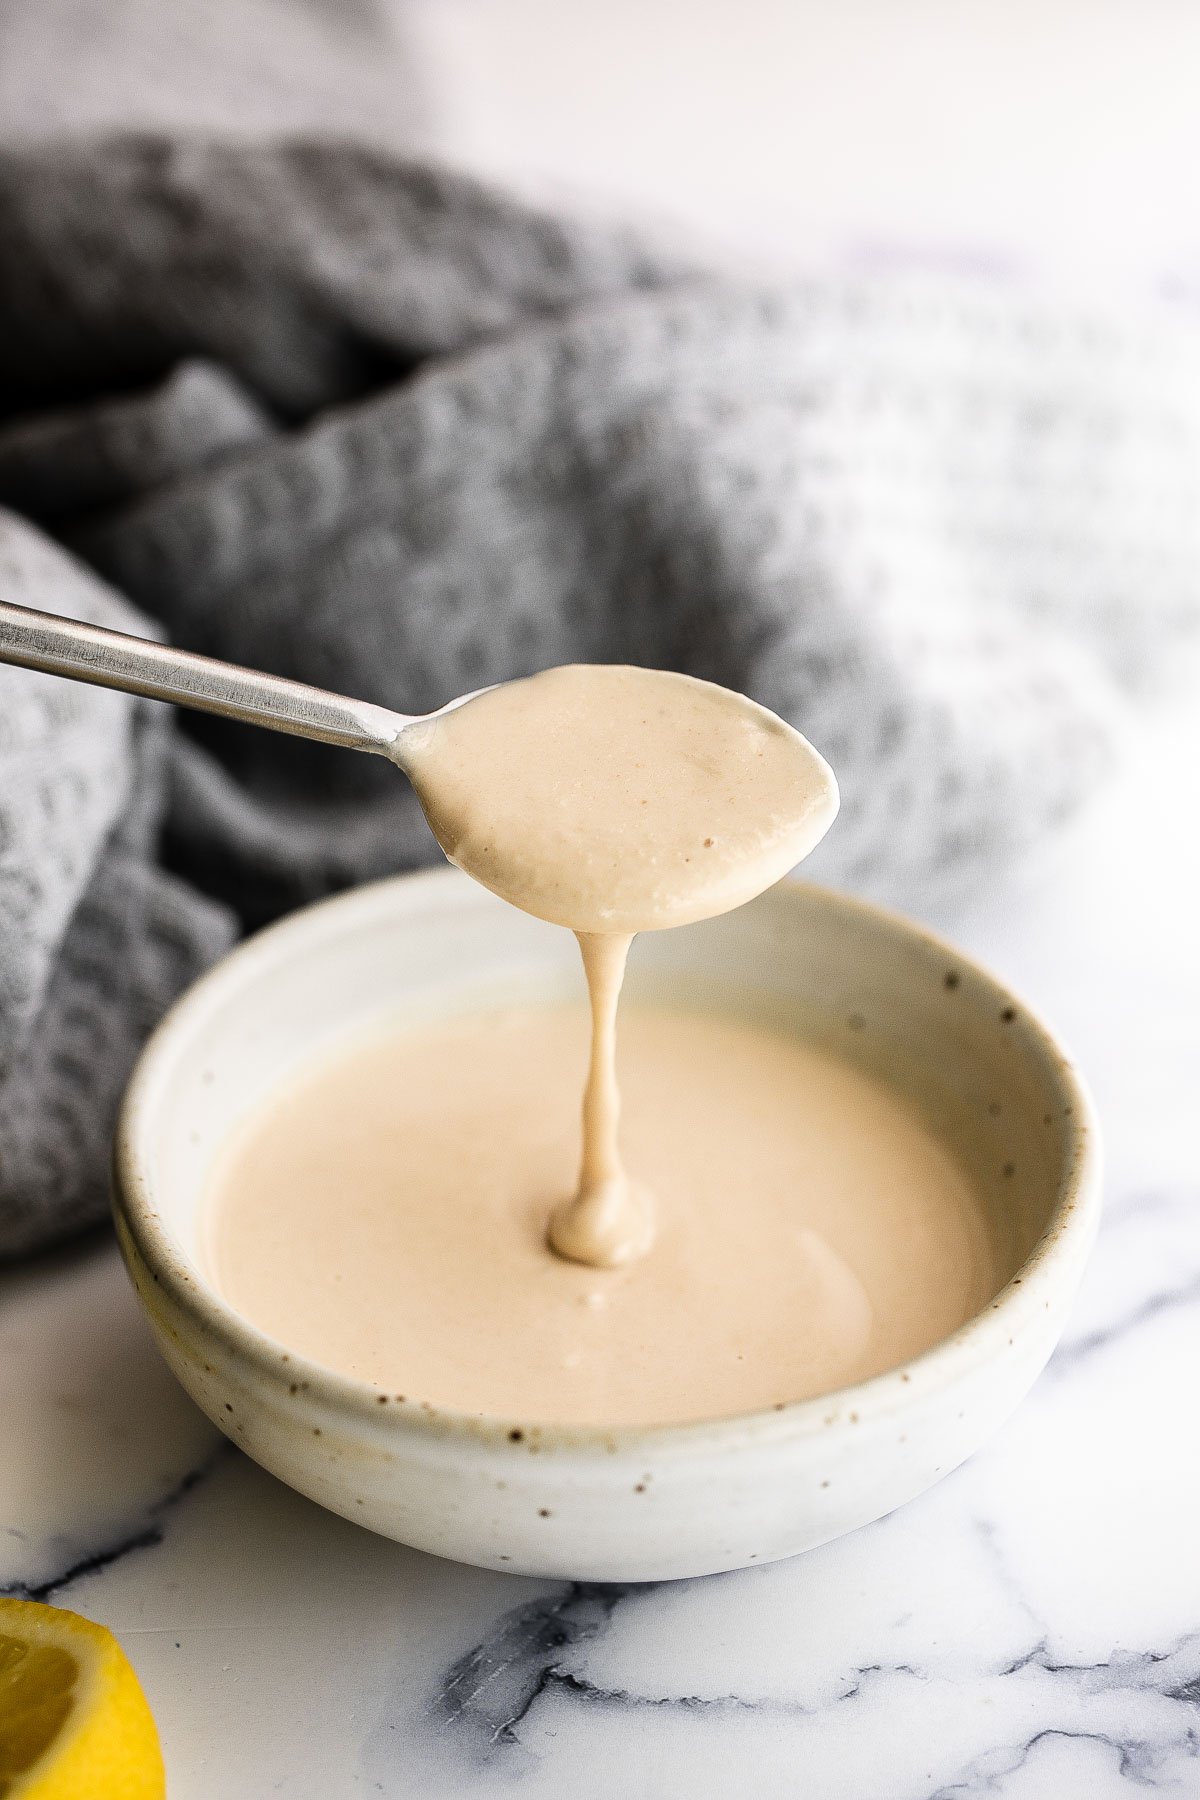
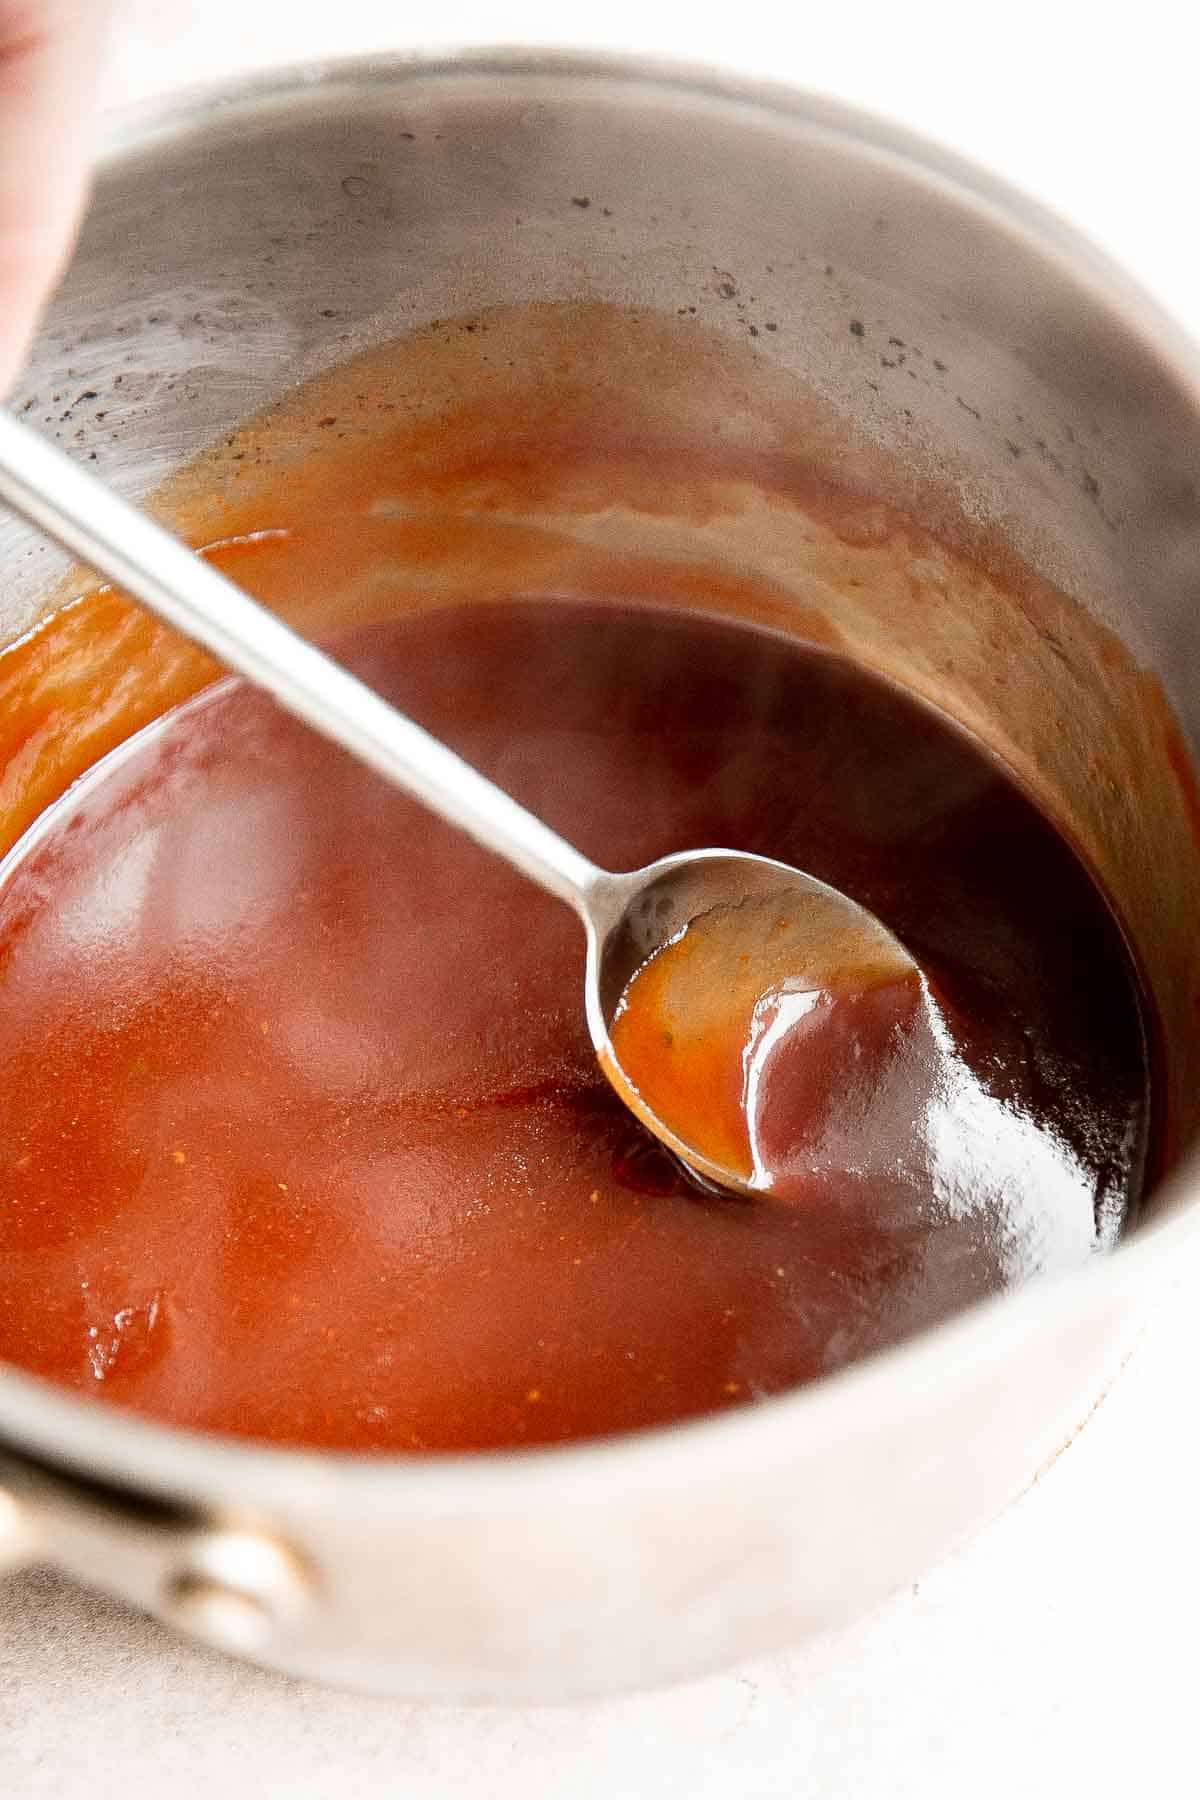
FAQ
Yes, you can make tofu skewers in the oven or on a stovetop grill pan. Preheat the oven to 400°F (200°C) and bake for 20-25 minutes, flipping halfway through. For a stovetop pan, heat over medium-high heat and cook the skewers, turning regularly until crispy and browned. If using the oven, try broiling the skewers for an extra crispy finish. The key is to get a nice, crispy texture on the outside while keeping the tofu tender inside.
Yes, grilling tofu on a skewer is a great way to cook it. Skewering the tofu allows it to cook evenly and get that crispy, golden exterior. Just make sure the tofu is firm or extra firm, as softer varieties may break apart on the skewer. When using skewers, press the tofu to remove as much moisture as possible to help it firm up. Also, be gentle when turning the skewers on the grill to prevent the tofu from falling off.
Tofu can stick to the grill if it's not properly prepared. Be sure to press out excess moisture and marinate the tofu before grilling. Lightly oil the grill or brush the tofu with sesame oil or olive oil to prevent sticking. Additionally, using a grill basket or grilling the tofu on skewers can help keep it from sticking and make flipping easier. This way, you avoid the hassle of tofu falling apart or sticking to the grill grates.
While marinating tofu for an extended period can enhance the flavor, marinating it for too long can cause the tofu to become too soft and soggy. Ideally, tofu should marinate for at least 30 minutes, but no longer than 24 hours in the refrigerator. Over-marinating can cause the tofu to absorb too much liquid, which may affect its texture when grilled. If you're short on time, a quick marinade of 30 minutes to 1 hour is sufficient to allow the tofu to soak up the flavors.
More Tofu Recipes
Looking for other recipes like this? Try these:

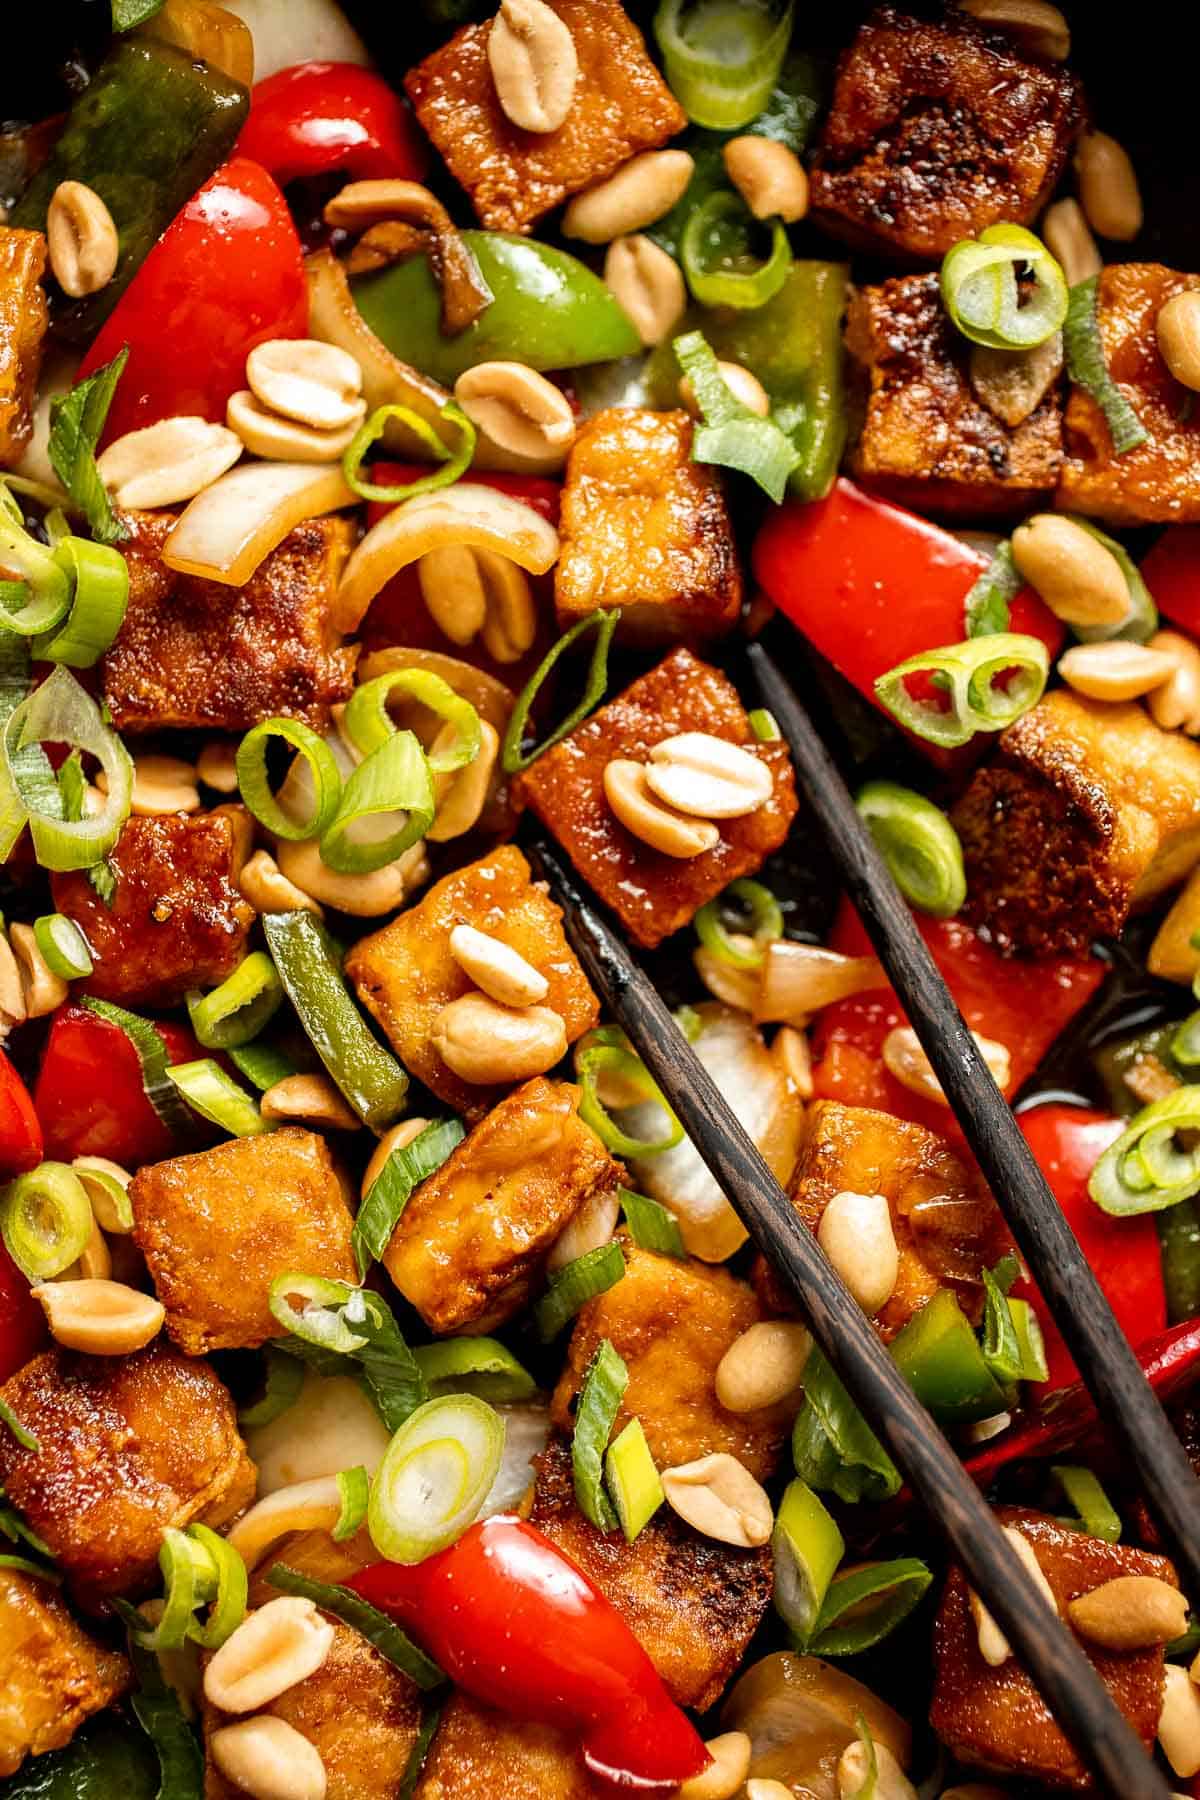


Tried this recipe?
I'd love to hear what you think! Leave a comment and rating below to share your feedback. Your reviews help others discover this recipe and help me keep creating more free recipes for you. Snap a photo and tag me on social media @aheadofthyme too.
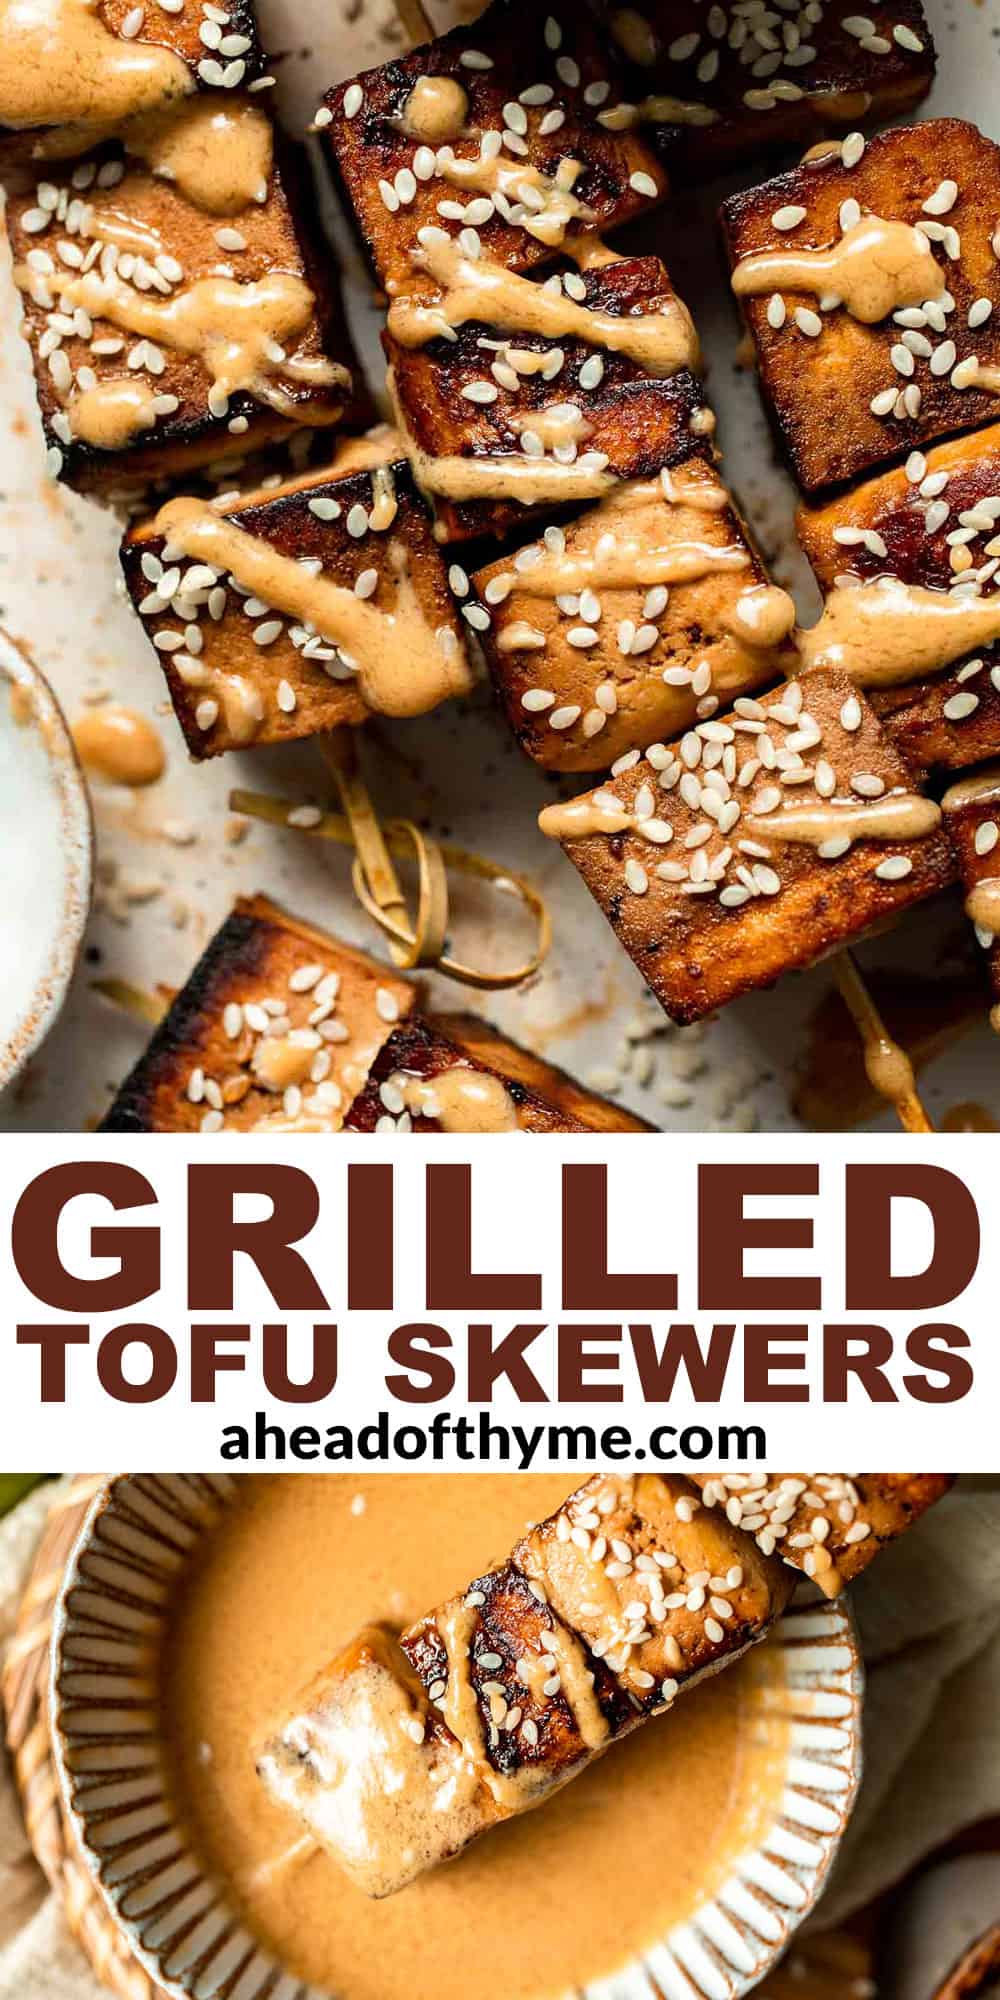
Muhammara (Roasted Red Pepper Dip)

Muhammara is a vibrant and flavorful Middle Eastern dip made from roasted red peppers, walnuts, and a touch of spice. This rich, creamy dip is not only easy to make but also packed with healthy ingredients, making it a perfect addition to any appetizer spread or as a savory snack.

With its smoky, slightly tangy, and nutty flavor, Muhammara combines roasted red peppers and walnuts with a hint of pomegranate molasses for an extra burst of sweetness. Whether you're hosting a gathering or simply craving something delicious, this roasted red pepper dip is sure to impress with its rich and complex taste.
Perfect for serving with our Homemade Pita Bread, crackers, or fresh vegetables, Muhammara makes a great accompaniment to any Mezze Platter.
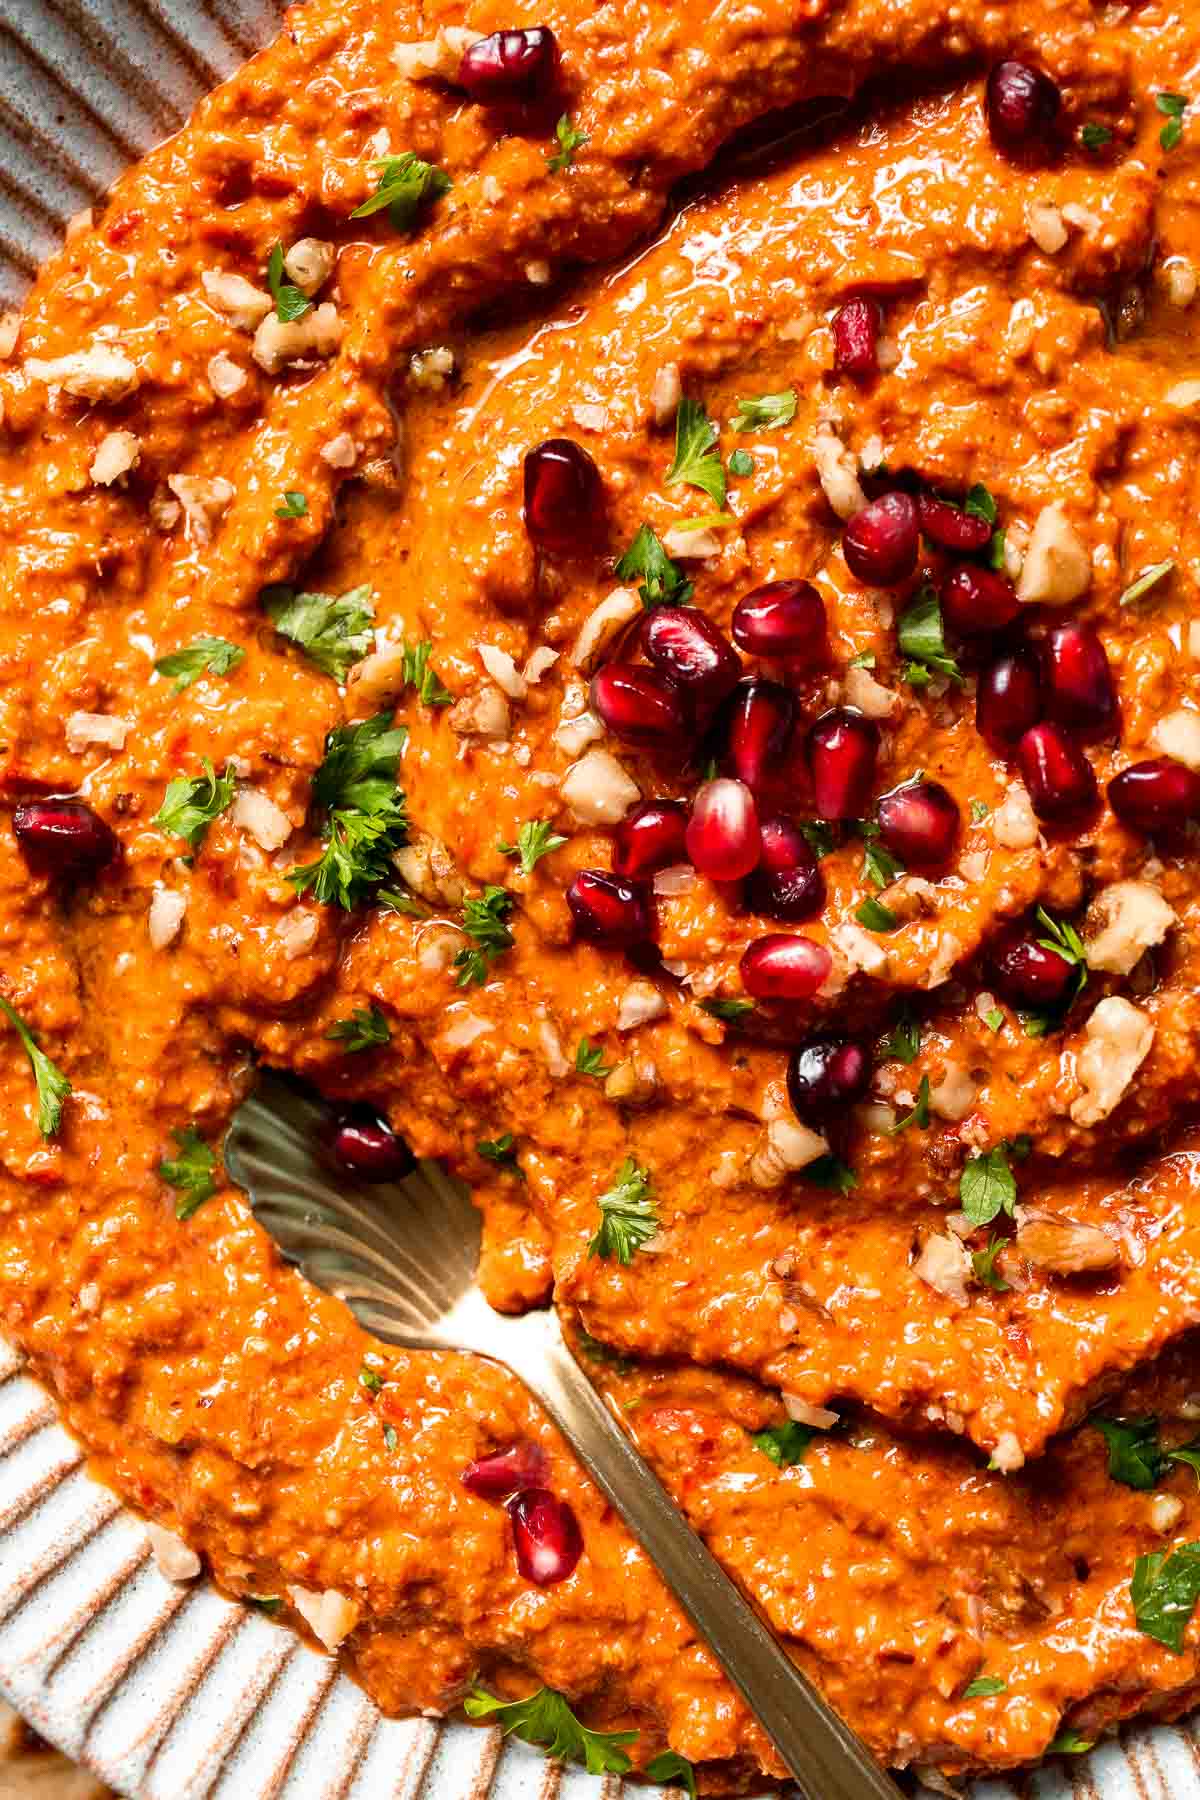
Why You'll Love This Recipe
- Rich and creamy texture. The combination of walnuts and roasted red peppers creates a smooth, creamy dip that's full of flavor and satisfying.
- Healthy ingredients. Packed with nutritious ingredients like walnuts, red peppers, and olive oil, this dip offers healthy fats and antioxidants, making it a guilt-free snack.
- Versatile. Serve it as a dip with warm pita bread or crackers, spread it on sandwiches, or drizzle it over grilled meats or vegetables.
- Easy to make. With only a handful of ingredients and a few simple steps, this dip comes together quickly, making it perfect for busy weeknights or gatherings.
- Perfect for parties. The unique flavor profile in this muhammara recipe will impress your guests and is sure to be the star of any appetizer spread.
Ingredients and Substitutions
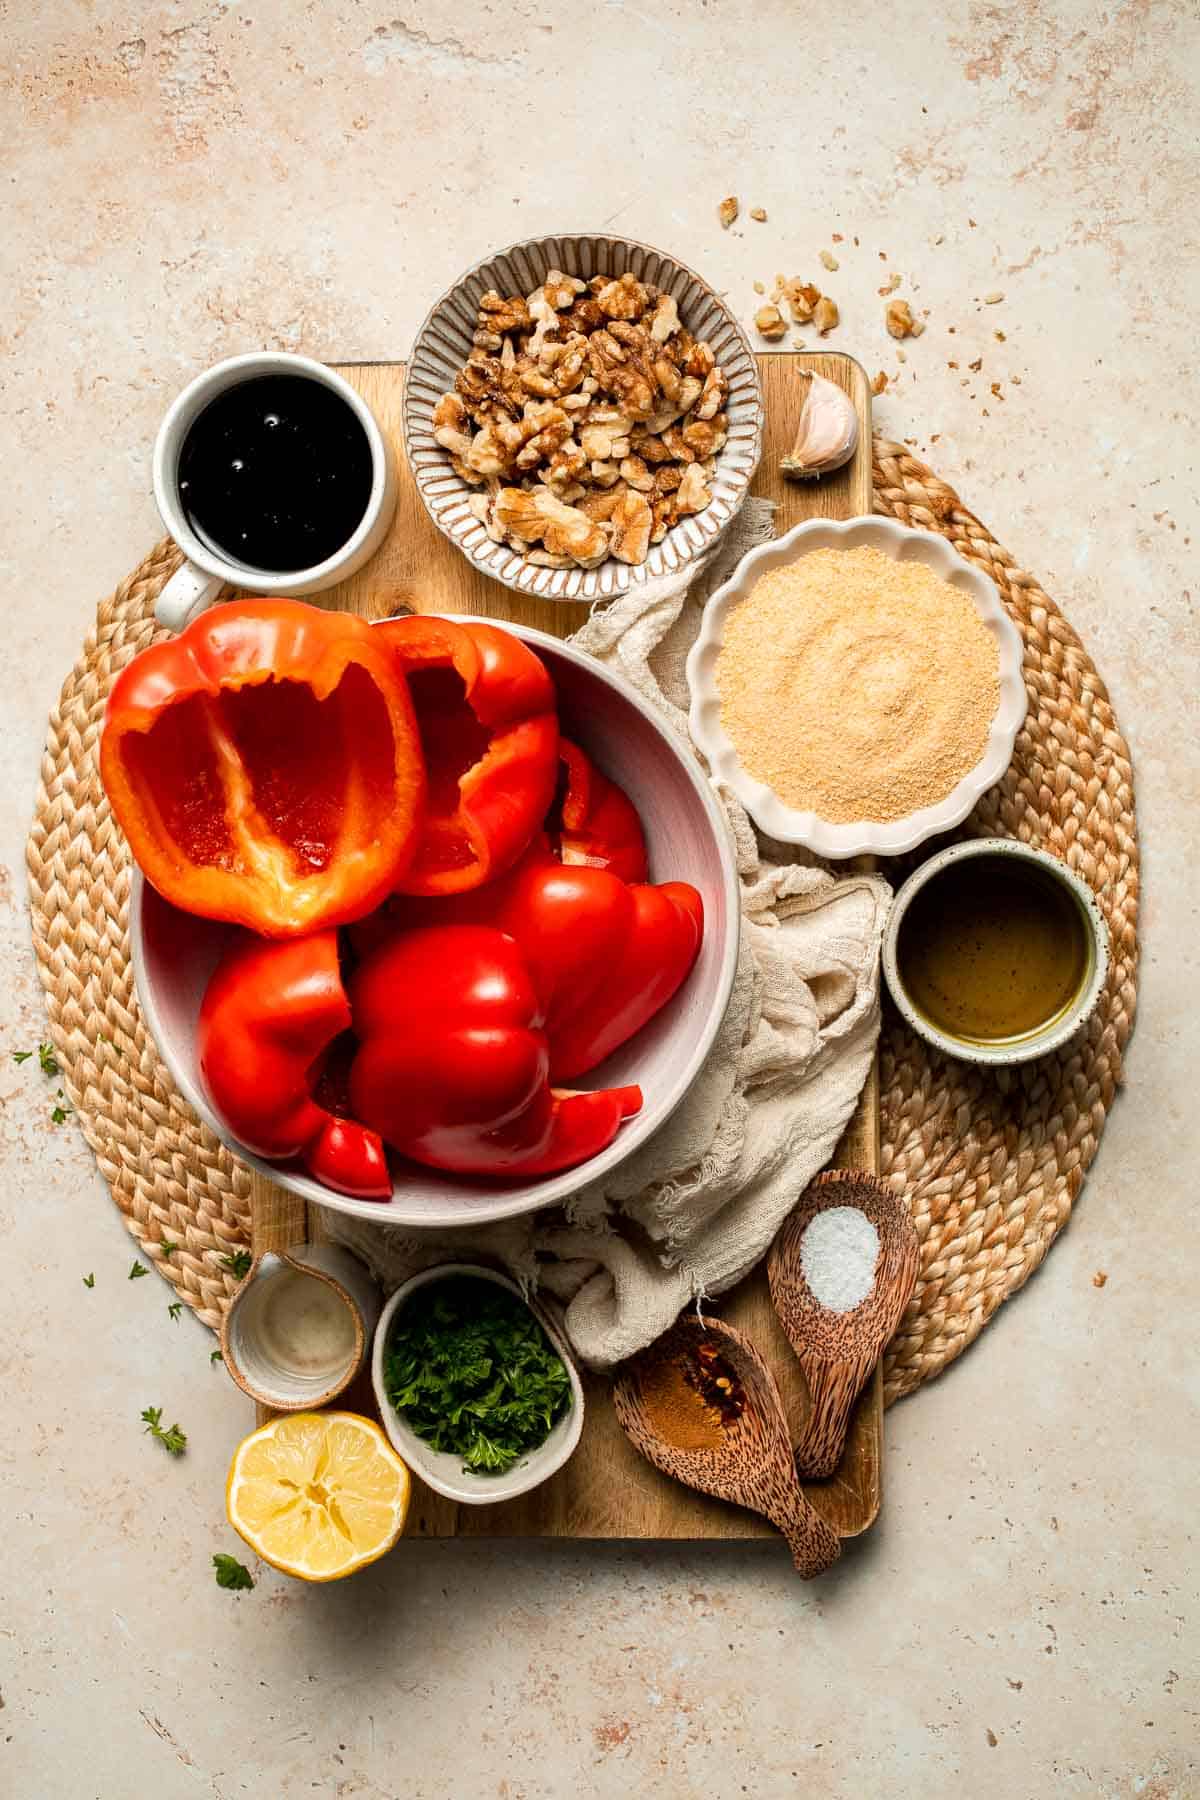
To make this delicious Muhammara Dip, you will need the following ingredients (see recipe card below for quantities):
- red peppers - The base of the dip, adding a sweet, smoky flavor. You'll roast these to bring out their natural sweetness. You can also use jarred roasted red peppers if fresh are not available.
- breadcrumbs - Adds a bit of texture to the dip, helping to bind everything together and making it extra smooth.
- walnuts - Provide a creamy texture and rich, nutty flavor. You can substitute with pine nuts or almonds if needed.
- olive oil - Adds richness and helps to bring everything together. Use a good quality extra virgin olive oil for the best flavor.
- pomegranate molasses - This ingredient gives the dip its signature sweet and tangy note. If you can't find it, try a splash of balsamic vinegar or honey as an alternative.
- lemon juice - Adds a fresh, citrusy tang to balance the richness of the dip.
- garlic - Adds a savory, aromatic depth to the dip. You can use fresh garlic or garlic powder.
- red chili flakes - Adds a touch of heat for a spicy kick. Adjust the amount to your desired spice level.
- ground cumin - A warm, earthy spice that complements the smoky peppers and walnuts.
- salt - Enhances the flavors and ties everything together.
- parsley - optional, for garnish.
Equipment
You'll also need measuring cups and spoons, a baking sheet (for roasting the red peppers), a food processor or blender, and a small bowl for serving.
Instructions
- Roast the red peppers. Preheat your oven to 450°F (230°C). Line a quarter sheet baking pan with parchment paper, then place the halved red bell peppers, cut side down, on the pan. Roast for 15-20 minutes until the skins are blackened and the peppers have collapsed. Remove from the oven and let them cool for a few minutes, or until they're cool enough to handle. If desired, peel off the blackened skin for a smoother texture.
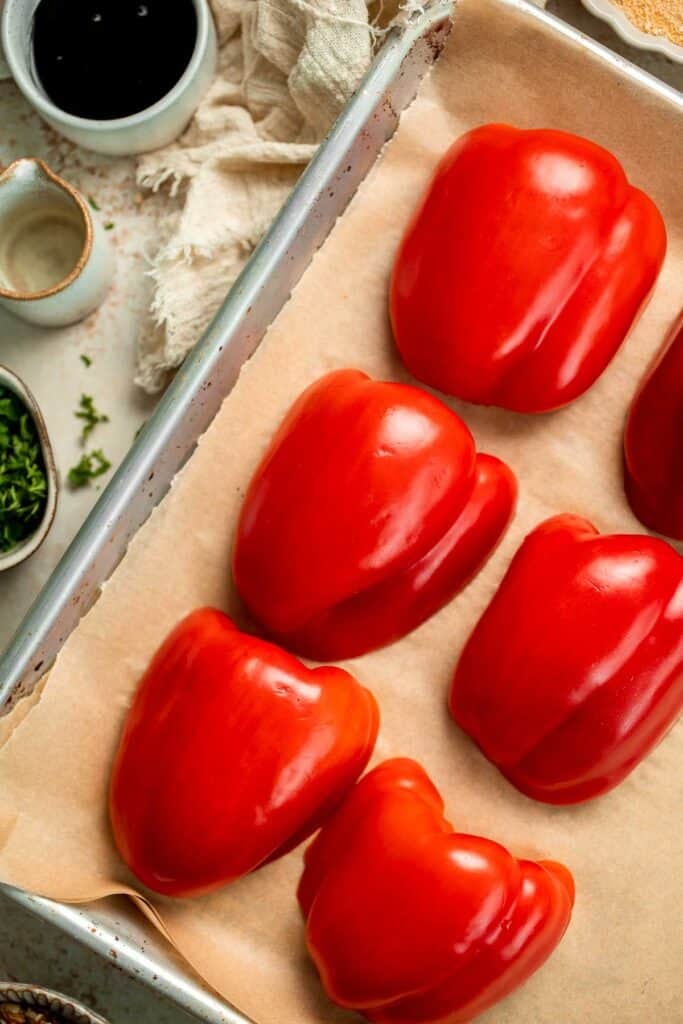
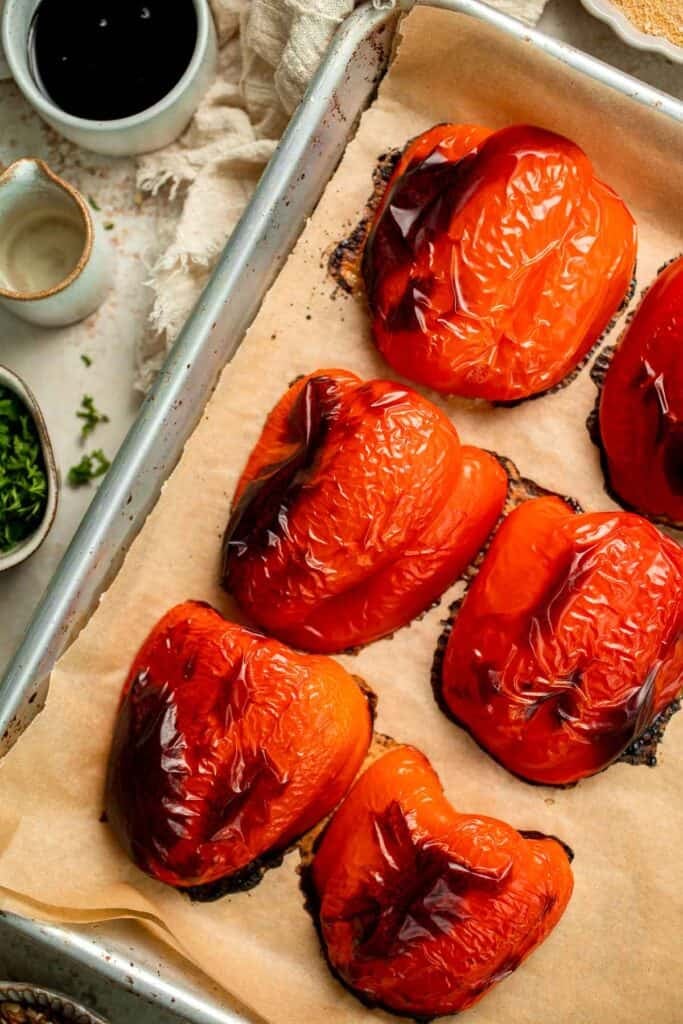
- Chop the peppers. Once cooled, chop the roasted peppers into small pieces.
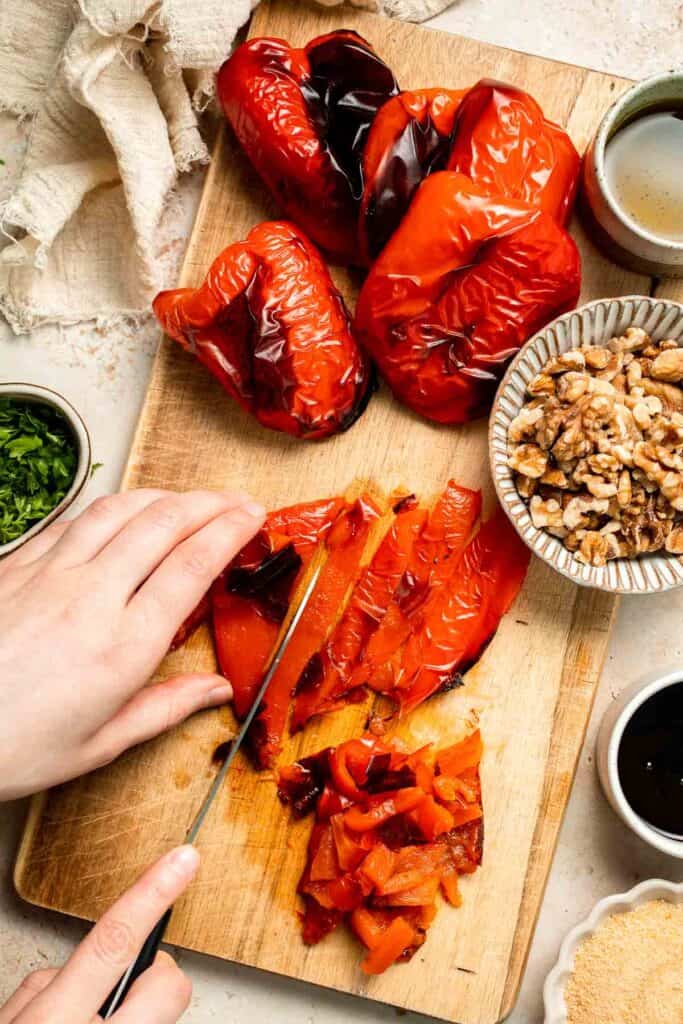
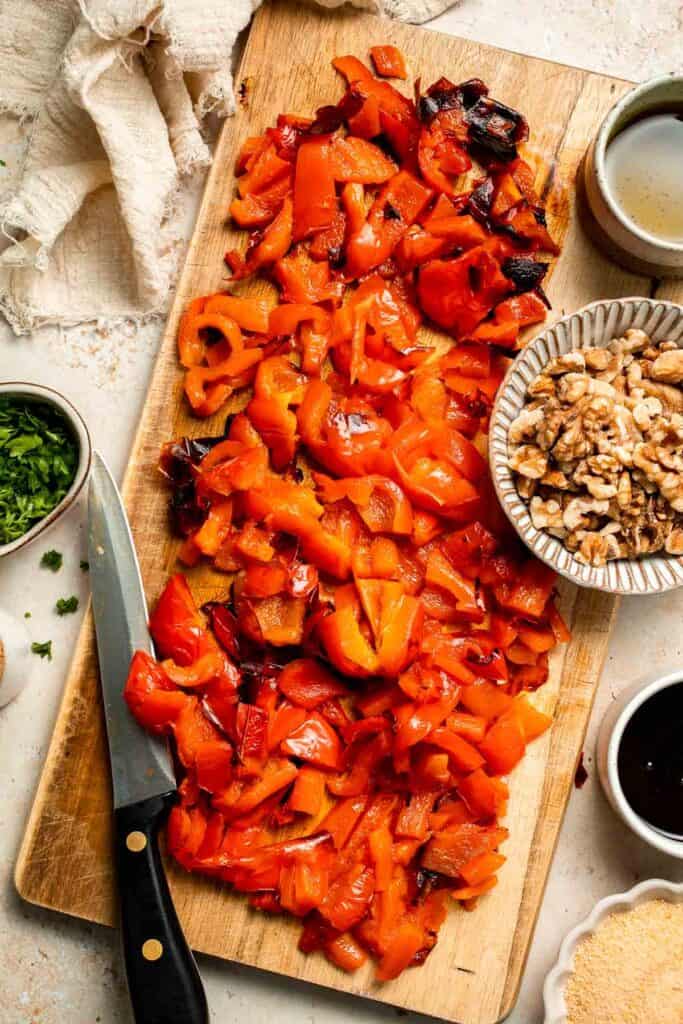
- Blend. In a blender or food processor, combine the chopped red peppers, bread crumbs, walnuts, olive oil, pomegranate molasses, lemon juice, garlic, chili flakes, cumin, and salt. Blend until smooth and well combined, about 30 seconds, scraping down the sides as needed.
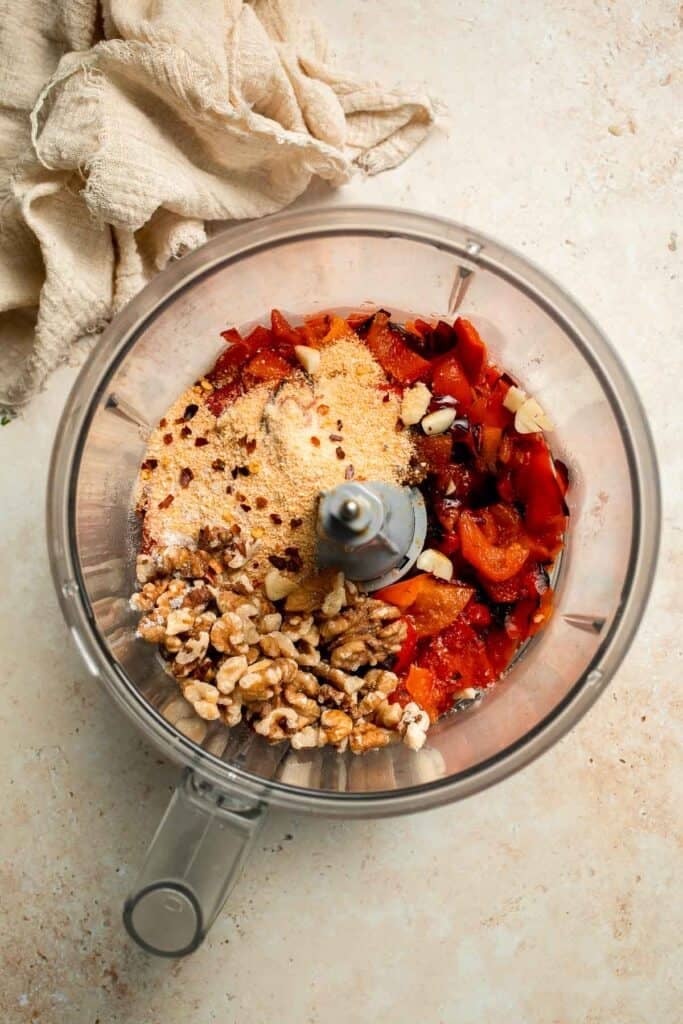
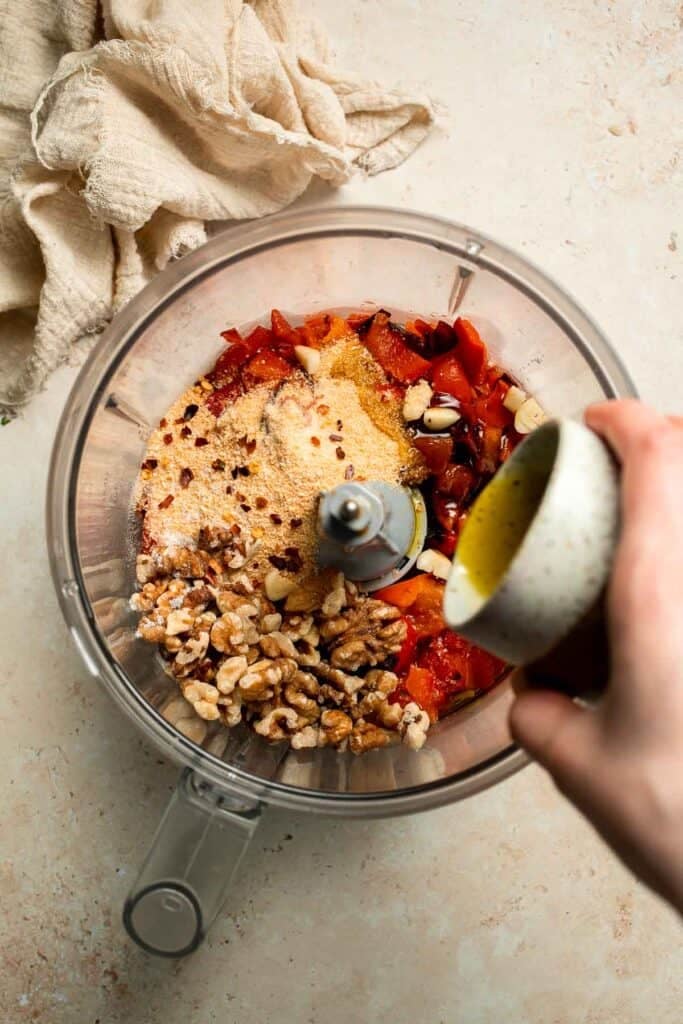
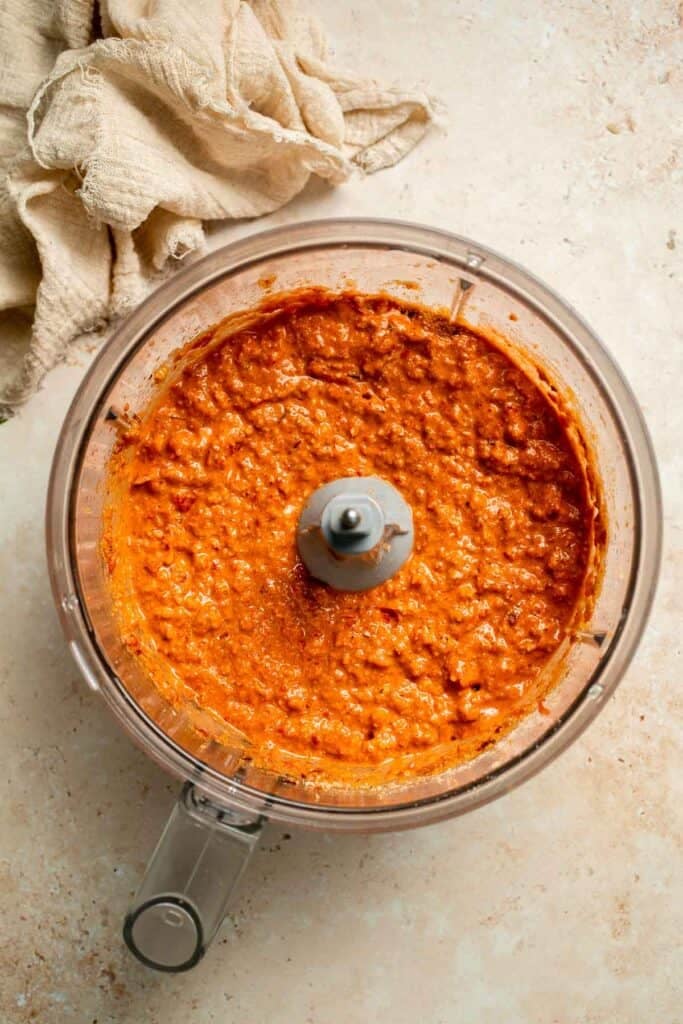
- Serve. Transfer the Muhammara to a bowl and drizzle with extra olive oil. Garnish with crushed walnuts and chopped parsley. For a vibrant touch, you can also sprinkle pomegranate seeds on top.
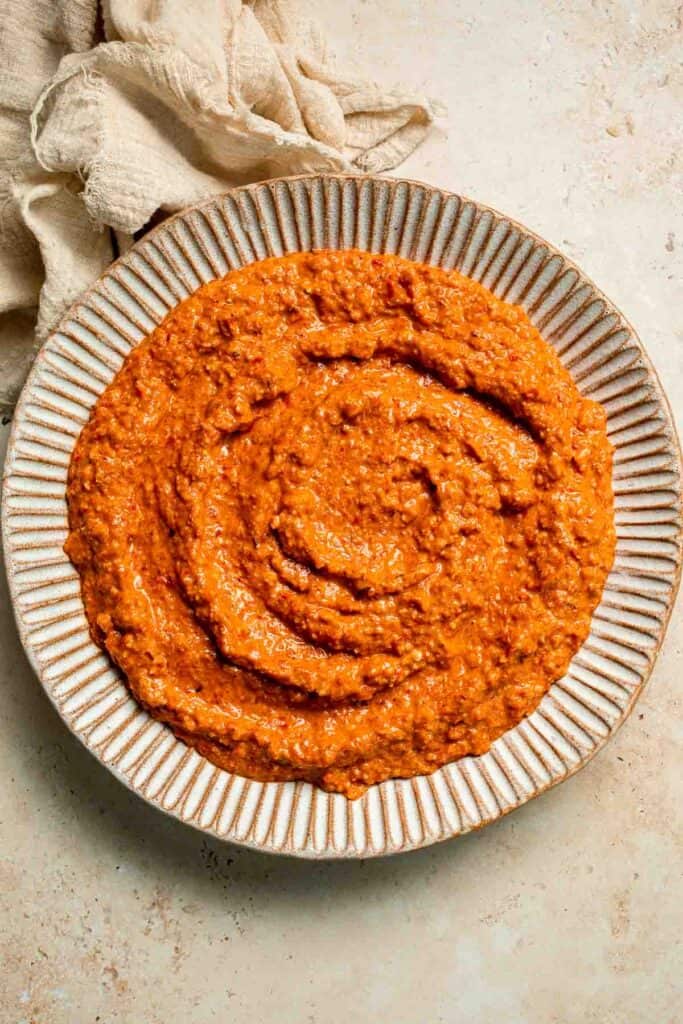
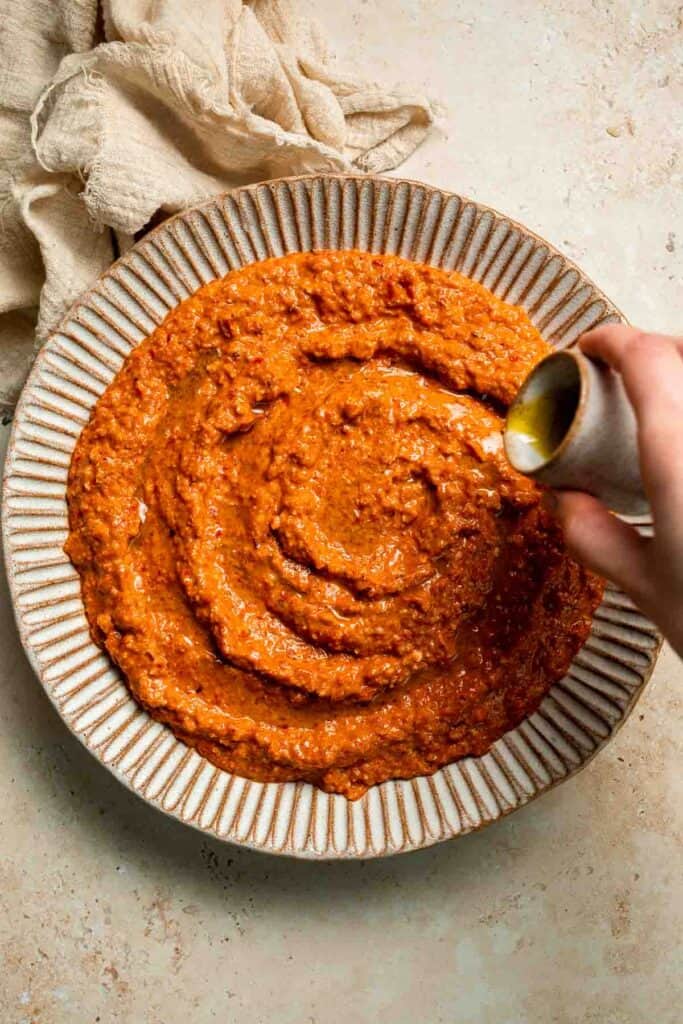
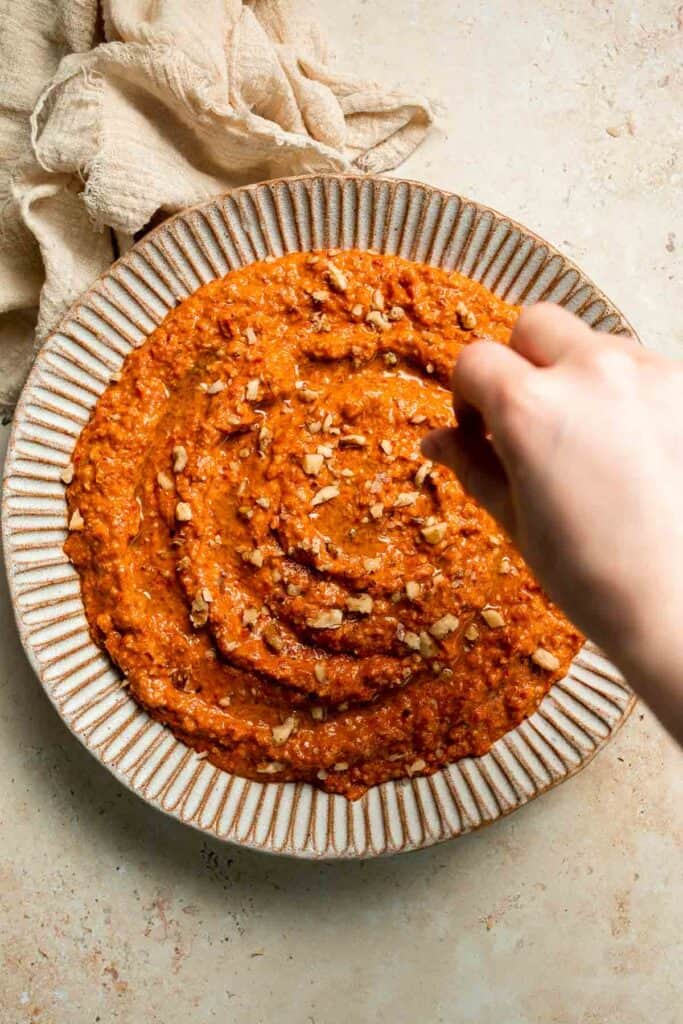
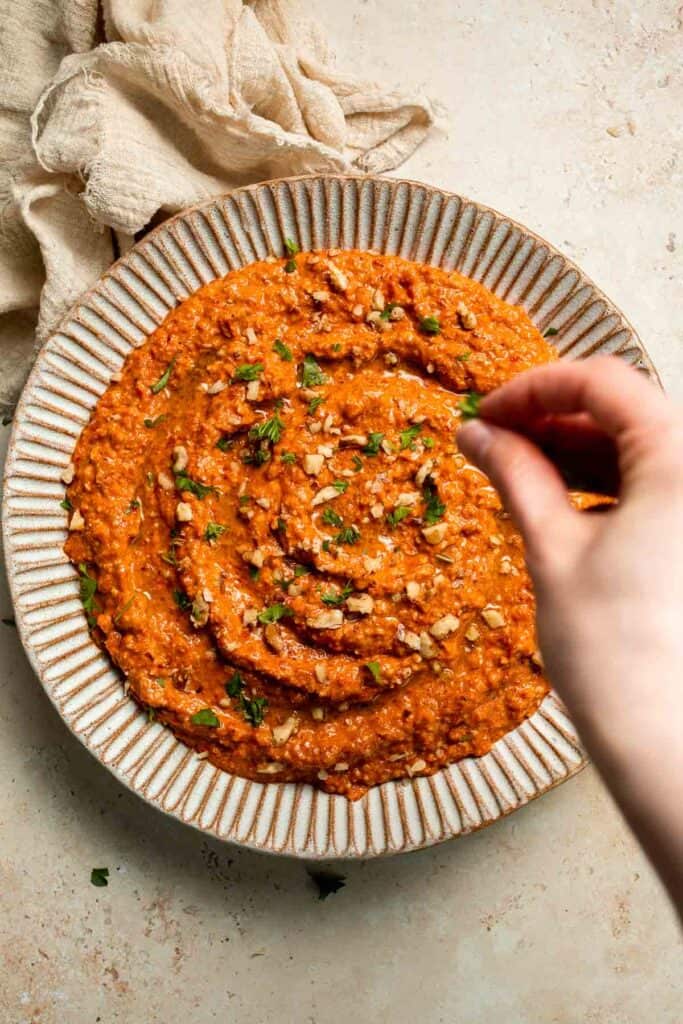
Top Tip: How to Change the Consistency
For an extra smooth texture, be sure to blend the dip until it's fully combined, scraping down the sides of the food processor as needed. If you prefer a chunkier dip, pulse it a few times instead of blending continuously.
Hint: leave a useful hint here, like let the grill run for 4-5 minutes to burn off any remnants, then clean it. I like to use this bristle-free barbecue brush (affiliate link) for cleaning the grill.
More Tips and Tricks
- Roast your peppers for deeper flavor. Roasting your own red peppers adds a smoky depth that jarred peppers can't match.
- Adjust the spice level. If you like a bit of heat, add a pinch of cayenne pepper or a chopped fresh chili to the dip.
- Make ahead. Muhammara Dip can be made ahead and stored in the fridge for up to 3 days. The flavors only improve after sitting for a few hours.
- Garnish for a pop of color. Top the dip with extra chopped walnuts, a drizzle of olive oil, or pomegranate seeds for a beautiful presentation.
- Use fresh walnuts. For the best texture, use fresh walnuts rather than pre-ground or stale ones, which can affect the dip's flavor and consistency.
Recipe Variations
- Spicy. Add a chopped jalapeño or a pinch of red pepper flakes to the dip for an extra kick.
- Vegan. Keep it fully vegan by ensuring the pomegranate molasses you use is plant-based and by omitting any dairy-based toppings.
- Herb-infused. Add fresh parsley or cilantro to the dip for a burst of fresh herb flavor.
- Nut-free. Substitute the walnuts with sunflower seeds for a nut-free version that still has plenty of creamy texture.
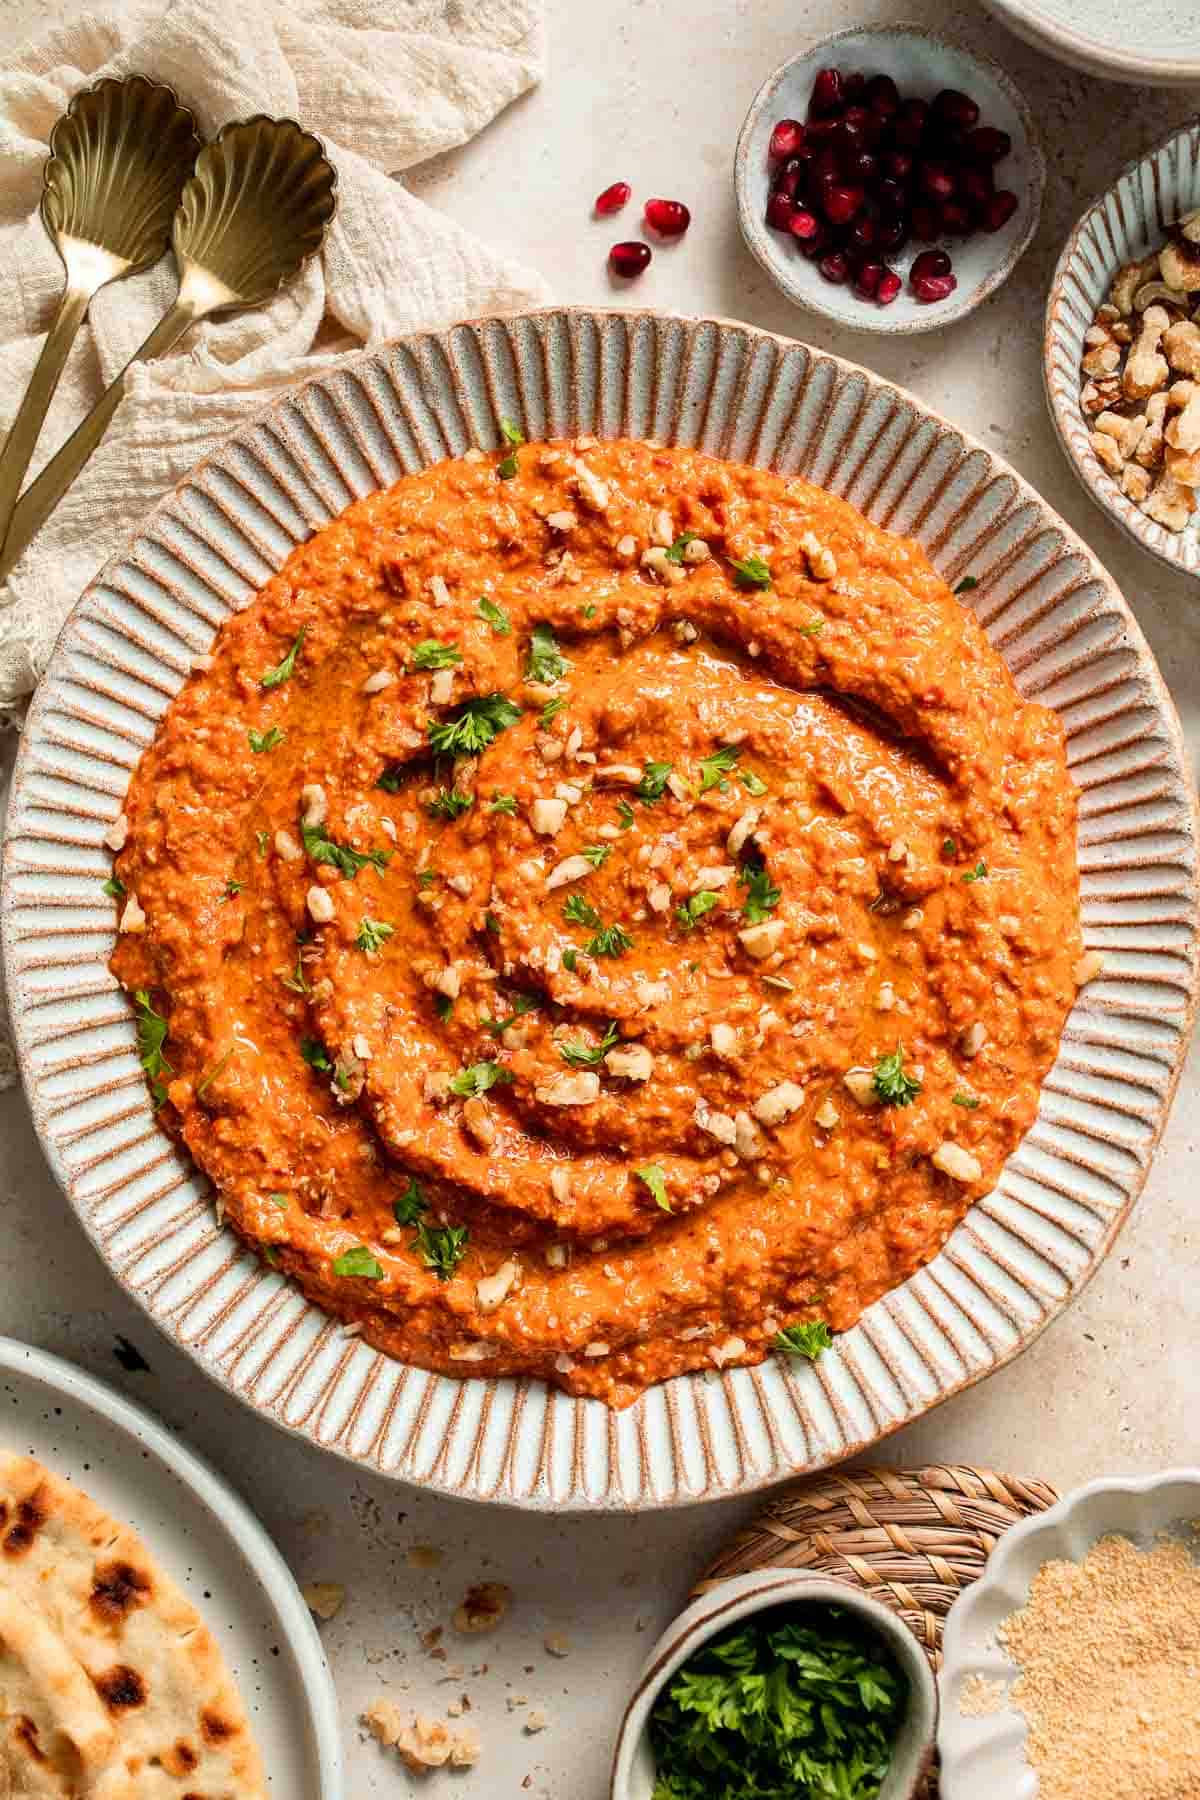
Storage
How to Store
Muhammara Dip can be stored in an airtight container in the refrigerator for up to 3 days. The flavors will continue to develop, so it's even better the next day! Make sure to cover it well to prevent it from drying out or absorbing other odors in the fridge.
How to Reheat
While Muhammara is typically served chilled or at room temperature, you can gently reheat it if you prefer it warm. To do so, transfer the dip to a microwave-safe dish and heat it in 15-second intervals, stirring each time. Be careful not to overheat, as it could affect the texture.
How to Freeze
Muhammara Dip can be frozen for up to 1 month. To freeze, place it in an airtight container, ensuring it's sealed tightly. When ready to use, thaw it overnight in the fridge. Keep in mind that the texture may change slightly upon freezing, so stir well before serving.
How to Serve
Muhammara Dip is delicious on its own or paired with a variety of sides. It's perfect for dipping pita, crackers, pita chips, or fresh veggies. You can also spread it on toast or use it as a condiment for grilled meats, roasted vegetables, or sandwiches.
These are my favorite dishes to serve with muhammara dip:
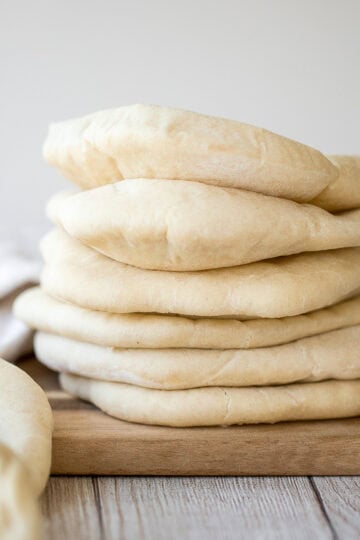


FAQ
Muhammara is a Middle Eastern dip made from roasted red peppers, walnuts, olive oil, and spices. It has a rich, creamy texture and a smoky, slightly sweet flavor that pairs perfectly with pita, crackers, or veggies. The combination of roasted red peppers and walnuts creates a unique depth of flavor, while the addition of pomegranate molasses and spices adds a complex sweetness and tanginess. It's often served as part of a mezze platter, alongside other dips like hummus and baba ganoush.
Muhammara is made of roasted red peppers, walnuts, olive oil, garlic, lemon juice, pomegranate molasses, and spices such as cumin and chili flakes. These ingredients come together to create a creamy, flavorful dip with a slight tang from the lemon and pomegranate molasses, a nutty richness from the walnuts, and a hint of smokiness from the roasted peppers. The blend of these ingredients gives Muhammara its signature taste that is both savory and subtly sweet, making it a unique addition to any appetizer spread.
Muhammara has a rich and complex flavor profile. The roasted red peppers bring a sweet, smoky depth, while the walnuts add a creamy, nutty richness. The pomegranate molasses provides a subtle sweetness with a tangy edge, and the garlic, cumin, and chili flakes add a warm, savory depth with a little heat. Overall, Muhammara tastes slightly sweet, smoky, tangy, and rich, with a little bit of spice that makes it irresistible and perfectly balanced.
Muhammara is typically served cold or at room temperature. It's perfect for making ahead of time, allowing the flavors to meld together as it chills in the refrigerator. While it can be enjoyed warm, serving it chilled allows the flavors to intensify and gives it a refreshing quality that pairs well with fresh veggies, pita, or crackers. However, if you prefer it warm, you can gently heat it up, but keep in mind that it may slightly alter the texture.
No, Harissa and Muhammara are not the same, although both are popular in Middle Eastern cuisine. Harissa is a hot chili paste made from roasted red peppers, spices, and olive oil. It's typically spicier and has a more pronounced heat compared to Muhammara. Muhammara, on the other hand, is a dip made from roasted red peppers and walnuts, with a sweet and tangy flavor profile that is much milder in heat. Harissa can be used as a condiment or flavor base, while Muhammara is a creamy dip.
Yes, Muhammara Dip is a healthy choice! It's made from wholesome ingredients like roasted red peppers, walnuts, olive oil, and garlic, which provide healthy fats, antioxidants, and anti-inflammatory properties. Walnuts are rich in omega-3 fatty acids, which are great for heart health, while red peppers are packed with vitamins A and C. The dip is naturally gluten-free, dairy-free, and can be made vegan, making it suitable for a variety of dietary needs. However, as with all dips, it's important to enjoy it in moderation.
Yes, you can make Muhammara without walnuts, though the texture and flavor will change slightly. If you're allergic to nuts or simply prefer not to use walnuts, you can substitute them with sunflower seeds or pumpkin seeds for a similar creamy texture. Another option is to use toasted bread crumbs to mimic the thickness and smoothness of the dip. The walnuts contribute a rich, nutty flavor, so while it won't taste quite the same, it will still be a delicious and satisfying dip.
More Dip Recipes
Looking for other recipes like this? Try these:
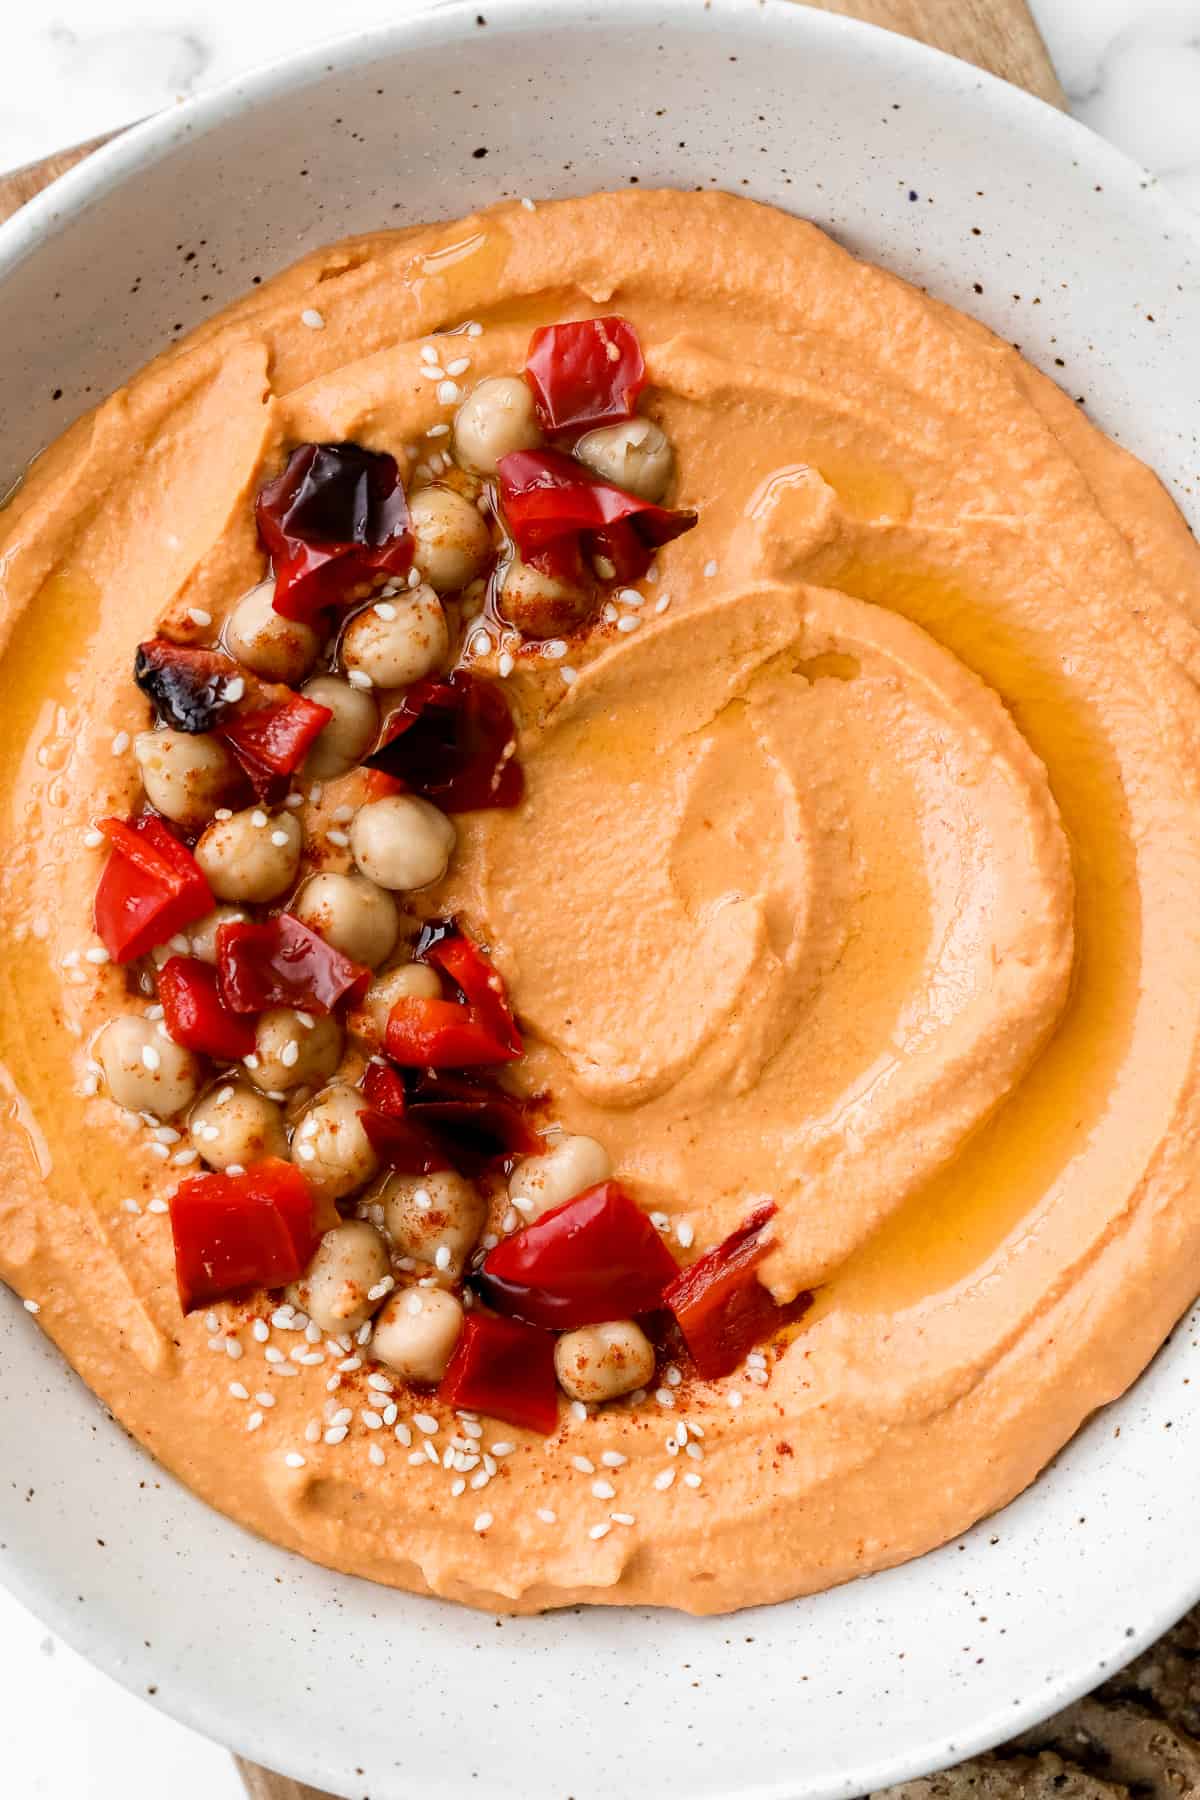
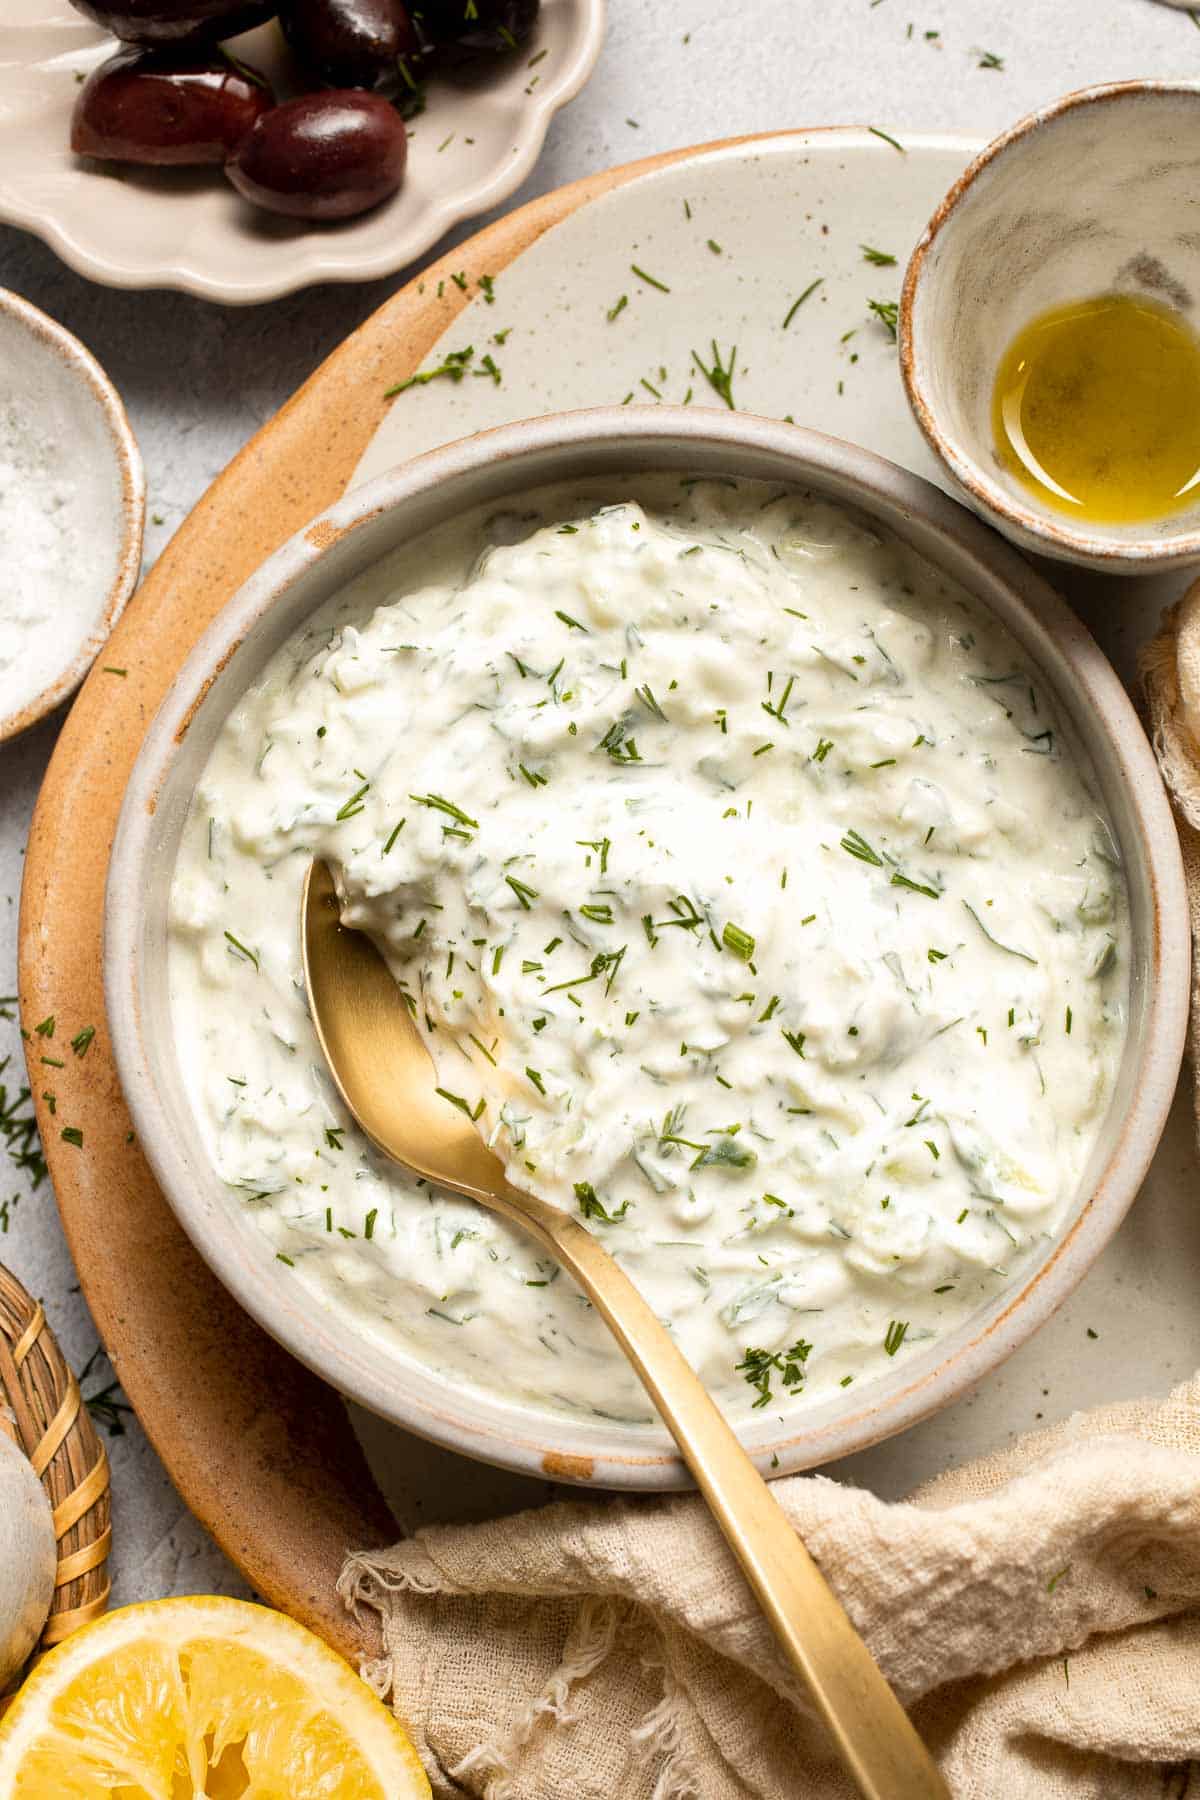

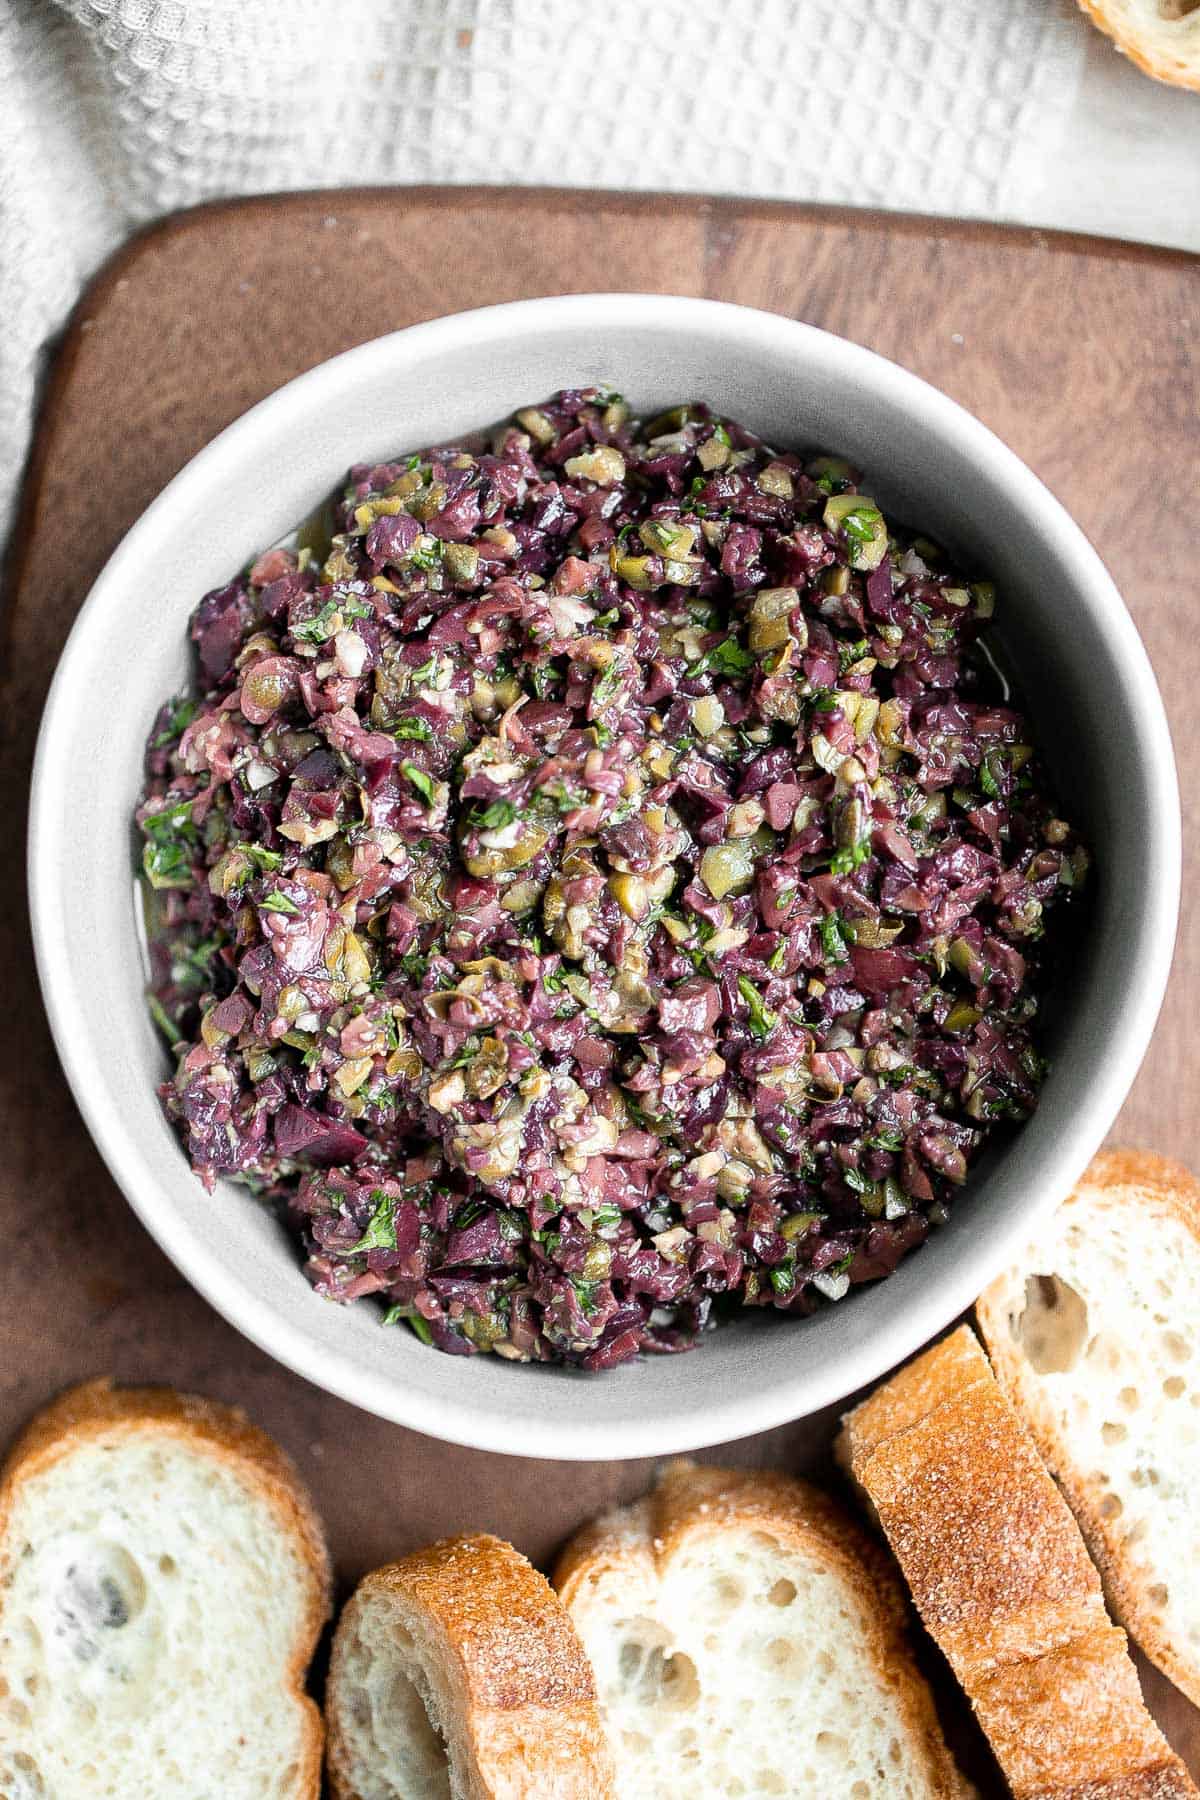
Tried this recipe?
I'd love to hear what you think! Leave a comment and rating below to share your feedback. Your reviews help others discover this recipe and help me keep creating more free recipes for you. Snap a photo and tag me on social media @aheadofthyme too.

Creamy Lemon Chicken Piccata
Quick and easy, this Creamy Lemon Chicken Piccata is a simple and delicious 30-minute meal. Soft and tender chicken breast is dredged in flour, seared, and tossed in a light and creamy lemon sauce with capers and garlic to give the best flavour. This crowd favourite is so easy to make in a single skillet and served over a bed of pasta or mashed potatoes. The perfect weeknight dinner!
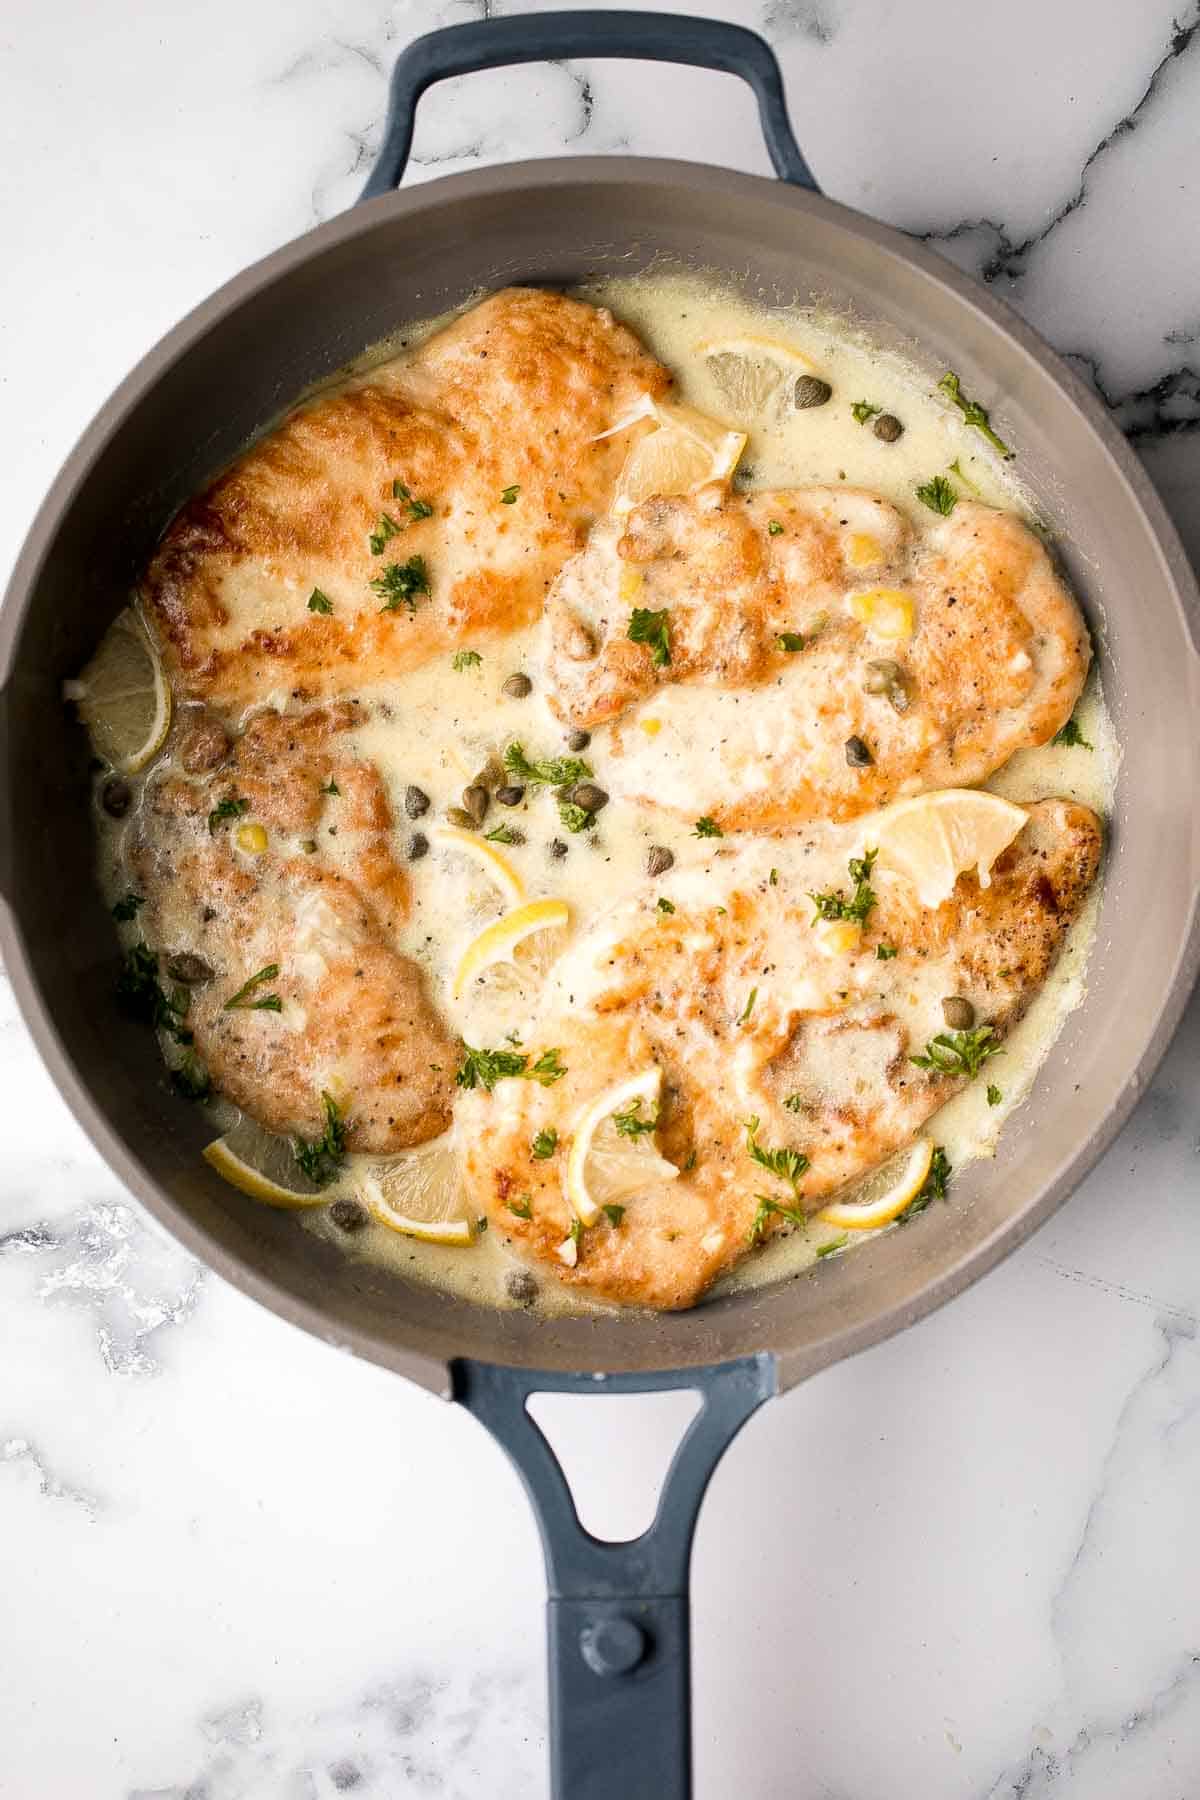
What is Chicken Piccata?
Chicken piccata is a classic Italian dish where chicken breast that has been sliced and pounded is covered in flour and cooked with a light lemon sauce with capers. It is one of my favourite Italian dishes along with Chicken Parmesan (Parmigiana), Chicken Marsala, Easy Meat Lasagna, and Creamy Tortellini Soup with Sausage. For more ideas, see our 50 Best Italian Recipes.
I think this recipe should be the new "marry me chicken" because my partner was seriously about to propose after this meal lol! Absolutely delish.
- Atom ★★★★★
Why You'll Love This Recipe
- Restaurant-quality at home. This creamy chicken piccata dish tastes like it came from your favorite Italian restaurant but is simple enough to make in your own kitchen any night of the week.
- Quick and easy. Ready in under 30 minutes, this chicken piccata is perfect for weeknights when you want something impressive without the extra work.
- Bright and creamy sauce. The lemon cream sauce is tangy, silky, and perfectly balanced by the salty pop of capers for an unforgettable flavor combination in this easy chicken dinner.
- Versatile pairing options. Serve with pasta, rice, mashed potatoes, or bread to enjoy the sauce to its fullest potential.

Ingredients and Substitutions
To make this delicious creamy lemon chicken piccata, you will need the following ingredients (see recipe card below for quantities):
- chicken breasts - two boneless and skinless chicken breasts, sliced in half and then carefully flattened with a rolling pin to ¼-inch thick. You can also use chicken thighs for a juicier alternative.
- chicken seasoning - Italian seasoning, salt and pepper.
- all-purpose flour - for dredging the chicken (coating) and some more for the sauce. Substitute with gluten-free flour if needed.
- vegetable oil - to sear the chicken. You can also use olive oil or avocado oil as substitutes.
- butter - unsalted butter adds richness to the sauce.
- garlic - freshly minced garlic brings out the flavor.
- chicken broth - forms the base of the sauce. You can also substitute with vegetable broth or use 1 tablespoon chicken chicken bouillon powder mixed into 1 cup water.
- heavy cream - for the creamy texture. Half-and-half can be used for a lighter sauce.
- capers and lemon juice - these are classic ingredients in chicken piccata and give it its signature tangy flavour.
- garnish - fresh parsley and lemon wedges are optional for garnish.
Equipment
You will also need measuring cups and spoons, a mallet, a large skillet, and a spatula. A meat thermometer also very useful for checking the chicken for doneness.
Instructions
- Flatten the chicken. Slice each chicken breast carefully in half lengthwise (horizontally) and place one at a time, between 2 sheets of plastic cling wrap or in a ziploc freezer bag. Carefully flatten the chicken breasts with a rolling pin until they are approximately ¼-inch thick. Don't pound the breasts too hard, as it could tear them apart. Ideally, you want flattened chicken breasts with uniform thickness.
- Season and dredge the chicken. Season both sides of each chicken breast with salt, pepper and Italian seasoning. Then, dip the chicken in a shallow bowl of flour and evenly coat both sides. Set aside on a plate.
- Sear the chicken. Heat oil in a large skillet over medium high for 2 minutes until the oil is sizzling and shimmering. Sear the chicken for about 5 minutes per side until golden brown and fully cooked through. The internal temperature for the chicken should reach 165F. Depending on the size of your skillet, you may have to do this in two batches. Rest the chicken on a plate.


- Make the lemon sauce. In the same skillet, melt butter and sauté the garlic until fragrant, about 1 minute. Stir in chicken broth and flour and mix well until the sauce is smooth and uniform. Add in heavy cream, capers, and lemon juice. Turn the heat down to medium low and bring the sauce to a simmer until thickened to a desired consistency, about 2-3 minutes. Stir continuously if the cream curdles because of lemon juice, until smooth.
- Toss in chicken. Return the chicken to pan and toss well to coat. Let the chicken cook with the sauce for another minute and garnish with lemon wedges and parsley.
- Serve. Serve over pasta, mashed potatoes, or rice, or with a side of crusty bread.


Step-by-Step Recipe Video
Pro Tip: Pound Chicken Evenly
For the best results, always pound your chicken breasts to an even thickness before cooking. This not only helps them cook more quickly, but also ensures they cook evenly so you don't end up with dry edges and undercooked centers. A uniform thickness also allows for a more consistent golden crust when searing, which adds flavor and locks in the juices.
More Tips and Tricks
- Don't overcrowd the pan. Cook the chicken in batches if necessary to get a perfect golden crust.
- Use fresh lemon juice. Freshly squeezed juice makes the sauce bright and flavorful.
- Adjust sauce consistency. If the sauce thickens too much, thin it with a splash of chicken broth or cream.
Recipe Variations
- Make it lighter. Use half-and-half instead of heavy cream for a lighter sauce.
- Add vegetables. Stir in spinach, mushrooms, or artichokes for extra texture and nutrition.
- Make it dairy-free. Swap heavy cream with coconut cream and butter with dairy-free butter.
- Add wine. Deglaze the pan with white wine for extra depth of flavor before adding the broth.
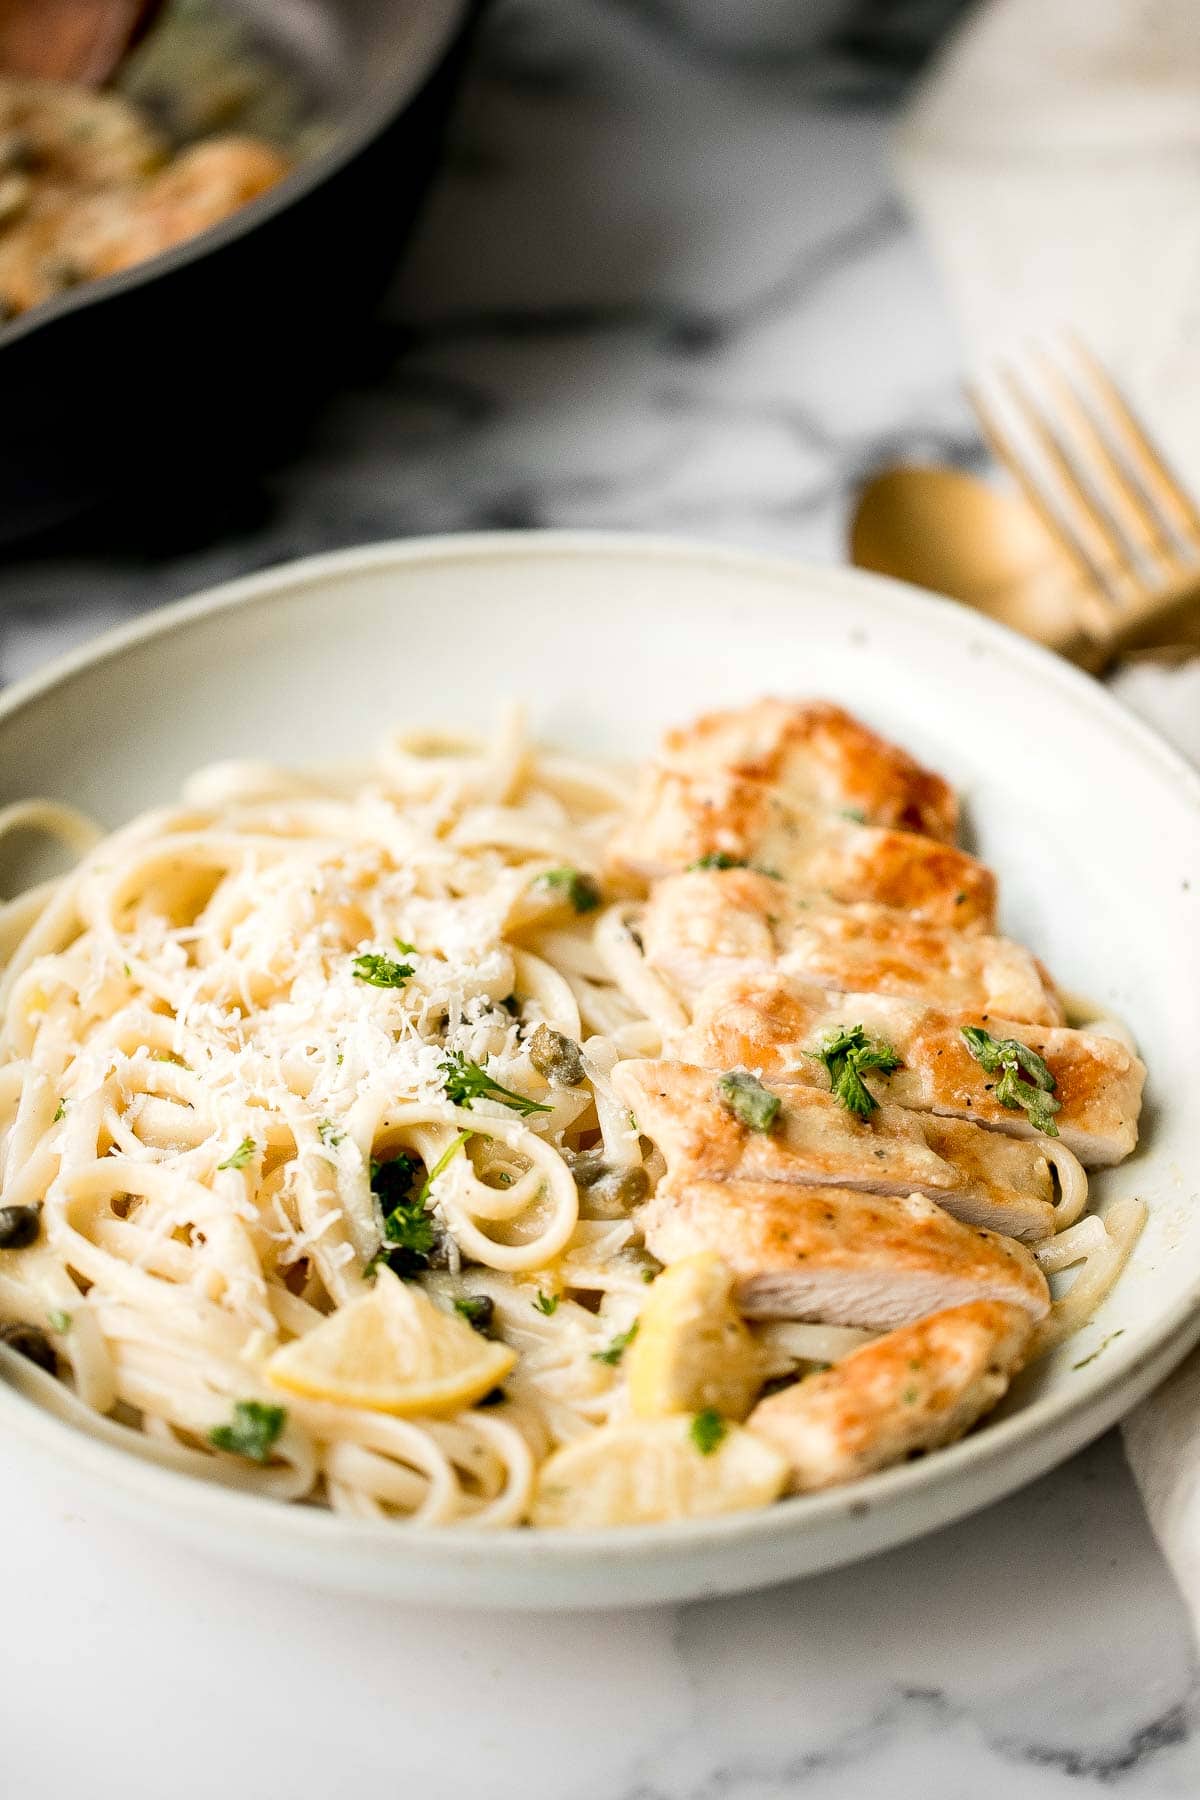
Storage
How to Store
Store chicken piccata with the sauce in an airtight container and refrigerate for up to 4 days.
How to Reheat
Reheat gently on the stovetop over medium-low heat for a few minutes adding a splash of broth or cream to loosen the sauce.. You can also reheat in the microwave until warmed through.
How to Freeze
Freeze cooked chicken and sauce together in an airtight container for up to 2 months. Thaw in the fridge overnight before reheating.
How to Serve Chicken Piccata
I like to serve creamy lemon chicken piccata over a bed of linguini pasta with the sauce drizzled on top, or on mashed potatoes or garlic mashed cauliflower.
These are my favorite dishes to serve with creamy chicken dinner:

Side Dishes for Chicken
Looking for the perfect accompaniments to your chicken dinner? From roasted vegetables and fresh salads to creamy mashed potatoes and flavorful grains, our collection of sides has something for every type of chicken recipe.
FAQ
Chicken Piccata should have a perfect balance of tangy and savory flavors. The sauce is bright and acidic from the lemon, with a salty, briny element from the capers. The white wine adds depth and complexity, while the chicken itself is lightly crispy on the outside, tender and juicy on the inside. Overall, it's a light, refreshing dish with layers of flavor, and the sauce should coat the chicken in a flavorful, smooth glaze.
Traditionally, Chicken Piccata is served with a side of pasta, but it's also common to serve it alongside sautéed vegetables like asparagus, broccoli, or green beans. For a lighter option, you can pair it with a fresh, crisp salad or roasted potatoes. The acidity and richness of the piccata sauce balance out the sides, making for a well-rounded, flavorful meal. You can also serve it with crusty bread to soak up any leftover sauce!
Chicken Piccata pairs wonderfully with a variety of pasta. Classic choices include angel hair pasta, spaghetti, or fettuccine, as their light, delicate texture complements the tangy, flavorful chicken and sauce. The noodles help absorb the rich, creamy piccata sauce, making each bite extra satisfying. For a heartier option, you can also serve it with rigatoni or penne. The goal is to choose a pasta that allows the sauce to shine, so keep it simple and let the chicken piccata be the star!
If you want a thicker sauce for your Chicken Piccata, you can reduce the liquid by simmering it for a few extra minutes, allowing the flavors to concentrate and the sauce to thicken naturally. Alternatively, you can add a small amount of cornstarch or flour mixed with water (a slurry) to the sauce while it simmers. Just be sure to whisk constantly to avoid clumping. Another option is to finish the sauce with a bit of heavy cream for extra richness and a velvety texture.
The term "piccata" comes from the Italian word "piccato," meaning "to pound" or "to slice." It refers to the way the chicken is prepared - typically, the meat is pounded thin before being dredged in flour and sautéed. This cooking method allows the chicken to cook quickly and evenly while absorbing the flavors of the sauce. The "piccata" designation is often used for dishes where meat is prepared in this way, typically accompanied by a sauce made with lemon, capers, and sometimes white wine.
The main difference between chicken piccata and chicken marsala lies in the sauce. Chicken Piccata features a tangy, lemony sauce with capers, often enhanced with white wine, that delivers a bright, zesty flavor. On the other hand, Chicken Marsala is made with a rich, earthy sauce primarily composed of Marsala wine and often includes mushrooms, giving it a deeper, slightly sweet flavor. Both are delicious, but piccata is more vibrant and acidic, while marsala is more robust and savory.
Common mistakes when making Chicken Piccata include overcooking the chicken, which can make it dry and tough. Another mistake is not allowing the sauce to simmer long enough to develop its flavors, or over-reducing it, which can result in a too-thick or overly concentrated sauce. It's also important to avoid using too much flour when dredging the chicken, as it can create a thick, clumpy coating that doesn't fry crisply. Finally, some people might skip the capers or use dried ones, which can affect the briny flavor essential to a good piccata.
More Creamy Chicken Recipes
Looking for other recipes like this? Try these:
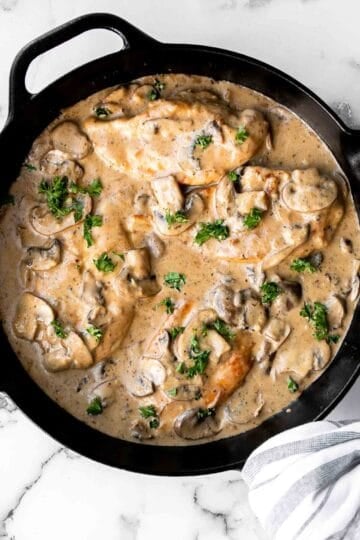
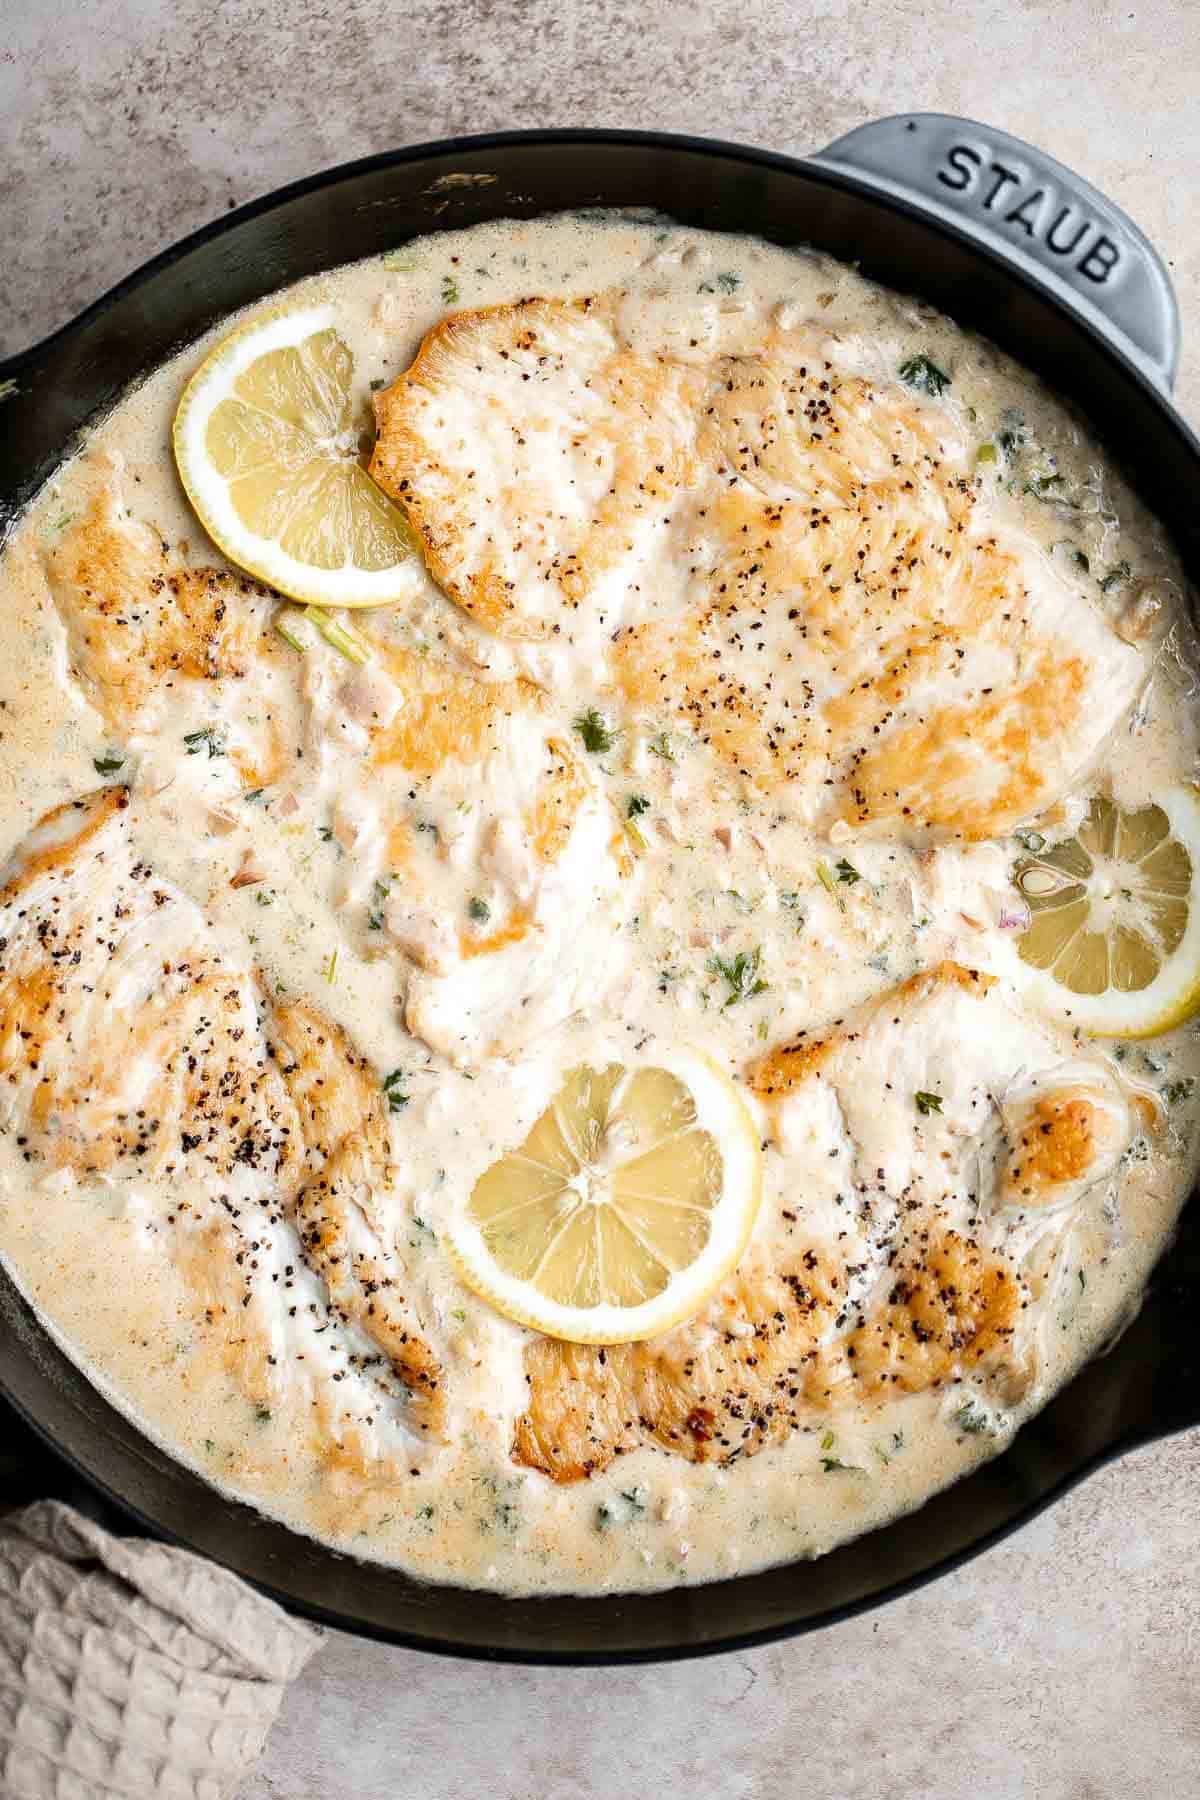
Tried this recipe?
I'd love to hear what you think! Leave a comment and rating below to share your feedback. Your reviews help others discover this recipe and help me keep creating more free recipes for you. Snap a photo and tag me on social media @aheadofthyme too.
This post was original posted in 2020. It has been updated with helpful content.

Quick and Easy Pickled Red Onions
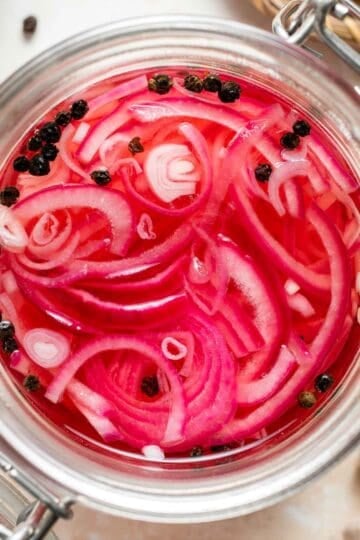
Pickled Red Onions are a simple, tangy condiment that you'll want to always have on hand. They add a burst of flavor and vibrant color to almost any dish - from salads and bowls to sandwiches and tacos - instantly taking ordinary meals to the next level. This quick and easy recipe requires just five pantry staples and can be made in a few simple steps. Plus, they can be stored in your fridge for weeks, making them the perfect topping to keep around for whenever you need them.
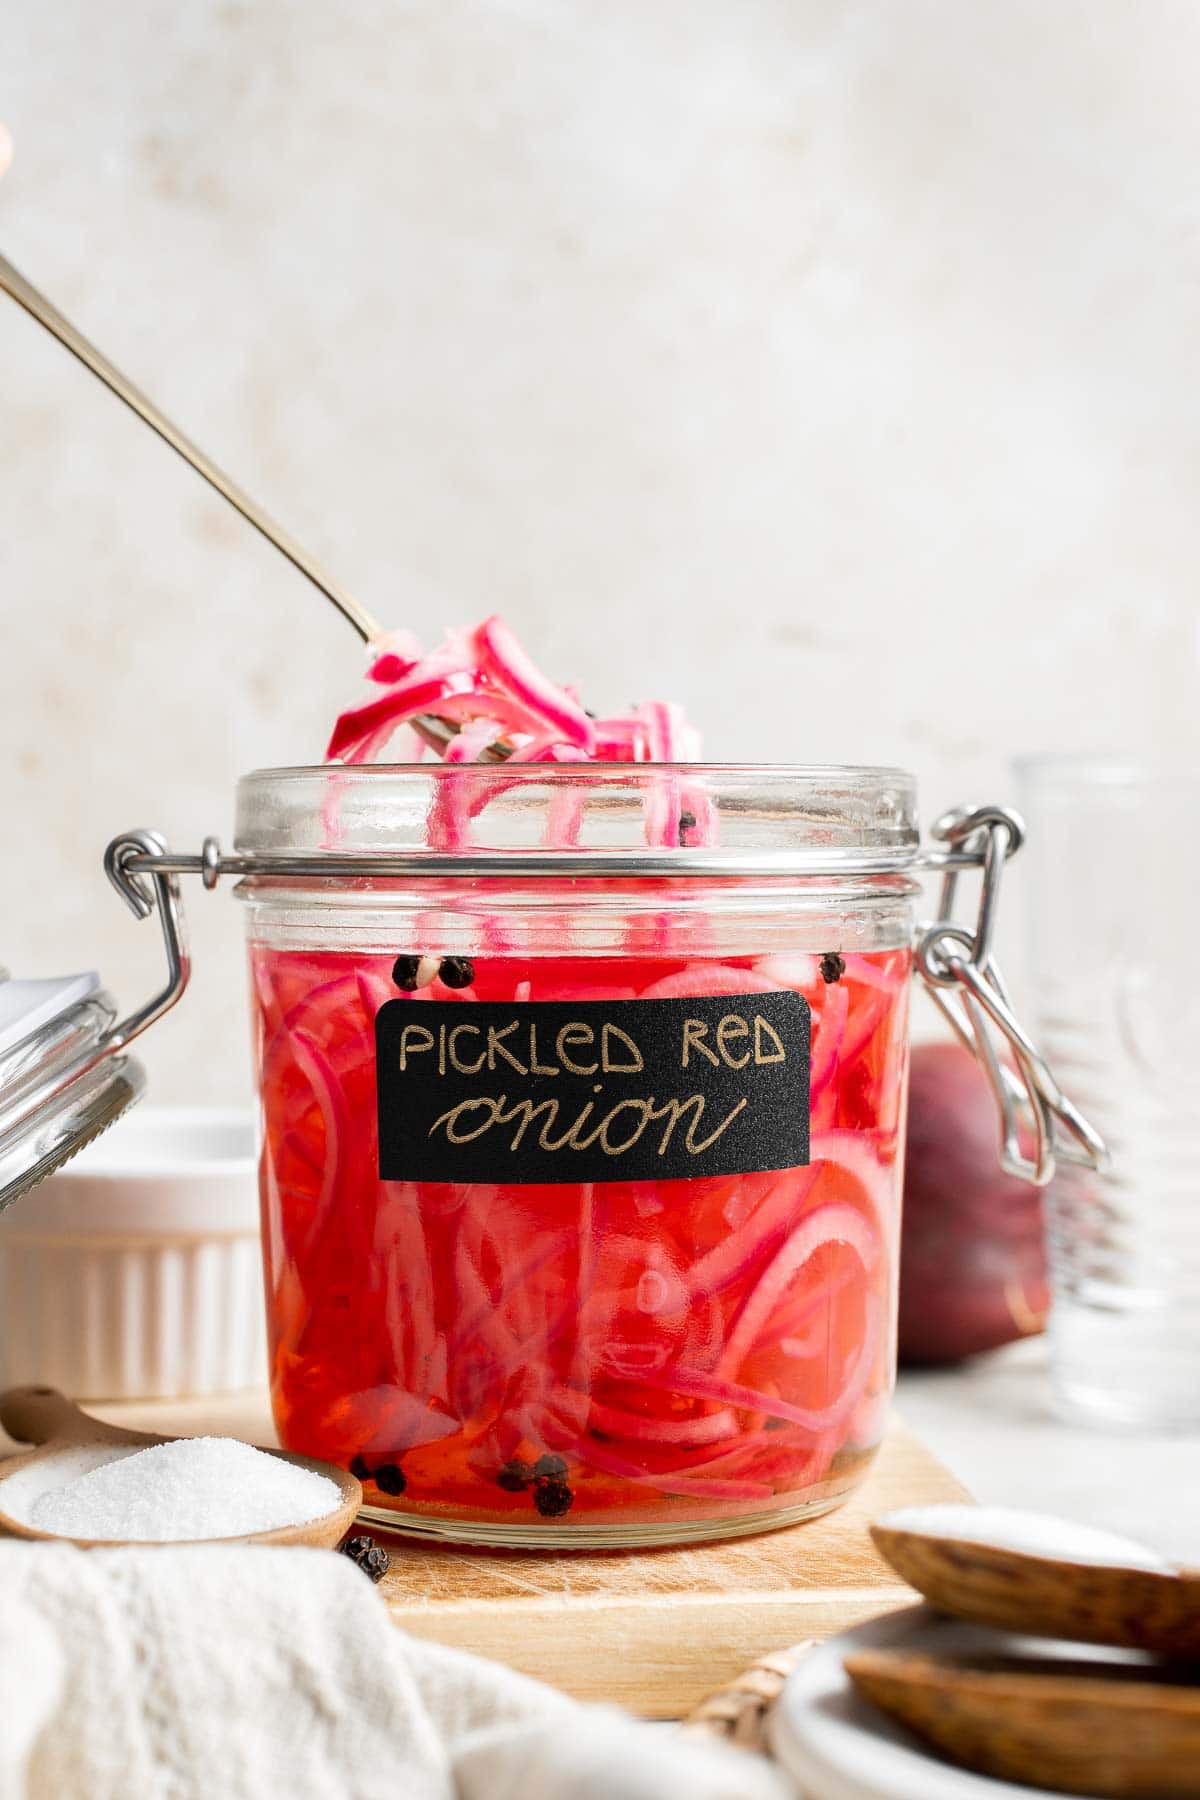
You might think pickling vegetables is a time-consuming task, but it's actually one of the easiest things you can make. Simply combine a few ingredients into a jar, let it sit, and that's it! These vibrant red onions will quickly become a go-to addition to enhance the flavor and brightness of your meals with minimal effort.
This was inspired by our Homemade Pickles, and pairs wonderfully with our Avocado Toast with Poached Egg.
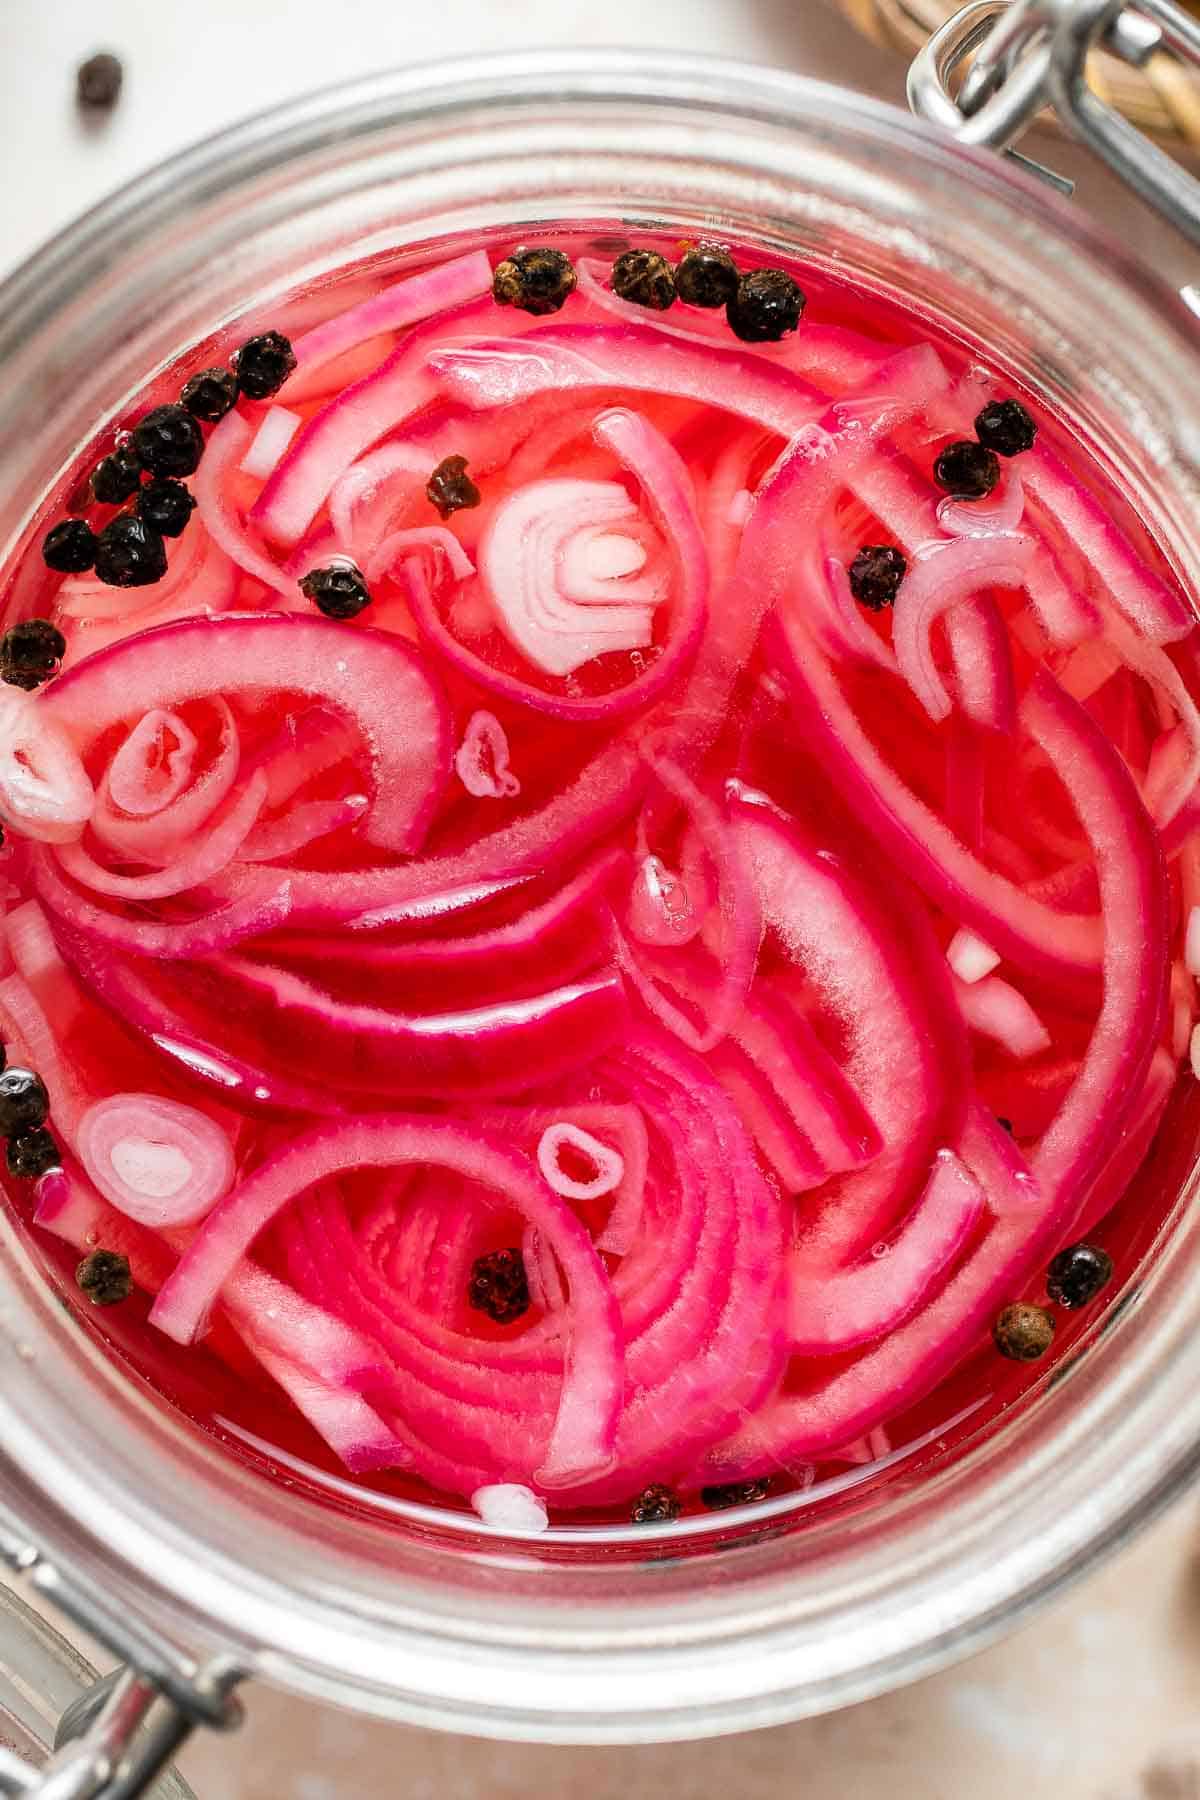
Why You'll Love This Recipe
- Instant flavor boost. Pickled red onions add the perfect tang to any meal, enhancing the flavor of everything from tacos to burgers. Just one taste and you'll understand why we have them in the fridge at all times!
- Simple and quick. This recipe takes just minutes to prepare and requires no special equipment, making it easy to whip up at a moment's notice.
- Long shelf life. Once made, these pickled onions last for weeks in the refrigerator, so you always have a fresh, flavorful condiment ready.
- Customizable. Adjust the amount of sugar or vinegar to suit your tastes. Add extra herbs or spices for a unique twist.
- Healthy and versatile. A great way to add flavor without the calories. Pickled onions are low in calories and add a punch of flavor to a variety of dishes.
- Cheaper than storebought. Fancy jars of pickled red onions at the store or farmer's market often cost $10-12! Save your money and make your own with this super simple quick pickled onions recipe.
Ingredients and Substitutions
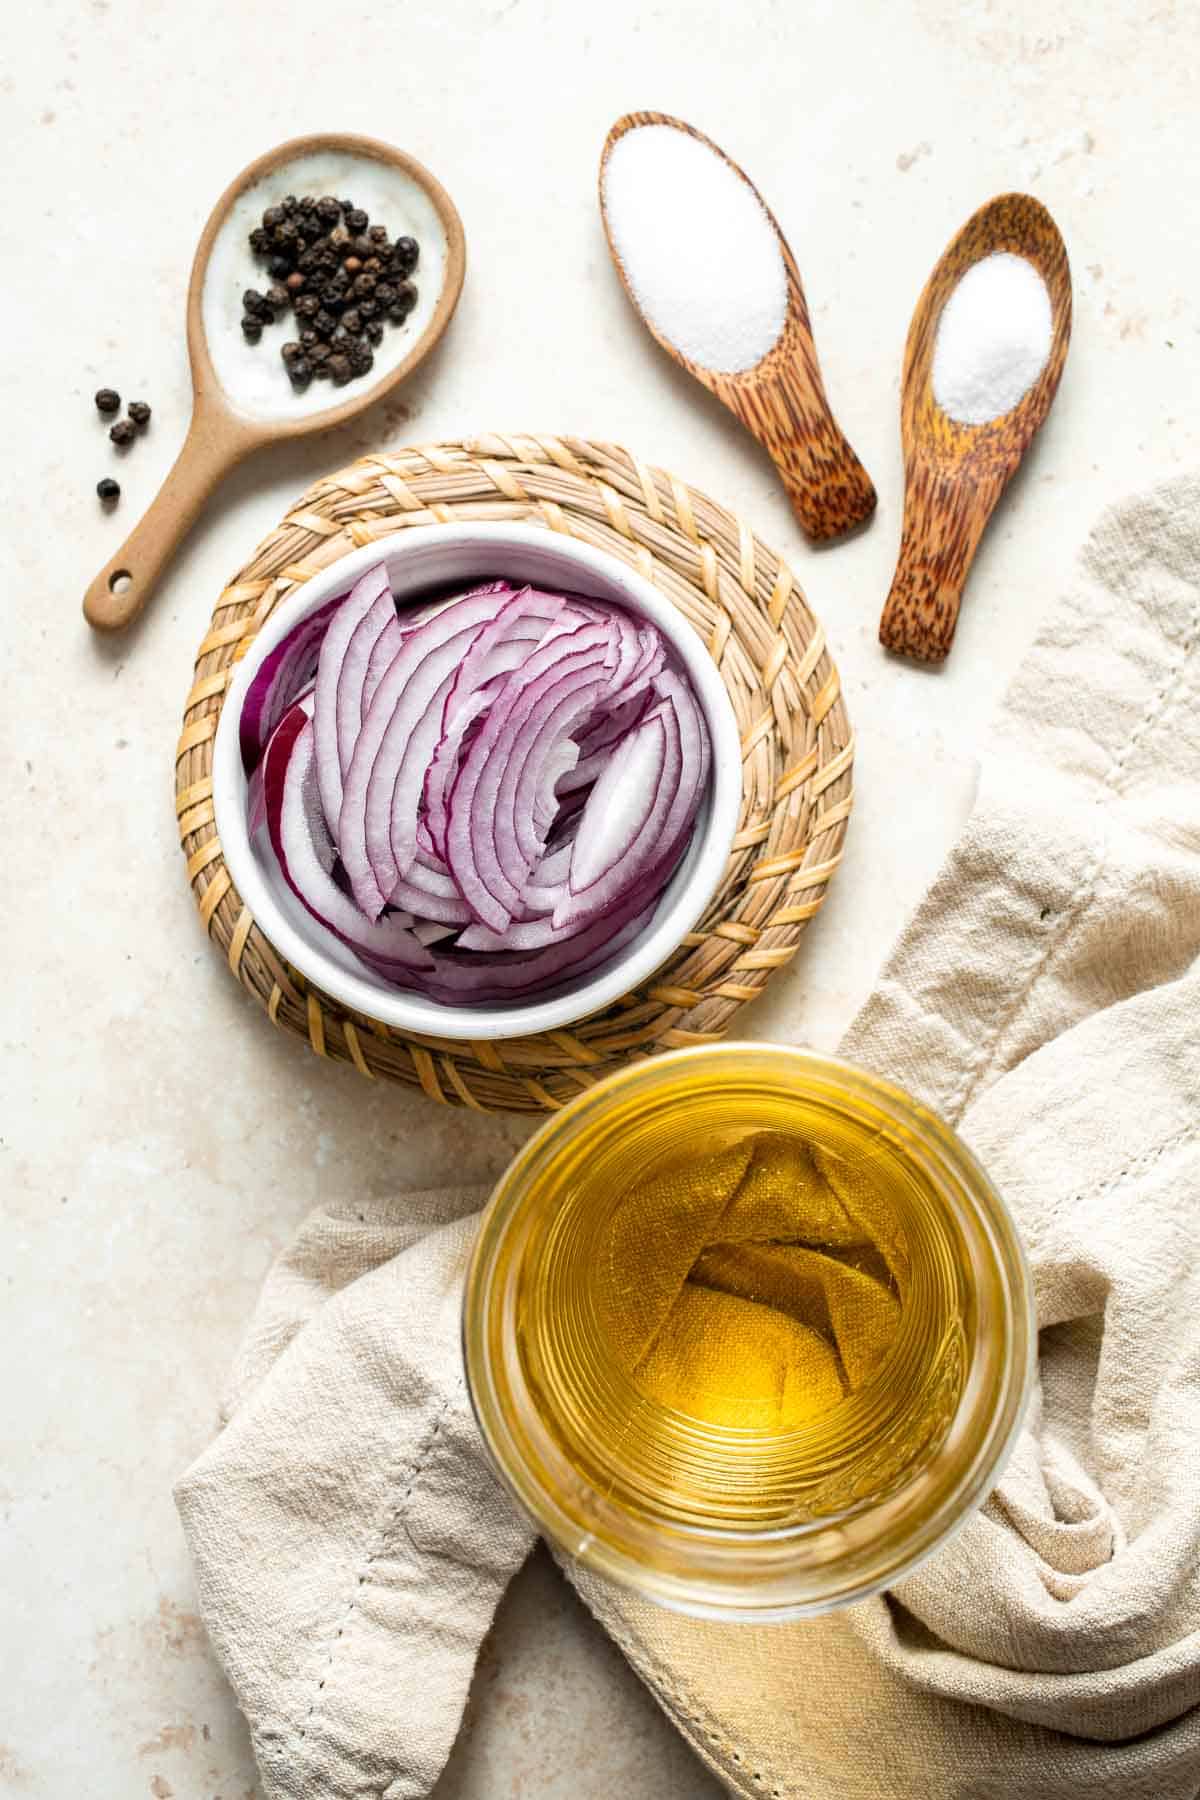
To make these quick and easy pickled red onions, you will need the following ingredients (see recipe card below for quantities):
- rice wine vinegar - This vinegar has a mild flavor that's perfect for pickling. You can substitute with other types of vinegar such as apple cider vinegar, white wine vinegar, or red wine vinegar, if needed.
- sugar - Adds the perfect sweetness to balance the tangy rice vinegar. You can also use a different sweetener such as honey, maple syrup, or agave syrup for a more natural alternative.
- salt - Essential for balancing the flavors and aiding in the pickling process.
- whole black peppercorns - Adds a subtle, earthy heat. You can substitute with a pinch of ground black pepper if preferred.
- water - Helps to dilute the vinegar and balance the flavors.
- red onion - Thinly sliced red onions are the star of this recipe, offering a sweet and slightly spicy flavor that becomes perfectly tangy when pickled. Choose fresh, firm onions and cut them evenly into thin slices. It's helpful to use a sharp chef's knife or a mandolin slicer to prep a bunch of sliced onions all at once.
Equipment
You will also need measuring cups and spoons, a large mason jar or a sealable container, a colander, and a small saucepan for boiling water.
Instructions

Combine ingredients.
In a large mason jar or sealable container, combine the vinegar, sugar, salt, and peppercorns, stirring until the sugar and salt dissolve.
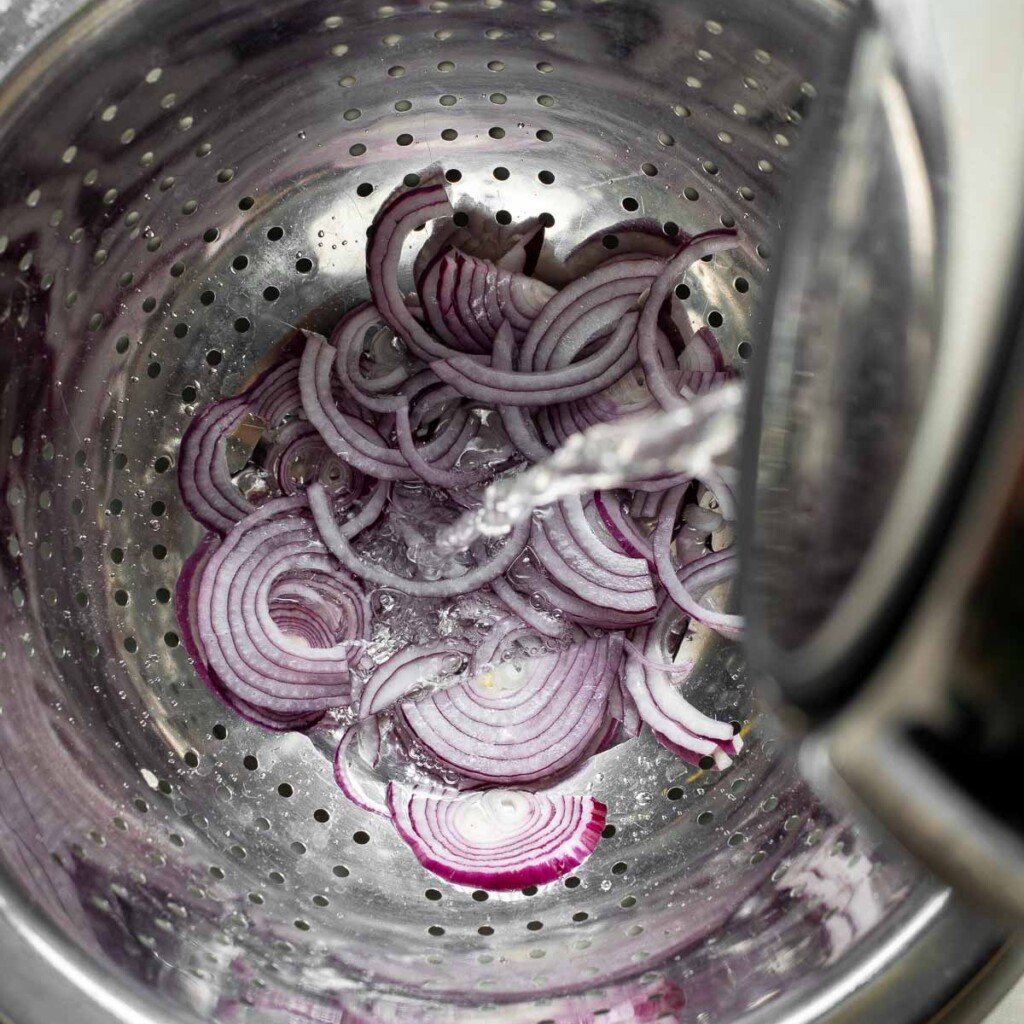
Blanch the red onions.
Bring the water to a boil, then place the sliced red onions in a colander. Pour the boiling water over the onions to blanch them, softening their flavor.text
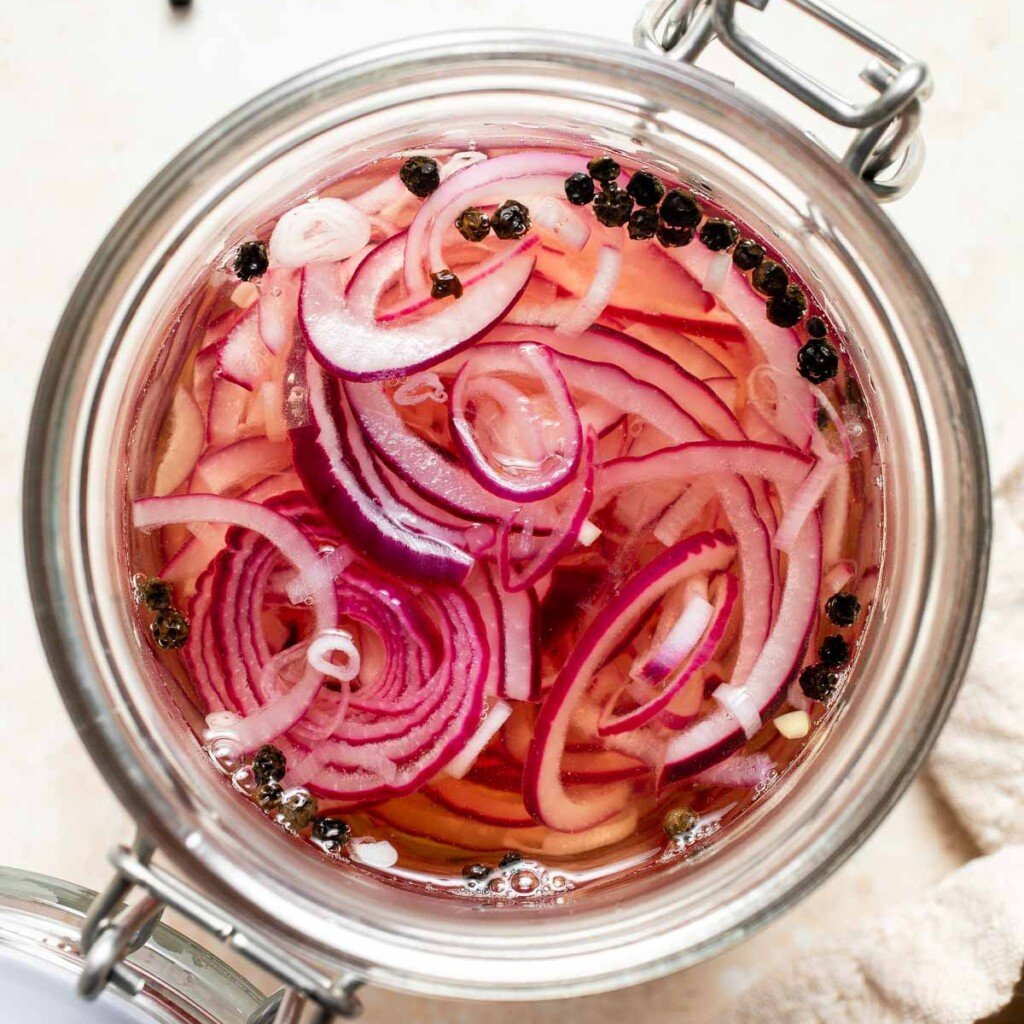
Add to the jar.
Transfer the blanched onions to the jar with the pickling liquid, seal the container.
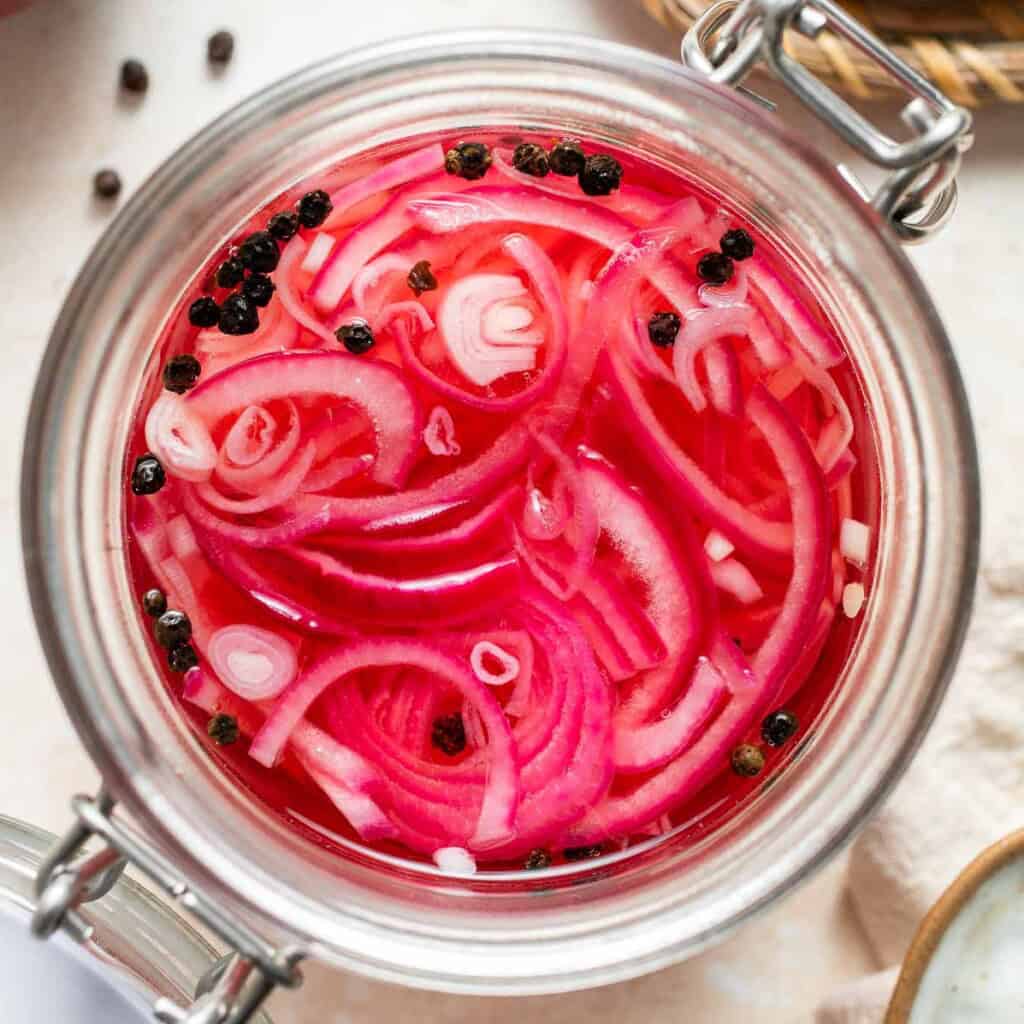
Let it sit.
Let it sit for at least 30 minutes to allow the flavors to meld.
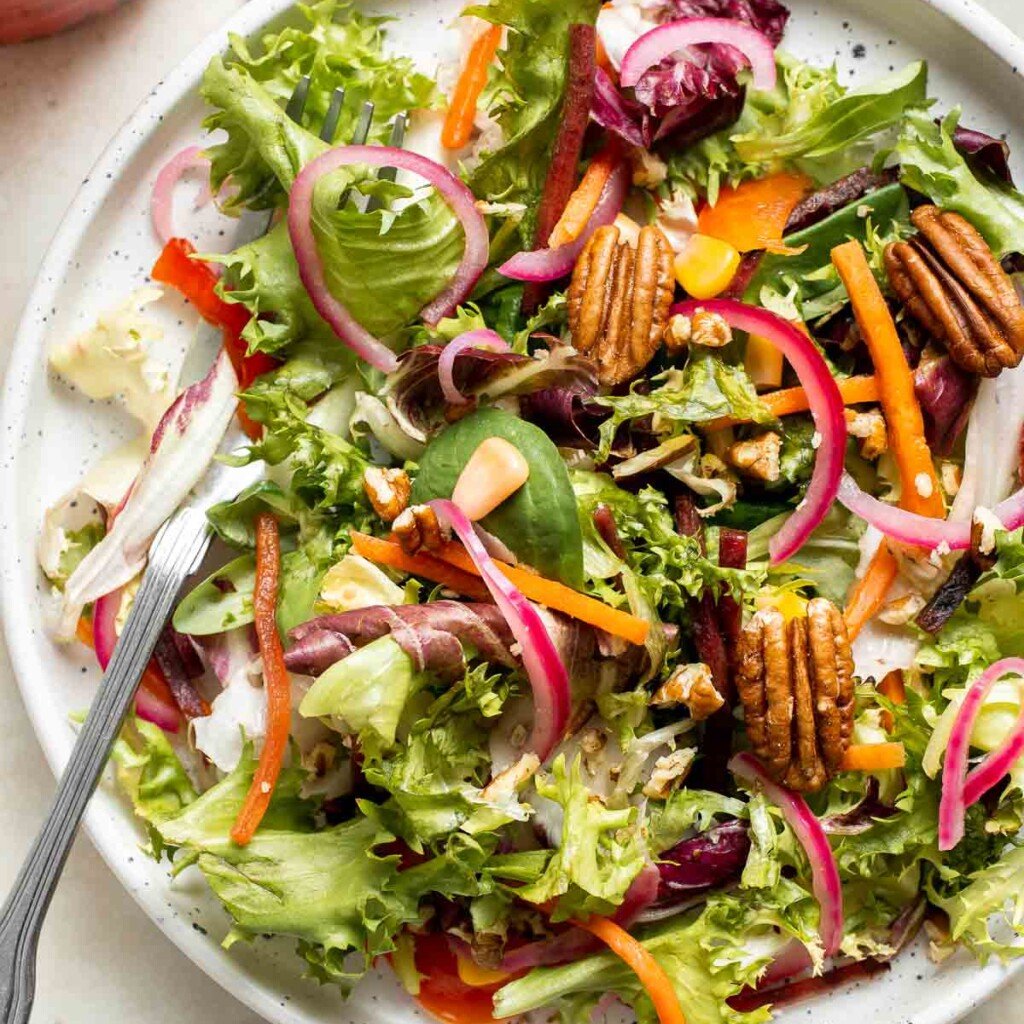
Serve.
Use the pickled onions to top your favorite salads, sandwiches, or tacos, and store the leftovers in the refrigerator for 3-4 weeks.
Top Tip: Let it Sit Longer
For an even more vibrant color and extra tang, let the pickled onions sit in the refrigerator for a few hours or overnight. The longer they sit, the more the flavors meld and intensify, resulting in a more flavorful and bold pickled onion. If you can, resist the urge to dive in right away - giving them extra time to absorb the pickling liquid will take your onions to the next level!
More Tips and Tricks
- Slice evenly. For perfect pickled onions, slice the red onion as thinly as possible. This will result in a better texture and faster pickling.
- Simplify your prep. Use the slicing attachment with your food processor or a mandolin for easy slicing.
- Stir the pickling liquid. Before adding the onions, give the liquid a quick stir to ensure the sugar and salt are fully dissolved.
- Adjust the sweetness. If you like your pickled onions a bit sweeter, add more sugar to taste.
- Make extra. You can easily double the recipe to make a larger batch that will last even longer in the fridge.
- Save the brine. Just like regular pickle juice, the flavorful brine can be used in marinades and salad dressings, too!
Recipe Variations
- Add garlic. Add 2-3 crushed garlic cloves to the jar for a garlicky twist on this classic recipe.
- Spicy kick. Add a small sliced chili pepper, a few slices of jalapeño peppers, or a pinch of red pepper flakes for a spicy version.
- Citrusy addition. Add a few slices of lemon or lime to the jar for a zesty citrus boost.
- Herbal twist. Add fresh herbs like thyme, rosemary, or dill to the jar for extra flavor and fragrance. A bay leaf or two also adds extra depth of flavor. A few coriander seeds or cumin seeds would add a nice aromatic note, too.
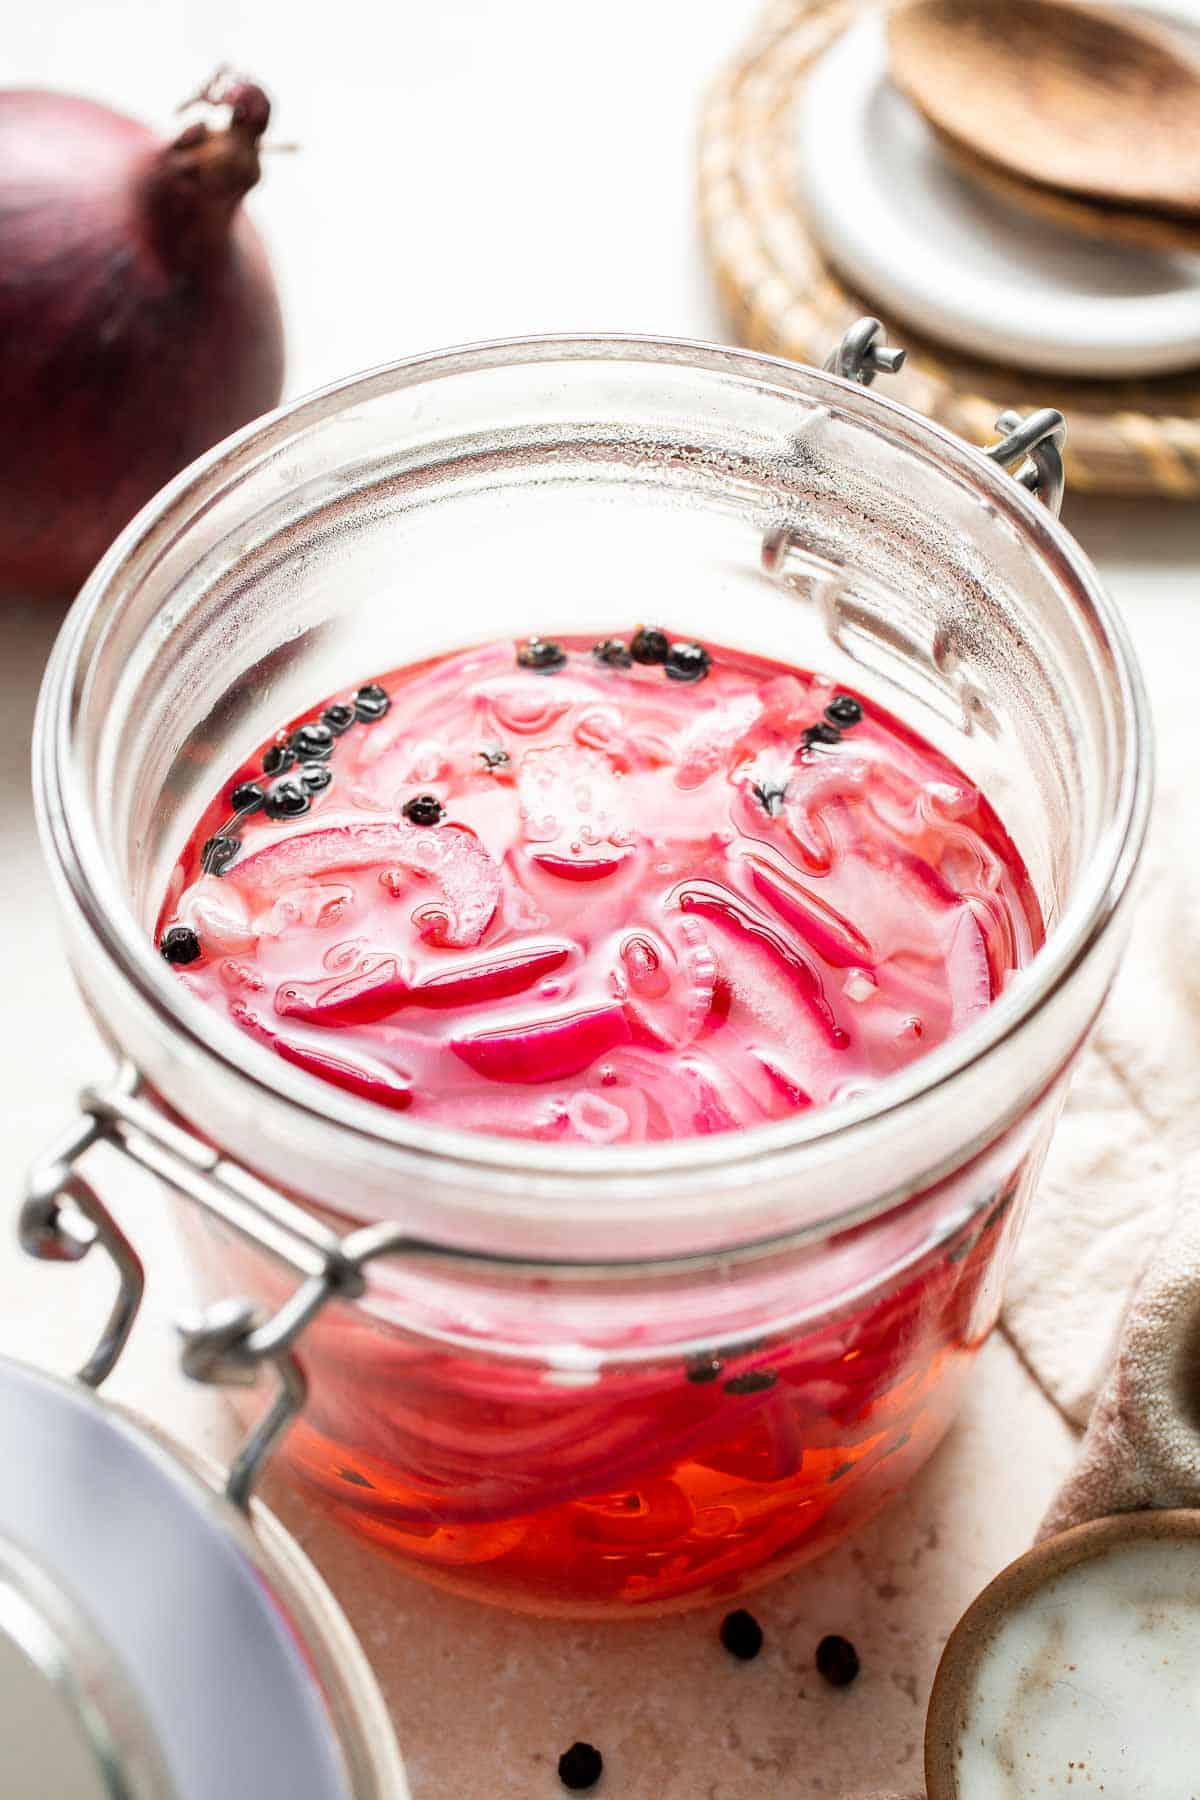
Storage
Once your pickled onions are ready, store them in a clean, airtight mason jar or a sealable container. They should be kept in the refrigerator, where they'll last for 3-4 weeks. The onions will continue to pickle in the jar, and their flavor will deepen over time. If you want to store them for a longer period, consider freezing the pickled onions. However, the texture may change slightly after freezing and thawing, so they're best enjoyed fresh or within a few weeks.
How to Serve
There are truly countless ways to use pickled red onions. They're the perfect topping for tacos or burritos for a tangy crunch, sandwiches or wraps to add a burst of flavor, fresh salads or grain bowls for a pop of color and zest, and grilled meats or vegetables for an extra flavor layer.
These are some of my favorite dishes to serve pickled red onions with:
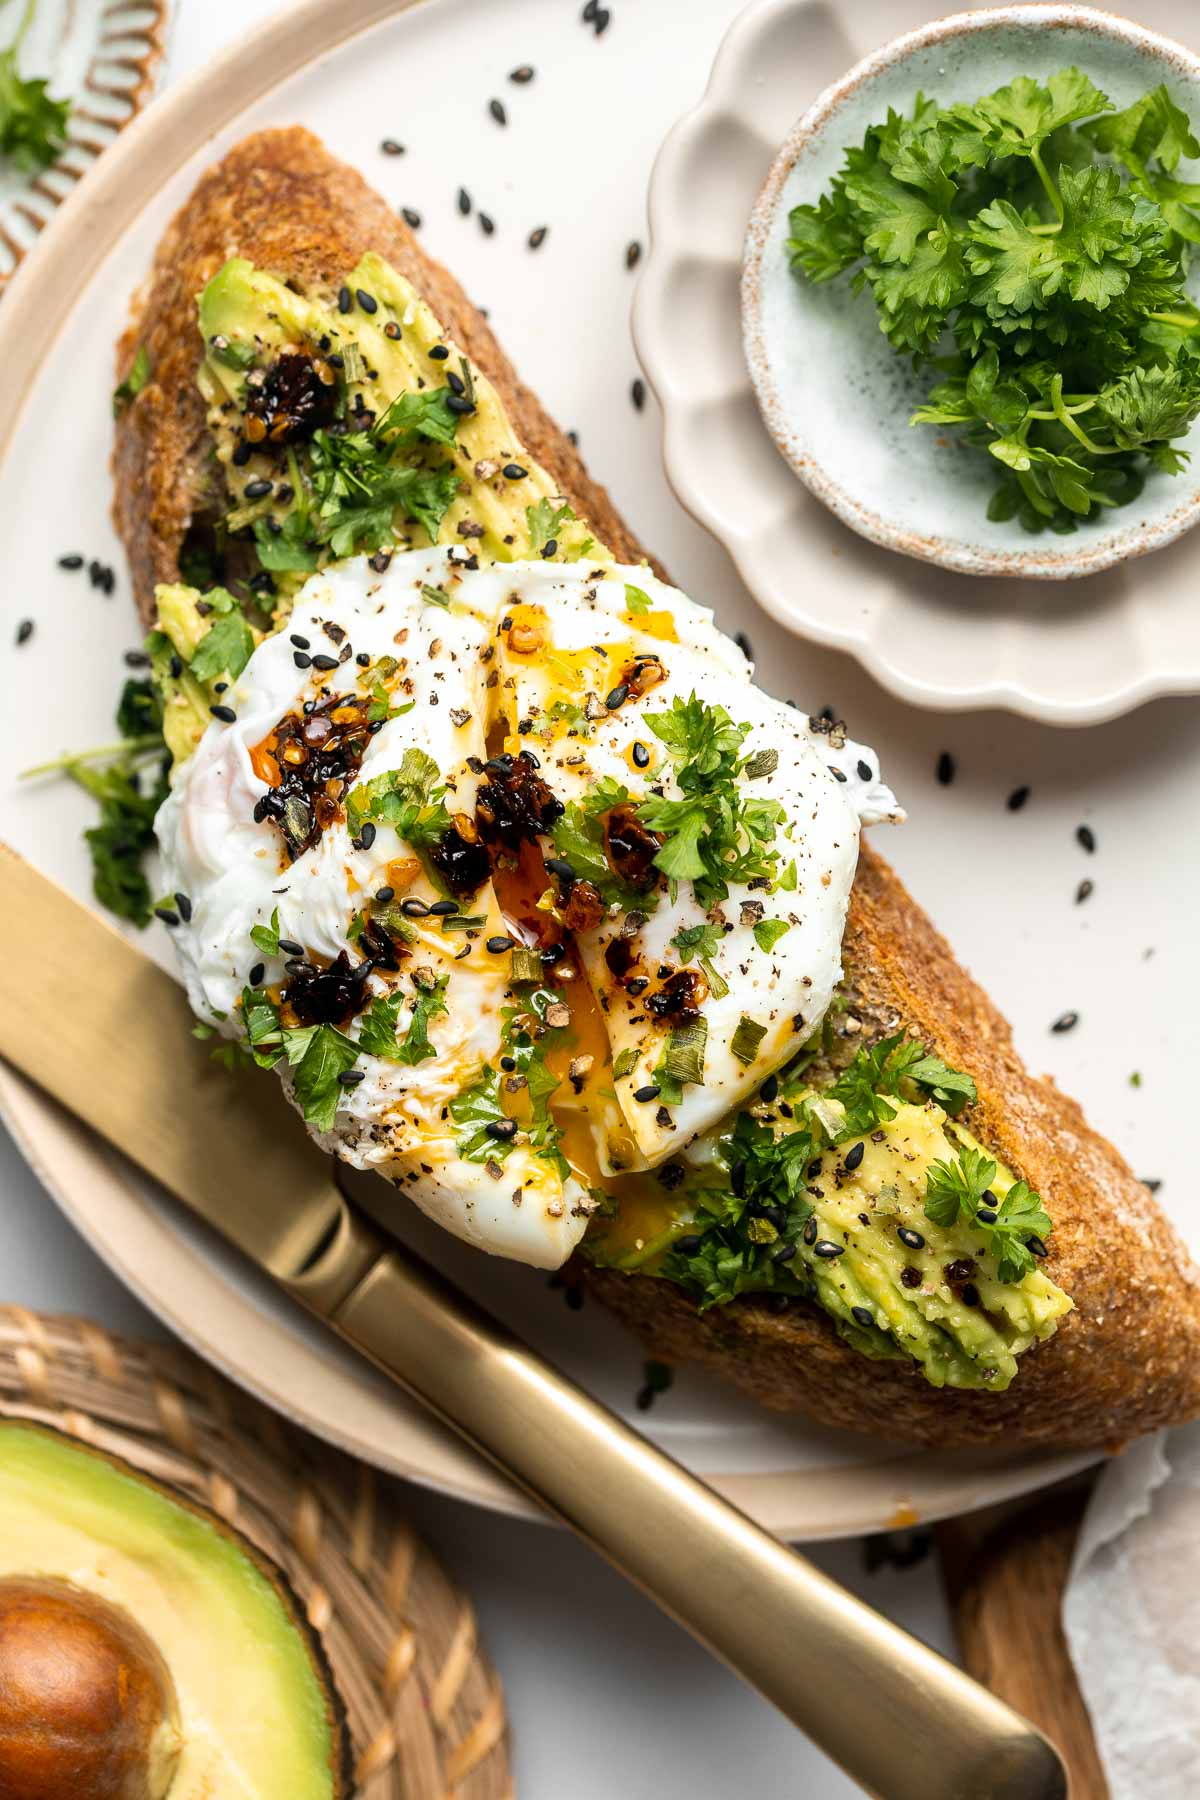
FAQ
Pickled red onions are tangy, oniony, a little salty, and surprisingly sweet from the natural sweetness of the onions. They add a pop of color and a nice tangy flavor to balance the richness of smoked or roasted meats, cheeses, and more.
No, you don't need to cook the onions. Instead, you'll blanch them by pouring boiling water over them, which softens their sharpness and makes them more suitable for pickling. The blanching step is important to mellow the raw onion's bite and allow the pickling liquid to infuse better. This method preserves the crispness of the onions while still allowing them to absorb the flavorful brine.
Pickling onions can promote gut health by introducing beneficial probiotics into your digestive system, especially if the onions are fermented. To pickle for gut health, use a more traditional fermentation method by substituting vinegar with a saltwater brine. This process encourages natural bacteria growth, which is beneficial for your gut microbiome. Be sure to keep the pickled onions submerged in the brine to create the ideal environment for fermentation and probiotics to thrive.
Some common mistakes include not cutting the onions thin enough, which prevents the pickling liquid from properly soaking in, and not fully dissolving the sugar or salt in the liquid. Another mistake is not using enough vinegar or an improper vinegar-to-water ratio, which can result in bland or weakly pickled onions. Additionally, storing the onions too early, before they've had enough time to absorb the brine, can lead to underwhelming flavor. Make sure to follow the recipe for the best results.
The solution for pickling onions is typically a mixture of vinegar, water, salt, and sugar. You can also add spices like peppercorns, garlic, or herbs for additional flavor. The solution should be acidic enough to preserve the onions while adding a tangy, flavorful kick. Adjust the sugar and salt levels based on your taste preference, and use a high-quality vinegar like rice wine vinegar for the best results. This combination creates the perfect balance between tartness and sweetness.
Pickled red onions can be a healthy addition to your diet when enjoyed in moderation. They provide essential nutrients, such as antioxidants from the red onions, which help fight inflammation and support heart health. The vinegar used in pickling can help regulate blood sugar levels, and the fermentation process (if done) can introduce beneficial probiotics to promote gut health. However, keep in mind that they do contain sodium, so it's important to consume them in moderation as part of a balanced diet.
Pickled red onions are not necessarily fermented, but they can be if you use a saltwater brine instead of vinegar. Traditional pickling methods involve fermentation, where natural bacteria break down the sugars in the onions and produce beneficial probiotics. However, the quick pickling method most commonly used for red onions involves vinegar and heat, which preserves them but does not involve the fermentation process. If you're looking for fermented pickled onions, consider using a lacto-fermentation method instead.
More Condiment Recipes
Looking for other recipes like this? Try these:
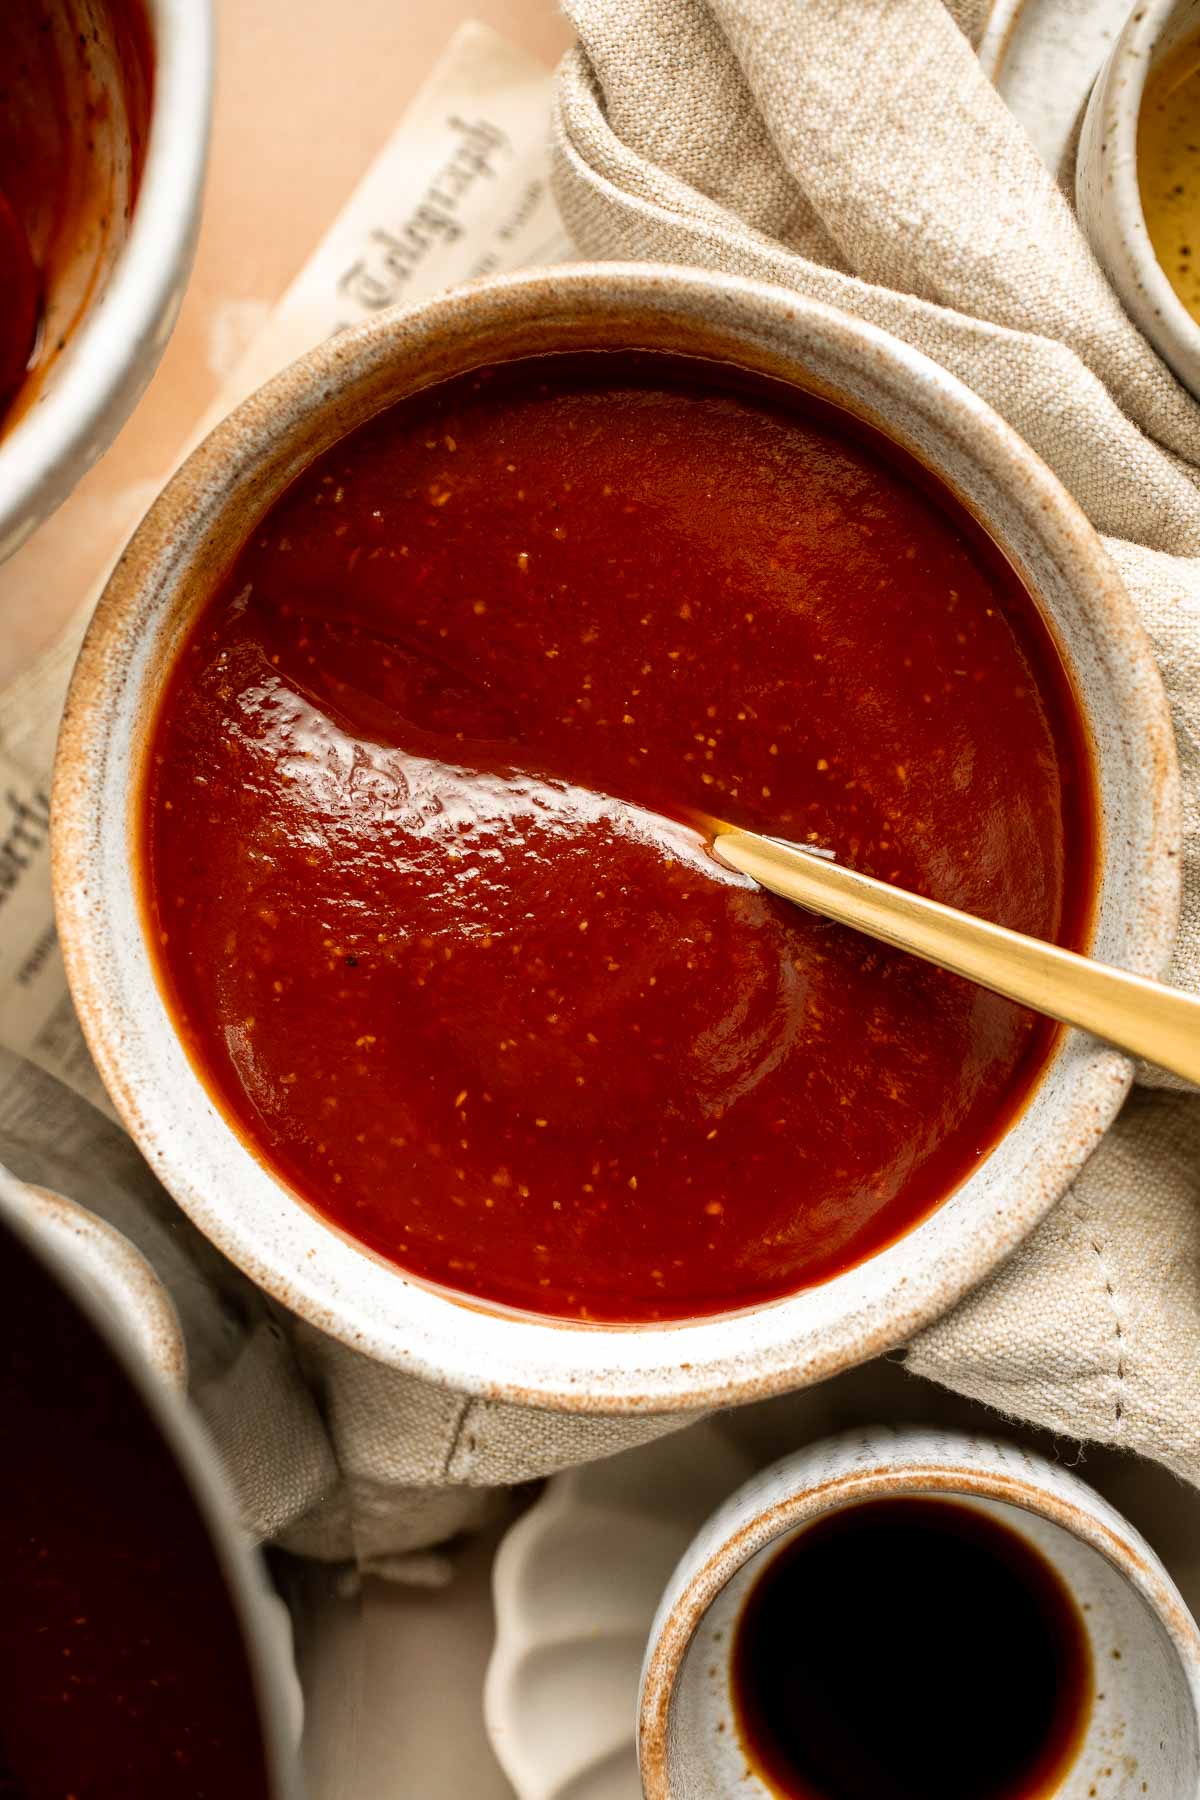
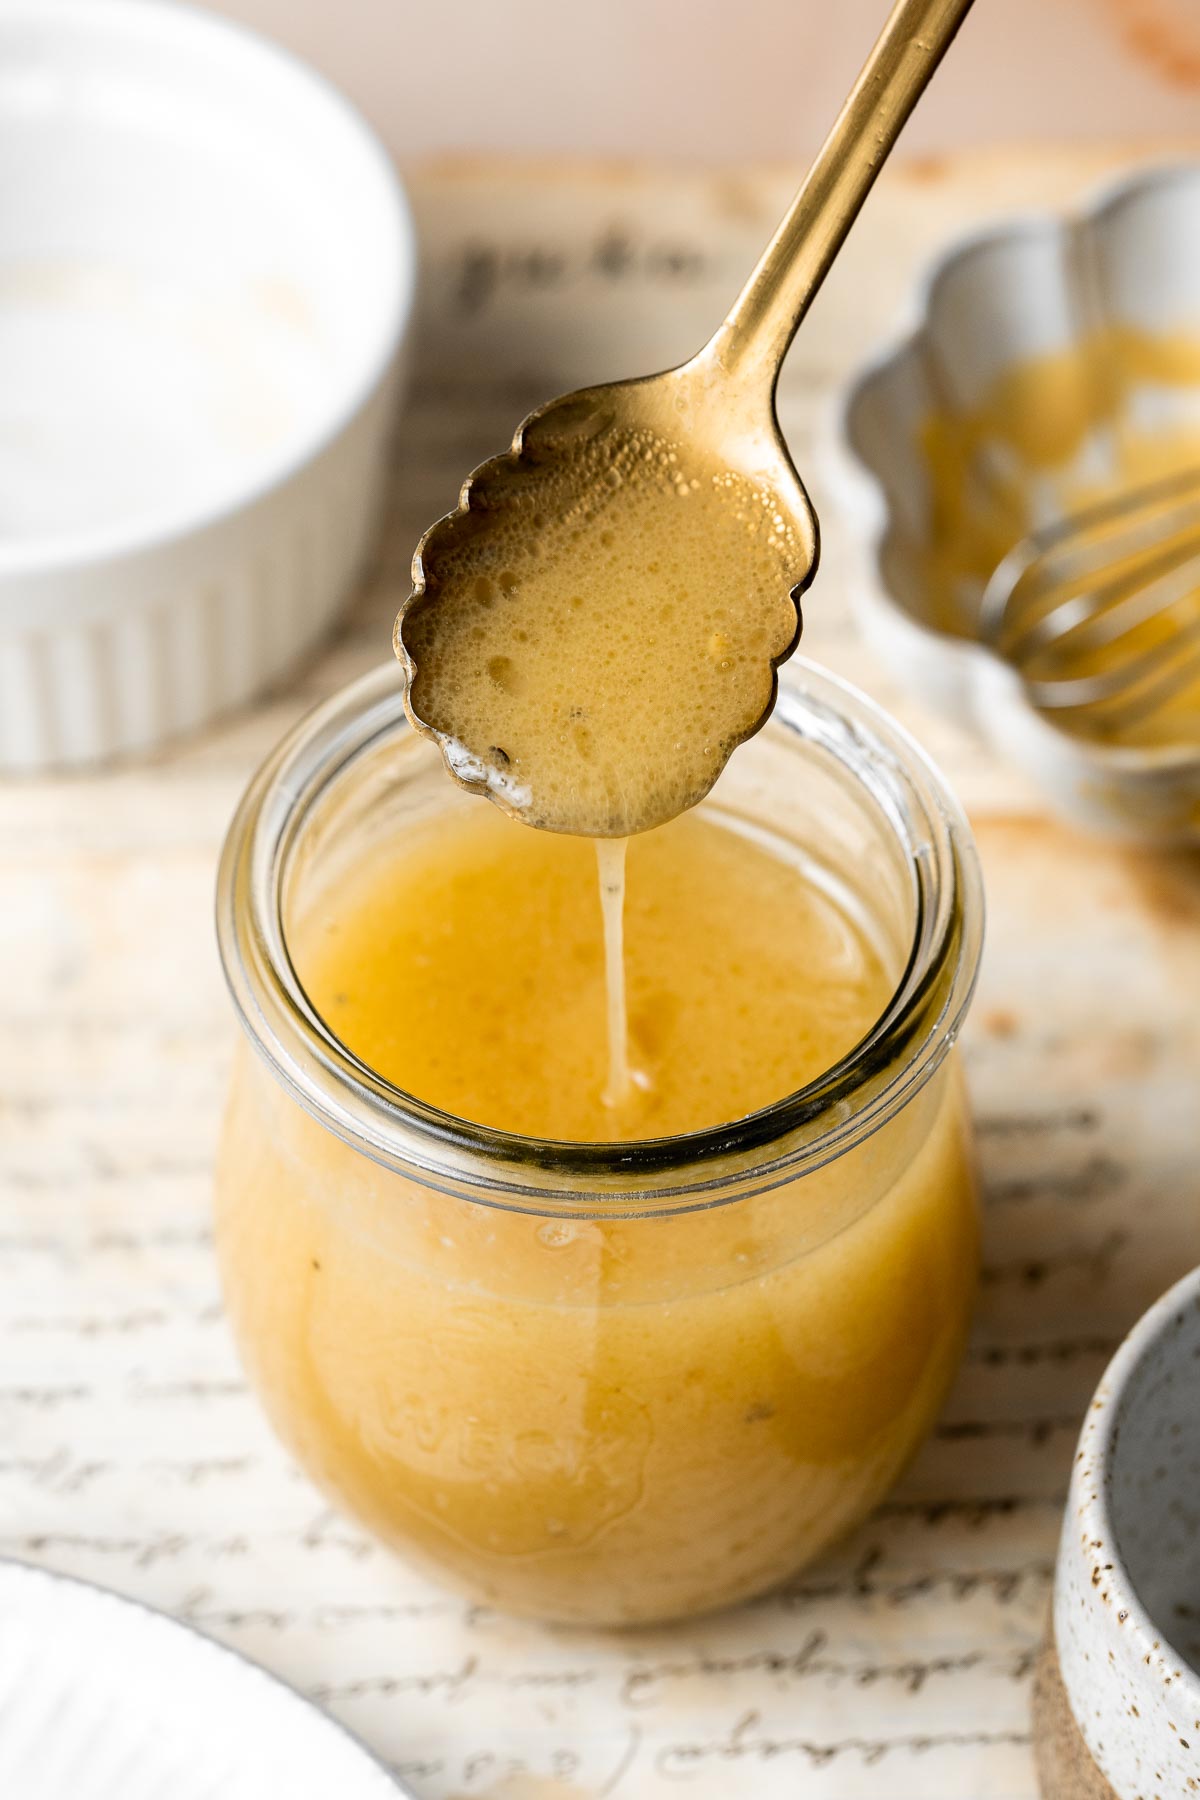
Tried this recipe?
I'd love to hear what you think! Leave a comment and rating below to share your feedback. Your reviews help others discover this recipe and help me keep creating more free recipes for you. Snap a photo and tag me on social media @aheadofthyme too.
Lemon Sorbet (Naturally Yellow with Turmeric)
Lemon Sorbet is the ultimate refreshing treat. Bright, zesty lemons meet a subtle touch of turmeric, creating a naturally golden color that's as eye-catching as it is delicious. Made with just a few simple and clean ingredients, this sorbet is fresh, light, and a healthier alternative to many other frozen treats.

As the weather warms up, this dairy-free dessert is exactly what I crave on hot afternoons. It's perfect after a big summer meal, for backyard gatherings, or anytime you want something cool and satisfying without feeling heavy. Plus, it's a crowd-pleaser - kids love the vibrant color, and adults love the bright, tart flavor.
This lemon sorbet recipe was inspired by our obsession with sorbets like our Strawberry Sorbet and Peach Sorbet, and it pairs well with this amazing Blueberry Sauce.
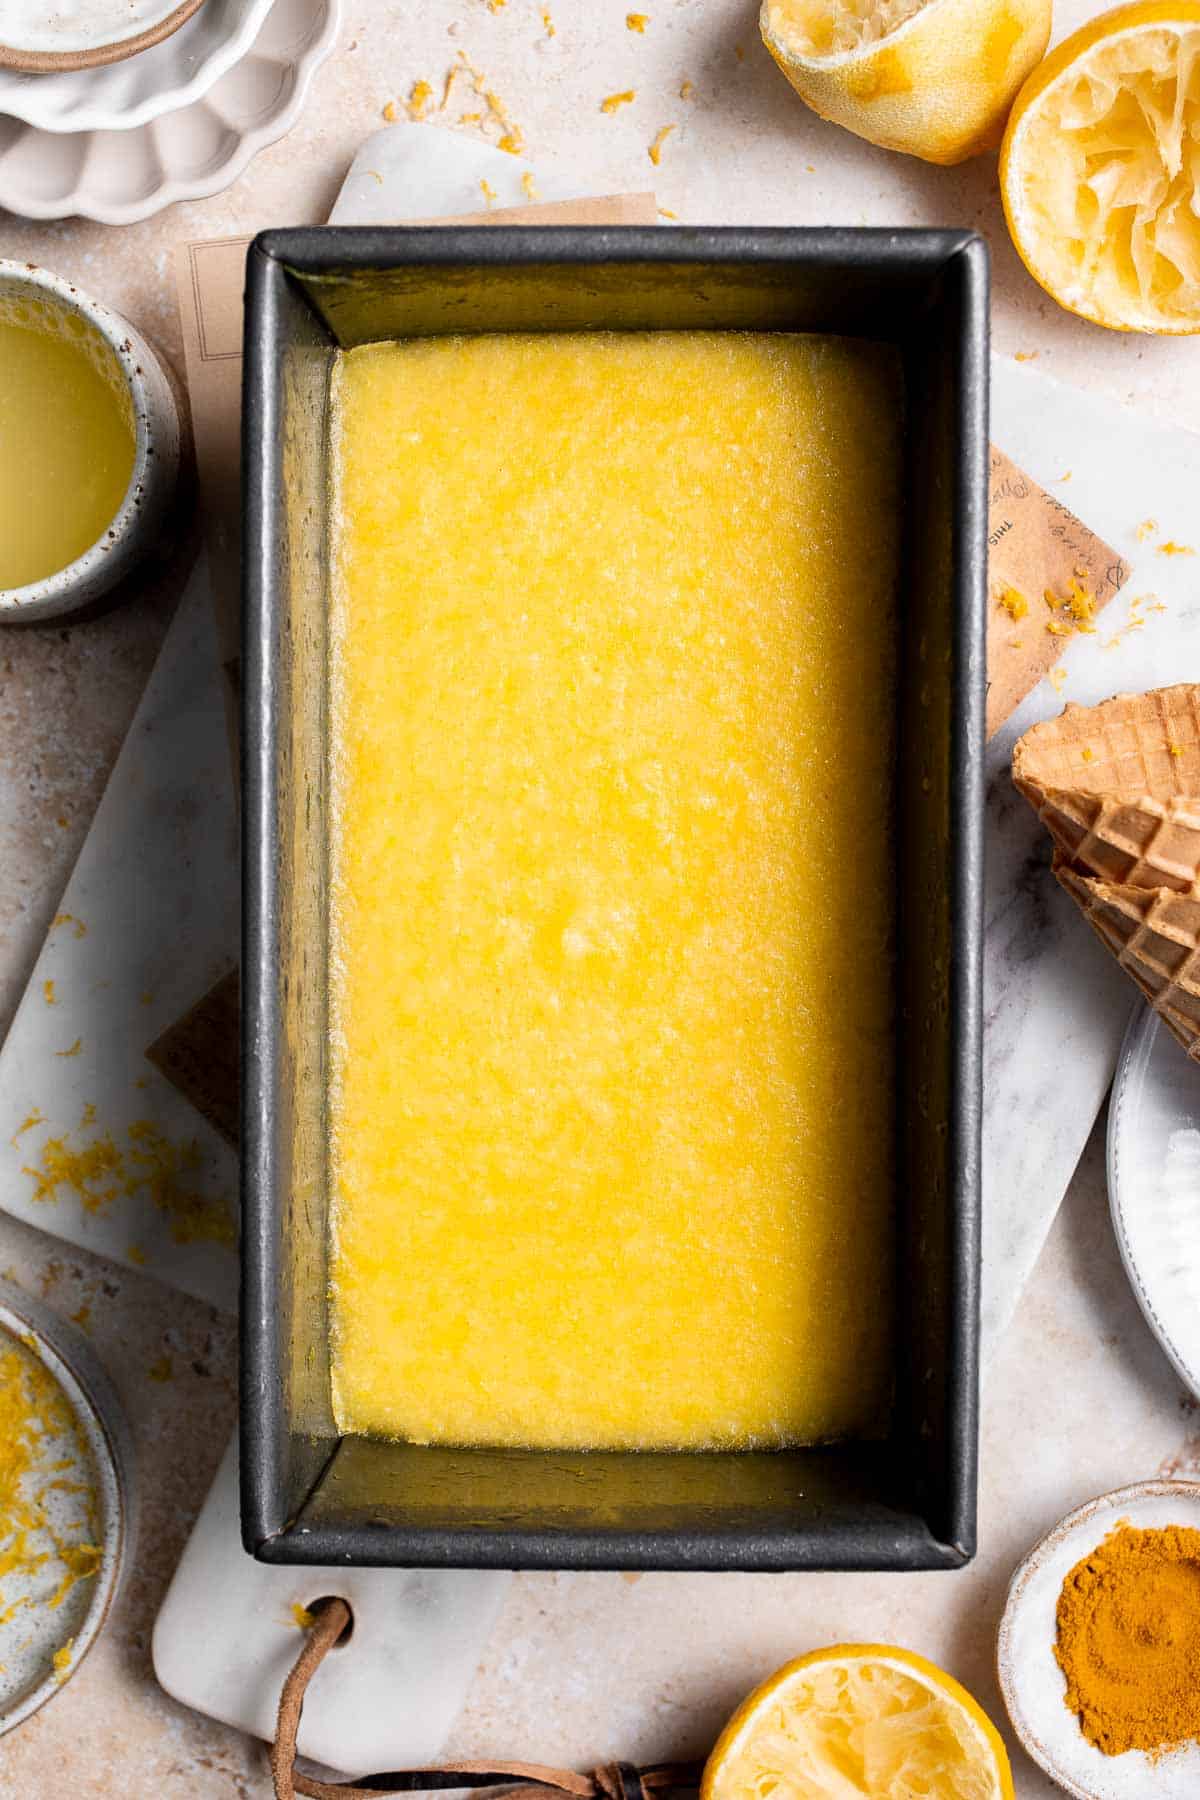
Why You'll Love This Recipe
- Naturally yellow with turmeric. The turmeric not only gives the sorbet its gorgeous color but also adds a slight depth of flavor. This is a great way to enjoy a vibrant dessert without using artificial dyes.
- Dairy-free and vegan. Perfect for those who follow a dairy-free or vegan lifestyle. It's a refreshing treat everyone can enjoy, even those with dietary restrictions.
- Simple ingredients. Made with just a few pantry staples (available all year round), this sorbet is easy to whip up and requires no complicated preparation. Plus, it doesn't require an ice cream maker either!
- Cleansing and refreshing. Lemon is known for its refreshing, detoxifying qualities. It's the perfect palate cleanser after a rich meal.
- Perfect for summer. The tangy lemon flavor makes this sorbet ideal for hot weather and outdoor gatherings, adding a cool, refreshing treat to any summer menu.
Ingredients and Substitutions
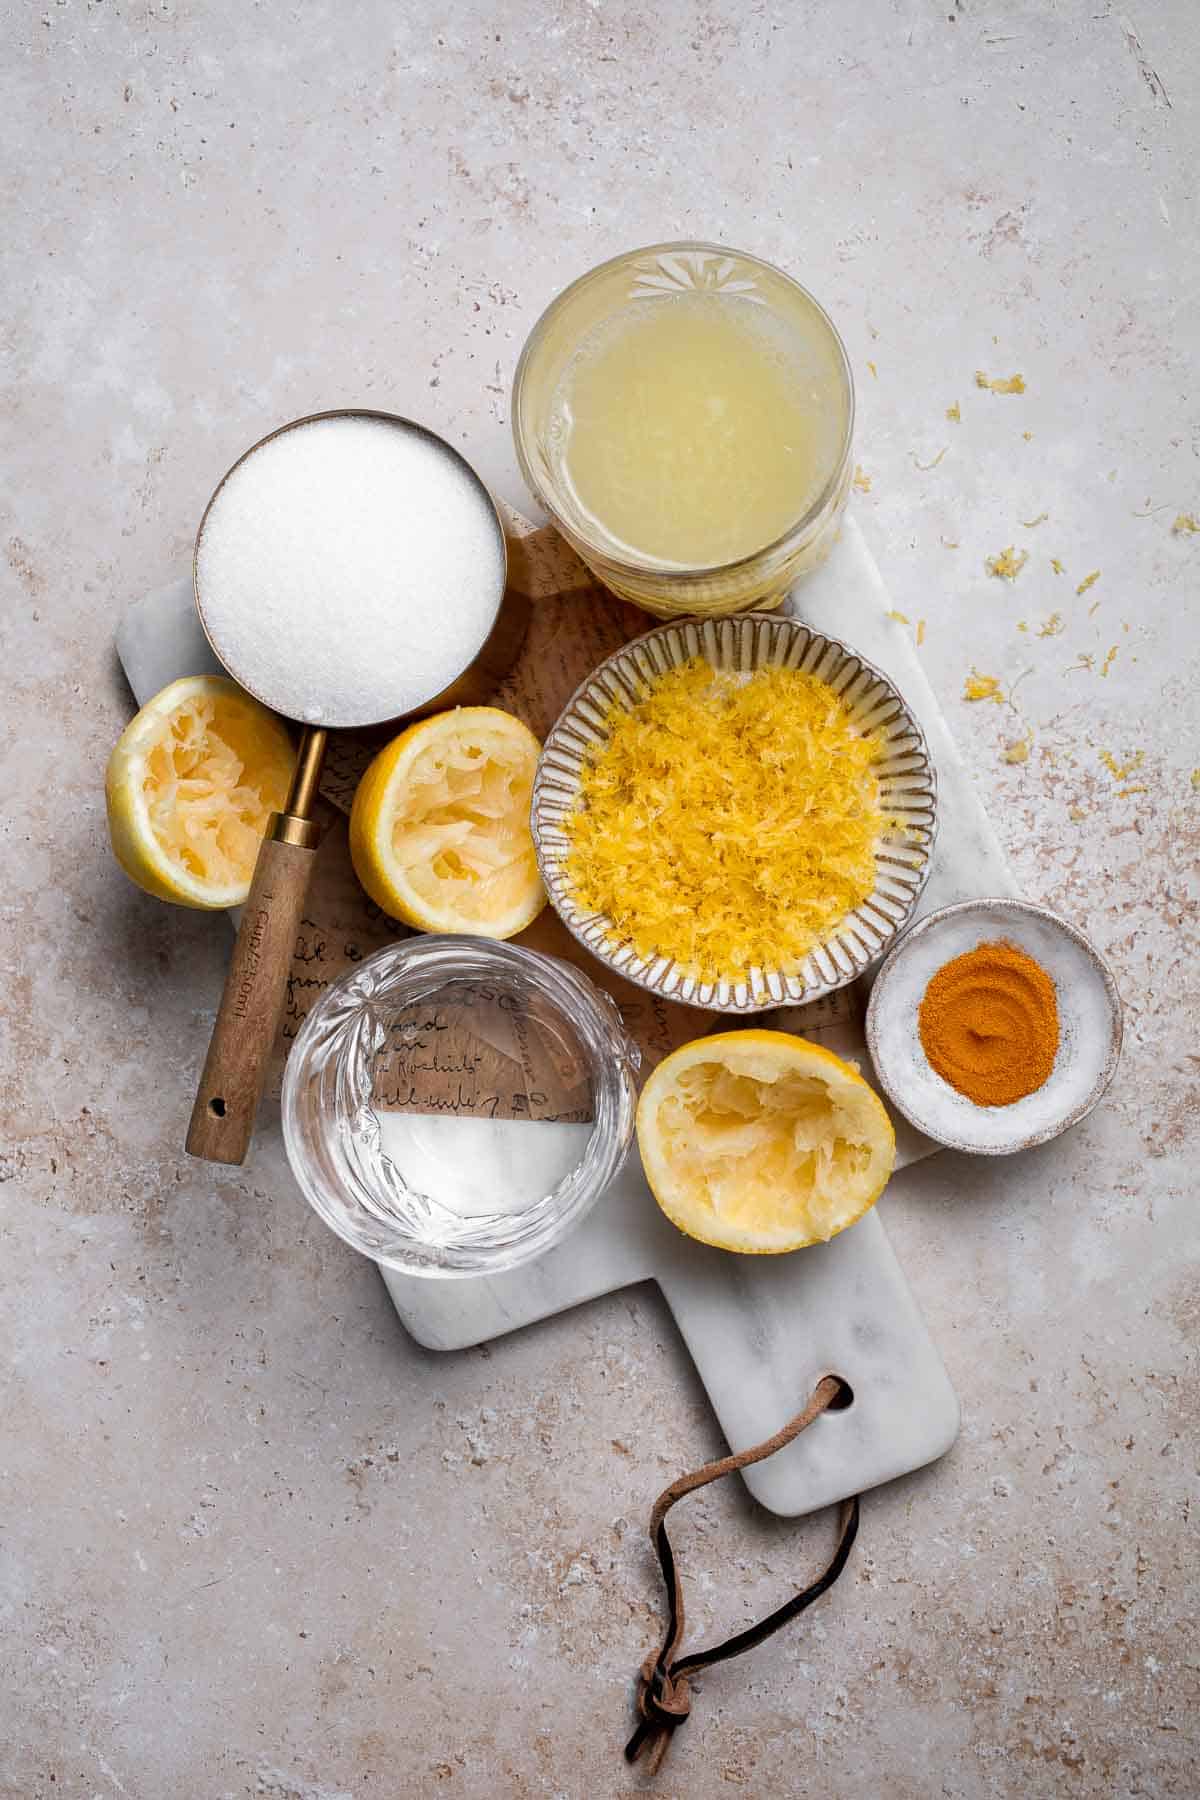
To make this delicious lemon sorbet, you will need the following ingredients (see recipe card below for quantities):
- lemons - Freshly squeezed lemon juice and zest is best for a zesty, bright flavor. Bottled lemon juice can be used, but fresh is always recommended.
- water - Acts as the base liquid for the sorbet. You can also use coconut water for a tropical twist.
- turmeric - Adds a natural, vibrant yellow color to the sorbet without any artificial additives. It also brings a subtle earthy flavor, enhancing the overall taste.
- sugar - This adds sweetness and helps the sorbet maintain the right texture. You can substitute with honey or maple syrup for a more natural alternative.
Equipment
You'll also need measuring cups and spoons, a blender or food processor, a medium saucepan, a fine mesh strainer, an ice cream maker (optional), and a shallow container for freezing.
Instructions
- In a medium saucepan, combine the water, sugar, and lemon zest. Bring to a boil over high heat, then reduce the heat to medium and simmer for about 5 minutes, or until the sugar has fully dissolved. Remove from heat and allow the simple syrup mixture to cool.


- Once cooled, stir in the fresh lemon juice and turmeric.


- Transfer the mixture to a shallow dish, such as a loaf pan, and cover. Place it in the freezer to freeze for 2 hours.
- After 2 hours, remove the sorbet from the freezer and whisk vigorously until it reaches a slushy consistency. Return it to the freezer for another 4 hours.


- Once it's partially frozen, remove it from the freezer again and whisk to incorporate air, which will make the sorbet lighter. Place it back in the freezer and let it fully set overnight.


- When ready to serve, scoop the sorbet. If it's too hard, transfer it to a food processor or blender and process until smooth. Enjoy!
Top Tip: Stir Frequently
Stir the mixture periodically as it freezes to break up the ice crystals and improve the texture. For an even smoother, creamier result, stir every 30 minutes. You can also use an ice cream maker to churn the sorbet quickly.
How to Make Sorbet in an Ice Cream Maker
Another option is to allow the hot lemon mixture to cool to room temperature and then transfer into an ice cream maker. Churn according to the manufacturer's directions, usually about 20 minutes, until frozen and smooth.
More Tips and Tricks
- Use fresh ingredients. Fresh lemons and natural sweeteners yield the best flavor and texture in the sorbet.
- Add a splash of alcohol. A tablespoon of vodka or limoncello helps prevent the sorbet from freezing too hard and creates a smoother consistency.
- Make it in advance. This sorbet can be made ahead of time and stored in the freezer for up to 1-2 weeks, making it a great dessert to prepare for a gathering.

Recipe Variations
- Add fruit. Try adding some fresh fruit, like raspberries or strawberries, to your sorbet for a fruity variation. Blend the fruit with the lemon juice before freezing for a beautiful marbled effect.
- Make it creamy. This recipe is naturally dairy-free, but for a creamier twist, blend in a splash of milk or yogurt. It transforms the sorbet into an ultra-smooth, velvety treat.
- Tropical flavor. Add coconut milk in place of some of the water for a tropical twist. The coconut flavor pairs really well with the lemon.
- Herbal twist. Experiment with herbs like fresh mint, basil, or rosemary for a unique take on the classic lemon flavor. Infuse the herbs in the water before mixing it into the sorbet base.
- Citrus medley. Combine lemon with other citrus fruits like orange, grapefruit, or tangerine for a refreshing citrus sorbet mix.
Storage
Once made, store your lemon sorbet in an airtight container in the freezer. It will last for up to 1-2 weeks, but for the best texture, consume it within a few days. If it becomes too hard, let it sit out for a few minutes at room temperature before scooping.
How to Serve
This lemon turmeric sorbet is delicious on its own, perfect after a hearty meal, or as a refreshing treat on a warm day.
These are my favorite recipes to serve with homemade lemon sorbet:

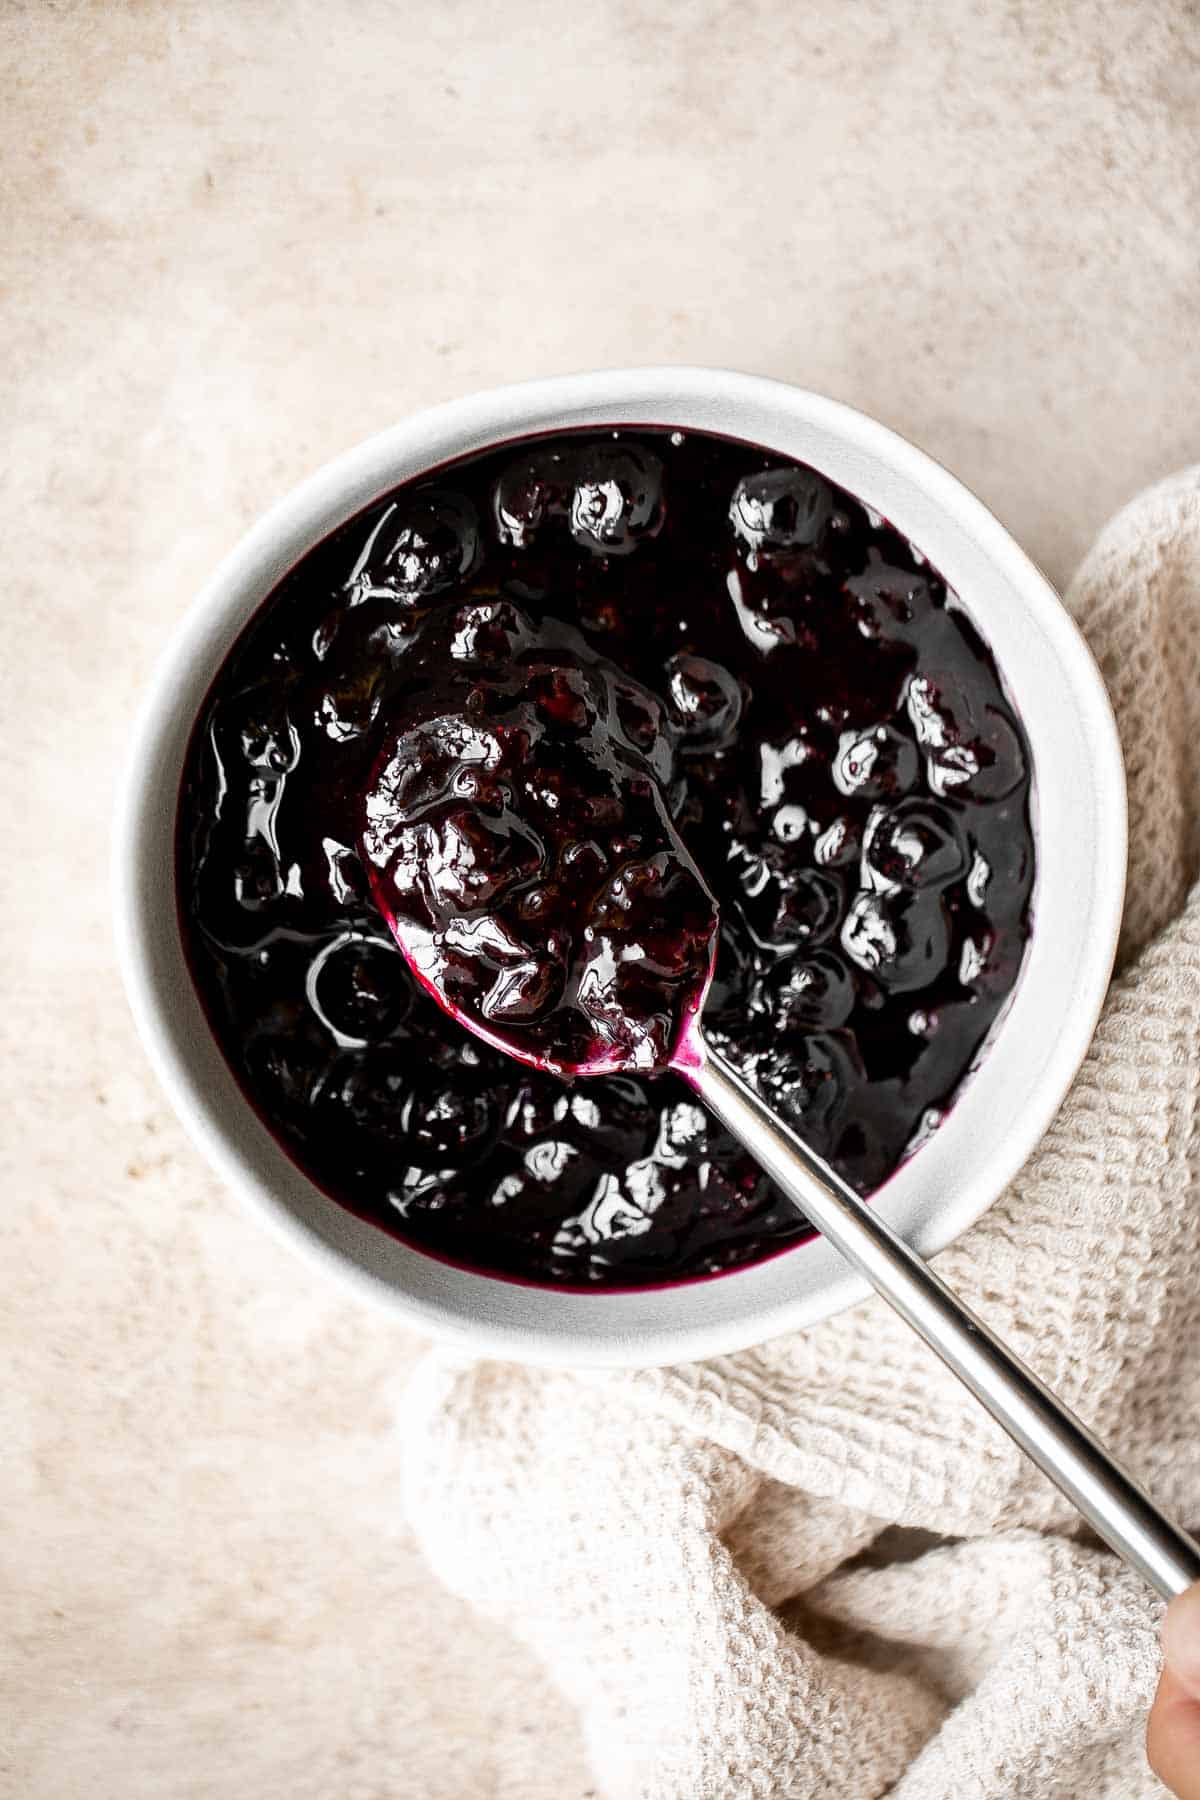
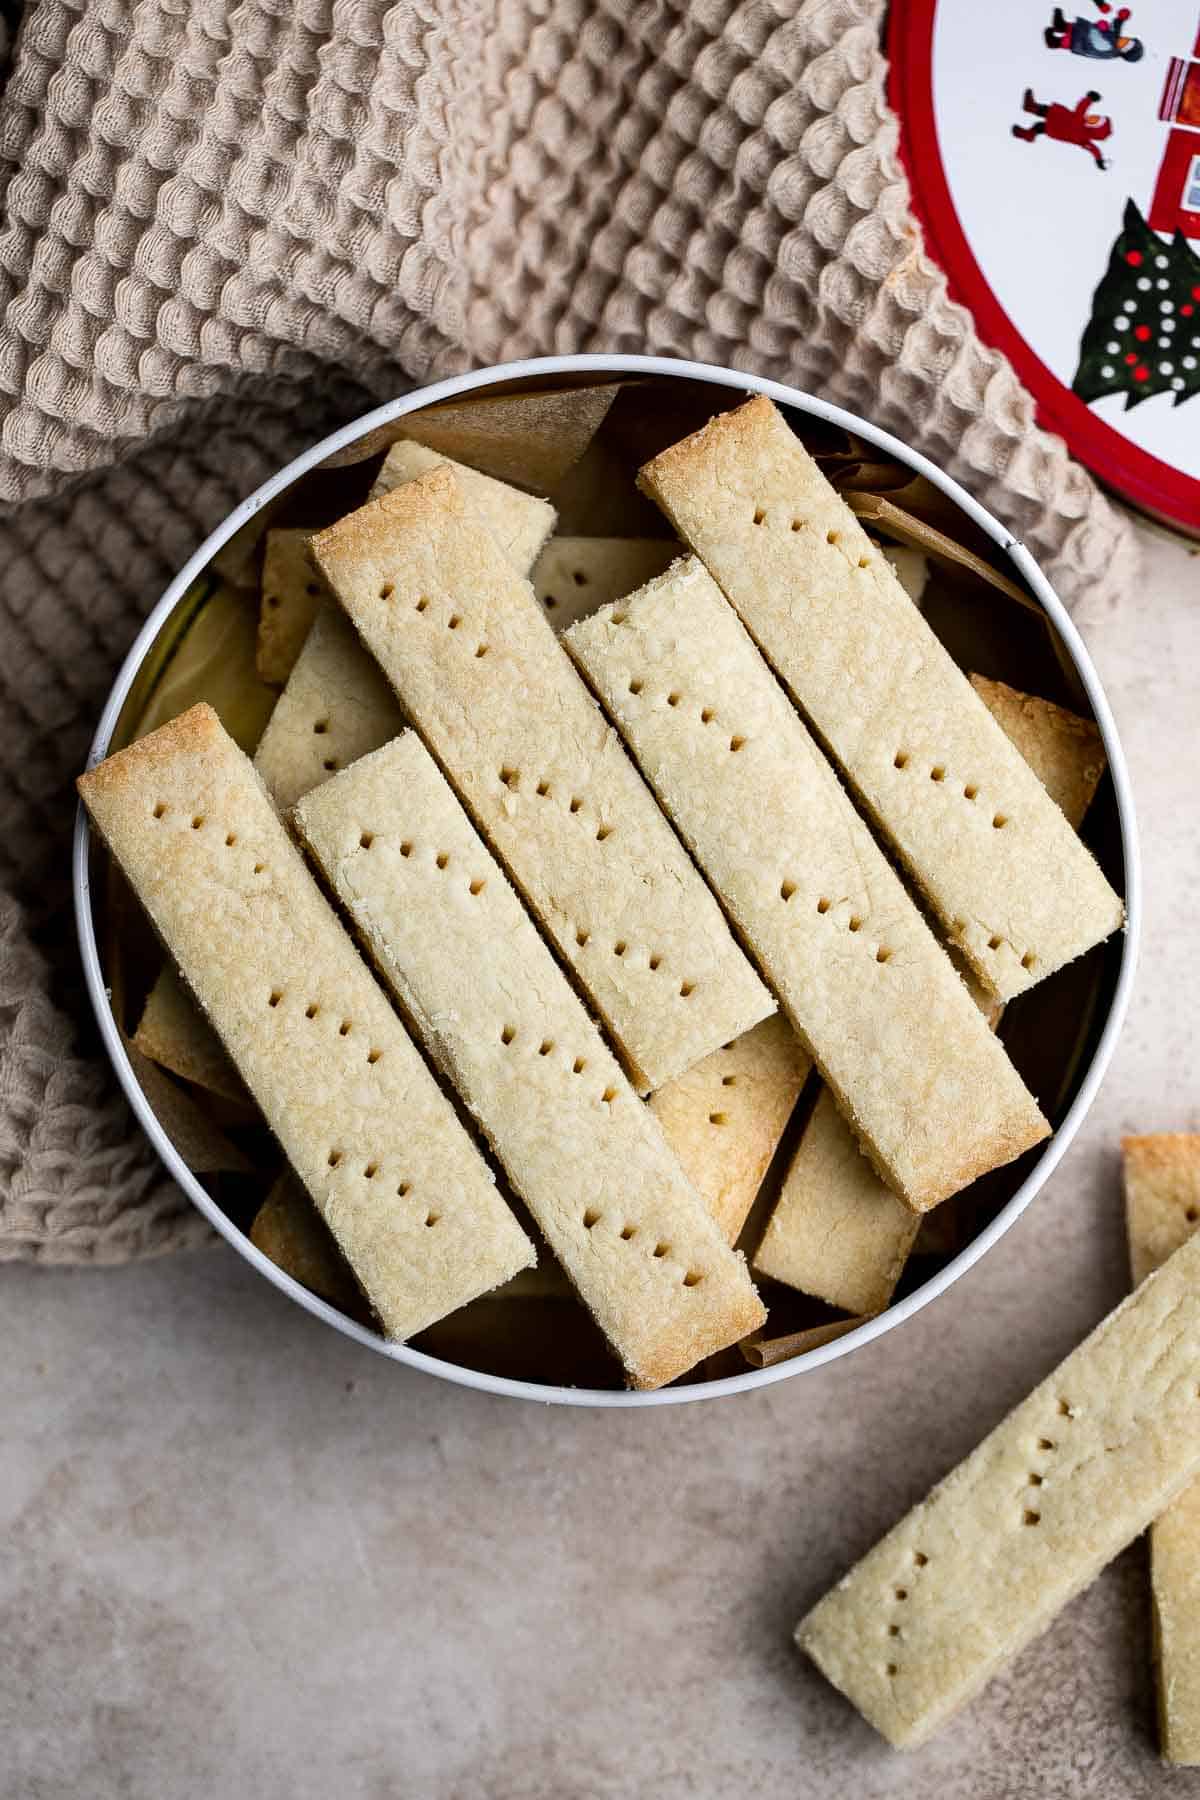
FAQ
No, lemon sorbet is not ice cream. While both are frozen desserts, the main difference lies in the ingredients. Sorbet is made with fruit juice, sugar, and water, and contains no dairy or fat. Ice cream, on the other hand, is made with cream or milk, and often includes egg yolks for a rich, creamy texture. Sorbet is much lighter and more refreshing, making it a great alternative for those seeking a dairy-free or lower-fat treat.
Yes, lemon sorbet is healthier than ice cream as it is dairy-free, lower in fat, and made with fewer ingredients. While ice cream is rich in calories and dairy, sorbet provides a lighter, more refreshing option that is typically lower in sugar and fat. For those looking to reduce dairy intake or avoid heavy desserts, sorbet is an excellent alternative.
Lemon sorbet has a bright, tangy, and refreshing taste that's both sweet and tart. The lemon provides a zesty burst of flavor, while the sugar balances out the tartness for a satisfying finish. The turmeric adds a subtle, earthy undertone, enhancing the flavor without overpowering the lemon. It's a clean and crisp dessert that's perfect for a refreshing treat on a warm day.
Lemon sorbet is a dairy-free dessert made from lemon juice, sugar, and water. It has a smooth, icy texture and is very refreshing. Lemon sherbet, however, contains a small amount of dairy, which gives it a creamier texture. The presence of dairy in sherbet makes it taste richer, while sorbet is usually more vibrant and tart due to the absence of cream or milk.
Sorbet can be a great substitute for ice cream, especially for people with dietary restrictions such as lactose intolerance or those following a vegan diet. Sorbet has a refreshing, fruit-forward flavor and is lighter than ice cream. While it doesn't have the creamy richness of ice cream, it offers a smooth, sweet alternative that is equally satisfying. Sorbet is also lower in calories and fat compared to traditional ice cream.
Sorbet generally contains less sugar than ice cream. Since sorbet does not require the added sweetness of dairy and fat, it tends to be lower in sugar content. However, the sugar levels can still vary depending on the recipe and any added ingredients. If you're looking for a lighter, less sugary option, sorbet is a great choice compared to ice cream, which requires sugar to balance out the creaminess of the dairy.
No, dogs should not consume lemon sorbet. The lemon and sugar content can upset a dog's stomach, and the turmeric, while safe in small amounts, may not be ideal for all pets. Additionally, sorbet often contains artificial sweeteners or other ingredients that are not safe for dogs. Always stick to dog-safe frozen treats that are designed specifically for their dietary needs.
Lemon and turmeric are both incredibly healthy ingredients packed with benefits. Lemons are rich in vitamins, minerals, and antioxidants, known to support skin, hair, and teeth health, while also helping to prevent diabetes, high blood pressure, constipation, fever, and indigestion. They also have cancer-fighting properties.
Turmeric, a powerful antioxidant, is proven to fight against various diseases such as arthritis, Alzheimer's, ulcers, and cancer. Regular consumption of turmeric can also help regulate blood pressure, lower cholesterol levels, and boost the immune system. Combining these two superfoods in this sorbet not only makes it refreshing but also nourishing for your body.
More Sorbet Recipes
Looking for other recipes like this? Try these:

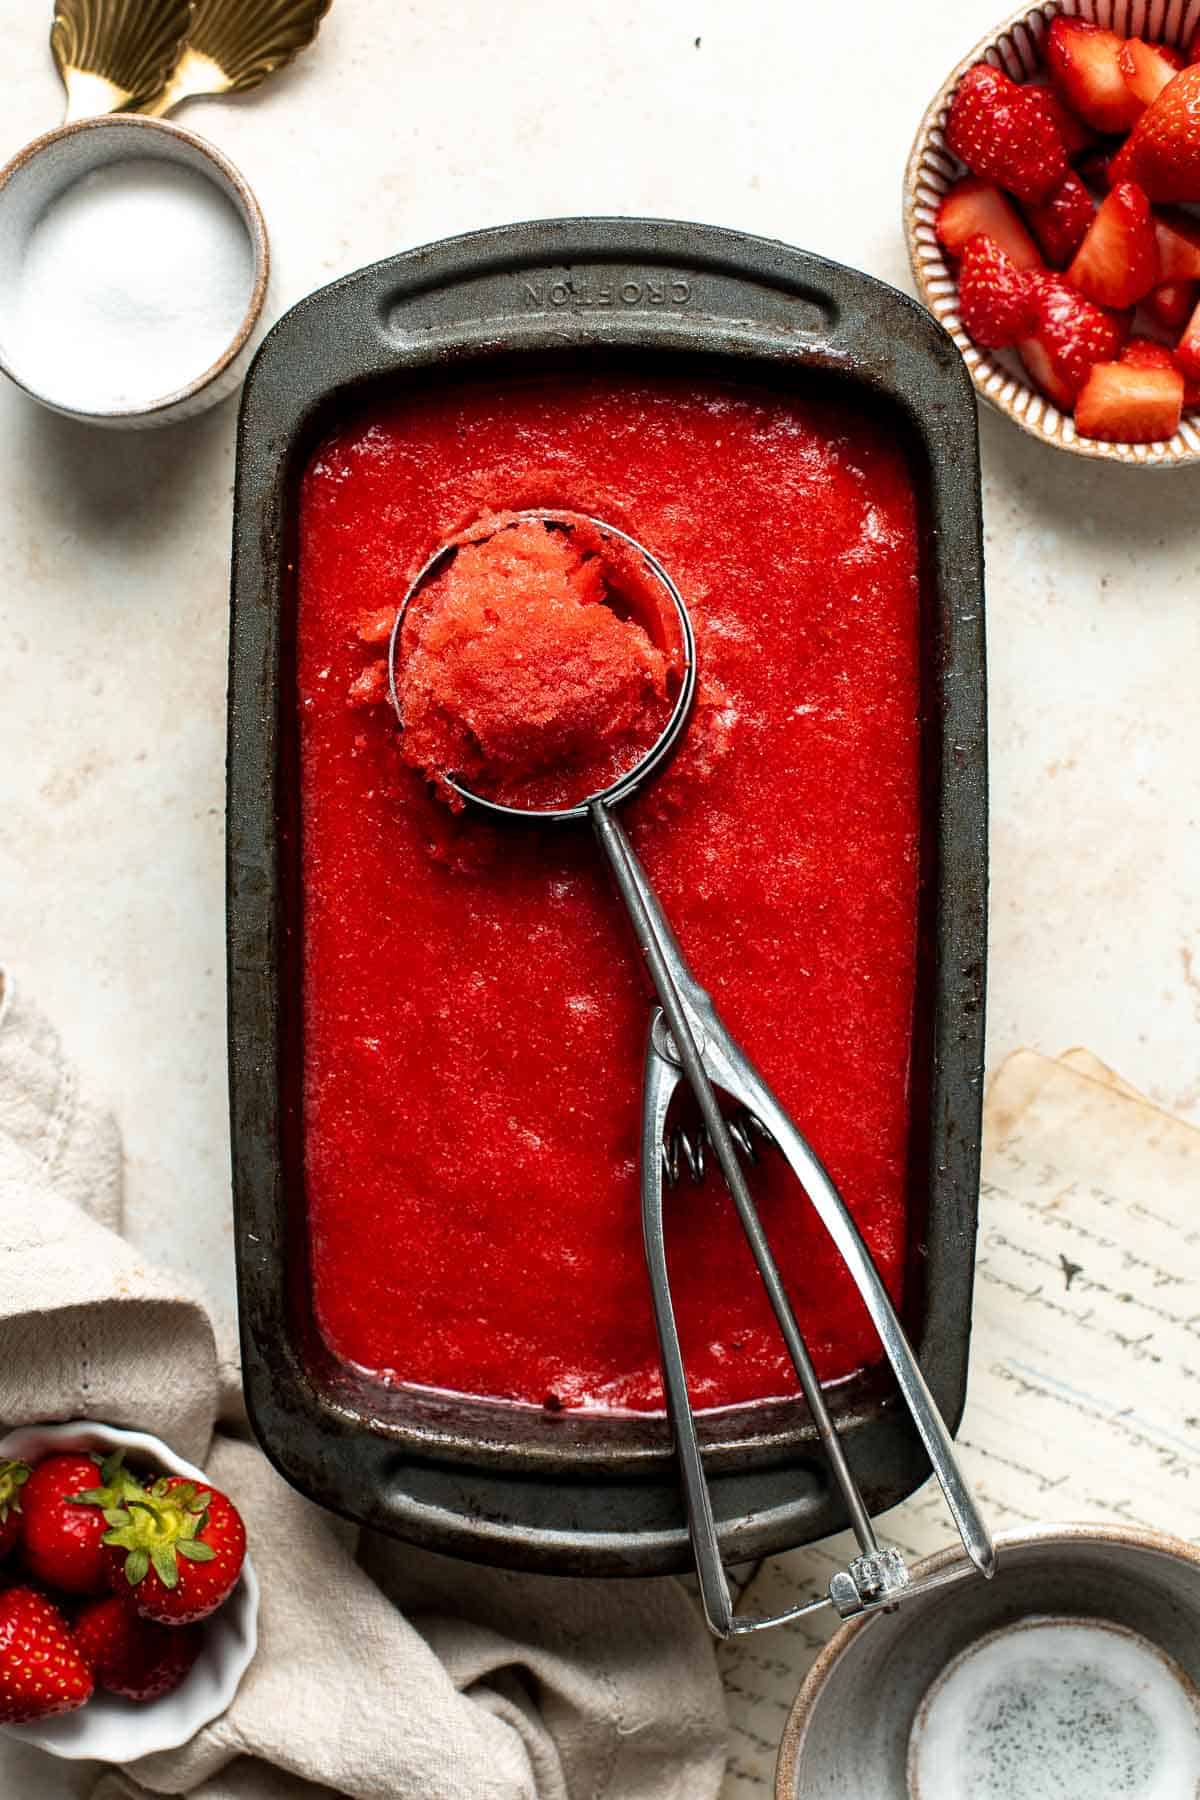

Tried this recipe?
I'd love to hear what you think! Leave a comment and rating below to share your feedback. Your reviews help others discover this recipe and help me keep creating more free recipes for you. Snap a photo and tag me on social media @aheadofthyme too.
This post was originally published in 2018 and was completely updated with new photos and written content.

Easy Creamy Corn Pasta
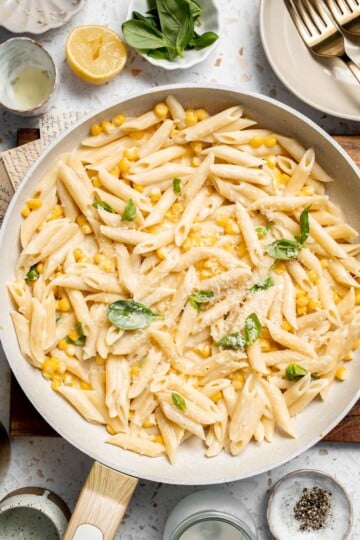
This Easy Creamy Corn Pasta is a simple, flavorful dish that's perfect for weeknight dinners or summer gatherings. Tender pasta is tossed in a rich, velvety cream sauce with sweet corn, Parmesan cheese, and fresh basil for a fresh yet comforting bite in every forkful.

This dish is incredibly versatile - it works beautifully with fresh corn at the peak of summer or frozen corn for a quick, cozy meal any time of year. It comes together in just 20 minutes and pairs well with salads, grilled vegetables, or crusty bread for a complete meal.
If you liked this recipe, you'll want to try our Lemon Ricotta Pasta or Cauliflower Alfredo next.

Why You'll Love This Recipe
- Quick weeknight dinner. Ready in just 20 minutes, this fresh corn pasta is perfect for busy evenings when you want something satisfying without hours in the kitchen.
- Fresh, bright flavors. The combination of sweet corn, lemon, and fresh basil adds a refreshing twist to classic creamy pasta, making it feel light yet indulgent.
- Works year-round. Whether you use fresh summer corn or frozen corn in the winter, this creamy corn pasta with basil is always delicious and easy to make.
- Customizable and versatile. Add extra veggies, swap cheeses, or include a protein like grilled chicken or shrimp to make this summer corn pasta recipe your own.
Ingredients and Substitutions

To make this delicious creamy corn pasta, you will need the following ingredients (see recipe card below for quantities):
- pasta - We used penne pasta because it holds sauce well. Substitute with rigatoni, fusilli, or spaghetti if preferred.
- butter - Adds richness to the sauce. You can use olive oil for a slightly lighter flavor.
- flour - Helps thicken the sauce. Substitute with gluten-free all-purpose flour if needed.
- garlic - Freshly minced garlic adds depth. Garlic powder works in a pinch.
- corn - Fresh or frozen corn kernels both work. If using fresh, either slice kernels off raw for a crisp, fresh taste (they'll cook lightly in the sauce) or boil the cobs first for a softer, cooked flavor.
- heavy cream or half-and-half - Heavy cream yields a richer sauce. Half-and-half works for a lighter version.
- lemon juice - Brightens the flavor. Fresh is best.
- Parmesan cheese or pecorino cheese - Parmesan is classic; Pecorino adds a sharper, saltier edge.
- salt and pepper - For seasoning to taste.
- fresh basil - Adds a burst of freshness. Substitute with parsley if preferred.
Equipment
You'll also need measuring cups and spoons, a large pot for boiling pasta, a large skillet, a whisk, and tongs or a spoon for tossing pasta.
Instructions
- Cook the pasta. Bring a large pot of salted water to a boil over medium-high heat. Add the pasta and cook until al dente, about 8-10 minutes or according to package directions. Reserve ½ cup pasta water, then drain and set aside.


- Start the sauce base. In a large skillet, melt the butter over medium heat until sizzling, about 1 minute. Whisk in the flour and cook for 1 minute to remove any raw flavor.

- Add garlic and corn. Stir in the garlic and corn, cooking for about 2 minutes until fragrant and the corn begins to soften.


- Build the creamy sauce. Pour in the heavy cream, lemon juice, and ¼ cup reserved pasta water. Stir constantly over medium heat for about 1 minute until smooth and slightly thickened.


- Add cheese. Add Parmesan cheese and stir until melted. For a looser sauce, add more pasta water as needed.


- Season and combine. Season with salt and pepper to taste. Add the drained pasta and fresh basil to the skillet, tossing until well coated.


- Serve. Garnish with extra Parmesan and fresh basil if desired. Serve immediately while warm and creamy.

Top Tip: Reserve Your Pasta Water
Don't skip saving some of your pasta water! The starchy liquid is the secret to achieving a silky, restaurant-quality sauce that clings beautifully to the pasta. Add it gradually while tossing the pasta with the sauce to loosen the consistency and create a glossy, creamy finish.
More Tips and Tricks
- Salt the pasta water generously. This seasons the pasta from the inside out and enhances the overall flavor of the dish.
- Use fresh lemon juice. Freshly squeezed lemon juice keeps the sauce bright and balanced against the richness of the cream.
- Taste before serving. Adjust seasoning, cheese, and lemon to taste right before serving for perfect flavor balance.
Recipe Variations
- Add protein. Grilled chicken, shrimp, or crispy pancetta all work beautifully with the creamy sauce.
- Add more veggies. Spinach, mushrooms, zucchini, or roasted red peppers make great additions for color and nutrition.
- Try a different cheese. Pecorino Romano, Asiago, or a blend of cheeses can change the flavor profile.
- Spicy twist. Add a pinch of red pepper flakes or diced jalapeños to the sauce for a gentle heat that balances the creamy richness.
- Herb upgrade. Swap basil for fresh tarragon, thyme, or chives to give the dish a different herbal note and more complexity.
- Roasted corn flavor. Char or roast the corn before adding it to the sauce to deepen its sweetness and add a smoky flavor.

Storage
How to Store
Store leftovers in an airtight container in the refrigerator for up to 3 days.
How to Reheat
Reheat gently on the stovetop over low heat, adding a splash of cream or pasta water to loosen the sauce.
How to Freeze
Freeze sauce and pasta separately in airtight containers for up to 2 months. Thaw in the fridge before reheating.
How to Serve
This easy pasta is delicious served on its own, or paired with a salad, veggies, and some crusty bread.
These are my favorite dishes to serve with this easy creamy corn pasta:

Side Dishes for Pasta
For more recipe ideas, check out our collection of pasta side dishes, featuring everything from fresh salads and roasted vegetables to crusty breads and flavorful appetizers that pair perfectly with any pasta dinner.
FAQ
Yes. You can make the sauce ahead and store it separately in an airtight container in the fridge for up to 2 days. When ready to serve, combine with freshly cooked pasta and a splash of pasta water or cream to refresh the texture and flavor.
To make your pasta sauce creamier, use heavy cream or add an extra splash of pasta water as it cooks to emulsify with the cheese. Stirring Parmesan in gradually while tossing the pasta also helps achieve a velvety consistency. This creates a smooth, luscious coating on every strand of pasta.
A classic cream sauce typically includes a dairy base (such as cream or milk), butter, and flour to thicken. Parmesan or Pecorino cheese is often added for flavor. Many variations also include garlic, herbs, or citrus for brightness. The beauty is in its simplicity and adaptability.
Adding grilled chicken, shrimp, or crispy pancetta are excellent ways to boost the protein in creamy corn pasta. For vegetarian options, white beans or chickpeas add protein while keeping it meat-free. All pair well with the creamy corn, basil, and Parmesan flavors in the sauce.
Lemon juice brightens and balances the richness of the cream sauce, preventing it from tasting too heavy. It also enhances the natural sweetness of the corn and makes the basil taste fresher. A small squeeze can transform the overall flavor, making it more vibrant and layered.
More Pasta Recipes
Looking for other recipes like this? Try these:
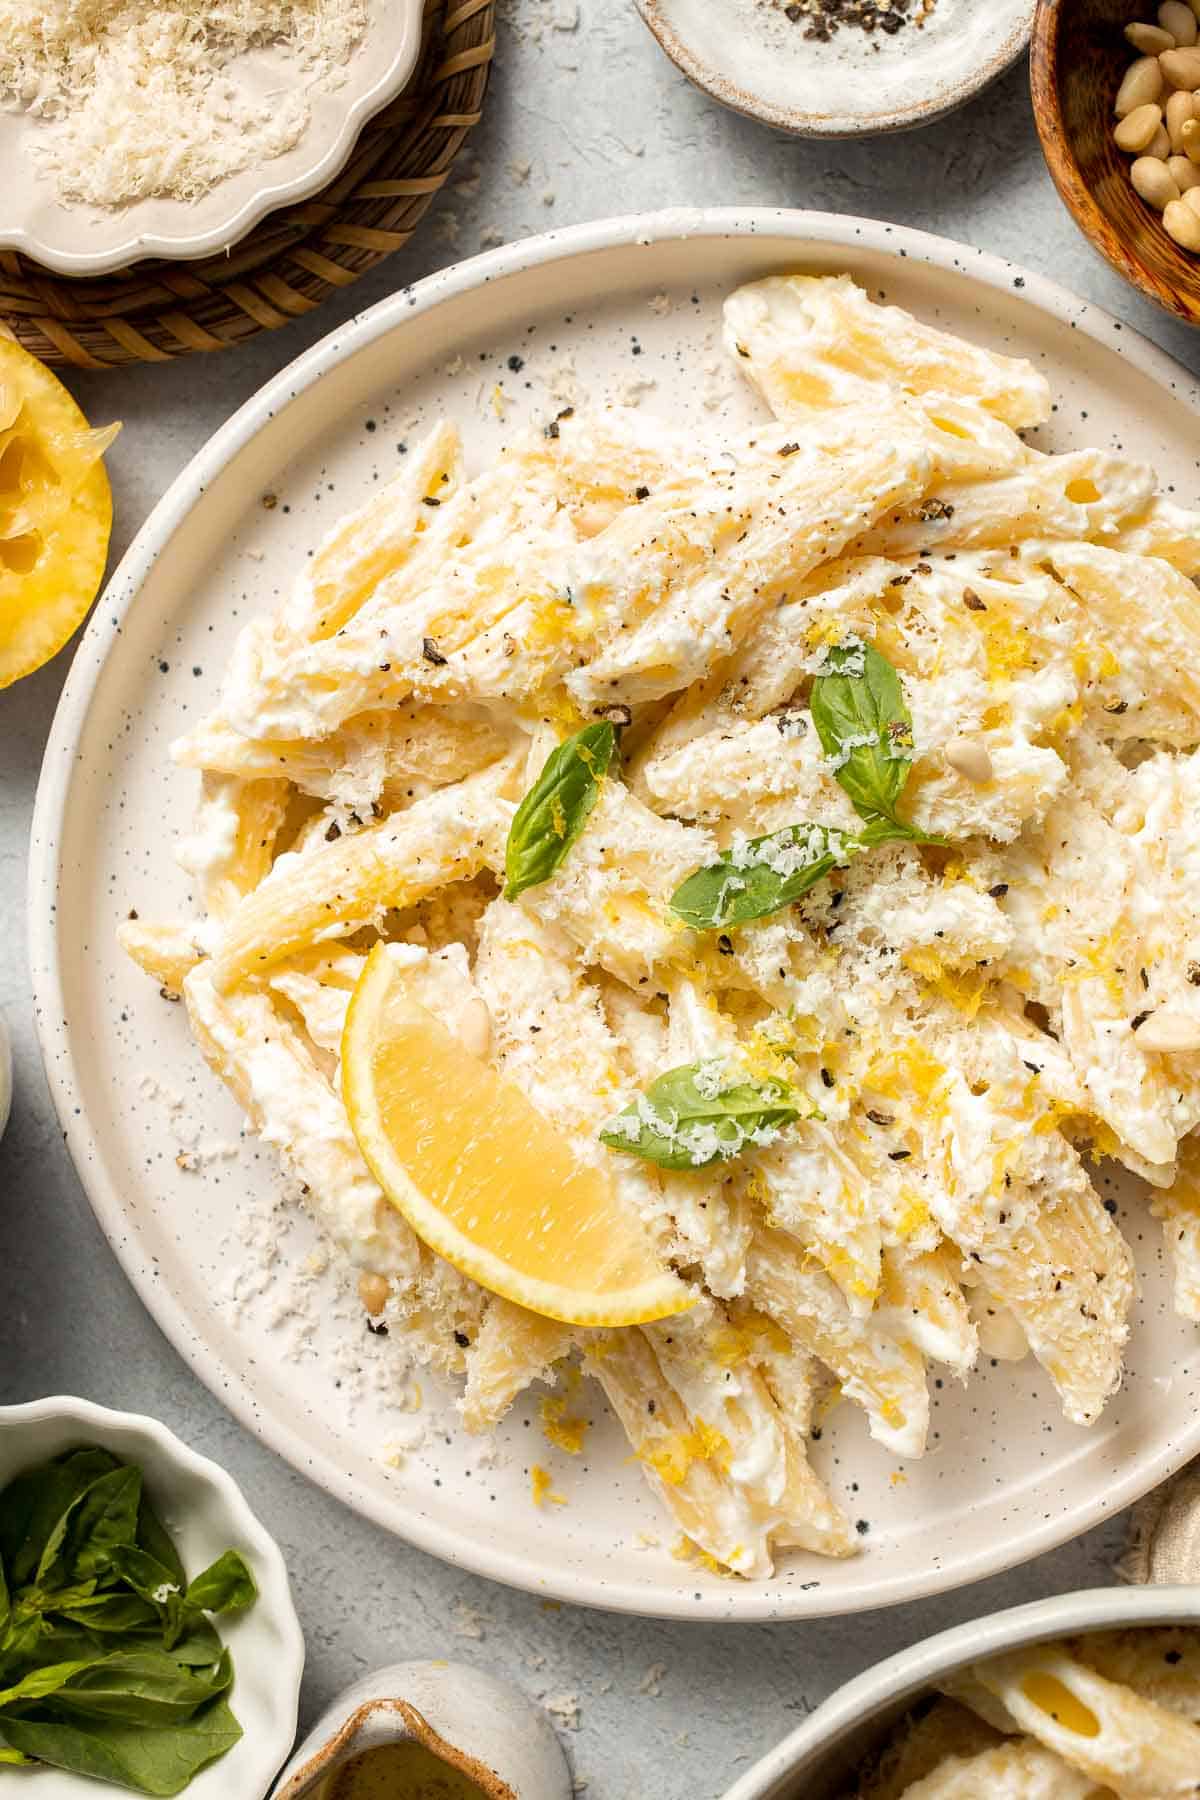
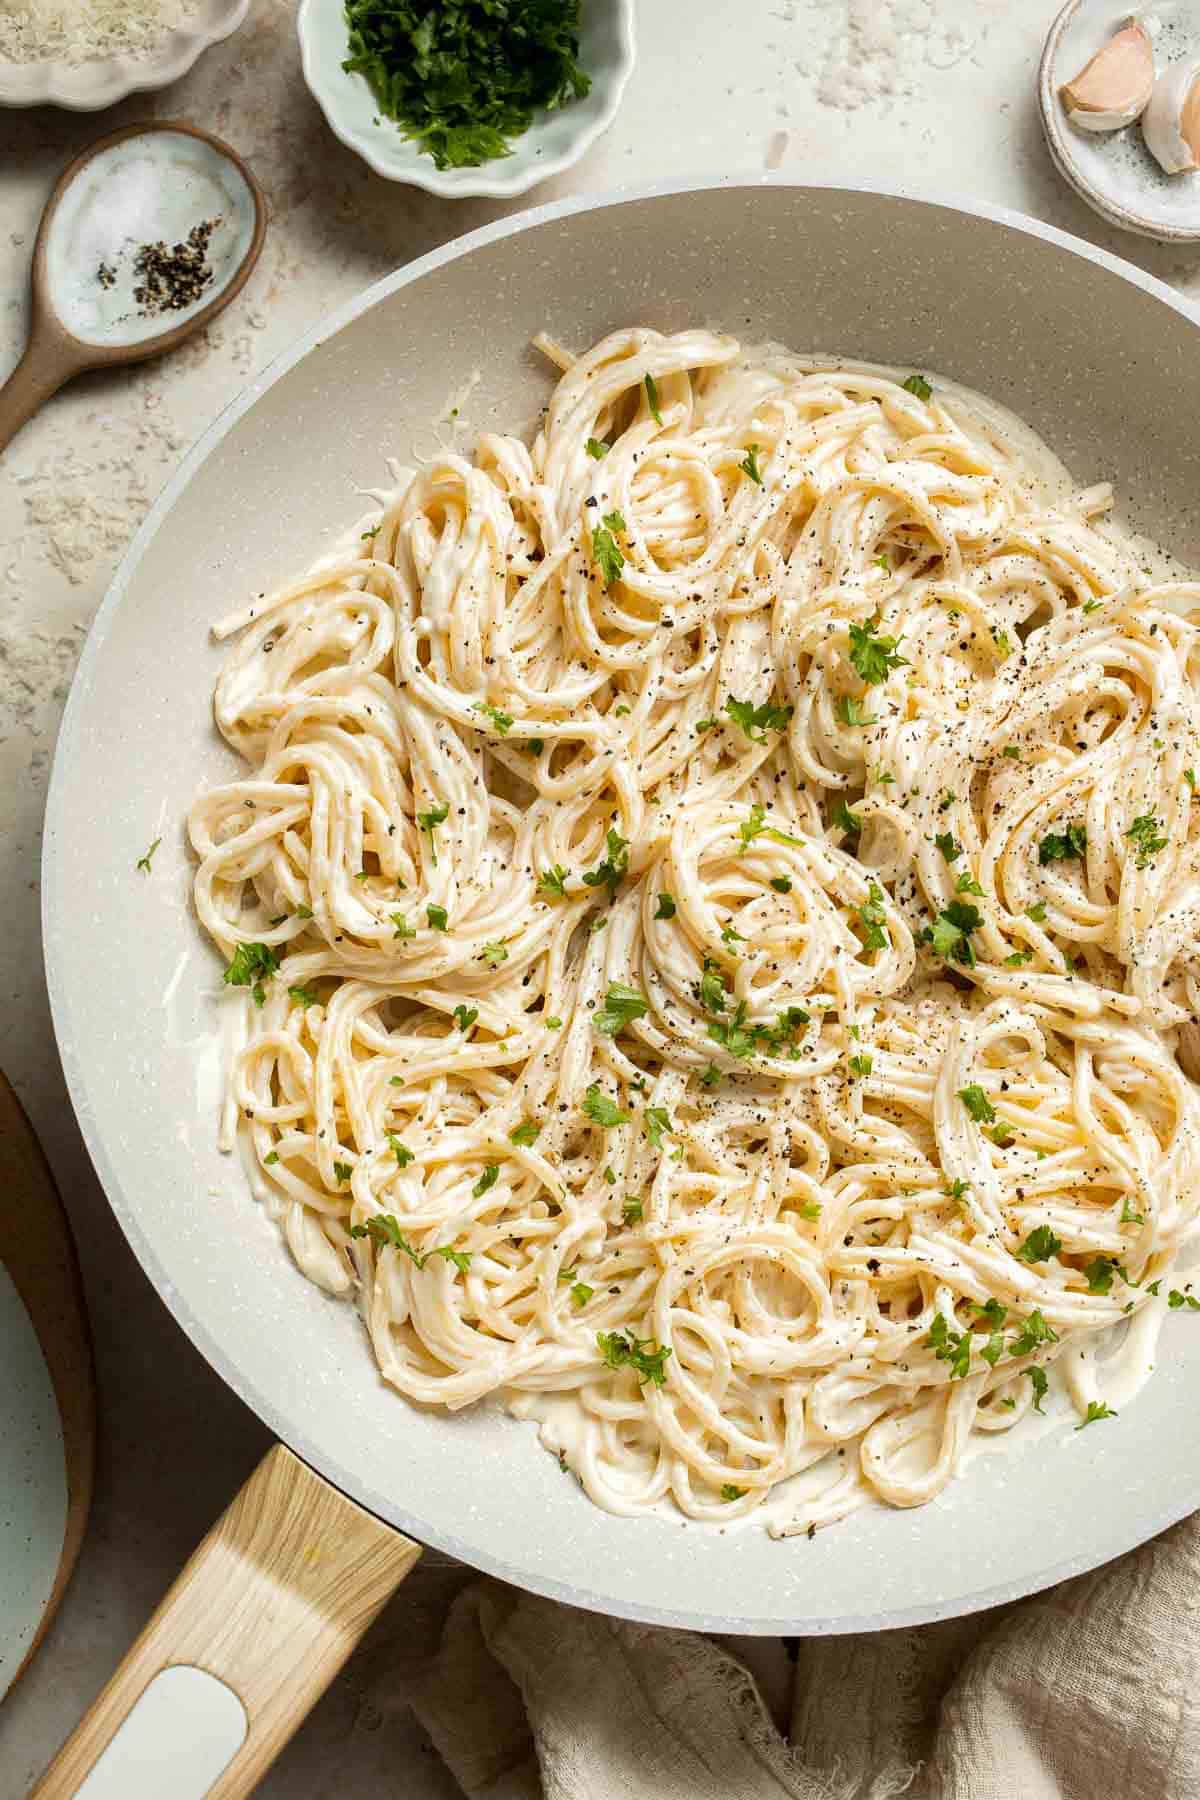
Tried this recipe?
I'd love to hear what you think! Leave a comment and rating below to share your feedback. Your reviews help others discover this recipe and help me keep creating more free recipes for you. Snap a photo and tag me on social media @aheadofthyme too.

Joojeh Kabob (Persian Chicken Kebabs)
Joojeh Kabob (Persian Chicken Kebabs) is a quick, flavorful, and classic dish that brings the vibrant flavors of Persian cuisine straight to your table. Juicy chicken pieces are marinated in a fragrant blend of saffron, lemon juice, yogurt, and olive oil, then grilled until tender and golden.

This dish is a beloved staple in Persian cooking and holds a special place at family gatherings, holidays, and celebrations. It's especially popular during spring and summer, when outdoor grilling is in full swing, but it's just as delicious any time of year. You can prepare it on the grill for a smoky char, in the oven for a convenient weeknight dinner, or even in the air fryer for a quick and easy twist.
Whether you're an experienced cook or making Persian food for the first time, this recipe is approachable, reliable, and turns out beautifully every time.
If you like this recipe, then you will love my Balsamic Chicken Kabobs and Greek Chicken Souvlaki Skewers also.

Why You'll Love This Recipe
- Authentic flavor. Made with saffron, lemon juice, and yogurt, these kebabs deliver the traditional flavor of Persian cuisine, just like at your favorite restaurant. Every bite captures the depth and aroma of classic Iranian flavors.
- Juicy and tender. The yogurt and saffron marinade works its magic by keeping the chicken moist and tender. Each piece of joojeh kabab turns out succulent and bursting with flavor, making it a standout main course.
- Quick and easy to make. With a simple, flavorful marinade and short grilling time, this dish is ready in about 30 minutes once marinated. It's ideal for busy nights, weeknight dinners, or last-minute entertaining.
- Versatile cooking options. Grill outdoors for a smoky char, use an indoor grill pan for convenience, or bake in the oven or air fryer for ease. No matter the method, these kebabs turn out delicious, juicy, and full of authentic flavor.
Ingredients and Substitutions
To make this delicious Joojeh Kabob, you will need the following ingredients (see recipe card below for quantities):
- chicken breasts - Boneless and skinless chicken breasts (approximately 6 breasts) cut into 1.5-inch pieces. This will give about 8-10 skewers, with 4-5 pieces of chicken on each skewer. You can also use boneless chicken thighs for a juicier texture.
- saffron - Using a high quality Persian saffron is key for the best flavour and colour. You can use saffron powder or grind down saffron threads into a powder yourself using a mortar and pestle. Grinding the threads into a powder yourself gives the freshest flavour.
- lemon juice - Freshly squeezed lemon juice is best, but bottled lemon juice will work fine too.
- yogurt - Full-fat plain yogurt is best, but you can also use low-fat yogurt or Greek yogurt also.
- olive oil - Use extra virgin olive oil for rich flavor. Avocado oil works as an alternative.
- onions - Yellow or white onions both work well.
- salt - Adjust to taste.
Equipment
You will also need measuring cups and spoons, mixing bowl, wooden or metal skewers, tongs for grilling, and either an grill, indoor grill pan, or oven.
Instructions

Marinate the chicken
In a large mixing bowl, combine chicken, onions, Greek yogurt, olive oil, lemon juice, salt, and saffron powder. Toss well until the chicken is evenly coated in the marinade. Cover the bowl with plastic wrap (or a lid) and refrigerate for at least 1 hour, or overnight for deeper flavor.

Skewer the chicken
Thread the marinated chicken pieces onto skewers, about 4-5 pieces per skewer.

Grill the skewers
Lightly brush olive oil over a grill pan or outdoor grill. Preheat over medium-high heat for 5 minutes until the oil shimmers. Place skewers evenly apart on the grill and cook for 8-10 minutes per side, or until the internal temperature reaches 165°F as read on a meat thermometer. Avoid overlapping the skewers to ensure even cooking.

Serve
Transfer the skewers to a plate and serve hot with basmati rice with saffron, grilled tomatoes, and Shirazi salad.
How to Make Joojeh Kabob in the Oven
Arrange the Persian chicken skewers on a baking sheet lined with foil or parchment paper. Roast at 480°F for 12-13 minutes, or until the internal temperature reaches 165°F. For a touch of smoky char, switch the oven to broil on high and cook for an additional 1 minute. Keep a close watch during broiling, as the chicken can brown quickly.
How to Make Joojeh Kabob in the Air Fryer
Skip threading the chicken onto skewers and place about 10 marinated pieces in a single layer in the air fryer basket. Cook at 350°F for 25 minutes, shaking the basket halfway through for even cooking. While you won't achieve the same charred grill marks as grilling, the chicken turns out incredibly tender, juicy, and full of flavor.

Pro Tip: Marinate as Long as Possible
It is crucial to let the chicken marinate at least for an hour to allow the flavours to infuse and for it to get juicier. However, if you are able to let it marinate even longer (4-8 hours), it will deepen the flavor more and make the chicken even more tender.
More Tips and Tricks
- Use fresh saffron. Freshly ground saffron threads release more aroma and vibrant color than pre-ground saffron powder.
- Soak wooden skewers. If using wooden skewers (such as bamboo skewers), soak in water for at least 30 minutes to prevent burning during grilling.
- Preheat your grill. A hot grill ensures beautiful grill marks and a quick sear to lock in juices.
- Don't overcook. Grill until the chicken is just cooked through (internal temp of 165°F as read on a meat thermometer). Overcooking will dry it out.
- Use a digital thermometer. A digital meat thermometer is very useful when grilling skewers for checking doneness. Simply insert halfway inside the meat to get a quick reading so that you never end up with undercooked or overcooked meat.
Recipe Variations
- Bone-in option. Use bone-in chicken pieces for extra flavor. Bone-in chicken takes longer to cook so you will have to adjust the cooking time accordingly.
- Add vegetables. Thread bell peppers, onions, or zucchini onto the skewers for a colorful, complete meal. See our Balsamic Chicken Kabobs for ideas.
- Spicy variation. Add a pinch of cayenne pepper or chili flakes to the marinade for a kick.
Storage
How to Store
Cool completely and store leftovers in an airtight container in the fridge for up to 3 days. I like to unthread the saffron chicken from the skewers for easy reheating.
How to Reheat
Reheat in the oven at 350°F or in an air fryer for a few minutes to restore crispness. You can also reheat unthreaded pieces quickly on a hot skillet or in the microwave.
How to Freeze
Freeze marinated raw chicken in a freezer-safe bag for up to 2 months. Thaw overnight in the fridge before cooking.
How to Serve
Jujeh kabob is delicious served on its own with a side of rice or flatbread (such as lavash bread or pita bread), grilled tomatoes, and a fresh herb platter. A tall glass of doogh also goes very well with this.
These are my favorite dishes to serve with these Persian chicken skewers:
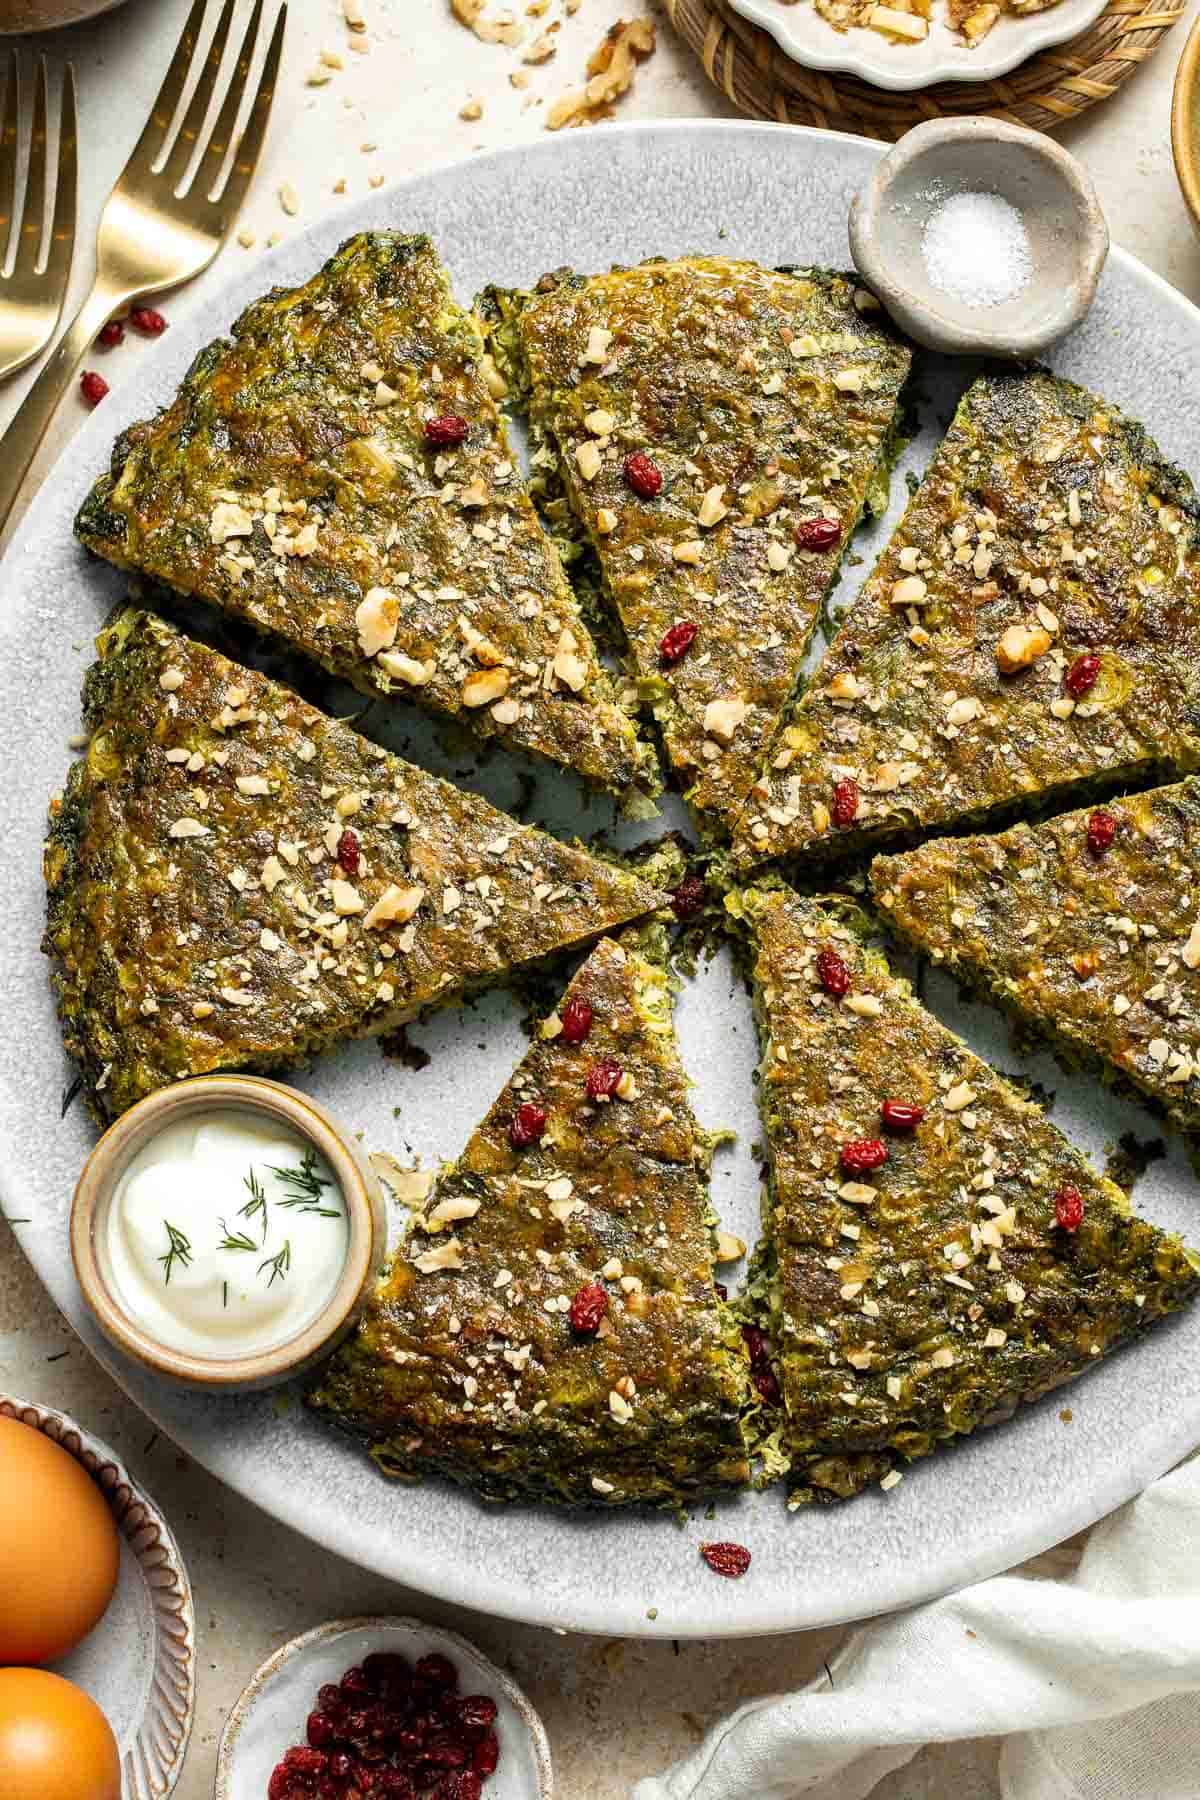

FAQ
Joojeh kabob is a classic Persian dish of saffron-marinated chicken grilled to tender perfection. It's one of the most popular items in Persian cuisine, commonly served at restaurants, weddings, and family gatherings. The marinade of saffron, lemon, and yogurt gives the chicken its signature golden color, juicy texture, and fragrant flavor that sets it apart from other grilled chicken recipes.
In Farsi, "Joojeh" translates to "young chicken" or "chick," referring to the tender chicken used for the kebabs. The dish celebrates simple yet bold Persian flavors and is widely beloved in Iranian cuisine.
Joojeh kabob is savory, aromatic, and slightly tangy, with floral saffron and bright lemon as the star flavors. The yogurt in the marinade adds a subtle tang and keeps the chicken incredibly tender. The final flavor is balanced and complex yet not overpowering, making it a crowd-pleaser that pairs beautifully with rice, salad, or flatbread.
Yes! Joojeh kabob is naturally high in protein and can be made with lean chicken breasts or thighs. The saffron, lemon, and yogurt marinade is light and free from heavy oils or breading. Served with rice and vegetables, it makes a balanced and nourishing meal, perfect for a wholesome lunch or dinner without feeling heavy or greasy.
Absolutely! In fact, marinating the chicken ahead of time (up to 24 hours) allows the flavors to develop and the meat to become more tender. Store the marinated chicken in the fridge until ready to grill. It's an excellent dish for meal prep, dinner parties, or summer barbecues where you want to minimize last-minute cooking.
Yes. While grilling adds a smoky char, you can easily cook joojeh kabob on an indoor grill pan, in the oven, or in an air fryer. Each method offers delicious results, though the flavor will slightly differ without the outdoor grill's smokiness. Oven-baking at 400°F or air frying at 375°F for about 12-15 minutes works well.
More Chicken Skewer Recipes
Looking for other recipes like this? Try these:


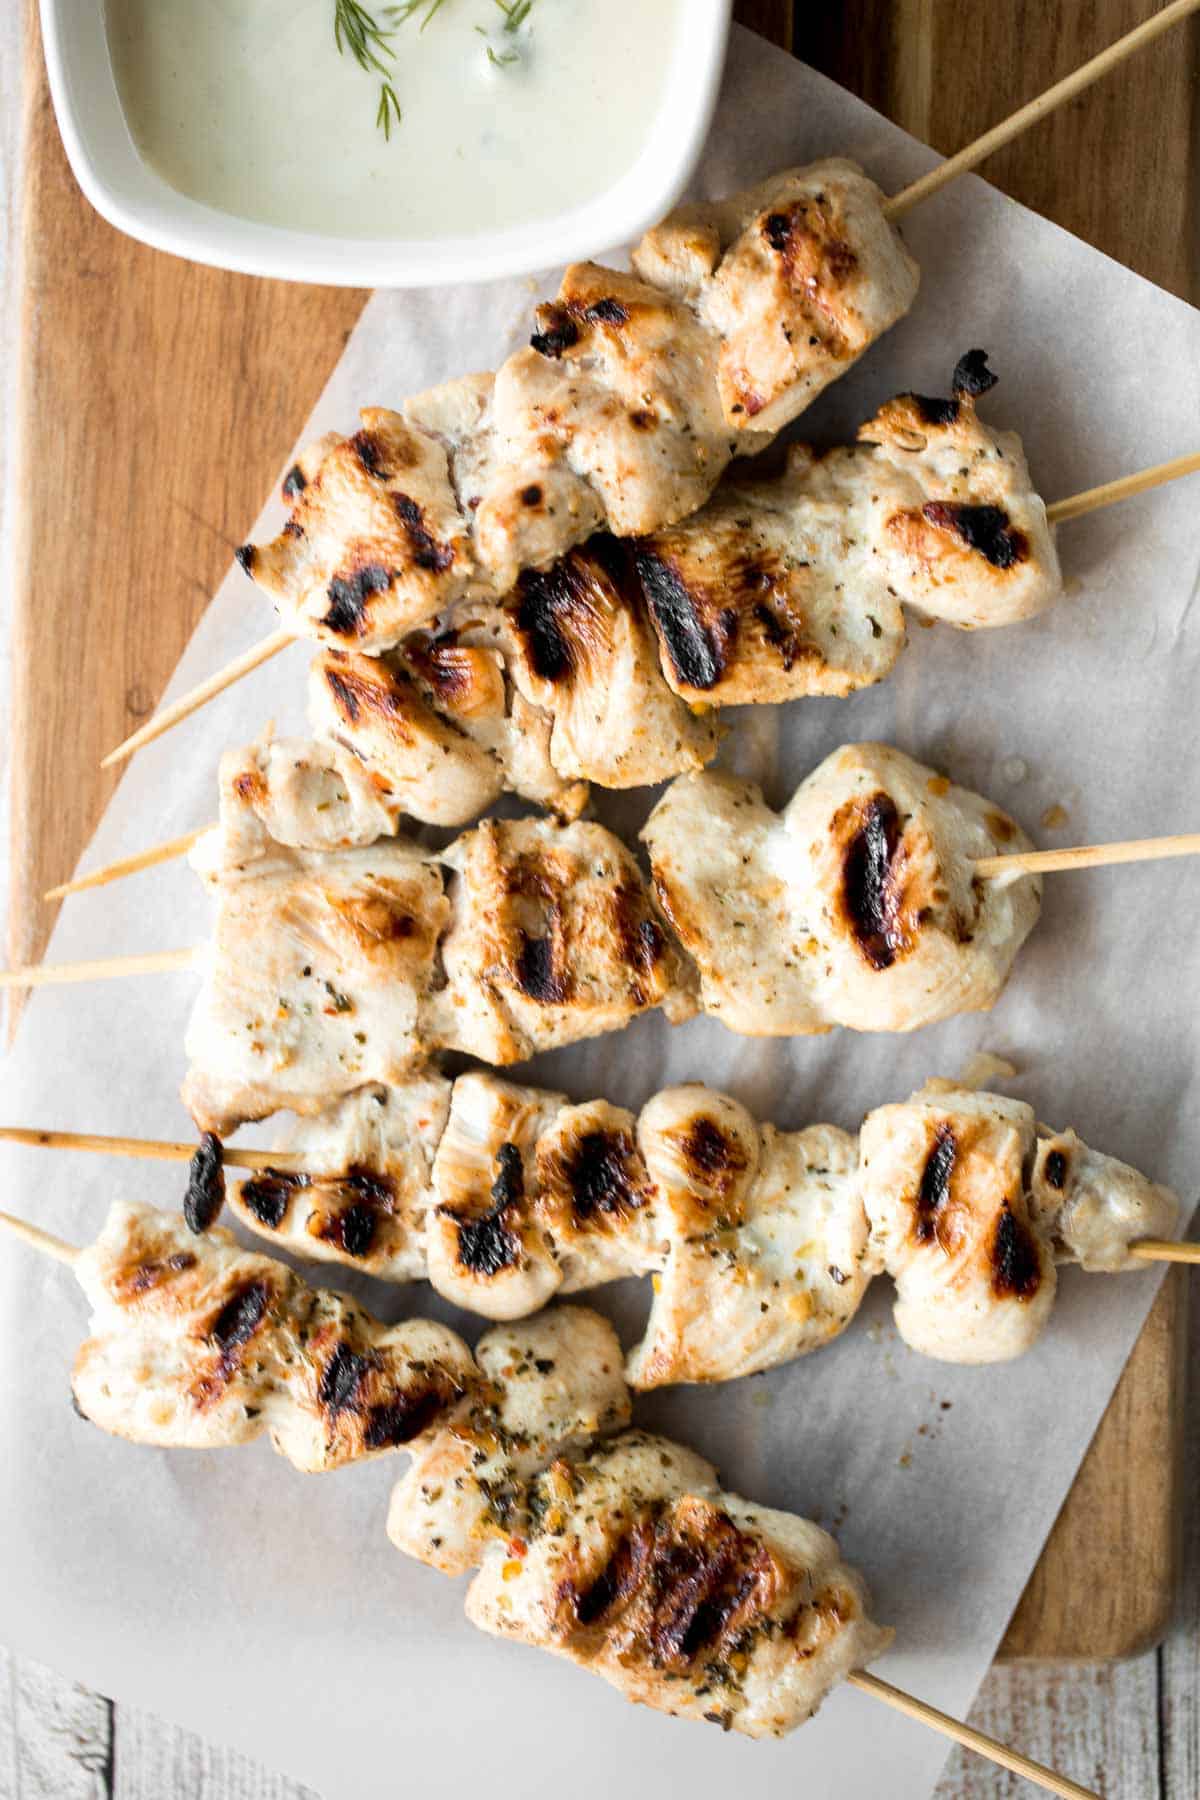
Tried this recipe?
I'd love to hear what you think! Leave a comment and rating below to share your feedback. Your reviews help others discover this recipe and help me keep creating more free recipes for you. Snap a photo and tag me on social media @aheadofthyme too.

- « Previous Page
- 1
- 2
- 3
- 4
- 5
- …
- 40
- Next Page »