
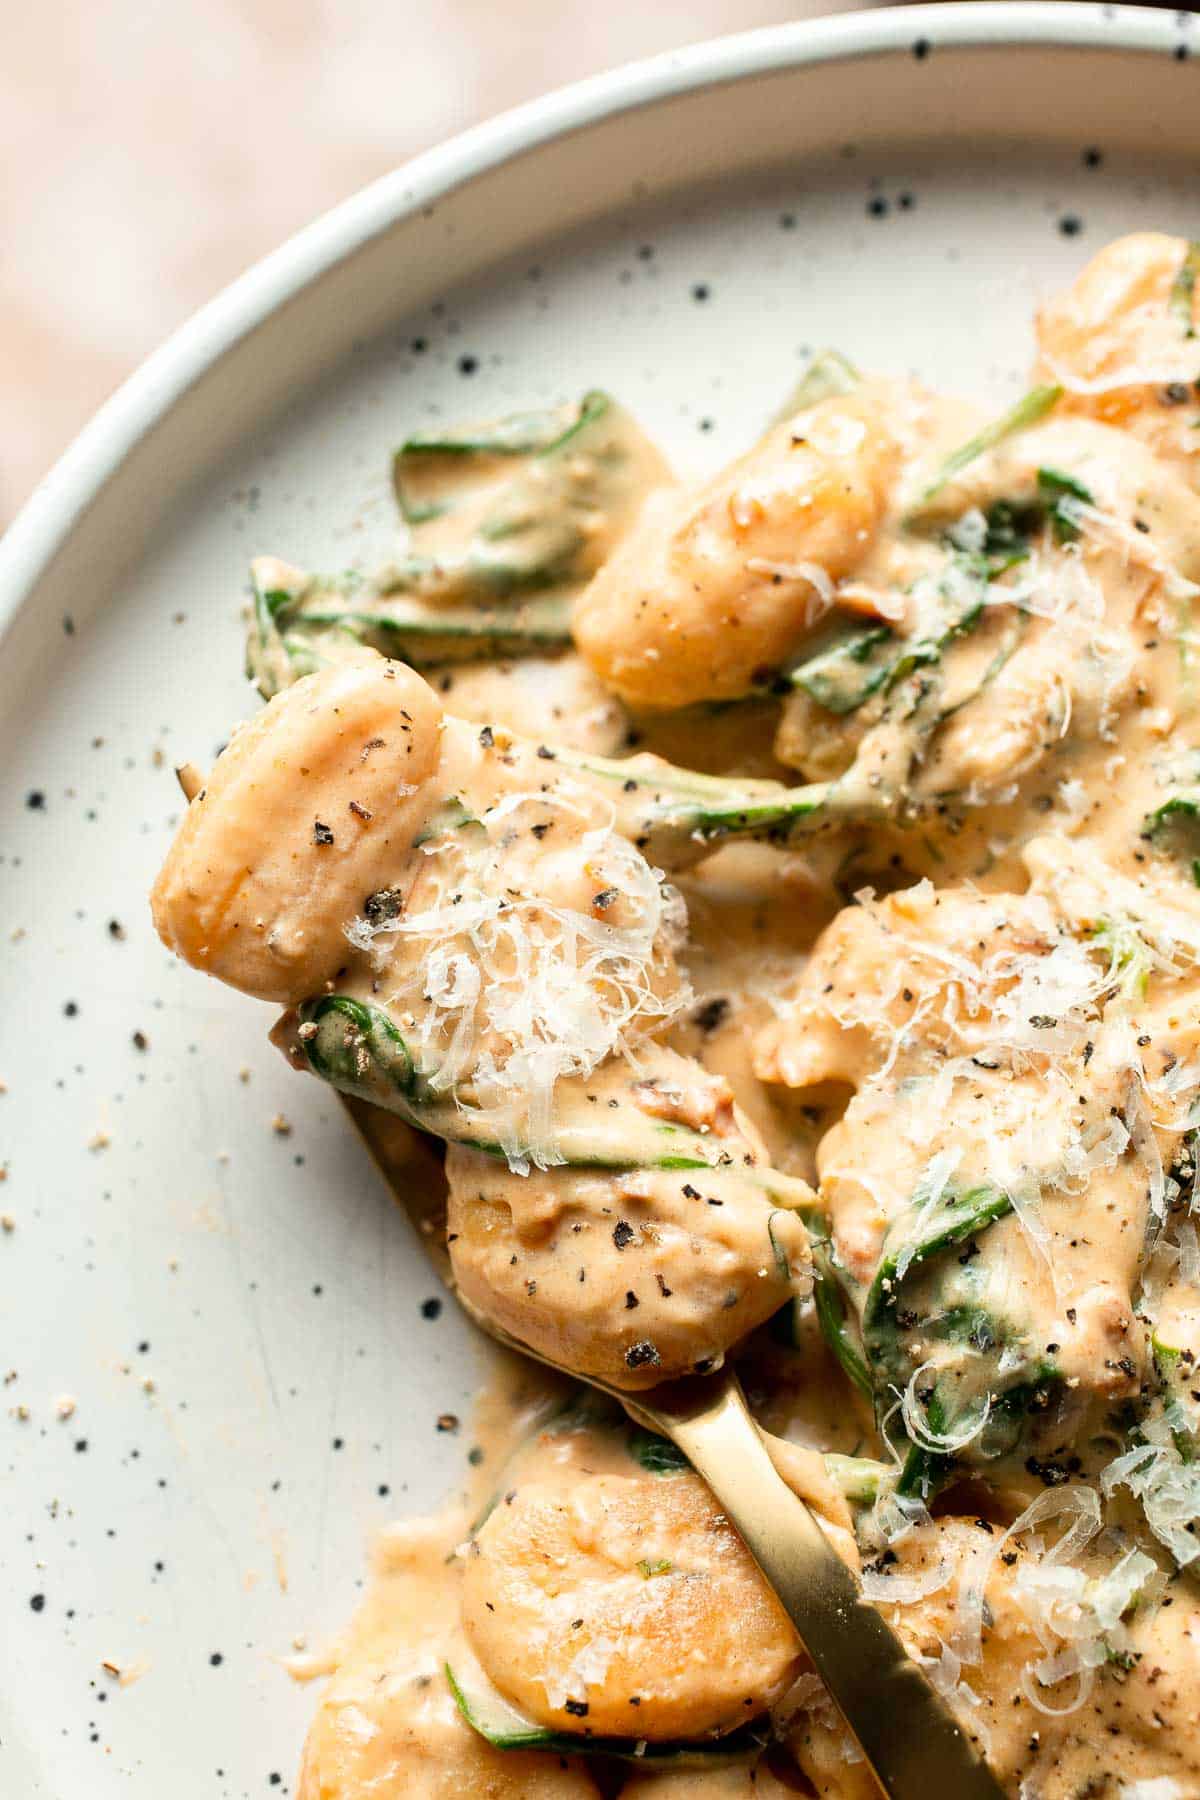
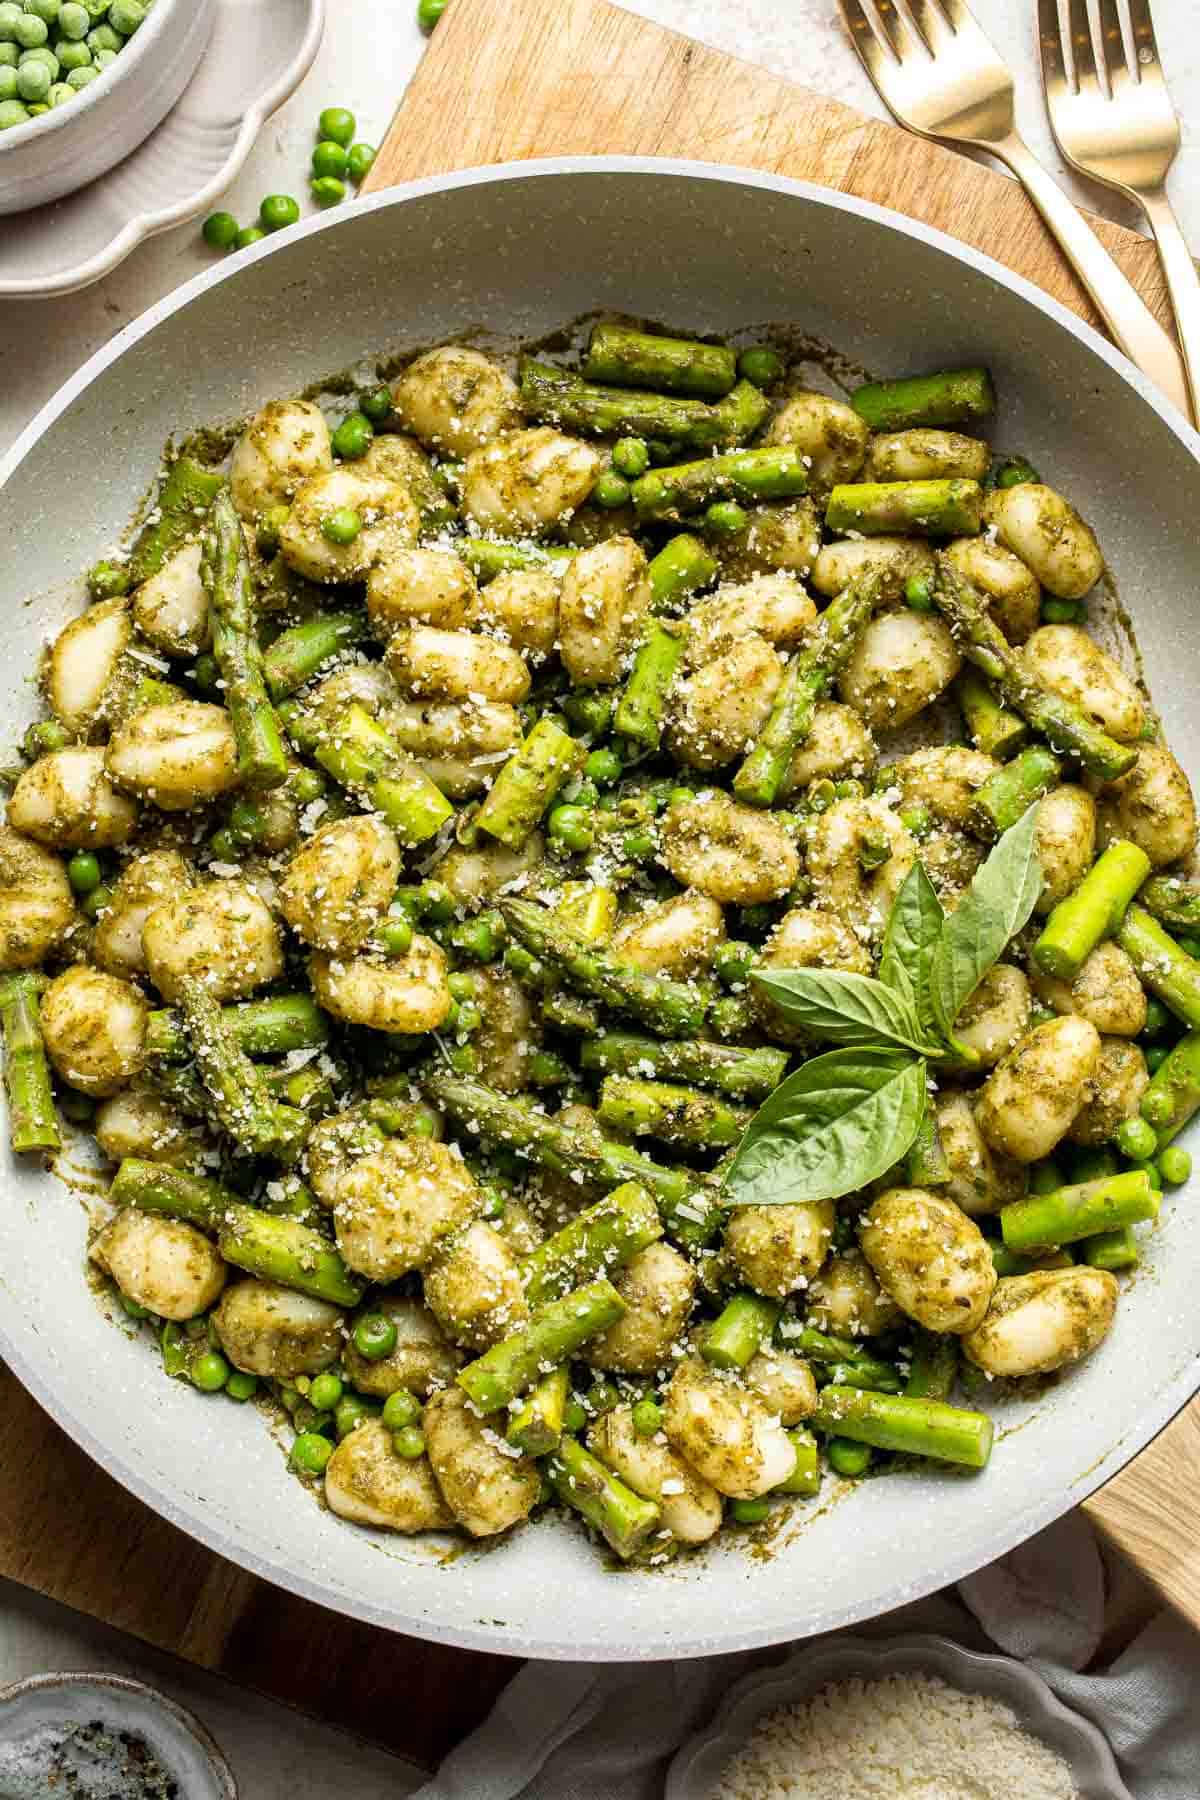
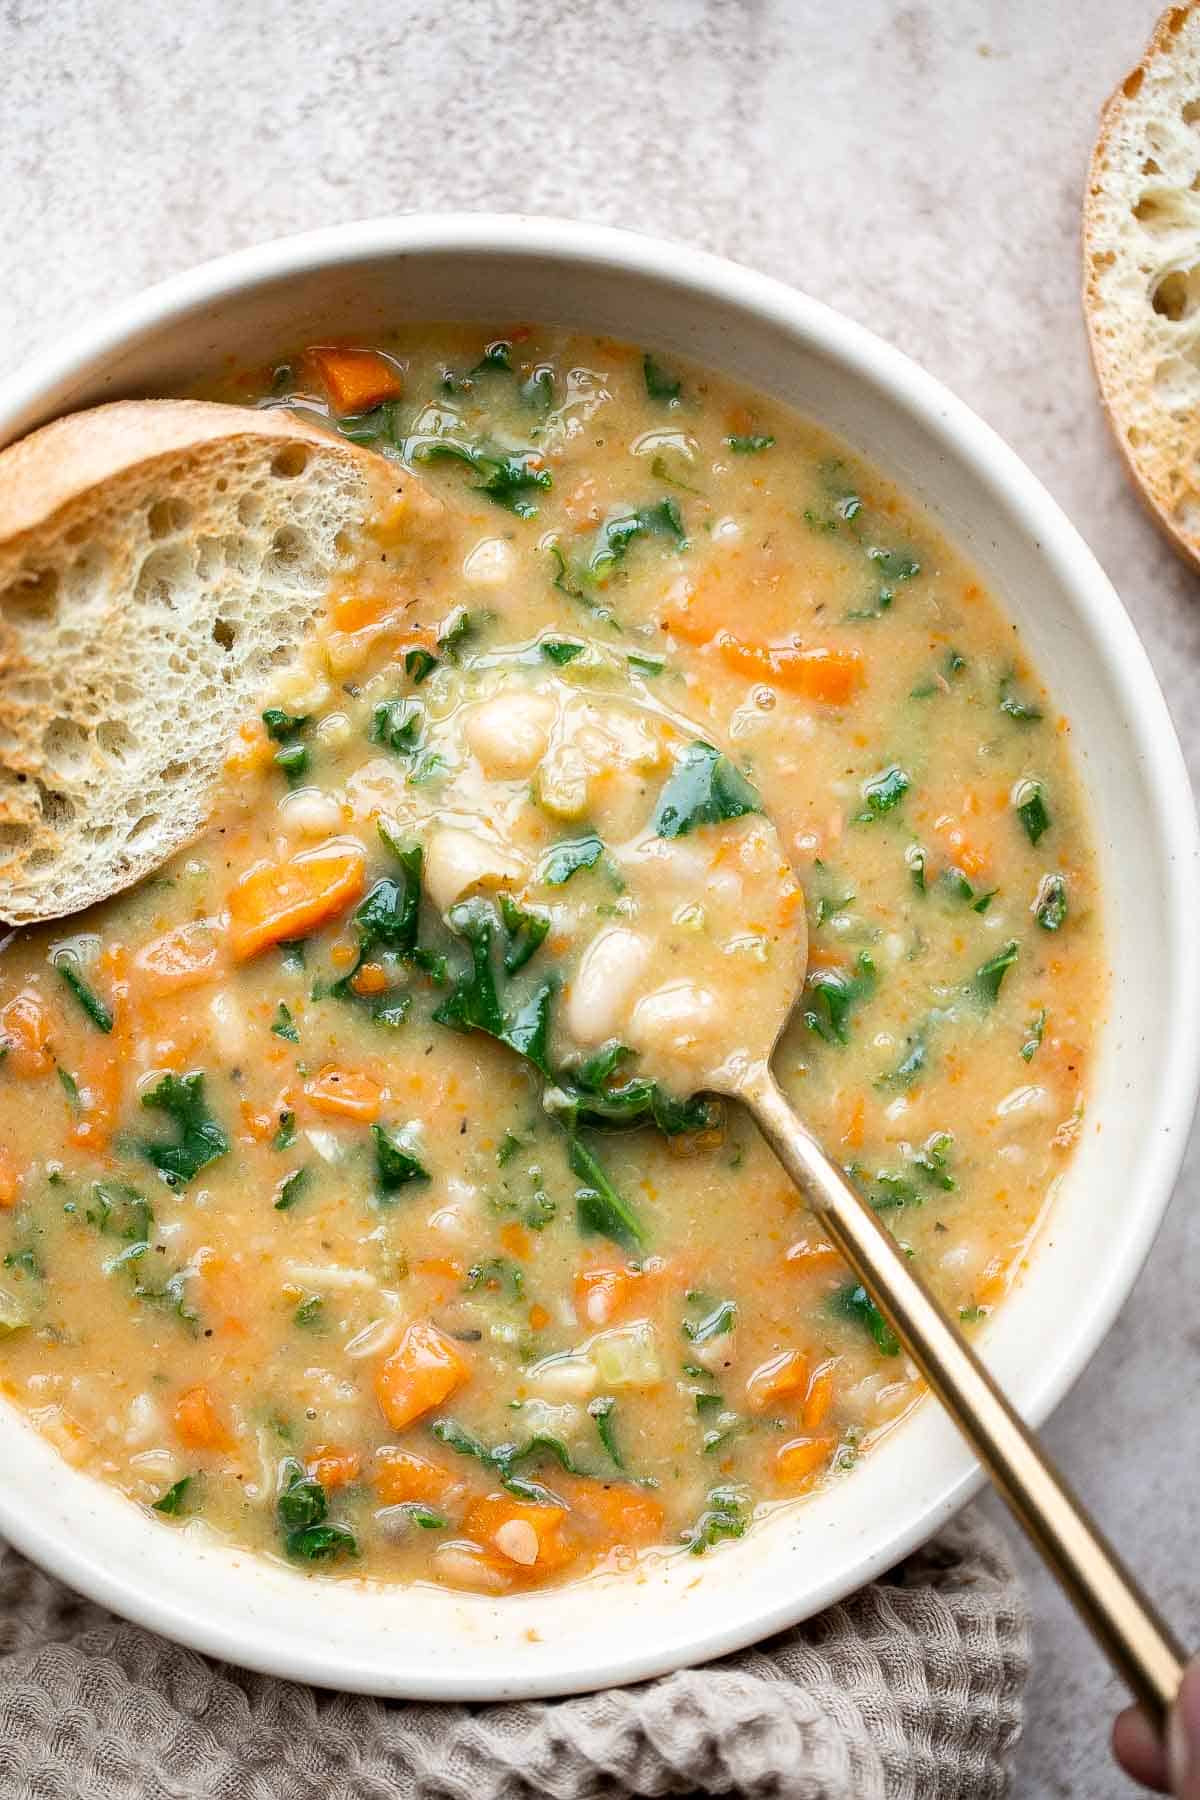
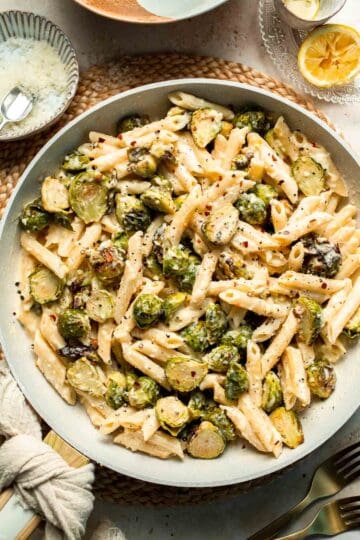
Rich, cozy, and full of bold Italian inspired flavor, this Creamy Tuscan Gnocchi is an easy one pan dinner that feels restaurant worthy while still being weeknight friendly. Pillowy gnocchi are pan seared until lightly golden, then simmered in a creamy garlic sauce with sun dried tomatoes, spinach, Parmesan, and fresh basil. The result is a comforting, indulgent meal that comes together in about 20 minutes.
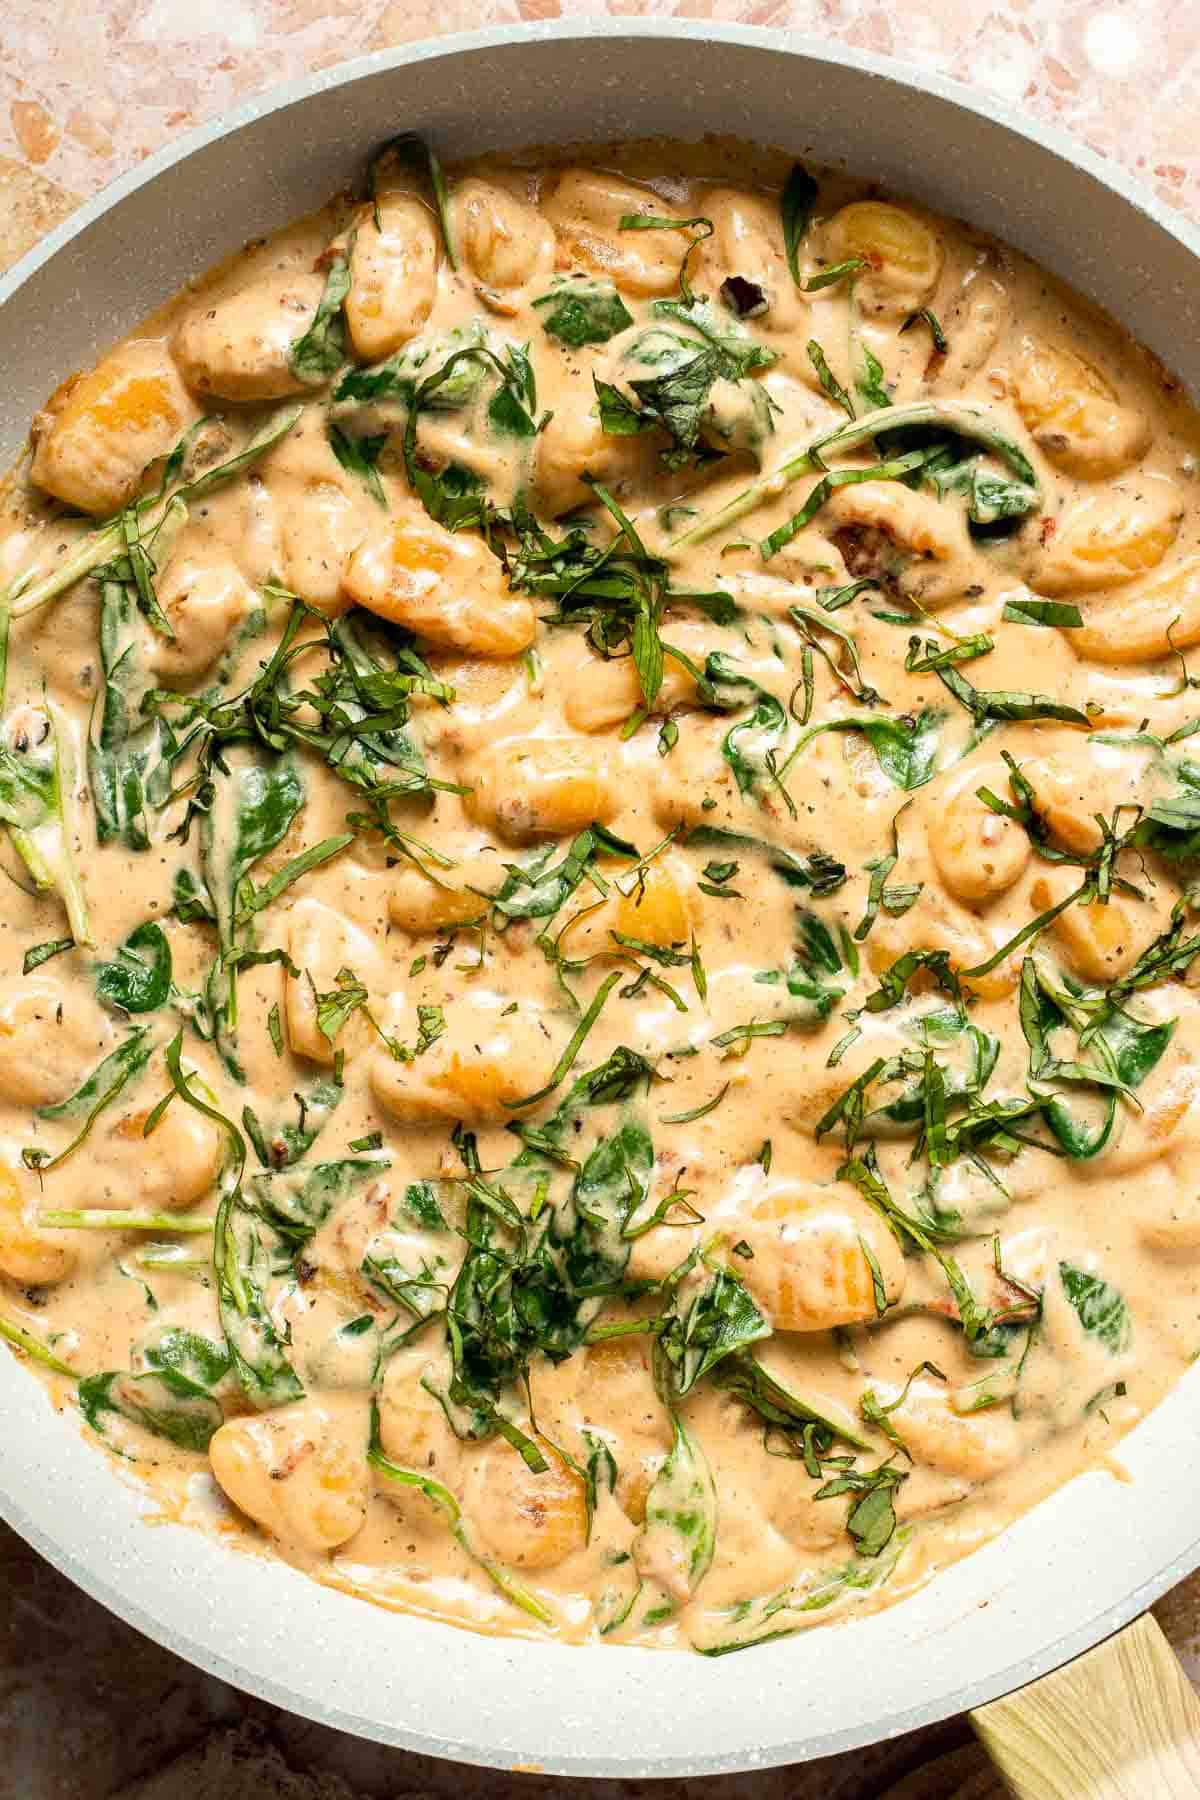
Tuscan style dishes are known for their creamy sauces, vibrant greens, and savory depth, and this gnocchi recipe delivers all of that with minimal effort. Using shelf stable gnocchi keeps things simple, while browning it first adds texture and flavor that elevates the entire dish. The sauce thickens quickly and coats every bite beautifully.
This creamy Tuscan gnocchi recipe was inspired by our classic Tuscan Chicken and Creamy Shrimp Pasta with Sun-Dried Tomatoes, but reimagined with gnocchi for an even cozier twist. It pairs well with a simple side salad, crusty bread, or roasted vegetables, making it a versatile recipe you will come back to again and again.
Why You'll Love This Recipe
- One pan and fast. Everything cooks in a single skillet, which means fewer dishes and a faster cleanup. The entire meal comes together in about 20 minutes, making it perfect for busy weeknights when you still want something satisfying and homemade.
- Creamy, comforting flavor. The sauce is rich and velvety thanks to heavy cream and Parmesan cheese, with garlic and sun dried tomatoes adding depth and savory balance. It tastes indulgent without feeling overly heavy.
- Perfect texture contrast. Browning the gnocchi first gives it a lightly crisp exterior, while the inside stays soft and pillowy. Once coated in the sauce, every bite is tender and so good.
- Versatile and customizable. This gnocchi works beautifully on its own or as a base for added proteins and vegetables. You can easily adapt it to suit your preferences or what you have on hand.
Ingredients and Substitutions
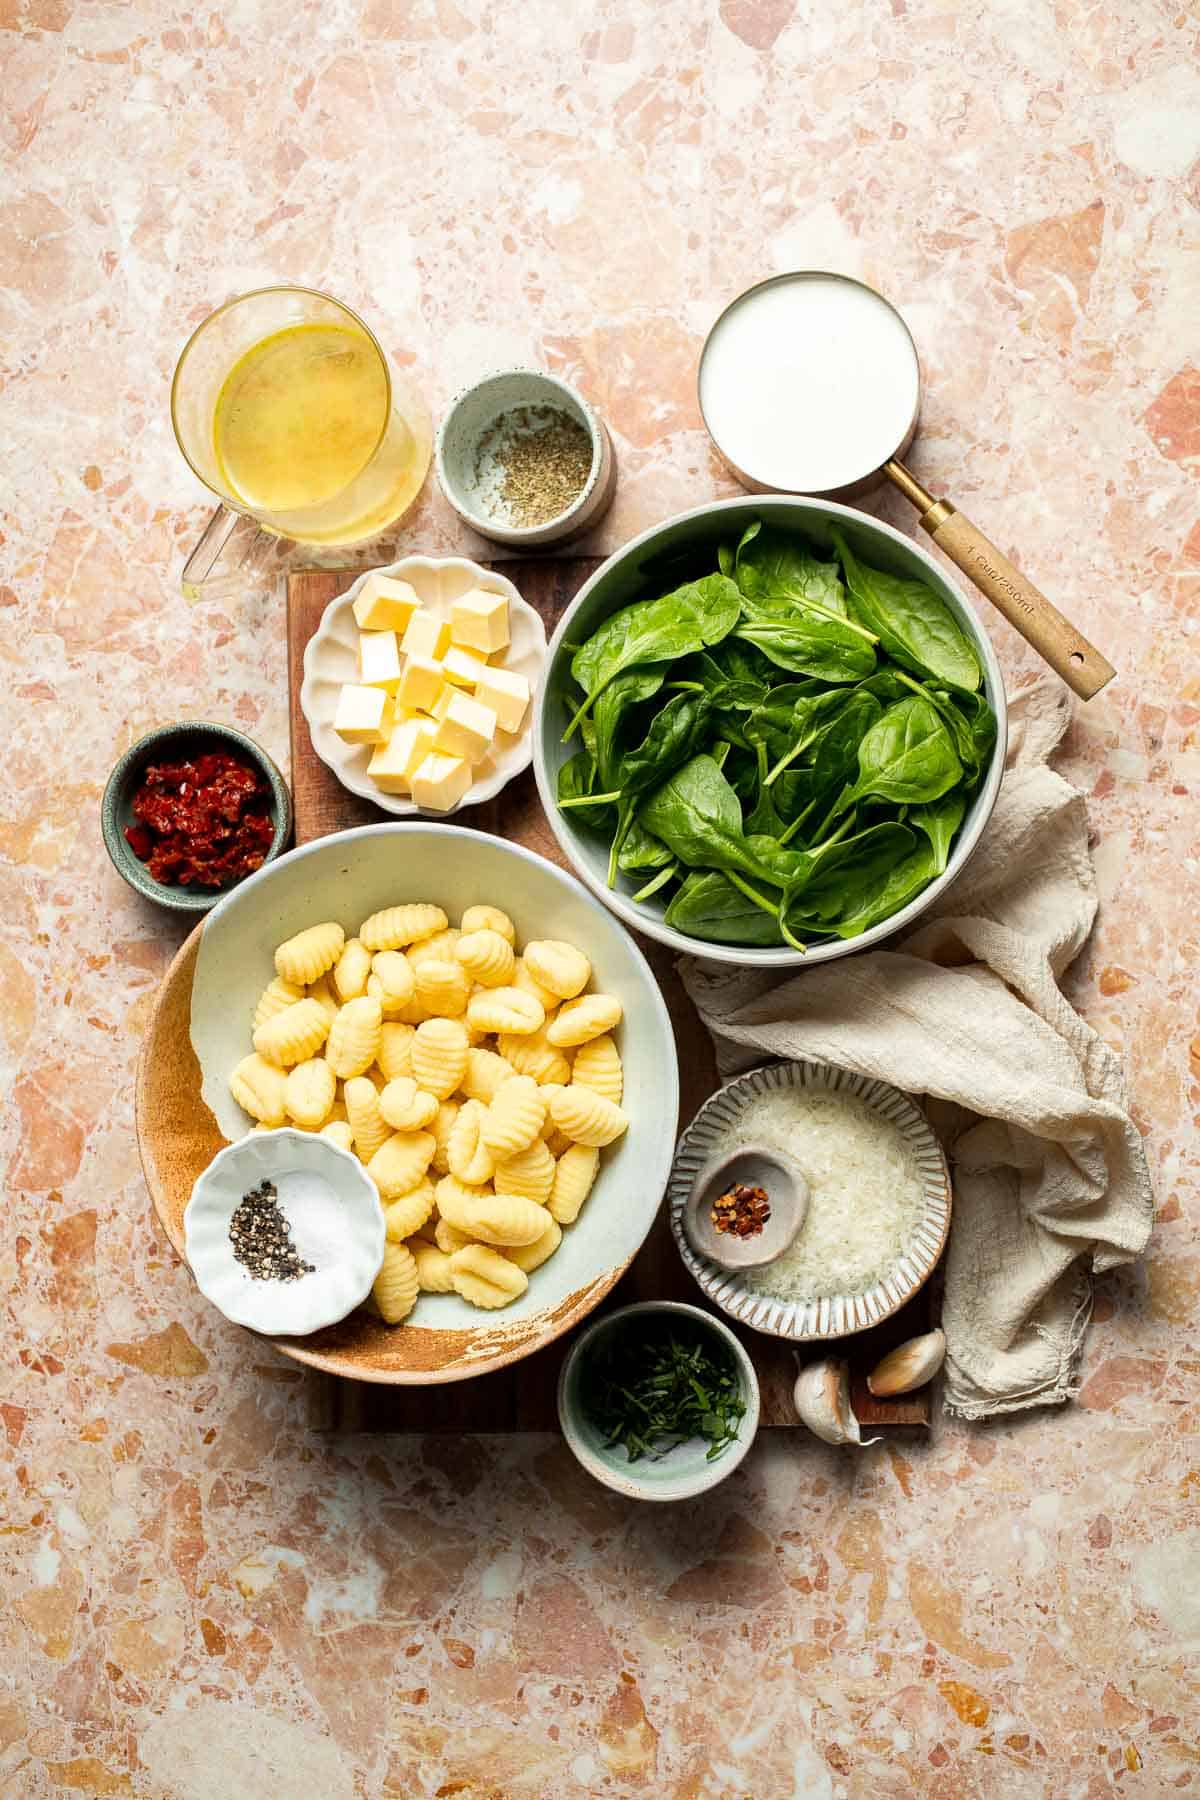
To make this delicious Creamy Tuscan Pasta, you will need the following ingredients (see recipe card below for quantities):
- butter - Adds richness and helps brown the gnocchi. Olive oil can be used instead.
- garlic - Fresh garlic provides the best flavor. Garlic paste or minced jarred garlic also works. Use 1 teaspoon garlic paste or 1 to 1½ teaspoons minced jarred garlic if substituting.
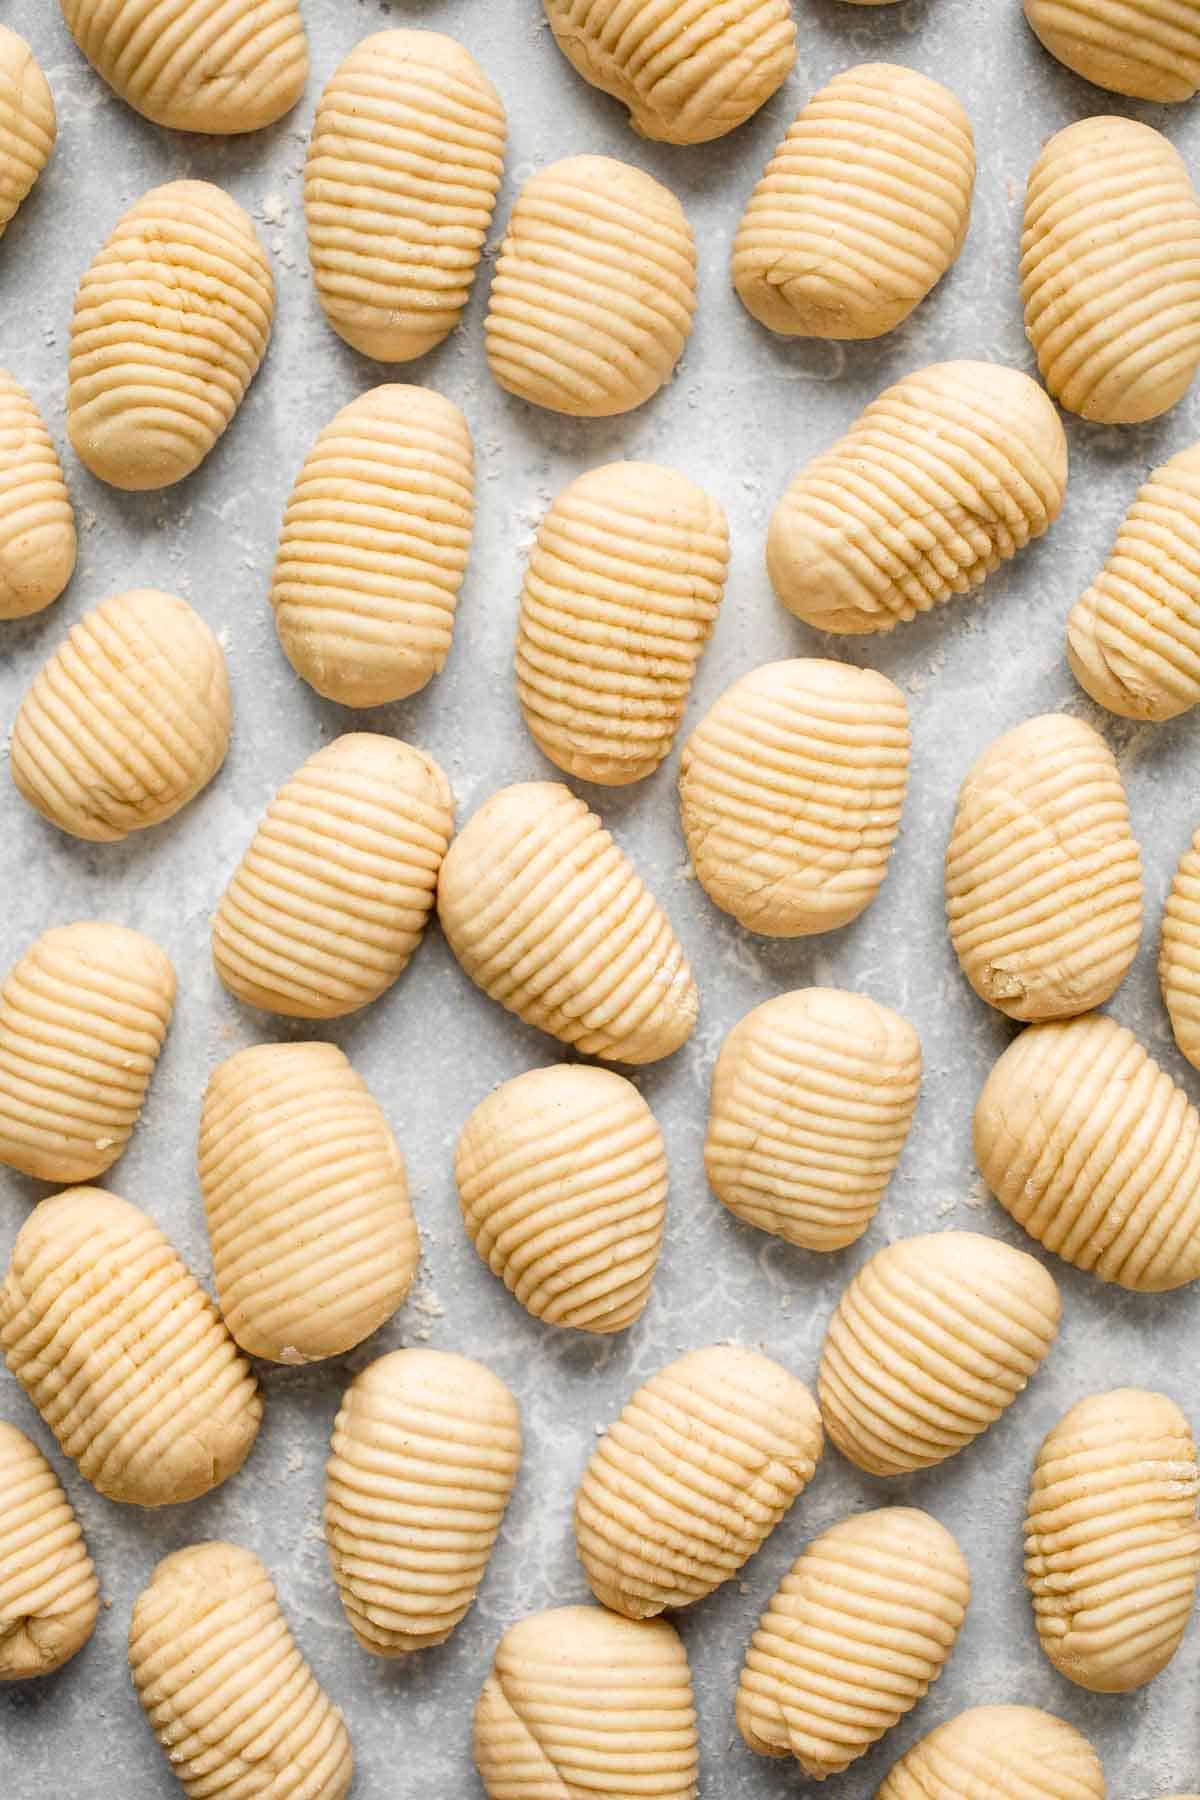
- gnocchi - Both shelf-stable gnocchi and fresh gnocchi work well in this recipe. Shelf stable gnocchi keeps things quick and pantry friendly, while fresh gnocchi cooks even faster and has a slightly softer texture.
- sun dried tomatoes - Adds sweet, tangy depth. Oil packed sun dried tomatoes work best.
- Italian seasoning - A convenient blend of herbs. You can substitute dried oregano and basil.
- crushed red pepper - Adds gentle heat. Adjust to taste or omit.
- salt and black pepper - Season gradually and adjust at the end.
- heavy cream - Creates a rich sauce. Half and half can be used for a lighter version.
- vegetable stock - Helps thin the sauce and adds flavor. Chicken broth also works.
- Parmesan cheese - Adds saltiness and body. Use freshly grated for best melting.
- spinach - Use baby spinach or fresh spinach, added at the very end so it wilts gently without overcooking. Kale can be substituted.
- fresh basil - Adds brightness and aroma at the end.
Equipment
You will also need measuring cups and spoons, a large skillet or sauté pan, a wooden spoon or spatula, and a sharp knife for prep.
Instructions
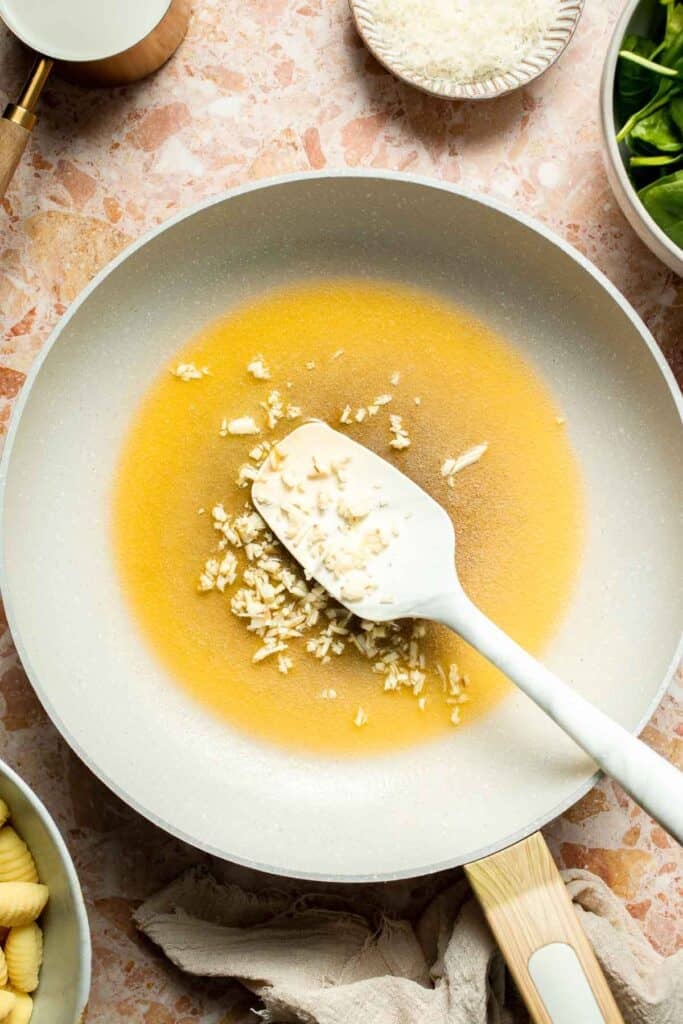
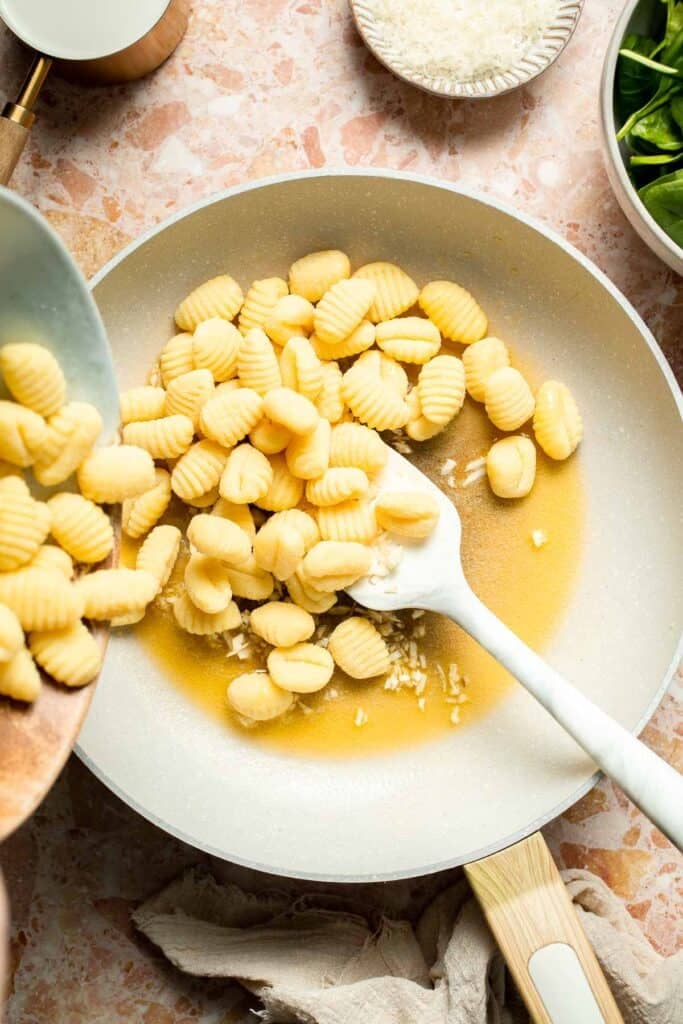
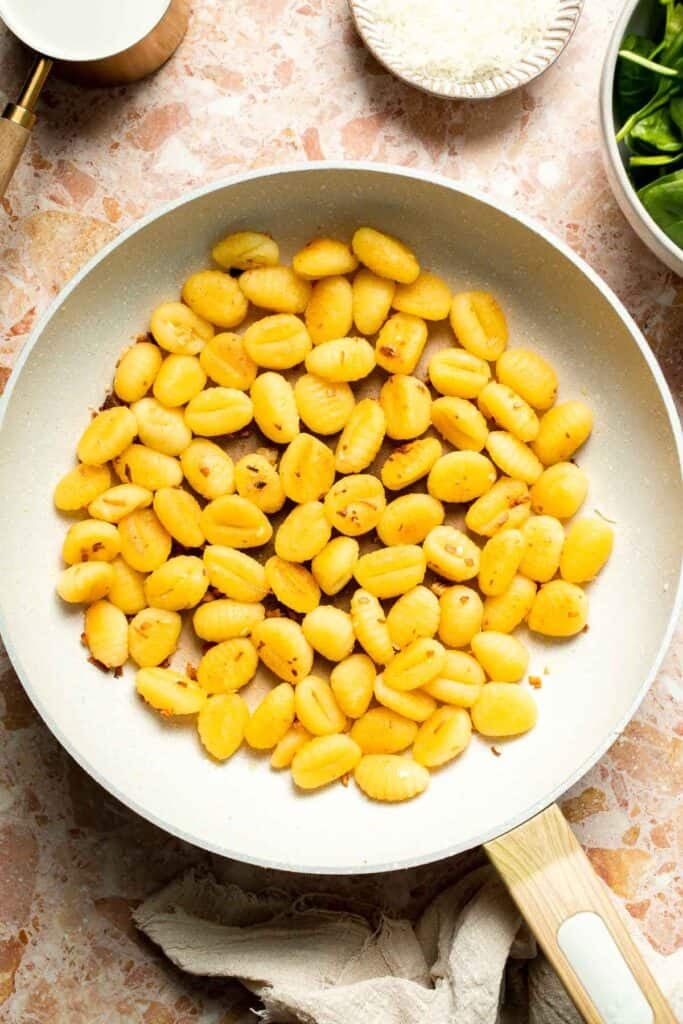
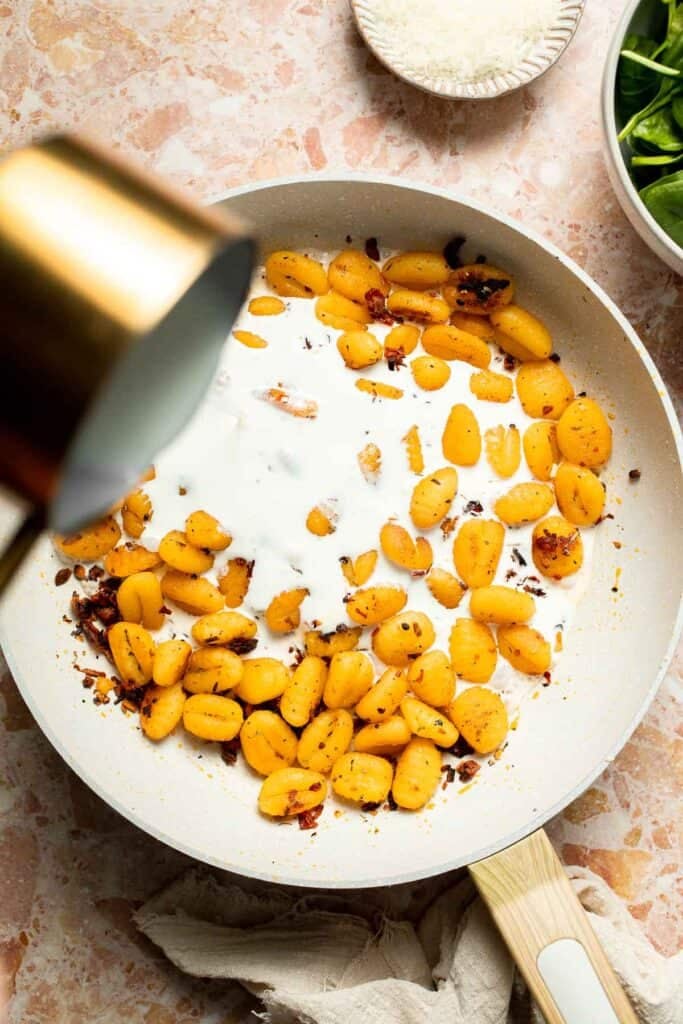
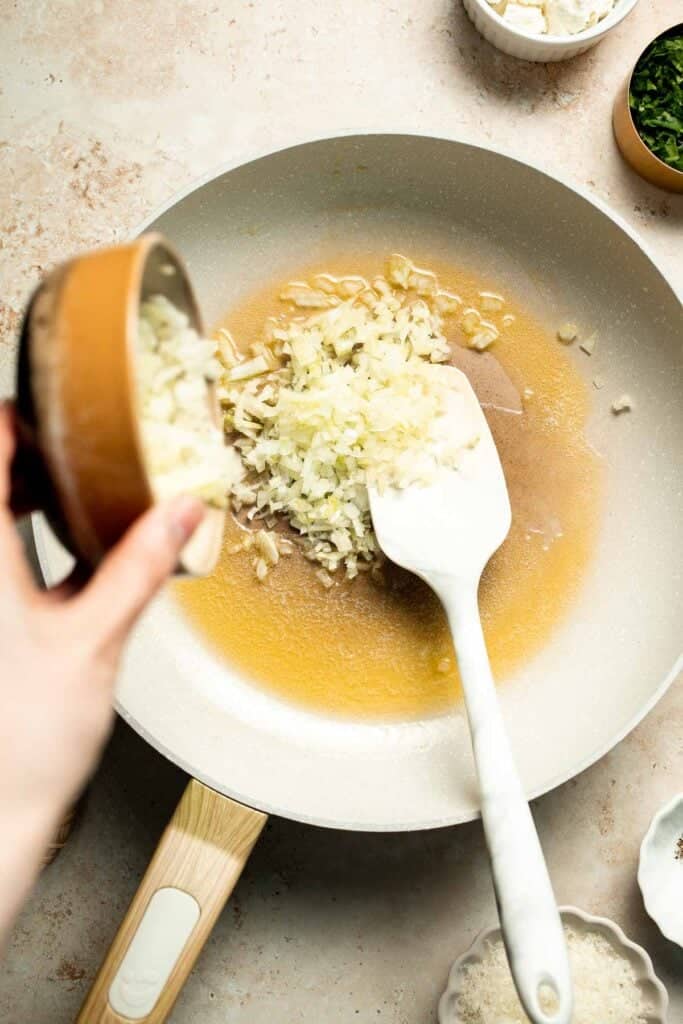
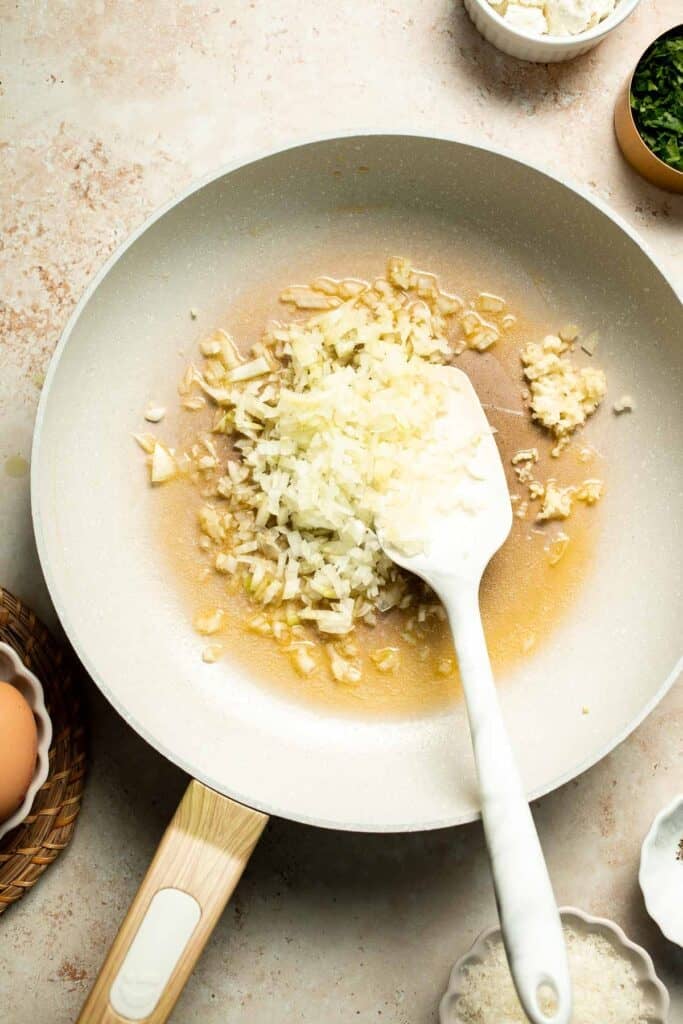
- Brown the gnocchi. Melt butter in a large skillet over medium-high heat until bubbly, about 1 minute. Add garlic and gnocchi. Sauté until the gnocchi turns golden brown on most sides, about 5 minutes. The gnocchi does not need to be cooked through yet.
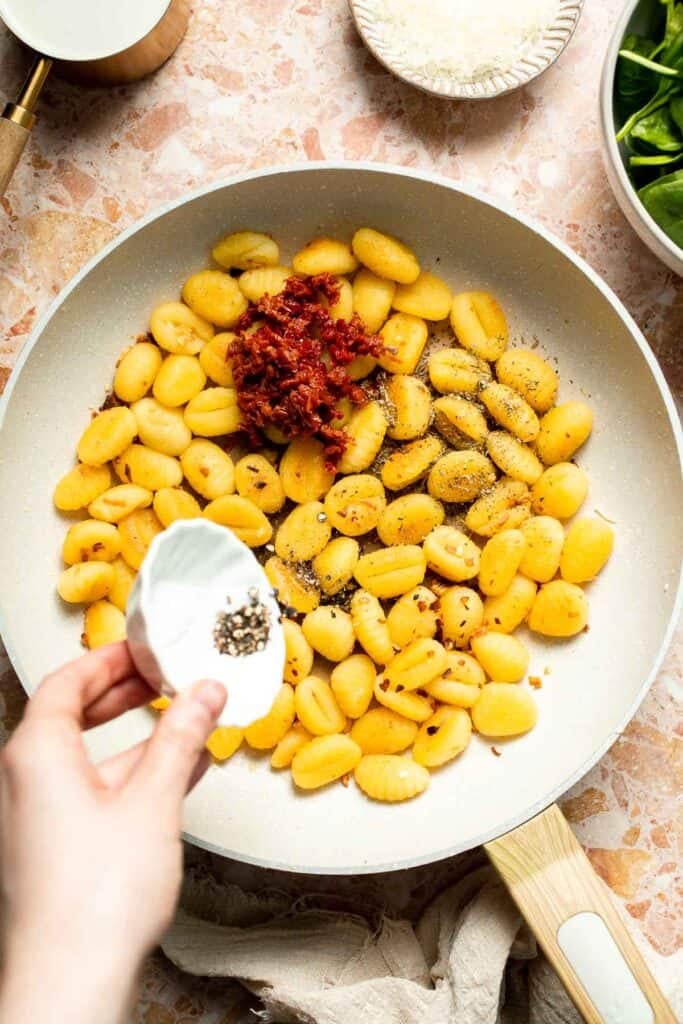
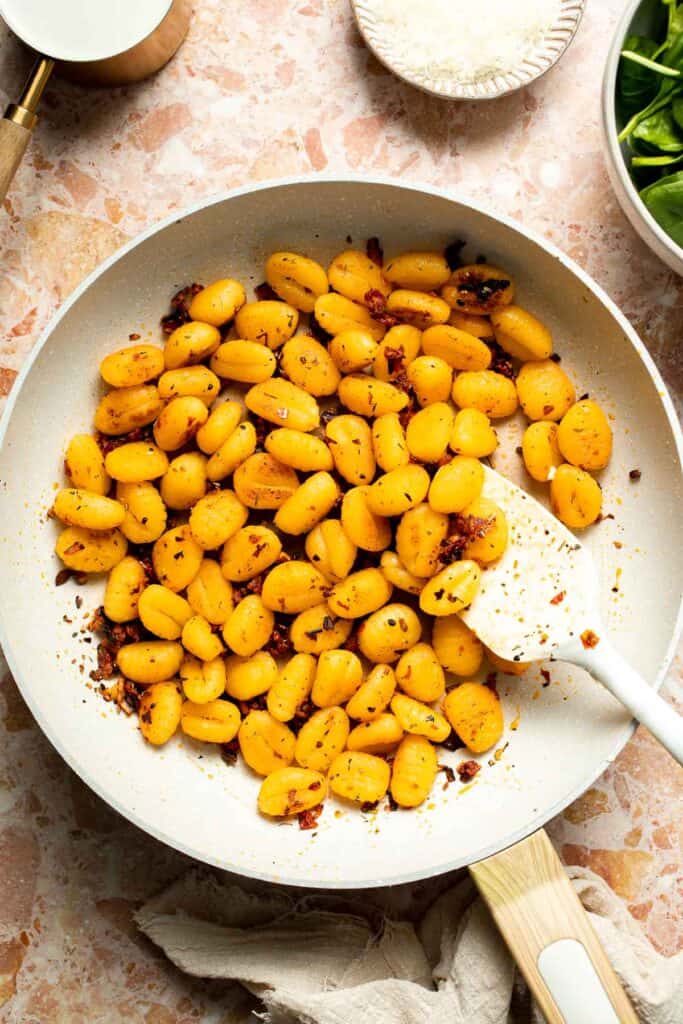
- Add seasonings and tomatoes. Add the sun-dried tomatoes, Italian seasoning, crushed red pepper, salt, and pepper. Mix well and cook for another 2-3 minutes until fragrant.
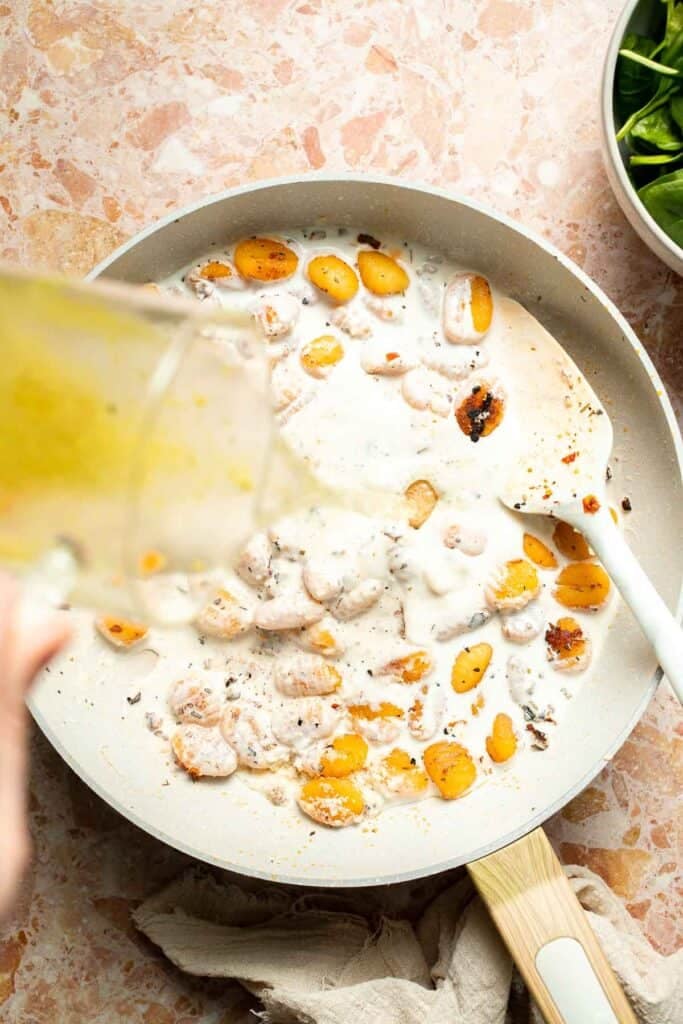
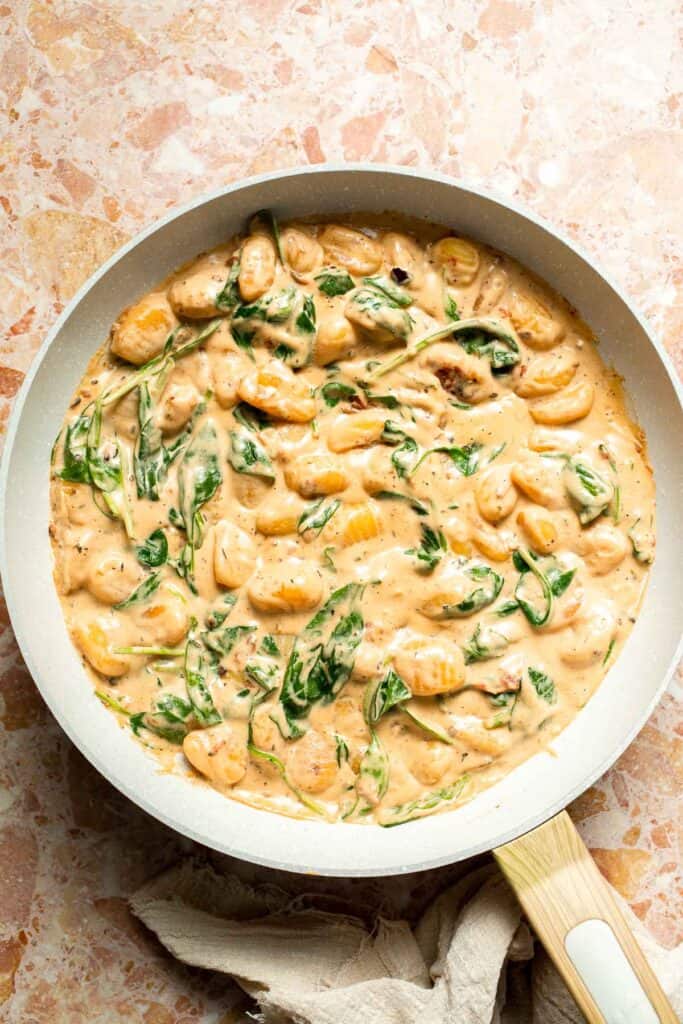
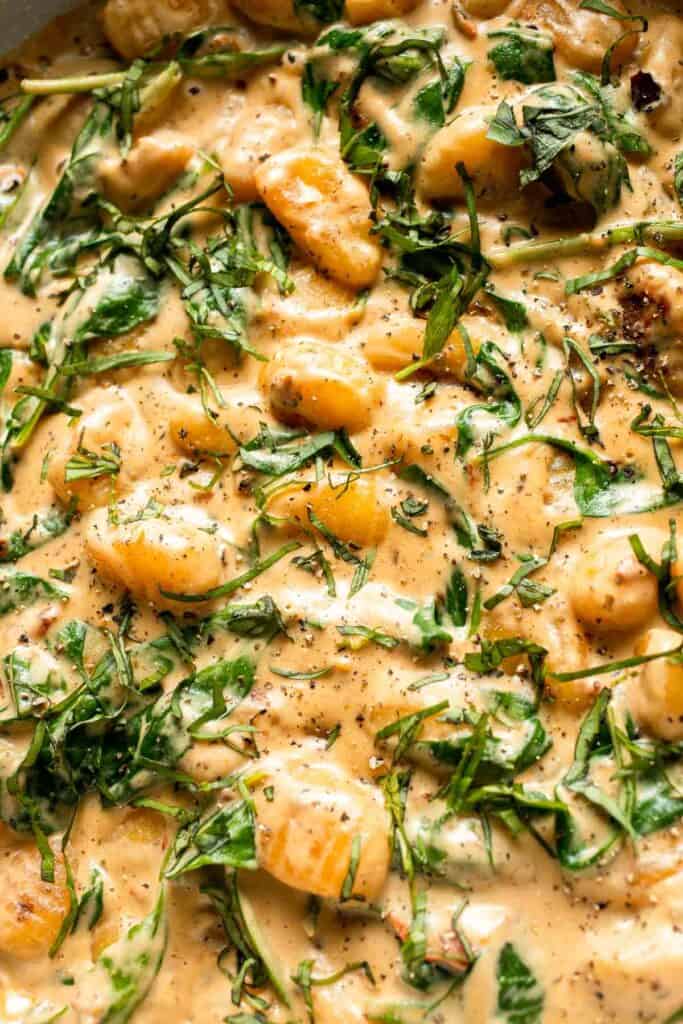
- Create the creamy sauce. Slowly pour in the heavy cream, vegetable broth, and Parmesan cheese, scraping the bottom of the pan to release any browned bits. Stir well and bring the sauce to a gentle simmer. Reduce the heat to medium and cook, stirring often, until the sauce thickens and the gnocchi is tender, about 2-3 minutes.
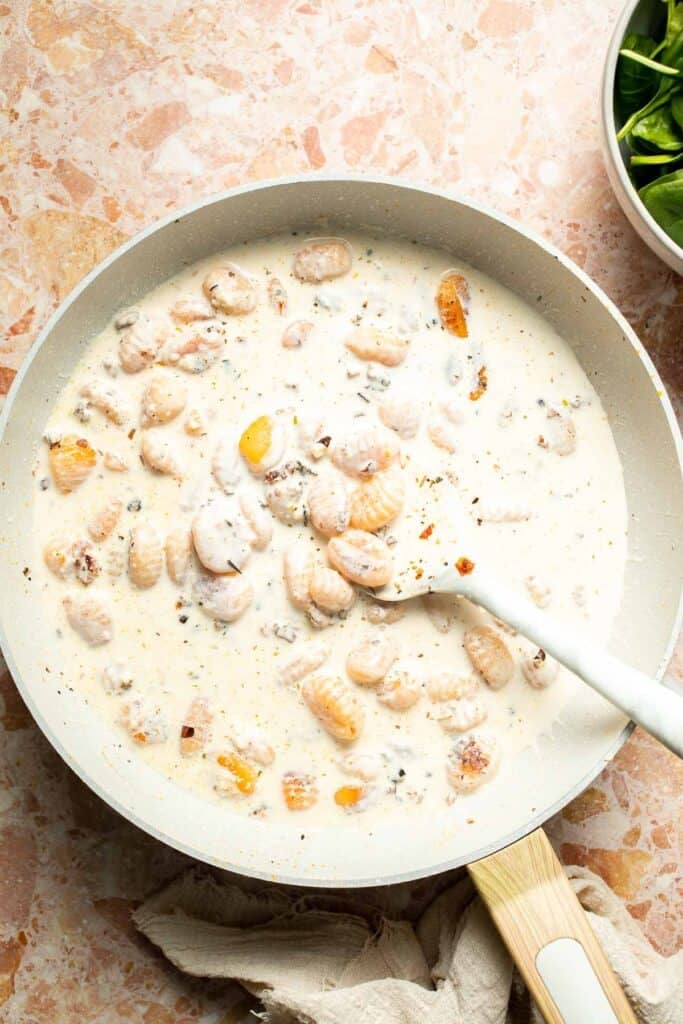
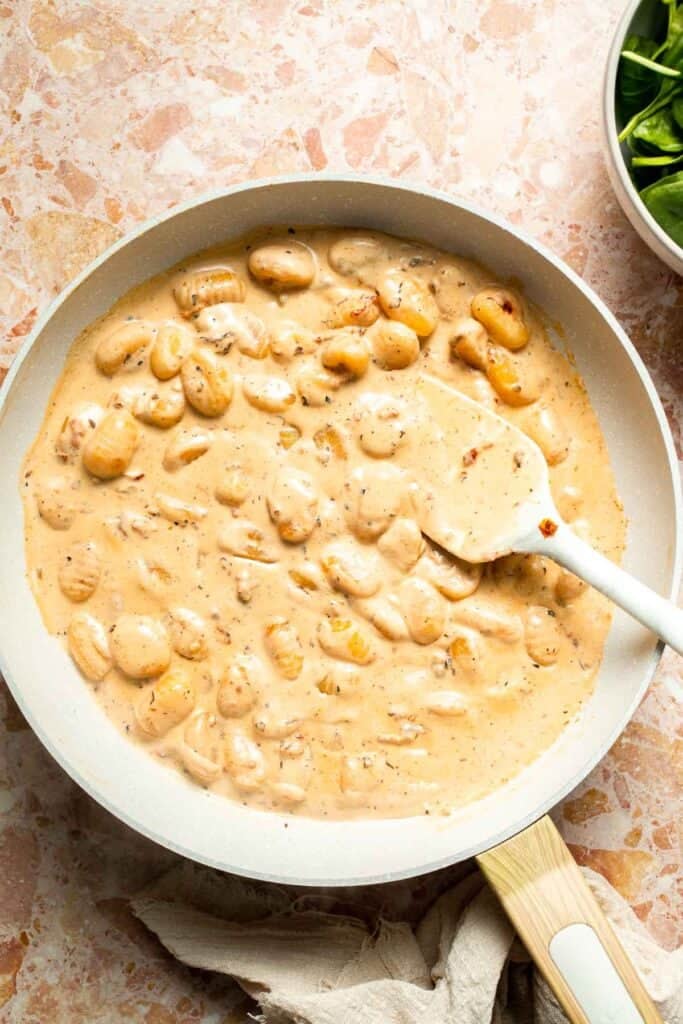
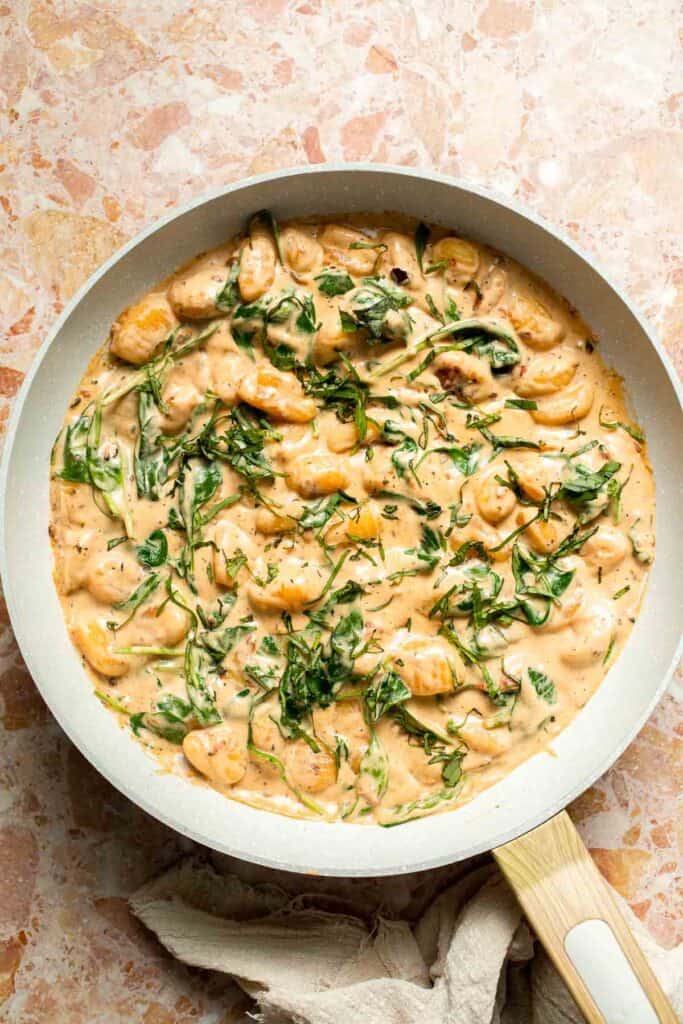
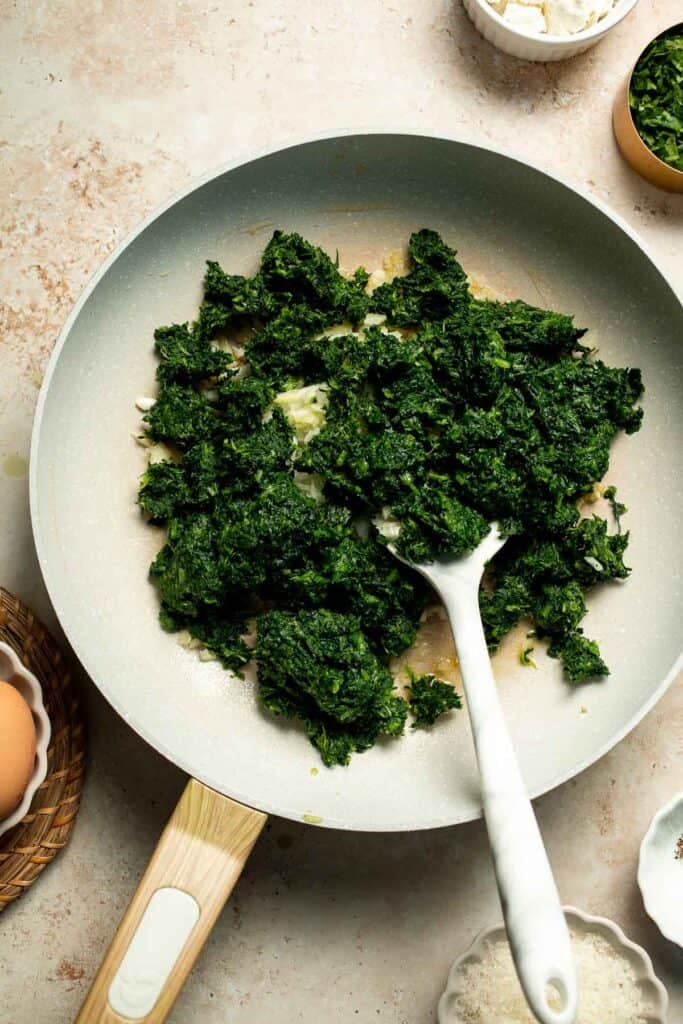
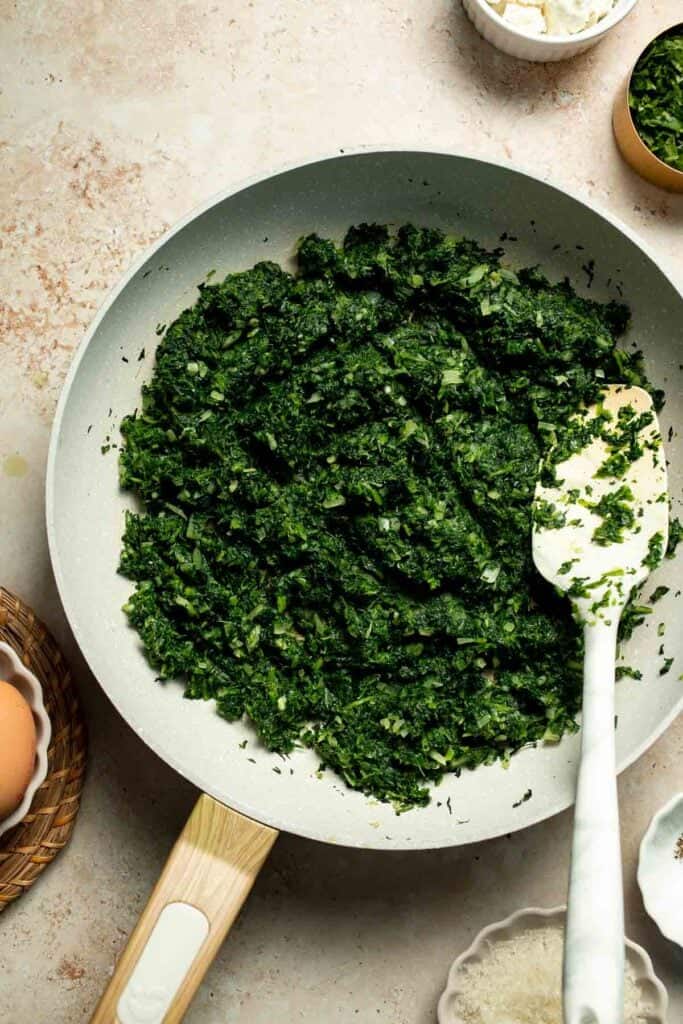
- Wilt the spinach. Stir in the spinach and cook until wilted, about 1 minute.
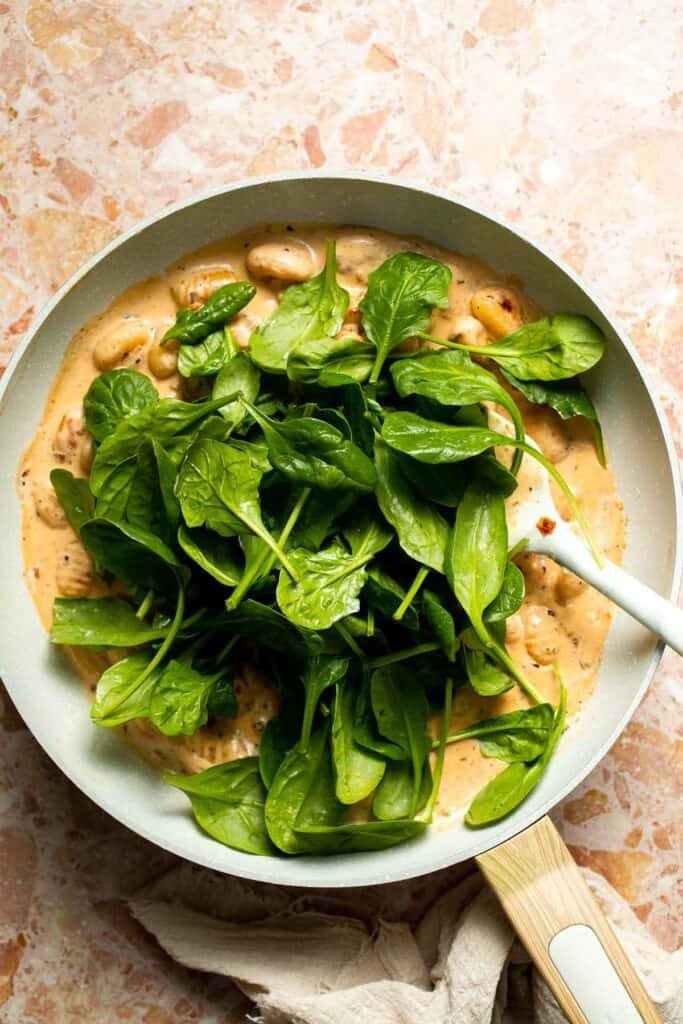
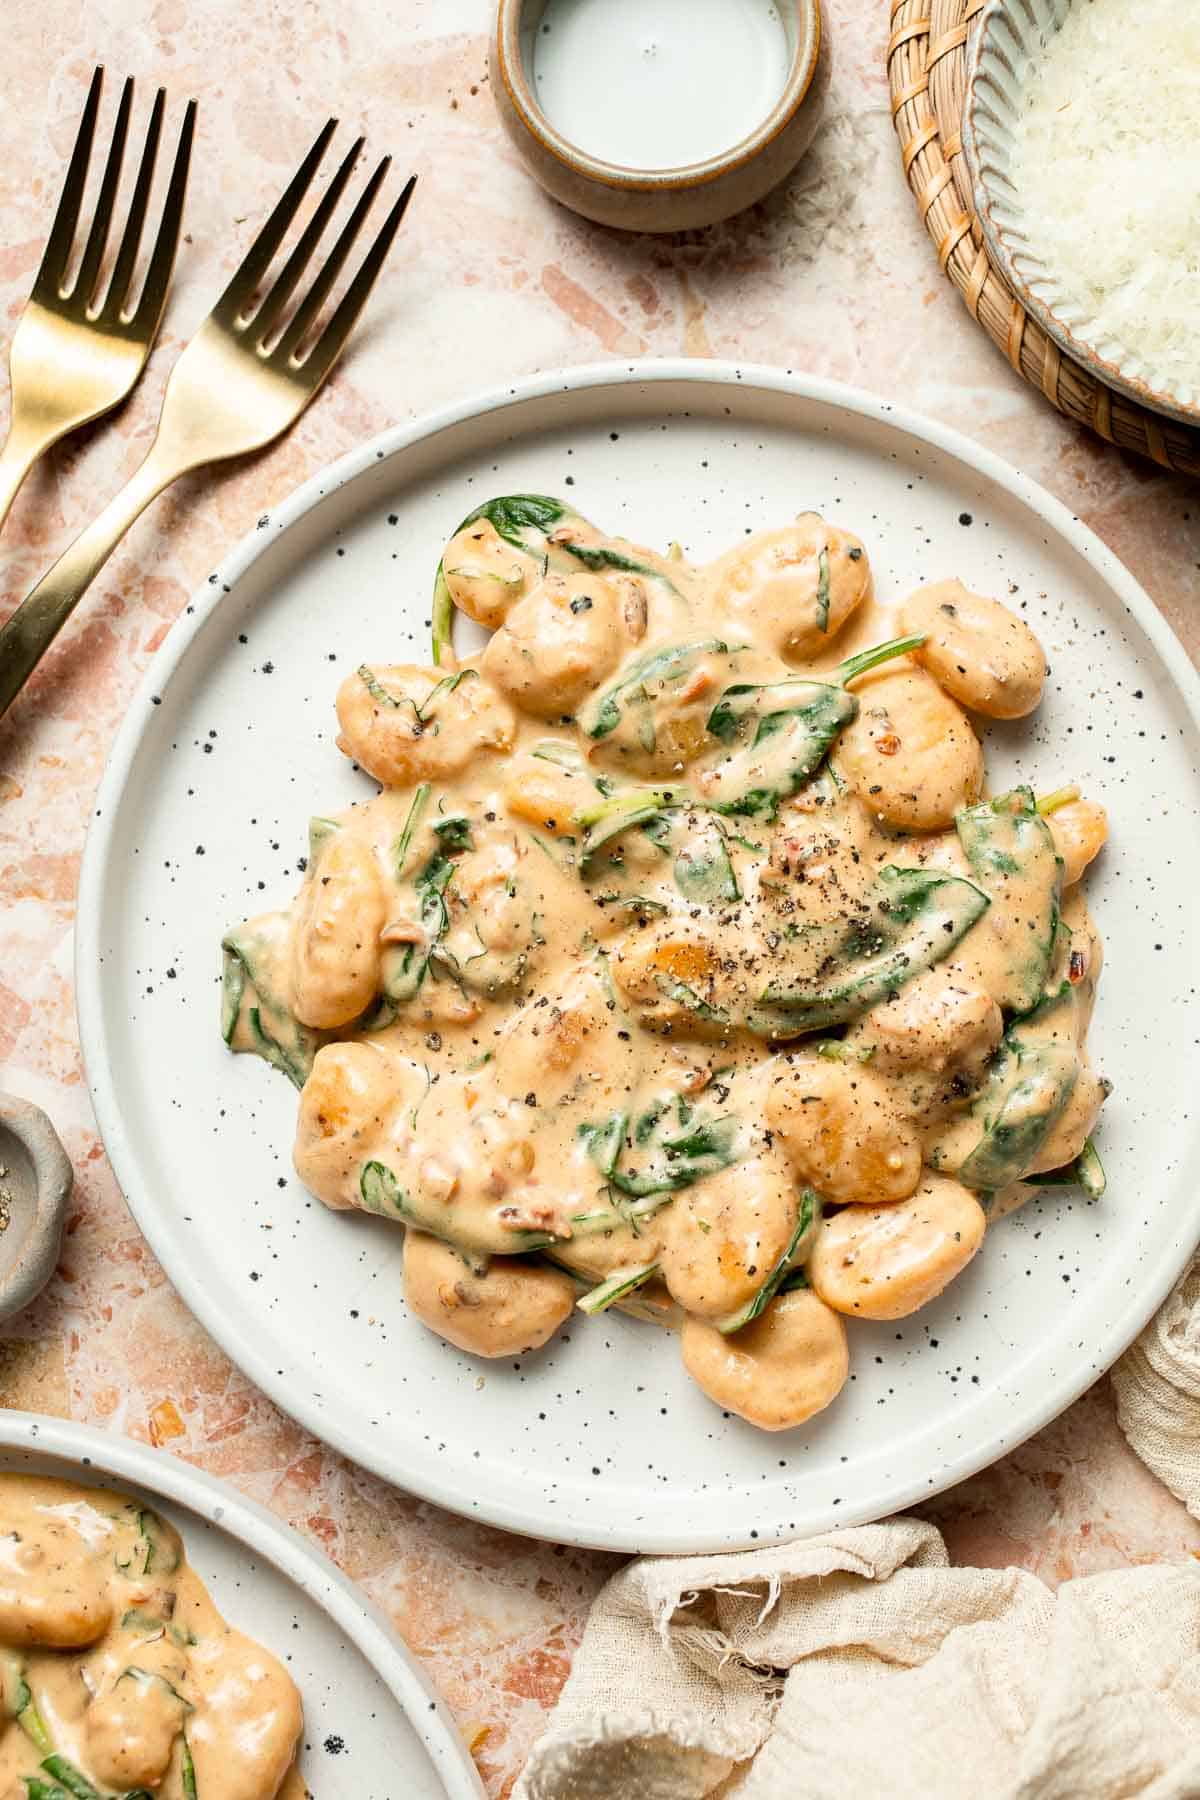
- Serve. Garnish with fresh basil and serve immediately.
Expert Tip: Brown the Gnocchi First
Browning the gnocchi before adding liquid adds a subtle crispness and extra flavor. Do not skip this step, it helps prevent the gnocchi from becoming too soft once the sauce is added.
More Tips and Tricks
- Use medium high heat to start. This helps the gnocchi develop a golden exterior without sticking.
- Stir frequently once the cream is added. This prevents the sauce from scorching and helps it thicken evenly.
- Add spinach at the very end. Spinach wilts quickly, so stirring it in last keeps it bright and tender.
- Taste before serving. Parmesan and sun dried tomatoes add salt, so always adjust seasoning at the end.
- Serve immediately. Creamy gnocchi is best enjoyed right away while the sauce is silky and smooth. Feel free to add a small squeeze of lemon juice at the end to brighten the sauce without overpowering the cream
Recipe Variations
- Tuscan gnocchi with sausage. Brown Italian sausage in the pan first, remove it, then proceed with the recipe and stir it back in before adding the spinach.
- Add chicken. Add sliced cooked chicken (or shredded chicken) or quickly sauté raw chicken pieces in the pan before adding the gnocchi.
- Add shrimp. Sauté shrimp separately and stir in at the end for a seafood twist. See our Creamy Shrimp Pasta with Sun-dried Tomatoes for a pasta variation.
- Extra savory version with onions. Sauté finely diced onions with the butter before adding the garlic for a deeper, sweeter base flavor.
- Add mushrooms. Add sautéed mushrooms for extra umami and heartiness.
- Dairy free version. Use coconut cream and dairy free Parmesan style cheese for a plant based option.
- Extra veggie version. Add zucchini, cherry tomatoes, or artichoke hearts along with the spinach.
Storage
How to Store
Store leftovers in an airtight container in the refrigerator for up to 3 days. Freezing is not recommended, as creamy sauces can separate and gnocchi may become mushy when thawed.
How to Reheat
Reheat gently on the stovetop or in the microwave, adding a splash of cream or stock to loosen the sauce as needed.
How to Serve
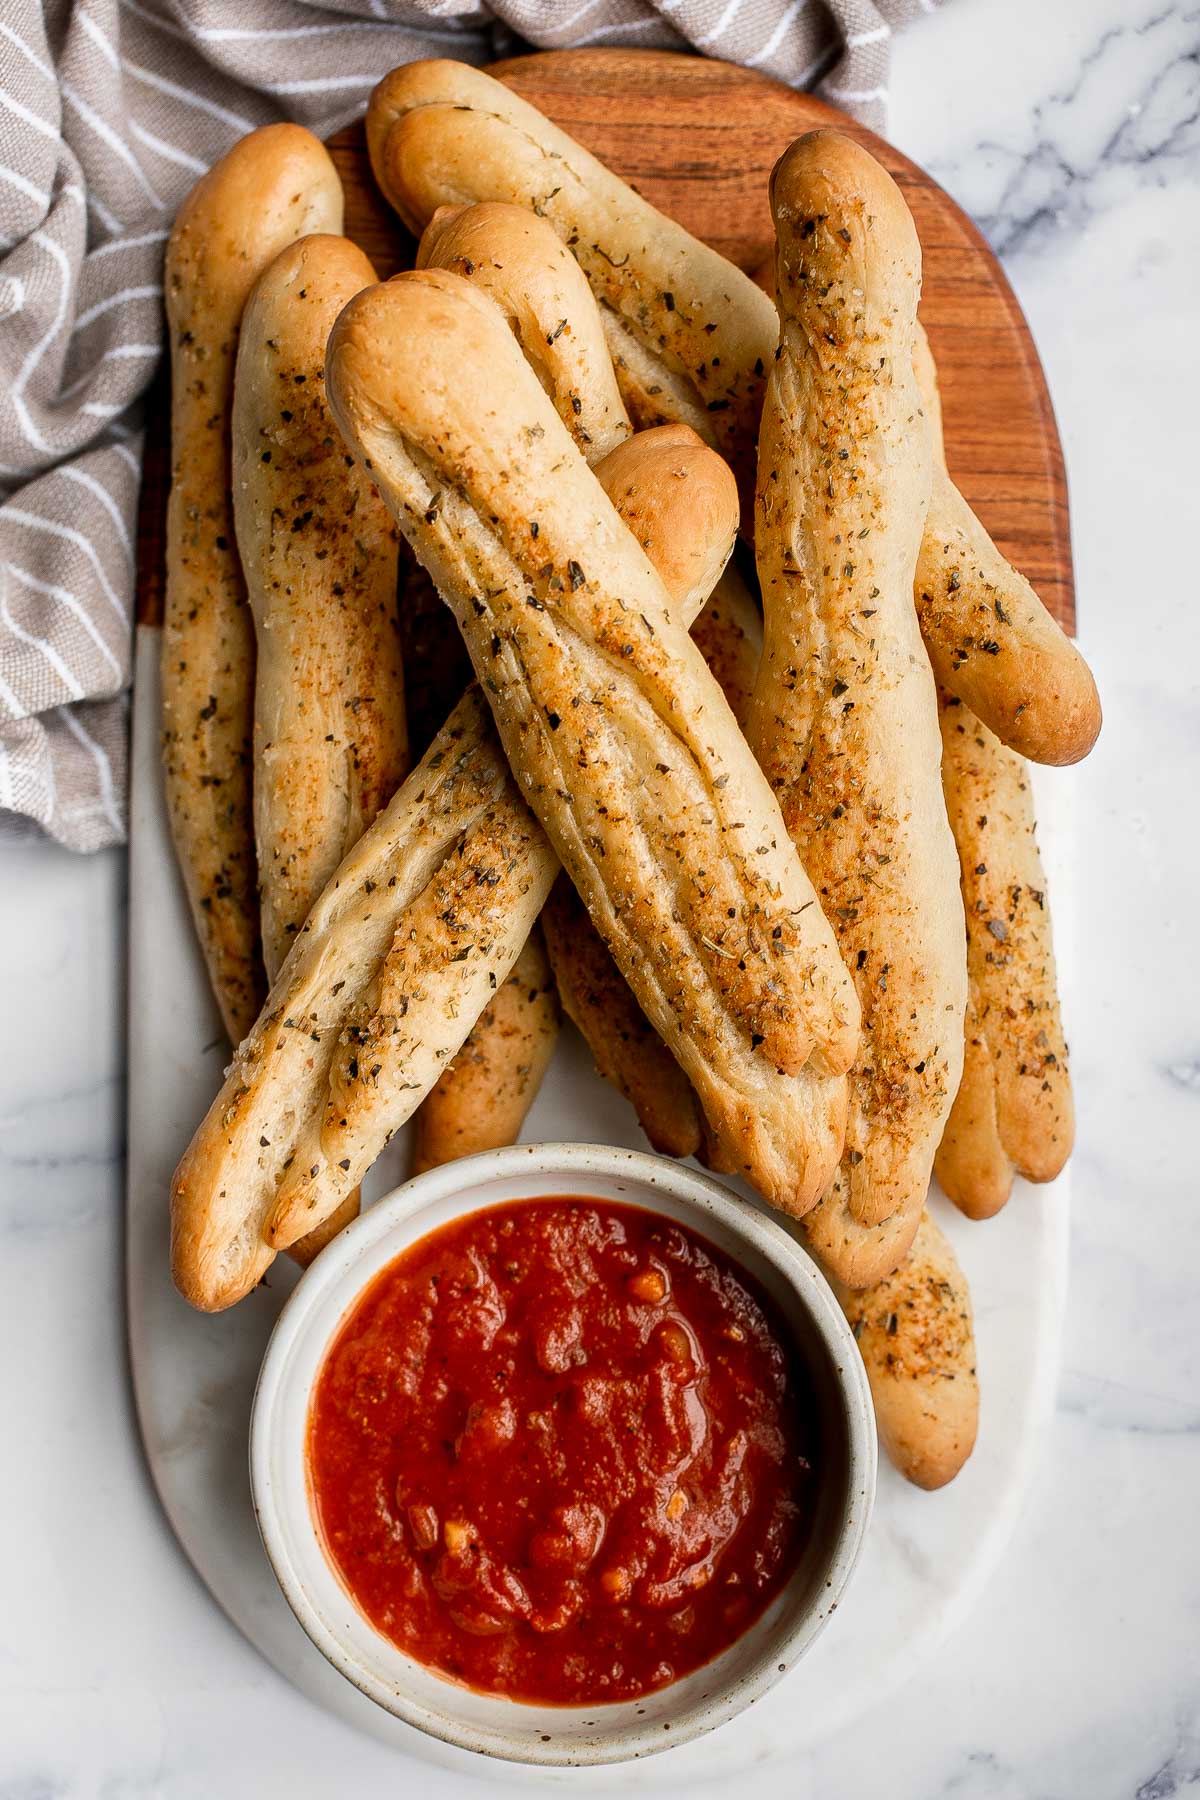
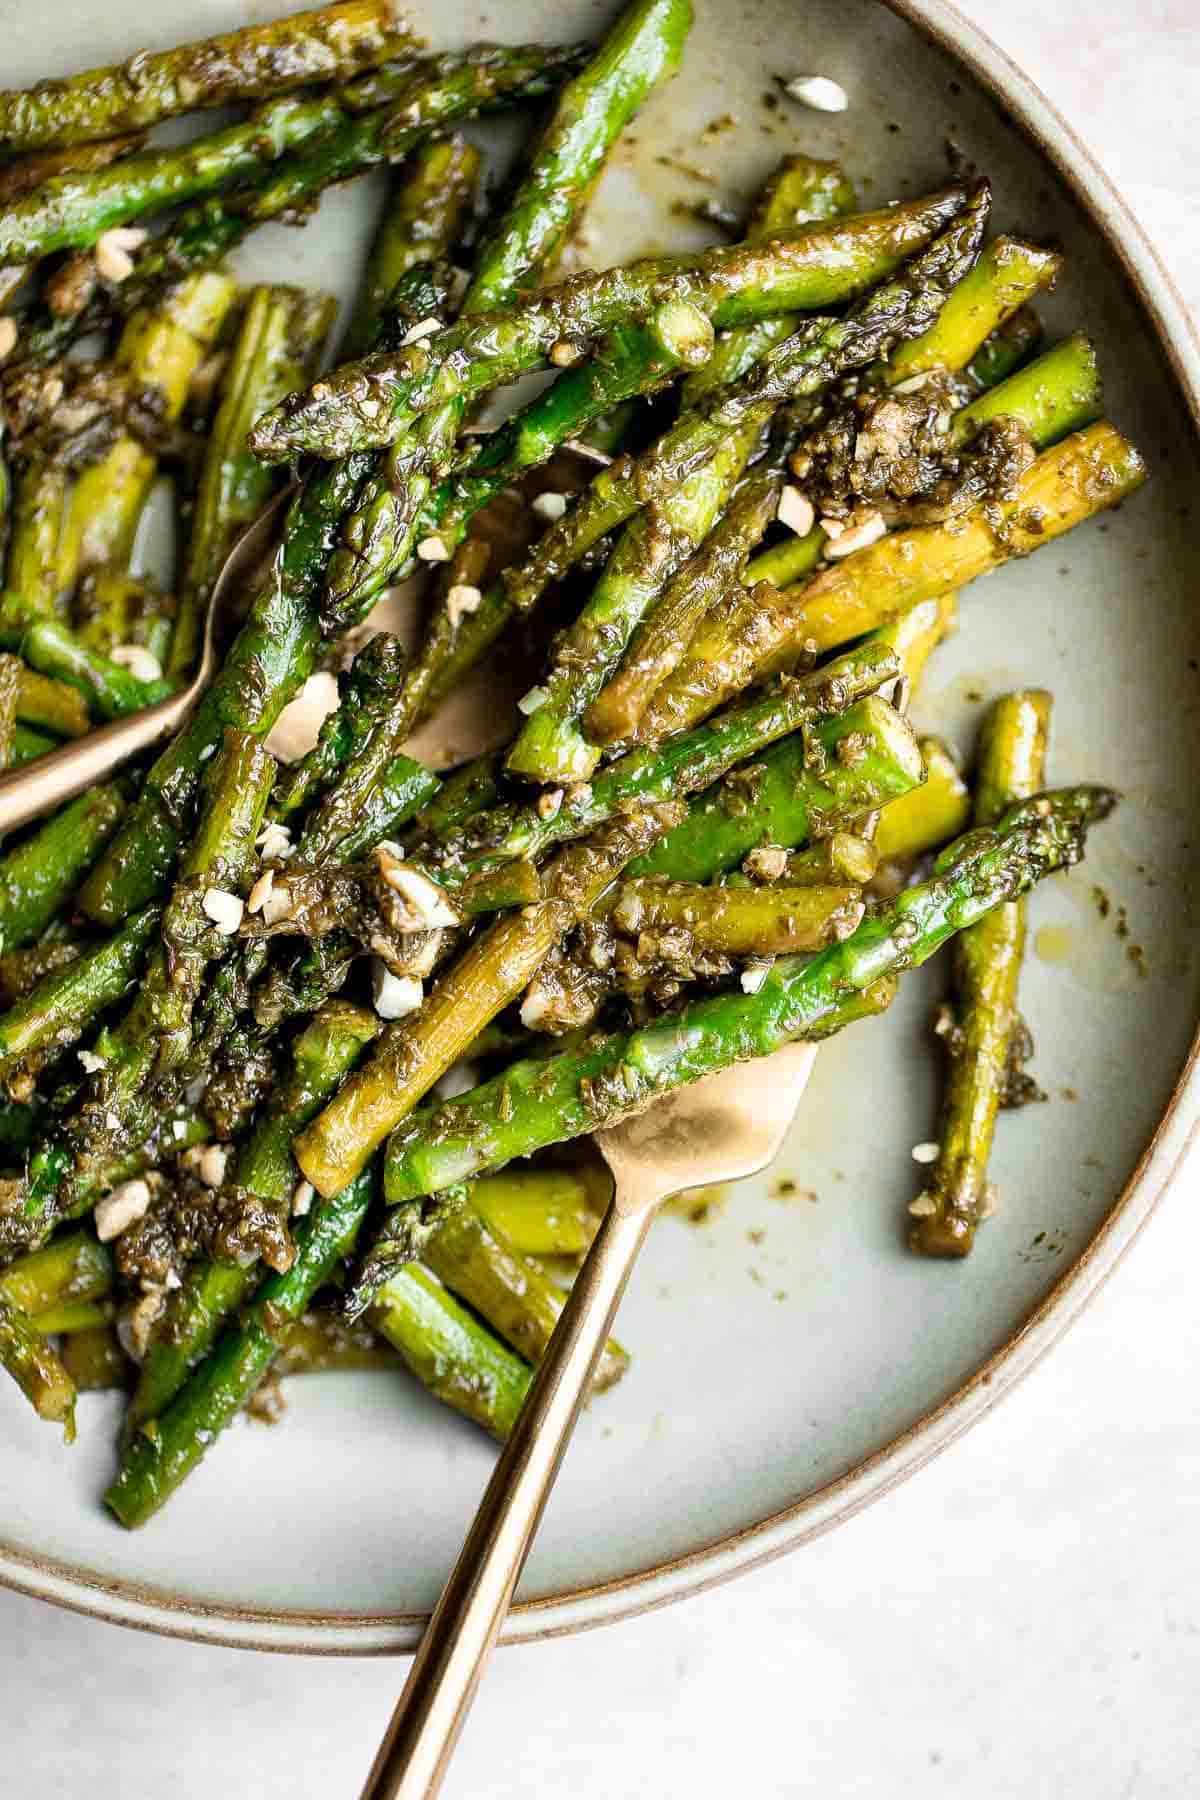
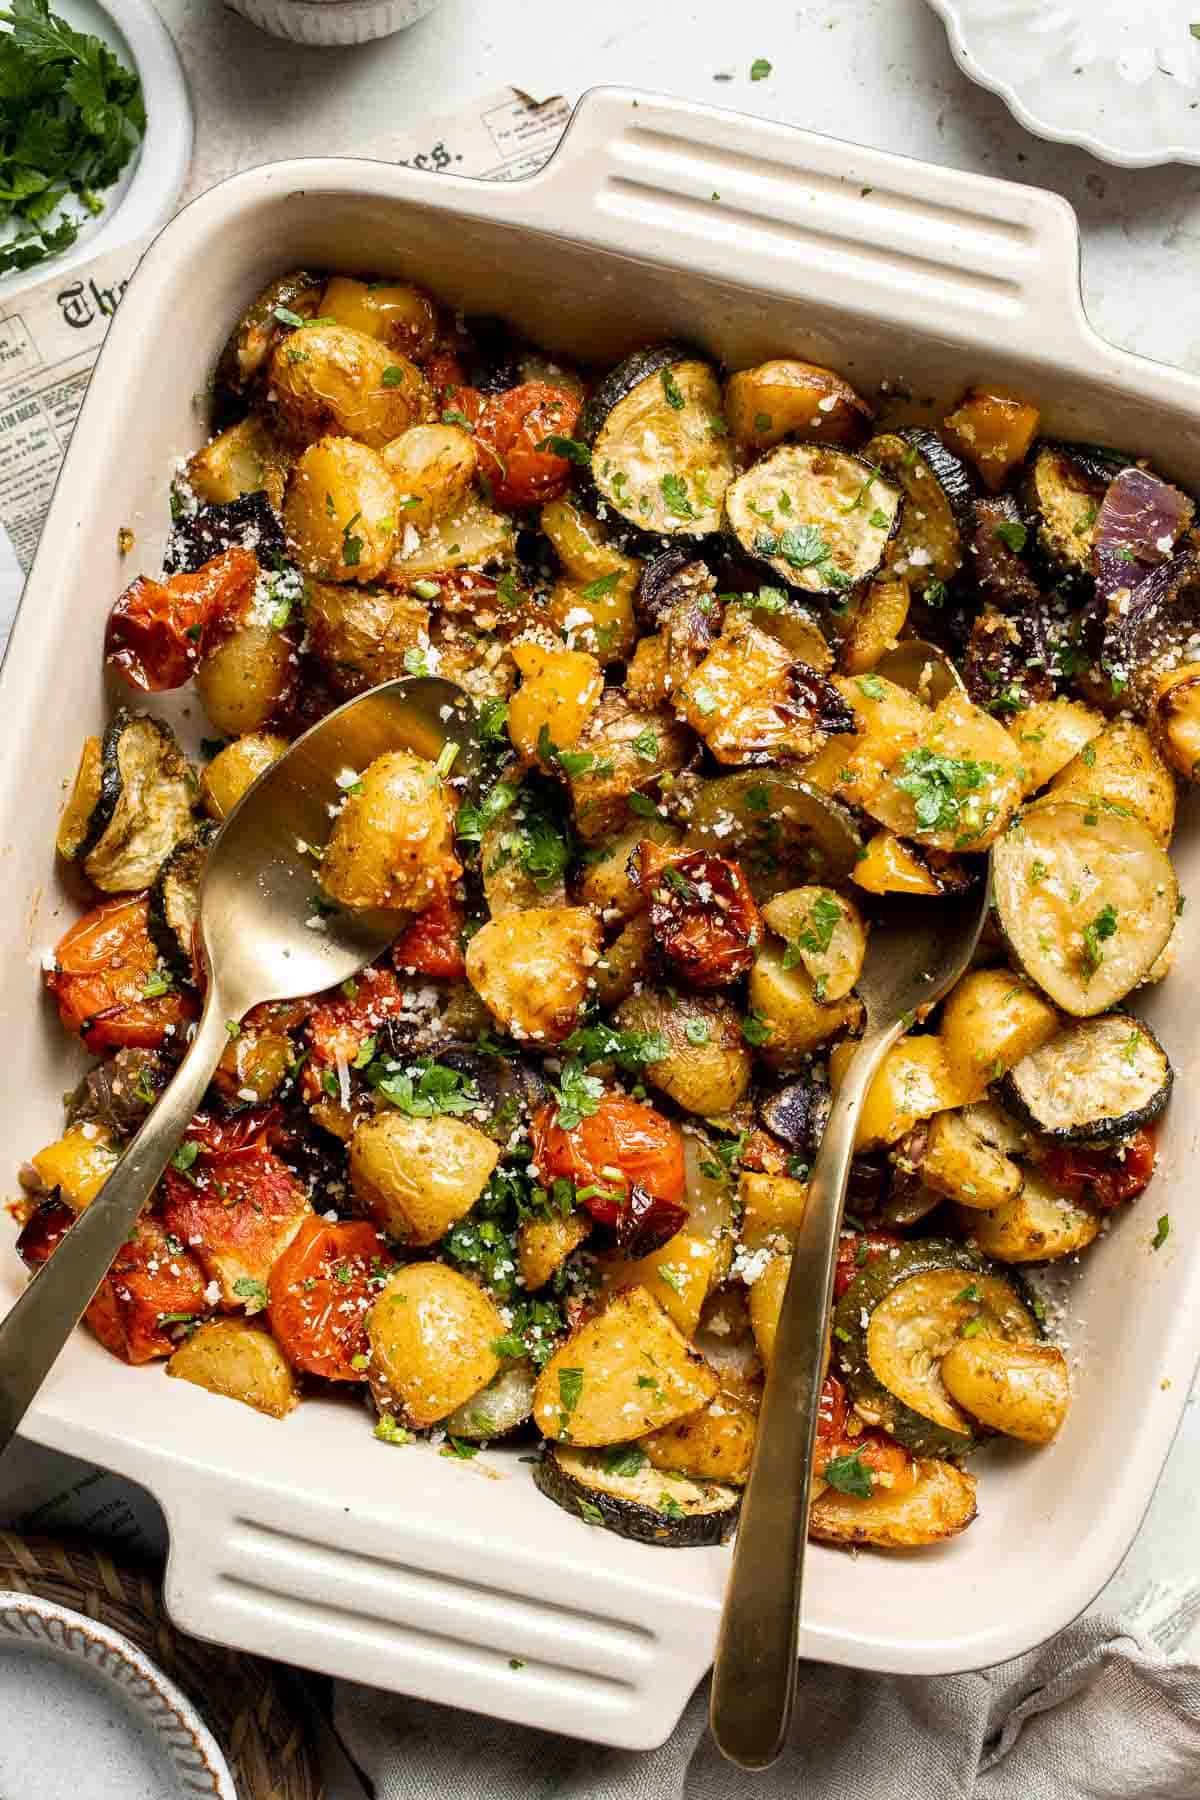
Serve creamy Tuscan gnocchi hot, garnished with extra basil and Parmesan. It pairs well with garlic bread, a simple green salad, or roasted vegetables like broccoli or asparagus.
These are my favorite dishes to serve with creamy gnocchi:


Side Dishes for Pasta
For more recipe ideas, check out our collection of pasta side dishes, featuring everything from fresh salads and roasted vegetables to crusty breads and flavorful appetizers that pair perfectly with any pasta dinner.
FAQ
Gnocchi are soft, pillowy dumplings traditionally made from potatoes, flour, and sometimes egg. They have a tender, slightly chewy texture and are designed to soak up sauces, making them rich, comforting, and very satisfying to eat. See our Leftover Mashed Potato Gnocchi.
Gnocchi and pasta are nutritionally similar, but gnocchi is often slightly higher in carbohydrates and lower in protein. Because gnocchi is more filling, many people find they eat a smaller portion compared to pasta. Healthiness depends on portion size and the sauce used.
Italian gnocchi are typically made with potatoes and flour, while French gnocchi, also called gnocchi à la parisienne, are made from choux pastry. French gnocchi are lighter and more airy, while Italian gnocchi are denser and more pillowy.
Creamy sauces, like this Tuscan style cream sauce, pair exceptionally well with gnocchi because they cling to the soft dumplings. Gnocchi also works beautifully with butter sauces, tomato sauces, pesto, or simple olive oil and herb based sauces.
Yes, gnocchi is eaten much like pasta and served as a main dish or first course with sauce. However, because gnocchi is softer and more delicate, it is usually simmered gently or sautéed rather than boiled aggressively.
No. Shelf stable or refrigerated gnocchi can be cooked directly in the skillet. Browning it first adds flavor and texture.
Yes. Add it directly to the pan from frozen and cook slightly longer until golden and tender.
Good gnocchi has a tender texture and mild flavor that allows sauces and seasonings to shine. Browning gnocchi in butter or oil adds depth, while well seasoned sauces and fresh herbs enhance its natural richness.
Gnocchi is traditionally served with simple sauces like butter and sage, tomato sauce, or cream based sauces. It is often paired with vegetables, herbs, or light proteins, and sometimes served with a side salad or crusty bread.
Yes, gnocchi can often replace pasta in many recipes. Because gnocchi is more tender and absorbent, sauces may need slightly less liquid, and cooking times are usually shorter than traditional pasta.
More Gnocchi Recipes
Looking for other recipes like this? Try these:
Tried this recipe?
I'd love to hear what you think! Leave a comment and rating below to share your feedback. Your reviews help others discover this recipe and help me keep creating more free recipes for you. Snap a photo and tag me on social media @aheadofthyme too.

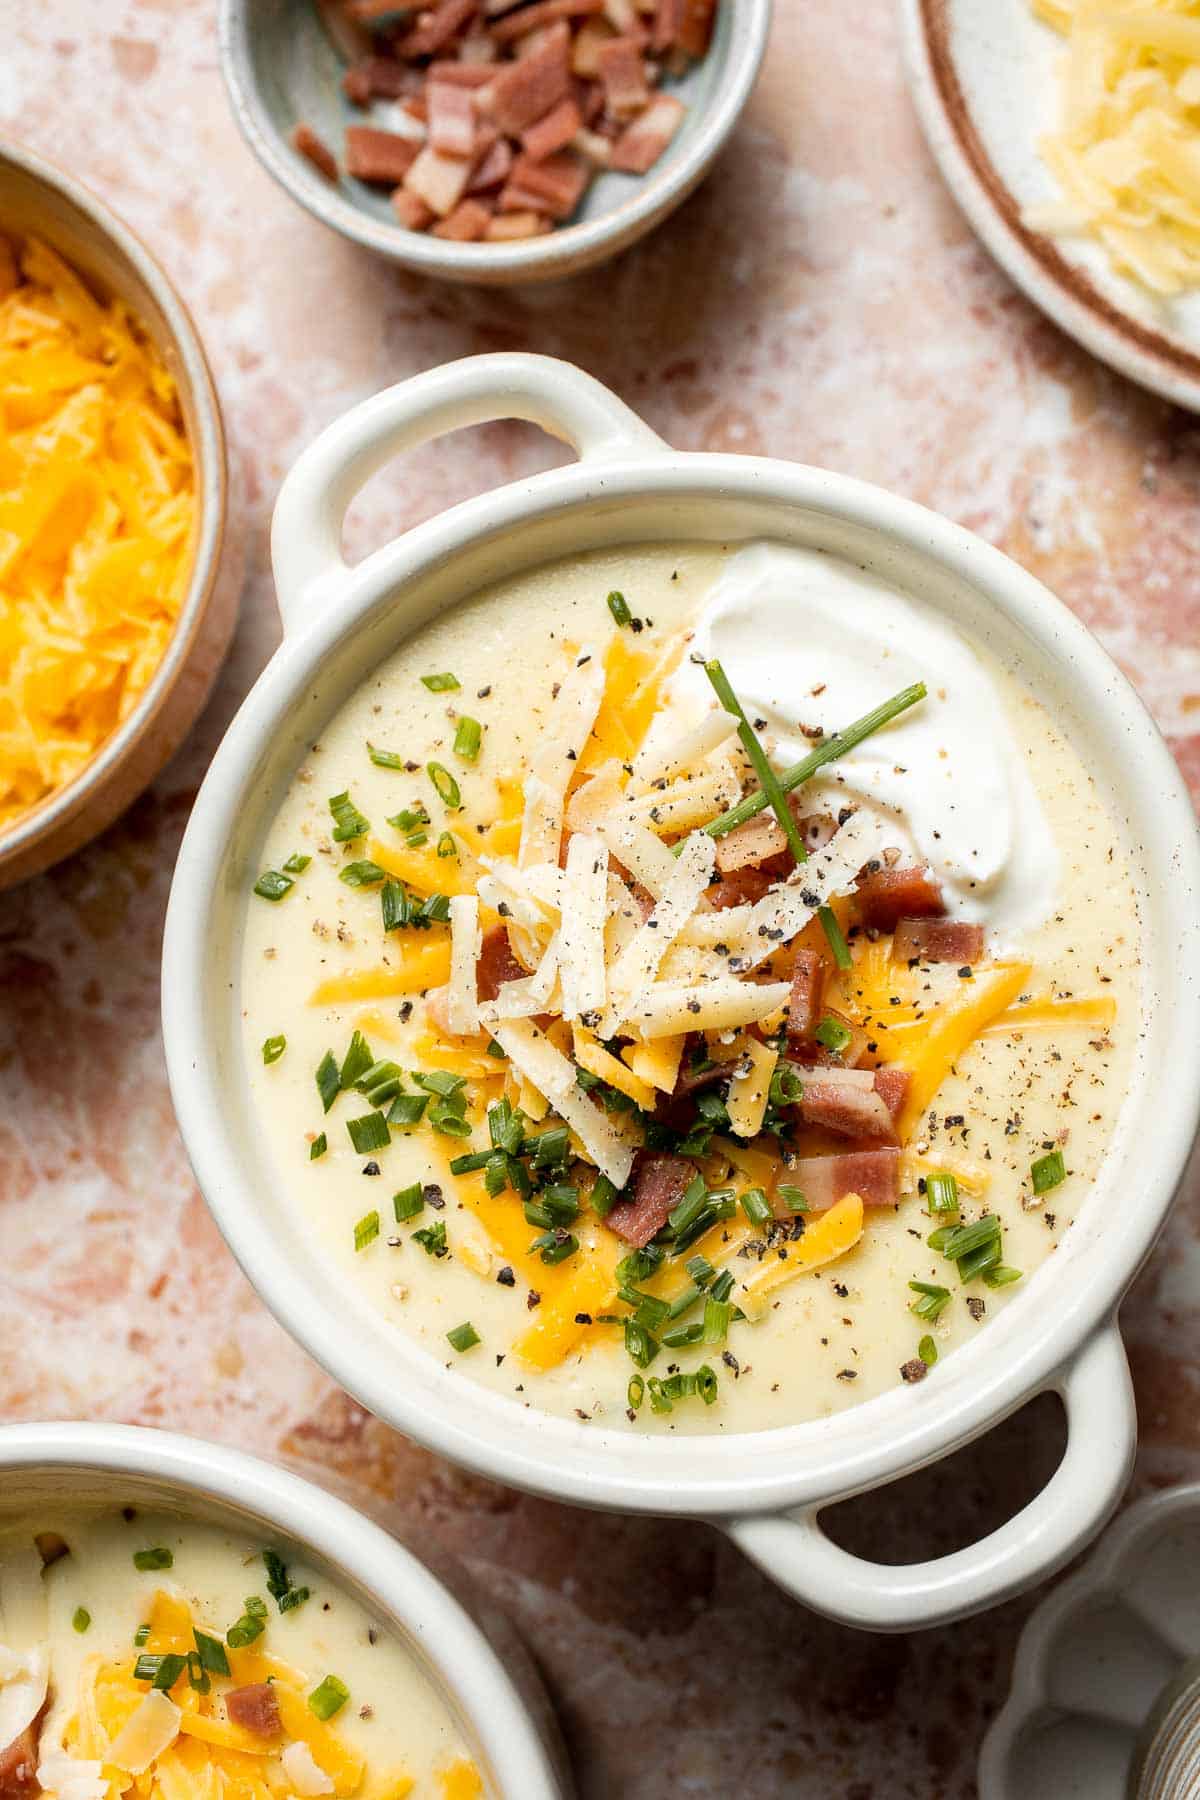
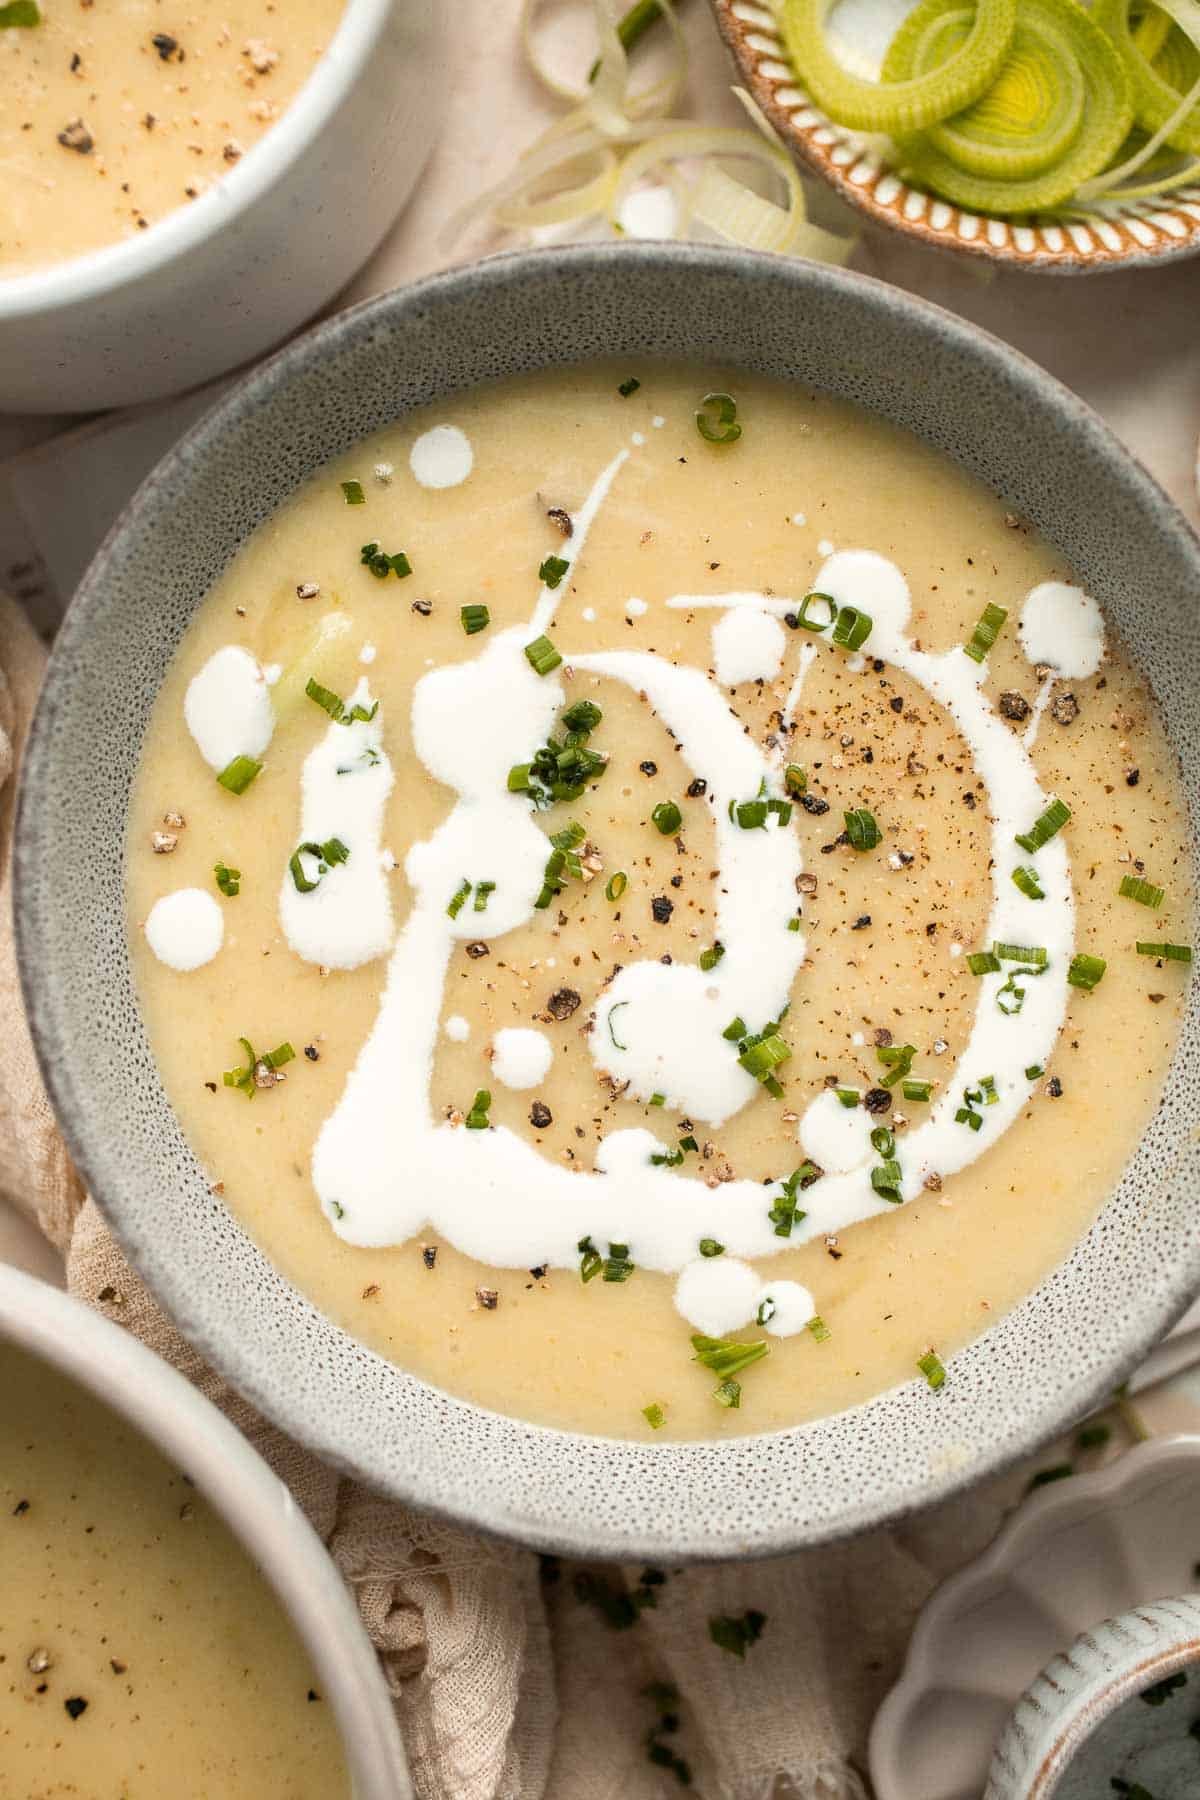
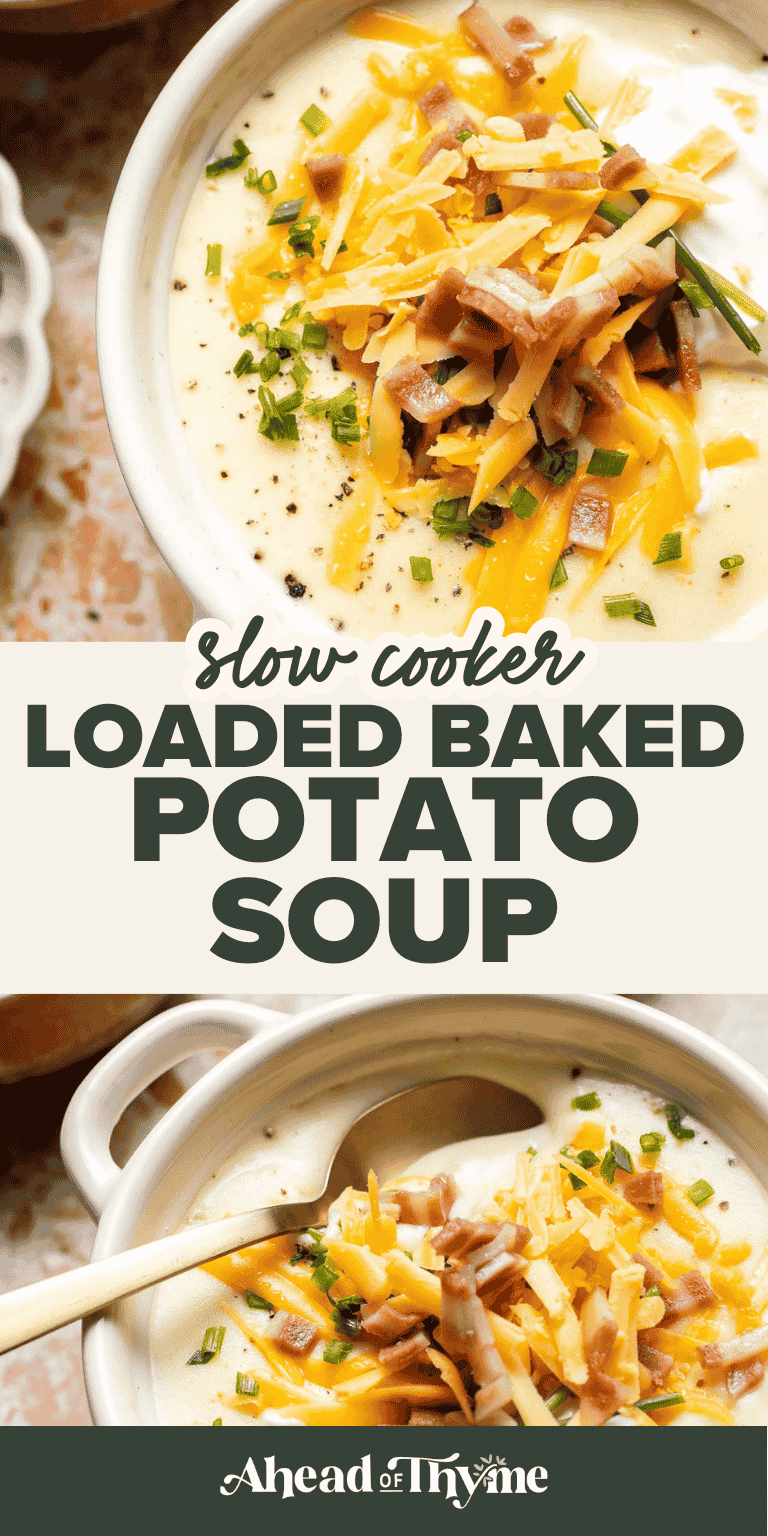
Slow Cooker Loaded Baked Potato Soup

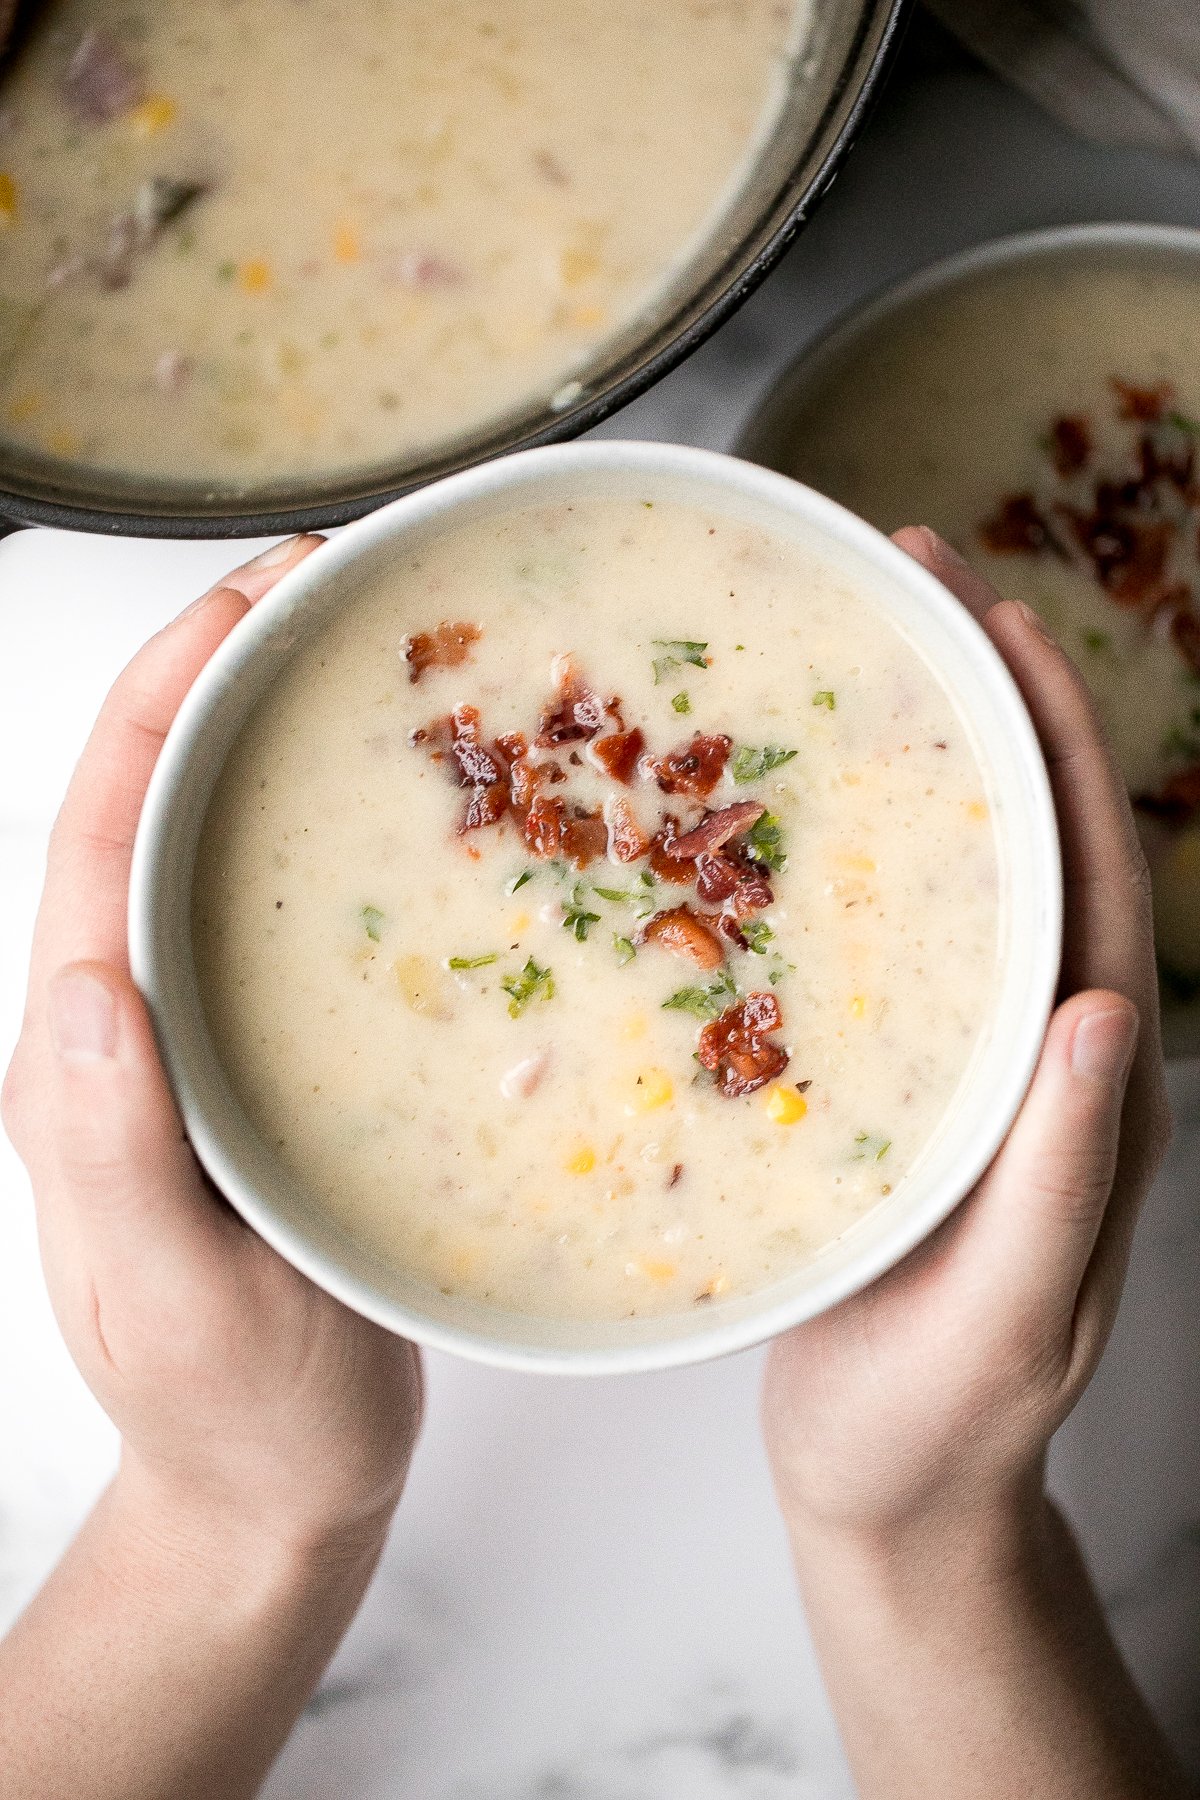
Rich, creamy, and deeply comforting, this Slow Cooker Loaded Baked Potato Soup is everything you love about a classic loaded baked potato, transformed into an easy, hands off soup. Tender chunks of russet potatoes simmer slowly with onion, garlic, butter, and stock, then get finished with cream, sour cream, and sharp cheddar for a soup that is thick, cozy, and incredibly satisfying.
One of the best things about making loaded baked potato soup in the slow cooker is how effortless it is. Everything starts right in the crockpot, giving the potatoes plenty of time to soften and absorb flavor. When it is time to finish the soup, you can mash it for a rustic texture or blend it smooth, depending on your preference.
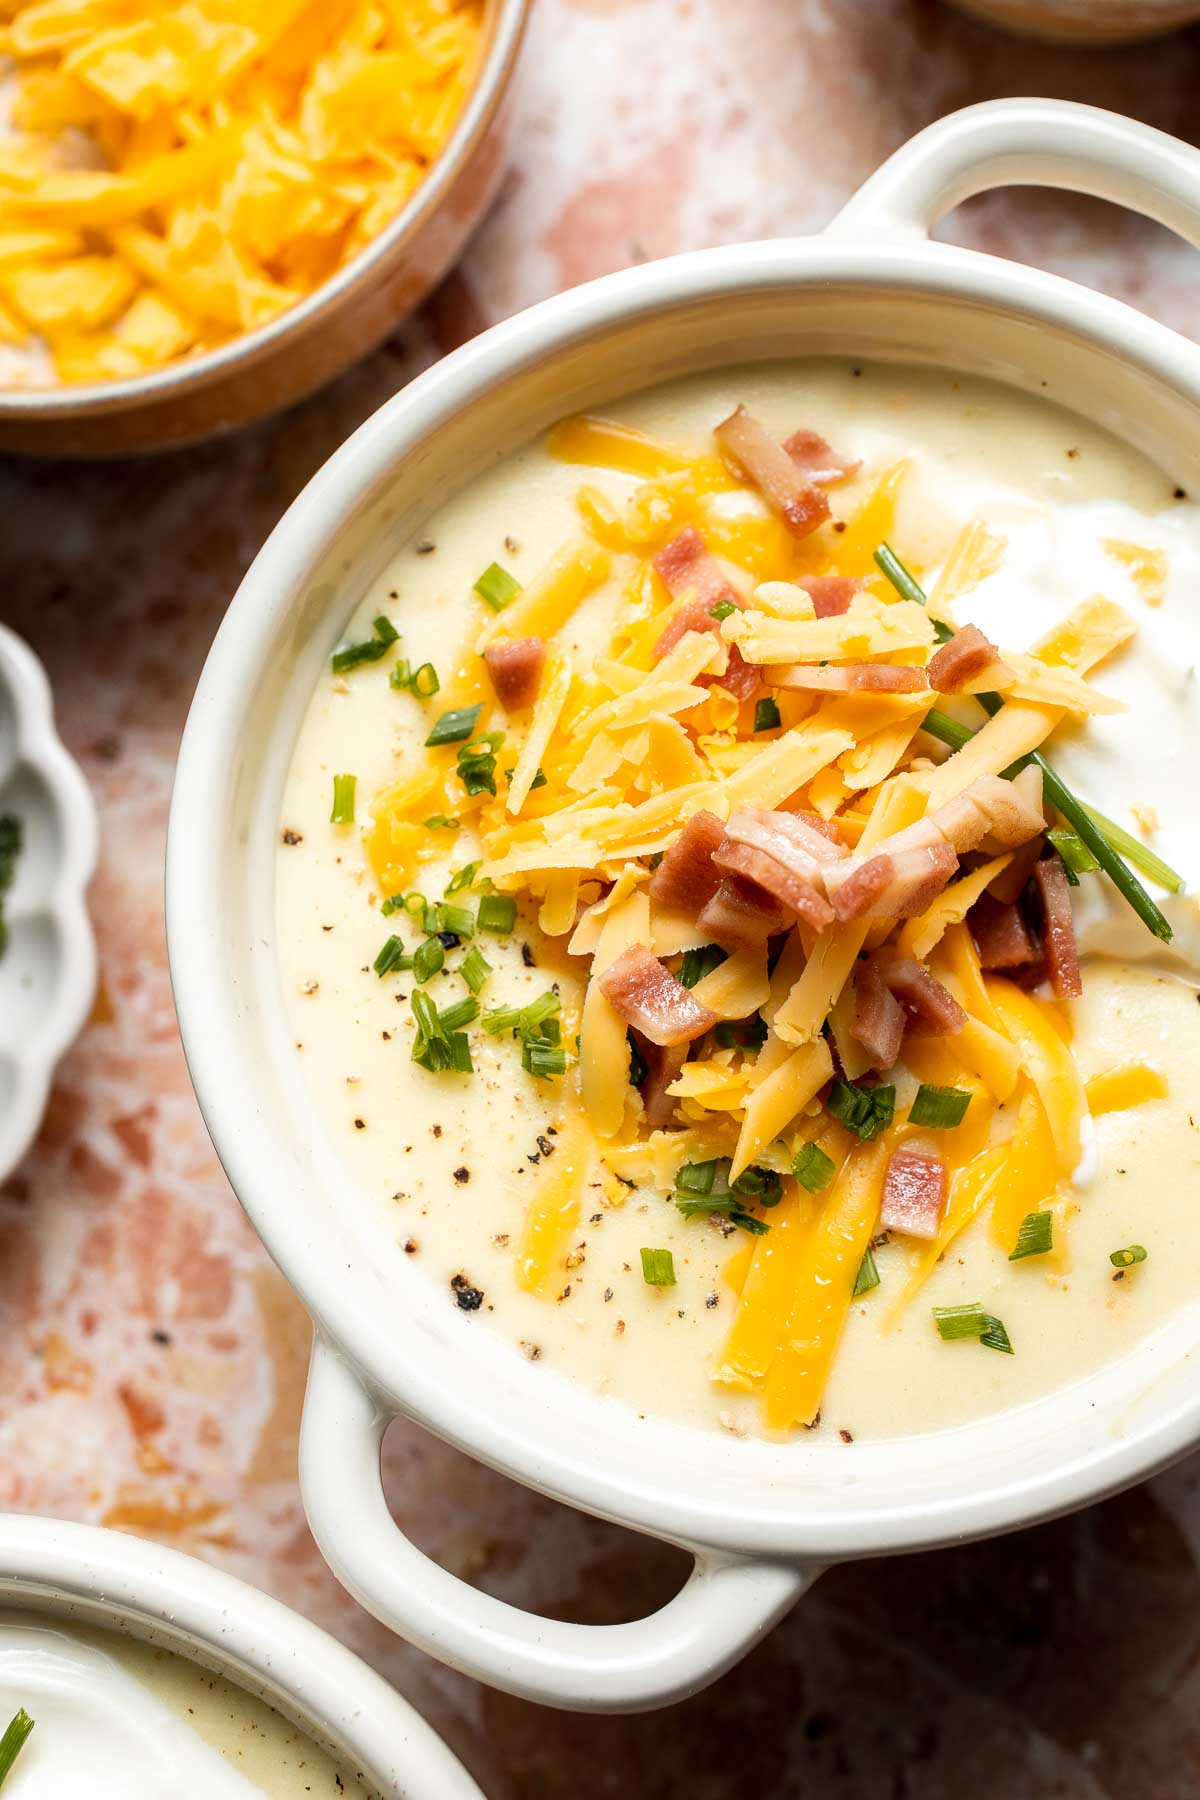
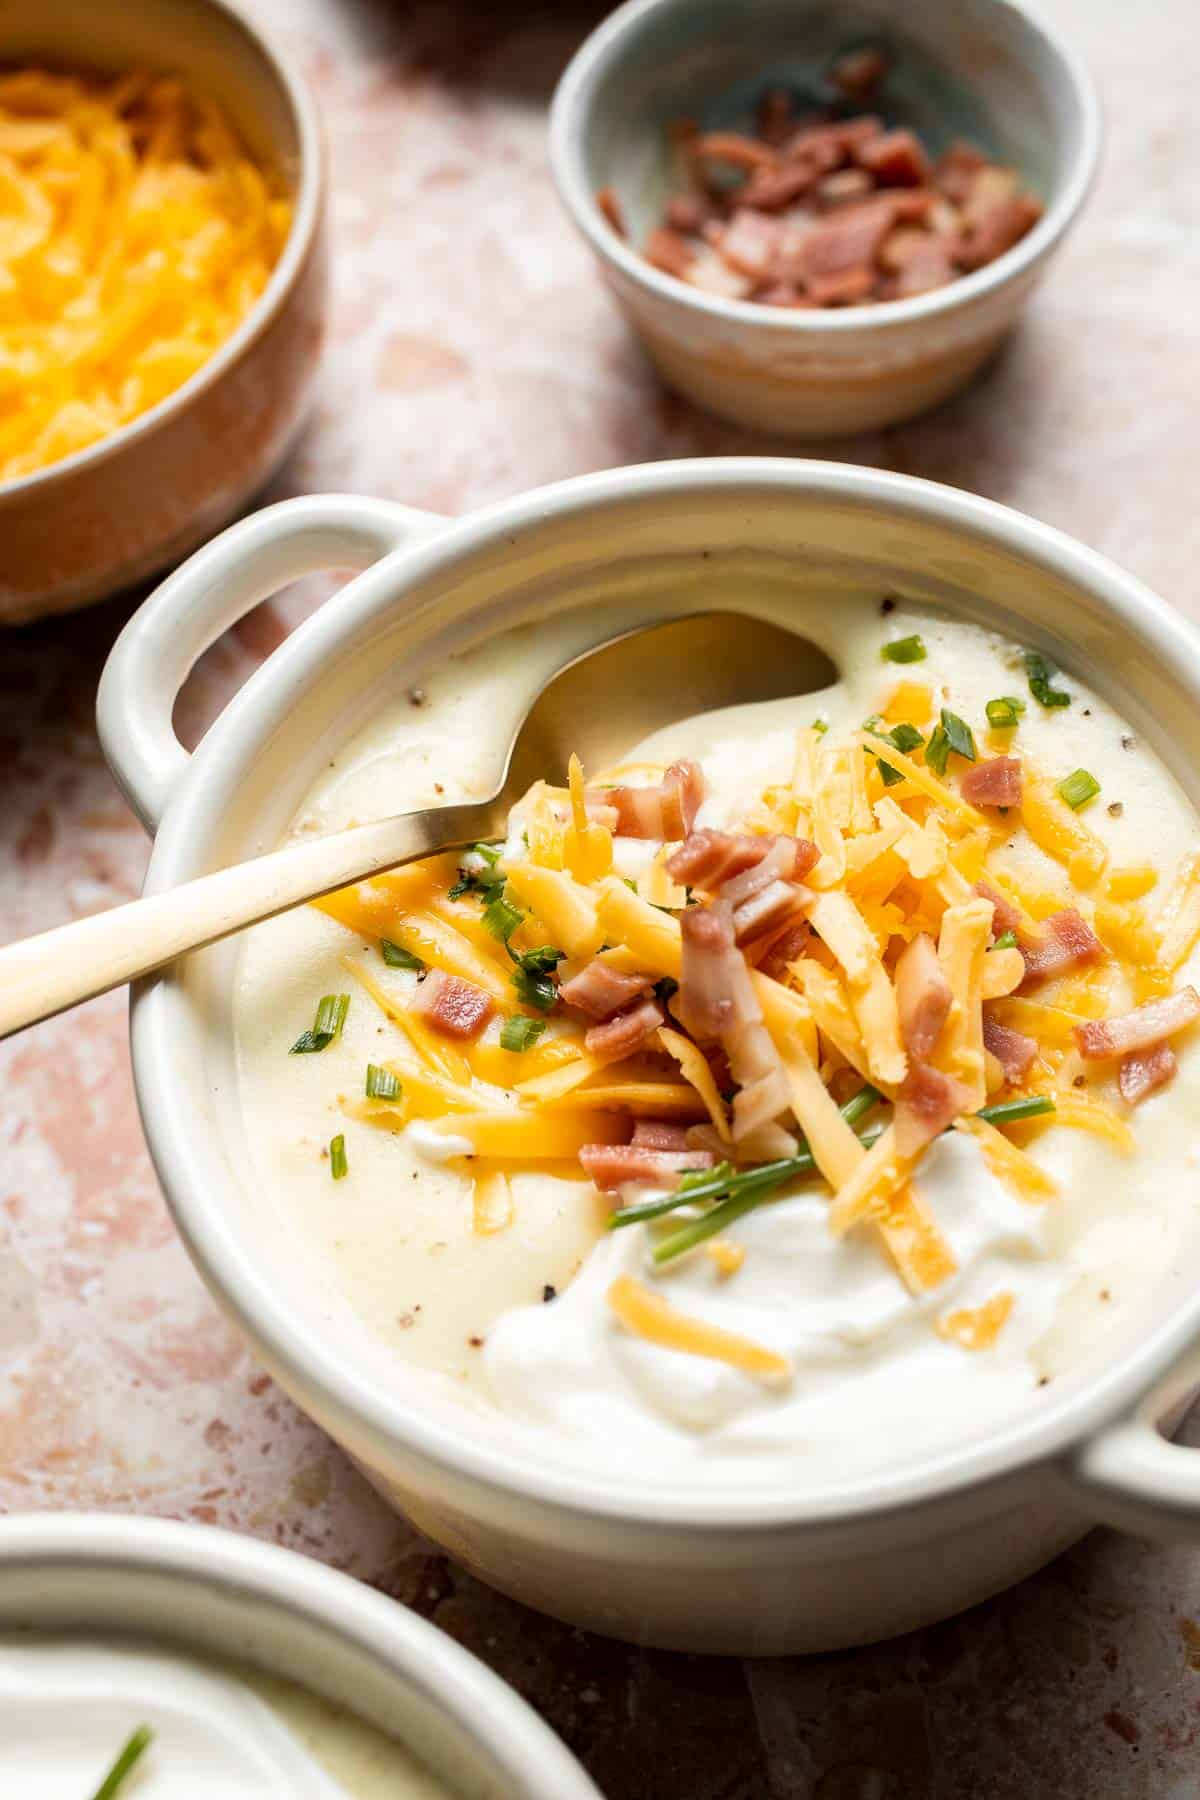
This slow cooker potato soup recipe is perfect for busy weeknights, chilly evenings, or anytime you want a comforting meal with minimal effort. Serve it piled high with bacon, cheese, chives, and extra sour cream for that classic loaded baked potato experience in every bowl.
Why You'll Love This Recipe
- Set it and forget it comfort food. The slow cooker does all the work, making this creamy soup perfect for busy days.
- Rich and creamy texture. Heavy cream, sour cream, and cheddar cheese create a velvety, indulgent finish.
- Customizable consistency. Mash for chunky soup or blend smooth, both options work beautifully.
- Classic loaded potato flavor. Bacon, cheese, and chives bring everything together just like a baked potato.
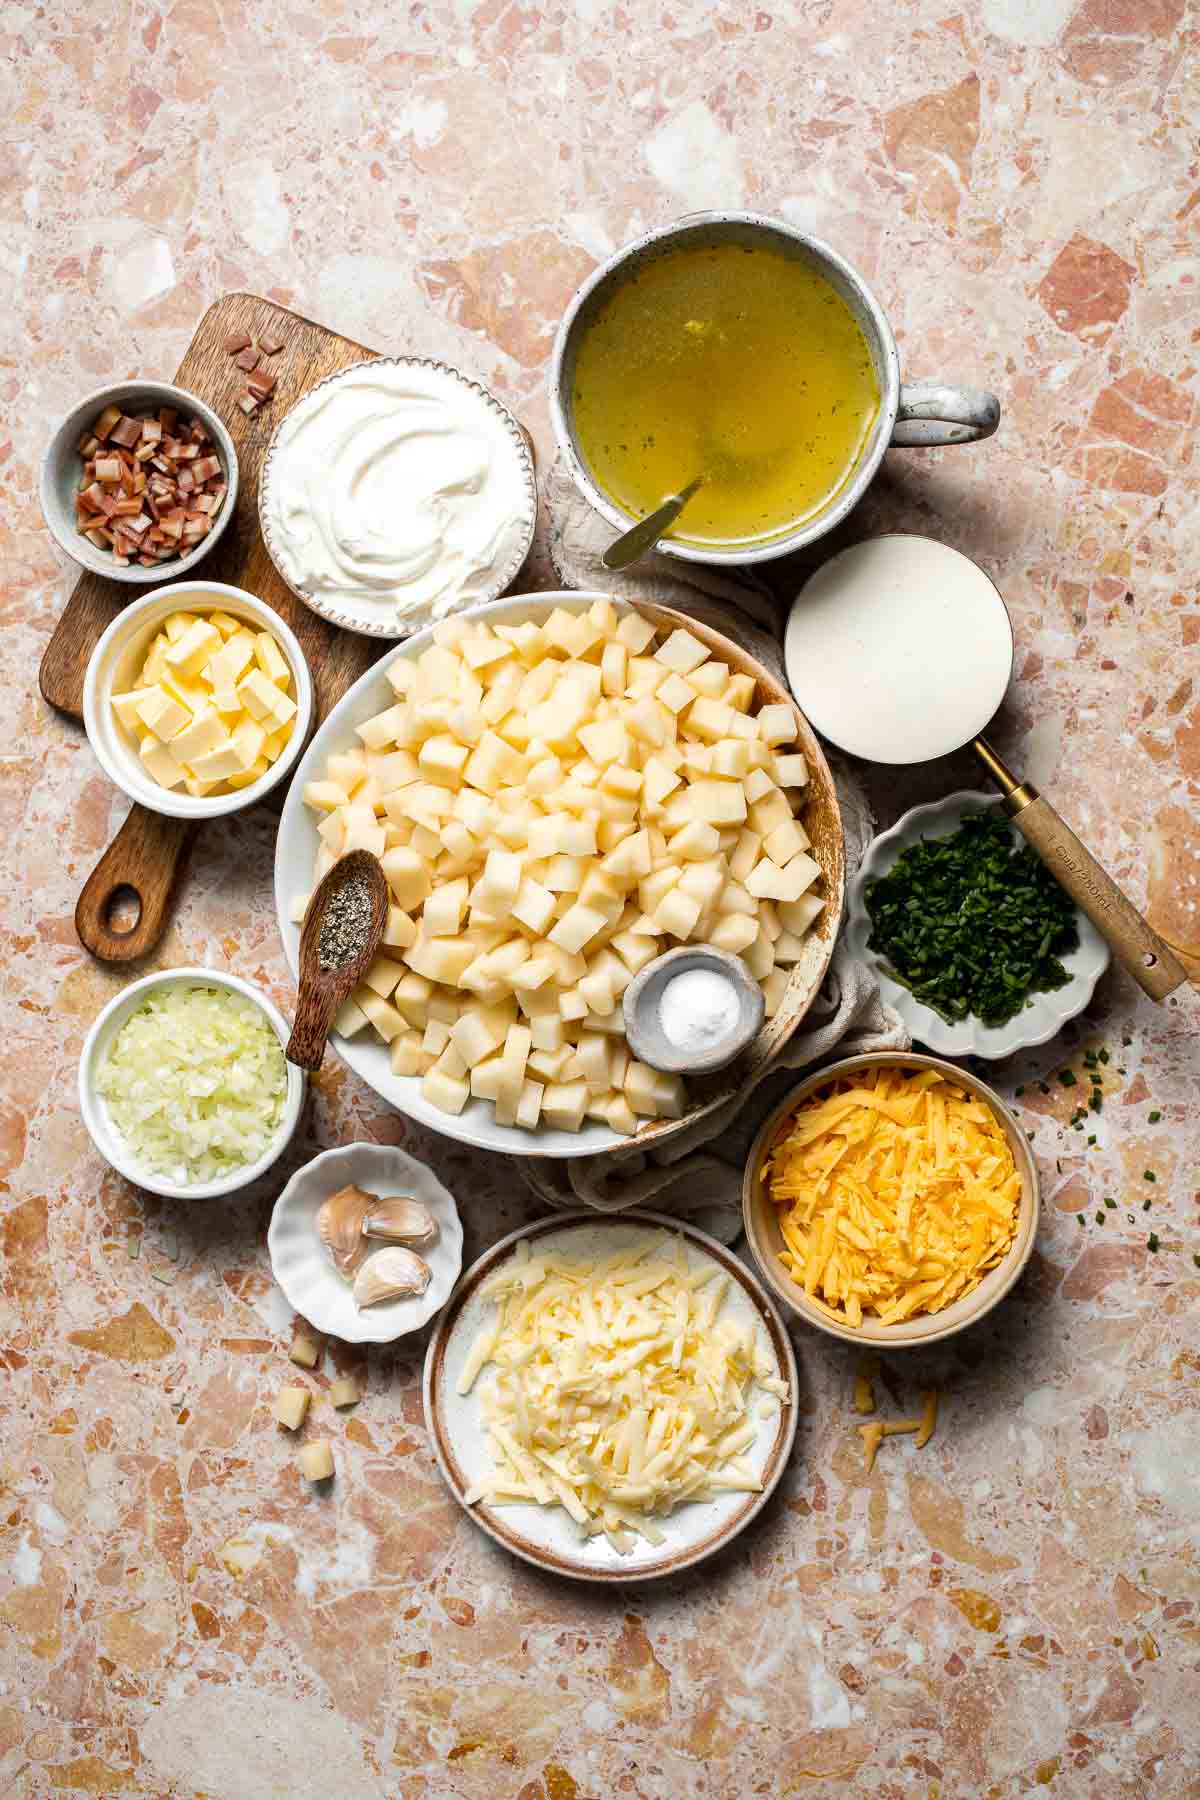
Ingredients and Substitutions
To make this delicious crockpot loaded baked potato soup, you will need the following ingredients (see recipe card below for quantities):
- russet potatoes - Russets are ideal because they break down slightly and create a creamy base. Yukon Gold potatoes also work for a naturally buttery texture.
- yellow onion - Adds sweetness and depth. White onion can be substituted.
- garlic - Fresh garlic provides the best flavor, but garlic powder can be used in a pinch.
- chicken stock - Adds richness. Vegetable stock works well for a vegetarian version.
- unsalted butter - Adds richness and flavor. Salted butter works if you adjust the seasoning.
- salt and black pepper - Season gradually and adjust at the end.
- heavy cream - Creates a creamy, luxurious soup. Half and half can be used for a lighter version, or replace some of the cream with whole milk.
- sour cream - Adds tang and thickness. Greek yogurt can be substituted.
- sharp cheddar cheese - Sharp cheddar provides the most flavor. Mild cheddar or a cheddar blend also work.
- toppings - Garnish with classic loaded baked potato toppings such as bacon, chives, extra cheese, and sour cream to add texture and flavor.
Equipment
You will also need measuring cups and spoons, a large slow cooker, a spoon for stirring, a potato masher or immersion blender, and a ladle for serving.
Instructions
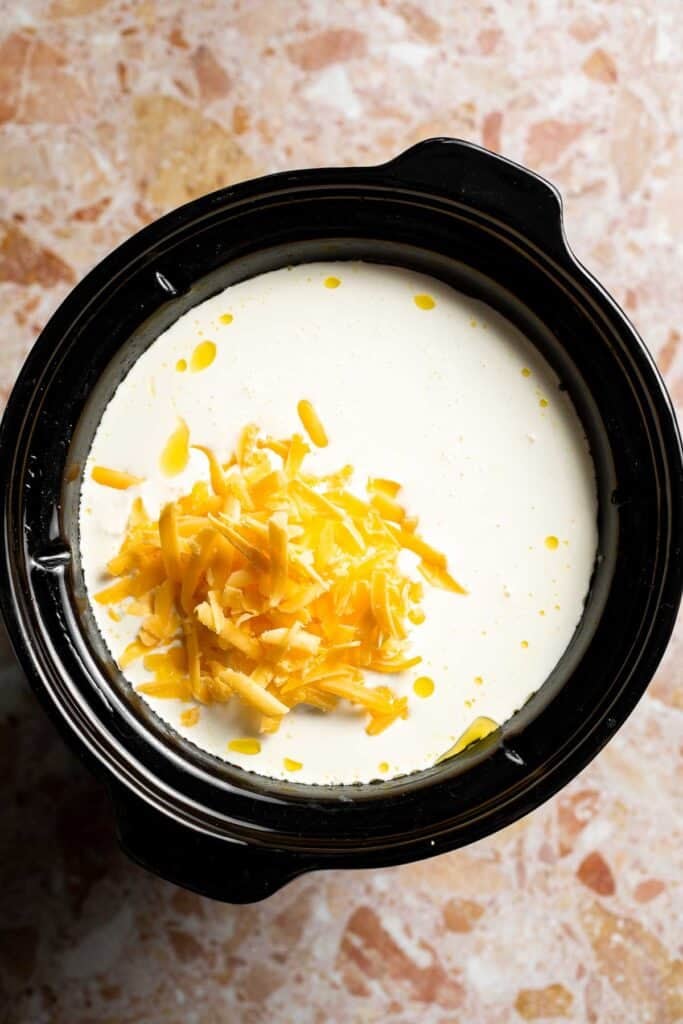
- Add ingredients to the slow cooker. Add the potatoes, onion, garlic, chicken stock, butter, salt, and black pepper directly to the slow cooker. Stir to combine.
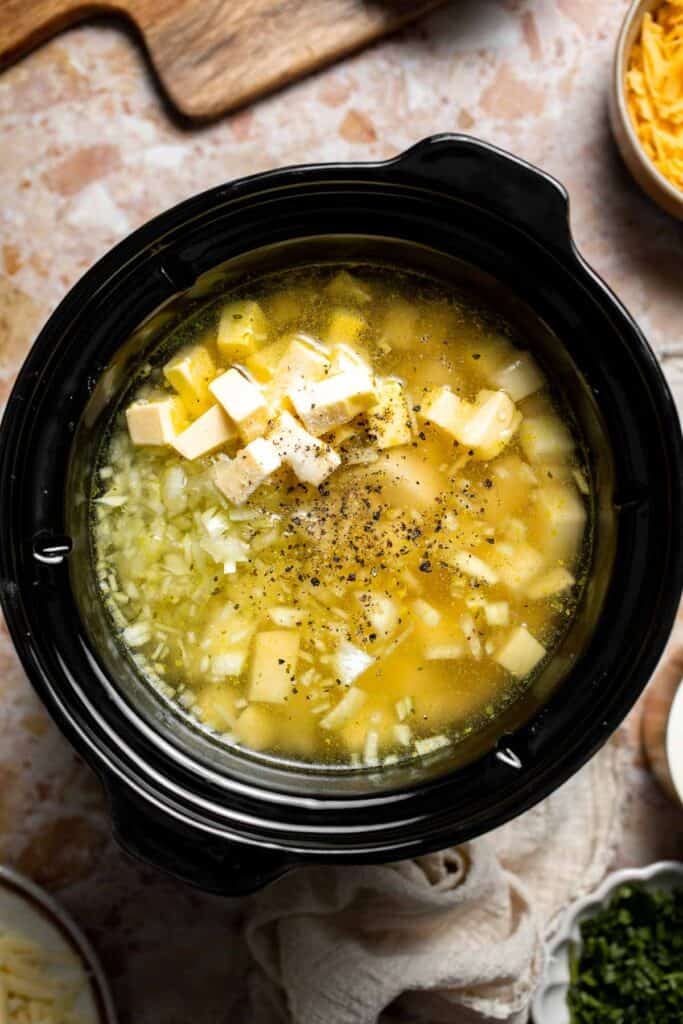
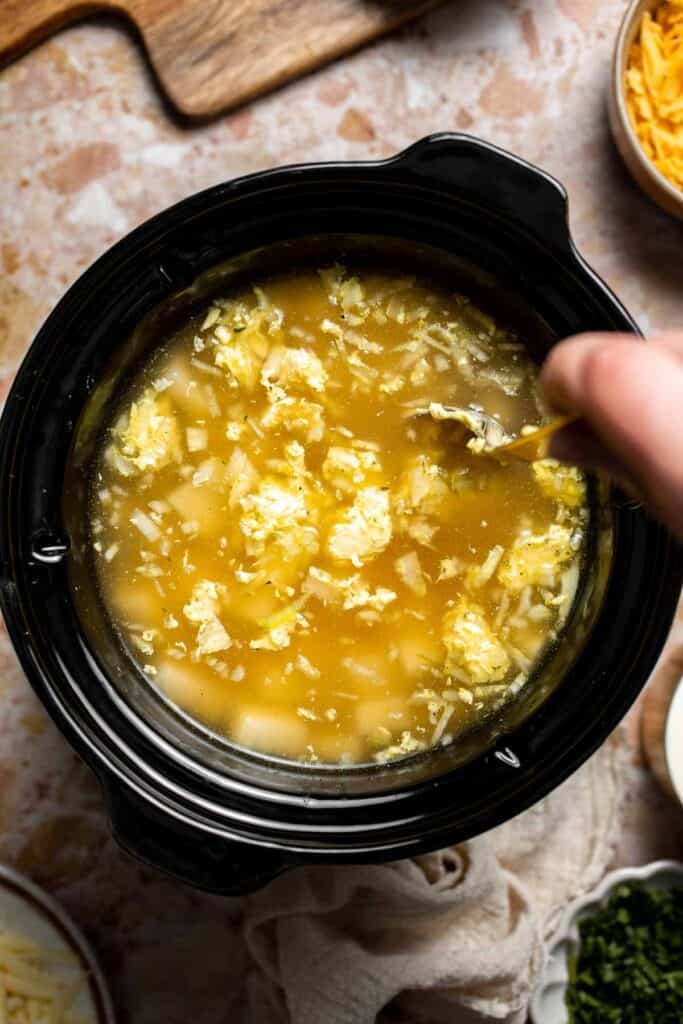
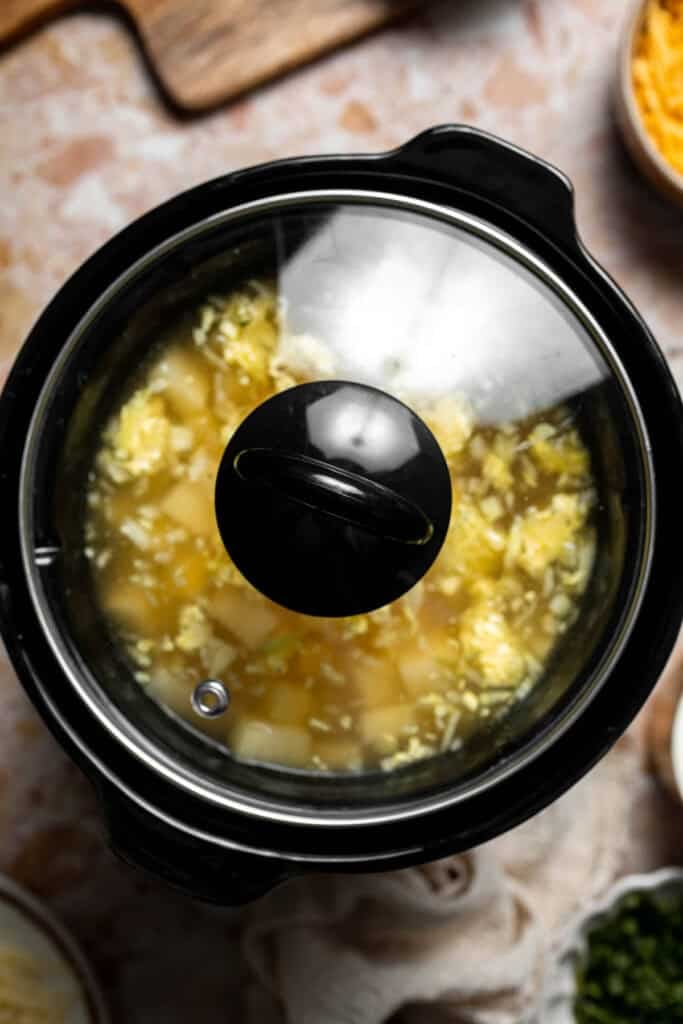
- Slow cook until tender. Cover and cook on HIGH for 3 to 4 hours or on LOW for 6 to 7 hours, until the potatoes are very tender.
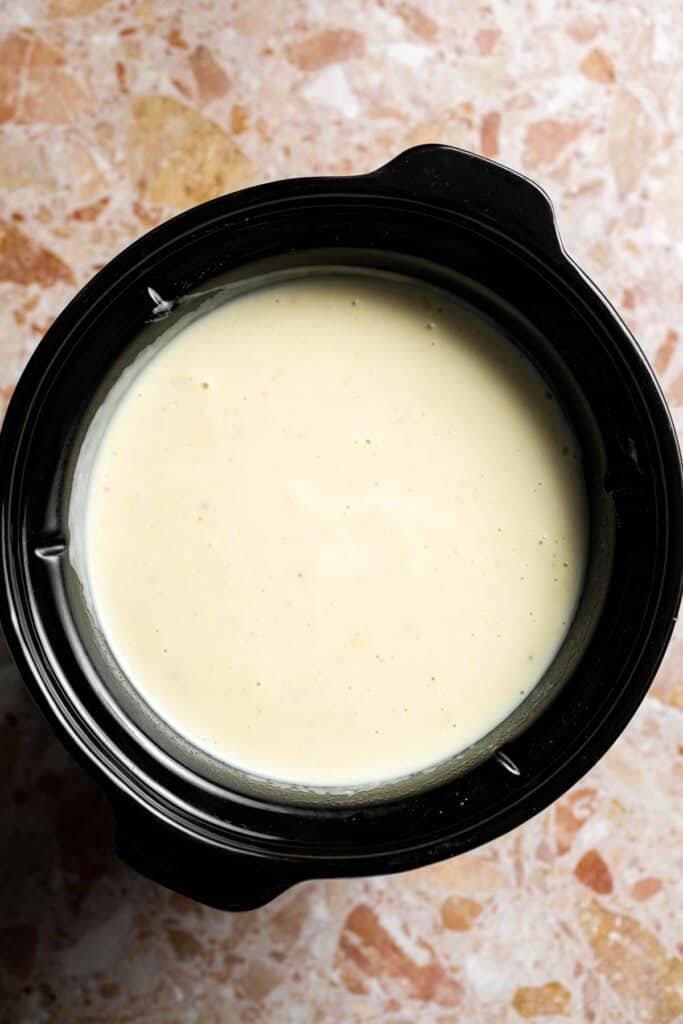
- Mash or blend the soup. Mash the soup gently with a potato masher for a rustic texture, or use an immersion blender for a smoother soup.

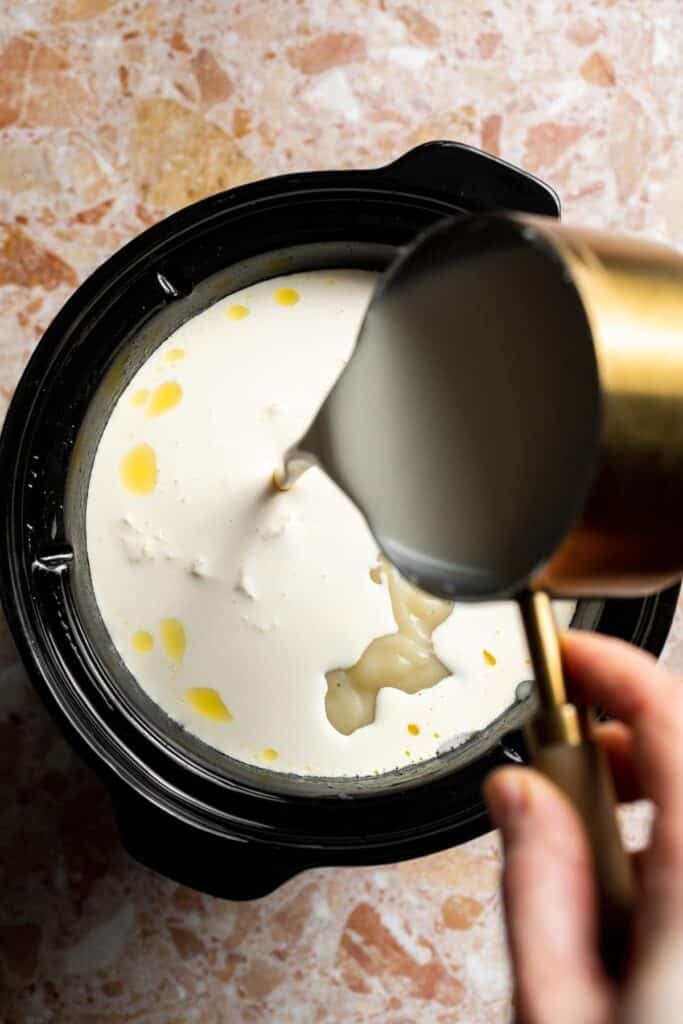
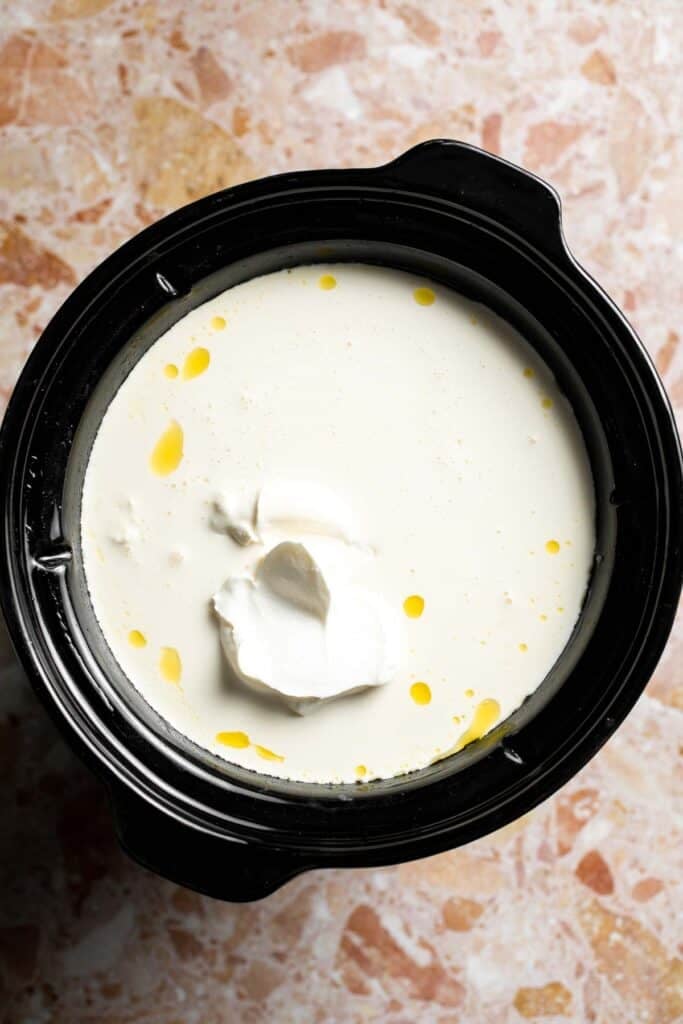
- Finish with dairy and cheese. Stir in the heavy cream, sour cream, and shredded cheddar cheese until melted and smooth. Let the soup heat through for 10 minutes. Taste and adjust salt and pepper as needed.
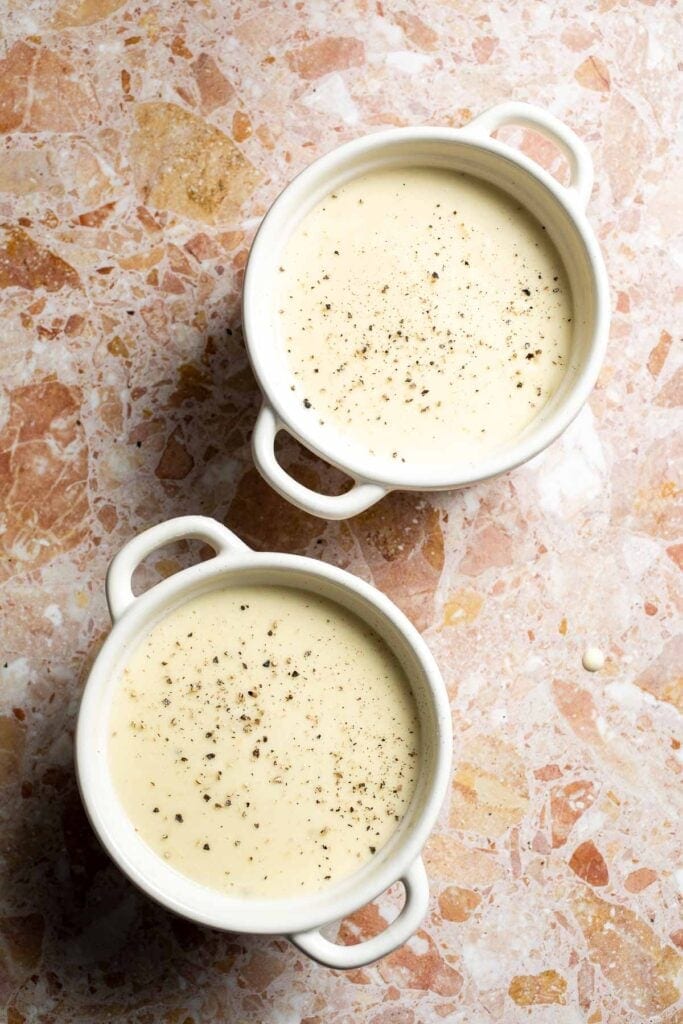
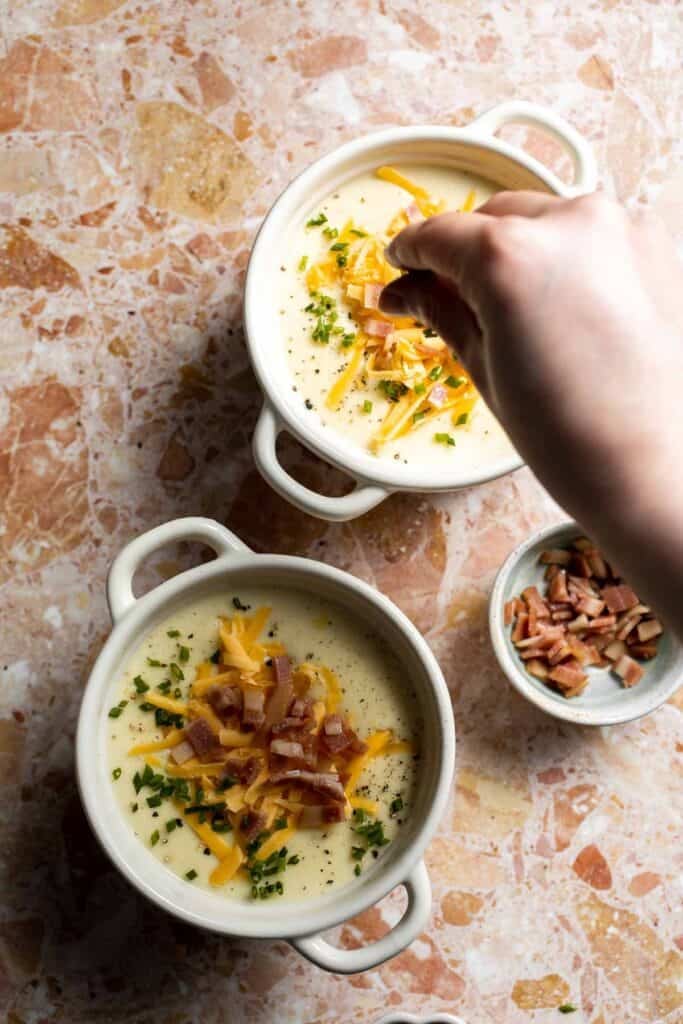
- Serve and garnish. Ladle into bowls and top with bacon, extra cheese, green onions, and an extra dollop of sour cream.


Instant Pot Instructions
To make this soup in the Instant Pot, add the potatoes, onion, garlic, stock, butter, salt, and pepper to the pot. Seal the lid and set the valve to sealing. Cook on high pressure for 10 minutes, then allow a 10 minute natural release before carefully releasing the remaining pressure. Mash or blend the soup, then switch to sauté on low and stir in the cream, sour cream, and cheese until melted and smooth.
Stovetop Instructions
Add the potatoes, onion, garlic, stock, butter, salt, and pepper to a large pot. Bring to a boil on the stove, then reduce heat and simmer for 20-25 minutes until the potatoes are very tender. Mash or blend the soup, then stir in the cream, sour cream, and cheese. Simmer gently for a few minutes until heated through, then serve.
Expert Tip: Do Not Over Blend
If you prefer a smooth soup, blend just until creamy. Over blending potatoes can make the soup gluey instead of silky. A few small potato pieces add great texture.
More Tips and Tricks
- Cut potatoes evenly. Cutting the potatoes into uniform half inch cubes ensures they cook evenly and soften at the same rate. This helps avoid undercooked chunks and makes mashing or blending much easier.
- Season in layers. Start with a modest amount of salt early in the cooking process, then adjust once the cream, sour cream, and cheese are added. Dairy can mute seasoning, so final adjustments at the end make a big difference.
- Shred cheese fresh. Freshly shredded cheddar melts more smoothly than pre shredded cheese, which often contains anti caking agents. This gives the soup a creamier texture without graininess.
- Blend carefully. If using an immersion blender, blend just until smooth. Over blending potatoes can release too much starch and make the soup gluey rather than creamy.
- Let the soup rest briefly. Allowing the soup to sit for 10 minutes after adding the dairy helps the flavors meld and gives the soup time to thicken slightly before serving.
Recipe Variations
- Make it extra chunky. Mash only a small portion of the potatoes and leave the rest intact for a hearty, rustic soup with lots of texture and visible potato pieces.
- Smooth and creamy version. Blend most or all of the soup until smooth, then stir in the cheese and dairy for a silky, restaurant style potato soup.
- Vegetarian loaded potato soup. Use vegetable stock instead of chicken stock and skip the bacon topping or try a vegan bacon. You can add smoked paprika for extra depth of flavor.
- Extra cheesy potato soup. Add an additional half cup to one cup of shredded cheddar for a more indulgent, cheese forward version.
- Spicy loaded potato soup. Stir in cayenne pepper, crushed red pepper flakes, or top with sliced jalapeños for a little heat.

Storage
How to Store
Store leftovers in an airtight container in the refrigerator for up to 4 days.
How to Reheat
Reheat gently on the stovetop or in the microwave, stirring occasionally. Add a splash of stock or milk if the soup thickens too much.
How to Freeze
This soup can be frozen, but the texture may change slightly due to the dairy. Freeze without toppings in a freezer safe container for up to 2 months. Thaw overnight in the refrigerator before reheating.
How to Serve
Serve slow cooker loaded baked potato soup hot with extra shredded cheese, crispy bacon, chives, and a swirl of sour cream. Pair it with crusty bread, garlic toast, or a simple green salad for a complete meal.
These are my favorite side dishes to serve with this crockpot potato soup:


Side Dishes for Soup
Looking for the perfect accompaniments to your favorite soups? Explore our collection of soup side dishes, including crusty breads, fresh salads, savory crackers, and hearty sandwiches that complement and elevate any bowl of soup.
FAQ
Baked potato soup is typically made with potatoes, onion, garlic, butter, and broth as the base. Creamy versions include dairy like heavy cream or milk, while loaded baked potato soup also features cheese, sour cream, bacon, and chives to mirror classic baked potato toppings. The soup can be left chunky or partially blended depending on preference.
Potato soup typically takes 3 to 4 hours on HIGH or 6 to 7 hours on LOW in a slow cooker. The soup is ready when the potatoes are very tender and easily mashable with a fork or potato masher.
Common mistakes include under seasoning, over blending the potatoes, adding dairy too early, and using the wrong type of potato. Over blending releases too much starch and can make the soup gluey, while adding dairy too early can cause it to separate or thin out the flavor.
No, you do not need to boil potatoes before adding them to a slow cooker. The slow cooker provides enough heat and time for the potatoes to cook fully and become tender on their own, as long as they are cut into evenly sized pieces.
Sharp cheddar cheese is the most popular choice for potato soup because it adds strong flavor and melts well. Mild cheddar, Colby Jack, or a cheddar blend also work. Avoid pre shredded cheese when possible, as it does not melt as smoothly.
Dairy should be added near the end of the cooking time. Adding cream, sour cream, or cheese too early can cause curdling or dull the flavor. Stir dairy in after the potatoes are fully cooked and the heat is lower.
Potato soup can taste bland if it is under seasoned or if the seasoning is added too early. Potatoes absorb a lot of salt, so seasoning needs to be adjusted at the end. Using a flavorful stock, adding enough salt, and finishing with cheese or sour cream helps boost flavor.
To enhance flavor, add sharp cheddar cheese, bacon, chives, garlic, or a pinch of smoked paprika. A small amount of sour cream or a splash of cream at the end can also brighten and balance the soup.
Avoid lifting the lid too often, as this releases heat and slows cooking. Do not overfill the slow cooker, and always add dairy near the end. Cutting ingredients unevenly and under seasoning early are also common slow cooker mistakes.
This usually happens from over blending. Potatoes release a lot of starch when blended too much, which can create a gummy texture. Mashing by hand or blending gently prevents this issue.
More Potato Soup Recipes
Looking for other recipes like this? Try these:


Tried this recipe?
I'd love to hear what you think! Leave a comment and rating below to share your feedback. Your reviews help others discover this recipe and help me keep creating more free recipes for you. Snap a photo and tag me on social media @aheadofthyme too.
This post was originally published in 2016. It has since been updated with new photos and helpful content.
Gingerbread Latte

Warm, cozy, and perfectly spiced, this Gingerbread Latte is made with espresso, steamed milk, and a simple homemade gingerbread syrup that tastes just like the holidays in a mug. It is rich, lightly sweet, and full of classic gingerbread flavor from molasses, ginger, cinnamon, nutmeg, and cloves. Best of all, it comes together in minutes and tastes just as good as a coffee shop version, if not better.

Making a gingerbread latte at home gives you full control over the sweetness and spice level. The homemade syrup is quick to stir together and can be adjusted to taste, whether you prefer a stronger molasses flavor or a more subtle warmth from the spices. Paired with freshly brewed espresso and silky steamed milk, this latte feels indulgent without being overly heavy.
This homemade gingerbread latte is perfect for cozy mornings, afternoon pick me ups, or serving as a festive drink during the holiday season. Enjoy it plain, topped with whipped cream, or finished with a sprinkle of cinnamon or nutmeg. Once you try it, you may never go back to store bought syrups again.

Why You'll Love This Recipe
- Cozy and comforting. Warm spices and molasses create that classic gingerbread flavor everyone loves. Enjoy it during Christmas, throughout the winter, or any time of year you're craving something cozy.
- Made with real ingredients. No artificial syrups, just pantry staples mixed together in minutes. Taste the difference immediately! It's deeper, warmer, more balanced, and you know exactly what simple ingredients are going into your mug.
- Easy to customize. You can adjust the sweetness, spice level, or milk to suit your taste.
- Coffee shop quality at home. Creamy, smooth, and perfectly balanced every time. With just a few minutes and basic equipment, you can make a holiday latte that tastes just as good as one from your favorite café.
Ingredients and Substitutions

To make this delicious Gingerbread Latte recipe, you will need the following ingredients (see recipe card below for quantities):
- maple syrup (or honey) - Maple syrup adds warmth and depth, while honey gives a slightly floral sweetness.
- molasses - Essential for classic gingerbread flavor. Use unsulphured molasses for best results.
- ground ginger - Provides warmth and spice. Fresh ginger is not recommended here.
- ground cinnamon - Adds sweetness and balance to the ginger. Sprinkle some on top of the drink too, if desired.
- ground nutmeg and cloves - Used in small amounts to round out the spice profile.
- hot water - Helps thin the syrup to a pourable consistency.
- espresso - Use freshly brewed espresso or strong coffee if needed. If using coffee that is not very strong instead, use less milk if your coffee so the gingerbread flavor still comes through.
- milk - Whole milk creates the creamiest texture, but almond, oat, or soy milk work well too.
- whipped cream - Optional, but adds a classic finishing touch.
Equipment
You will also need measuring spoons, a small bowl, a spoon for stirring, espresso machine or coffee maker, a saucepan or microwave safe container for heating milk, and a milk frother or whisk.
Instructions
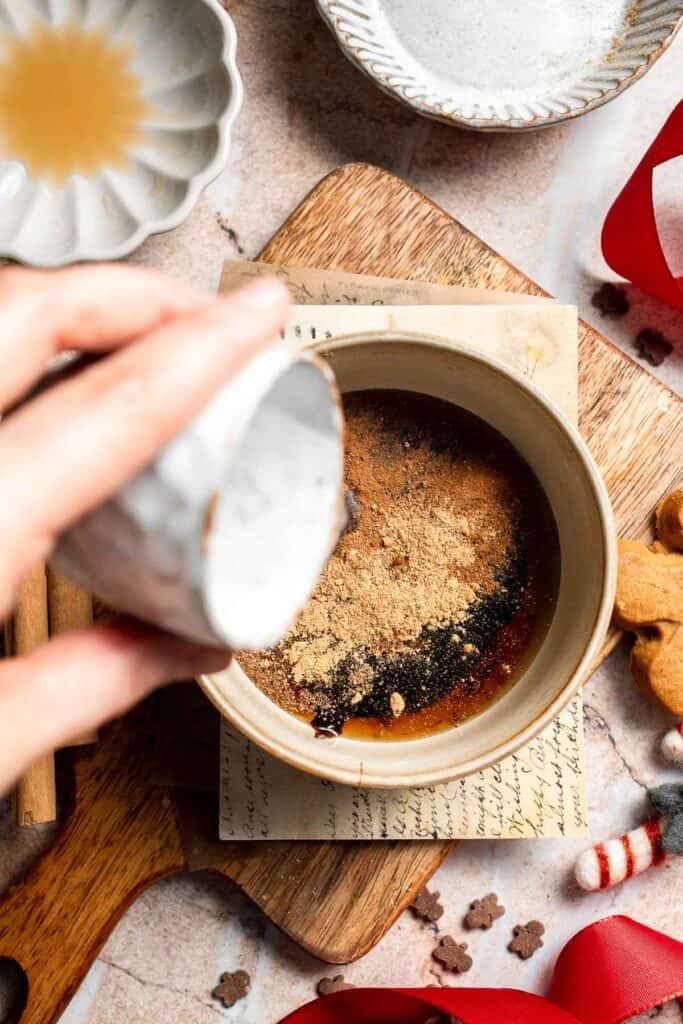
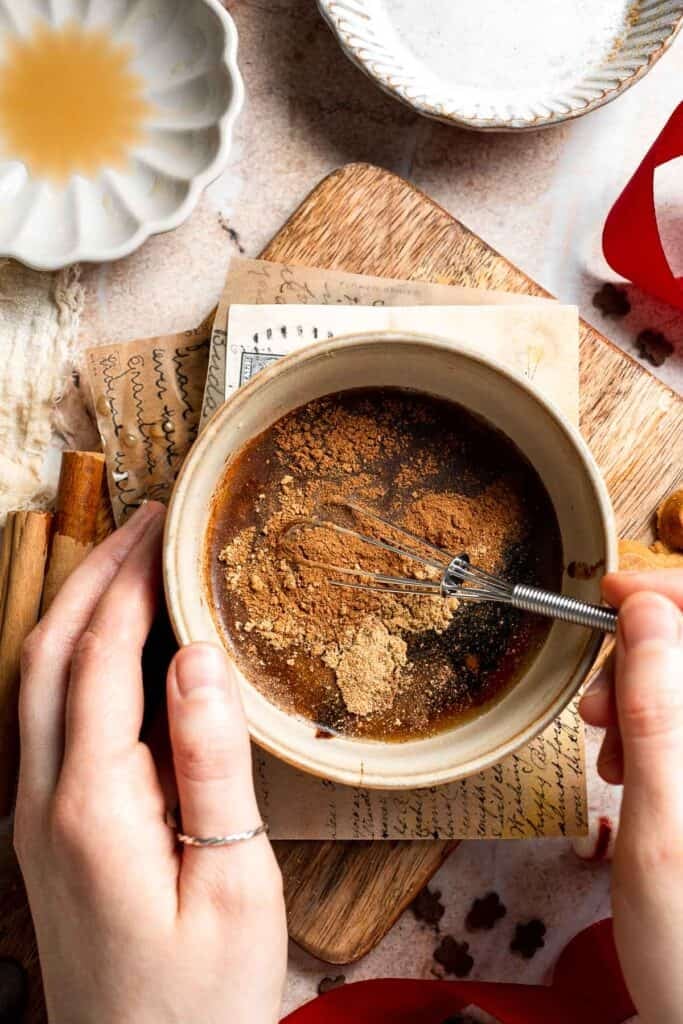
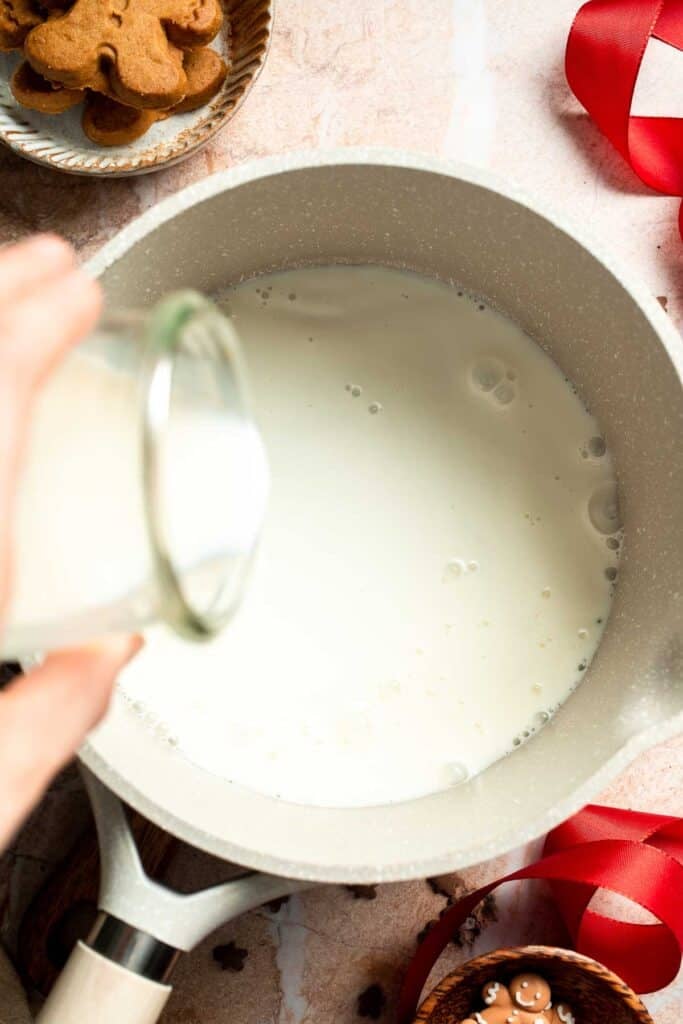
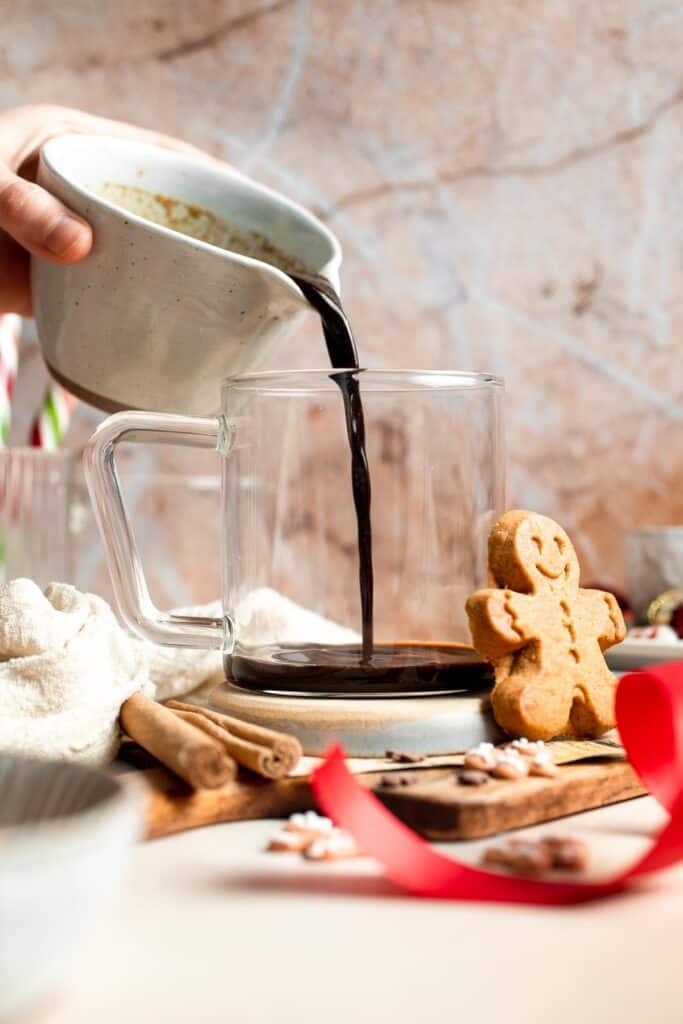
- Make the gingerbread syrup. In a small bowl, stir together maple syrup (or honey), molasses, ginger, cinnamon, nutmeg, and cloves. Add a splash of hot water to thin until pourable.
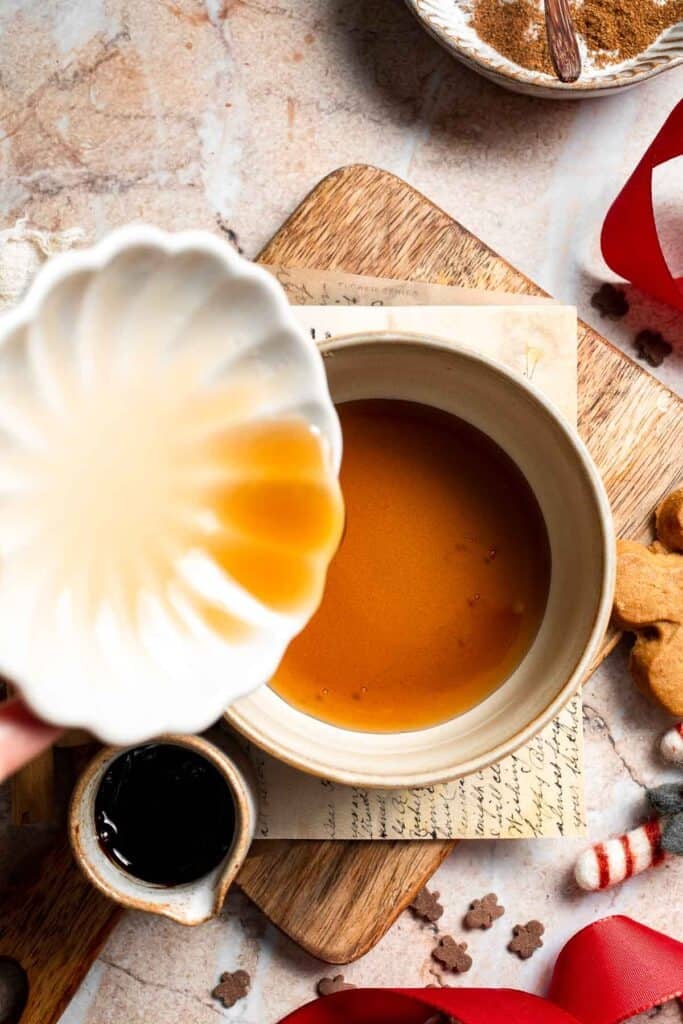


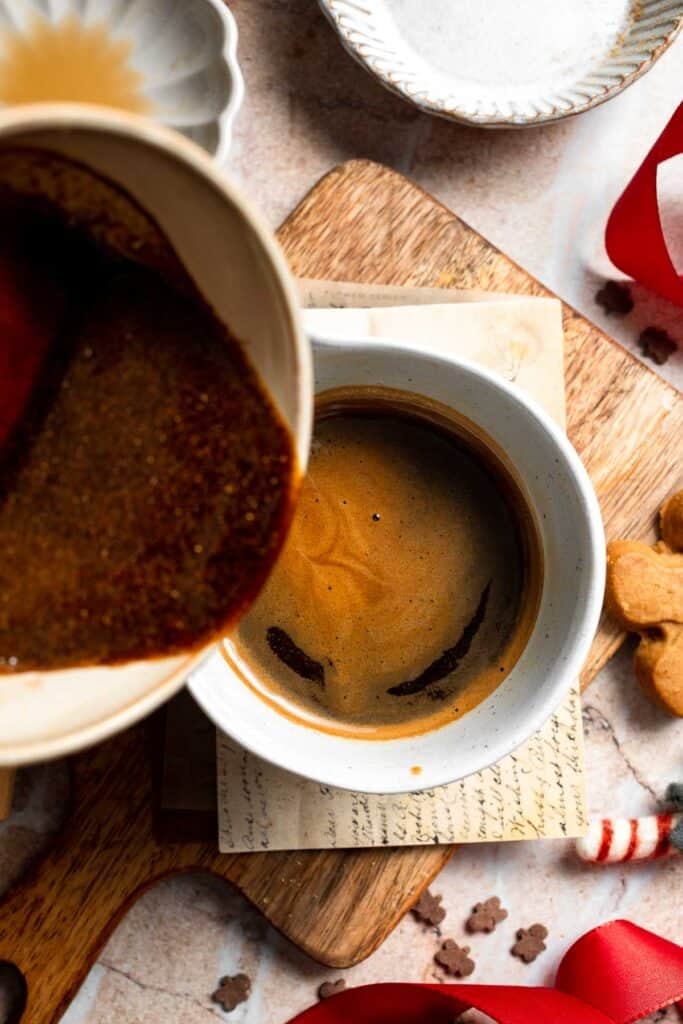
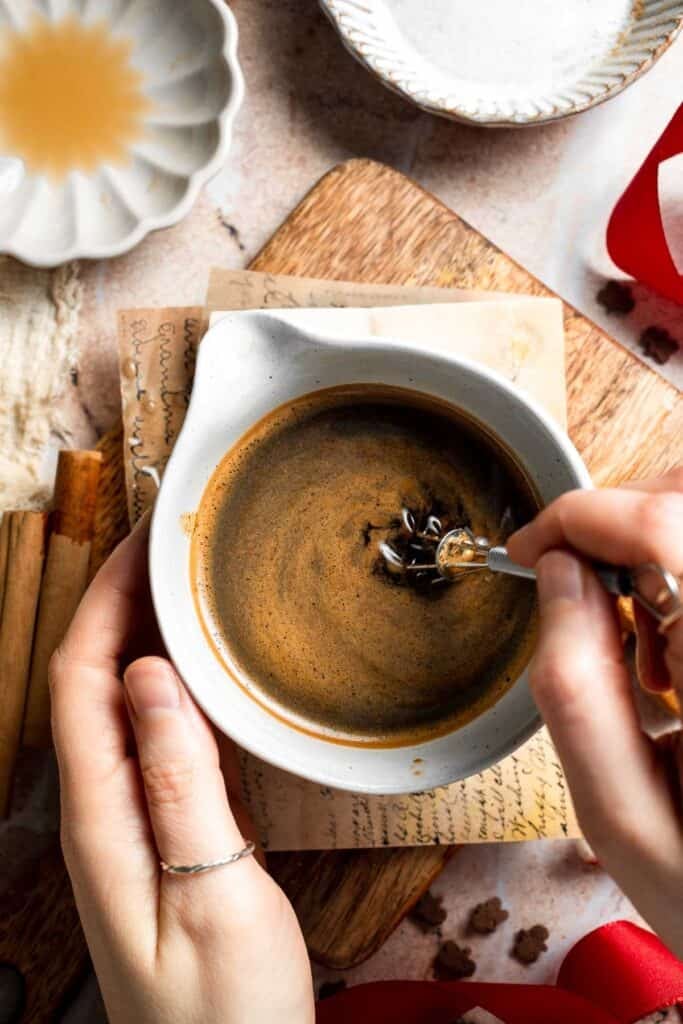
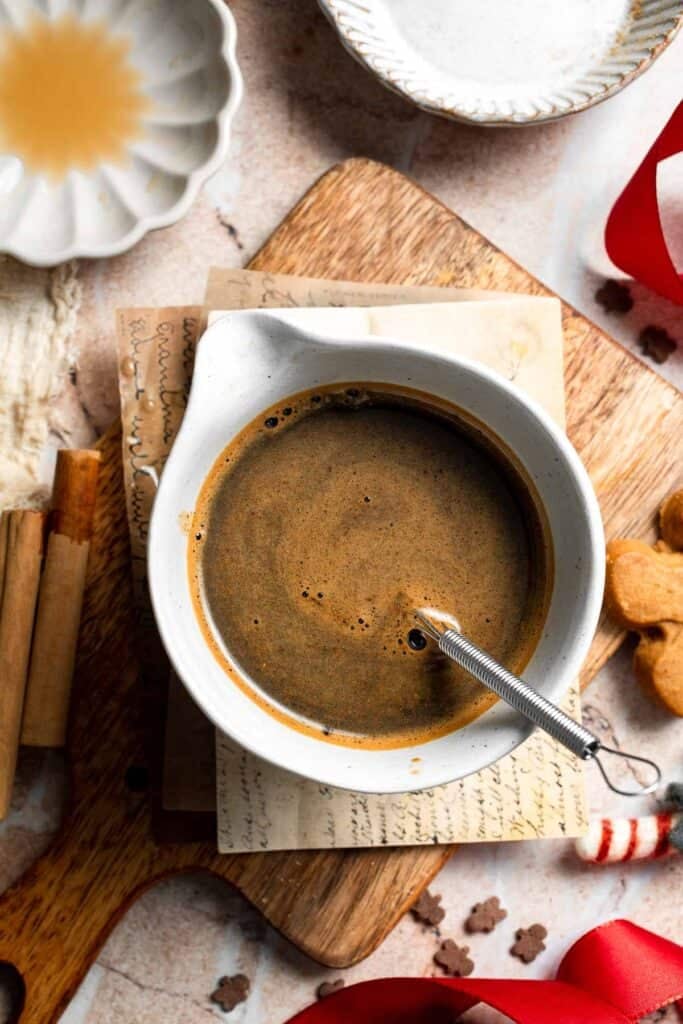
- Mix with espresso. Add the warm gingerbread syrup to the hot espresso and stir until fully dissolved.

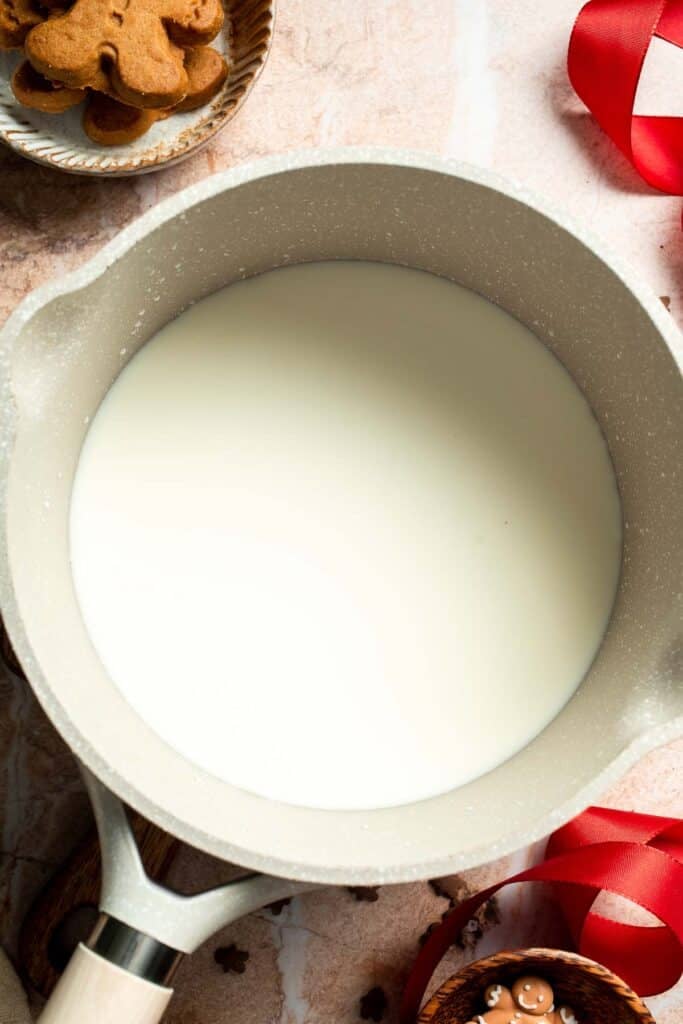
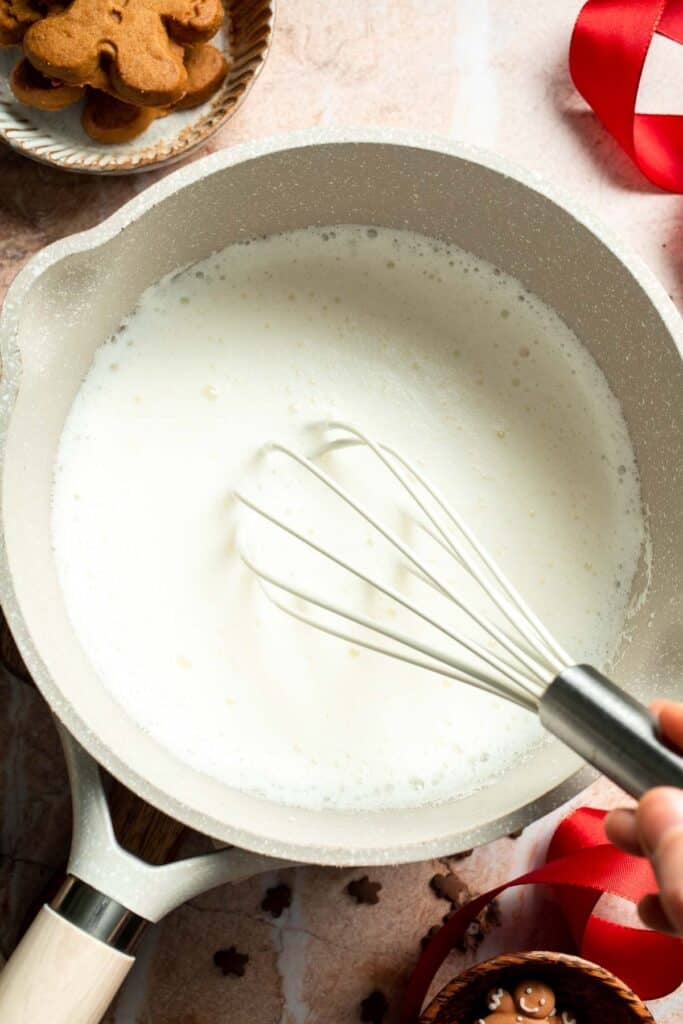
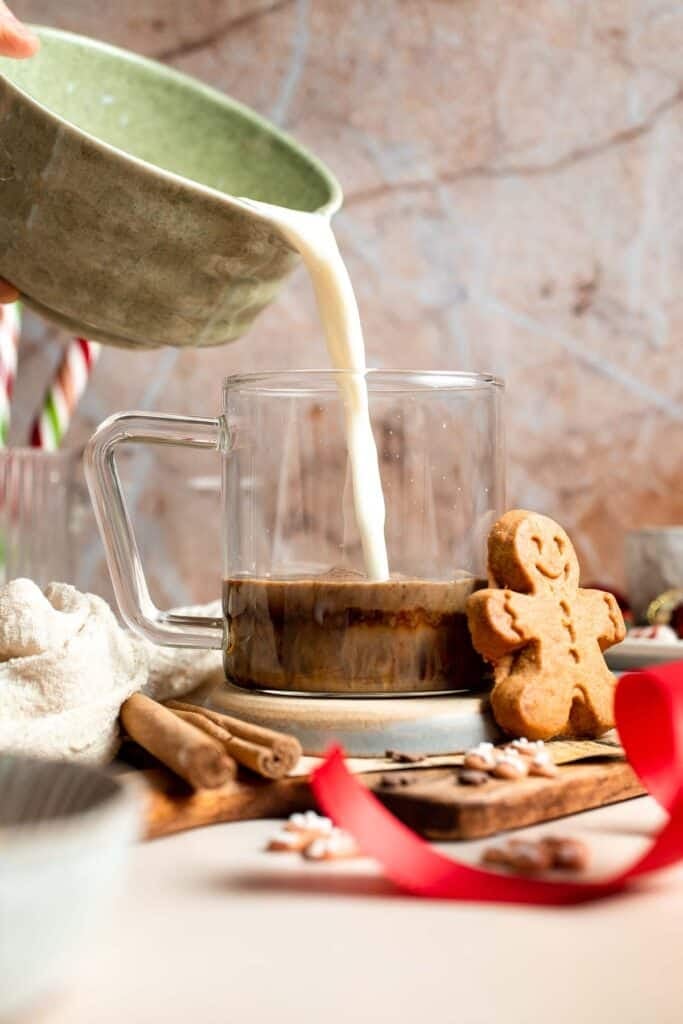
- Steam the milk. Use a steam wand, a handheld frother, or a saucepan to steam the milk:
- Steam wand method: Submerge the tip just below the surface of the milk and steam until it reaches a silky texture and a temperature around 150 to 155 degrees Fahrenheit.
- Frother method: Heat the milk in the microwave or on the stove until hot but not boiling, then froth until foamy.

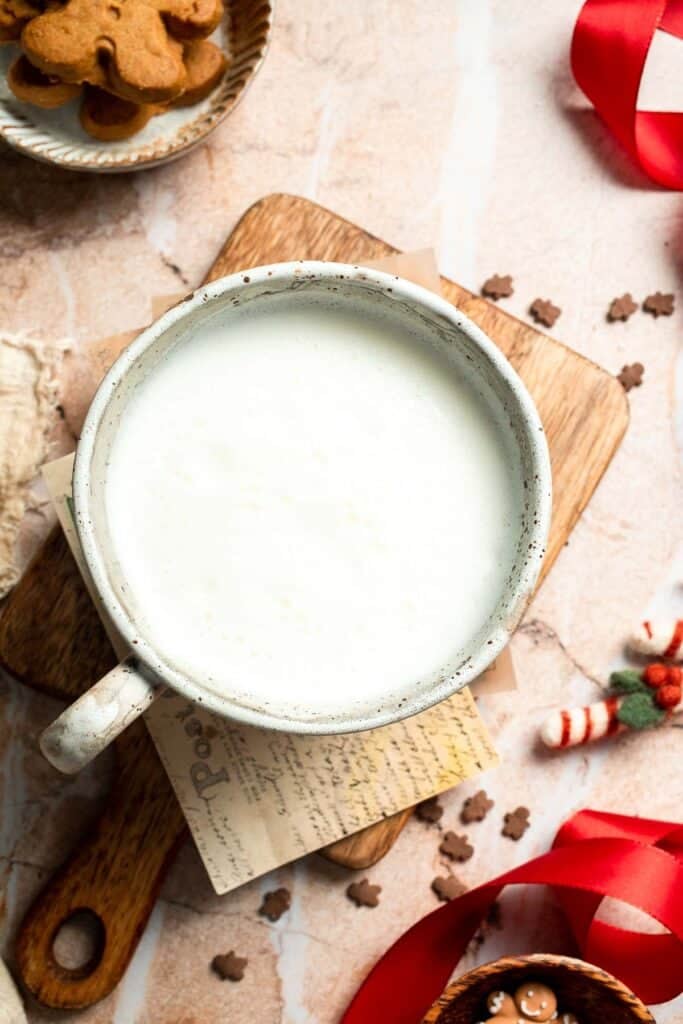
- Stovetop method: Gently warm the milk in a small pot over medium heat until hot and steamy, then whisk briskly to add some air.
- Assemble the lattes. Divide the espresso mixture between two mugs. Pour the steamed milk over top, holding back the foam with a spoon if needed, then spoon the foam on last.

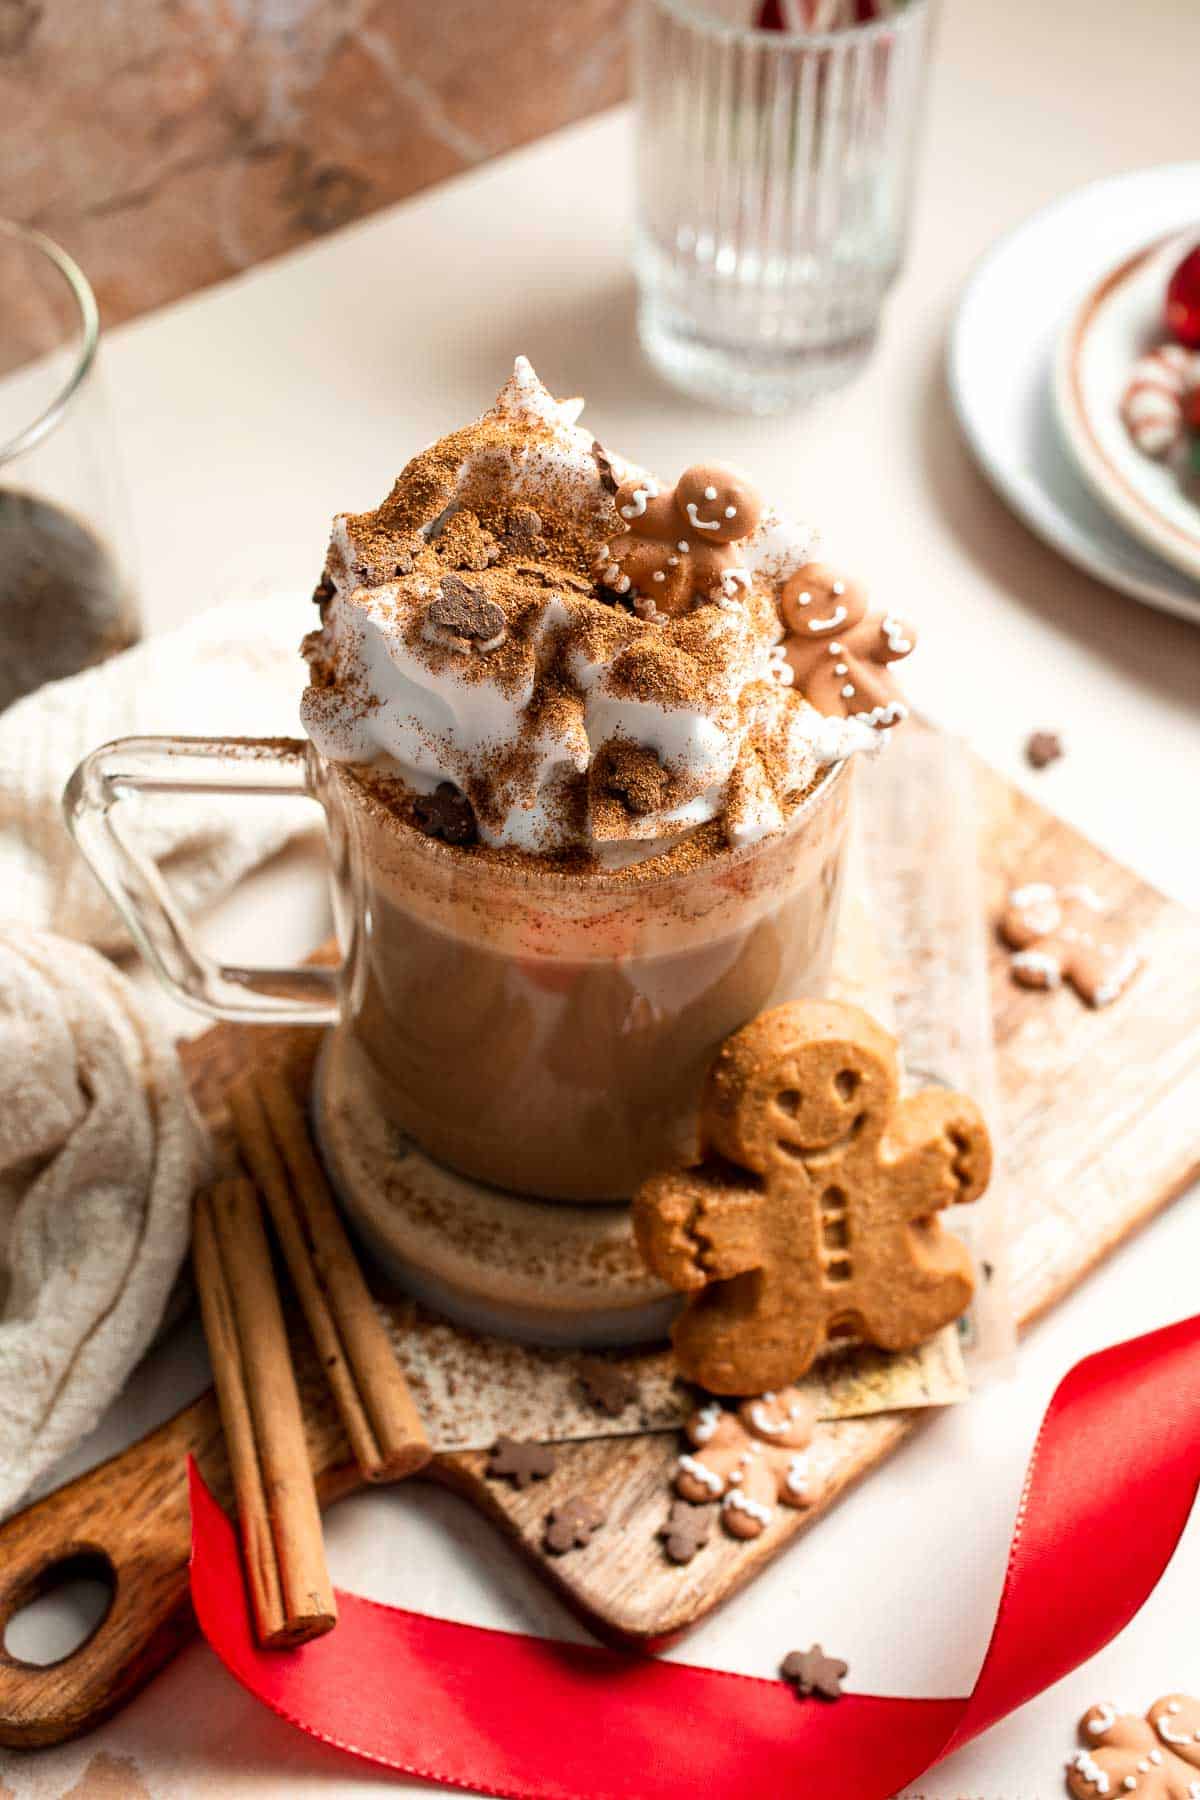
- Serve. Top with whipped cream and a sprinkle of cinnamon or nutmeg, if desired. You can also top with a mini gingerbread men sprinkles or cookies for a festive touch full of holiday spirit.


Expert Tip: Start with Less Syrup
Gingerbread syrup is flavorful and slightly strong. Start with a smaller amount, taste, and add more as needed. This keeps the latte balanced and prevents the spices from overpowering the espresso.
More Tips and Tricks
- Use hot espresso. Adding the syrup to freshly brewed, hot espresso helps it dissolve completely. If the espresso cools too much, the syrup may not blend as smoothly, which can affect the texture.
- Heat the milk gently. Milk should be hot and steamy, but not boiling. Overheating can cause the milk to lose its silky texture and develop a cooked flavor. Gentle heating gives the best foam and mouthfeel.
- Froth just before serving. Freshly frothed milk gives the latte a creamy, café style finish. If the milk sits too long, the foam will separate and lose volume.
- Make extra syrup. Doubling the syrup ingredients lets you enjoy gingerbread lattes throughout the week. Store it in the fridge and stir before using, as the spices may settle.
- Adjust the spices. Add more ginger for heat or more cinnamon for sweetness.
Recipe Variations
- Iced gingerbread latte. To make an iced latte, pour the espresso and syrup over ice cubes, then add cold milk.
- Extra creamy latte. Use 1 ¼ cups milk instead of 1 cup, or replace part of the milk with half and half for a richer, more indulgent drink.
- Dairy free gingerbread latte. Use oat milk, soy milk, or almond milk and skip whipped cream.
- Vanilla gingerbread latte. Add a splash of vanilla extract to the syrup or the milk for a softer, rounder flavor.
- Decaf version. Use decaf espresso or coffee.
- Flavor twist. Add a pinch of pumpkin spice alongside the gingerbread spices for a subtle seasonal variation.
Storage
How to Store the Syrup
Store leftover gingerbread syrup in an airtight container in the refrigerator for up to one week. The spices may settle so stir before using.
How to Reheat the Syrup
Reheat the syrup gently on the stovetop over low heat or in the microwave in short intervals until warm. Do not boil, as this can concentrate the flavors too much.
How to Store a Prepared Latte
If you have leftover gingerbread latte, let it cool completely, then store it in a sealed container in the refrigerator for up to 24 hours. Keep in mind that the milk will lose its foam and the texture will change slightly.
How to Reheat a Prepared Latte
Reheat gently on the stovetop over low heat or in the microwave until just warmed through. Whisk or froth again before serving to help restore some creaminess. Avoid boiling, as this can cause the milk to scorch or separate.
How to Serve
Serve gingerbread lattes hot in your favorite mugs. Top with whipped cream, a sprinkle of cinnamon or nutmeg, or even crushed gingerbread cookies for a festive touch. They pair perfectly with holiday cookies, breakfast pastries, or cozy desserts.
These are my favorite ginger cookies to serve with this festive latte:


More Cookies
For more recipe ideas, check out our collection of cookie recipes, featuring everything from soft and chewy classics and festive holiday treats to fun flavored cookies and easy no chill options that bake up beautifully for any occasion.
FAQ
To make coffee taste like gingerbread, you need a combination of warm spices and sweetness. Molasses is key, as it gives gingerbread its signature depth. Pair it with ground ginger, cinnamon, nutmeg, and cloves, then add a natural sweetener like maple syrup or honey. Stirring this gingerbread syrup into hot coffee or espresso instantly creates that classic gingerbread flavor.
A classic gingerbread latte uses ground ginger, cinnamon, nutmeg, and cloves. Ginger adds warmth, cinnamon provides sweetness, nutmeg brings richness, and cloves add depth. Together, these spices create the cozy, nostalgic gingerbread flavor.
A gingerbread latte tastes warm, gently spiced, and lightly sweet. The flavor is rich with molasses notes, balanced by creamy milk and bold coffee or espresso. It is comforting without being overpowering and has a smooth, cozy finish.
A Starbucks style gingerbread latte is made with espresso, steamed milk, and a gingerbread flavored syrup that contains sugar, water, molasses, and spice flavoring. It is usually topped with whipped cream and a sprinkle of nutmeg or cinnamon. Homemade versions often use real spices and simpler ingredients.
Yes, a gingerbread latte contains caffeine because it is made with espresso or coffee. The caffeine level depends on how many shots of espresso are used. You can make a low caffeine or caffeine free version by using decaf espresso or decaffeinated coffee.
Yes. Gingerbread syrup can be made in advance and stored in an airtight container in the refrigerator for up to one week. Stir before using, as the spices may settle.
This latte is lightly sweetened. You can adjust the sweetness easily by adding more or less gingerbread syrup to suit your taste.
More Holiday Drink Recipes
Looking for other recipes like this? Try these:


Tried this recipe?
I'd love to hear what you think! Leave a comment and rating below to share your feedback. Your reviews help others discover this recipe and help me keep creating more free recipes for you. Snap a photo and tag me on social media @aheadofthyme too.

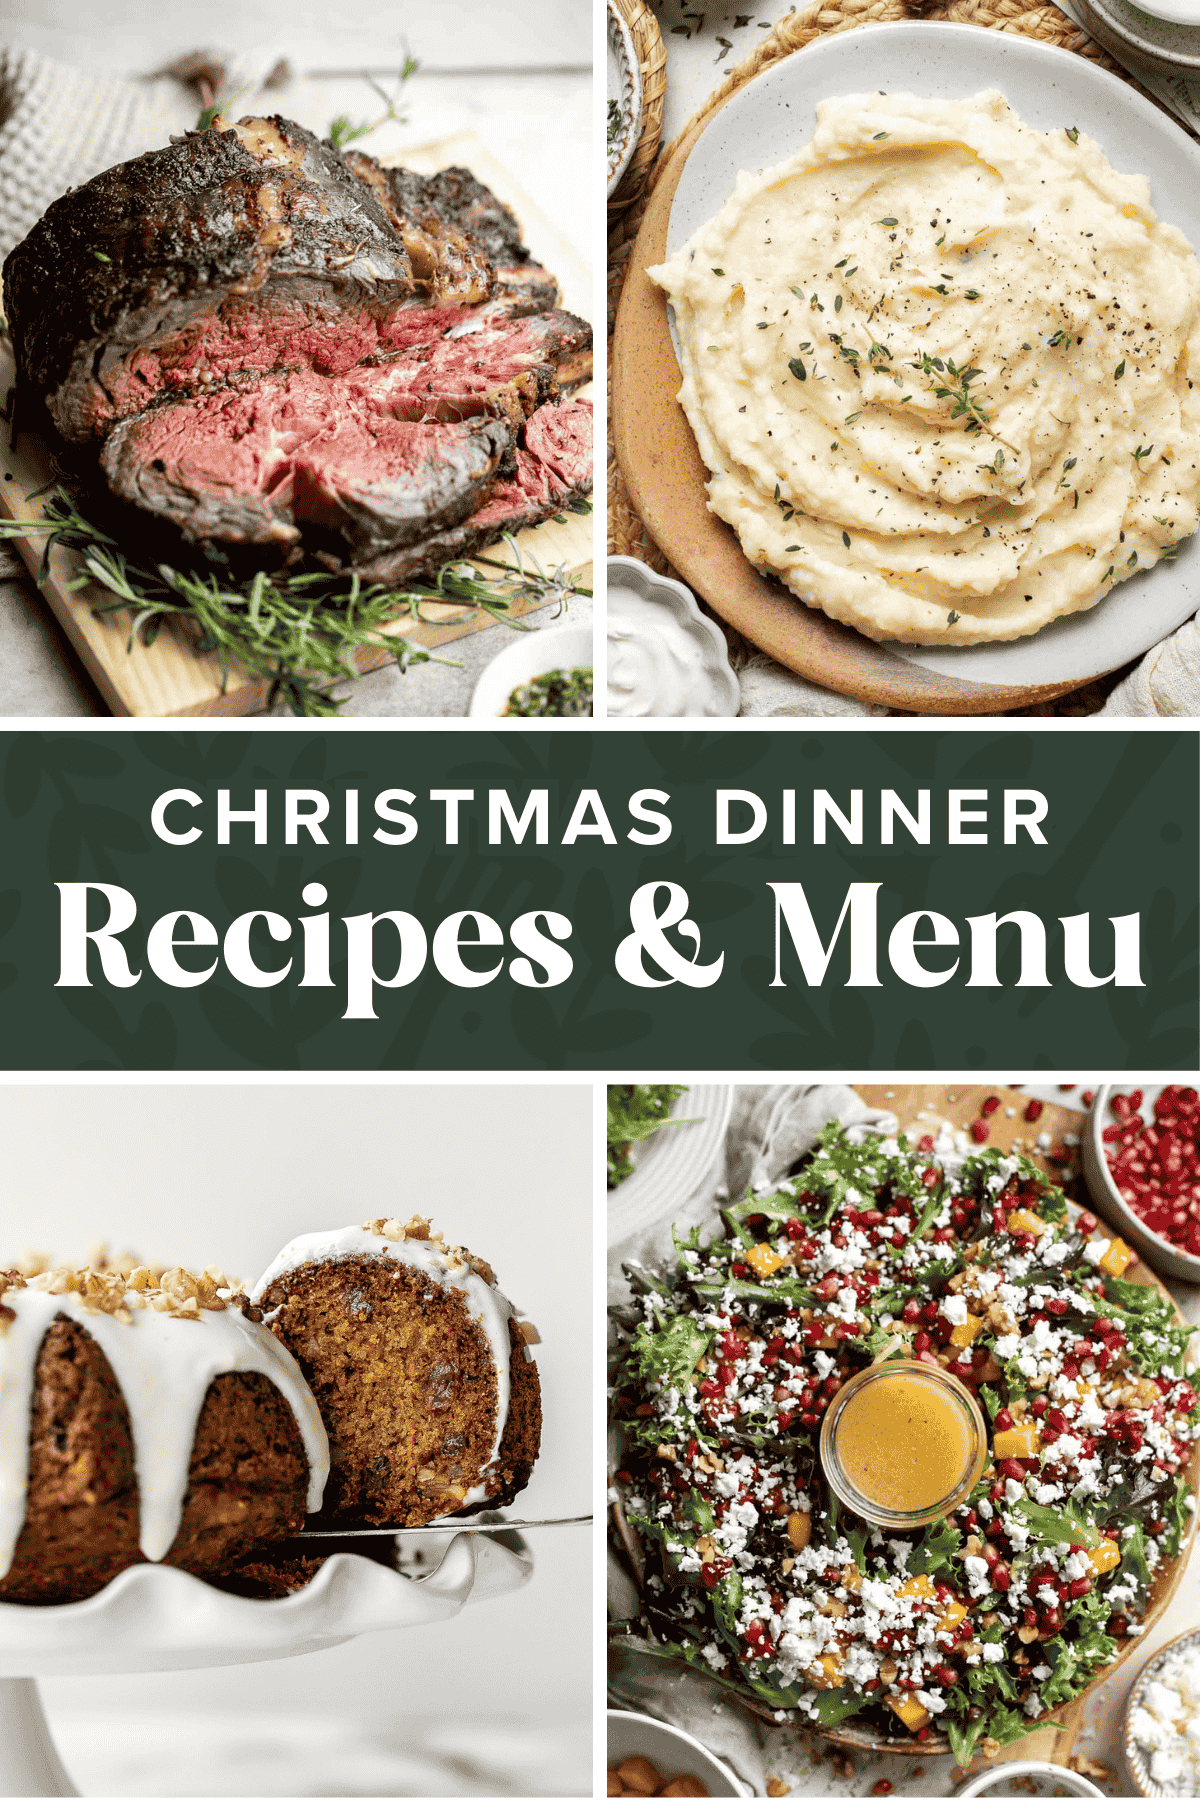
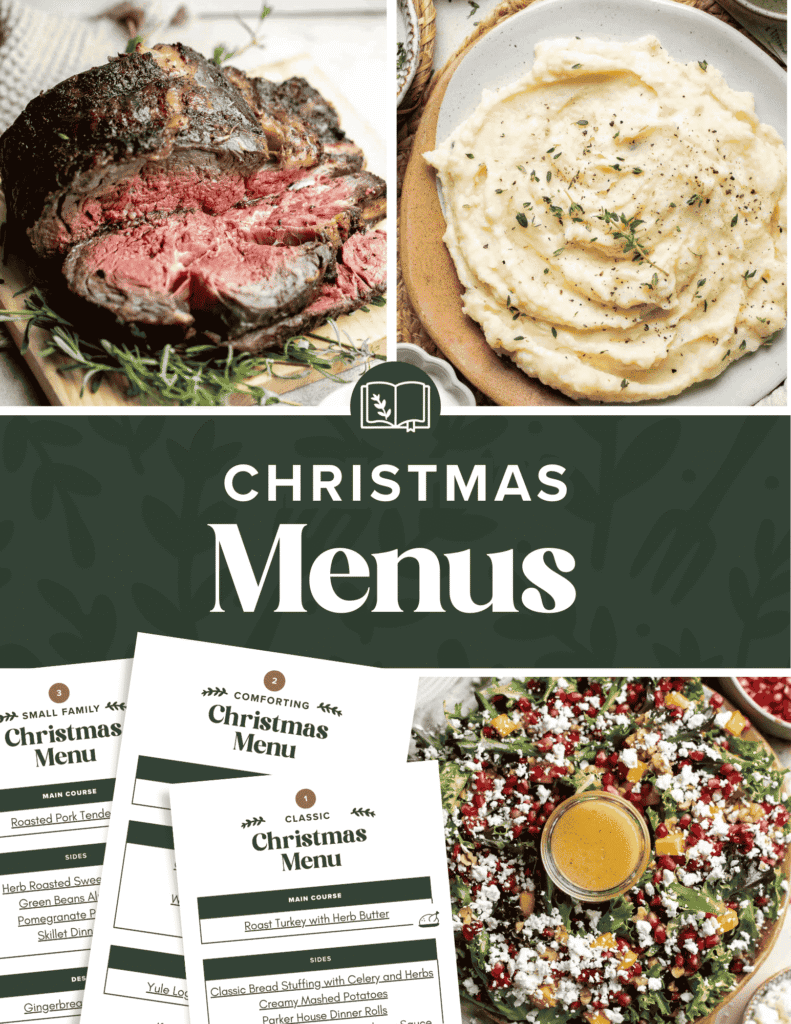
Best Christmas Recipes and Menu Ideas (Easy Holiday Entertaining)
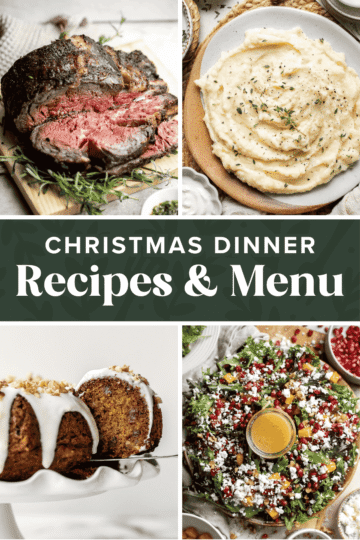
Planning your Christmas meals doesn't have to feel overwhelming. Whether you're hosting a big holiday gathering, planning a cozy Christmas Eve dinner, or keeping things simple on Christmas Day, this guide to the Best Christmas Recipes and Menu Ideas is here to help. From festive mains and crowd pleasing sides to holiday appetizers, desserts, and make ahead options, you'll find everything you need to plan a delicious and memorable Christmas menu.
Christmas is all about gathering around the table, sharing comforting food, and enjoying time together. But between decorating, gift shopping, and holiday events, deciding what to cook can quickly become stressful. That's why this post is designed to help you plan ahead with ease, offering flexible menu ideas with festive recipes, simple planning tips, and plenty of recipes you can mix and match based on your schedule, guest list, and cooking style.
To make planning even easier, we've created free printable Christmas menus you can download and use as a starting point for your holiday meals. Whether you're sticking to classic traditions, planning a relaxed Christmas Day, or hosting a festive holiday gathering this December, there's a ready made menu option below to help you stay organized and stress free.
[feast_advanced_jump_to]Christmas Menu Ideas at a Glance
This post is designed to be a flexible planning tool. You can build your own Christmas menu by mixing and matching recipes from each section, or you can use one of our ready made printable Christmas menus to simplify planning even more.
Below you'll find Christmas dinner ideas for all the categories including Christmas mains, appetizers, side dishes, desserts, and even breakfast and brunch. Scroll through, bookmark your favorites, or grab the printable menus to keep everything organized while you plan your holiday meals.
Christmas Dinner Mains
Christmas mains are the heart of the holiday table. Whether you love a classic roast, a glazed ham, or something a little different, these main dishes are festive, flavorful, and perfect for serving a crowd. Choose one standout centerpiece and build the rest of your menu around it.
Classic Christmas Mains
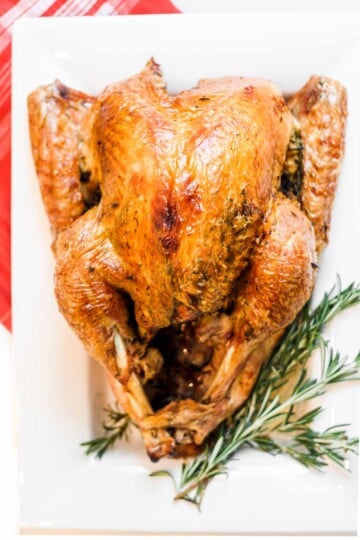
- Easy Roast Turkey Recipe (Best Juicy Thanksgiving Turkey)
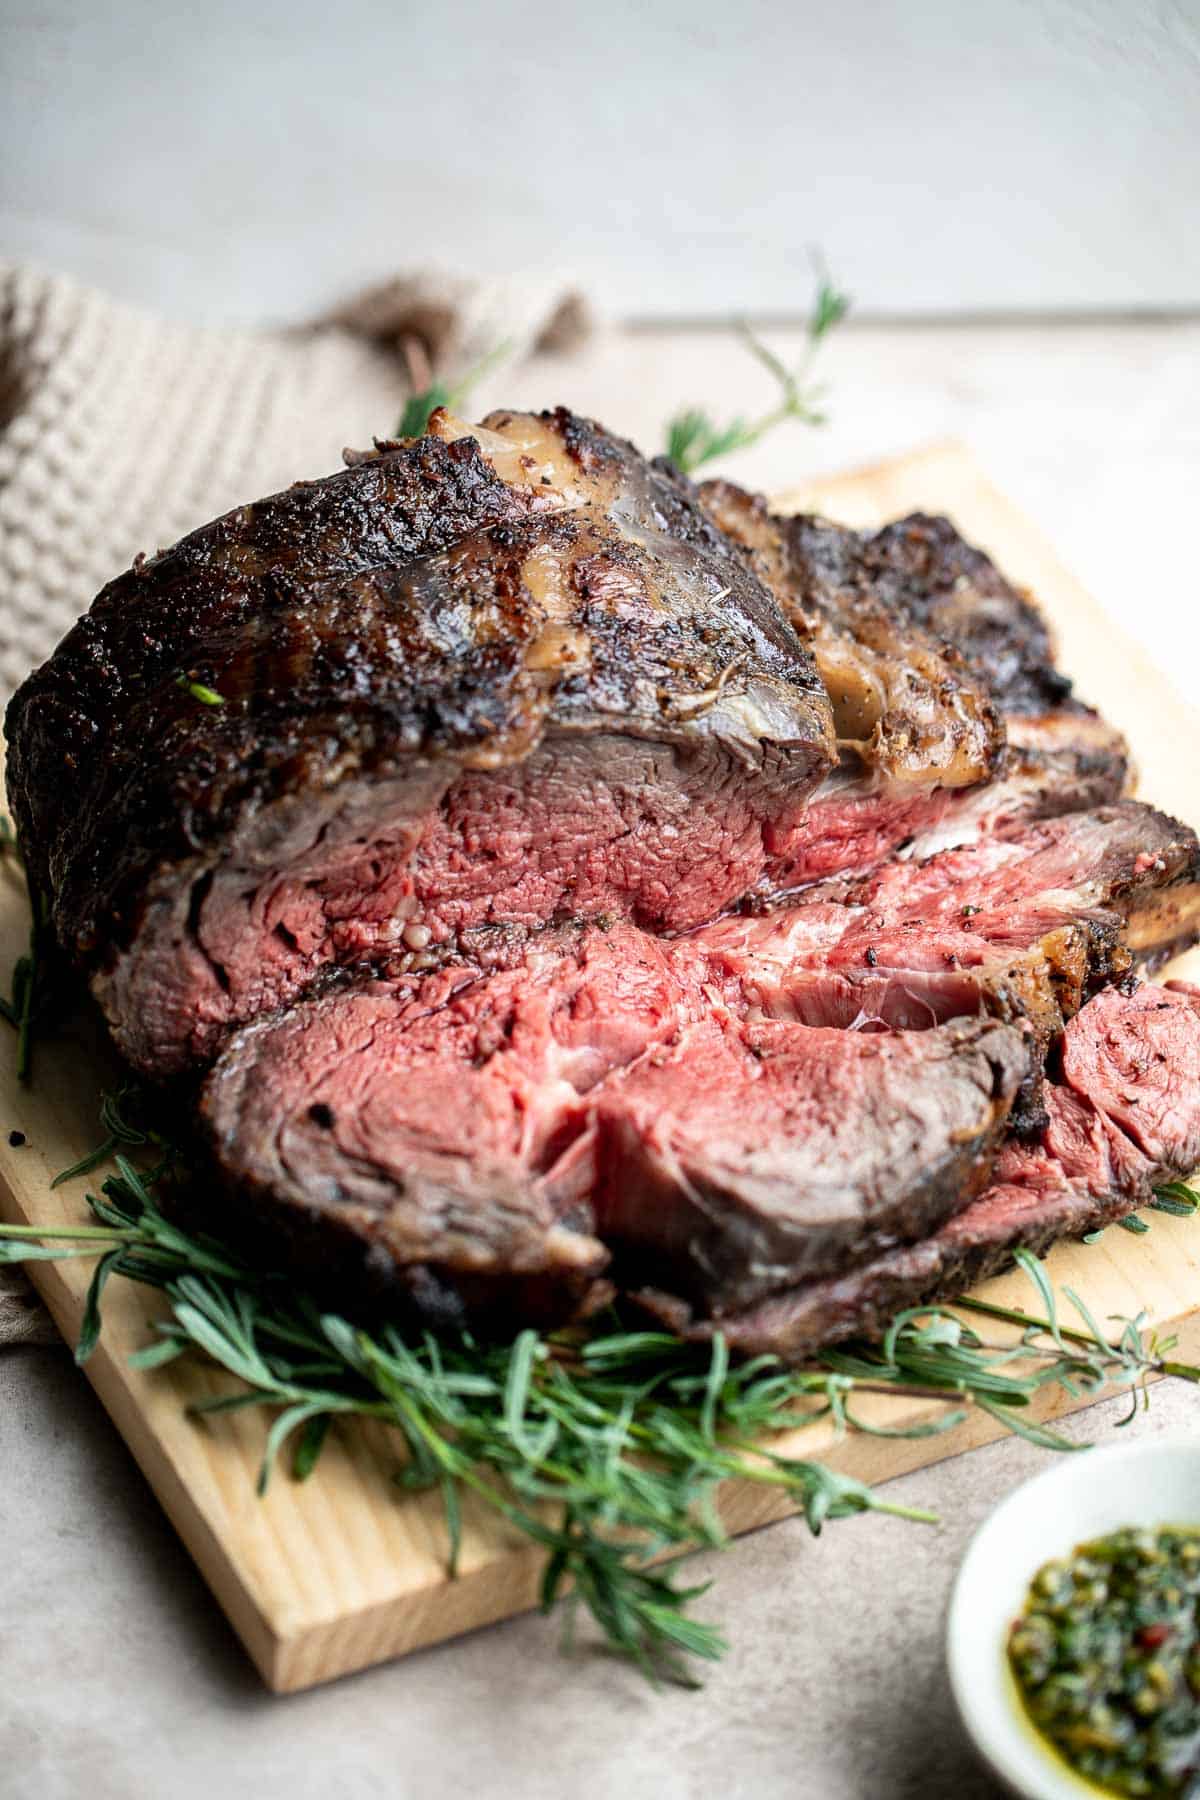
- Prime Rib Roast
- Holiday Glazed Baked Ham
- Roast Beef
Alternative & Non-Traditional Mains

Christmas Appetizers and Starters
Christmas appetizers set the tone for the entire meal. Think easy finger foods, cozy soups, and light starters that keep guests happy while the main dishes finish cooking. These are perfect for Christmas Eve gatherings, cocktail hours, or casual holiday entertaining.
Christmas Appetizers


Soups and Salads


Christmas Side Dishes
Side dishes are where Christmas menus really shine. From creamy potatoes and roasted vegetables to warm breads and make ahead casseroles, these recipes balance comfort and flavor and pair beautifully with any main dish. Many can be prepped in advance to make Christmas Day cooking easier. See all Christmas sides.
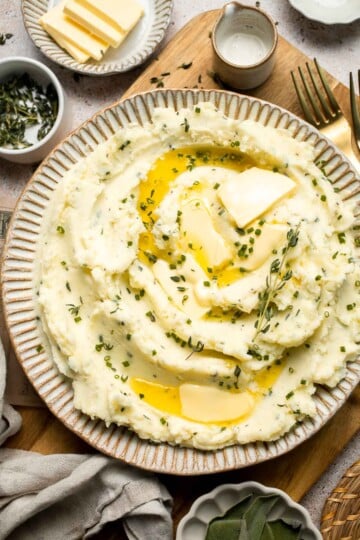
Potato Side Dishes
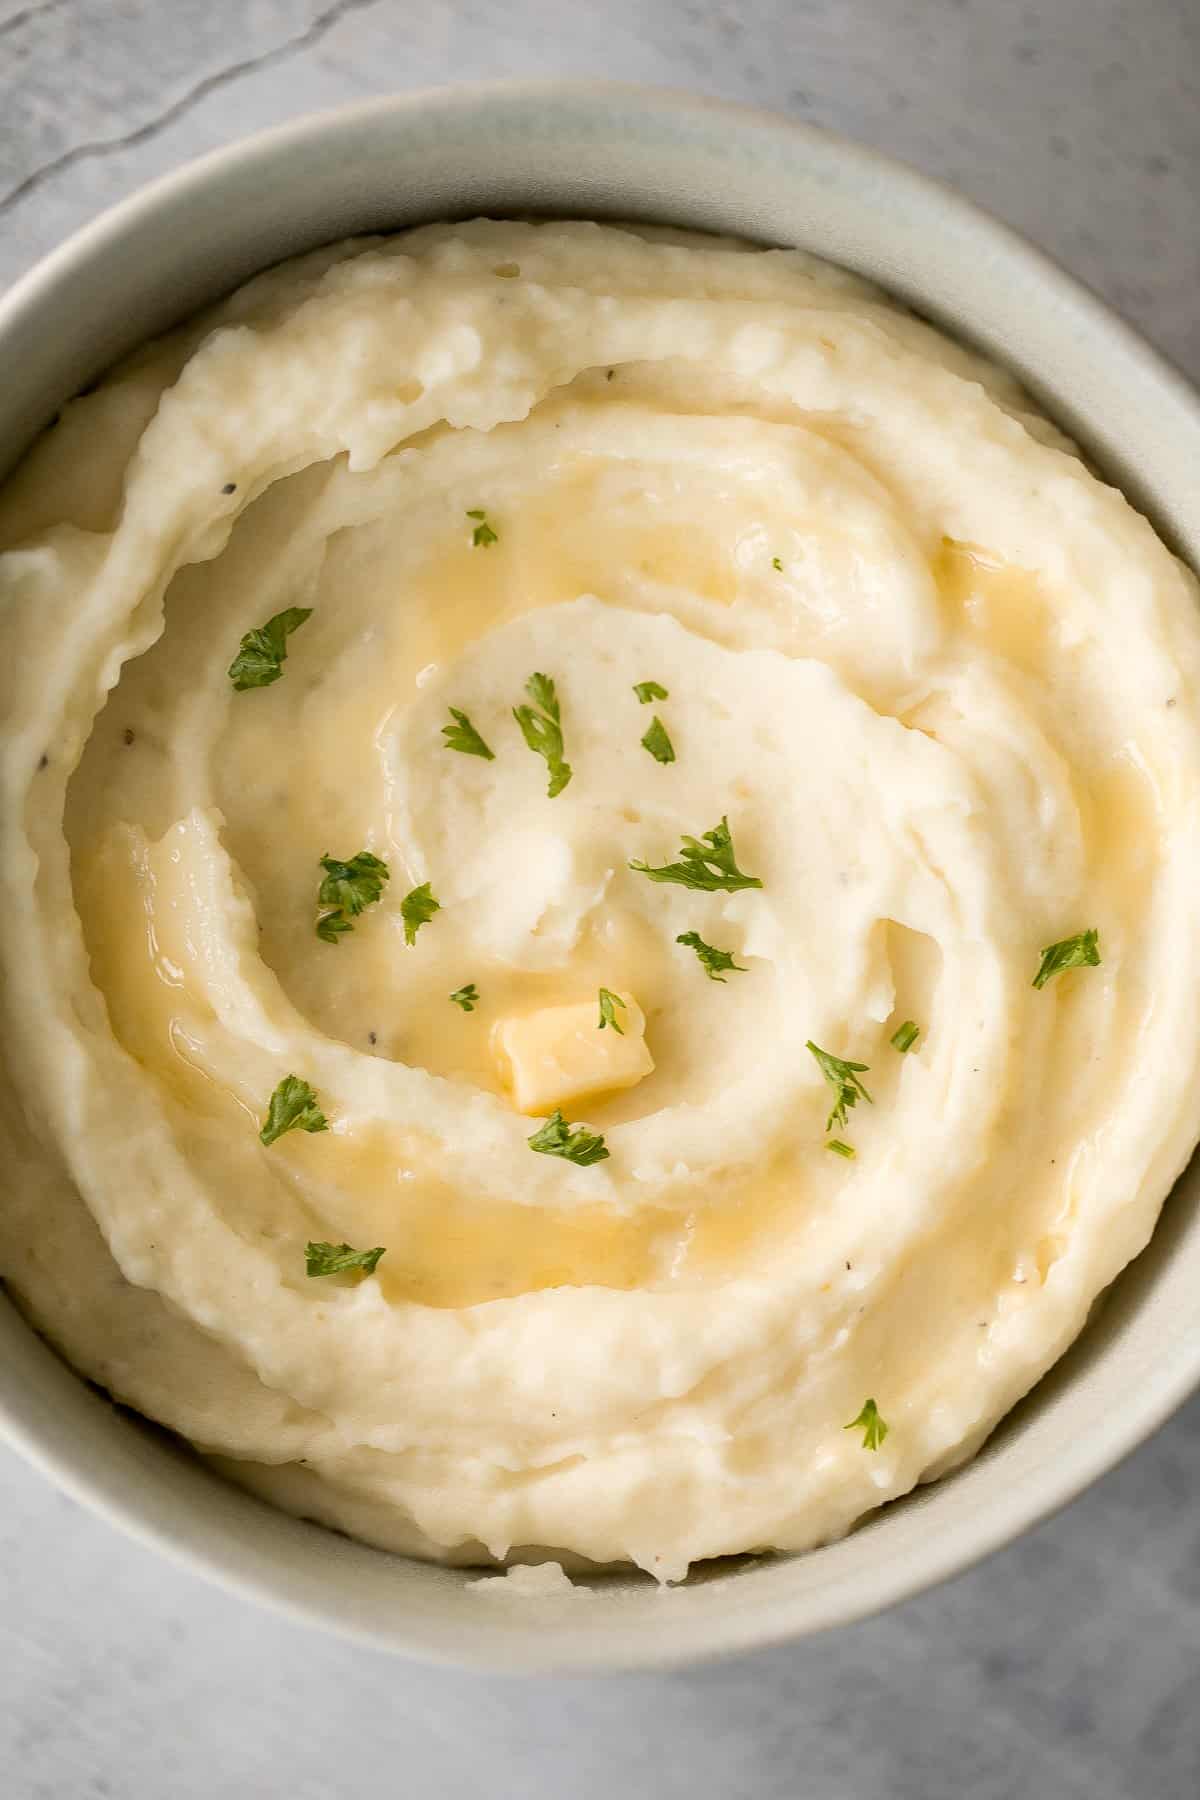
- The Best and Creamiest Mashed Potatoes
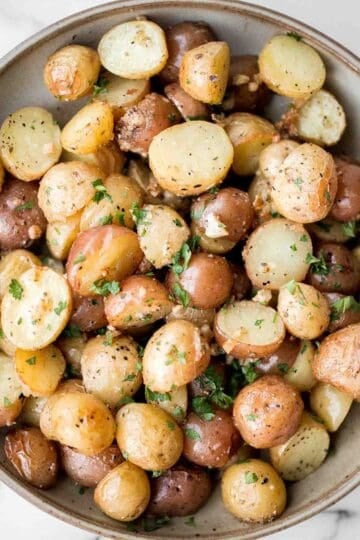
- Roasted Garlic Parmesan Baby Potatoes
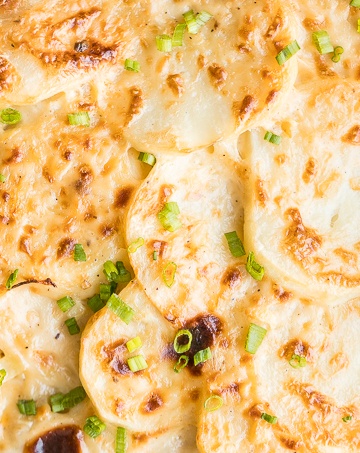
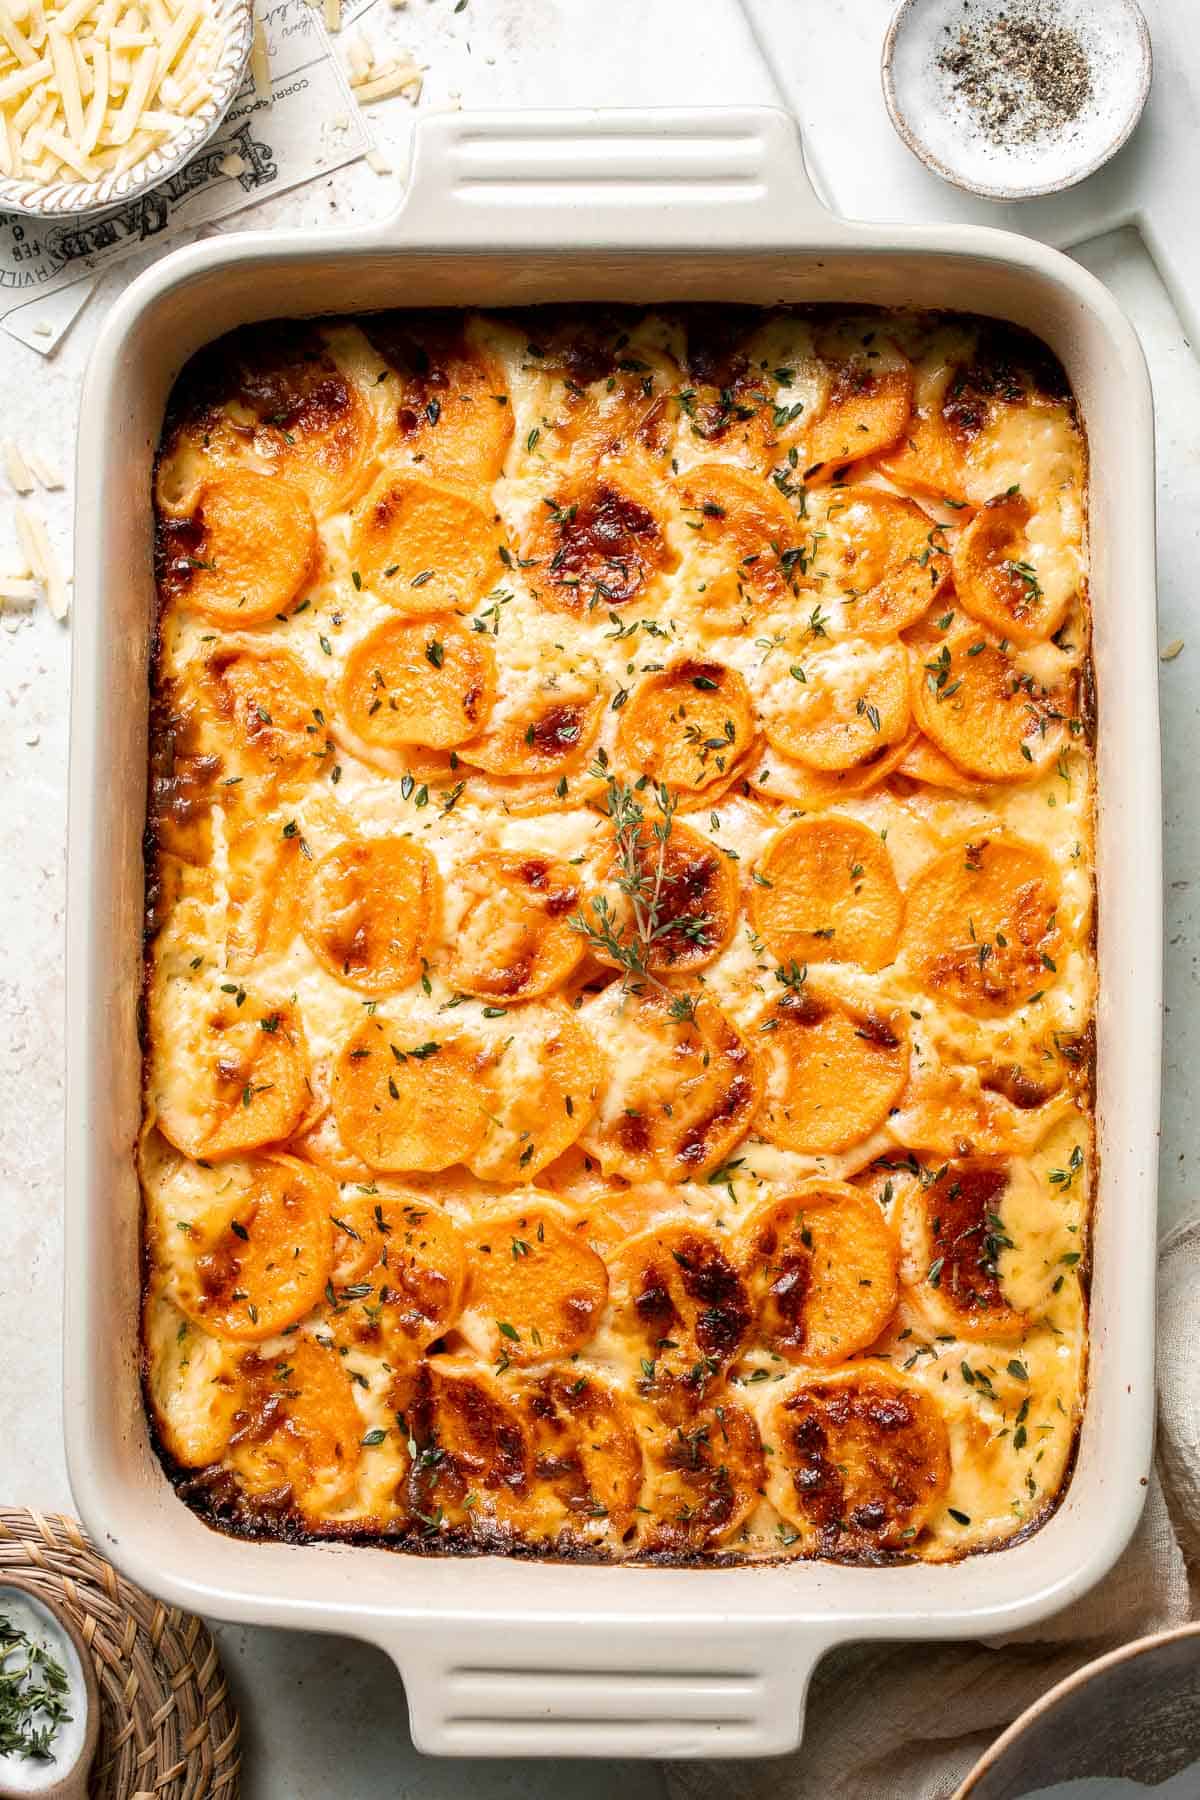
- Creamy Potatoes Au Gratin
- Garlic Herb Mashed Potatoes
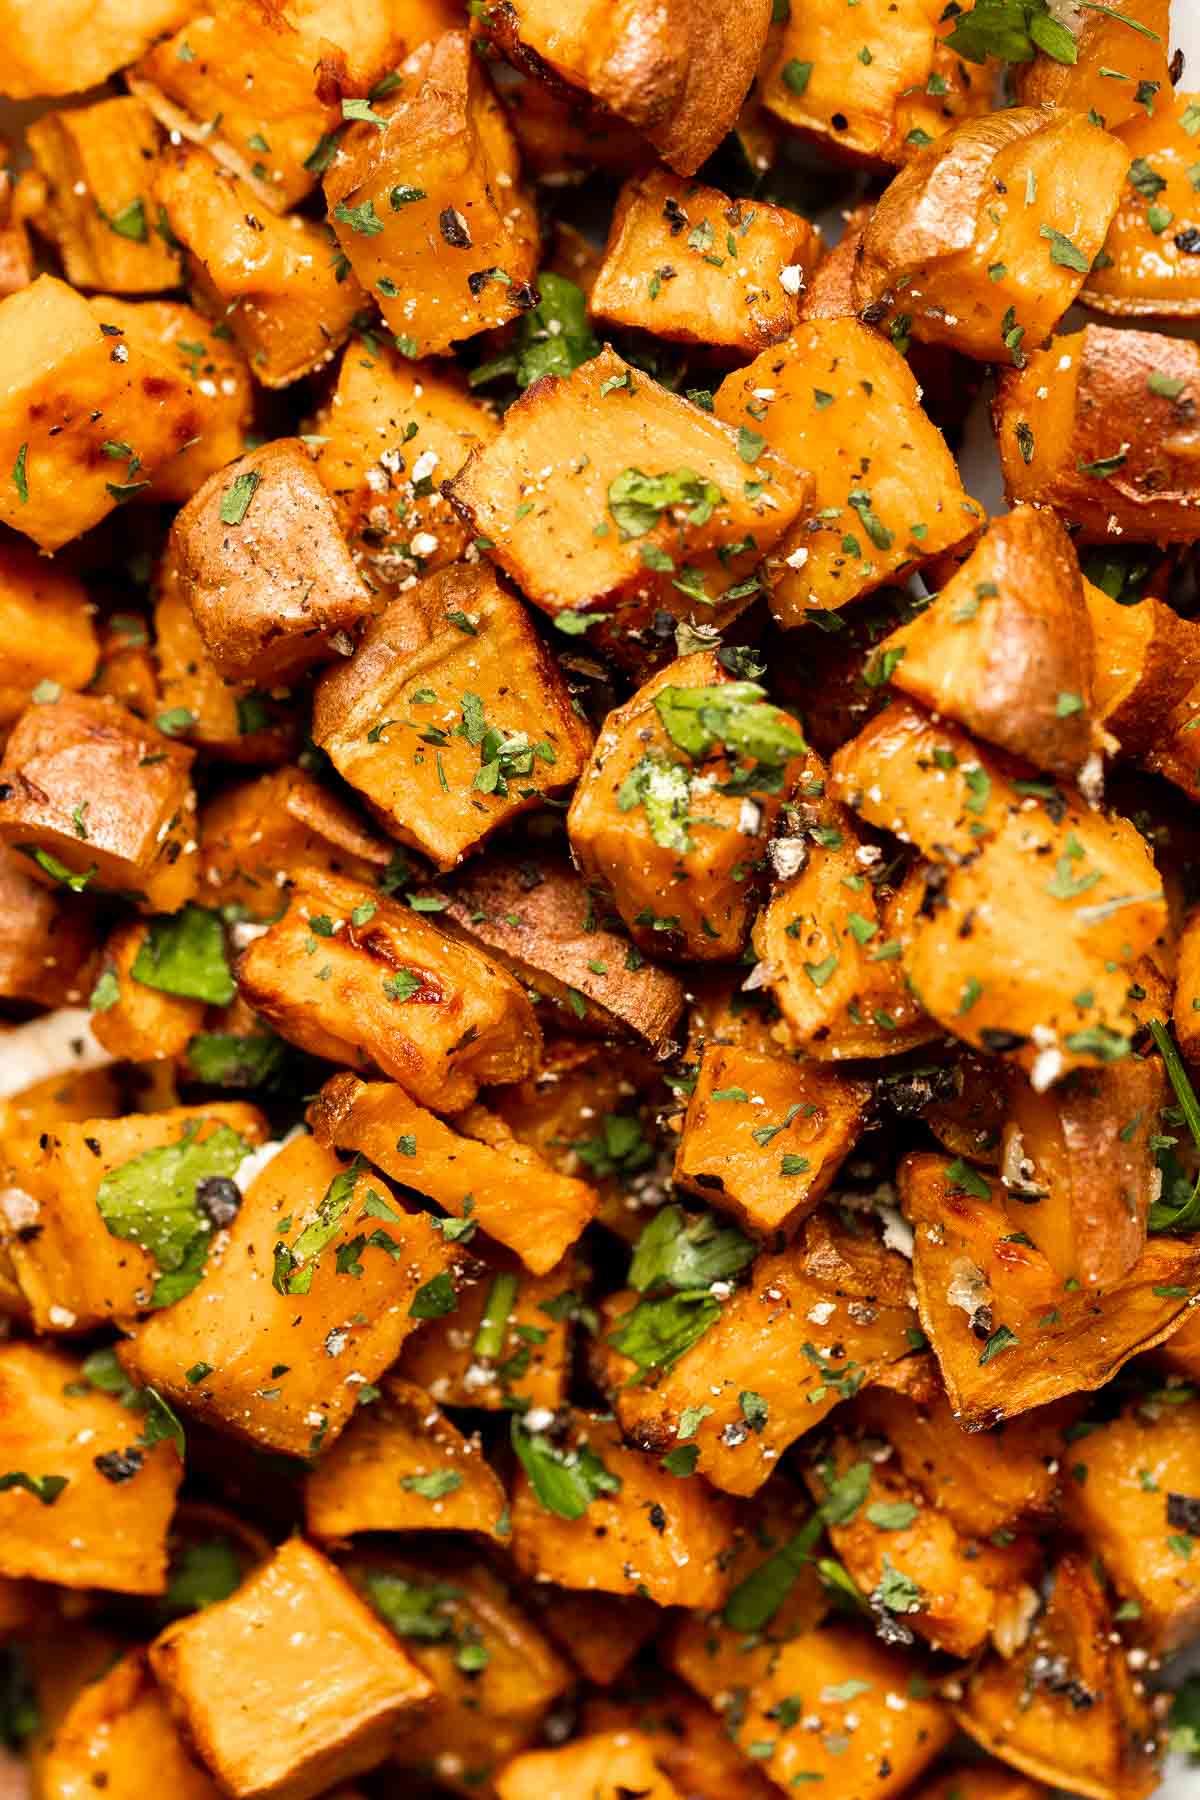
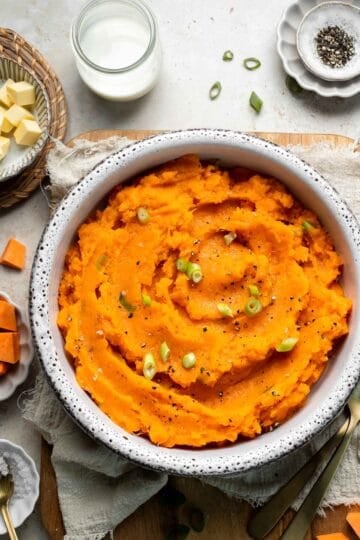
Sweet Potato Sides
Vegetable Sides
- Balsamic Brussels Sprouts
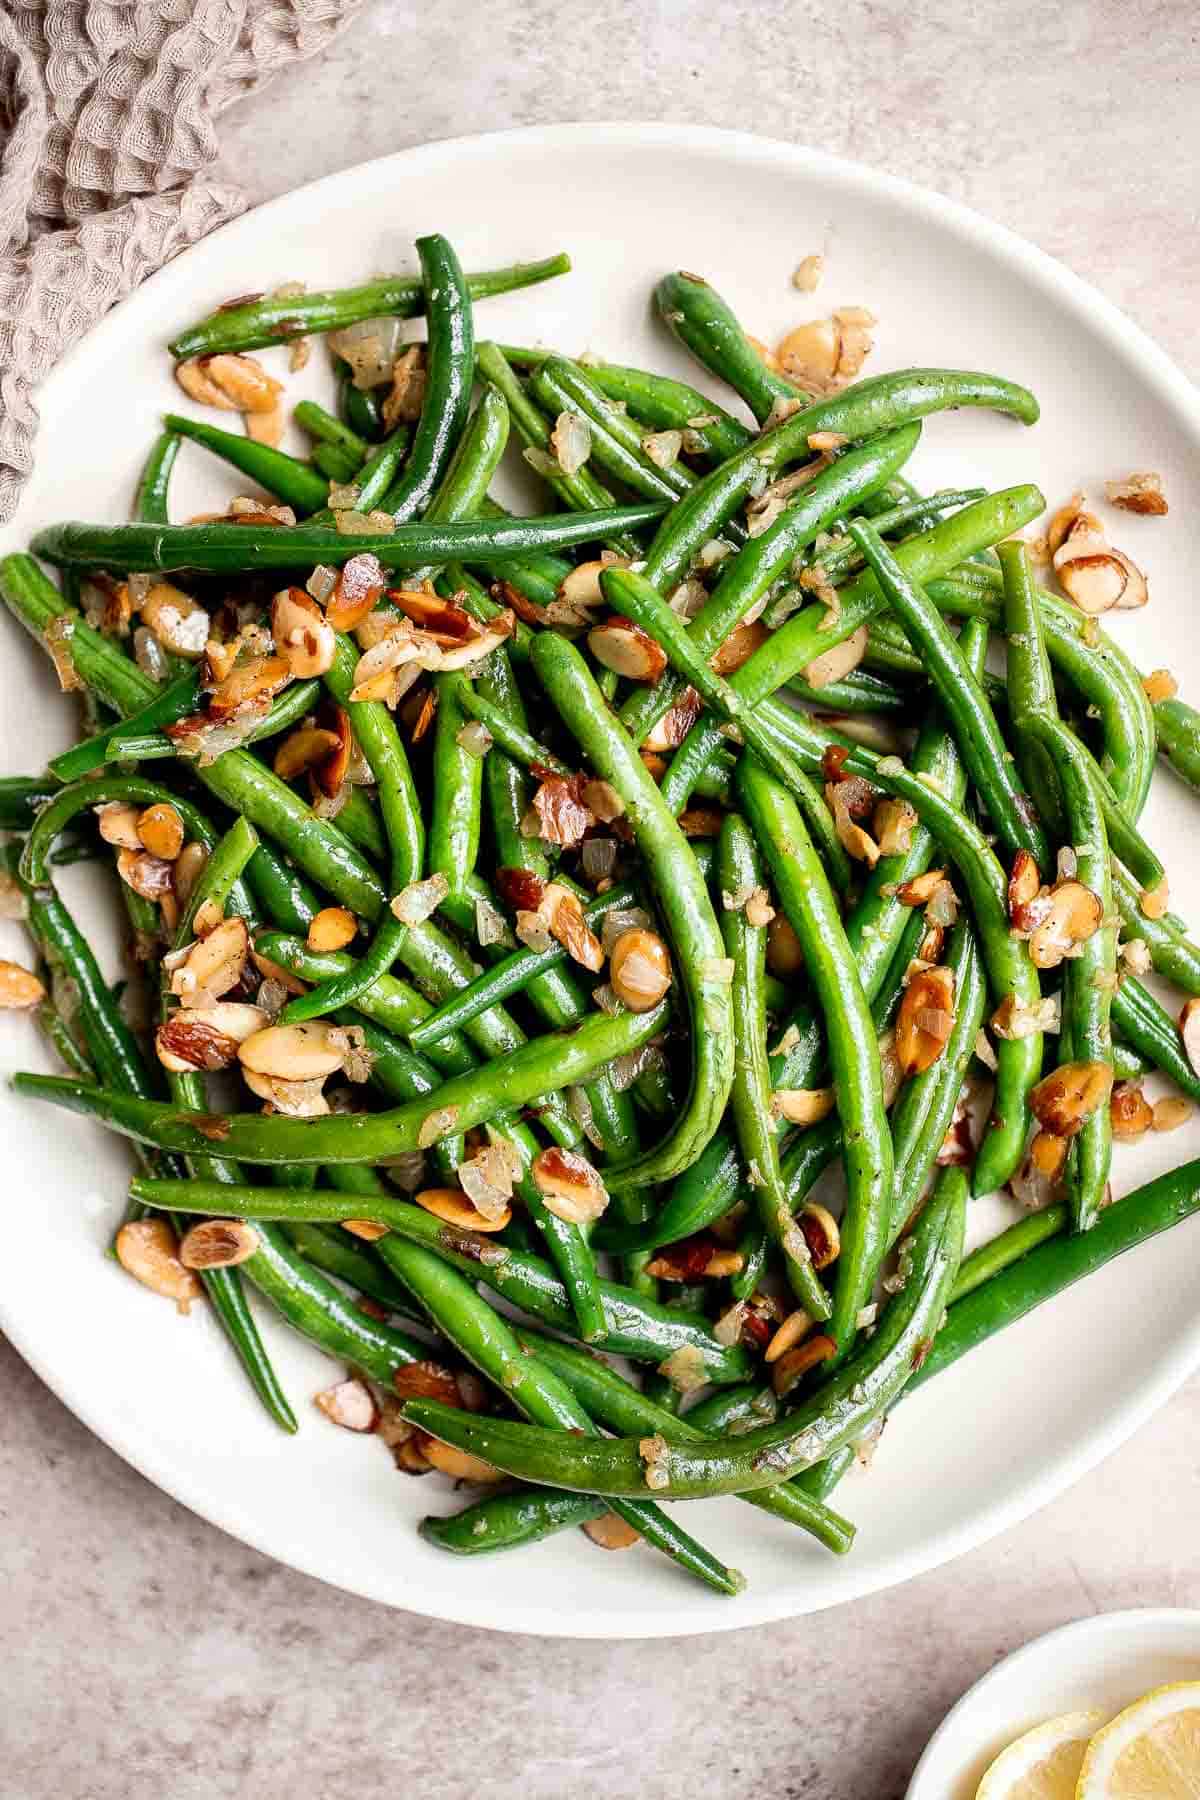
- Green Beans Almondine
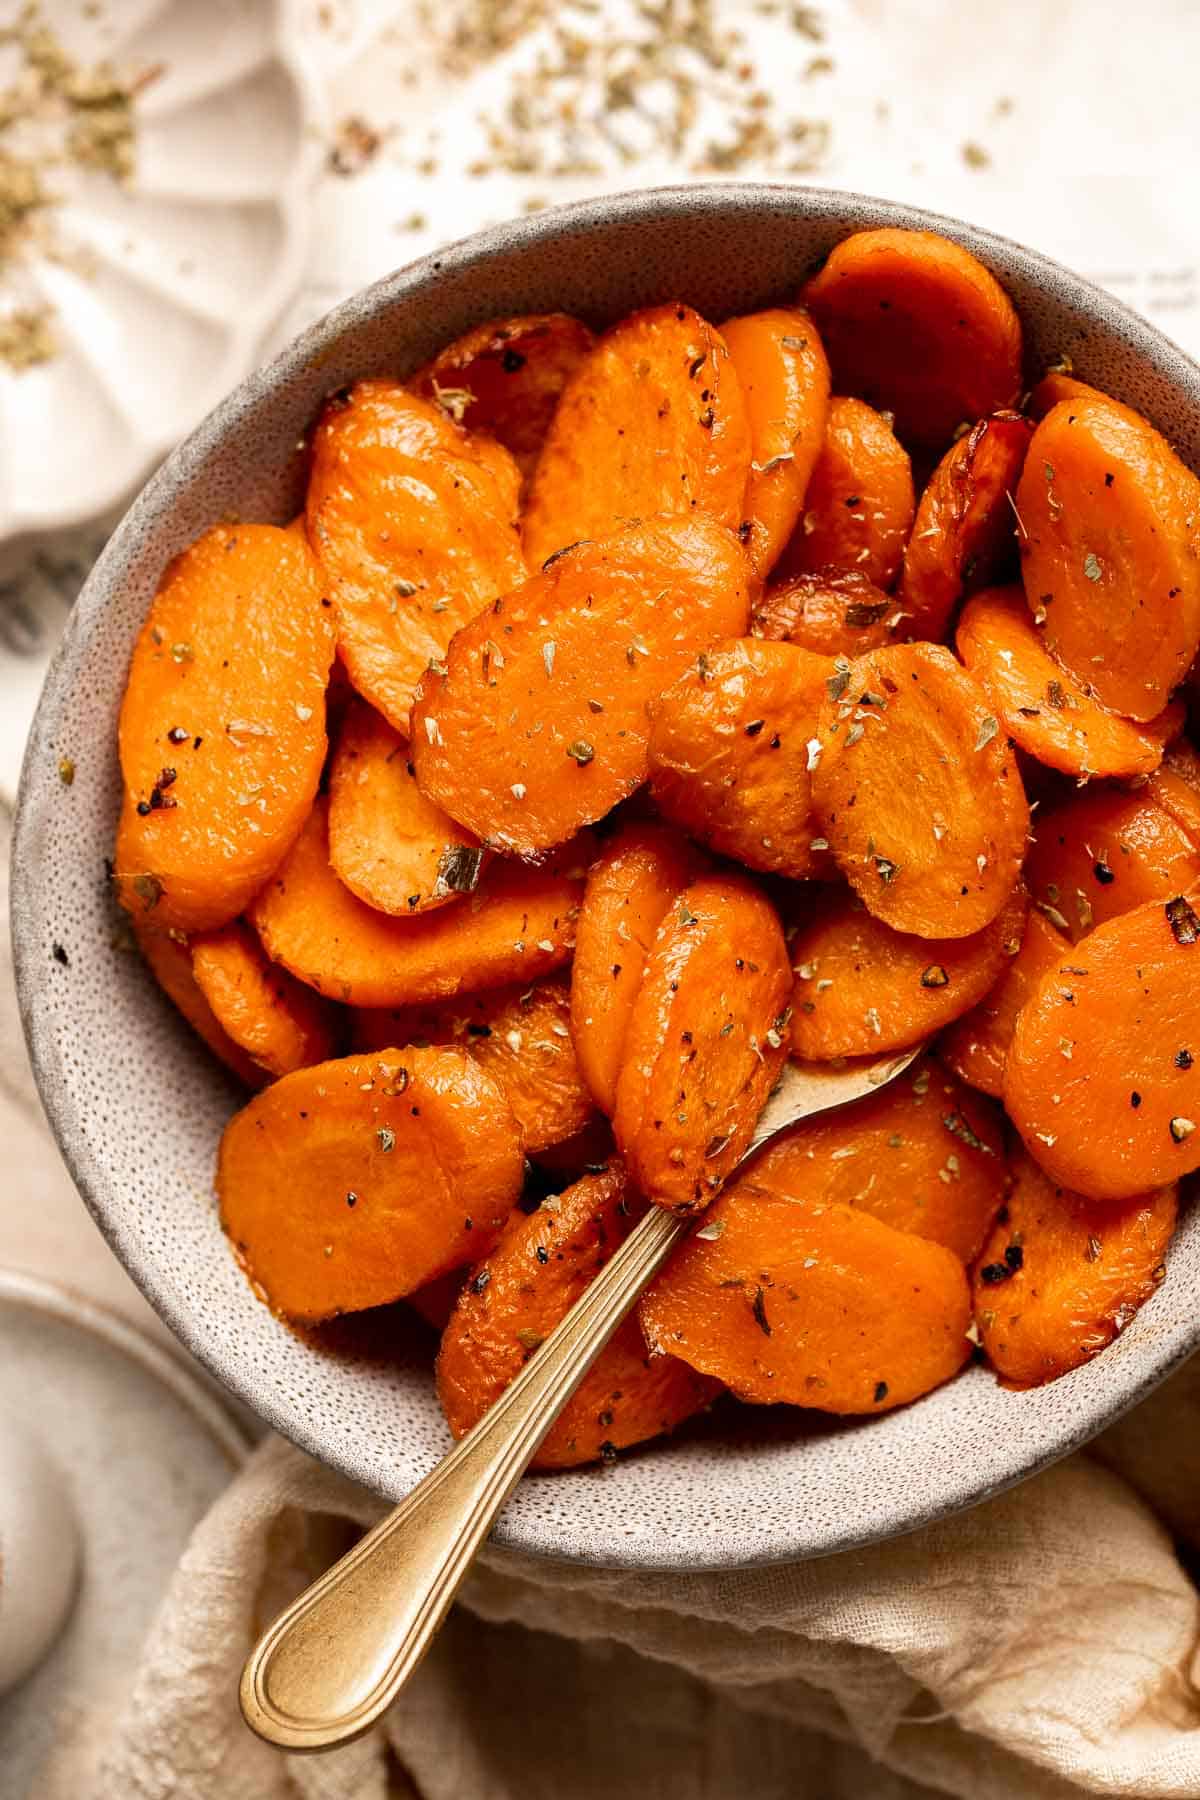
- Roasted Carrots
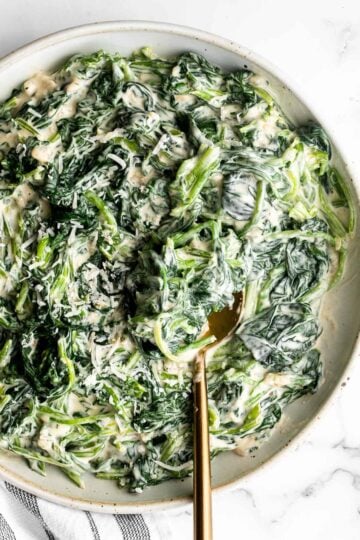
- Best Creamed Spinach (Steakhouse Style)
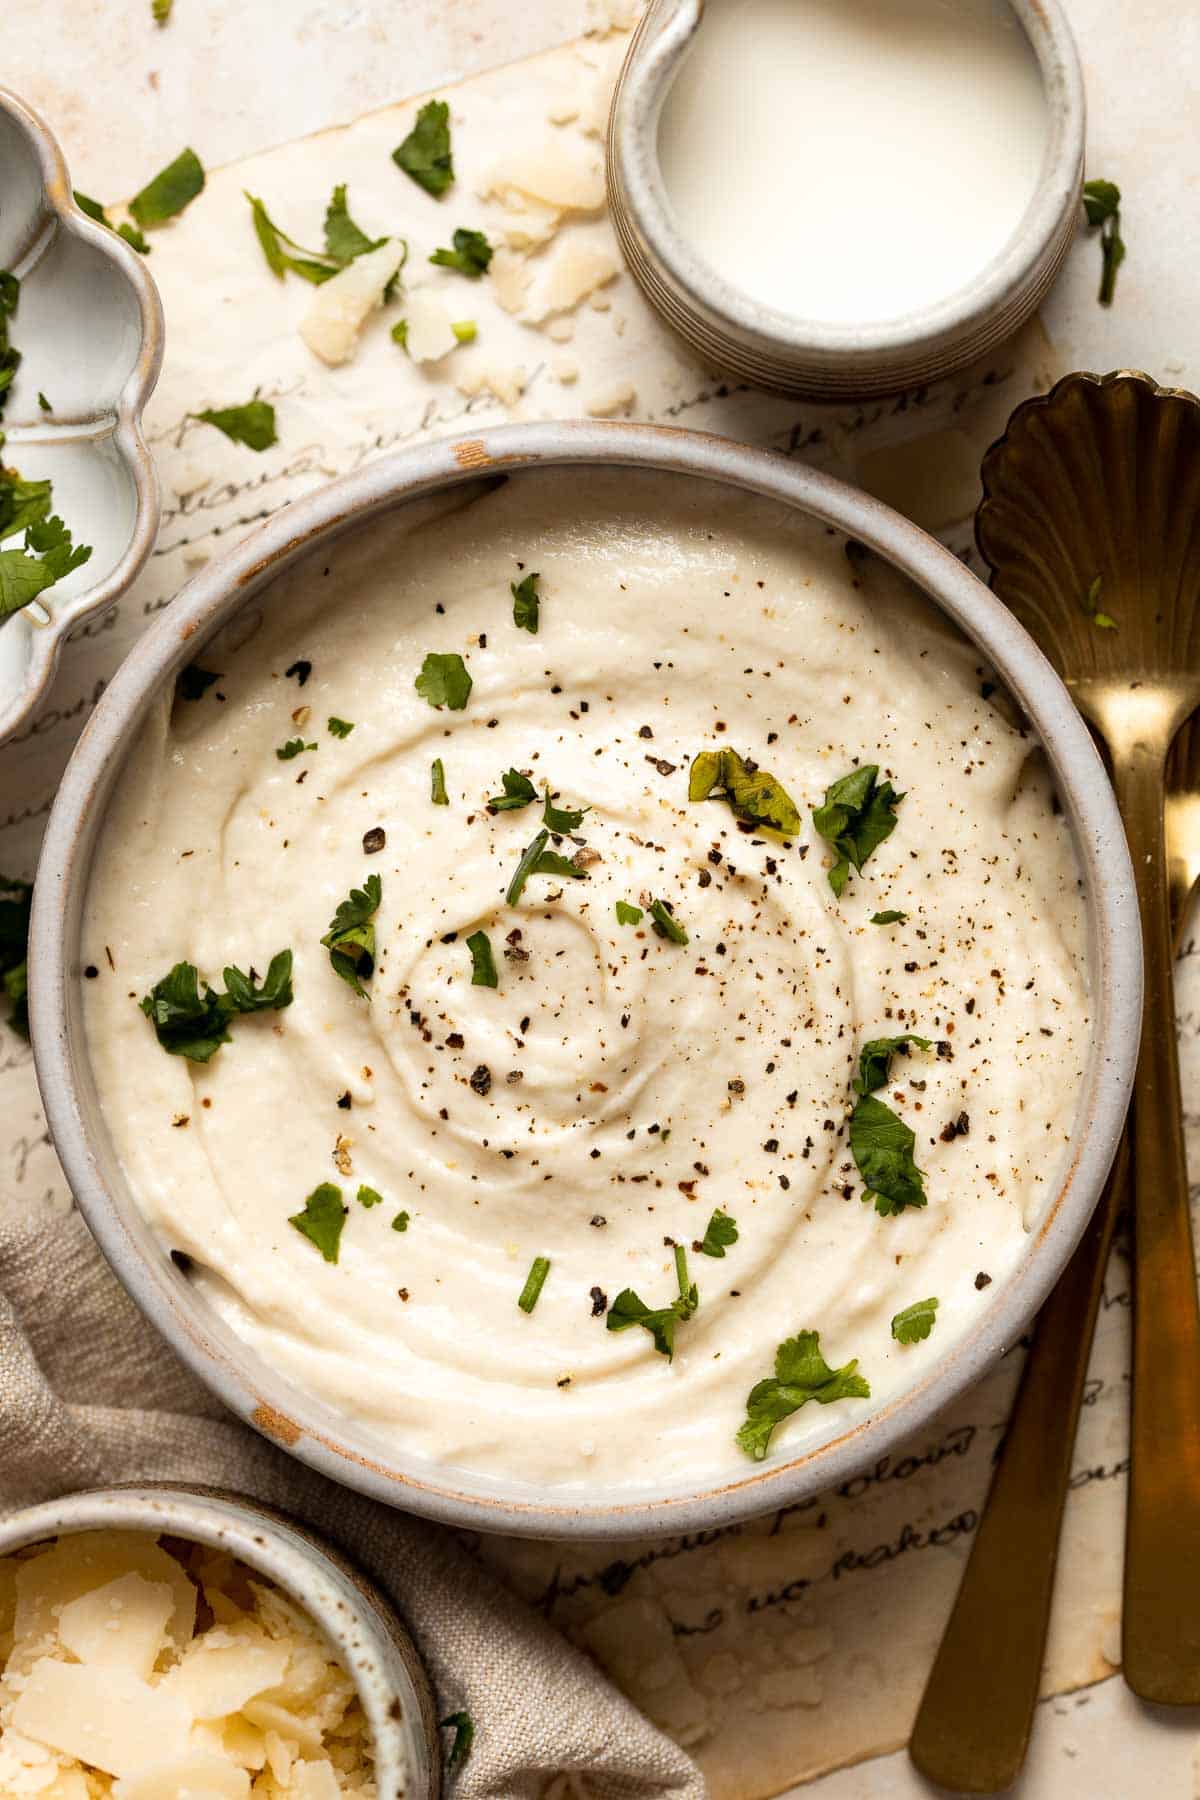
- Mashed Cauliflower
- Collard Greens with Bacon


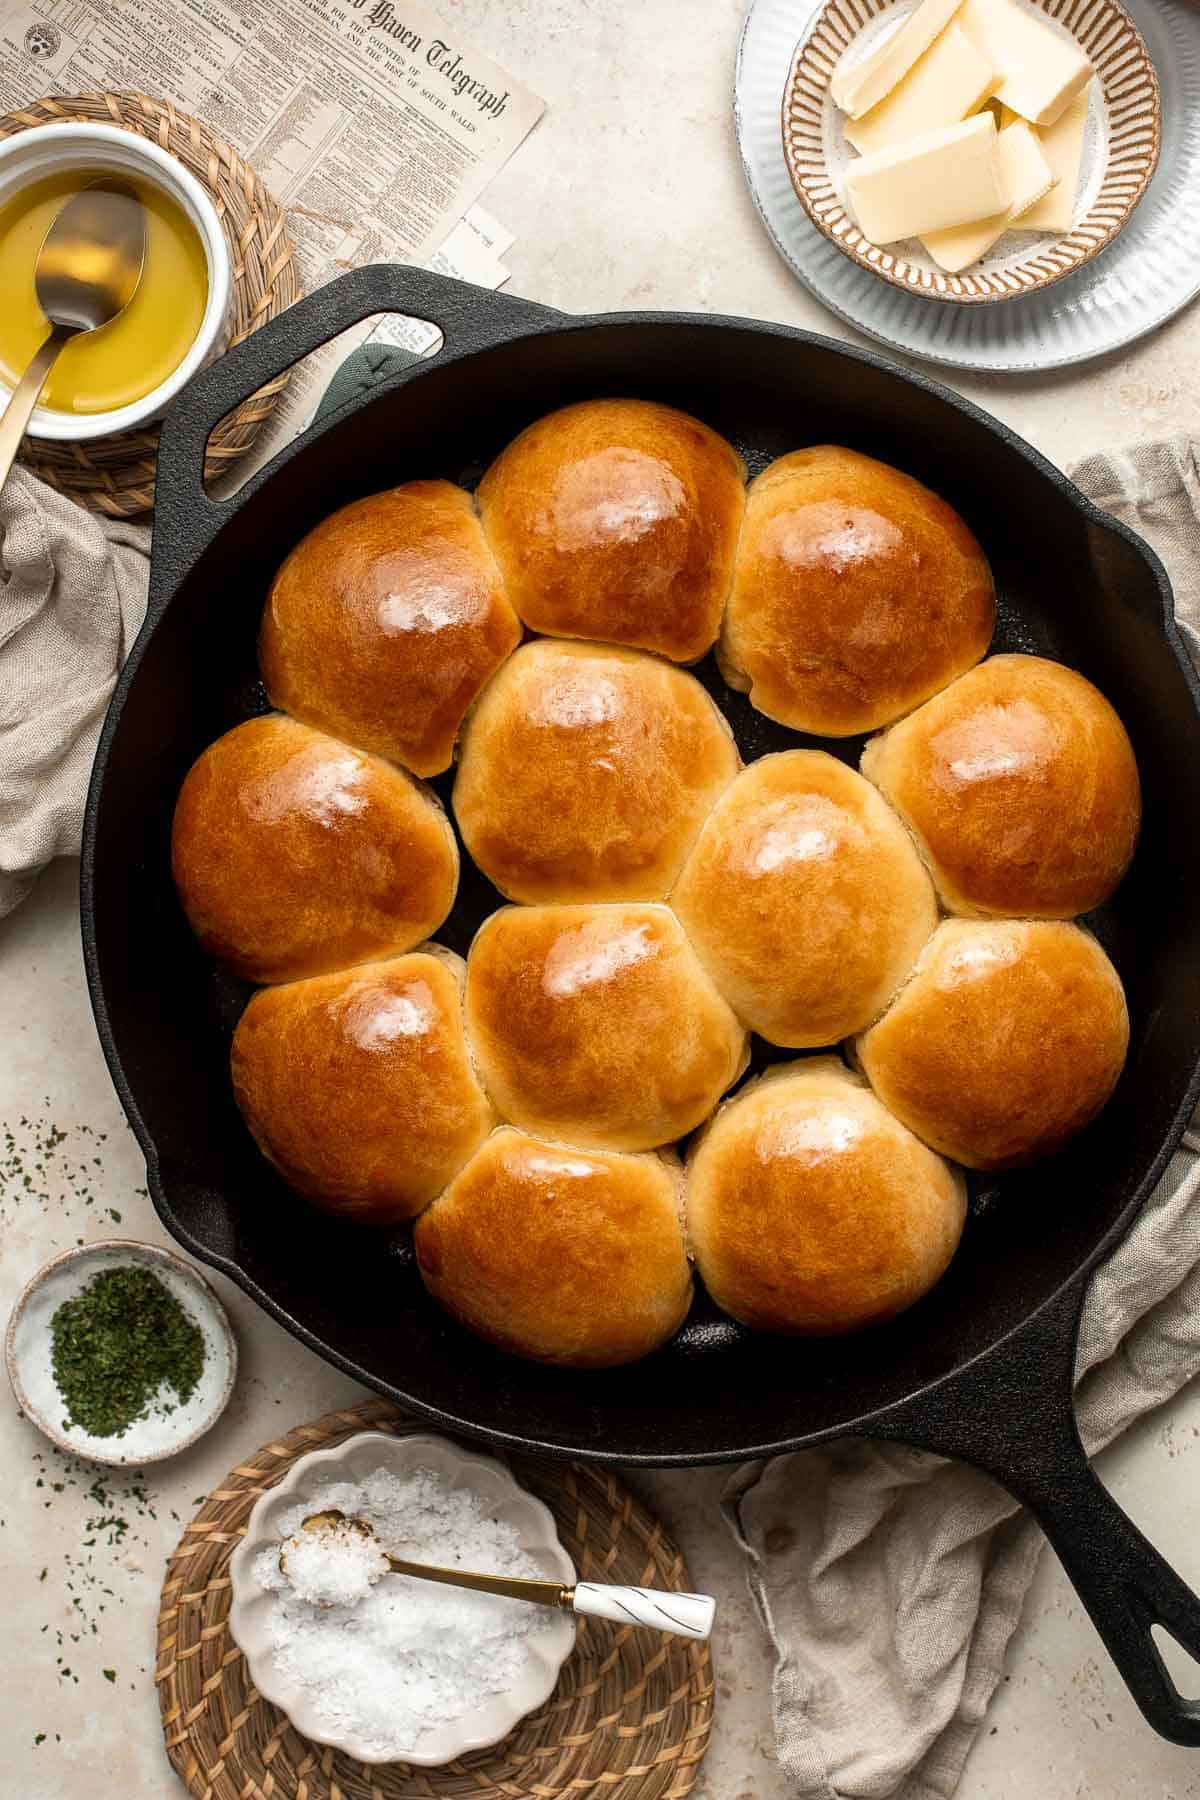
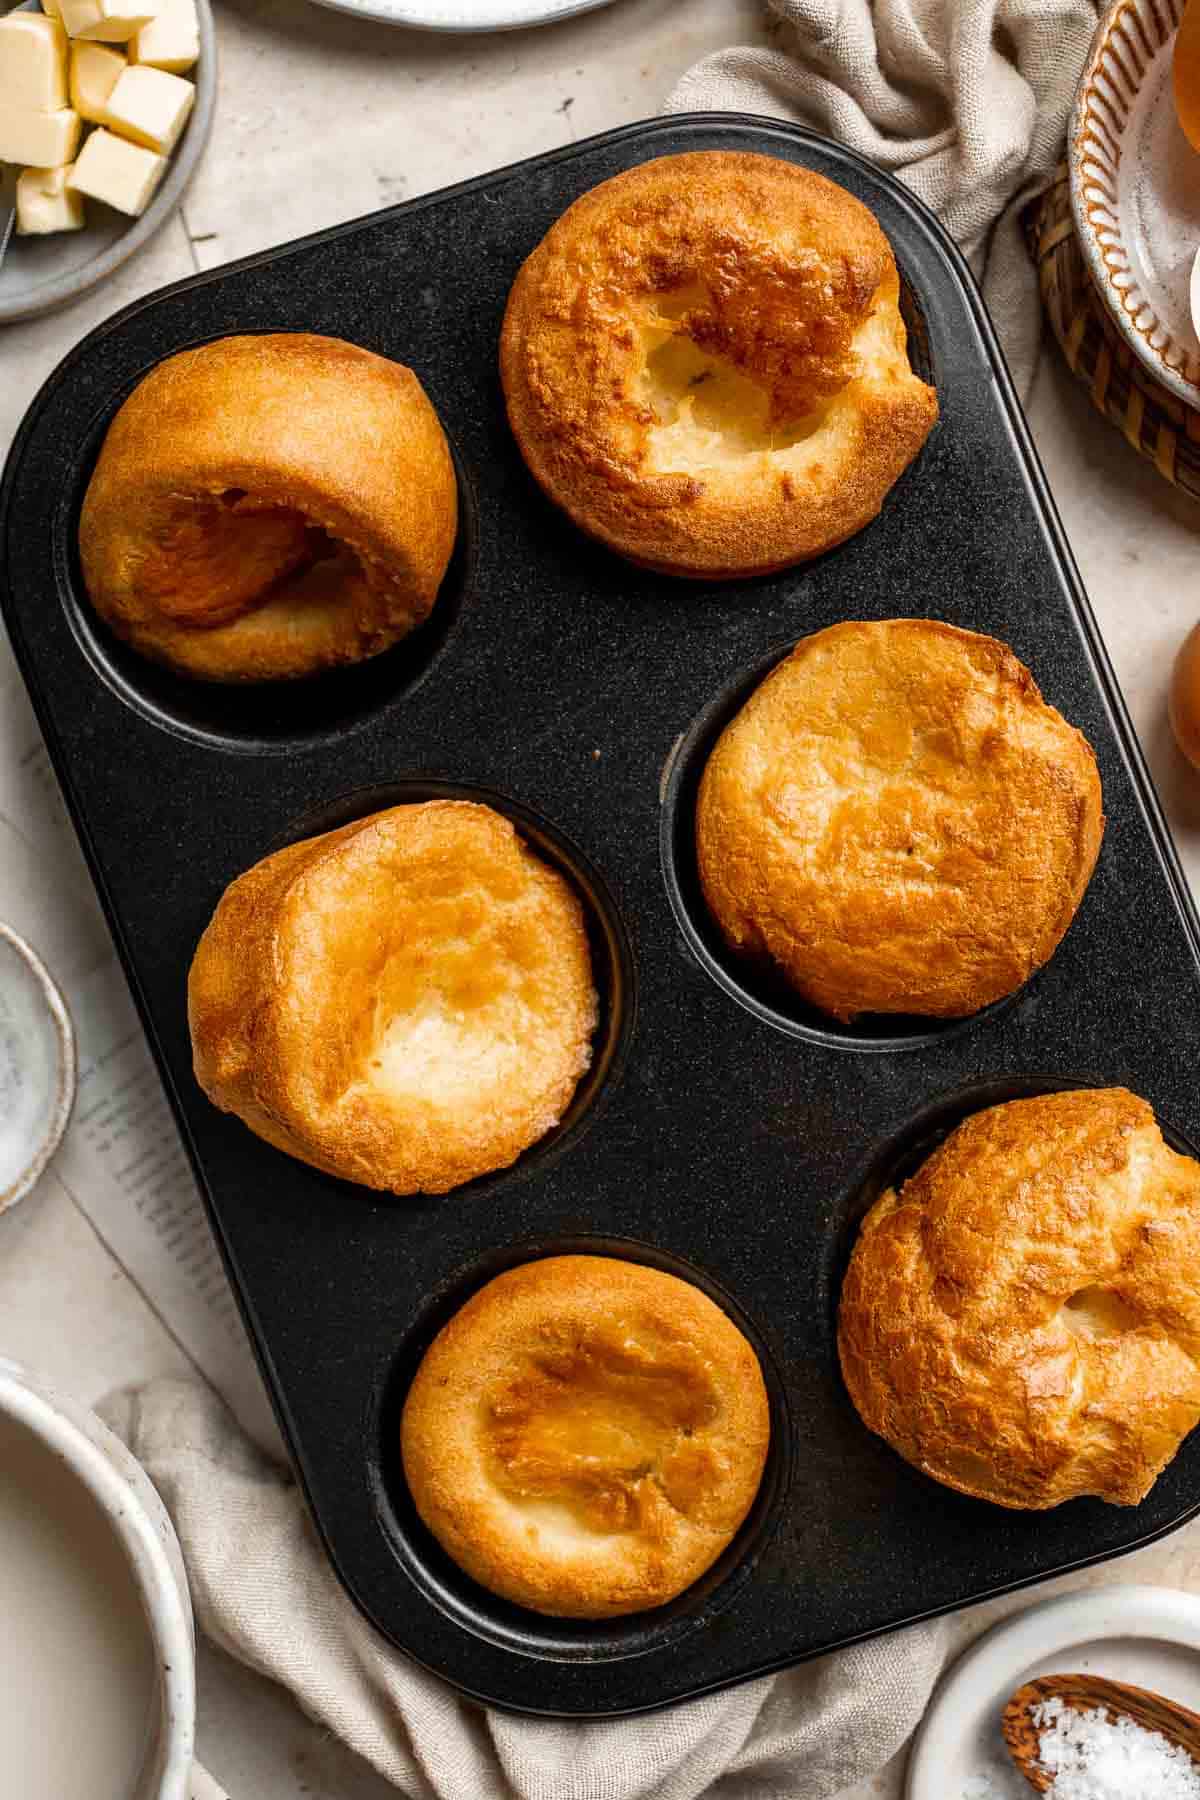
Bread and Rolls


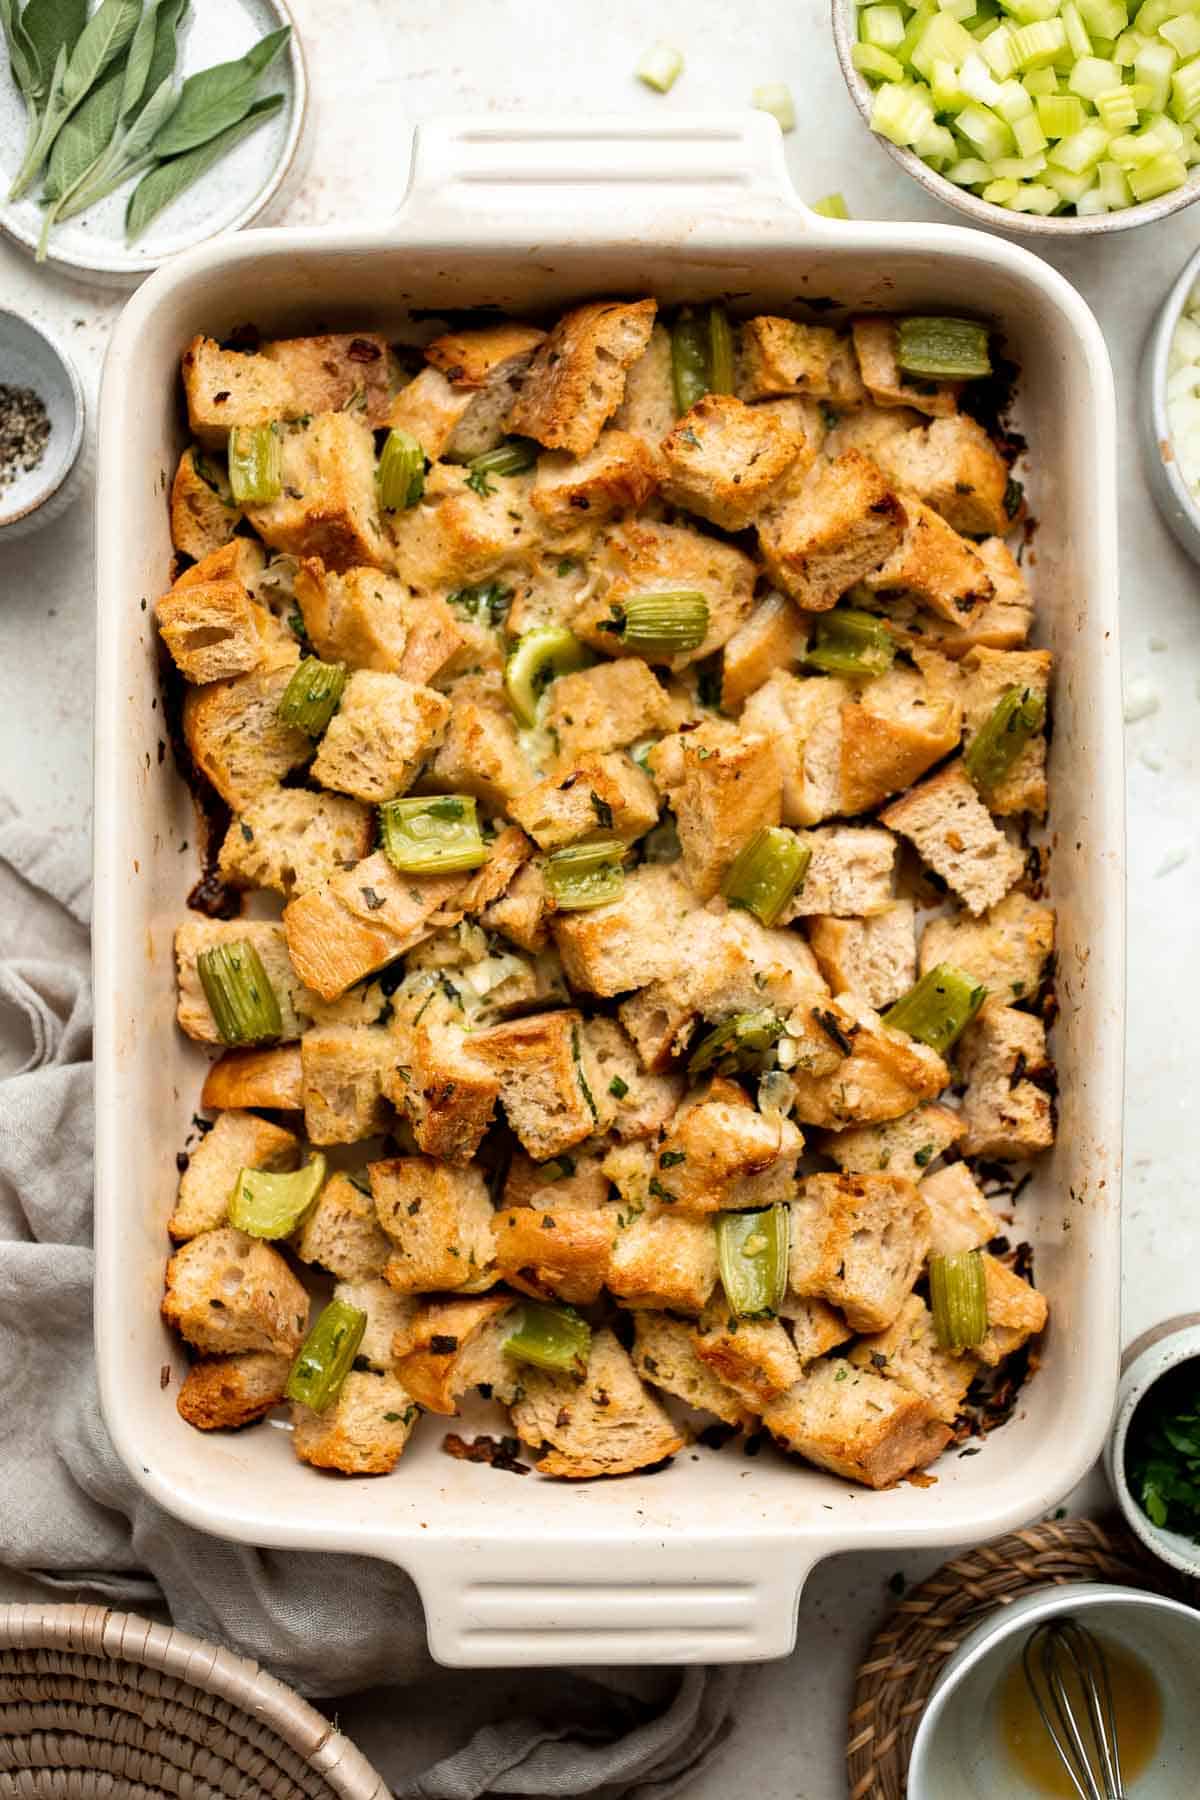
Casseroles and Make-Ahead Sides


Christmas Sauces, Gravies, and Condiments
No Christmas meal is complete without the finishing touches. Gravy, cranberry sauce, and simple condiments add extra flavor and bring the entire menu together. These small additions make a big impact and are often easy to prepare ahead of time.
- Classic Homemade Turkey Gravy (from Drippings or Broth)
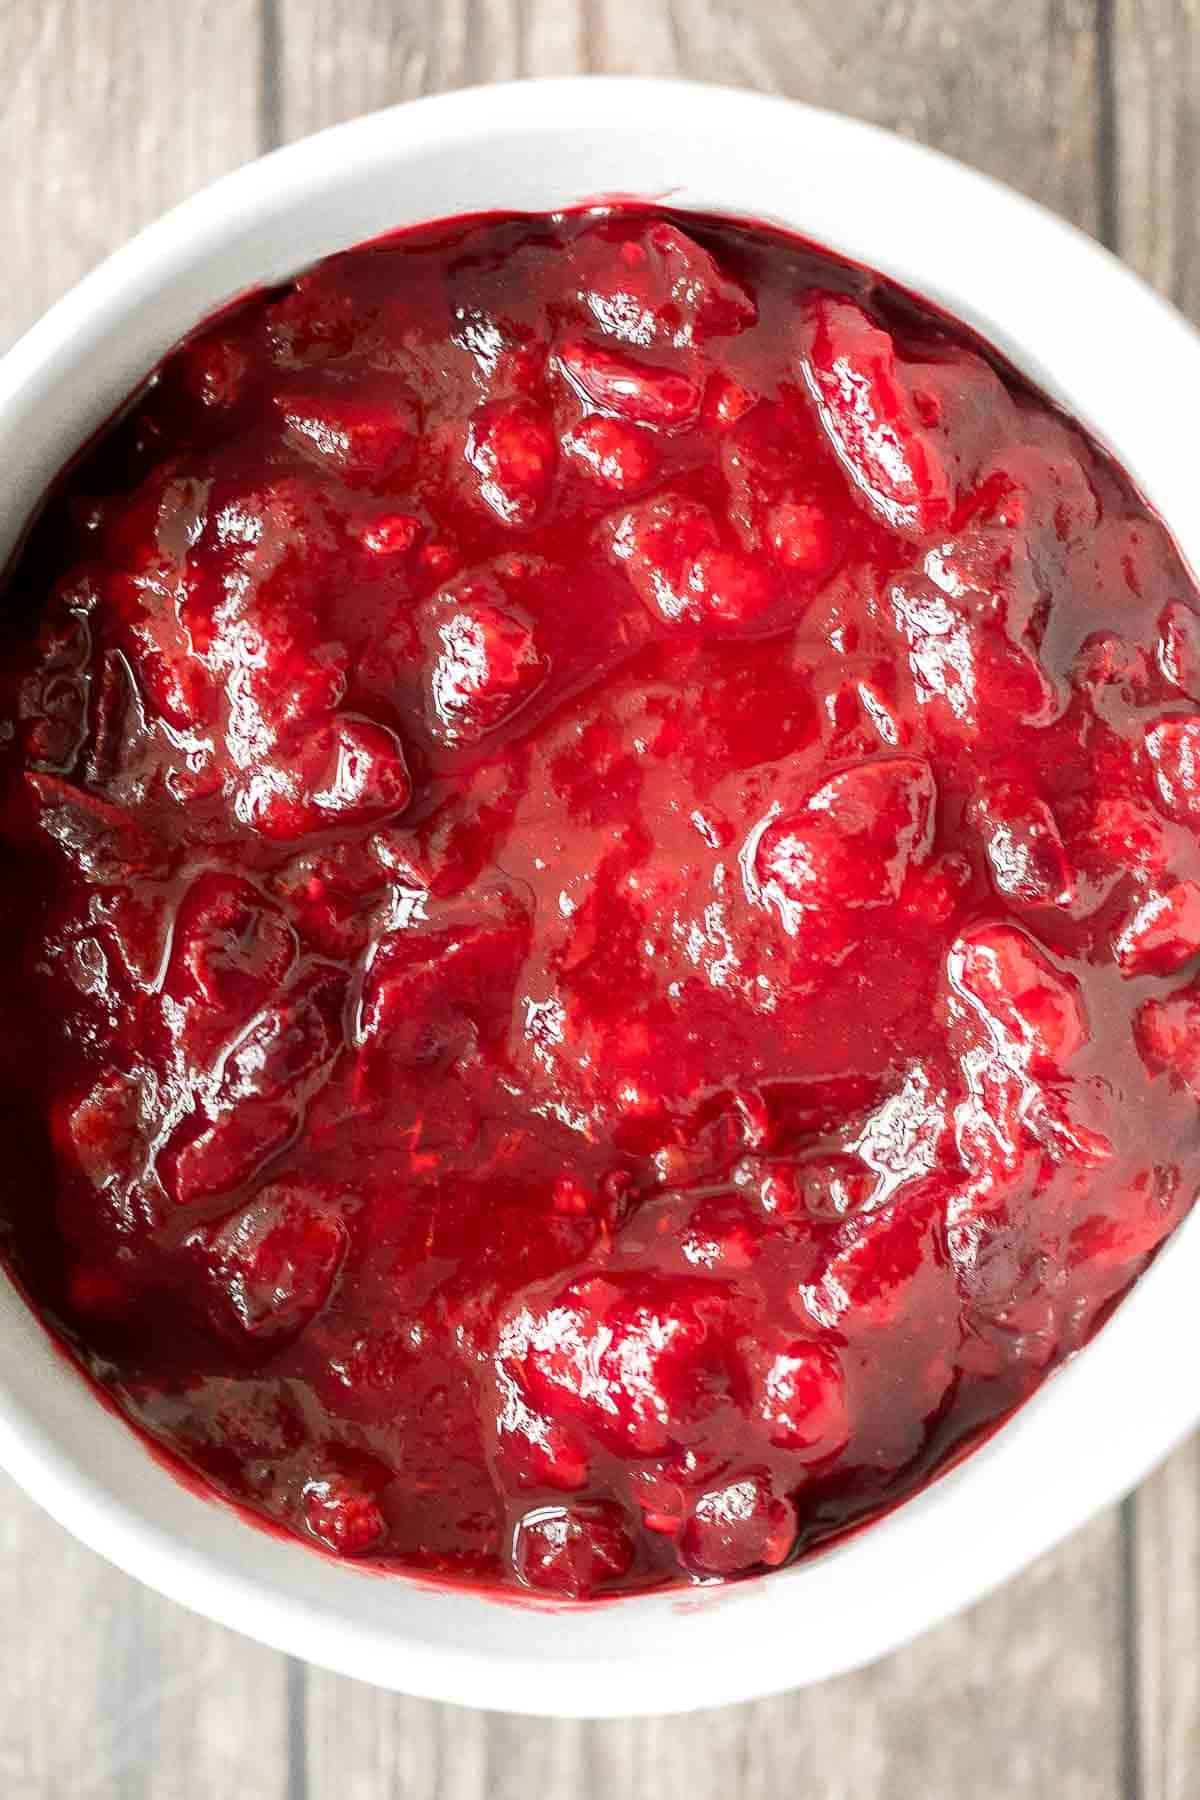
- Easy Make-Ahead Cranberry Sauce
- Jellied Cranberry Sauce
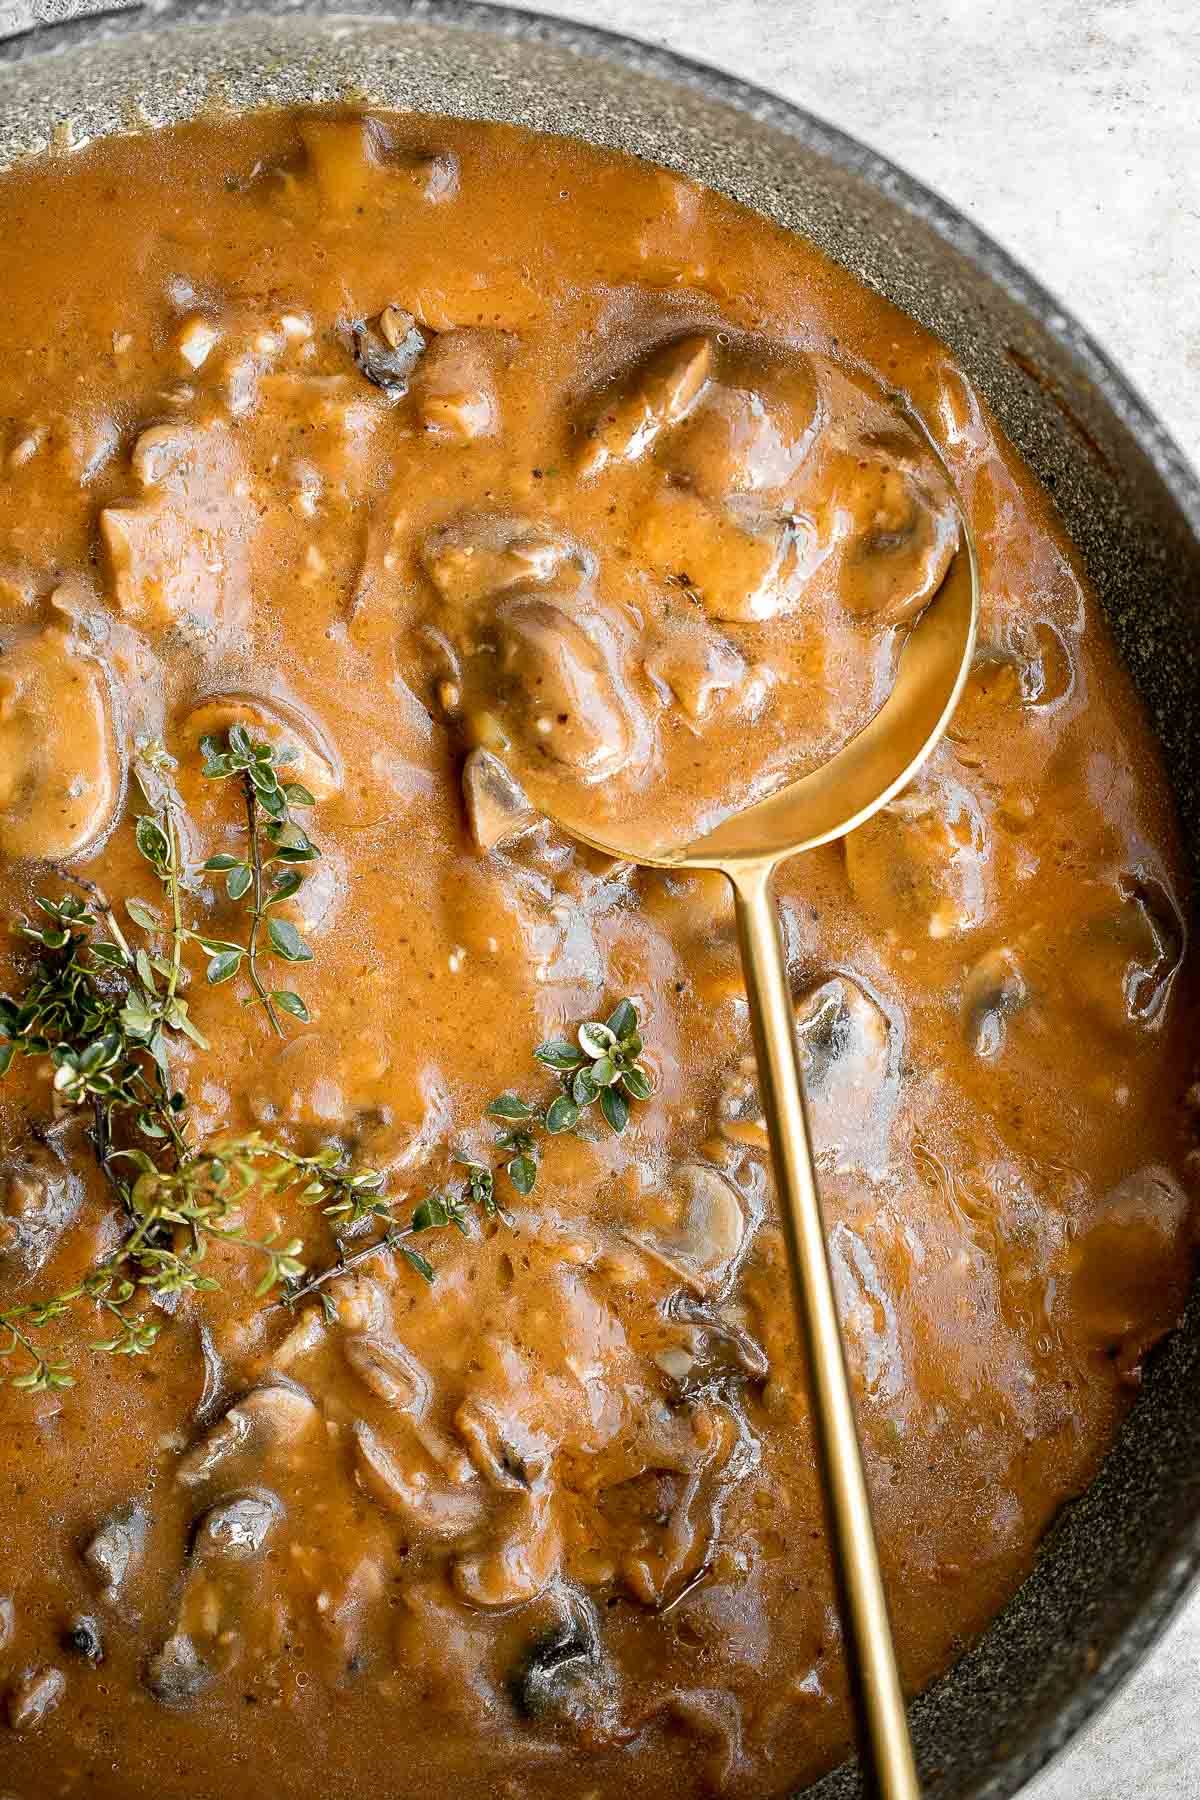
- Mushroom Gravy


Christmas Drinks
No holiday gathering is complete without something festive to sip on. These Christmas drink recipes include cozy warm beverages and non alcoholic options everyone can enjoy. From make ahead punches to simple drinks you can mix as guests arrive, these recipes help set the mood and keep entertaining easy, whether you're hosting Christmas Eve, Christmas dinner, or a casual holiday get together.
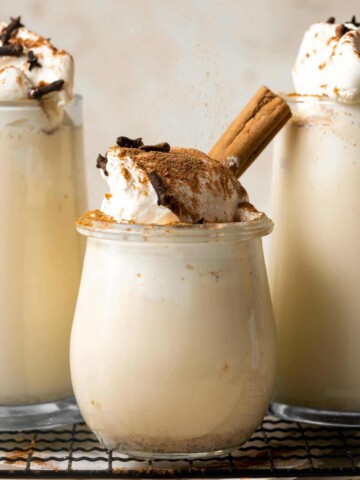
- Non-Alcoholic Homemade Eggnog
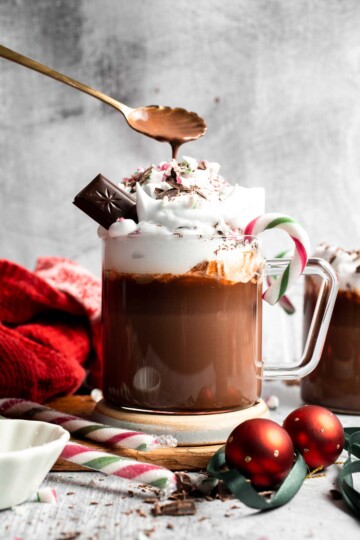
- Peppermint Hot Chocolate Recipe
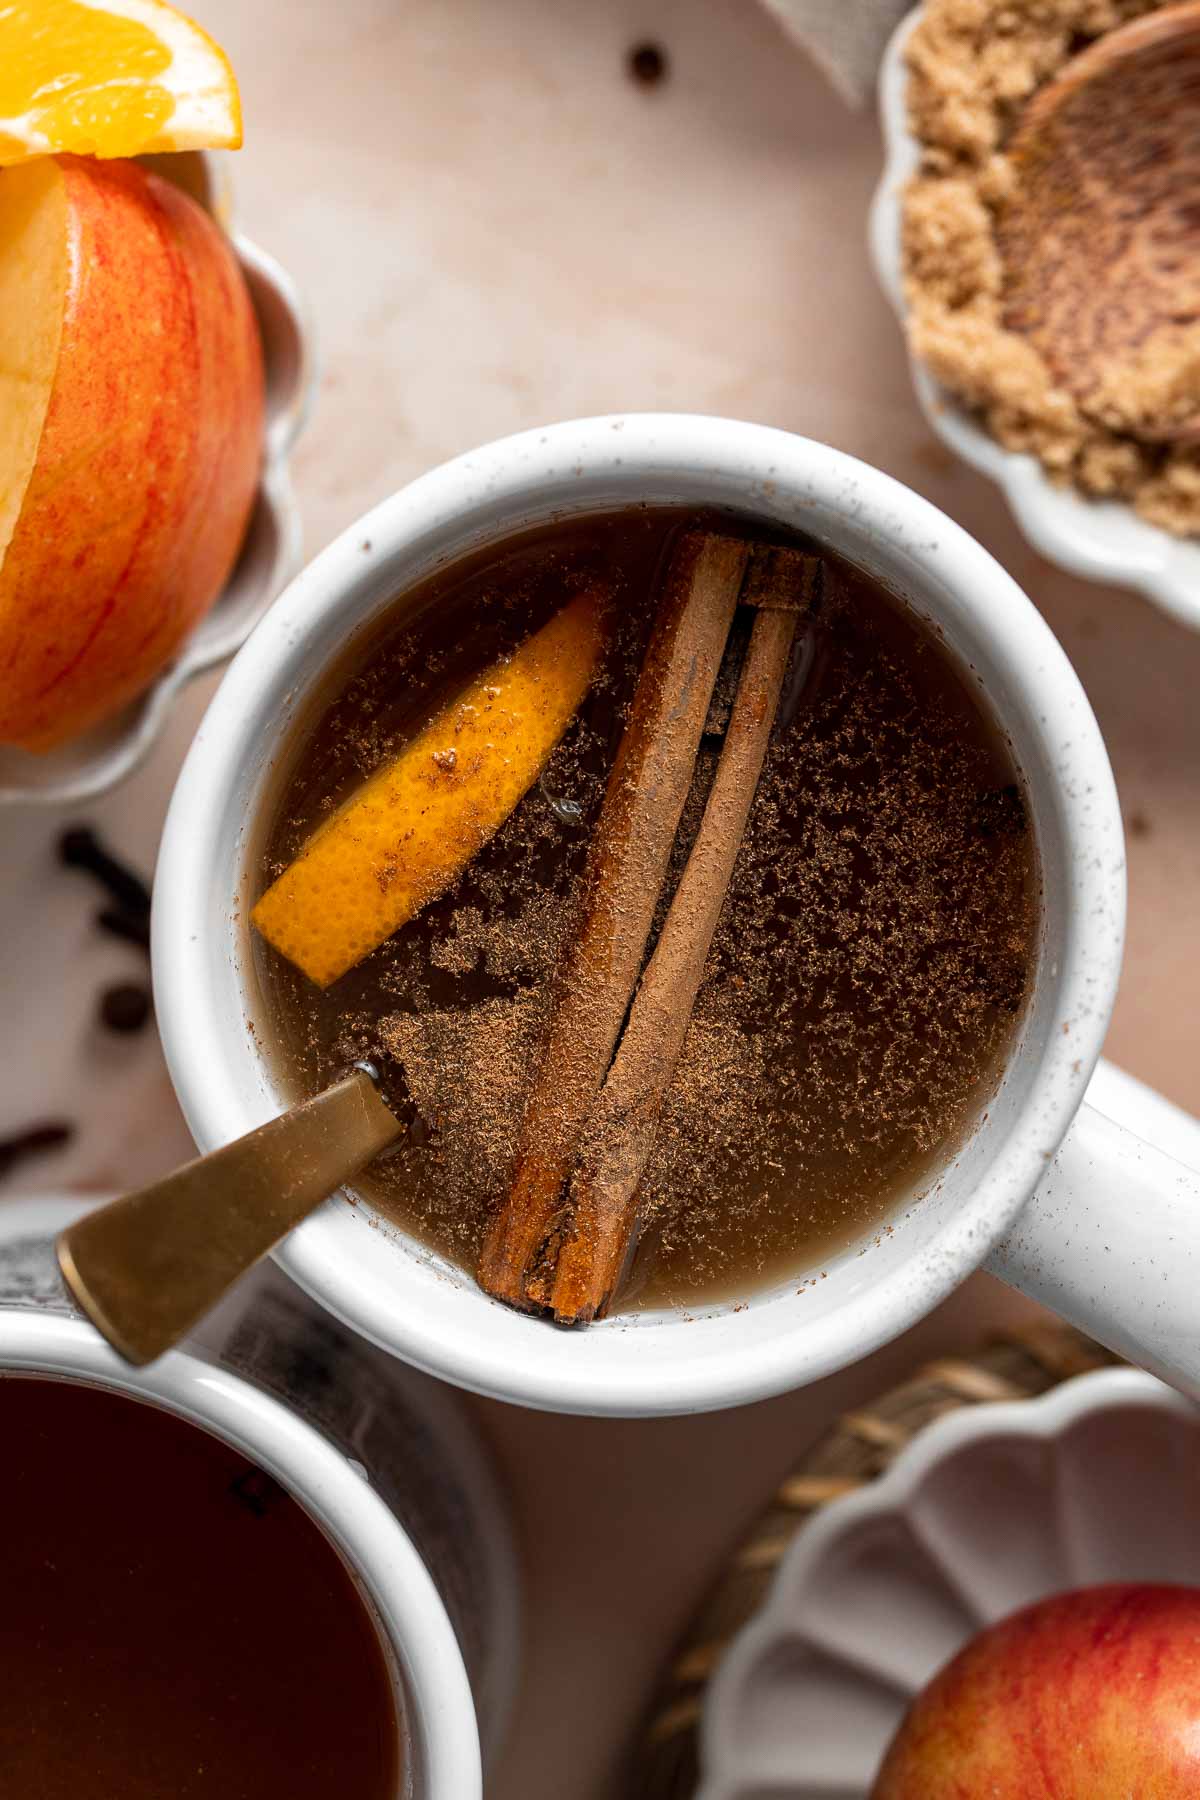
- Slow Cooker Apple Cider
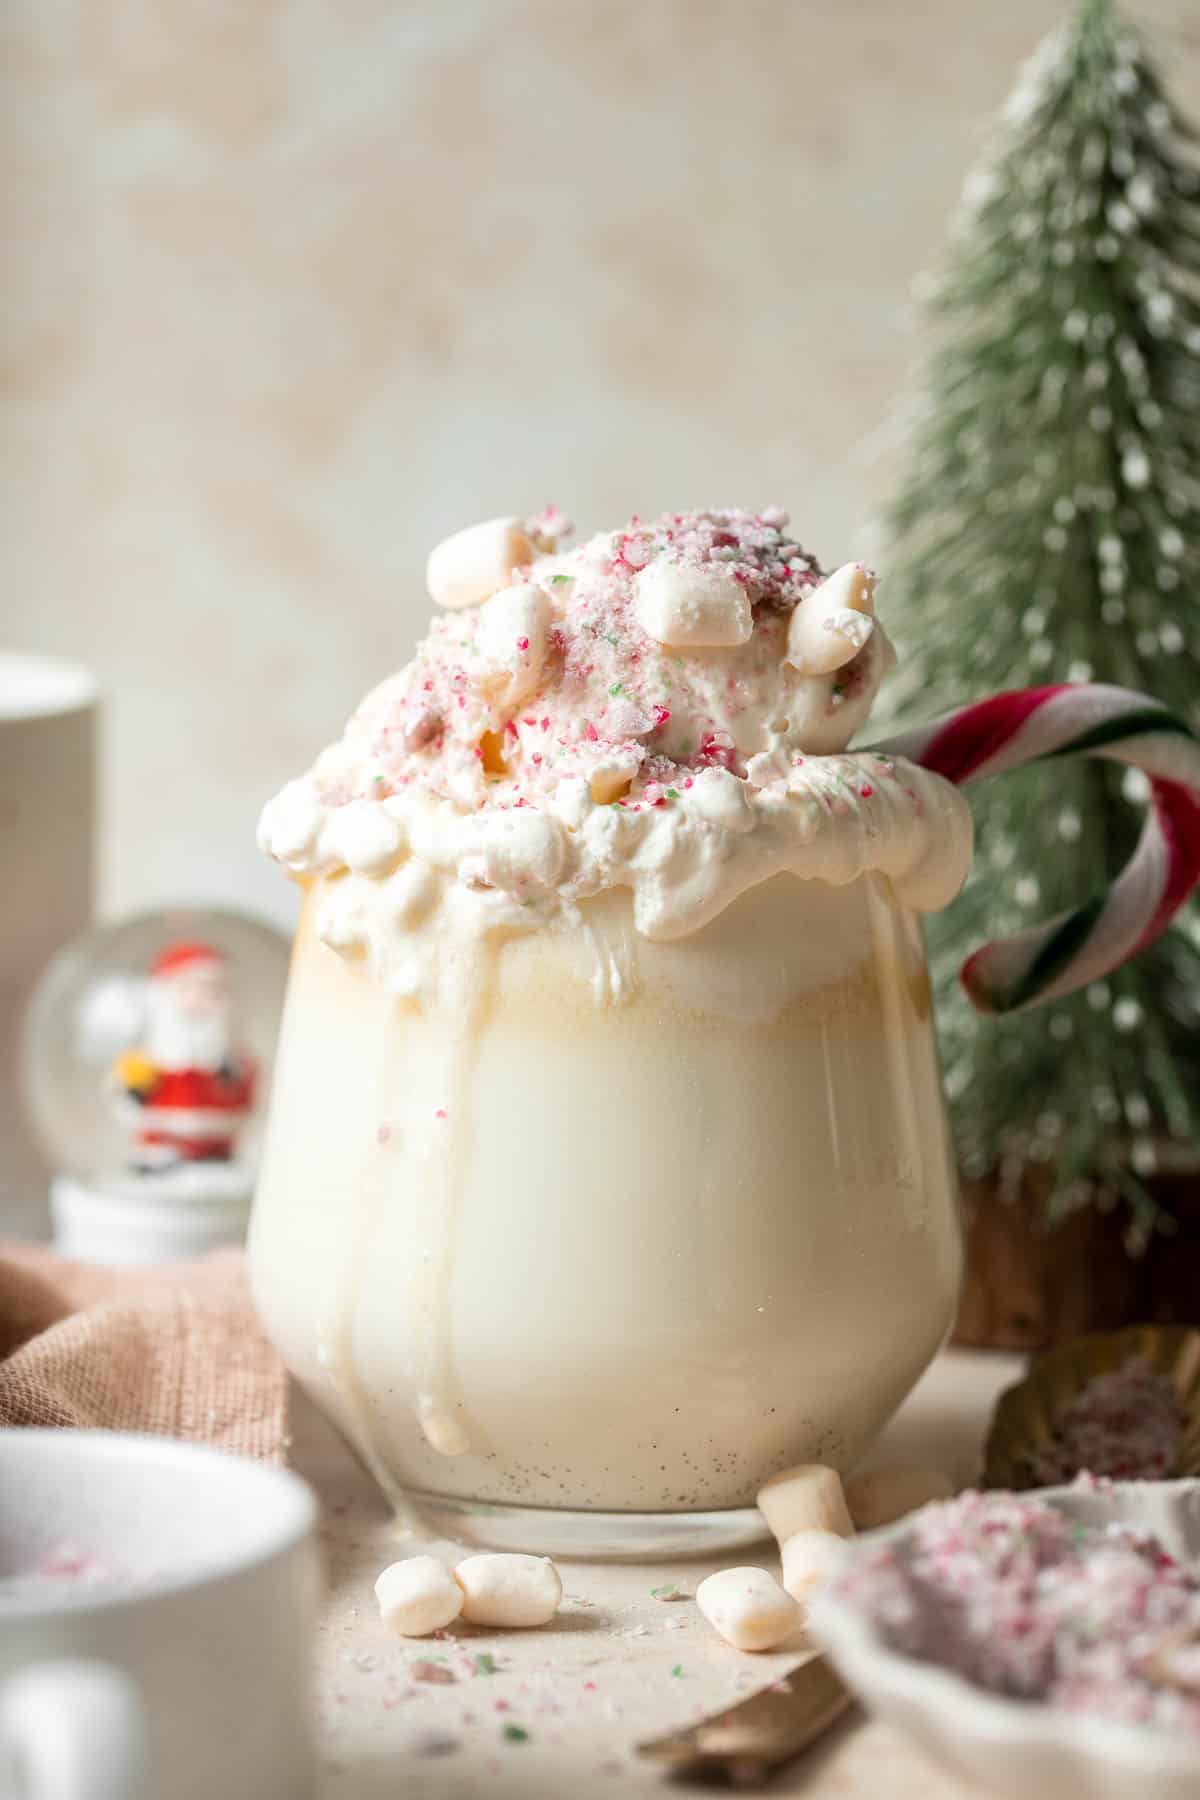
- White Hot Chocolate
Christmas Dessert
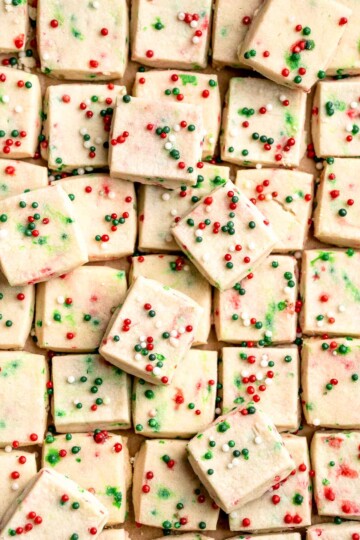
Christmas desserts are all about indulgence. From classic cakes and pies to cookie trays and festive bars, these sweet treats are perfect for ending your meal or enjoying throughout the holiday season. Many of these desserts are also great for gifting or holiday parties. See all Christmas desserts.
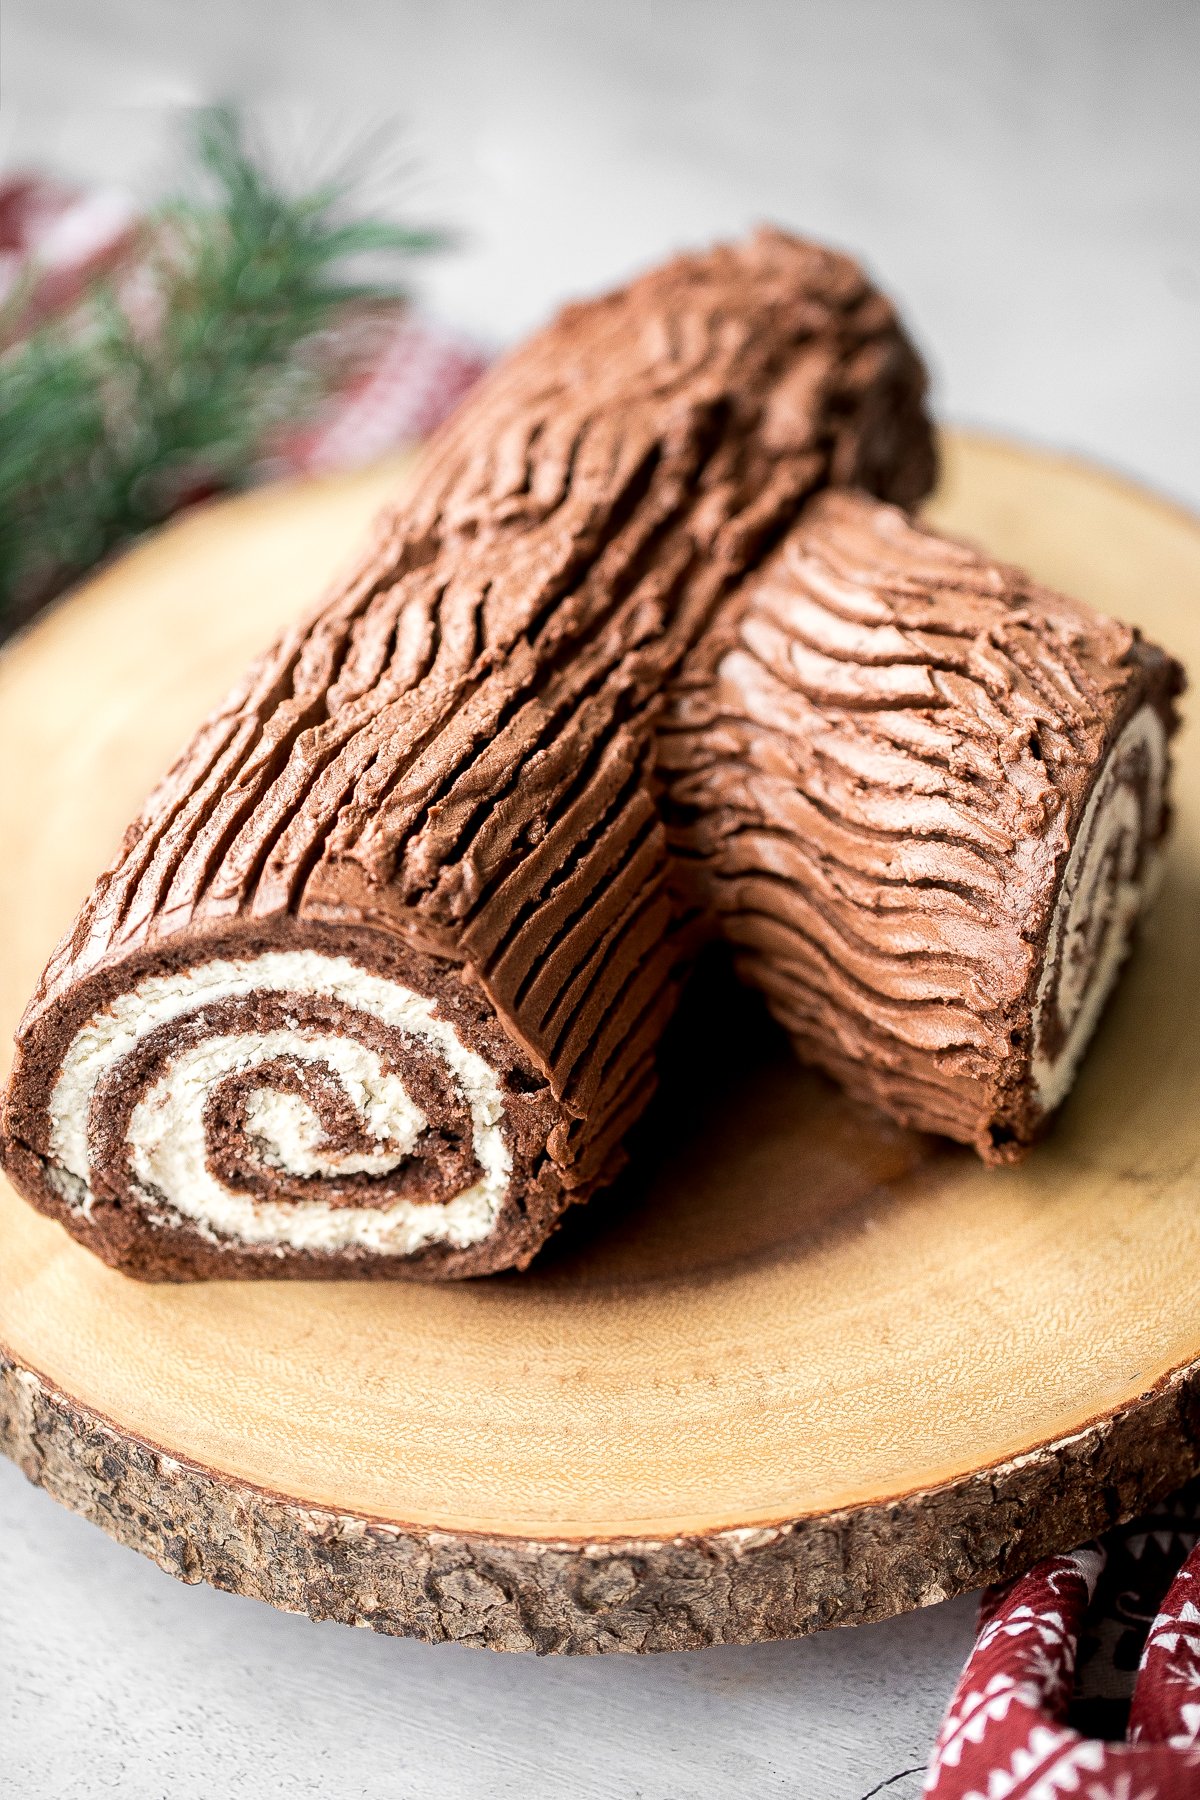
Christmas Cakes and Cheesecakes
- Holiday Yule Log Cake (Bûche de Noël)
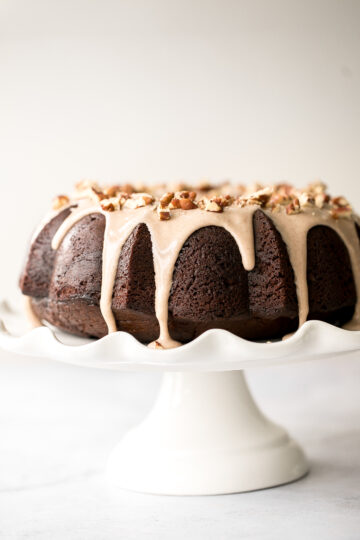
- Gingerbread Bundt Cake with Maple Cinnamon Glaze
- Christmas Cupcakes
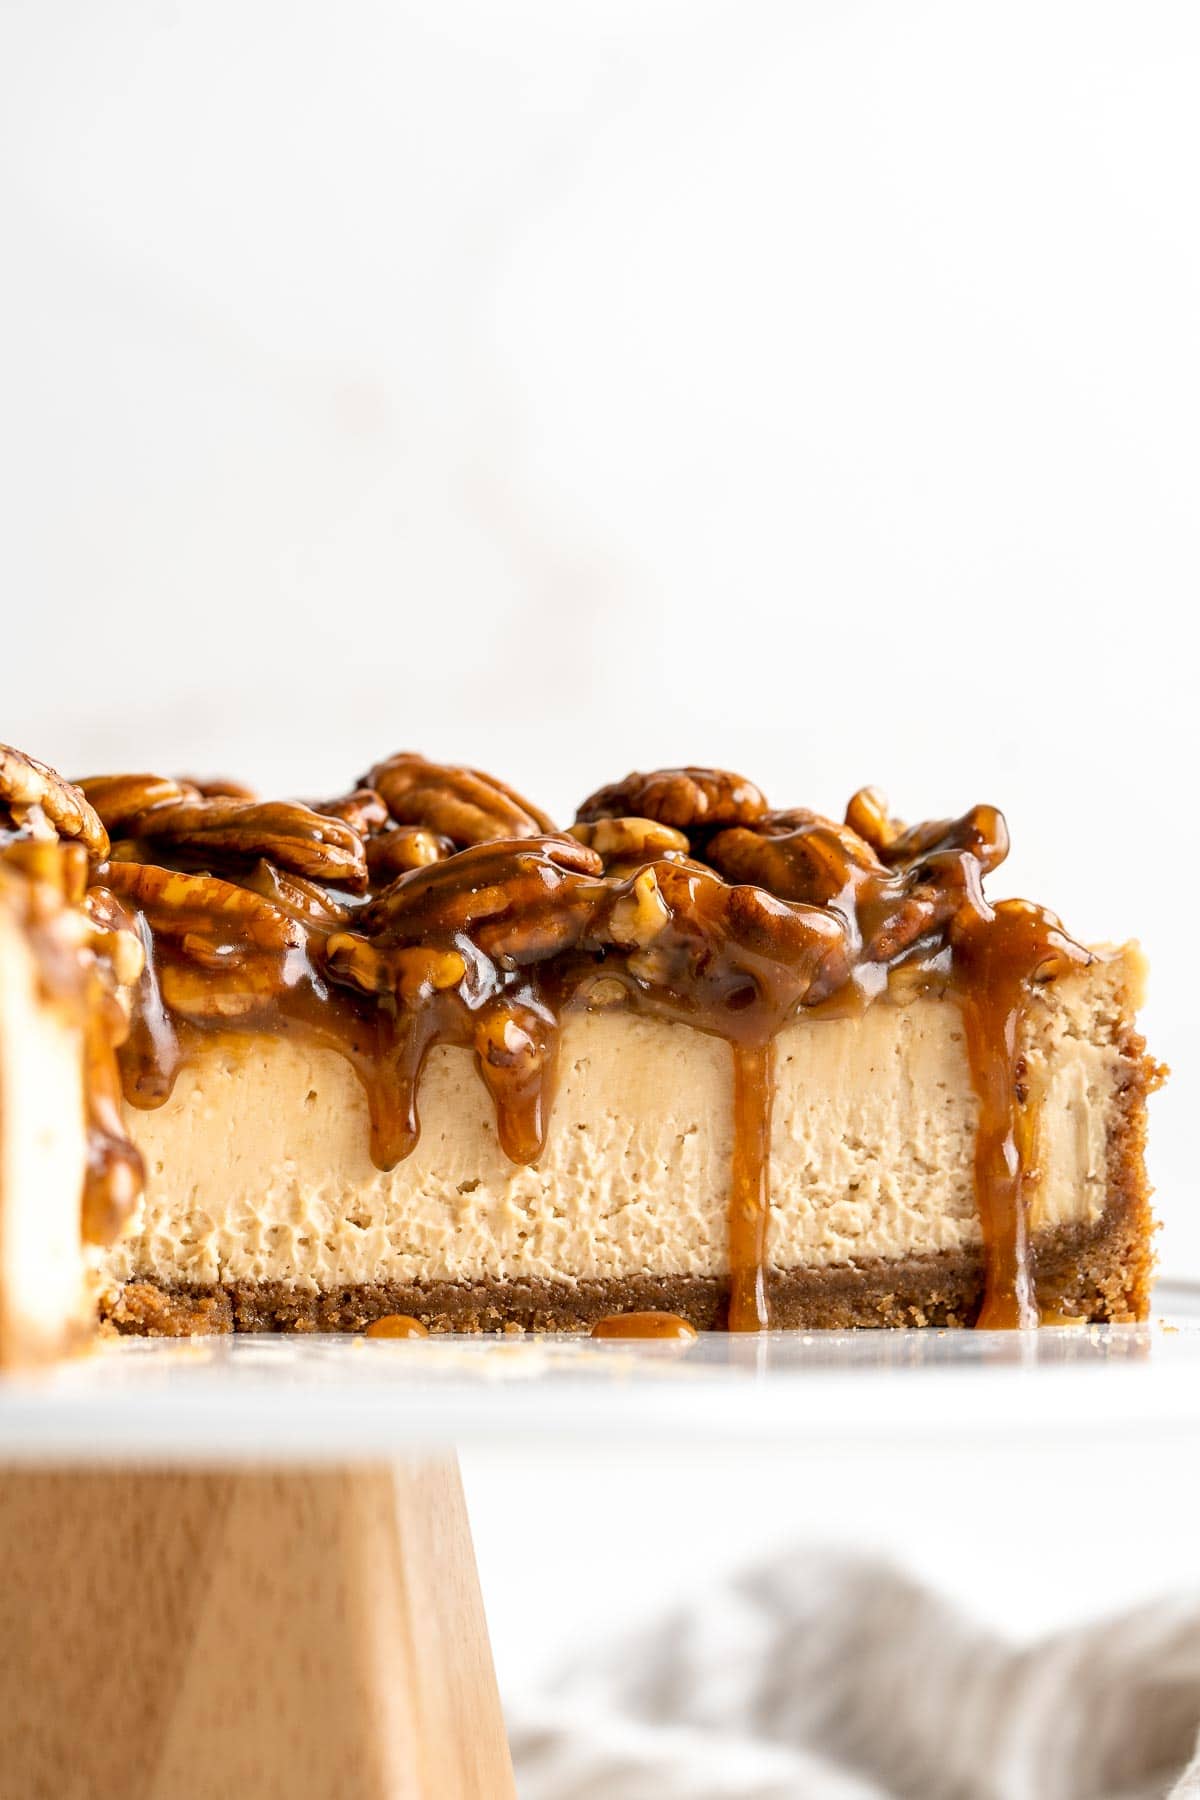
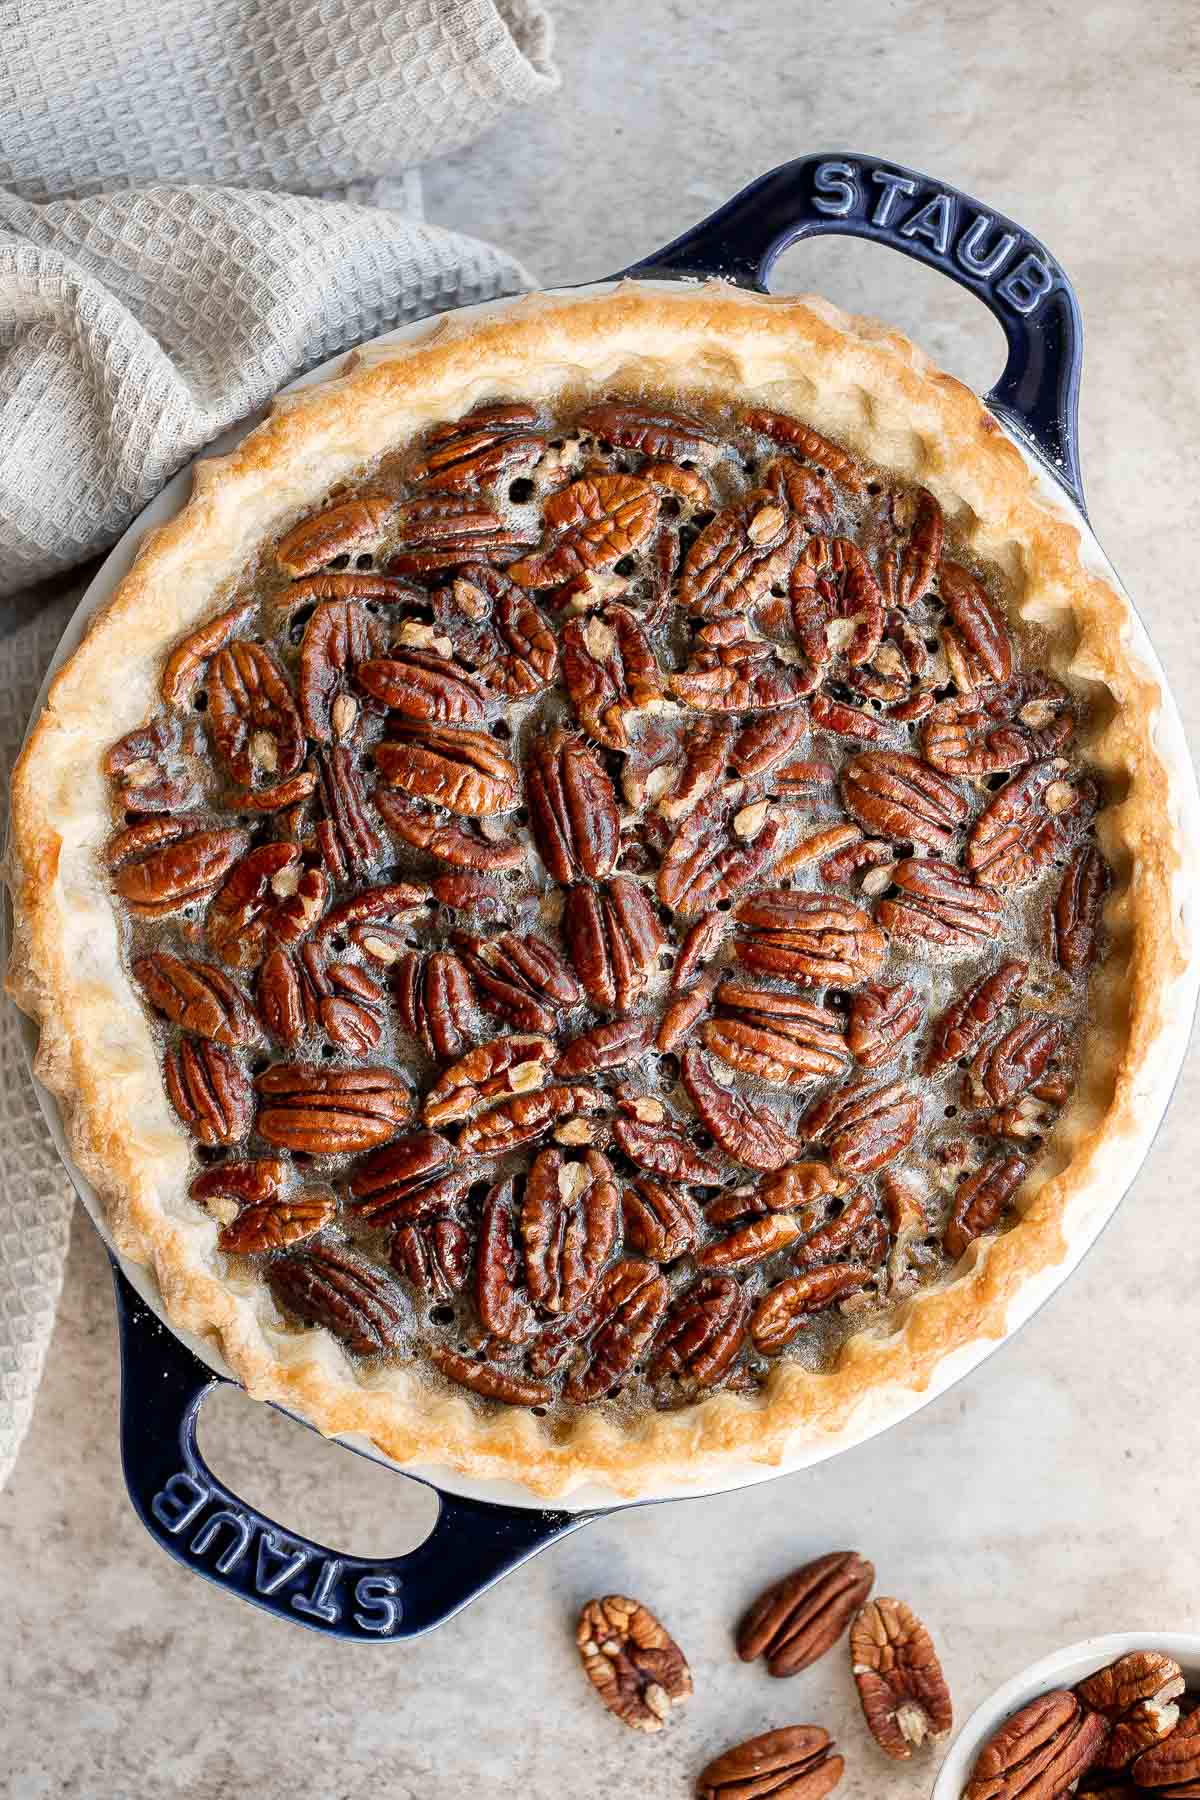
- Pecan Pie Cheesecake

Christmas Cookies and Bars
- Christmas Sugar Cookies with Royal Icing
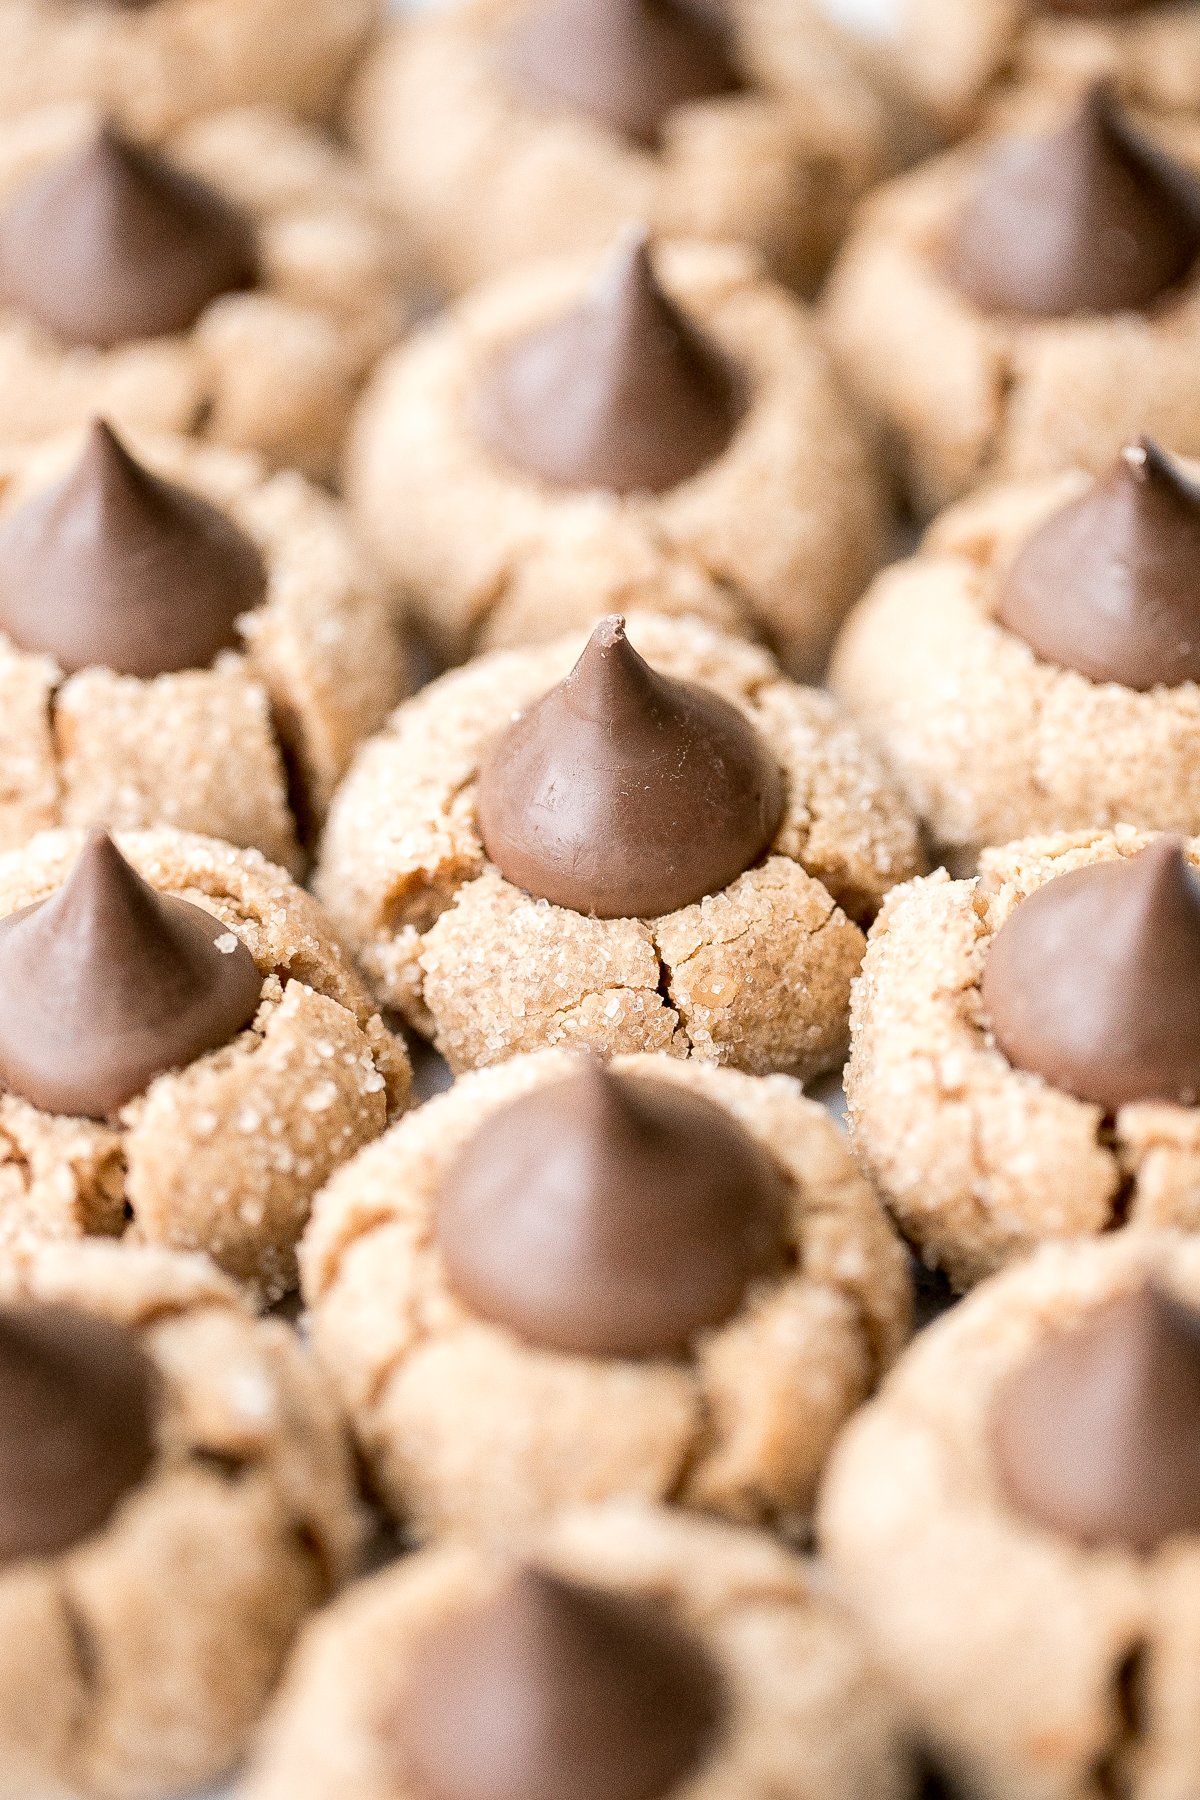
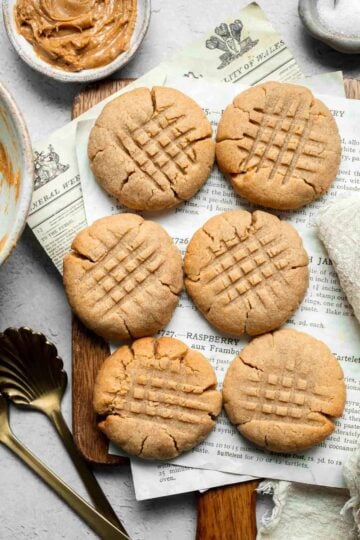
- Peanut Butter Blossoms
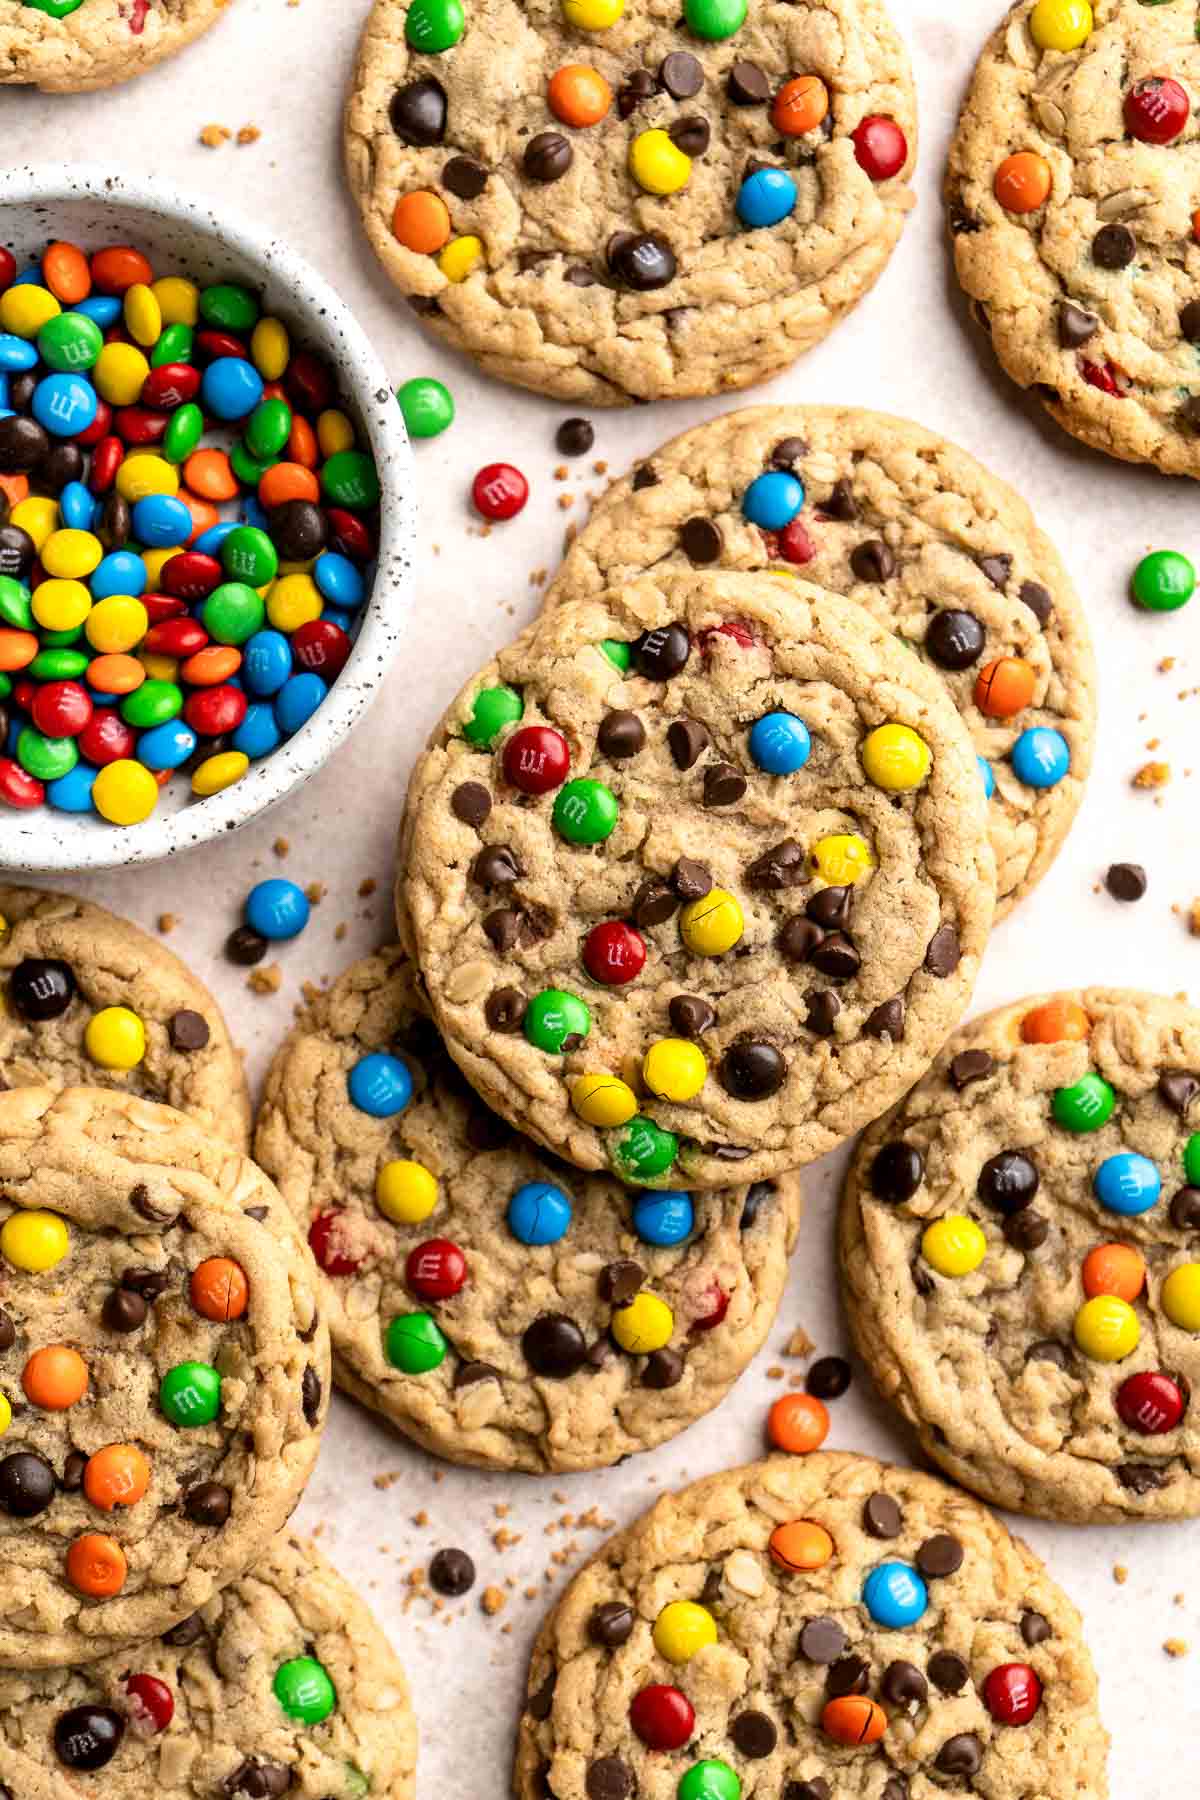
- M&M Christmas Cookies
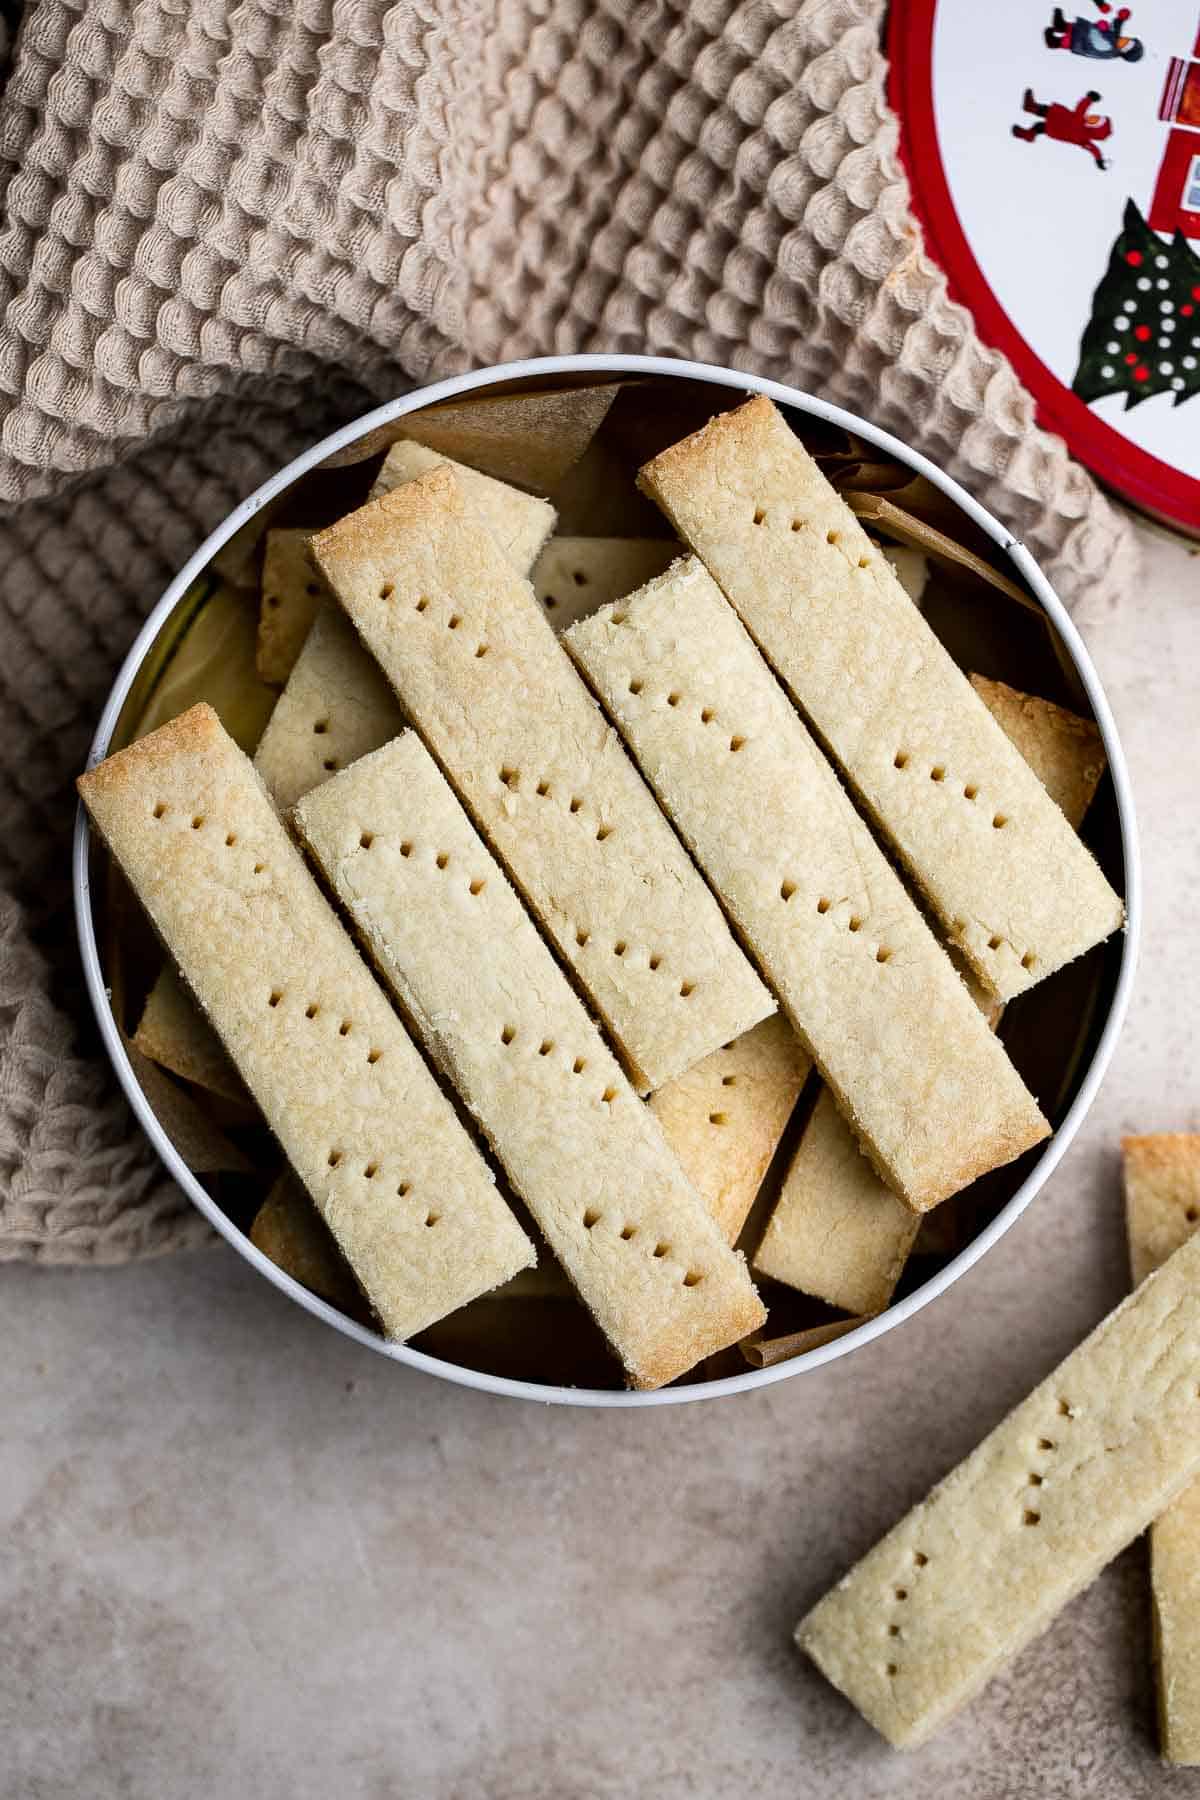
- Christmas Shortbread Cookie Bites
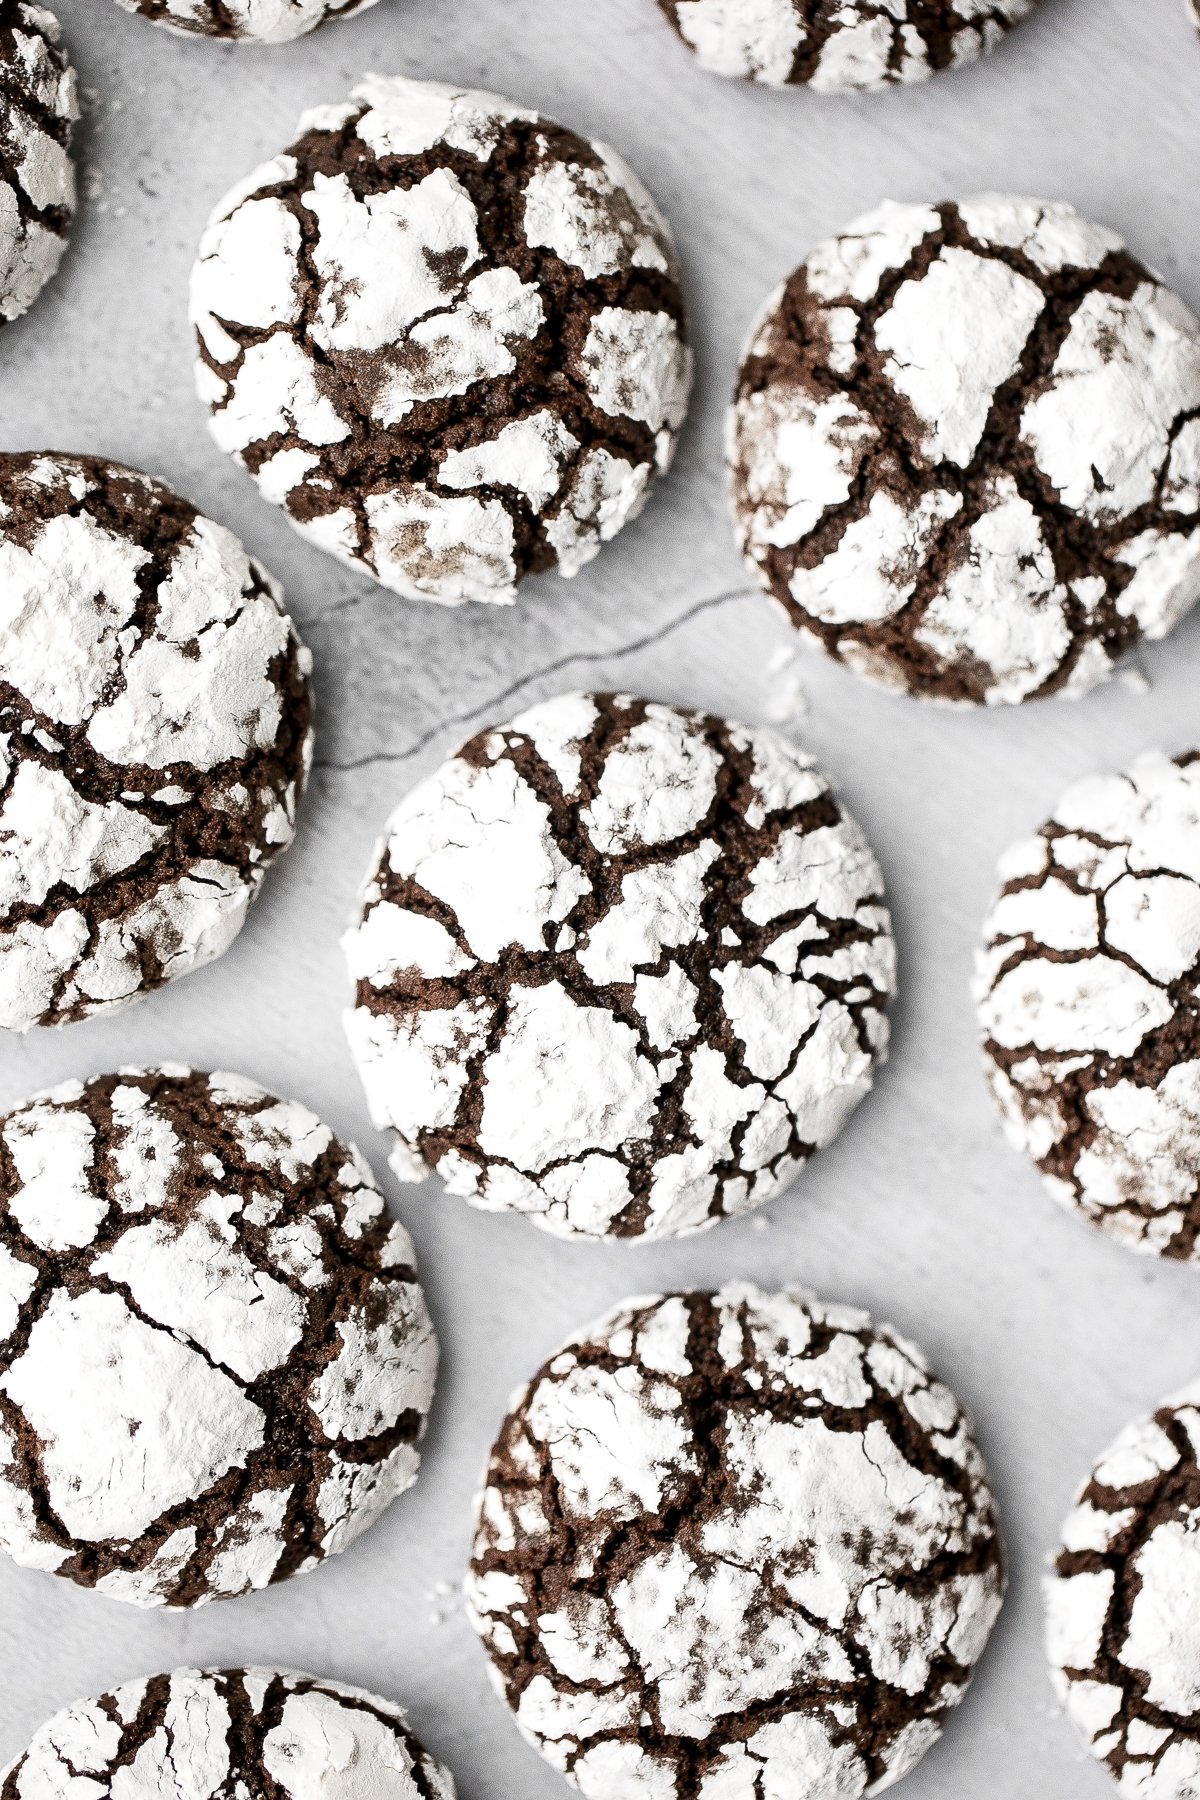
- Chocolate Crinkle Cookies
- Cornflake Christmas Wreath Cookies


Holiday Cookie Week
If you're planning a full holiday cookie spread, don't miss our annual Christmas Cookie Week, featuring festive cookie recipes perfect for trays and gift boxes. You'll find everything from nostalgic classics and colourful decorated cookies to creative flavours and fun themed bakes that make Cookie Week such a favourite holiday tradition.
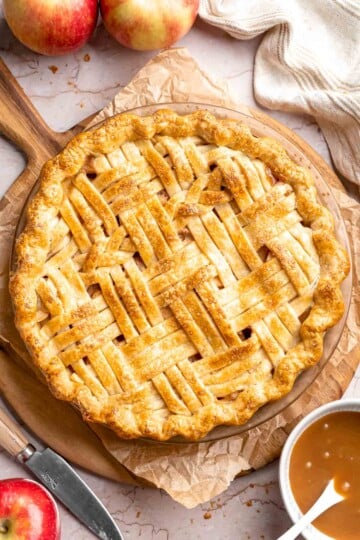
Christmas Pies and Tarts
Christmas Breakfast and Brunch Ideas
Christmas morning calls for something special, but not stressful. These breakfast and brunch recipes are cozy, comforting, and often make ahead friendly, so you can enjoy the morning without spending it in the kitchen. Perfect for slow mornings, pajamas, and coffee refills.
Make Ahead Christmas Recipes
Planning ahead is one of the best ways to enjoy Christmas without rushing. These make ahead Christmas recipes can be prepped or fully cooked in advance, then reheated when needed. They're ideal for busy schedules, hosting multiple meals, or simply making Christmas Day more relaxed.

Christmas Leftover Recipes
Christmas leftovers are one of the best parts of the holiday. From extra roast turkey and ham to leftover vegetables and sides, these recipes help you turn what's left in the fridge into easy, comforting meals you'll actually look forward to eating. Whether you're reheating favorites or transforming them into soups, casseroles, sandwiches, or breakfast dishes, these Christmas leftover recipes make the most of every bite and help stretch your holiday cooking into the next few days.
- Roasted Brussels Sprouts Pasta
- Ham and Cheese Pinwheels
- Cranberry Brie Grilled Cheese
- Leftover Stuffing Meatballs

Printable Christmas Menus
To make holiday planning even easier, we've created six printable Christmas menus you can download and use as is, or customize to fit your needs. Each menu includes a complete lineup of mains, sides, and desserts so you don't have to start from scratch.
Here's what's inside the pack:
- Classic Christmas Dinner Menu - A traditional holiday feast with a festive main, comforting sides, and a classic dessert.
- Christmas Eve Comfort Menu - Cozy, relaxed dishes perfect for Christmas Eve gatherings and casual entertaining.
- Make-Ahead Christmas Menu - Prep-friendly recipes designed to keep Christmas Day calm and stress-free.
- Small Gathering Christmas Menu - A scaled-down menu ideal for intimate dinners without sacrificing flavor.
- Simple No-Fuss Christmas Menu - Easy, low-stress holiday favorites that still feel special.
- Vegetarian Christmas Menu -
free download!
Get the Printable Christmas Menus
Download all 6 menus and keep them handy as you plan your holiday meals.
Plan Your Christmas Menu
When it comes to planning your Christmas menu, keep it simple and flexible. Choose one main dish, a few sides you love, and one or two desserts, and let the rest go. Not everything needs to be homemade, and prepping a few dishes ahead of time can make a big difference.
Use the printable Christmas menus as a starting point, swap in your favorite recipes, and plan around your schedule, not perfection. The goal is a delicious meal, a relaxed kitchen, and more time spent enjoying the holiday with the people you love.
Bookmark this post, save the printable menus, and come back to it anytime you need Christmas dinner inspiration.
Tips for Planning the Best Christmas Dinner Menu
Planning your Christmas menu ahead of time makes everything else fall into place. When you know exactly what you're serving, grocery shopping becomes easier, prep feels more manageable, and the day itself runs much more smoothly.
- Plan your menu early. This allows you to shop efficiently and take advantage of make ahead recipes. Many Christmas dishes can be prepared in advance and stored in an airtight container at room temperature, in the refrigerator, or frozen according to recipe instructions.
- Make your main course fresh on the day of serving. This keeps it tasting its best and ensures your centerpiece dish feels special and celebratory.
- Balance fresh and make ahead sides. Some sides are best made fresh, but many can be prepared ahead and reheated. Great make ahead options include creamy mashed potatoes, stovetop mac and cheese with white cheddar, creamy garlic mashed cauliflower, and easy cranberry sauce.
- Prep soups and salads in advance. Soups can usually be made up to five days ahead and stored in the refrigerator. For salads, prep the vegetables and dressing ahead of time, then assemble just before serving.
- Make desserts ahead whenever possible. Most desserts can be made in advance and stored in an airtight container at room temperature or in the fridge. Some can even be frozen weeks ahead and reheated in the oven.
- Mix homemade and store bought. There's nothing wrong with getting a little help. If baking a dessert feels overwhelming, a store bought cake or pie is a perfectly acceptable shortcut.
- Prep ingredients early. Chop vegetables, measure ingredients, and prepare dressings in advance. Store everything in airtight containers in the refrigerator so cooking feels calm and organized.
- Set the table the night before. Lay out your dinnerware, flatware, glasses, napkins, and decorations ahead of time. It's one less thing to think about on Christmas Day.
plan now!
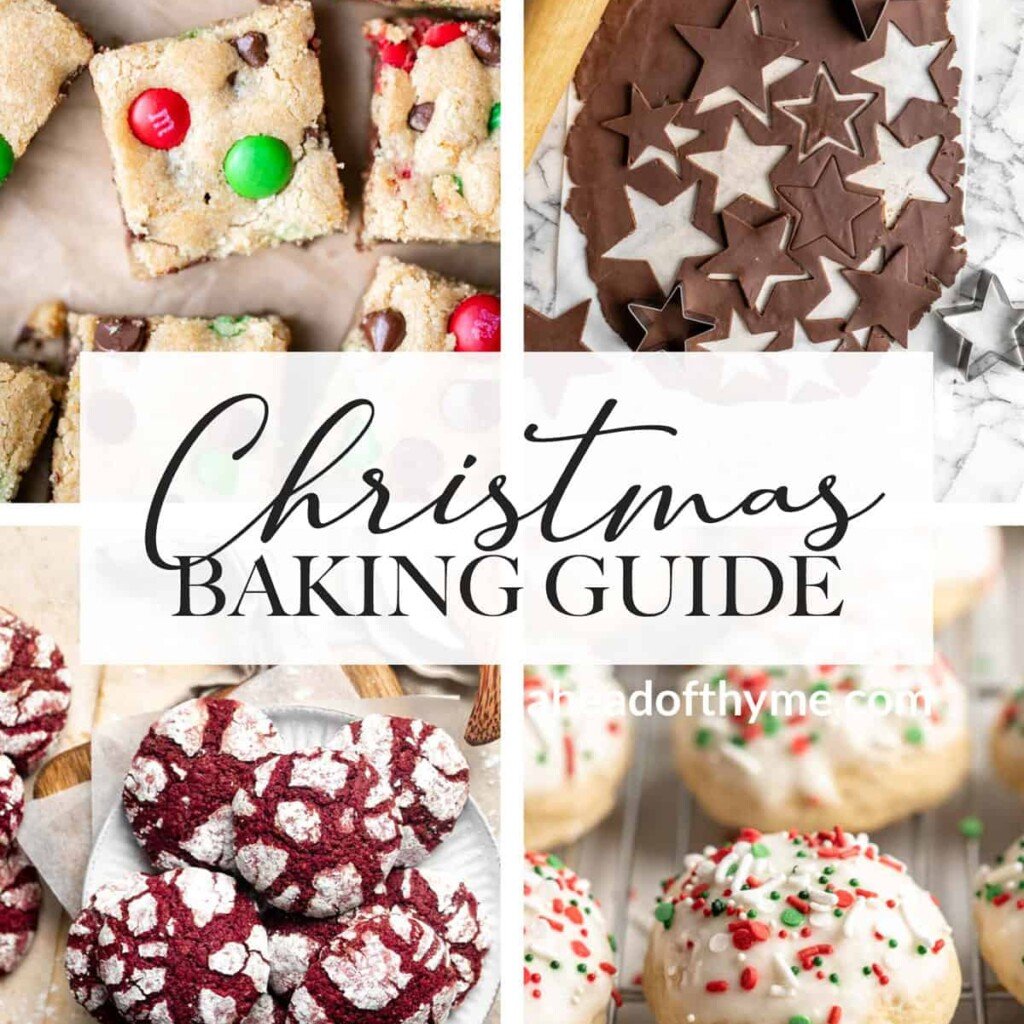
Holiday Baking Guide (with Free Printable Checklists!)
For even more stress free baking and prep tips, check out our Holiday Baking Guide, complete with printable baking checklists and planning tools.
Tried any of these Christmas recipes?
I'd love to hear what you think! Leave a comment and rating for the Christmas recipe that you made to share your feedback. Your reviews help others discover the recipe and help me keep creating more free recipes for you. Snap a photo and tag me on social media @aheadofthyme too.
This post was originally published in 2020. It has since been updated with more helpful content.

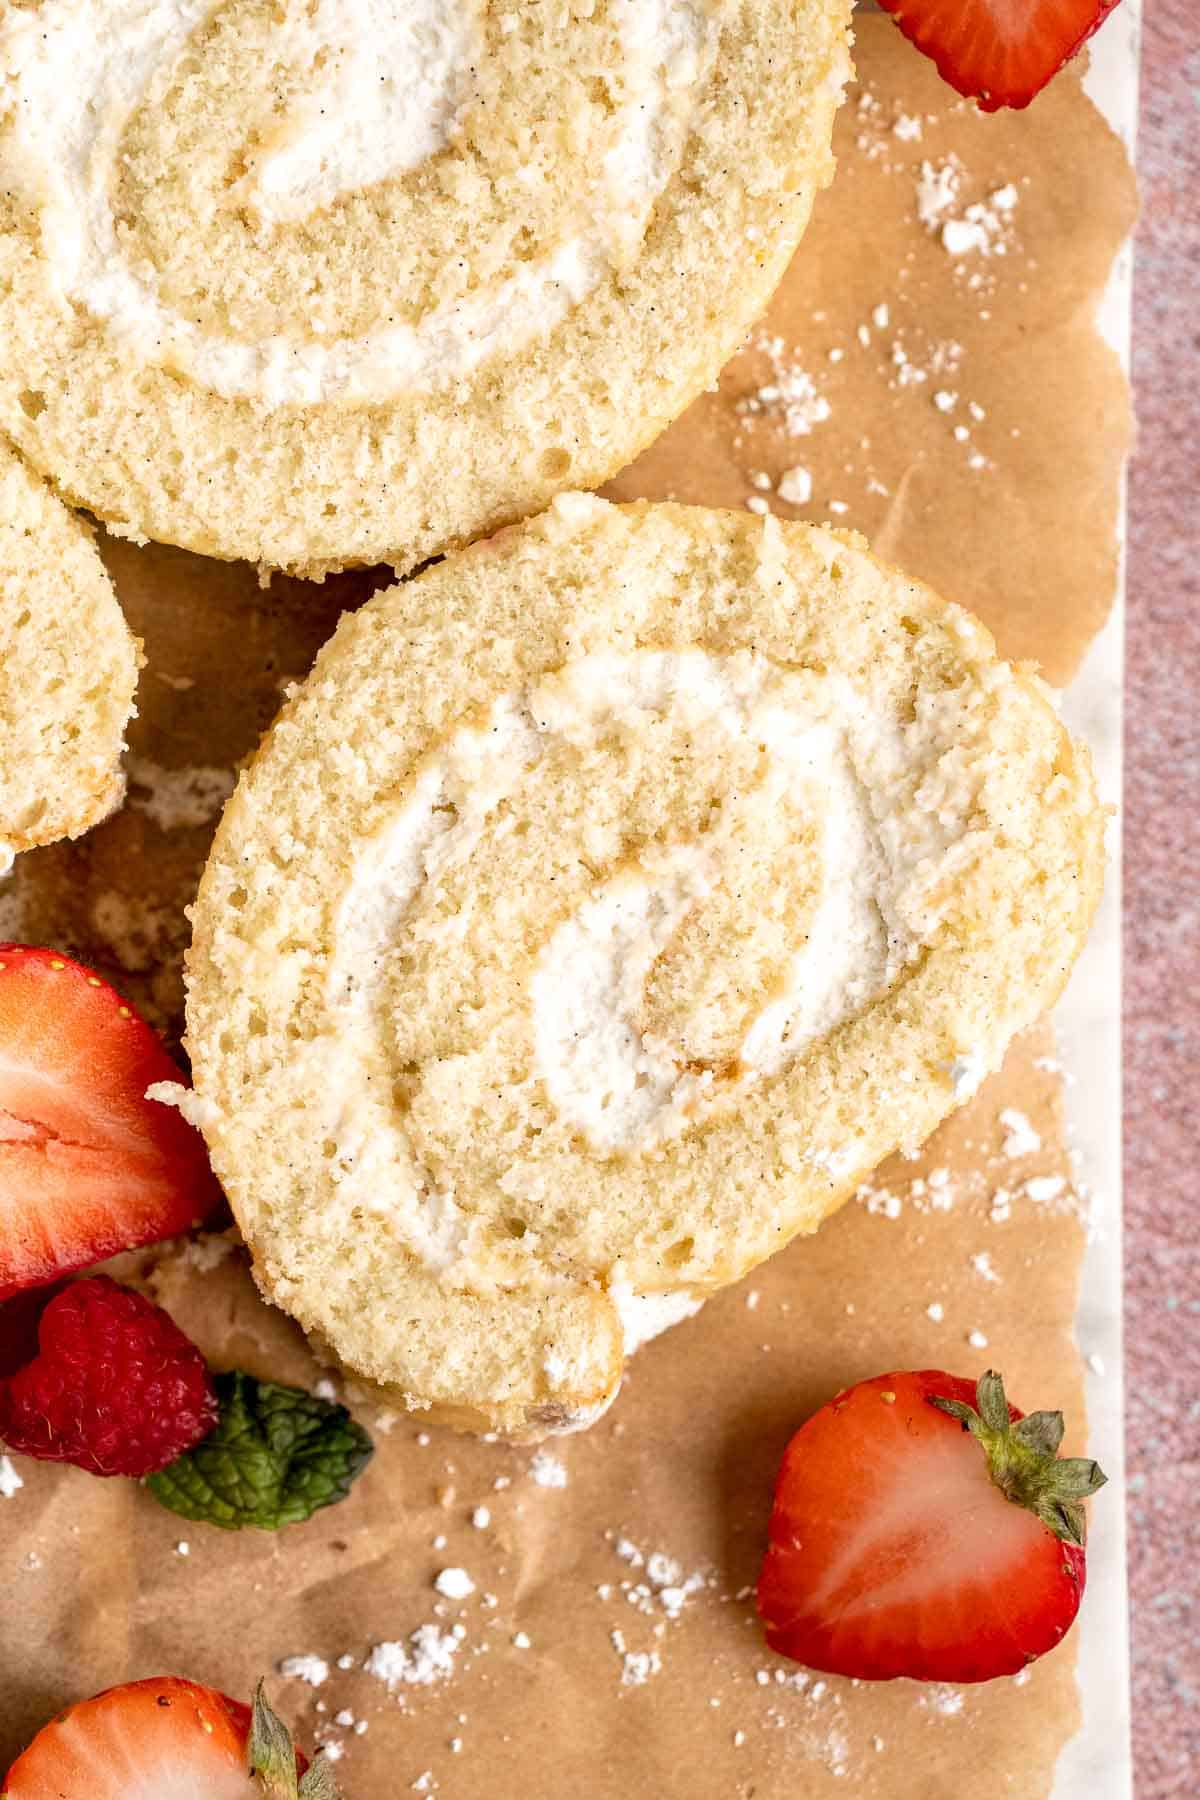
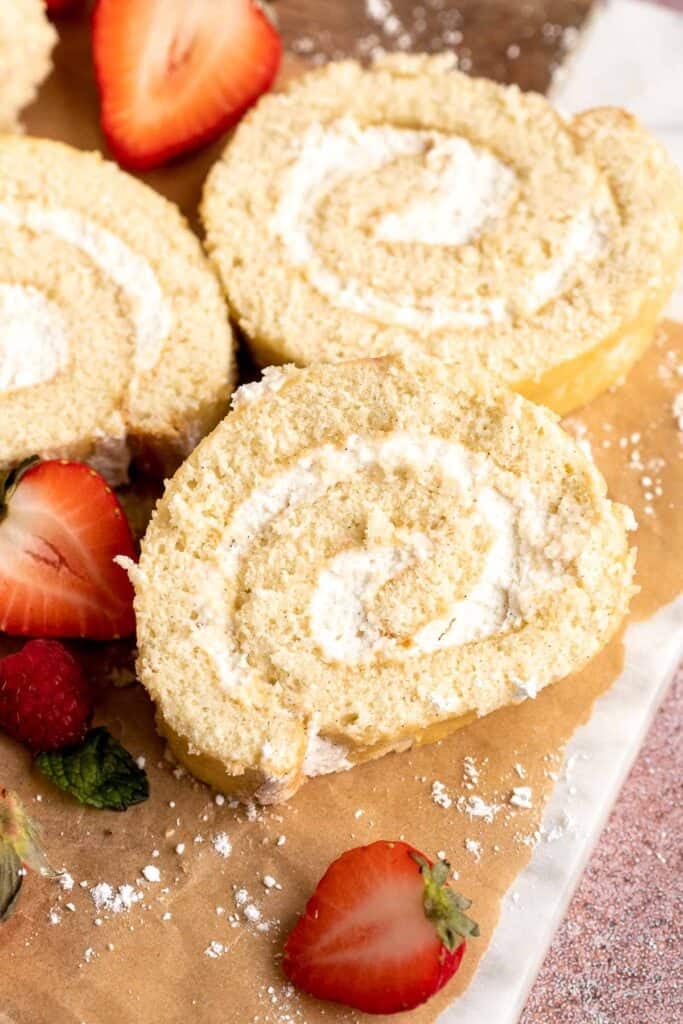
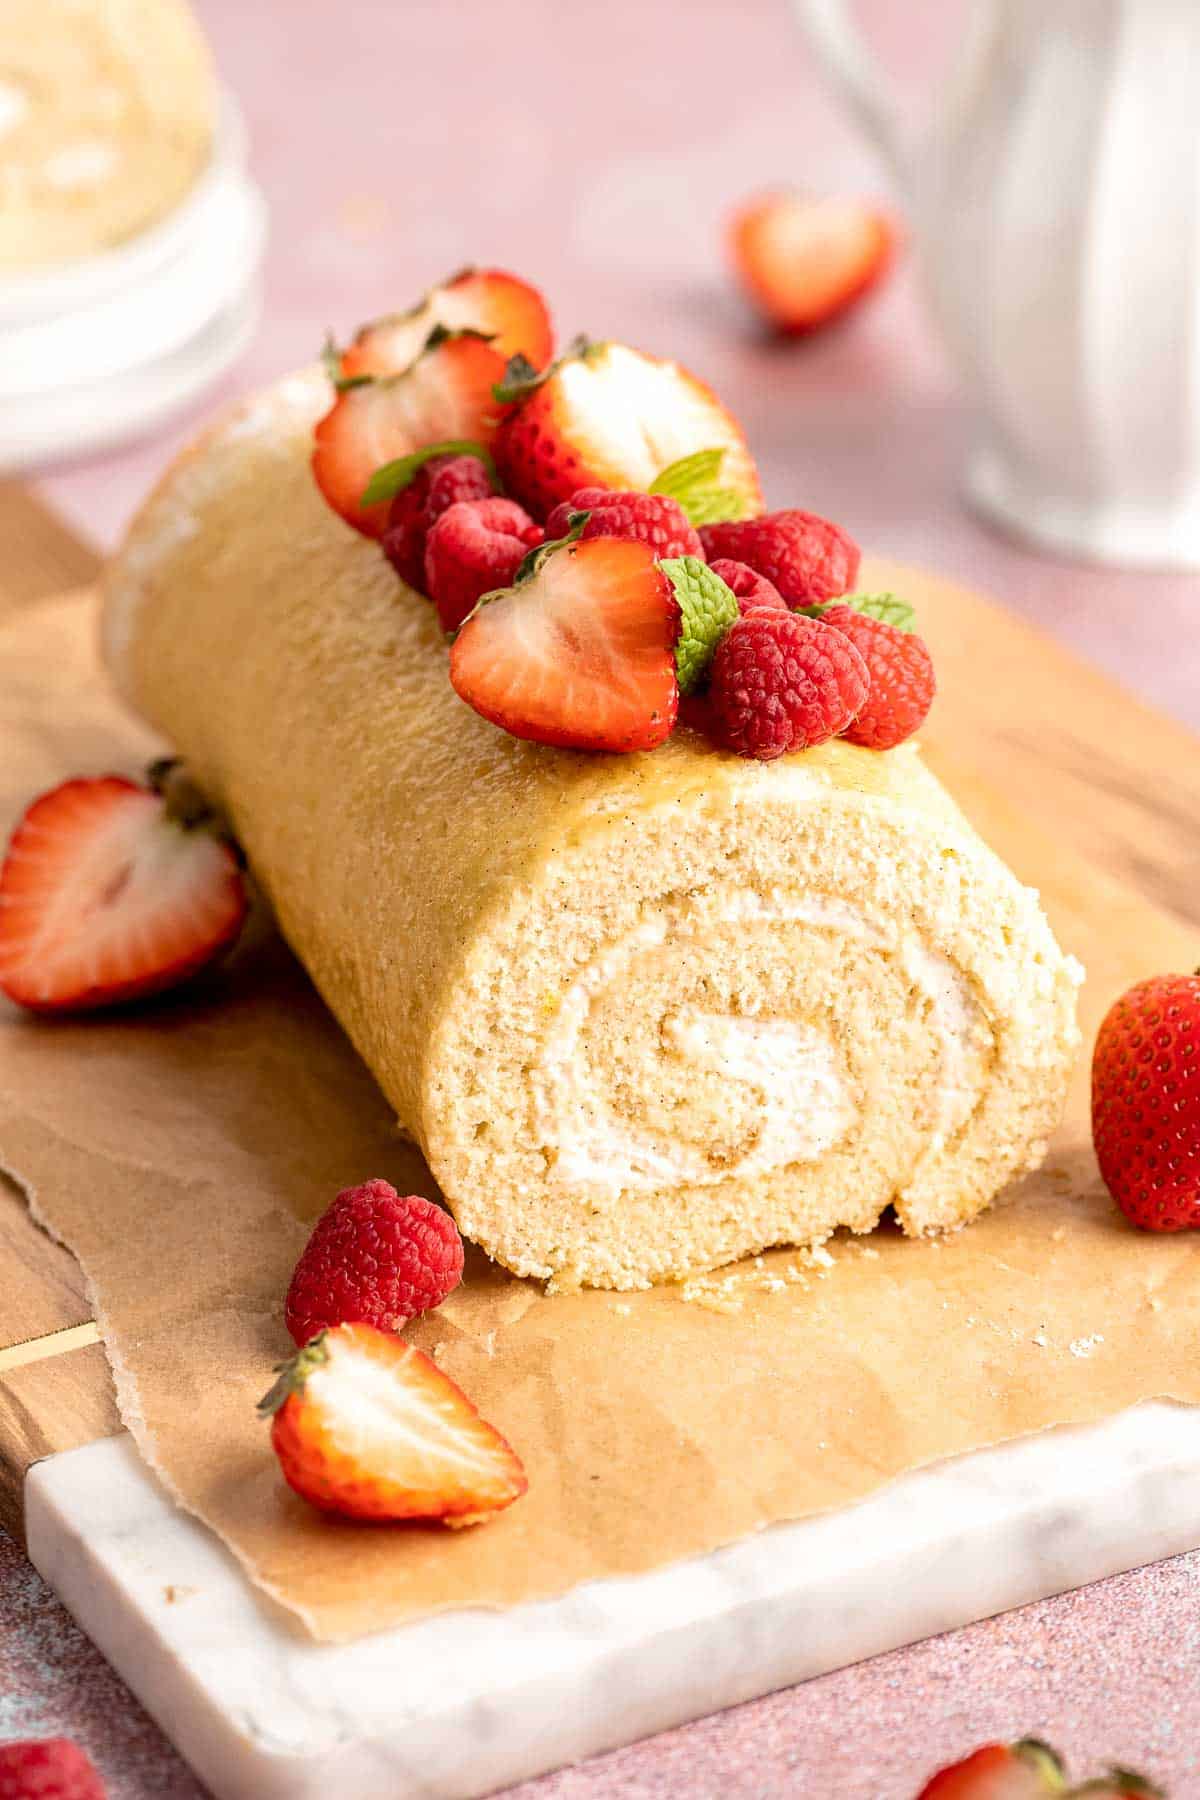
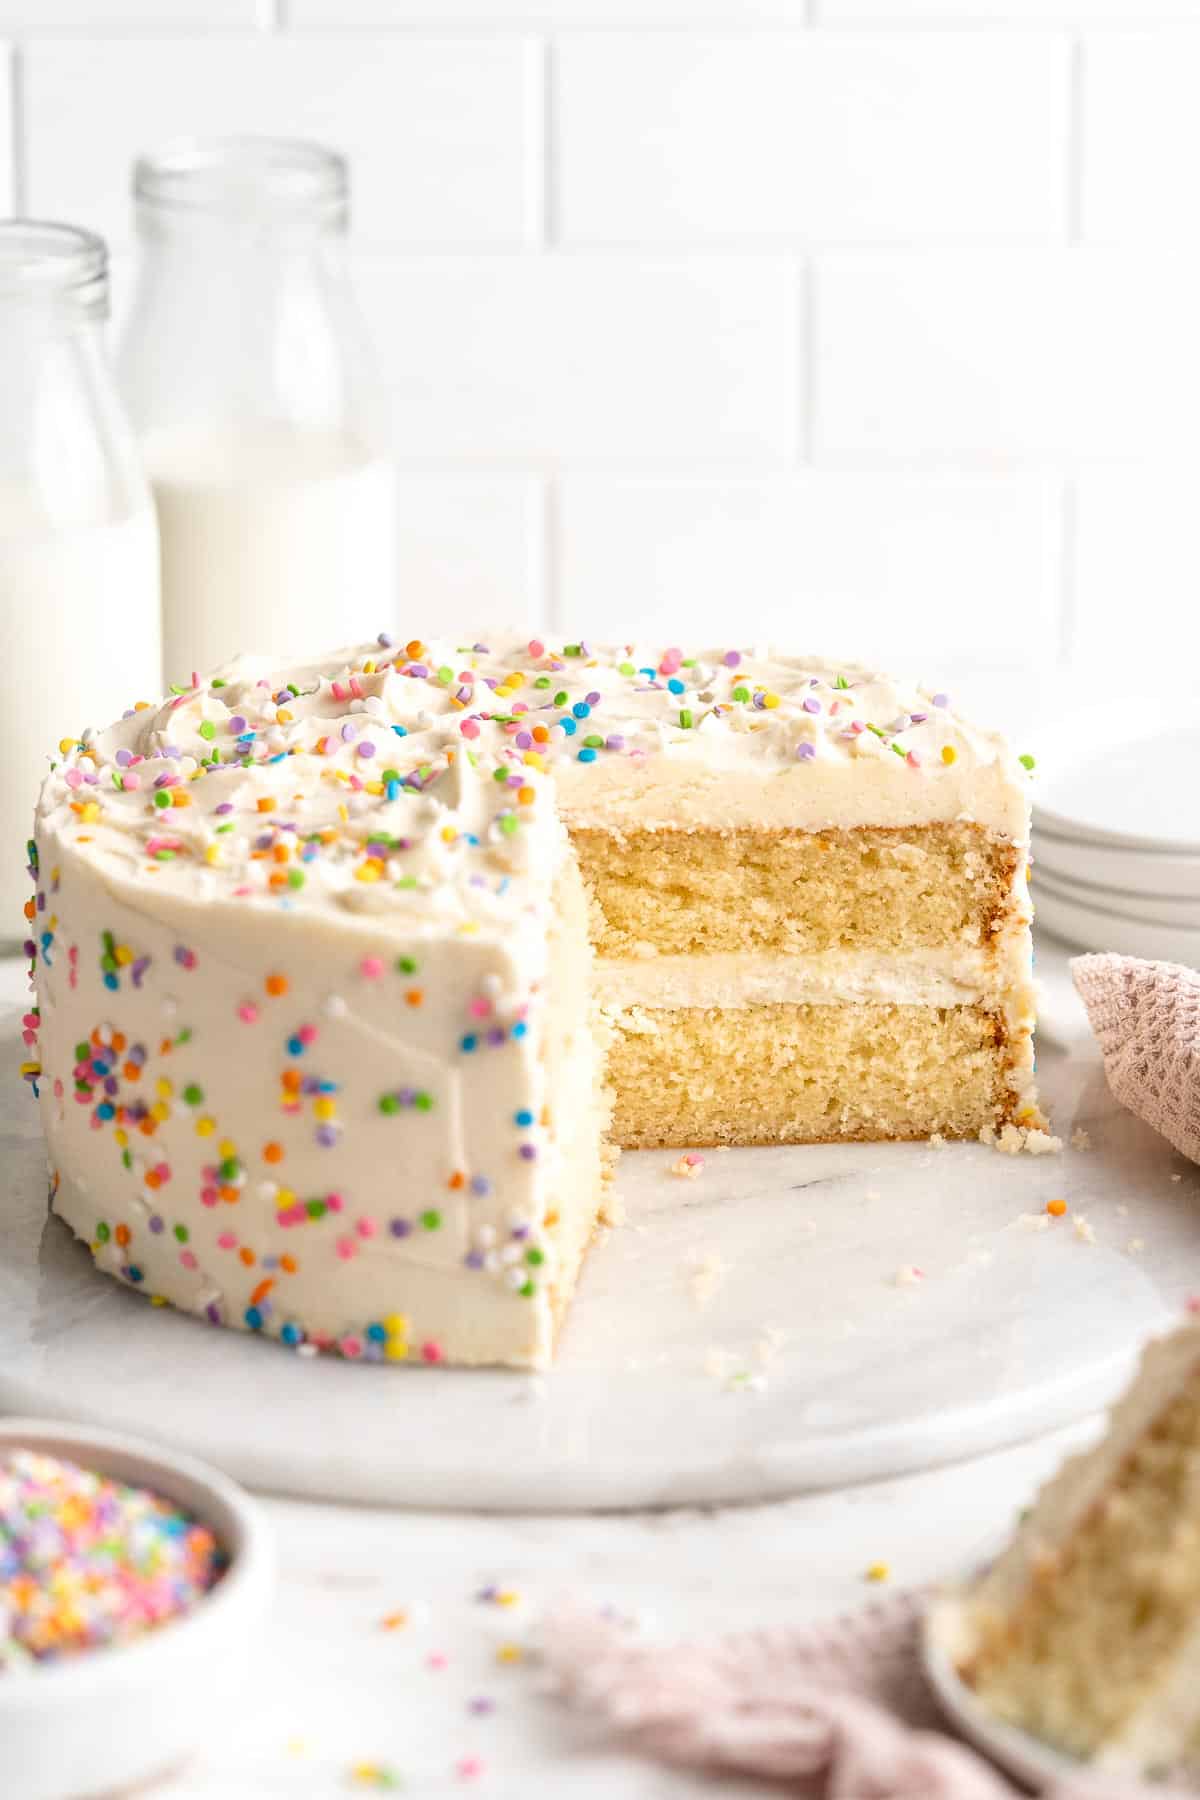
Vanilla Swiss Roll Cake

Soft, light, and beautifully elegant, this Vanilla Swiss Roll Cake is a classic dessert made with a fluffy sponge cake and a simple whipped cream filling. The cake bakes up thin and tender, rolls easily without cracking, and slices into neat spirals that look impressive every time. It is one of those desserts that feels bakery worthy but is completely achievable at home with the right technique.
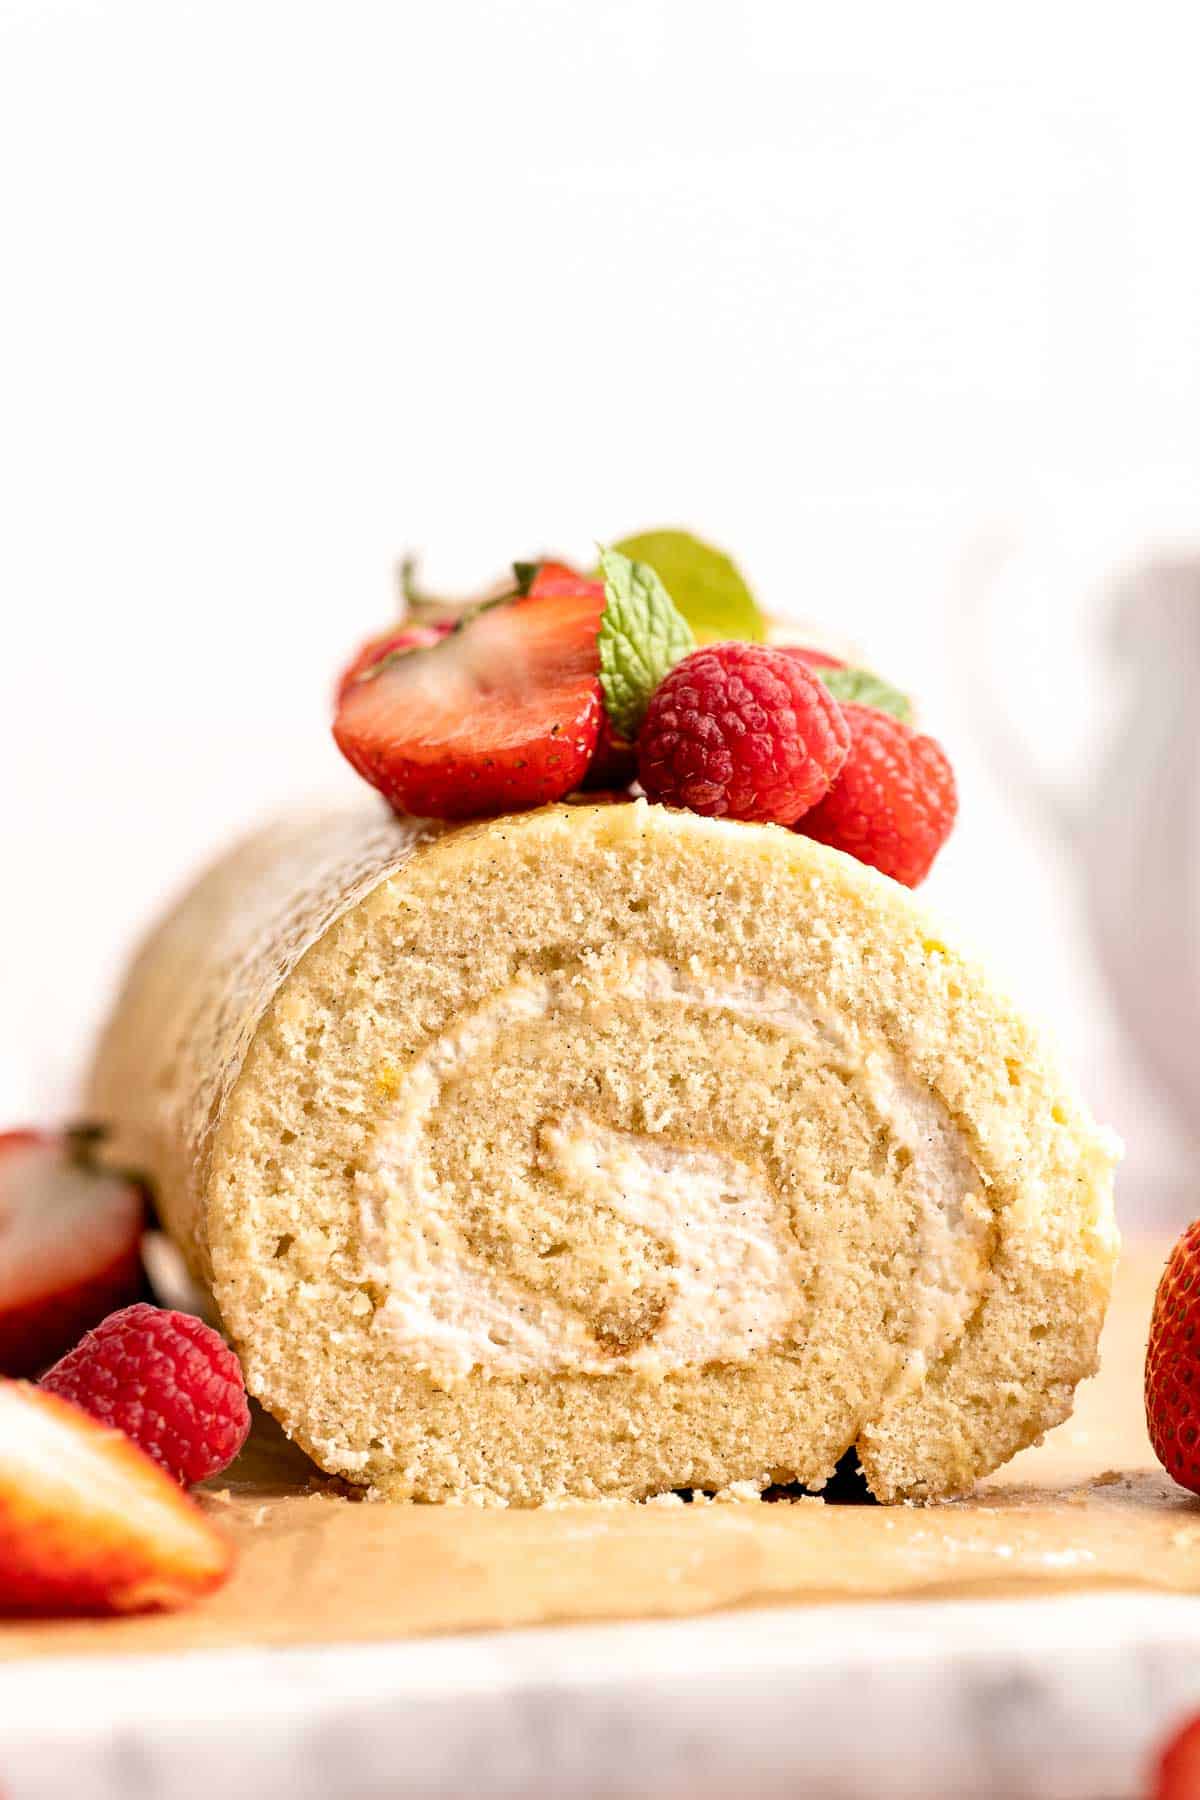
Swiss roll cakes are popular all over the world because they rely on simple ingredients and careful handling rather than heavy frostings or complicated layers. Whipping the eggs and sugar until thick creates a delicate sponge that stays flexible when warm, which is the secret to a smooth roll. Rolling the cake while it is still hot helps set the shape so it holds perfectly once filled.
This vanilla version is a great base recipe that works year round. Serve it plain, with fresh berries, or alongside coffee or tea. Once you master the technique, you can easily adapt it with different fillings and flavors, making this vanilla Swiss roll a staple recipe worth keeping in your baking rotation.
Why You'll Love This Recipe
- Light and fluffy texture. Whipped eggs create a soft sponge that rolls easily without cracking. The roll cake stays tender even after chilling, with a delicate crumb that melts in your mouth without being heavy or dense.
- Simple ingredients. No butter or oil in the cake batter, just pantry staples like eggs, sugar, flour, and vanilla in this swiss roll cake recipe.
- Clean, beautiful slices. The rolled cake sets neatly and slices without falling apart. Each piece reveals a defined spiral with smooth edges, making it ideal for serving at gatherings or when you want a dessert that looks polished and professional.
- Versatile base recipe. This vanilla sponge pairs well with many fillings and toppings, from whipped cream and fresh fruit to jam or flavored creams. Adapt this recipe for different seasons, occasions, or personal preferences.
Ingredients and Substitutions

To make this delicious Vanilla Swiss Roll Cake, you will need the following ingredients (see recipe card below for quantities):
- confectioners' sugar - Used both for dusting the cake during rolling and for sweetening the whipped cream. The fine texture prevents sticking and dissolves smoothly. You can substitute superfine sugar in a pinch, but confectioners sugar works best for dusting.
- large eggs - Eggs provide all the structure and lift in this sponge cake. They must be whipped thoroughly to achieve volume. There is no true substitute here, as the recipe relies on eggs for structure.
- granulated sugar - Sweetens the cake and stabilizes the whipped eggs. You can use caster sugar if preferred. Avoid liquid sweeteners, which will deflate the batter.
- vanilla - Used in both the cake and whipped cream for flavor. Vanilla bean paste adds visual flecks but pure vanilla extract works perfectly.
- salt - Enhances the sweetness and balances the flavor.
- all purpose flour - Provides just enough structure while keeping the cake soft and flexible. Cake flour can be used for an even lighter texture, but reduce the amount by two tablespoons.
- heavy cream - Used for the filling. It must be cold to whip properly. You can substitute whipping cream, but avoid half and half, which will not whip to stiff peaks. Whole milk and buttermilk are also not good substitutes as it will not whip.
Equipment
You will also need measuring cups and spoons, a stand mixer with whisk attachment or hand mixer, a fine mesh sieve, a rubber spatula, a 10x15 inch jelly roll pan, parchment paper, baking spray, a clean cotton dish towel, and a cooling rack.
Instructions
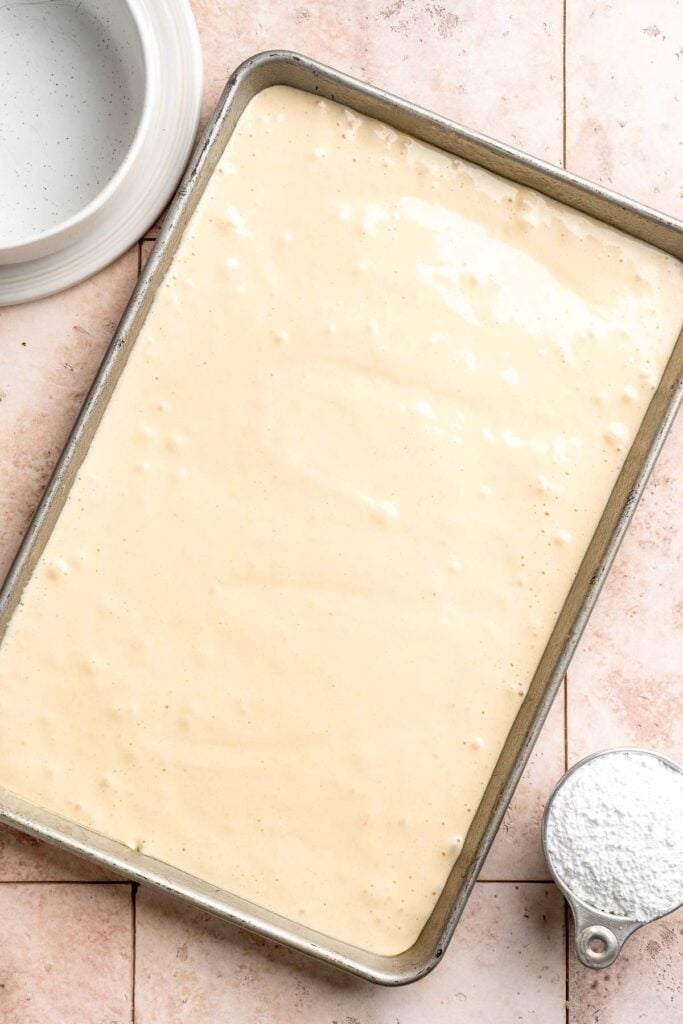
- Prepare the pan and workspace. Preheat the oven to 350°F. Line a 10x15 inch jelly roll pan with parchment paper, leaving about a 1 inch overhang on the long sides for easy removal. Lightly spray the pan (under the parchment) and the top of the parchment with baking spray. Set out a clean cotton dish towel and a sieve filled with confectioners sugar so everything is ready once the cake comes out of the oven, as you will need to work fast.
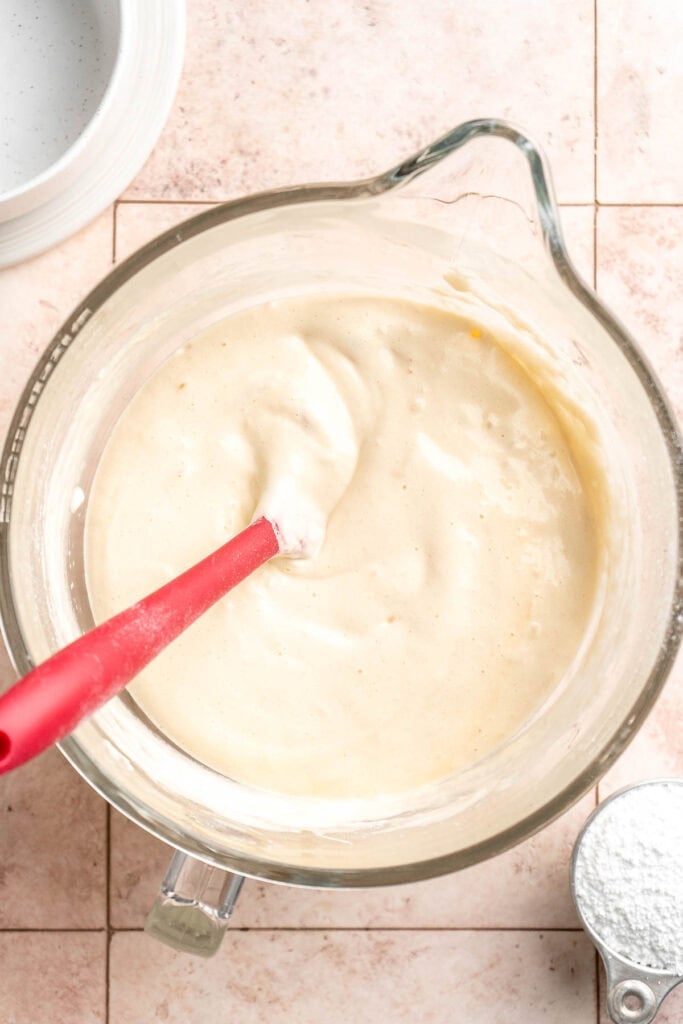
- Whip the eggs and sugar. In a stand mixer fitted with the whip attachment, add the eggs, granulated sugar, and vanilla. Beat on high speed until very thick, pale, and voluminous, about 5 minutes. Add the salt and beat briefly to incorporate.
- Fold in the flour. Place a sieve over the mixing bowl and sift in the flour in three intervals. Gently fold the flour in with a spatula after each addition, taking care not to deflate the batter. Finish with a gentle fold using a large balloon whisk or rubber spatula until smooth and fully combined.


- Bake the cake. Pour the batter into the prepared pan and spread evenly. Bake for 13-15 minutes, or until the cake springs back lightly when touched and a toothpick inserted in the center comes out clean.

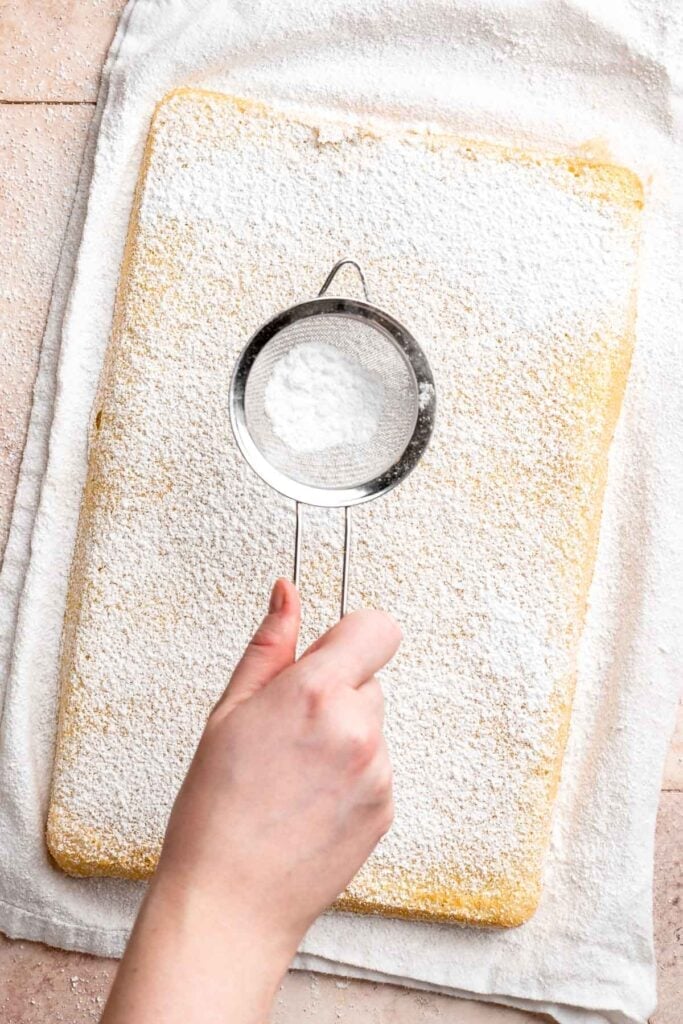
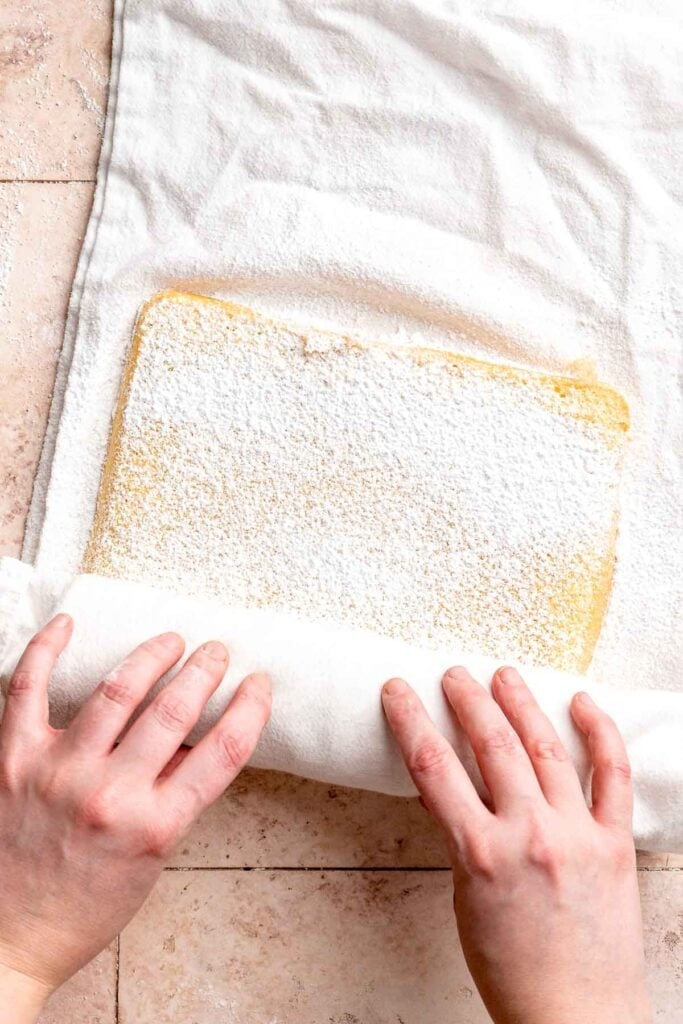
- Dust the cake. Immediately dust the top of the hot cake generously with confectioners' sugar. Lay the clean dish towel over the cake, then invert onto a large cutting board. Peel off the parchment paper, dust the exposed side with more confectioners sugar.

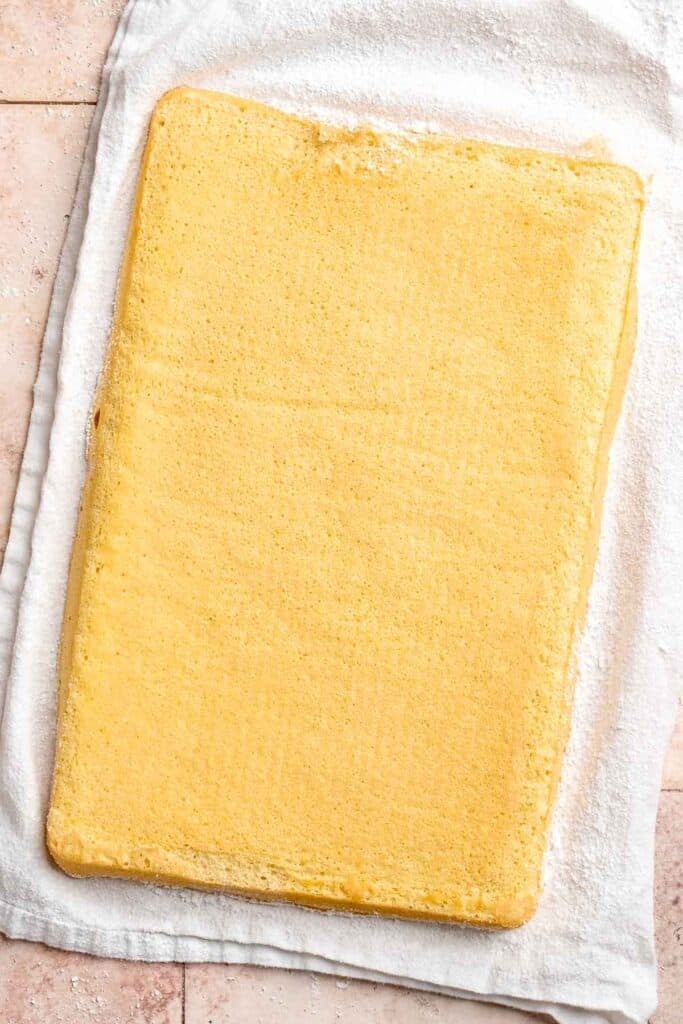
- Roll the cake while warm. Immediately, slowly roll the cake up tightly inside the towel. Allow the cake to cool rolled up for exactly 40 minutes.

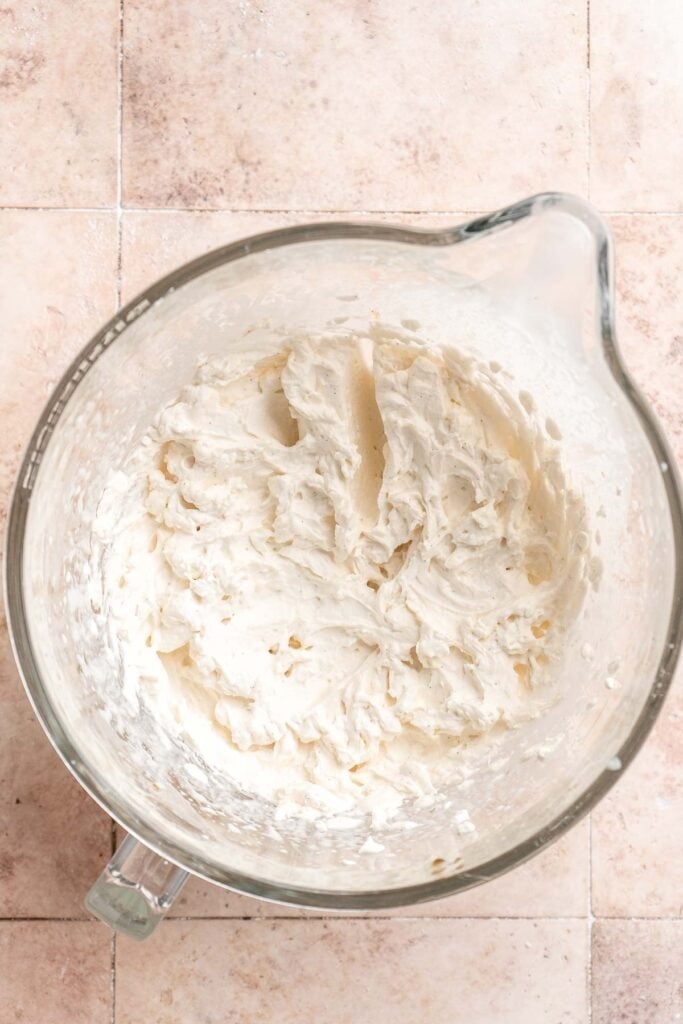
- Make the whipped cream filling. Prepare the filling while the cake cools. In a stand mixer fitted with the whisk attachment, add the heavy cream, confectioners' sugar, and vanilla. Beat on medium high speed until stiff peaks form and the cream holds its shape.
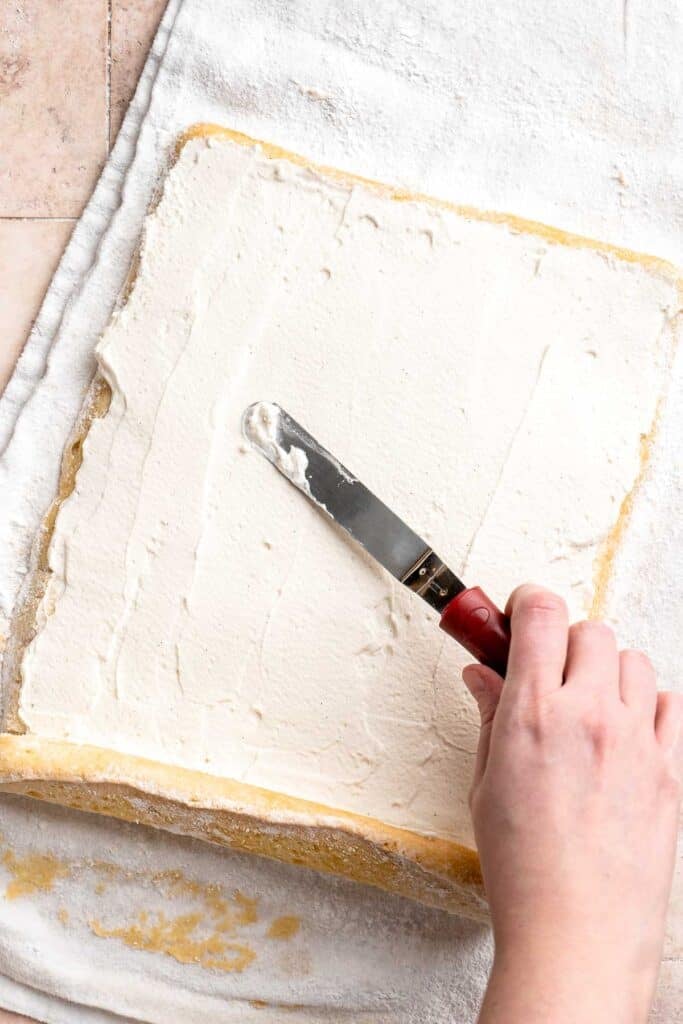
- Fill and re-roll the cake. Carefully unroll the cooled cake. Spread the whipped cream filling in an even layer over the surface, leaving a small border along the edges. Gently roll the cake back up without the towel. Refrigerate for at least 1 hour, or preferably overnight, to set.

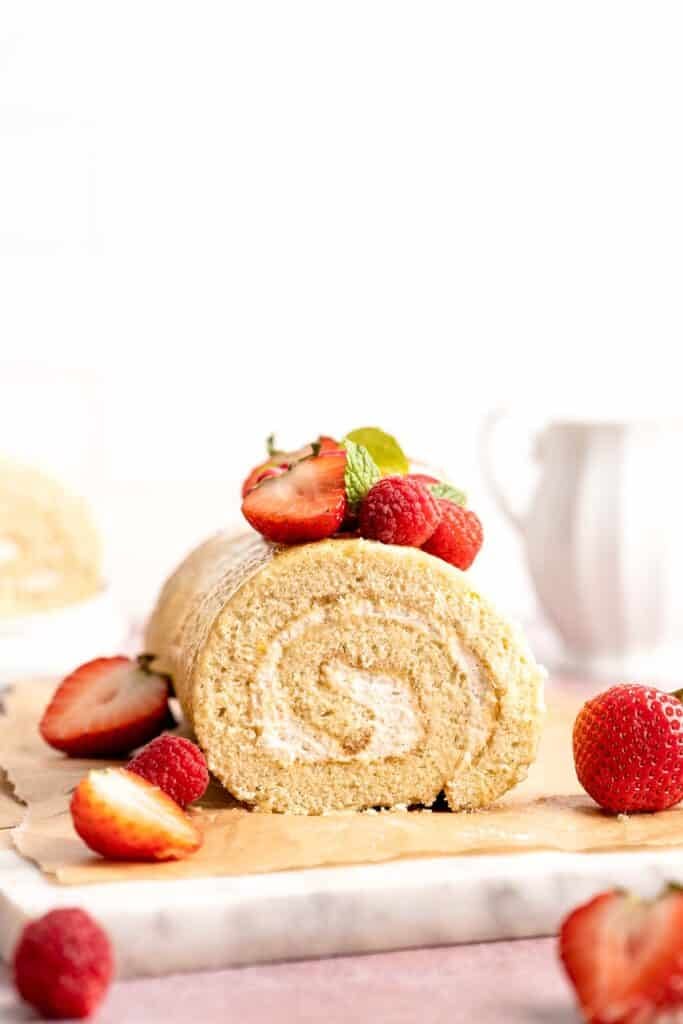
- Slice and serve. Slice into portions and serve as is or with fresh fruit, if desired.
Expert Tip: Roll the Cake While Hot
The most important step in making a Swiss roll cake is rolling it while it is still hot from the oven. Rolling the cake immediately helps prevent cracking and trains it to hold its shape once cooled and filled.
More Tips and Tricks
- Whip the eggs fully. The batter should be thick, pale, glossy, and ribbon like before adding flour. Under whipping leads to a dense cake.
- Fold gently. Overmixing will deflate the batter and also result in a dense cake. Use slow, careful motions when adding the flour to preserve volume.
- Prepare everything in advance. You will need to work quickly after baking, so have the towel, sugar, and workspace ready before the cake comes out of the oven.
- Do not overbake. A dry sponge is more likely to crack when rolled. Even one extra minute can dry out the sponge and cause cracking.
- Use a clean kitchen towel. A lightly dusted clean kitchen towel prevents sticking and absorbs excess moisture while cooling.
- Work with warm cake. Rolling the cake from the short side while it is still hot helps set the spiral shape and prevents cracking.
- Chill before slicing. Refrigerating the filled cake helps it set and slice cleanly.
Recipe Variations
- Berry Swiss roll. Spread a thin layer of raspberry or strawberry jam under the whipped cream for bright flavor.
- Chocolate Swiss roll. Replace two tablespoons of flour with unsweetened cocoa powder for a chocolate sponge cake. Or use a chocolate ganache filling for that chocolately flavor.
- Lemon Swiss roll. Add lemon zest to the batter and fill with lemon whipped cream or lemon curd. Alternatively, add a few drops of lemon juice to the whipped cream filling. This is common in Chinese bakery style roll cakes, where the sponge is paired with very light cream rolls that are airy and delicate.
- Coffee Swiss roll. Add espresso powder to the whipped cream filling for a subtle coffee flavor.
- Mascarpone cream filling. Swap half of the whipped cream for mascarpone cheese for a richer filling.
Storage
How to Store
Store the Swiss roll cake covered in the fridge for up to three days.
How to Freeze
Freeze the rolled cake without filling or with filling wrapped tightly in plastic wrap and foil for up to one month. Thaw overnight in the refrigerator before serving.
How to Serve
Slice the vanilla Swiss roll cake with a sharp knife and serve chilled or slightly softened at room temperature. It pairs beautifully with fresh berries, powdered sugar dusting, or a drizzle of berry sauce.
These are my favorite treats to serve with this Swiss roll cake:


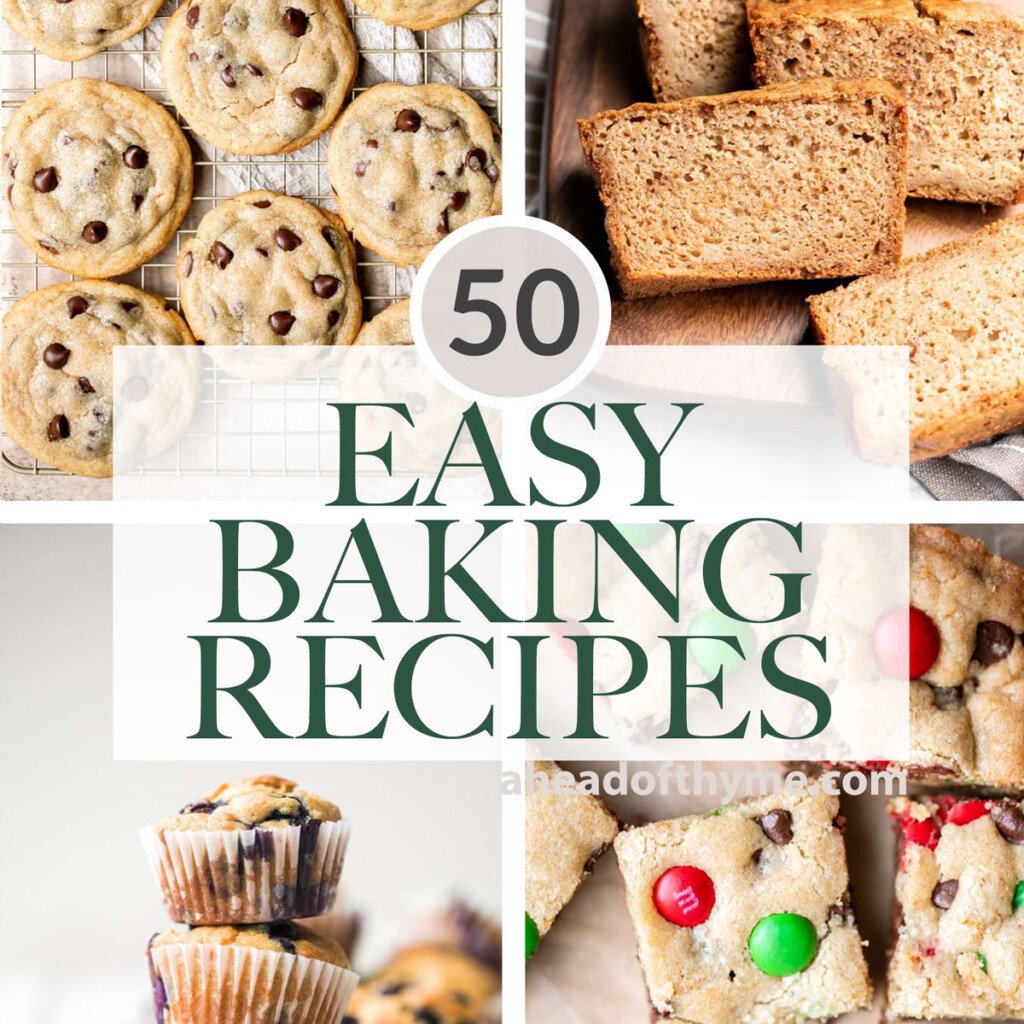
Easy Baking Recipes
Discover our collection of easy baking recipes, perfect for beginners or busy bakers. From quick breads and muffins to cookies and simple cakes, these recipes make homemade baked goods effortless, delicious, and satisfying every time.
FAQ
A Swiss roll cake is known by different names around the world. It is commonly called a Swiss roll, jelly roll, or roll cake in North America. In the United Kingdom, it is often referred to as a Swiss roll or jam roll. In other regions, you may see it called a roulade or rolled sponge cake, depending on the filling and presentation.
A Yule log, also known as a bûche de Noël, is a type of Swiss roll that is decorated to resemble a log and is traditionally served at Christmas. A Swiss roll is more general and can be served year round with a variety of fillings and decorations.
A Swiss roll typically refers to a sweet rolled sponge cake, while a roulade is a broader term that can describe both sweet and savory rolled dishes. In baking, the terms are often used interchangeably, but roulade may refer to more elaborate or filled versions.
The best filling for a Swiss roll is something light and spreadable. Whipped cream, stabilized whipped cream, mascarpone cream, and fruit based fillings like jam or curd work especially well. Heavy frostings are not ideal, as they can cause the cake to split or lose its shape. Stick to light fillings like chantilly cream, pastry cream, or lightly sweetened whipped cream.
Common mistakes include overbaking the sponge, under whipping the eggs, overmixing the batter after adding flour, and waiting too long to roll the cake. Any of these can lead to a dry or cracked cake. Proper preparation and working quickly once the cake comes out of the oven are key to success.
Breaking usually occurs if the cake is too dry, overbaked, or rolled after it has cooled. Folding the dry ingredients gently and rolling while hot and pliable helps minimize the risk of a cake crack.
Roll the cake immediately after baking while it is still hot. Dust generously with confectioners sugar, use a clean dish towel, and roll gently but firmly. Letting the cake cool in its rolled shape helps it hold without cracking later.
A rubbery texture usually happens when the cake is overbaked or the batter is overmixed after adding the flour. Over baking dries out the sponge, while overmixing develops too much gluten, making the cake tough instead of light.
Sticking often happens if the parchment was not greased or if the cake was allowed to cool on the paper. Dusting the cake generously with confectioners sugar and inverting it immediately after baking helps prevent sticking.
Yes. You can bake and roll the cake one day ahead, then fill and chill it before serving. The fully assembled cream roll keeps well in the refrigerator for up to three days.
Yes, you can use a boxed cake mix, but the texture may be heavier than a traditional sponge. Look for recipes specifically designed for cake mix Swiss rolls, as standard cake batter is often too thick and less flexible for rolling.
More Cake Recipes
Looking for other recipes like this? Try these:

Tried this recipe?
I'd love to hear what you think! Leave a comment and rating below to share your feedback. Your reviews help others discover this recipe and help me keep creating more free recipes for you. Snap a photo and tag me on social media @aheadofthyme too.

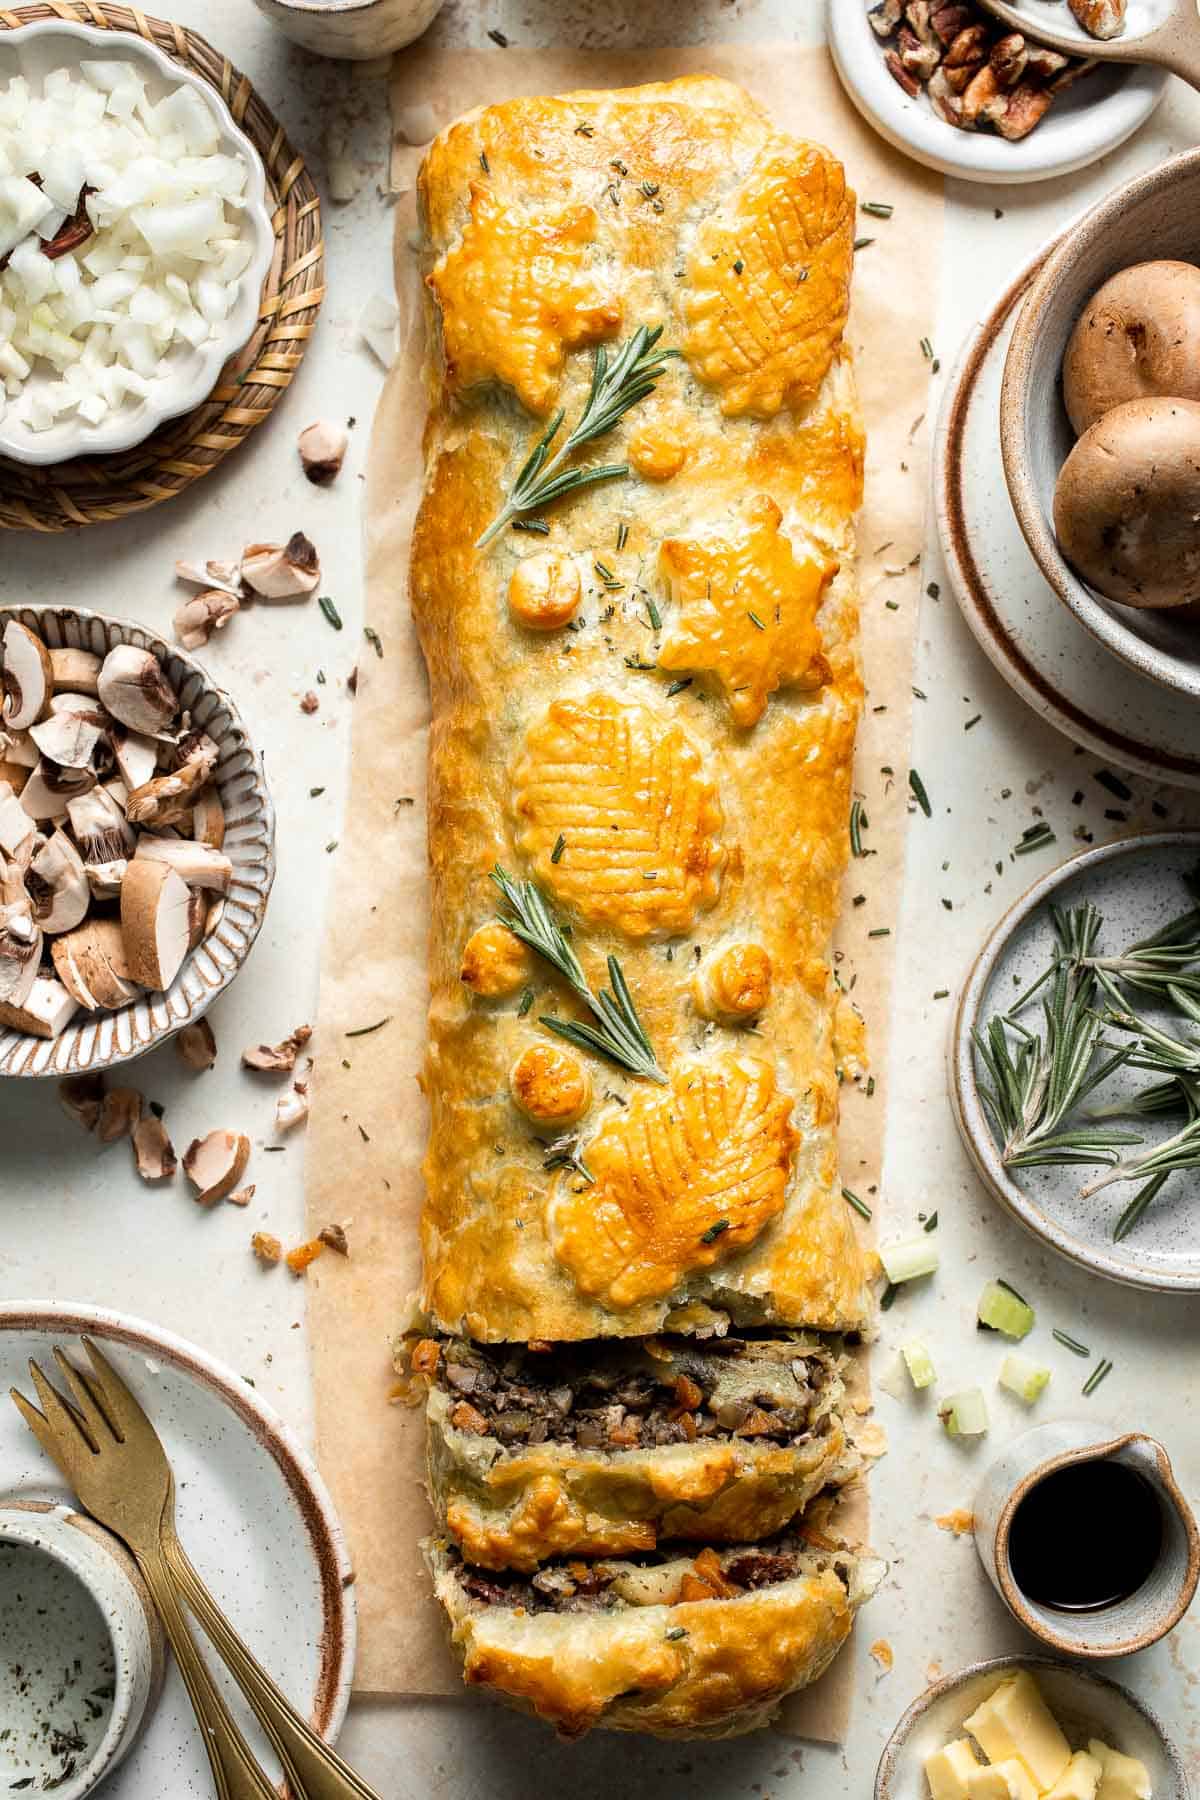
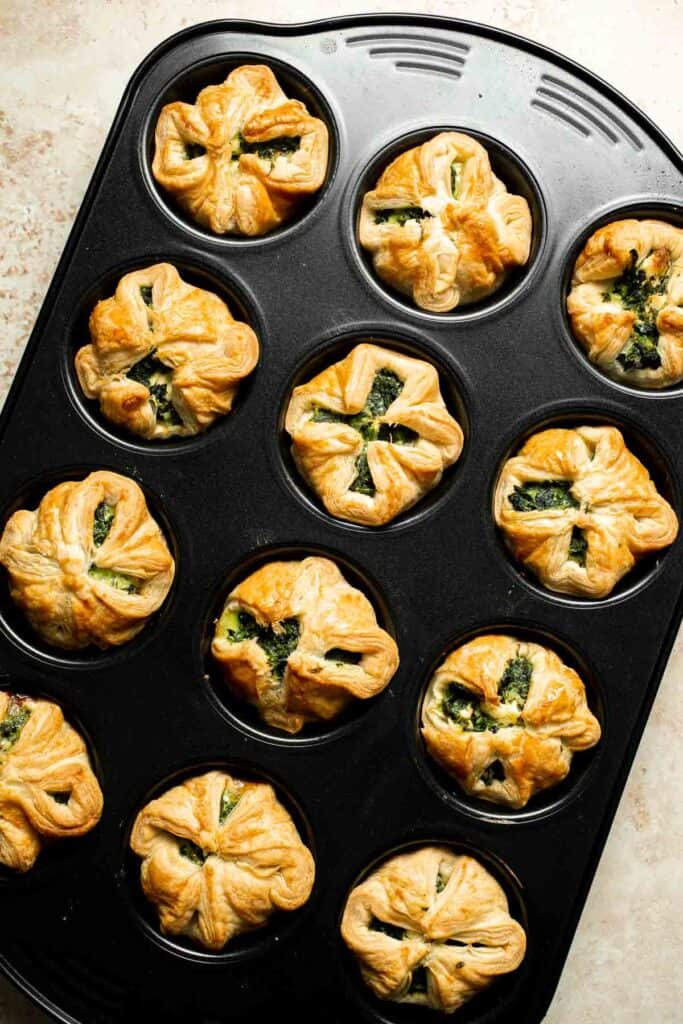
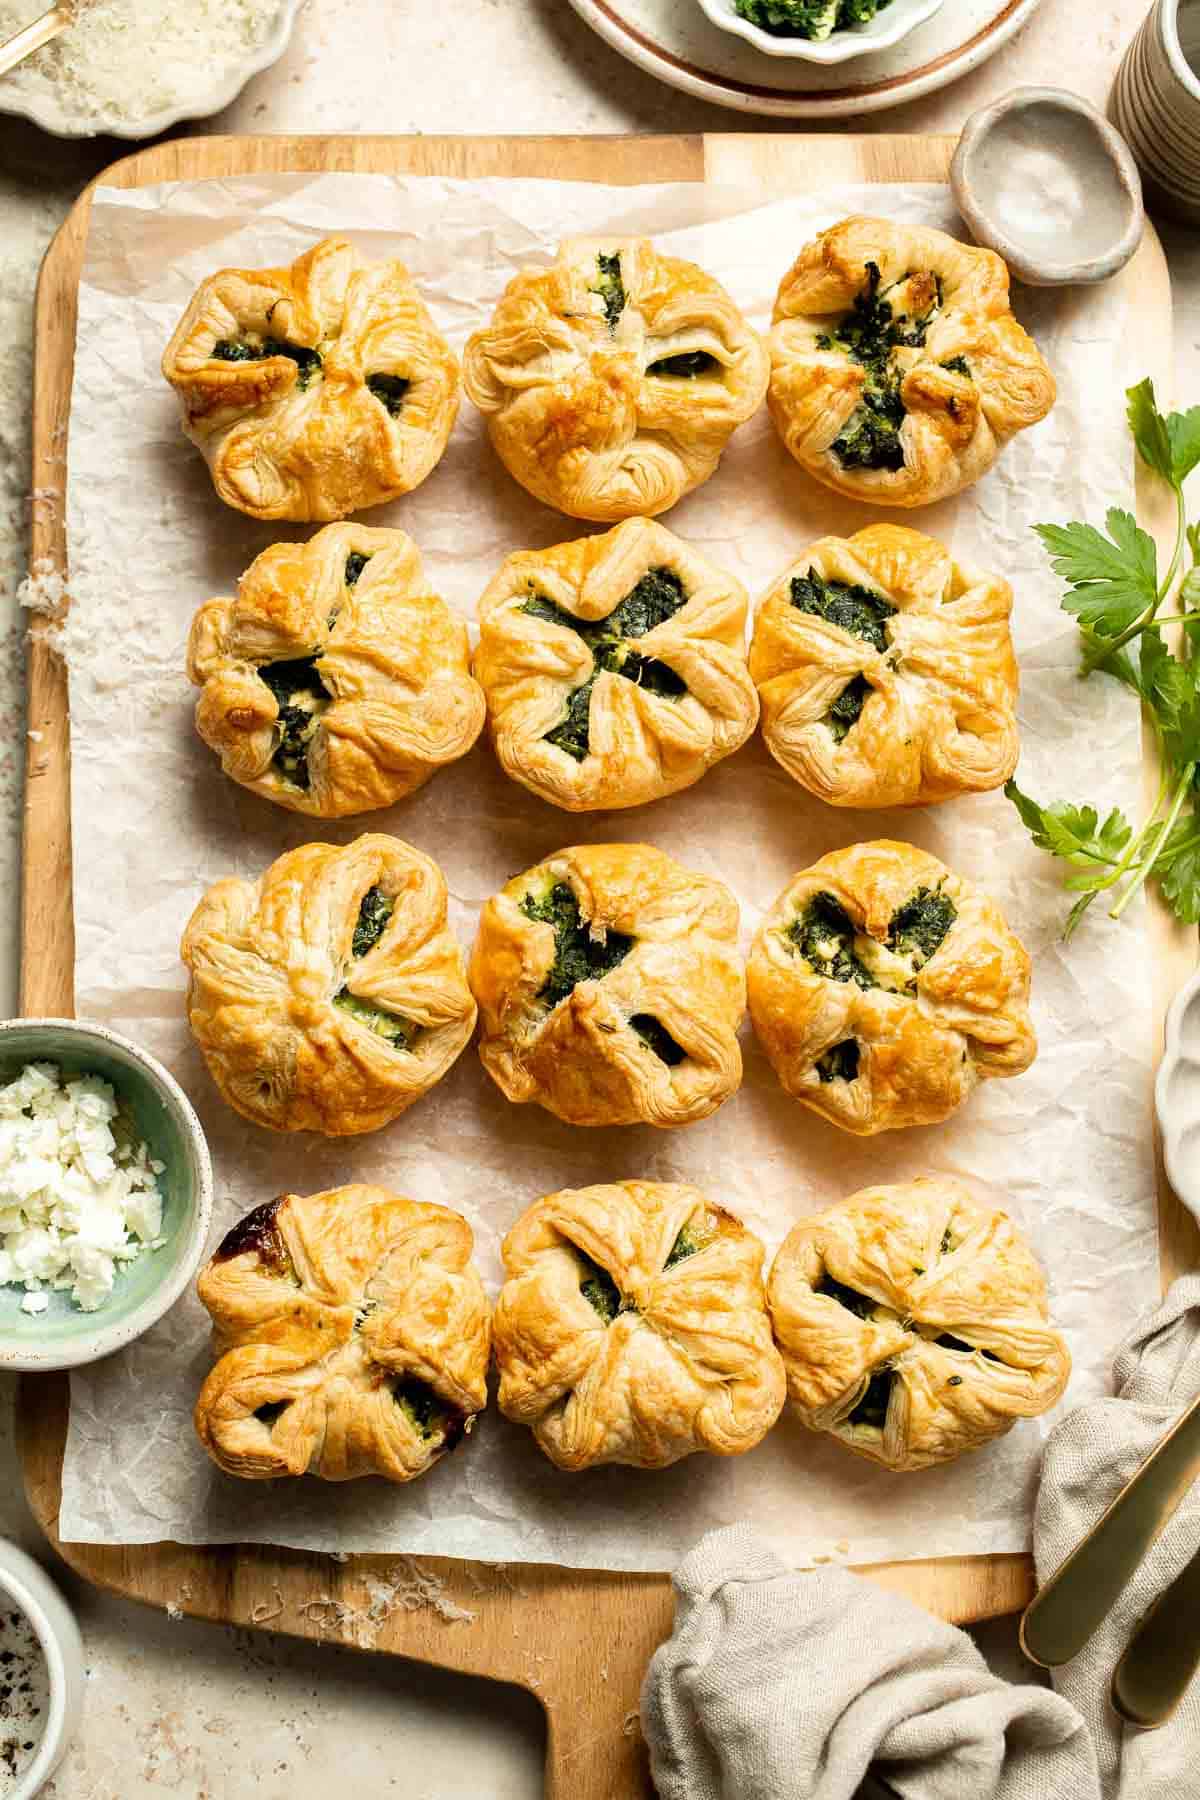
Spinach Puff Pastry Bites
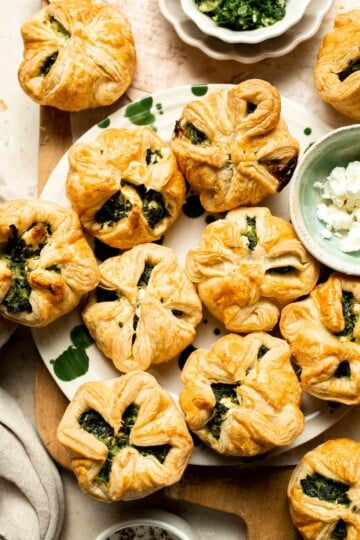
Crispy, golden, and packed with savory flavor, these Spinach Puff Pastry Bites are the kind of appetizer that disappears fast. Flaky puff pastry wraps around a creamy spinach and feta filling, baking up into irresistible little parcels with crisp edges and a soft, flavorful center. They feel fancy enough for entertaining but are simple enough to make for casual gatherings or even a cozy night in.
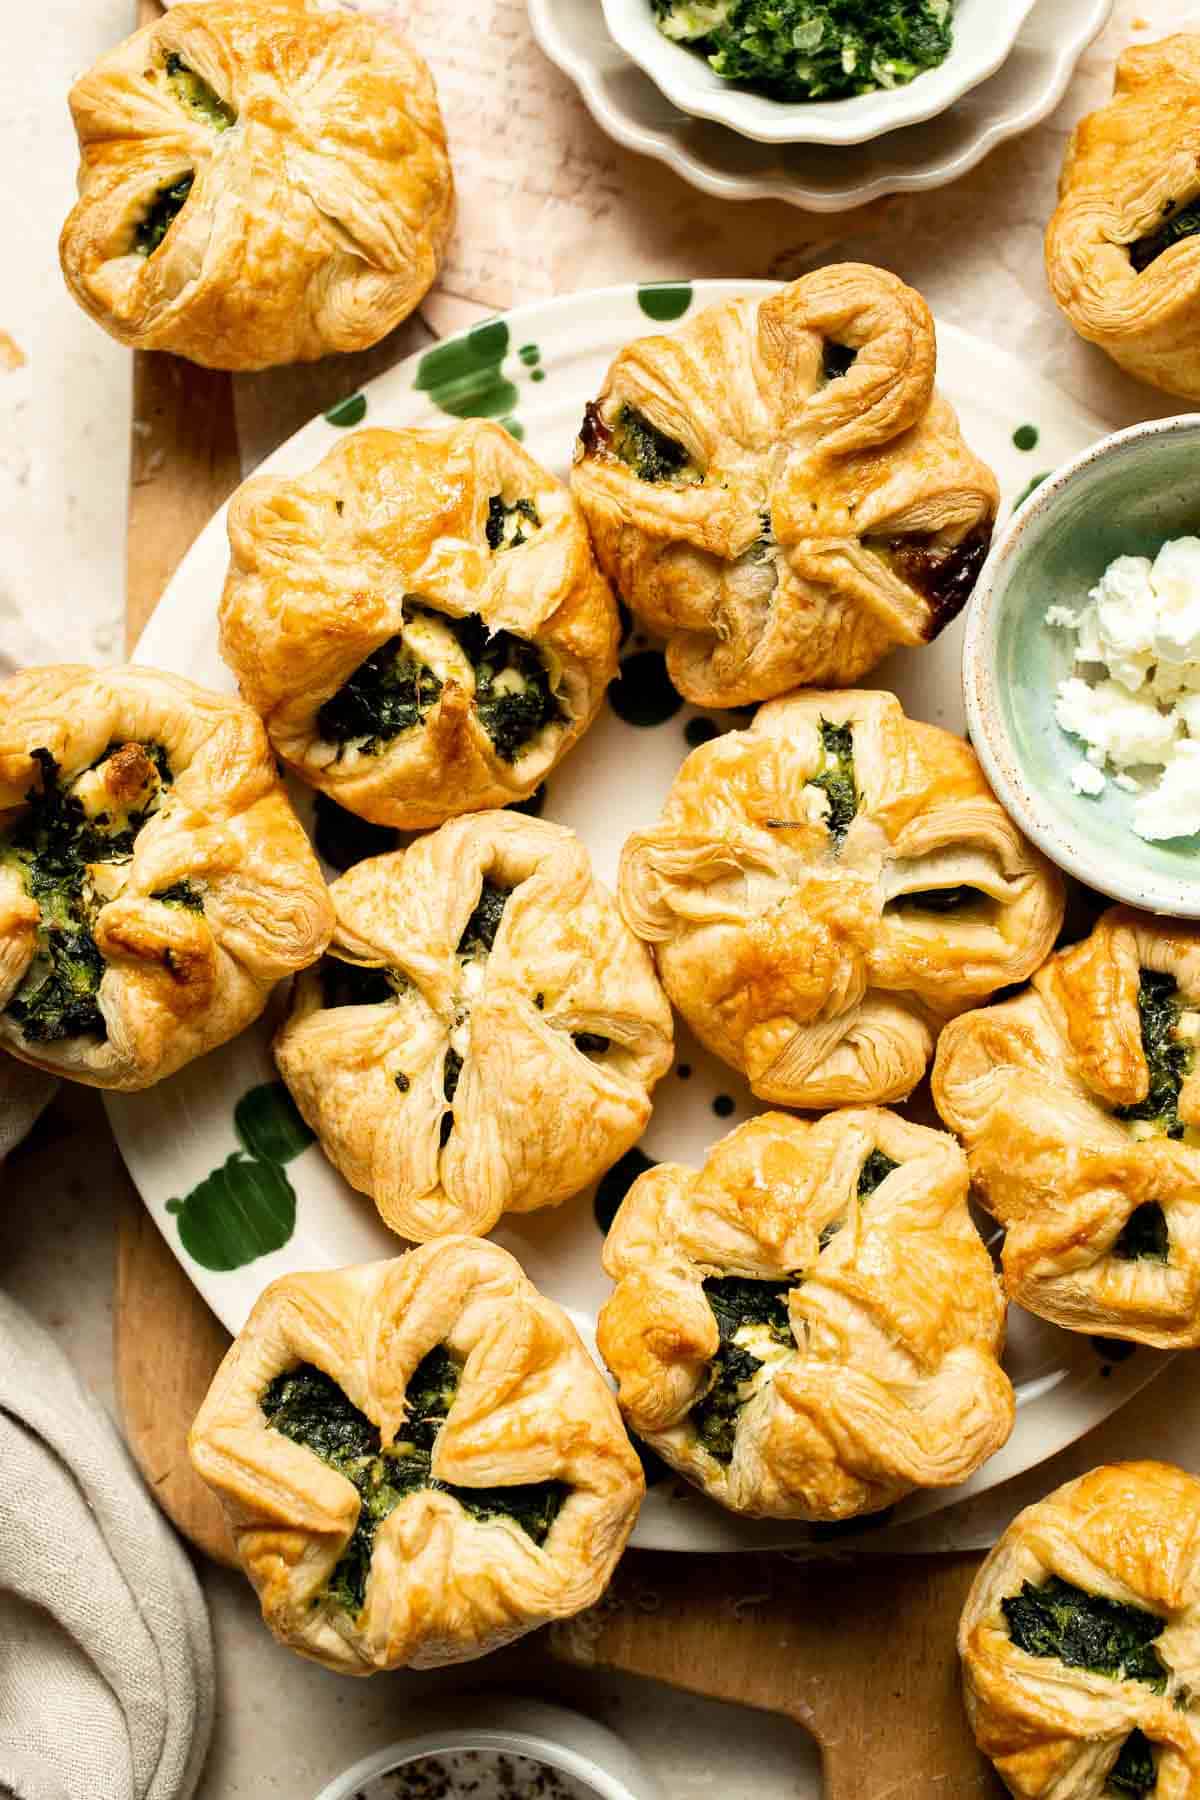
Spinach puff pastry bites are a go to appetizer because they strike the perfect balance between comfort food and crowd pleasing finger food. The filling is made with sautéed spinach, onion, garlic, fresh parsley, feta, and parmesan, giving each bite plenty of flavor without feeling heavy. Baking them in a muffin pan helps the pastry puff up beautifully while keeping the filling neatly tucked inside.
This spinach puff recipe was inspired by classic spinach pastries and spanakopita style flavors, but with a quicker, more approachable method thanks to store bought puff pastry. Serve these spinach puffs warm or at room temperature for parties, holidays, brunch spreads, or game day snacks. They are easy to prep ahead and always get rave reviews.

Why You'll Love This Recipe
- Perfect party appetizer. These bite sized spinach puffs are easy to grab, easy to serve, and perfect for entertaining.
- Flaky and flavorful. Puff pastry bakes up crisp and golden while the spinach filling stays creamy and savory.
- Make ahead friendly. You can prep the filling and assemble the puffs in advance, then bake when ready.
- Versatile and customizable. Swap cheeses, add herbs, or adjust seasonings to suit your taste.
Ingredients and Substitutions
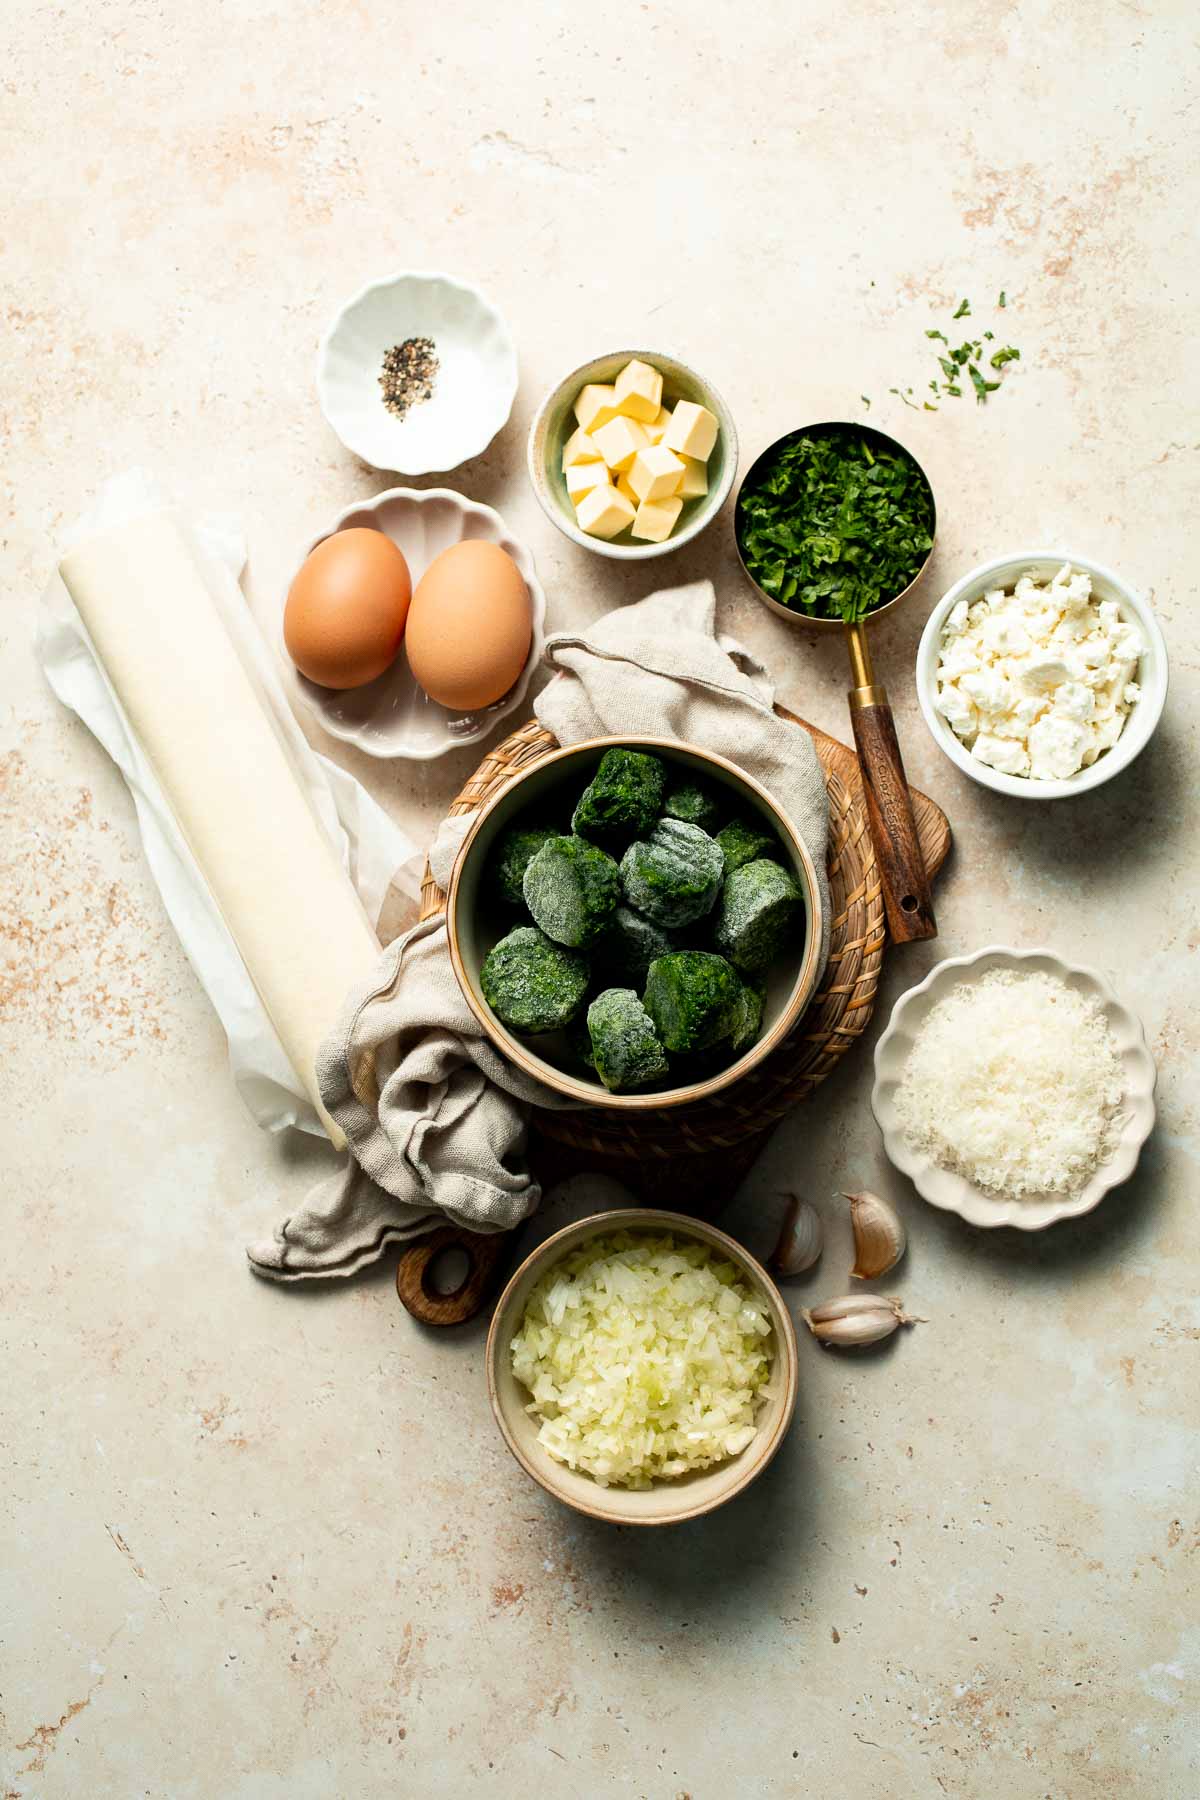
To make these delicious Spinach Puff Pastry Bites, you will need the following ingredients (see recipe card below for quantities):
- butter - Used to sauté the onion and garlic. Olive oil works as a substitute.
- onion and garlic - Create a savory base. Shallots can be used instead of onion.
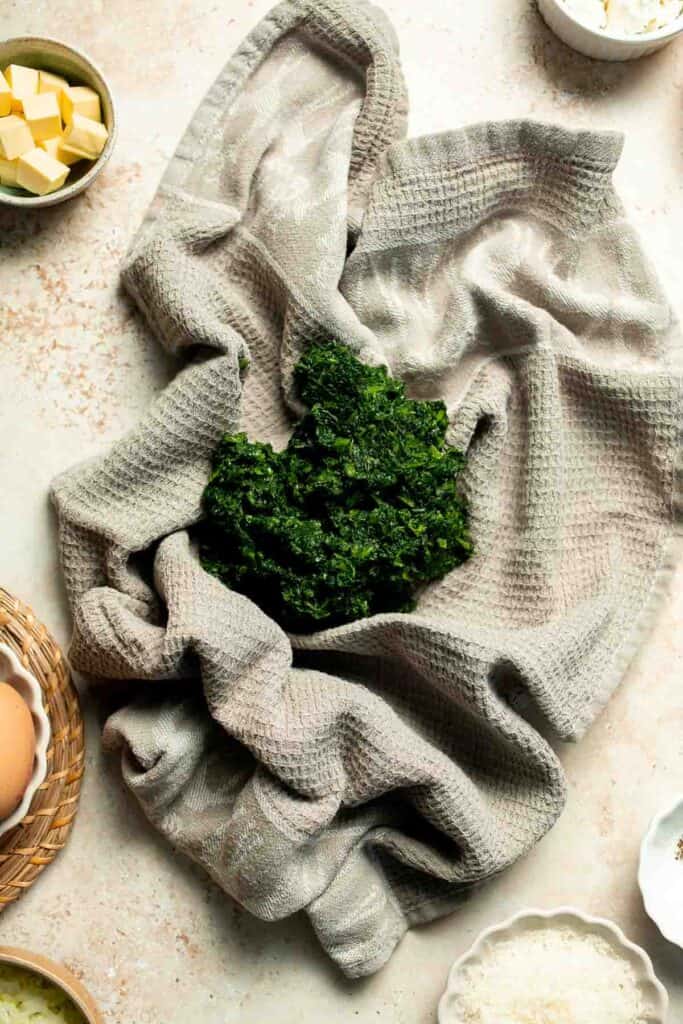
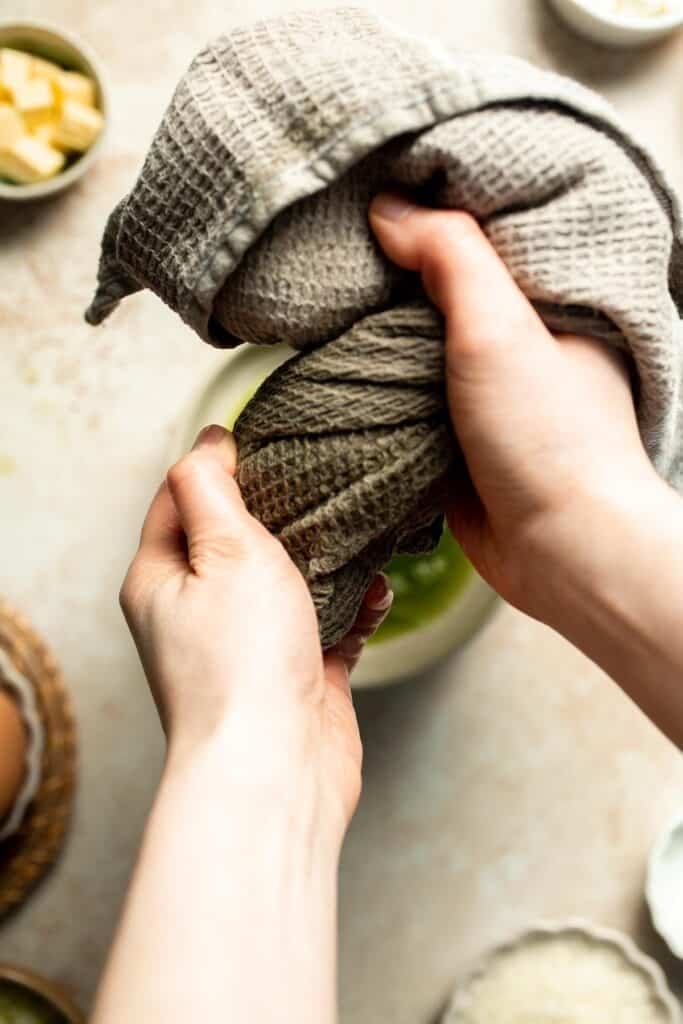
- spinach - Be sure the frozen chopped spinach is fully thawed and well drained to avoid soggy pastry. Fresh spinach also works but must be cooked down. You will need about 10 ounces. Cook it down in the pan until wilted, then let it cool and squeeze out all excess liquid before using. This step is essential to prevent soggy puff pastry.
- fresh parsley - Dill or chives are good alternatives.
- feta cheese - Feta is classic and adds tangy flavor, but ricotta, goat cheese, or a mix of mozzarella and parmesan also work well. Just be mindful of moisture content, especially with ricotta, which should be well drained.
- parmesan cheese - Adds nuttiness and depth. Pecorino Romano also works.
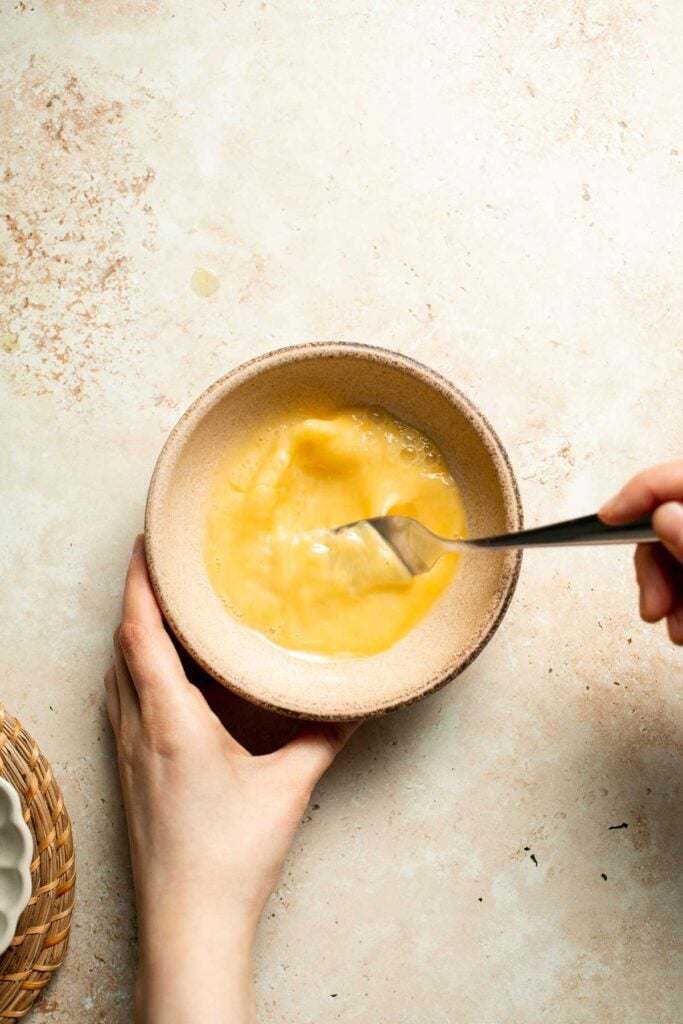
- eggs - One binds the filling, and one is used for the egg wash.
- salt and black pepper. -Season to taste, especially since feta is salty.
- puff pastry - Store bought puff pastry makes this recipe quick and easy. Keep it cold until ready to use.
Equipment
You will also need measuring cups and spoons, a large saucepan, a mixing bowl, a sharp knife, a rolling pin if needed, a 12-cup muffin pan, parchment paper or cooking spray, a pastry brush or silicone brush, and a silicone spatula or small knife for removing the baked puffs.
Instructions
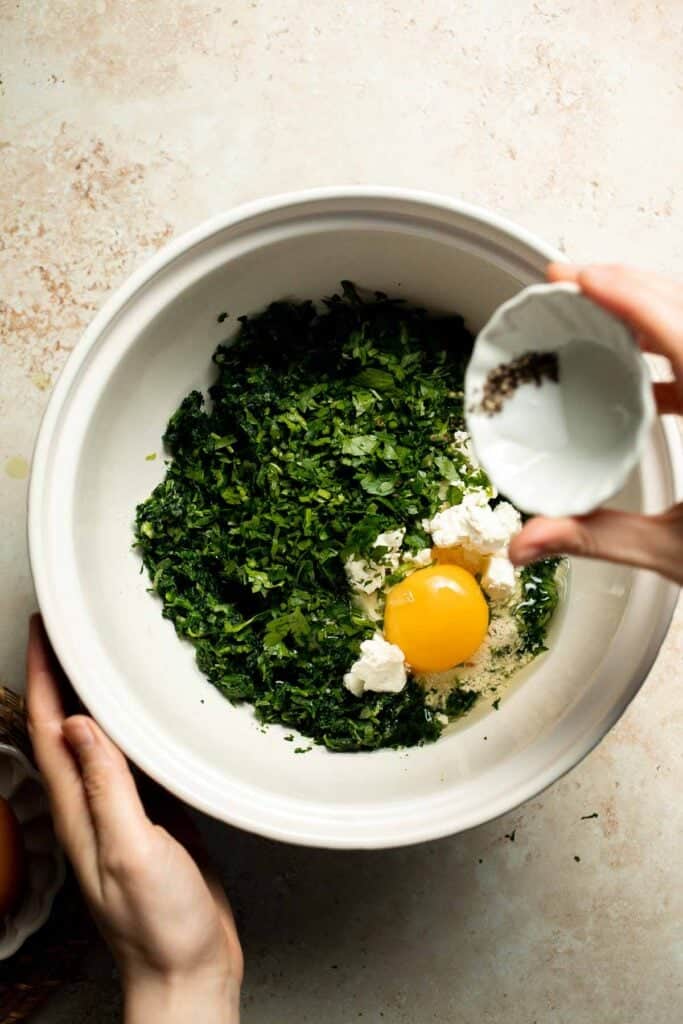
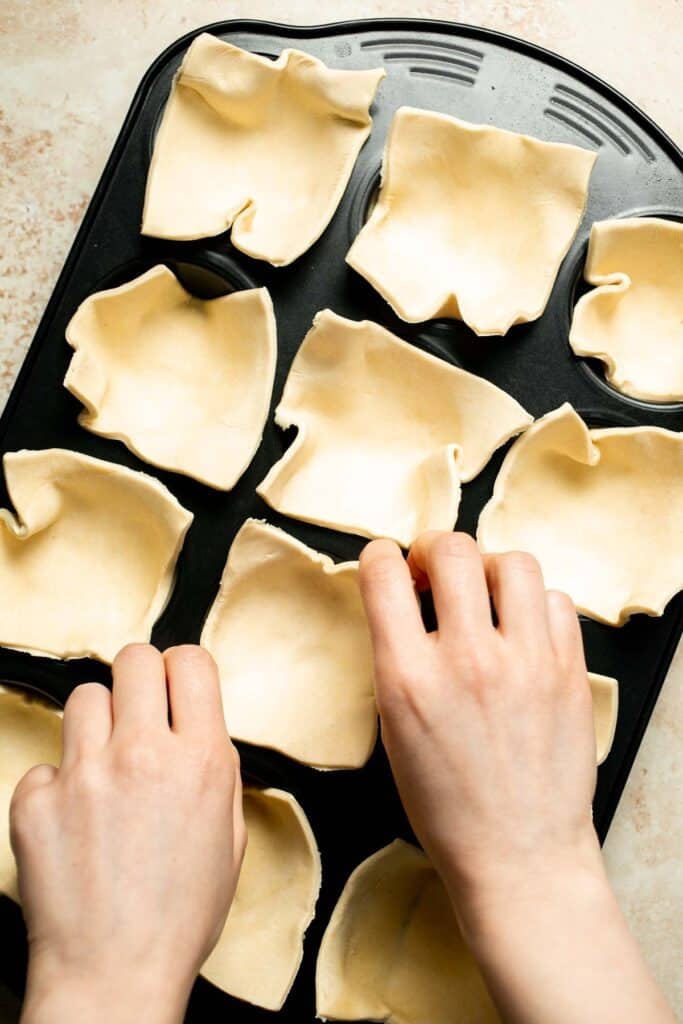
- Drain the spinach. Thaw the spinach completely, then squeeze out as much liquid as possible using a clean kitchen towel or paper towels.
- Sauté the vegetables. Heat butter in a large saucepan over medium-high heat until bubbly. Add onion, garlic, and spinach. Sauté until most of the moisture evaporates, about 3-5 minutes. Set aside to cool for 5 minutes.
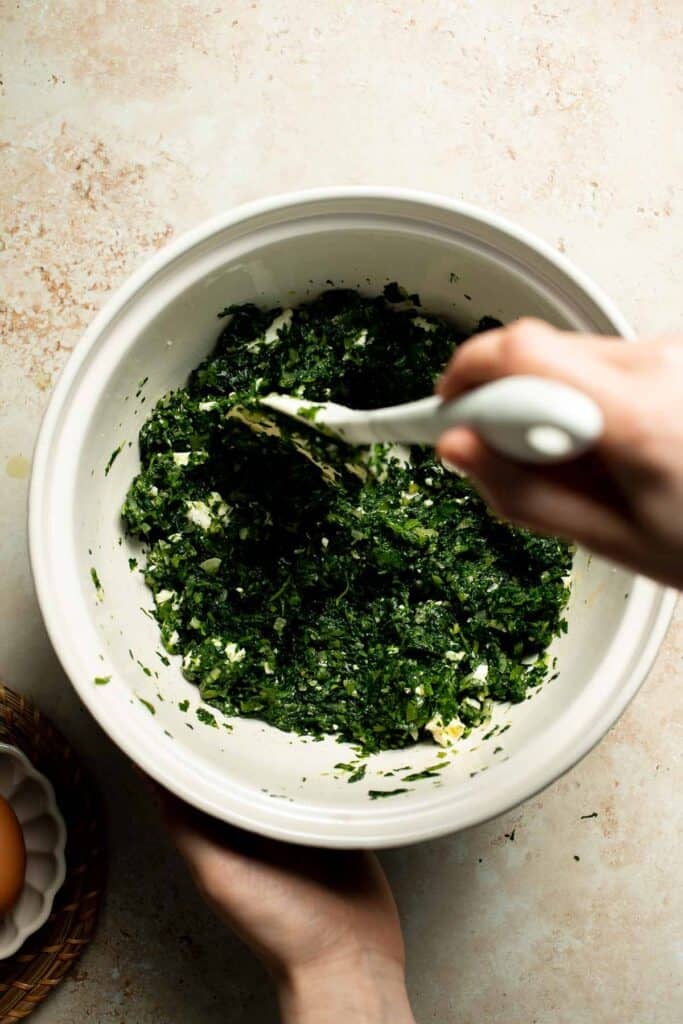
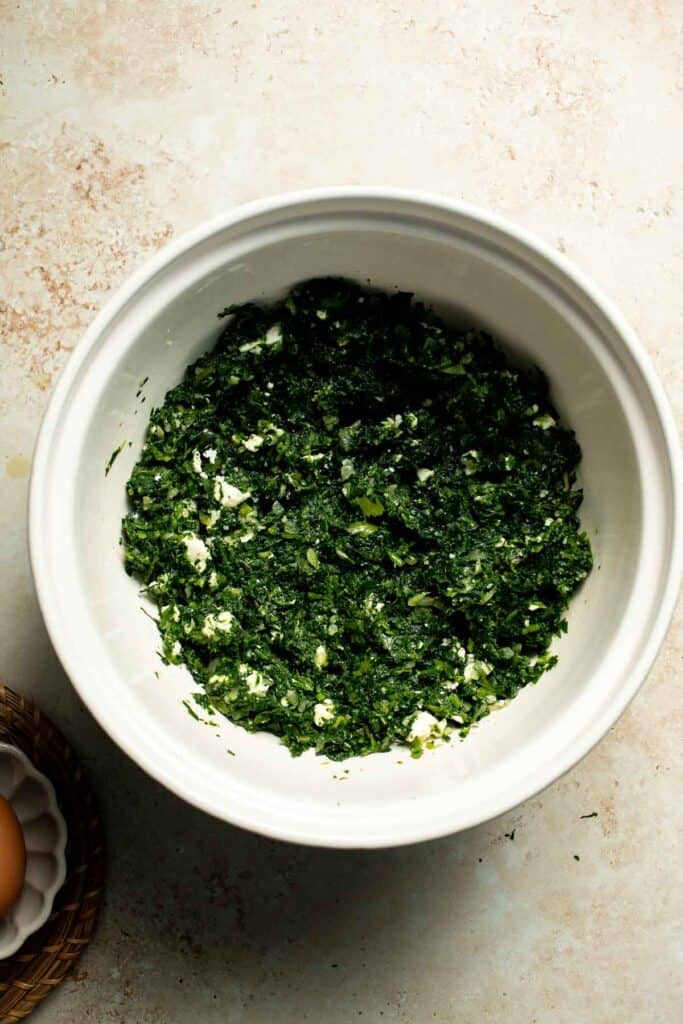
- Mix the filling. In a large bowl, combine the spinach mixture, parsley, feta, parmesan, one egg, salt, and pepper. Stir until evenly combined. Chill in the fridge for 10 minutes.
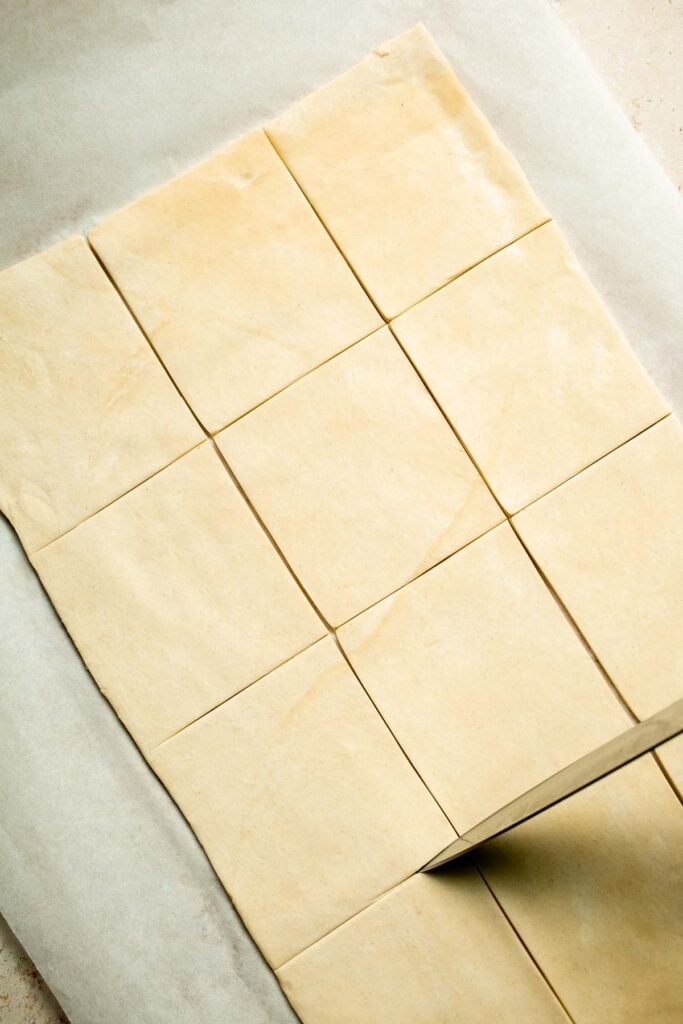
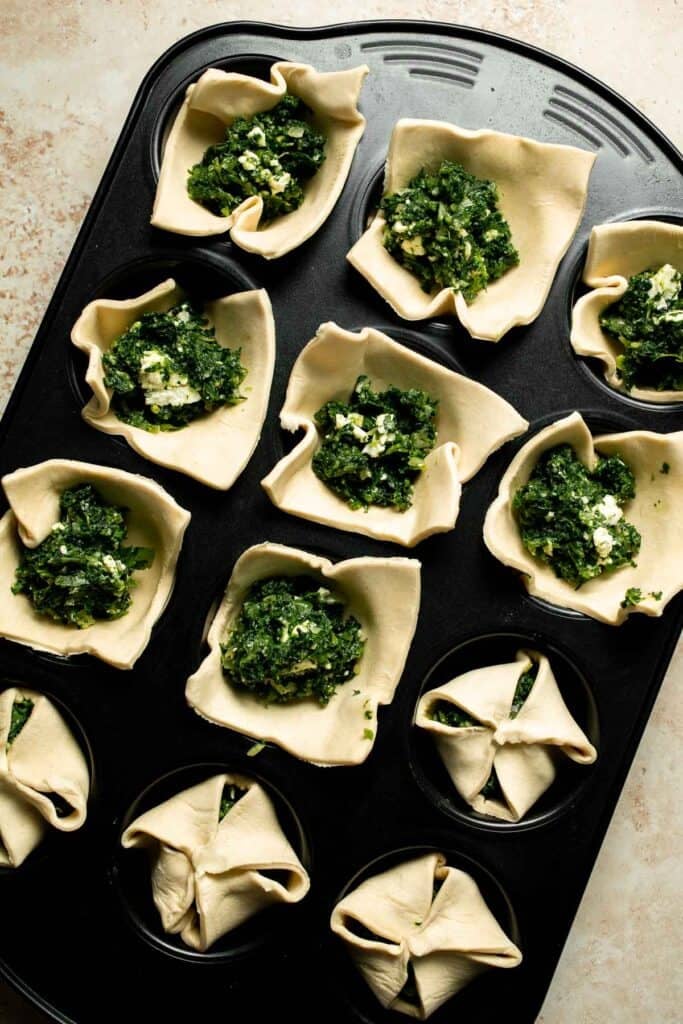
- Cut the puff pastry. Place puff pastry on a clean and lightly floured surface. Cut the 10x15-inch sheet into 12 equal rectangles (about 3 by 4 inches each). You will need dto make 3 vertical cuts and 2 horizontal cuts.

- Assemble the puffs. Grease a 12-cup muffin pan generously with cooking spray or butter. Press the pastry rectangles into the bottom of the muffin cups (one rectangle per cup). Spoon about 2 tablespoons of filling into the center of each.

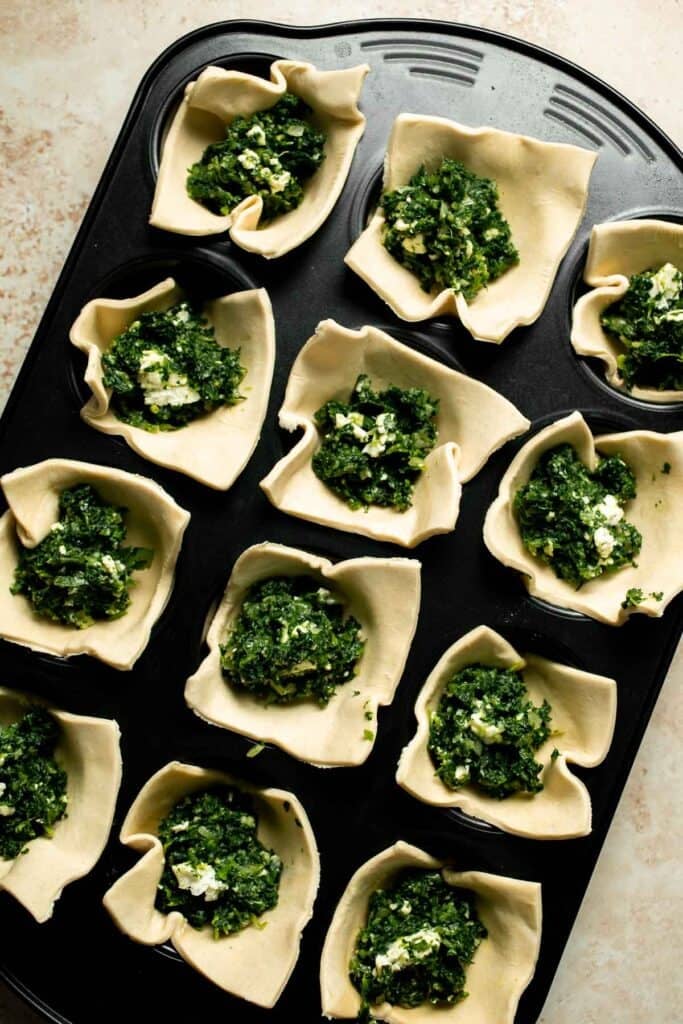
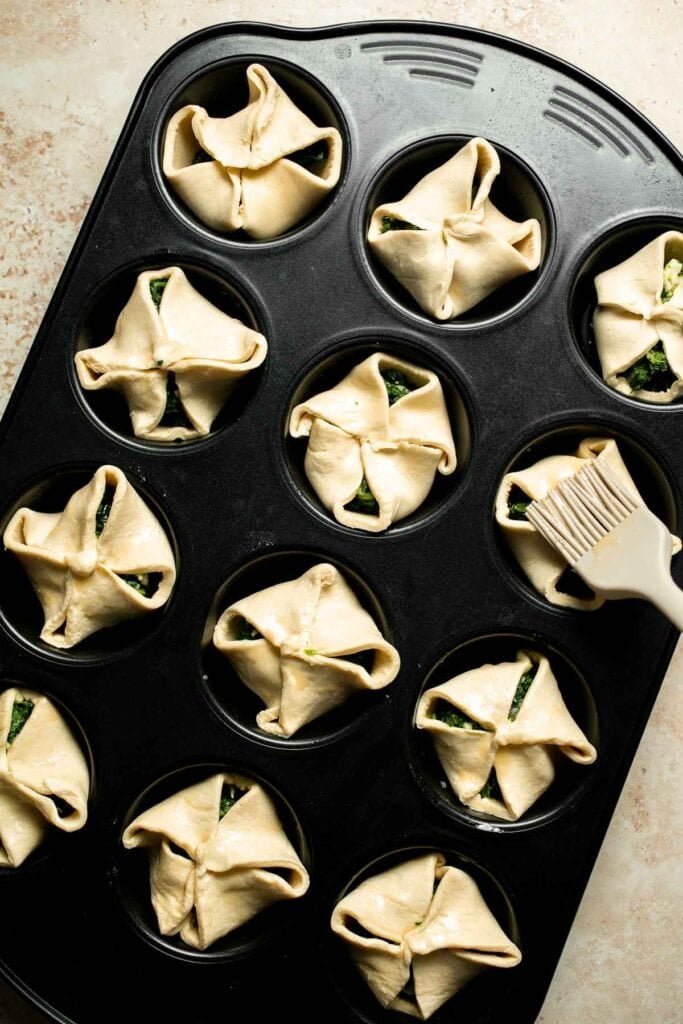
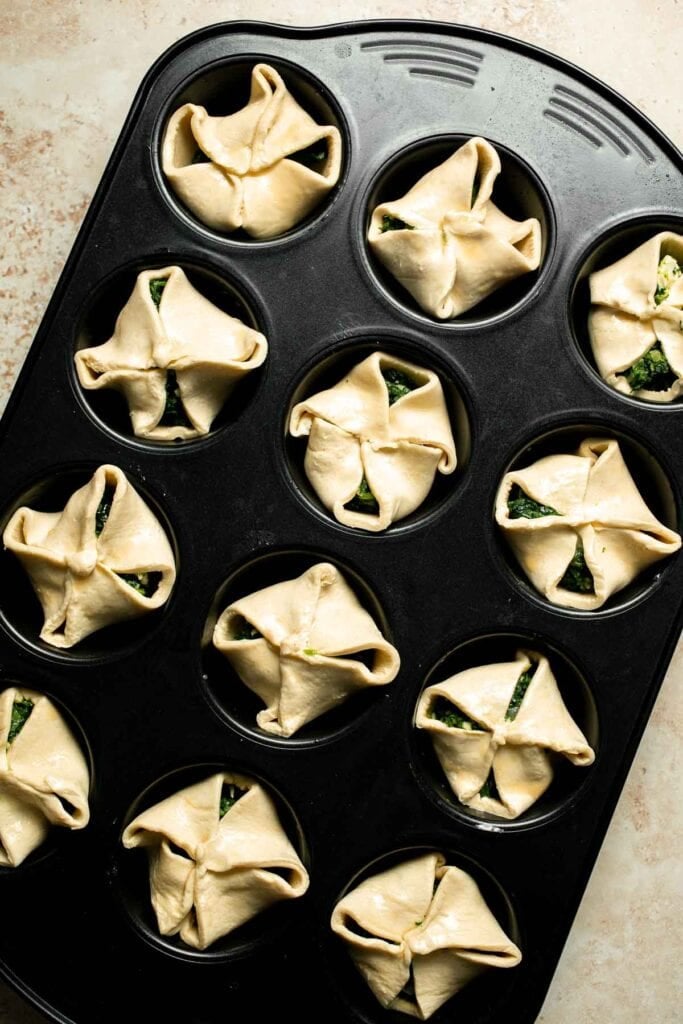
- Fold and seal. Fold the four corners toward the center (over the top of the spinach mixture) and pinch lightly together, leaving some filling visible.
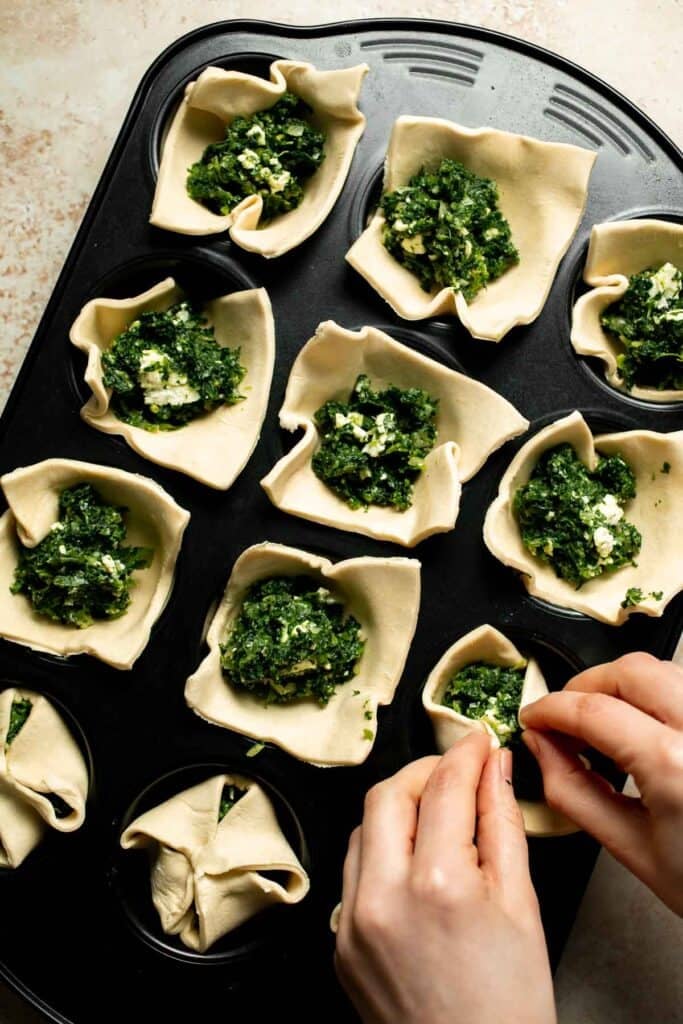
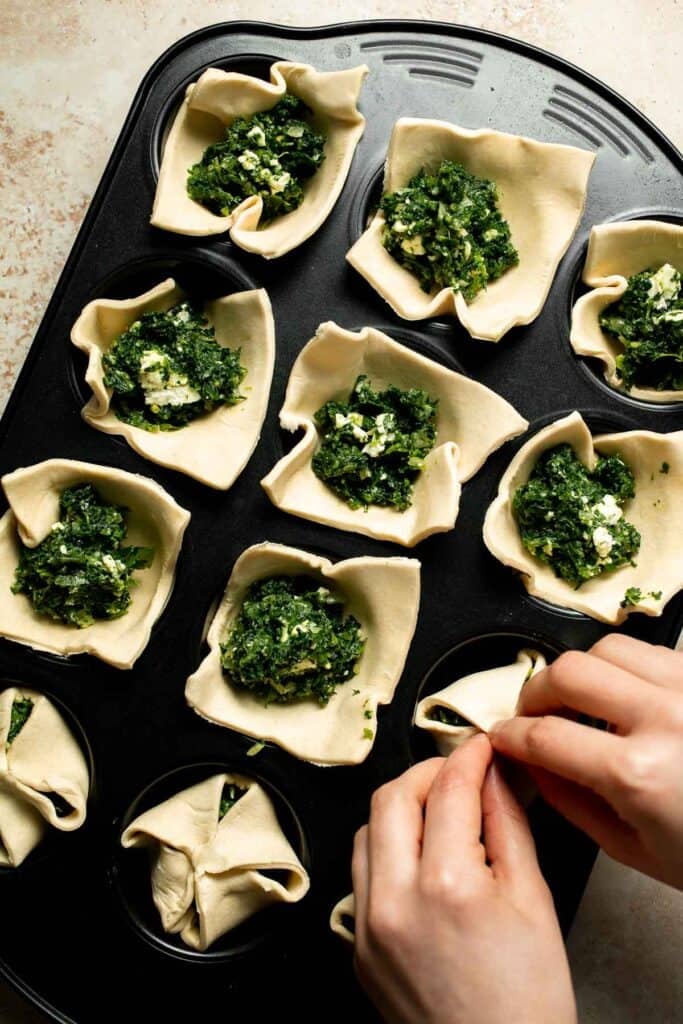

- Apply the egg wash. Beat the remaining egg in a small bowl with a fork. Brush the egg wash evenly on top of each sealed puff.
- Bake. Bake in a 375°F preheated oven for 25-30 minutes until puffed and golden brown. Cool for 5 minutes.
- Remove and serve. Loosen each puff with a silicone spatula or knife and remove carefully. Serve warm or at room temperature.
Expert Tip: Drain the Spinach Thoroughly
Excess moisture is the biggest reason puff pastry turns soggy. After thawing the spinach, squeeze it firmly in a kitchen towel or paper towels until no liquid remains. This step makes a huge difference in keeping the pastry crisp and flaky.
More Tips and Tricks
- Cool the filling slightly. Let the spinach mixture cool before adding the egg so it does not scramble.
- Keep the pastry cold. Cold puff pastry puffs better in the oven. Work quickly and chill if needed.
- Do not overfill. About two tablespoons of filling per puff is perfect for sealing and baking evenly.
- Use a muffin pan. It supports the pastry as it bakes and creates uniform shapes. You can use oven safe ramekins if you do not have a muffin pan, however as ramekins are often wider and deeper than muffin cups, you may need slightly larger pastry pieces and a bit more filling.
- Brush evenly with egg wash. This ensures a deep golden finish.
Recipe Variations
- Add mushrooms. Add finely chopped sautéed mushrooms to the filling for extra depth.
- Add bacon. Stir finely chopped cooked bacon into the filling for a smoky, savory variation. Crumbled ham also works well.
- Make them spicy. Add red chili flakes or a pinch of cayenne pepper.
- Spinach and ricotta bites. Swap feta for ricotta cheese for a milder, creamier filling. Be sure to drain the ricotta well to avoid excess moisture.
- Spinach and cream cheese puffs. Replace half of the feta with cream cheese to create a richer, creamier filling. This cream cheese mixture makes the centers extra smooth and works especially well if serving the puffs warm.
- Make mini spanakopita bites. Add dill and a splash of lemon juice for Greek inspired flavor.
- Cheesy spinach puffs. Swap the parmesan for mozzarella cheese for a milder, gooier center with classic comfort food appeal.
- Mini spinach puffs. For bite sized appetizers, use a mini muffin pan instead of a regular muffin pan. Cut the puff pastry sheet into smaller puff pastry squares, press them into the bottom of the muffin cups, and fill with about 1 tablespoon of filling. Bake at 375°F for 18 to 22 minutes until puffed and golden. These mini spinach puffs are perfect for parties, New Year's Eve, or grazing tables.
Storage
How to Store
Store leftovers in an airtight container in the refrigerator for up to 3 days.
How to Reheat
Reheat spinach puff pastry bites in a 350°F oven for 8-10 minutes until warmed through and crisp. For a quicker option, reheat in the air fryer at 350°F for 4-6 minutes, checking halfway, until hot and flaky. Avoid reheating in the microwave, which will soften the flaky pastry and make it lose its crisp texture.
How to Freeze
Spinach puff pastry bites can be frozen either before or after baking, making them ideal for entertaining and meal prep.
- To freeze unbaked spinach puffs: Assemble the puffs completely, but do not brush with egg wash. Arrange them in a single layer on a baking sheet and freeze for 1-2 hours, until firm. Transfer to a freezer safe container or zip top bag and freeze for up to 2 months. When ready to bake, place the frozen puffs directly into a greased muffin pan, brush with egg wash, and bake at 375°F for 30-35 minutes, until golden and heated through.
- To freeze baked spinach puffs: Allow baked puffs to cool completely. Freeze in a single layer on a baking sheet for 1-2 hours, then transfer to a freezer safe container. Freeze for up to 2 months. Reheat from frozen in a 375°F oven for 12-15 minutes, or in the air fryer at 350°F for 6-8 minutes, until hot and crisp.
How to Serve
Serve spinach puff pastry bites warm or at room temperature. They pair well with a simple green salad, a bowl of olives, or dipping sauces like tzatziki or marinara. They are perfect for holidays, brunch, cocktail parties, and potlucks.
These are my favorite dishes to serve with spinach puffs:


Easy Appetizers
If you're planning a larger appetizer spread, browse our collection from bite-sized finger foods and shareable snack platters to creamy dips, holiday appetizers, and more. These recipes are perfect for entertaining, casual gatherings, or anytime you want a delicious, crowd-pleasing starter.
FAQ
Spinach puffs are bite sized pastries made with puff pastry filled with a savory spinach and cheese mixture. They are typically baked until golden and flaky, with a creamy, flavorful filling inside. Spinach puffs are often served as appetizers, party snacks, or finger foods. Many versions are inspired by spanakopita flavors, using spinach, feta, herbs, and eggs, but shaped into easy individual portions instead of a large pie.
Spinach puffs can be part of a balanced diet when enjoyed in moderation. Spinach provides vitamins, minerals, and fiber, while the eggs and cheese add protein and richness. Puff pastry is higher in fat, so these are best served as an appetizer or snack rather than a main dish. Pairing spinach puffs with a fresh salad or vegetable sides helps balance the meal.
Yes, spinach puff pastry bites are great for making ahead. You can prepare the filling and assemble the puffs up to one day in advance, then cover and refrigerate them unbaked. When ready to serve, brush with egg wash and bake fresh so the pastry stays crisp and flaky. You can also bake them fully ahead and reheat in the oven just before serving.
The most important step to avoid soggy puffs is removing as much moisture as possible from the spinach. Thaw it completely and squeeze it very dry using a kitchen towel or paper towels. Also allow the sautéed spinach mixture to cool slightly before mixing with the egg. Baking on the middle rack and avoiding overcrowding helps the pastry crisp properly.
Yes, they freeze well. Freeze baked puffs once cooled in a single layer, then store in a freezer safe container for up to two months. Reheat directly from frozen in a 375°F oven until hot and crisp.
Spinach puff pastry bites pair well with light sides and fresh flavors. Serve them with a simple green salad, roasted vegetables, olives, or a mezze style spread. They also work nicely alongside soups or as part of an appetizer platter with other finger foods.
Spinach puffs are delicious on their own but even better with a dipping sauce. Popular options include tzatziki, marinara sauce, garlic aioli, lemon yogurt sauce, or sour cream based dips. A light yogurt dip with herbs complements the spinach and feta without overpowering the pastry.
More Bite-Sized Appetizer Recipes
Looking for other recipes like this? Try these:


Tried this recipe?
I'd love to hear what you think! Leave a comment and rating below to share your feedback. Your reviews help others discover this recipe and help me keep creating more free recipes for you. Snap a photo and tag me on social media @aheadofthyme too.

How to Host a Cookie Exchange Party (Cookie Swap Guide)

Hosting a Cookie Exchange Party (or Cookie Swap) is one of the sweetest holiday traditions you can bring to life in your home. It is simple, joyful, and filled with that cozy December vibe. Instead of baking trays of different cookies for gifting, you make one big batch of your favorite cookie recipe and trade with your friends for an entire assortment. By the end of the night, you head home with a beautiful mix of holiday treats, along with plenty of laughter and memories. It is the easiest way to try new cookies without spending days in the kitchen!

A Christmas cookie exchange works for nearly every group. Friends, kids, coworkers, neighbors, and big extended families all love it. Plan your party early to avoid December stress. Planning early also gives guests plenty of time to choose their recipe and bake their batch. This guide will walk you through everything you need to plan the most organized, delicious, and festive cookie exchange this season.
Whether you want a simple cookie swap or a fully themed holiday gathering with decorations and games, this tutorial covers each step in detail so you can host with confidence.
What Is a Cookie Exchange Party?
A cookie exchange party is a holiday gathering where every guest bakes a batch of one cookie recipe, brings it to the party, and trades with others for a mixed assortment. Guests leave with a curated collection of homemade treats that they can enjoy, gift, or freeze for later. It is similar to a potluck, but instead of sharing a meal at the table, everyone swaps cookies in an organized way.
The charm of a cookie swap is that you only bake one recipe, yet you go home with many. It saves time, encourages creativity, and brings people together in the most festive way. A holiday cookie exchange usually takes place in early or mid December and often includes light snacks, drinks, music, and a lot of holiday cheer.

Pick a Theme for Your Cookie Exchange
Choosing a theme can make your cookie exchange feel extra special and helps set the mood for decorations, invitations, and even recipe choices. You can go simple or really lean into your creative side. It's completely optional though!
Here are some fun themes to try:
- Classic Christmas
- Cozy Pajama Party
- Hot Cocoa Bar and Cookie Swap
- Ugly Sweater Party
- Vintage Holiday Baking
- International Cookies
- Color themed, such as red and green
- Kids Cookie Exchange with simple recipes
- No Bake Treats Only
- Vegan or gluten free swaps
Plan the Details
Pick the date and time
Cookie exchanges work best from the first week of December through the week before Christmas. Weekends are great for families and daytime swaps feel relaxed and kid friendly. Evening gatherings feel cozy and festive with lights and music. Pick a time when guests will not be rushing between events.
Set the guest list size
Aim for 6-12 people. With fewer guests you get less variety. With more guests there is a lot of cookie volume to manage. Consider your space, seating, and table size. You want a relaxed setup with enough room for everyone to display their cookies.
Send invitations
Once the details are set, send invitations by card, email, or group message. Include the date and time, location, theme, how many cookies to bake, instructions for claiming cookie types, packaging guidelines, recipe submission details, any dress code such as pajamas or festive sweaters, and the RSVP deadline. Send invitations at least 2 weeks in advance helps ensure everyone has time to bake.
Set the Rules and Expectations
A successful cookie exchange always starts with clear guidelines. This prevents confusion and gives guests confidence while choosing their recipe.
- How many cookies to bake - The typical amount is a 2 dozen plate of cookies per guest for a tasting style swap, or 4-6 dozen total for a full exchange. This ensures everyone goes home with a nice mix.
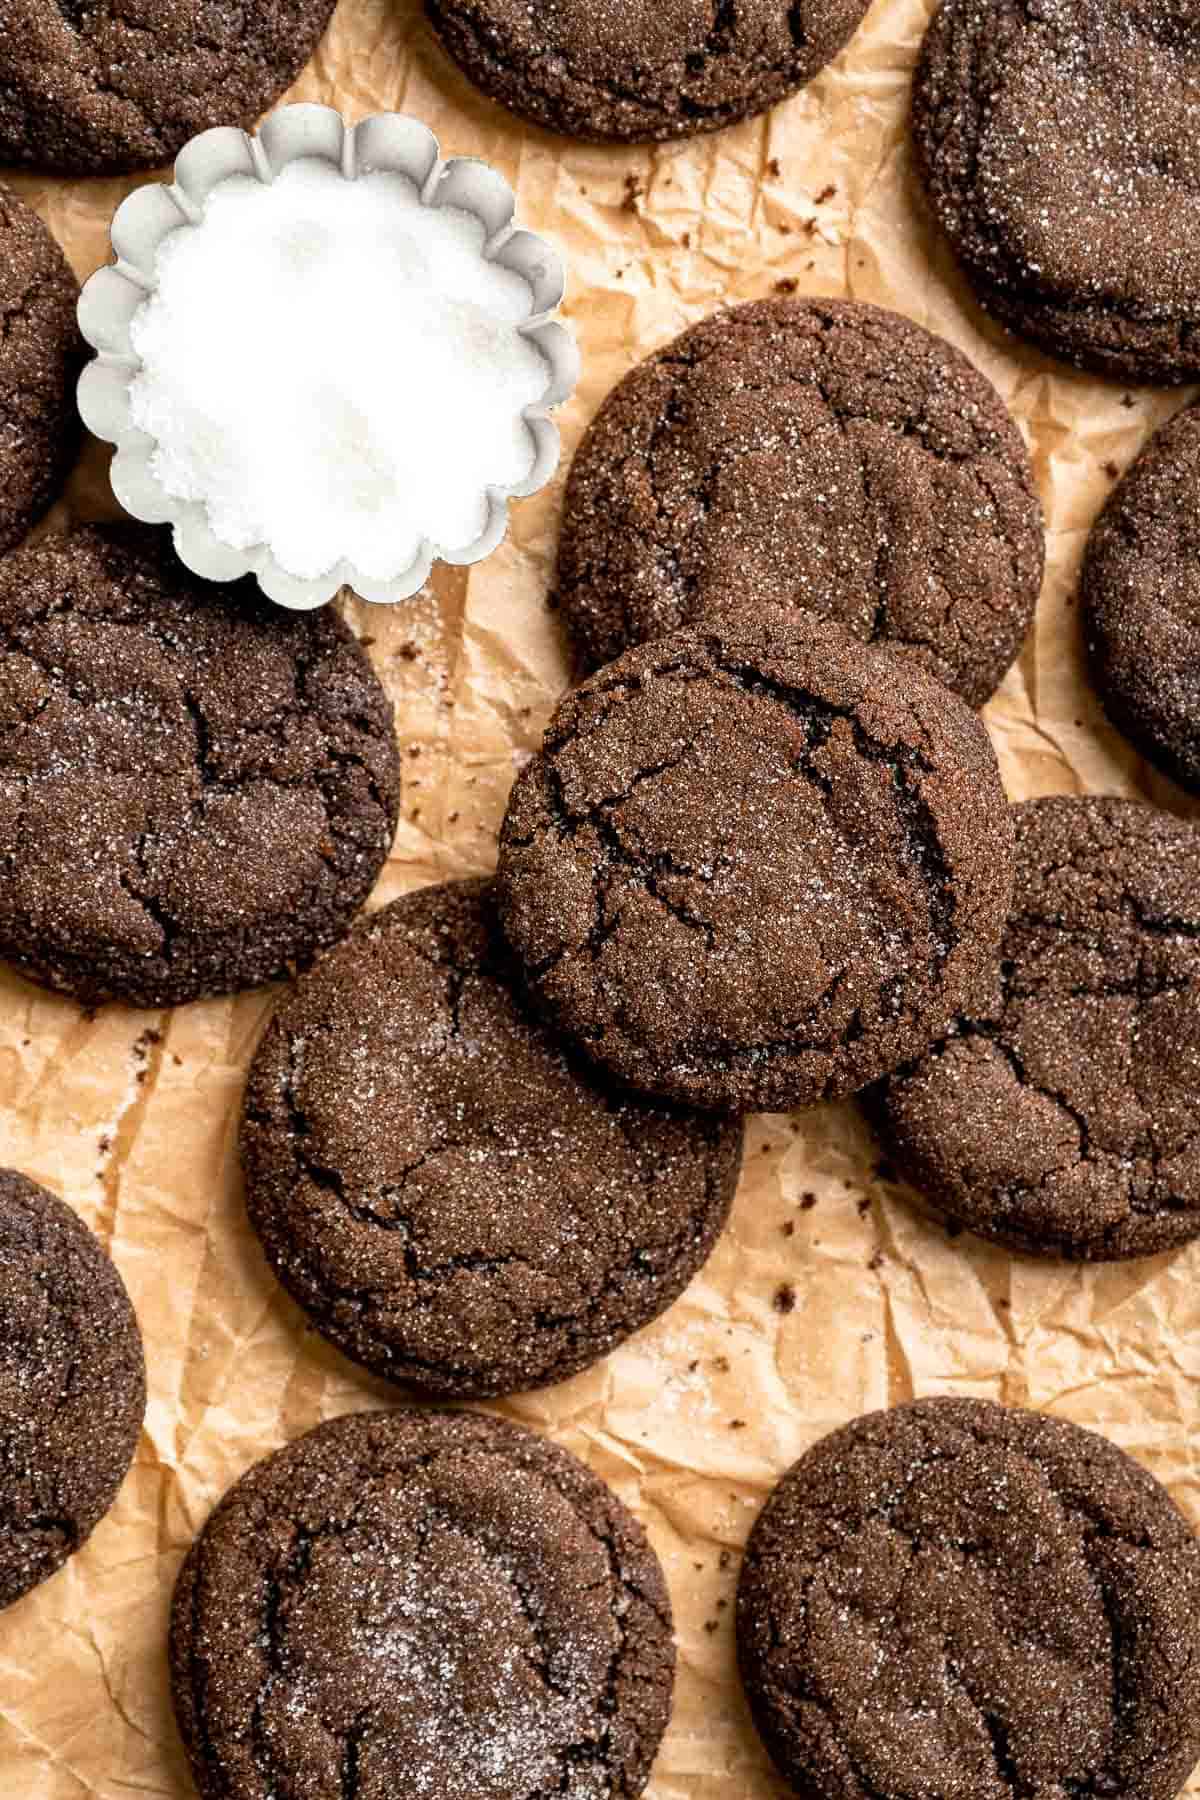
- Cookie types - Ask guests to choose homemade cookies only, not store bought. Suggest choosing cookies that travel well, such as shortbread, biscotti, gingerbread, thumbprints, snowballs, or slice and bake cookies. Avoid overly delicate cookies or anything with soft icing that smears.
- Avoid duplicates - Encourage guests to call or message you with their cookie choice. This avoids having six people show up with chocolate chip cookies.
- Allergy notes - If anyone has dietary needs, mention this early. Ask bakers to label allergens clearly on their recipe card and on their cookie tray.
- Packaging guidelines - Let guests know if you want cookies packaged in sets or if you prefer that everyone brings their batch unwrapped. Reusable tins or boxes are always appreciated.

Holiday Baking Guide
with free printable checklists!
This comprehensive Christmas Baking Guide with free checklists includes info on baking ingredients and tools, tons of tips, mistakes to avoid, and recipes.
Prepare Your Space
Setting up your home for a cookie exchange is simple and fun. A few thoughtful touches create a welcoming atmosphere and make it easy for guests to navigate the swap.
- Cookie Display Table - Choose a large dining table or kitchen island for the designated cookie table. Place each batch of cookies on a plate, tray, or platter with a labeled index card. If you want to add height, use cake stands or stack boxes under a tablecloth to create levels.
- Tasting Area - Set out small plates, napkins, and cups. A hot chocolate bar is a great centerpiece for this area. Offer milk, tea, or sparkling water to balance the sweetness.
- Packaging Station - Have a table with boxes, tins, parchment squares, ribbon, stickers, pens, and gift tags. This is where guests assemble their final cookie assortment. Keep everything clustered together for an easy flow.
- Decor and Ambience - Twinkle lights, evergreen garland, candles, and a simple holiday playlist bring the whole party to life during the holiday season. Keep decor warm and inviting rather than overwhelming.
Host the Party: Step by Step
Once the setup is complete, the party practically runs itself. Here is an easy flow.
Welcome Guests
Offer a welcome drink. Collect their cookies and recipe cards, then place them on the display table.
Display and Label
Make sure each cookie type has a label with the name and key ingredients.
Tasting Round
Some hosts allow guests to taste a few cookies before the swap begins. This is optional but very fun.
Exchange Time
There are two popular methods:
- Round Robin Exchange. Everyone rotates around the table with their containers, taking a set amount from each batch. This works well when cookies are displayed loose.
- Preset Packaged Swap. Guests prepackage cookies in sets. Everyone picks up one pack from each batch. Clean and simple.
Packaging Station
Provide boxes or tins and let guests assemble their assortment. Add ribbons and tags to make them gift ready.
Fun Extras
Keep the atmosphere light with holiday games, prizes, or crafts. Some ideas:
- Best cookie contest
- Guess the spices
- Ornament decorating
- Holiday trivia
- Ugly sweater mini parade
Kids love simple activities like coloring sheets or decorating cardboard ornaments.

What to Serve at a Cookie Exchange
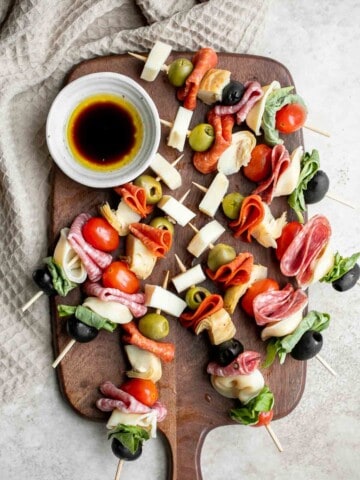
Since cookies are the star of the show, serve simple savory snacks like a charcuterie board with veggies and dip so everyone does not get overwhelmed with sweetness.
Savory Bites


Tips for a Successful Cookie Exchange
- Choose cookies that travel well and stay fresh.
- Place parchment between cookies to prevent sticking.
- Encourage guests to package cookies gently and avoid fragile decorations.
- Provide extra containers in case someone forgets theirs.
- Bake your cookies the day before for the best texture and freshness.
- Offer a few additional cookies for tasting so the take home quantities stay balanced.
Cookie Recipe Ideas for Your Party
Need some inspiration? Browse some ideas below and feel free to share your favorite cookie recipes with your guests too.
Our Most Popular Cookies


Our 2025 Holiday Cookies


These are some of our go-to cookie types for a cookie swap:
- Classic Christmas cookies - See our 30 Best Christmas Cookies.
- Drop cookies - Try our Lemon Drop Cookies (Anginetti).
- Slice and bake cookies - Try our Slice and Bake Christmas Cookies, Pinwheel Cookies, Pecan Sandies, or Pinwheel Cookies.
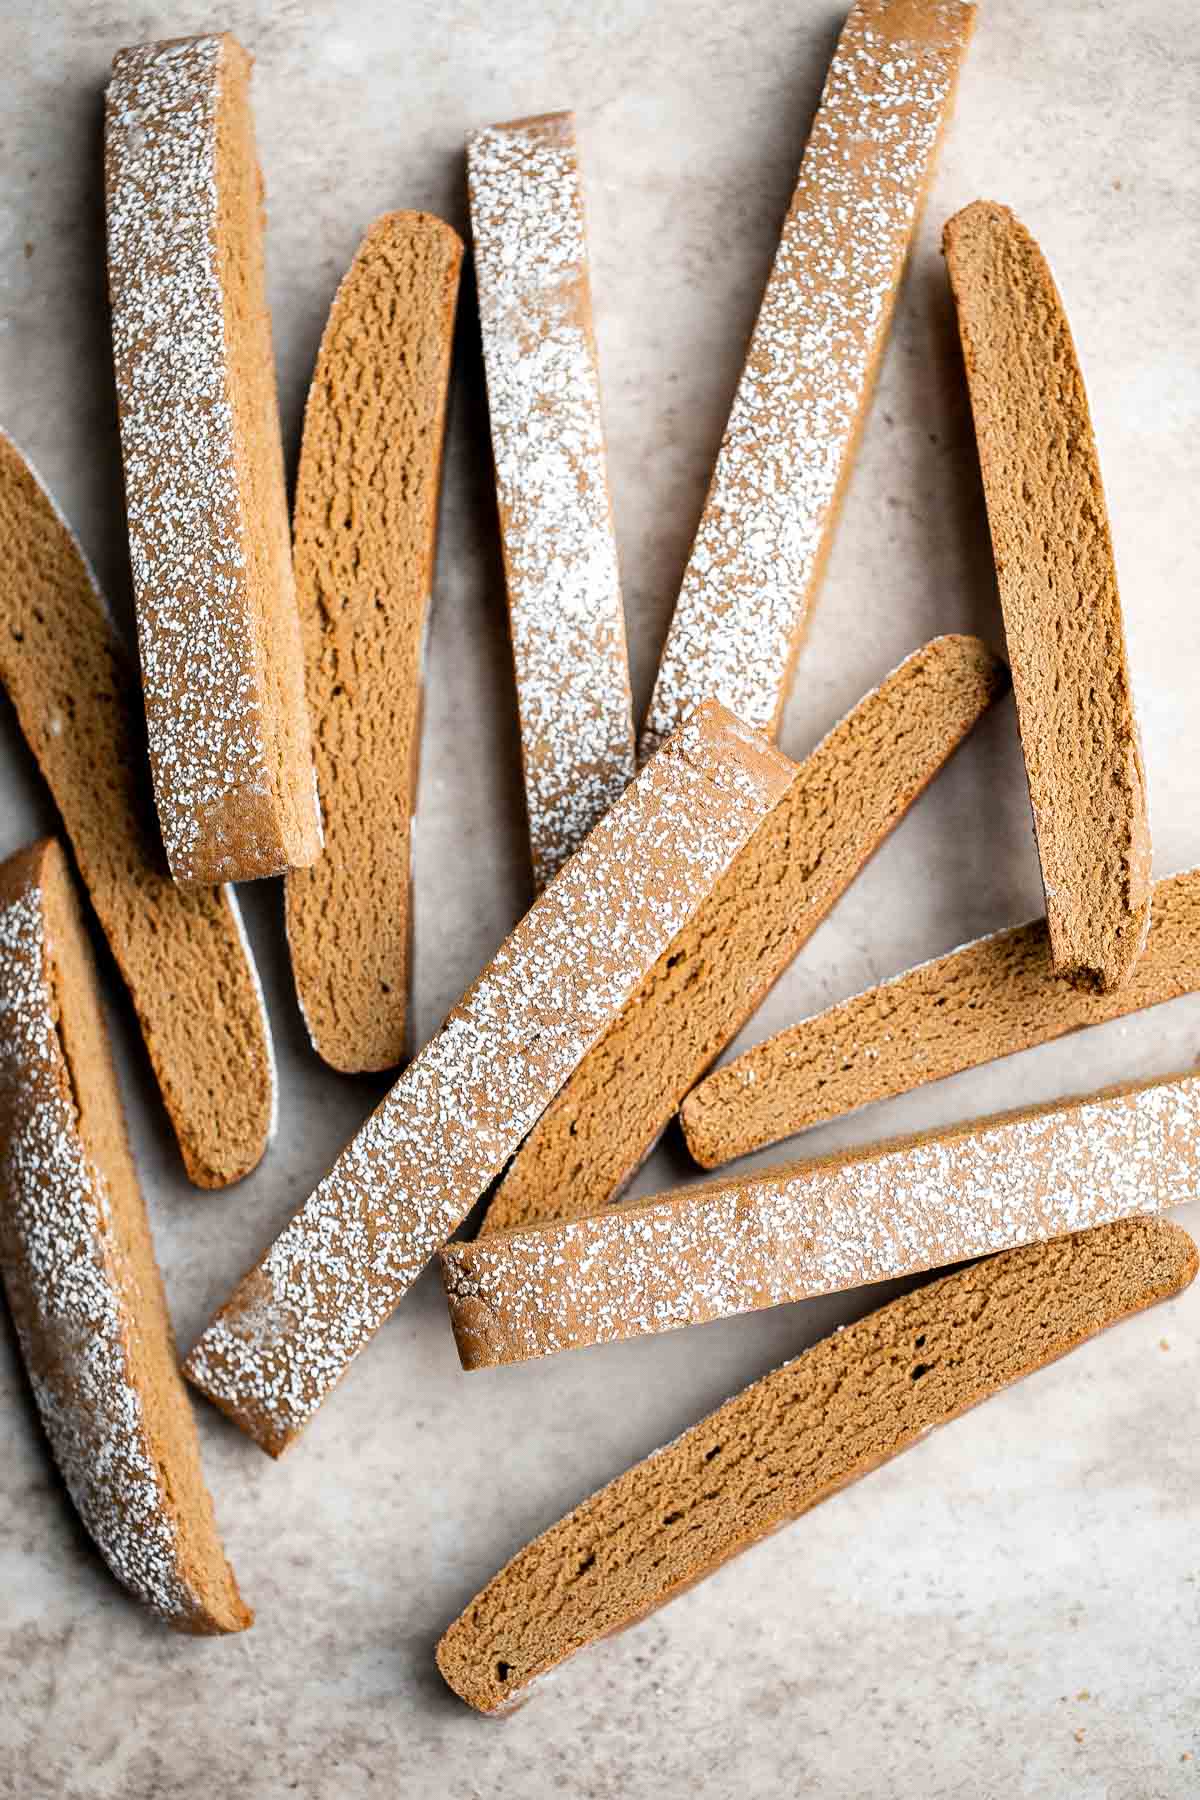
- Biscotti - Try our Cranberry Pistachio Biscotti, Almond Biscotti, Gingerbread Biscotti, or Carrot Cake Biscotti.
- No bake cookies - Try our Cornflake Christmas Wreath Cookies or No Bake Bird's Nest Cookies.
- Gluten free cookies - Try our Almond Horns, Red Velvet Macarons, or Florentines.
- Shortbread cookies - Try our Classic Shortbread Cookies, Whipped Shortbread Cookies, Christmas Shortbread Cookie Bites, or Chocolate Shortbread Cookies.
- Decorated sugar cookies - See our Christmas Sugar Cookies with Royal Icing, Valentine's Day Heart Sugar Cookies, or Easter Egg Sugar Cookies.
More Cookies
For more recipe ideas, check out our collection of cookie recipes, featuring everything from soft and chewy classics and festive holiday treats to fun flavored cookies and easy no chill options that bake up beautifully for any occasion.
What to Do With Leftover Cookies
Leftovers rarely last long, but if they do, here are a few ideas:
- Pack them into small gift bags for neighbors, teachers, or coworkers. See our Holiday Cookie Box for ideas.
- Freeze cookies for up to three months in an airtight container. Most cookies freeze beautifully, which makes future snacking easy.
- Crumble them over ice cream or yogurt.
- Add cookies to a holiday dessert board for upcoming gatherings.
FAQ
Two to six dozen total is ideal. If you are doing a tasting exchange, two dozen works. For a full exchange with gifting, aim for four to six dozen.
Have guests claim their cookie type when they RSVP. If there is overlap, gently suggest someone choose another recipe so the final assortment has variety.
Most cookies stay fresh for two to three days when stored properly. If you want to bake farther in advance, freeze the cookies in airtight containers. Thaw at room temperature before the party.
Use boxes, tins, or paper treat bags lined with parchment. Add ribbon, stickers, and gift tags. For layered cookies, separate each layer with parchment or wax paper.
Place cookies in a sturdy container with tight fitting lid. Layer with parchment for padding. Carry the container on a flat surface rather than in a bag where it tilts.

now available!
Grab Your Free Holiday Baking Checklists!
Recipe planner, pantry ingredient list, and baking shopping list - all in one printable pack sent straight to your inbox.

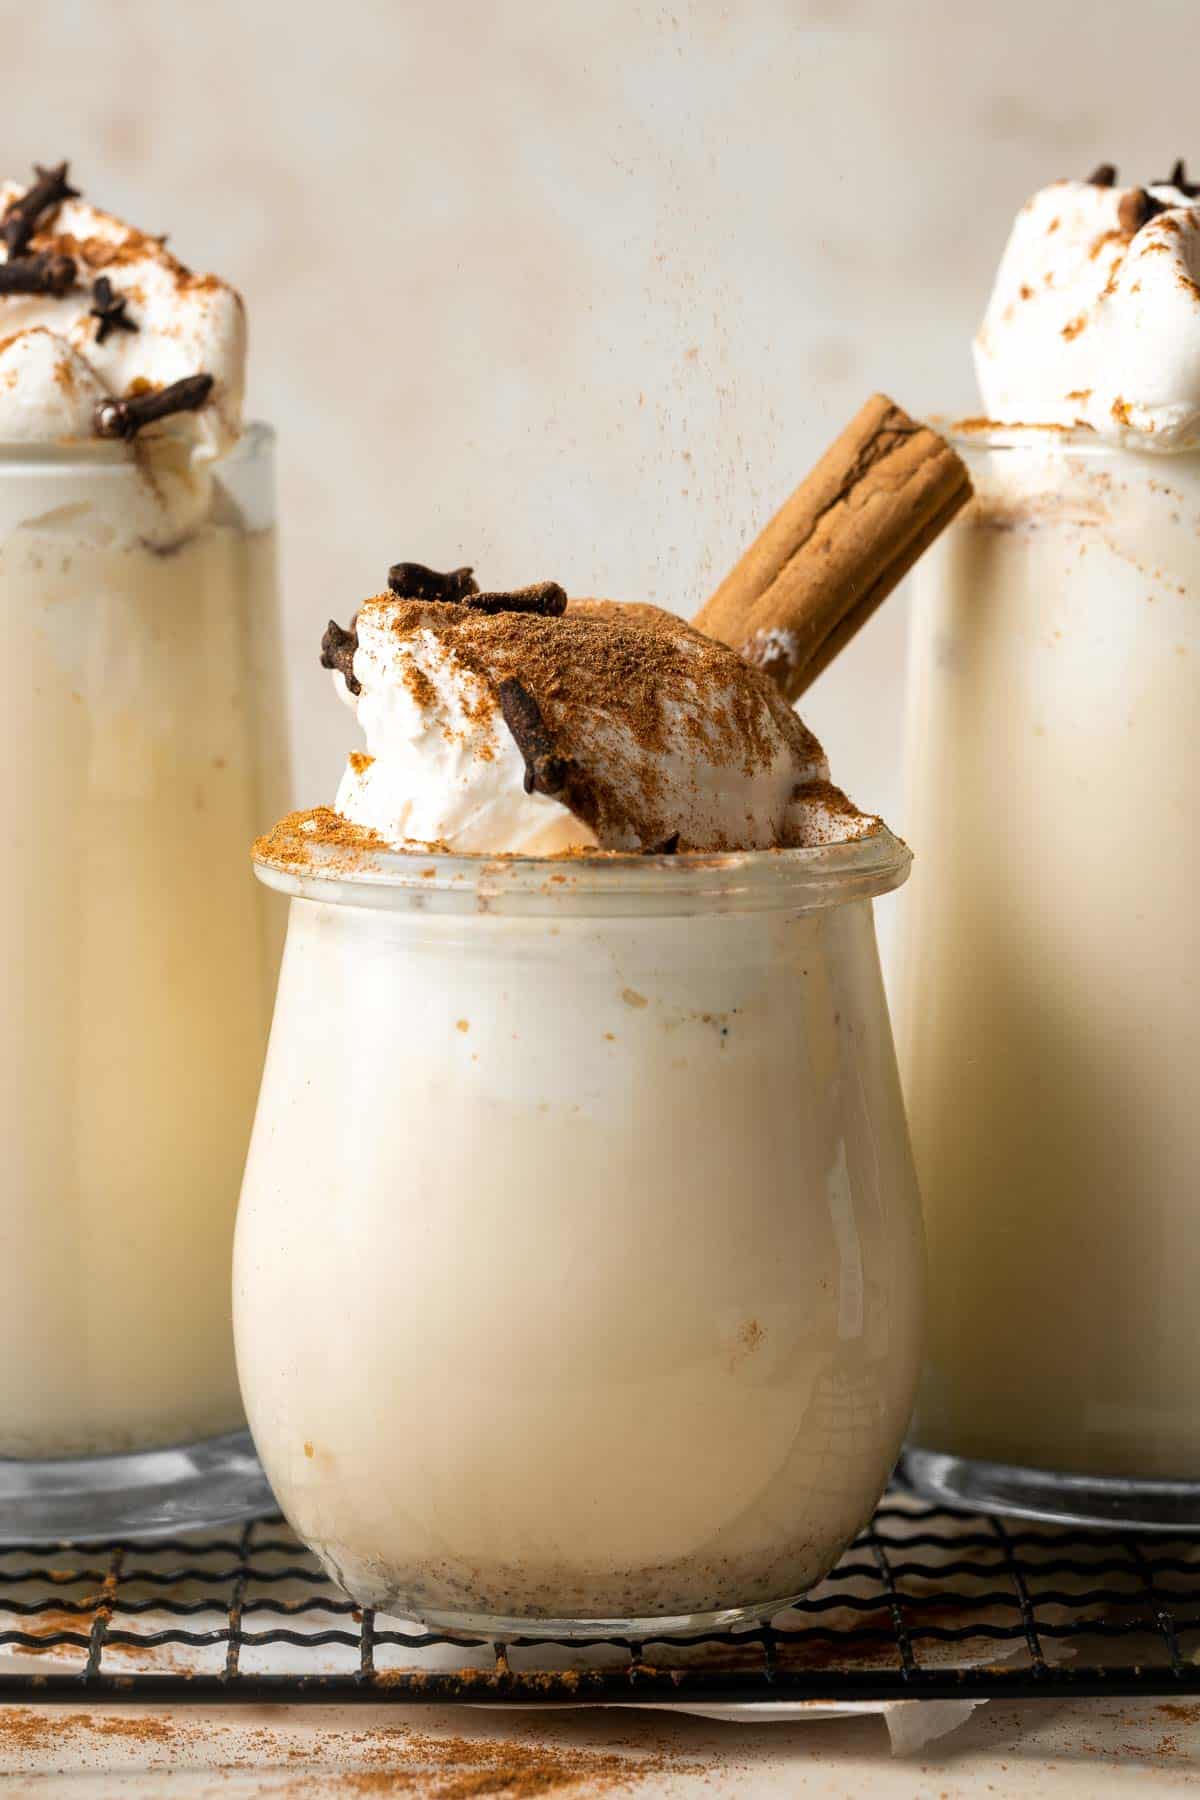
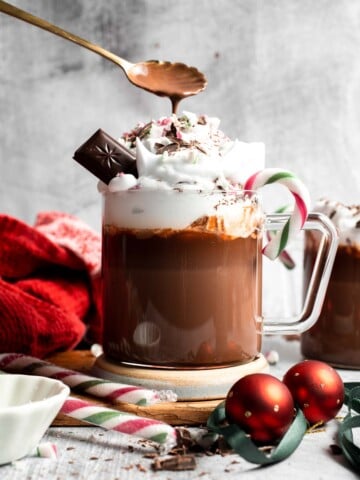
Peppermint Hot Chocolate Recipe
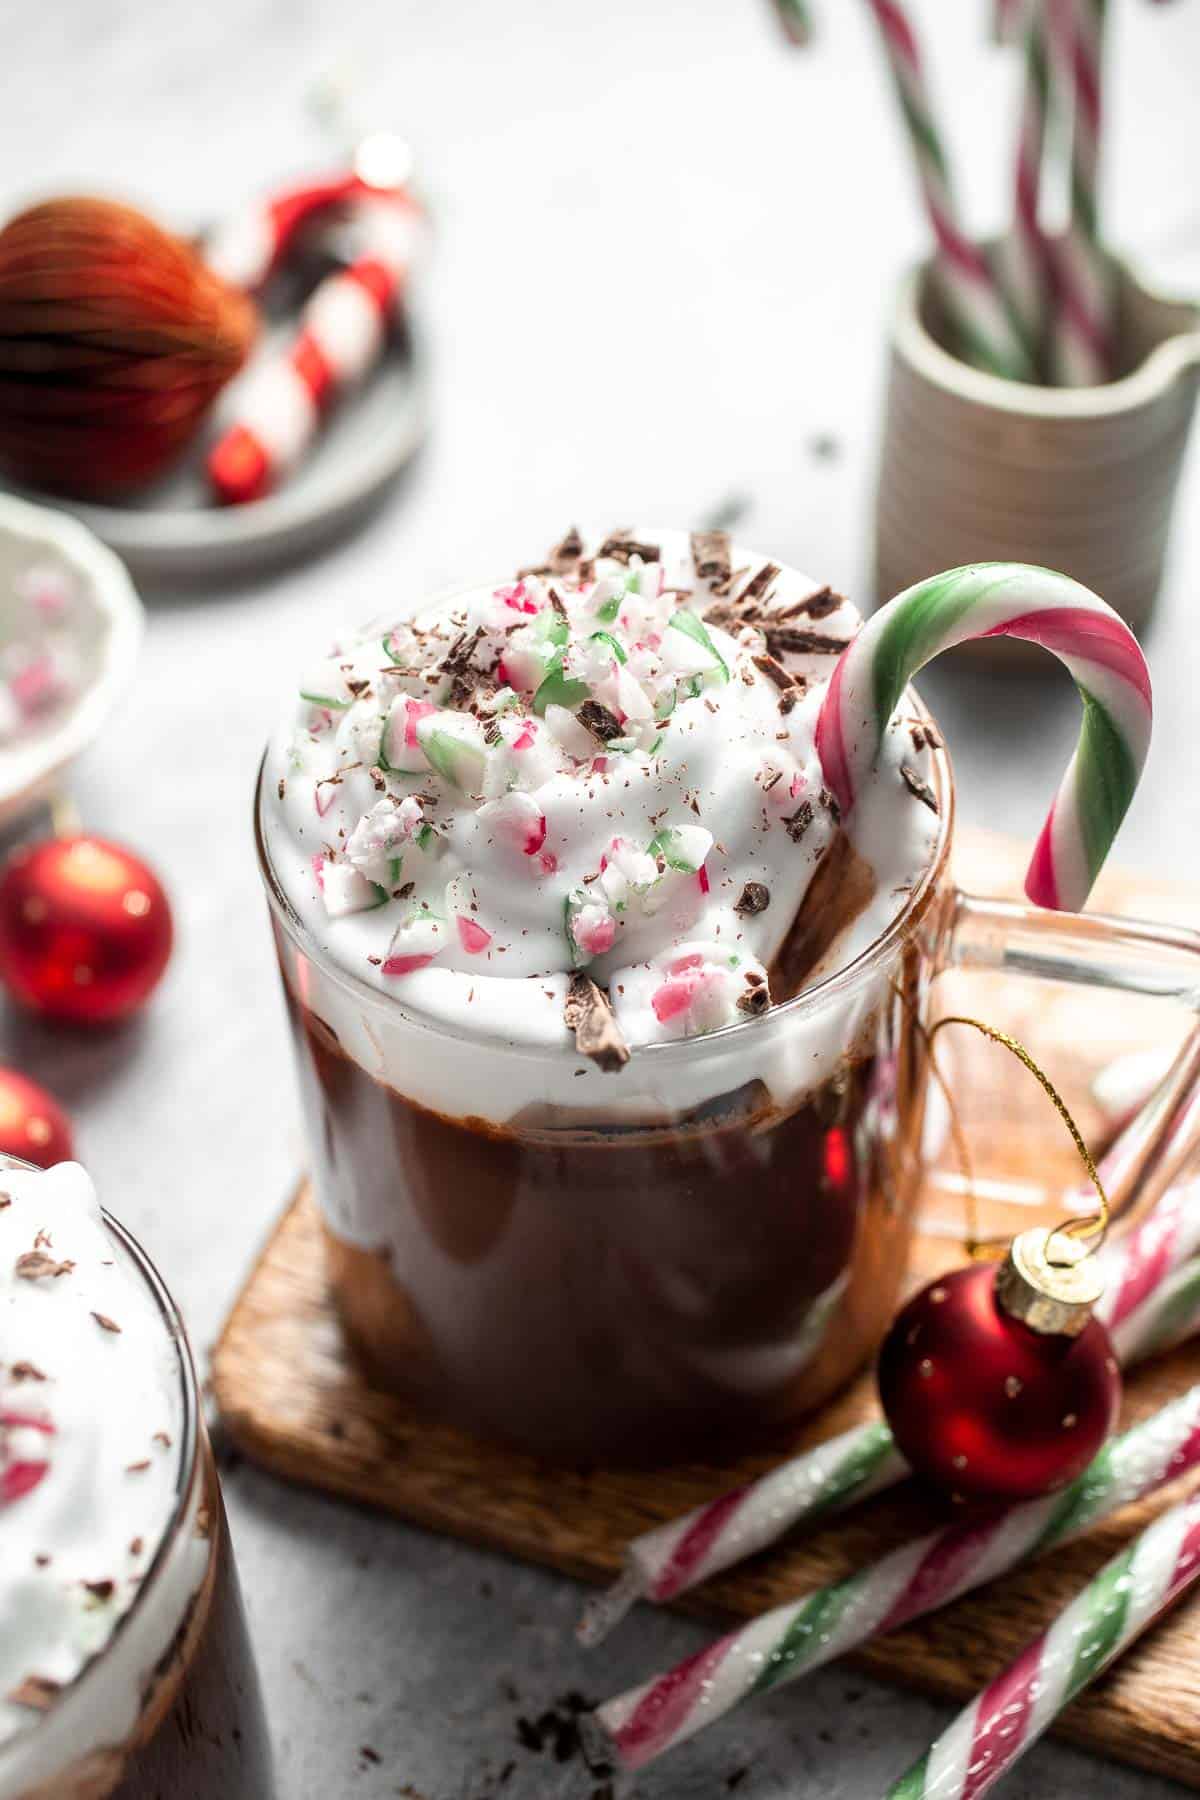
Cozy, creamy, and full of festive flavor, this Peppermint Hot Chocolate recipe is made with real chocolate, warm milk, and just the right touch of peppermint extract. It tastes rich and velvety, with a refreshing minty finish that feels like winter in a mug. Topped with whipped cream and crushed candy canes, it is a homemade upgrade from any instant mix and comes together in minutes on the stovetop.

Peppermint hot cocoa is the perfect warm drink for December evenings, winter celebrations, or whenever you crave something sweet and comforting. Using real semi sweet chocolate instead of cocoa powder creates a deeper chocolate flavor with a smooth finish, and the peppermint extract adds just enough coolness without overpowering the chocolate. You can customize the sweetness, make it extra rich, or adjust the peppermint to your liking.
This recipe was inspired by my love for festive winter drinks like classic hot chocolate and white hot chocolate. It pairs perfectly with Christmas cookies, cozy movie nights, and cold snowy days. If you are building a holiday drink bar, this homemade peppermint hot chocolate deserves a prime spot.
Why You'll Love This Recipe
- Rich and creamy. Made with real chocolate for a smooth, decadent texture.
- Perfect peppermint flavor. Light, refreshing mint that complements the chocolate beautifully. Perfect for the holiday season!
- Quick to make. Only a few ingredients and ready in under ten minutes.
- Festive and fun. The whipped cream and crushed candy cane topping make it look and taste like a holiday treat from your favorite cafe.
Ingredients and Substitutions
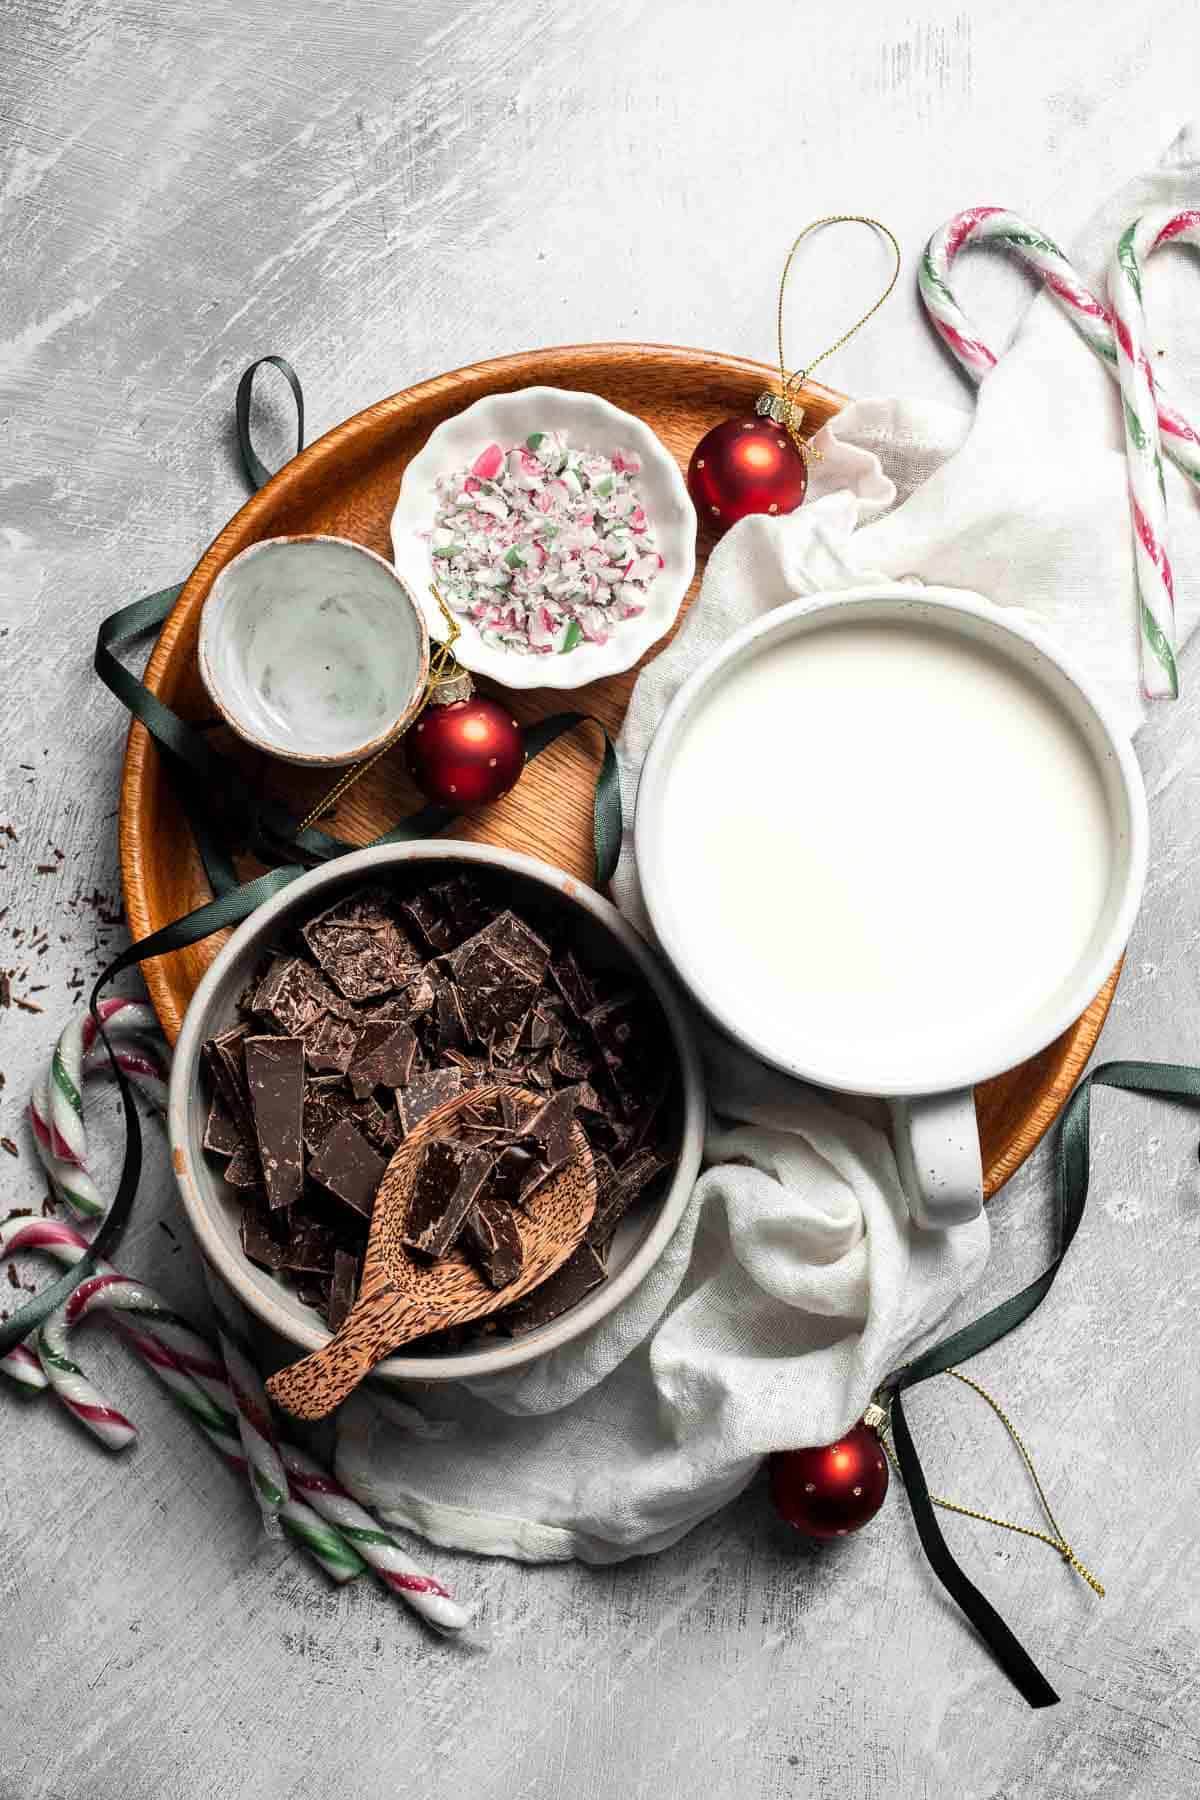
To make this delicious Peppermint Hot Chocolate recipe, you will need the following ingredients (see recipe card below for quantities):
- milk - Whole milk creates the creamiest texture, but you can use 2 percent or a dairy free option like oat milk or almond milk. You can even substitute with water and still get good results, but just not as rich and creamy.
- semi sweet chocolate - Use high quality chocolate bars or chopped baking chocolate for the smoothest melting. Dark chocolate also works for a richer flavor.
- peppermint extract - A small amount goes a long way. Adjust to taste.
- candy canes - Crush into small pieces for topping or serve a whole candy cane for stirring. You can also use peppermint candies.
- whipped cream - Optional but delicious. Use homemade or store bought.
Equipment
You will also need measuring cups and spoons, a medium saucepan, a whisk, heatproof mugs, and a small silicone spatula if you want to scrape every bit of melted chocolate into your cups.
Instructions
- Heat the milk. Add the milk to a medium saucepan and bring it to a gentle simmer over medium heat.
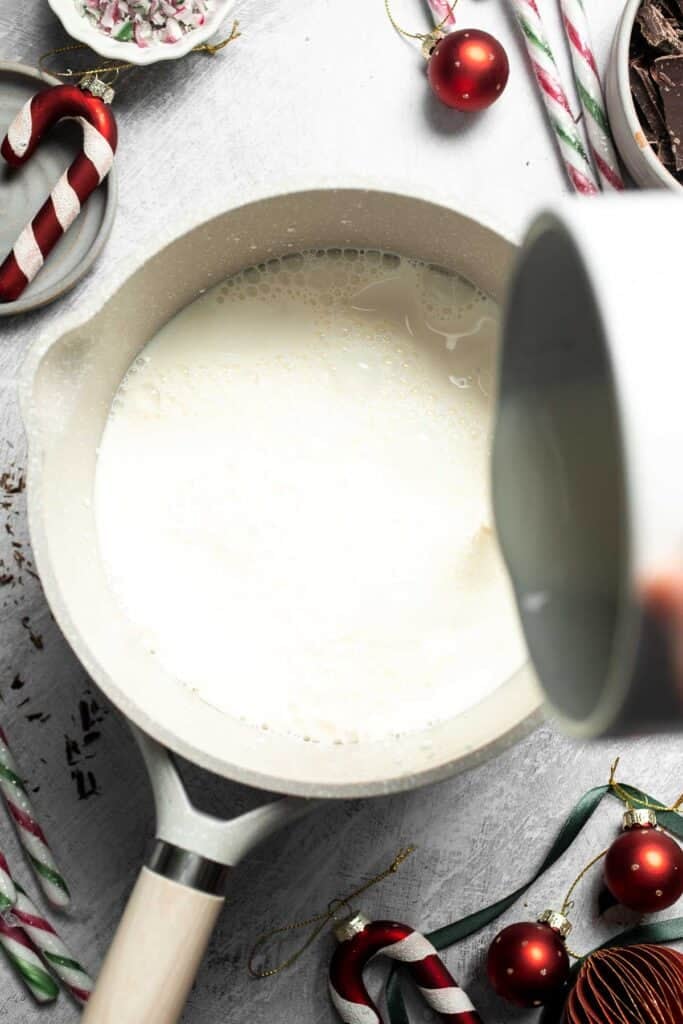

- Melt the chocolate. Reduce the heat to low, then add the chopped chocolate and peppermint extract. Whisk slowly until the chocolate melts completely and the mixture becomes smooth and creamy, about 3-4 minutes
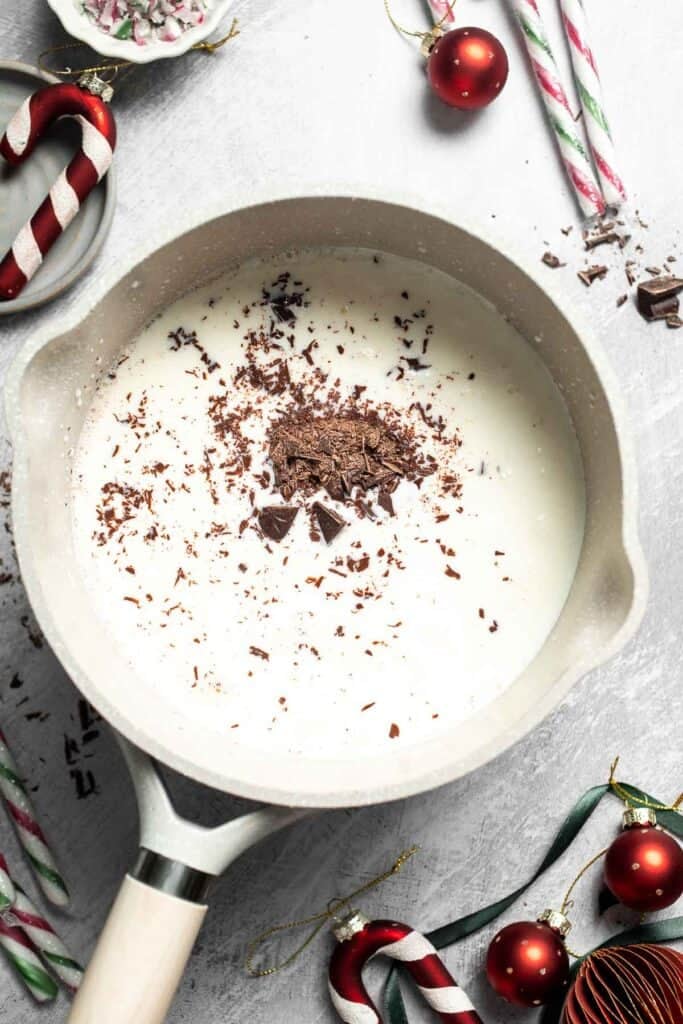
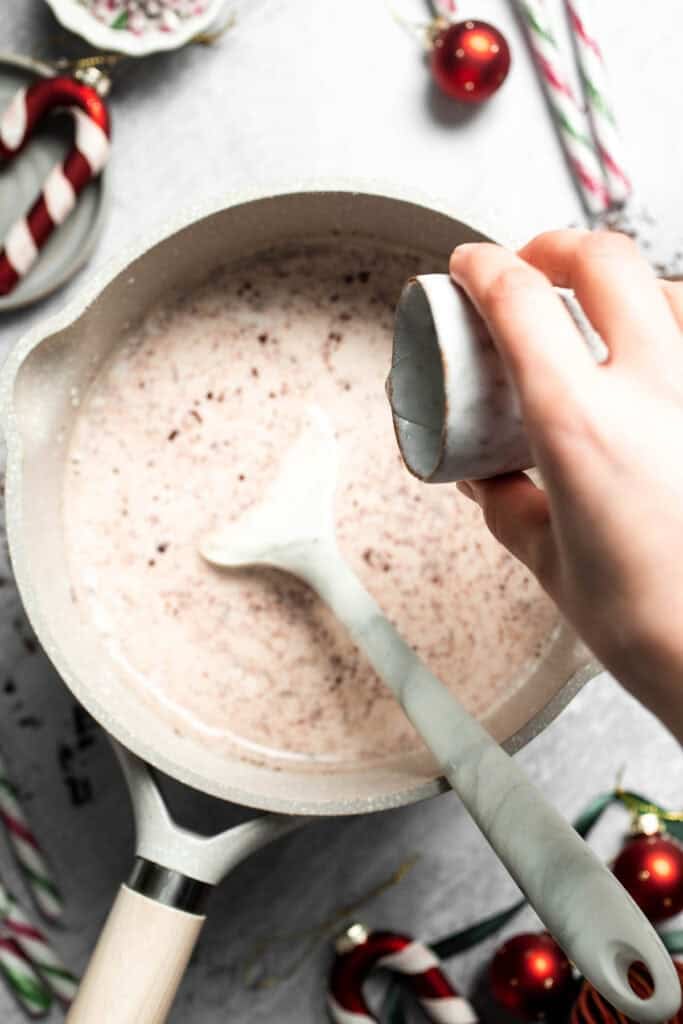
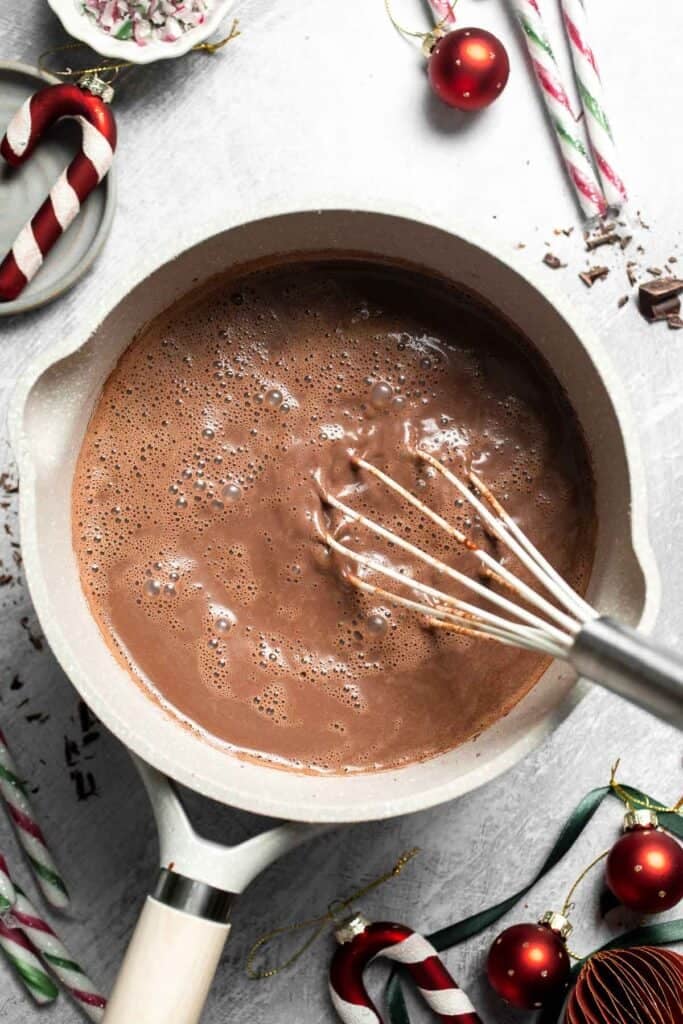
- Serve. Pour the hot chocolate into two cups and top with whipped cream, crushed candy canes (or a whole candy cane), if desired
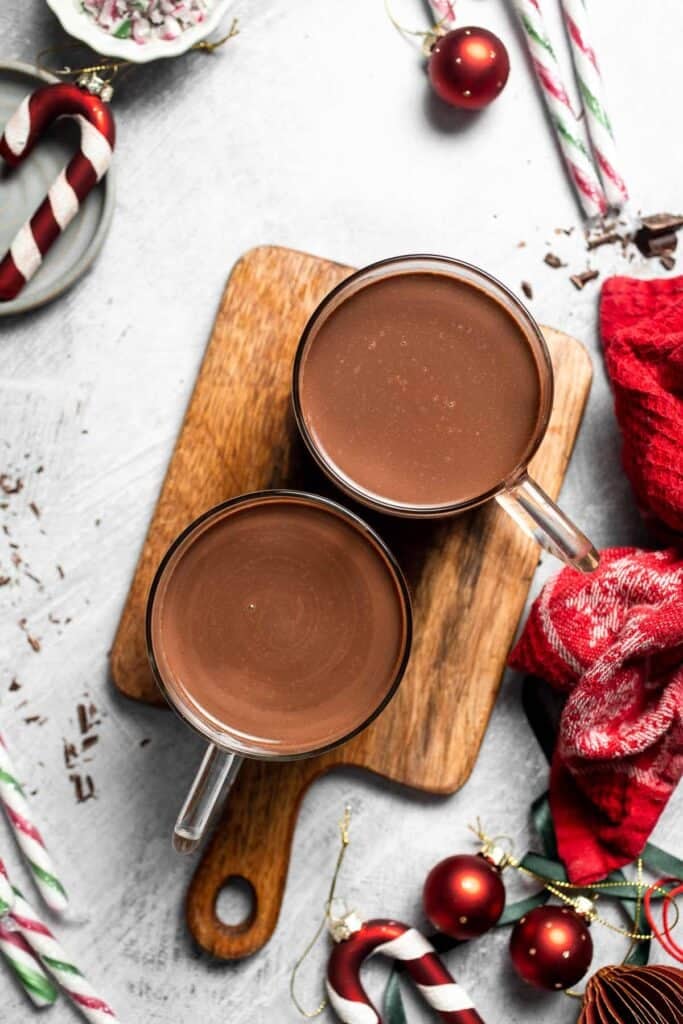
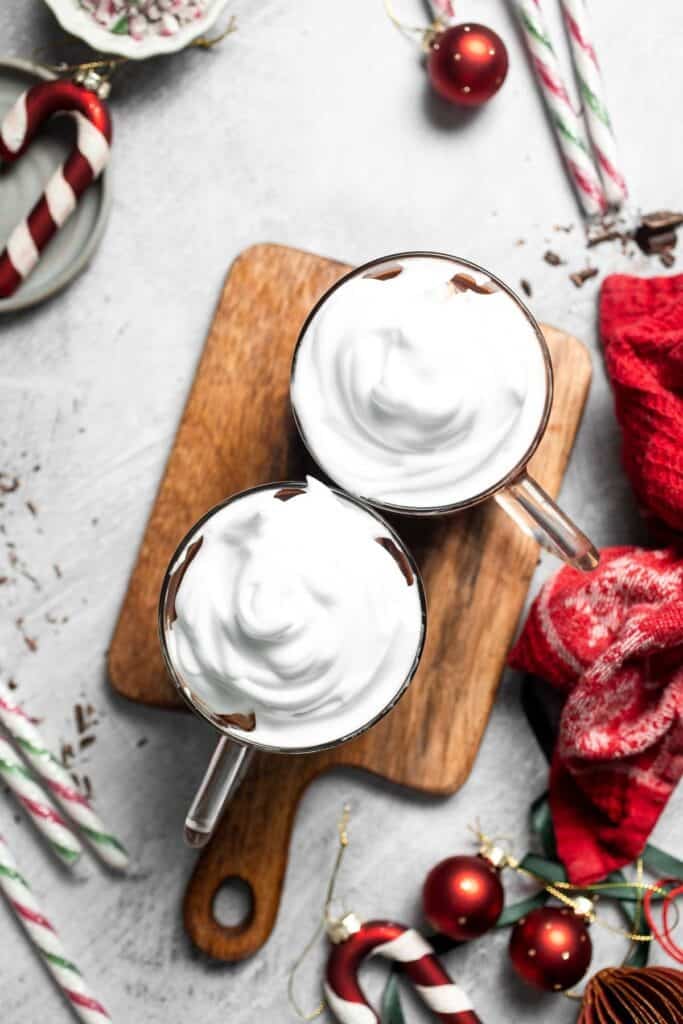
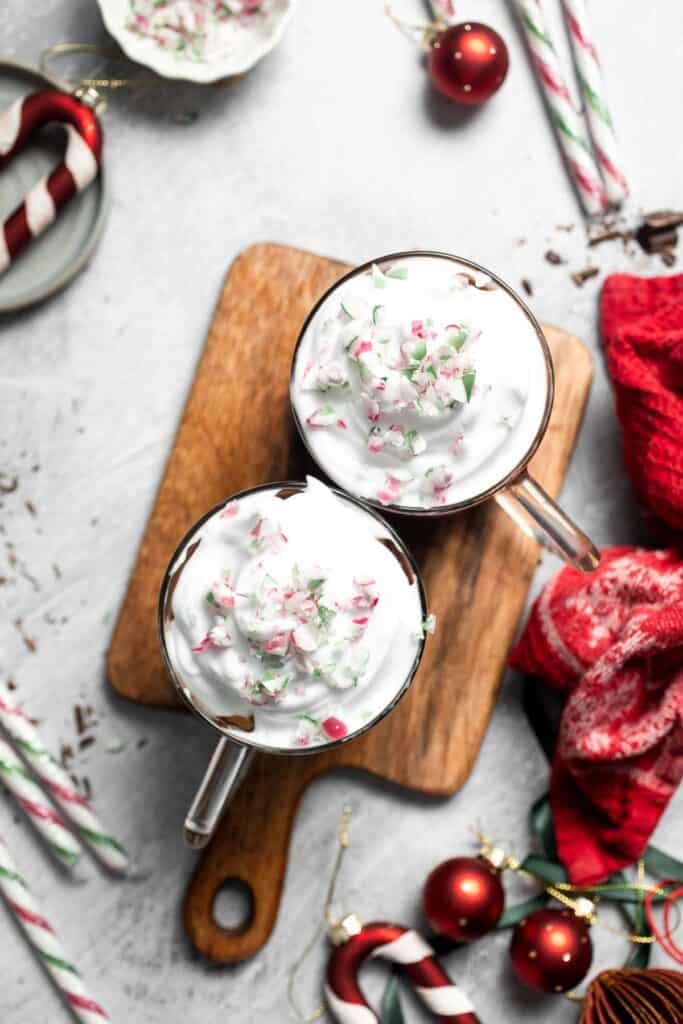
Expert Tip: Warm the Milk Slowly for the Best Texture
Heat the milk gently and avoid boiling. Warming the milk slowly helps the chocolate melt evenly and prevents graininess. If you notice the chocolate sticking to the sides of the pan, lower the heat and whisk steadily until smooth.
More Tips and Tricks
- Use real chocolate. Chopped bars melt smoother than chocolate chips.
- Adjust the peppermint. Start with a small amount and add more only if needed.
- Serve immediately. Hot chocolate is best right after melting the chocolate.
- Make it richer. Replace a quarter cup of milk with heavy cream for an extra velvety drink.
- Keep it warm. If needed, keep on the lowest heat setting and whisk occasionally.
Recipe Variations
- Peppermint mocha. Add a splash of strong brewed coffee or espresso.
- White peppermint hot chocolate. Replace the semi sweet chocolate with chopped white chocolate. See our White Hot Chocolate.
- Extra minty. Stir in a tiny bit more peppermint extract or top with peppermint whipped cream.
- Marshmallow lovers version. Skip the whipped cream and pile on mini marshmallows.
- Dairy free peppermint hot chocolate. Use almond, oat, or coconut milk and dairy free chocolate.
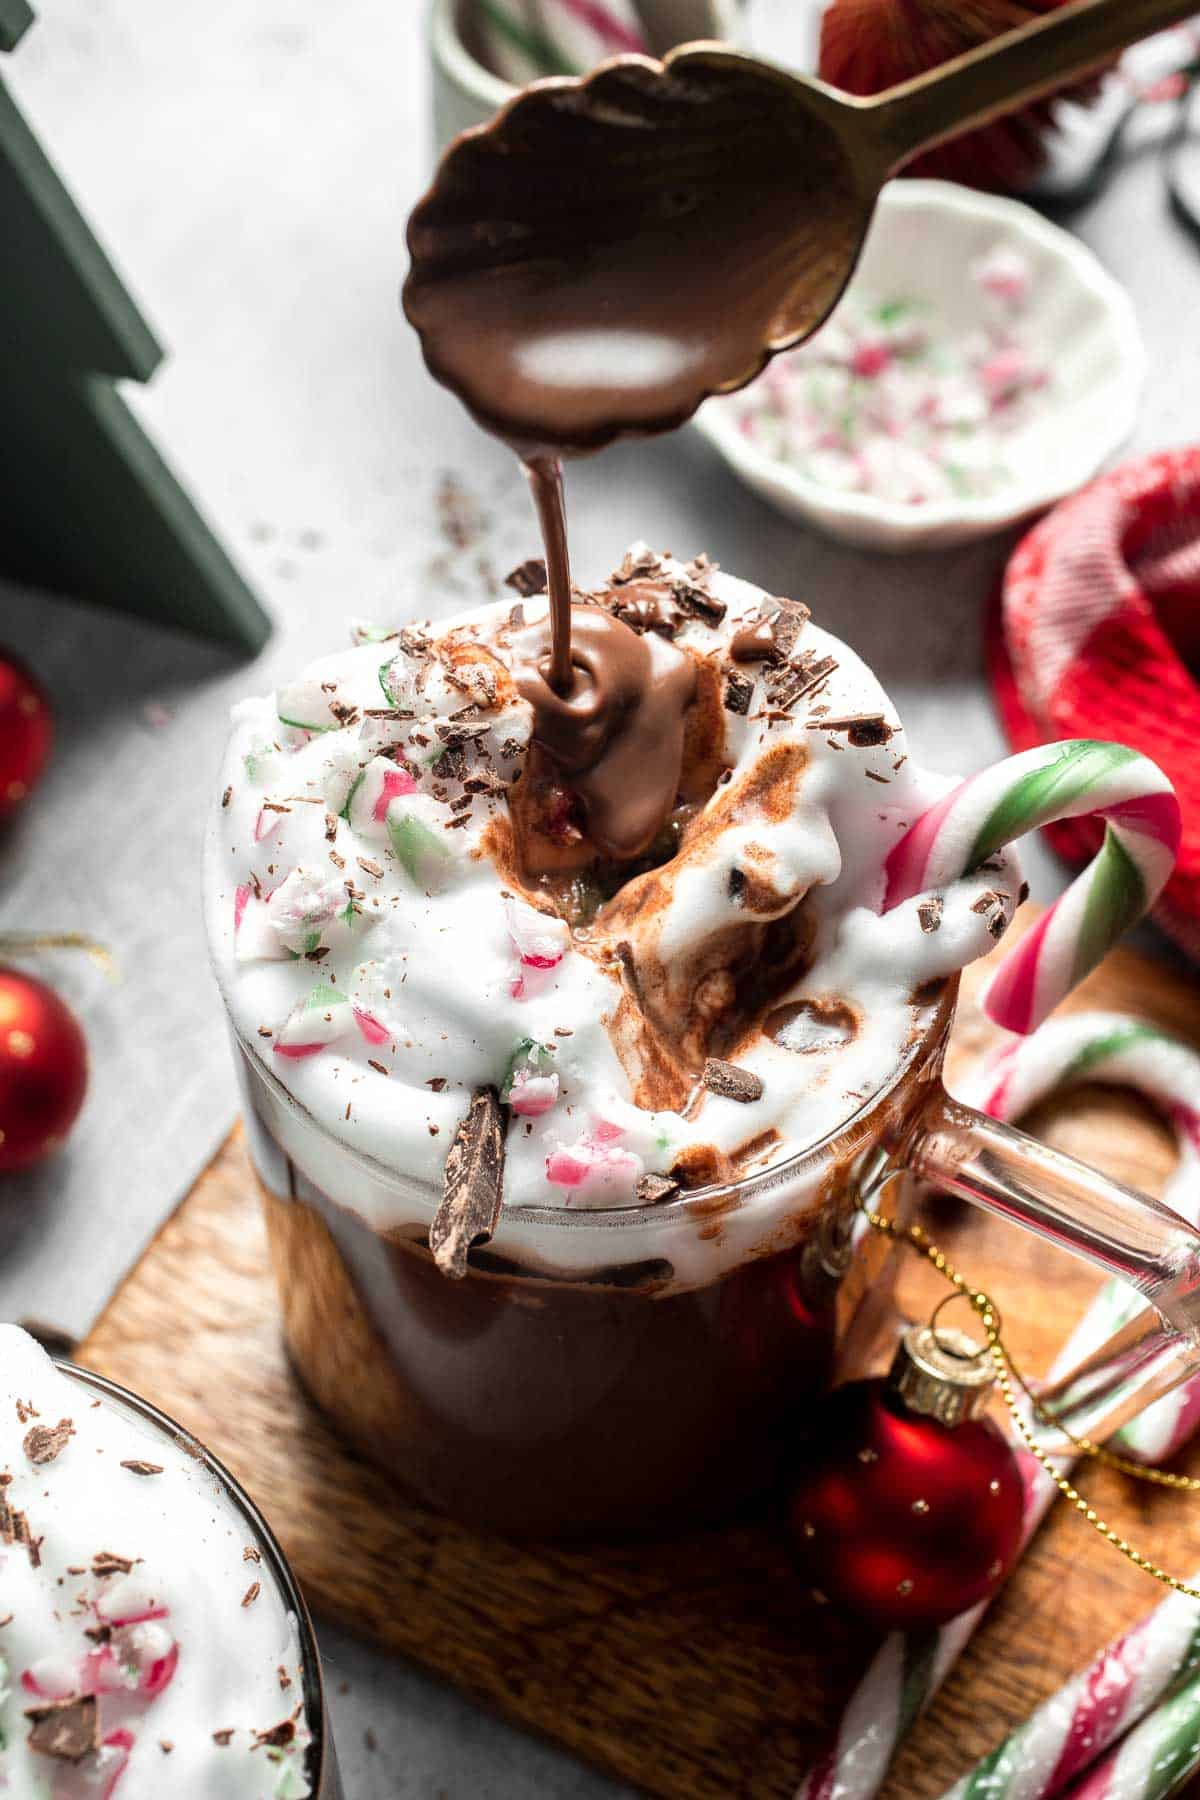
Storage
How to Store
Peppermint hot chocolate is best enjoyed fresh. If you do have leftovers, refrigerate in an airtight jar for up to 2 days.
How to Reheat
Warm gently in a saucepan over low heat, whisking until smooth, or microwave in short intervals, stirring often.
How to Freeze
Freezing is not recommended, as dairy based hot chocolate can separate once thawed.
How to Serve
Serve in warm mugs topped with whipped cream, crushed candy canes, chocolate shavings, or a whole candy cane for stirring. Peppermint hot chocolate pairs beautifully with Christmas cookies, brownies, or an evening by the fireplace.
These are my favorite holiday cookies to serve with peppermint hot cocoa:
- Christmas Shortbread Cookie Bites
- Christmas Sugar Cookies with Royal Icing
- White Chocolate Peppermint Cookies
- Peppermint Macarons

More Cookies
For more recipe ideas, check out our collection of cookie recipes, featuring everything from soft and chewy classics and festive holiday treats to fun flavored cookies and easy no chill options that bake up beautifully for any occasion.
FAQ
You can, but the drink will be thinner and less creamy. Real chocolate creates a richer, smoother hot chocolate with deeper flavor.
Add a teaspoon or two of sugar, maple syrup, or honey while whisking the chocolate. Taste and adjust as needed.
Yes. Double all ingredients and warm gently, whisking often until the chocolate melts evenly.
You can, but peppermint oil is much stronger. Use only one to two drops.
More Hot Chocolate Recipes
Looking for other recipes like this? Try these:
Tried this recipe?
I'd love to hear what you think! Leave a comment and rating below to share your feedback. Your reviews help others discover this recipe and help me keep creating more free recipes for you. Snap a photo and tag me on social media @aheadofthyme too.
This recipe was first published in 2019. It has since been updated with new photos and helpful content.

Pistachio Thumbprint Cookies
Buttery, nutty, and melt in your mouth tender, these Pistachio Thumbprint Cookies bake into cute little treats filled with a creamy pistachio white chocolate ganache and a delicate crunch on the outside. These cookies feel sophisticated enough for special occasions, yet they are simple enough to bake anytime you want a small batch of something sweet and homemade.
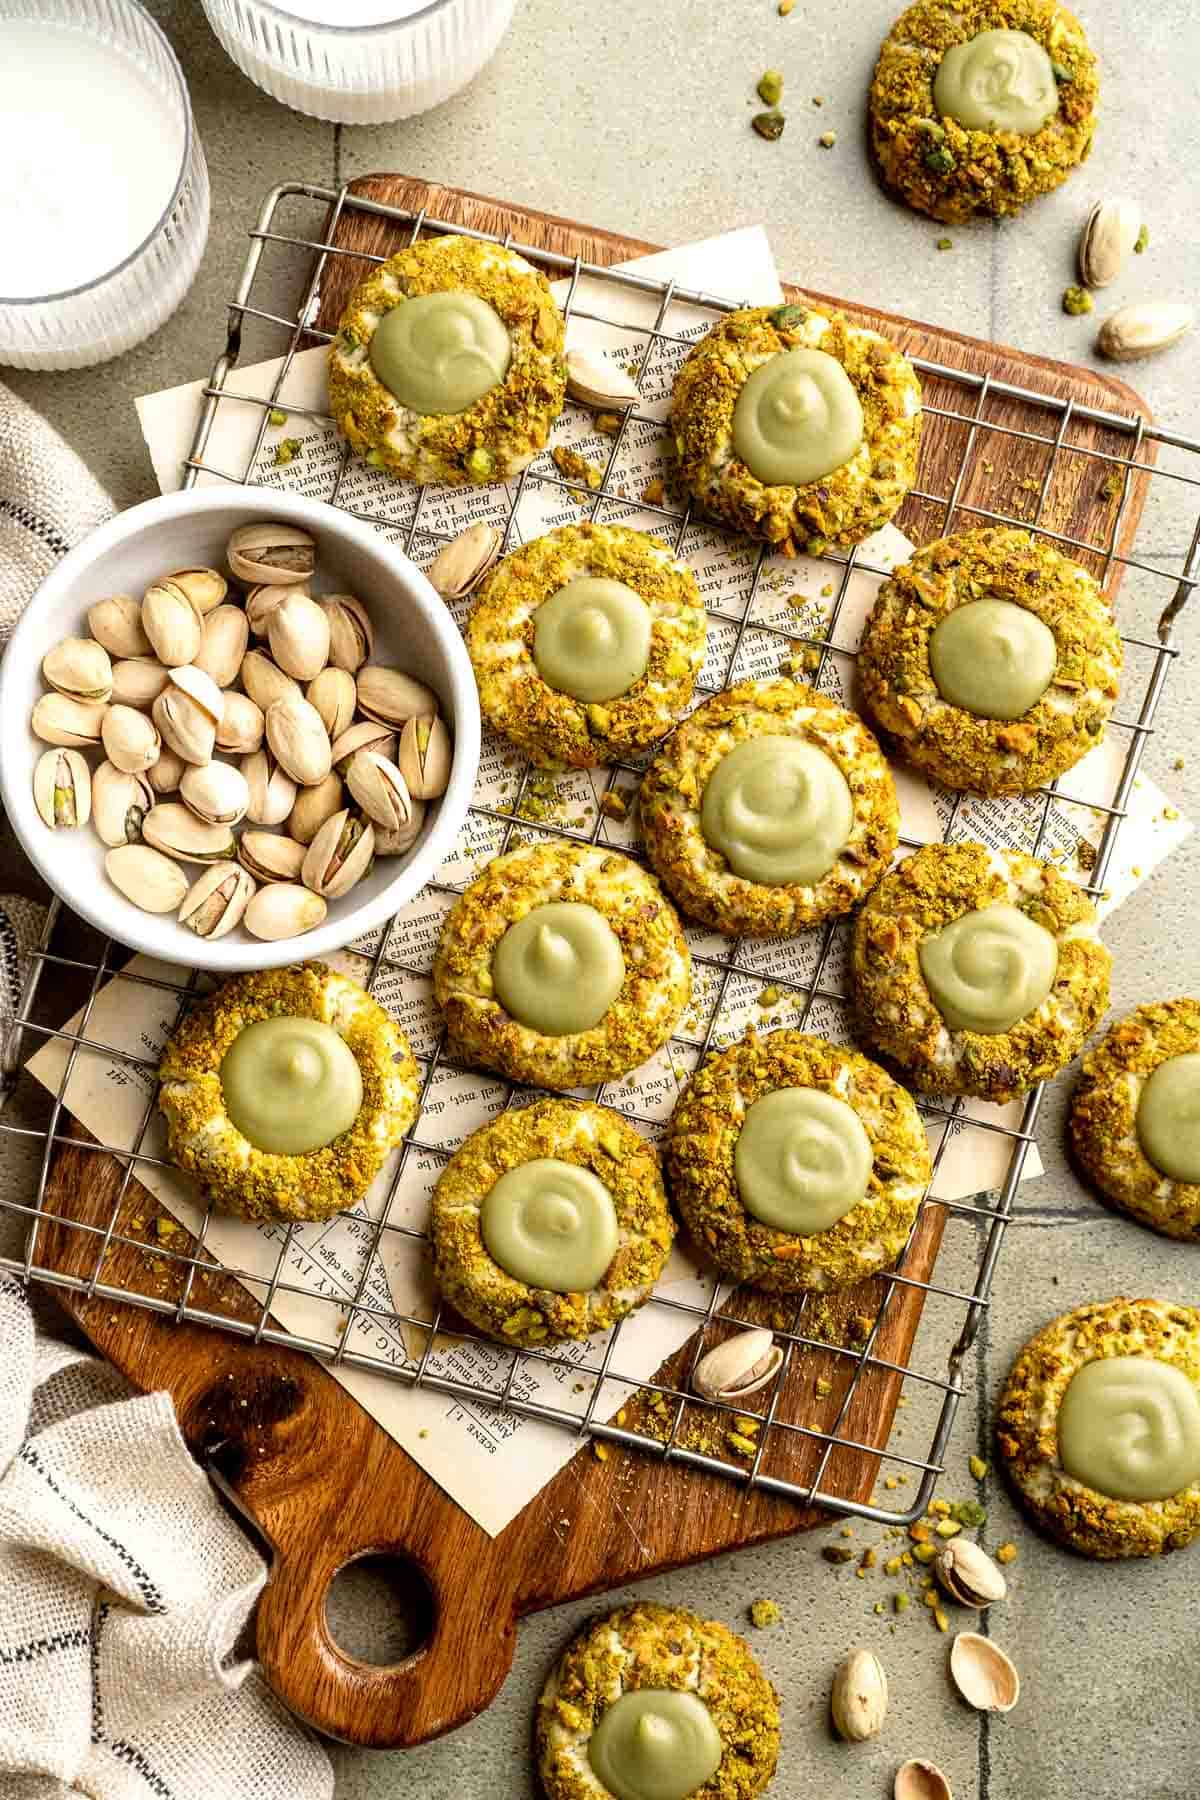
Although thumbprint cookies often show up during the holidays, this pistachio version is truly an all season cookie. They are perfect for spring gatherings, afternoon tea, bridal showers, birthdays, gifting, or simply stocking your cookie jar. The pistachio flavor shines through both the dough and the filling, and the smooth ganache sets with a soft truffle like finish that keeps each bite rich and satisfying without being overly sweet.
This recipe was inspired by my love for pistachio desserts, like pistachio cookies and pistachio macarons. These thumbprints pair beautifully with coffee or tea and always look impressive on dessert trays. If you enjoy cookies that balance delicate textures with big flavor, these pistachio thumbprints will quickly become a year round favorite.
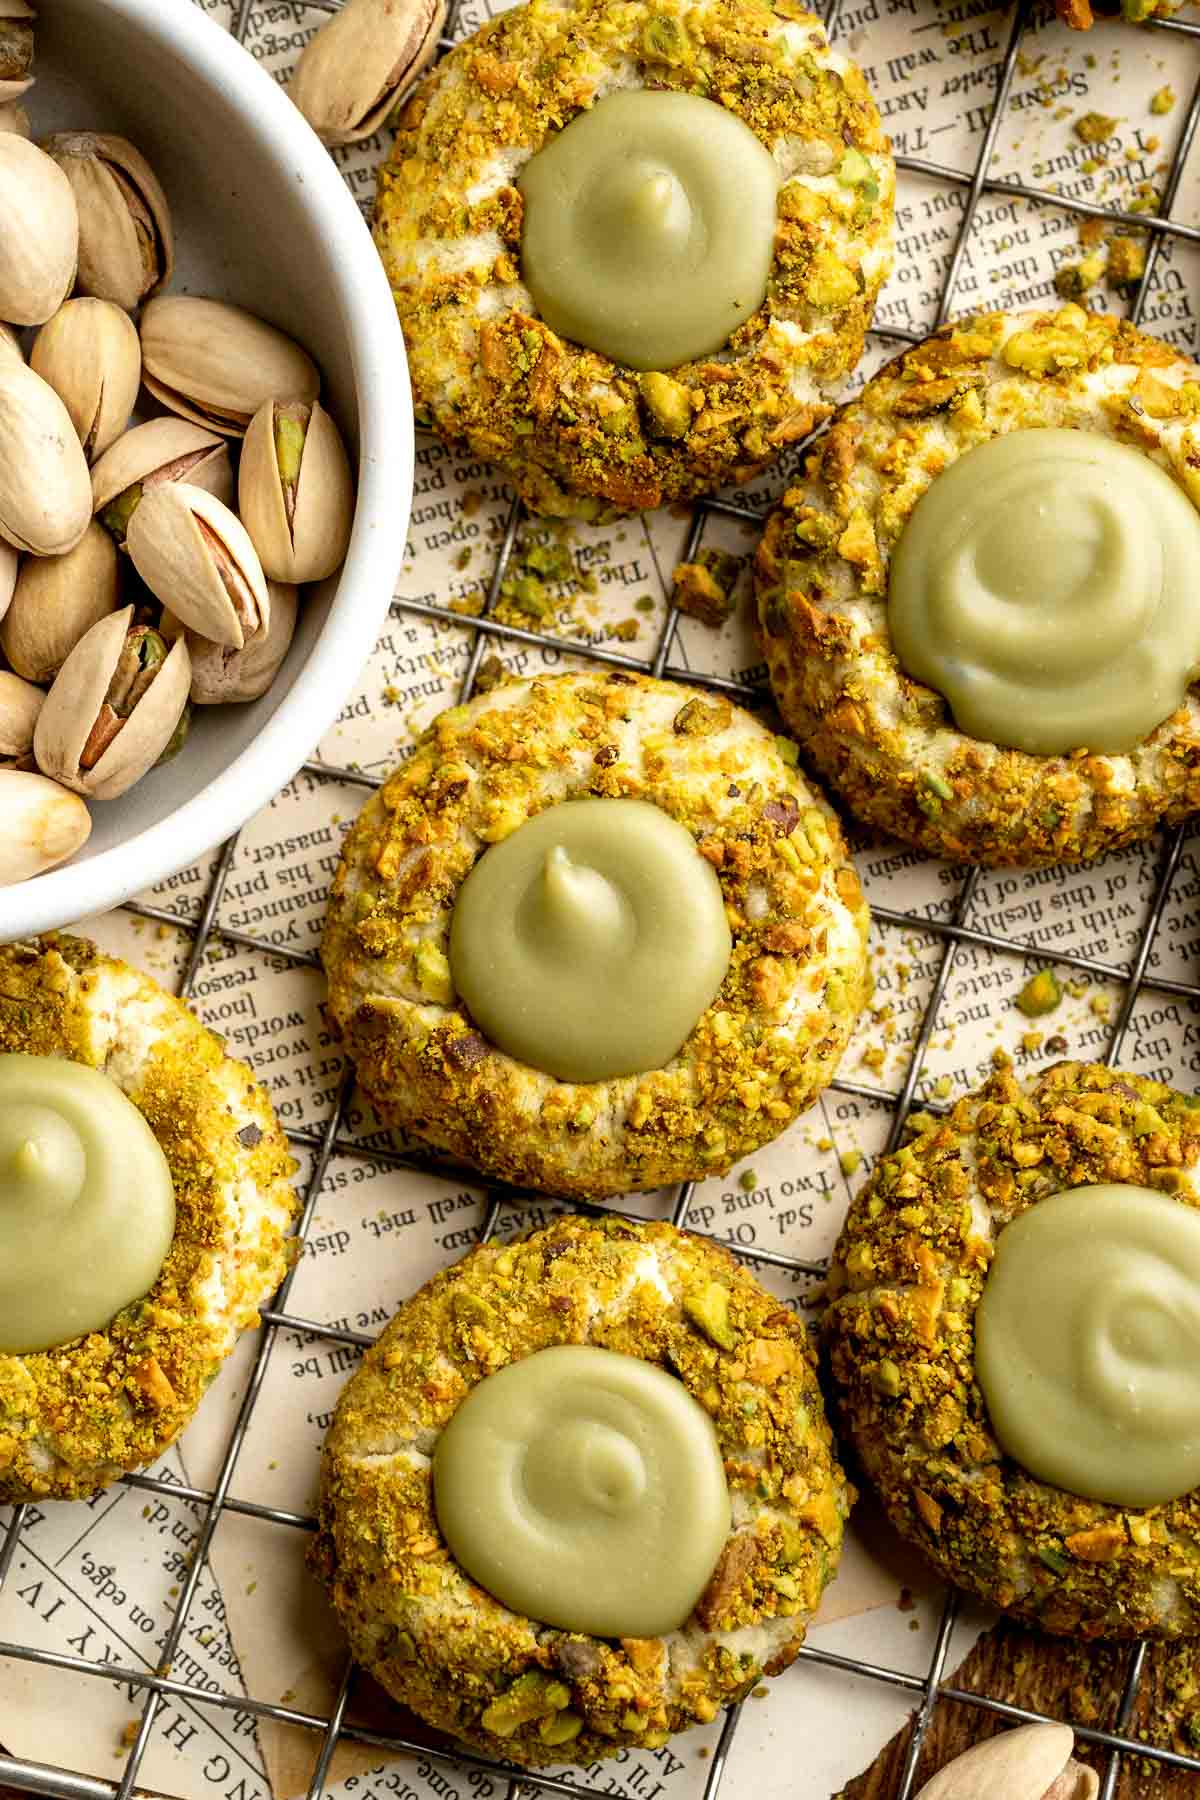
Why You'll Love This Recipe
- Eye catching treats. The pistachio coating and creamy green center make these cookies stand out. They look bakery worthy with minimal effort.
- Rich, buttery texture. The dough bakes into soft, tender cookies with subtle nutty flavor from finely ground pistachios.
- Creamy pistachio ganache. A simple three ingredient mix of white chocolate, heavy cream, and pistachio cream creates a velvety center that tastes like a gourmet truffle.
- Make ahead friendly. The dough chills well, the baked cookies store easily, and the ganache sets perfectly for gifting.
Ingredients and Substitutions
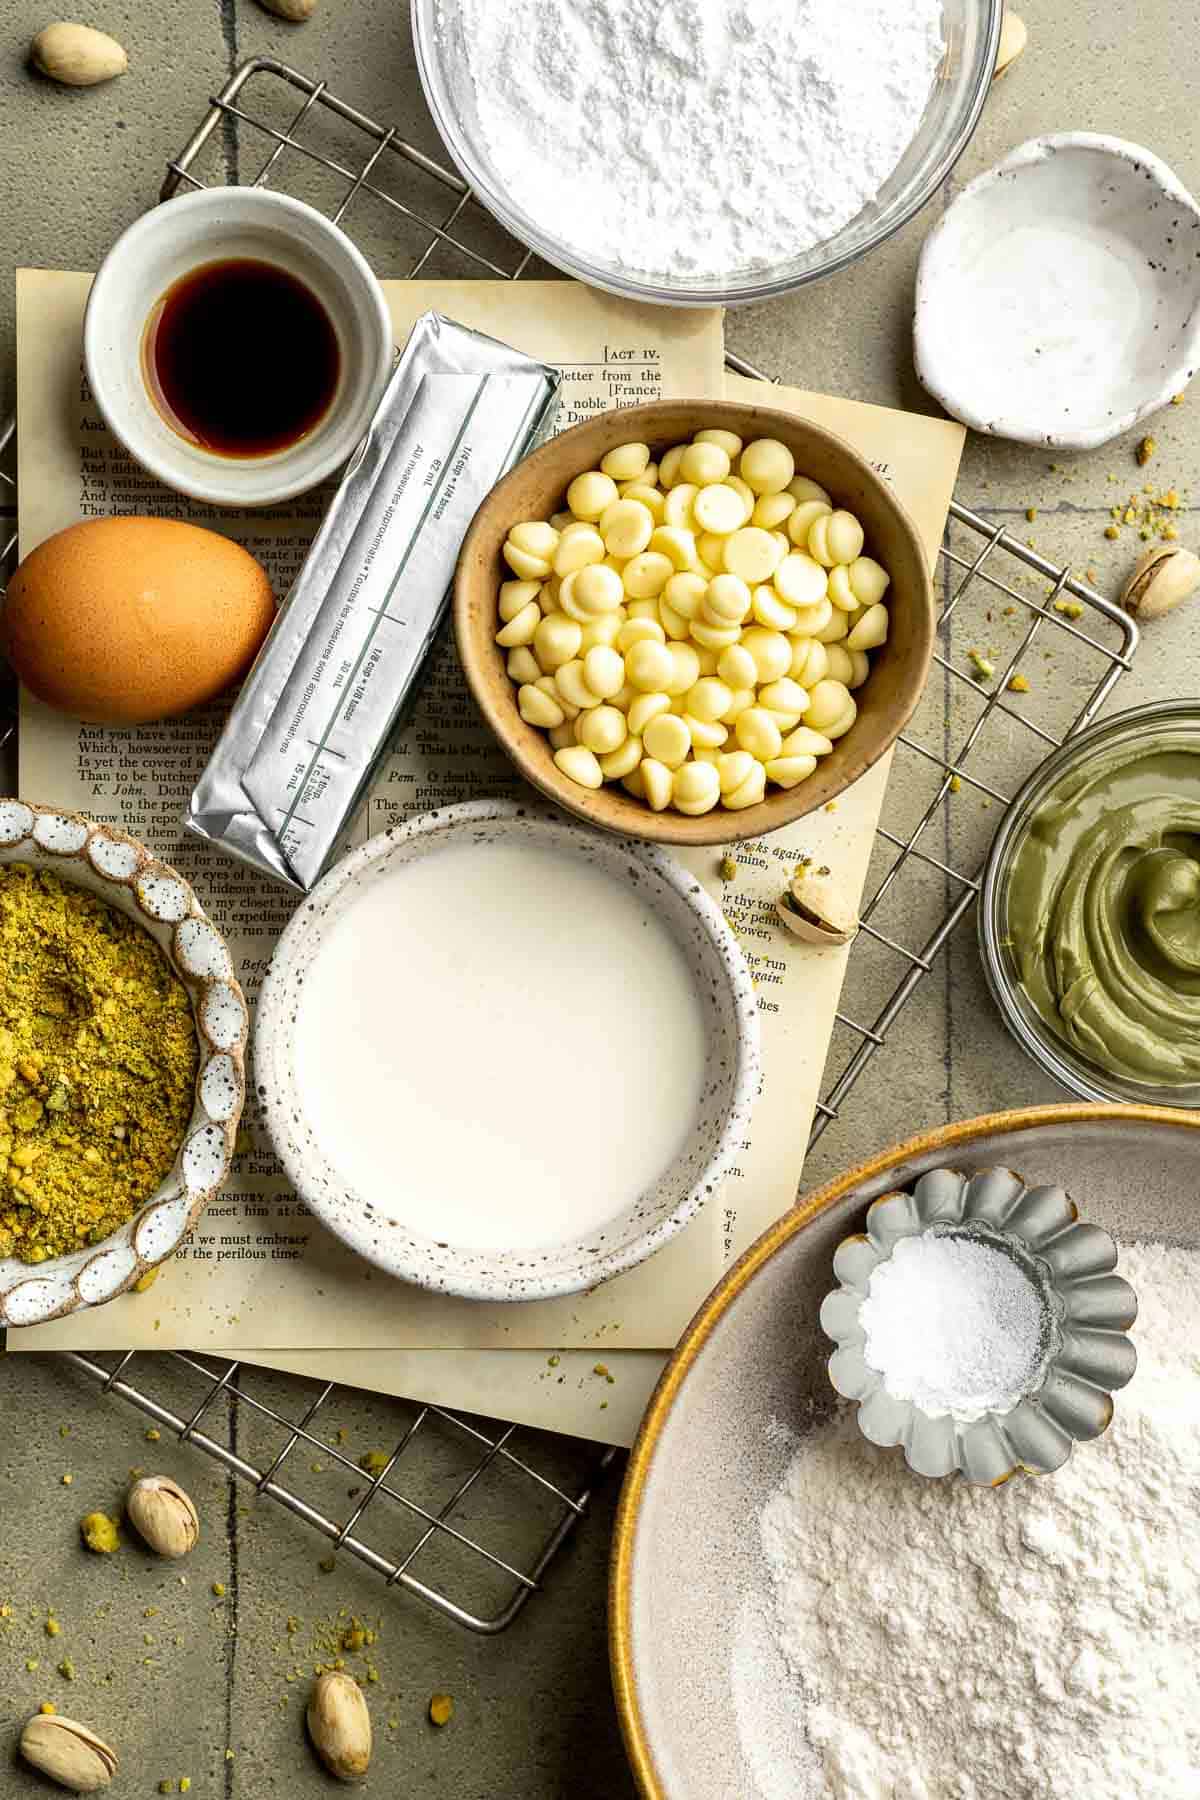
To make these cute Pistachio Thumbprint Cookies, you will need the following ingredients (see recipe card below for quantities):
- pistachios - Use unsalted, shelled pistachios. You will grind some finely for the dough and leave some coarser for rolling. You can use chopped pistachios instead of the medium grind for the coating if you prefer a crunchier exterior.
- unsalted butter - Creates a soft, melt in your mouth cookie.
- confectioners' sugar - Gives the cookies a smooth, tender crumb.
- salt - Enhances the nuttiness of the pistachios.
- egg - Helps bind the dough and gives it structure.
- vanilla extract - Adds warmth and depth.
- almond or pistachio extract - Boosts the nutty flavor, especially if your pistachios are mild, but it is totally optional.
- all purpose flour - Forms the base of the dough.
- egg white - Helps the pistachio coating stick.
- white chocolate - Forms the base of the creamy ganache.
- heavy cream - Makes the ganache silky and rich.
- pistachio cream - Adds flavor and color to the center. Substitute with pistachio paste if needed.
Equipment
You will also need measuring cups and spoons, a food processor, stand mixer or hand mixer, mixing bowls, baking sheets lined with parchment, a small cookie scoop, and a wire cooling rack. A piping bag with a round tip makes filling the cookies quick and tidy.
Instructions
Make the pistachio thumbprint cookies
- Grind the pistachios coarsely. Add the pistachios to a food processor and pulse until a medium grind forms. Remove about ⅔ of the pistachios and place into a bowl for rolling later.
- Grind the pistachios finely. Continue processing the remaining pistachios until very finely ground. Measure out ¼ cup and set aside. Discard the rest or add it to the medium ground pistachios.
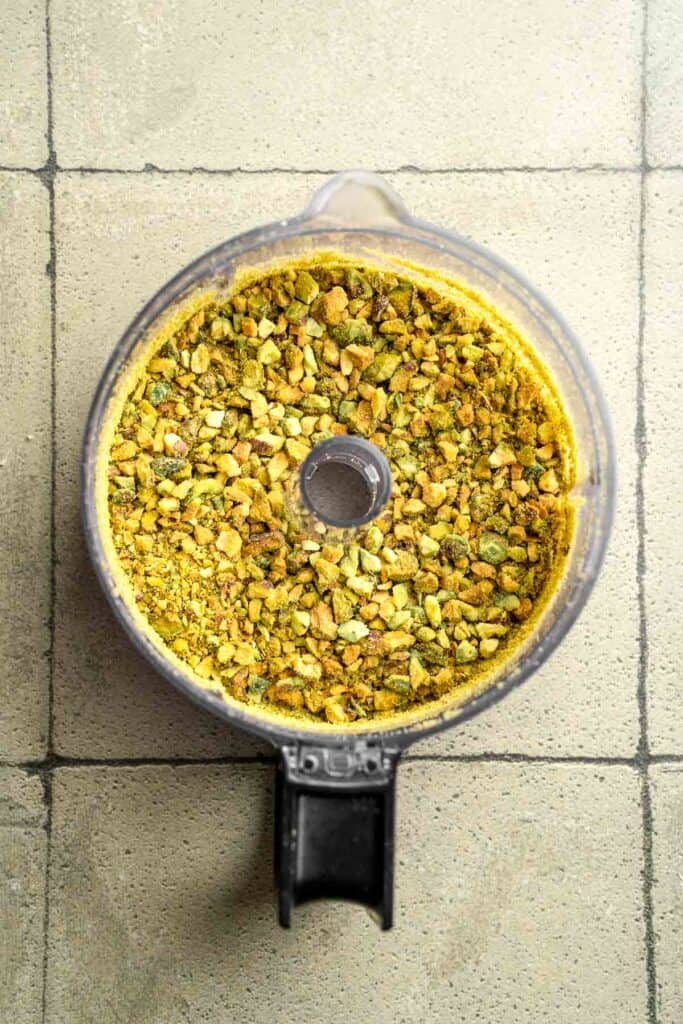
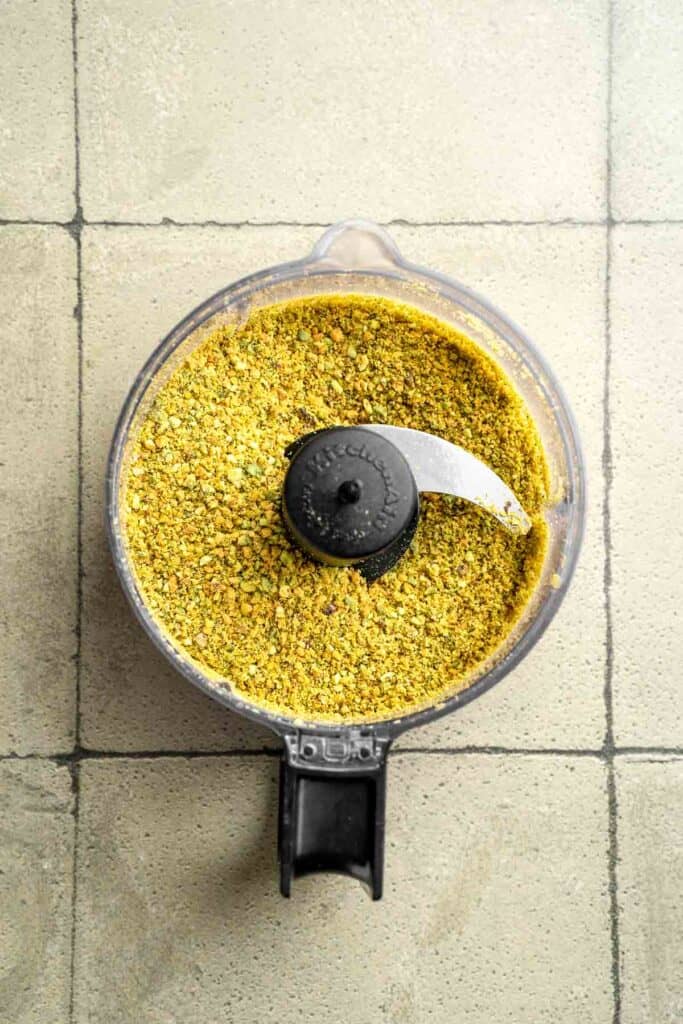
- Cream the butter and sugar. In a large mixing bowl, beat together the butter, confectioners' sugar, and salt with a hand mixer until light and fluffy, about 2-3 minutes.
- Add the egg and extracts. Add the egg, vanilla, and almond/pistachio extract. Beat again until creamy and well combined.
- Add the dry ingredients. Add the flour and the ¼ cup of finely ground pistachios, then beat until the well combined.
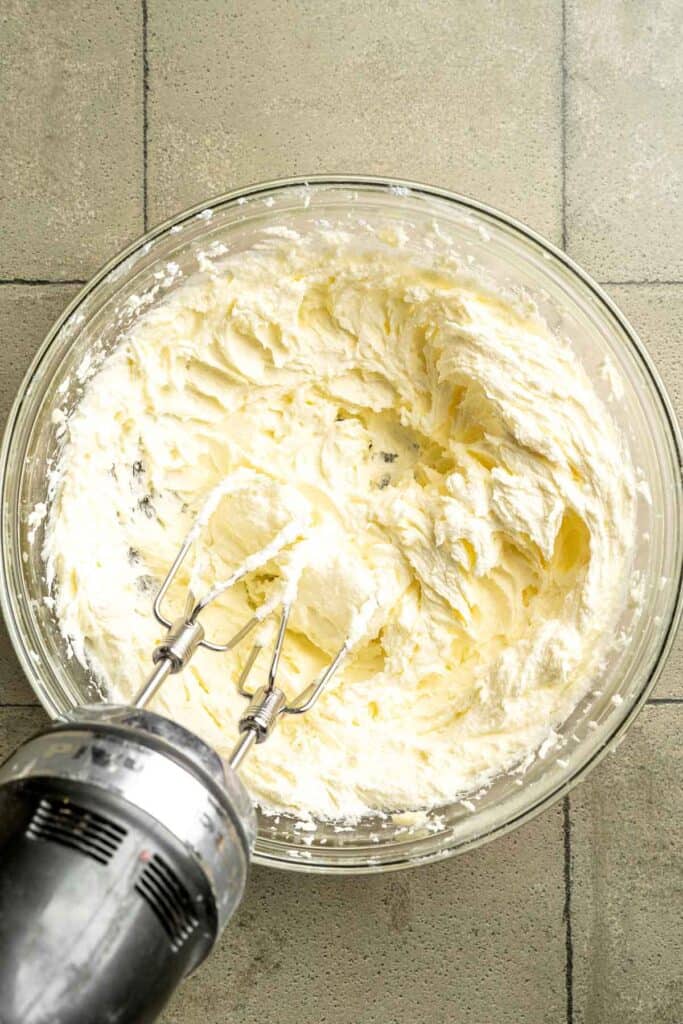
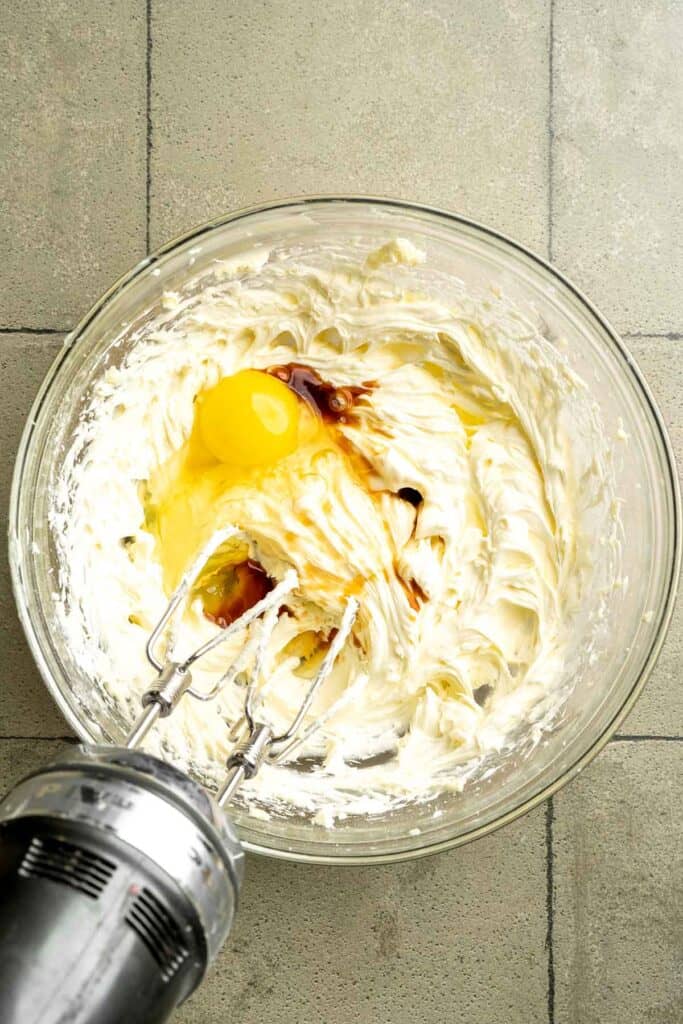
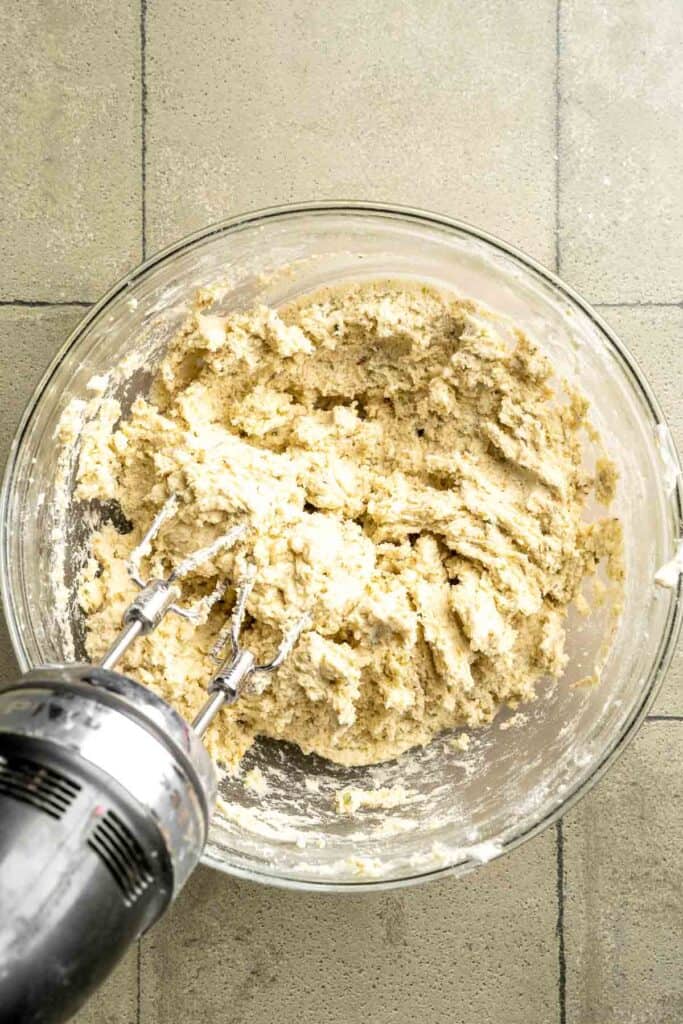
- Shape and coat the cookies. Use a small cookie scoop to portion the dough. Roll each portion in the frothy egg white, then roll in the medium ground pistachios until fully coated. Arrange on a parchment lined baking sheet as you coat them.
- Create the thumbprints. Use your thumb, the back of a wooden spoon, or a measuring spoon to gently press a divot (or "thumbprint") into the center of each cookie.
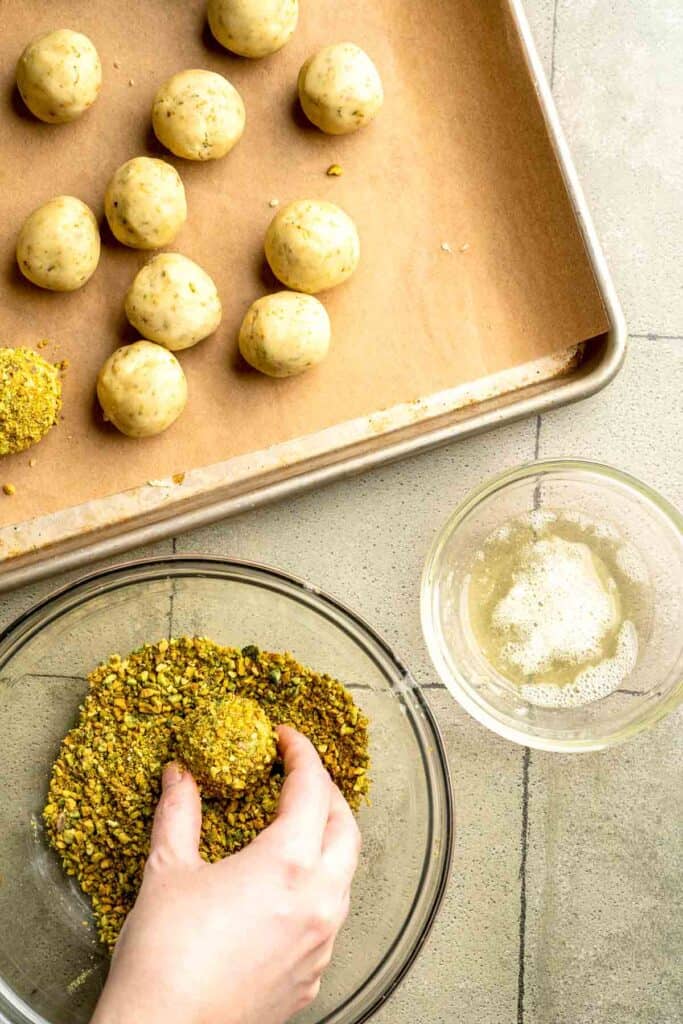
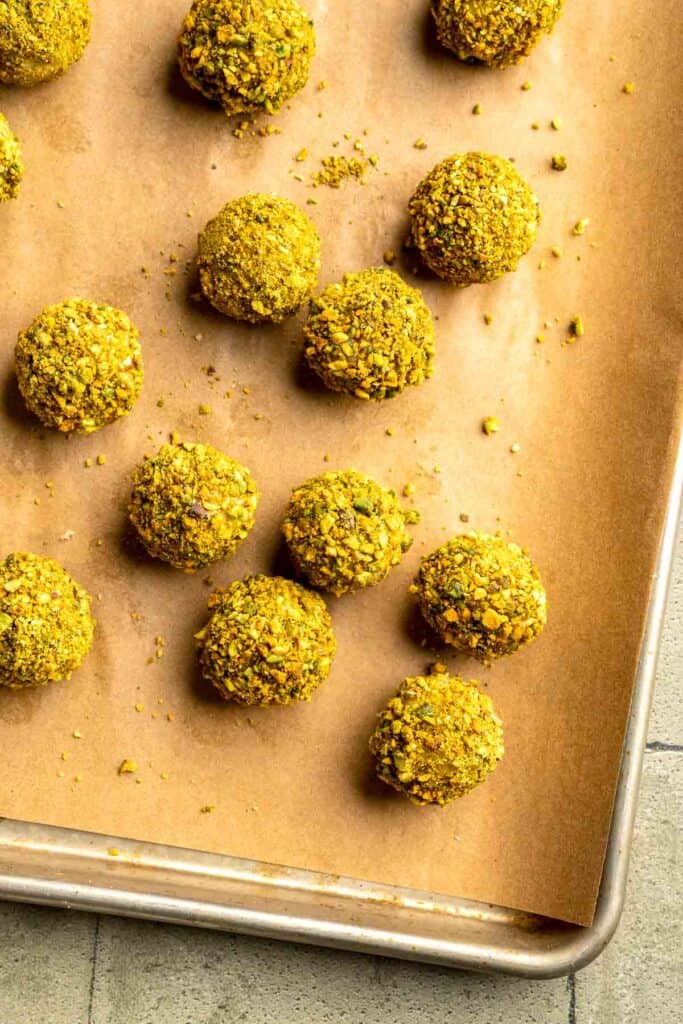
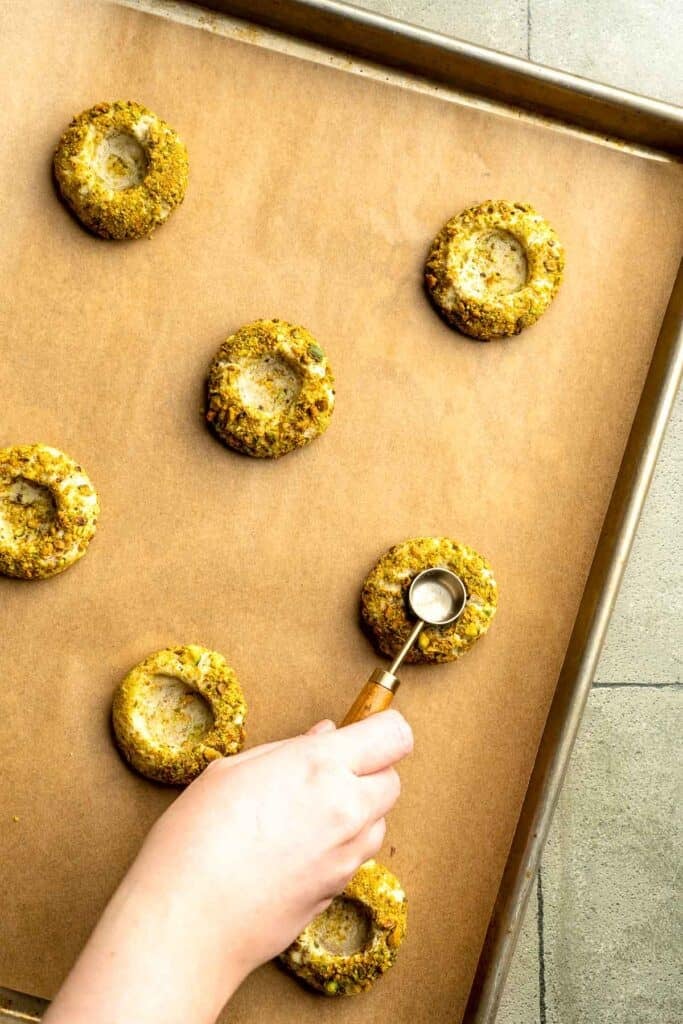
- Chill the dough. Cover lightly with plastic wrap and freeze for 30 minutes or refrigerate for at least one hour.
- Bake. Preheat the oven to 375°F. Line two baking sheets with parchment paper. Transfer the cookies to the prepared baking sheets and bake for 9-10 minutes, or until set and lightly golden at the edges. Re-press the divots into the centers with a spoon while hot.
- Cool completely. Allow the cookies to cool slightly on the pan for 5 minutes, then transfer to a cooling rack and let them cool fully before filling the centers.
Make the pistachio white chocolate ganache filling.
- Melt the ganache ingredients. Add the white chocolate, heavy cream, and pistachio cream to a microwave-safe bowl. Microwave in 30 second intervals, stirring between each, until melted and smooth.

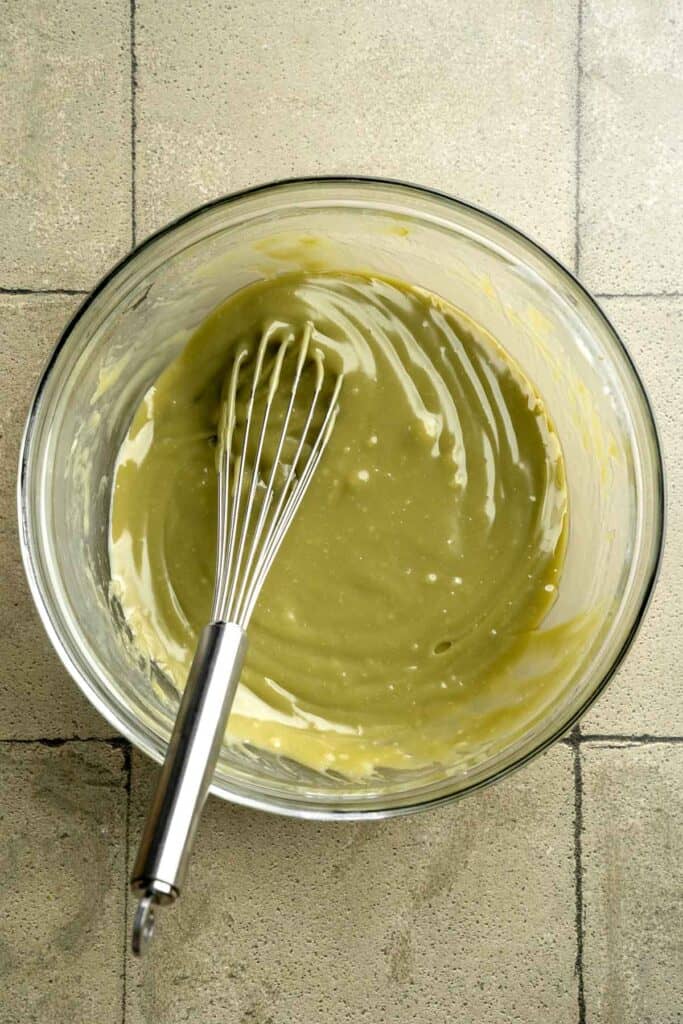
- Fill the cookies. Let the ganache cool slightly, then transfer to a piping bag fitted with a medium round tip. Pipe the ganache into each of the indentations. Allow cookies to cool completely until the centers set before serving.
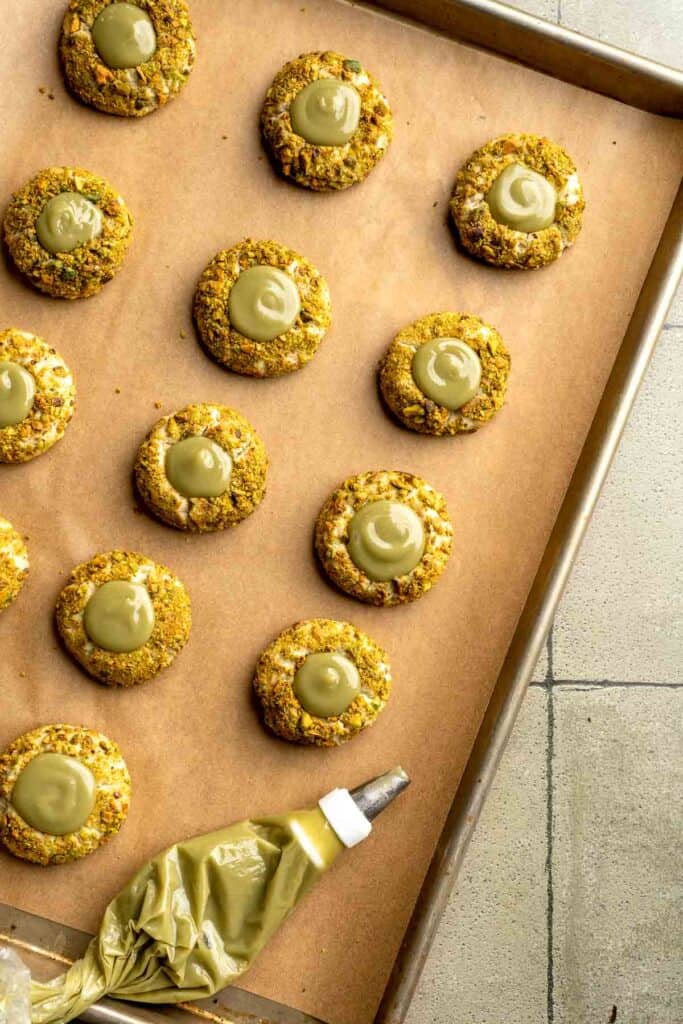
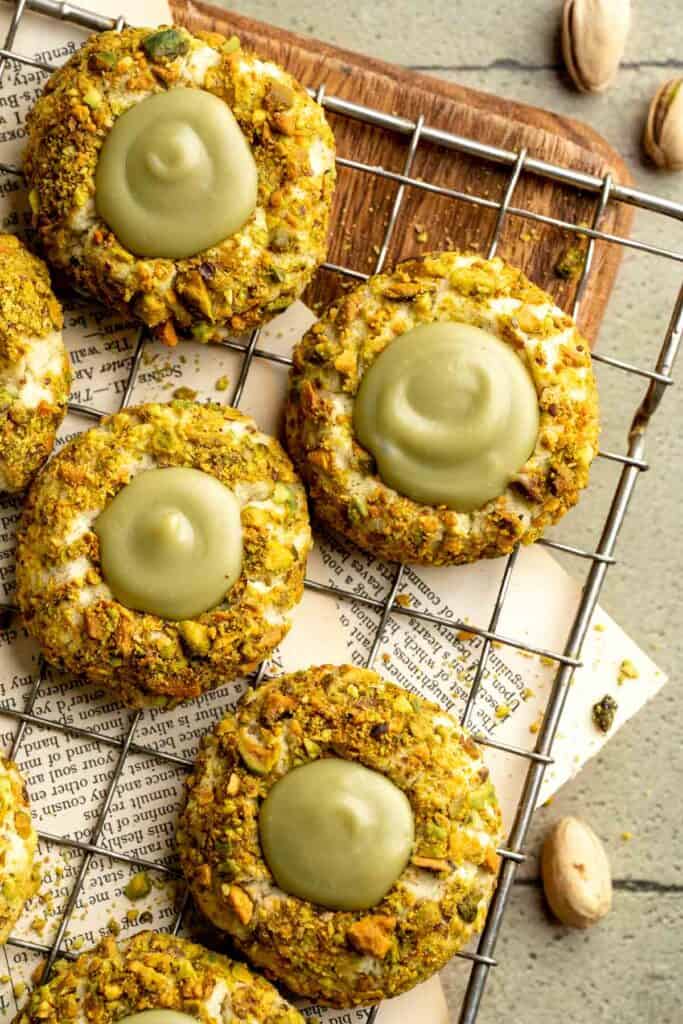
Expert Tip: Repress the Centers While Warm
Thumbprints tend to puff slightly in the oven, which can make the divet shallow. As soon as the cookies come out of the oven, use the back of a wooden spoon or measuring spoon to gently press the centers again. Doing this while the cookies are warm ensures a clean well for the ganache once the cookies cool.
More Tips and Tricks
- Mix at the right speed. Cream the butter mixture on medium-high speed, then add the egg and extracts and beat on low speed so the dough stays tender.
- Stir gently. When adding the finely ground pistachios and flour, stir just until combined to avoid overworking the dough.
- Chill the dough for clean shape. Chilled dough spreads less, which keeps the thumbprints tidy and round.
- Do not skip the egg white roll. It helps the pistachios adhere and creates a crisp outer coating.
- Allow cookies to cool before filling. If the cookies are warm, the ganache will melt and lose its shape.
- Let the ganache set fully. Once piped, let the cookies rest until the centers firm up. This makes them perfect for stacking or packaging.
Recipe Variations
- Jam filled thumbprints. Swap the ganache for raspberry or apricot jam for a classic version. See our Jam Thumbprint Cookies.
- Chocolate pistachio thumbprints. Fill the centers with dark chocolate ganache instead of white chocolate. See our Chocolate Thumbprint Cookies.
- Lemon pistachio thumbprints. Add lemon zest to the dough and fill the centers with lemon curd. See our Lemon Curd Cookies.
- Pistachio shortbread thumbprints. Reduce the egg to create a more crumbly shortbread style dough.
- Nut coated thumbprints. Swap pistachios for almonds or pecans for a different flavor.
- Chocolate chip pistachio thumbprints. Fold a small handful of chocolate chips into the cookie dough before shaping for a richer, sweeter variation.
- Holiday color twist. Tint the ganache lightly green or add festive Christmas sprinkles before it sets.
- Seasonal versions. Color the white chocolate ganache any shade. Try a soft pastel shade for spring, or orange for Halloween, or red for Lunar New Year in January or Valentine's Day.
- Pistachio forward version. Add a spoonful of pistachio butter to the dough for even stronger pistachio flavor.
- Protein enhanced ganache. A small scoop of neutral protein powder can be added to the ganache for a more nutrient dense treat.
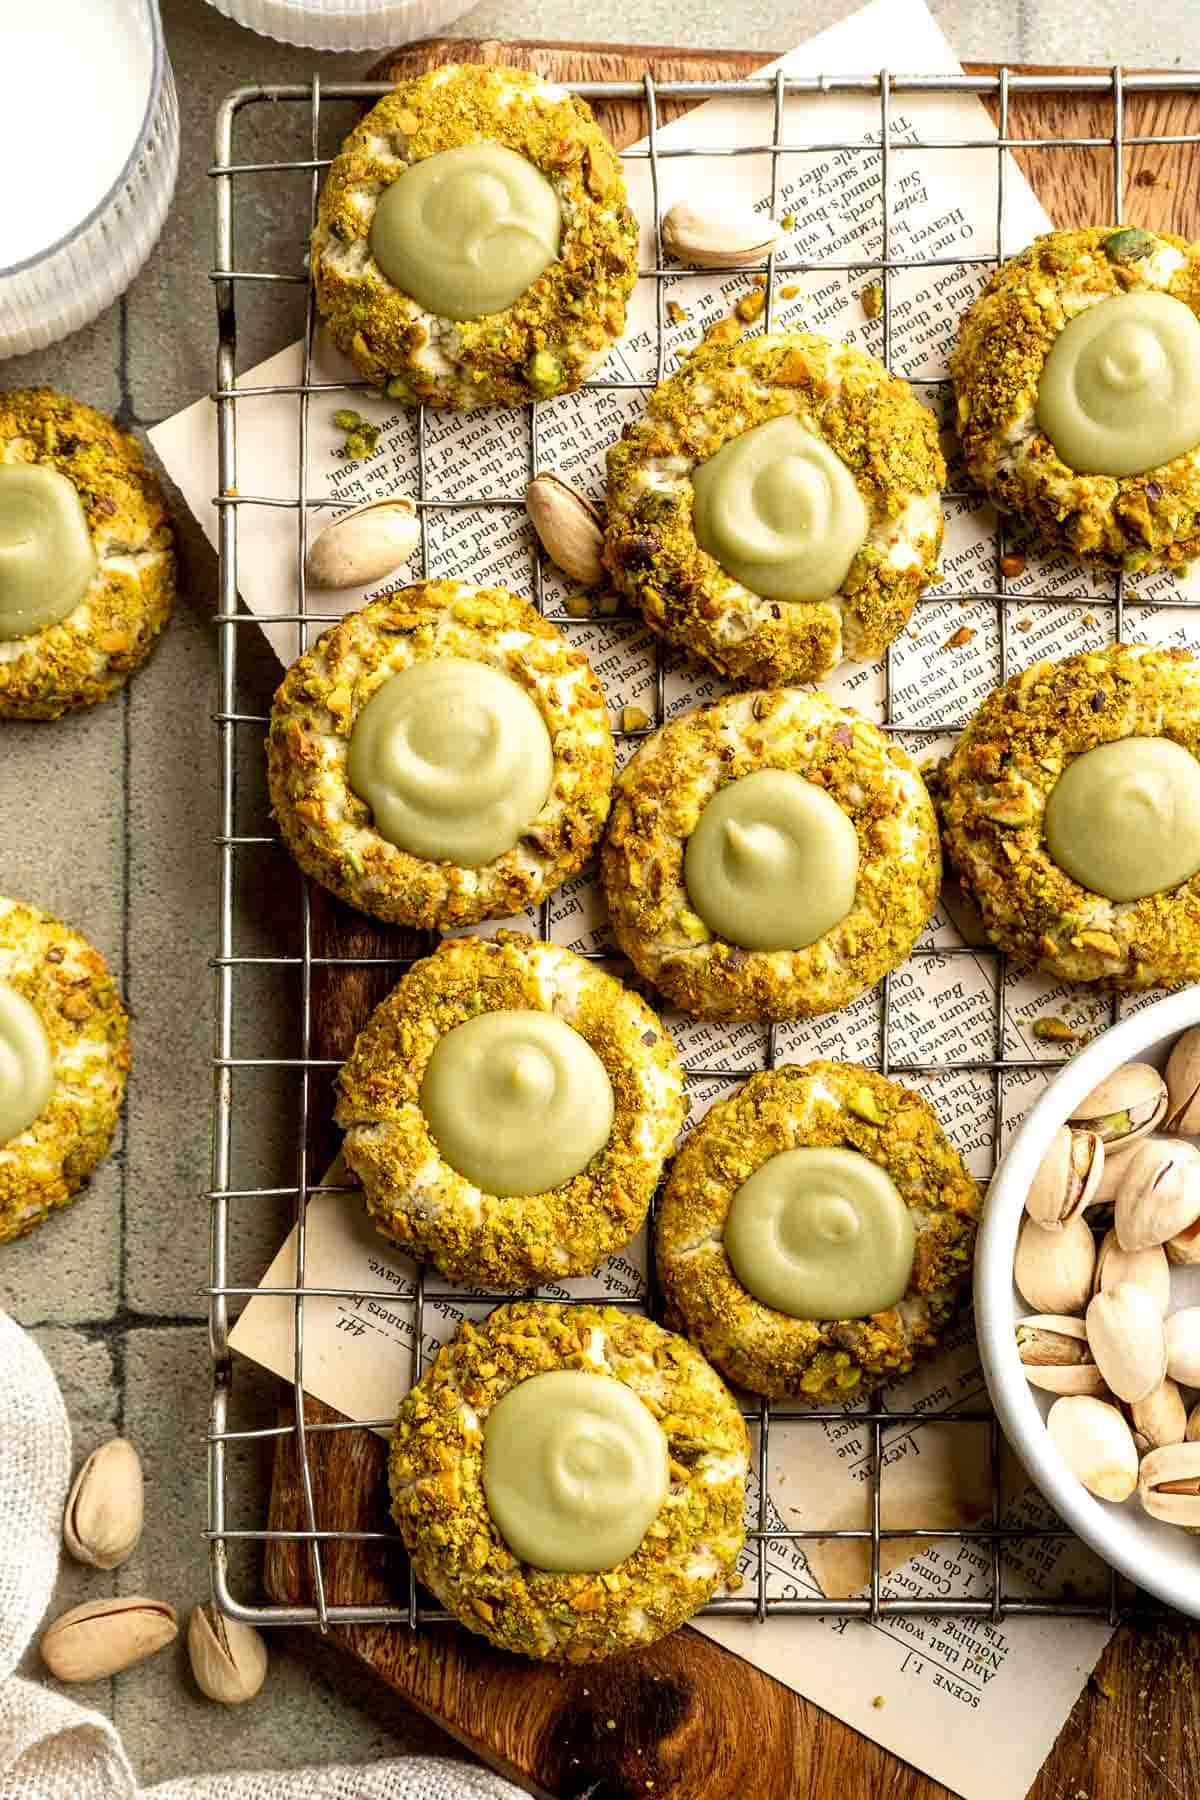
Storage
How to Store
Store cookies in an airtight container at room temperature for 3 to 4 days. Separate layers with parchment to protect the ganache. You can also store in the fridge if your kitchen is warm. Refrigeration keeps the ganache firm while maintaining the tenderness of the cookies.
These cookies do not require reheating, but if they firm up too much, let them sit briefly at room temperature before serving.
How to Freeze
Freeze unfilled cookies in a freezer safe container for up to 2 months. Thaw, then fill with fresh ganache. Filled cookies can also be frozen, but the centers may soften slightly after thawing.
How to Serve
These pistachio thumbprint cookies pair beautifully with coffee, hot tea, espresso, or dessert wines. Serve them after dinner, at celebrations, or on cookie platters. They also make thoughtful edible gifts, especially when packaged in small boxes or tins with tissue or parchment separators.
These are my favorite drinks to serve with pistachio thumbprints:
Holiday Cookie Week
These cookies are part of our Annual Cookie Week! For more sweet inspiration, explore our full holiday cookie collection from this year and year's past. You will find everything from nostalgic classics and colourful decorated cookies to creative flavours and fun themed bakes that make our annual Cookie Week such a favourite tradition.
FAQ
Yes, but reduce the added salt in the dough. Salted pistachios add pleasant contrast, but too much can overwhelm the delicate flavor.
Small cracks are normal and add charm. Deep cracks usually indicate the dough was too cold. Let the dough sit for a few minutes before shaping.
The ratio of chocolate to cream may have been off. Add a little more melted chocolate to thicken it if needed.
Yes. Bake and cool the cookies, then freeze them unfilled. Fill with ganache the day you plan to gift them.
Yes, but the coating adds flavor, texture, and color. You can also roll the cookies in sugar instead.
More Pistachio Cookie Recipes
Looking for other recipes like this? Try these:
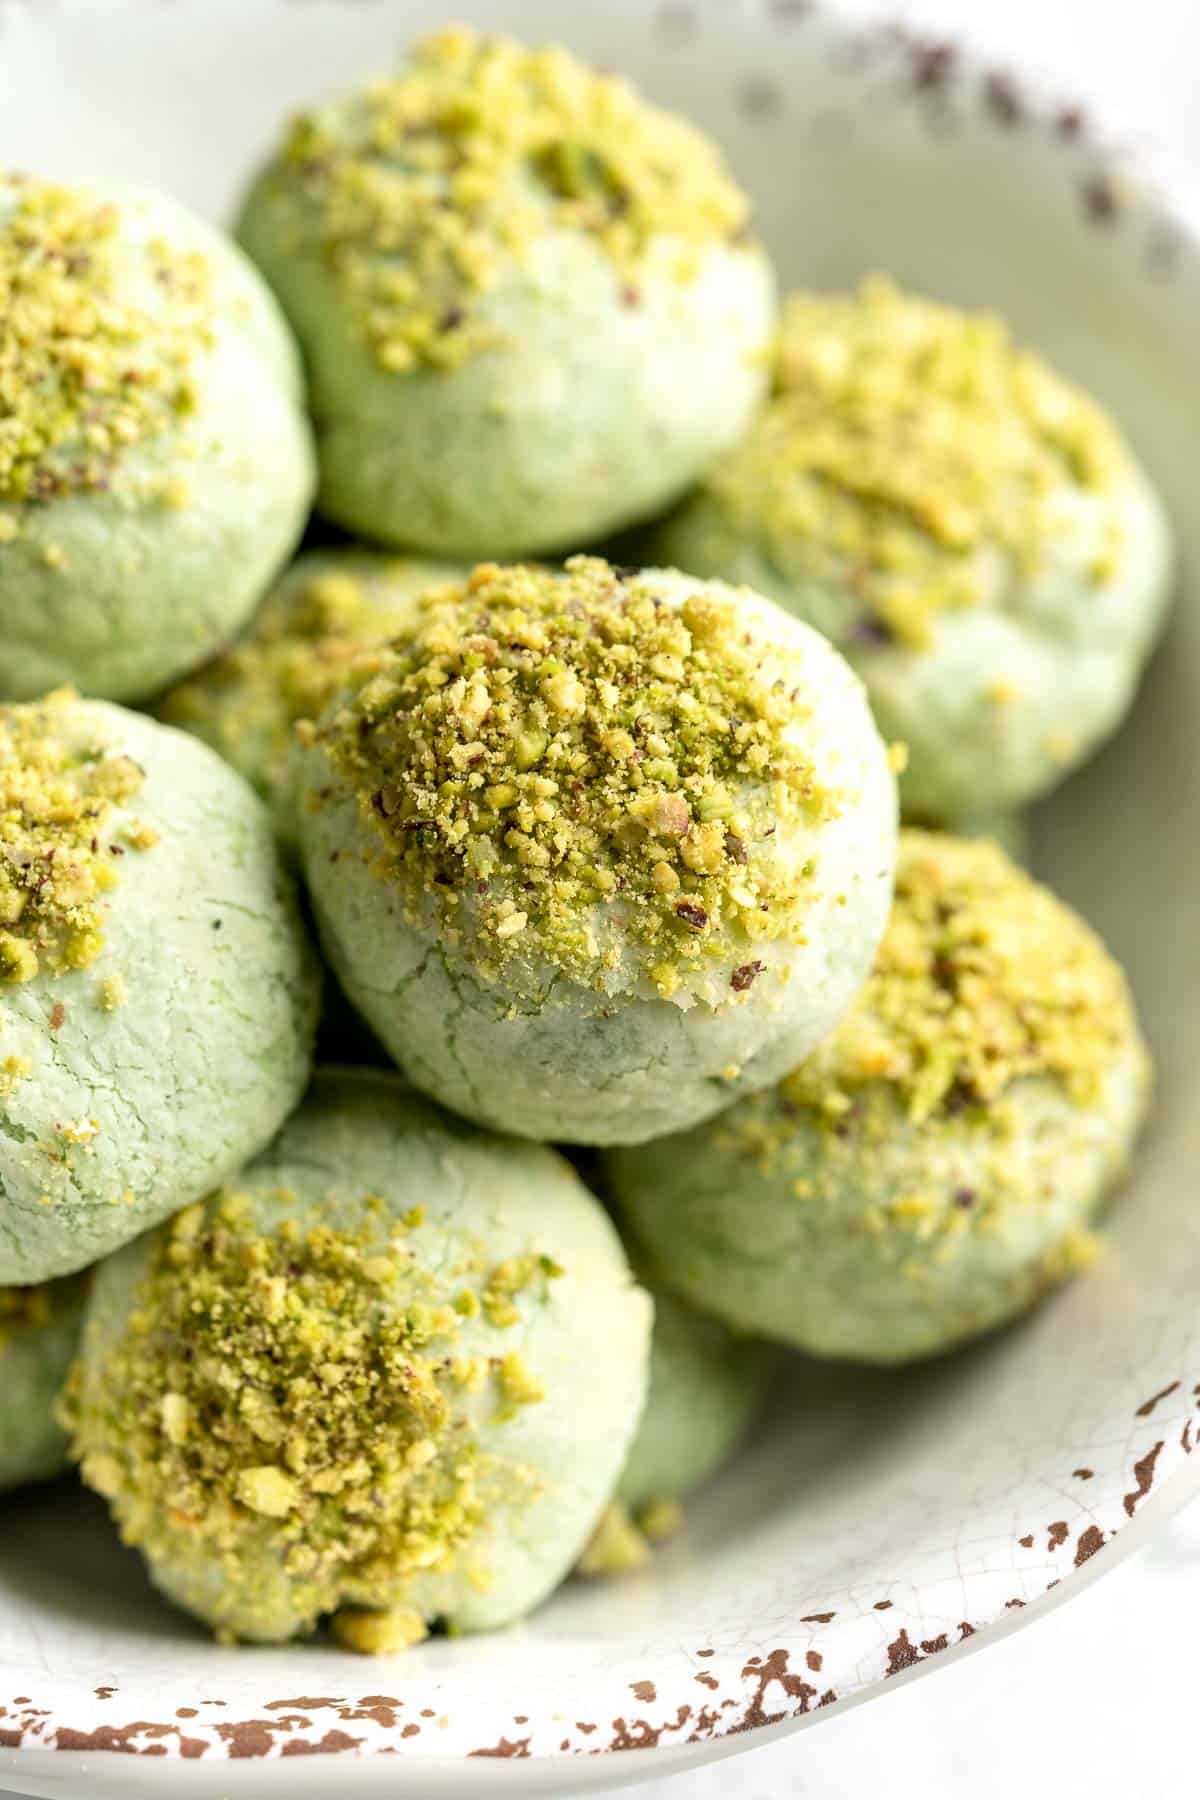
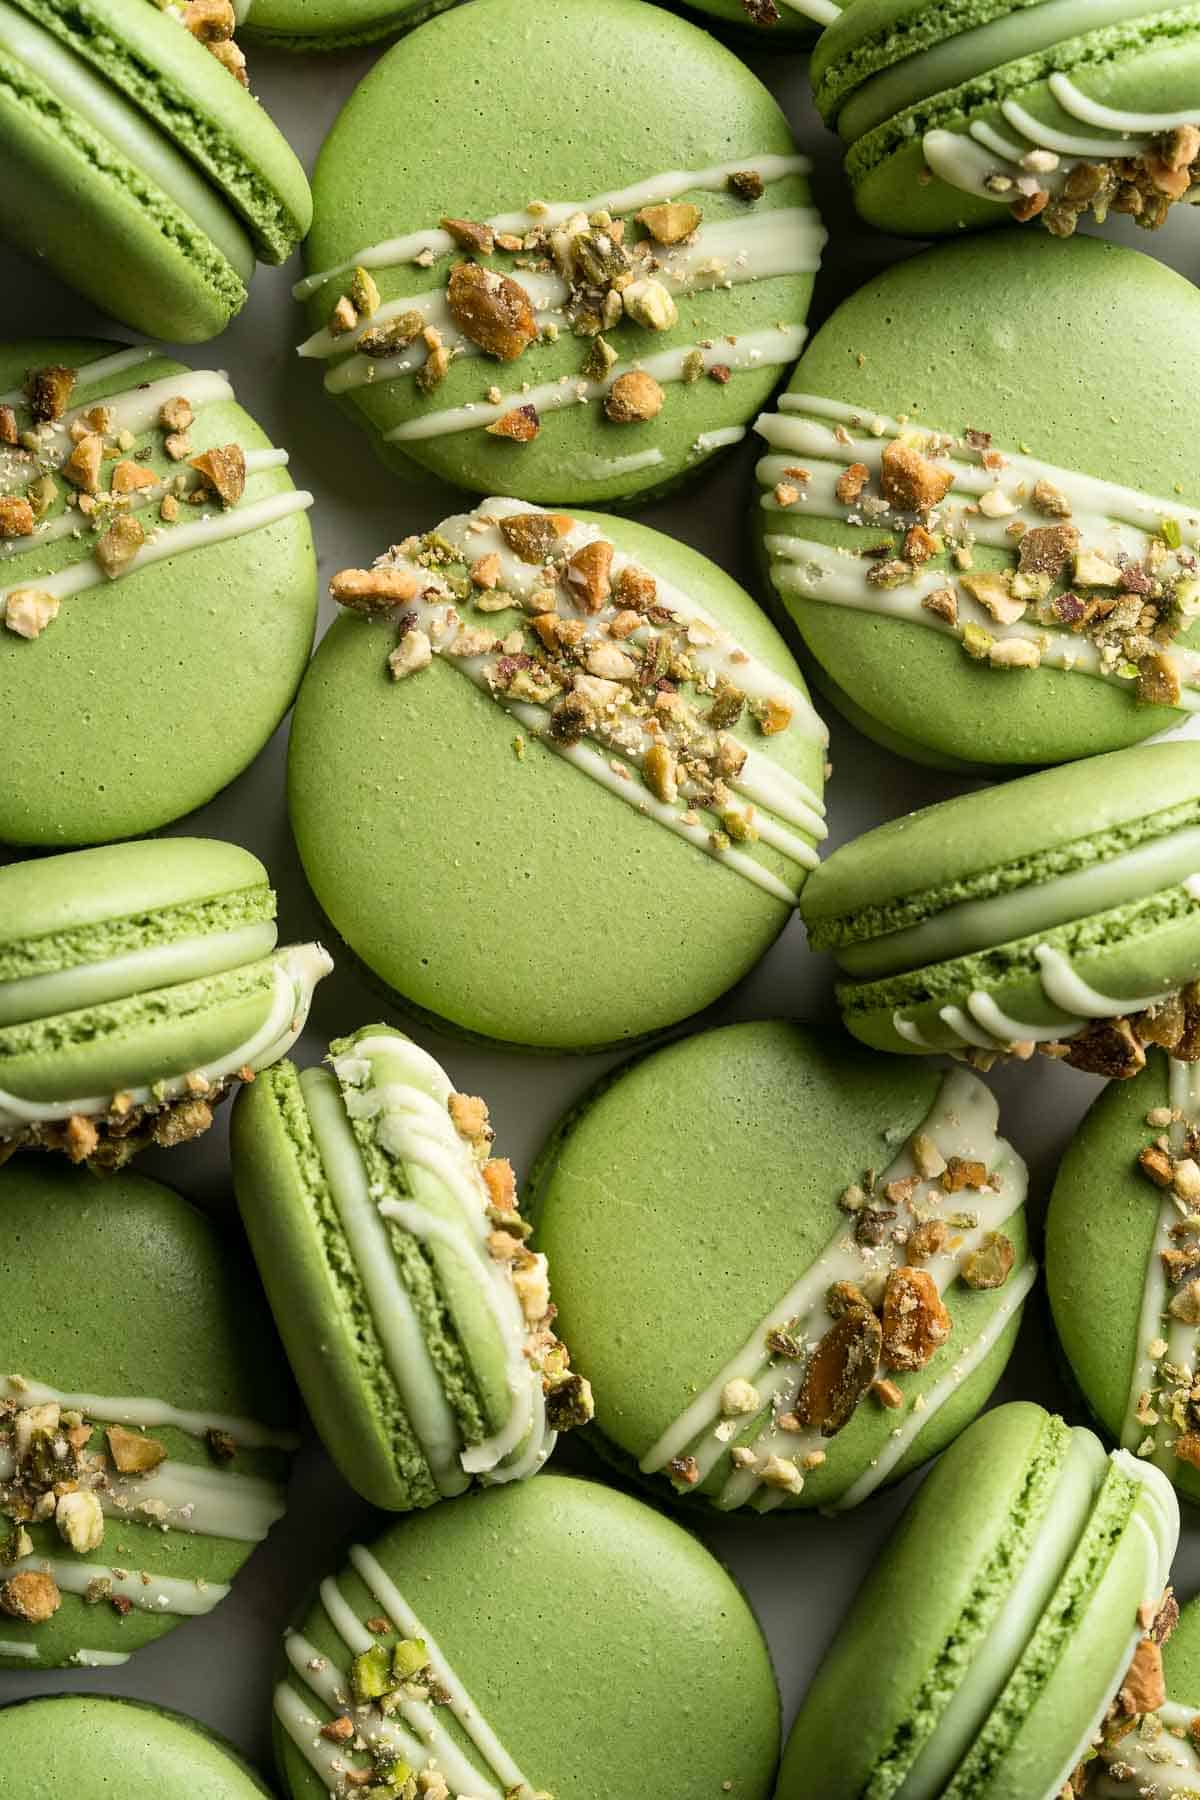
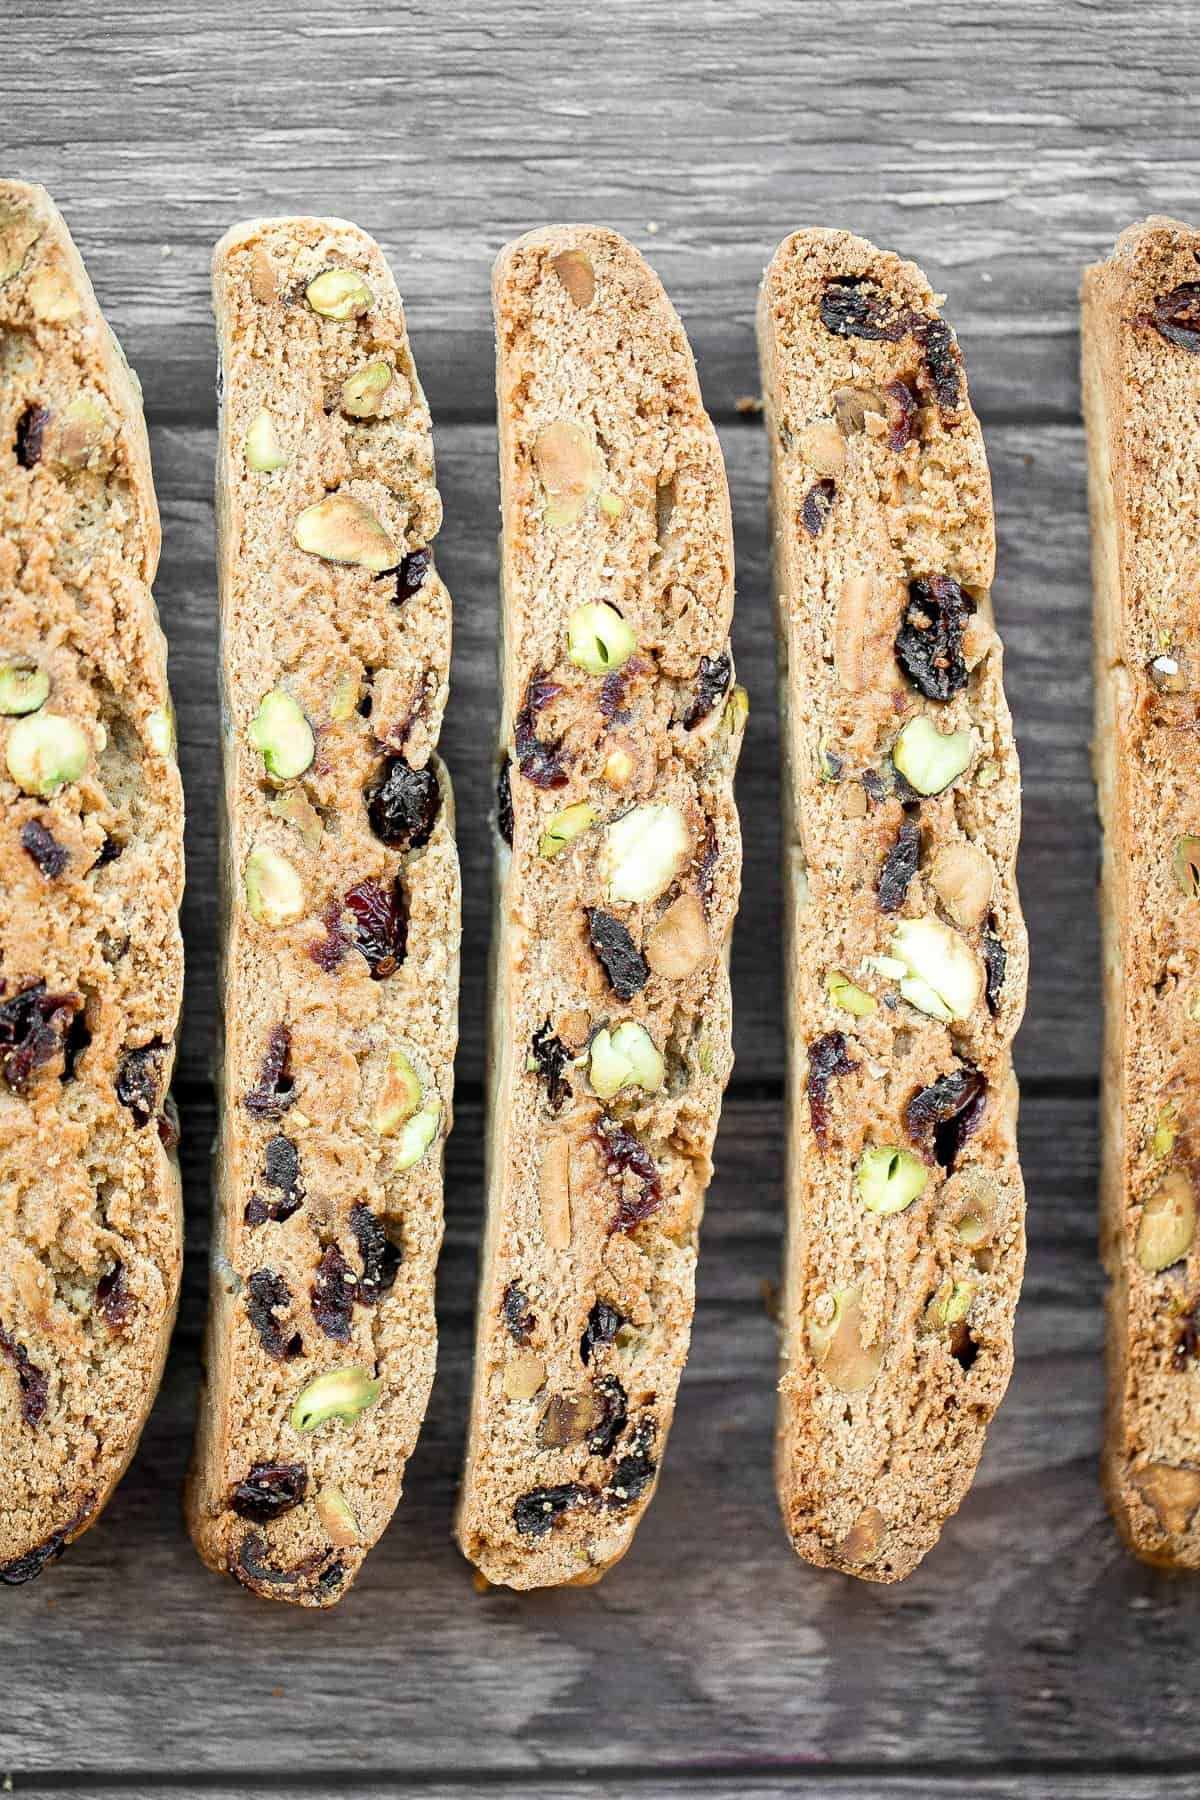
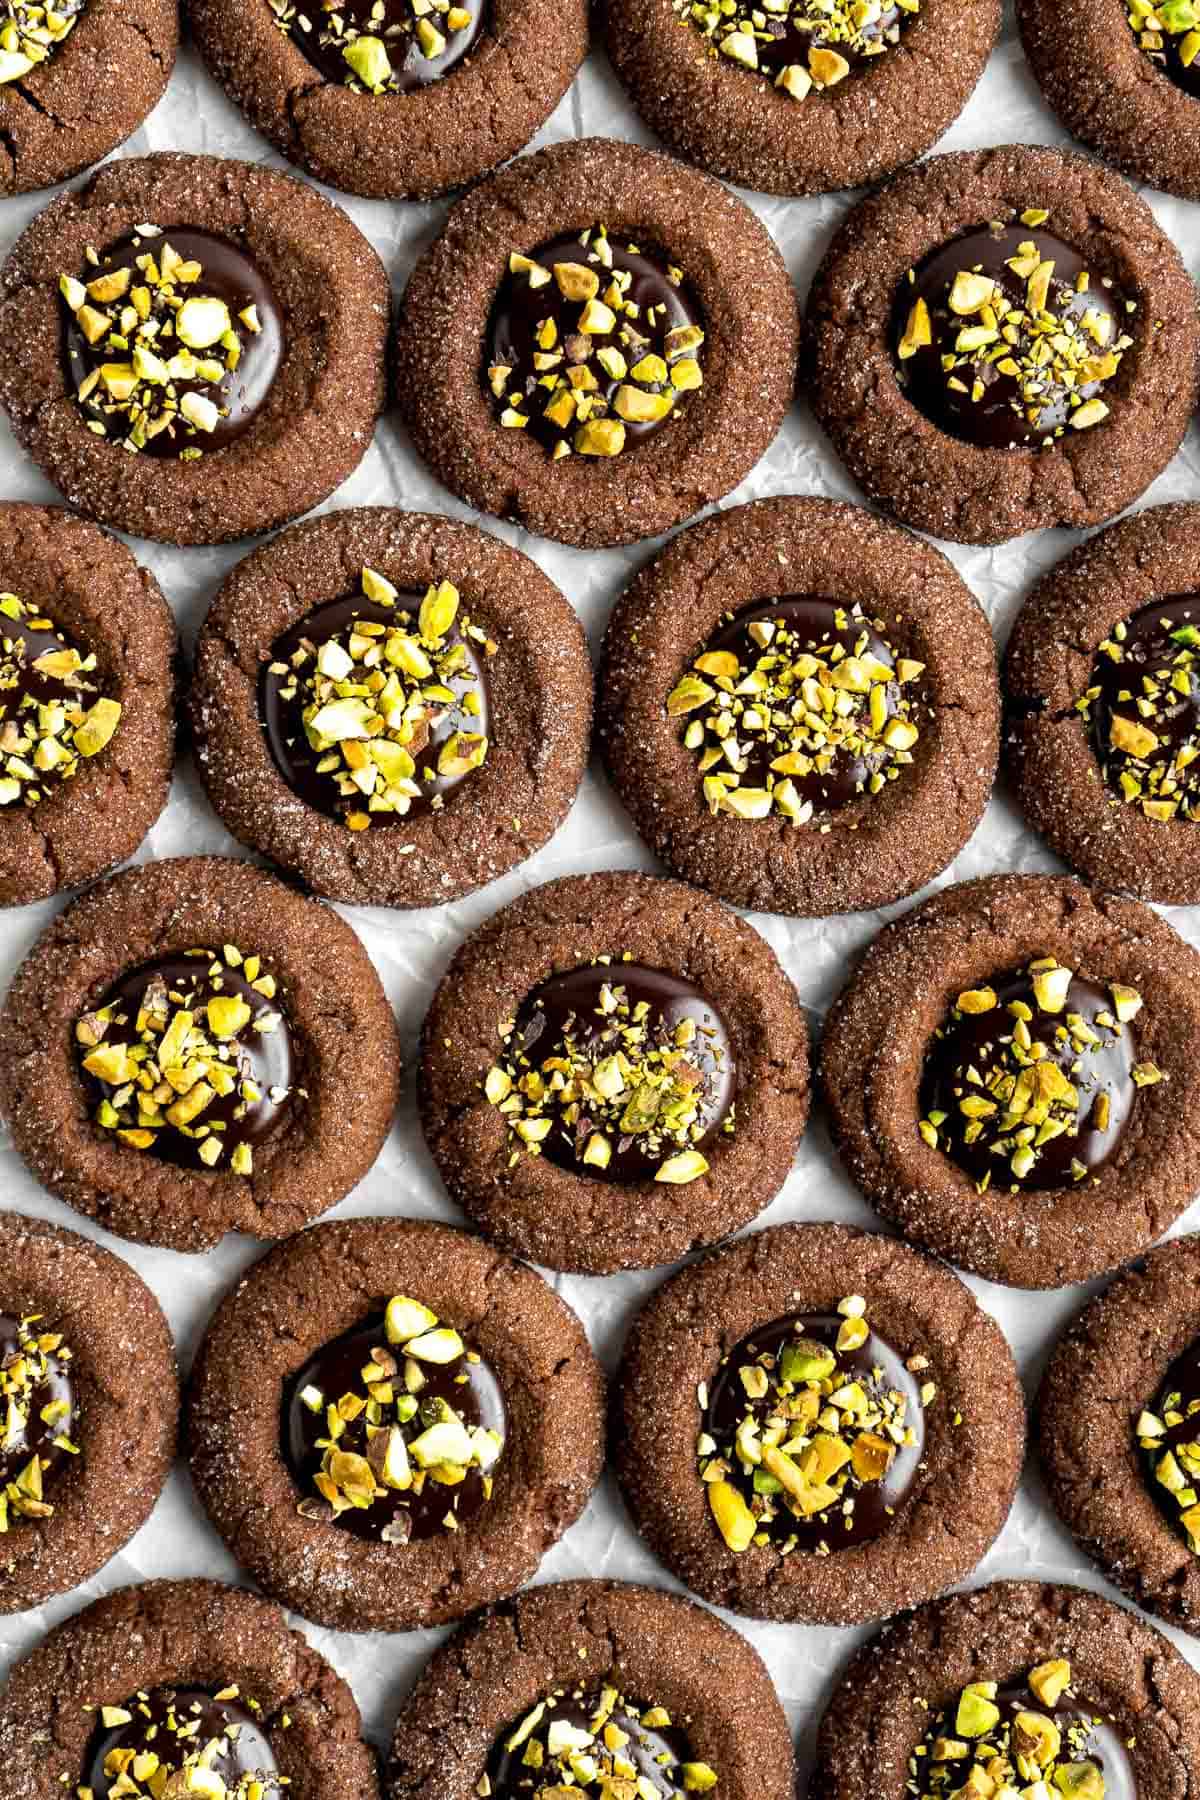
Tried this recipe?
I'd love to hear what you think! Leave a comment and rating below to share your feedback. Your reviews help others discover this recipe and help me keep creating more free recipes for you. Snap a photo and tag me on social media @aheadofthyme too.
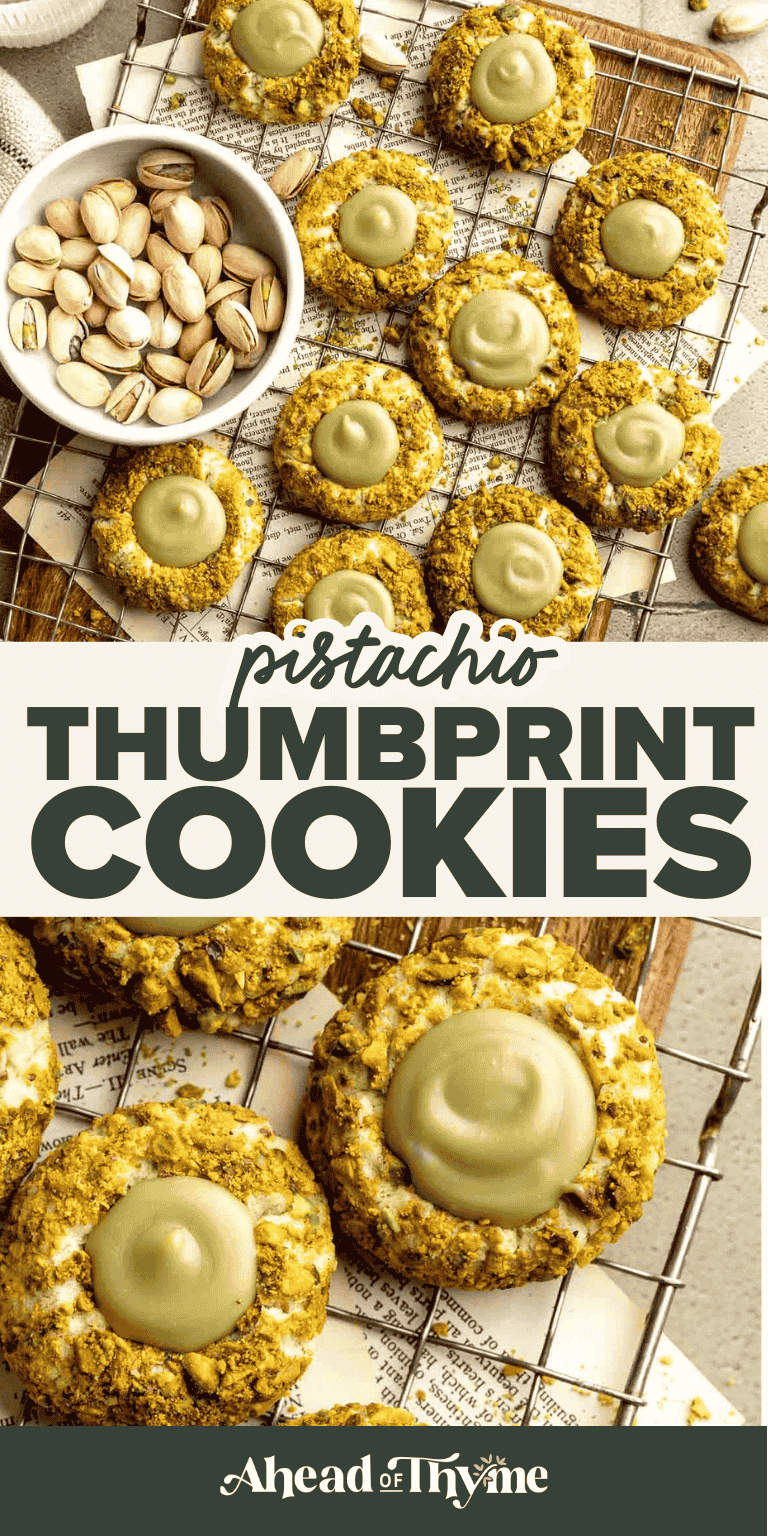
Cornflake Christmas Wreath Cookies
Festive, nostalgic, and impossibly fun, these Cornflake Christmas Wreath Cookies are bright green no bake treats shaped into cute holiday wreaths with red candy "berries" on top. Made with marshmallows, butter, and crispy cornflakes, they come together quickly on the stovetop and set into chewy, glossy wreaths that look just as charming as they taste.

These classic Christmas wreath cookies are perfect for anyone who loves retro, family friendly holiday baking. They require simple pantry staples, skip the oven entirely, and hold up beautifully on dessert trays, cookie plates, and in treat boxes. If you love Rice Krispie treats, these have the same soft, buttery texture but with a festive twist for Christmas.
This recipe was inspired by the nostalgic Rice Krispie treats found in vintage cookbooks and winter bake sales. These cookies pair well with hot chocolate, peppermint bark, or any cozy holiday drinks. If you are building a Christmas cookie box, these little wreaths are guaranteed to be the cookies everyone mentions first.

Why You'll Love This Recipe
- No bake and quick. Everything comes together with a handful of ingredients on the stovetop, making these one of the easiest Christmas cookies you can prepare during busy December days.
- Kid friendly. The shaping and decorating of these cornflake wreaths are perfect tasks for little helpers, and they cool quickly, which keeps the process fun.
- Festive and colorful. The bright green wreaths with red candies add a cheerful pop of color to any dessert board or holiday cookie platter.
- Perfect for gifting. These cornflake wreath cookies set firmly, pack beautifully, and hold their shape, making them great for holiday tins and treat boxes.
Ingredients and Substitutions
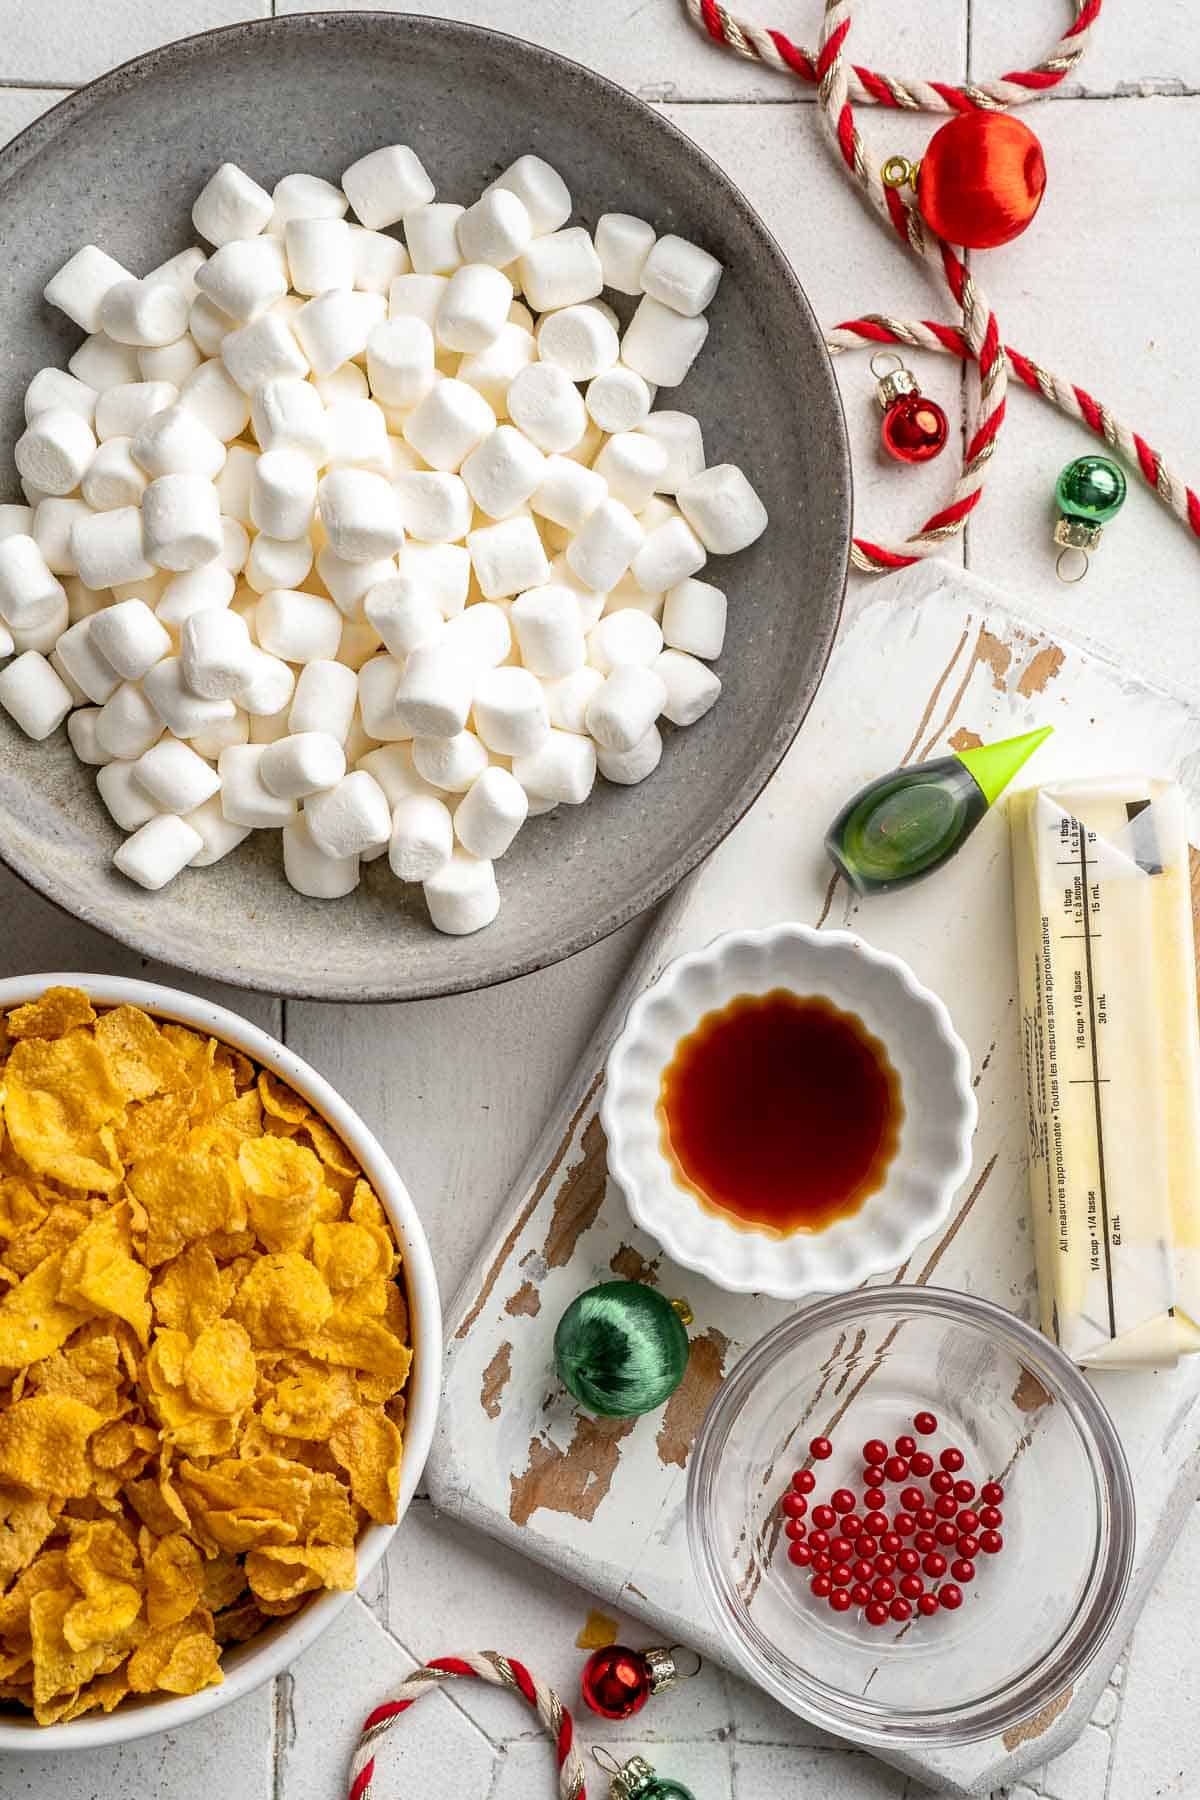
To make this delicious Cornflake Christmas Wreath Cookies, you will need the following ingredients (see recipe card below for quantities):
- unsalted butter - Creates a rich, glossy coating. Salted butter works if that is what you have.
- mini marshmallows - Melt into a smooth base that coats the cornflakes. Large marshmallows can also be used.
- vanilla extract - Adds sweetness and warmth to the marshmallow mixture.
- green gel food coloring - Gel coloring creates the brightest shade without thinning the mixture.
- cornflakes - Provide the classic crispy texture. Use gluten free corn flakes if needed.
- sprinkles or red M&M's - Add the festive "berries" on top of each wreath.
Equipment
You will also need measuring cups and spoons, a large pot or wide saucepan, a heatproof spatula, parchment paper (or wax paper), a medium cookie scoop for portioning, and a baking sheet for cooling.
Instructions
- Melt the butter and marshmallows. In a large pot or wide pan over medium heat, melt the butter. Add the mini marshmallows and stir continuously until they are fully melted and smooth.

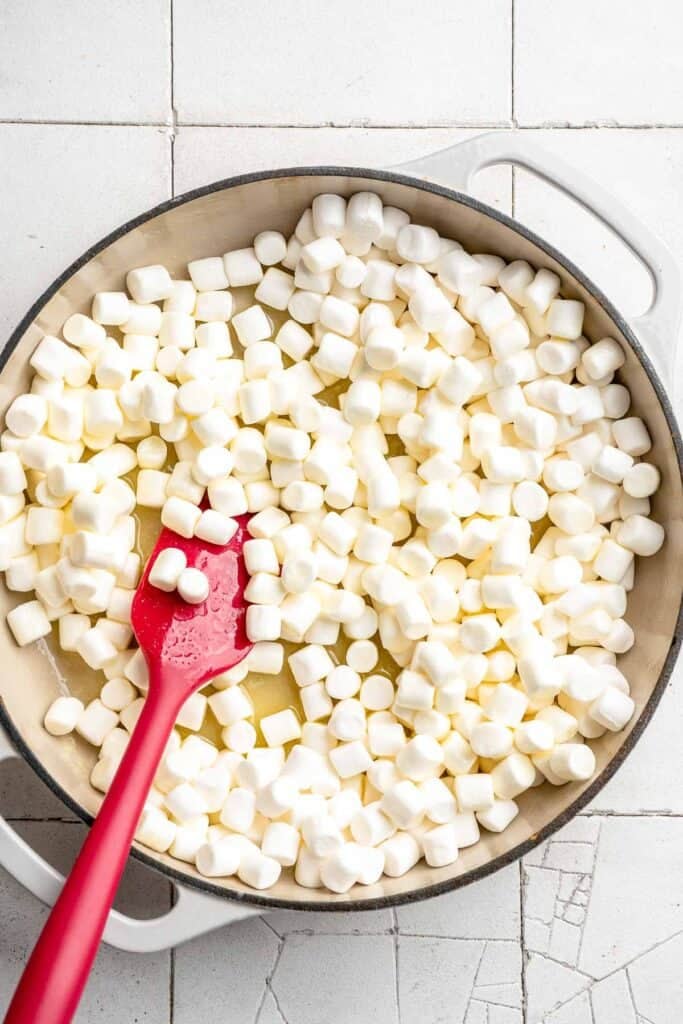
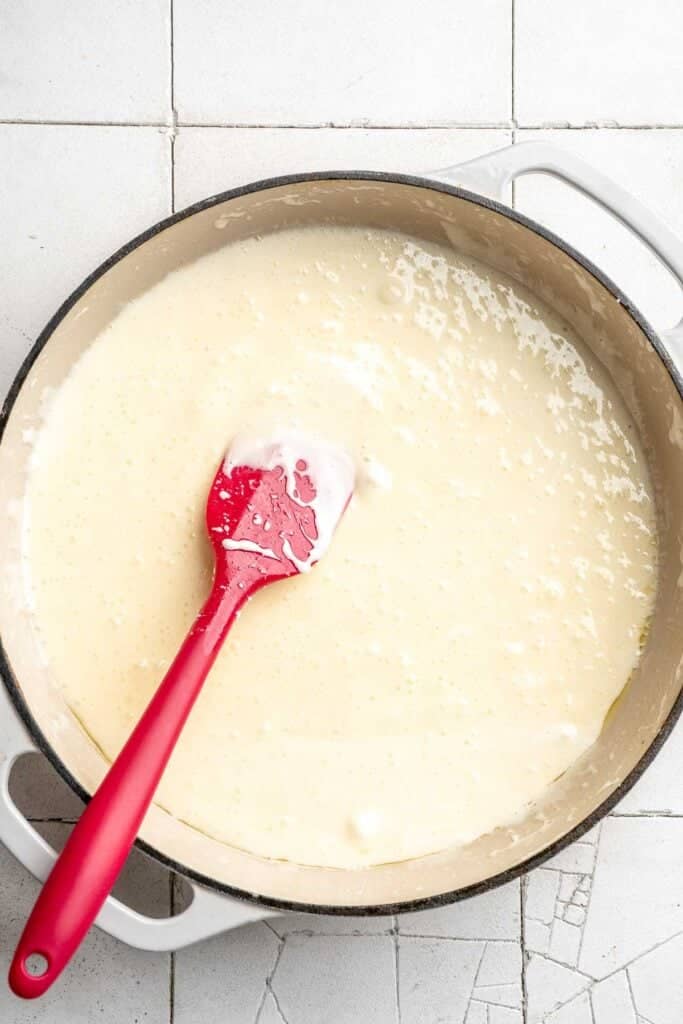
- Add vanilla and food coloring. Stir in the vanilla and green food coloring until the mixture is evenly tinted.
- Coat the cornflakes. Add the cornflakes and fold gently until all of the flakes are evenly coated in the marshmallow mixture.
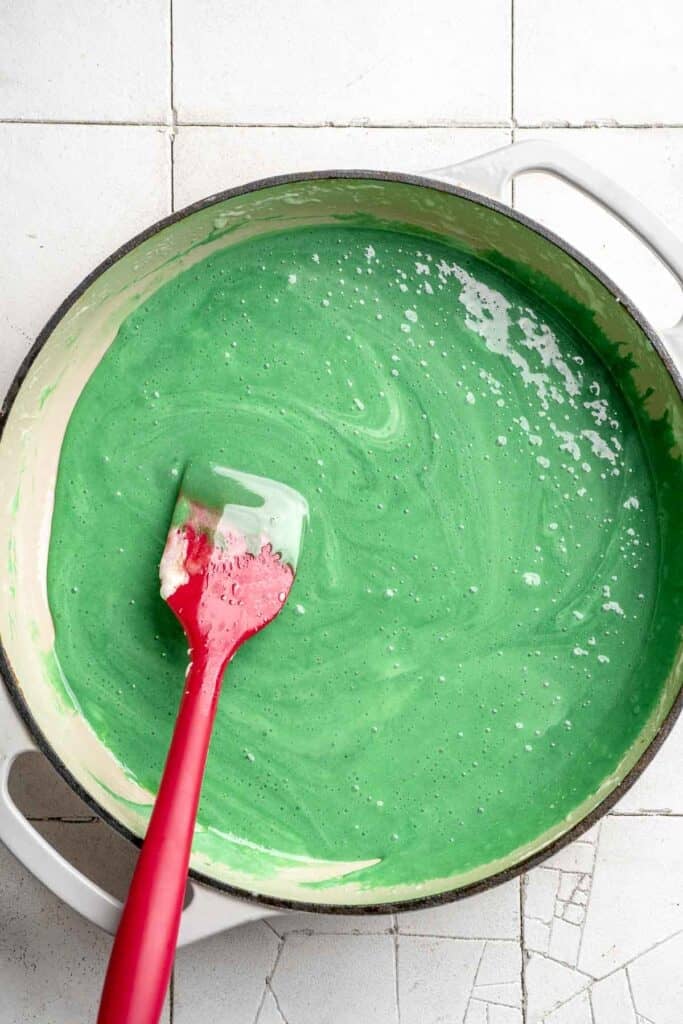
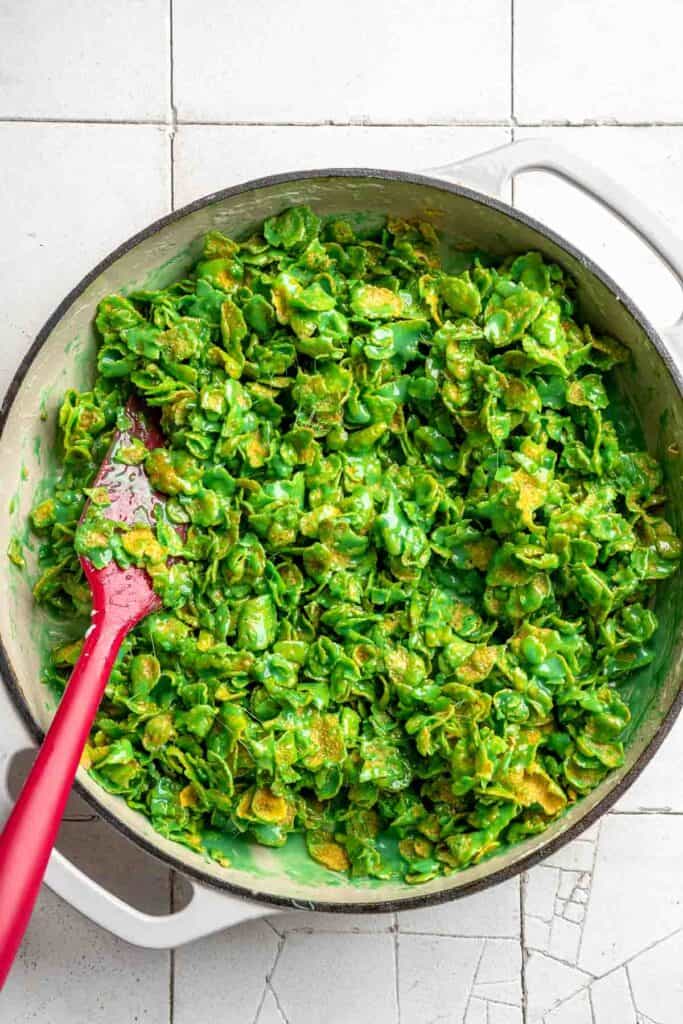
- Shape the wreaths. Use a medium cookie scoop or your hands to portion small mounds of the cornflake mixture onto a parchment lined cookie sheet. Lightly oil your hands you find this step to be too sticky and unmanageable. Shape each mound into a circle with a small hole in the center to create a wreath.
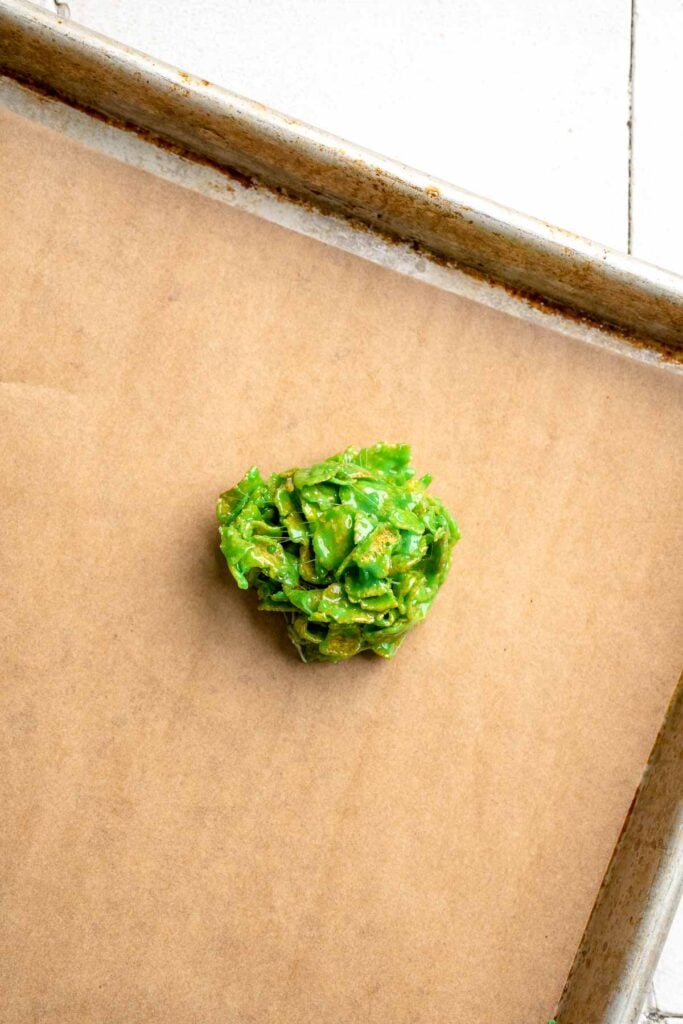
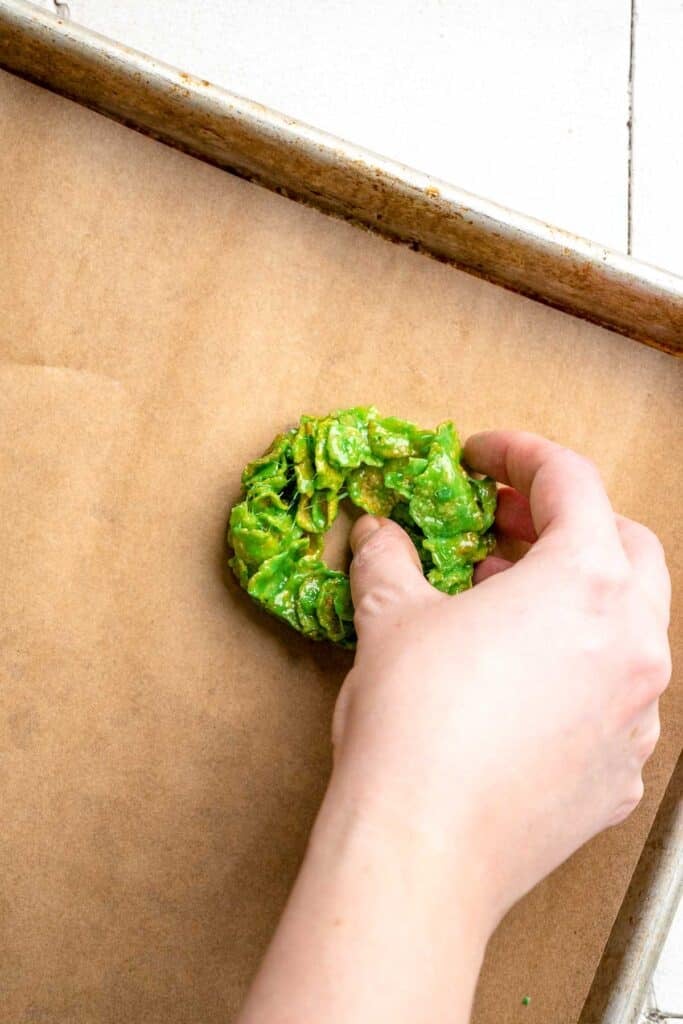
- Decorate and cool. Press sprinkles or red M&M's onto the tops of each wreath. Allow them to cool and set completely for at least 4 hours before serving.
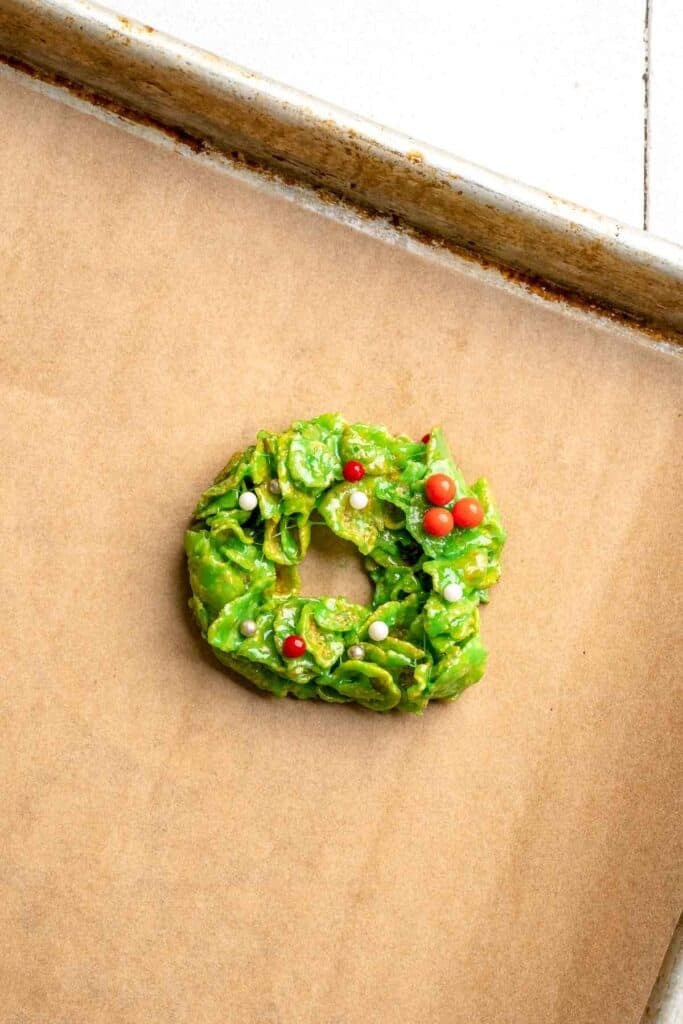
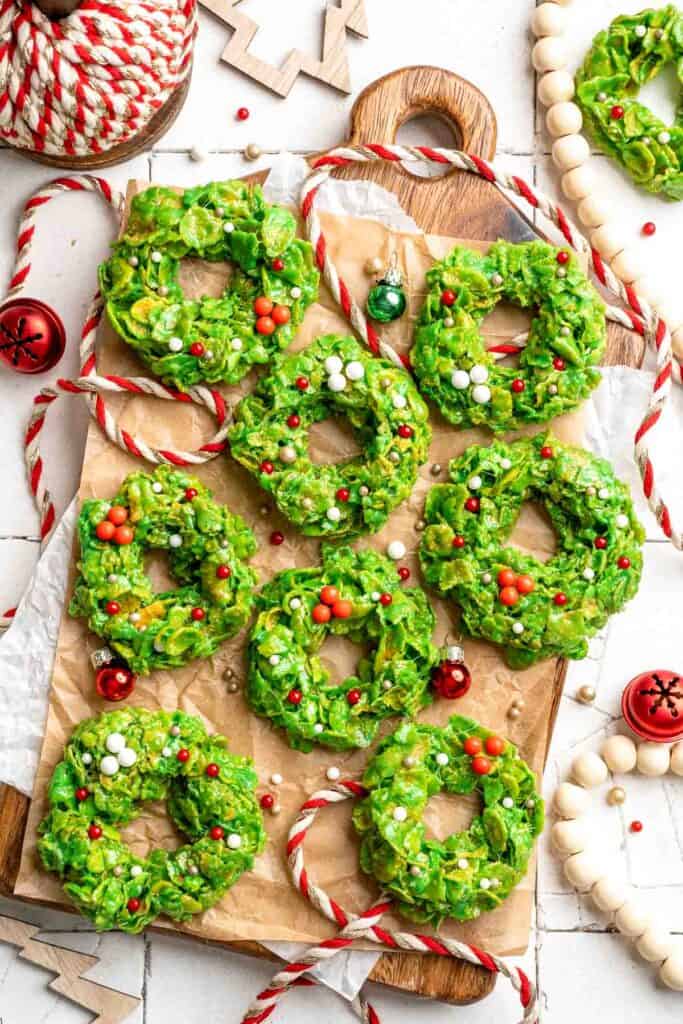
Expert Tip: Oil Your Hands for Easy Shaping
The marshmallow mixture is sticky, so lightly oiling your hands makes it much easier to shape the wreaths. A small amount of neutral oil helps you quickly form clean circles and press out the centers without the mixture sticking.
More Tips and Tricks
- Melt slowly for the smoothest texture. Use low heat to melt the melted butter and marshmallows together. A gentle melt keeps the mixture glossy and prevents scorching, which helps the cornflakes coat evenly and stay crisp.
- Adjust the color. Add more food coloring for a deeper green or keep the color soft and pastel for different holiday themes.
- Shape while warm. The mixture sets quickly as it cools, so work efficiently while it is still warm and pliable.
- Use parchment for easy handling. Transfer the scooped mounds directly onto parchment paper so you can shape them without sticking to the pan.
- Grease your hands lightly. A dab of cooking spray on your fingertips prevents sticking and makes shaping each wreath quicker and cleaner.
- Press decorations firmly. Add sprinkles or M&M's while the mixture is still tacky so they stick well and do not fall off after cooling.
- Let them cool completely. The wreaths need time to firm up. Give them at least four hours so they set and hold their shape when moved.
Recipe Variations
- Classic wreaths with cinnamon candies. Swap the sprinkles for classic red cinnamon imperials or red hot candies for the traditional vintage look.
- Mint chocolate wreaths. Add a tiny splash of peppermint extract to the marshmallow base and use mini chocolate chips as decorations.
- Holiday color variations. Use different colors for other celebrations, such as pink and red for Valentine's Day or pastel shades for Easter.
- Rice Krispie wreaths. Replace the cornflakes with Rice Krispies for a lighter, puffier version that is easier for small kids to shape.
- Sprinkle coated edges. Dip the edges of each wreath into holiday sprinkles for extra crunch and color.
- Mini bite size wreaths. Use a small cookie scoop to create tiny wreaths that set faster and are perfect for cookie boxes.
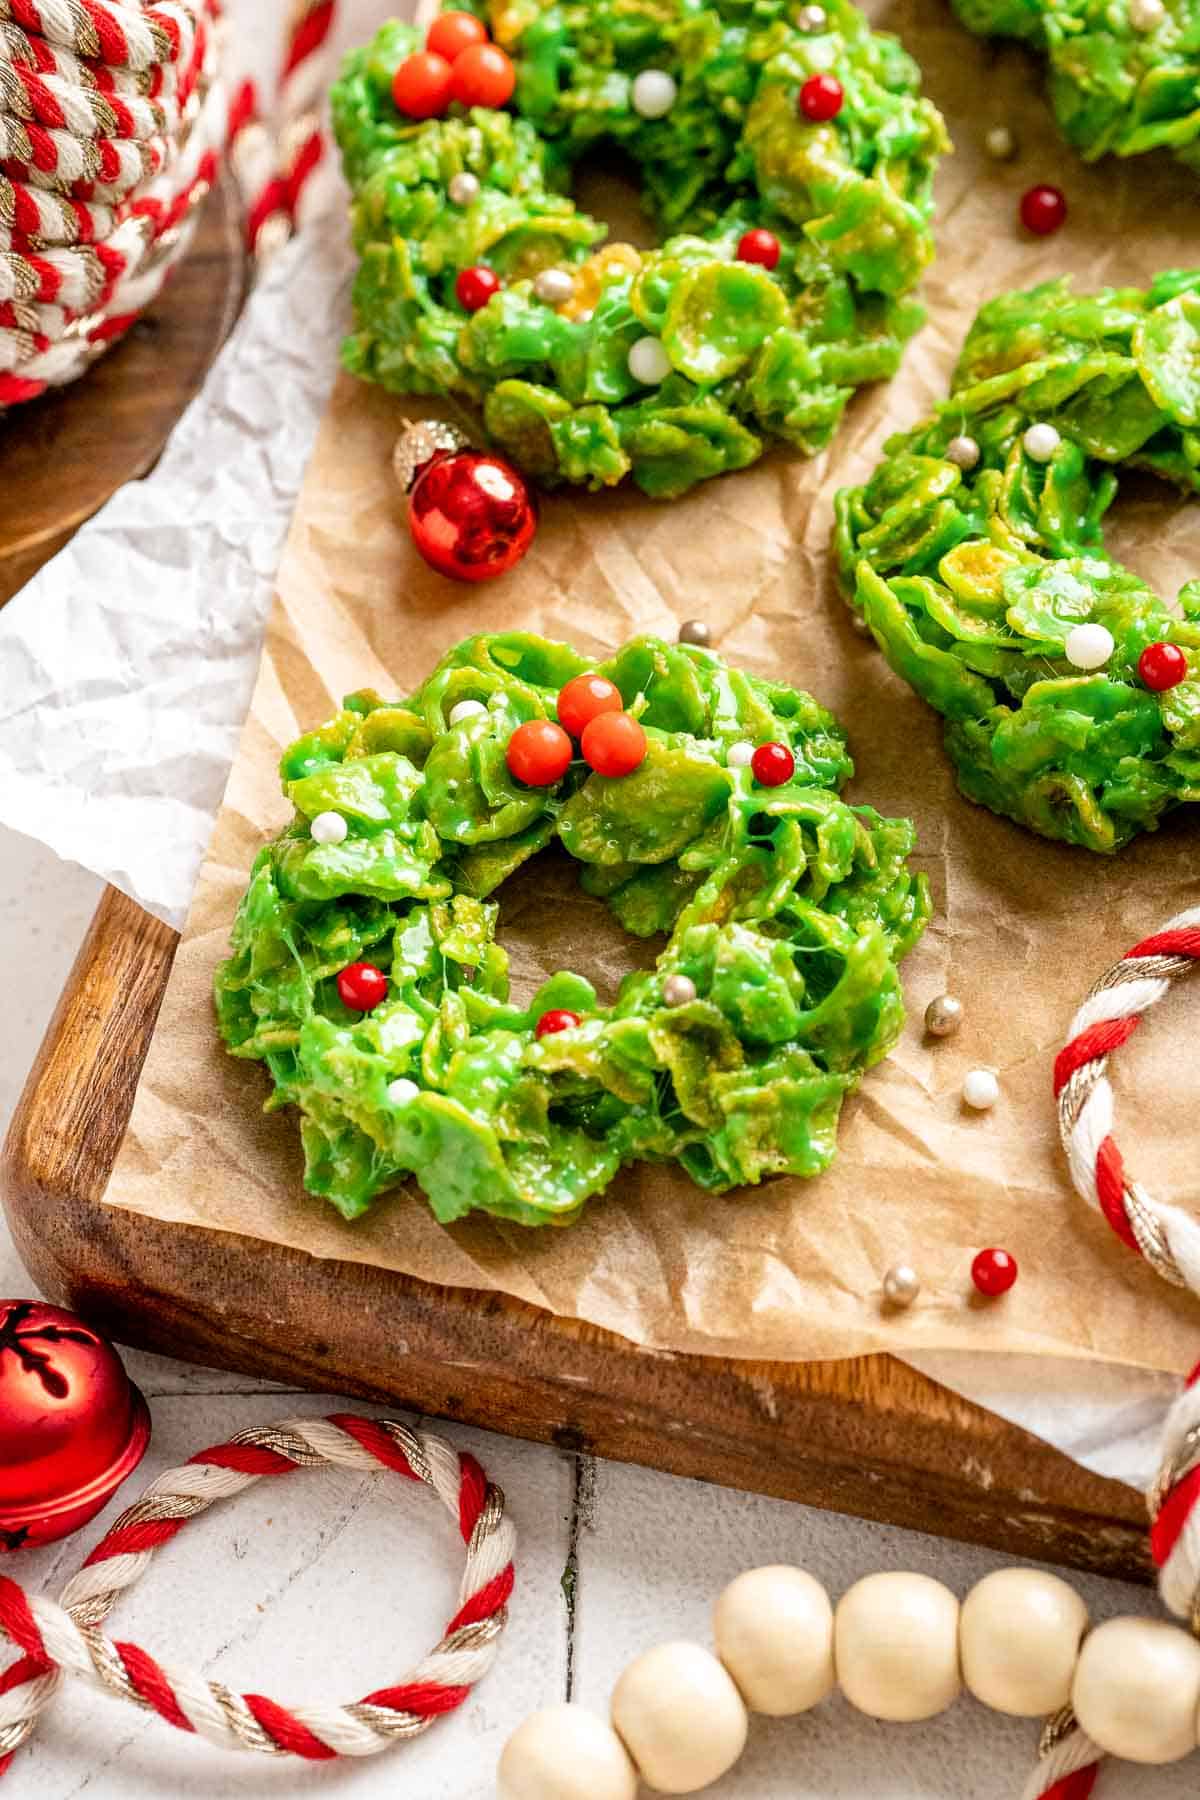
Storage
How to Store
Store the cooled wreath cookies in an airtight container at room temperature for up to one week. Separate layers with parchment paper to prevent sticking.
How to Reheat
These cookies do not require reheating, but if a wreath becomes too firm, a few seconds near a warm stovetop or microwave softens it slightly.
How to Freeze
Freeze wreath cookies in a single layer, then transfer to a freezer safe container for up to one month. Thaw at room temperature before serving. Freezing may slightly soften the crunch but still yields delicious results.
How to Serve
Serve these cookies on holiday dessert boards, in treat bags, or alongside cocoa and Christmas drinks. They also make adorable additions to classroom parties, cookie swaps, and festive baking boxes. Place them on a platter with chocolate crinkle cookies, gingerbread cookies, or sugar cookies for a colorful holiday spread.
These are my favorite cookies to serve with cornflake christmas wreath cookies:

Holiday Cookie Week
These cookies are part of our Annual Cookie Week! For more sweet inspiration, explore our full holiday cookie collection from this year and year's past. You will find everything from nostalgic classics and colourful decorated cookies to creative flavours and fun themed bakes that make our annual Cookie Week such a favourite tradition.
FAQ
Sticky wreath cookies usually mean the marshmallow mixture was not cooked long enough or the butter ratio was off. Let the marshmallows fully melt and bubble slightly before adding the cornflakes. If the mixture remains too sticky, let it cool for a minute or two before shaping to help it firm up.
If the wreaths do not hold together, the marshmallow mixture may not have fully coated the cornflakes. Fold gently but thoroughly so every flake is evenly covered. Also make sure to let the cookies cool completely before moving them, since they need time to set.
Yes, these cookies keep their shape and texture for several days, making them great for early holiday prep. Store them in airtight containers away from heat and humidity to keep them crisp.
Absolutely. You can leave them uncolored for a natural look or swap in natural dyes like matcha powder. The wreath shape and decorations still make them festive even without the bright green color.
More Christmas Cookie Recipes
Looking for other recipes like this? Try these:
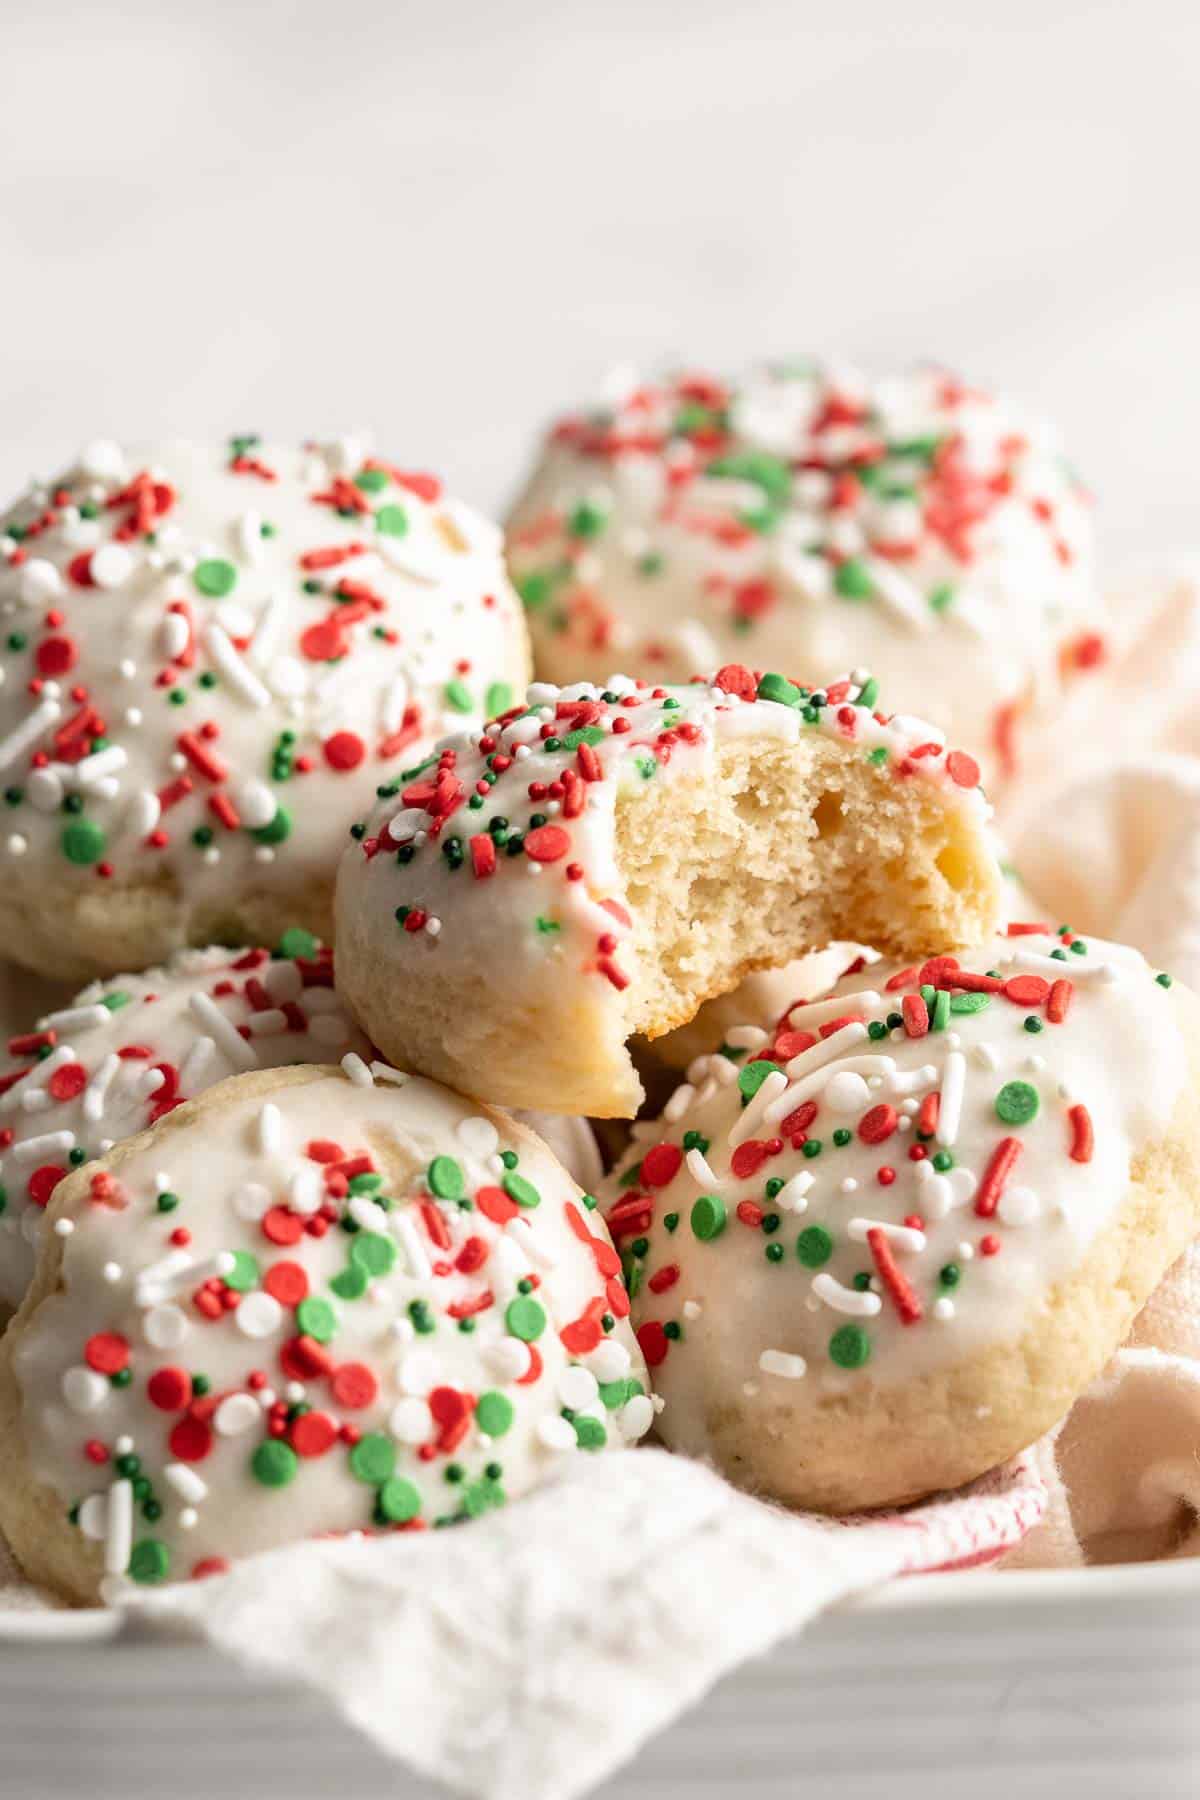
Tried this recipe?
I'd love to hear what you think! Leave a comment and rating below to share your feedback. Your reviews help others discover this recipe and help me keep creating more free recipes for you. Snap a photo and tag me on social media @aheadofthyme too.

Christmas Shortbread Cookie Bites
Soft, buttery, and full of holiday cheer, these funfetti Christmas Shortbread Cookie Bites are little bites of melt-in-your mouth shortbread packed with red, green, and white sprinkles. They bake into festive mini cookies that are perfect for snacking, gifting, or filling up a Christmas cookie tray. These are the perfect cookies to spread a little joy this Christmas.
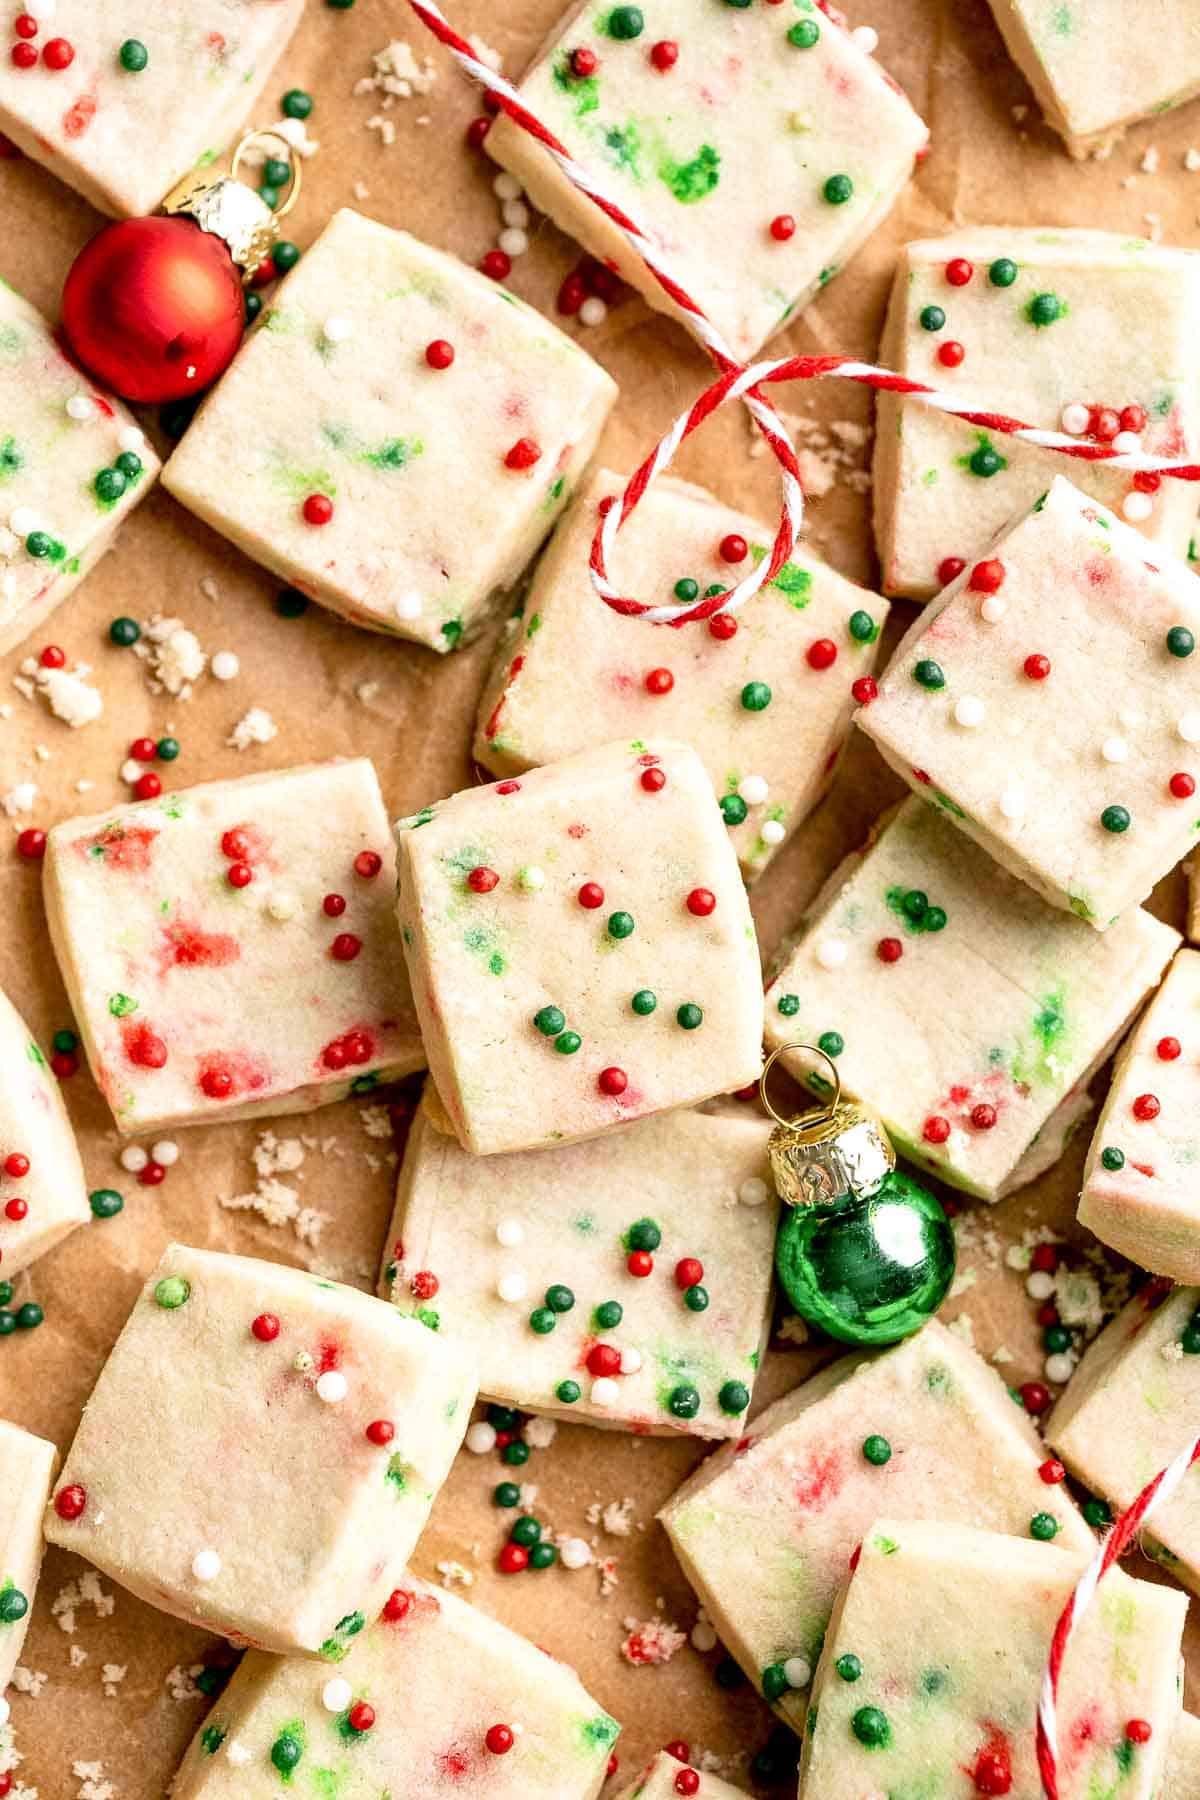
What makes these shortbread cookie bites so perfect is their texture. They bake into crisp edged, soft centered mini cookies that taste like classic shortbread but in the cutest bite sized form. They hold their shape beautifully, chill well, freeze beautifully, and can be decorated with a drizzle of white chocolate for an extra festive touch. They also come together with minimal effort, using one bowl and a rolling pin to flatten the dough inside a storage bag, with no cookie cutters needed.
Christmas shortbread cookie bites are always on my holiday baking list because they are simple, reliable, and universally loved. They look adorable in cookie tins, pair beautifully with warm drinks, and add bright pops of colour alongside other Christmas treats. My favourite tradition is making cute holiday cookie boxes for family and friends, and there always has to be shortbread in some form, especially something buttery and bite sized like this.
This recipe was inspired by my other favourite shortbread holiday bakes, like whipped shortbread cookies or cut out shortbread cookies, and it pairs well with other small holiday treats like peppermint bark, gingerbread truffles, or hot chocolate cookies on a Christmas dessert board. These festive shortbread squares are exactly the kind of treat that brings joy, feels nostalgic, and keeps your cookie tray looking bright and cheerful.
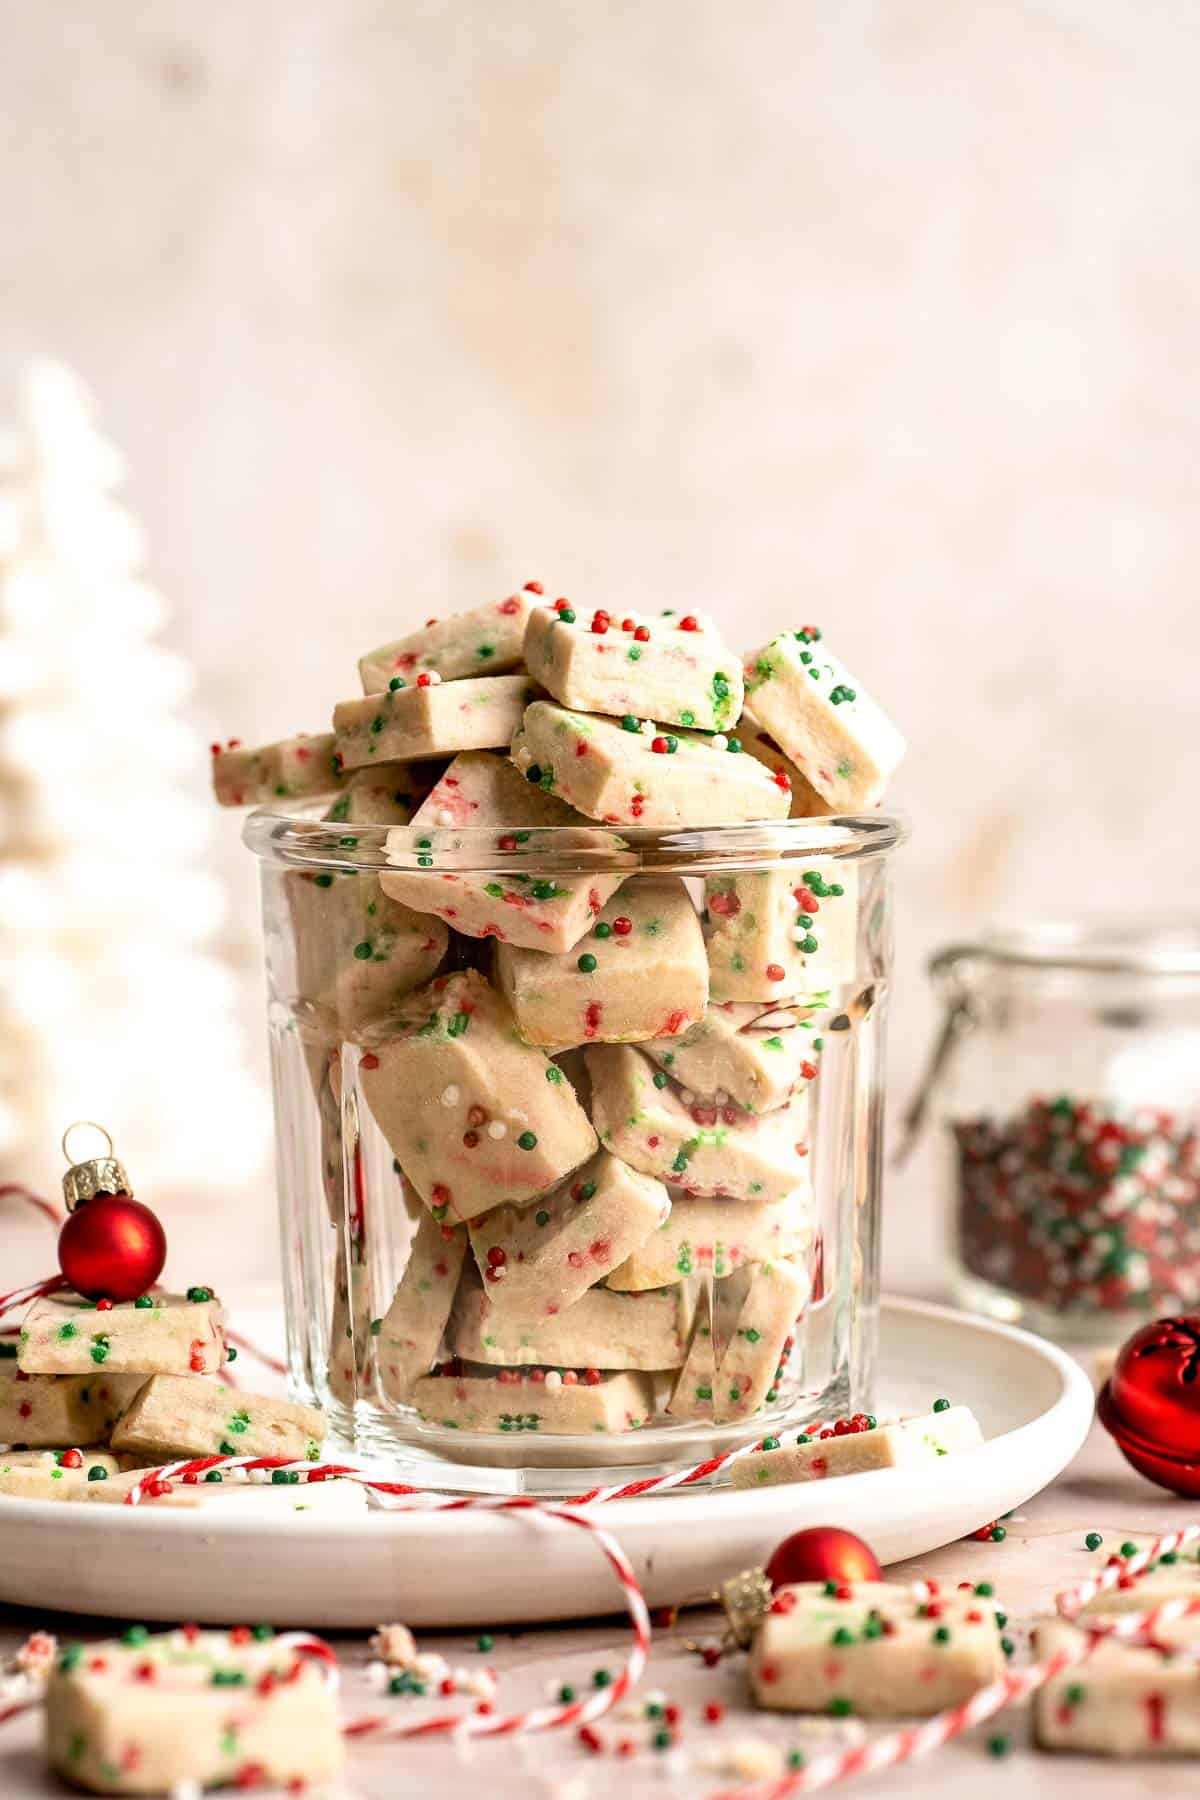
Why You'll Love This Recipe
- Quick and easy. The dough mixes in minutes, rolls smoothly inside a bag, and bakes into tiny cookie bites without any shaping or cookie cutters needed.
- Festive and fun. Christmas sprinkles add instant holiday cheer, and white chocolate drizzle makes these little shortbread bites look polished and gift ready this holiday season.
- Perfect for gifting. Their small size makes them ideal for cookie boxes, office treats, and festive party trays that need lots of variety.
- Make ahead friendly. The dough chills beautifully, freezes well, and can be baked days in advance without losing its soft buttery texture.
Ingredients and Substitutions
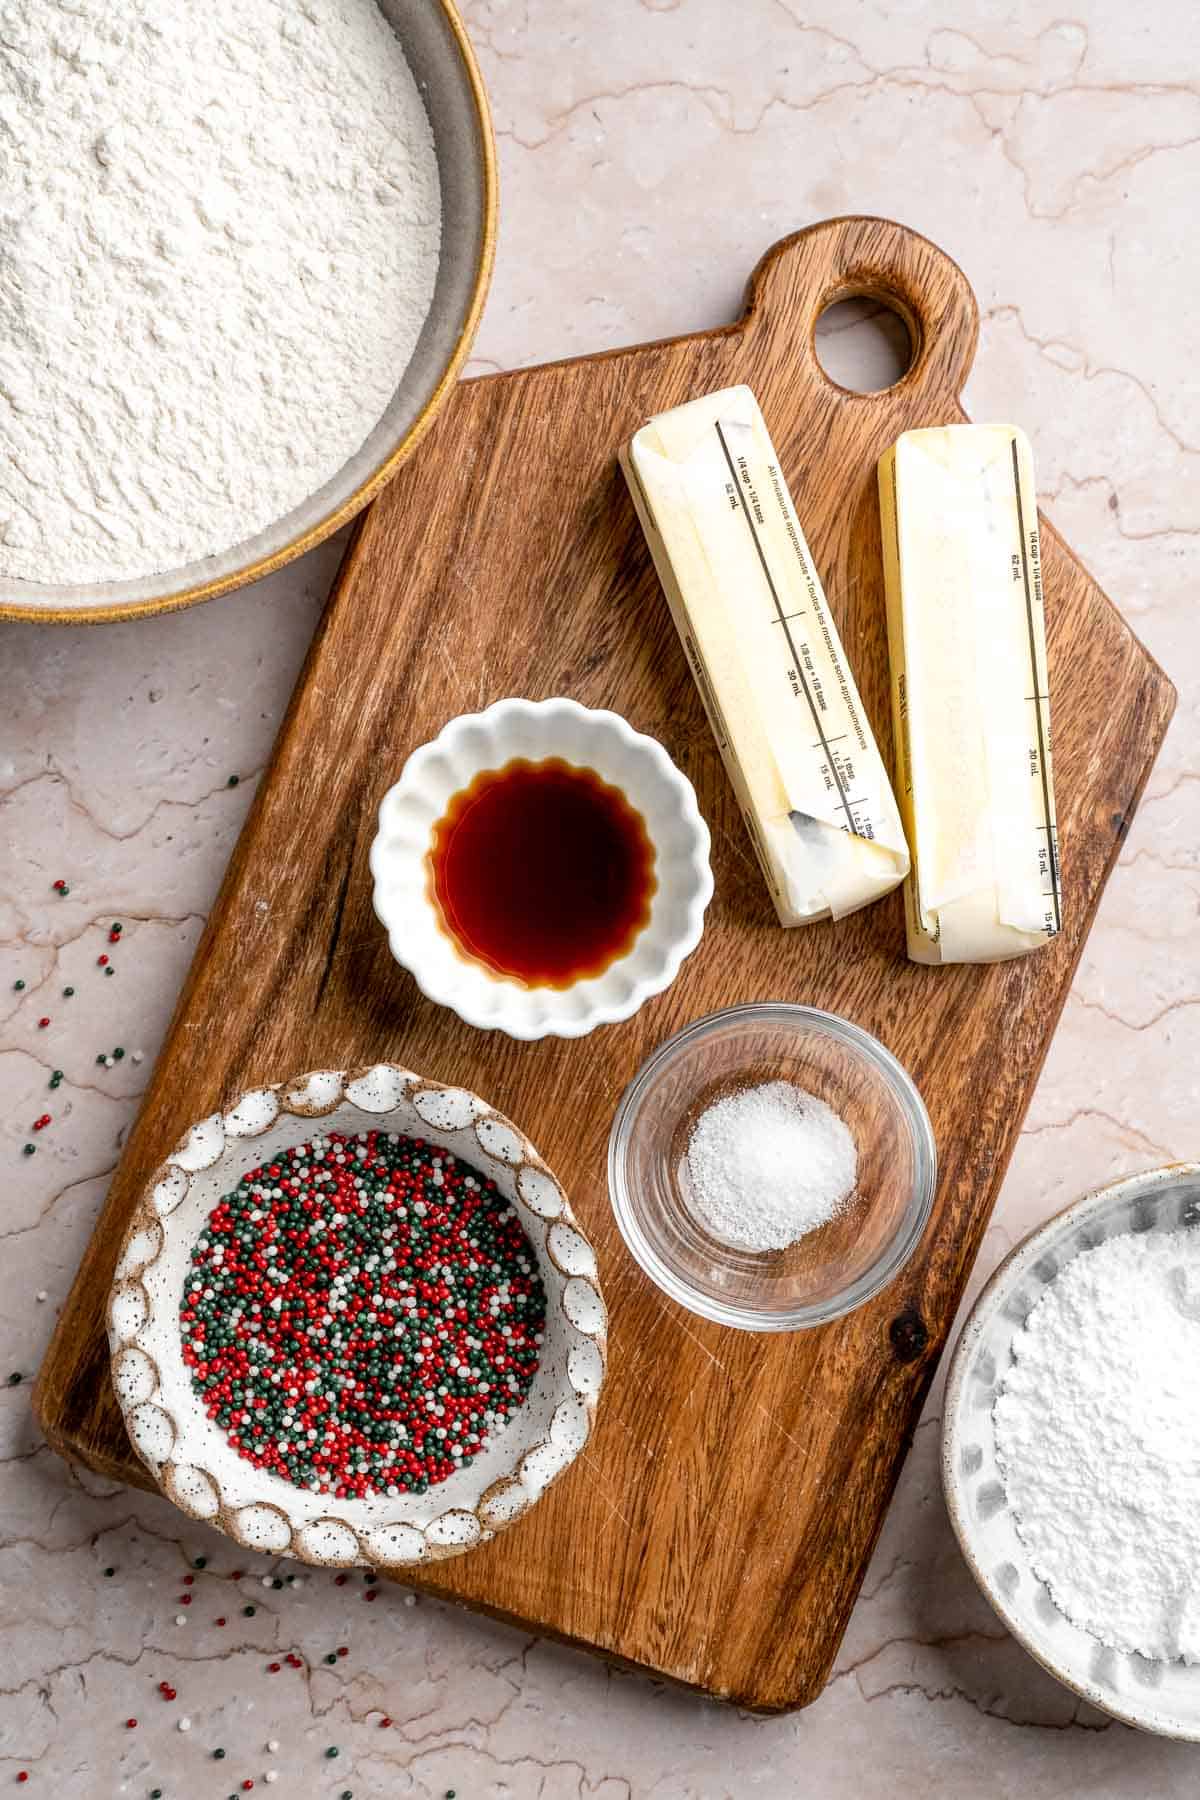
To make this festive Christmas shortbread bites, you will need the following ingredients (full quantities in the recipe card below):
- butter - Softened unsalted butter gives these cookie bites their rich, tender crumb and buttery shortbread flavor. Salted butter works too, but reduce the added salt slightly.
- confectioners' sugar - The key ingredient that creates smooth, soft, melt in your mouth cookie bites. You can replace with fine granulated sugar, but the cookies will be slightly firmer.
- vanilla extract - Vanilla enhances the classic shortbread flavor. You can experiment with other extracts like almond or peppermint for different holiday variations.
- salt - Balances the sweetness and enhances the butter flavor. Use fine kosher or table salt for even distribution.
- all purpose flour - Provides structure while keeping the cookies tender. Do not overpack the flour or the dough will become dry. Add the flour with the rest of the dry ingredients to keep the dough even and smooth.
- sprinkles - Use Christmas colored sprinkles that hold their shape in the oven. Avoid nonpareils, which can bleed color into the dough. You could use make these bites any time of the year, just switch up the theme with the color sprinkles that you use.
Equipment
You will also need measuring cups and spoons (or a kitchen scale for the most accurate measurements), a stand mixer or hand mixer, a mixing bowl, a rolling pin, plastic wrap or sandwich sized zip top bags for shaping the dough, a sharp knife for cutting squares, a baking sheet, silicone baking mat or parchment paper, cookie sheet, and a cooling rack.
How to Make the Best Christmas Shortbread Cookie Bites
- Make the shortbread dough. In a large mixing bowl, cream the butter and sugar together using a stand mixer or hand mixer on medium speed until light and fluffy, about 2 minutes. Add the vanilla and salt and beat until incorporated. Add the flour and sprinkles and beat until the mixture forms into a shaggy dough.
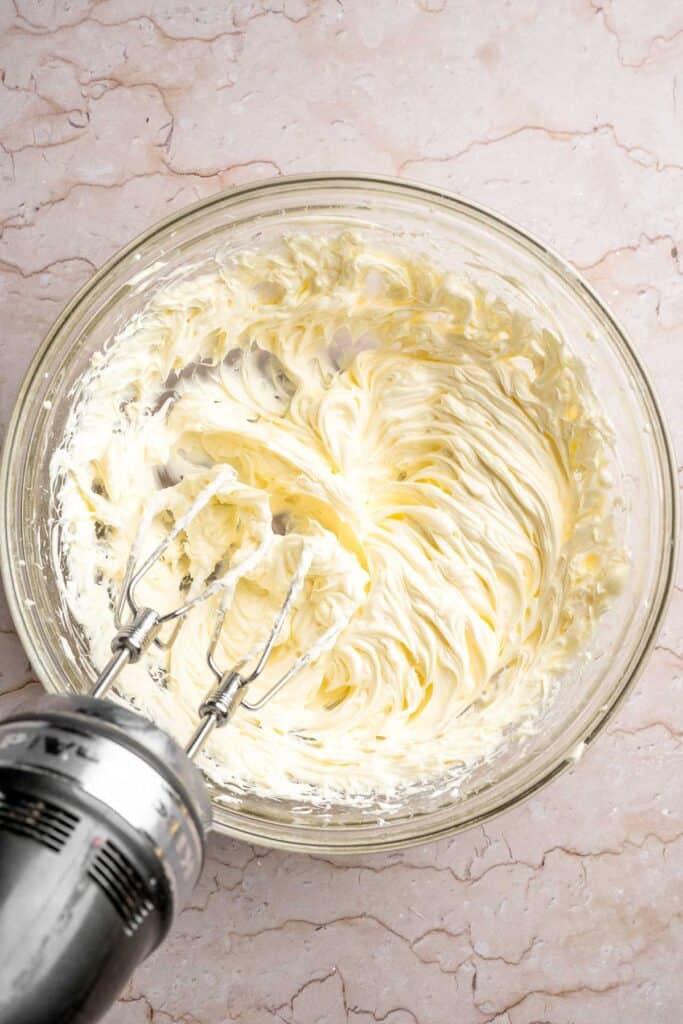
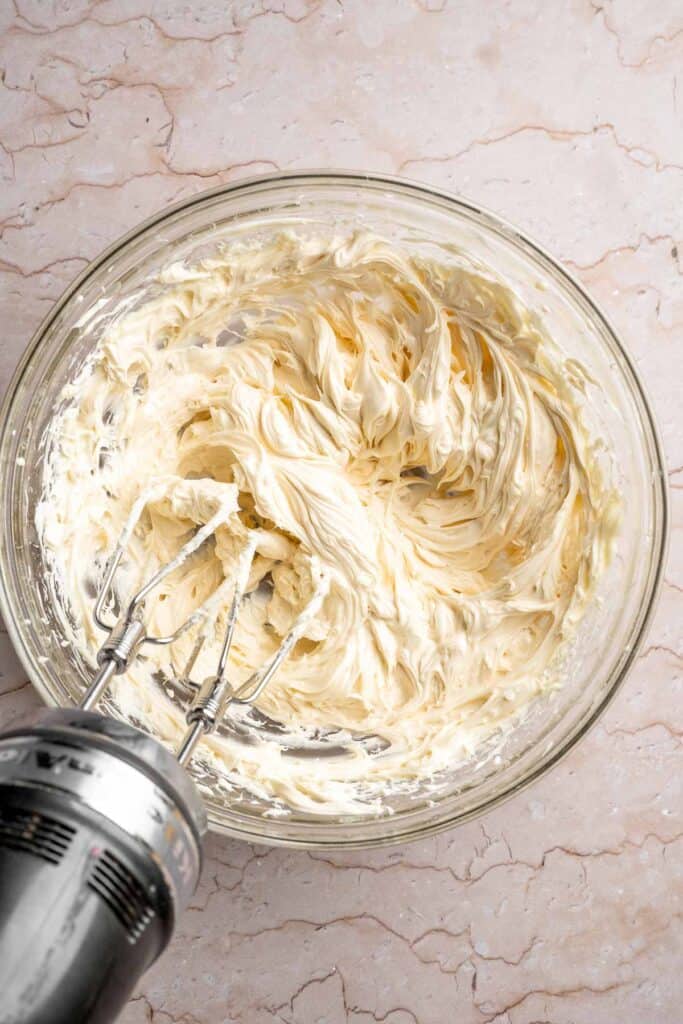

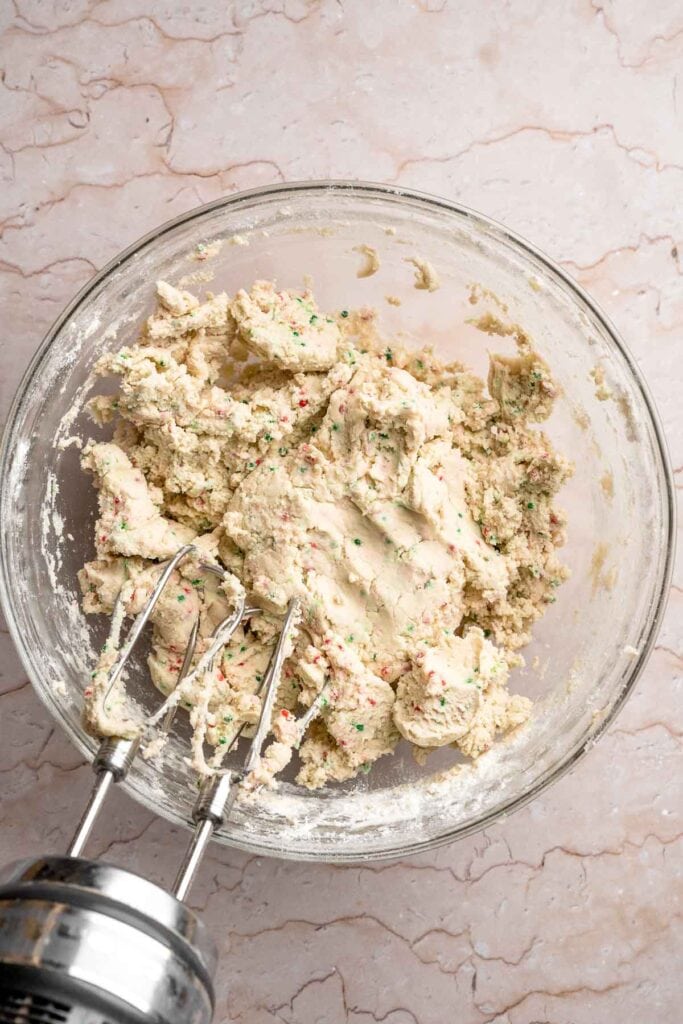
- Form dough. Use your hands to shape the crumbly dough into a smooth ball. The dough may feel slightly dry, but it will soften as you work with it.
- Divide and roll. Divide the dough into two portions. Place each portion into a sandwich-sized ziploc bag and seal. Use a rolling pin to flatten the dough inside the sealed ziploc bag to spread it out. It will be roughly ½-inches thick when rolled.
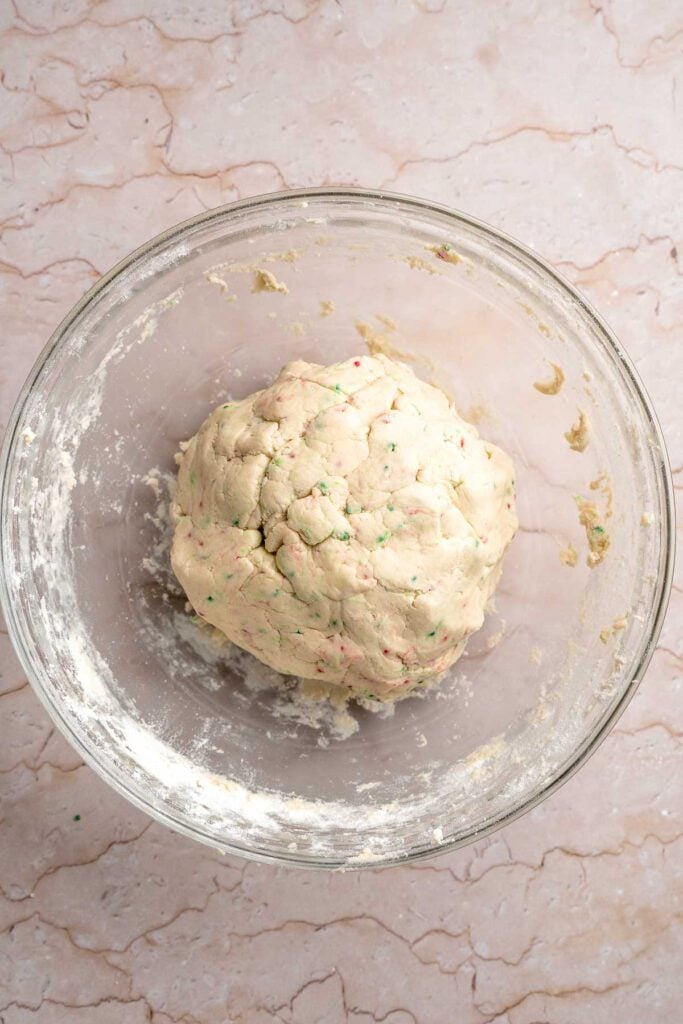
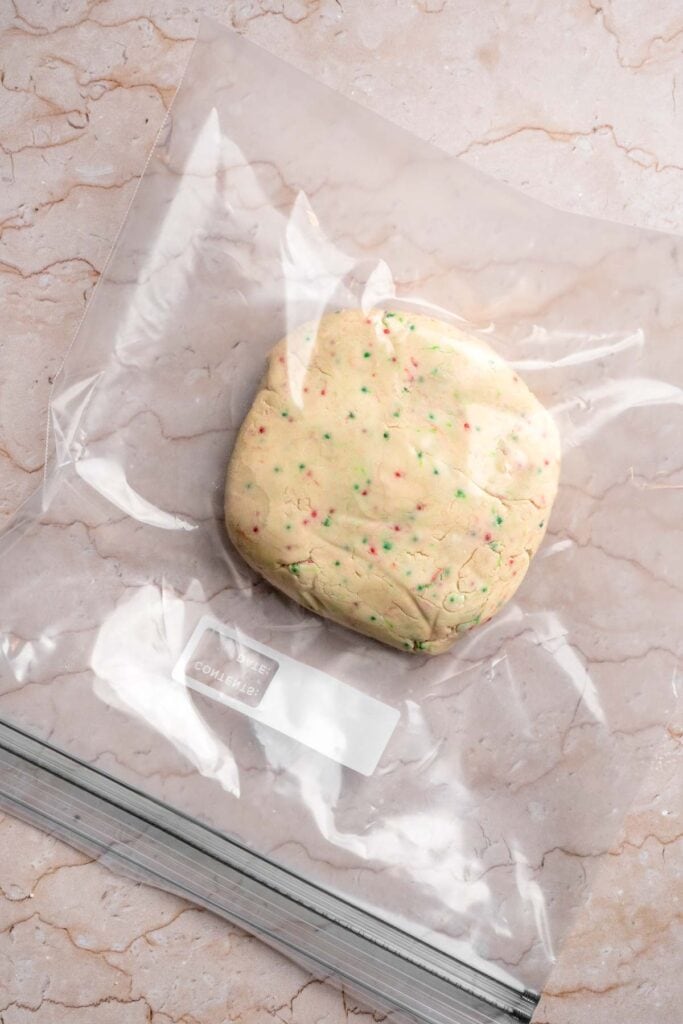
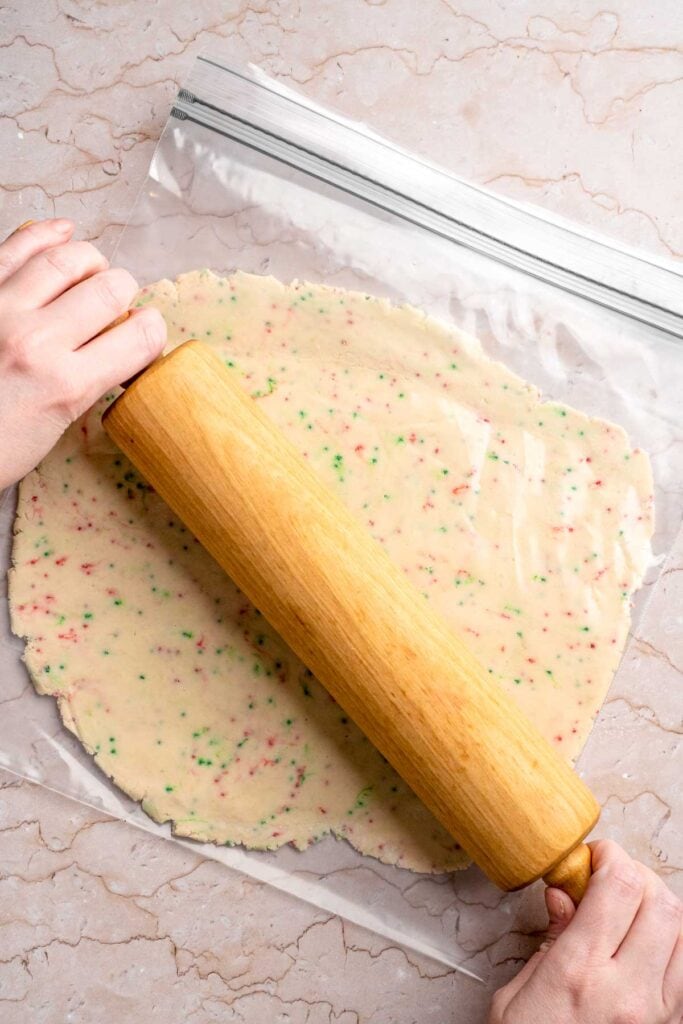
- Chill. Refrigerate for 2 hours, up to overnight.
- Slice. Remove one of the flattened slabs of doughs from the fridge. Cut away the bag and slice the dough into small ½-inch squares. Arrange on the baking sheet lined with parchment paper about ½-inch apart. Transfer the tray back to the refrigerator while you wait for the oven to preheat to 350°F.
- Bake. Bake for 8-10 minutes until just starting to turn golden brown on the edges.
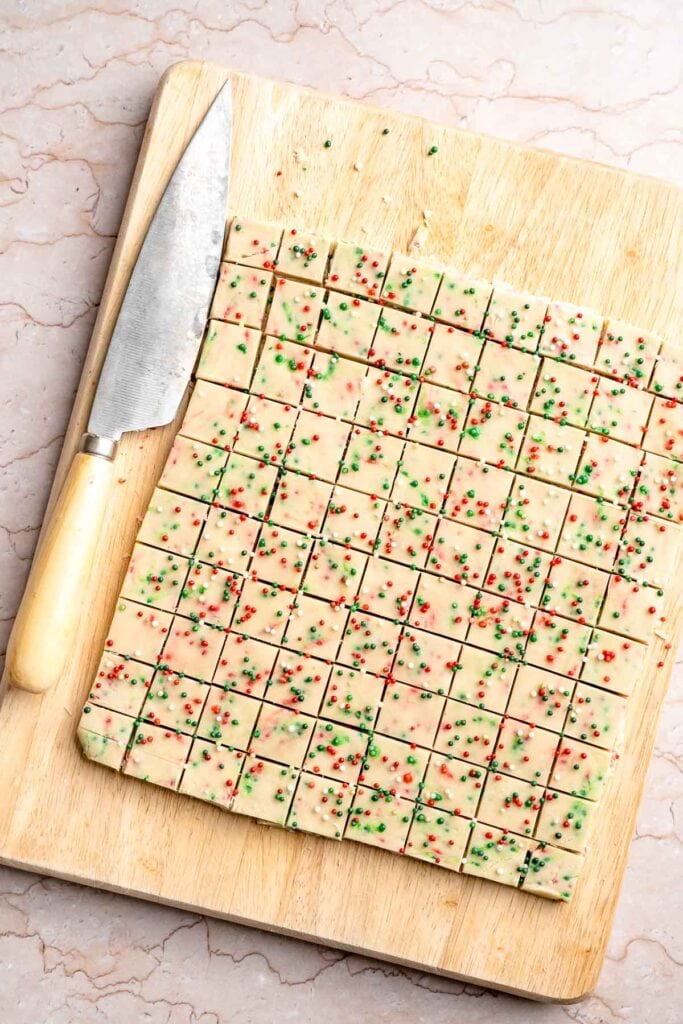
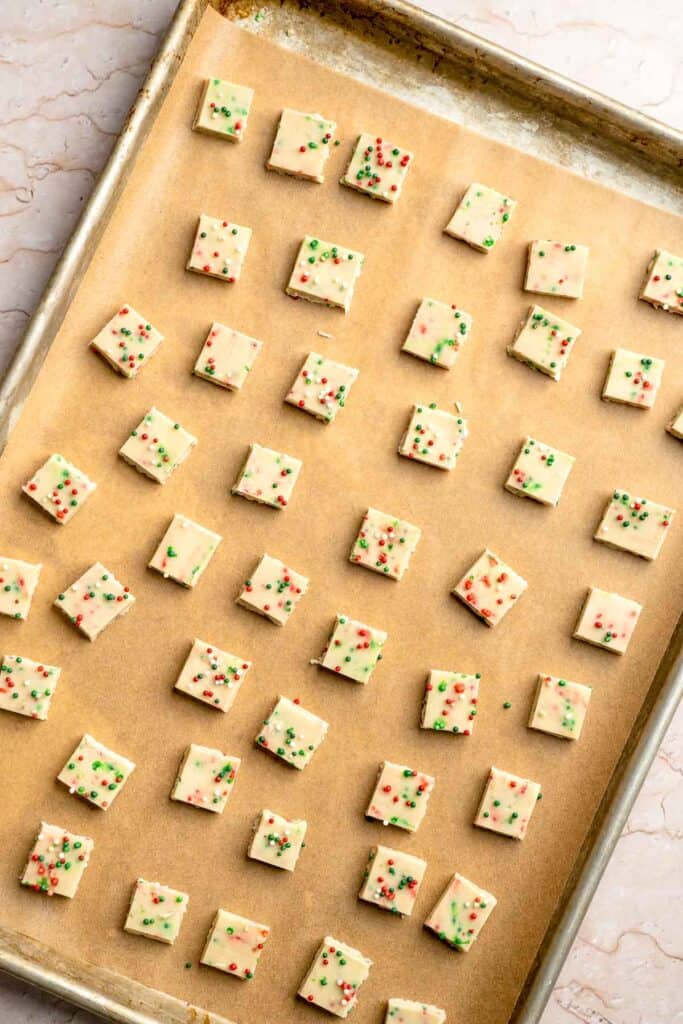
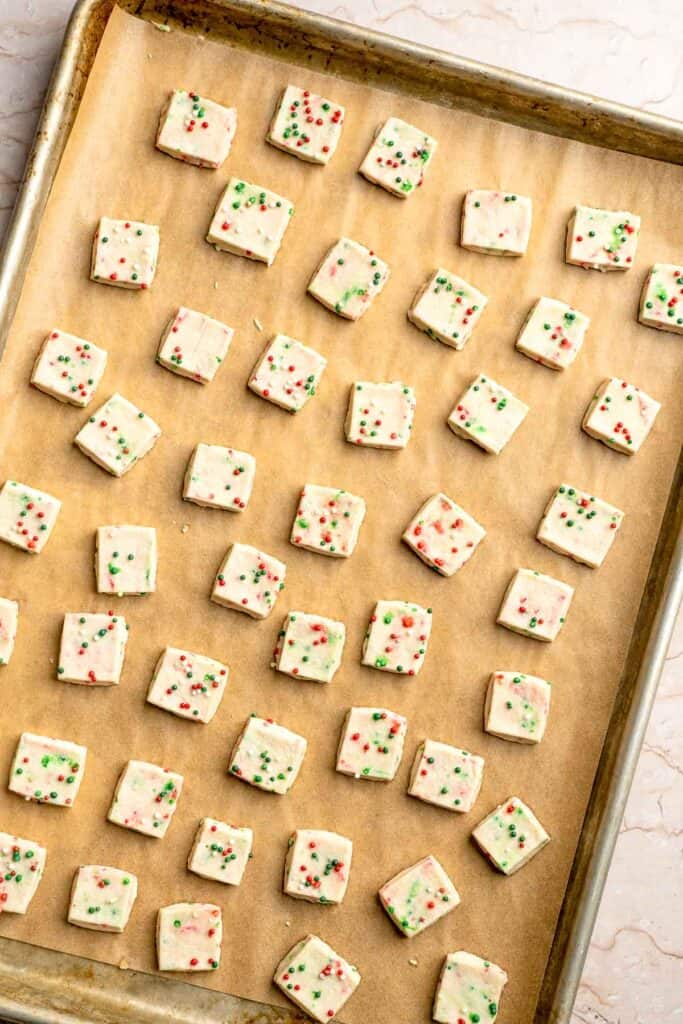
- Cool. Let the cookies cool in the pan for 10 minutes, then transfer to a wire cooling rack to cool completely.
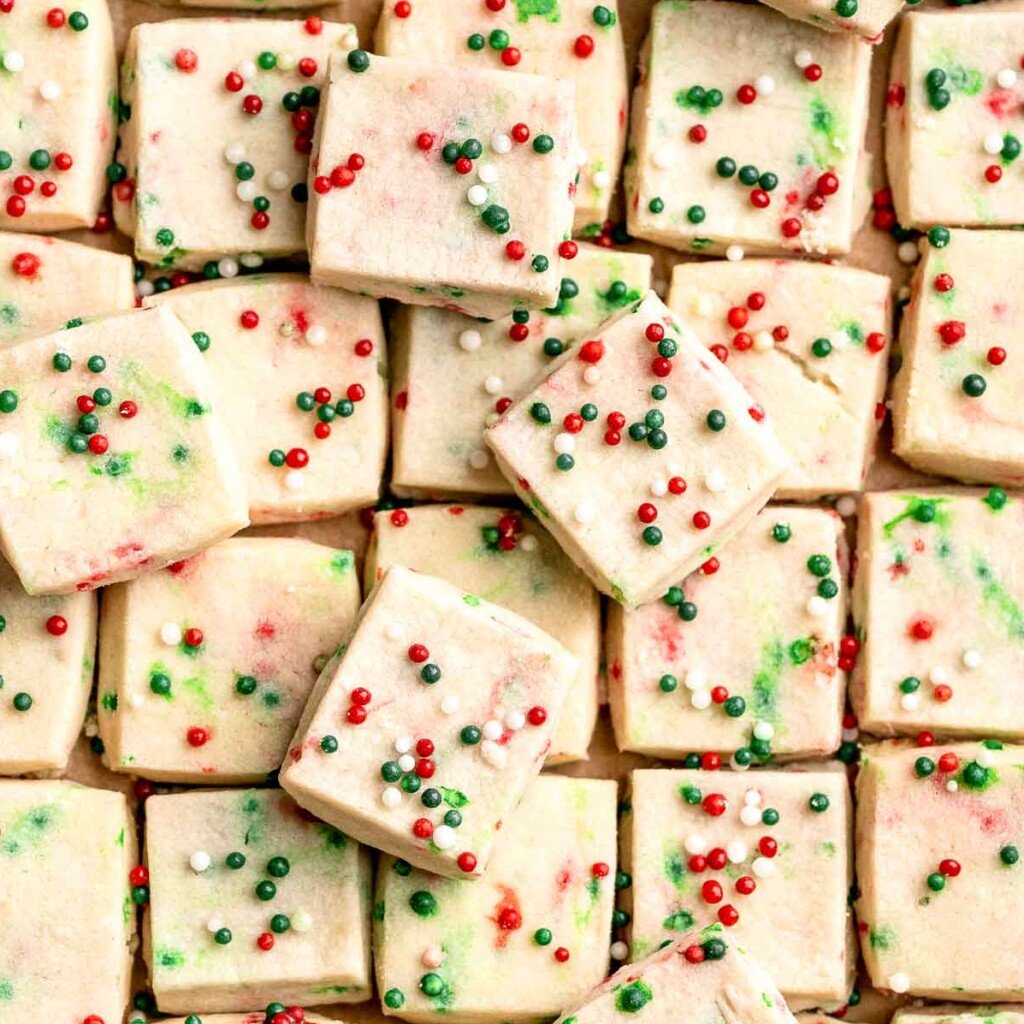

Recipe Video
Expert Tip: Roll the Dough Inside the Bag for Perfect Thickness
Rolling the dough inside a sealed zip top bag keeps everything contained, prevents sticking, and guarantees even thickness. Press the dough firmly toward the edges, then use a rolling pin to smooth it into a flat rectangle. This method creates clean edges, consistent half inch thickness, and makes cutting uniform squares much easier. It also helps the dough chill evenly, which improves the texture of the shortbread as it bakes.
More Tips and Tricks
- Follow the instructions closely. Shortbread dough is simple but sensitive to temperature, so following the instructions step by step helps create a smooth, clean dough that cuts well and bakes evenly.
- Use room temperature butter. Soft butter blends smoothly with the confectioners sugar, helping the dough come together without crumbling. If the butter is too cold, the dough will be dry and difficult to shape.
- Chill long enough. This dough must chill fully to prevent spreading and to achieve that classic shortbread bite. Chilling also keeps the sprinkles bright and helps the squares maintain clean edges during baking.
- Cut evenly sized squares. Aim for half inch cubes for the best texture. Uneven sizes will bake at different speeds, so consistent cutting ensures soft centers and lightly crisp edges in every bite.
- Use a silicone mat. Silicone baking mats help these tiny squares bake evenly and prevent over browning on the bottoms, which is especially useful since the cookies are very small.
- Use parchment for easy handling. If you prefer not to roll inside a bag, place the dough between two sheets of parchment paper and roll gently. This keeps everything contained and prevents sticking.
Recipe Variations
- Chocolate dipped shortbread bites. Melt white, milk, or dark chocolate and dip half of each cooled cookie bite for a rich holiday twist. Add crushed peppermint, coconut, or extra sprinkles on top before the chocolate sets.
- Almond shortbread bites. Replace the vanilla with almond extract. Drizzle with white chocolate to enhance the almond aroma even more.
- Peppermint white chocolate bites. Add a small amount of peppermint extract to the dough and use crushed candy cane sprinkles. After baking, drizzle with white chocolate and extra crushed candy canes. These variations work well throughout November and December as you transition from fall baking to holiday spreads.
- Cranberry orange bites. Add finely grated orange zest and tiny chopped dried cranberries to the dough instead of sprinkles. See our Cranberry Orange Shortbread Cookies for a different shape.
- Funfetti shortbread bites. Use rainbow sprinkles for a year round version. These cute, colorful shortbread squares are perfect for birthdays, celebrations, and kids parties. The texture stays tender and buttery while the sprinkles add a playful pop of color.
- Chocolate chip shortbread bites. Swap the sprinkles for mini chocolate chips, keeping the bite sized shape the same.
- Cut them bigger. Make slightly bigger bites by slicing the dough into 1-inch squares.
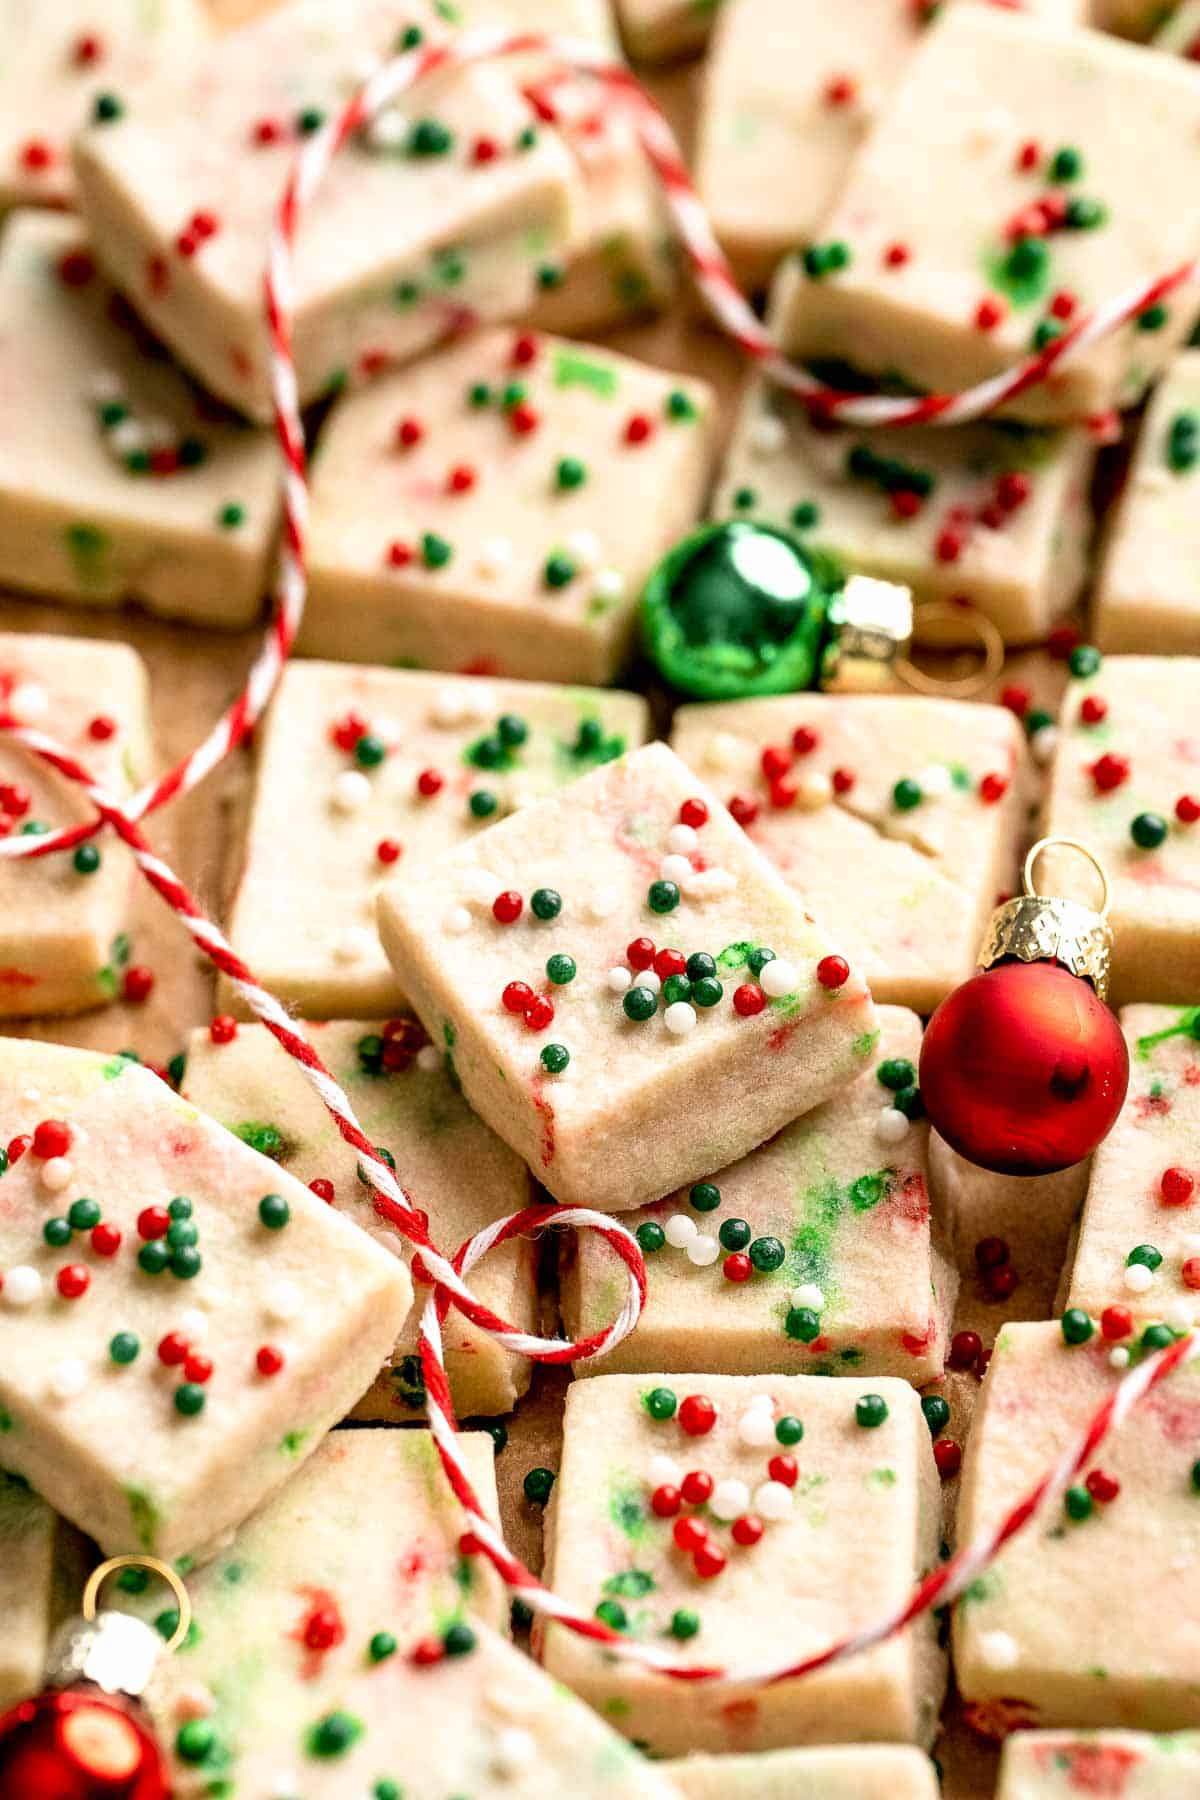
Storage
How to Store
Store cooled Christmas shortbread cookie bites in an airtight container at room temperature for up to 3 days, or in the refrigerator for up to one week. Keep them away from moisture and light to prevent the sprinkles from softening.
How to Freeze
Both the dough and the baked cookies freeze exceptionally well.
- To freeze the baked cookies, place them on a tray in a single layer until solid, then transfer them to a freezer safe container or bag. They keep for up to three months and thaw quickly at room temperature.
- To freeze the dough, store the flattened dough slabs in a zip top bag and freeze for up to three months.
How to Serve
These Christmas shortbread cookie bites are perfect for holiday dessert tables, cookie exchanges, cookie platters, and gift boxes because they are small, festive, and easy to package. They pair wonderfully with warm drinks, seasonal treats, and other Christmas cookies, adding a bright pop of color and buttery flavor to any tray.
These are my favorite dishes to serve with holiday shortbread cookie bites:
Holiday Cookie Week
These cookies are part of our Annual Cookie Week! For more sweet inspiration, explore our full holiday cookie collection from this year and year's past. You will find everything from nostalgic classics and colourful decorated cookies to creative flavours and fun themed bakes that make our annual Cookie Week such a favourite tradition.
FAQ
Christmas shortbread cookies are simple to make because they rely on a few basic ingredients and gentle mixing. Start by creaming softened butter with confectioners sugar until light and fluffy. Mix in vanilla and salt, then add flour until the dough comes together. Shortbread dough is naturally soft and slightly crumbly, so it helps to shape it with your hands to warm the butter and create a smooth ball. Add festive sprinkles or mix ins if you like, then flatten or shape the dough and chill it so it firms up. Chilling helps the cookies hold their shape in the oven and develop that classic buttery crumb. Bake at a moderate temperature until pale with lightly golden edges for perfect Christmas shortbread.
Shortbread cookies are different because they rely almost entirely on butter for their texture and flavor. They do not contain eggs, baking powder, or baking soda, which means they stay dense, buttery, and melt in your mouth rather than light and cakey. The simple ratio of butter, sugar, and flour creates a tender crumb that is rich but delicate, and the low baking temperature keeps the cookies from browning much.
The trick to great shortbread is all about controlling the texture.
1. Start with room temperature butter so it creams properly with the sugar, since this step creates the smooth base needed for the signature melt in your mouth crumb.
2. Measure the flour correctly using the spoon and level method to avoid packing too much into the cup, which can make the dough dry.
3. Bring the dough together gently with your hands to help the butter bind the flour without overmixing.
4. Chilling is essential because it firms the butter, helps the cookies hold their shape, and prevents spreading.
5. Finally, bake at a steady moderate temperature until just barely golden around the edges for the most tender, buttery results.
Absolutely. These shortbread cookie bites are a fantastic make ahead recipe. You can prepare the dough several days in advance and refrigerate it, or freeze it for up to three months. Once baked, the cookies also keep well for a full week at room temperature, making them ideal for holiday gifting and party prep. You can also bake them, freeze them, and thaw closer to Christmas with no loss of quality.
Yes, shortbread dough refrigerates beautifully and actually improves when chilled. Because the dough contains a high amount of butter, chilling it firms the fats, making the dough easier to cut and helping the cookies hold their shape when baked. You can refrigerate the dough for a few hours or overnight, depending on your schedule. If the dough becomes too firm, let it rest at room temperature for a few minutes before shaping or slicing. Refrigerated shortbread dough is ideal for busy holiday prep because you can make it ahead, store it well covered, and bake fresh cookies exactly when you need them.
Yes. This dough is very flexible. You can add citrus zest, almond extract, peppermint extract, mini chocolate chips, or finely chopped dried fruit. Just be careful not to add too much moisture, since shortbread relies on its low liquid content for the proper texture. Mix ins like sprinkles, nuts, or chocolate chips work best when added in small amounts so the dough still binds properly.
Most Christmas cookies stay fresh for about three to five days when stored properly, but shortbread generally lasts even longer due to its low moisture content. Store the cookies in an airtight container at room temperature, away from heat and moisture, and they will stay tender and buttery for a full week.
Definitely. Once the cookies are fully cooled, drizzle them with melted white chocolate, milk chocolate, or dark chocolate. If dipping, let the excess drip back into the bowl and lay the cookies on parchment until set. Chocolate adds richness, creates a polished finish, and makes the cookies perfect for gifting. You can also add holiday sprinkles to the chocolate before it sets for extra color and crunch.
More Christmas Cookie Recipes
Looking for other recipes like this? Try these:
- Christmas Sugar Cookies with Royal Icing
- Chocolate Crinkle Cookies
- Red Velvet Blossoms
- Pecan Snowball Cookies
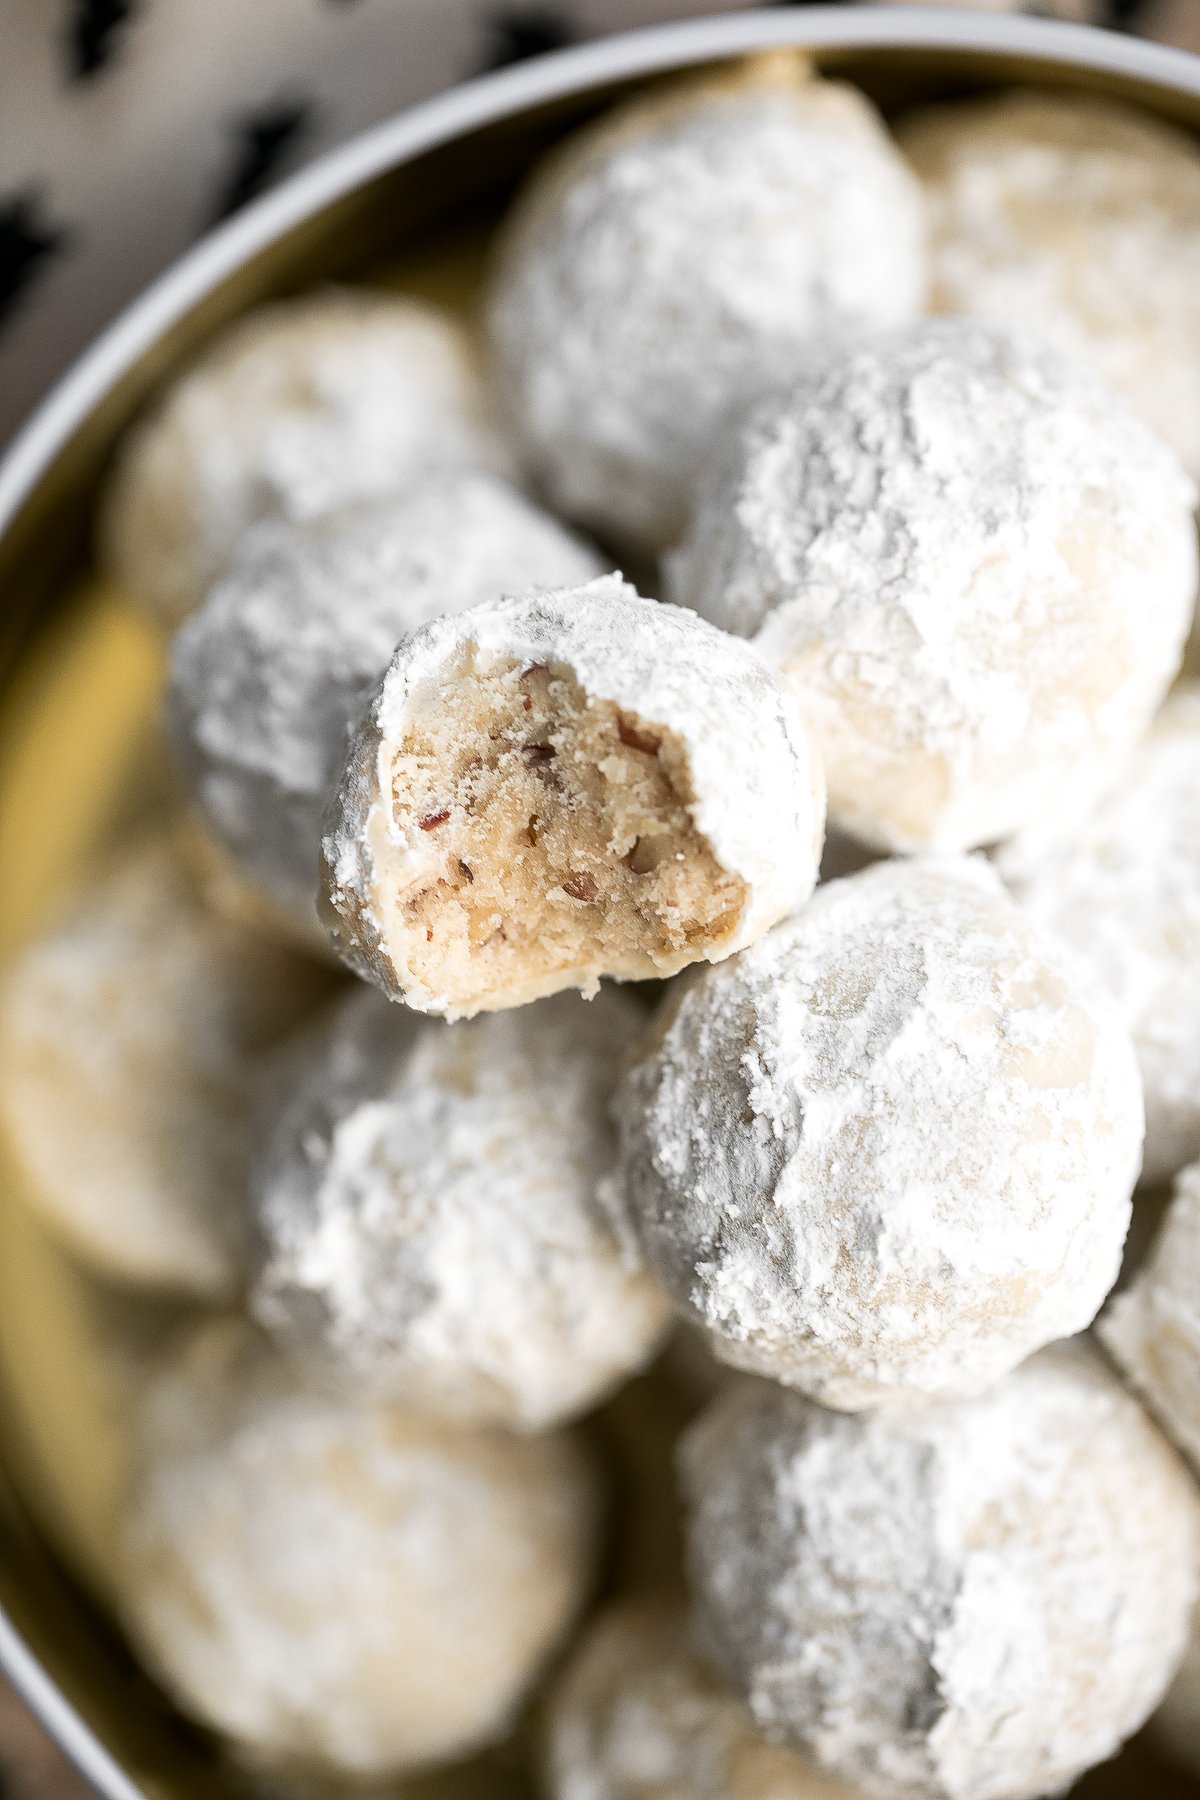
Tried this recipe?
I'd love to hear what you think! Leave a comment and rating below to share your feedback. Your reviews help others discover this recipe and help me keep creating more free recipes for you. Snap a photo and tag me on social media @aheadofthyme too.
This recipe was first published in 2020 but has since been updated with new photos and helpful content.
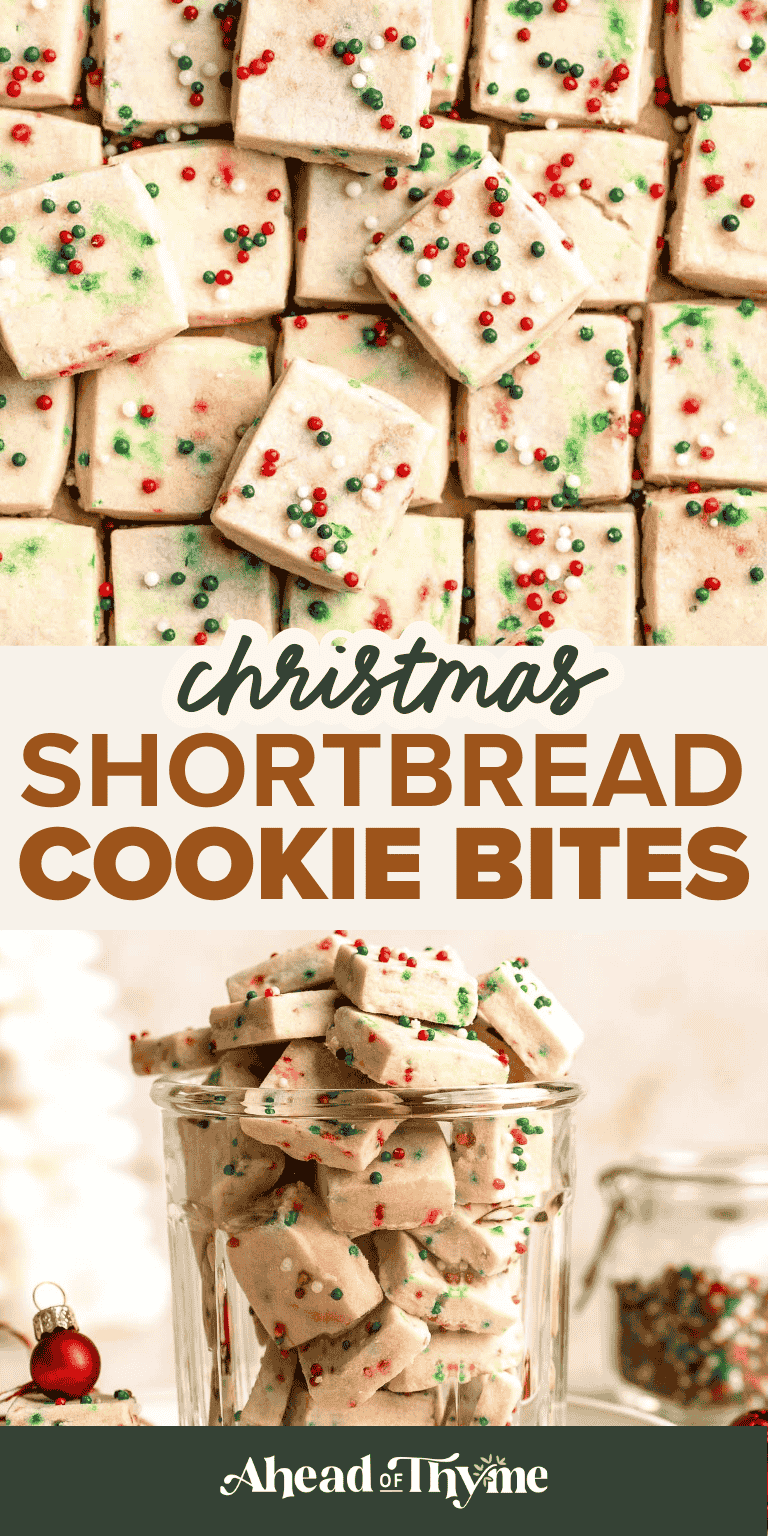
Slice and Bake Christmas Cookies
Soft, buttery, festive, and so much fun to make, these Slice and Bake Christmas Cookies are a beautiful addition to any holiday baking lineup. Each cookie reveals a cute hidden design in the center, which makes them perfect for cookie boxes, class treats, and Christmas dessert trays. The dough mixes easily, takes color wonderfully, and bakes into crisp edged cookies with tender centers and clean holiday shapes that look instantly cheerful and gift worthy.

This type of slice and bake cookie looks impressive, but the process is much more approachable than it appears. The dough handles well, chills reliably, and holds its shape in the oven, which means your colors stay bright and your designs stay sharp. It is a fun baking project for anyone who loves creative holiday cookies, and it is easy to customize with different Christmas shapes, colors, and sprinkles.
These cookies are also great for making ahead because both the dough logs and the baked cookies freeze beautifully. You can prepare the dough days or even weeks in advance and bake fresh cookies whenever you need them. Whether you are filling a holiday cookie tin, hosting a cookie exchange, or adding something playful to your Christmas dessert table, these slice and bake cookies are guaranteed to stand out.

Why You'll Love This Recipe
- Easy to prep and customize. The dough comes together quickly and works beautifully with food coloring, sprinkles, or mix ins. You can create stripes, swirls, or fun patterned cookies without complicated shaping.
- Make ahead friendly. The dough freezes and chills well, which means you can prep it days or even weeks ahead. Slice off what you need and bake fresh cookies whenever you want them.
- Perfect for holiday gifting. These sliced cookies keep their shape, cut cleanly, and look picture perfect. They are ideal for holiday tins, cookie boxes, teacher gifts, or your Christmas cookie trays.
- Kid friendly and festive. Kids love choosing the colors and watching the cookies bake. With gel food coloring, you get bold Christmas tones like red, green, and gold without affecting the texture of the dough.
Ingredients and Substitutions
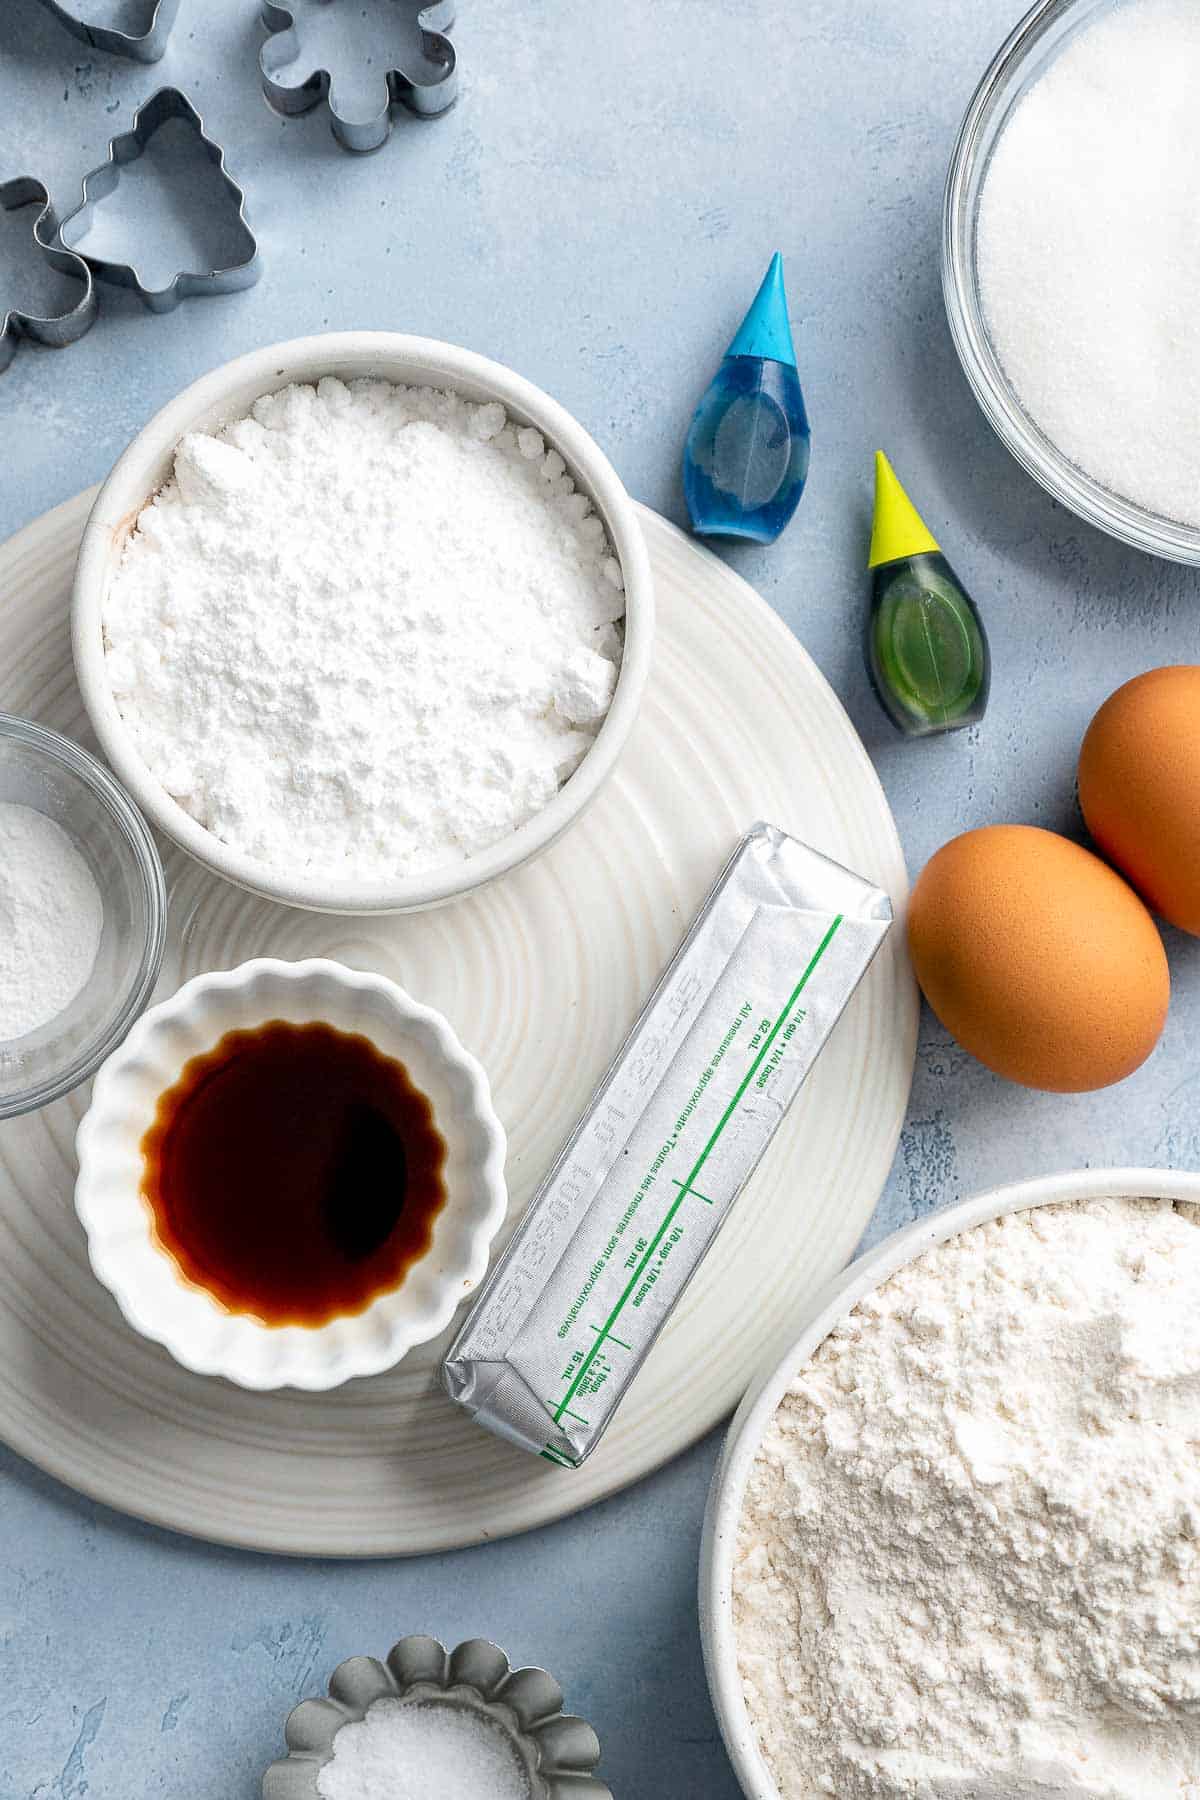
To make this delicious Slice and Bake Christmas Cookies, you will need the following ingredients (see recipe card below for quantities):
- unsalted butter - Softened butter gives the cookies their classic tender texture. Salted butter works too, but reduce the added salt slightly.
- confectioners' sugar - Helps create a smooth dough with a soft crumb. You can replace it with additional white sugar, but the texture will be slightly crispier.
- white sugar - Sweetens the dough and helps the cookies spread just the right amount as they bake.
- vanilla - Adds depth and classic sugar cookie flavor. Almond extract also works well.
- eggs - Bind the dough and create a soft cookie. Use room temperature eggs for best results. You can crack them into a medium bowl before adding to the dough to avoid shells sneaking in.
- all purpose flour - Gives the dough structure. For a gluten free version, a 1 to 1 gluten free flour blend works well.
- baking powder - Gives the cookies a light lift so they do not bake up too dense. Do not substitute with baking soda here, since the texture would change.
- salt -Balances sweetness and enhances flavor.
- gel food coloring - Use gel instead of liquid so the dough stays firm and bright in color. Red, green, blue, and gold are great for holiday cookies.
Baking Equipment
You will also need measuring cups and spoons, a stand mixer or hand mixer, mixing bowls, a sharp knife for slicing the dough, a ruler for measuring even slices, plastic wrap for wrapping the cookie logs, a baking sheet, and a cooling rack for the cookies.
Instructions
- Mix the dry ingredients. In a large mixing bowl, whisk together the flour, baking powder, and salt until well combined. Set aside.
- Cream the butter and sugars. In another large mixing bowl, beat the room temperature butter, confectioners' sugar, and white sugar with a hand mixer until light and fluffy, about 3 minutes.
- Add the eggs and vanilla. Add the vanilla extract and eggs, then beat again until fully combined and smooth.
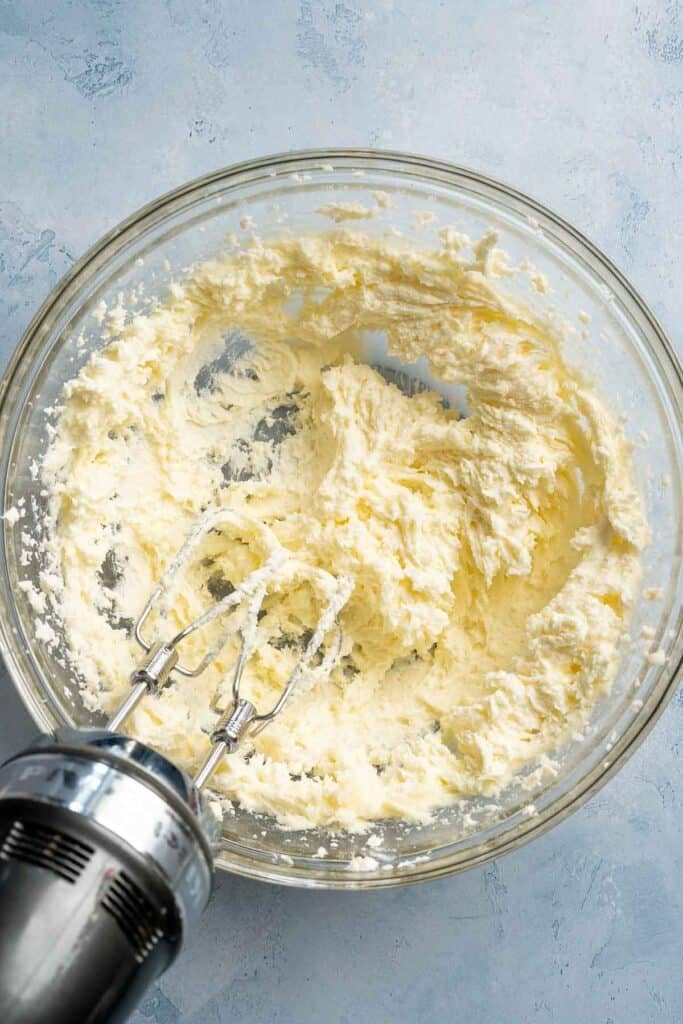
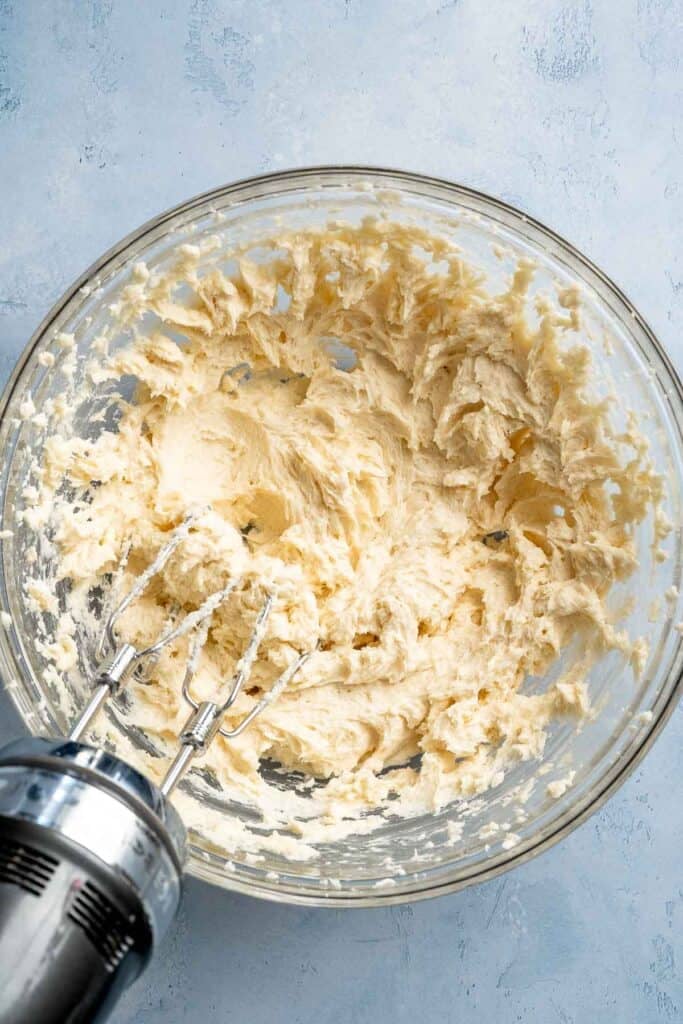
- Bring the dough together. Add the dry mixture to the wet ingredients and beat until a soft dough forms. The dough should not feel sticky.
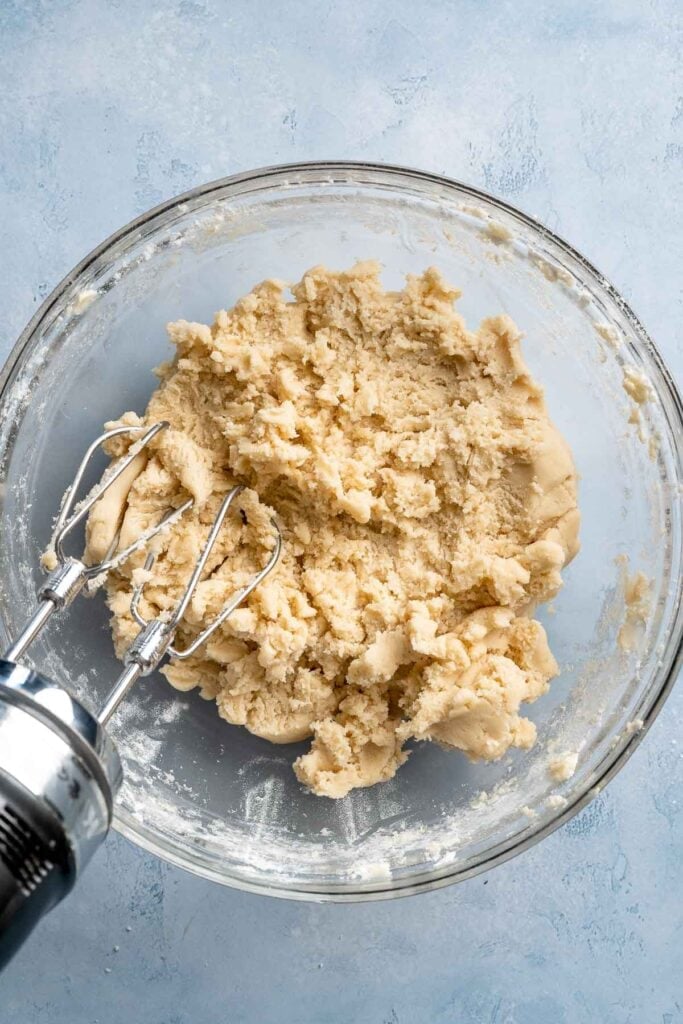
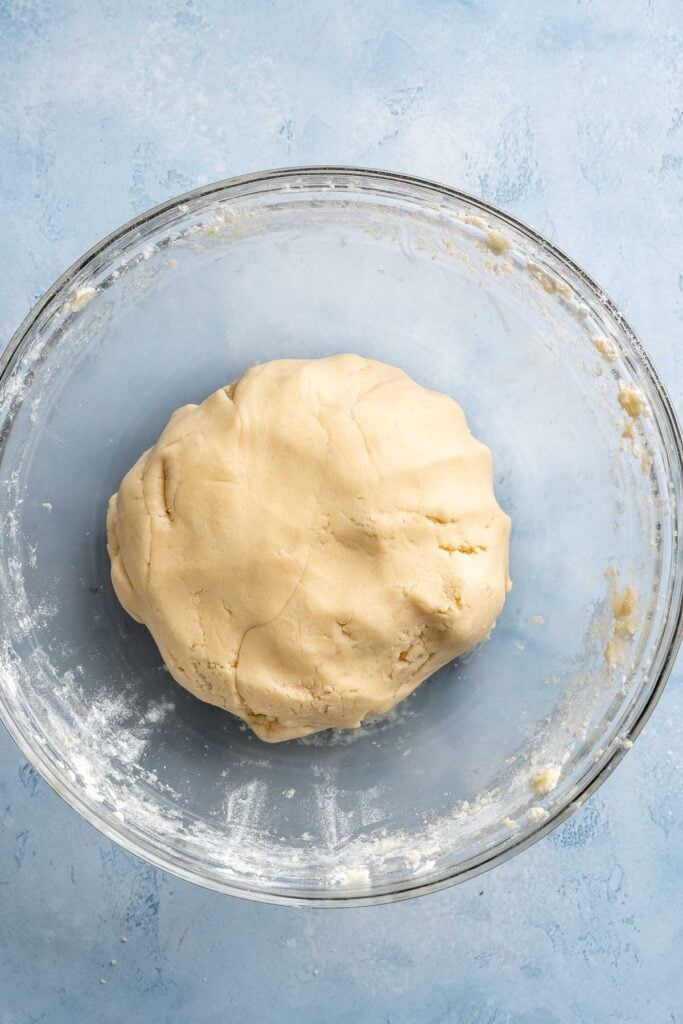
- Separate and chill the dough. Wrap and refrigerate two-thirds of the plain dough. Divide the remaining one-third into as many colors as you plan to use (I used green, brown, and blue, so I separated it 3 further times).
- Color the dough. Add gel food coloring to each portion of dough. Mix using a hand mixer or knead by hand with gloves (this is the easiest way). Wrap each color in plastic wrap and place in the refrigerator for at least 1 hour.


- Create the center shapes. Remove the colored dough from the fridge. Roll each color to about ½ inch thick. Use mini cookie cutters to cut out small shapes, then stack identical shapes into tall, firm stacks. Repeat with remaining doughs (if doing multiple shapes/colours) into separate stacks. Freeze your stack(s) for at least 4 hours to harden.

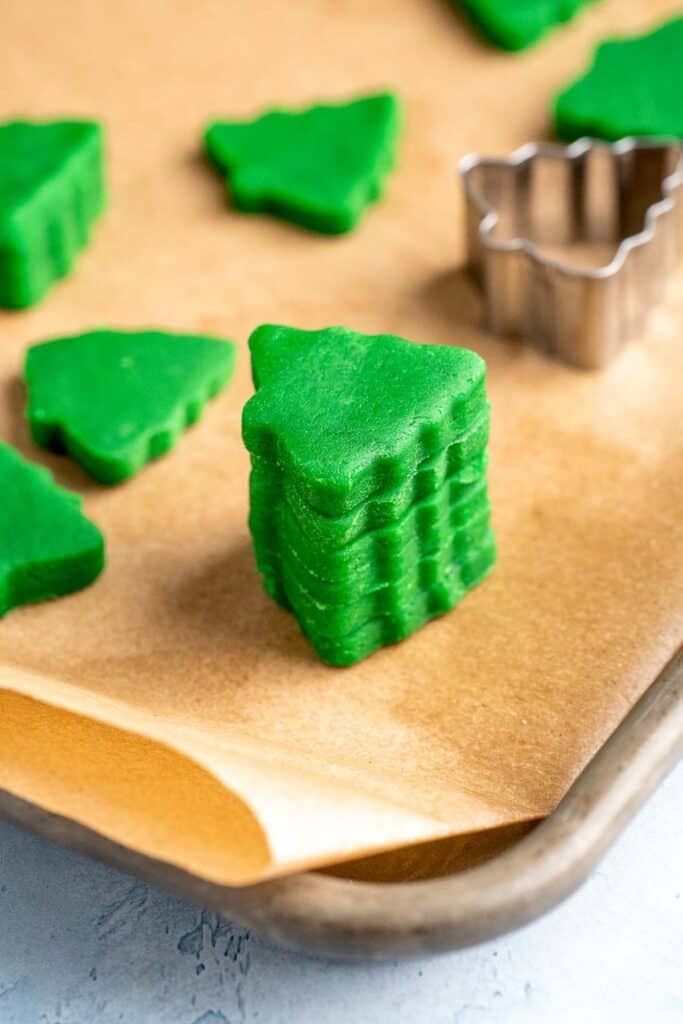
- Soften the plain dough. After about 3 hours of freezing, remove the plain dough from the fridge and let it sit at room temperature until softened, about 1 hour.
- Form the cookie logs. Remove the frozen shape stacks from the freezer. Press the softened plain uncolored dough around each stack to form a log, ensuring the stack runs directly through the center. For shapes with small crevices and lots of corners (such as snowflakes), it helps to press small bits of plain dough into crevices before wrapping fully.

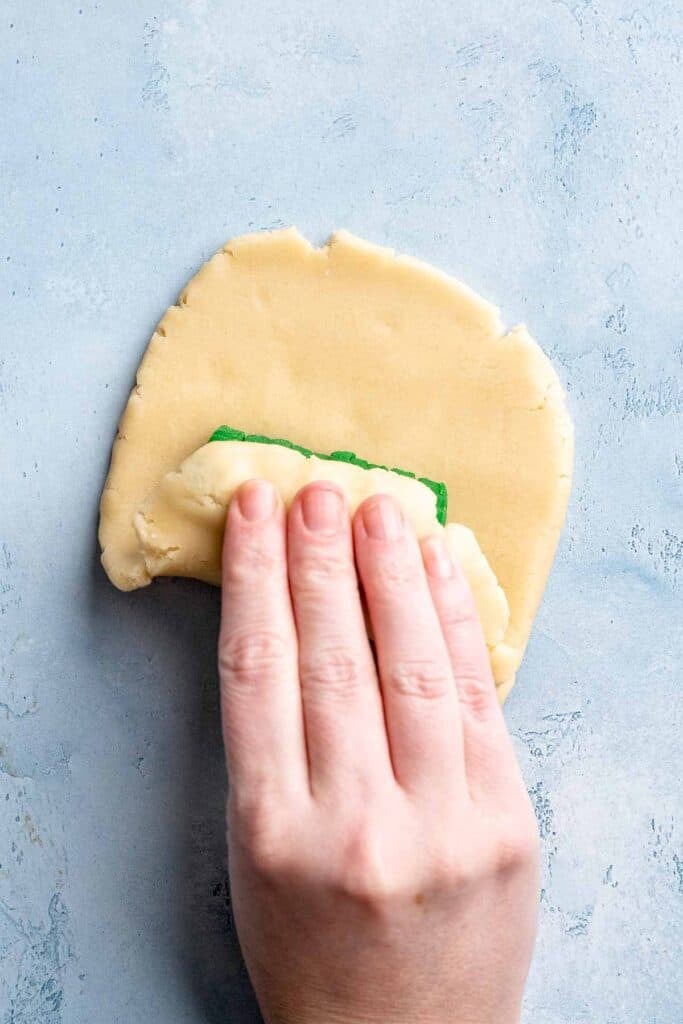
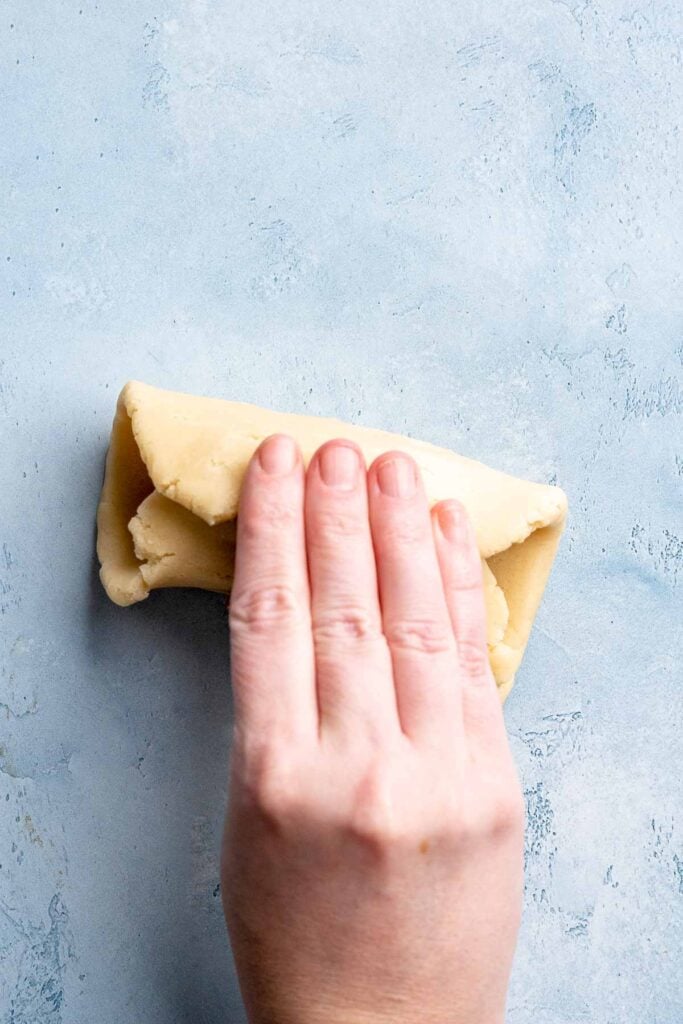
- Chill the logs. Roll the logs gently between your hands until smooth, round, and even. Wrap tightly with plastic cling wrap and freeze for at least 4 hours, or overnight.
- Slice the cookies. Remove frozen cookie dough logs from the freezer and let them sit for about 20 minutes so they soften slightly. Using a sharp knife, slice into ¼-inch cookies.
- Bake the cookies. Place slices onto the baking sheets lined with parchment paper and bake in a 350°F preheated oven for 9-10 minutes, or until set and very lightly golden at the edges.
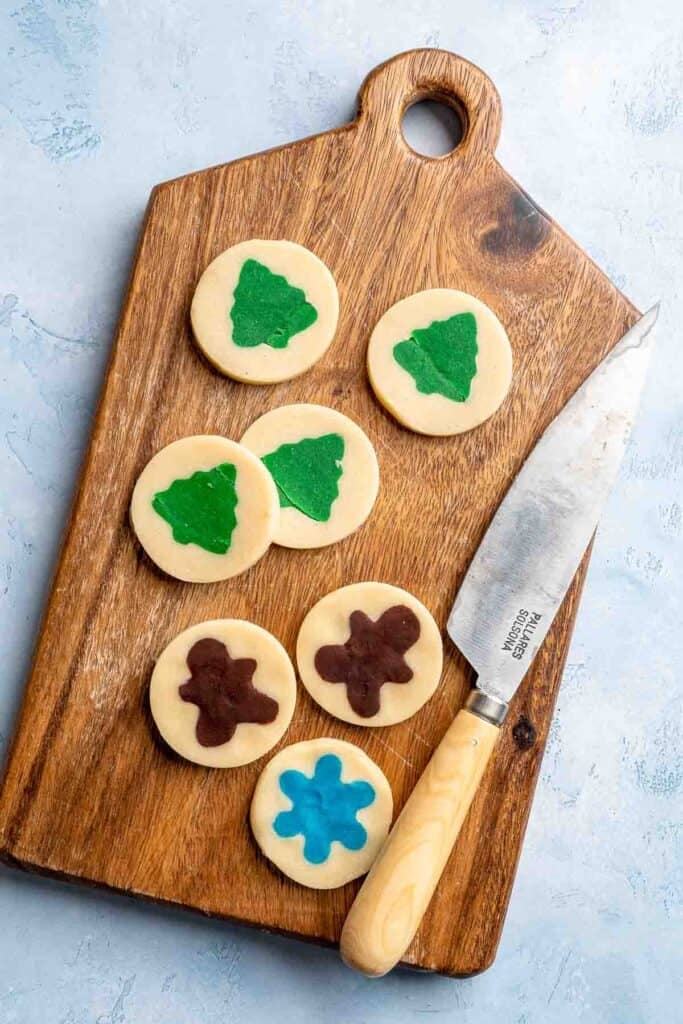


Expert Tip: Chill the Dough Long Enough for Clean Slices
Slice and bake cookies look their best when the dough is fully chilled and firm. Wrap each log tightly in plastic cling wrap, then chill for at least three hours. If the dough softens while slicing, pop it back into the fridge for fifteen minutes. A firm dough gives the cleanest edges and the most defined colors and patterns.
More Tips and Tricks
- Use gel food coloring only. Liquid coloring softens the dough and makes slicing harder.
- Do not over bake. They should look pale, not browned, for a soft sugar cookie texture.
- Make multiple logs. Split the dough into two to four logs so the colors and designs stay vivid and defined.
- For perfect rounds, reshape. Roll the dough into an even cylinder so your cookies slice evenly. If your cookies come out slightly misshaped, gently round the edges while still warm.
- Chill as needed. If the rest of the dough softens while you work, chill it again to keep the shapes clean.
- Use cooking rack. Always cool the cookies on a cooling rack so the bottoms do not soften.
Recipe Variations
- Classic swirl cookies. Skip the cutout center and divide the dough into two or three colors. Roll each color into a rectangle, stack them, then roll tightly into a spiral. Chill well and slice for colorful swirl cookies.
- Checkerboard cookies. Divide the dough into two contrasting colors, shape each into a rectangle, chill them, then slice into long strips. Stack the strips in alternating colors to form a checkerboard block. Chill again, then slice into patterned squares.
- Striped cookie logs. Roll colored doughs into thin sheets and layer them to create bold stripes. Fold, trim, and stack again for more stripes, then shape into logs and freeze before slicing.
- Two tone logs. Keep it simple by creating one colored dough log and wrapping it in plain dough or a second color. This creates a clean two tone ring effect when sliced.
- Sprinkle edge logs. Before freezing, roll the shaped dough logs in holiday sprinkles, sanding sugar, or even crushed candy canes. Once sliced, the edges bake up bright, festive, and crunchy. A light egg wash brushed on the outside of the cylinder before adding sprinkles helps them stick better. See our Pecan Sandies which we rolled in crushed nuts.
- Chocolate dough variation. Replace one half cup of the flour with unsweetened cocoa powder to create a chocolate cookie exterior. This pairs beautifully with red, green, white, or gold designs inside.
- Peppermint twist. Add a little peppermint extract to one portion of the dough and color it red. Twist or braid the red dough with a plain dough portion to create a candy cane effect through the log.
- White chocolate drizzle. After baking, drizzle melted white chocolate over the cookies for a snowy holiday finish.
- Orange twist. Add orange zest to part of the dough for bright and fragrant orange cookies. See our Cranberry Orange Shortbread Cookies.

Storage
How to Store
Store cooled cookies in an airtight container at room temperature for up to one week.
How to Reheat
If you prefer warm cookies, microwave one for a few seconds to soften slightly.
How to Freeze
- How to freeze cookie dough: Slice and bake cookie dough freezes beautifully. Wrap each dough log tightly in parchment, then place it in a freezer bag or freezer safe container. Freeze for up to three months. When you are ready to bake, thaw the log in the fridge just until it is firm enough to slice cleanly.
- How to freeze baked cookies: Baked slice and bake cookies also freeze very well. Once fully cooled, arrange them in a single layer and freeze until solid, then transfer them to a freezer safe container or bag. They keep for about three months and thaw quickly at room temperature while staying soft and buttery.
How to Serve
These cookies are perfect for Christmas dessert trays, cookie exchanges, gift boxes, and holiday parties. They pair well with hot chocolate, milk, festive cocktails, and cozy warm drinks. Add them to your Christmas cookie platter alongside classic favorites like gingerbread men, shortbread, and chocolate peppermint cookies and other holiday cookie recipes.
These are my favorite drinks to serve with slice and bake cookies:
Holiday Cookie Week
These cookies are part of our Annual Cookie Week! For more sweet inspiration, explore our full holiday cookie collection from this year and year's past. You will find everything from nostalgic classics and colourful decorated cookies to creative flavours and fun themed bakes that make our annual Cookie Week such a favourite tradition.
FAQ
Start by creaming the butter and sugars until light and fluffy. Mix in the vanilla and eggs, then add the dry ingredients to form a smooth dough. Divide the dough and add gel food coloring to create festive colors. Shape each portion into a log, wrap tightly, and chill until firm. Once the dough is fully chilled, slice it into rounds and bake at 350 degrees until set around the edges. Cool on a rack and enjoy. The whole process is simple, flexible, and perfect for holiday baking.
Create a center design by shaping a portion of the dough into a small log or shape, then wrap it in a contrasting colored dough. Chill the center shape first so it keeps its form. Once firm, press another color of dough around it evenly to create the outer layer. Chill again, then slice to reveal the design.
Cookies baked at 375 degrees will bake faster and may develop darker edges with a slightly crispier texture. The higher heat encourages more rapid spread and browning. This can be great if you like lightly caramelized edges, but it is easier to overbake them. For slice and bake cookies that need clean edges and even color, 350 degrees gives the most reliable result.
Yes, baking cookies at a lower temperature often results in a softer and more tender texture. Lower heat cooks the dough more gently, so the cookies stay pale and do not crisp as much around the edges. Keep in mind that they may also spread a little more slowly. If you want soft sugar cookie style slice and bake cookies, sticking to 350 degrees is usually the best balance.
Yes, slice and bake cookies can be baked in the air fryer. Preheat the air fryer to 325 degrees, line the basket with parchment, and place the cookies in a single layer with space between each one. Bake for 5 to 7 minutes, checking early so they do not overbrown. Air fryers run hotter than ovens, so shorter times and slightly lower temperatures work best.
Make sure the dough is fully chilled before slicing. Rotate the dough log slightly after each cut so it does not flatten on one side. If a slice loses its shape, gently reshape the edges with your fingers before baking. Wrapping the dough tightly in parchment while chilling also helps maintain a perfectly round shape.
You can roll the dough log in sprinkles or colored sugar before chilling to create a decorative edge. After baking, decorate with drizzled chocolate, royal icing, or festive sprinkles. These cookies are simple on their own, so a few small finishing touches go a long way for holiday trays.
Use a sharp, non serrated knife and slice straight down with gentle pressure. If the dough crumbles, let it warm slightly at room temperature for a few minutes. If it smashes or loses its shape, it may be too soft, so chill it again until firm. Clean the knife every few slices to keep the edges neat.
Yes. You can turn the recipe into orange cookies, almond cookies, or even peppermint cookies by adjusting extracts and colors. For something richer, start with a shortbread cookies base instead. You can even add warm spices like cinnamon or nutmeg to one portion of dough for a cozy twist.
Start with good quality butter, use gel food coloring for bright festive colors, and chill the dough long enough for clean slices. Rolling the dough in sprinkles or sanding sugar before chilling adds a fun decorative edge. You can also play with flavors by adding citrus zest, almond extract, peppermint extract, cocoa powder, or finely chopped chocolate.
Make sure the dough is fully chilled before slicing. If your slices are too thinner, chill them again before baking. A firm dough helps keep the designs crisp.
More Slice and Bake Cookie Recipes
Looking for other recipes like this? Try these:
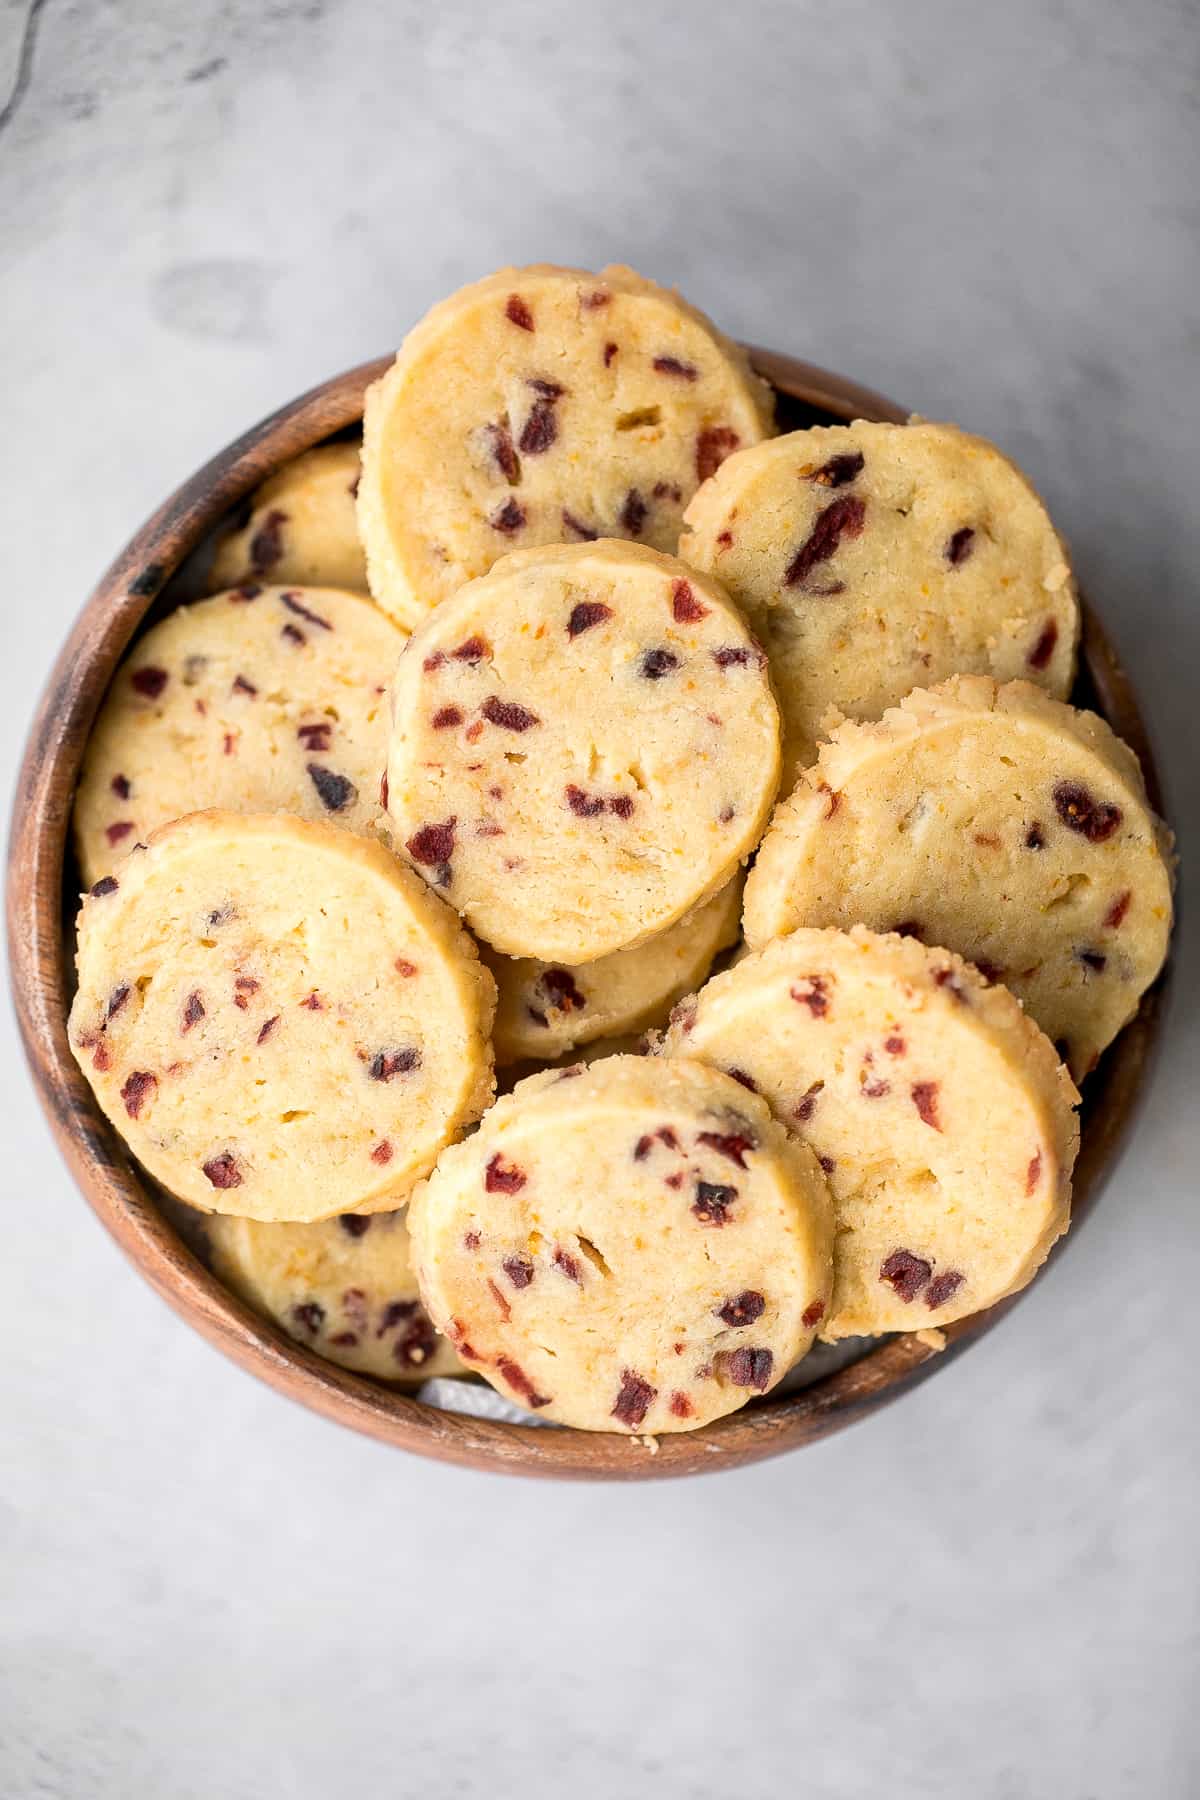
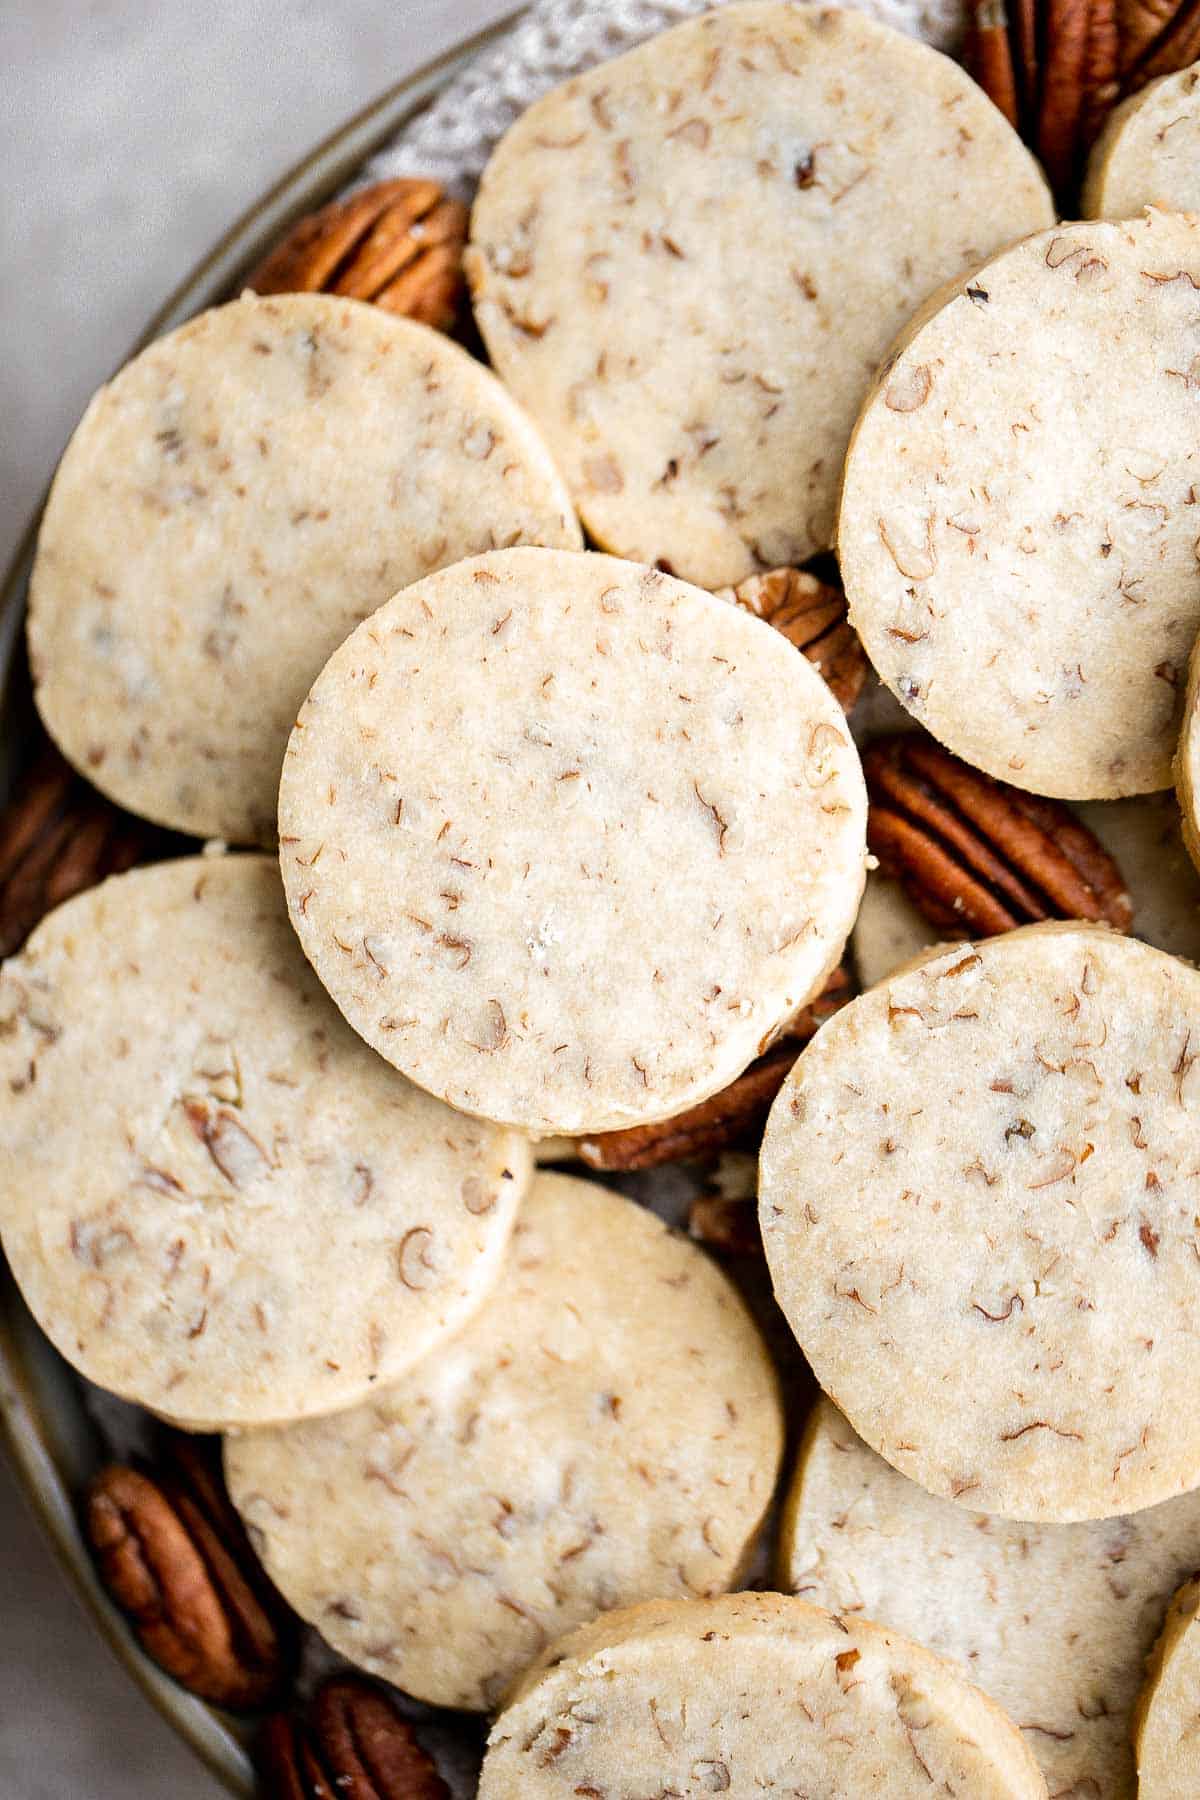
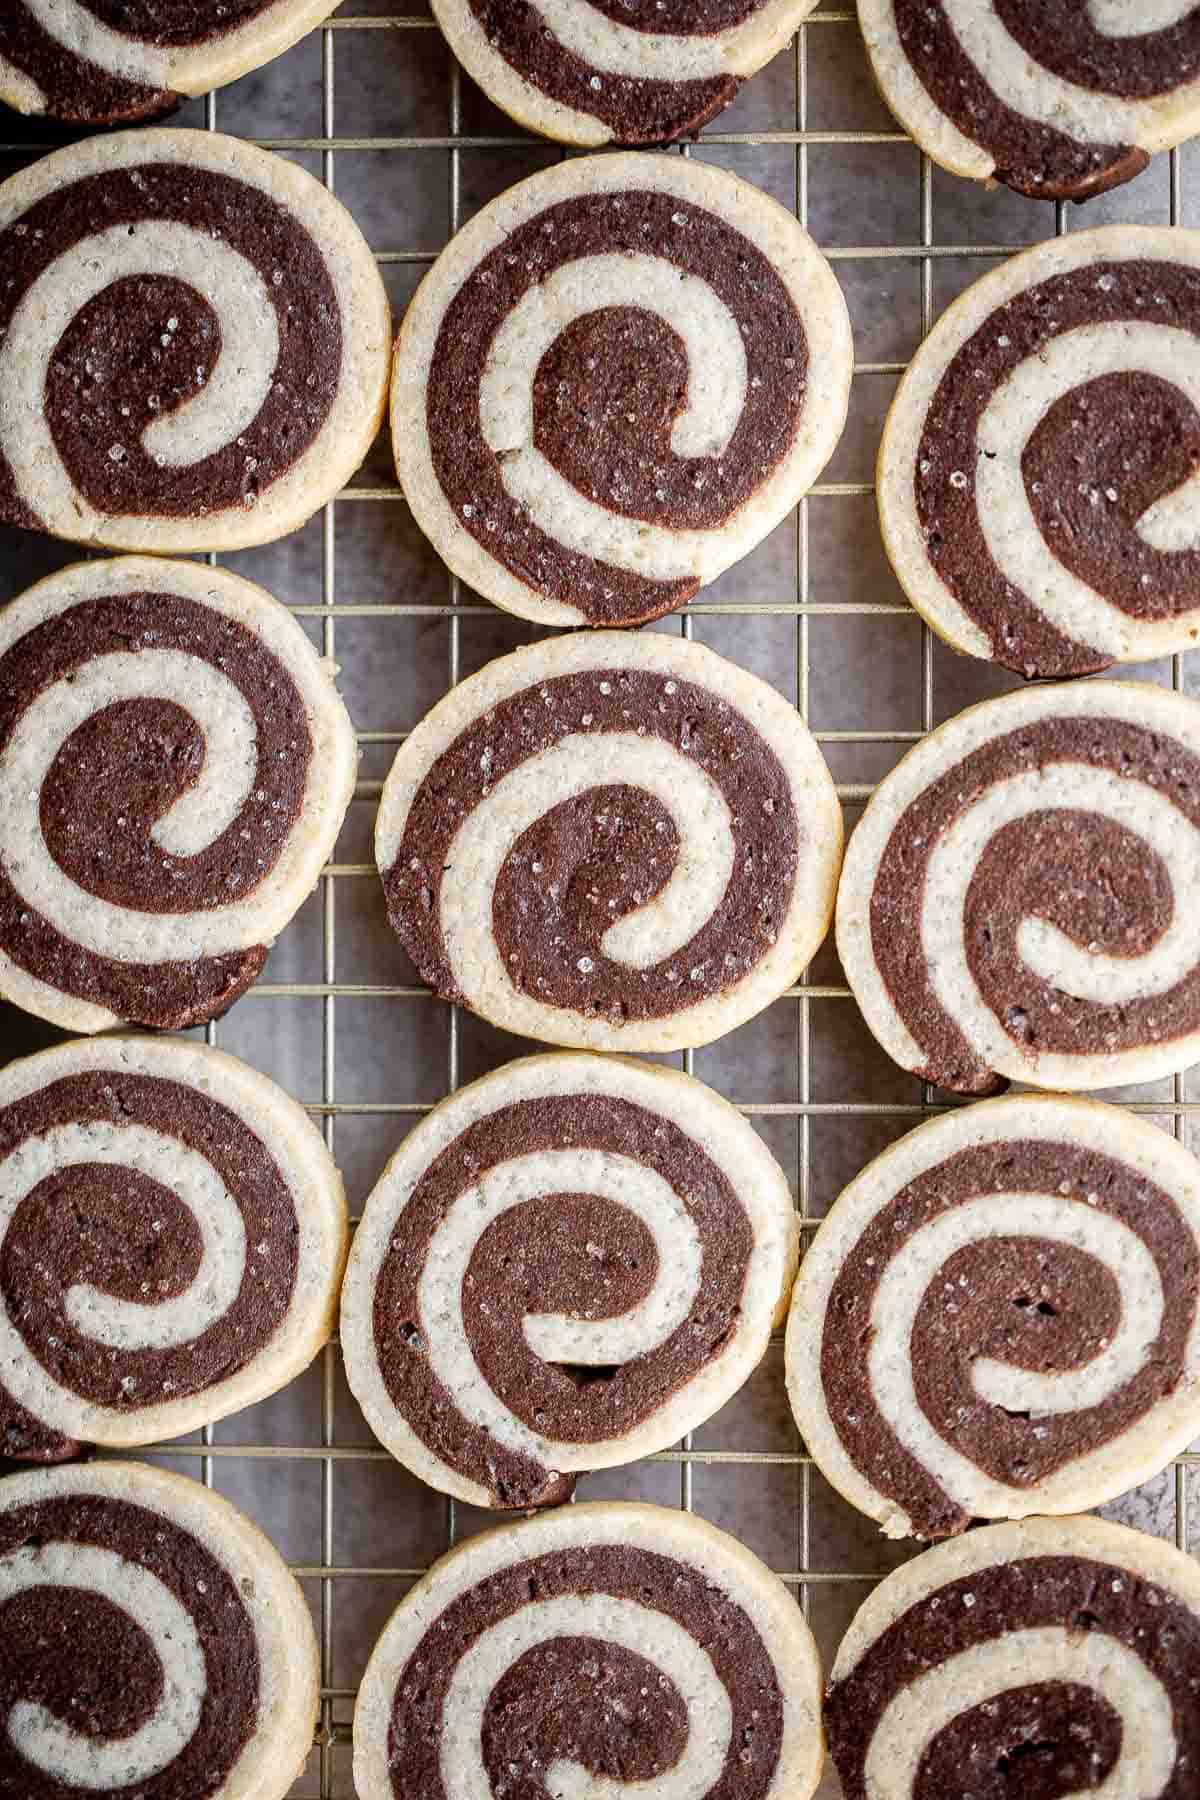
Tried this recipe?
I'd love to hear what you think! Leave a comment and rating below to share your feedback. Your reviews help others discover this recipe and help me keep creating more free recipes for you. Snap a photo and tag me on social media @aheadofthyme too.

Gingerdoodle Cookies (Soft and Chewy Ginger Snickerdoodles)
Soft, chewy, spiced just right, and rolled in warm cinnamon sugar, these Gingerdoodle Cookies are the perfect mashup of classic snickerdoodles and nostalgic ginger cookies. They bake into thick, tender cookies with crackly tops, crisp edges, and soft centers that taste like pure holiday comfort. The molasses adds depth and chew, the spices bring warmth, and the cinnamon ginger sugar coating gives every bite a sweet, fragrant crunch.
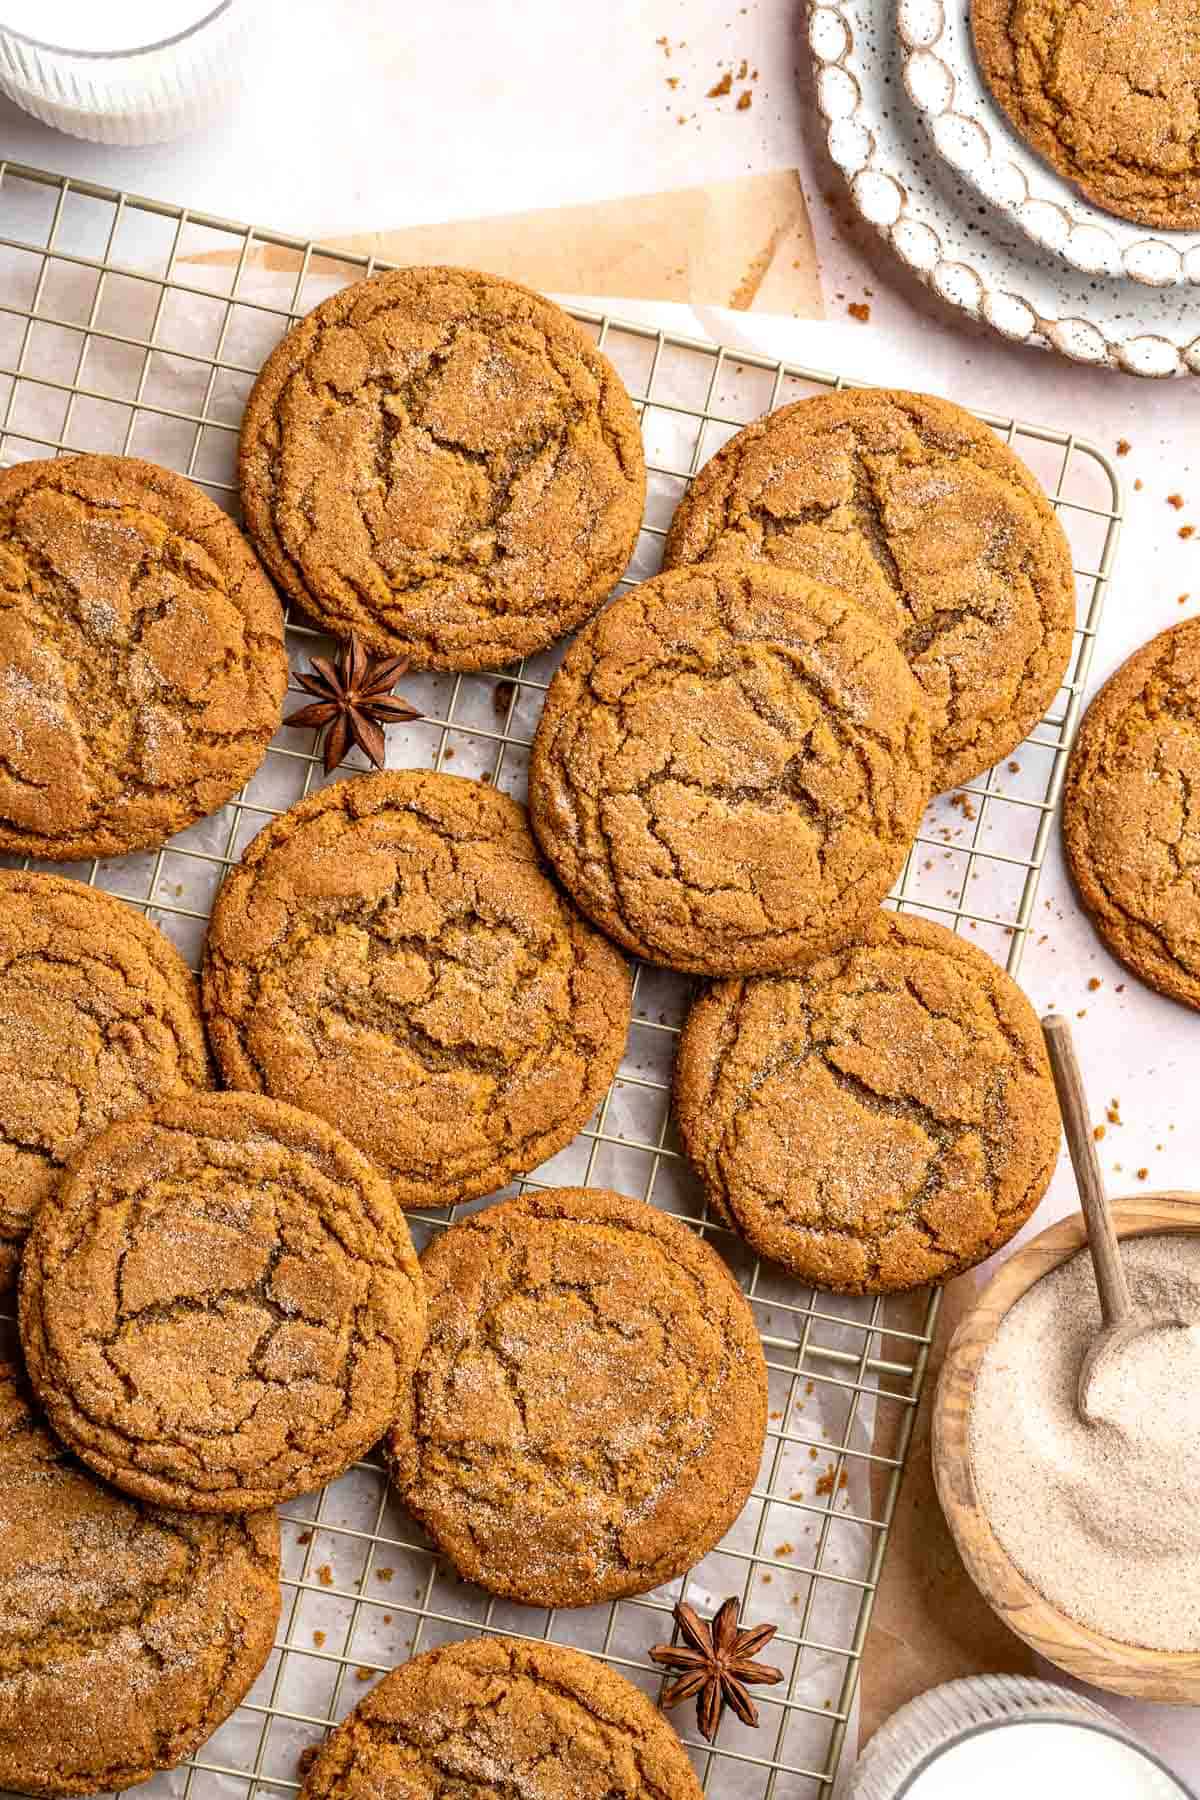
These gingerdoodles are incredibly easy to make with everyday pantry staples, and they come together quickly with no chill time required. The melted butter base means minimal effort and maximum flavor, and allowing the dough to briefly rest helps the cookies form their signature thick, crinkled shape. They feel familiar and cozy, yet different enough to stand out on a holiday cookie tray or December bake list.
This recipe was inspired by my love of both ginger molasses cookies and soft snickerdoodles, and it pairs beautifully with hot chocolate, chai, or a warm winter latte. If you love cinnamon sugar cookies but want something richer and more festive, these gingerdoodles are the perfect addition to your seasonal baking.
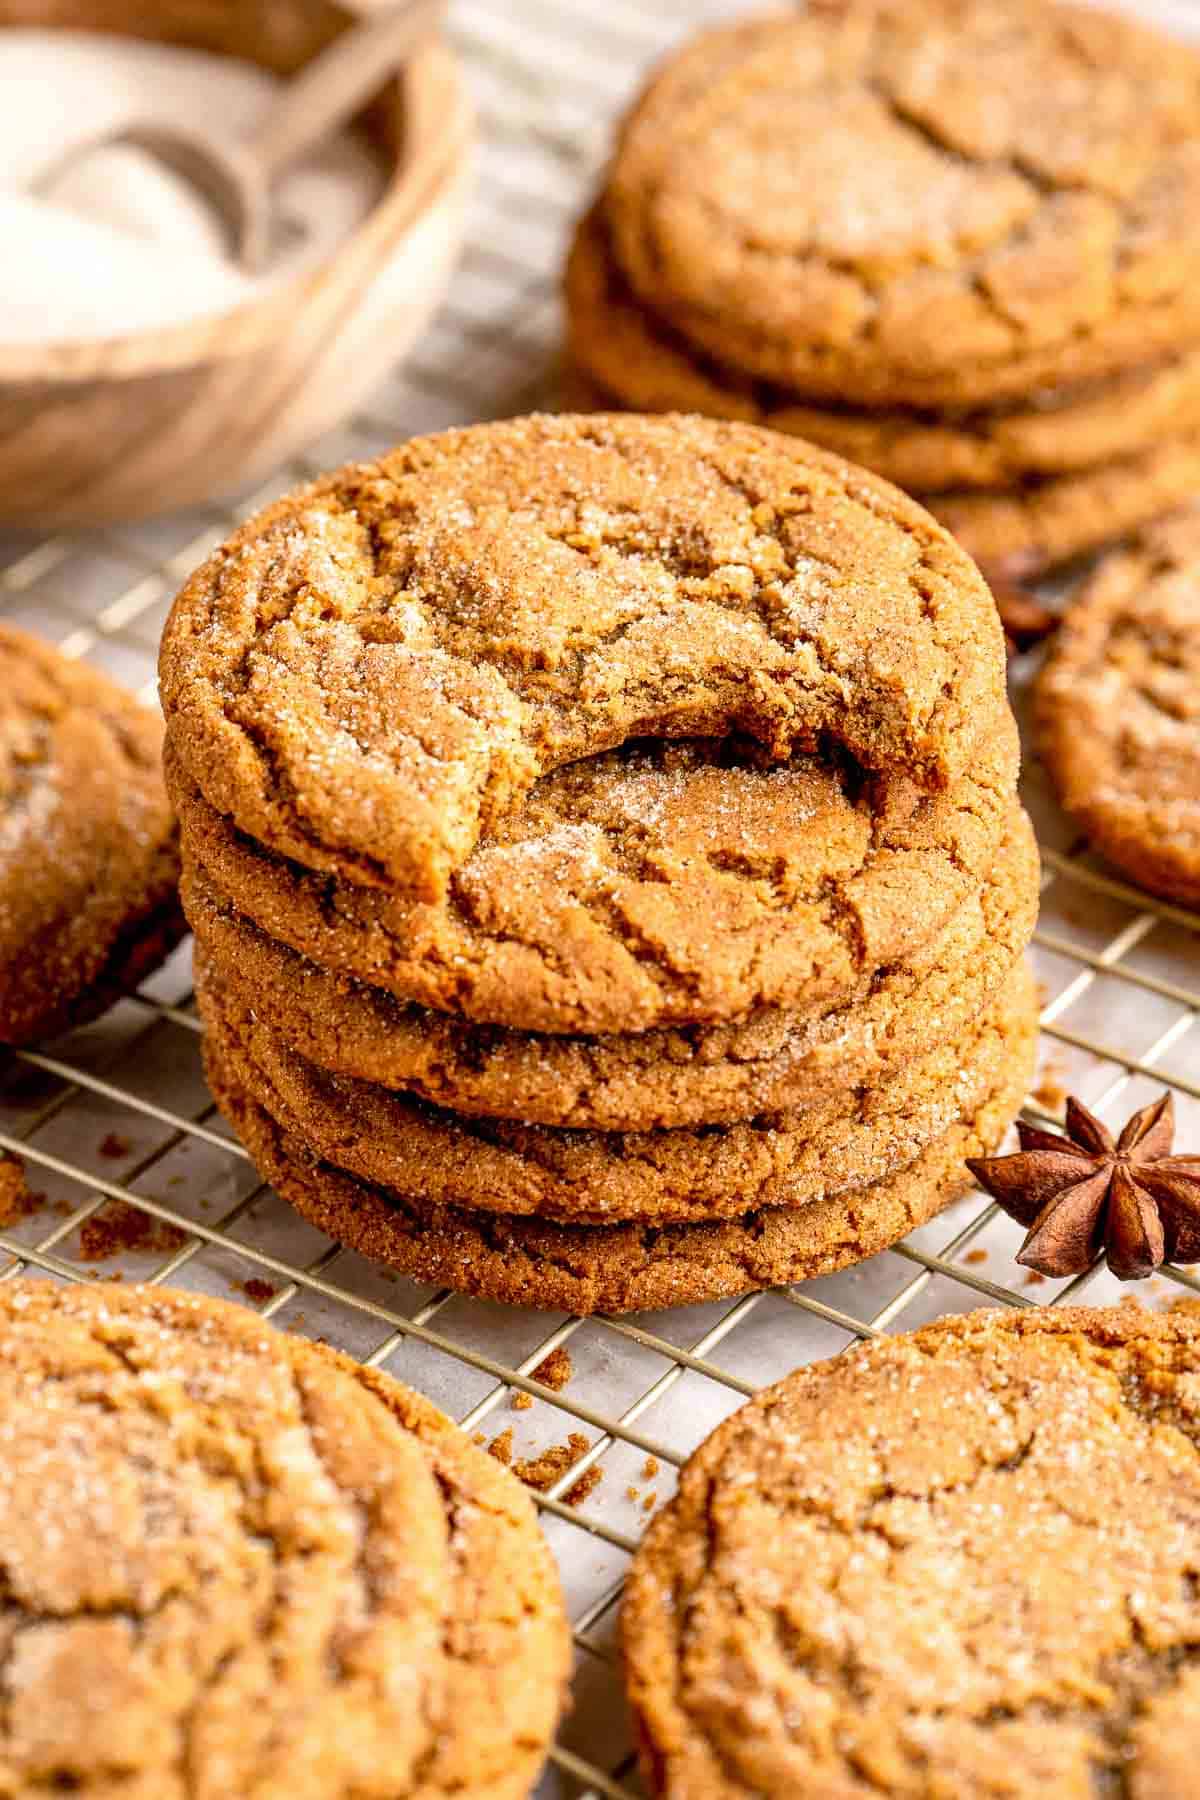
Why You'll Love This Recipe
- Soft and chewy texture. Thick, tender cookies with warm spices, crackled tops, and centers that stay soft even after cooling.
- Perfect holiday flavor. A cozy blend of cinnamon, ginger, cloves, and molasses creates a festive cookie everyone loves during December.
- Easy no chill dough. Melted butter keeps the recipe simple, and a short rest helps the dough scoop smoothly without refrigeration in this chewy gingerdoodle cookies.
- Crowd pleasing twist. The combination of ginger cookies and snickerdoodles creates a familiar yet unique cookie perfect for cookie boxes.
Ingredients and Substitutions
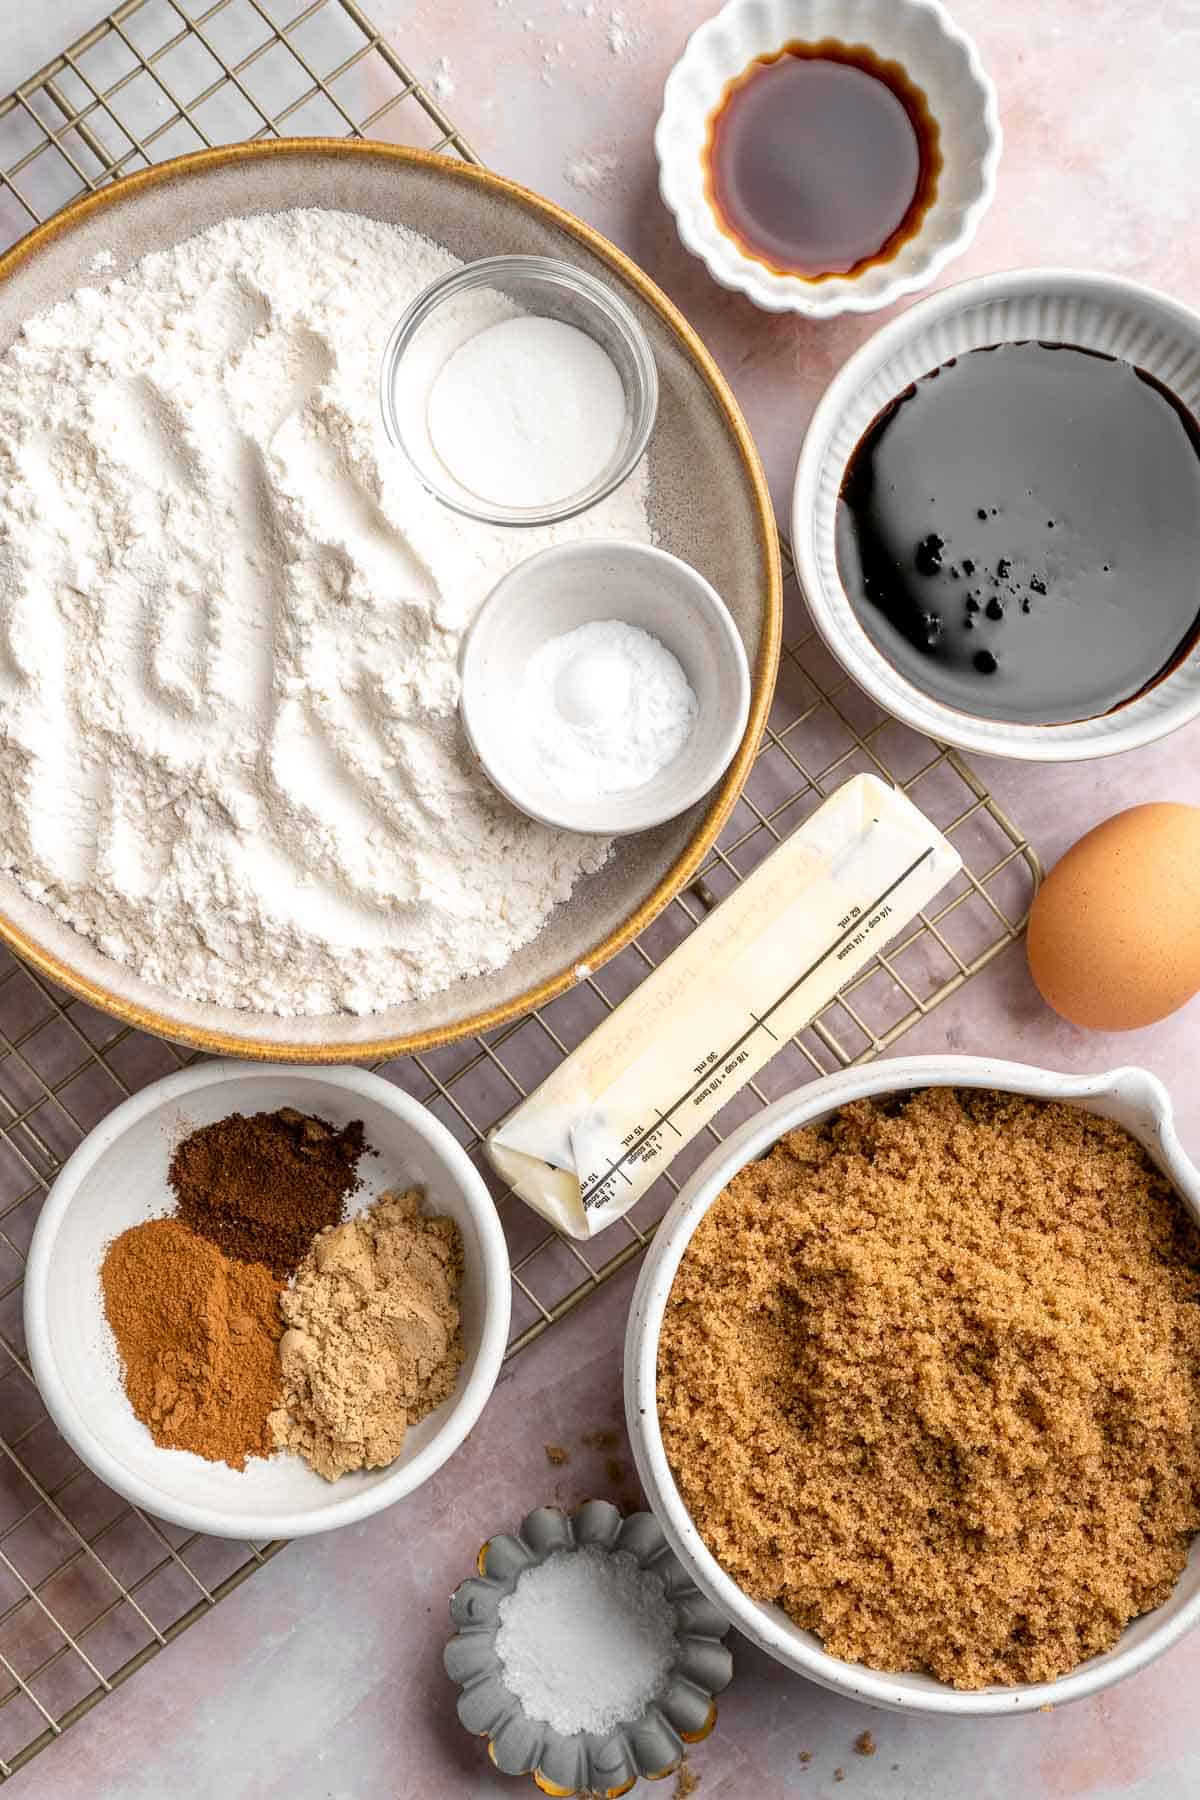
To make this delicious Gingerdoodle Cookies, you will need the following ingredients (see recipe card below for quantities):
- white sugar - Used for the cinnamon sugar coating. Granulated sugar works best for crisp, sparkly edges.
- cinnamon and ground ginger - These spices give the coating its warm flavor. You can increase the ginger for extra heat.
- all purpose flour - Provides structure. For a gluten free option, use a 1 to 1 gluten free flour blend. If you prefer slightly softer cookies, replace one tablespoon of flour with one tablespoon of cornstarch, which helps create an extra tender crumb.
- baking soda and cream of tartar - Essential for lift and that classic snickerdoodle tang. Do not substitute them with baking powder.
- salt - Balances sweetness and enhances spice.
- warm spices - Cinnamon, ground ginger, and cloves create the gingerbread flavor base. You can reduce cloves if you prefer a milder spice. A pinch of nutmeg can be added for extra warmth, especially during the holiday season. Cinnamon and ginger are also used in the cinnamon sugar coating.
- unsalted butter - Melted butter gives the cookies a soft, chewy texture. Slightly cooled salted butter works too if you reduce added salt.
- dark brown sugar - Adds moisture, chewiness, and deeper molasses flavor. Light brown sugar can be used but the flavor will be slightly lighter.
- egg - Provides structure and binds the dough. Use room temperature for best texture.
- molasses - Essential for gingerdoodles. Unsulphured molasses gives the ideal flavor. Do not substitute with blackstrap.
- vanilla extract - Adds warmth and balances the spice.
Equipment
You will also need measuring cups and spoons, mixing bowls, a whisk, a spatula or wooden spoon, a medium cookie scoop for portioning, parchment paper or silicone mats, cookie sheets, and a cooling rack for cooling the baked cookies.
Instructions
- Make the cinnamon sugar coating. Add the white sugar, cinnamon, and ground ginger to a medium bowl. Whisk until combined and set aside.
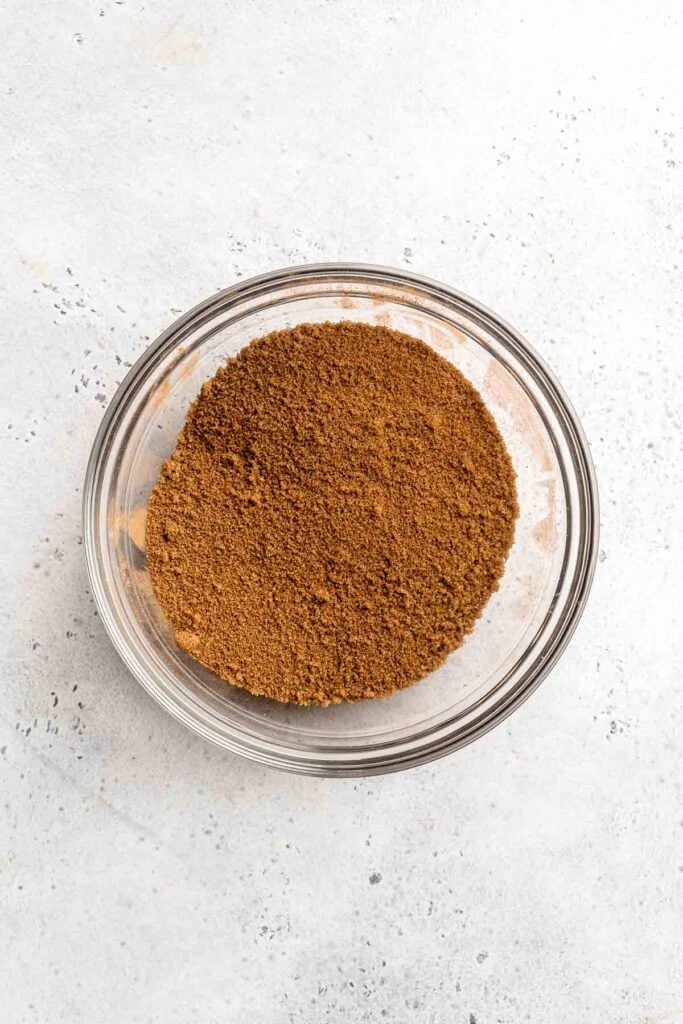
- Mix the dry ingredients. In a medium to large bowl, whisk together the flour, baking soda, cream of tartar, salt, ground ginger, cinnamon, and cloves until well combined.
- Mix the wet ingredients. In a large mixing bowl, whisk together the melted butter, dark brown sugar, egg, molasses, and vanilla until smooth.
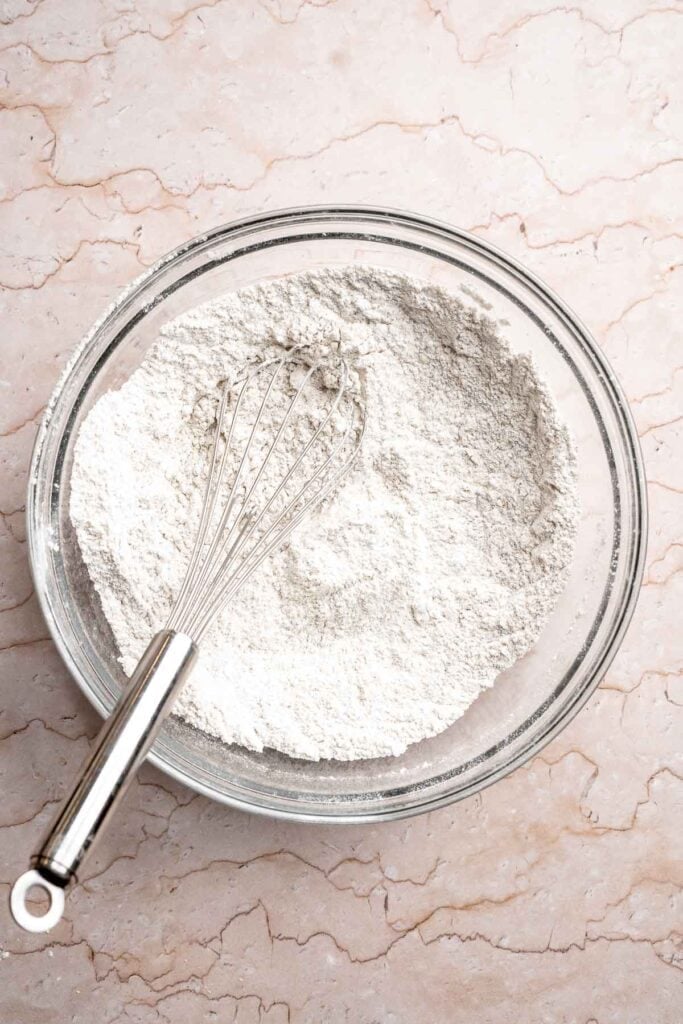
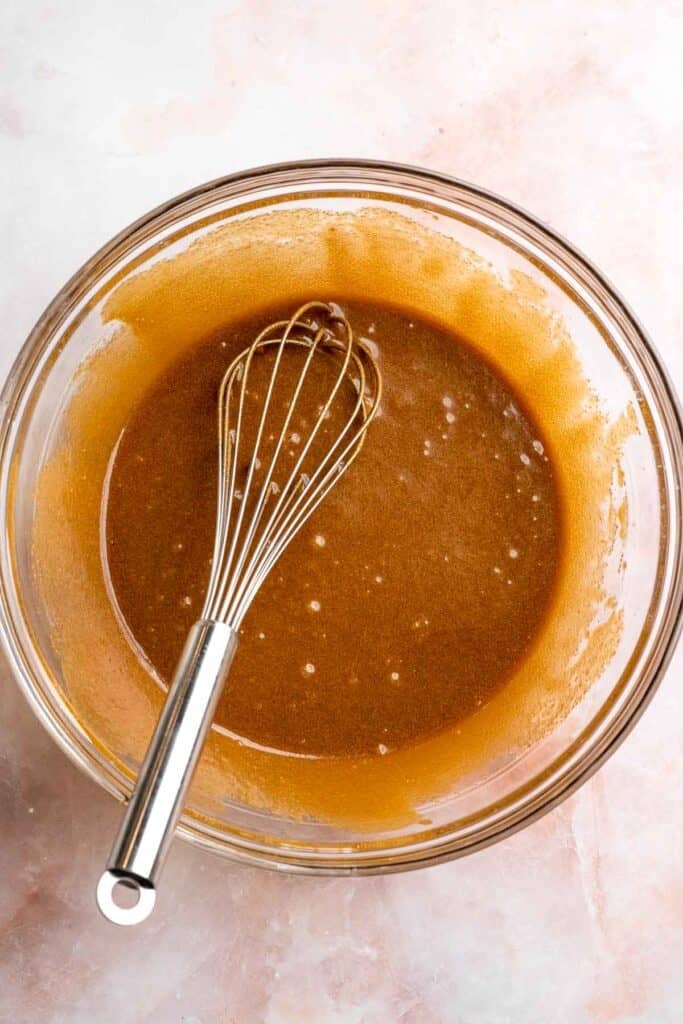
- Combine the dough. Add the dry ingredients to the wet ingredients. Mix with a spatula or wooden spoon until just combined. Do not overmix.
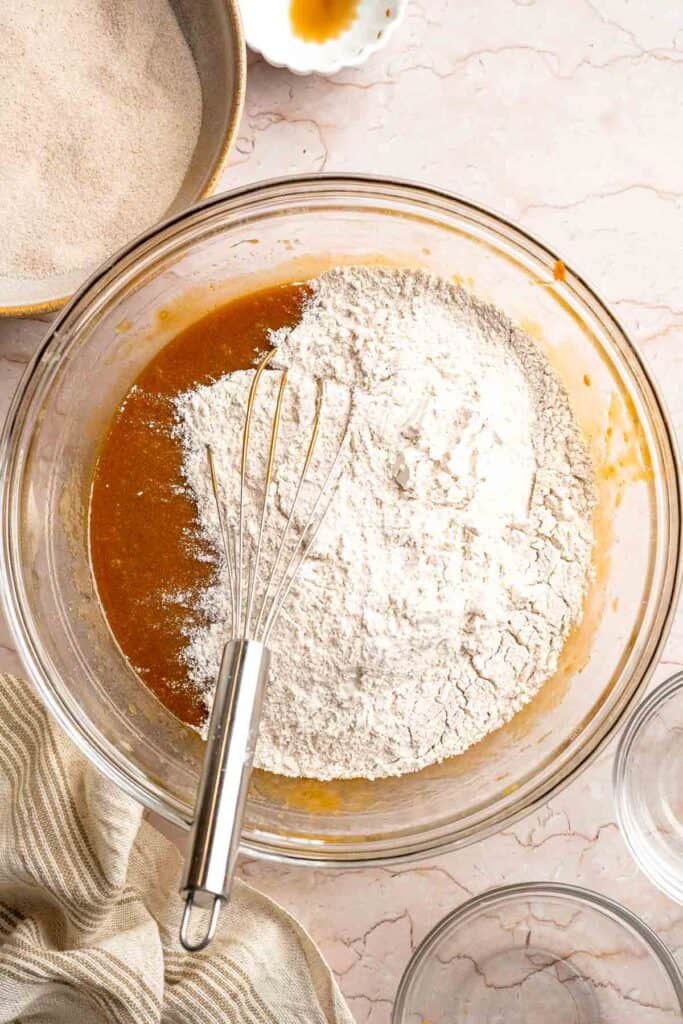
- Let the dough rest. Allow the dough to rest for 5-10 minutes to firm up slightly. This makes the scooping and rolling process easier.
- Scoop and coat. Using a medium cookie scoop, scoop out your cookies. Roll each ball in the prepared cinnamon sugar mixture and evenly place the cookie dough balls onto parchment paper lined baking sheets (no more than 6 per sheet).
- Bake. Bake in a 350°F preheated oven for 11-12 minutes until the edges are set and the tops are lightly crackled. Let cool in the pan for 5 minutes, then transfer to a wire rack to cool completely.

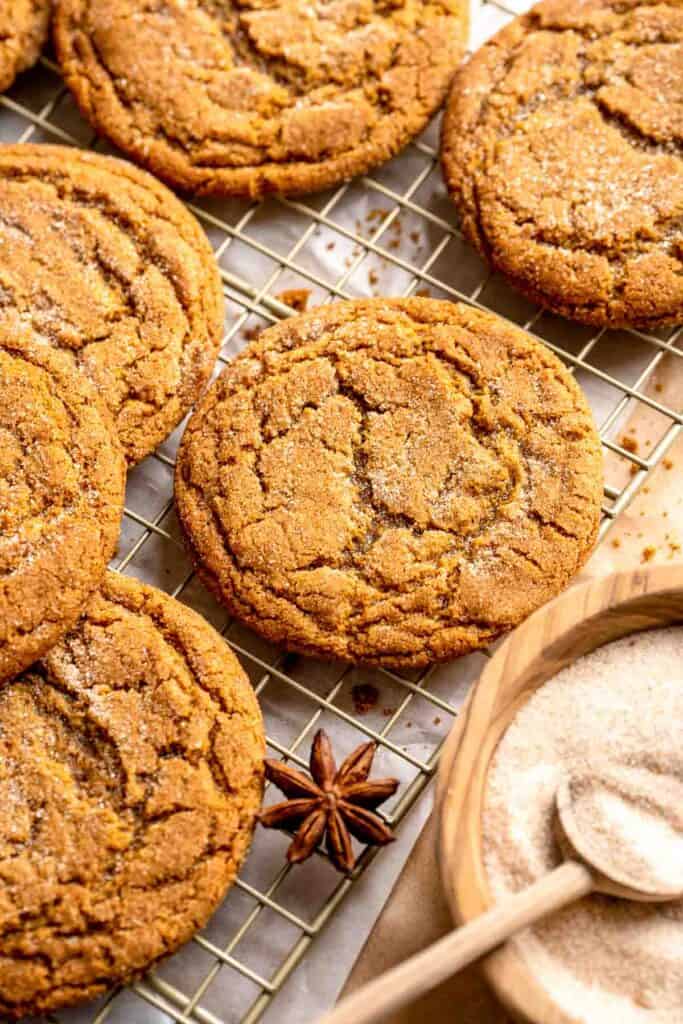
Expert Tip: Let the Dough Rest Before Scooping
Even though this is a no chill recipe, letting the dough rest for 5-10 minutes is key for perfect gingerdoodles. The melted butter begins to firm slightly, allowing the flour and molasses to fully hydrate. This makes the dough easier to scoop and roll in cinnamon sugar, helps the cookies stay thicker as they bake, and creates that signature soft and chewy texture without requiring refrigeration.
More Tips and Tricks
- Whisk the dry ingredients well. Since the spices are fine and potent, whisking helps distribute them evenly and prevents pockets of flavor. This step also ensures the cookies bake evenly with consistent flavor throughout.
- Scoop evenly. Use a medium cookie scoop to portion your dough. Even sizes help the cookies bake at the same rate and stay soft without overbaking. Rolling in the cinnamon sugar coating also becomes easier and more uniform.
- Use fresh spices. Ginger, cinnamon, and cloves lose potency over time. Using fresh spices dramatically improves the warm, cozy flavor of your gingerdoodles.
- Do not overmix. Stir just until the dough comes together. Overmixing after adding the flour can create a tougher cookie instead of a soft, chewy one.
- Roll thoroughly. After scooping the dough, toss each ball in the cinnamon sugar mixture until fully coated. This ensures even baking and rich flavor.
- Finish with extra sugar. After rolling, lightly sprinkle tops of cookies with a bit more cinnamon sugar before baking for an extra sparkly finish, if desired.
- Watch the bake time. These cookies set quickly in the oven. Remove them as soon as the edges begin to firm up. They will look slightly under baked, but they continue cooking on the tray.
Recipe Variations
- Extra spicy gingerdoodles. Increase the ginger to two teaspoons and the cinnamon to one and a half teaspoons for a bold, warming flavor. This variation is perfect for those who love deeply spiced holiday cookies.
- Glazed gingerdoodles. Drizzle cooled cookies with a simple icing made from powdered sugar, milk, and vanilla. The glaze adds a sweet finish and looks beautiful sprinkled with cinnamon.
- Molasses rich cookies. Add an extra tablespoon of molasses for deeper flavor and richer color. The cookies will spread slightly more and stay extra soft in the center, giving them a gooey, tender texture.
- Gingerdoodle sandwich cookies. Spread a layer of cream cheese frosting or vanilla buttercream between two cookies. The tangy filling pairs perfectly with the warm spices and creates a decadent holiday treat.
- Sparkle sugar gingerdoodles. Roll the cookies in coarse sparkling sugar instead of cinnamon sugar. This creates a crunchy exterior with a shimmering finish, amazing for holiday cookie boxes and Christmas dessert boards.
- Gingerdoodles with chocolate chips. Fold in half a cup of mini chocolate chips for a fun twist.

Storage
How to Store
Store the cookies in an airtight container at room temperature. They stay soft and chewy for four to five days. If stacking cookies, place parchment between layers to prevent the cinnamon sugar coating from rubbing off. Keep the container sealed tightly to maintain the chewy texture and avoid drying out.
How to Reheat
If you prefer warm cookies, reheat one or two in the microwave for a few seconds until just softened. Avoid overheating to keep them from drying out. You can also warm them briefly in a low oven.
How to Freeze
Freeze baked cookies in a single layer, then transfer to a freezer safe container for up to three months. Thaw on the counter before serving. You can also freeze the dough balls after rolling in cinnamon sugar. Freeze on a tray, transfer to a bag, and bake directly from frozen by adding one to two extra minutes to the bake time.
How to Serve
Gingerdoodle cookies are perfect for holiday dessert trays, cookie exchanges, gifting, and cozy nights with warm drinks. Their cinnamon ginger flavor pairs beautifully with classic holiday treats and makes them a standout choice for December baking.
These are my favorite dishes to serve with gingerdoodles:
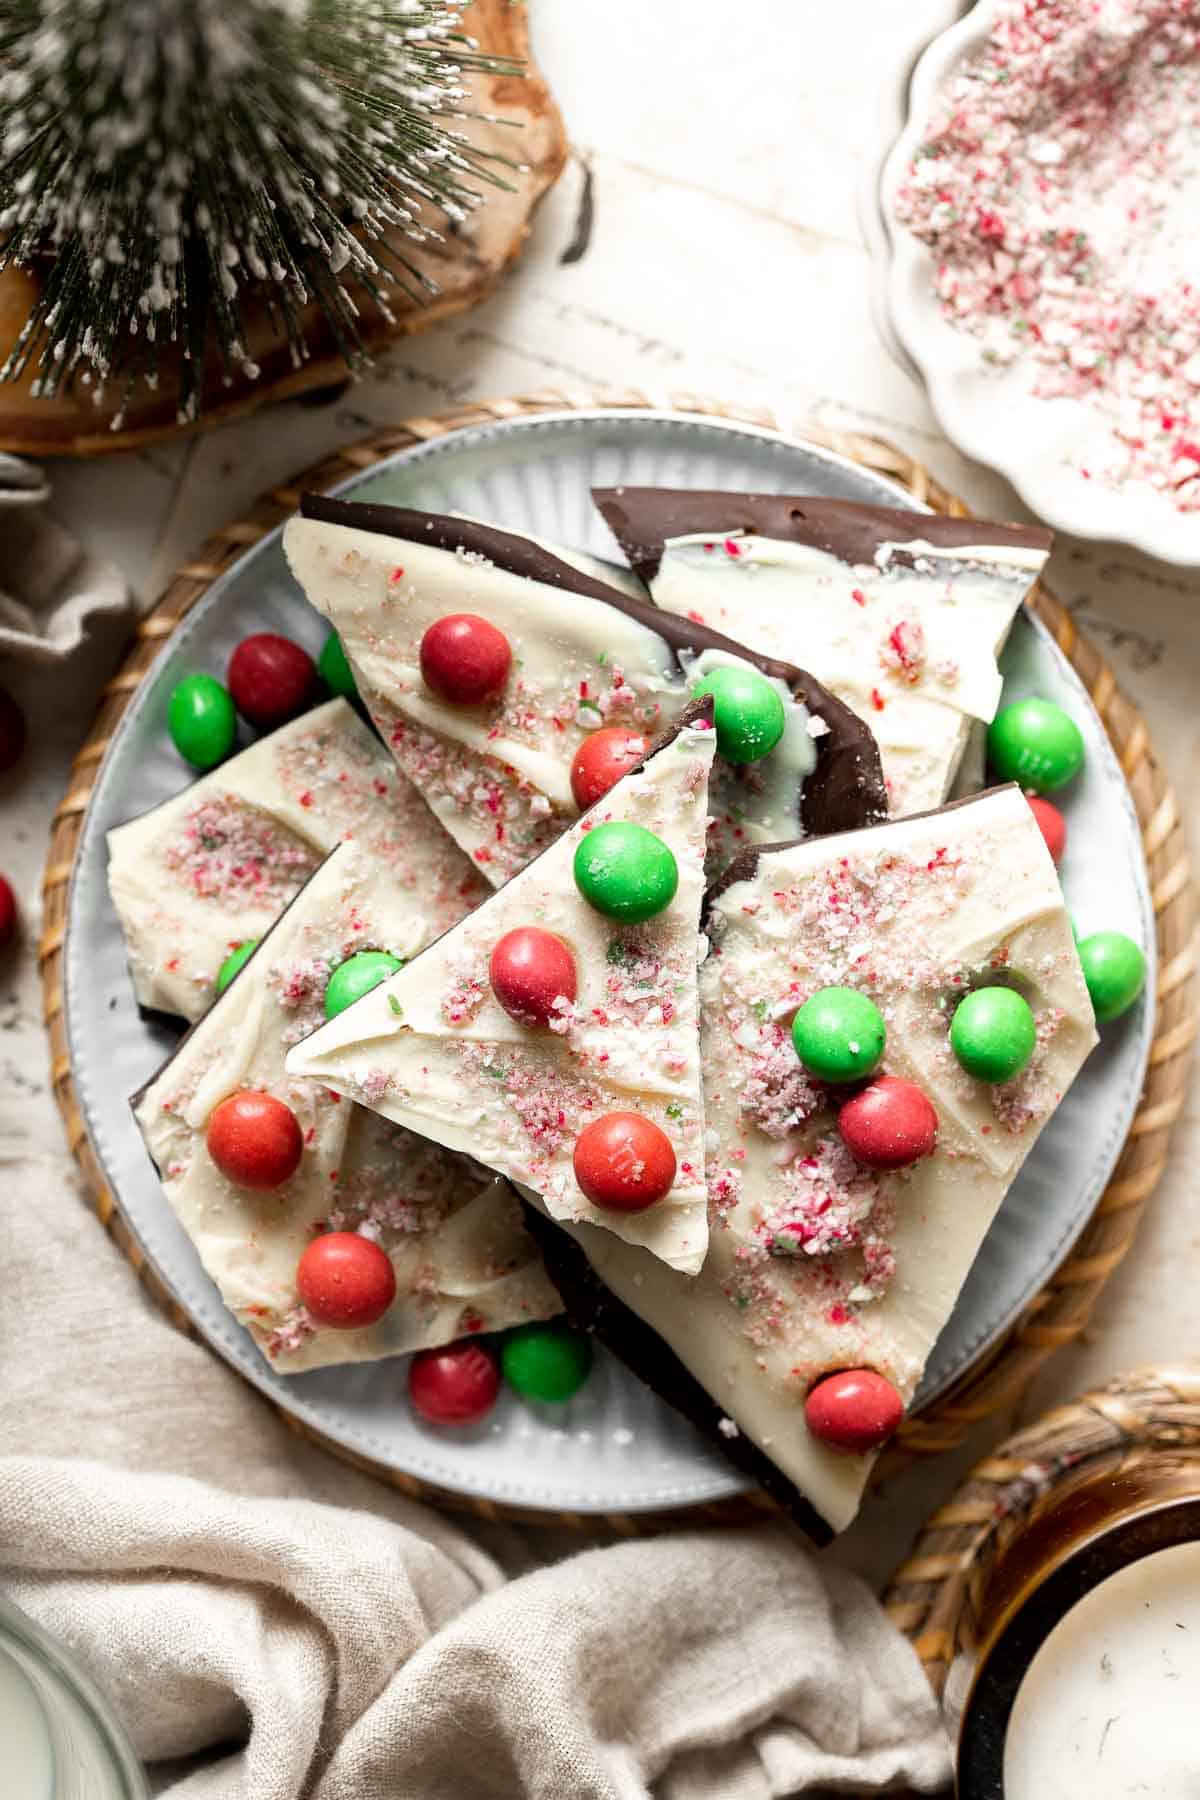


Holiday Cookie Week
These cookies are part of our Annual Cookie Week! For more sweet inspiration, explore our full holiday cookie collection from this year and year's past. You will find everything from nostalgic classics and colourful decorated cookies to creative flavours and fun themed bakes that make our annual Cookie Week such a favourite tradition.
FAQ
A gingerdoodle is a soft and chewy cookie that blends the warm, spiced flavor of a ginger molasses cookie with the classic tang and cinnamon sugar coating of a snickerdoodle. It has the best parts of both cookies in one bite. The dough includes ginger, cinnamon, cloves, and molasses for depth, along with cream of tartar and baking soda for the signature snickerdoodle lift and crackled top. Gingerdoodles are thicker and softer than gingersnaps, with a tender center and crisp edges.
Gingersnap cookies are crisp, spicy, and deeply flavored with ginger and molasses. They bake until crunchy and often have a stronger ginger bite. Snickerdoodles, in contrast, are soft, chewy sugar cookies rolled in cinnamon sugar. They contain cream of tartar, which gives them their signature tang and puffy crackled tops. The two cookies have completely different textures and flavor profiles. Gingersnaps are bold and crisp with warm spice, while snickerdoodles are tender, cinnamon forward, and mild.
Gingerdoodles stay soft when they are not overbaked. These cookies only need 11-12 minutes in the oven, and they should still look slightly under baked in the center when you take them out. They continue firming as they cool. Remove them as soon as the edges set for soft, chewy perfection. Overmixing the dough, using too much flour, or letting the cookies bake until fully browned can also create a firmer texture. To ensure softness, measure the flour correctly, mix only until combined, and pull the cookies out when the edges are just beginning to set.
Yes, this recipe is very make ahead friendly. You can prepare the dough, scoop it, roll in cinnamon sugar, and refrigerate the dough balls for up to three days before baking. You can also freeze the dough balls and bake straight from frozen when needed. The baked cookies also store well for several days and stay soft, making them perfect for gifting and holiday prep. Many bakers prepare a double batch in December to keep on hand for cookie exchanges.
Molasses is essential to achieving the deep, rich gingerdoodle flavor. It adds chewiness, moisture, and the warm caramel notes that distinguish gingerdoodles from snickerdoodles. If you skip it, the cookies will taste more like plain snickerdoodles and will be less soft and tender. If you absolutely must replace it, use dark brown sugar plus a teaspoon of maple syrup, but the flavor will not be the same.
Cream of tartar creates the classic snickerdoodle tang and helps the dough rise while staying soft. It also prevents sugar crystallization, giving the cookies their tender, chewy texture. In gingerdoodles, cream of tartar balances the stronger flavors of ginger and molasses, keeping the cookie light and chewy instead of dense. It works together with baking soda to create the perfect thick, crinkled cookie.
Yes, gingerdoodles adapt easily to different spice preferences. If you love bold spice, add an extra half teaspoon of ginger, a pinch more cinnamon, or a tiny amount of ground cloves. You can also add a small pinch of black pepper for gentle heat, similar to traditional gingerbread. The key is balancing the extra spices with the sweetness of the dough so the cookies stay warm and complex without becoming overwhelming.
More Ginger Cookie Recipes
Looking for other recipes like this? Try these:
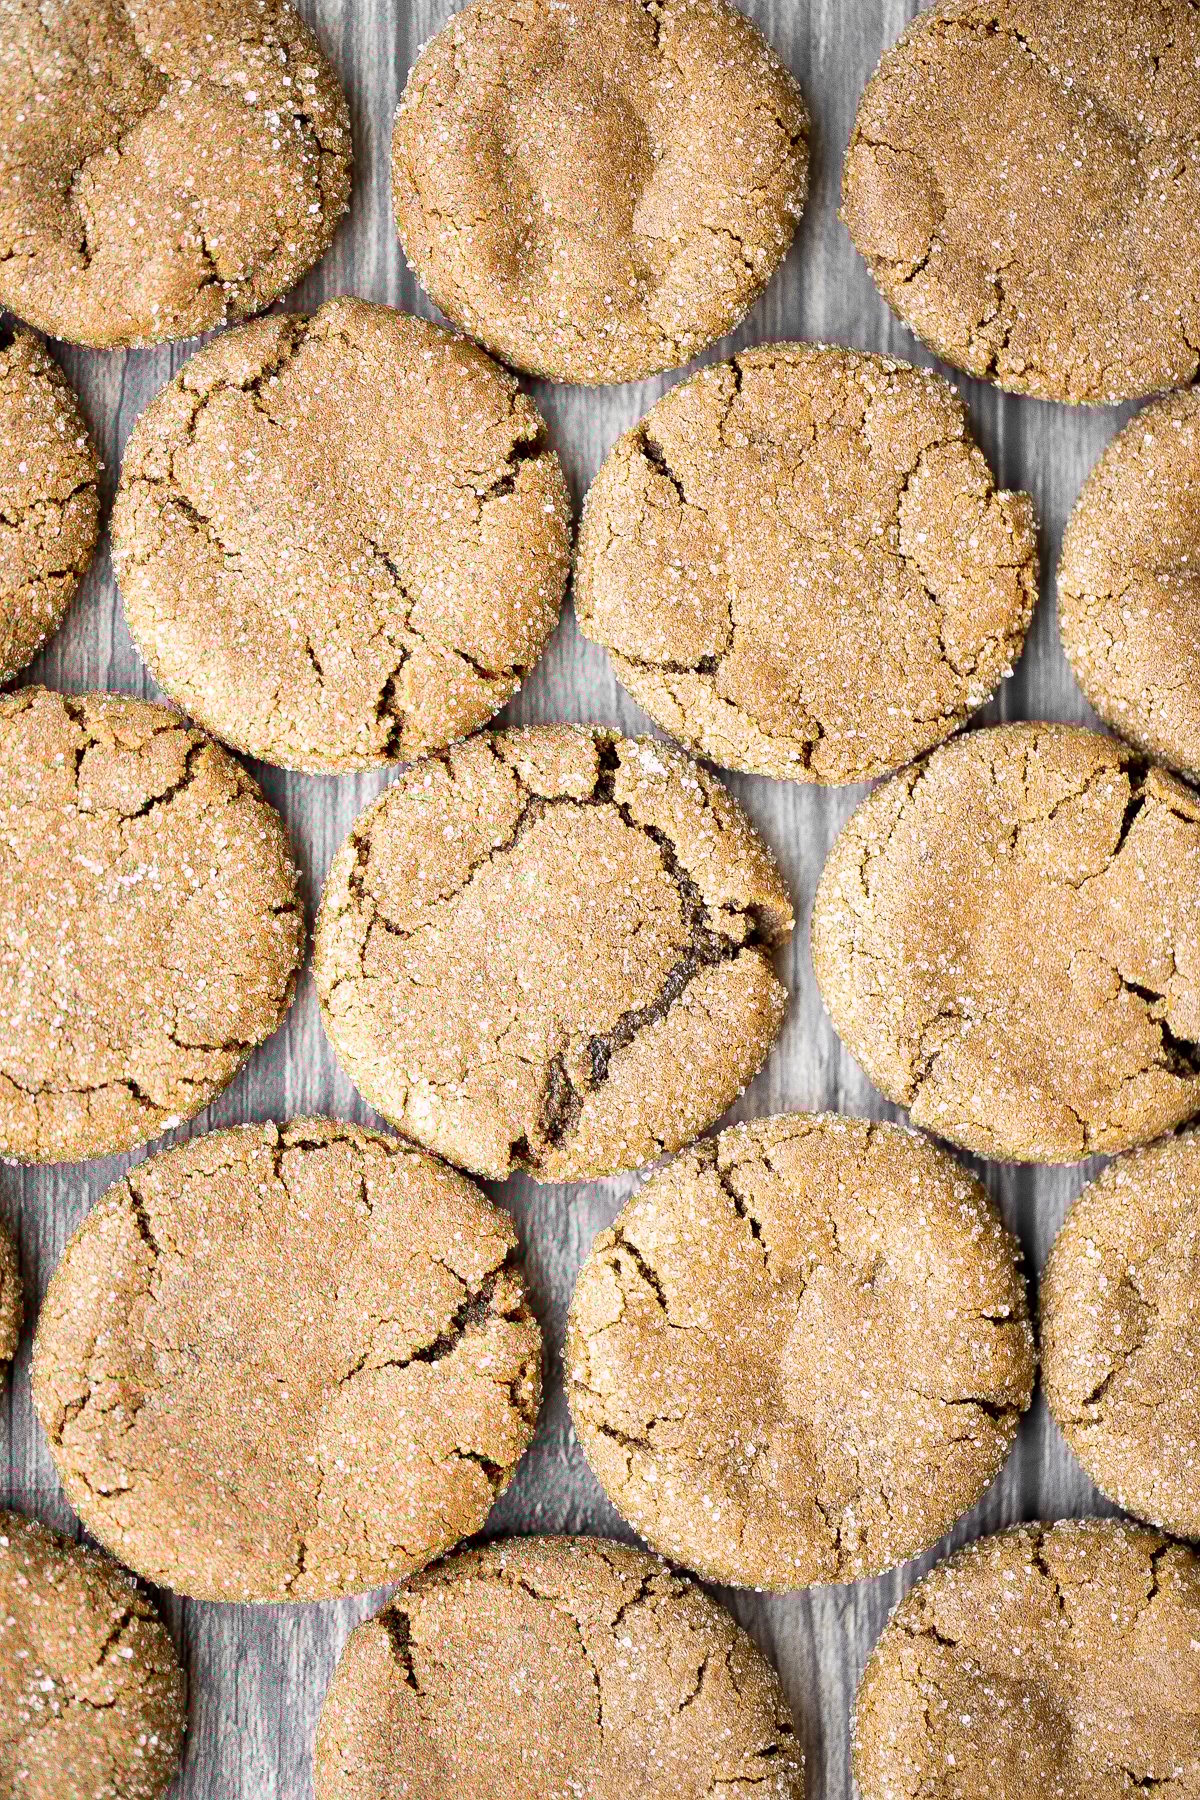
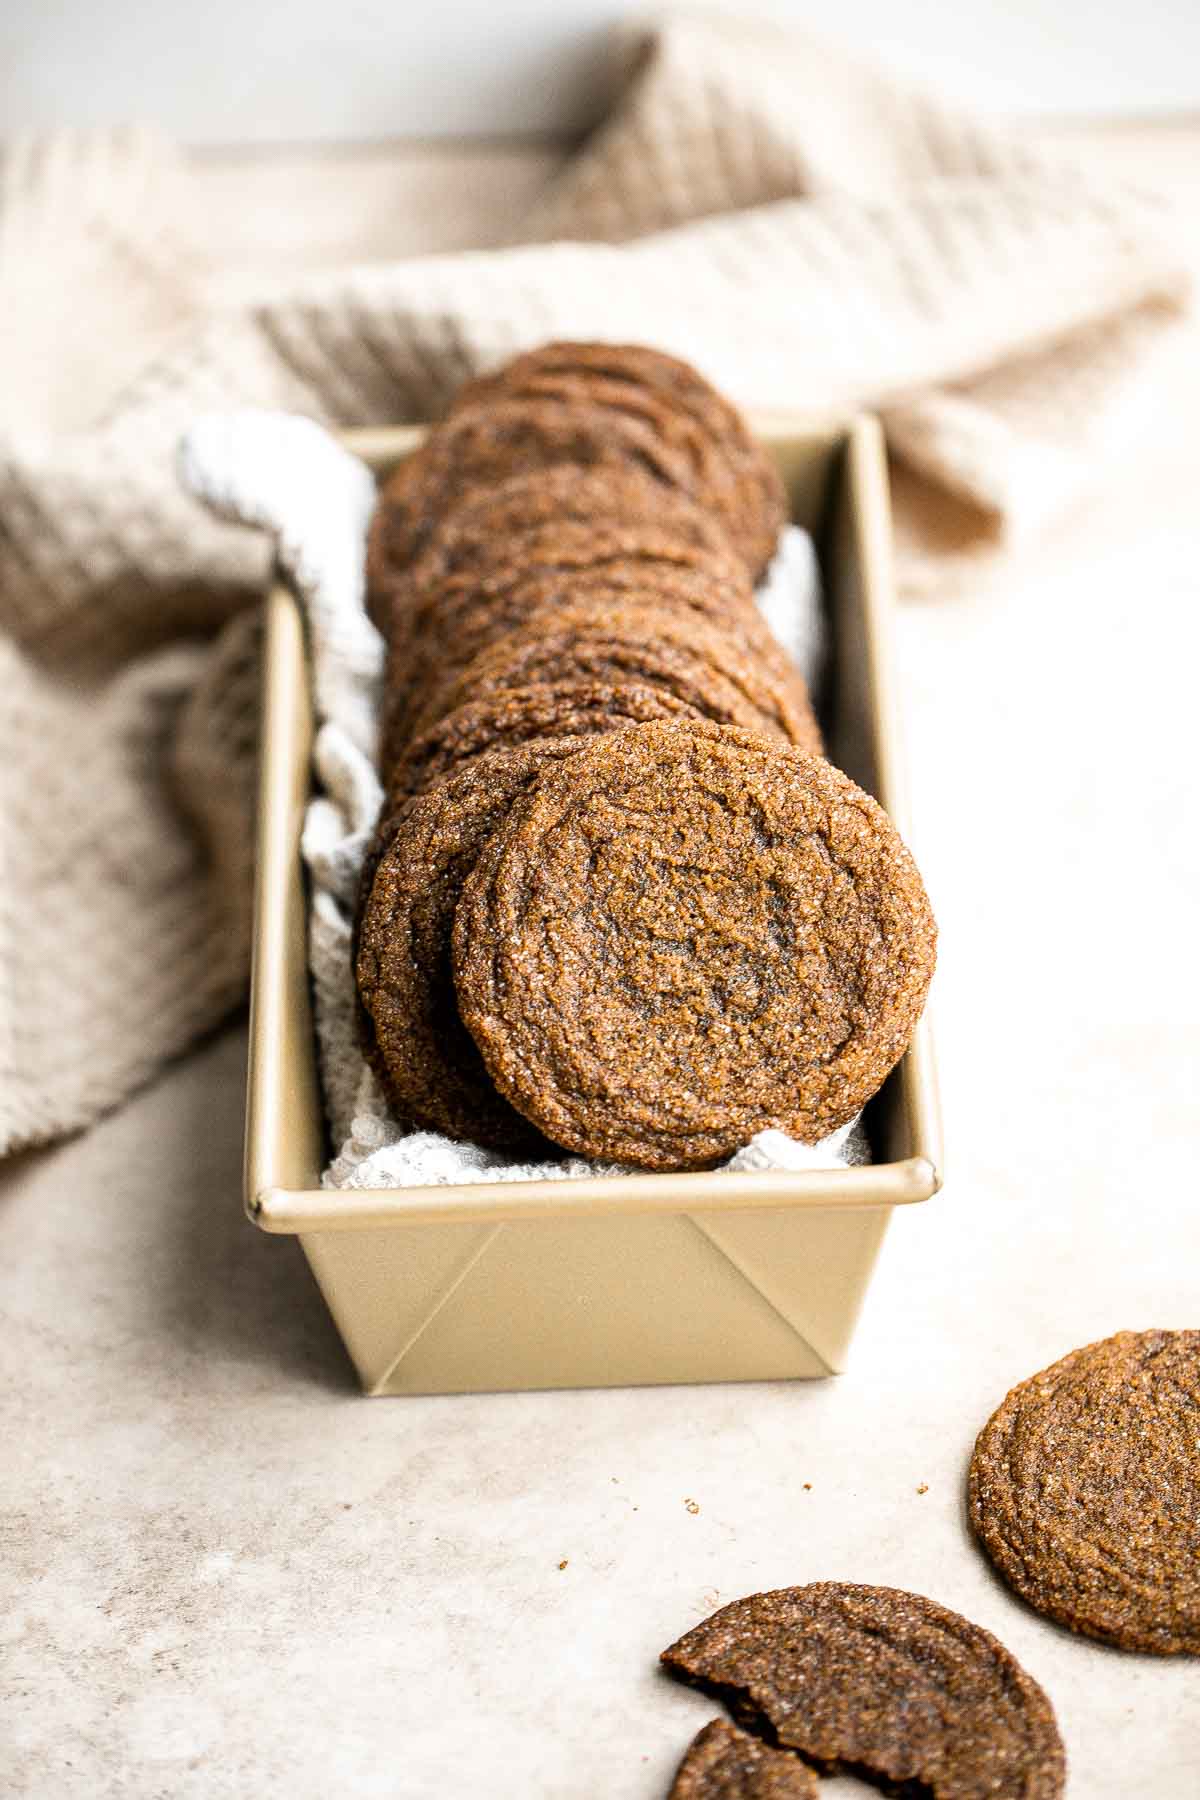
Tried this recipe?
I'd love to hear what you think! Leave a comment and rating below to share your feedback. Your reviews help others discover this recipe and help me keep creating more free recipes for you. Snap a photo and tag me on social media @aheadofthyme too.

Hot Chocolate Macarons
There is something magical about Hot Chocolate Macarons, where crisp cocoa shells meet a fluffy marshmallow filling that melts on your tongue in the warmest, coziest way. These winter inspired macarons pack in all the nostalgic hot cocoa flavor you love, wrapped up in a bite sized treat that feels special enough for the holidays yet simple enough for an afternoon bake. They are chocolaty, delicate, and ridiculously festive for cookie boxes or Christmas dessert trays.

Cold weather baking always makes me crave richer flavors, and this recipe delivers exactly that with deep cocoa shells, a creamy hot chocolate buttercream, and tiny marshmallows for that classic mug of cocoa vibe. Macarons are famously picky, but this recipe walks you through each step in a clear and friendly way so that your shells bake up smooth, full, and perfect with those pretty little feet.
This recipe was inspired by our festive Peppermint Macarons and our Classic Chocolate Macarons, and it pairs beautifully with our Homemade Hot Chocolate or any chocolate forward holiday treats you love to bake this season.

Why You'll Love This Recipe
- Cozy hot chocolate flavor in macaron form. These macarons capture everything you love about a warm cup of cocoa, with deep chocolate shells and a marshmallow filled center that feels indulgent, nostalgic, and perfect for winter baking.
- Bakery quality results at home. You get crisp tops, chewy centers, and pretty macaron feet without complicated steps or confusing instructions. This recipe is written to guide you through the entire process confidently so you can create bakery worthy macarons in your own kitchen even if you are not an expert.
- Perfect for the holidays. These French macarons look stunning on cookie trays, holiday dessert boards, and gifting boxes. The tiny marshmallow decoration makes them feel instantly festive and extra cute, which is why they are perfect for Cookie Week and all your holiday celebrations.
- Fun to decorate and customize. You can drizzle chocolate on top, pipe tall swirls of frosting through a star tip, add mini marshmallows, sprinkle crushed candy canes, swirl of ganache, or tint the shells slightly for a winter twist. The recipe is flexible enough to let you create your own holiday inspired macaron style.
Ingredients and Substitutions
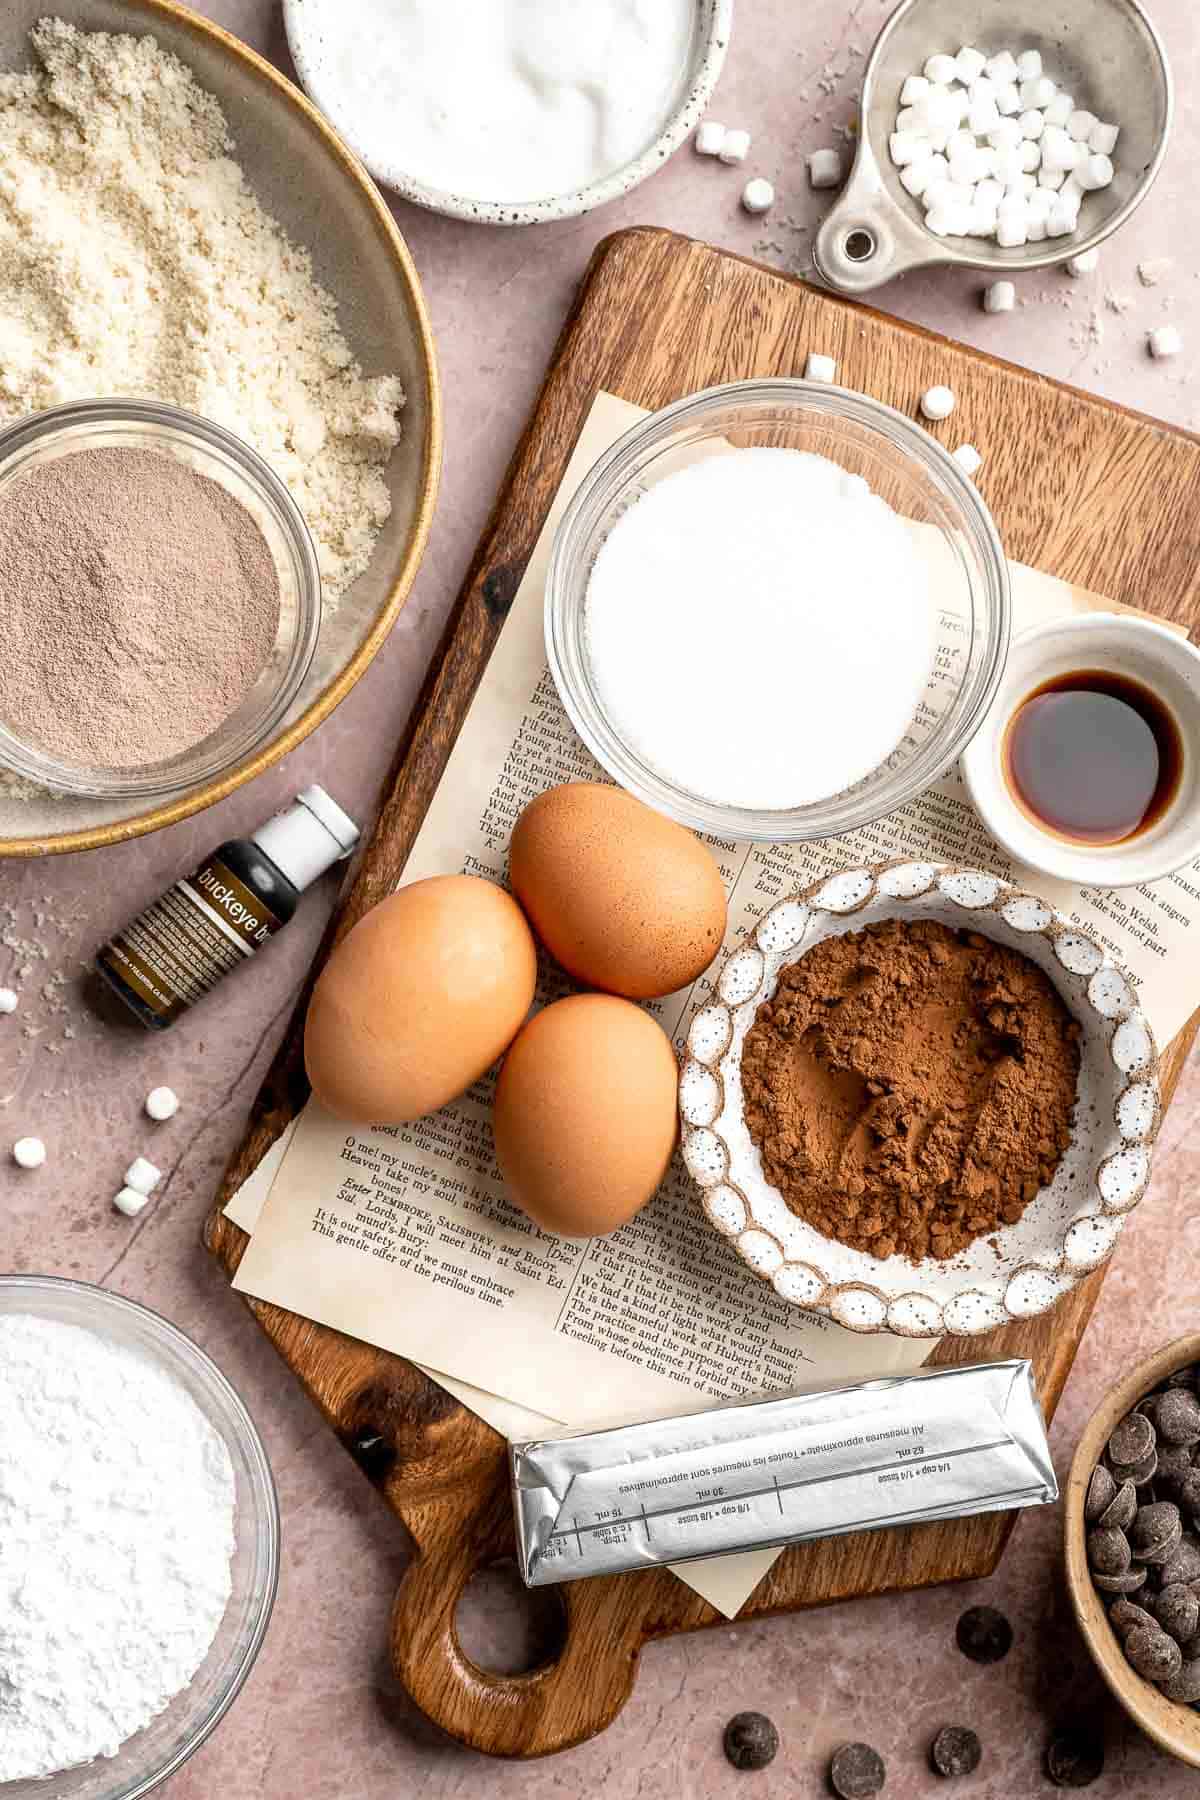
To make these delicious Hot Chocolate Macarons, you will need the following ingredients (see recipe card below for quantities):
- super fine almond flour - For the smooth shells. Use blanched almond flour only.
- confectioners sugar - Used in both the shells and filling, which helps create a smooth texture.
- dutch processed cocoa powder - For the deep chocolate flavor. Natural cocoa works in a pinch but the shells will be lighter in color.
- egg whites - Use aged or room temperature egg whites.
- super fine white sugar - This helps stabilize the meringue.
- brown gel food coloring - This is totally optional, to deepen the cocoa tone.
- unsalted butter - Softened butter is needed for the filling.
- marshmallow fluff - This gives a classic hot chocolate marshmallow flavor.
- hot chocolate powder - Blends smoothly into the delicious hot chocolate buttercream and gives it an authentic hot cocoa taste. Feel free to use any brand of hot cocoa mix.
- vanilla - For sweetness and balance.
- semi sweet chocolate - Used for drizzling on top or decorating.
- dehydrated mini marshmallows - Also used for decoration. Regular mini marshmallows can work but the texture will differ.
Equipment
You will also need measuring cups and spoons, a kitchen scale, stand mixer with whisk attachment, sieves, silicone baking mats, large piping bags, medium round piping tips, mixing bowls, and a spatula for folding.
Instructions
Make the chocolate macaron shells
- Prepare the pans. Line one or two baking sheets with silicone mats. Set aside.
- Sift the dry mixture. Place a sieve over a bowl set on a scale. Sift the almond flour until you reach 130 grams, discarding any large pieces. Repeat with confectioners' sugar and cocoa powder. Whisk together until very well combined, then set aside.
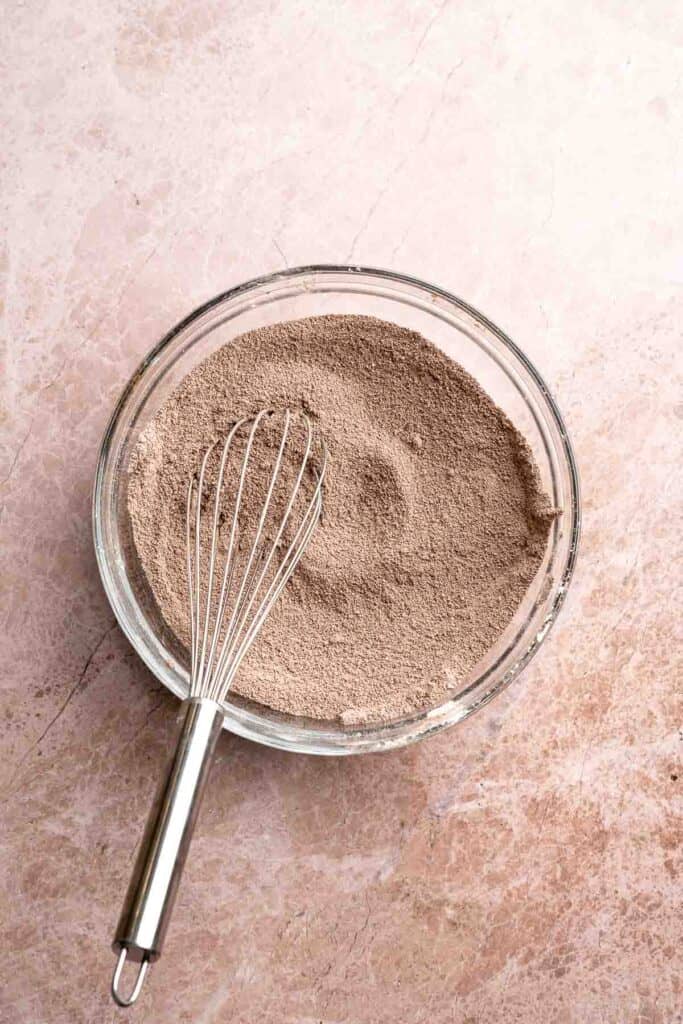
- Whip the meringue. Add the egg whites and white sugar to the bowl of a stand mixer. Whisk by hand to combine, then attach the whip attachment. Beat eon low speed until soft peaks form, increase to medium until medium peaks form, then increase to high. Beat until stiff, glossy peaks develop.
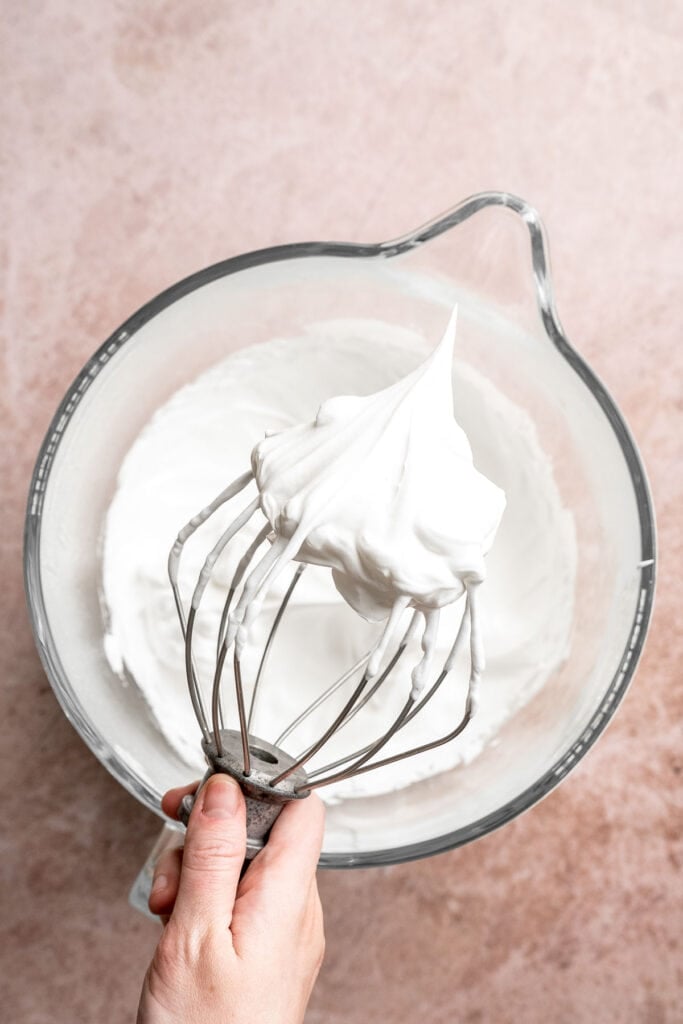

- Add food coloring (optional). Add gel food coloring and mix until just combined.
- Combine wet and dry ingredients. Remove the bowl from the mixer. Place a sieve over the meringue and sift in the dry mixture.


- Fold to make macaron batter. Gently fold the dry ingredients into the meringue, being careful not to deflate it. The batter is ready when it flows in smooth ribbons off your spatula. It should fall continuously, without drizzling off too quickly If it is coming off in large V shaped chunks it needs to be folded more. Use the figure eight test to confirm the right consistency: If you can lift some batter up and use it to draw several figure 8's without the stream breaking, it is ready.
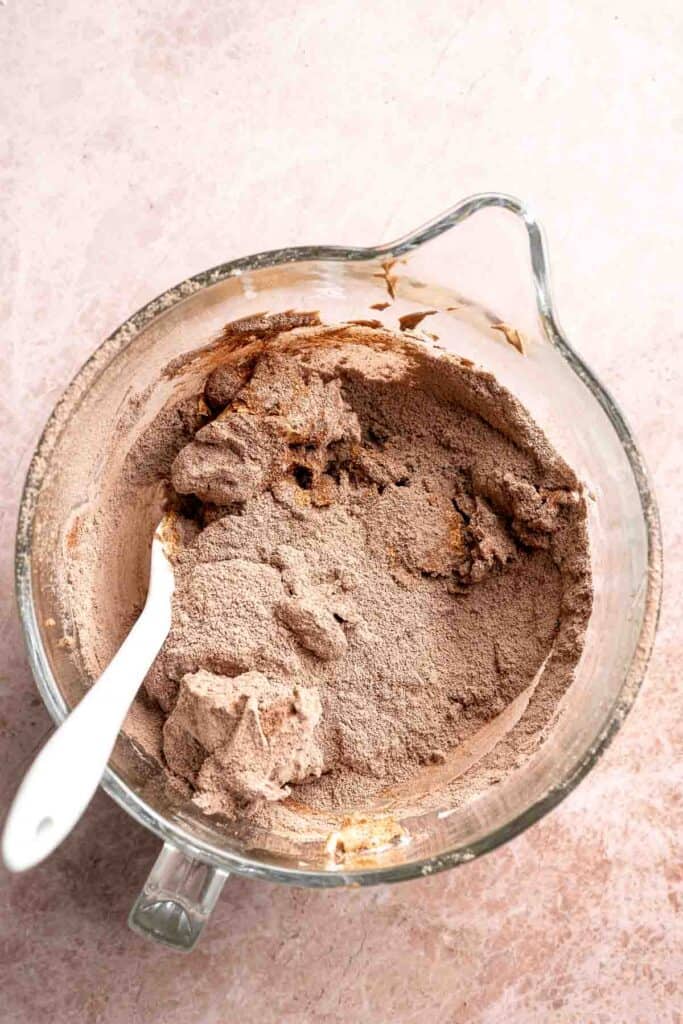

- Pipe the macaron shells. Transfer the batter to a piping bag fitted with a medium round tip. Pipe 1 to 1 ½-inch circles onto the prepared baking sheets, holding the bag straight above the pan and perpendicular to baking sheet.
- Release air bubbles. After you've piped all the macarons, tap the baking sheet firmly on the counter several times to remove air bubbles. Use a toothpick to pop any remaining bubbles.
- Rest the shells. Preheat the oven to 300°F. While it heats, allow the macarons to sit until a thin "skin" forms. This can take anywhere from 8 minutes to an hour, depending on humidity. They are ready when you can lightly touch the tops without batter sticking to your finger. Keep checking them periodically to see if they have formed a skin.
- Bake the shells. Bake for 15-20 minutes. Check at 15 minutes, then continue baking one minute at a time until the tops are firm and do not wiggle at the base. Cool completely on the silicone mat before removing.
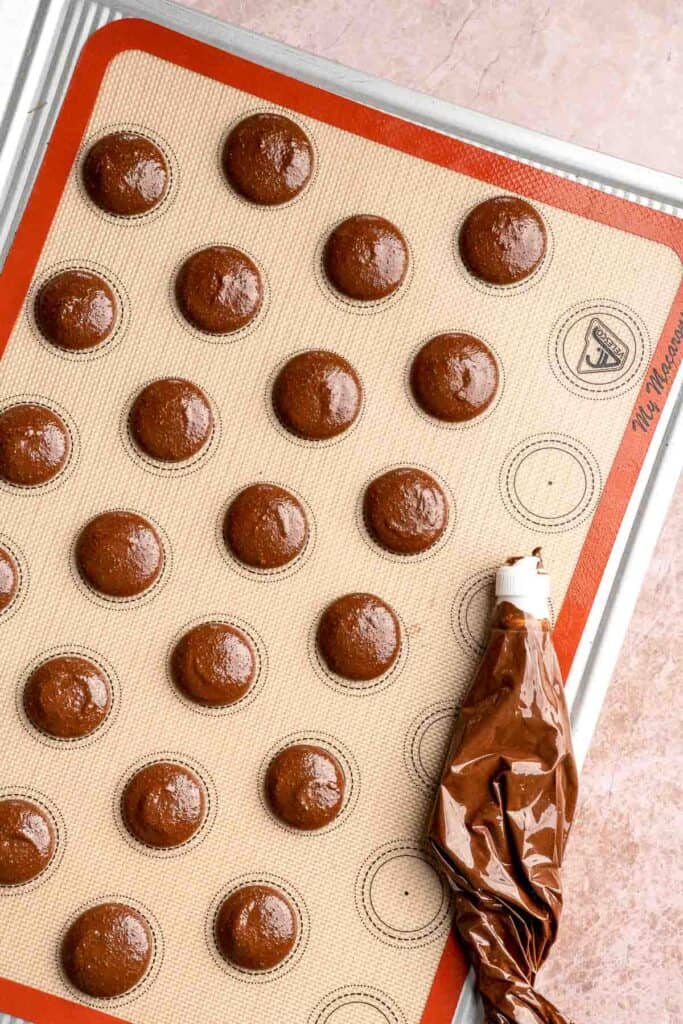
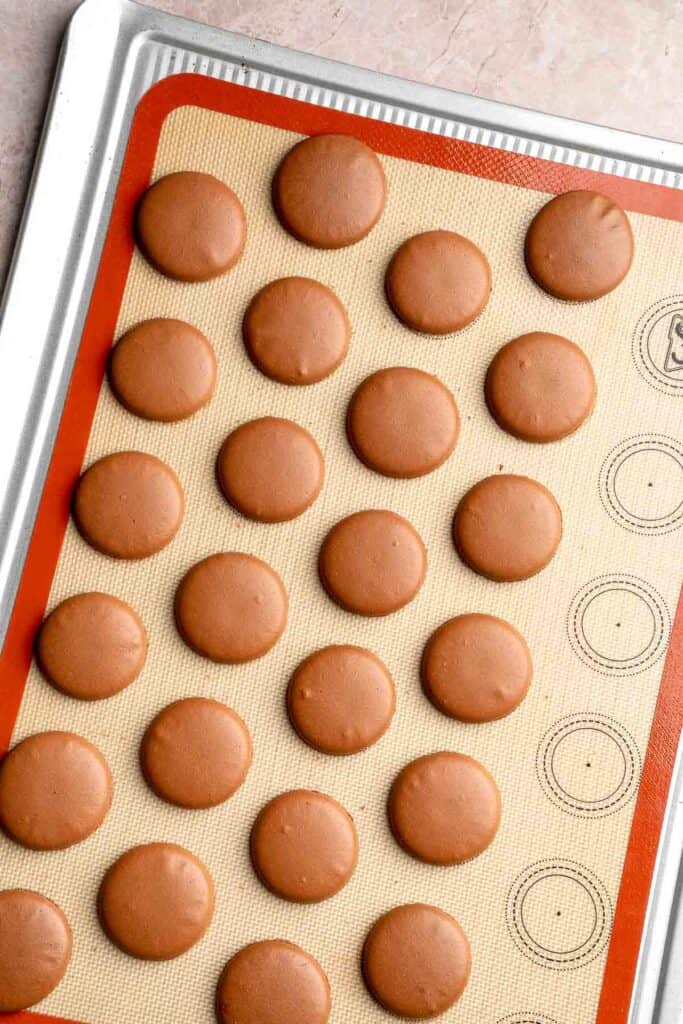
- Remove the shells. Once cooled, gently peel all the macaron shells off the mats and set aside.
Make the hot chocolate buttercream filling
Add butter and marshmallow fluff to a large mixing bowl and beat with an electric hand mixer until fluffy, about 2 minutes. Add in the confectioners' sugar, hot chocolate powder, and vanilla. Beat again until smooth, well-combined, and creamy.
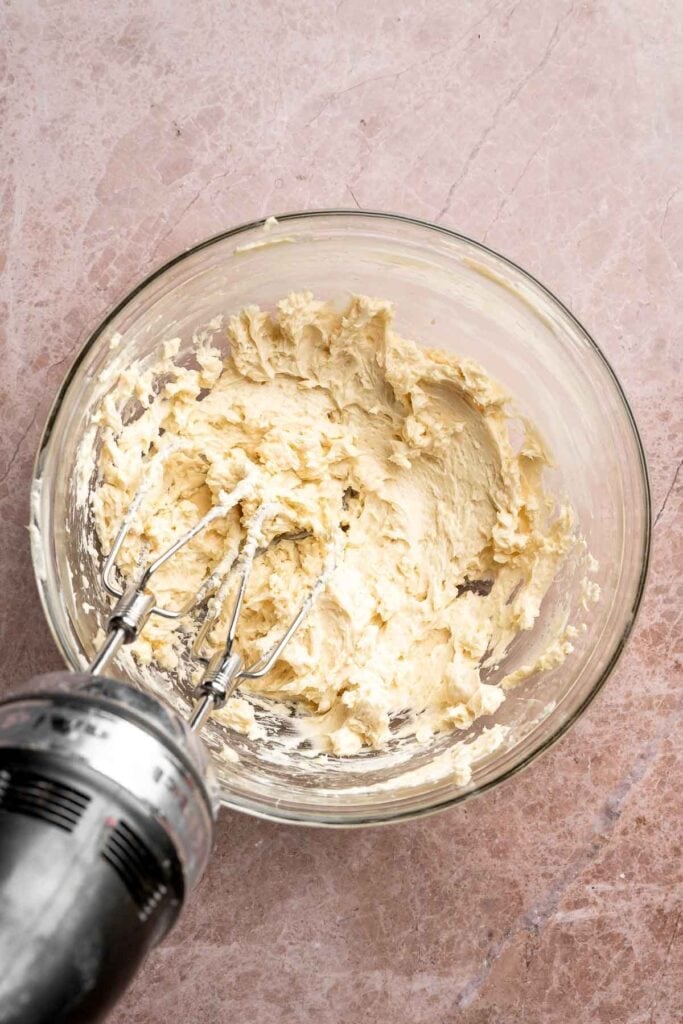
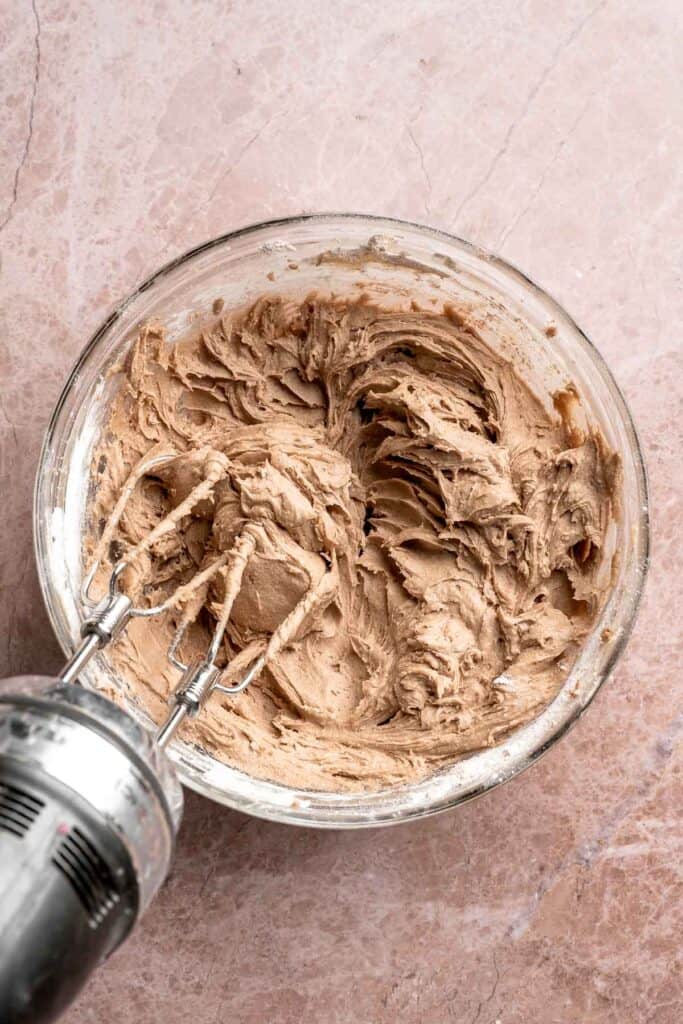
Assemble the hot chocolate macarons
- Melt the chocolate. Melt the chocolate using a double boiler or microwave.
How to Melt Chocolate
You can melt chocolate either on the stovetop or in the microwave.
- On the stove: Bring about 2 inches of water to a gentle simmer in a saucepan over medium-low heat. Reduce the heat to low and place a medium heatproof bowl over the saucepan, making sure the bottom of the bowl doesn't touch the water (you can also use a steamer insert). Add the chocolate and stir constantly as it melts. Continue stirring until completely smooth and gloss. This should take just a few minutes.
- In the microwave: For a quicker method, place the chopped chocolate in a heatproof bowl and microwave in 30-second intervals, stirring well after each one. Continue until the chocolate is fully melted and smooth. Be sure to stir between intervals to prevent overheating or scorching.
- Decorate the tops. Drizzle melted chocolate over half of the macaron shells and sprinkle with dehydrated mini marshmallows. Let them set until firm.
- Fill and sandwich. Transfer the hot chocolate buttercream to a large piping bag fitted with a round tip. Pipe a generous amount onto the undecorated shells. Top each one with a decorated shell of similar size.

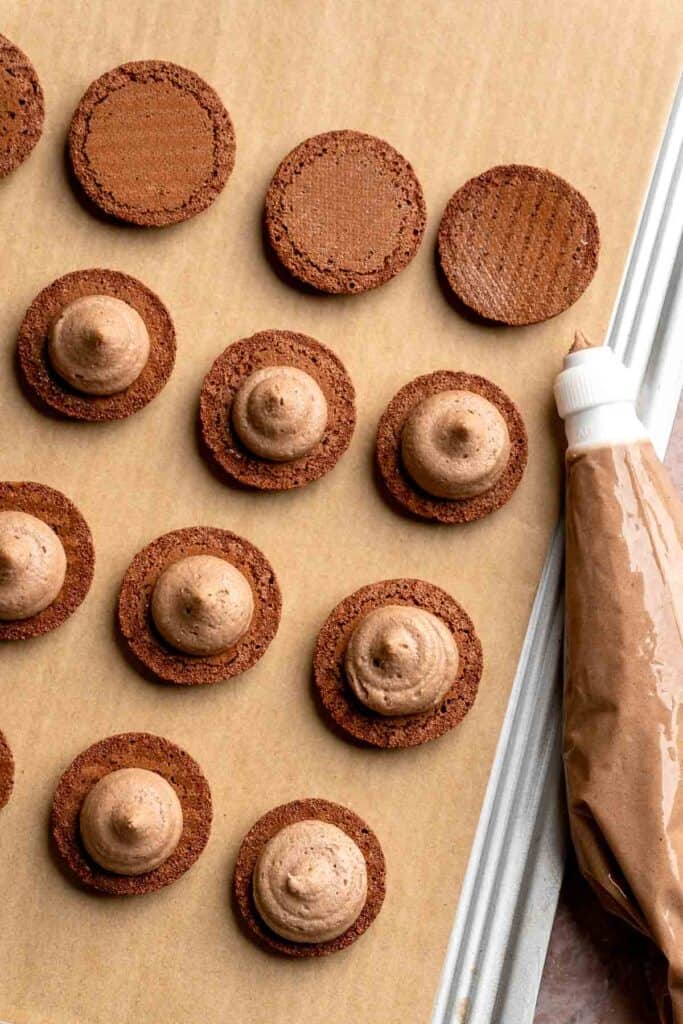

- Mature the macarons. Refrigerate the filled macarons overnight to allow the shells and filling to meld together for the best texture and flavor.

Expert Tip: Let the shells mature overnight
Macarons get noticeably better after maturing in the fridge. The shells absorb moisture from the filling, turning soft, chewy, and deeply flavorful. Even if you want to eat them the same day, plan to chill them overnight for that perfect macaron texture that makes every bite feel luxurious and balanced.
More Tips and Tricks
- Use a scale for accuracy. Measuring your ingredients by weight gives you consistent, reliable results and prevents dry or hollow shells. A kitchen scale is essential for macaron success because even small changes in almond flour or sugar can affect the texture.
- Check the meringue carefully. Whether you use the simple French method or experiment with swiss meringue, your goal is stiff glossy peaks that do not droop. Whip on medium speed at first, then increase as needed.
- Fold patiently and test often. Macaron batter should ribbon smoothly off your spatula without clumping. Too thick and your shells will be lumpy, too thin and they will spread flat. The macaronage stage should look like slow flowing lava. Stop folding once the batter ribbons smoothly off your spatula. Use the figure eight test for accuracy.
- Resting creates perfect shells. Allowing the shells to form a dry skin helps them develop those pretty feet during baking. Rest time can vary based on humidity, so touch test often until no batter sticks to your fingers.
- Control your oven heat. Every oven runs slightly different, so check your shells early. If they brown too quickly, lower the heat slightly. If they do not rise, increase the heat just a little on your next tray.
- Use a pastry bag. Use a pastry bag instead of a plastic bag because it gives better control over the batter flow, especially when testing for the lava like ribbon stage.
Recipe Variations
- Peppermint hot chocolate macarons. Add a splash of peppermint extract to the filling and sprinkle crushed candy cane over the chocolate drizzle.
- Salted hot chocolate macarons. Sprinkle a tiny pinch of flaky sea salt over the chocolate drizzle to balance sweetness and add depth.
- Dark chocolate macarons. Use dark cocoa and a dark chocolate drizzle for a richer, less sweet version. You can even enrich the filling with one or two egg yolks for a silky finish.
- Spicy Mexican hot chocolate macarons. Add cinnamon and a tiny pinch of cayenne to the filling for gentle heat and warmth.
- Mocha macarons. Replace one tablespoon of hot chocolate powder with instant espresso powder for a chocolate coffee twist.
- Cookies and cream hot chocolate macarons. Add crushed chocolate sandwich cookies to the filling for a creamy, crunchy center.

Storage
How to Store
Store assembled macarons in an airtight container in the fridge. They stay fresh for about five days and actually improve for the first two days as the shells soften and meld with the filling. Keep them in a single layer or separate layers with parchment paper to protect the tops. Macarons always taste better after a day in the fridge because the filling softens the shells and deepens the cocoa flavor.
How to Reheat
Macarons should not be warmed, but you can let them sit at room temperature for 20-30 minutes before serving. This helps the filling soften and the shells return to their ideal texture.
How to Freeze
Freeze the assembled macarons in a single layer on a baking sheet until solid, then transfer to a freezer safe container. Separate layers with parchment. They keep for up to two months and thaw quickly at room temperature without losing texture or flavor.
How to Serve
Hot chocolate macarons are beautiful on their own, but they shine even brighter as part of a cozy winter spread. Serve them with warm drinks, chocolate themed desserts, or a festive assortment of seasonal treats for a perfect holiday platter.
These are my favorite dishes to serve with hot cocoa macarons:
Holiday Cookie Week
These cookies are part of our Annual Cookie Week! For more sweet inspiration, explore our full holiday cookie collection from this year and year's past. You will find everything from nostalgic classics and colourful decorated cookies to creative flavours and fun themed bakes that make our annual Cookie Week such a favourite tradition.
FAQ
The main trick to making successful macarons is controlling each step with patience and accuracy. Using a scale rather than cups gives you consistent results, since even small measurement differences change the texture of your shells. Whipping the meringue to proper stiff peaks is also essential because it creates structure and prevents spreading. Folding the batter slowly and stopping as soon as it ribbons off the spatula keeps the shells smooth and full rather than hollow or cracked. Resting the shells before baking helps them develop a dry skin, which is what creates those pretty macaron feet. Finally, baking on silicone mats and monitoring your oven temperature keeps the bottoms from browning or sticking. Together, these little details create perfect macarons.
The best method for most home bakers is the French macaron method because it is the most approachable and requires the least equipment. The French method uses granulated sugar whipped directly into egg whites to create a stable meringue. It is simple, reliable, and easy to learn even if you are new to macaron baking. The Italian method uses hot sugar syrup and creates an extremely stable batter, but it requires a thermometer and more precision. The Swiss method sits somewhere in between, using gently warmed egg whites for a glossy meringue. All three methods work beautifully, but the French method is ideal when you want consistent results without extra tools or added complexity.
Common macaron mistakes usually come from a few key steps. Under whipped meringue leads to spreading or cracked shells, while over whipped meringue can cause hollow or brittle shells. Over mixing or under mixing the batter is another issue because macaronage affects everything from texture to shape. Skipping the resting period often causes cracked tops or missing feet. Baking at too high or too low a temperature can also create problems, such as browning, sticking, or under baked centers. Even crowded baking sheets or uneven oven heat can distort the shells. Most mistakes come down to meringue texture, batter consistency, resting time, and oven accuracy, so focusing on these areas usually results in much better success.
The best hot chocolate powder for these macarons is a classic, good quality drinking cocoa that dissolves smoothly and has a balanced chocolate flavor. You want something that tastes like traditional hot chocolate rather than baking cocoa, since it gives the filling that nostalgic sweetness. Any well known brand works as long as the powder is fine and mixes easily with buttercream.
Resting is one of the most important steps for preventing cracks and achieving those signature macaron feet. Some fast macaron methods skip resting, but classic macarons need that dry skin to bake properly. Skipping this step often leads to spreading or cracked tops. It is worth the short wait.
Macarons should sit anywhere from 8 minutes to an hour before baking, depending on the humidity in your kitchen. The goal is to allow the piped shells to form a thin, dry skin on the surface. This step is important because it helps the macarons rise upward instead of outward, giving you those classic ruffled feet.
Shells usually crack when the meringue is under whipped, when the batter is under folded, or when the shells were not rested long enough to form a dry skin. Cracking can also happen when the oven heat is too high or uneven. To prevent cracking, make sure your meringue reaches stiff peaks, fold gently until the batter ribbons smoothly, rest until the shells no longer feel tacky, and use an oven thermometer so the temperature stays steady.
Hollow shells often happen when the meringue is over whipped or when the oven temperature fluctuates. Over whipping creates too many large air pockets that collapse during baking. To avoid this, stop whipping as soon as stiff peaks form. Also check that your oven is not too hot, since rapid rising and collapsing can cause hollow interiors.
Macarons stick when they are under baked or when the bottoms did not dry out enough. Bake them until the tops do not move at the base when gently nudged. If your oven runs cool, adding one or two extra minutes helps. Once fully cooled, they should peel off cleanly.
More Macaron Recipes
Looking for other recipes like this? Try these:


Tried this recipe?
I'd love to hear what you think! Leave a comment and rating below to share your feedback. Your reviews help others discover this recipe and help me keep creating more free recipes for you. Snap a photo and tag me on social media @aheadofthyme too.

Peppermint Pinwheel Cookies
Soft, buttery, and perfectly festive, these Peppermint Pinwheel Cookies are the ultimate slice and bake Christmas treat. Swirled with bright red, green, and white sugar cookie dough and rolled in crunchy nonpareil sprinkles, they bake into cheerful holiday cookies with crisp edges, soft centers, and a delicate peppermint flavor. They look impressive, but the dough is incredibly easy to work with, and the whole recipe uses simple pantry staples (plus food coloring and sprinkles).
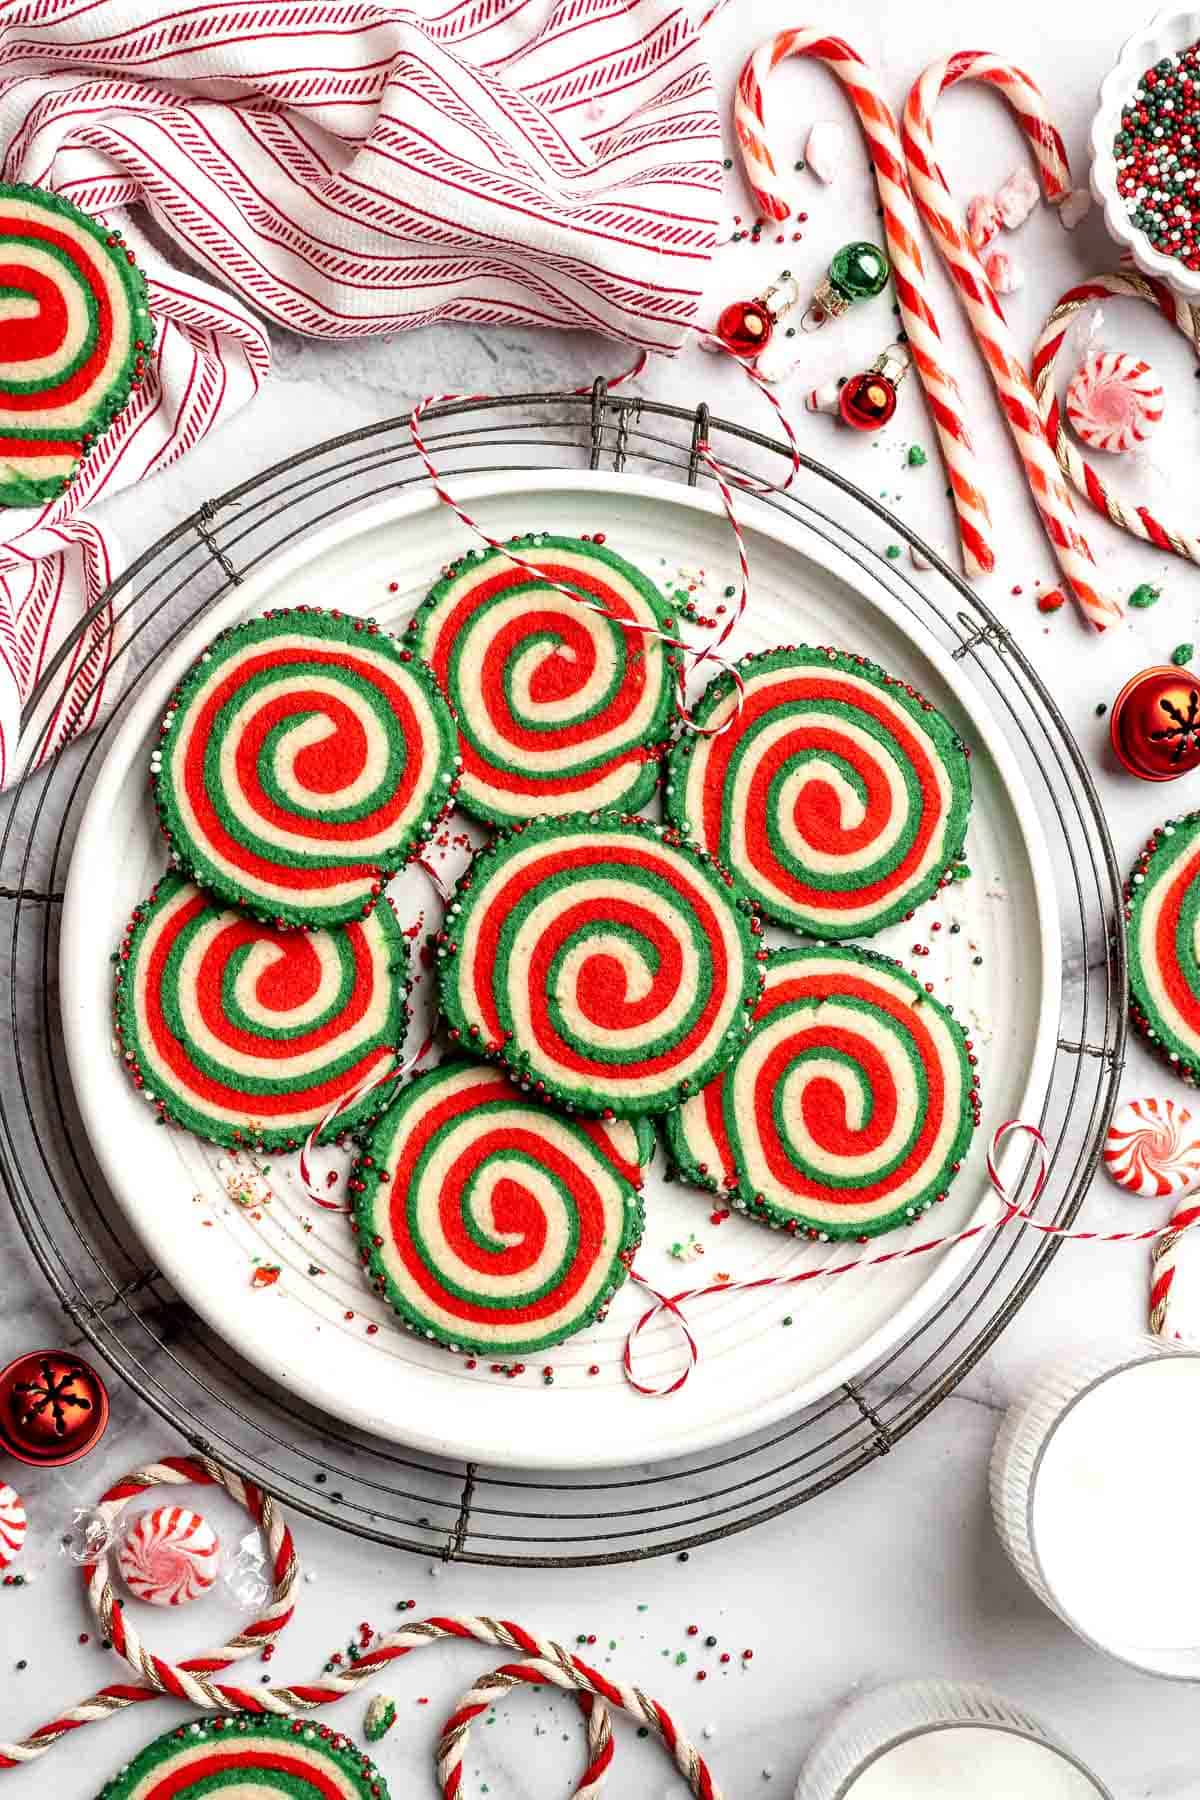
These peppermint pinwheels have a classic holiday flavor and a nostalgic swirl pattern that makes them extra fun to gift, display, and snack on throughout December. The dough rolls smoothly, chills cleanly, and slices into beautiful spirals every time. Once baked, the cookies get lightly crisp at the edges while staying tender in the middle, giving you that perfect balance of texture that makes holiday cookies so irresistible.
This recipe was inspired by my favorite Christmas sugar cookies and classic slice and bake designs that always feel magical this time of year. These peppermint pinwheel cookies pair beautifully with hot chocolate, espresso, or a mug of peppermint tea. If you are building a Christmas cookie tray or gifting holiday treat boxes, these colorful spirals will always be one of the first cookies people reach for.

Why You'll Love This Recipe
- Festive holiday colors. Red, green, and white swirls rolled in sprinkles make these cookies eye catching, bright, and perfect for any Christmas dessert platter.
- Peppermint flavor. A touch of peppermint extract gives these Christmas pinwheel cookies a refreshing holiday twist without overpowering their buttery sugar cookie base.
- Slice and bake convenience. The dough log chills in advance and slices cleanly, making this one of the easiest cookies for holiday prep or making ahead.
- Perfect for gifting. These cookies hold their shape, pack well, and stay fresh, making them ideal for cookie tins, party trays, and homemade holiday gifts.
Ingredients and Substitutions
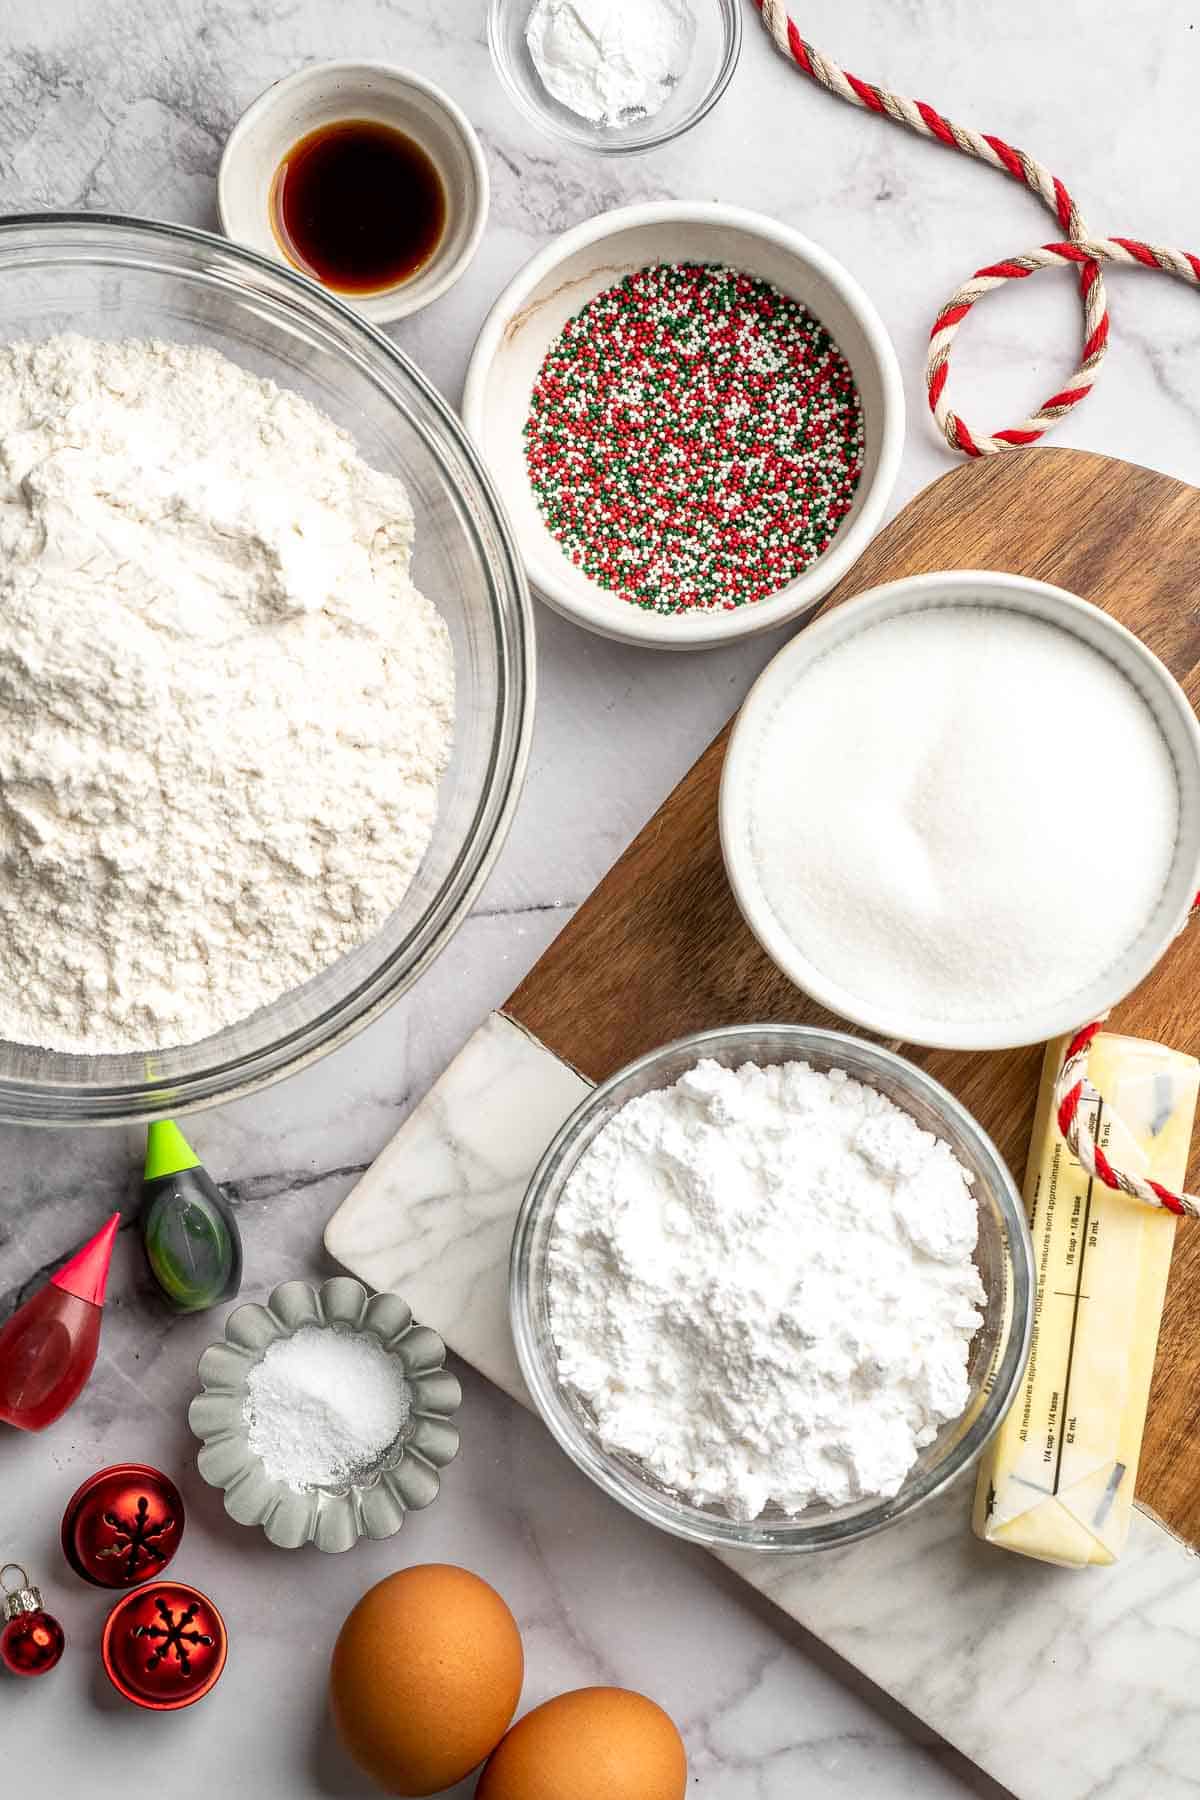
To make these festive Peppermint Pinwheel Cookies, you will need the following ingredients (see recipe card below for quantities):
- unsalted butter - Softened for easy mixing. Salted butter works if you reduce the added salt slightly.
- confectioners' sugar - Creates a smooth, tender cookie texture. Do not substitute with granulated sugar here.
- granulated sugar - Helps the cookies spread slightly and adds sweetness.
- eggs - Bind the dough and add richness. Room temperature eggs incorporate more smoothly.
- vanilla extract - Adds depth and warmth to the sugar cookie base.
- peppermint extract - Provides the holiday flavor. Adjust the amount slightly depending on how strong you like peppermint.
- all purpose flour - Gives structure. Measure accurately using a spoon and level method or a kitchen scale for the most consistent dough texture. For softer cookies, replace one tablespoon of flour with one tablespoon of cornstarch.
- baking powder - Helps keep the cookies light and tender.
- salt - Balances sweetness and enhances flavor.
- food coloring - Gel food coloring is best for bright, vivid red and green swirls without altering the texture. If needed, you can use liquid food coloring, but you may have to compensate with a bit more flour.
- holiday nonpareil sprinkles - Add crunch and a festive look when rolled around the cookie log.
Equipment
You will also need measuring cups and spoons, a large mixing bowl, a hand mixer or stand mixer with a paddle attachment, sheets of parchment paper, a rolling pin, plastic wrap for chilling the dough, a sharp knife for slicing, two baking sheets, and cooling racks to cool the cookies completely.
Instructions
- Combine the dry ingredients. In a large mixing bowl, whisk together the flour, baking powder, and salt until well combined. Set aside.
- Cream the butter and sugars. In another large mixing bowl, beat the butter, confectioners' sugar, and white sugar on medium speed until light and fluffy, about 3 minutes.
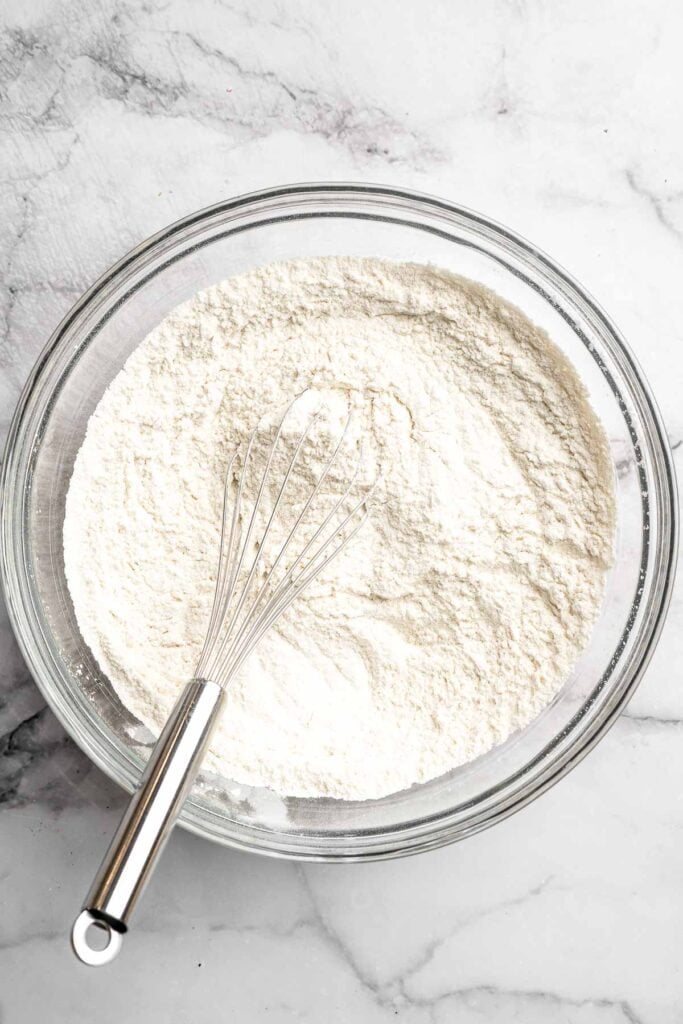
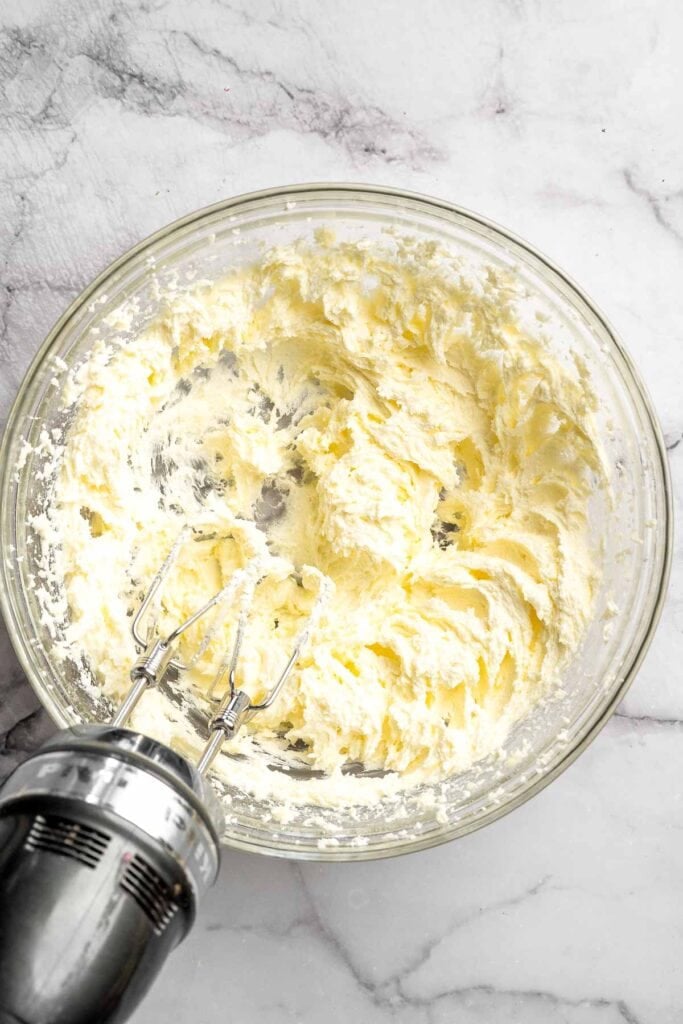
- Add eggs and extracts. Add the vanilla, peppermint extract, and eggs, then beat again until fully combined and smooth.
- Add the dry ingredients. Add the flour mixture to the wet ingredients and beat until a soft but not sticky dough forms.
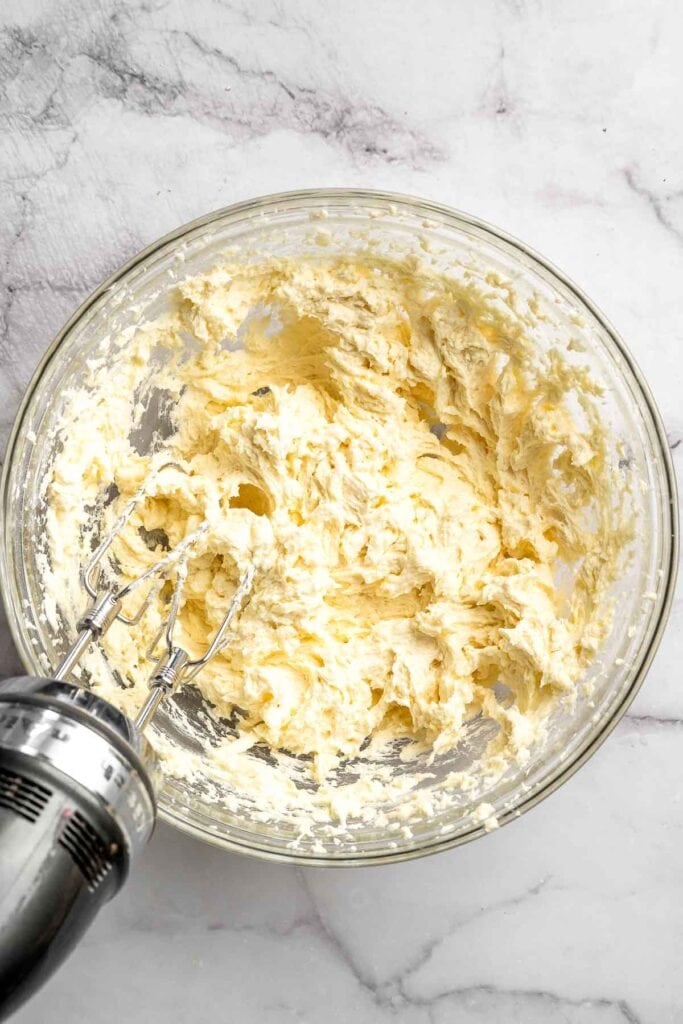
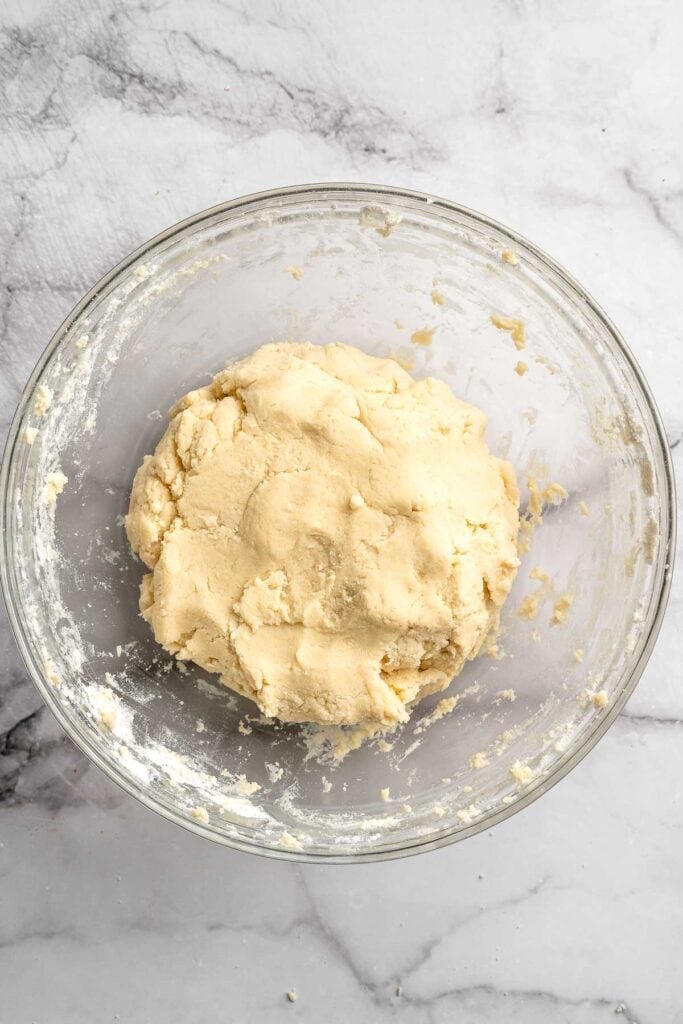
- Divide and chill the dough. Divide the dough into three equal portions. Wrap one portion as the plain white dough with cling wrap and refrigerate.
- Color the remaining doughs. Add green food coloring to one portion of dough and mix with a hand mixer or use your hands with gloves (this is the easiest way). Color the remaining portion with red food coloring. Wrap each dough separately with plastic cling wrap and refrigerate for at least 1 hour.
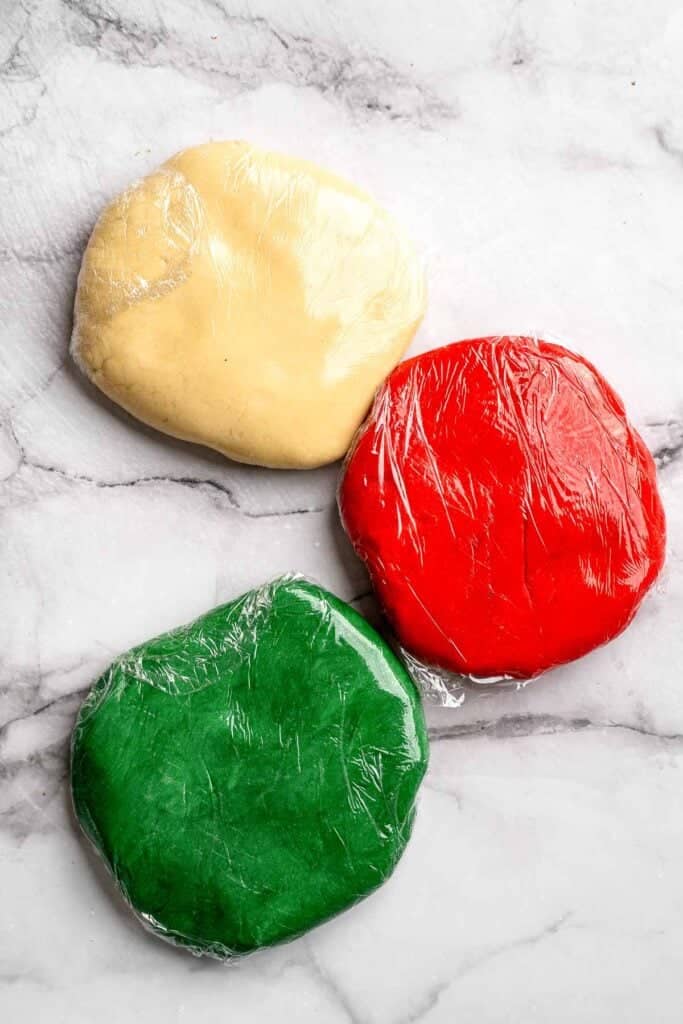
- Roll out each dough. After chilling, remove the doughs from the fridge. Roll each portion out, on top of a lightly floured piece of parchment paper, into a 9x12-inch rectangle.
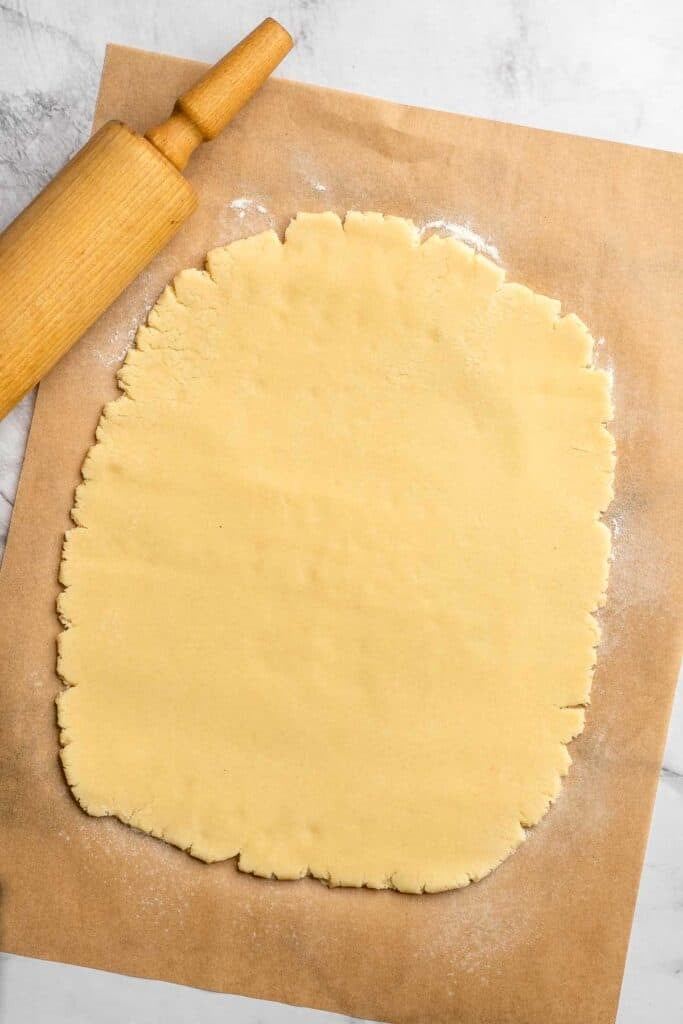
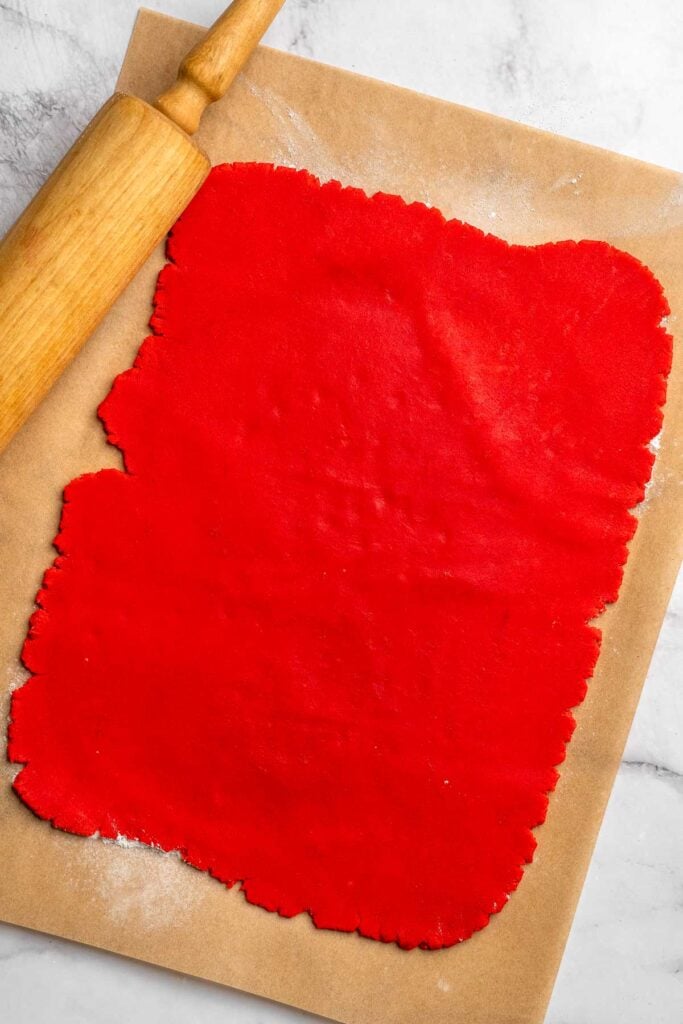
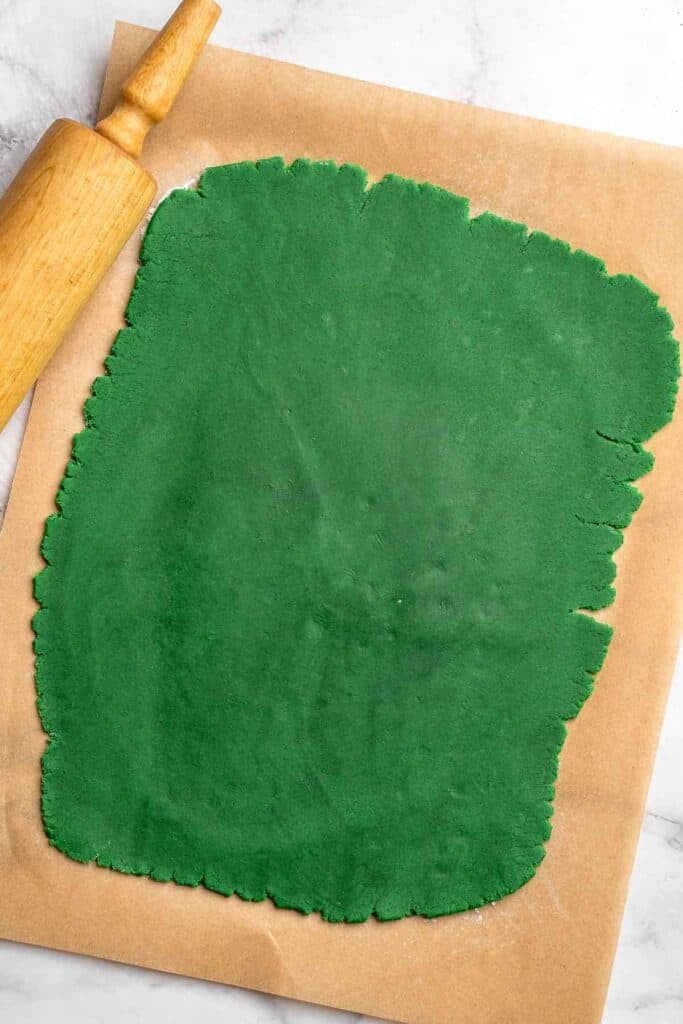
- Stack and trim. Stack the colored doughs on top of each other (green on the bottom, then plain, then red). Trim the edges with a sharp knife to form an even rectangle.

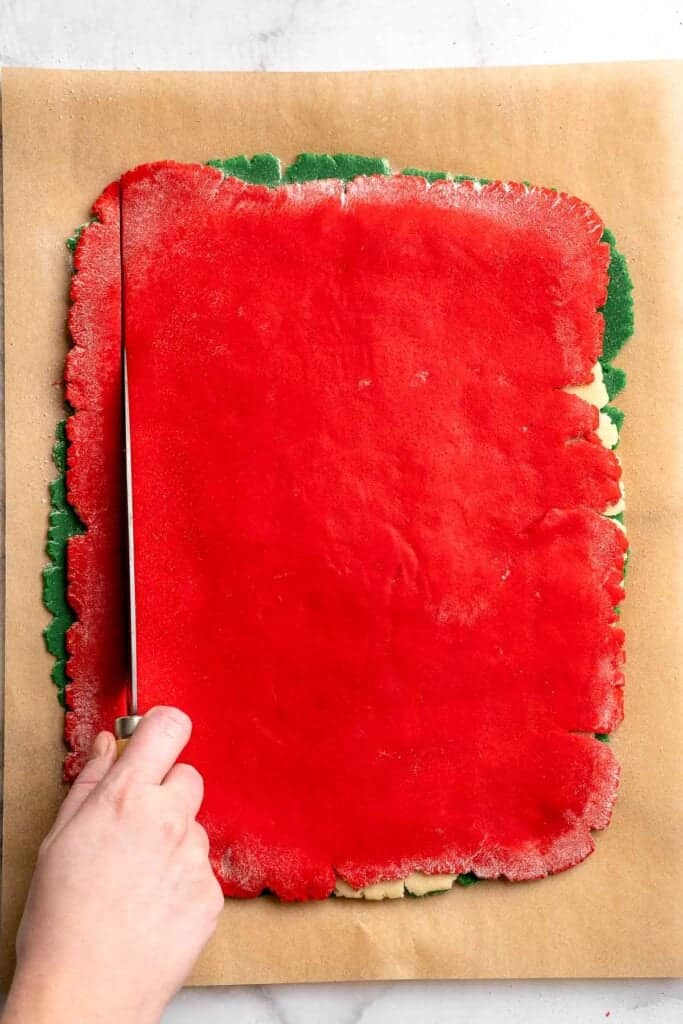

- Roll into a log. Starting from the long side, roll the stacked dough tightly into a log.
- Add sprinkle coating. Pour the sprinkles into a small rimmed baking sheet or container. Roll the dough log over the sprinkles, pressing gently until the entire log is sufficiently coated.
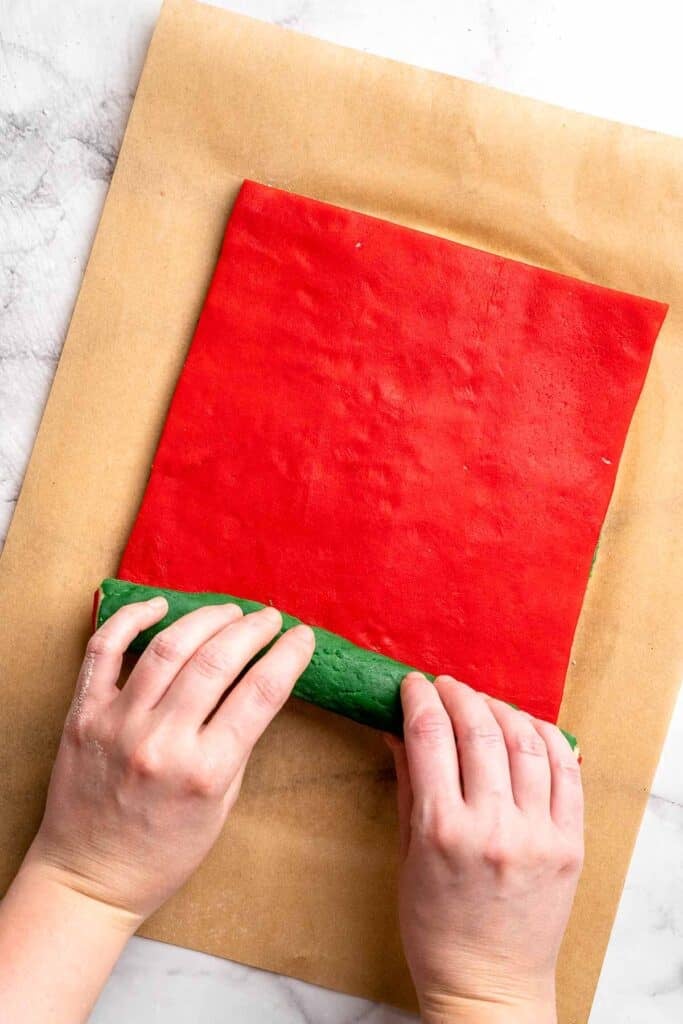
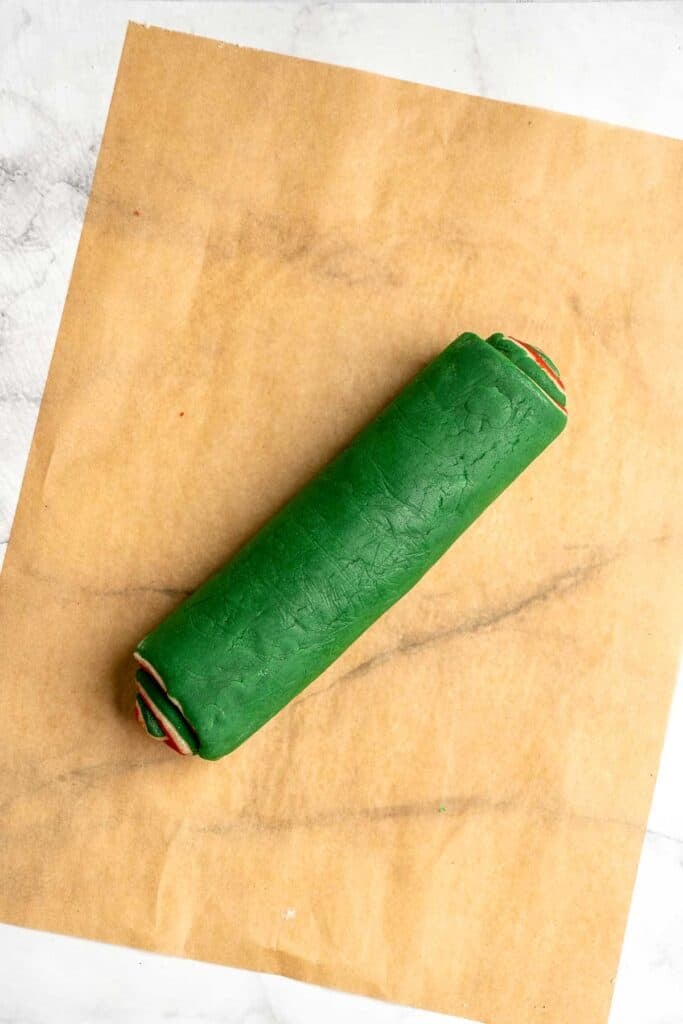
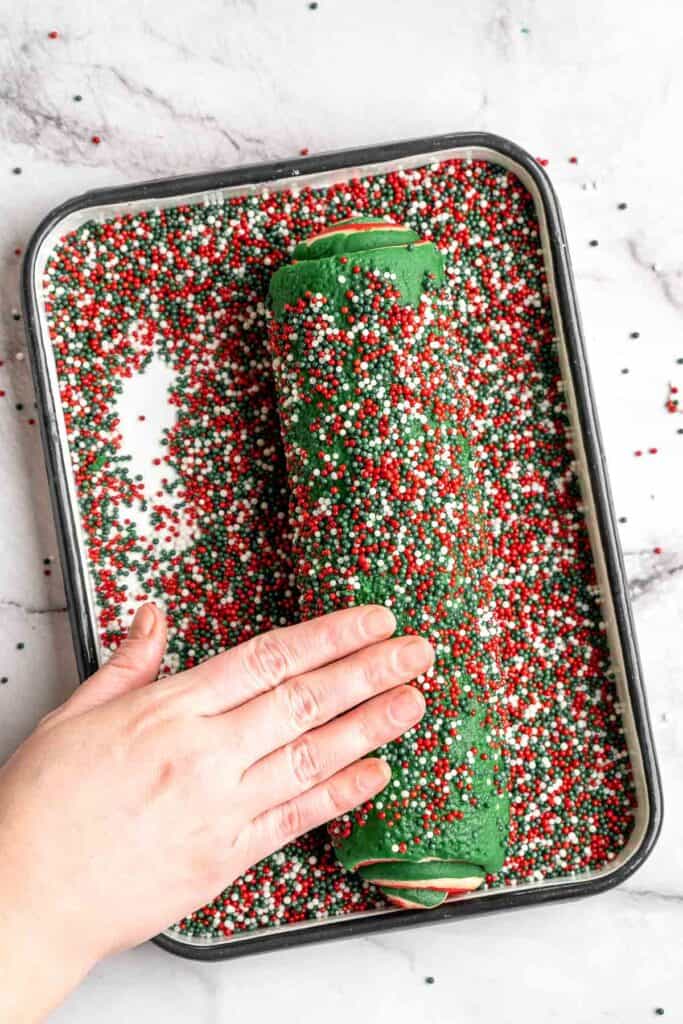
- Chill the log. Wrap the sprinkle coated dough log in plastic wrap and refrigerate for at least 4 hours.
- Preheat the oven. Preheat the oven to 350°F and line two baking sheets with parchment paper.
- Slice the cookies. Remove the chilled log and cut into ¼-inch thick slices using a sharp knife.
- Bake. Place the cookies on the prepared baking sheets and bake for 9-11 minutes, or until the cookies are set but still soft. Cool on the sheet briefly, then transfer to a wire rack to cool completely.
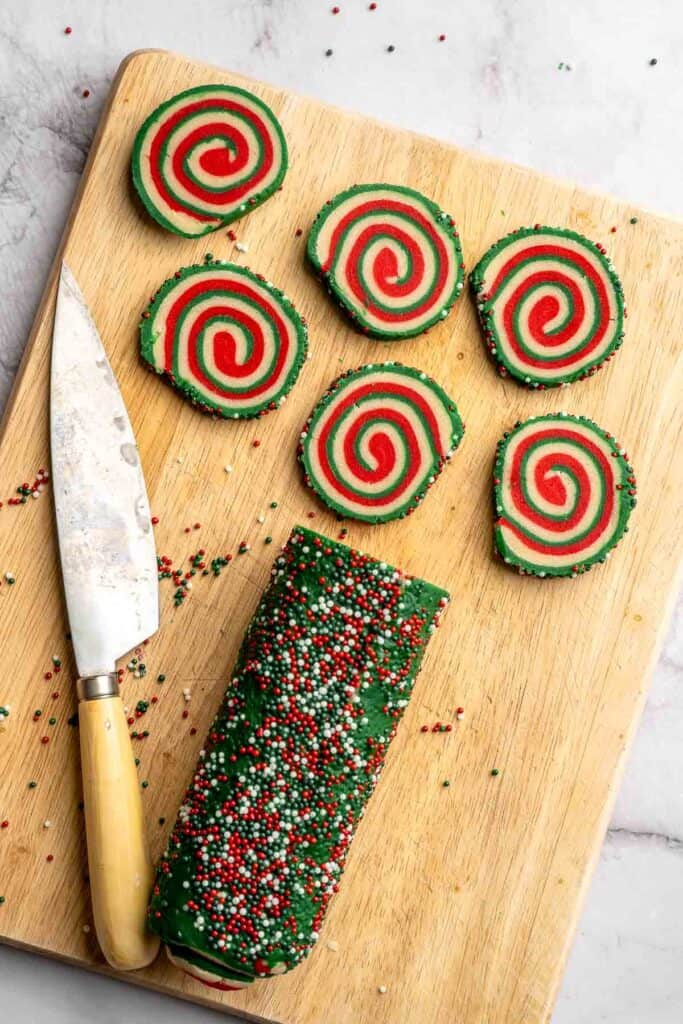
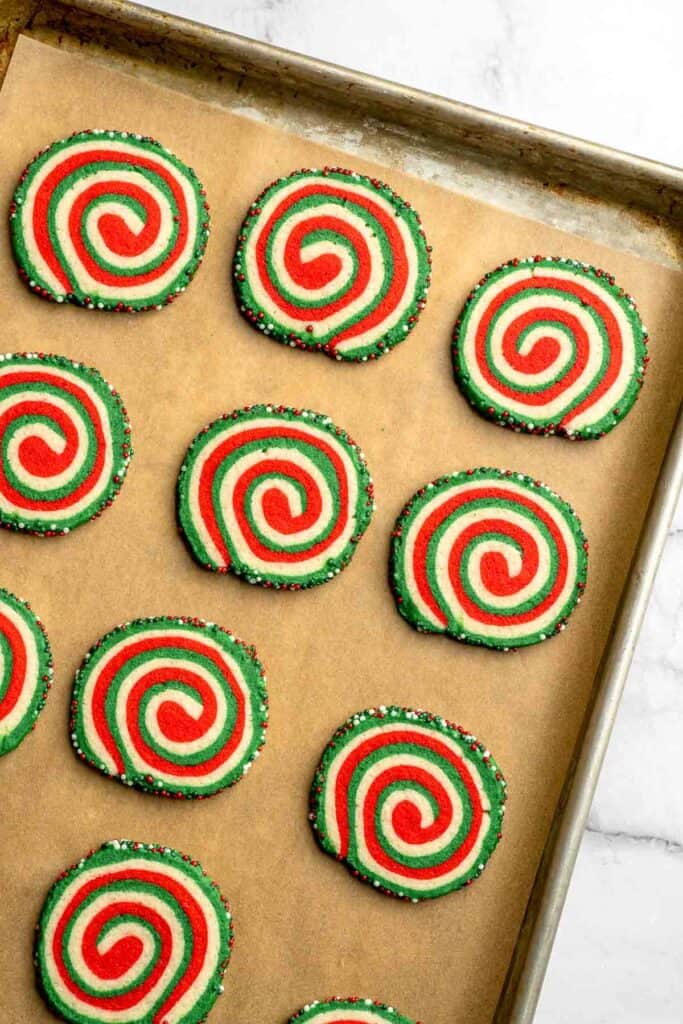

Expert Tip: Chill the Log for Perfect Spirals
Chilling the dough log thoroughly is the secret to clean, even slices. A well chilled log holds its shape as you cut, ensuring the spirals stay tight and round rather than flattening or smudging. For best results, chill the dough for a full 4 hours or overnight before slicing, and wipe your knife clean between cuts.
More Tips and Tricks
- Mix on low speed and scrape often. When creaming the butter mixture, mix on low speed at first so the sugar incorporates smoothly. As you mix, pause to scrape down the sides of the bowl to prevent streaks of color or uneven dough. This helps create clean layers that roll tightly without cracks.
- Roll evenly for clean layers. When rolling out each color of dough, try to maintain the same thickness across all three layers. Even thickness helps the spirals stay tight and prevents uneven spreading in the oven.
- Trim the edges for a perfect rectangle. Use a sharp knife to square off the edges before rolling. This step makes the final spiral cleaner and more defined when baked.
- Use parchment to help roll the dough. Roll each color of dough directly on parchment so you can easily lift, stack, and roll everything without sticking or tearing the layers.
- Work on a cool counter. Rolling on a cool counter helps keep the dough firm and prevents the swirls from smudging.
- Seal the seam. When rolling the stacked dough into a log, pinch the seam gently so it stays tight and does not open while slicing.
- Add sprinkles to a shallow tray. Pour the sprinkles into a rimmed sheet or dish, then gently press the dough log into the sprinkles so they adhere evenly. This keeps the coating neat and prevents runaway sprinkles.
- Slice gently with a sharp knife. Avoid pressing straight down, which can squish the spiral. Instead, use a gentle sawing motion for smooth, clean cuts.
Recipe Variations
- Candy cane swirl. Replace the green layer with another red layer for a two tone candy cane look. Add a touch of crushed peppermint candies to the edges before baking for extra flavor and festive texture.
- Chocolate peppermint pinwheels. Swap one third of the dough's flour with cocoa powder for a chocolate layer. Stack chocolate, white, and red dough for a holiday Neapolitan style pinwheel cookie with a peppermint twist.
- Rainbow slice and bake. Skip the peppermint and color each section with bright rainbow shades. These make fun birthday or celebration cookies year round and follow the same rolling method.
- Vanilla almond pinwheels. Replace the peppermint extract with almond extract for a nutty, bakery style flavor. Roll the edges in sanding sugar or colored sugar instead of nonpareils.
- Chocolate chip pinwheels. Mix mini chocolate chips into the white dough layer and keep the peppermint extract. This gives the cookies a fun mint chocolate twist.
- Sprinkle filled centers. Add a thin layer of sprinkles between each colored dough sheet before rolling. This creates confetti style flakes throughout the swirls.
- Halloween version. Swap red and green for orange and black for a fun Halloween pinwheel cookie. Slice slightly thicker thick slices to keep the colors bold.

Storage
How to Store
These cookies stay fresh for days, making them one of my picks for the best Christmas cookie recipe to store ahead for the season. They hold their shape beautifully and keep their crunch even after a few days.
Store cookies in an airtight container at room temperature for up to one week. Separate layers with parchment so the sprinkles stay intact and the spirals remain clean.
How to Reheat
These cookies do not need reheating, but you can warm them gently in a low oven if you prefer a softer texture. Avoid microwaving, which can melt sprinkles.
How to Freeze
Freeze baked cookies in a single layer, then move to an airtight container or freezer safe bag for up to three months. You can also freeze the unbaked dough log. Wrap tightly in plastic and freeze for up to three months. Thaw in the refrigerator before slicing.
How to Serve
Peppermint pinwheel cookies are perfect for cookie boxes, classroom treats, holiday dessert boards, cookie swaps, and Christmas parties. Their bright colors make them a standout on any platter, and they pair beautifully with hot chocolate, coffee, or peppermint mocha. Serve them with other festive favorites like sugar cookies, gingerbread men, or chocolate crinkle cookies for a beautiful holiday spread.
These are my favorite drinks to serve with christmas pinhweel cookies:
Holiday Cookie Week
These cookies are part of our Annual Cookie Week! For more sweet inspiration, explore our full holiday cookie collection from this year and year's past. You will find everything from nostalgic classics and colourful decorated cookies to creative flavours and fun themed bakes that make our annual Cookie Week such a favourite tradition.
FAQ
Yes. This recipe is ideal for preparing ahead because the dough log must chill for several hours. You can make the dough one or two days in advance, keep it wrapped in the refrigerator, then slice and bake when needed. The dough also freezes well if you want to prep weeks ahead during busy holiday baking.
Pinwheel cookies spread slightly but should hold their shape if the dough is chilled properly. A warm dough log is the most common reason for overly spread cookies. Chill for at least four hours and use parchment lined sheets to help the cookies bake evenly. Trim the edges neatly for smooth spirals, and slice with a sharp knife for clean cuts.
Roll each dough color evenly, stack with care, and trim the edges to create a perfect rectangle. Use parchment underneath to help guide the roll. Chill the log thoroughly, slice with a sharp knife, and clean the blade between cuts. These tips help keep the swirls distinct and beautiful.
Yes. Try sanding sugar for sparkle, crushed peppermint candies for extra mint flavor, or finely chopped nuts for a nutty edge. Nonpareils add the best crunch and color, but any coating that sticks to the chilled dough log will work.
More Peppermint Cookie Recipes
Looking for other recipes like this? Try these:
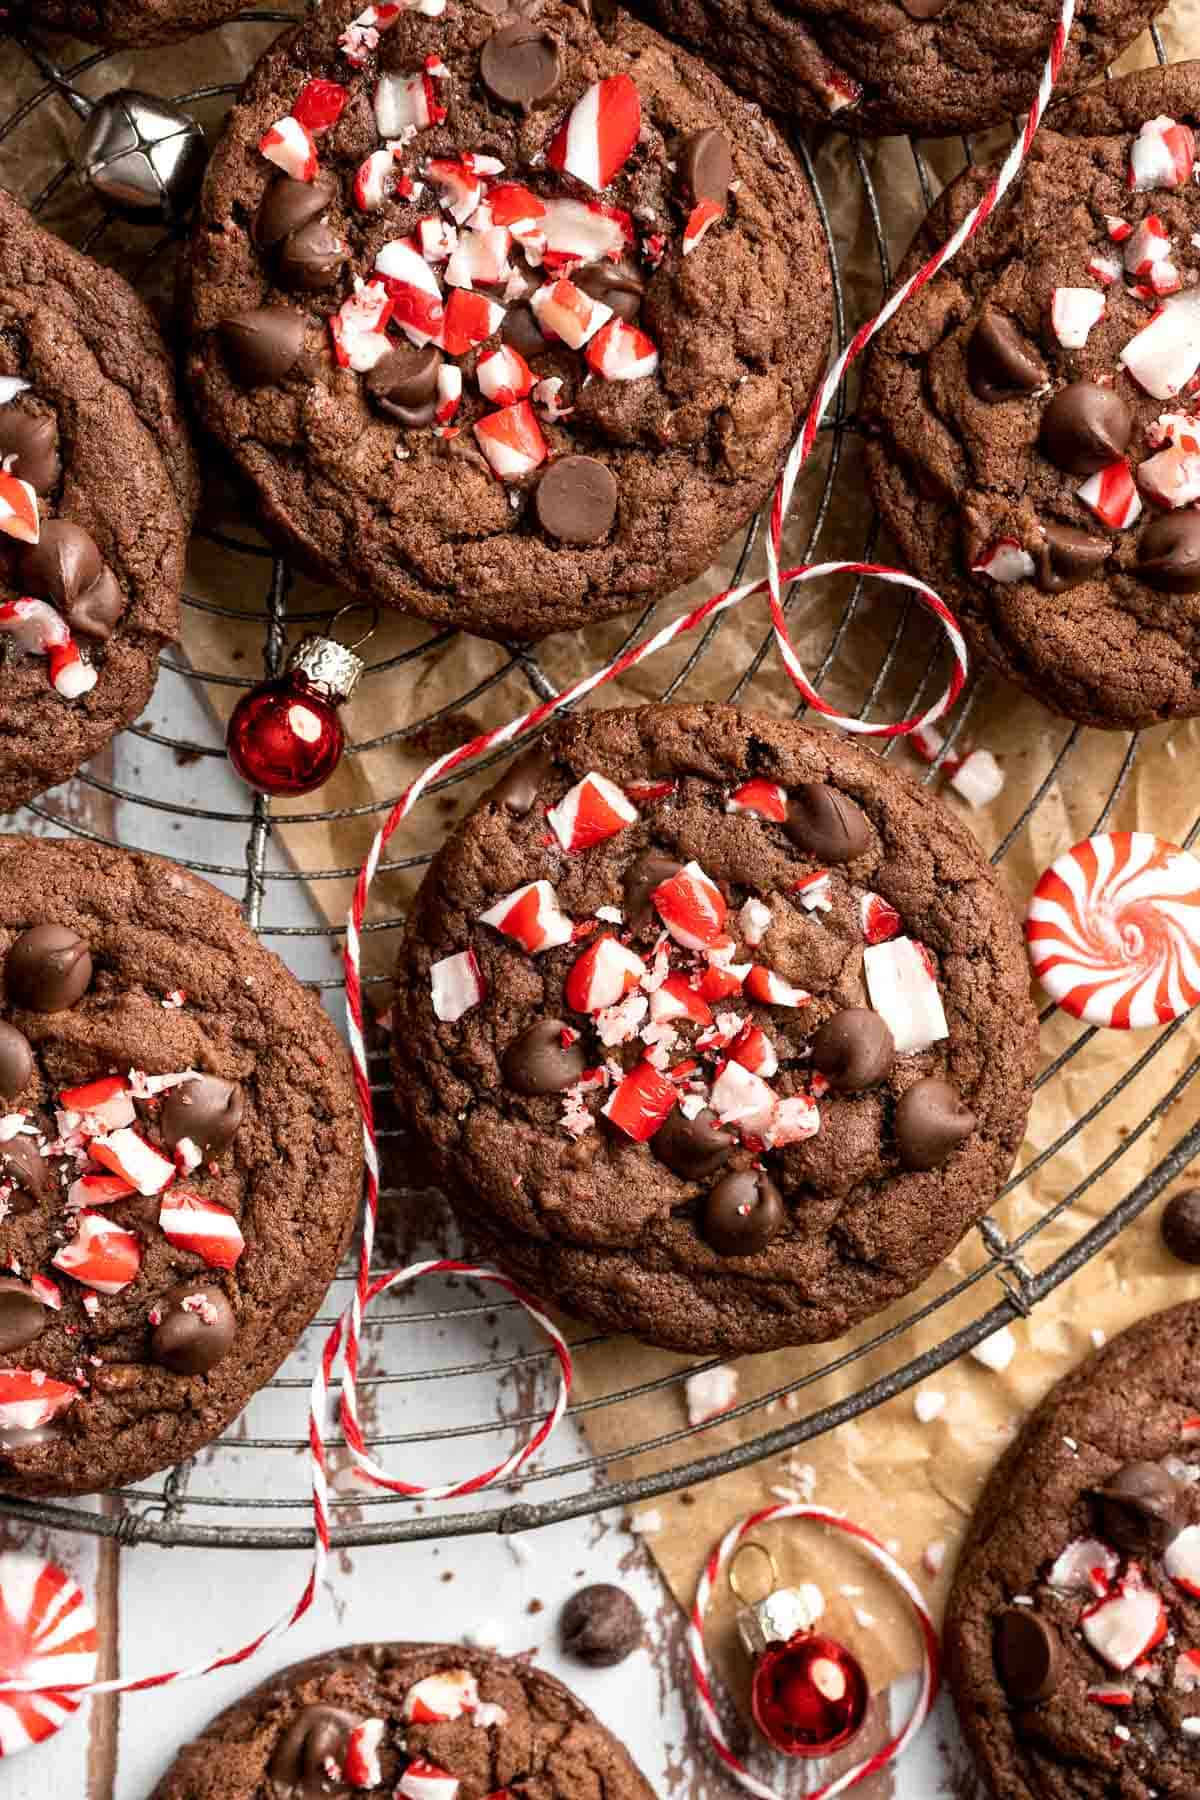


Tried this recipe?
I'd love to hear what you think! Leave a comment and rating below to share your feedback. Your reviews help others discover this recipe and help me keep creating more free recipes for you. Snap a photo and tag me on social media @aheadofthyme too.
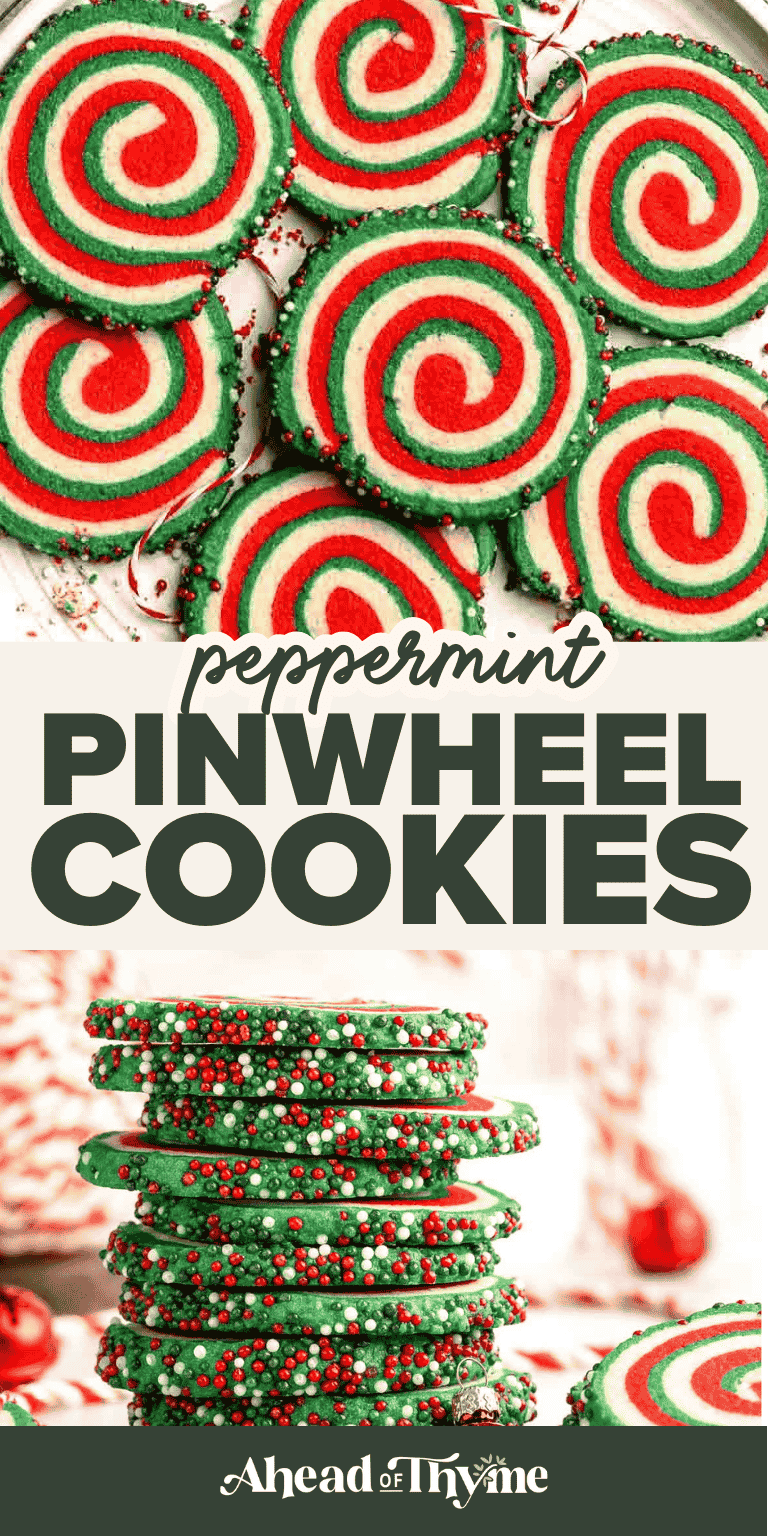
Grinch Cookies
These Grinch Cookies are soft, sweet, festive treats that taste like a classic sugar cookie but with a fun holiday twist. They are tinted the perfect Grinch green, rolled in sparkly sugar, and finished with a little red heart that melts right into the warm cookie. They are adorable, cheerful, and guaranteed to brighten any Christmas cookie box or holiday dessert table.

The dough comes together quickly in one bowl, using simple pantry staples and a few drops of green food coloring for that iconic look. The cookies bake up soft in the center with lightly crisp edges, making them perfect for kids, cookie exchanges, or any cozy December baking day. Press the heart sprinkle on while the cookies are still warm, and just like that, they transform into the sweetest holiday cookies you will ever make.
These cookies were inspired by my Soft Sugar Cookies and are the perfect addition to holiday parties, cookie trays, or festive movie nights. They pair well with a glass of milk, hot chocolate, or anything warm and cozy. Whether you bake them with kids or prepare a batch for gifting, these grinch cookies add a little extra magic to the season.

Why You'll Love This Recipe
- Soft, chewy, and festive. These cookies bake up with perfectly soft centers, lightly crisp edges, and a bright green color that makes them the cutest addition to any holiday cookie box. The perfect holiday cookie recipe!
- Simple ingredients and easy steps. You only need basic pantry staples, one bowl for mixing, and simple decorating that takes just seconds. No complicated techniques or chill time required for this grinch cookie recipe.
- Perfect for holiday baking. These green cookies are cheerful, kid friendly, and ideal for cookie exchanges, school events, Christmas dessert platters, or a grinch movie night. They always get attention because they look so fun.
- Customizable and make ahead friendly. You can adjust the green color, swap in different sprinkles, and bake them ahead of time. Grinch christmas cookies freeze beautifully and stay soft for days.
Ingredients and Substitutions
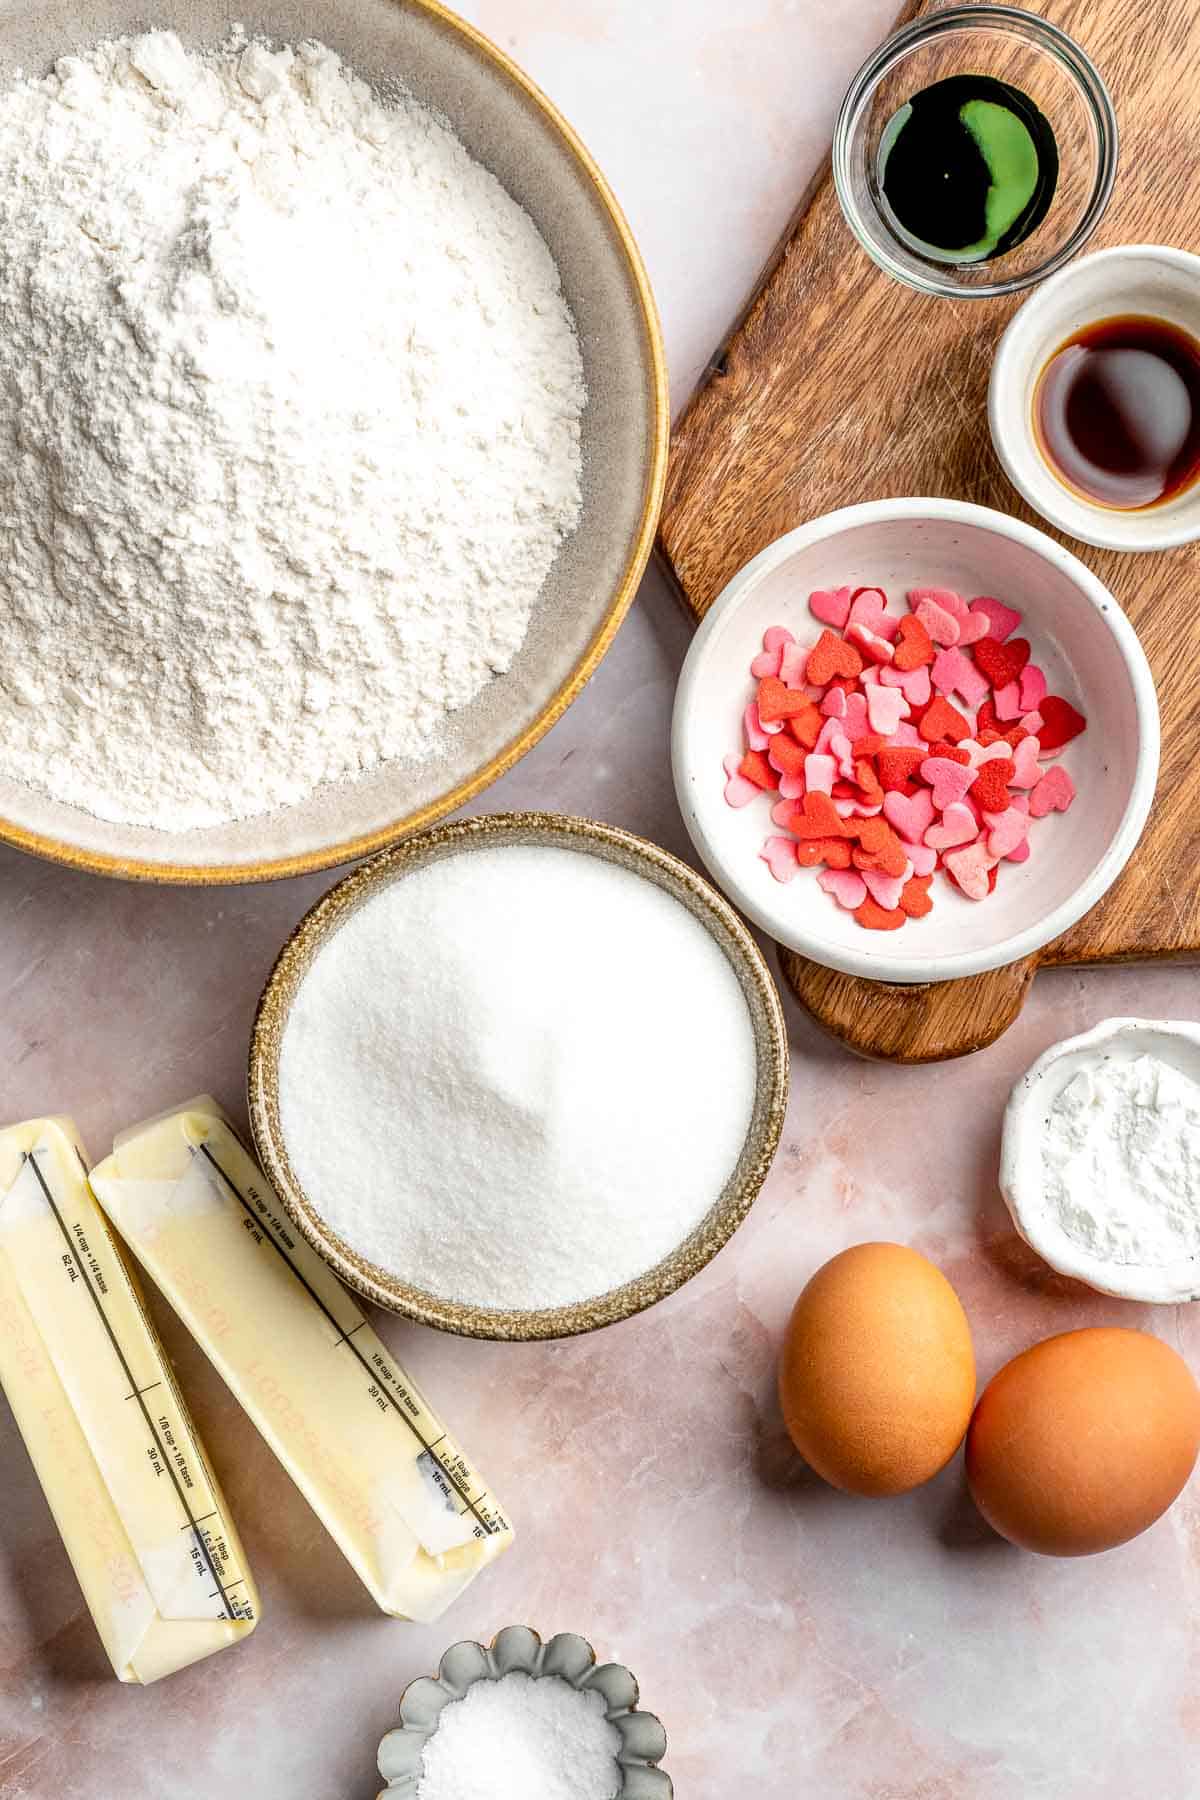
To make these easy Grinch Cookies, you will need the following ingredients (see recipe card below for quantities):
- all purpose flour - Provides structure and helps the cookies stay soft and chewy.
- baking powder - Gives the cookies light lift and keeps the centers soft.
- salt - Balances sweetness and enhances flavor.
- unsalted butter - Softened butter creams beautifully with sugar, giving the cookies their classic texture.
- white sugar - Sweetens the dough and creates lightly crisp edges. We also use sugar for rolling the cookie dough balls in to add sparkle and a bit of crunch. Rolling the dough in white sugar gives sparkle, but you can also use powdered sugar or confectioner's sugar for a softer, frosty look.
- egg and egg yolk - Add richness and create a soft, tender interior.
- vanilla extract - Adds warm flavor that complements the sugar cookie base.
- green food coloring - Use gel or liquid until you reach the perfect Grinch green.
- red heart sprinkles - The iconic finishing touch representing grinch's small heart. Use red hearts for the classic Grinch look. These are the heart sprinkles I used. You can also use red m&m or cinnamon hearts.
Equipment
You will also need measuring cups and spoons, a large mixing bowl, a hand mixer or stand mixer, a whisk, a medium cookie scoop, two parchment lined baking sheets, and a cooling rack for finishing the cookies.
Instructions
- Mix the dry ingredients. In a large mixing bowl, whisk together flour, baking powder, and salt until well combined. Set aside.
- Cream the butter and sugar. In another large mixing bowl, beat the softened butter and white sugar with an electric hand mixer until light and fluffy, about 3 minutes.
- Add remaining wet ingredients. Add the egg, egg yolk, vanilla extract, and green food coloring. Beat again until the mixture is smooth, fluffy, and evenly tinted.
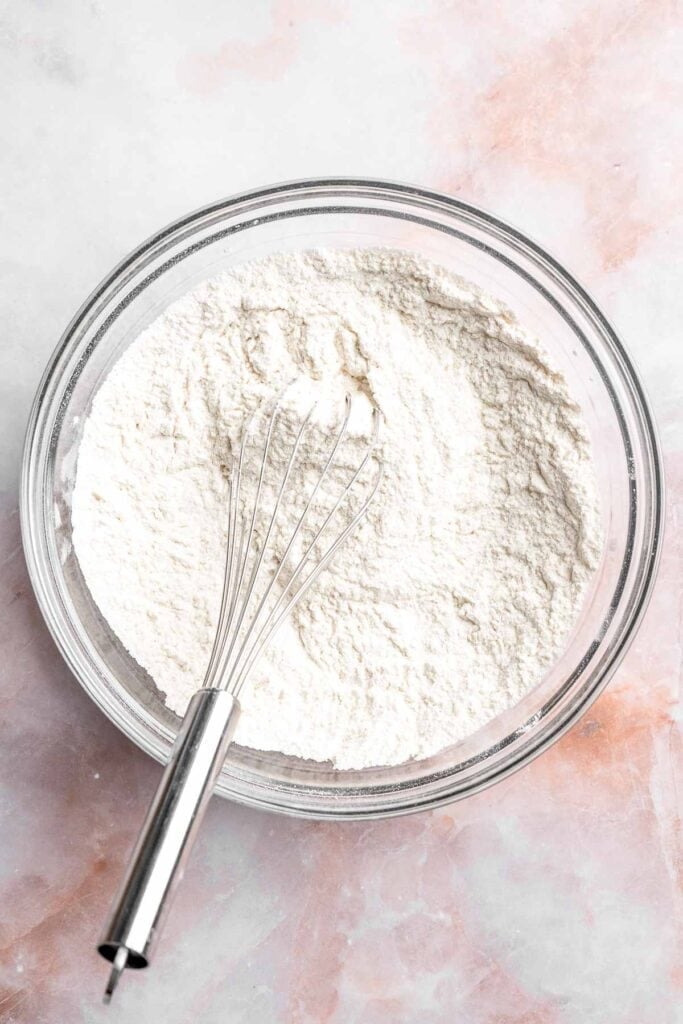
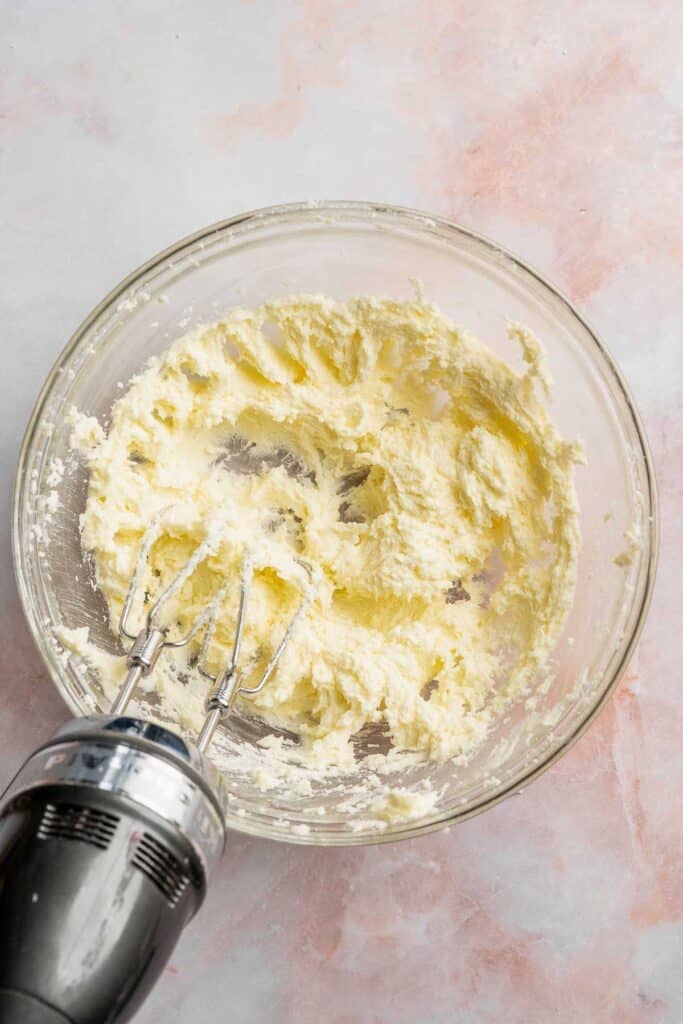
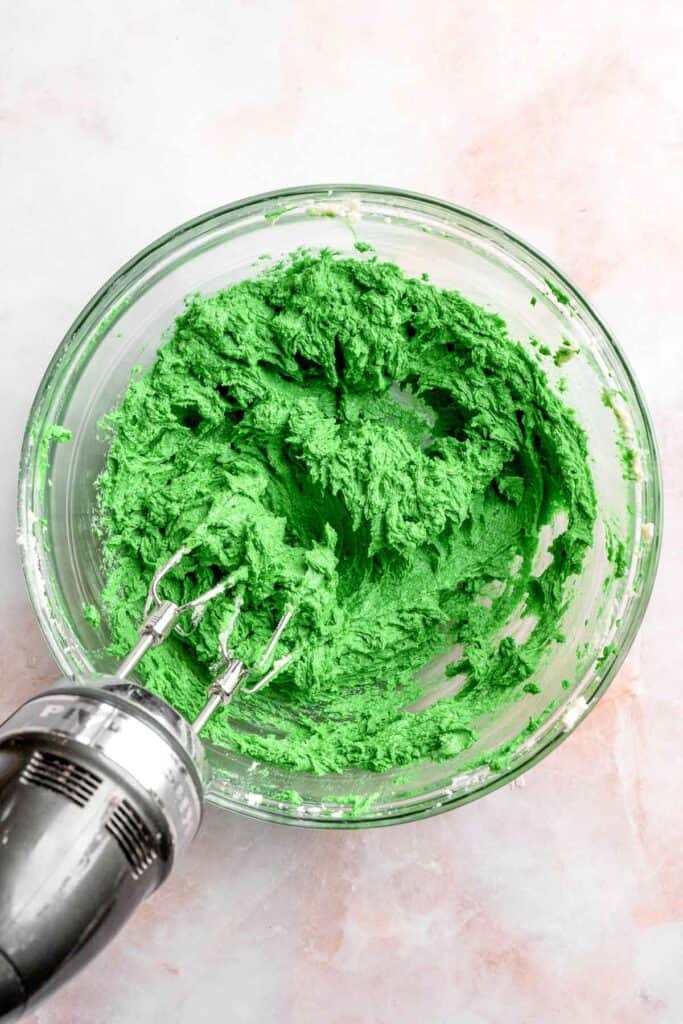
- Combine the wet and dry ingredients. Add the dry mixture to the wet mixture and beat again until a uniform cookie dough forms.
- Scoop and roll the cookies. Line two baking sheets with parchment paper. Using a medium cookie scoop, portion the dough and roll each piece in white sugar. Arrange the cookies evenly on the prepared baking sheets.
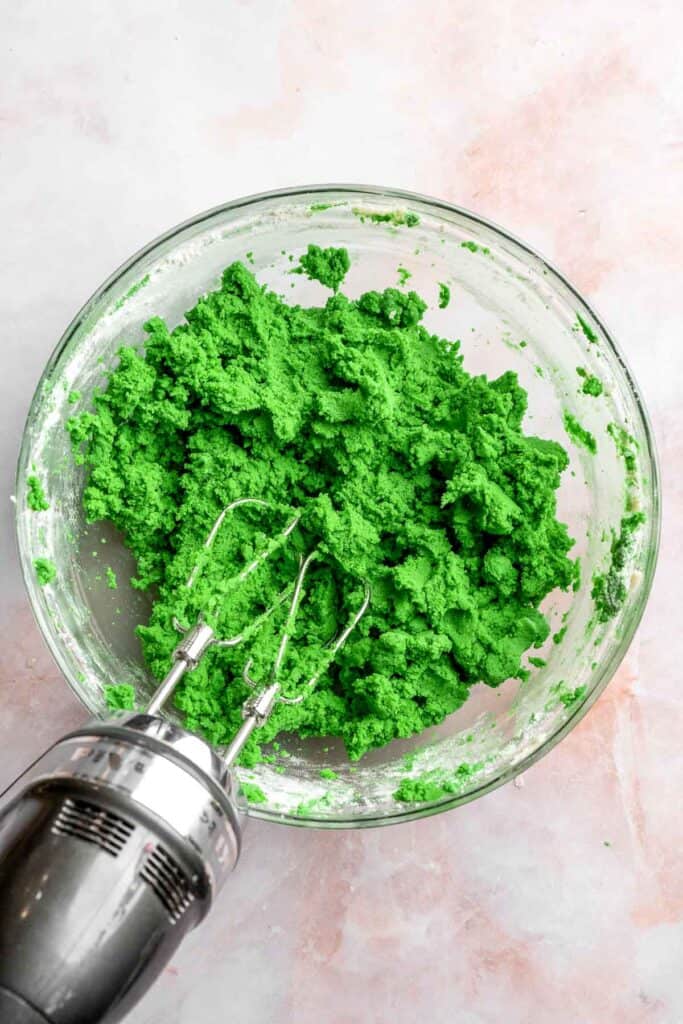
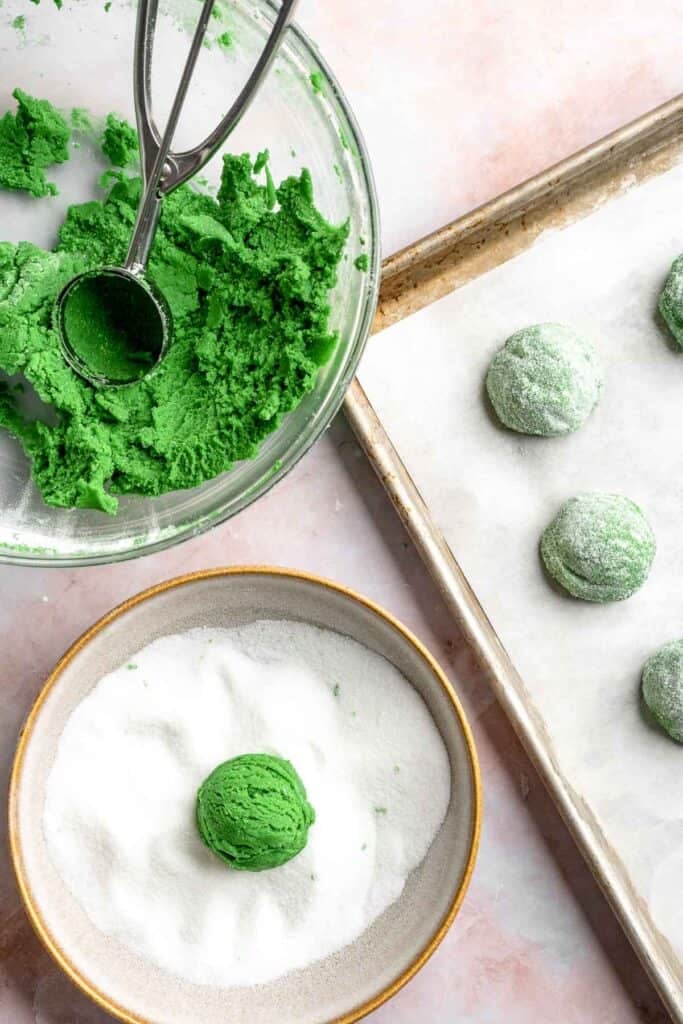
- Bake the cookies. Bake in a 350°F preheated oven for 11-12 minutes, until the edges are just set and the cookies look slightly puffed.
- Add the heart sprinkles. Press one heart sprinkle into the center of each cookie while they are still warm from the oven.
- Cool the cookies. Let the cookies cool on the baking sheet for 5 minutes, then transfer them to a wire rack to cool completely.
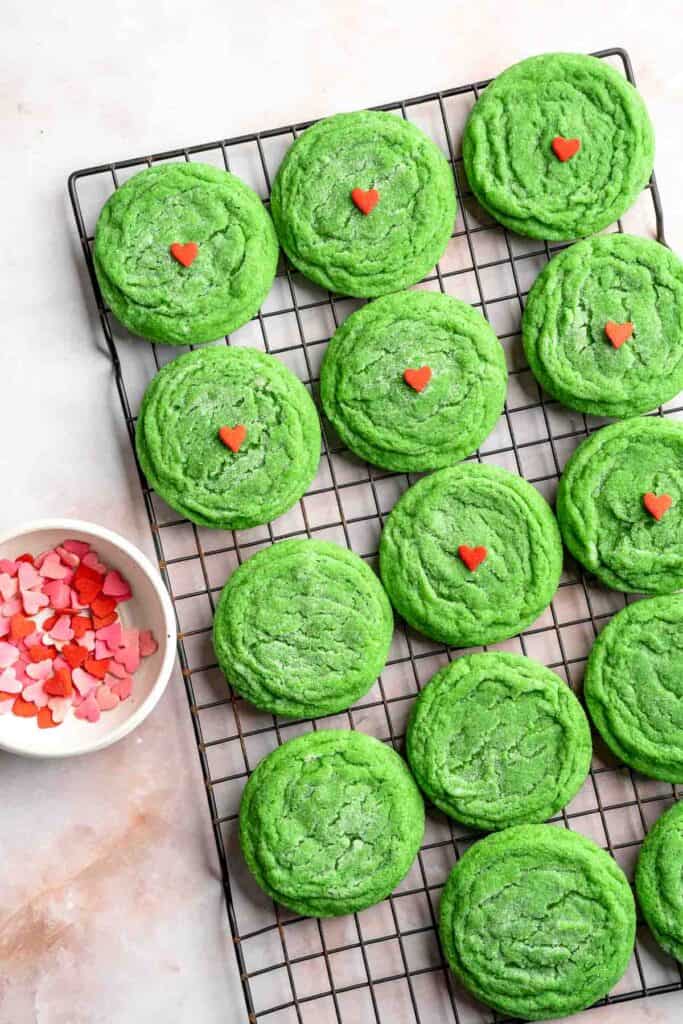

Expert Tip: Add the Heart Sprinkle While Hot
Press the heart sprinkle onto each cookie within the first minute after they come out of the oven. The warmth helps the sprinkle melt slightly into the center, creating that perfect iconic Grinch look that sticks without falling off later.
More Tips and Tricks
- Use softened butter for the best texture. Soft butter creams perfectly with sugar and traps air in the dough, which helps the cookies bake up soft and fluffy. If the butter is too cold, the dough will be dense. If it is too warm, the cookies may spread too much. Leave your butter on the counter for about 30 minutes before starting or press it gently with your fingertip to check softness.
- Do not overmix the dough. Once you add the dry ingredients, mix only until just combined. Overmixing can make the cookies tough and cause them to spread more than you want.
- Adjust the color as you go. Start with a few drops of green food coloring and add more gradually. Food coloring gets darker as it bakes, so aim for a slightly brighter shade than what you want in the final cookie. Gel coloring creates the most vibrant look with minimal liquid.
- Roll in sugar for sparkle. Rolling the dough balls in white sugar adds gentle crunch and pretty shimmer.
- Rotate your baking sheet for even baking. Every oven has hot spots, so rotate your baking sheet halfway through if your cookies seem to brown quickly on one side.
Recipe Variations
- Extra chewy version. Add a tablespoon of cornstarch for a softer, chewier cookie.
- Mint Grinch cookies. Add a drop of peppermint extract for a minty holiday twist.
- Sparkle Grinch cookies. Roll the dough in green sanding sugar instead of white.
- Red heart icing. Instead of sprinkles, pipe a tiny red icing heart on each cookie.
- Chocolate Grinch cookies. Add two tablespoons of cocoa powder for a chocolate green cookie version.
- Sprinkle edges. Roll the dough in red and green sprinkles for an extra festive look.

Storage
How to Store
Store cooled cookies in an airtight container at room temperature for up to 4 days. They stay soft and chewy for several days. You can place them in the fridge if your kitchen runs warm. They pack beautifully into cookie tins and are ideal for sharing as part of lots of christmas cookies during the season.
How to Reheat
Warm in the microwave for 5-8 seconds for that fresh from the oven softness.
How to Freeze
Freeze baked cookies in a single layer, then transfer to a freezer safe bag for up to 2 months. Freeze the dough balls separately for fresh baked cookies anytime.
How to Serve
Serve Grinch Cookies on holiday dessert trays, school party treat boxes, cookie exchange platters, or alongside hot chocolate during Christmas movie nights. Their bright green color and little red heart make them a joyful addition to any festive celebration.
These are my favorite drinks to serve with Grinch Cookies:
Holiday Cookie Week
These cookies are part of our Annual Cookie Week! For more sweet inspiration, explore our full holiday cookie collection from this year and year's past. You will find everything from nostalgic classics and colourful decorated cookies to creative flavours and fun themed bakes that make our annual Cookie Week such a favourite tradition.
FAQ
Grinch cookies are soft, chewy sugar cookies tinted bright green to resemble the famous character from How the Grinch Stole Christmas. They are rolled in sugar for extra sparkle and finished with a small red heart that melts slightly into the warm cookie. The color and little heart make them instantly recognizable and perfect for holiday cookie trays, Christmas parties, or baking with kids. They taste similar to a classic soft sugar cookie and rely on simple pantry ingredients, which makes them easy for beginners and fun for festive baking days. Their cheerful look always brings a little extra magic to the season.
Green Grinch cookies start with a soft sugar cookie dough made from butter, sugar, eggs, flour, and vanilla. Once the wet ingredients are mixed, add a few drops of green food coloring until you reach the perfect shade of Grinch green. Gel food coloring works best because it creates strong color with very little liquid. Roll the dough in sugar to add sparkle, then bake until just set. While the cookies are still warm, press a red heart sprinkle into the center of each one so it melts slightly into the cookie. Let them cool fully before storing or decorating further.
To make a cake mix version, use one box of vanilla or white cake mix, one third cup of oil, and two eggs. Stir together until a dough forms. Add green food coloring until you reach the shade you like. Scoop the dough, roll in sugar, and bake at 350°F for about 10 to 12 minutes. While the cookies are still warm, press a small red heart sprinkle into each one. Cake mix cookies will be softer and slightly more cakey than the scratch version, but they are fast, easy, and perfect for last minute holiday baking.
Yes, you can still make delicious cookies without food coloring, but they will not have the classic Grinch look. If you prefer to skip artificial coloring, use a natural green gel color or matcha powder to tint the dough slightly. Matcha adds a mild earthy flavor that pairs surprisingly well with vanilla sugar cookies. See our Matcha Cookies. You can also keep them natural and simply add the red heart sprinkle for a minimalist Grinch theme.
Cookies often spread too much when the butter is too warm, the dough was overmixed, or the flour measurement was too light. To fix this, chill the dough for 15 minutes before baking or add an extra tablespoon of flour. Using a kitchen scale helps ensure accurate measurements, especially for flour. Also make sure your baking sheet is fully cool before placing a new batch of dough on it, since a warm sheet can cause cookies to spread before they set.
Yes, these cookies freeze extremely well and are great for make ahead holiday baking. You can freeze the baked cookies in a single layer on a baking sheet, then transfer them to an airtight freezer safe container for up to two months. To freeze the dough, scoop and roll the dough balls in sugar, then freeze them on a sheet pan until solid before transferring them to a freezer bag. Bake from frozen with one or two extra minutes added to the cook time. Add the heart sprinkle after baking while the cookies are still warm so it sticks properly.
You can keep the classic look with a red heart or add a dusting of powdered sugar for extra sparkle. Rolling the dough in a sugar mixture before baking also adds shine and helps highlight the Grinch green color. These cookies look adorable on cookie plates and are perfect for bringing holiday spirit to parties or family baking days.
How the Grinch Stole Christmas is a classic Dr. Seuss story about a grumpy creature who dislikes Christmas and tries to stop it by taking all the presents, decorations, and food from the Whos in Whoville. After carrying out his plan, the Grinch is surprised when the Whos still celebrate with joy even without their things. Seeing that Christmas is more than gifts, his heart grows, and he has a change of heart. He returns everything he took and joins the Whos for their holiday celebration. The story teaches kindness, compassion, and the true meaning of the season.
The word "Grinch" refers to someone who is grumpy or tries to spoil other people's fun, especially during the holiday season. It comes from the character in Dr. Seuss's story How the Grinch Stole Christmas. Over time, the name has become a common way to describe someone who is not excited about Christmas or who complains about holiday traditions.
The Grinch was originally drawn black and white, but in the 1966 animated film (one of our favorite Christmas movies!), the creators decided to make him green. The bright green color made him stand out visually and emphasized his mischievous personality. The color later became iconic and is now recognized worldwide as part of the Grinch's character.
In the story, the Grinch dislikes Christmas because he feels annoyed by the noise, celebrations, and joyful energy coming from Whoville. His isolated home and grumpy personality make him feel disconnected from the warmth of the holiday.
More Christmas Cookie Recipes
Looking for other recipes like this? Try these:

Tried this recipe?
I'd love to hear what you think! Leave a comment and rating below to share your feedback. Your reviews help others discover this recipe and help me keep creating more free recipes for you. Snap a photo and tag me on social media @aheadofthyme too.

M&M Christmas Cookies
Soft, chewy, and packed with festive red and green candies, these M&M Christmas Cookies are everything you want in a holiday cookie. They bake up with crisp edges, gooey centers, and big pops of melty chocolate in every bite. The best part is that these fun holiday cookies require no chill time, so you can go from mixing the dough to enjoying warm, fresh out of the oven M&M cookies in under 20 minutes. They are easy, reliable, and perfect for adding to your holiday baking list.

Christmas M&M Cookies are also a great cookie for the youngest bakers to help with, since the dough comes together quickly and rolling the tops in extra M&M's is always a kid favorite. The soft and chewy texture makes them irresistible (the cookies stay soft for days!), and the colorful candies give them that classic December look that feels cheerful and nostalgic. These cookies are ideal for cookie exchanges, classroom treats, or simply stocking your kitchen with something sweet for the season.
This cookie recipe was inspired by the classic chocolate chip M&M cookies we make all year, but this Christmas version feels extra fun and festive. They pair perfectly with peppermint hot chocolate, gingerbread cookies, or any of your favorite cozy holiday drinks. If you are building a Christmas dessert board or gifting cookie tins this season, these Christmas M&M Cookies are guaranteed to be one of the first treats everyone grabs.

Why You'll Love This Recipe
- Soft and chewy texture. These cookies bake thick and tender with chewy centers and perfectly crisp edges that stay soft for days.
- Festive and colorful. Red and green holiday M&M's make these cookies instantly Christmas ready and perfect for gift boxes or dessert trays this holiday season.
- No chill cookie dough. The dough mixes quickly and goes straight into the oven, making this an easy last minute holiday cookie. The best m&m cookies!
- Crowd pleasing flavor. A blend of chocolate chips and M&M's gives every bite melty chocolate and candy crunch, ideal for kids and adults.
Ingredients and Substitutions
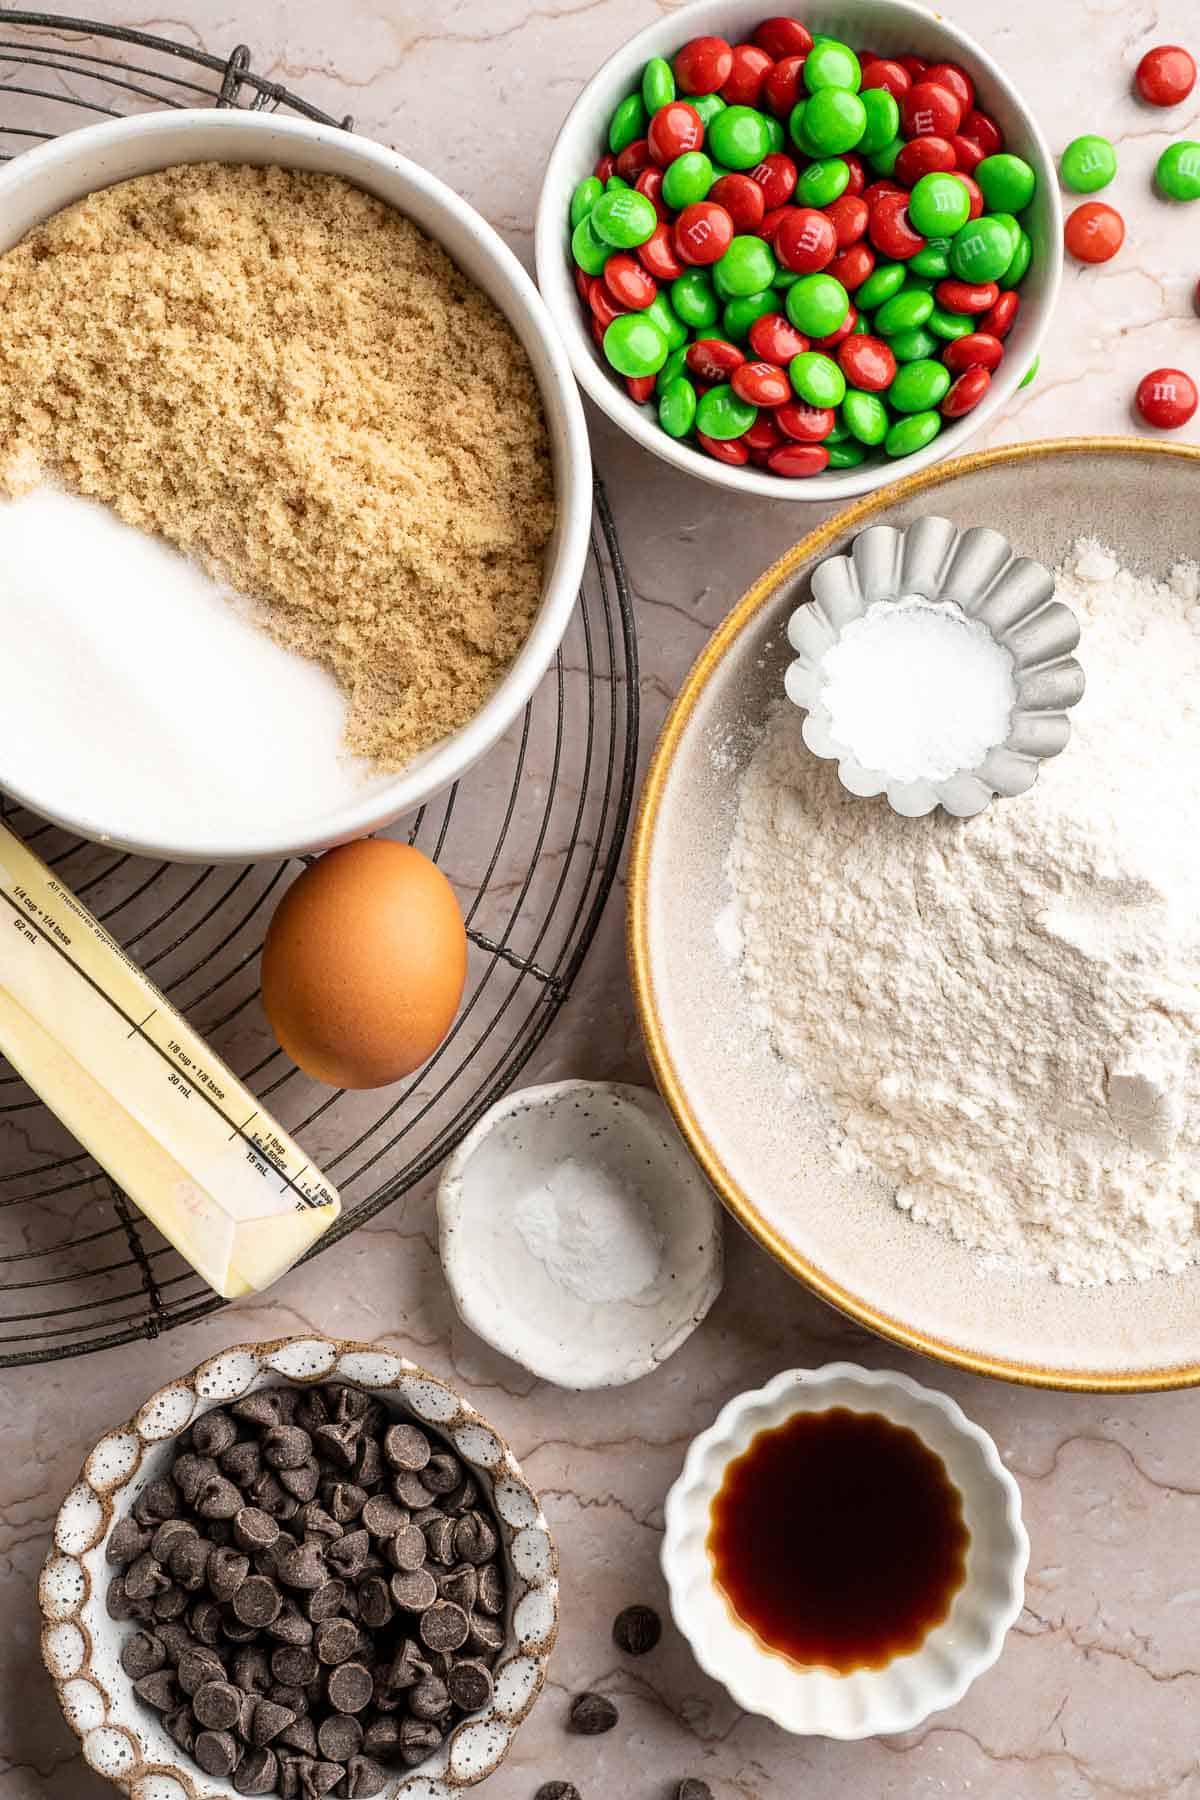
To make these super easy chocolate m&m cookies, you will need the following pantry staples (full quantities in recipe card below):
- butter - Softened unsalted butter to room temp so it creams smoothly and creates a smooth dough and tender cookie. Salted butter works if you reduce added salt slightly.
- sugar - Both light brown sugar and granulated sugar create a soft chewy cookie texture. Dark brown sugar makes the cookies richer and adds extra chewiness.
- granulated sugar - Helps the cookies spread and adds sweetness.
- egg - Binds the dough and gives structure. Room temperature egg incorporates more smoothly. If you ever want extra tenderness, add an extra egg yolk.
- vanilla extract - Adds warmth and complements the chocolate. Use real pure vanilla extract for the best taste.
- all purpose flour - Provides structure. For a softer texture, replace one tablespoon of flour with one tablespoon of cornstarch.
- baking soda - Helps the cookies rise and spread properly.
- salt - Balances sweetness and enhances flavor.
- M&M's - Use red and green colored M&M's for Christmas. You can use this recipe for any holiday and just switch up the colours. Mini M&M's also work.
- chocolate chips - Semi sweet chips add melty chocolate pockets. Milk, dark chocolate chips, or mini chocolate chips are also great options.
Equipment
You will also need measuring cups and spoons, a mixing bowl, a hand mixer or stand mixer with a paddle attachment, a rubber spatula to scrape the bottom of the bowl, parchment paper or silicone baking mats to line baking sheets, a medium cookie scoop for portioning the dough, a baking sheet, and a cooling rack.
Instructions
- Combine the dry ingredients. In a medium bowl, add the flour, baking soda, and salt. Whisk to combine.
- Cream the butter and sugars. In a large mixing bowl, use a hand mixer or stand mixer to cream the butter, brown sugar, and granulated sugar together on medium speed until light and fluffy, about 2 minutes.
- Add wet ingredients. Mix in the egg and vanilla extract until combined.
- Add dry ingredients to wet. Add the dry ingredients and beat until just combined.
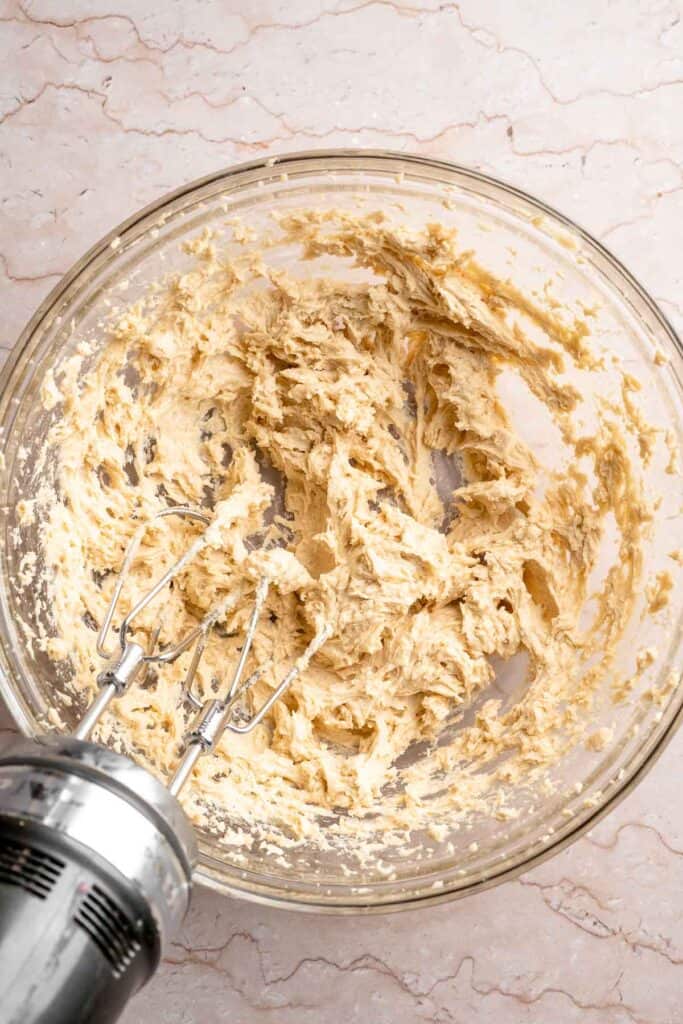
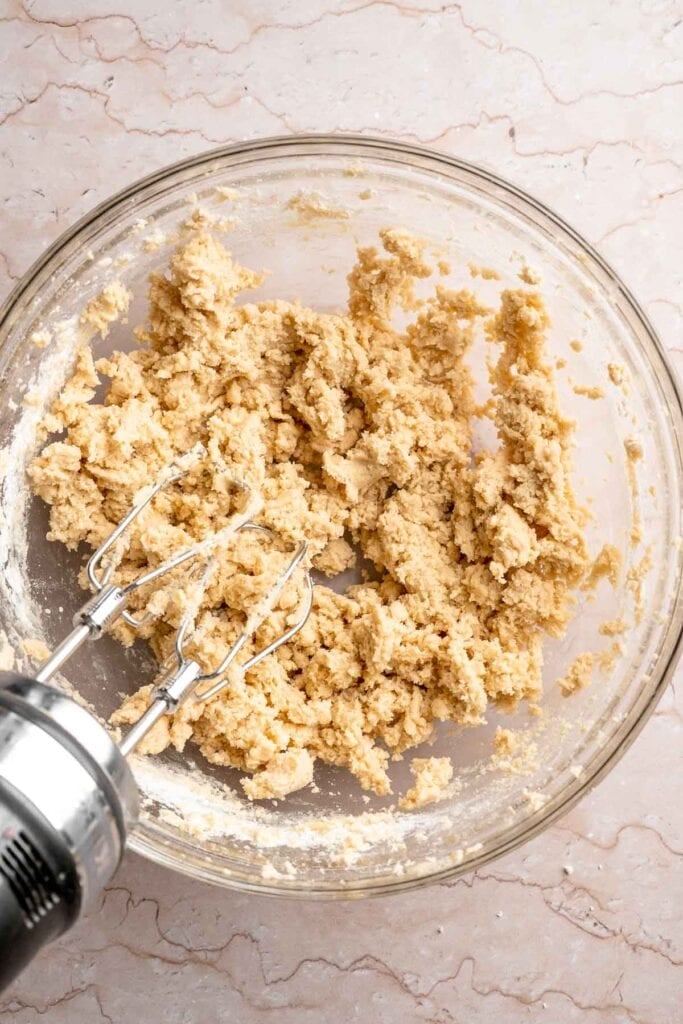
- Add mix ins. Fold in the M&M's and chocolate chips gently to avoid breaking the candies.
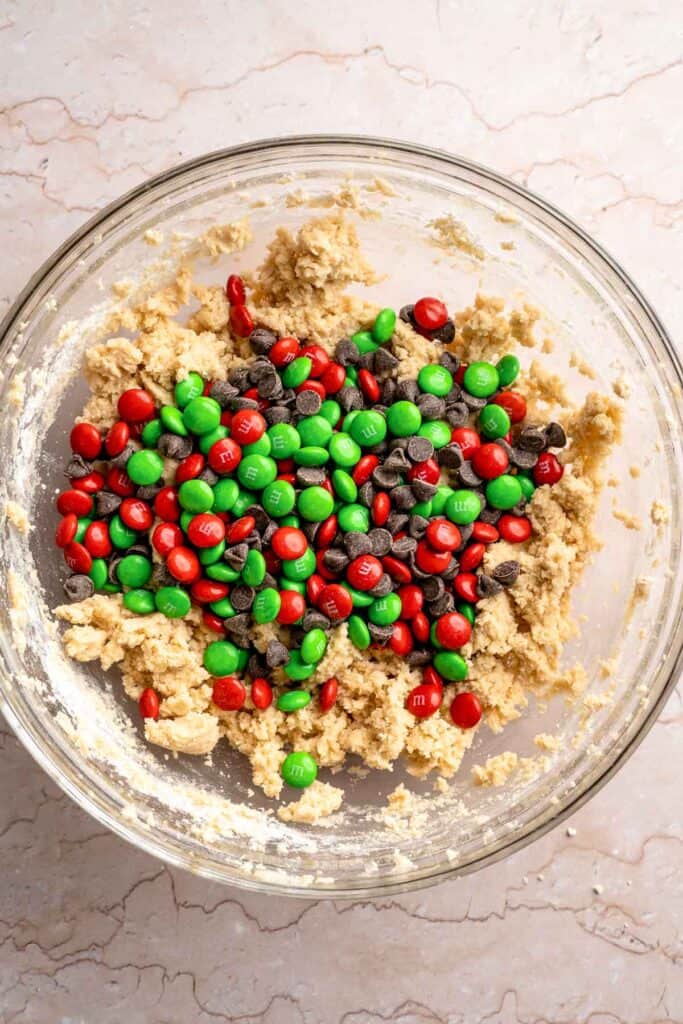

- Scoop the dough. Use a medium cookie scoop to scoop out 2 tablespoon balls of cookie dough. Drop onto a large baking sheet lined with parchment paper or a silicone baking mat or use your hands to roll into smooth balls if desired (for smoother edges). Space the cookies a few inches apart (you can fit about 6-8 on a large cookie sheet). Press a few additional M&M's onto the tops of each dough ball for a festive look.

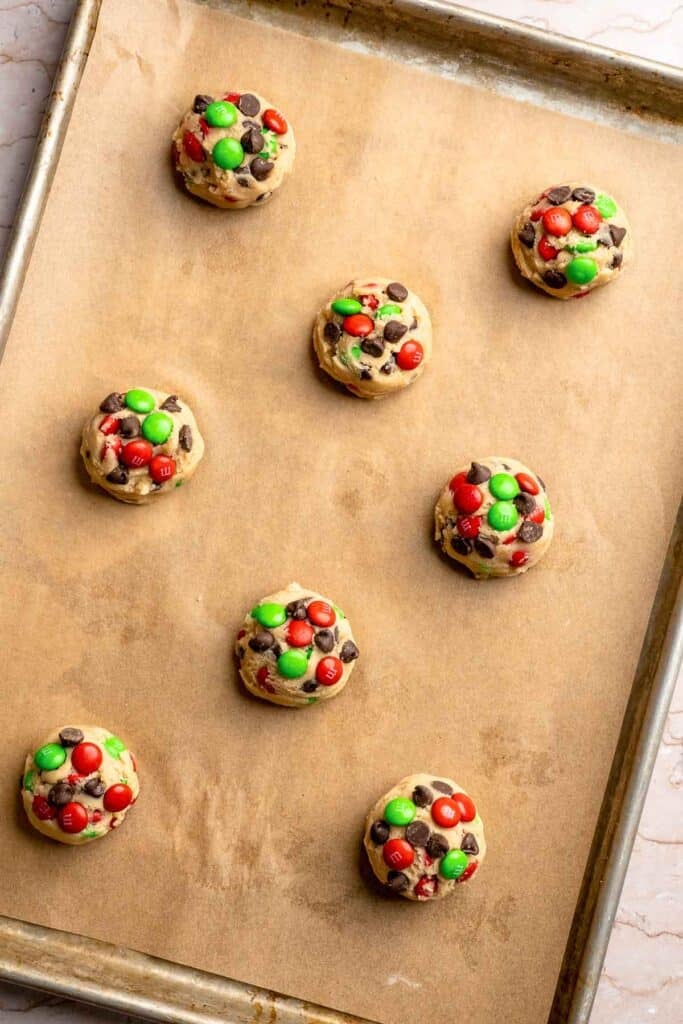
- Bake. Bake in a 350°F preheated oven for 8-10 minutes, until edges just start to brown. Do not overbake. The cookies may not look done in the middle, but they will continue to cook as they are cooling. Remove from oven and allow the cookies to cool in the baking sheet for 5 minutes, then transfer to a wire cooling rack to cool completely.
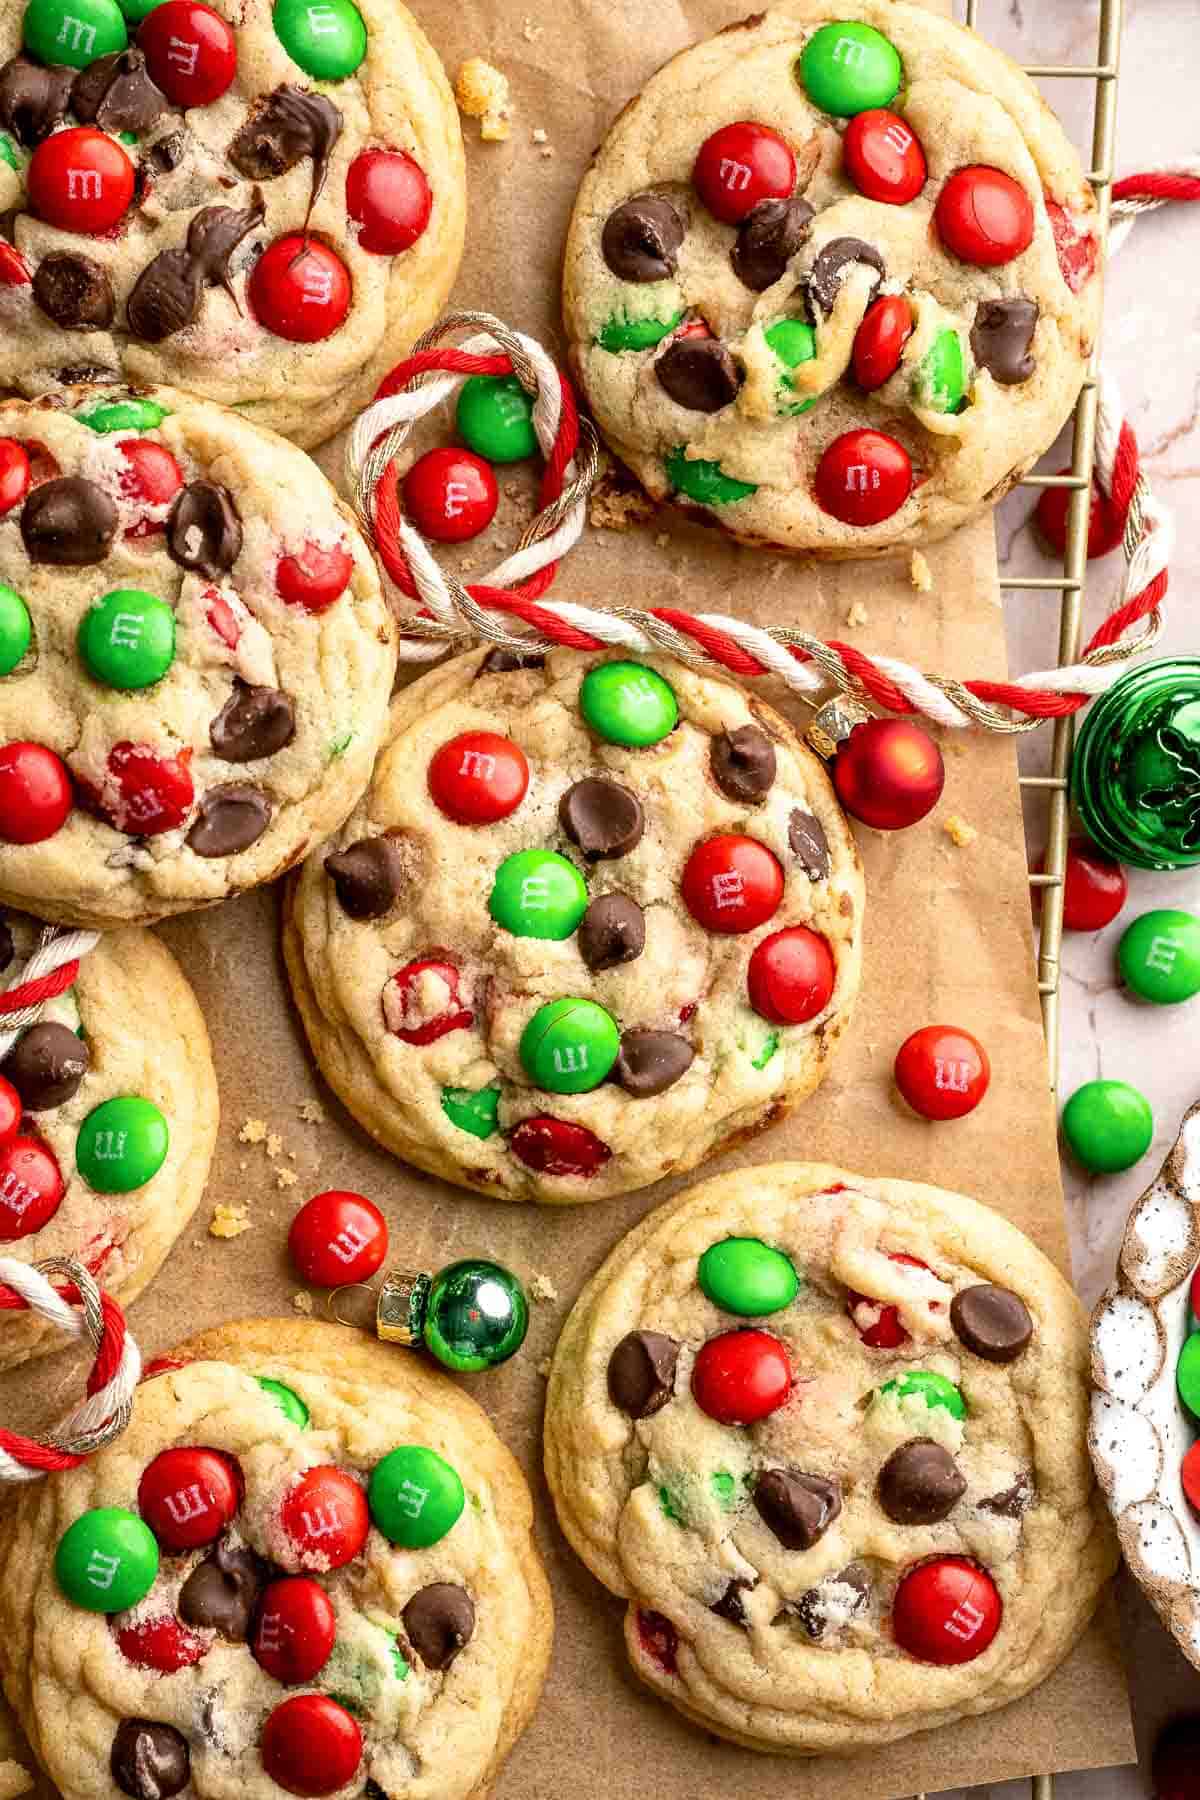
Expert Tip: Save Extra M&M's for Topping
Always reserve a small handful of M&M's to gently press into the tops of the cookie dough balls before baking. This keeps the color bright, prevents candies from cracking inside the dough, and gives your cookies that classic bakery style look. Adding them at the end also ensures the cookies stay festive and colorful without relying on mix ins hidden inside the dough.
More Tips and Tricks
- Cream butter and sugars well. Properly creaming the butter with the brown and white sugar adds air to the dough, helping the cookies bake thicker and softer. Mix until light and fluffy for best texture.
- Fold gently. After adding the flour mixture, fold the dough just until combined to avoid overworking the gluten. Overmixing can lead to dense cookies instead of soft, chewy ones.
- Use a cookie scoop. Scooping consistently helps the cookies bake evenly. The medium cookie scoop makes the perfect two tablespoon dough ball for thick bakery style cookies.
- Do not overbake. Pull the cookies when the edges of the cookies are just starting to turn golden brown and the centers look slightly underdone. They finish cooking on the baking sheet and stay soft.
- Cool correctly. Let the cookies rest on the tray for five minutes before transferring to a cooling rack. This sets the structure and keeps them from breaking while still warm. A slightly warm cookie continues to set.
- Avoid a warm kitchen. If the dough becomes too soft, place it in the fridge briefly between batches so the cookies keep their height.
Recipe Variations
- Double chocolate Christmas cookies. Replace two tablespoons of flour with cocoa powder for a chocolate cookie base. Keep the red and green M&M's and add white chocolate chips for extra festive color. These bake slightly fudgier.
- Mint chocolate M&M cookies. Add a small amount of peppermint extract to the dough and use mint M&M's or a blend of peppermint baking chips and classic chocolate chips. This version has a cool, refreshing flavor that feels incredibly seasonal.
- Jam stuffed M&M cookies. Scoop out half the dough, press a small indent using the back of a spoon, add a teaspoon of raspberry or strawberry jam, then cover with more dough. These cookies stay soft and sweet with a fruity center and still bake perfectly with colorful M&M's on top.
- Oatmeal M&M cookies. Fold in half a cup of quick oats for a slightly heartier texture. This adds chewiness without changing the flavor and keeps the cookies thick and tender.
- White chocolate Christmas cookies. Replace the chocolate chips with white chocolate chips to create a sweeter, creamier cookie.
- Salted caramel M&M cookies. Add caramel baking bits and a pinch of flaky sea salt to the tops of the cookies before baking. The caramel melts beautifully and the salt enhances the chocolate flavor.
- Thick bakery style cookies. Chill the dough for twenty to thirty minutes to prevent spreading. This creates cookies with tall centers and chewy edges. Great for gifting or December cookie recipes.
- Loaded chocolate M&M cookies. Swap some M&M's for chunks of dark chocolate or crushed peppermint chocolate bars. This version feels decadent and extra festive for this time of year.
- Monster M&M cookies. Add a spoonful of peanut butter, oats, and mini chocolate chips. This makes thicker cookies with lots of texture. Scoop with a cookie cutter for uniform edges. See our Christmas Monster Cookies for more.

Storage
How to Store
Store chewy M&M cookies in an airtight container at room temperature for up to 3-5 days. If stacking cookies, separate layers with parchment paper to protect the M&M tops. Keep them in a cool, dry place to maintain their soft texture. You can store them longer in the fridge but their texture will change slightly.
How to Reheat
Warm a cookie in the microwave for a few seconds to soften the center and warm the chocolate chips. You can also warm several cookies on a baking sheet in a low oven if serving to guests.
How to Freeze
Once cool, freeze baked cookies in a single layer, then transfer to an airtight container or freezer safe bag. They keep for up to three months. To freeze the dough before baking, roll or scoop the dough into balls, freeze on a tray until hard (about 1-2 hours), then store the frozen balls in a freezer bag. Bake frozen dough balls directly from frozen by adding two minutes to the bake time.
How to Serve
Christmas M&M Cookies are perfect for holiday dessert boards, cookie exchanges, classroom treats, and gifting. Their bright colors make them a must have in December, and they pair beautifully with warm drinks and other festive cookies.
These are my favorite warm drinks to serve with these M&M cookies:
Holiday Cookie Week
These cookies are part of our Annual Cookie Week! For more sweet inspiration, explore our full holiday cookie collection from this year and year's past. You will find everything from nostalgic classics and colourful decorated cookies to creative flavours and fun themed bakes that make our annual Cookie Week such a favourite tradition.
FAQ
Yes. These cookies store and freeze well, making them a great make ahead option for holiday baking. You can prepare the dough a day ahead and keep it covered in the refrigerator. You can also freeze dough balls and bake them straight from frozen. The baked cookies stay soft for several days, so they are ideal for gifting and cookie boxes.
No. This recipe is designed as a no chill cookie dough, but a short chill can help if your dough feels warm or sticky. Chilling for ten to twenty minutes will help the cookies keep their shape and bake thicker with more pronounced edges.
Absolutely. These cookies are very flexible. Try adding chopped nuts, toffee bits, crushed candy cane, or swapping out the chocolate chips for white, milk, or dark chocolate. You can also add a sprinkle of flaky salt for a sweet and salty finish. Just avoid adding ingredients with excess moisture, which could affect the texture.
Flat and thin cookies often come from overly soft butter, warm dough, or too little flour. Make sure the butter is softened but not melted, and measure flour using the spoon and level method. Chilling the dough for ten to fifteen minutes can help if your kitchen is warm. Also check your baking soda to make sure it is fresh and active. Using parchment paper instead of greasing a pan prevents excess spread and ensures thicker cookies.
Press the M&M's gently into the tops of the dough balls right before baking rather than mixing too many into the dough itself. This helps prevent cracking and ensures bright, visible color. Also avoid overbaking, since extended heat can cause the candy coating to split.
A lack of chew usually means the cookies were overbaked or the flour was overmeasured. The usual culprit is scooping flour directly from the bag instead of spooning and leveling. Pull the cookies when the edges look barely set and the centers look soft. They will firm up as they cool. Let them rest on the tray before moving them to a rack. This method keeps every cookie a perfect chewy cookie with a gooey middle.
More Festive Christmas Recipes
Looking for other recipes like this? Try these:

Tried this recipe?
I'd love to hear what you think! Leave a comment and rating below to share your feedback. Your reviews help others discover this recipe and help me keep creating more free recipes for you. Snap a photo and tag me on social media @aheadofthyme too.
This recipe was originally posted in 2020. It has since been updated with new photos and helpful content.

Quinoa Vegetable Soup
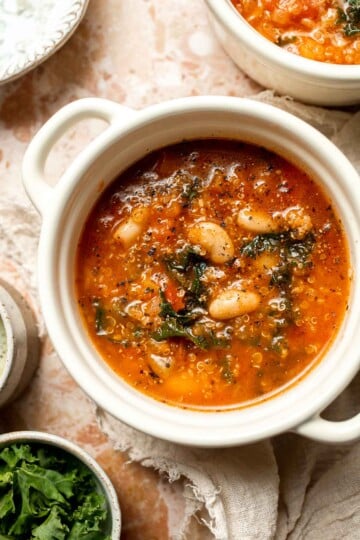
Hearty, cozy, and nourishing, this Quinoa Vegetable Soup is packed with tender vegetables, protein rich beans, leafy kale, and fluffy quinoa simmered together in a flavorful tomato broth. It is the perfect comfort meal when you want something wholesome and feel good that also tastes bright and fresh. The quinoa cooks directly in the pot, soaking up all the flavors while adding a satisfying hearty texture that makes each bowl feel so good.
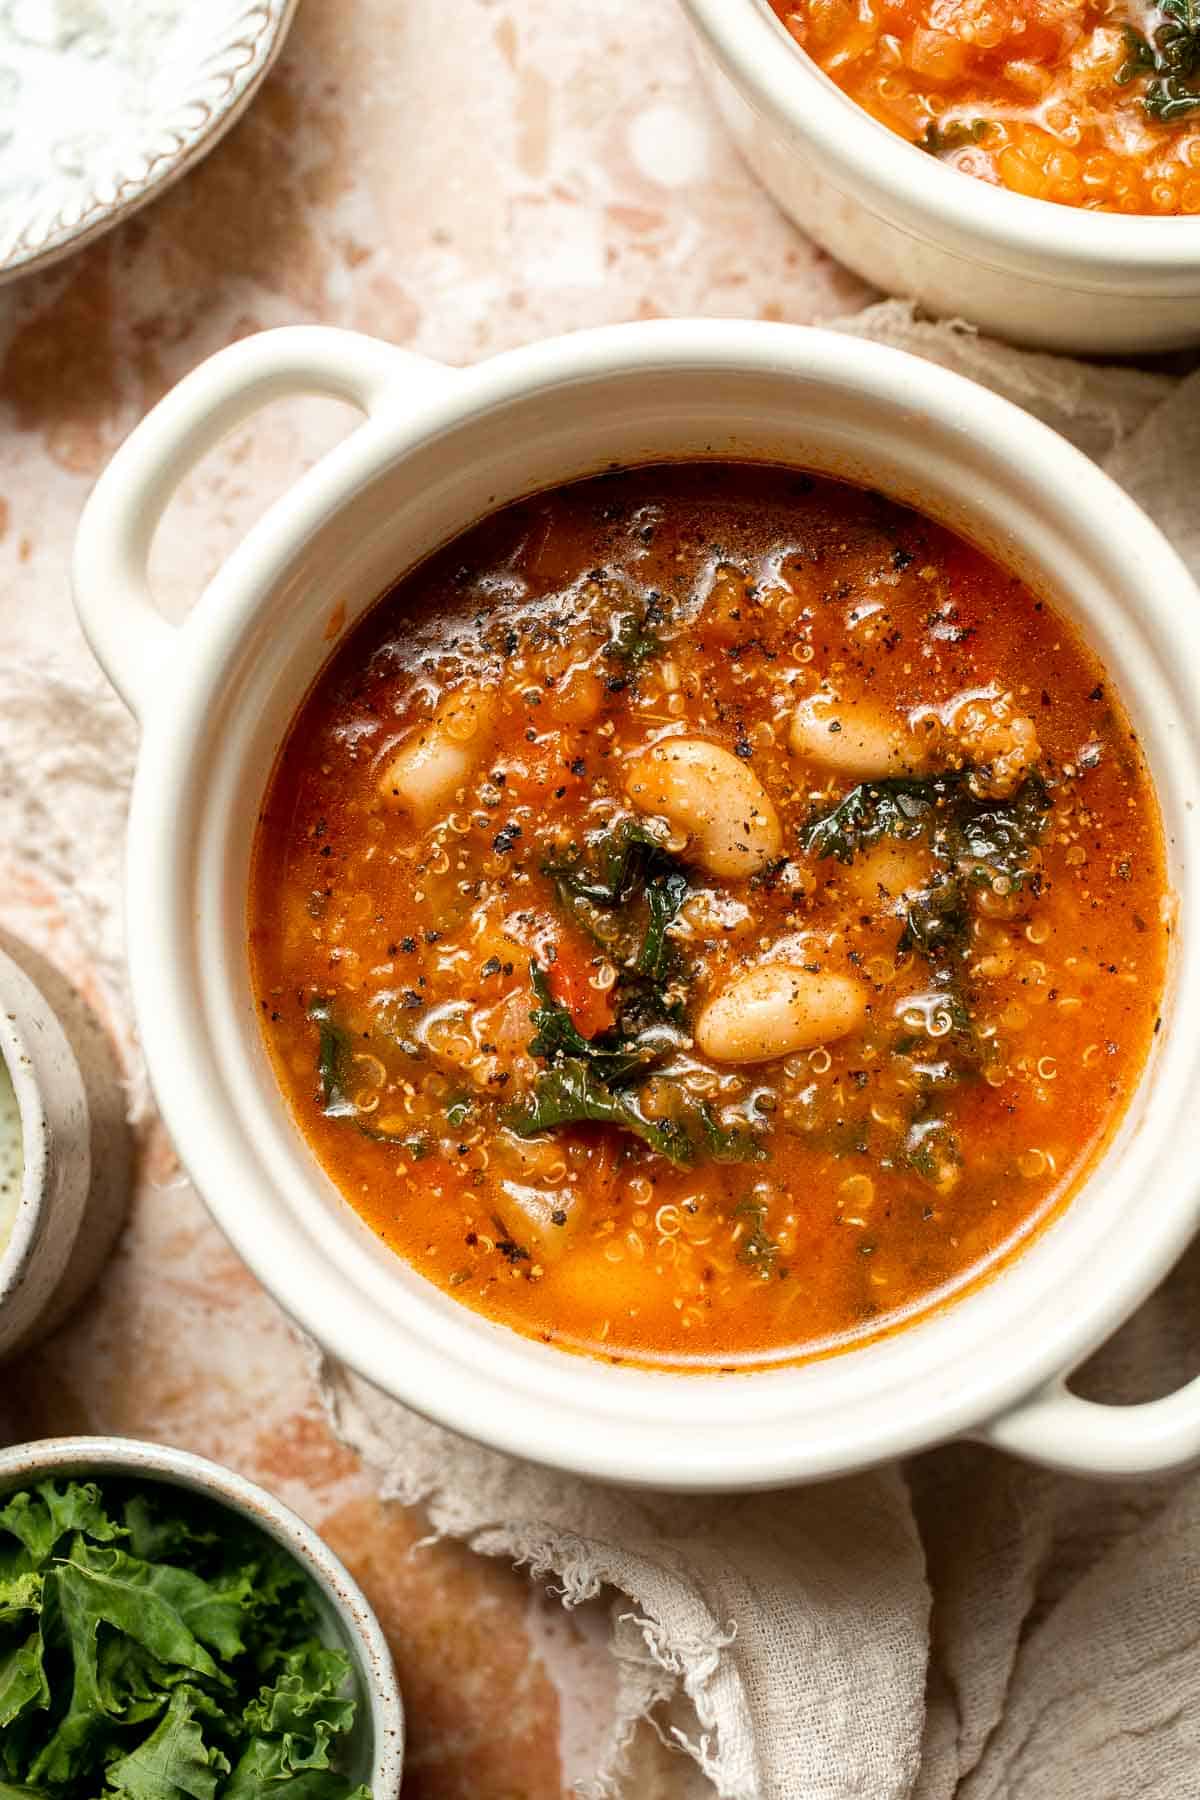
This soup is one of my favorite ways to bring lots of colorful vegetables together in one warm and comforting pot. The tomatoes, carrots, celery, bell pepper, quinoa, and cannellini beans create a balanced meal that feels healthy and filling, especially during cooler months. It is freezer friendly, incredibly easy to make from mostly pantry staples, and great for meal prep since the flavors deepen as it sits.
This recipe was inspired by my other vegetable based soups and one pot meals, and it pairs beautifully with a slice of crusty bread or a simple green salad. It is also a great way to use up any leftover vegetables you have in the fridge. Whether you are planning busy weeknight dinners or prepping lunches ahead of time, this quinoa vegetable soup is a nourishing staple you will want to make again and again.
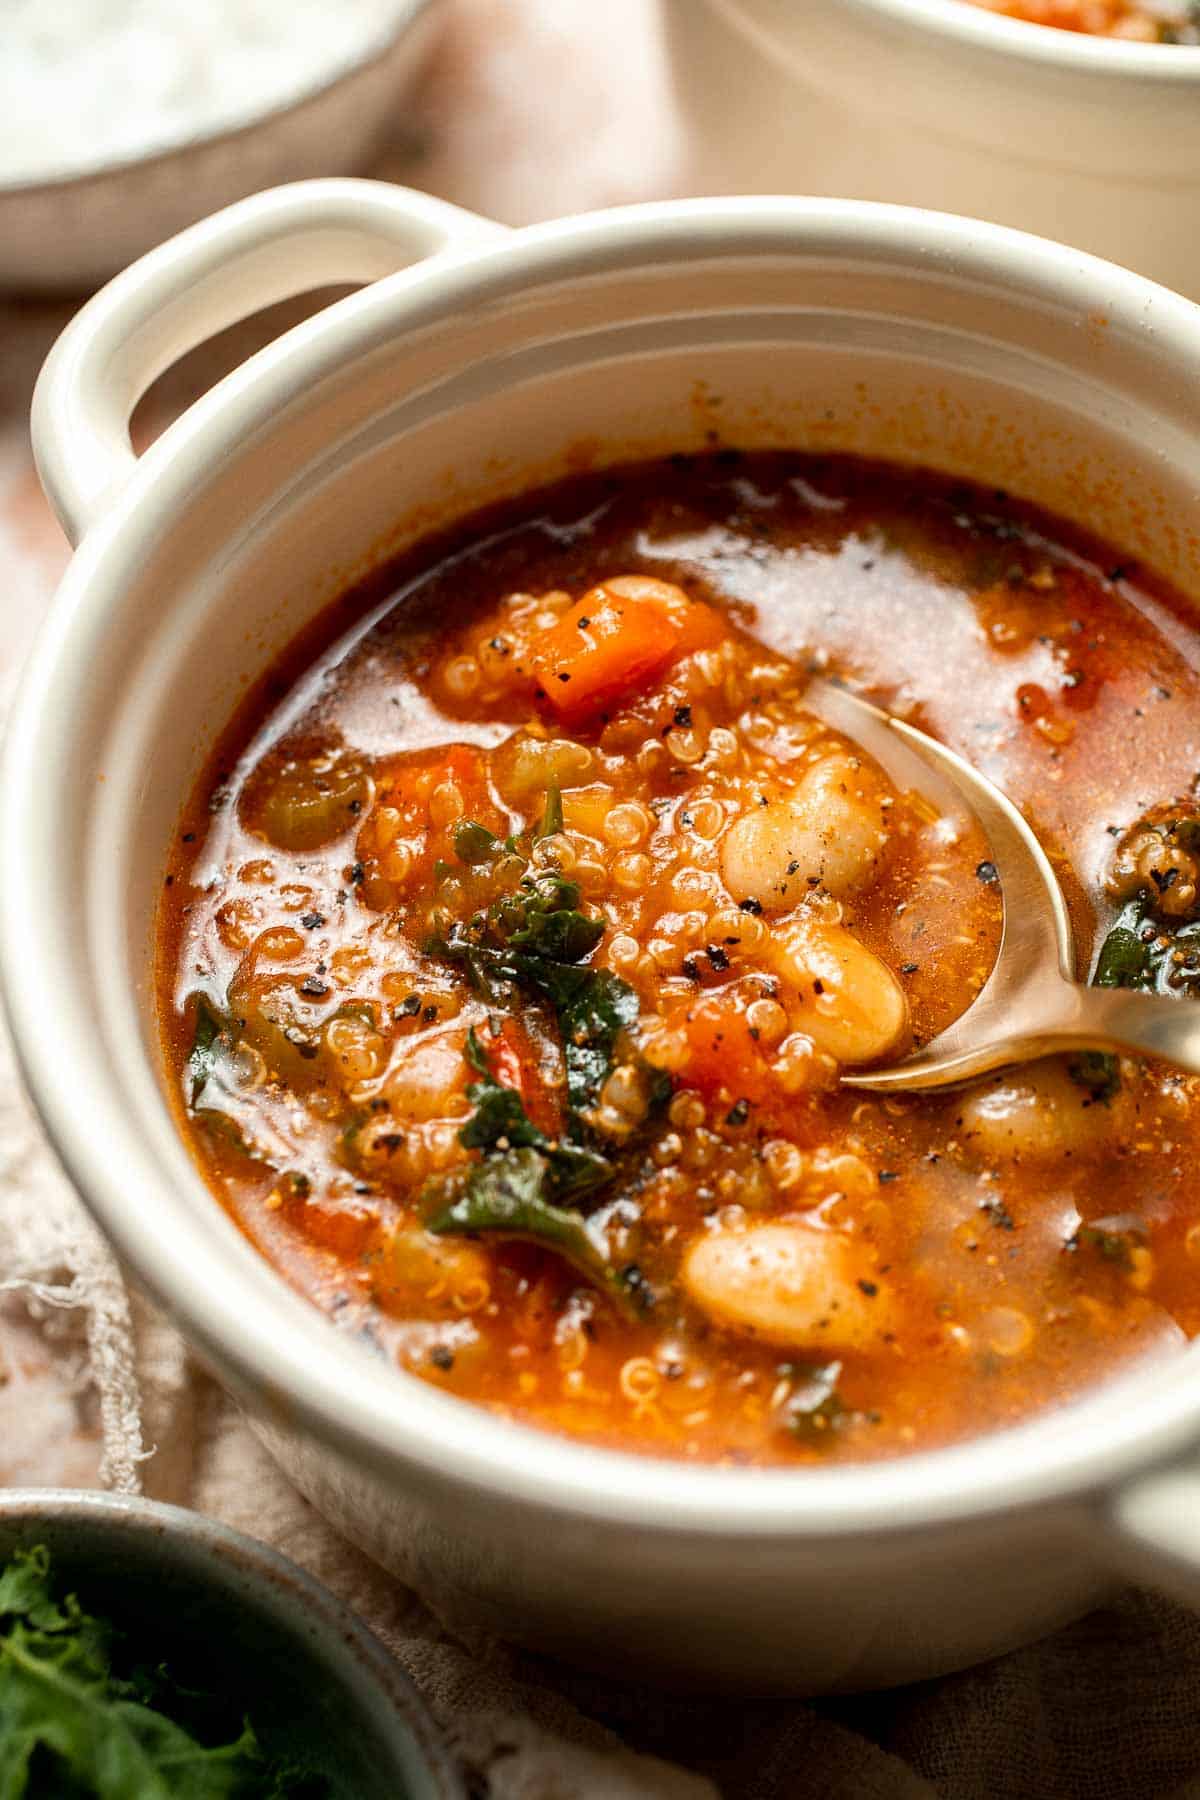
Why You'll Love This Recipe
- One pot and easy. Everything cooks in a single pot, including the quinoa, which keeps cleanup simple and makes this an easy weeknight staple.
- Nutritious and hearty. Packed with vegetables, beans, and quinoa, this delicious soup is full of protein, fiber, and cozy flavor without feeling heavy.
- Great for meal prep. This soup stores and reheats beautifully, making it perfect for lunches, leftovers, and make ahead dinners that taste even better the next day.
- Flexible and customizable. Swap vegetables, use different beans, or adjust seasonings easily. This recipe works with whatever you have on hand.
Ingredients and Substitutions
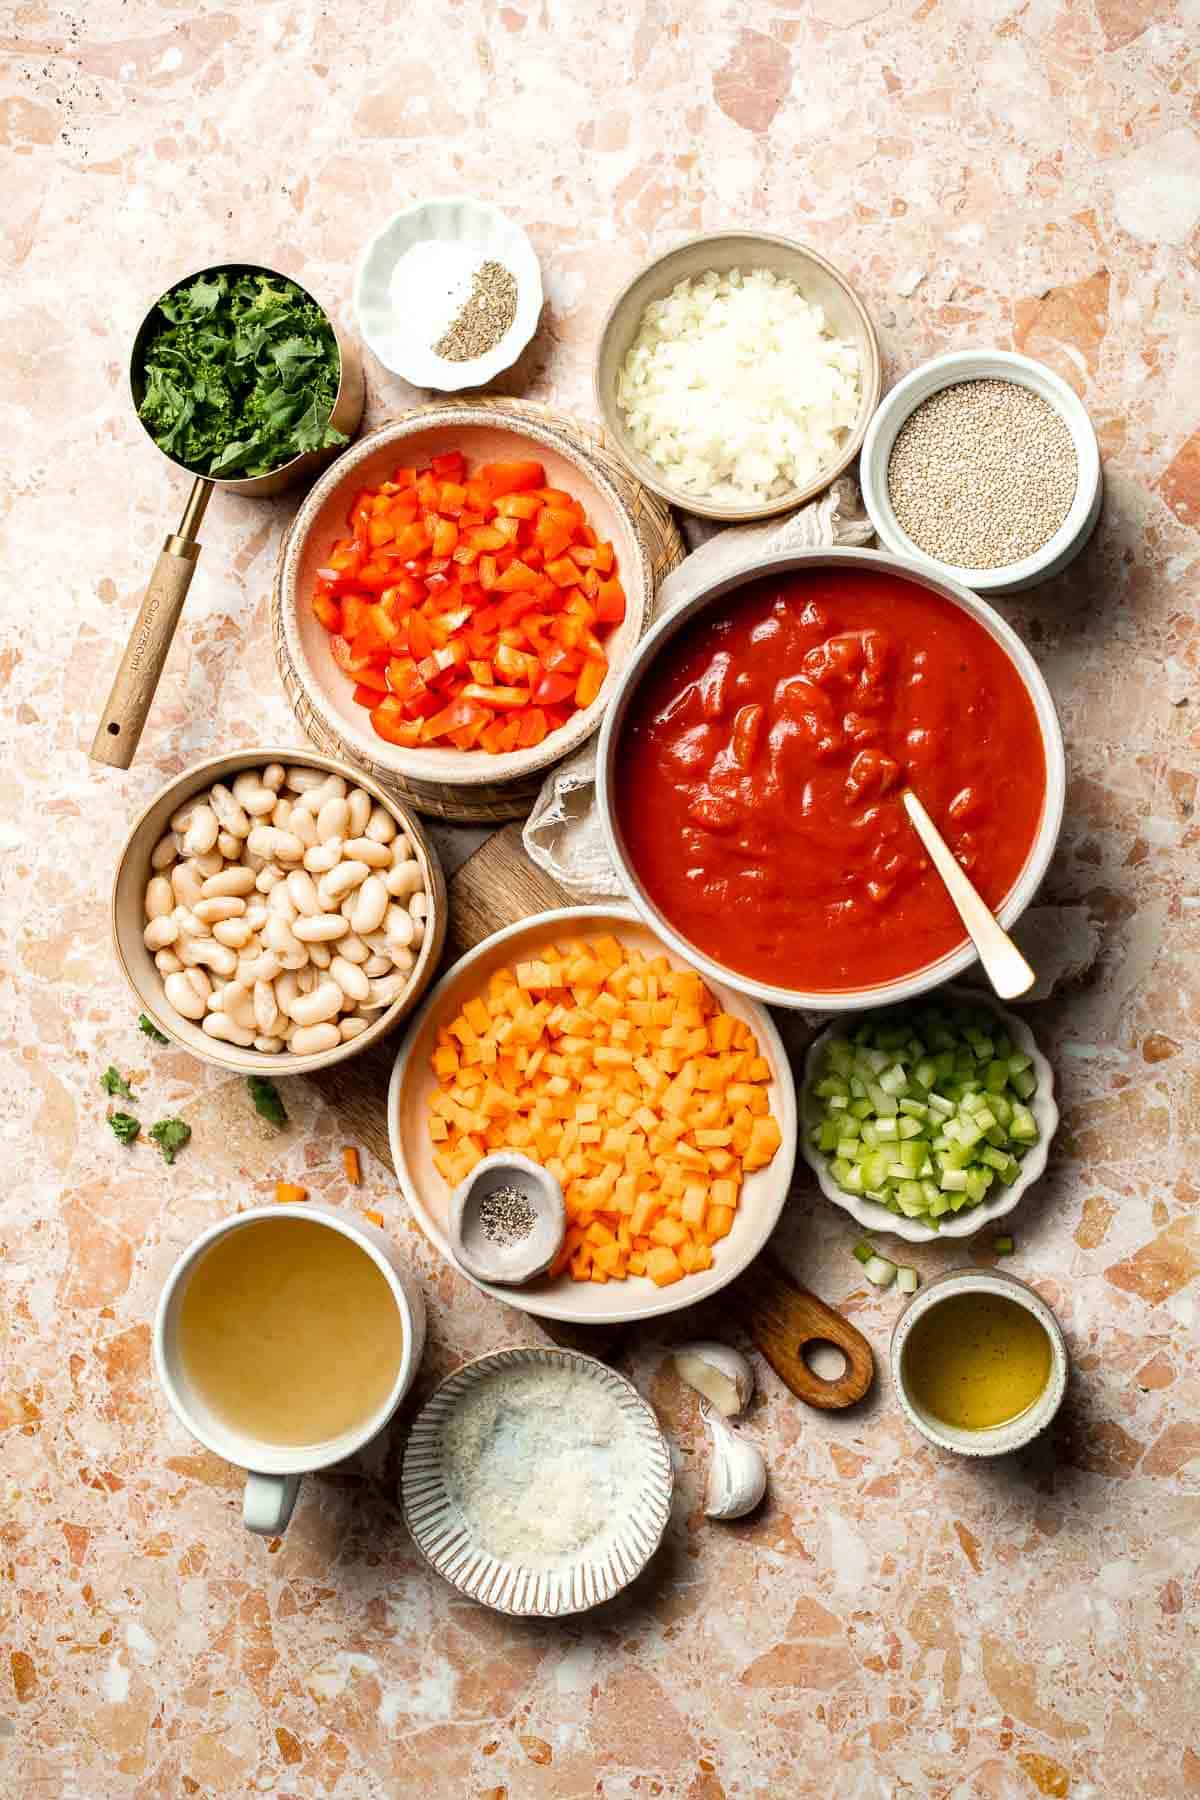
To make this easy Quinoa Vegetable Soup, you will need the following ingredients (see recipe card below for quantities):
- extra virgin olive oil - Adds richness and helps sauté the vegetables. Avocado oil works as an alternative.
- onion and garlic - Build a flavorful base. Yellow or white onions both work.
- veggies - Carrots, celery, and red bell pepper are classic aromatics that add sweetness and texture. Substitute any bell pepper color or add other vegetables like zucchini, mushrooms, potatoes, yellow squash, cabbage, or peas for more bulk and color.
- diced tomatoes - Canned tomatoes add acidity and depth. Crushed tomatoes or fire roasted tomatoes are also great.
- vegetable stock or water - Stock gives the most flavor, but water works in a pinch. You can also use chicken stock if not vegetarian.
- Italian seasoning - Adds herb flavor. It can be swapped with thyme, dried basil, dried oregano, or a whole bay leaf that you remove before serving.
- quinoa - Any color quinoa works and cooks right in the soup.
- salt and pepper - Season to taste and adjust after simmering.
- cannellini beans - Adds protein and creaminess, but you can substitute with other beans including chickpeas, kidney beans, navy beans, white beans, white kidney beans, or pinto beans.
- kale - Adds texture and nutrients. Spinach, Swiss chard, or collard greens also work.
- parmesan cheese - Optional but delicious for serving. Leave it out if you want to keep the soup vegan.
Equipment
You will also need measuring cups and spoons, a cutting board and knife, a large pot or Dutch oven, and a wooden spoon or spatula for stirring.
Instructions
- Sauté the vegetables. Heat the oil in a large stockpot or 4-quart Dutch oven over medium-high heat until shimmering, about 2 minutes. Add the onion, garlic, carrots, celery, and bell pepper. Sauté until fragrant and slightly tender, about 5 minutes.
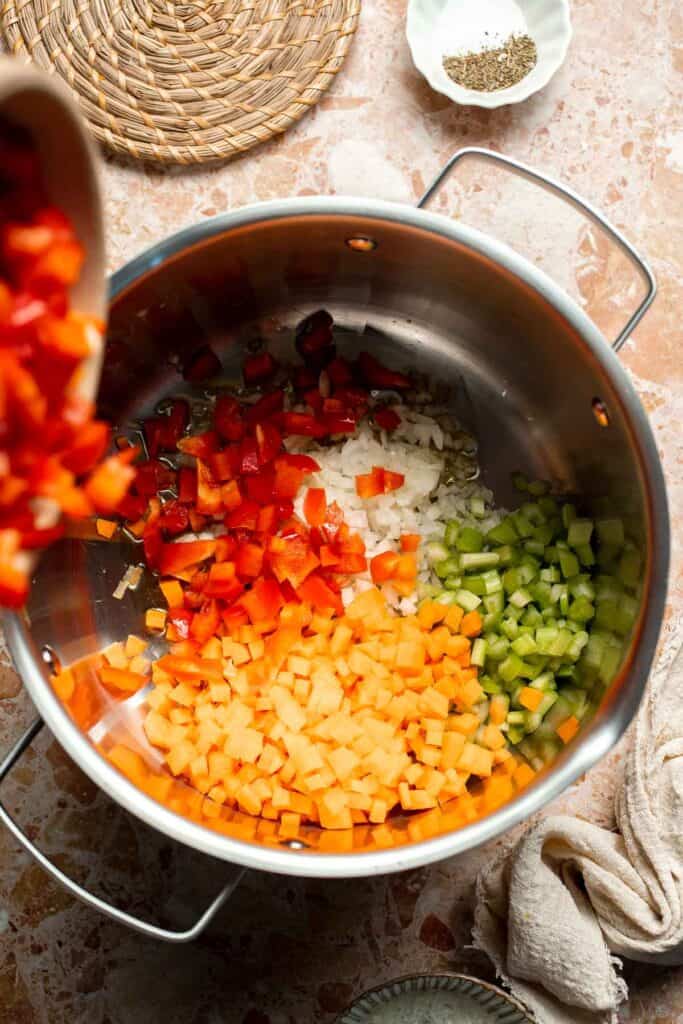

- Add liquids and quinoa. Stir in the diced tomatoes, vegetable stock, Italian seasoning, and quinoa. Season with salt and pepper. Bring to a boil, then reduce heat to medium. Cook for 20-25 minutes, stirring occasionally, until the quinoa is tender.
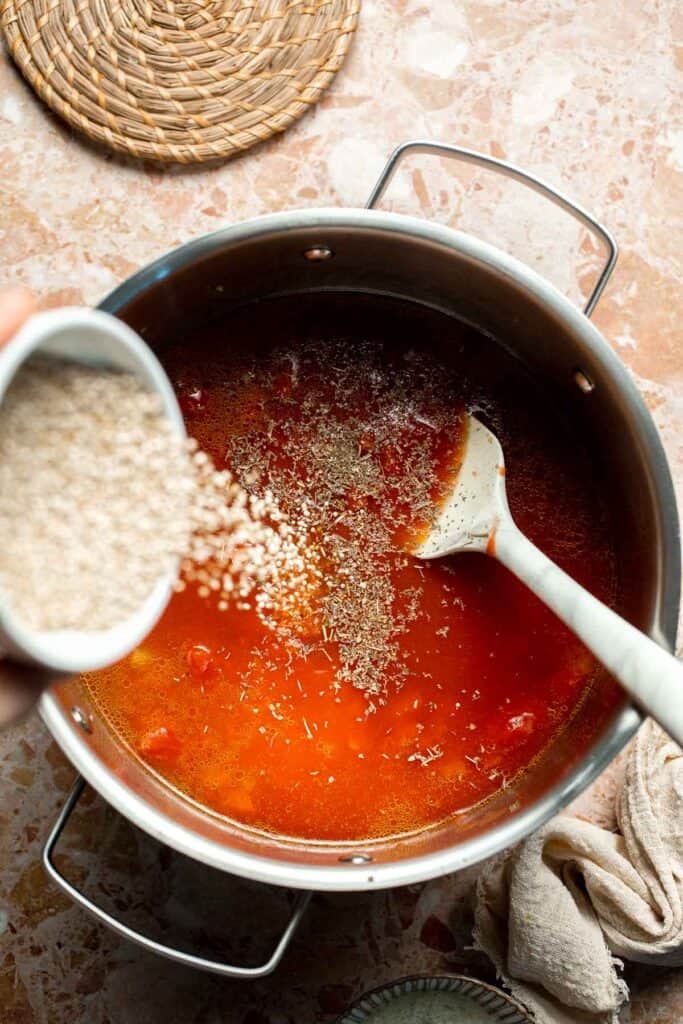
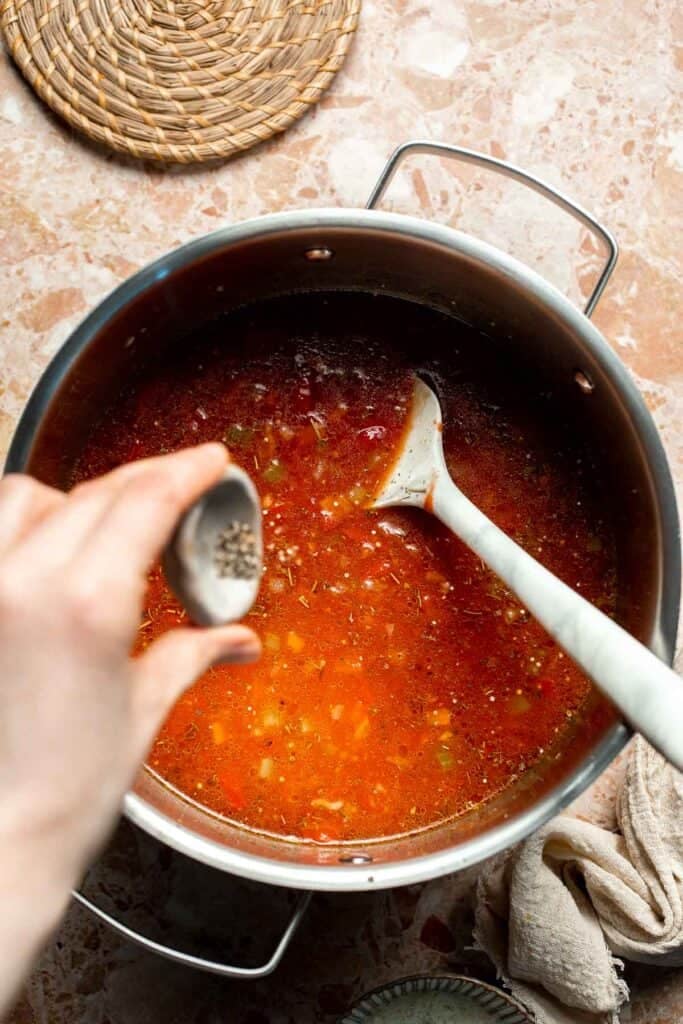

- Finish the soup. Stir in the cannellini beans and kale. Cook until the beans are heated through and the kale has wilted, about 3-5 minutes. If the soup becomes too thick, add a splash of water or extra stock to adjust the consistency.
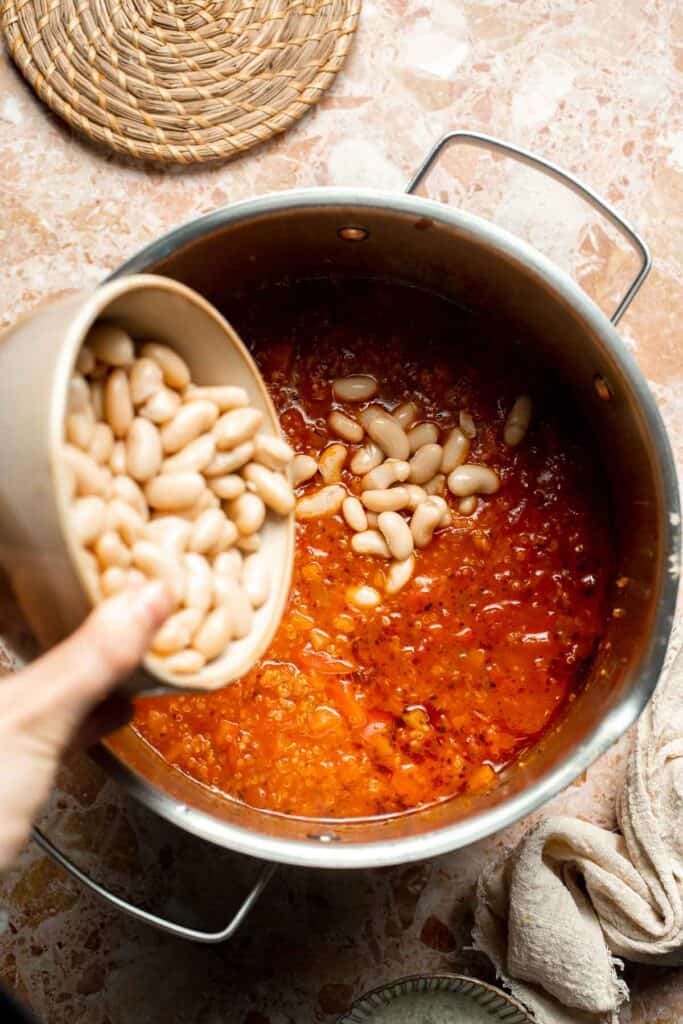
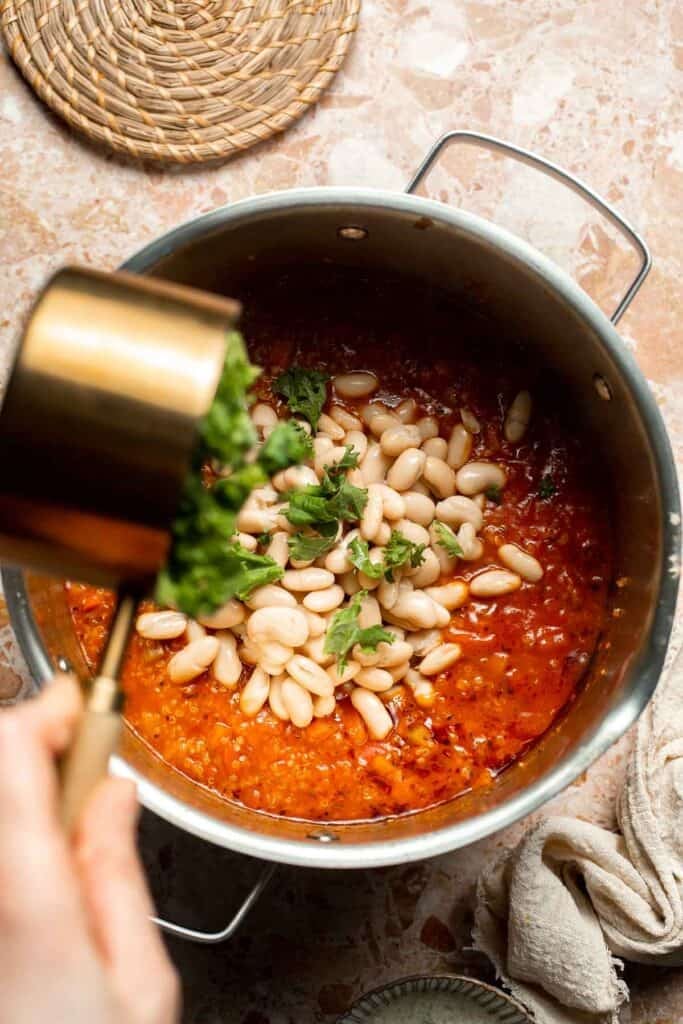
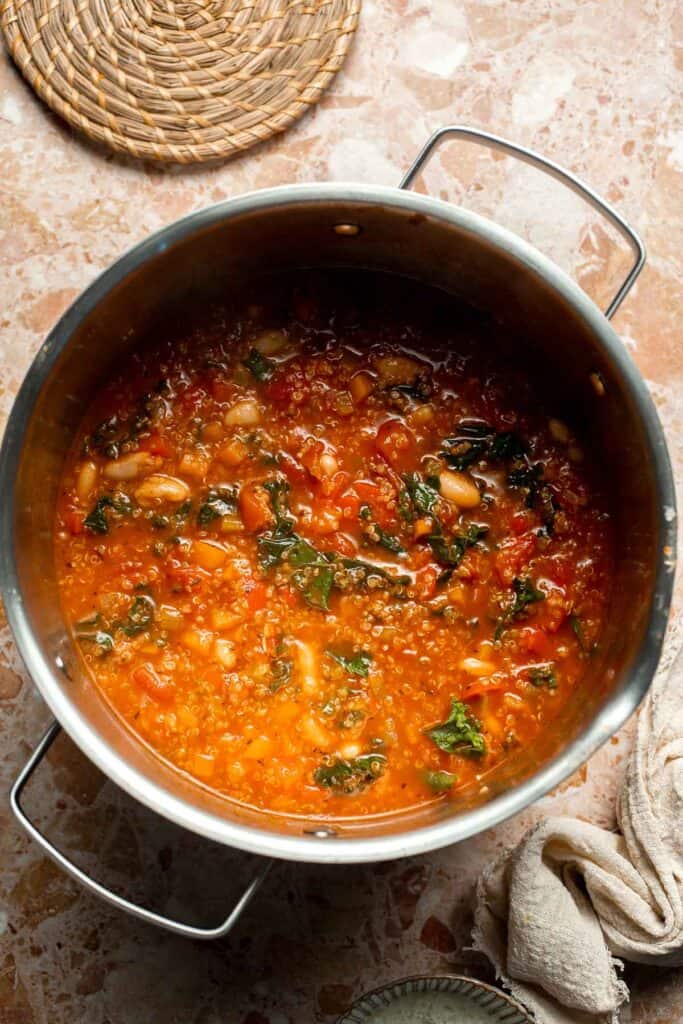
- Serve. Ladle into bowls and top with fresh parmesan cheese if desired.
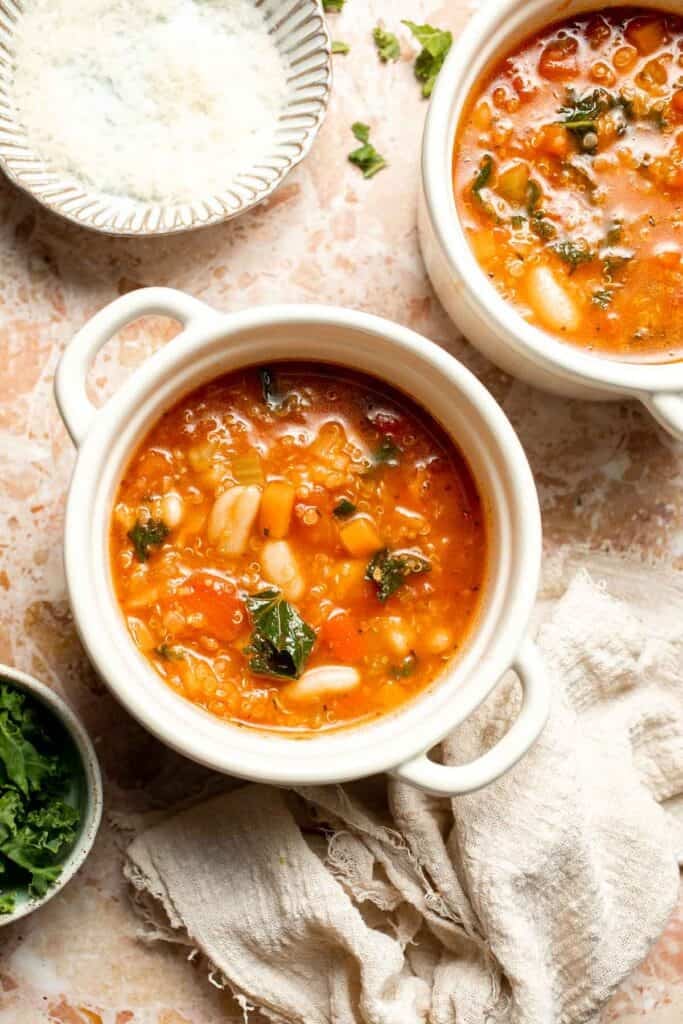

Slow Cooker Instructions
To make quinoa vegetable soup in the crockpot, add all ingredients except the cannellini beans and kale to the crock. Stir well, cover, and cook on Low for 6-7 hours or on High for 3-4 hours, until the vegetables and quinoa are tender. Stir in the cannellini beans and chopped kale during the last 20-30 minutes of cooking so the kale softens without overcooking. If the soup becomes too thick, stir in extra water or broth before serving. Taste and adjust seasoning as needed.
Instant Pot Instructions
To make quinoa vegetable soup in the Instant Pot, turn on Sauté mode and heat the oil. Add the onion, garlic, carrots, celery, and bell pepper, then cook until slightly softened. Stir in the diced tomatoes, vegetable broth, quinoa, Italian seasoning, salt, and pepper. Close the lid, set the valve to Sealing, and pressure cook on High for 3 minutes. Allow a natural release for 10 minutes before releasing remaining steam. Stir in the cannellini beans and kale, then use Sauté mode for 2-3 minutes until the kale wilts and the beans are warmed through. Adjust seasoning and add more broth if needed.

Expert Tip: Rinse the Quinoa Well
Rinsing the quinoa removes its natural coating, which can taste bitter if left on. Use a fine mesh sieve and rinse under cold water until the water runs clear. This simple step improves the flavor and keeps the soup tasting clean and balanced.
More Tips and Tricks
- Sauté long enough for flavor. Giving the vegetables a proper sauté helps them soften and develop more flavor before the liquids go in. This extra step deepens the entire soup.
- Stir occasionally while simmering. Quinoa can settle at the bottom of the pot as it cooks, so stirring every few minutes prevents sticking and ensures even cooking.
- Adjust consistency to taste. The quinoa absorbs liquid as the soup cools. Add a splash of water or stock if you prefer a thinner broth or if reheating leftovers.
- Season at the end. After simmering, taste and adjust salt and pepper. The tomatoes and stock can vary in saltiness.
- Add leafy greens at the end. Stir in kale or other leaves (such as spinach or finely shredded cabbage) just before serving so it keeps its vibrant color and tender texture without overcooking. A sprinkle of fresh parsley added right before serving gives the soup a pop of color and fresh flavor.
Recipe Variations
- Spicy quinoa vegetable soup. Add red pepper flakes or a diced jalapeño when sautéing the vegetables for a lightly spicy version.
- Lemony quinoa soup. Stir fresh lemon juice into the pot just before serving. It brightens the broth and adds fresh flavor that pairs well with tomatoes and kale.
- Quinoa minestrone. Add pasta shells, zucchini, and green beans, and finish with parmesan rind simmered in the pot. This creates a cozy minestrone style soup with quinoa instead of pasta.
- Mexican inspired version. Add corn, black beans, cumin, chili powder, and a squeeze of lime. Serve with avocado and cilantro for a hearty southwest twist.
- Creamy quinoa vegetable soup. Stir in a splash of cream, half and half, or coconut milk near the end for a creamy broth that feels extra comforting.
- Roasted vegetable version. Roast the carrots, celery, and peppers before adding them to the pot. This brings out deeper, caramelized flavors in the finished soup.
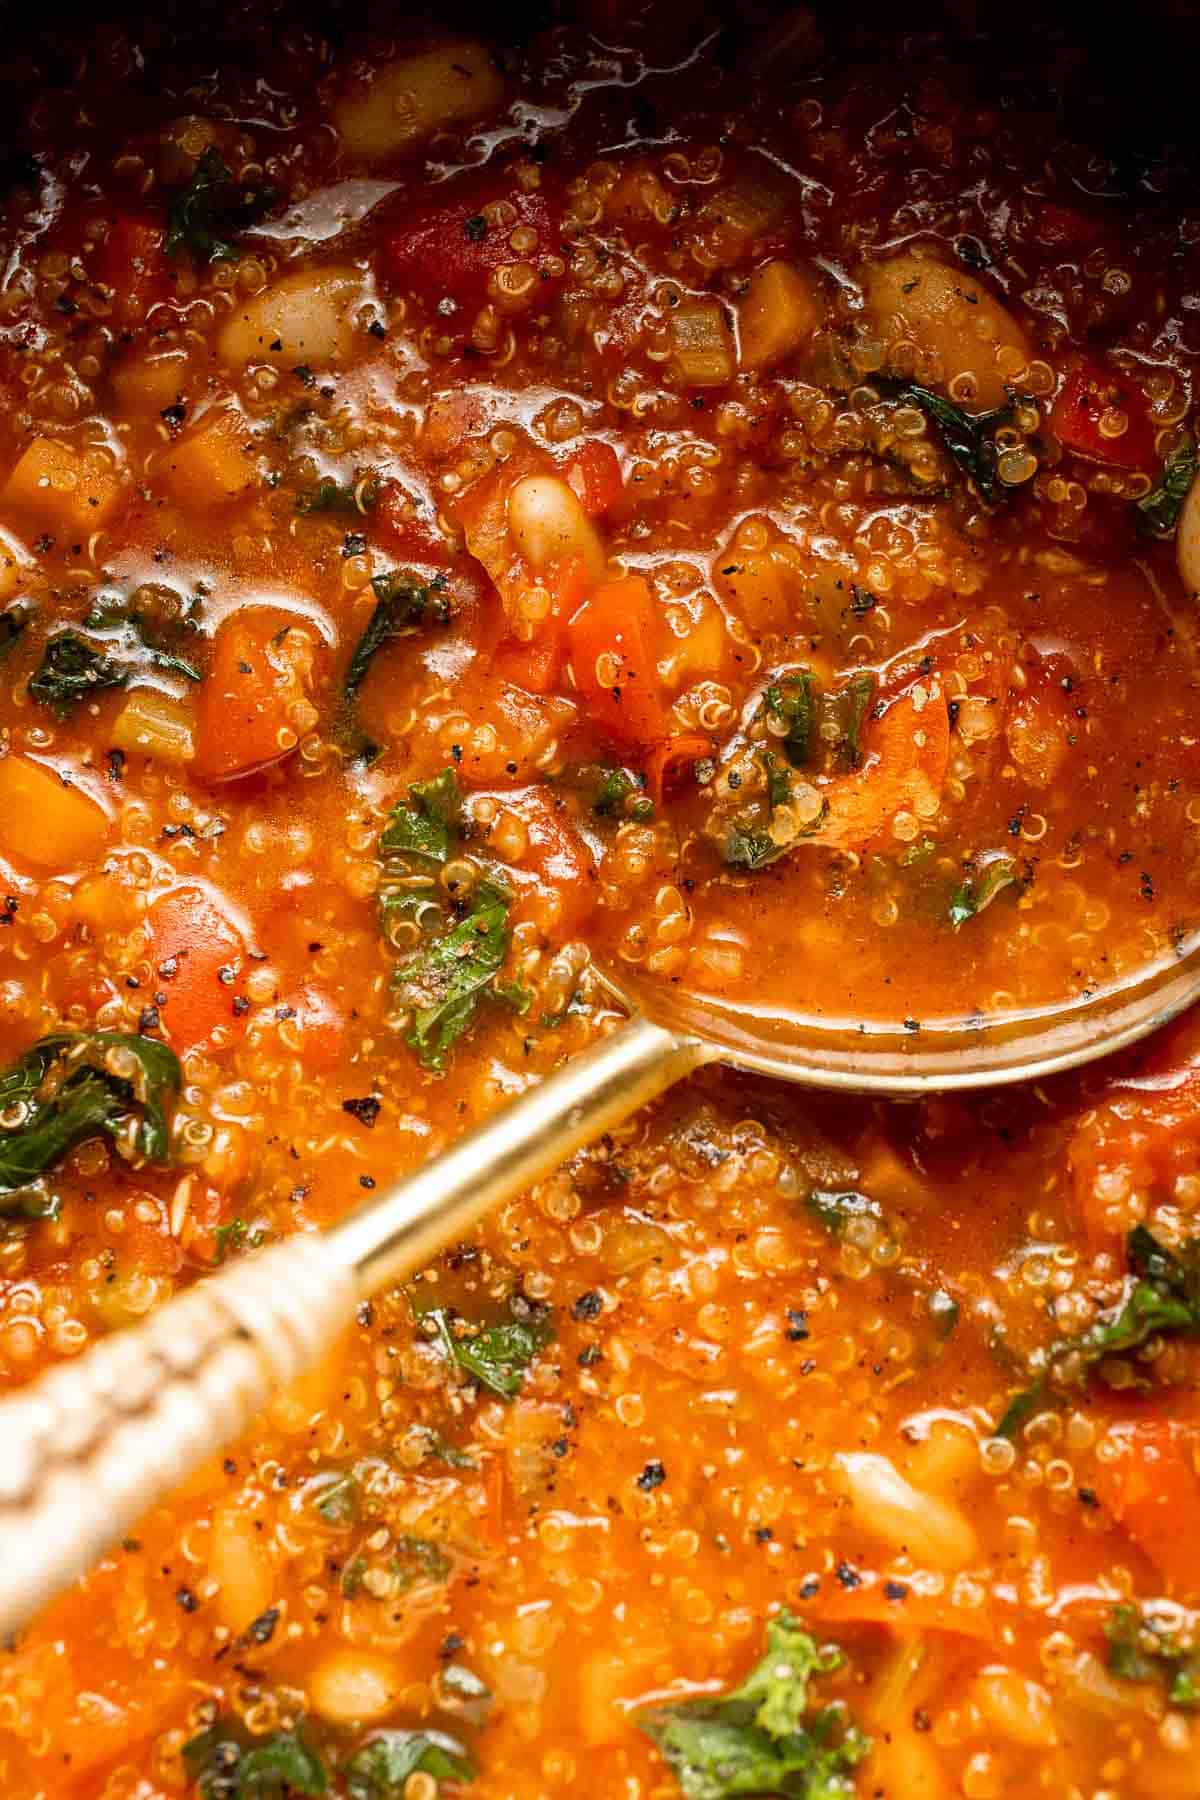
Storage
How to Store
Store cooled soup in an airtight container in the refrigerator for up to four days. The quinoa will continue to absorb liquid, so add a splash of water when reheating if needed.
How to Reheat
Reheat on the stovetop over medium heat, stirring occasionally until warmed through. You can also microwave individual portions in a microwave safe bowl, stirring halfway.
How to Freeze
To freeze, let the soup cool completely, then portion into freezer safe containers. Leave a little room for expansion. Freeze for up to three months. Thaw overnight in the refrigerator or reheat gently from frozen with additional stock as needed.
How to Serve
Serve this soup warm with freshly grated parmesan, crusty bread, garlic toast, or a simple green salad. It pairs beautifully with a grilled cheese sandwich, roasted vegetables, or a slice of focaccia. It is cozy enough for winter dinners yet light enough for any time of year.
These are my favorite dishes to serve with quinoa vegetable soup:

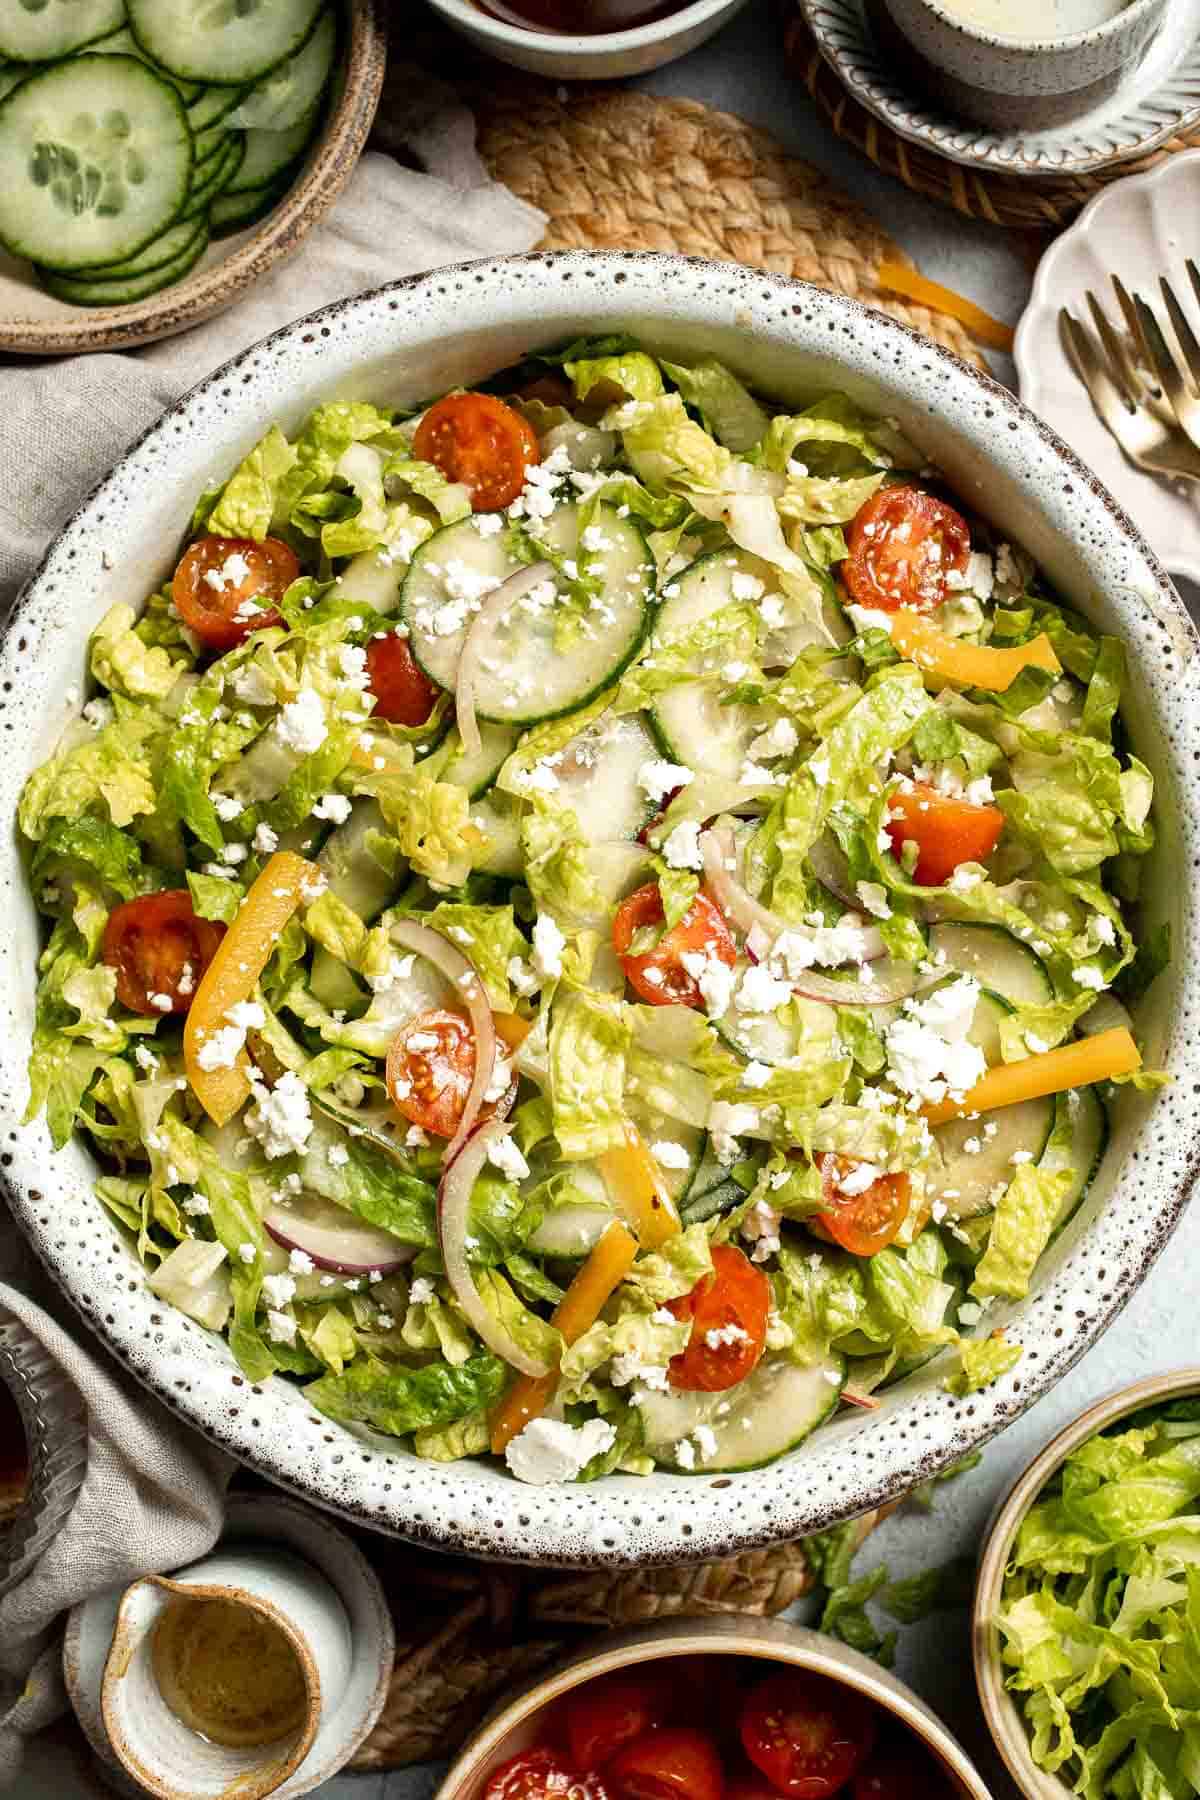
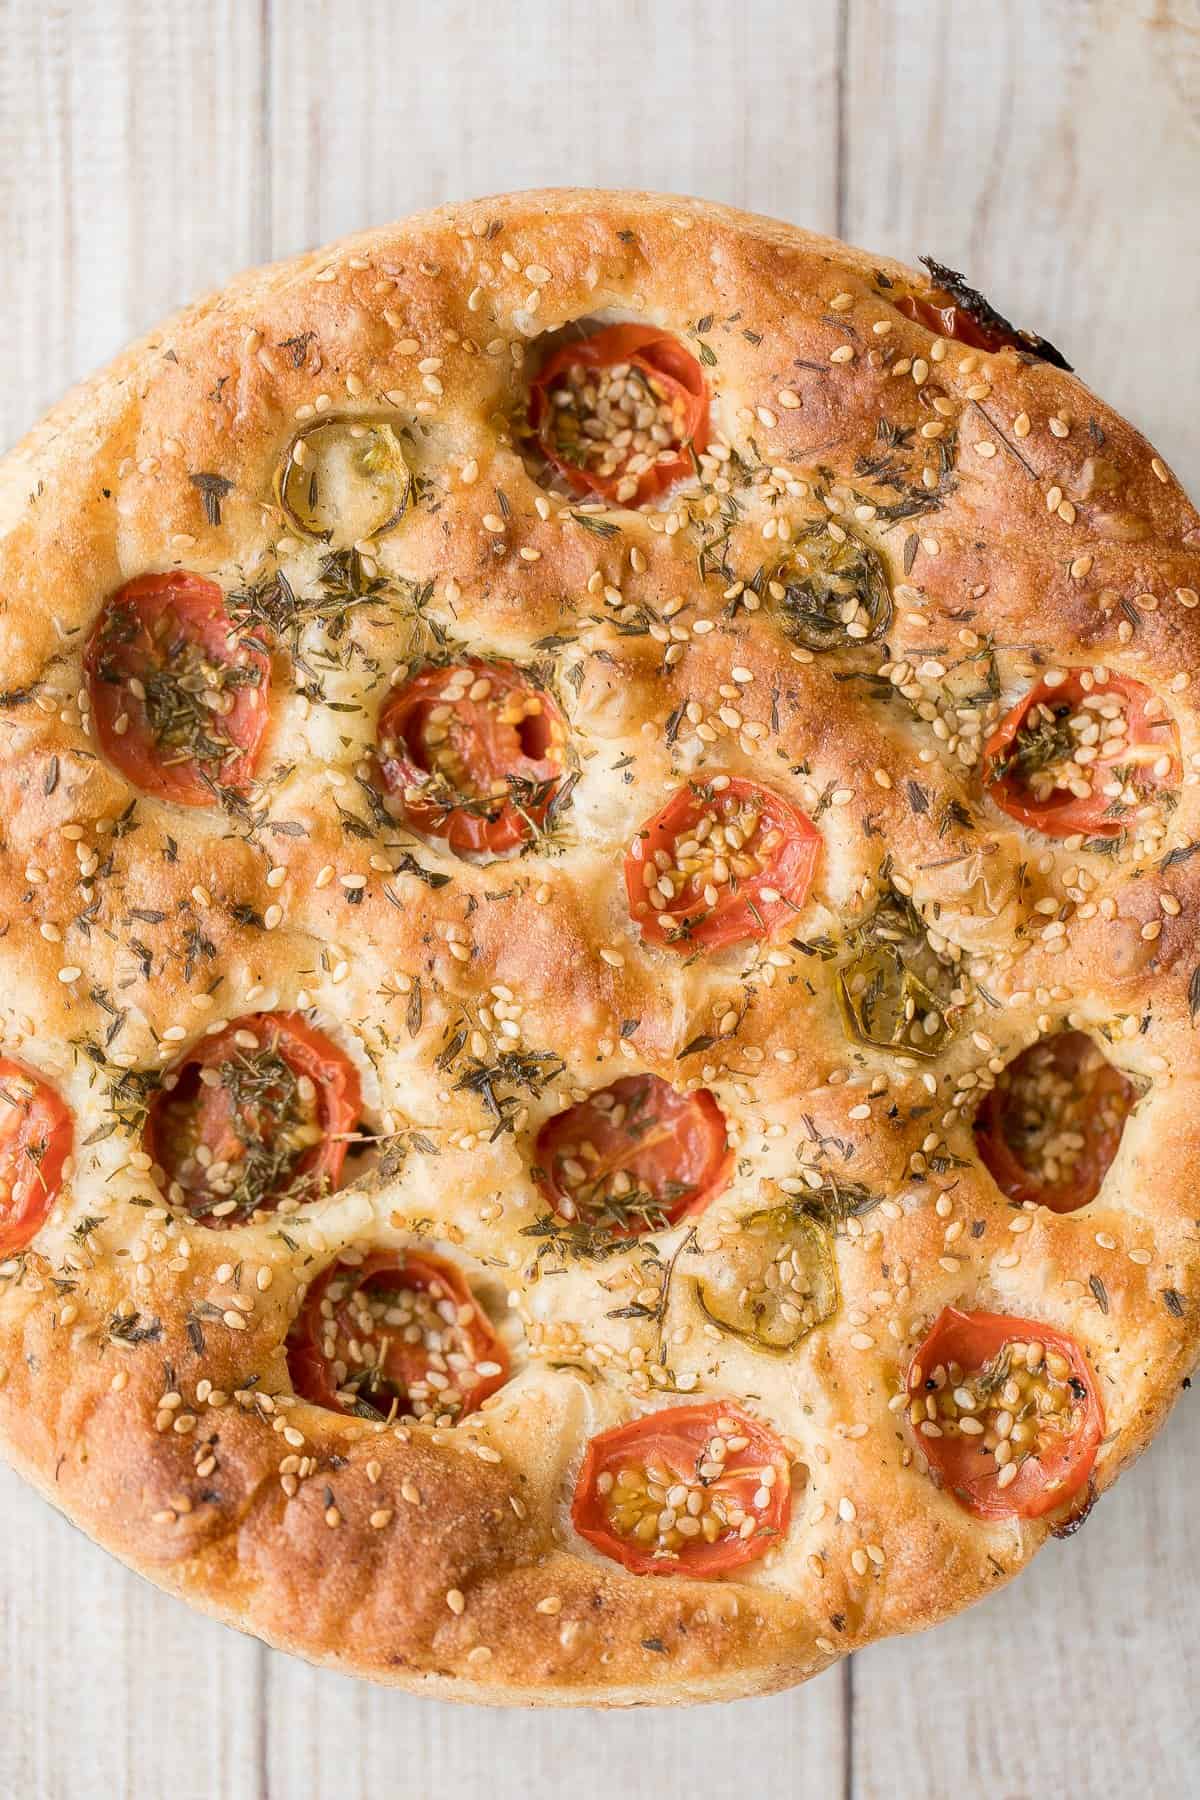
Side Dishes for Soup
Looking for the perfect accompaniments to your favorite soups? Explore our collection of soup side dishes, including crusty breads, fresh salads, savory crackers, and hearty sandwiches that complement and elevate any bowl of soup.
FAQ
Yes, you can add raw quinoa directly to soup. Quinoa cooks beautifully in broth because it absorbs liquid well and becomes tender without losing its structure. Adding raw quinoa allows it to simmer along with the vegetables and seasoning, which gives it more flavor than cooking it separately in water. It also helps thicken the soup naturally as it releases starches into the broth. Just make sure to rinse your quinoa before adding it so the natural coating is removed, since it can taste slightly bitter if left on. Raw quinoa usually cooks in about 20 to 25 minutes, so add it early enough in the recipe to ensure it becomes fluffy and tender by the end of the simmering time.
Quinoa holds its texture surprisingly well because its outer shell helps it stay firm while absorbing liquid. It becomes tender but not mushy. If you prefer firmer quinoa, slightly reduce the cooking time or add the quinoa partway through simmering.
Rinsing quinoa is recommended because it removes the natural coating that can taste slightly bitter. If your quinoa packaging states that it is pre rinsed, you can skip this step, but rinsing always improves flavor.
Veggie soup becomes more flavorful when you build layers of taste from the start. Sautéing aromatics like onion, garlic, carrot, and celery in olive oil creates a fragrant base. Tomatoes, vegetable broth, and dried herbs add depth, while salt and pepper help everything shine. Using fresh herbs at the end brightens the soup, and a squeeze of lemon can add acidity that lifts the entire pot. Adding umami rich ingredients such as parmesan rind, soy sauce, tomato paste, or nutritional yeast can also boost flavor without overpowering the vegetables. Letting the soup simmer gives time for flavors to blend. Tasting and adjusting seasoning right before serving ensures the perfect balance.
Absolutely. Frozen vegetables work well and soften quickly once added to the pot. They are great for convenience and do not affect the overall flavor or consistency of the soup.
Quinoa absorbs broth as it cooks and even more as it sits. If the soup thickens more than you like, simply add water or extra stock until you reach your preferred consistency.
Yes. You can add cooked shredded chicken near the end of cooking or simmer raw diced chicken with the broth and vegetables until fully cooked. This makes the soup heartier while keeping the overall flavor balanced.
Quinoa is highly nutritious and offers several health benefits because it is a complete protein containing all nine essential amino acids. It is also rich in protein, fiber, and essential vitamins and minerals like magnesium and folate. It provides long lasting energy, supports muscle repair, and helps keep you full due to its combination of protein and fiber. It is naturally gluten free and rich in minerals like magnesium, iron, manganese, and phosphorus, which support bone health, energy production, and healthy blood circulation. Quinoa also contains beneficial antioxidants that help protect your cells from everyday stress. Because it digests slowly and does not spike blood sugar, quinoa is an excellent option for balanced meals, especially in soups, salads, and bowls where you want nourishment that feels satisfying but still light.
Quinoa is nutritious and well loved, but a few things can cause discomfort for some people. The natural coating on quinoa, called saponin, can be bitter and slightly irritating if not rinsed well before cooking. Washing quinoa under cold water removes most of this and makes it much easier to digest.
Cooking quinoa in vegetable broth is simple and gives it much more flavor than using water alone. Rinse the quinoa thoroughly under cold running water to remove the natural coating. Add one part quinoa to two parts vegetable broth in a saucepan or directly into a soup. Bring it to a boil, then reduce heat, cover, and let it simmer gently until the quinoa is fluffy and the broth is absorbed, usually about 15 minutes on its own or 20 to 25 minutes when cooked inside a soup. Cooking quinoa in broth infuses it with savory flavor, reduces bitterness, and helps it blend seamlessly with the other ingredients in the dish.
More Vegetable Soup Recipes
Looking for other recipes like this? Try these:
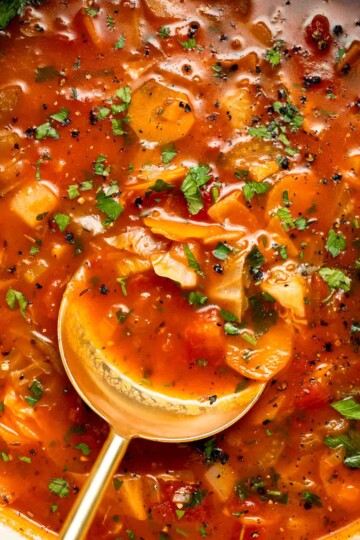

Tried this recipe?
I'd love to hear what you think! Leave a comment and rating below to share your feedback. Your reviews help others discover this recipe and help me keep creating more free recipes for you. Snap a photo and tag me on social media @aheadofthyme too.
Crispy Roasted Kale
If you love a simple, healthy side that delivers big flavor with very little effort, this Crispy Roasted Kale is about to become your new go to. The kale roasts into delicate, crunchy pieces with golden edges and a savory garlic finish that makes it impossible not to snack on right from the pan. It is the perfect balance of crisp texture and earthy flavor, and the whole batch cooks in just a few minutes.
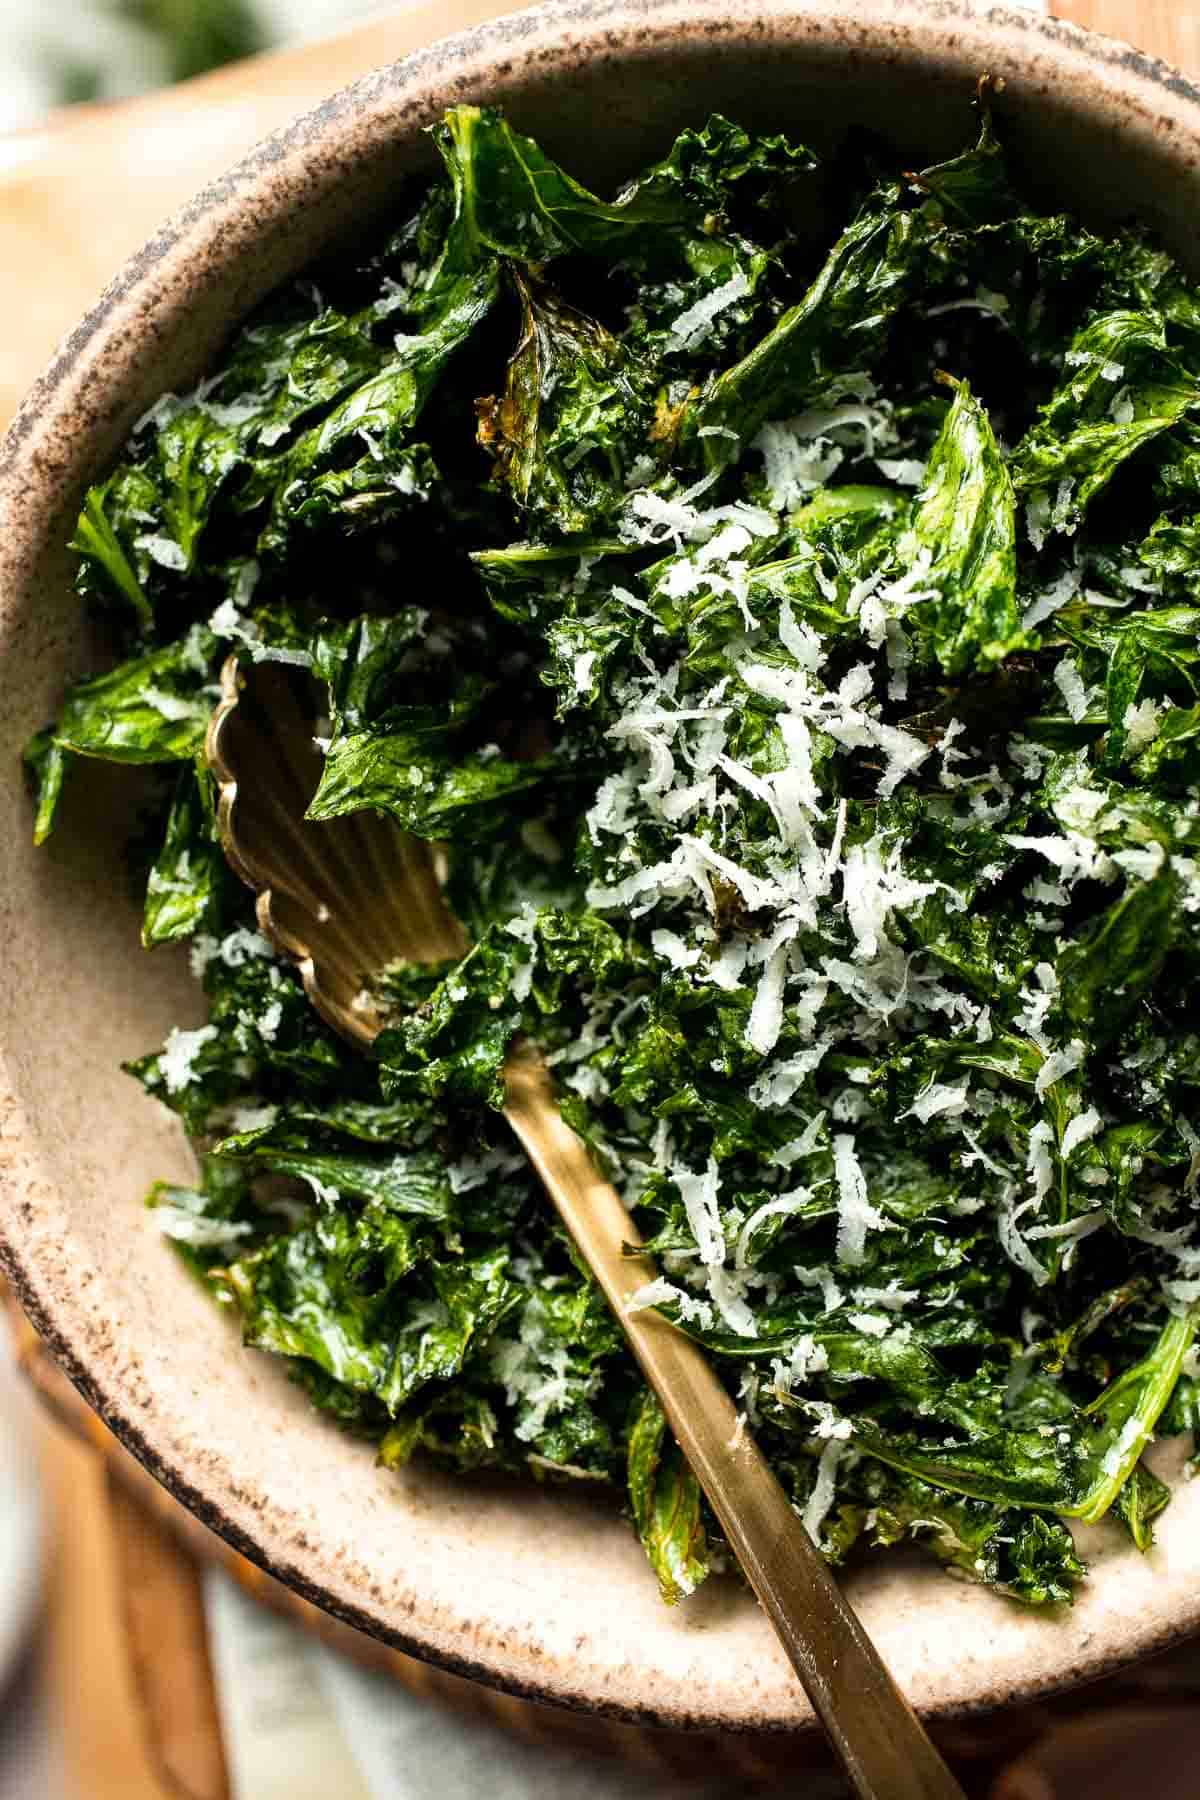
Roasting kale is one of those winter friendly kitchen tricks that turns an everyday vegetable into something special. A little olive oil, a gentle massage, and a short time in the oven are all you need to create a surprisingly addictive sheet pan side. Whether you are serving it with weeknight meals, adding a green dish to a holiday spread, or snacking by the handfuls, it is quick, wholesome, and naturally flavorful.
This recipe was inspired by our Kale Chips, and it pairs beautifully with cozy and simple mains like Baked Chicken Drumsticks, Butternut Squash Lentil Soup, or Creamy Tomato Pasta.
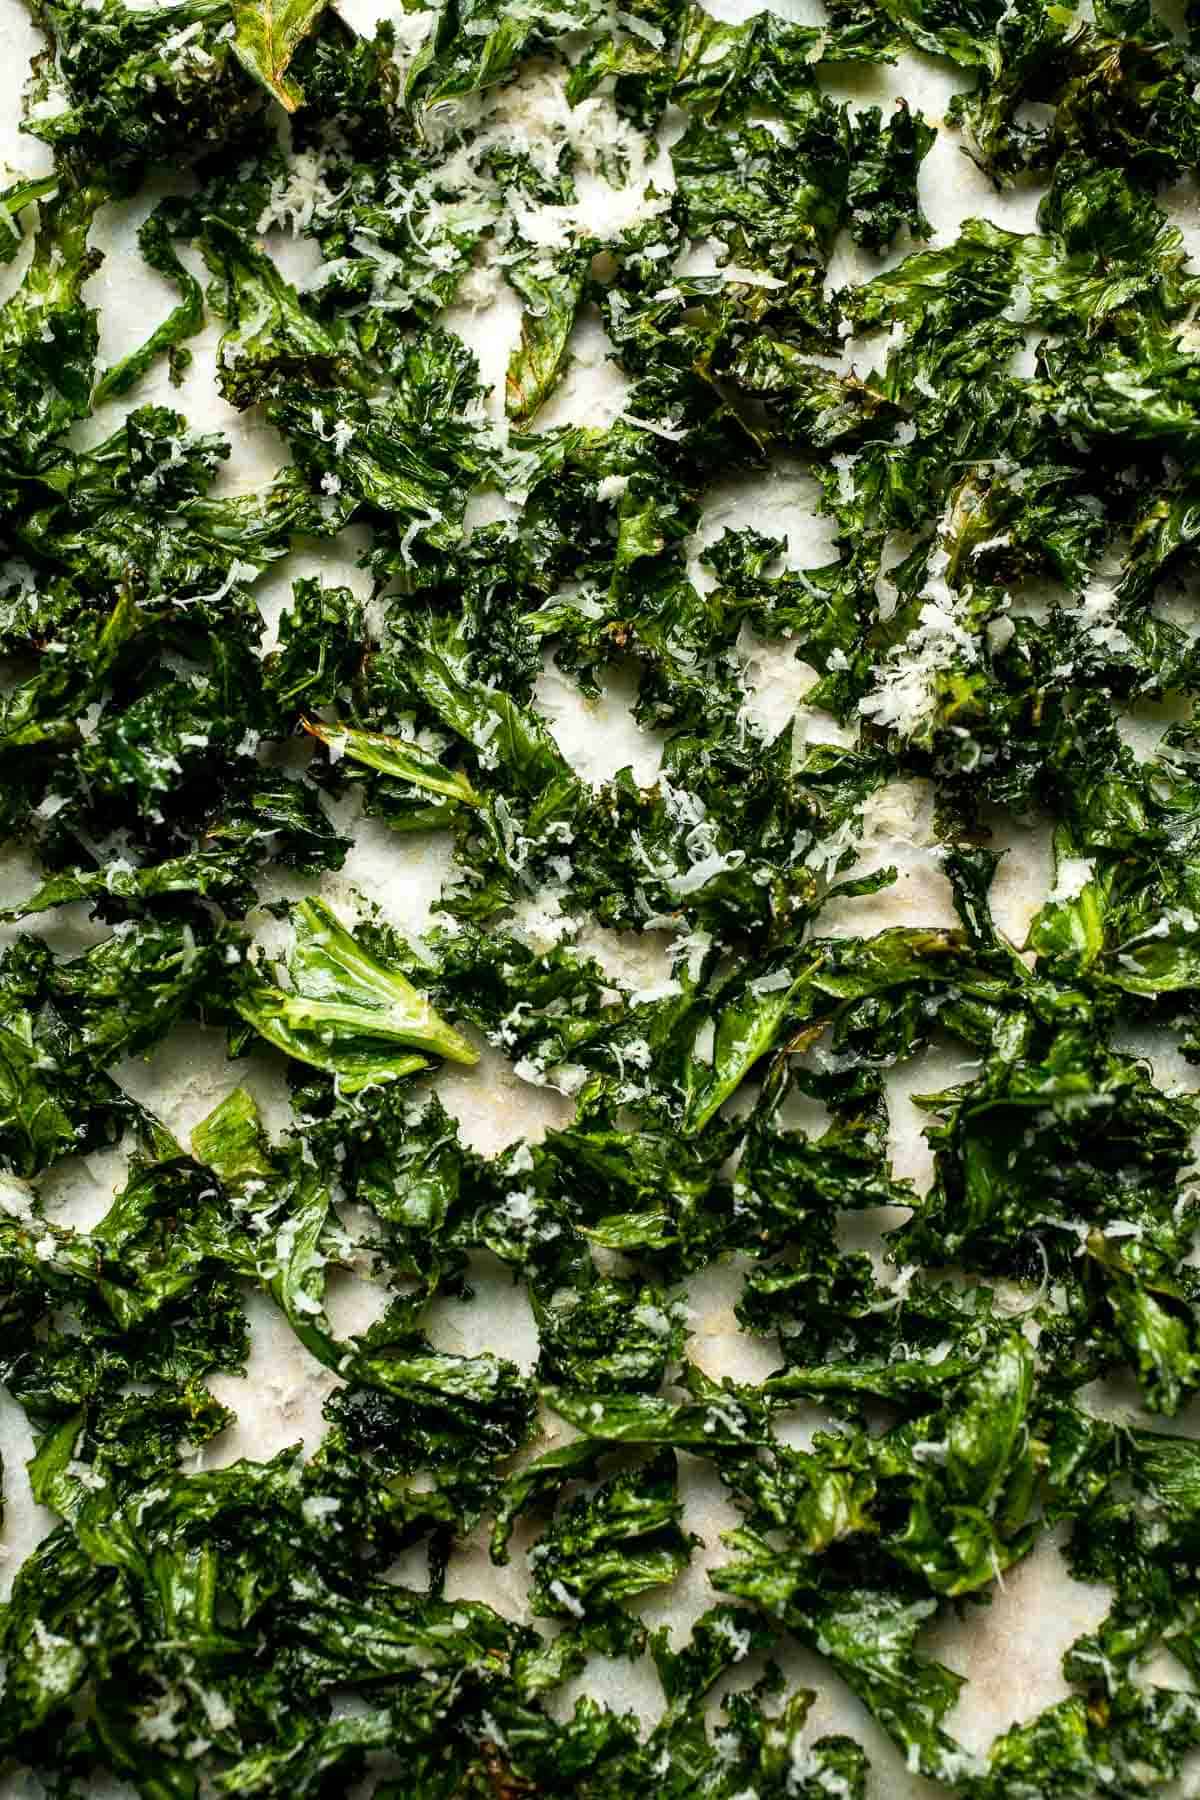
Why You'll Love This Recipe
- Perfect crisp texture. Roasting kale at the right temperature gives you deliciously crispy pieces with lightly toasted edges. The texture feels like a cross between kale chips and a warm side dish, making it fun, flavorful, and surprisingly snackable.
- Fast and effortless. With only a few ingredients and minimal prep, this side dish comes together in about 20 minutes. It is ideal for busy weeknights when you want something fresh and healthy without extra fuss.
- Flexible flavor options. You can add parmesan or nutritional yeast, sprinkle it with chili flakes, toss in lemon zest, or adjust the seasonings to match any meal. Roasted kale is easy to customize while keeping the same quick cooking method.
- Healthy and wholesome. Kale is naturally packed with vitamins and fiber, and roasting it with olive oil keeps it simple, nourishing, and naturally gluten free. It is a great way to add greens to your dinner menu in a warm and comforting way.
Ingredients and Substitutions
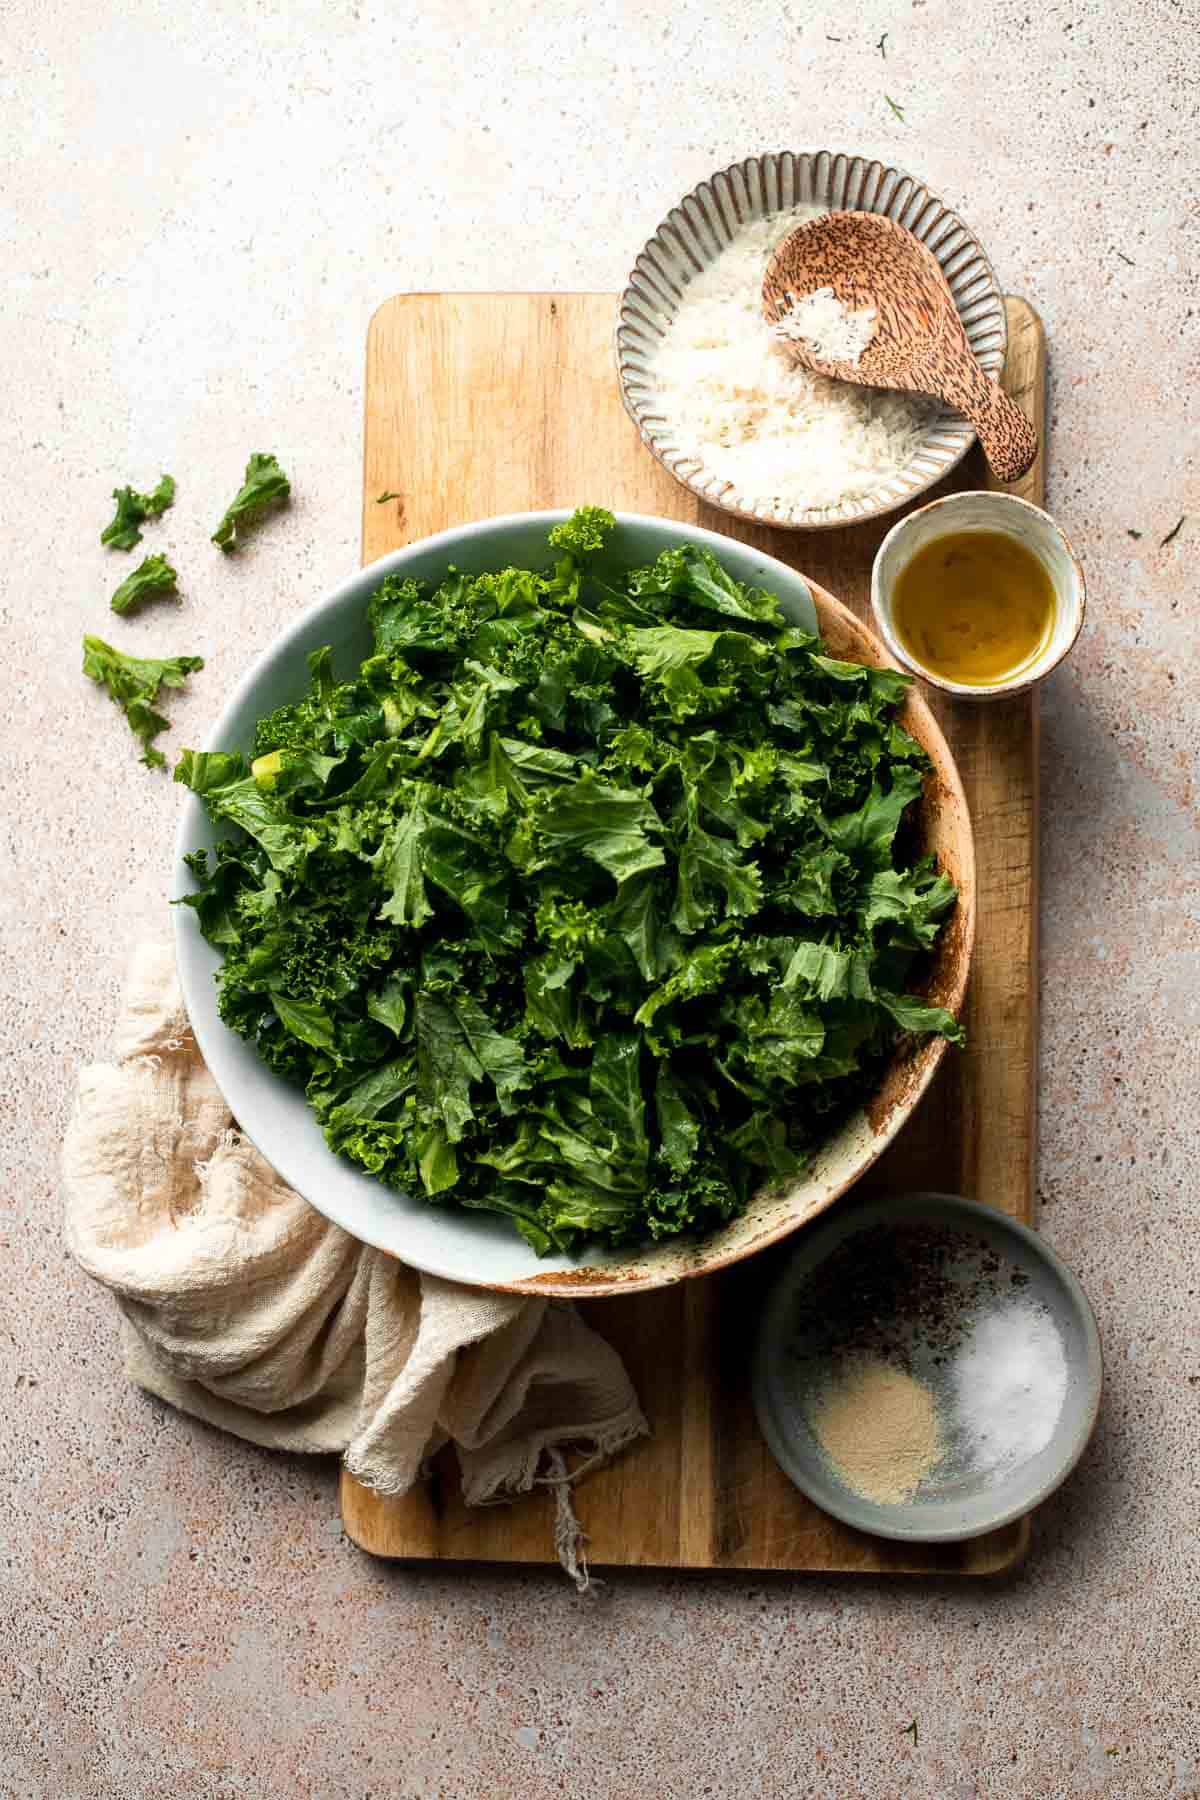
To make this easy Crispy Roasted Kale, you will need the following ingredients (see recipe card below for quantities):
- curly kale - Curly kale works best because the sturdy leaves crisp beautifully in the oven. Remove the hard stem form each kale leaf and chop the leaves into even pieces for the most consistent texture. Lacinato or dinosaur kale can work, but the pieces will roast faster since the leaves are flatter.
- olive oil - Helps the kale crisp and prevents it from drying out. Extra virgin olive oil adds more flavor, but any light tasting oil such as avocado oil works as a substitute.
- salt - Essential for seasoning and balancing the earthy flavor of the kale. Regular fine salt works well, but you can finish the roasted kale with a pinch of fleur de sel for a more delicate, gourmet touch.
- ground black pepper - Adds gentle heat and depth. Freshly cracked pepper has the best flavor, but pre ground pepper works perfectly too.
- garlic powder - Gives the kale a warm savory flavor without adding moisture. Granulated garlic also works and produces a similar taste.
- parmesan cheese or nutritional yeast - Parmesan adds a salty cheesy finish and melts slightly on the warm kale. Nutritional yeast is the best dairy free alternative and still adds a cheesy flavor with a nutty twist.
Equipment
You will also need measuring cups and spoons, a large mixing bowl, a baking sheet, parchment paper for easy cleanup, and tongs or a spatula for tossing.
Instructions
- Season the kale. In a large mixing bowl, add kale, oil, salt, pepper, and garlic powder. Use your hands to massage the kale for 1-2 minutes until coated evenly and slightly softened.
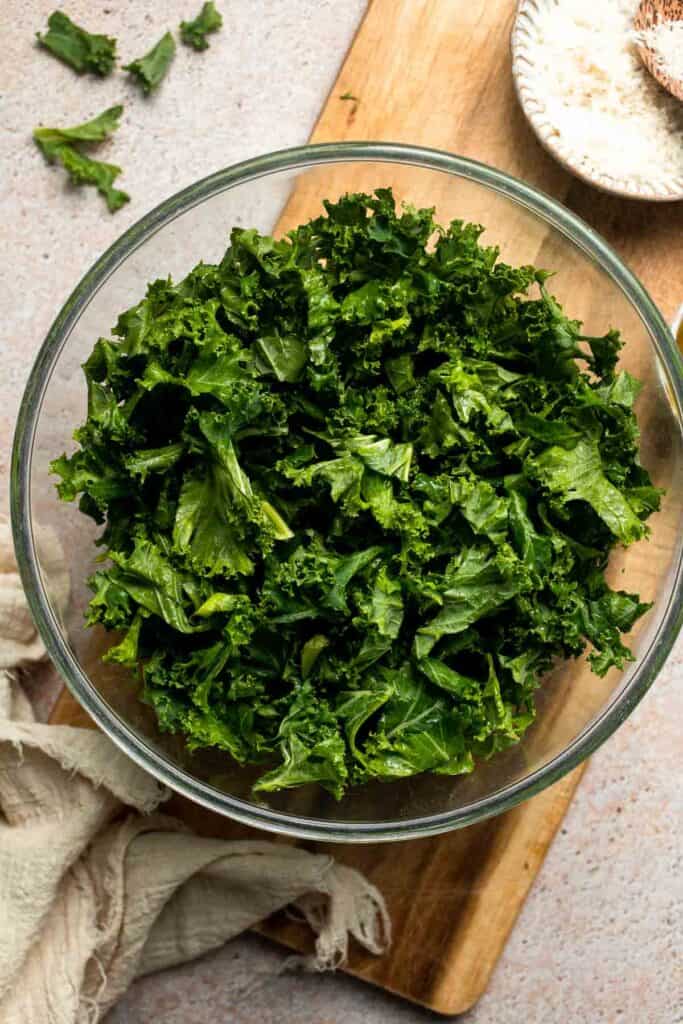
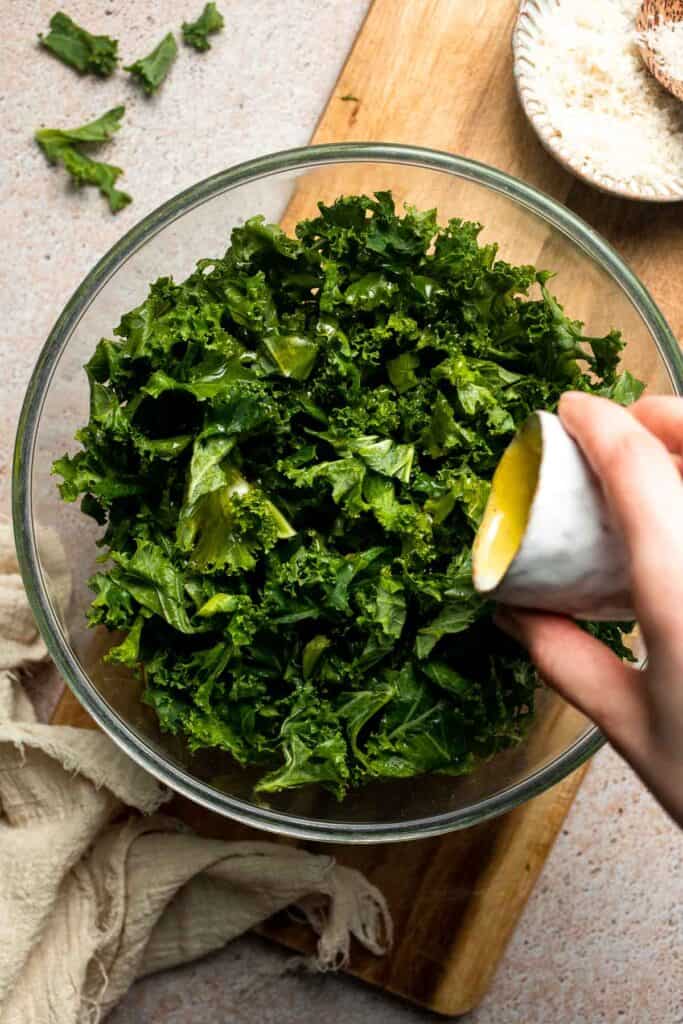
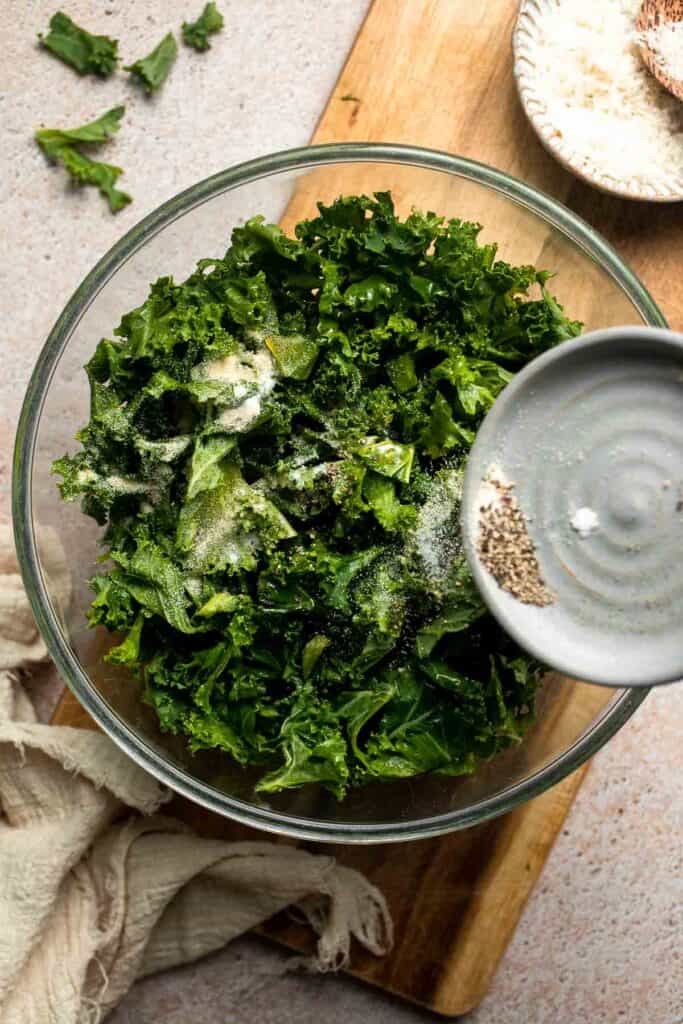
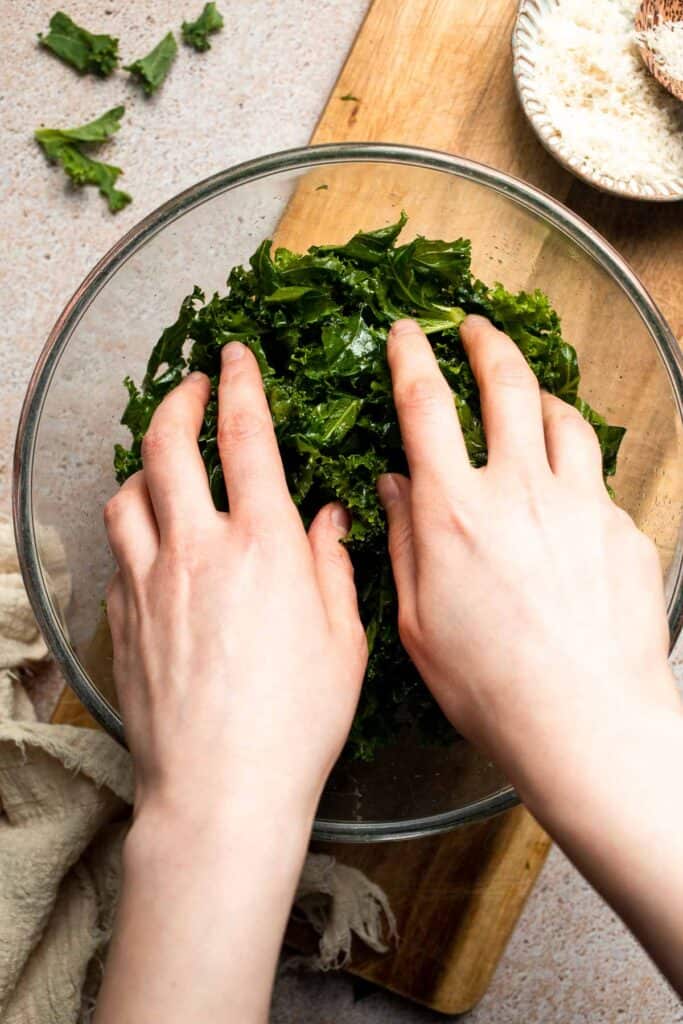
- Bake. Spread the kale leaves in a single layer on a parchment lined baking sheet. Bake in a 325°F preheated oven for 15-18 minutes, tossing once halfway through, until crispy but not browned. Watch closely in the final minutes to prevent burning.
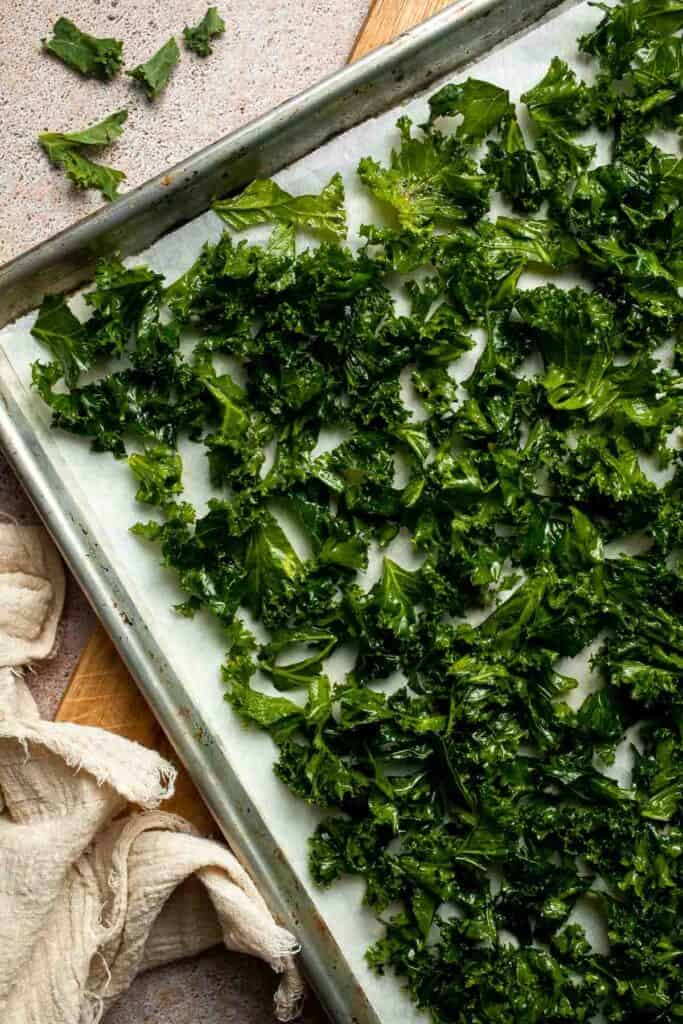
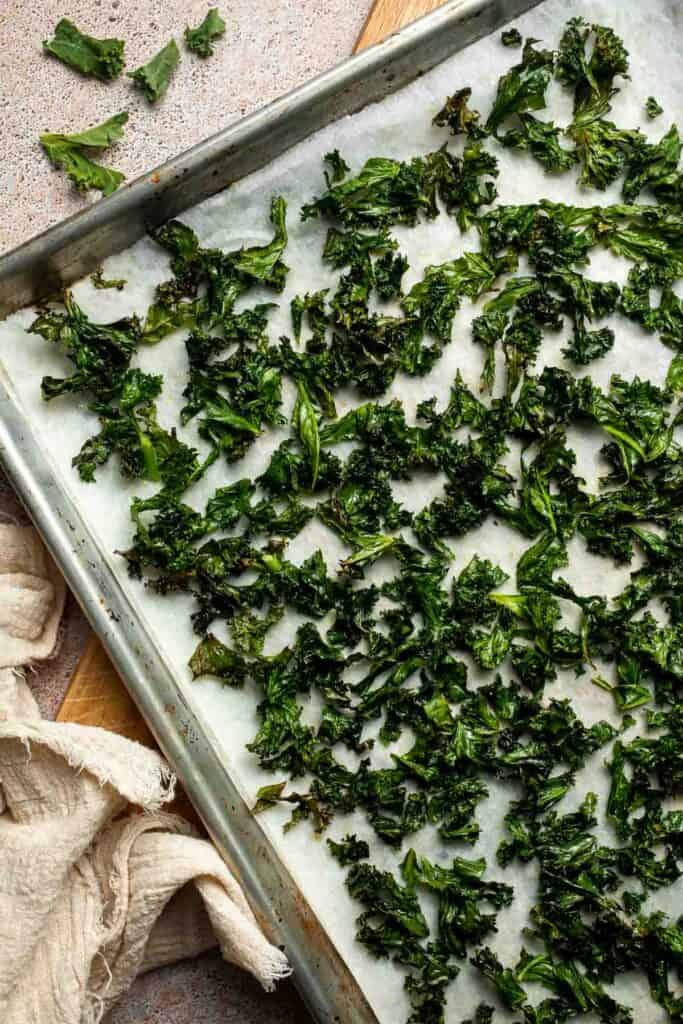
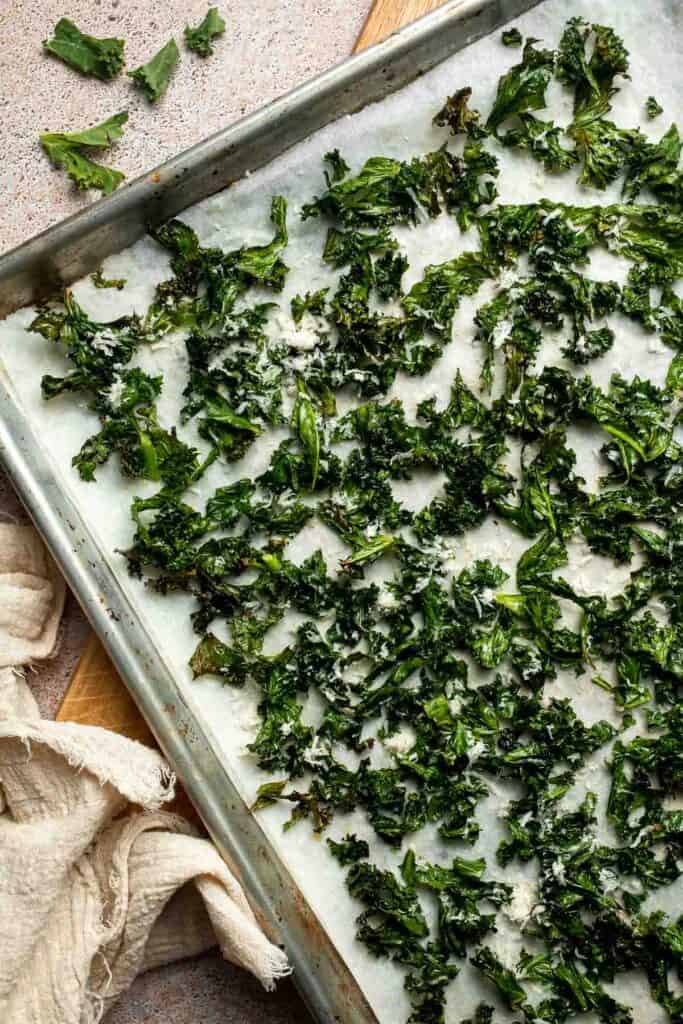
- Finish with cheese. Remove from the oven and immediately sprinkle with parmesan or nutritional yeast.
- Serve. Serve immediately as a festive side or crunchy snack.
Air Fryer Kale
Preheat air fryer to 350°F (175°C). Place seasoned kale in the basket in small batches to avoid overcrowding. Cook for 6-10 minutes, shaking the basket halfway. Check early since kale crisps quickly. Sprinkle with parmesan before serving.
Expert Tip: Dry the kale completely for maximum crispness
Any leftover moisture will cause the kale to steam instead of roast, which keeps the leaves soft instead of crisp. Spread the chopped kale on a clean kitchen towel or use a salad spinner to remove all moisture before adding the oil. This one simple step makes a huge difference in achieving those crunchy, golden edges.
More Tips and Tricks
- Massage the kale well. Rubbing the oil into the kale helps soften the leaves and ensures every piece roasts evenly.
- Avoid overcrowding. Spread the kale in a single layer across the baking sheet so the pieces crisp instead of steaming. If needed, use two pans.
- Watch closely at the end. Kale can turn from perfectly crisp to burned within a minute. Keep an eye on it during the last few minutes for the best texture.
- Use parchment for easy cleanup. The kale gets extra crispy and lifts off easily with parchment paper, which also keeps the baking sheet spotless.
- Add cheese right away. Sprinkle parmesan or nutritional yeast over the kale while it is still warm so it melts slightly and sticks to the leaves.
Recipe Variations
- Spicy roasted kale. Add chili flakes or cayenne pepper for a little heat.
- Lemon garlic kale. Add lemon zest and a squeeze of fresh lemon juice before serving.
- Smoky roasted kale. Add smoked paprika for deep, warm flavor.
- Everything seasoning kale. Toss with everything bagel seasoning for a savory, crunchy finish.
- Parmesan crisp kale. Add extra parmesan for a more cheesy, snack like texture.
- Nutritional yeast version. Keep it dairy free while still adding a savory, cheesy flavor.
- Balsamic roasted kale. Drizzle a little balsamic vinegar over the warm kale right after it comes out of the oven for a sweet tangy finish.
- Kale and veggie mix. Add roasted vegetables such as broccoli, cauliflower, or even spinach for a mixed green side dish.
- Kale bowl topping. Serve roasted kale over rice or quinoa bowls for extra crunch and earthy flavor.
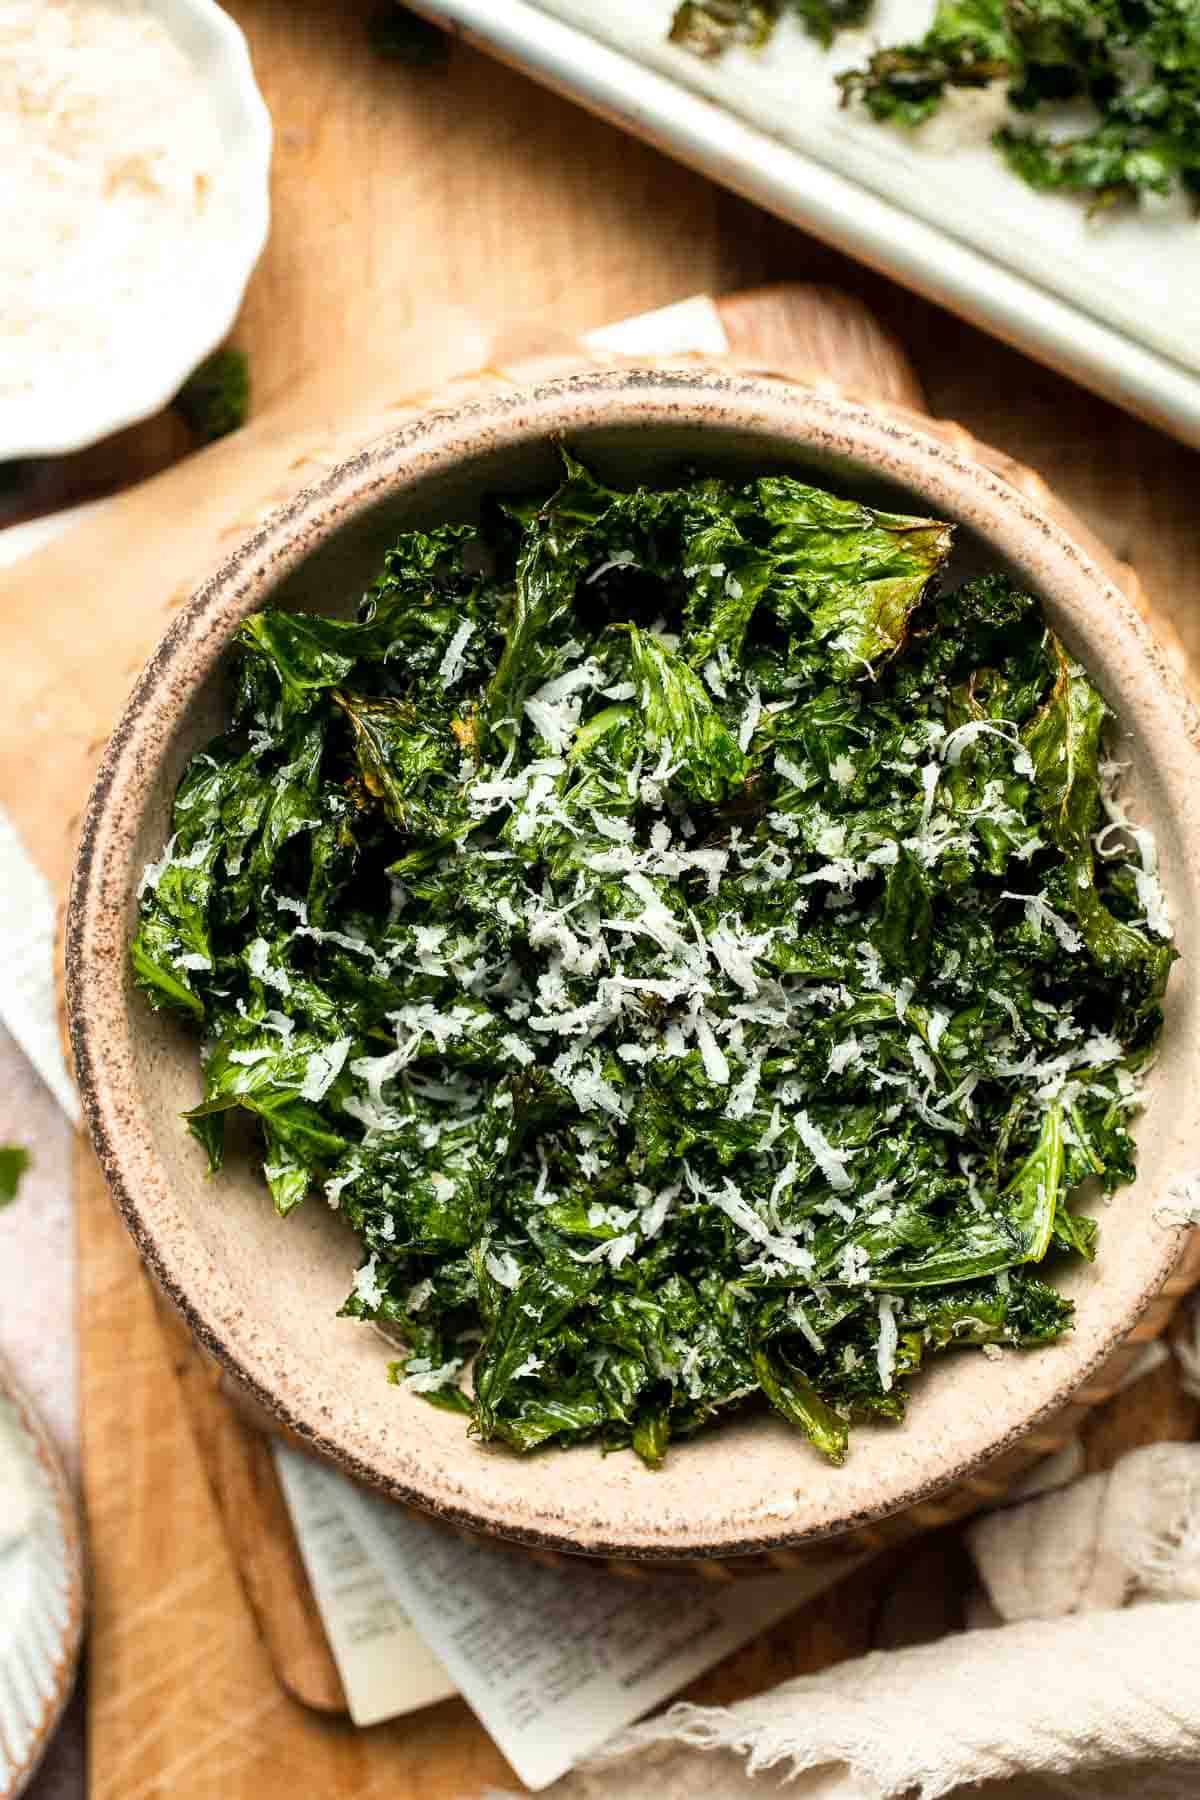
Storage
How to Store
Store cooled roasted kale in an airtight container for up to two days. It will soften slightly, but you can crisp it back up in the oven or air fryer.
How to Reheat
Reheat on a baking sheet in a 300°F oven for 3-5 minutes until crisp again (or 1-2 minutes in the air fryer). Avoid microwaving because it softens the kale.
How to Freeze
Freezing is not recommended because the leaves will lose their crispness and become soft when thawed.
How to Serve
Crispy roasted kale adds a flavorful, crunchy pop to almost any meal. It works as a warm green side, a healthy snack, or a topping that adds texture and color. Serve it with weeknight dinners, holiday mains, or cozy soups for an easy extra layer of flavor.
These are my favorite dishes to serve with roasted kale:

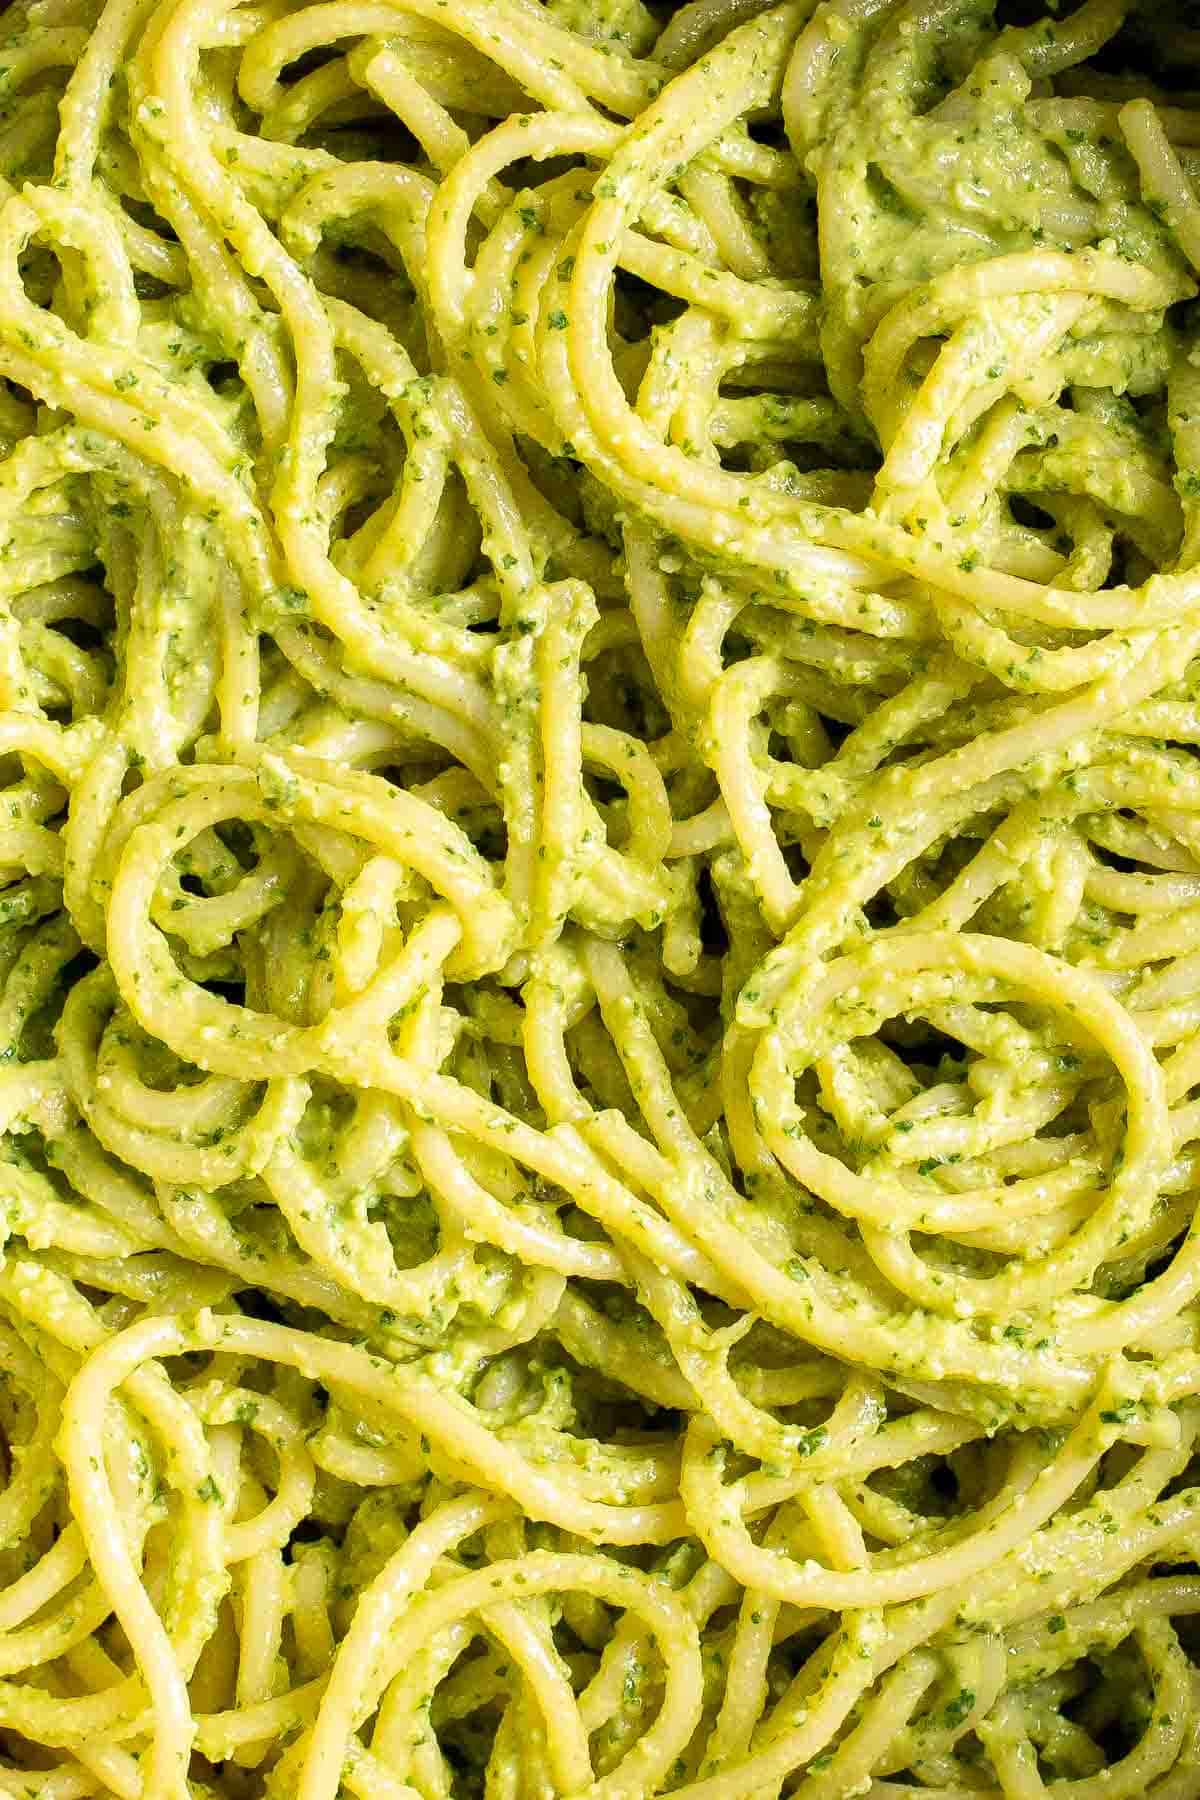

Dinner Ideas
For more recipe ideas to pair this with on busy weeknights, check out our collection of easy dinner recipes, featuring one-pan dishes, quick pasta, roasted vegetables, light sides, and flavorful meals that come together in no time.
FAQ
Yes, roasting kale in the oven is one of the easiest ways to transform it into a crisp, savory, and lightly browned side dish.
The most common reason kale does not crisp is moisture. If the leaves are even slightly wet when they go in the oven, they will steam instead of roast. Overcrowding the pan can have the same effect since the heat cannot circulate around the leaves. Make sure the kale is very dry, tossed well with oil, and spread in a single layer. Lower oven temperatures can also prevent crisping, so check that your oven is fully preheated to 325 F.
A little oil helps the kale crisp, keeps the edges from burning, and improves the flavor. You can reduce the oil if you prefer, but completely oil free kale will turn dry and papery rather than crunchy. If you want to keep it lighter, try using a spray bottle to lightly mist the kale with oil instead of drizzling.
Kale cooks quickly, so it is important to watch it during the last few minutes. Bake it at 325 F, toss halfway, and keep an eye on the color. The kale should look crisp and slightly toasted but not brown. Ovens vary, so you may need to reduce the time by a minute or two if yours runs hot.
Baby kale is more tender and will crisp much faster, often in less than 10 minutes. Because the leaves are thinner, they are more likely to burn, so check them often. Curly kale is the best option for even baking and sturdy, crunchy texture.
Yes, roasted kale is a nutrient dense side dish rich in vitamins A, C, and K. It is naturally low carb, gluten free, and packed with fiber. Using olive oil adds healthy fats and helps the greens roast evenly. You can adjust the seasonings to keep it dairy free or reduce salt based on your preferences.
The most common mistake is not drying the kale thoroughly before adding oil. Even a little moisture will cause the leaves to steam instead of crisp, which results in soft or soggy pieces. Overcrowding the baking sheet can create the same issue because the heat cannot circulate around the leaves. Using too much oil can also weigh the kale down and prevent crisping. Another mistake is roasting at a very high temperature, which can burn the thin edges quickly. It is also easy to forget that kale cooks fast, so it is important to watch closely during the last few minutes. With dry leaves, enough spacing, and the right temperature, the kale becomes perfectly crisp.
One of the tastiest ways to enjoy kale is roasting it until the leaves turn crisp and lightly golden. The texture becomes light and crunchy, making it easy to eat straight from the baking sheet. If you want kale that feels satisfying, flavorful, and snackable, roasted kale is hard to beat.
Yes, kale is still widely considered a superfood because it is packed with nutrients, fiber, and antioxidants while remaining low in calories. It contains significant amounts of vitamins A, C, and K, along with minerals like calcium and potassium. Kale also offers plant based phytonutrients that support overall health. Its versatility makes it easy to incorporate into different meals, whether roasted, blended into smoothies, tossed into salads, or added to soups. Roasting kale actually makes it easier to eat more of it because the leaves shrink and develop a savory, crispy texture. It remains one of the most nutritious greens you can add to your weekly menu.
More Kale Recipes
Looking for other recipes like this? Try these:

Tried this recipe?
I'd love to hear what you think! Leave a comment and rating below to share your feedback. Your reviews help others discover this recipe and help me keep creating more free recipes for you. Snap a photo and tag me on social media @aheadofthyme too.
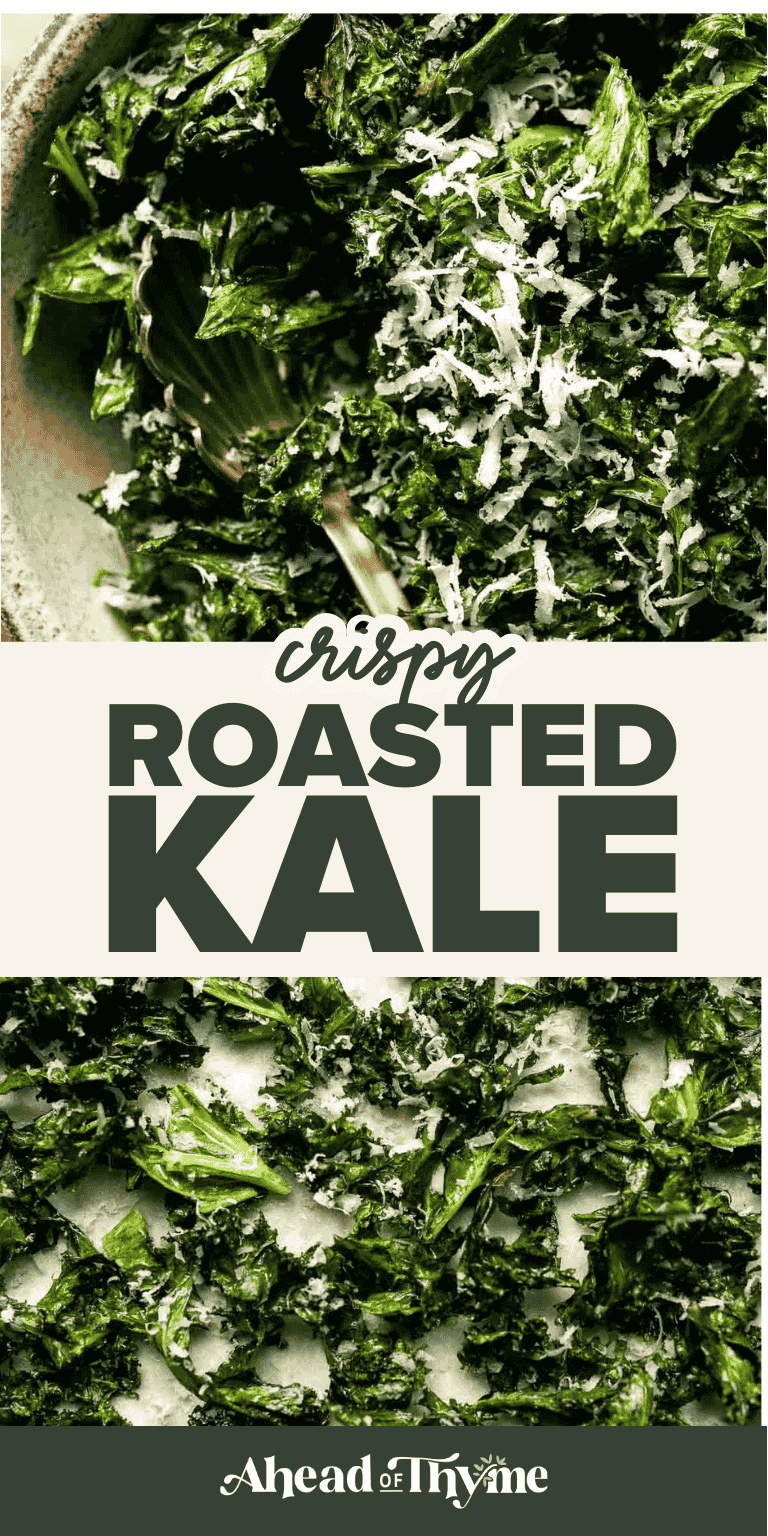
Ultimate Christmas Baking Guide (with Printable Checklists!)
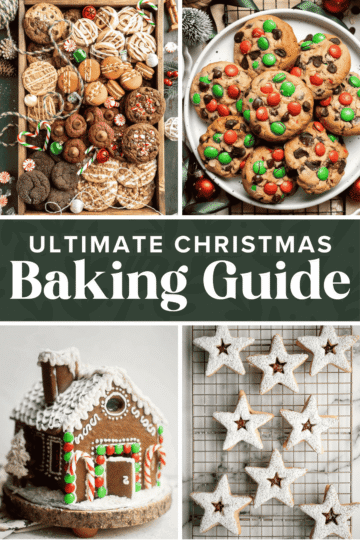
Whether it is your very first Christmas baking season or you already have a well loved cookie lineup, this Christmas Baking Guide will walk you through everything you need for stress free holiday baking. You will learn about common baking ingredients and how to choose them, essential baking tools, how to measure ingredients the right way, and practical tips for making desserts ahead, storing them, and even mailing cookies as gifts. Plus, you can grab free printable holiday baking checklists to help you plan, shop, and bake like a pro this Christmas.

Christmas is one of the busiest times of year. Between shopping, hosting, and family events, it can feel overwhelming to also tackle a long list of Christmas cookies, cakes, and pies. This guide is here to simplify that part of the season. Use it as a one stop resource for all things holiday baking, from pantry staples and room temperature butter tips to packaging and shipping Christmas cookies safely.
Use the Table of Contents below to jump to the section you need, or read straight through as you plan your Christmas baking day.
[feast_advanced_jump_to]now available!
Get Your Free Holiday Baking Checklists!
Stay organized this baking season with our printable recipe planner, pantry checklist, and baking shopping list.
Common Christmas Baking Ingredients
Before you preheat the oven, it helps to understand the common baking ingredients you will reach for again and again during the holidays.
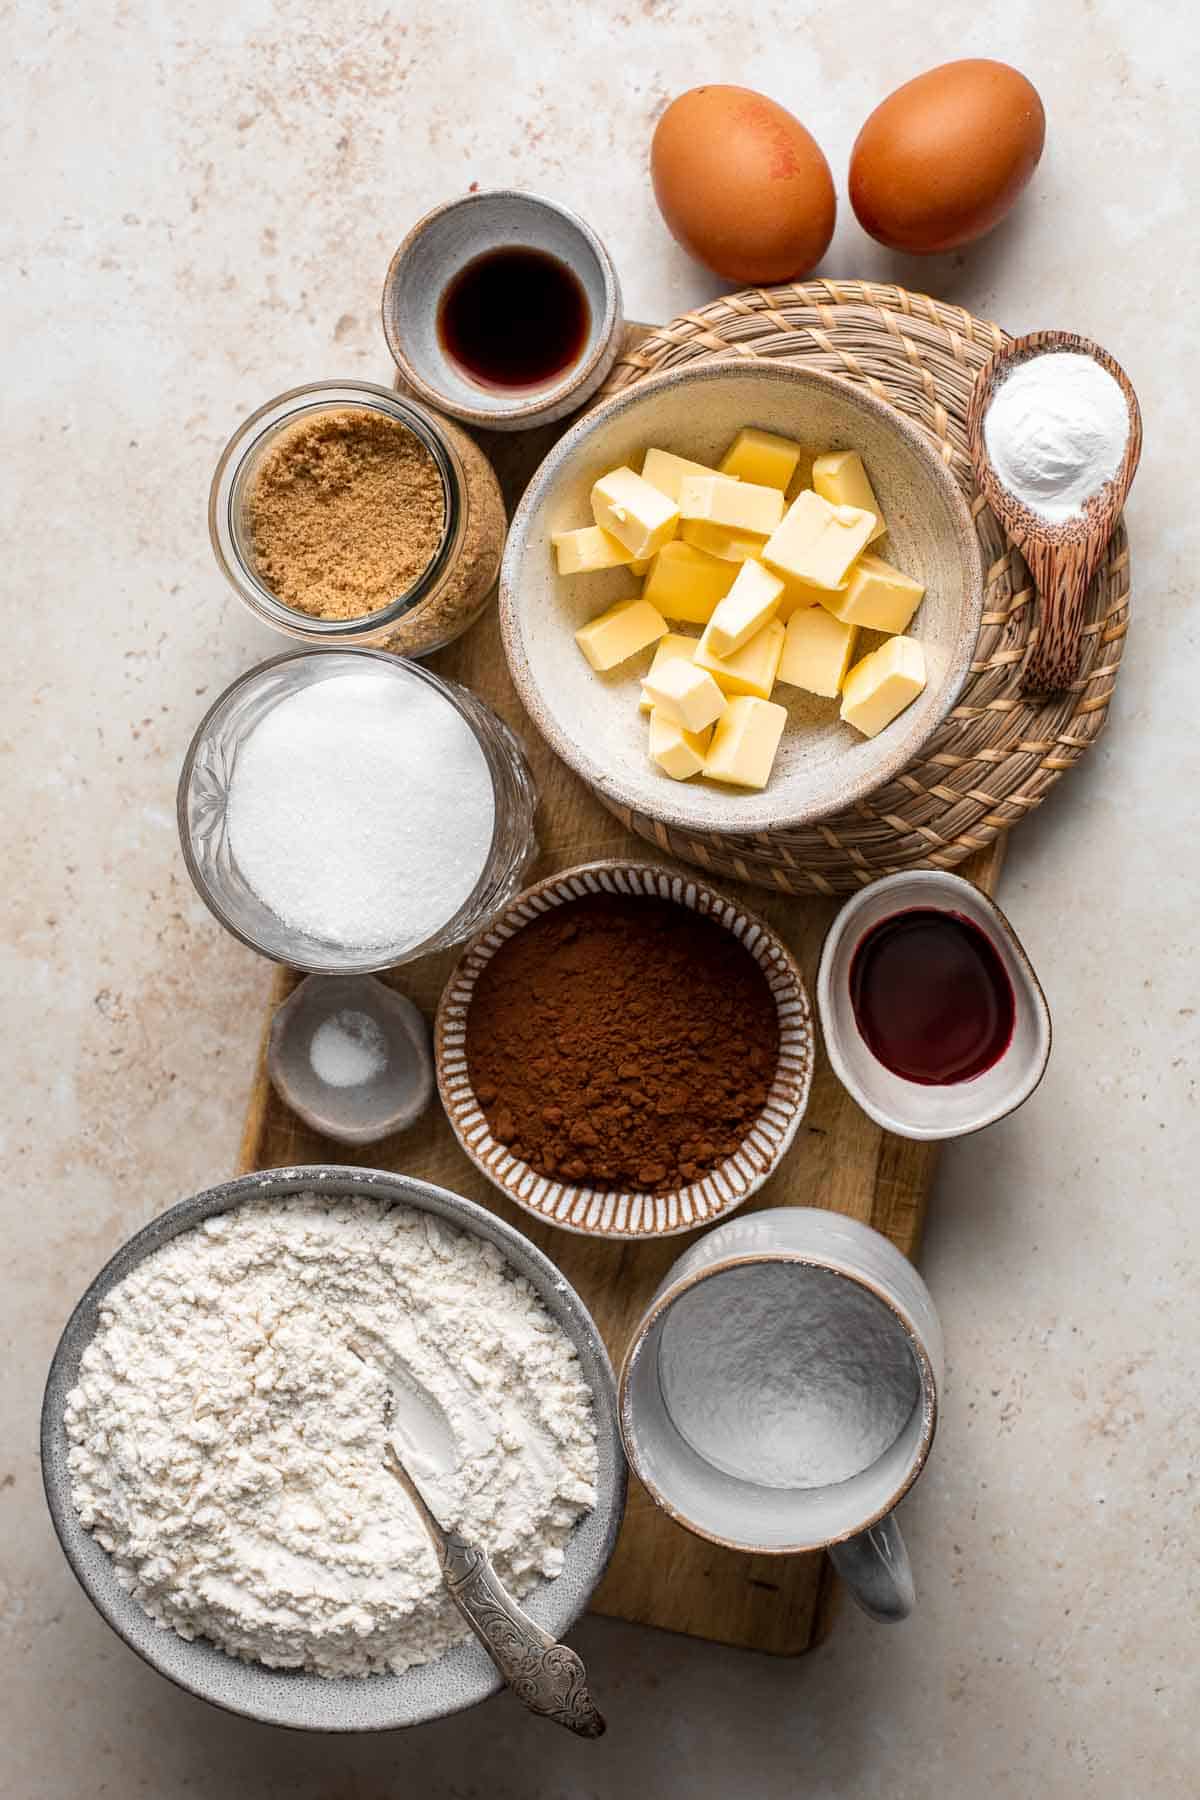
Pantry Staples
- Flour. There are many different types of flour, including all purpose flour, bread flour, cake flour, self rising flour, whole wheat flour, and gluten free flour. They vary by protein content and purpose, and that affects texture in cookies, cakes, and breads.
- Granulated sugar. White granulated sugar is also called cane sugar. There are also other granulated sweeteners like coconut sugar, date sugar, and sugar substitutes such as stevia or Swerve, which some recipes are specifically developed for.
- Brown sugar. Brown sugar is granulated sugar mixed with molasses, which adds moisture, deeper color, and a richer caramel flavor. It is common in Christmas cookies and bars.
- Confectioners' sugar. Confectioners' sugar, also called powdered sugar, is very finely ground. It is used to dust finished baked goods, make glazes, and whip up light and fluffy frostings and meringues.
- Baking soda and baking powder. These are leavening agents that help baked goods rise and give cakes, muffins, and cookies structure. They are not interchangeable, so always follow the recipe.
- Salt. Finely ground salt balances sweetness and brings out flavor. Some recipes also call for flaky salt as a finishing touch to add texture and a burst of salty contrast.
- Vanilla extract. Vanilla extract provides a warm, aromatic base flavor in almost every Christmas dessert. You can often swap in vanilla bean paste for an even richer vanilla taste.
- Cocoa powder. Cocoa powder adds chocolate flavor to cakes, brownies, cookies, and hot chocolate mixes. Most recipes call for unsweetened cocoa powder, and some specify natural or Dutch processed.
- Chocolate chips. Chocolate chips, chocolate chunks, and chopped chocolate bars are used as mix ins for cookies, brownies, fudge, and candy.
- Nuts. Walnuts, hazelnuts, pecans, almonds, and pistachios are popular in holiday baking for flavor and crunch.
- Oil. Neutral oils like vegetable oil, grapeseed oil, avocado oil, and light olive oil help keep baked goods moist and prevent sticking.
- Yeast. Yeast is necessary for breads, rolls, and some sweet holiday breads. It creates rise and gives dough its airy texture.
Refrigerator Staples
- Butter. Butter is a star ingredient in Christmas baking. It adds flavor, structure, and tenderness. Most baking recipes use unsalted butter so you can control the salt level.
- Milk. Whole milk is commonly used in batters, custards, and frostings to improve browning and add richness.
- Heavy whipping cream. Heavy cream creates rich, creamy desserts and fluffy whipped toppings, and is used in ganaches, sauces, and fillings.
- Eggs. Most baking recipes use large eggs. Shell color does not matter. Eggs provide structure, moisture, and help emulsify ingredients.
Room Temperature Ingredients for Holiday Baking
Many Christmas cookie recipes specify that butter, eggs, or milk should be at room temperature. This helps ingredients mix evenly and gives you the best texture.
Here are quick ways to bring ingredients to room temperature when you forget to take them out in advance.
- Butter. Fill a bowl or mug with hot water and let it sit for a few minutes. Empty it, then place the wrapped butter inside the warm vessel and cover for several minutes. Or cut butter into small cubes and let it sit on the counter.
- Eggs. Place cold eggs in a bowl of warm water, not hot water, for about five minutes to gently warm them.
- Milk. Microwave milk on the lowest power setting in ten second increments, stirring between each, until it reaches room temperature.
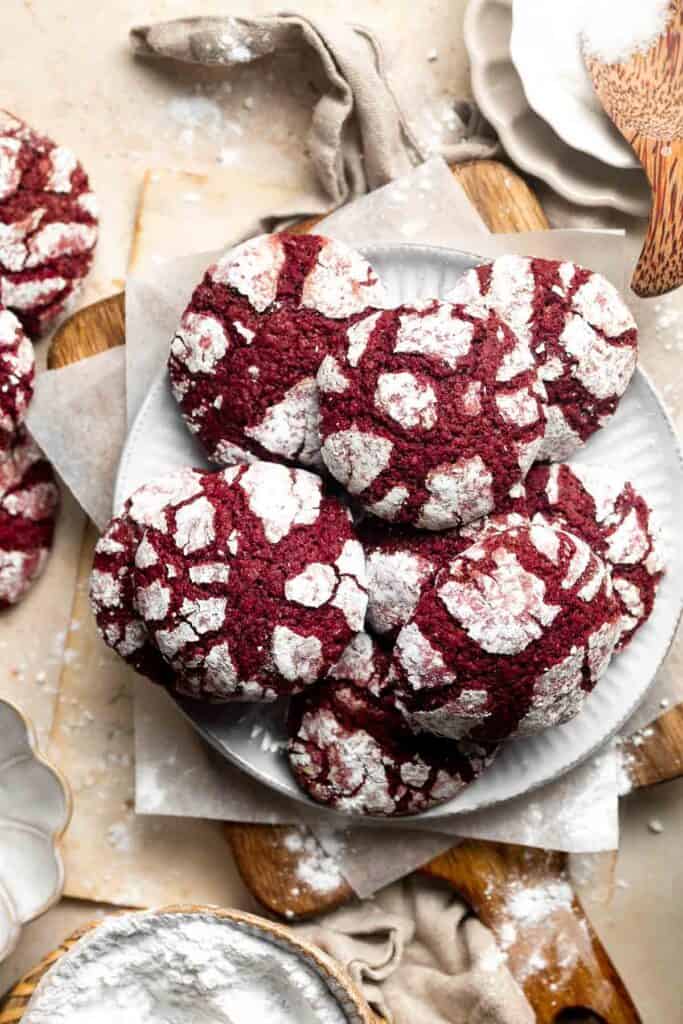
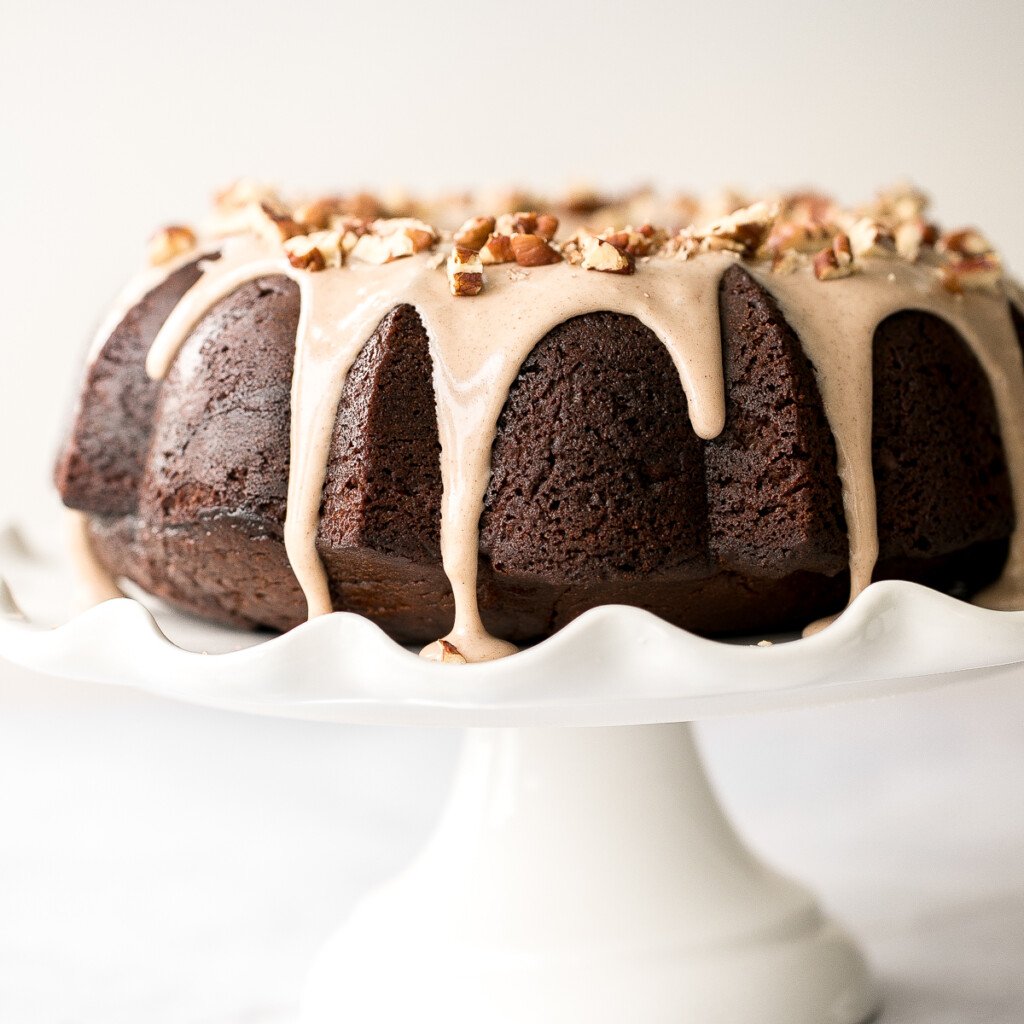
How to Choose the Right Ingredients
Small ingredient choices can make a big difference in your Christmas baking.
Butter vs margarine
Butter and margarine are both sources of fat, but they behave differently. Butter usually creates a more tender baked good with richer flavor. Margarine has more water and can change the texture, so it is best used as a spread or in recipes that specifically call for it.
Oils
In most recipes, you can use any neutral oil such as vegetable, canola, or avocado oil. Coconut oil has more flavor and behaves differently when cold, so it can slightly change the taste and texture. Choose the oil based on how much flavor you want it to add.
All purpose flour vs specialty flour
Most recipes are written with a specific flour in mind. Bread flour or 00 flour is perfect for breads and pizza crusts, while cake flour is ideal for light, tender cakes. In many cases you can substitute all purpose flour if you do not have the specialty flour, but the final texture will be different.
Eggs
If a recipe calls for large eggs and you only have smaller ones, you can usually use two small eggs in place of one large, especially when the recipe uses more than one egg.
Milk vs milk alternatives
Milk adds fat and helps with browning. Milk alternatives like almond milk or oat milk tend to have less fat, but can work as one to one substitutes in many recipes when you need a dairy free option. Expect slight changes in flavor and texture.
Granulated sugar vs confectioners sugar
Granulated sugar is used in batters and doughs, and confectioners sugar is used for icings, glazes, and dusting. It dissolves quickly and creates smooth, light frostings.
How to Measure Baking Ingredients Correctly
Using a kitchen scale
A kitchen scale is the most precise way to measure ingredients.
- Place your empty bowl or cup on the scale
- Press the tare or zero button
- Add your ingredient until you reach the desired weight
Always zero out the scale between ingredients so you are not including the weight of the container.
Measuring dry ingredients without a scale
Spoon or pour the ingredient into a dry measuring cup. Do not pack it down unless the recipe says to. Level the top with the back of a knife.
This prevents you from using too much flour, cocoa, or sugar, which can make baked goods dense or dry.
Measuring liquid ingredients without a scale
Use a clear liquid measuring cup (or normal measuring spoons) to measure liquids by volume instead of weight. Set it down of a flat surface so that it is level. Then, get down to eye level to check the measurement.
This helps ensure your milk, oil, or water measurements are accurate.
Essential Baking Tools for Christmas Baking
You do not need a full bakery setup to make beautiful Christmas desserts. These tools cover most holiday baking projects.
Small Baking Tools
- Measuring cups. Used to measure both dry and liquid ingredients. Dry cups are meant for flour and sugar, while liquid cups have a spout.
- Kitchen scale. Digital or analog, it is used to weigh ingredients for accuracy.
- Mixing bowls. A variety of sizes is helpful for mixing batters, whipping cream, and working with doughs.
- Silicone spatula. Great for folding batters and scraping every last bit from the bowl.
- Flat spatula. Also called a turner, used to lift and flip cookies, pancakes, and other baked goods.
- Icing spatula. Also known as an offset spatula or palette knife, perfect for spreading frosting smoothly over cakes and cupcakes.
- Whisk. Used to mix ingredients and add air to mixtures like eggs, cream, and thin batters.
- Rolling pin. Used to roll out pie crusts, sugar cookies, and other doughs.
- Chef's knife. For chopping chocolate, nuts, fruit, and more.
- Bench scraper. A flat tool that makes it easy to cut and portion dough and scrape surfaces clean.
- Wooden spoons. Sturdy spoons that are ideal for mixing thicker batters and doughs.
- Cookie scoop. Helps portion cookies evenly and makes scooping muffin or cupcake batter less messy.

Kitchen Appliances
- Hand mixer or stand mixer. Used to beat, cream, and knead ingredients. Attachments like paddle beaters and dough hooks make many baking tasks easier.
- Blender or food processor. Helpful for pureeing ingredients, making crumbs, or quickly combining some doughs and crusts.
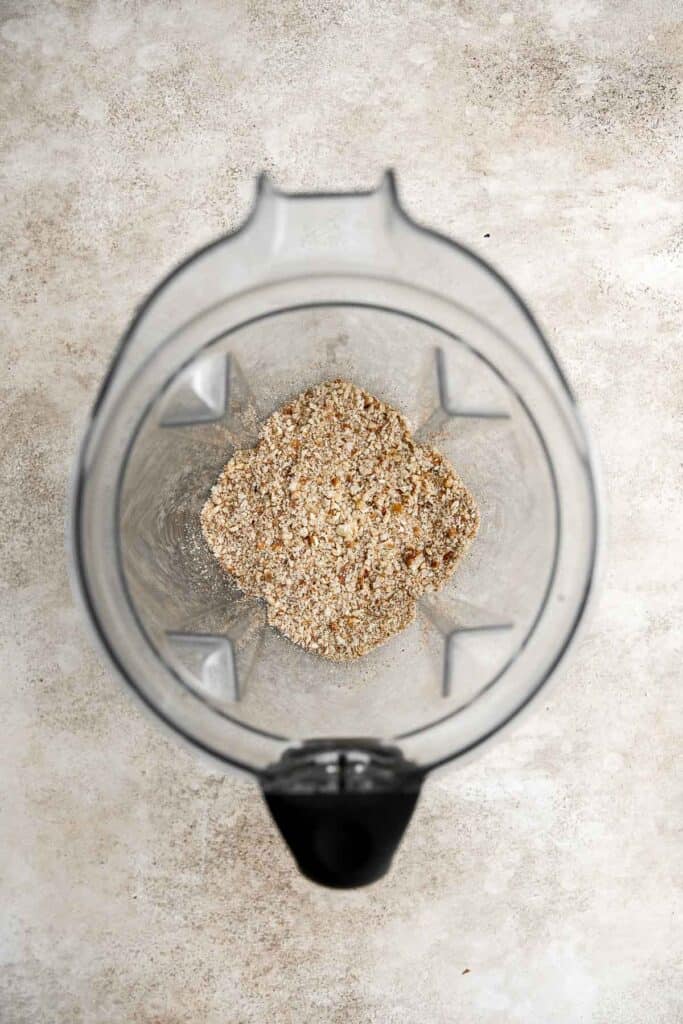
Bakeware
- Sheet pan. Flat rectangular pans with short sides, used for cookies, pastries, and roasting nuts. Half sheet baking pans and quarter sheet baking pans are most versatile.
- Loaf pan. Rectangular pans for breads and loaf cakes. The most common ones are 8.5 x 4.5-inch loaf pans (1 pound loaf pan) and 9x5-inch loaf pans (1.5 pound loaf pan).
- Muffin and cupcake tins. Standard 12-cup muffin pan or mini muffin pan for cupcakes, muffins, and other small treats.
- Round cake pans and springform pans. Used for layer cakes and cheesecakes. Some common sizes are 6-inch round pan, 8-inch round pan, 9-inch round pan, and 10-inch round pan. Springform pans have removable sides which help with delicate desserts. We always use our 8-inch springform pan.
- Pie dish. Metal or glass pans used to shape and bake pies and tarts. The most standard size is a 9-inch pie dish.
- Square and rectangular baking pans. Common sizes like 8 inch square, 9 inch square, and 9 by 13 inch pans are used for brownies, bars, and sheet cakes. Our favorites are 8-inch square baking pan, 9-inch square baking pan, and 9x13-inch baking pan.
- Wire cooling rack. Allows air to circulate around baked goods so they cool evenly and do not become soggy.
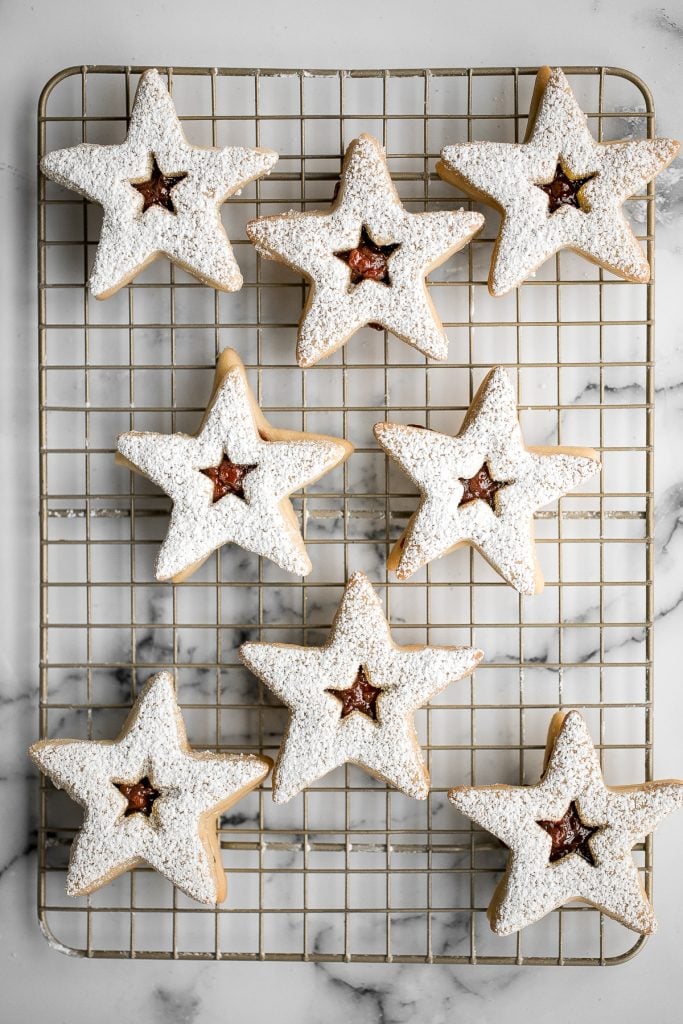

Common Baking Terms to Know

Blend
Blending refers to either simply combining ingredients together by stirring them until they become one uniform mixture, or adding ingredients to a blender or food processor until ingredients break down and incorporate fully.
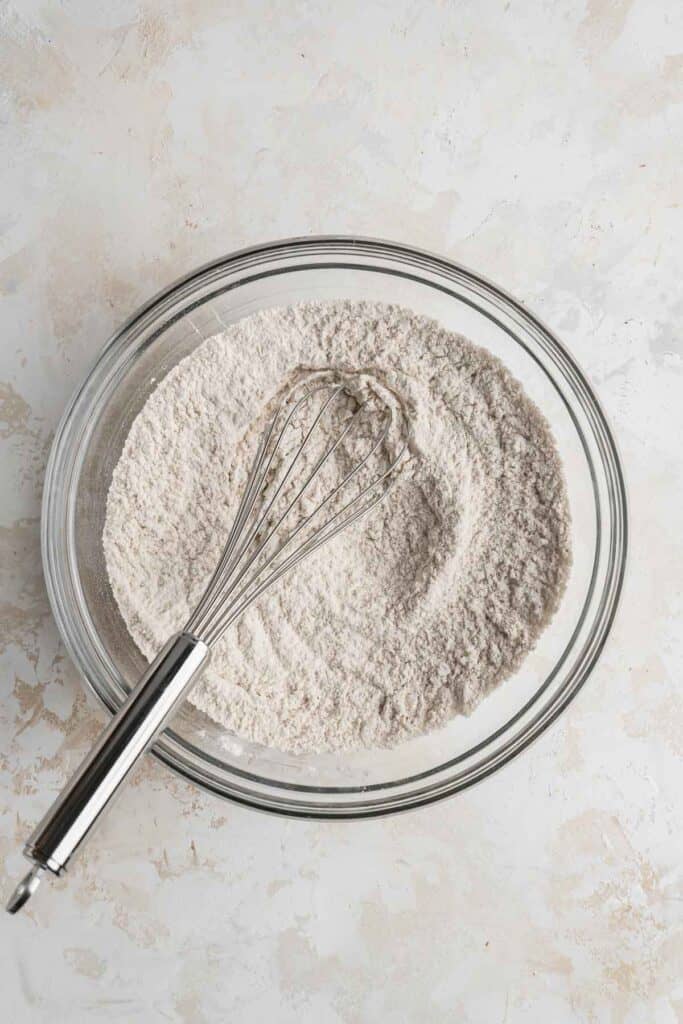
Whisk
Whisking incorporates air into a mixture by using a fork or whisk to rapidly stir ingredients together.

Beat
Beating is a rapid way of stirring (usually with a whisk, fork, hand mixer, or stand mixer) to incorporate ingredients, usually two liquids or a liquid and a solid.
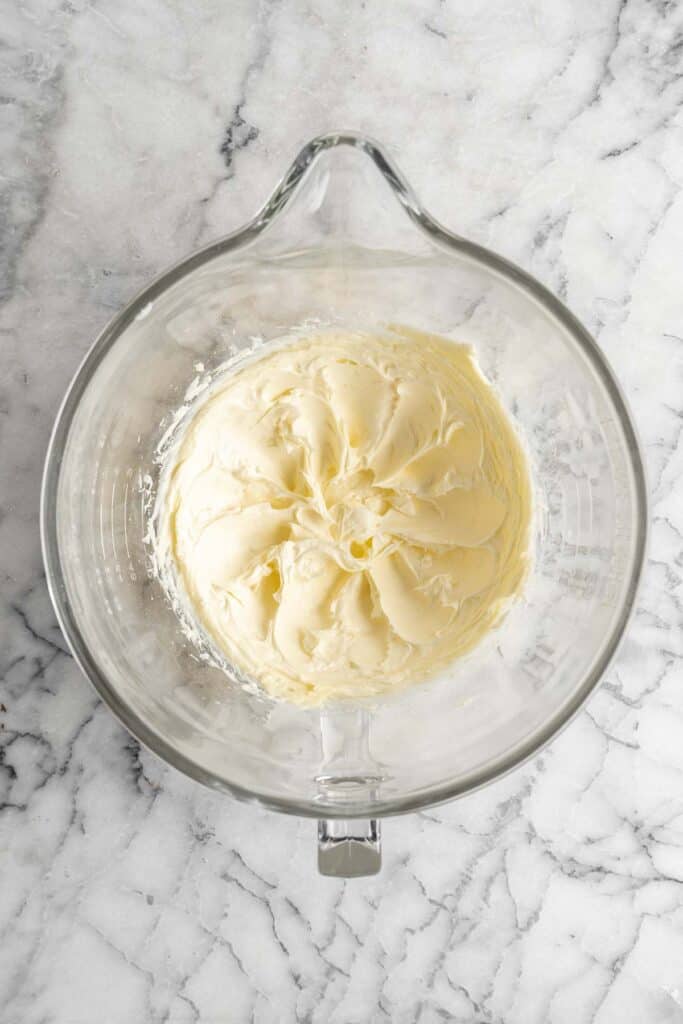
Cream
Creaming is beating softened butter (and sometimes sugar) at a high speed until it becomes light and fluffy.
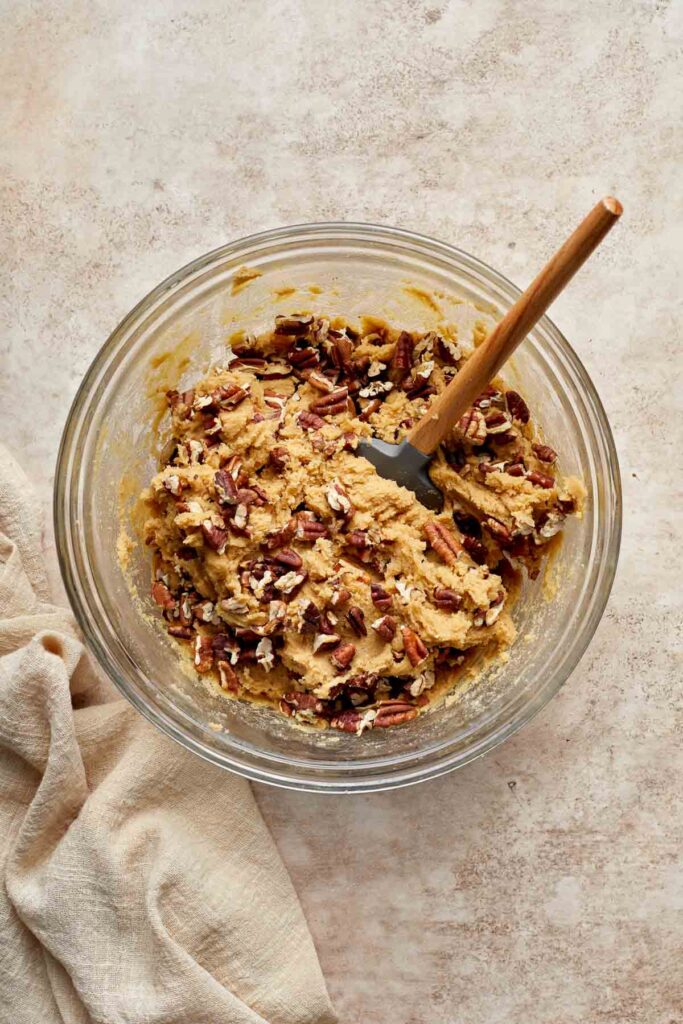
Fold
Gently combine two ingredients by scooping from the bottom of the bowl and turning over, which protects air bubbles in batters and whipped cream. You often fold in mix ins to cookie dough such as chocolate chips or nuts.
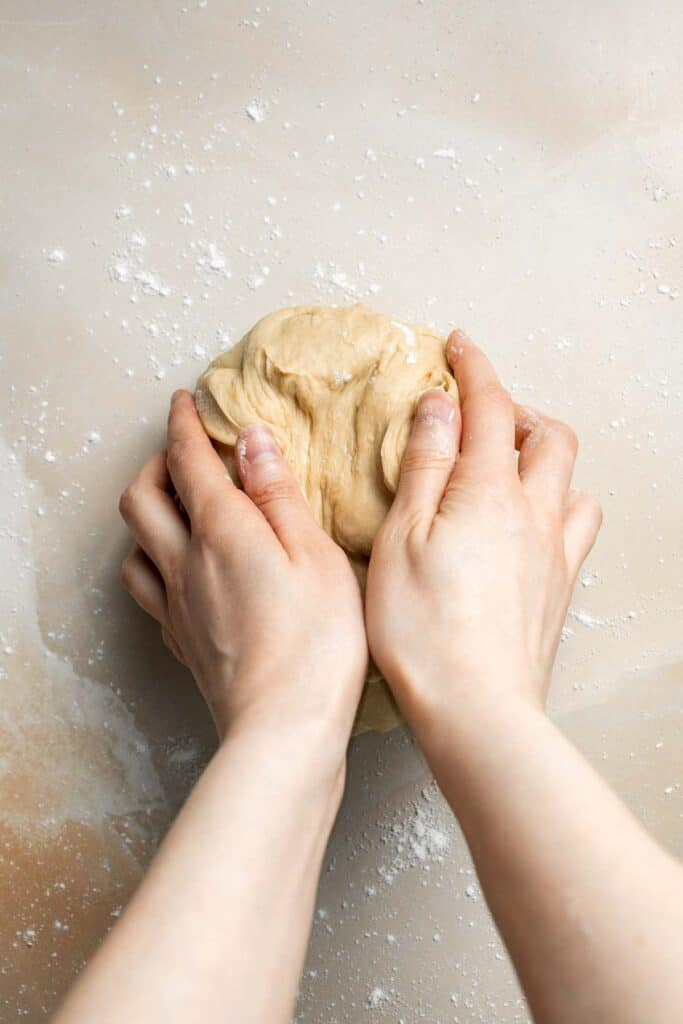
Knead
Kneading refers to working or pressing bread dough (by hand or in a stand mixer with a kneading hook) to smooth the dough and form strands of gluten to give the bread shape when it bakes.
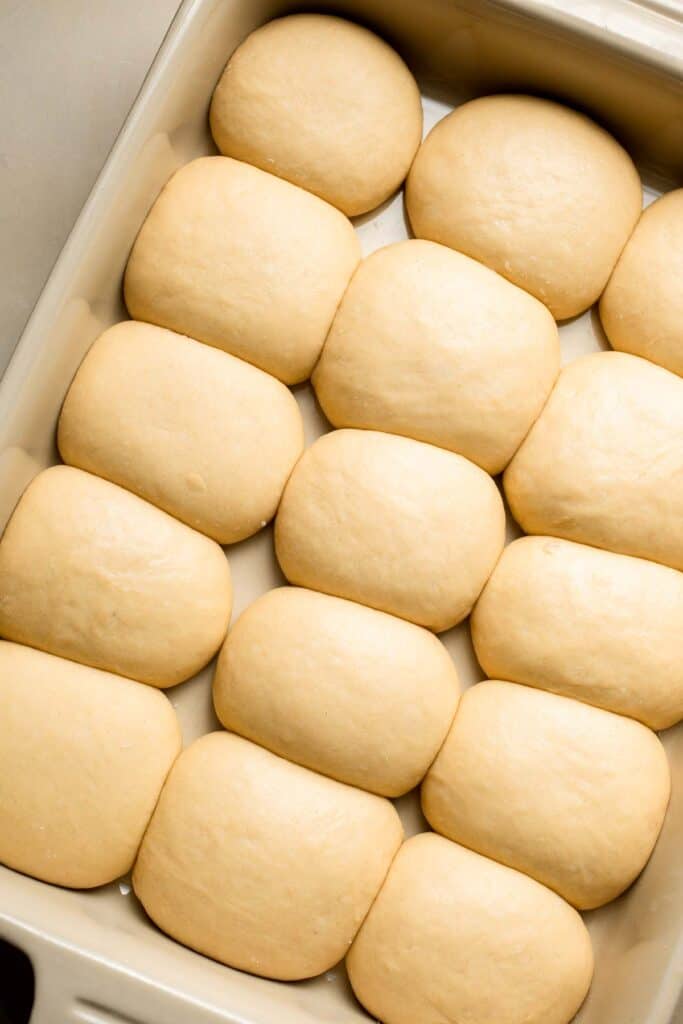
Rise or Proof
Rising or proofing is when you allow allow the dough to rise and expand before baking, usually in bread recipes with yeast.

Punch
Punching is the act of pressing dough down to deflate it after it has risen, also usually in bread recipes.
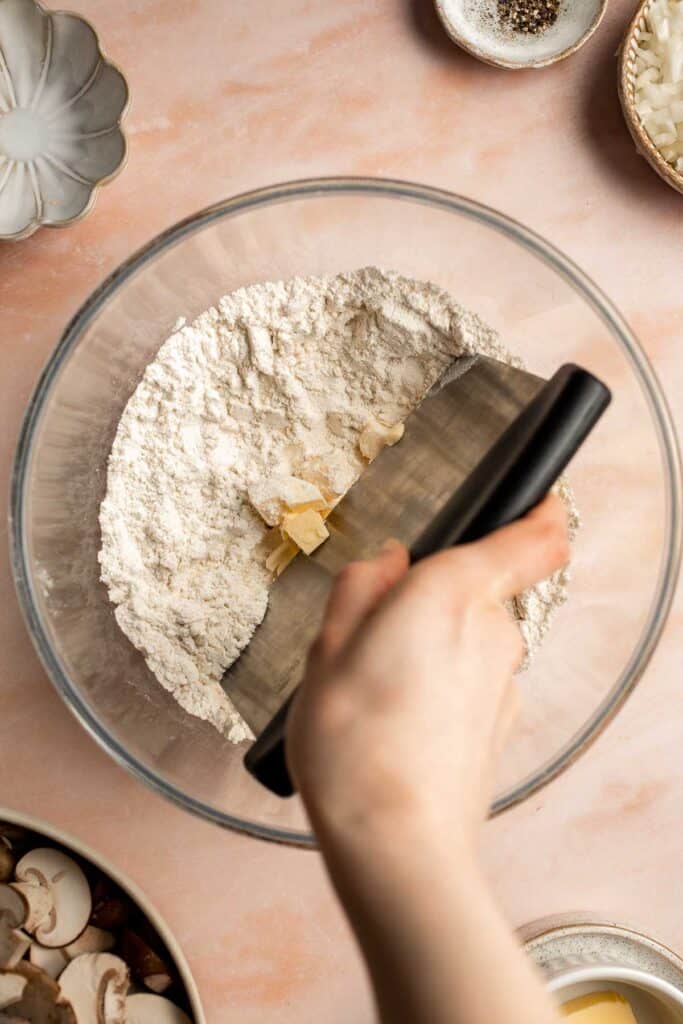
Cut in
Cutting in usually refers to butter or other solid fats being incorporated into flour by using knives, a pastry cutter, or your hands to create small crumbs of flour and fat.
Score
Scoring typically means adding a quick cut or slash to the surface of a bread or pie using a sharp blade or knife.

Crimp
Sealing the edges of pies, tarts, and some pastries by folding and pressing them together, usually with a fork or pinching together with your fingers.
Parbake
Also known as blind baking, parbaking involves baking a pie crust without the filling to ensure it stays crispy when the filling is added.
Grease (or Grease and Flour)
Greasing a pan involves coating the surface with a fat to prevent your baked goods from sticking to the pan. Typically, oil, butter, or shortening is used. Adding a dusting of flour over the top of the grease adds a second layer of protection.
Tips for Making Christmas Baking Ahead and Storing
- Cookies. Most cookie dough can be refrigerated for 2-4 days or frozen for up to 3 months. Scoop dough into balls, freeze on a lined tray for 1-2 hours until hard, then store in a freezer bag. Baked cookies also freeze well. Store them in an airtight container with a slice of bread to keep them soft, or freze for up to 3 months.
- Muffins. Muffin batter can be made a day ahead and baked fresh. Cooled muffins can be wrapped individually in plastic wrap and then frozen for up to 3 months.
- Scones. Once cooled, freeze baked scones without glaze for up to 3 months, then thaw and glaze before serving.
- Cakes. Cool completely, wrap in plastic cling wrap, and then wrap in a layer of aluminum foil to prevent freezer burn. Freeze for up to 3 months. Allow the cake to thaw in the fridge overnight before serving. If your cake is frosted, freeze it for an hour before wrapping in plastic wrap to harden the frosting and follow the rest of the steps as described.
- Pies. Make the pie crust ahead of time or use a store-bought crust and focus on the filling. Blind-baked crusts can be refrigerated for 3 days or frozen for 3 months in a plastic freezer bag. You can also choose to make the whole pie four or five days ahead, refrigerate it, and then reheat it in the oven to allow it to crisp up again.
- Candies. Truffles, fudge, pralines,and bark can be made ahead of time and stored in an airtight container at room temperature for 7-10 days in advance (depending on the recipe) or frozen for up to three months.
- Breads and Rolls. Yeasted breads and rolls can be refrigerated for 8-12 hours during the first or second rise to slow down the process, buying you up to 24 hours of time to check other things off your list before baking.
How to Package and Mail Holiday Cookies
Mailing Christmas cookies is such a fun way to share your baking, but it needs a bit of planning.

Choose the right cookies
Not all cookies are shipping-friendly. Pick sturdy cookies that are not very fragile and do not rely on gooey fillings or powdered sugar on top. Avoid very delicate, sticky, or heavily glazed cookies for shipping.
Package carefully
Once your cookies have fully cooled and any decorations or glazes are dry and set (ideally overnight), you can start to package them. You'll need two boxes: an outer box and an inner box or a cookie tin, some cushioning material like bubble wrap, aluminum foil, or parchment paper, and some plastic cling wrap and/or Ziploc bags.
Then follow these steps:
- Separate cookies by flavor and type.
- Wrap the cookies tightly in several layers of plastic cling wrap or place them in Ziploc bags with all of the air pressed out.
- Pack them into a cookie tin or "inner box", filling in gaps with rolled up parchment paper or bubble wrap to prevent the cookies from sliding around in transit. We like these Christmas cookie tins or holiday cookie boxes.
- Line a slightly larger shipping box (the "outer box") with bubble wrap and place the smaller box inside.
- Seal tightly with packing tape, label it clearly, add appropriate postage and take it to the post office!
You can also ship frozen cookies which will slowly thaw on their way and often arrive extra fresh.
Pick your postage
Aim for a shipping method that delivers within two or three days. Factor in holiday delays and plan to send your cookies a little earlier than you think.
Also keep in mind that the total weight of the cookies plus the boxes and insulating materials is taken into account with the destination when determining the price of shipping.
Avoid Common Christmas Baking Mistakes
A few simple habits help you avoid the most common problems.
- Always read the full recipe before you start. Taking the extra few minutes to fully read the recipe will help you prepare and prevent you from running into a potentially derailing surprise step down the road. This may be the most important tip in the Christmas baking guide!
- Use an oven thermometer to check the true temperature as the temperature on the oven display and the actual temperature in the oven aren't always the same.
- Spoon and level flour, never scoop straight from the bag. Scooping flour out of the bag with measuring cups compacts the flour in some spots and leaves unseen holes in other spots, resulting in inaccurate measurements. Avoid this by spooning flour into the measuring cup instead, and level the cup with a flat surface like the back of a butterknife.
- Use a kitchen scale for extra accuracy. Weigh the ingredients on a kitchen scale for an even more precise measurement - ounces are fine, but grams are the most precise.
- Do not skip chilling dough if the recipe calls for it. Chilling does many things: ensures cookies don't spread too much, prevents pie crusts from breaking down in the oven, improves the crust on brownies, and so much more.
- Let baked goods cool fully so they set properly. Otherwise, you risk them falling apart before you even get a bite.
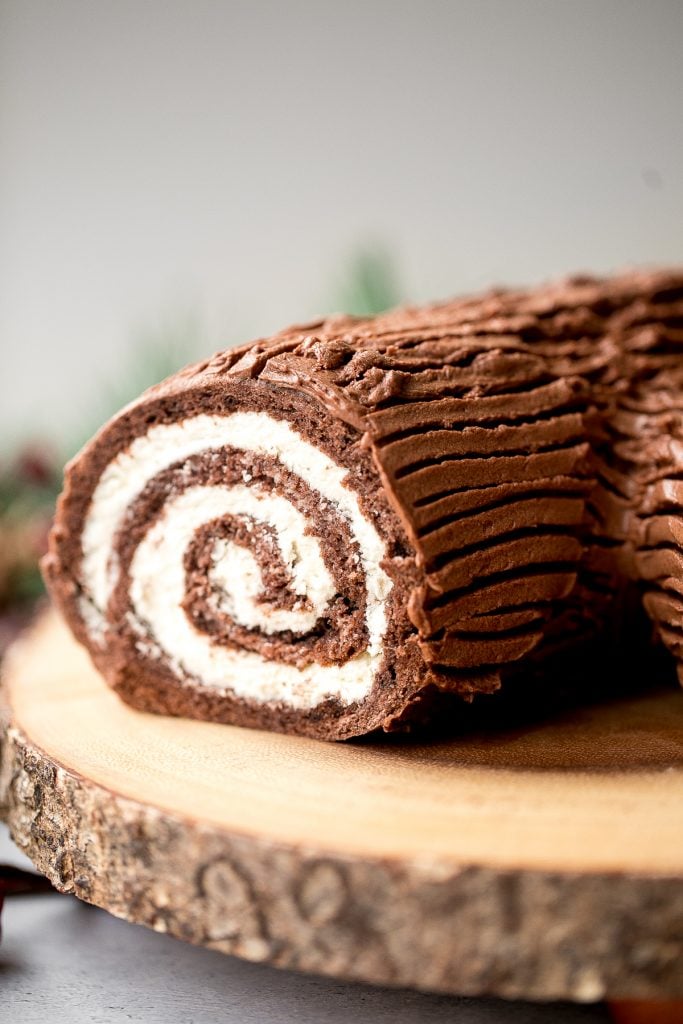

Our Best Baking Tips
- Create a baking plan. If you plan on hosting or otherwise plan to bake several types of goods, creating a baking plan will help you stay organized and allow you to use your time and kitchen resources in the most efficient way. A baking plan might consist of a complete shopping list for all the ingredients you'll need, a checklist for the types of equipment you'll have to use, and a baking schedule to get goods in the oven in succession. Grab a copy of our essential checklists in the next section below - for free!
- Prepare ahead. As mentioned above in this Christmas Baking Guide, several things can be prepped for baking or baked and stored prior to the big day! Most kinds of cookie dough can be refrigerated or frozen and then baked right before they're needed. Brownie batter can be refrigerated for several days before baking. Pies can be made several days in advance and refrigerated or frozen!
- Gather your tools and ingredients. Don't wait until you're halfway through each recipe to dig through the utensil drawer or pantry. Gather all of your ingredients and the necessary tools ahead of time and organize them into groups based on the recipe they'll be needed for to streamline the baking process.
Christmas Baking Recipes
No Christmas Baking Guide is complete without a list of our best and most popular holiday baking recipes. Here are our latest Christmas cookie recipes, Christmas cakes and desserts, and Christmas pie recipes. Click the links below to browse more.
Christmas Cookie Recipes


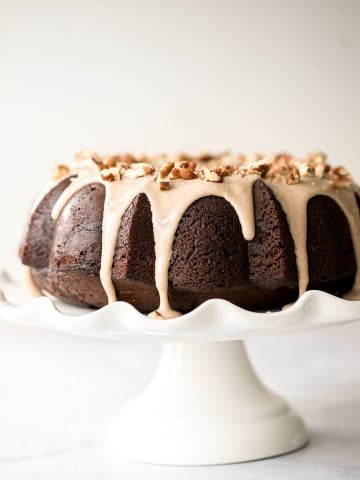
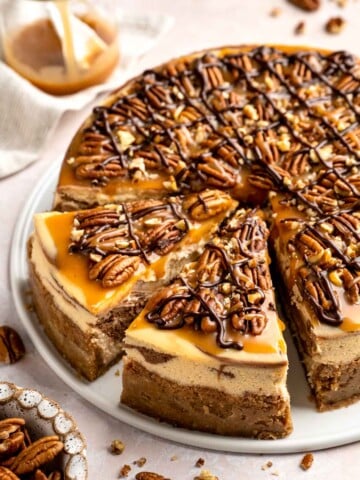
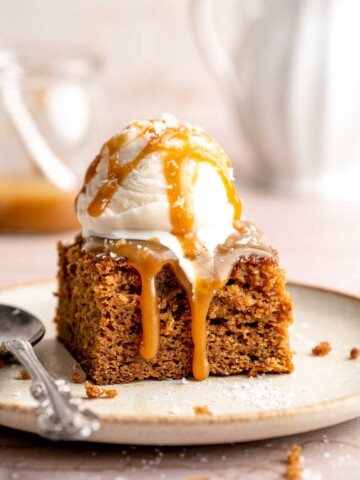
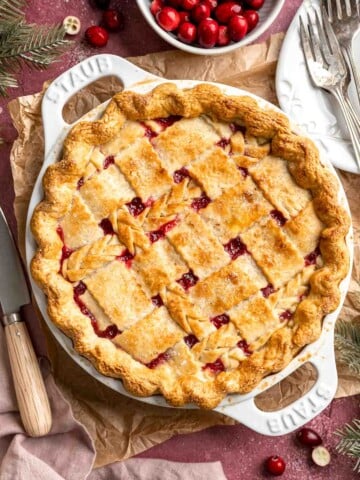
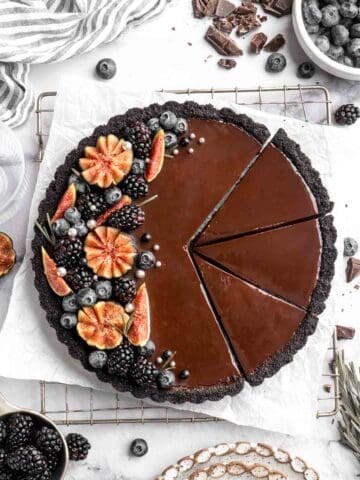

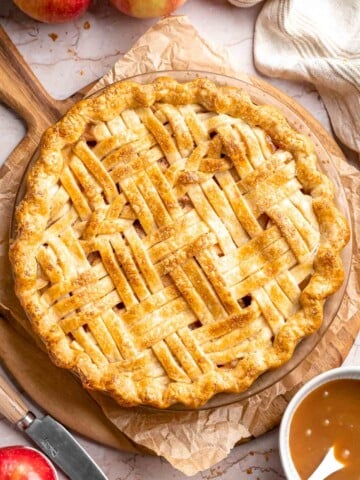
Final Tips
- Dress things up. You don't need a degree in decorating to make beautiful holiday desserts and breads! Add garnishes like fresh or candied cranberries, sprigs of rosemary or thyme, dried orange slices, or a dusting of powdered sugar to take ordinary baked goods to the next level.
- Don't forget about servingware. Speaking of the next level, you can really go the extra mile by breaking out your best servingware to display your finished baking projects.
- Use dry beans or lentils as weights for pie crusts. It's often necessary to blind bake pie crusts using pie weights to make sure the crust stays crispy. You can skip the pie weights, though, if you have dry beans or lentils hanging out in your pantry! Use them in place of the weights and hang on to them for future pie crusts.
now available!
Grab Your Free Holiday Baking Checklists!
Recipe planner, pantry ingredient list, and baking shopping list - all in one printable pack sent straight to your inbox.
This guide was originally published in 2022. It has since been updated with more helpful content.

Tiramisu Cookies
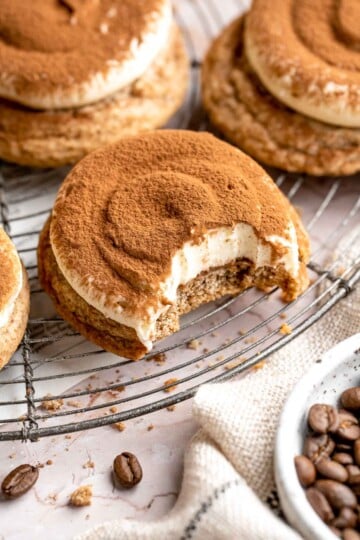
These Tiramisu Cookies are soft, fluffy, espresso filled treats topped with a creamy mascarpone swirl that tastes just like a bite sized version of the classic Italian dessert. The espresso cookie base is tender, lightly sweet, and scented with vanilla, making it the perfect canvas for that cloud of mascarpone frosting. Finished with a dusting of cocoa powder, each cookie delivers that unmistakable tiramisu magic in the most adorable cookie form.
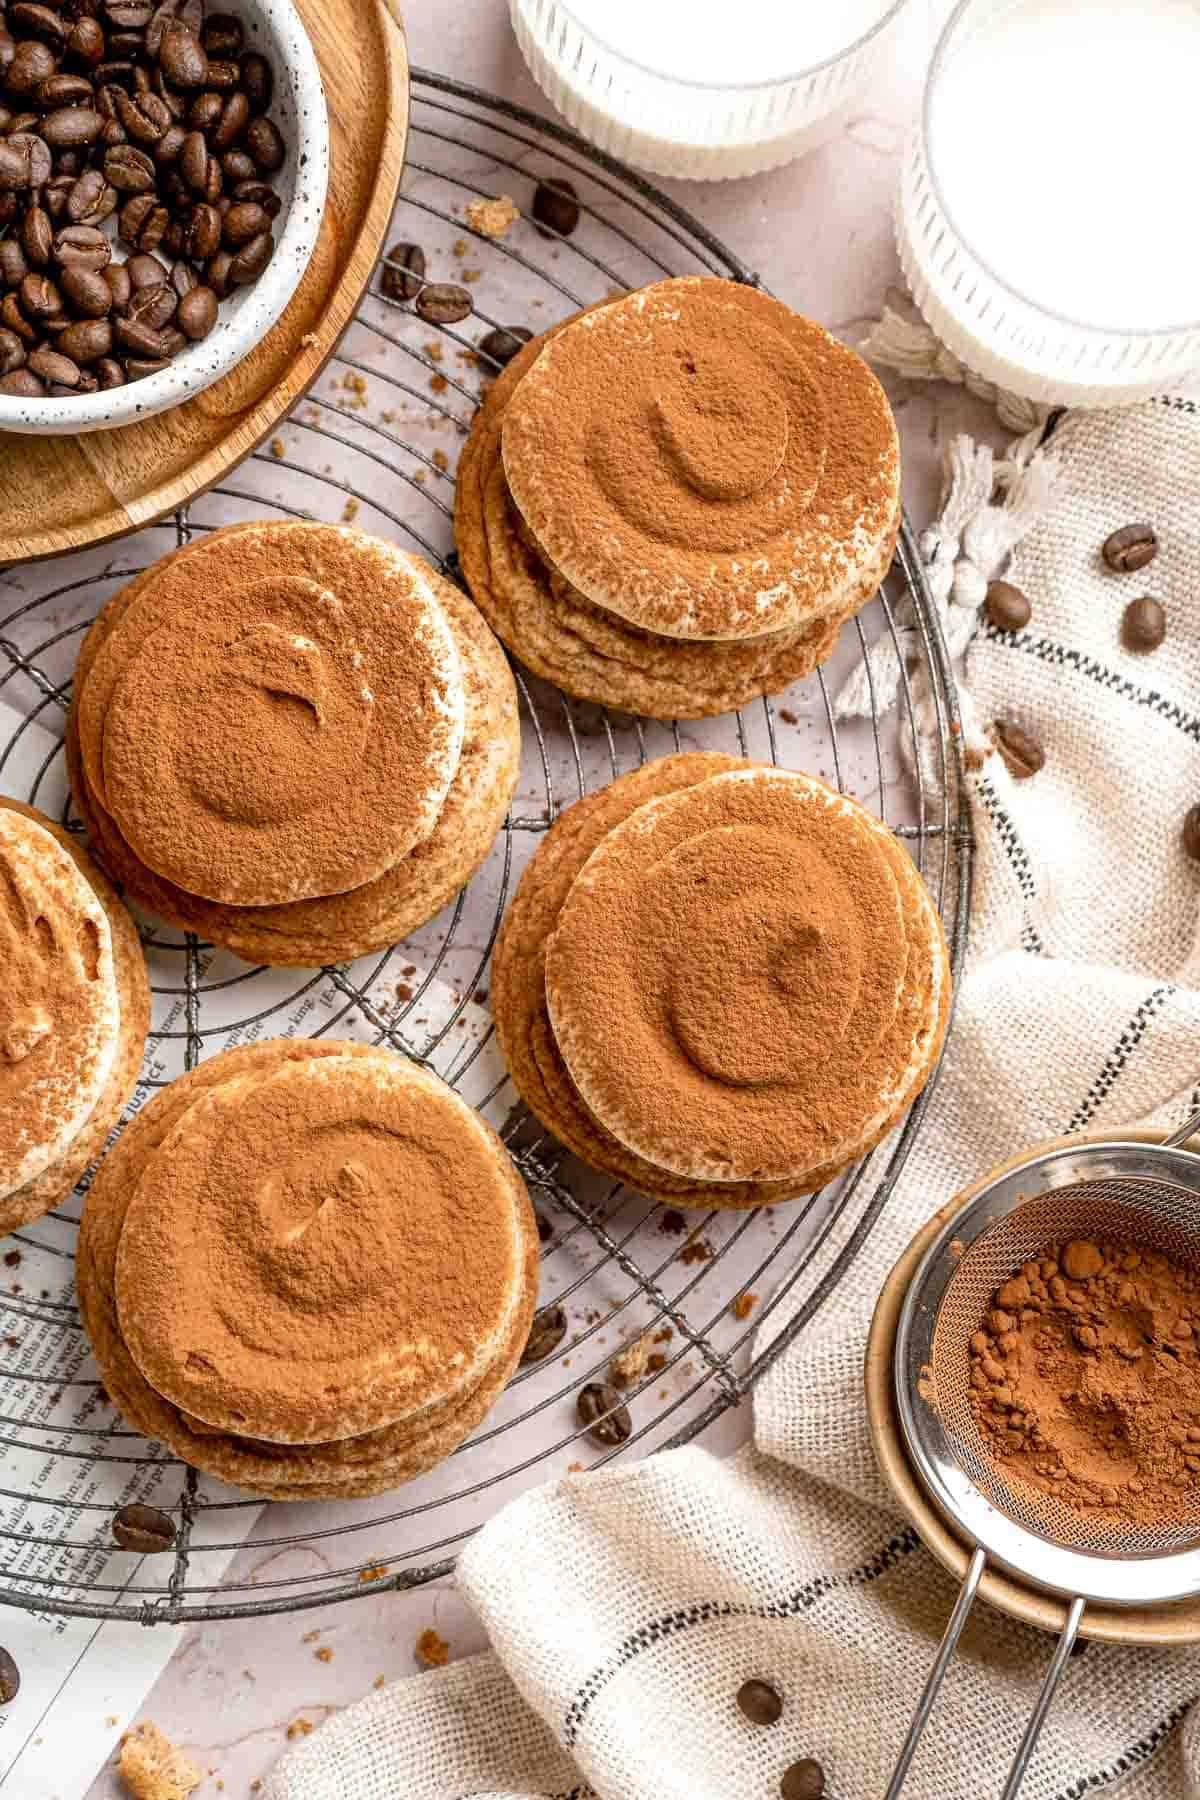
Tiramisu is well loved for its layers of coffee soaked flavor, creamy mascarpone, and cocoa. These cookies capture all those elements in a quick, easy, no fuss way. Instead of soaking ladyfingers, you bake soft espresso cookies. Instead of assembling layers, you pipe a fluffy mascarpone topping. They taste elegant and impressive while being surprisingly simple to prepare. They look bakery perfect but require only basic mixing bowls and a hand mixer.
This tiramisu cookie recipe was inspired by my Coffee Cookies, and it pairs beautifully with a cup of espresso or a cozy mug of hot chocolate. Whether you are baking for a holiday cookie box, a dinner party, or a cozy weekend treat, these tiramisu cookies are guaranteed to stand out and disappear fast.
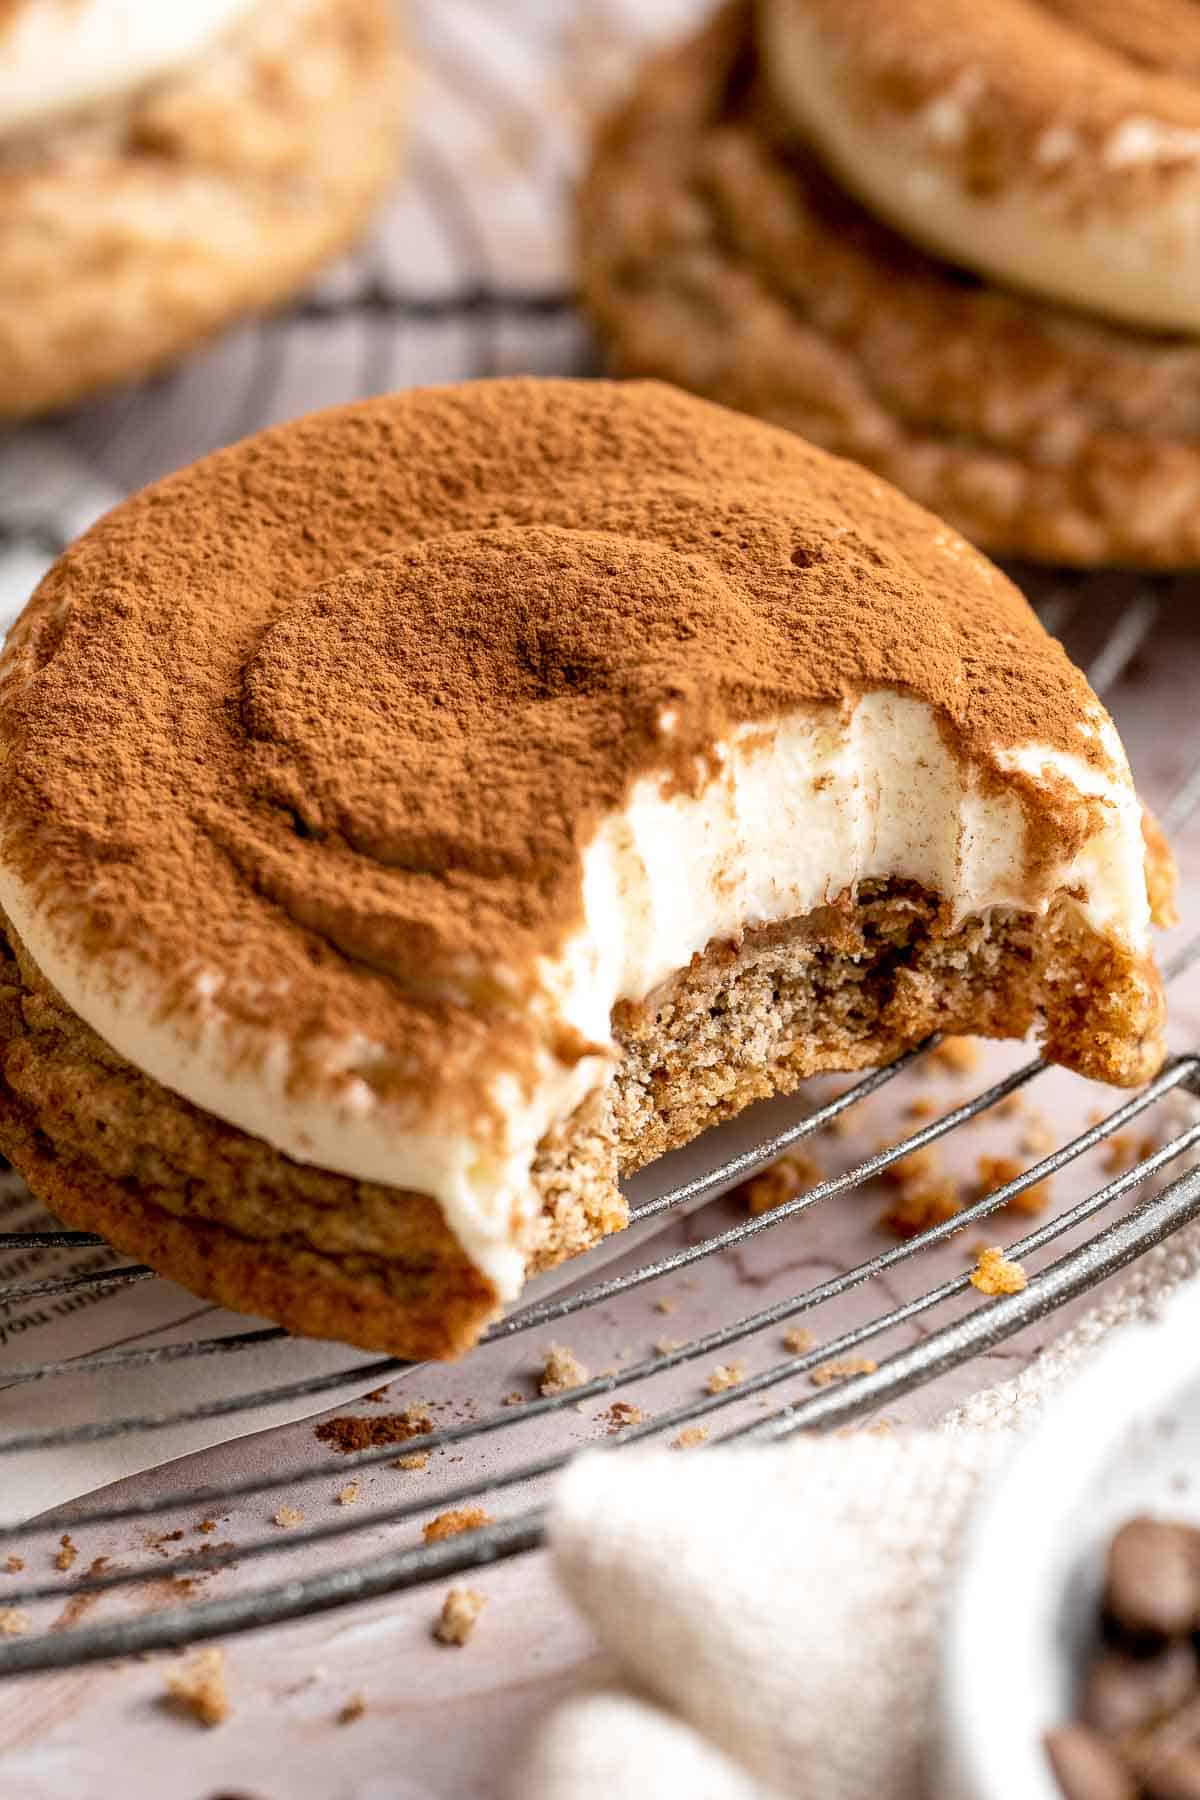
Why You'll Love This Recipe
- Classic tiramisu flavor. The espresso cookie base, creamy mascarpone topping, and cocoa dusting capture everything you love about tiramisu in a soft, sweet, handheld cookie.
- Bakery quality with simple steps. These cookies look elegant and professional, yet the recipe uses easy techniques and basic ingredients you probably already have.
- Light, creamy topping. The mascarpone and whipped cream mixture creates a fluffy, cloud like finish that feels luxurious without being heavy or overly sweet.
- Perfect for gifting or entertaining. They hold their shape, chill beautifully, and make a stunning addition to cookie trays, parties, or holiday dessert spreads.
Ingredients and Substitutions
To make these easy Tiramisu Cookies, you will need the following ingredients (see recipe card below for quantities):
- all purpose flour - Provides the structure that keeps the cookies soft yet sturdy. You can substitute with a one to one gluten free flour blend if needed, though the cookies may spread slightly differently.
- confectioners' sugar - Adds sweetness while keeping the cookie crumb soft and delicate. It's also used in the topping to help create a thick, stable consistency.
- espresso powder - The key to getting true tiramisu flavor. You can use instant espresso powder as a substitute, though the flavor will be a little milder.
- baking soda + powder - Helps the cookies rise slightly so they stay soft in the center. Using both baking soda and baking powder ensures a soft, pillowy cookie.
- salt - Balances the sweetness in the cookie.
- white sugar - Sweetens the cookie dough and helps it cream properly with the butter, creating that soft, fluffy texture. If you prefer deeper sweetness, you can replace a spoonful of white sugar with brown sugar to add a hint of caramel flavor.
- butter - Softened butter is essential for a smooth, creamy dough. We use unsalted butter, but salted butter can be used if you reduce the added salt slightly.
- egg - Binds the dough together and adds moisture.
- vanilla extract - Deepens the flavor and complements the espresso perfectly. High quality vanilla makes a noticeable difference here since it plays a key role in balancing the bold coffee flavor. Vanilla is also used in the topping.
- mascarpone cheese - This is what gives the topping its classic tiramisu creaminess. Make sure it is slightly softened so it blends easily.
- heavy cream - Whips together with the mascarpone to form a light, fluffy topping.
- cocoa powder - The finishing touch. A light dusting of cocoa powder gives the cookies that signature tiramisu look.
Equipment
You will also need measuring cups and spoons, large bowls, a whisk, a electric mixer with a whisk attachment, a medium cookie scoop, a spatula, two parchment lined baking sheets, a piping bag with a large round tip, and a small sieve for dusting the cocoa powder. A baking tray for cooling or transporting finished cookies is useful too.
Instructions
Step 1: Make the espresso cookies

Mix the dry ingredients
In a large mixing bowl, whisk together the flour, confectioners' sugar, espresso powder, baking soda, baking powder, and salt until well combined. Set aside.

Cream the butter and sugar
In a separate large mixing bowl, beat together the white sugar and softened butter using an electric hand mixer until light and fluffy, about 3 minutes.
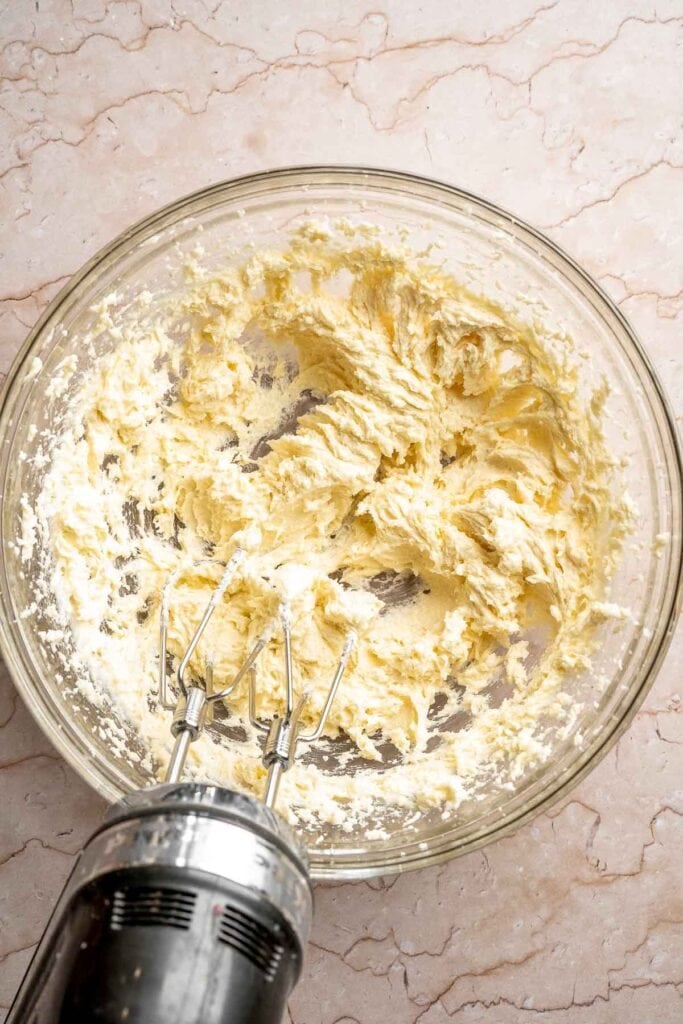
Add the egg and vanilla
Beat in the egg and vanilla extract until fully combined and fluffy.
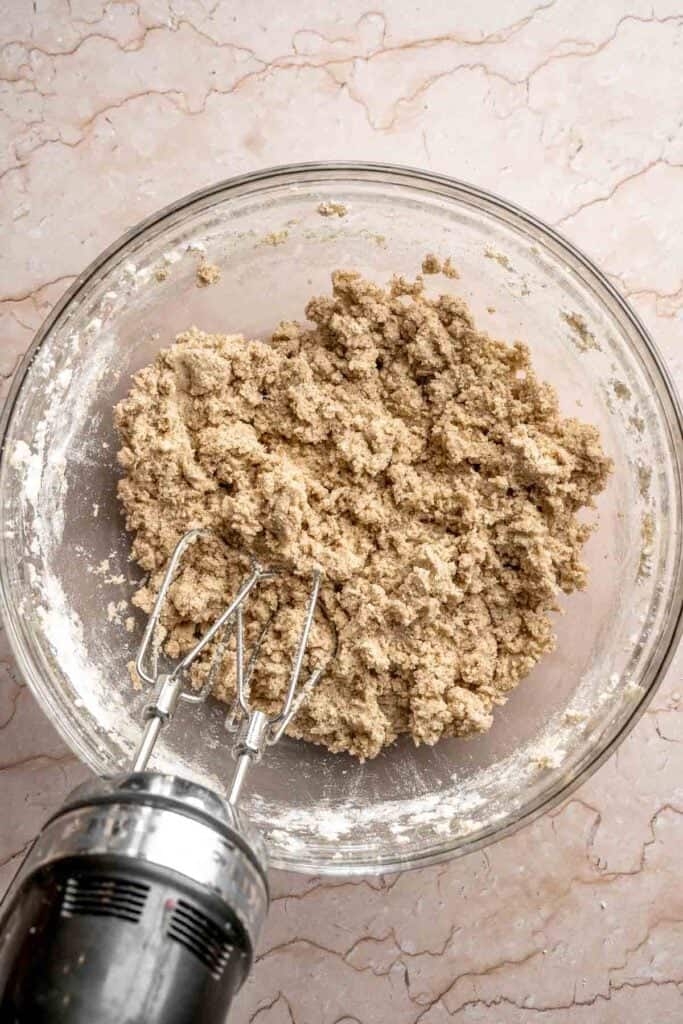
Combine wet and dry ingredients
Add the dry mixture to the wet mixture and beat again until a uniform cookie dough forms.
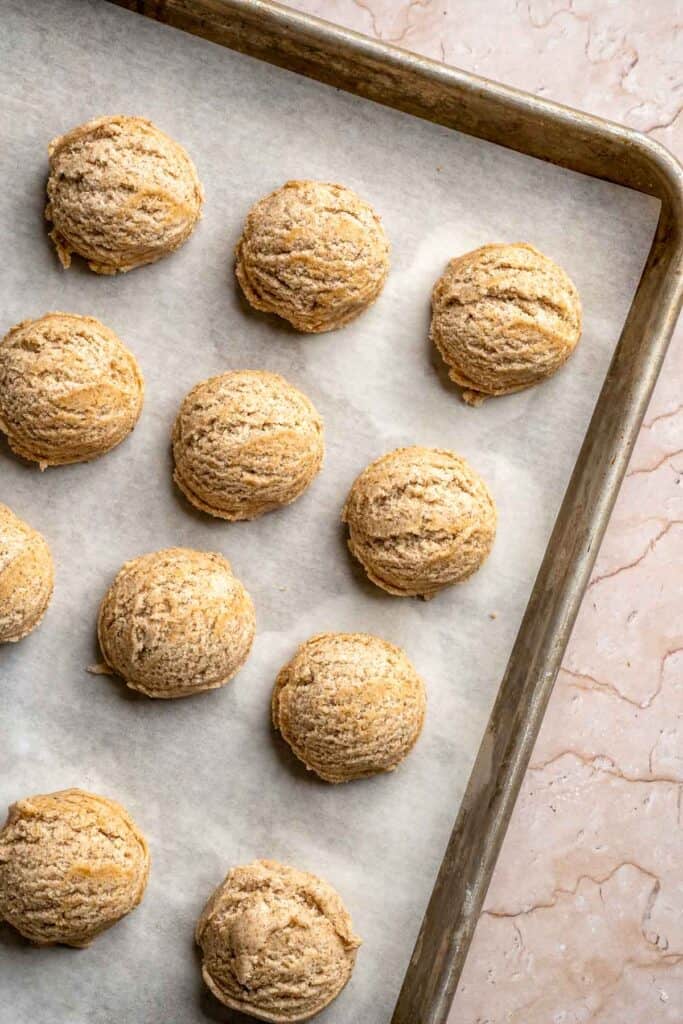
Scoop
Line two baking sheets with parchment paper. Using a medium cookie scoop, portion the dough onto the prepared baking sheets, spacing the cookies evenly.

Bake
Bake in a 350°F preheated oven for 13-14 minutes, until the edges are set. Cool on the baking sheet for 5 minutes, then transfer to a wire rack to cool completely before topping.
Step 2: Make the tiramisu topping

Whip
In a large mixing bowl, beat together the mascarpone cheese, heavy cream, confectioners' sugar, and vanilla until stiff, fluffy peaks form.
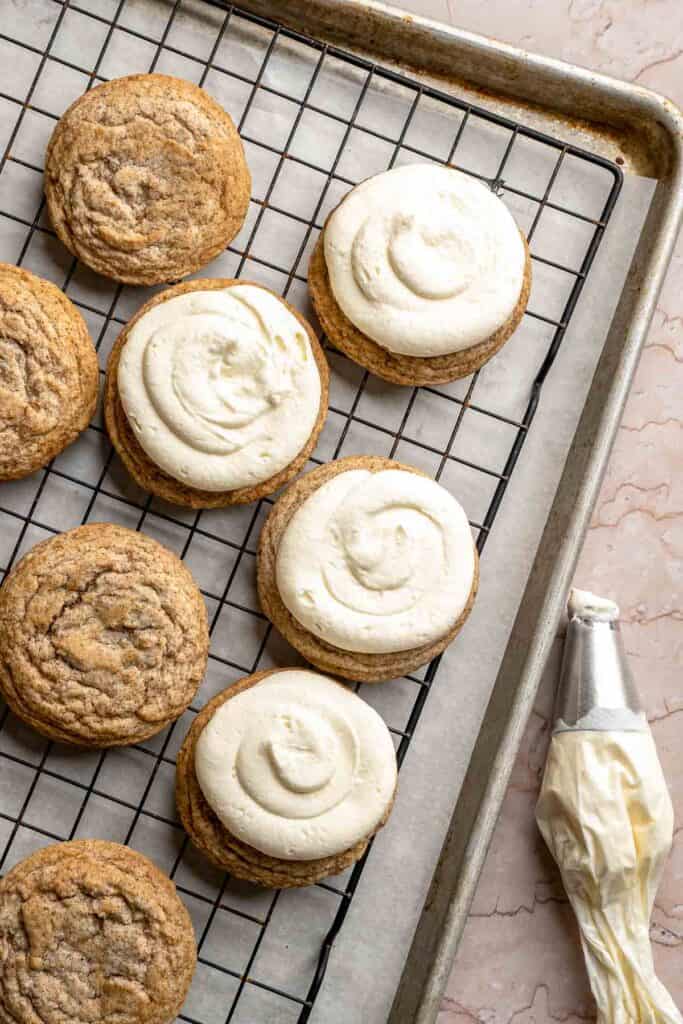
Pipe
Transfer the mixture to a piping bag fitted with a large round tip. Pipe swirls onto fully cooled cookies.
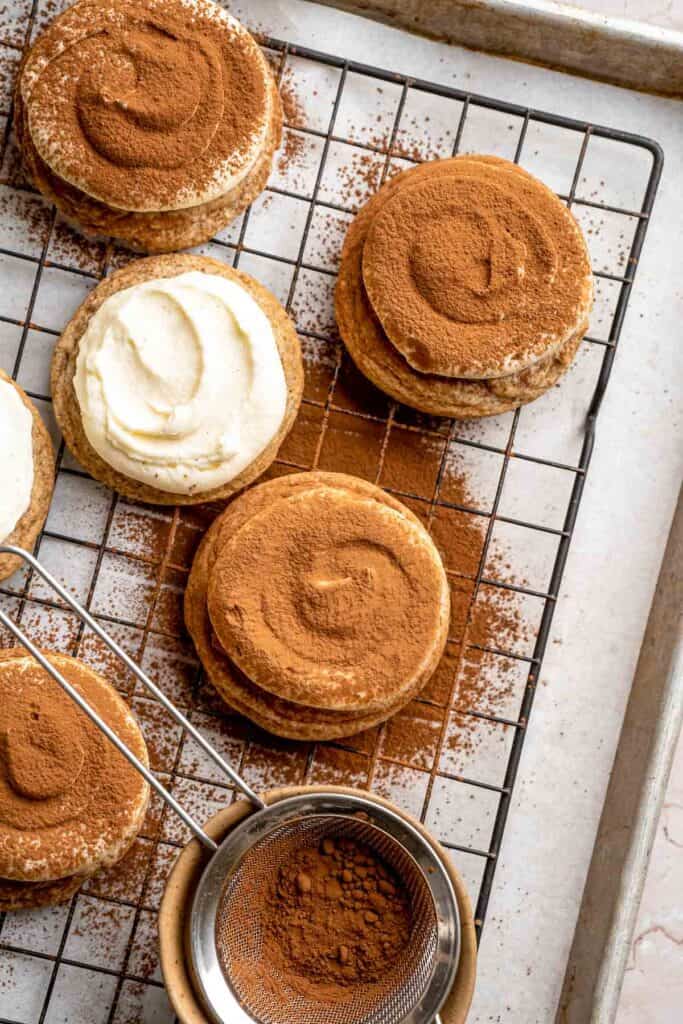
Dust
Place cocoa powder in a mini sieve and dust it generously over the topping on top of the cookies. Enjoy immediately or refrigerate until serving.
Expert Tip: Chill the Topped Cookies Before Serving
Once piped, place the cookies in the fridge for at least 20 minutes before serving. This helps the mascarpone topping firm up slightly so each bite is creamy and smooth without sliding or melting. It also enhances the classic tiramisu flavor because the cocoa sits beautifully on chilled frosting.
More Tips and Tricks
- Use a kitchen scale. Using a kitchen scale to measure your flour gives the most consistent results and keeps the cookies soft rather than dry.
- Use room temperature ingredients. Softened butter and room temperature eggs help the dough mix evenly and create the soft, fluffy cookie texture these need. Cold ingredients make the dough dense and prevent proper mixing, which can lead to flat cookies. Let everything sit on the counter for about 30 minutes before starting. Mascarpone should also be slightly softened so it blends smoothly into the cream without clumping.
- Do not overbake the cookies. These cookies should stay soft in the center. Bake until the edges are set but not deeply browned. They may look slightly pale, which is perfect. Check them at the 12 minute mark and adjust based on your oven.
- Beat the mascarpone gently. Mascarpone can break if overmixed, so start the mixer slowly and stop once stiff peaks form. If you whip too long, the mixture can become grainy. Smooth mascarpone is essential for the traditional tiramisu flavor and texture.
- Sift the cocoa powder. Using a mini sieve creates the even, soft cloud of cocoa that tiramisu is known for. Dumping it directly can create bitter patches.
- Store the topping separately for parties. If you want to serve these later but keep them looking perfect, bake the cookies ahead of time and store the frosting in a container in the fridge. Pipe the topping right before serving for the freshest look and texture.
Recipe Variations
- Mocha tiramisu cookies. Add a tablespoon of cocoa powder to the dough for a chocolate espresso cookie base.
- Chocolate chip tiramisu cookies. Fold mini chocolate chips into the dough for added texture.
- Stronger espresso flavor. Add an extra teaspoon of espresso powder to the dough for a deeper coffee taste.
- Cinnamon dusted tiramisu cookies. Mix a little cinnamon with the cocoa powder for a warm twist.
- Tiramisu sandwich cookies. Spread the mascarpone filling between two cookies instead of piping on top.
- Lemon tiramisu cookies. Add a touch of lemon zest to the topping for a bright, refreshing twist.

Storage
How to Store
Place cookies in an airtight container and refrigerate for up to 3 days. Keep them chilled to maintain the texture of the mascarpone topping.
How to Reheat
These are served chilled or at room temperature, so no reheating is needed.
How to Freeze
Store the baked, unfrosted cookies in the freezer for up to 2 months. Freeze the topping separately or make it fresh when ready to serve. Do not freeze the frosted cookies.
How to Serve
These cookies taste like a miniature version of your favorite dessert, delivering all the flavors of tiramisu in an easy cookie format. Serve them chilled or slightly softened at room temperature. They pair beautifully with coffee, espresso, hot chocolate, or an after dinner dessert board. Because they look elegant and hold their shape well, they make a stunning addition to cookie boxes, holiday spreads, or special occasions. A final dusting of cocoa powder before serving makes them feel extra special.
These are my favorite drinks to serve with tiramisu cookies:
More Cookies
For more recipe ideas, check out our collection of cookie recipes, featuring everything from soft and chewy classics and festive holiday treats to fun flavored cookies and easy no chill options that bake up beautifully for any occasion.
FAQ
Tiramisu cookies are easy to make and come together in three simple stages. First, prepare the espresso cookie dough by whisking the dry ingredients, then creaming softened butter with sugar until fluffy. Mix in the egg and vanilla, then add the dry mixture and scoop the dough onto lined baking sheets. Bake until the edges are set and the cookies are soft and tender. Next, make the mascarpone topping by whipping mascarpone, heavy cream, confectioners sugar, and vanilla until stiff peaks form. Once the cookies are fully cooled, pipe the topping on each cookie and finish with a dusting of cocoa powder. Chill briefly to help the topping set before serving.
Mascarpone gives the topping its classic tiramisu flavor and silky texture, but you can substitute it with a combination of softened cream cheese and a splash of heavy cream. This creates a similar richness, although the flavor will be slightly tangier. Another option is using whipped ricotta, which is lighter but still creamy. For a dairy free version, use a vegan cream cheese and coconut cream mixture. Keep in mind that each substitute may alter the sweetness and texture, so adjust confectioners sugar as needed.
Mascarpone can become grainy if beaten too quickly or for too long. Use a lower speed and stop as soon as stiff peaks form. If your topping turned thin, the mascarpone may have been too warm. Place the mixture in the fridge for ten minutes to firm up, then gently whip again. Using cold heavy cream also helps the topping stabilize. Avoid overmixing once the texture is smooth.
Yes, the mascarpone topping requires refrigeration to maintain safety and texture. Store frosted cookies in an airtight container in the fridge. They remain soft and delicious even when chilled, and the cold temperature actually enhances the tiramisu flavor. If serving at a party, the cookies can sit out for about two hours at room temperature. For longer events, keep small batches chilled and replenish as needed.
Yes, these cookies are great for preparing ahead. You can bake the cookies one to two days in advance and store them in an airtight container at room temperature. The mascarpone topping can be whipped and stored in the fridge for up to 24 hours before piping. If making ahead for a party, pipe the topping the day of serving for the best texture and appearance. Once topped, the cookies should be kept chilled and served within three days. They taste even better after a short chill because the flavors meld beautifully.
More Cookie Recipes
Looking for other recipes like this? Try these:

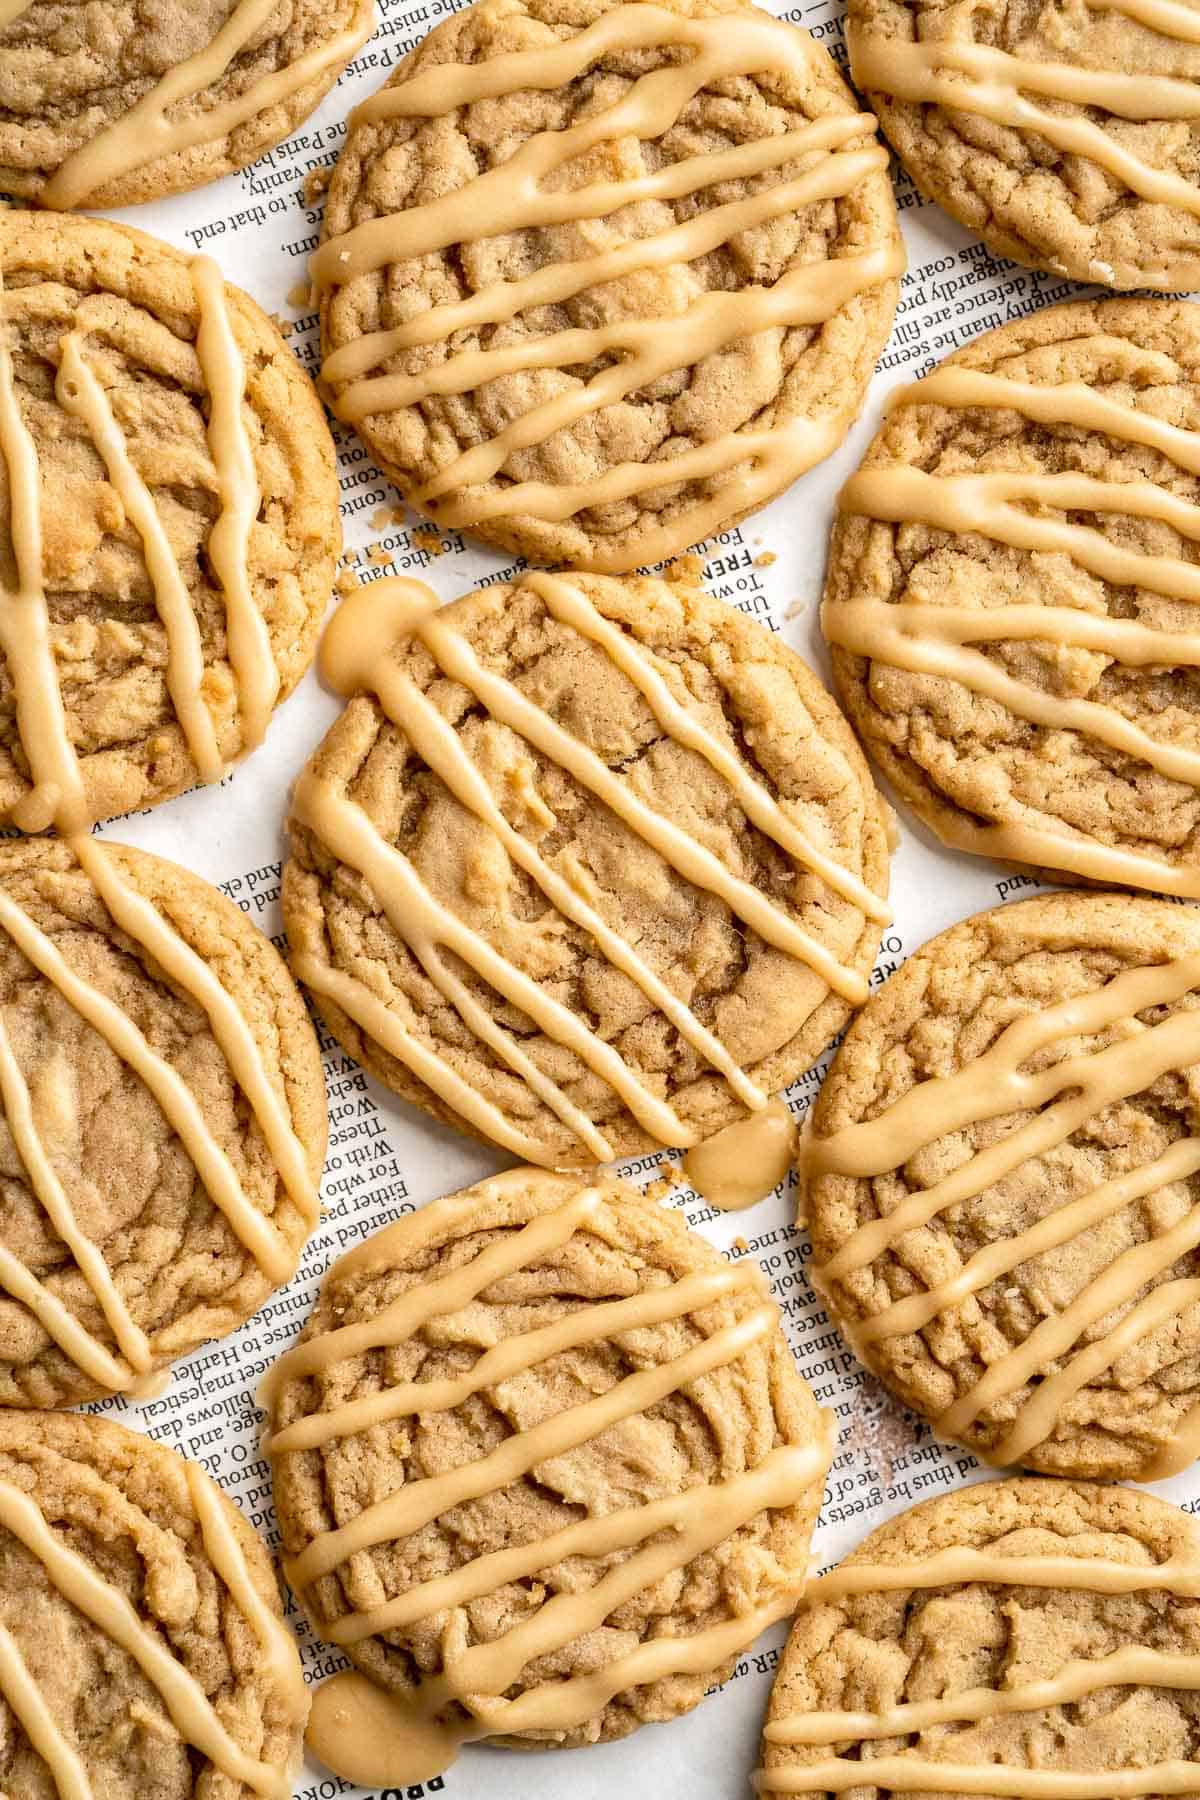
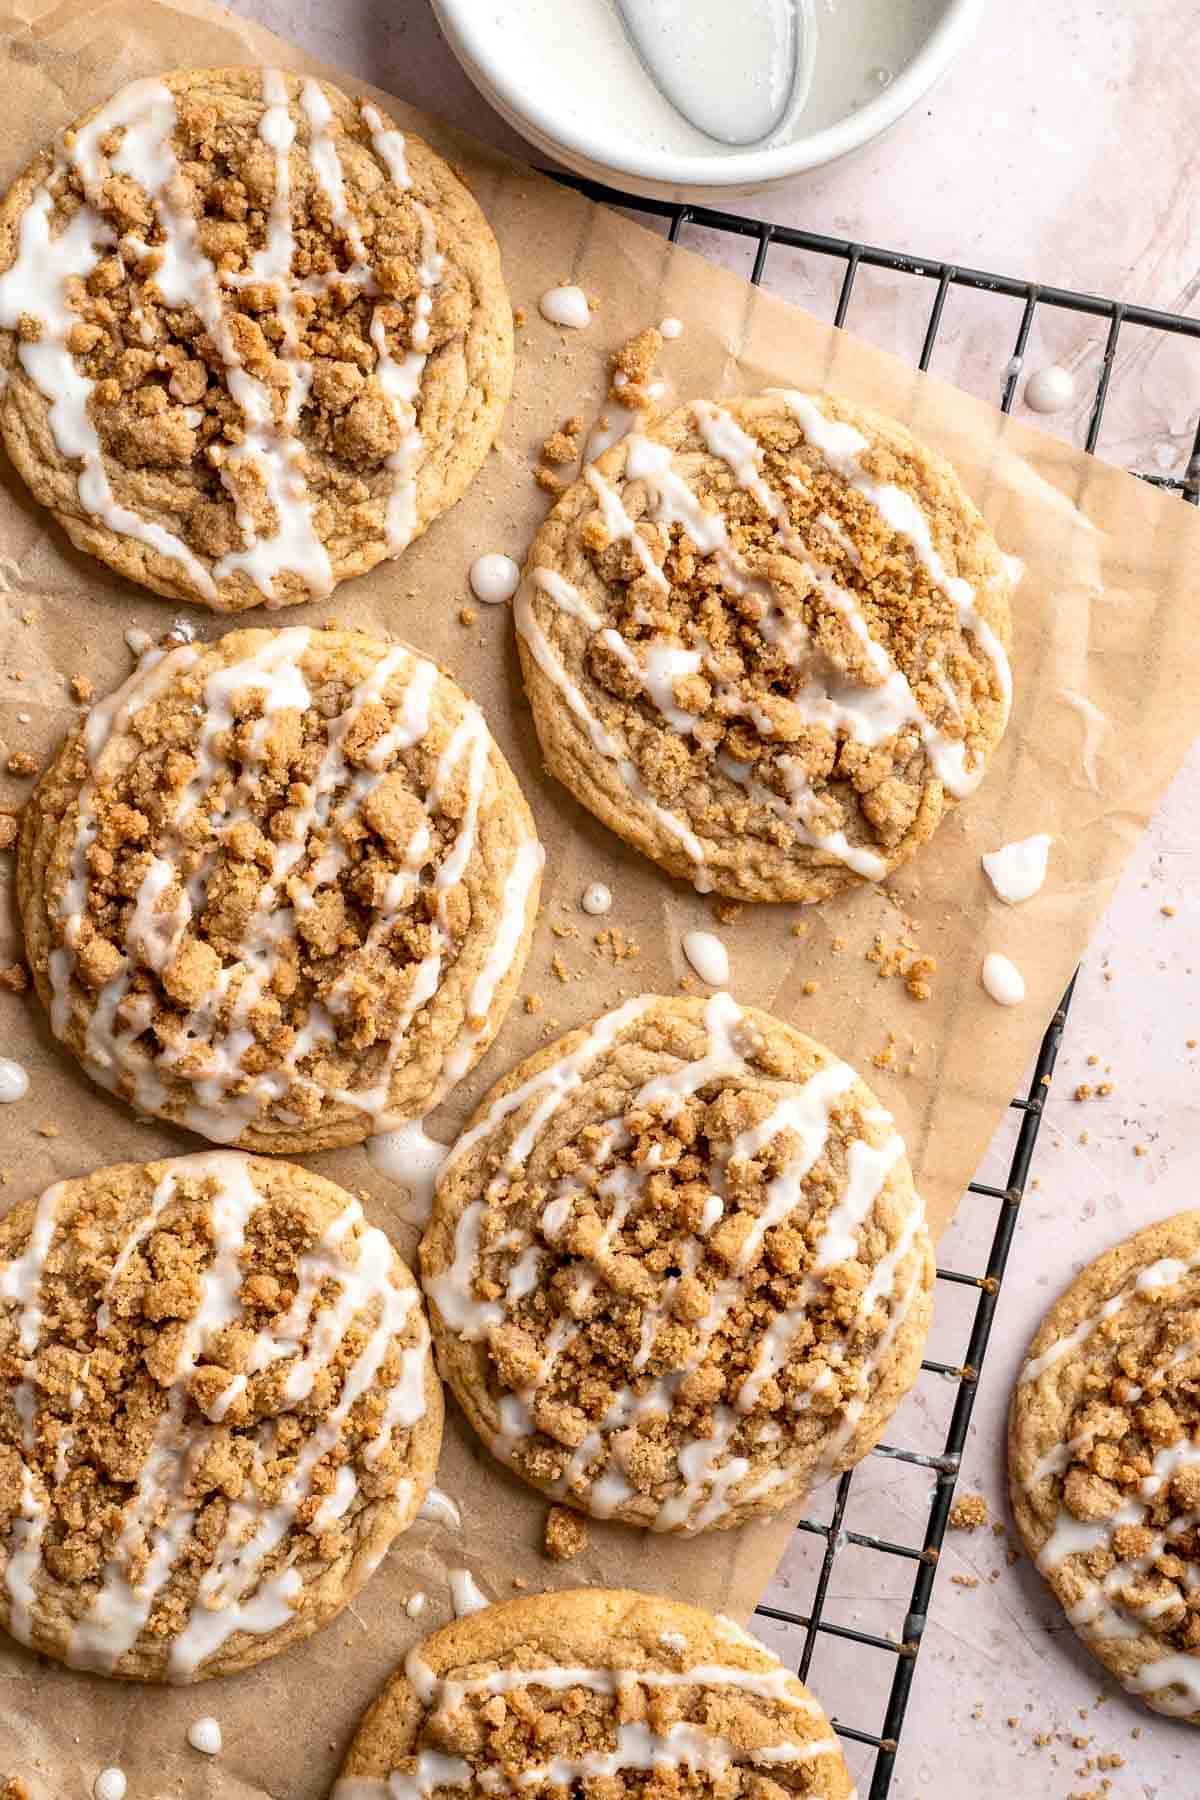
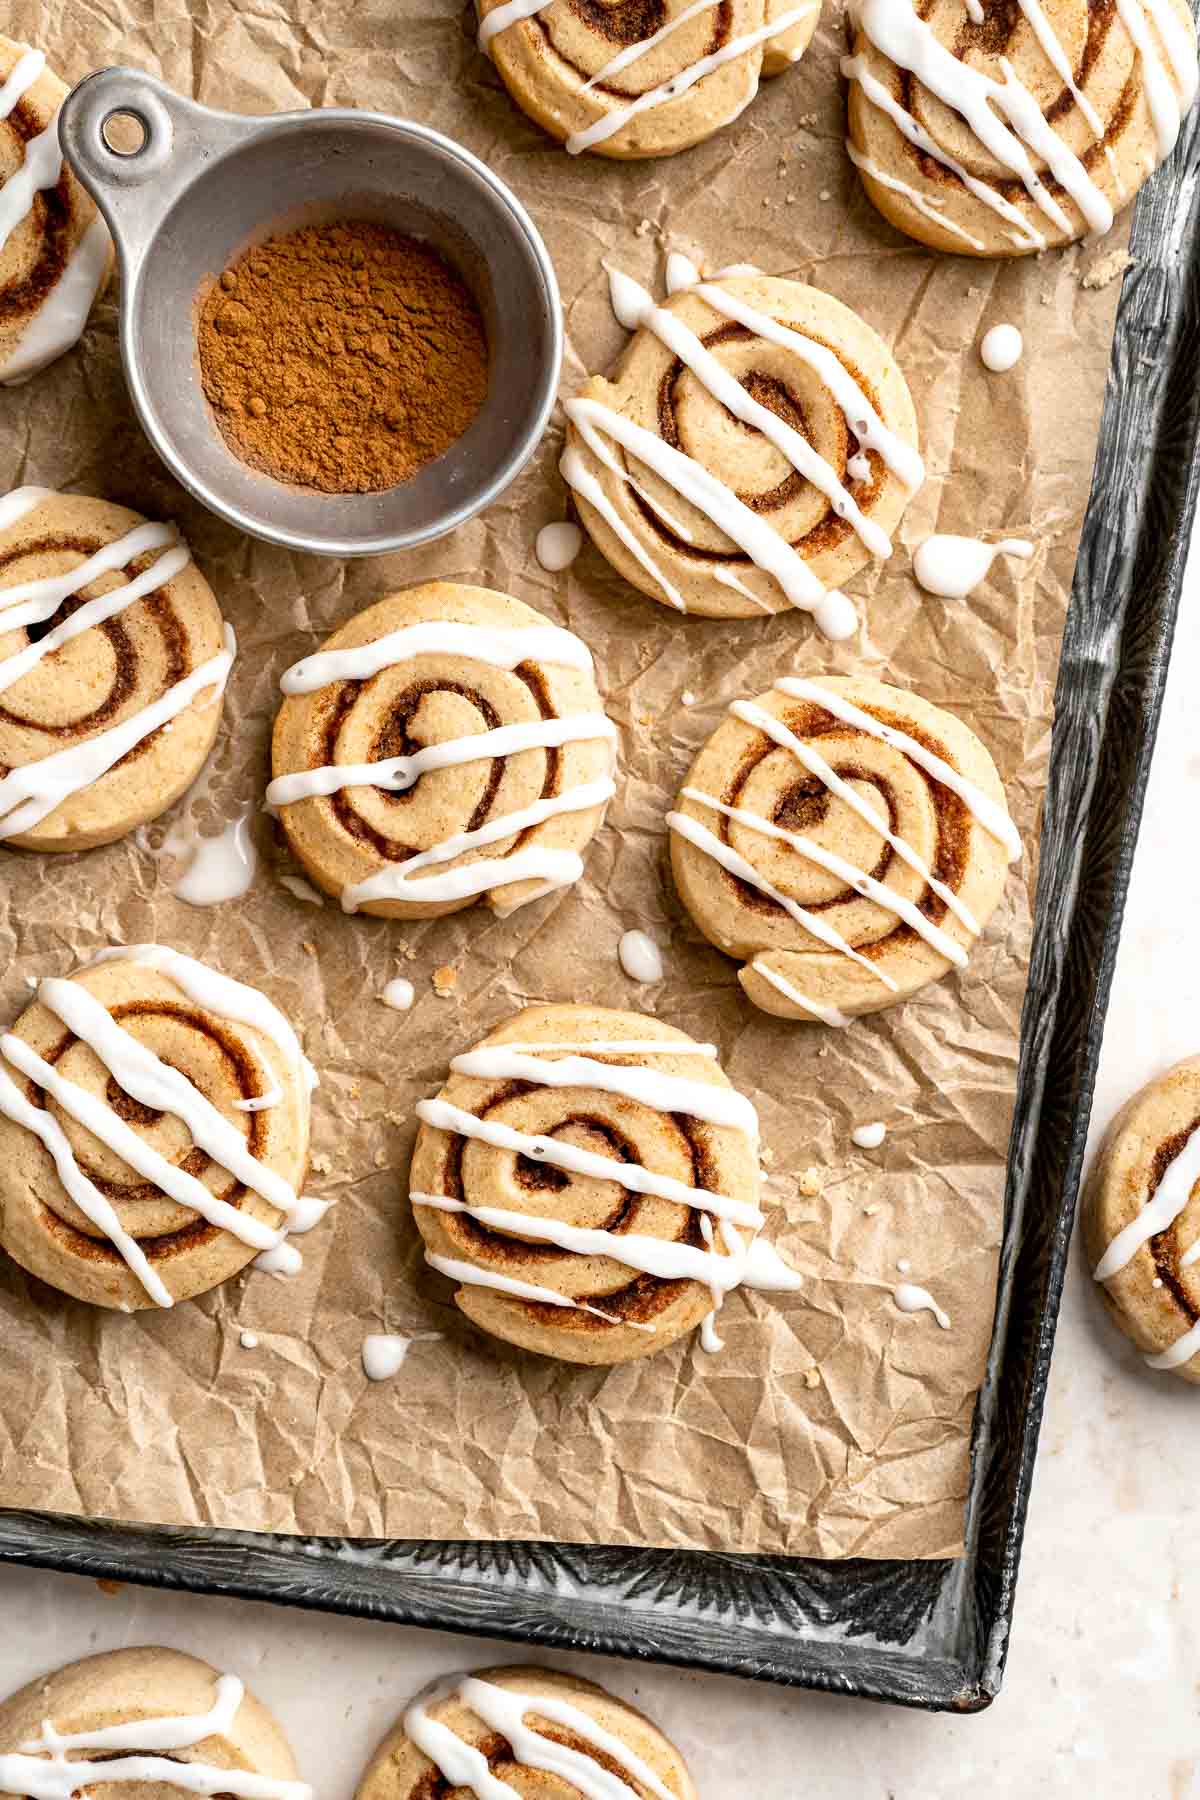
Tried this recipe?
I'd love to hear what you think! Leave a comment and rating below to share your feedback. Your reviews help others discover this recipe and help me keep creating more free recipes for you. Snap a photo and tag me on social media @aheadofthyme too.

Stovetop Mac and Cheese with White Cheddar
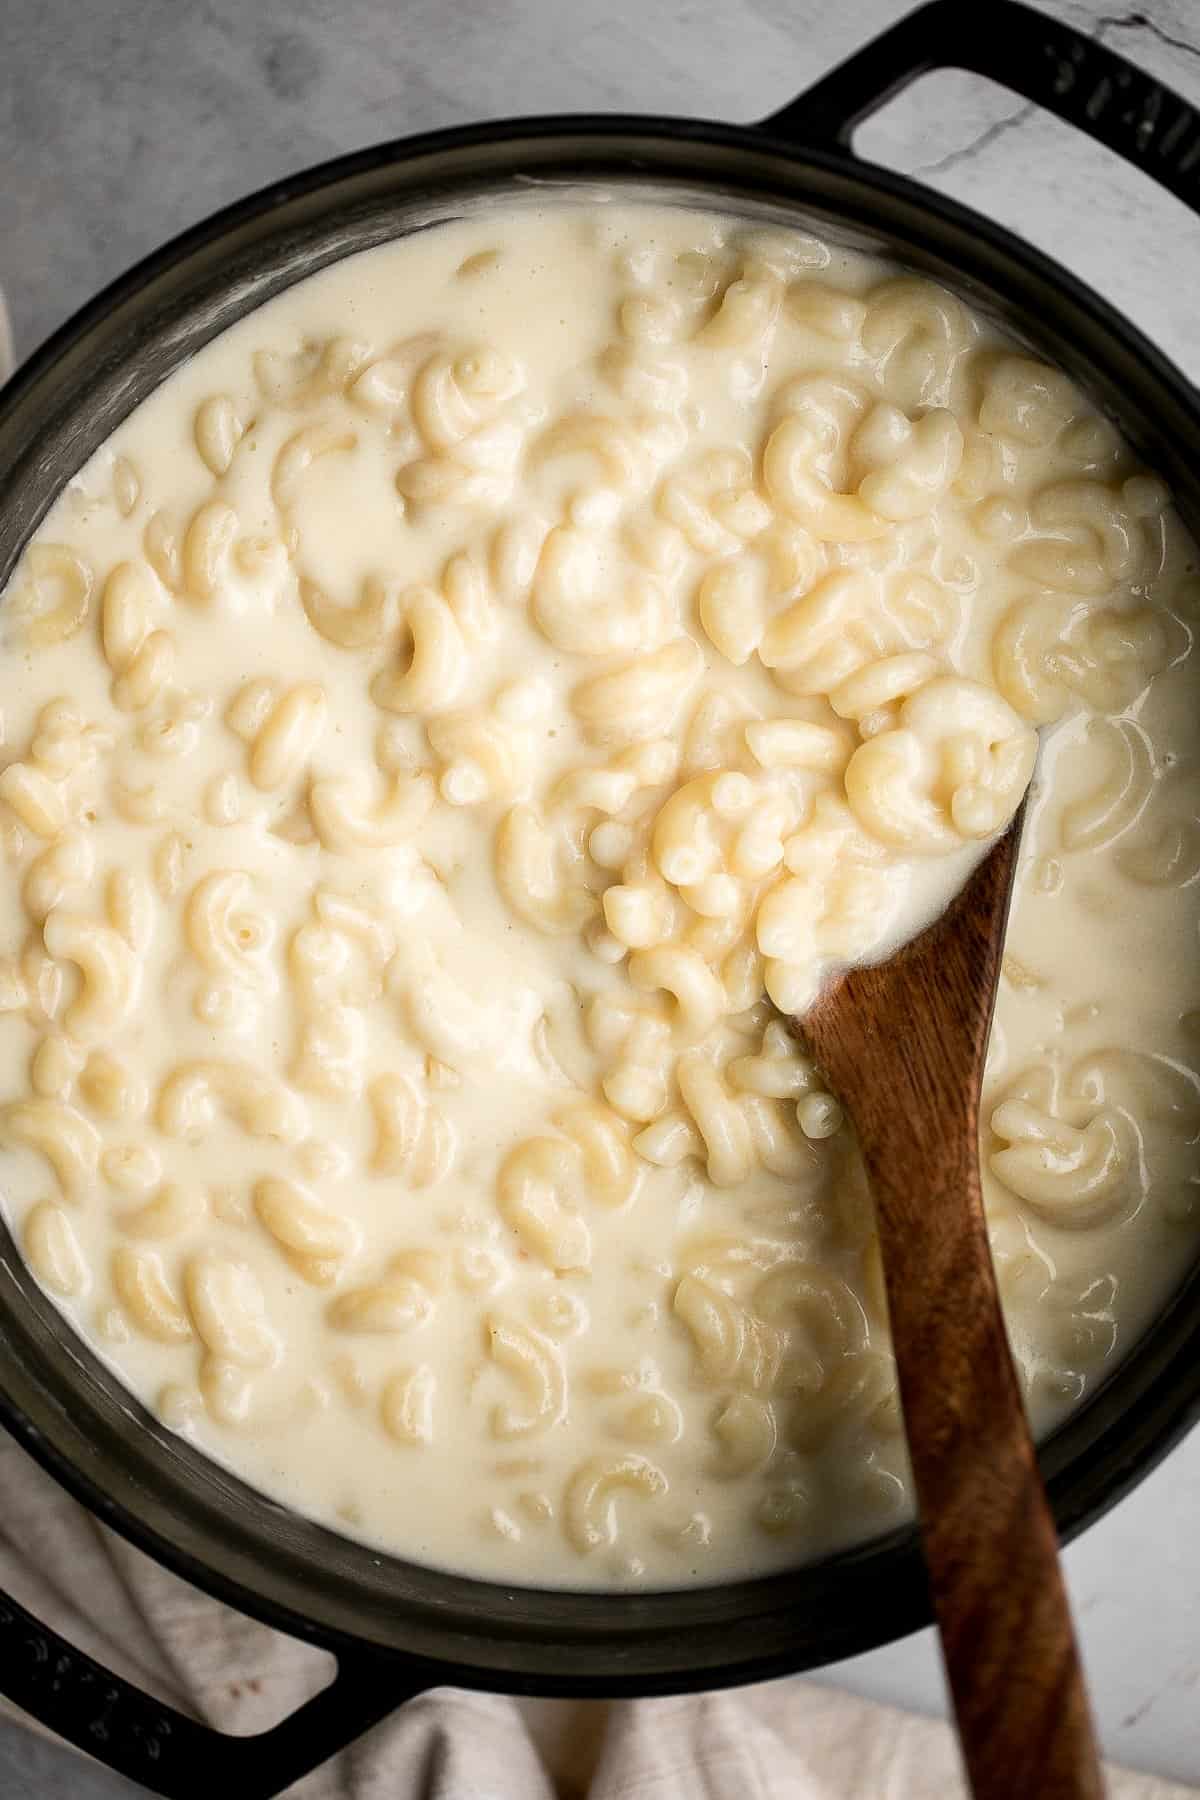
Quick and easy, creamy Stovetop Mac and Cheese with White Cheddar is the kind of comforting one pot, 20 minute meal everyone needs in their weeknight rotation. It is packed with three types of cheese that melt into the creamiest sauce, and you can finish it with toasted panko breadcrumbs for the perfect crunchy topping. This rich, decadent pasta always feels cozy and satisfying, and it is a true family favourite any day of the week.
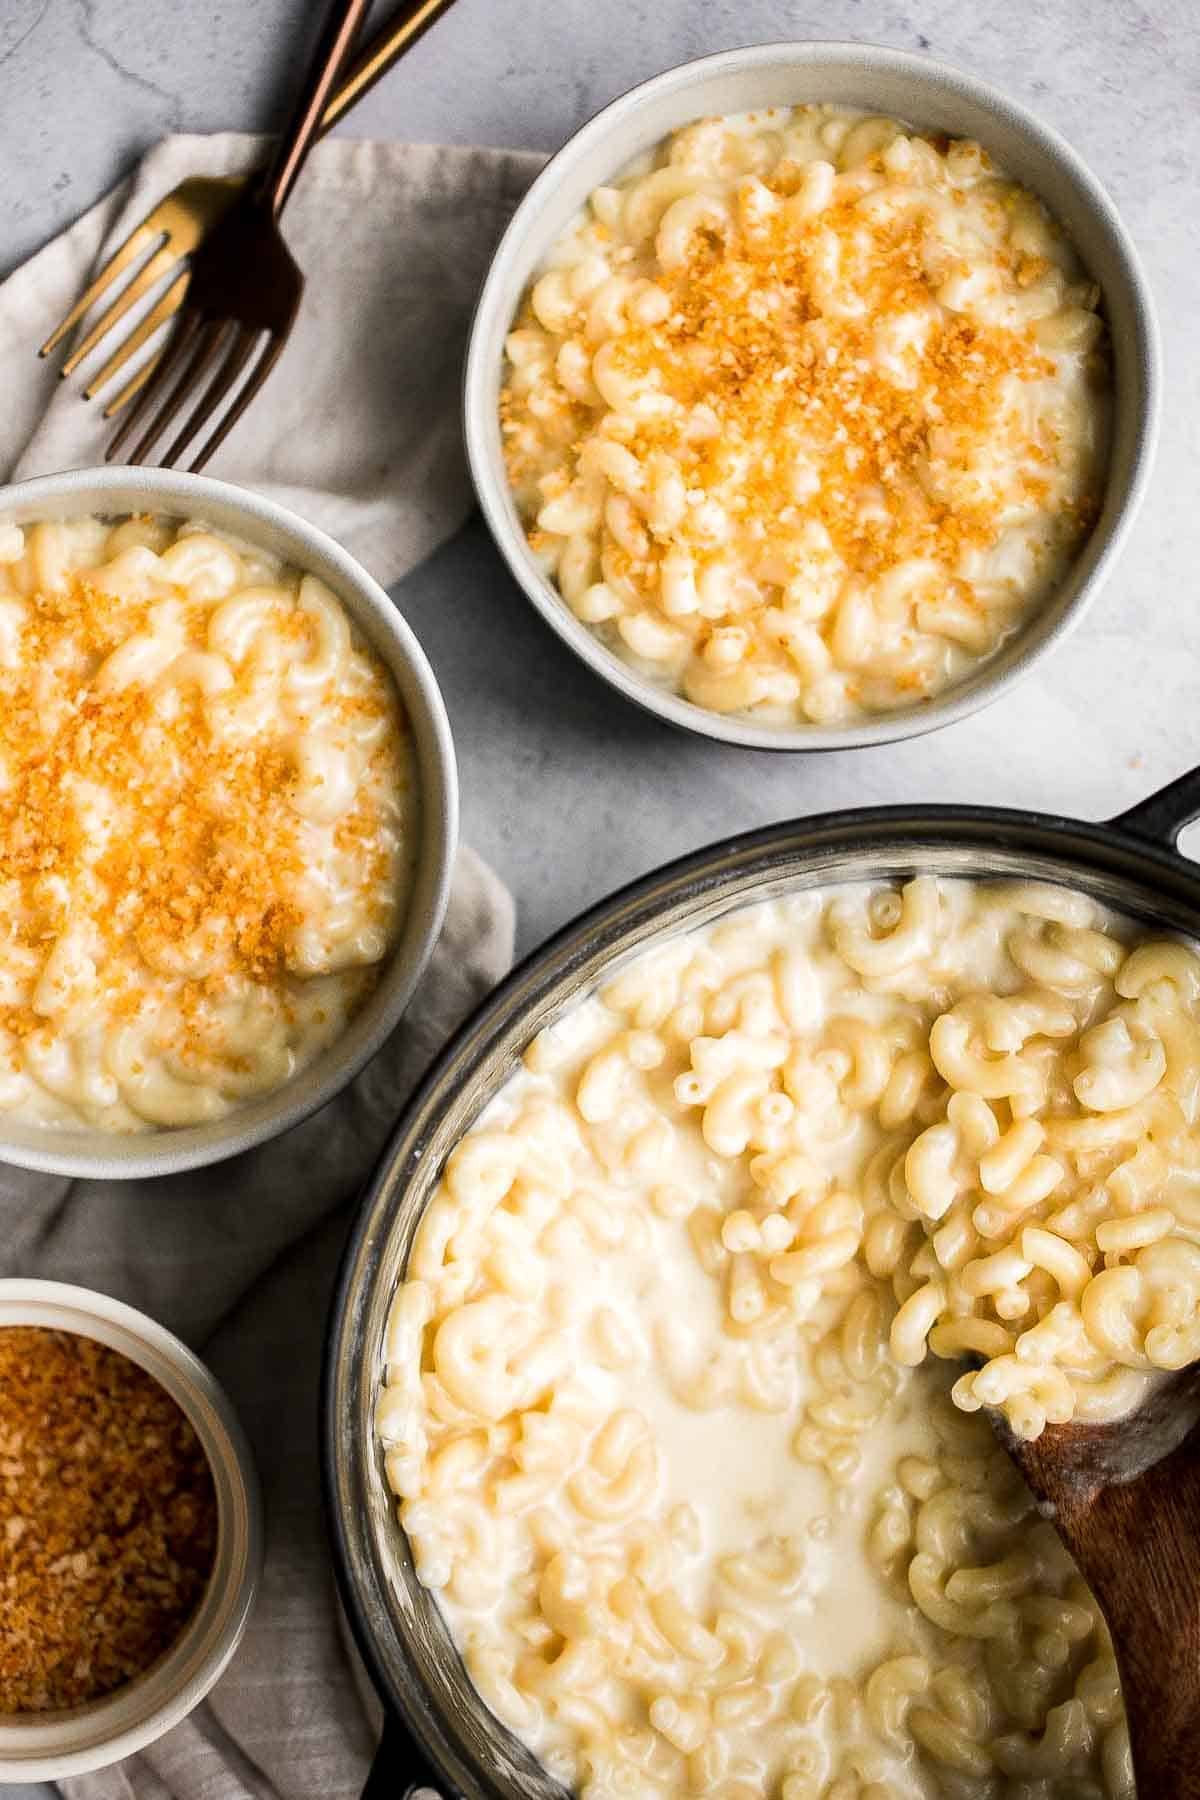
Stovetop mac and cheese is an amazing alternative to baked mac and cheese. It cooks in half the time yet still delivers incredible flavor and that thick crunchy panko finish if you want it. There is no boxed mac and cheese with powdered cheese here because it is surprisingly easy to make ultra creamy mac and cheese from scratch, all in one pot from start to finish (including the pasta!). No baking required, no extra dishes, just a cozy bowl of real homemade mac and cheese that always hits the spot.
This recipe is also great for meal prep. It reheats beautifully, and any leftovers can be turned into delicious fried mac and cheese balls for a fun snack or appetizer the next day. Whether you serve it as a main dish, pair it with a protein, or double it for a holiday table, this easy stovetop mac and cheese is reliable, crowd pleasing, and incredibly delicious.

Why You'll Love This Recipe
- Quick and convenient. Everything cooks in one pot and the whole recipe is ready in about twenty minutes, which makes it perfect for busy days when you want something homemade without a long prep time.
- Creamy and flavorful. The combination of sharp white cheddar, Parmesan, and mozzarella creates a rich and silky sauce that coats every piece of pasta with just the right balance of sharpness and creaminess.
- No baking required. Since it cooks entirely on the stovetop, you skip the oven and avoid any extra steps. The result is a warm, ultra creamy mac and cheese that is ready to serve immediately.
- Customizable. It is simple to adjust the seasonings, change the type of cheese, add vegetables or protein, or finish with crunchy panko to match whatever flavor and texture you are craving.
Ingredients and Substitutions
To make this delicious Stovetop White Cheddar Mac and Cheese, you will need the following ingredients (see recipe card below for quantities):
- butter - Unsalted butter creates the base of the roux and helps the sauce thicken. You can swap in margarine or a neutral oil if needed.
- all purpose flour - Thickens the sauce and keeps it smooth. Use cornstarch or a gluten free all purpose blend if you prefer a flour alternative.
- water and milk - These cook the pasta and form the sauce. Whole milk gives the creamiest result, but two percent works well. For a richer sauce, replace one cup of milk with light cream or add a splash of heavy cream.
- elbow macaroni pasta - Classic for mac and cheese because it holds sauce well. We cook the pasta directly in the pot so there is no need to make the pasta in a separate pot. You can also use any small pasta like shells, cavatappi, fusilli, or gluten free pasta with similar cooking times.
- garlic powder - Adds mellow savory flavor. Replace with minced garlic if you prefer fresh garlic. You can use 2 cloves minced garlic (or about 2 teaspoons freshly minced garlic).
- ground mustard - Brightens the cheese flavor without tasting like mustard. A small splash of Dijon also works.
- salt and black pepper - Essential for seasoning. Adjust to taste since different cheeses have different salt levels.
- sharp white cheddar cheese - The star of the sauce. Use freshly shredded cheese for the best melt. Buy a block of cheese and shred it yourself for a smoother creamy cheese sauce. You can also use extra sharp white cheddar cheese if you want a bolder flavor, or swap with yellow cheddar if that is what you have.
- Parmesan cheese - Adds salty depth. Pecorino Romano or asiago cheese are good substitutes.
- mozzarella cheese - Helps create a smooth stretchy texture. Monterey Jack or fontina work well too.
- panko topping - This is an optional topping to sprinkle over the mac and cheese. It is made with panko breadcrumbs, garlic powder, paprika, and olive oil (or butter). Feel free to use regular breadcrumbs or crushed crackers as a substitute for panko.
Equipment
You'll also need measuring cups and spoons, a large heavy bottomed pot for making the sauce (I used my 4 qt. Dutch oven), a whisk for blending the roux, a wooden spoon or spatula for stirring the pasta, and a small skillet if you decide to toast the panko topping.
How to Make the Best Stovetop Mac and Cheese with White Cheddar
- Make a roux. In a large pot, melt the butter over medium heat. Add the flour and cook for 1 minute, stirring constantly. Pour in the water and whisk until smooth. Add the milk and whisk to combine.
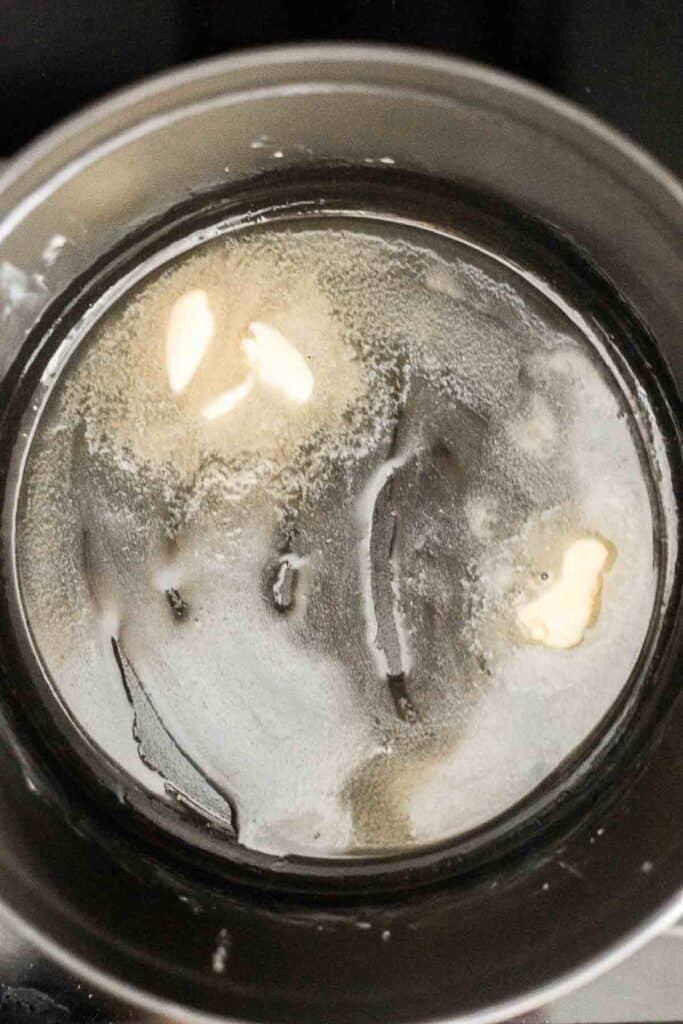

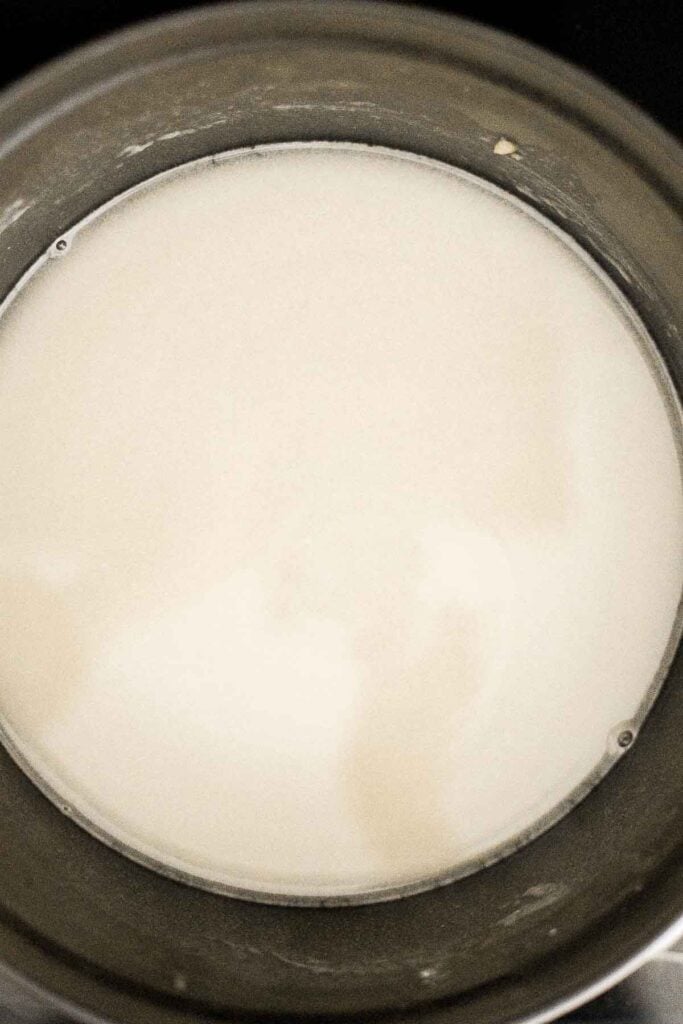
- Add pasta. Add the uncooked pasta, garlic powder, ground mustard, salt, and pepper. Bring to a boil over high heat, then reduce heat to medium low. Cook for 9-10 minutes until the pasta is al dente, stirring occasionally so that the pasta doesn't stick to the bottom of the pot.
- Stir in cheeses. Remove the pot from the heat and stir in the cheddar, Parmesan and mozzarella until fully melted and creamy.

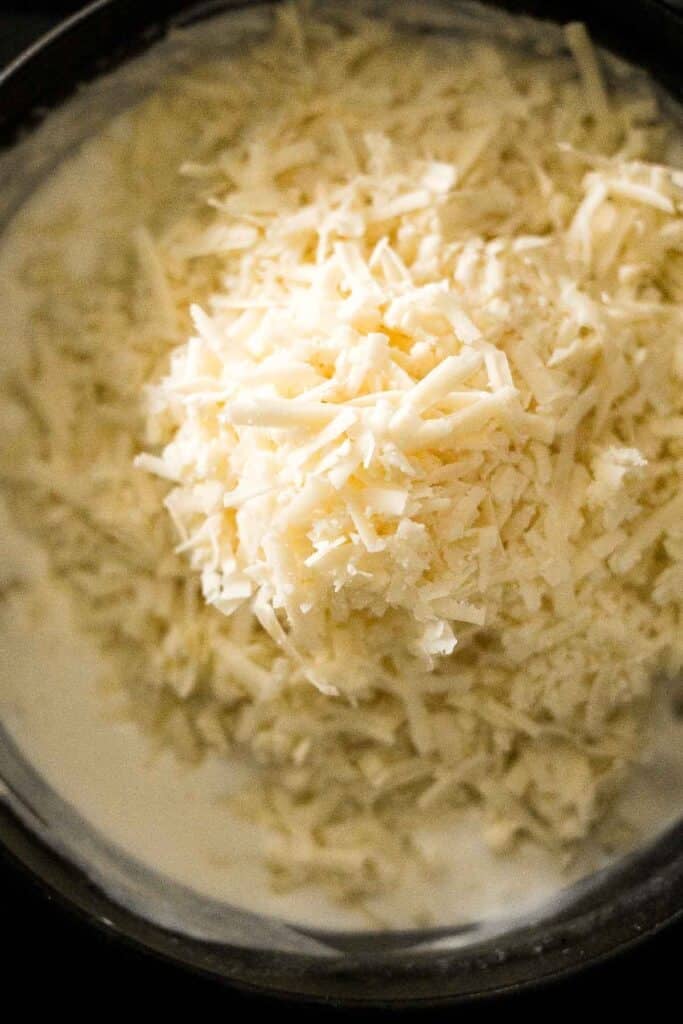

- Make the panko topping (optional): In a small bowl, combine the panko breadcrumbs, garlic powder, and paprika. Heat the olive oil in a skillet over medium heat, then add the panko mixture. Cook for 2-3 minutes until lightly toasted. Remove from the heat.
- Serve. Spoon the mac and cheese into bowls and top with toasted panko if using. Serve warm.

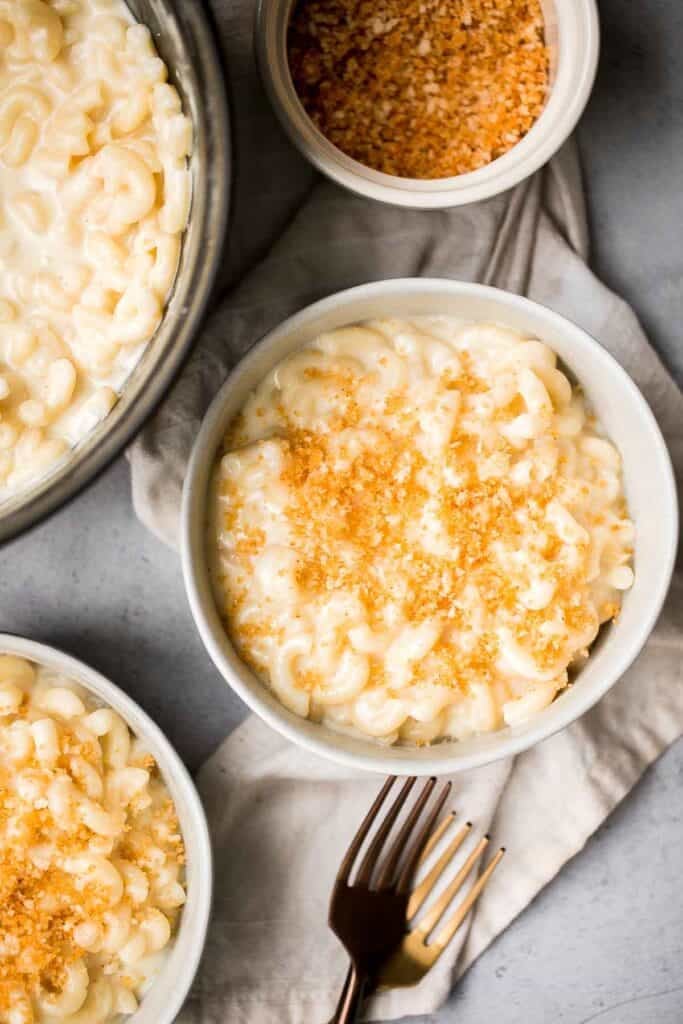
Expert Tip: Shred the Cheese Fresh for the Smoothest Sauce
Pre shredded cheese contains starches and anti clumping agents that prevent it from melting into a silky sauce, and those additives can make your mac and cheese grainy instead of creamy. For the best texture, shred the cheddar and mozzarella yourself right before adding them to the hot pasta on the stove. Freshly grated cheese melts more quickly, blends more smoothly with the roux, and gives the sauce a richer, more luxurious finish for that classic cheesy comfort food texture the whole family loves.
More Tips and Tricks
- Use high quality cheese. A high quality cheddar melts better and tastes richer. Choose sharp or extra sharp white cheddar cheese for the best flavor.
- Add all the cheese. Just under 5 cups of cheese might seem a lot, but this big pot makes about 6-8 servings and skimping on the cheese won't give you a mac and cheese that is creamy and decadent. You can however switch up the kind of cheese and play around with different flavours.
- Add the panko topping. The panko topping is completely optional but recommenced. It adds a really nice crunch to every bite of that creamy mac and cheese. You can use regular breadcrumbs if you don't have panko.
- Shred your own cheese. Pre shredded cheese contains anti caking agents that make sauces grainy. Freshly shredded cheese melts much smoother.
- Adjust the thickness. If the sauce becomes thicker than you like, stir in a splash of warm milk until it reaches your preferred consistency.
- Stir regularly. Since the pasta cooks directly in the sauce, stirring prevents sticking and keeps everything creamy.
- Use a heavy pot. A thicker pot distributes heat more evenly and helps prevent scorching on the bottom.
- Season at the end. Once the cheese melts, taste and add extra salt or pepper if needed.
Recipe Variations
- Add protein. Stir in cooked bacon, ham, rotisserie chicken, or even crispy seasoned ground beef or ground turkey for a filling meal that still tastes like pure comfort foods.
- Spice it up. Add a pinch of cayenne pepper or crushed red pepper for heat.
- Extra cheesy. Mix in Gouda, fontina, Monterey Jack, or gruyere for even deeper flavor.
- Extra creamy. Add a splash of heavy cream or stir in a small amount of cream cheese to enrich the creamy cheese sauce even more.
- Veggie packed. Stir in sautéed broccoli, spinach, peas, or roasted vegetables. These mix ins work especially well with stovetop versions that already have plenty of flavor.
- Baked version. Transfer to a casserole dish, top with extra cheese and panko, and bake until bubbly. See our Classic Baked Mac and Cheese for tips.
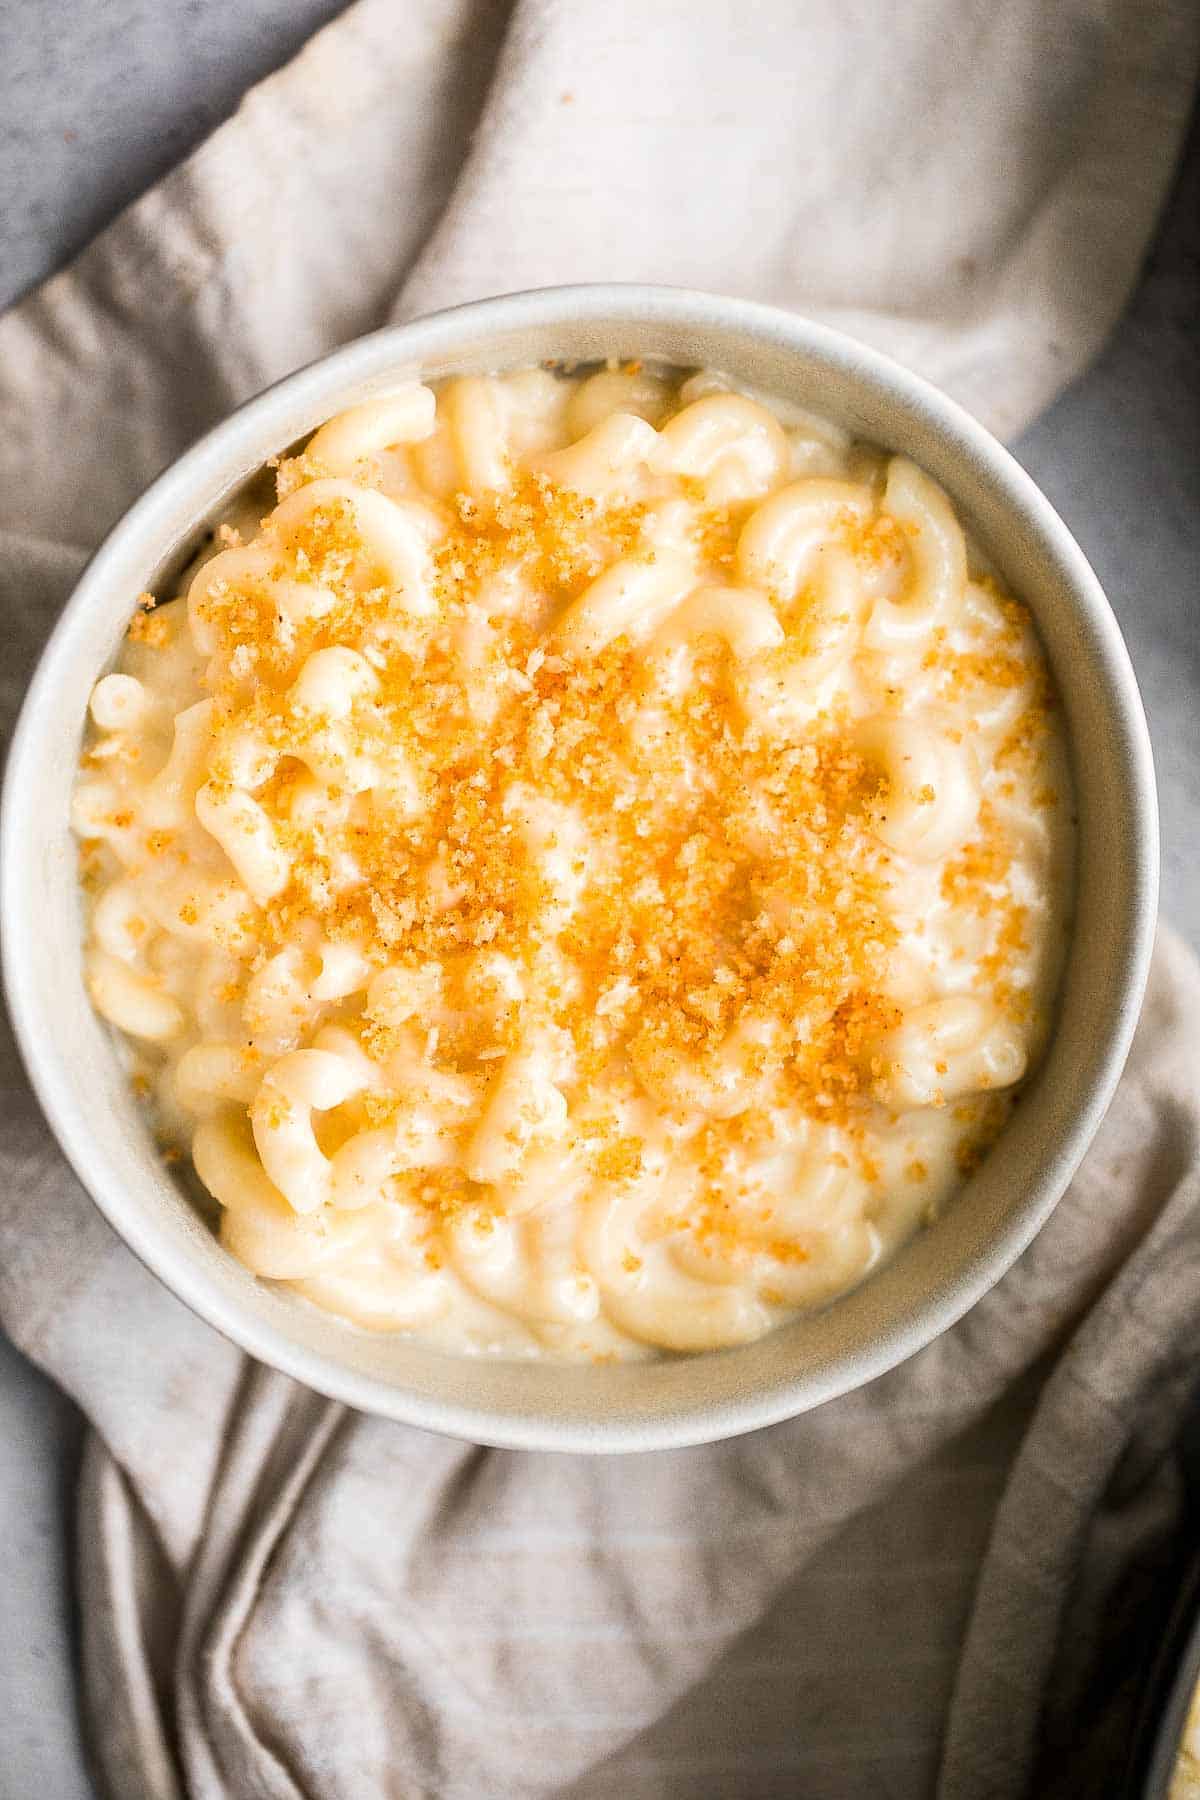
Storage
How to Store
Let leftovers cool completely and transfer to an airtight container. Store in the refrigerator for up to 3 days.
Let the mac and cheese cool, then transfer it to an airtight container or a freezer safe container if you plan to freeze it. Store in the refrigerator for up to 3 days.
How to Reheat
Reheat gently in a saucepan on the stove over medium low heat with a splash of milk or water to loosen the sauce. Stir until smooth. You an also reheat in the microwave.
How to Freeze
Freeze without the panko topping for up to 2 months in a freezer-safe container. Thaw overnight in the fridge and reheat gently with extra milk.
How to Serve
This mac and cheese is fantastic on its own, but it pairs beautifully with simple proteins and quick veggie sides. Try it with roasted chicken, grilled sausages, baked salmon, or a fresh green salad. You can also serve it as a holiday side dish, especially with the toasted panko topping.
These are my favorite side dishes to serve with this stovetop mac and cheese:

Side Dishes for Pasta
For more recipe ideas, check out our collection of pasta side dishes, featuring everything from fresh salads and roasted vegetables to crusty breads and flavorful appetizers that pair perfectly with any pasta dinner.
FAQ
You do not have to use flour, but it helps create a stable creamy sauce that does not separate. Flour thickens the liquid and gives the cheese something to cling to, which makes the sauce smooth and velvety. Without flour, the sauce may be thinner or more prone to becoming oily. If you prefer a flour free version, you can use a cheese first method or reduce the liquid, but the texture will be slightly different.
Cornstarch, arrowroot, or potato starch all work as alternatives to flour. Dissolve the starch in a little cold water or milk before adding it to the pot so it thickens evenly. Some people also use cream cheese to help stabilize the sauce without flour. If you prefer an entirely flour free method, you can cook the pasta in less liquid and rely on starch from the pasta itself to thicken the sauce.
Cheeses that melt smoothly and have good flavor are best for mac and cheese. Sharp white cheddar, regular cheddar, gruyere, fontina, Monterey Jack, and gouda all melt beautifully. Combining two or three cheeses creates more depth and a silkier sauce. Avoid dry or crumbly cheeses that do not melt well because they can create a grainy texture.
Yes, white cheddar and yellow cheddar are the same cheese. The only difference is the color. Yellow cheddar has annatto added for color, while white cheddar is left in its natural state. Both types melt the same way, and both work well in mac and cheese. Many people prefer white cheddar because it has a cleaner look and a slightly more pronounced sharp flavor.
Avoid cheeses that do not melt smoothly, such as feta, cotija, queso fresco, halloumi, paneer, and hard aged cheeses like aged parmesan or pecorino used on their own. These cheeses can become grainy or rubbery when heated. They are better used as finishing cheeses or combined with melt friendly cheeses like cheddar or gouda.
If the sauce is too watery, continue cooking it over low heat until it reduces and thickens. You can also stir in a slurry made from one teaspoon of cornstarch mixed with two teaspoons of cold water to help it thicken quickly. Another option is to add a bit more cheese, which gives the sauce more body. Make sure not to cook on high heat because it can cause the cheese to separate.
The key is gentle heat and freshly shredded cheese. High heat can cause the sauce to split, so always remove the pot from the heat before stirring in the cheese. Using cheese you shred yourself gives a smoother result because it melts better. Adding a splash of milk or cream while reheating also helps maintain the creamy texture.
The secret is using a blend of cheeses, gentle heat, and the right liquid to pasta ratio. Sharp cheddar brings flavor, while cheeses like gouda or fontina melt smoothly for a velvety sauce. Cooking the pasta directly in the sauce adds extra starch that helps everything thicken naturally. A touch of mustard powder or garlic powder brings balance without making the sauce taste overly seasoned.
Use a high quality cheddar, combine two or three cheeses for depth, and season with mustard powder, garlic powder, onion powder, or a touch of smoked paprika. You can also pulse toasted breadcrumbs in a food processor until fine and sprinkle over top for added crunch
More Mac and Cheese Recipes
Looking for other recipes like this? Try these:
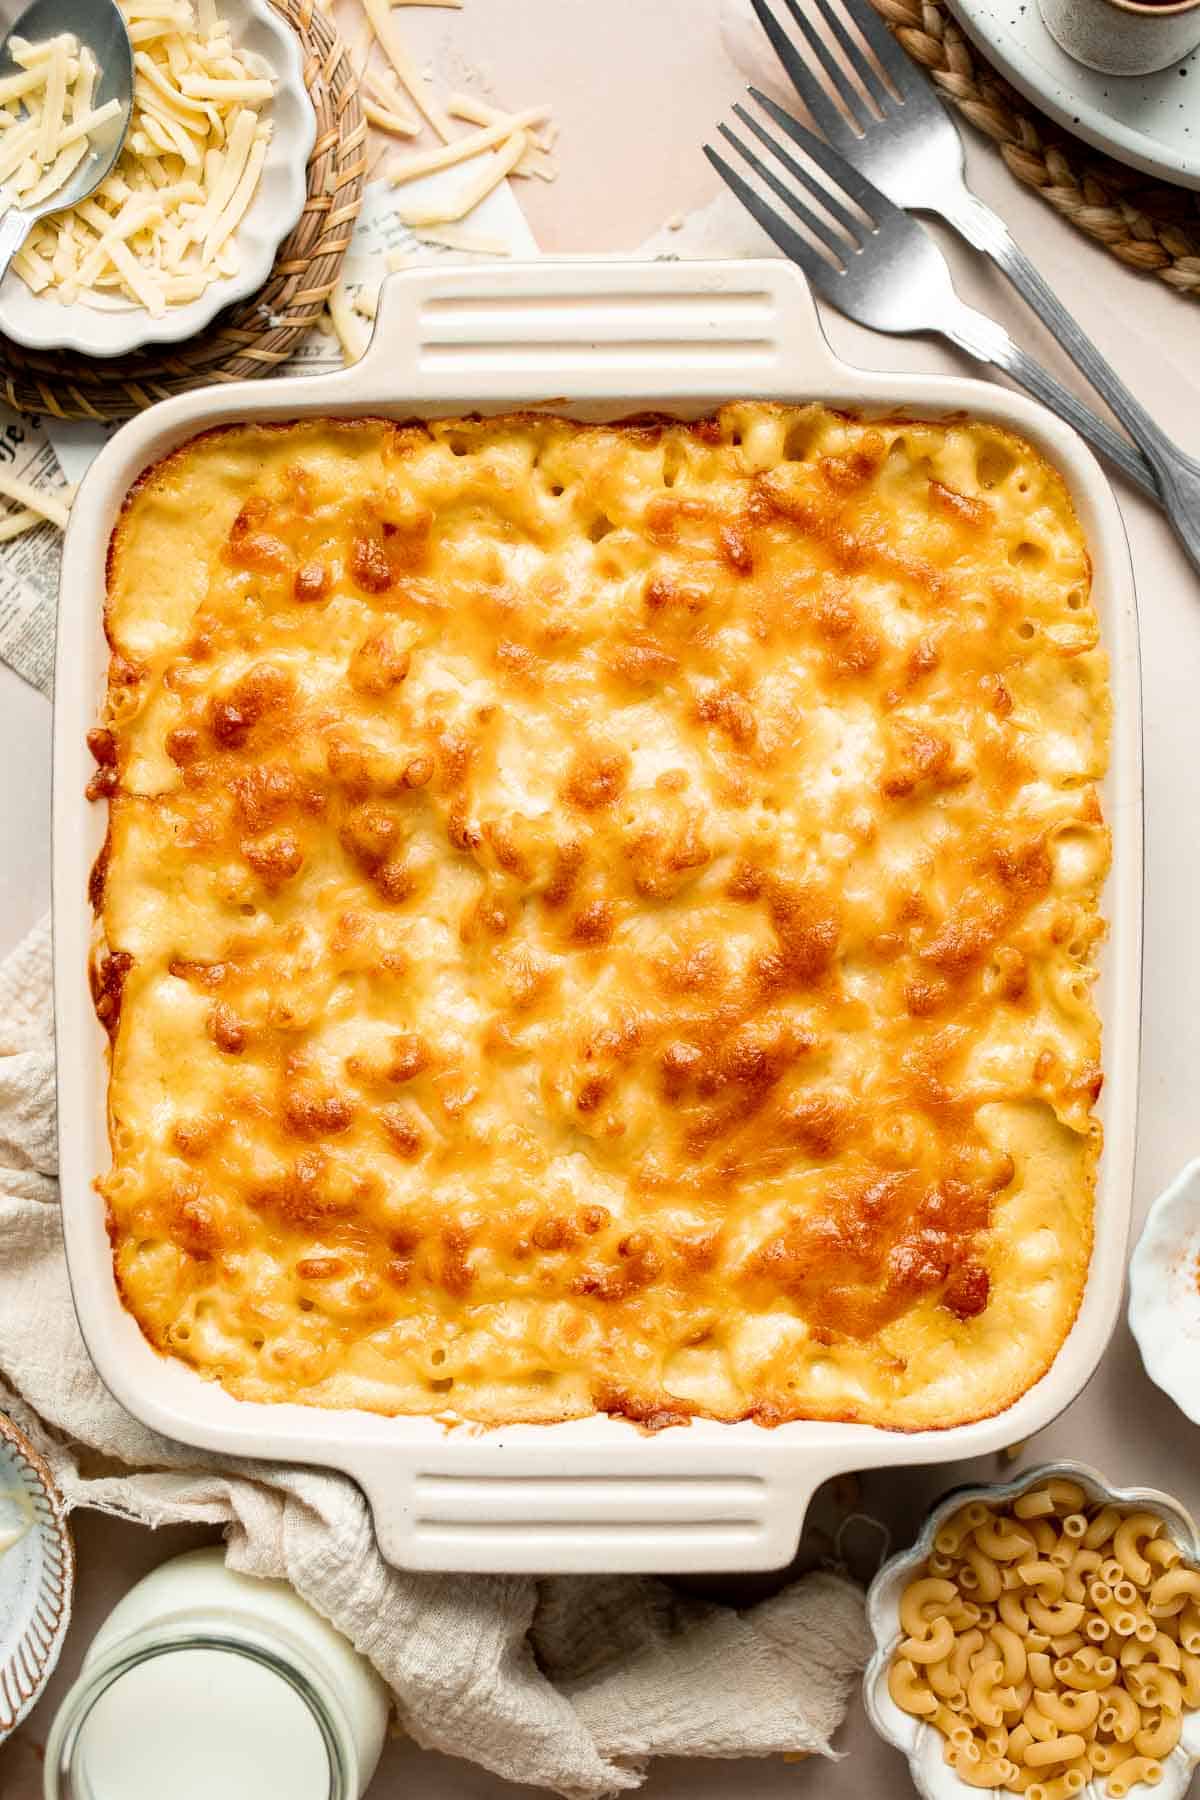
Tried this recipe?
I'd love to hear what you think! Leave a comment and rating below to share your feedback. Your reviews help others discover this recipe and help me keep creating more free recipes for you. Snap a photo and tag me on social media @aheadofthyme too.
This recipe was originally posted in 2020. It has since been updated with more helpful content.
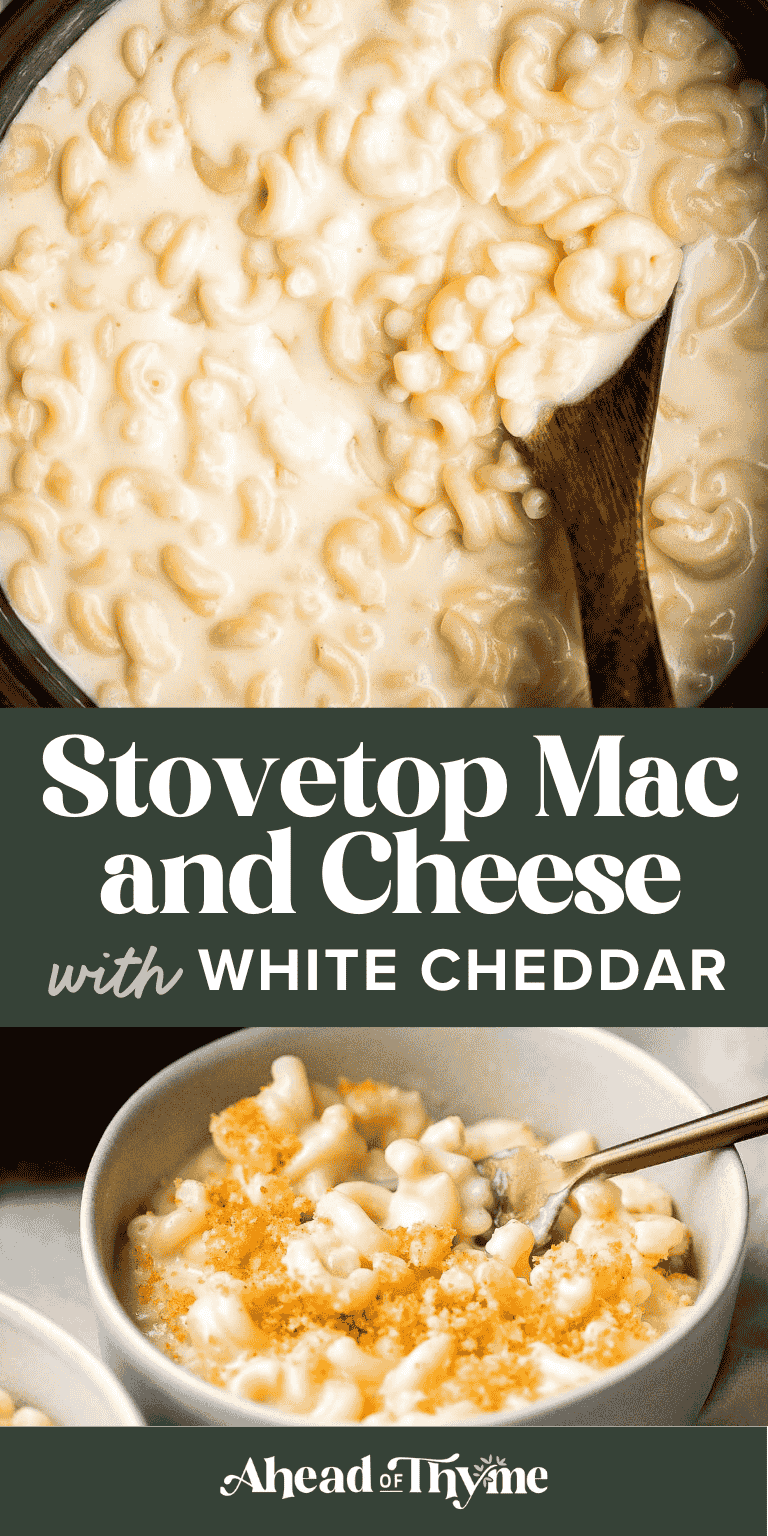
Roasted Brussels Sprouts Pasta
This Roasted Brussels Sprouts Pasta is creamy, cozy, and packed with caramelized veggies that bring major flavor to a simple pasta night. The Brussels sprouts roast until golden and crisp on the outside, then get folded into a silky garlic Parmesan cream sauce that clings beautifully to each piece of penne. It is warm, comforting, and full of those rich browned bits you can only get from roasting the sprouts at high heat.
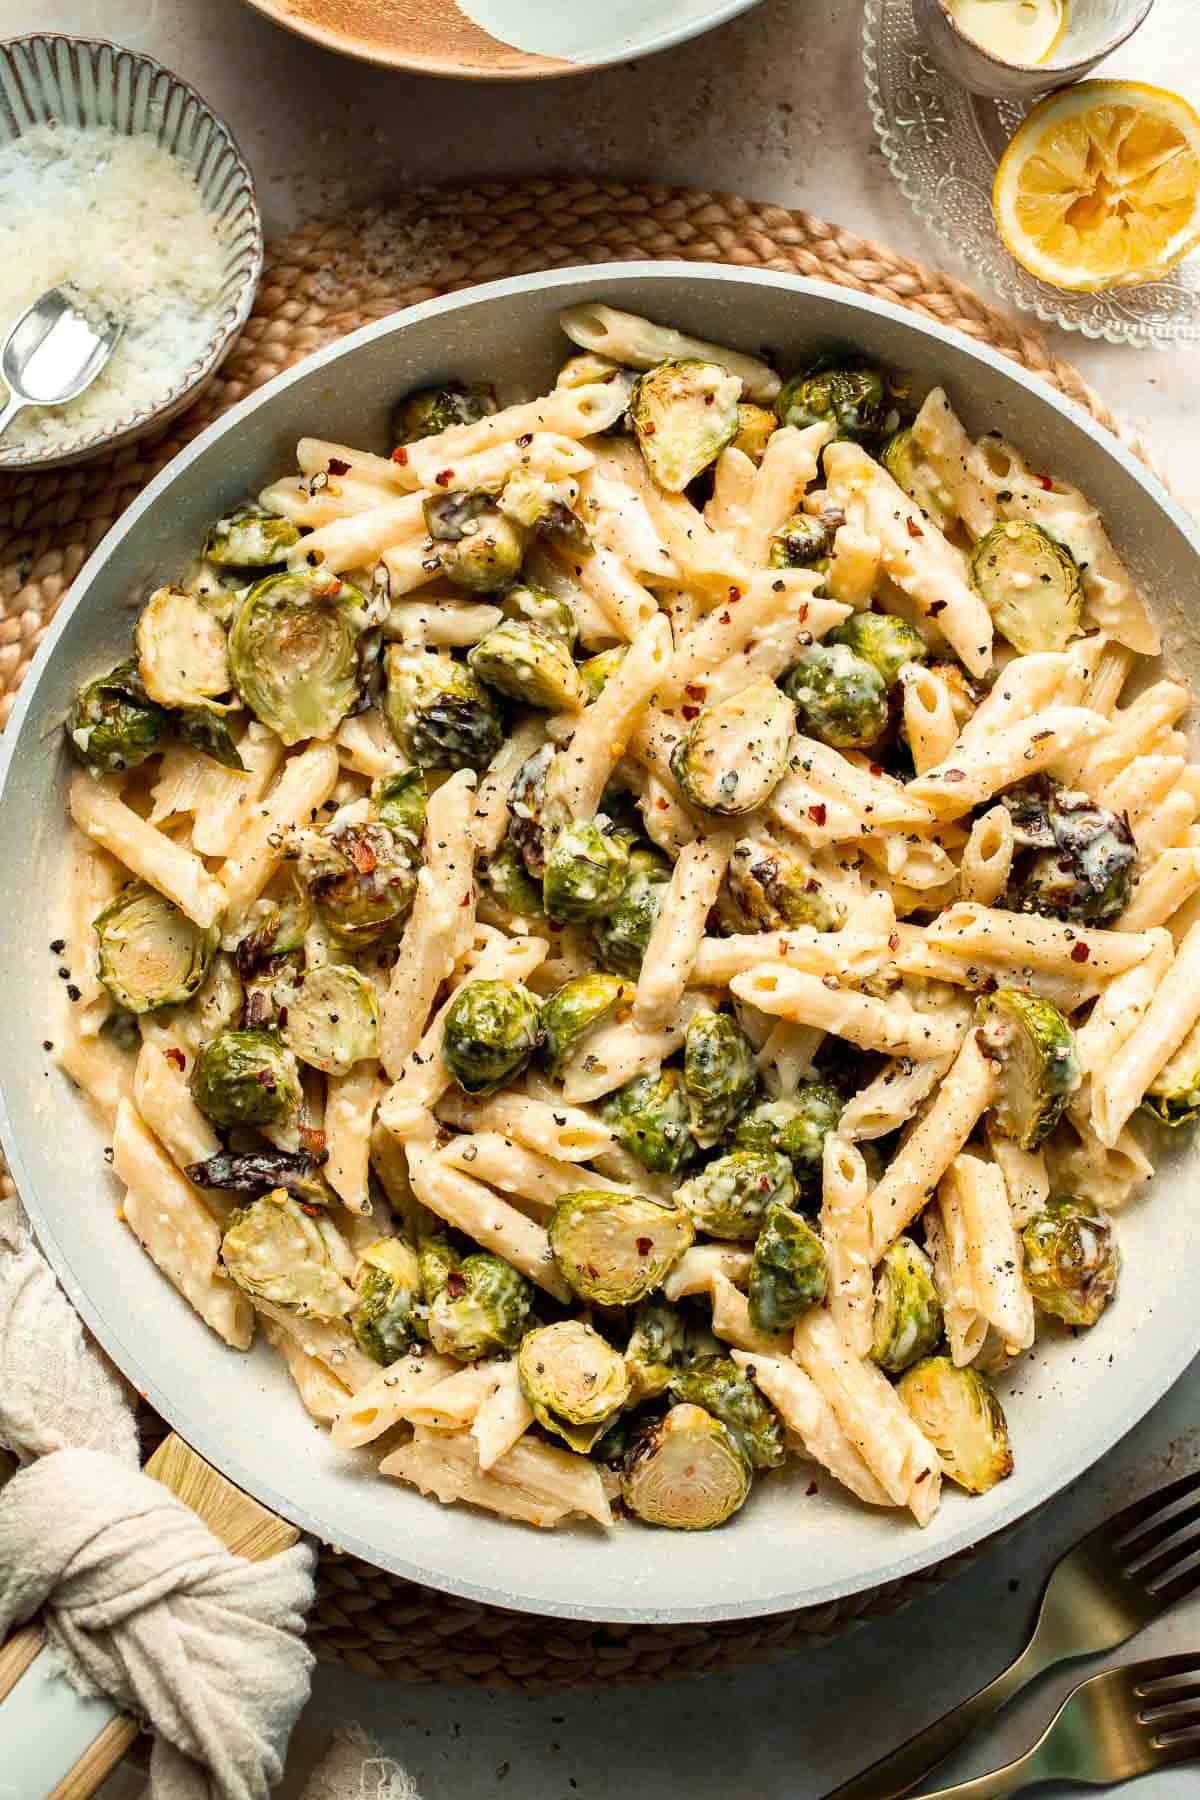
Roasting the Brussels sprouts transforms them completely. They develop charred edges, a sweet nutty aroma, and a tender center that pairs perfectly with creamy pasta. The sauce takes only a few minutes on the stovetop and balances richness with just the right amount of garlic and Parmesan. Fresh lemon brightens everything at the end, tying together the roasted flavors with a pop of freshness.
This pasta recipe was inspired by my Creamy Garlic Mushroom Pasta and pairs well with simple favorites like Homemade Garlic Bread or my Easy Baked Chicken Breasts. It is a beautiful weeknight dinner that feels comforting without being too heavy, and it brings an elevated twist to a classic creamy pasta bowl.
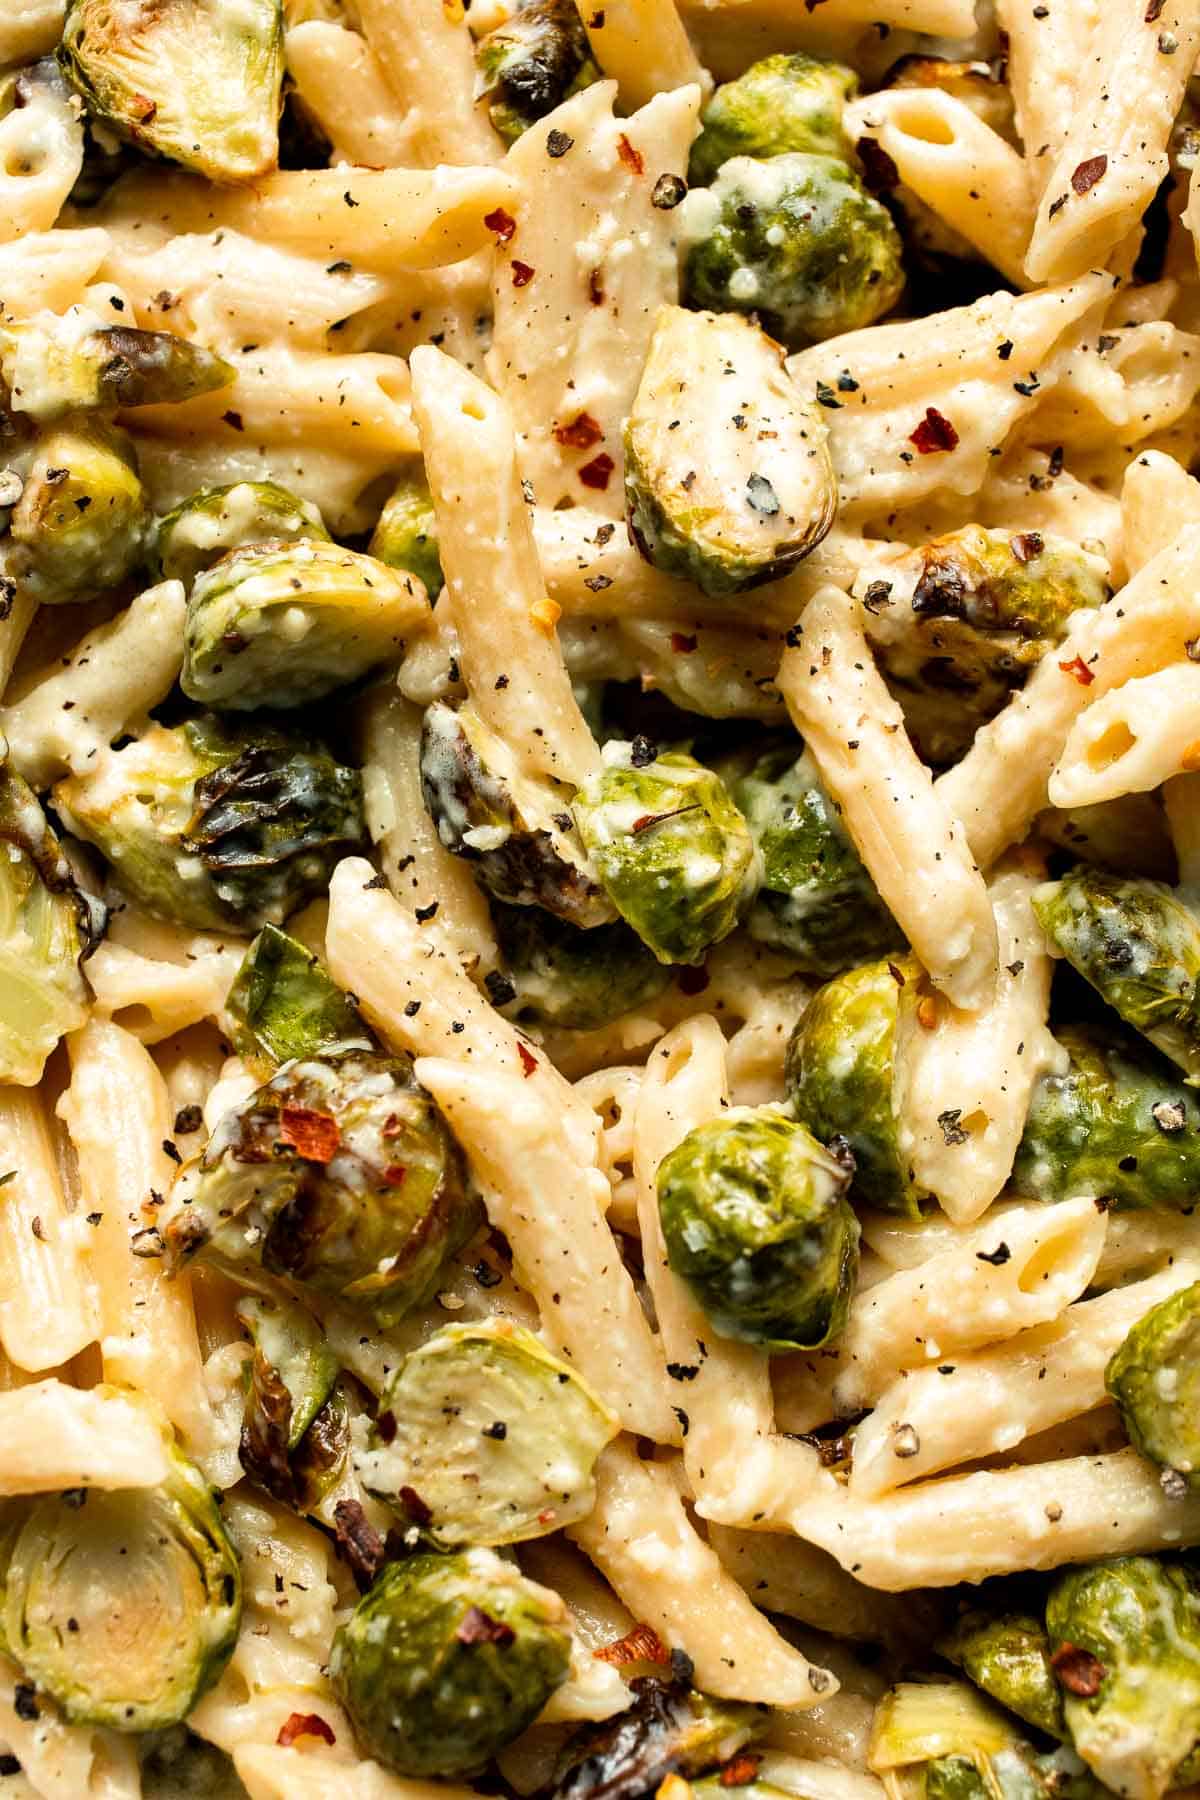
Why You'll Love This Recipe
- Roasted flavor in every bite. Brussels sprouts roast until golden and caramelized, adding depth and a toasty nuttiness that makes this pasta taste rich, cozy, and restaurant level.
- Creamy sauce without the fuss. The garlic Parmesan cream sauce comes together quickly with simple ingredients, giving you a silky, luxurious pasta that still feels easy and weeknight friendly.
- Balanced and bright. A squeeze of lemon balances the richness of the sauce, and the roasted vegetables add texture, freshness, and a subtle sweetness that keeps every bite of this pasta dish interesting.
- Flexible and family friendly. You can use any pasta shape, make it lighter with half and half, or add protein. It is a simple dish that works for all kinds of family dinners.
Ingredients and Substitutions
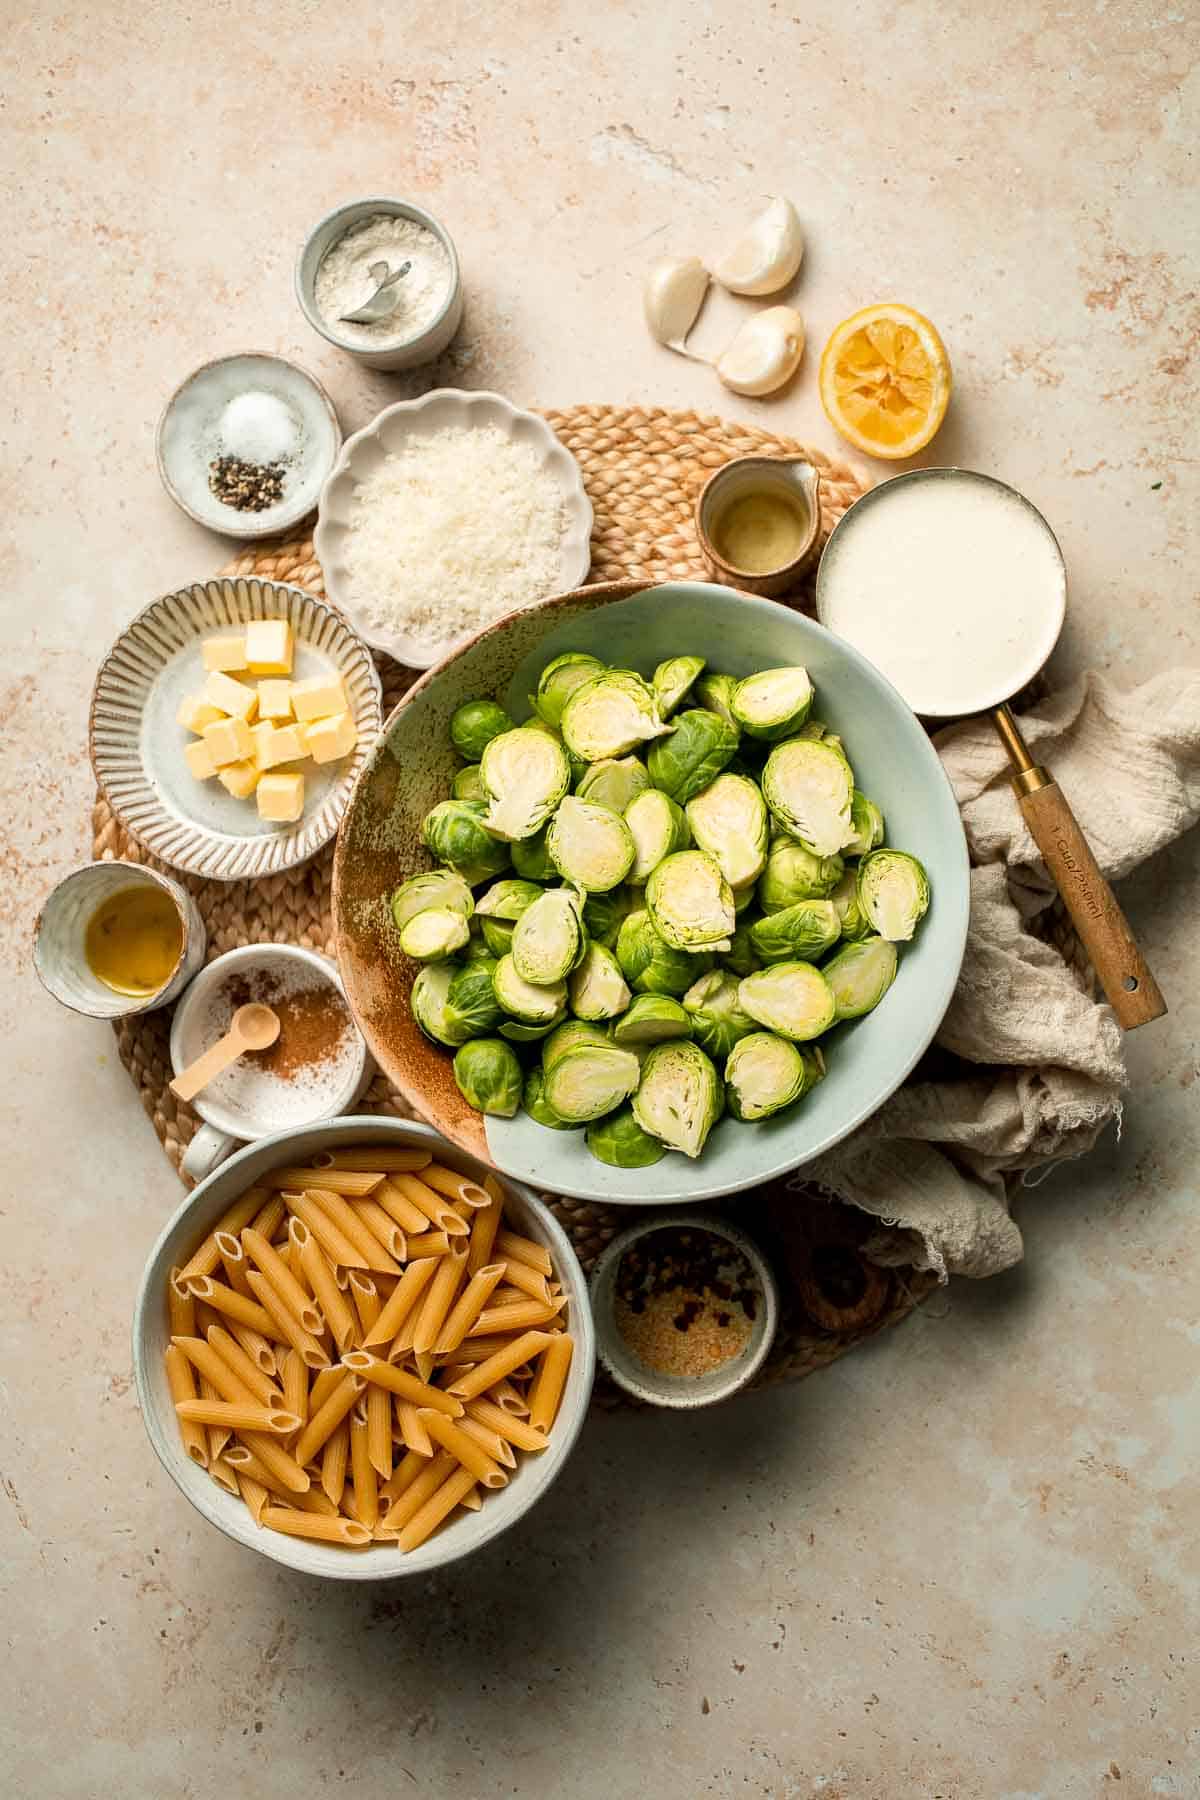
To make this delicious Roasted Brussels Sprouts Pasta, you will need the following ingredients (see recipe card below for quantities):
- brussels sprouts - Halved lengthwise so they caramelize well. Look for firm, bright green sprouts that will roast evenly. This is also a great recipe for using 2.5 to 3 cups of leftover cooked brussels sprouts.
- extra virgin olive oil - Helps the sprouts crisp in the oven. Avocado oil works too.
- garlic powder - Adds savory depth. Use fresh garlic if you prefer. A little goes a long way when roasting at high heat, so mince one clove finely and toss it with the sprouts after coating them in oil, so it does not burn.
- salt and black pepper - Essential for seasoning and balancing the sweetness of the roasted sprouts.
- red pepper flakes - Optional for gentle heat.
- lemon juice - Adds brightness after roasting and keeps the dish from feeling heavy.
- pasta - Penne pasta holds the sauce well, but any short pasta works, including rigatoni, fusilli, or orecchiette.
- butter - Creates a rich base for the cream sauce.
- garlic - Freshly chopped garlic cloves gives the sauce its aromatic backbone.
- all purpose flour - Thickens the sauce. You can use cornstarch if needed.
- heavy cream - Makes the sauce silky and luxurious. Half and half works for a lighter version.
- parmesan cheese - Melts into the sauce for a savory, salty finish.
- nutmeg - Adds a subtle warmth that enhances the cream sauce. A little goes a long way.
Equipment
You will also need measuring cups and spoons, a large pot for boiling pasta, a large baking sheet for roasting the Brussels sprouts, a sharp knife, a cutting board, a mixing bowl, a whisk, and a large skillet for making the cream sauce.
Instructions
Step 1: Roast the brussels sprouts
- Season the brussels sprouts. In a large mixing bowl, add brussels sprouts, olive oil, salt, pepper, garlic powder, and red pepper flakes (if using). Toss to combine.
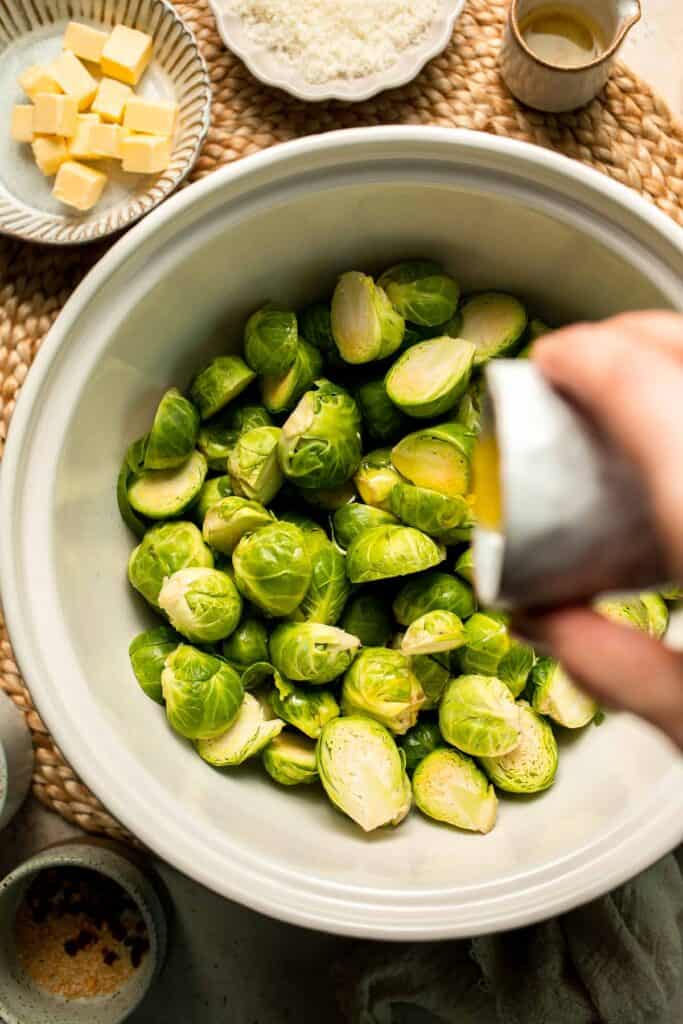
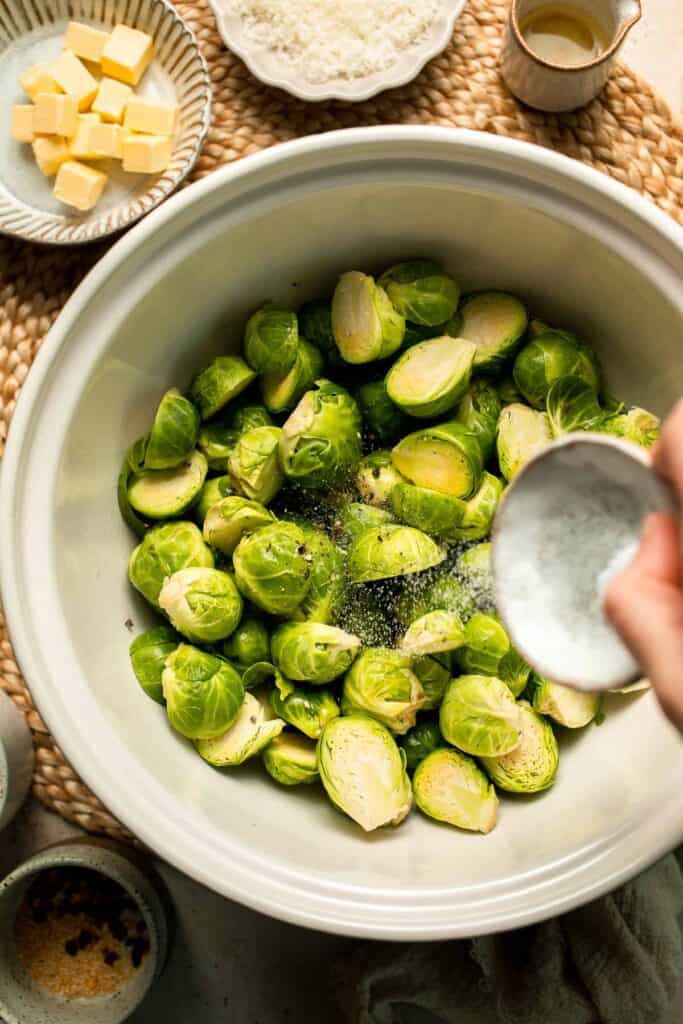
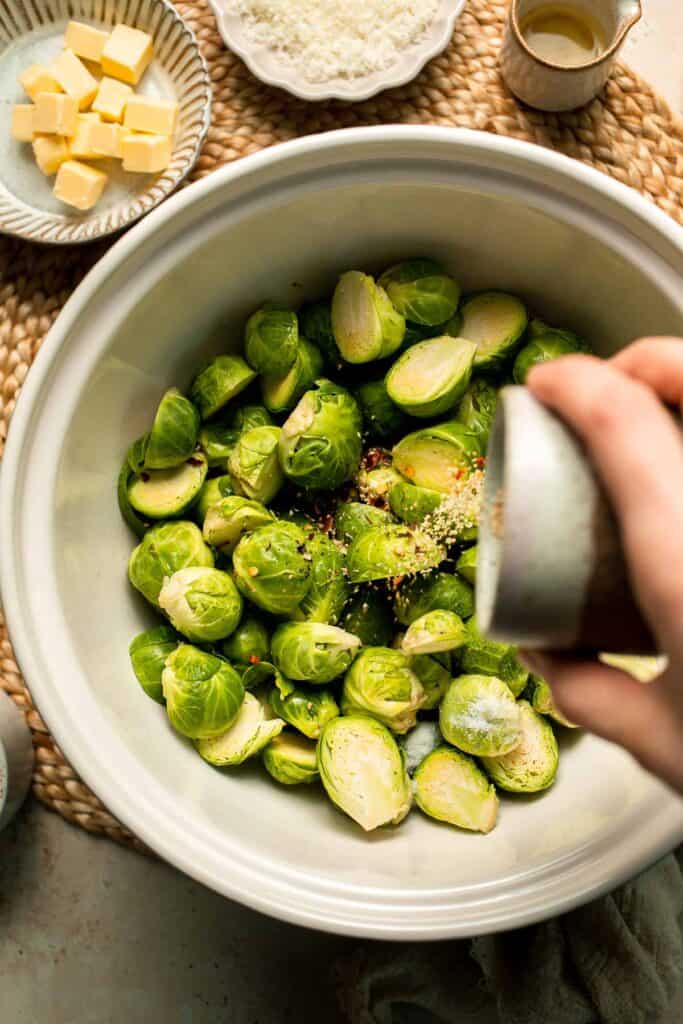
- Arrange on baking sheet. Spread brussels sprouts evenly on a large baking sheet, arranging most of the brussels sprouts with the flat side facing down.
- Roast. Place the tray in the oven and roast in a 425°F preheated oven for 20-30 minutes, until golden brown and caramelized. crisp on the outside and tender inside, with slight charring on the edges. Set aside. Drizzle with lemon juice before tossing into the pasta.
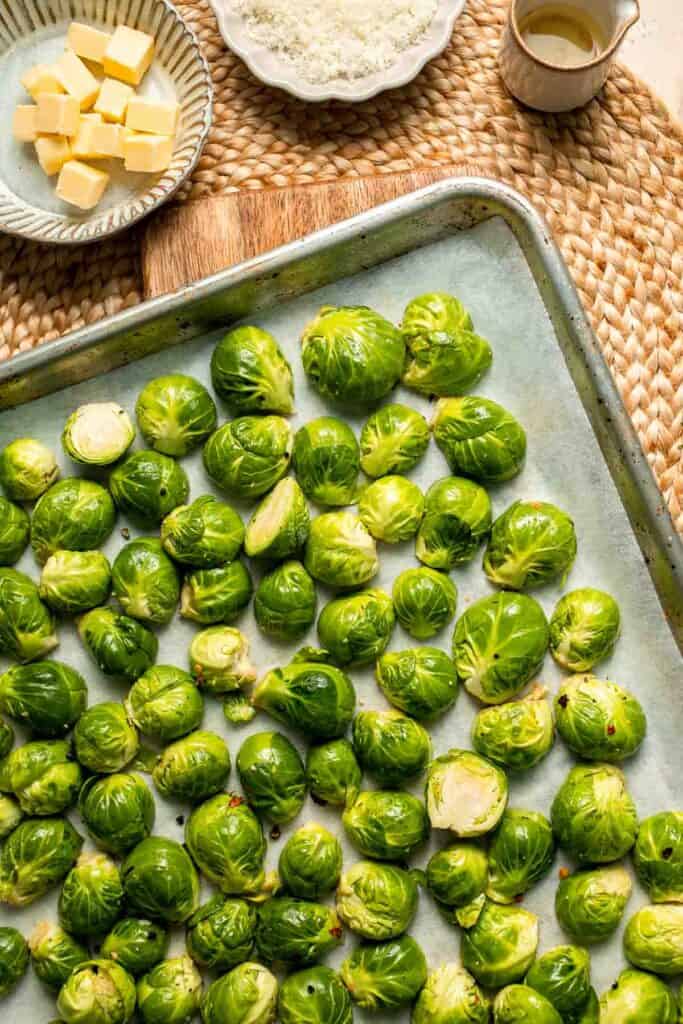
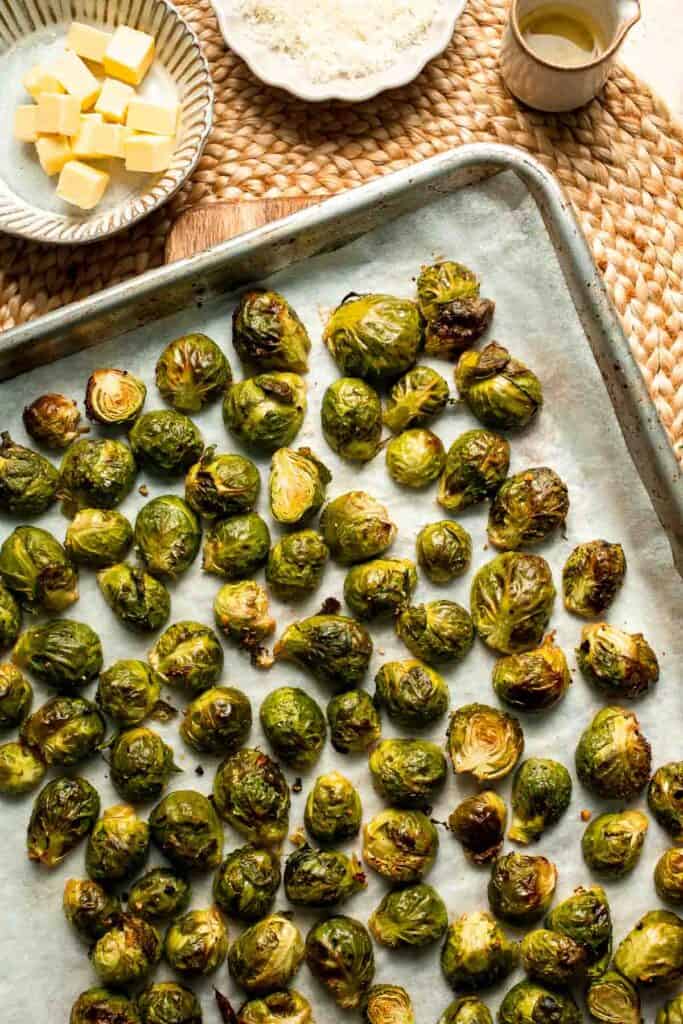
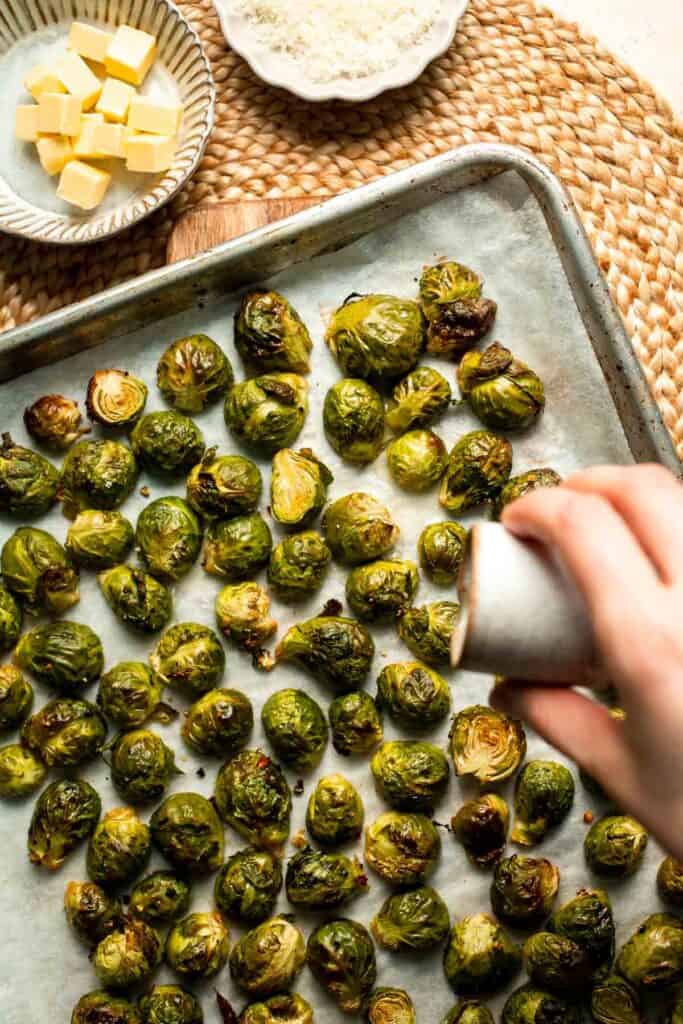
Step 2: Boil the pasta
While the brussels sprouts are roasting, Add pasta and cook until al dente, about 10 minutes or according to package directions. Reserve ½ cup pasta water, then drain and set aside.
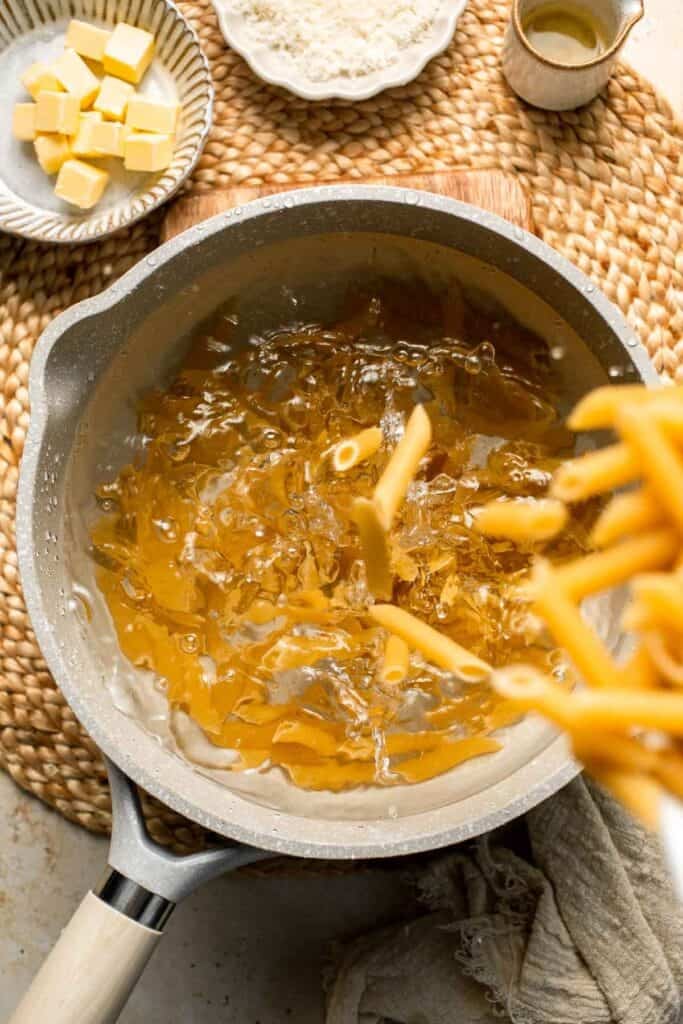
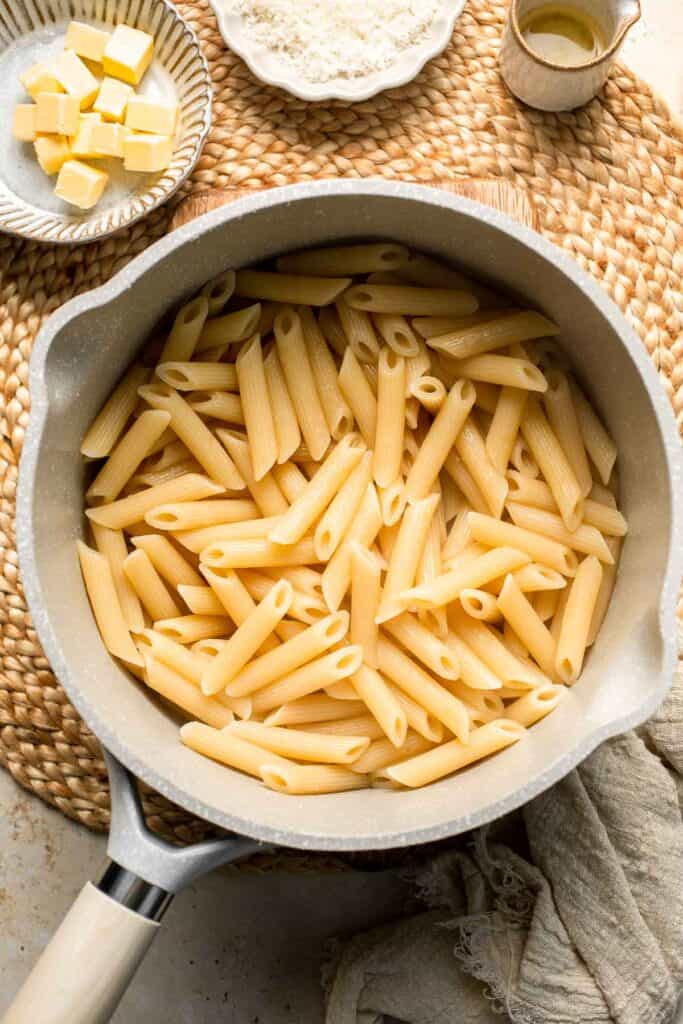

Step 3: Make the cream sauce
- Sauté the garlic. In a large skillet, melt butter over medium heat. Add garlic and sauté until fragrant, about 1 minute.
- Build the sauce. Stir in flour and cook until bubbling and golden, about 1 minutes. Slowly whisk in heavy cream until smooth. Reduce heat to medium-low and simmer for 2-3 minutes until slightly thickened.
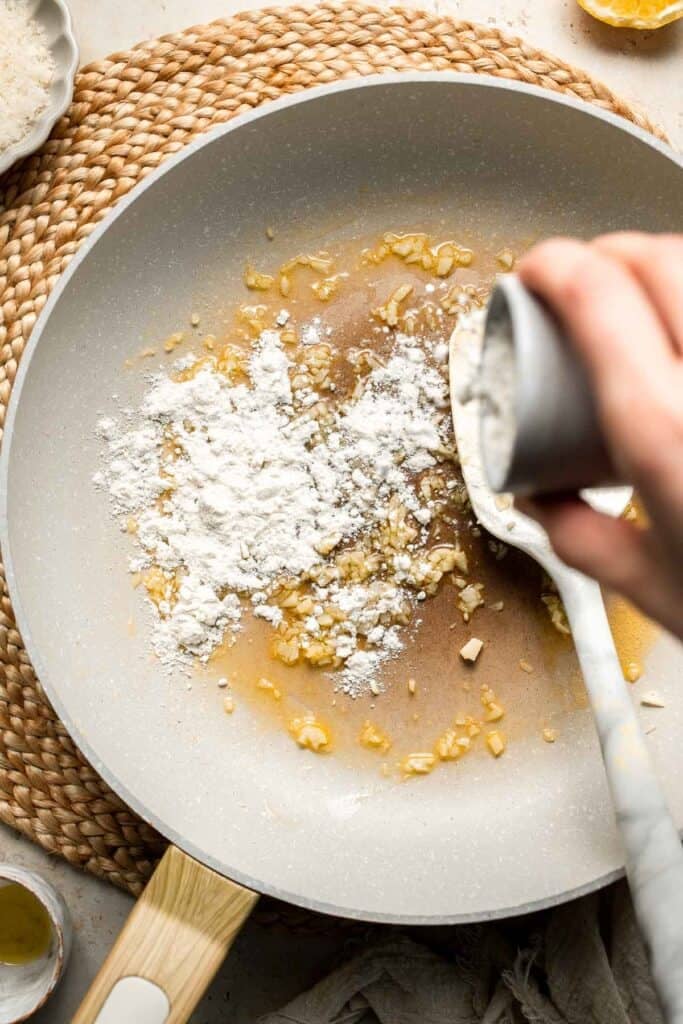
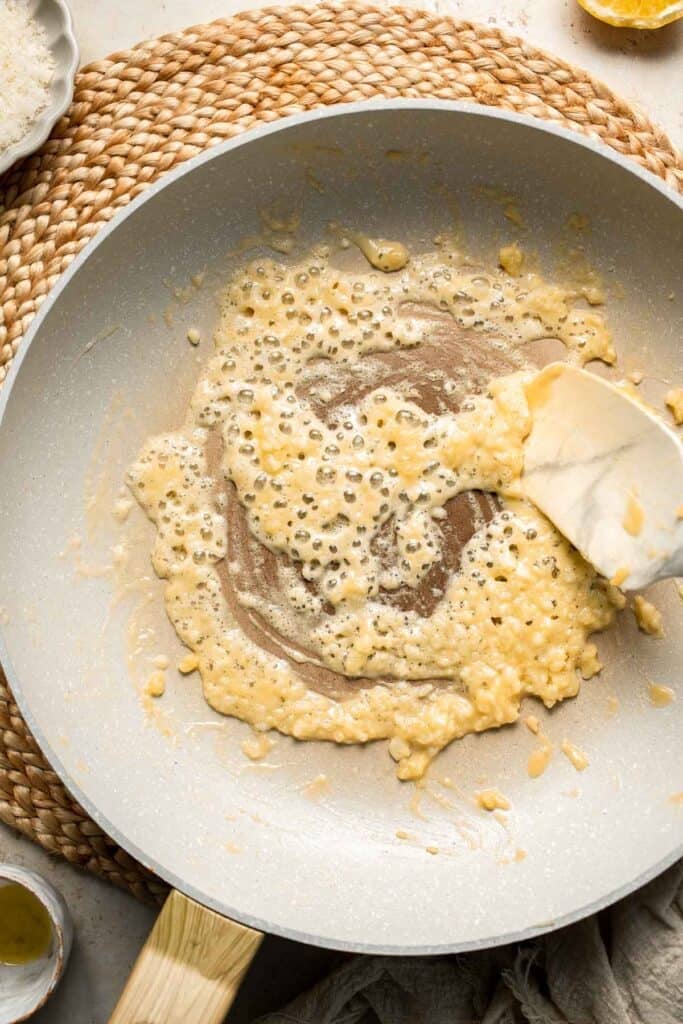
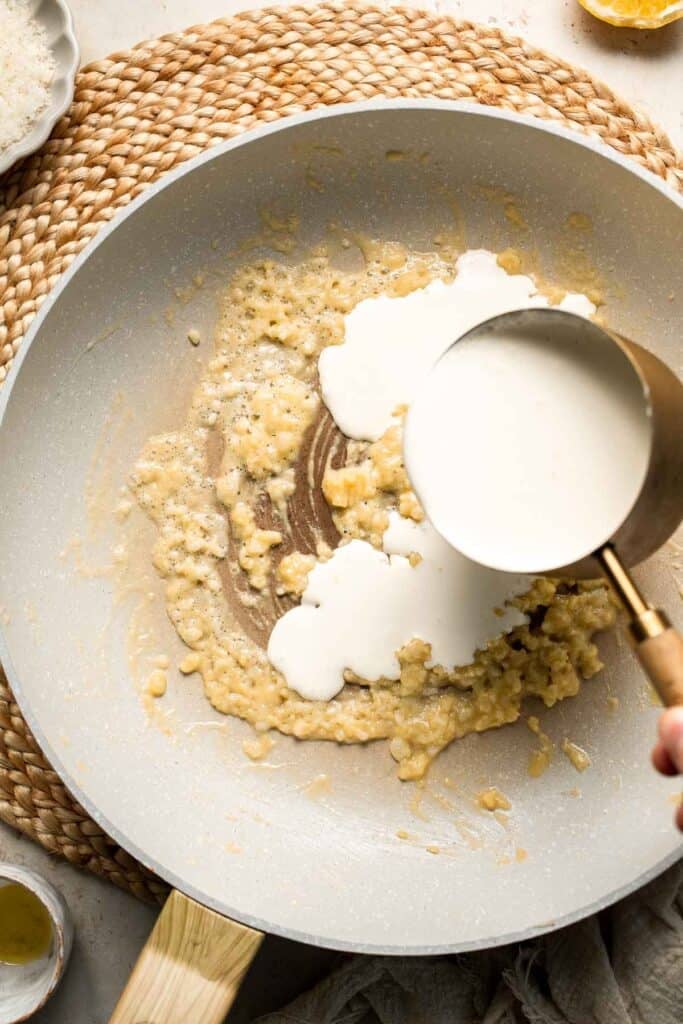
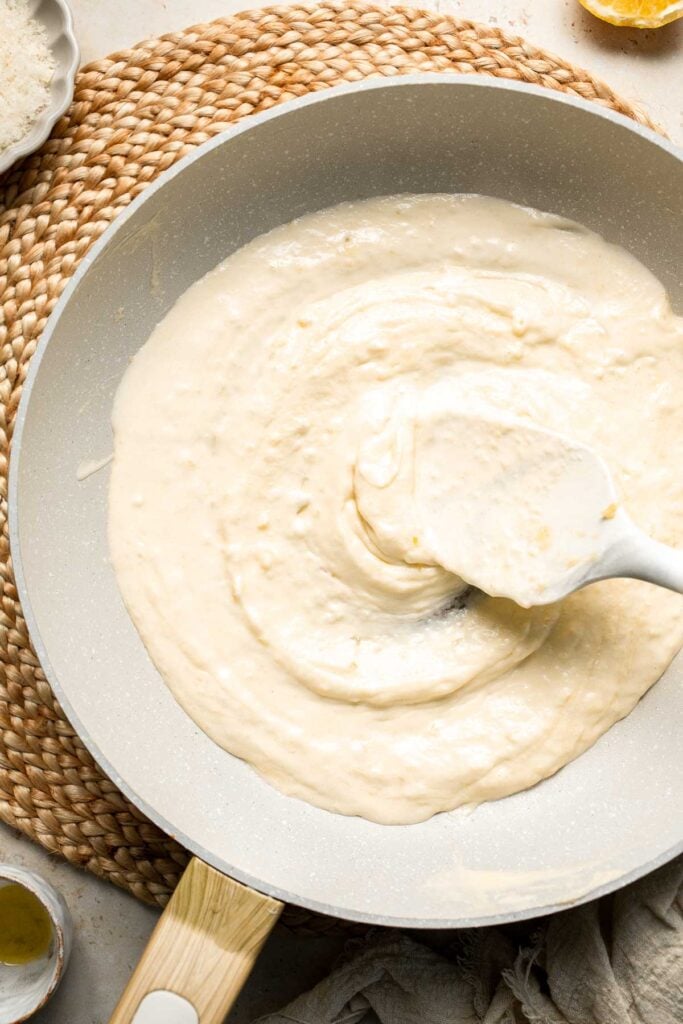
- Add cheese. Stir in Parmesan cheese and a pinch of nutmeg.
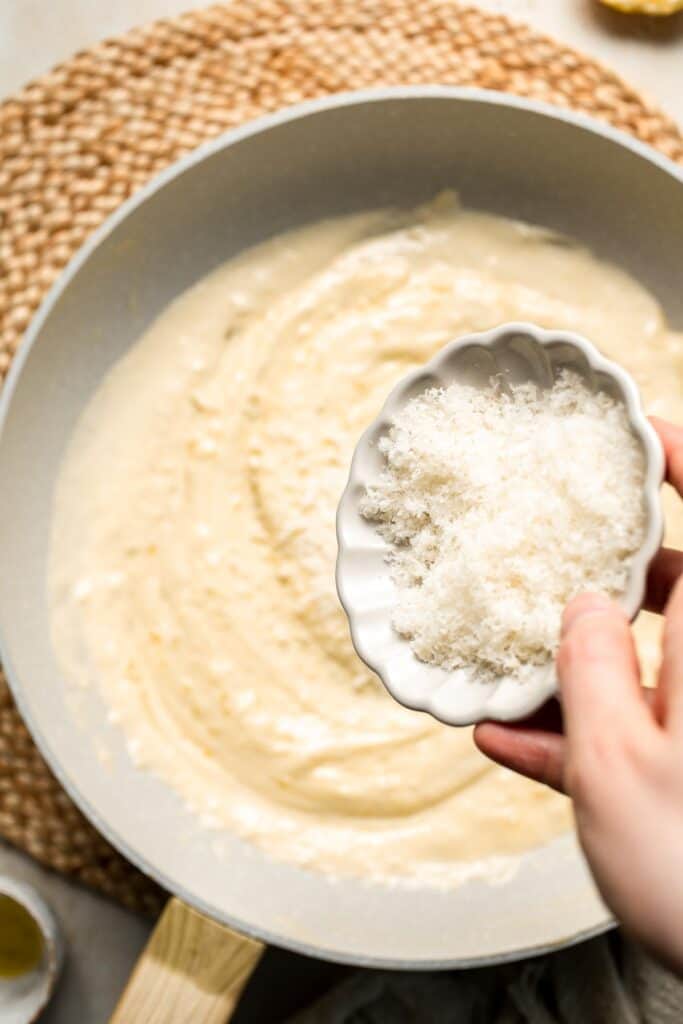
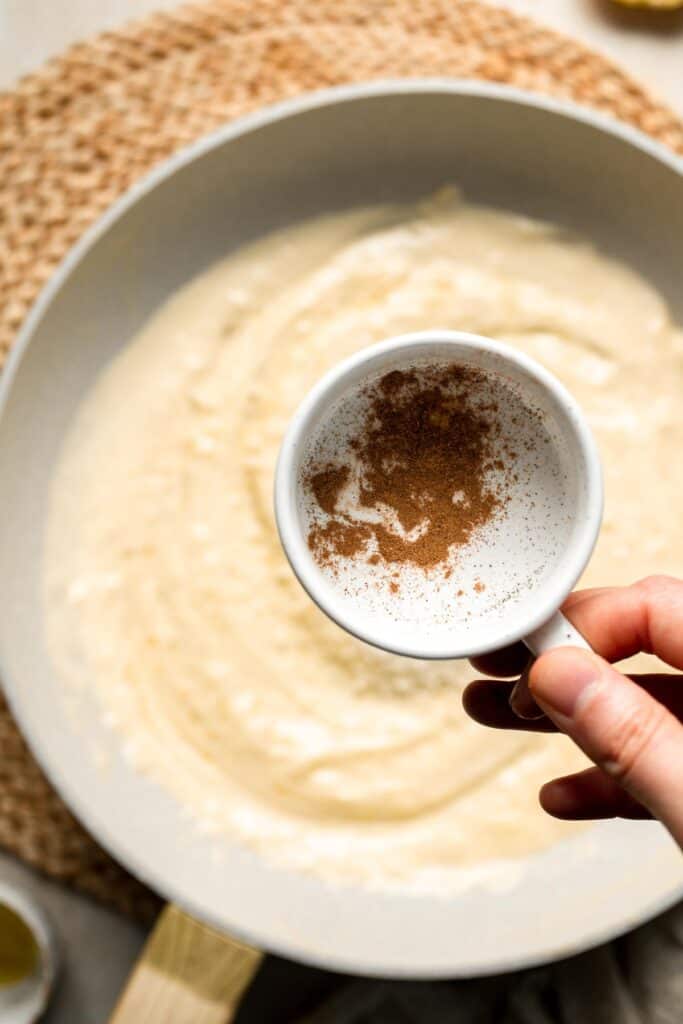
- Adjust consistency. If the sauce is too thick, add reserved pasta water, a little at a time. Season with salt and pepper to taste.
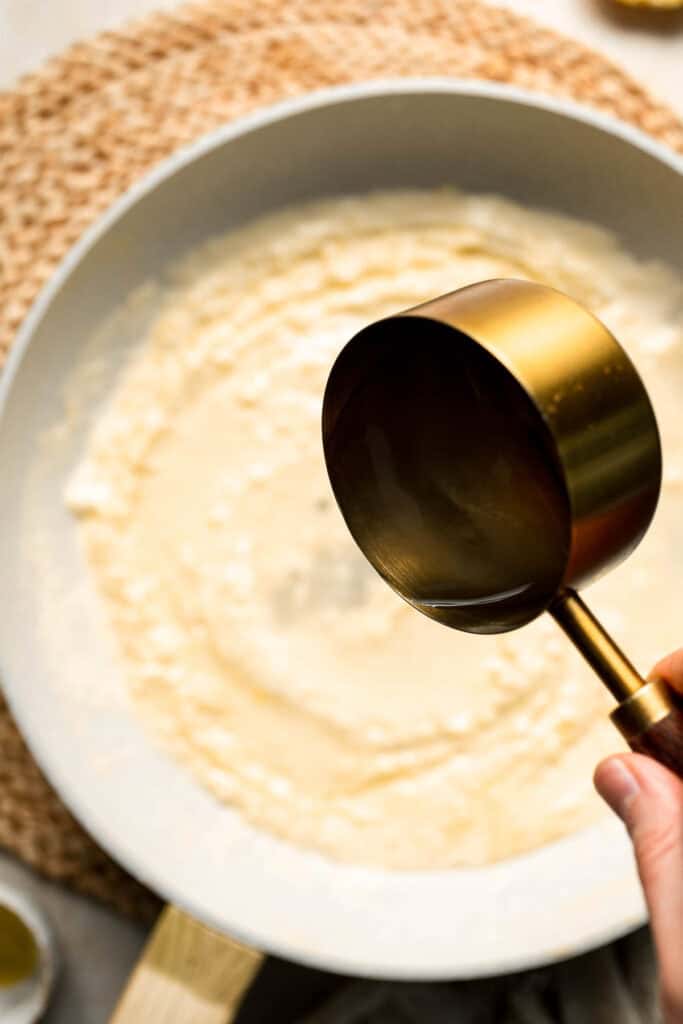
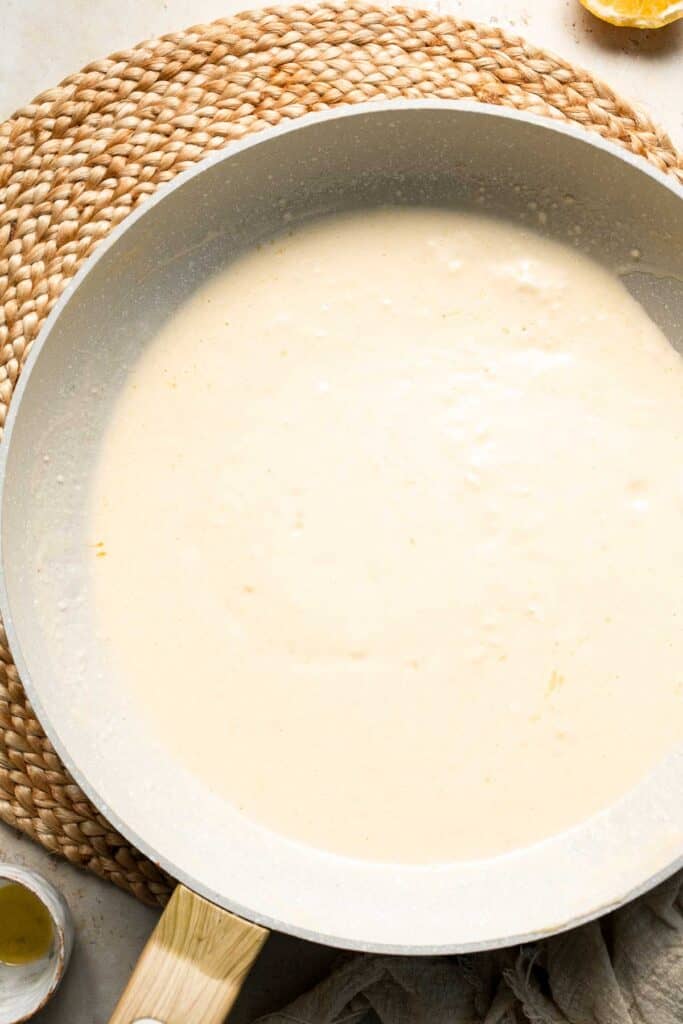
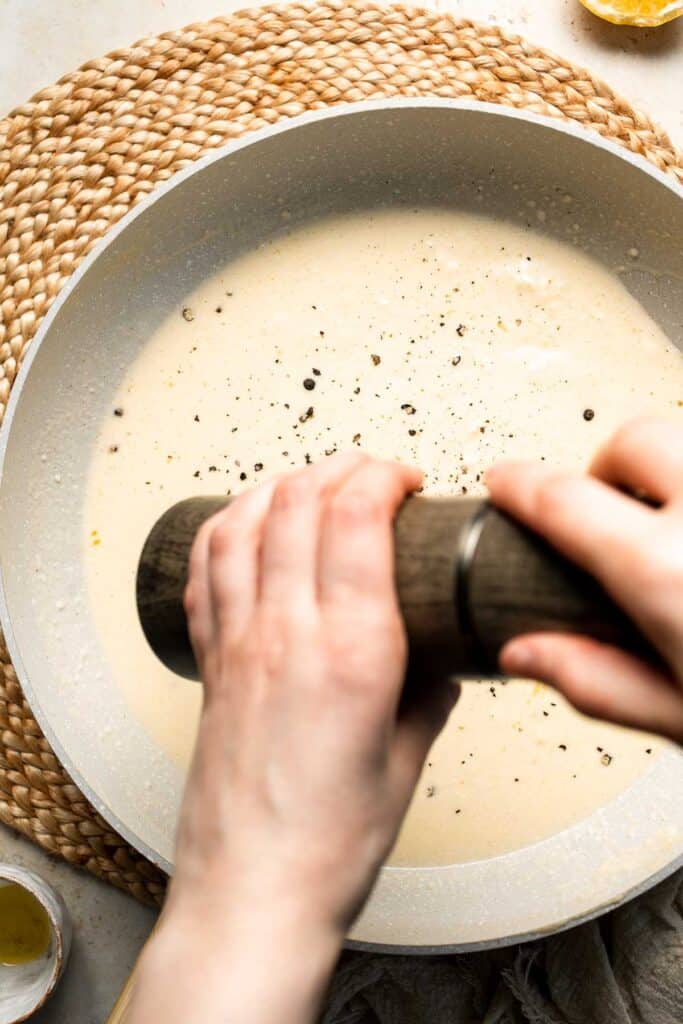
Step 4: Assemble and serve
- Toss together. Add cooked pasta and roasted brussels sprouts to the skillet with the sauce. Toss until evenly coated.
- Serve. Transfer to serving bowls and top with extra Parmesan, if desired. Serve immediately.
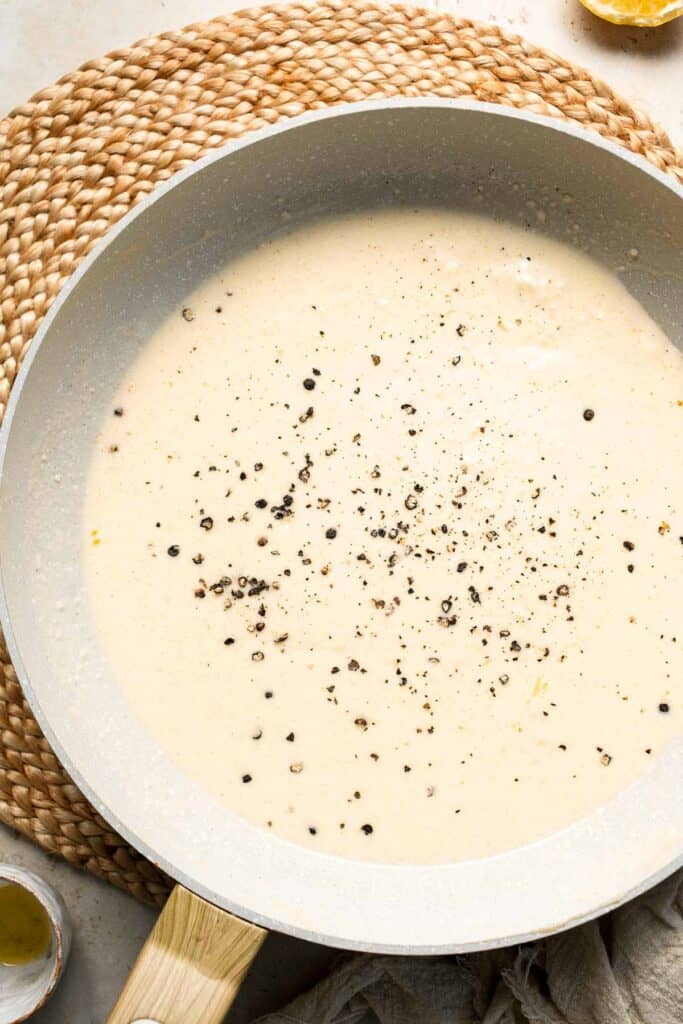
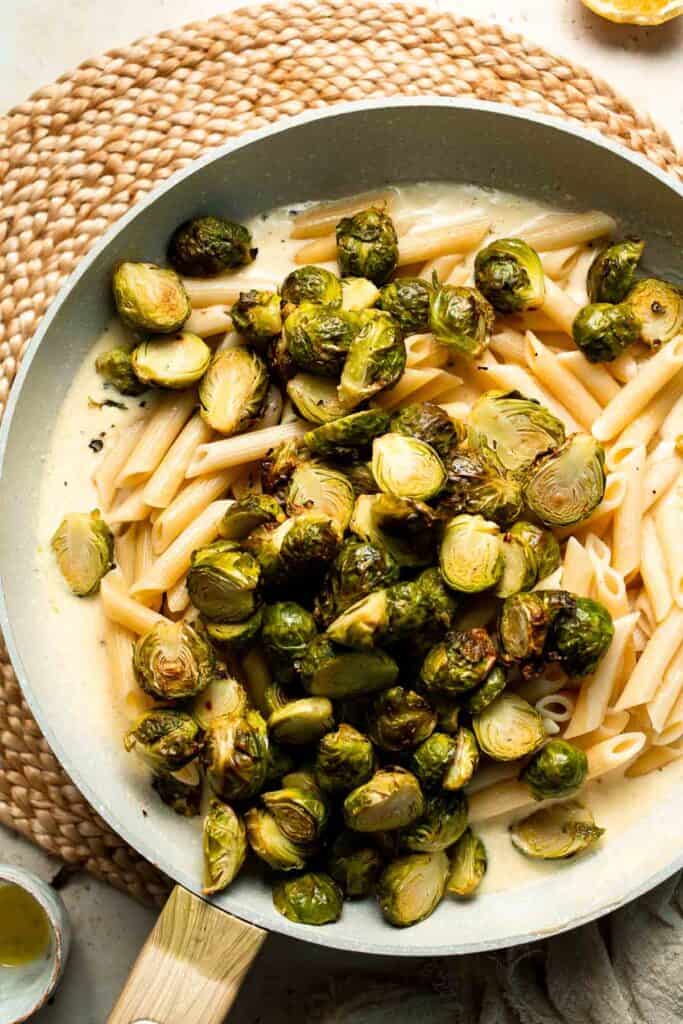
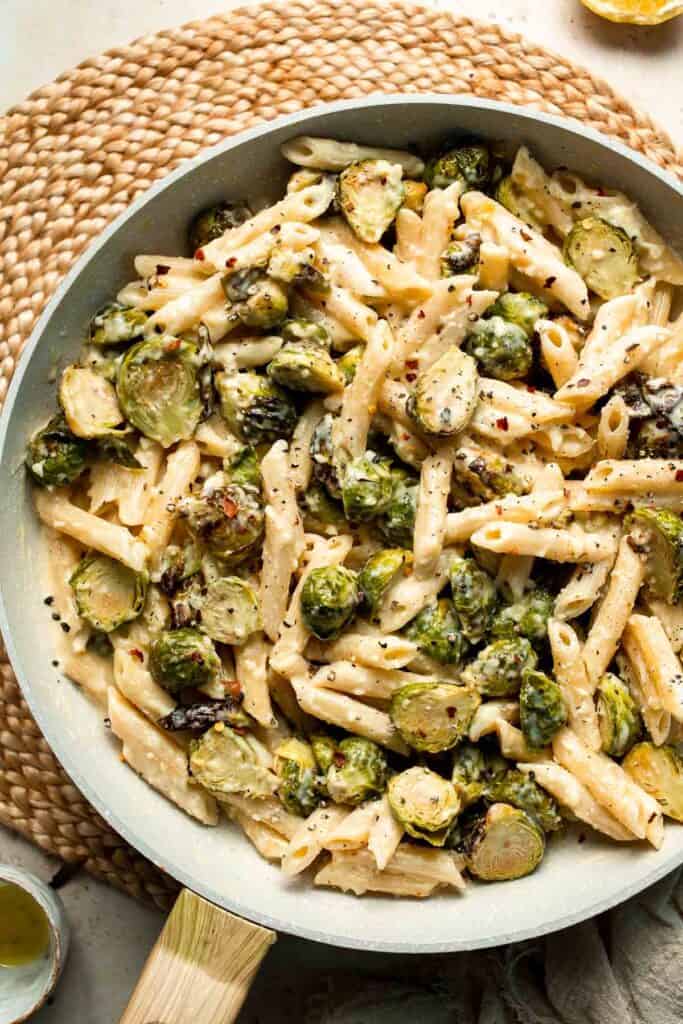
Using Leftover Brussels Sprouts
This pasta is the perfect way to use leftover Brussels sprouts from Thanksgiving or any holiday meal. If your sprouts are already cooked, you can skip the roasting step completely and add them straight into the pasta. For the best texture, warm them in a hot skillet for a minute or two to bring back some caramelization and help them crisp up again before tossing them in the sauce. Leftover sprouts often soften in the fridge, but a quick sear restores their flavor and gives the pasta the same golden, toasty taste as freshly roasted vegetables. It is a delicious, easy way to turn leftovers into a brand new meal.
Expert Tip: Roast the Brussels Sprouts Flat Side Down
Brussels sprouts caramelize best when most of them are arranged flat side down on the baking sheet. This creates maximum contact with the pan, giving you the deep golden color and crisp edges that make this pasta so delicious.
More Tips and Tricks
- Use plenty of heat for roasting. Brussels sprouts love high heat. Roasting them at 425°F helps them caramelize instead of steaming. Spread them out in a single layer on a large baking sheet so they brown instead of getting soft. Crowding the pan traps steam and prevents color, which takes away the sweetness and flavor you want in this dish.
- Reserve pasta water. Pasta water is liquid gold for cream sauces. It contains starch that helps the sauce cling to the noodles and keeps everything silky instead of thick or gloppy. Add a tablespoon at a time to adjust consistency without thinning the flavor.
- Do not overcook the sprouts. They should be crisp at the edges and tender in the center, not mushy. Check them at the 20 minute mark, and if they need more time, continue roasting until you see a deep golden color on the flat side.
- Stir the sauce gently. When adding cream and Parmesan, stir slowly so the cheese melts evenly and does not clump. Adding the cheese too quickly or at high heat can make the sauce grainy, so keep the temperature at medium low.
- Finish with lemon for brightness. A squeeze of lemon juice at the end lifts the entire dish. It balances the richness of the cream sauce and complements the sweetness of the roasted veggies. Even a small amount makes the flavors pop.
Recipe Variations
- Add bacon or pancetta. Cook until crisp, then toss into the pasta for a salty, smoky layer of flavor.
- Add mushrooms. Sauté sliced mushrooms in the butter before adding the garlic for extra earthy flavor.
- Spicy version. Add extra red pepper flakes to the sauce or toss in Calabrian chili paste for heat.
- Lemon herb version. Add lemon zest and fresh parsley for a lighter, brighter pasta.
- Pesto swirl. Stir a spoonful of basil pesto into the pasta for extra color and herb flavor.
- Chicken or shrimp. Add cooked chicken breast or quickly sautéed shrimp to make this dish heartier.
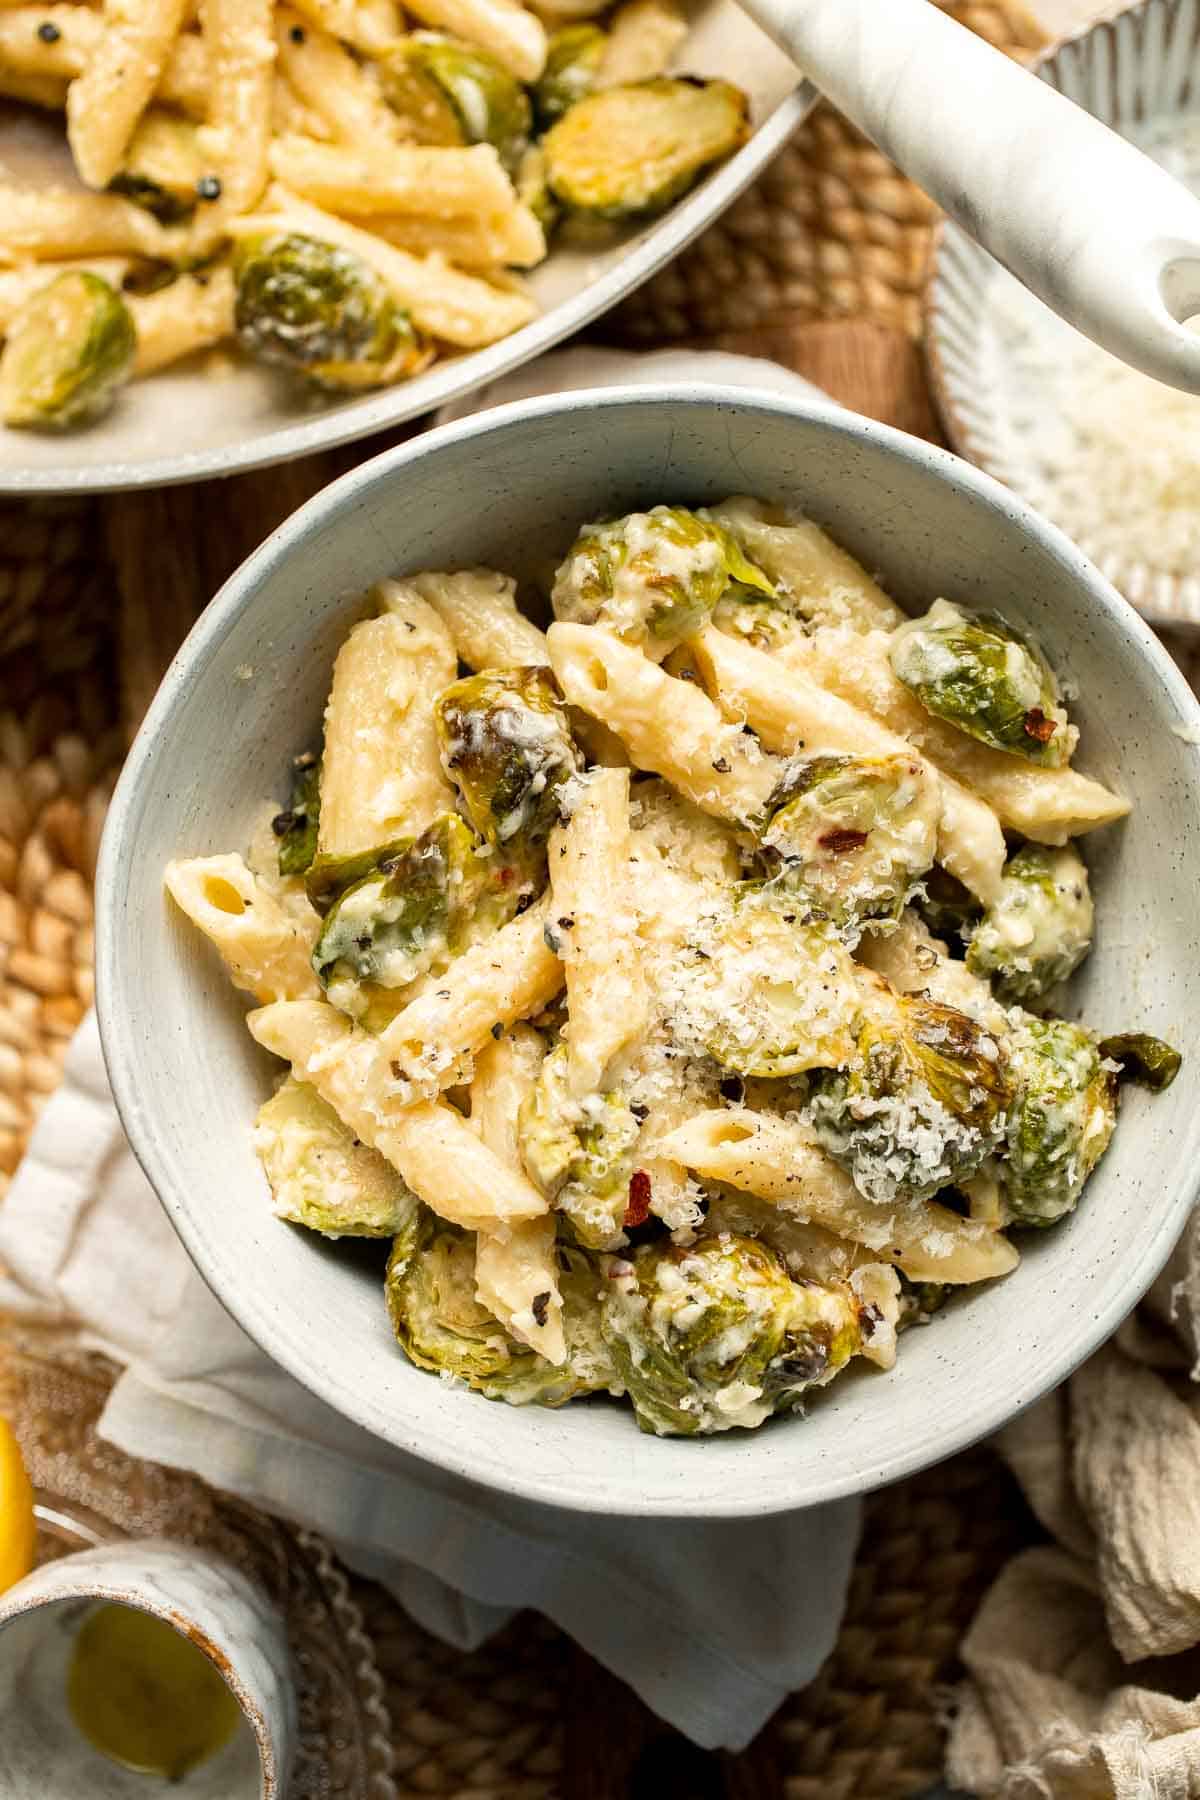
Storage
How to Store
Let leftovers cool, then store in an airtight container in the fridge for 3 to 4 days.
How to Reheat
Reheat in a skillet over medium heat, adding a splash of milk or reserved pasta water to loosen the sauce. Microwave reheating also works.
How to Freeze
This pasta freezes well in a freezer safe container for up to 2 months. Thaw in the fridge overnight and reheat on the stovetop with added liquid to refresh the sauce.
How to Serve
Serve this roasted Brussels sprouts pasta warm and creamy. It pairs beautifully with lemon garlic chicken, roasted vegetables, buttery garlic bread, or a simple green salad. It is hearty enough for a cozy weeknight dinner but special enough for entertaining, especially during the colder months when roasted veggies shine.
These are my favorite dishes to serve with this brussels sprout pasta:

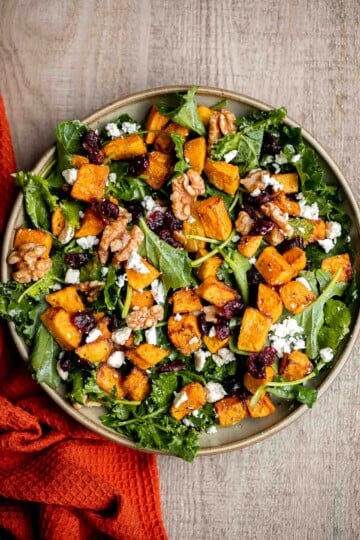
Side Dishes for Pasta
For more recipe ideas, check out our collection of pasta side dishes, featuring everything from fresh salads and roasted vegetables to crusty breads and flavorful appetizers that pair perfectly with any pasta dinner.
FAQ
Yes, Brussels sprouts are delicious in pasta. Roasting them first transforms their texture, giving you caramelized edges, tender centers, and a slightly sweet flavor that pairs beautifully with creamy sauces, olive oil based pastas, and Parmesan. Their hearty texture makes them a great stand in for other veggies, and they hold up well when tossed with warm noodles. They add color, depth, and a satisfying bite to creamy pasta dishes, lemon pasta, and even simple garlic butter noodles. Many people who do not love Brussels sprouts end up enjoying them in pasta because the flavors blend so naturally.
Frozen Brussels sprouts will not roast the same way because they contain more moisture, but they can still be used. To make them work, thaw completely and pat dry before roasting. They may not caramelize deeply, but they will still soften and develop flavor in the oven. If you use frozen sprouts, roast them longer until most of the moisture evaporates. Alternatively, you can sauté them in a skillet until browned. Fresh Brussels sprouts give the best golden results, but frozen is a workable option when needed.
Short pasta shapes work best because they catch the roasted sprouts and creamy sauce in their ridges and tubes. Penne, rigatoni, cavatappi, and farfalle are top choices. Long noodles like spaghetti can also be used, but they do not hold the roasted vegetables as well. If you want extra texture, use a ridged shape such as rigate pasta, which grips the sauce beautifully. You can also use gluten free pasta if needed, just be sure not to overcook it so it stays firm.
Brussels sprouts taste best when cooked in a way that brings out their natural sweetness. High heat is the secret. Roasting them at 425°F helps the outer leaves caramelize and turn golden brown, which reduces bitterness and adds a nutty flavor. Seasoning them well with salt, garlic, and a little olive oil helps them crisp up rather than steam. A squeeze of lemon juice or a sprinkle of Parmesan at the end brightens their flavor even more. If you want extra depth, add a touch of red pepper flakes, balsamic glaze, or herbs like thyme or rosemary.
If your sauce is too thick, slowly add reserved pasta water until it reaches a silky consistency. Pasta water loosens the sauce without diluting flavor. If the sauce is too thin, continue simmering on medium low heat until it reduces naturally. Adding more Parmesan also helps thicken the sauce. Avoid boiling the sauce, which can cause it to separate or become grainy. Gentle heat and gradual adjustments are the secrets to a smooth and creamy finish.
Yes, you can make a lighter version without losing creaminess. Replace the heavy cream with half and half, or use whole milk thickened with a teaspoon of extra flour. Keep the heat moderate so the sauce does not separate. You can also increase the lemon juice and add fresh herbs to brighten the dish while reducing richness. Another option is tossing the pasta with olive oil, garlic, and a bit of pasta water instead of making a full cream sauce. The roasted sprouts provide plenty of flavor on their own.
More Brussels Sprouts Recipes
Looking for other recipes like this? Try these:


Tried this recipe?
I'd love to hear what you think! Leave a comment and rating below to share your feedback. Your reviews help others discover this recipe and help me keep creating more free recipes for you. Snap a photo and tag me on social media @aheadofthyme too.

Cranberry Apple Walnut Stuffing
This Cranberry Apple Walnut Stuffing is a cozy, flavorful, and festive holiday side dish that brings together sweet apples, tart cranberries, warm herbs, and rustic bread baked until golden and crisp on top. It is everything you want in a Thanksgiving stuffing, with soft tender pockets inside and deliciously toasted edges on top. The combination of fruit, herbs, and hearty bread makes each bite feel comforting and full of homemade warmth.
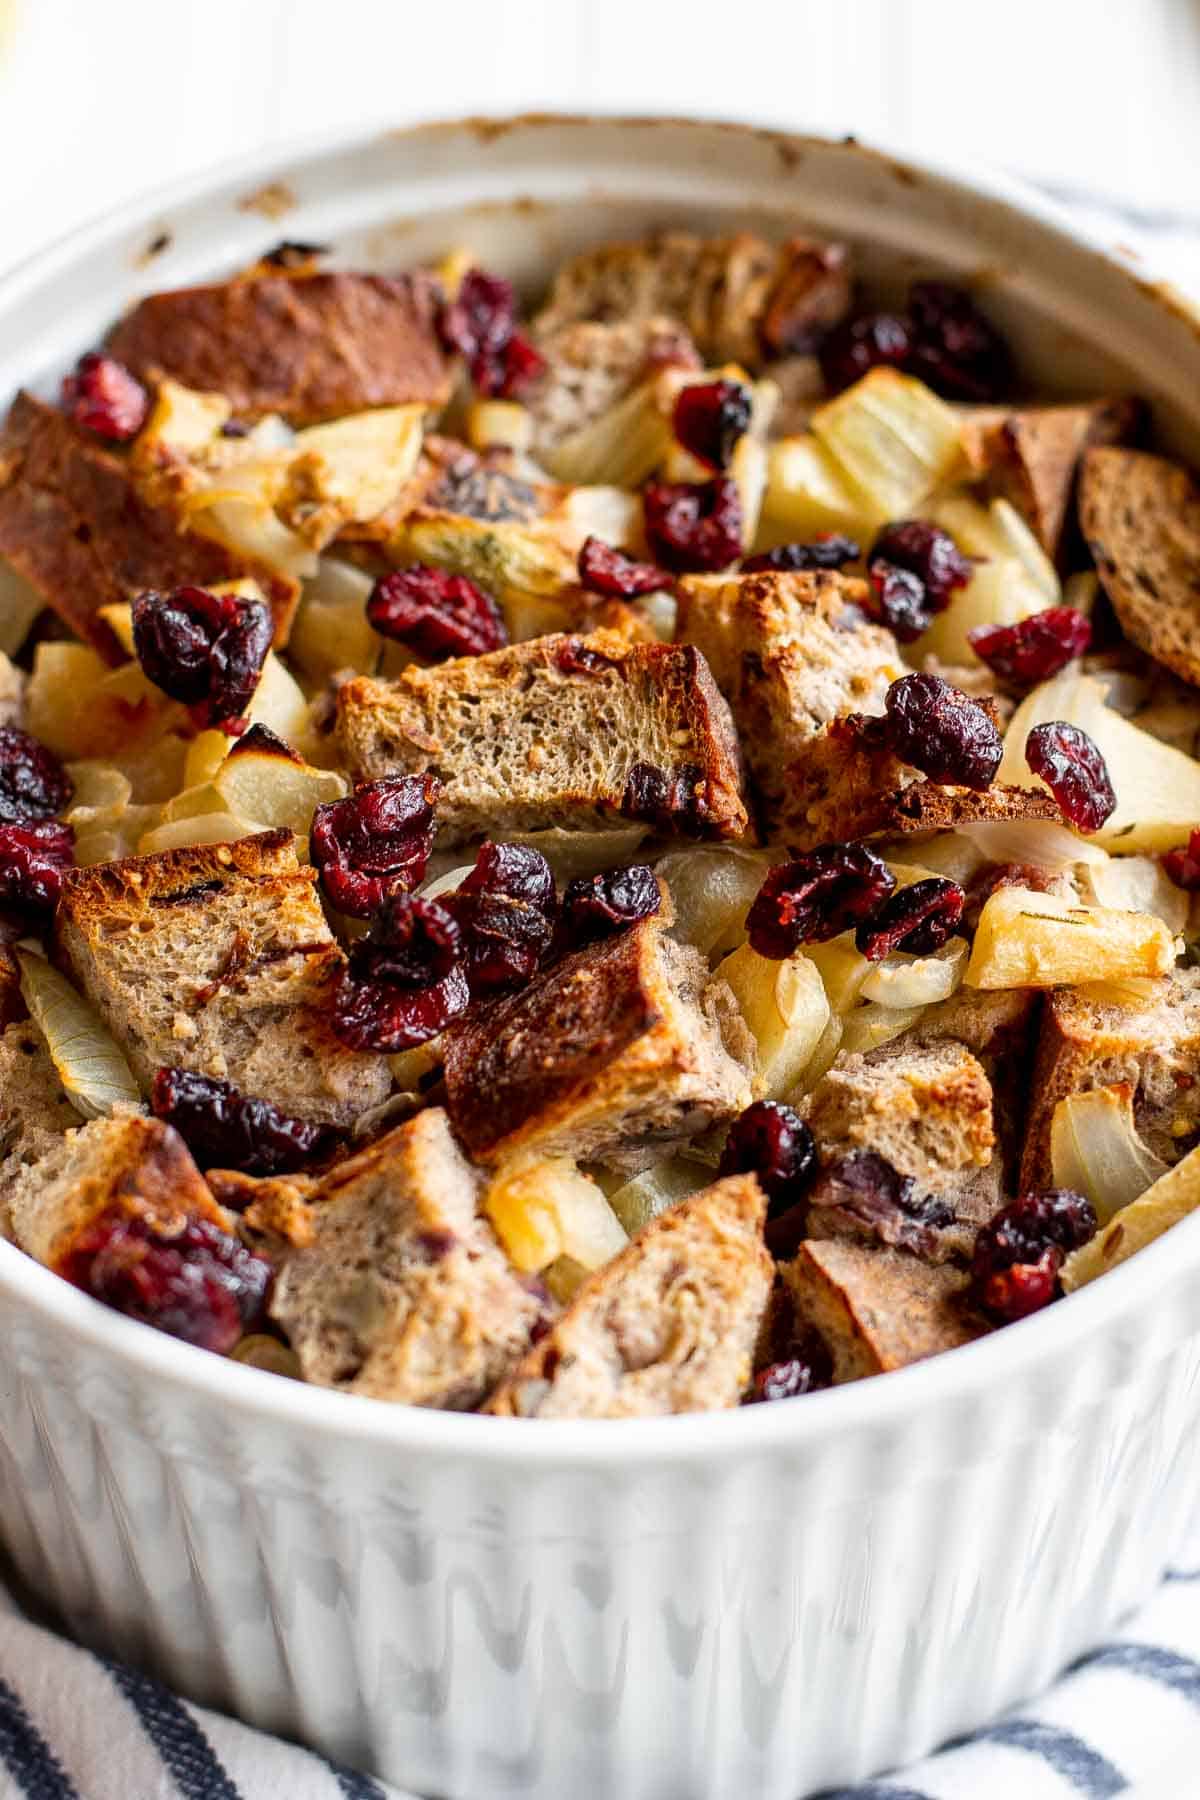
Stuffing is one of the most loved Thanksgiving sides because it feels nostalgic and familiar, but this version adds a bright, seasonal twist. The sweetness of the apples pairs beautifully with cranberry studded bread, and the toasted walnuts add richness and crunch. Rosemary and garlic round out the savory notes, giving this dish a perfect balance of sweet and savory flavors. It is simple to prepare, easy to bake, and always a crowd pleaser on a holiday table.
This stuffing recipe was inspired by my Classic Stuffing and my Cranberry Apple Chutney, and it pairs beautifully with Roast Turkey Breast or Creamy Mashed Potatoes for a complete Thanksgiving menu. Whether you are hosting a big gathering or bringing a dish to a potluck, this stuffing fits right into any fall or winter celebration.
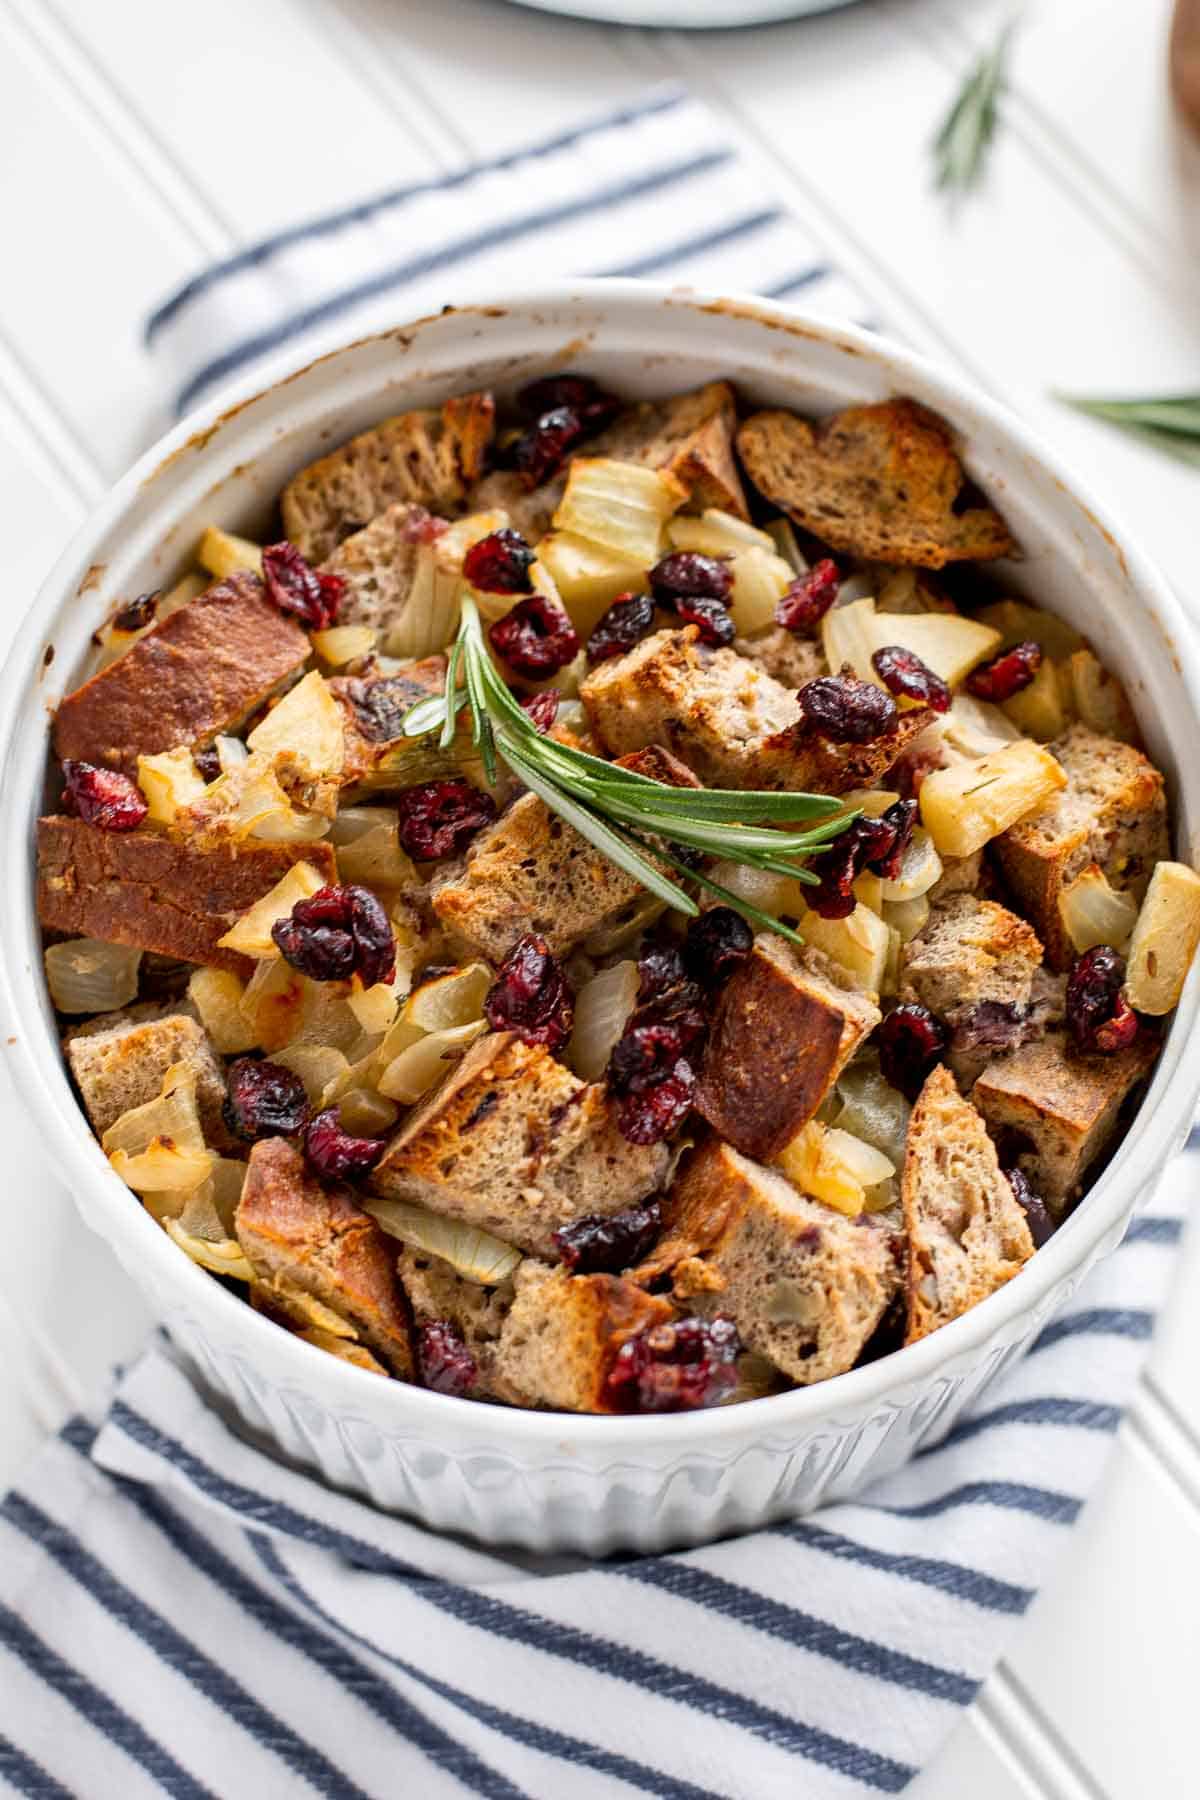
Why You'll Love This Recipe
- Perfect sweet and savory balance. Tart cranberries, sweet apples, warm rosemary, and hearty bread create a stuffing with rich flavor, soft centers, and crisp edges that feels festive, comforting, and holiday ready.
- Simple ingredients, big flavor. Everyday pantry staples blend beautifully when baked together, creating a cozy Thanksgiving stuffing that tastes impressive without requiring complicated steps or specialty ingredients.
- Flexible and customizable. Change the herbs, add nuts, switch the bread, or make it vegetarian. This stuffing adapts easily to different menus and works with almost any holiday main.
- Delicious leftovers. This stuffing reheats wonderfully and tastes even better the next day. Serve it alongside leftovers, in a sandwich, or warmed up with eggs for a cozy post holiday breakfast. I've been enjoying the leftovers with a drizzle of balsamic - it just takes it over the top!
Ingredients and Substitutions
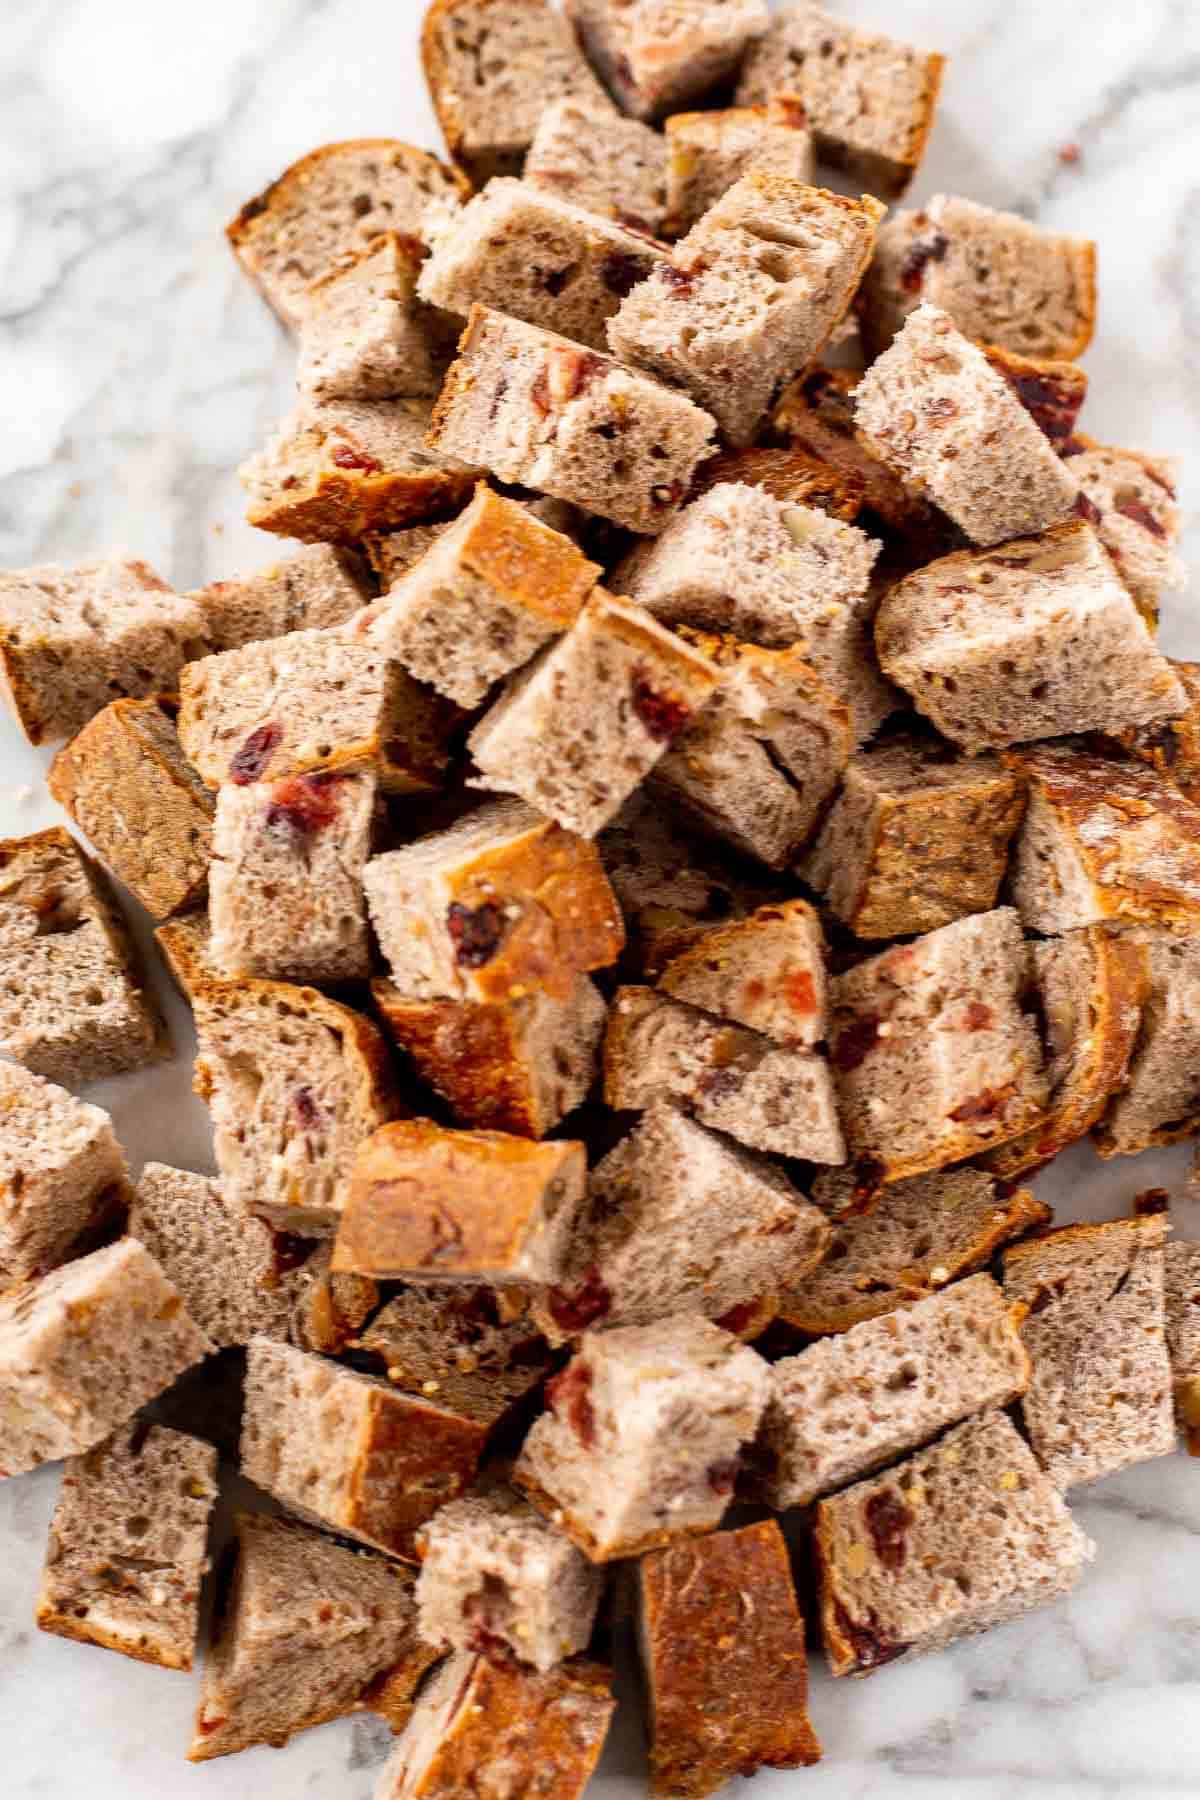
To make this delicious Cranberry Apple Walnut Stuffing, you will need the following ingredients (see recipe card below for quantities):
- extra virgin olive oil - Used to sauté the onions, apples, garlic, and herbs, adding richness and helping the aromatics caramelize. You can substitute with butter or avocado oil for a slightly different flavor.
- onion - Adds sweet and savory base flavor as it cooks down in a large skillet. Yellow or white onions work best, and you can add a little celery if you want extra veggie flavor.
- apple - Brings natural sweetness and moisture. Use Honeycrisp, Gala, or another firm apple so it holds its shape without turning mushy too quickly.
- garlic - Adds aromatic depth. Use freshly minced garlic or garlic powder in a pinch.
- rosemary - Fresh herbs provide warm flavor. You can replace some of the fresh rosemary with thyme or sage for more traditional stuffing flavor.
- cranberry walnut bread - Builds in sweetness and texture. I used a dense brown loaf, but ciabatta or a crusty baguette also work well. I chose a cranberry walnut bread to make things easier. If you are using plain white bread, simply add ½ cup dried cranberries and ¼ cup toasted walnut pieces (or substitute with pecans or pistachios) to replicate the flavor. Easy peasy.
- egg - Helps bind the stuffing together and creates a custard like texture when baked.
- heavy cream - Adds richness and moisture. Substitute with half and half for a lighter version.
- chicken broth - Keeps the stuffing moist. Use vegetable broth to keep the recipe vegetarian.
- salt and pepper - Enhances all the flavors. Adjust to taste based on the saltiness of your bread.
- melted butter - Optional but delicious for drizzling on top before baking.
- olive oil spray - Helps the top of the stuffing brown and crisp while keeping the surface light.
Equipment
You will also need measuring cups and spoons, a large sauté pan or skillet, mixing bowls, a whisk, a sharp knife, a cutting board, a spoon or spatula for tossing, a small baking dish or 2 quart casserole, and a large baking sheet if toasting bread cubes.
Instructions
- Sauté the aromatics. Heat olive oil in a large pan over medium-high heat. Add onions, season with a pinch of salt and pepper, and sauté until translucent, about 5-7 minutes. Add apples and cook for 3-5 minutes until slightly softened. Stir in garlic and rosemary, cook for 1 minute, then remove from heat.
- Combine the bread and vegetables. Place the cubed bread into a large mixing bowl and pour the cooked onion mixture on top.
- Mix the custard. In a small mixing bowl, whisk together the egg, heavy cream, chicken stock, salt, and pepper. Pour the mixture over the bread and toss well to combine, adding a splash more stock if the bread looks too dry.
- Bake. Transfer the stuffing mixture into a greased small baking pan or 2-quart baking dish. Lightly coat the top with olive oil spray. Bake in a 375°F preheated oven for 30 minutes or until the edges are browned and the top feels set.
- Serve. Serve warm and garnish with extra cranberries if desired.
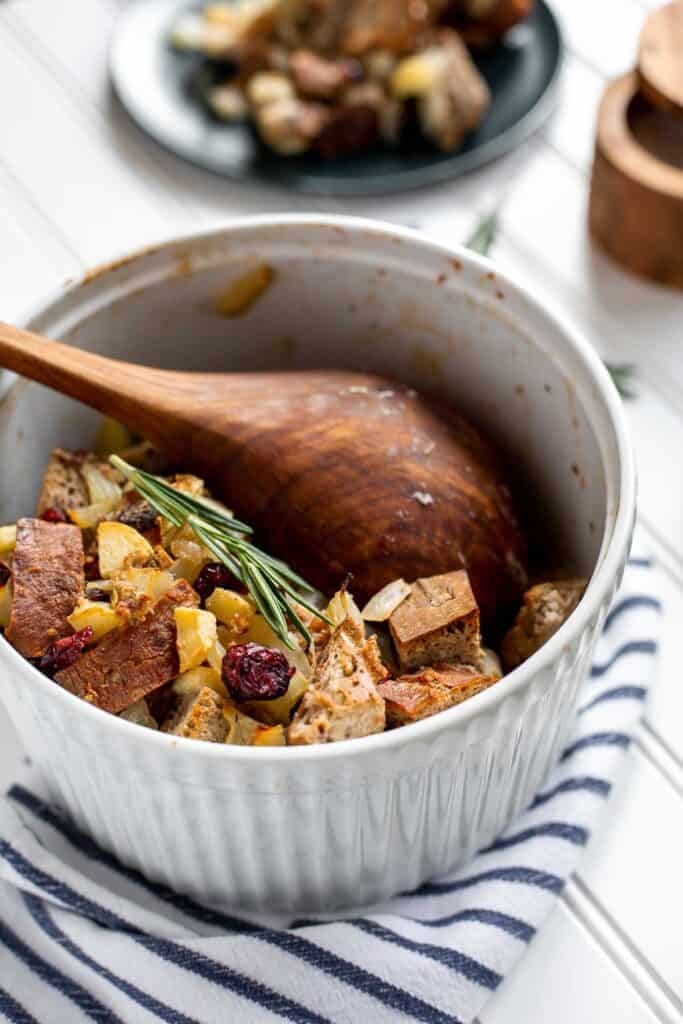
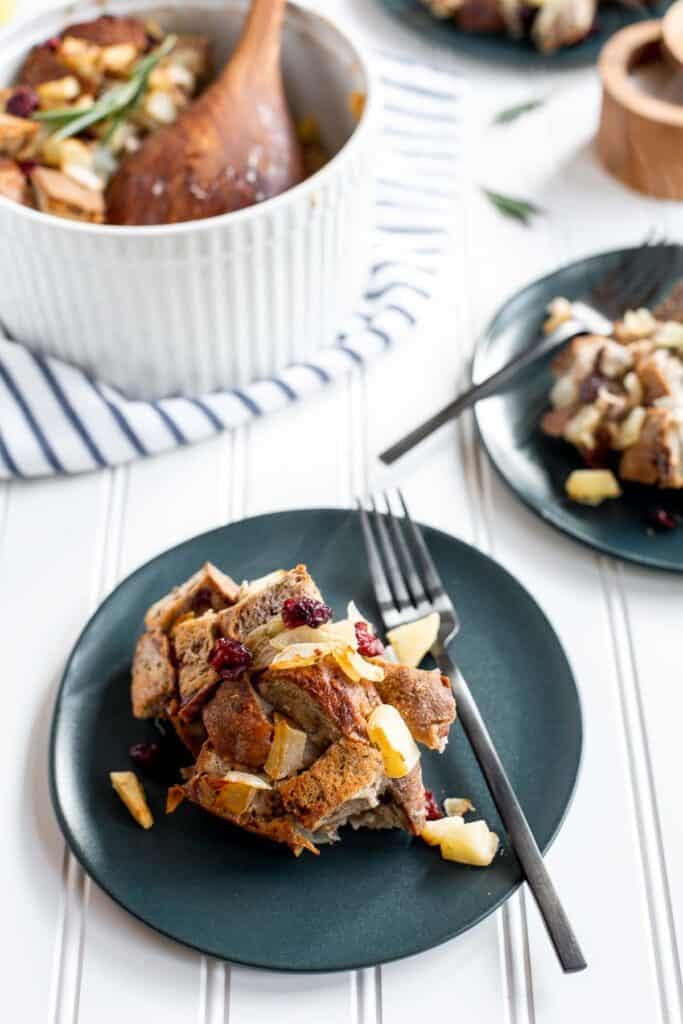
Expert Tip: Dry Your Bread for Better Texture
Stuffing turns out best when the bread is dry enough to soak up the egg and stock mixture without becoming soggy. If your cranberry walnut bread is very fresh, toast the cubes on a baking sheet (in a single layer) at 325°F for about 10 minutes to dry them slightly. Dry bread acts like a sponge, absorbing moisture evenly and creating a stuffing with a soft interior and crisp edges.
More Tips and Tricks
- Cut the bread into even cubes. Evenly sized pieces ensure the stuffing bakes uniformly and absorbs the custard mixture properly. If the cubes are too large, the center may stay dry, so aim for consistent 1 inch pieces.
- Taste the aromatics before mixing. The onions, apples, garlic, and rosemary are the flavor base. Taste them after sautéing and adjust the seasoning before adding to the bread. This helps your stuffing come out perfectly seasoned.
- Do not skip the rest after baking. Letting the stuffing sit for a few minutes after removing it from the oven helps the custard set and makes scooping easier. This resting time also allows the flavors to meld.
- Add extra stock if needed. Depending on how dry your bread is, you may need a splash more stock. The mixture should feel moist but not wet. If it looks dry, stir in one to two tablespoons more stock.
- Toast the walnuts for better flavor. A quick toast in the oven or skillet deepens their nutty aroma and adds extra crunch. This helps the walnuts stand out against the soft bread and sweet apples.
Recipe Variations
- Classic herb stuffing. Replace the cranberry walnut bread with French bread and use sage and thyme for a traditional flavor profile.
- Sausage stuffing. Brown your favorite sausage and mix it with the bread cubes before baking for a more savory, hearty dish. See our Sausage Stuffing for more instructions.
- Cranberry orange stuffing. Add a teaspoon of orange zest and a splash of orange juice to the custard mixture for a bright citrus twist.
- Walnut pecan mix. Use a combination of walnuts and pecans for deeper nutty flavor and added crunch.
- Apple pear stuffing. Replace half the apple with diced pear for a softer, sweeter variation that works beautifully with rosemary.
- Vegetarian version. Use vegetable stock instead of chicken stock. It keeps the recipe fully vegetarian while still giving you that classic comfort foods vibe that fits beautifully with weeknight dinner menus.
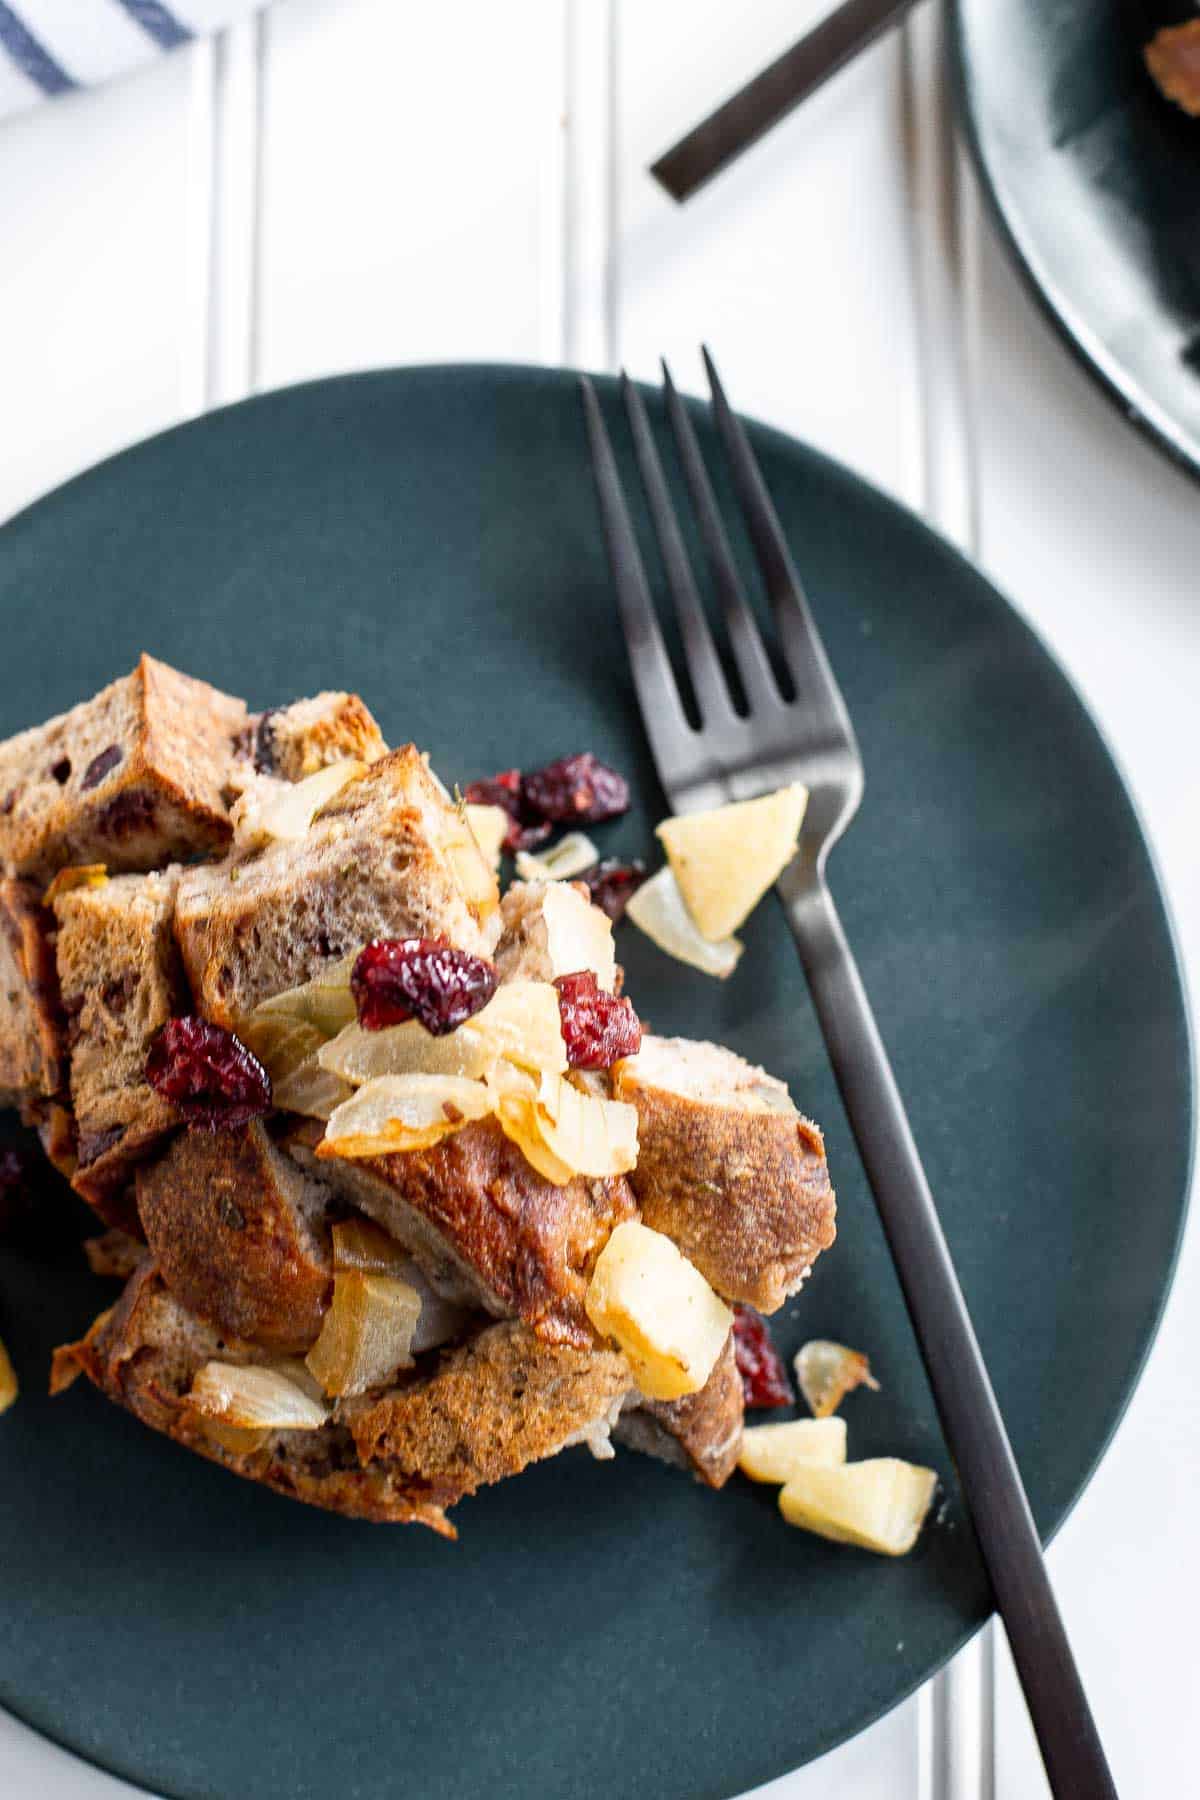
Storage
How to Store
Cool the stuffing completely, then transfer it to an airtight container. Store in the fridge for 3 to 4 days. The flavors deepen as it sits, making it even tastier the next day.
How to Reheat
Reheat in the oven at 325°F until warmed through. Cover with foil if the top is browning too quickly. You can also reheat single servings in the microwave.
How to Freeze
Place leftover stuffing in a freezer safe container and freeze for up to 2 months. Thaw in the fridge overnight before reheating in the oven until warmed through.
How to Serve
This Cranberry Apple Walnut Stuffing is perfect for Thanksgiving, Christmas, or any fall or winter dinner. It brings sweetness, texture, and warm herbal flavor to the table and pairs beautifully with roasted meats, gravy, and classic holiday sides. Add a little fresh parsley before serving for color, if desired.
These are my favorite dishes to serve with this bread stuffing:
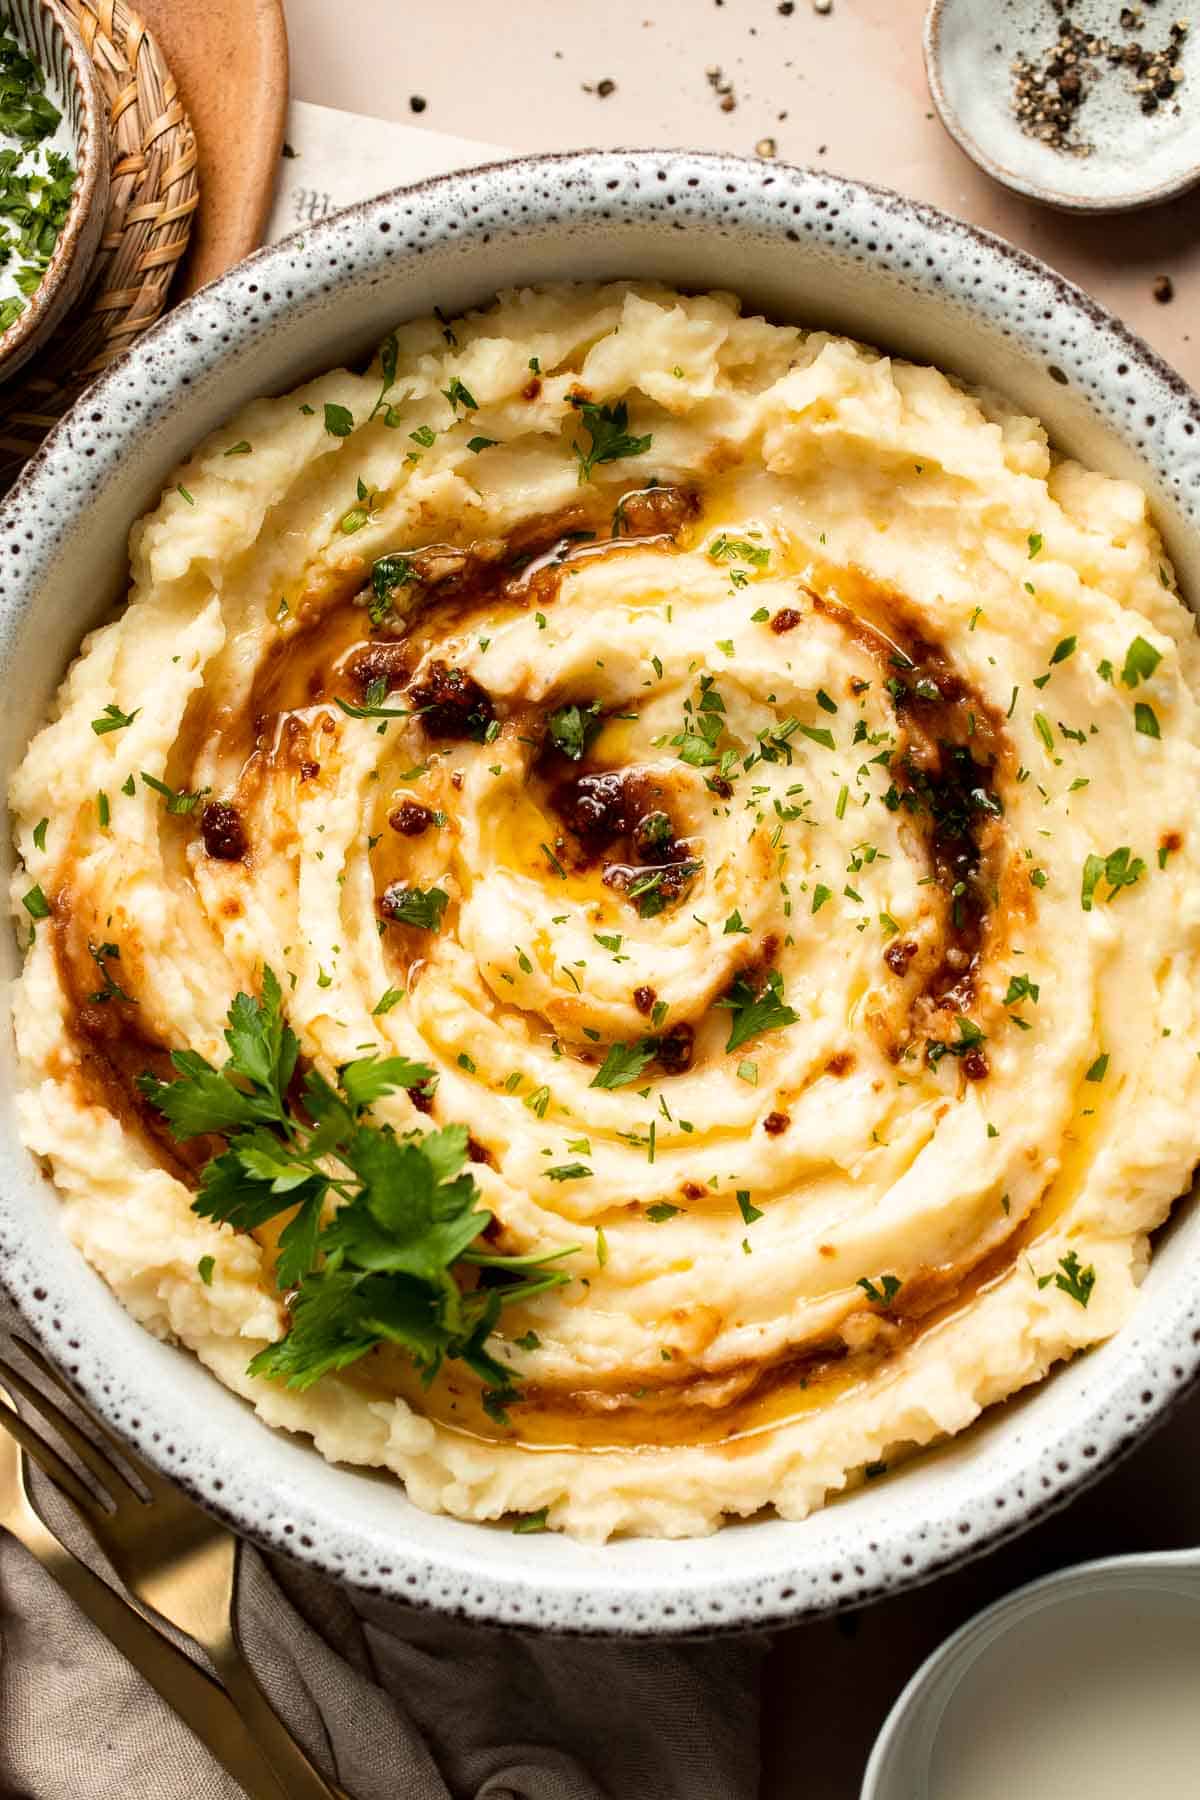
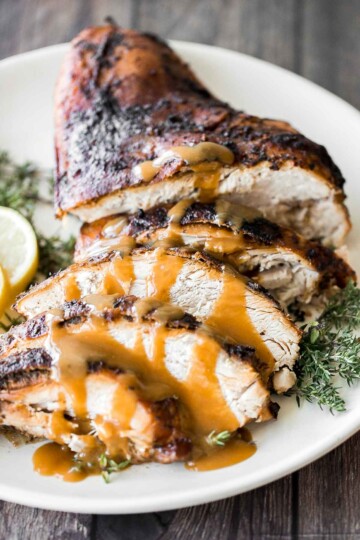
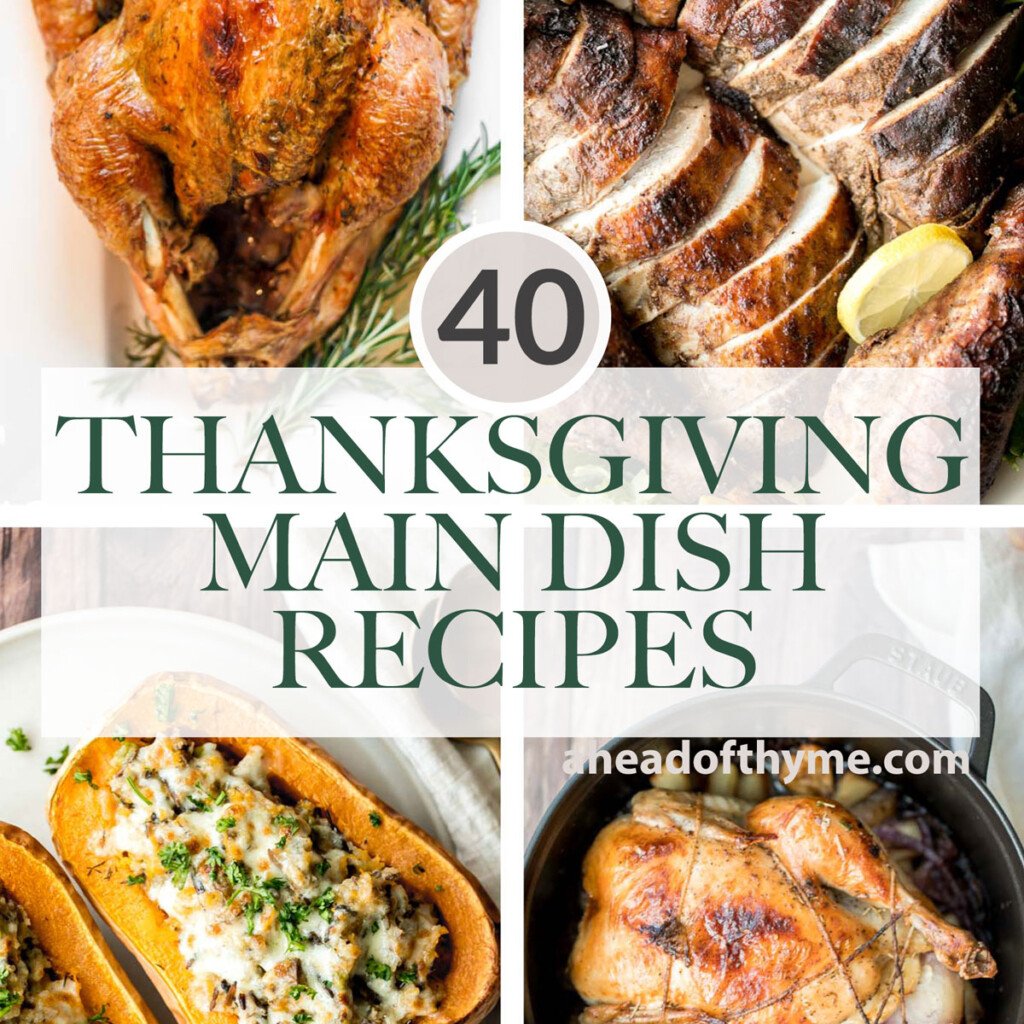
Thanksgiving Mains
If serving this as a side dish for Thanksgiving, pair it with one of our delicious mains. From roasted turkey and glazed ham to savory vegetarian roasts and hearty stuffing-filled options, these recipes help create a memorable holiday feast your family and guests will love.
FAQ
Apple cranberry stuffing is made by sautéing onions, apples, garlic, herbs, and a little celery (if desired) in a large skillet until softened. Combine them with cubed bread in a large bowl. Whisk together an egg, cream, and stock in a small bowl, then spoon the mixture over the bread, stirring until evenly moistened. Add dried cranberries and walnuts if your bread does not already include them. Transfer to a greased baking dish and bake until the top is golden brown and the center feels set. The bread absorbs the custard mixture and bakes into a soft, flavorful stuffing with crisp edges.
Yes, this stuffing is an excellent make ahead option. You can prepare the entire dish, assemble it in your baking dish, cover it tightly, and refrigerate it for up to 24 hours before baking. When ready to cook, simply place it in the oven and bake as directed, adding a few extra minutes if it is going in cold. You can also bake the stuffing fully, cool it, and reheat it the next day. Just add a splash of stock before reheating to keep it moist.
Absolutely. If you cannot find cranberry walnut bread, use any sturdy loaf such as sourdough, French bread, or multigrain. To replicate the flavor, add one half cup dried cranberries and one quarter cup toasted walnut pieces to the bowl with the bread cubes. The result will be very close to the original recipe. Make sure the bread is slightly dry so it absorbs the egg and stock mixture properly.
Firm, crisp apples such as Honeycrisp, Granny Smith, Fuji, or Gala hold their shape well during baking. Softer varieties break down and can make the stuffing mushy. Honeycrisp is a great option for sweetness, while Granny Smith brings a subtle tartness that complements the cranberries beautifully.
Dry stuffing usually means the bread did not absorb enough liquid. The moisture level depends on how dry your bread was to begin with. If your mixture looks dry before baking, add an extra splash of stock until the pieces feel evenly moistened. Bread that is too fresh may also resist absorbing liquid, so lightly toasting the cubes helps. During reheating, always add a spoonful of stock to restore moisture without making the stuffing soggy.
More Stuffing Recipes
Looking for other recipes like this? Try these:
Tried this recipe?
I'd love to hear what you think! Leave a comment and rating below to share your feedback. Your reviews help others discover this recipe and help me keep creating more free recipes for you. Snap a photo and tag me on social media @aheadofthyme too.
This recipe was originally published in 2017. It has since been updated with helpful content.
Vegetarian Meatloaf (Lentil Walnut Meatloaf)
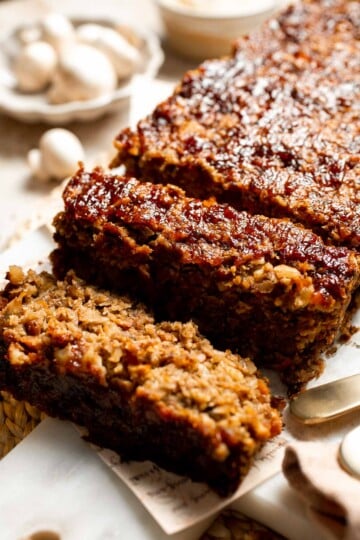
This Vegetarian Meatloaf is hearty, flavorful, and incredibly satisfying, made with a savory mixture of lentils, vegetables, walnuts, mushrooms, and warm seasonings. It slices beautifully, holds together perfectly, and has the same comfort food appeal as traditional meatloaf, all while being completely meatless. The glaze on top adds extra sweetness and tang that makes every bite even better.
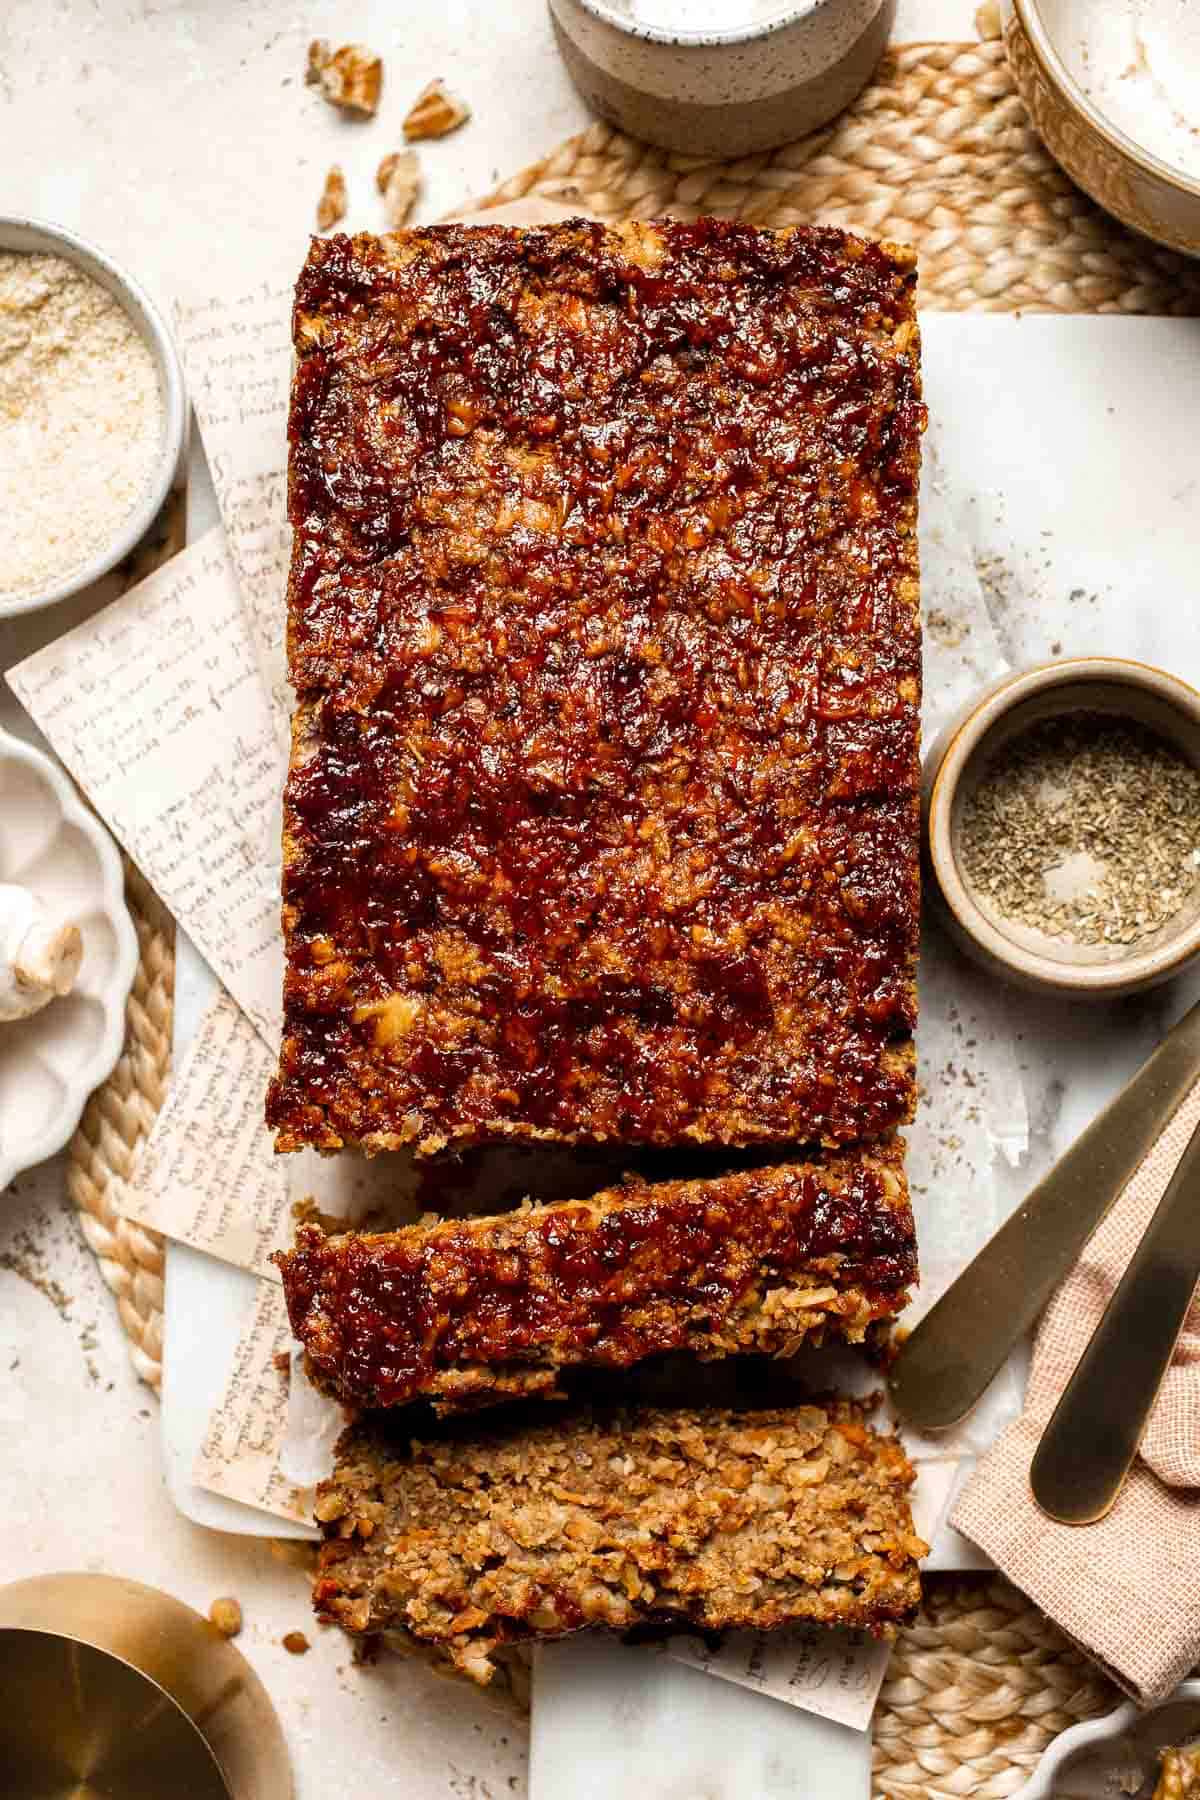
It is a cozy dinner idea for chilly evenings and a great plant based option for families looking to add more vegetables and protein rich ingredients into their weekly meals. Lentils, mushrooms, and walnuts mimic classic meatloaf texture without feeling heavy or dense, and the result is surprisingly rich and hearty.
This veggie meatloaf recipe was inspired by my Lentil Meatballs and Black Bean Burgers, and it pairs well with Creamy Mashed Potatoes or Mushroom Rice for a complete comfort style dinner. It also makes a delicious vegetarian option for holiday tables or Sunday meals when you want something warm and satisfying.

Why You'll Love This Recipe
- Hearty texture without meat. Lentils, mushrooms, and walnuts create a satisfying, sliceable loaf that feels comforting and familiar while staying plant based. The texture is hearty, flavorful, and perfect for cozy dinners.
- Packed with nourishing ingredients. Lentils, vegetables, and nuts bring fiber, protein, and nutrients in every bite. It fills you up without feeling heavy and is a great way to enjoy a wholesome dinner.
- Simple to make and easy to customize. Everything comes together with basic pantry ingredients and a few simple steps. You can adjust the seasoning, glaze, and vegetables to suit your taste.
- Makes great leftovers. The meatless meatloaf holds together well and tastes even better the next day. It reheats beautifully, making it perfect for meal prep or sandwiches.
Ingredients and Substitutions
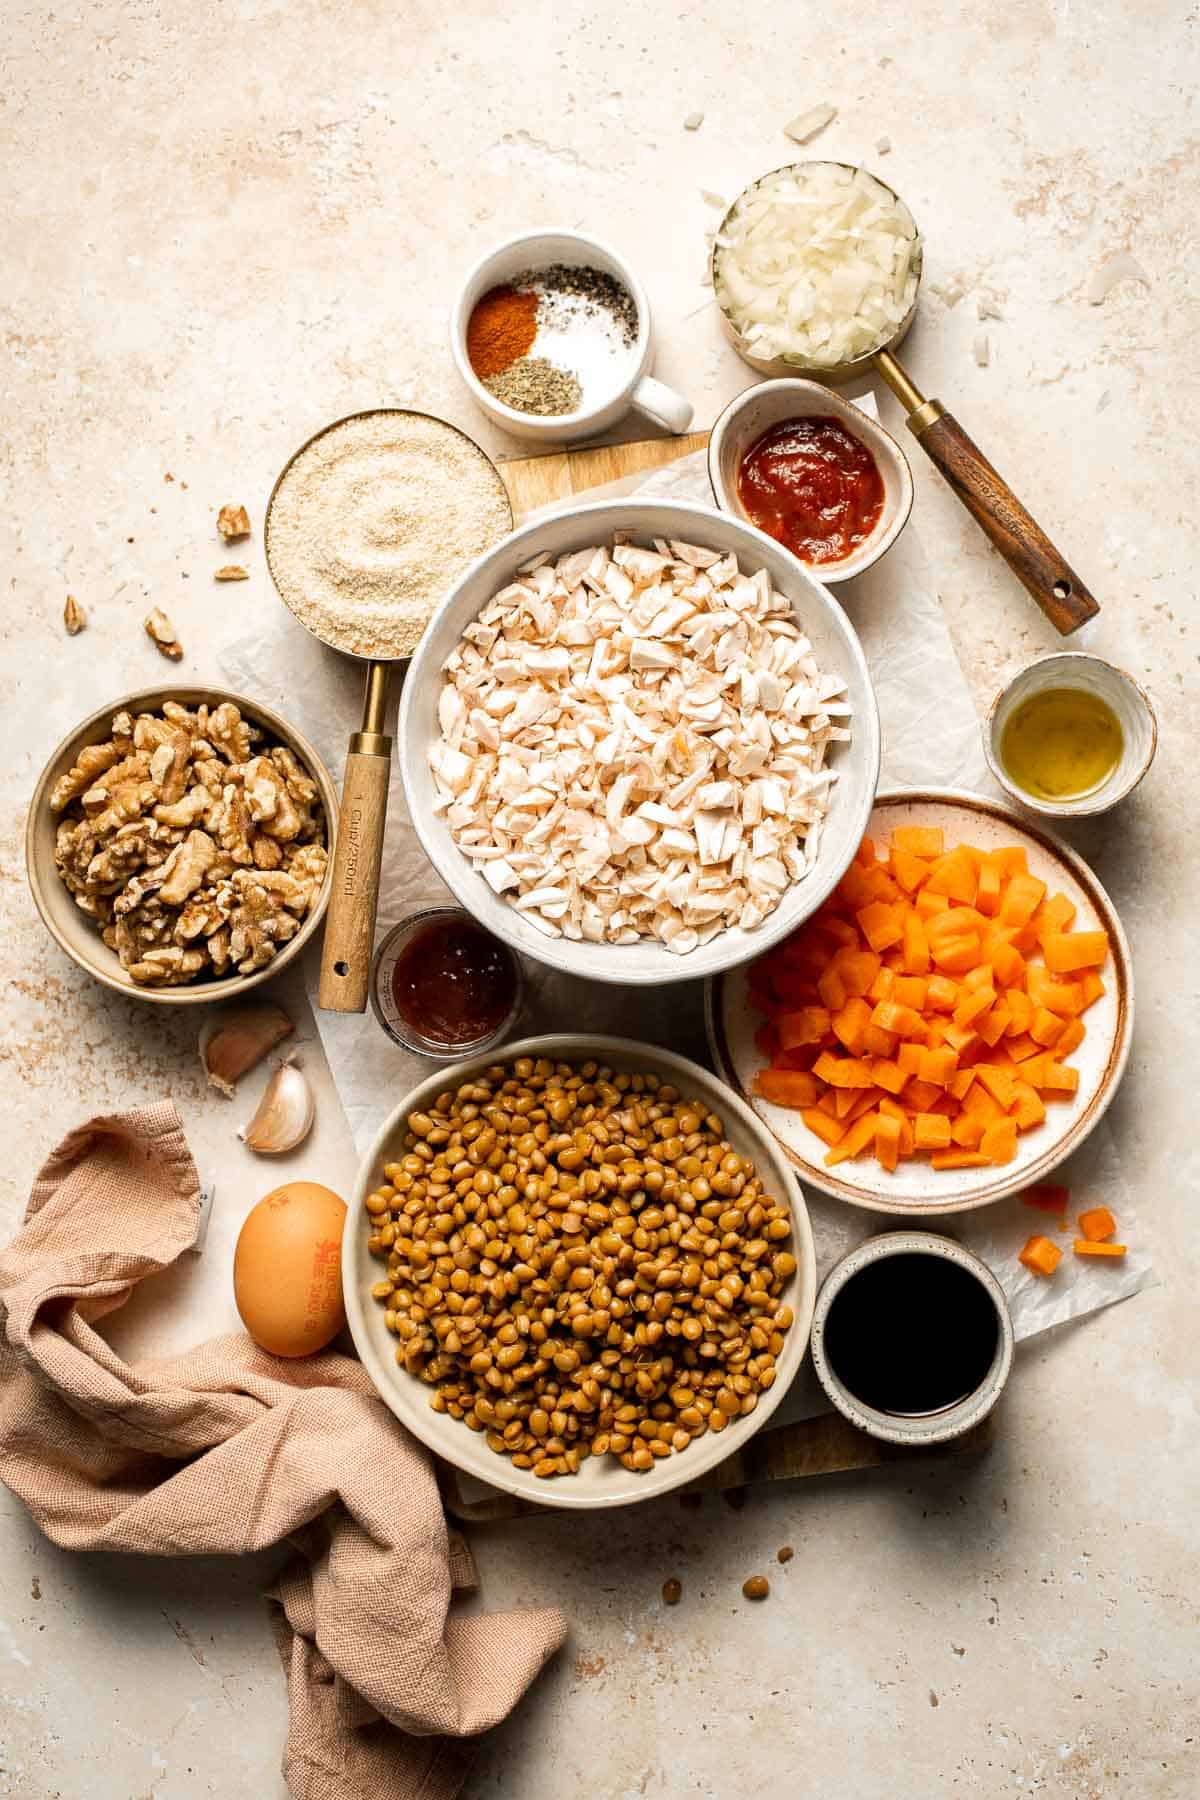
To make this delicious Vegetarian Meatloaf, you will need the following ingredients (see recipe card below for quantities):
- extra virgin olive oil - Used to sauté the vegetables and help the mushrooms brown for deeper flavor. Any neutral oil works if needed.
- onion and garlic - Build the flavor base of the loaf. Yellow or white onion works best, and fresh garlic gives the richest taste.
- carrot - Adds subtle sweetness and moisture. Finely dicing helps it soften fully. Celery or bell pepper can be added too.
- baby mushrooms - Provide savory depth and a "meaty" texture. Cremini or white mushrooms both work well.
- Italian seasoning and paprika - Bring warm herb flavor and mild smokiness. You can swap the herbs for thyme or oregano.
- salt and black pepper - Essential for seasoning and balancing flavor. Adjust to taste.
- lentils - The main base of the loaf. Use canned or cooked lentils, green or brown lentils for the best texture. Pat dry to remove excess moisture. Brown or green lentils work best because they hold their shape.
- breadcrumbs - Bind the mixture and help it hold together. Regular or gluten free breadcrumbs both work. You can also add old fashioned oats or quick oats to the mixture in place of some breadcrumbs for a heartier texture. Oats help bind the loaf and are great for anyone avoiding excess gluten.
- walnuts - Add richness and structure. Toasting boosts flavor. Pecans can be used in place of walnuts.
- egg - Acts as the binder to help the loaf set. For a vegan version, substitute with a flax egg.
- Worcestershire sauce - Adds tangy savory flavor. Choose a vegetarian Worcestershire if needed.
- ketchup - Adds classic sweetness and acidity to the glaze.
- BBQ sauce - Creates a smoky caramelized glaze. For a thinner glaze, use Worcestershire instead.
Equipment
You will also need measuring cups and spoons, a large skillet, food processor, mixing bowls, parchment paper, a loaf pan, and a silicone spatula for pressing the mixture into the pan.
Instructions
- Cook the vegetables. In a large skillet, heat oil over medium-high heat for 1 minute. Add onion, garlic, carrot, and mushrooms. Sauté until the mushrooms release their liquid, about 5 minutes.
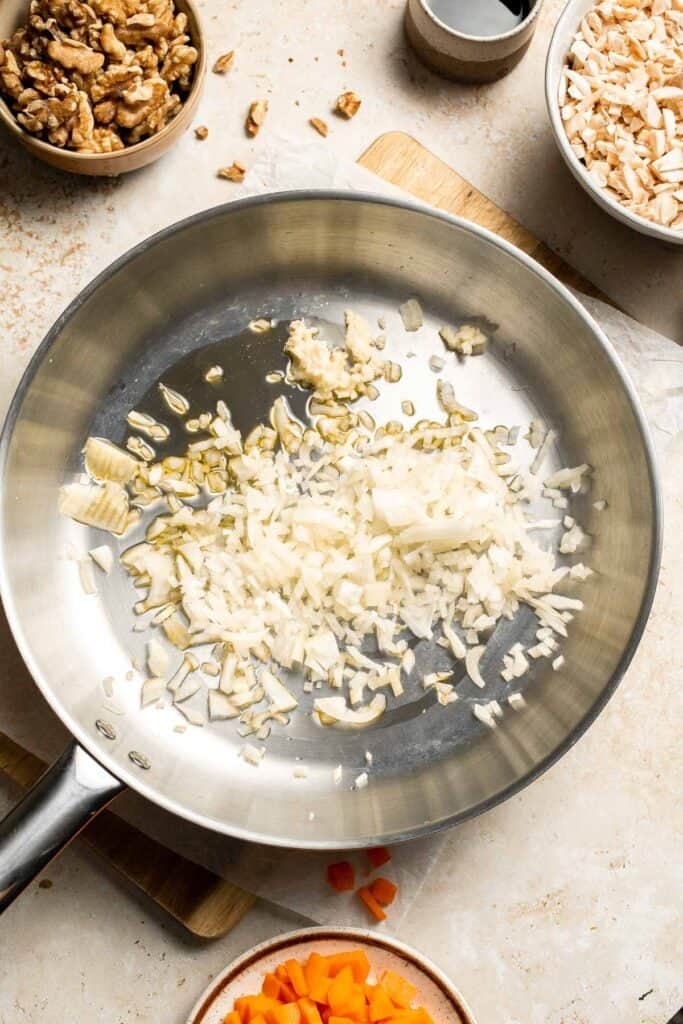
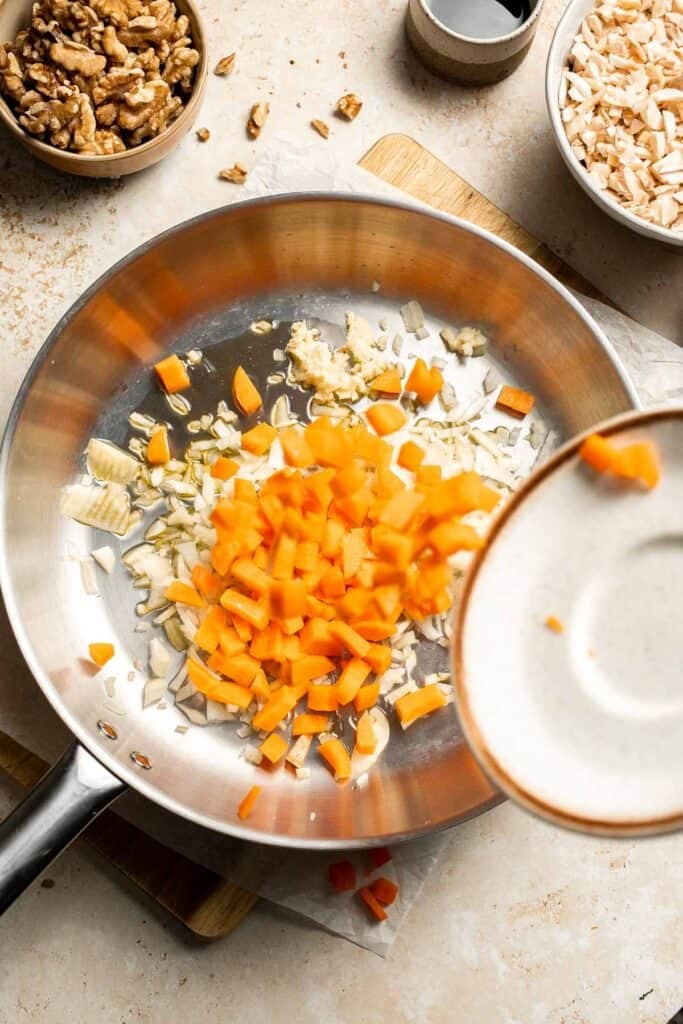
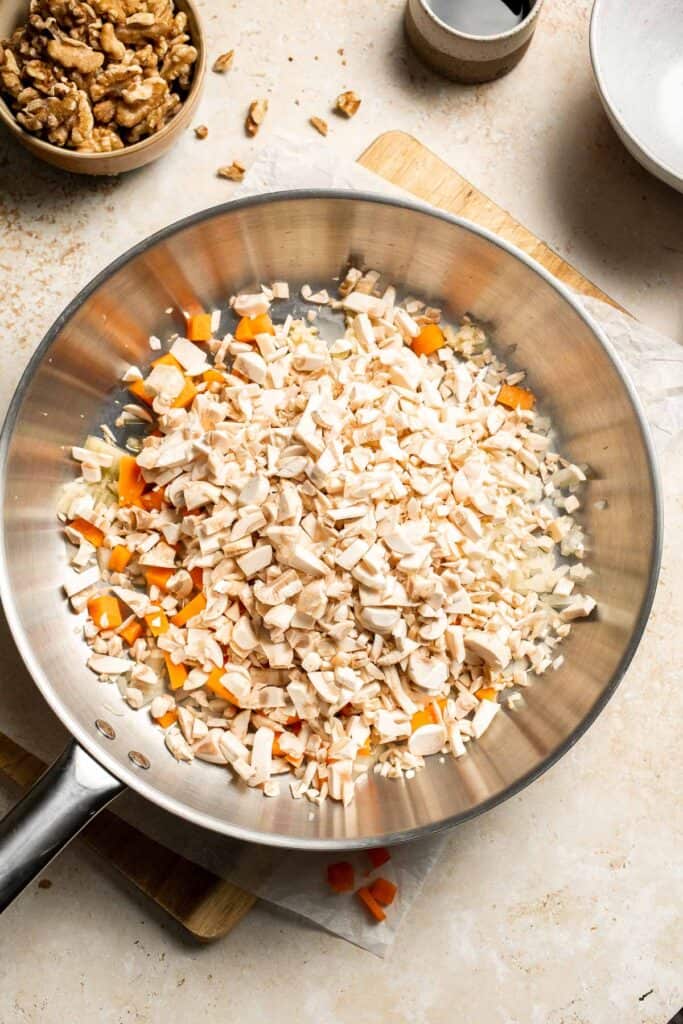
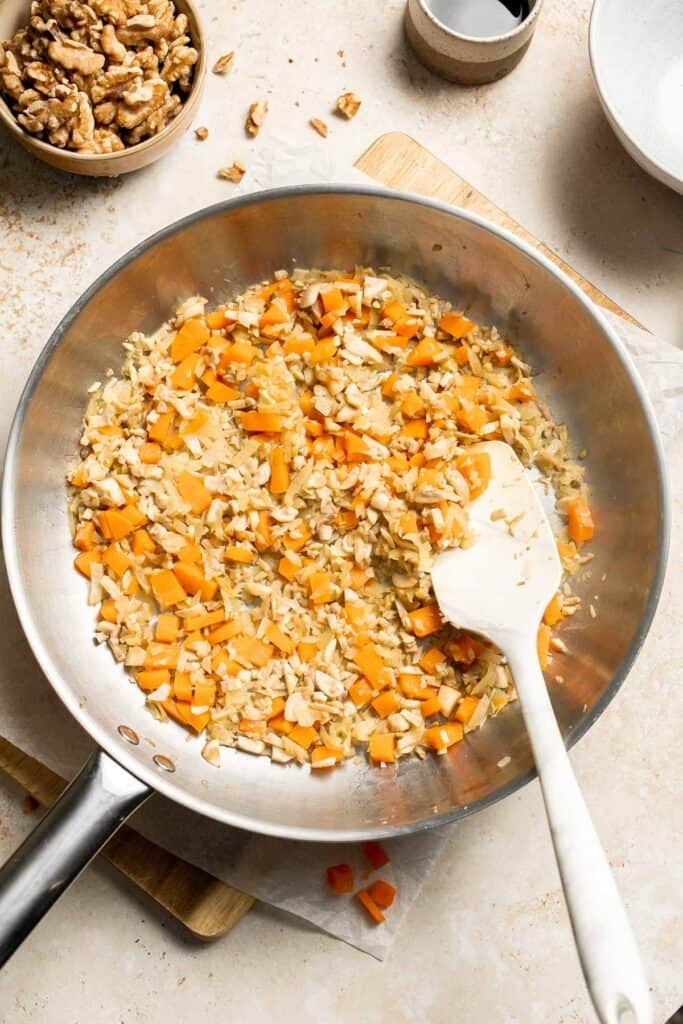
- Season. Add Italian seasoning, paprika, salt, and pepper. Cook 3-5 more minutes until most of the liquid evaporates and the mushrooms turn golden brown. Set aside to cool for 5 minutes.
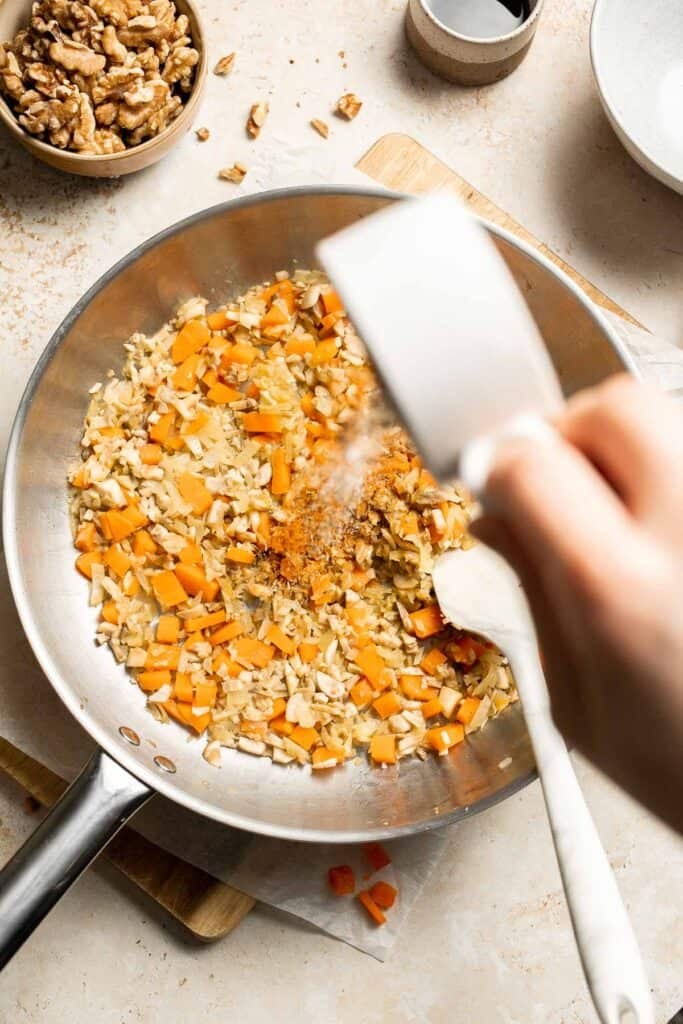
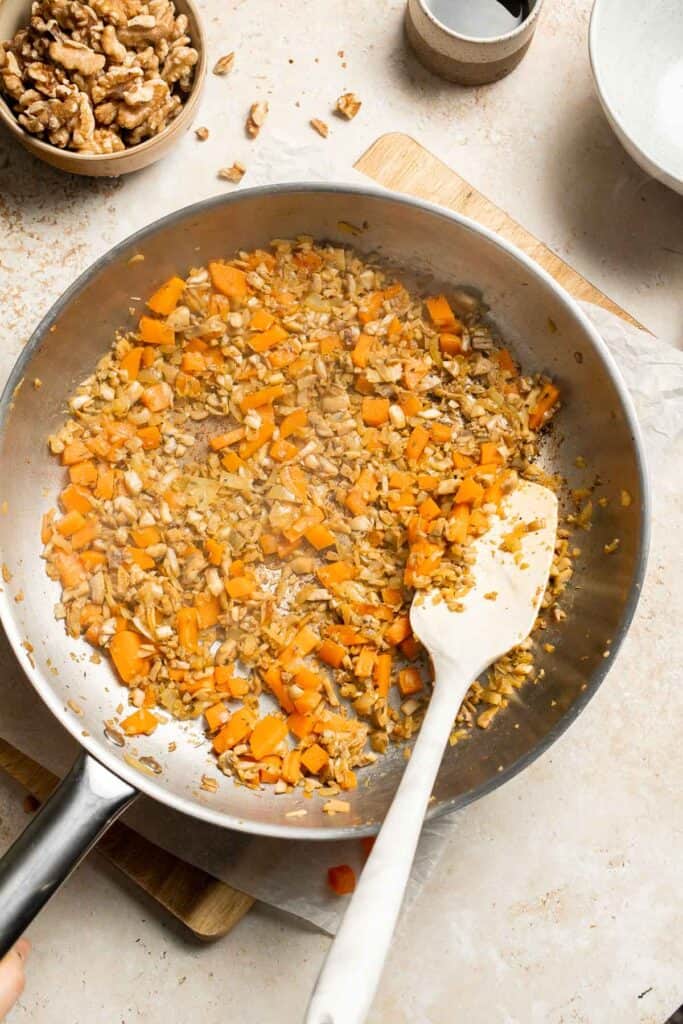
- Blend the mixture. Pat the lentils dry with a paper towel. Transfer to a food processor along with the cooked vegetable mixture, breadcrumbs, walnuts, egg, and Worcestershire sauce. Pulse until well combined but not fully pureed.
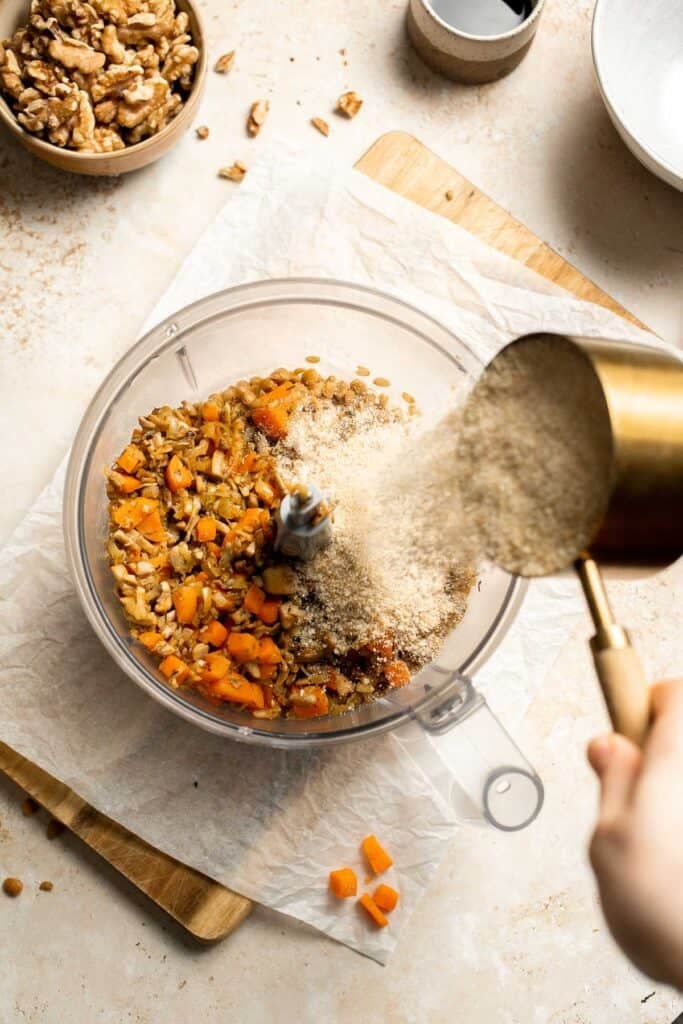
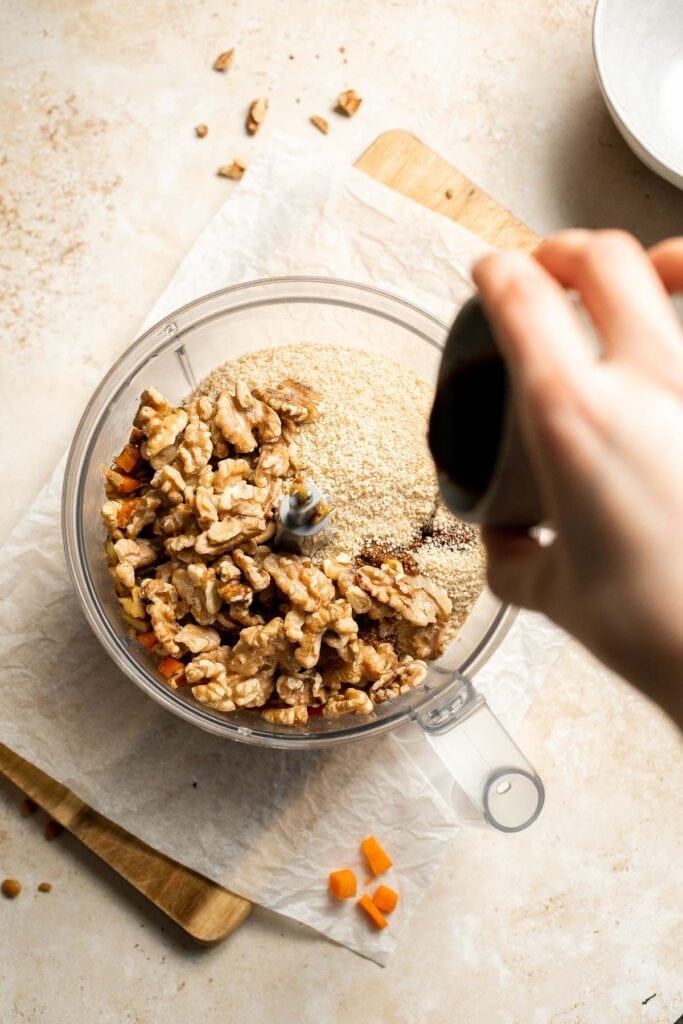
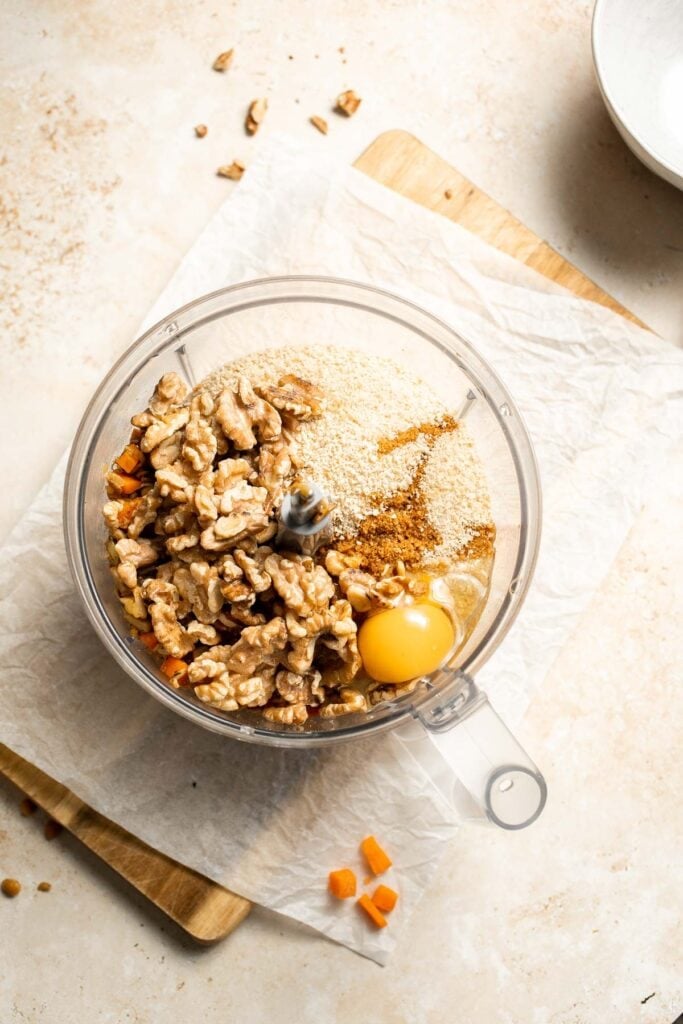
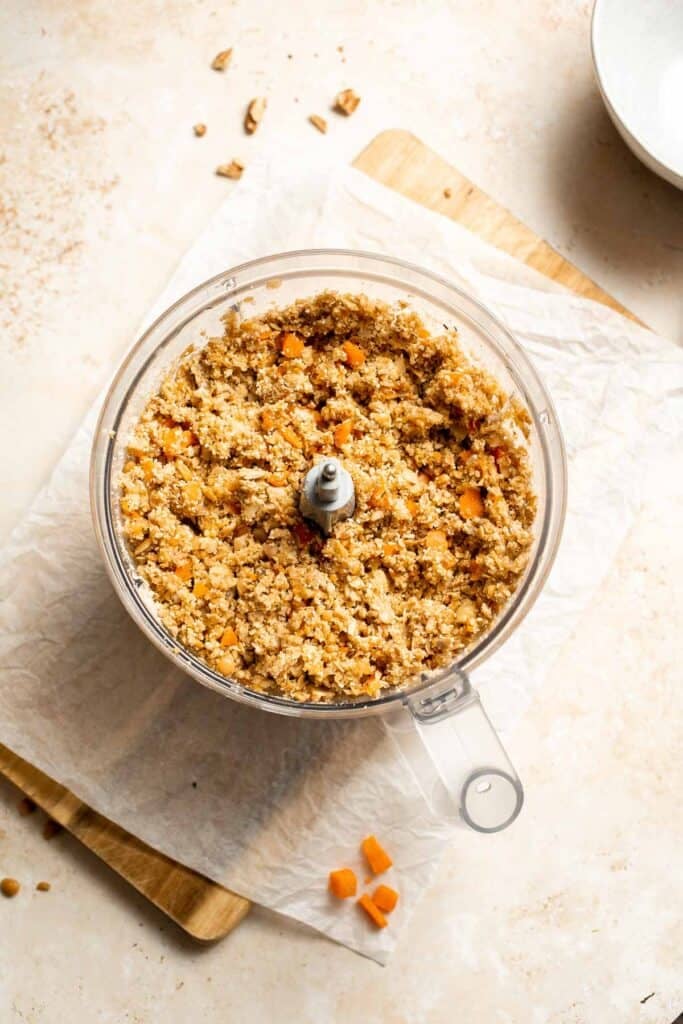
- Shape the meatloaf. Line a 9x5-inch loaf pan with parchment paper. Transfer the lentil mixture into the lined loaf pan and press the mixture firmly into the pan.
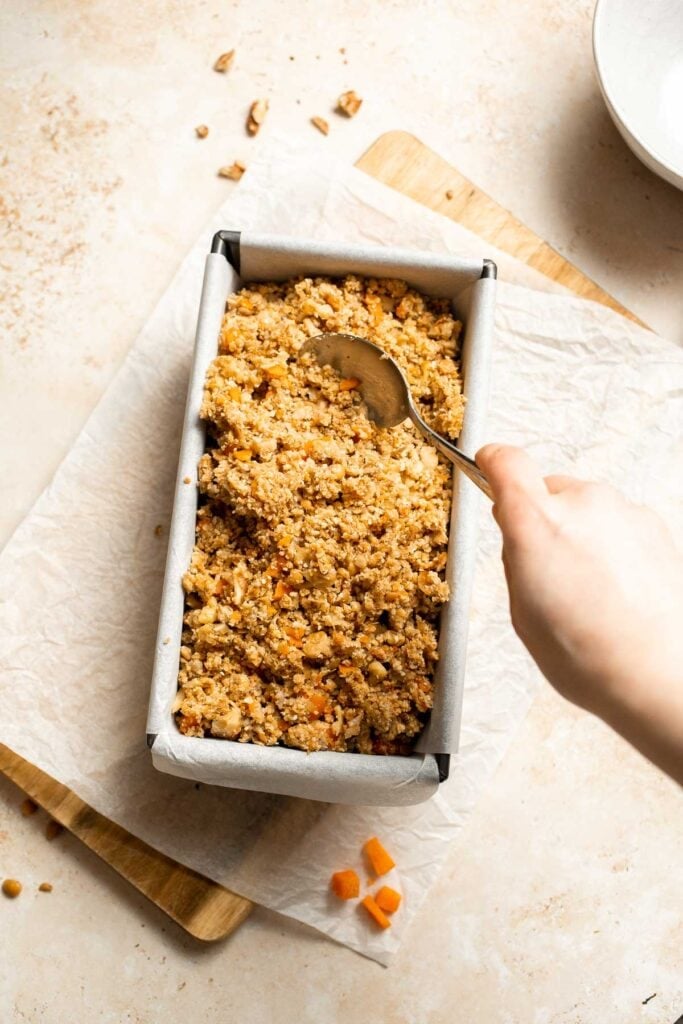
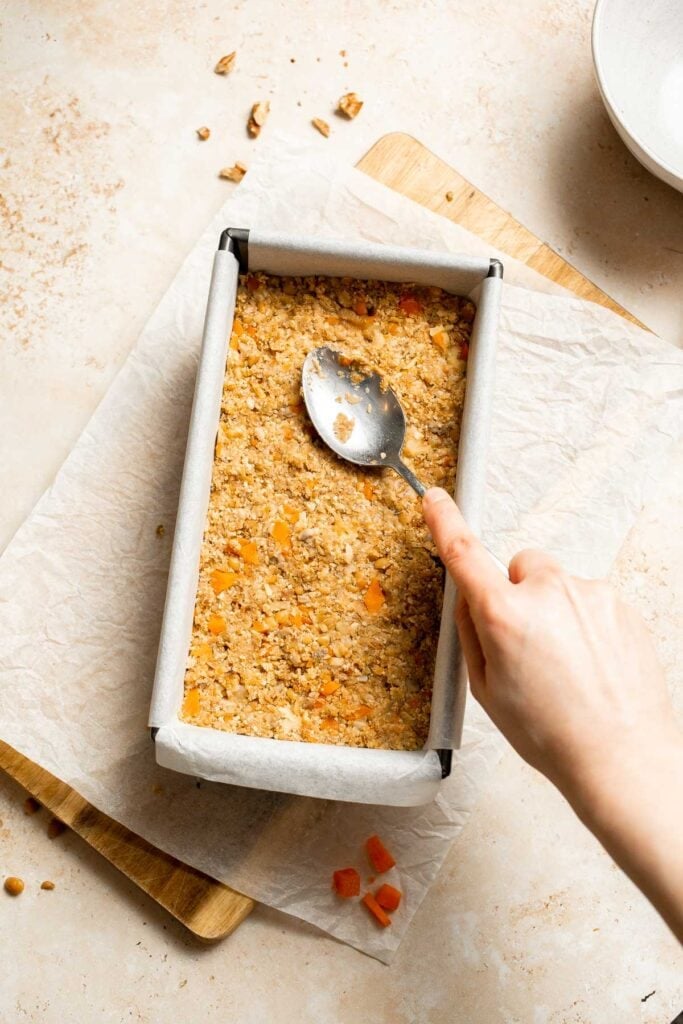
- Bake the meatloaf. Bake in a 350°F preheated oven for 35-40 minutes until the top feels firm.
- Add the glaze. In a small mixing bowl, whisk together the ketchup and BBQ sauce. Spread the sauce evenly over the meatloaf and return to the oven for another 10-15 minutes until the glaze caramelizes.
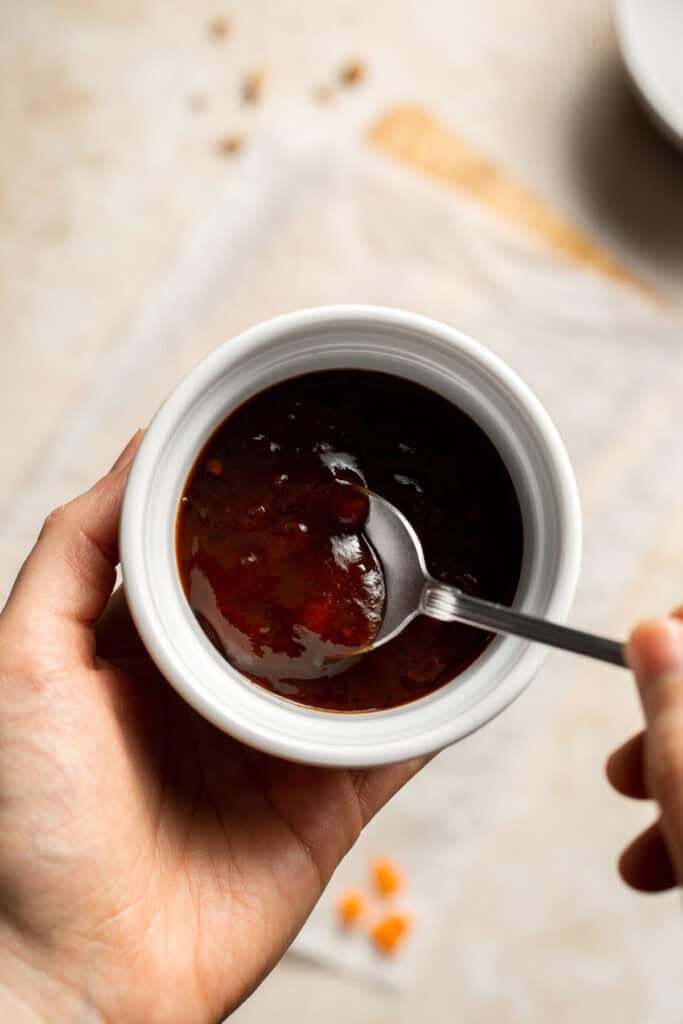
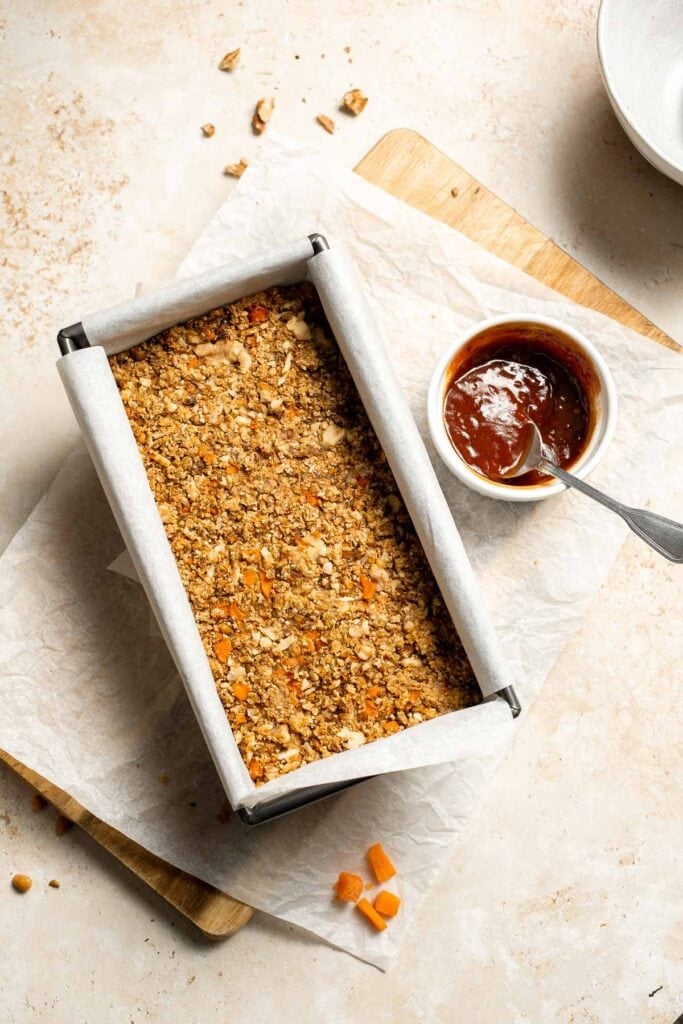
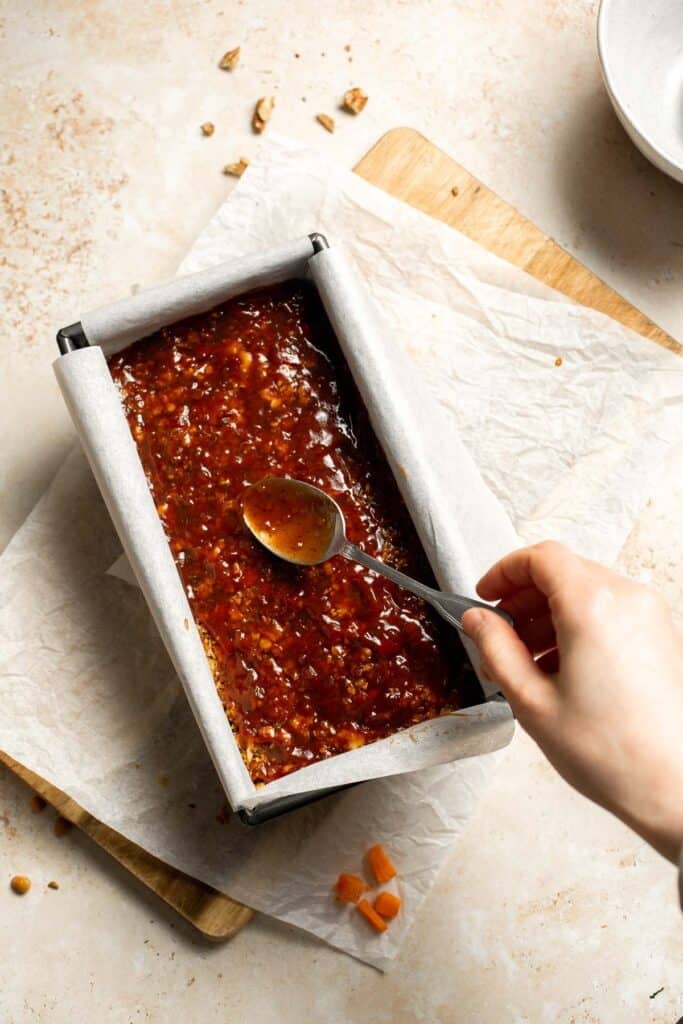
- Rest and slice. Cool for 15 minutes before slicing to allow it to firm up.
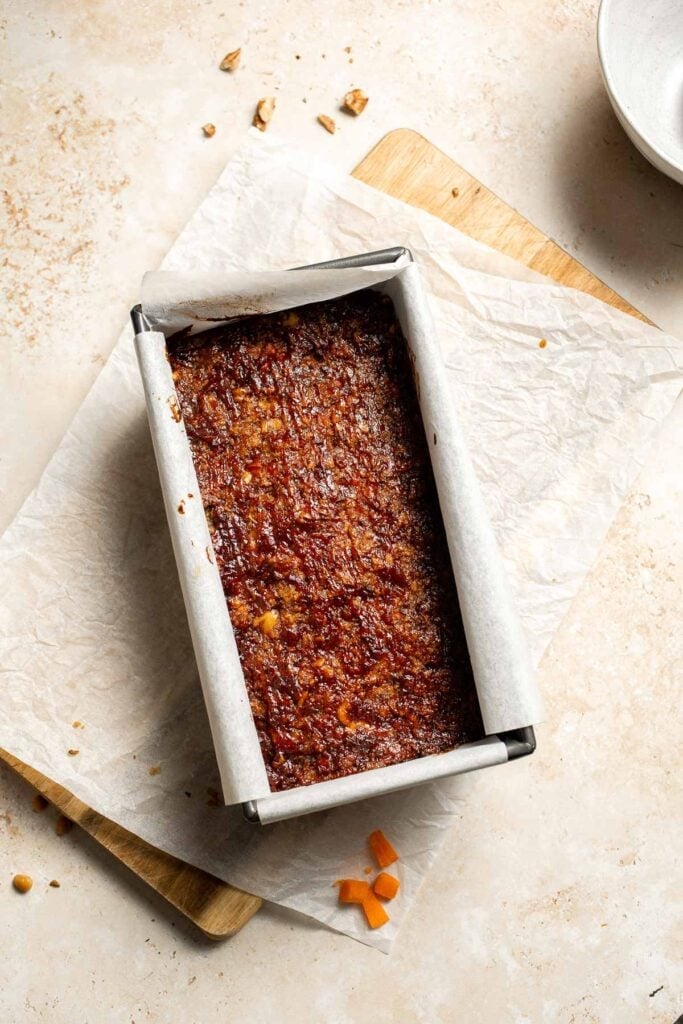
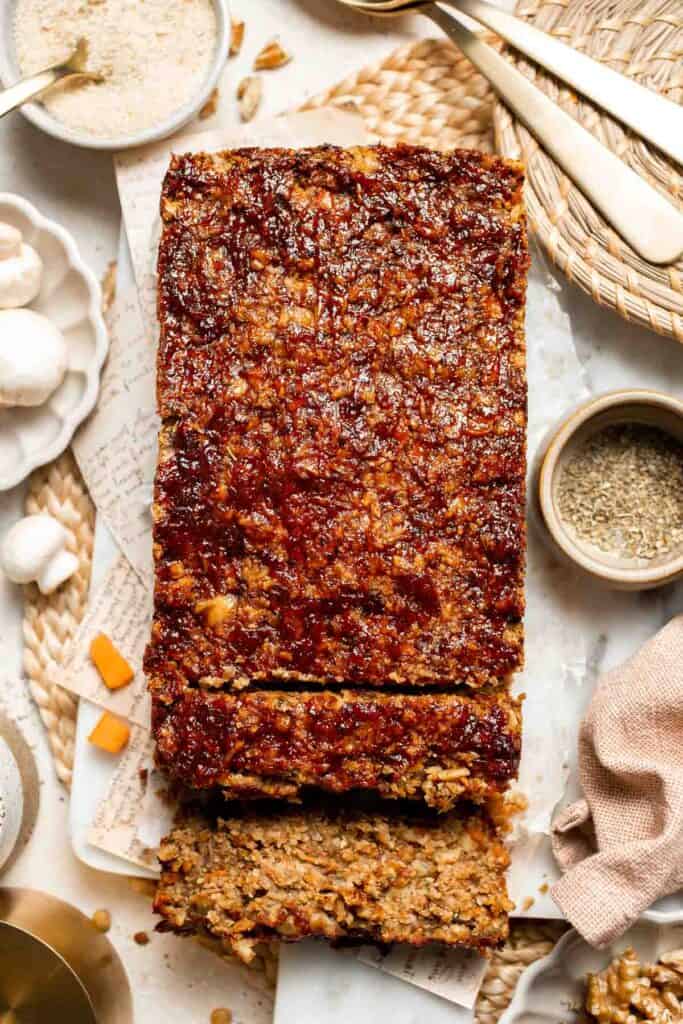
Expert Tip: Toast the Walnuts for Extra Flavor
Toasting the walnuts before adding them enhances their natural richness and gives the meatloaf a deeper, more savory flavor. It takes just a few minutes in a dry skillet and makes a noticeable difference in both taste and aroma. Cool them slightly before adding to the food processor so the mixture does not become too soft.
More Tips and Tricks
- Do not puree the mixture completely. A lightly chunky mixture gives your vegetarian meatloaf the best texture. Pulse until combined but leave small pieces of lentils, vegetables, and walnuts intact. This helps the loaf feel hearty rather than mushy and improves the final slice.
- Pat the lentils dry. Excess moisture can make the mixture too soft and prevent the loaf from setting properly. Quickly blot the lentils with a paper towel before adding them to the food processor. This small step helps the loaf hold together and slice cleanly.
- Press firmly into the loaf pan. Packing the mixture tightly eliminates air pockets and ensures even baking. Use a spatula to press the top very firmly so the loaf keeps its shape and bakes into a cohesive sliceable texture.
- Let the meatloaf cool before slicing. Resting for at least 15 minutes allows the structure to firm up so you can slice the loaf without it falling apart. The resting time also helps the flavors settle and blend.
- Make extra glaze. If you like a thick glossy topping, double the glaze mixture and add a little more halfway through baking. The sauce caramelizes into a beautiful finish that adds sweetness and tang to every bite.
Recipe Variations
- Add tomato paste. One of the best secrets for rich flavor is adding a spoonful of tomato paste when sautéing the veggies. It deepens the savory base and enhances the final result.
- Vegan version. Replace the egg with a flax egg and use vegan Worcestershire sauce for a fully plant based loaf.
- Mushroom heavy version. Add an extra cup of mushrooms for a deeper savory flavor and more moisture.
- Cheesy twist. Mix in a handful of shredded mozzarella, parmesan, swiss cheese, or even cottage cheese for a richer and creamier loaf.
- Mediterranean style. Add sun dried tomatoes, spinach, and oregano for a different flavor profile.
- Spicy version. Add chili flakes, smoked paprika, or a spoonful of your favorite hot sauce.
- BBQ loaf. Add a spoonful of BBQ sauce to the mixture and use a full BBQ glaze for smoky flavor.
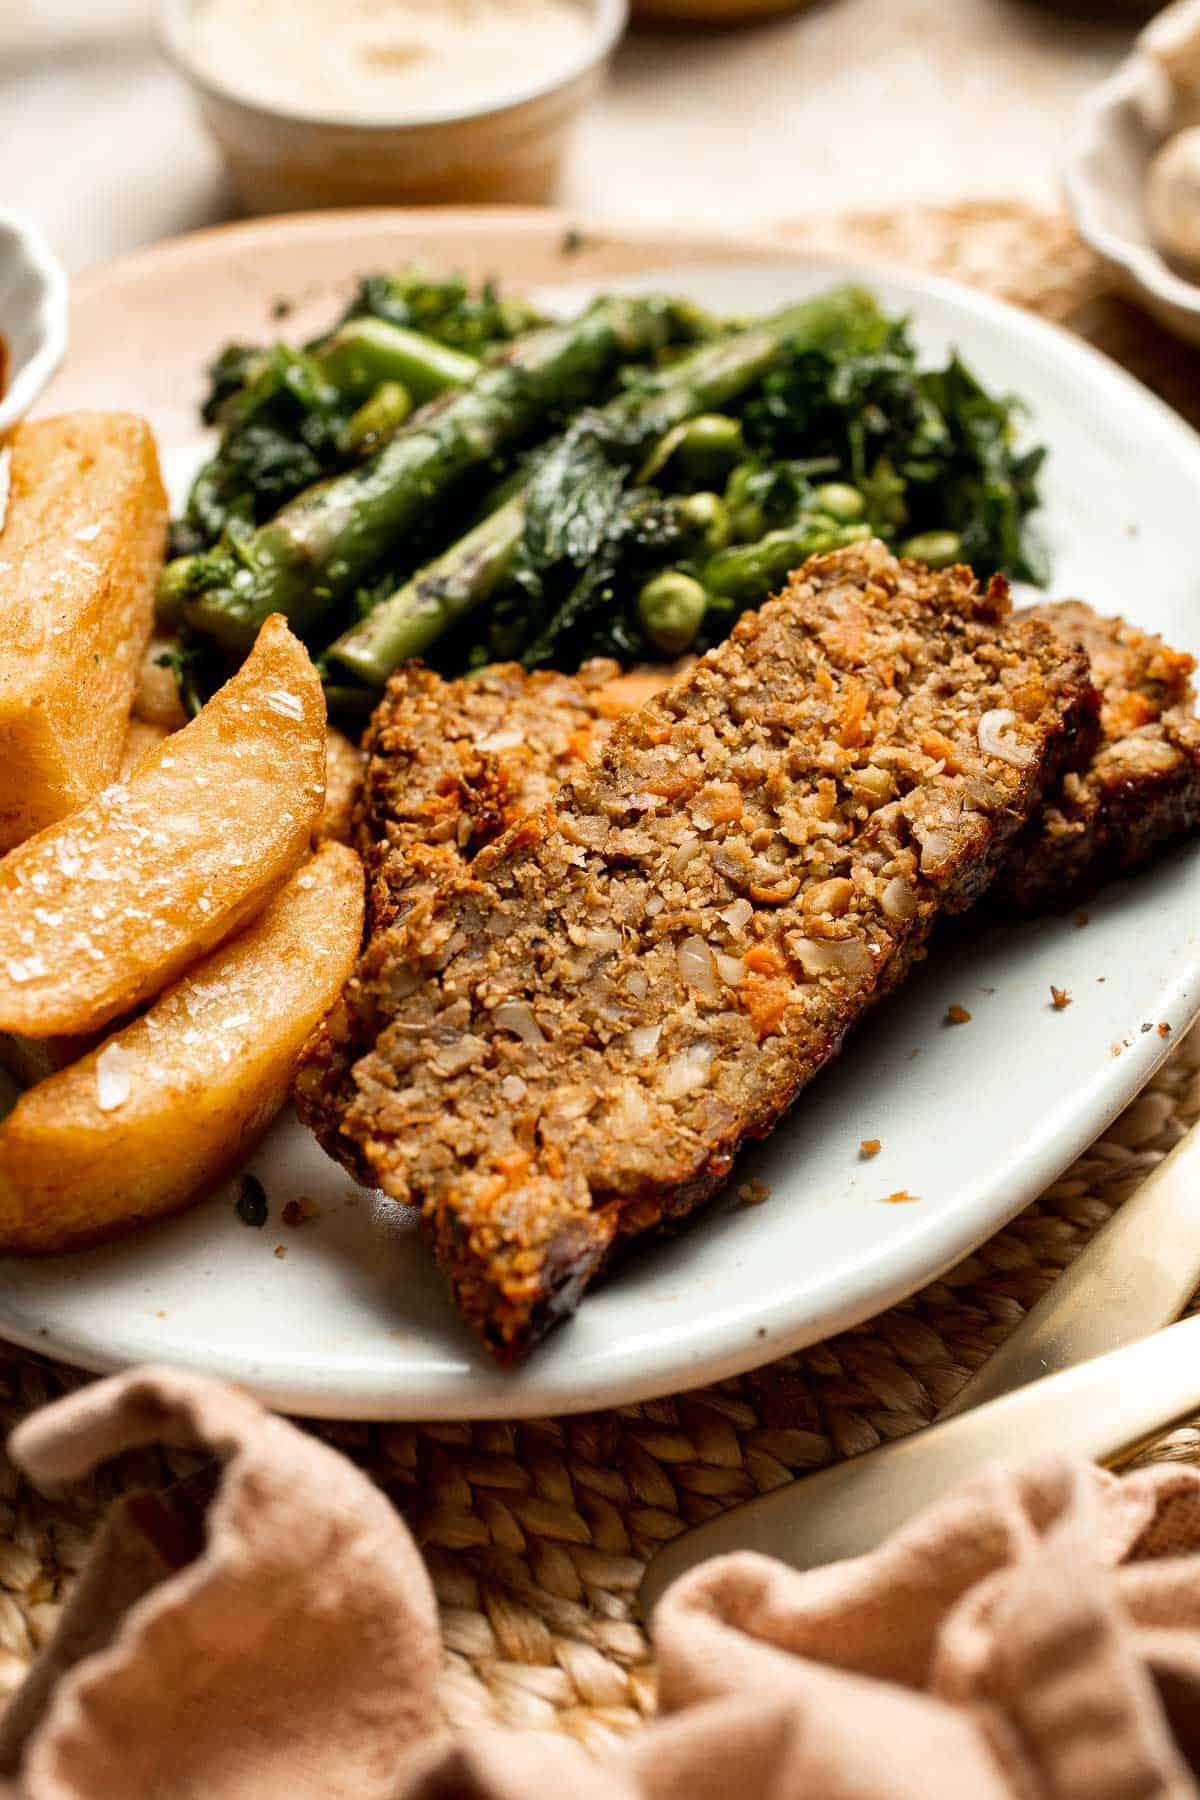
Storage
How to Store
Store leftovers in an airtight container in the fridge for up to 4 days. The loaf keeps its structure well and tastes even better the next day.
How to Reheat
Reheat slices in the microwave or warm in the oven, covered with foil, at 325°F until heated through. Brush with extra glaze if desired.
How to Freeze
Freeze whole or in slices. Wrap tightly and freeze for up to 3 months. Thaw in the fridge before reheating.
How to Serve
Vegetarian meatloaf is a cozy and satisfying dinner that pairs well with classic comfort style sides. Serve it with creamy mashed potatoes, roasted vegetables, warm bread, or a crisp green salad. It also works beautifully for meal prep, family dinners, or as part of a holiday menu. You can also slice it thin for a delicious meatloaf sandwich the next day.
These are my favorite dishes to serve with this lentil loaf:
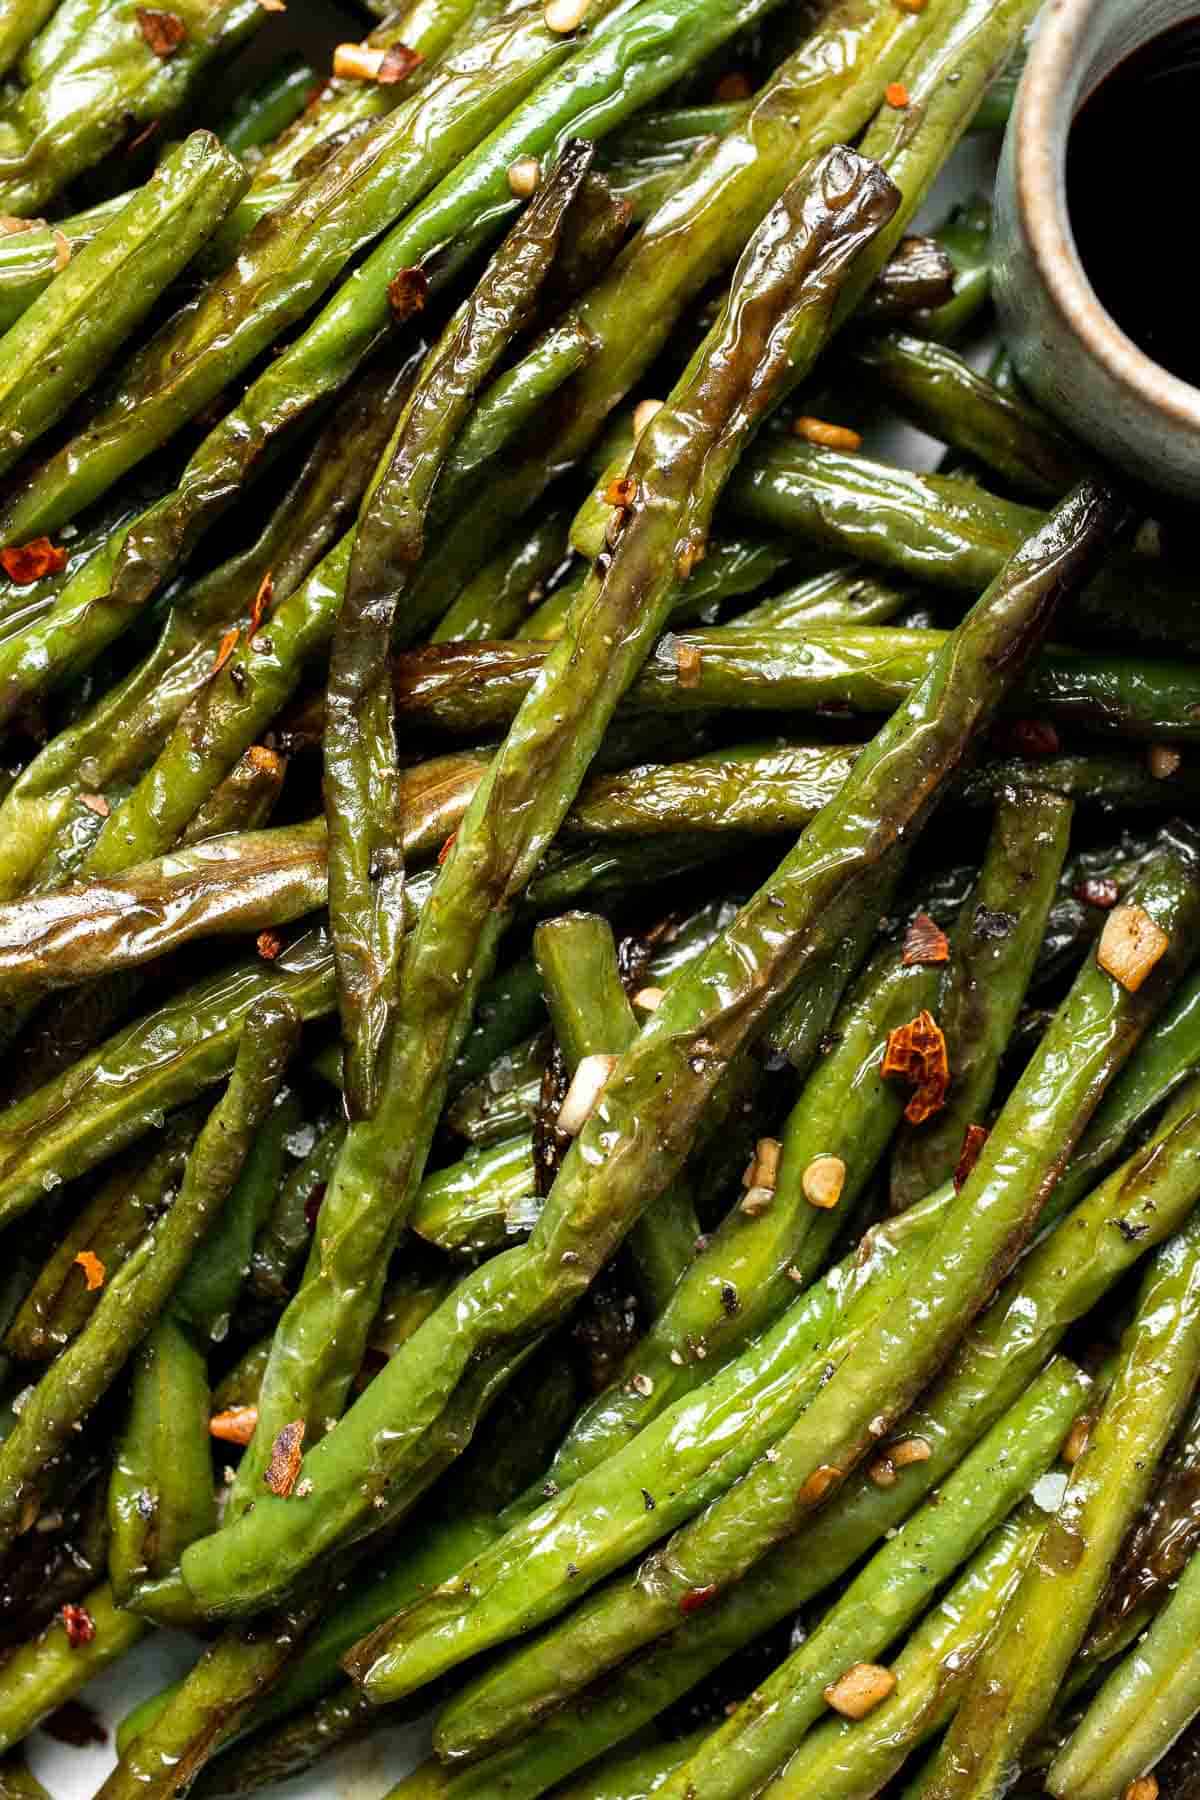
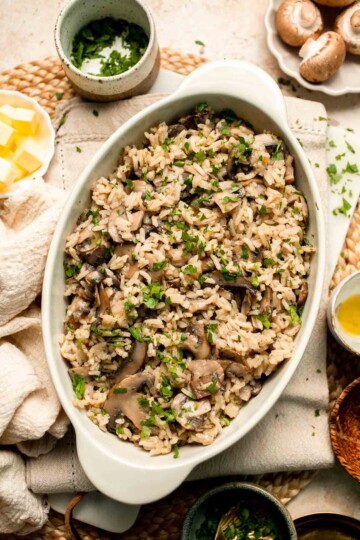
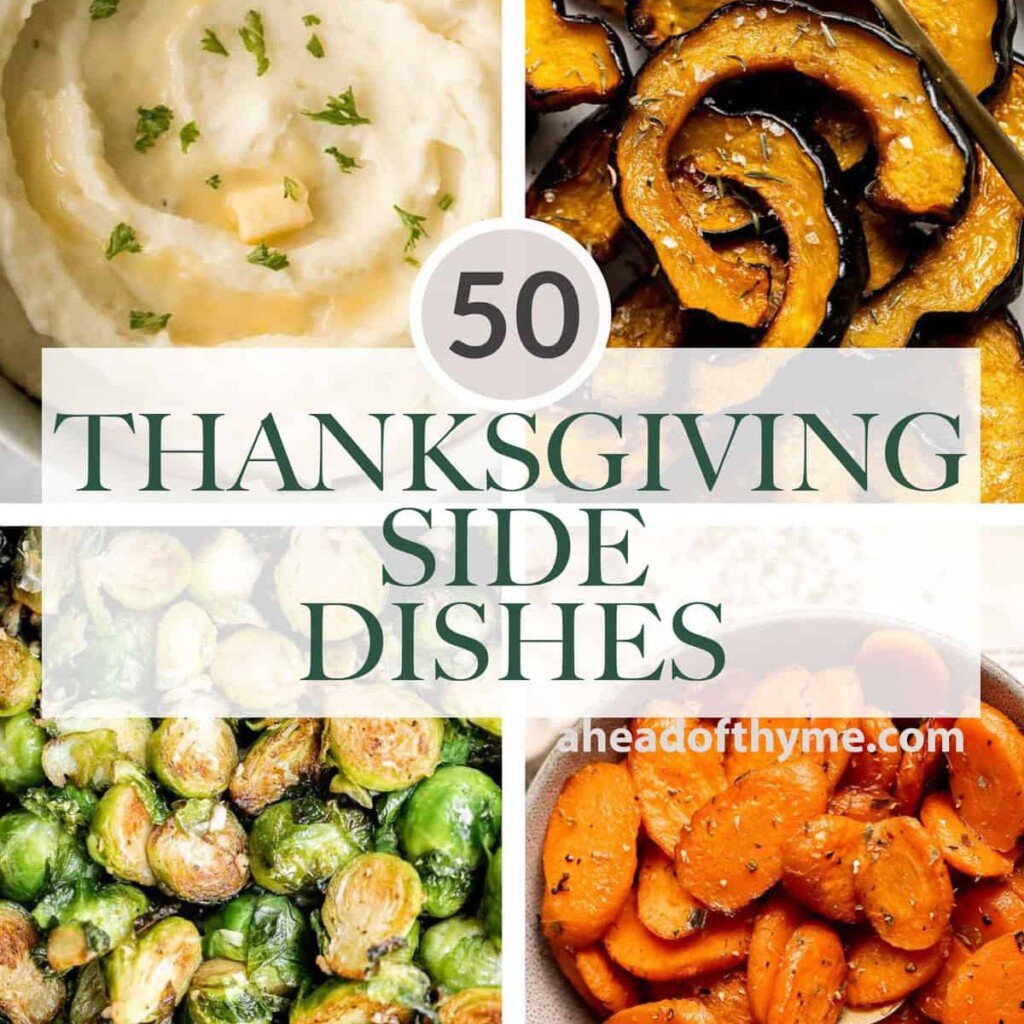
Thanksgiving Side Dishes
If serving this as part of your Thanksgiving feast, explore our collection of classic and creative sides. From creamy mashed potatoes and roasted vegetables to savory stuffing, vibrant salads, and flavorful casseroles, these recipes perfectly complement any main course.
FAQ
Vegetarian meatloaf is usually made from a mixture of protein rich lentils, sautéed vegetables, mushrooms, nuts, breadcrumbs, eggs or flax eggs, and seasonings. Lentils provide the hearty base, mushrooms add savory depth, and walnuts bring richness and structure. Breadcrumbs help bind everything together, and a glaze of ketchup or BBQ sauce adds the classic sweet tang found in traditional meatloaf. The key is balancing moisture and texture so the loaf holds together while still tasting tender. When prepared properly, vegetarian meatloaf slices beautifully and offers the same comfort food feel as the meat version.
Lentils are one of the best substitutes for beef in meatloaf because they hold their shape, absorb seasoning well, and create a hearty texture. Mushrooms add umami and moisture, while chopped walnuts add structure. A combination of lentils, mushrooms, nuts, and breadcrumbs gives a balanced texture that mimics traditional meatloaf without feeling mushy. You can also use chickpeas, black beans, or a mix of grains like quinoa, although those may produce a softer loaf. For the best result, combine at least two plant based ingredients to create a fuller, more complex texture.
Eggs are the most reliable binder for vegetarian meatloaf because they help the mixture firm up and hold its shape after baking. If you need a plant based binder to make a vegan meatloaf, a flax egg or chia egg is the next best option and works surprisingly well, although the loaf may be slightly softer. Breadcrumbs also play an essential supporting role by absorbing moisture and helping the loaf stay cohesive. A small amount of oil or nut butter can also help add structure. The key is using both a wet binder and a dry binder so the loaf is firm, sliceable, and not crumbly.
Moisture comes from the vegetables, mushrooms, lentils, and a little oil. Mushrooms, in particular, help keep the loaf tender because they release moisture as they cook. Sautéing the vegetables until they are softened but not fully dry helps maintain moisture as well. Walnuts add richness, and eggs or flax eggs help keep everything from drying out. Avoid overbaking the loaf, which can make it crumbly. The glaze also helps lock in moisture during the second bake. If your mixture feels dry before baking, add a small splash of olive oil or a spoonful of broth.
A good binder is essential to keep vegetarian meatloaf from falling apart. Eggs or flax eggs help hold everything together, while breadcrumbs absorb moisture and give the mixture structure. Patting the lentils dry prevents excess water from weakening the loaf. Pressing the mixture firmly into the loaf pan ensures it bakes into a cohesive shape. Allowing the loaf to cool for at least 15 minutes before slicing is also important because it firms up as it rests. If your mixture looks too wet before baking, simply add a bit more breadcrumb to help stabilize the texture.
More Lentil Recipes
Looking for other recipes like this? Try these:
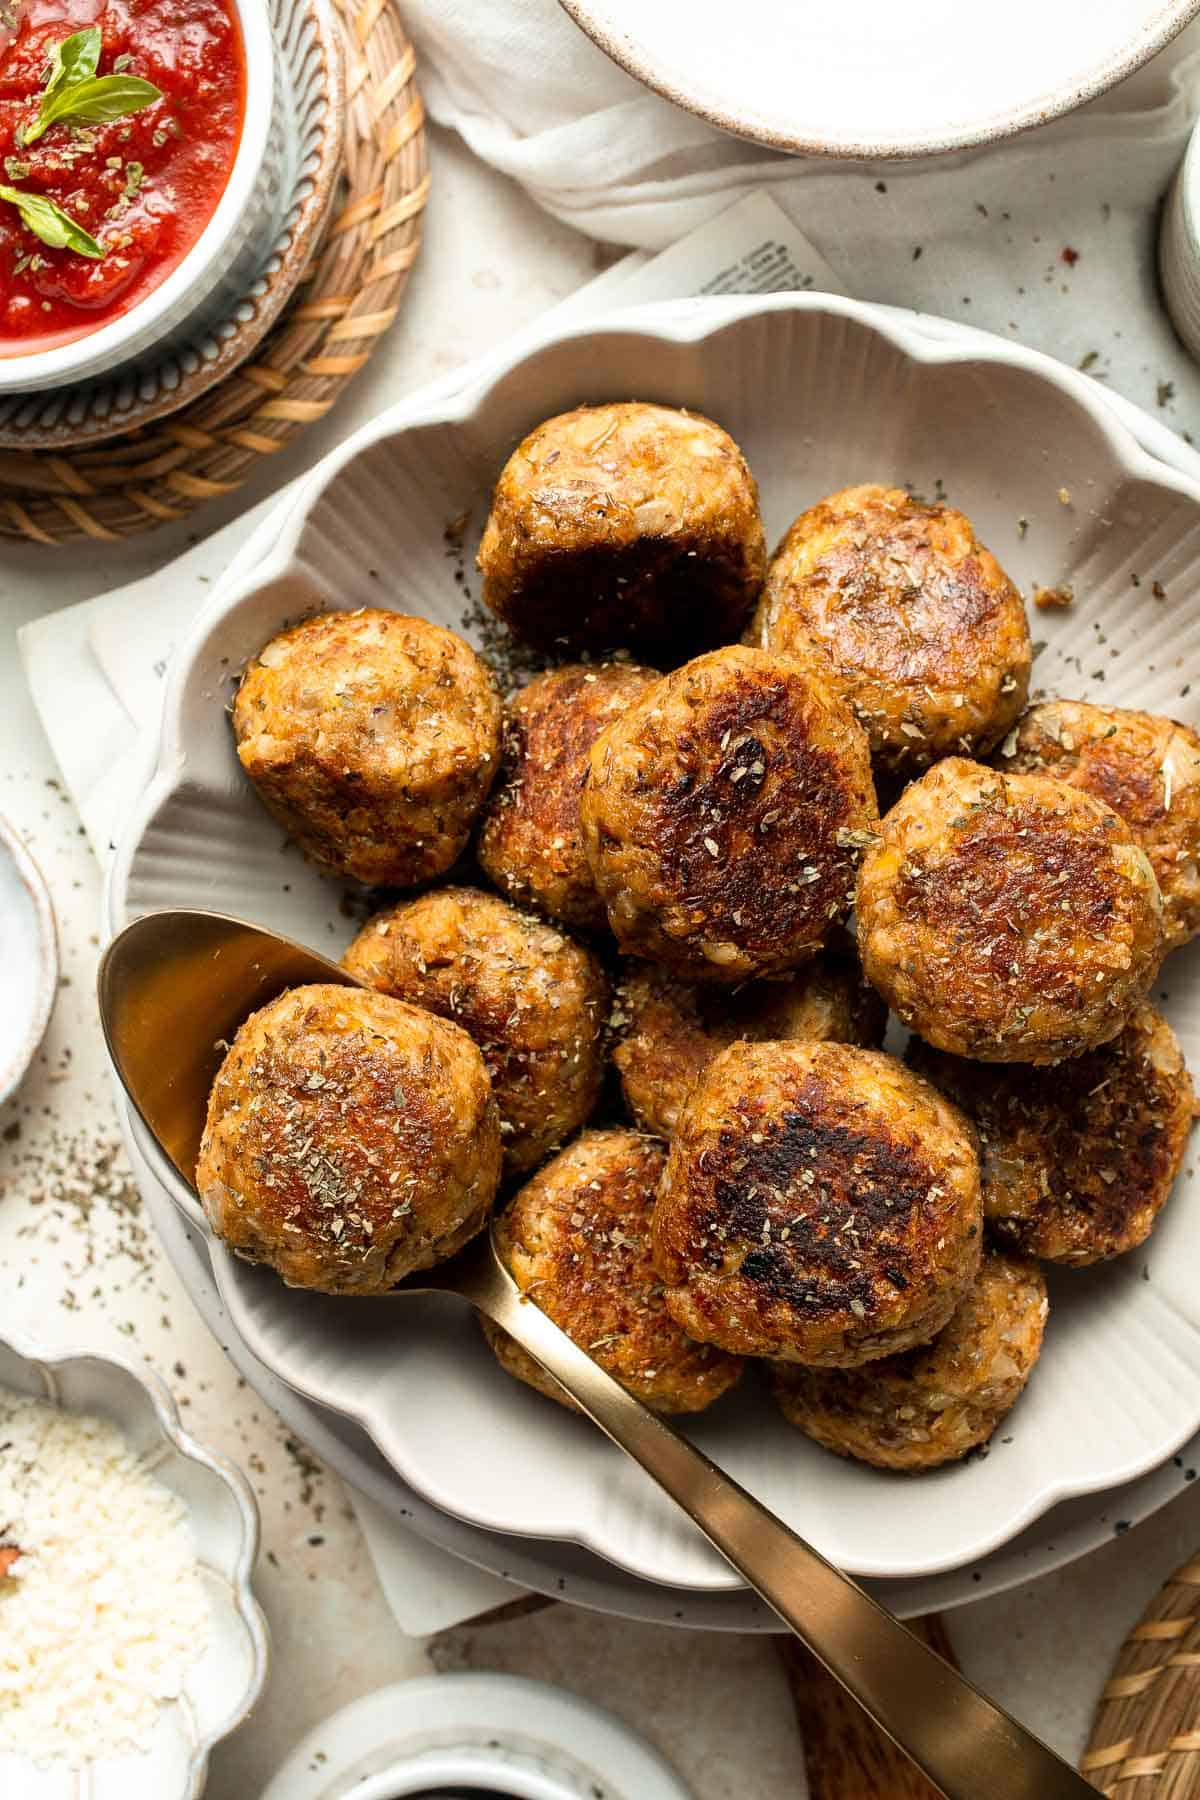
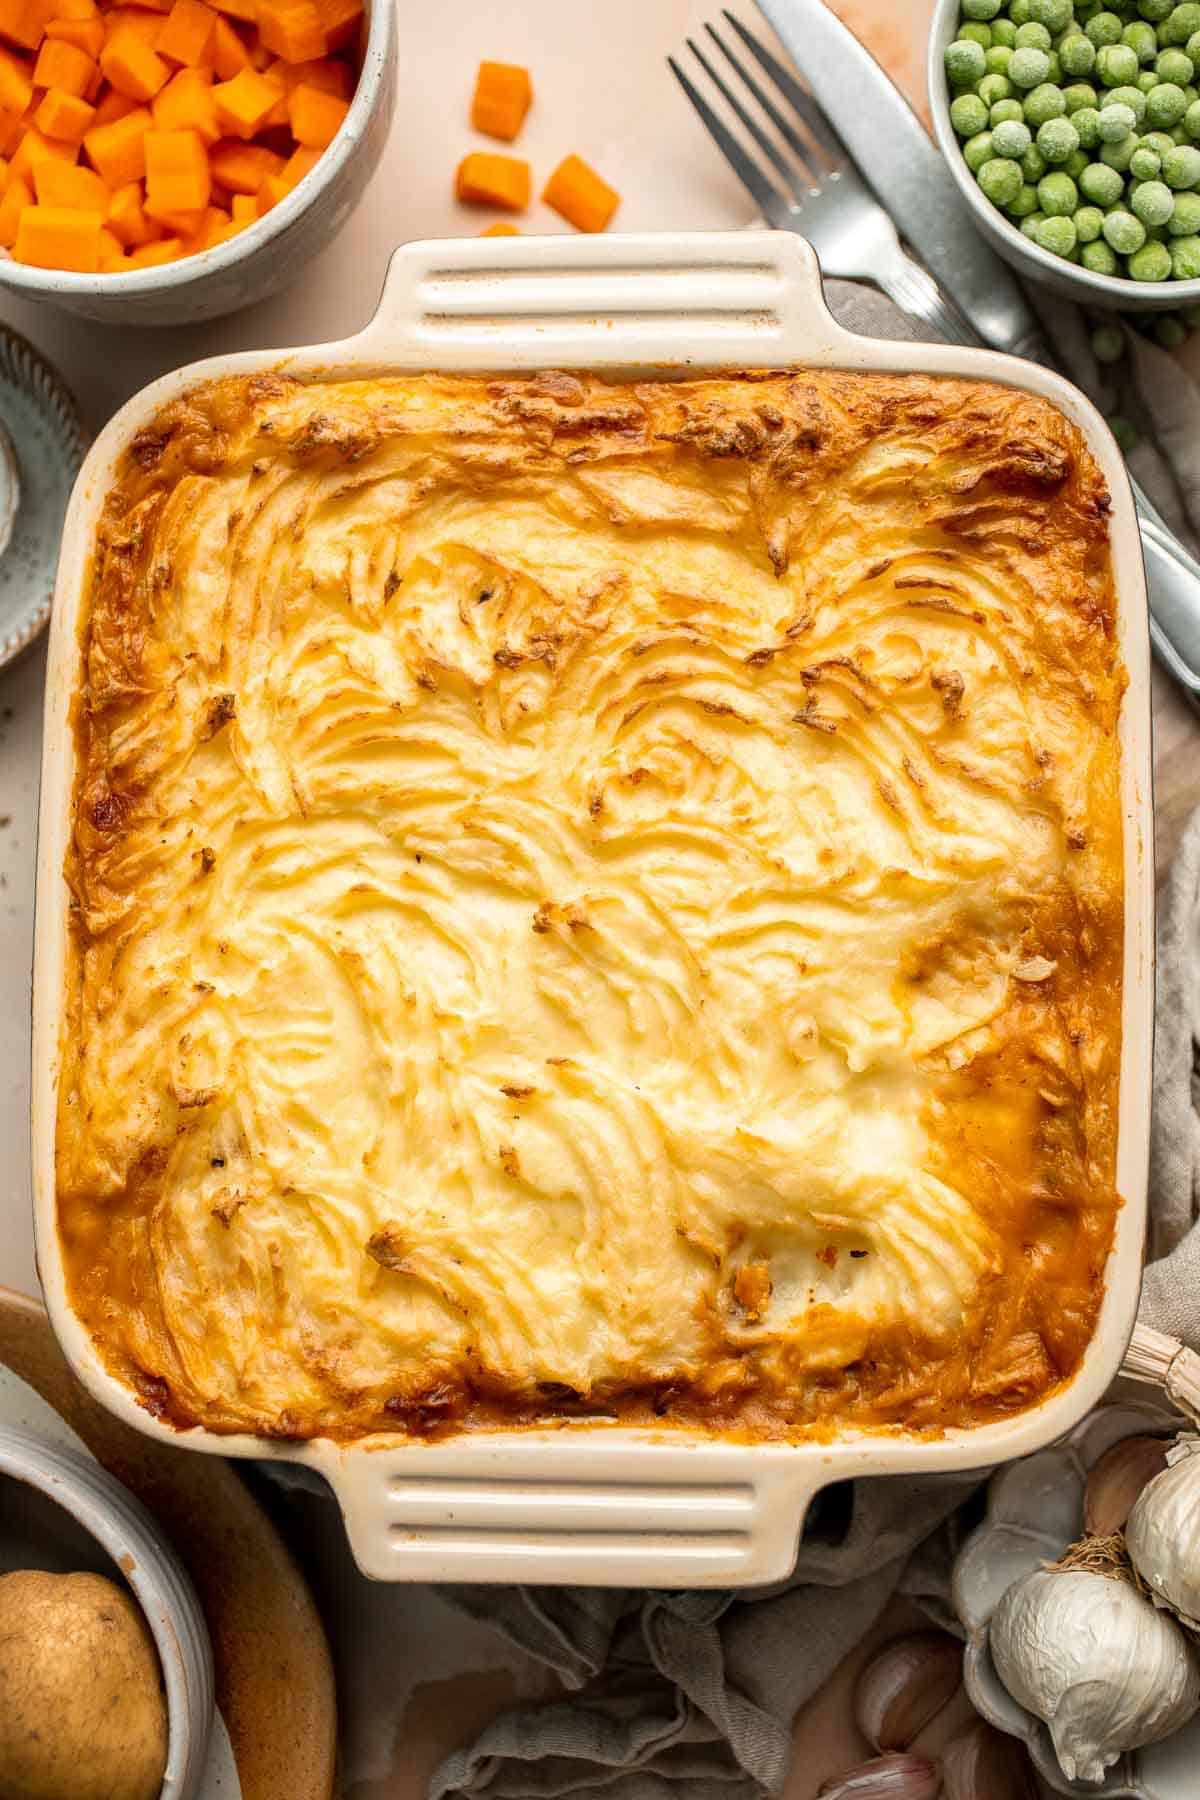
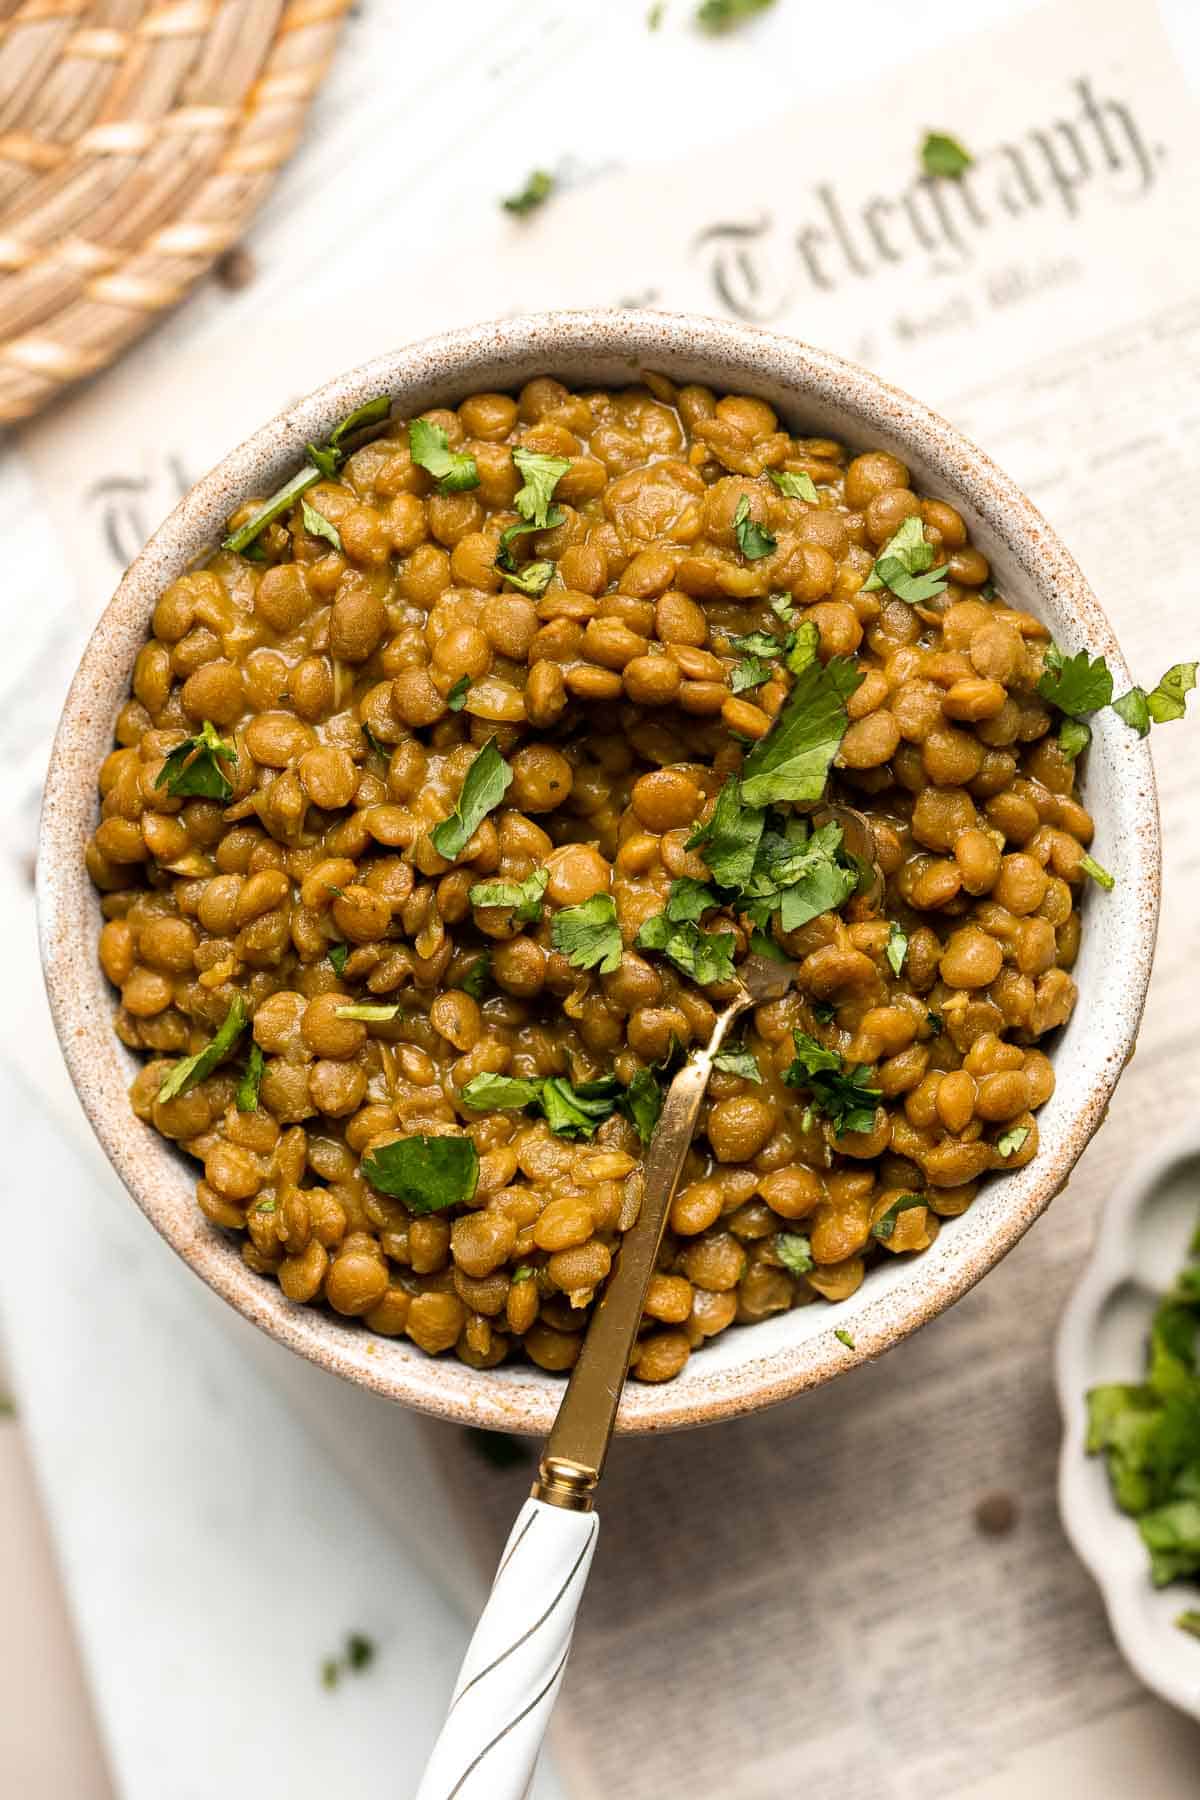
Tried this recipe?
I'd love to hear what you think! Leave a comment and rating below to share your feedback. Your reviews help others discover this recipe and help me keep creating more free recipes for you. Snap a photo and tag me on social media @aheadofthyme too.
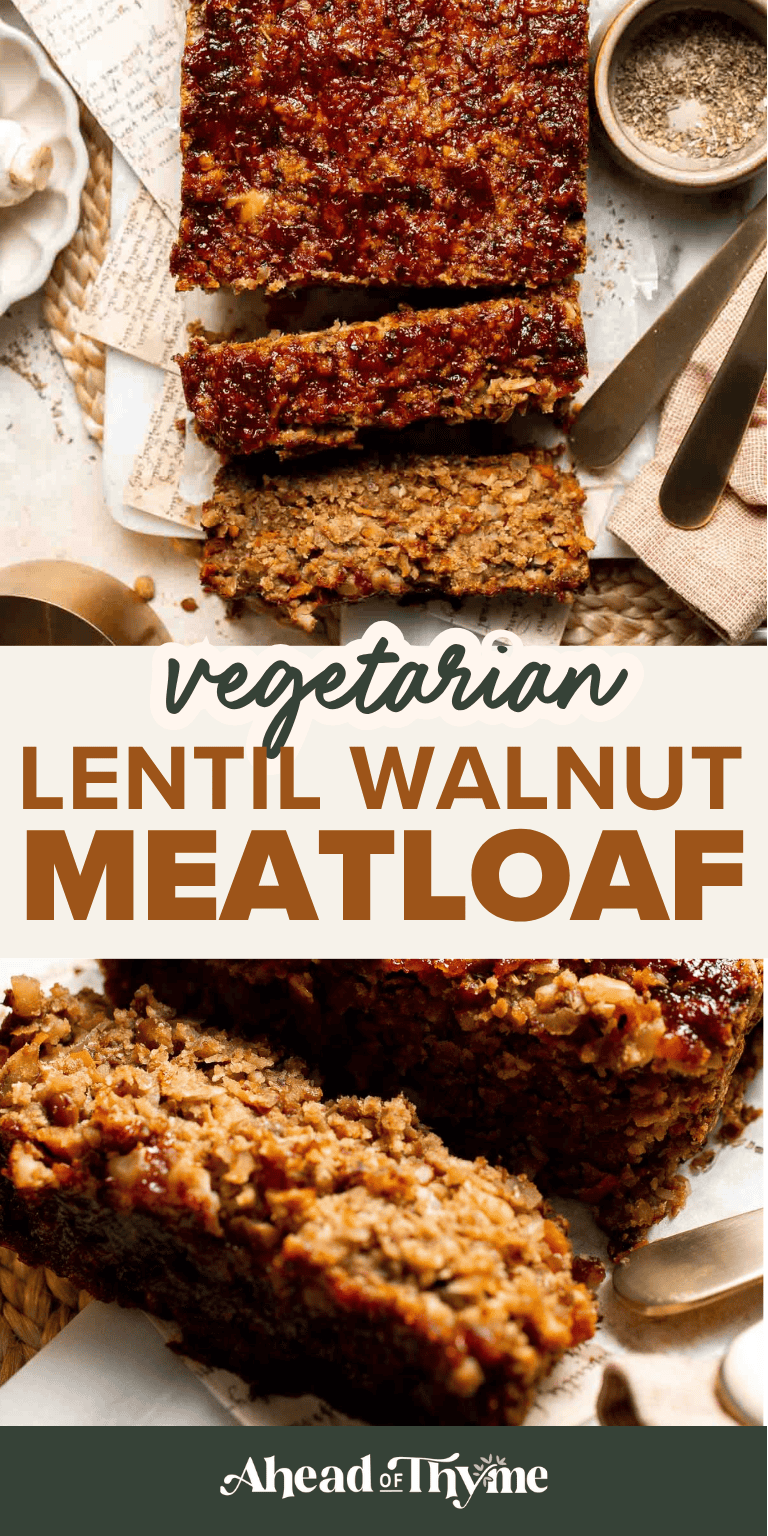
Butternut Squash Salad (with Kale, Walnuts, and Cranberries)
This Butternut Squash Salad is a healthy fall and winter recipe that manages to be fresh, hearty, cozy, and bright all at once. Packed with roasted butternut squash, fresh baby kale, crunchy walnuts, sweet dried cranberries, and tangy feta cheese, it brings plenty of warm autumn flavors and textures to the table. It is nutrient heavy without feeling heavy, and the ingredients come together so naturally.

This colorful salad checks every seasonal box. It is ideal for weeknight dinners, weekend meal prep, or your holiday gatherings when you need something green and festive to balance richer mains. The combination of kale, squash, cranberries, and bright lemon dressing creates a balanced bowl that tastes vibrant and satisfying, yet the flavor profile is versatile enough to enjoy all year long.
This was inspired by my Fall Harvest Salad with Butternut Squash and Apple, and it pairs well with this amazing Ravioli Soup for a cozy and complete meal. It is also a beautiful addition to your holiday dinner table, whether you are serving Thanksgiving classics or a festive winter menu.

Why You'll Love This Recipe
- The healthy main ingredient. Butternut squash is technically a fruit, but it behaves like a hearty winter vegetable and it is packed with nutrients. It is loaded with vitamins A and C, potassium, magnesium, fiber, and antioxidants. With its naturally sweet, nutty flavor, it brings wholesome richness to any meal.
- Delicious and flavorful fall salad. This roasted butternut squash salad highlights everything great about fall. Roasted butternut squash becomes caramelized and tender, baby kale brings a crisp leafy base, walnuts add rich crunch, cranberries offer sweetness, and feta ties it together. Every bite has contrast, color, and a mix of textures and flavors that feel comforting and seasonal. One of my favorite autumn salads! It feels substantial and satisfying without being heavy.
- A simple lemon dressing that you can tweak. Every great salad starts with a great dressing, and this one is as simple as it gets. Olive oil, lemon juice, salt, and pepper create a bright, fresh base that you can easily customize. Add maple syrup, mustard, or herbs to make it your own.
- Quick, easy, and great for meal prep. This is one of those kale salads that uses simple ingredients and comes together with minimal effort. The squash roasts hands off in the oven, and the dressing takes seconds to whisk together. The components store well, so you can prep everything ahead and assemble just before serving. It is practical, fuss free, and reliable for busy days.
- Holiday worthy without extra work. This salad is beautiful enough for Thanksgiving, Christmas, or any holiday dinner, yet simple enough for an everyday lunch. It brings bright, fresh contrast to classic comfort food spreads and pairs well with roasted meats, soups, or pasta. Guests love it, and it always disappears fast.
Ingredients and Substitutions

To make this easy butternut squash salad, you will need the following ingredients (full quantities in the recipe card below):
- butternut squash - When roasting cubed butternut, make sure the pieces are evenly sized (1 inch cubes) so the flesh cooks at the same rate and caramelizes properly on the baking sheet.
You can substitute with sweet potatoes or delicata squash if desired. This is also a great way to use up any leftover butternut squash from a Thanksgiving holiday dinner such as Roasted Butternut Squash or Air Fryer Butternut Squash. - olive oil - Helps the squash roast and crisp. Avocado oil works too.
- Italian seasoning - Adds herb flavor. Use oregano or thyme if preferred.
- garlic powder - Enhances the roasted flavor. For more potent flavor, use 1 small clove of fresh garlic (finely minced) to replace the garlic powder in this recipe.
- salt and black pepper - Essential seasoning. Adjust to taste.
- baby kale - Tender and perfect for salads. Feel free to substitute with any salad greens you have on hand such as baby spinach, rocket or peppery arugula, or shredded green kale.
- walnuts - Add crunch and richness. Pecans, almonds, candied pecans, or pumpkin seeds work well too.
- dried cranberries - Sweet and tart. Try dried cherries or raisins if needed.
- feta cheese - Adds salty creaminess. Goat cheese or shaved parmesan cheese are great alternatives.
- lemon dressing - an easy and delicious dressing made in just seconds with olive oil, lemon juice, salt, and pepper. Use freshly squeezed lemon juice for the best flavor. You can boost the dressing ingredients with a touch of dijon mustard if you want a slightly sharper salad dressing.
The best thing about butternut squash salad is that it is completely customizable. You can add any vegetables or salad toppings you love. Some of my favorites are sliced apples or pears, pomegranate seeds, or a scoop of cooked quinoa to make it more filling.
Equipment
You will also need measuring cups and spoons, a sharp knife, a cutting board, baking sheet pan, small bowl, whisk for the dressing, and salad tongs for tossing.
How to Make the Best Butternut Squash Salad
- Roast the butternut squash. In a large mixing bowl, toss the butternut squash with olive oil, Italian seasoning, garlic powder, salt, and pepper. Spread onto a quarter sheet baking pan in a single layer and roast in a 400°F preheated oven for 30 minutes, or until tender. You can also pop into the air fryer instead. Cook in a single layer at 400°F for 12-15 minutes.
- Build the salad base. In a large serving bowl, combine baby kale, walnuts, dried cranberries, and feta cheese.
- Make dressing. In a small mixing bowl, whisk together olive oil, lemon juice, salt and pepper until well combined.
- Assemble the salad. Drizzle your desired amount of dressing over the salad and toss to combine. Add additional feta on top if desired. Serve immediately.


Expert Tip: Massage the Kale for Softer Leaves
Baby kale is naturally tender, but massaging it with a tiny splash of olive oil for just 20 to 30 seconds makes the leaves even softer and easier to eat. This also helps the dressing cling to the greens and distributes flavor more evenly. If your kale looks slightly stiff or thick, a quick massage transforms it completely.
More Tips and Tricks
- Cut the squash evenly. Uniform cubes roast evenly, giving you perfectly tender pieces without any undercooked or mushy edges.
- Roast until caramelized. Let the squash get lightly golden on the edges. This caramelization adds sweetness and depth that really makes the salad shine.
- Use fresh lemon juice. The dressing is simple, so fresh lemon juice makes a noticeable difference in brightness.
- Toast the walnuts. Toasting for a few minutes in a dry pan brings out flavor and makes the nuts extra crunchy.
- Dress just before serving. This keeps the kale crisp and prevents the salad from becoming soggy if making ahead.
- Perfect for sharing. This recipe is naturally free of gluten, which makes it great for sharing during gatherings or when serving an assorted holiday side dish.
Recipe Variations
- Pecan version. Swap the walnuts for toasted pecans for a sweeter, softer crunch that pairs beautifully with roasted squash.
- Add grains. Mix in cooked quinoa, farro, or couscous to make the salad heartier. Grains add texture, protein, and substance without overpowering the squash or kale, turning this into a complete meal.
- Apple twist. Add thinly sliced apples for crisp sweetness and extra freshness. Honeycrisp or Pink Lady apples work best and pair perfectly with cranberries, walnuts, and lemon dressing.
- Swap with maple dressing. Replace the lemon dressing with a simple maple vinaigrette for a sweeter, more autumn inspired flavor. It pairs especially well with pecans and adds a warm finish to the salad.
- Add orange. Add orange zest or a few orange segments for bright citrus notes. It boosts freshness and complements the sweet roasted squash and tart cranberries beautifully.
- Warm salad version. Serve the salad with warm roasted squash to gently wilt the kale and soften the feta. This variation feels extra cozy and works well as a fall or winter main dish.

Storage
How to Store
Fully assembled, this butternut squash salad will last 1-2 days in an airtight container in the fridge. The greens will soften over time as they absorb the dressing. For the freshest texture, store the salad and dressing separately. Assemble everything except the dressing, then keep the dressing in a small sauce container and toss it in right before serving.
How to Reheat
If you prefer the squash warm, reheat it in the microwave for 20 to 30 seconds or warm it in a skillet before adding it back to the salad. The rest of the salad should be kept cold.
How to Freeze
This salad is not suitable for freezing because both roasted squash and leafy greens change texture once thawed.
How to Serve
This butternut squash salad is a beautiful addition to any fall or winter menu. The sweet squash, crunchy walnuts, and tart cranberries pair well with savory mains, soups, and roasted meats, making it a great choice for holidays, potlucks, or everyday meals. With so many nutrients, it is also satisfying enough to enjoy on its own for lunch, dinner, or something in between. If you want to make it more substantial, add a protein such as salmon, chicken, or even roasted chickpeas to turn it into a complete meal.
These are my favorite dishes to serve with this butternut squash walnut salad:
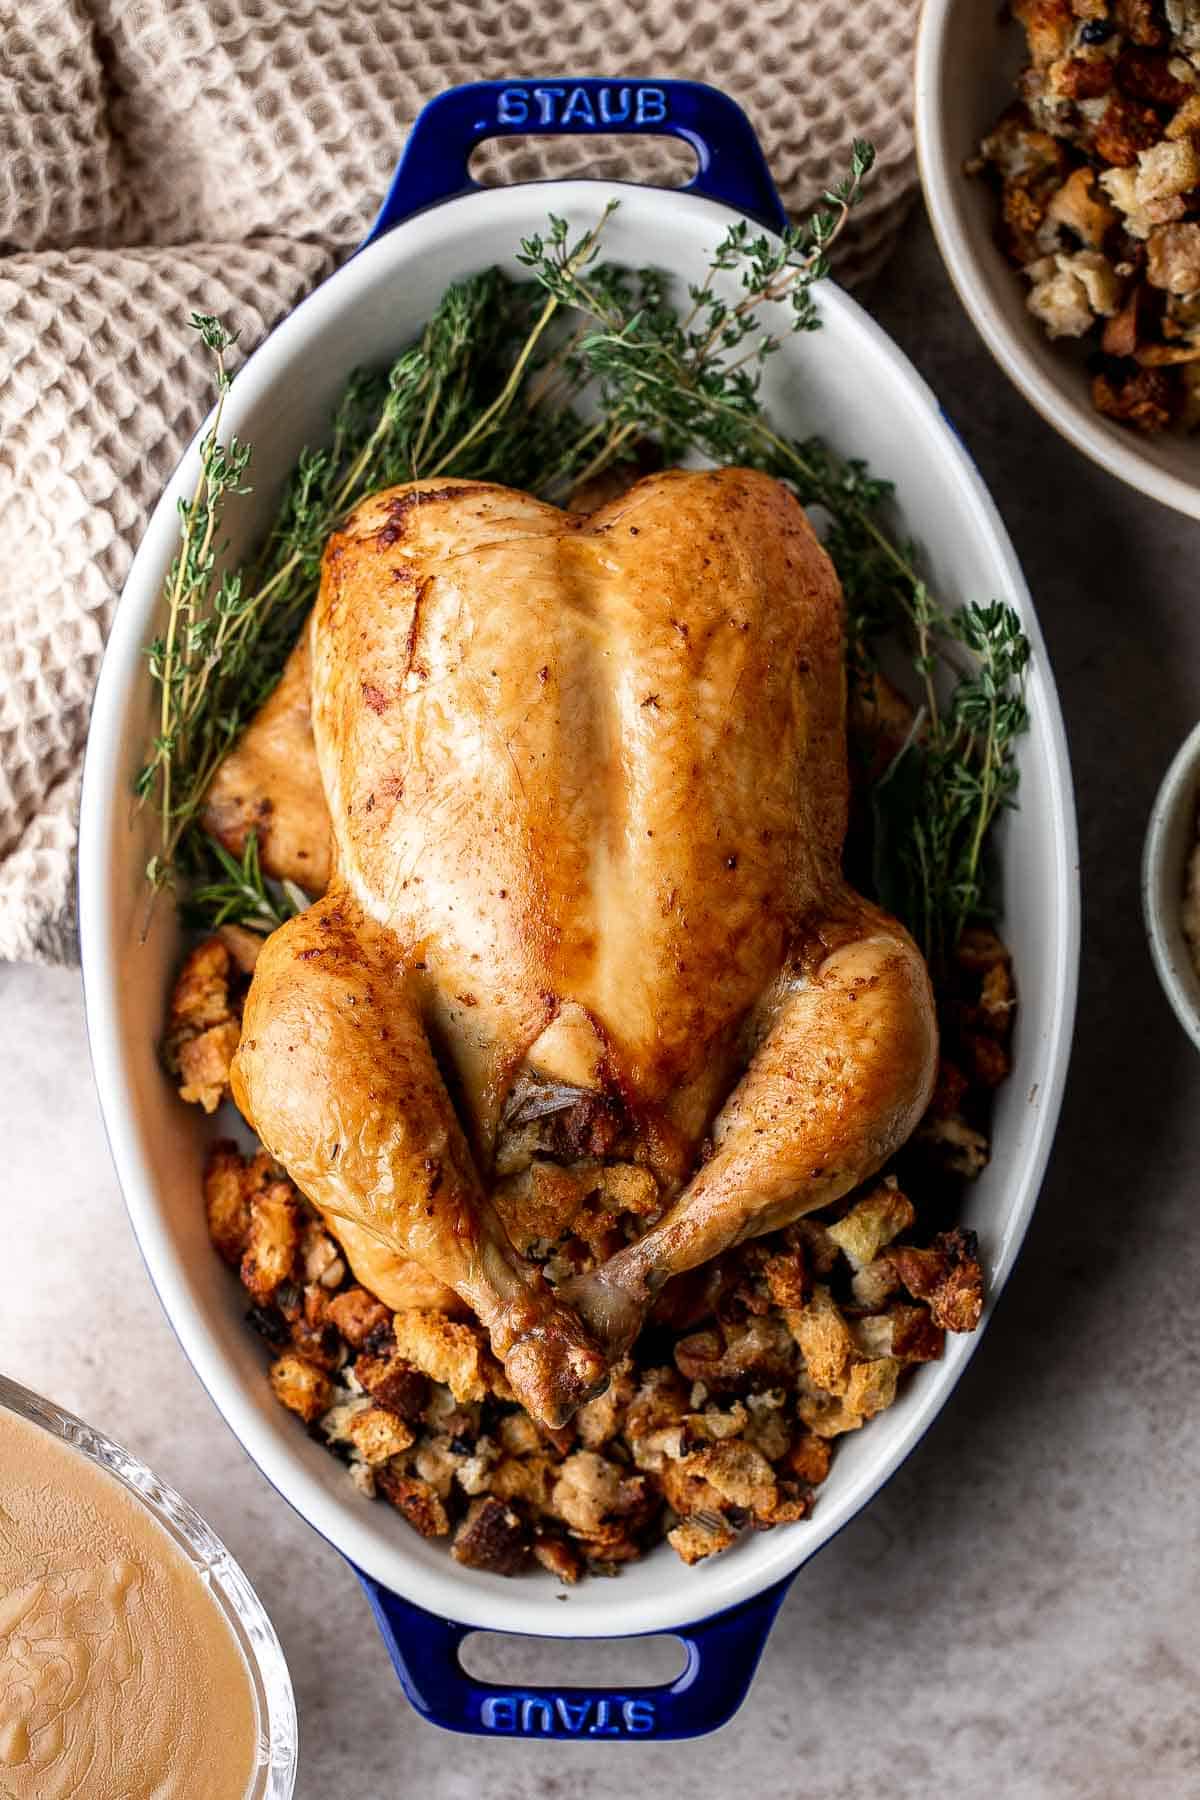

Fall Dinners
If serving this as part of a cozy autumn meal, see our collection of fall dinner ideas, featuring hearty roasted vegetables, comforting soups, savory mains, and seasonal sides perfect for crisp evenings and festive gatherings.
FAQ
Yes, butternut squash is wonderful in salad. When roasted, it becomes tender, lightly caramelized, and naturally sweet, which adds warm flavor and beautiful color to leafy greens. It pairs especially well with kale, spinach, arugula, and mixed greens. The soft texture of the squash contrasts nicely with crunchy nuts and chewy dried fruit, helping create a salad that feels hearty and balanced. You can serve it warm or at room temperature, and it holds up well when tossed with vinaigrettes, especially citrus or maple based dressings.
You can eat butternut squash raw, but it is quite firm and mildly starchy when uncooked. If you plan to use it raw, grate it finely or shave it into thin ribbons so it blends more easily with the other ingredients. Roasting the squash makes it sweeter, softer, and more flavorful, which is why most salads use roasted cubes instead of raw pieces. Roasting also enhances the natural caramelization, making every bite more enjoyable and easier to chew.
Start by trimming off both ends of the squash, then peel it with a sharp vegetable peeler. Slice it in half vertically and scoop out the seeds. Cut the squash into even 1 half inch cubes, which ensures they cook evenly and become tender without turning mushy. Uniform cubes roast better, brown more consistently, and mix easily into salads without overpowering the other ingredients. A sharp chef's knife and a stable cutting board make the process smoother and safer.
Roasting is the best way to cook butternut squash for salads. It concentrates the natural sweetness, gives the edges light caramelization, and creates a tender texture that holds up well when tossed with greens. Coat the cubes lightly with olive oil and seasonings, then roast at a high temperature, usually around 400 F, until soft and golden. You can also air fry the squash for an even faster result. Steaming or boiling works too, but it will not develop the same deep flavor or caramelization that roasting creates.
Butternut squash pairs well with both sweet and savory flavors. Cranberries, apples, oranges, maple syrup, and cinnamon all bring out its natural sweetness. Savory ingredients like feta, goat cheese, kale, garlic, sage, thyme, and rosemary provide balance and depth. Nuts and seeds such as walnuts or pecans add crunch and richness, while bright acidic dressings with lemon or apple cider vinegar help lift the flavor and prevent the salad from tasting too heavy.
Italian seasoning, garlic powder, rosemary, thyme, cinnamon, nutmeg, paprika, and sage all work well on butternut squash. A simple mix of olive oil, salt, and black pepper is all you need for a basic roasted flavor, but adding herbs or warm spices boosts the taste and makes the salad more interesting. For a sweeter version, add a drizzle of maple syrup. For savory fall flavor, try thyme or rosemary. The squash is mild enough that it works with a wide range of seasonings.
Yes, butternut squash and feta are a perfect match. The sweetness of the roasted squash pairs beautifully with the salty, tangy flavor of feta cheese. The creamy texture of the crumbled feta adds richness and contrast to the tender squash and crunchy salad components. This combination is especially popular in fall and winter salads because it balances warmth, sweetness, and savory flavor in a simple and delicious way.
Walnuts, pecans, almonds, and hazelnuts all pair beautifully with butternut squash. Walnuts and pecans are the most common because they offer natural sweetness and a rich crunch that enhances the soft texture of the squash. Almonds add a lighter crunch, especially when sliced or slivered. Hazelnuts bring a toasty, bold flavor that works well in more complex salads. Toasting the nuts lightly before adding them to the salad makes the flavor deeper and more aromatic.
More Fall Salad Recipes
Looking for other recipes like this? Try these:
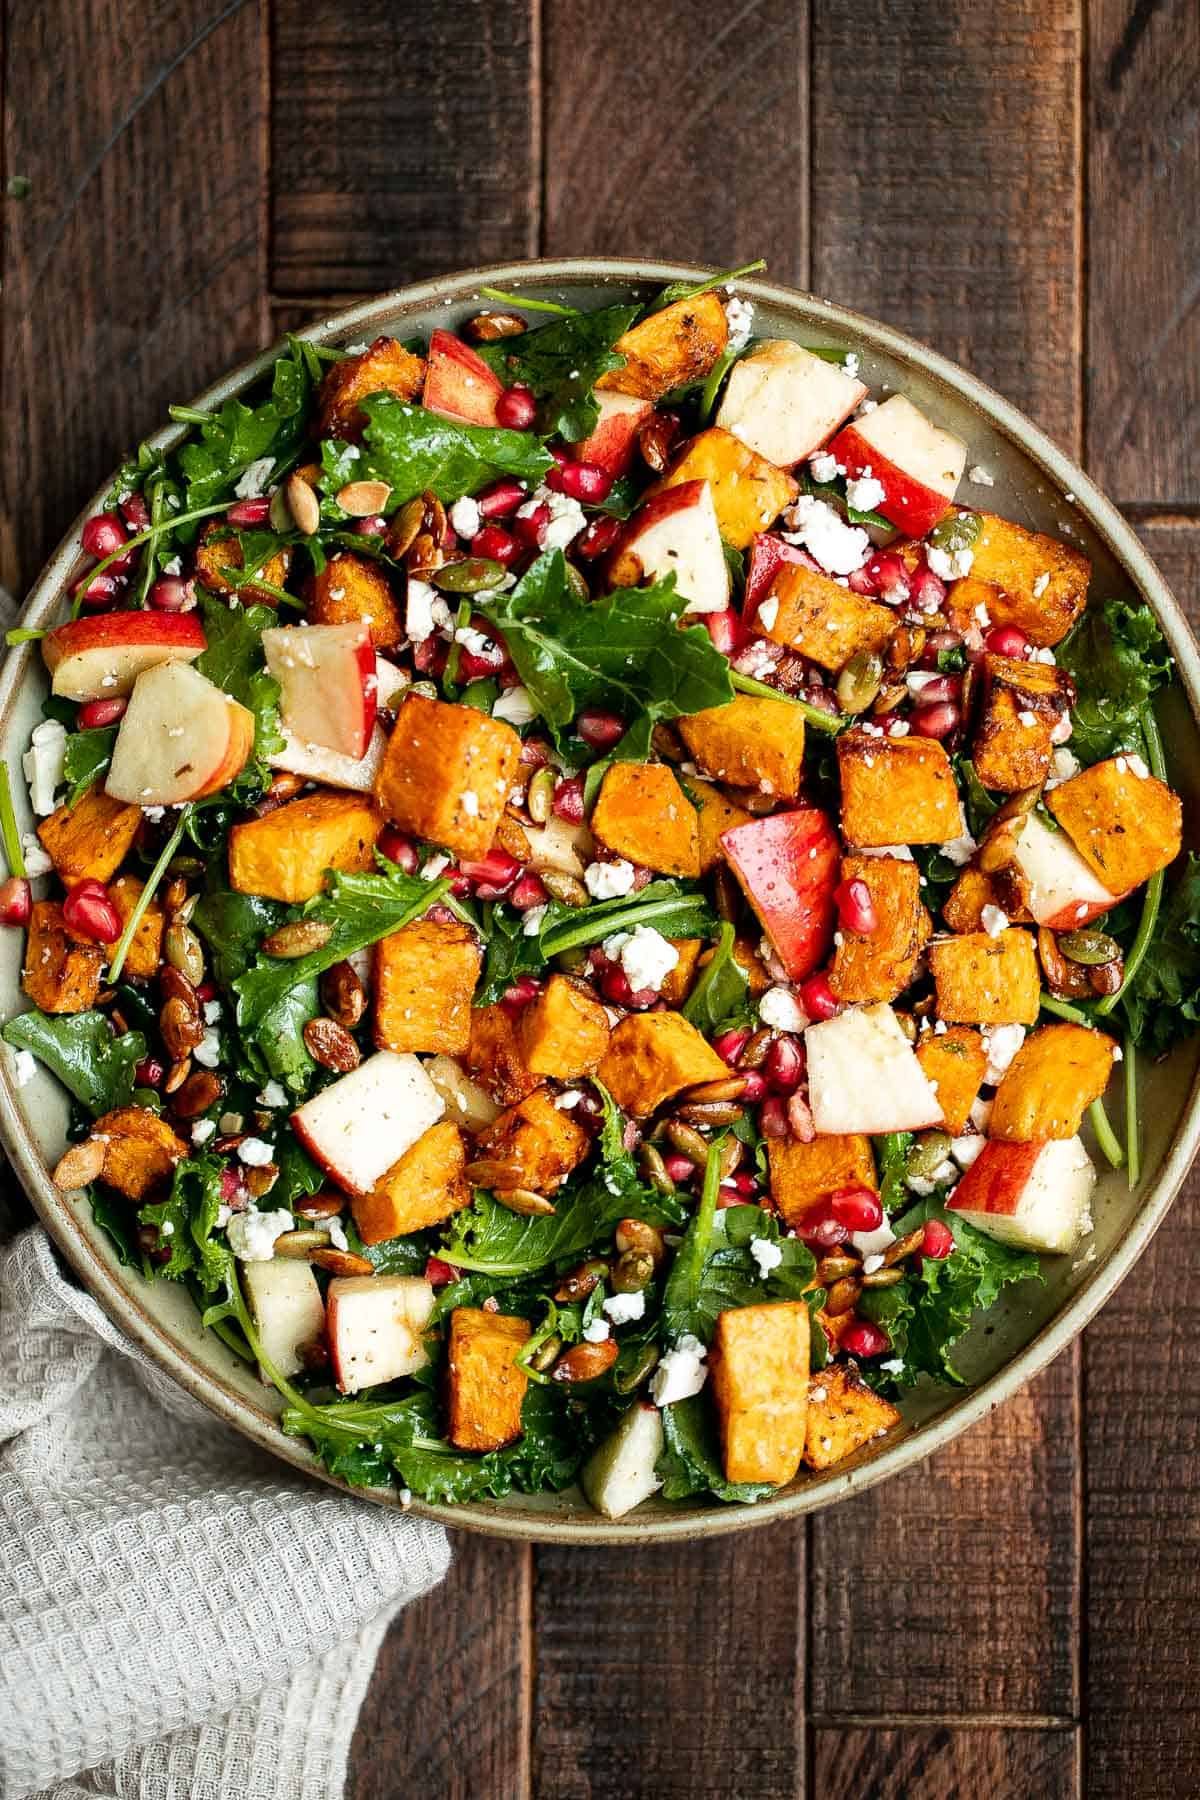
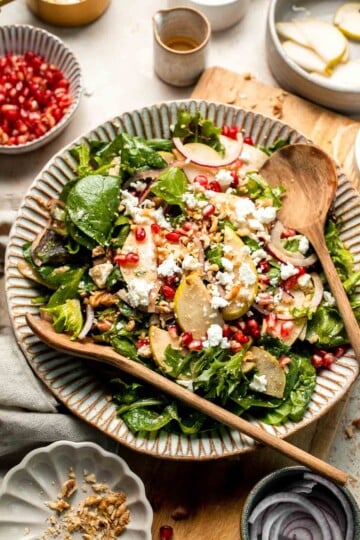
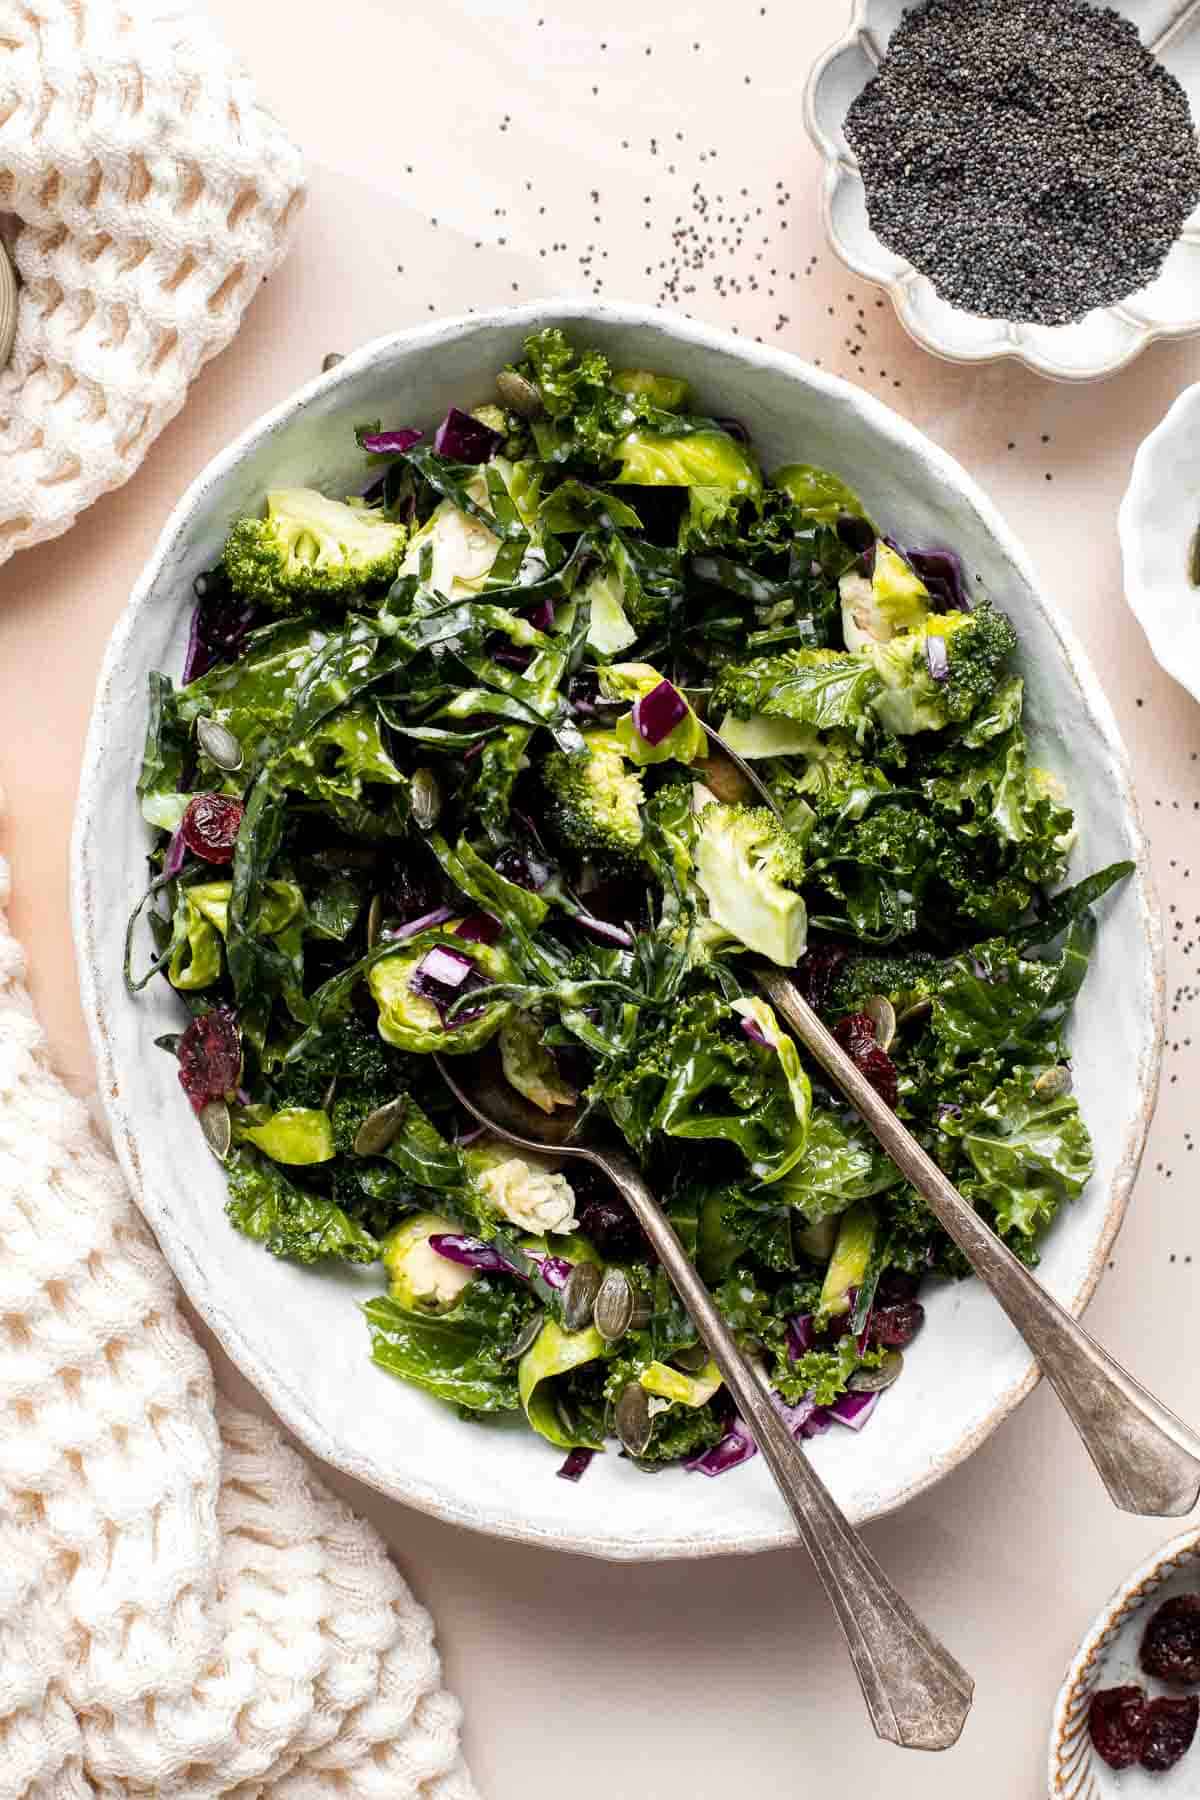
Tried this recipe?
I'd love to hear what you think! Leave a comment and rating below to share your feedback. Your reviews help others discover this recipe and help me keep creating more free recipes for you. Snap a photo and tag me on social media @aheadofthyme too.
This recipe was originally published in 2021. It has since been updated with helpful content.

Best Gifts for Foodies 2025: Holiday Gift Guide for Food Lovers

If you have a food lover on your holiday list, then this foodie gift guide is going to make your shopping feel easy and fun. I gathered my favorite kitchen tools, clever gadgets, pantry treats, and cozy cooking essentials that any home cook would be thrilled to unwrap. Think of this as the ultimate shortcut to finding something thoughtful, practical, and genuinely exciting for the food obsessed people in your life.
Holiday gifting can feel overwhelming when you are trying to balance budgets, personalities, and a long list of people to shop for. That is exactly why curated, tested picks make such a big difference. Whether you are shopping for a confident home cook, a new baker, or someone who simply loves good food, you will find ideas here that spark instant delight.
This guide pulls together items my own kitchen uses year after year, along with a few fresh favorites that bring a little luxury into everyday cooking. Ready to shop?
[feast_advanced_jump_to]Gifts Under 30 Dollars
Small, useful, and loved by cooks, these make perfect stocking stuffers that still feel thoughtful.
Heat safe, flexible, and perfect for mixing and scraping. A kitchen basic that foodies always appreciate.
Stainless Steel Silicone Whisk
A sturdy everyday whisk that is gentle on nonstick pans and great for sauces and batters.
Glass Olive Oil Pour Dispenser Bottle
A tidy drizzle bottle with a smart pour spout that looks great on the counter.
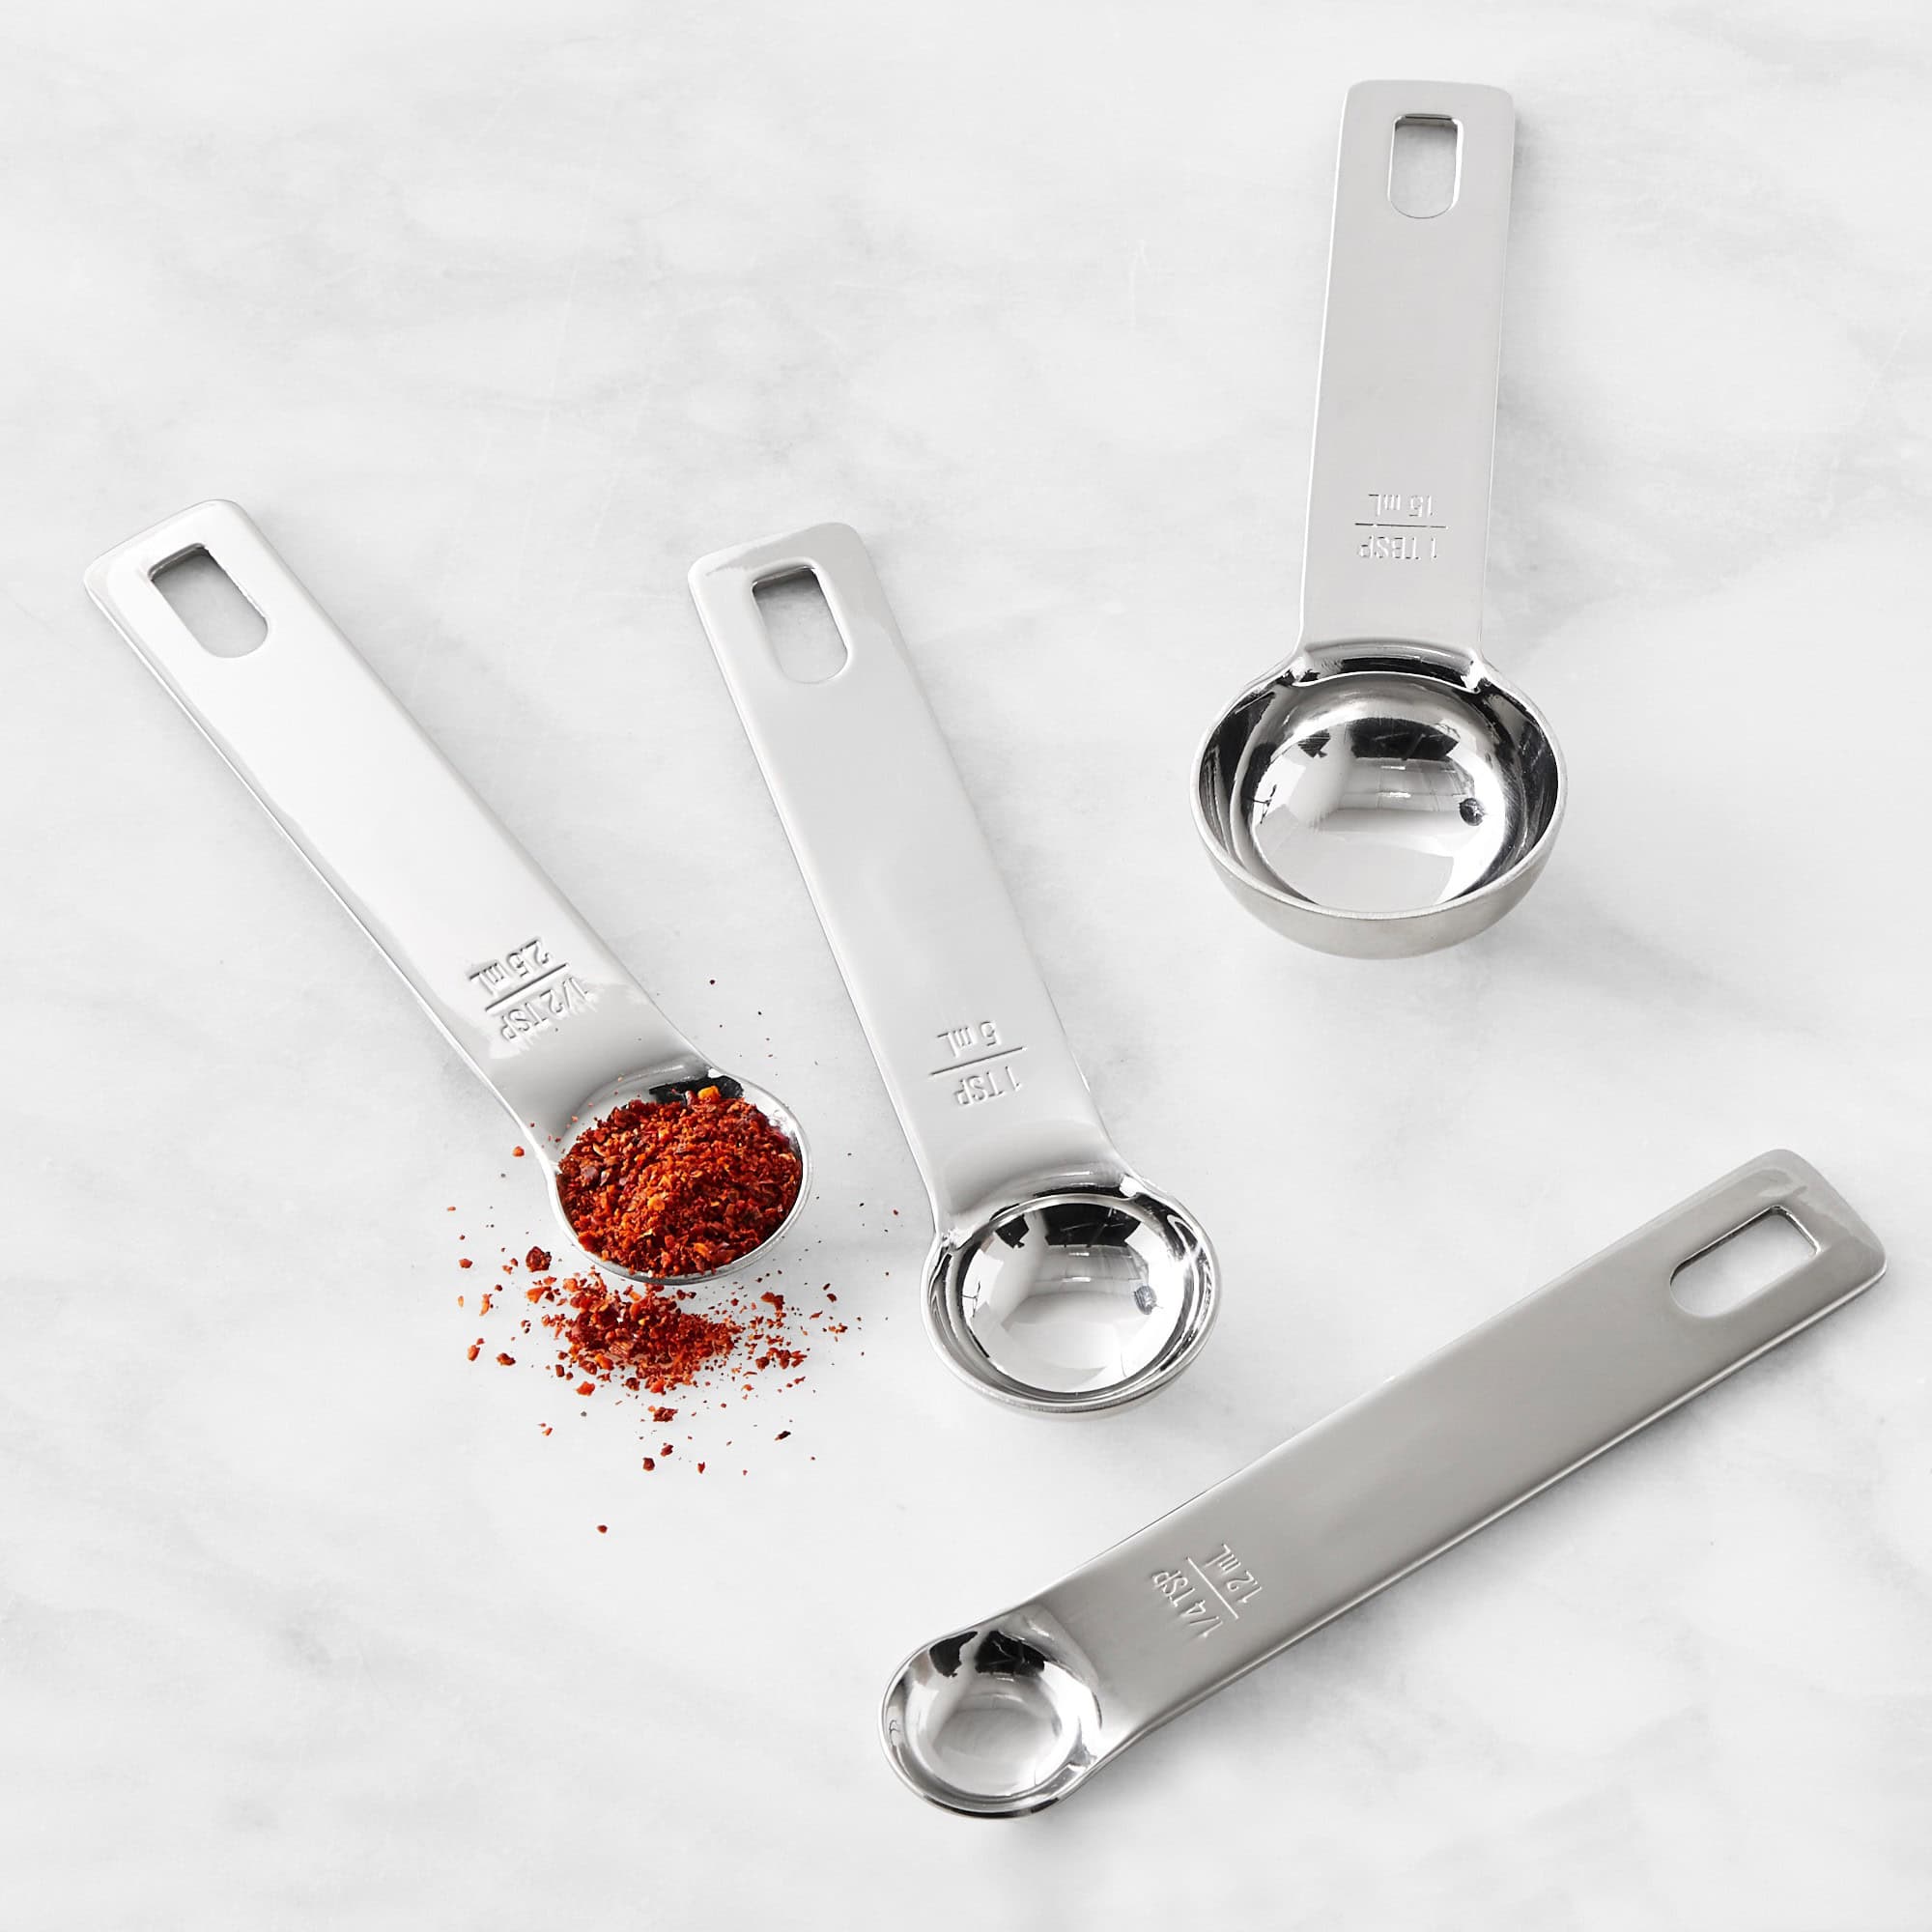
Stainless Steel Measuring Spoons
Slim profiles slide into jars for accurate measuring without the mess.


Gifts Under 50 Dollars
Elevated but accessible, these are the kind of upgrades home cooks use every week.


Gifts Under 100 Dollars
A little more special and incredibly useful, these gifts truly elevate everyday cooking.
A sharp, balanced knife that handles chopping, slicing, and everyday prep with ease.

A thick, durable board that protects knives and looks beautiful on the counter.
Stackable borosilicate containers that keep leftovers fresh and organized.
Splurge Worthy Gifts
High impact gifts that every foodie dreams of using. These are the showstoppers.


Gifts for Bakers
Thoughtful upgrades that make baking smoother, easier, and more fun.


Gifts for Home Cooks
Practical tools that every home cook will reach for daily.

A safe, durable nonstick pans perfect for eggs, stir fries, and fast dinners.


Gifts for the Entertainer
Hosting friendly pieces that elevate appetizers, charcuterie, and gatherings.


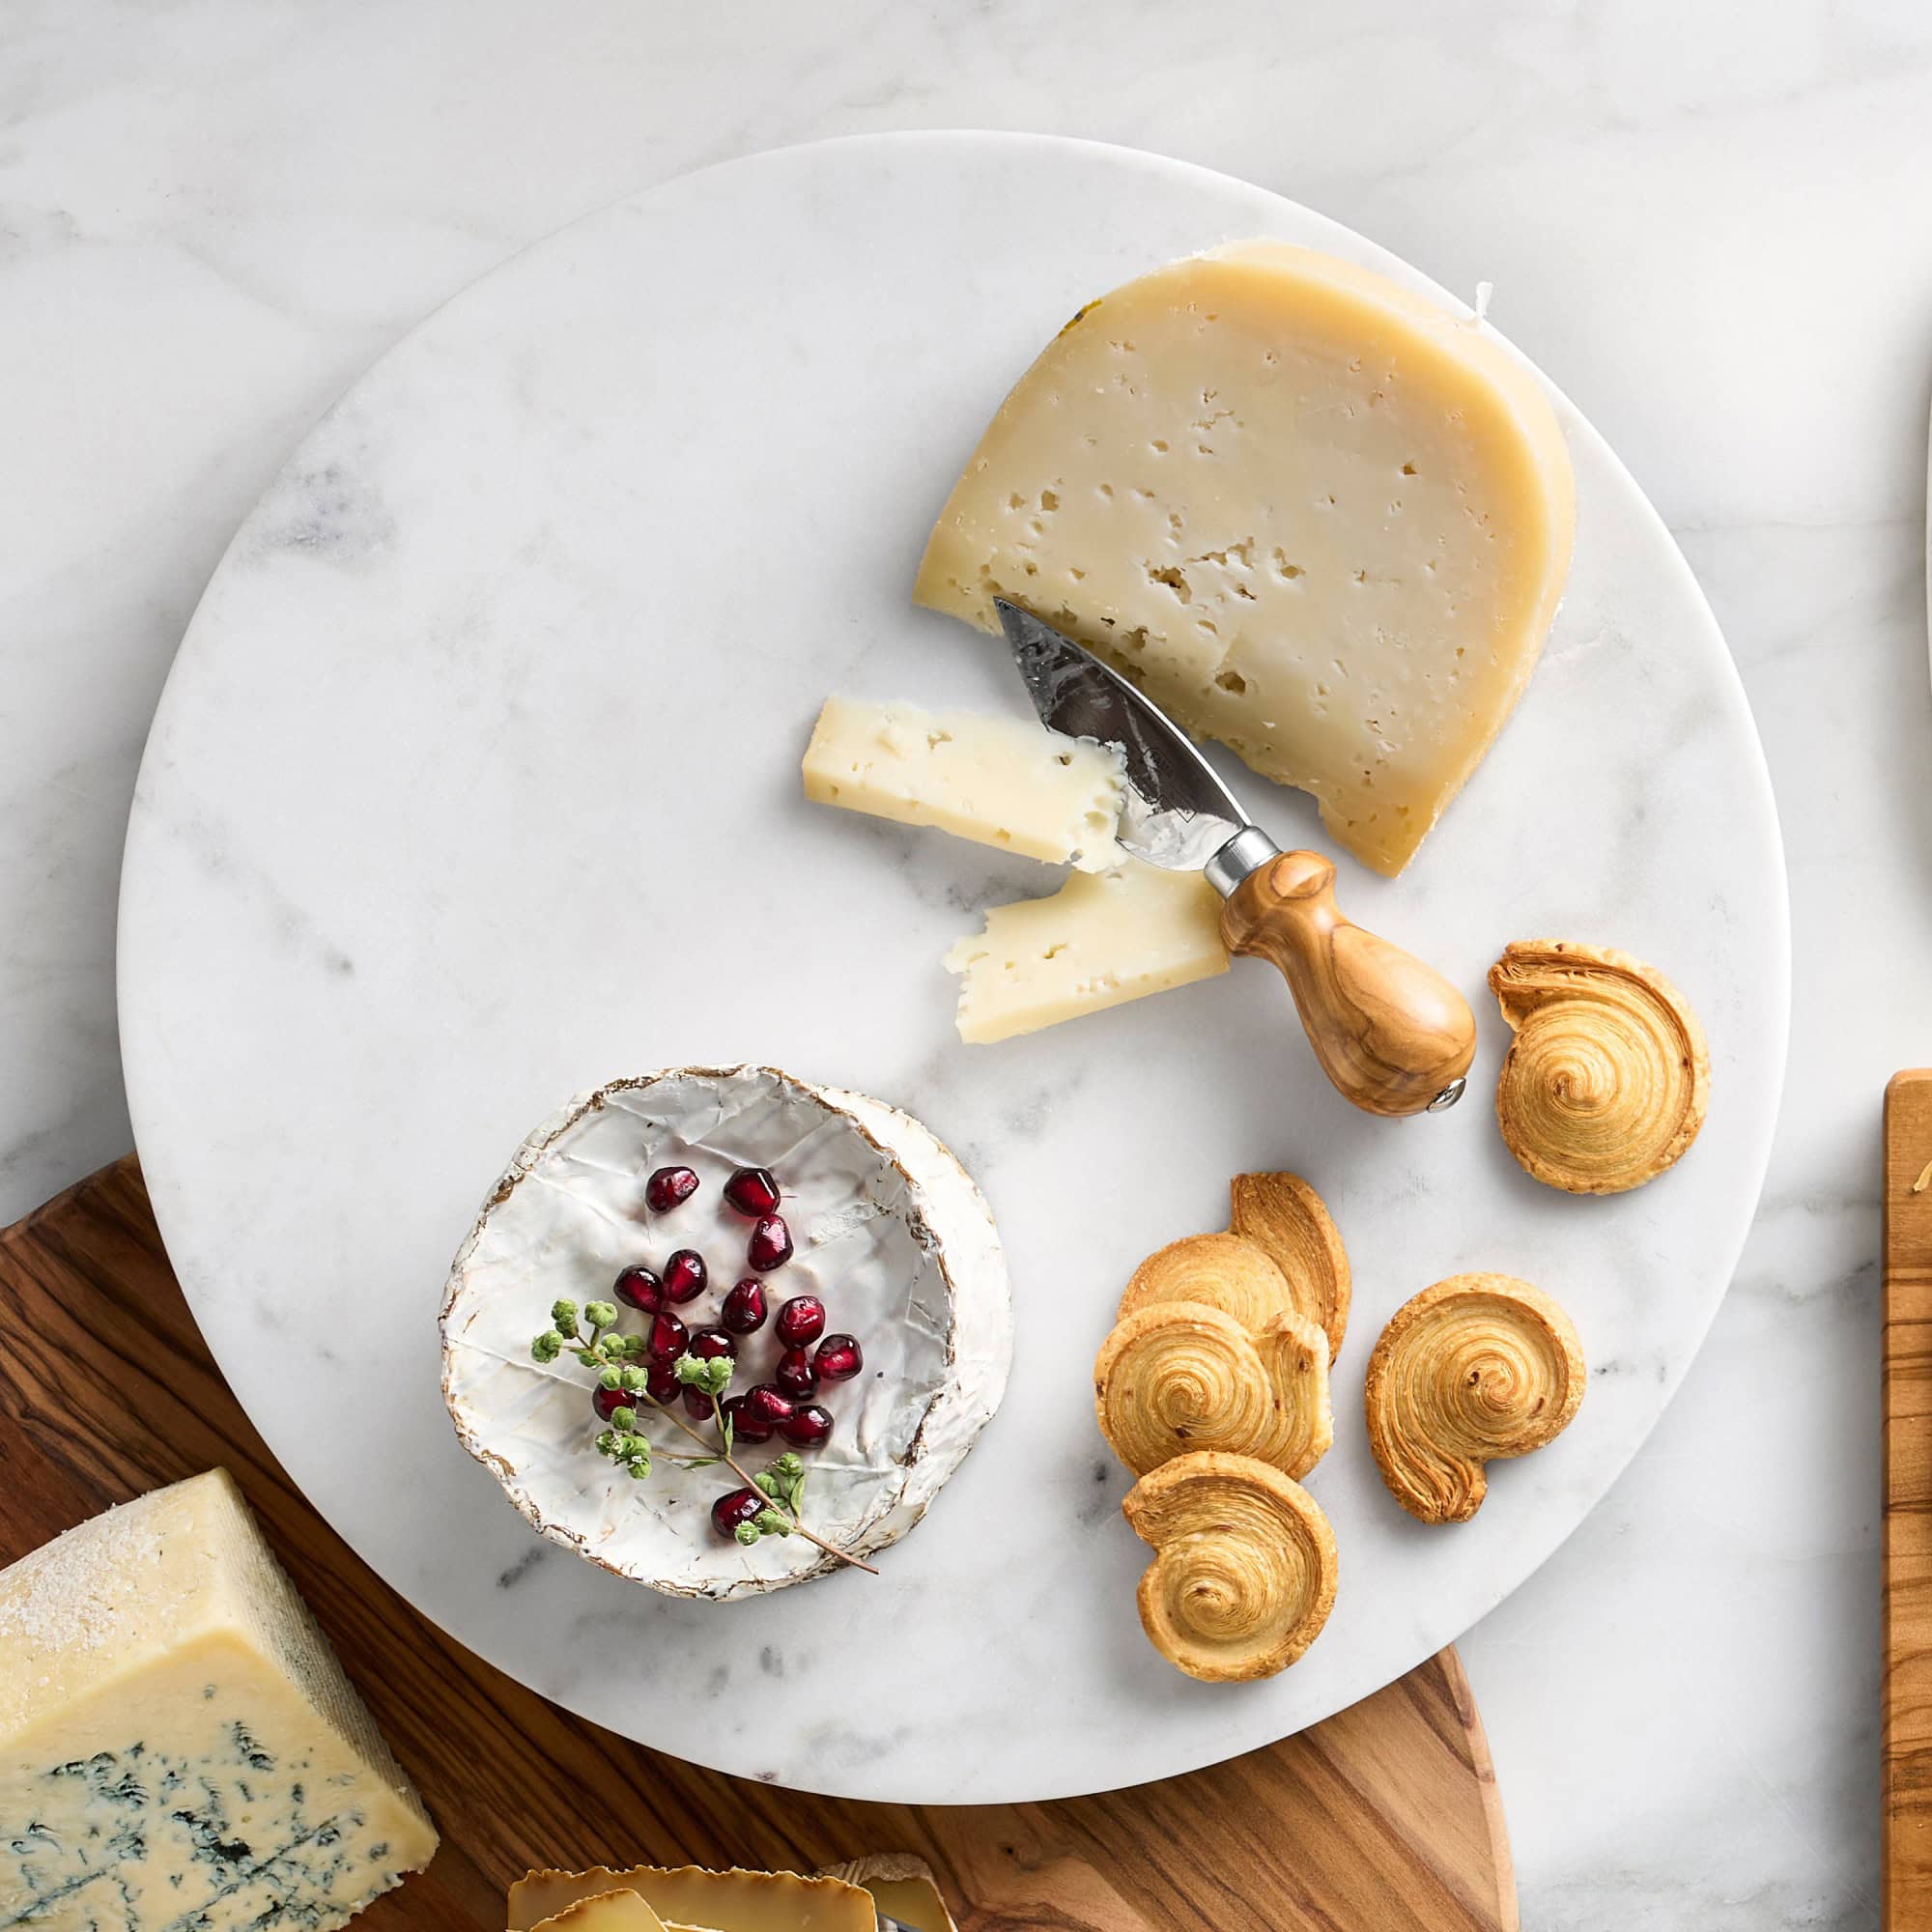
Pantry Upgrades and Edible Gifts
Delicious, high quality goodies that food lovers adore.


Personalized and Thoughtful Gifts
Meaningful, heartfelt gifts that feel extra special.


Cranberry Hand Pies (with Leftover Cranberry Sauce)

Cranberry Hand Pies are buttery, flaky, and filled with sweet-tart cranberry sauce that bursts with flavor in every bite. They're the perfect way to turn leftover cranberry sauce into something new, festive, and irresistible. Think mini handheld pies with a golden, sugary crust and a glossy cranberry center that peeks through the top. It's a treat that's as beautiful as it is delicious.

These little pies are ideal for the holidays, whether you're baking for Thanksgiving, Christmas, or just craving something cozy in winter. They're quick to make with just a few simple ingredients, ready in under 30 minutes, and can be made with store-bought or homemade pie dough.
This recipe is the perfect follow-up to our Slow Cooker Cranberry Sauce or Easy Make-Ahead Cranberry Sauce, turning your leftovers into a brand-new dessert. Pair them with Whipped Cream or Vanilla Ice Cream for a festive, crowd-pleasing finish to your holiday table.
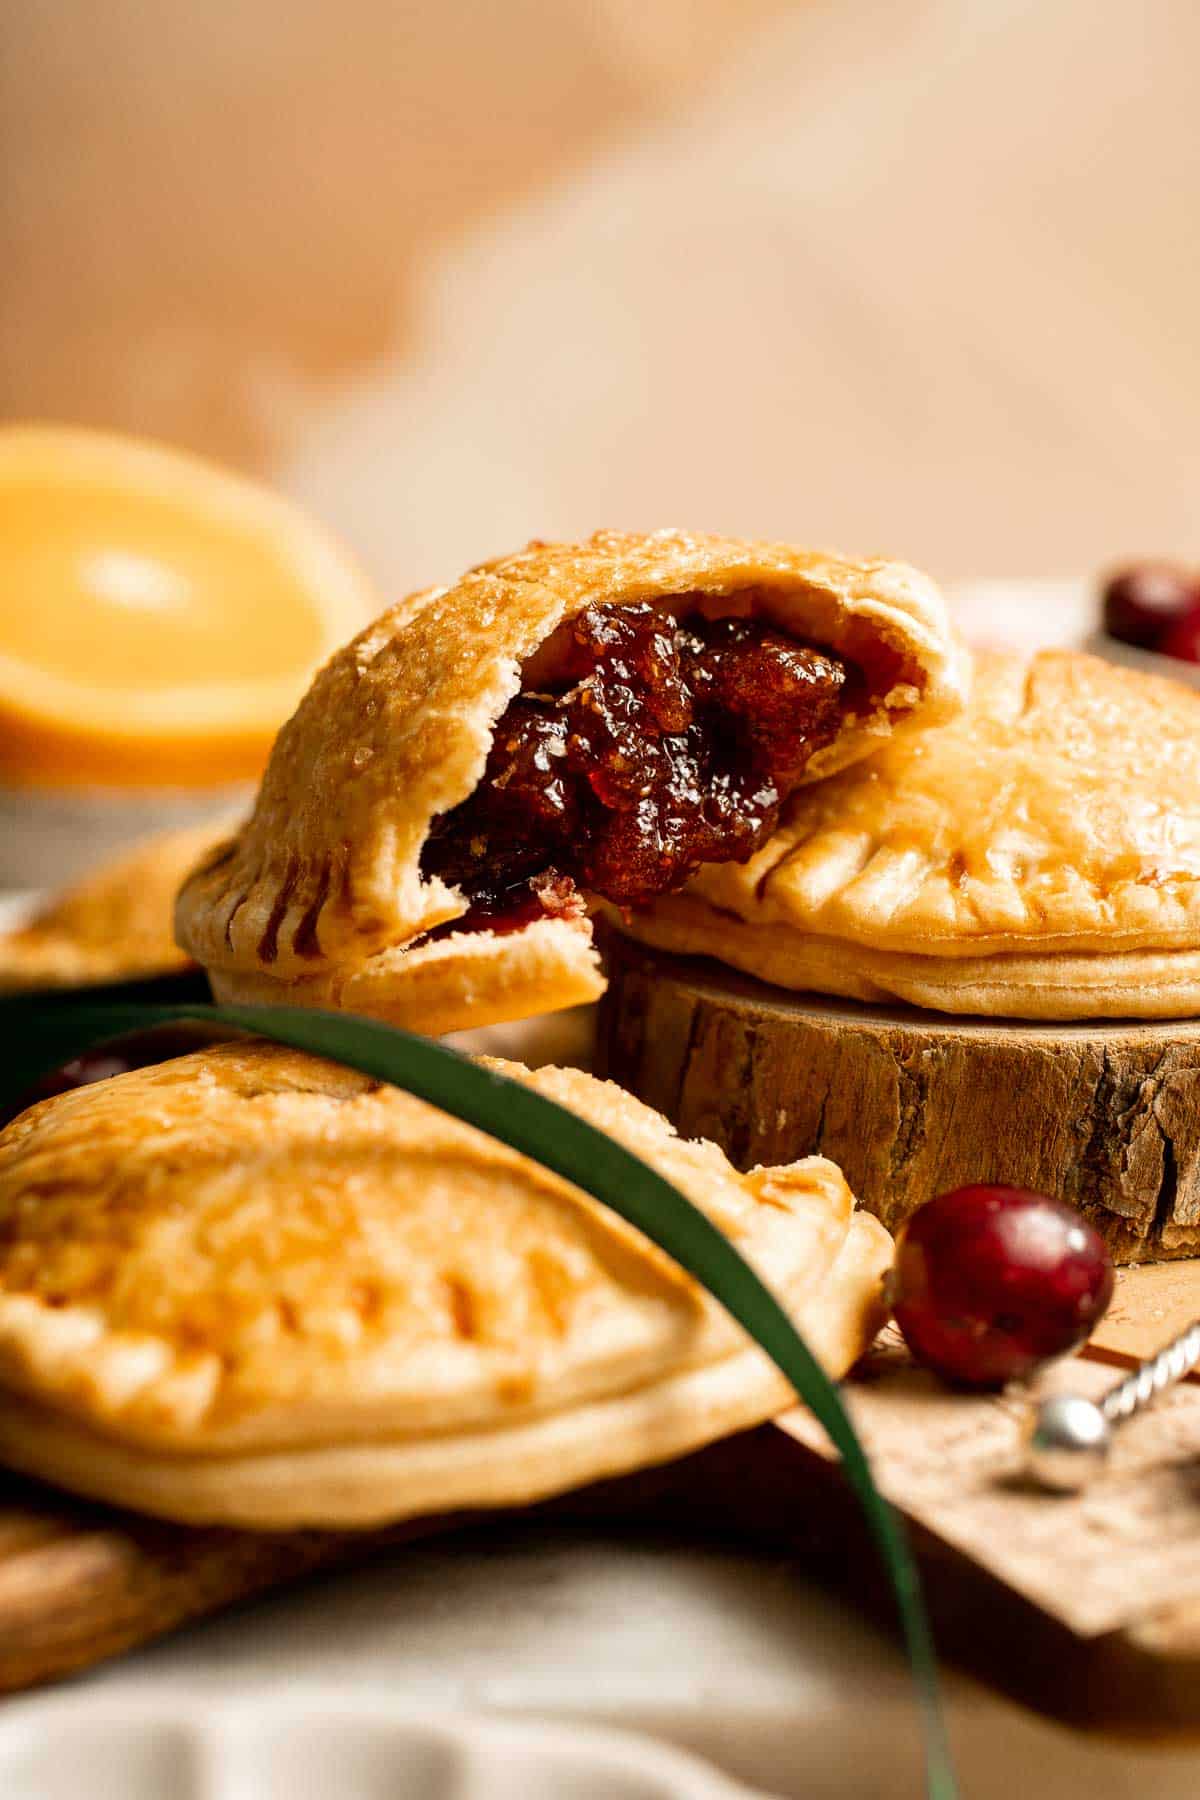
Why You'll Love This Recipe
- A delicious way to use leftovers. Transform leftover cranberry sauce into a fresh new dessert that's sweet, tart, and buttery. No one will guess it started as leftovers!
- Perfect holiday treat. These cranberry hand pies are festive, portable, and perfectly portioned for Thanksgiving or Christmas dessert trays. We love making these Christmas hand pies!
- Easy to make. With just four ingredients and under 30 minutes of prep, this recipe is simple enough for beginners and impressive enough for guests.
- Flaky, golden perfection. The buttery pie crust bakes up crisp on the outside and tender inside, sealing in the cranberry filling for that perfect jammy bite.
Ingredients and Substitutions
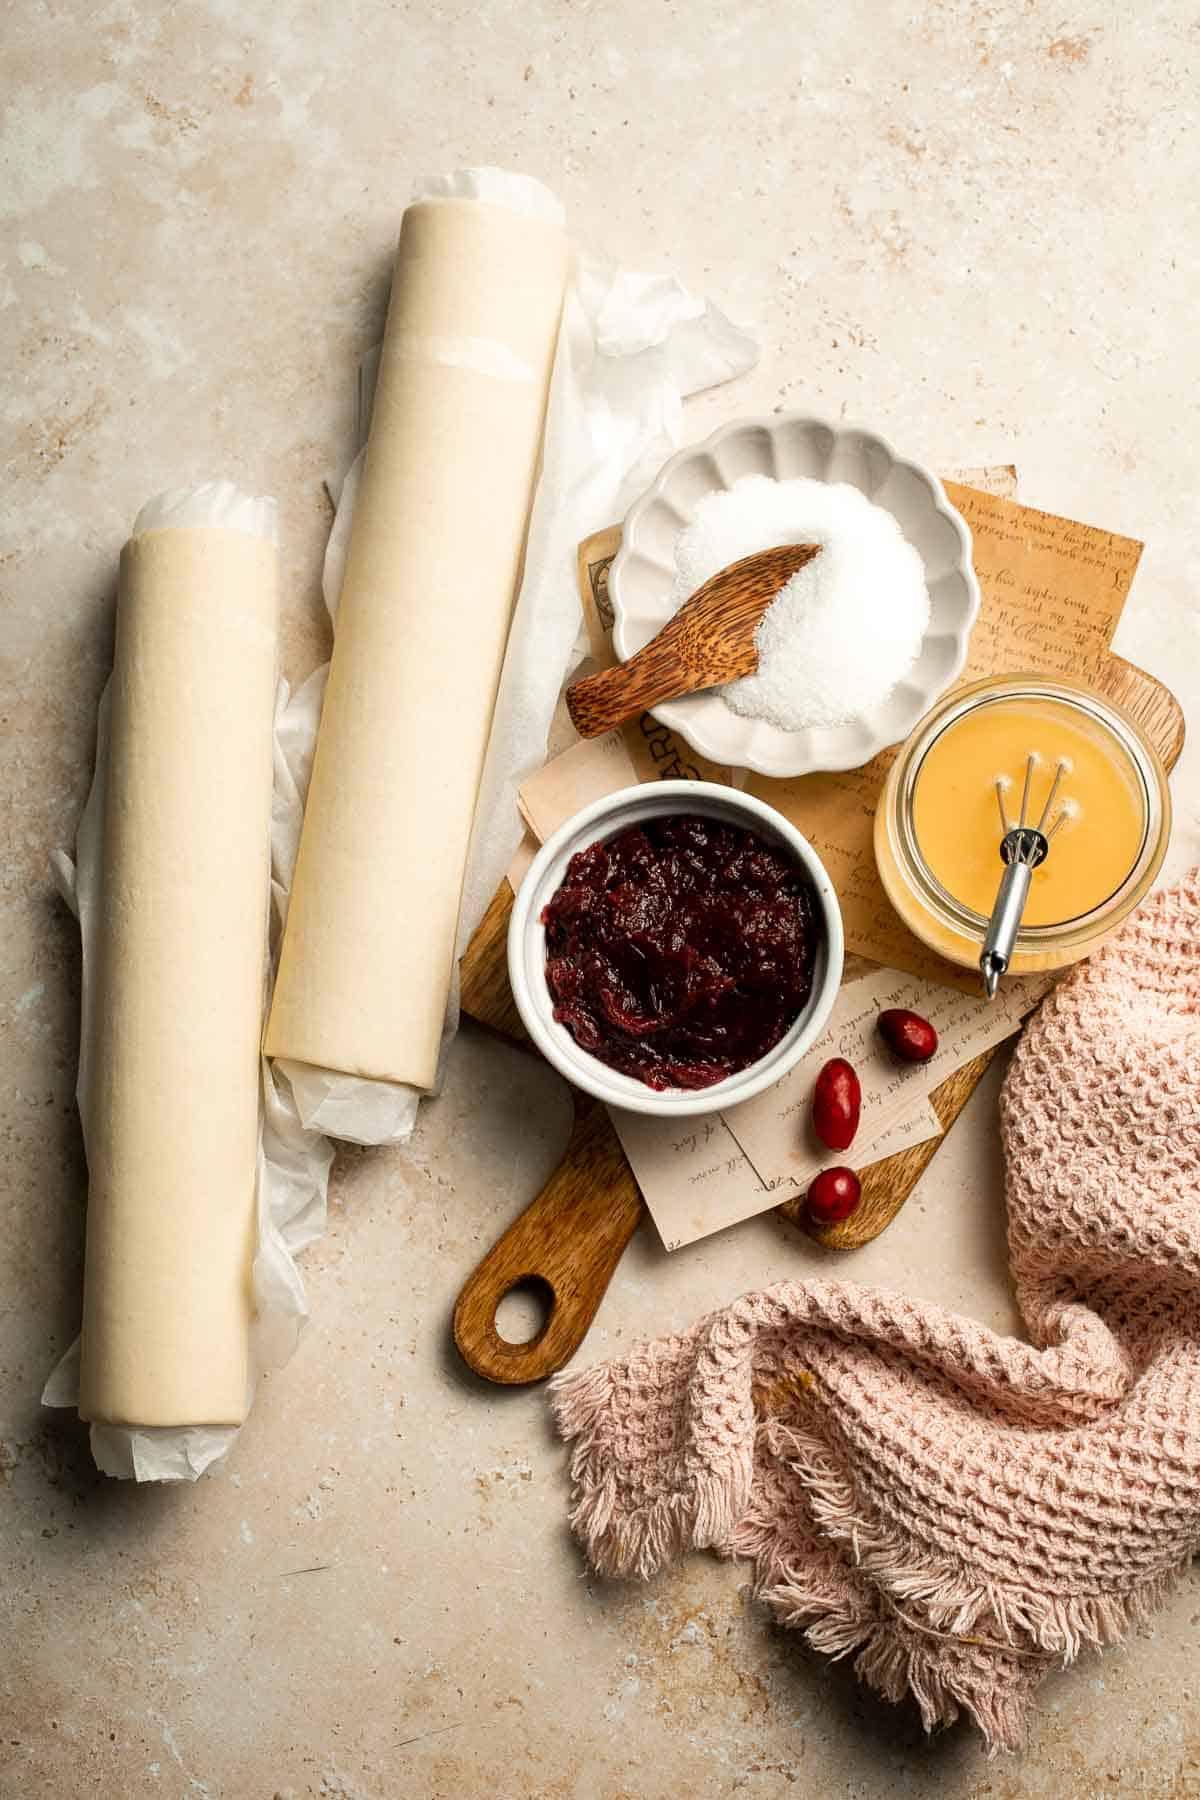
To make these delicious and easy Cranberry Hand Pies, you will need the following ingredients (see recipe card below for quantities):
- pie dough - You can use either homemade pie crust or store-bought ready-made pie crust. For best results, use dough that's cold and easy to roll.
- cranberry sauce - About ¾ cup of leftover cranberry sauce, either store-bought or homemade. You can even make your own filling with fresh cranberries simmered in sugar and fresh orange juice for a brighter, tangier taste. Try our Easy Make-Ahead Homemade Cranberry Sauce or Slow Cooker Cranberry Sauce.
- egg - One beaten egg for the egg wash that gives the crust its glossy, golden finish.
- sugar - A light sprinkle of granulated sugar over the tops adds sparkle and texture. You can use coarse sugar for extra crunch.
Equipment
You'll also need measuring cups and spoons, a rolling pin, large baking sheet, parchment paper or silicone mat, pastry brush for the egg wash, and a fork for sealing the edges.
Instructions
- Cut dough. Place one pie dough sheet (thawed) on a lightly floured surface. Use a 3.5-inch round cookie cutter (or the rim of a can) to cut out 10-12 circles for the bottoms. Repeat with the second dough sheet for the tops, re-rolling scraps as needed.
- Add egg wash. Brush the edges of the bottom circles with egg wash.
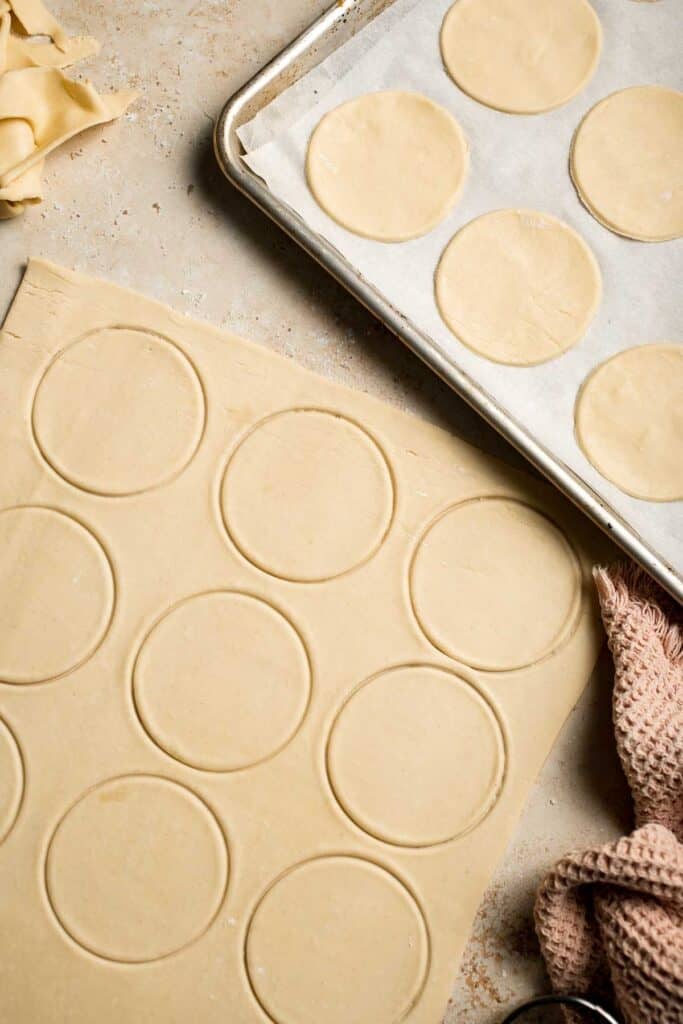
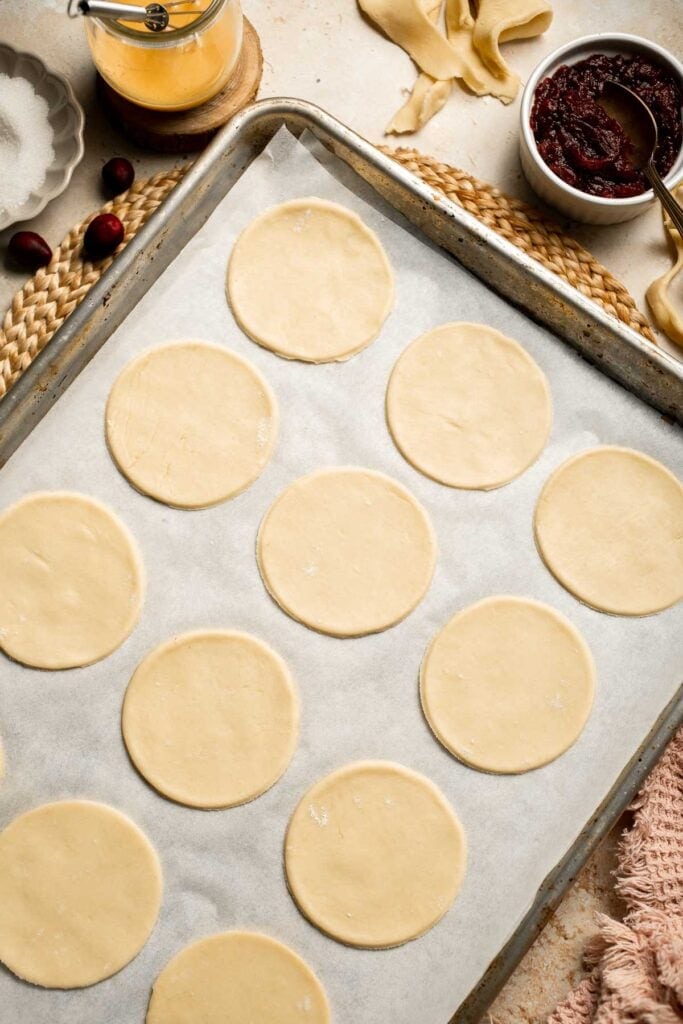
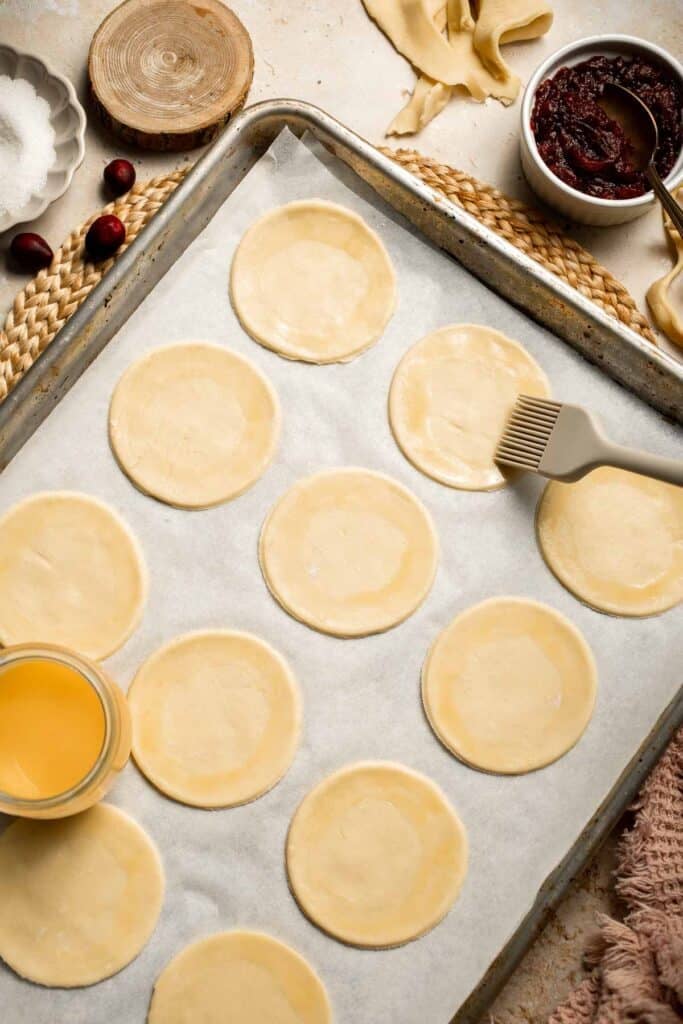
- Assemble. Spoon about 1 tablespoon of cranberry sauce onto the center of each bottom circle (10-12 circles only) to create a filled circle of sweet, tangy goodness. Top with the remaining dough circles.
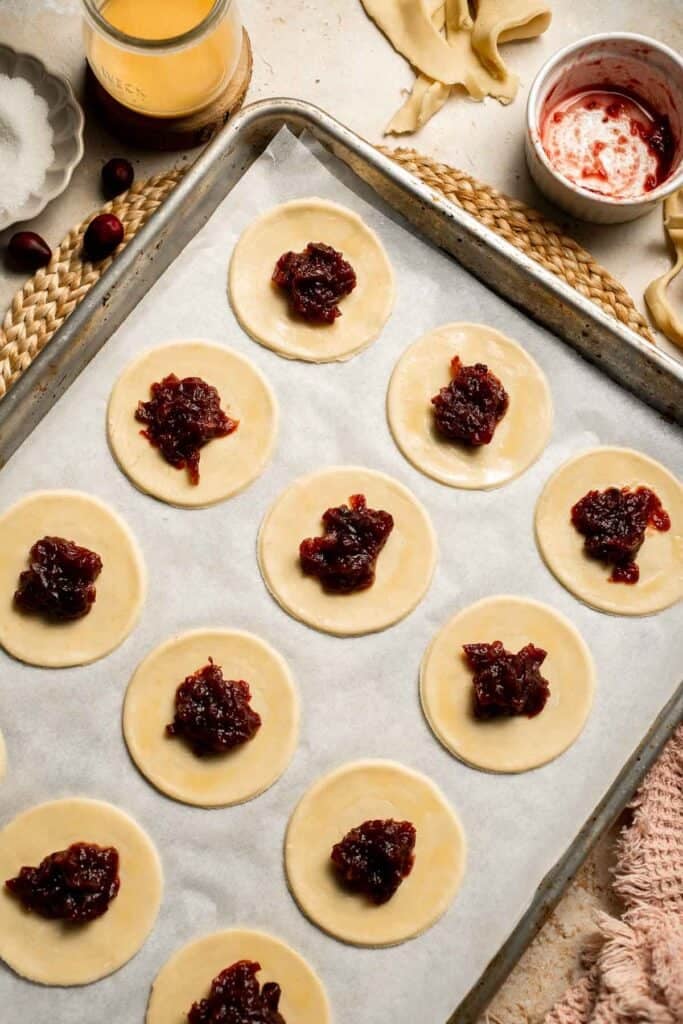
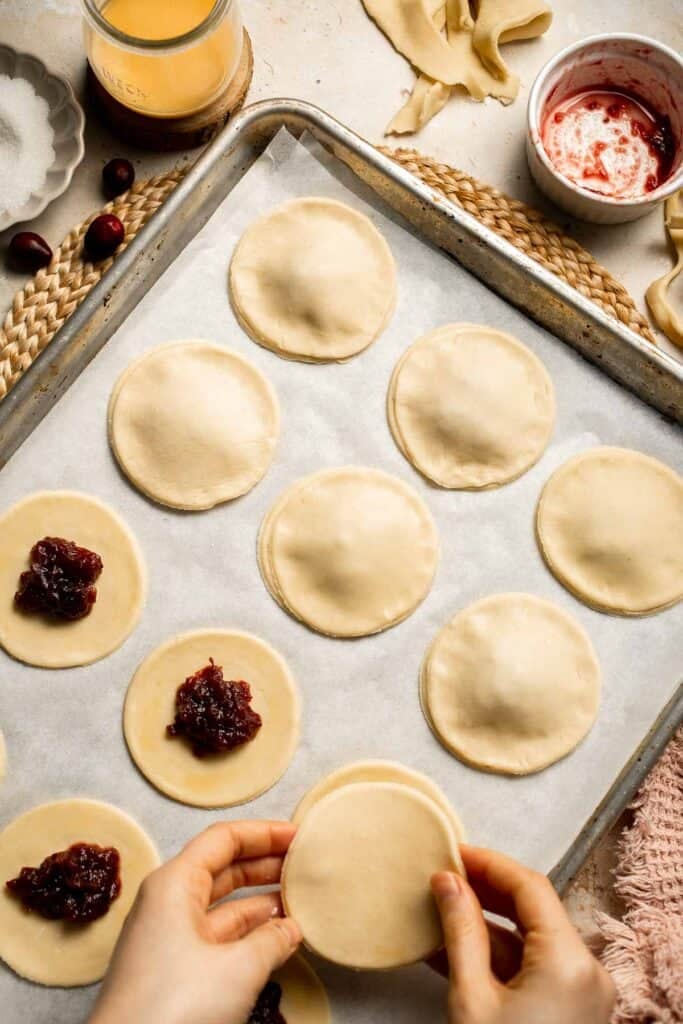
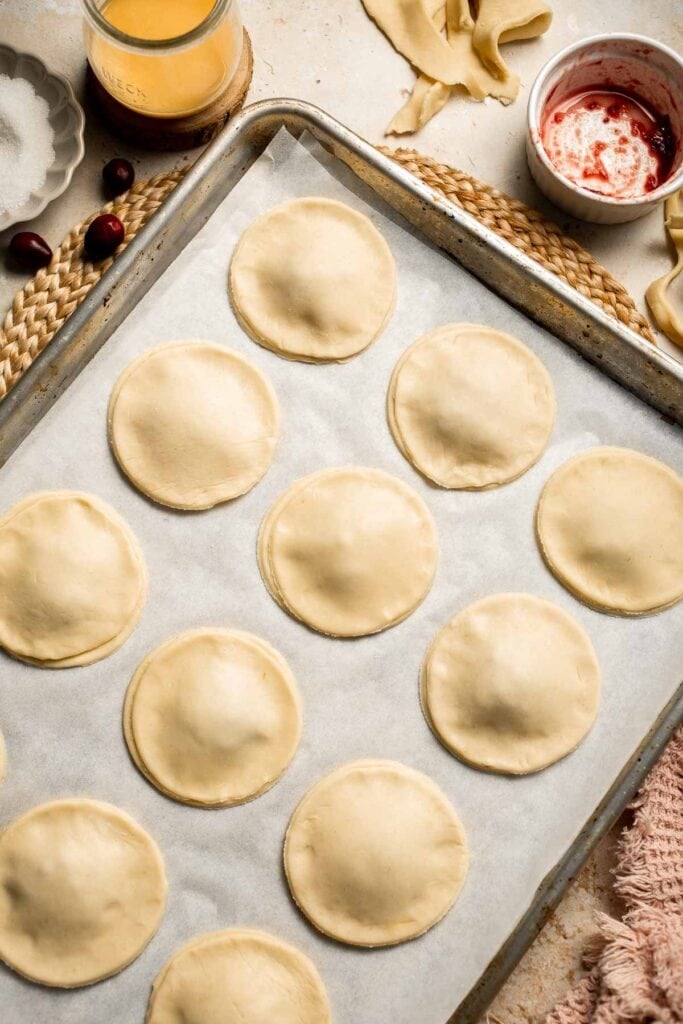
- Seal and create vents. Press and seal the edges all the way around by crimping the edges with the tines of a fork. Use a sharp knife to carefully cut a small slit or an X shape on the tops of each pie for venting, lightly brush with egg wash, and then sprinkle with a pinch of sugar on top.
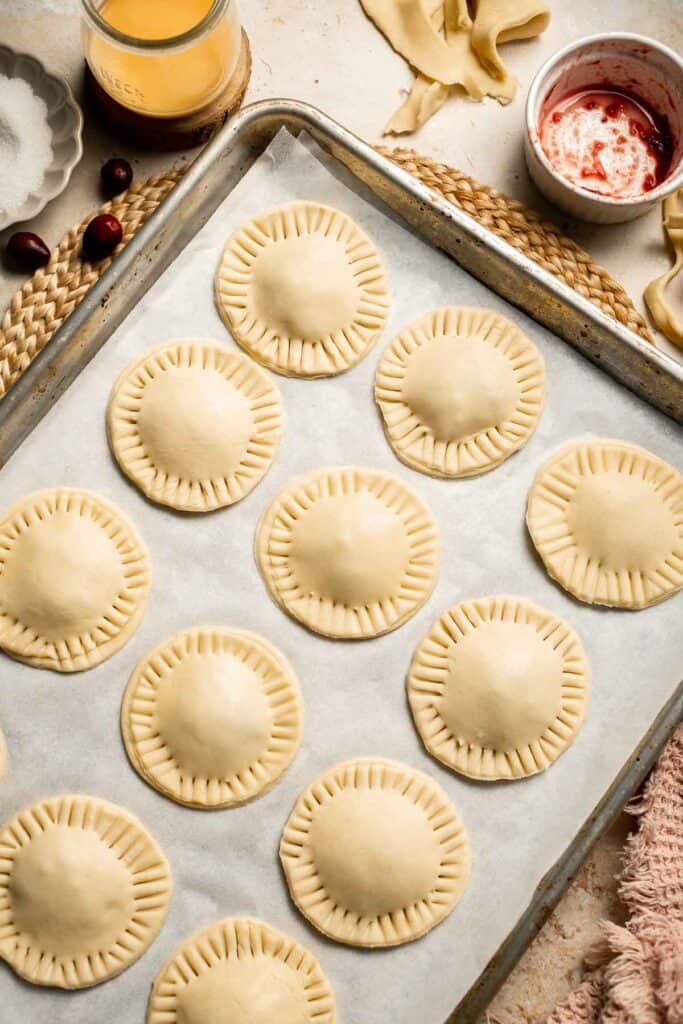
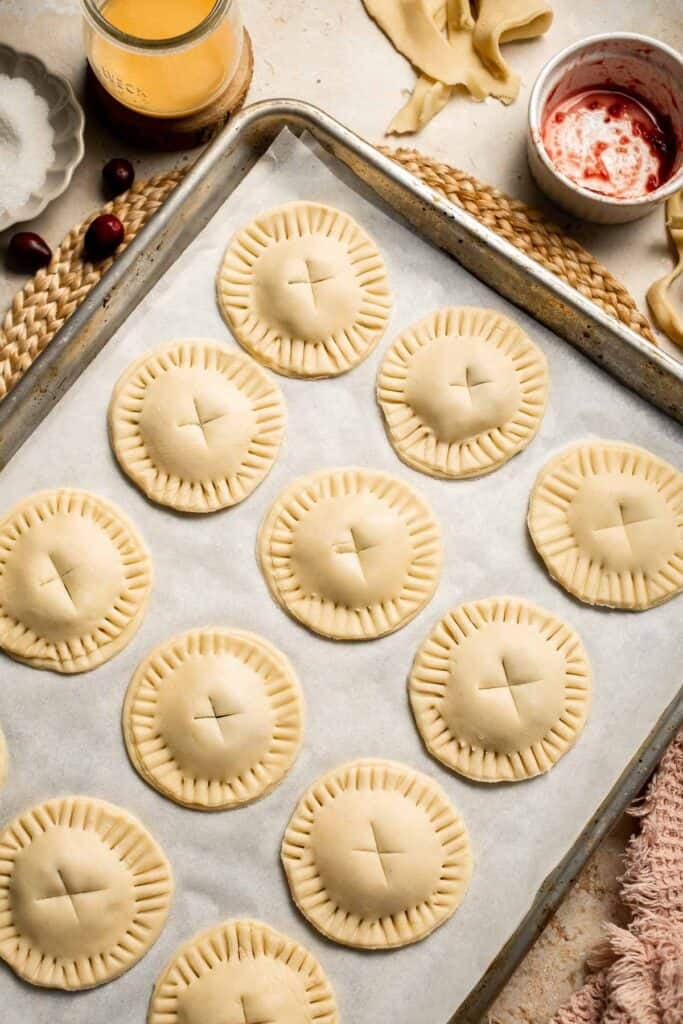
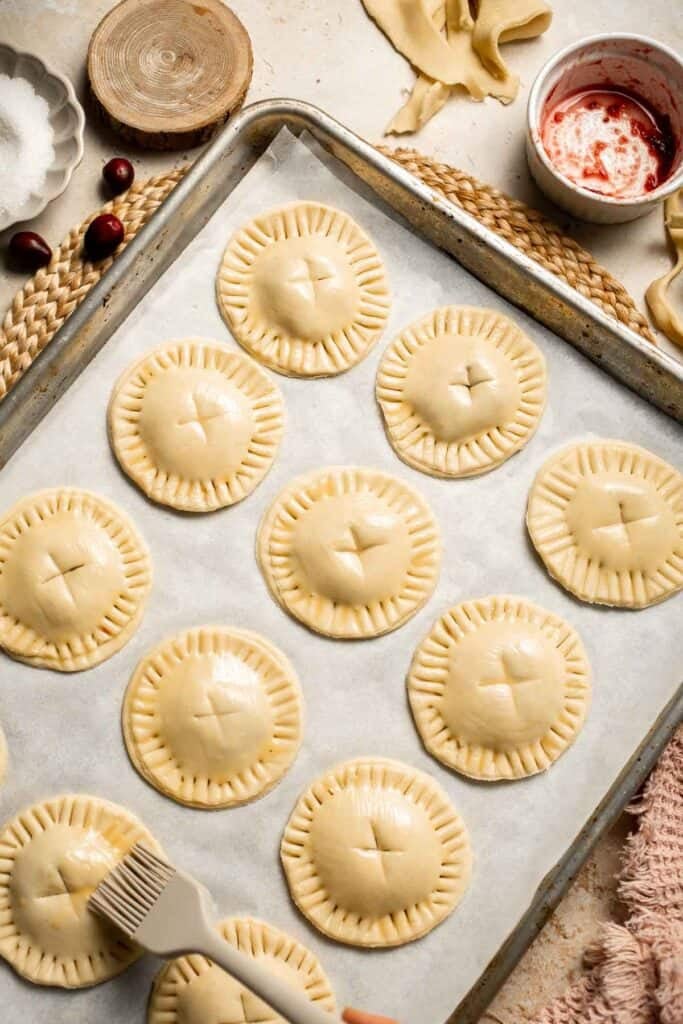

- Chill. Arrange the assembled hand pies on a large parchment-linked large baking sheet and chill in the fridge for 15-20 minutes while preheating the oven.
- Bake. Bake in a 375°F preheated oven for 20-25 minutes, or until the crusts turn golden brown and crisp.

- Serve. Transfer the pies to a wire cooling rack and let them cool slightly on the counter before serving. Enjoy warm or at room temperature.
Expert Tip: Keep Everything Cold
For perfectly flaky hand pies, make sure your dough and filling are cold before baking. If the dough warms up too much, the butter softens and the crust won't puff properly. Chill the assembled hand pies for 10 minutes before baking. It's a simple step that makes all the difference.
More Tips and Tricks
- Don't overfill. Add only about 1-2 tablespoons of cranberry sauce per pie. Overfilling can cause the filling to leak during baking.
- Seal tightly. Press the edges with a fork to ensure a tight seal. This prevents the filling from bubbling out.
- Use leftover pie dough scraps. Re-roll scraps gently to make one or two extra mini pies. We waste nothing over here!
- Brush with egg wash. That golden sheen comes from brushing the tops with beaten egg before sprinkling sugar.
- Cool before serving. Let the hand pies cool for at least 10 minutes before serving so the filling can set and won't ooze when you bite in.
Recipe Variations
- Add orange zest. Stir a teaspoon of orange zest into the cranberry sauce for a delicious orange cranberry filling with a citrusy twist.
- Make them mini. Use a small biscuit cutter to create bite-sized hand pies. These are perfect for dessert platters.
- Try other fillings. You can use this same base dough and filling method for any hand pie, from cranberry to cherry hand pies or even apple. The process and bake time remain the same. Substitute cranberry sauce with jam, apple butter, or leftover pie filling for an easy year-round variation.
- Add cream cheese. Spread a thin layer of cream cheese on one side of the dough before adding cranberry sauce for a rich, tangy flavor.
- Festive glaze. Once cooled, drizzle with a simple icing made of powdered sugar and orange juice for extra holiday sparkle.
- Cranberry-apple combo. Mix cranberry sauce with a few spoonfuls of apple pie filling for a cozy fall fusion.
- Alternate shapes. For a fun twist, shape your pies into disks, rectangles, or half-moons. For a fun twist, try making tree-shaped or star-shaped hand pies during the holiday season.
- Add extra finishes. For extra sparkle and crunch, sprinkle coarse sanding sugar instead of regular sugar over the top crust before baking. You can also try a drizzle melted chocolate over the cooled pies for an indulgent holiday touch, or dust with powdered sugar for a simple finish.

Storage
How to Store
Cool completely, then store in an airtight container at room temperature for up to 2 days, or in the refrigerator for up to 5 days.
How to Reheat
Warm in a 350°F oven or toaster oven for 5-8 minutes until crisp again. Avoid using the microwave if you want to keep the crust flaky.
How to Freeze
Freeze unbaked hand pies on a baking sheet until solid, then transfer to a freezer bag. Bake directly from frozen at 375°F for 25-30 minutes until golden.
How to Serve
Cranberry Hand Pies are delightful warm or at room temperature and make a stunning addition to any holiday spread. Serve them on a dessert platter with other festive treats or enjoy them as an afternoon snack with coffee or tea.
These are my favorite recipes to serve with cranberry sauce hand pies:
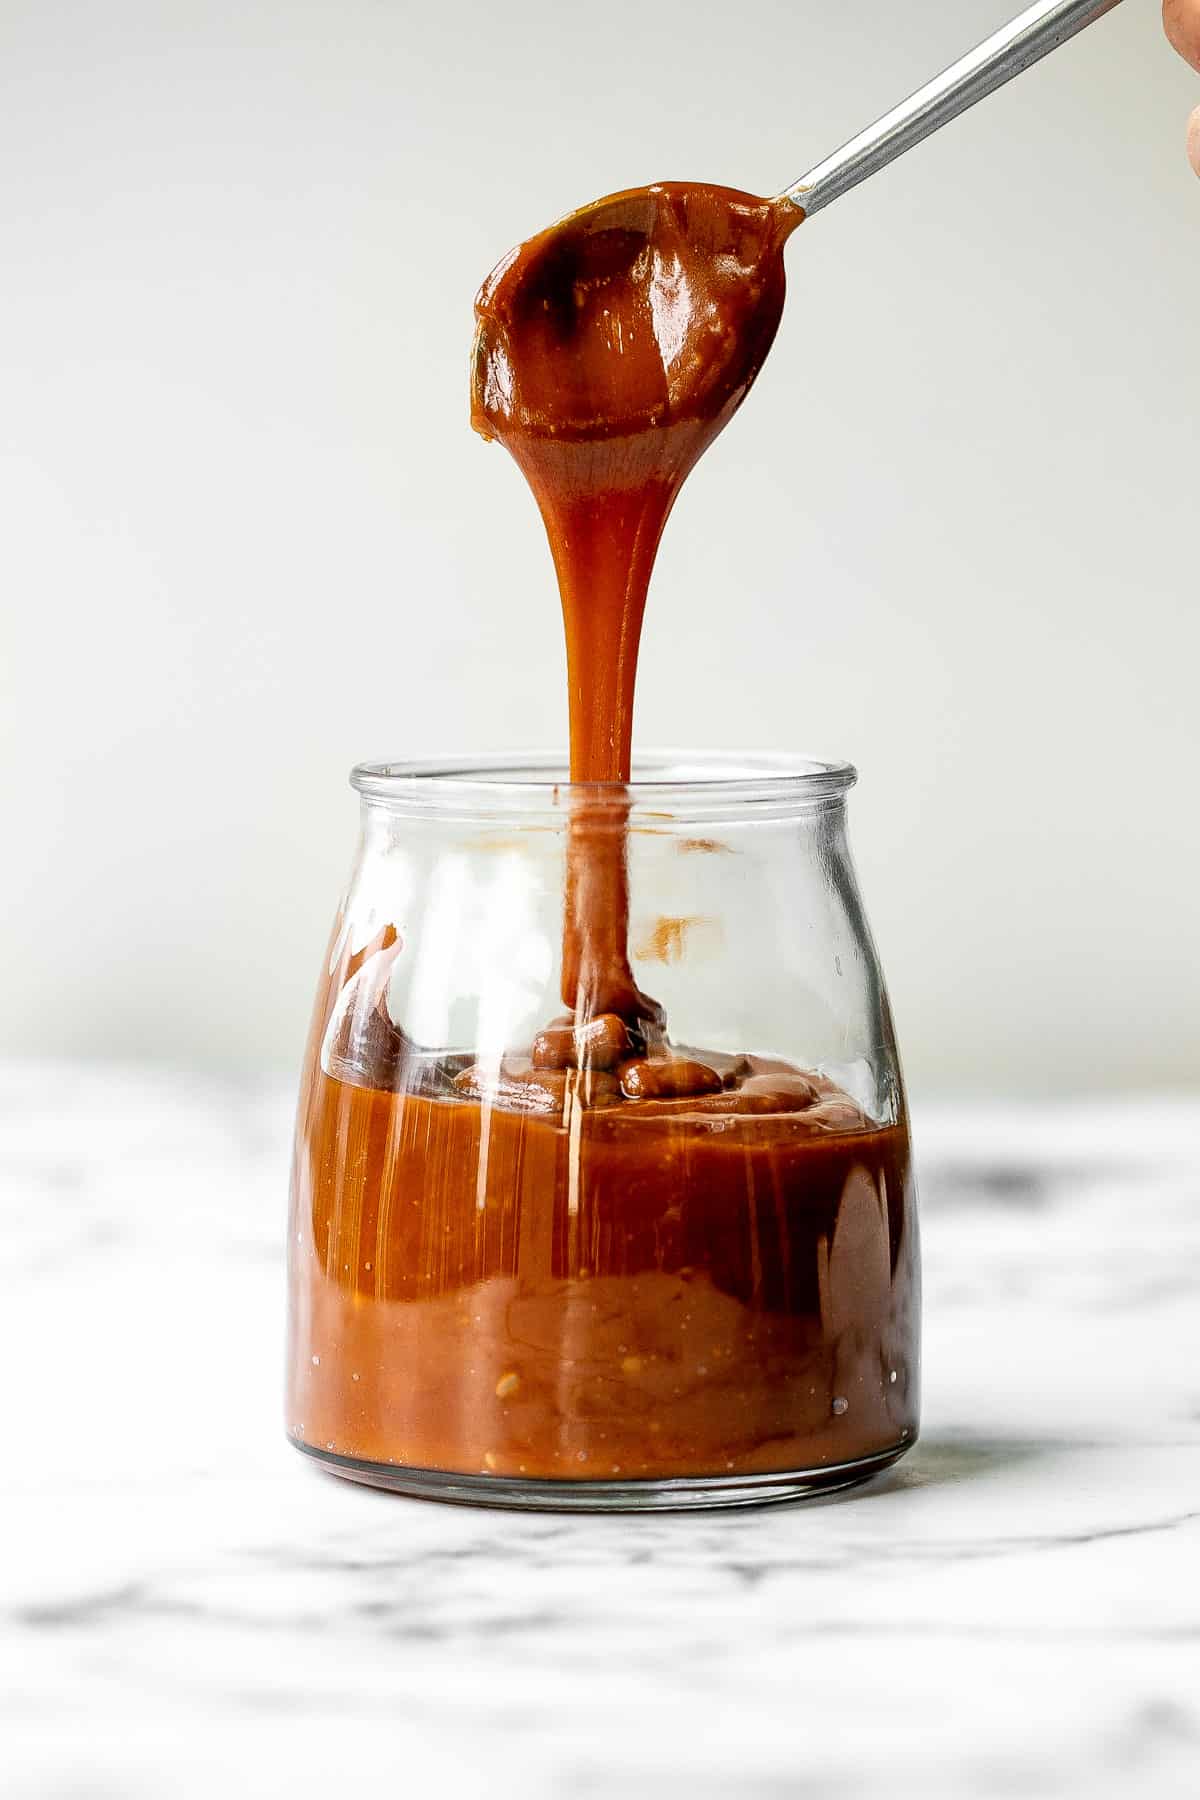
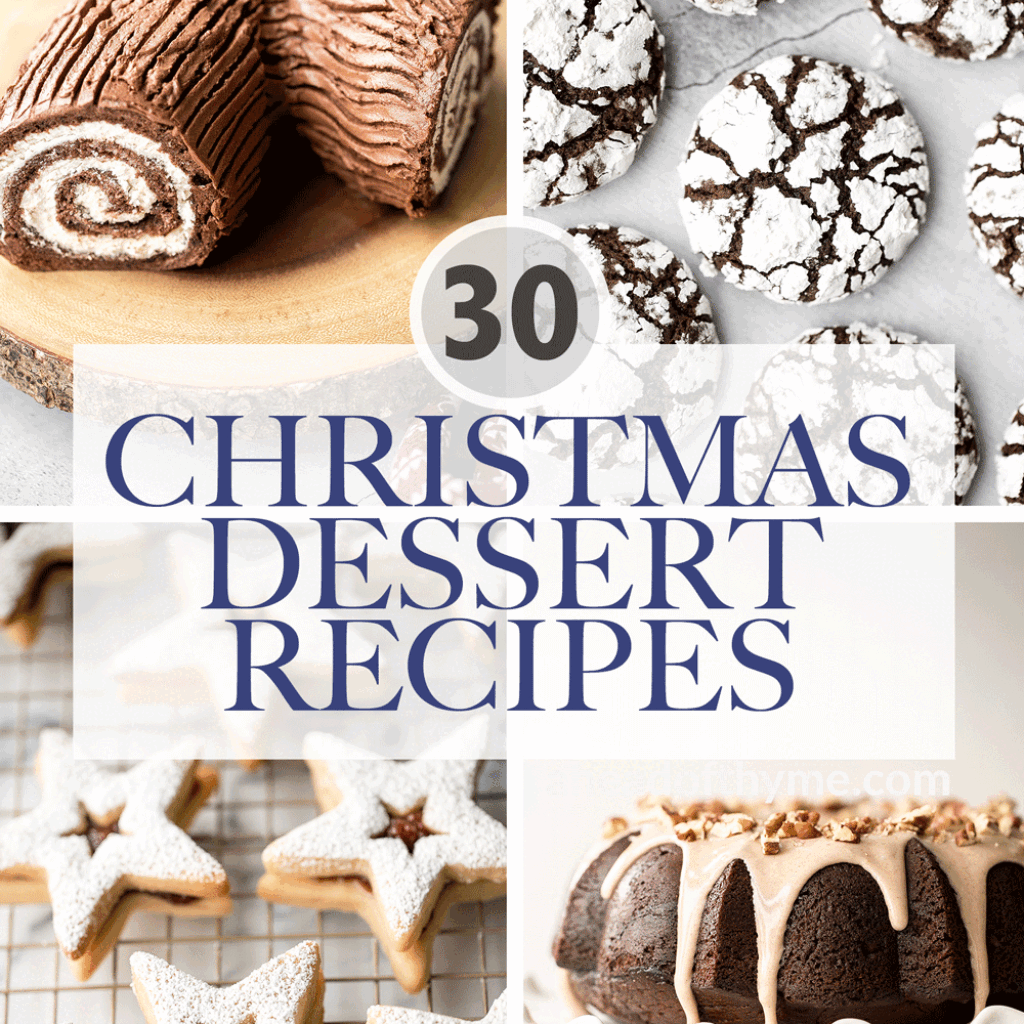
Holiday Desserts
If serving this as part of a holiday dessert spread, explore our collection of Christmas dessert recipes. From festive cookies and creamy cheesecakes to rich chocolate cakes, spiced loaves, and cozy fruit crisps, these treats capture the warmth and sweetness of the season.
FAQ
Absolutely! Cranberry sauce adds a bright, tangy flavor to baked goods and helps keep them moist. It works beautifully in muffins, quick breads, coffee cakes, and pastries like hand pies or turnovers. You can use either homemade or canned cranberry sauce - both bake well and create a lovely jammy texture once heated. If your sauce is chunky, mash it lightly before using so it spreads evenly in doughs or batters.
Leftover cranberry sauce is incredibly versatile and can be used in both sweet and savory dishes. Try spreading it on toast, layering it in yogurt parfaits, or swirling it into oatmeal or baked goods for a tart-sweet pop of flavor. It's also perfect as a glaze for roasted meats like turkey or chicken. For a fun holiday twist, use it in desserts like Cranberry Hand Pies or mix it into muffin or cake batter for a festive touch. Leftover cranberry sauce freezes well, too. Just transfer it to an airtight container and freeze for up to 3 months to use later.
Yes! Store-bought cranberry sauce works perfectly. If it's too thick, loosen it with a teaspoon of orange juice before spooning it into the hand pies.
Canned cranberry sauce softens and becomes jam-like when baked, but it doesn't completely melt or disappear. Its gelled texture loosens up with heat, making it perfect for fillings like pies, bars, and pastries. When baking with canned cranberry sauce, it's best to give it a quick stir or mash before using so it spreads more evenly. If it seems too stiff, mix in a teaspoon of orange juice or water to loosen it. Once baked, it turns into a luscious, glossy filling that keeps its bright cranberry flavor and color beautifully.
Seal the edges firmly with a fork and don't overfill. Also, chill the pies before baking so the dough firms up as this helps prevent bursting.
Use a classic butter pie dough, either homemade or store-bought. It should be pliable but cold for easy sealing and perfect flakiness. Our Easy Puff Pastry Pie Dough works well.
Absolutely. Make this easy recipe and assemble them up to a day in advance, cover tightly, and refrigerate until ready to bake. Or freeze unbaked pies for longer storage.
Yes, this full recipe can easily be doubled or tripled if you're baking for a crowd. Just make sure to chill your pies before baking and leave space between each one on the pan so the seams stay sealed and the crusts bake evenly.
Definitely. This base recipe works with just about any fruit filling - think apple, cherry filling, blueberry, or even leftover pumpkin pie filling.
More Leftover Cranberry Sauce Recipes
Looking for other recipes like this? Try these:
Tried this recipe?
I'd love to hear what you think! Leave a comment and rating below to share your feedback. Your reviews help others discover this recipe and help me keep creating more free recipes for you. Snap a photo and tag me on social media @aheadofthyme too.

Classic Homemade Turkey Gravy (from Drippings or Broth)
Classic Homemade Turkey Gravy is thick, creamy, and bursting with rich roasted flavor - because Thanksgiving dinner just isn't the same without it! Made from leftover pan drippings and homemade turkey stock, this silky gravy brings everything on your plate together. There's seriously no need for powdered gravy when you're already roasting a turkey!
Whether you're making it with drippings or using only broth, this recipe delivers that same deep, comforting flavor that everyone expects at the holiday table. It's easy, foolproof, and ready in under 30 minutes once your turkey comes out of the oven.
Make this easy turkey gravy recipe alongside your Whole Roast Turkey. Juicy Roasted Turkey Breast, or any Thanksgiving turkey - it's the perfect finishing touch to your holiday plate, especially when served with Garlic Mashed Potatoes and Classic Stuffing.

Why You'll Love This Recipe
- Rich and flavorful. Made with turkey drippings, fresh herbs, and aromatic vegetables, this homemade gravy captures every bit of roasted turkey flavor and turns it into something luscious and velvety.
- No drippings? No problem. Even if you don't have drippings, you can make it entirely with broth or turkey stock and still get that deep, comforting flavor.
- Silky smooth texture. Straining the finished gravy ensures it's completely lump-free and restaurant-quality smooth every time.
- Make-ahead friendly. You can prepare the stock (or even the entire gravy) a day or two ahead, then reheat before serving to save time on the big day.
Ingredients and Substitutions
To make this delicious homemade turkey gravy, you will need the following ingredients (see recipe card below for quantities):
- fat from turkey drippings - This gives authentic flavor and a golden color. If you don't have drippings, substitute with butter.
- all-purpose flour - Thickens the gravy. Substitute with gluten-free flour for a gluten-friendly version.
- juice from turkey drippings - Adds savory depth. If you're making this without a turkey, use 1-2 tablespoons of Worcestershire or soy sauce for extra flavor.
- turkey stock - The rich, flavorful base of your gravy. You'll need about 4 cups. Make it homemade using the turkey neck and giblets from your bird (or just the neck if you prefer). Add carrots, celery, onion, garlic, and fresh herbs like rosemary, thyme, and sage for that classic Thanksgiving aroma, then simmer everything in water until deeply golden and fragrant.
- salt and pepper - Season at the end for perfect balance.
After roasting that bird for a few hours, you'll end up with about a cup of drippings - or as I like to call it, a cup of Thanksgiving heaven. Don't be alarmed if you think a cup isn't enough. It's more than enough! That cup of rich, all-encompassing holiday flavor goes a long way - way longer than any packet of powdered gravy ever can. It's just like how Grandma used to make for her Thanksgiving menu.
Equipment
You'll also need measuring cups and spoons, a large pot or Dutch oven for the stock, fine mesh sieve, medium saucepan for the gravy, whisk, ladle, heatproof bowl for separating the drippings (or a fat separator), and a gravy boat for serving.
How to Make Turkey Gravy with Drippings or Stock
With drippings (best flavor):
Use the pan drippings from your roasted turkey as the base of the gravy. Pour them into a measuring cup, let the fat rise to the top, and spoon off about 4 tablespoons to make your roux. Then combine the remaining juices with enough turkey stock to make 4 cups total liquid. This version gives you the deepest roasted flavor and a beautiful golden color.
Without drippings (using broth or stock):
If you don't have drippings, no problem! Simply melt 4 tablespoons of butter (or olive oil) instead of the turkey fat to make your roux. Use 4 cups of turkey stock or chicken broth as your liquid, and follow the same steps to thicken and season. It's still rich and flavorful - just slightly lighter and cleaner tasting.
Instructions
Step 1: Make the turkey stock (or use store-bought stock)
- Make the turkey stock. In a large pot, add the turkey neck, giblets (optional), carrots, celery, onion, garlic, rosemary, thyme, sage, and water. Bring to a boil over medium-high heat, then reduce the heat and maintain a gentle simmer. Cover and simmer for about 2 hours until the stock is fragrant and golden.
- Strain the stock. Carefully strain the turkey stock through a fine mesh sieve into a large bowl or container. Discard the solids and set the strained stock aside.
Step 2: Make the turkey gravy
- Separate the drippings. After roasting your turkey, remove it from the pan and pour the drippings (including the brown bits) into a clear measuring cup. Let it sit for a few minutes to allow the fat and juices to separate.
- Skim off the fat. Tilt the measuring cup slightly and use a spoon to skim the fat from the top. Transfer 4 tablespoons of the fat to a small bowl and set aside.
- Measure the liquid. Add enough turkey stock to the remaining juices to make a total of 4 cups of liquid for your gravy base.
- Make the roux. In a medium saucepan, heat the reserved fat over medium-high heat. Add the flour and whisk continuously for about 2 minutes until a smooth roux forms and turns light golden in color.
What is a roux?
A roux is just a fancy word for a cooked mixture used to thicken sauces and gravies. It's made by combining equal parts fat (like oil from turkey drippings) and flour, which helps thicken the sauce without making it clumpy or grainy. I use a roux in a lot of other recipes including this Classic Baked Macaroni and Cheese. It's the secret to that creamy, silky texture.
In other words, our perfect turkey gravy wouldn't exist without it. Thank you, fancy French cooking techniques!
- Add the liquid. Gradually pour in the liquid mixture while whisking constantly to prevent lumps. As the gravy thickens, add more liquid until smooth and velvety.
- Simmer and season. Bring the mixture to a gentle simmer and cook uncovered for about 5 minutes, stirring occasionally. For a thicker gravy, continue simmering until it reaches your desired consistency. Season with salt and pepper to taste.
- Strain. For an ultra-smooth texture, strain the gravy through a fine mesh sieve before serving. Serve warm over roasted turkey, mashed potatoes, or stuffing.

Expert Tip: Skim the Fat Carefully
When separating the fat from the pan drippings, tilt your measuring cup slightly so the clear juices settle at the bottom and the fat floats to the top. Spoon off the fat gently and save about 4 tablespoons. It's the secret to smooth, flavorful gravy with a glossy sheen.
More Tips and Tricks
- Make the stock ahead. To save time (and free up precious stovetop space), prepare the turkey stock in advance. You can refrigerate it overnight and use it the next day when you're ready to make the gravy.
- Gravy must wait for the drippings. Unfortunately, you can't make the full gravy ahead because the drippings are only ready once the turkey is done (unless you are substituting with butter). But don't panic - the gravy itself comes together in just 10-15 minutes once you have those drippings.
- Roast the neck first for deeper flavor. If you have time, roast the turkey neck and veggies before simmering the stock to enhance color and richness.
- Use a whisk for smoothness. Whisk constantly when adding the flour and liquid to prevent lumps and ensure a silky texture.
- Make extra stock. The turkey stock yields about 4-5 cups, but doubling it gives you leftovers for reheating turkey or making soups later.
- Adjust consistency to your taste. This gravy recipe follows the classic 3-2-1 rule but with a slightly richer ratio for a thicker, creamier texture - perfect for Thanksgiving. If you prefer a lighter gravy, use 4 tablespoons fat and 4 tablespoons flour instead of 6. For a thicker, more luxurious finish, keep the full 6 tablespoons flour as written. You can also whisk in a splash of extra stock or water at the end to thin it slightly if needed.
- Season at the end. Salt can concentrate as the gravy reduces, so always season after simmering for the best balance.
- Strain before serving. Running the gravy through a fine sieve gives it that classic, professional finish.
Recipe Variations
- Butter-based gravy. If you don't have drippings, substitute 4 tablespoons butter for the fat. It still creates a rich, flavorful base.
- Vegetarian version. Use vegetable broth and butter instead of turkey drippings for a meat-free option. Or try a Mushroom Gravy.
- Creamy gravy. Stir in 2-3 tablespoons of heavy cream or half-and-half at the end for a velvety finish.
- Herb-infused twist. Add a sprig of rosemary or thyme while simmering for extra aroma.
- Make-ahead gravy. Prepare up to 2 days in advance, refrigerate, and reheat slowly on the stove with a splash of stock or water before serving.
- Pan-seared version. Deglaze the roasting pan directly with stock or wine to capture every last bit of flavor before straining.
- Giblet gravy - This recipe can easily be turned into traditional giblet gravy by finely chopping the cooked giblets and stirring them back into the finished gravy for added texture and flavor.
Storage
How to Store
Cool completely, then transfer to an airtight container. Refrigerate for up to 4 days.
How to Reheat
Reheat on the stove over medium-low heat, whisking occasionally until hot. Add a splash of broth or water if it thickens too much.
How to Freeze
Freeze in airtight containers or freezer bags for up to 3 months. Thaw overnight in the refrigerator and reheat slowly, whisking to restore smoothness.
How to Serve
This Classic Homemade Turkey Gravy is the ultimate Thanksgiving and holiday essential. Pour it generously over your roasted turkey, mashed potatoes, stuffing, or even biscuits. It also adds incredible flavor to leftover turkey sandwiches or pot pies.
For a full Thanksgiving feast, serve this classic turkey gravy alongside:
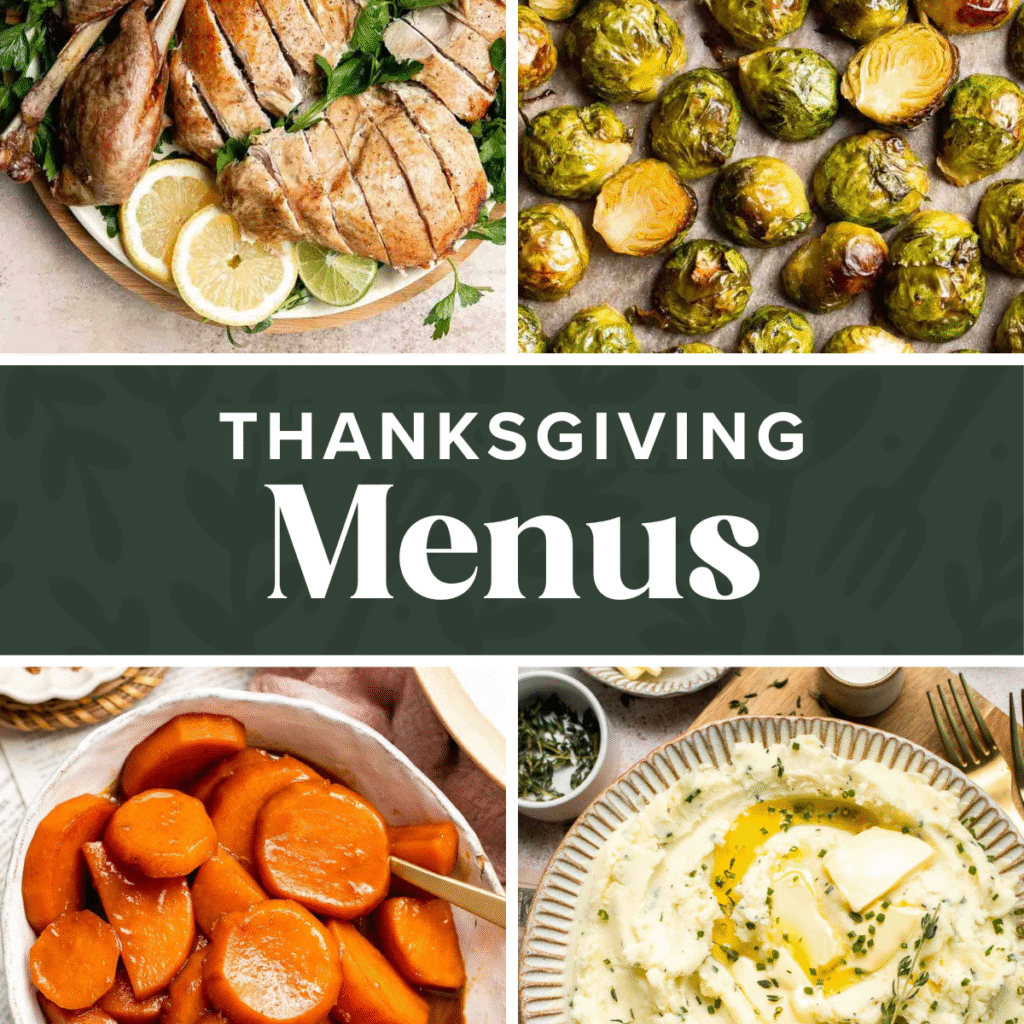
Easy Thanksgiving Menu
Check out our complete Thanksgiving Menu for more recipes, curated menu ideas, and free printable menus.
FAQ
Homemade turkey gravy starts with drippings from your roasted turkey. Skim off a few tablespoons of fat, whisk it with flour to create a roux, and cook until golden. Then slowly whisk in turkey stock (or chicken broth) and the remaining drippings, stirring until smooth and thickened. Let it simmer for a few minutes, season with salt and pepper, and strain for a silky texture. That's it! Simple ingredients, but the flavor is rich, savory, and far better than anything store-bought or powdered. You can even make it ahead of time and reheat before serving for a stress-free Thanksgiving.
The 3-2-1 rule is an easy way to remember the classic gravy ratio: 3 parts liquid, 2 parts stock or drippings, and 1 part roux (fat + flour). In practical terms, that means about 3 cups of broth or drippings, 2 tablespoons fat, and 1 tablespoon flour for a smooth, medium-thick gravy. You can adjust the ratio depending on how thick or thin you like it. For example, a bit more flour for a thicker gravy, or more liquid for a lighter, pourable consistency. This simple guideline ensures perfect texture every time without measuring stress on a busy holiday.
The secret to truly great turkey gravy is layered flavor. Start with roasted drippings, a flavorful stock, and a properly cooked roux. Don't skip the step of whisking the flour into hot fat, it removes any raw taste and creates that silky, glossy texture. Use fresh herbs like thyme or sage in your stock for depth, and always strain the gravy before serving for a professional finish. The key is patience: cook it low and slow for a few minutes to let it thicken naturally instead of rushing.
A splash of acid - like white wine, Worcestershire sauce, or even a squeeze of lemon - brightens and balances the richness of the gravy. It's subtle but transformative. Other great "secret" ingredients include a small spoonful of soy sauce for umami or a dash of poultry seasoning for depth. These tiny additions don't make the gravy taste different, just more complex and restaurant-worthy. Always taste at the end and adjust salt and pepper to bring everything together.
For deeper flavor, start with roasted turkey drippings and caramelized brown bits from the pan. Use a rich, homemade turkey stock (or a high-quality broth) instead of water. Add aromatics like onion, garlic, or fresh herbs while simmering. A splash of white wine or sherry adds complexity, and whisking the roux well ensures a buttery, nutty base. Don't forget to season in layers - a little salt early, and a final taste at the end. If your gravy still needs a boost, a touch of soy sauce or a pinch of bouillon works wonders.
The basic ratio for gravy is 1 tablespoon flour per 1 cup of broth or liquid. For a medium-thick gravy, that's the sweet spot - rich but pourable. If you prefer thicker gravy, add an extra half-tablespoon of flour for each cup of broth. Always whisk the flour into the fat first to make a roux before adding the liquid. This prevents lumps and creates that smooth, glossy finish. Remember, the gravy will continue to thicken slightly as it cools, so aim for just shy of your perfect consistency while it's hot.
Flour is the most traditional and reliable thickener for turkey gravy. It gives the sauce body, smoothness, and that classic homemade texture. For a gluten-free option, cornstarch or arrowroot powder works beautifully - just whisk 1 tablespoon with 2 tablespoons of cold water to make a slurry, then add it to the simmering broth while stirring constantly. The key is to cook the thickener long enough to remove any starchy taste while keeping the gravy silky, not gummy.
Simmer the gravy uncovered for a few extra minutes to reduce and thicken naturally. You can also whisk together 1 tablespoon flour with 2 tablespoons stock or water, then stir it in and simmer for another 2-3 minutes.
Absolutely. Chicken stock is a great substitute and still gives the gravy a deep, savory flavor. It's ideal if you're making the gravy ahead or don't have turkey parts on hand.
Absolutely! Turkey gravy pairs wonderfully with chicken - the flavor is savory, rich, and perfectly complementary. In fact, this gravy recipe doubles as a fantastic chicken gravy when made with chicken drippings or chicken stock. Pour it over roast chicken, mashed potatoes, or even biscuits for a comforting meal any time of year. The seasonings and texture are versatile enough to work with all kinds of poultry.
Yes, turkey gravy freezes beautifully. Once cooled, transfer it to an airtight container or freezer bag, leaving a little space for expansion. Freeze for up to 3 months. To reheat, thaw overnight in the fridge and warm on the stovetop over medium heat, whisking occasionally until smooth. If it's too thick after thawing, add a splash of broth or water. Freezing gravy is a great way to get ahead for your next roast dinner or holiday meal.
More Thanksgiving Sauce Recipes
Looking for other recipes like this? Try these:

Tried this recipe?
I'd love to hear what you think! Leave a comment and rating below to share your feedback. Your reviews help others discover this recipe and help me keep creating more free recipes for you. Snap a photo and tag me on social media @aheadofthyme too.
This recipe was originally published in 2016. It has since been updated with new content and tips.
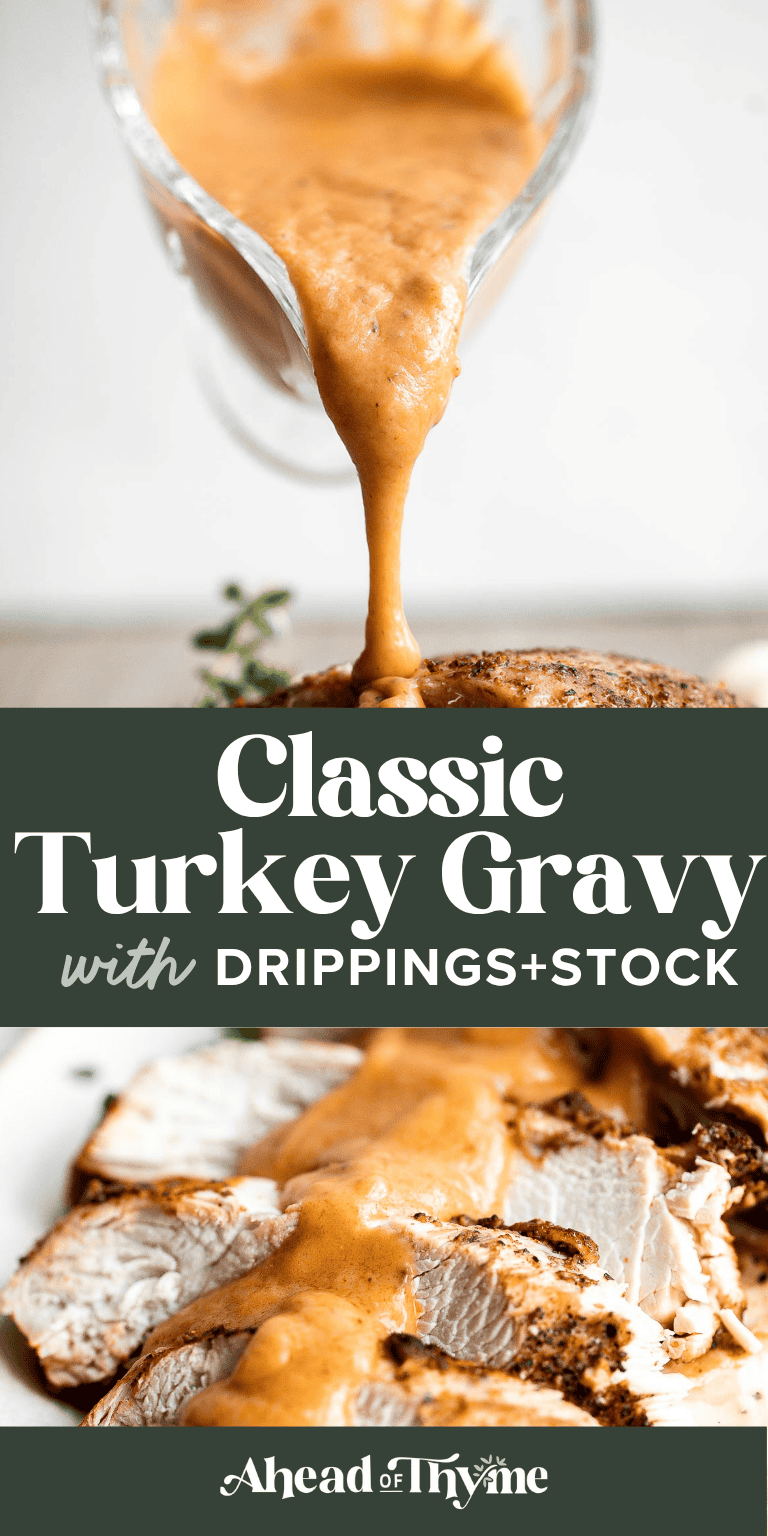
Creamy Tortellini Minestrone Soup
Creamy Tortellini Minestrone Soup is hearty, cozy, and loaded with vegetables, tender cheese tortellini, and a rich tomato-cream broth that hits all the right notes. It's like two comfort food classics in one bowl: the wholesome goodness of traditional minestrone combined with the creamy indulgence of a tortellini soup.
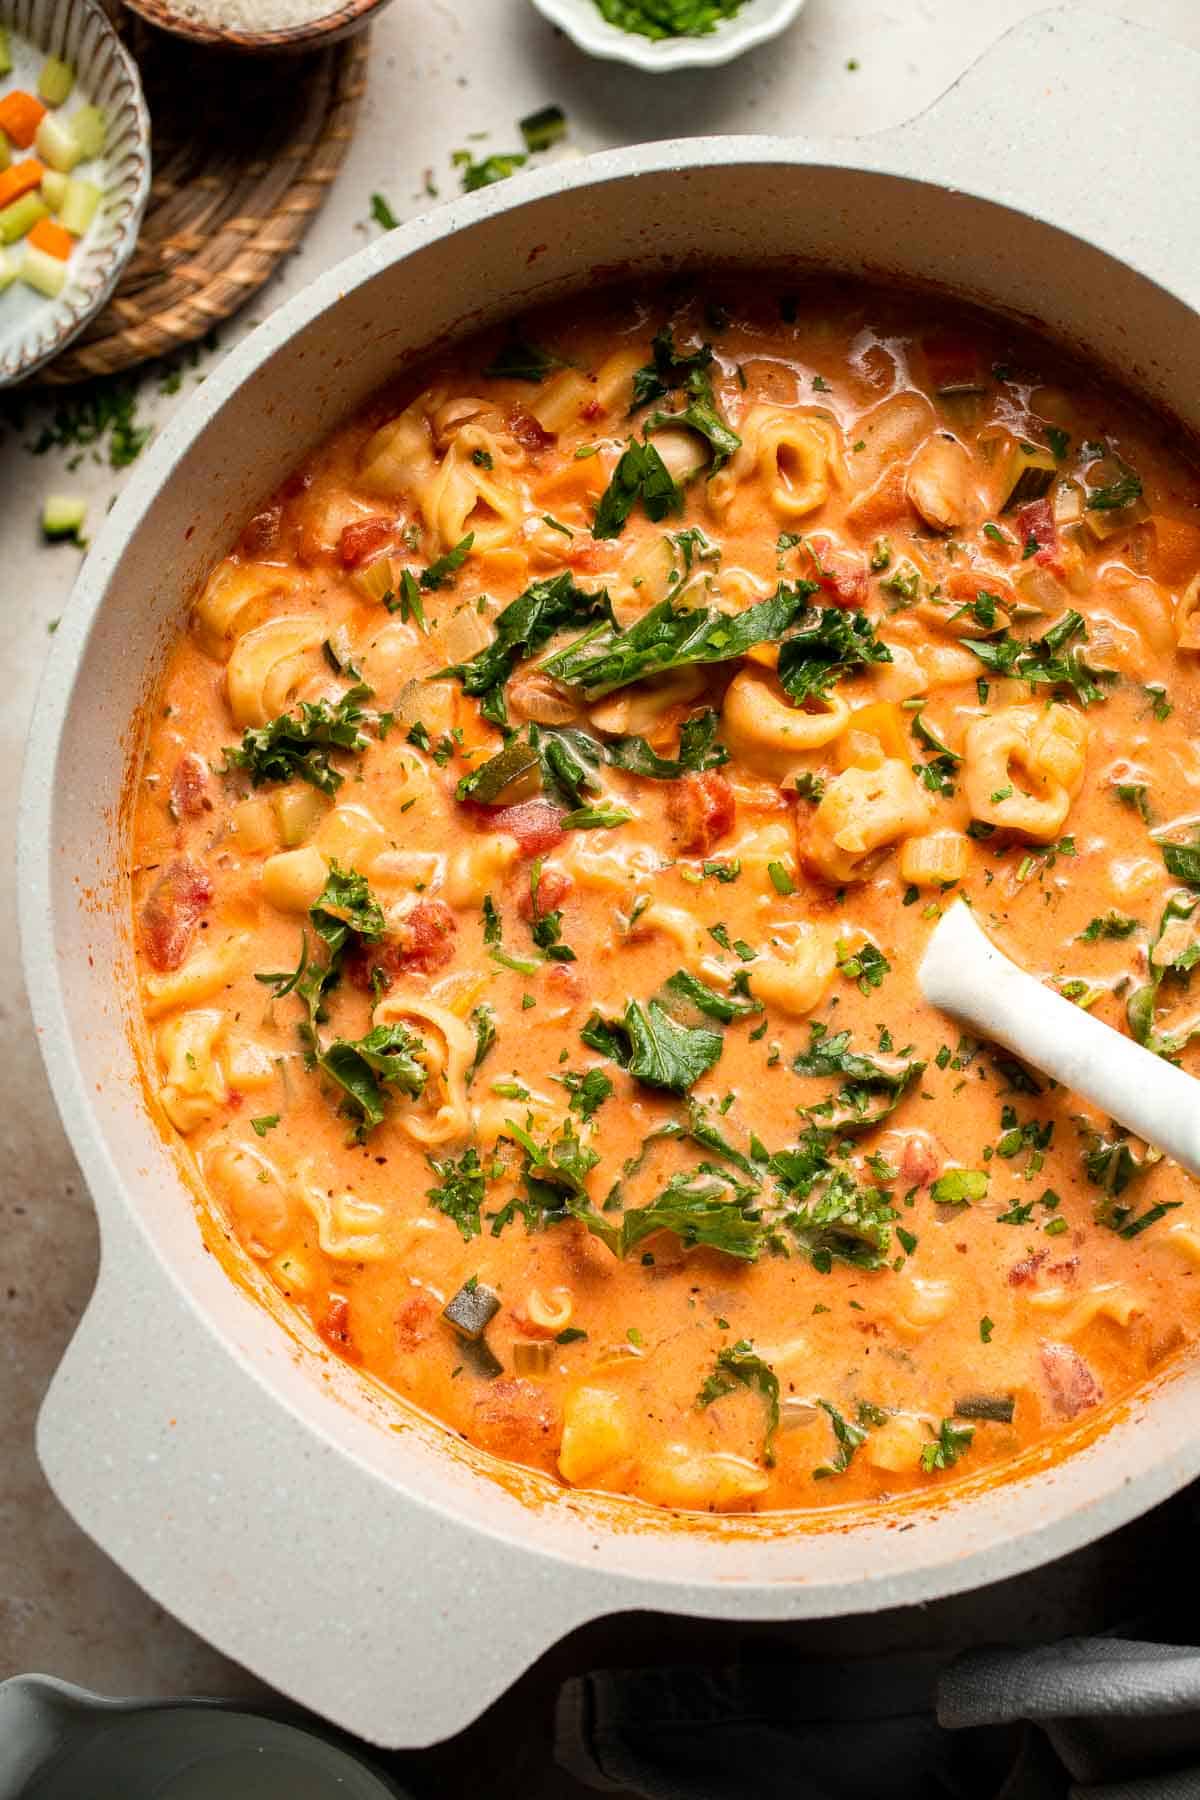
This one-pot wonder is perfect for chilly nights or busy weeknights when you want something satisfying but easy. Packed with veggies like carrots, celery, zucchini, and greens, it's nourishing yet rich enough to feel like a treat. Plus, it's ready in under 40 minutes, made from simple pantry ingredients you likely already have on hand.
This recipe was inspired by our Creamy Tortellini Soup with Sausage and Minestrone Soup, and it pairs beautifully with Homemade Garlic Breadsticks or Soft Dinner Rolls for the ultimate cozy meal.
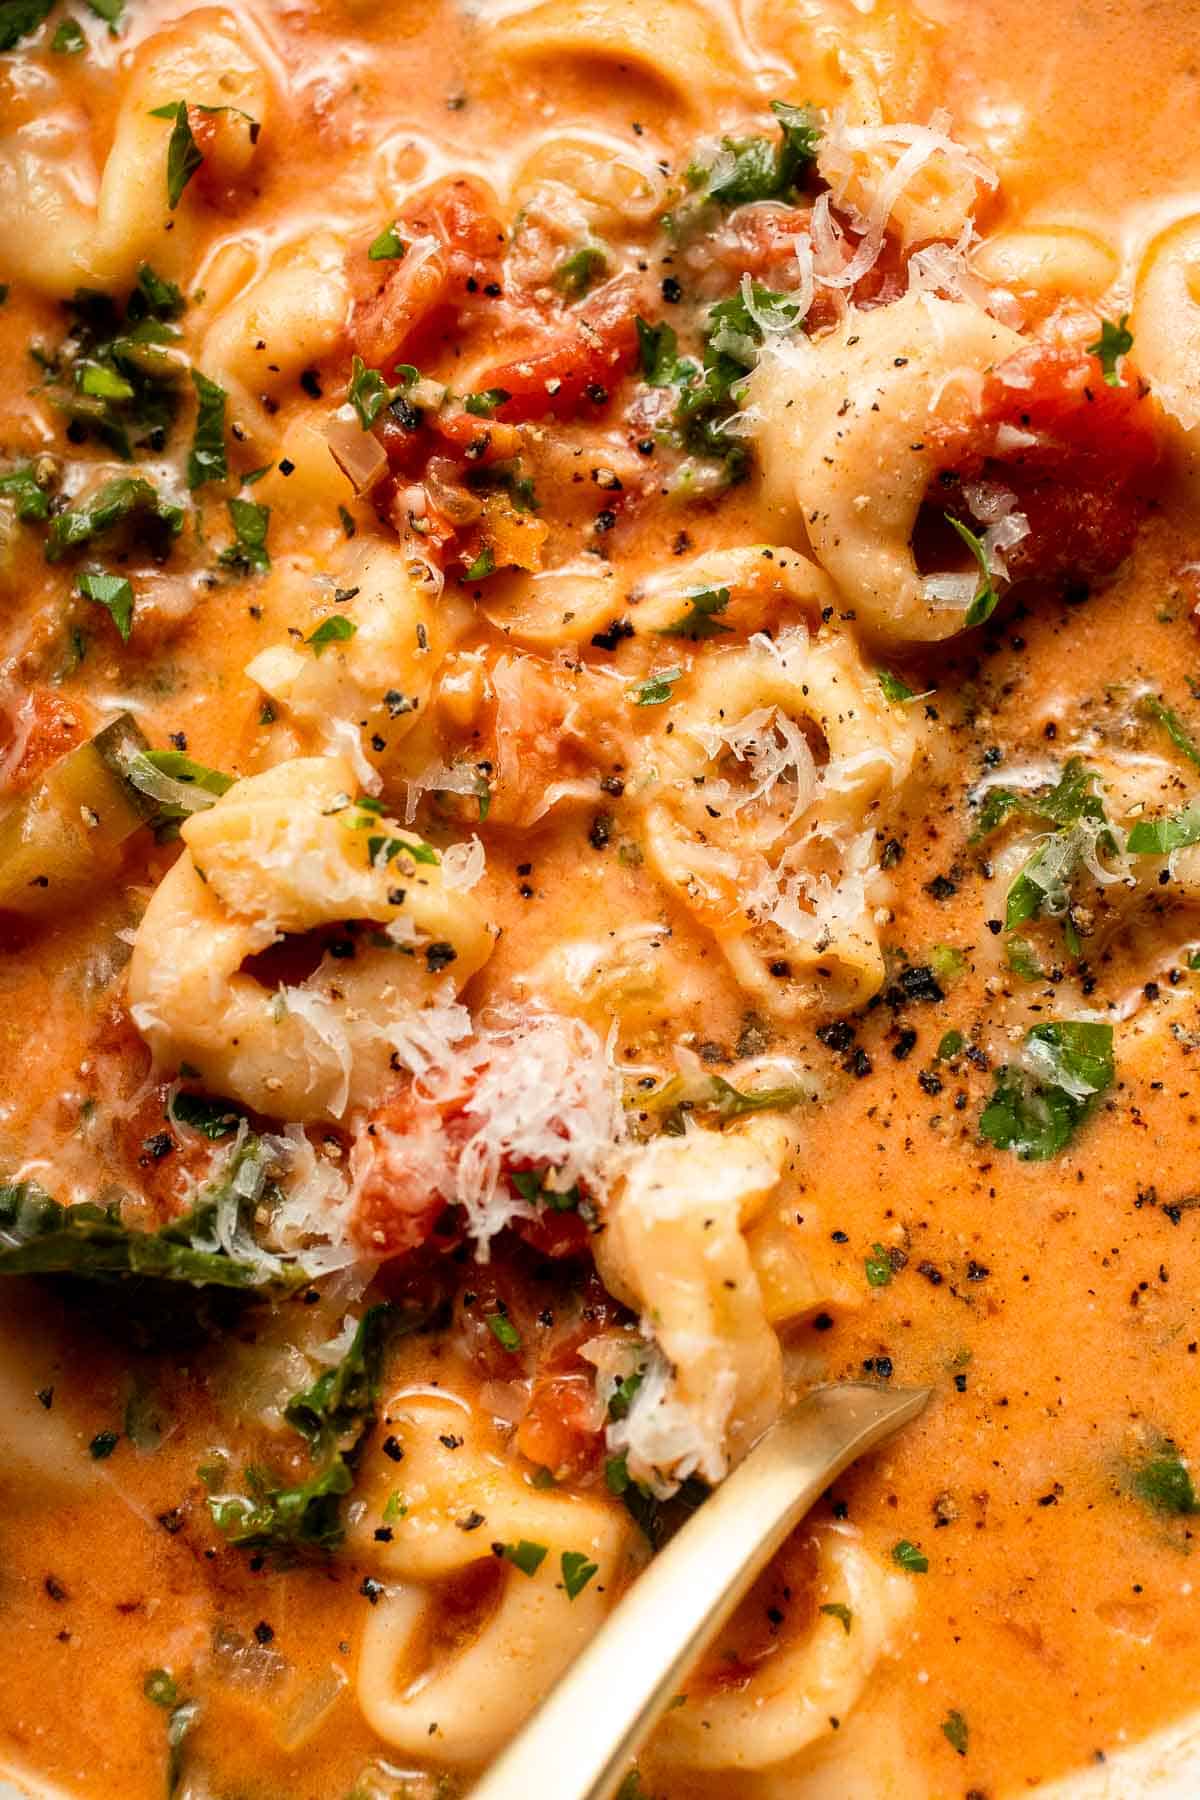
Why You'll Love This Recipe
- Two soups in one. It's a delicious blend of creamy tortellini soup and classic minestrone, giving you the best of both worlds: hearty, veggie-packed comfort with a velvety finish that feels extra indulgent.
- Quick and easy. Everything cooks in one pot in under 40 minutes. No need for multiple pans or fancy steps - just simple layering of flavor for an impressive, restaurant-worthy soup.
- Perfectly balanced. The broth is rich and creamy without being heavy, and the mix of veggies, beans, and tortellini creates an ideal texture that's cozy but fresh.
- Family-friendly and freezer-ready. Everyone loves cheesy tortellini, and this soup keeps beautifully for leftovers or meal prep. You can even freeze the base and add tortellini later for a fresh-cooked finish.
Ingredients and Substitutions
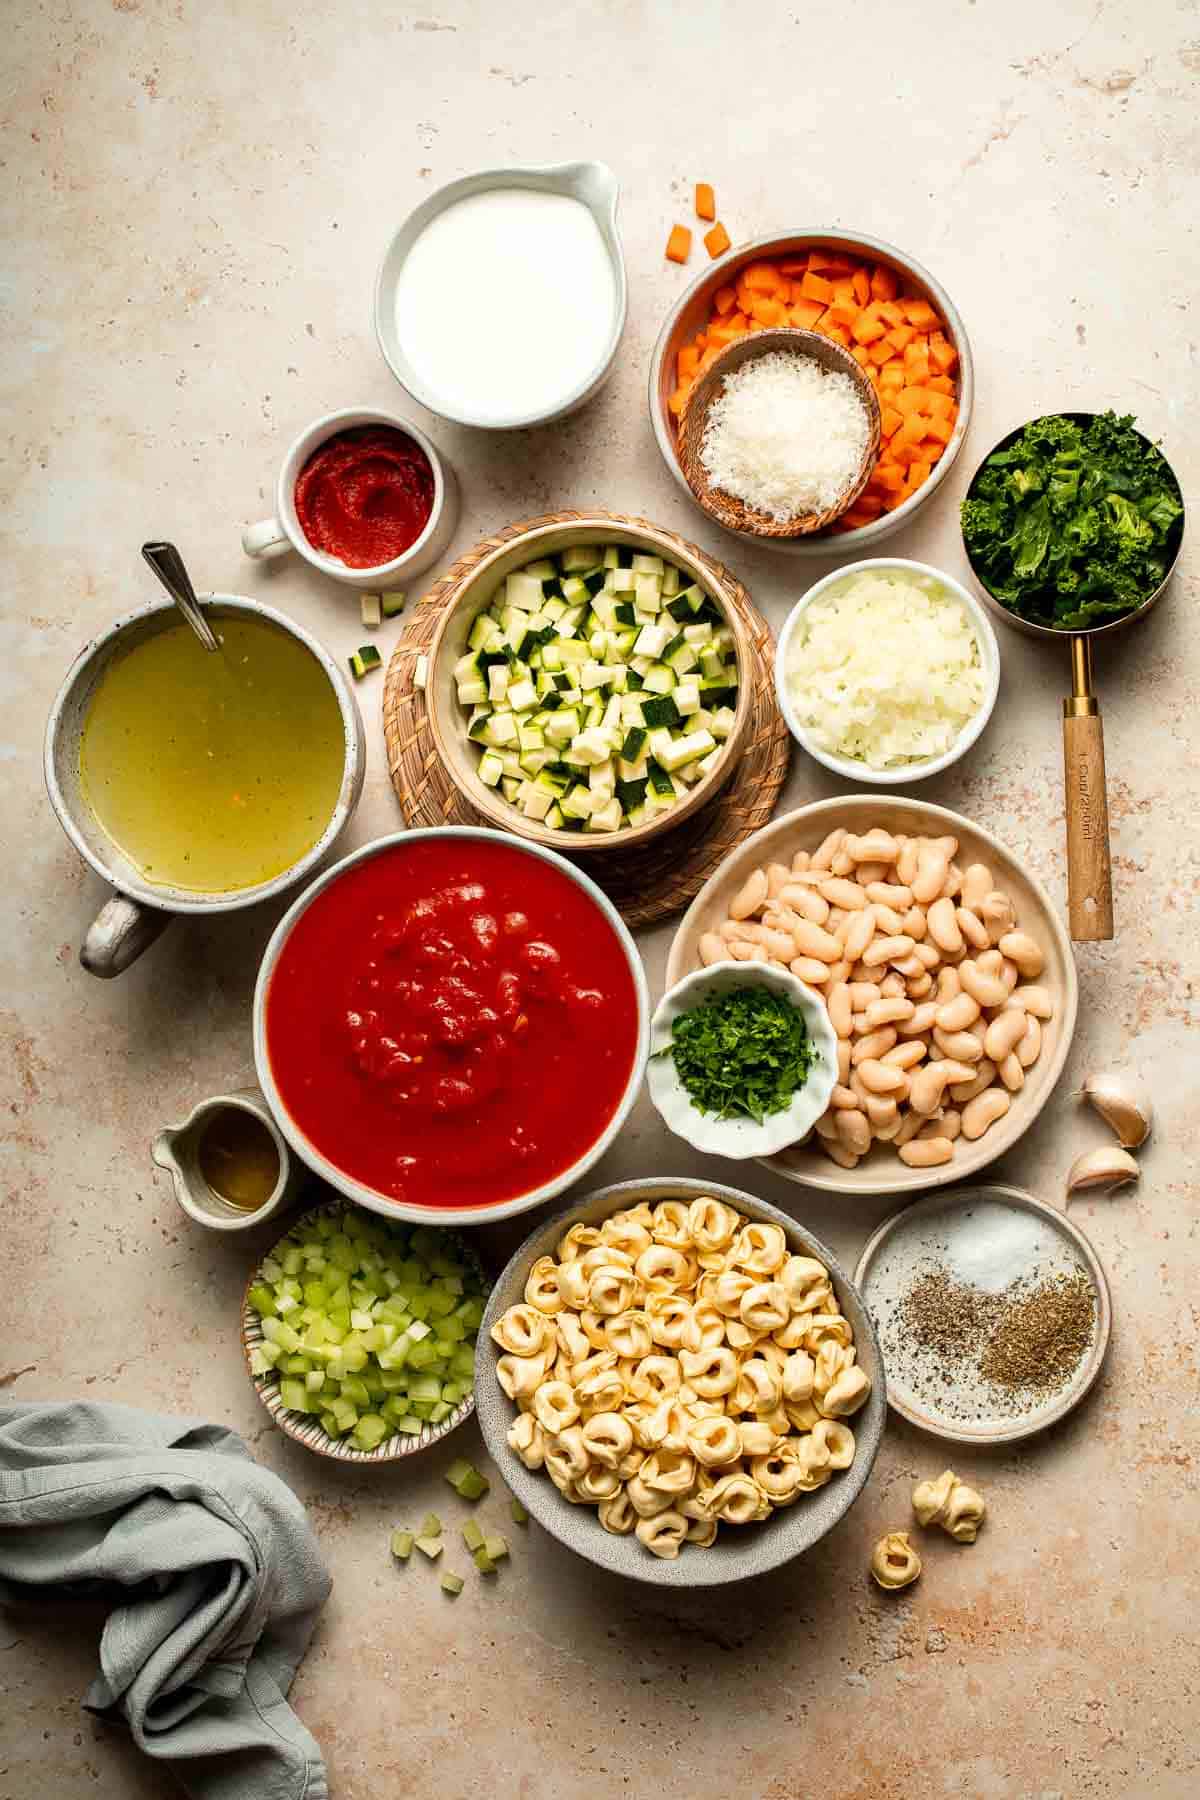
To make this delicious Creamy Tortellini Minestrone Soup, you will need the following ingredients (see recipe card below for quantities):
- extra virgin olive oil - Adds richness and depth to sauté the aromatics. Use avocado oil if preferred.
- onion - Yellow or white onions both work. Dice finely for even cooking.
- garlic - Fresh garlic adds essential flavor. Use more if you like it garlicky.
- veggies - Carrots, celery, zucchini are classic minestrone vegetables that add sweetness, crunch, and color. Substitute with other vegetables like bell peppers or green beans.
- Italian seasoning - A mix of oregano, basil, thyme, and rosemary. You can also use fresh herbs.
- tomato paste - Deepens the flavor and gives the soup a rich tomato base.
- diced tomatoes - Canned tomatoes make it quick and easy. Use fire-roasted tomatoes for more depth.
- vegetable stock - Keeps it vegetarian, but chicken broth adds more richness if desired. Add more liquid for a thinner consistency.
- white kidney beans (cannellini beans) - Adds creaminess and protein. Substitute with navy beans or chickpeas, if desired.
- tortellini - Any flavor of fresh or frozen tortellini works. Use a gluten-free version if preferred.
- heavy cream - Creates the creamy finish. Half-and-half or milk can be used for a lighter texture.
- greens - Baby spinach or kale adds freshness and color. Frozen spinach works in a pinch.
- Parmesan cheese - For serving. You can also stir in a small amount to enrich the broth.
- parsley - Optional garnish for a pop of freshness.
Equipment
You'll also need measuring cups and spoons, a large heavy-bottomed pot or Dutch oven, wooden spoon or ladle for stirring, chef's knife for chopping vegetables, and a grater for the Parmesan garnish.
Instructions
- Sauté the aromatics. Heat olive oil in a large pot or Dutch oven over medium-high heat until shimmering, about 2 minutes. Add the onion, garlic, carrot, celery, and zucchini. Sauté until fragrant and softened, about 5 minutes.
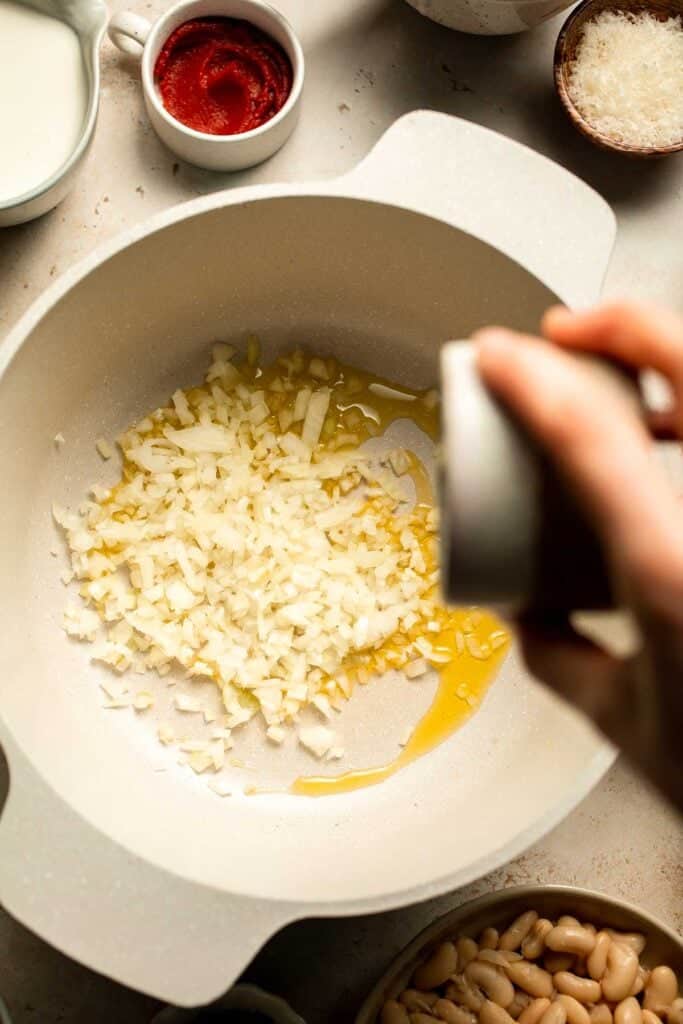
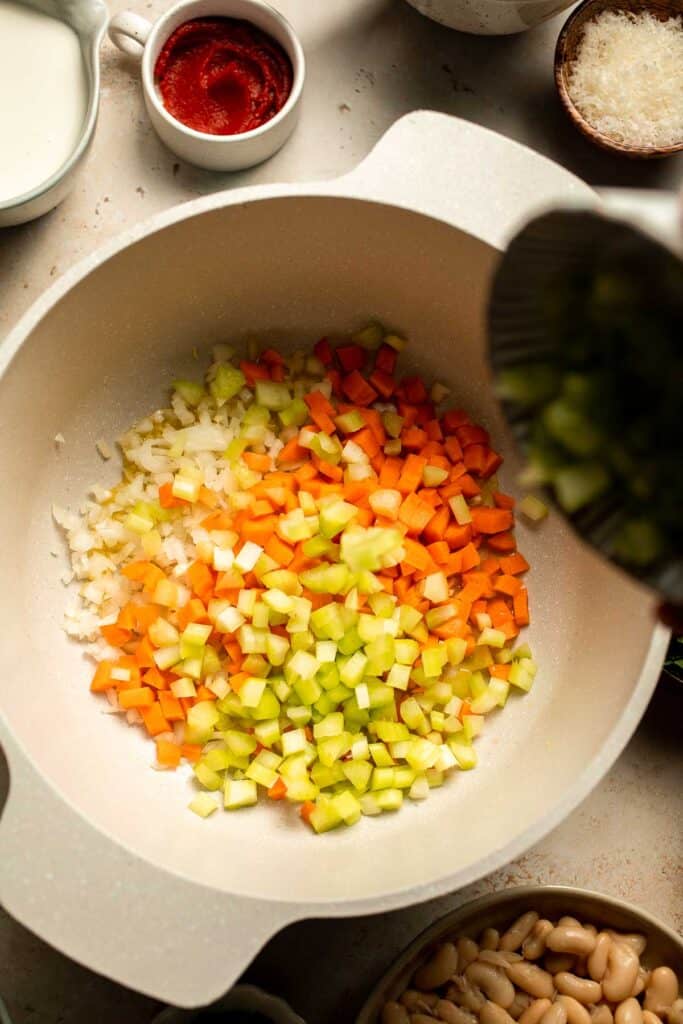
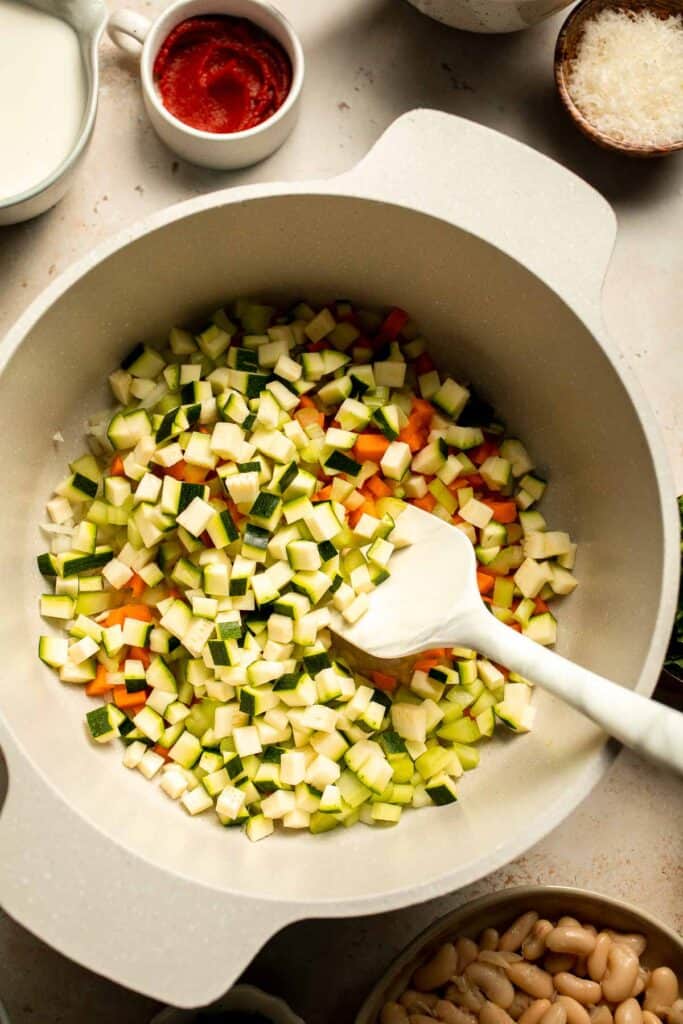
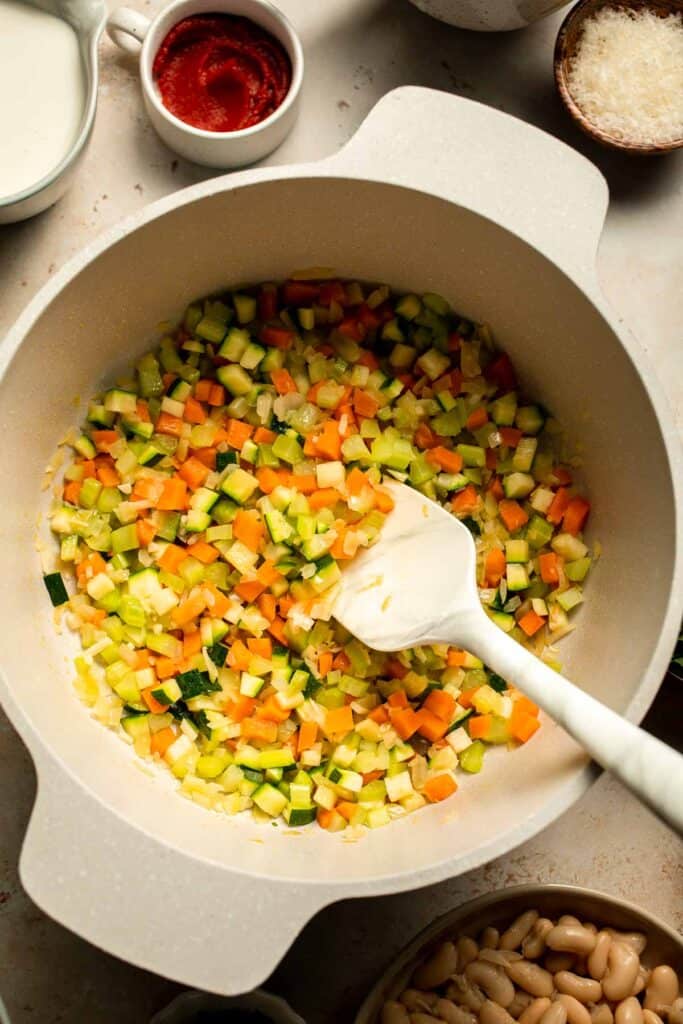
- Add tomato paste and seasoning. Stir in Italian seasoning and tomato paste until evenly combined. Cook for 1 minute to develop flavor and slightly caramelize the tomato paste.
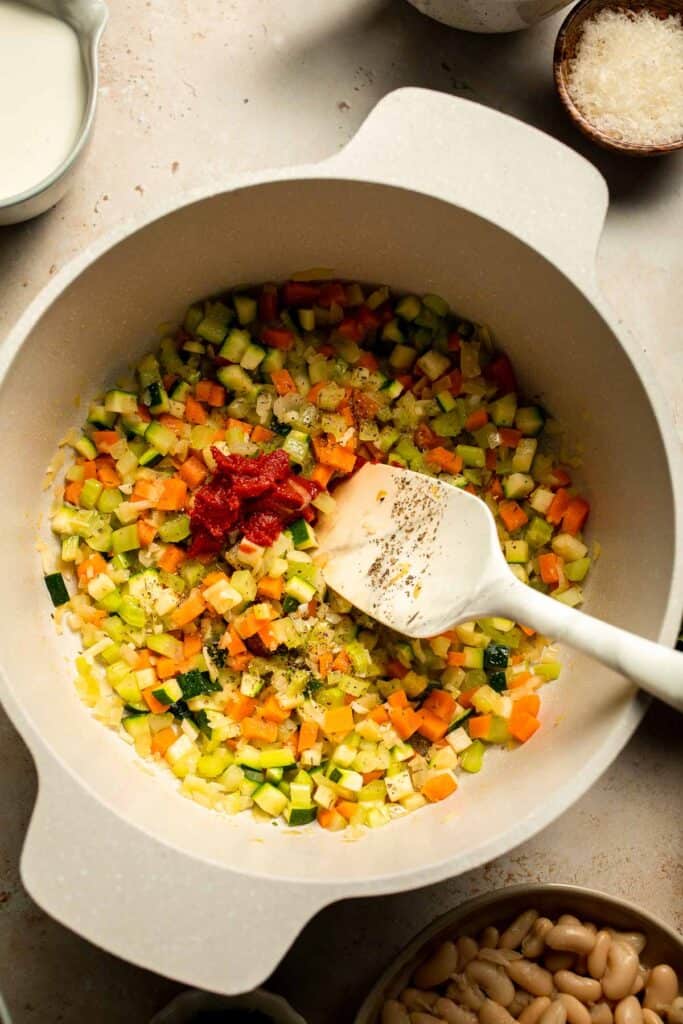
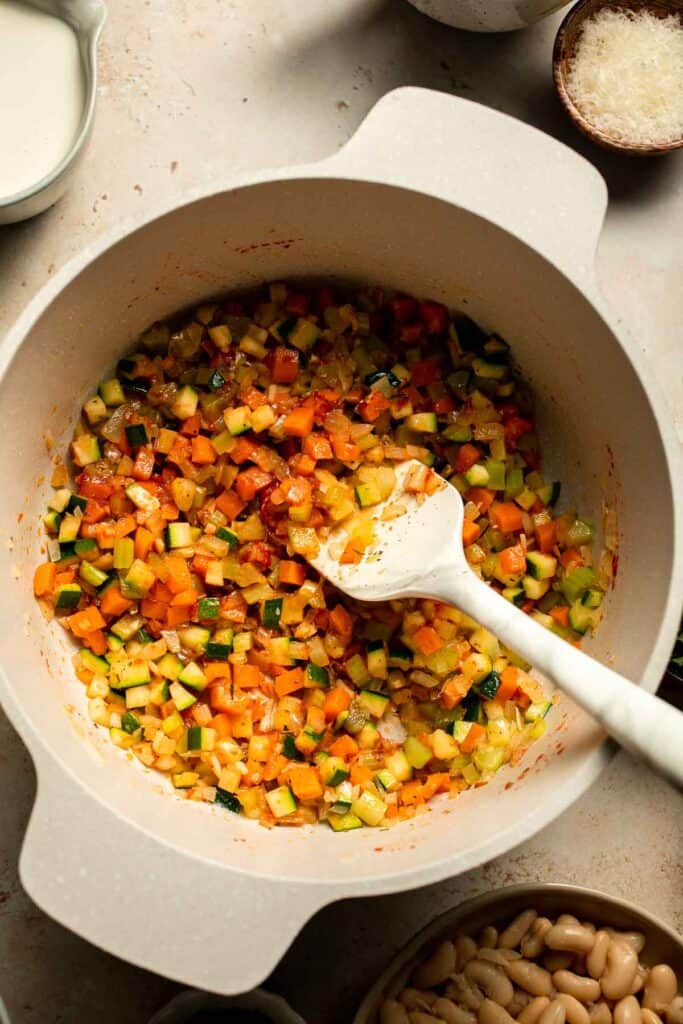
- Build the soup base. Add the diced tomatoes, vegetable broth, and white beans. Season with salt and pepper. Stir well until the mixture is evenly combined. Bring to a boil, then reduce heat to medium. Simmer uncovered for 10-12 minutes, stirring occasionally, until the vegetables are tender and the flavors meld together.
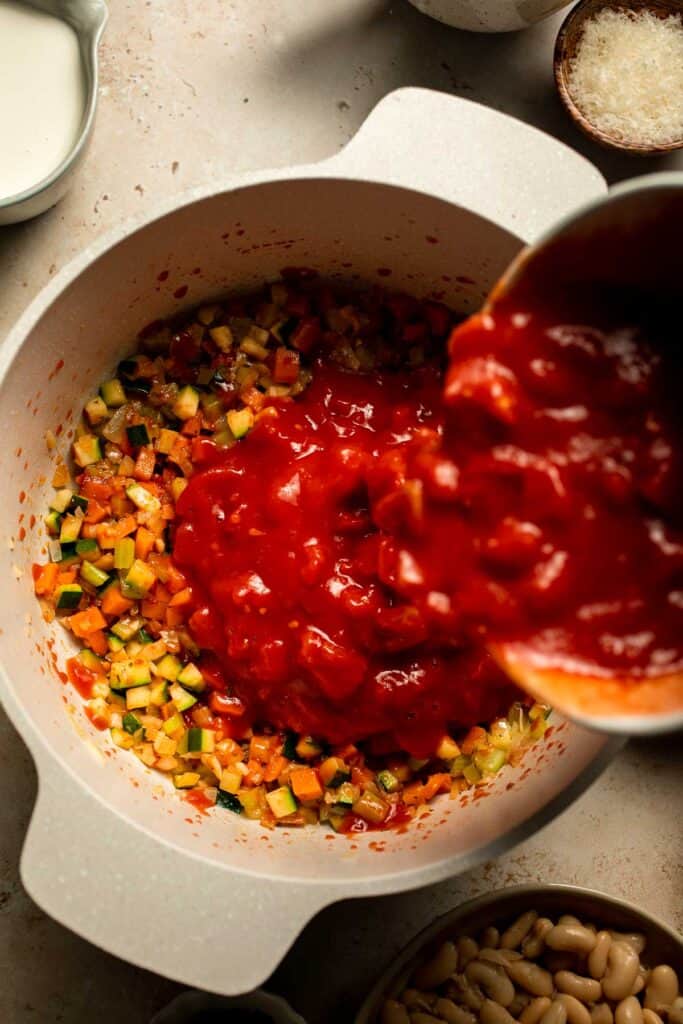
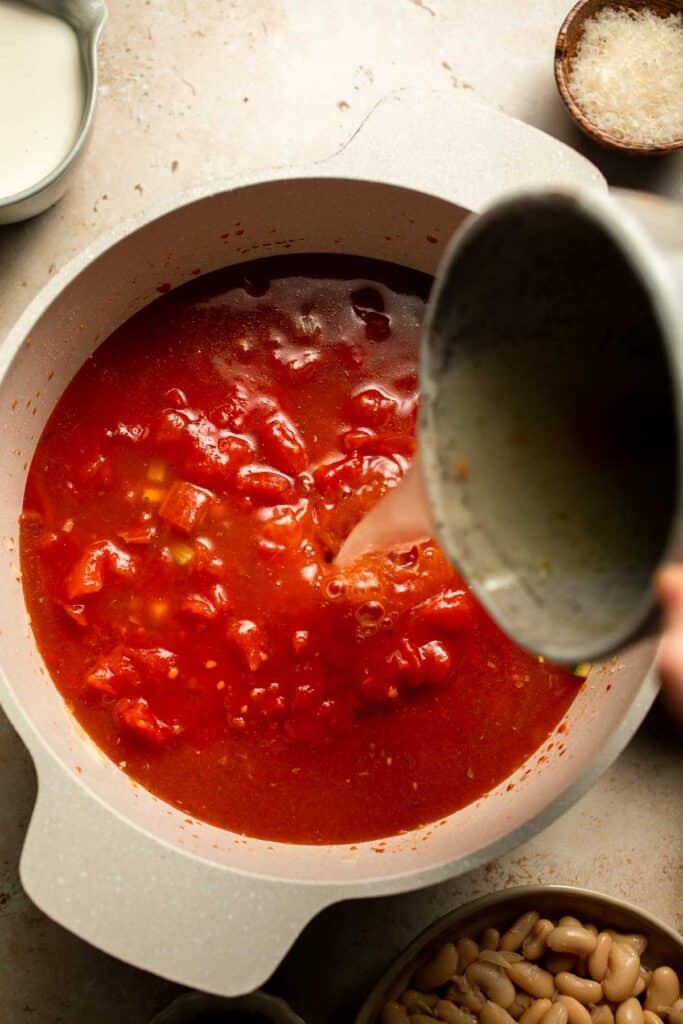

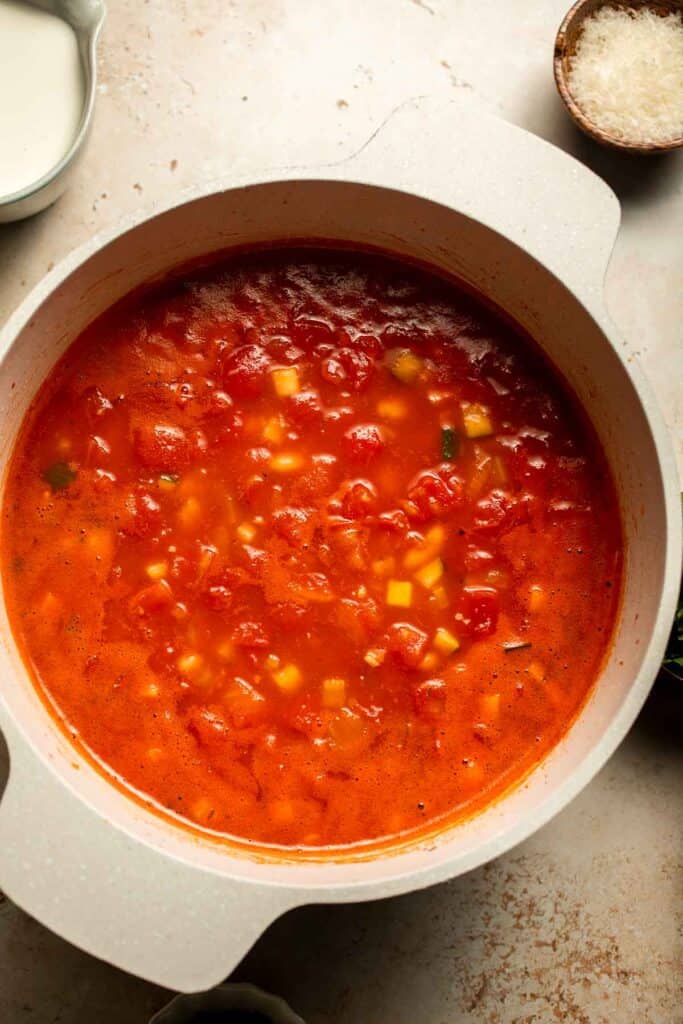
- Cook the tortellini. Add the tortellini and cook according to package directions, about 8-10 minutes, until tender. Stir occasionally to prevent sticking.
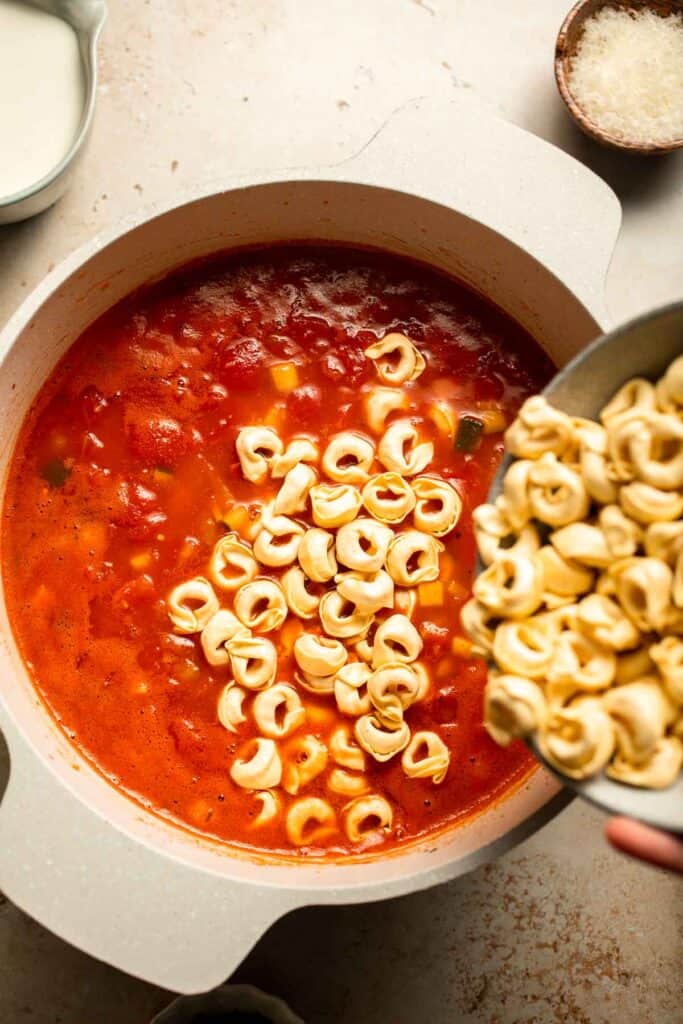
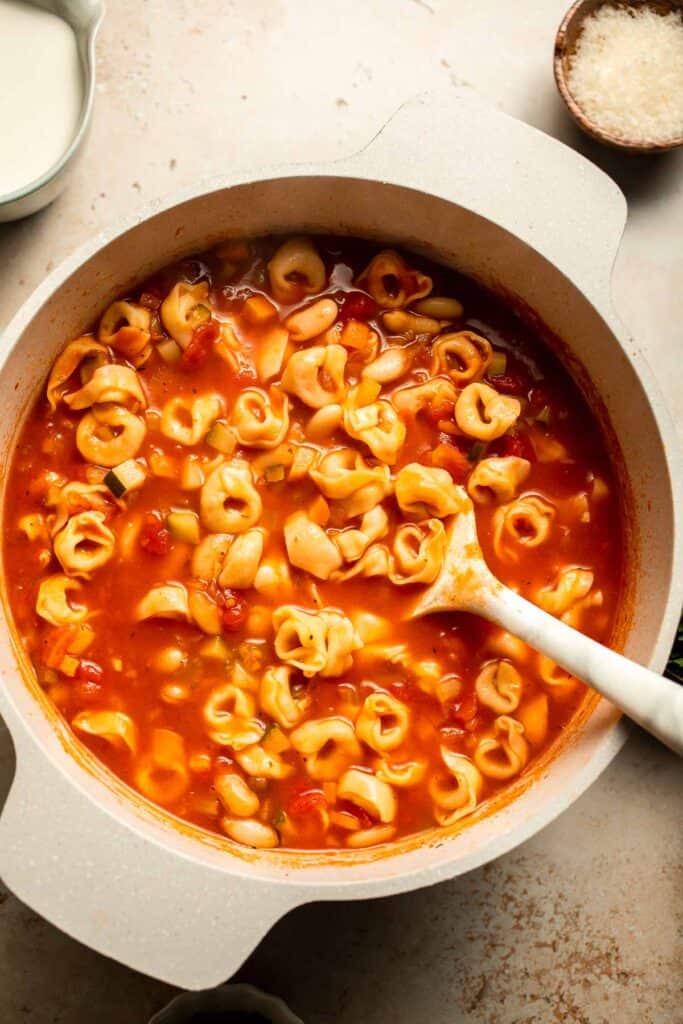
- Make it creamy. Stir in heavy cream and baby spinach (or kale) and cook for another 1-2 minutes until the greens wilt and the soup is creamy. Adjust consistency with more broth if needed.
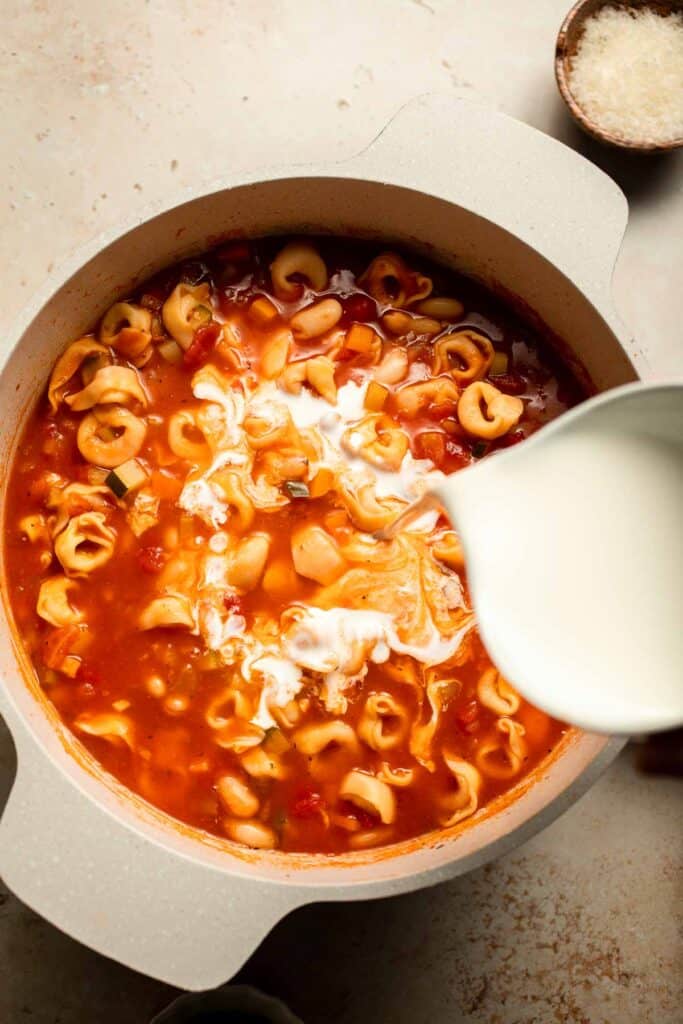
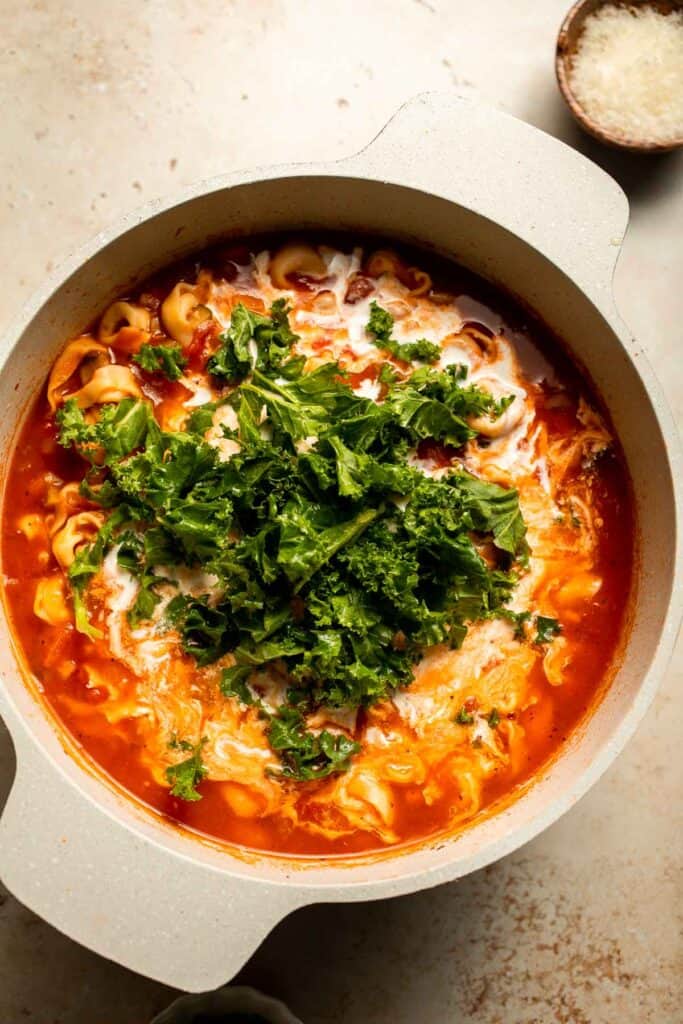
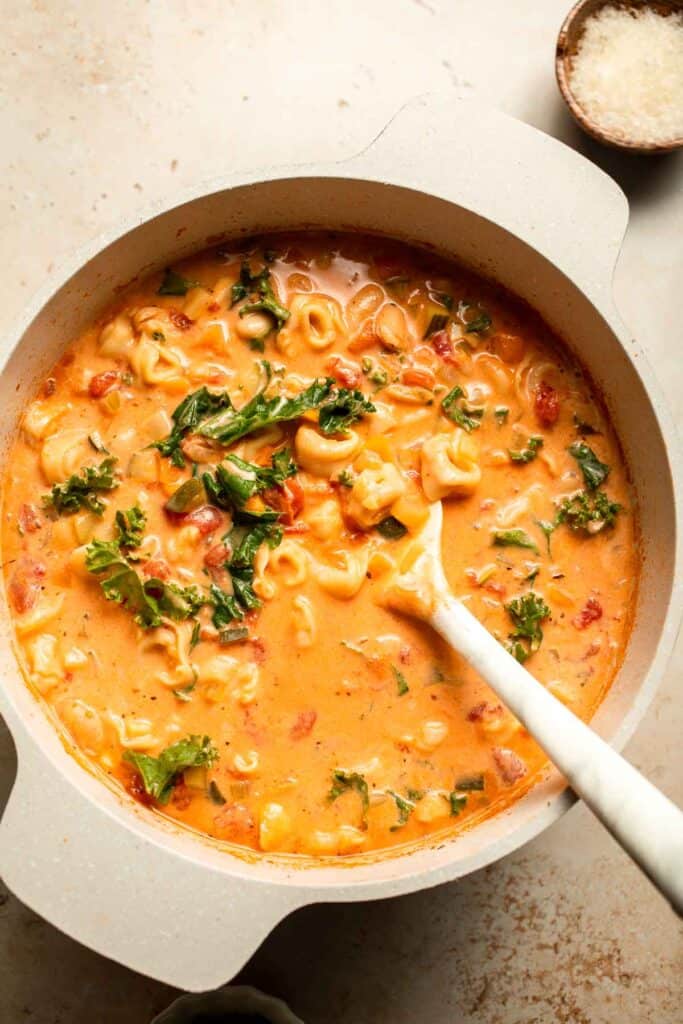
- Serve. Taste and adjust seasoning with salt and pepper if desired. Serve warm, topped with parmesan cheese and a sprinkle of fresh herbs.
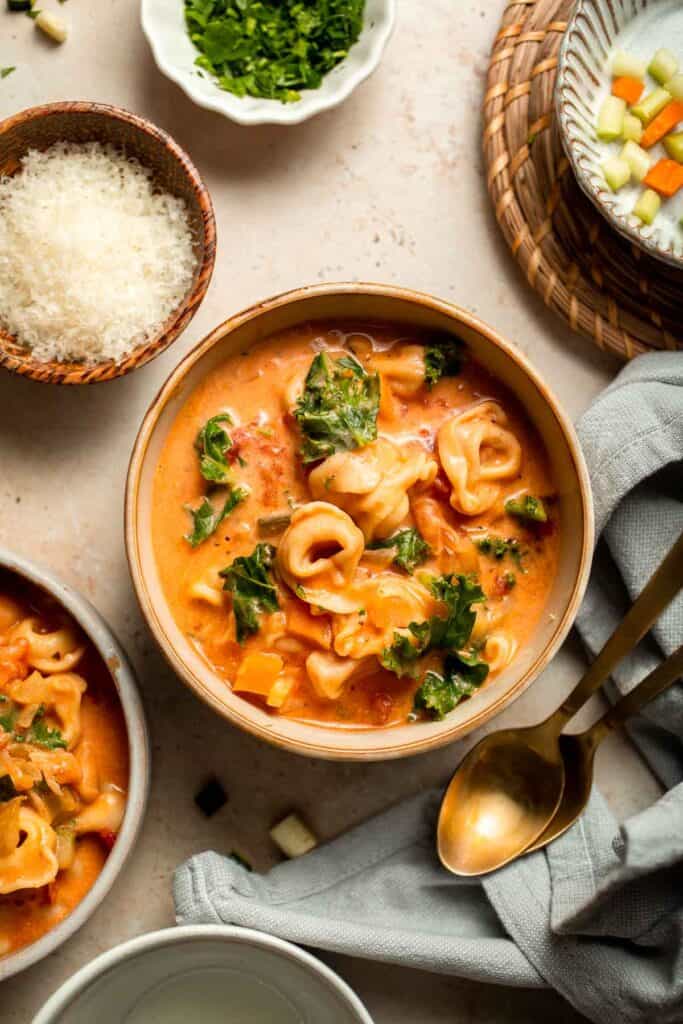
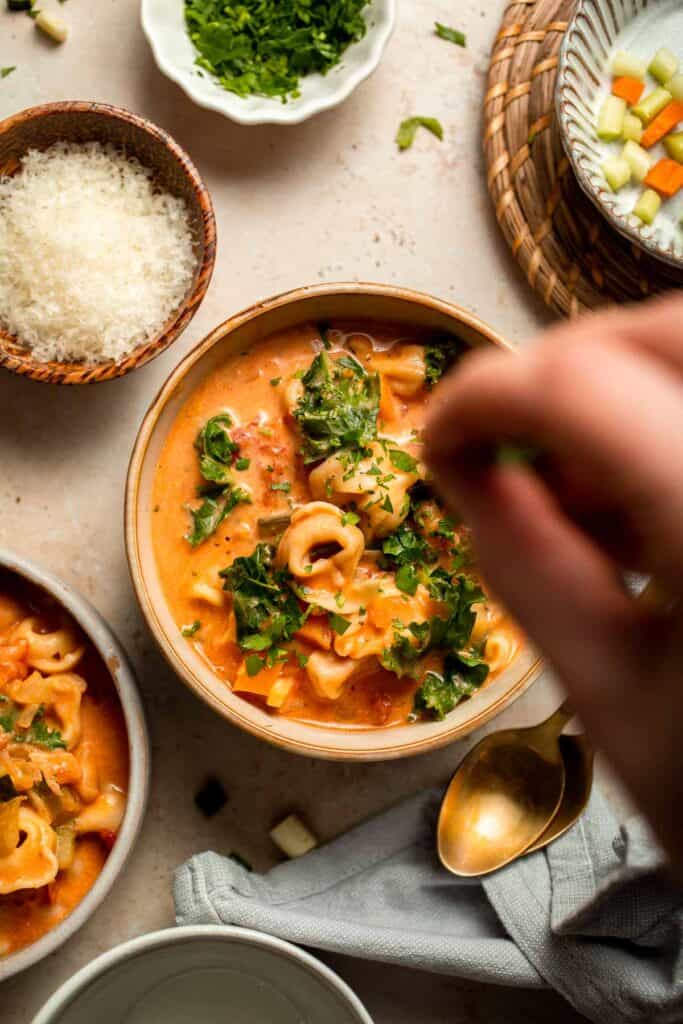
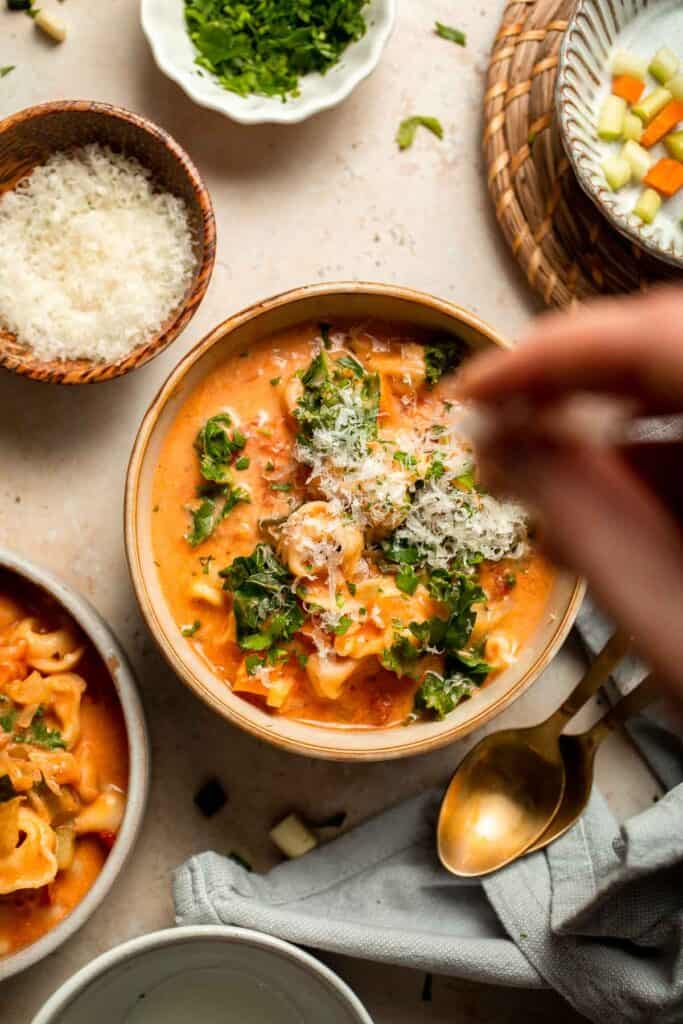
Expert Tip: Layer Flavor Gradually
Start with a good base by sautéing the aromatics until fragrant before adding the tomato paste and seasoning. This short step builds incredible depth and ensures every spoonful has rich, developed flavor. It's the secret to making a simple soup taste like it's been simmering all day.
More Tips and Tricks
- Cook the tortellini just right. Add it near the end so it doesn't overcook or become mushy. It should be tender but still slightly firm.
- Adjust thickness to your liking. Mash a few beans for a naturally thicker broth or add extra stock for a lighter texture.
- Use good-quality tortellini. Fresh or refrigerated tortellini hold their shape better than dried varieties.
- Add greens at the end. Spinach or kale only need a minute or two to wilt - this keeps their bright color and nutrients intact.
- Store tortellini separately for leftovers. If you expect leftovers, keep some tortellini aside and add them to reheated soup later to avoid sogginess.
Recipe Variations
- Add protein. Stir in cooked Italian sausage, shredded chicken, or turkey for a heartier version.
- Make it dairy-free. Use coconut milk or a dairy-free cream alternative and skip the Parmesan topping.
- Add more veggies. Toss in fresh green beans, yellow squash, corn, or peas for extra texture and sweetness.
- Spicy twist. Add a pinch of red pepper flakes or chili oil for gentle heat.
- Use different pasta. Substitute tortellini with mini ravioli or short pasta like ditalini or small shells.
- Cream cheese version. For an even creamier soup, stir in 2 tablespoons of cream cheese before the heavy cream. It adds a velvety body and mild tang.
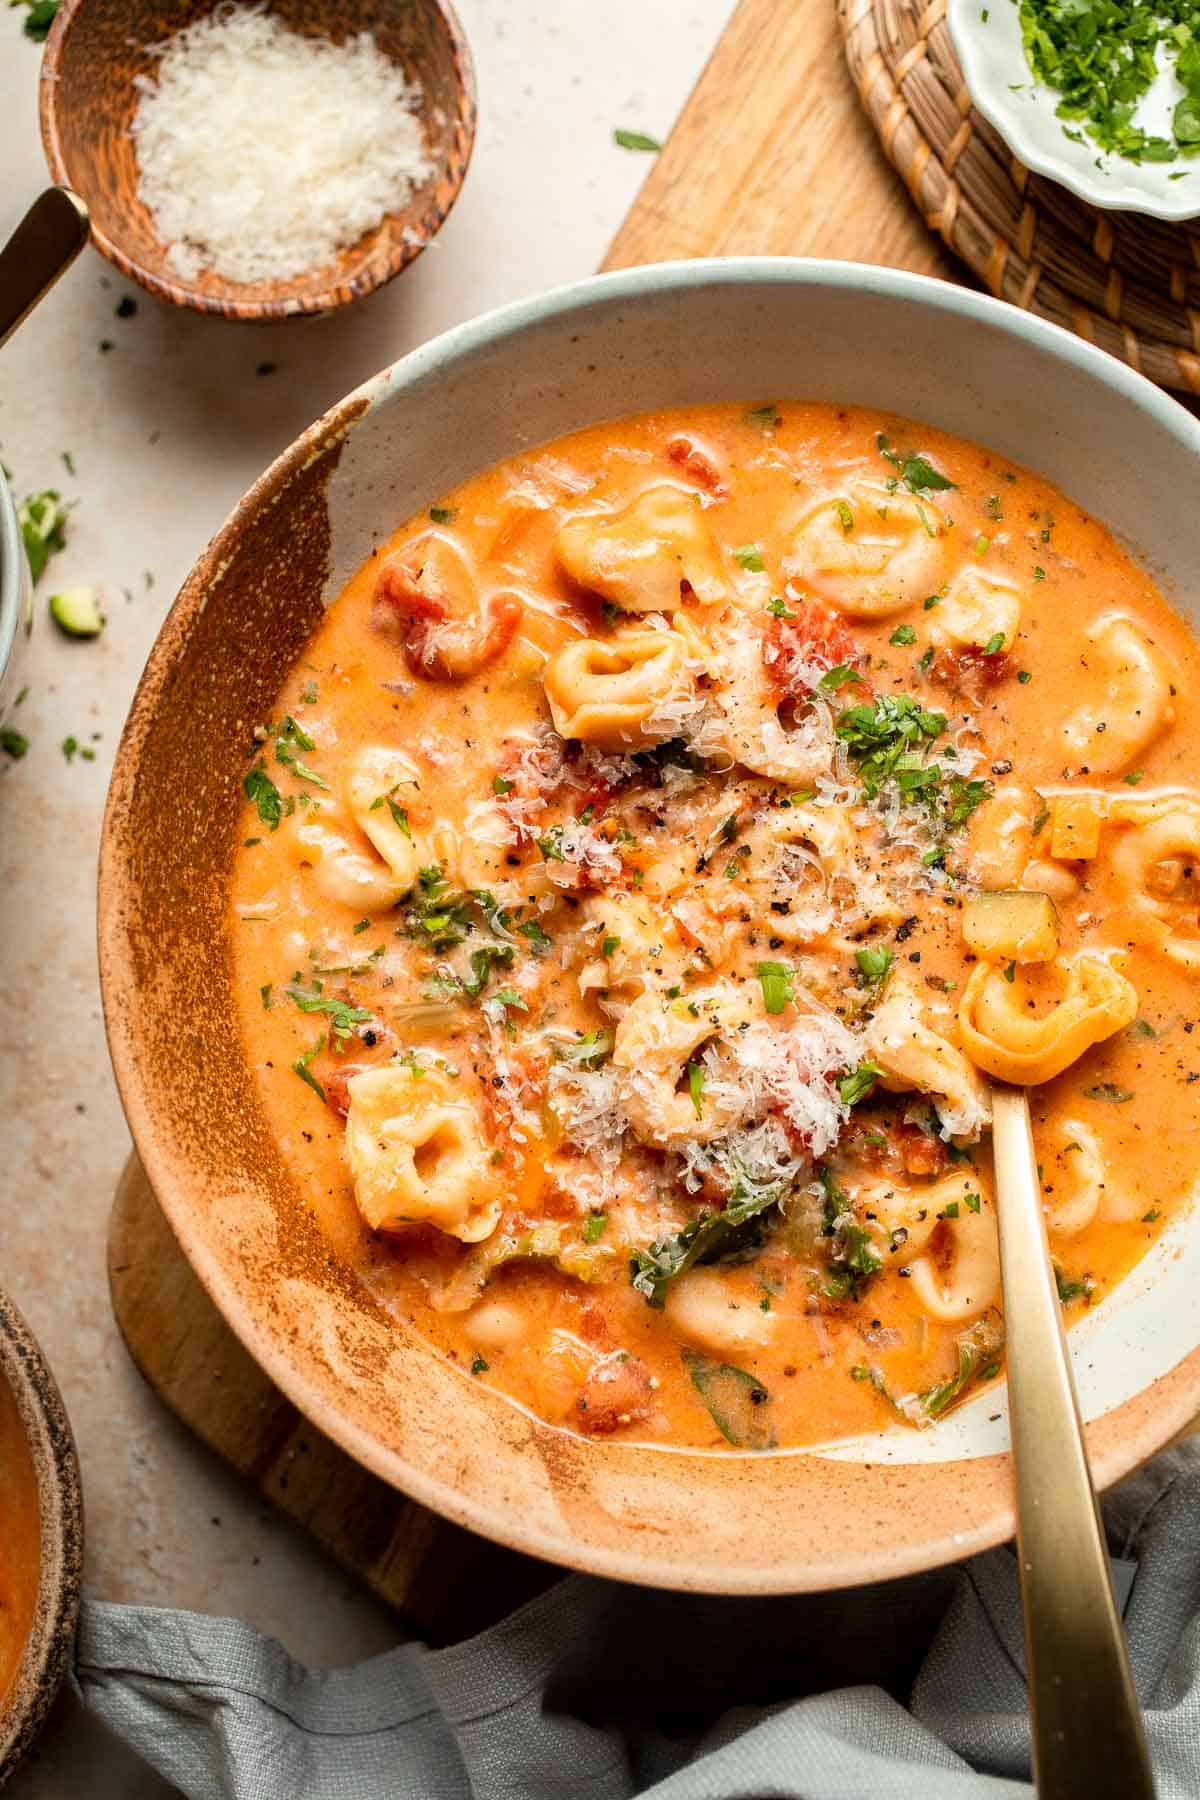
Storage
How to Store
Cool completely, then transfer to airtight containers and refrigerate for up to 3 days.
How to Reheat
Reheat on the stovetop over medium heat until warmed through. Add a splash of broth or water to loosen if it thickens.
How to Freeze
For best results, freeze the soup before adding tortellini (they can get too soft). Store in airtight containers for up to 3 months. When ready to serve, thaw overnight and add freshly cooked tortellini before finishing with cream.
How to Serve
Creamy Tortellini Minestrone Soup is hearty enough to enjoy as a full meal but also pairs beautifully with light sides. The creamy tomato base and cheesy pasta make it perfect for dipping and scooping.
These are my favorite dishes to serve with this tortellini soup:
Side Dishes for Soup
Looking for the perfect accompaniments to your favorite soups? Explore our collection of soup side dishes, including crusty breads, fresh salads, savory crackers, and hearty sandwiches that complement and elevate any bowl of soup.
FAQ
Yes, and it's delicious! Adding tortellini instantly transforms a classic minestrone into a cozy, comforting pasta soup that feels heartier and more satisfying. The tender, cheesy pasta absorbs the flavors of the tomato-based broth, while the vegetables and beans add texture and balance. This twist makes it a perfect comfort food dinner for fall and winter when you're craving something warm and filling. Just add the tortellini near the end of cooking so it stays tender and doesn't overcook. You can use cheese, spinach, or even mushroom tortellini - all work beautifully.
Tortellini can get soft if it sits too long in the hot broth, especially after the soup has been stored. To keep it perfectly al dente, add the tortellini near the end of cooking and simmer just until tender. If you plan to store leftovers, consider keeping the tortellini separate and adding it fresh when reheating. This trick keeps the texture perfect even the next day. Tortellini soup is still wonderful reheated, just remember that pasta continues to absorb liquid, so you may want to add a splash of broth or water to loosen it up before serving.
No, you don't need to boil tortellini separately before adding it to the soup. Fresh or frozen tortellini can be added directly to the simmering broth, where it will cook perfectly in just a few minutes while absorbing the soup's flavor. This makes cleanup easier and ensures the pasta is infused with the tomato and herb base. If you prefer firmer pasta for leftovers, you can boil the tortellini separately and add it to individual servings instead. Either way, this one-pot method keeps things simple and is perfect for quick, weeknight cooking.
Yes, frozen tortellini works perfectly. Add it directly to the simmering soup and cook for 1-2 minutes longer than the package directions. No need to thaw first.
Use half-and-half or milk instead of heavy cream, or skip the cream entirely and blend a portion of the soup for natural creaminess. You can also reduce the tortellini or cheese for a lighter variation.
Minestrone is a classic Italian vegetable soup often served with simple, rustic sides. Traditionally, it's paired with crusty bread, focaccia, or breadsticks to soak up the flavorful broth. It also goes well with green salads, roasted vegetables, or a light antipasto platter. For a heartier meal, you can serve it alongside grilled chicken, steak, or baked fish. In the colder months, this creamy tortellini minestrone is especially good with a warm slice of garlic bread and a glass of red wine - the ultimate cozy winter dinner.
More Italian Soup Recipes
Looking for other recipes like this? Try these:
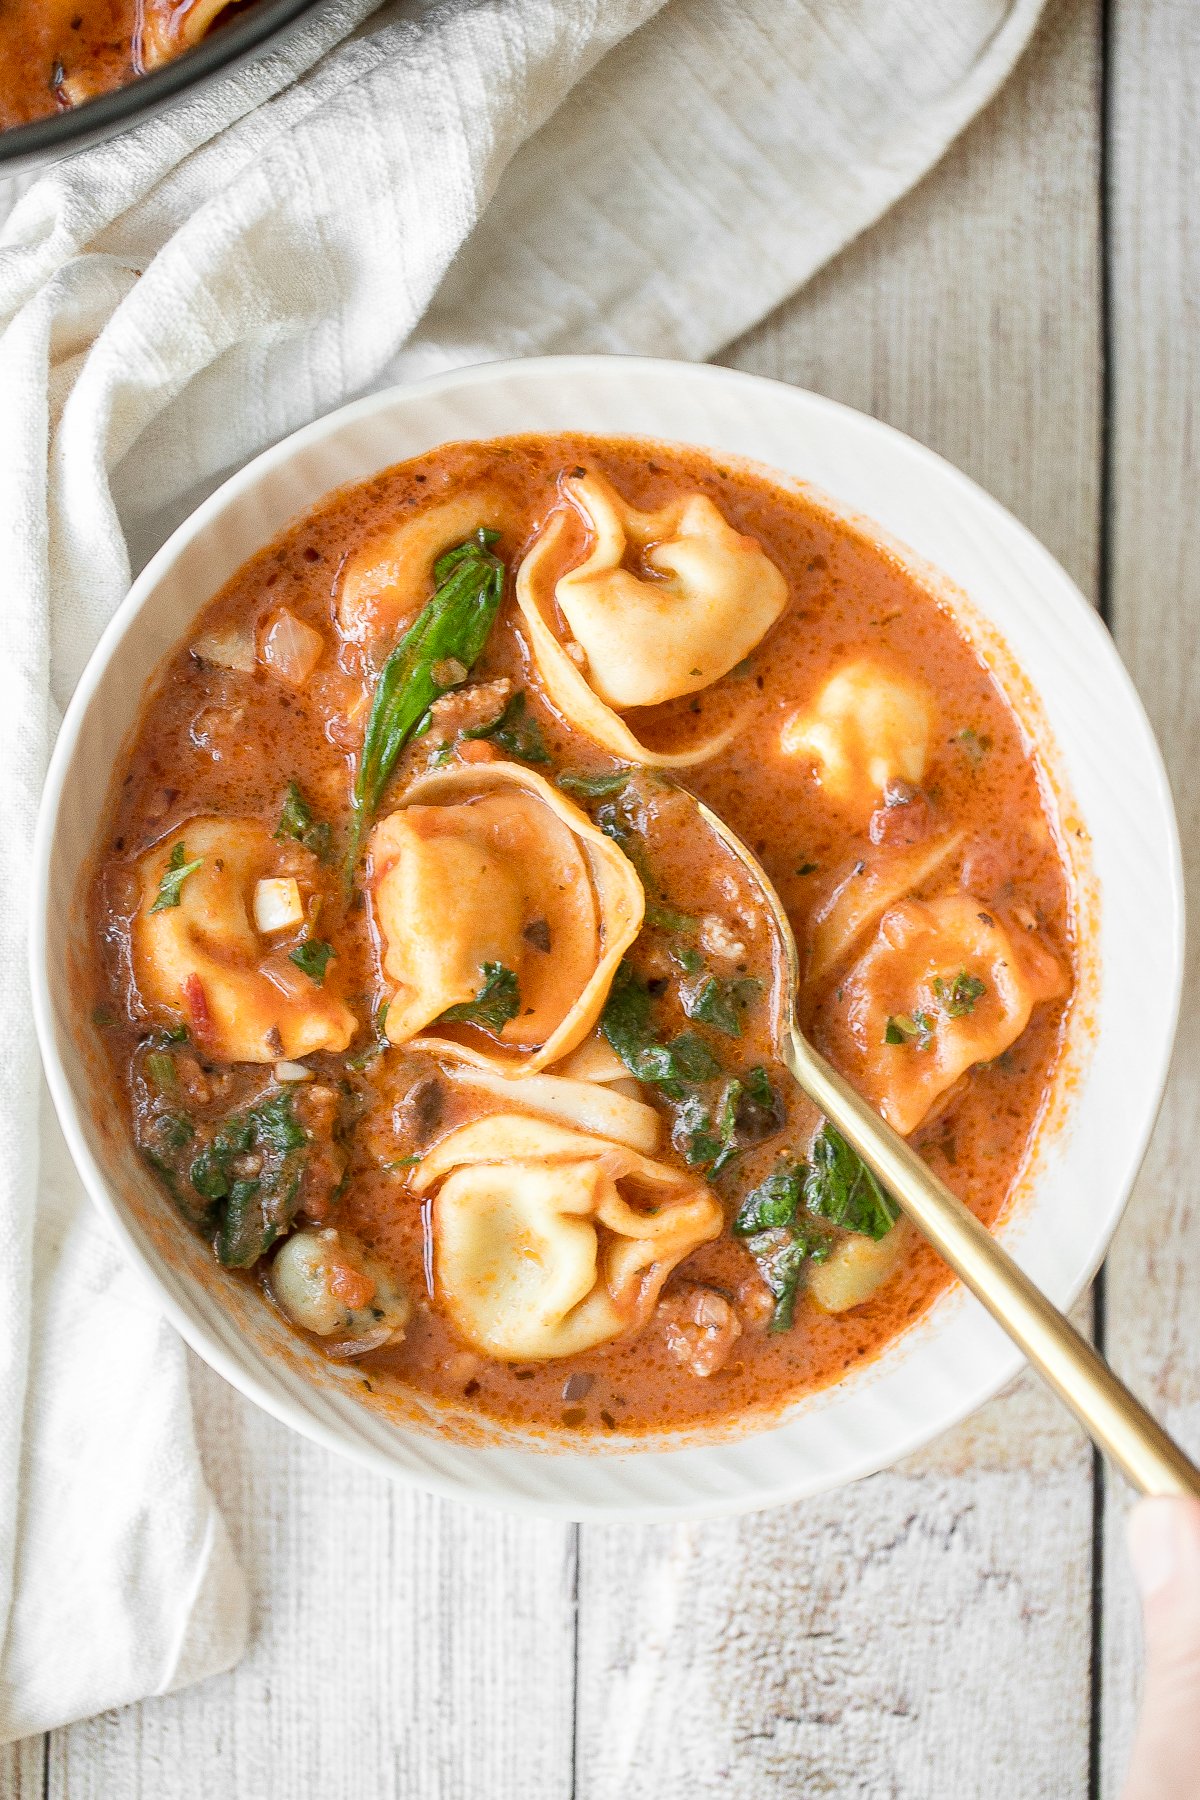

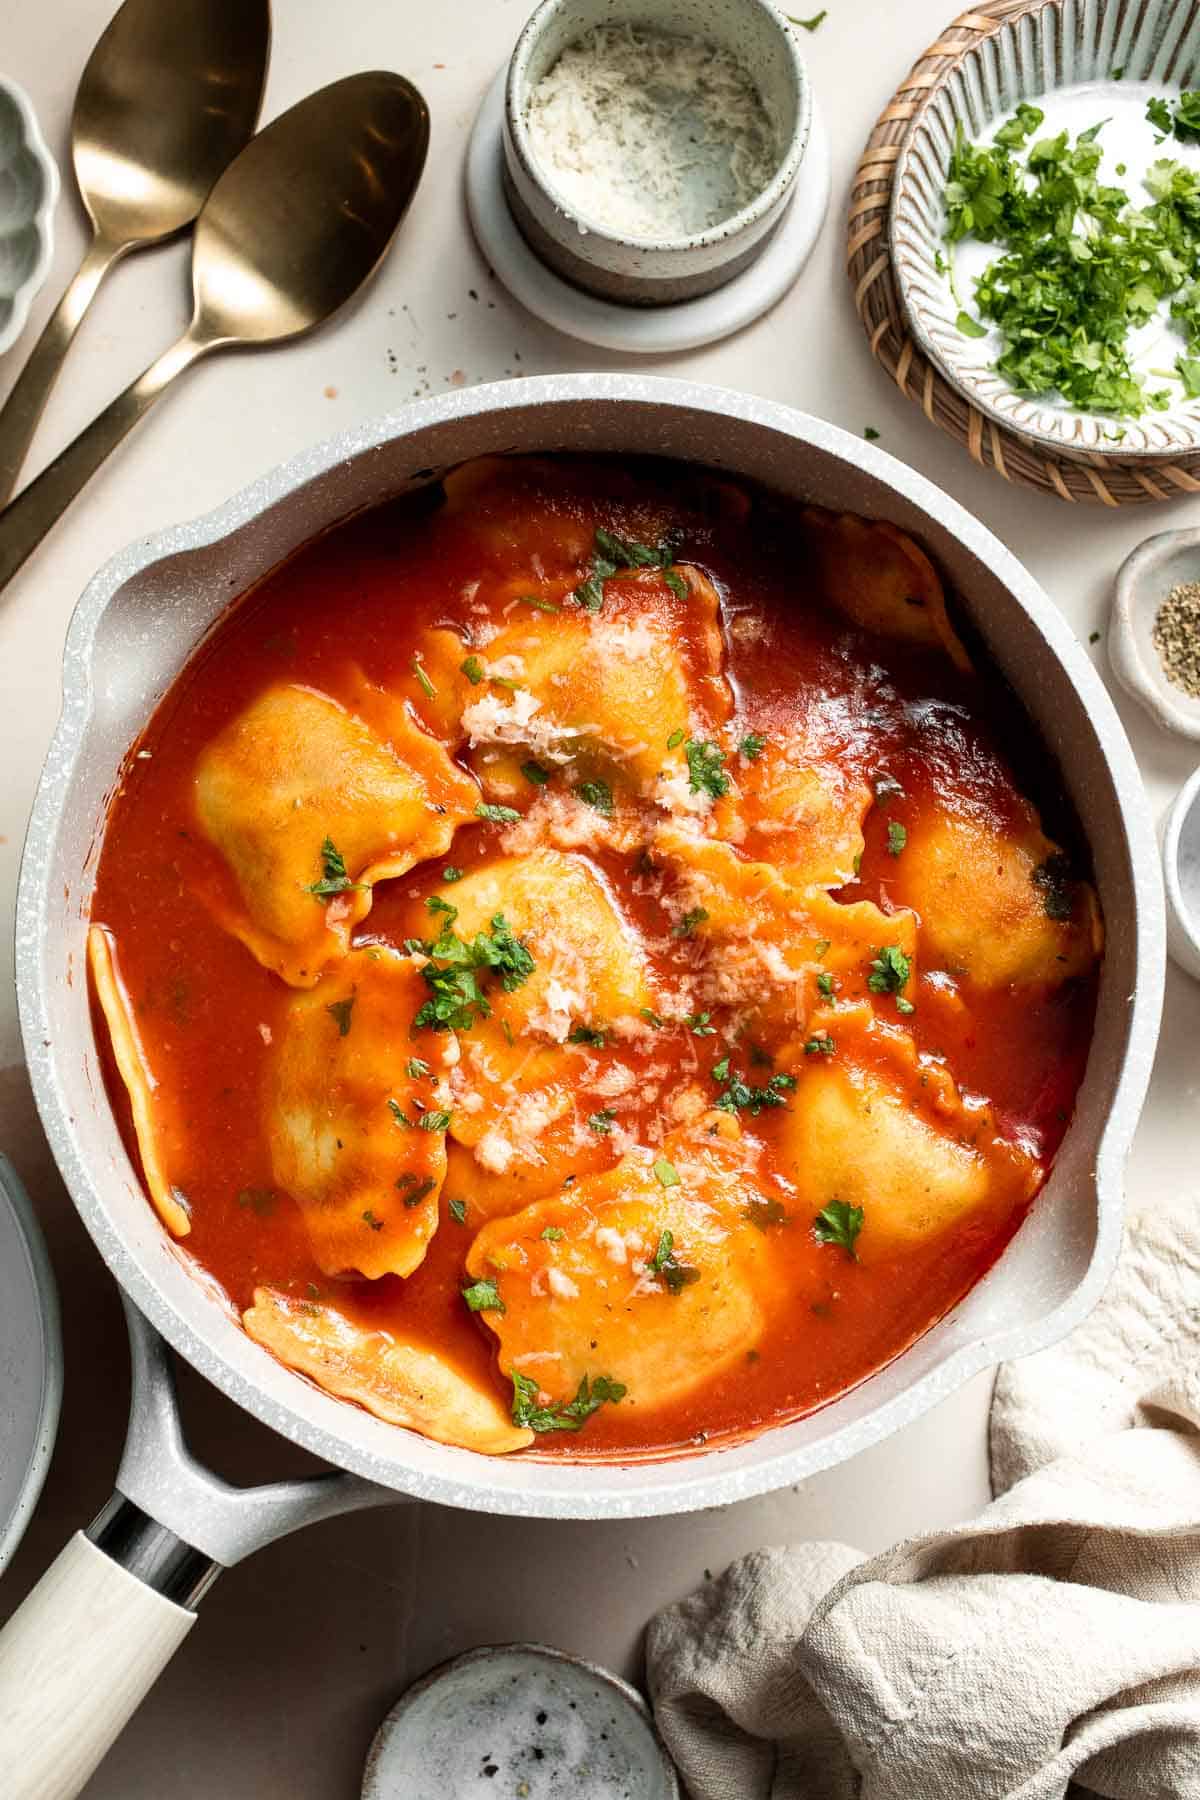
Tried this recipe?
I'd love to hear what you think! Leave a comment and rating below to share your feedback. Your reviews help others discover this recipe and help me keep creating more free recipes for you. Snap a photo and tag me on social media @aheadofthyme too.
Creamed Spinach Gratin
Creamed Spinach Gratin is a rich, cheesy, and irresistibly creamy side dish with a layer of bubbly, golden cheese on top. It's like the perfect cross between baked spinach dip and classic creamed spinach - silky and flavorful underneath, with a crispy, melty topping that's impossible to resist. Fresh spinach is blanched, stirred into a garlicky cream sauce, and finished with a blend of mozzarella and Parmesan before being baked to golden perfection.
This dish is elegant enough for the holidays but easy enough for a weeknight family dinner. With just a handful of simple ingredients, you can create a show-stopping side that feels fancy but comes together effortlessly. It's also make-ahead and freezer-friendly, so you can prep it in advance and simply bake when ready. Make it for Thanksgiving, Christmas, or any cozy meal that needs a touch of luxury.
This recipe was inspired by our Creamy Potatoes au Gratin and Brussels Sprouts Gratin, and it pairs beautifully with Roast Beef or Pistachio-Crusted Salmon for an easy, comforting, restaurant-worthy meal right at home.
Why You'll Love This Recipe
- Classic French comfort, simplified. Inspired by the traditional French gratin technique, this dish layers creamy spinach with melty cheese and bakes it until the top turns golden and crisp. Every spoonful breaks through that irresistible crust into a velvety, savory filling beneath.
- A delicious way to eat your greens. This creamed spinach gratin transforms simple spinach into a rich, indulgent side that even picky eaters will devour. With butter, garlic, cream, and cheese, it's the kind of vegetable dish that disappears first at the dinner table.
- Rich, creamy, and cheesy flavor. Every bite is velvety and satisfying thanks to the blend of butter, garlic, and cream that coats each leaf of spinach. Plus, parmesan and mozzarella melt into a golden crust that adds irresistible texture and savory depth to every scoop.
- Elegant but effortless. Though it looks impressive with its bubbling, browned top, this gratin is surprisingly easy to make. It takes about 30 minutes start to finish, using ingredients you probably already have in your kitchen. It's perfect for both weeknight dinners and holiday gatherings.
Ingredients And Substitutions
To make this easy creamy spinach gratin, you will need the following ingredients (full quantities in the recipe card below):
- spinach - Use about 1½ pounds (3 bunches) of fresh spinach, stems removed. A 16 ounce (1 pound) package of frozen spinach also works, just thaw completely and squeeze out excess liquid.
- butter - Adds richness and flavor. You can substitute with olive oil for a lighter version.
- onion - Diced small for sweetness and depth. Shallots work well for a milder taste.
- garlic - Freshly minced garlic gives the dish its signature savory flavor. Use more if you love garlic.
- all-purpose flour - Thickens the sauce. Substitute cornstarch for a gluten-free option.
- heavy cream - Creates a smooth, luscious sauce. Half-and-half or whole milk can work in a pinch, though it will be slightly thinner.
- Parmesan cheese - Adds a salty, nutty kick. Pecorino Romano or Asiago are great substitutes.
- mozzarella cheese - For that gooey melt and golden crust. You can also substitute with any melty cheese. Try Gruyère, provolone, or white cheddar for a twist.
- salt and black pepper - Simple seasoning to enhance all the flavors.
Equipment
You'll also need measuring cups and spoons, a large pot for blanching spinach, colander, large skillet (I used my 12-inch cast-iron skillet), mixing spoon, 9-inch square baking pan, and a spatula for spreading the creamy mixture evenly before baking.
How To Make The Best Spinach Gratin
- Blanch the spinach. Cut fresh spinach in half and cook in a large pot of boiling water for about 30 seconds, just until wilted. Drain in a colander immediately and rinse under cold running water until cool enough to handle. Squeeze out as much excess water as possible, then set aside.
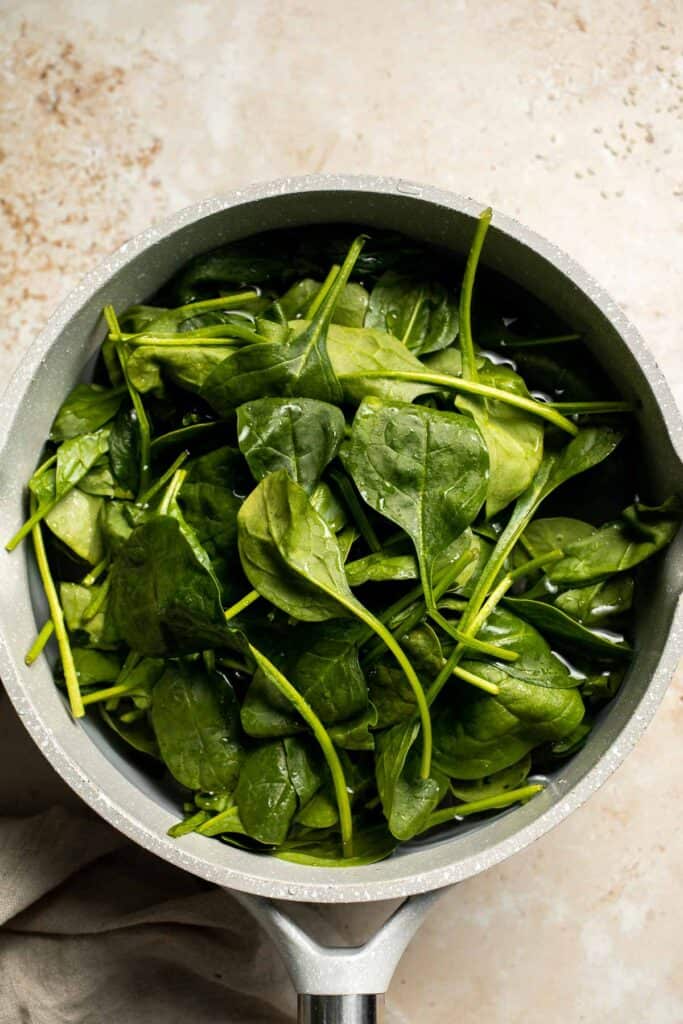


- Sauté aromatics. In a large skillet, melt butter over medium-high heat bubbly, about 1-2 minutes. Add the onion and garlic, and sauté until soft and fragrant, about 2 minutes.
- Make the creamy sauce. Add flour (or cornstarch) and stir well until combined. Gradually pour in the heavy cream, stirring constantly. Add ¼ cup of Parmesan, then reduce the heat to medium and bring the mixture to a gentle simmer. Cook for 4-5 minutes, stirring often, until smooth and thickened. Season with salt and pepper to taste.
- Add the spinach. Stir in the prepared spinach and toss well to coat in the creamy sauce. Cook for another 1-2 minutes until evenly heated through.
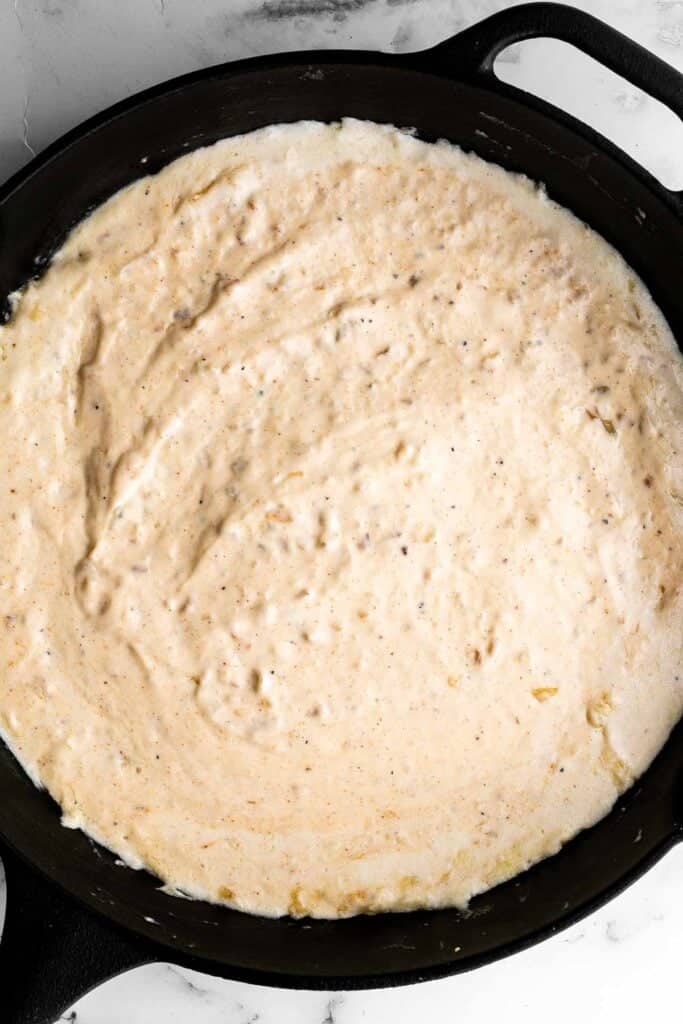
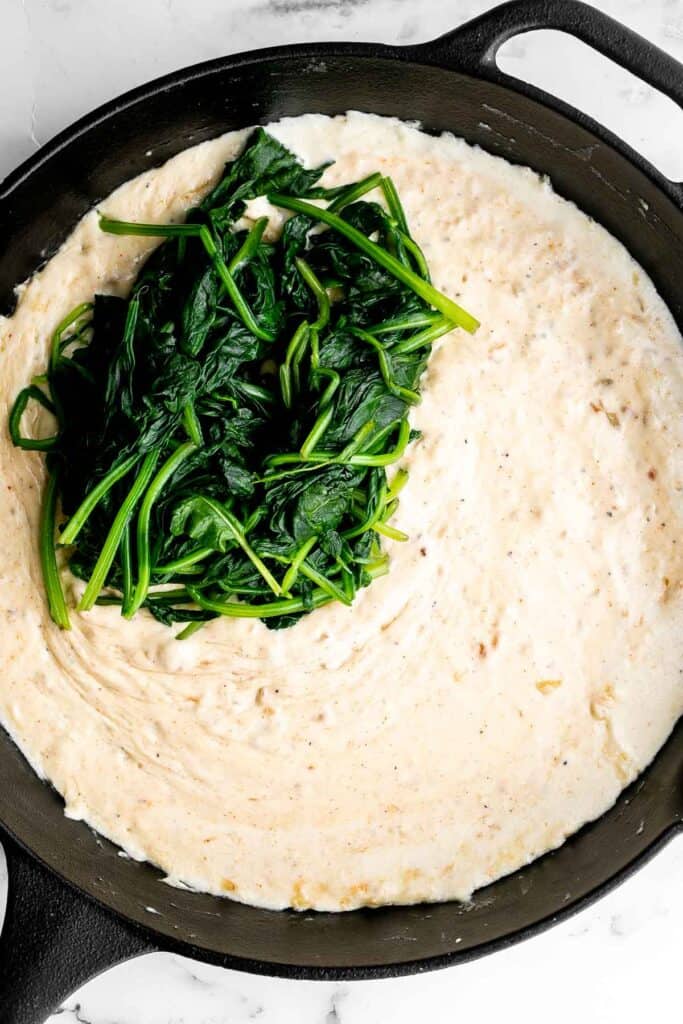
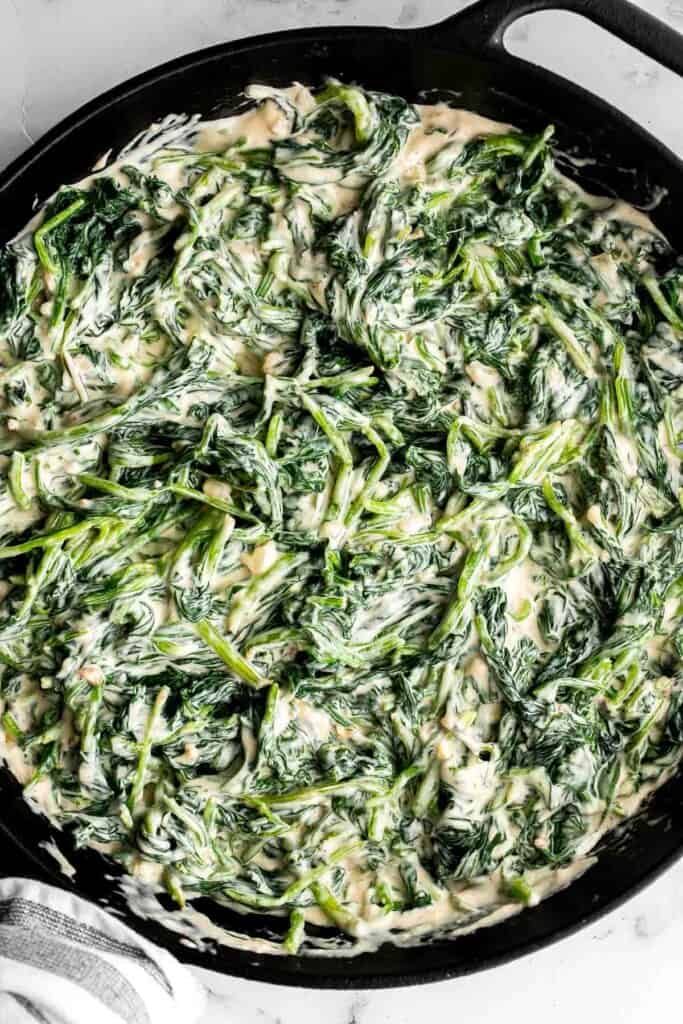
- Add cheese. Transfer spinach mixture to a 9-inch square baking pan and top with mozzarella and remaining ¼ cup Parmesan.
- Bake. Bake in a 350°F preheated oven for 20 minutes until cheese is melted and golden brown. Alternatively, you can place the dish under the broiler on high for 2-3 minutes until golden and bubbly. Watch closely so it doesn't burn.
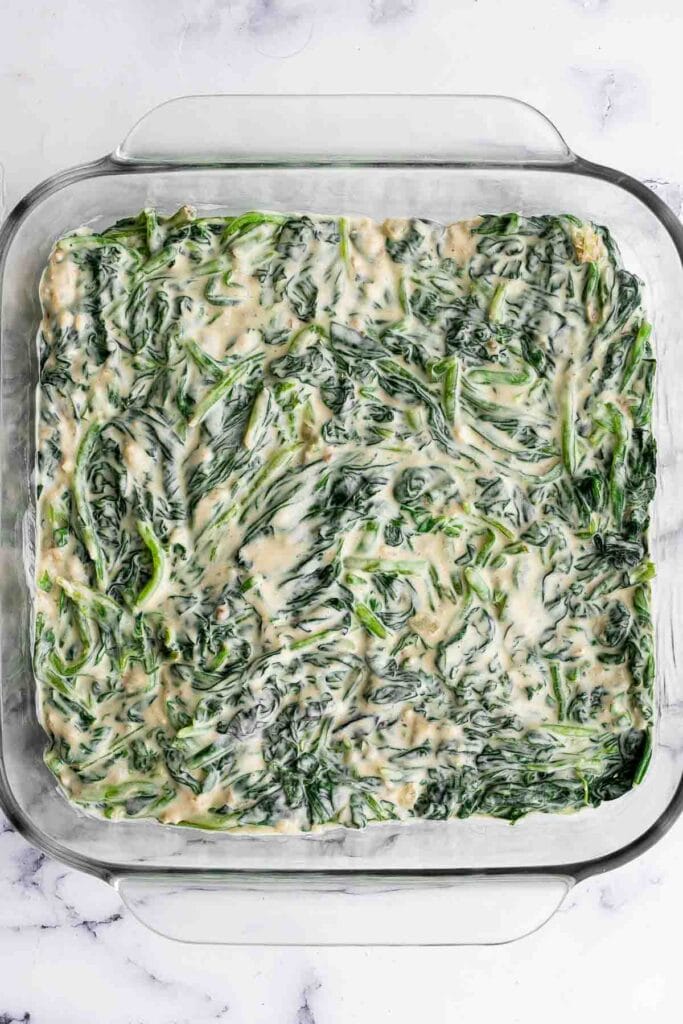
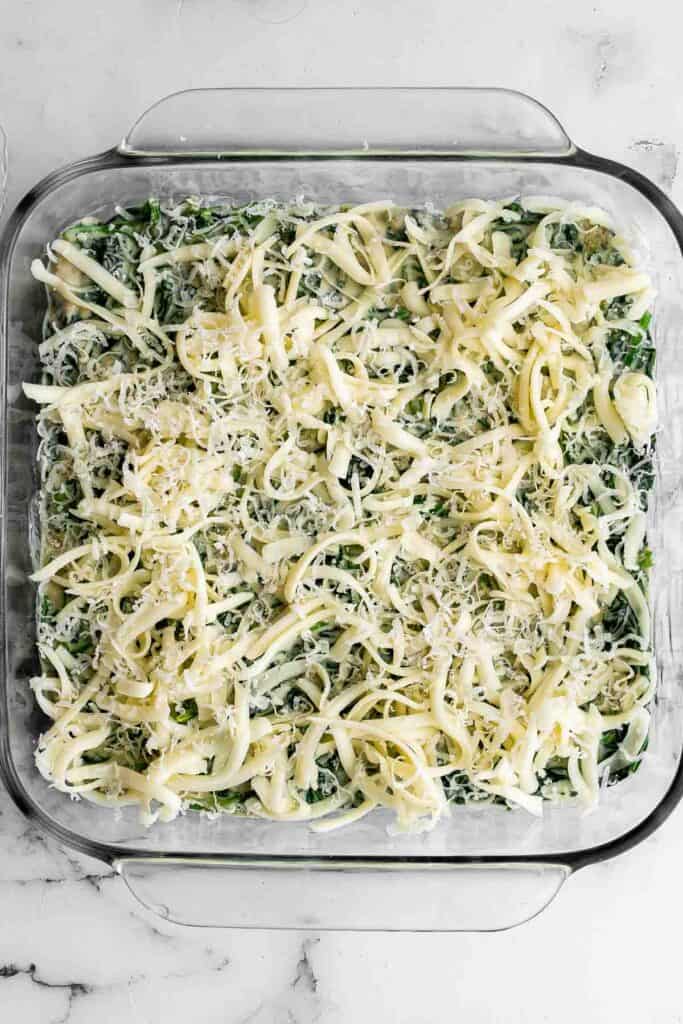
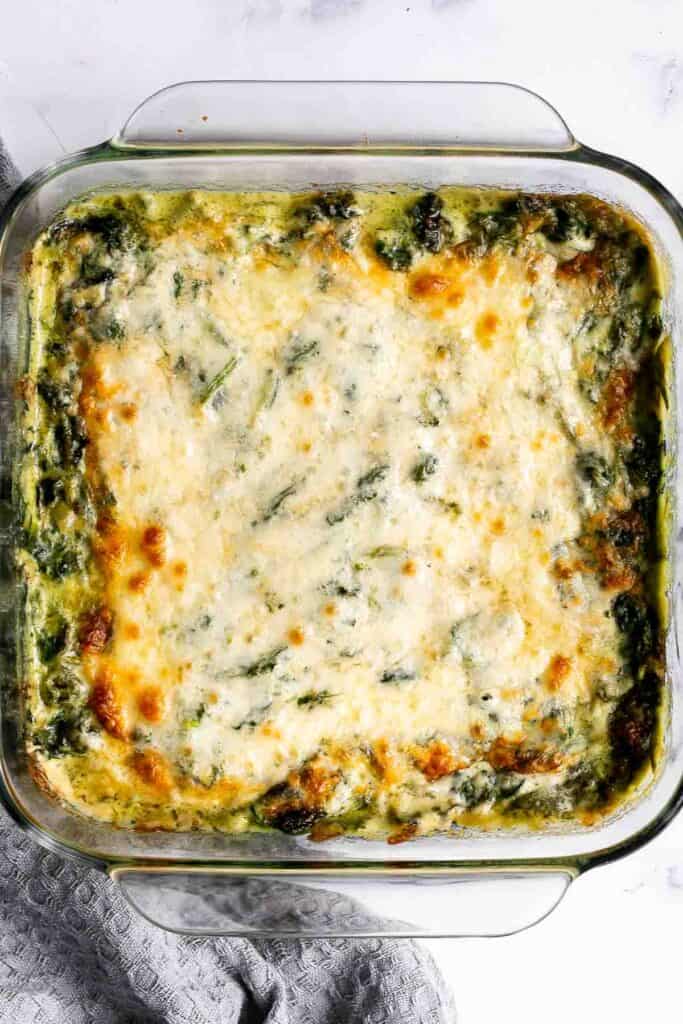
Expert Tip: Squeeze Out Every Drop
After blanching the spinach, make sure to squeeze out as much liquid as possible. Excess moisture will thin the cream sauce and prevent that luscious, thick consistency that makes this gratin so rich and indulgent. Wrap the spinach in a clean kitchen towel or paper towel and press firmly before adding it to the sauce.
More Tips and Tricks
- Use fresh spinach for best texture. Fresh leaves retain their shape and color better than frozen, giving the gratin a more vibrant look and tender bite.
- Start with a proper roux. Whisking the flour into melted butter creates the roux that thickens the cream sauce. Let it cook for a minute before adding cream to ensure smoothness and no raw flour taste.
- Cook the sauce until thick. Simmer the cream mixture for 4-5 minutes until it coats the back of a spoon for a smooth and creamy consistency.
- Balance the richness. If you prefer a slightly lighter dish, you can use less cheese in the topping while keeping the creamy base intact. It still bakes up beautifully with that signature golden crust.
- Broil for a golden top. After baking, switch to broil for 2-3 minutes to achieve a perfectly browned, bubbly cheese crust.
- Season gradually. Taste the sauce before baking and adjust salt and pepper so the flavors are balanced and not overly salty.
- Let it rest before serving. Allow the gratin to cool for 5 minutes after baking as this helps it set slightly, making serving neat and easy.
- Make ahead instructions. Assemble the spinach gratin up to the baking step, then cover tightly with plastic wrap and refrigerate for up to 2 days. When ready to serve, bake as directed, adding about 10 extra minutes if it's coming straight from the fridge. This is one of my favorite simple recipes for prepping ahead of holidays or dinner parties.
- Repurpose leftovers. Leftovers reheat wonderfully and can be served as a side with eggs, spooned over toast, or paired with a seared steak for a quick, cozy lunch the next day.
Recipe Variations
- Add mushrooms. Sauté sliced cremini mushrooms with the onions and garlic for extra umami and a heartier texture.
- Mix in breadcrumbs. Sprinkle buttery breadcrumbs over the top before baking for added crunch and flavor contrast.
- Make it lighter. Use half-and-half or evaporated milk instead of cream for a lighter yet still creamy dish.
- Try different cheeses. Swap mozzarella for Gruyère or Swiss for a nutty, French twist.
- Add spice. Stir in a pinch of red pepper flakes or cayenne pepper for gentle heat that cuts through the richness.
- Add cream cheese. For an even silkier texture, stir in a spoonful of cream cheese with the heavy cream. It adds tang and body without making the gratin too heavy.
- Turn it into a main. Add cooked shredded chicken or chickpeas and bake in a larger dish for a complete meal.
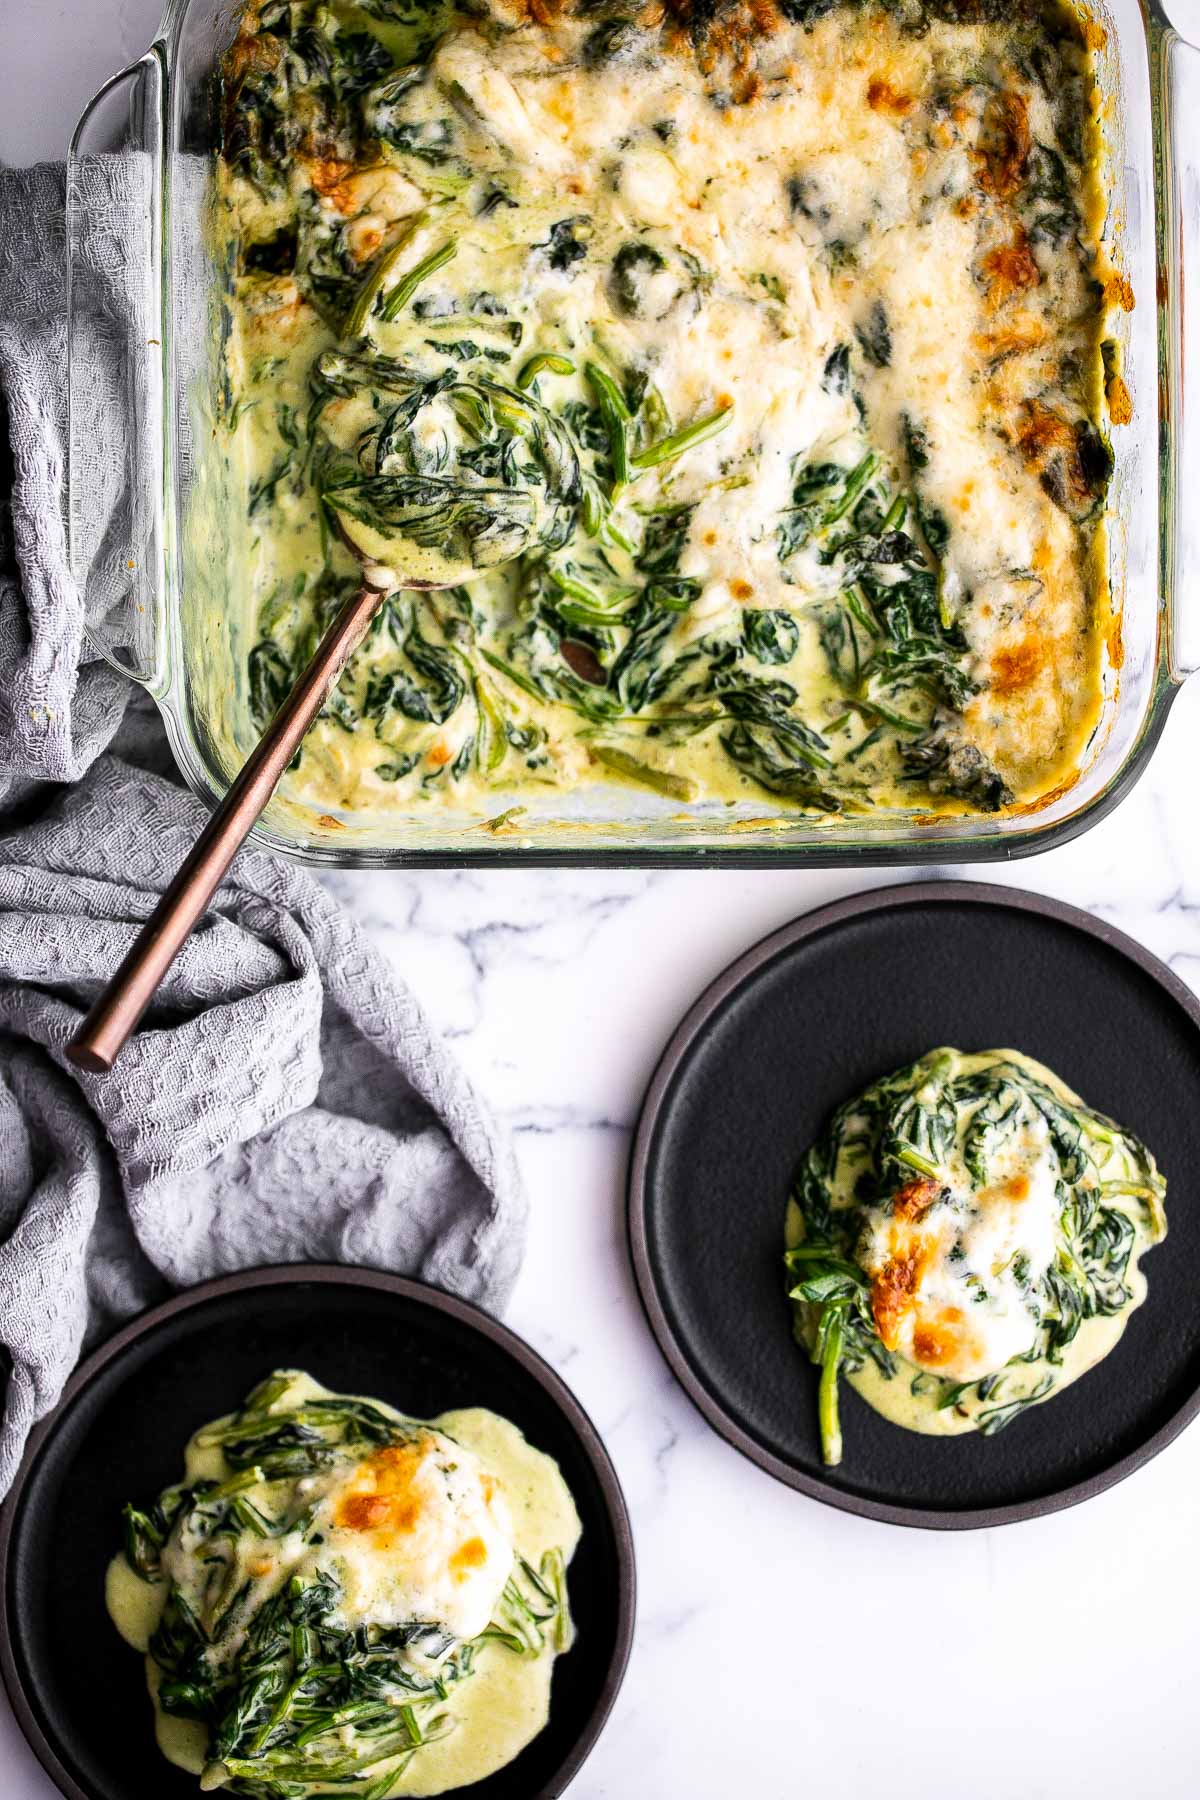
Storage
How to Store
Cool completely, then cover the leftover spinach gratin tightly with plastic wrap or transfer to an airtight container. Refrigerate for up to 3 days.
How to Reheat
Reheat the entire dish in a 350°F oven for 10-15 minutes until heated through. You can also reheat individual portions, covered, in the microwave in a microwave safe bowl on medium heat in 20 second intervals.
How to Freeze
Assemble the gratin (without baking), cover tightly with foil, and freeze for up to 2 months. Bake straight from frozen at 350°F for 40-45 minutes, or thaw overnight in the fridge before baking as directed.
How to Serve
Creamed Spinach Gratin is rich, flavorful, and pairs beautifully with so many dishes. It tastes like something straight from a steakhouse, pairing perfectly with rich mains like chicken, beef, pork, fish, and any other protein you can think of! It also tastes amazing with pasta, rice, and potatoes. The creamy texture and cheesy crust balance bold flavors and elevate any meal.
These are my favorite main dishes to serve with spinach gratin:
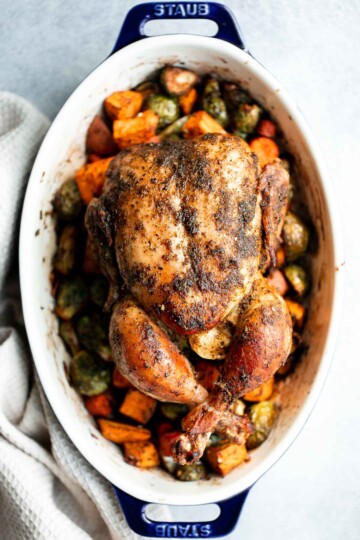

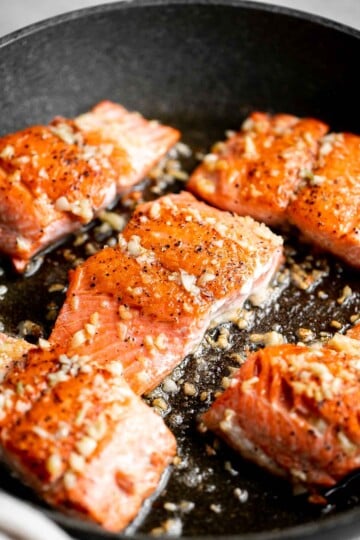
Dinner Ideas
For more recipe ideas to pair this with on busy weeknights, check out our collection of easy dinner recipes, featuring one-pan dishes, quick pasta, roasted vegetables, light sides, and flavorful meals that come together in no time.
FAQ
Spinach gratin is made with simple yet rich ingredients that create a creamy, cheesy baked side dish. The base is usually fresh spinach (or thawed frozen spinach) combined with butter, garlic, onions, heavy cream, and a touch of flour to thicken the sauce. It's then layered with cheeses like Parmesan and mozzarella for flavor and a perfectly melted golden crust. The result is a comforting dish that's creamy underneath with a lightly crisp top, making it a perfect side for any roast or festive meal.
A gratin is any dish that's baked with a browned crust on top, typically made with cheese, breadcrumbs, or both. The word "gratin" comes from the French term gratter, meaning "to scrape," referring to the crispy layer that forms on top and gets scraped off to serve. What makes it distinct is that beautiful golden-brown finish that adds both texture and flavor. While many gratins feature potatoes or vegetables in a creamy sauce, spinach gratin is a lighter twist that still delivers that classic, indulgent gratin experience in every bite.
A gratin is technically a type of casserole, but not all casseroles are gratins. The key difference lies in the topping. A gratin always has a browned crust of cheese, breadcrumbs, or both, giving it that signature golden top. Casseroles, on the other hand, are broader and can include baked one-dish meals without a crispy topping, like pasta bakes or rice dishes.
Spinach on its own has a mild, earthy flavor that transforms beautifully when paired with the right ingredients. Garlic, onions, butter, and cream bring richness and depth, while salt and pepper enhance its natural taste. A sprinkle of nutmeg or red pepper flakes adds warmth and balance. For extra flavor, toss in cheeses like Parmesan, feta, or mozzarella. Acidic ingredients like a squeeze of lemon juice or a dash of white wine can also brighten up the dish and make the flavors pop without overpowering the spinach.
Spinach au gratin pairs wonderfully with a variety of mains, especially rich or roasted dishes. It's a classic side for holiday roasts, steak dinners, or baked fish. Try serving it alongside roast chicken, turkey, beef tenderloin, or pork chops. For a lighter meal, it's also delicious with grilled salmon or seared halibut. The creamy texture and savory flavor make it perfect for balancing hearty mains, and it pairs beautifully with crusty bread, mashed potatoes, or a crisp green salad to round out the meal.
More Spinach Recipes
Looking for other recipes like this? Try these:
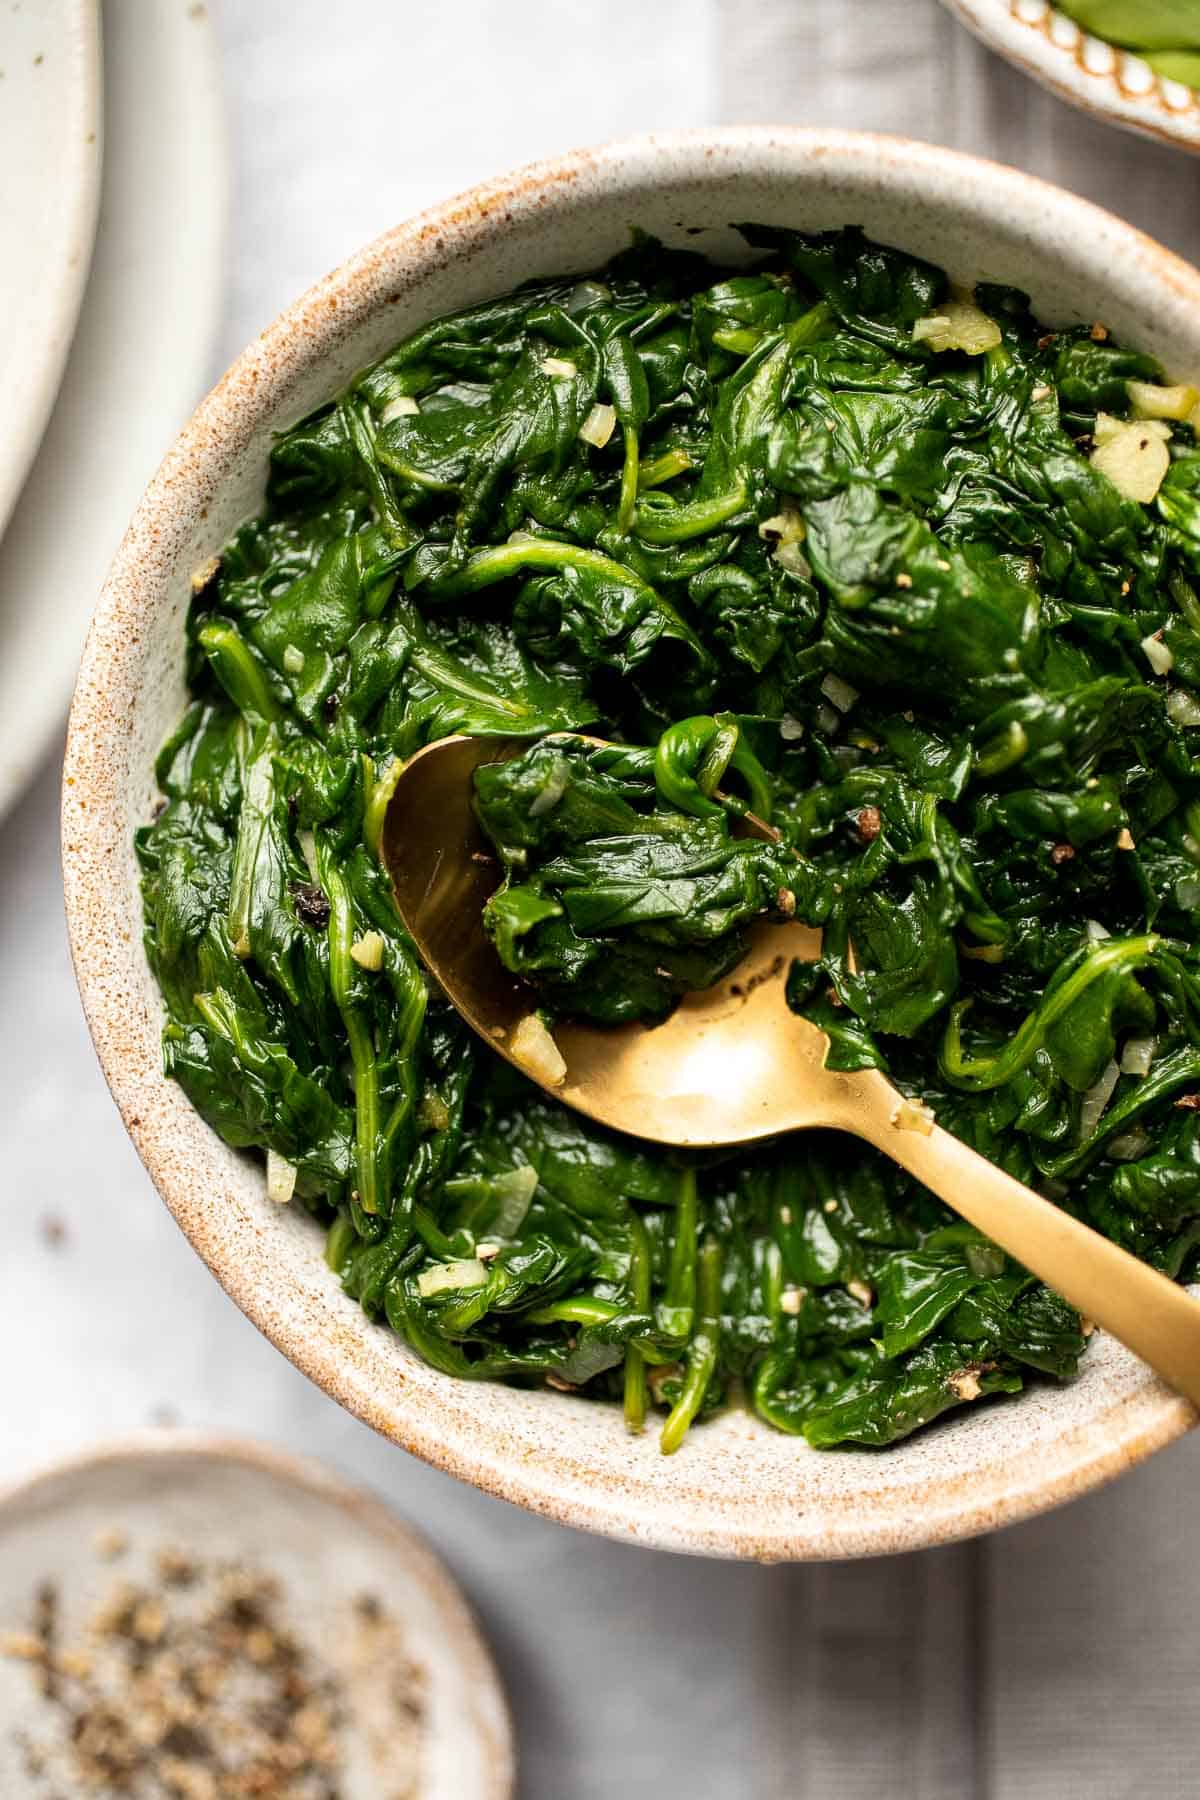
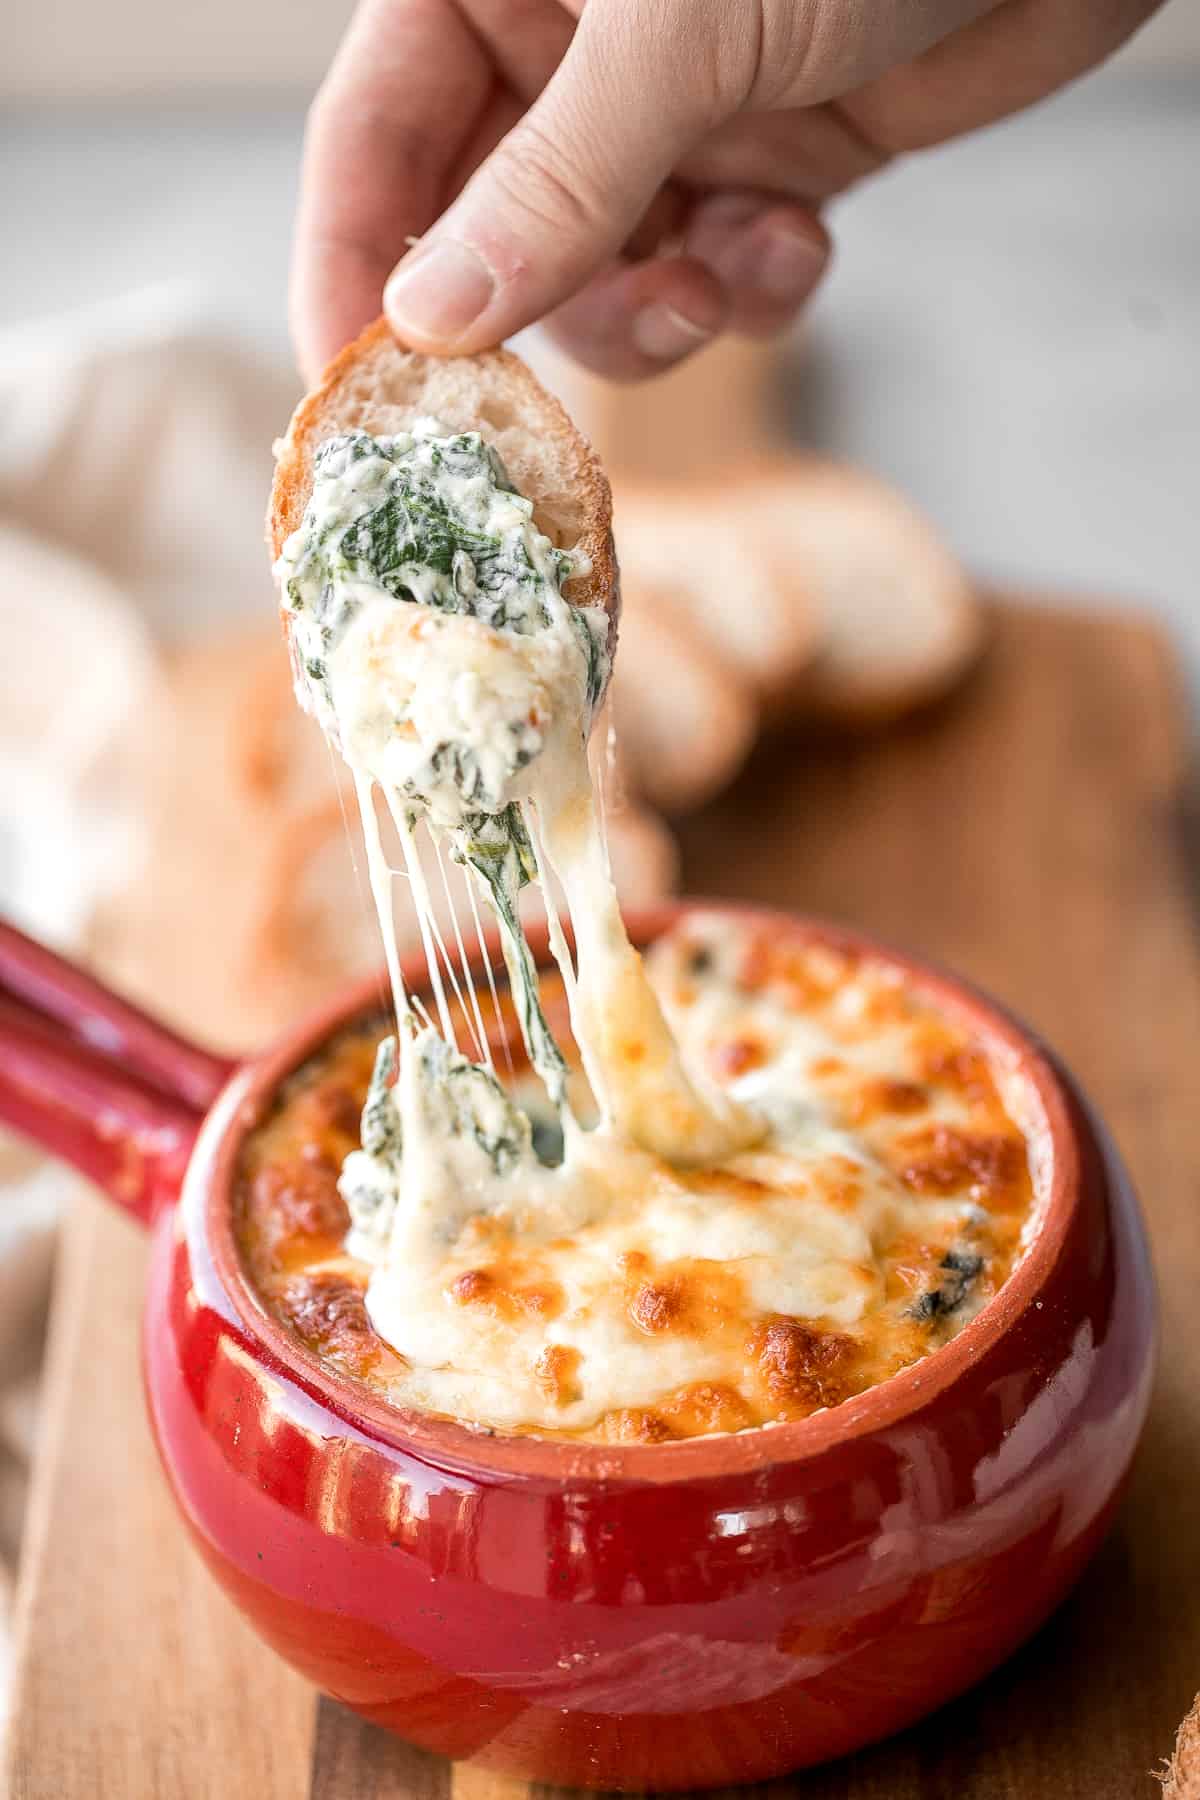
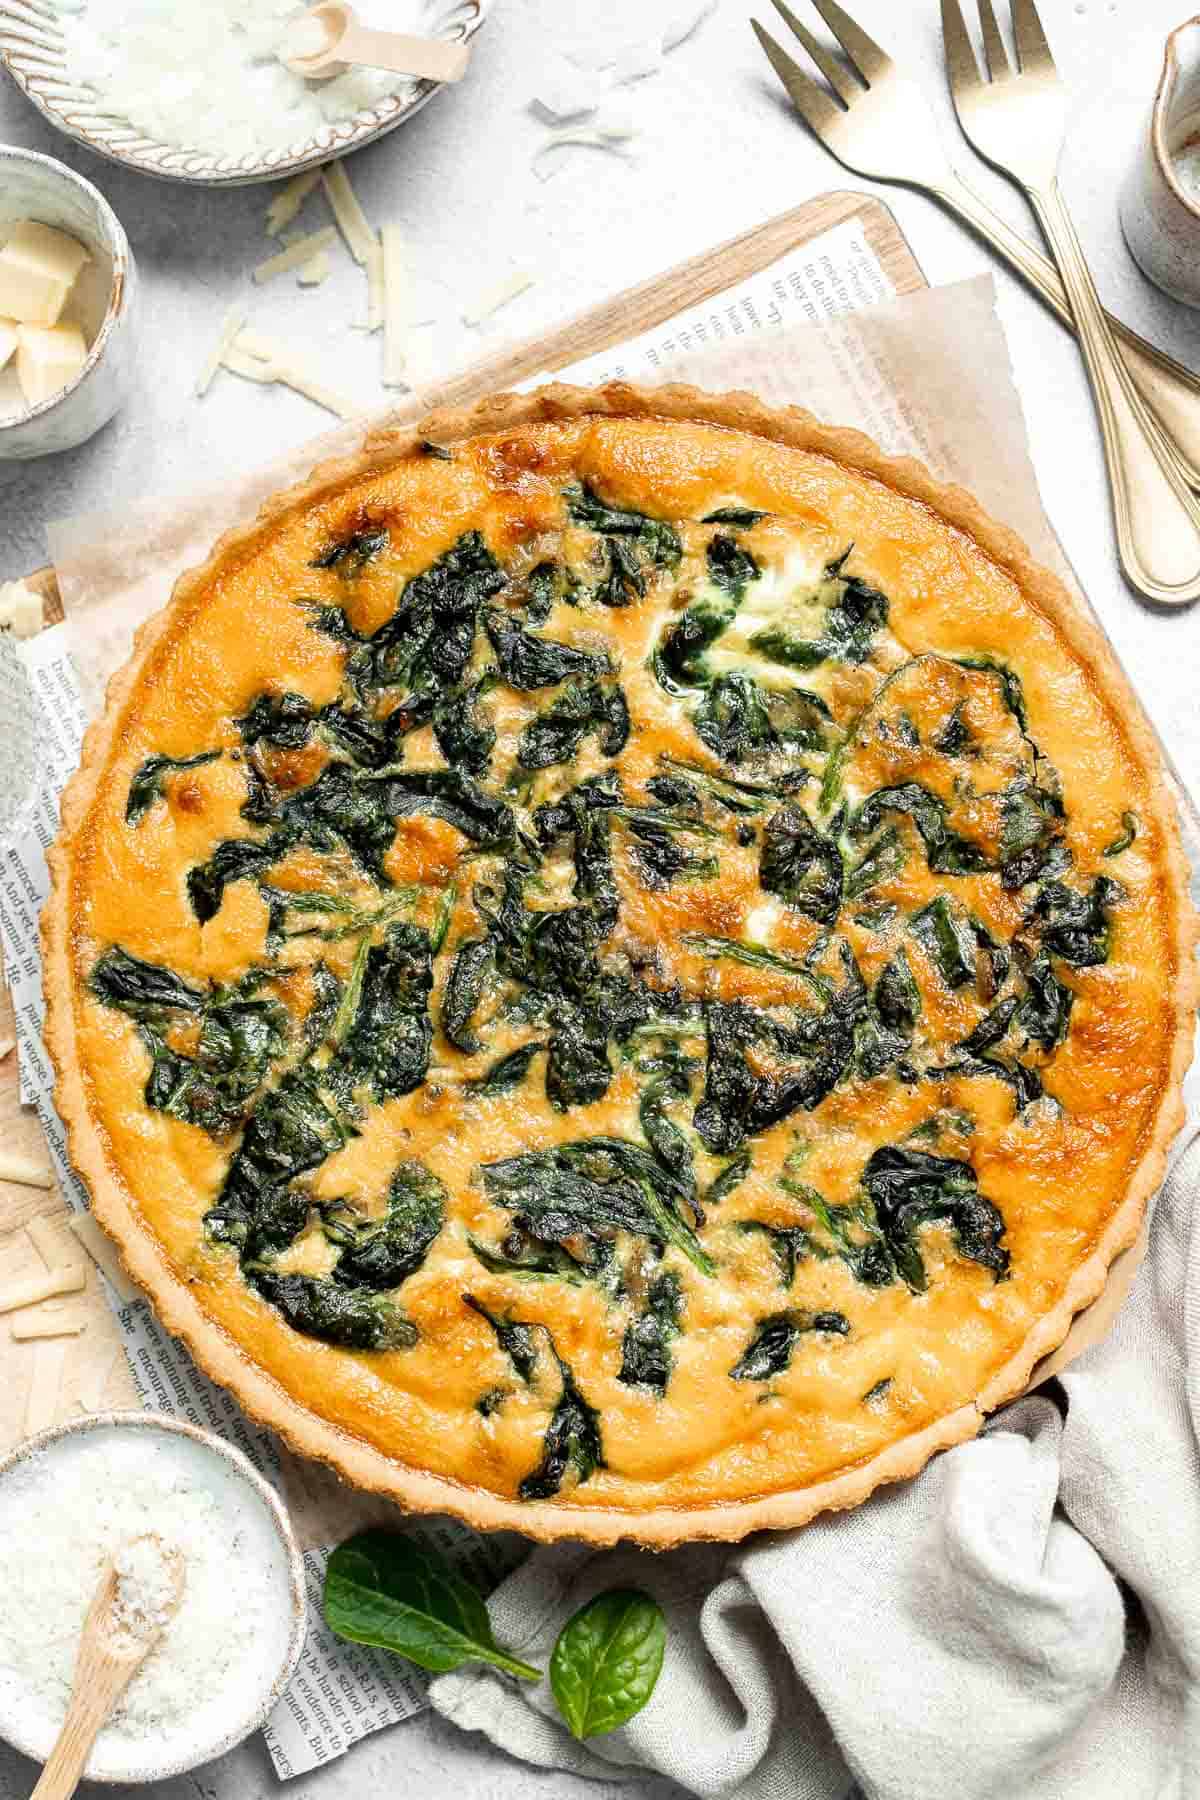
Tried this recipe?
I'd love to hear what you think! Leave a comment and rating below to share your feedback. Your reviews help others discover this recipe and help me keep creating more free recipes for you. Snap a photo and tag me on social media @aheadofthyme too.
This recipe was originally published in 2021. It has since been updated with new content.
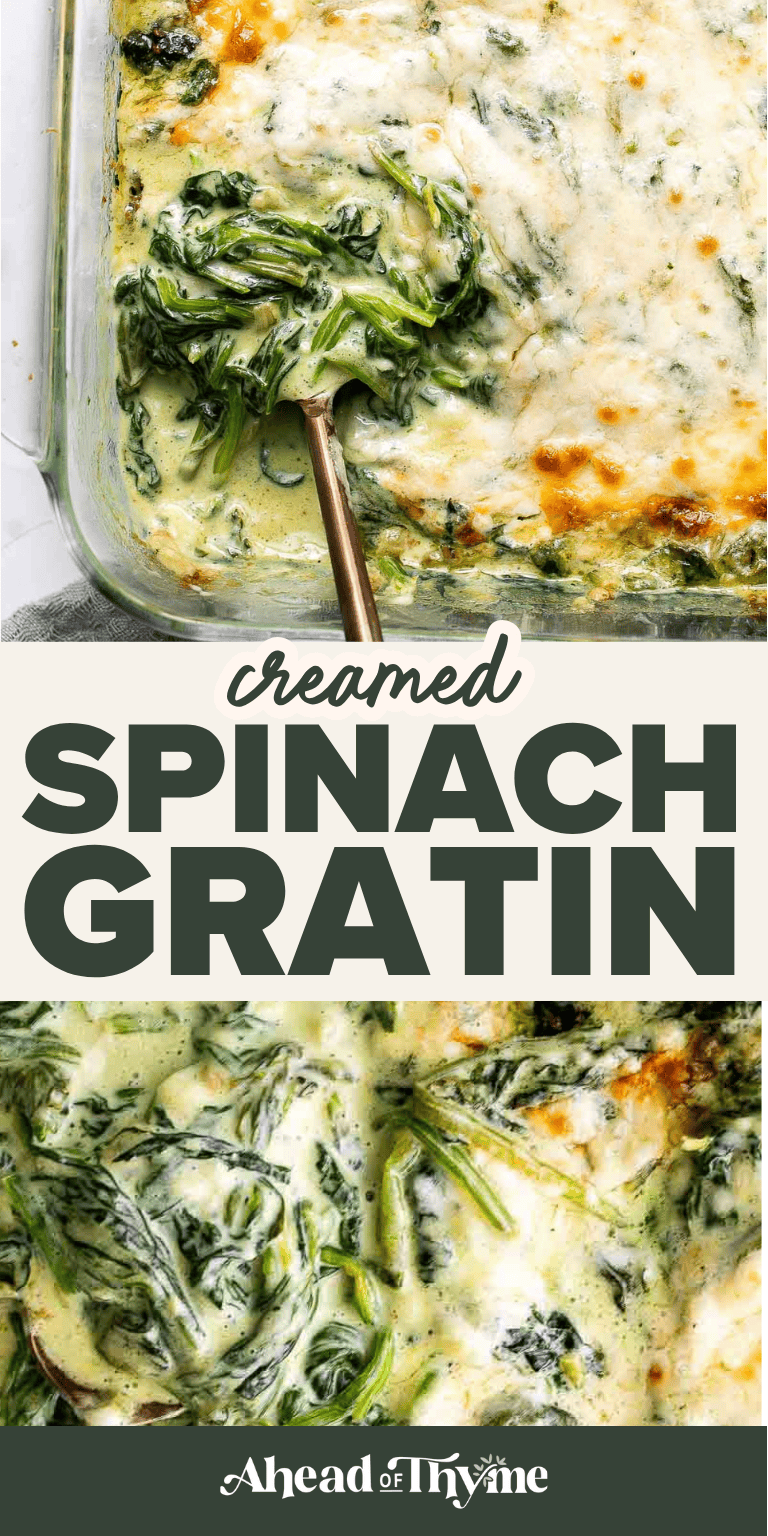
Slow Cooker Cranberry Sauce (Cranberry Sauce in the Crockpot)
This slow cooker cranberry sauce is the easiest way to make everyone's favorite holiday side - rich, glossy, and bursting with tart-sweet flavor. With just five simple ingredients, this cranberry sauce in the crockpot practically makes itself while you prep the rest of your meal. The slow cooker gently simmers fresh cranberries with orange juice, sugar, and cinnamon until thick and jammy, filling your kitchen with the warm, cozy scent of the holidays.
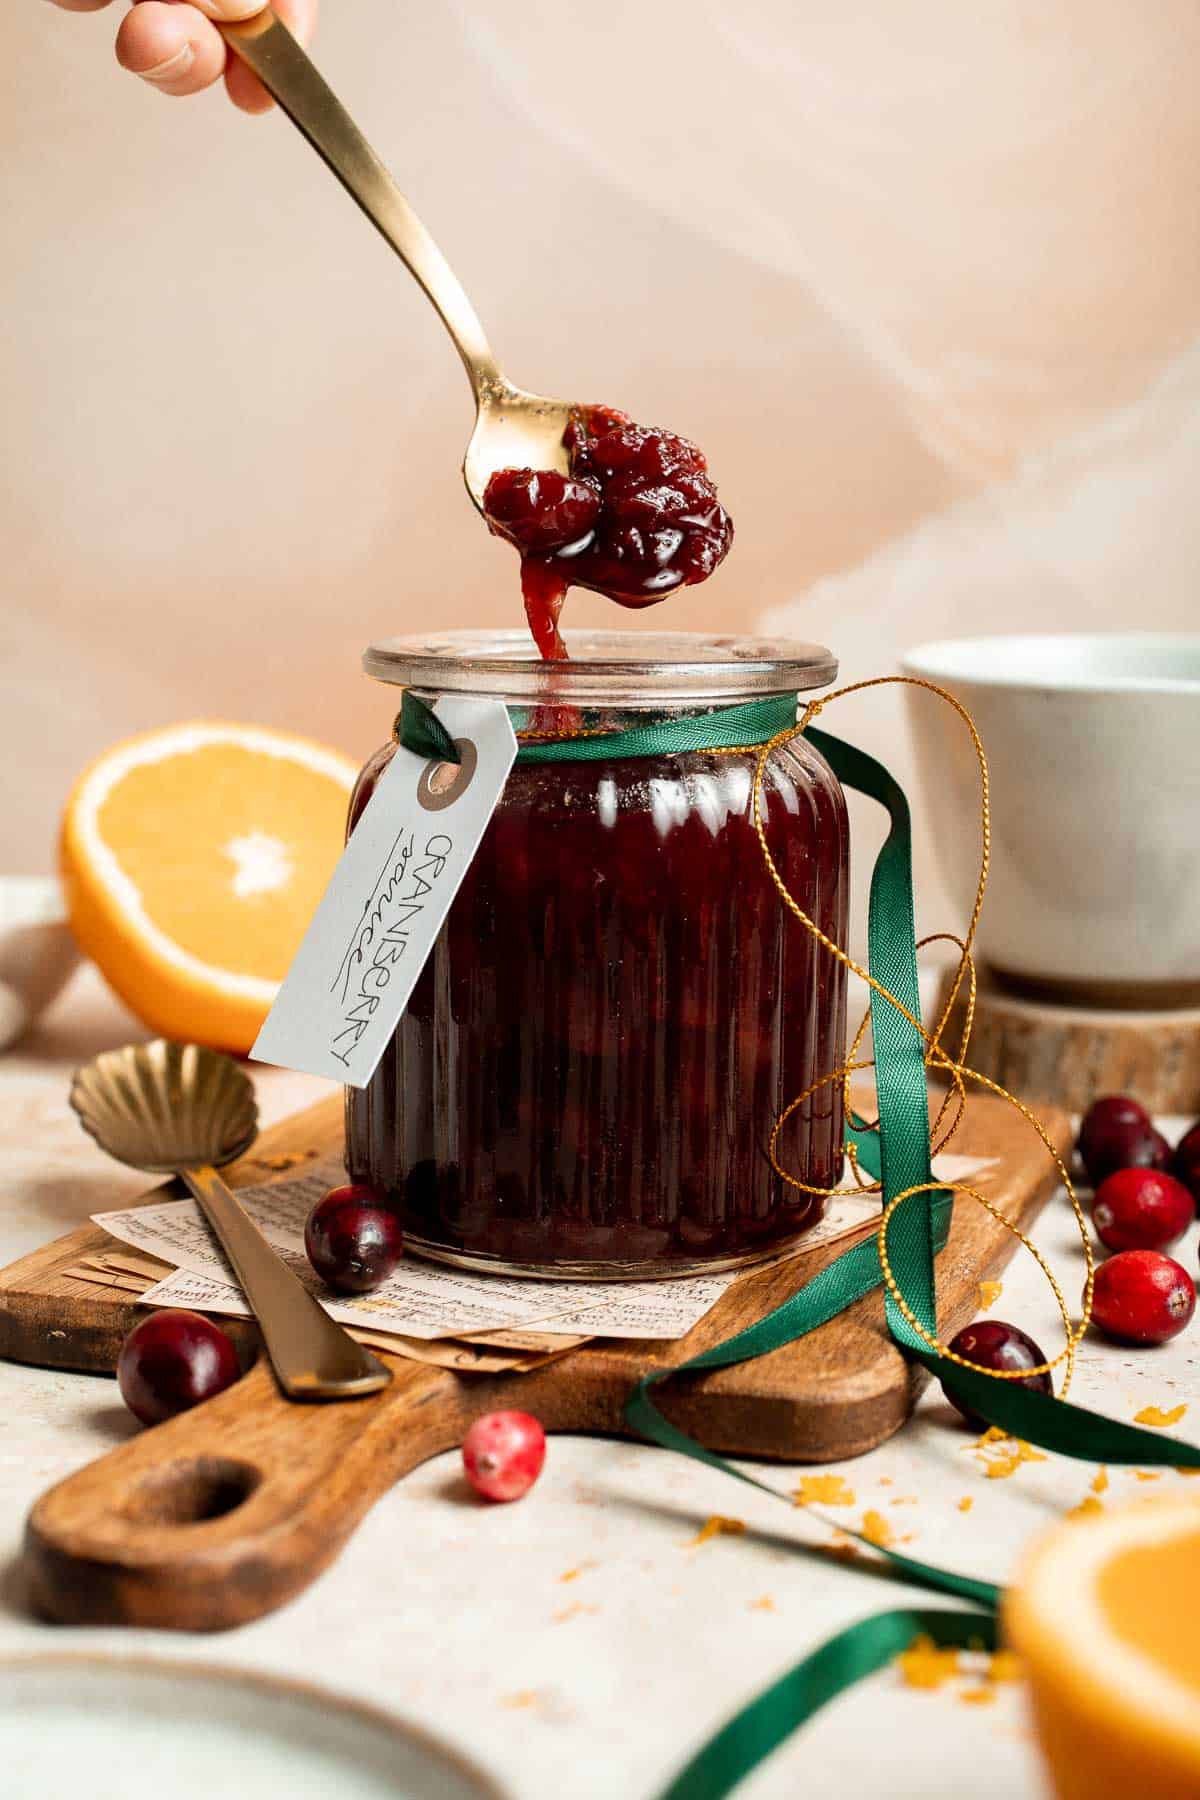
Homemade cranberry sauce has never been simpler or more foolproof. No stirring over the stove or worrying about boiling sugar. Just toss everything into the crockpot, set it, and let time do the work. You'll end up with perfectly balanced flavor that's fresh, slightly tangy, and perfectly sweetened.
This is one of those make-ahead recipes that's a total lifesaver for Thanksgiving or Christmas. You can prepare it a few days early, store it in the fridge, and serve it warm or chilled on the big day. It's an effortless, crowd-pleasing upgrade from canned cranberry sauce that adds brightness and color to any holiday table.
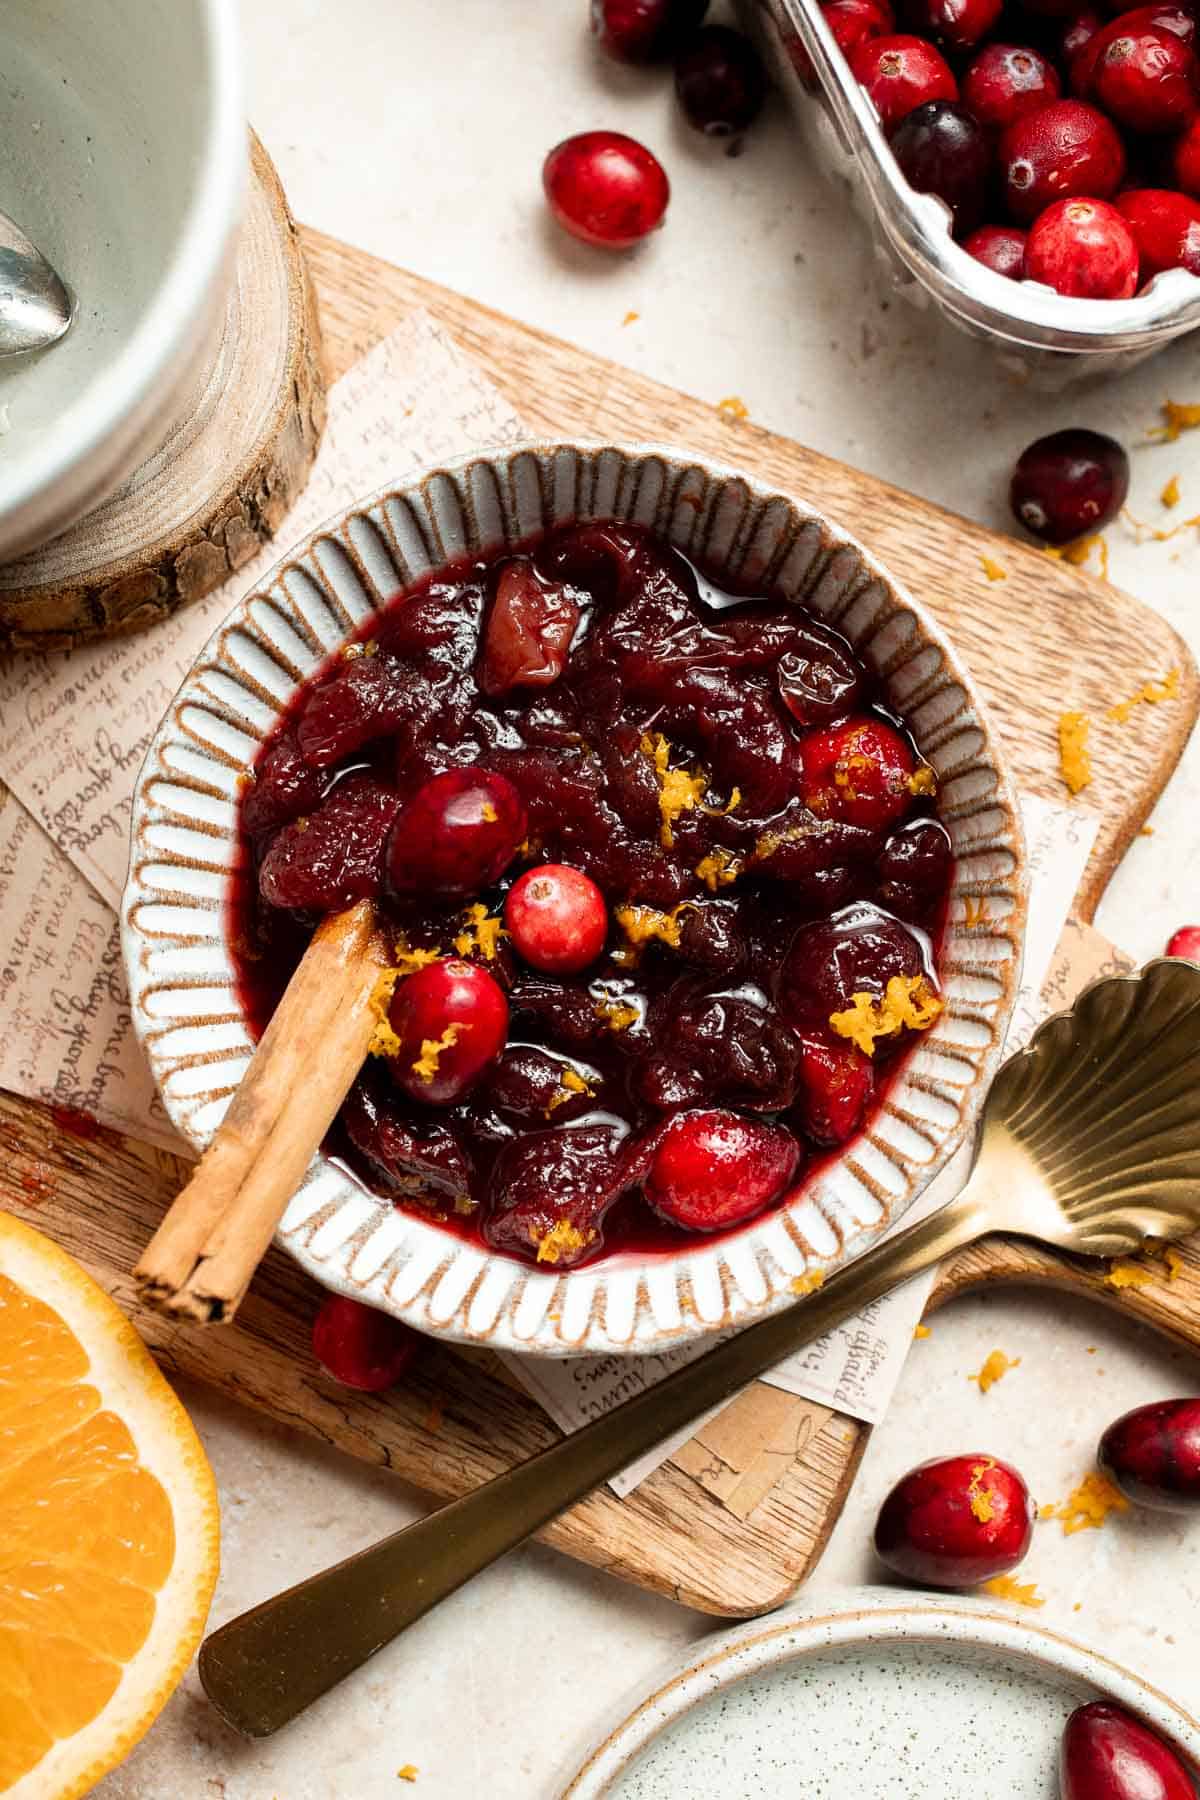
Why You'll Love This Recipe
- No stove required. Just combine everything in your slow cooker, set the timer, and walk away. It's the easiest cranberry sauce you'll ever make.
- Perfectly balanced flavor. This slow cooker cranberry sauce recipe is sweet, tart, and lightly spiced with cinnamon for that cozy holiday warmth.
- Make-ahead friendly. Cook it days before your holiday meal! It thickens beautifully as it chills.
- Versatile and festive. Serve with turkey, ham, or over cheesecake, yogurt, and even pancakes the next morning.
Ingredients and Substitutions
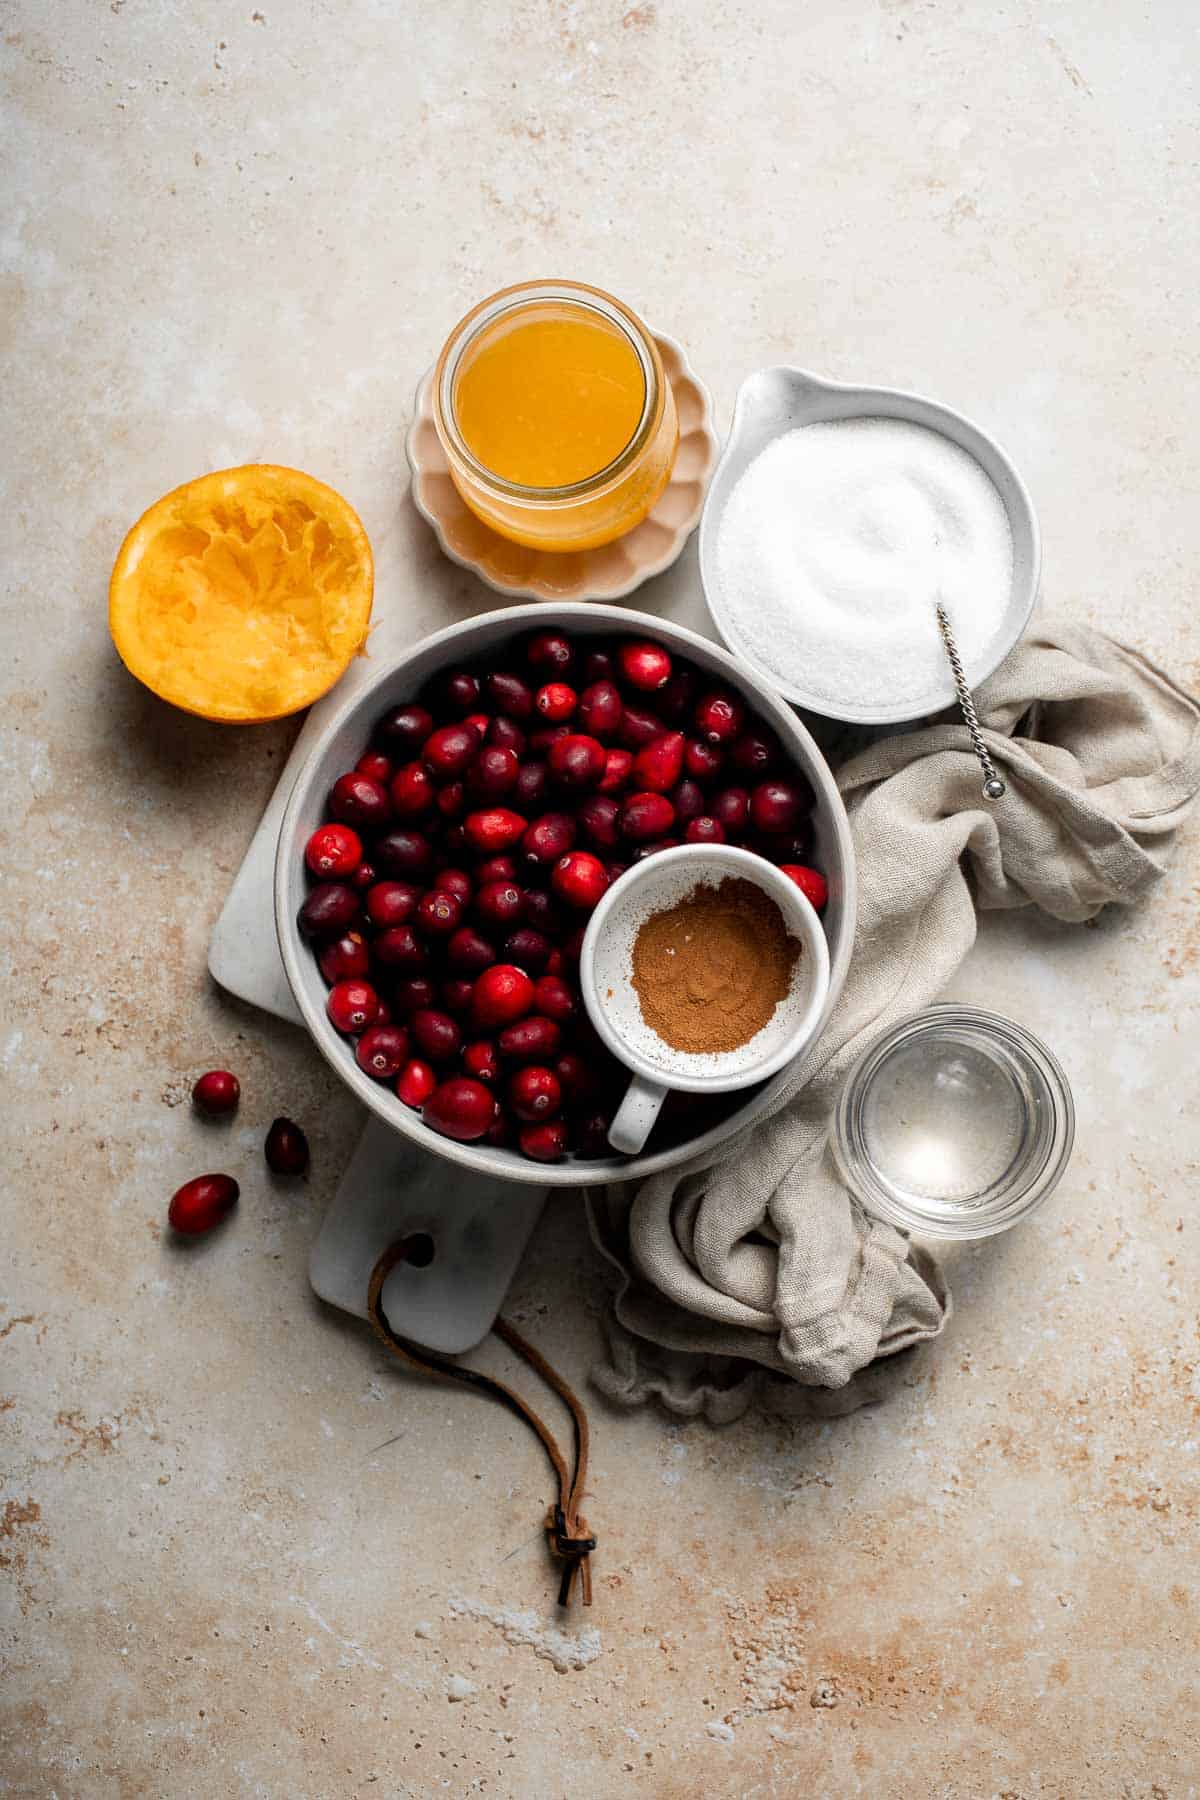
To make this delicious slow cooker cranberry sauce, you will need the following ingredients (see recipe card below for quantities):
- fresh cranberries - Use a standard 12-ounce bag of fresh cranberries, rinsed and drained. Frozen cranberries work too and there's no need to thaw first.
- orange juice - Adds brightness and subtle citrus flavor. You can substitute apple juice or cranberry juice for a slightly different twist.
- water - Helps thin out the sauce so it doesn't reduce too quickly.
- white sugar - Balances the cranberries' tartness. Try brown sugar, honey, or maple syrup for a deeper, caramel-like sweetness.
- ground cinnamon - Adds warm spice and cozy aroma. Substitute a cinnamon stick, a pinch of nutmeg, or pumpkin pie spice for variation.
Equipment
You'll also need a slow cooker (crockpot), measuring cups and spoons, and a wooden spoon or spatula for stirring. Optional tools include a zester if you plan to add orange zest and a heatproof container for storing leftovers.
Instructions
- Add ingredients. Combine all ingredients (cranberries, orange juice, water, sugar, and cinnamon) in the slow cooker. Stir until evenly mixed.
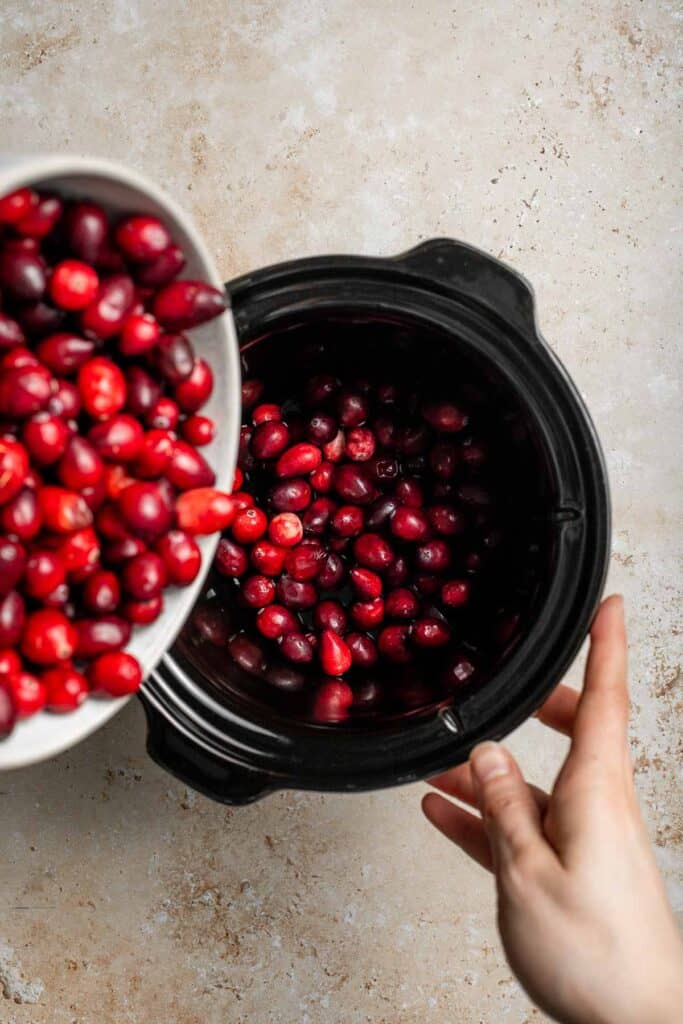
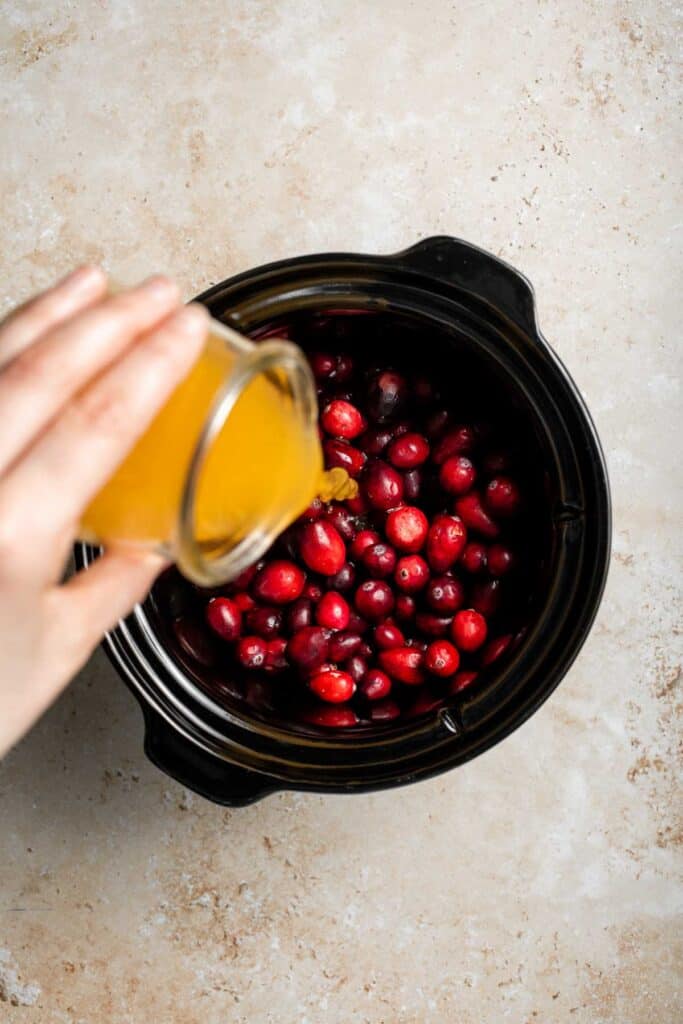
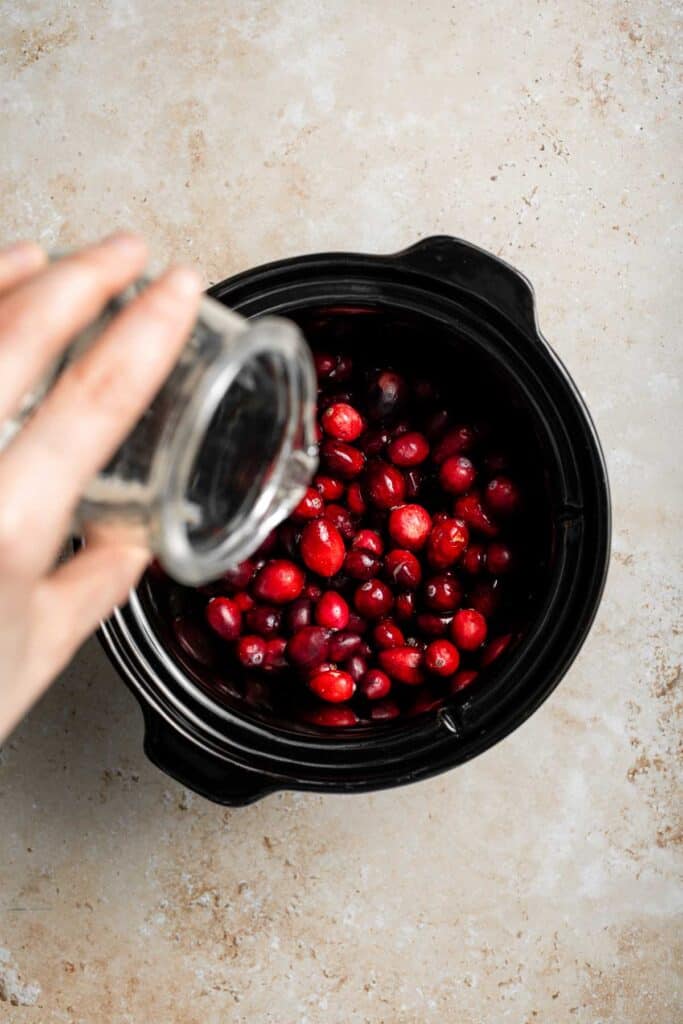
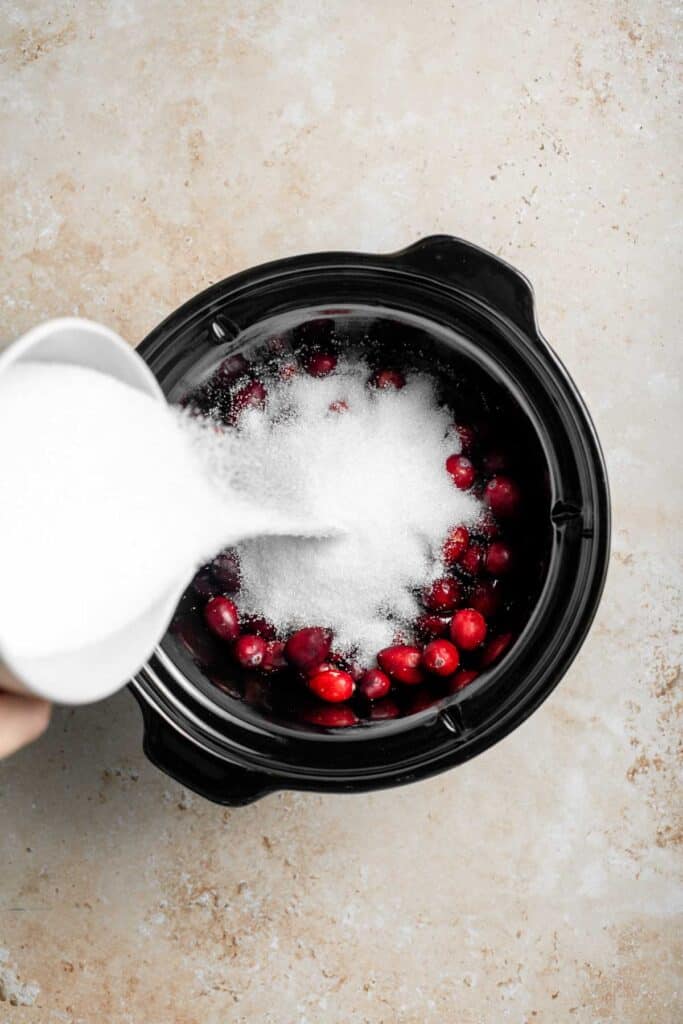
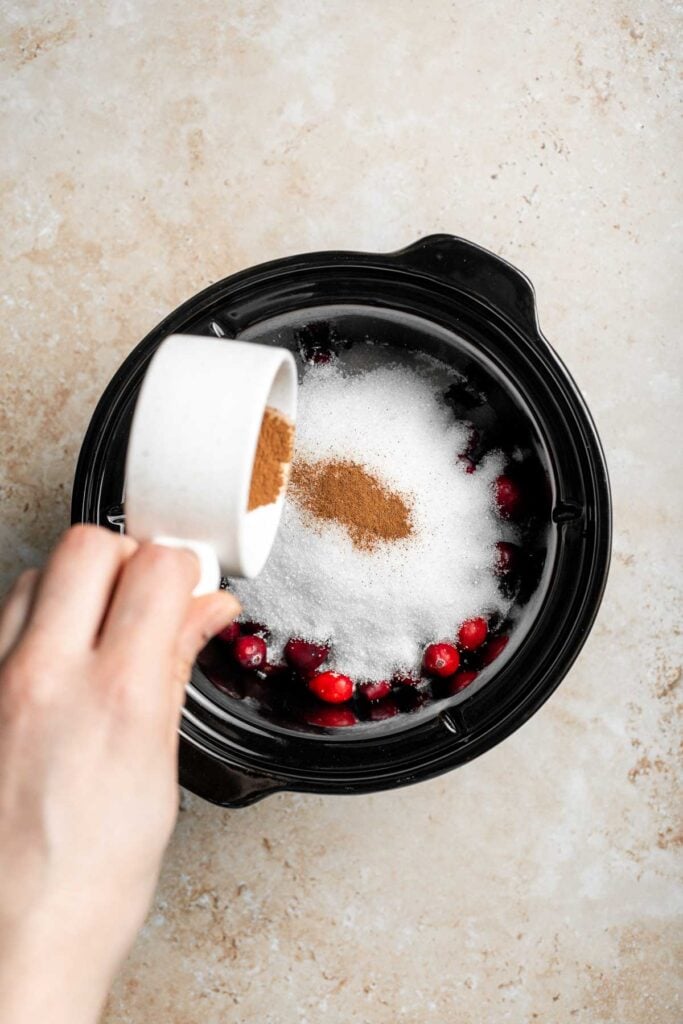
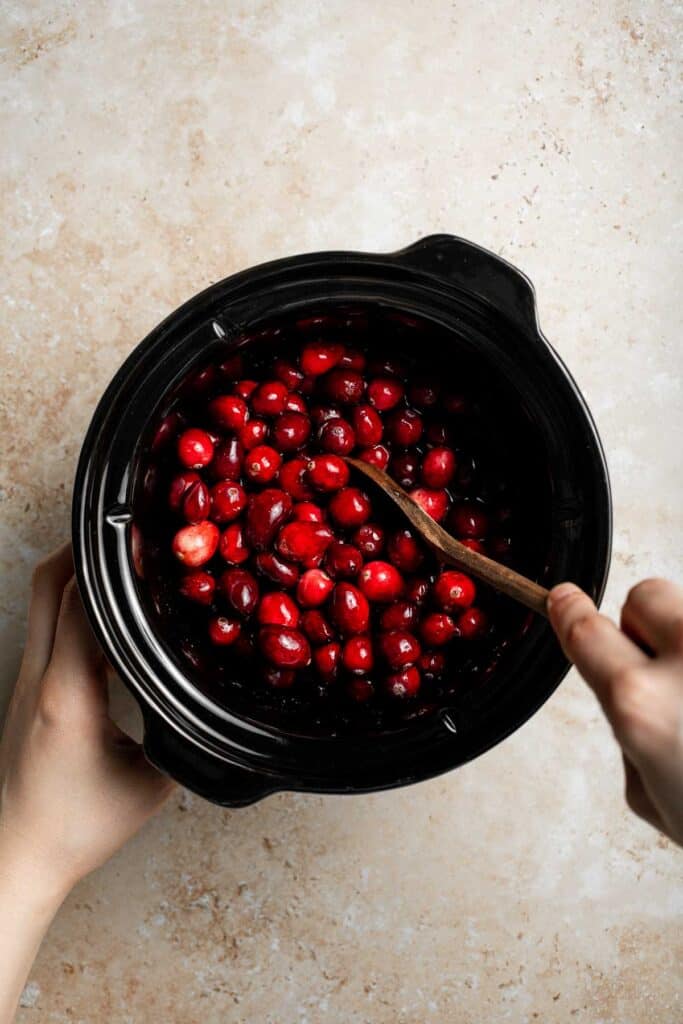
- Cook. Cover and cook on high for 4 hours or on low for 6 hours, stirring once or twice during cooking. The cranberries should be all popped open should pop open and the sauce will thicken as it cooks.
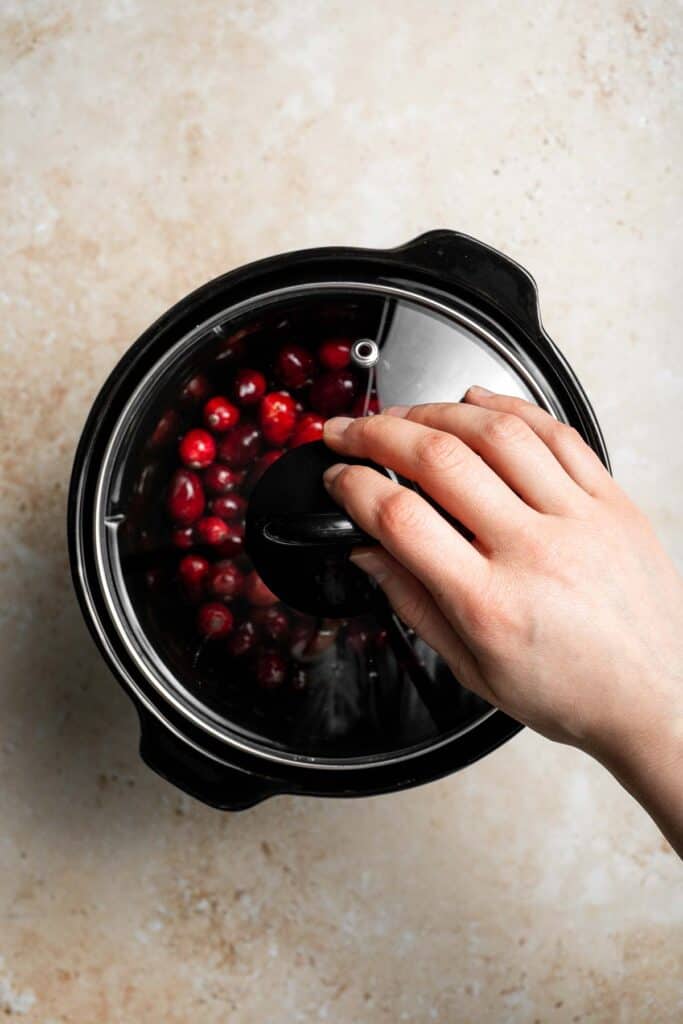
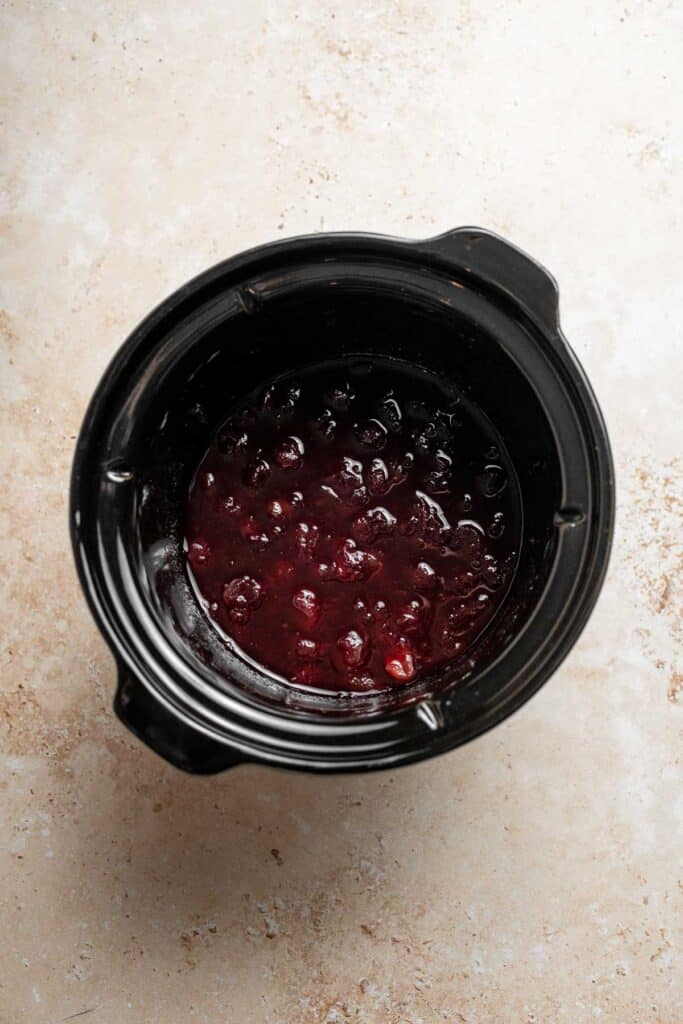
- Cool and serve. Once thickened, turn off the slow cooker and let the sauce cool slightly. Serve warm or at room temperature.
- Store. Transfer leftovers to an airtight container and refrigerate for up to one week. The sauce will continue to thicken as it cools.
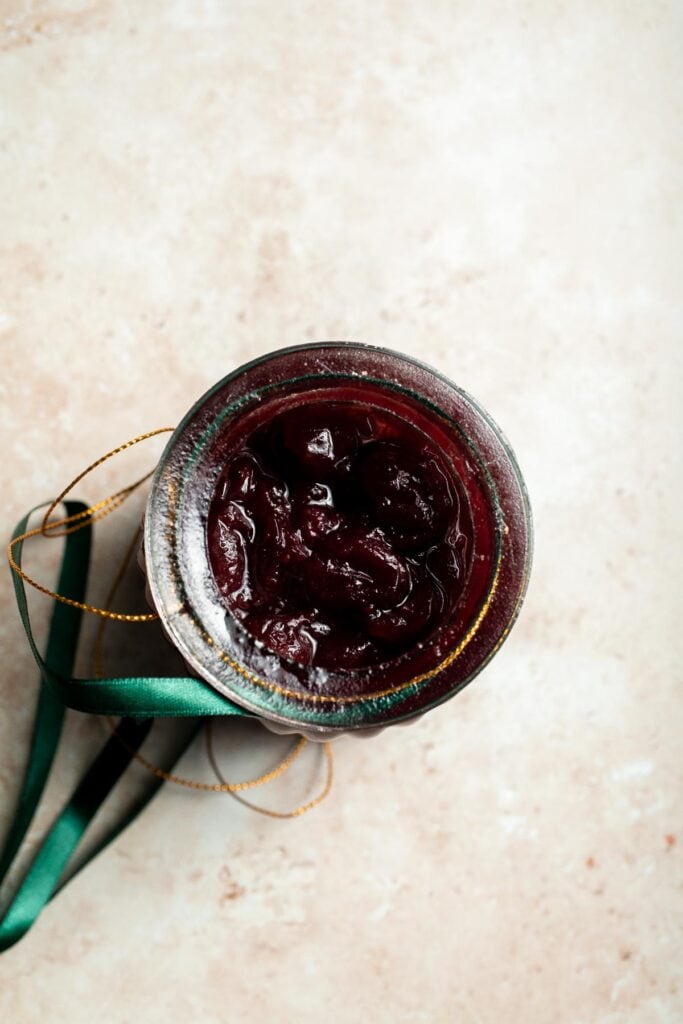


Expert Tip: Pop the Cranberries
As the sauce cooks, you'll hear little pops as the cranberries burst open - that's how you know they're breaking down perfectly. For the smoothest sauce, give it a gentle stir halfway through cooking to help the berries burst evenly and release their natural pectin, which thickens the sauce beautifully.
More Tips and Tricks
- Adjust the sweetness. If you prefer a less-sweet sauce, start with ¾ cup of sugar, then taste and add more later.
- Thicker texture. Leave the lid slightly ajar during the last 30 minutes of cooking to let steam escape and the sauce thicken.
- Add zest. Stir in orange zest or lemon zest before serving for a bright citrusy lift.
- Make it smooth. For a smoother sauce, mash it gently with a potato masher or blend it briefly with an immersion blender.
- Chill for best flavor. Cranberry sauce always tastes better the next day once the flavors meld - perfect for make-ahead holiday prep.
Recipe Variations
- Orange cinnamon cranberry sauce. Add 1 teaspoon orange zest and an extra dash of cinnamon for a spiced, citrusy kick.
- Maple cranberry sauce. Replace half the sugar with maple syrup for a deeper, earthy sweetness.
- Apple cranberry sauce. Swap the water for apple cider and stir in ¼ cup of chopped apples for extra texture.
- Vanilla cranberry sauce. Add ½ teaspoon vanilla extract at the end of cooking for warmth and depth.
- Cranberry chutney style. Stir in chopped pecans, raisins, or a pinch of ground ginger for a chunkier, more savory sauce. See our Cranberry Chutney for tips.
- Citrus twist. Combine orange and lemon juice for a tangier, fresher flavor balance.
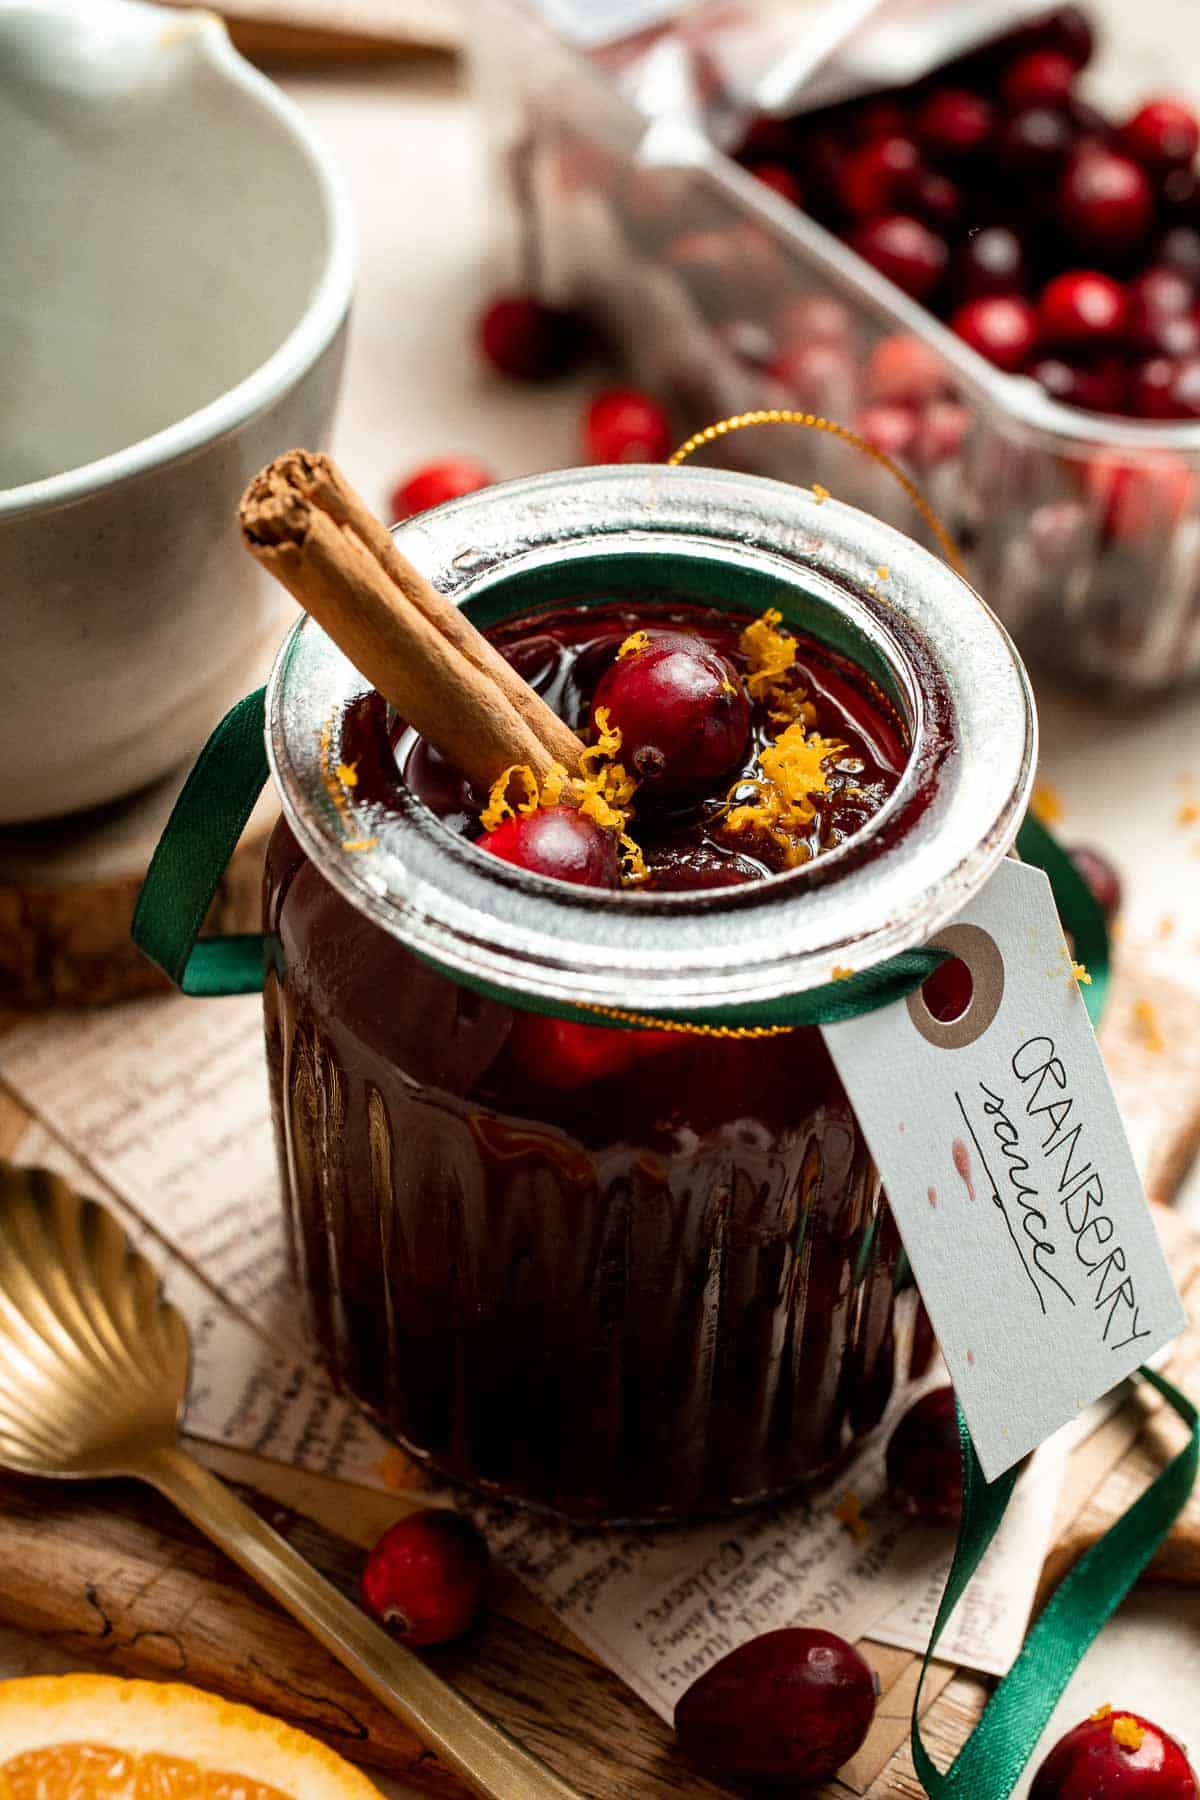
Storage
How to Store
Once cooled, transfer the cranberry sauce to an airtight container or jar. Store in the refrigerator for up to 1 week. The sauce will continue to thicken as it chills.
How to Reheat
Reheat gently in a small saucepan over low heat, stirring occasionally until warm. You can also warm it in the microwave in 20-second intervals or in the air fryer at 300°F for 4-5 minutes (in a heat-safe dish) for a just-made taste.
How to Freeze
Freeze cooled cranberry sauce in a freezer-safe container or resealable bag for up to 3 months. Thaw overnight in the refrigerator before serving and stir well to restore texture.
How to Serve
This crockpot cranberry sauce is a must for Thanksgiving and Christmas, but it's delicious any time of year. Serve it warm or chilled - either way, it adds a pop of color and sweet-tart flavor to every plate. Try it with:
- Cheesecake, yogurt, or ice cream for a sweet twist
- Roast turkey, chicken, or ham
- Mashed potatoes and stuffing
- Pork chops or roast beef
- Pancakes, waffles, or oatmeal for a holiday breakfast
These are my favorite dishes to serve with slow cooker cranberry sauce:
Thanksgiving Mains
If serving this as a side dish for Thanksgiving, pair it with one of our delicious mains. From roasted turkey and glazed ham to savory vegetarian roasts and hearty stuffing-filled options, these recipes help create a memorable holiday feast your family and guests will love.
FAQ
Cranberry sauce is made from fresh cranberries, sugar, and liquid (like water or orange juice). As the cranberries cook, they burst open, releasing natural pectin that thickens the sauce. You can enhance it with spices like cinnamon or nutmeg, or add citrus for brightness.
The sauce naturally thickens as it cools thanks to the cranberries' pectin. For a thicker consistency, cook uncovered for the last 30 minutes or mash some cranberries as it cooks.
The slow cooker method is hands-free and foolproof - no boiling, no burning, and no watching the pot. It frees up your stove for other dishes during the holidays and ensures even, gentle cooking.
Try orange zest, maple syrup, vanilla, or spices like cinnamon and cloves. These add layers of warmth and depth without overpowering the cranberry flavor.
Orange juice adds natural sweetness and acidity that help balance the cranberries' tartness. It also enhances the flavor with subtle citrus notes, giving the sauce a vibrant, fresh taste. The natural pectin in orange juice can also help thicken the sauce slightly, creating a glossy, jammy consistency.
Yes, you can absolutely make honey-sweetened cranberry sauce. Honey adds a more complex, floral sweetness and pairs beautifully with tart cranberries. Just remember that honey darkens a little as it cooks, so your sauce may be slightly deeper in color.
Yes, but be careful not to overcook it. Honey can caramelize or burn if exposed to high heat for too long. In the slow cooker, it's safe to add at the start since the temperature stays gentle, but for the freshest flavor, you can also stir in the honey during the last 30 minutes of cooking instead of at the beginning.
The most common mistakes are using too much liquid, not cooking long enough, or adding sweeteners too late. Overcooking can make the sauce bitter, while undercooking leaves it too runny. Another big one is not letting it cool completely - cranberry sauce thickens as it cools, so if you judge it too early, it might seem thinner than it really is. Also, skipping citrus or spice can make it taste flat, so don't be afraid to add a splash of orange juice or a pinch of cinnamon for balance.
More Cranberry Sauce Recipes
Looking for other recipes like this? Try these:
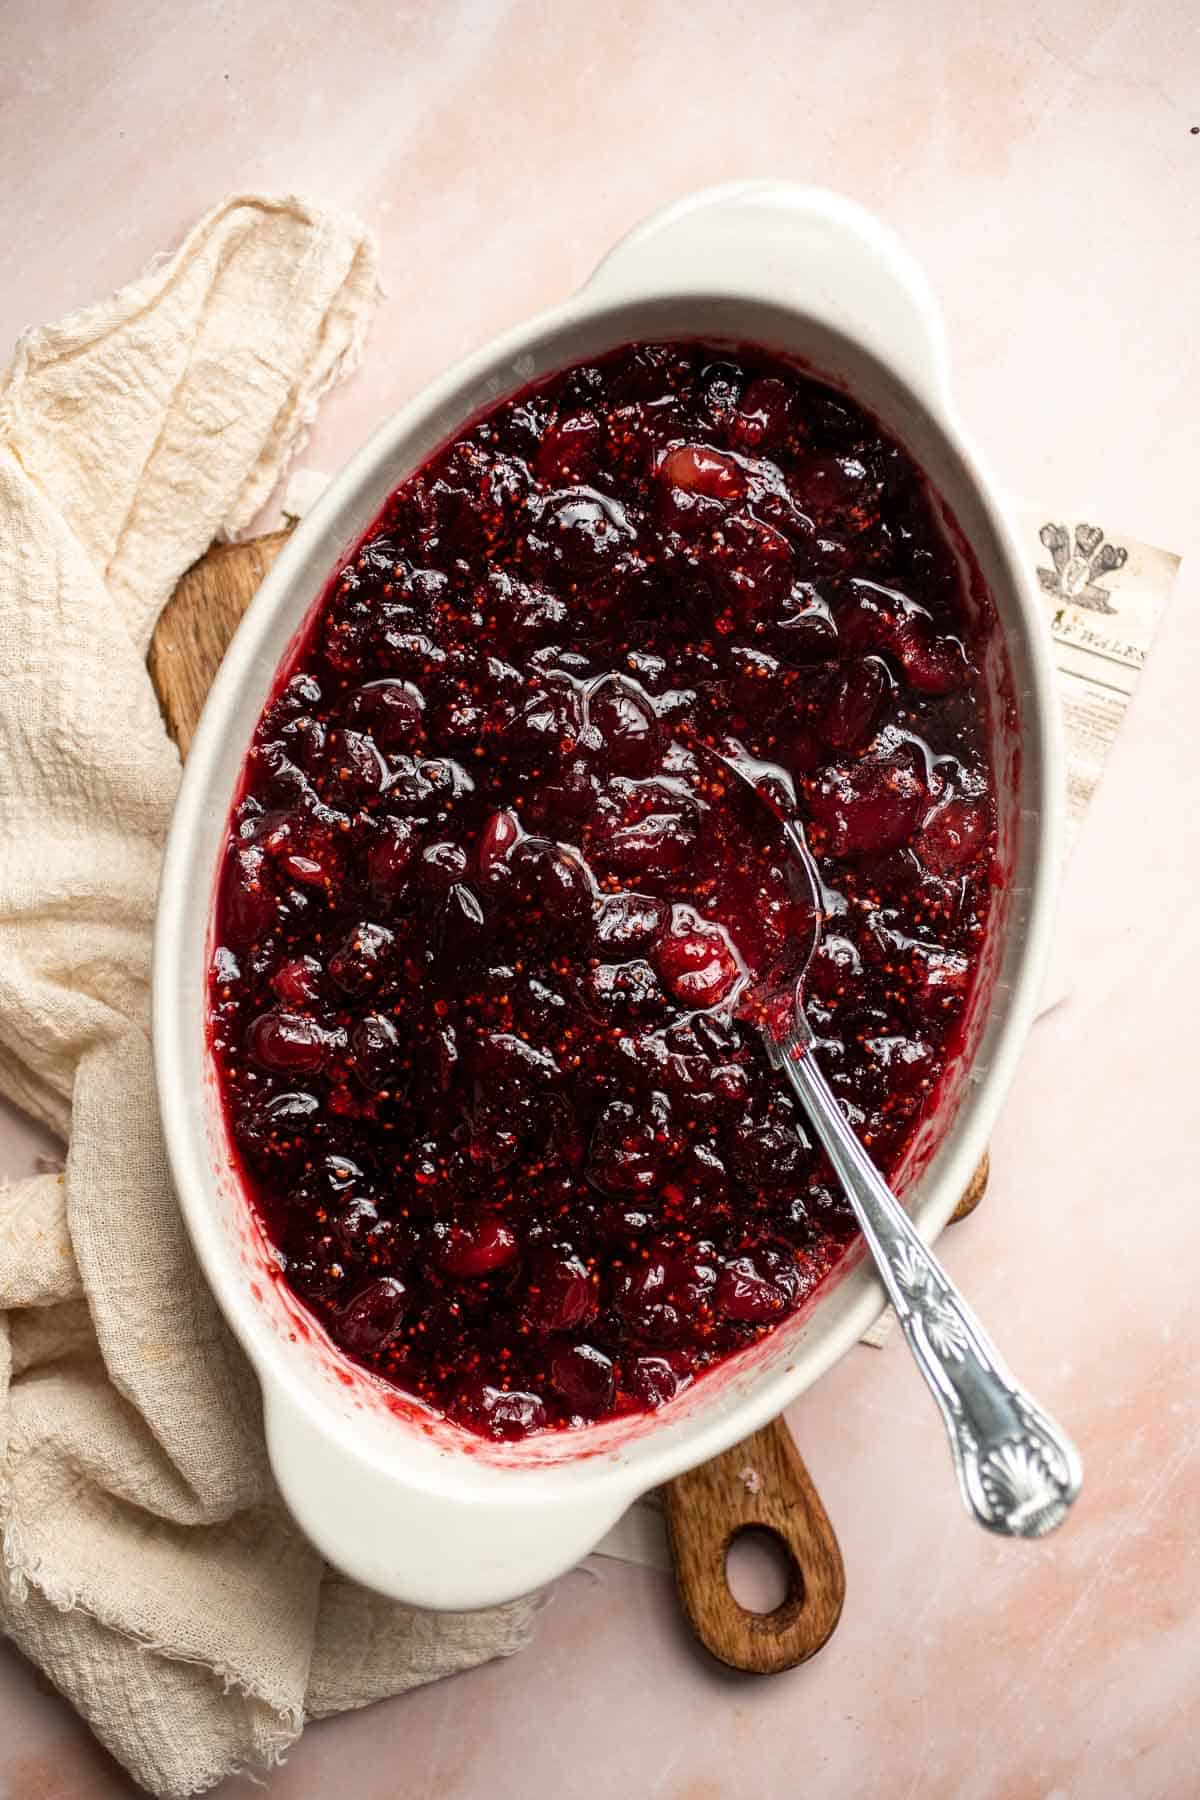

Tried this recipe?
I'd love to hear what you think! Leave a comment and rating below to share your feedback. Your reviews help others discover this recipe and help me keep creating more free recipes for you. Snap a photo and tag me on social media @aheadofthyme too.
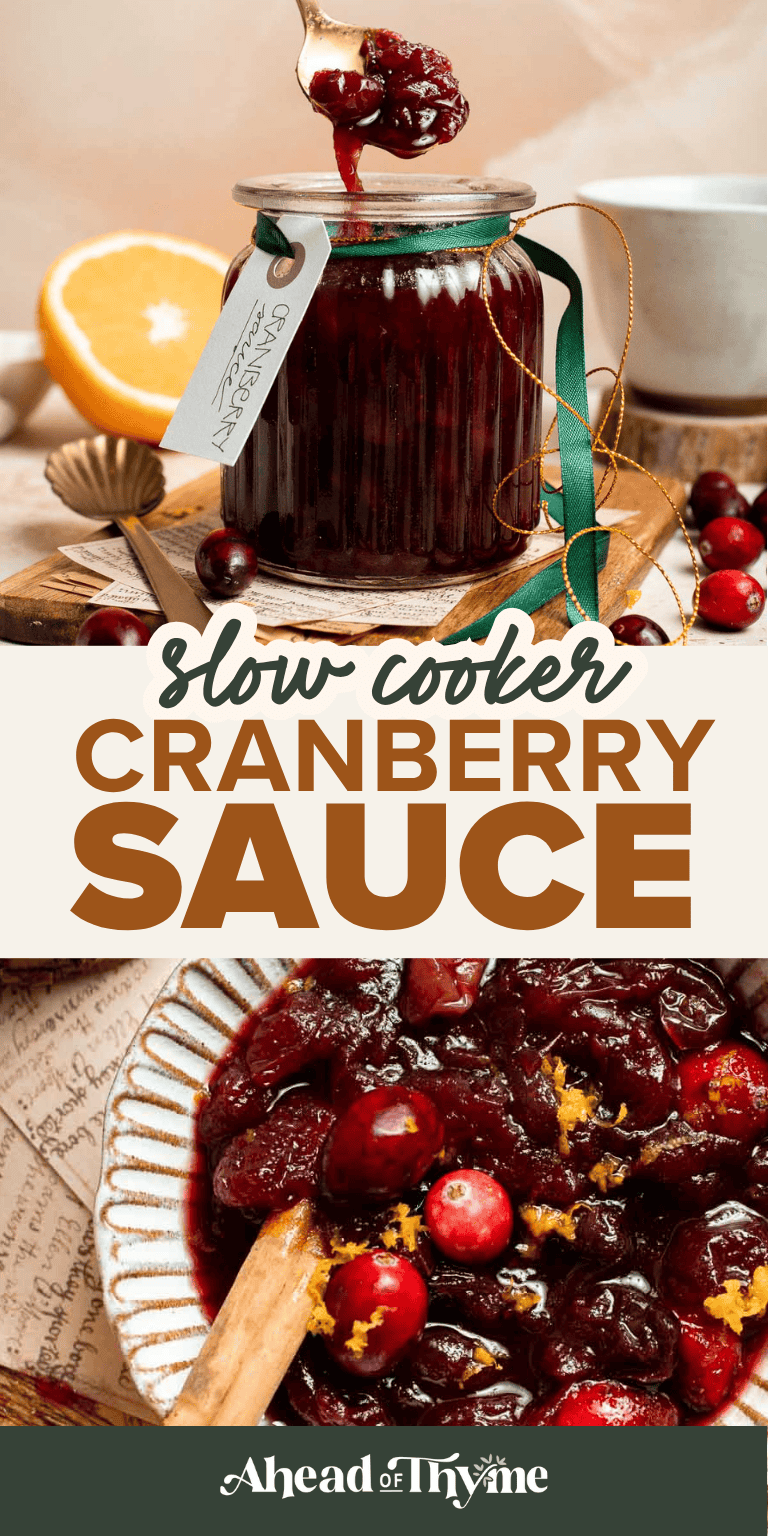
Spoon Bread Recipe (Southern Cornbread Casserole)
Spoon bread is the ultimate Southern comfort food, with a texture that's somewhere between cornbread and pudding - soft, buttery, and melt-in-your-mouth tender. It's baked until golden and fluffy, then served warm straight from the dish with a pat of butter or drizzle of honey. This sweet-meets-savory cornbread casserole is the kind of cozy side dish that disappears fast, whether you serve it for Sunday dinner or alongside a big holiday spread.

This traditional Southern favorite has been around for generations, with roots tracing back to Native American corn dishes and later embraced in Southern kitchens. It's known for its rich flavor, simple ingredients, and that irresistible, custardy center that practically begs for a spoon - hence the name.
If you love old-fashioned comfort foods like cornbread or biscuits, this spoon bread will absolutely win you over. It's easy to make, ready in under an hour, and perfect for both weeknight meals and special occasions.
Why You'll Love This Recipe
- Soft, fluffy, and buttery. Spoon bread has a light, pudding-like texture with a golden, crisp top and tender, creamy center that practically melts in your mouth.
- Simple pantry ingredients. Made with cornmeal, flour, milk, eggs, and butter - all everyday staples you probably already have in your kitchen.
- Versatile side dish. Spoonbread pairs beautifully with roasted meats, barbecue, soups, or even holiday turkey dinners, making it a year-round favorite.
- Perfectly balanced flavor. Slightly sweet, buttery, and savory all at once, this cornbread casserole satisfies every craving for cozy, homemade comfort food.
Ingredients and Substitutions
To make this delicious spoon bread, you will need the following ingredients (see recipe card below for quantities):
- butter - Adds rich flavor and moisture. Melt half for mixing into the batter and reserve a bit for greasing the pan to create that crisp golden edge.
- all-purpose flour - Helps the spoon bread hold its structure while staying soft.
- yellow cornmeal - The base of the recipe, giving classic sweet corn flavor and subtle texture. Use fine or medium-grind cornmeal for best results. For a more traditional cornbread, try using white cornmeal, which was common in early Southern recipes. Combine both for extra depth.
- sugar - Adds a gentle sweetness that balances the buttery flavor. You can reduce the sugar slightly if you prefer a more savory version.
- baking powder and baking soda - Work together for a soft, fluffy rise.
- salt - Enhances all the flavors so don't skip it!
- cream-style corn - Sometimes labeled as cream corn, this adds moisture, texture, and richness. It's what makes this recipe so soft and custardy compared to classic cornbread.
- milk or sour cream - Milk makes it lighter, while sour cream gives a richer, tangier flavor. You can also use buttermilk for extra tenderness.
- eggs - Essential for the light, airy texture. You can even separate the egg yolks and egg whites, whisking the whites until frothy before folding them into the cornmeal mixture for extra lift and fluffiness.
Equipment
You'll also need measuring cups and spoons, a mixing bowl for dry ingredients, another for wet ingredients, a whisk, silicone spatula, and an 8-inch baking dish or 1½-quart casserole dish. A pastry brush is handy for coating the pan with melted butter.
Instructions
- Prep. Preheat the oven to 375°F. Lightly grease an 8-inch-square baking dish or 1 ½-quart casserole with 1-2 tablespoons melted butter, then plaee the dish in the oven for about 5 minutes while it preheats. This helps create a golden, slightly crisp crust.
- Mix the dry ingredients. In a large mixing bowl, whisk together the flour, cornmeal, sugar, baking powder, baking soda, and salt until evnly combined. Set aside.
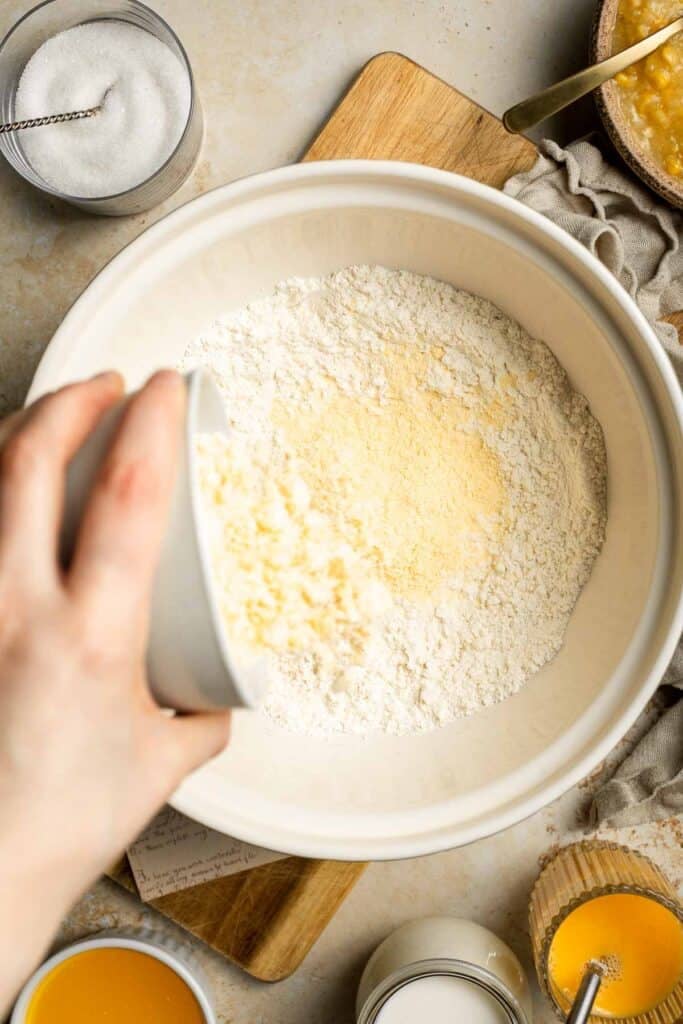
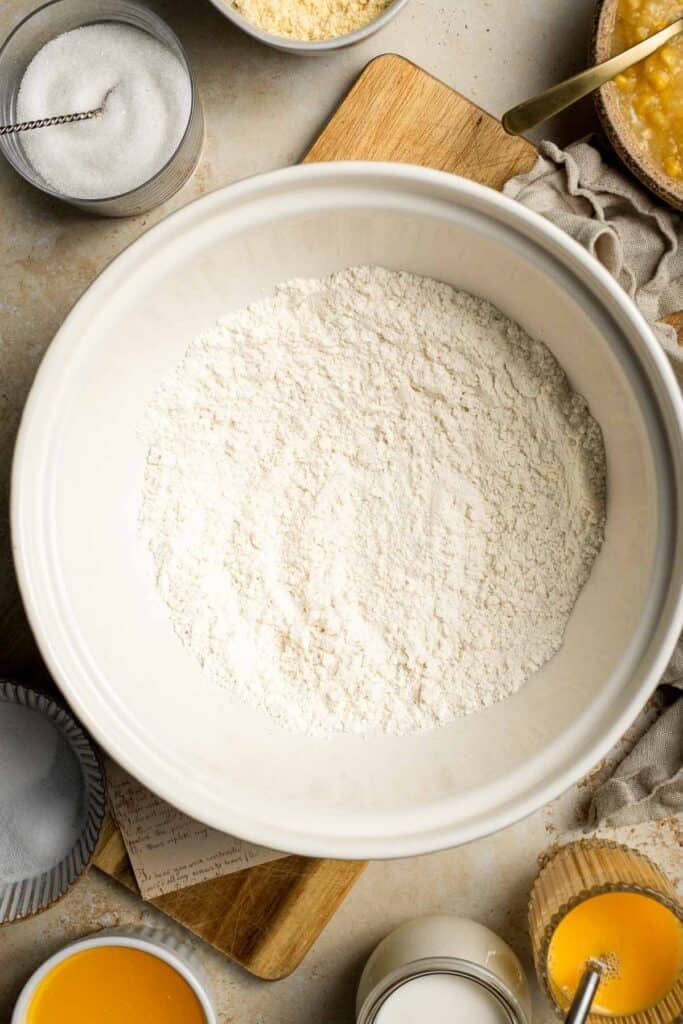
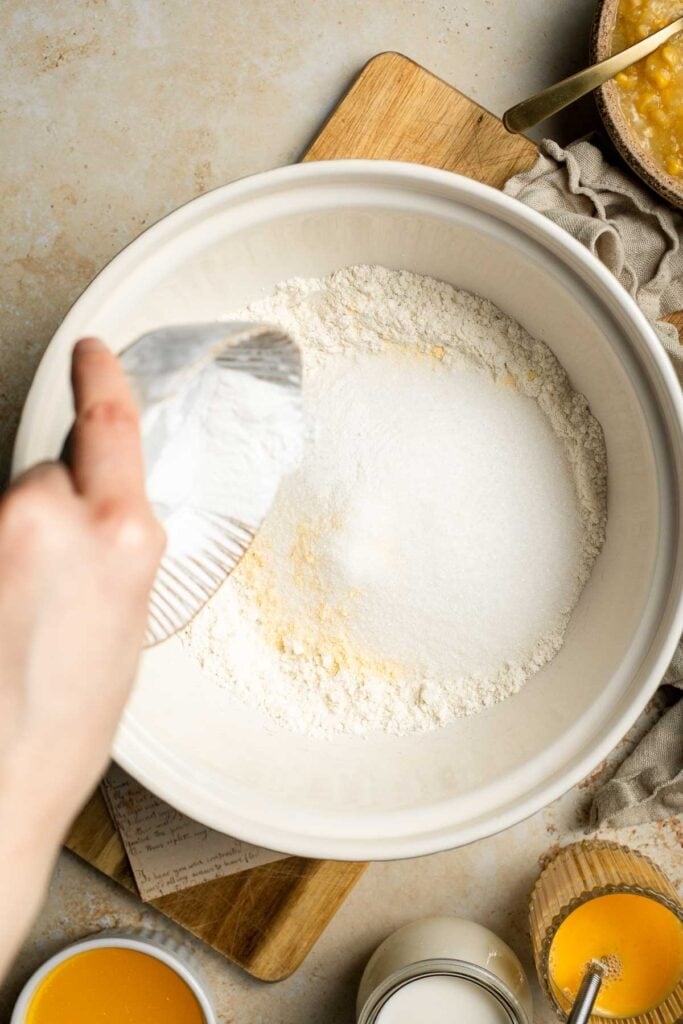
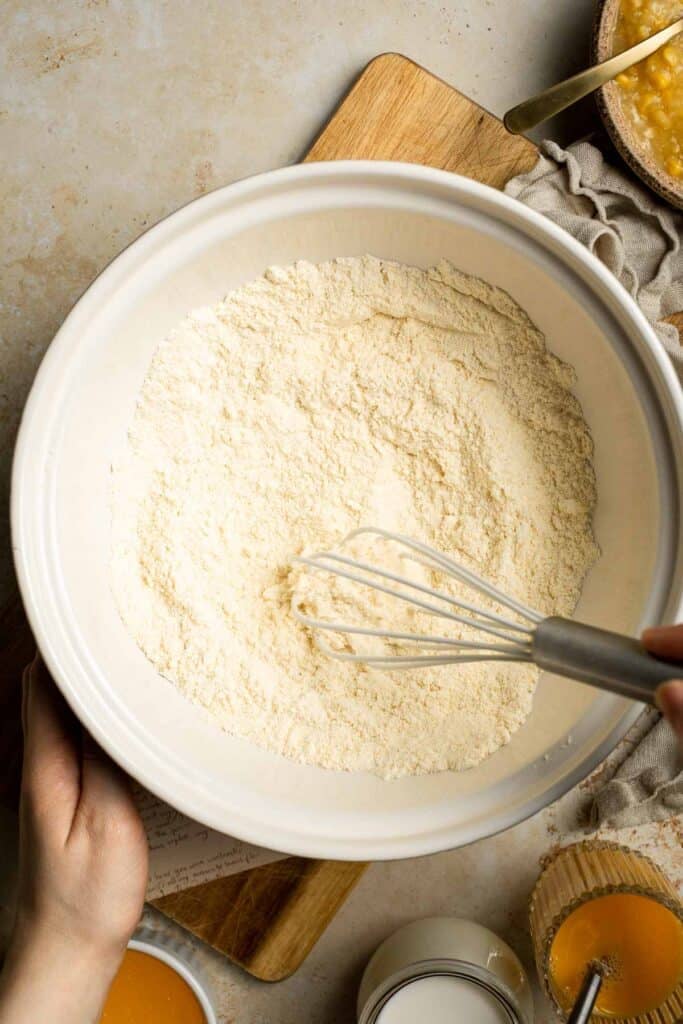
- Mix the wet ingredients. In a medium mixing bowl, whisk together the remaining melted butter, cream style corn, milk (or sour cream), and eggs until smooth.
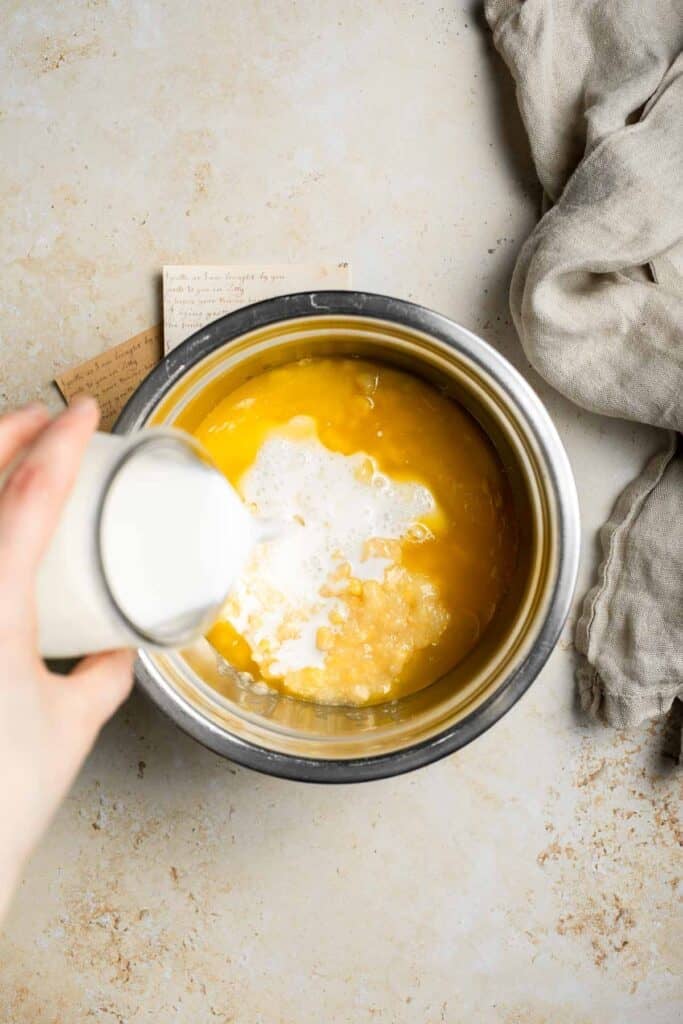
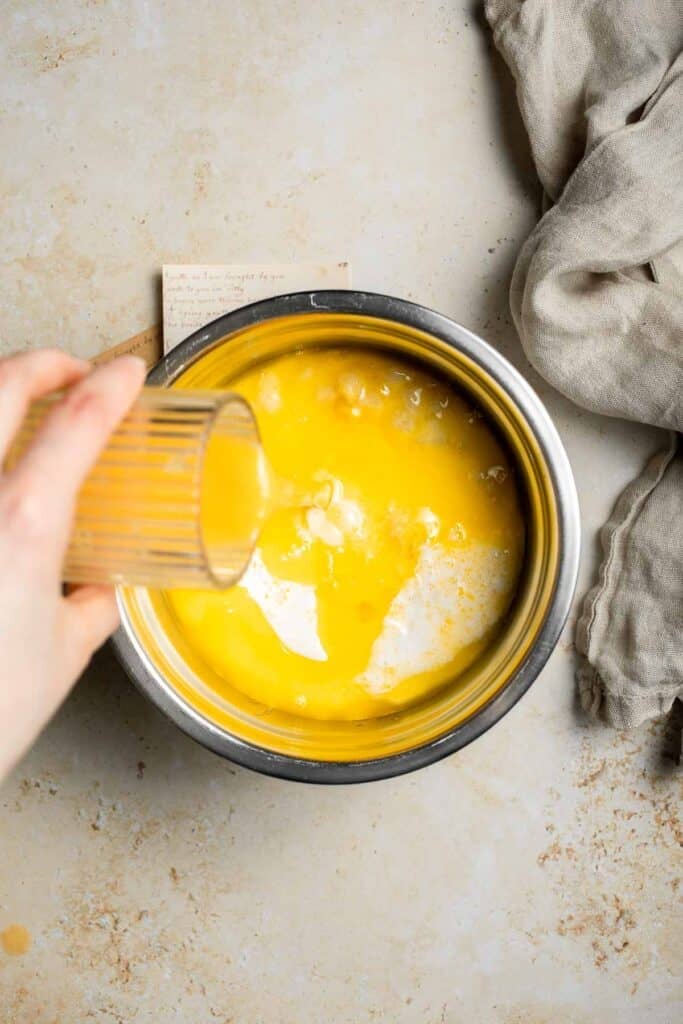
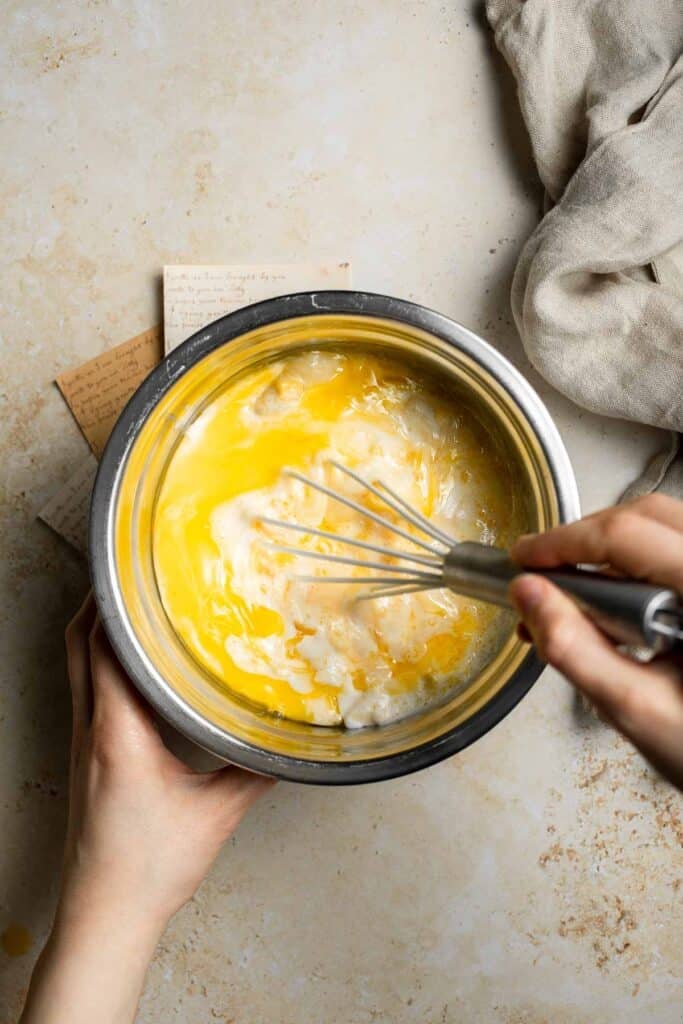
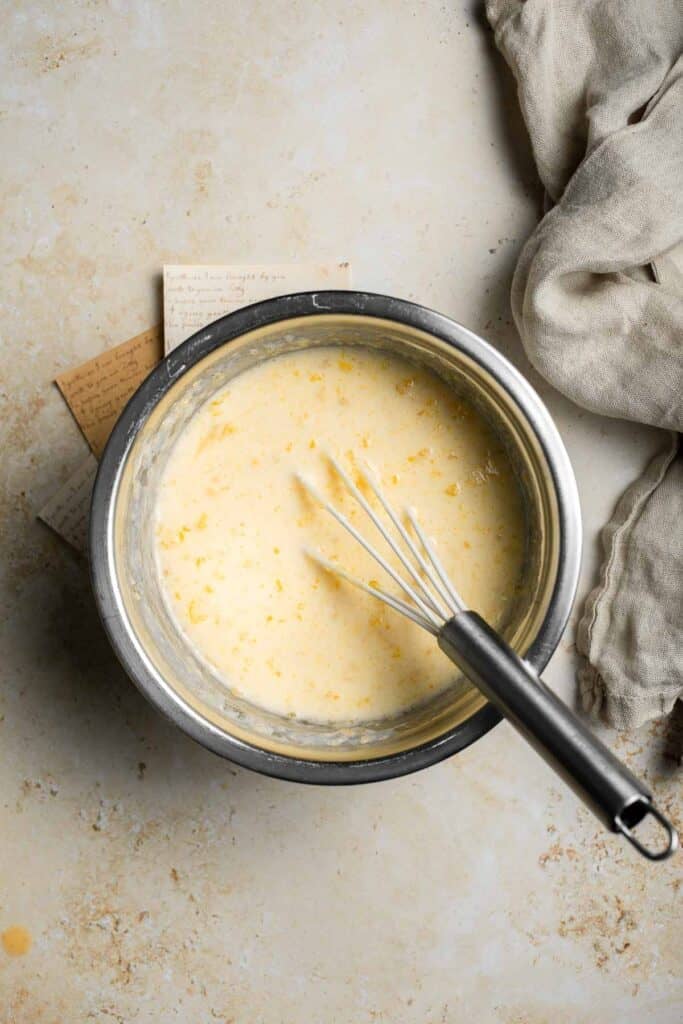
- Combine. Pour the wet ingredients into the dry ingredients. Use a silicone spatula or an electric mixer to stir until combined and no dry flour is visible in the bowl. Avoid overmixing. Let the batter rest for 5 minutes to allow the cornmeal to hydrate.
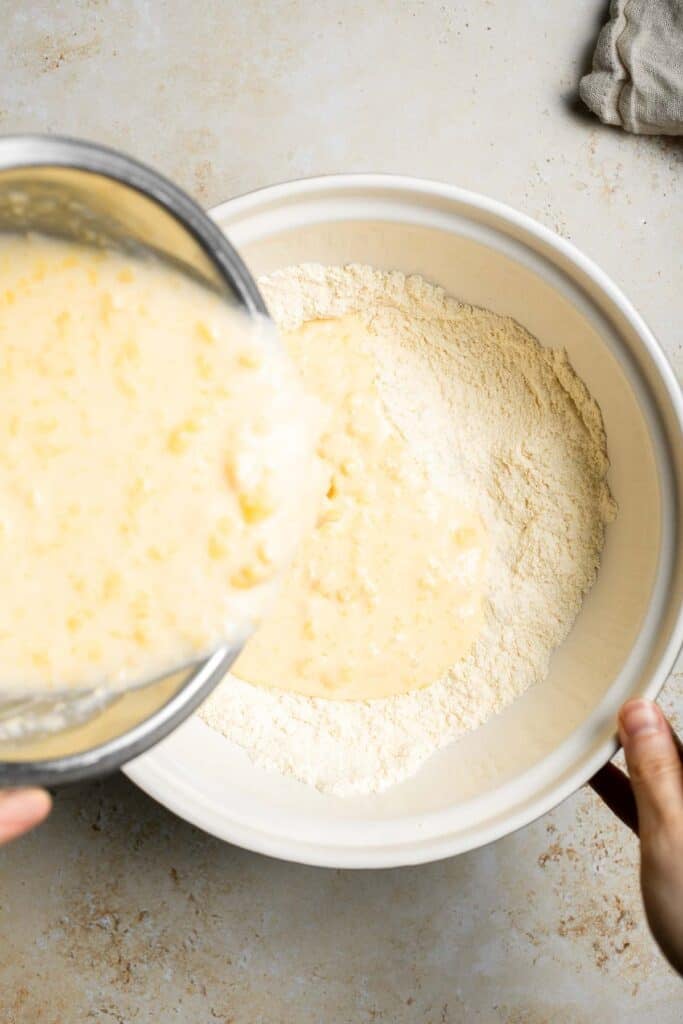

- Bake. Carefully remove the hot baking dish from the oven, swirl the melted butter to coat evenly, then pour in the batter. Smooth the top with a spatula. Bake for 35-40 minutes, or until golden brown and a toothpick inserted in the center comes out clean with a few moist crumbs.
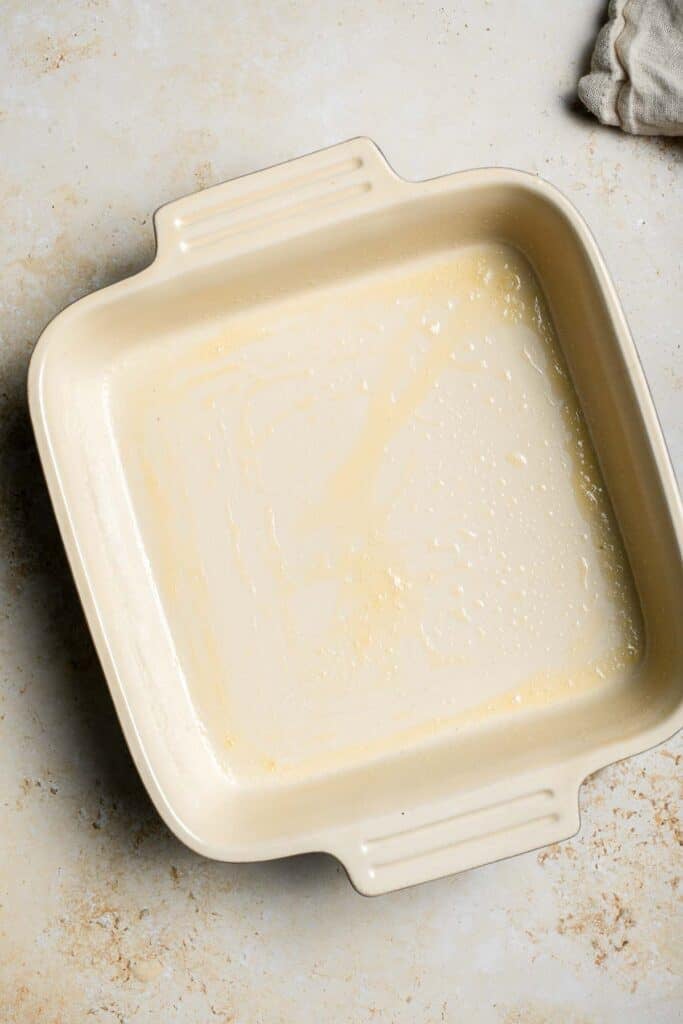
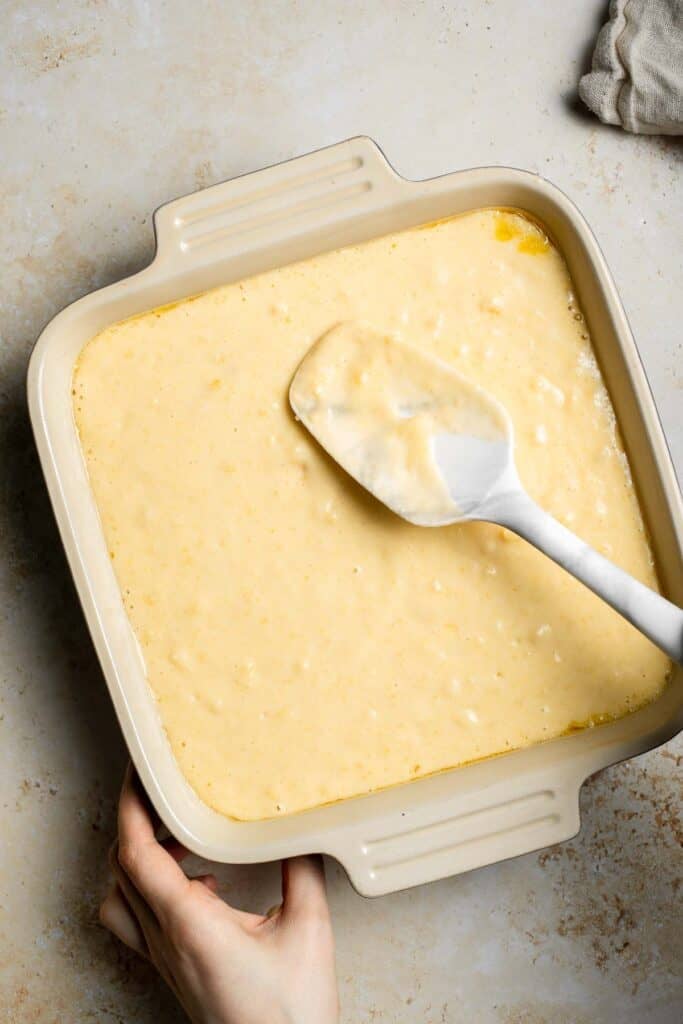
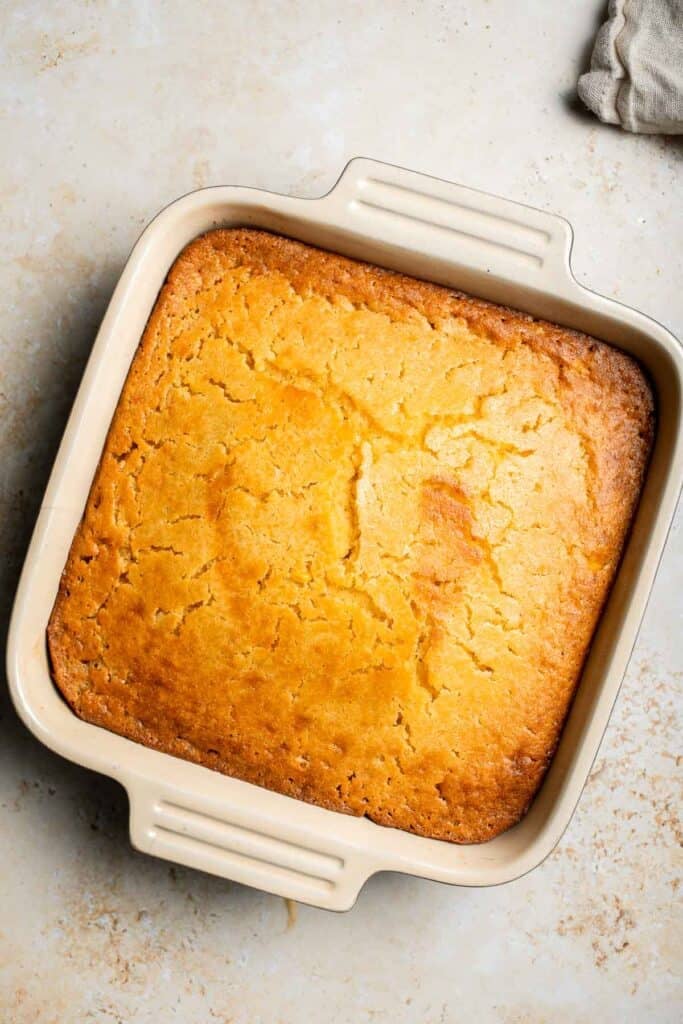
- Cool and serve. Allow the cornbread to cool for 10 minutes before slicing. Serve warm or at room temperature with butter, honey, or your favorite spread.
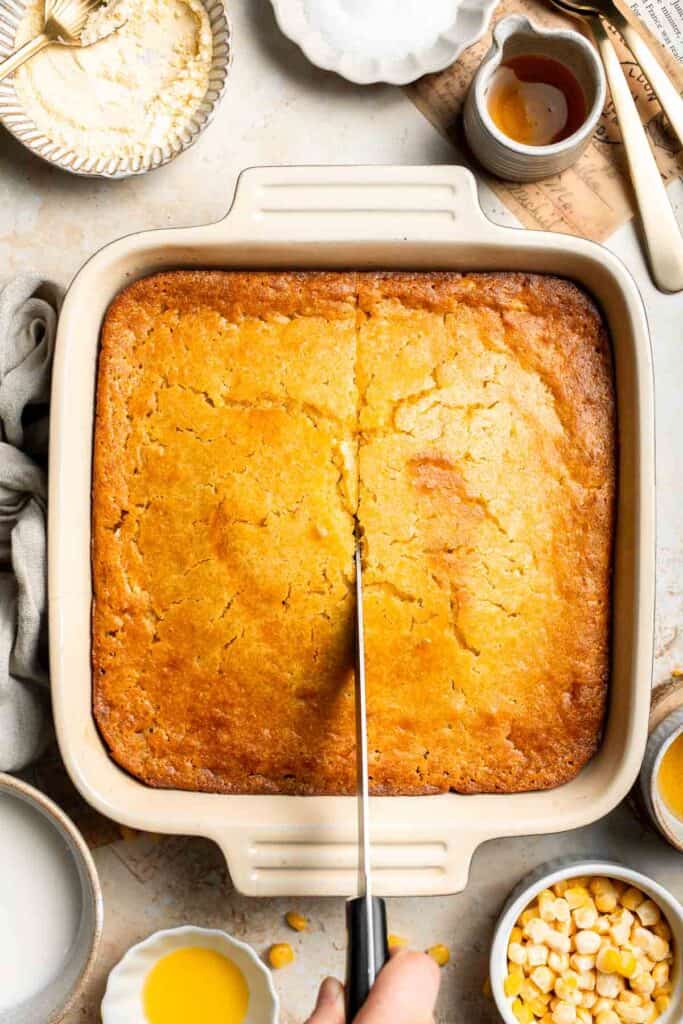
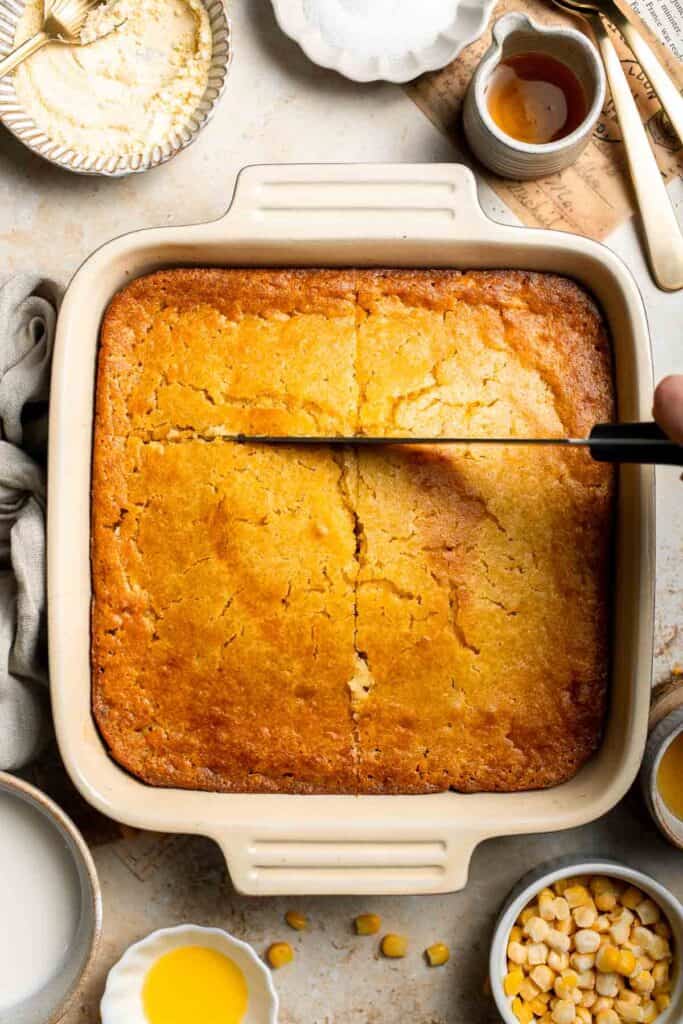
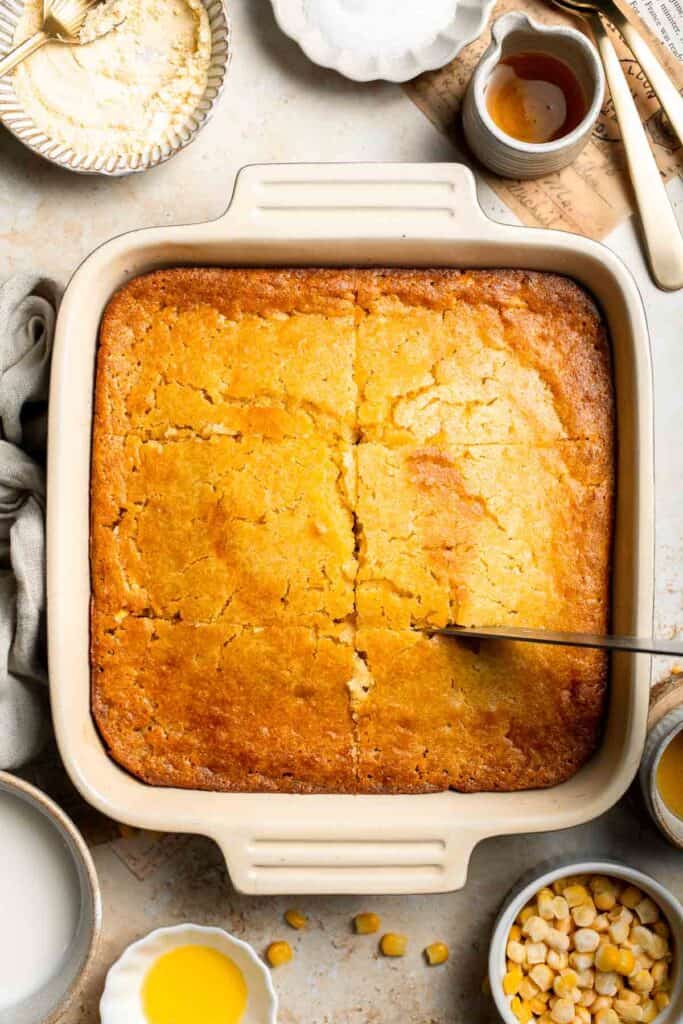
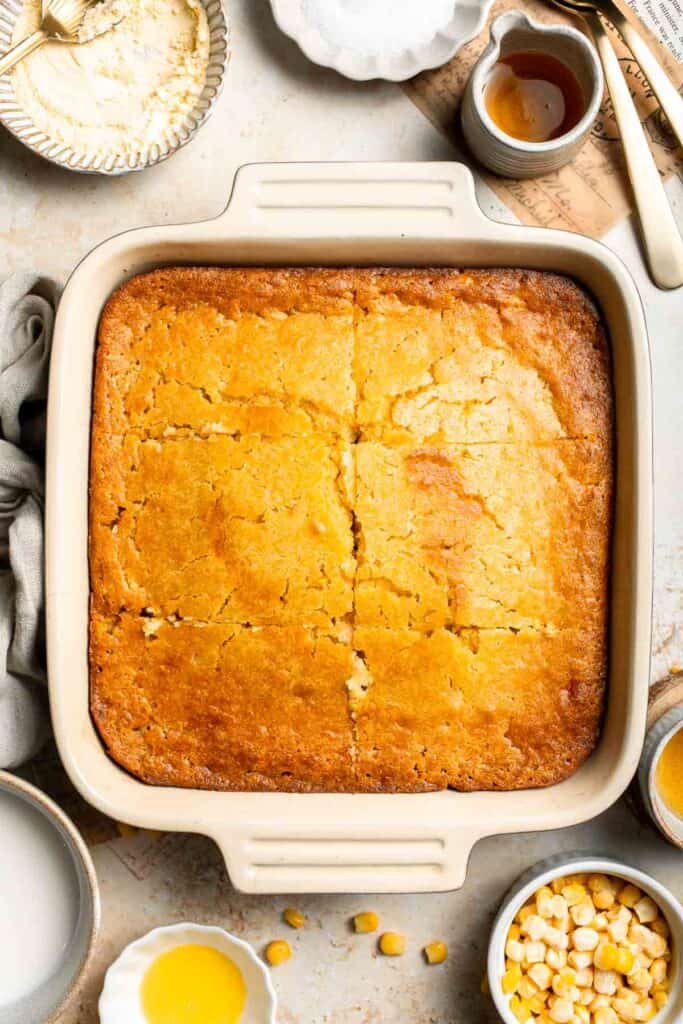
Expert Tip: Rest the Batter Before Baking
Letting the spoon bread batter rest for 5 minutes before baking allows the cornmeal to absorb the liquid, giving you a more even texture and creamier crumb. It's a small step that makes a big difference in the final result.
More Tips and Tricks
- Don't overmix. Stir until the flour just disappears. Overmixing develops gluten, which can make spoon bread dense instead of tender.
- Preheat your pan. Warming your greased dish in the oven before pouring in the batter gives the spoon bread a light crust and rich buttery flavor.
- Check doneness carefully. Spoon bread should be golden on top with a slightly soft center. A toothpick should come out clean but moist.
- Add toppings. A drizzle of honey, a pat of butter, or even a sprinkle of flaky salt on top right before serving makes it extra special.
- Make ahead for gatherings. Spoon bread reheats beautifully, so you can bake it earlier in the day and warm it before serving.
- Serving tip. If you're serving a crowd, estimate about ¾ cup of spoon bread per person. It's rich, so a little goes a long way.
Recipe Variations
- Add cheese. Stir in ½ cup shredded cheddar or Monterey Jack for a cheesy twist.
- Go savory. Add chopped scallions or chives, a pinch of cayenne pepper, or a spoonful of creamed jalapeños for gentle heat.
- Sweet style. Swap sugar for brown sugar or drizzle maple syrup into the batter for extra sweetness.
- Corn lovers' version. Mix in ½ cup of drained corn kernels for more texture.
- Gluten-free option. Replace the flour with a gluten-free blend or fine corn flour for a naturally wheat-free side.
- Holiday variation. Add a dash of cinnamon or nutmeg for warmth during the fall and winter months.
- Add toppings and extras. Finish with a sprinkle of cheddar, breadcrumbs, or crushed Ritz crackers before baking for a golden, crisp top.
- Add bacon. Stir in crispy bacon pieces for a salty balance to the sweetness.
- Corn casserole style. For a heartier side closer to corn casserole, fold in extra cream corn and top with a sprinkle of cheese or breadcrumbs.
- Old Virginia classic. Honor the dish's roots by using white cornmeal and a touch of buttermilk, a nod to its early days in Virginia kitchens.
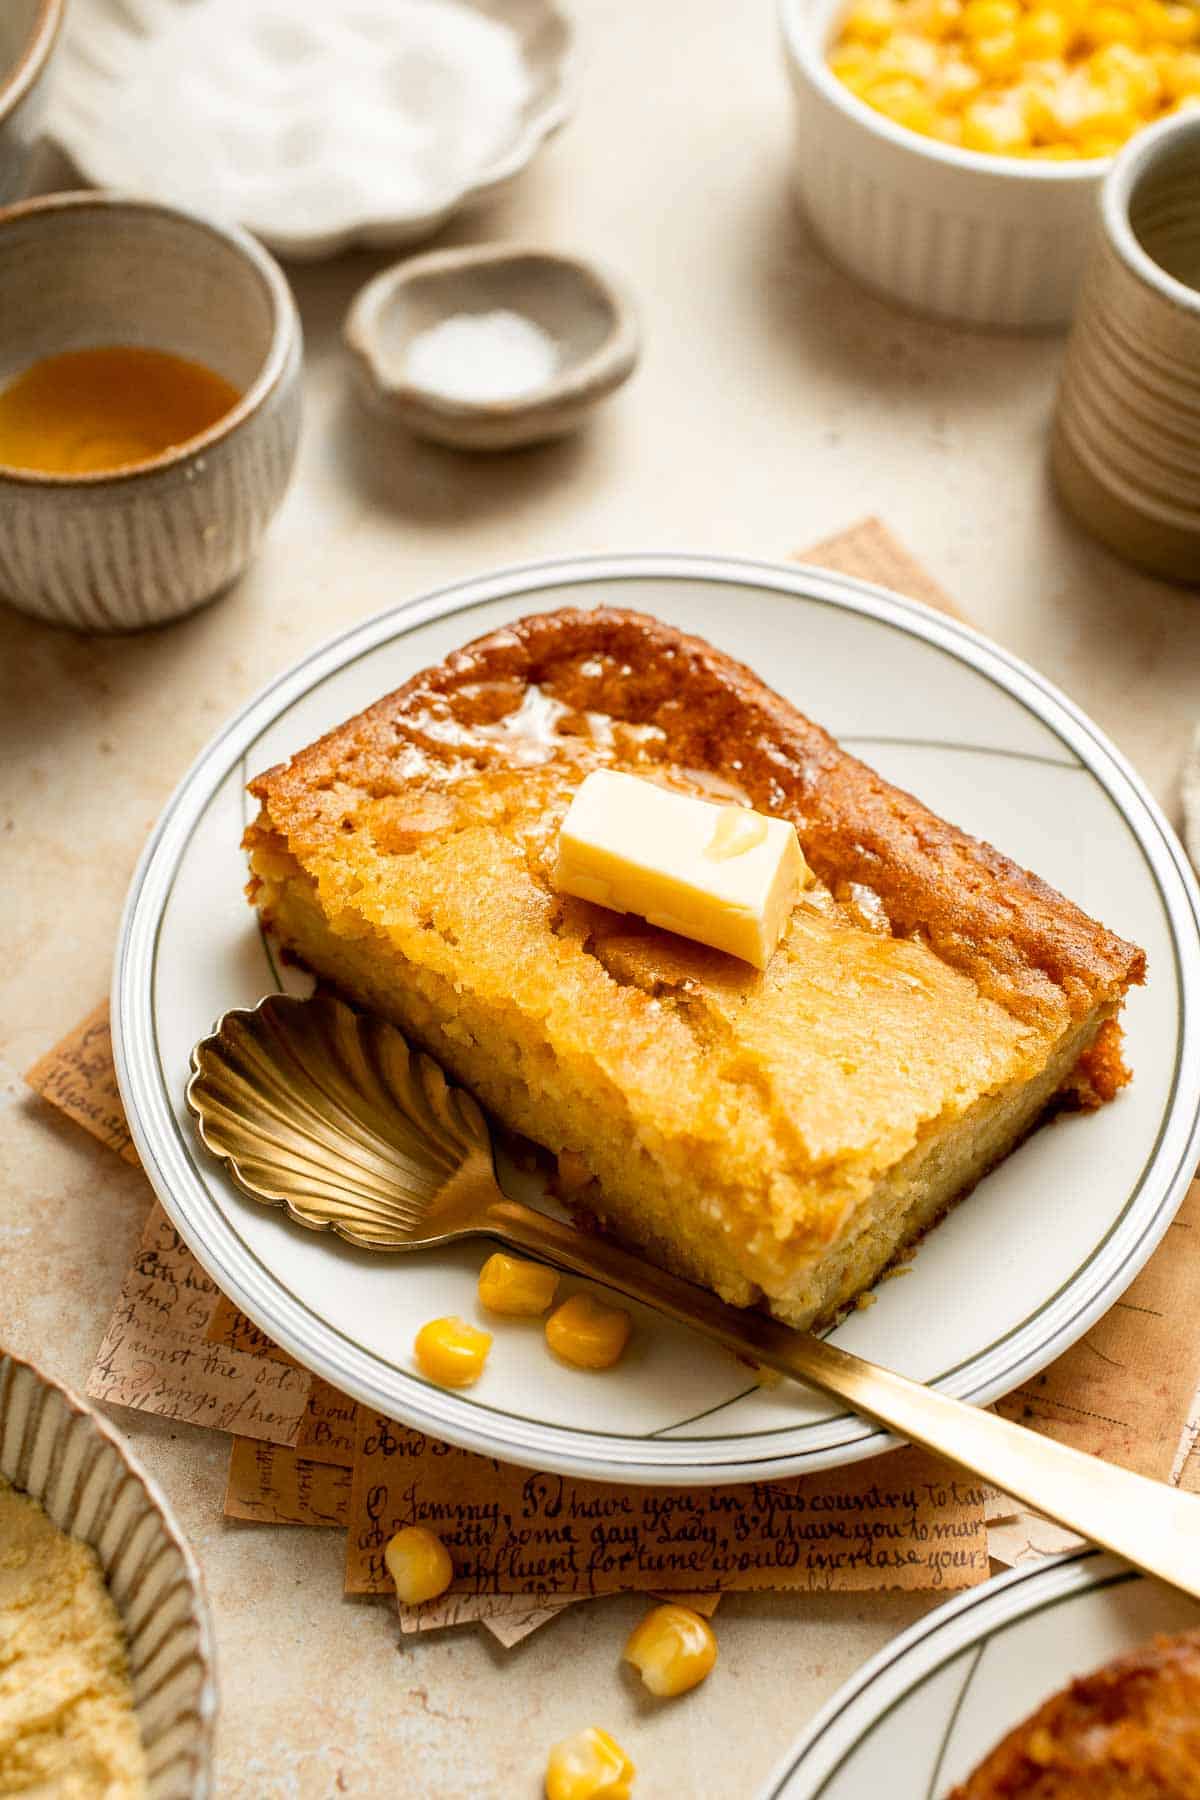
Storage
How to Store
Once cooled, cover tightly with plastic wrap or transfer leftovers to an airtight container. Store in the refrigerator for up to 4 days.
How to Reheat
Reheat spoon bread in a 350°F preheated oven for 10-15 minutes until warmed through. For smaller portions, the microwave works well, just heat in 20-second bursts until soft and steamy. You can also reheat slices or scoops of leftover spoon bread in a parchment-lined air fryer basket. Heat at 320°F for 5-7 minutes until warmed through and slightly crisp on the edges.
How to Freeze
Let the spoon bread cool completely, then wrap tightly in plastic wrap and foil (or use a freezer-safe container). Freeze for up to 2 months. When ready to enjoy, thaw overnight in the fridge and reheat. Avoid microwaving from frozen as the texture can become soggy.
How to Serve
Spoon bread is soft enough to serve with a spoon yet sturdy enough to slice. It's delicious with both sweet and savory dishes - a true all-purpose side. Enjoy it warm with a pat of butter, honey, or maple syrup, or pair it with:
- Holiday favorites like mashed potatoes and green beans
- Roast chicken, turkey, or beef
- Barbecue dishes or grilled meats
- Hearty soups, stews, or chili
These are my favorite main dishes to serve with spoon bread:


Thanksgiving Mains
If serving this as a side dish for Thanksgiving, pair it with one of our delicious mains. From roasted turkey and glazed ham to savory vegetarian roasts and hearty stuffing-filled options, these recipes help create a memorable holiday feast your family and guests will love.
FAQ
Spoon bread is made from a simple mixture of cornmeal, flour, eggs, butter, and milk - similar to cornbread but softer and more custard-like. Cream-style corn and eggs give it a moist, almost pudding-like consistency that sets it apart from regular bread. It's baked until golden, then scooped and served warm with butter or honey.
Cornbread is firmer, crumbly, and sliceable, while spoon bread is soft, moist, and spoonable. Think of spoon bread as the creamier cousin of cornbread - a cross between a soufflé and a casserole. It's lighter, fluffier, and has a silky texture from the eggs and milk.
Spoon bread is sometimes called cornbread pudding or cornmeal soufflé, thanks to its light, airy texture and custard-like center. In older cookbooks, it's even referred to as "Southern corn pudding," especially when served with extra butter or honey drizzled on top.
Spoon bread tastes buttery, lightly sweet, and slightly savory, with the comforting flavor of corn. The top bakes to a golden crispness while the inside stays soft, almost creamy. It's rich enough to serve on its own but mild enough to pair with nearly any meal.
It gets its name because it's so soft you can serve it with a spoon instead of cutting it into slices like traditional bread. The pudding-like texture means it's often scooped straight from the baking dish, warm and steaming, onto the plate.
The spoon bread is ready when it's golden on top and slightly puffed, and a toothpick inserted in the center comes out clean or with a few moist crumbs. It should jiggle just slightly in the middle but not look wet. Overbaking can make it dry, so start checking at 35 minutes.
Spoon bread is a versatile side that complements everything from roast meats and holiday dinners to casual weeknight meals. It's often served alongside barbecue, fried chicken, or hearty stews. For a sweeter twist, try it with butter, honey, or jam for breakfast or brunch.
More Corn Recipes
Looking for other recipes like this? Try these:

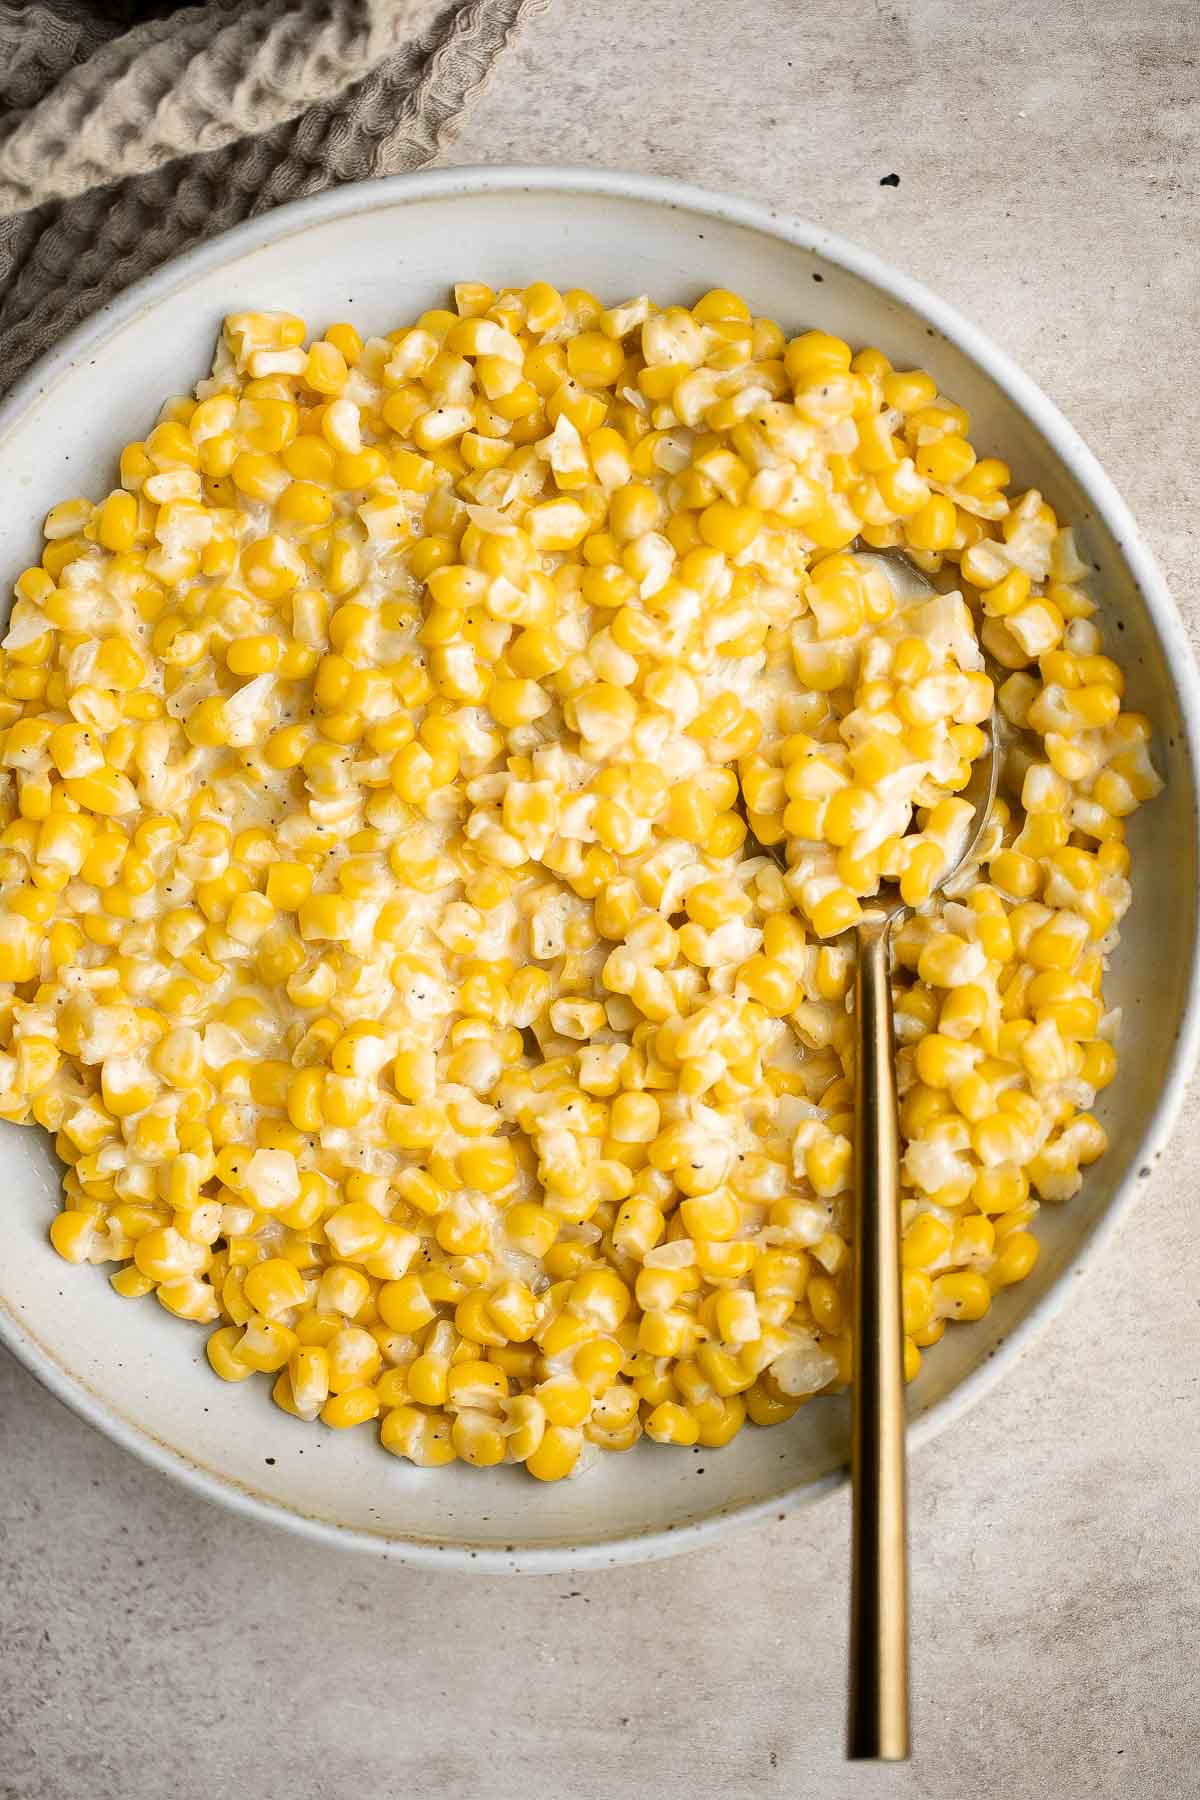

Tried this recipe?
I'd love to hear what you think! Leave a comment and rating below to share your feedback. Your reviews help others discover this recipe and help me keep creating more free recipes for you. Snap a photo and tag me on social media @aheadofthyme too.
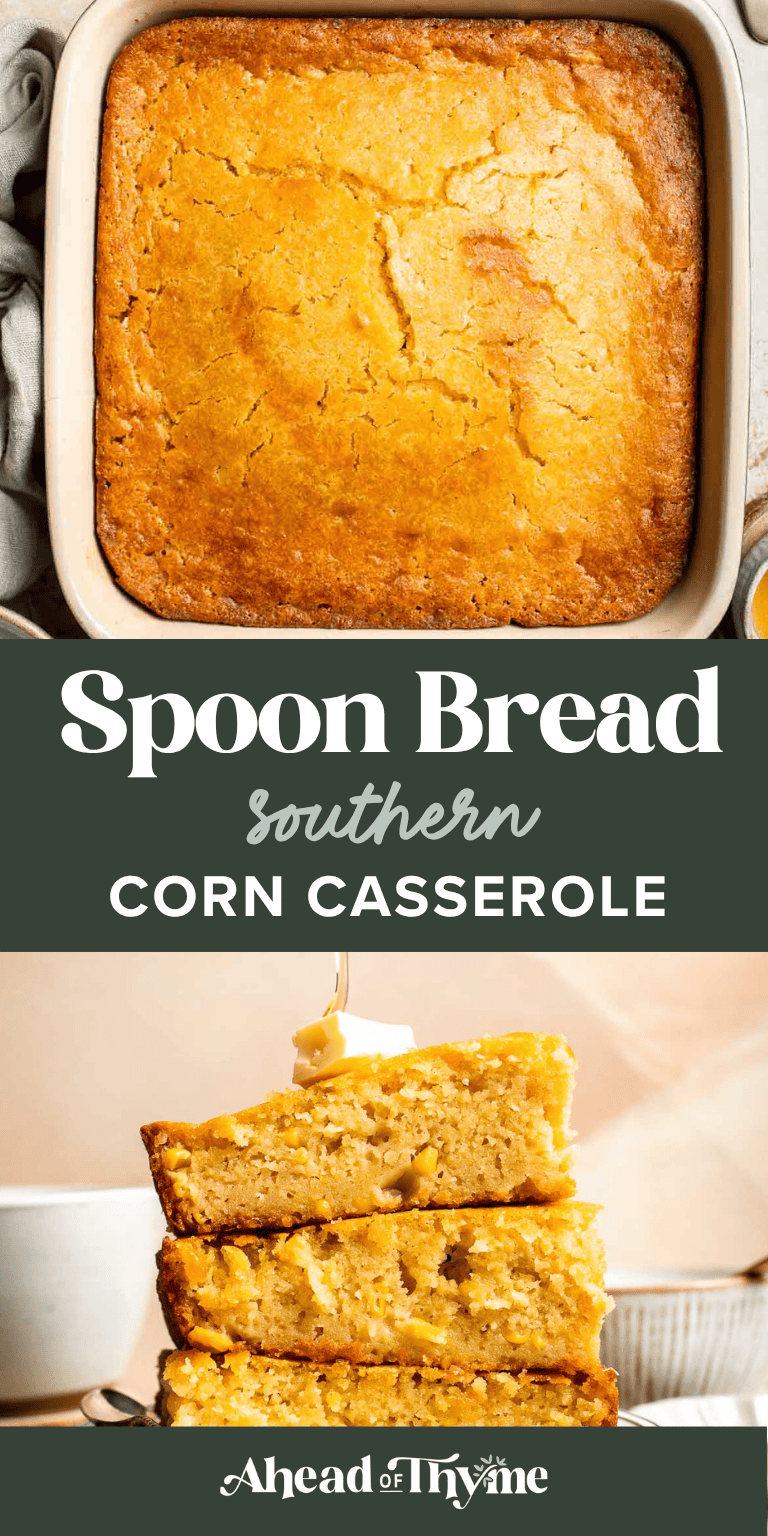
Thanksgiving Dinner Prep Guide + Checklists

Planning your Thanksgiving dinner doesn't have to be stressful! Whether you're hosting your first big dinner or you're a seasoned Thanksgiving pro, this Thanksgiving Dinner Prep Guide has everything you need for a seamless, delicious holiday meal. From a week-by-week prep timeline and day-of cooking schedule to hosting tips, recipe ideas, and free printable checklists, we've got all your bases covered.
Think of this as your one-stop shop for organizing, cooking, and enjoying Thanksgiving from start to finish. You'll find practical tips, time-saving tricks, and step-by-step guidance to help you stay calm and confident all week long. Plus, if you're still finalizing your recipes, check out our Easy Thanksgiving Menu (with Printable Menus!) for curated menu ideas and inspiration.
Whether you're hosting a big family gathering, a small cozy dinner, or planning ahead for next year, this guide will walk you through everything you need to know to host Thanksgiving like a pro - stress-free, organized, and ready to impress your guests. It even includes time-saving tips and ideas for getting the kids involved so the whole family can enjoy the day together.
To make planning even easier, we've put together free printable Thanksgiving checklists to help you stay on track from start to finish - including your meal plan, shopping list, recipe tracker, and day-of timeline. You can download them below to keep your Thanksgiving prep organized and stress-free.
[feast_advanced_jump_to]How to Plan for Thanksgiving
The key to a smooth Thanksgiving is all about planning early and breaking it into steps. Think of it as a marathon, not a sprint - everything comes together when you pace it right.
- One month before: Make your guest list, reach out to family and friends to confirm who's joining, and send your invites with a clear RSVP date so you have a headcount to work with.
- Two to three weeks before: Choose your Thanksgiving dinner menu, plan your shopping list, and order your turkey early to get the size you want.
- One week before: Clean out your fridge, check your pantry for staples like salt, olive oil, and pepper, and start making freezer-friendly dishes like soups or cookie dough.
- A few days before: Start prepping sides and desserts that hold up well, like sweet potato casserole, green bean casserole, and cornbread.
- Thanksgiving Day: Follow your cooking schedule below, take a deep breath, and enjoy the process - you've got this!
Thanksgiving Planning Timeline
This Thanksgiving prep timeline walks you through exactly what to do and when. Print it out, check it off, and take some of the stress out of holiday preparations.
1 Month Before Thanksgiving
It's never too early to start planning! The earlier you get organized, the less stressful Thanksgiving week will be.
- Make your guest list. Reach out to family and friends to confirm who's joining, then send your invites (text, email, or printed) and ask for RSVPs by a set date so you have a headcount to work with. Knowing the number of guests you'll have will guide everything - from the size of your turkey to how many side dishes you'll need.
- Plan your Thanksgiving dinner menu. Start building your menu around your Thanksgiving turkey (or your chosen main dish). Then fill it in with sides, appetizers, and desserts. Be realistic about how many dishes you can make yourself - and don't hesitate to ask others to bring a dish or dessert.
- Decide on a theme or color palette. Choose a look that fits your style - whether it's classic autumn (orange and gold), minimalist white and greenery, or cozy rustic with natural wood tones. Think about how your dinnerware, linens, and centerpieces will tie in for a cohesive Thanksgiving table.
- Order rental items. If you're renting tables, chairs, linens, tablecloths, or serving ware, reserve them now. Rental companies get busy this time of year, and ordering early ensures you'll get what you need.
- Review your recipes. Read through each recipe you plan to make and note prep times, oven temperatures, and serving sizes. This will make scheduling much easier later.
- Make note of special dietary needs. Ask your guests if there are any allergies or dietary restrictions so you can plan vegetarian, gluten-free, or dairy-free options ahead of time.
- Plan any decor or DIY projects. If you're crafting your own centerpiece or making place cards, get started now - these are the first things that fall off the list when the kitchen gets busy!
2-3 Weeks Before Thanksgiving
Now that your menu and guest list are set, it's time to move into practical prep. This is when you'll get your kitchen ready, make shopping lists, and start stocking up on essentials.
- Order your turkey. Plan for about one pound of turkey per person (a bit more if you love leftovers). The best birds sell out fast, so ordering early guarantees you get the size and type you want - whether it's fresh, organic, or heritage.
- Review your recipes again. Go through your Thanksgiving dinner menu to double-check which ingredients and tools you'll need. Note things like baking dishes, roasting pans, meat thermometer, and measuring cups and spoons. This ensures you're not scrambling on Thanksgiving morning.
- Check your kitchen tools. Inspect your cookware and appliances. Make sure your hand mixer, food processor, or instant-read thermometer are working properly. If anything's missing or broken, now's the time to replace it.
- Create your grocery list. Go recipe by recipe and list out every ingredient you'll need. Include quantities and check off what you already have in your pantry. Divide the list into sections (non-perishables, perishables, dairy, freezer, and produce) to make shopping easier later.
- Shop early for non-perishables. Go to the supermarket and stock up on ingredients that keep well, like flour, sugar, spices, canned pumpkin, nuts, crackers, and drinks. Organize them neatly in your pantry so they're easy to find.
- Order specialty items online. If you're using unique ingredients, like a specific spice blend, fresh herbs, or imported cheeses, order them now to ensure delivery in time.
- Shop for freezer items. Pick up frozen items like puff pastry, frozen cranberries, or frozen desserts and store them until you're ready to use them.
- Organize your freezer. Clear space for all your make-ahead recipes and ingredients you'll soon be prepping. This is also a great time to label freezer-safe containers for soups, doughs, or casseroles.
- Start gathering decor. Look for candles, table runners, or fall accents that match your Thanksgiving theme. If you're using fresh flowers or greenery, plan where to buy them the week of.
1 Week Before
You're officially in countdown mode! This week is all about final details and tackling a few make-ahead tasks so Thanksgiving Day feels calm and manageable.
- Confirm your guest list. Double-check your headcount and confirm arrival times. Find out if anyone's bringing a dish, needs oven space, or has dietary preferences. If little ones are coming, ask whether parents are bringing highchairs or if you should make room for them. Clarifying these details early saves you from last-minute surprises on Thanksgiving Day.
- Create a cooking schedule. Review every recipe in your Thanksgiving menu and jot down prep time, cook time, and oven temperature. This helps you map out when each dish goes in and comes out - a lifesaver when juggling multiple sides and one oven. Post your schedule on the fridge for easy reference.
- Shop for dairy and perishables. Stock up on items that last at least a week in the fridge, like butter, milk, heavy cream, eggs, and cheese. Check expiration dates and store everything in the coldest part of the fridge.
- Make freezer-friendly dishes. Get a head start by making desserts (like pies or cookie dough), appetizers, dips, soups, or bread dough. Most of these freeze beautifully and taste freshly made when thawed. Label each with cooking or reheating instructions so there's no confusion later. We always make pumpkin pie ahead!
- Check storage containers. Make sure you have plenty of containers, foil, and freezer bags for both prepped food and leftovers. If you're hosting a big group, pick up some disposable containers so guests can take home leftovers easily.
- Do a quick pantry check. Verify you've got all the basics like salt, pepper, olive oil, flour, and sugar. Refill or restock anything that's running low.
- Plan your table setting. If you haven't already, decide on your Thanksgiving table layout and theme. Gather candles, napkins, vases, dinner plates, silverware, cutlery, wine glasses, and serving dishes so everything is easy to access when it's time to decorate.
3-5 Days Before Thanksgiving
Now the kitchen work begins! This is the time to roll up your sleeves and get ahead on all the prep that makes Thanksgiving Day smooth and stress-free.
- Start thawing your turkey. Move it from the freezer to the fridge, allowing roughly one day for every 4-5 pounds. Place a tray or large baking sheet underneath to catch any drips. If you're hosting a big crowd, start earlier rather than later to ensure it's completely thawed in time. Tip: According to the USDA, you can safely start thawing a 15-pound frozen turkey no more than six days in advance.
- Shop for perishables. Go to the grocery store and pick up all remaining ingredients on your shopping list (fresh produce, herbs, and meat) so you're stocked up for cooking and garnishing.
- Clean the house. Vacuum, mop, dust, and refresh bathrooms. Don't forget guest spaces like the entryway or guest bathroom. You'll thank yourself when people start arriving.
- Wash linens and tableware. Launder napkins and tablecloths, polish glasses and silverware, and make sure your Thanksgiving table setup is ready to go.
- Check oven and fridge space. Clear out older leftovers to make room for the turkey, casseroles, and sides that need chilling.
2 Days Before Thanksgiving
This is your big prep day - the more you get done now, the calmer tomorrow will be!
- Finish thawing the turkey. If your frozen bird still icy, use the cold water method: submerge the wrapped turkey in a sink of cold water, changing the water every 30 minutes until fully thawed, about 6-8 hours depending on the size of your turkey.
- Gather your recipes. Print or bookmark everything on your phone or tablet so you're not scrolling mid-cook with floury hands.
- Chop vegetables and prep ingredients. Dice onions, mince garlic, peel potatoes, and pre-measure spices and herbs. Store everything in airtight containers in the fridge to save time later.
- Prep salads and dressings. Wash and dry greens like kale or brussels sprouts, and store separately from dressings to keep them crisp.
- Organize your kitchen. Make sure knives are sharp, cutting boards are clean, and you have plenty of counter space for assembly.
The Day Before Thanksgiving
Tomorrow's the big day - today's all about getting ahead.
- Brine or season the turkey. If you're brining, start tonight so it can soak for 8-12 hours. If you're seasoning with a dry rub or compound butter, let it rest uncovered in the fridge to help the skin crisp up beautifully.
- Make sides ahead. Prepare any make-ahead casseroles, mashed potatoes, creamed vegetables, or cornbread that can be reheated easily. Cranberry sauce is also great to make ahead. Store in the fridge tightly covered with foil.
- Prep appetizers and desserts. Assemble dishes that can be baked or served fresh tomorrow, like cheese boards, dips, pies, and cookie dough.
- Set the table. Lay out your dinnerware, glasses, and seasonal décor tonight so it's one less thing to worry about in the morning. Add candles or flowers for a cozy touch.
- Ready the servingware. Pull out platters, serving spoons, and utensils for each dish. Label them with sticky notes so you're not scrambling when everything comes out of the oven at once.
- Final tidy-up. Do a last-minute sweep of the kitchen and living spaces. Plump pillows, clear clutter, and add finishing touches like hand towels and extra toilet paper in bathrooms.
Thanksgiving Day Schedule
All of your planning and preparation have led to this moment! You're in the home stretch - just a few more hours until you can sit down, relax, and enjoy the meal you've worked so hard to create. The key to a smooth Thanksgiving Day is pacing yourself, sticking to a plan, and adapting as needed so the transition from morning prep to dinnertime feels effortless.
Follow this simple schedule to stay organized from sunrise to supper on the big day.
Morning
- Thaw bread and desserts. Start your day by taking any frozen rolls, bread dough, or desserts out of the freezer so they have time to thaw and rise before baking. Most frozen items need several hours to come to room temperature, so set them out early while you prep other dishes.
- Prep veggies and sides. If you're serving mashed potatoes or another potato-based dish, begin peeling now. This gives you time to work without rushing and keeps your prep area tidy. Store peeled potatoes in a pot of water until it's time to cook. Chop onions, mince garlic, and prep your other vegetables - it's much easier to enjoy the day when these tasks are out of the way.
- Assemble sides. Finish prepping any sides you can bake later, such as sweet potato casserole, green bean casserole, cornbread stuffing, or roasted butternut squash. Many recipes can be assembled in the morning, stored in the refrigerator, and baked just before dinner. This frees up oven space and keeps your kitchen calm.

Early afternoon
- Roast the turkey. Now it's turkey time! Plan for about 13-15 minutes of roasting per pound, depending on size and whether it's stuffed. A 14-pound bird takes roughly 3 to 3½ hours. When it's done, let the Thanksgiving turkey rest for at least 30 minutes before carving so it stays juicy and tender.
- Make turkey stock and gravy base. If you're preparing gravy from scratch, start simmering turkey stock using the neck and giblets once your turkey goes into the oven. The stock will be ready to combine with drippings later for a rich, flavorful gravy seasoned with salt, pepper, and a pinch of nutmeg.
- Line up and reheat sides. Bring refrigerated dishes to room temperature before baking to ensure even heating. Start cycling sides through the oven according to your cooking schedule - casseroles, roasted veggies, and breads last the longest once baked, so prioritize those.
- Set out drinks and appetizers. As your home fills with the scent of fresh herbs, roasted turkey, and olive oil, set up your beverage station and lay out light appetizers to keep guests happy while you finish cooking. Think small bites like a brussels sprouts salad, crostini, or a simple cheese board.

Before serving
- Make the gravy. Once the turkey finishes roasting (and while the turkey rests), use those delicious drippings and your prepared stock to whip up homemade gravy. Stir gently until silky smooth - it's the finishing touch that ties the whole meal together.
- Transfer and set the table. Place finished dishes into their serving bowls or platters and bring them to your beautifully set Thanksgiving table. Double-check that every dish has its own serving utensil to keep things organized and avoid mix-ups.
- Carve the turkey. Some hosts carve the turkey in a grand, ceremonial way at the table, while others prefer to slice it in the kitchen. Either way, separate white and dark meat to make serving easy for everyone - even the fan of turkey who's waiting for that perfect piece.
- Top off beverages and close the kitchen. Before you sit down, take a quick look around the table. Top off drinks, grab any last-minute condiments, and confirm that all burners and the oven are turned off (unless dessert is warming).
Now, gather your fam, take a deep breath, and enjoy every bite of the classic Thanksgiving recipes you've poured your heart into.
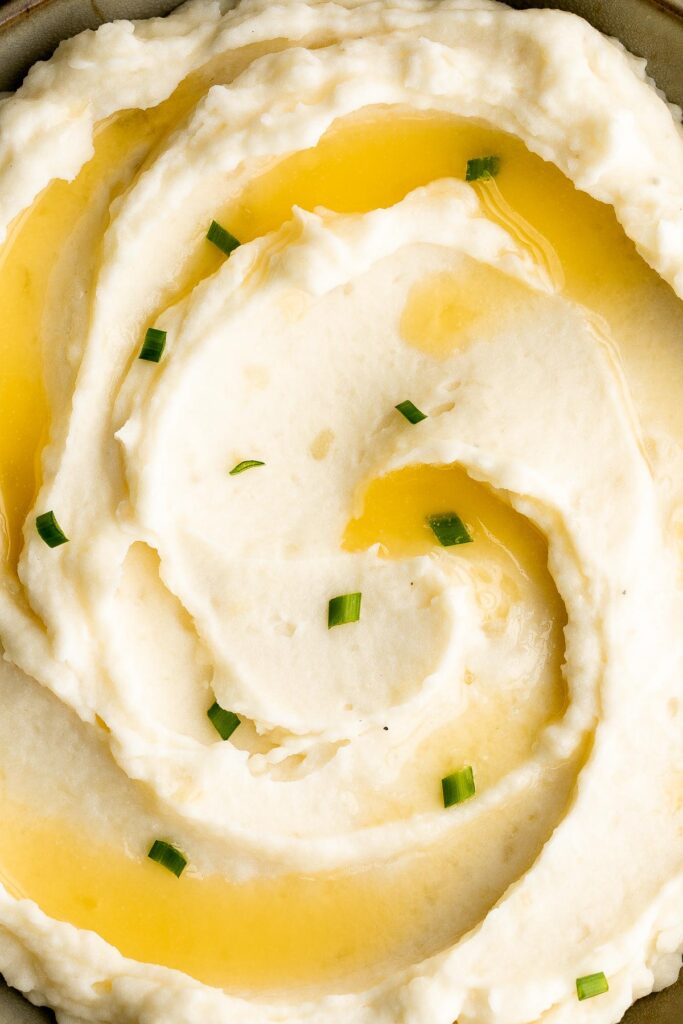

Thanksgiving Day Snapshot
When the big day arrives, timing is everything! Use this Thanksgiving Day cooking schedule to stay calm, organized, and on track from the moment you wake up until dinner hits the table. Adjust it based on your menu and when you plan to serve dinner.
8:00 AM - Prep and Preheat
- Take your Thanksgiving turkey out of the fridge to come to room temperature.
- Preheat your oven and double-check your roasting tools.
- Brew coffee, put on some music, and start the day relaxed.
9:00-11:00 AM - Cook and Roast
- Roast your turkey and set reminders for basting.
- Prep or bake sides that reheat easily, like green bean casserole or sweet potato casserole.
- Sauté onion, garlic, and fresh herbs for stuffing or gravy.
12:00-2:00 PM - Reheat and Assemble
- Warm up mac and cheese, mashed potatoes, and homemade dinner rolls.
- Toss kale or brussels sprouts salad and refrigerate until serving.
- Mix drinks or mocktails and set the Thanksgiving table.
3:00-4:00 PM - Finishing Touches
- Bake casseroles and brush sides with olive oil or honey.
- Garnish with fresh herbs and sprinkle a pinch of salt or nutmeg.
- Light candles and get ready to welcome your guests.
5:00 PM - Serve and Celebrate
- Carve the turkey and call your fam to gather around.
- Enjoy your feast and take in the moment - you've pulled off the perfect Thanksgiving Day!
Thanksgiving Day Tips for a Stress-Free Celebration
A few of our favorite Thanksgiving Day tips we live by:
- Clean as you go. It's one of the best-kept secrets of professional chefs and seasoned home cooks alike. You need all the prep space you can get, and a clean kitchen makes everything calmer. Wash mixing bowls and utensils while dishes bake, and wipe down counters between tasks. Quick cleanups throughout the day save you from feeling buried in mess later - and it's a great job for eager younger helpers!
- Mix homemade and store-bought. There's no shame in getting a little help. If baking dessert feels like too much, buy a beautiful pie from the bakery. Don't want to peel and cube an entire butternut squash for soup? Grab pre-cut squash from the store. The goal is a delicious, memorable meal - not perfection.
- Make time for yourself. Between basting, baking, and greeting guests, don't forget to take care of you. Schedule a quick shower, change into something festive, and take a few minutes to breathe before dinner. You've earned it.
Free Printable Thanksgiving Checklists
Stay organized every step of the way with your free printable Thanksgiving Checklists - designed to make your hosting stress-free and fun.
What's included:
- Thanksgiving Prep Checklist
- Thanksgiving Day-Of Checklist
- Thanksgiving Dinner Menu Template
- Recipe and Cooking List
- Grocery Shopping List
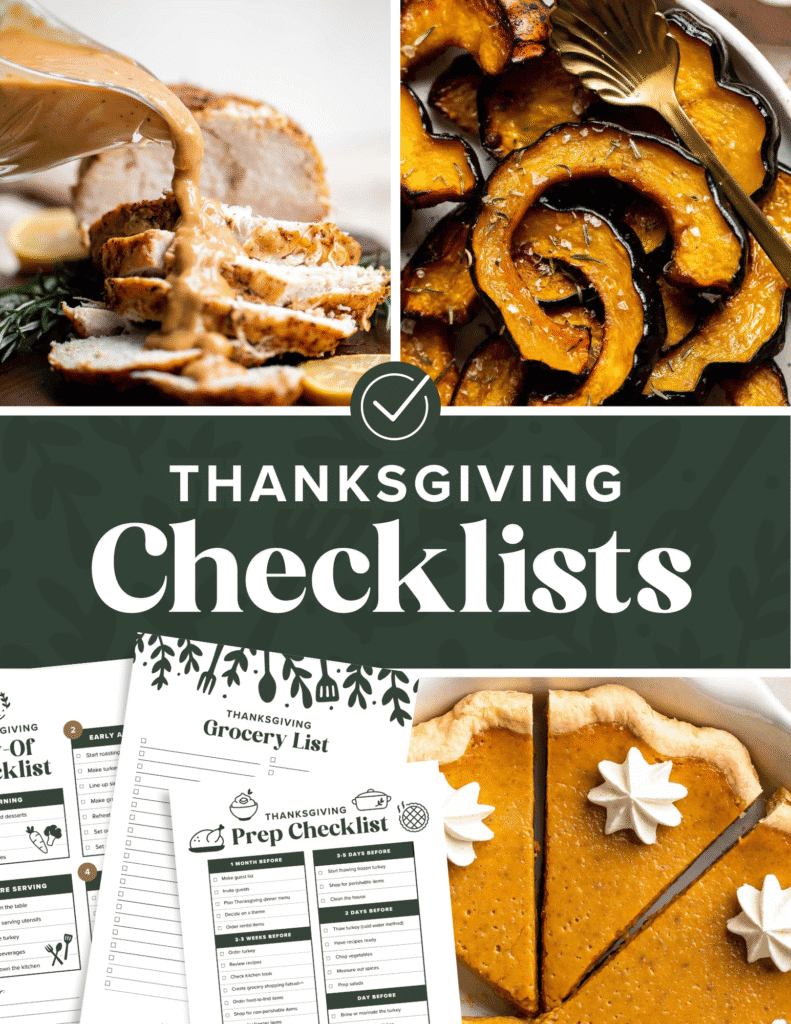
now available!
Free Printable Thanksgiving Checklists!
Stay organized from prep to cleanup with my free Thanksgiving Checklists Pack - including your meal planner, shopping list, recipe tracker, and day-of timeline.
After Thanksgiving
Once the feast is over, a little post-dinner organization goes a long way.
- Create a cleanup plan. Have your storage containers and foil ready, and clear space in the fridge or freezer for a seamless transition from dinner to cleanup.
- Tackle dishes in batches. Scrape plates and stack them by type - large baking dishes first, then mixing bowls, cups, and utensils. Rinse and load efficiently so you're not facing a mountain later. Once everything's scraped and rinsed, load the dishwasher strategically to save space - it's the perfect task to delegate to eager kids or helpful guests while you pack up leftovers.
- Store leftovers quickly. Transfer everything into airtight containers or share the love - let your guests take home a little of their favorite dish.
- Enjoy and reuse leftovers. Eat them as-is or repurpose them into something new. Scroll down for our favorite Thanksgiving leftover recipes and creative ideas.
Thanksgiving Dinner Menu
Once your prep is done, it's time for the best part - the food! We've rounded up our favorite Thanksgiving recipes to help you plan the perfect Thanksgiving meal menu, whether you're cooking a traditional feast with a whole turkey, keeping things simple with turkey breast or thighs, or adding a few creative twists.
From juicy turkey mains and elegant appetizers to cozy sides and festive desserts, these recipes will make your Thanksgiving Day meal unforgettable.
Thanksgiving Mains (Turkey and Beyond)

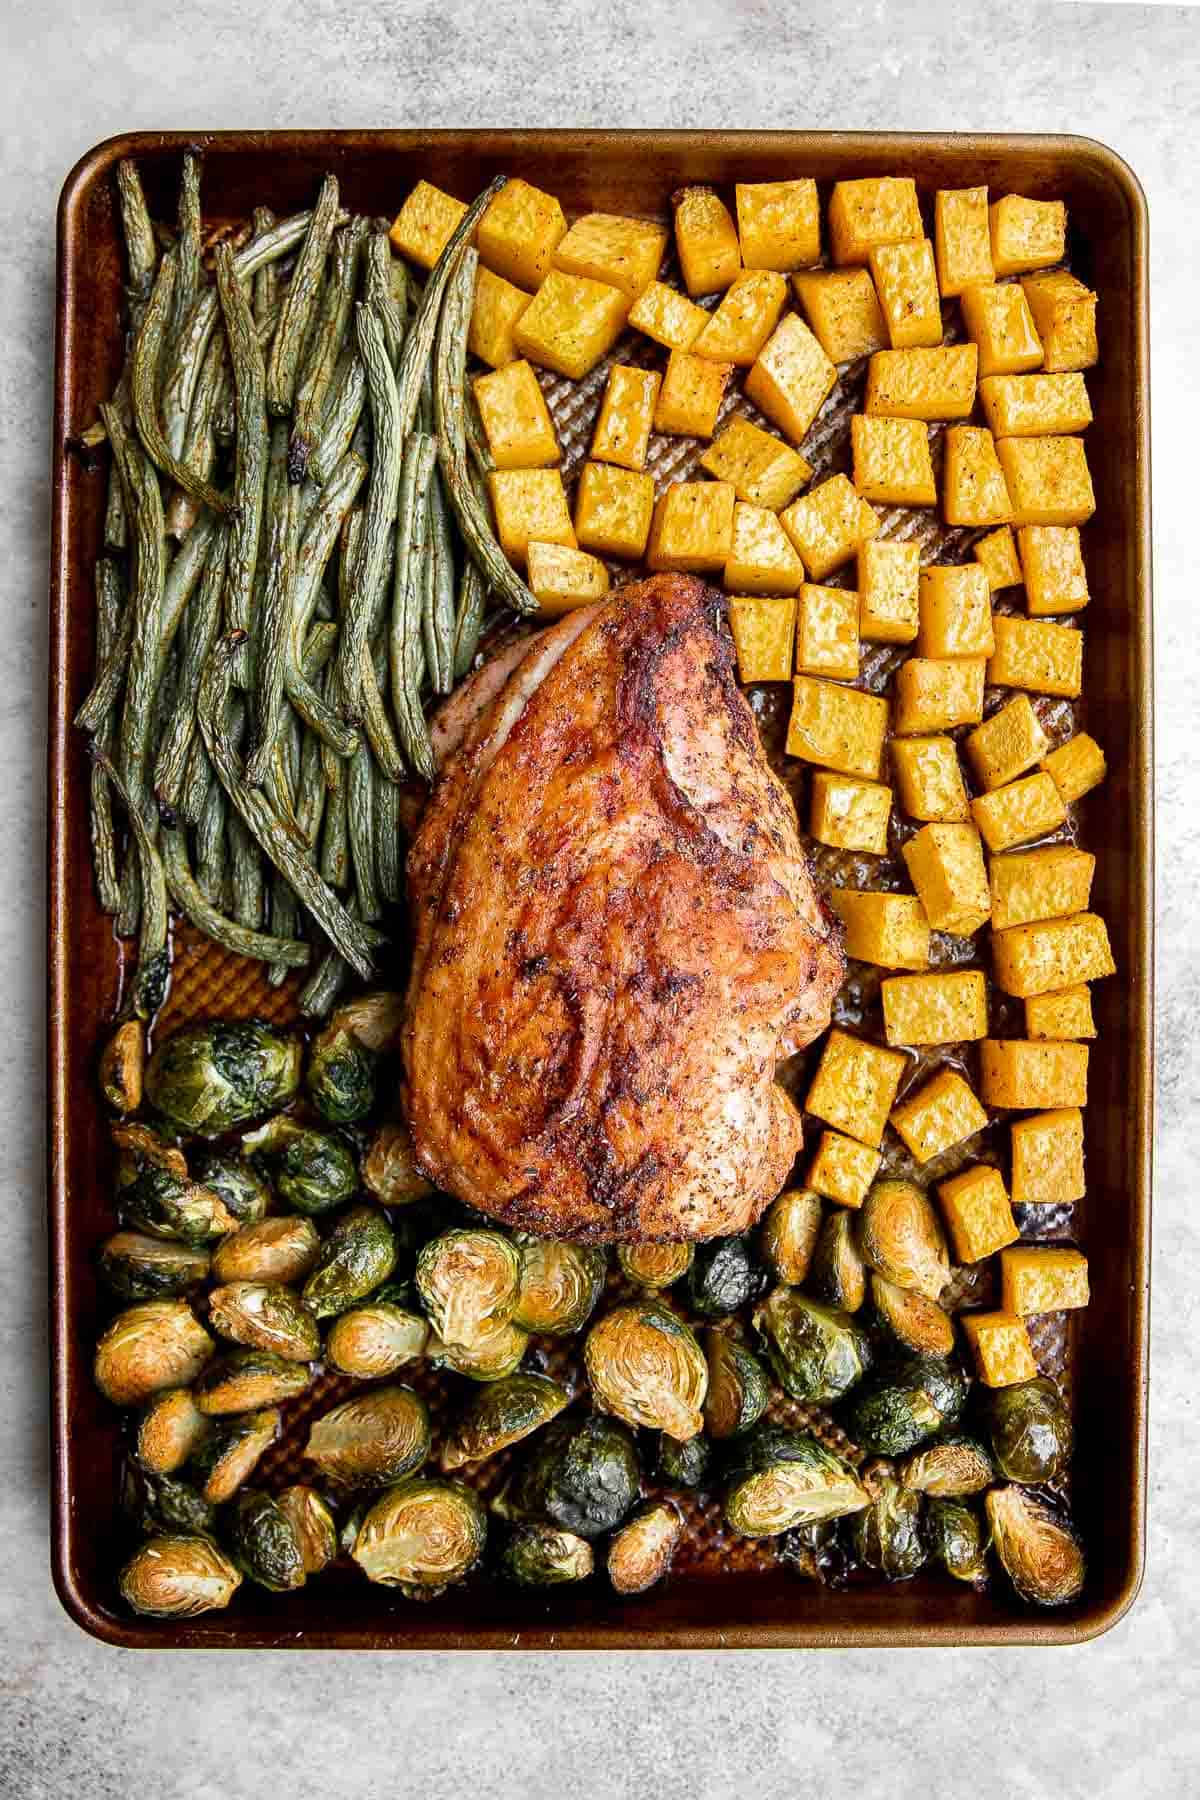
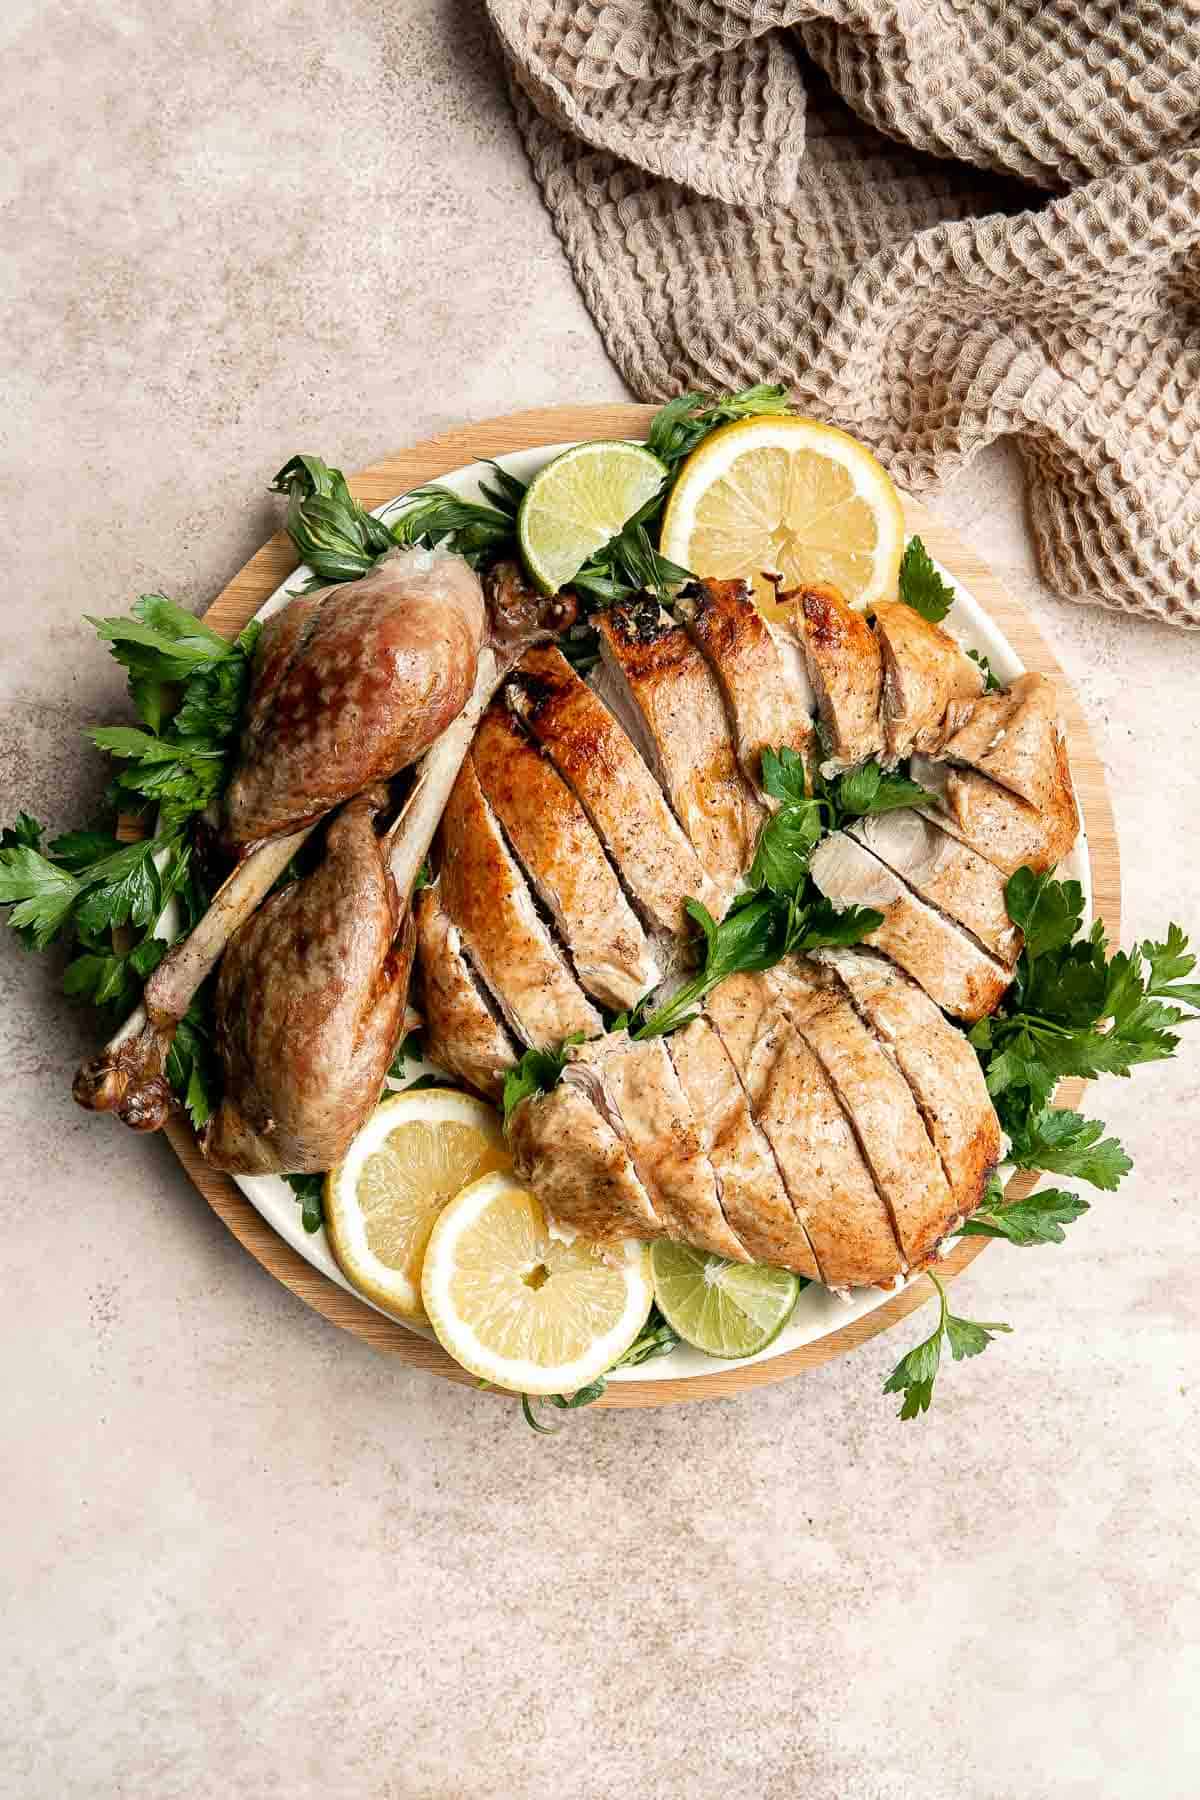
Thanksgiving Side Dishes
- Stovetop Mac and Cheese with White Cheddar
- Cranberry Apple Walnut Stuffing
- Creamed Spinach Gratin
- Spoon Bread Recipe (Southern Cornbread Casserole)
Thanksgiving Appetizers
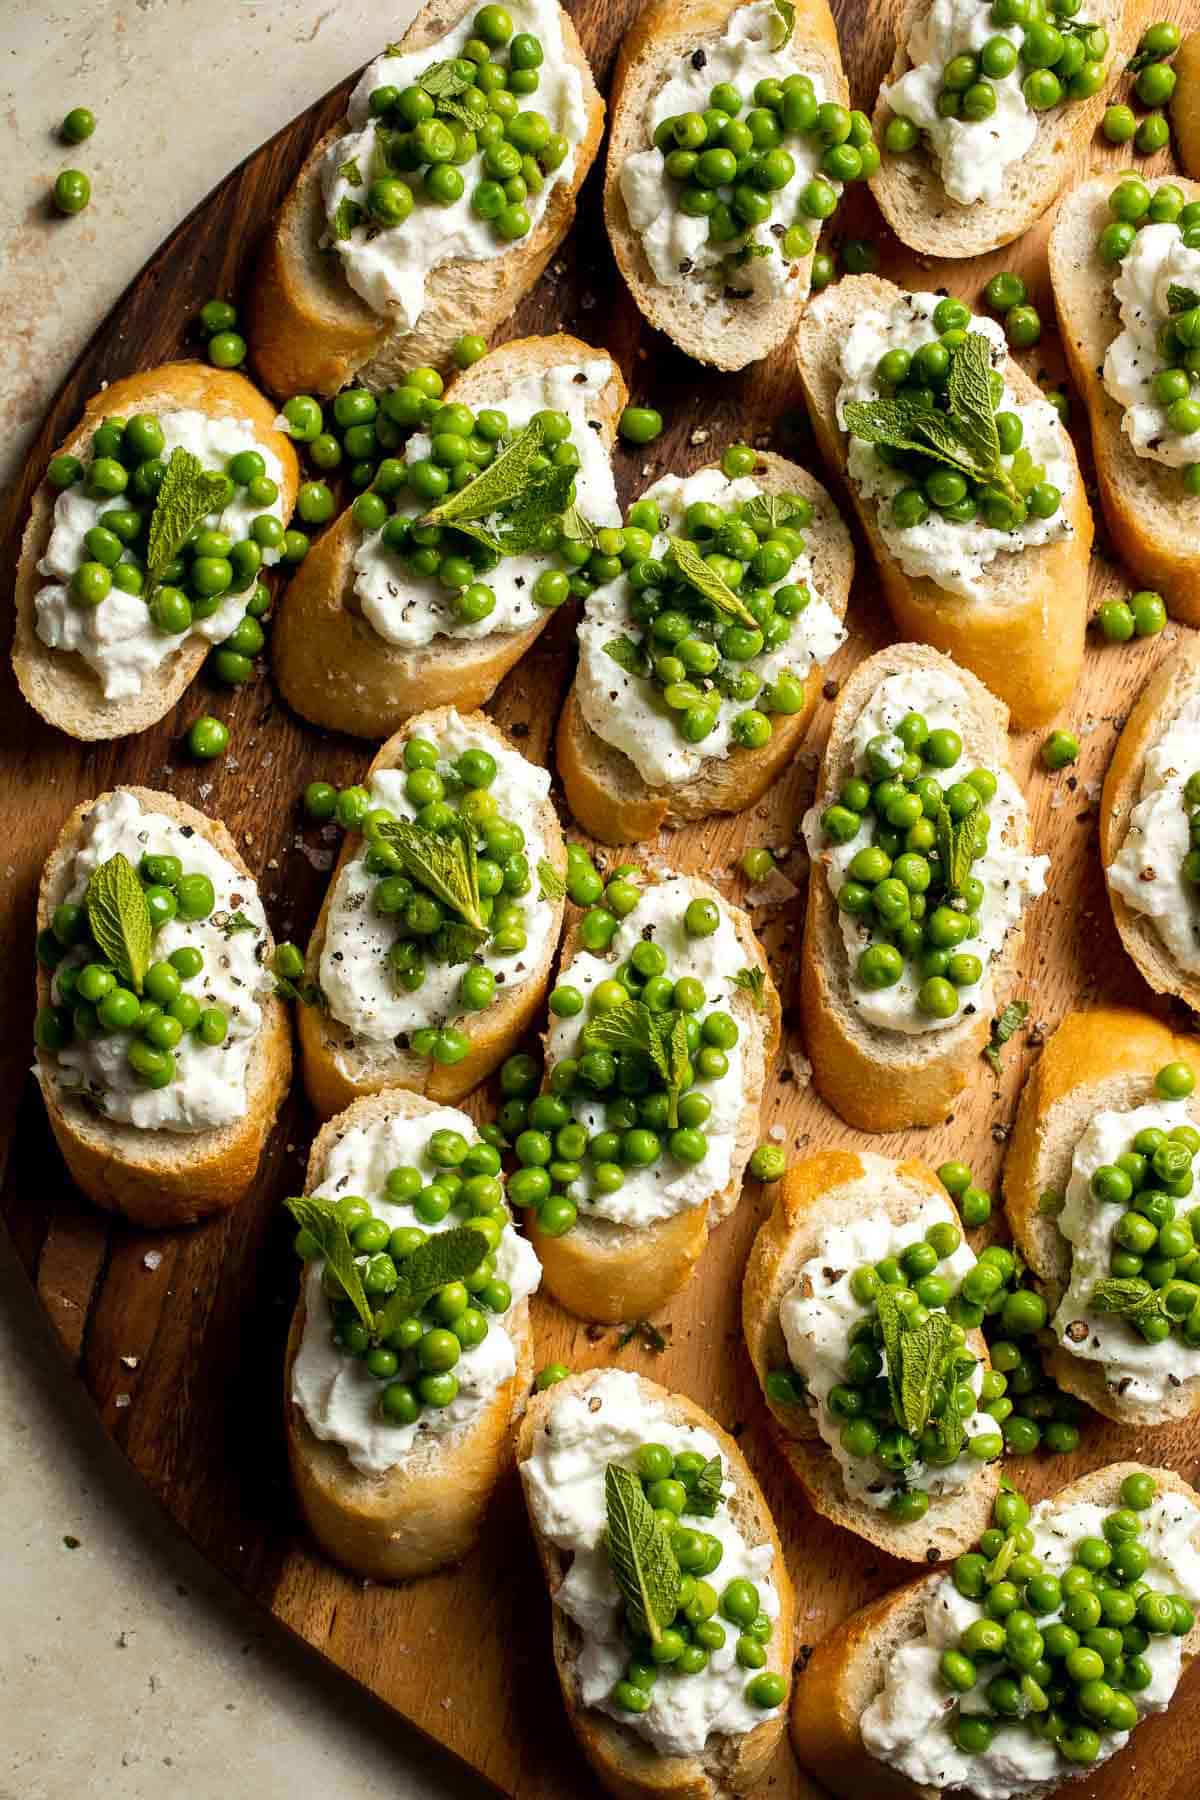
Thanksgiving Dessert
- Sweet Potato Cake with Cream Cheese Frosting
- Classic Homemade Pumpkin Pie from Scratch
- Pumpkin Coffee Cake with Streusel Topping
- Soft and Chewy Pumpkin Snickerdoodles

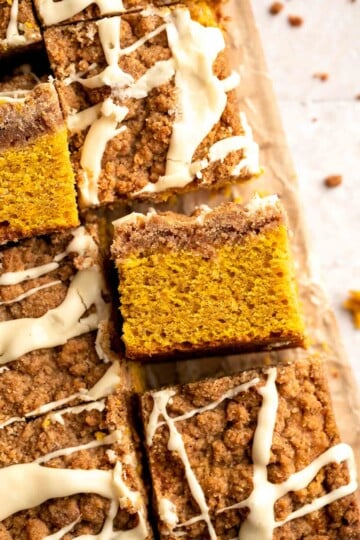
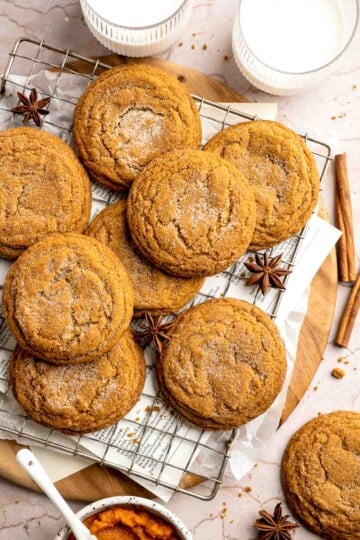
want full menu inspiration?
Easy Thanksgiving Menu (with Free Printable Menus!)
Check out our complete Thanksgiving Menu for recipes, curated menu ideas, and free printables.
Thanksgiving Entertaining Tips and Hosting Ideas
Hosting Thanksgiving is about more than just the food - it's about creating a warm, welcoming space for everyone around the table.
- Personalize table settings. Small touches go a long way - a sprig of rosemary tied to a napkin, mini white pumpkins, a handwritten name card, or a cookie place card with each person's name adds warmth without much effort.
- Check the weather. Peek at the forecast a day or two before. If rain or snow is on the way, set out trays for wet shoes and designate space for coats or umbrellas. If outdoor traditions (like football or walks) aren't possible, plan some cozy indoor activities instead.
- Set up a self-serve station. Keep guests happy and out of the kitchen by setting up a drink and appetizer station away from the prep zone. A small cheese board and a pitcher of mocktails or mulled cider will do the trick.
- Rent extra tables and chairs. Make sure everyone has a comfortable seat and a spot in the conversation. A few rented chairs or folding tables can make a big difference for larger gatherings.
- Create a Thanksgiving playlist. Curate a cozy mix of songs to play from prep time to dessert. It sets the mood and keeps the day festive.
Thanksgiving Leftovers
Just because Thanksgiving is over doesn't mean the deliciousness has to end.
- Share the wealth. Encourage guests to bring containers so they can take home some of their favorite dishes.
- Freeze what you can't finish. If you have more Thanksgiving turkey or sides than you can eat within four days, pack and freeze them for easy meals later.
- Repurpose leftovers. Get creative! Turn turkey into soups, pot pies, sandwiches, egg scrambles, or even fried rice. The classic Thanksgiving leftover sandwich will always be a favorite, but new ideas keep things exciting.
- Check out our favorite leftover recipes below. We've rounded up delicious ways to give your Thanksgiving dishes a second life.
Thanksgiving Leftover Recipes
- Cranberry Sauce Parfait
- Leftover Turkey Salad
- Sweet Potato Croquettes
- Turkey Enchiladas
- Cranberry Meatballs
- Potato Dinner Rolls
- Coconut Turkey Curry
- Cranberry Sauce Smoothie
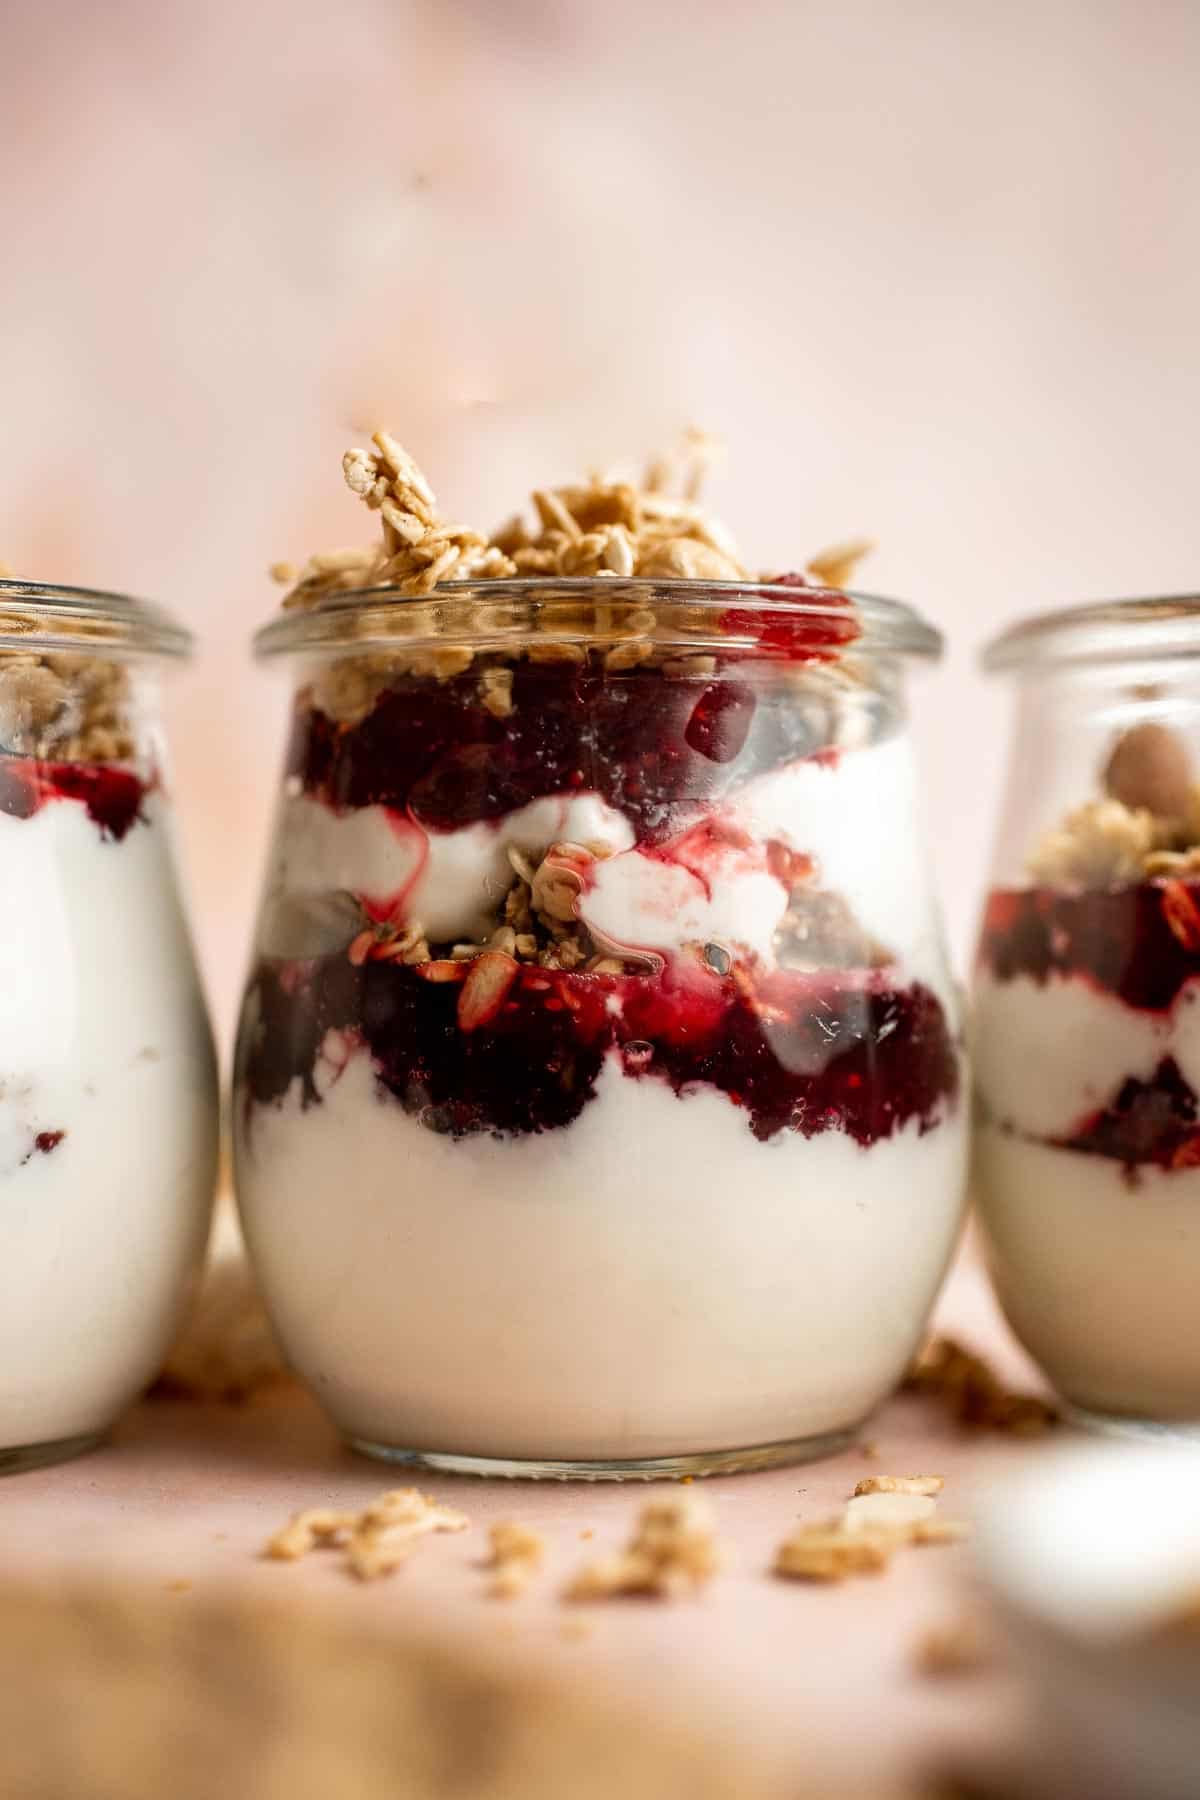
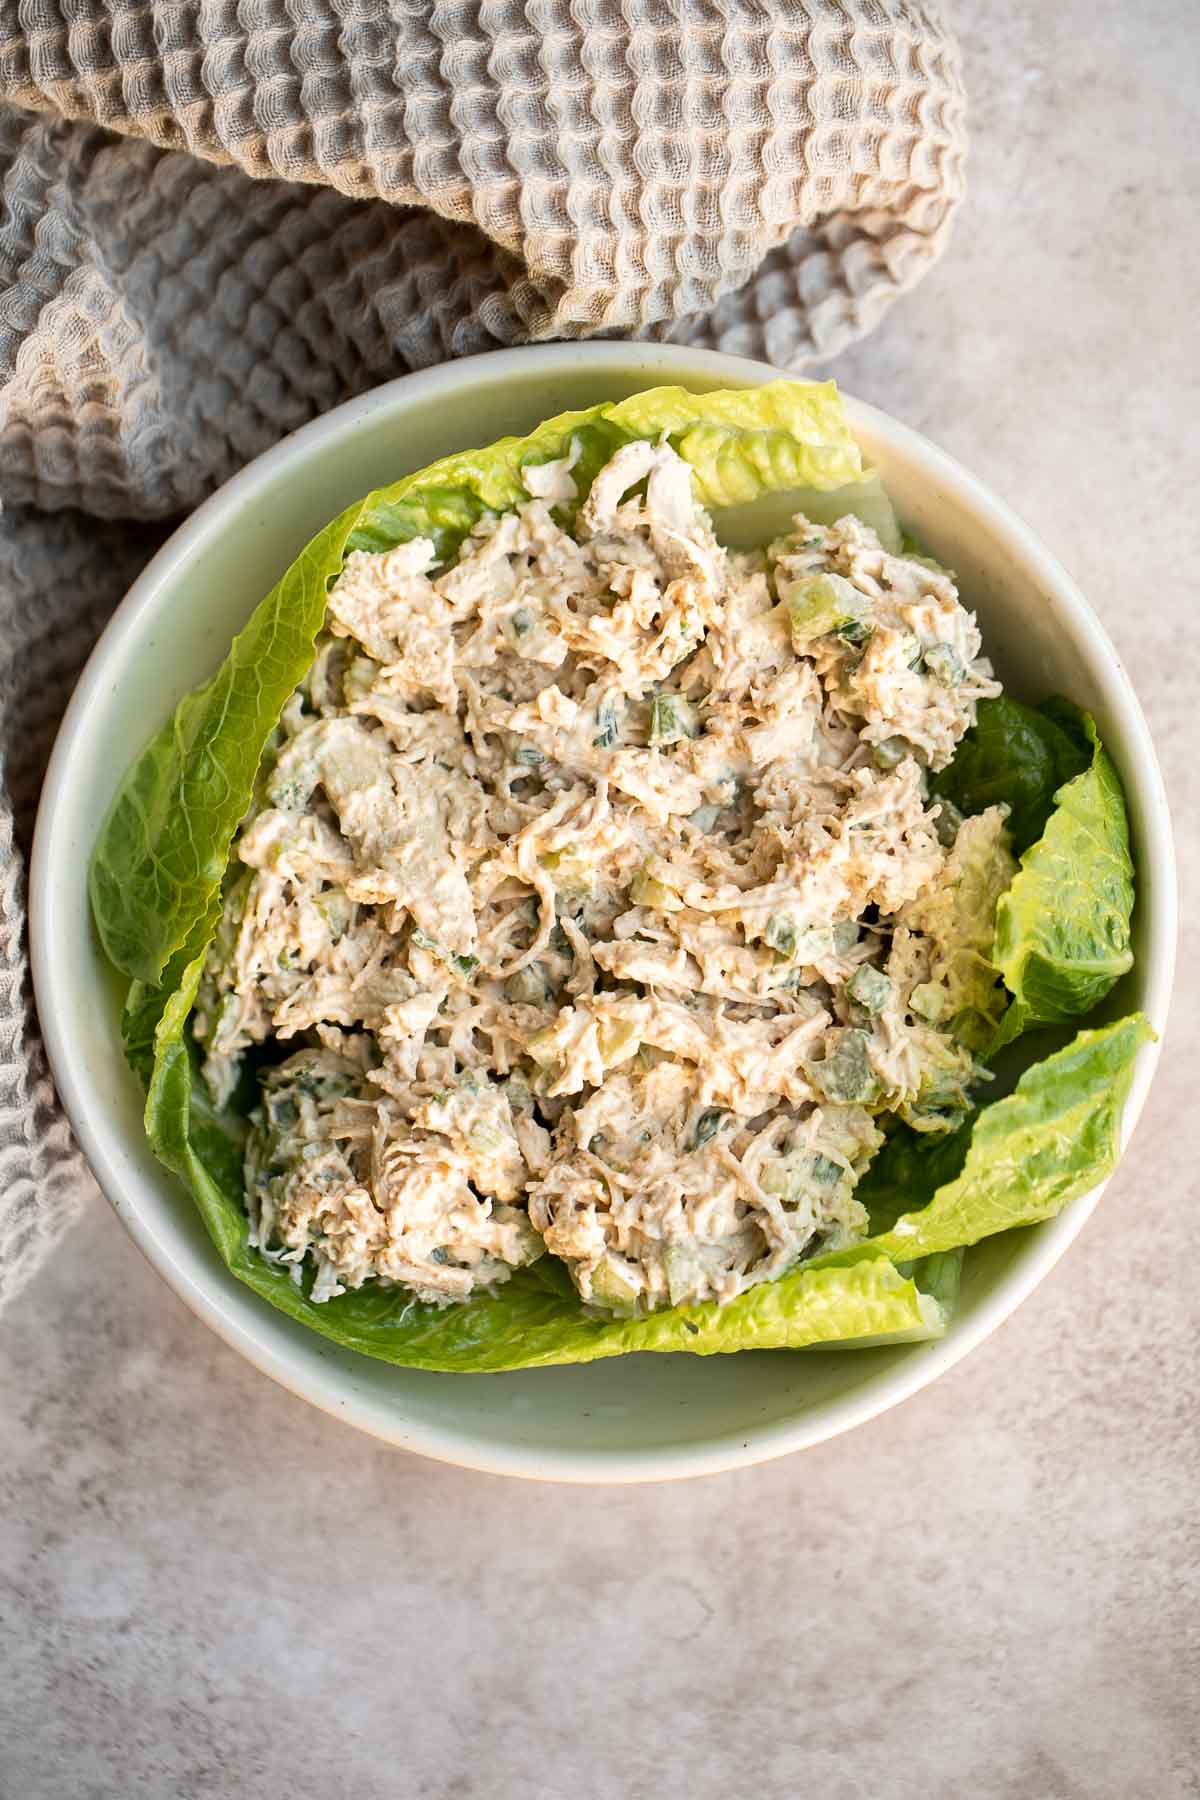

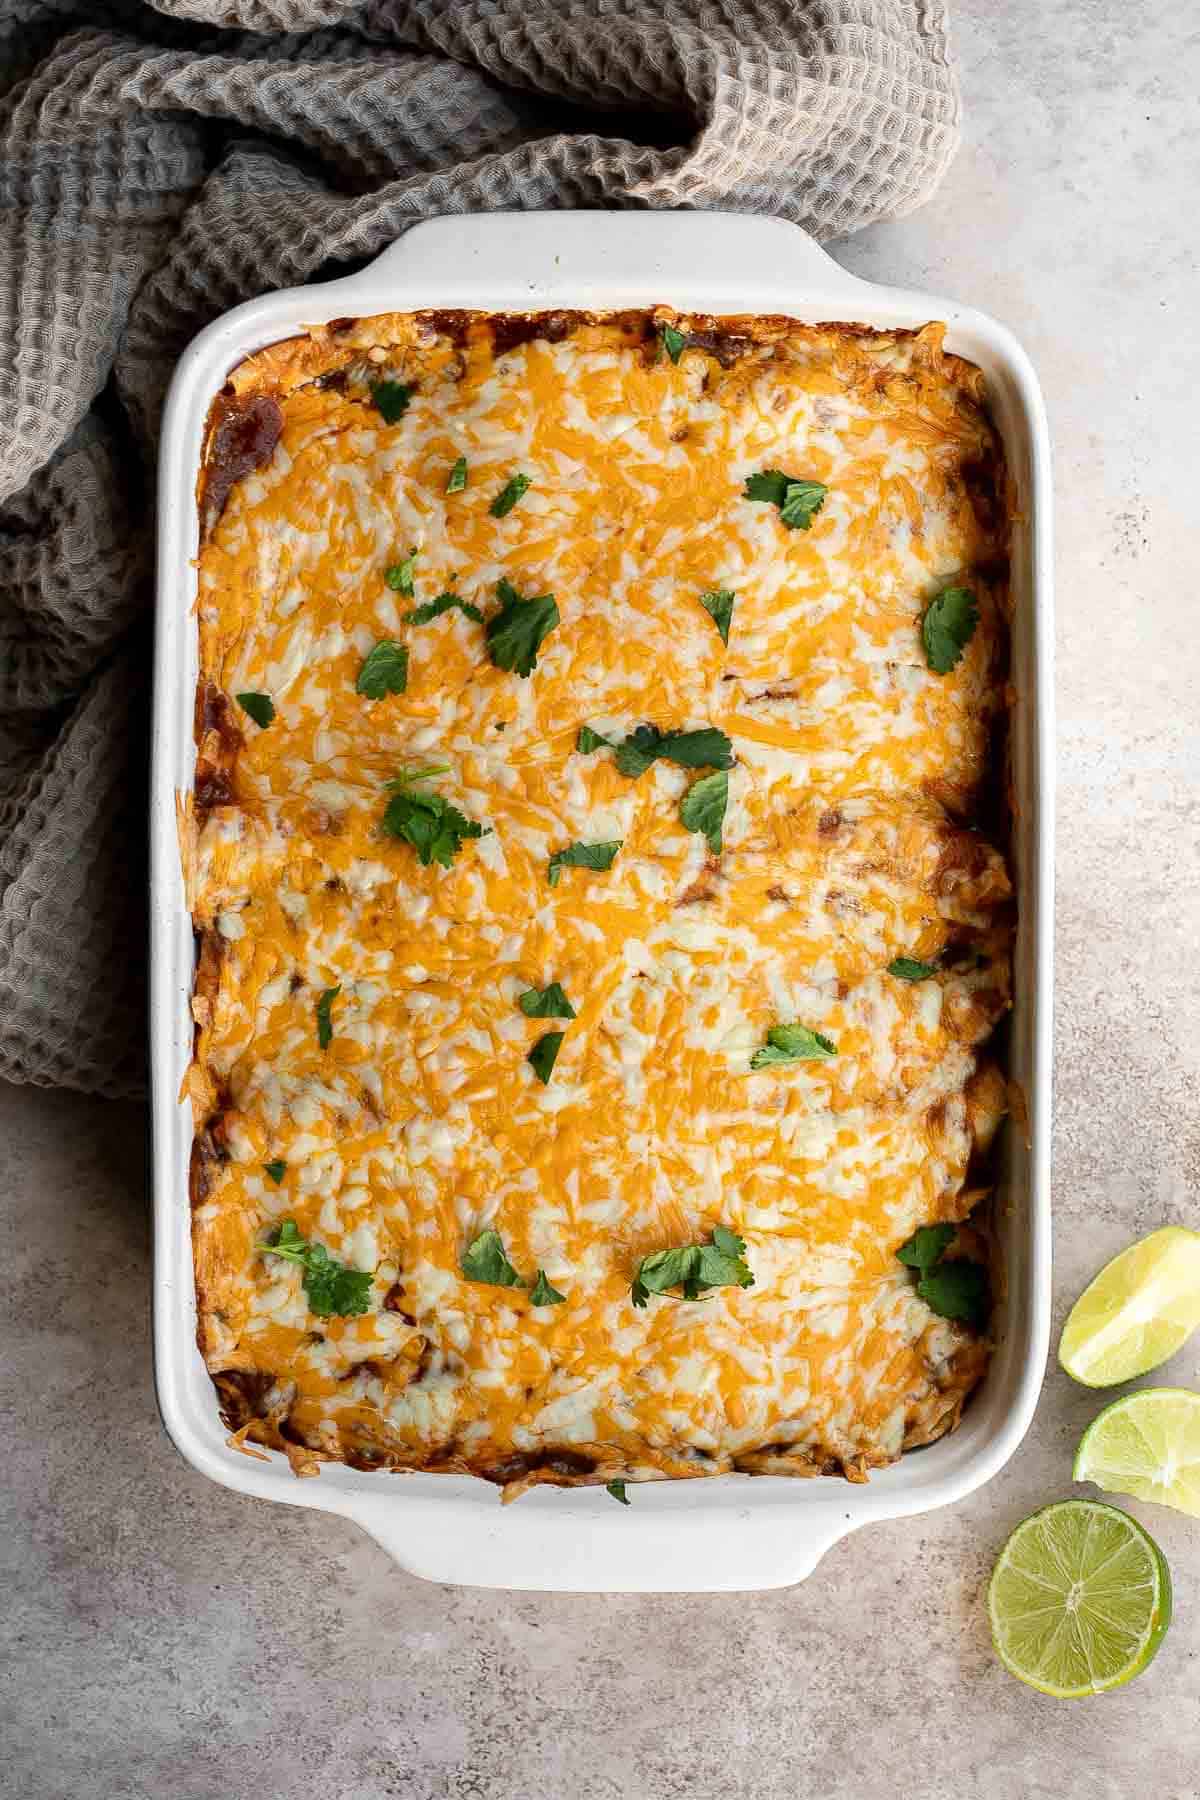
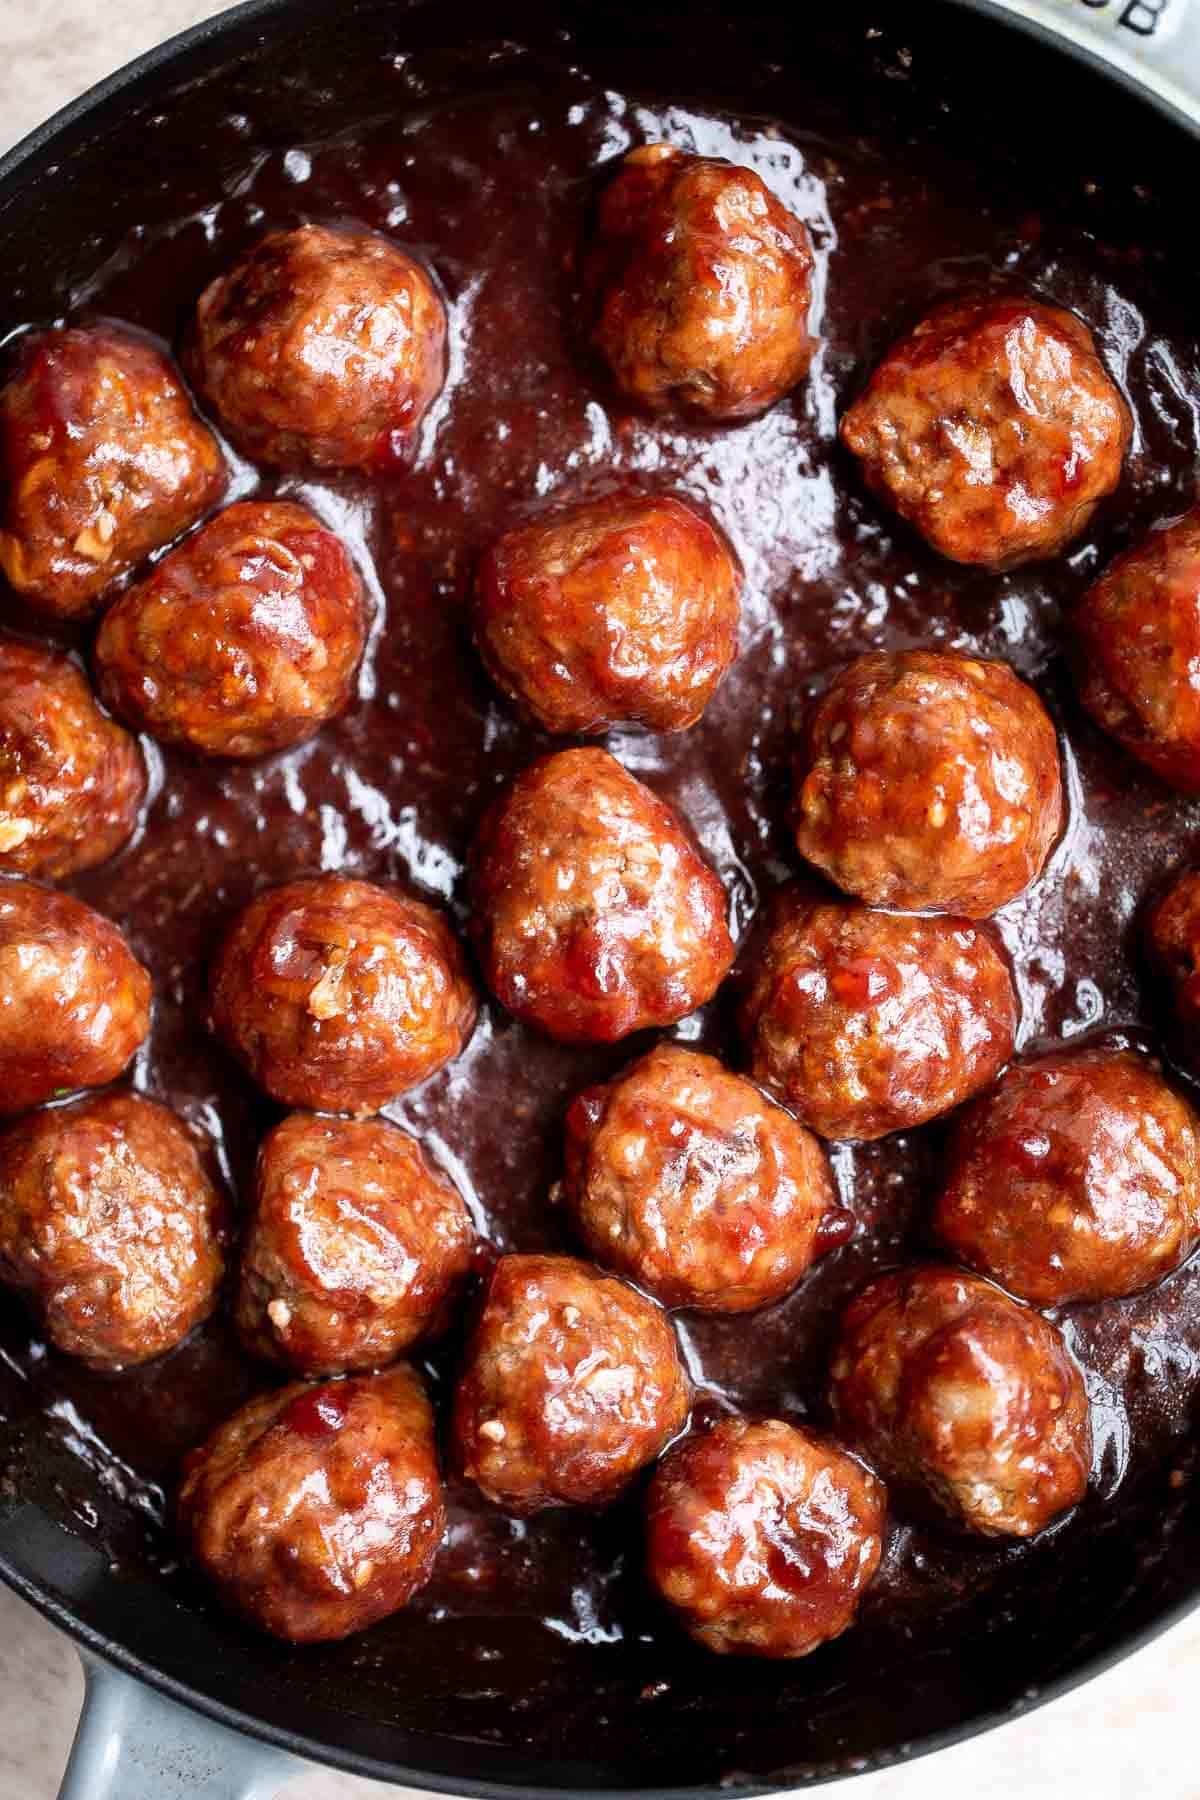
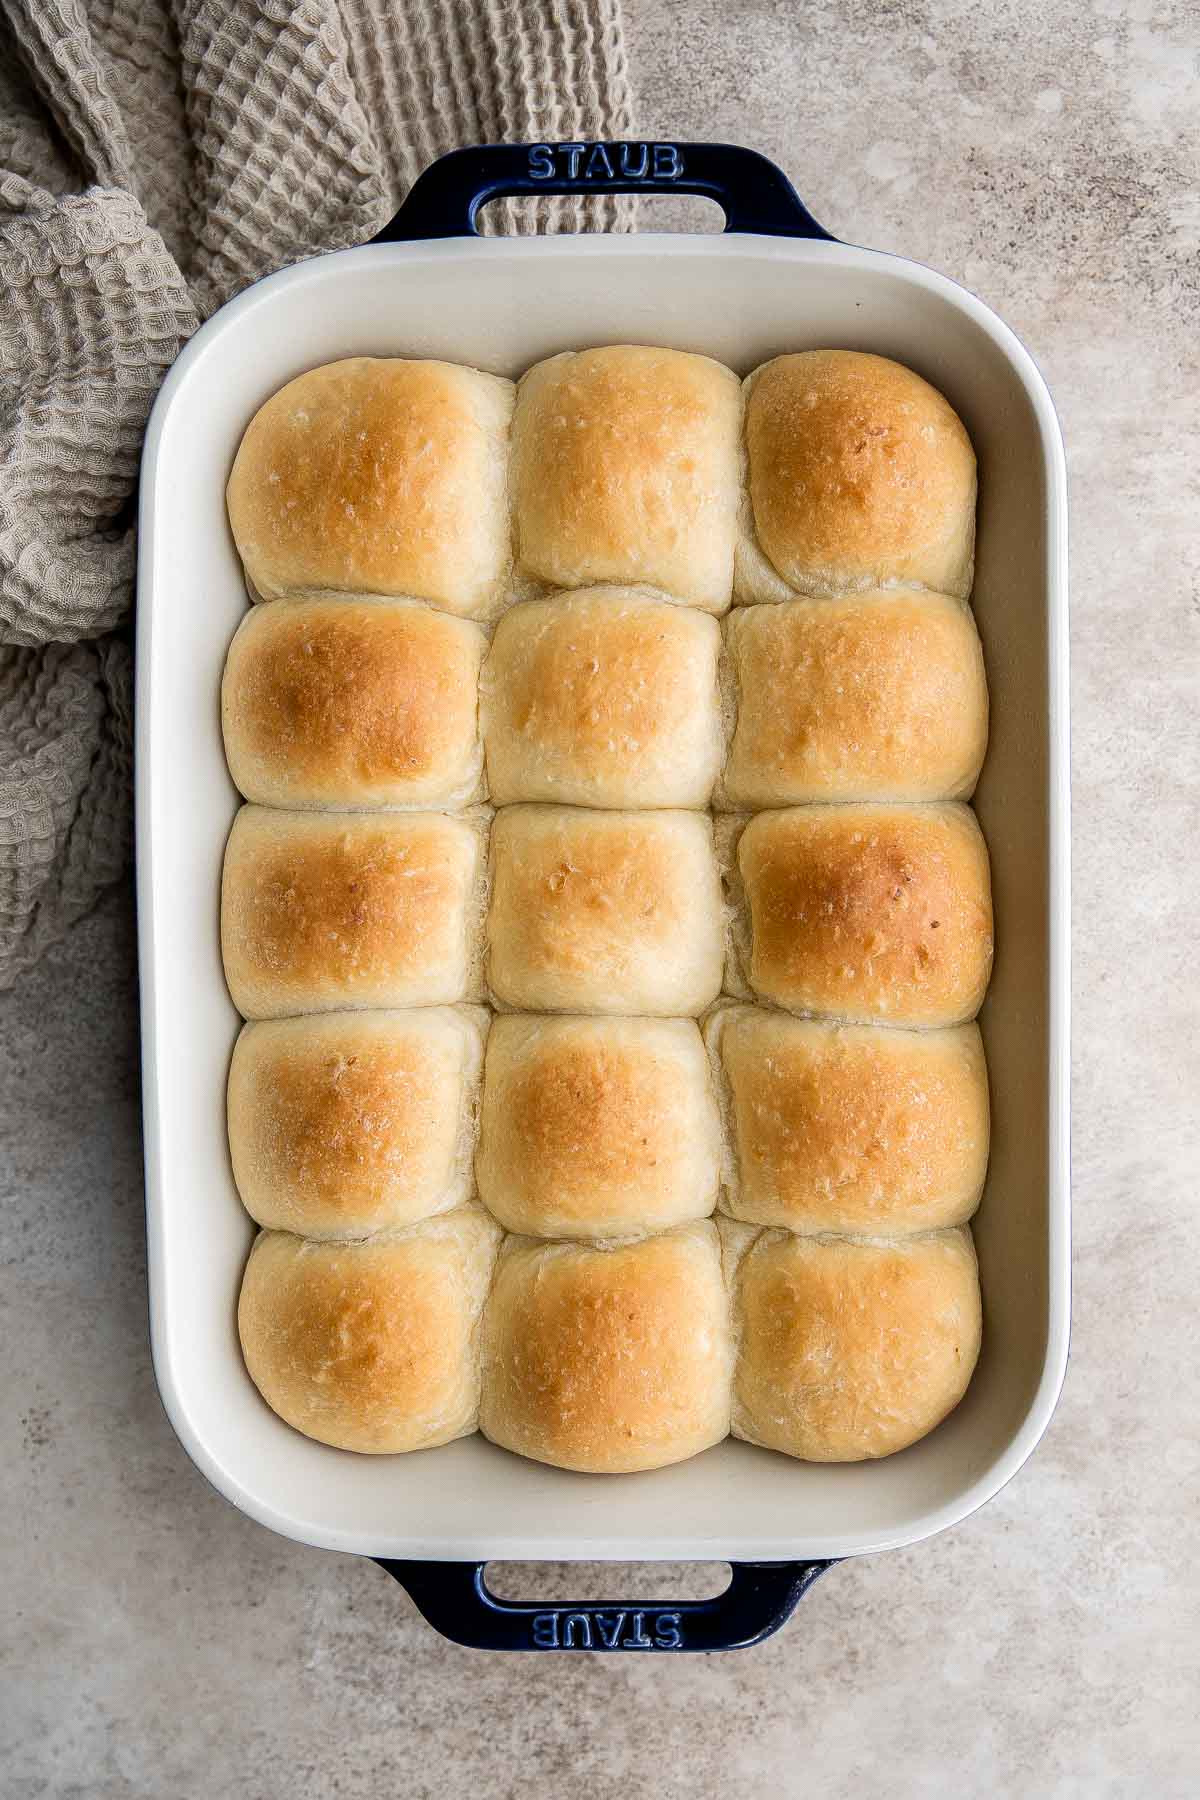
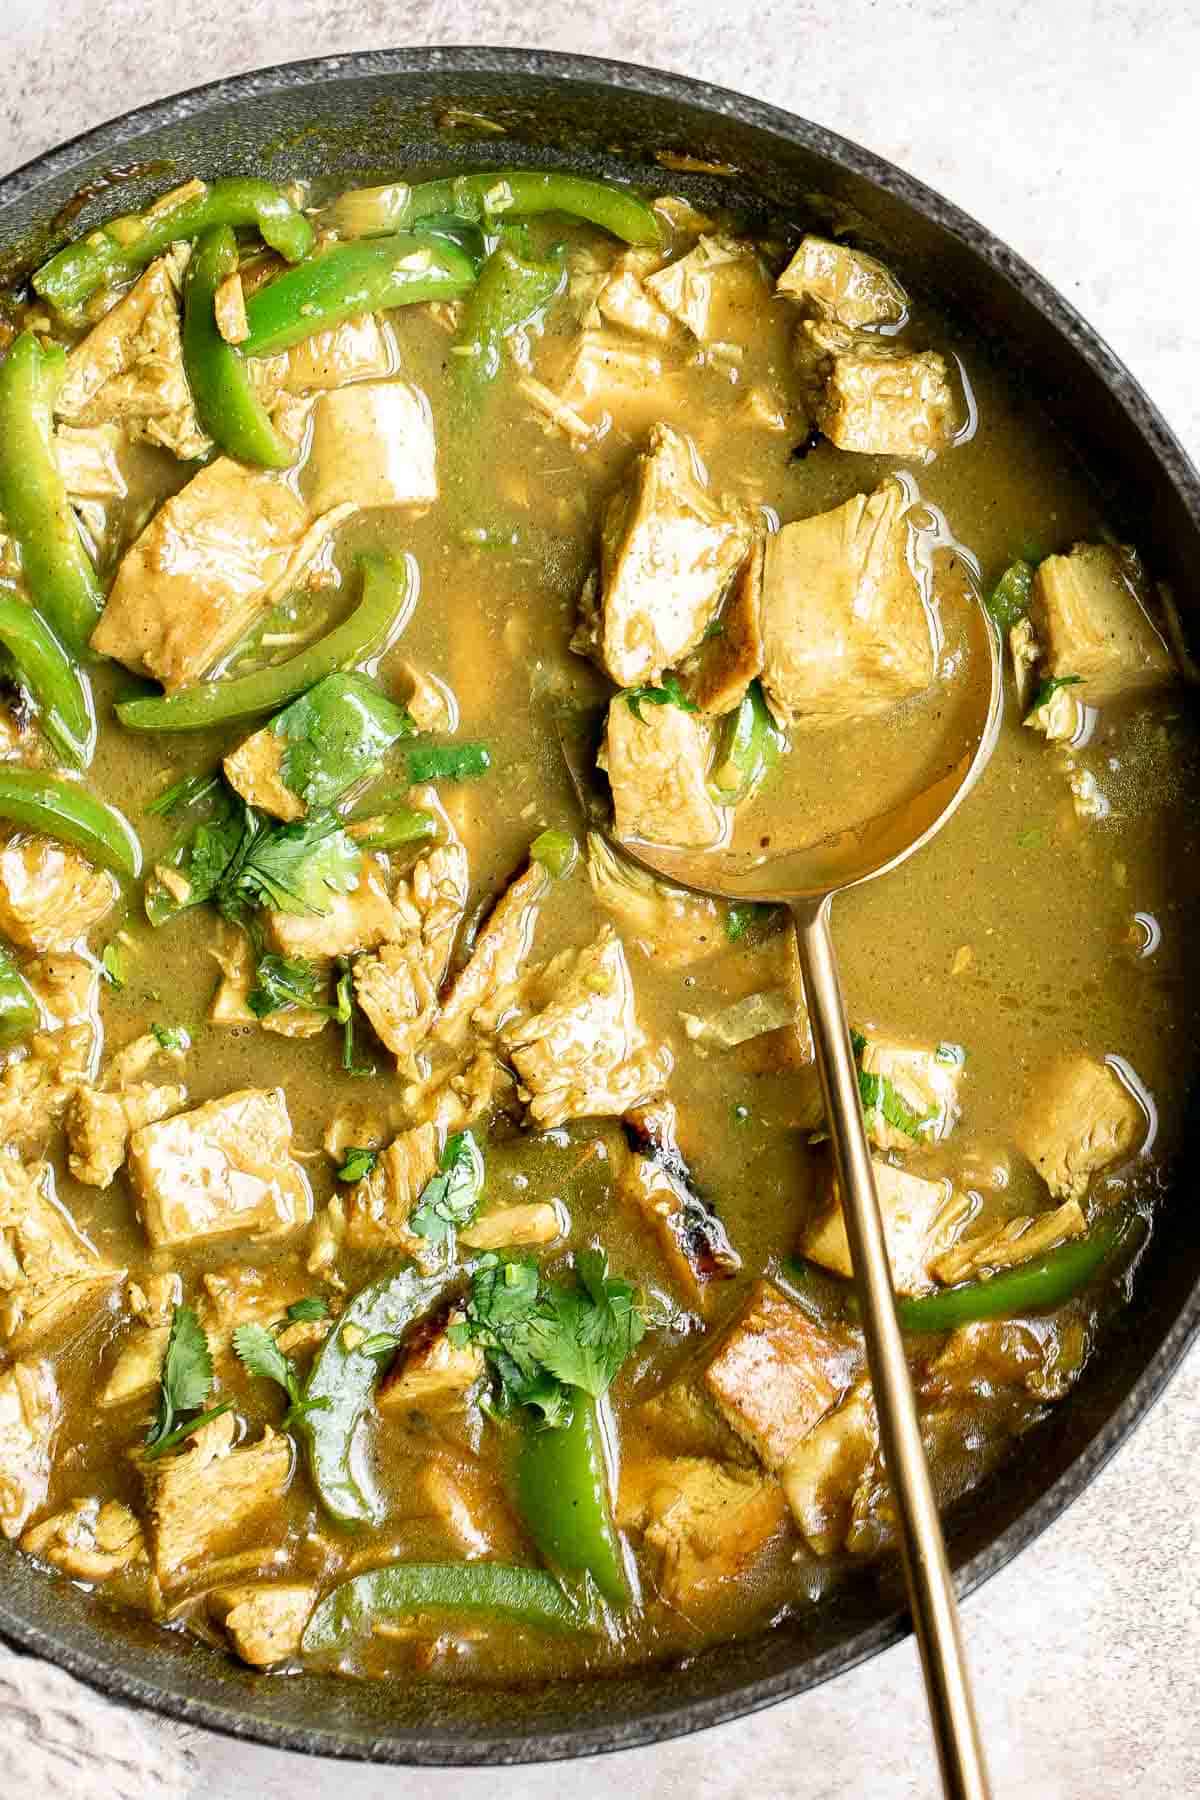
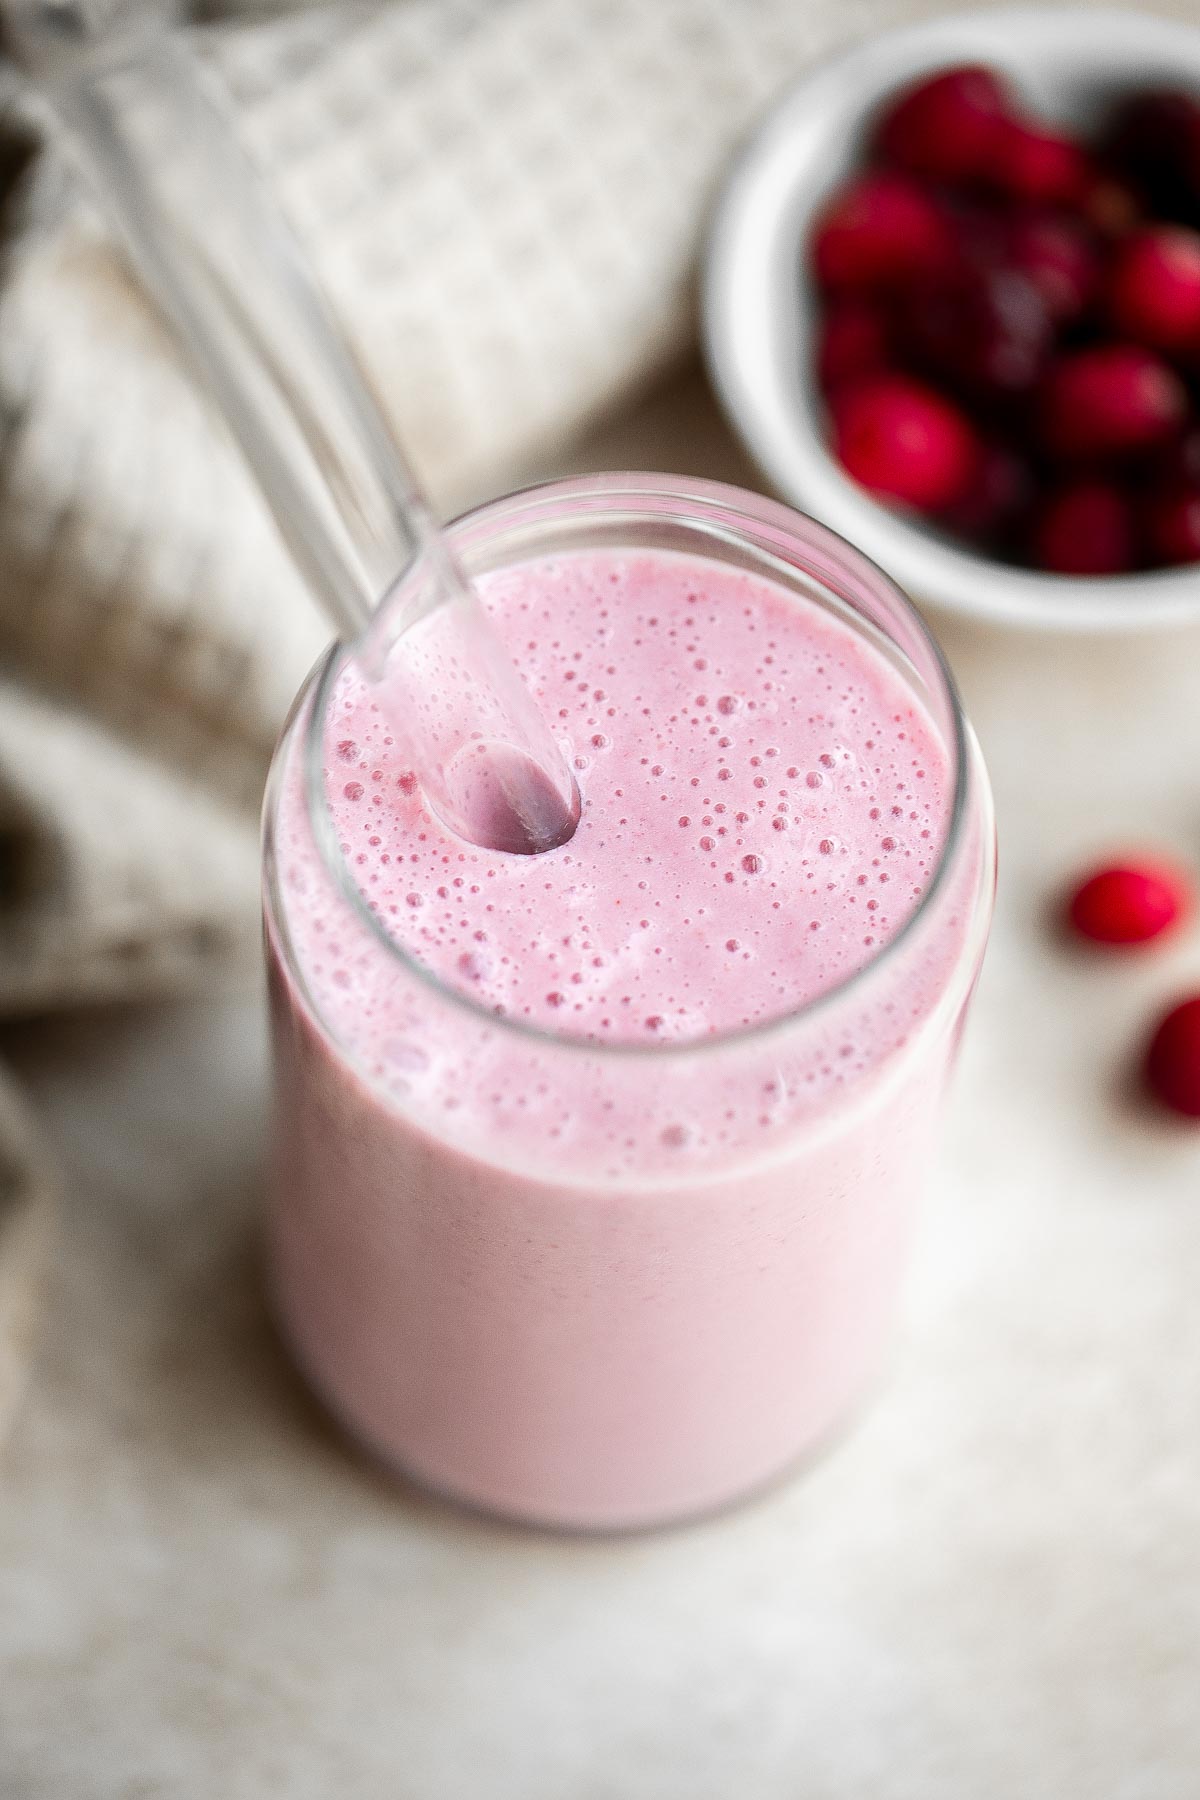
before you go!
Grab Your Free Thanksgiving Checklists!
Stay organized from prep to cleanup with my free Thanksgiving Checklists Pack - including your Thanksgiving dinner checklist, shopping list, recipe tracker, and day-of Thanksgiving checklist.
This post was originally published in 2022. It has since been updated with better tips and new printables.
Easy Roast Turkey Recipe (Best Juicy Thanksgiving Turkey)
This Easy Roast Turkey Recipe is your foolproof guide to making the best juicy Thanksgiving turkey ever - tender, golden, and bursting with flavor. With just a few simple ingredients, like olive oil (or butter), fresh herbs, and a touch of apple and cinnamon for aroma, you can create a perfectly roasted turkey that's beautifully crisp on the outside and moist inside every time.
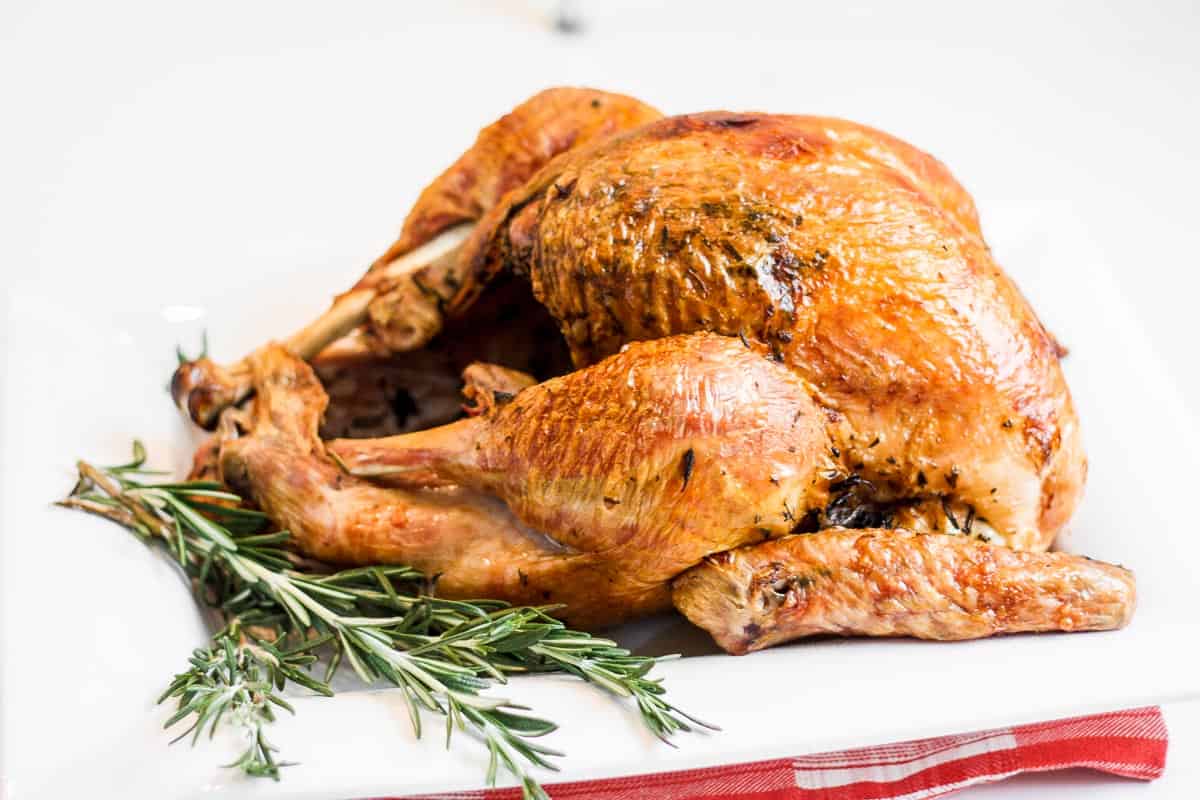
Even if it's your first time roasting a turkey, don't worry, this recipe is easy, straightforward, and completely stress-free. With a few simple techniques like patting the turkey dry, roasting at high heat to lock in moisture, and finishing low and slow, you'll get that perfect juicy bird that looks (and tastes) like it came straight out of a magazine.
This roast turkey recipe has been a Thanksgiving favorite for years because it delivers consistent results with minimal fuss. Whether you're hosting a small family dinner or cooking for a crowd, this simple method gives you all the rich flavor and tender texture of a traditional roast turkey - without the complicated brining, basting, or stress.

Why You'll Love This Recipe
- Juicy and tender every time. Roasting at high heat first helps crisp the skin and seal in the juices, while the low and slow finish ensures moist, perfectly cooked meat from edge to center. It's the best roast turkey recipe!
- Simple ingredients, incredible flavor. You only need a handful of ingredients (butter or olive oil, herbs, apple, and cinnamon) to create deep, rich flavor that's both savory and subtly aromatic.
- No complicated prep. There's no need for an overnight brine or complicated seasoning steps. This method keeps things simple and straightforward while still delivering big flavor.
- Perfect for the holidays. This is the Thanksgiving turkey recipe you'll come back to year after year - it's classic, foolproof, and always impressive on the table.
The Secret to the Perfect Roast Turkey
So what's the secret to the perfect roast turkey? It's all about roasting it at a higher heat for a shorter period of time. That's right - you no longer need to spend five hours tending to your bird or pull it out every hour to baste or brine. Just prep it, pop it in the oven, adjust the temperature once midway, and let the oven do the rest. It's truly the easiest and juiciest way to roast a turkey, and the flavor payoff is unbeatable.
I also like to stuff the cavity with apples, a cinnamon stick, and plenty of fresh herbs. Not only does this fill the kitchen with the most incredible aroma, but it also infuses the turkey drippings with deep, rich flavor, which also equals the perfect base for a truly amazing homemade gravy.
Ingredients and Substitutions
To make this delicious roast turkey recipe, you will need the following ingredients (see recipe card below for quantities):
- turkey - Choose a fresh or frozen turkey that's fully thawed before cooking. Plan for about 1 to 1½ pounds of turkey per person. Remove the bag of giblets and turkey neck from inside the cavity before roasting - you'll use them later for homemade gravy.
- olive oil or butter - Either works beautifully for coating the skin of the turkey. Butter gives a richer flavor, while olive oil helps achieve a golden crisp skin.
- salt and pepper - Essential for seasoning.
- aromatics - Stuff the cavity with apple, a cinnamon stick, and plenty of fresh herbs. These add amazing flavor and make the kitchen smell like the holidays. For extra flavor, add in fresh onion, quartered lemon, and parsley.
- apple - Adds subtle sweetness and moisture inside the cavity. You can use pear or orange slices for a different twist.
- cinnamon stick - Infuses gentle warmth and aroma. Optional, but it makes the kitchen smell amazing.
- fresh herbs - Use classic herbs like rosemary, thyme, and sage for turkey.
Equipment
You'll also need measuring cups and spoons, a large roasting pan with rack, twine for tying the legs, basting brush, instant-read thermometer, and aluminum foil for resting the turkey.
Instructions on How to Make the Best Juicy Roast Turkey
- Prep the oven. Preheat oven to 500°F and position the rack on the lowest level.
- Clean and prep the turkey. Remove the bag of giblets and turkey neck from inside the turkey cavity and set aside for gravy or stock. Rinse the turkey inside and out under cold water, then pat it completely dry with paper towels. Place the turkey on a roasting rack set inside a roasting pan, breast side up, and tuck the wings under the body.
- Season the turkey. Generously rub olive oil or softened butter all over the turkey, including under the skin if possible. Season evenly with salt and black pepper, making sure to cover every surface. For even more flavor, sprinkle some chopped herbs (rosemary, thyme, or sage) over the top of the bird if you like.
- Add aromatics. Insert the apple slices, cinnamon stick, and fresh herbs into the cavity of the turkey for subtle aroma and flavor. Tie the turkey legs together with twine to keep the shape even during roasting.
- Roast at high heat. Place the turkey in the oven and roast for 30 minutes at 500°F to crisp the skin and seal in moisture.
- Reduce heat and continue roasting. Lower the oven temperature to 350°F and continue roasting until the internal temperature reaches 165°F (74°C) in the thickest part of the breast meat. For a 14-16 pound turkey, this takes about 2 to 2½ hours total. Use an instant-read thermometer for accuracy. If the top of the turkey starts to brown too quickly, lightly cover it with a foil tent to prevent burning.

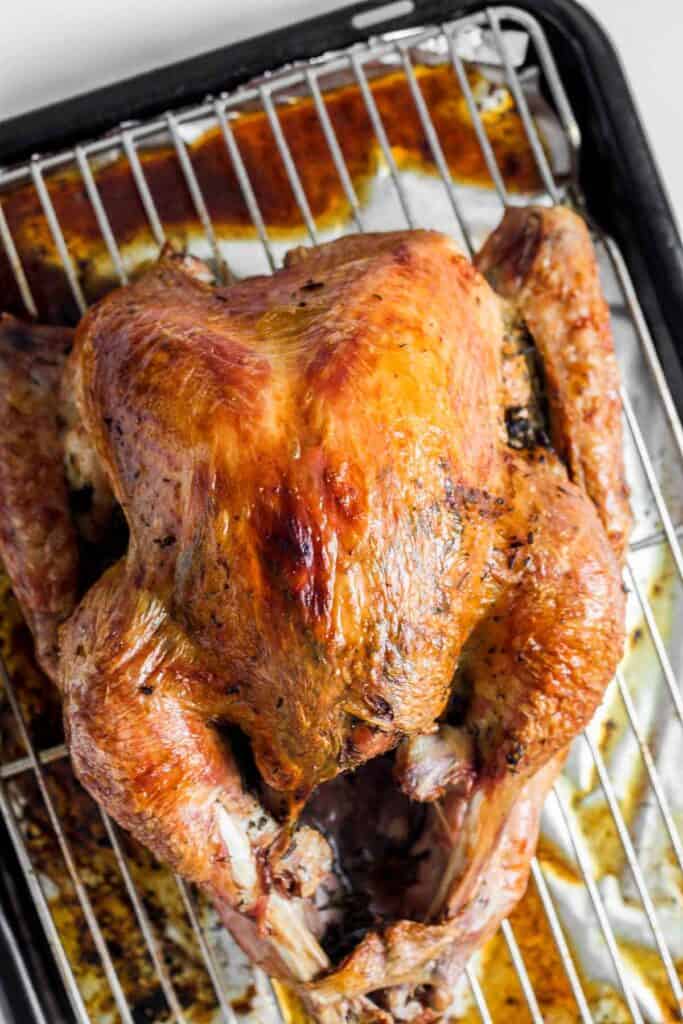
- Rest before carving. Remove the turkey from the oven, cover the entire turkey loosely with foil, and let rest for 15-20 minutes to allow the juices to redistribute. Reserve the pan drippings (juices at the bottom of the pan) for homemade gravy.
- Carve and serve. Transfer the turkey to a cutting board or platter, carve, and serve with your favorite holiday sides like mashed potatoes, stuffing, and cranberry sauce.
Homemade Turkey Gravy
This recipe also gives you everything you need to make the best turkey gravy! Almost all the flavor is already right there in the turkey. Just be sure to save the neck and giblets when prepping - you'll need them to make a rich turkey stock. And don't toss those golden pan drippings after roasting, they're liquid gold for gravy. Follow my easy Homemade Turkey Gravy Recipe, and you'll never go back to powdered gravy again. If you're already making a roast turkey dinner, you might as well go all in!
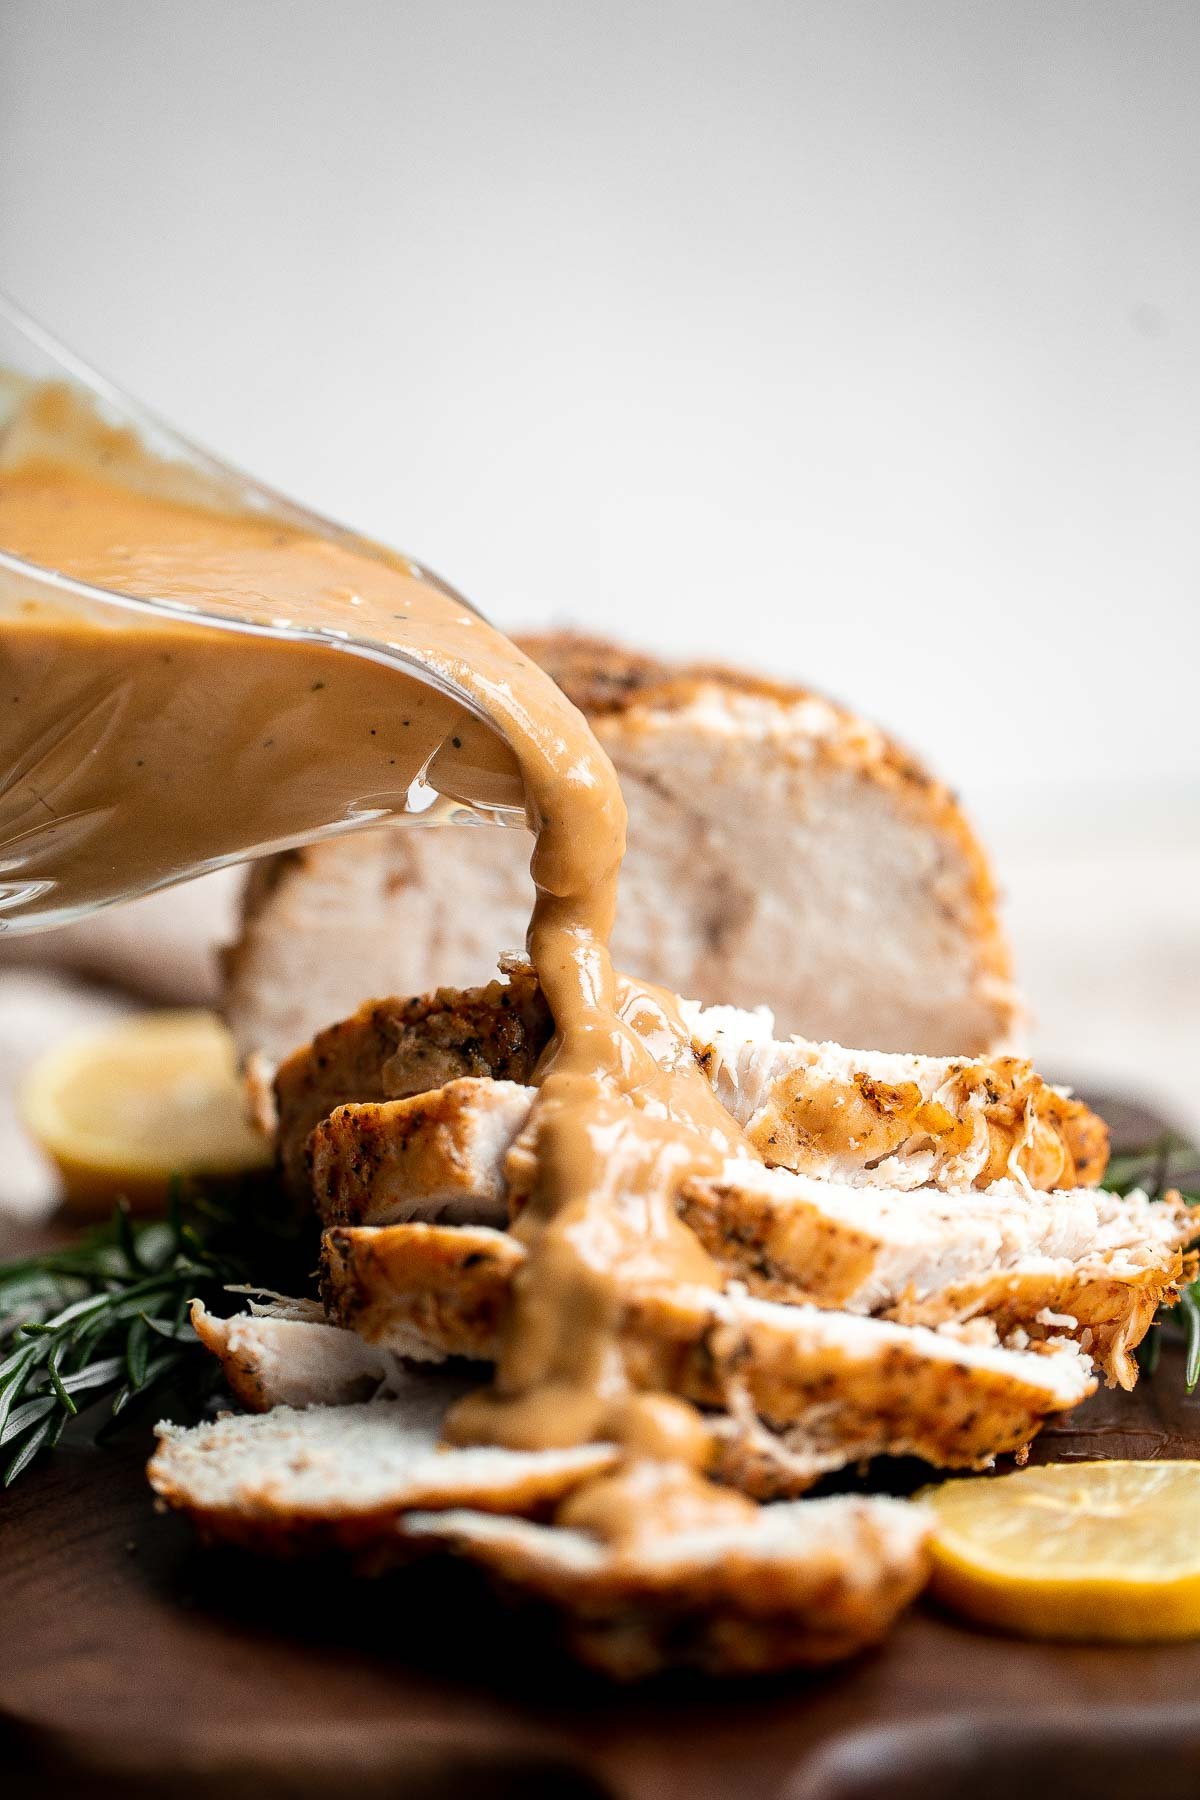
Expert Tip: Use a Meat Thermometer for Perfect Results
Every oven is a little different, and turkey sizes vary. The most reliable way to ensure juicy, perfectly cooked meat is by using a meat thermometer. Check both the thickest part of the breast and the inner thigh - both should register 165°F for doneness.
More Tips and Tricks
- Always thaw a frozen turkey. Always thaw a frozen turkey completely before roasting. One day in the fridge per 4 pounds of turkey is a good rule of thumb. Starting with a cold or partially frozen bird can affect cooking time and evenness.
- Pat the turkey dry for crispy skin. For extra crispy, golden skin, pat the turkey completely dry with paper towels before seasoning. This removes surface moisture so the oil or butter sticks better and helps the skin crisp up beautifully in the oven.
- Start hot, finish low. That initial 500°F roast crisps the skin and locks in juices before the slow roast cooks it evenly.
- Don't overbake. Turkey keeps cooking slightly after it's removed from the oven. Pull it out once it hits 160°F, and it will rise to 165°F while resting.
- Let it rest. Always rest your turkey before carving. It's the secret to juicy meat.
- Add flavor with herbs and aromatics. Herbs like sage, rosemary, and thyme add rich flavor without overpowering the meat.
- Save the drippings. Use the drippings for homemade turkey gravy or to flavor soups and stuffing.
- Planning tip. When planning your holiday season timeline, budget about 15 minutes per pound of turkey for roasting and another 30 minutes for resting and carving. See our Thanksgiving Dinner Prep Guide + Checklists for more planning tips.
Recipe Variations
- Use herb butter. Rub softened garlic herb butter under the skin before roasting for even richer flavor.
- A citrus twist. Add orange or lemon slices to the cavity for a bright, aromatic twist.
- Dry-brine the turkey. Season the bird with kosher salt and refrigerate uncovered overnight for even crisper skin and better flavor.
- Add roasted vegetables. Roast your turkey over a bed of carrots, onions, and celery to create a flavorful base for drippings and gravy.
- Try a smaller turkey breast version. Roast a bone-in turkey breast at 350°F for 1½ to 2 hours for an easier, smaller portion option. See our Easy Juicy Roasted Turkey Breast.
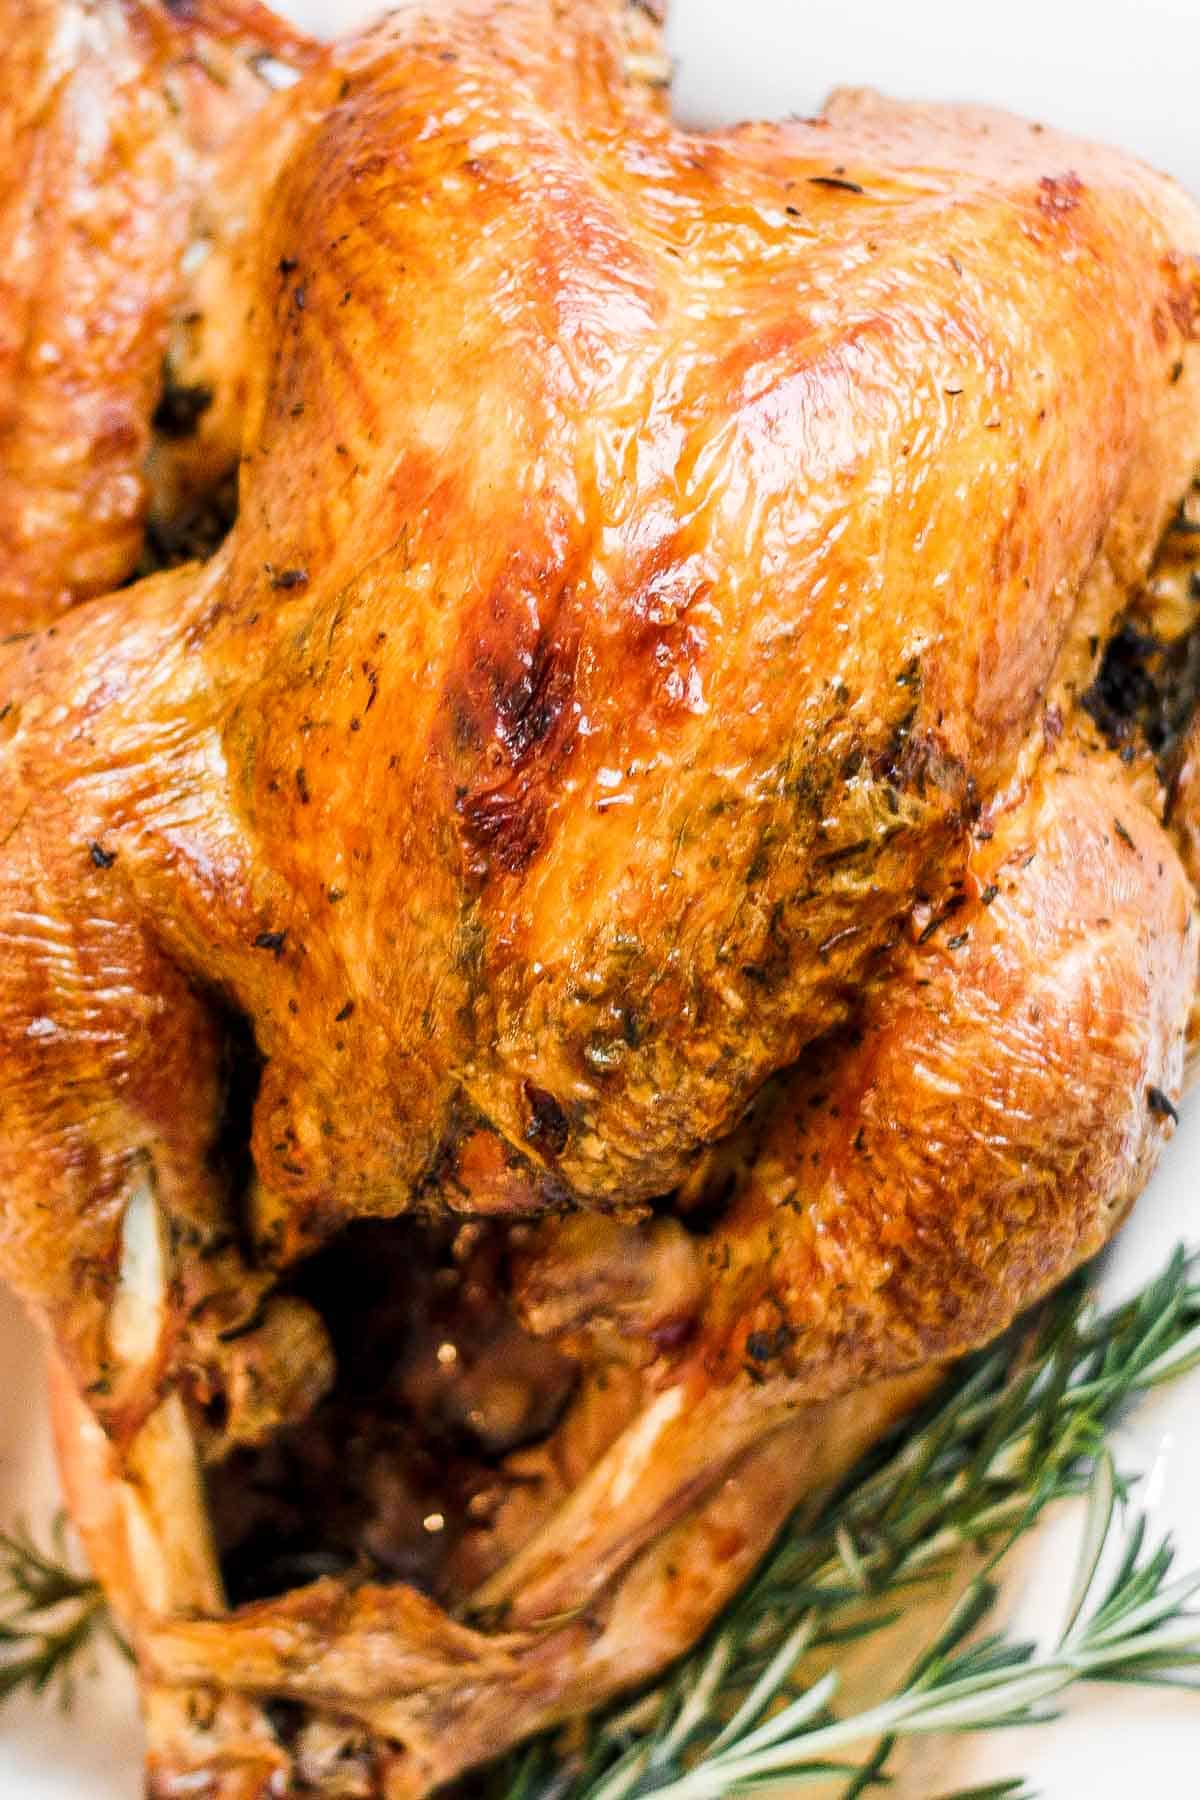
Storage
How to Store
Store leftover turkey in an airtight container in the refrigerator for up to 4 days.
How to Reheat
Reheat slices in the oven at 325°F covered with foil until warmed through, or heat gently in the microwave with a splash of broth to retain moisture.
How to Freeze
Freeze carved turkey meat in airtight bags for up to 3 months. Thaw in the fridge overnight before reheating.
How to Serve
Roast turkey is the centerpiece of any holiday table. Serve with gravy, stuffing, mashed potatoes, cranberry sauce, and roasted vegetables for the ultimate Thanksgiving dinner. For something lighter, pair it with garlic green beans, fall salads, or fresh dinner rolls.
These are my favorite side dishes to serve with roast turkey:
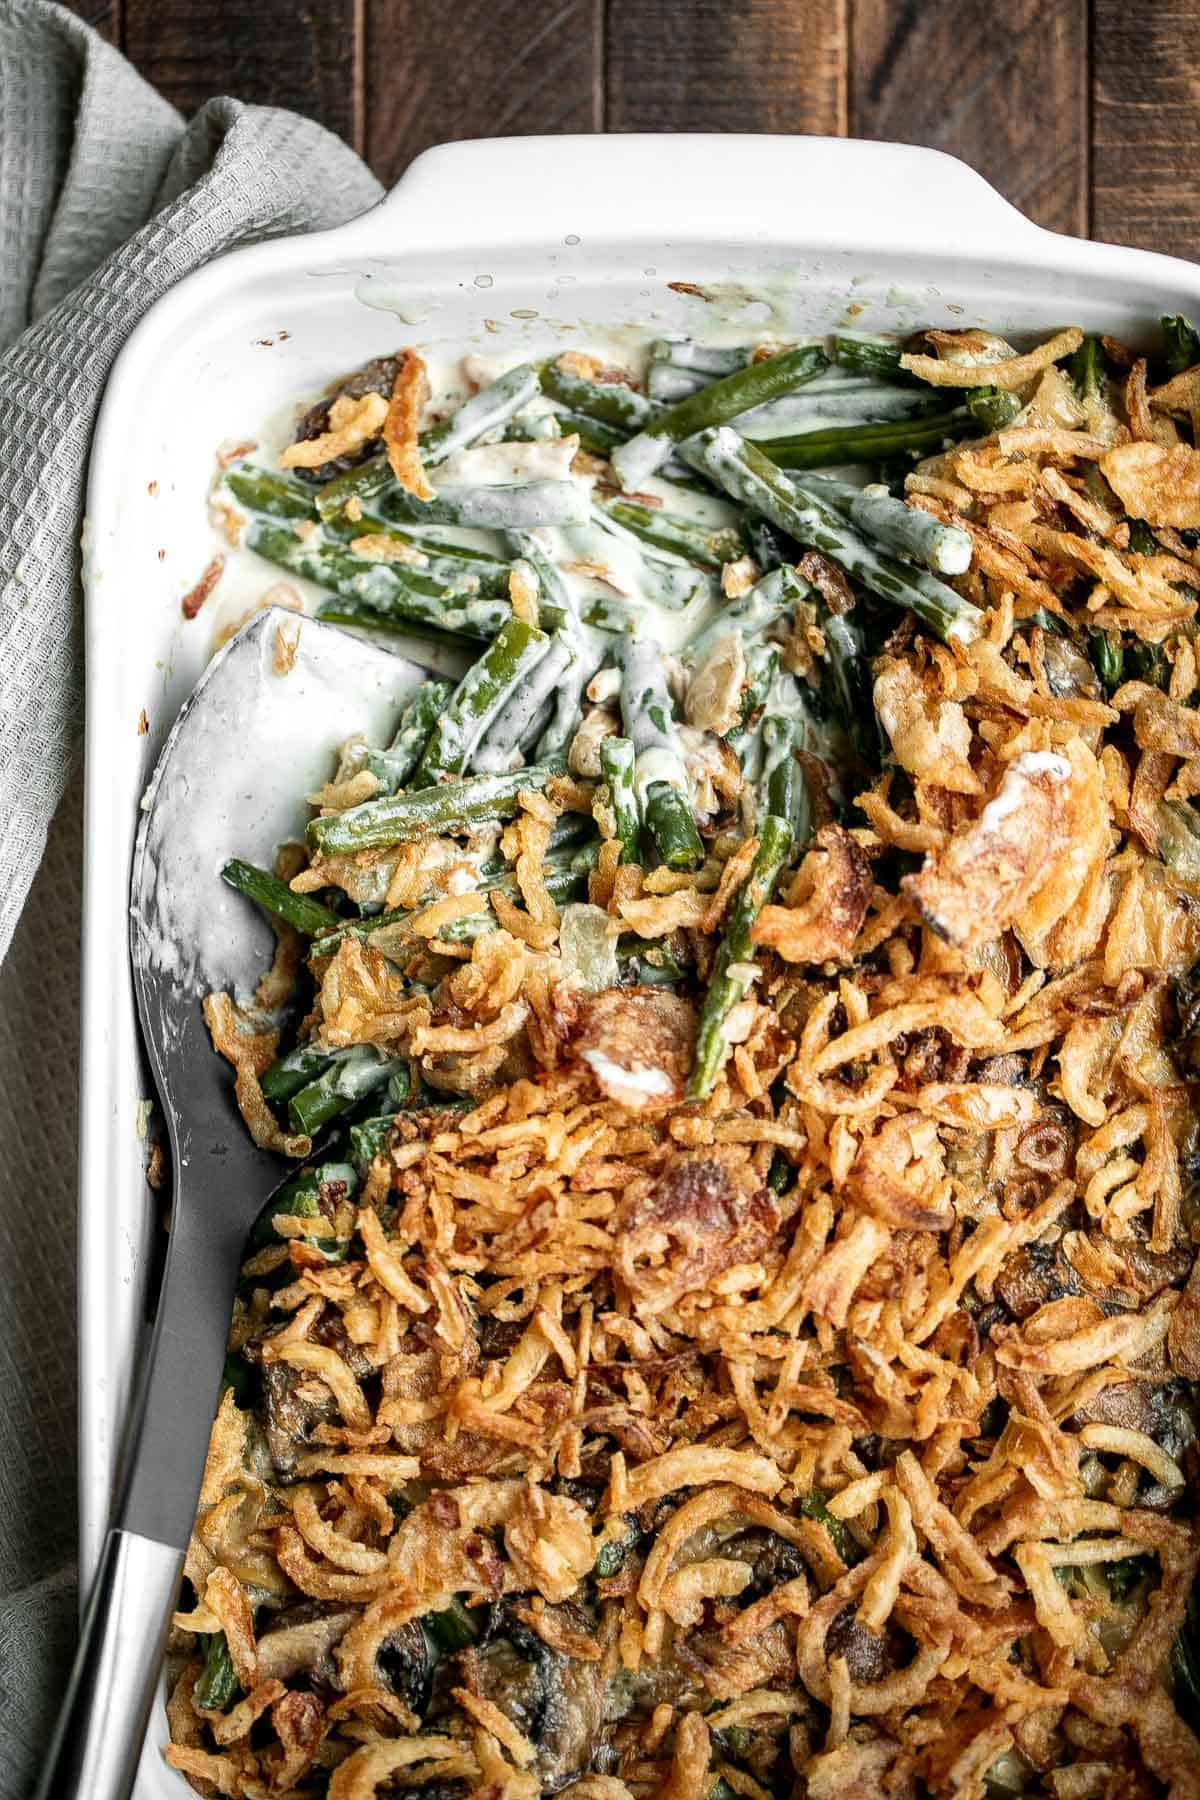
Thanksgiving Side Dishes
If serving this as part of your Thanksgiving feast, explore our collection of classic and creative sides. From creamy mashed potatoes and roasted vegetables to savory stuffing, vibrant salads, and flavorful casseroles, these recipes perfectly complement any main course.
FAQ
Start with a fully thawed turkey, pat it completely dry, and season it generously. Roast at a high temperature first to crisp the skin, then reduce to 350°F to finish cooking evenly. Use an instant-read thermometer, and let the turkey rest before carving. A touch of butter or olive oil, fresh herbs, and aromatics like apple and cinnamon inside the cavity guarantee maximum flavor and moisture every time.
A turkey generally needs 13-15 minutes per pound at 350°F if unstuffed, or about 15-17 minutes per pound if stuffed. So for a 14 to 16-pound turkey, expect around 2½ to 3½ hours total cook time. Always use an instant-read thermometer to confirm doneness - the thickest part of the breast should reach 165°F, and the thigh should reach 175°F. Keep in mind that every oven varies, so begin checking earlier to avoid overcooking. Once done, let the turkey rest for 15-20 minutes before carving to keep it juicy.
Use the regular bake or roast setting, not convection unless specified. The standard bake function ensures gentle, even heat. If using convection roast, reduce the temperature by about 25°F and monitor closely since convection cooks faster.
Both work, but 350°F strikes the best balance between even cooking and golden-brown skin. Roasting at 325°F yields a slightly slower cook, which is gentler but won't crisp the skin quite as well. If you start the turkey at a higher temperature (like 450-500°F for 30 minutes) and then lower it to 350°F for the remainder, you'll get the perfect combination: browned, crispy skin and moist, tender meat underneath.
The sweet spot is 350°F. At this temperature, the turkey cooks through evenly without drying out the white meat. Starting high (around 450°F for 30 minutes) helps brown the skin quickly, then lowering to 350°F allows the interior to cook slowly and stay juicy. Remove the turkey when the thickest part of the breast reaches 165°F - it will rise a few degrees while resting to finish perfectly.
You don't need to. Adding water or stock to the pan will create steam, which softens the skin instead of crisping it. For a beautiful roasted turkey, roast it dry - the turkey's natural juices will drip into the pan, creating flavorful drippings you can use for gravy later.
Place the turkey on the lowest oven rack, ensuring the top is centered and has enough clearance for air to circulate. This helps the legs cook through without burning the top. If using a roasting pan, place the turkey on a roasting rack to lift it above the drippings.
It's best to roast your turkey uncovered so the skin becomes golden and crisp. However, if the bird starts browning too quickly before it reaches temperature, loosely cover it with aluminum foil to prevent over-browning. Some cooks like to tent the turkey for the first hour and uncover it near the end, but roasting uncovered from the start usually gives the most evenly crisp skin.
No lid is needed. You want the hot, dry oven air to circulate freely around the bird to develop crisp, golden skin. Cover the turkey loosely with foil only if the top starts browning too quickly.
No rack? No problem. Layer the bottom of your roasting pan with roughly chopped onions, carrots, and celery, or even roll small balls of foil to lift the turkey slightly. This lets air circulate underneath and keeps the turkey from sitting in its juices while roasting.
The secret lies in three steps: pat the turkey dry, season generously, and roast at two temperatures (a high heat to crisp the skin, then lower to cook through). Basting isn't required if you coat the turkey with enough butter or oil. For extra insurance, you can dry-brine the turkey overnight with salt to lock in moisture before roasting. Always allow the meat to rest so the juices reabsorb before carving.
The key to a juicy turkey is not overcooking and letting it rest. Use a meat thermometer to track the internal temperature and pull the turkey from the oven as soon as the breast reaches 165°F. Rubbing the bird with olive oil or butter helps lock in moisture and encourages browning. Roasting with aromatics (like apples, rosemary, and sage) also keeps the meat flavorful. Letting the turkey rest before carving redistributes the juices for tender, moist slices.
The biggest mistakes are overcooking, not using a thermometer, and skipping the rest time. Other pitfalls include not drying the turkey before roasting (which prevents crisp skin), stuffing it too tightly, or roasting at one constant temperature. Also, avoid opening the oven too often, which lets out heat and extends cooking time.
Don't roast straight from the fridge - let it rest at room temperature for 30-45 minutes first. Don't forget to remove the giblets, don't overstuff the cavity, and don't skip seasoning the skin. Lastly, don't carve the turkey immediately; it needs time to rest so the juices settle back into the meat.
More Turkey Recipes
Looking for other recipes like this? Try these:

Tried this recipe?
I'd love to hear what you think! Leave a comment and rating below to share your feedback. Your reviews help others discover this recipe and help me keep creating more free recipes for you. Snap a photo and tag me on social media @aheadofthyme too.
This recipe was originally published in 2018, but has since been updated with more content and tips.
Sautéed Green Beans and Mushrooms
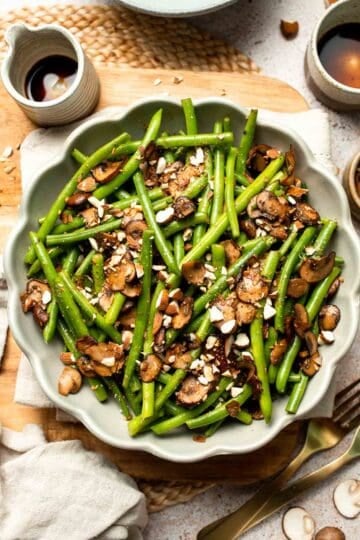
Sautéed Green Beans and Mushrooms are a quick and flavorful side dish that's ready in just 25 minutes. Crisp-tender green beans meet golden sautéed mushrooms and fragrant garlic, all tossed in a light soy-balsamic glaze that adds the perfect savory balance. It's simple, fresh, and packed with umami - the kind of vegetable side that tastes restaurant-worthy but is weeknight-easy.
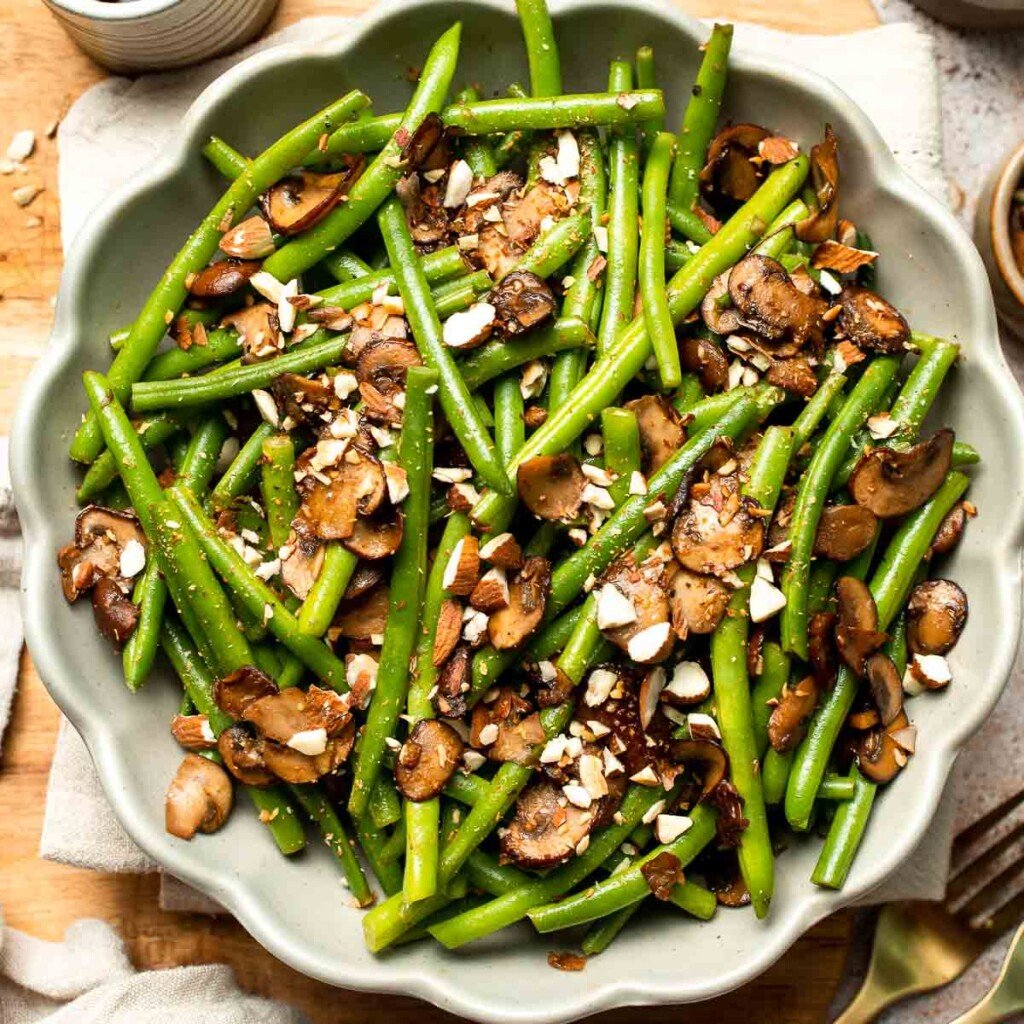
This dish brings together the best of both worlds: everyday simplicity and holiday elegance. It pairs beautifully with anything from roasted chicken and salmon to hearty beef mains and vegetarian dishes. Serve it for Thanksgiving, Christmas, or just because you want a colorful, wholesome veggie on the table that everyone actually wants to eat.
If you love garlicky, buttery sides like my Air Fryer Garlic Green Beans or Balsamic Roasted Carrots, this one's a must-try. The combination of tender green beans, earthy mushrooms, and a hint of tangy sweetness makes it a year-round favorite.
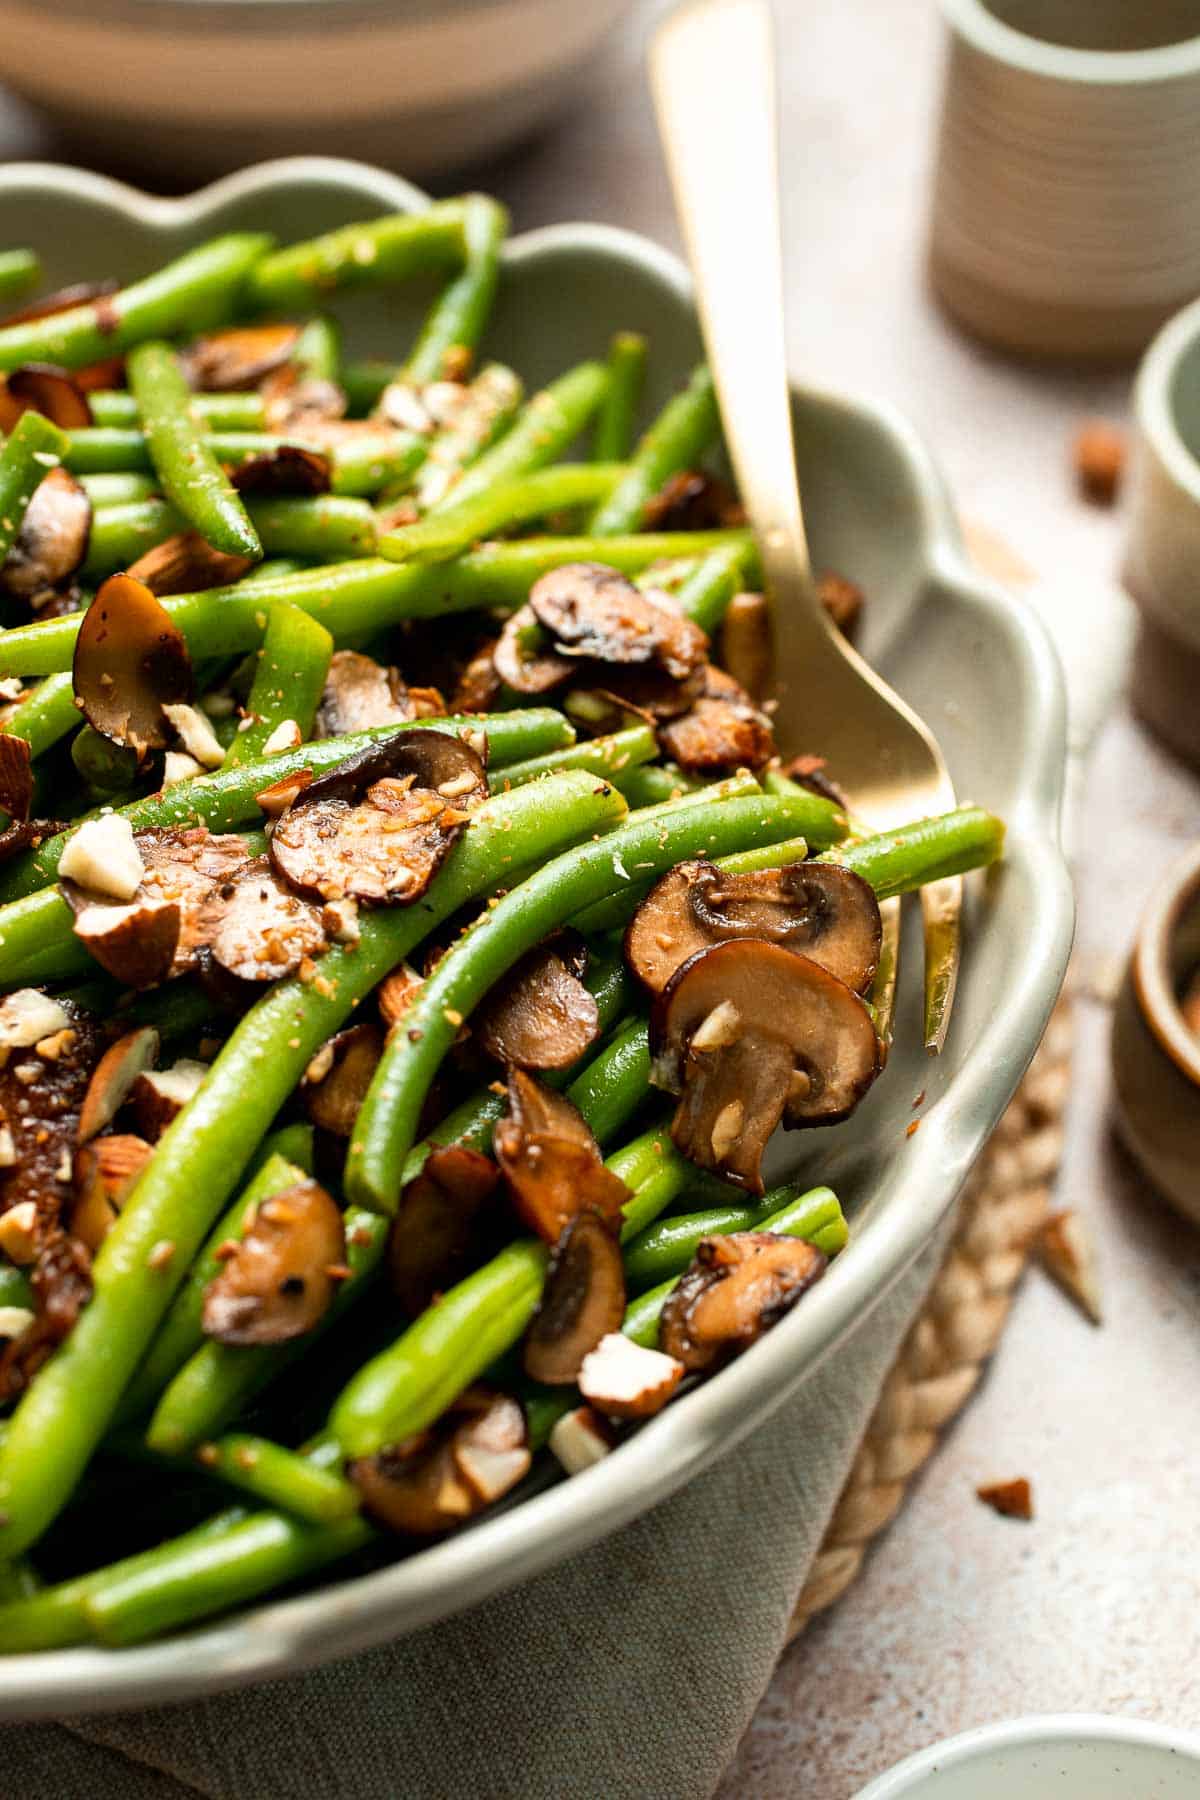
Why You'll Love This Recipe
- Quick, easy, and ready in 25 minutes. With a short blanch and a quick sauté, this recipe delivers incredible flavor in minimal time. It's perfect for busy nights or when you need one more dish for your holiday spread.
- Perfect texture and flavor. The green beans stay crisp-tender while the mushrooms caramelize for rich depth and bite. Garlic, butter, soy sauce, and balsamic vinegar bring everything together in the most delicious way.
- Healthy and versatile. These sautéed vegetables are naturally gluten-free, vegetarian, and packed with nutrients. You can serve them as a light side or toss leftovers into salads, rice bowls, or pasta.
- Simple ingredients, big flavor. You only need a handful of pantry staples (olive oil, butter, garlic, soy sauce, and mushrooms) to create a dish that tastes like it came from a bistro.
Ingredients and Substitutions

To make this delicious Sauteed Green Beans and Mushrooms, you will need the following ingredients (see recipe card below for quantities):
- green beans - Trimmed and blanched until bright green and crisp-tender. You can use French green beans (haricots verts) for a slightly thinner, more delicate texture.
- cremini mushrooms - Meaty and flavorful. White button mushrooms, baby bellas, or sliced portobellos also work well for this mushroom recipe. Make sure to pat them dry before cooking for better browning.
- olive oil and butter - The combination adds richness and helps the mushrooms sear beautifully. You can use all olive oil for a lighter version or all butter for extra flavor.
- garlic - Freshly minced for the best aroma. You can use garlic powder in a pinch.
- soy sauce - Adds a savory umami depth; substitute with tamari for a gluten-free option.
- balsamic vinegar - Balances the saltiness with a hint of tangy sweetness.
- salt and pepper - Enhances flavor and helps draw moisture from the mushrooms.
Equipment
You'll also need measuring cups and spoons, a medium pot for blanching, a large skillet for sautéing, a mixing spoon or spatula, and a colander for draining the beans.
Instructions
- Blanch the green beans. In a medium pot, bring 5 cups of water to a boil over medium-high heat. Add the green beans and blanch for 2-3 minutes until crisp-tender and bright green. Drain immediately and rinse under cold water to stop the cooking process. Set aside.
Blanch or skip it - your choice.
Blanching the green beans first keeps them bright green, crisp-tender, and evenly cooked, but if you're short on time, you can skip it. Just sauté the raw beans for 8-10 minutes before adding the mushrooms. They'll be slightly firmer and less vibrant, but still delicious.
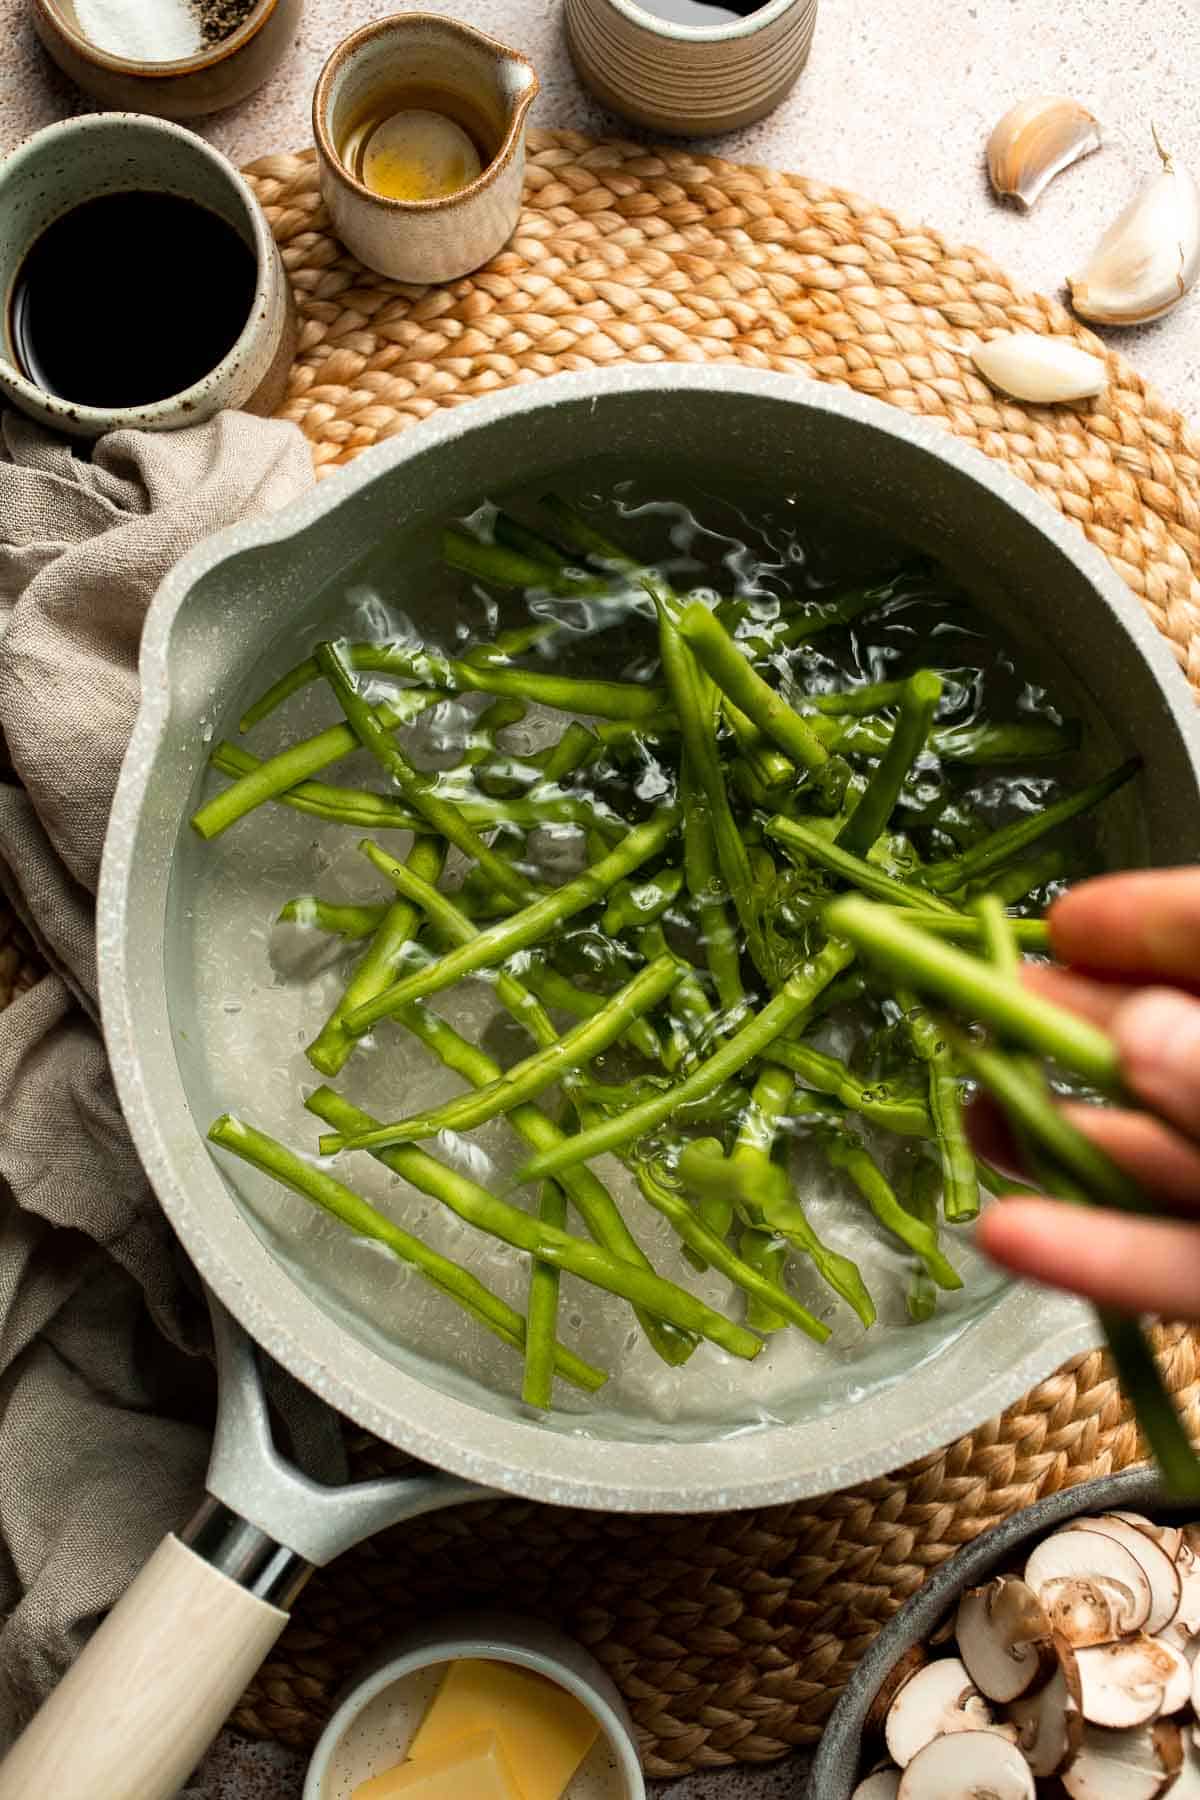
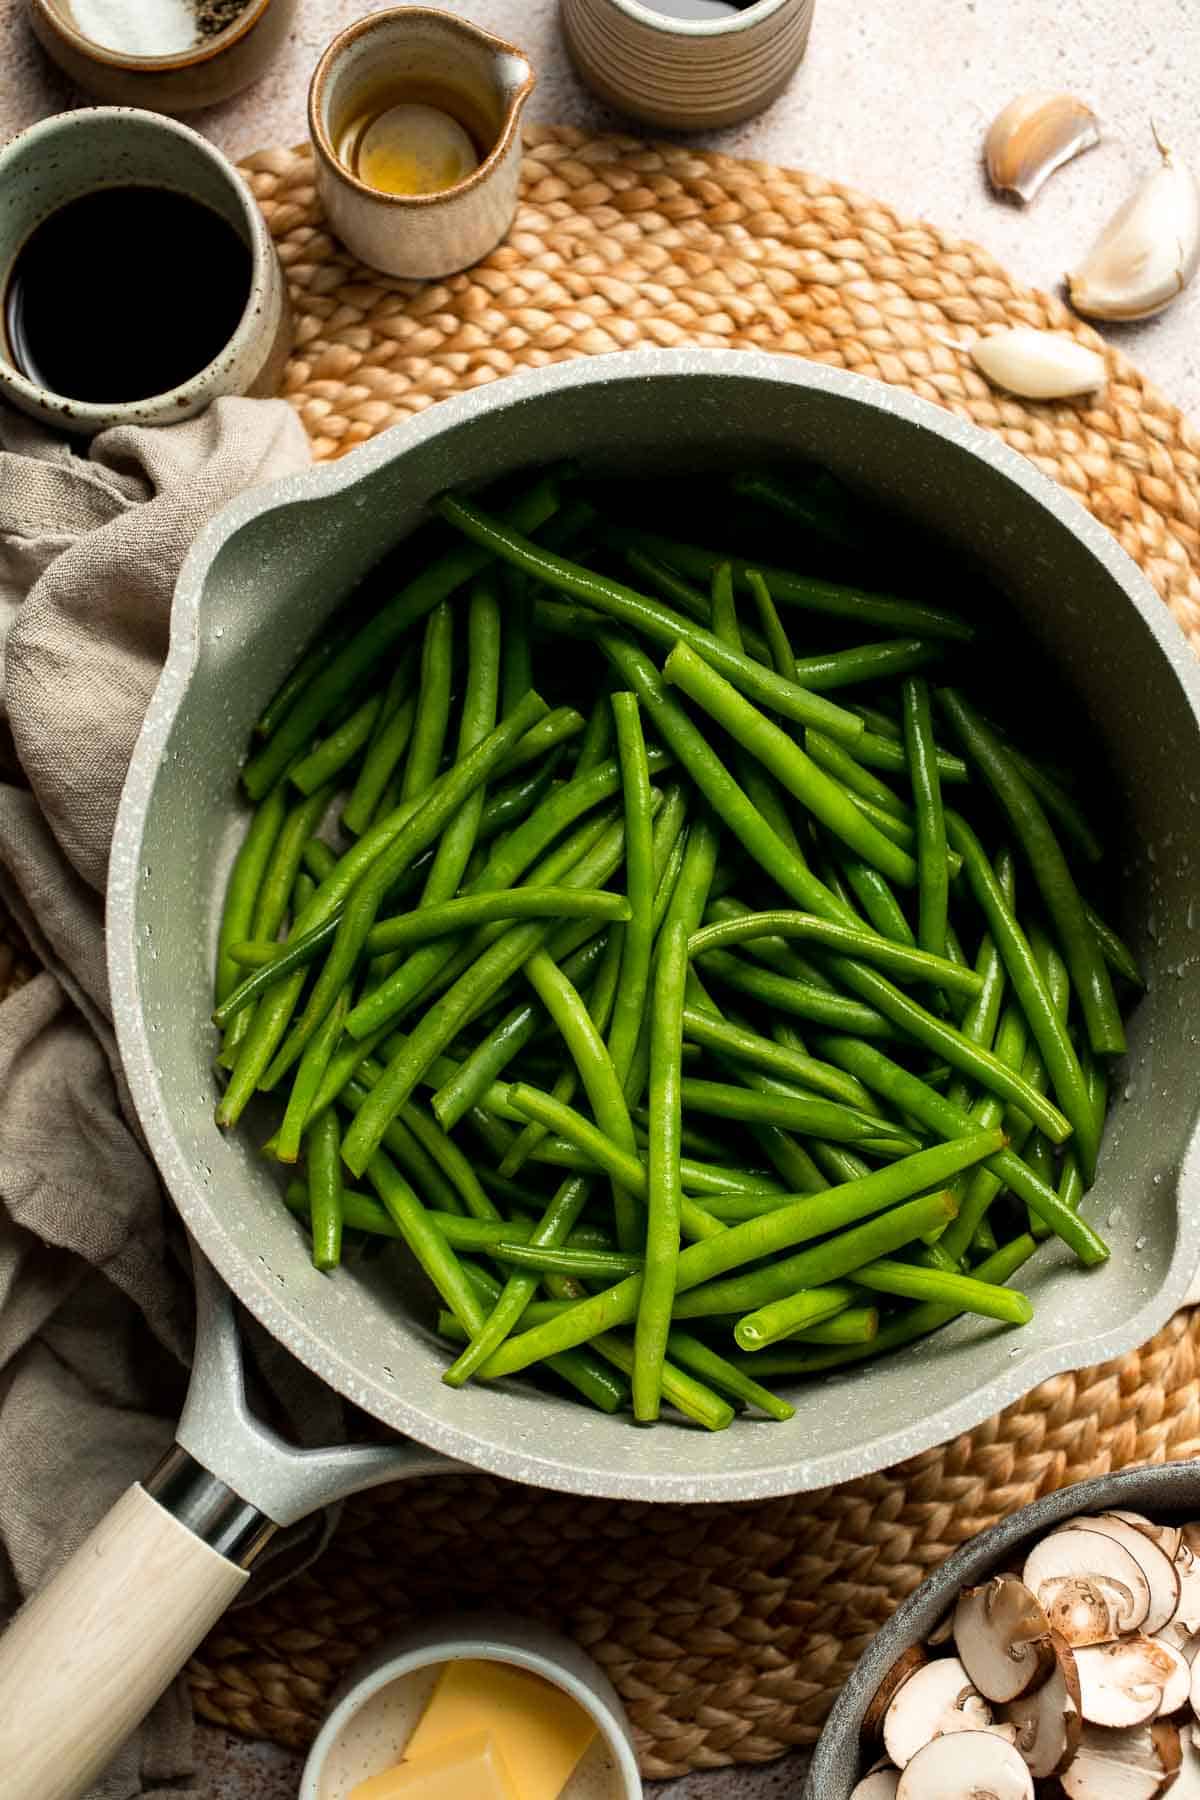
- Sauté the mushrooms. In a large skillet, heat olive oil and butter over medium-high heat until the butter starts to bubble, about 1 minute. Add the mushrooms, salt, and black pepper. Cook without stirring for 2-3 minutes to allow browning, then stir and continue cooking for another 2-3 minutes until golden and tender.
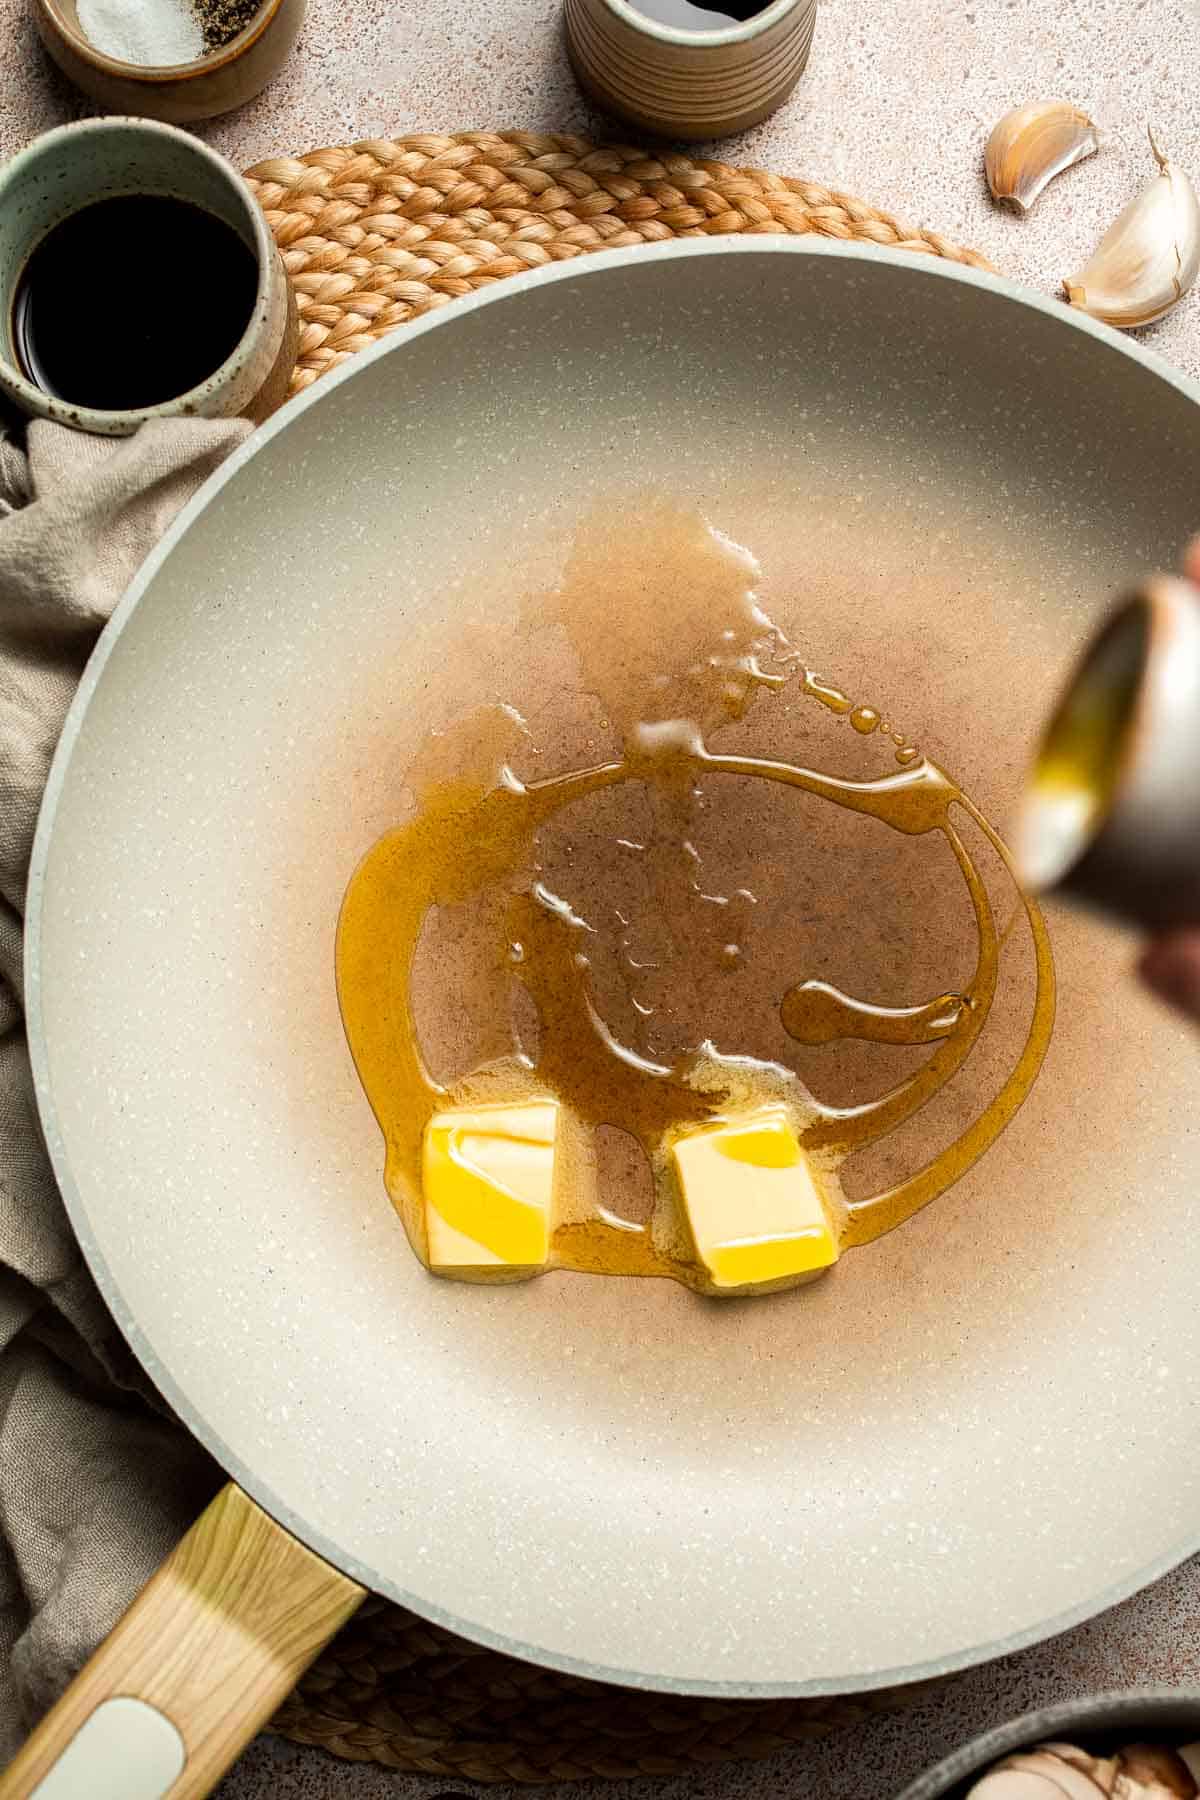
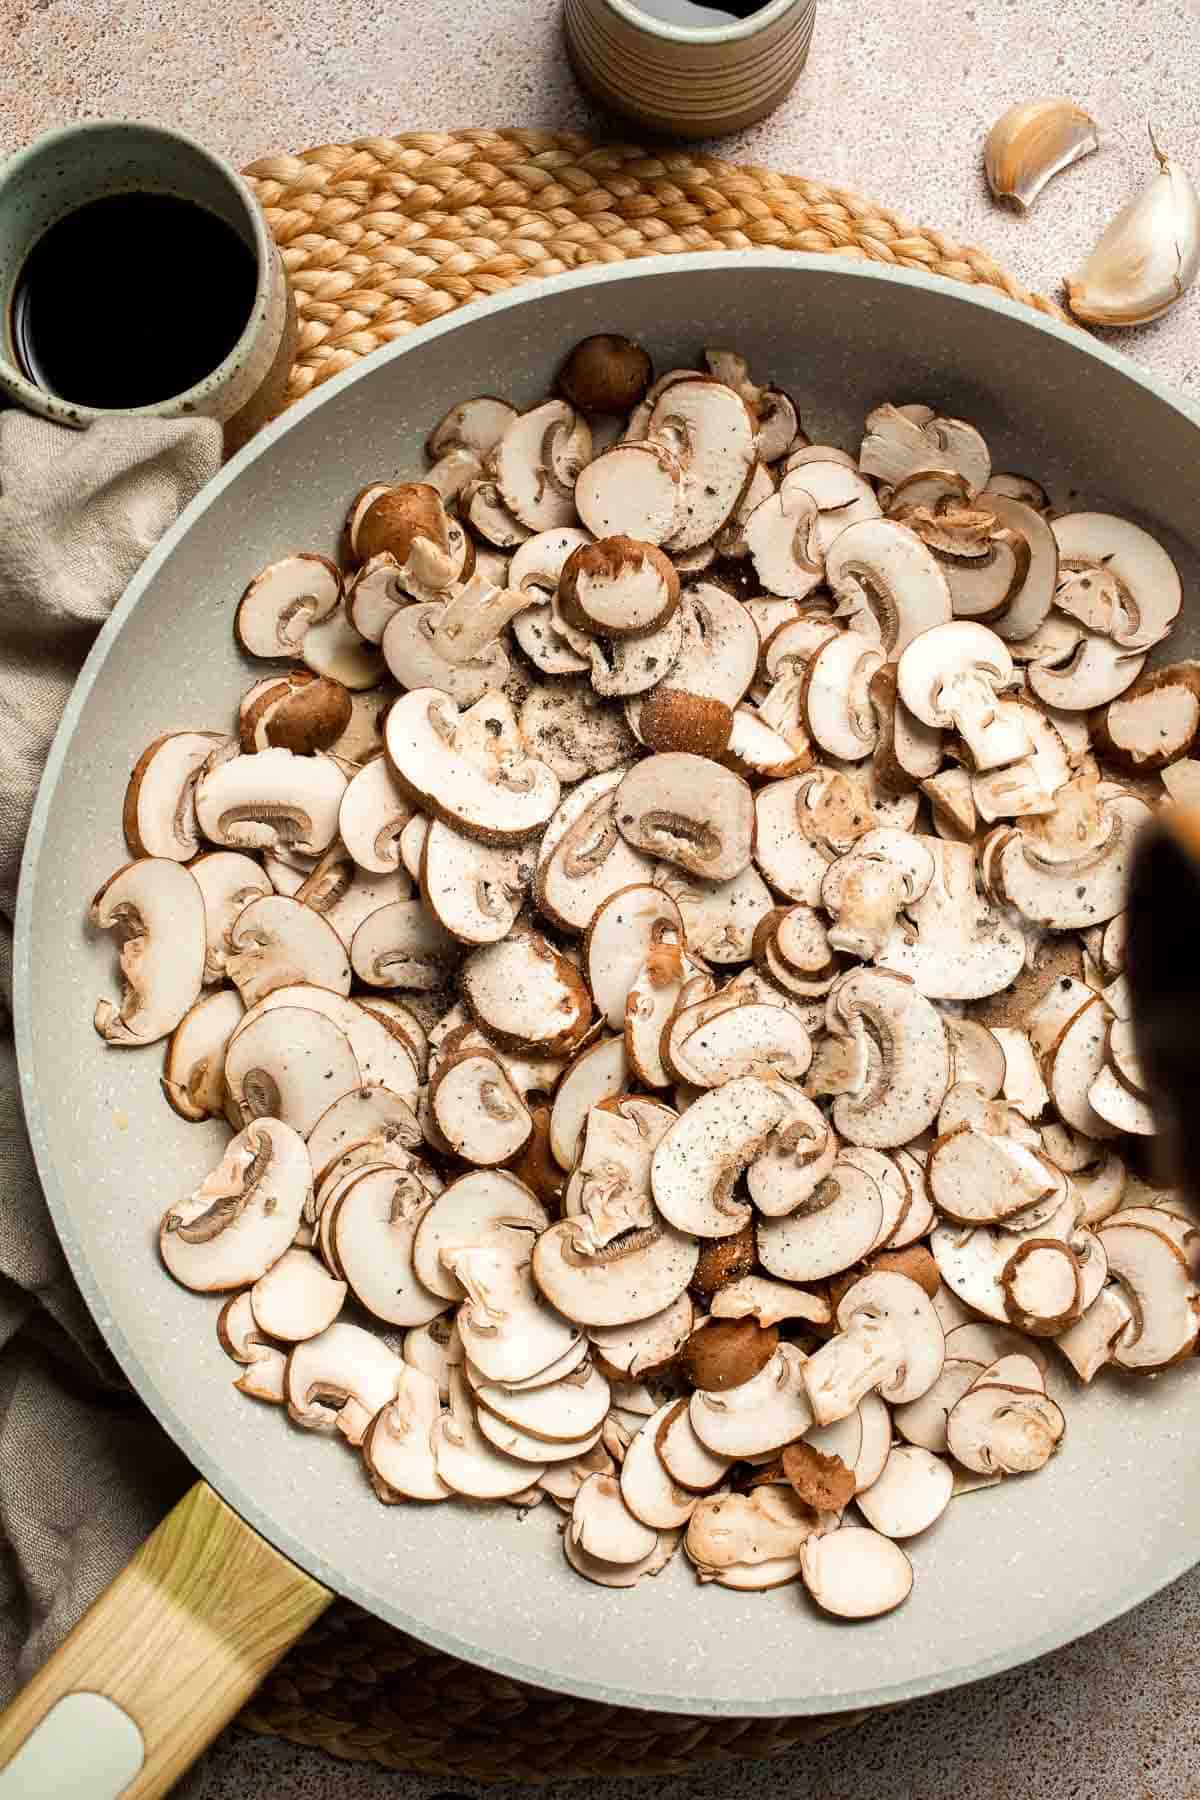
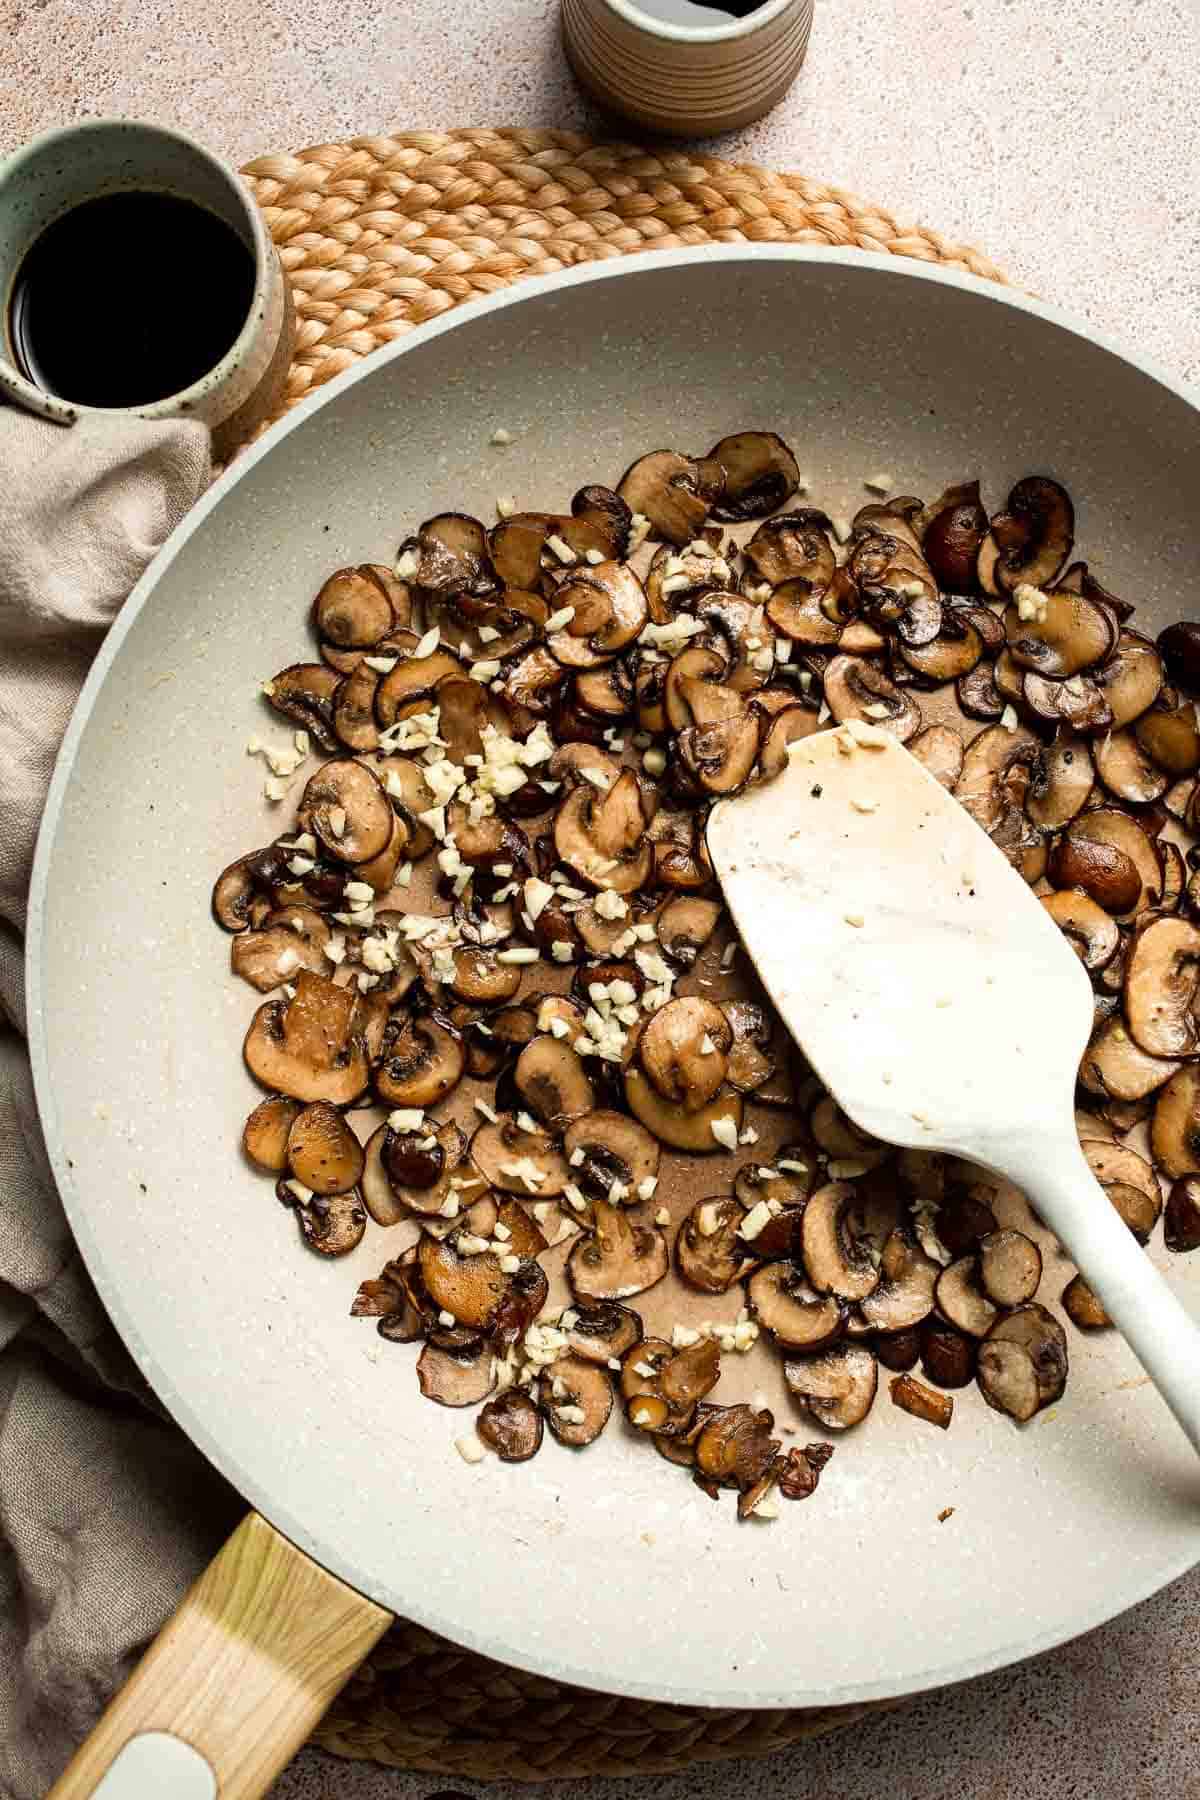
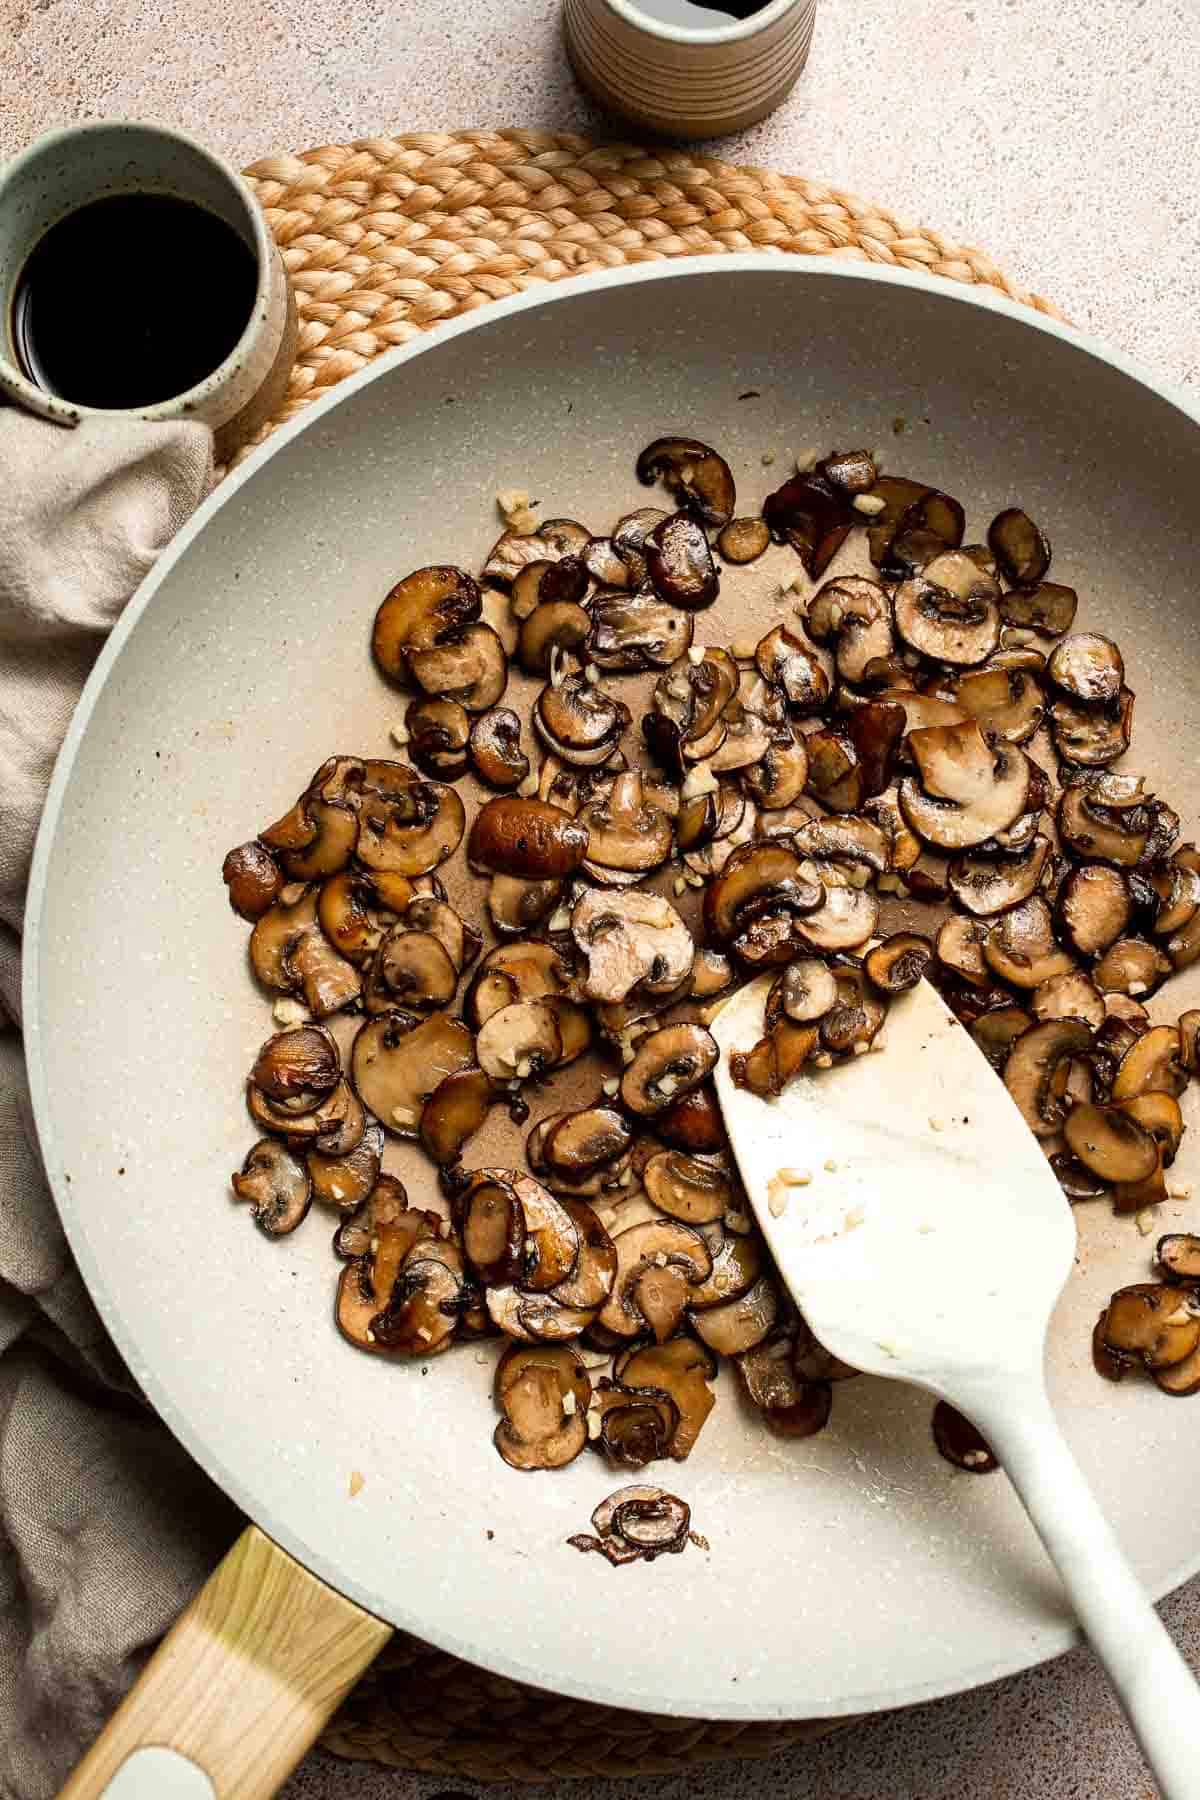
- Add the garlic. Stir in the chopped garlic and sauté for 1-2 minutes until fragrant.
- Combine the vegetables. Add the blanched green beans, soy sauce, and balsamic vinegar. Toss well to combine, then cook for another 2-3 minutes until heated through and coated in sauce.
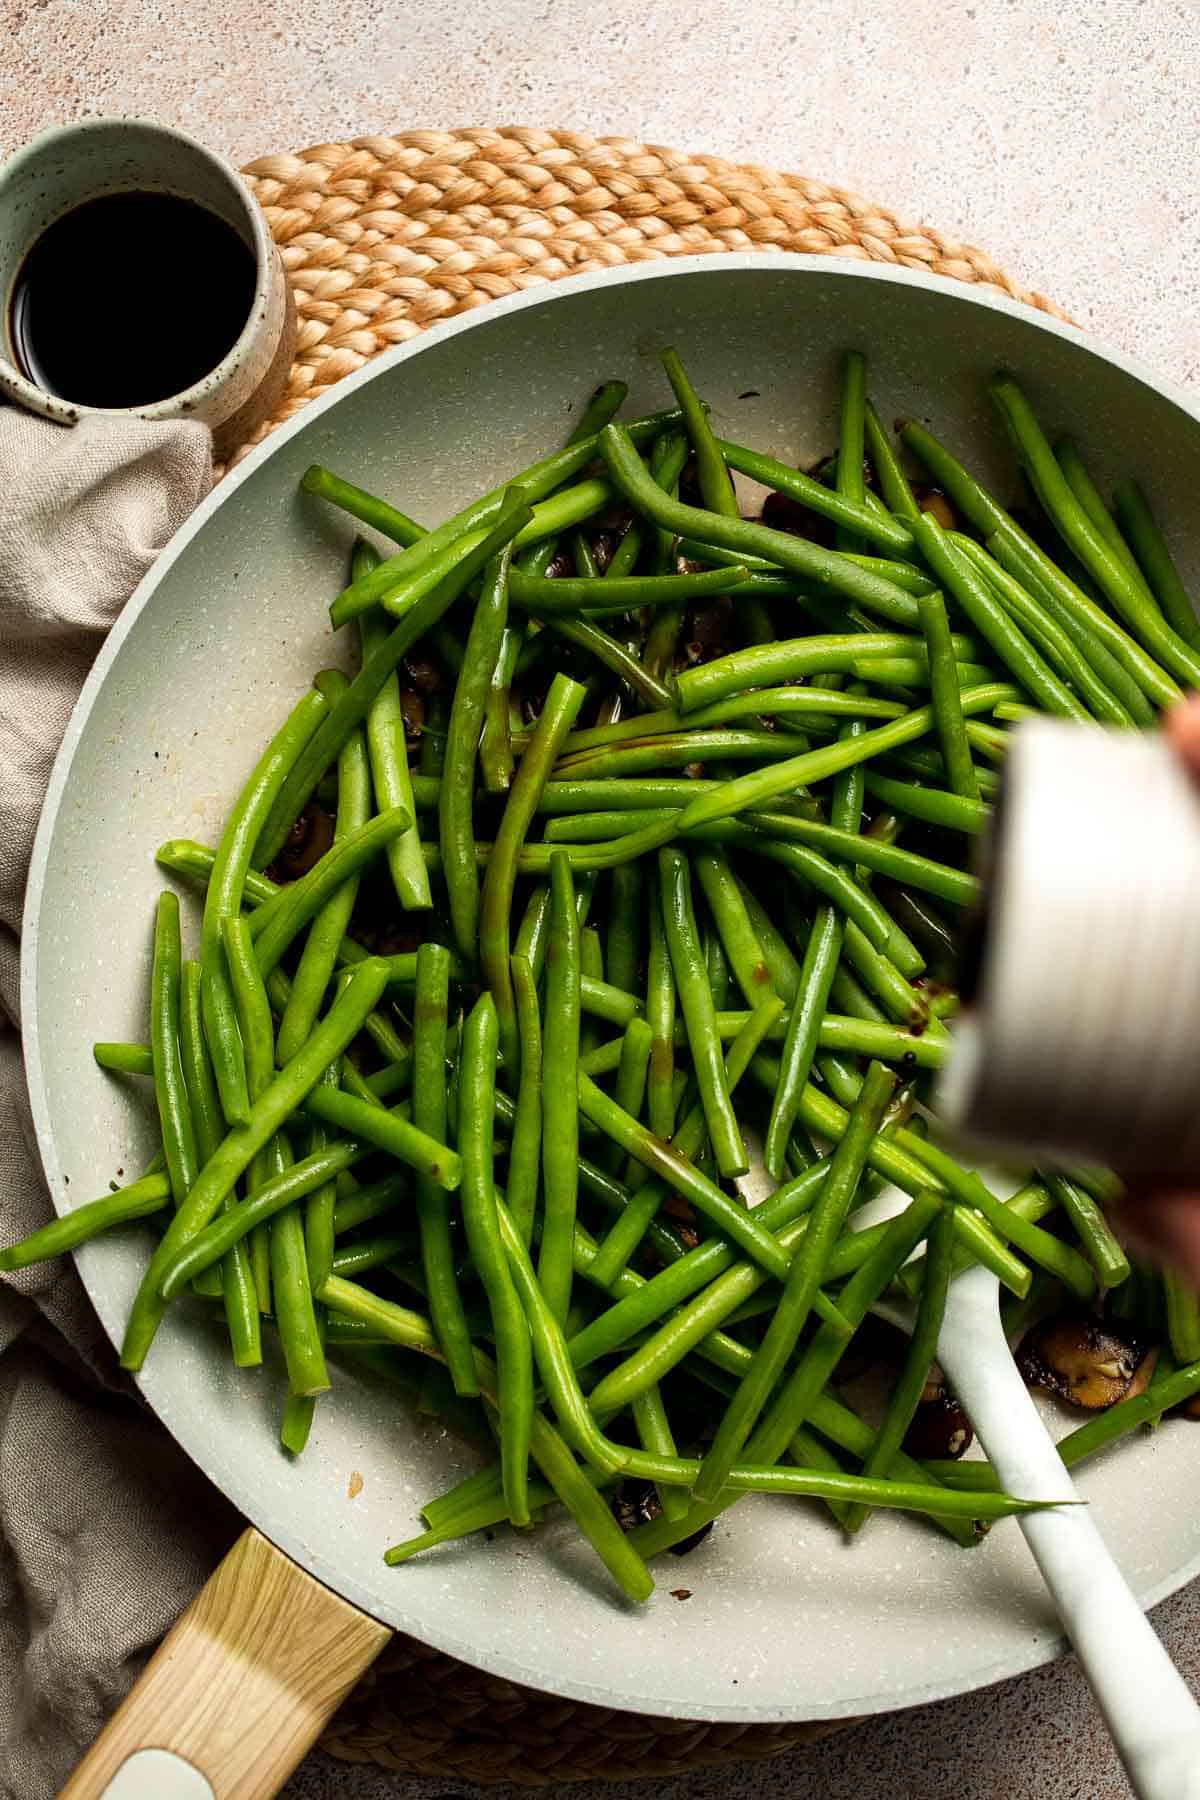
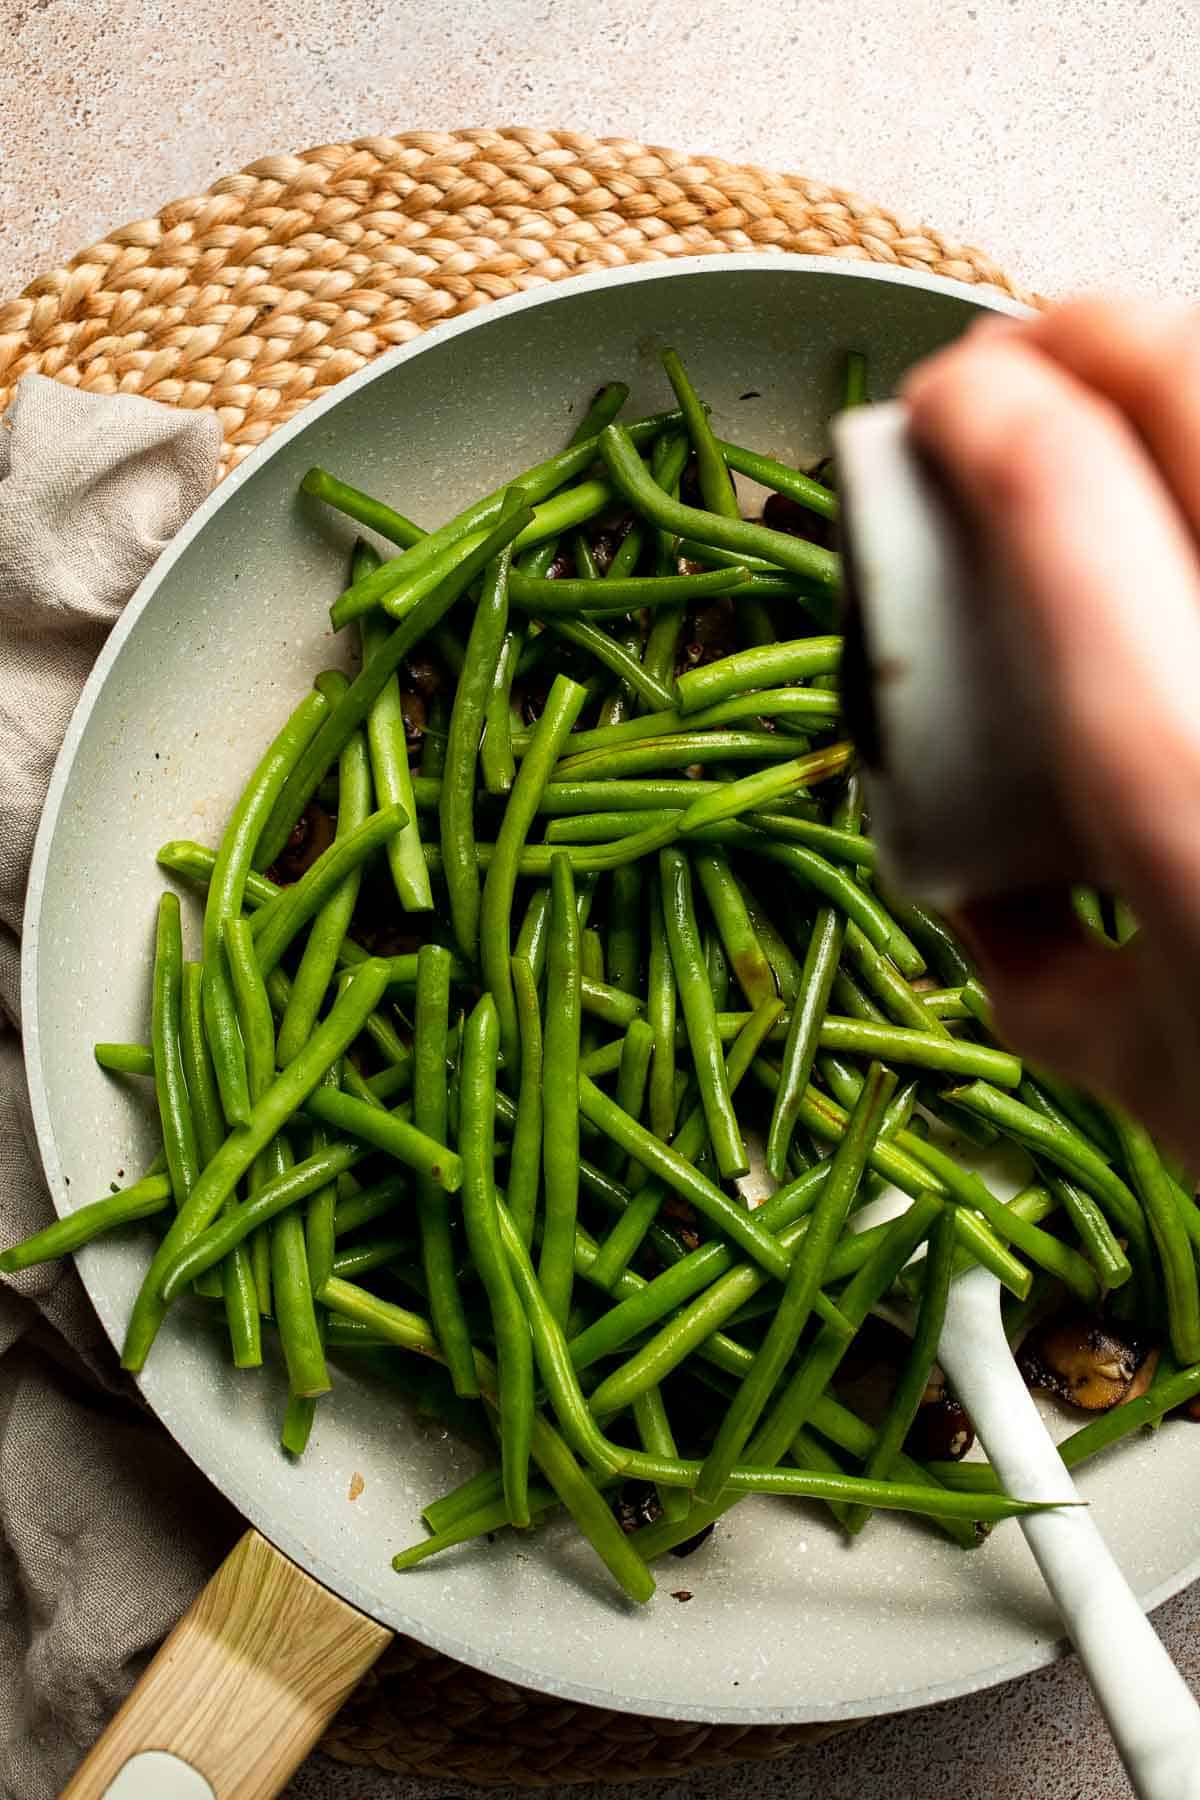
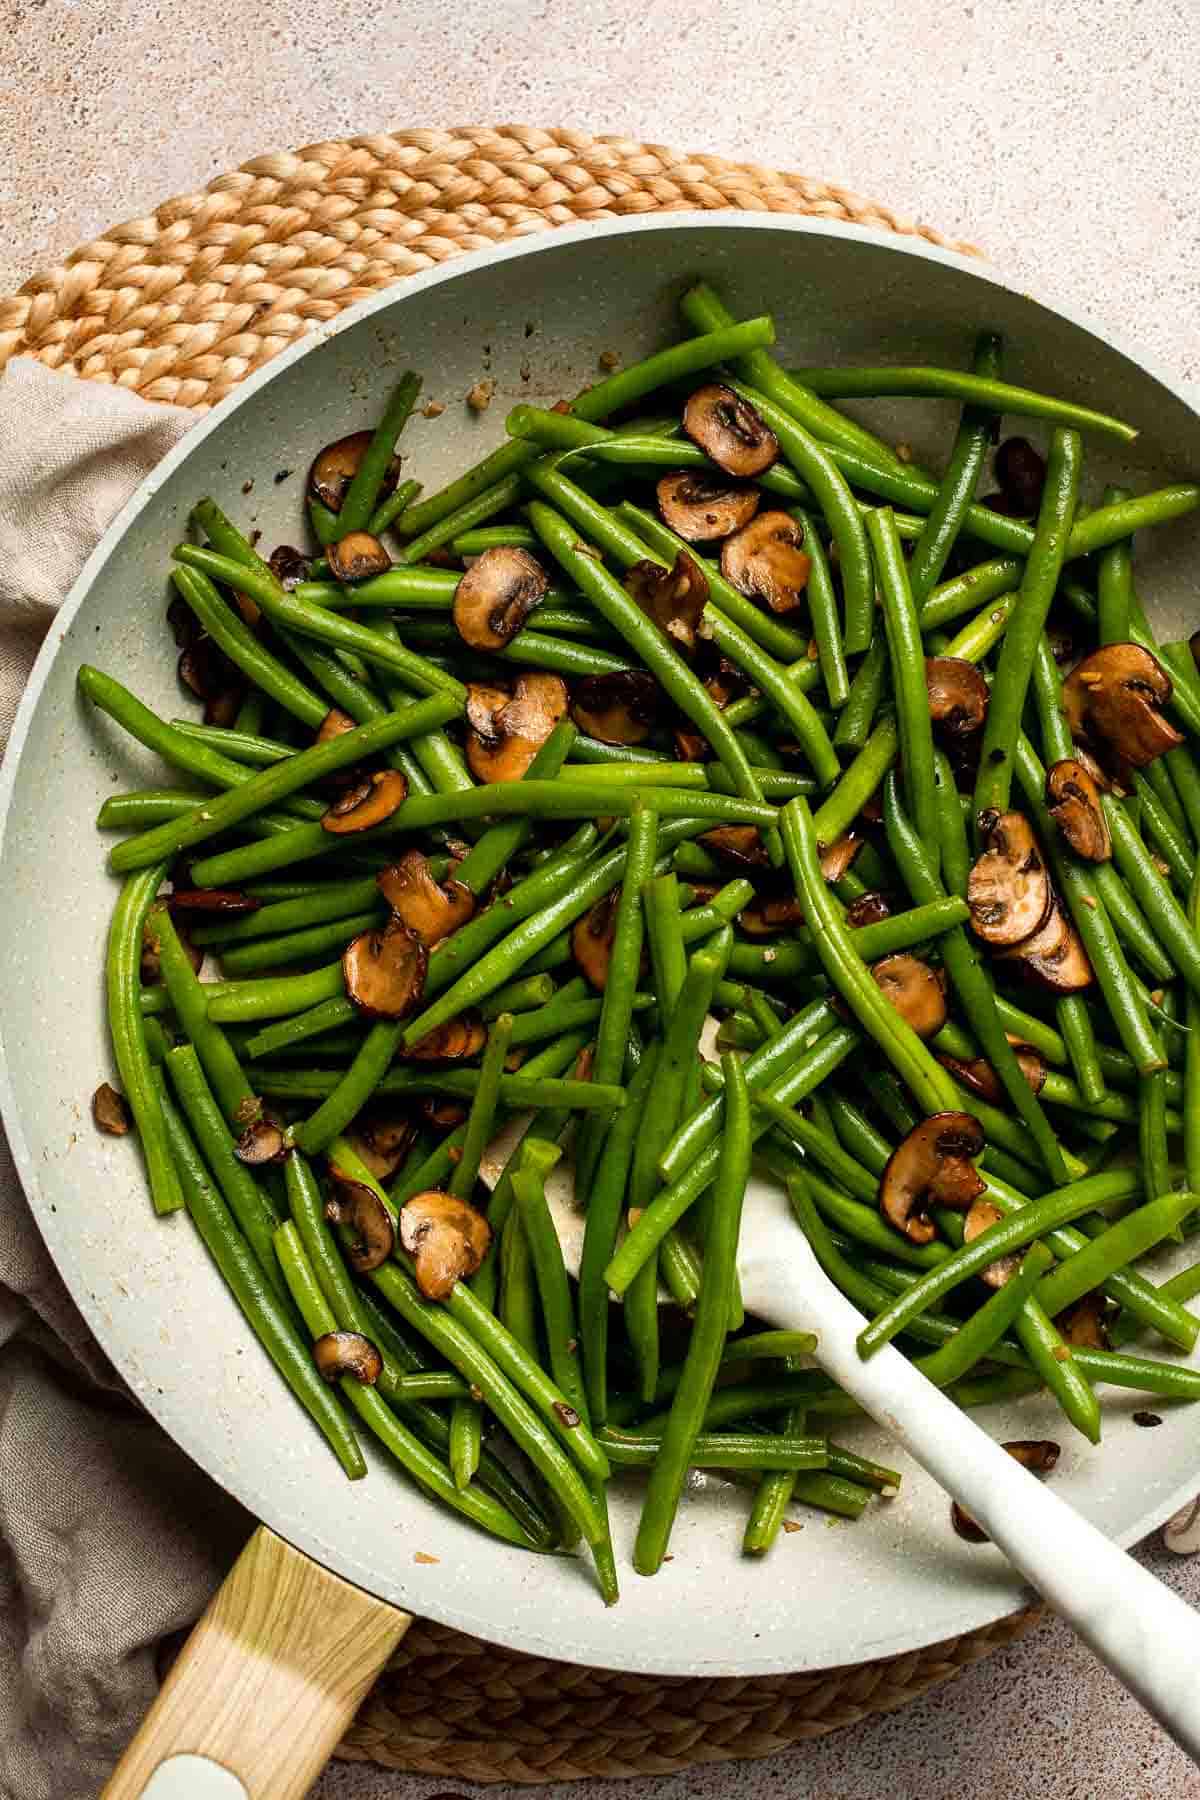
- Serve. Transfer to a serving dish and serve immediately while warm. Top with toasted almonds, if desired.
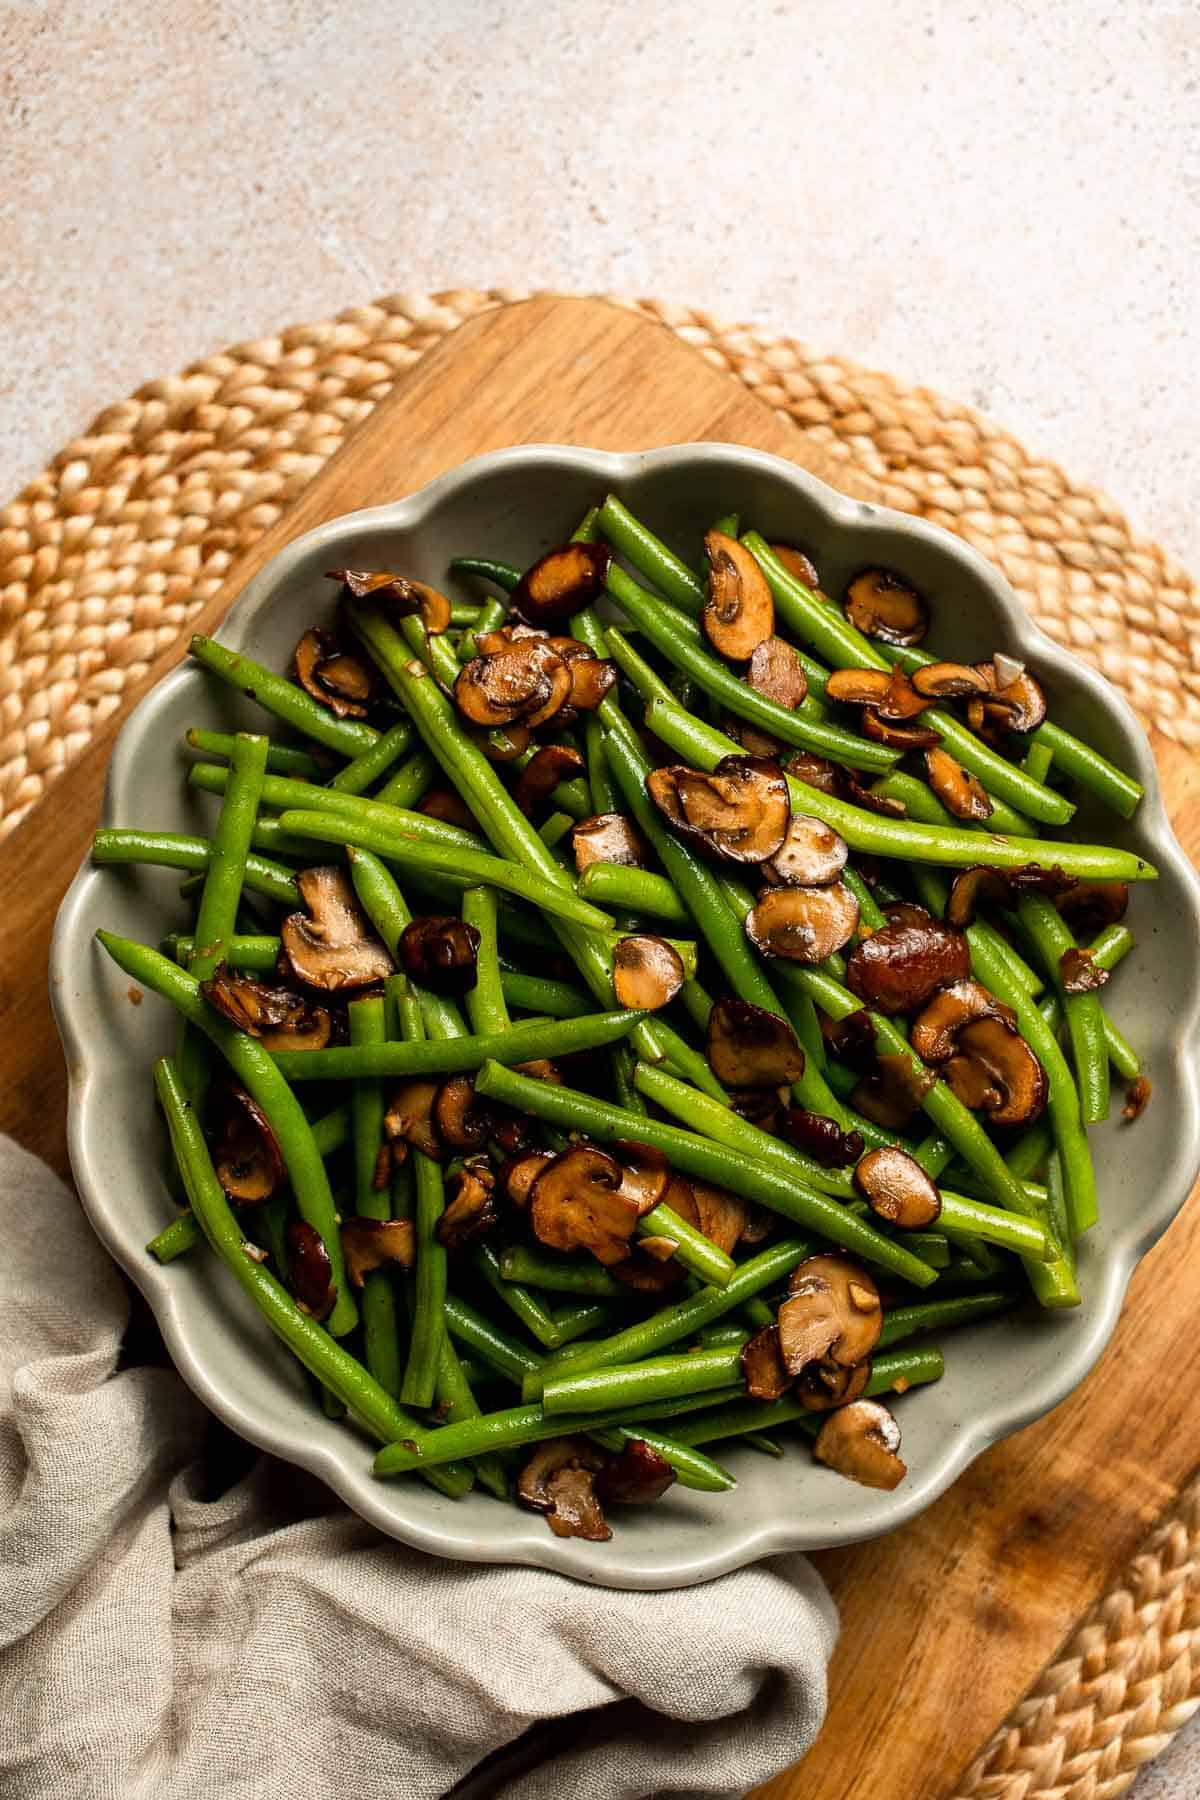

Expert Tip: Dry Your Mushrooms Before Cooking
For perfectly browned mushrooms, pat them completely dry with a paper towel before adding them to the pan. Moisture makes them release too much liquid and prevents them from searing and can make them steam instead of brown. Once they hit the hot pan, resist stirring too soon. Let them sit for a couple of minutes to develop that deep, golden color and richer flavor.
More Tips and Tricks
- Blanch first for vibrant color. Quickly boiling and shocking the green beans keeps them crisp and bright instead of dull or soggy. If you're short on time, you can skip it. Just sauté the raw beans for 8-10 minutes before adding the mushrooms. They'll be slightly firmer and less vibrant, but still delicious.
- Don't overcrowd the pan. Give the mushrooms space so they sear instead of steaming. Use a large skillet if needed.
- Adjust seasoning at the end. After adding soy sauce and balsamic vinegar, taste before salting as both add plenty of flavor.
Recipe Variations
- Add onions or shallots. Sauté thinly sliced shallots or red onion with the mushrooms for extra sweetness and depth.
- Make it nutty. Top with toasted almonds, pecans, or walnuts for texture and crunch.
- Spice it up. Sprinkle red pepper flakes or drizzle chili oil for a little kick.
- Add umami depth. Stir in a few drops of Worcestershire sauce or a dash of sesame oil near the end for an extra savory note.
- Make it cheesy. Sprinkle freshly grated parmesan cheese or crumble feta before serving for a more indulgent finish.
- Add citrus brightness. Finish with a squeeze of fresh lemon juice or serve with lemon wedges on the side.
- Roasted version. Toss everything in olive oil, salt, pepper, and garlic, spread on a baking sheet, and roast at 400°F for 18-20 minutes, tossing halfway through, until tender and caramelized.
- Air fryer version. Combine green beans, mushrooms, and seasonings in a bowl, toss well, and air fry at 375°F for 8-10 minutes, shaking the basket halfway. Cooking time may vary depending on the size of your air fryer.
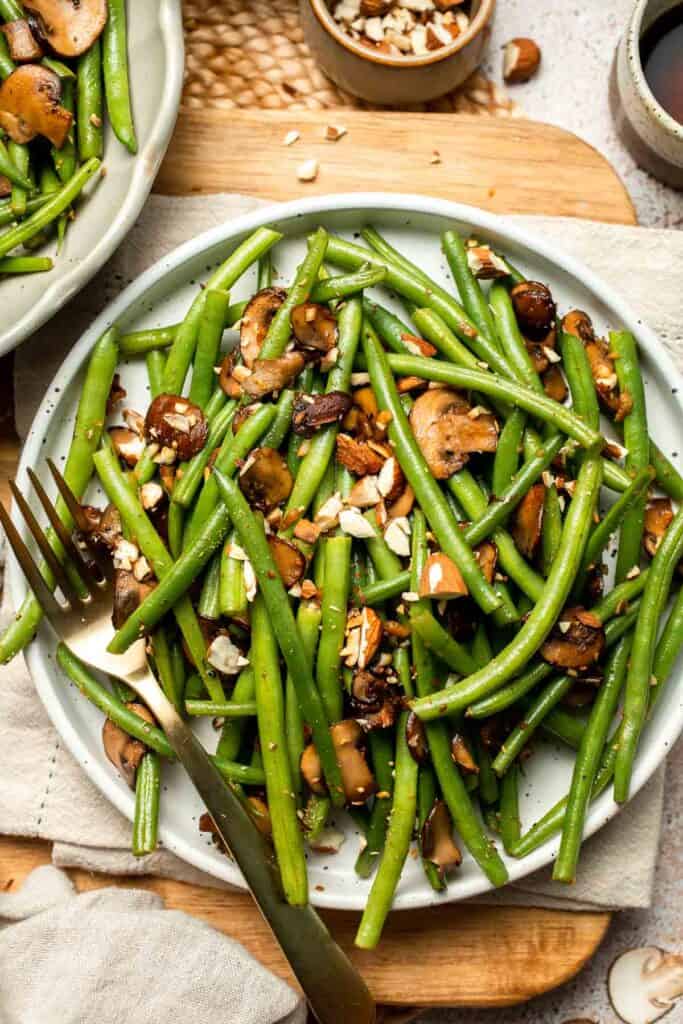
Storage
How to Store
Keep leftovers in an airtight container in the refrigerator for up to 4 days.
How to Reheat
Reheat quickly in a skillet over medium heat for 3-4 minutes or in the microwave until warmed through. Add a drizzle of olive oil if needed to refresh the texture.
How to Freeze
It's best to enjoy this dish fresh, but if you do freeze it, note that the green beans may soften slightly. Reheat directly from frozen in a skillet to help retain texture.
How to Serve
These sautéed green beans and mushrooms go with everything! Try a lean protein like roasted chicken, baked salmon, or tofu for a complete and balanced meal. It's also low in carbs, so it works beautifully with grain-free or lighter dinner spreads. They're an easy side dish that balances rich mains and adds freshness to the plate. Serve them warm, topped with lemon wedges, fresh parsley, or a sprinkle of sea salt for the perfect finish.
These are my favorite dishes to serve with garlic mushrooms and green beans:
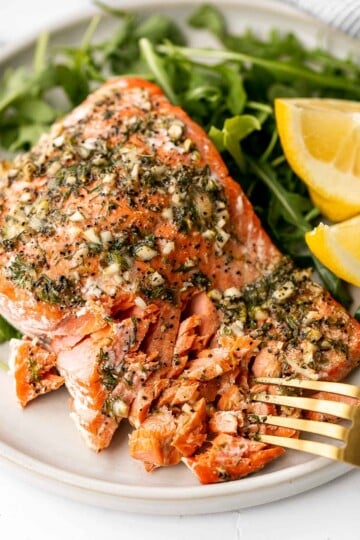
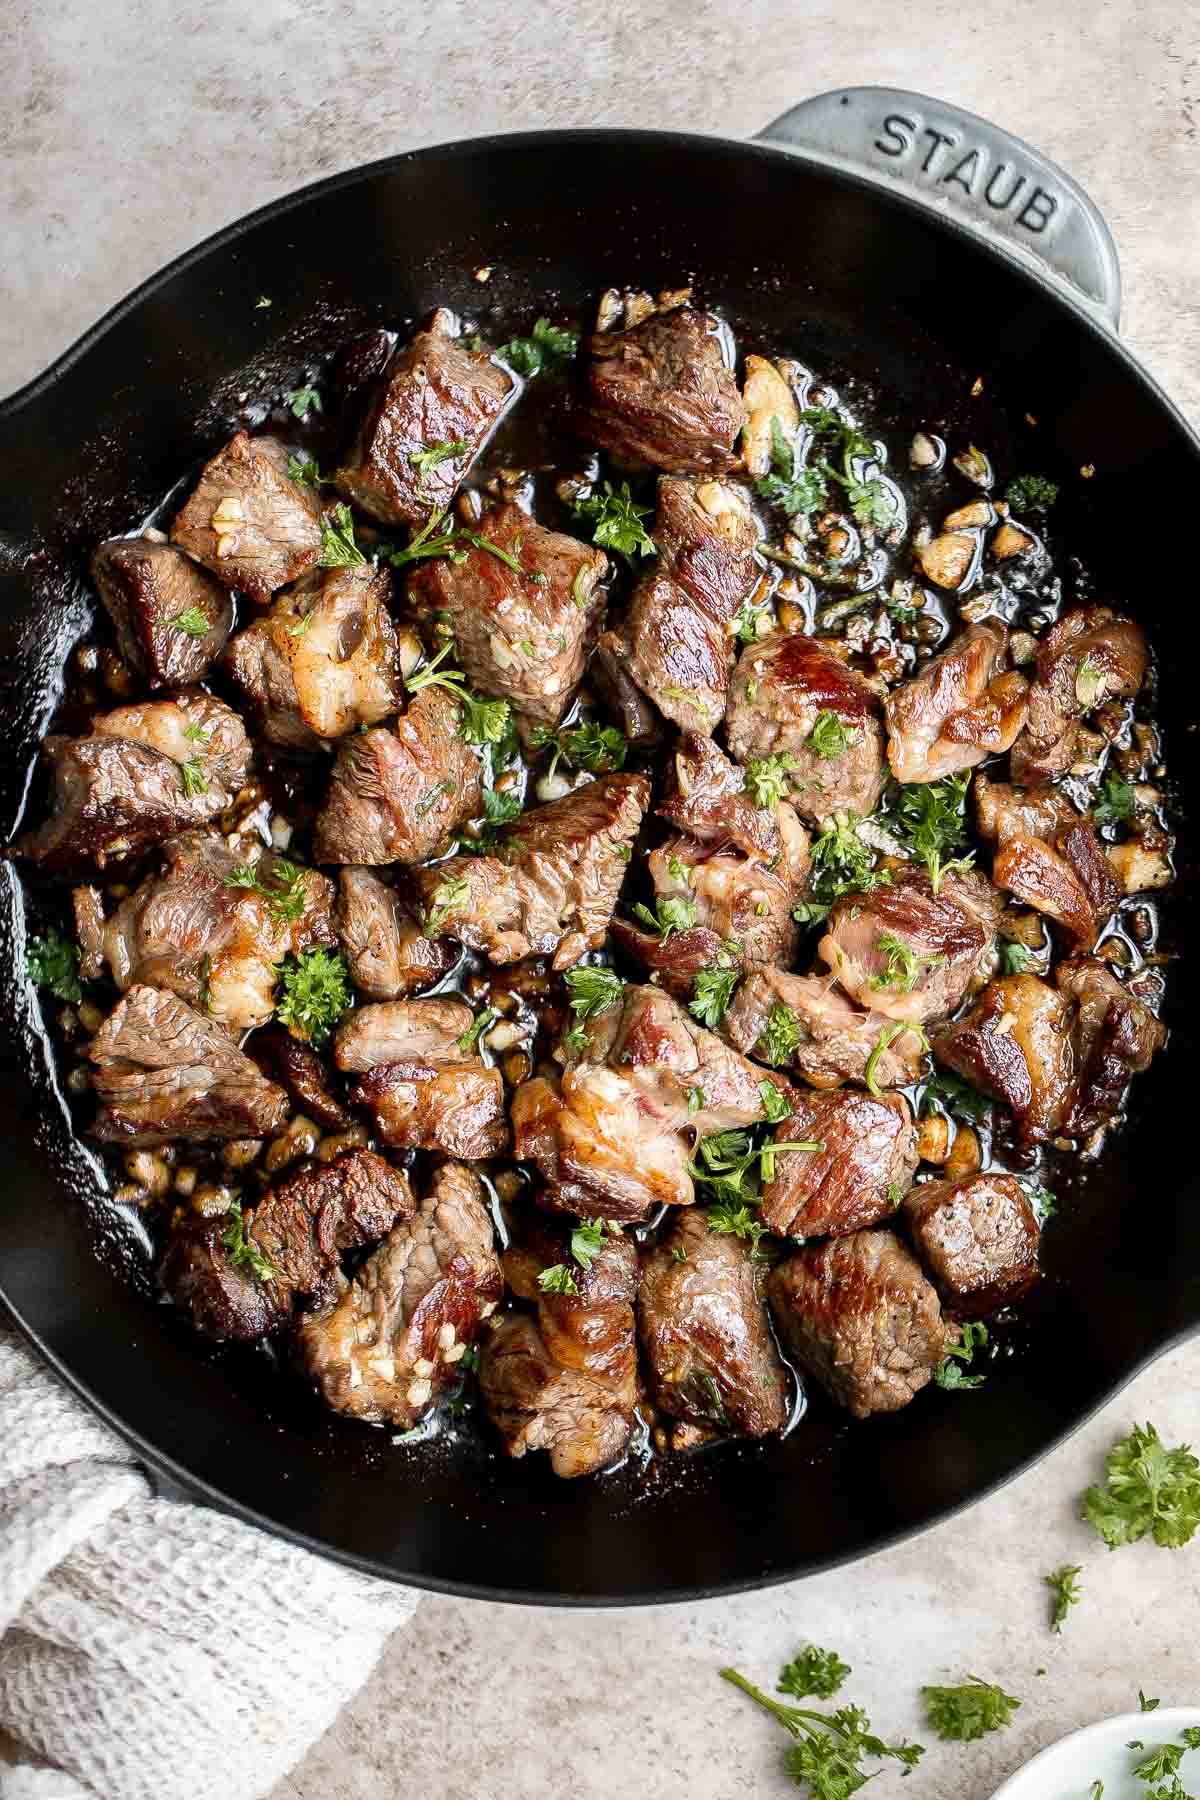
Thanksgiving Mains
If serving this as a side dish for Thanksgiving, pair it with one of our delicious mains. From roasted turkey and glazed ham to savory vegetarian roasts and hearty stuffing-filled options, these recipes help create a memorable holiday feast your family and guests will love.
FAQ
Absolutely! Mushrooms and green beans are a perfect match in both flavor and texture. The mushrooms add a rich, earthy depth, while the green beans bring a fresh, crisp bite. It's a classic pairing you'll find in both Asian-style stir-fries and Western vegetable medleys, and it works for everything from casual dinners to holiday feasts.
Yes, you can - and it's one of the easiest ways to make a flavorful veggie side. Start by sautéing the mushrooms first so they can brown and release their juices, then add the green beans near the end of cooking. This ensures both vegetables cook perfectly without becoming soggy. Add garlic, soy sauce, or balsamic vinegar for a touch of flavor, and you'll have restaurant-quality sautéed green beans and mushrooms in just minutes.
Definitely! Mushrooms go well with almost any vegetable because they add a savory, umami richness that enhances lighter ingredients. Try sautéing mushrooms with asparagus, zucchini, bell peppers, or spinach for variety. They also taste great with root veggies like carrots or sweet potatoes for heartier dishes. When cooking mixed vegetables, always sauté mushrooms first so they have time to caramelize before adding quicker-cooking veggies.
To make green beans taste restaurant-quality, cook them just until tender but still crisp, then toss them in a flavorful sauce or seasoning. Restaurants often use a mix of butter, olive oil, garlic, and soy sauce to bring out the best in green beans. Blanching them first helps retain color and texture. A sprinkle of salt, a drizzle of balsamic vinegar or lemon juice, and some red pepper flakes or toasted nuts at the end make all the difference.
Green beans are versatile and pair well with both herbs and spices. Garlic, onion powder, black pepper, and a little salt are classics. You can also add Italian seasoning, thyme, rosemary, or oregano for a Mediterranean twist. For bolder flavor, try soy sauce, sesame oil, or red pepper flakes. Fresh lemon juice, balsamic vinegar, or a sprinkle of parmesan cheese also brighten them up beautifully.
Green beans and mushrooms make a great base for many dishes. You can toss them into pasta, stir them into fried rice, or serve them alongside roasted chicken, steak, or salmon. They also pair beautifully with grain bowls, mashed potatoes, or a hearty risotto. For a vegetarian meal, serve them over rice or quinoa with a drizzle of sesame oil or tahini sauce for a balanced and flavorful plate.
More Green Bean Recipes
Looking for other recipes like this? Try these:

Tried this recipe?
I'd love to hear what you think! Leave a comment and rating below to share your feedback. Your reviews help others discover this recipe and help me keep creating more free recipes for you. Snap a photo and tag me on social media @aheadofthyme too.
Sweet Potato Cake with Cream Cheese Frosting
Sweet Potato Cake is soft, moist, and full of cozy fall flavor. It's made with sweet potato puree, warm spices like cinnamon and nutmeg, and topped with a luscious cream cheese frosting that melts in your mouth. Every bite is fluffy, flavorful, and just sweet enough - like a cross between a spice cake and a carrot cake, but with its own naturally sweet and earthy twist.
This easy fall dessert is perfect for cozy weekends, potlucks, or Thanksgiving gatherings. It's simple to make, yet feels special and festive. The sweet potato puree keeps the cake moist and tender, while the cream cheese frosting adds just the right balance of tang and sweetness. It's the kind of cake that looks rustic and homemade in the best possible way.
This sweet potato cake recipe was inspired by my love for warm, spiced bakes like my Pumpkin Bread and Carrot Cake Muffins. It pairs perfectly with a hot cup of coffee or tea and makes the best fall treat to share with family and friends.

Why You'll Love This Recipe
- Moist, tender, and perfectly spiced. Thanks to the sweet potato puree and a mix of cinnamon, ginger, and nutmeg, this cake bakes up moist, soft, and fragrant every time. It has just the right amount of warmth and sweetness for the season.
- Easy to make from scratch. This recipe uses simple pantry staples and a straightforward mixing method - no fancy tools required. Just mix, bake, and frost! You can even make your own sweet potato puree in minutes.
- Topped with creamy frosting. The smooth, tangy cream cheese frosting complements the sweet, spiced cake beautifully. Add a sprinkle of chopped pecans for texture and a bit of crunch.
- Perfect for any occasion. This sweet potato dessert fits just as easily at a holiday dinner as it does at a fall brunch or weekday treat. It's cozy, classic, and completely irresistible.
Ingredients and Substitutions
To make this delicious Sweet Potato Cake with Cream Cheese Frosting, you will need the following ingredients (see recipe card below for quantities):
- sweet potato puree - Use homemade or store-bought puree. Homemade gives a fresher flavor and easy to make! Just boil or roast sweet potatoes and blend until smooth. You could also use canned sweet potatoes for a shortcut. Just drain them well and puree until smooth in a food processor.
- all-purpose flour - The base of the cake for a soft crumb. You can substitute with a 1:1 gluten-free flour blend if needed.
- baking powder - Helps the cake rise and stay fluffy.
- salt - Balances sweetness and enhances flavor.
- warm spices - Cinnamon, ginger, and nutmeg bring depth and cozy autumn flavor. You can swap these for pumpkin pie spice or allspice if that's what you have on hand. Both blends give the same warm fall flavor profile.
- butter - Adds richness and tenderness to the cake. Make sure it's softened for easy mixing. We also use unsalted butter in the frosting to help create a creamy, spreadable consistency.
- sugar - A mix of white and brown sugar gives the perfect balance of sweetness and subtle caramel flavor. Confectioners' sugar is also usedin this recipe, in the frosting to sweeten and thicken it.
- eggs - Provide structure and moisture.
- vanilla extract - Adds warmth and enhances all the other flavors in both the cake and frosting.
- sour cream - Makes the crumb extra moist and tender without being heavy.
- cream cheese - For the cream cheese frosting. Use block-style cream cheese, not the spreadable kind, for best texture.
- chopped nuts - Add pecans or walnuts for garnish and crunch. This is totally optional though.
Equipment
You'll also need measuring cups and spoons, a 9x9-inch baking pan lined with parchment paper, mixing bowls, an electric hand mixer, a whisk, and a spatula for spreading the frosting.
Instructions
Make the sweet potato puree (if making homemade)
Add 1½ cups peeled and diced sweet potato to a large pot of boiling water. Boil until very tender, about 10-12 minutes. Drain well, then transfer to a food processor or blender and puree until completely smooth. Measure out 1 cup of puree and set aside to cool slightly.
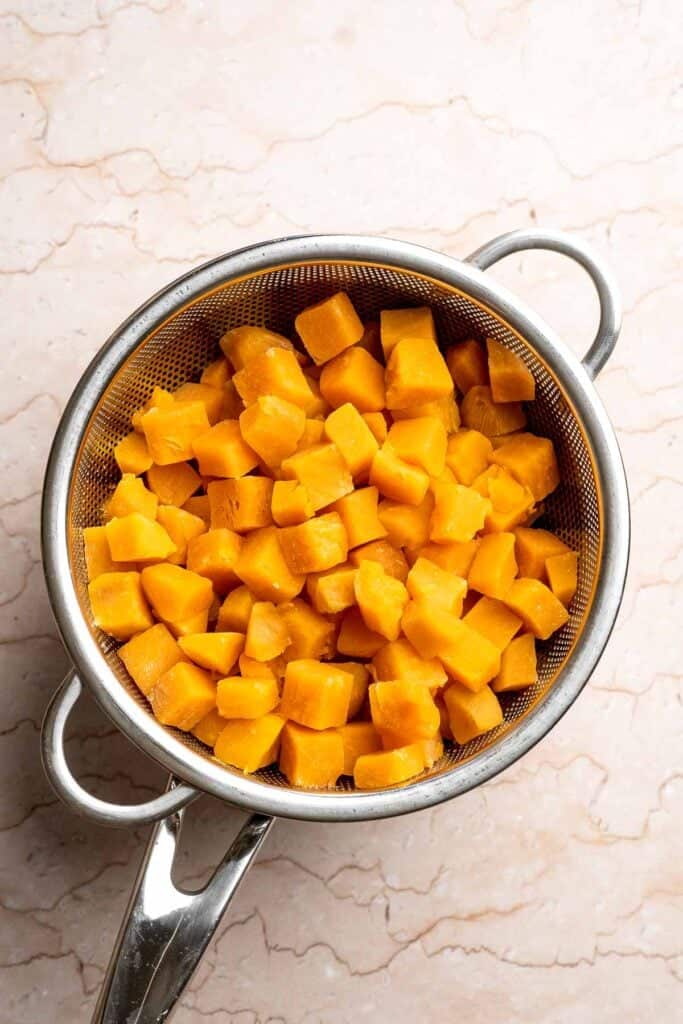
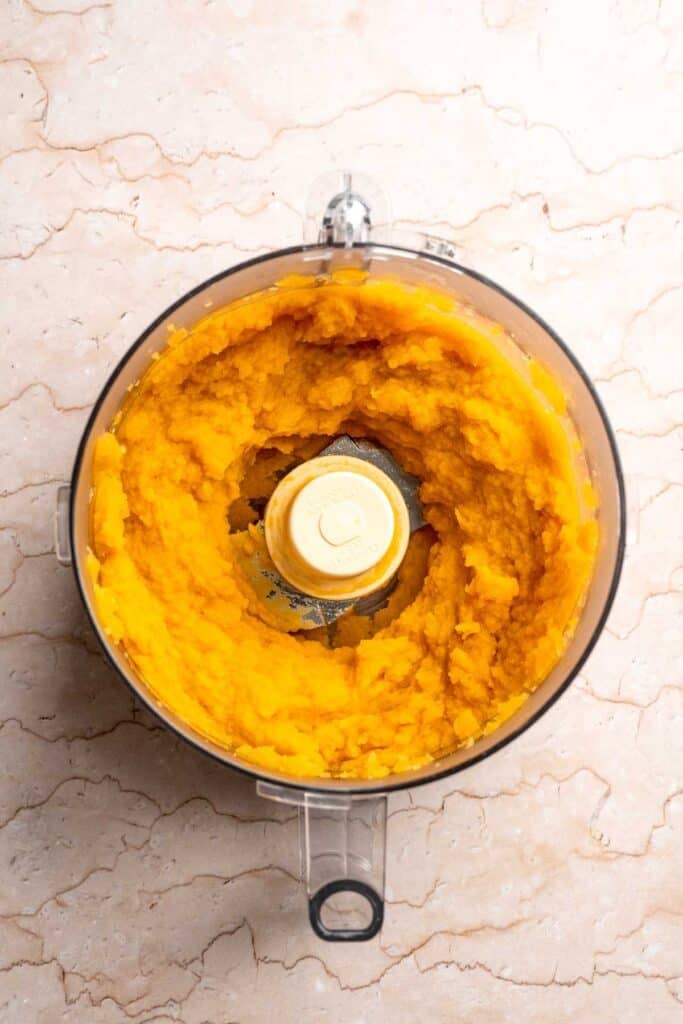
Make the sweet potato cake
- Combine the dry ingredients. In a medium bowl, whisk together the flour, baking powder, salt, cinnamon, ginger, and nutmeg until evenly combined. Set aside.
- Cream the butter and sugars. In a large bowl, add the butter, white sugar, and brown sugar. Beat on medium-high speed with an electric hand mixer until the mixture is light, fluffy, and pale in color, about 3-4 minutes.
- Add the eggs and vanilla. Mix in the eggs and vanilla extract, beating again until the batter looks smooth and creamy.
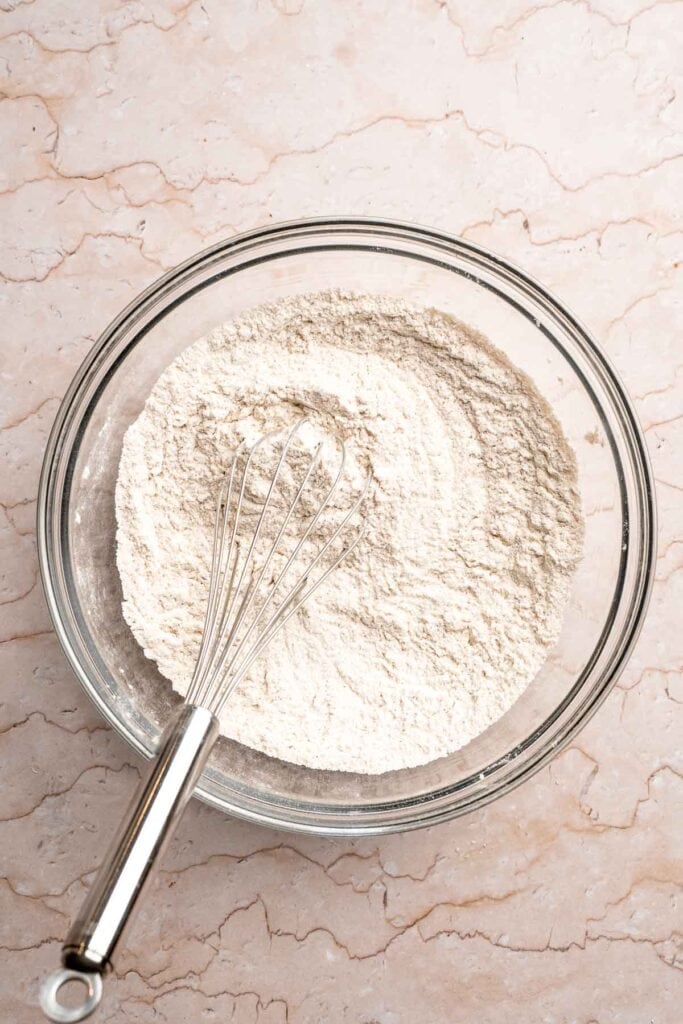
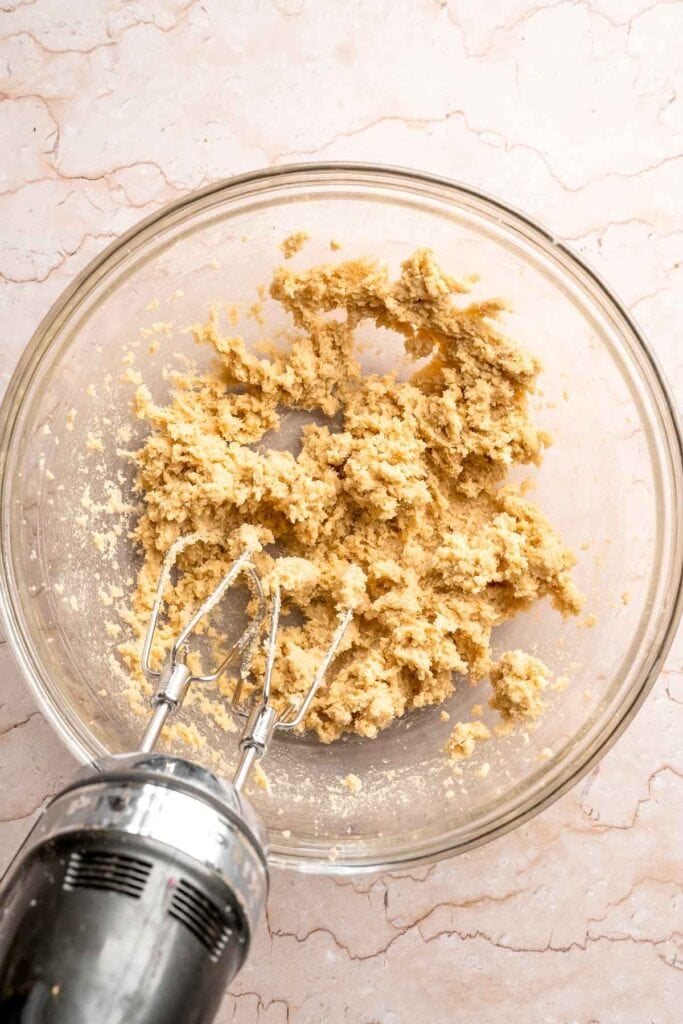
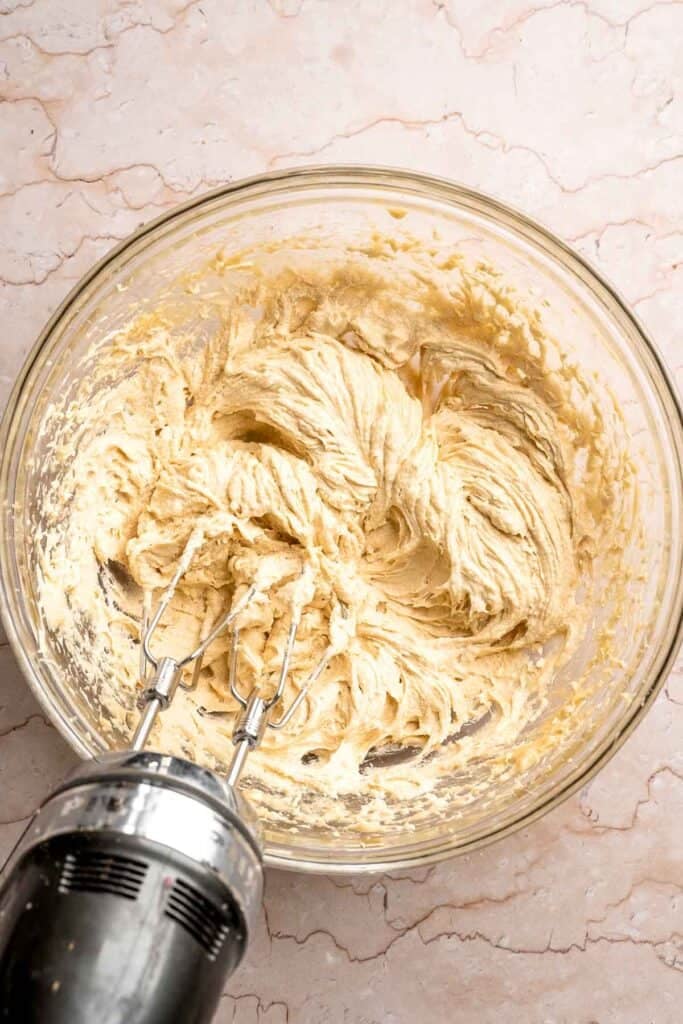
- Alternate wet and dry ingredients. Add ⅓ of the flour mixture to the wet ingredients and mix on low until just combined. Add ½ of the sour cream and ½ of the sweet potato puree, and mix again on low speed until incorporated. Continue alternating between the flour mixture and the sweet potato mixture, ending with the flour, until everything is fully combined.
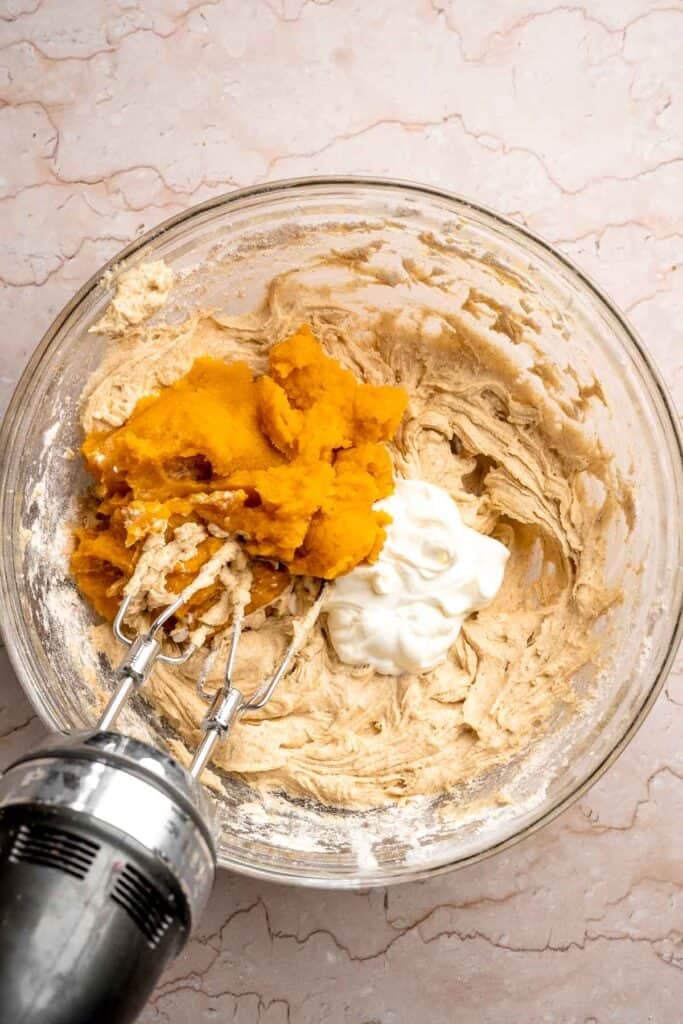
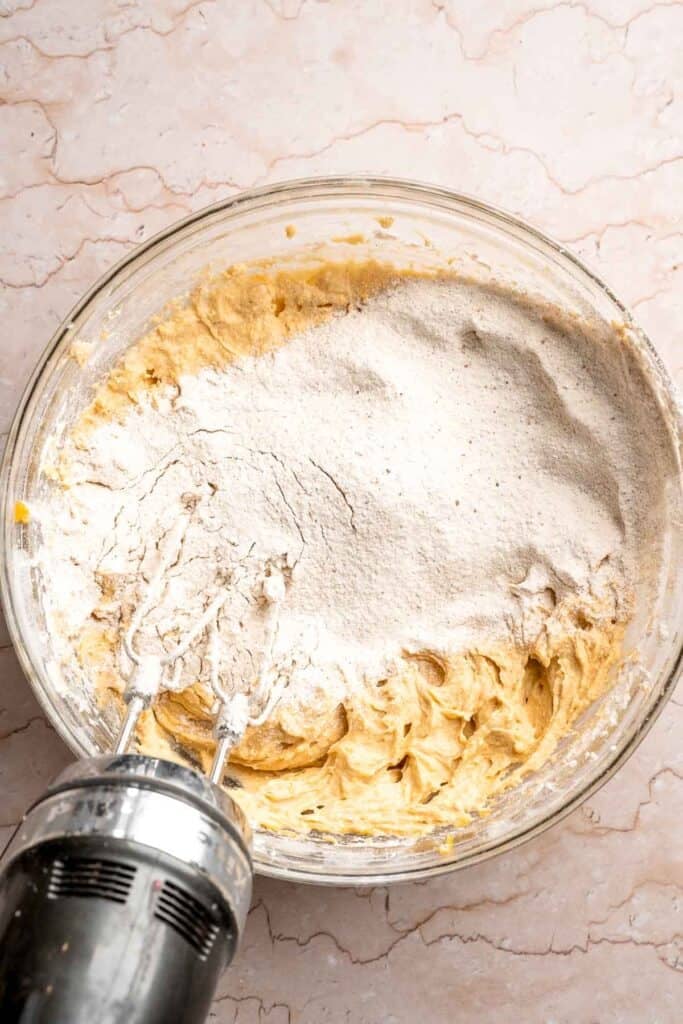
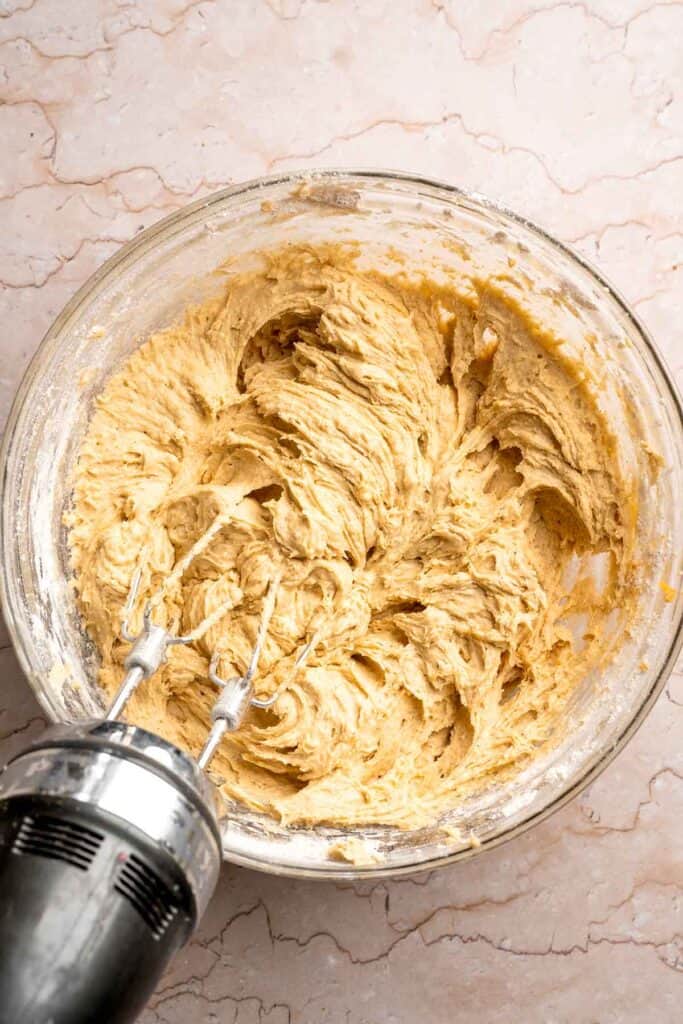
- Pour batter. Line a 9x9-inch baking pan with parchment paper, leaving some overhang for easy removal later. Pour the wet batter evenly into the prepared baking pan and smooth out the top.
- Bake the cake. Bake in a 350°F preheated oven for 35-40 minutes, or until a toothpick inserted into the center comes out clean. Allow the cake to cool in the pan for 5 minutes, then carefully transfer it to a wire rack to cool completely before frosting.
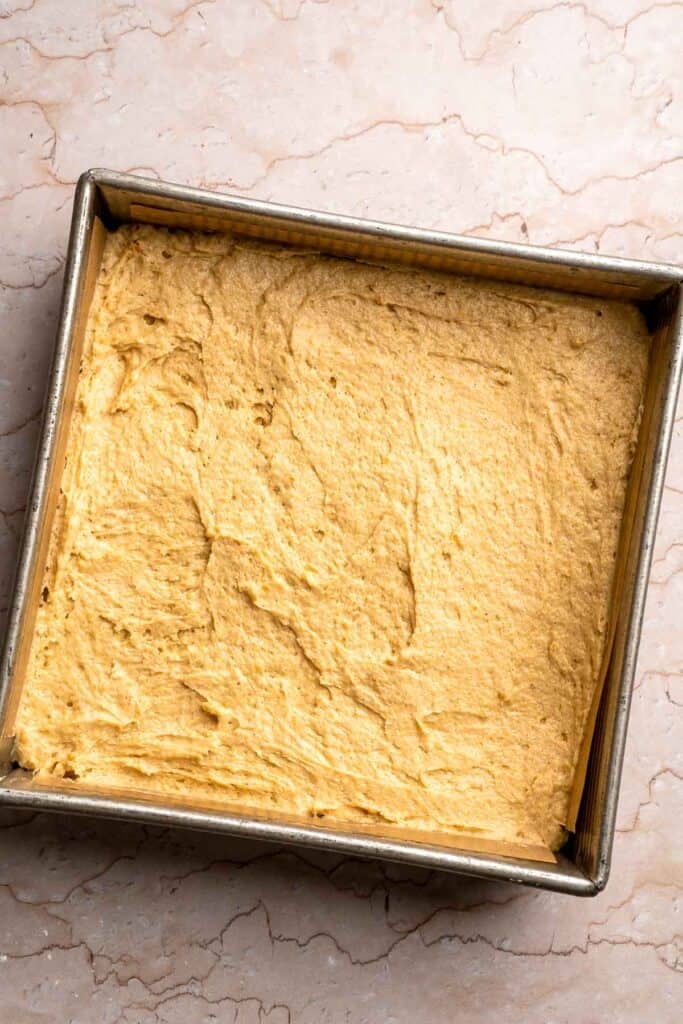
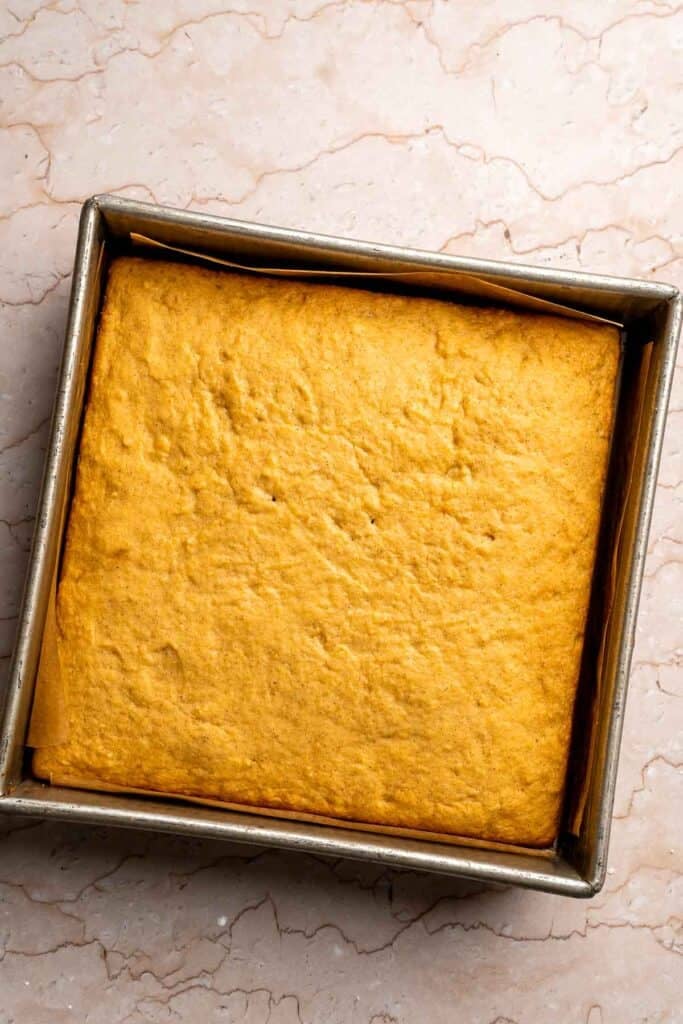
Make the cream cheese frosting
- Combine ingredients. In a large mixing bowl, use an electric mixer to beat the cream cheese, butter, and vanilla together on medium speed until creamy and smooth, about 1 minute. Gradually add the confectioners' sugar, beating until light, fluffy, and fully combined.

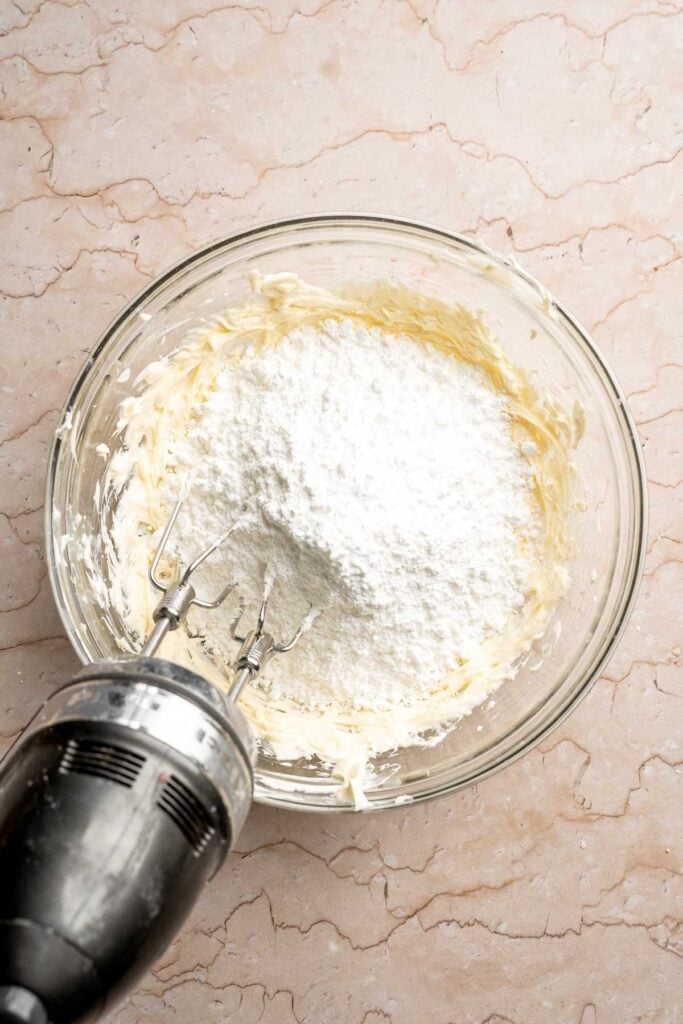
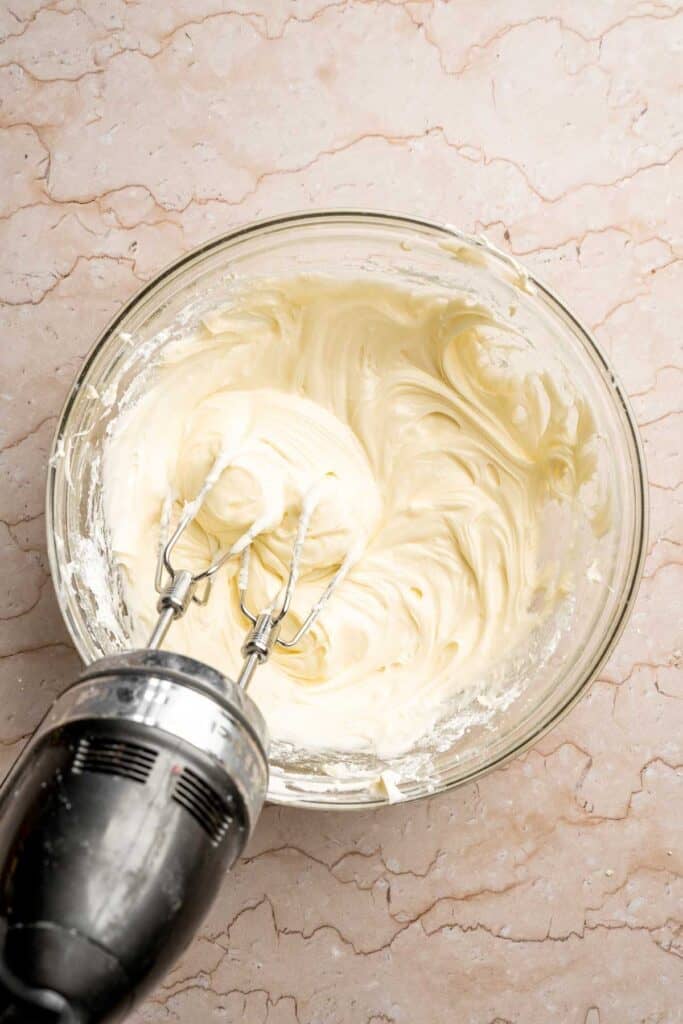
- Frost and garnish. Once the cake has cooled completely, spread the frosting evenly over the top with a spatula. Garnish with chopped pecans or your favorite nuts for a little crunch. Slice and serve!
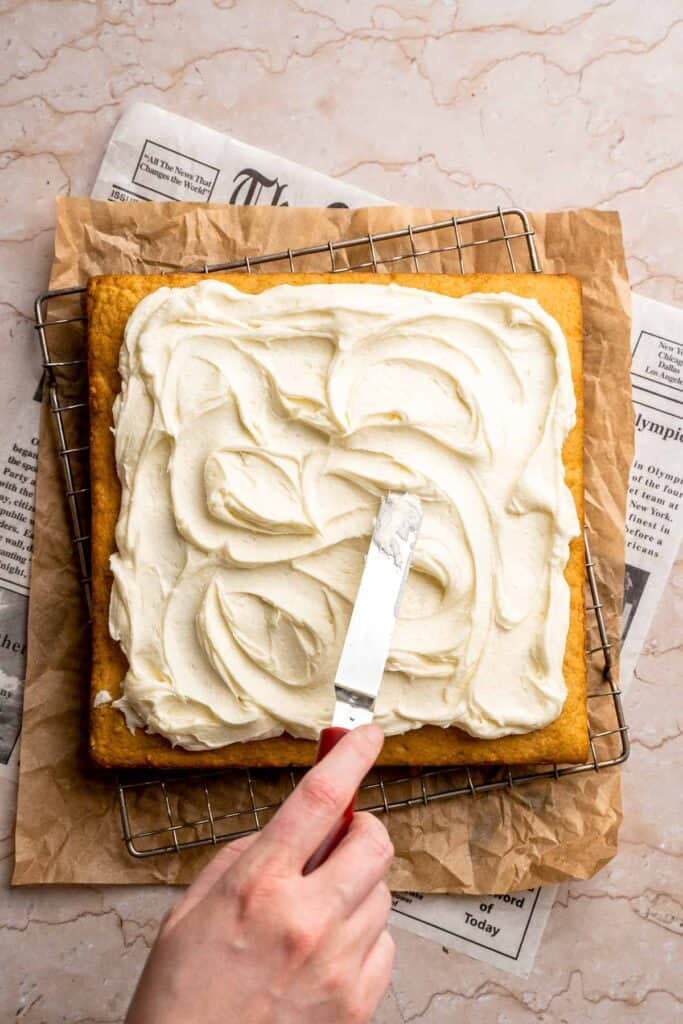
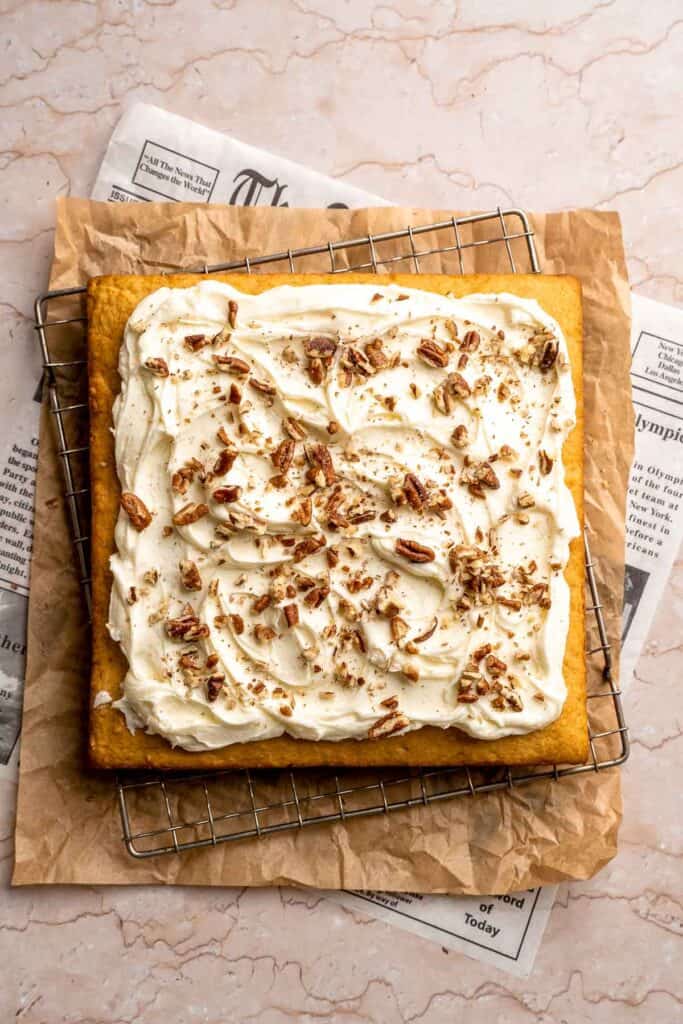
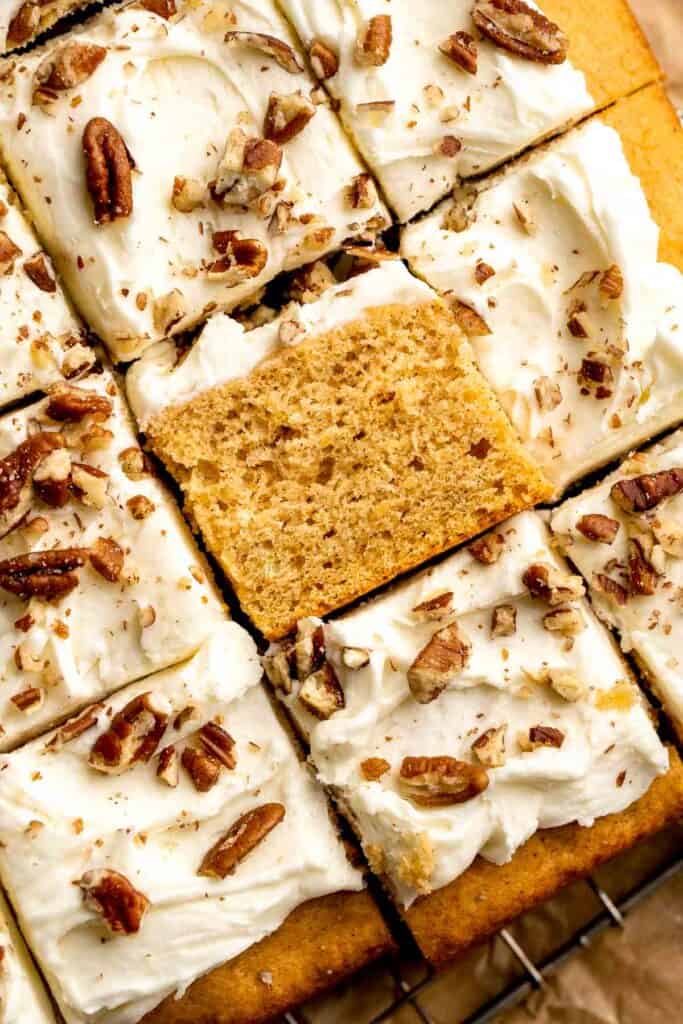
Baking Pan Options and Adjustments
- Sheet cake. Double the recipe and bake in a 9x13-inch pan for 40-45 minutes, for a larger crowd or party dessert.
- Cupcakes. Divide the batter evenly among 12 cupcake liners and bake for 18-20 minutes. Frost as desired once cooled.
- Loaf pan cake. Turn this recipe into a rich, buttery sweet potato pound cake by baking it in two loaf pans instead for 45-55 minutes. Slice thick and serve with a drizzle of maple glaze or a layer of cream cheese frosting.
- Two-tier cake. For a more impressive presentation, divide the batter between two 8-inch or 9-inch round cake pans, bake for 25-30 minutes, and sandwich the frosting between the cake layers.
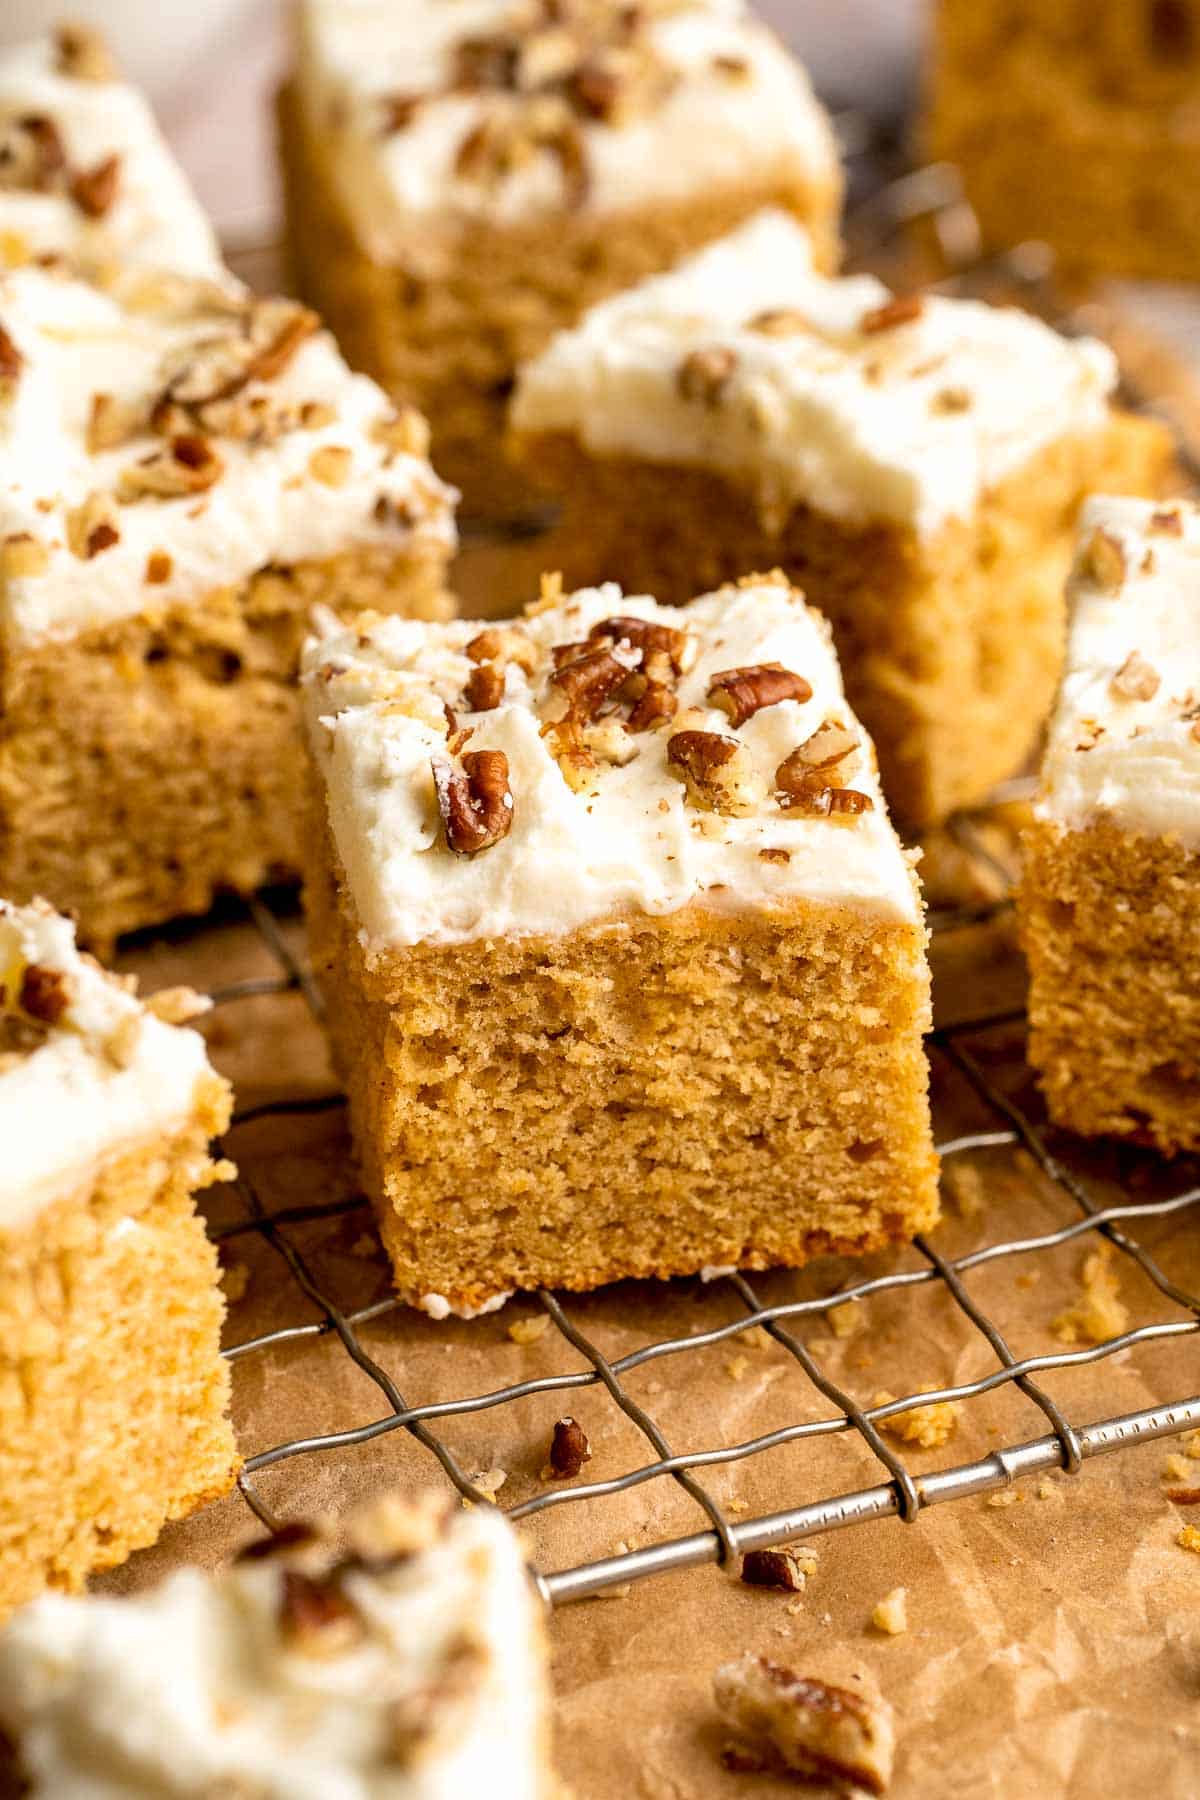
Expert Tip: Use Room Temperature Ingredients
For the fluffiest, smoothest cake texture, make sure your butter, eggs, and sour cream are all at room temperature before mixing. This helps the batter blend evenly and prevents overmixing - which means no dense cake, just soft, tender crumbs every time.
More Tips and Tricks
- Don't overmix the batter. Once you add the flour, mix only until combined. Overmixing can make the cake dense.
- Make it ahead. Bake the cake the day before, wrap tightly, and frost it the next day. It stays moist!
- Use leftover sweet potatoes. This cake is a great way to use up mashed sweet potatoes from dinner or the holidays.
- Frosting too soft? Chill it for 10 minutes before spreading to help it firm up.
- Love fall flavors? Try sprinkling crushed cookies on top (like gingersnaps or vanilla wafers) for a sweet, crunchy finish.
Recipe Variations
- Use maple syrup. Replace part of the sugar with maple syrup for a deeper, caramel-like sweetness that adds cozy fall flavor and extra moisture to the cake.
- Add chopped nuts. Fold ½ cup of chopped pecans or walnuts into the batter before baking for added crunch.
- Add other mix-ins Try stirring in a handful of shredded coconut or even mini chocolate chips for extra indulgence.
- Use brown butter in the frosting. Brown the butter before making the frosting for a rich, nutty flavor.
- Spice up the frosting. Add a pinch of cinnamon or ground ginger to the cream cheese frosting for an extra layer of warmth.
- Serve without frosting. It's still delicious served plain or with a light dusting of powdered sugar. You can even top it with a maple glaze for a simpler finish.

Storage
How to Store
Cover and store leftover cake in an airtight container in the refrigerator for up to 5 days.
How to Reheat
If you prefer it warm, let slices come to room temperature or warm them slightly in the microwave for a few seconds.
How to Freeze
Freeze unfrosted cake for up to 3 months. Wrap tightly in plastic wrap and foil, then thaw overnight in the fridge before frosting and serving.
How to Serve
This sweet potato cake with cream cheese frosting is delicious on its own or paired with a scoop of vanilla ice cream or a drizzle of caramel sauce. It's perfect for cozy fall evenings, Thanksgiving dessert tables, or as an everyday treat with coffee. The hint of spice and silky frosting make it a cake you'll crave year-round.
These are my favorite drinks to serve with sweet potato cake:

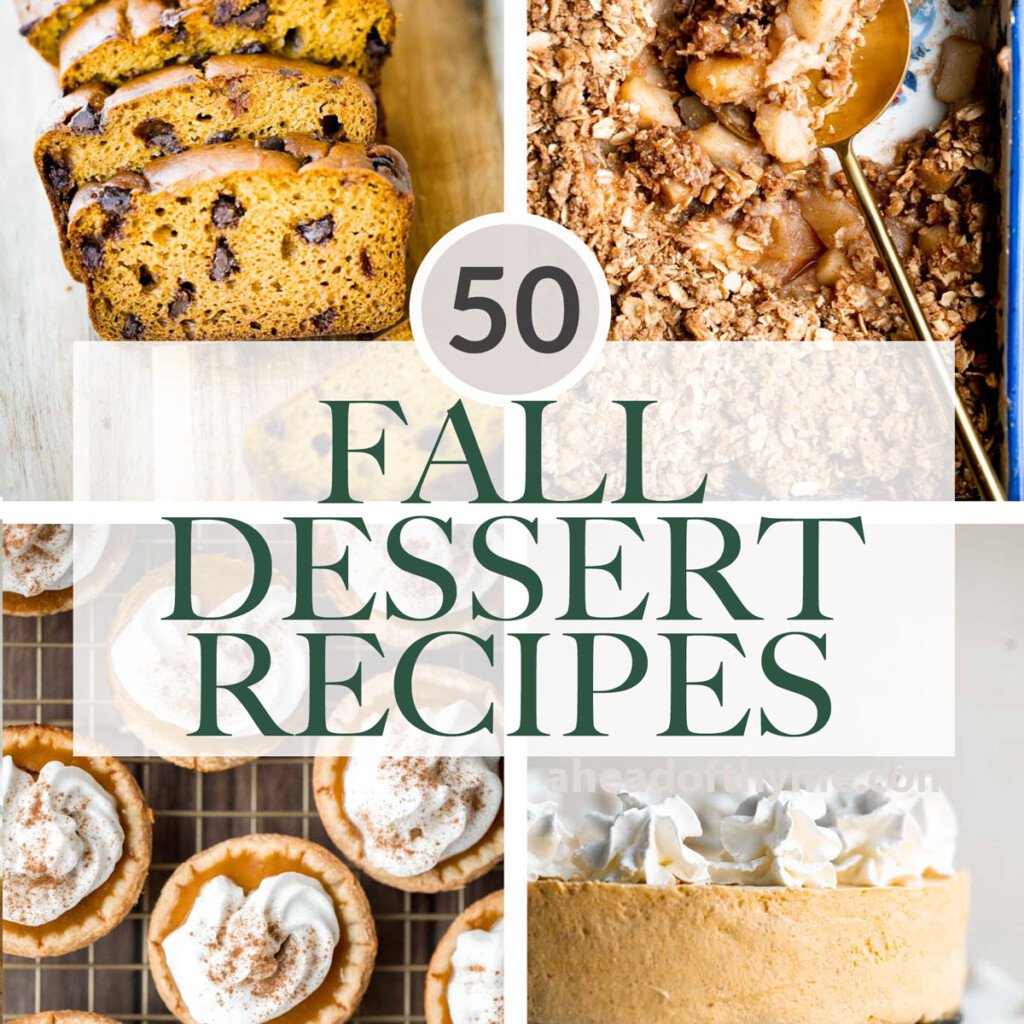
Fall Desserts
Why not create a full autumn dessert spread? Pair these with pumpkin muffins, caramel apple pie, pecan bars, or cinnamon cookies for a cozy, seasonal treat table. These desserts complement each other perfectly with warm fall flavors and a mix of soft, crunchy, and gooey textures.
FAQ
Yes! Sweet potatoes are amazing in baked goods. When mashed or pureed, they add moisture, flavor, and natural sweetness to cakes, muffins, and quick breads. They also pair beautifully with fall spices and creamy toppings like frosting or whipped cream.
Sweet potato cake is a soft, moist dessert made with sweet potato puree, warm spices, and a tender cake base. It's similar to carrot cake or pumpkin bread, but with a richer, naturally sweet flavor from the sweet potatoes. The result is a cozy, lightly spiced cake that's delicious on its own or topped with cream cheese frosting.
Some versions of sweet potato cake are nicknamed "depression cake" because they originated during the Great Depression, when ingredients like butter, milk, and eggs were scarce. Sweet potatoes added moisture and natural sweetness, allowing bakers to make a soft, flavorful cake without expensive ingredients. Today's recipes are more indulgent, but the name nods to that creative, resourceful history.
Sweet potato cake tastes similar to carrot cake - warmly spiced, sweet but not overly sugary, and wonderfully moist. The sweet potato adds a natural earthy sweetness that pairs perfectly with the creamy frosting.
Sweet potato cake is made from a blend of sweet potato puree, flour, butter, sugar, eggs, and spices like cinnamon and nutmeg. These ingredients work together to create a cake that's fluffy yet dense enough to hold its shape, with a flavor that's naturally sweet and aromatic.
To make your sweet potato cake extra fluffy, make sure your ingredients (especially butter, eggs, and sour cream) are at room temperature before mixing. Cream the butter and sugar until light and airy, and avoid overmixing once you add the flour. A little extra baking powder or sifting the dry ingredients can also help give the cake a lighter crumb.
You can make flourless sweet potato cake by using almond flour, oat flour, or coconut flour instead of all-purpose flour. These alternatives create a dense, moist texture that's naturally gluten-free. Keep in mind that you may need to adjust the liquid ingredients to balance the texture.
Yes, you can substitute grated carrots for sweet potatoes to make a variation that's closer to carrot cake. It will be slightly less dense and have a milder flavor, but it still pairs perfectly with cream cheese frosting and the same blend of spices.
More Sweet Potato Recipes
Looking for other recipes like this? Try these:
Tried this recipe?
I'd love to hear what you think! Leave a comment and rating below to share your feedback. Your reviews help others discover this recipe and help me keep creating more free recipes for you. Snap a photo and tag me on social media @aheadofthyme too.
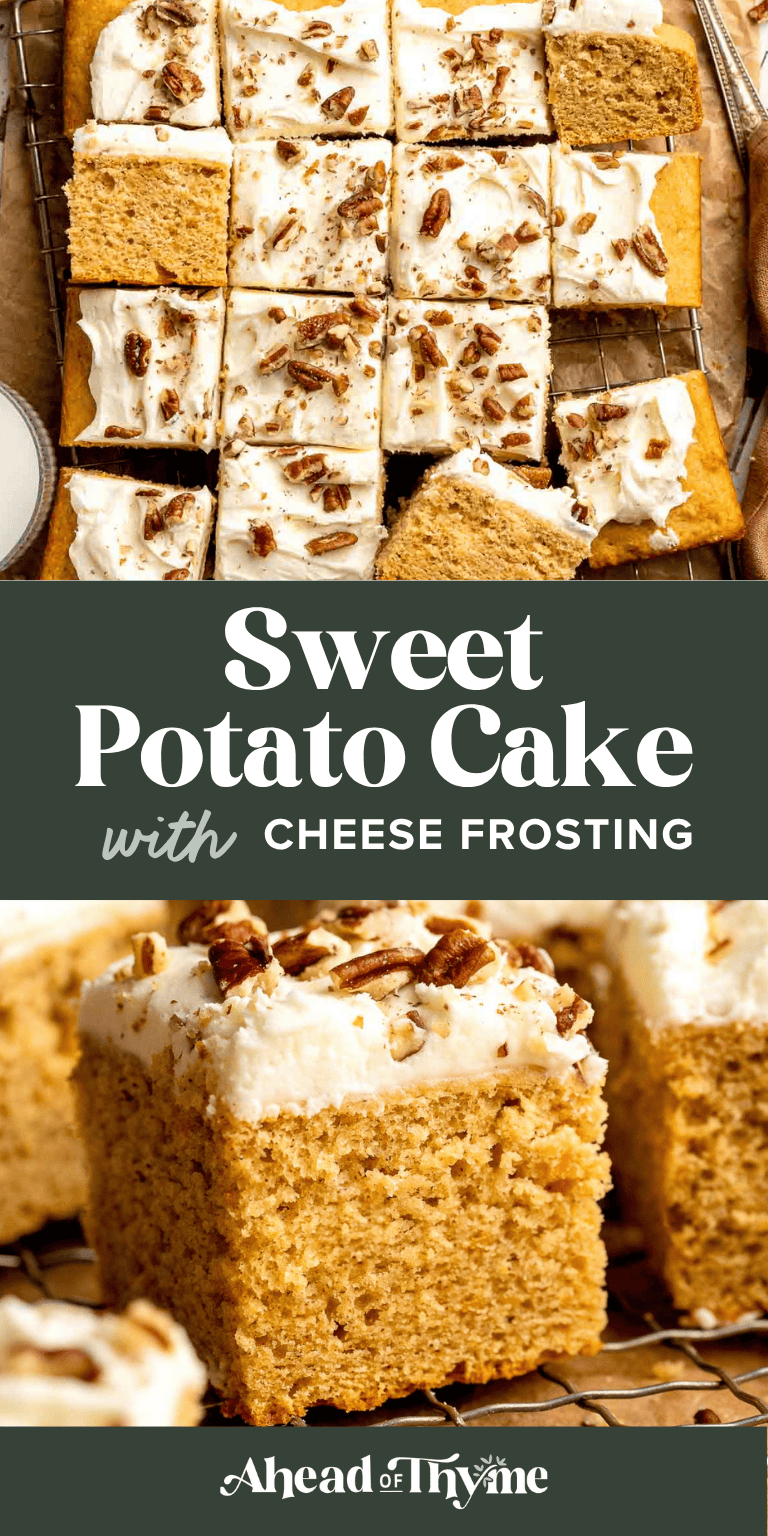
Pesto Roast Chicken (Whole Roast with Basil Pesto)
Pesto Roast Chicken is a simple yet impressive dinner that's full of flavor, color, and aroma. A whole chicken is coated in garlicky basil pesto, stuffed with fresh herbs, and roasted over a bed of caramelized vegetables until the skin turns golden and crisp. Every bite is juicy, tender, and infused with that irresistible pesto flavor - herby, garlicky, and slightly nutty. It's the kind of meal that looks fancy enough for company but is easy enough for a weeknight roast.

Roasting a whole chicken with pesto is a game-changer. The rich, oily texture of pesto locks in moisture, ensuring perfectly juicy meat every time, while the herbs and garlic perfume your kitchen as it cooks. The vegetables roast underneath, soaking up the savory drippings and balsamic glaze for the ultimate one-pan dinner that's hearty, wholesome, and low-effort. This pesto whole chicken is truly a flavor-packed twist on classic roast chicken.
This recipe was inspired by my love for all things pesto (and my obsession with making dinners that double as meal prep). It pairs beautifully with my Garlic Herb Mashed Potatoes or a crisp Beet Salad for a balanced meal that feels rustic and restaurant-worthy. Whether you're cooking for Sunday dinner or a cozy gathering with friends, this pesto roast chicken will absolutely steal the show.
The best roast chicken I have ever made!
- Kathryn ★★★★★
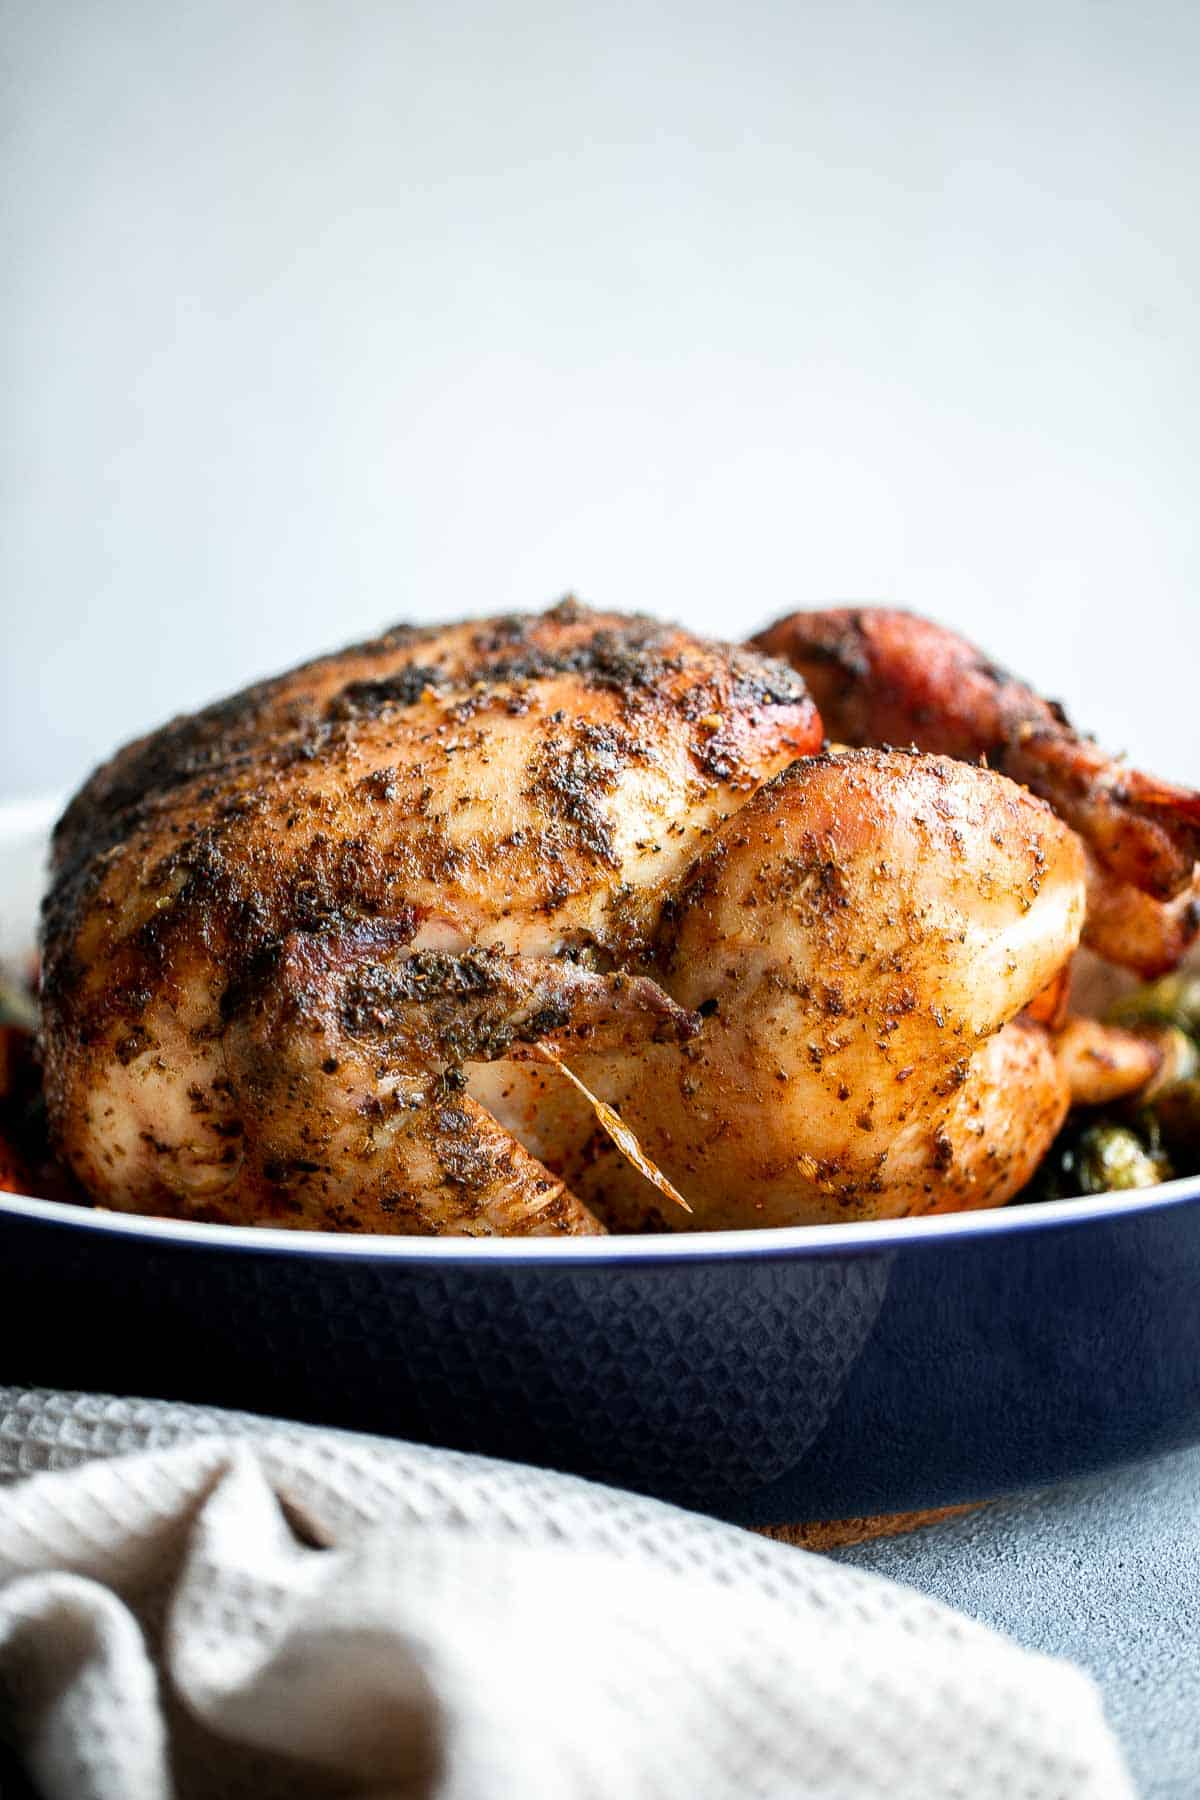
Why You'll Love This Recipe
- The most tender, juicy, and crispy chicken. This pesto roast chicken is everything you crave in a perfect chicken dinner - juicy and tender on the inside, with crispy, golden-brown skin that locks in all the flavor. Every bite melts in your mouth, bursting with the herby richness of basil pesto.
- Made with simple ingredients that deliver big flavor. You don't need anything fancy to make this whole roast chicken taste incredible. A few pantry staples (olive oil, pesto, herbs, and seasoning) bring out the natural flavor of the chicken in the most delicious way. Add a bed of roasted vegetables underneath, and every bite becomes a mix of savory, herby, and slightly sweet goodness.
- A bed of roasted vegetables that steals the show. The brussels sprouts, carrots, and sweet potatoes aren't just side characters here, they soak up all the drippings and pesto juices from the chicken, becoming caramelized, flavorful, and just as irresistible. It's a wholesome, one-pan dinner that feels both comforting and elegant.
- Easy dinner idea. With just a few ingredients, you can roast a whole chicken that feels restaurant-worthy with minimal prep. Leftovers are also delicious shredded over pasta, tossed in salads, or stuffed into wraps for easy lunches.
Ingredients and Substitutions
To make this easy Pesto Whole Chicken, you will need the following ingredients (full quantities in the recipe card below):
- whole chicken - Use a 3-4 pound whole chicken, cleaned and patted completely dry. This size roasts evenly and stays juicy.
- olive oil - Helps the skin turn golden and crisp in the oven. It also helps the vegetables crisp up and roast evenly. Substitute with vegetable oil if needed.
- salt and pepper - Essential for seasoning and enhancing all the flavors.
- paprika - Adds a subtle smoky flavor and beautiful color to the chicken skin.
- basil pesto - Use either homemade pesto or store-bought. For a twist, try kale or spinach pesto.
- fresh herbs - Fresh thyme or rosemary tucked inside the cavity infuse the roast with aroma and earthy flavor.
- onion - Adds moisture and a hint of sweetness to the cavity while roasting.
- vegetables - We used brussels sprouts, carrots, and sweet potatoes for a hearty, colorful base. Trim and halve the brussels sprouts for even roasting, and cut the carrots into 1-inch pieces. Feel free to mix it up with your favorite veggies, or roast the chicken on its own for a simpler version.
- balsamic vinegar - Adds tangy depth and enhances the caramelized flavor. You can leave this out if you prefer.
Equipment
You'll also need measuring cups and spoons, mixing bowl, a baking tray or roasting pan, a basting brush, kitchen twine (for trussing), and an instant-read thermometer to ensure the chicken reaches perfect doneness.
Instructions
- Prepare the chicken. Use a paper towel to pat the whole chicken completely dry. Generously rub olive oil, salt, pepper, paprika, and pesto evenly over the entire bird, inside and out. Let it rest for at least 30 minutes or refrigerate overnight. If refrigerating, bring the marinated chicken to room temperature before cooking - this helps the meat stay tender and juicy.
- Stuff with aromatics. Stuff the cavity of the chicken with thyme sprigs and onion halves to infuse flavor from the inside out as it roasts.
- Prepare the vegetables. In a large mixing bowl, combine brussels sprouts, carrots, and sweet potatoes with vegetable oil, salt, pepper, and balsamic vinegar. Toss well to coat the vegetables evenly.
- Arrange in the pan. Spread the vegetables evenly in a 2.5-quart casserole dish or roasting pan. Place the whole chicken, breast side up, on top of the vegetables so the juices baste them as it cooks.
- Roast the chicken. Bake the chicken in a 425°F (220°C) preheated oven for 20 minutes until lightly browned. Reduce the oven temperature to 375°F (190°C) and continue baking for 1 to 1½ hours, depending on the size of the chicken, until the internal temperature reaches 165°F (74°C). Check doneness by inserting a meat thermometer into the thickest part of the breast or thigh.
When roasting a whole chicken, plan for about 18-20 minutes per pound at 375°F. This simple rule helps you estimate cooking time accurately so your chicken stays perfectly juicy and cooked through every time.
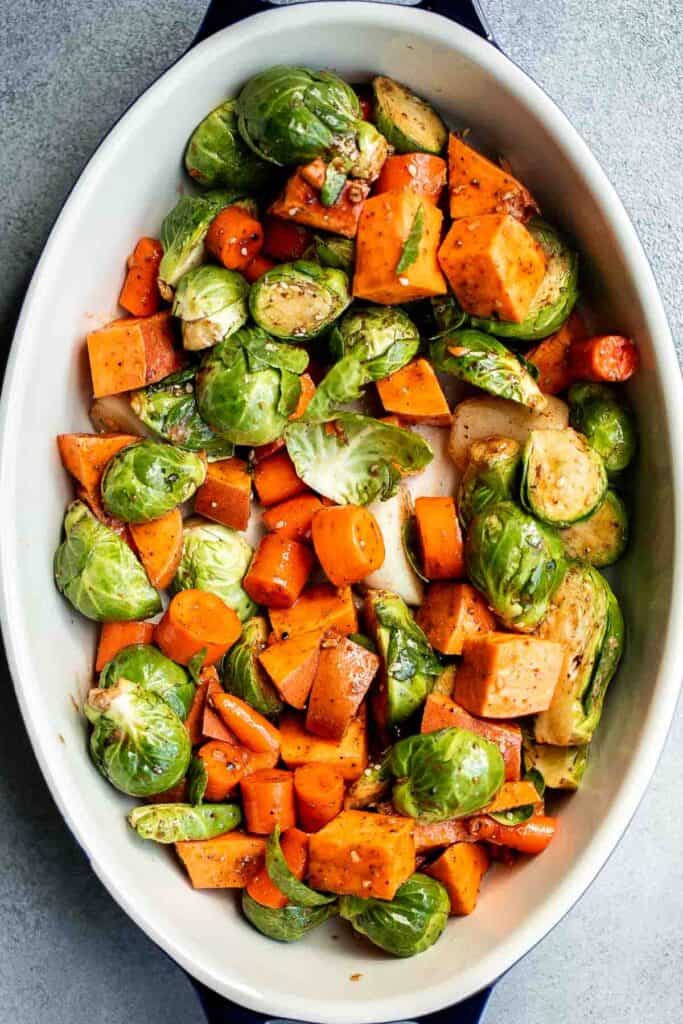
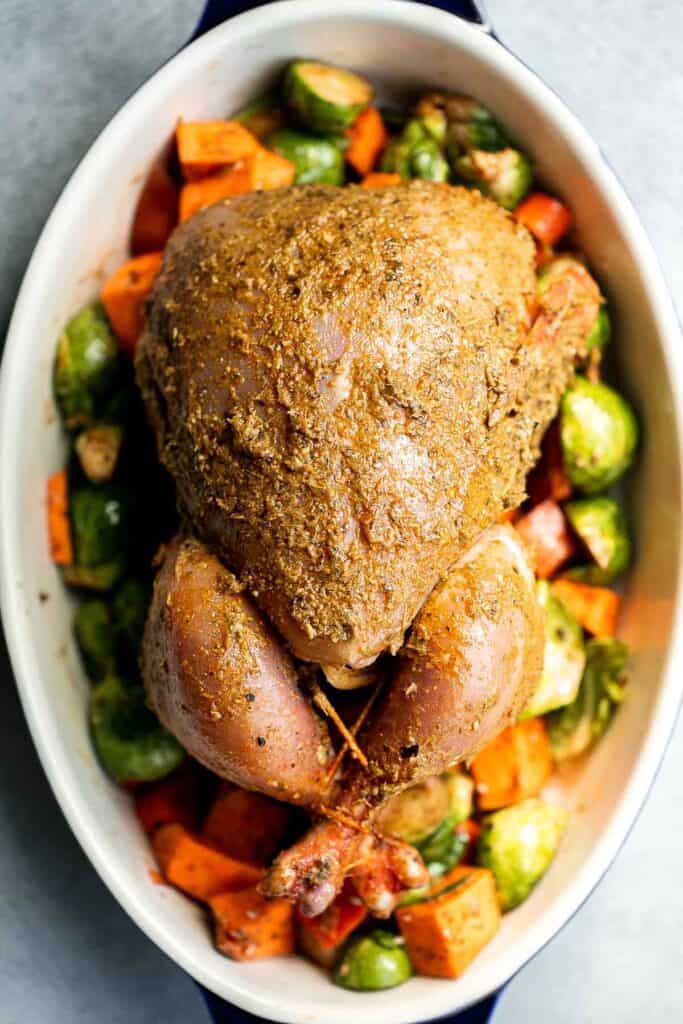
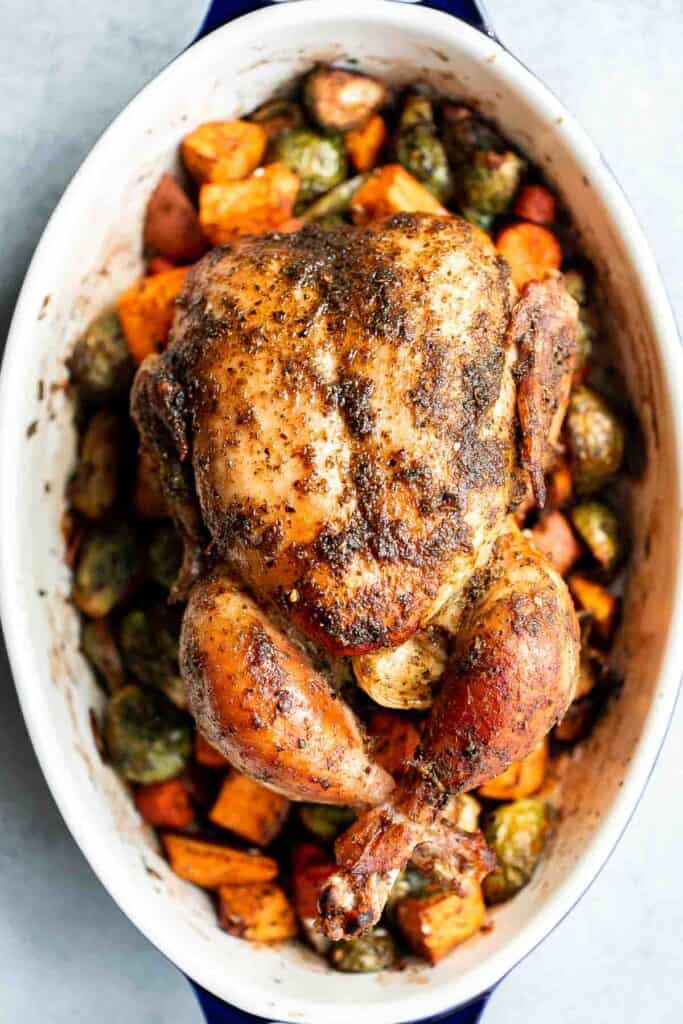
- Optional broil for crispy skin. For extra crispy and golden-brown skin, turn the broiler to high and broil for an additional 5 minutes, watching closely to avoid burning.
- Rest before serving. Remove the pan from the oven and let the chicken rest at room temperature for 15 minutes before carving. This allows the juices to redistribute for perfectly tender meat.
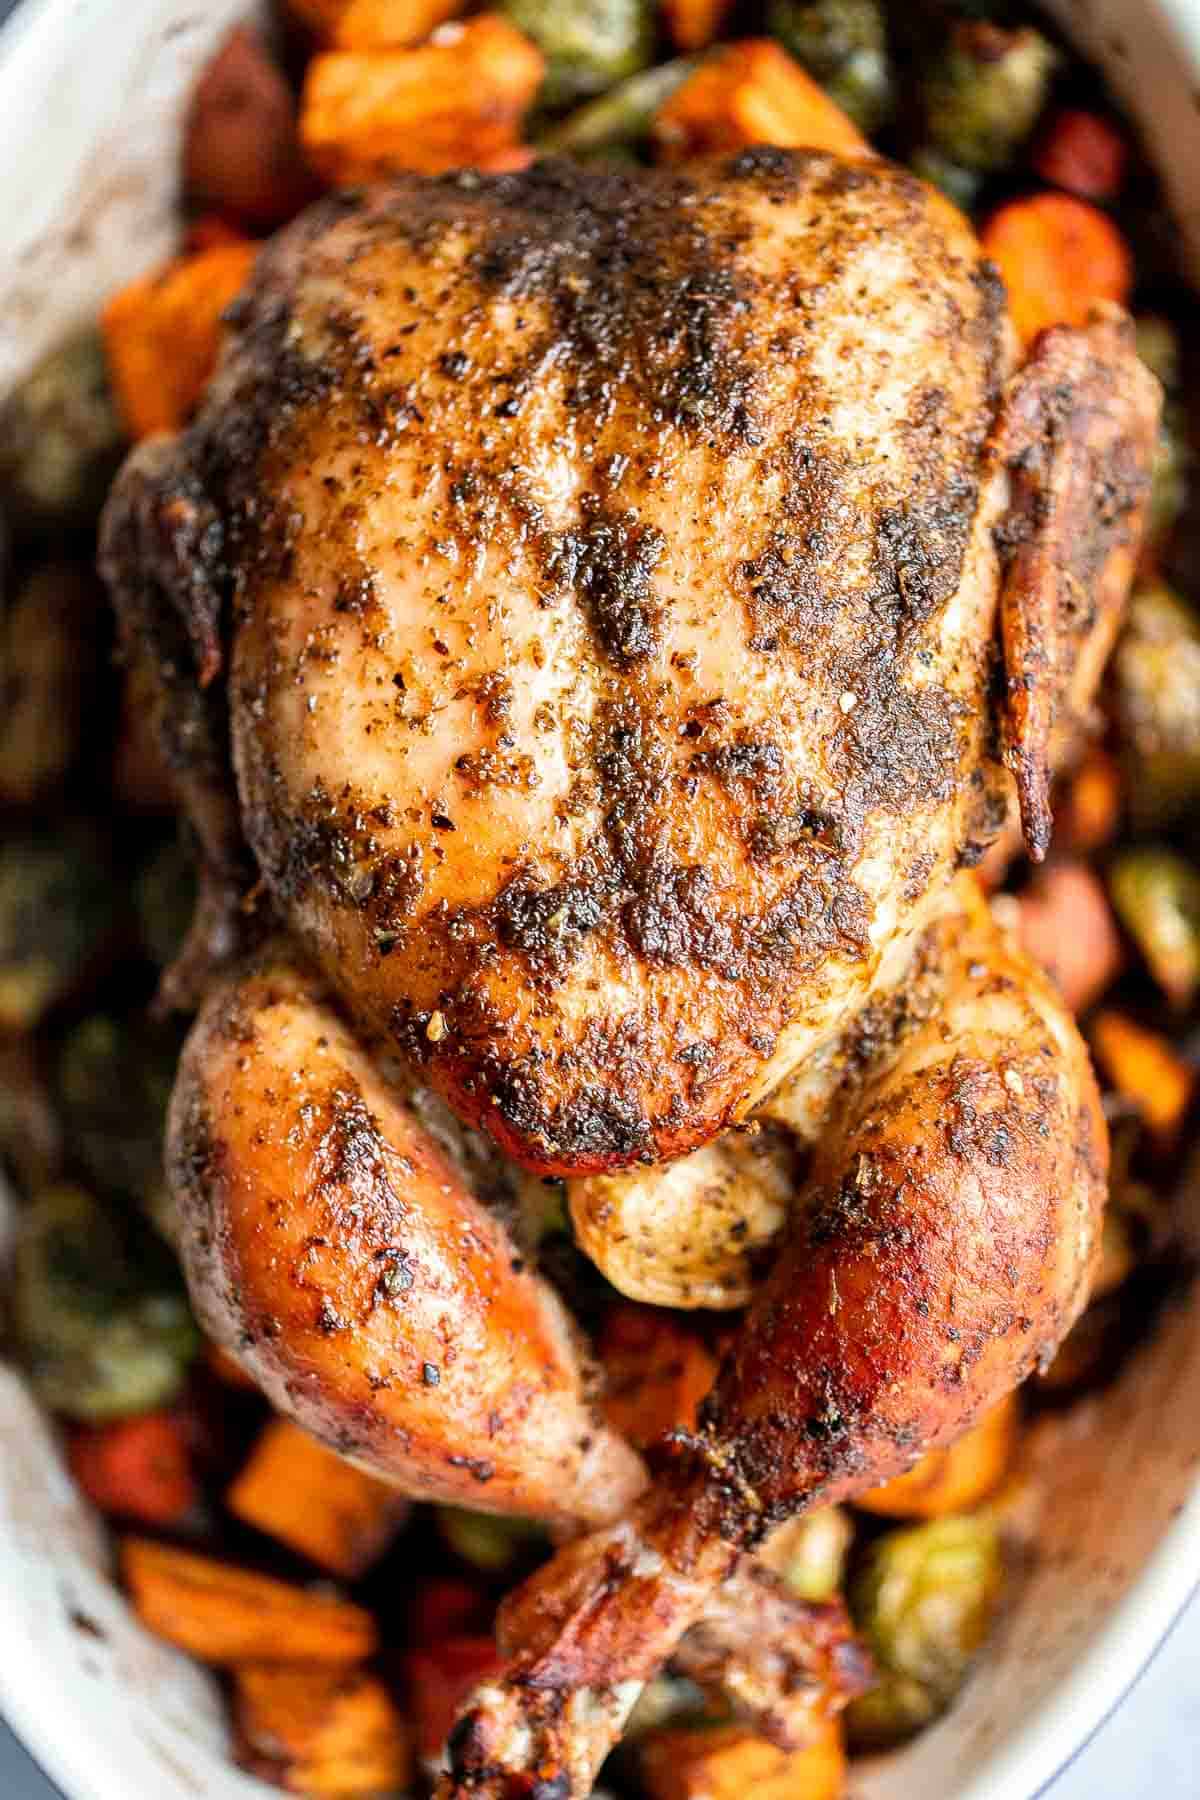
Expert Tip: Pat the Chicken Dry for Crisp Skin
Before spreading on the pesto, pat the chicken completely dry with paper towels, especially under the wings and around the legs. This step helps the oil and pesto stick better, giving you that beautiful, golden-brown chicken skin that crisps up perfectly in the oven.
More Tips and Tricks
- Use good pesto. The flavor of your chicken depends heavily on your pesto. Homemade is best, but a quality store-bought one works too. We used our easy 5 minute Homemade Basil Pesto.
- Make your own pesto. It's easy to make homemade pesto in a food processor - just blend fresh basil, garlic cloves, Parmesan, pine nuts, and olive oil until smooth. The fresh flavor takes this mixture to the next level.
- Roast on a rack. Elevating the chicken helps the heat circulate and keeps the bottom from steaming.
- Don't skip resting. Resting lets the juices redistribute, keeping the meat tender and juicy.
- Save the drippings. The pan juices make an incredible sauce for drizzling over the carved chicken.
- Save the bones. After carving, save the bones to make a flavorful chicken soup or broth. The roasted flavor gives your stock incredible depth.
Recipe Variations
- Add more pesto flavor. Brush the chicken with extra pesto halfway through roasting for an extra burst of herby goodness.
- Garlic butter version. Combine equal parts pesto and garlic herb butter for a richer coating and extra shine.
- Add lemon. Mix a tablespoon of lemon juice into the pesto for a brighter, zesty flavor.
- Swap with herb pesto. Swap basil pesto for parsley, oregano, or rosemary pesto for a different herbal note.
- Make a spatchcocked version. Butterfly the chicken to reduce the cooking time to 40-45 minutes for a quicker dinner. See our tips for making Spatchcock Chicken.
- Pesto salmon. Try the same pesto mixture on salmon for a quick, protein-packed dinner. Roast at 400°F for about 12-15 minutes until flaky and tender.
- Pesto chicken breasts. Not in the mood to roast a whole bird? Use skinless chicken breasts instead. Simply coat them with basil pesto and bake at 400°F for 25-30 minutes until cooked through.
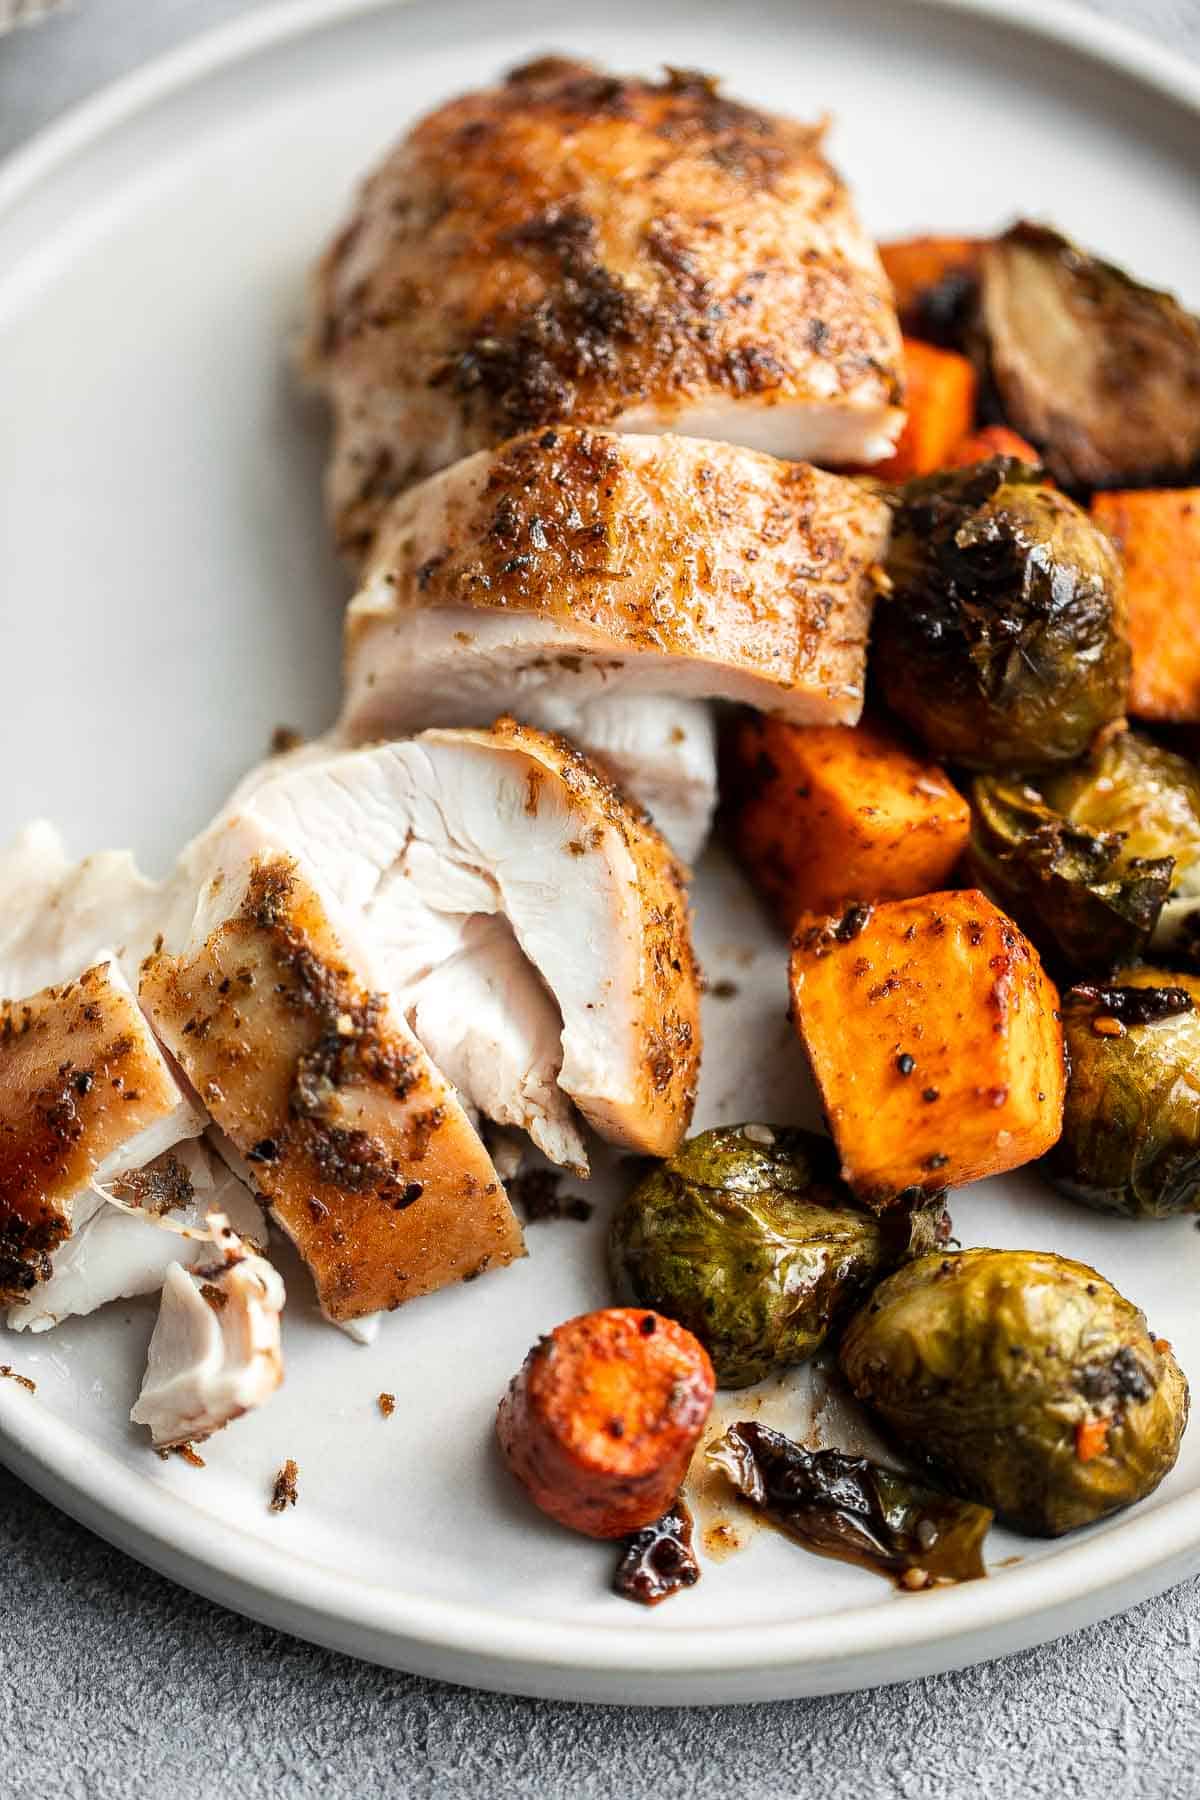
Storage
How to Store
Keep leftover pesto chicken in an airtight container in the refrigerator for up to 3-4 days.
How to Reheat
Reheat in a 350°F oven for 10-15 minutes, covered with foil to retain moisture. You can also shred and reheat in a skillet with a drizzle of olive oil.
How to Freeze
Freeze shredded or whole portions in freezer-safe bags for up to 3 months. Thaw overnight in the fridge before reheating. Freezing leftovers makes it easy to throw into Leftover Rotisserie Chicken Recipes.
How to Serve
This pesto roast chicken pairs perfectly with roasted vegetables, mashed potatoes, or a fresh green salad. Serve it with crusty bread to soak up the pesto pan sauce, or toss the leftovers into pasta, grain bowls, or sandwiches for quick, flavorful meals throughout the week. It's a truly versatile dish that transforms simple ingredients into something special.
These are my favorite side dishes to serve with pesto chicken:
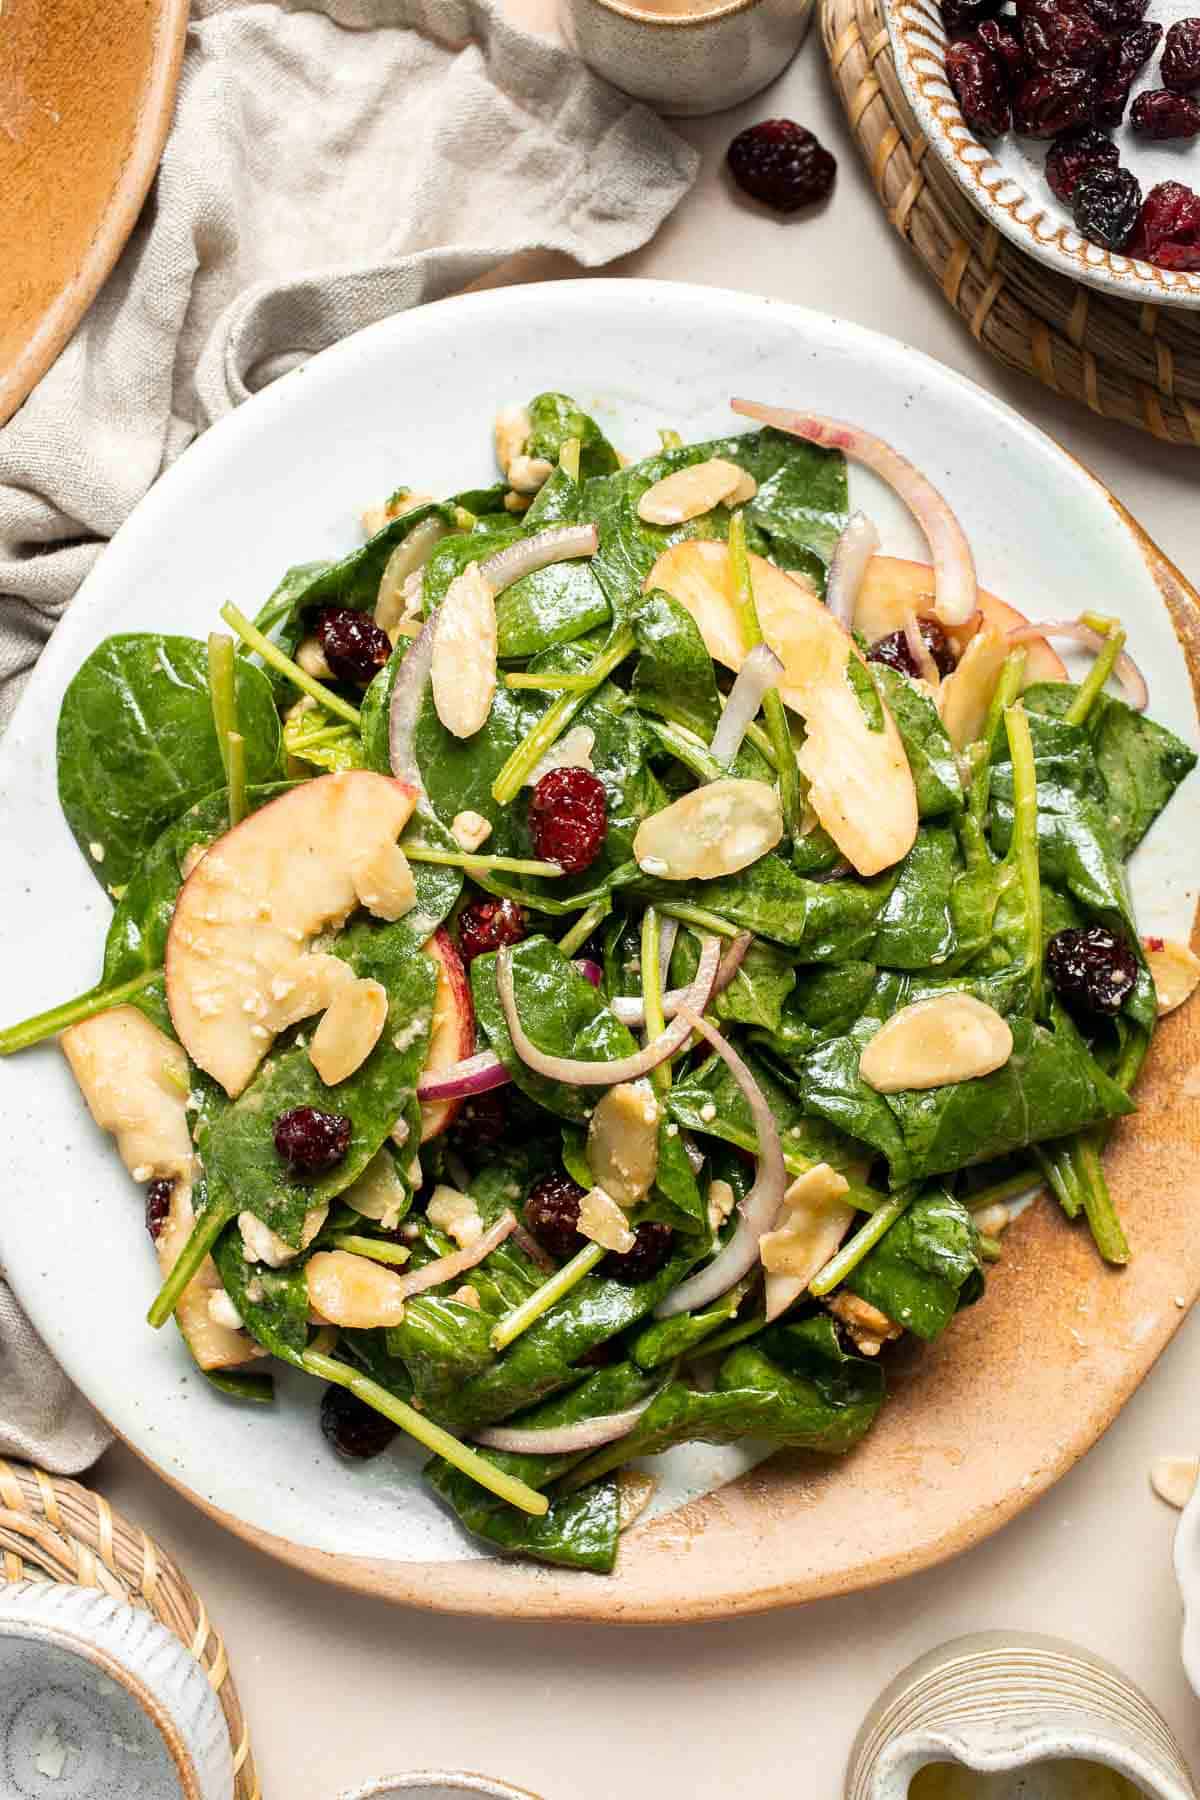
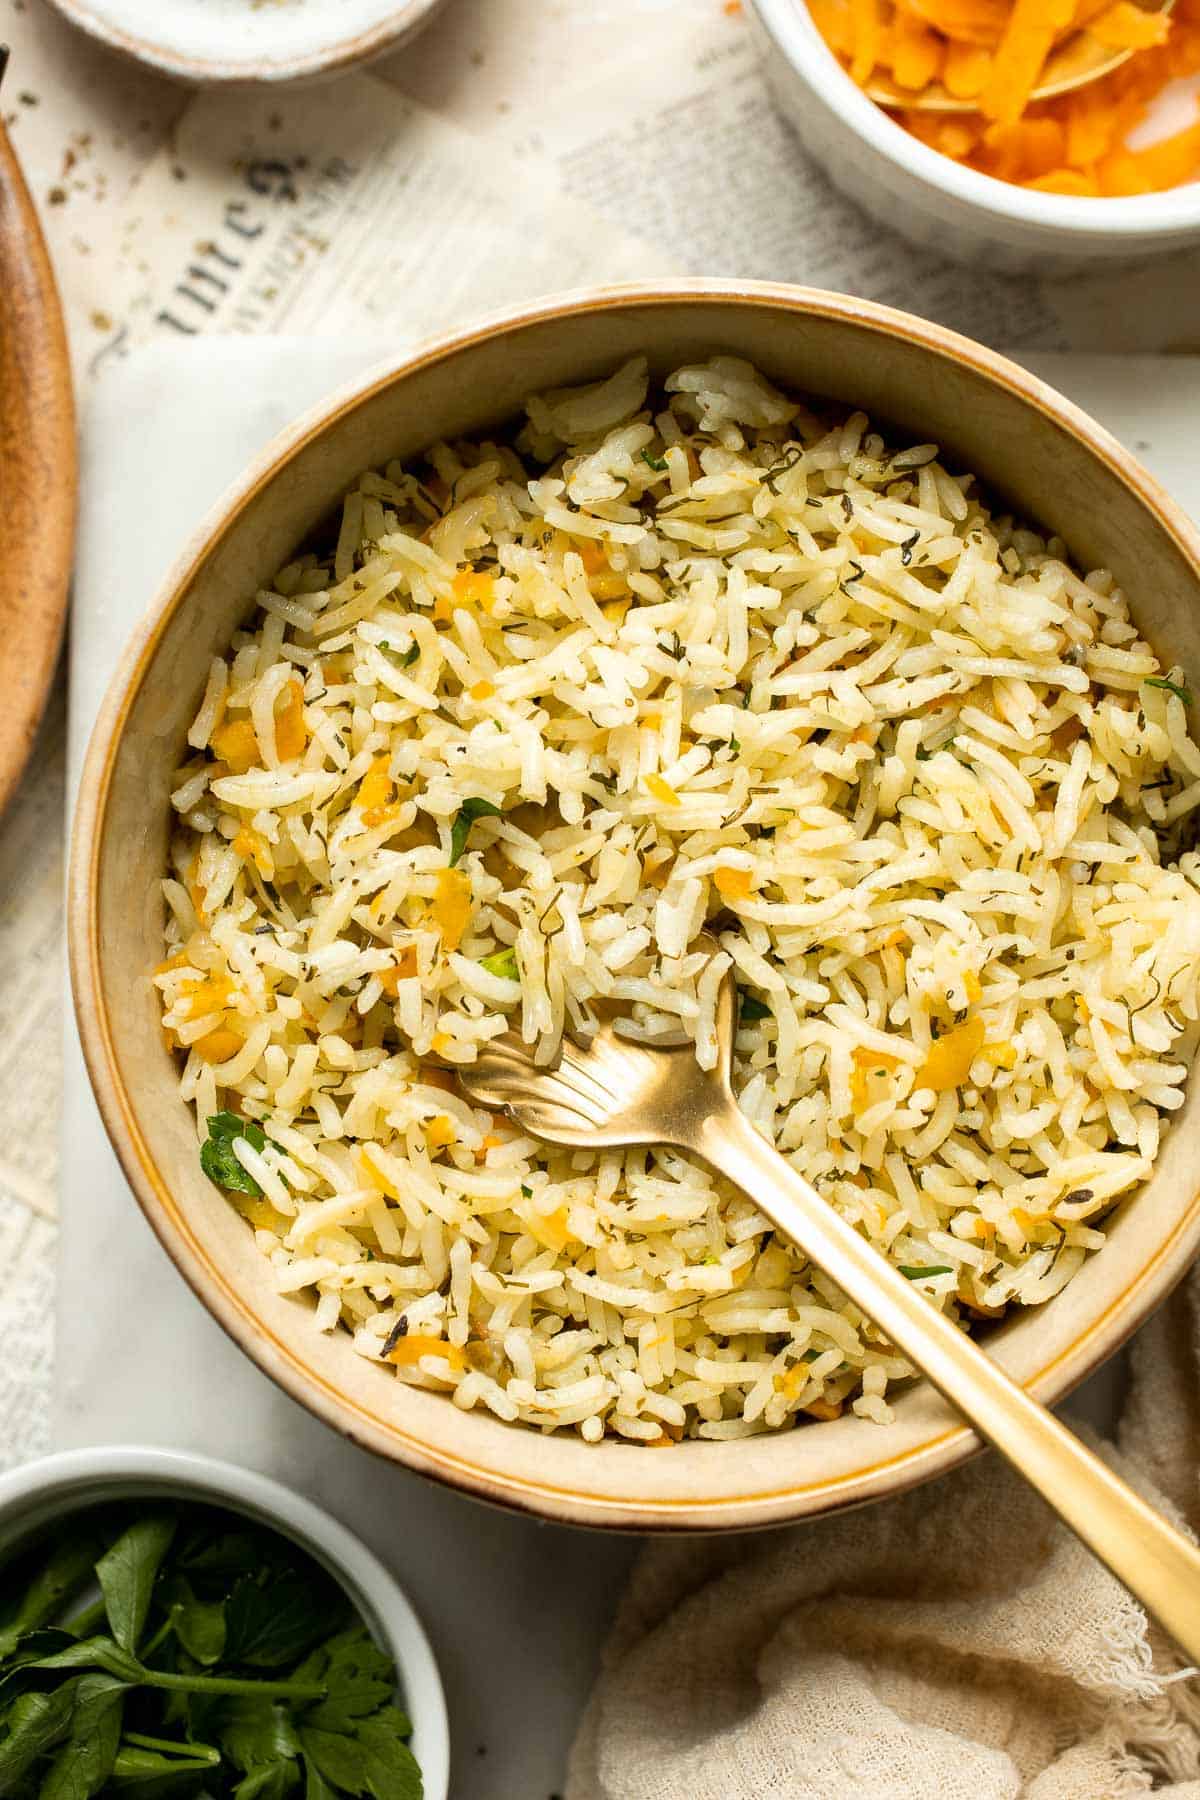

Side Dishes for Chicken
Looking for the perfect accompaniments to your chicken dinner? From roasted vegetables and fresh salads to creamy mashed potatoes and flavorful grains, our collection of sides has something for every type of chicken recipe.
FAQ
Yes! Pesto is a fantastic pairing with roast chicken. Its blend of basil, garlic, Parmesan, and olive oil adds a burst of herby, savory flavor that seeps into the meat as it cooks, creating a juicy and aromatic roast.
For the best flavor, spread pesto before roasting so it can infuse the chicken as it cooks. You can also add a fresh spoonful afterward for extra brightness and aroma.
Absolutely. Store-bought pesto can be used straight from the jar - just give it a stir first. For more depth, mix in a spoonful of olive oil or a squeeze of lemon before using.
Good-quality pesto doesn't need much! But for extra richness, you can mix in a splash of lemon juice, olive oil, or grated Parmesan to balance the flavor.
It depends on your taste! Green pesto (basil-based) has a bright, fresh, herby flavor, while red pesto (made with sun-dried tomatoes) is richer and slightly smoky. Both work wonderfully with chicken.
To make pesto chicken, simply coat the chicken in pesto before roasting, grilling, or baking. The oil in the pesto helps crisp the skin while the basil and garlic infuse deep flavor into the meat.
Preheat your oven to 400°F (200°C), coat the chicken with pesto, and roast until the internal temperature reaches 165°F (74°C). For whole chickens, this takes 1-1½ hours; for pieces, about 25-35 minutes.
A higher temperature like 400-425°F produces crispier skin and juicy meat. Lower temperatures (350°F) are better for larger birds or slower roasts.
Roast the chicken uncovered to achieve crispy, golden-brown skin. If the pesto starts to darken too quickly, tent it loosely with foil halfway through cooking.
Absolutely! You can skip the vegetables completely and follow recipe as written (omitting the veggies).
Traditionally, pesto is served with pasta (most famously trofie or linguine) but it also pairs beautifully with chicken, seafood, potatoes, and roasted vegetables.
More Whole Chicken Recipes
Looking for other recipes like this? Try these:
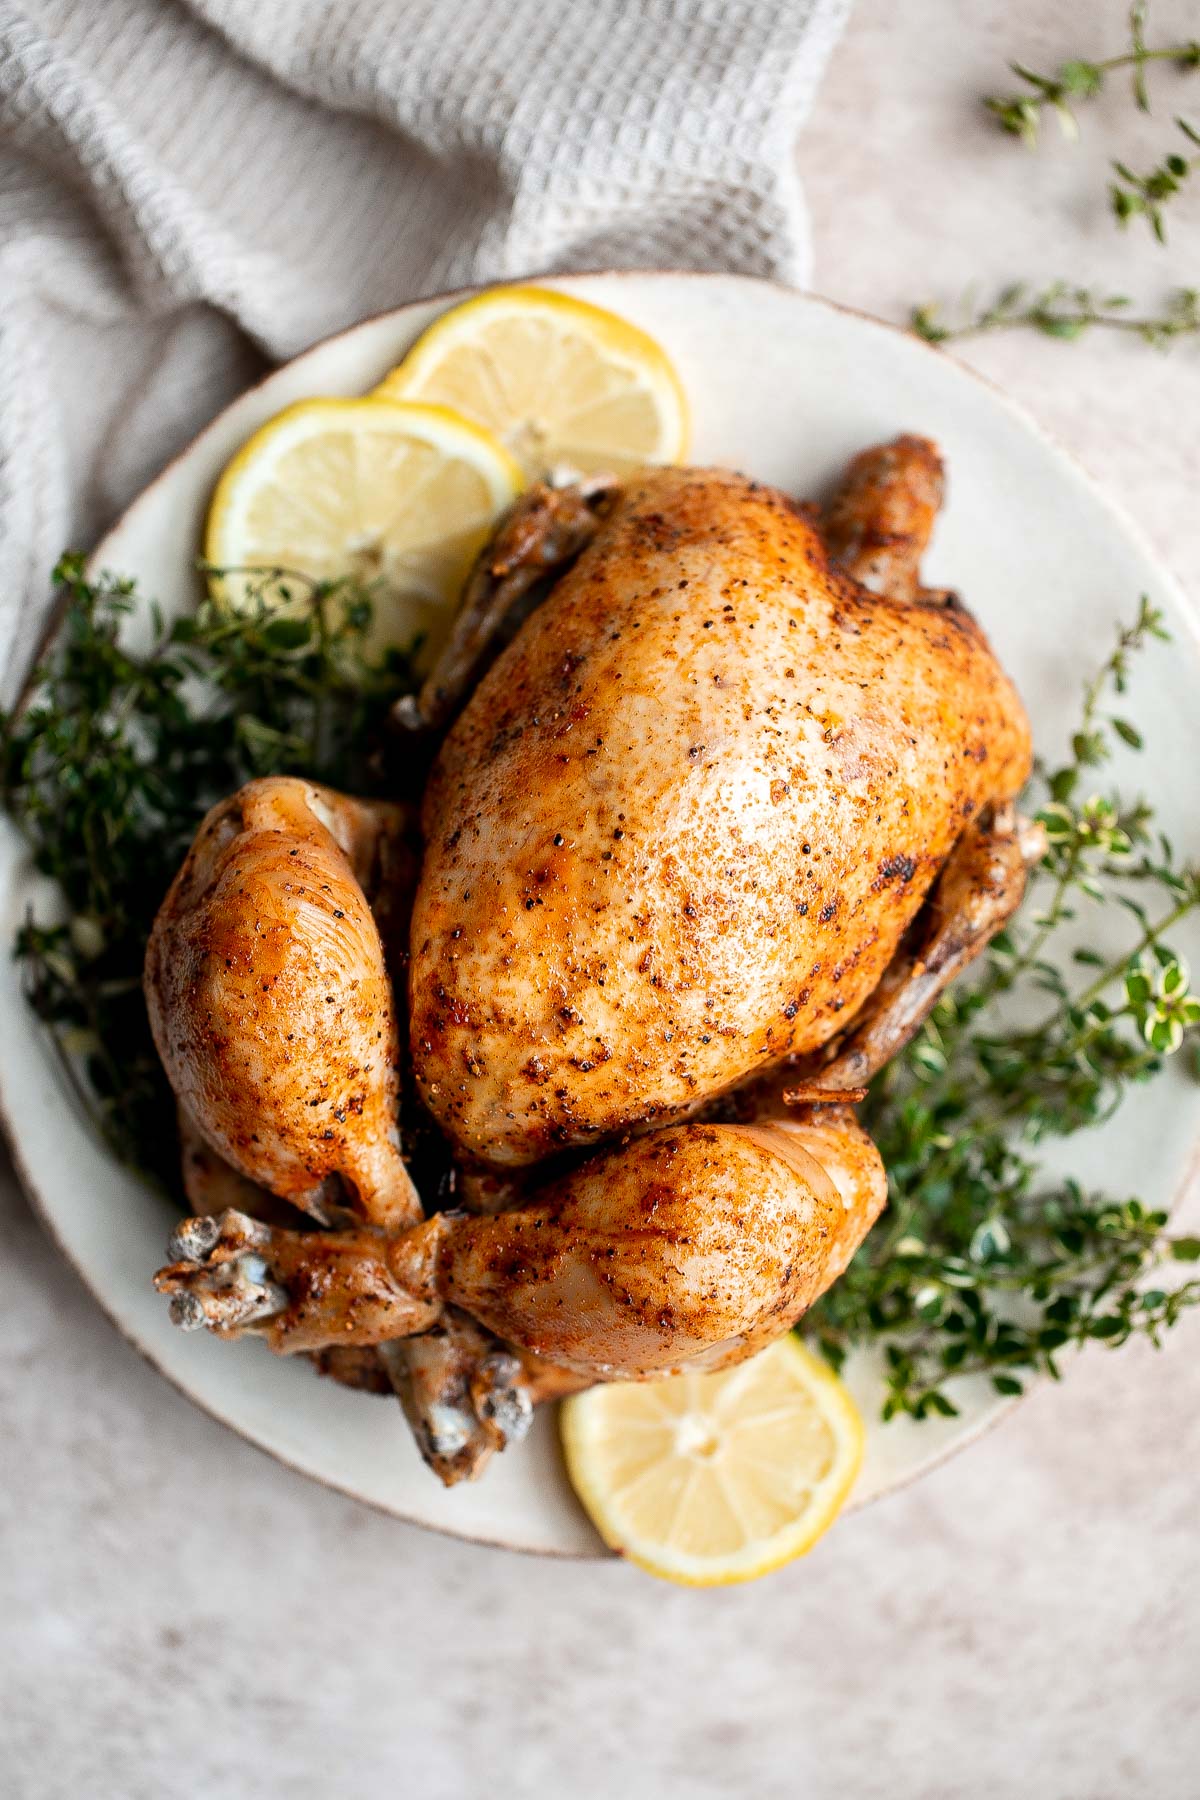

Tried this recipe?
I'd love to hear what you think! Leave a comment and rating below to share your feedback. Your reviews help others discover this recipe and help me keep creating more free recipes for you. Snap a photo and tag me on social media @aheadofthyme too.
This recipe was originally published in 2021. It has since been updated with new content.
Balsamic Roasted Beets and Carrots

Balsamic Roasted Beets and Carrots are the perfect combination of sweet, savory, and caramelized goodness. Oven-roasted to golden perfection, this colorful side dish brings out the natural sweetness of earthy beets and tender carrots, all coated in a glossy balsamic glaze that's tangy and rich. It's wholesome, flavorful, and so easy to make with just a few simple ingredients.

This beet and carrot recipe is a delicious way to elevate everyday vegetables into something special - ideal for weeknight dinners or holiday gatherings. The balsamic vinegar adds a beautiful depth of flavor while olive oil keeps everything crisp and caramelized. And if you're in the mood to take it up a notch, drizzle the veggies with a quick tahini dressing for a creamy, nutty finish that's simply irresistible.
Best of all, this dish is naturally vegan, gluten-free, and absolutely packed with color and flavor. You can serve it warm right out of the oven or at room temperature - it's just as good either way.
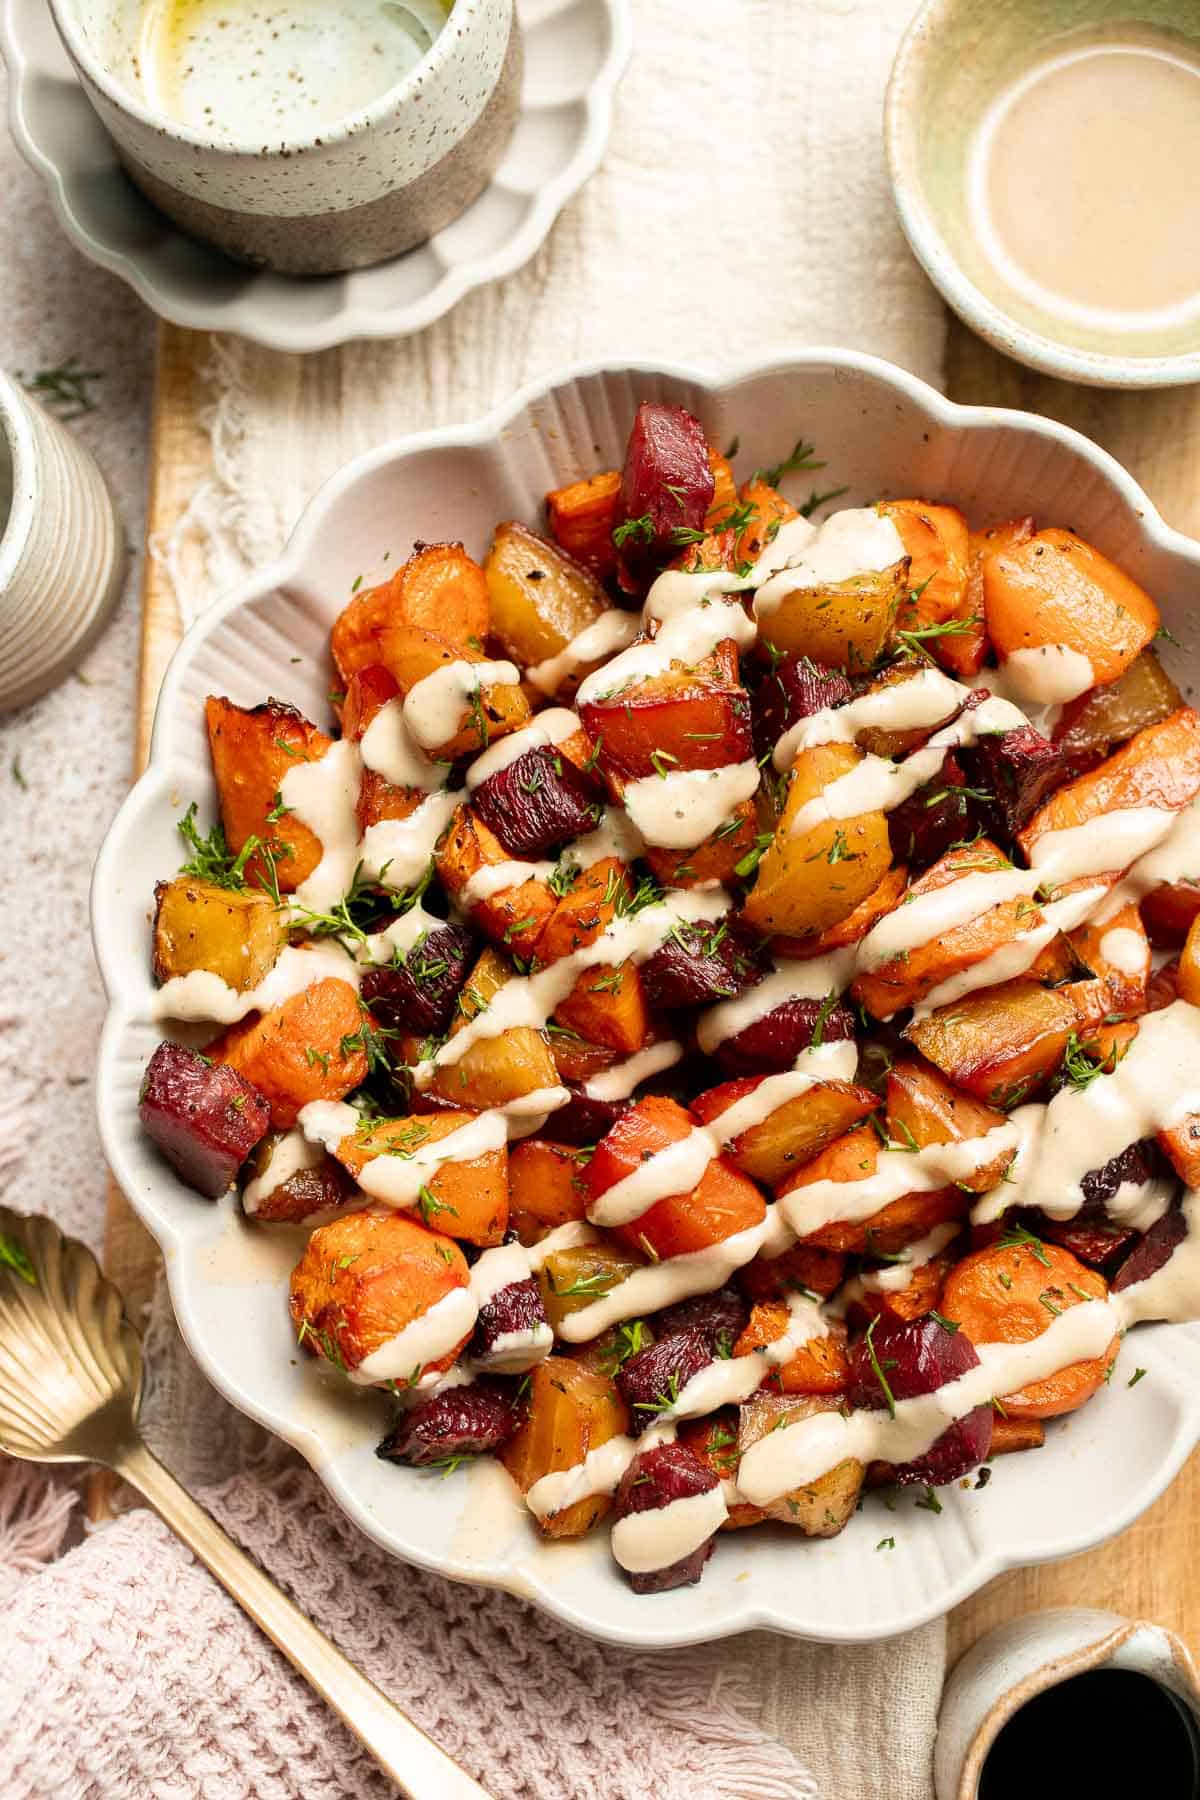
Why You'll Love This Recipe
- Simple ingredients, big flavor. All you need are carrots, beets, olive oil, and balsamic vinegar, yet the result tastes like something straight out of a restaurant. The balance of sweet and tangy makes every bite delicious.
- Caramelized and tender. Roasting brings out the natural sweetness in beets and carrots, giving them that irresistible golden, caramelized edge while keeping the centers soft and perfectly cooked.
- Healthy and colorful. Packed with fiber, vitamins, and antioxidants, this dish is as nourishing as it is beautiful. It adds a pop of color and freshness to any dinner table.
- Versatile and make-ahead friendly. Enjoy these roasted vegetables hot, warm, or cold. They store well and can easily be prepped ahead for busy weeknights or holiday meals.
Ingredients and Substitutions
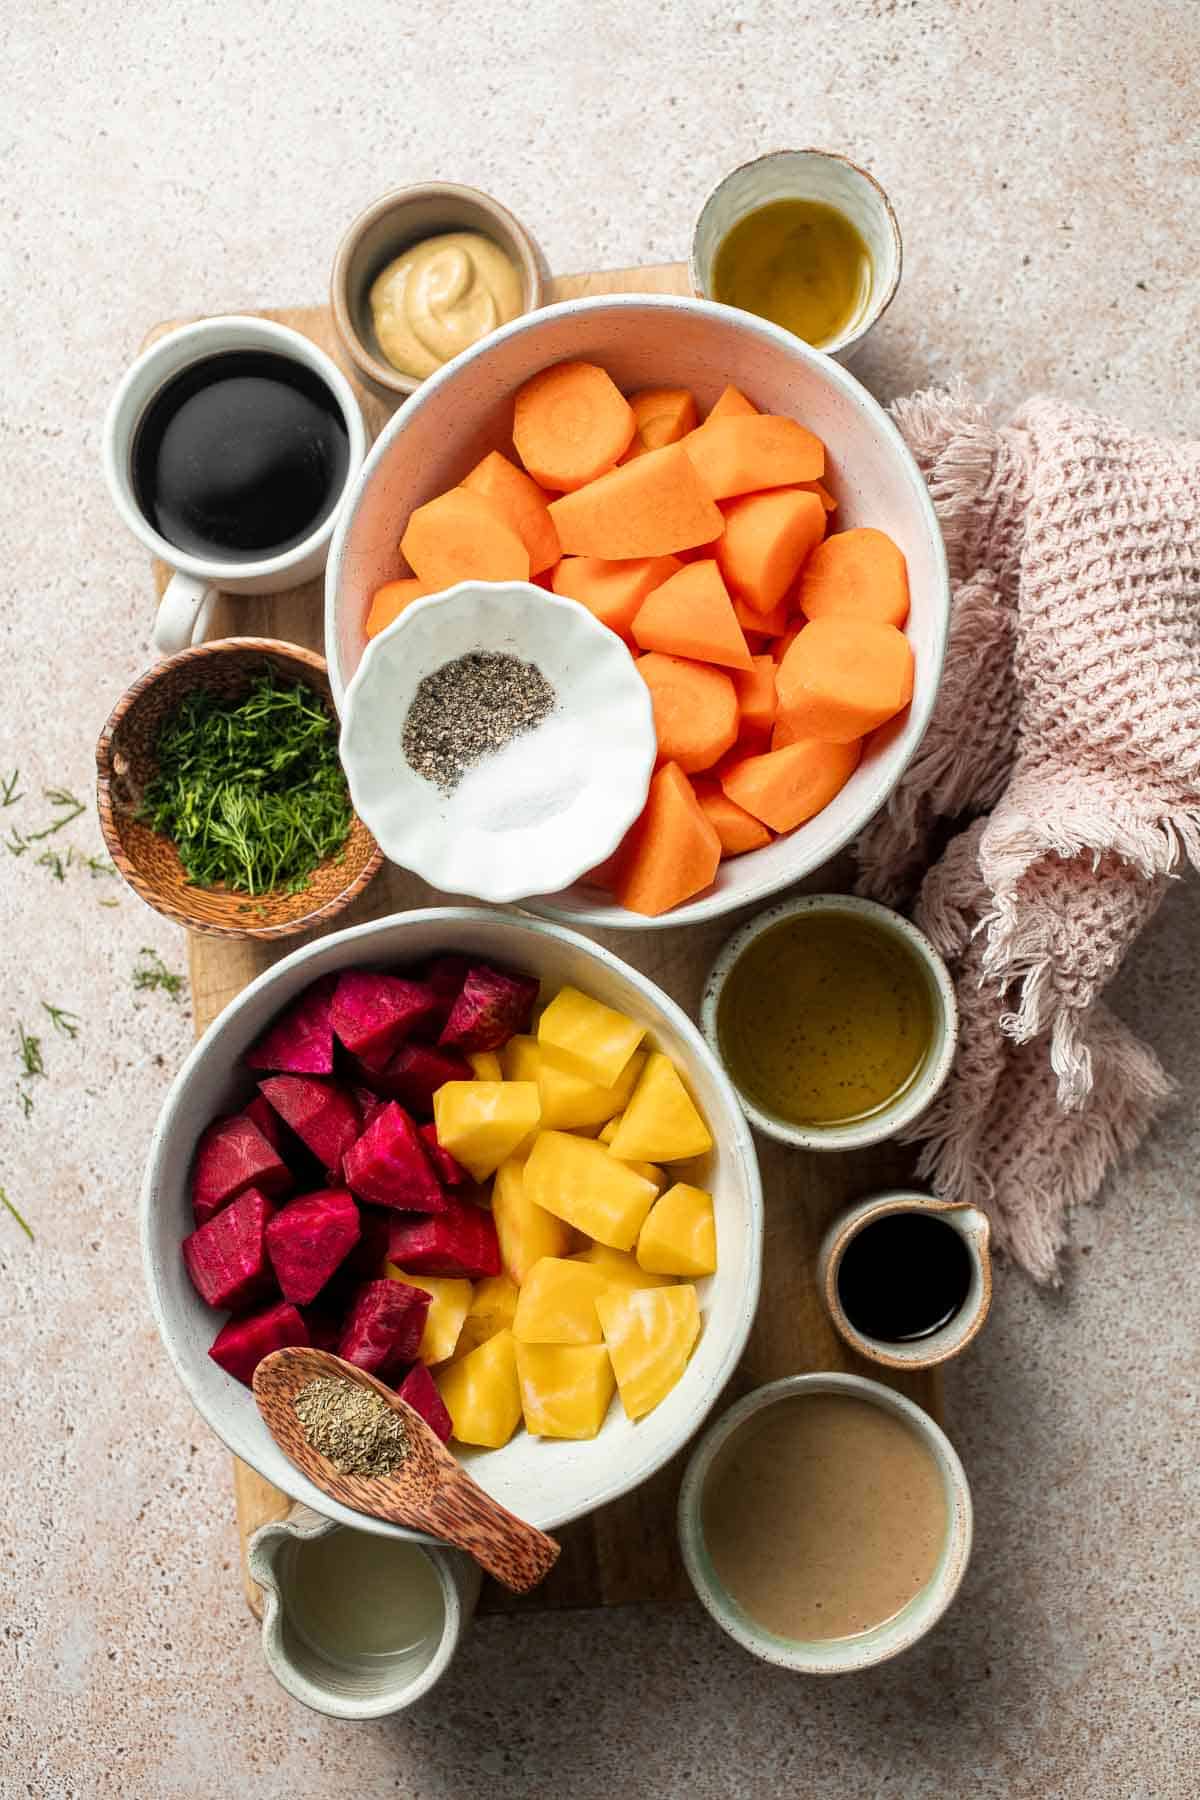
To make this delicious Balsamic Roasted Beets and Carrots, you will need the following ingredients (see recipe card below for quantities):
- carrots - Choose medium carrots, peeled and cut into 1-inch pieces for even roasting. You can also use rainbow carrots for extra color and sweetness, or baby carrots for convenience.
- beets - Peel and cut into ¾-inch pieces so they roast evenly with the carrots. Red beets, golden beets, or Chioggia beets all work beautifully.
- olive oil - Use a good-quality extra virgin olive oil for the best flavor and caramelization.
- balsamic vinegar - Adds tangy sweetness and helps the veggies develop that gorgeous glaze. Substitute with red wine vinegar or honey balsamic if preferred.
- salt - Essential for balance and to bring out the vegetables' natural sweetness. Adjust to taste after roasting.
- black pepper - Adds subtle spice and depth. Freshly ground pepper works best.
- Italian seasoning - A simple mix of herbs like thyme, rosemary, oregano, and basil adds savory, aromatic flavor.
- parsley or dill - Fresh herbs make the dish pop with color and brightness.
Optional Tahini Dressing
- tahini - Adds creaminess and a nutty flavor that pairs perfectly with roasted vegetables.
- olive oil - Smooths out the dressing for a silky finish.
- balsamic vinegar - Ties the dressing to the roasted veggies for flavor consistency.
- Dijon mustard - Adds tang and depth.
- lemon juice - Brings freshness and balances the richness.
- water - Helps thin the dressing to your preferred consistency.
Equipment
You'll also need measuring cups and spoons, a large mixing bowl, a baking sheet, parchment paper, and a spatula or tongs for flipping halfway through roasting.
Instructions
- Season the vegetables. In a large mixing bowl, combine the carrots, beets, olive oil, balsamic vinegar, salt, pepper, and Italian seasoning. Toss well until the vegetables are evenly coated.
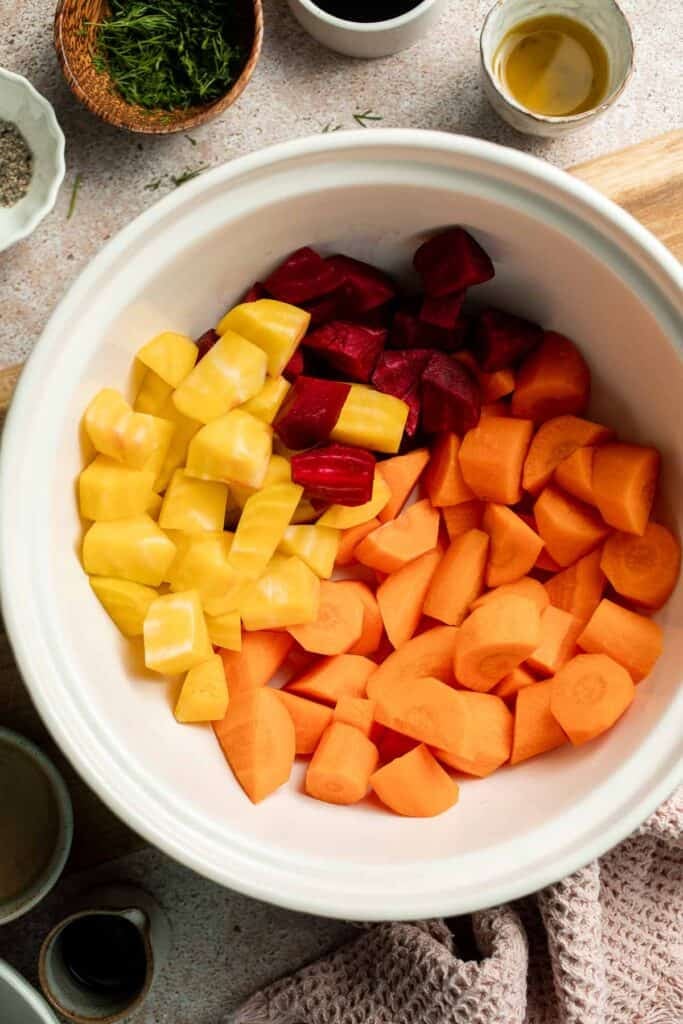
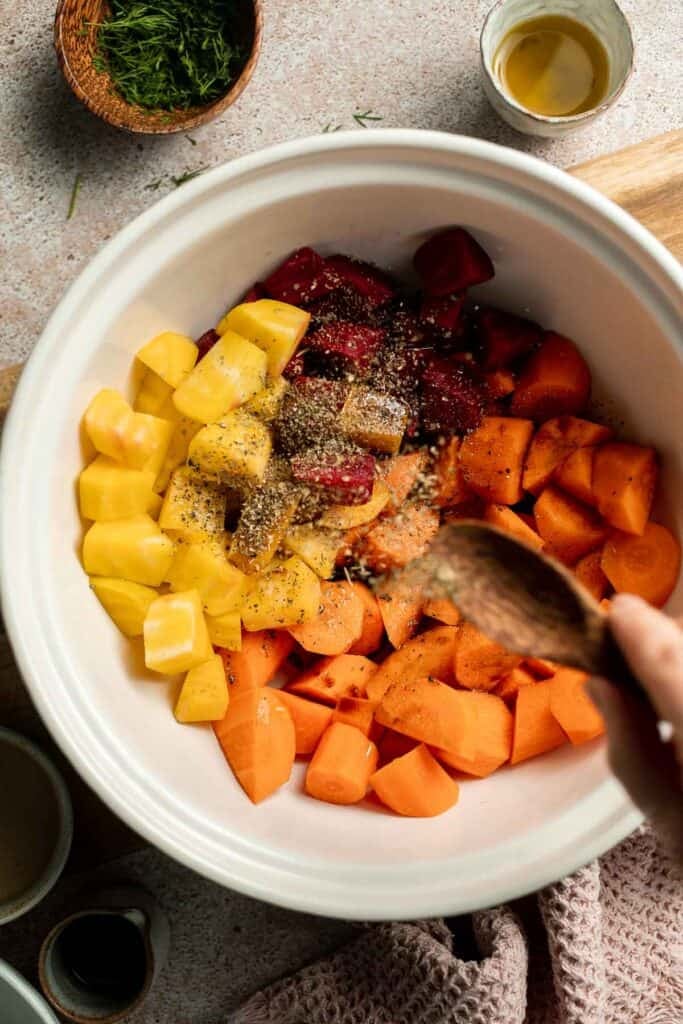

- Roast the vegetables. Spread the carrots and beets in a single layer on a large baking sheet. Roast in a 400°F preheated oven for 35-40 minutes, flipping once halfway, until fork-tender and caramelized at the edges.

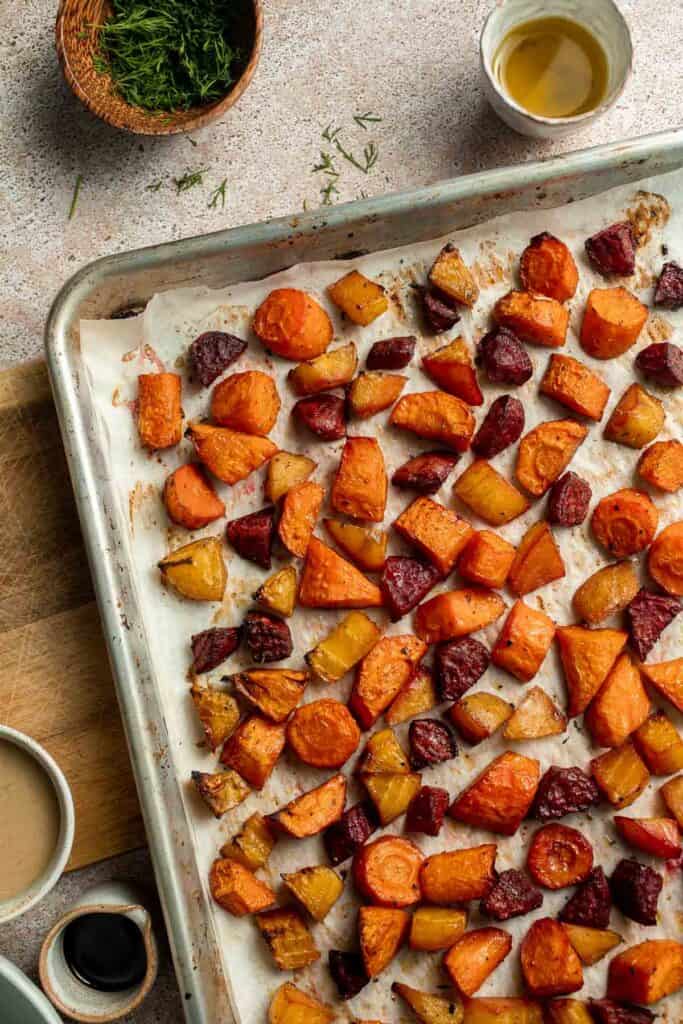
- Make the tahini dressing (optional). While the vegetables are roasting, whisk together the tahini, olive oil, balsamic vinegar, Dijon mustard, lemon juice, and water in a medium bowl until smooth. Adjust the consistency by adding more water if too thick.
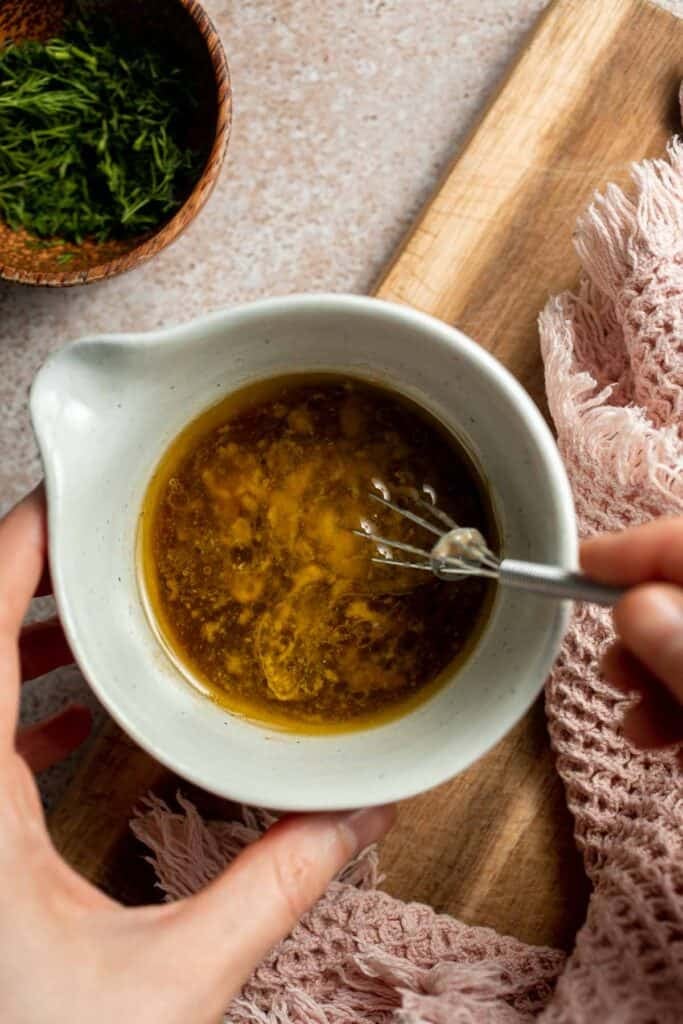
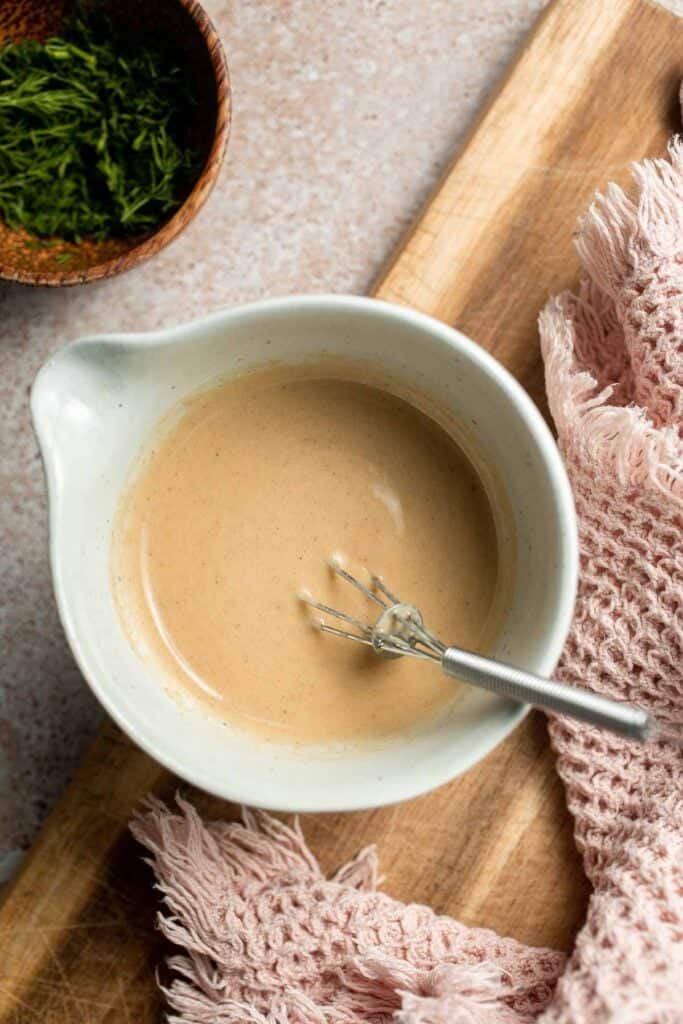
- Assemble and garnish. Transfer the roasted vegetables to a serving platter. Drizzle with tahini dressing or serve on the side. Garnish with fresh parsley or dill.

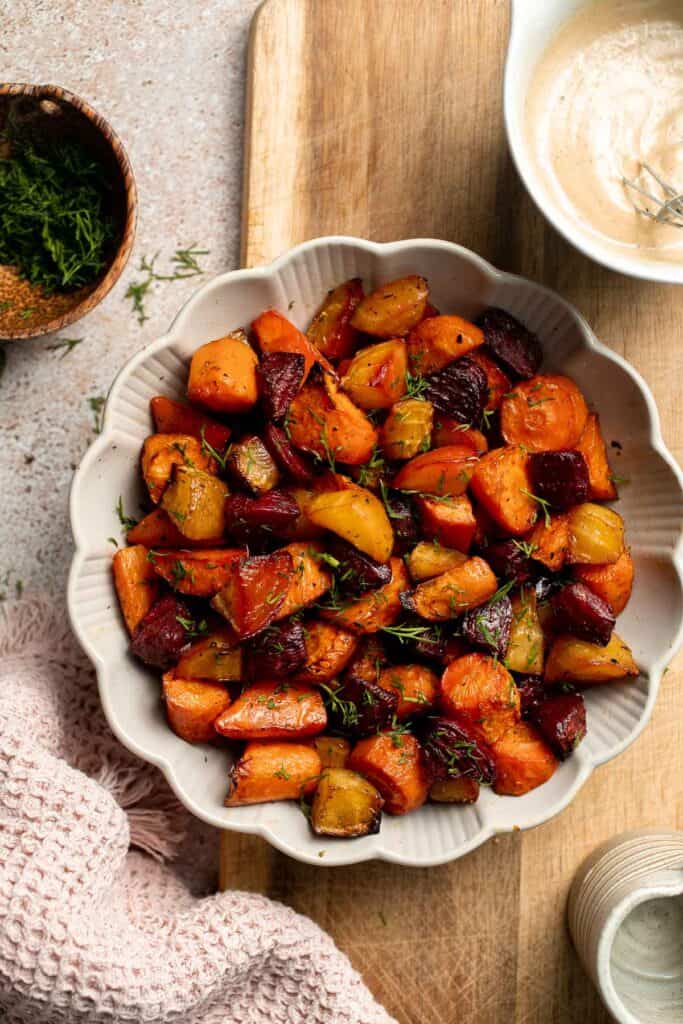
- Serve. Serve warm or at room temperature.
Air Fryer Instructions
To make roasted beets and carrots in the air fryer, preheat to 375°F (190°C). Toss the vegetables with olive oil, balsamic vinegar, salt, pepper, and seasoning, then arrange them in a single layer in the basket (work in batches if needed). Air fry for 18-20 minutes, shaking halfway through, until tender and caramelized.
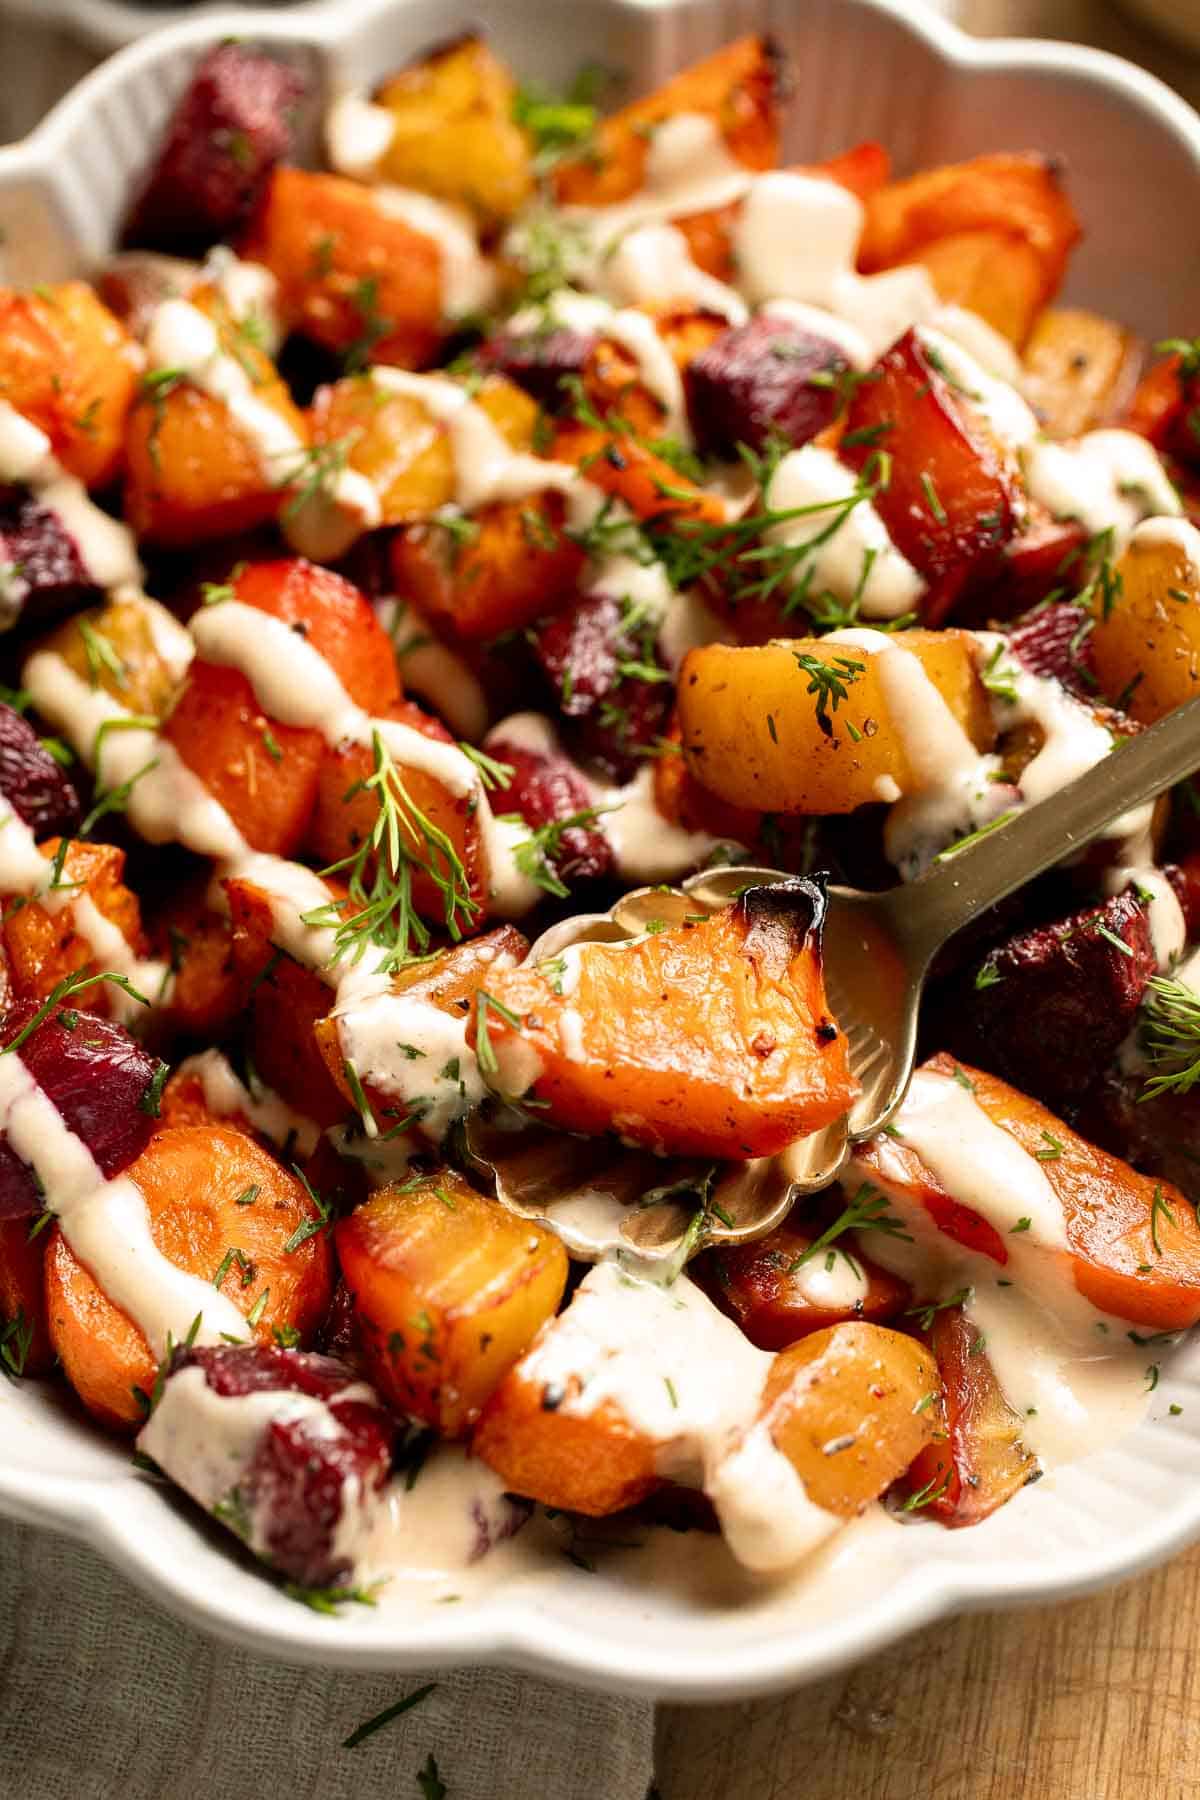
Expert Tip: Cut Evenly for Perfect Roasting
To make sure your vegetables roast evenly, cut the beets slightly smaller than the carrots since they're denser and take longer to cook. This ensures both come out perfectly tender at the same time with those irresistible caramelized edges.
More Tips and Tricks
- Use parchment paper. It prevents sticking and makes cleanup a breeze.
- Don't overcrowd the pan. Give the vegetables room to roast. If they're piled up, they'll steam instead of caramelize.
- Flip halfway. Turn the vegetables once during roasting to help them brown evenly on all sides.
- Add a touch of sweetness. For extra caramelization, drizzle with a teaspoon of honey or maple syrup during the last 10 minutes of roasting.
- Roast at the right temperature. 400°F is ideal for crispy edges and tender centers - high enough to brown, low enough to cook through.
Recipe Variations
- Add honey. Add 1 tablespoon honey to the balsamic mixture for extra sweetness and shine.
- Garlic herb roasted. Toss in 2 minced garlic cloves and extra rosemary for a fragrant, savory twist.
- Swap with citrus. Replace balsamic vinegar with fresh orange juice and zest for a bright, citrusy flavor.
- Maple Dijon twist. Combine 1 tablespoon maple syrup with 1 teaspoon Dijon mustard for a sweet-savory glaze.
- Tahini drizzle. Top with the tahini dressing (recipe included) or Greek yogurt for creaminess.
- Add other veggies. Mix in parsnips, sweet potatoes, or turnips for extra color and texture.
Storage
How to Store
Allow roasted carrots and beets to cool completely, then store in an airtight container in the refrigerator for up to 4 days.
How to Reheat
Reheat in a 400°F oven for 10 minutes or in the air fryer at 375°F for 3-5 minutes until warmed through and crisp at the edges. You can also reheat in the microwave for a quick option, though the texture will be softer.
How to Freeze
Freeze in a single layer on a baking sheet until solid, then transfer to a freezer-safe bag. Reheat directly from frozen - no thawing needed!
How to Serve
These balsamic roasted beets and carrots are perfect for any occasion. Serve them as an easy side dish alongside roasted chicken, beef tenderloin, salmon, or lentil stew for a complete meal. For a vegetarian meal, toss them into quinoa bowls or serve them over hummus with pita bread. They're also a colorful addition to your holiday spread and pair beautifully with creamy mashed potatoes or fresh salads.
These are my favorite main dishes to serve with these roasted veggies:
Thanksgiving Mains
If serving this as a side dish for Thanksgiving, pair it with one of our delicious mains. From roasted turkey and glazed ham to savory vegetarian roasts and hearty stuffing-filled options, these recipes help create a memorable holiday feast your family and guests will love.
FAQ
You can do either! Peeling before roasting gives a cleaner look and slightly smoother texture. If you prefer less prep, roast them with the skin on. The skins will slip off easily once cooled.
Yes, it's best to peel beets before roasting to remove the tough outer skin. Once roasted, they'll be tender, sweet, and easy to eat.
After boiling or roasting, use a paper towel or your fingers to rub off the skin - it slips right off when the beets are warm. For this recipe, peel them raw with a vegetable peeler before roasting for clean cuts and even color.
At 400°F, roast for about 35-40 minutes, flipping halfway through. The carrots should be tender and the beets caramelized at the edges.
Carrots cook faster than beets because they're less dense. To make sure everything roasts evenly, cut the beets into smaller pieces (about ¾-inch), or into sliced beets, and the carrots into slightly larger pieces (about 1 inch).
Absolutely! Add root vegetables like parsnips, sweet potatoes, or potatoes. Just keep the pieces about the same size so they roast evenly.
It's creamy, nutty, and slightly tangy from the balsamic vinegar and lemon juice. It gives the perfect contrast to the sweet, roasted vegetables.
Fresh herbs like fresh thyme, fresh rosemary, dill, or parsley pair beautifully with roasted beets and carrots. For dried herbs, Italian seasoning works great because it includes thyme and oregano - two herbs that enhance the natural sweetness of roasted vegetables.
Cumin, coriander, smoked paprika, and thyme all complement the natural sweetness of beets and carrots. For more warmth, try adding a pinch of cinnamon or nutmeg.
They're delicious alongside roasted meats, salmon, or vegetarian mains like quinoa bowls or lentil salads. Try pairing them with creamy mashed potatoes, grain bowls, or tahini sauce for a balanced meal.
More Roasted Vegetable Recipes
Looking for other recipes like this? Try these:
Tried this recipe?
I'd love to hear what you think! Leave a comment and rating below to share your feedback. Your reviews help others discover this recipe and help me keep creating more free recipes for you. Snap a photo and tag me on social media @aheadofthyme too.
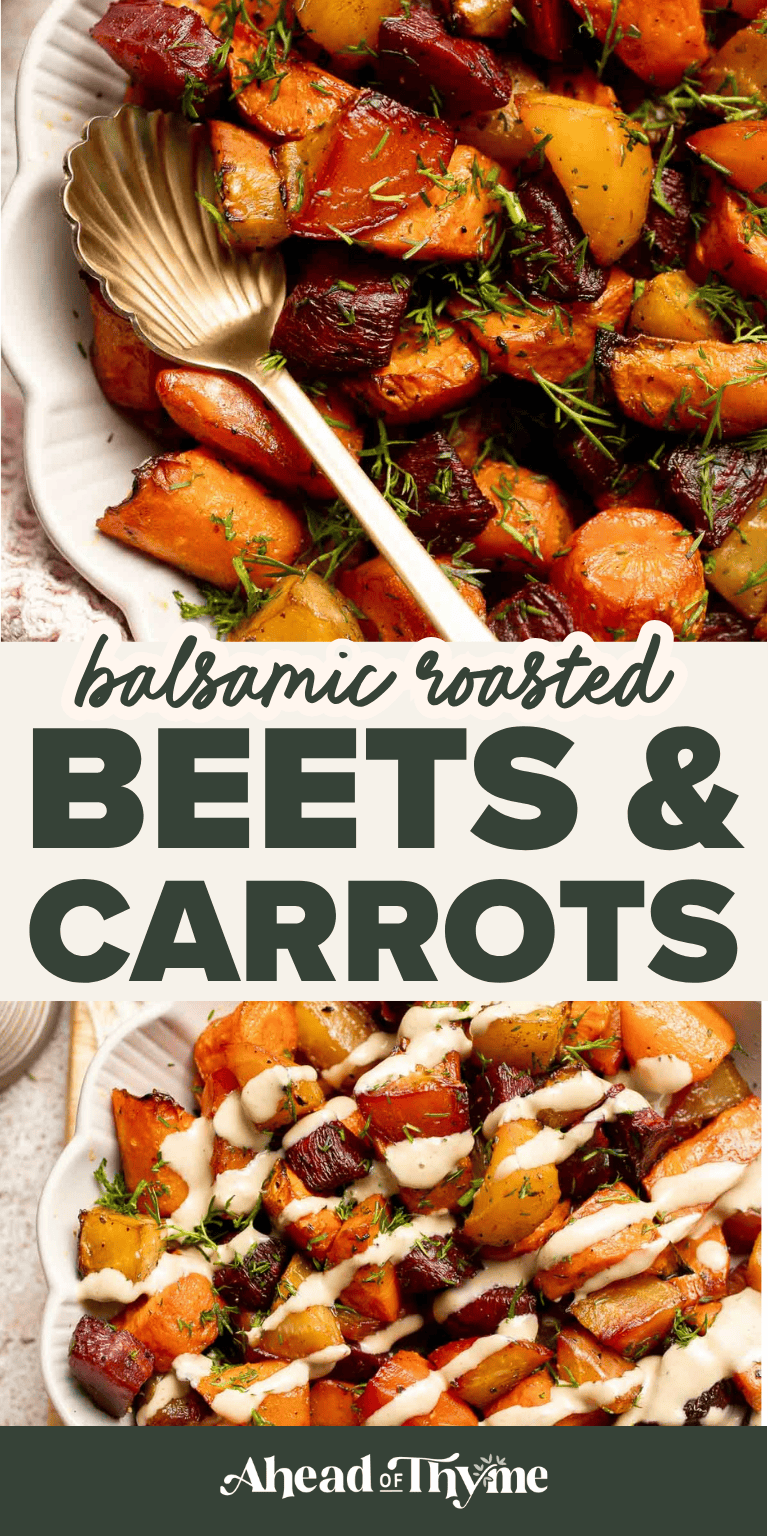
Easy Air Fryer Green Beans
Easy Air Fryer Green Beans are the ultimate quick and flavorful side dish - tender, crisp, and bursting with garlicky goodness. Made with a simple mix of soy sauce, garlic, and balsamic vinegar, these roasted garlic green beans hit all the right notes: tangy, savory, and just a touch sweet. Plus, they are ready in just 10 minutes!
Whether you're serving them for a busy weeknight dinner or a stress-free side at a big holiday dinner spread like Thanksgiving, these air fryer green beans deliver on both flavor and convenience. You'll love how the air fryer gives them that irresistible, roasted texture without heating up the oven. Plus, if you don't have an air fryer, don't worry - I've included oven-roasted green bean instructions too.
This is one of those simple veggie sides that everyone loves. They're crispy, savory, a little tangy, and completely addictive. Once you taste them, you'll never go back to steamed green beans again!

Why You'll Love This Recipe
- Quick and easy to make. These air fryer garlic green beans come together in under 15 minutes with just one bowl and minimal prep. It's a total lifesaver when you need a healthy and easy side dish fast.
- Crispy texture, roasted flavor. Cooking green beans in the air fryer (or oven) gives you that perfectly crisp-tender bite and delicious roasted garlic flavor - no soggy beans here!
- Healthy and delicious. With just a touch of oil and plenty of seasonings, these green beans are light, nutritious, and packed with flavor. It's a veggie side you'll actually crave!
- So flavorful. This air fryer recipe is inspired by Asian sambal green beans, known for their irresistible flavor and perfectly crisp-tender texture. The air fryer gives you that same delicious crunch in a fraction of the time, and no wok or deep frying required.
- Perfect for any meal. Whether it's a weeknight dinner, a holiday side, or a healthy snack, these easy green beans pair beautifully with everything from chicken and steak to salmon and tofu.
Ingredients and Substitutions
To make these delicious and easy Air Fryer Green Beans, you will need the following ingredients (see recipe card below for quantities):
- green beans - Use fresh green beans or French green beans (haricots verts) for a more delicate texture. Make sure to trim the stem end or any tough stems before cooking and wash them well. Frozen green beans work too but may be softer.
- garlic - Fresh minced garlic gives the best flavor, but you can substitute with ½ teaspoon garlic powder if needed.
- vegetable oil - Helps the beans crisp up. You can also use olive oil or avocado oil.
- sesame oil - Adds a nutty depth of flavor and pairs perfectly with soy sauce.
- Italian seasoning - A simple mix of herbs that complements the garlic and sesame flavors. You can also use oregano or thyme.
- Worcestershire sauce - Adds umami and depth. Use soy sauce or tamari for a vegetarian version.
- balsamic vinegar - Gives the beans a tangy balance and a hint of sweetness.
- soy sauce - Adds saltiness and umami richness. Use low-sodium if preferred.
- black pepper - For a bit of spice and balance. Add to taste or swap for crushed red pepper if you like heat.
Equipment
You'll also need measuring cups and spoons, a mixing bowl, tongs, and an air fryer (or a baking sheet if roasting in the oven).
Instructions
- Prep. Wash and trim the green beans, then pat them dry with a paper towel. Place them in a large mixing bowl and add all remaining ingredients. Toss well to evenly coat the beans in the seasoning mixture.
- Cook. Transfer the green beans into the air fryer basket and cook at 350°F for 10 minutes, until tender but still slightly crisp. Shake the basket halfway through cooking to help them brown evenly.
Oven Instructions
No air fryer? No problem! Spread the green beans evenly on a baking sheet and roast at 400°F for 15-20 minutes, tossing halfway through, until they're crisp, tender, and lightly browned.

Expert Tip: Don't Overcrowd the Basket
Give your green beans a little breathing room! Spacing them out in the air fryer basket helps them roast evenly and get that perfect crisp edge. If you crowd them, they'll steam instead of roast - so cook in batches if needed.
More Tips and Tricks
- Pat them dry. After washing, make sure to thoroughly pat your green beans dry with paper towels before seasoning. Moisture prevents them from crisping properly.
- Preheat your air fryer. A preheated air fryer helps the beans start roasting immediately and develop a better sear.
- Mind your air fryer size. The size of your air fryer will affect how many green beans you can cook at once. Don't overcrowd the basket - air circulation is key for perfectly air-fried veggies.
- Shake halfway through. Give the basket a good shake about 5 minutes in to ensure the beans cook evenly on all sides.
- Adjust seasoning to taste. Feel free to add a sprinkle of Parmesan, chili flakes, or toasted sesame seeds before serving.
- Make them in the oven. No air fryer? Roast the green beans on a baking sheet at 400°F for 15-20 minutes, tossing halfway through, until crisp and lightly browned.
- Repurpose the sauce. The balance of tangy, sour, savoury and sweet flavours in the sauce make it an excellent choice to use for any roasted vegetable such as brussels sprouts, potatoes, butternut squash and more.
Recipe Variations
- Add toppings, These green beans are delicious just the way they are. You could also add some toppings if you please. Some great options are crushed peanuts or pecans, and crispy bacon.
- Use garlic butter. Swap the sesame oil for melted butter and toss the beans in garlic butter right after cooking.
- Make the spicy. Add a pinch of red pepper flakes or drizzle with sriracha for a little kick.
- Add parmesan. Sprinkle with grated Parmesan cheese before air frying for a cheesy, crispy finish.
- Give them an Asian-style. Add a touch of hoisin sauce, sesame seeds, and a drizzle of soy sauce for bold umami flavor.
- Honey balsamic. Mix a teaspoon of honey with the balsamic vinegar for a sweet-tangy glaze.
- Lemon finish. Add freshly grated lemon zest and a squeeze of fresh lemon juice for a bright, fresh twist.
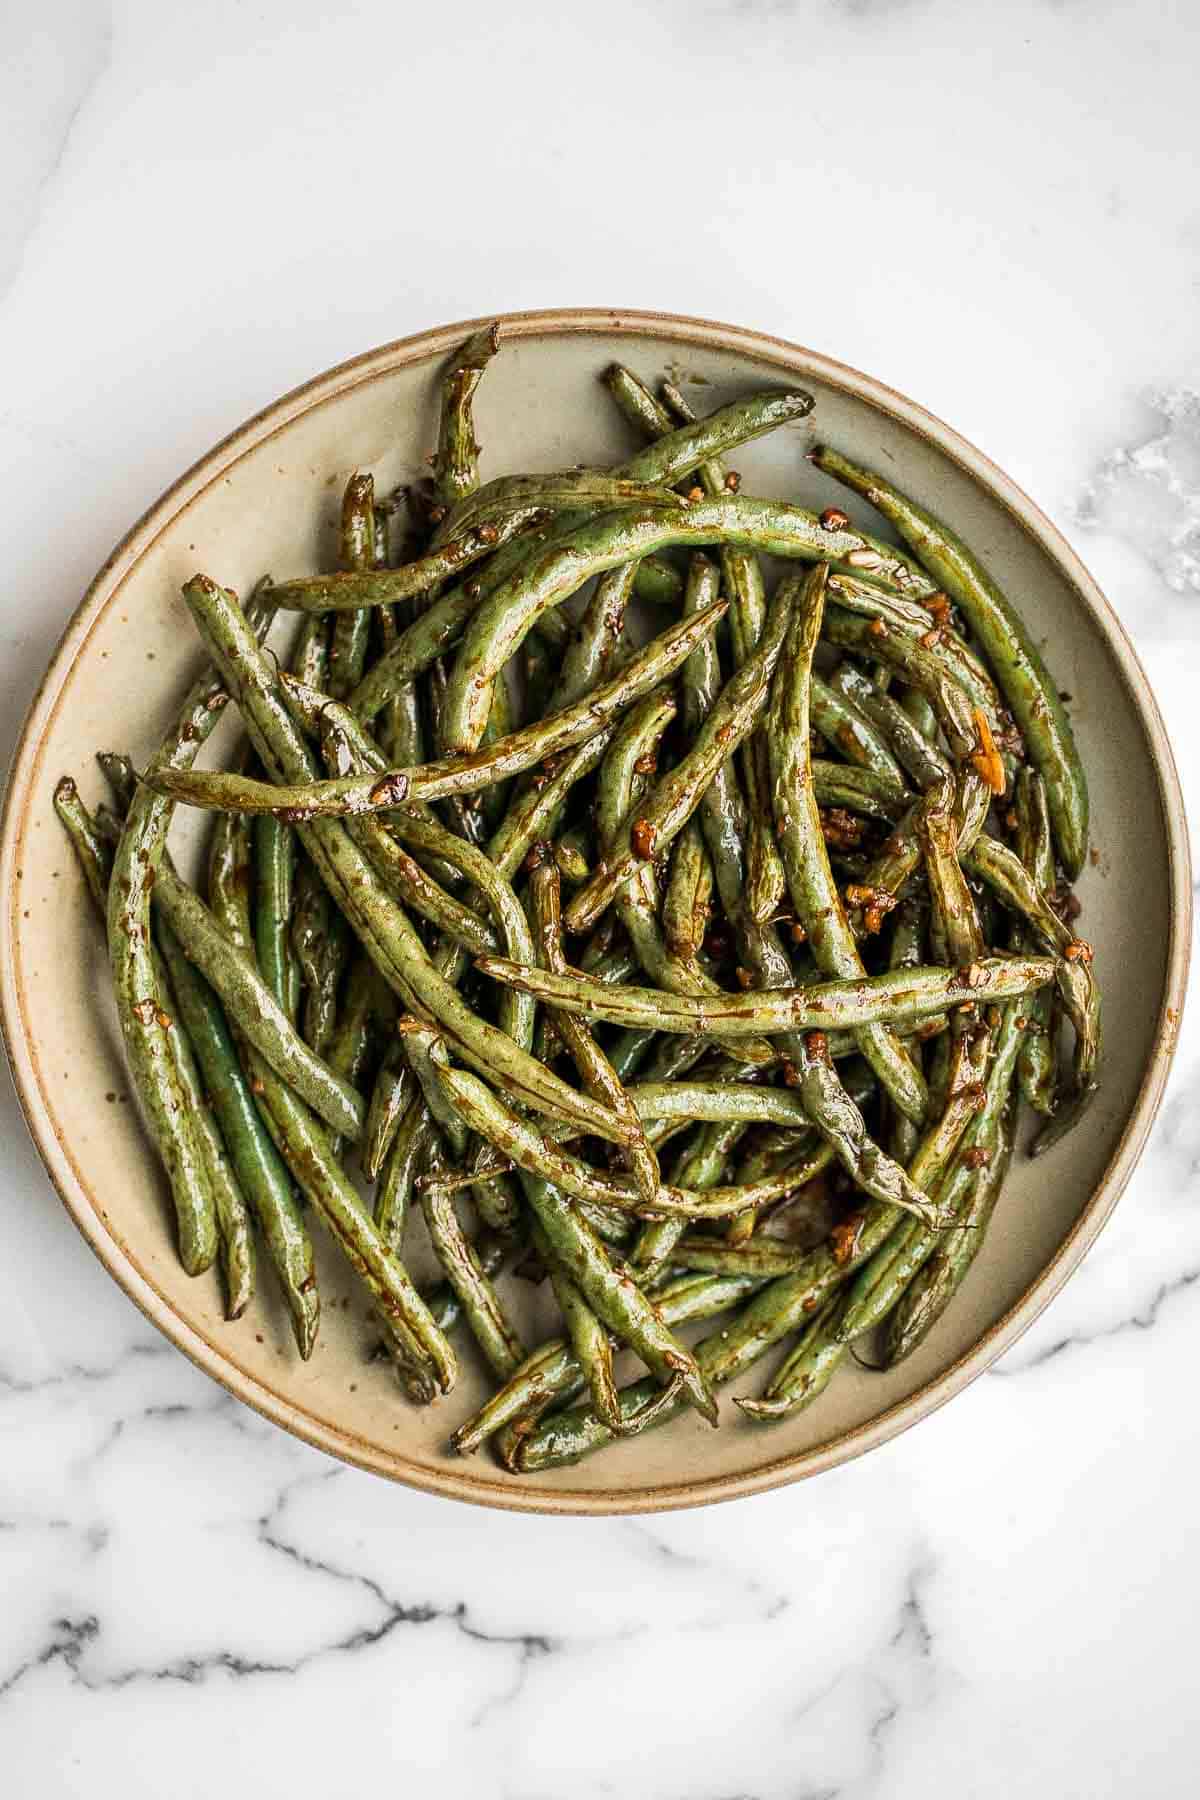
Storage
How to Store
Let green beans cool completely before transferring them to an airtight container. Store in the fridge for up to 4 days.
How to Reheat
Reheat leftover green beans in the air fryer at 350°F for 3-5 minutes until hot and crisp. You can also use the microwave for 30 seconds to 1 minute, but the air fryer gives the best texture.
How to Freeze
Freeze in a single layer on a baking sheet, then transfer to a freezer bag. Reheat directly from frozen in the air fryer until hot and crisp.
How to Serve
These air fryer green beans go with just about anything! They're perfect alongside roast chicken, baked salmon, or even tofu stir fry. I also love serving them with mashed potatoes and gravy or next to a cozy casserole for a hearty family dinner.
These are my favorite dishes to serve air fryer garlic green beans with:
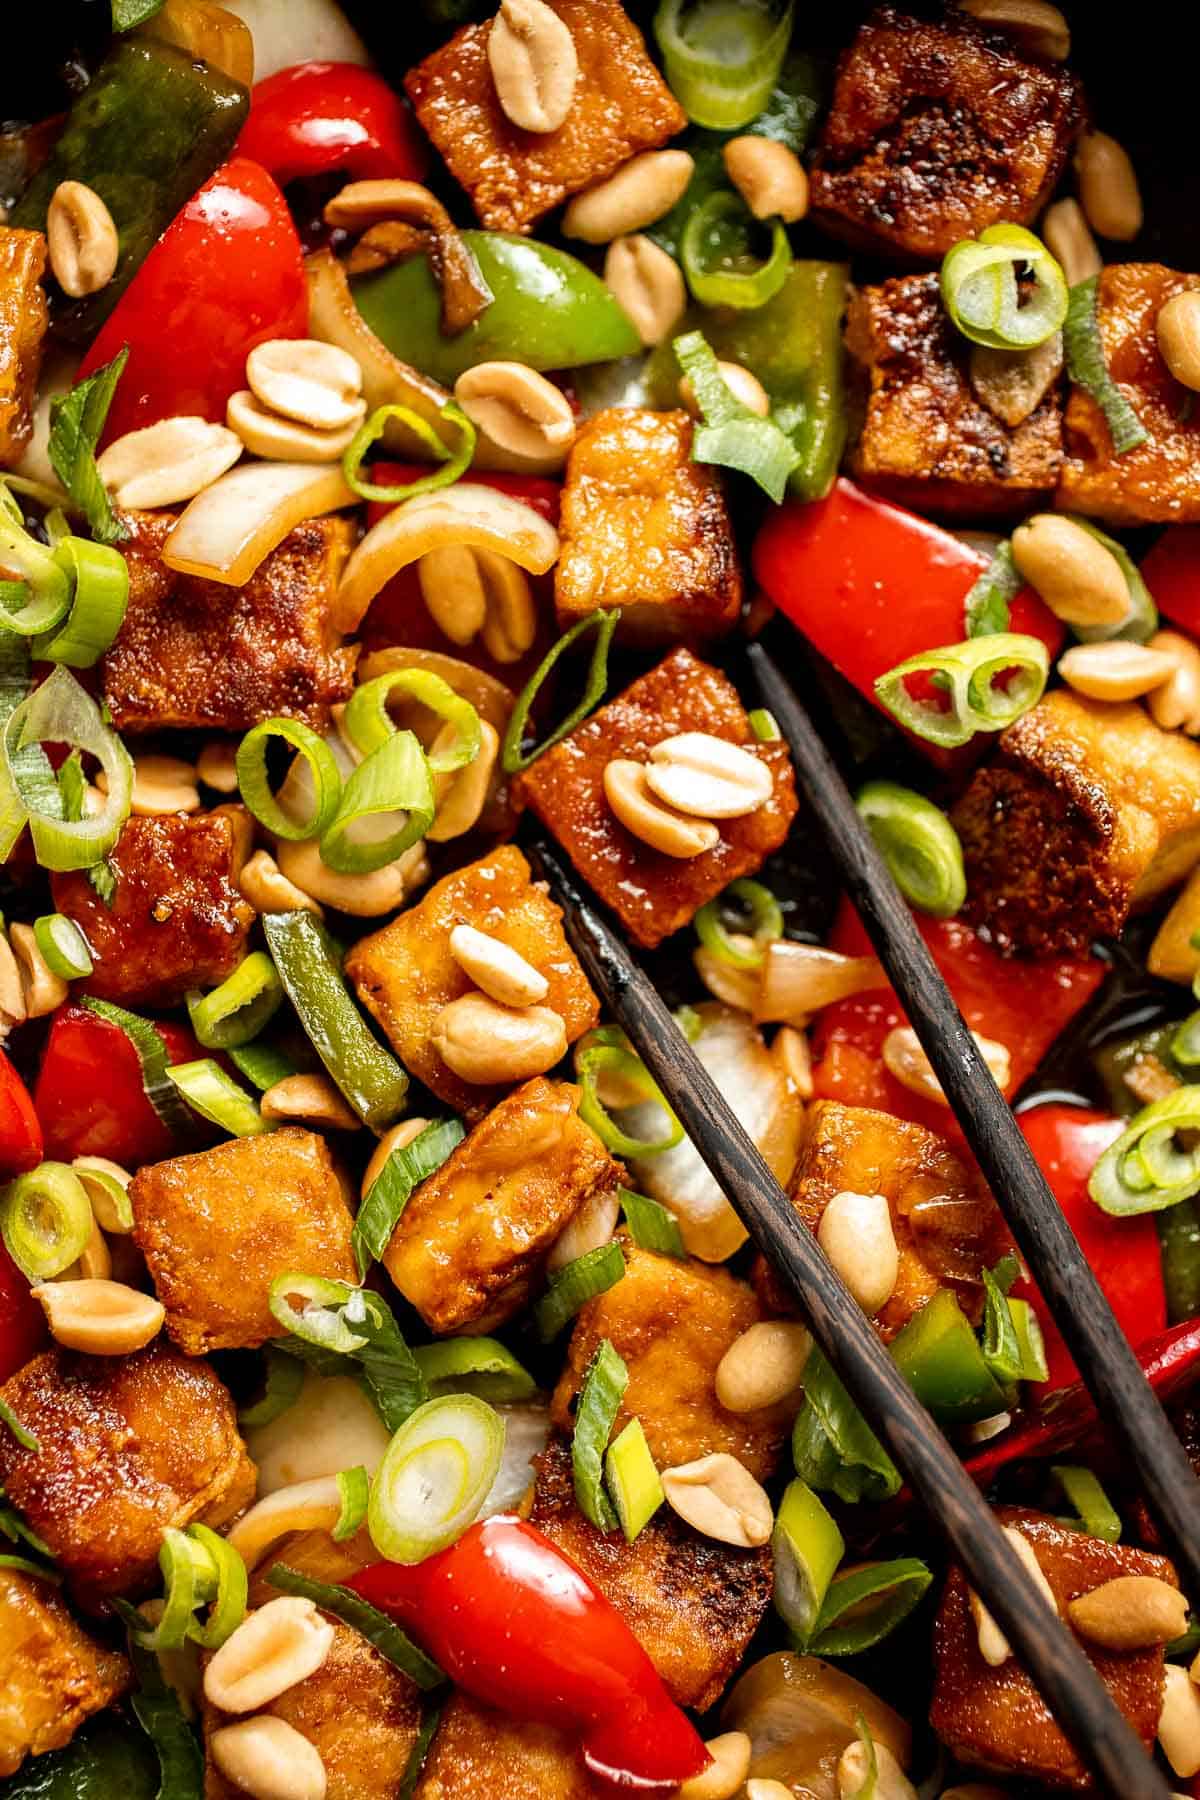
Thanksgiving Mains
If serving this as a side dish for Thanksgiving, pair it with one of our delicious mains. From roasted turkey and glazed ham to savory vegetarian roasts and hearty stuffing-filled options, these recipes help create a memorable holiday feast your family and guests will love.
FAQ
Green beans cook quickly in the air fryer, about 8 to 10 minutes at 400°F is all it takes. The result is perfectly tender green beans with lightly blistered, crispy edges and a delicious roasted flavor. For extra-crispy results, give the basket a good shake halfway through cooking so the beans cook evenly. If your air fryer tends to run hot or you like them extra charred, check around the 7-minute mark to prevent overcooking.
At 400°F, green beans take about 8-10 minutes in the air fryer or 15-20 minutes in the oven, depending on their thickness. The air fryer gives you faster, crispier results, while the oven version offers a slightly deeper roasted flavor.
It depends on what you're going for! Steamed green beans are soft, tender, and mild which is great for salads or classic side dishes. Air fryer green beans, on the other hand, are crispy, flavorful, and lightly charred, with a texture similar to roasted vegetables. Air frying also locks in more flavor since the garlic and seasonings caramelize instead of washing away in water.
The best cooking method really depends on your goal - but air frying is one of the easiest ways to get crispy, flavorful vegetables without excess oil.
Absolutely! Air frying vegetables is one of the best ways to make them taste amazing. The hot air circulation crisps them up without needing a ton of oil, making it a healthier option than frying. Vegetables like green beans, Brussels sprouts, broccoli, and carrots cook evenly and get deliciously roasted edges in just minutes. It's fast, easy, and the cleanup is minimal - what's not to love?
Yes, they're so good! Air fryer green beans are crispy on the outside, tender inside, and infused with whatever seasonings you add - especially garlic, soy sauce, and a splash of sesame oil. They're simple, flavorful, and a perfect quick side dish for just about any meal. Once you try green beans in the air fryer, you may never go back to boiling or steaming them again.
Definitely. Air fryer green beans are one of the healthiest veggie sides you can make. They're low in calories, packed with fiber, and full of vitamins like A, C, and K. Because they're cooked with minimal oil, they stay light and nutritious while still tasting indulgent. Plus, the air fryer locks in more nutrients than boiling since there's no water to leach them out.
Yes! The air fryer gives green beans a lightly crisp exterior with tender insides - the best of both worlds. They won't be crunchy like chips, but you'll get that satisfying roasted texture with a golden, caramelized finish. For the crispest results, make sure to pat the green beans dry before tossing with oil and garlic, and don't overcrowd the air fryer basket so the hot air can circulate evenly.
More Green Bean Recipes
Looking for other recipes like this? Try these:
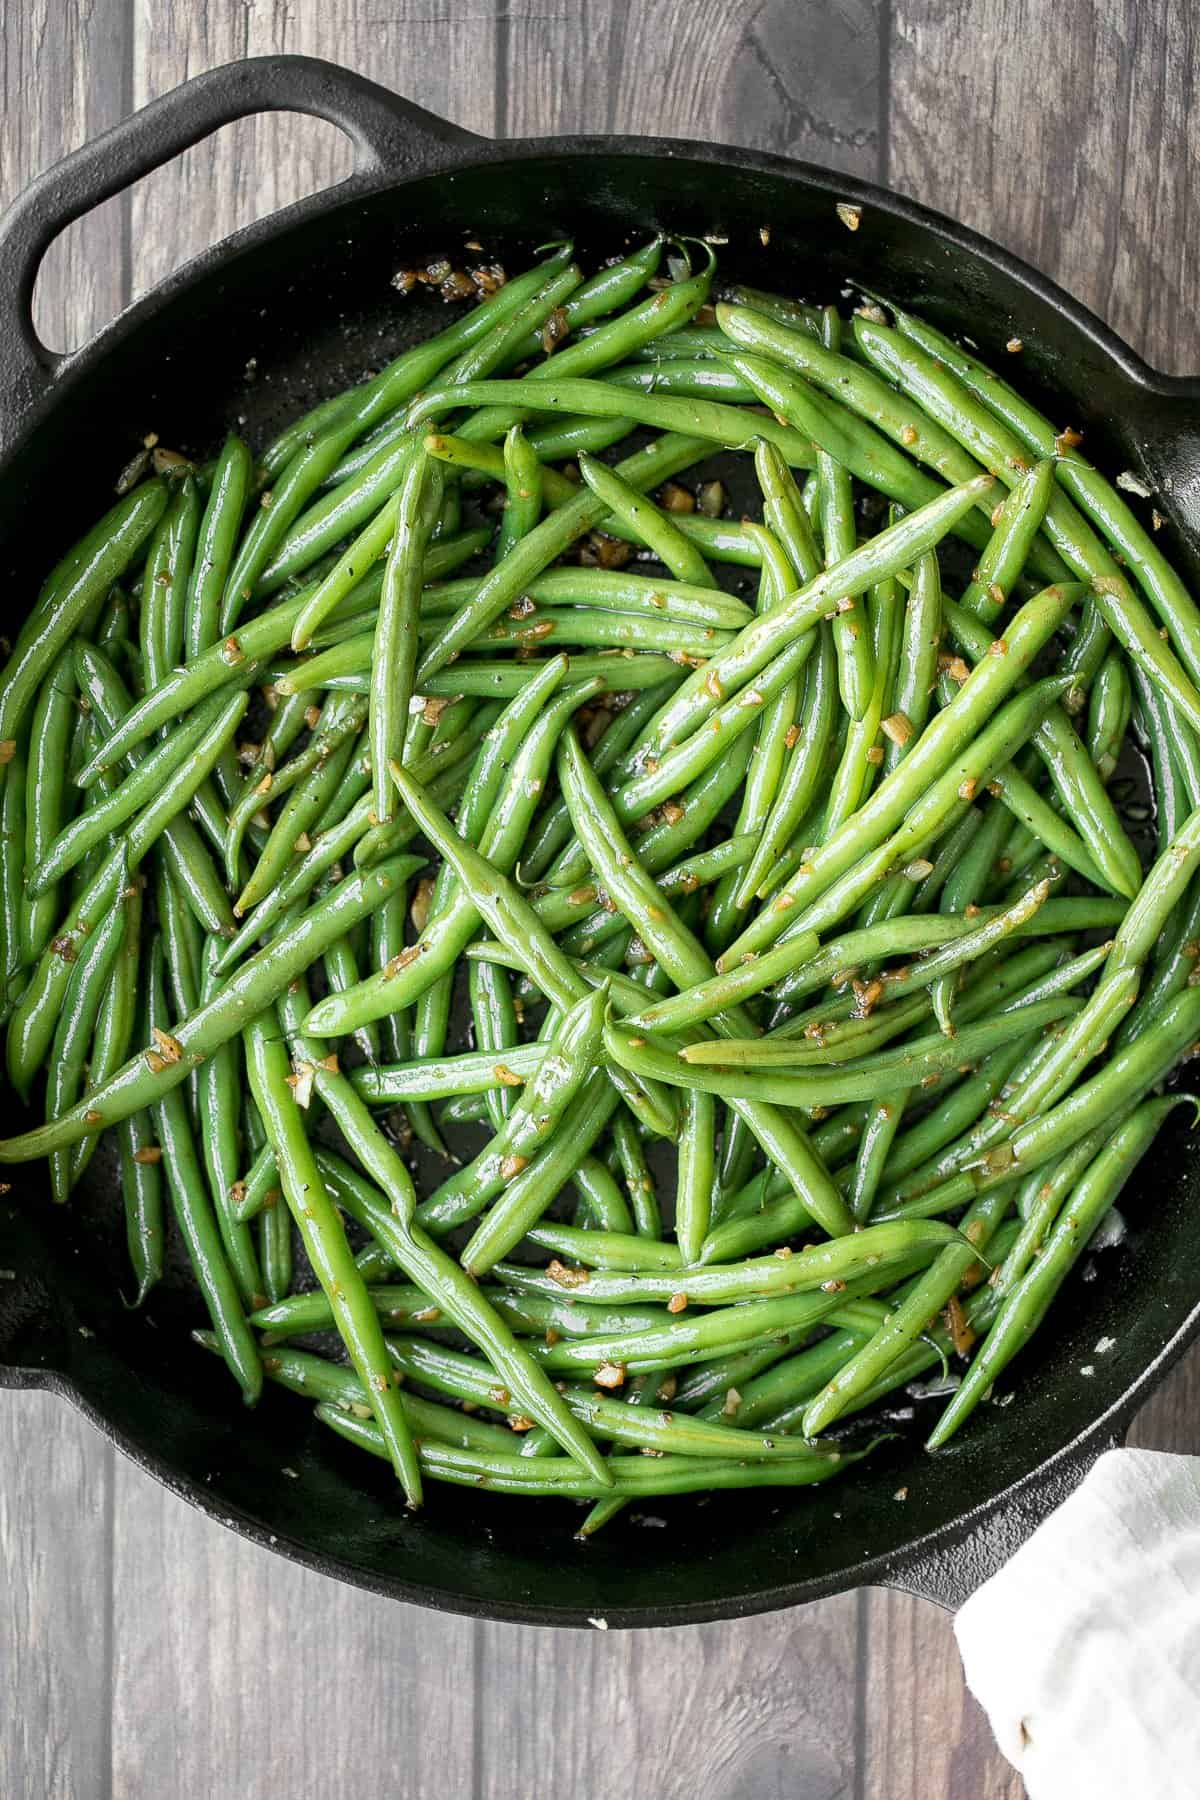
Tried this recipe?
I'd love to hear what you think! Leave a comment and rating below to share your feedback. Your reviews help others discover this recipe and help me keep creating more free recipes for you. Snap a photo and tag me on social media @aheadofthyme too.
This recipe was originally published in 2020 but has since been updated with new content.
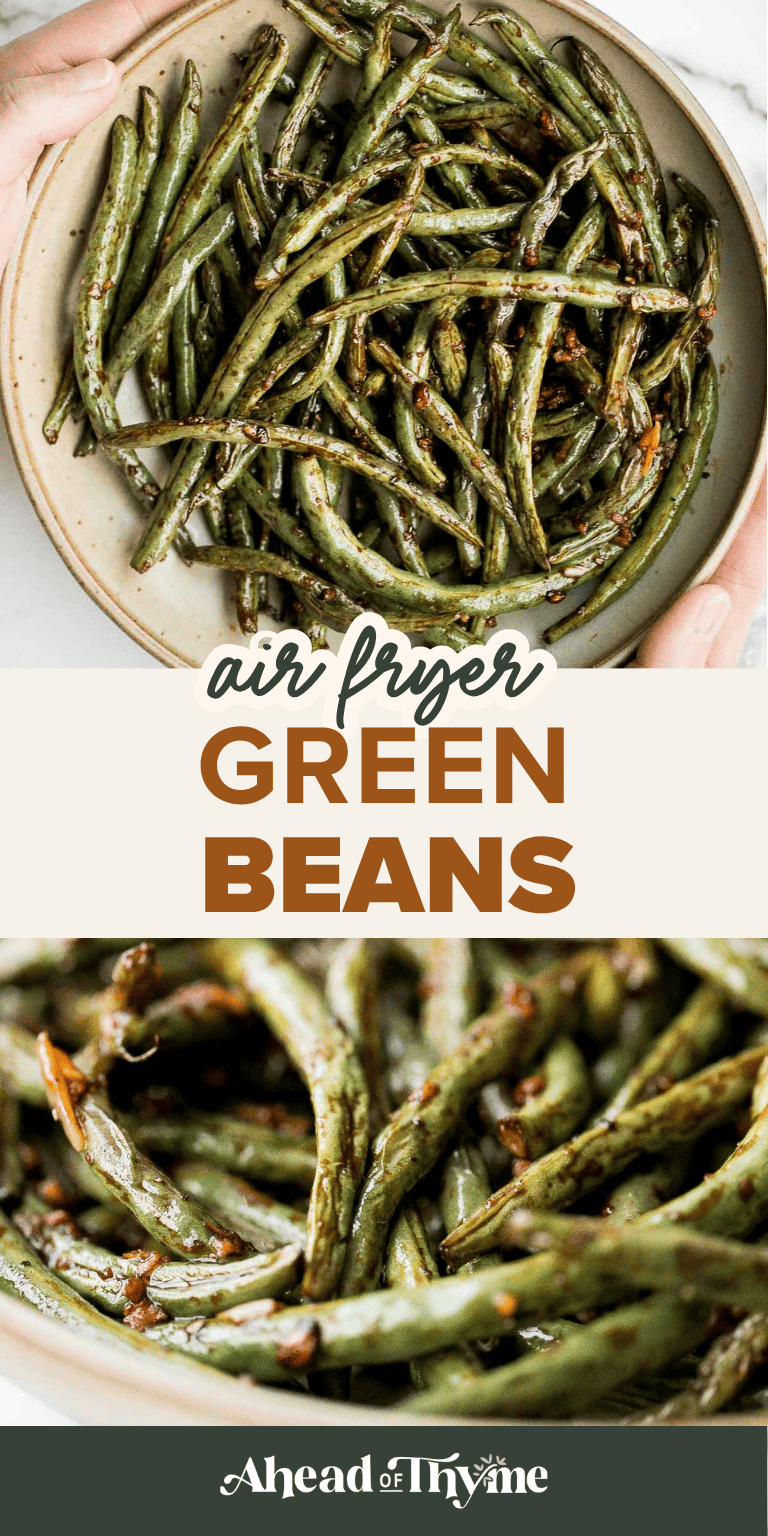
Easy Thanksgiving Menu (with Printable Menus!)

Tired of searching the internet for a collection of recipes to serve at your holiday dinner this year? Look no further! I have compiled the perfect Thanksgiving menu for you, all in one place.
Planning your Thanksgiving menu doesn't have to be stressful! Whether you're hosting your first big dinner, you're a seasoned Thanksgiving pro, or you're just tired of searching the internet for recipes, this easy Thanksgiving menu has everything you need for a seamless, delicious holiday meal. From the juiciest roast turkey and cozy make-ahead side dishes to festive fall desserts, we've got all your bases covered - plus free printable Thanksgiving menus to make planning even easier.
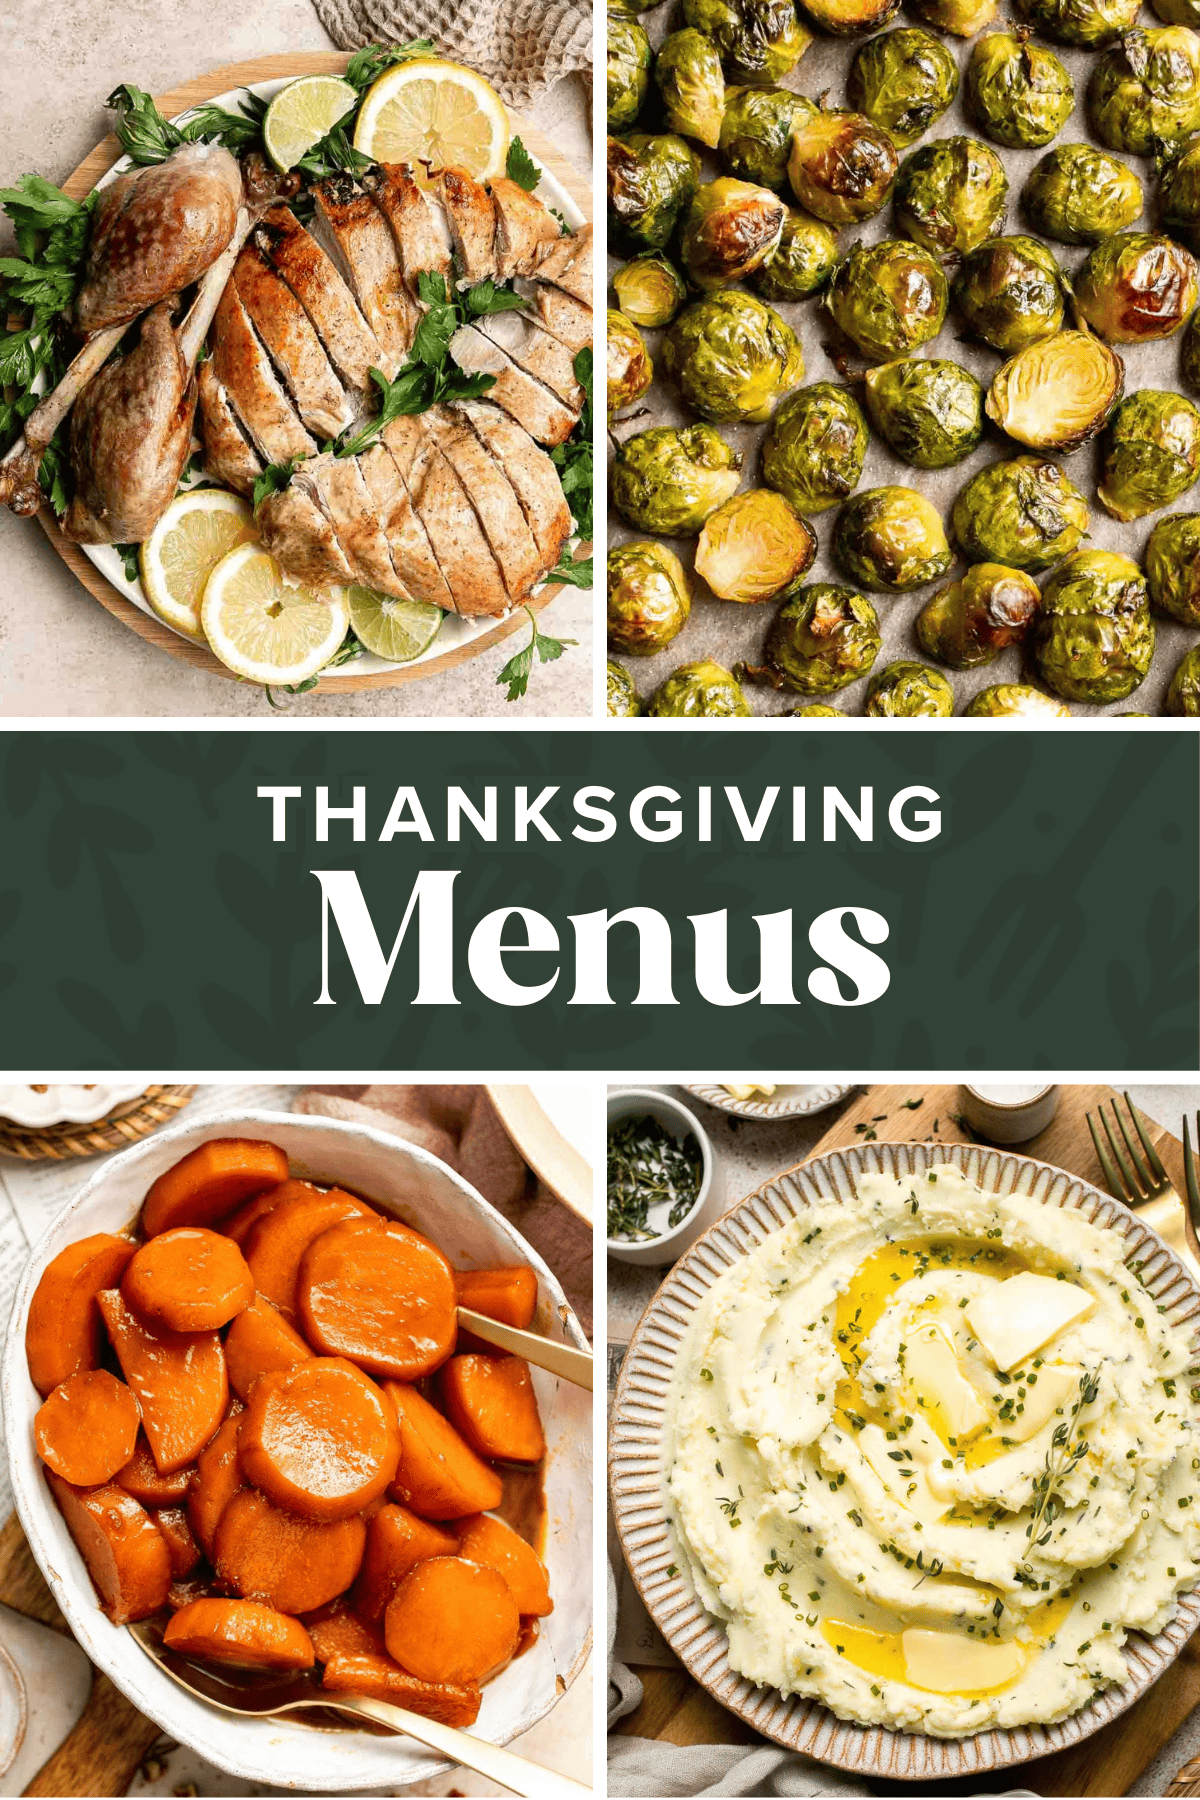
Think of this as your one-stop shop for curating the perfect Thanksgiving dinner menu. You'll find inspiration for every part of the meal - from savory mains to sweet endings - all organized so you can pick and choose, mix and match, or simply print one of our ready-made menus below.
Whether you're feeding a small group, sticking to the classics, or looking for a stress-free make-ahead plan, there's a printable menu here for you. Let's dive in and start planning your best Thanksgiving yet!
[feast_advanced_jump_to]The Ultimate Thanksgiving Menu at a Glance
Not sure where to start? We've made it easy for you! Download our free printable Thanksgiving Menu Pack - a beautifully designed 5-page PDF that includes five themed Thanksgiving menus to fit every hosting style.
Each Thanksgiving day menu is perfectly balanced with mains, sides, and desserts that complement each other, so all you have to do is choose your favorite and start cooking!
What's Inside the Printable Pack:
- Traditional Thanksgiving Dinner - Classic Thanksgiving recipes for the ultimate holiday feast with turkey, gravy, stuffing, and pie.
- Make-Ahead Thanksgiving Menu - Dishes you can prep days in advance for a stress-free dinner.
- Small Family Thanksgiving Menu - Scaled for smaller gatherings without sacrificing flavor.
- Vegetarian Thanksgiving Menu - Cozy, hearty dishes full of fall produce (no turkey needed!).
- Simple No-Fuss Thanksgiving Menu - All the classics, streamlined for easy cooking.
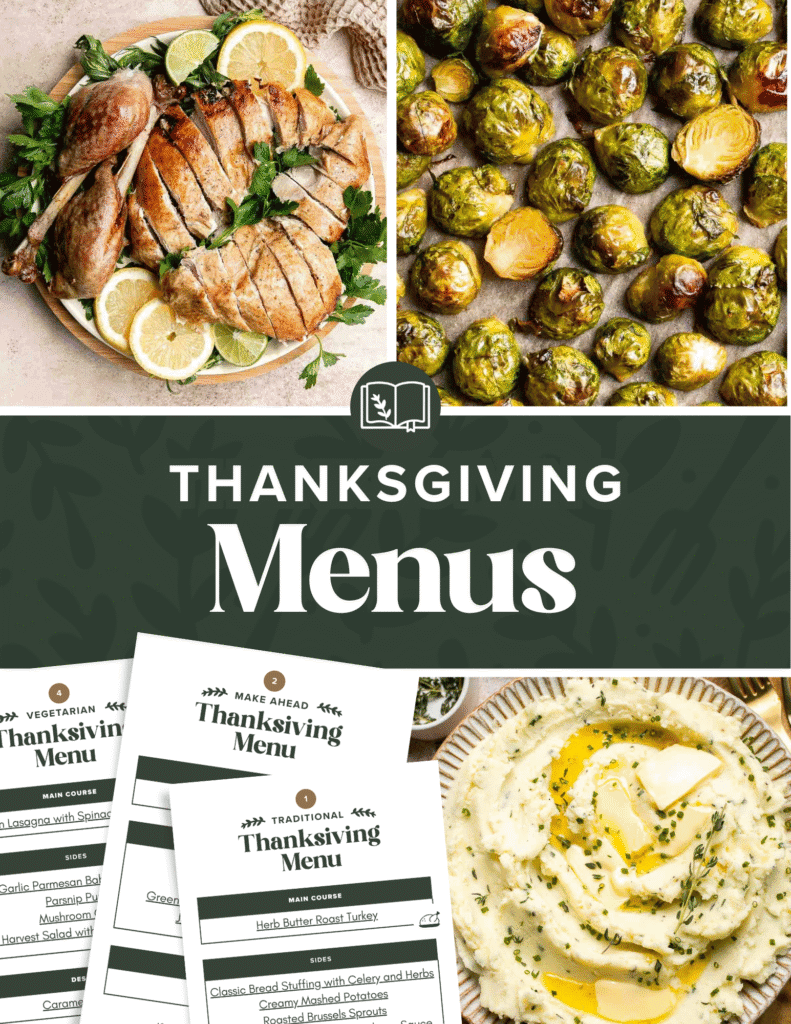
now available!
Free Printable Thanksgiving Menu Pack!
Plan your holiday dinner with ease! Get all 5 curated menus sent straight to your inbox.
The printable menus are just a starting point! Keep scrolling to explore even more recipes below, from mains and sides to desserts and more, so you can build your own perfect Thanksgiving spread.
Classic Thanksgiving Mains
The main event deserves a lot of love - and these recipes deliver. Whether you're going classic and roasting a tender Thanksgiving turkey with garlic, onion, salt, pepper, and a hint of nutmeg, or serving something unexpected for the fan of turkey alternatives (like ham or vegetarian mains), these dishes make every Thanksgiving table shine.
Roast Turkey Recipes
The secret to a perfectly juicy Thanksgiving turkey is all in the seasoning - think butter, garlic, and plenty of herbs for deep flavor. Serve it with homemade gravy made from rich drippings and a splash of spice for warmth.
- Easy Roast Turkey Recipe (Best Juicy Thanksgiving Turkey)
- Instant Pot Whole Turkey
- Easy Juicy Roasted Turkey Breast
- Sheet Pan Thanksgiving Dinner
Alternative Mains (Ham, Chicken, Vegetarian Options)
Looking for something different? Try a baked ham with orange glaze, roasted beets with goat cheese, or a creamy cauliflower gratin - comforting, festive, and easy to prep ahead.
- Holiday Glazed Baked Ham
- Dutch Oven Whole Roast Chicken
- Pumpkin Lasagna with Ricotta and Spinach
- Crispy Roasted Spatchcock Chicken (Butterflied Chicken)
Easy Thanksgiving Starters
Kick off your feast with something light, seasonal, and delicious. These Thanksgiving starters set the tone for the meal ahead - simple enough to prepare while the turkey cooks, yet elegant enough to make your table feel special. From cozy soups to crisp salads, these appetizers add color and texture to your table without too much work.
Warm up your guests with comforting Thanksgiving soups or crisp, fresh salads like crreamy butternut squash soup with a drizzle of honey, or a cozy kale salad or shaved brussels sprouts salad that balances richness with freshness. Most of these easy starters can be prepped ahead and tucked into the fridge - perfect for a calm Sunday cooking session before the big day.
Thanksgiving Soups
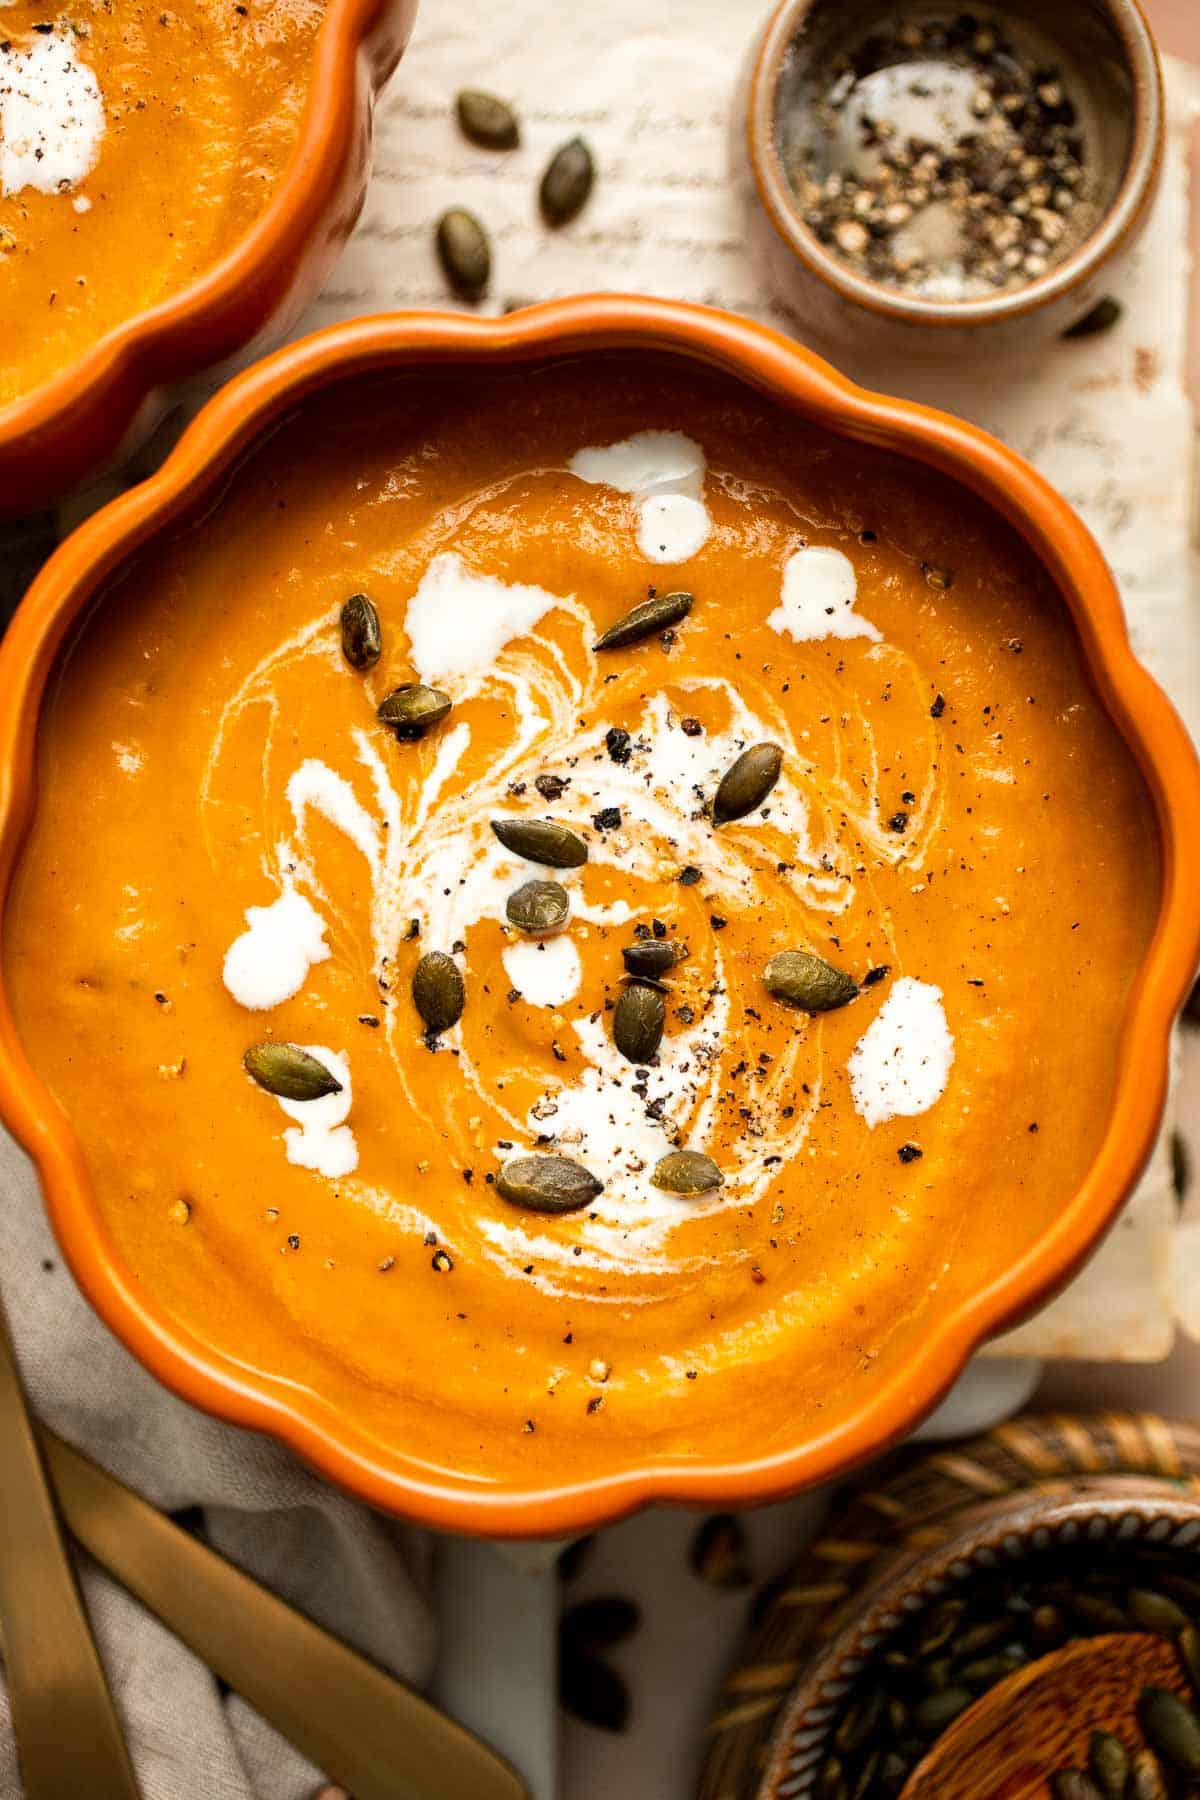
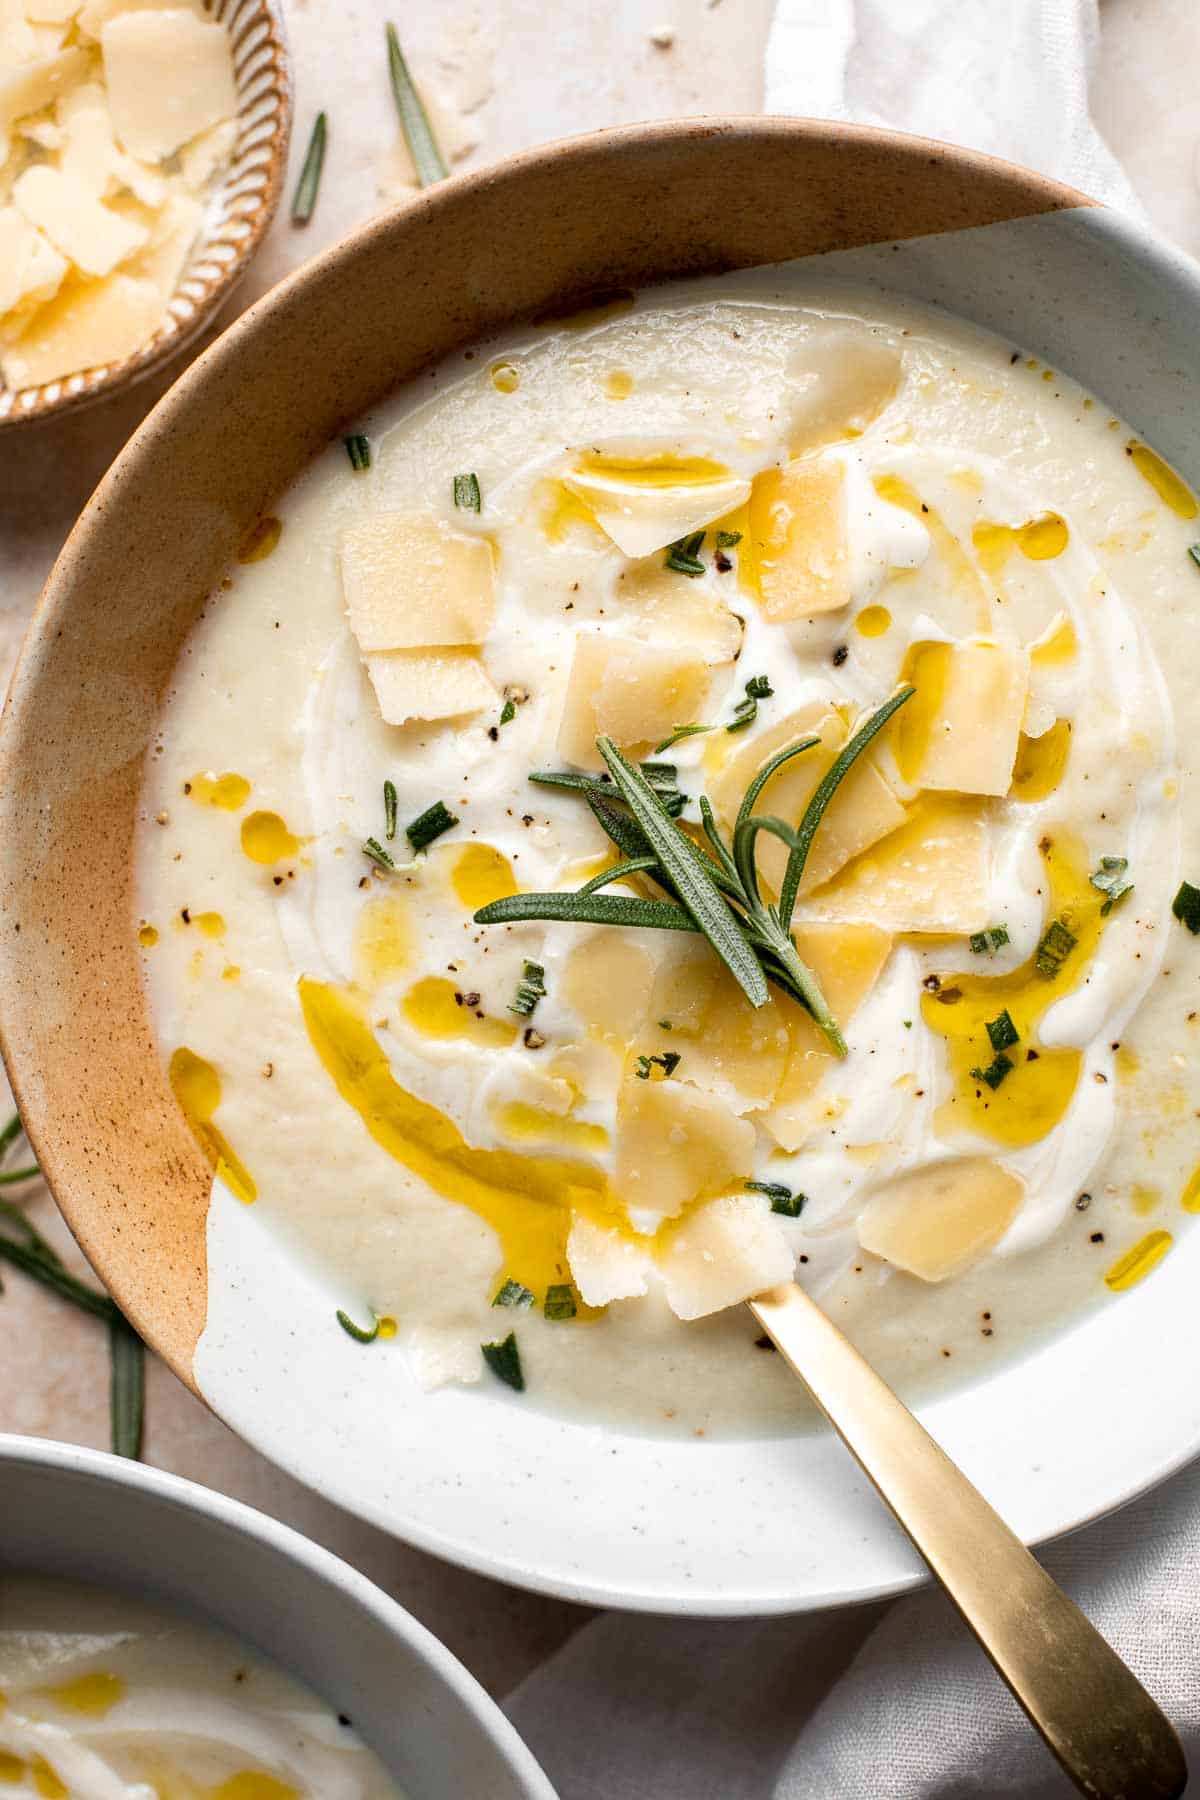
Fresh Fall Salads
- Pomegranate Pear Salad with Walnuts
- Apple Walnut Salad with Balsamic Vinaigrette
- Fall Harvest Salad with Butternut Squash and Apple
- Shaved Brussels Sprout Salad
Easy Thanksgiving Side Dishes
No Thanksgiving feast is complete without a lineup of comforting, crowd-pleasing side dishes. From creamy mashed potatoes or sweet potatoes and roasted squash to buttery homemade dinner rolls and sweet cornbread, to sweet potato casserole topped with gooey marshmallows, and crispy green bean casserole baked to perfection or crispy roasted vegetables, these recipes are truly the heart of the feast.
Mix and match your favorites, or build your own custom side spread from the ideas below.
Expert Tip: Prep Your Sides Ahead
Planning ahead? Many of these can be made a day or two in advance - ideal for a stress-free holiday prep.
Potato Sides (Mashed, Roasted)
- The Best and Creamiest Mashed Potatoes
- Roasted Garlic Parmesan Baby Potatoes
- Creamy Potatoes Au Gratin
- Garlic Herb Mashed Potatoes
Sweet Potato Sides
Squash and Root Vegetables
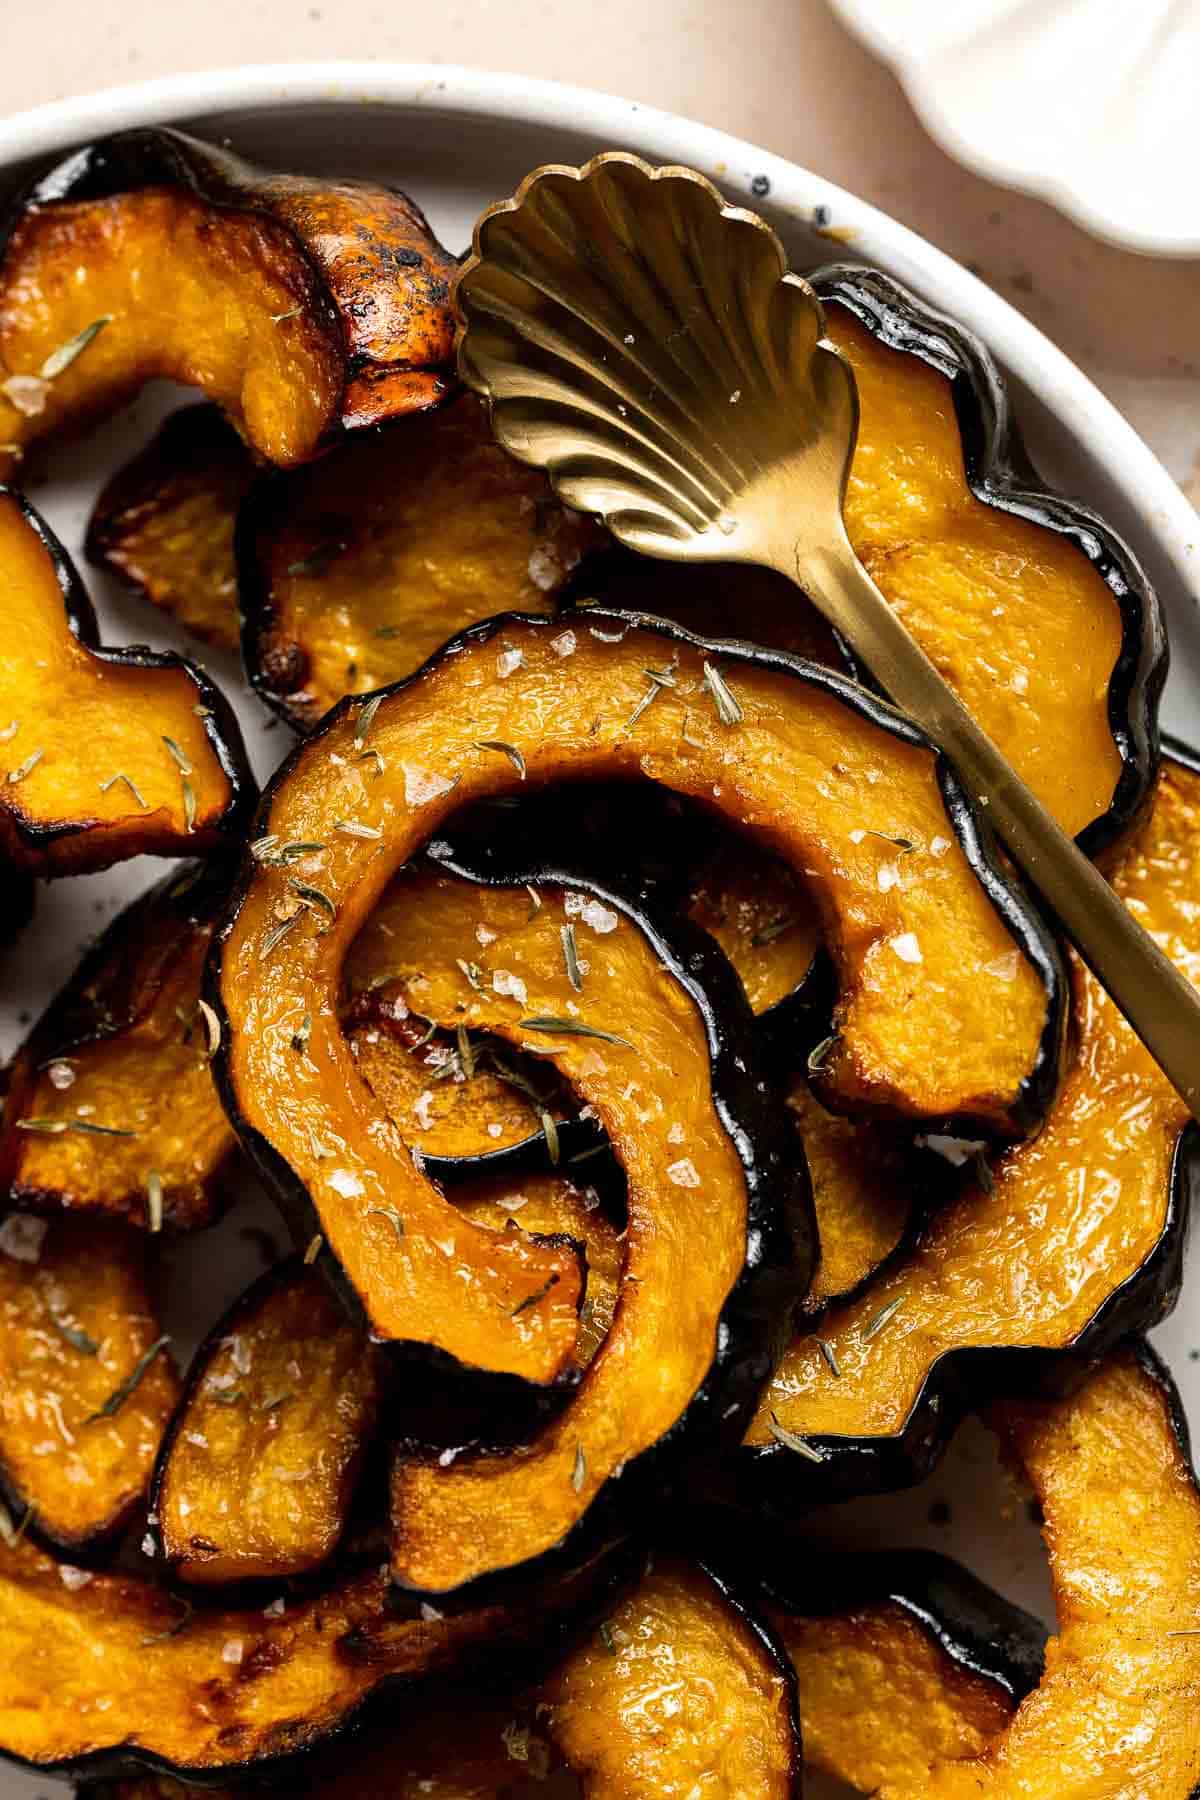
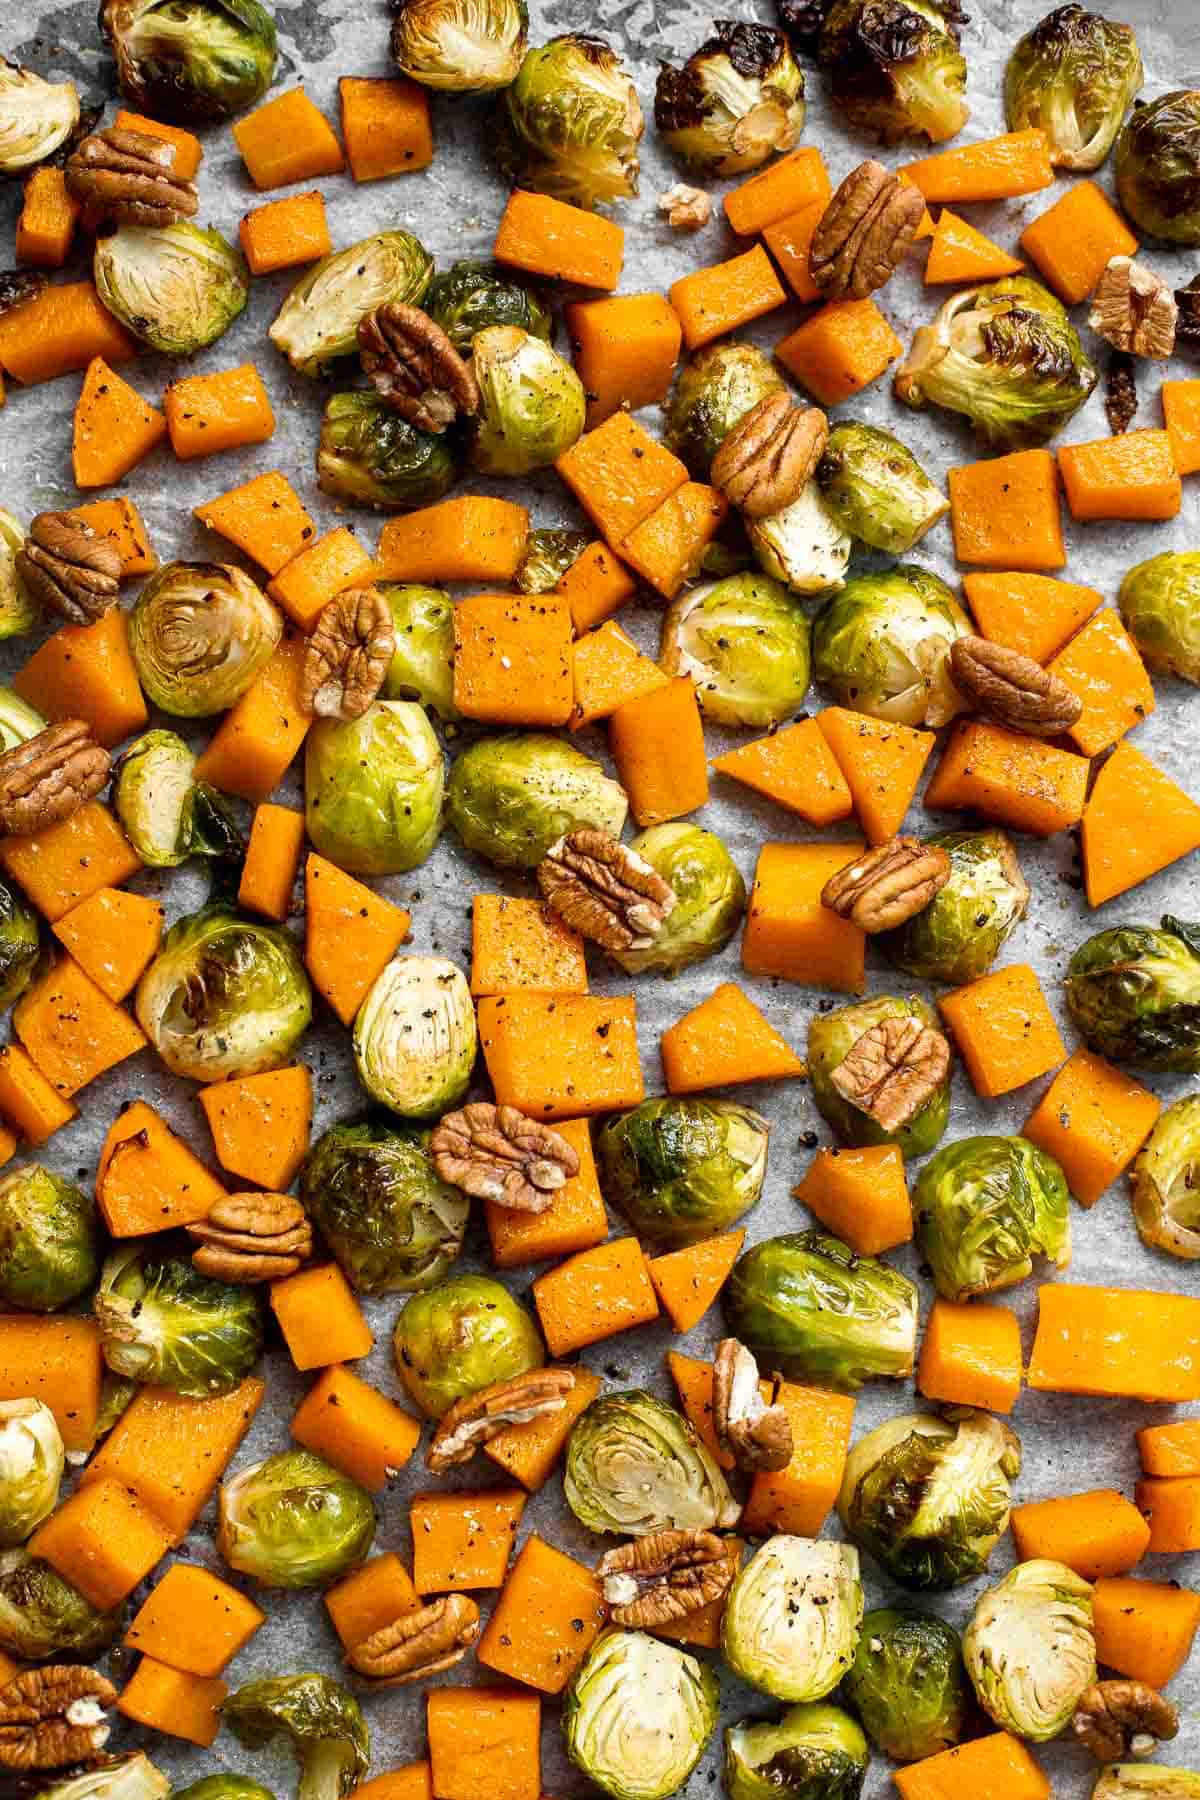
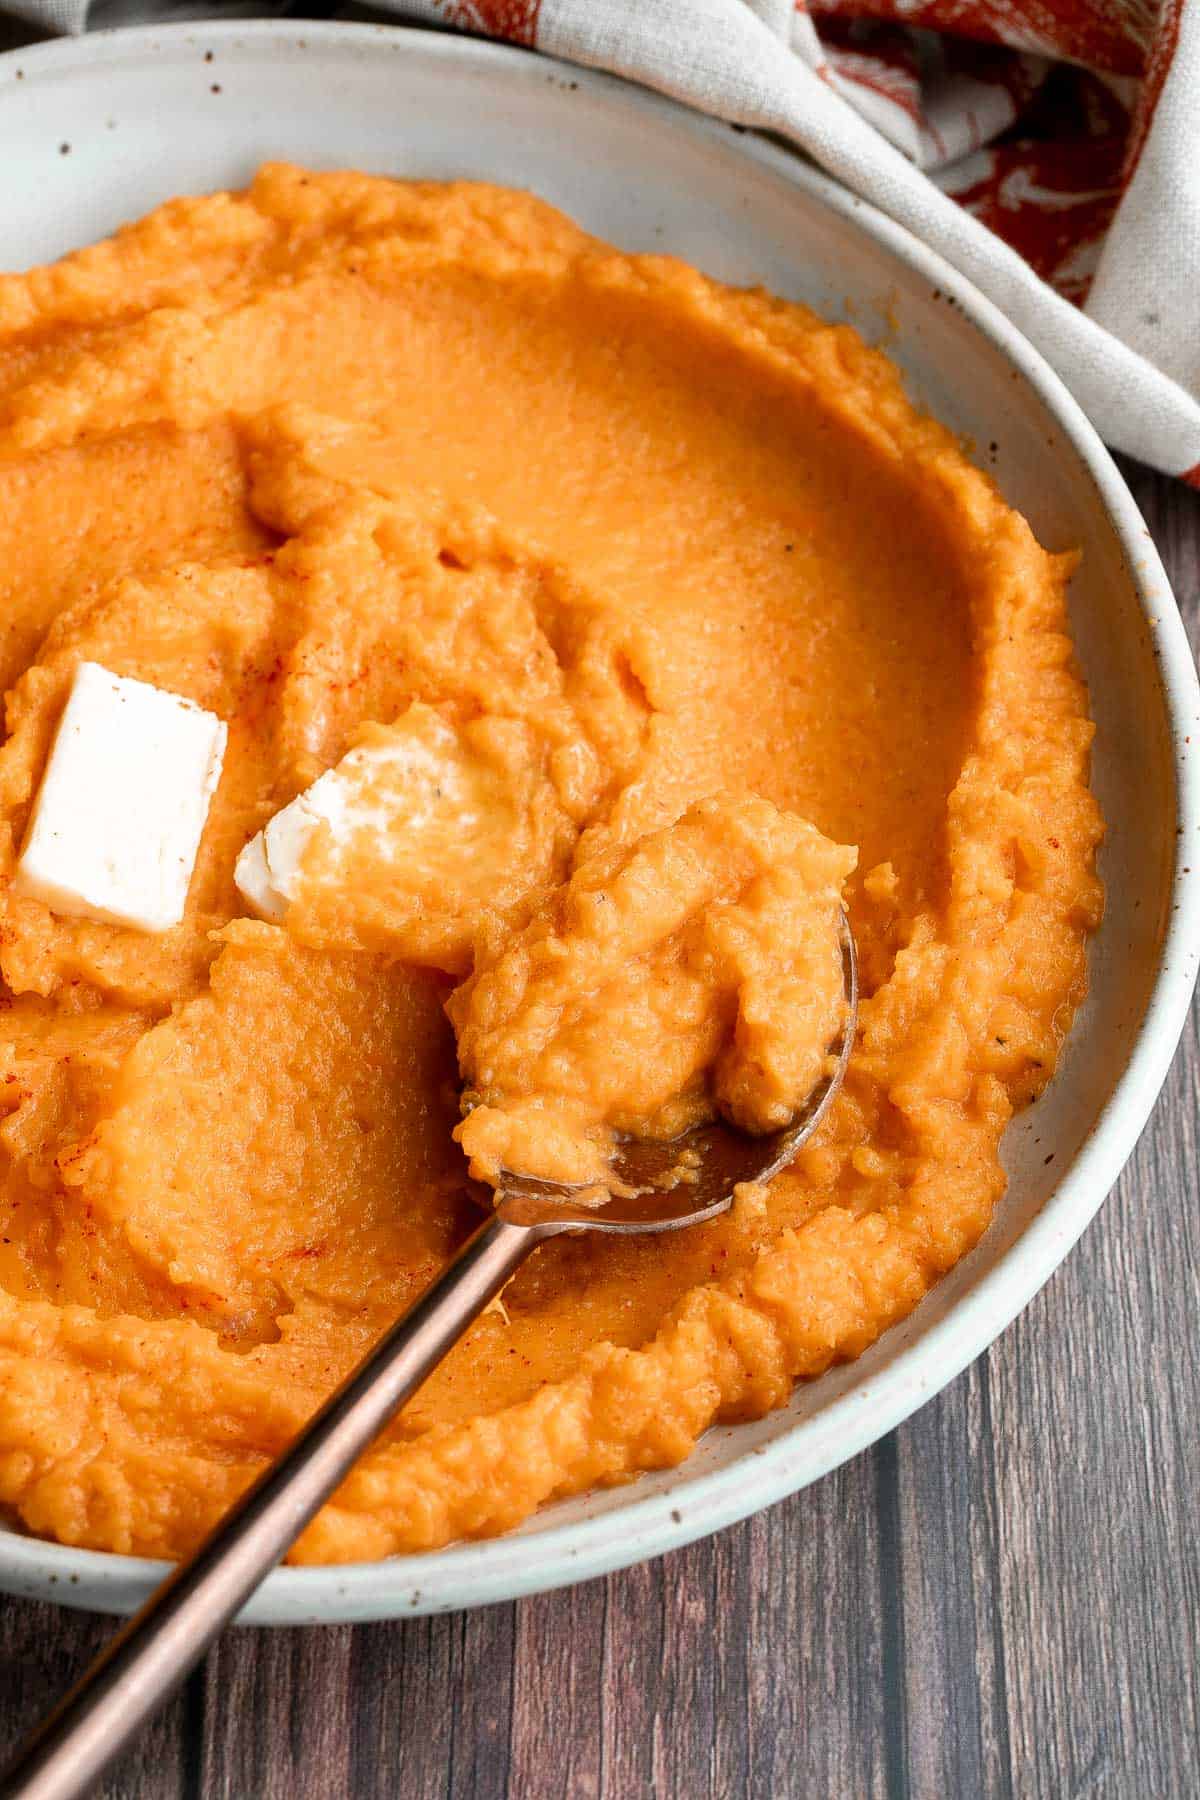
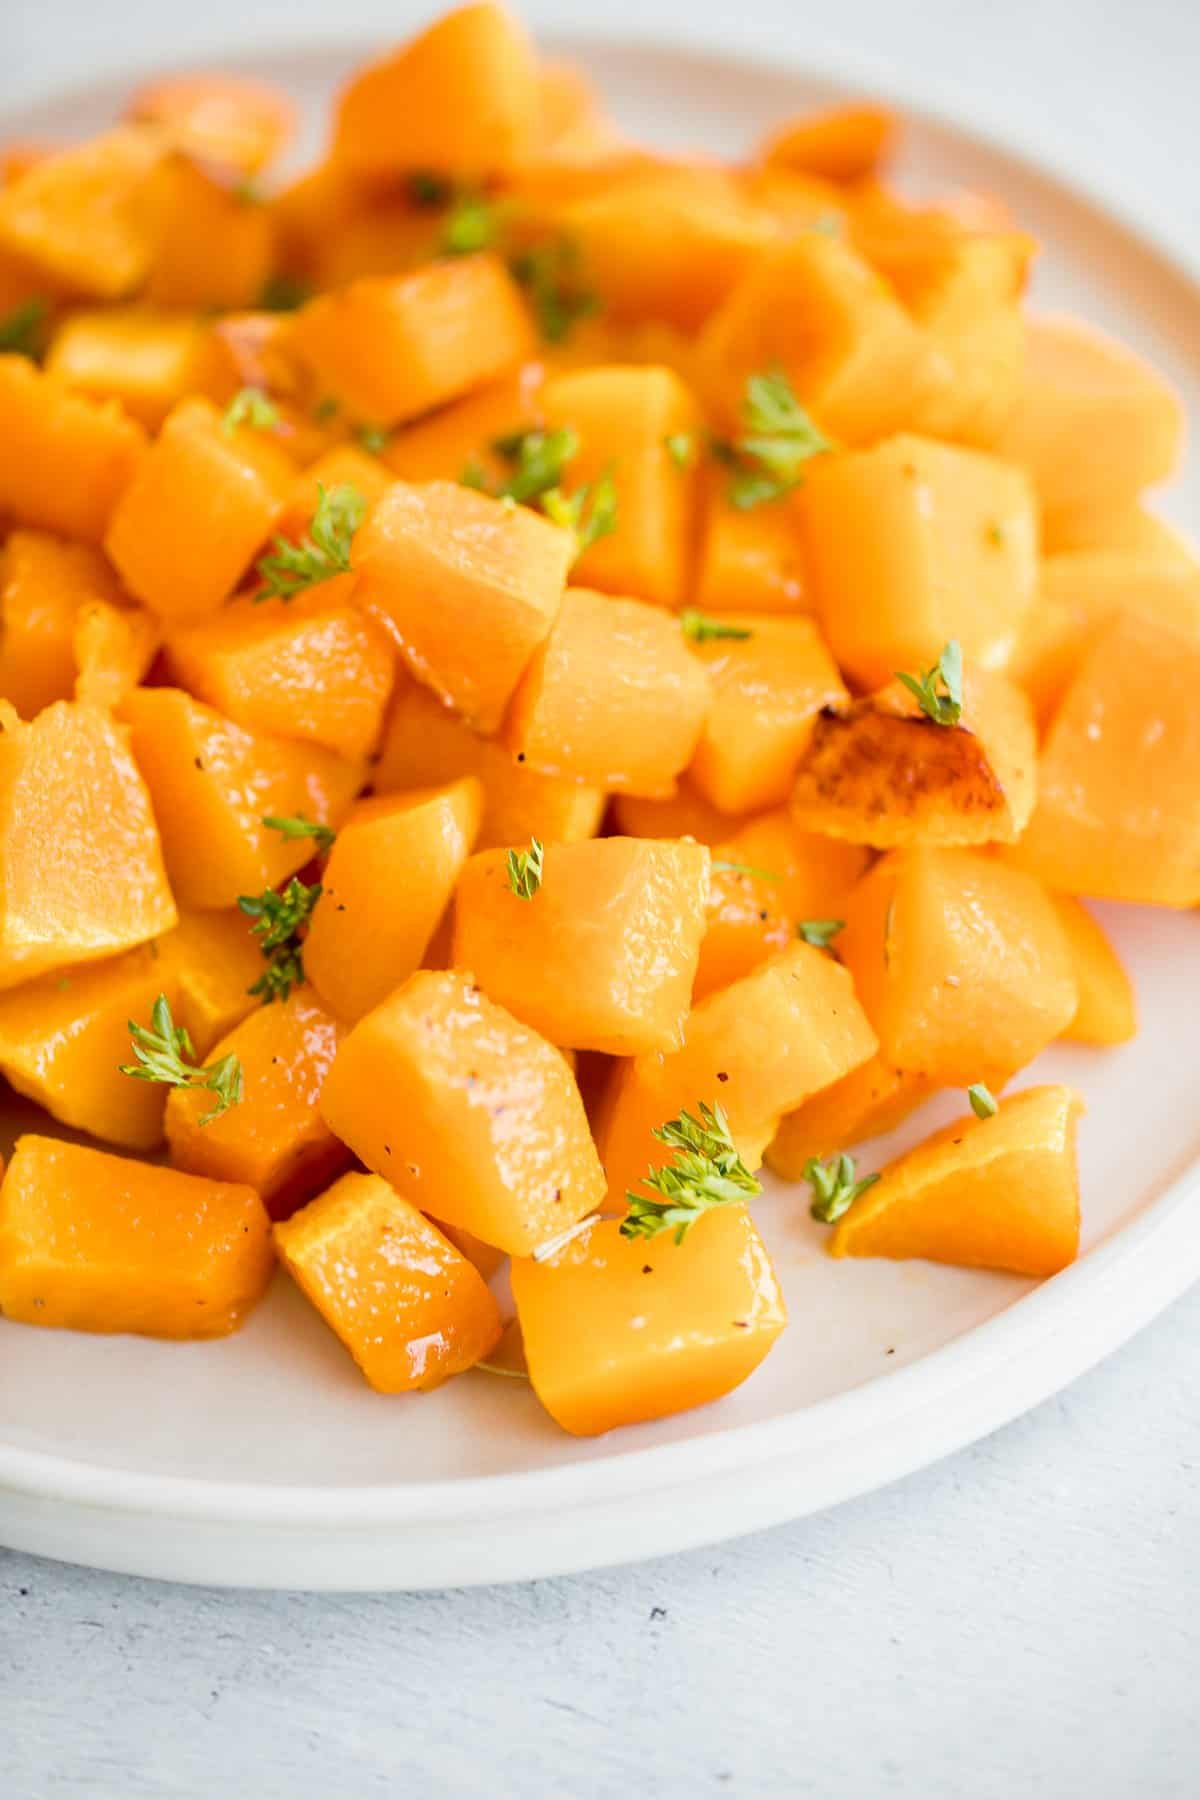
Brussels Sprouts Sides
Vegetable Sides (Green Beans, Carrots, Corn)
- Roasted Fall Vegetables (Easy One Pan Harvest Vegetables)
- Green Beans Almondine
- Roasted Carrots
- Best Creamed Spinach (Steakhouse Style)
- Sautéed Garlic Green Beans
- Creamed Corn
Stuffing
Bread
Don't forget to add a basket of biscuits or cornbread to your dinner table - both soak up gravy beautifully and bring that classic Southern touch to the feast.
Casseroles and Bakes
Comfort food fans, this section's for you. From golden-topped mac and cheese recipes to savory vegetable bakes layered with bacon, onion, and garlic, these dishes are cozy, creamy, and perfectly at home on your Thanksgiving menu.
Thanksgiving Sauces and Gravy
No holiday plate is complete without something rich and saucy to tie it all together. Whether it's classic turkey gravy, a flavorful pan sauce, or a bright, tangy cranberry sauce, these recipes bring everything on your plate to life. You'll find make-ahead options too, so there's no last-minute stress at the stove.
- Classic Homemade Turkey Gravy (from Drippings or Broth)
- Easy Make-Ahead Cranberry Sauce
- Jellied Cranberry Sauce
- Mushroom Gravy
Thanksgiving Desserts to End on a Sweet Note
After the turkey and trimmings, it's time for something sweet. From traditional pumpkin pie and pecan pie to indulgent cheesecakes and seasonal cookies full of fall spice, these Thanksgiving desserts are the perfect grand finale to your feast. Each one brings cozy fall flavors and just the right amount of wow factor for your guests at the holiday table.
Thanksgiving Pies (Pumpkin, Apple, Pecan)
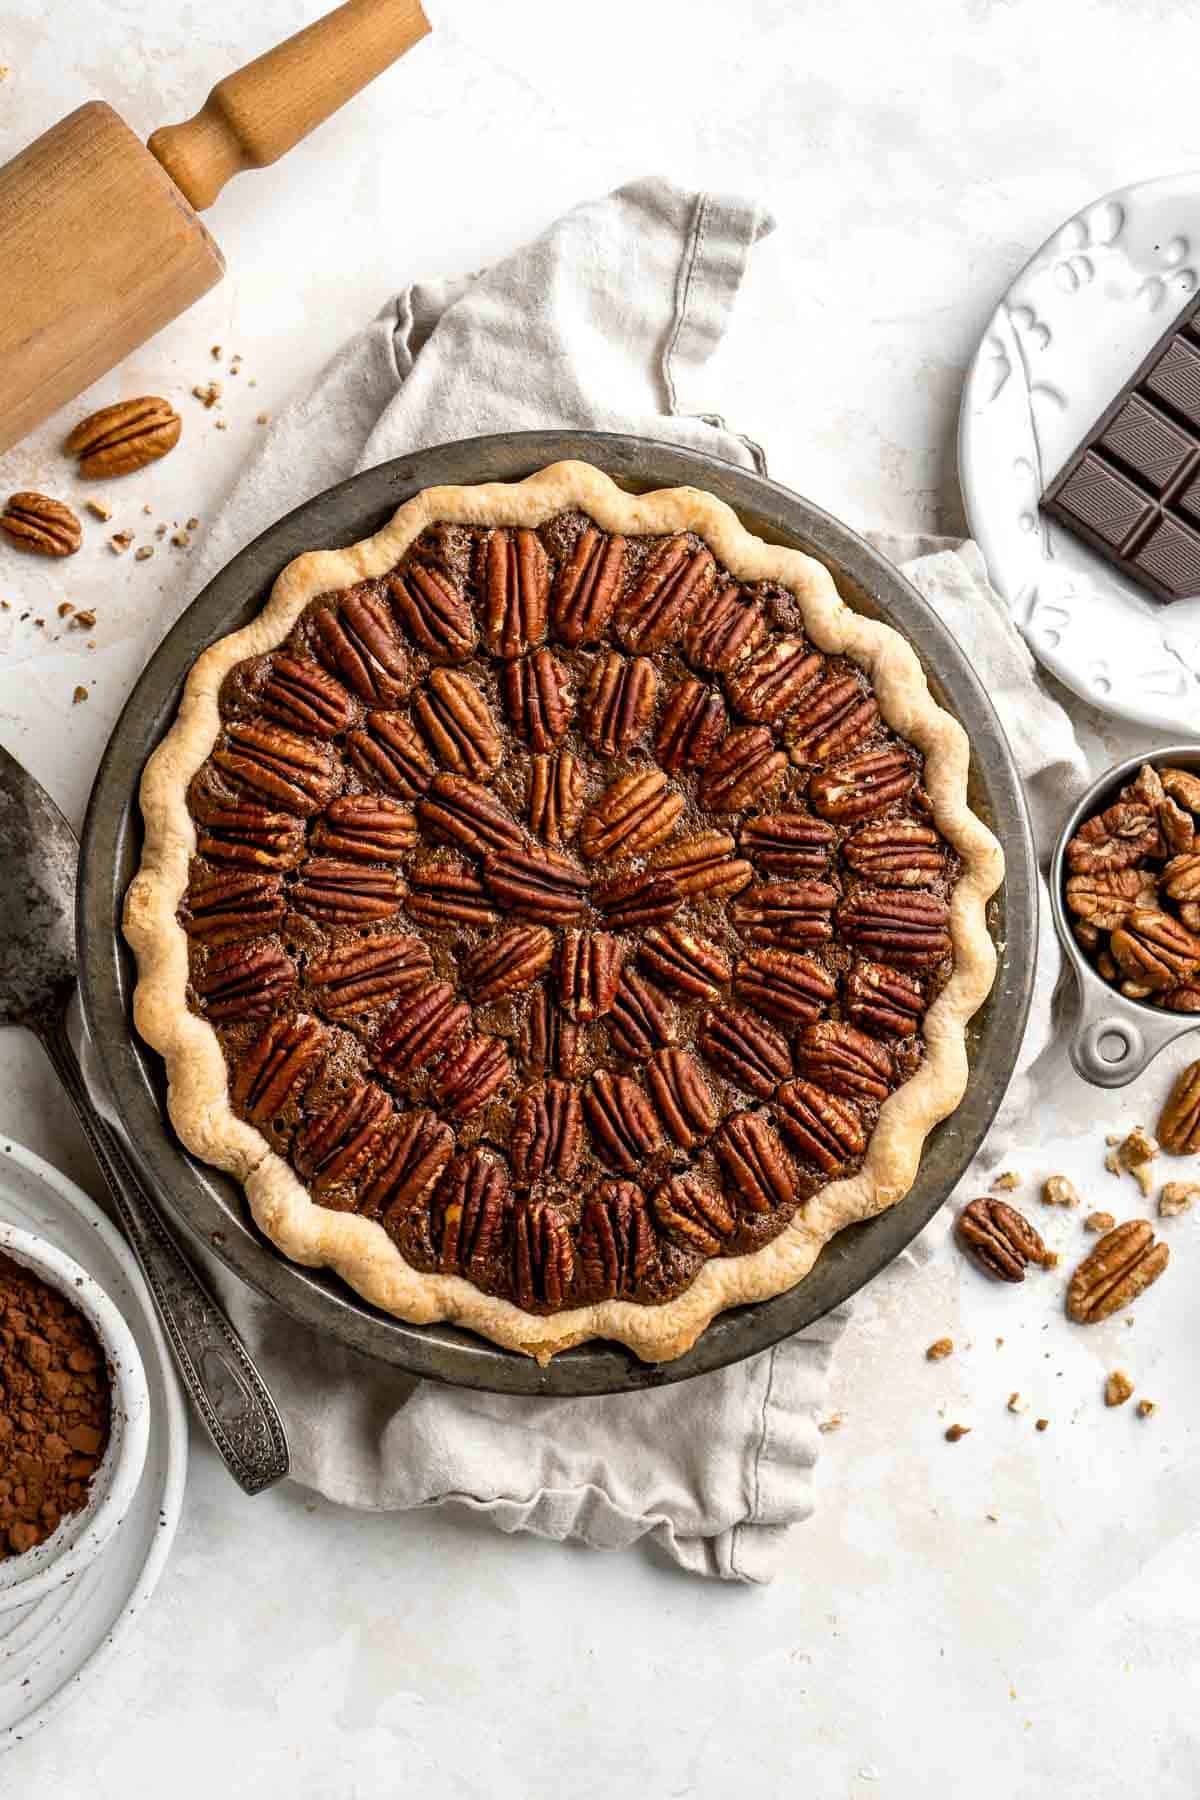
Cakes and Cheesecakes

Cookies and Bars
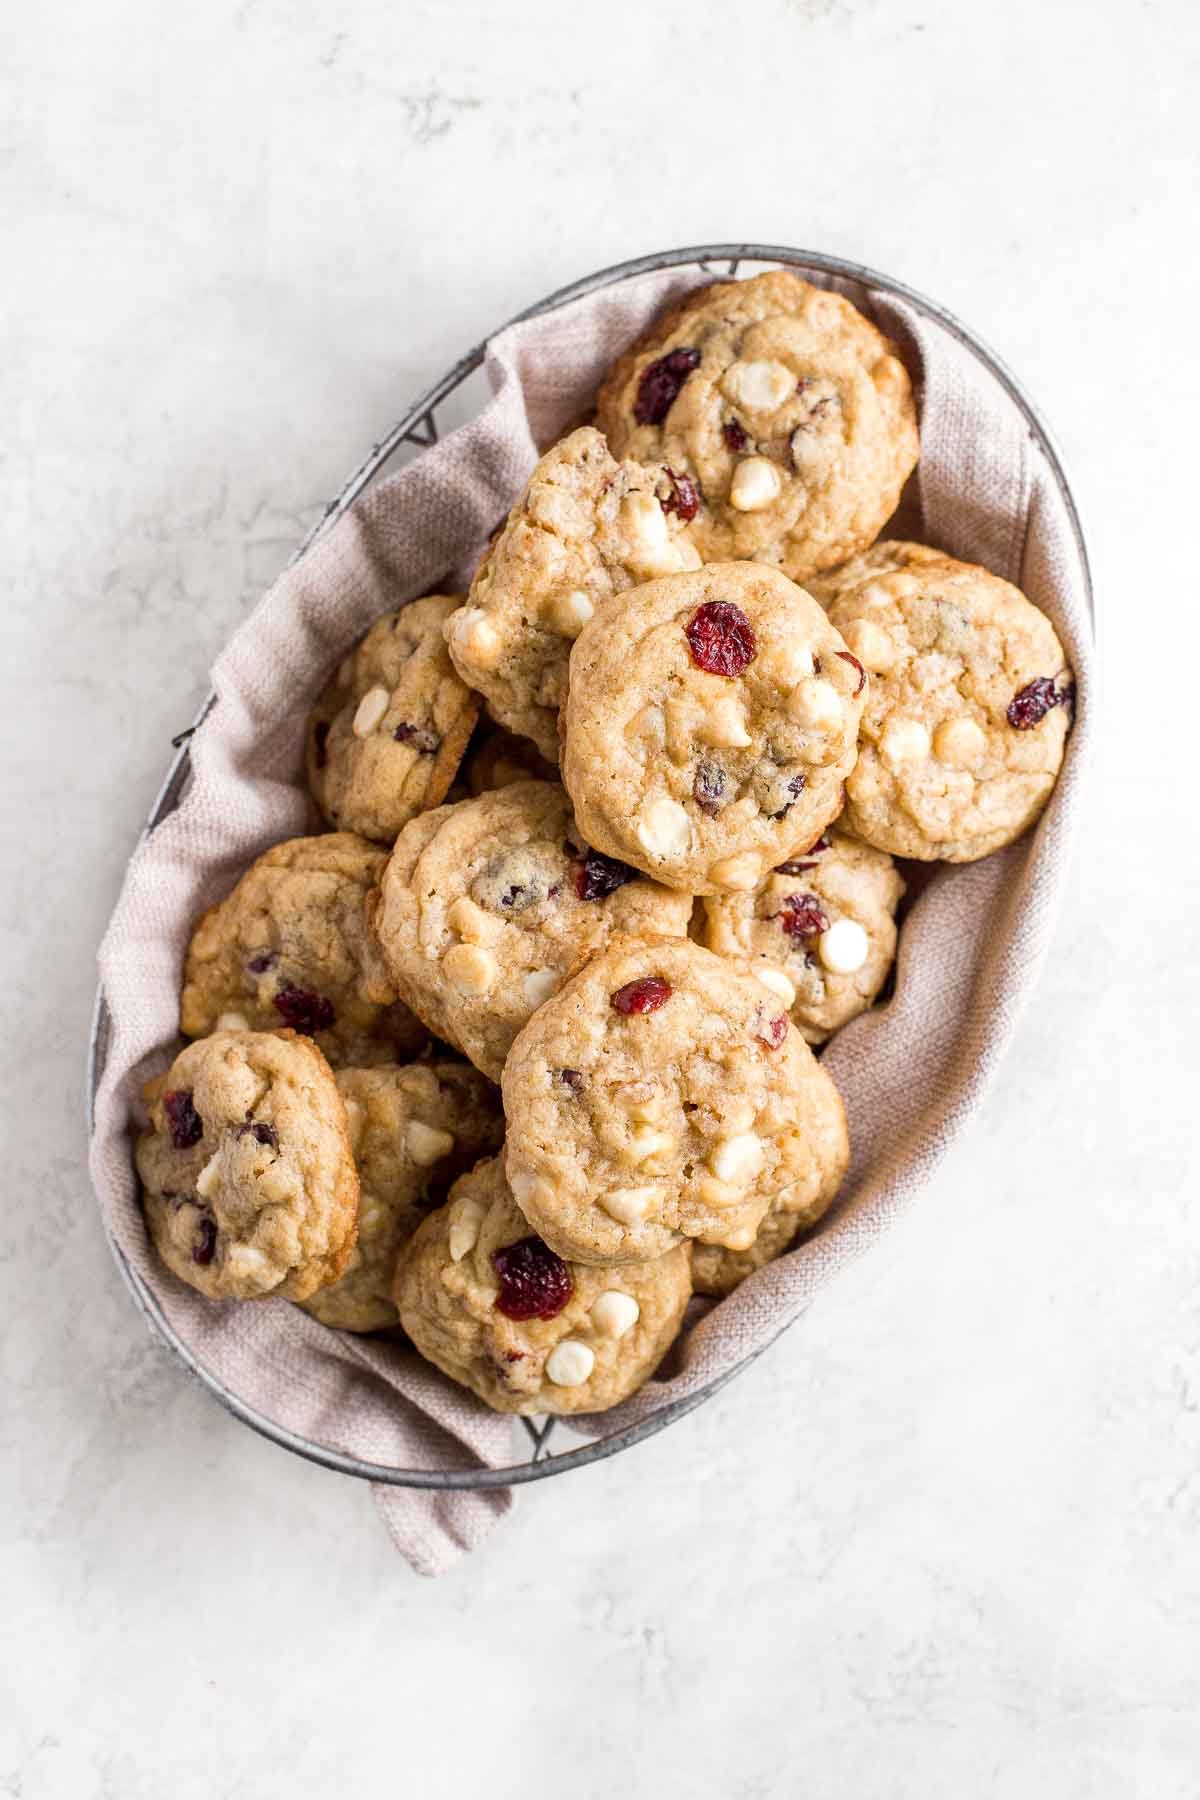


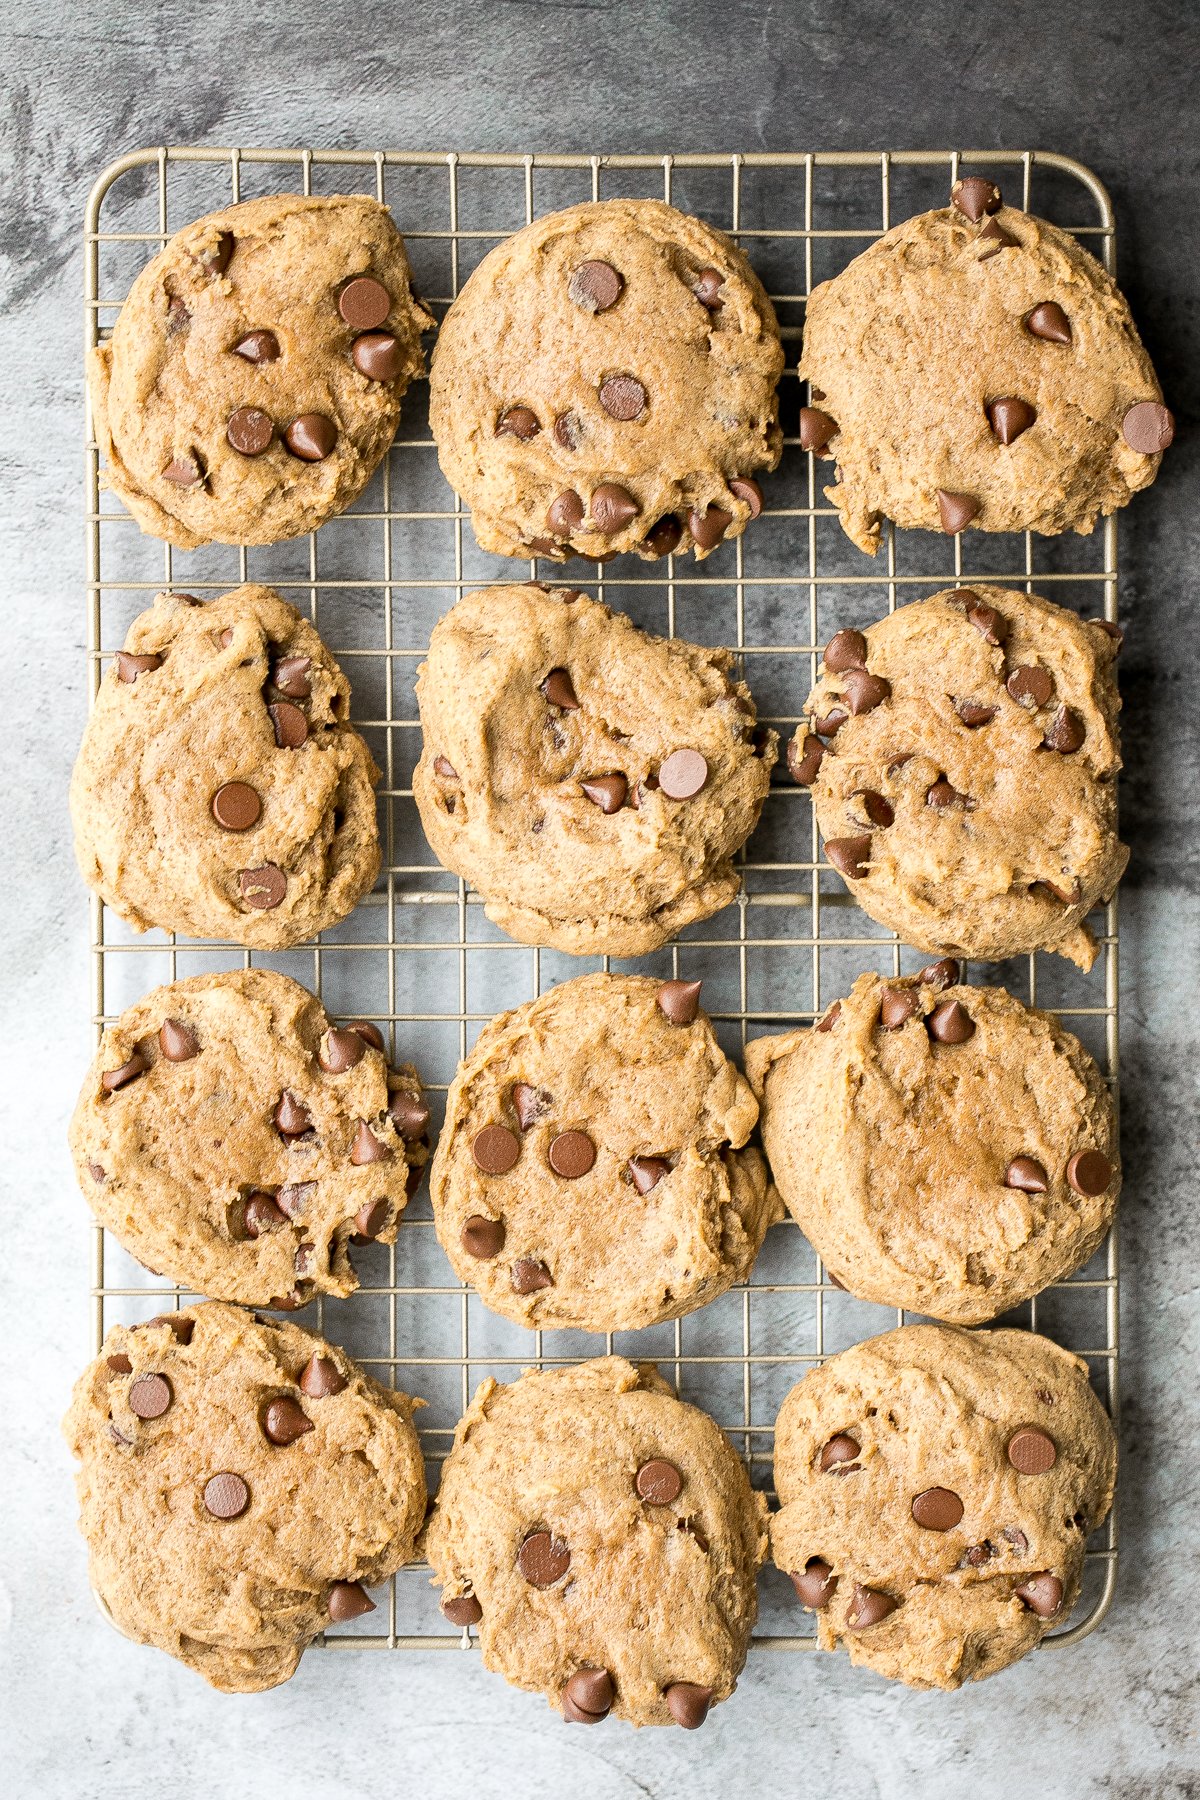
Thanksgiving Leftover Recipes
Keep the celebration going with these creative Thanksgiving leftovers ideas that give your feast a second life the next day. From hearty soups and sandwiches to cozy casseroles, these recipes make the most of every bite - because Thanksgiving flavors deserve an encore.
- Turkey Tetrazzini with Spinach
- Leftover Stuffing Meatballs
- Leftover Mashed Potato Gnocchi
- Leftover Cranberry Sauce Muffins with Oat Streusel Topping
- Mashed Potato Cakes
- Creamy Turkey Orzo Soup
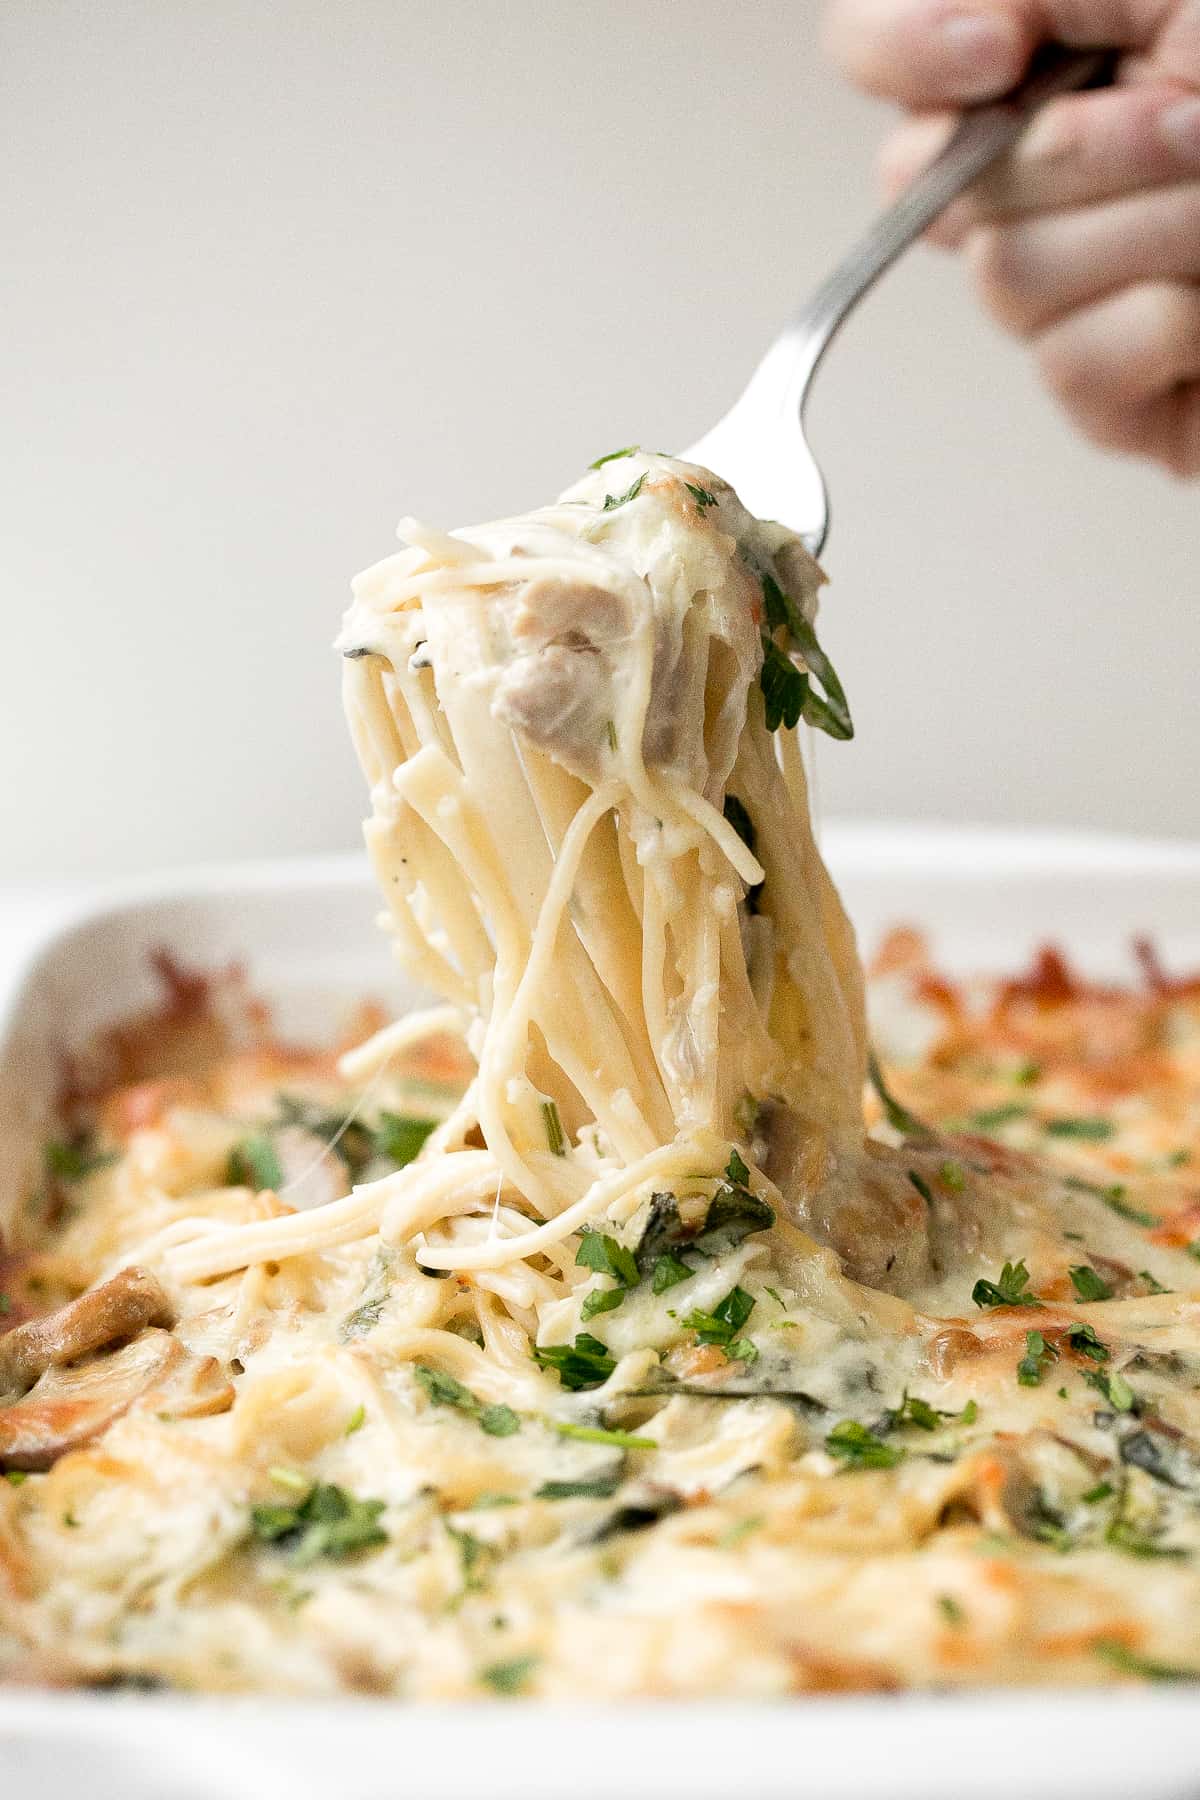

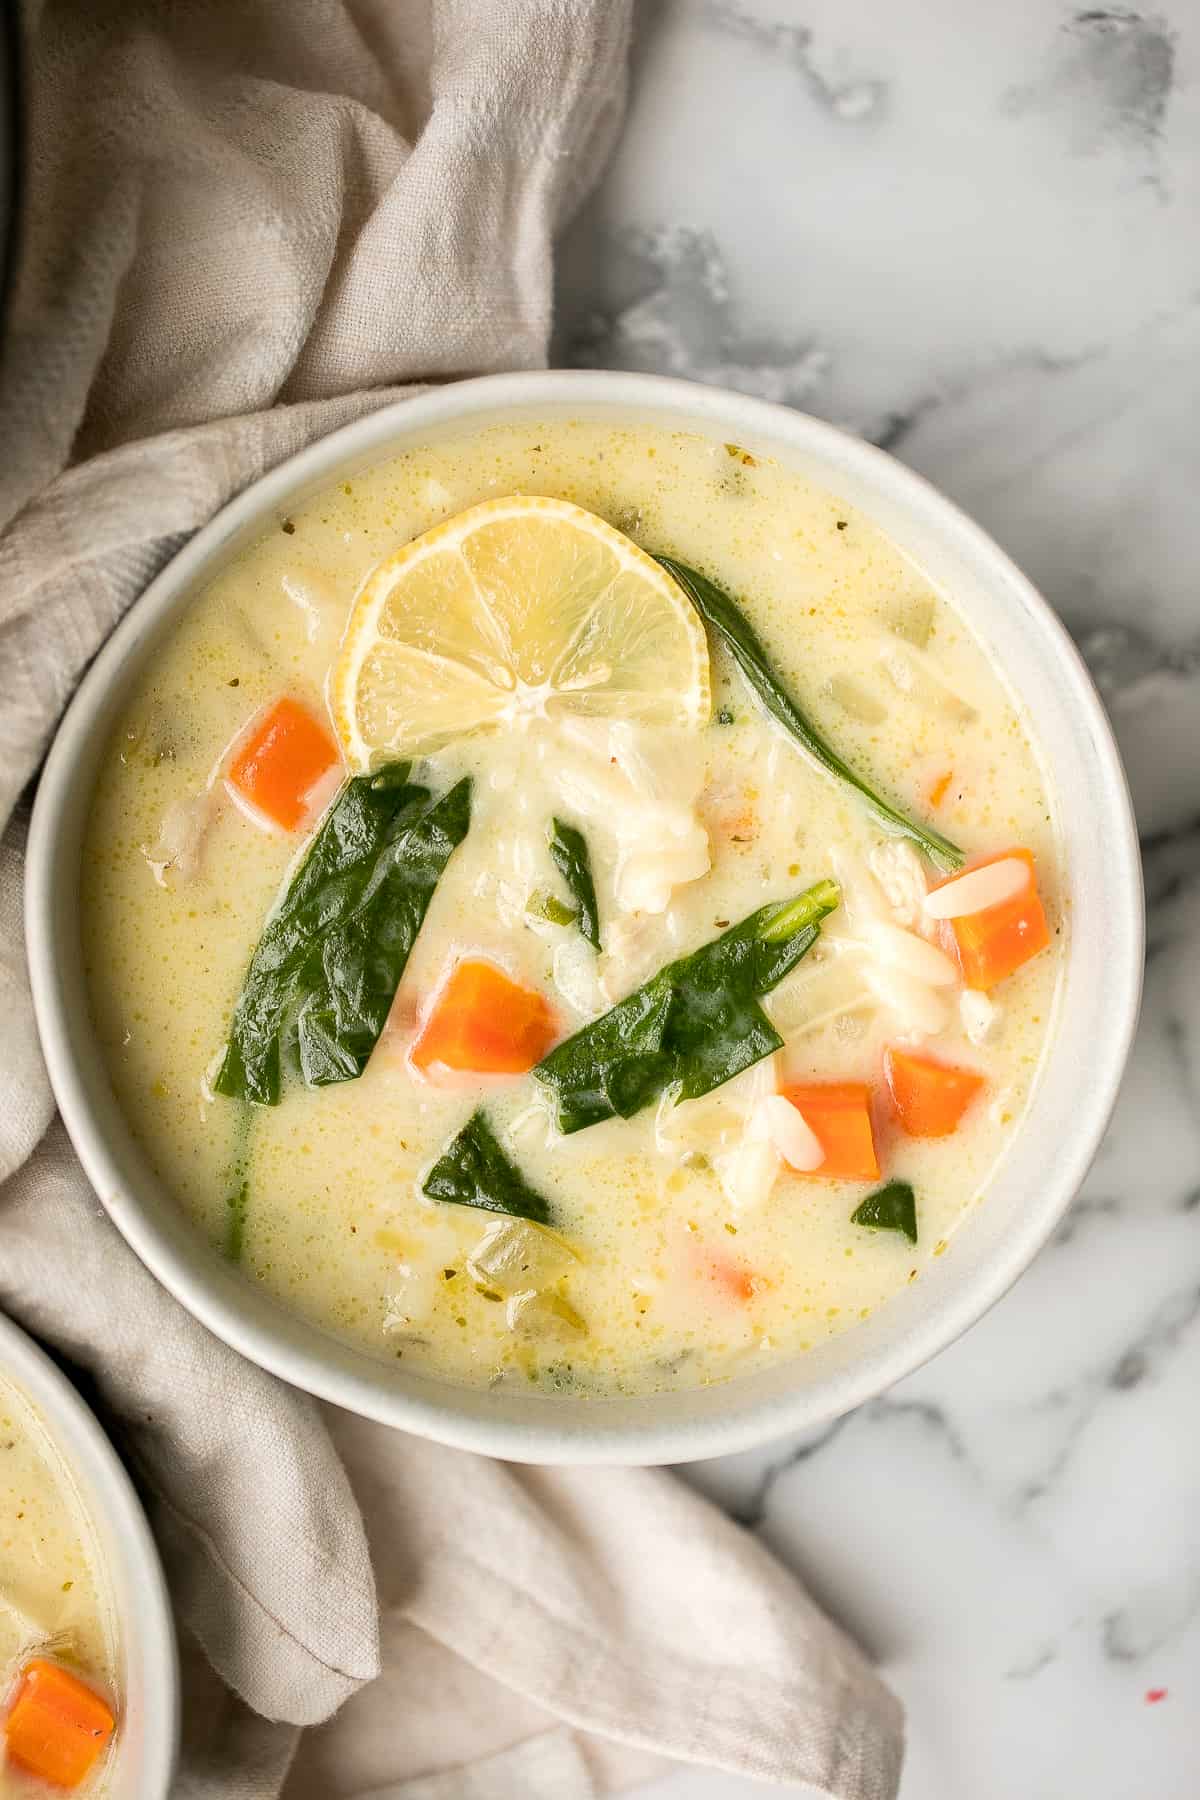
Thanksgiving Prep Tips and Timeline
Hosting doesn't have to be stressful! Follow these quick Thanksgiving prep tips for a smooth, organized Thanksgiving Day from start to finish:
- Plan early. Choose your menu and download your printable by early November.
- Shop smart. Buy pantry staples and frozen ingredients ahead of time.
- Make ahead. Prep soups, casseroles, and desserts 1-2 days early.
- Assign oven time. Prioritize dishes that reheat easily on the stovetop or air fryer.
For a detailed breakdown, check out our Complete Thanksgiving Prep Guide for a full day-by-day timeline.
Printable Thanksgiving Menus
Now that you've seen all the recipes and ideas, it's time to bring it all together! Download our free printable Thanksgiving Menu Pack for five curated menus designed to make planning easier - plus a matching shopping list to keep you organized.
Each printable includes a perfectly balanced combination of mains, sides, and desserts that work beautifully together.
Here's what's inside the pack:
- Traditional Thanksgiving Dinner - The full feast with turkey, stuffing, potatoes, and pie.
- Make-Ahead Thanksgiving Menu - Prep-friendly recipes for a stress-free holiday.
- Small Family Thanksgiving Menu - Scaled-down dishes with all the flavor.
- Vegetarian Thanksgiving Menu - Cozy, hearty fall favorites with no turkey needed.
- Simple No-Fuss Thanksgiving Menu - All the classics, simplified for easy cooking.
now available!
Free Printable Thanksgiving Menu Pack!
Plan your holiday dinner with ease! Get all 5 curated menus sent straight to your inbox.
Tried any of these Thanksgiving recipes?
I'd love to hear what you think! Leave a comment and rating for the Thanksgiving recipe that you made to share your feedback. Your reviews help others discover the recipe and help me keep creating more free recipes for you. Snap a photo and tag me on social media @aheadofthyme too.
This post was first published in 2018. It has since been completely reorganized with updated content.

Thai Coconut Soup with Chickpeas

Thai Coconut Soup with Chickpeas is creamy, cozy, and bursting with feel-good flavor. This comforting noodle soup is filled with rice noodles, tender vegetables, and crispy roasted chickpeas for the perfect protein crunch. All of it simmers together in a fragrant, coconut curry broth that's both spicy and soothing - and seriously hard to stop sipping. It's the perfect one-bowl meal for those busy weeknights when you're craving something warm, nourishing, and delicious.
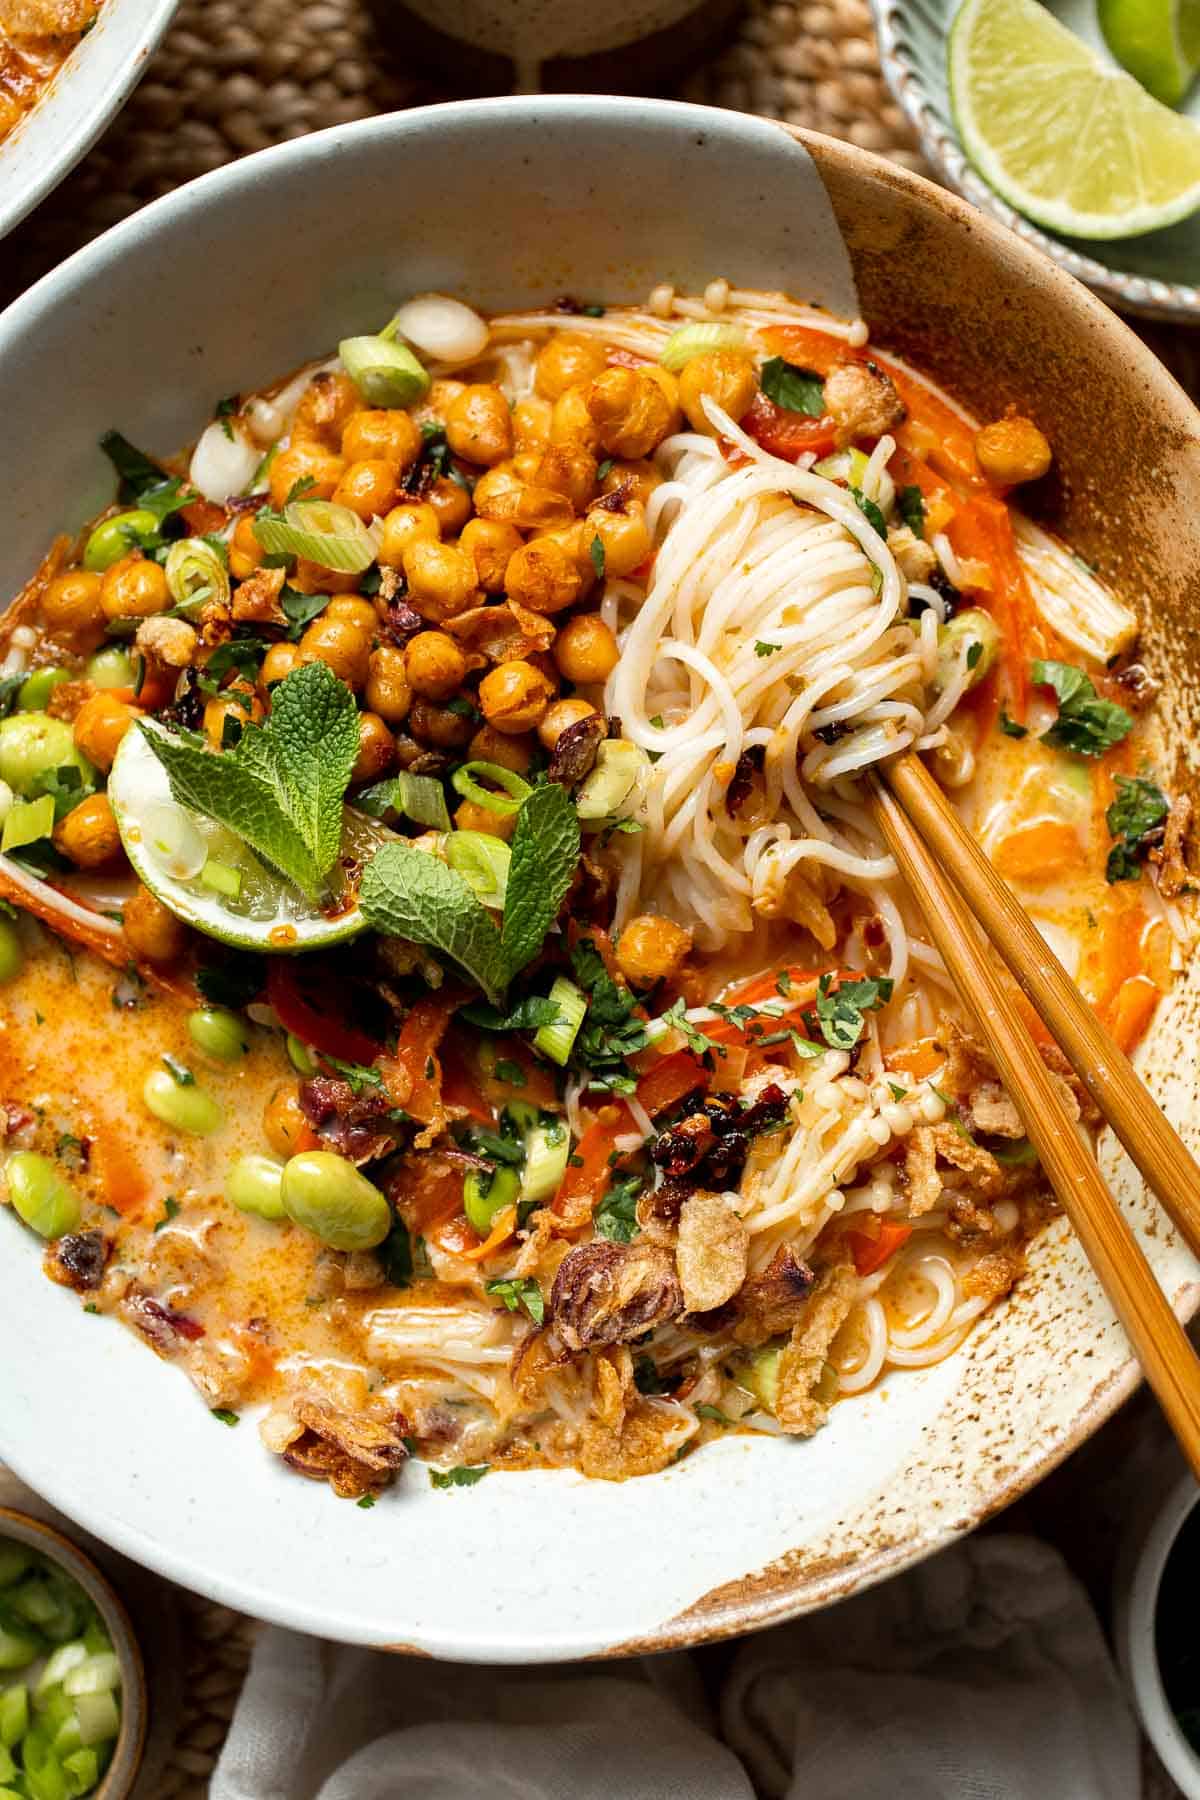
Inspired by classic Thai coconut soup (Tom Kha), this twist takes all those iconic sweet, savory, and tangy flavors and makes them heartier with noodles and crunchy chickpeas. Creamy coconut milk, fiery red curry paste, and a squeeze of fresh lime juice bring that dreamy balance of spice and brightness, while cilantro, Thai basil, and mint keep each bite fresh and vibrant. Basically, it's sunshine in soup form.
This easy, one-pot dinner was inspired by my One Pot Thai Red Curry Noodle Soup and pairs beautifully with Crispy Spring Rolls or Thai Mango Salad for a fresh, vibrant meal that tastes better than takeout.
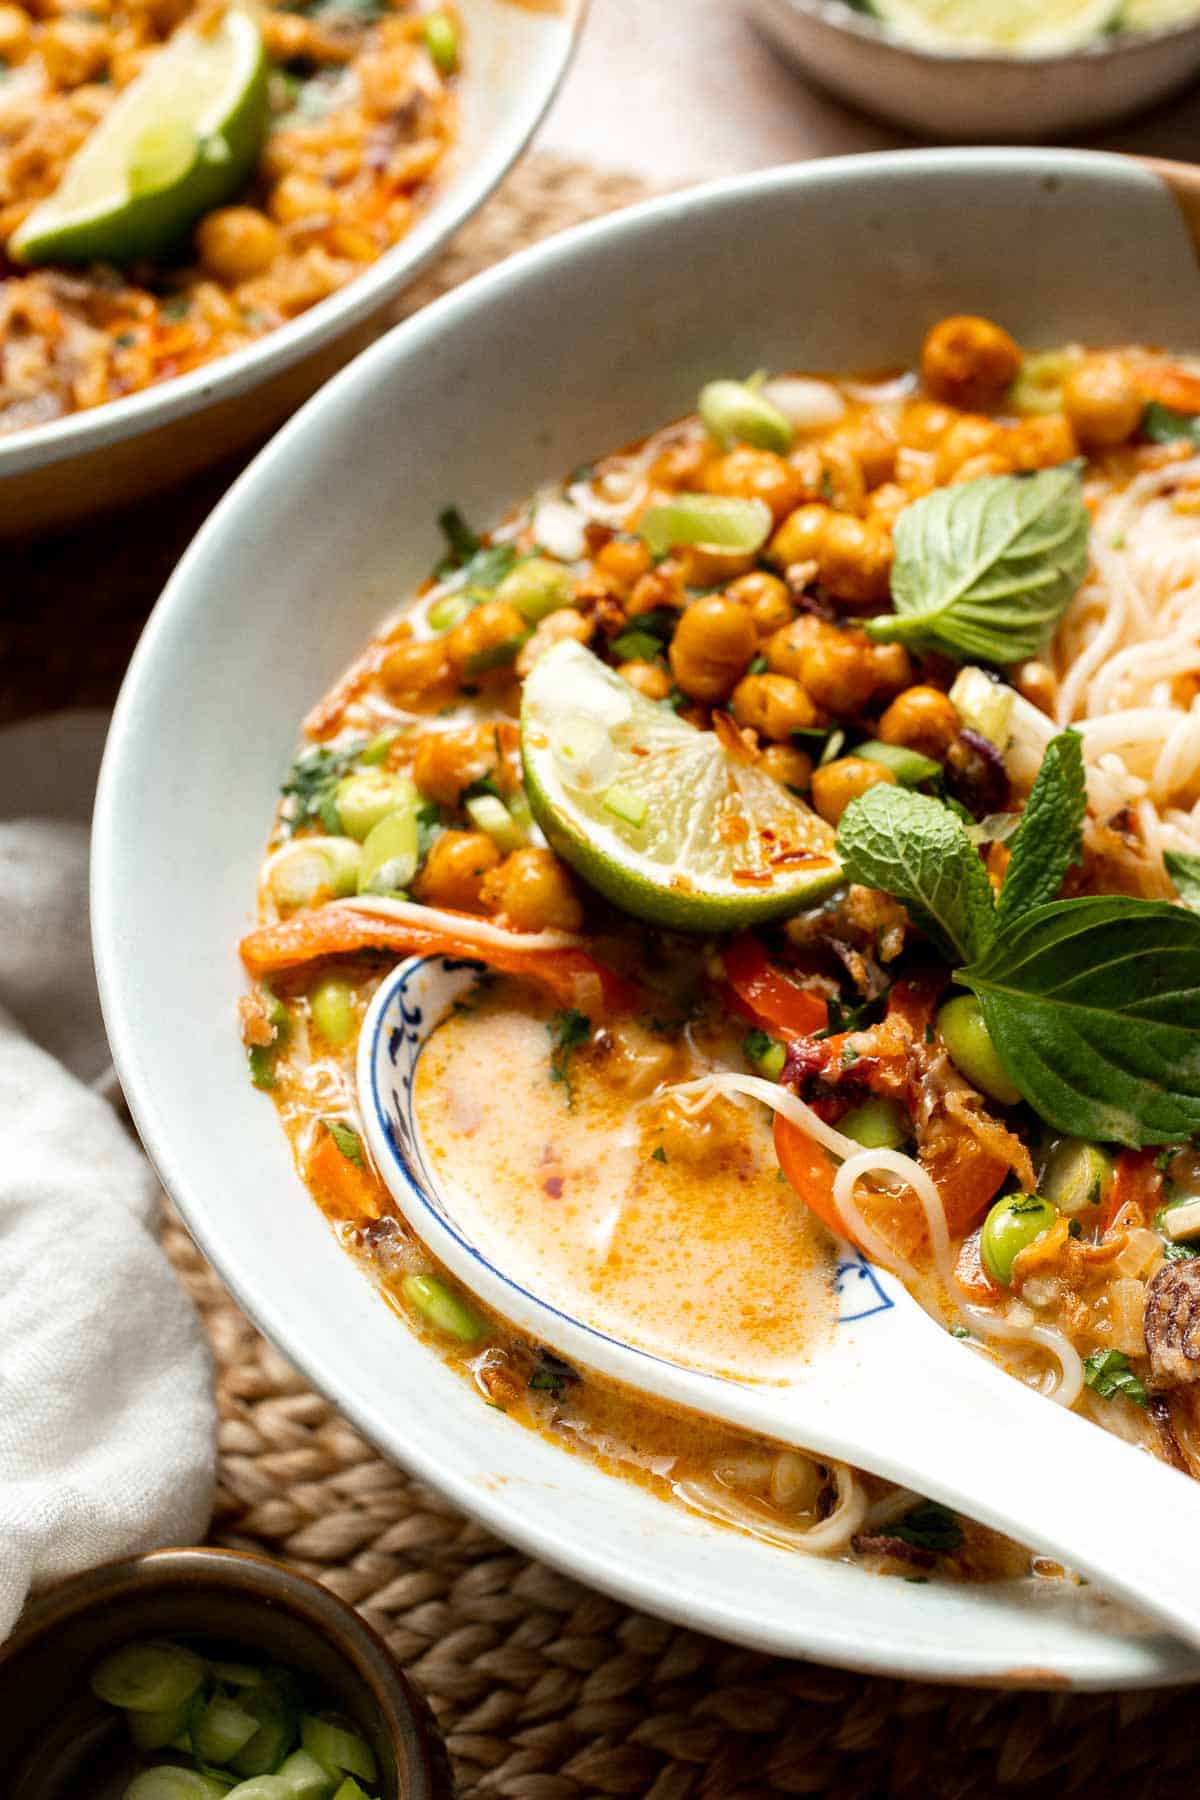
Why You'll Love This Recipe
- Creamy, rich, and full of flavor. Coconut milk, curry paste, and lime juice combine for a creamy broth that's spicy, tangy, and deeply aromatic.
- Protein-packed and filling. Roasted chickpeas add crunch and plant-based protein, transforming this soup into a full, satisfying meal.
- Quick and easy to make. With just 40 minutes and a few simple steps, you'll have a steaming bowl of comfort ready to serve.
- Customizable for any diet. Keep it vegetarian with soy sauce or make it vegan by skipping the fish sauce entirely.
- A vibrant, colorful bowl. Loaded with red bell peppers, mushrooms, and herbs, this soup looks as good as it tastes - perfect for sharing on Instagram.
Ingredients and Substitutions
To make this delicious Thai coconut noodle soup, you will need the following ingredients (see recipe card below for quantities):
- avocado oil - A light, neutral oil that helps sauté aromatics without overpowering the flavor. Substitute with olive oil or coconut oil.
- shallot - Adds subtle sweetness. You can replace it with red onion or yellow onion if needed.
- garlic - Fresh garlic builds the base flavor. Add a pinch of garlic powder for extra depth.
- ginger - Fresh ginger adds warmth and brightness, similar to galangal, which is used in authentic Tom Kha Gai but can be harder to find.Ground ginger works in a pinch (use ¼ teaspoon if substituting).
- Thai red curry paste - The key to that signature Thai flavor. Adjust the amount depending on your spice preference.
- coconut milk - Full-fat coconut milk makes the broth rich and creamy. Light coconut milk can be used for a lighter version.
- vegetable stock - Adds body and balances the coconut milk. Use veggie broth for a vegetarian version or swap for chicken stock for a richer base.
- fish sauce - Adds umami depth. For a vegetarian option, use soy sauce or tamari instead.
- lime juice - Freshly squeezed lime juice brightens the soup and balances the curry's heat.
- brown sugar - Optional, but adds a subtle sweetness that complements the spice. For a more traditional flavor, substitute with coconut sugar, which adds a subtle caramel note that pairs beautifully with curry paste.
- noodles - Ramen noodles or rice noodles both work well. Rice noodles keep the soup gluten-free.
- red bell pepper - Adds color, sweetness, and crunch. You can use yellow or orange bell pepper too.
- enoki mushrooms - Offer delicate texture. Substitute with button mushrooms or shiitake mushrooms.
- edamame - Adds protein and texture. Frozen peas or snap peas also work.
- salt - Seasoning essential for the soup.
- chickpeas - Roasted with smoked paprika, garlic powder, and salt for a crunchy topping. Use canned drained chickpeas or make your own using dried beans that are soaked overnight.
- cilantro - Freshly chopped cilantro adds brightness at the end.
- Thai basil or mint - Optional garnish for fragrance and color.
- lime wedges - For serving and an extra hit of acidity.
Equipment
You'll also need measuring cups and spoons, a large pot for the soup, a baking sheet for roasting chickpeas, a medium bowl for tossing ingredients, and a small saucepan or kettle for boiling noodles.
Instructions
Step 1: Roast the chickpeas
Pat the chickpeas dry with a paper towel. Spread on a baking sheet, toss with olive oil, smoked paprika, garlic powder, and salt until evenly coated. Roast in a 400°F preheated oven for 20-25 minutes, shaking the pan halfway, until golden and crispy. Set aside.
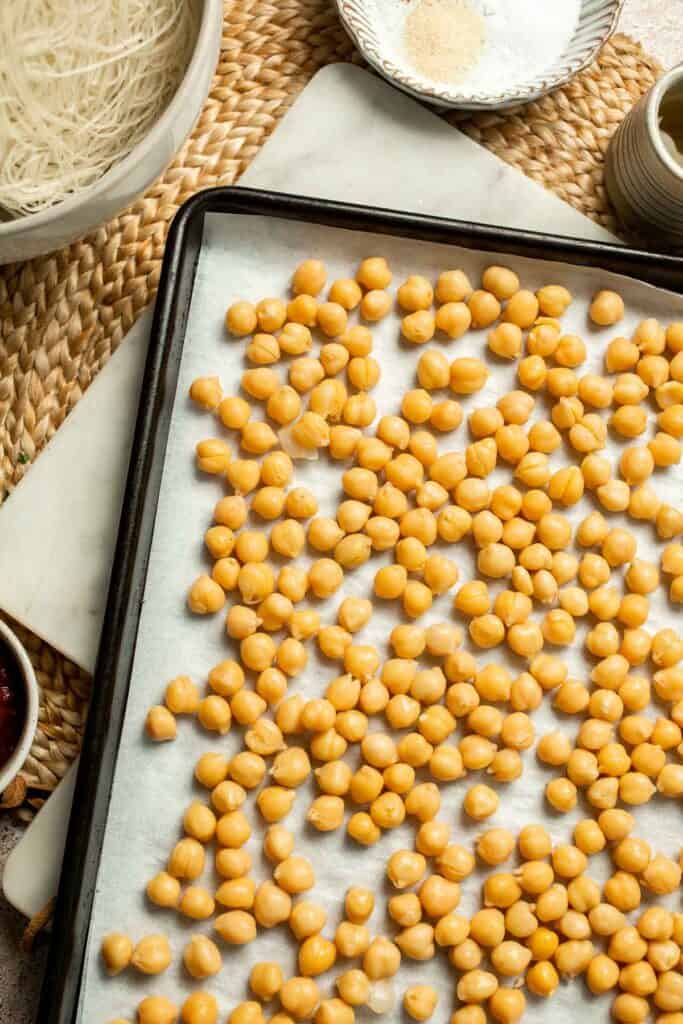

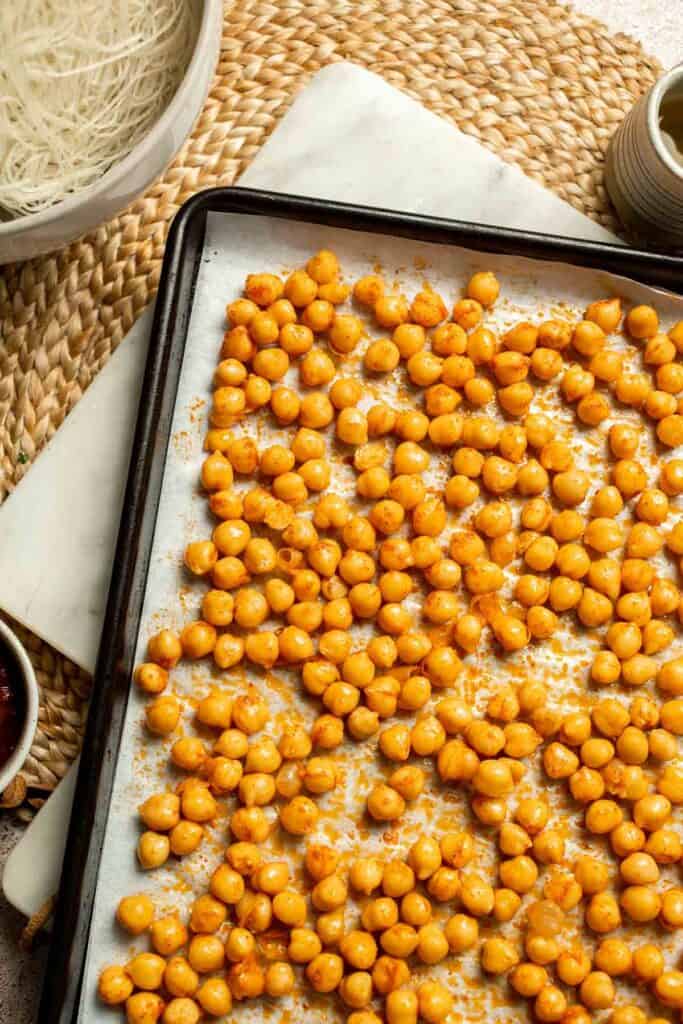
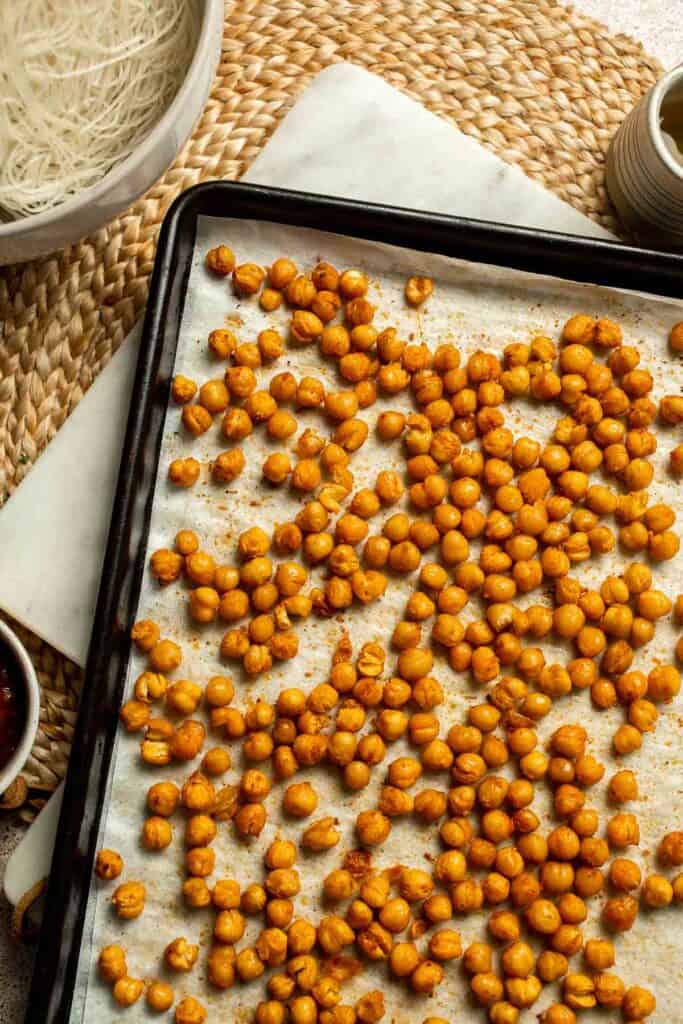
Step 2: Make the soup base
- Sauté the aromatics. In a large pot, heat oil over medium-high heat until shimmering, about 1 minute. Add the shallot, garlic, ginger, and red curry paste. Mix well and cook until fragrant, about 2 minutes.
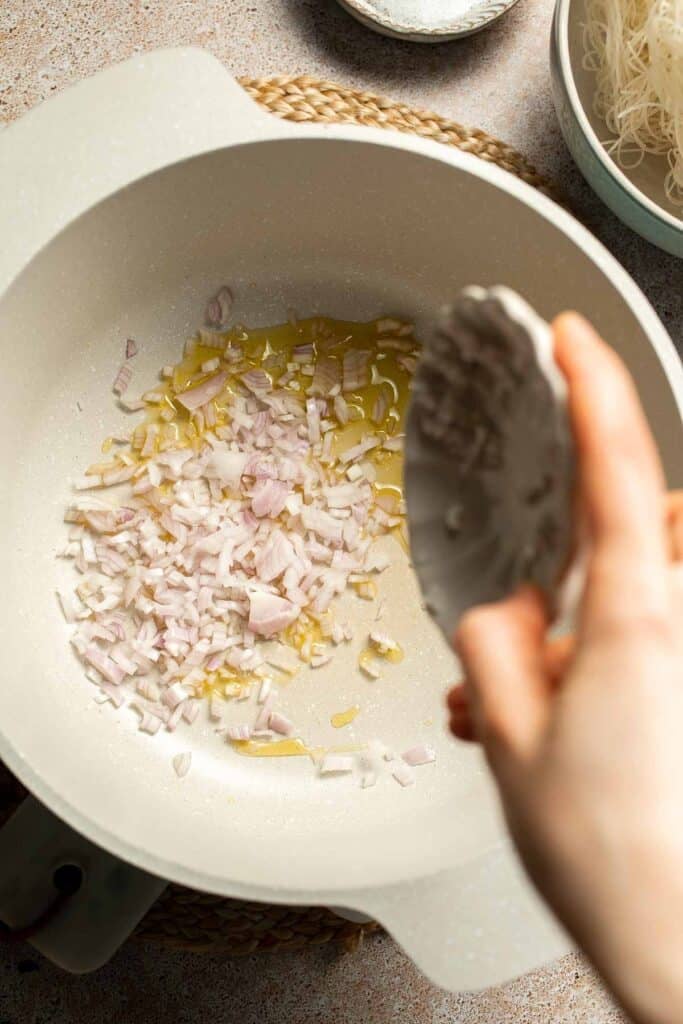
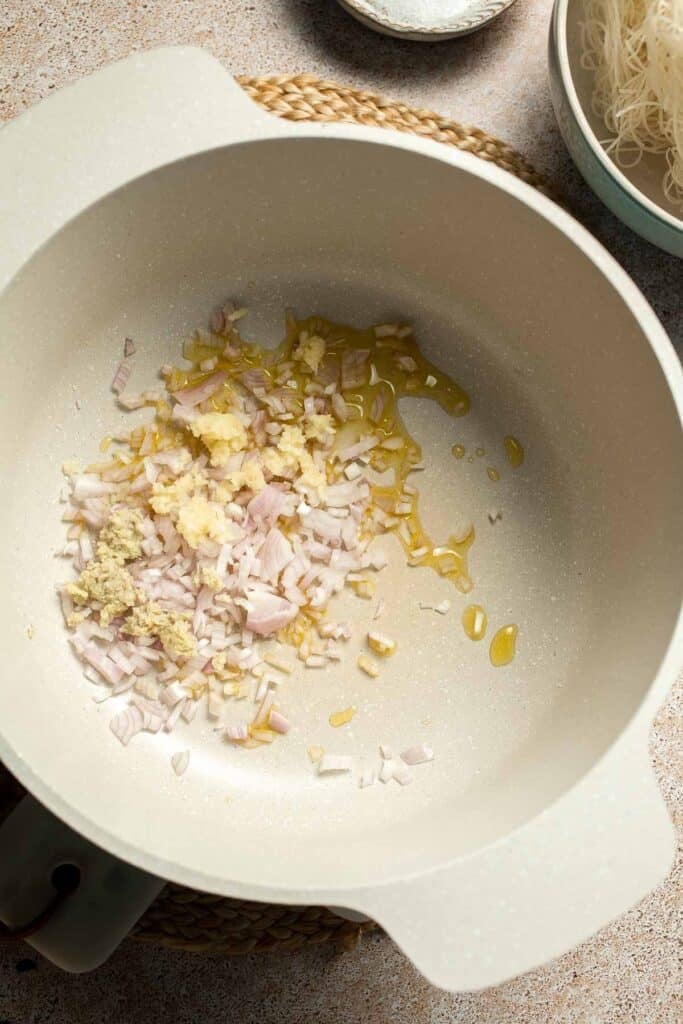
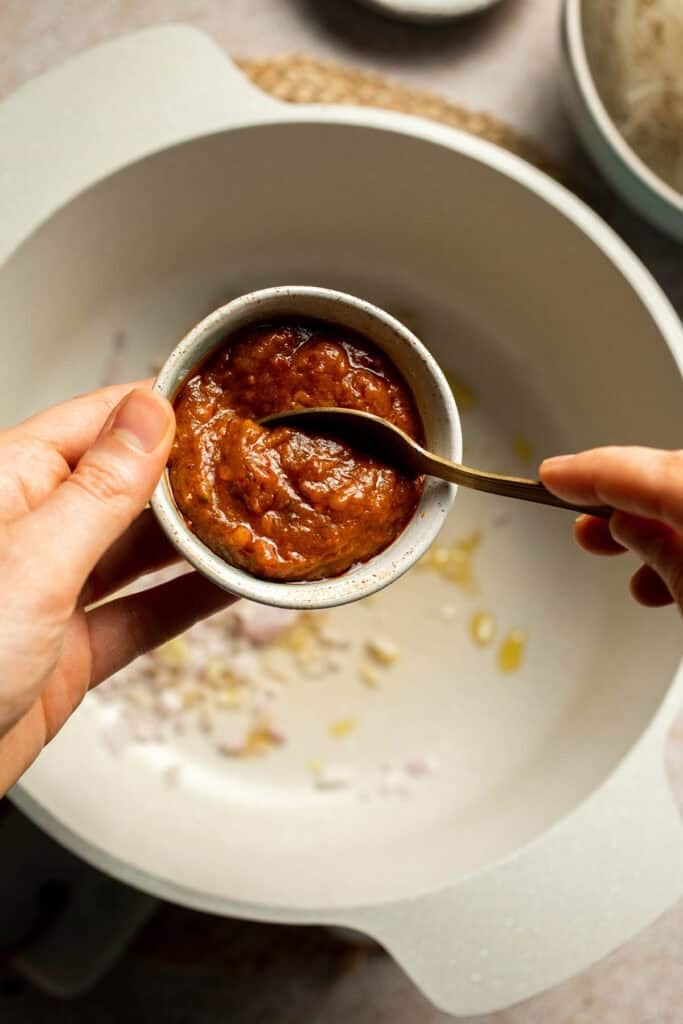


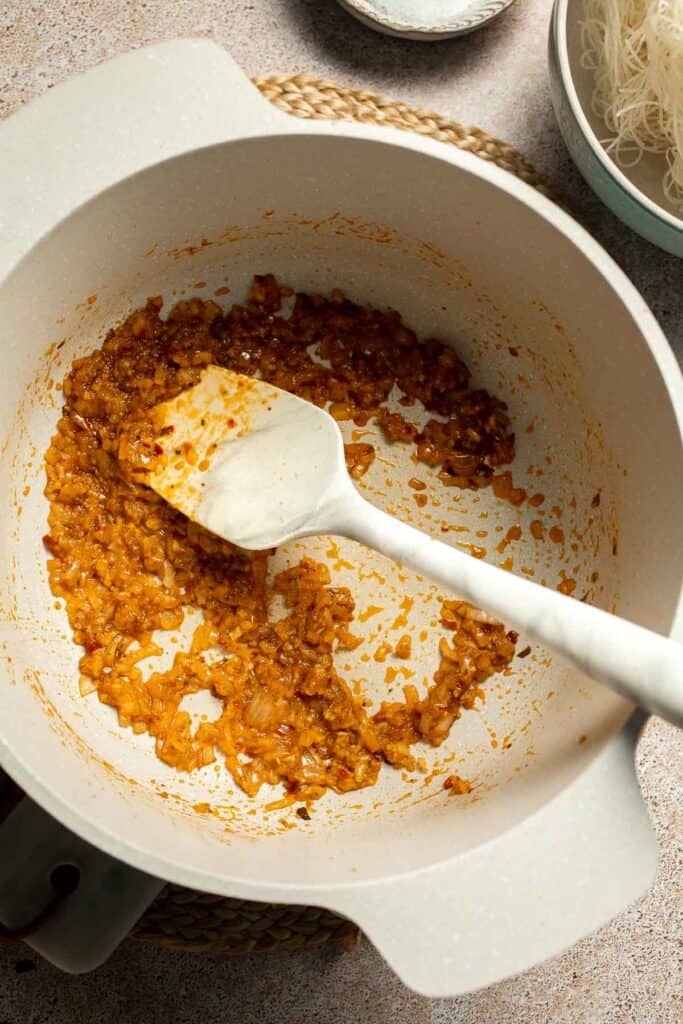
- Build the coconut broth. Stir in the coconut milk, vegetable stock, fish sauce, lime juice, and brown sugar (if using). Mix well, bring to a gentle boil, then reduce the heat to medium.
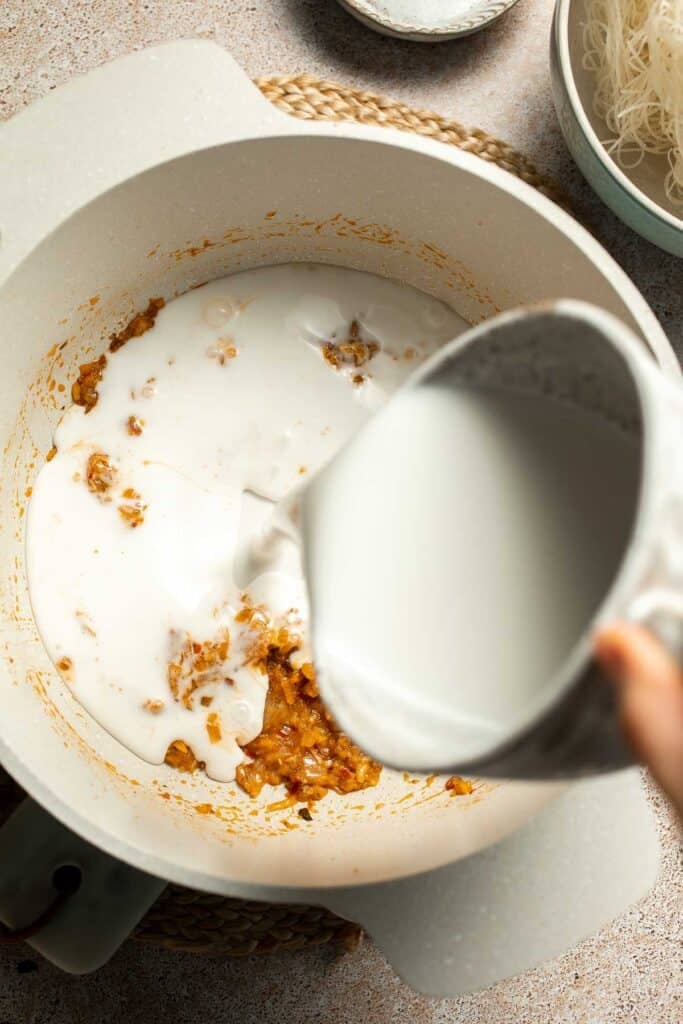
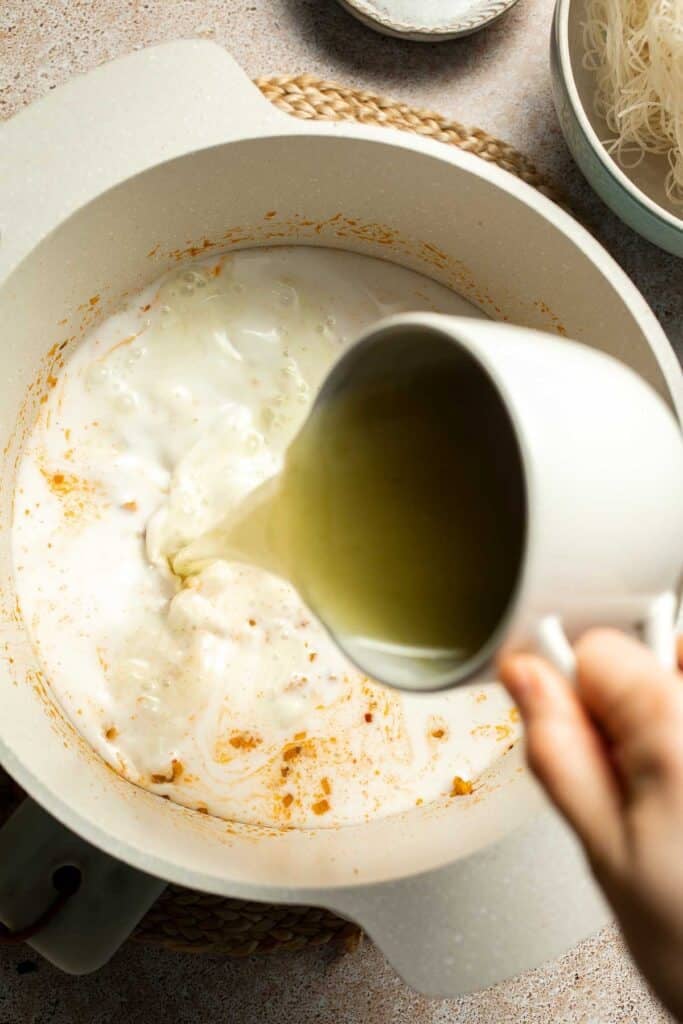
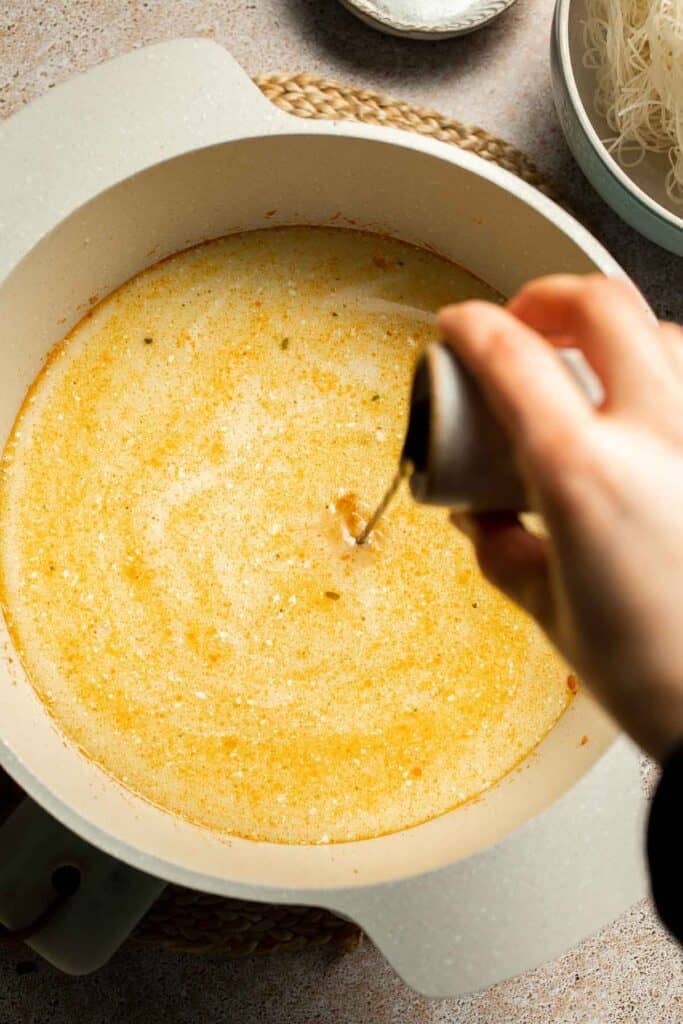

- Add the vegetables. Add the bell pepper, enoki mushrooms, and edamame. Simmer for 2-3 minutes until vegetables are just tender.
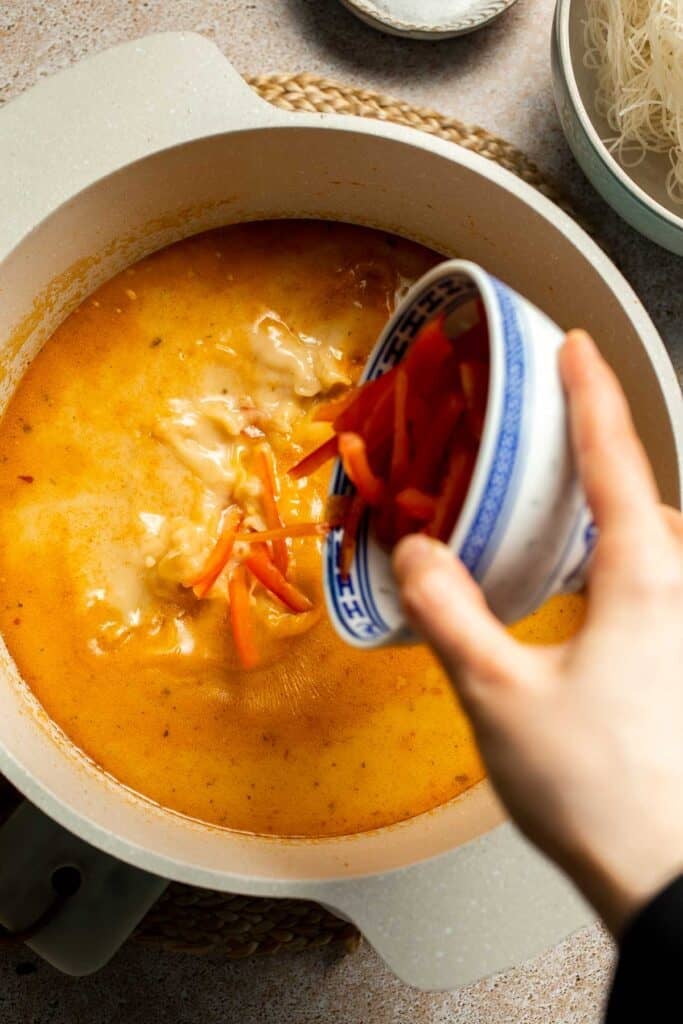

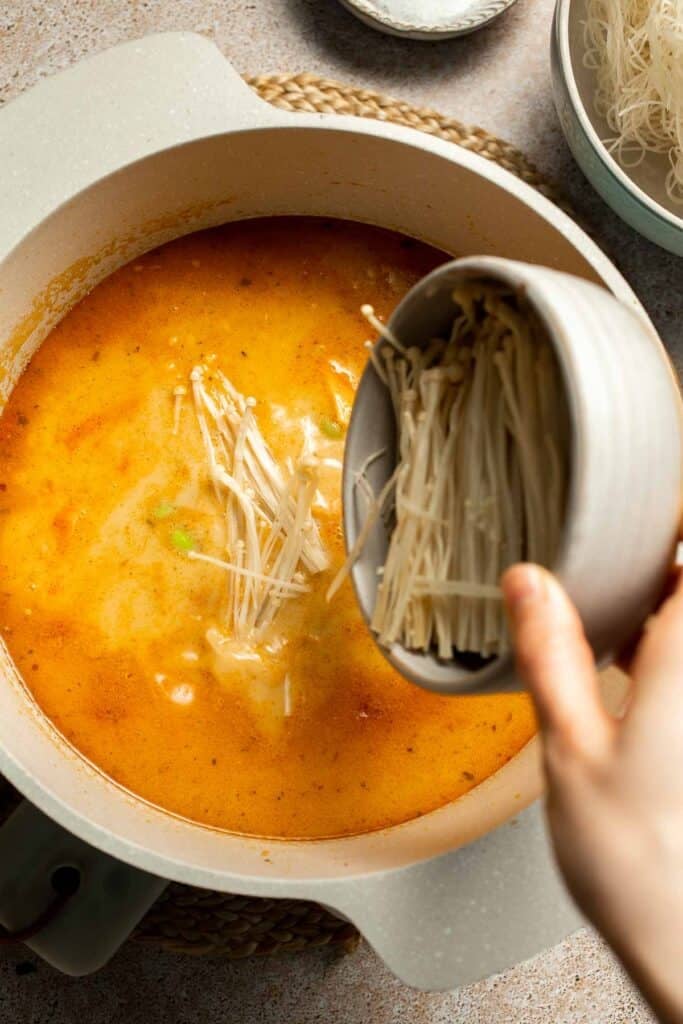
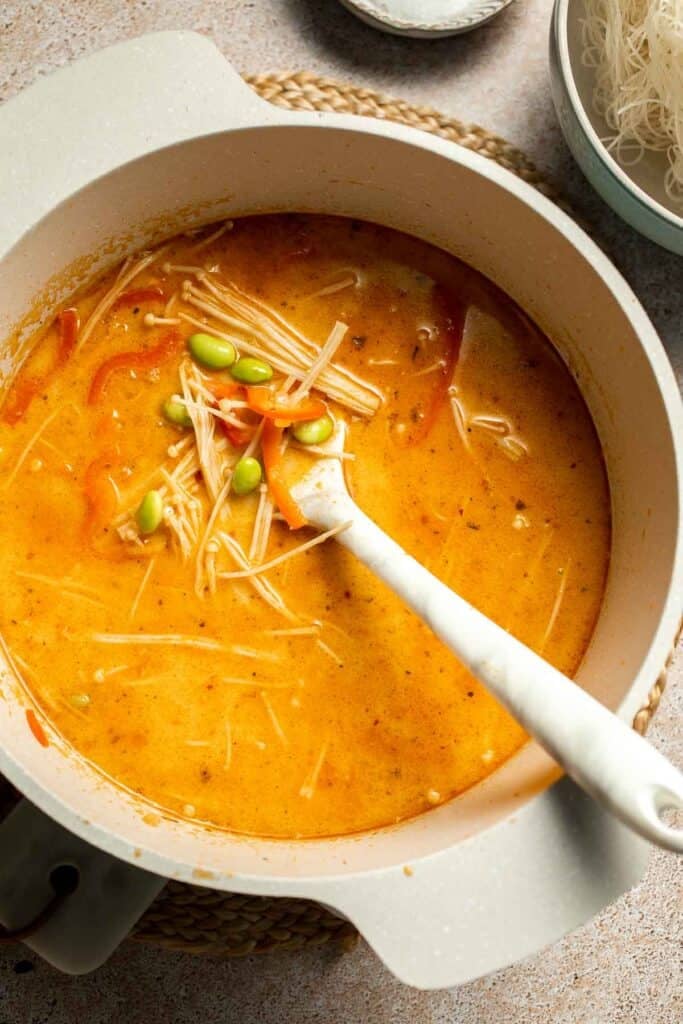
Step 3: Cook the noodles
In a separate pot, bring water to a boil and cook the noodles according to package instructions (usually 3-5 minutes) until al dente. Drain well.
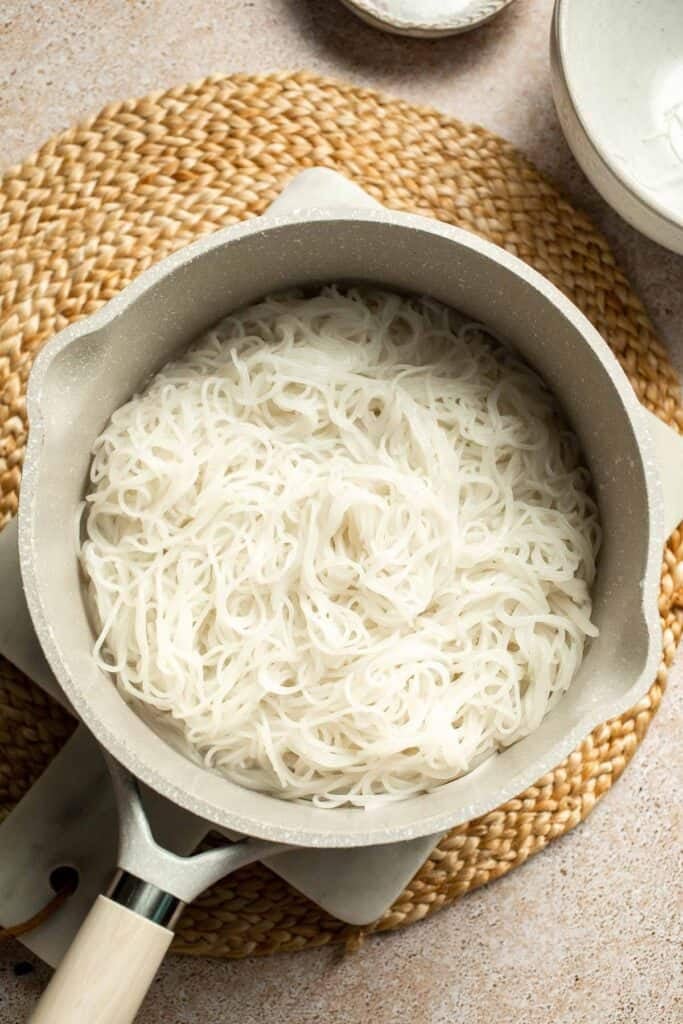
Step 4: Assemble the soup and serve
- Divide the noodles into two large bowls. Ladle the hot coconut curry broth and vegetables over the noodles. Top generously with the roasted chickpeas.
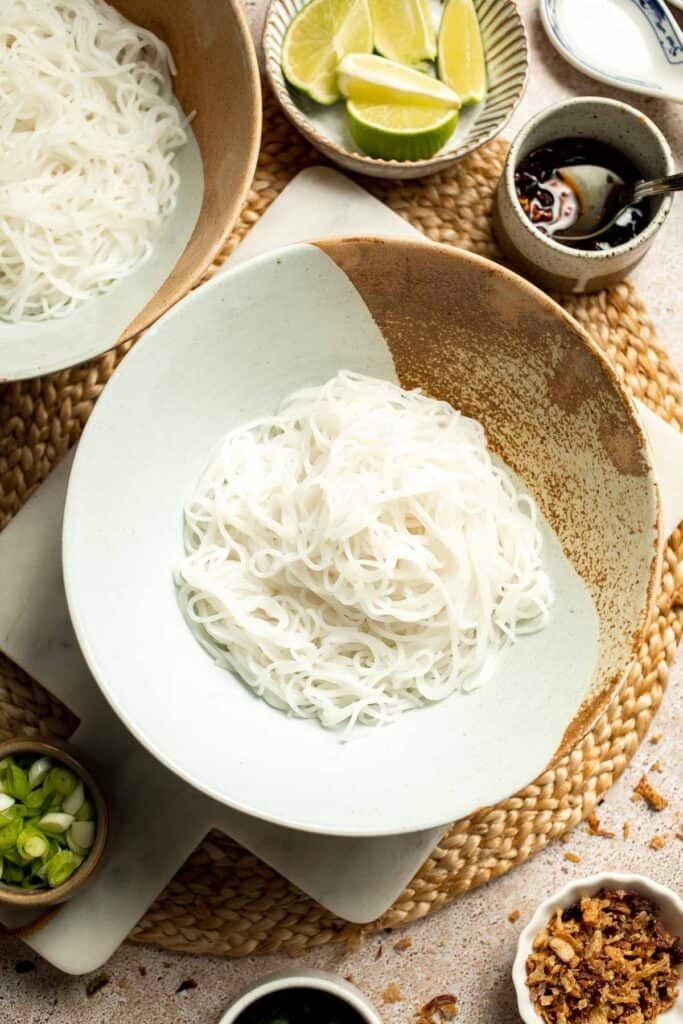
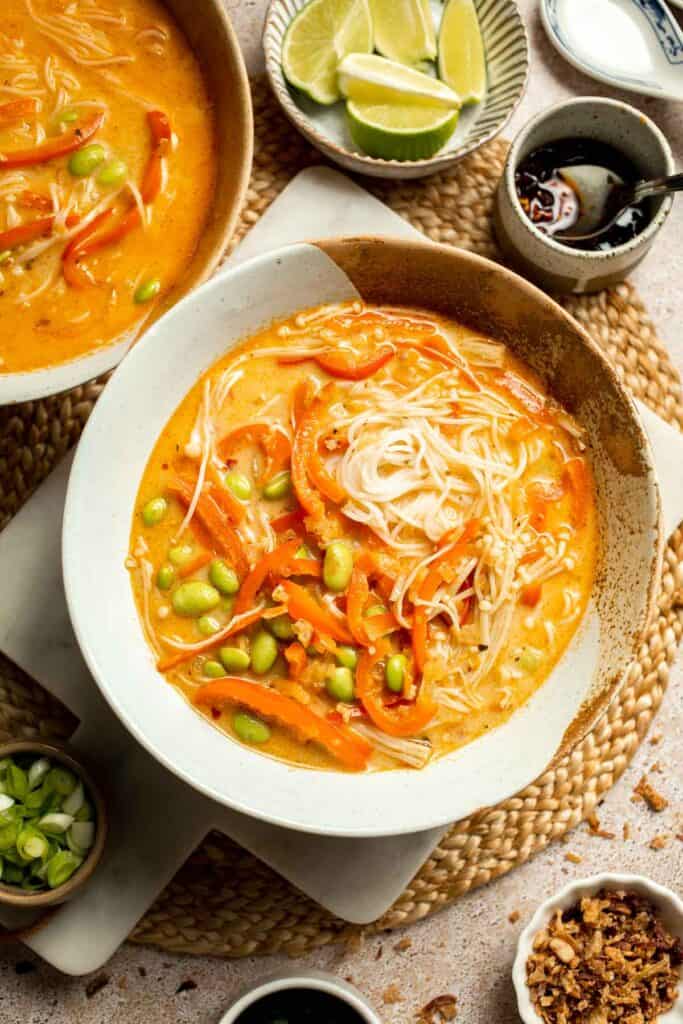
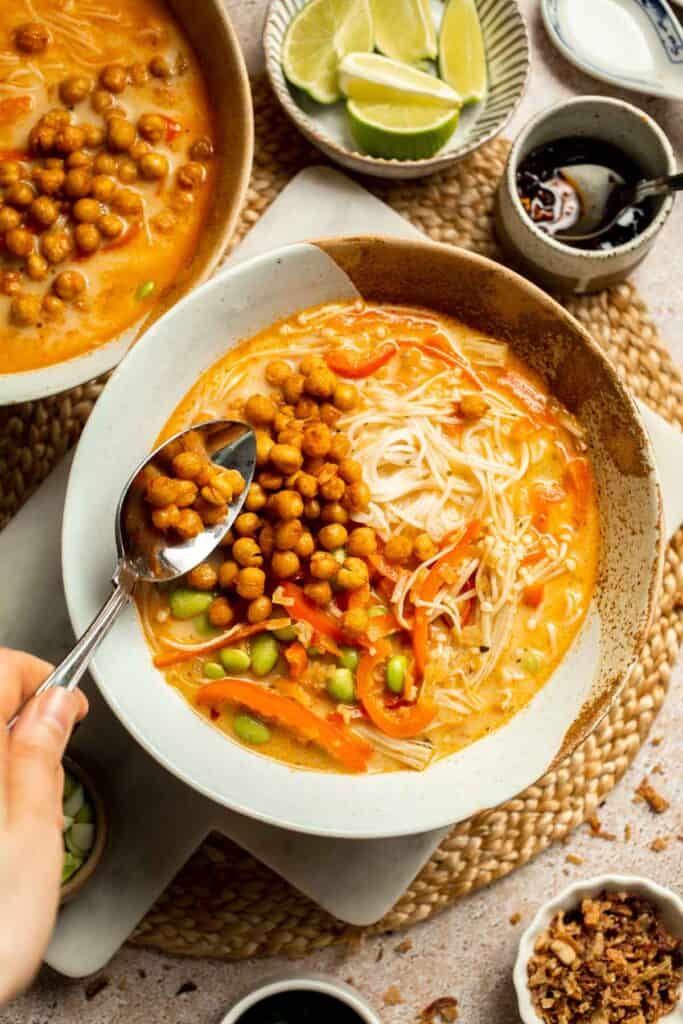
- Finish with fresh cilantro and your choice of garnishes (ie. a drizzle of chili oil, a squeeze of lime, or a sprinkle of crispy shallots or peanuts). Serve immediately while hot.


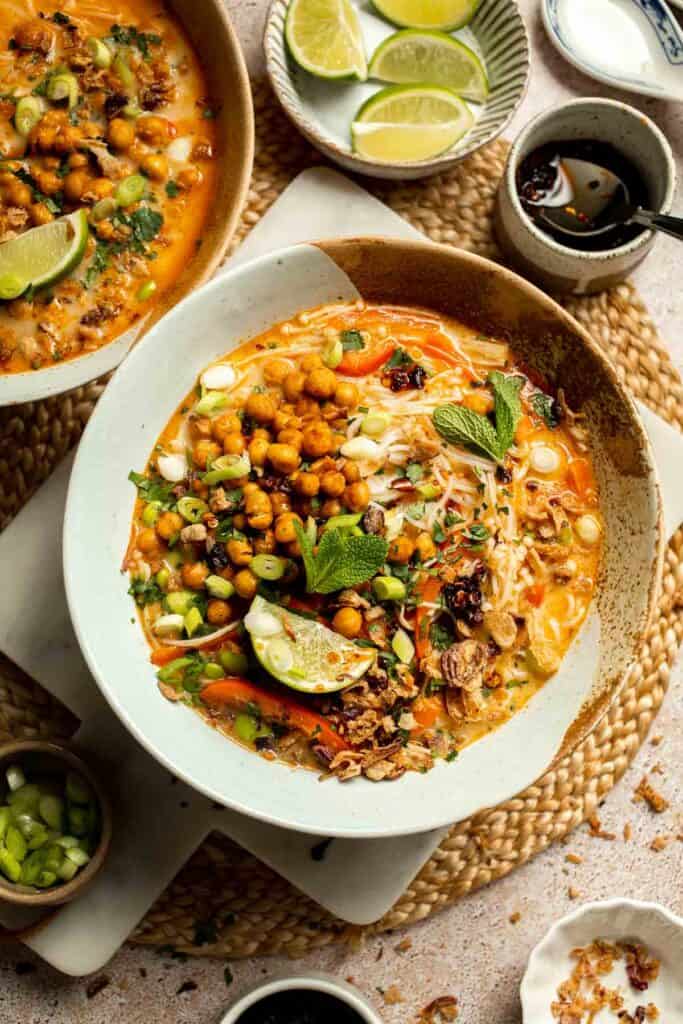
Expert Tip: Roast the Chickpeas for Crunch and Protein
Don't skip the roasted chickpeas! They add a satisfying crunch and a boost of protein that makes this soup feel complete.
More Tips and Tricks
- Adjust the spice. Add more or less curry paste depending on your heat tolerance. A little goes a long way!
- Don't overcook the noodles. Cook them al dente so they hold their texture when added to the hot soup.
- Balance the flavors. Lime juice and a touch of brown sugar balance the spice and richness of the coconut milk.
- Use quality coconut milk. Full-fat brands produce the creamiest broth and prevent separation.
- Garnish generously. Cilantro, Thai basil, and a drizzle of chili oil elevate presentation and flavor.
- Authentic touch. Want to make your soup taste even closer to Tom Kha Gai? Toss in a couple of kaffir lime leaves, a few lemongrass stalks, or a few slices of galangal while simmering the broth. Remove them before serving for a perfectly infused, aromatic flavor.
- Spice it your way. Add extra chillies or a drizzle of chili oil to turn up the heat, or keep it mild for a cozy, comforting bowl.
Recipe Variations
- Make it vegan. Skip the fish sauce and use soy sauce or tamari for a 100% plant-based version.
- Add tofu or tempeh. Pan-fry cubes and add them to the soup in place of chickpeas for extra protein.
- Add shrimp. Stir in peeled shrimp during the last 3-4 minutes of simmering until they turn pink and opaque. The mild sweetness of shrimp pairs perfectly with the spicy coconut broth.
- Use chicken. Add thinly sliced boneless chicken breast or thigh to the simmering broth before the vegetables. It cooks quickly and soaks up the curry flavor beautifully.
- Try different noodles. Use soba, udon, or even spaghetti if that's what you have - just adjust cook times.
- Boost the veggies. Add spinach, bok choy, or broccoli for more texture and color.
- Make it creamy-spicy. Stir in a spoonful of peanut butter or add extra chillies or a drizzle of chili oil for a Thai-inspired twist.
- Add lemongrass. Simmer a couple fresh lemongrass stalks in the broth for extra authentic Thai aroma.

Storage
How to Store
Allow leftovers to cool completely, then transfer to an airtight container. Store the soup and noodles separately in the refrigerator for up to 3-4 days.
How to Reheat
Reheat gently on the stove over medium heat until warmed through. If the broth thickens, add a splash of coconut milk or stock to loosen it.
How to Freeze
Freeze the broth separately (without noodles) for up to 2 months. Thaw overnight in the fridge, reheat on the stove, and add freshly cooked noodles before serving.
How to Serve
Thai Coconut Soup with Chickpeas is a full meal in one bowl. Serve it hot, topped with roasted chickpeas, cilantro, and a drizzle of chili oil for heat. Add a squeeze of lime and a sprinkle of toasted peanuts or crispy shallots for crunch. Pair with Spring Rolls, Thai Mango Salad, or Fried Tofu to round out your meal - it's pure comfort in every bite.
These are my favorite sides to pair with this coconut curry noodle soup:
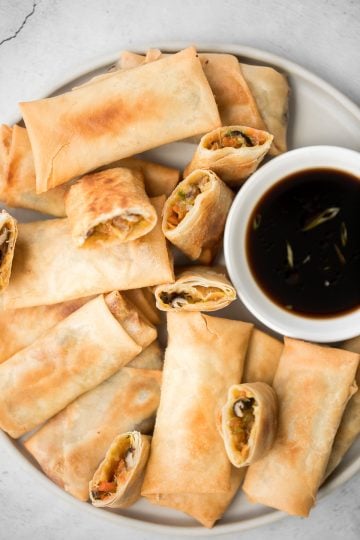
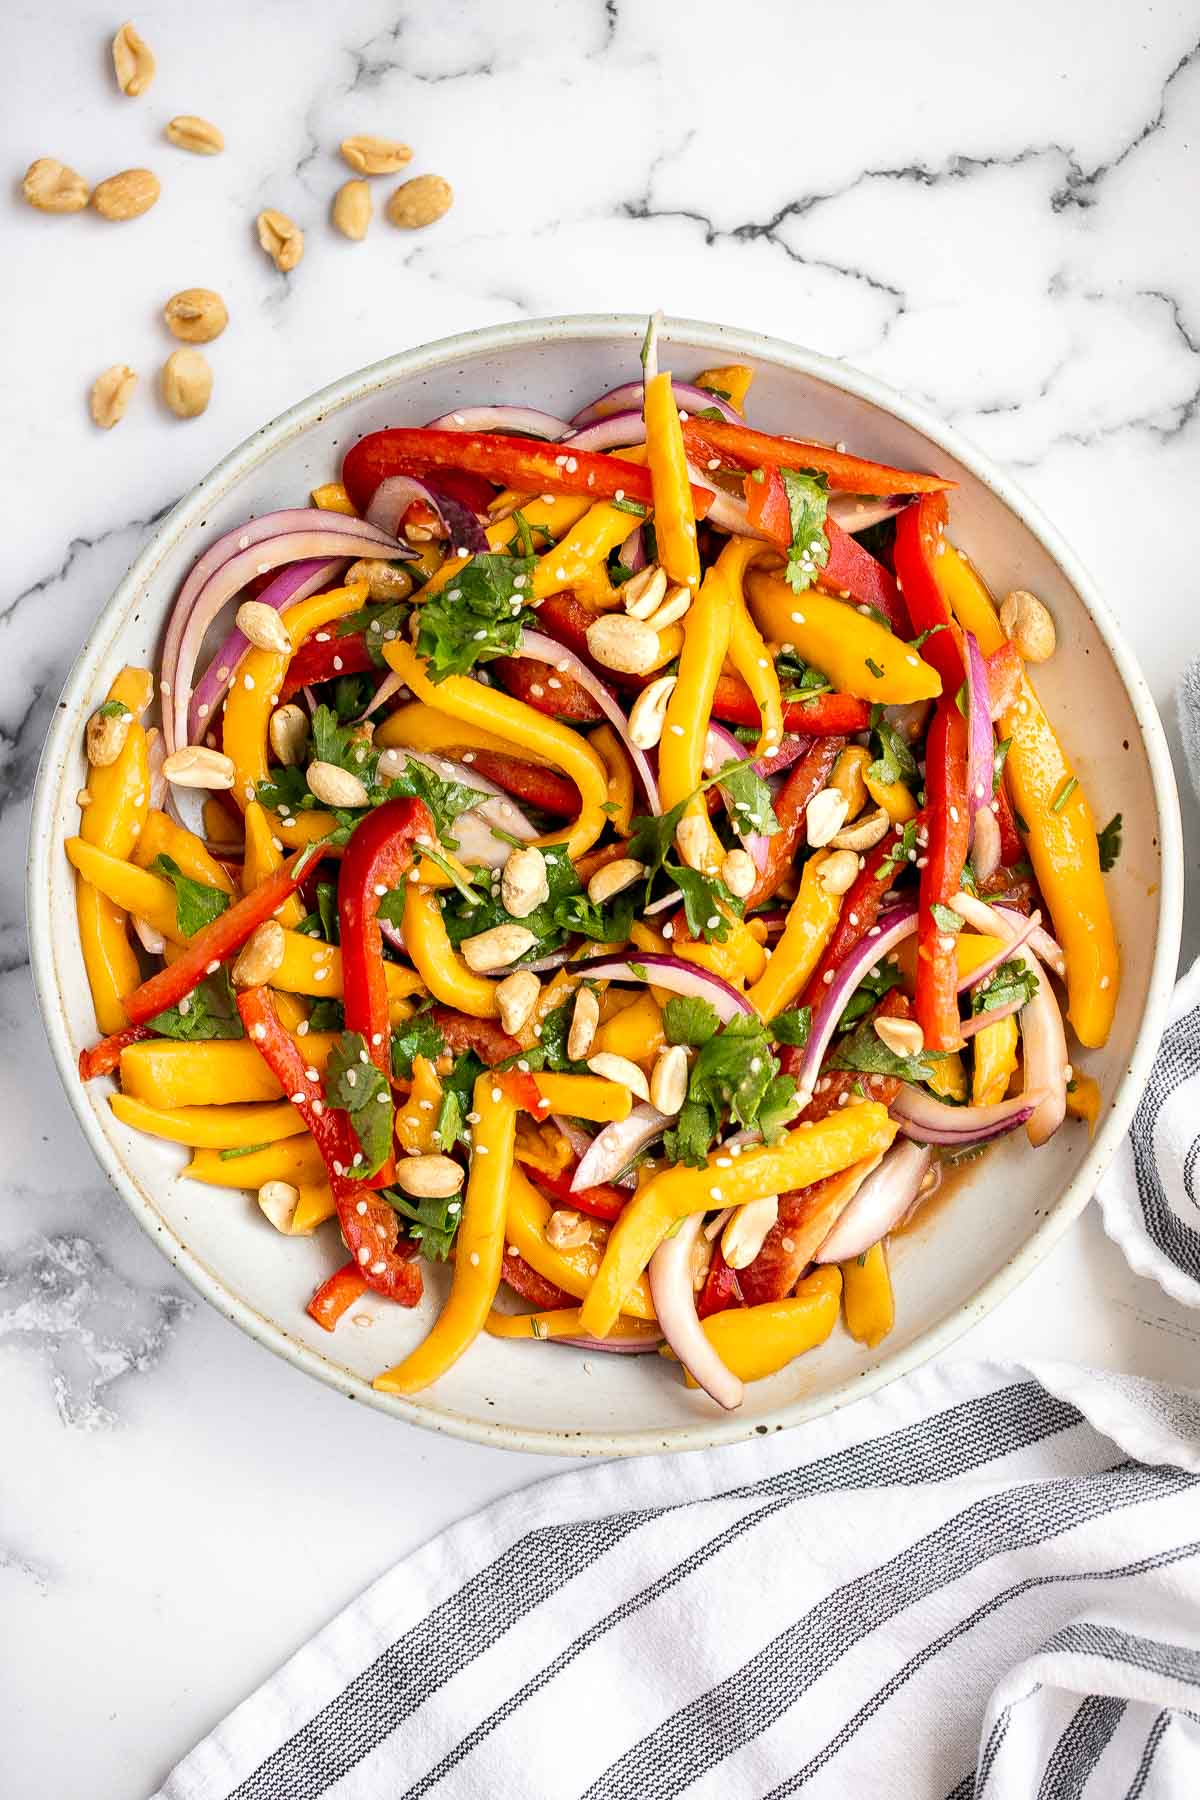
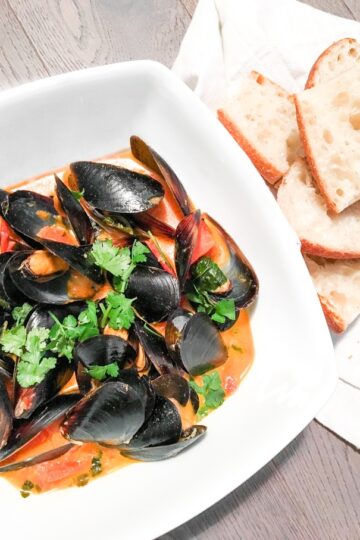
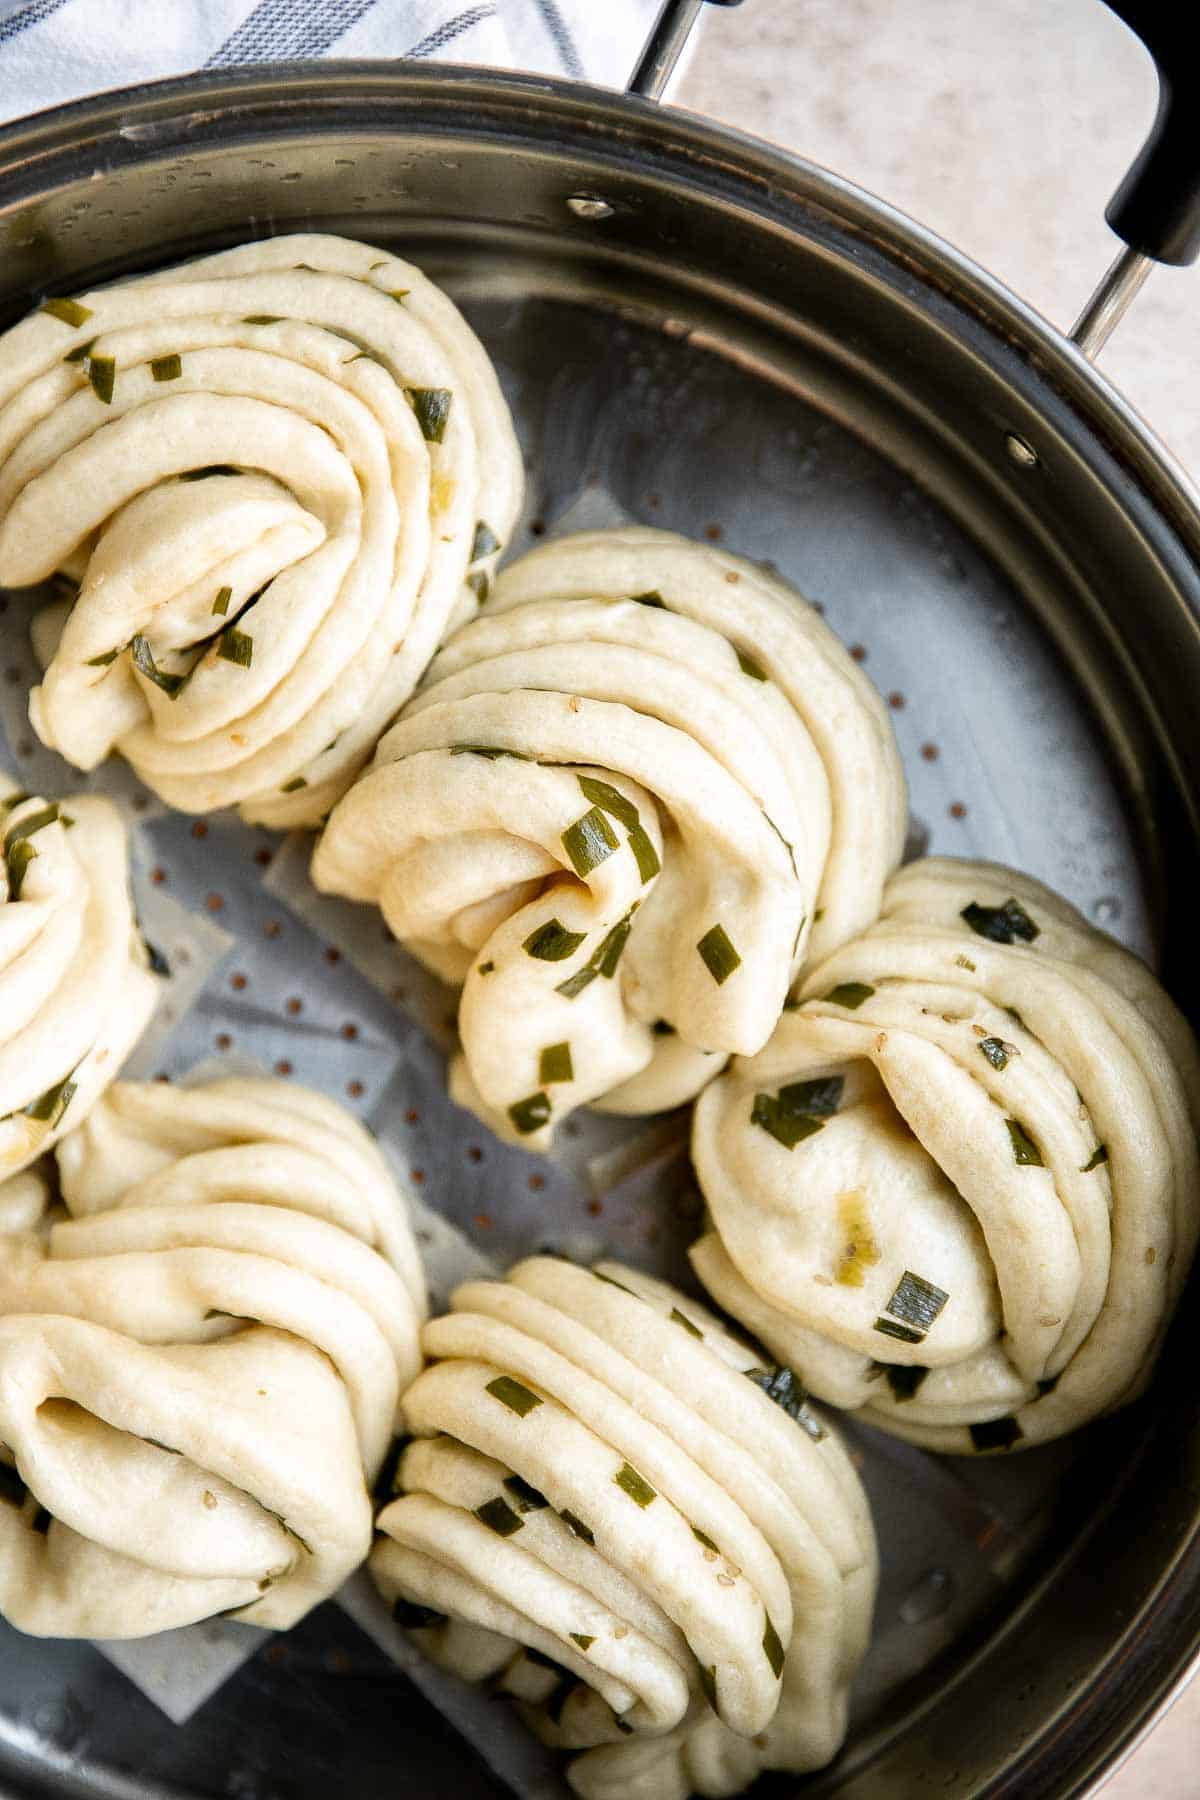
FAQ
Thai coconut soup, also known as Tom Kha, is made with coconut milk, Thai curry paste, ginger, garlic, lime juice, and vegetable or chicken stock. These ingredients come together to create a creamy, fragrant, and slightly spicy broth that's both comforting and refreshing. Many versions also include vegetables like mushrooms, bell peppers, and herbs such as cilantro or Thai basil. This recipe adds noodles and roasted chickpeas for extra heartiness, turning the traditional soup into a complete, satisfying meal.
It can be! The spice level depends on how much Thai red curry paste you use. Start with less and adjust to taste. The coconut milk also balances the heat well.
Thai coconut soup is a beautiful balance of creamy, spicy, tangy, and slightly sweet. The coconut milk gives it richness, while red curry paste adds heat and depth. Lime juice brightens the broth, and fresh herbs bring a burst of freshness that ties everything together. It's the kind of soup that feels indulgent yet light enough to enjoy year-round.
While both Tom Yum and Thai coconut soup (Tom Kha) are beloved Thai dishes, they're quite different in flavor and texture. Tom Yum has a clear, tangy, and spicy broth made with lemongrass, lime leaves, and chili paste - it's light and zesty. Tom Kha, on the other hand, includes coconut milk, which makes the broth richer, creamier, and slightly sweet. Think of Tom Yum as bright and fiery, while Tom Kha is warm, mellow, and soothing with a hint of spice.
Yes! Thai coconut soup can be very nutritious, especially when made with wholesome ingredients. Coconut milk provides healthy fats, while vegetables and chickpeas add fiber, protein, and antioxidants. Using fresh herbs, lime juice, and ginger boosts the soup with anti-inflammatory and immune-supporting benefits. If you'd like to make it lighter, you can use light coconut milk or reduce the curry paste to lower the fat and sodium without losing flavor.
In Thai cuisine, soups like Tom Kha and Tom Yum are often served as part of a larger meal alongside rice, stir-fried dishes, or grilled meats. Thai people usually enjoy soup as a side or complementary dish rather than a standalone meal. It's common to eat soup with steamed jasmine rice, which helps balance the rich and spicy flavors of the broth. You might also find it paired with crispy spring rolls or green papaya salad for a balanced meal with different textures.
Yes, simply replace fish sauce with soy sauce or tamari and ensure your curry paste is vegan (some contain shrimp paste). The rest of the ingredients are naturally plant-based.
More Noodle Soup Recipes
Looking for other recipes like this? Try these:
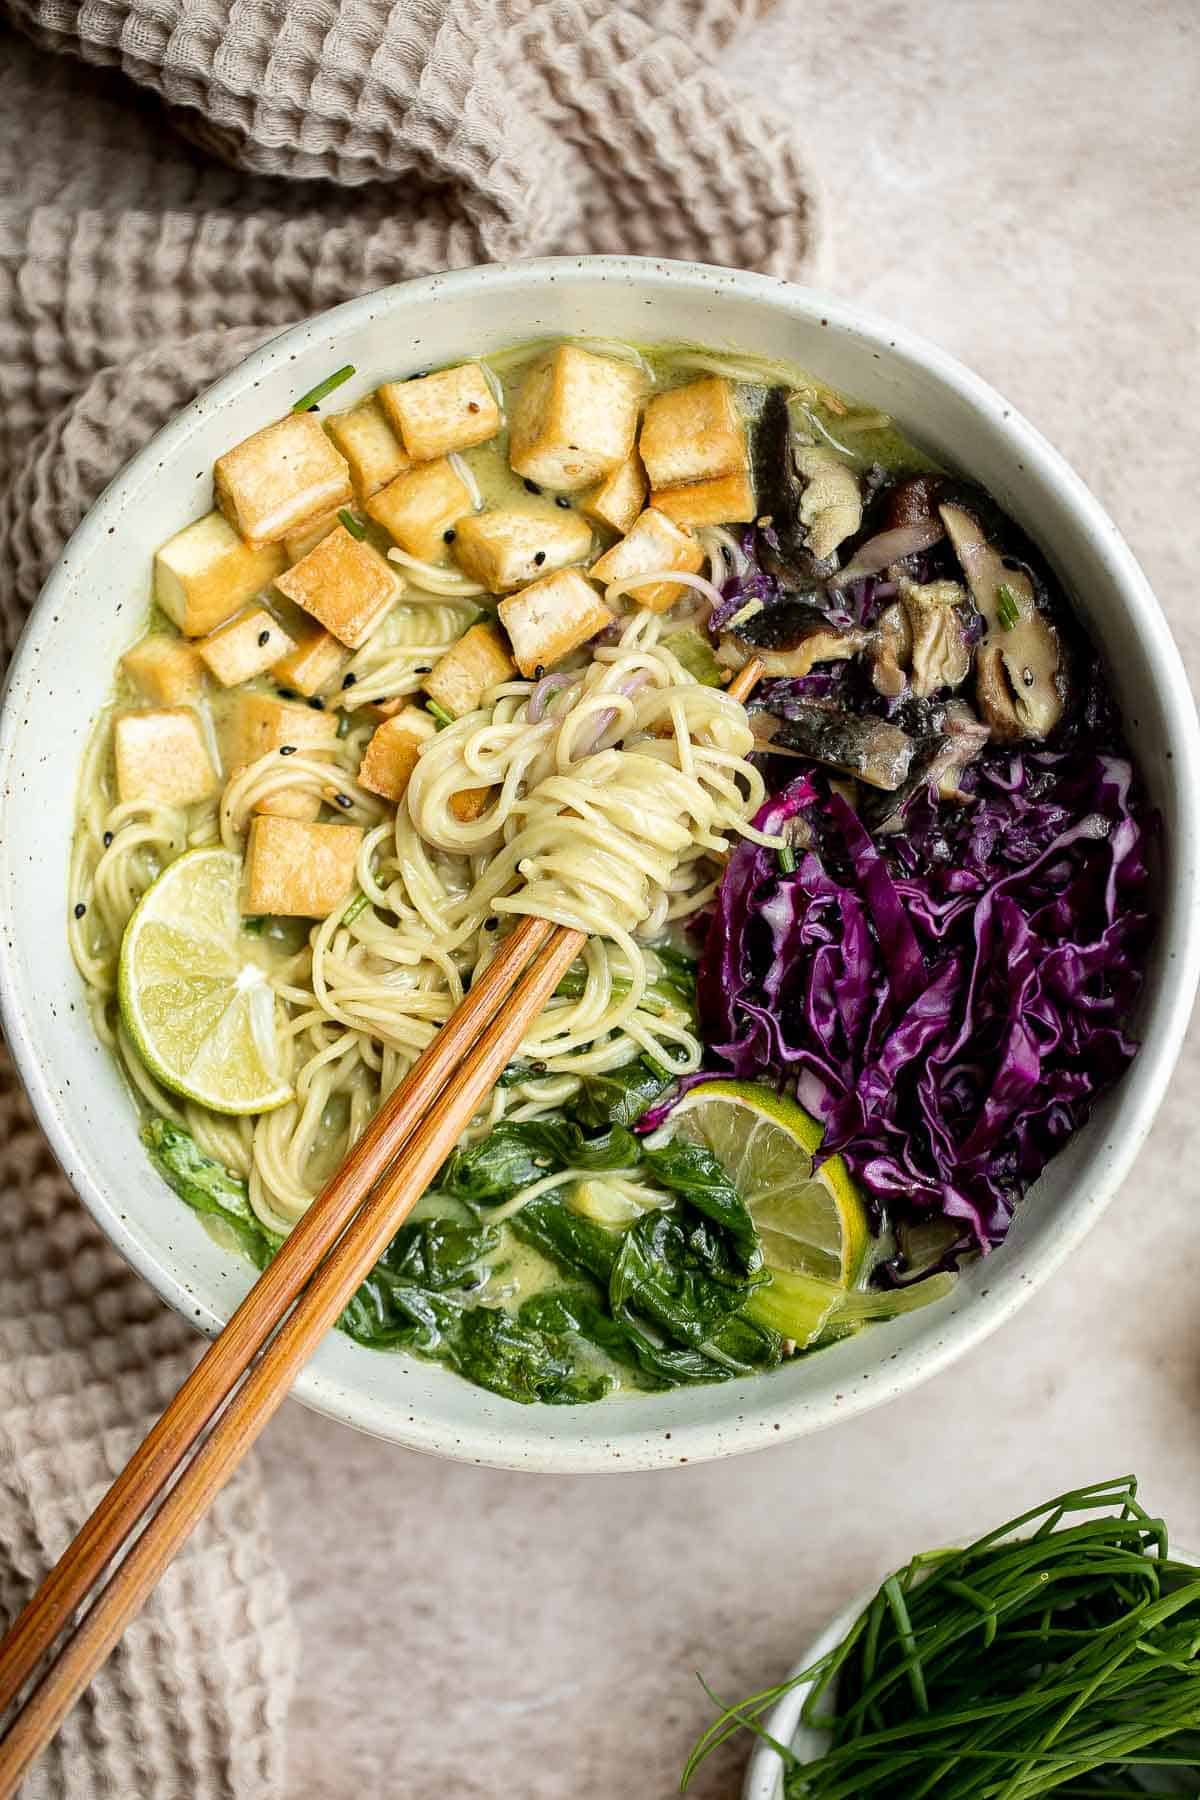


Tried this recipe?
I'd love to hear what you think! Leave a comment and rating below to share your feedback. Your reviews help others discover this recipe and help me keep creating more free recipes for you. Snap a photo and tag me on social media @aheadofthyme too.

- 1
- 2
- 3
- …
- 40
- Next Page »