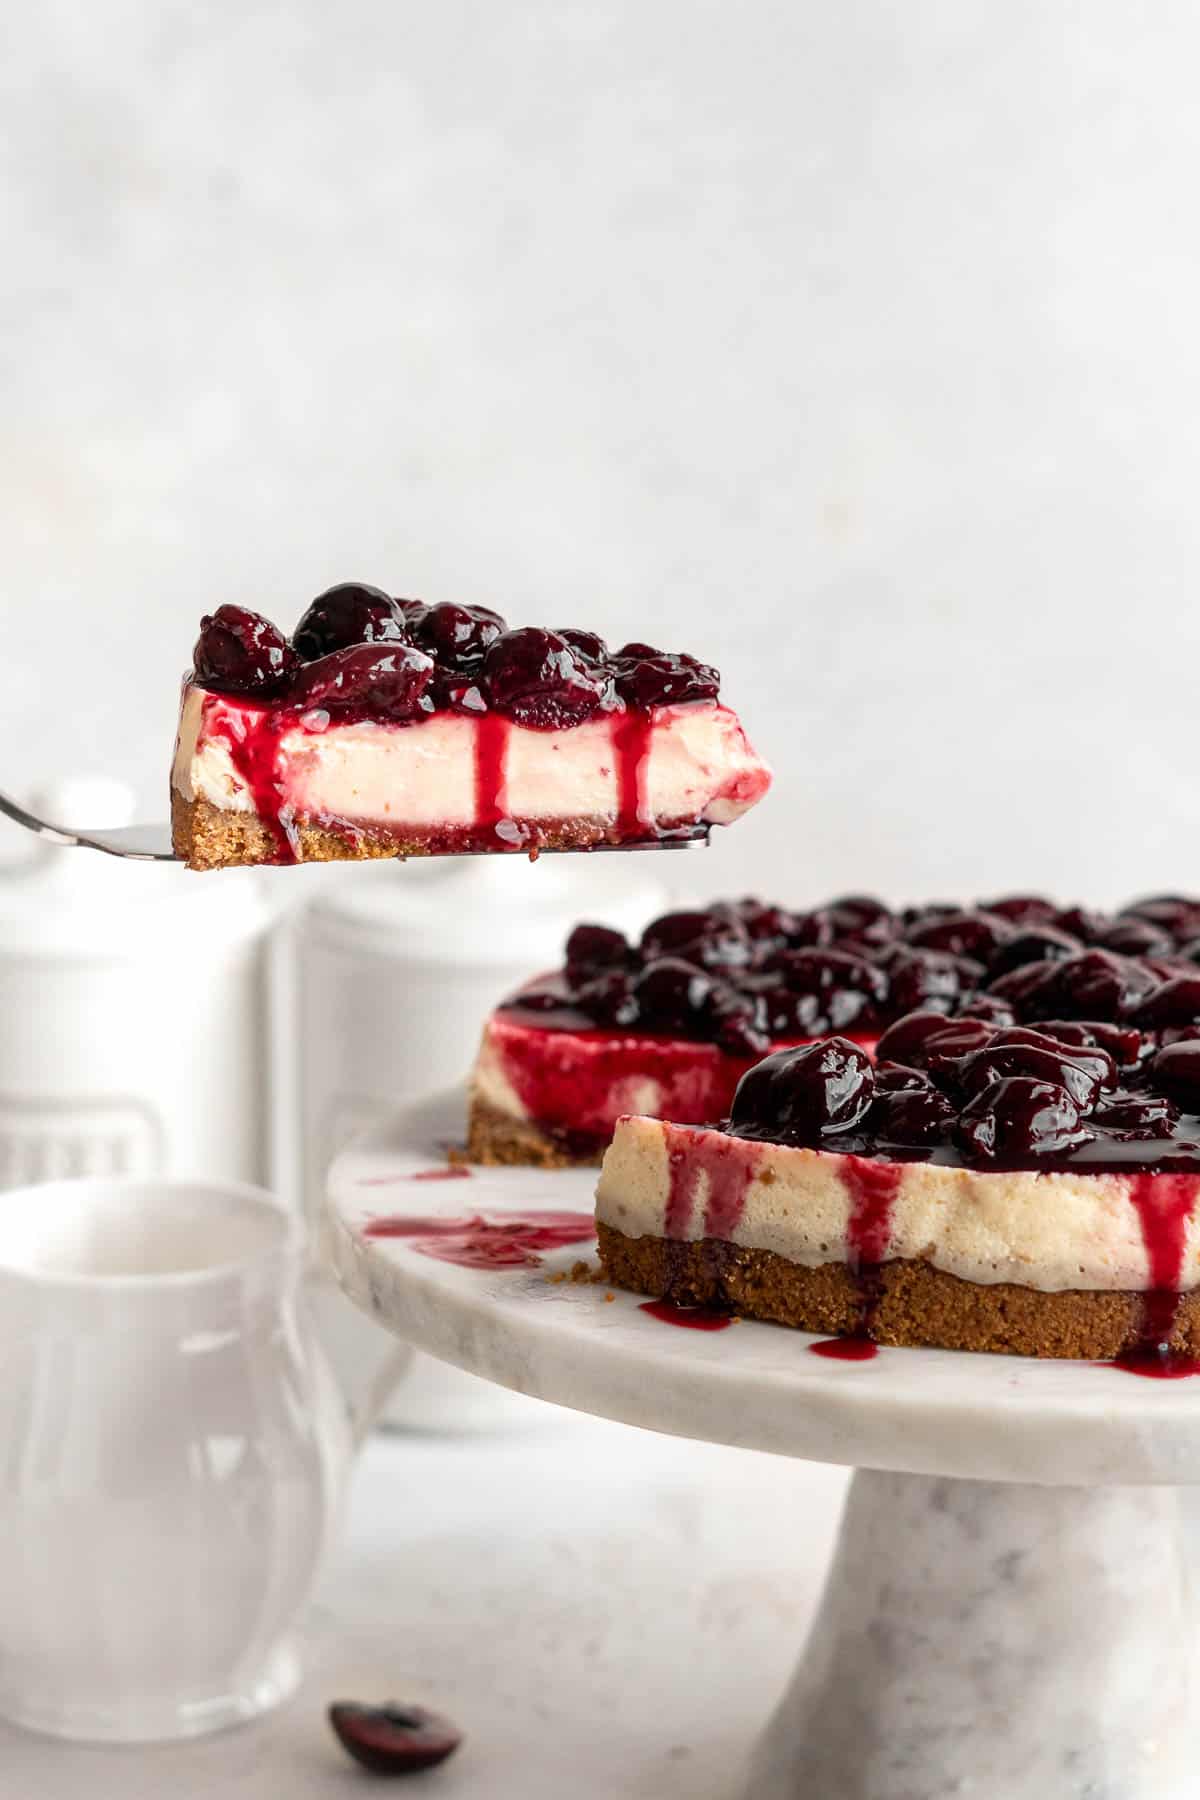
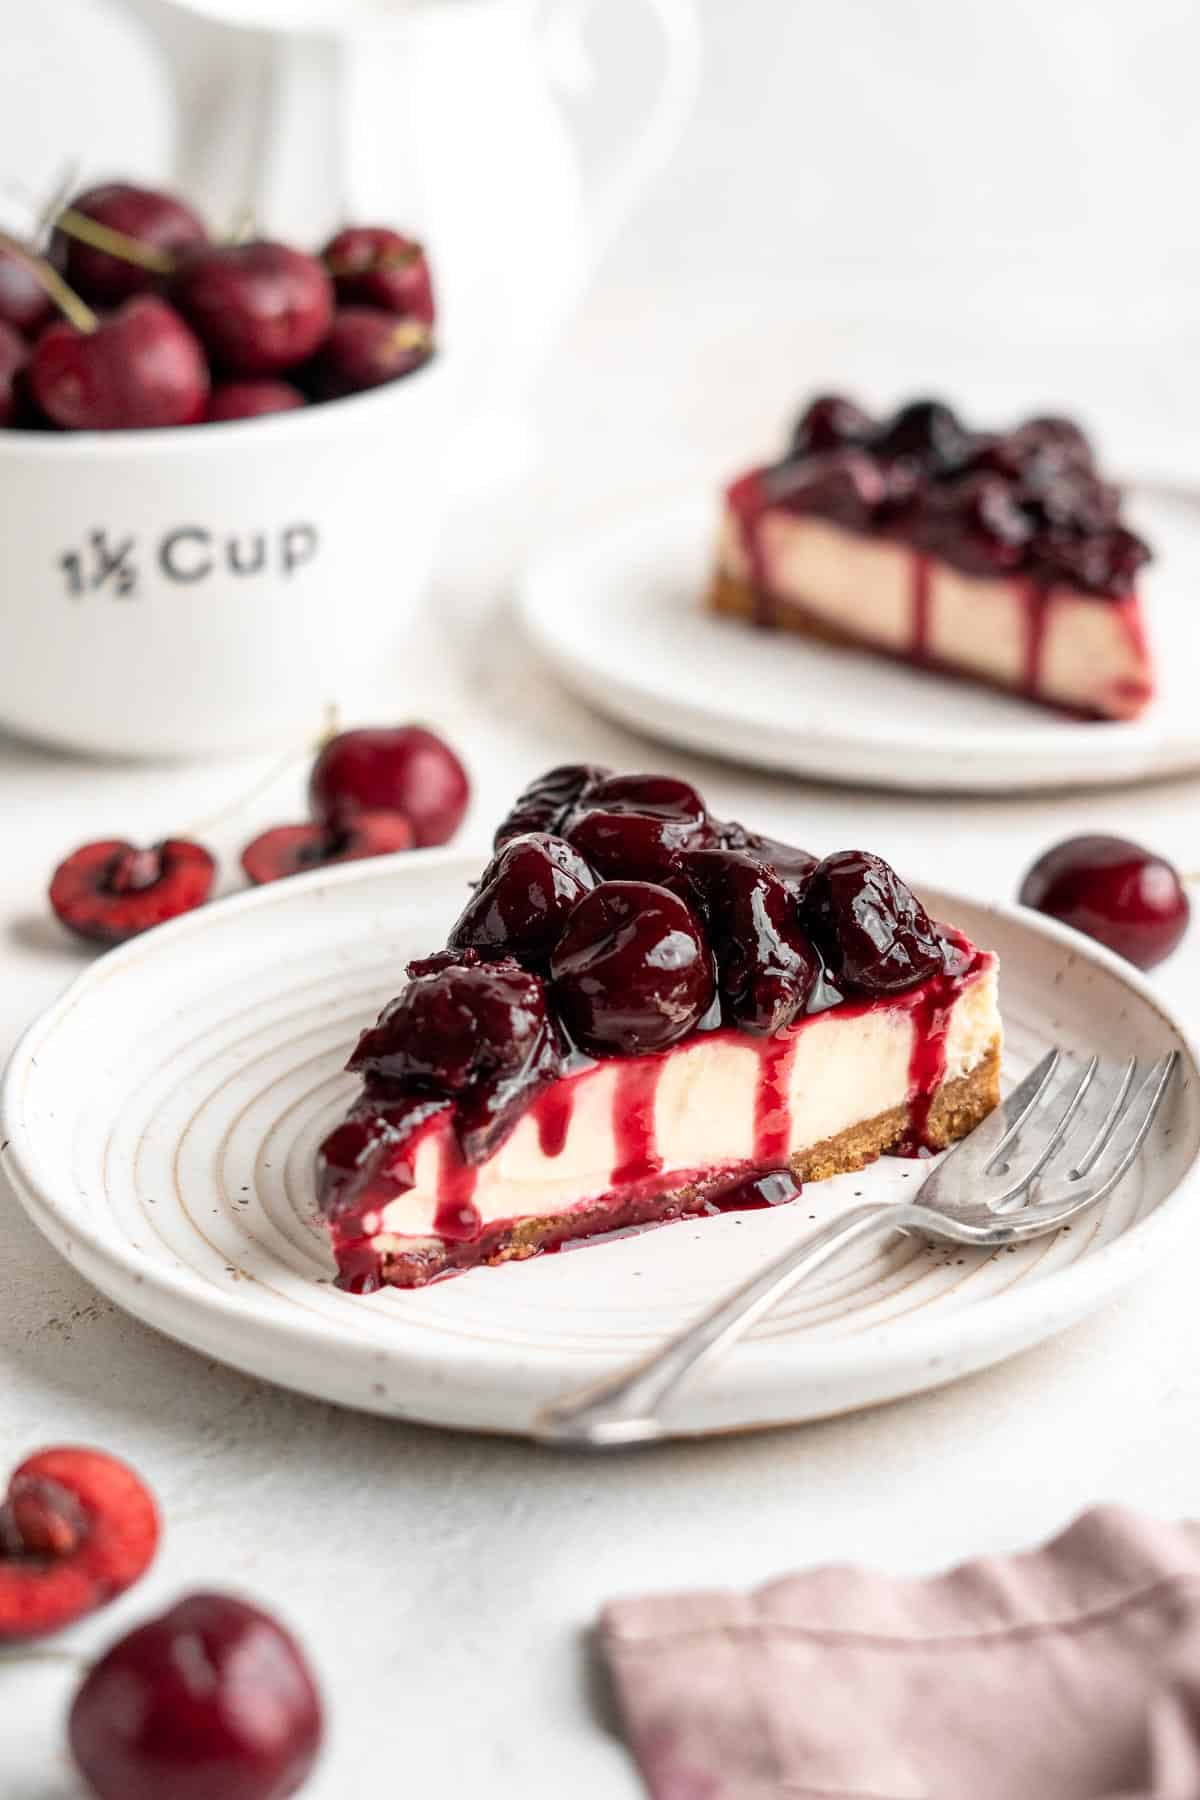
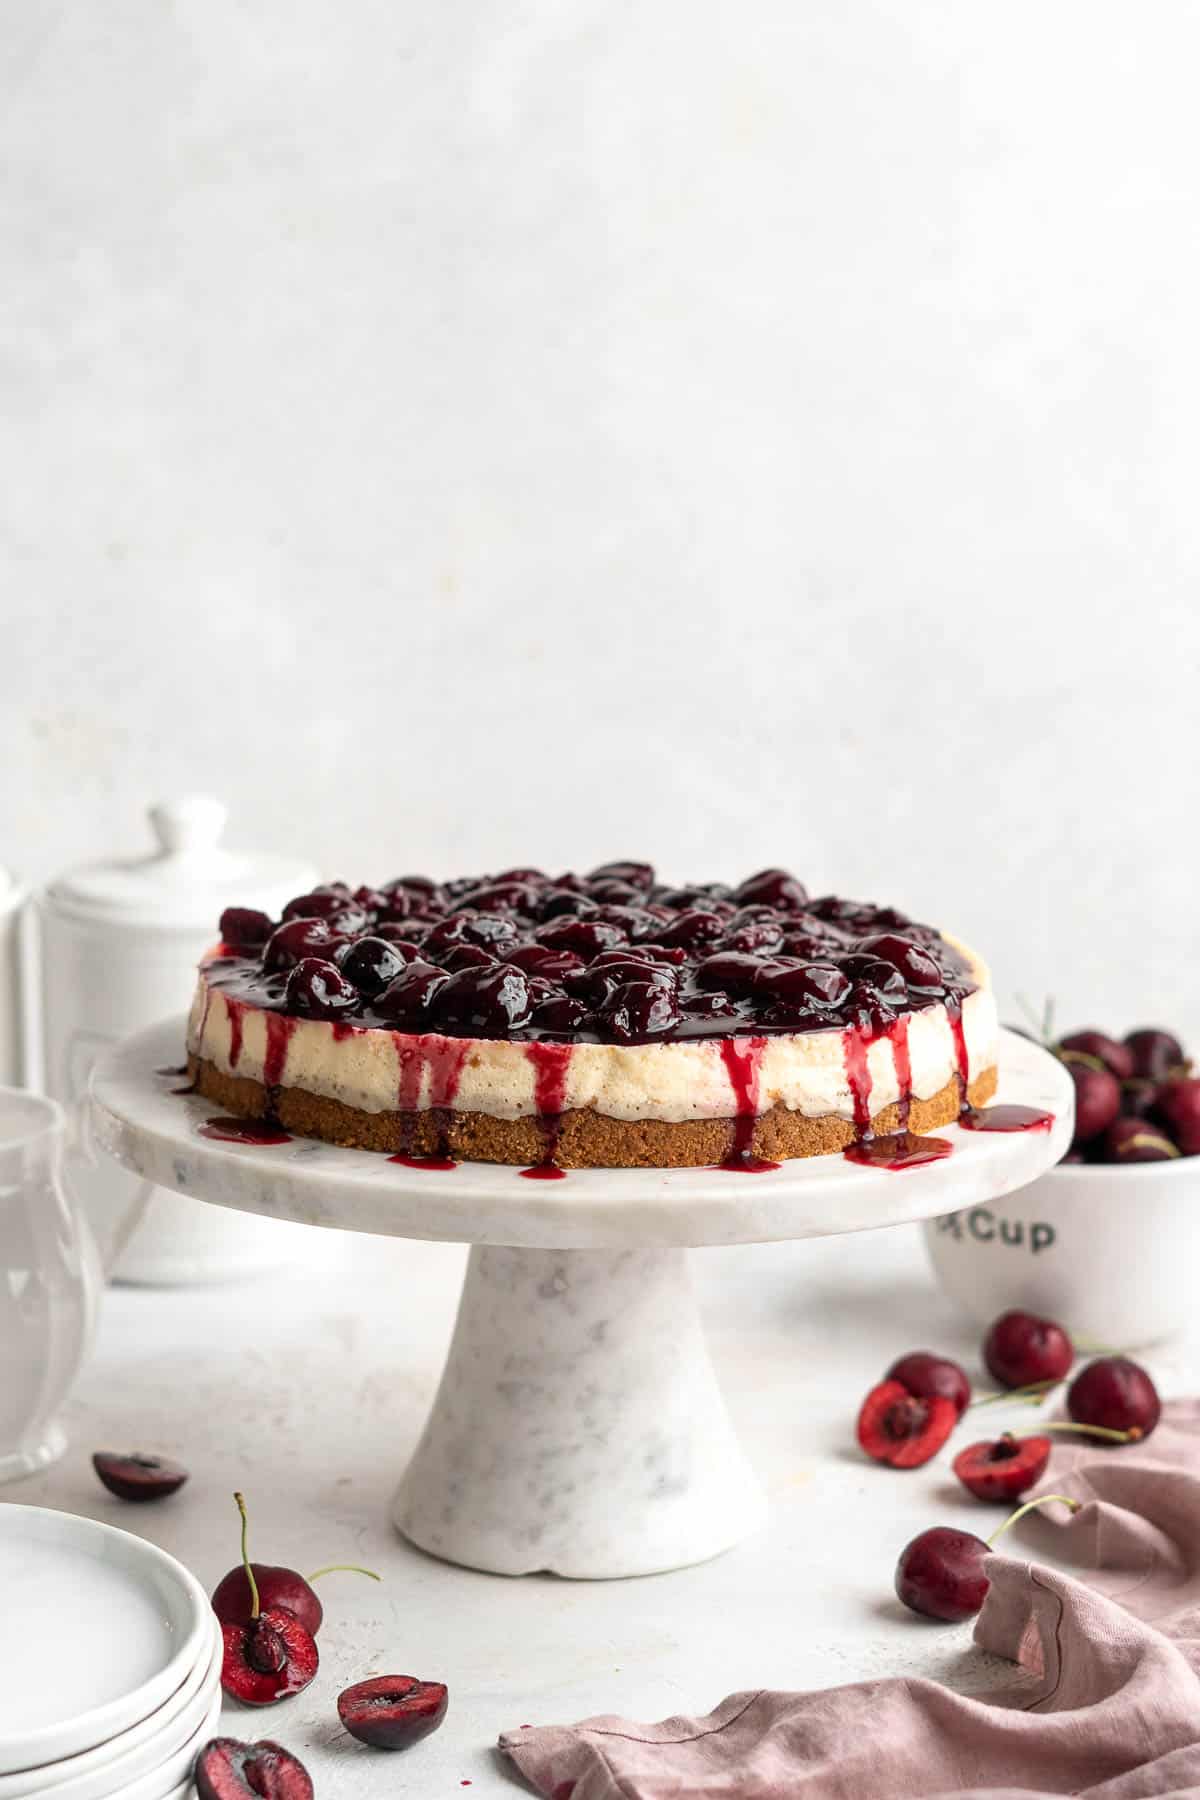
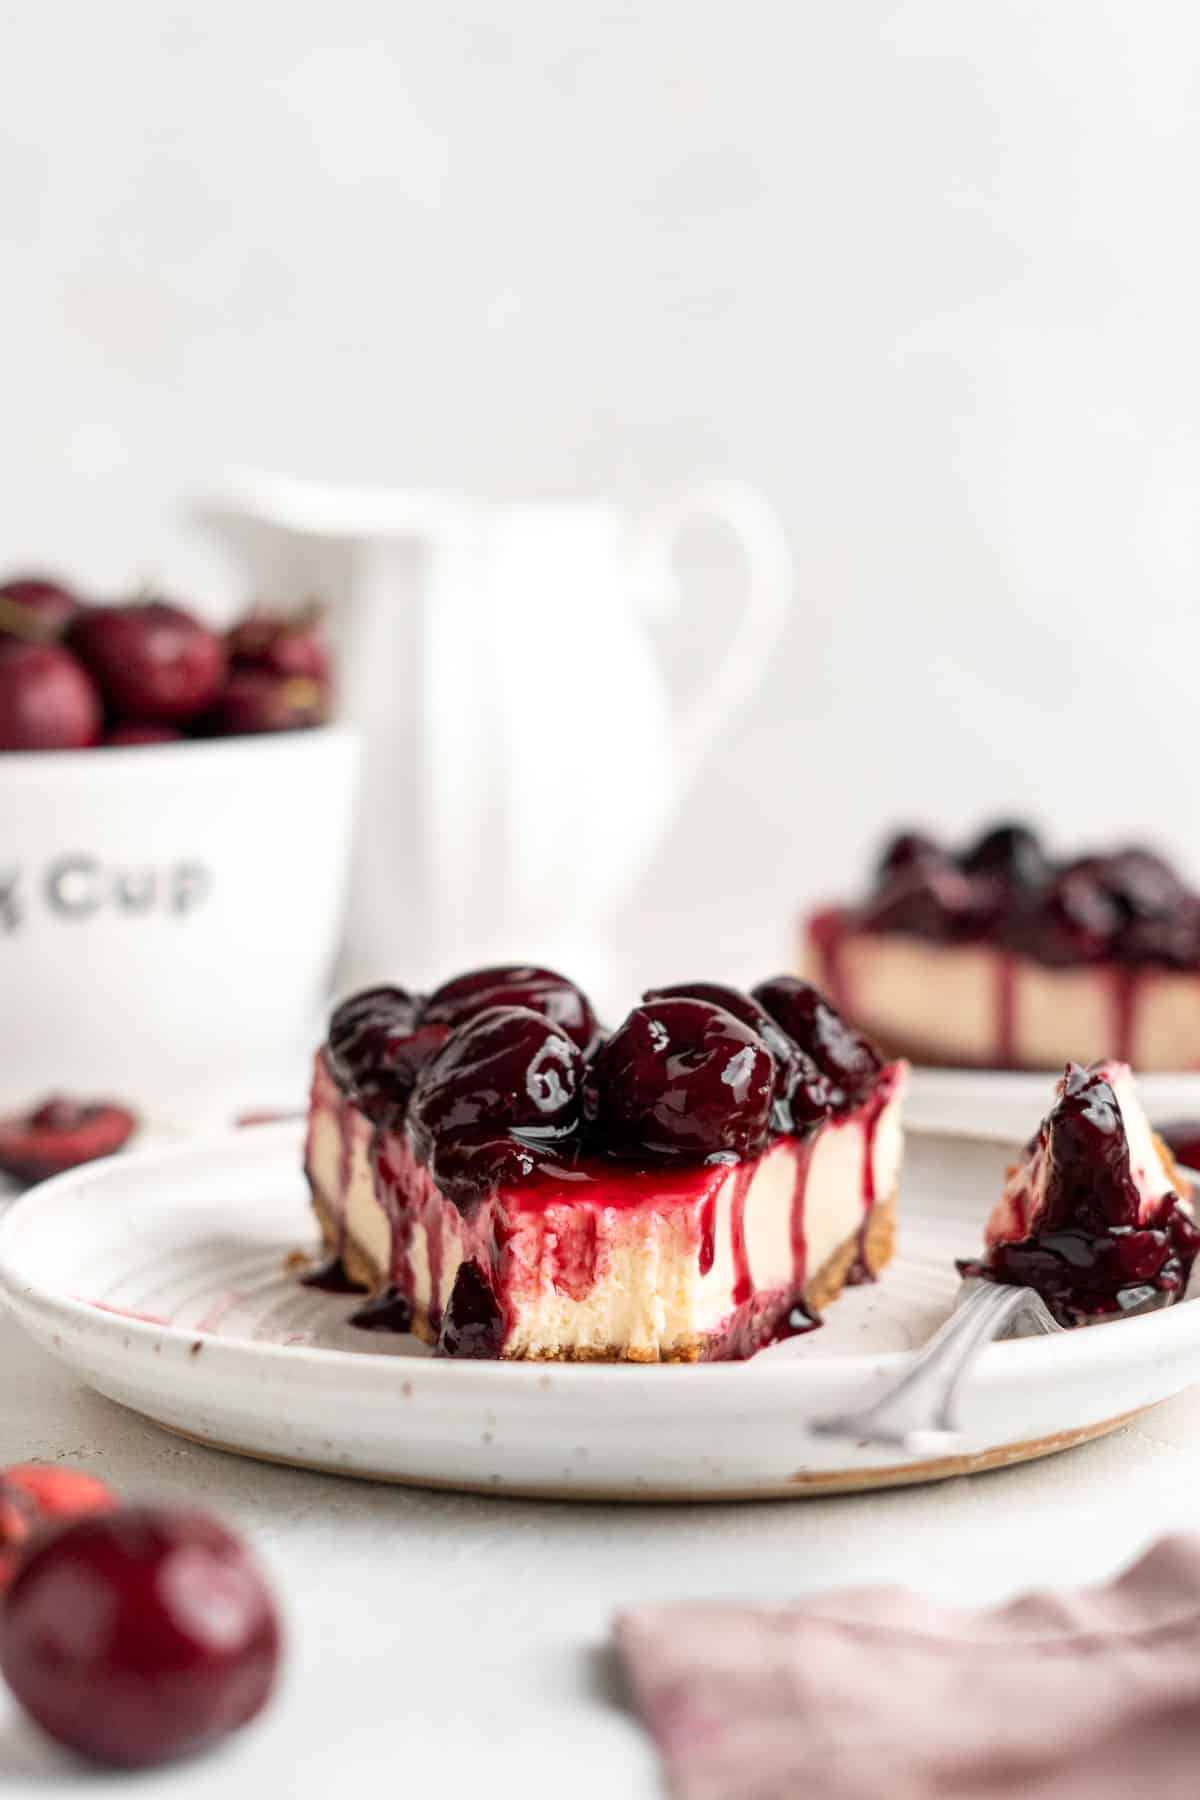
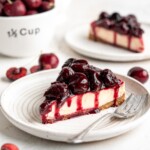
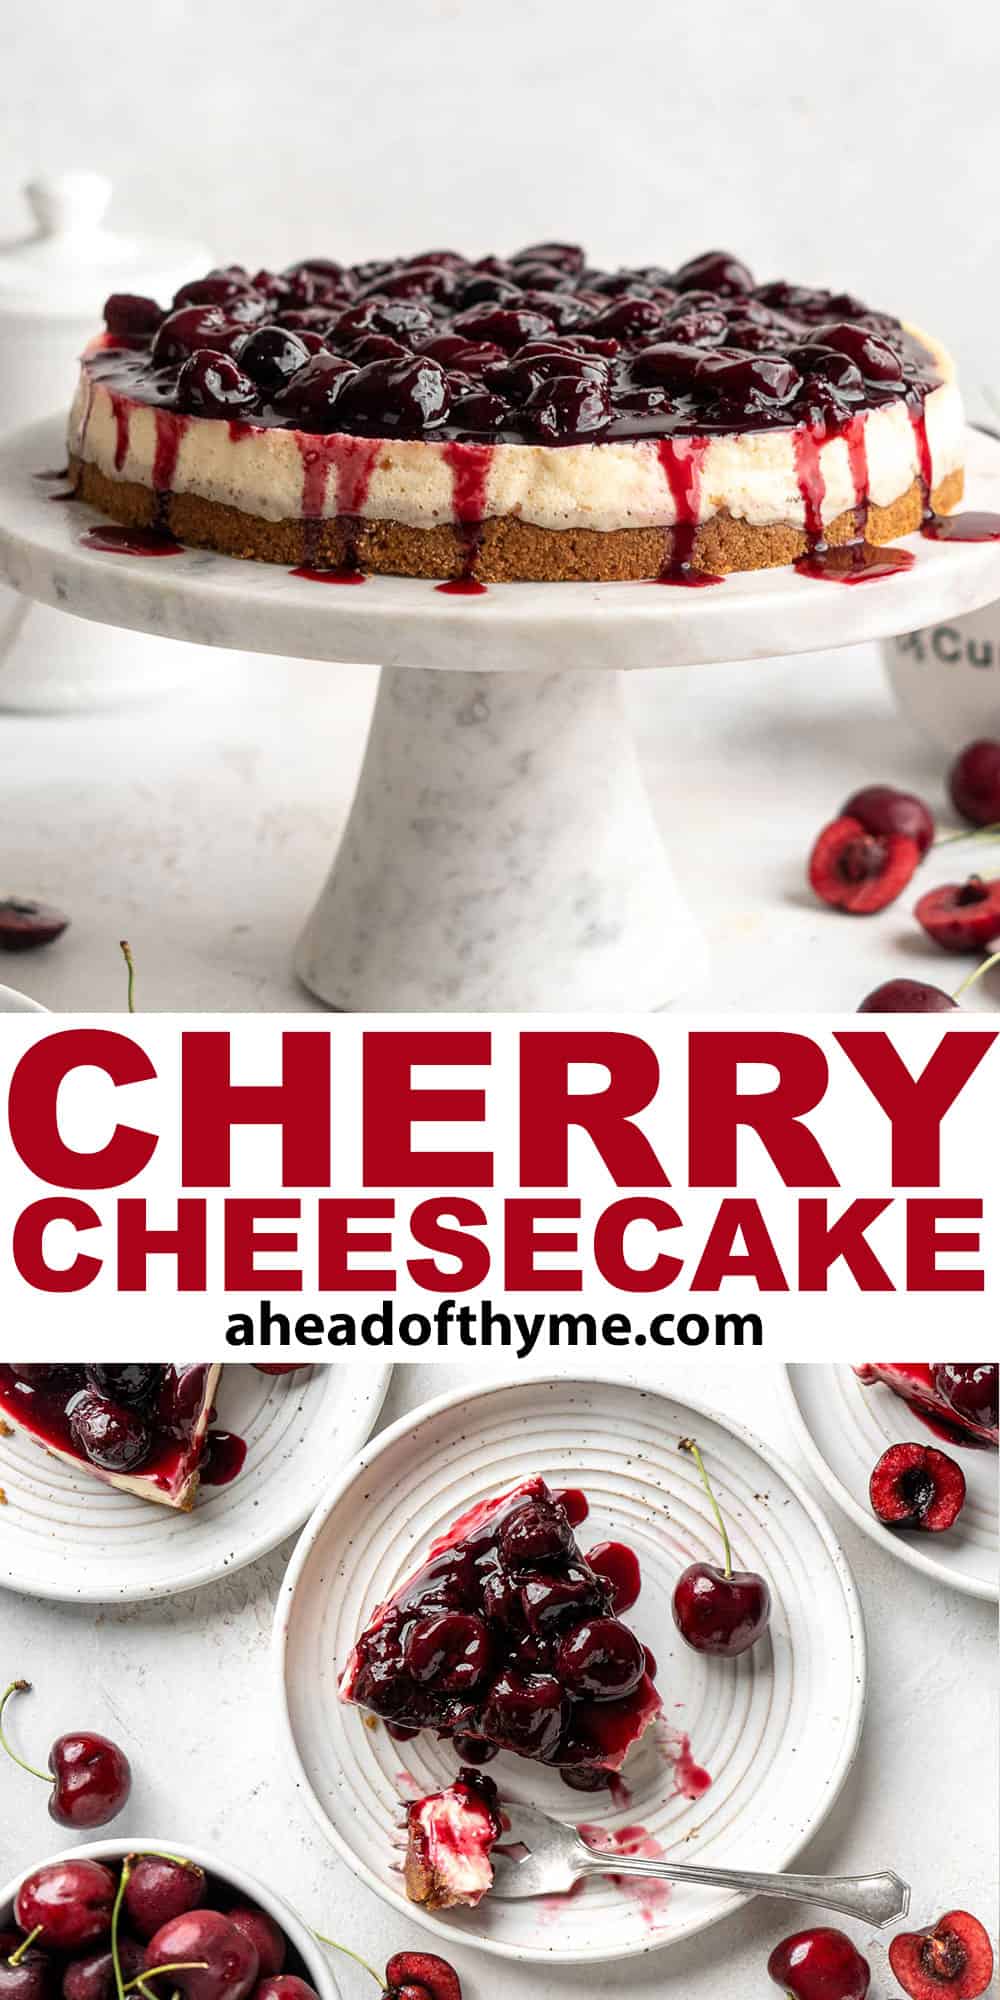
This Cherry Cheesecake is lush, velvety, and creamy finished with a generous heap of sweet homemade cherry sauce on top. It's the perfect summer dessert to indulge in while cherries are in season. The crunchy graham cracker crust, rich vanilla cheesecake filling, and made from scratch cherry topping will easily rival your favorite bakery!
The best part? Making cheesecake from scratch is a lot easier than you think! This easy-to-follow recipe will walk you through making the perfect cheesecake for all occasions - whether you're a baking beginner or a cheesecake expert. It's broken down into a few simple parts to make baking the perfect cheesecake foolproof.
Why You'll Love this Cherry Cheesecake Recipe
- Sweet cherry topping. The homemade cherry topping transforms a luscious vanilla cheesecake into a mouthwateringly decadent dessert. The tartness of the cherries is just the thing to balance the sweet, creamy cheesecake filling.
- Buttery homemade crust. Is there anything better than a Graham cracker crust? One that's made fresh at home, of course. Made of just two ingredients, the crust on this cherry cheesecake is the perfect foundation for all the flavor that follows.
- Classic vanilla cheesecake. The filling used in this cherry cheesecake is the same as the wildly beloved classic vanilla cheesecake. It's smooth all the way through, and crack-free thanks to a little oven trick (more details in the recipe).
Ingredient Notes
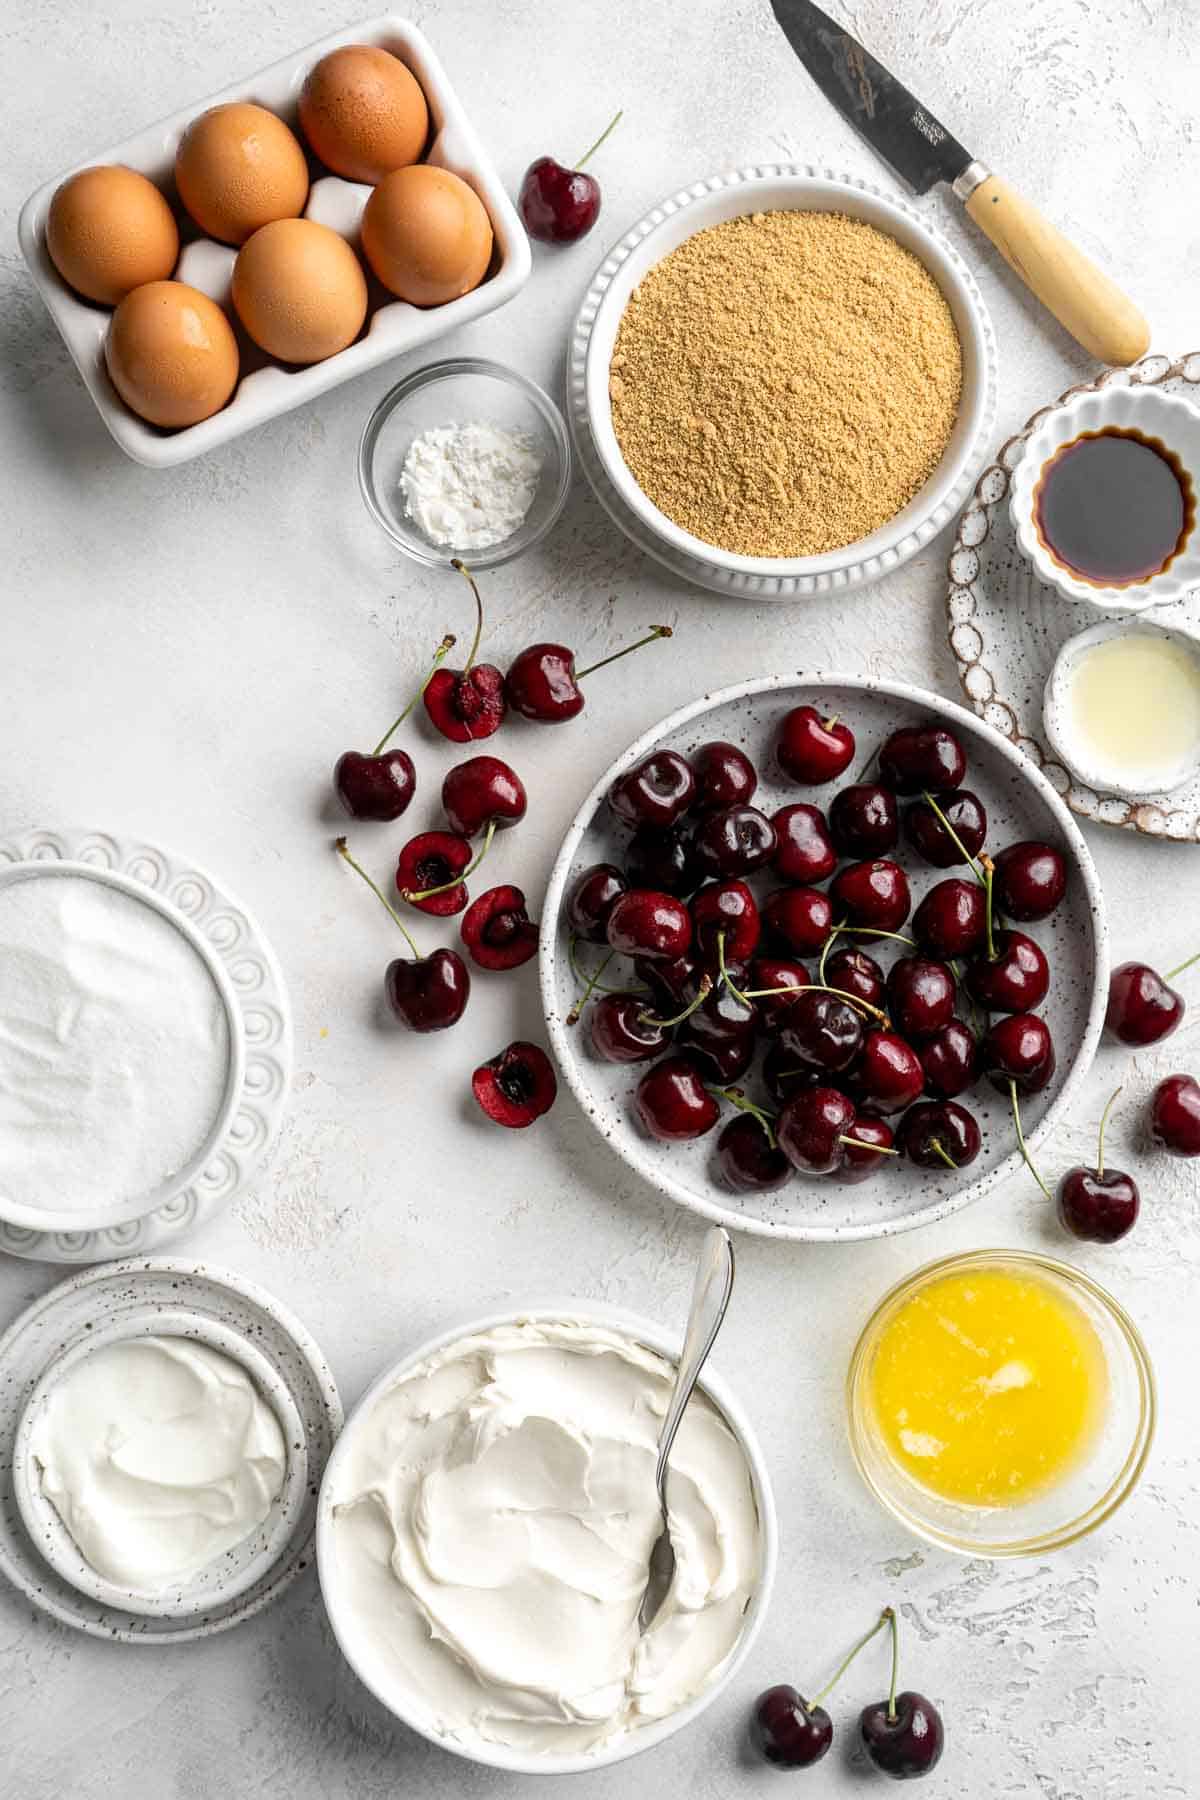
To make this delicious Cherry Cheesecake, you will need the following ingredients (full measurements in recipe card below):
- Graham cracker crumbs - or an equal amount of Gingersnap cookie crumbs. You can also use Graham crackers and crush them manually in a food processor. For a gluten-free cheesecake, use gluten-free Graham cracker crumbs.
- butter - use unsalted butter, if possible. It contains less water than salted butter and gives you more control over the flavor.
- cream cheese - if you don't have cream cheese on hand, swap it with blended cottage cheese, mascarpone cheese, or silken tofu.
- sour cream - you can also use plain Greek yogurt.
- lemon juice - fresh-squeezed lemon juice is best, but you can use lemon juice concentrate or white distilled vinegar.
- white sugar - granulated white sugar can be substituted for any granulated sugar alternative, but the type you choose will affect the overall taste of the cheesecake.
- vanilla extract - you can also use vanilla bean paste at a 1:1 ratio.
- eggs
- pitted cherries - fresh cherries (like Bing cherries or morello cherries) are best, but you can also use frozen cherries.
- water
- cornstarch - if you're out of cornstarch, try the same measure of rice flour or potato flour instead.
You will also need measuring cups and spoons, mixing bowls, electric mixer (hand mixer or stand mixer), 9-inch springform pan, and a large baking dish (for the hot water bath)
How to Make the Best Cherry Cheesecake
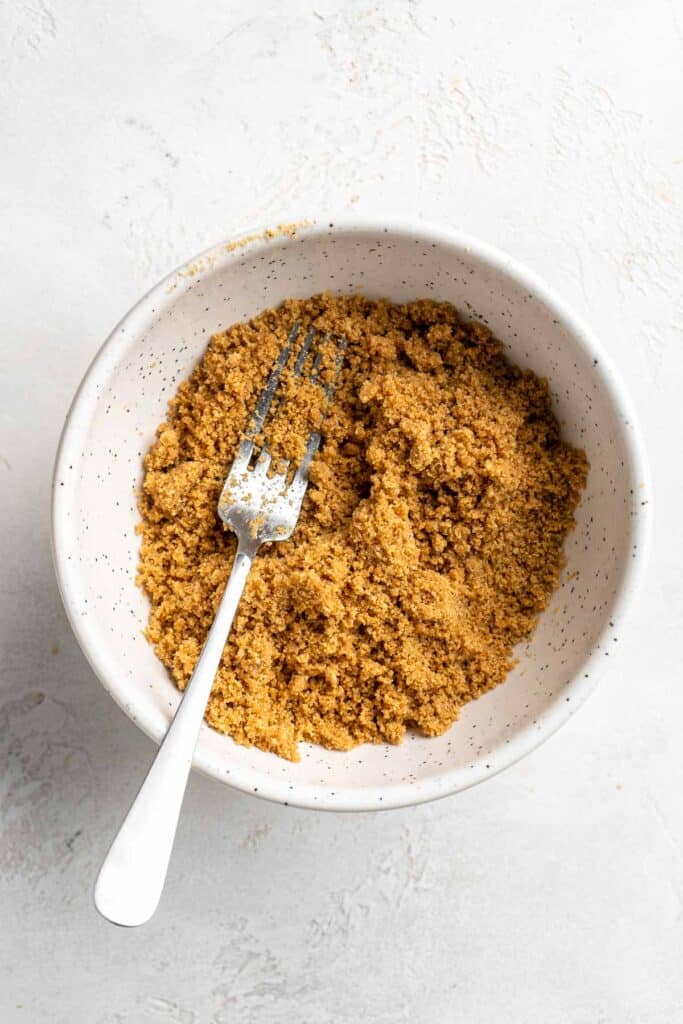
First, make the crust.
- Combine ingredients. In a medium mixing bowl, stir the Graham cracker crumbs and melted butter together until well mixed. (If using whole Graham crackers, add them to a food processor first and process until fine crumbs form).
- Freeze. Press the crumbs firmly into a lightly greased 9-inch round springform pan. Freeze for 15 minutes, allowing the crust to set before filling.

Next, make the cheesecake filling.
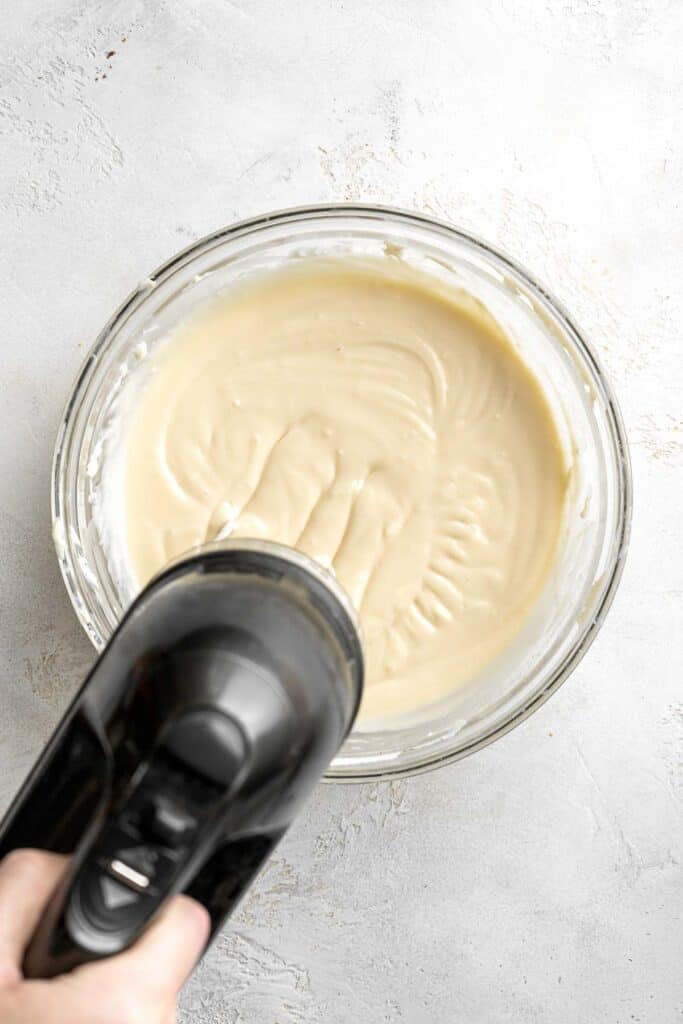
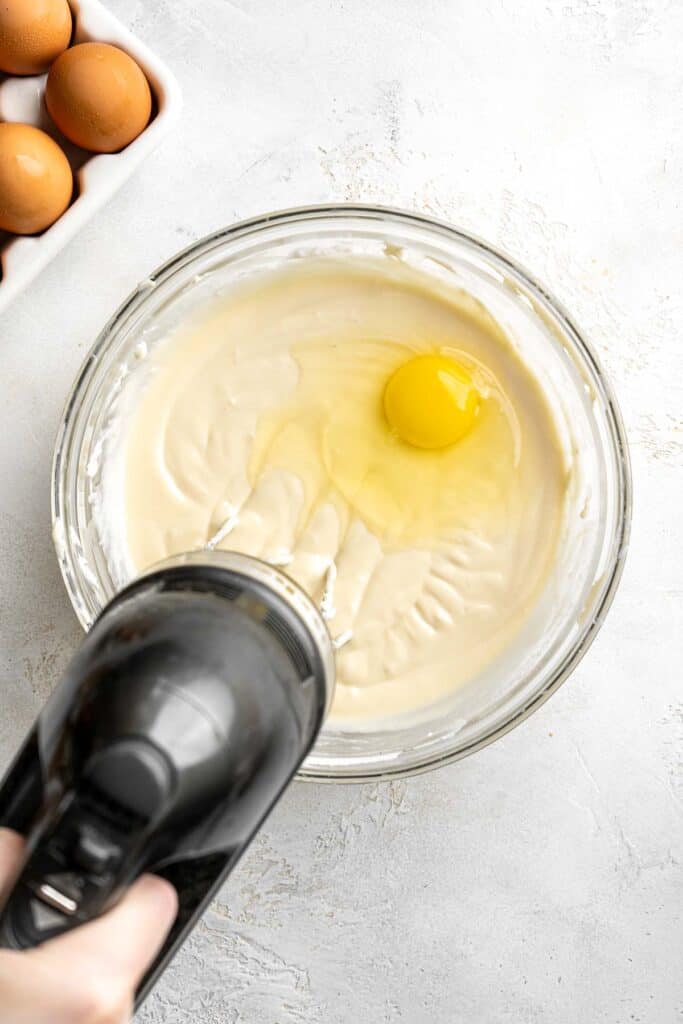
In a large mixing bowl, use an electric mixer to combine the cream cheese, sour cream, sugar, lemon juice, and vanilla extract together until well blended, about 2 minutes. Scrape down the sides of the bowl to help mix evenly. Add eggs, one at a time, and beat on low speed until just blended. Repeat until all eggs are added and blended (Do not overmix to avoid cracking during baking).
Finally, assemble and bake.
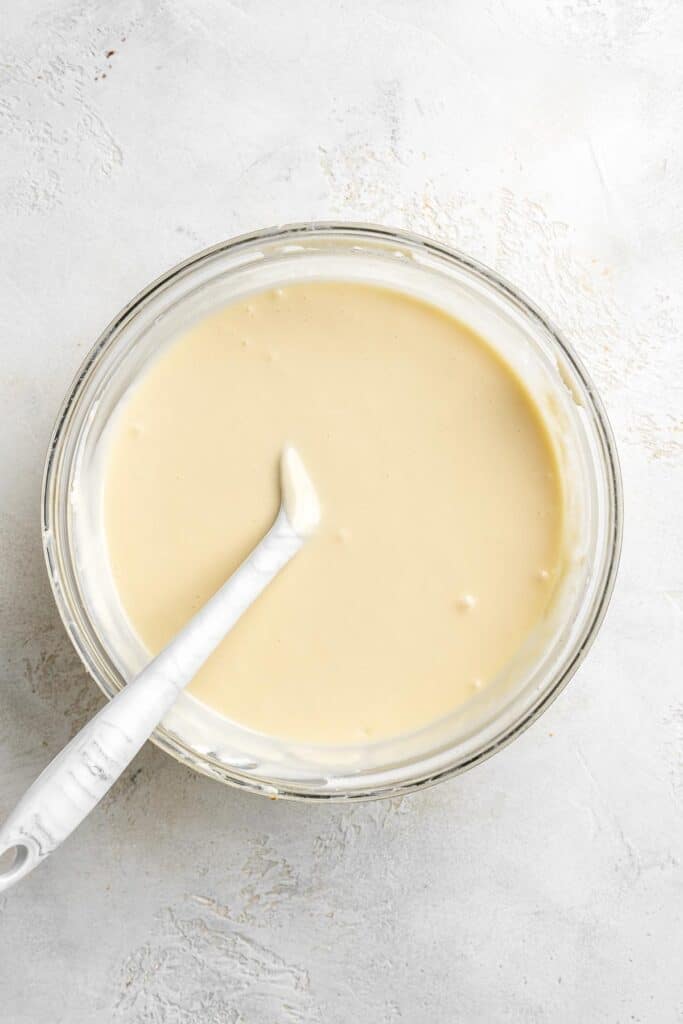
- Assemble. Carefully pour the cheesecake filling into the cooled crust and smooth out the surface. Gently tap the pan to remove any air bubbles from the filling.
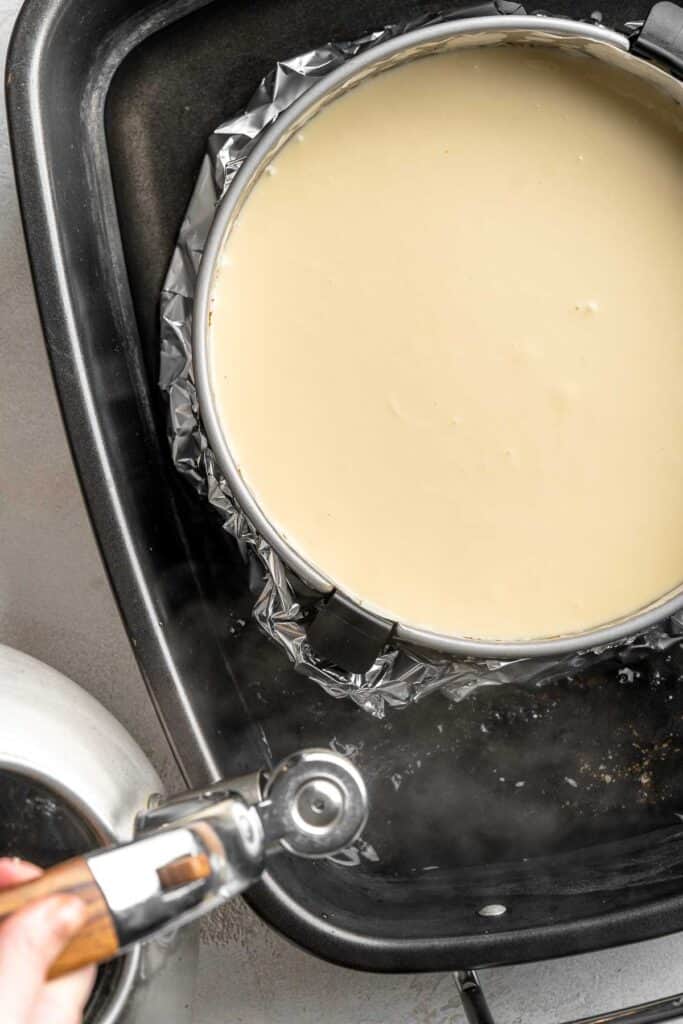
- Prepare boiling water bath. Wrap the outside of the springform pan tightly with aluminum foil and place the pan in a large baking dish. Fill the dish with 1 inch (2 cm) deep of boiling water.

- Bake. Move the baking dish to the oven and bake in a 325F preheated oven for 1 hour in the boiling water bath (This helps prevent sudden temperature drop and cracking).
- Rest. Turn off the heat and leave the cheesecake in the oven for another 30 minutes, allowing it to continue baking slowly (do not open the oven door).
- Chill. Take the pan out of the oven and run a paring knife gently around the outside of the cheesecake to loosen it from the sides of the pan. Cover the pan with plastic cling wrap and transfer to the refrigerator for at least 6 hours (or overnight) to cool down and solidify.
Serve the cheesecake.
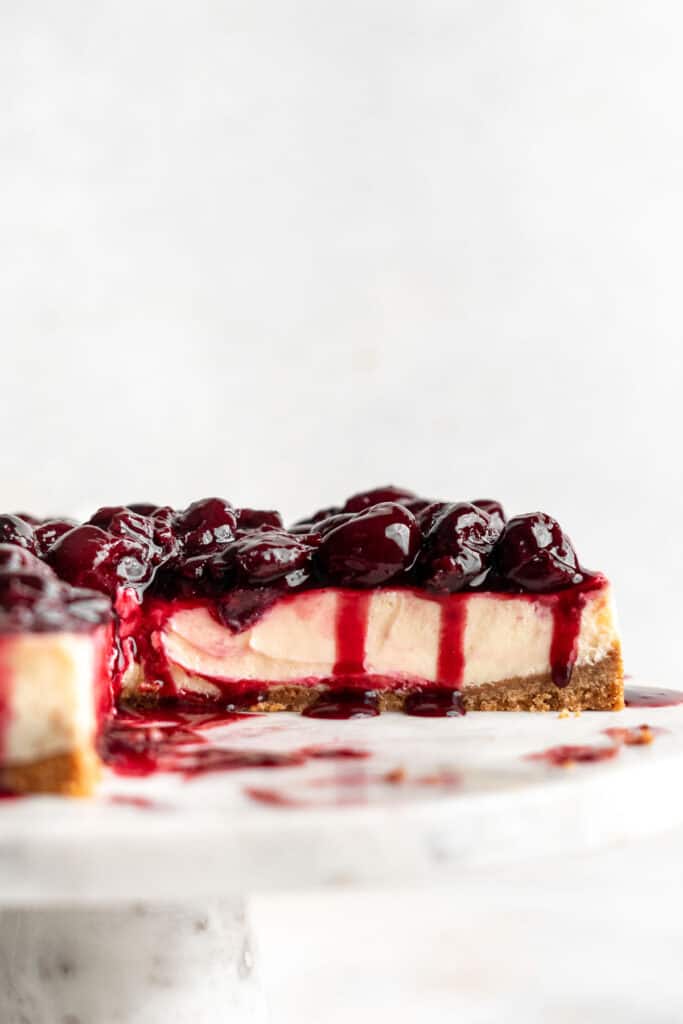
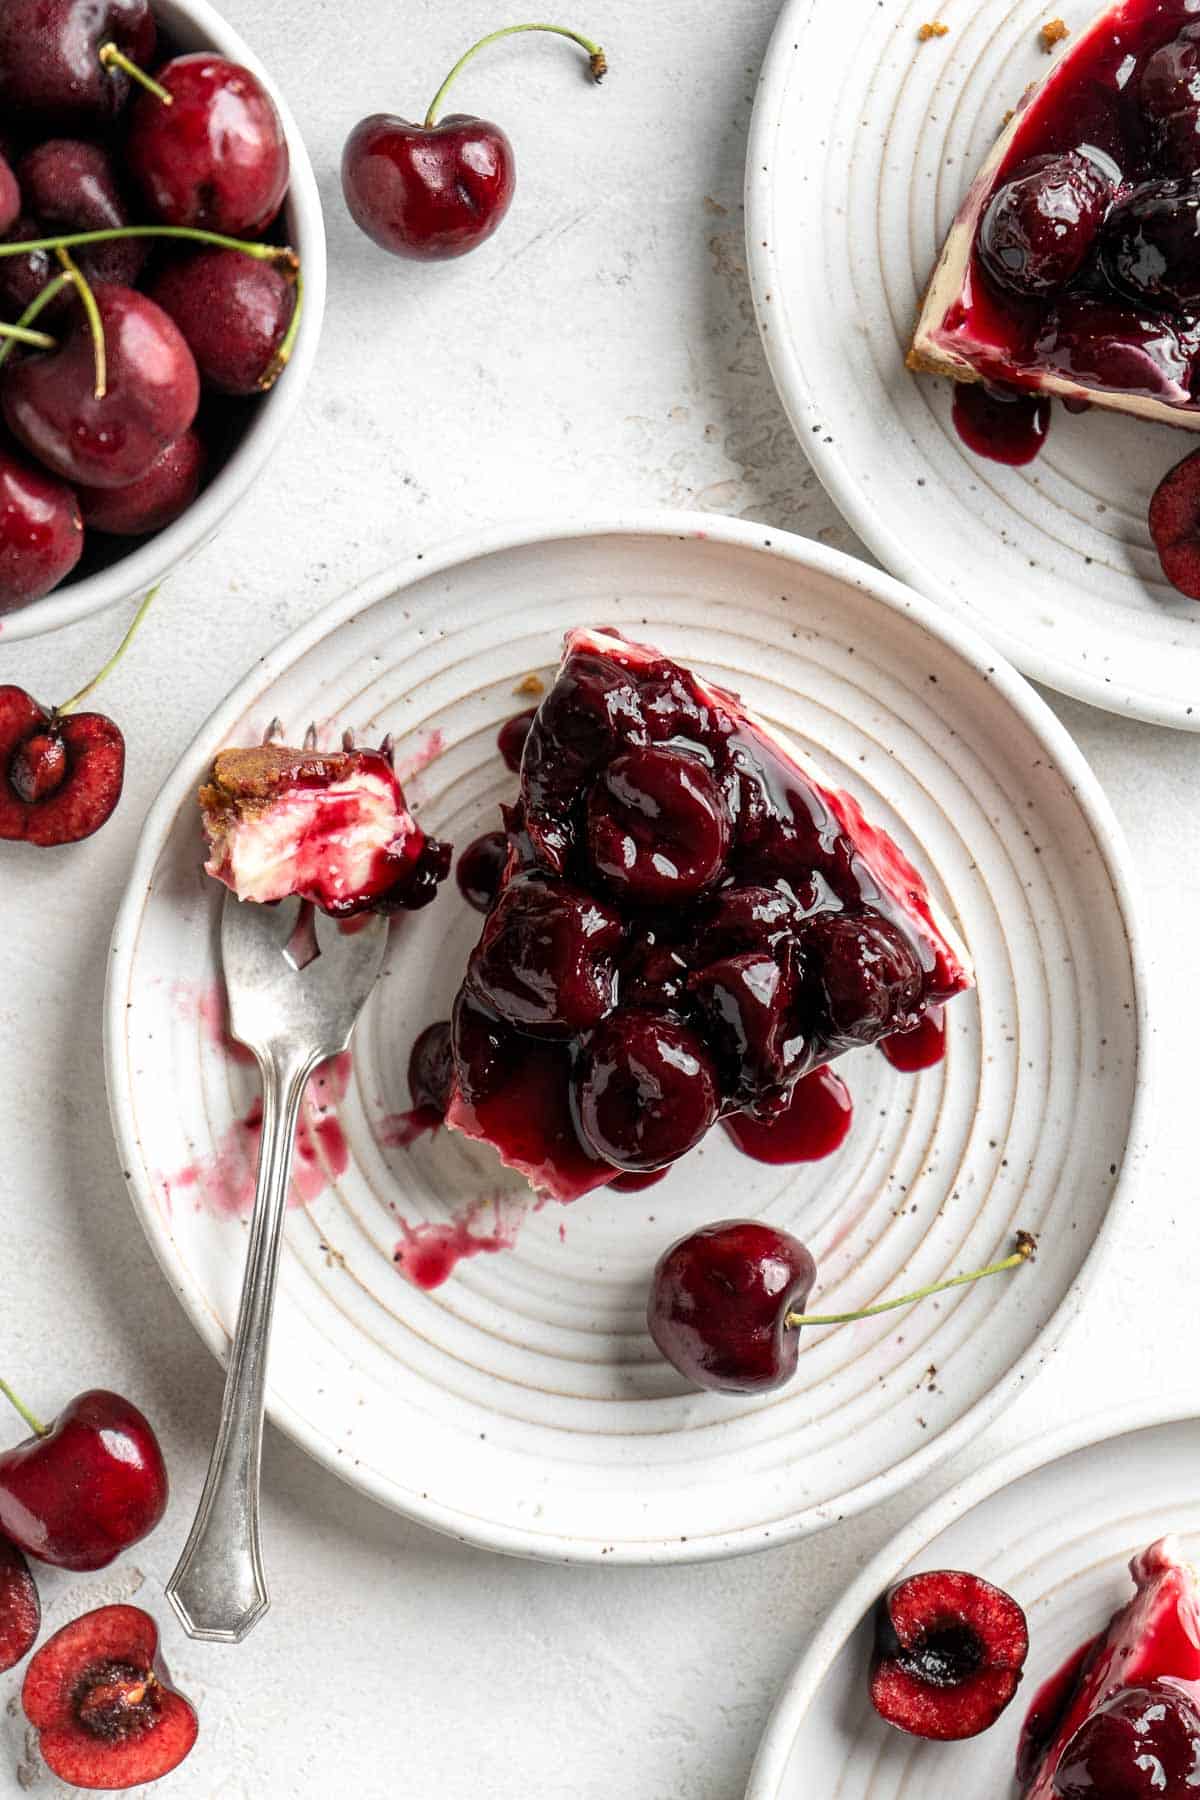
Remove the sides of the springform pan and transfer the cheesecake to a serving dish. Spoon the cherry sauce evenly over the cheesecake. Slice and serve.
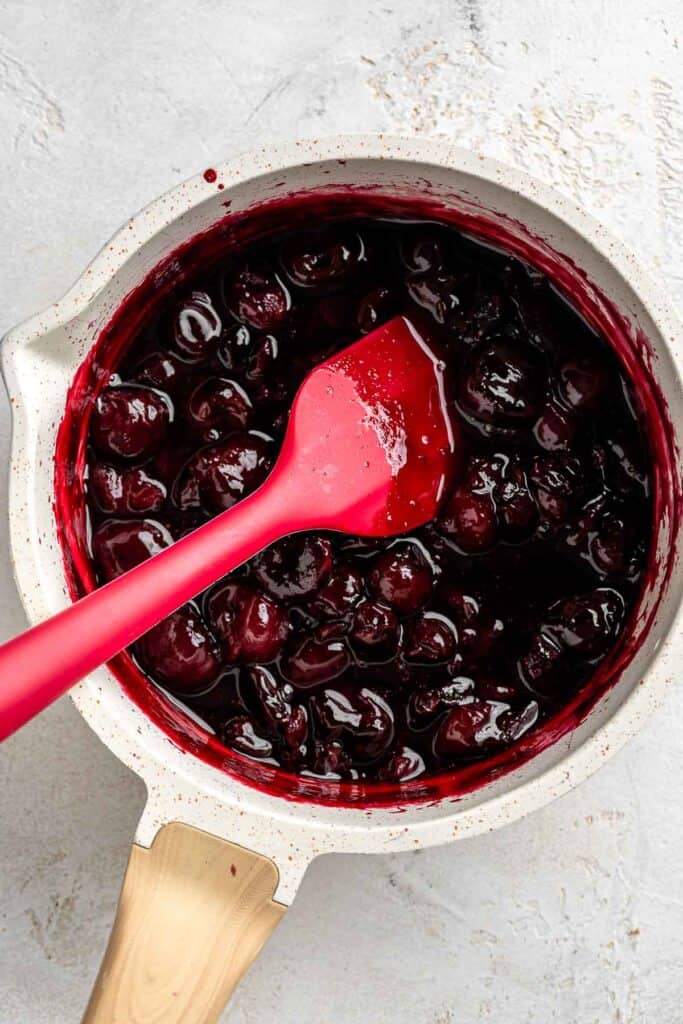
How to Make Cherry Sauce for Cheesecake
In a small saucepan, combine cherries, sugar, lemon juice, water, and cornstarch, and stir to combine. Heat over medium heat and bring to a gentle boil. Reduce heat to low and continue stirring until the sauce thickens to a desired consistency, about 4-5 minutes.
Set aside and let the sauce cool to room temperature before serving over the cheesecake.
Recipe Variations
- Make it extra creamy. Add in an extra ½ cup to 1 cup of cream cheese or mascarpone cheese for an even richer and creamier filling.
- Add citrus flavor. The cheesecake filling has a hint of lemony flavor thanks to a bit. of lemon juice. You can make it extra citrusy by adding in some lemon zest into the batter.
- Add chocolate. Make a chocolate cherry cheesecake by adding in some cocoa powder or melted chocolate into the cheesecake batter. You can garnish with a drizzle of melted chocolate on top too.
- Change the topping. You can switch out the cherry sauce topping with something else. Try our Strawberry Sauce or top with fresh berries, peaches, mangoes, or other fruit of your choice.
- Add caramel. Drizzle some caramel sauce over the cheesecake for delicious sweetness. Try our homemade Salted Caramel Sauce. I recommend adding a sprinkle of chopped nuts too for a perfect combination of flavors.
- Top with whipped cream. Top the cheesecake with a dollop of light and airy whipped cream.
How to Serve
Serve this Cherry Cheesecake on it's own or with some desserts and drinks that pair well with cheesecake such as:
- Vanilla Ice Cream
- Lemon Loaf with Lemon Glaze
- Homemade Lemonade
- Strawberry Muffins
- Iced Latte
- Nutella Mousse
- Madeleines
- Frappuccino
Recipe Tips and Tricks
- Use room-temperature ingredients. In almost all baking recipes (but especially for this cherry cheesecake) it's important to allow any of the refrigerated ingredients to come up to room temperature before mixing and baking them. This prevents the ingredients from separating due to temperature differences for a smooth, velvety batter.
- Make it gluten-free. This recipe is really easy to customize to make gluten-free. Simply use gluten-free Graham cracker crumbs for the crust. These are easy to find at the grocery store int he cookie aisle or gluten-free aisle.
- Use the right pan. The shape and size of the pan can make or break a cheesecake, because it will affect how the cheesecake cooks and sets. You can use either an 8-inch springform pan or a 9-inch springform pan. These pans allow the crust and filling to cook evenly and releases the cheesecake without damage!
- Don't over-mix the cheesecake batter. Speaking of batter, try not to overdo it with the mixer! Over-mixing the ingredients or using a really high speed will introduce too much air in the mixture, which will cause major cracking.
- Use an oven thermometer. Check your oven temperature using an oven thermometer. Precision matters when making a cheesecake, and the temperature on the display may not be the actual temperature in your oven, which could result in some baking mishaps if you're not aware.
- Use a water bath. Baking the cheesecake in a water bath helps to regulate the temperature and prevent cracking. To do this, wrap the bottom of the cheesecake pan with aluminum foil and place it in a larger pan. Add hot water to the larger pan, making sure the water level comes halfway up the cheesecake pan.
- Let it cool gradually. After the cheesecake is done baking, turn off the oven and let it cool slowly inside the oven. This will also help prevent cracking due to sudden changes in temperature.
- Cherry topping shortcut. You can make our easy homemade cherry sauce or use canned cherry pie filling - whatever is more convenient! If using canned cherry pie filling, gently spoon it over the cooled cheesecake just before serving.
Storing and Freezing Instructions
How to Store
Store the entire cheesecake in an airtight container or wrap as tightly as possible in plastic cling wrap and refrigerate for up to 5 days.
How to Freeze
Wrap the entire cherry cheesecake tightly in plastic cling wrap or cut the cheesecake into individual servings and wrap each one. Then, wrap in a layer of aluminum foil to prevent freezer burn. Freeze for up to 2 months. Thaw overnight in the refrigerator before serving.
More Cheesecake Recipes
- New York Cheesecake
- Blueberry Cheesecake
- No Bake Strawberry Cheesecake
- Burnt Basque Cheesecake
- Creamy Mango Cheesecake
- No Bake Blackberry Cheesecake
Tried this recipe?
I'd love to hear what you think! Leave a comment and rating below to share your feedback. Your reviews help others discover this recipe and help me keep creating more free recipes for you. Snap a photo and tag me on social media @aheadofthyme too.
Recipe
Cherry Cheesecake
- Total Time: 8 hours
- Yield: 12 servings 1x
- Diet: Vegetarian
Description
This Cherry Cheesecake is lush, velvety, and creamy finished with a generous heap of sweet homemade cherry sauce on top. It's the perfect summer dessert to indulge in while cherries are in season. The crunchy graham cracker crust, rich vanilla cheesecake filling, and made from scratch cherry topping will easily rival your favorite bakery!
Ingredients
For the cheesecake crust:
- 1 ½ cups Graham cracker crumbs (about 8 ounces)
- ¼ cup butter, melted (about 60 ounces)
For the cheesecake filling:
- 2 ½ cups (20 ounces or 2 ½ - 8 ounce blocks) cream cheese, at room temperature
- ¼ cup sour cream, at room temperature
- 1 cup white sugar
- ½ tablespoon lemon juice
- 1 teaspoon vanilla extract
- 3 large eggs
- boiling water (for the water bath)
For the cherry sauce:
- 3 cups fresh cherries, pitted
- 2 tablespoons granulated sugar
- 1 tablespoon lemon juice
- 3 tablespoons water
- ½ tablespoon cornstarch
Instructions
Make the crust:
- In a medium mixing bowl, stir the Graham cracker crumbs and melted butter together until well mixed. (If using whole Graham crackers, add them to a food processor first and process until fine crumbs form).
- Press the crumbs firmly into a lightly greased 9-inch round springform pan. Freeze for 15 minutes, allowing the crust to set before filling.
Make the filling and bake:
- Preheat oven to 325F.
- In a large mixing bowl, use an electric mixer to combine the cream cheese, sour cream, sugar, lemon juice, and vanilla extract together until well blended, about 2 minutes. Scrape down the sides of the bowl to help mix evenly.
- Add eggs, one at a time, and beat on low speed until just blended. Repeat until all eggs are added and blended (Do not overmix to avoid cracking during baking).
- Carefully pour the cheesecake filling into the cooled crust and smooth out the surface. Gently tap the pan to remove any air bubbles from the filling.
- Wrap the outside of the springform pan tightly with aluminum foil and place the pan in a large baking dish. Fill the dish with 1 inch (2 cm) deep of boiling water.
- Move the baking dish to the oven and bake in the 325F preheated oven for 1 hour in the boiling water bath (This helps prevent sudden temperature drop and cracking).
- Turn off the heat and leave the cheesecake in the oven for another 30 minutes, allowing it to continue baking slowly (do not open the oven door).
- Take the pan out of the oven and run a paring knife gently around the outside of the cheesecake to loosen it from the sides of the pan. Cover the pan with plastic cling wrap and transfer to the refrigerator for at least 6 hours (or overnight) to cool down and solidify.
Make the cherry sauce:
- In a small saucepan, combine cherries, sugar, lemon juice, water, and cornstarch, and stir to combine. Heat over medium heat and bring to a gentle boil. Reduce heat to low and continue stirring until the sauce thickens to a desired consistency, about 4-5 minutes.
- Set aside and let the sauce cool to room temperature before serving over the cheesecake.
Serve the cheesecake:
- Remove the sides of the springform pan and transfer the cheesecake to a serving dish. Spoon the cherry sauce evenly over the cheesecake. Slice and serve.
Notes
How to store: Store the entire cheesecake in an airtight container or wrap as tightly as possible in plastic cling wrap and refrigerate for up to 5 days.
How to freeze: Wrap the entire cherry cheesecake tightly in plastic cling wrap or cut the cheesecake into individual servings and wrap each one. Then, wrap in a layer of aluminum foil to prevent freezer burn. Freeze for up to 2 months. Thaw overnight in the refrigerator before serving.
- Prep Time: 30 minutes
- Chill Time: 6 hours
- Cook Time: 1 hour 30 minutes
- Category: Dessert
- Method: Bake
- Cuisine: American


Comments
No Comments