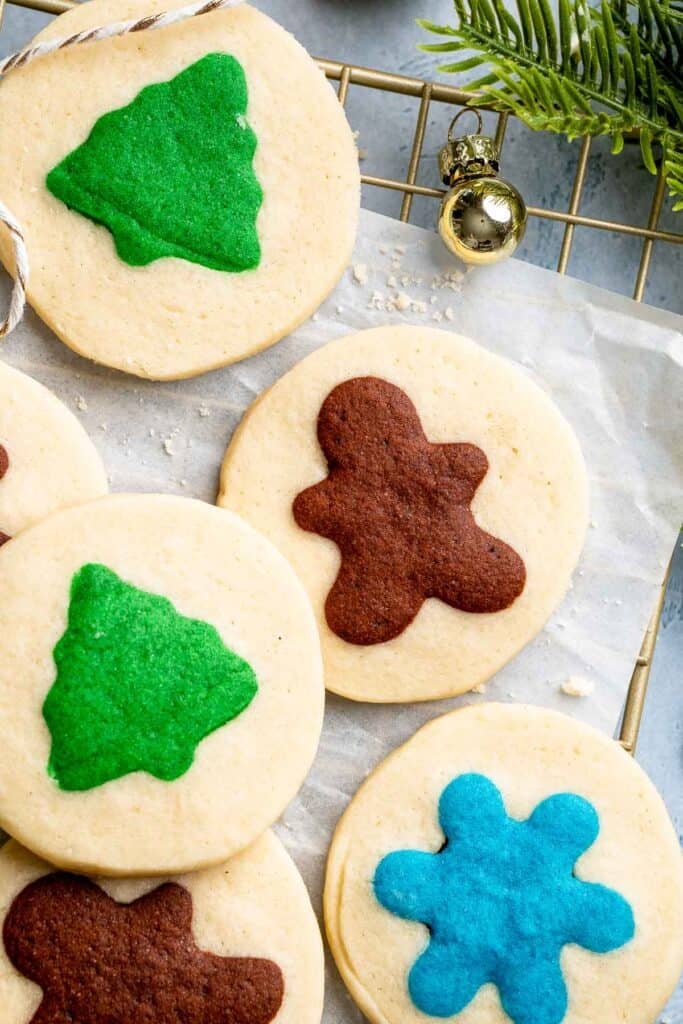
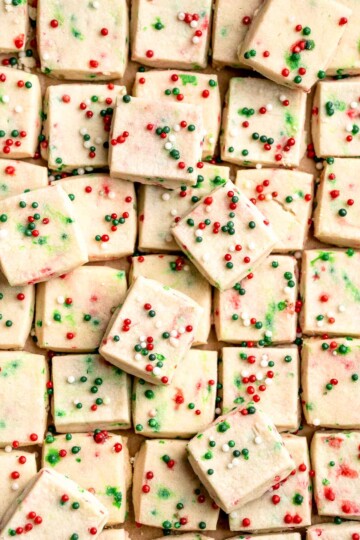
Soft, buttery, festive, and so much fun to make, these Slice and Bake Christmas Cookies are a beautiful addition to any holiday baking lineup. Each cookie reveals a cute hidden design in the center, which makes them perfect for cookie boxes, class treats, and Christmas dessert trays. The dough mixes easily, takes color wonderfully, and bakes into crisp edged cookies with tender centers and clean holiday shapes that look instantly cheerful and gift worthy.

This type of slice and bake cookie looks impressive, but the process is much more approachable than it appears. The dough handles well, chills reliably, and holds its shape in the oven, which means your colors stay bright and your designs stay sharp. It is a fun baking project for anyone who loves creative holiday cookies, and it is easy to customize with different Christmas shapes, colors, and sprinkles.
These cookies are also great for making ahead because both the dough logs and the baked cookies freeze beautifully. You can prepare the dough days or even weeks in advance and bake fresh cookies whenever you need them. Whether you are filling a holiday cookie tin, hosting a cookie exchange, or adding something playful to your Christmas dessert table, these slice and bake cookies are guaranteed to stand out.

Why You'll Love This Recipe
- Easy to prep and customize. The dough comes together quickly and works beautifully with food coloring, sprinkles, or mix ins. You can create stripes, swirls, or fun patterned cookies without complicated shaping.
- Make ahead friendly. The dough freezes and chills well, which means you can prep it days or even weeks ahead. Slice off what you need and bake fresh cookies whenever you want them.
- Perfect for holiday gifting. These sliced cookies keep their shape, cut cleanly, and look picture perfect. They are ideal for holiday tins, cookie boxes, teacher gifts, or your Christmas cookie trays.
- Kid friendly and festive. Kids love choosing the colors and watching the cookies bake. With gel food coloring, you get bold Christmas tones like red, green, and gold without affecting the texture of the dough.
Jump to:
Ingredients and Substitutions
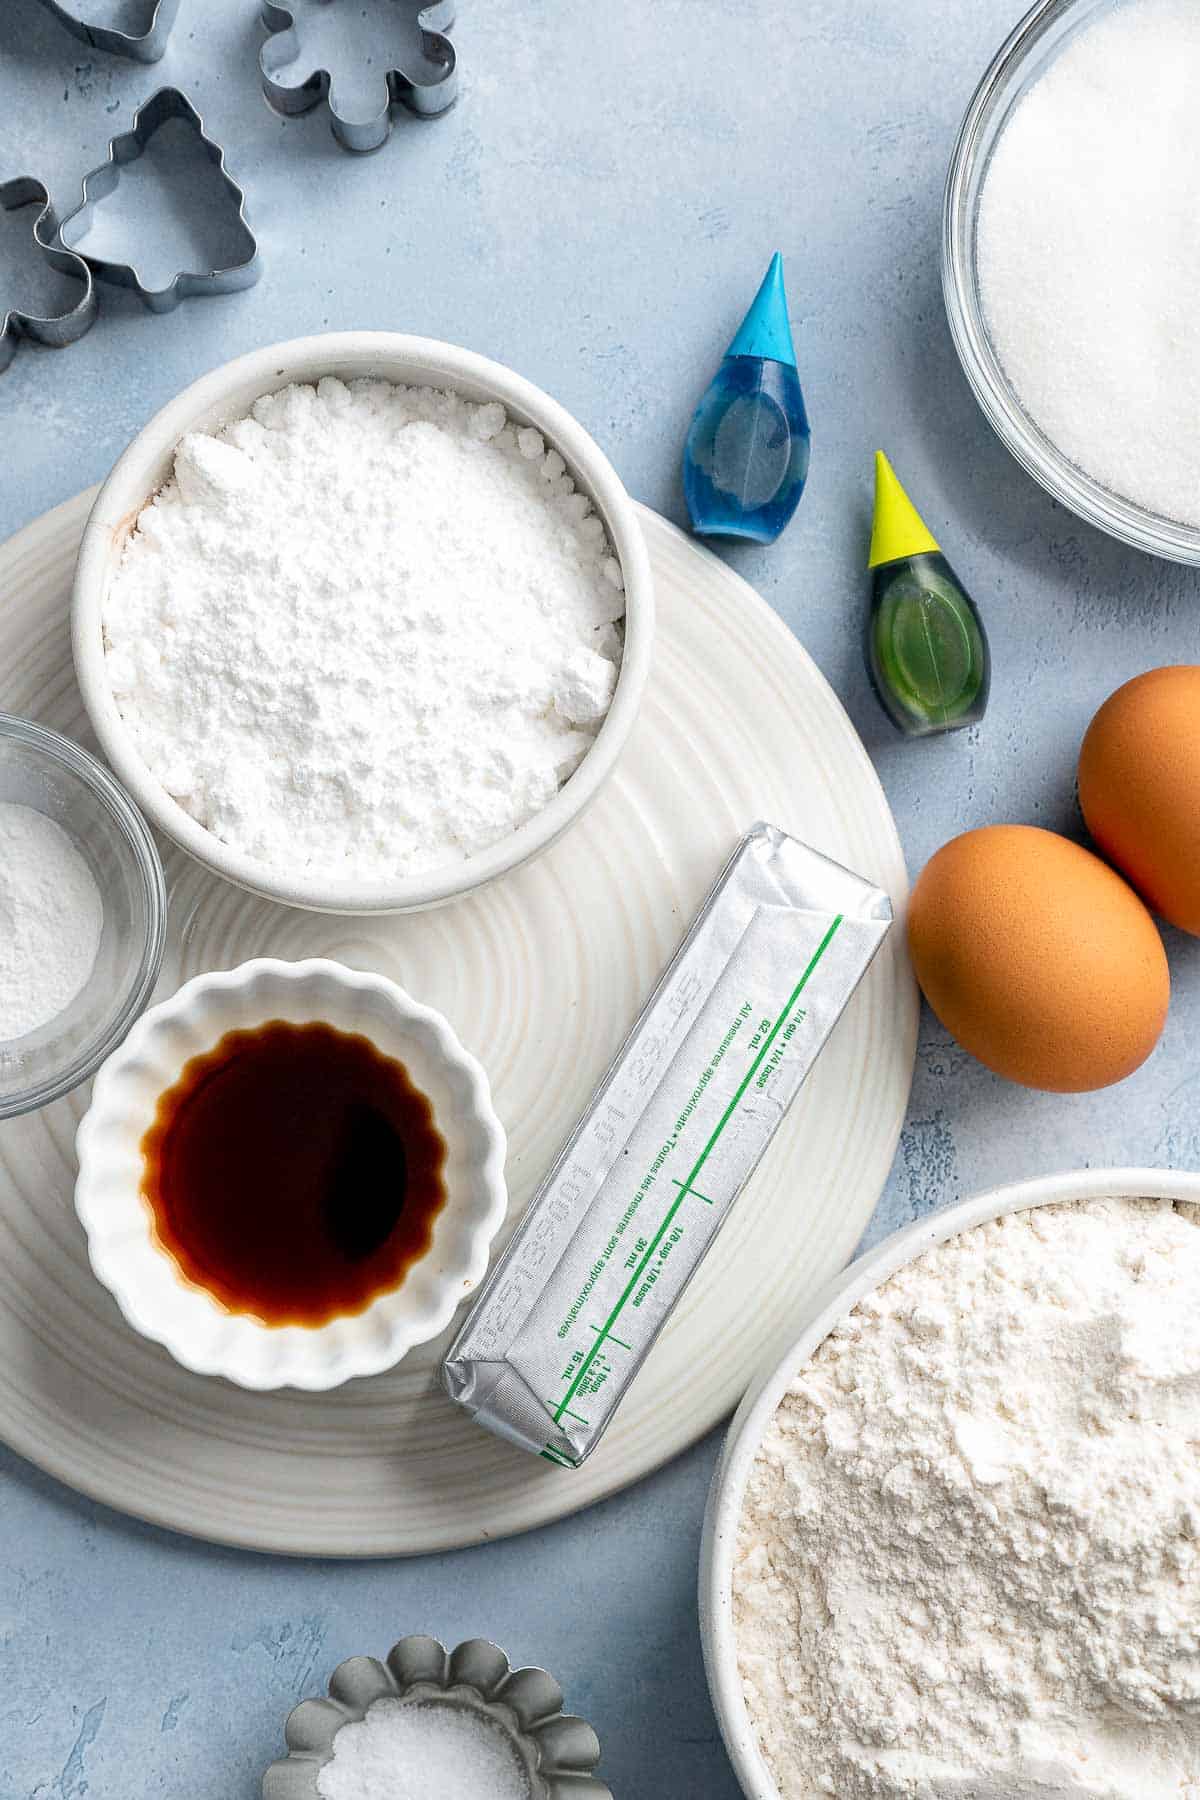
To make this delicious Slice and Bake Christmas Cookies, you will need the following ingredients (see recipe card below for quantities):
- unsalted butter - Softened butter gives the cookies their classic tender texture. Salted butter works too, but reduce the added salt slightly.
- confectioners' sugar - Helps create a smooth dough with a soft crumb. You can replace it with additional white sugar, but the texture will be slightly crispier.
- white sugar - Sweetens the dough and helps the cookies spread just the right amount as they bake.
- vanilla - Adds depth and classic sugar cookie flavor. Almond extract also works well.
- eggs - Bind the dough and create a soft cookie. Use room temperature eggs for best results. You can crack them into a medium bowl before adding to the dough to avoid shells sneaking in.
- all purpose flour - Gives the dough structure. For a gluten free version, a 1 to 1 gluten free flour blend works well.
- baking powder - Gives the cookies a light lift so they do not bake up too dense. Do not substitute with baking soda here, since the texture would change.
- salt -Balances sweetness and enhances flavor.
- gel food coloring - Use gel instead of liquid so the dough stays firm and bright in color. Red, green, blue, and gold are great for holiday cookies.
Baking Equipment
You will also need measuring cups and spoons, a stand mixer or hand mixer, mixing bowls, a sharp knife for slicing the dough, a ruler for measuring even slices, plastic wrap for wrapping the cookie logs, a baking sheet, and a cooling rack for the cookies.
Instructions
- Mix the dry ingredients. In a large mixing bowl, whisk together the flour, baking powder, and salt until well combined. Set aside.
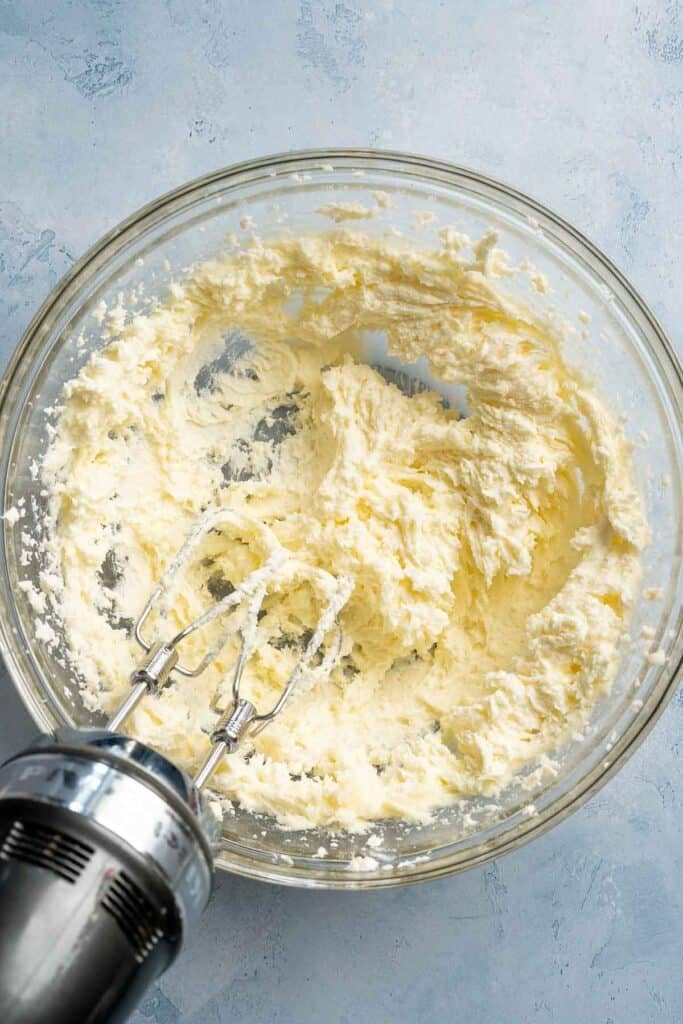
- Cream the butter and sugars. In another large mixing bowl, beat the room temperature butter, confectioners' sugar, and white sugar with a hand mixer until light and fluffy, about 3 minutes.
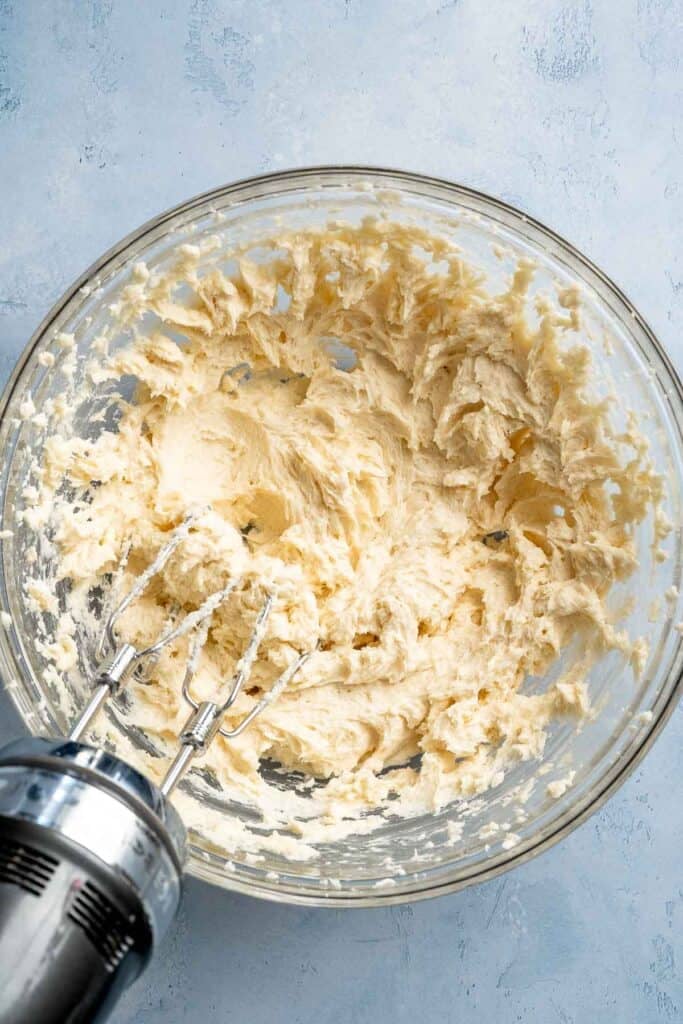
- Add the eggs and vanilla. Add the vanilla extract and eggs, then beat again until fully combined and smooth.
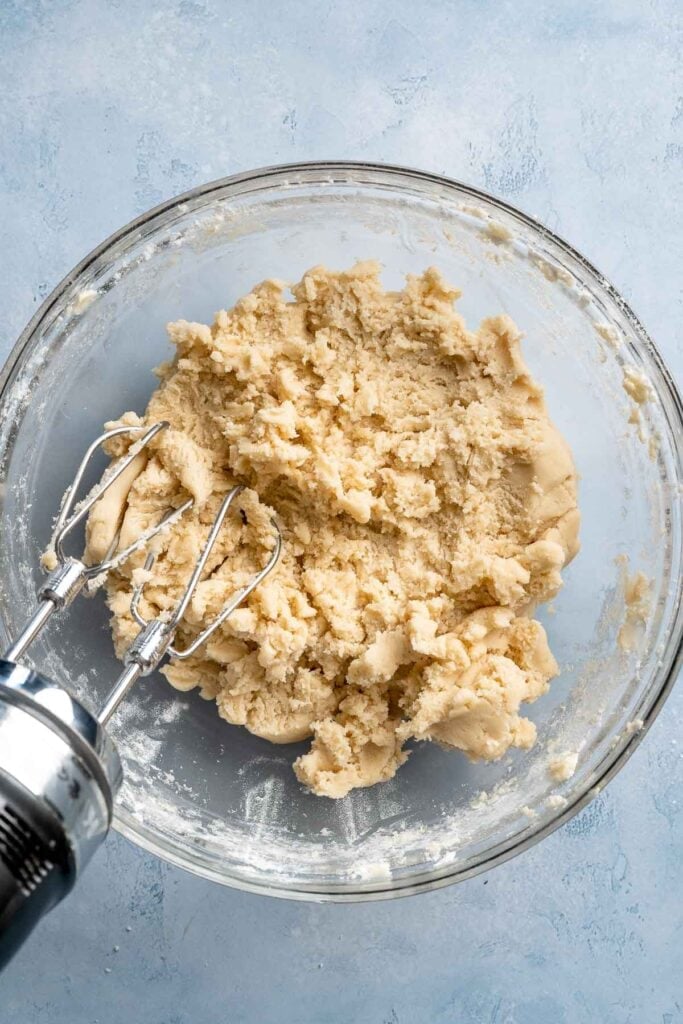
- Bring the dough together. Add the dry mixture to the wet ingredients and beat until a soft dough forms. The dough should not feel sticky.
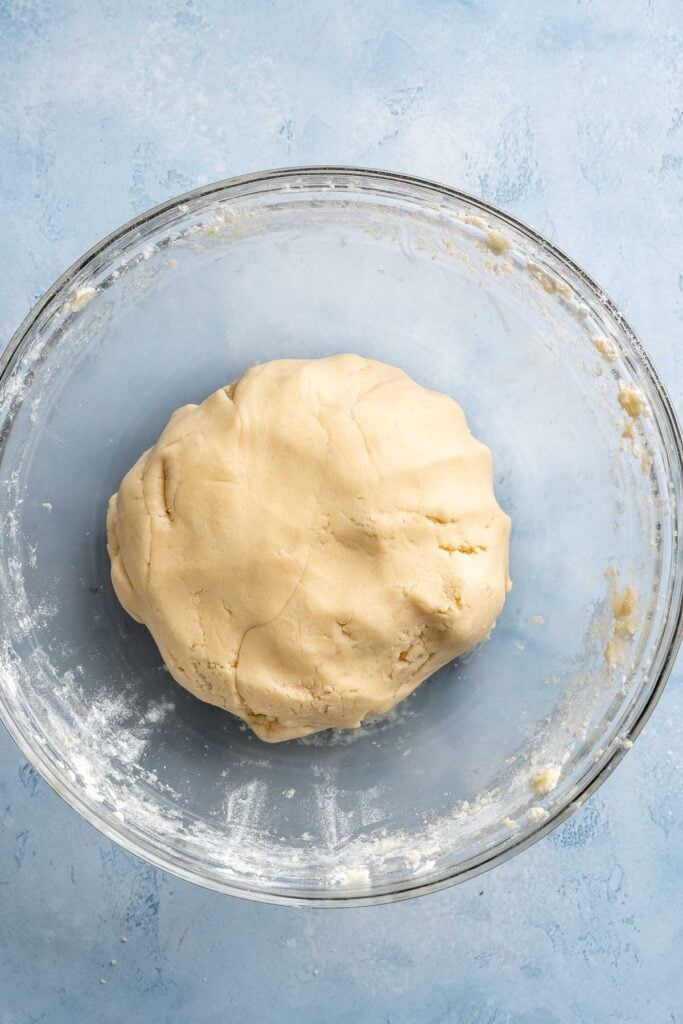
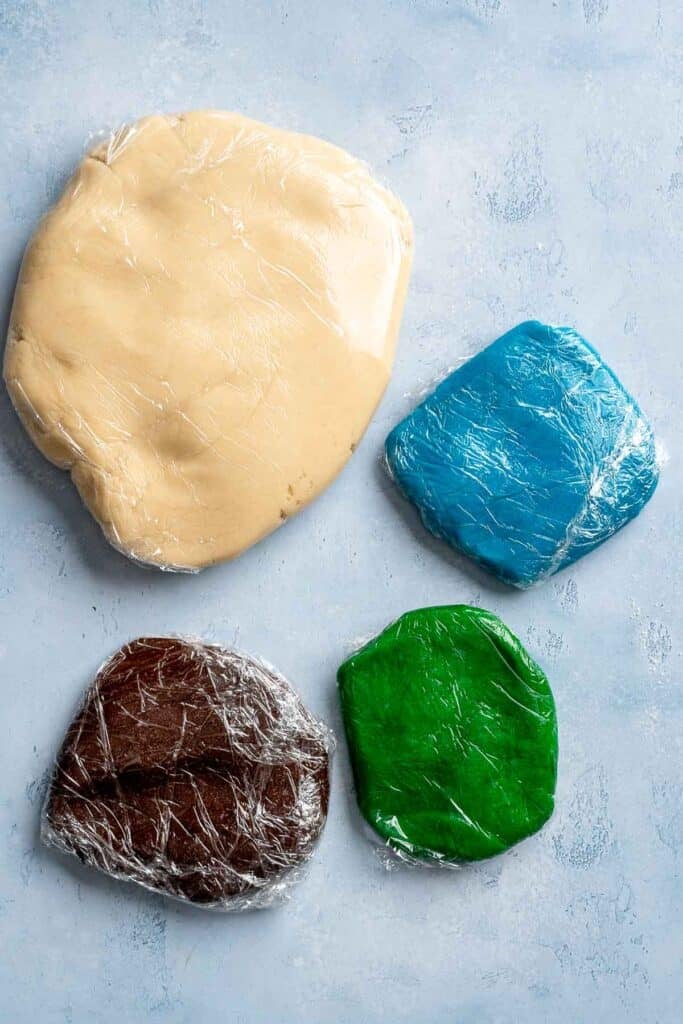
- Separate and chill the dough. Wrap and refrigerate two-thirds of the plain dough. Divide the remaining one-third into as many colors as you plan to use (I used green, brown, and blue, so I separated it 3 further times).
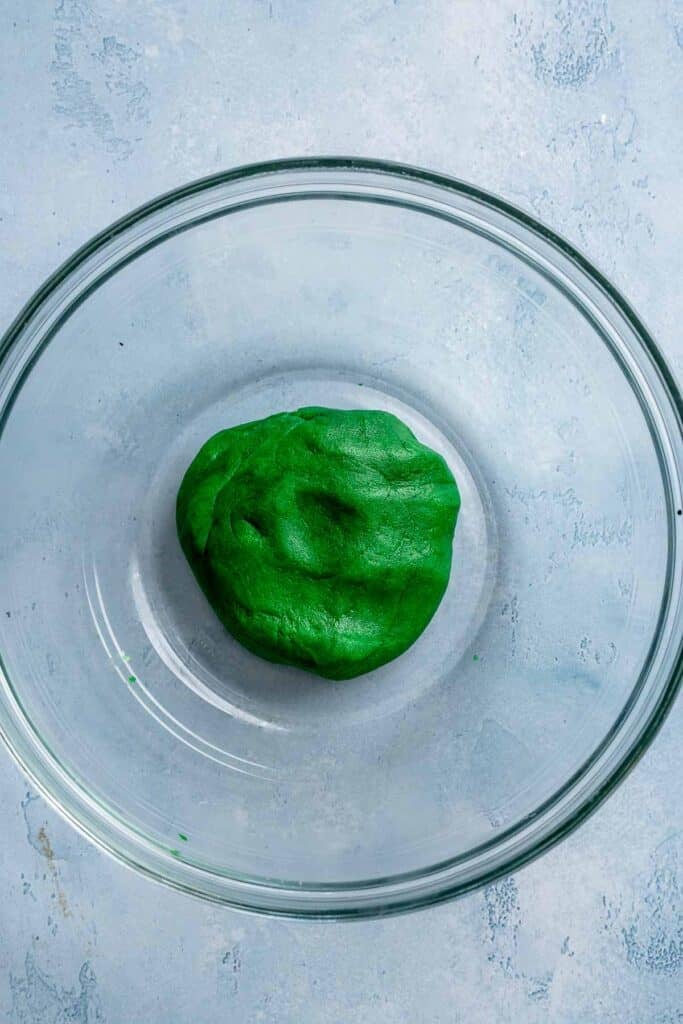
- Color the dough. Add gel food coloring to each portion of dough. Mix using a hand mixer or knead by hand with gloves (this is the easiest way). Wrap each color in plastic wrap and place in the refrigerator for at least 1 hour.
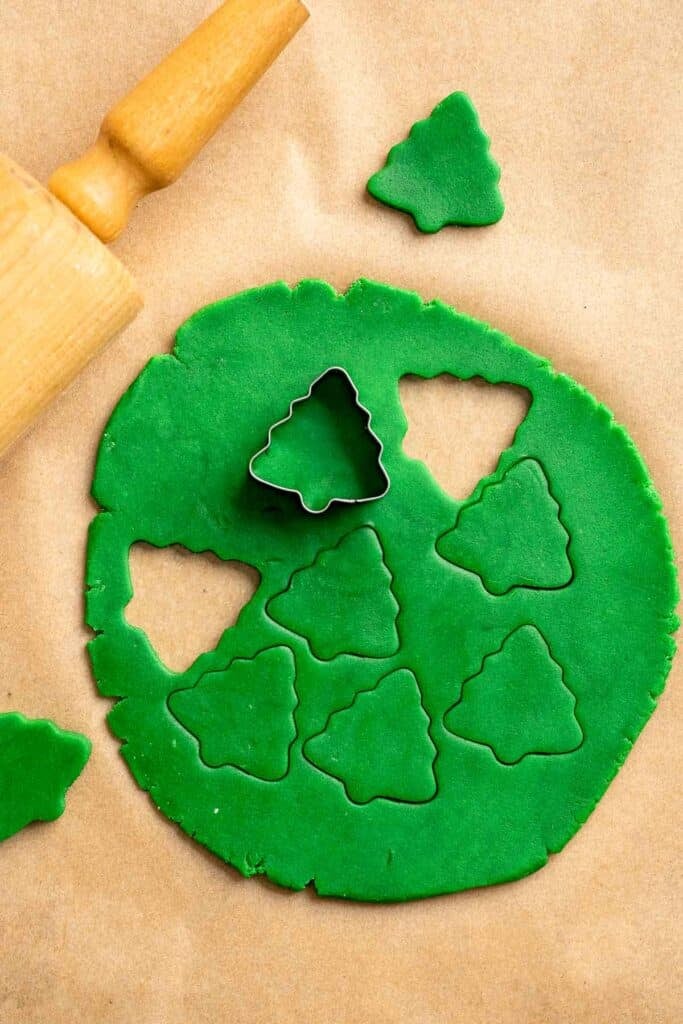
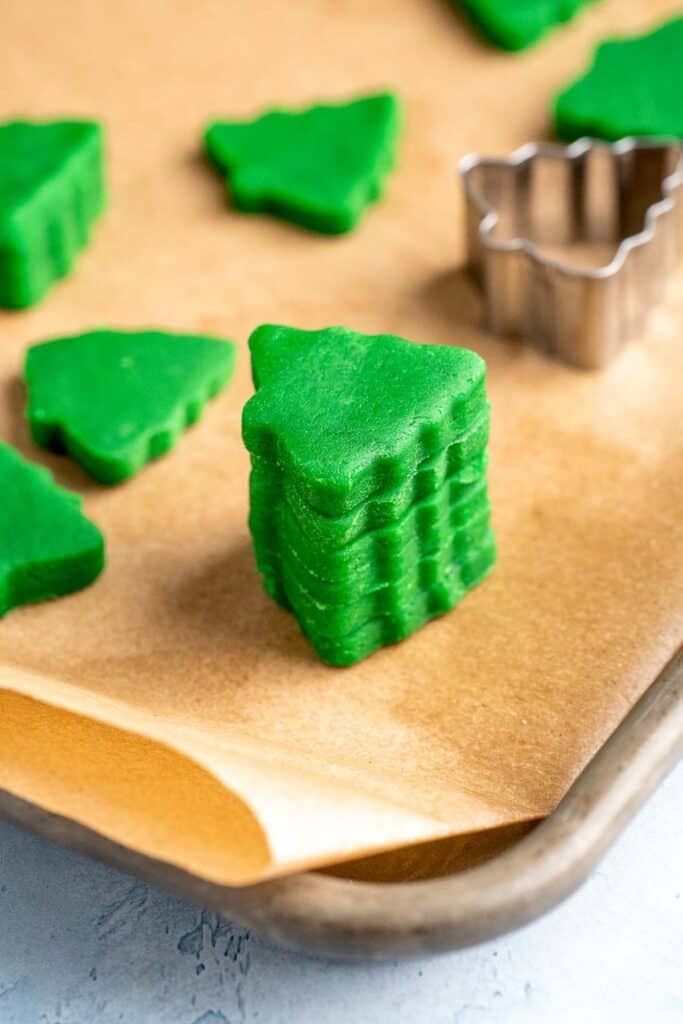
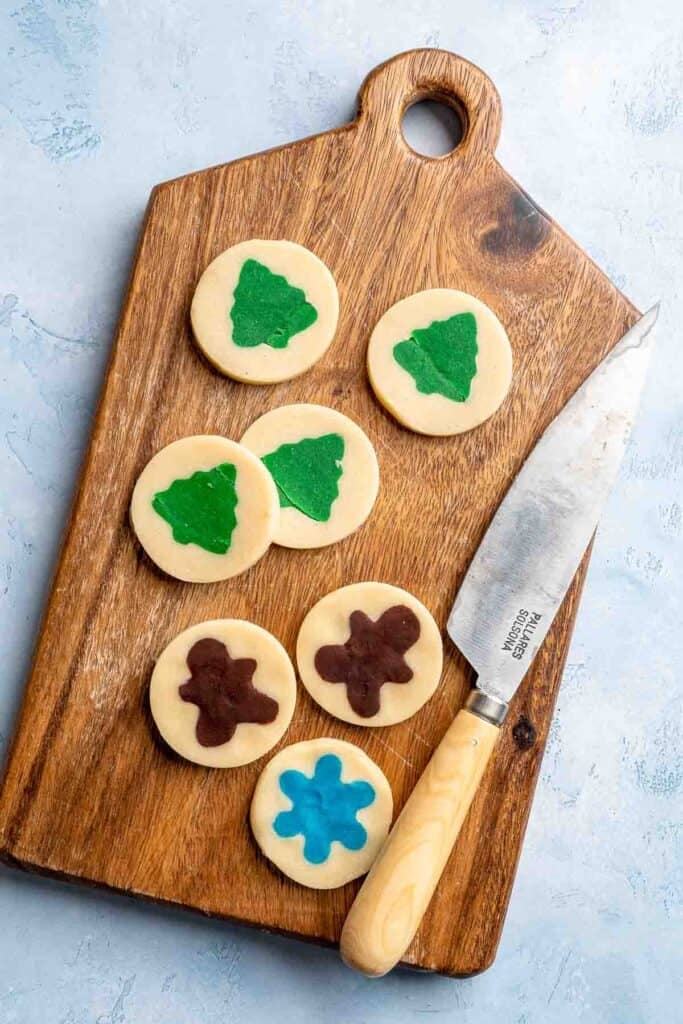
- Create the center shapes. Remove the colored dough from the fridge. Roll each color to about ½ inch thick. Use mini cookie cutters to cut out small shapes, then stack identical shapes into tall, firm stacks. Repeat with remaining doughs (if doing multiple shapes/colours) into separate stacks. Freeze your stack(s) for at least 4 hours to harden.
- Soften the plain dough. After about 3 hours of freezing, remove the plain dough from the fridge and let it sit at room temperature until softened, about 1 hour.
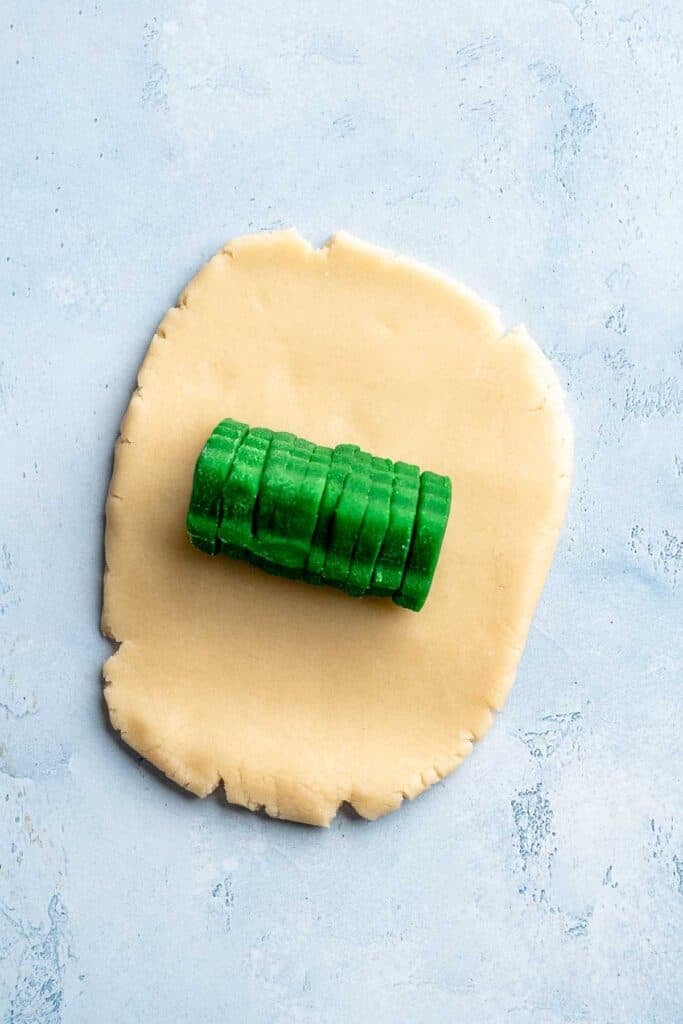
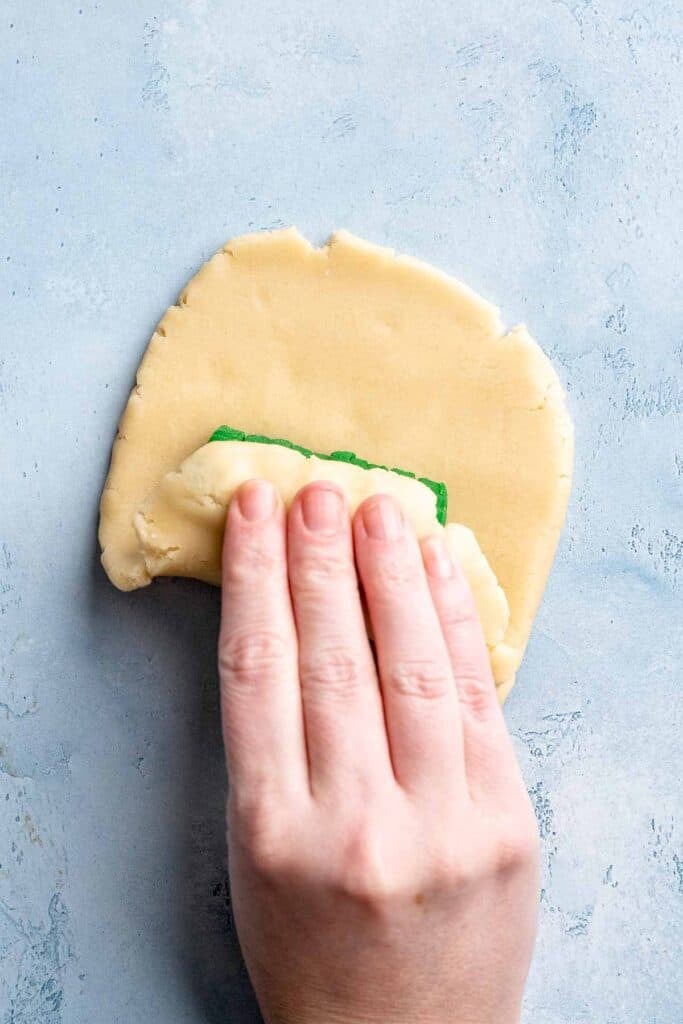
- Form the cookie logs. Remove the frozen shape stacks from the freezer. Press the softened plain uncolored dough around each stack to form a log, ensuring the stack runs directly through the center. For shapes with small crevices and lots of corners (such as snowflakes), it helps to press small bits of plain dough into crevices before wrapping fully.
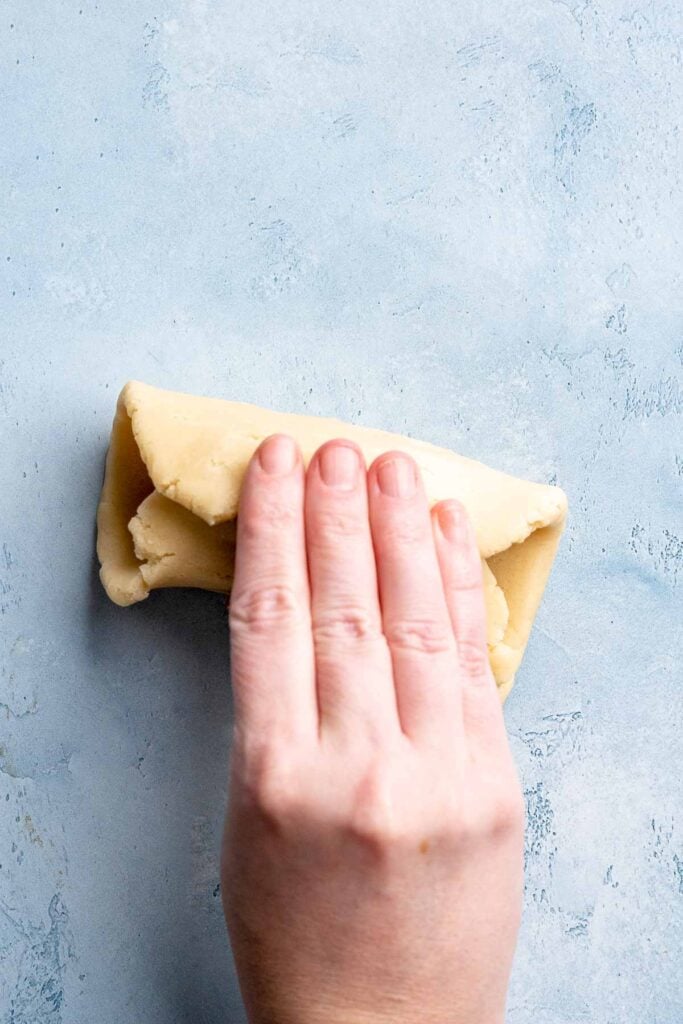
- Chill the logs. Roll the logs gently between your hands until smooth, round, and even. Wrap tightly with plastic cling wrap and freeze for at least 4 hours, or overnight.
- Slice the cookies. Remove frozen cookie dough logs from the freezer and let them sit for about 20 minutes so they soften slightly. Using a sharp knife, slice into ¼-inch cookies.
- Bake the cookies. Place slices onto the baking sheets lined with parchment paper and bake in a 350°F preheated oven for 9-10 minutes, or until set and very lightly golden at the edges.

Expert Tip: Chill the Dough Long Enough for Clean Slices
Slice and bake cookies look their best when the dough is fully chilled and firm. Wrap each log tightly in plastic cling wrap, then chill for at least three hours. If the dough softens while slicing, pop it back into the fridge for fifteen minutes. A firm dough gives the cleanest edges and the most defined colors and patterns.
More Tips and Tricks
- Use gel food coloring only. Liquid coloring softens the dough and makes slicing harder.
- Do not over bake. They should look pale, not browned, for a soft sugar cookie texture.
- Make multiple logs. Split the dough into two to four logs so the colors and designs stay vivid and defined.
- For perfect rounds, reshape. Roll the dough into an even cylinder so your cookies slice evenly. If your cookies come out slightly misshaped, gently round the edges while still warm.
- Chill as needed. If the rest of the dough softens while you work, chill it again to keep the shapes clean.
- Use cooking rack. Always cool the cookies on a cooling rack so the bottoms do not soften.
Recipe Variations
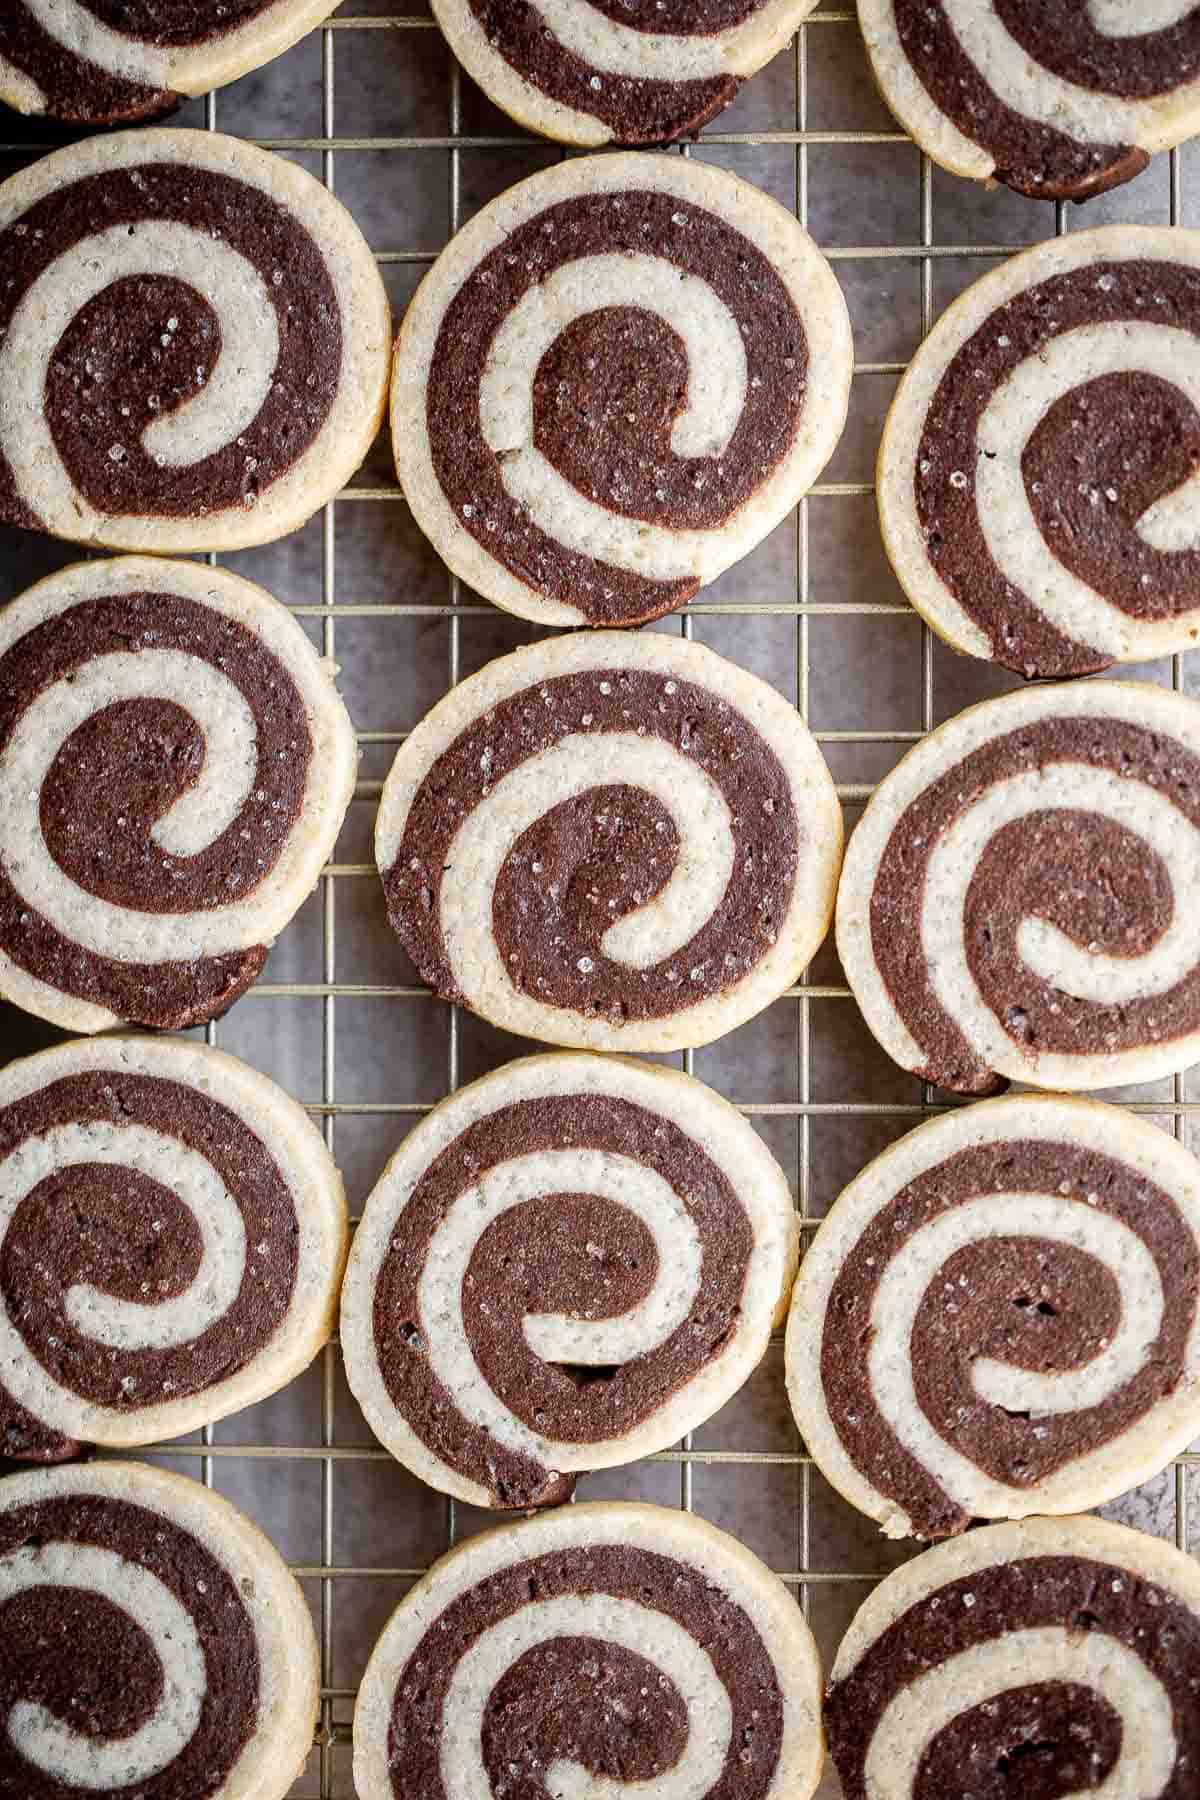
- Classic swirl cookies. Skip the cutout center and divide the dough into two or three colors. Roll each color into a rectangle, stack them, then roll tightly into a spiral. Chill well and slice for colorful swirl cookies.
- Checkerboard cookies. Divide the dough into two contrasting colors, shape each into a rectangle, chill them, then slice into long strips. Stack the strips in alternating colors to form a checkerboard block. Chill again, then slice into patterned squares.
- Striped cookie logs. Roll colored doughs into thin sheets and layer them to create bold stripes. Fold, trim, and stack again for more stripes, then shape into logs and freeze before slicing.
- Two tone logs. Keep it simple by creating one colored dough log and wrapping it in plain dough or a second color. This creates a clean two tone ring effect when sliced.
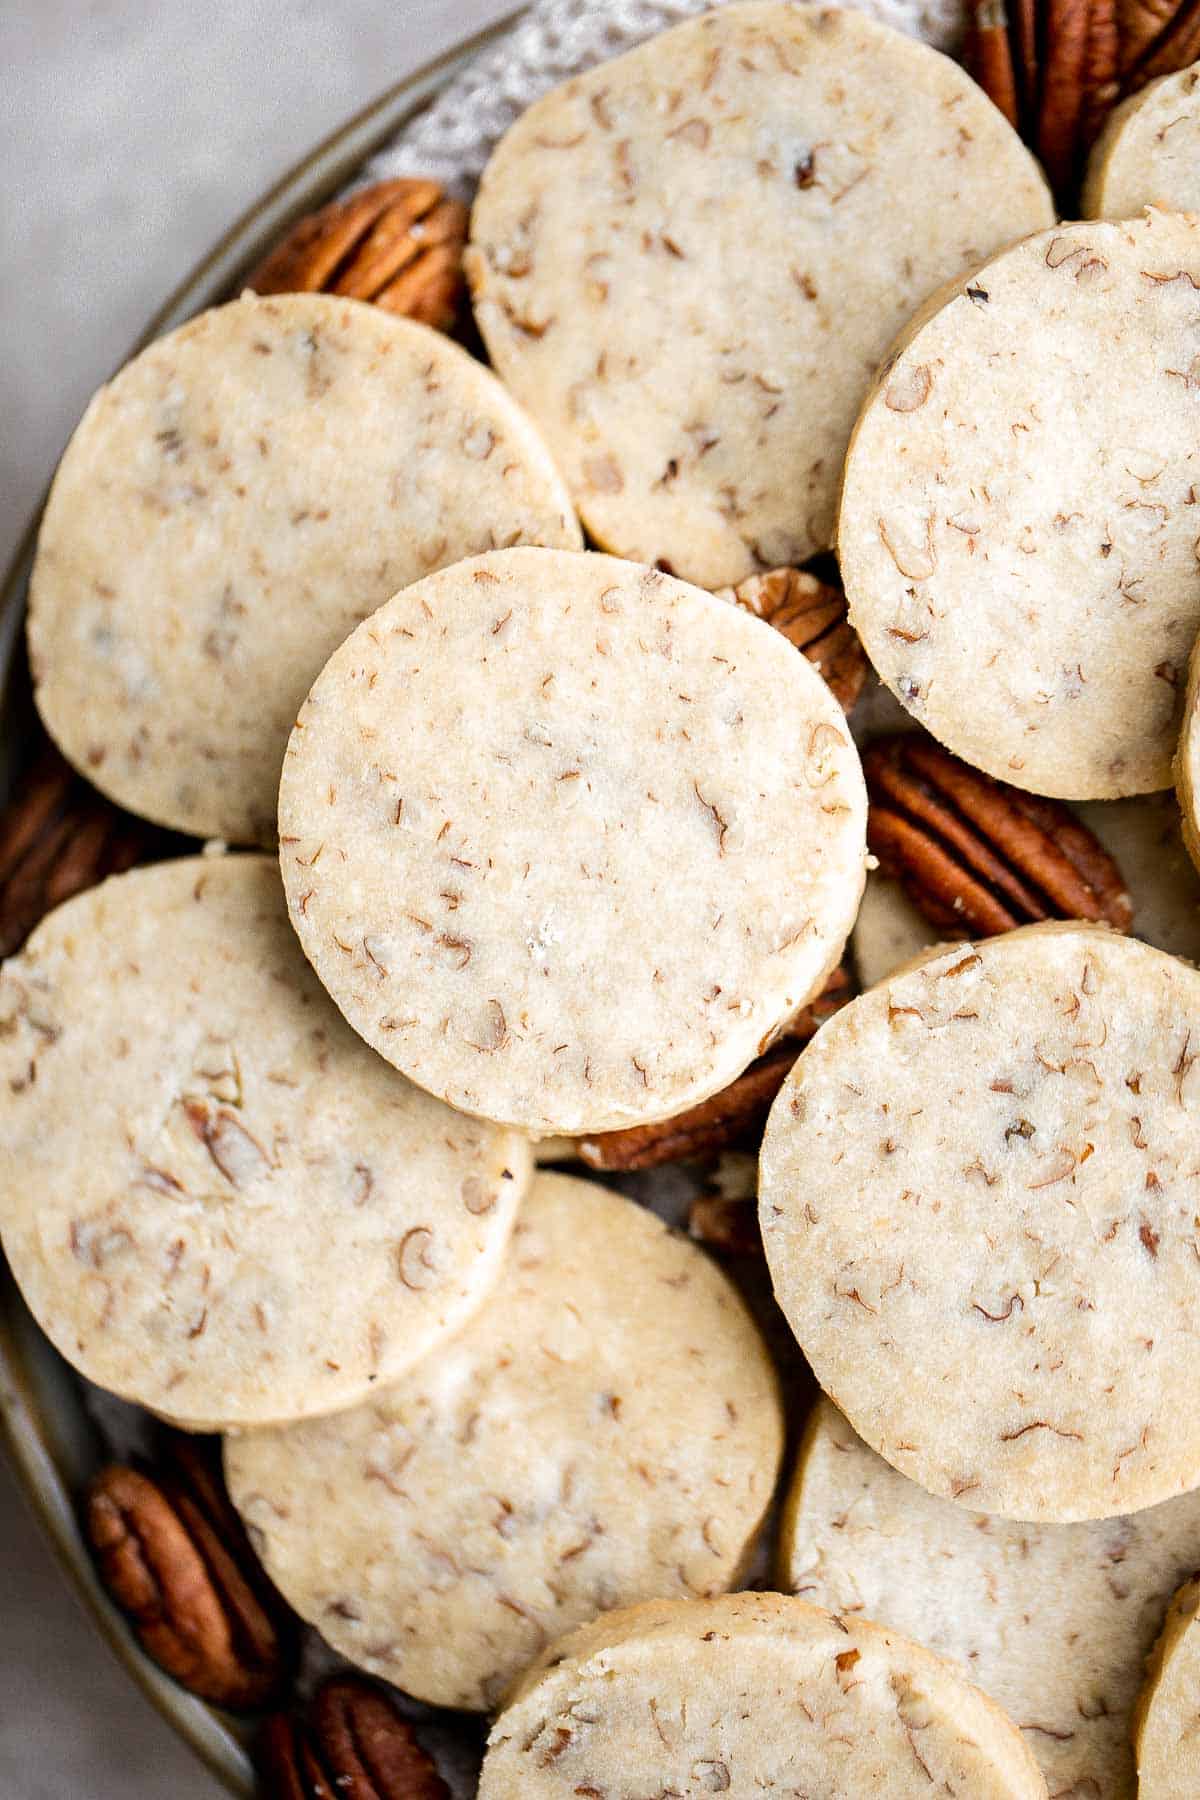
- Sprinkle edge logs. Before freezing, roll the shaped dough logs in holiday sprinkles, sanding sugar, or even crushed candy canes. Once sliced, the edges bake up bright, festive, and crunchy. A light egg wash brushed on the outside of the cylinder before adding sprinkles helps them stick better. See our Pecan Sandies which we rolled in crushed nuts.
- Chocolate dough variation. Replace one half cup of the flour with unsweetened cocoa powder to create a chocolate cookie exterior. This pairs beautifully with red, green, white, or gold designs inside.
- Peppermint twist. Add a little peppermint extract to one portion of the dough and color it red. Twist or braid the red dough with a plain dough portion to create a candy cane effect through the log.
- White chocolate drizzle. After baking, drizzle melted white chocolate over the cookies for a snowy holiday finish.
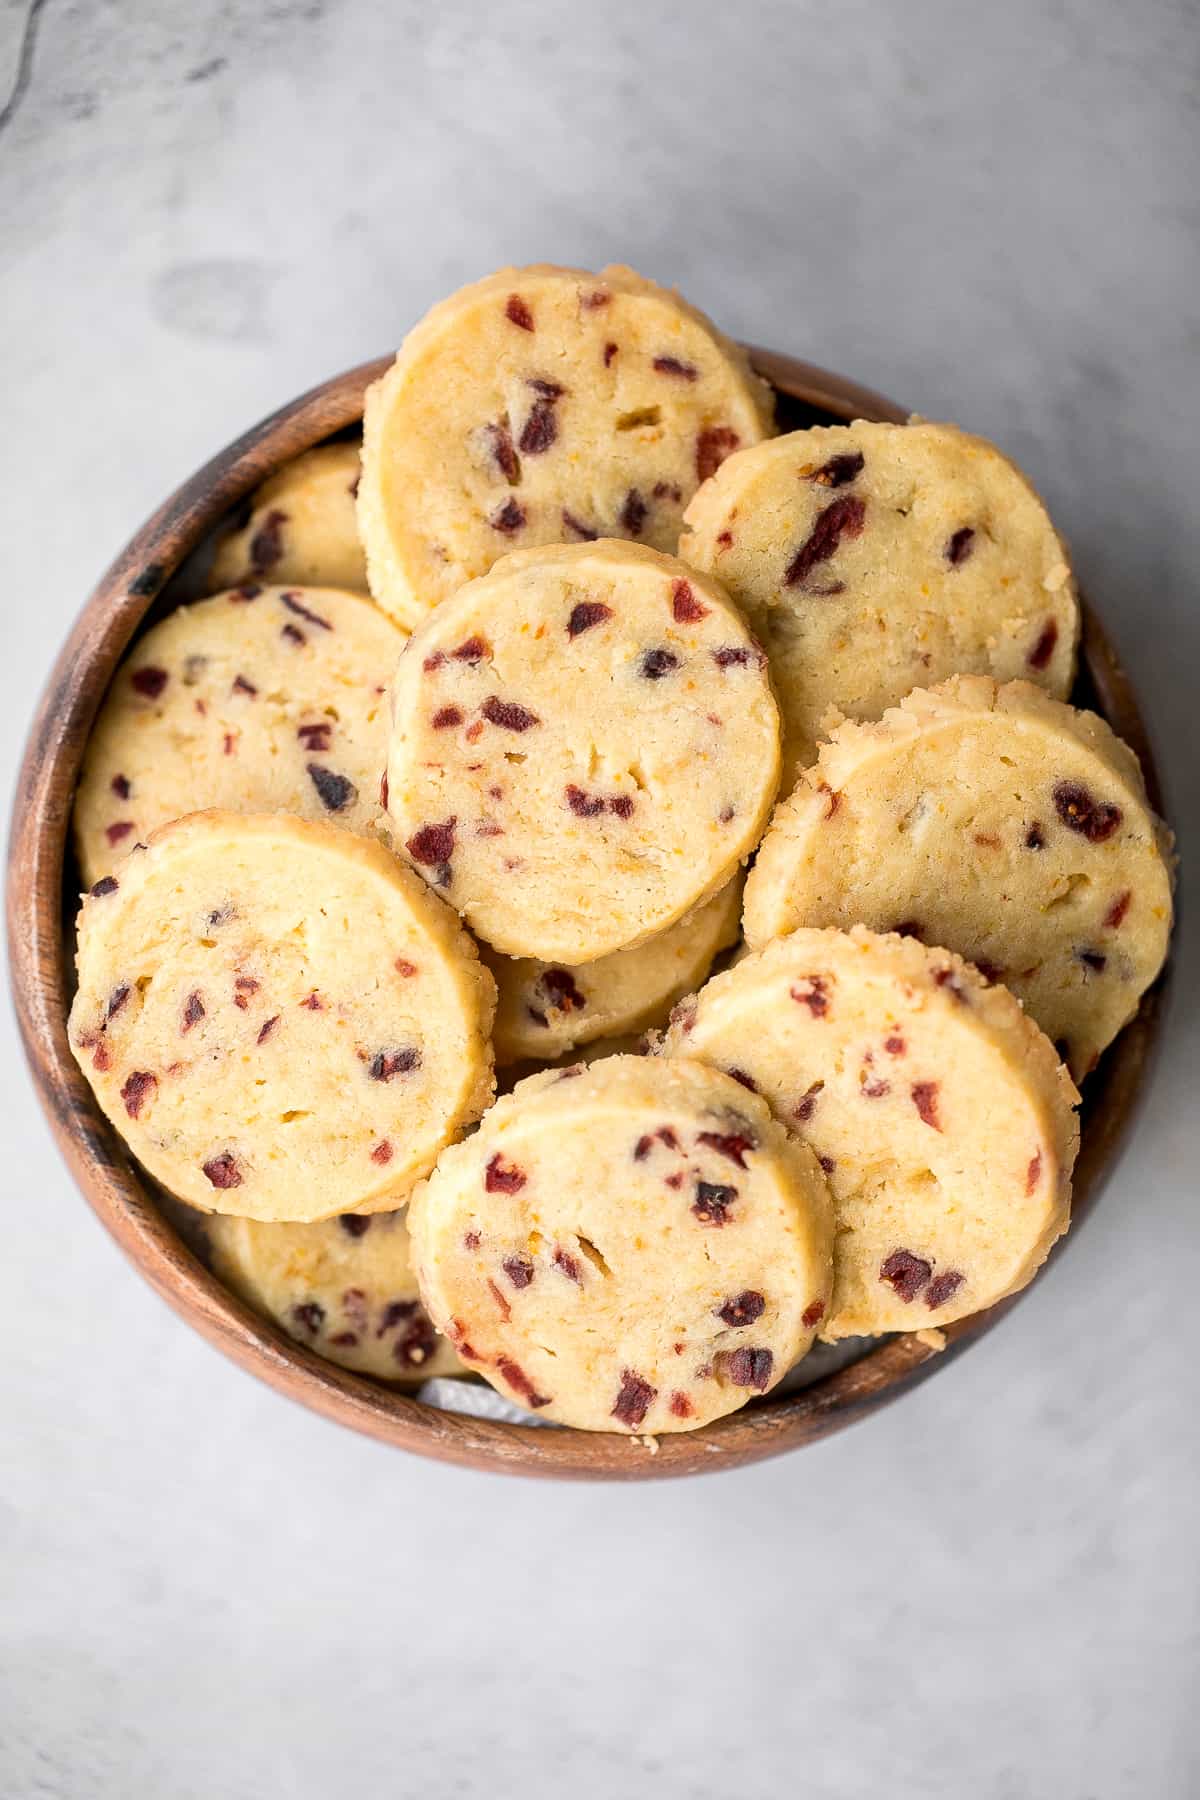
- Orange twist. Add orange zest to part of the dough for bright and fragrant orange cookies. See our Cranberry Orange Shortbread Cookies.

Storage
How to Store
Store cooled cookies in an airtight container at room temperature for up to one week.
How to Reheat
If you prefer warm cookies, microwave one for a few seconds to soften slightly.
How to Freeze
- How to freeze cookie dough: Slice and bake cookie dough freezes beautifully. Wrap each dough log tightly in parchment, then place it in a freezer bag or freezer safe container. Freeze for up to three months. When you are ready to bake, thaw the log in the fridge just until it is firm enough to slice cleanly.
- How to freeze baked cookies: Baked slice and bake cookies also freeze very well. Once fully cooled, arrange them in a single layer and freeze until solid, then transfer them to a freezer safe container or bag. They keep for about three months and thaw quickly at room temperature while staying soft and buttery.
How to Serve
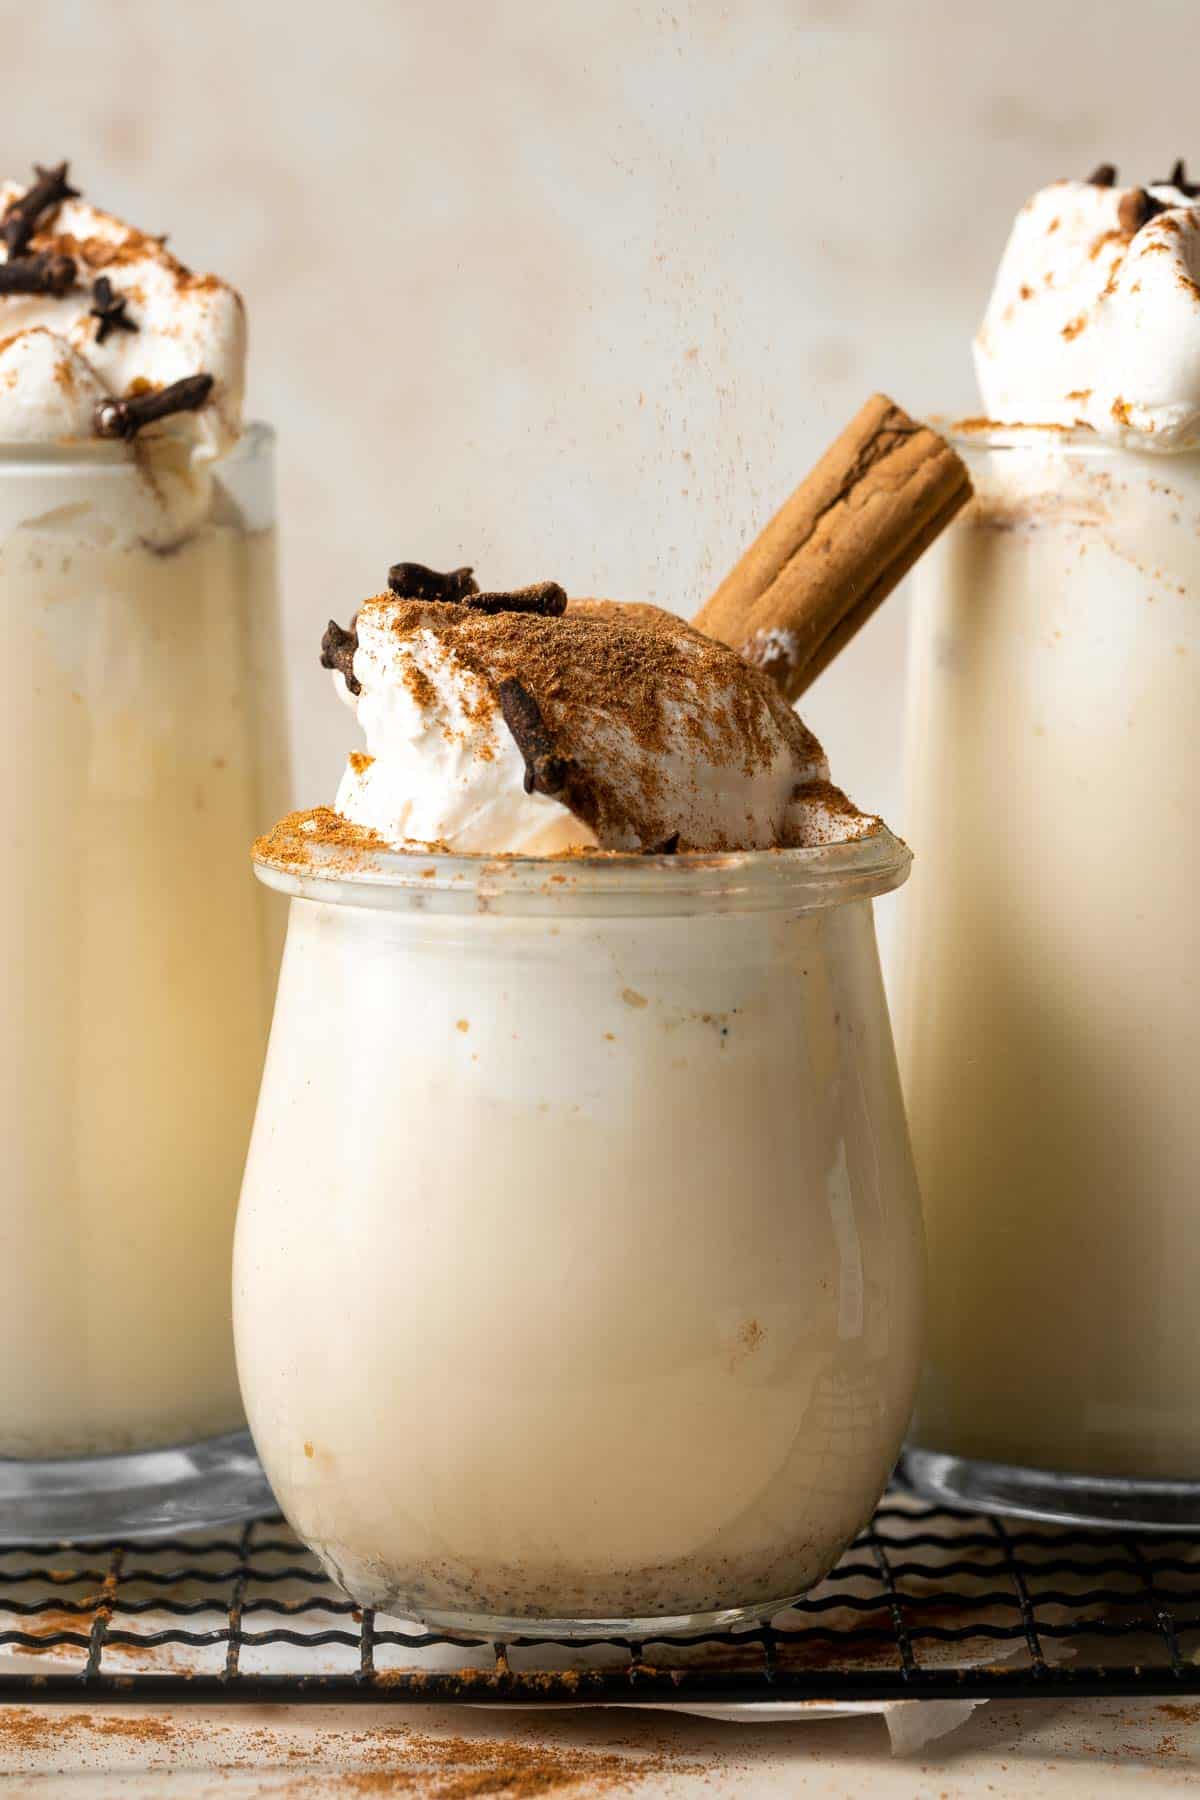
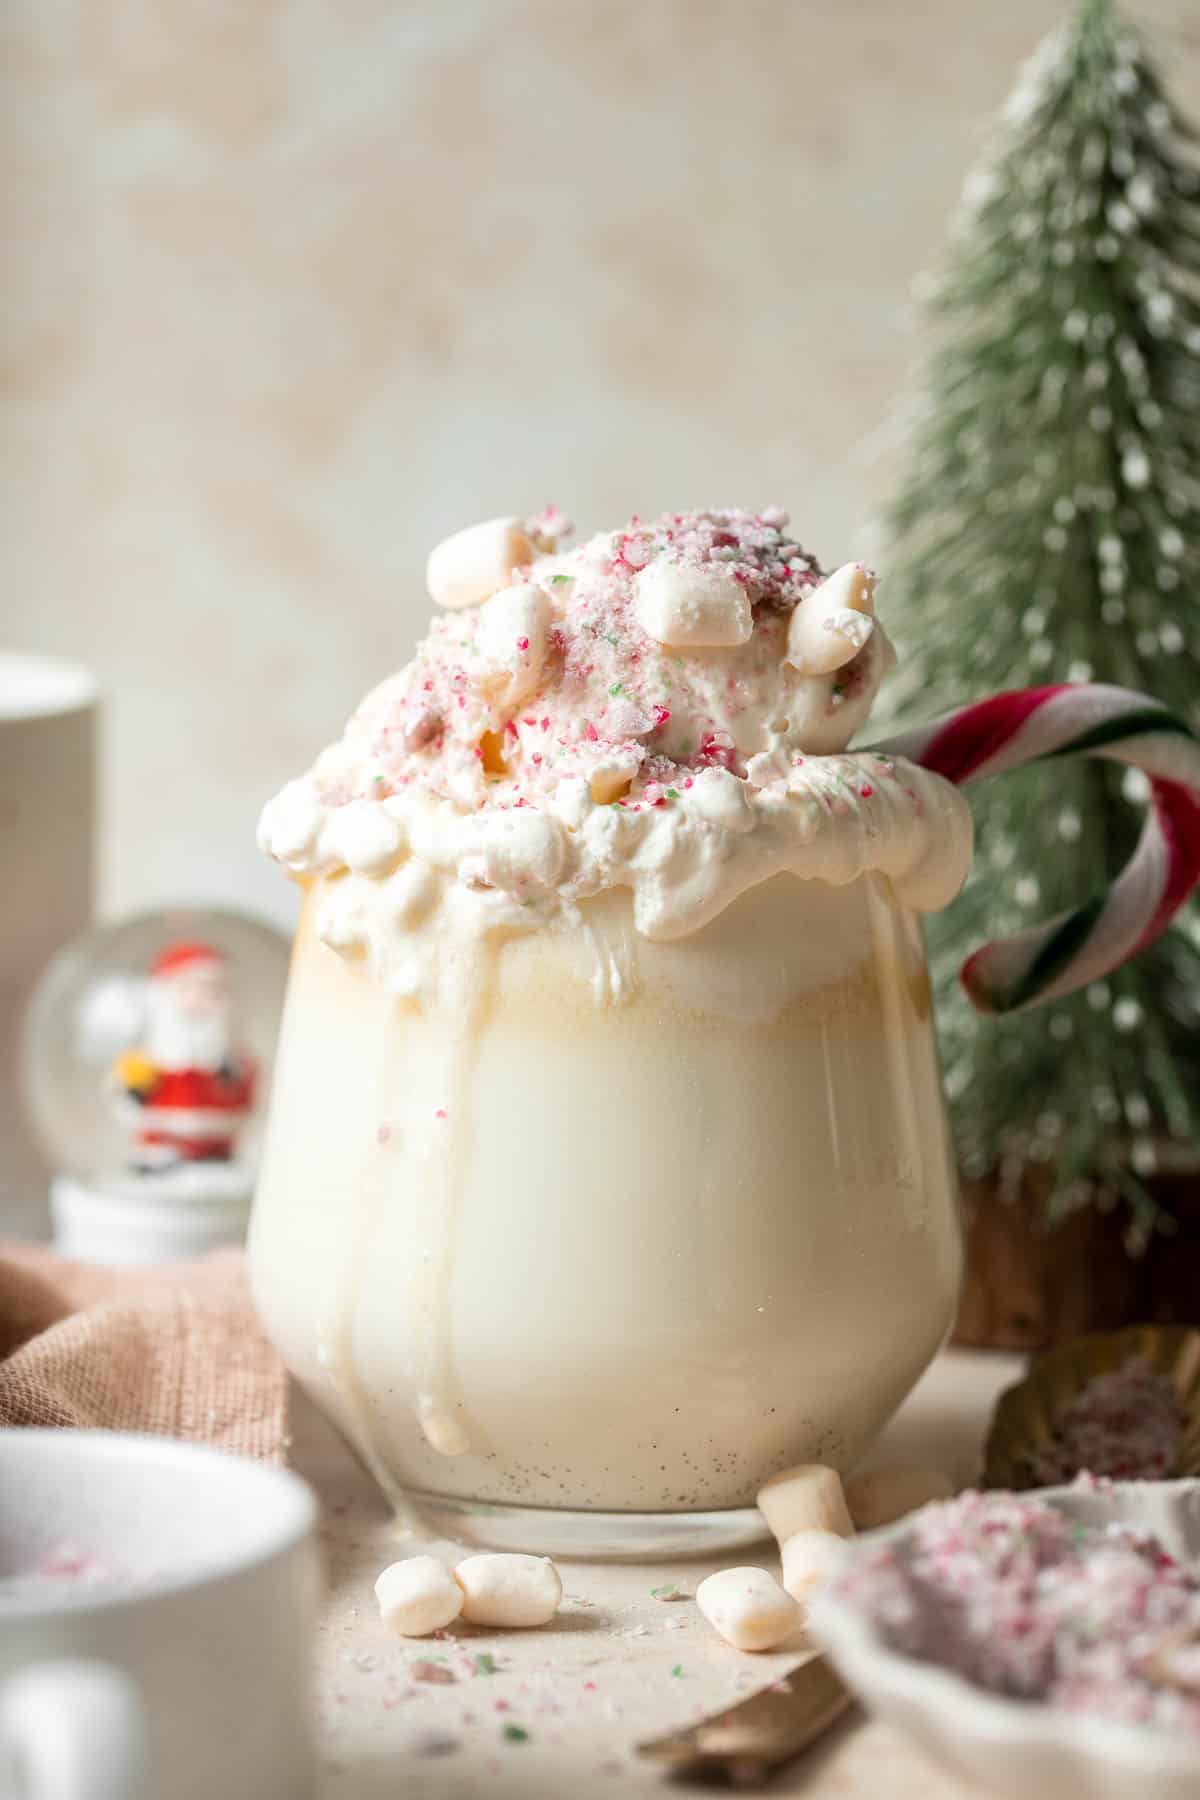
These cookies are perfect for Christmas dessert trays, cookie exchanges, gift boxes, and holiday parties. They pair well with hot chocolate, milk, festive cocktails, and cozy warm drinks. Add them to your Christmas cookie platter alongside classic favorites like gingerbread men, shortbread, and chocolate peppermint cookies and other holiday cookie recipes.
These are my favorite drinks to serve with slice and bake cookies:


Holiday Cookie Week
These cookies are part of our Annual Cookie Week! For more sweet inspiration, explore our full holiday cookie collection from this year and year's past. You will find everything from nostalgic classics and colourful decorated cookies to creative flavours and fun themed bakes that make our annual Cookie Week such a favourite tradition.
FAQ
Start by creaming the butter and sugars until light and fluffy. Mix in the vanilla and eggs, then add the dry ingredients to form a smooth dough. Divide the dough and add gel food coloring to create festive colors. Shape each portion into a log, wrap tightly, and chill until firm. Once the dough is fully chilled, slice it into rounds and bake at 350 degrees until set around the edges. Cool on a rack and enjoy. The whole process is simple, flexible, and perfect for holiday baking.
Create a center design by shaping a portion of the dough into a small log or shape, then wrap it in a contrasting colored dough. Chill the center shape first so it keeps its form. Once firm, press another color of dough around it evenly to create the outer layer. Chill again, then slice to reveal the design.
Cookies baked at 375 degrees will bake faster and may develop darker edges with a slightly crispier texture. The higher heat encourages more rapid spread and browning. This can be great if you like lightly caramelized edges, but it is easier to overbake them. For slice and bake cookies that need clean edges and even color, 350 degrees gives the most reliable result.
Yes, baking cookies at a lower temperature often results in a softer and more tender texture. Lower heat cooks the dough more gently, so the cookies stay pale and do not crisp as much around the edges. Keep in mind that they may also spread a little more slowly. If you want soft sugar cookie style slice and bake cookies, sticking to 350 degrees is usually the best balance.
Yes, slice and bake cookies can be baked in the air fryer. Preheat the air fryer to 325 degrees, line the basket with parchment, and place the cookies in a single layer with space between each one. Bake for 5 to 7 minutes, checking early so they do not overbrown. Air fryers run hotter than ovens, so shorter times and slightly lower temperatures work best.
Make sure the dough is fully chilled before slicing. Rotate the dough log slightly after each cut so it does not flatten on one side. If a slice loses its shape, gently reshape the edges with your fingers before baking. Wrapping the dough tightly in parchment while chilling also helps maintain a perfectly round shape.
You can roll the dough log in sprinkles or colored sugar before chilling to create a decorative edge. After baking, decorate with drizzled chocolate, royal icing, or festive sprinkles. These cookies are simple on their own, so a few small finishing touches go a long way for holiday trays.
Use a sharp, non serrated knife and slice straight down with gentle pressure. If the dough crumbles, let it warm slightly at room temperature for a few minutes. If it smashes or loses its shape, it may be too soft, so chill it again until firm. Clean the knife every few slices to keep the edges neat.
Yes. You can turn the recipe into orange cookies, almond cookies, or even peppermint cookies by adjusting extracts and colors. For something richer, start with a shortbread cookies base instead. You can even add warm spices like cinnamon or nutmeg to one portion of dough for a cozy twist.
Start with good quality butter, use gel food coloring for bright festive colors, and chill the dough long enough for clean slices. Rolling the dough in sprinkles or sanding sugar before chilling adds a fun decorative edge. You can also play with flavors by adding citrus zest, almond extract, peppermint extract, cocoa powder, or finely chopped chocolate.
Make sure the dough is fully chilled before slicing. If your slices are too thinner, chill them again before baking. A firm dough helps keep the designs crisp.
More Slice and Bake Cookie Recipes
Looking for other recipes like this? Try these:
Tried this recipe?
I'd love to hear what you think! Leave a comment and rating below to share your feedback. Your reviews help others discover this recipe and help me keep creating more free recipes for you. Snap a photo and tag me on social media @aheadofthyme too.
Recipe

Slice and Bake Christmas Cookies
- Total Time: 9 hours 35 minutes
- Yield: 20-24 cookies 1x
Description
Easy slice and bake Christmas cookies with buttery dough and festive colors, perfect for make ahead holiday baking.
Ingredients
- 1 cup (227 grams) unsalted butter, softened
- ¾ cup (90 grams) confectioners' sugar
- ¾ cup (150 grams) white sugar
- 1 ½ teaspoons vanilla
- 2 eggs
- 4 cups (480 grams) all purpose flour
- ¾ teaspoon baking powder
- ¼ teaspoon salt
- gel food coloring
Instructions
- In a large mixing bowl, whisk together the flour, baking powder, and salt until well combined. Set aside.
- In another large mixing bowl, beat the butter, confectioners' sugar, and white sugar with a hand mixer until light and fluffy, about 3 minutes.
- Add the vanilla and eggs, then beat again until fully combined and smooth.
- Add the dry mixture to the wet mixture and beat until a soft dough forms. The dough should not feel sticky.
- Wrap and refrigerate two-thirds of the plain dough. Divide the remaining one-third into as many colors as you plan to use (I used green, brown, and blue, so I separated it 3 further times).
- Add gel food coloring to each portion of dough. Mix using a hand mixer or knead by hand with gloves (this is the easiest way). Wrap each color in plastic cling wrap and refrigerate for at least 1 hour.
- Remove the colored dough from the fridge. Roll each color to about ½ inch thick. Use mini cookie cutters to cut out small shapes, then stack identical shapes into tall, firm stacks. Repeat with remaining doughs (if doing multiple shapes/colours) into separate stacks. Freeze your stack(s) for at least 4 hours to harden.
- After about 3 hours of freezing, remove the plain dough from the fridge and let it sit at room temperature until softened, about 1 hour.
- Remove the frozen shape stacks from the freezer. Press the softened plain dough around each stack to form a log, ensuring the stack runs directly through the center. For shapes with small crevices and lots of corners (such as a snowflake), it helps to press small bits of plain dough into crevices before wrapping fully.
- Roll the logs gently between your hands until smooth, round, and even. Wrap tightly with plastic cling wrap and freeze for at least 4 hours, or overnight.
- Preheat oven to 350°F. Line two baking sheets with parchment paper.
- Remove frozen logs from the freezer and let them sit for about 20 minutes so they soften slightly. Using a sharp knife, slice into ¼-inch cookies.
- Place slices onto the prepared baking sheets and bake for 9-10 minutes, or until set and very lightly golden at the edges.
Notes
How to store: Store cooled cookies in an airtight container at room temperature for up to one week.
How to freeze cookie dough: Slice and bake cookie dough freezes beautifully. Wrap each dough log tightly in parchment, then place it in a freezer bag or freezer safe container. Freeze for up to three months. When you are ready to bake, thaw the log in the fridge just until it is firm enough to slice cleanly.
How to freeze baked cookies: Baked slice and bake cookies also freeze very well. Once fully cooled, arrange them in a single layer and freeze until solid, then transfer them to a freezer safe container or bag. They keep for about three months and thaw quickly at room temperature while staying soft and buttery.
- Prep Time: 25 minutes
- Cook Time: 10 minutes
- Category: Cookies
- Method: Bake
- Cuisine: American


Comments
No Comments