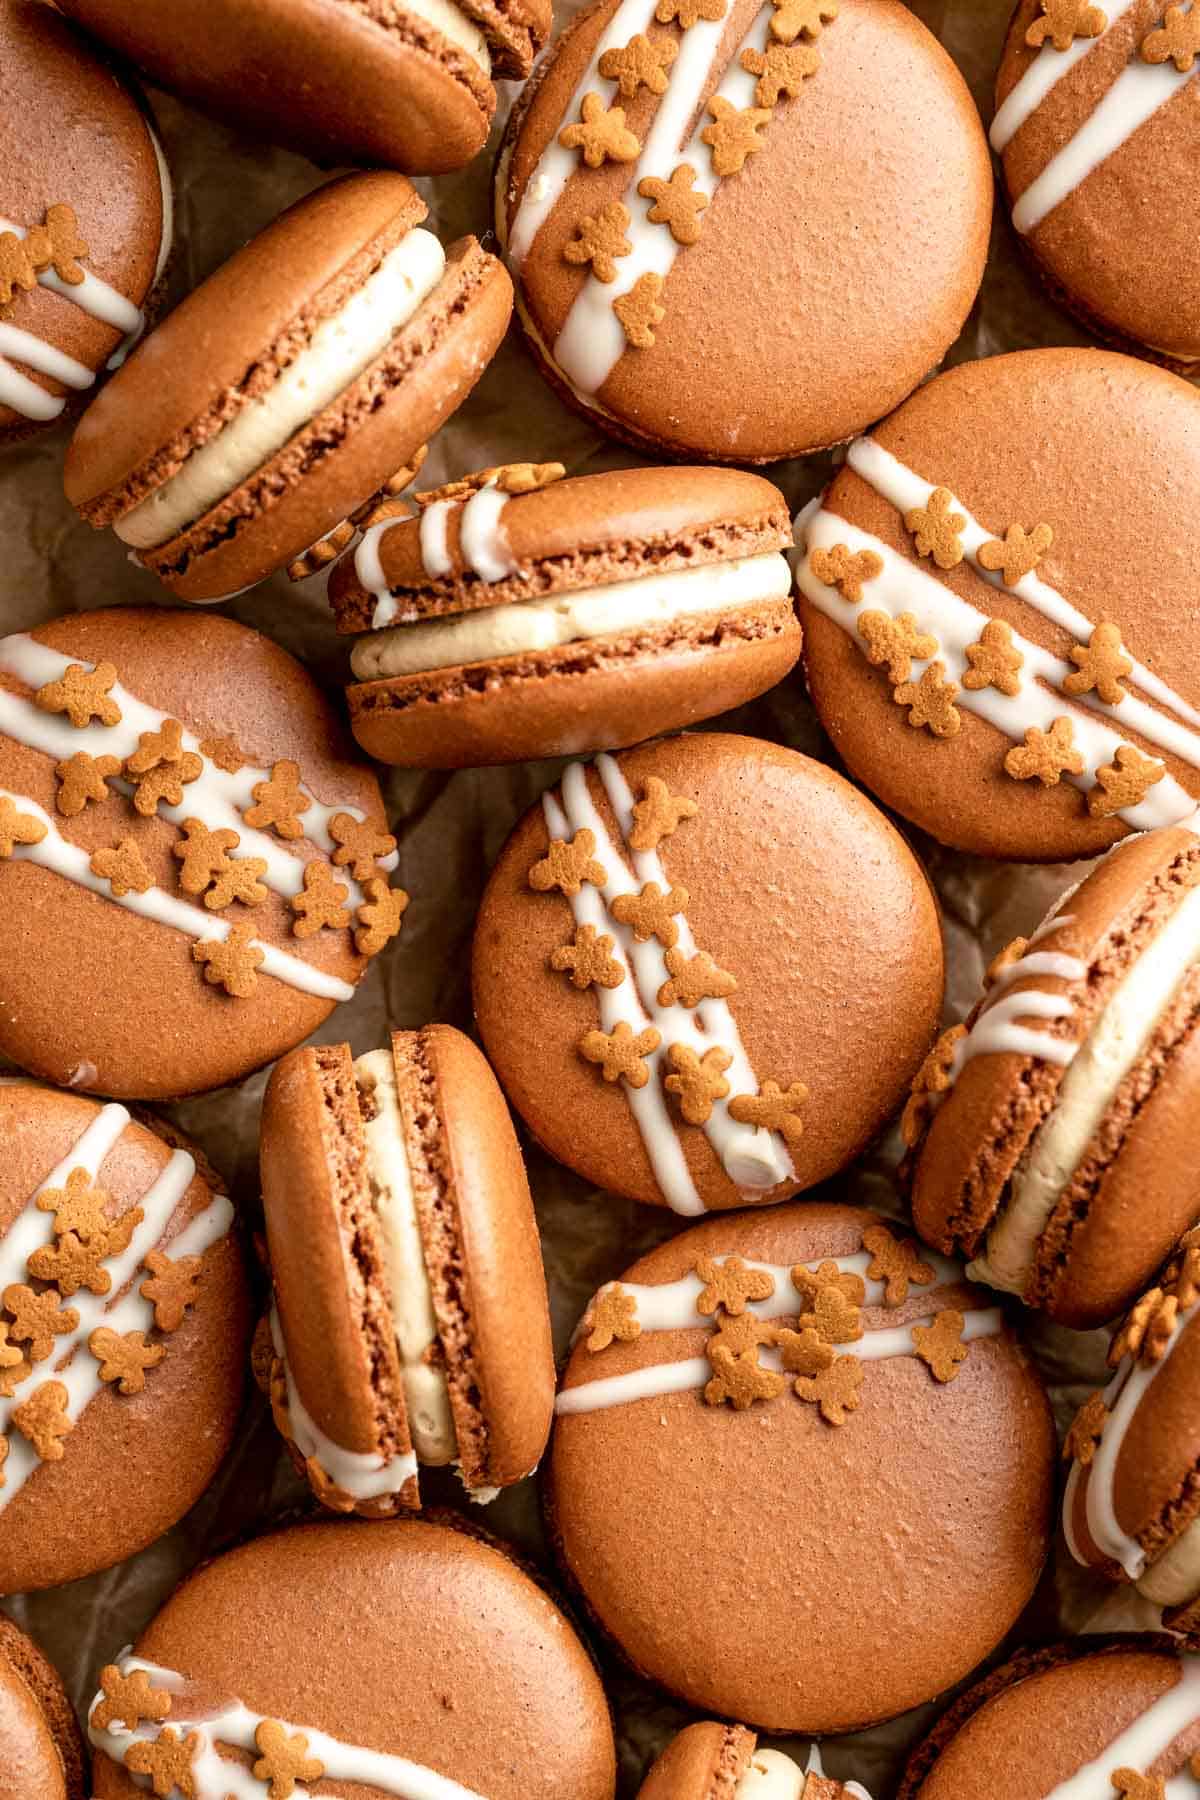
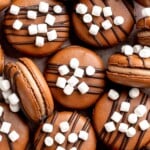
There is something magical about Hot Chocolate Macarons, where crisp cocoa shells meet a fluffy marshmallow filling that melts on your tongue in the warmest, coziest way. These winter inspired macarons pack in all the nostalgic hot cocoa flavor you love, wrapped up in a bite sized treat that feels special enough for the holidays yet simple enough for an afternoon bake. They are chocolaty, delicate, and ridiculously festive for cookie boxes or Christmas dessert trays.

Cold weather baking always makes me crave richer flavors, and this recipe delivers exactly that with deep cocoa shells, a creamy hot chocolate buttercream, and tiny marshmallows for that classic mug of cocoa vibe. Macarons are famously picky, but this recipe walks you through each step in a clear and friendly way so that your shells bake up smooth, full, and perfect with those pretty little feet.
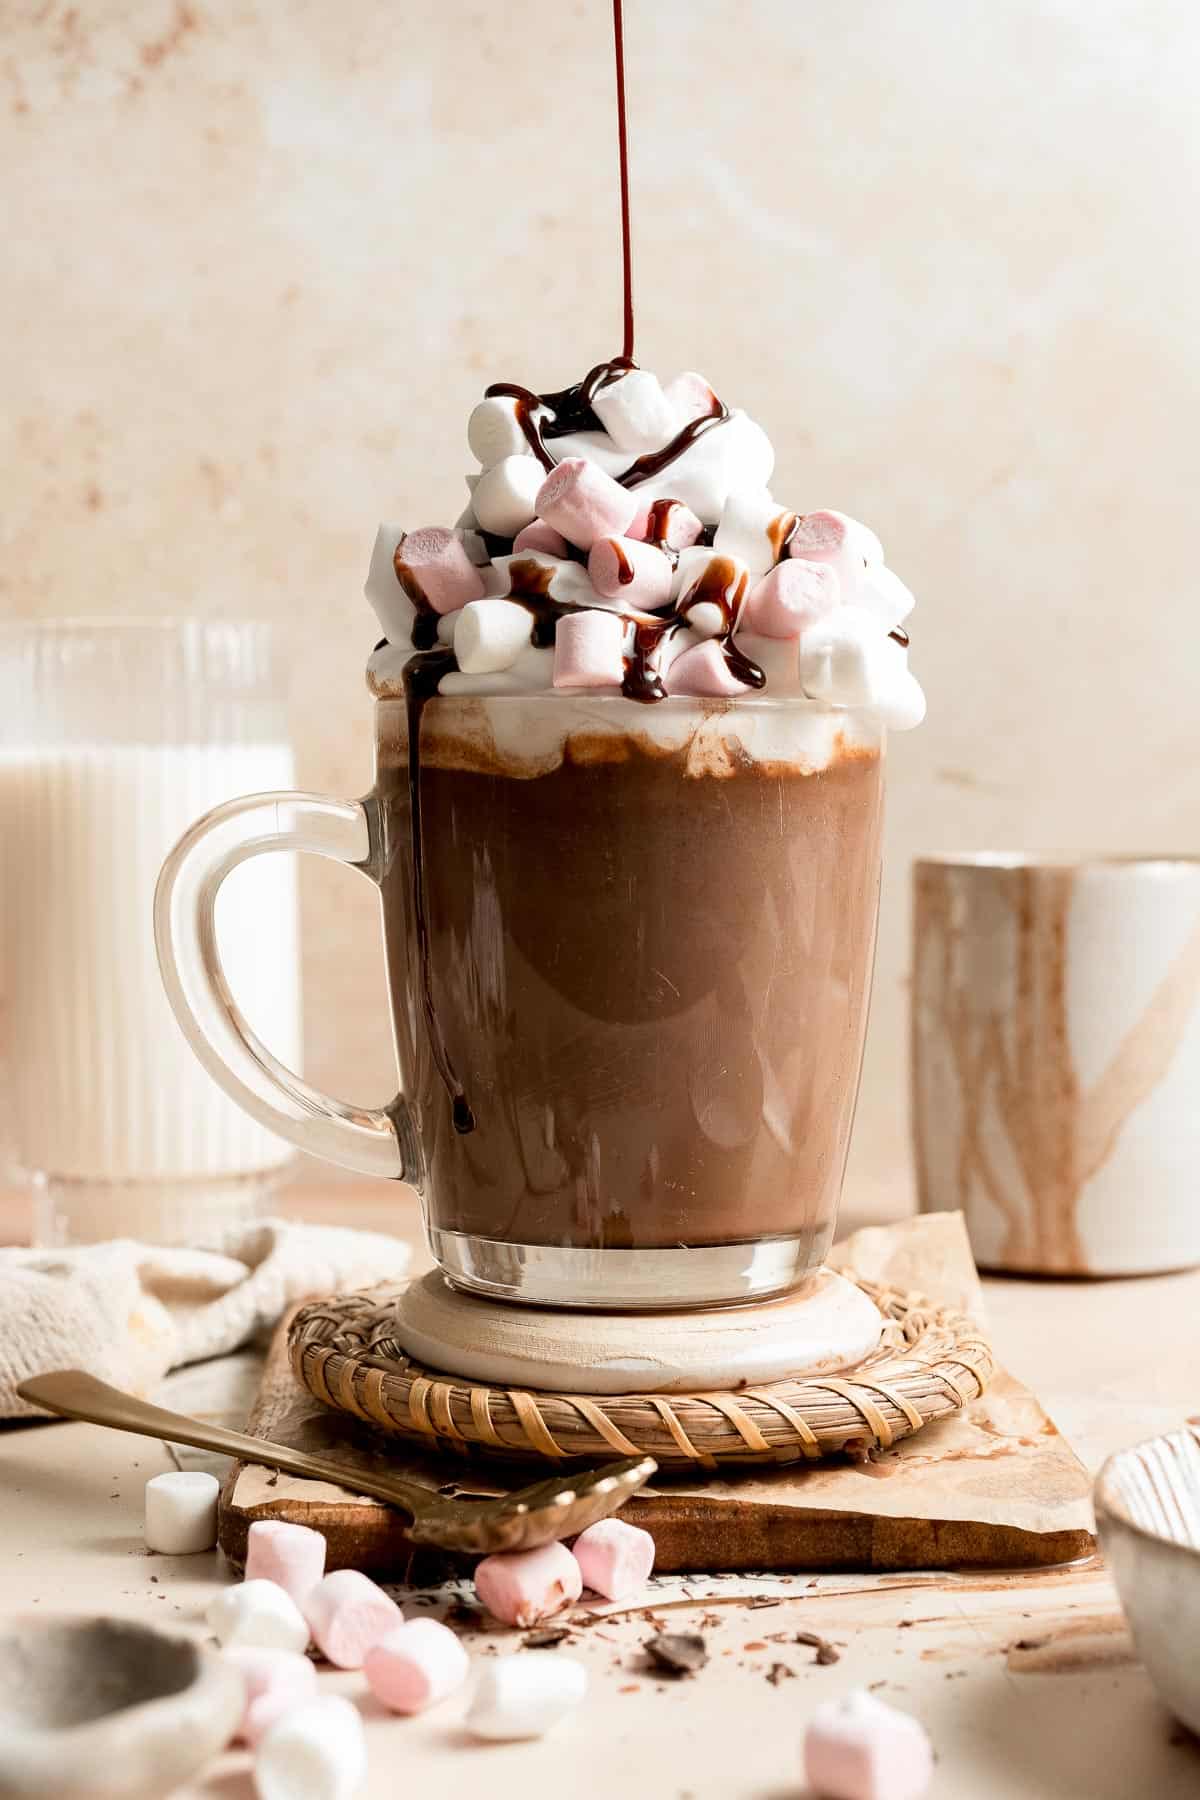
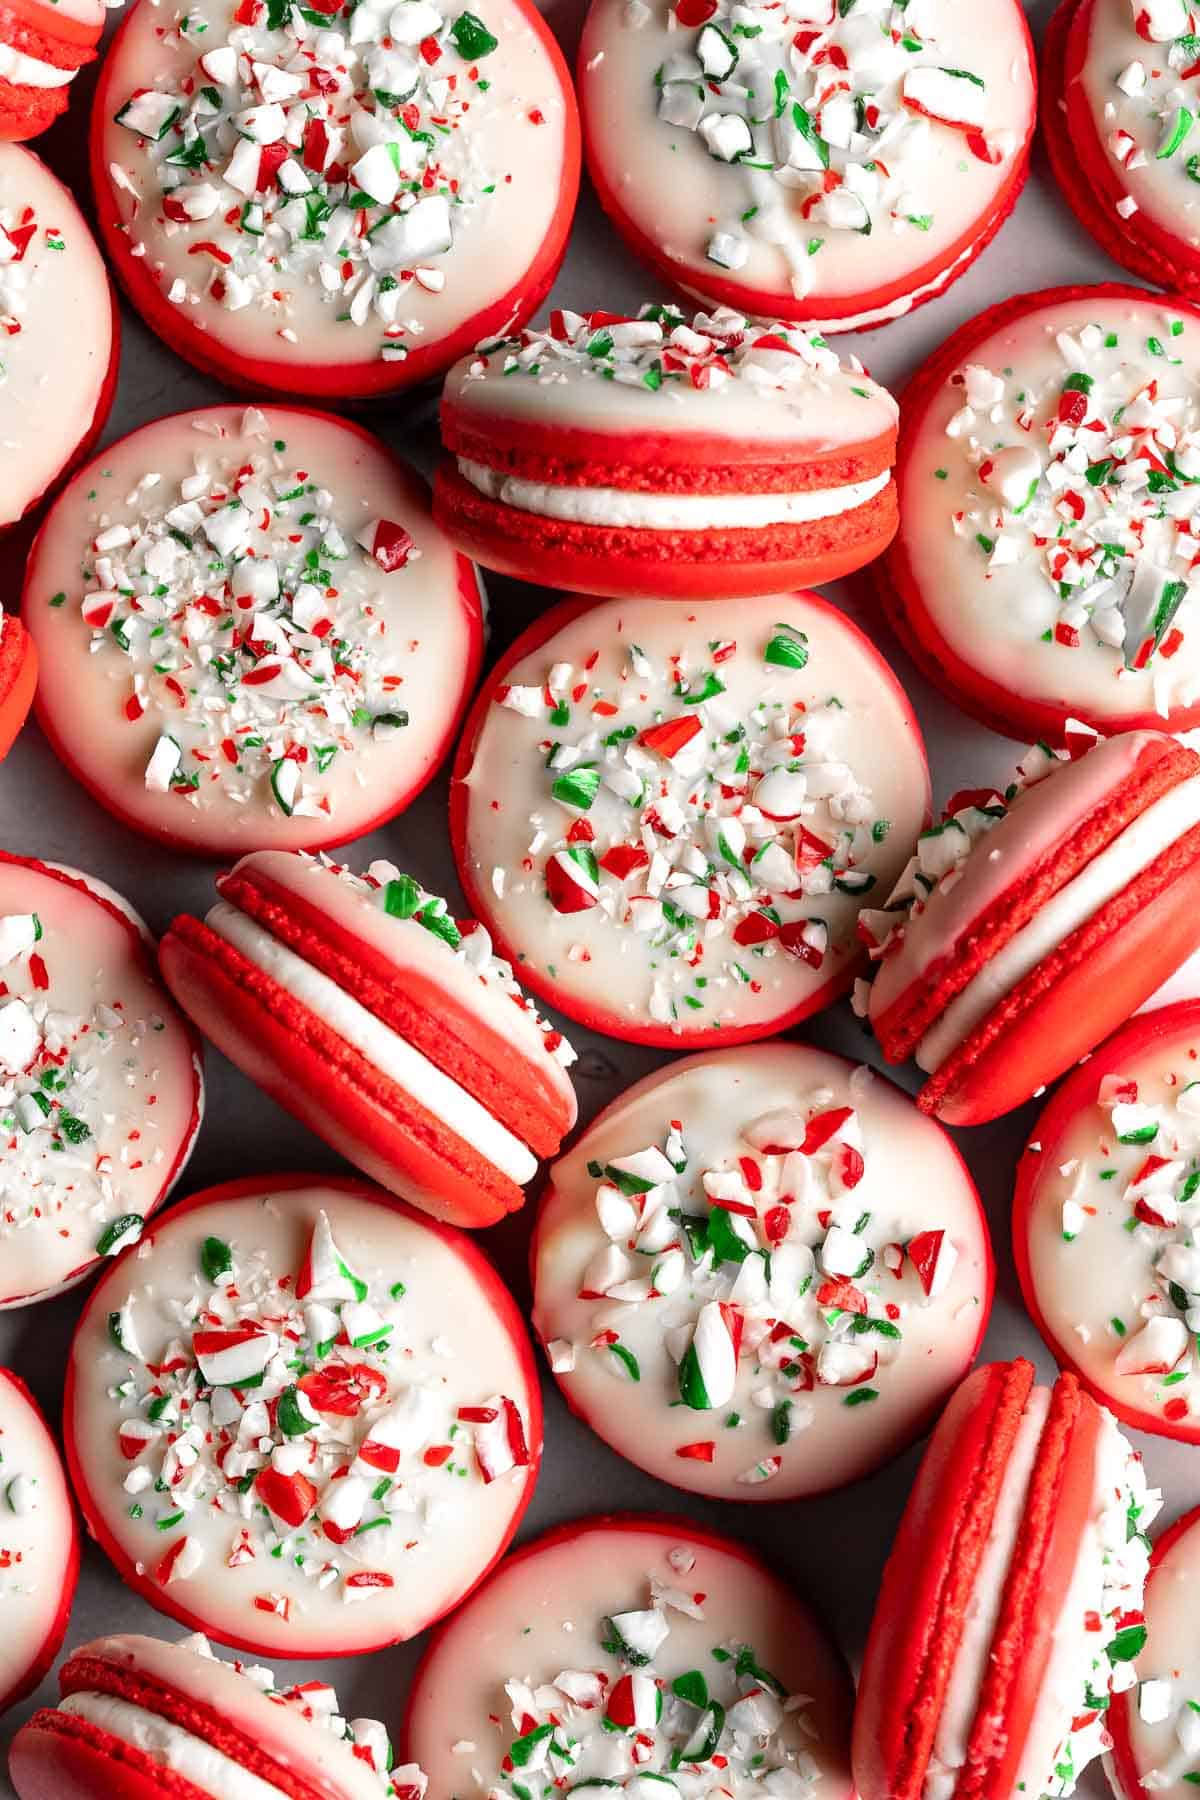
This recipe was inspired by our festive Peppermint Macarons and our Classic Chocolate Macarons, and it pairs beautifully with our Homemade Hot Chocolate or any chocolate forward holiday treats you love to bake this season.

Why You'll Love This Recipe
- Cozy hot chocolate flavor in macaron form. These macarons capture everything you love about a warm cup of cocoa, with deep chocolate shells and a marshmallow filled center that feels indulgent, nostalgic, and perfect for winter baking.
- Bakery quality results at home. You get crisp tops, chewy centers, and pretty macaron feet without complicated steps or confusing instructions. This recipe is written to guide you through the entire process confidently so you can create bakery worthy macarons in your own kitchen even if you are not an expert.
- Perfect for the holidays. These French macarons look stunning on cookie trays, holiday dessert boards, and gifting boxes. The tiny marshmallow decoration makes them feel instantly festive and extra cute, which is why they are perfect for Cookie Week and all your holiday celebrations.
- Fun to decorate and customize. You can drizzle chocolate on top, pipe tall swirls of frosting through a star tip, add mini marshmallows, sprinkle crushed candy canes, swirl of ganache, or tint the shells slightly for a winter twist. The recipe is flexible enough to let you create your own holiday inspired macaron style.
Jump to:
Ingredients and Substitutions
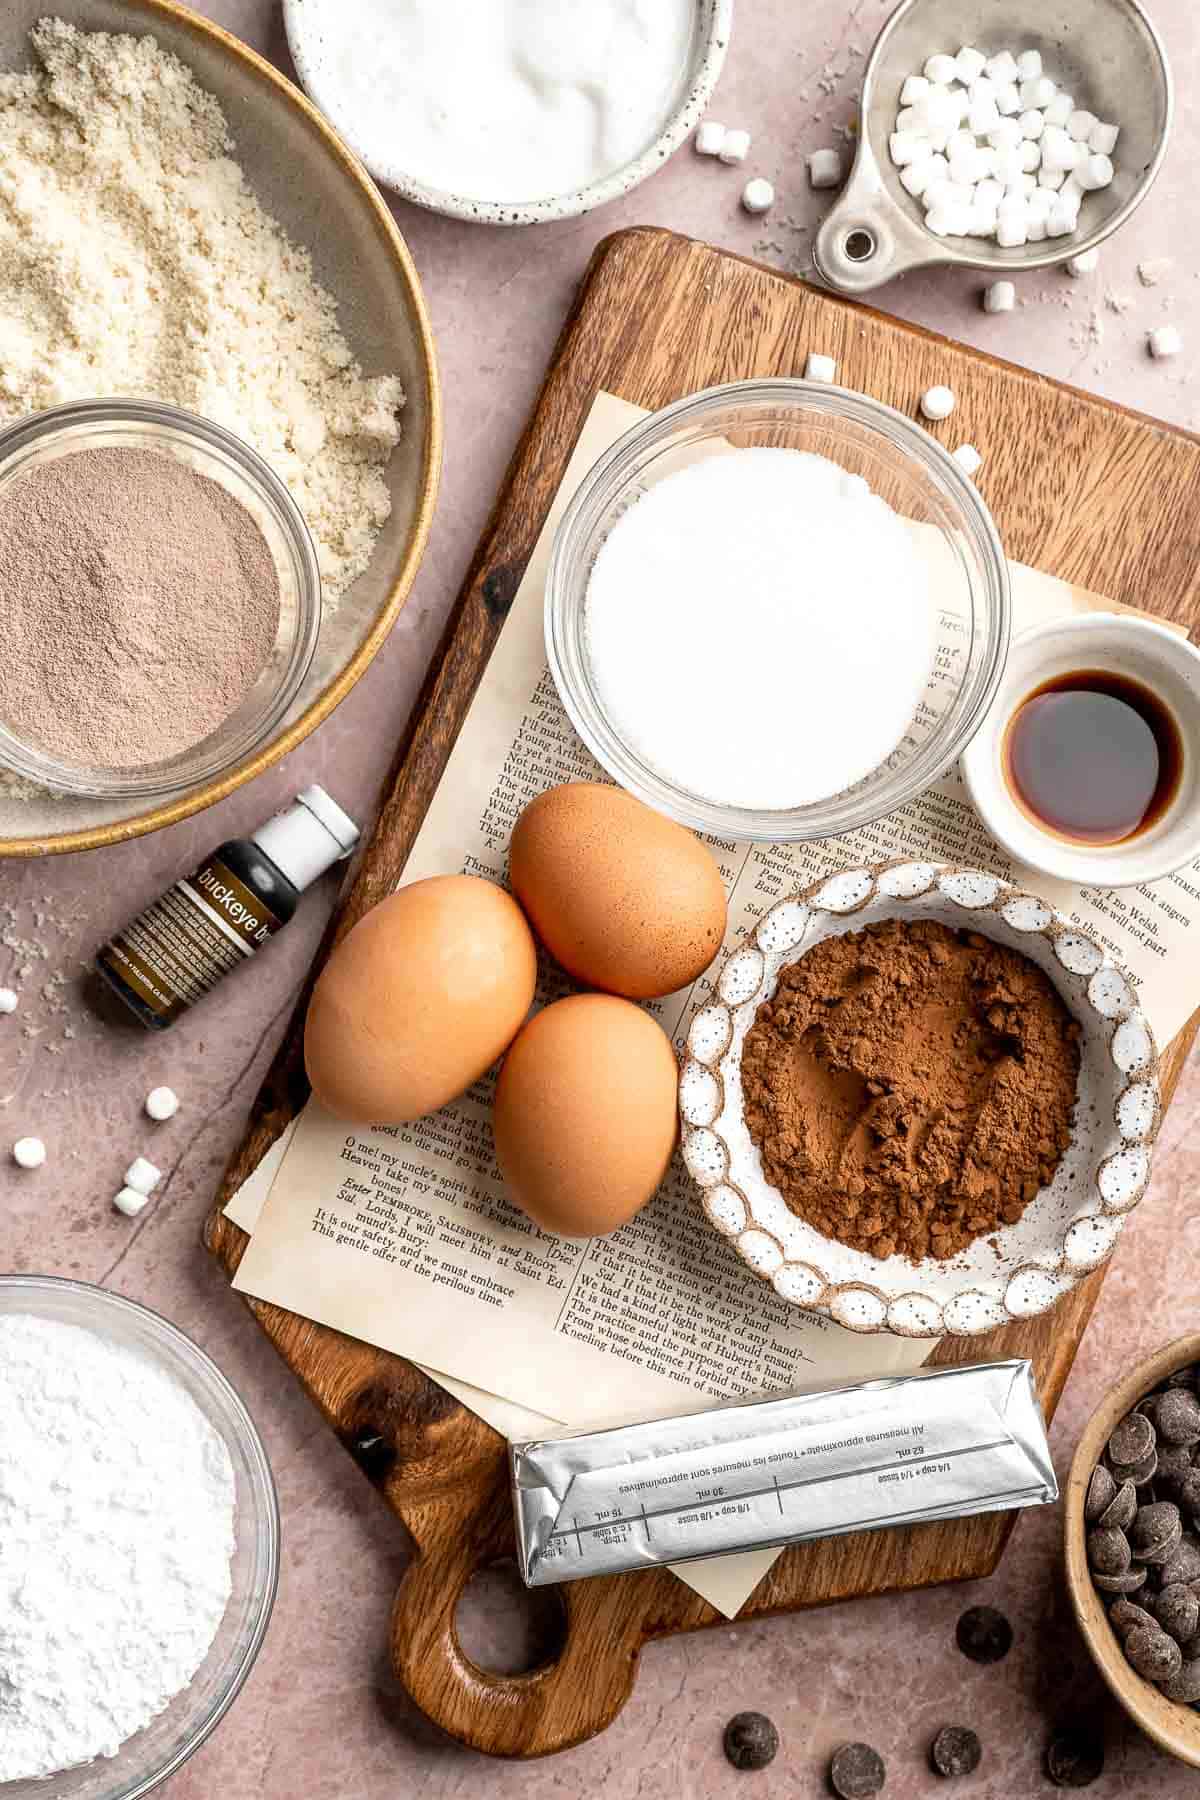
To make these delicious Hot Chocolate Macarons, you will need the following ingredients (see recipe card below for quantities):
- super fine almond flour - For the smooth shells. Use blanched almond flour only.
- confectioners sugar - Used in both the shells and filling, which helps create a smooth texture.
- dutch processed cocoa powder - For the deep chocolate flavor. Natural cocoa works in a pinch but the shells will be lighter in color.
- egg whites - Use aged or room temperature egg whites.
- super fine white sugar - This helps stabilize the meringue.
- brown gel food coloring - This is totally optional, to deepen the cocoa tone.
- unsalted butter - Softened butter is needed for the filling.
- marshmallow fluff - This gives a classic hot chocolate marshmallow flavor.
- hot chocolate powder - Blends smoothly into the delicious hot chocolate buttercream and gives it an authentic hot cocoa taste. Feel free to use any brand of hot cocoa mix.
- vanilla - For sweetness and balance.
- semi sweet chocolate - Used for drizzling on top or decorating.
- dehydrated mini marshmallows - Also used for decoration. Regular mini marshmallows can work but the texture will differ.
Equipment
You will also need measuring cups and spoons, a kitchen scale, stand mixer with whisk attachment, sieves, silicone baking mats, large piping bags, medium round piping tips, mixing bowls, and a spatula for folding.
Instructions
Make the chocolate macaron shells
- Prepare the pans. Line one or two baking sheets with silicone mats. Set aside.
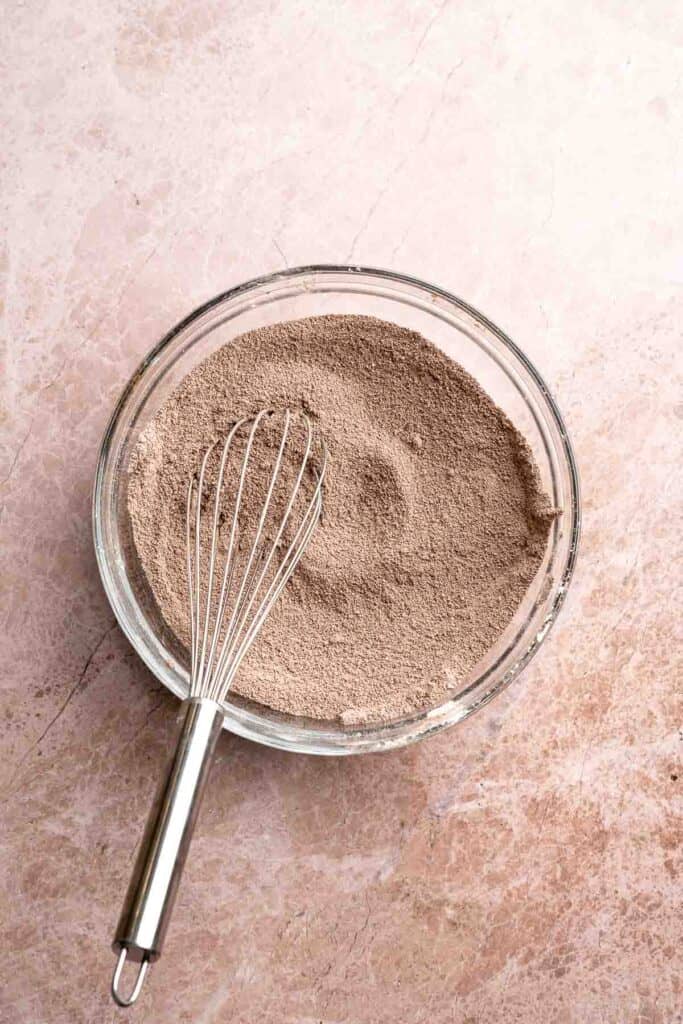
- Sift the dry mixture. Place a sieve over a bowl set on a scale. Sift the almond flour until you reach 130 grams, discarding any large pieces. Repeat with confectioners' sugar and cocoa powder. Whisk together until very well combined, then set aside.
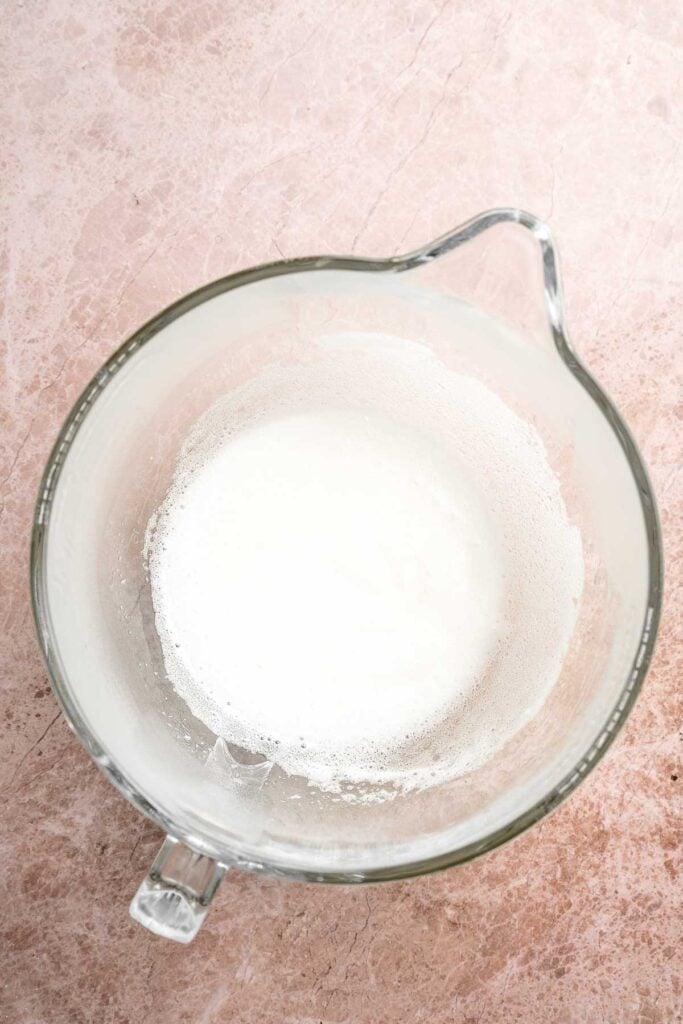
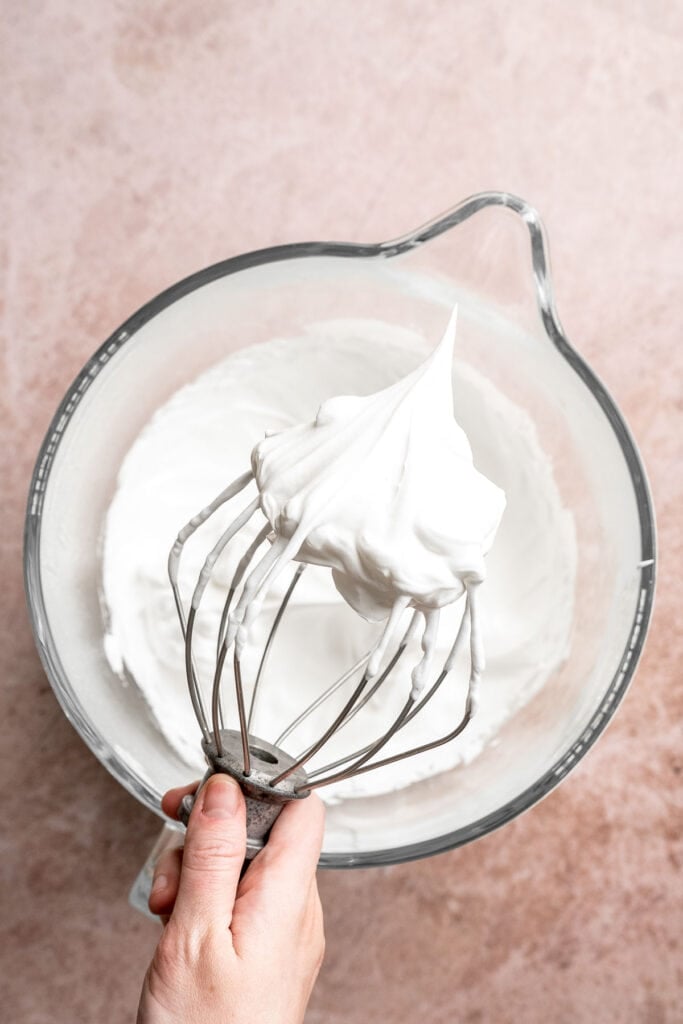
- Whip the meringue. Add the egg whites and white sugar to the bowl of a stand mixer. Whisk by hand to combine, then attach the whip attachment. Beat eon low speed until soft peaks form, increase to medium until medium peaks form, then increase to high. Beat until stiff, glossy peaks develop.

- Add food coloring (optional). Add gel food coloring and mix until just combined.
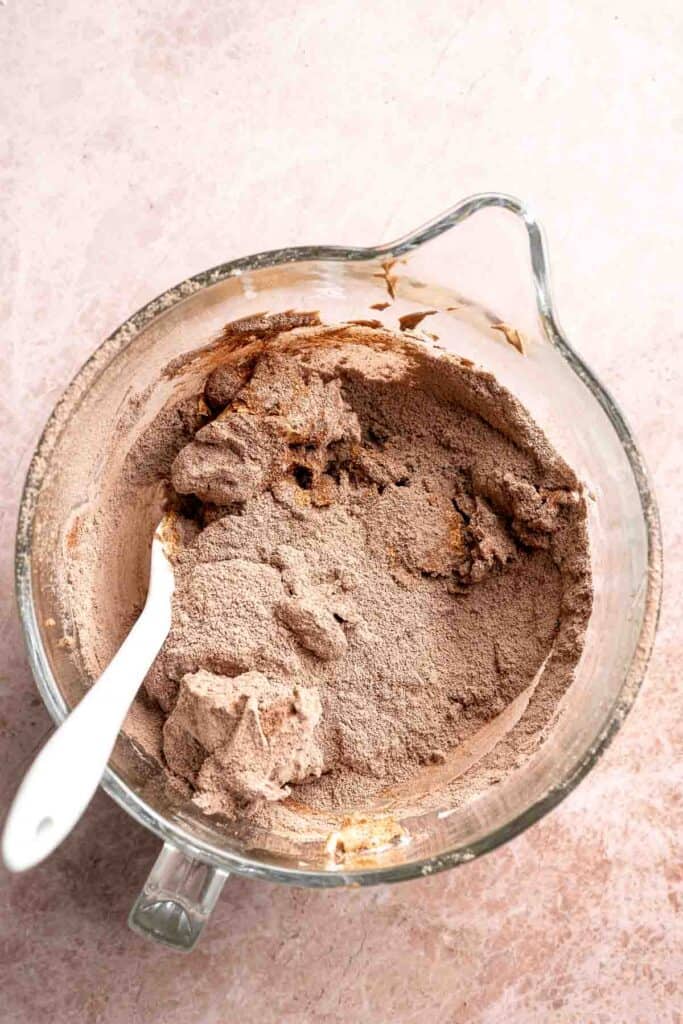
- Combine wet and dry ingredients. Remove the bowl from the mixer. Place a sieve over the meringue and sift in the dry mixture.


- Fold to make macaron batter. Gently fold the dry ingredients into the meringue, being careful not to deflate it. The batter is ready when it flows in smooth ribbons off your spatula. It should fall continuously, without drizzling off too quickly If it is coming off in large V shaped chunks it needs to be folded more. Use the figure eight test to confirm the right consistency: If you can lift some batter up and use it to draw several figure 8's without the stream breaking, it is ready.

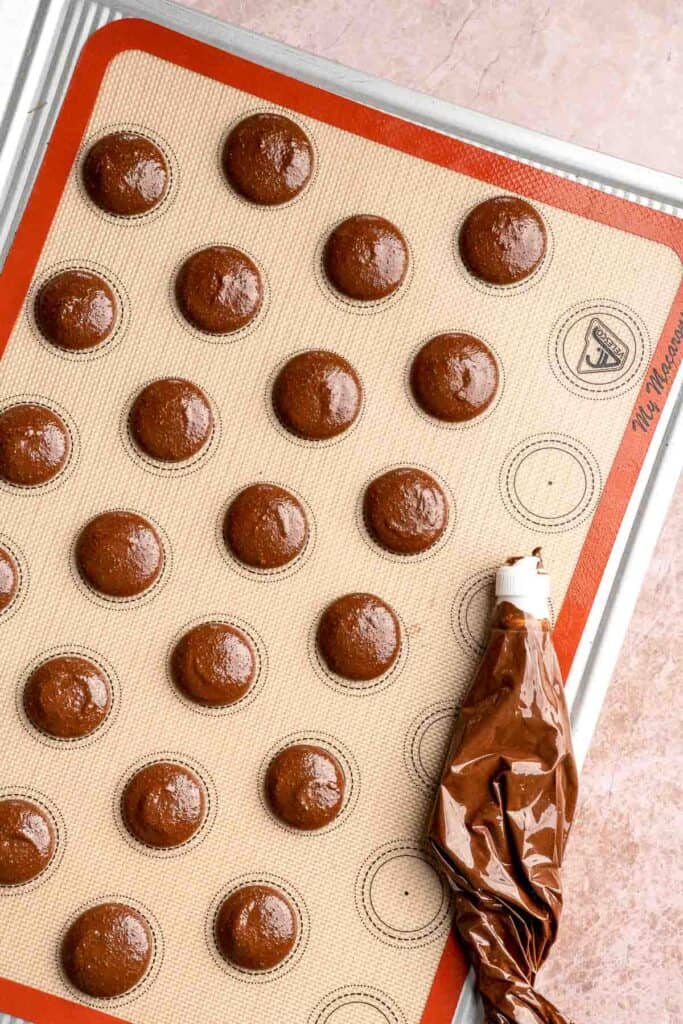
- Pipe the macaron shells. Transfer the batter to a piping bag fitted with a medium round tip. Pipe 1 to 1 ½-inch circles onto the prepared baking sheets, holding the bag straight above the pan and perpendicular to baking sheet.
- Release air bubbles. After you've piped all the macarons, tap the baking sheet firmly on the counter several times to remove air bubbles. Use a toothpick to pop any remaining bubbles.
- Rest the shells. Preheat the oven to 300°F. While it heats, allow the macarons to sit until a thin "skin" forms. This can take anywhere from 8 minutes to an hour, depending on humidity. They are ready when you can lightly touch the tops without batter sticking to your finger. Keep checking them periodically to see if they have formed a skin.
- Bake the shells. Bake for 15-20 minutes. Check at 15 minutes, then continue baking one minute at a time until the tops are firm and do not wiggle at the base. Cool completely on the silicone mat before removing.
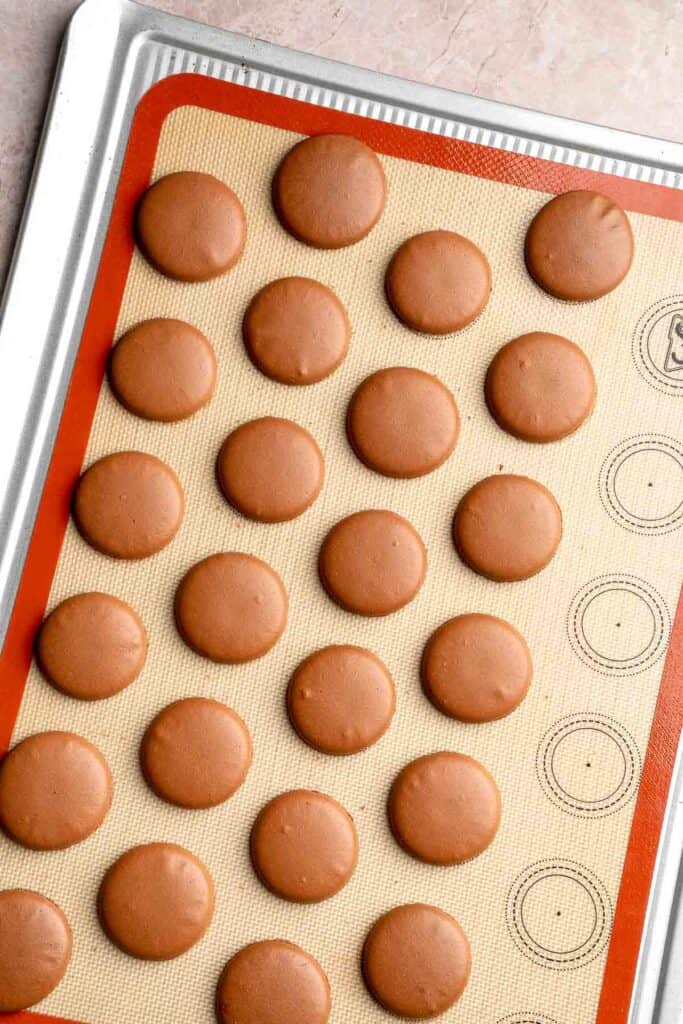
- Remove the shells. Once cooled, gently peel all the macaron shells off the mats and set aside.
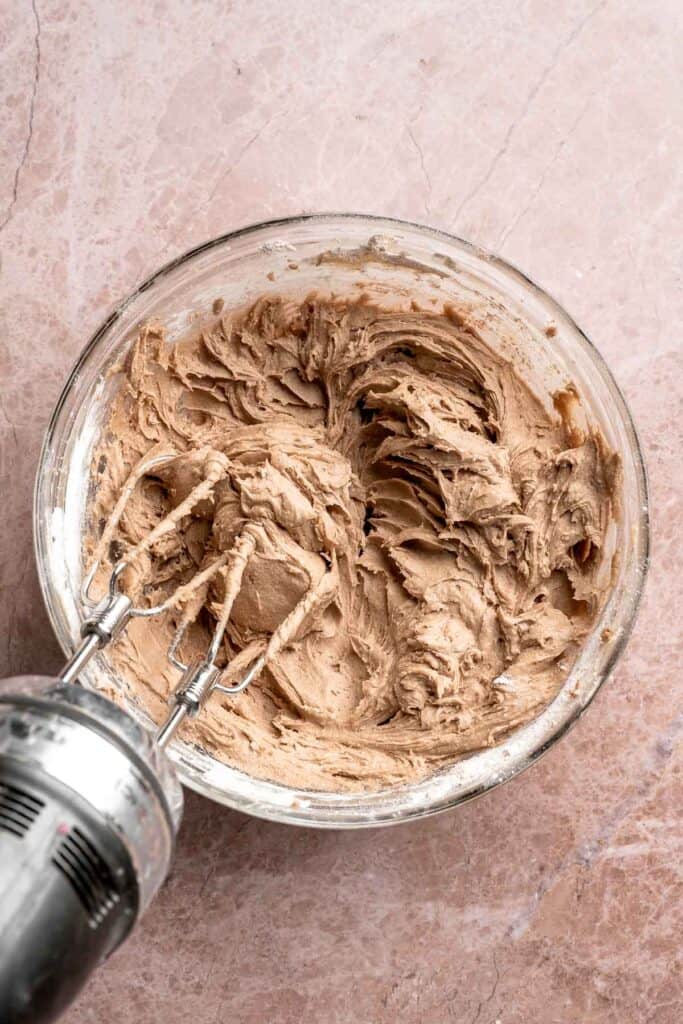
Make the hot chocolate buttercream filling
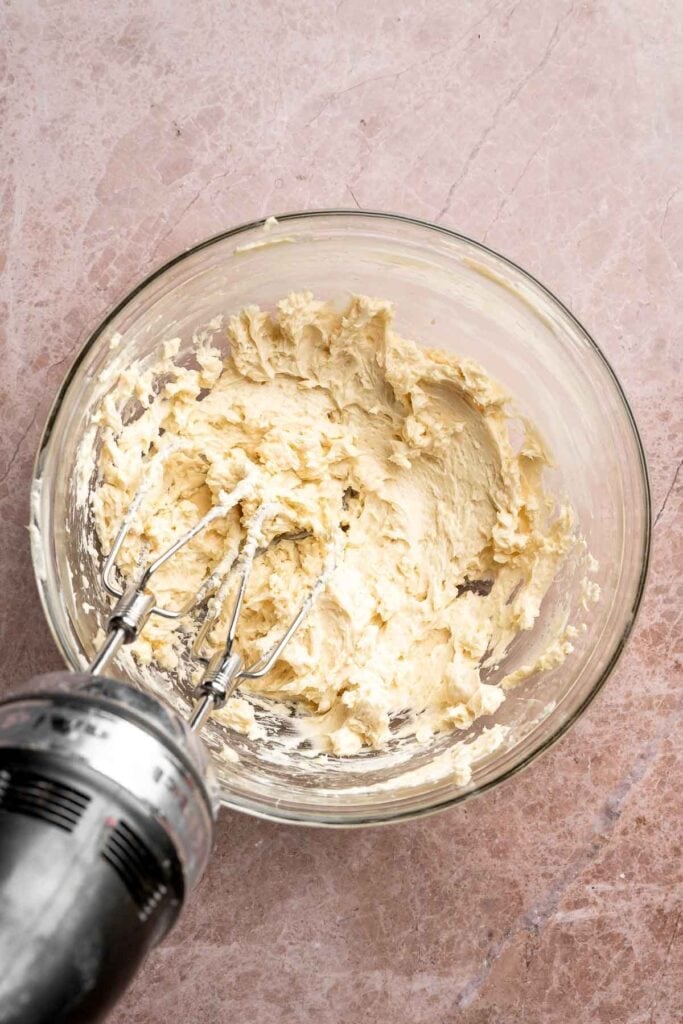
Add butter and marshmallow fluff to a large mixing bowl and beat with an electric hand mixer until fluffy, about 2 minutes. Add in the confectioners' sugar, hot chocolate powder, and vanilla. Beat again until smooth, well-combined, and creamy.
Assemble the hot chocolate macarons
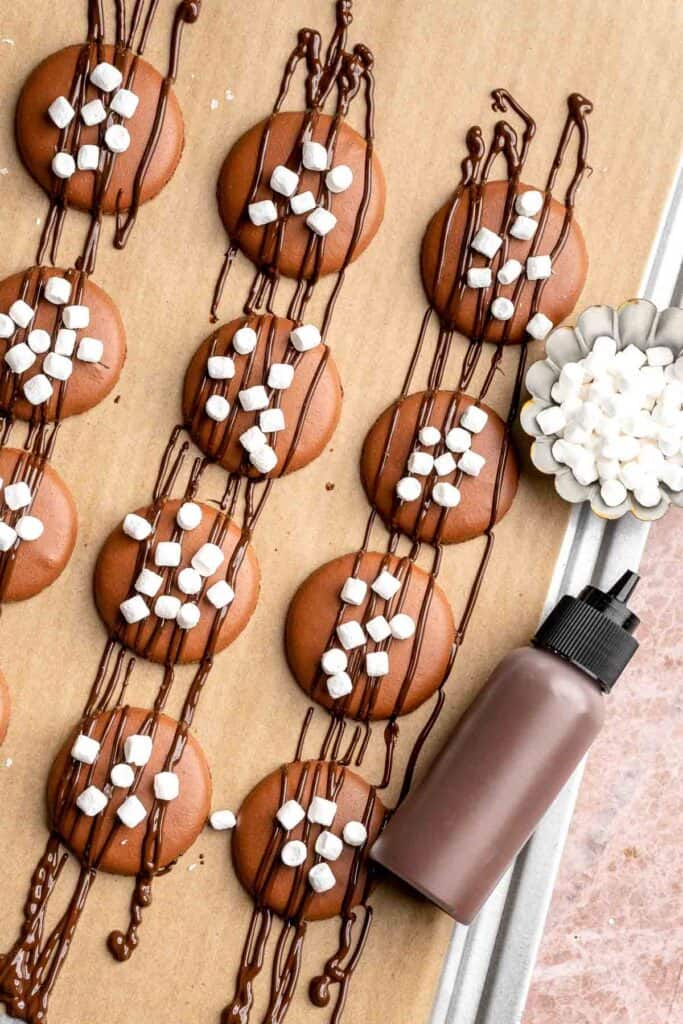
- Melt the chocolate. Melt the chocolate using a double boiler or microwave.
How to Melt Chocolate
You can melt chocolate either on the stovetop or in the microwave.
- On the stove: Bring about 2 inches of water to a gentle simmer in a saucepan over medium-low heat. Reduce the heat to low and place a medium heatproof bowl over the saucepan, making sure the bottom of the bowl doesn't touch the water (you can also use a steamer insert). Add the chocolate and stir constantly as it melts. Continue stirring until completely smooth and gloss. This should take just a few minutes.
- In the microwave: For a quicker method, place the chopped chocolate in a heatproof bowl and microwave in 30-second intervals, stirring well after each one. Continue until the chocolate is fully melted and smooth. Be sure to stir between intervals to prevent overheating or scorching.
- Decorate the tops. Drizzle melted chocolate over half of the macaron shells and sprinkle with dehydrated mini marshmallows. Let them set until firm.
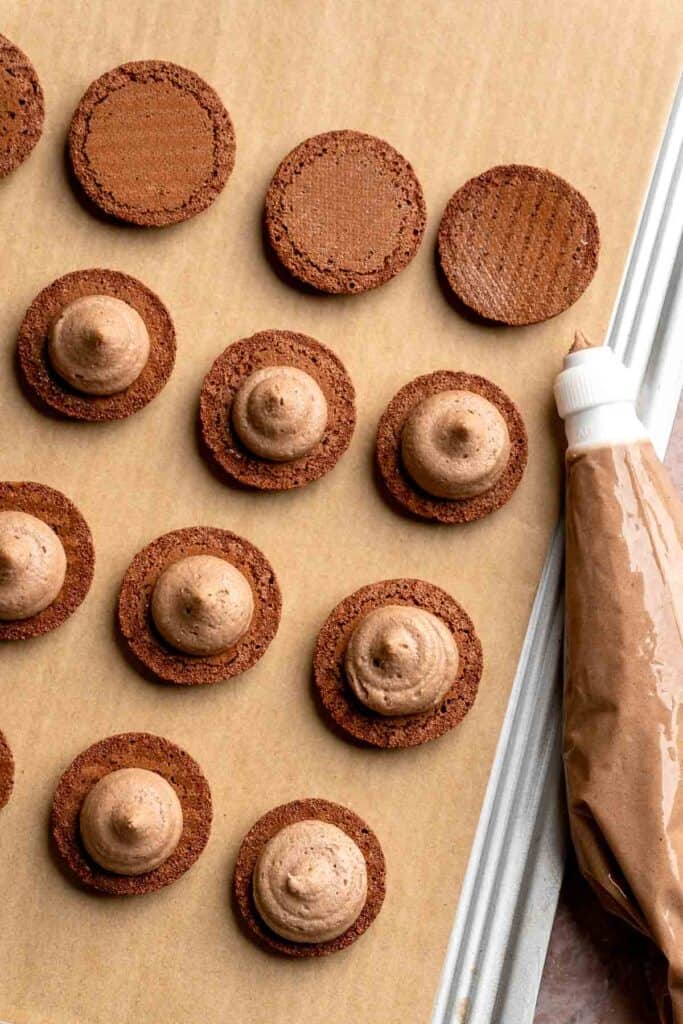
- Fill and sandwich. Transfer the hot chocolate buttercream to a large piping bag fitted with a round tip. Pipe a generous amount onto the undecorated shells. Top each one with a decorated shell of similar size.

- Mature the macarons. Refrigerate the filled macarons overnight to allow the shells and filling to meld together for the best texture and flavor.

Expert Tip: Let the shells mature overnight
Macarons get noticeably better after maturing in the fridge. The shells absorb moisture from the filling, turning soft, chewy, and deeply flavorful. Even if you want to eat them the same day, plan to chill them overnight for that perfect macaron texture that makes every bite feel luxurious and balanced.
More Tips and Tricks
- Use a scale for accuracy. Measuring your ingredients by weight gives you consistent, reliable results and prevents dry or hollow shells. A kitchen scale is essential for macaron success because even small changes in almond flour or sugar can affect the texture.
- Check the meringue carefully. Whether you use the simple French method or experiment with swiss meringue, your goal is stiff glossy peaks that do not droop. Whip on medium speed at first, then increase as needed.
- Fold patiently and test often. Macaron batter should ribbon smoothly off your spatula without clumping. Too thick and your shells will be lumpy, too thin and they will spread flat. The macaronage stage should look like slow flowing lava. Stop folding once the batter ribbons smoothly off your spatula. Use the figure eight test for accuracy.
- Resting creates perfect shells. Allowing the shells to form a dry skin helps them develop those pretty feet during baking. Rest time can vary based on humidity, so touch test often until no batter sticks to your fingers.
- Control your oven heat. Every oven runs slightly different, so check your shells early. If they brown too quickly, lower the heat slightly. If they do not rise, increase the heat just a little on your next tray.
- Use a pastry bag. Use a pastry bag instead of a plastic bag because it gives better control over the batter flow, especially when testing for the lava like ribbon stage.
Recipe Variations
- Peppermint hot chocolate macarons. Add a splash of peppermint extract to the filling and sprinkle crushed candy cane over the chocolate drizzle.
- Salted hot chocolate macarons. Sprinkle a tiny pinch of flaky sea salt over the chocolate drizzle to balance sweetness and add depth.
- Dark chocolate macarons. Use dark cocoa and a dark chocolate drizzle for a richer, less sweet version. You can even enrich the filling with one or two egg yolks for a silky finish.
- Spicy Mexican hot chocolate macarons. Add cinnamon and a tiny pinch of cayenne to the filling for gentle heat and warmth.
- Mocha macarons. Replace one tablespoon of hot chocolate powder with instant espresso powder for a chocolate coffee twist.
- Cookies and cream hot chocolate macarons. Add crushed chocolate sandwich cookies to the filling for a creamy, crunchy center.

Storage
How to Store
Store assembled macarons in an airtight container in the fridge. They stay fresh for about five days and actually improve for the first two days as the shells soften and meld with the filling. Keep them in a single layer or separate layers with parchment paper to protect the tops. Macarons always taste better after a day in the fridge because the filling softens the shells and deepens the cocoa flavor.
How to Reheat
Macarons should not be warmed, but you can let them sit at room temperature for 20-30 minutes before serving. This helps the filling soften and the shells return to their ideal texture.
How to Freeze
Freeze the assembled macarons in a single layer on a baking sheet until solid, then transfer to a freezer safe container. Separate layers with parchment. They keep for up to two months and thaw quickly at room temperature without losing texture or flavor.
How to Serve
Hot chocolate macarons are beautiful on their own, but they shine even brighter as part of a cozy winter spread. Serve them with warm drinks, chocolate themed desserts, or a festive assortment of seasonal treats for a perfect holiday platter.
These are my favorite dishes to serve with hot cocoa macarons:
Holiday Cookie Week
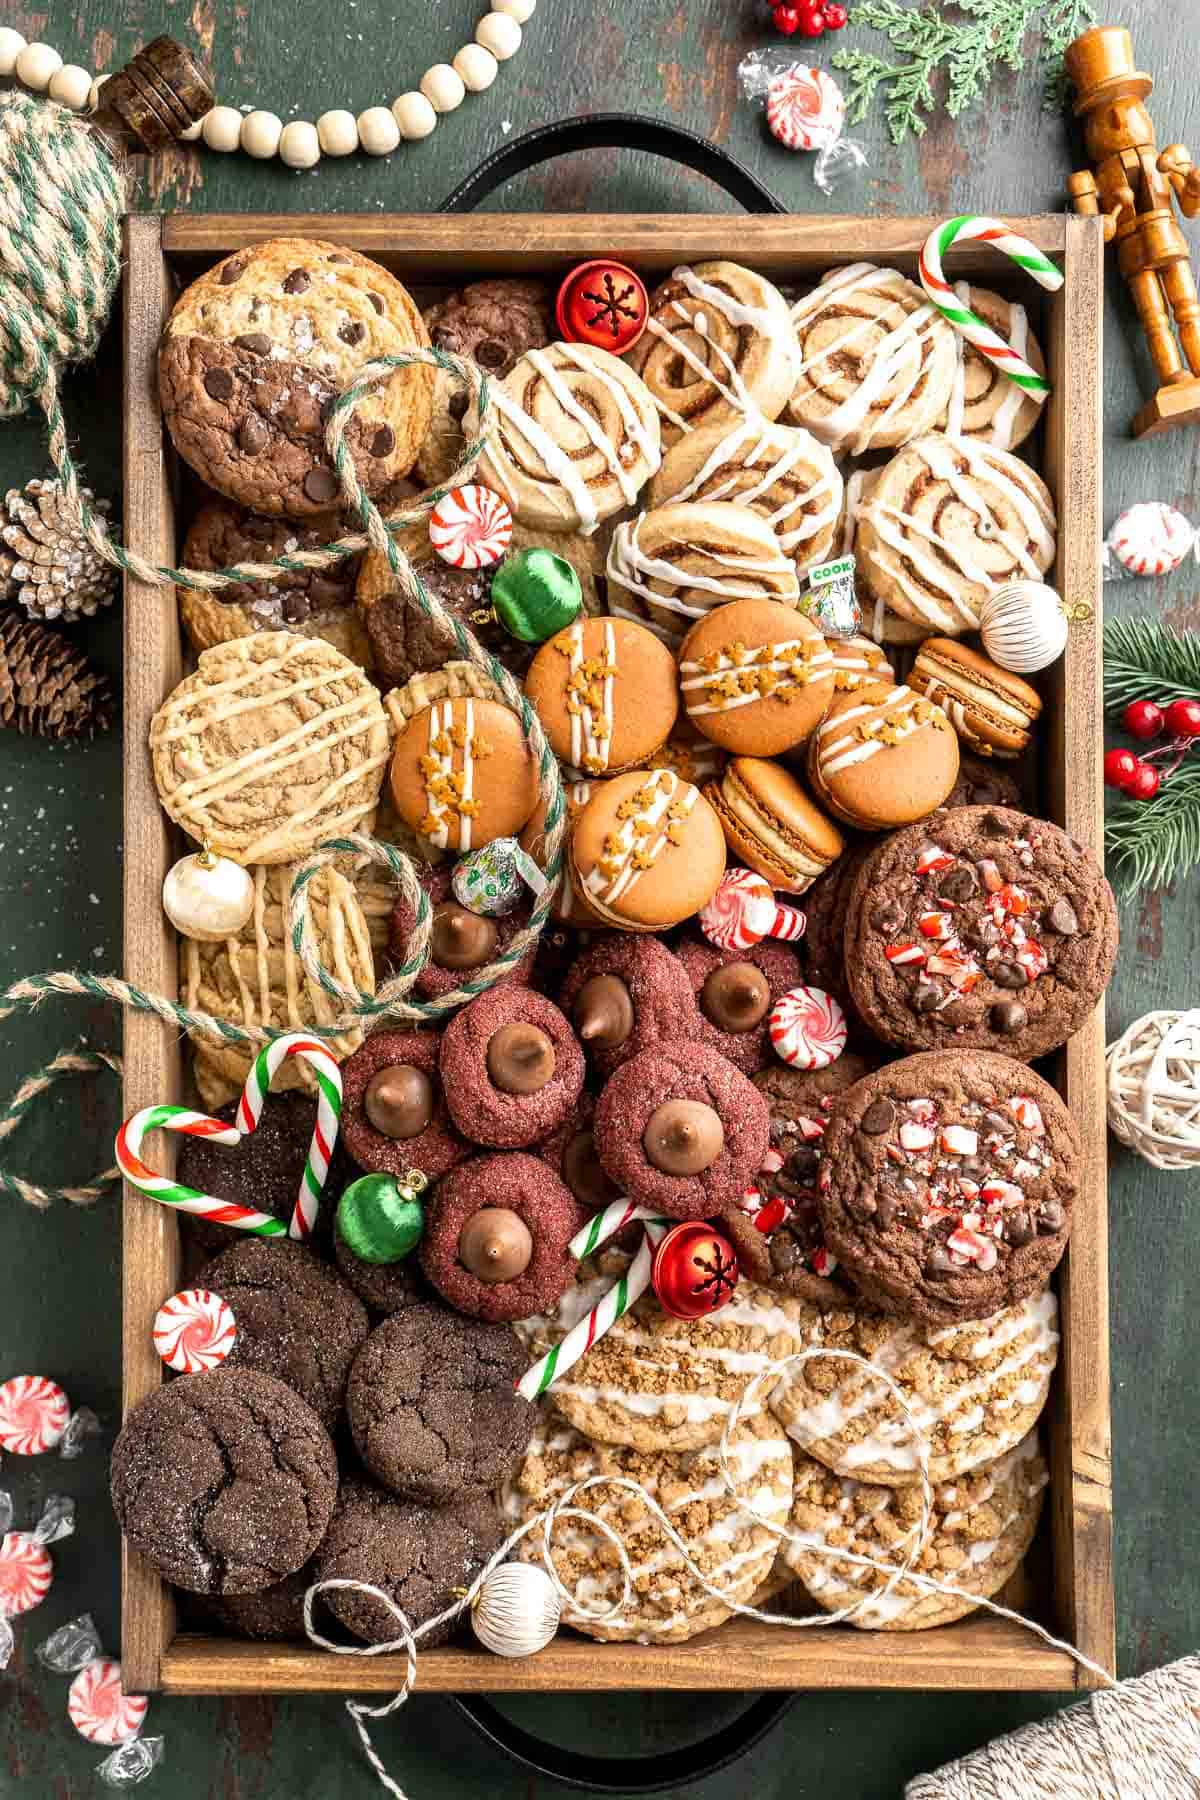
These cookies are part of our Annual Cookie Week! For more sweet inspiration, explore our full holiday cookie collection from this year and year's past. You will find everything from nostalgic classics and colourful decorated cookies to creative flavours and fun themed bakes that make our annual Cookie Week such a favourite tradition.
FAQ
The main trick to making successful macarons is controlling each step with patience and accuracy. Using a scale rather than cups gives you consistent results, since even small measurement differences change the texture of your shells. Whipping the meringue to proper stiff peaks is also essential because it creates structure and prevents spreading. Folding the batter slowly and stopping as soon as it ribbons off the spatula keeps the shells smooth and full rather than hollow or cracked. Resting the shells before baking helps them develop a dry skin, which is what creates those pretty macaron feet. Finally, baking on silicone mats and monitoring your oven temperature keeps the bottoms from browning or sticking. Together, these little details create perfect macarons.
The best method for most home bakers is the French macaron method because it is the most approachable and requires the least equipment. The French method uses granulated sugar whipped directly into egg whites to create a stable meringue. It is simple, reliable, and easy to learn even if you are new to macaron baking. The Italian method uses hot sugar syrup and creates an extremely stable batter, but it requires a thermometer and more precision. The Swiss method sits somewhere in between, using gently warmed egg whites for a glossy meringue. All three methods work beautifully, but the French method is ideal when you want consistent results without extra tools or added complexity.
Common macaron mistakes usually come from a few key steps. Under whipped meringue leads to spreading or cracked shells, while over whipped meringue can cause hollow or brittle shells. Over mixing or under mixing the batter is another issue because macaronage affects everything from texture to shape. Skipping the resting period often causes cracked tops or missing feet. Baking at too high or too low a temperature can also create problems, such as browning, sticking, or under baked centers. Even crowded baking sheets or uneven oven heat can distort the shells. Most mistakes come down to meringue texture, batter consistency, resting time, and oven accuracy, so focusing on these areas usually results in much better success.
The best hot chocolate powder for these macarons is a classic, good quality drinking cocoa that dissolves smoothly and has a balanced chocolate flavor. You want something that tastes like traditional hot chocolate rather than baking cocoa, since it gives the filling that nostalgic sweetness. Any well known brand works as long as the powder is fine and mixes easily with buttercream.
Resting is one of the most important steps for preventing cracks and achieving those signature macaron feet. Some fast macaron methods skip resting, but classic macarons need that dry skin to bake properly. Skipping this step often leads to spreading or cracked tops. It is worth the short wait.
Macarons should sit anywhere from 8 minutes to an hour before baking, depending on the humidity in your kitchen. The goal is to allow the piped shells to form a thin, dry skin on the surface. This step is important because it helps the macarons rise upward instead of outward, giving you those classic ruffled feet.
Shells usually crack when the meringue is under whipped, when the batter is under folded, or when the shells were not rested long enough to form a dry skin. Cracking can also happen when the oven heat is too high or uneven. To prevent cracking, make sure your meringue reaches stiff peaks, fold gently until the batter ribbons smoothly, rest until the shells no longer feel tacky, and use an oven thermometer so the temperature stays steady.
Hollow shells often happen when the meringue is over whipped or when the oven temperature fluctuates. Over whipping creates too many large air pockets that collapse during baking. To avoid this, stop whipping as soon as stiff peaks form. Also check that your oven is not too hot, since rapid rising and collapsing can cause hollow interiors.
Macarons stick when they are under baked or when the bottoms did not dry out enough. Bake them until the tops do not move at the base when gently nudged. If your oven runs cool, adding one or two extra minutes helps. Once fully cooled, they should peel off cleanly.
More Macaron Recipes
Looking for other recipes like this? Try these:
Tried this recipe?
I'd love to hear what you think! Leave a comment and rating below to share your feedback. Your reviews help others discover this recipe and help me keep creating more free recipes for you. Snap a photo and tag me on social media @aheadofthyme too.
Recipe
Hot Chocolate Macarons
- Total Time: 1 hour 20 minutes
- Yield: 24 macarons 1x
- Diet: Vegetarian
Description
Hot chocolate macarons with cocoa shells and fluffy marshmallow filling. A cozy winter treat perfect for holiday baking and festive cookie trays.
Ingredients
For the chocolate macaron shells:
- 130 grams super fine almond flour (about 1 ½ cups)
- 100 grams confectioners' sugar (about 1 scant cup)
- 15 grams dutch processed cocoa powder (about 4 teaspoons)
- 100 grams egg whites (about 3 large egg whites)
- 110 grams super fine white sugar (about 1 cup + 2 teaspoons)
- 1 teaspoon brown gel food colouring (optional)
For the hot chocolate buttercream filling:
- ½ cup (114 grams) unsalted butter, softened
- ¼ cup (20 grams) marshmallow fluff
- 2 cups (240 grams) confectioners' sugar
- ⅓ cup (64 grams) hot chocolate powder
- 2 teaspoons vanilla
- ¼ cup (50 grams) semi-sweet chocolate, chopped (for decoration)
- ¼ cup (50 grams) dehydrated mini marshmallows (for decoration)
Instructions
Make the chocolate macaron shells:
- Line one or two baking sheets with silicone mats. Set aside.
- Place a sieve over a bowl set on a scale. Sift the almond flour until you reach 130 grams, discarding any large pieces. Repeat with confectioners' sugar and cocoa powder. Whisk together until very well combined, then set aside.
- Add the egg whites and white sugar to the bowl of a stand mixer. Whisk by hand to combine, then attach the whip attachment. Beat eon low speed until soft peaks form, increase to medium until medium peaks form, then increase to high. Beat until stiff, glossy peaks develop. Add gel food coloring and mix until just combined.
- Remove the bowl from the mixer. Place a sieve over the meringue and sift in the dry mixture.
- Gently fold the dry ingredients into the meringue, being careful not to deflate it. The batter is ready when it flows in smooth ribbons off your spatula. It should fall continuously, without drizzling off too quickly If it is coming off in large V shaped chunks it needs to be folded more. Use the figure eight test to confirm the right consistency: If you can lift some batter up and use it to draw several figure 8's without the stream breaking, it is ready.
- Transfer the batter to a piping bag fitted with a medium round tip. Pipe 1 to 1 ½-inch circles onto the prepared baking sheets, holding the bag straight above the pan and perpendicular to baking sheet.
- After you've piped all the macarons, tap the baking sheet firmly on the counter several times to remove air bubbles. Use a toothpick to pop any remaining bubbles.
- Preheat the oven to 300°F. While it heats, allow the macarons to sit until a thin "skin" forms. This can take anywhere from 8 minutes to an hour, depending on humidity. They are ready when you can lightly touch the tops without batter sticking to your finger. Keep checking them periodically to see if they have formed a skin.
- Bake for 15-20 minutes. Check at 15 minutes, then continue baking one minute at a time until the tops are firm and do not wiggle at the base. Cool completely on the silicone mat before removing.
- Once cooled, gently peel all the macaron shells off the mats and set aside.
Make the hot chocolate buttercream filling:
- Add butter and marshmallow fluff to a large mixing bowl and beat with an electric hand mixer until fluffy, about 2 minutes. Add in the confectioners' sugar, hot chocolate powder, and vanilla. Beat again until smooth, well-combined, and creamy.
Assemble the hot chocolate macarons:
- Melt the chocolate using a double boiler or microwave.
- On the stove: Bring 2 inches of water to a low simmer in a saucepan over medium-low heat. Then, turn the heat to low and place a medium heatproof bowl on the mouth of the pot. Make sure that there is a gap of a few inches in between the bottom of the bowl and the water (You can also place a bowl on a steamer attachment on top of your pot). Add the chocolate and stir constantly as it melts. Stir until the chocolate is completely smooth and melted. This should take a few minutes.
- In the microwave: Place a medium heatproof bowl of chocolate into the microwave and microwave in 30 second intervals. Remove the bowl at each interval and stir well. Repeat until the chocolate has completely melted. Stir until completely smooth.
- Drizzle melted chocolate over half of the macaron shells and sprinkle with dehydrated mini marshmallows. Let them set until firm.
- Transfer the hot chocolate buttercream to a piping bag fitted with a round tip. Pipe a generous amount onto the undecorated shells. Top each one with a decorated shell of similar size.
- Refrigerate the filled macarons overnight to allow the shells and filling to meld together for the best texture and flavor.
Notes
How to store: Store assembled macarons in an airtight container in the fridge. They stay fresh for about five days and actually improve for the first two days as the shells soften and meld with the filling. Keep them in a single layer or separate layers with parchment paper to protect the tops.
How to reheat: Macarons should not be warmed, but you can let them sit at room temperature for 20-30 minutes before serving. This helps the filling soften and the shells return to their ideal texture.
How to freeze: Freeze the assembled macarons in a single layer on a baking sheet until solid, then transfer to a freezer safe container. Separate layers with parchment. They keep for up to two months and thaw quickly at room temperature without losing texture or flavor.
- Prep Time: 30 minutes
- Cook Time: 20 minutes
- Category: Dessert
- Method: Bake
- Cuisine: French


Sierra says
Hi are these gluten free?
Sam says
Yes, they are!